by Steve Laug
I have been working lately replacing tenons on bowls in my own work box. After 6 of them I am ready for something different. While I was in Florence, Italy I had received and email from Jack regarding some pipes that he had that needed some work. Here is his email.
I have a Dunhill from unknown era, a Hardcastle, and possibly a third pipe that could use your workmanship. If you’d like, I can send you pictures of the pipes so you know what condition they’re in. Please let me know the necessary details! — Jack
We chatted about that and I suggested he email me when I returned to Canada. He wrote back and asked me to work on not three but four pipes. He listed what he had and I thought these would be an interesting diversion from tenon replacement work.
Are you still willing to entertain restoring/refurbishing a few pipes? I have four in various stages of need, and I’ve attached pictures of each for your evaluation. I would be very grateful for anything that you could and would be willing to do.
- 1992 (?) Dunhill
- Bertram 80
- Hardcastle – This pipe looks very clean except for some pitting? fissures? in the chamber.
- Dr. Grabow Supreme – This poor pipe… well, it’s a doozy.
Thank you very much! – Jack
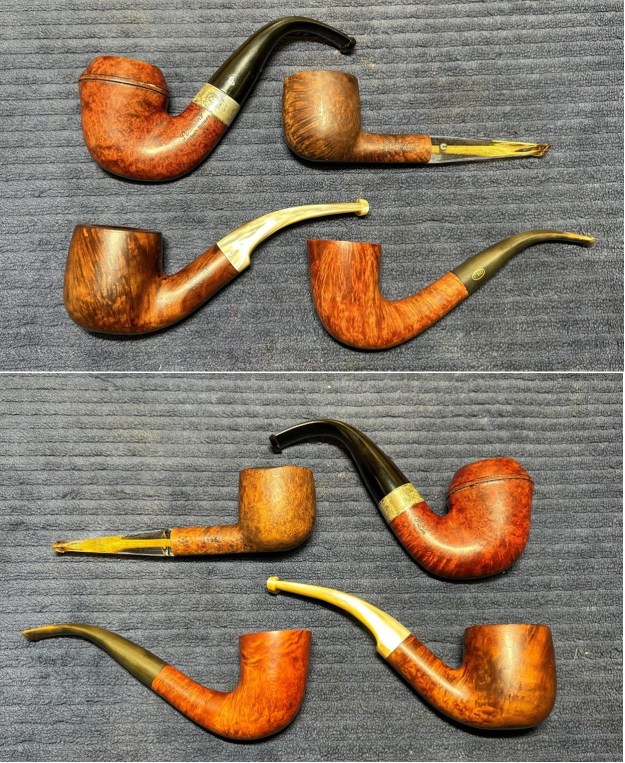
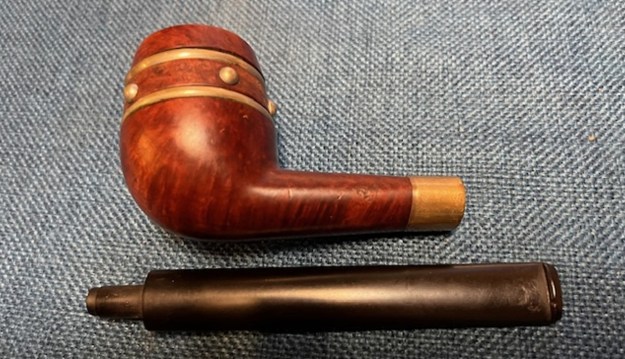
I agreed and asked that he send them to me. Interestingly they arrived the day I finished the last of the tenon replacements. I unpacked them and they were indeed as interesting as his email had led me to believe. I decided to work on the last of the foursome – the Poor Dr. Grabow Supreme doozy. Here are the photos he sent to me of that pipe. I will give my evaluation of the work that will need to be done on the pipe as I walk through the photos with you.
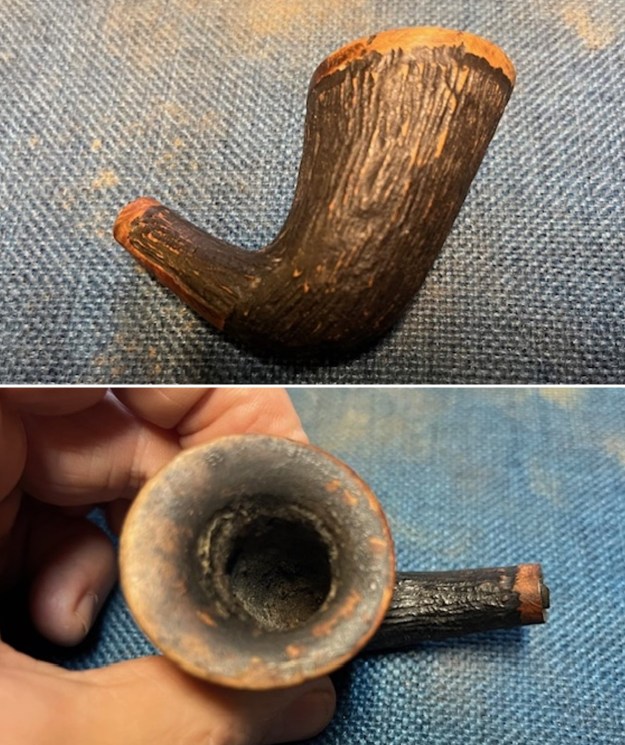
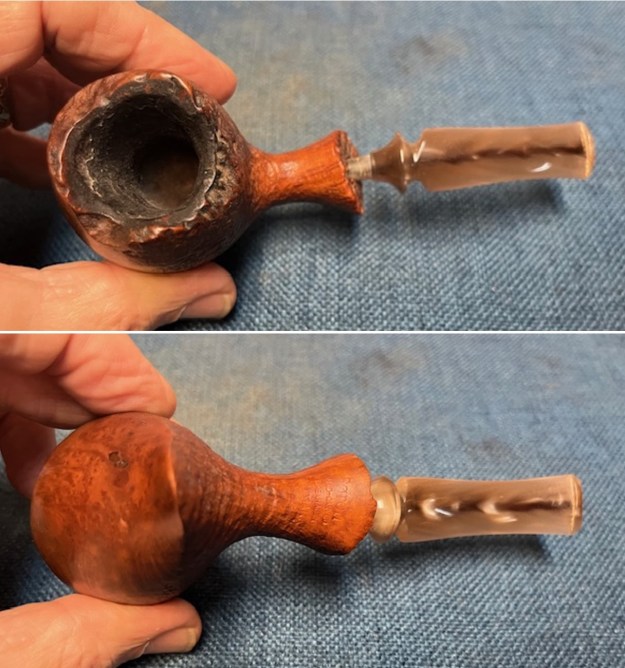
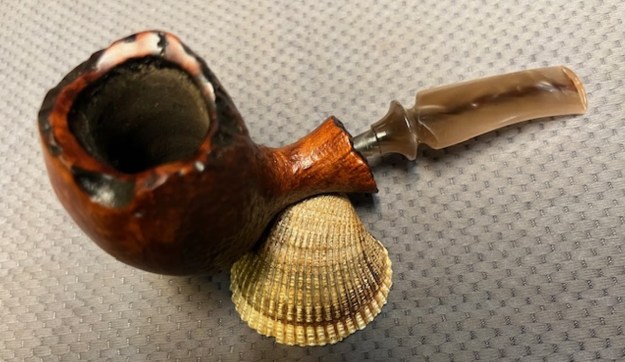
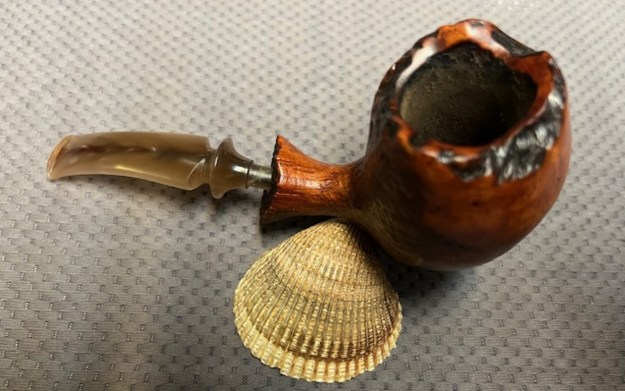
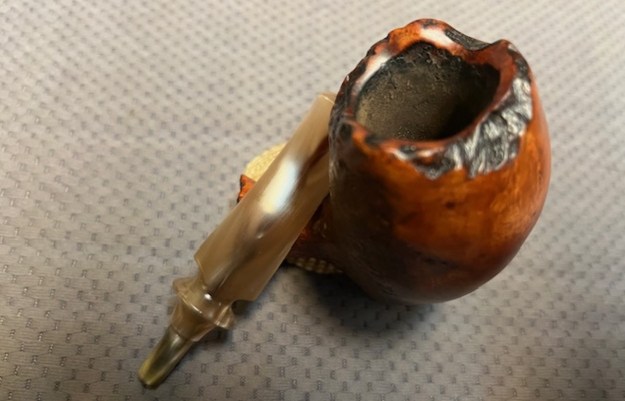
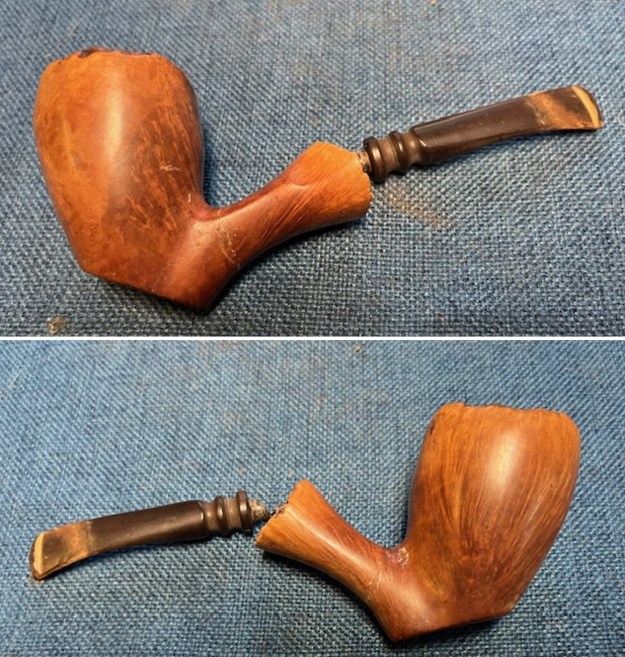
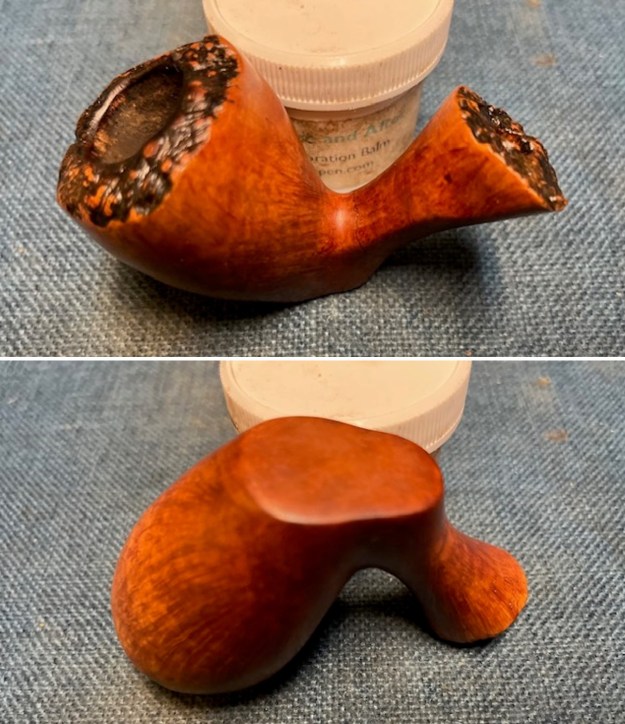
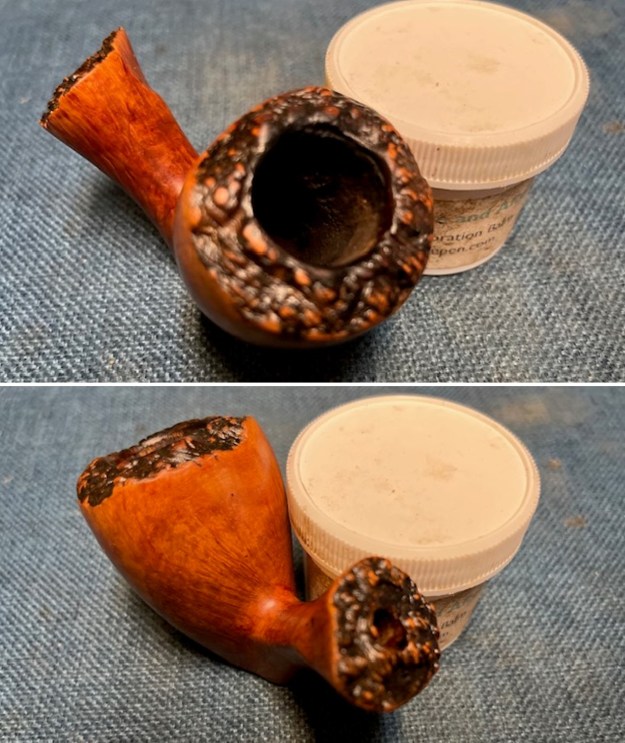
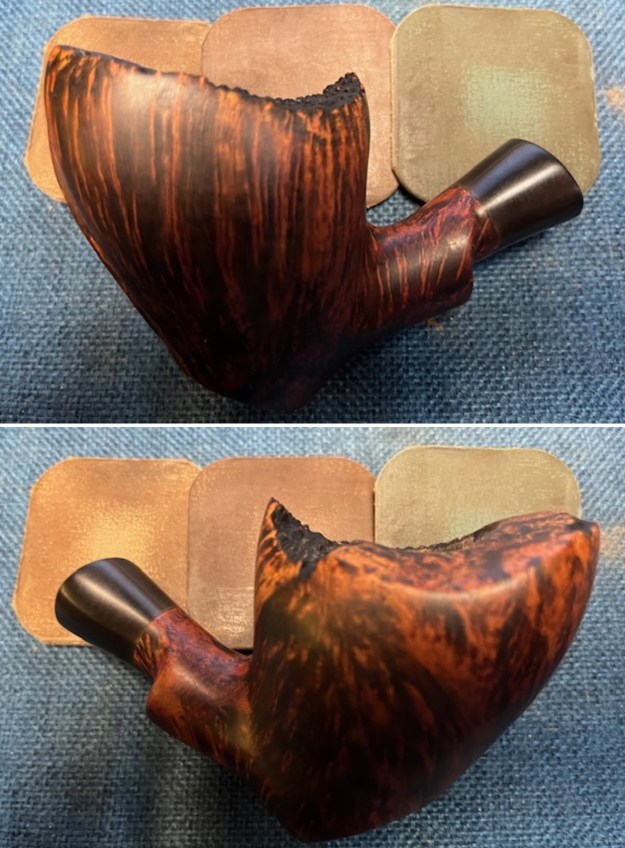
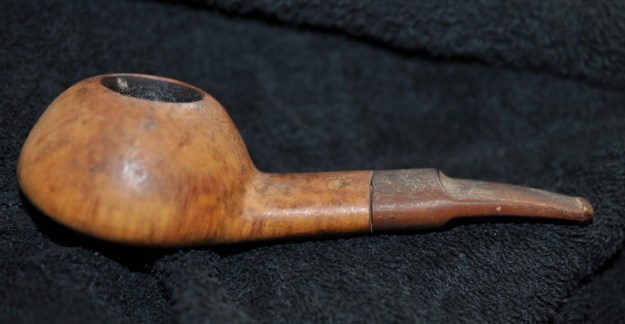
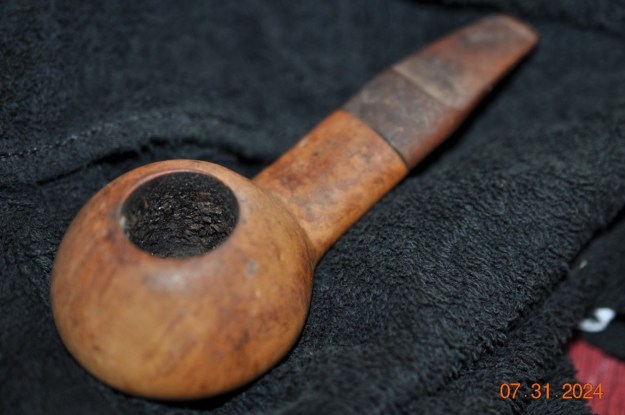
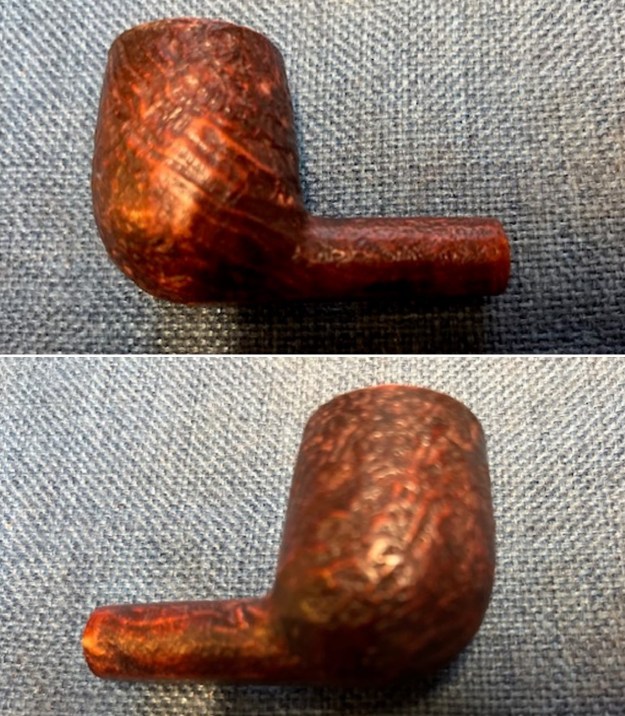
The first two photos that Jack sent show the overall condition of the pipe. You can see from these photos that the rim top had a thick coat of lava on the rim and inner edge of the bowl. There is a thick cake with all the potential for damage on a thin walled bulldog on the bottom half of the bowl. The finish is very dirty but does not look to damaged with scratches or nicks in the photos. The stem is overclocked (or underclocked depending on your perspective😊). It is also oxidized, calcified and had tooth marks on the top and the underside. The stamping on the left side of the shank appears to be faint toward the bowl but the shape stamp on the right side looks good.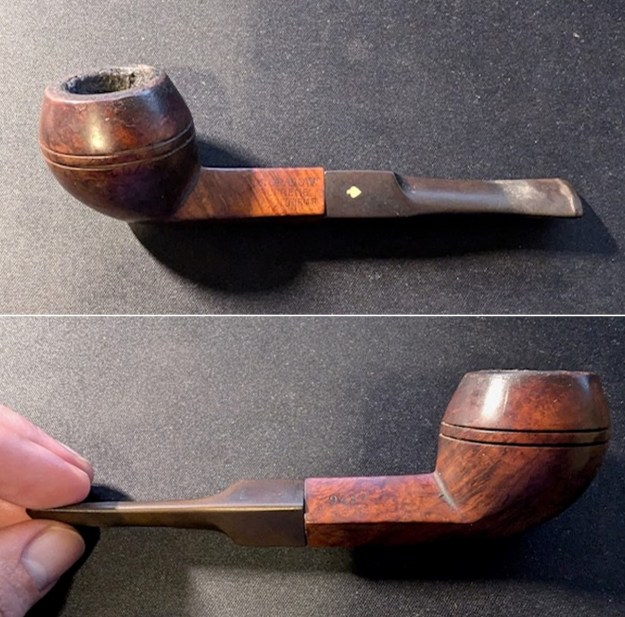 The next two photos affirm my evaluation of the thick cake in the bowl and overflow of lava on the rim top. Fortunately, there do not appear to be any cracks on the rim top or sides of the bull cap.
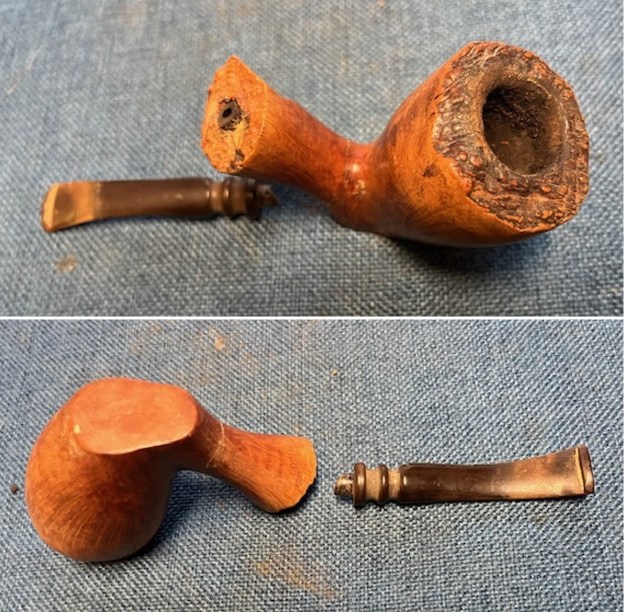
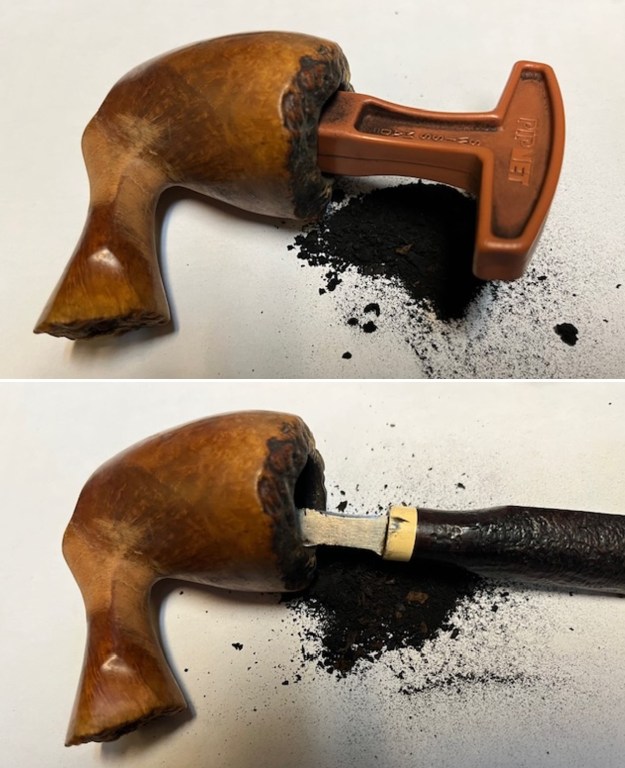
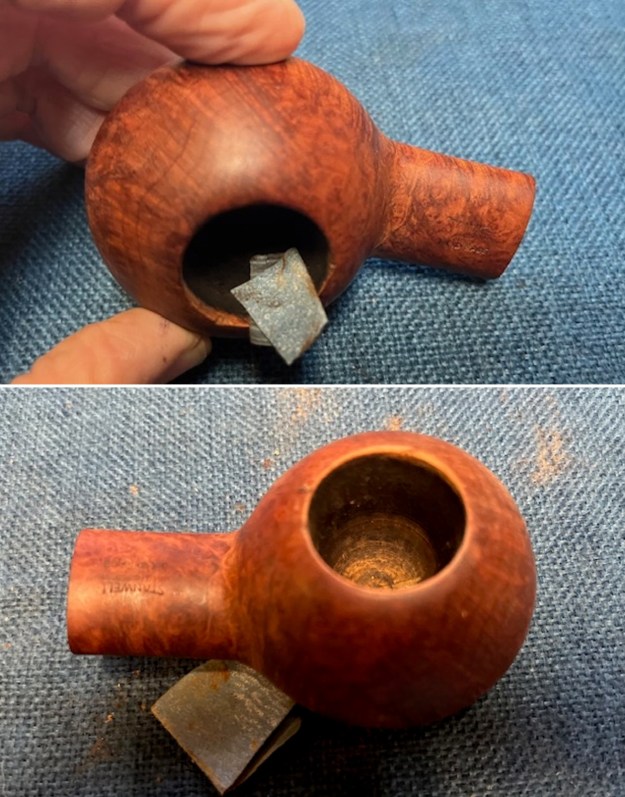
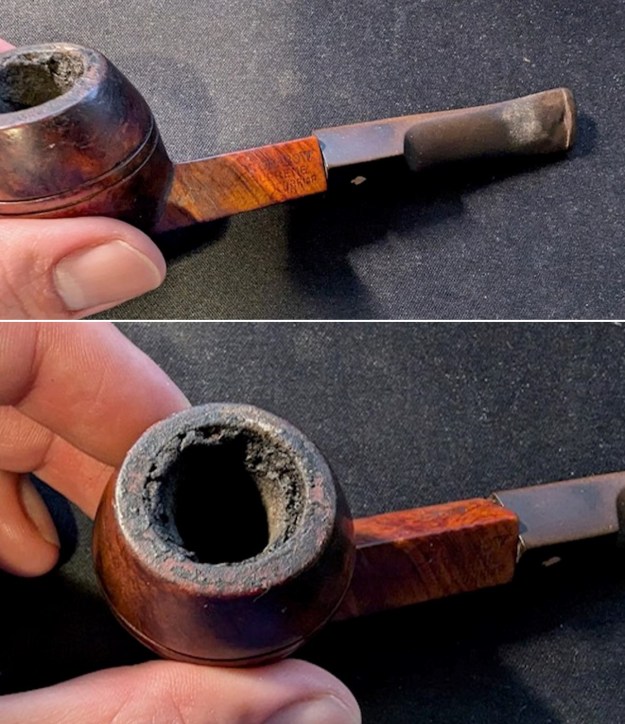 The final photo that Jack send showed the Grabow “spoon” stinger/tenon apparatus. It is intact which is good news as many have been snipped off that I have worked on. The stinger is coated with a tar and oil coat and the aluminum is oxidized but it is in decent condition. The insert in the shank end also appears to be in good condition other than being dirty.
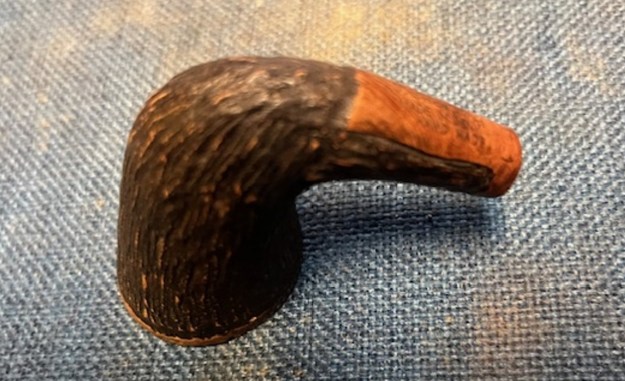
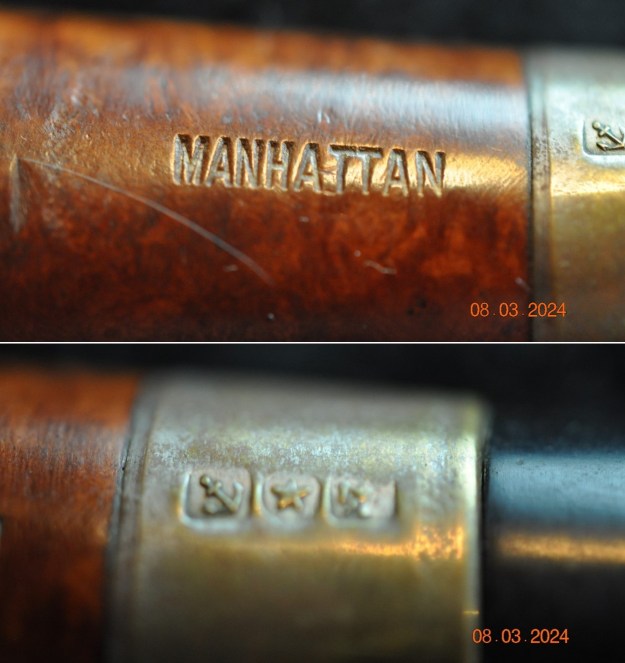
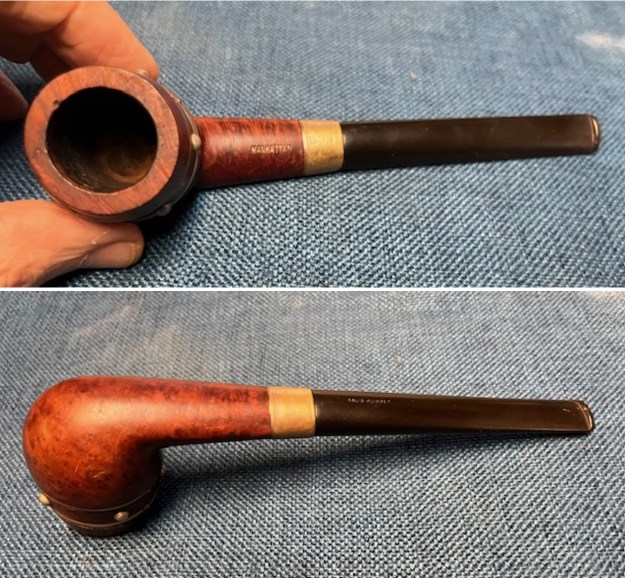
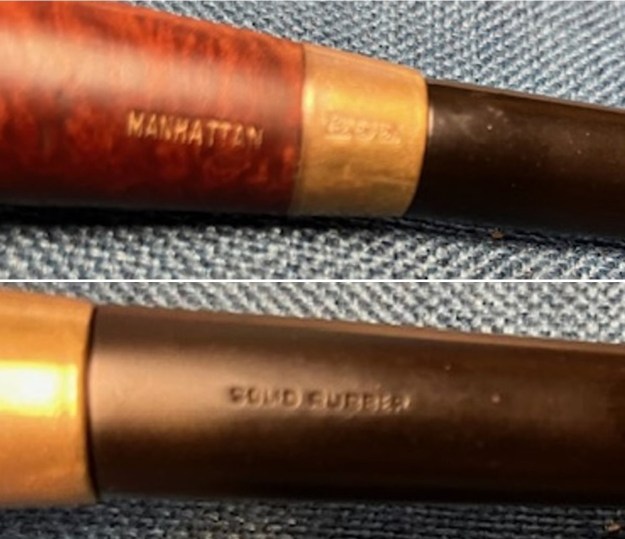
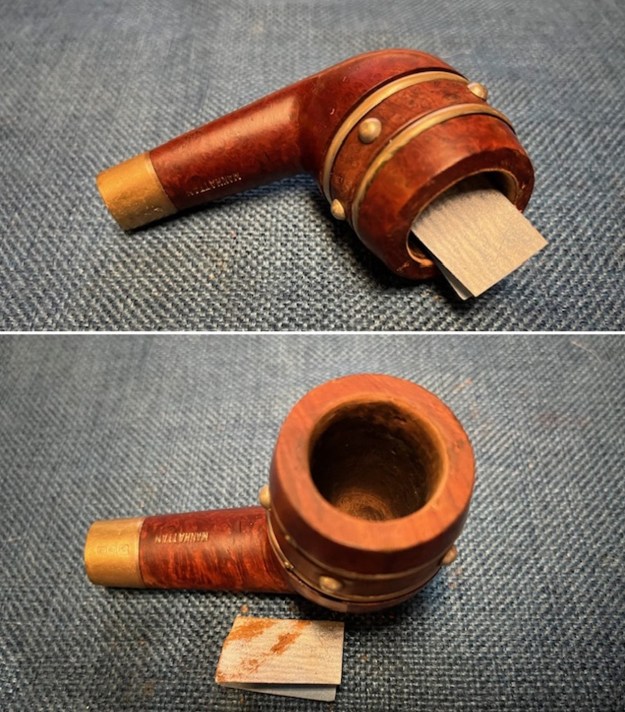
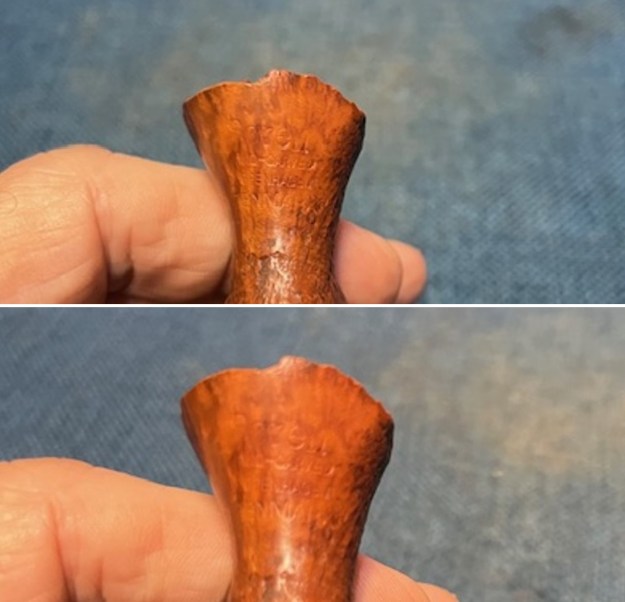
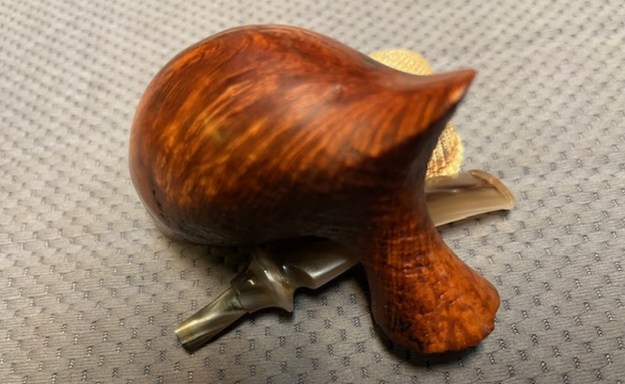
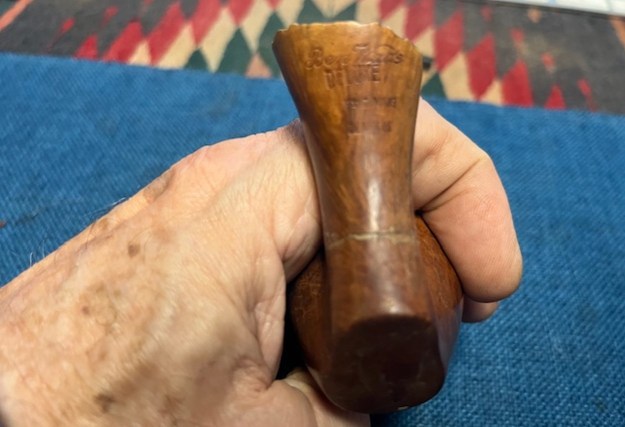
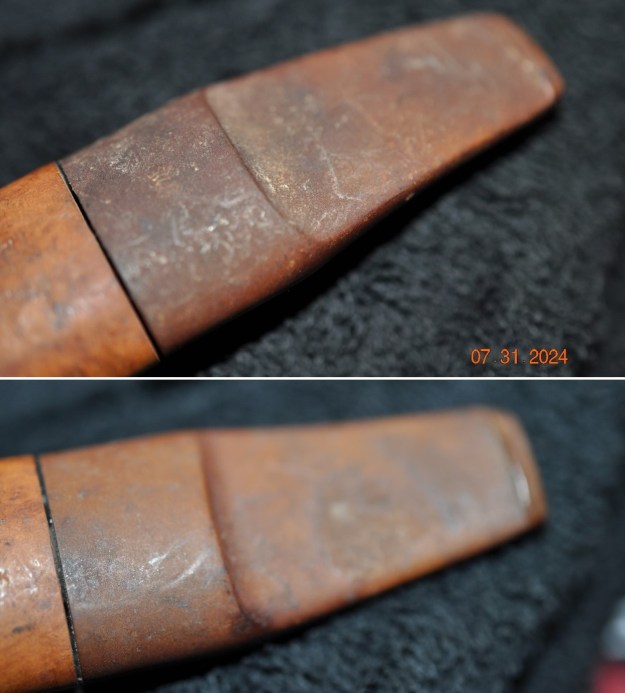
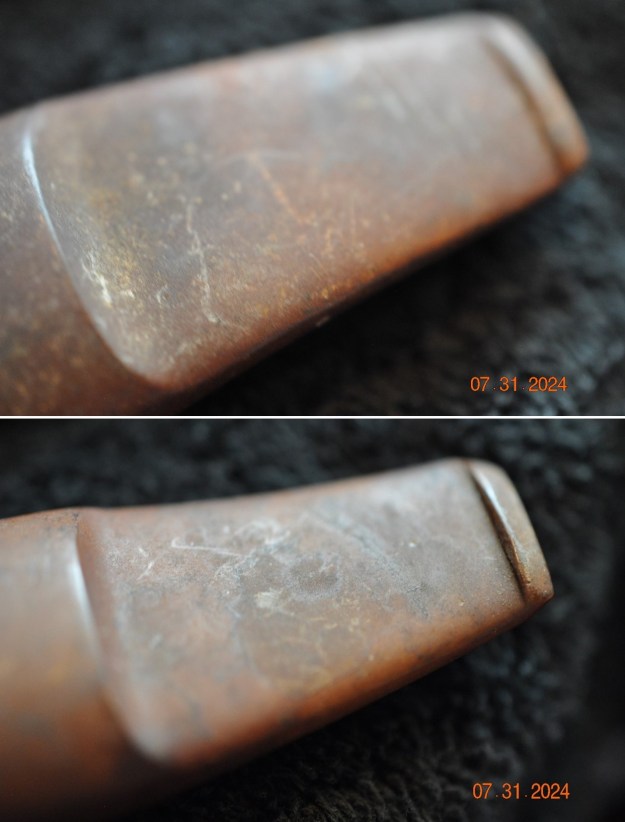
 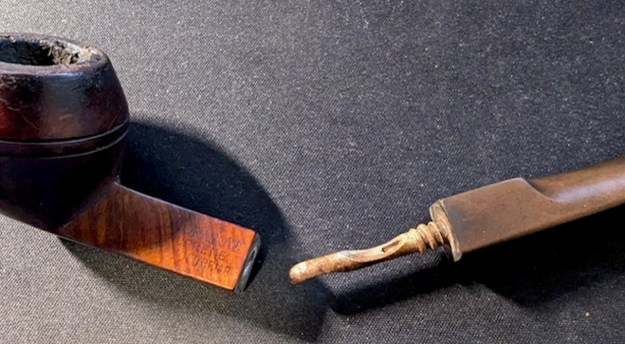 I unpacked the pipes when they arrived on Thursday and went over each one. As I examined this one my observations based on the photos were confirmed. The one thing that was better was that the finish actually looked better in person than in the photos. There was some nice grain around the bowl. The cake and the lava were as expected. They were both thick but did not appear to be hard as is often the case. The stamping on the shank was clear and readable. The left side stamp was faint on the bowl side of the stamping. It read Dr. Grabow [over] Supreme [over] Imported Briar. On the right side of the shank it is stamped with the shape number 9437. The stem looked as noted and you can see that it is overturned in the photos below. It was oxidized, calcified and had tooth chatter and marks as noted. The Grabow Spade logo is white and is horizontal on the top left side of the saddle. Have a look at the photos below.
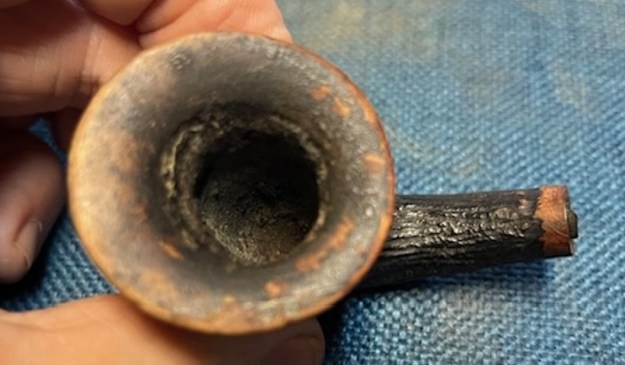
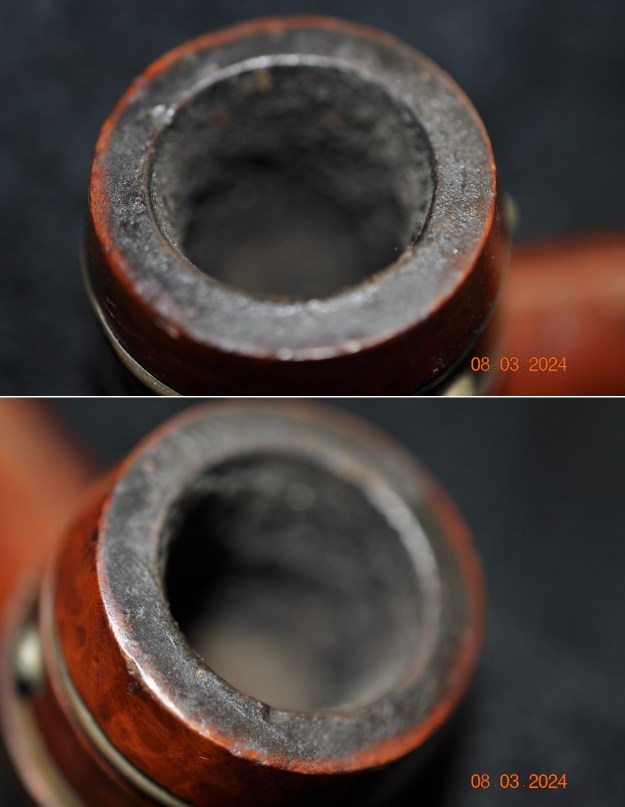
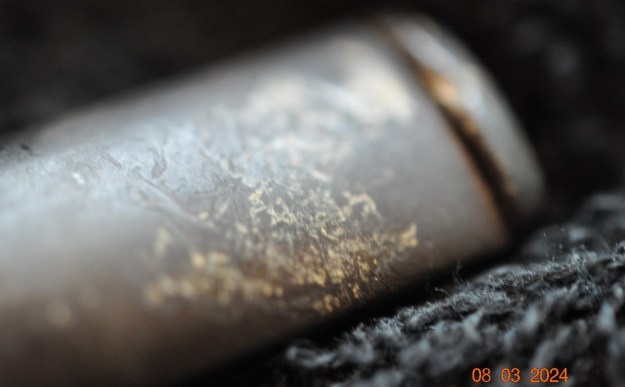
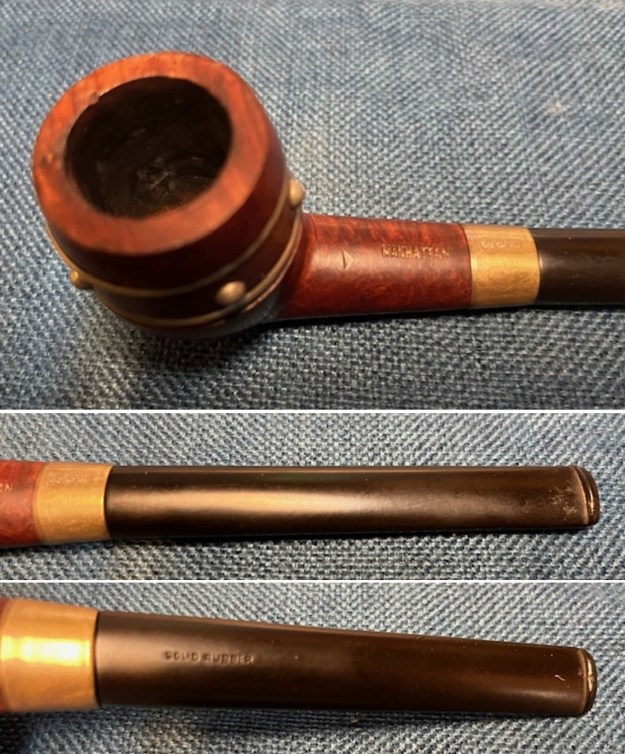
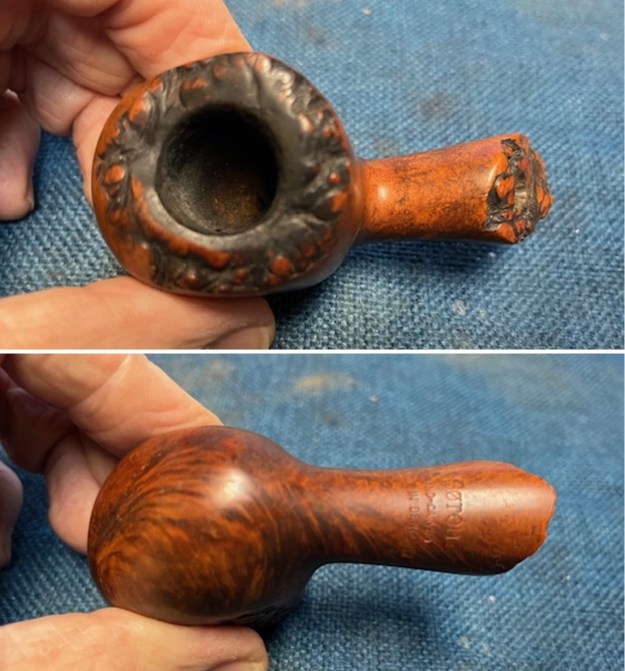
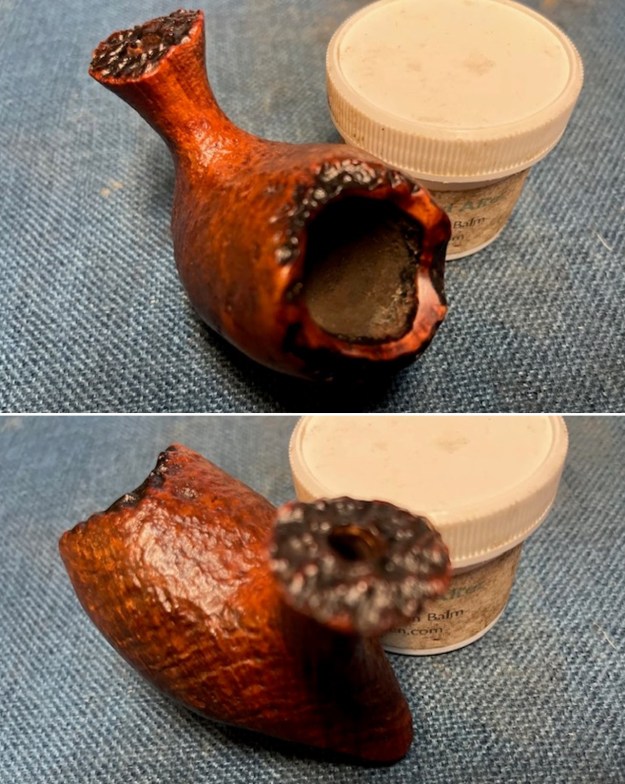
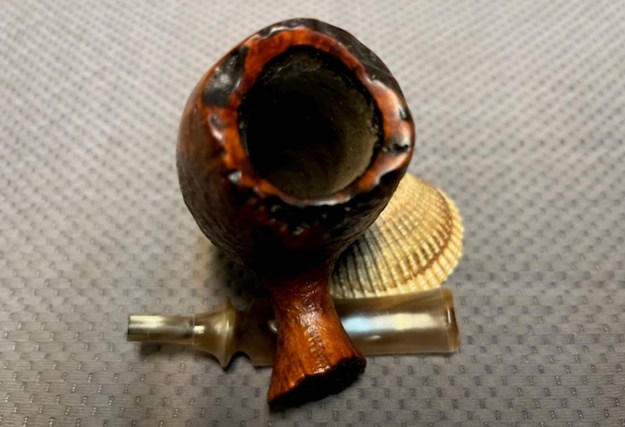
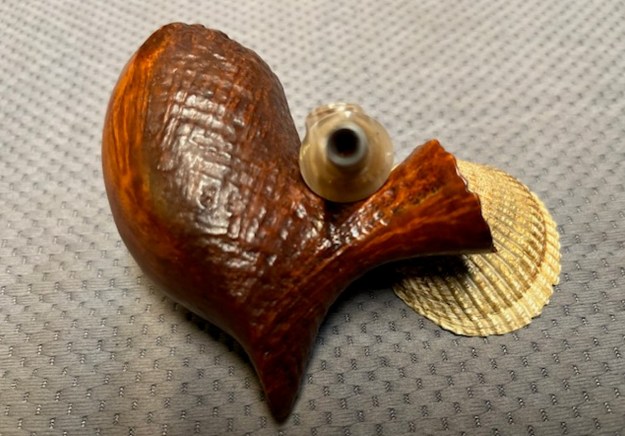
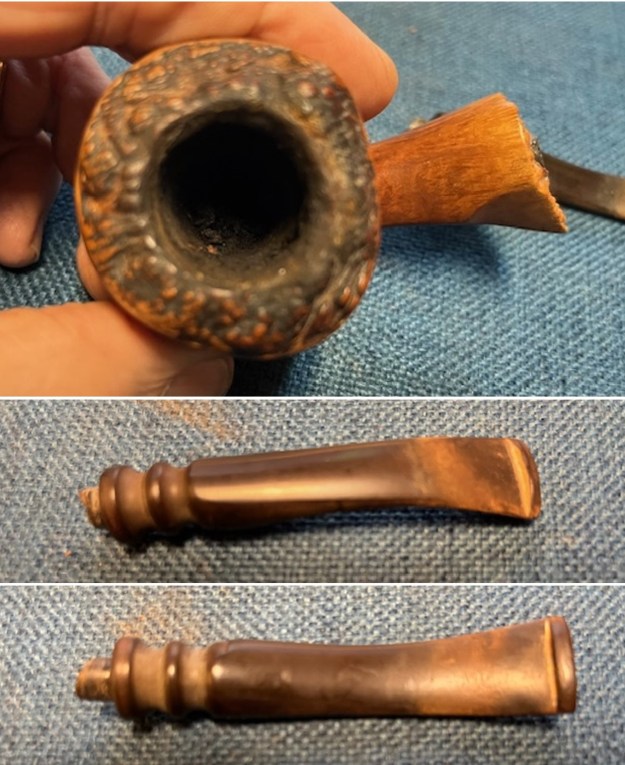
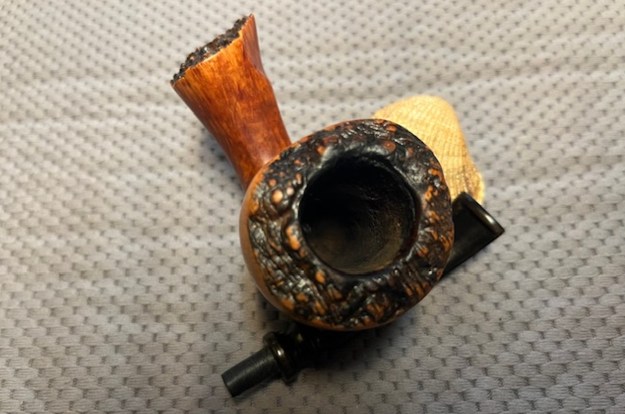
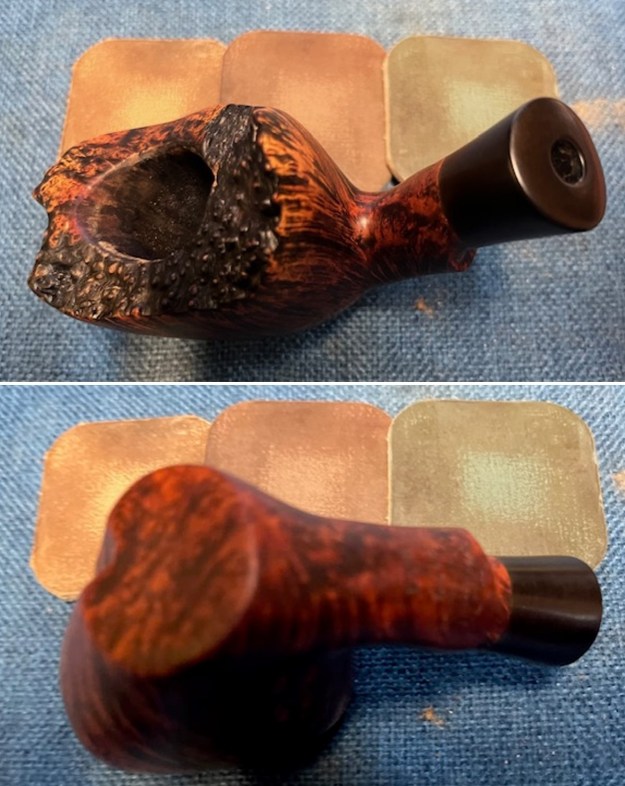
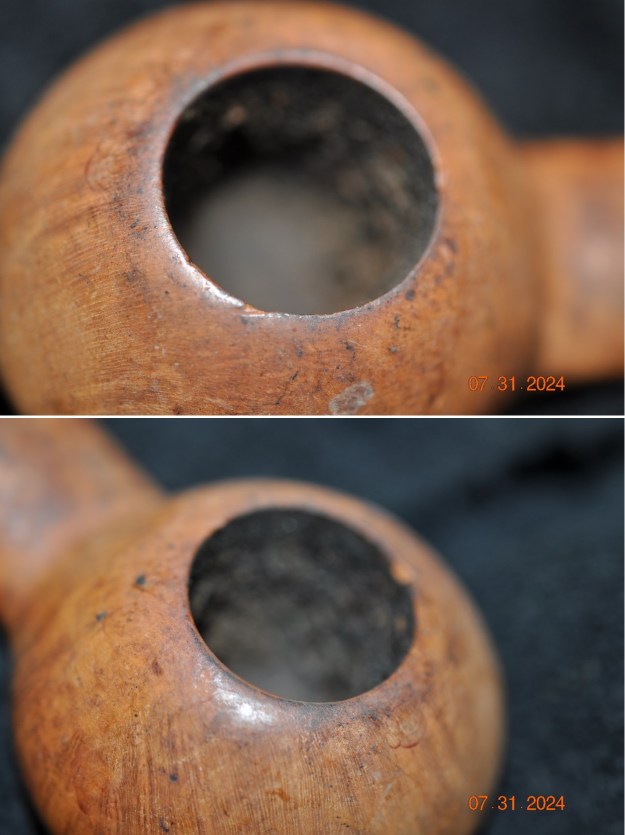
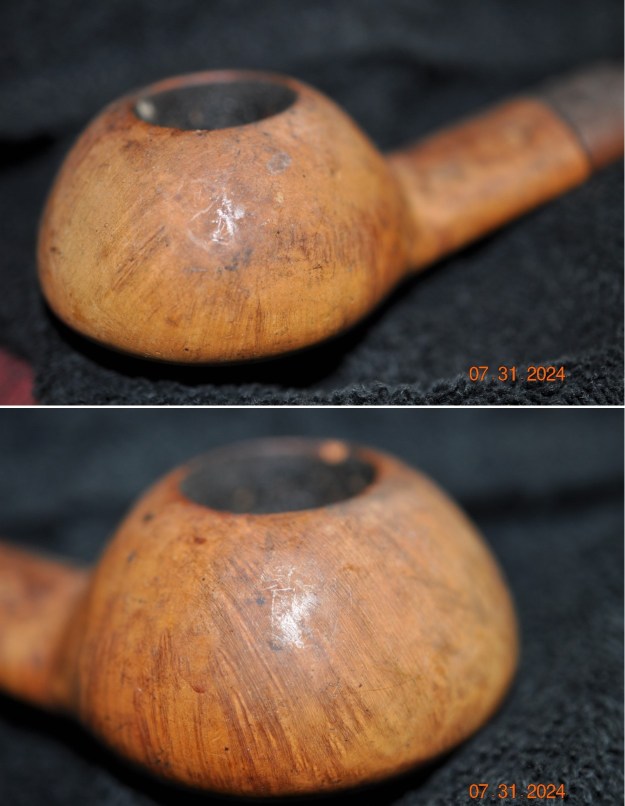
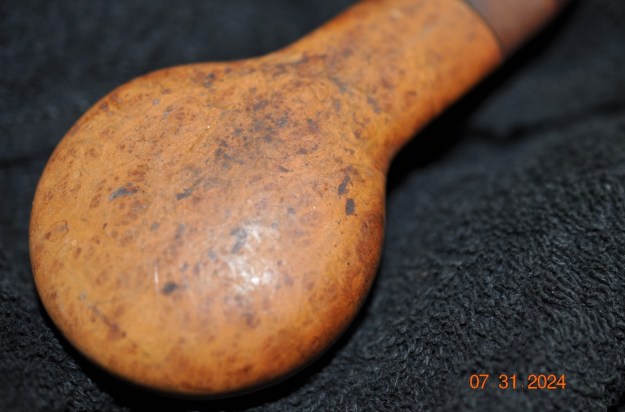
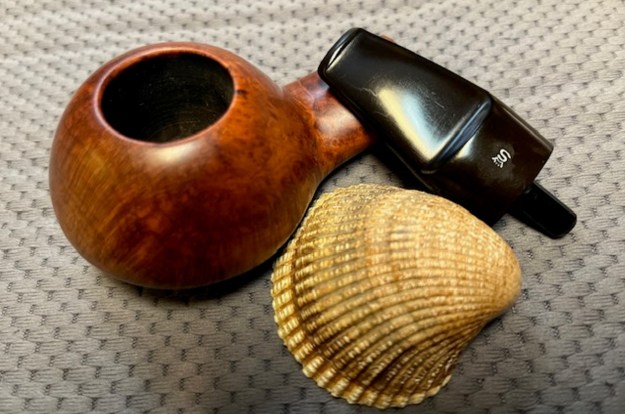
 I took close up photos of the bowl and rim top to show the condition of both the bowl and the rim top. You can see the lava and build up on the rim top and the lava flowing over the inner edge of the bowl. It is hard to know if there is damage or if the lava protected it. The bowl has a thick cake that lining the walls and overflowing into lava. The stem is oxidized, calcified and has tooth marks and chatter on both sides ahead of the button. The metal “spoon” stinger and tenon were dirty but in good condition.
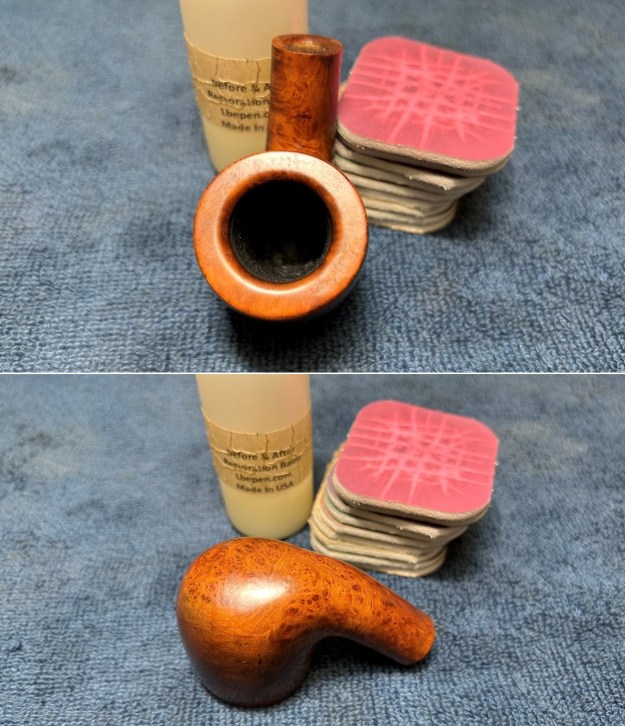
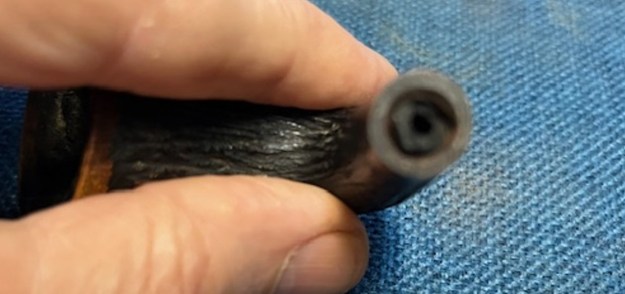
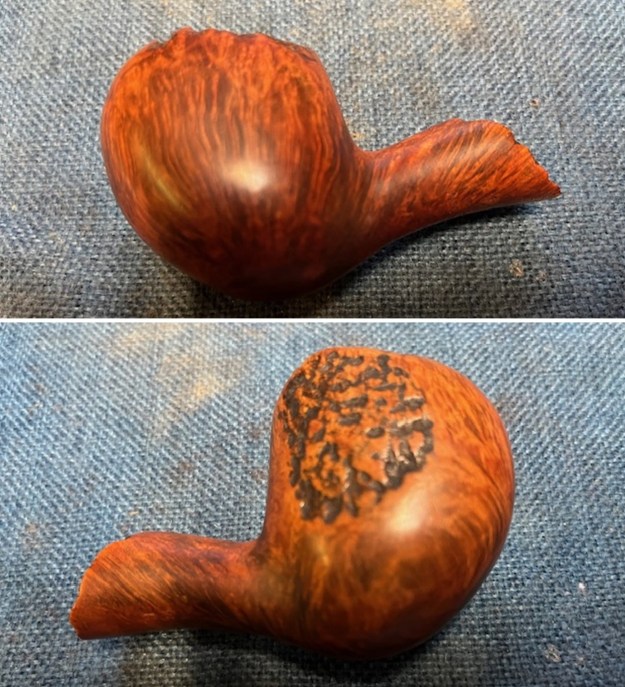
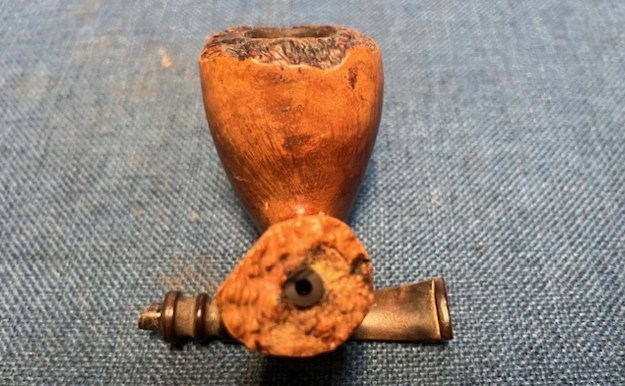
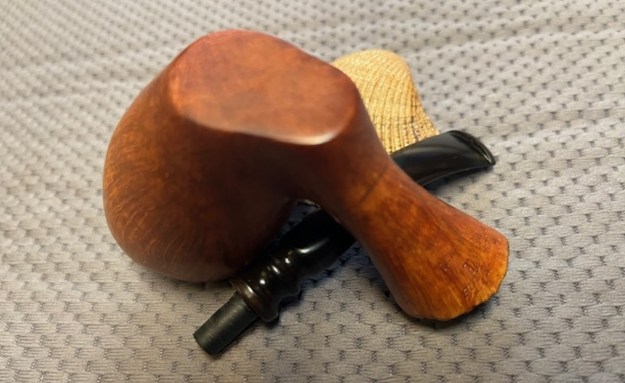
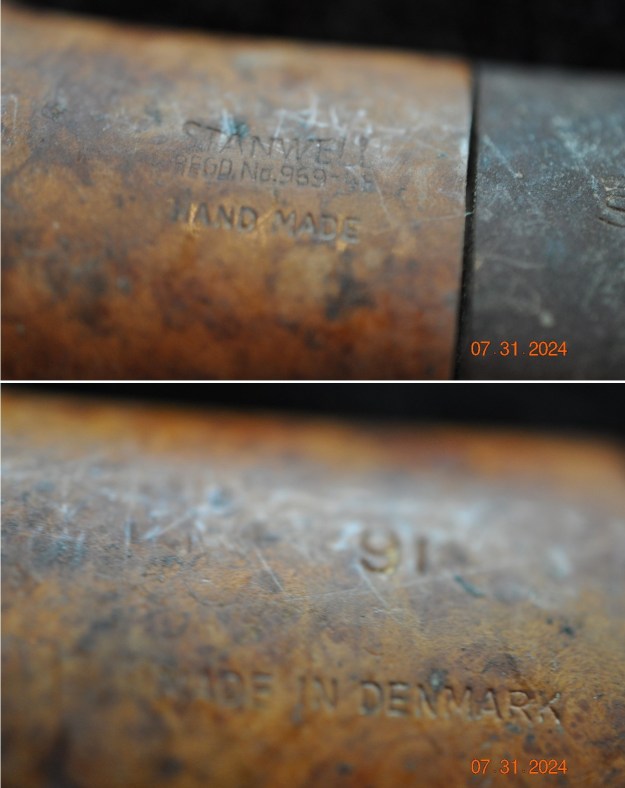
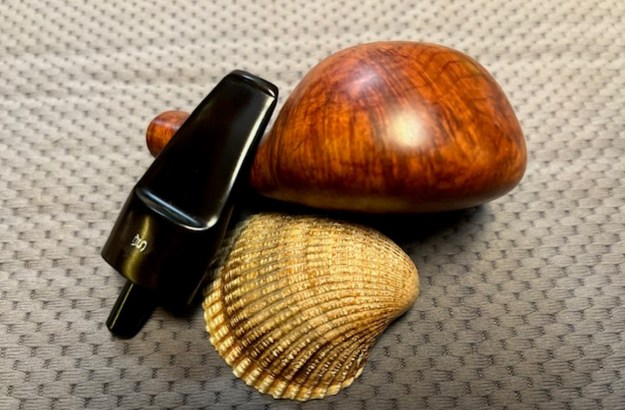
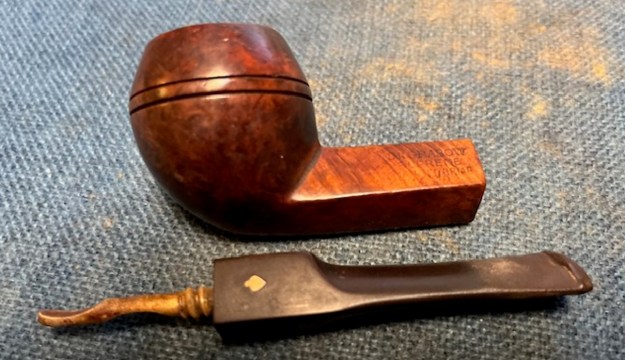
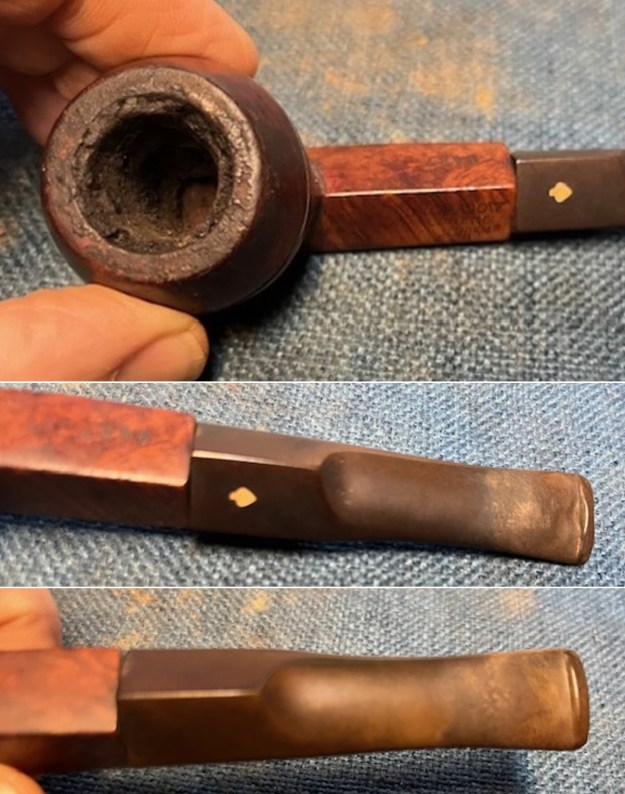 I tried to capture the stamping on the shank sides to show their condition before my work. They are readable as noted above and faint in spots. I removed the stem from the bowl and took a photo of the parts to give a sense of the symmetry of the pipe. It is a beauty beneath all grime.
 I looked up information on the Dr. Grabow Supreme 9437 Bulldog on Pipedia to see what I could learn about the pipe. There was specific article on the Grabow Models available and turned to it (https://pipedia.org/wiki/Dr._Grabow_Models_(Series,Line)_Names_Through_the_Years) to see what I could find. Here is what I learned:
To make it much easier to locate a certain pipe name in this section, I have placed them in simple alphabetical order with a little information about each line or series. Information with more detail about the grade of briar used, the ranking of the pipes in quality from say, best to least, will be added later in a different area.
Furthermore, I have split these pipe names into two groupings of my own definition, “OLD” and “NEW”. Roughly that equates to pipes made in Chicago and pipes made in Sparta, North Carolina area after the sale and “move”. In a very grey area in between is an era I call the “transition period” when strange things were happening with production and the like, and where, possibly, pipes were being made at both locations at the same time, or may have even been contracted out to yet another place. This is a separate subject in and of itself and one we may never really resolve, but it IS a very interesting time in Dr. Grabow history, even if we affectionately call some of the pipes we suspect from that time, “Dr. Crapos”.
“OLD” Pipe Names and First Two-Digit Codes and Symbols:
- COURTLEIGH begins with 91 Series 82 = “The Antique Courtleigh” with an Antique Grain Finish c1937. (Not really a Dr. Grabow) Series 91 = Natural Select Grain Finish, c1937.
- DE LUXE begins with 92, 97, 98 – Two Dots, Circle or Shield on shank sometimes. Series 92 = Very dark reddish wine, solid looking finish, yet undefined, possibly from 1938 or slightly later era. Series 97 = Natural Variegated Grain Finish, c1937. Series 98 = yet undefined, Dark Brown appearance? Series 99 = Dark Walnut Finish, c1937.
- DOLLAR DR. GRABOW — See “SPECIAL” below.
- DR. GRABOW (C1930 to 1932?) had no series number as in the begining, this WAS the only pipe name for this new Linkman’s line of pipes. Most examples have MLC in an ocal stamp and just a TWO-digit shape number.
- FIFTY GRAND begins with 15, c1937? or later. (Not really a Grabow)
- HOLLYCOURT begins with 88, c1938 or later. (Not really a Grabow)
- RINGMASTER begins with 50, c1955+?
- SELECT GRAIN begins with 84 – Sideways Spade pointed to bowl
- SUNSET GRAIN begins with 96, c1955? or later.
- SPECIAL (or Special Italian Briar) post-1937, begins with 43, 49, maybe no number at all; DOLLAR DR. GRABOW 1937 or previous, may not be marked as such, begins with 43, 44, 49 Series 43 = Natural Finish (DG), c1937. Series 44 = Dark Finish (DG), c1937. Series 49 = Walnut Finish (DG), c1937.
- STANDARD begins with 44 (early Linkman’s?) or has no number at all, may be replacement for Special. Linkman’s were push stems, HL&T’s were Ajusto.
- SUPREME begins with 94, 95 Series 95 = one example has lighter reddish stain, yellow stem, c1950?
- TRU-GRAIN begins with 60, 62
- VENTILATOR begins with 63, 64, 65 Series 63 = Natural Finish, c1937. Series 64 = Dark Finish, c1937. Series 65 = Walnut Finish, c1937.
Thus, I knew that the pipe was made before the move from Chicago in what the writer of the article calls the old pipes. I marked the Supreme in the list above. It states that the four digit shape number with 94, 95 came out around 1950.
I did some more digging on Pipedia and found the following information that also helped pin down the date (https://pipedia.org/wiki/Dr._Grabow).
The production of the pipes started in 1930/31. In 1937 Linkman began calling his pipes “Pre-Smoked”. An ad dating from 1946 celebrates it as “America’s Most Wanted Pipes” and the text announced that each Dr. Grabow was broken in on the Linkman’s Automatic Smoking Machine with fine Edgeworth tobacco, reducing the need for the new owner to spend time breaking in his pipe. In 1949 the official name read Dr. Grabow Pipe Company Inc. with seat at W. Fullerton Avenue 1150, Chicago 14, Illinois. (Thus the Linkman factory.) Series: Special, De Luxe, Supreme, Tru’ Grain, Select Grain.
That helped to pin down the line to the manufacture at the Linkman Factory. It is listed as one of the series. I have highlighted the SUPREME in red. Now it was time to work on the pipe itself.
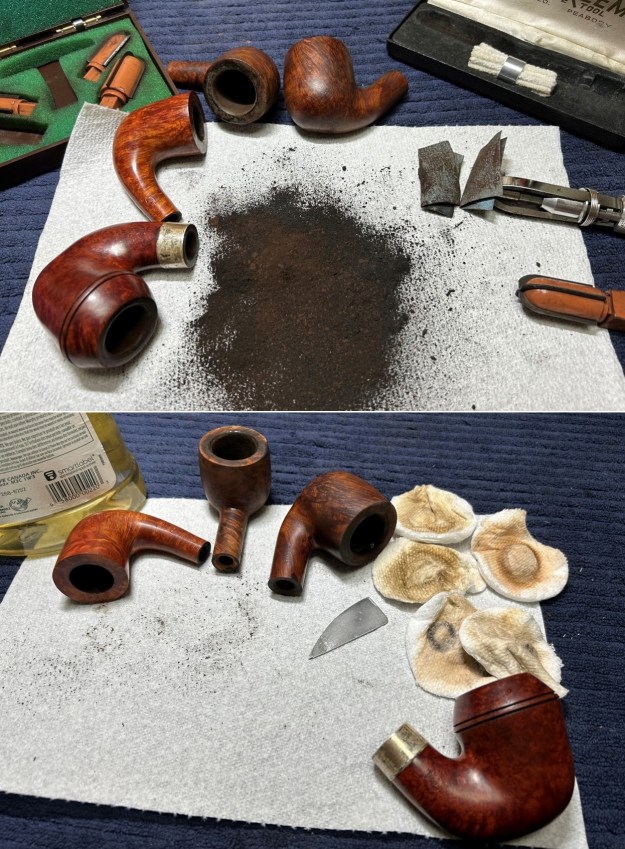
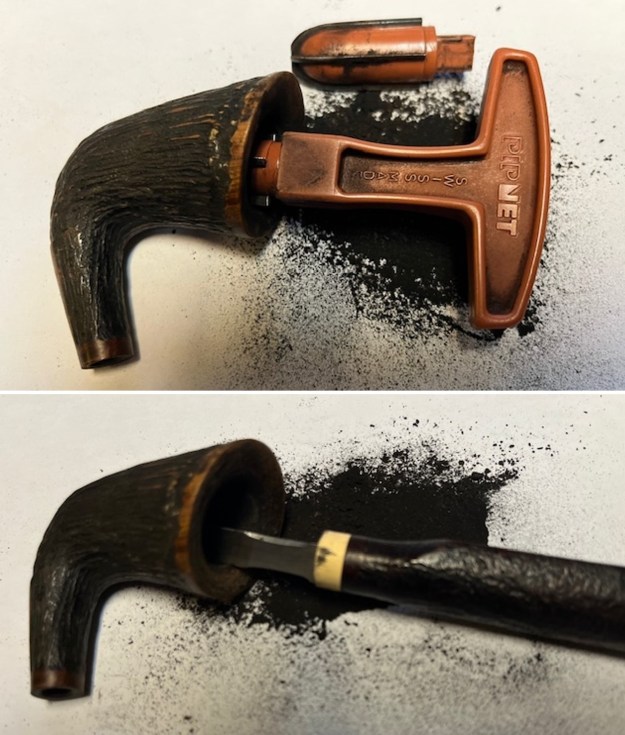
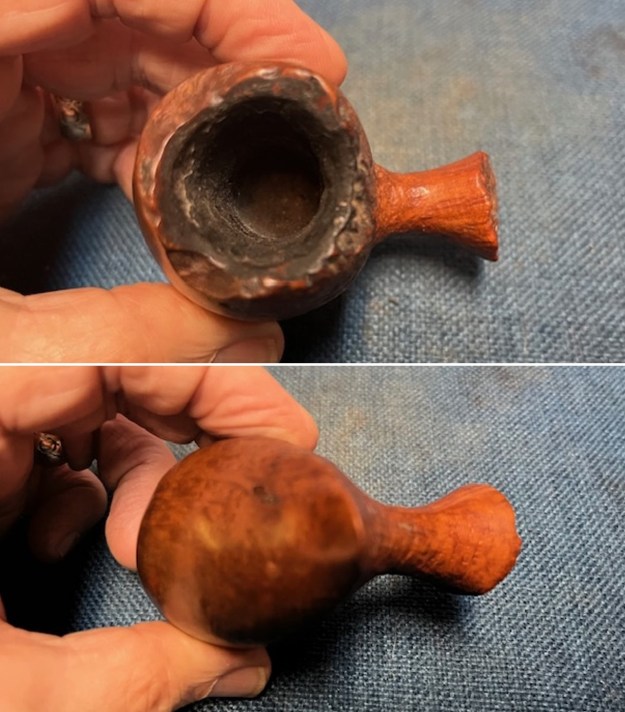
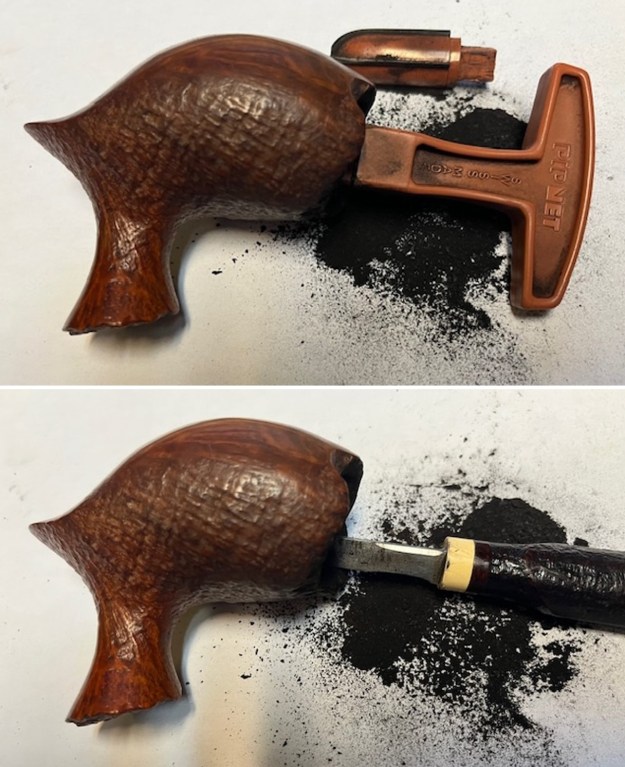
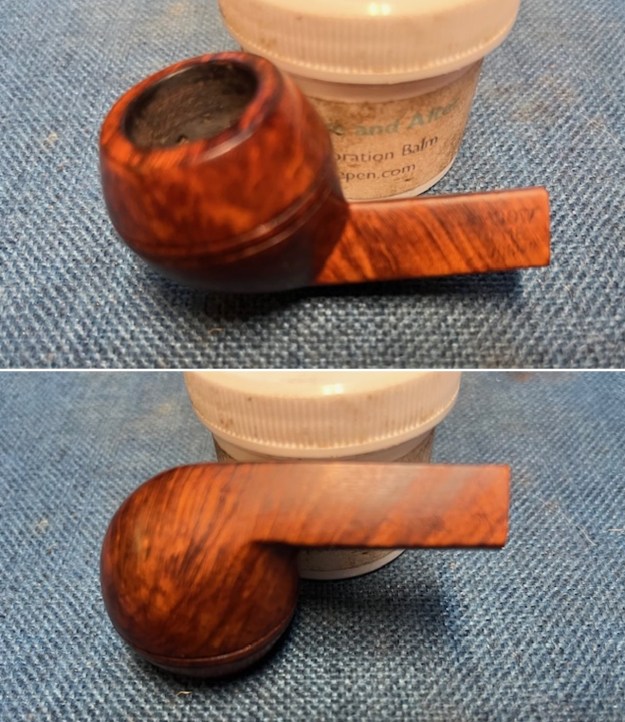
I decided to ream the bowl and do some internal clean up work before further polishing the briar. I reamed the bowl with a PipNet pipe reamer using the 2nd and 3rd cutting heads to remove the cake in the bowl. I cleaned up the reaming with a Savinelli Fitsall Pipe Knife and finally sanded the bowl with 220 grit sandpaper wrapped around a piece of dowel to clean up the walls of the bowl. The walls appeared to be in good condition. 
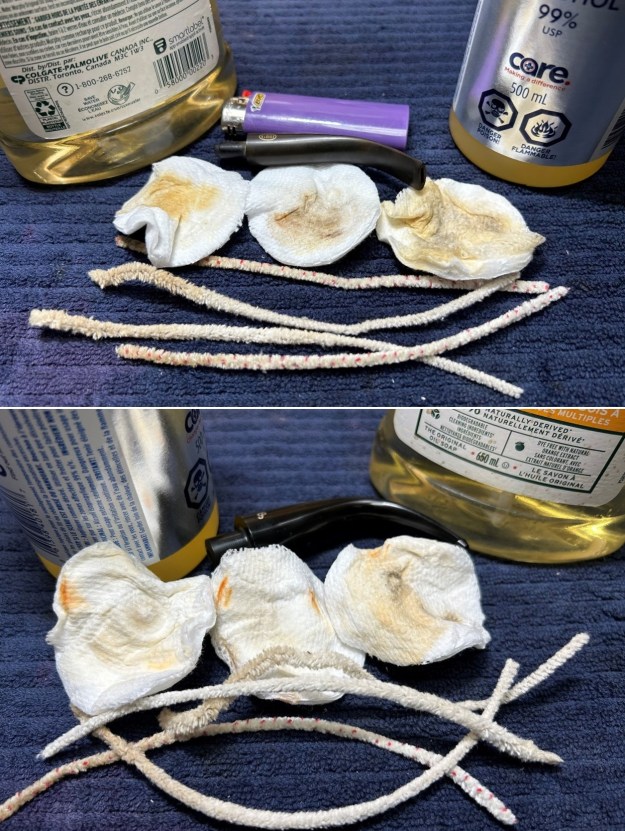
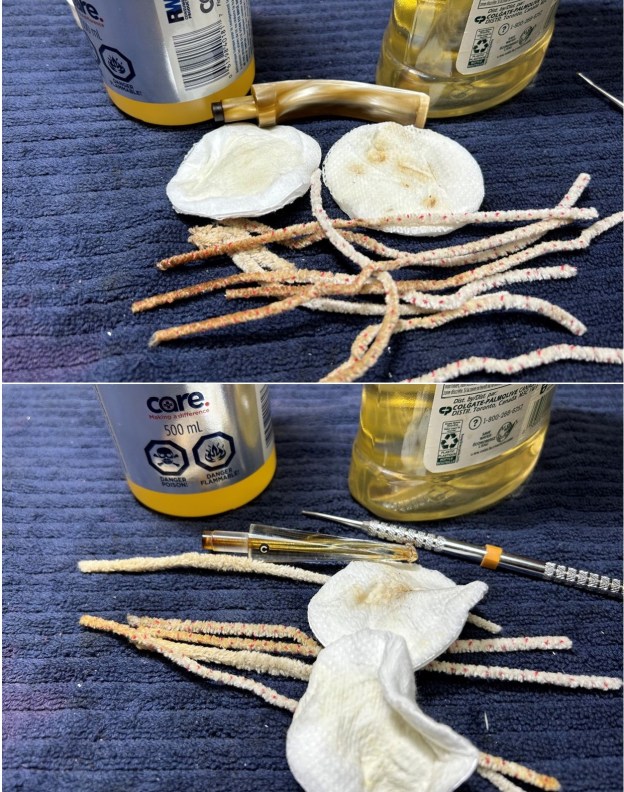
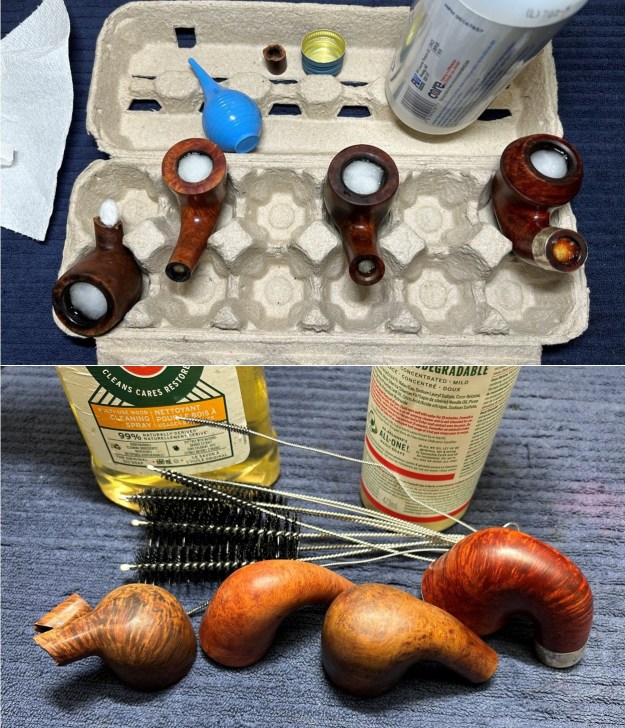
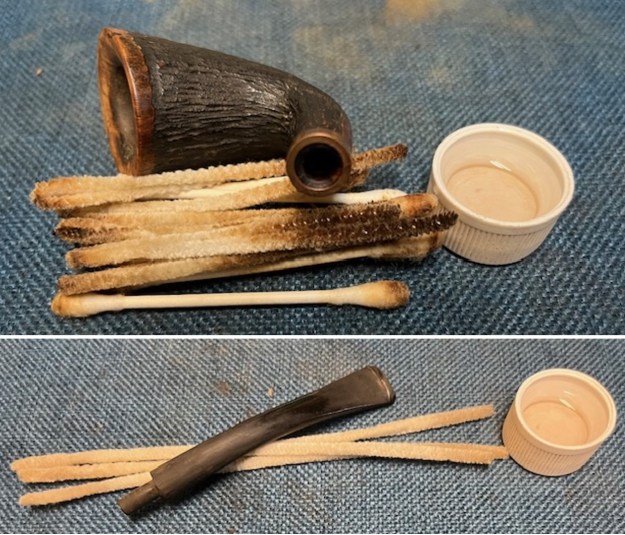
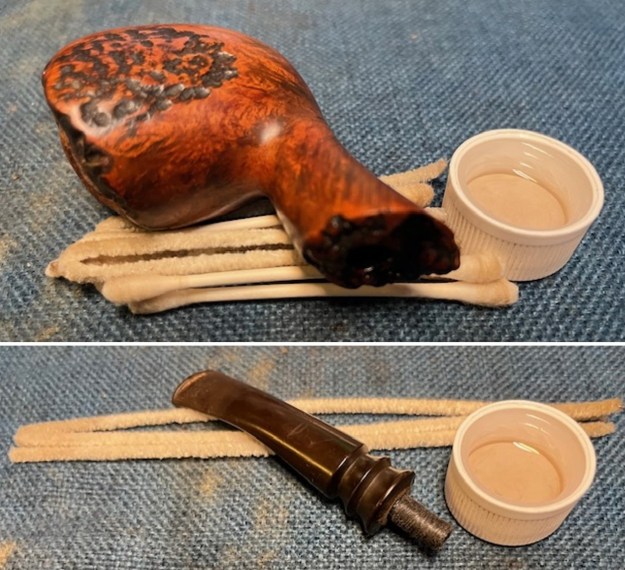
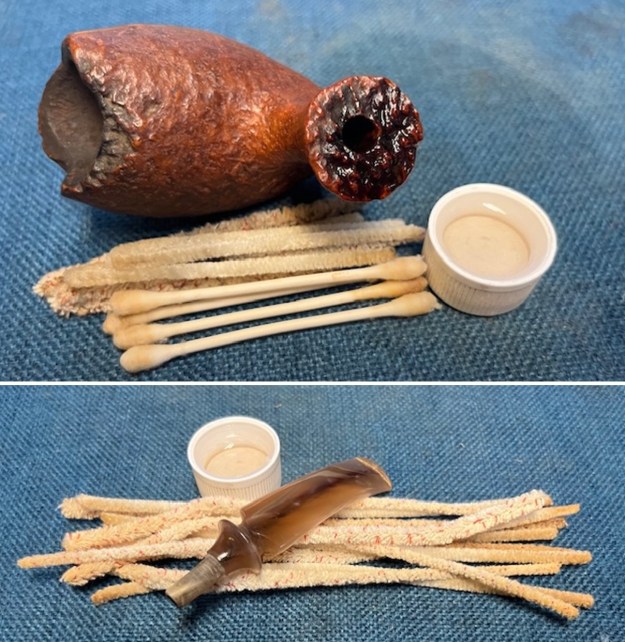
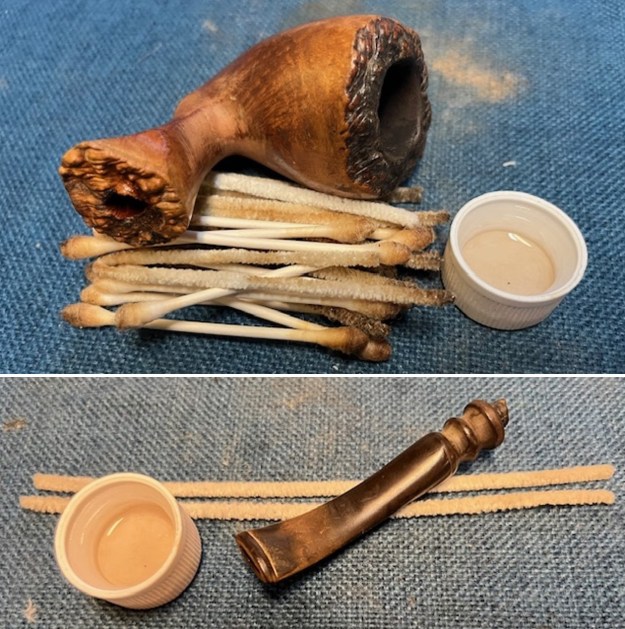
 I scrubbed out the internals with pipe cleaners (normal & bristle), cotton swabs and alcohol to remove the tars and oils in the shank between the mortise and the entrance of the airway into the bowl. It was quite dirty.
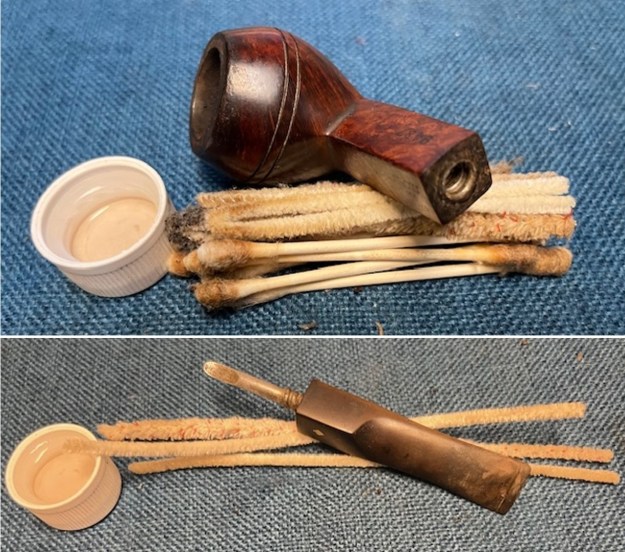 I scrubbed the aluminum “spoon” stinger and threaded tenon with a brass bristle wire brush to remove the debris and start the polishing.
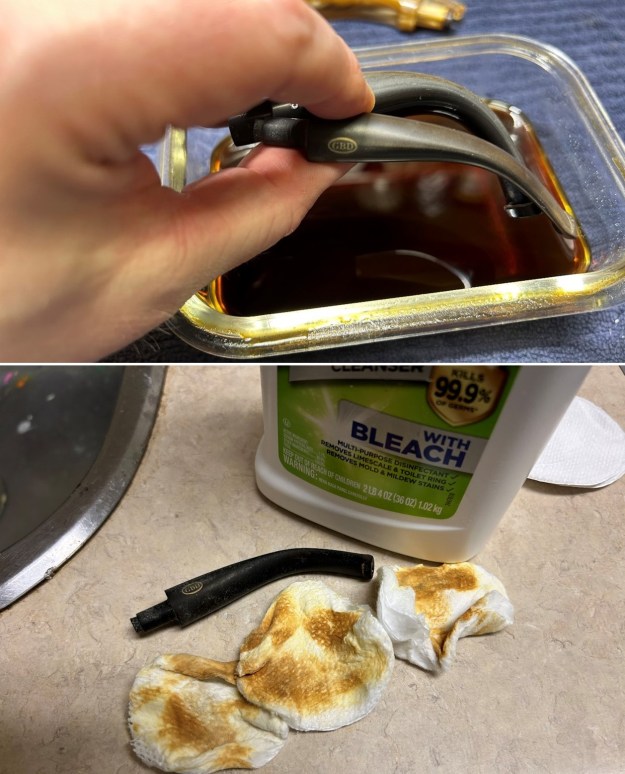
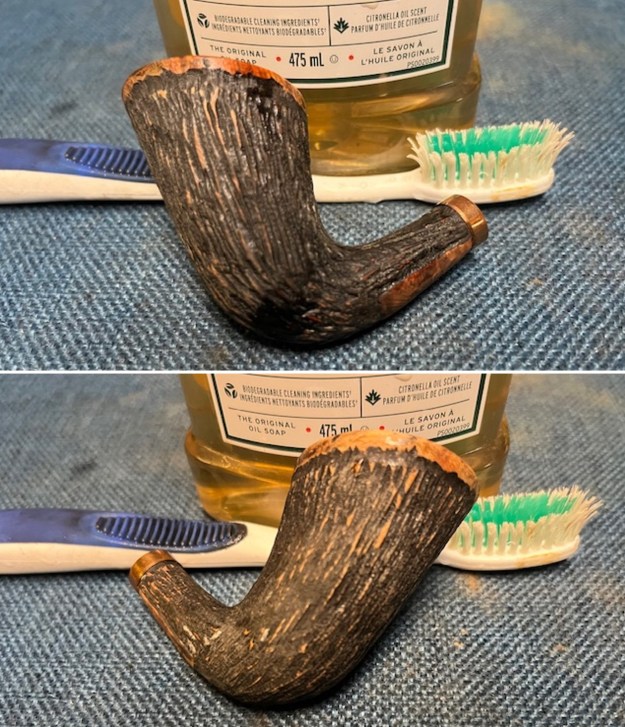
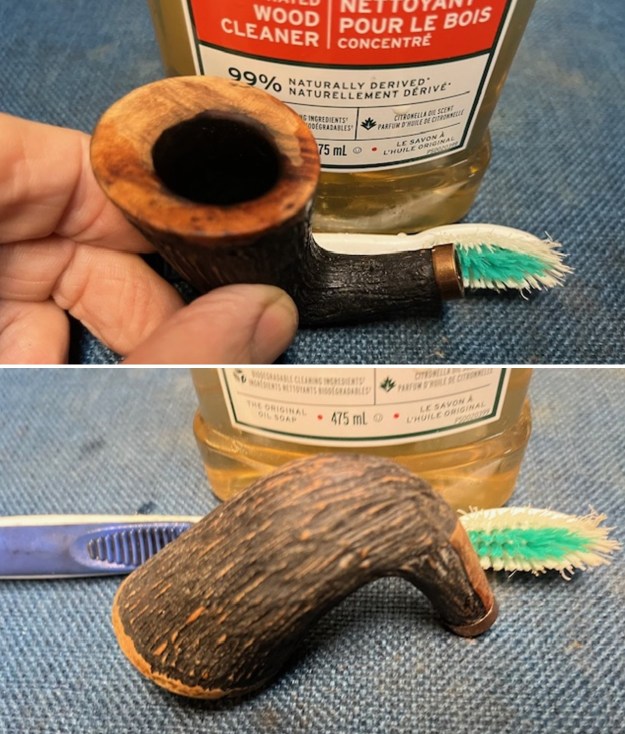
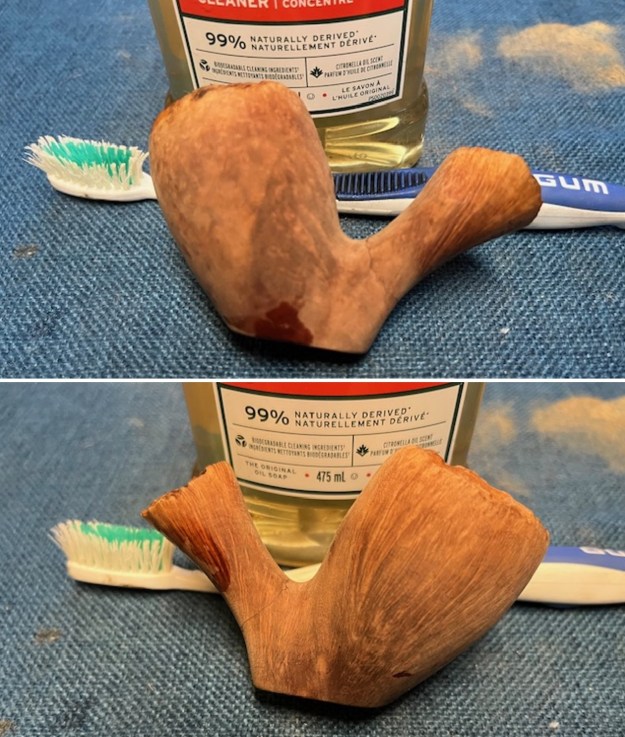
 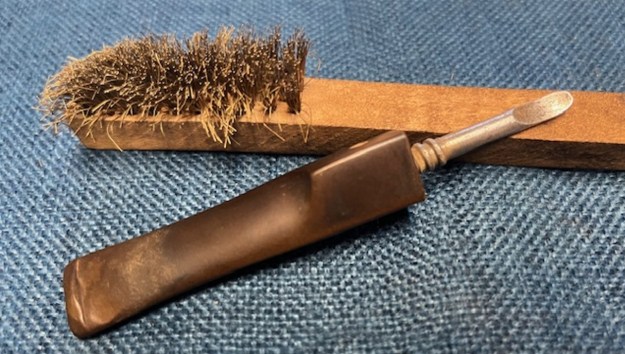 I scrubbed the bowl and rim top with undiluted Murphy’s Oil Soap and a tooth brush to remove the grime. I rinsed it with warm water and dried it off with a cotton towel.
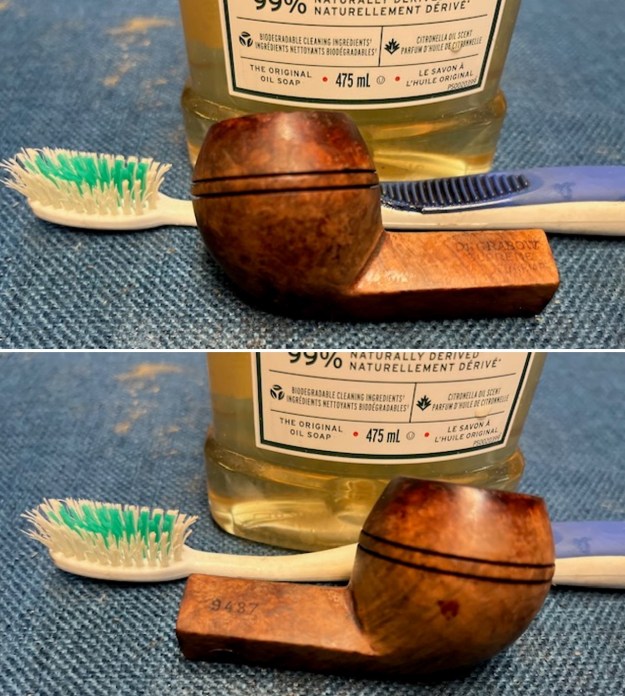
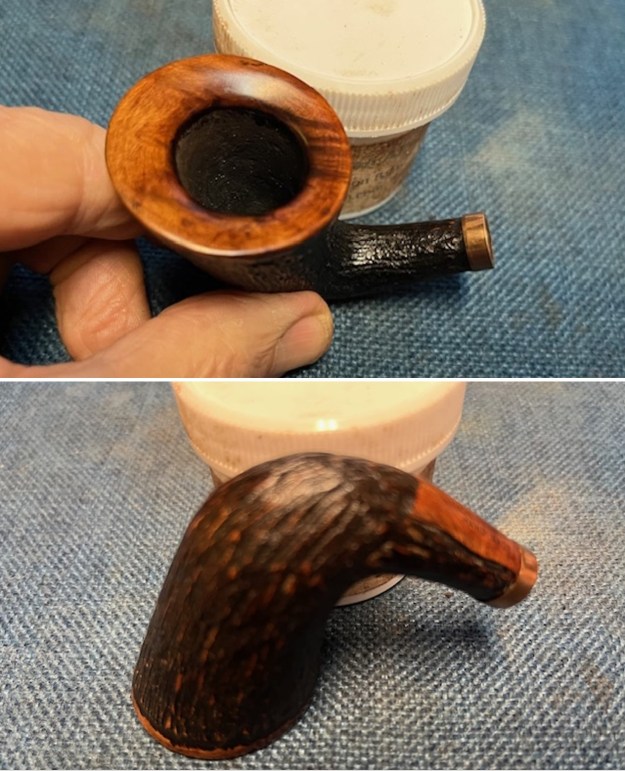
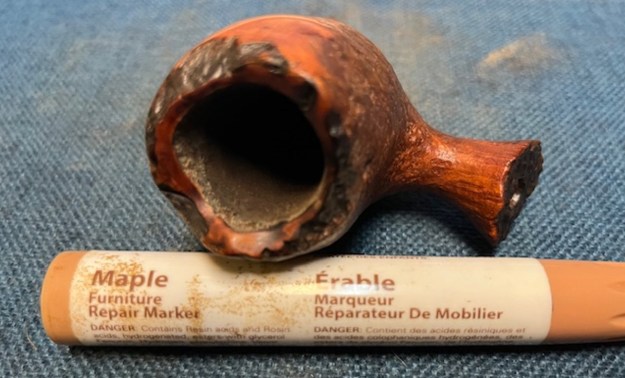
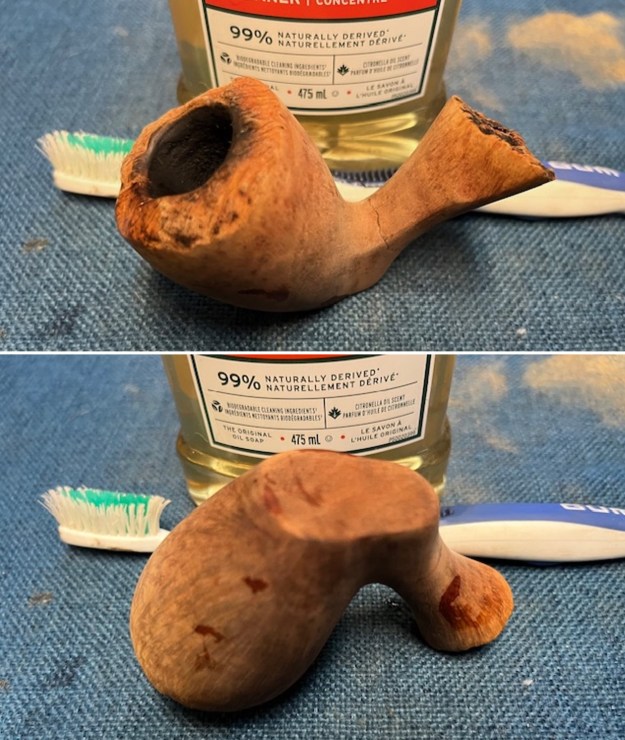
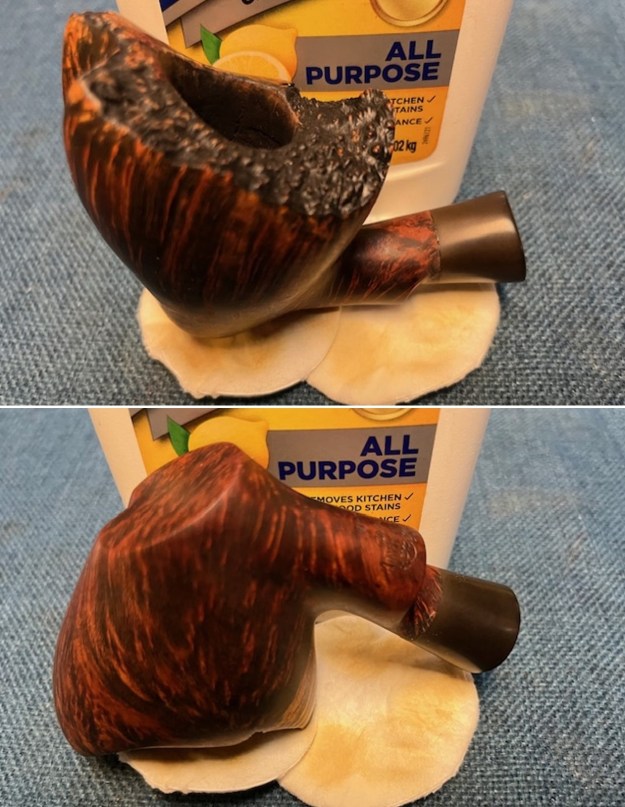
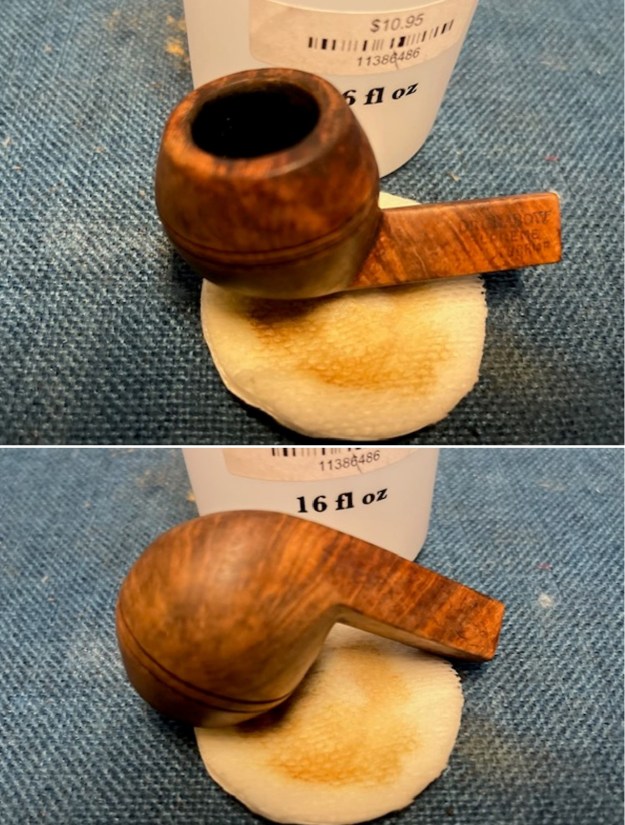
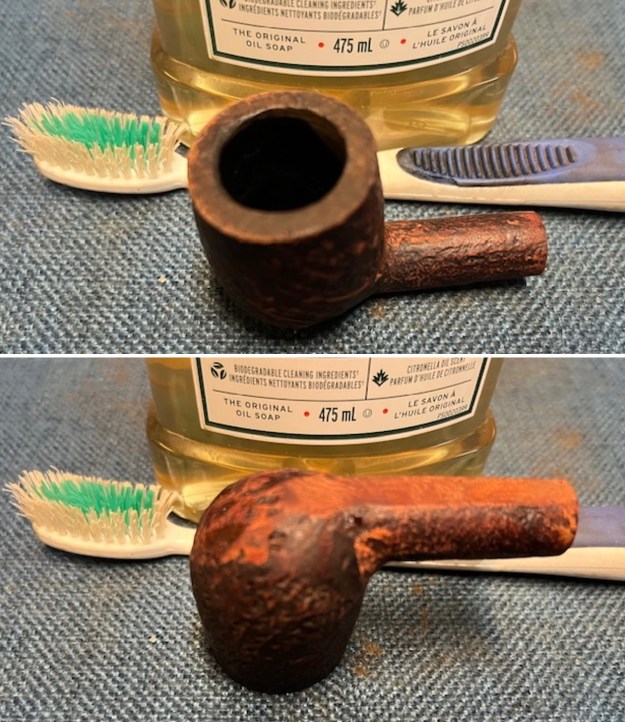
 There were still some shiny spots on the briar where the varnish had stuck to the finish. I wiped the bowl and shank down with acetone to remove the shiny spots. It worked well and the bowl looked great once it dried off.
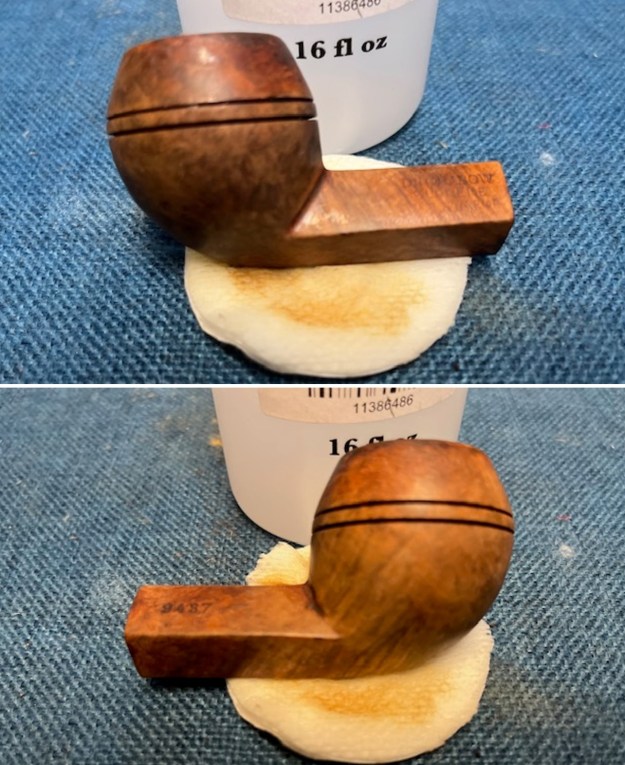
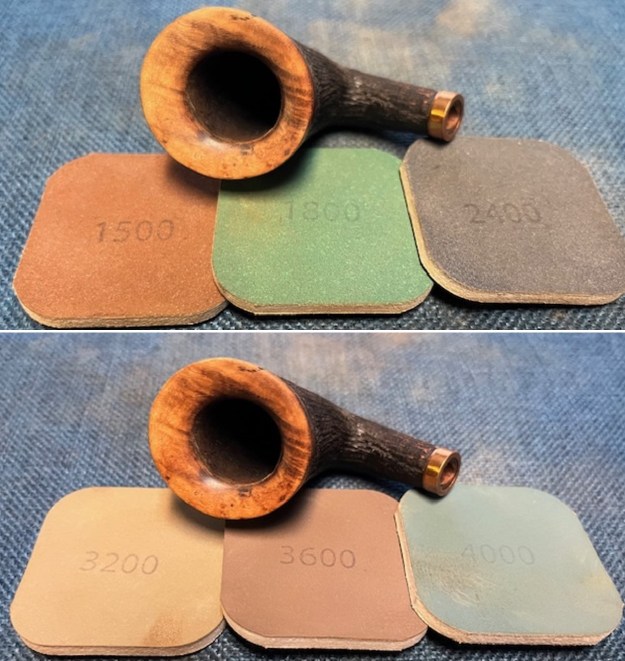
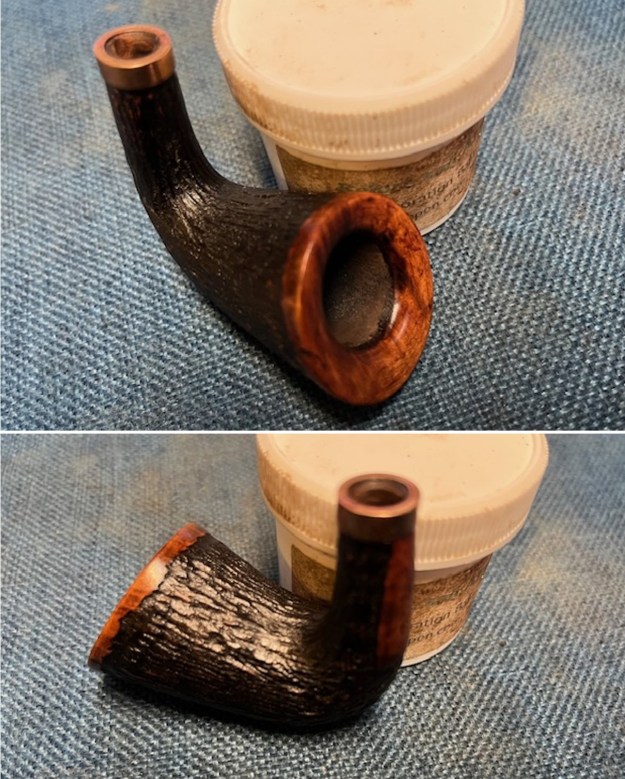
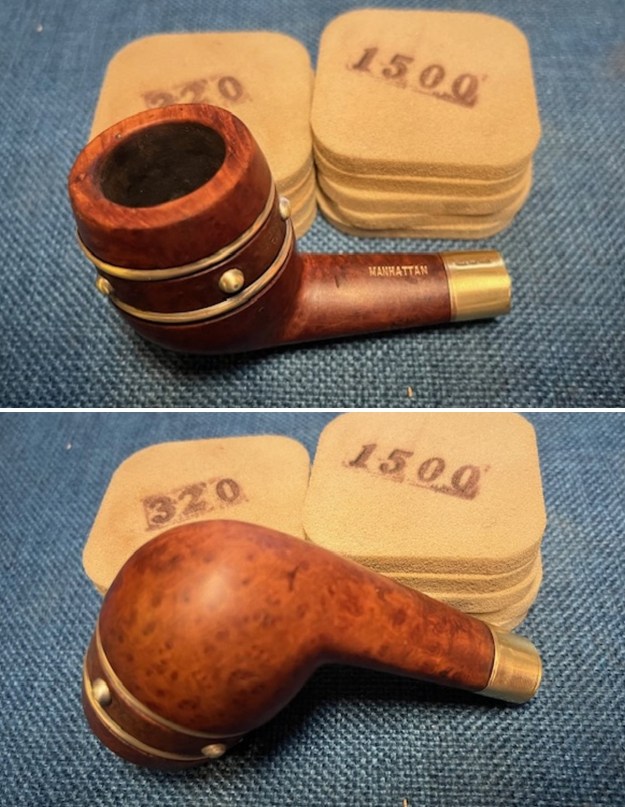
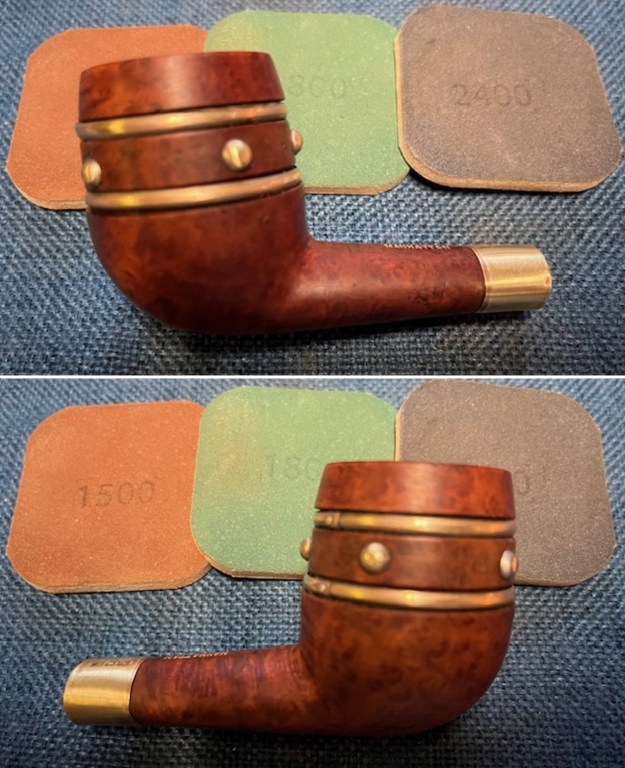
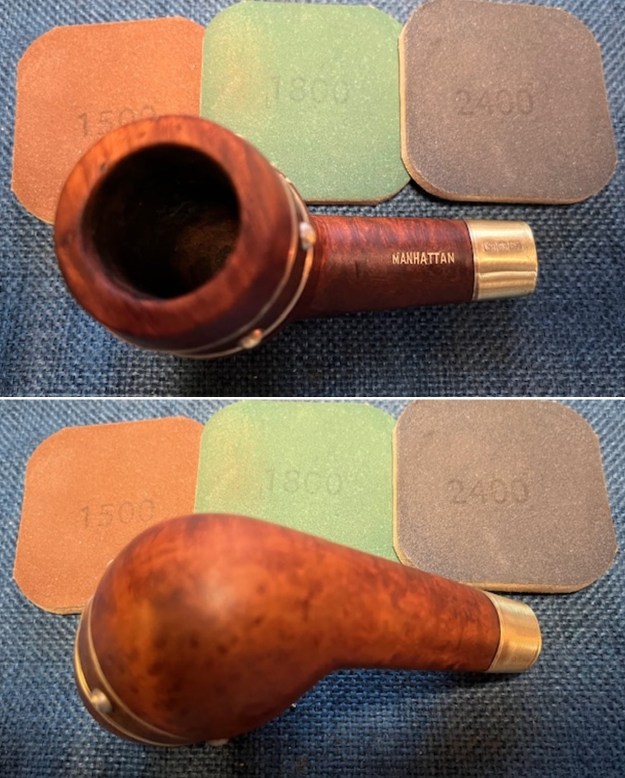
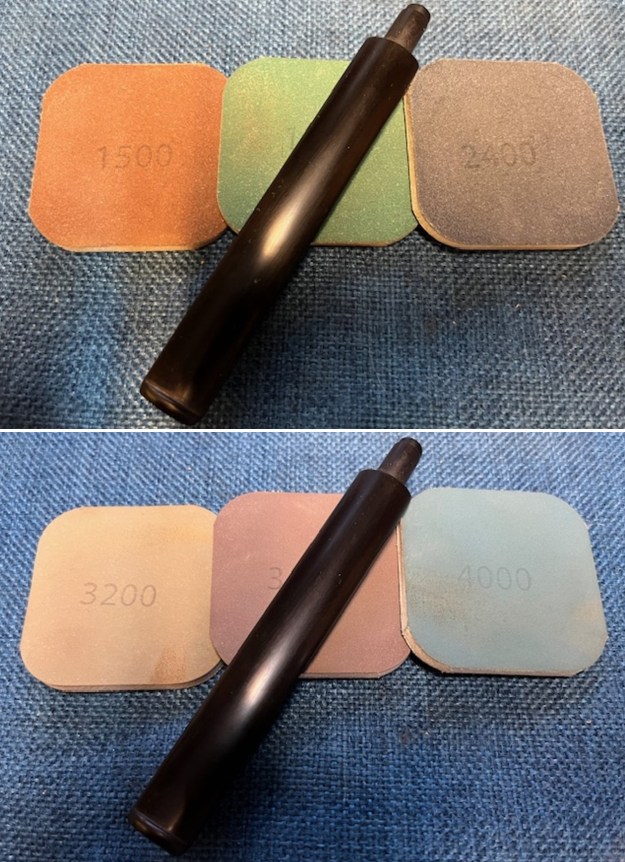
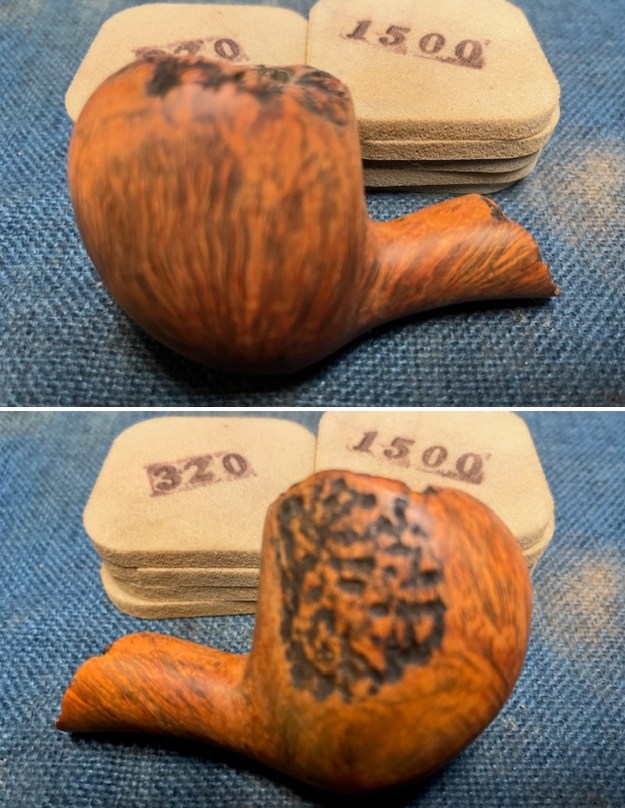
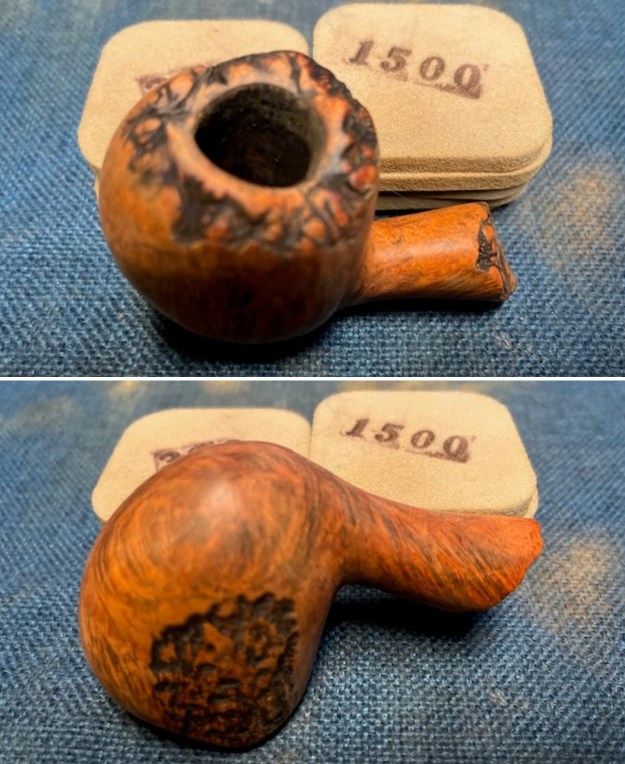
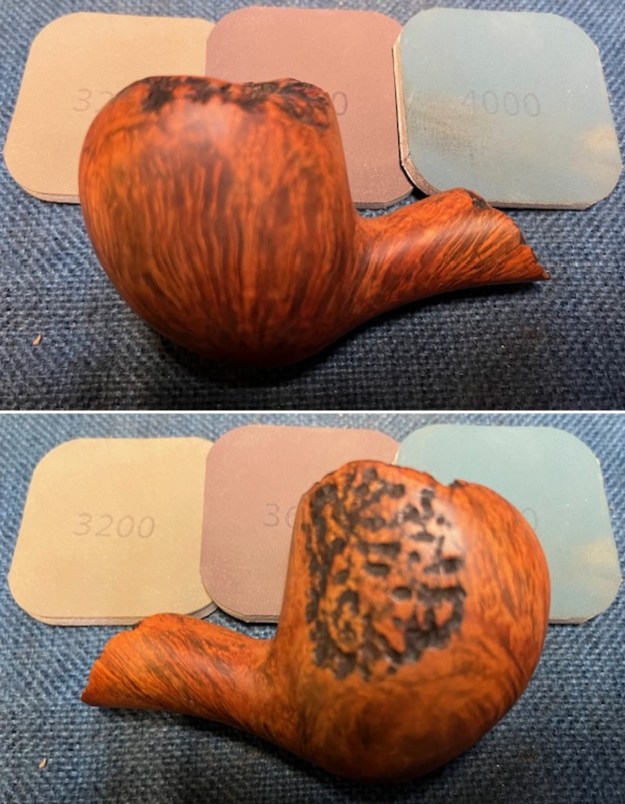
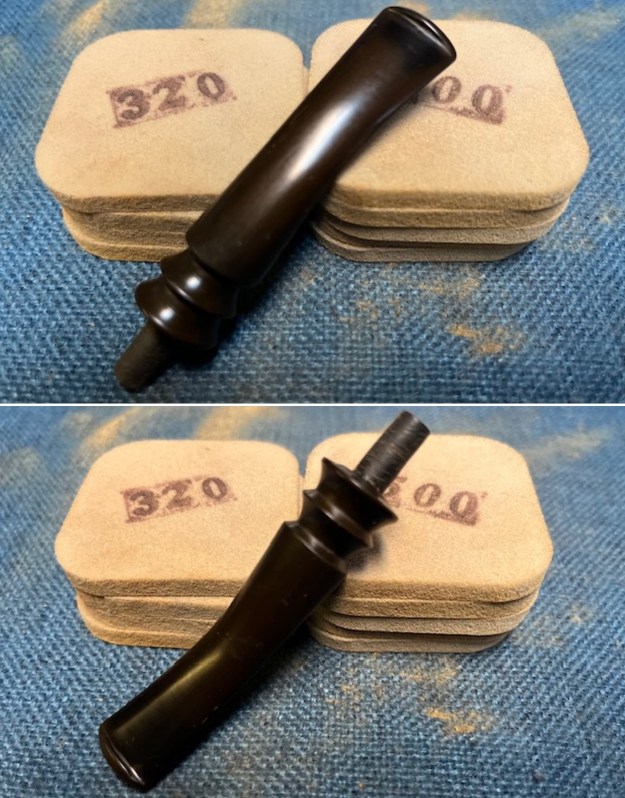
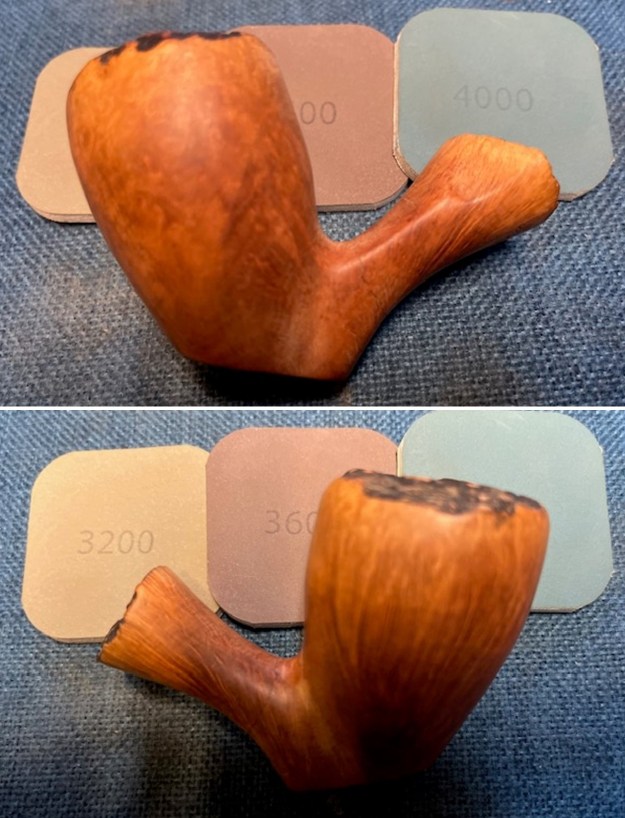
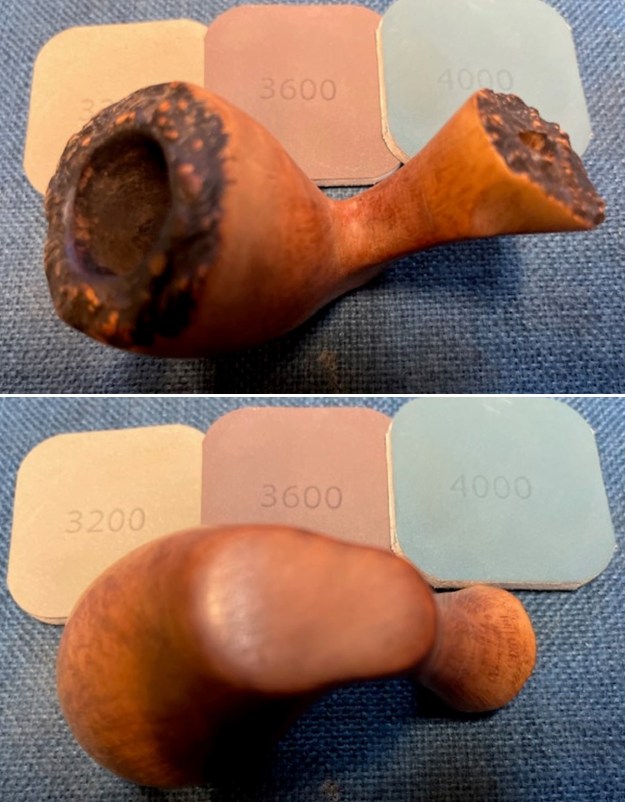
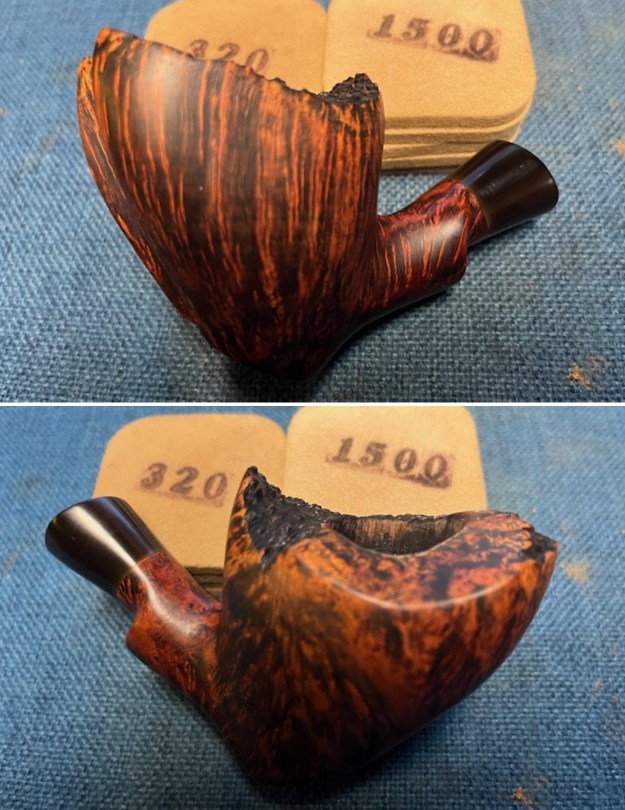
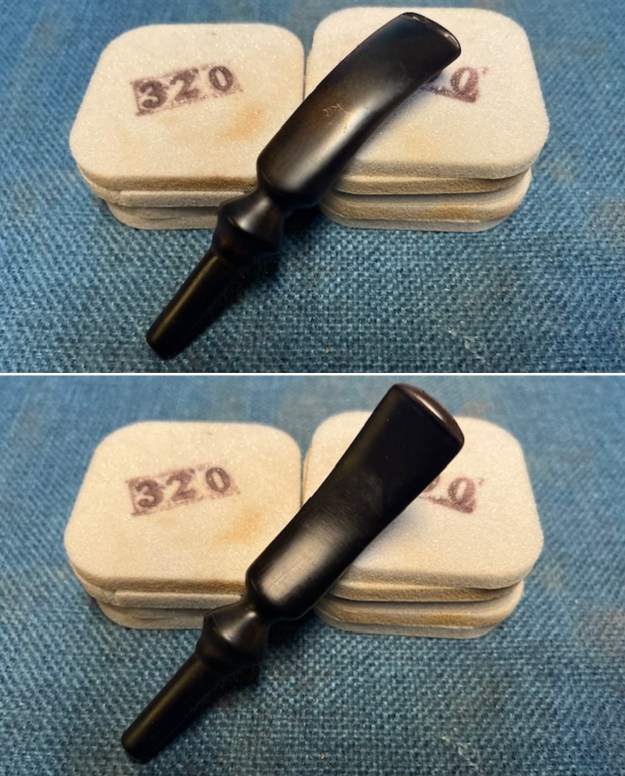
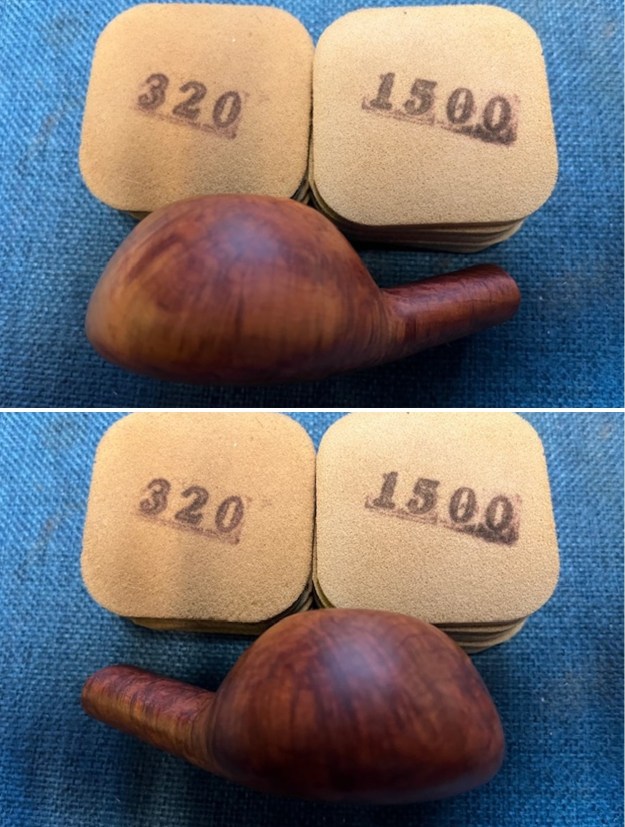
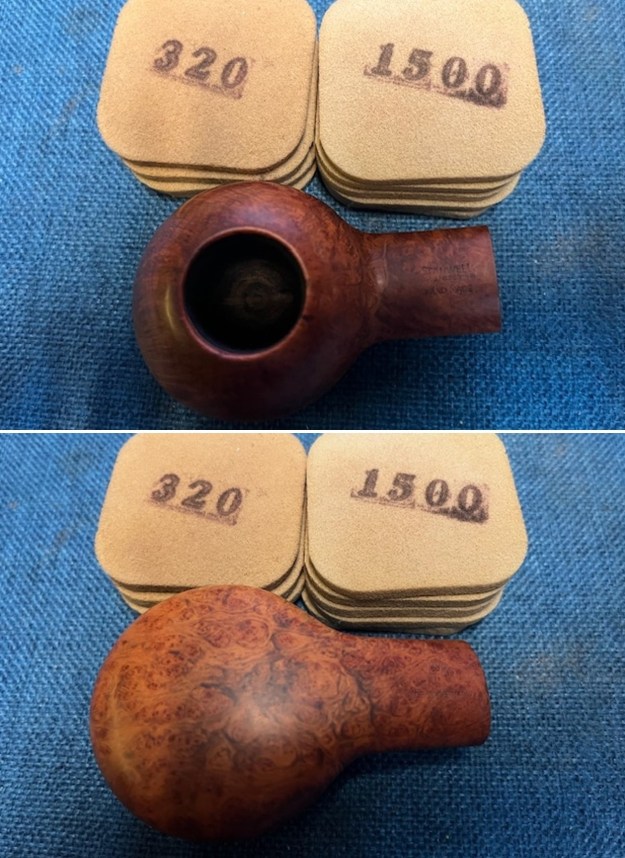
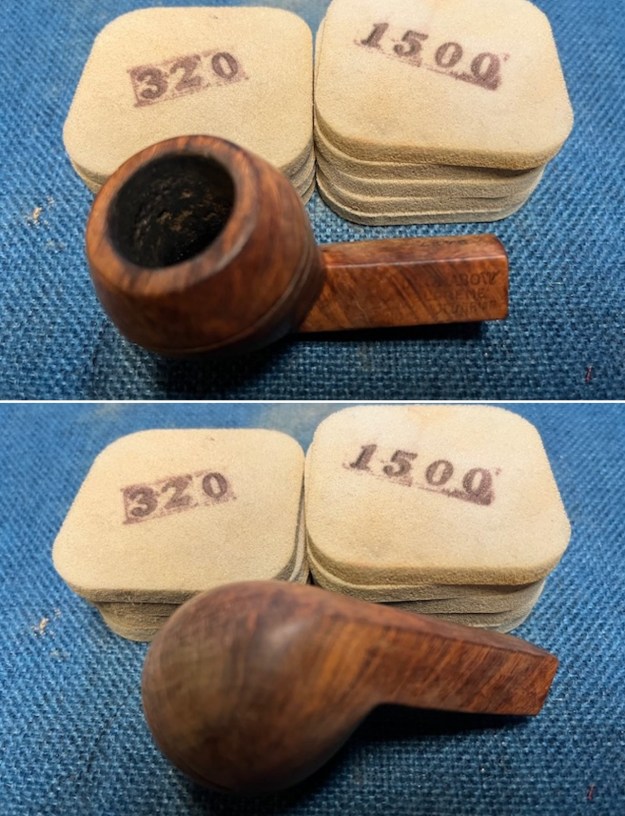
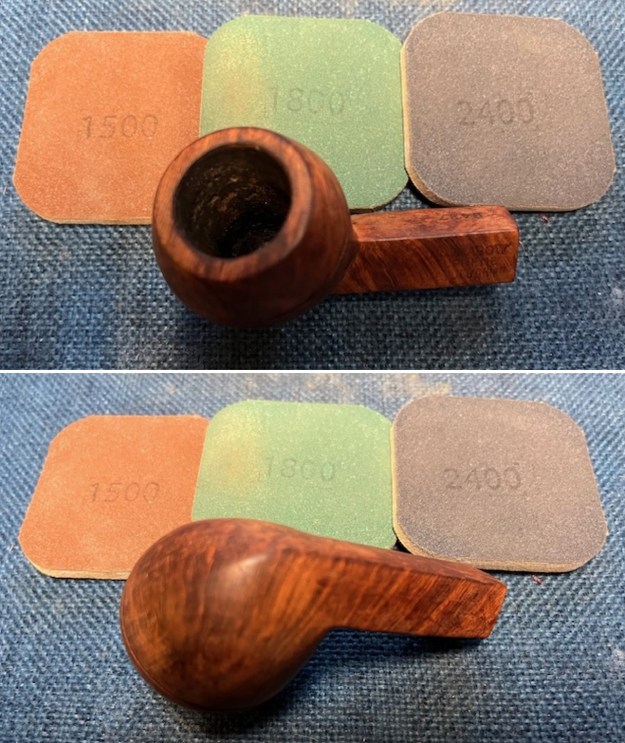
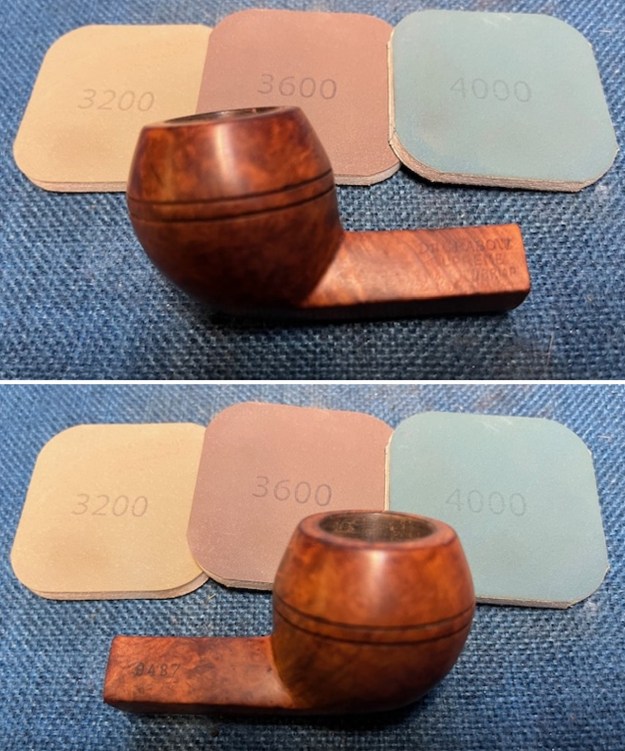
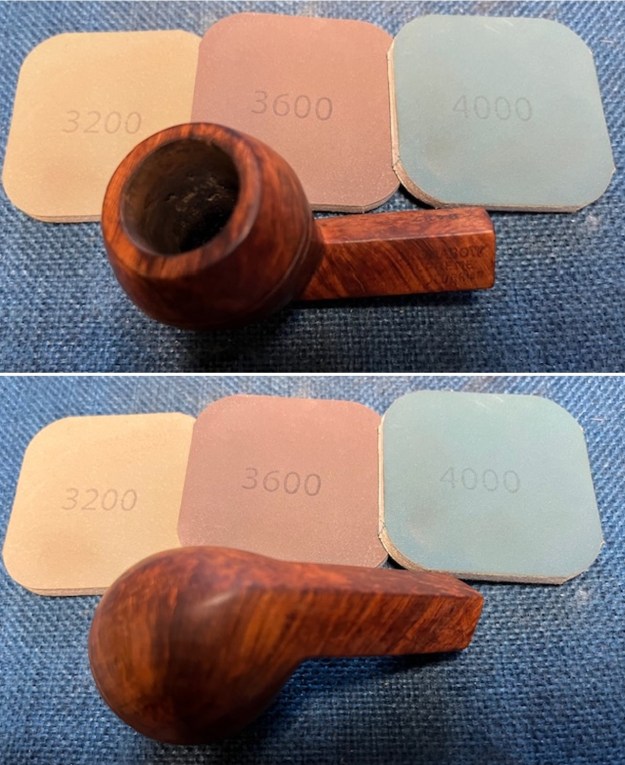
 I sanded the bowl and shank with sanding pads – 320-3500 grit pads. I wiped the bowl down after each sanding pad to remove grime and check the progress. It was looking very good by the time I finished with the final pad.
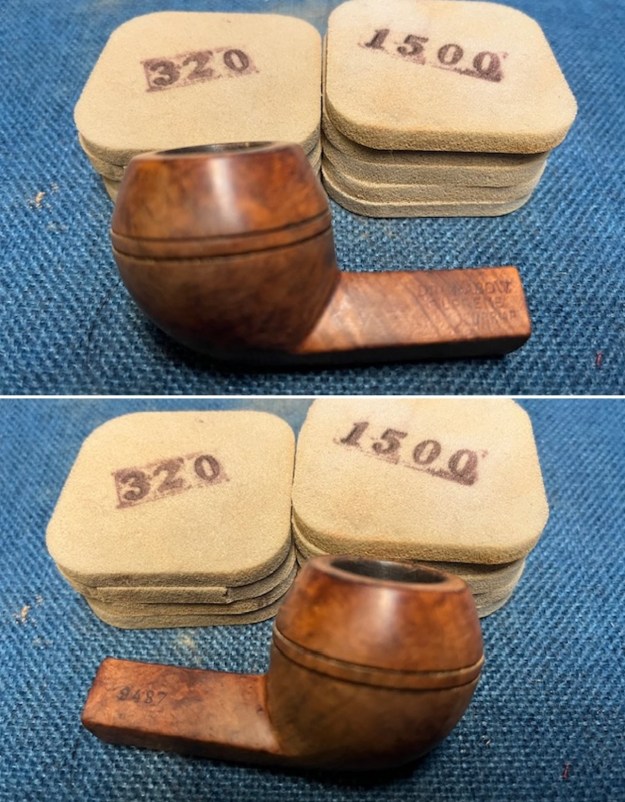
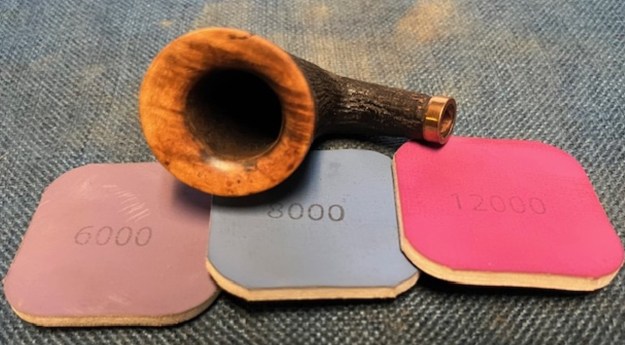
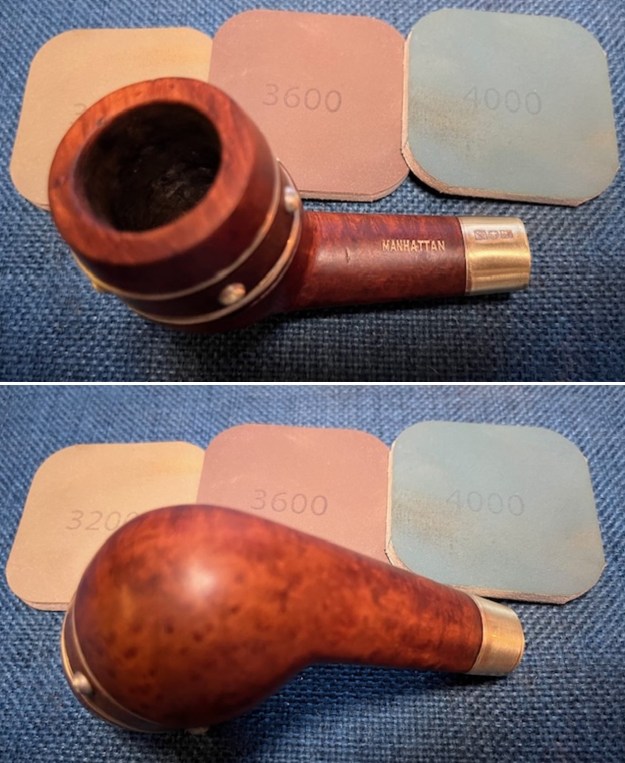
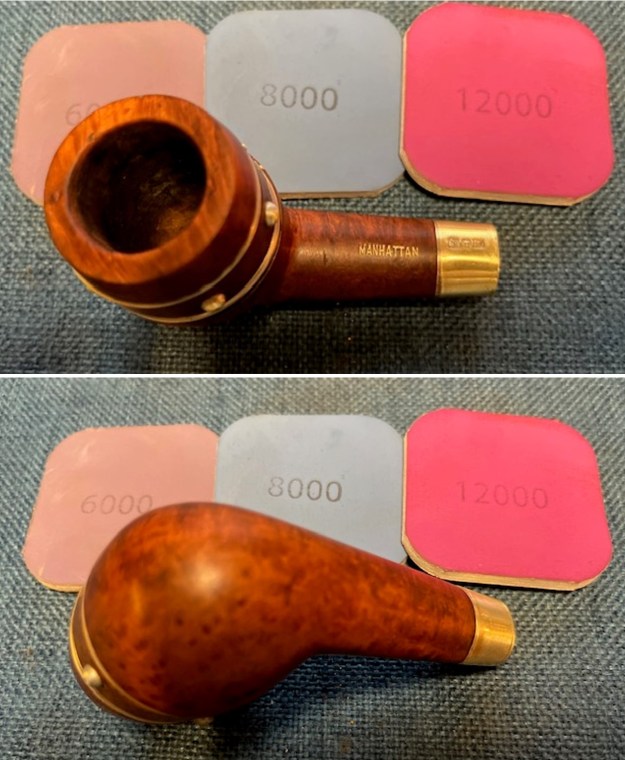
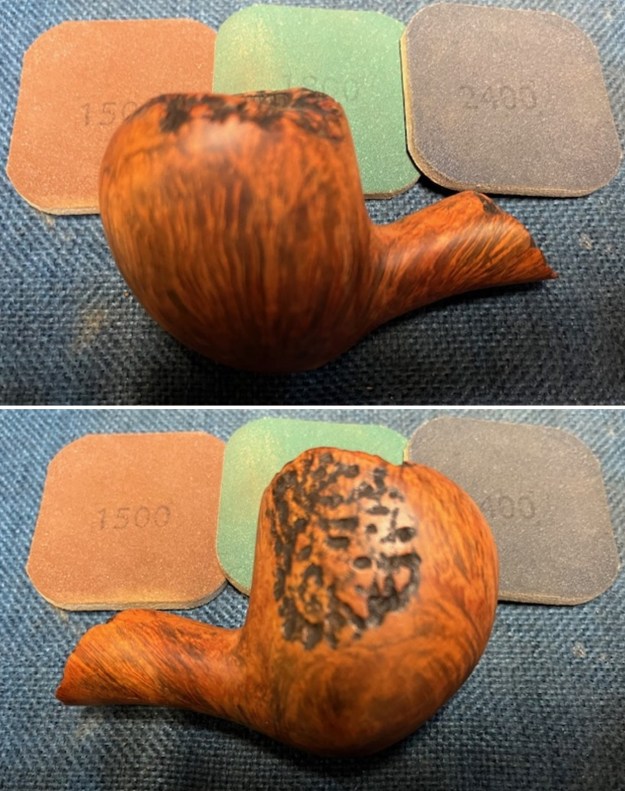
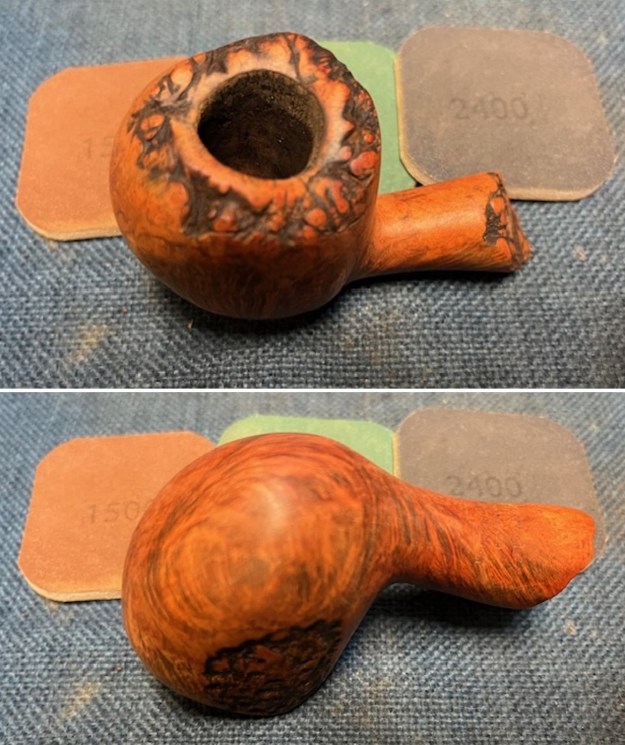
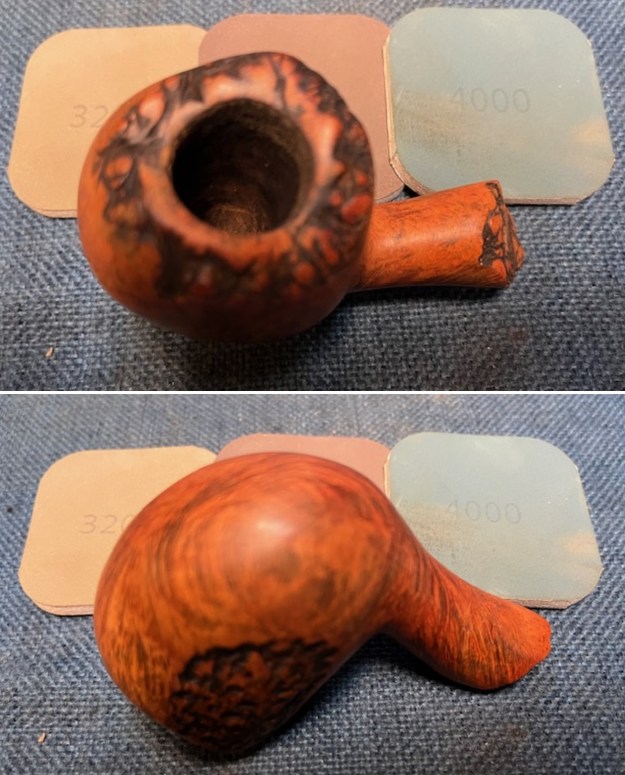
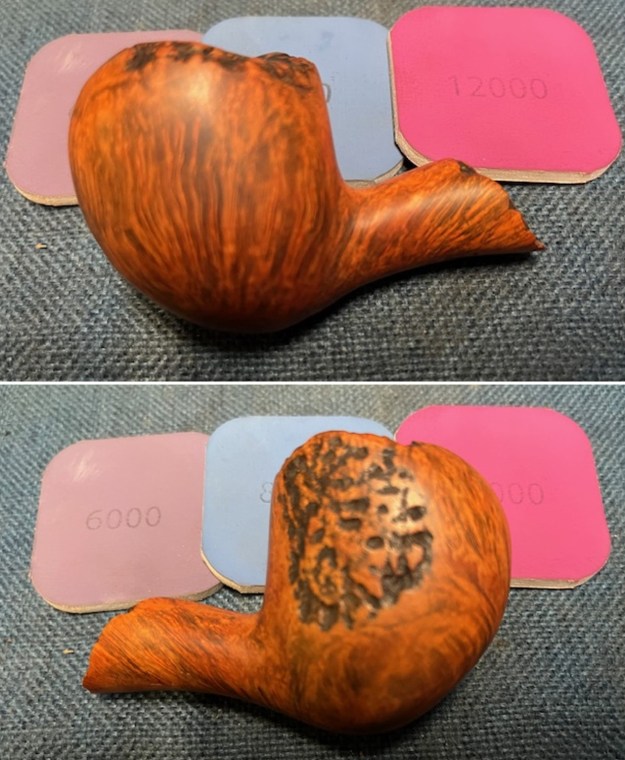
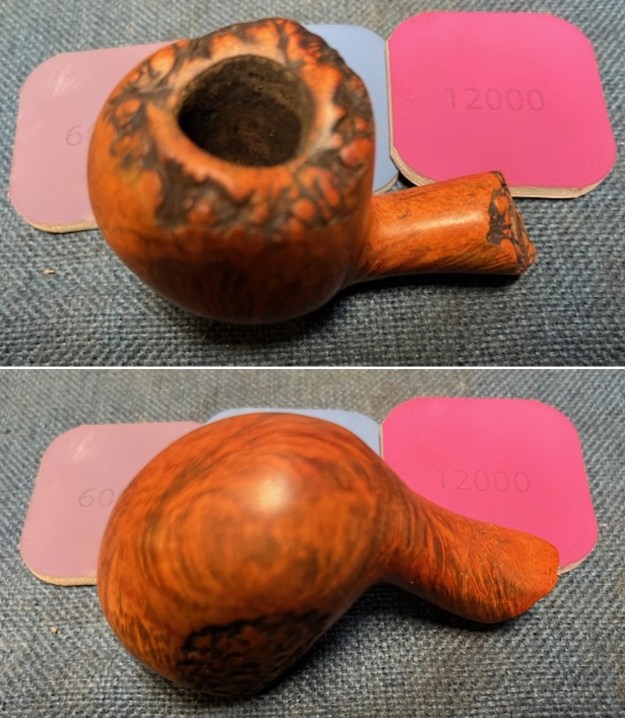
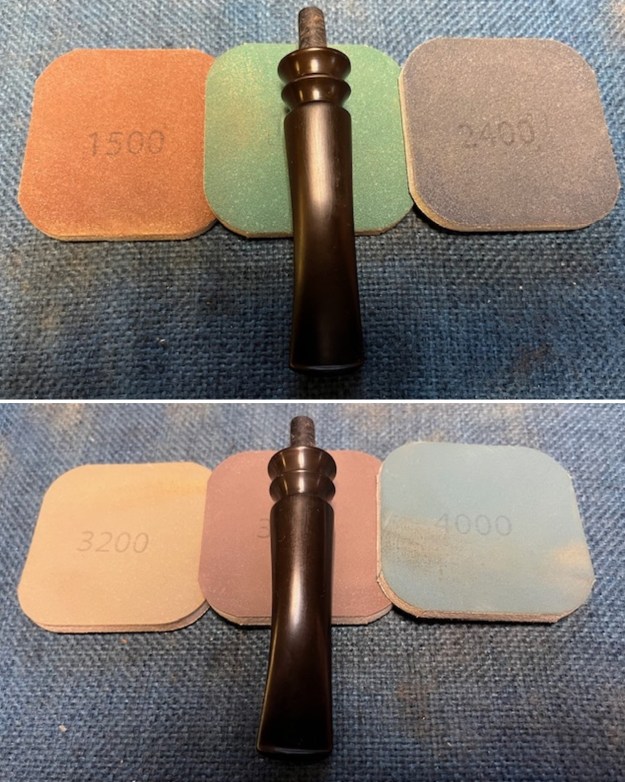
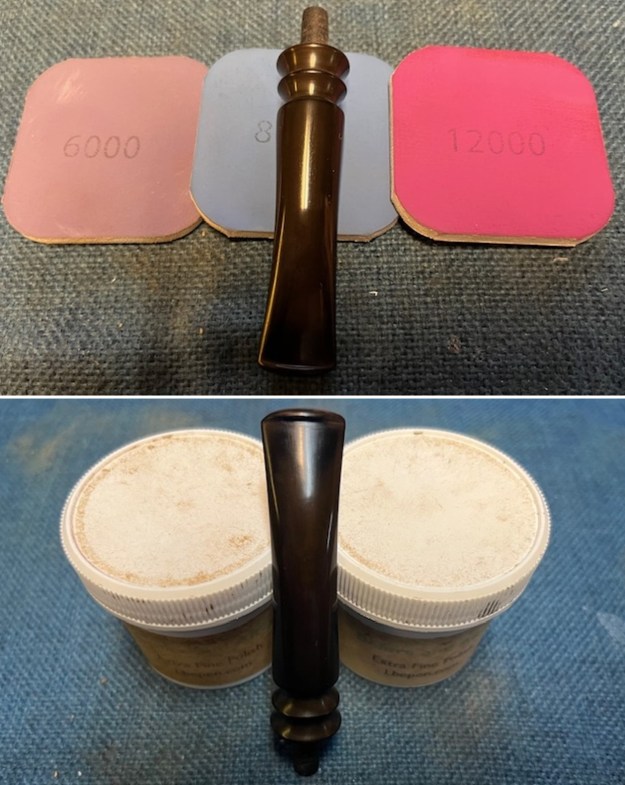
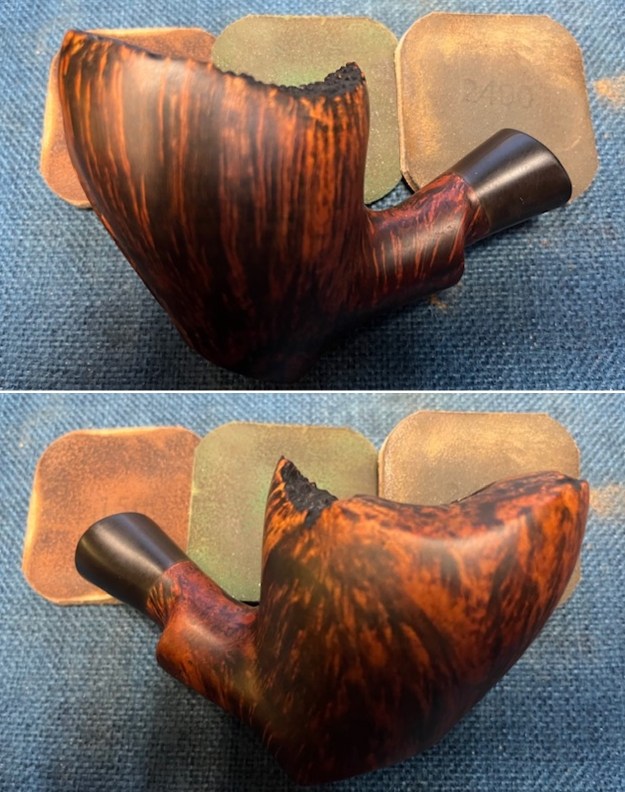
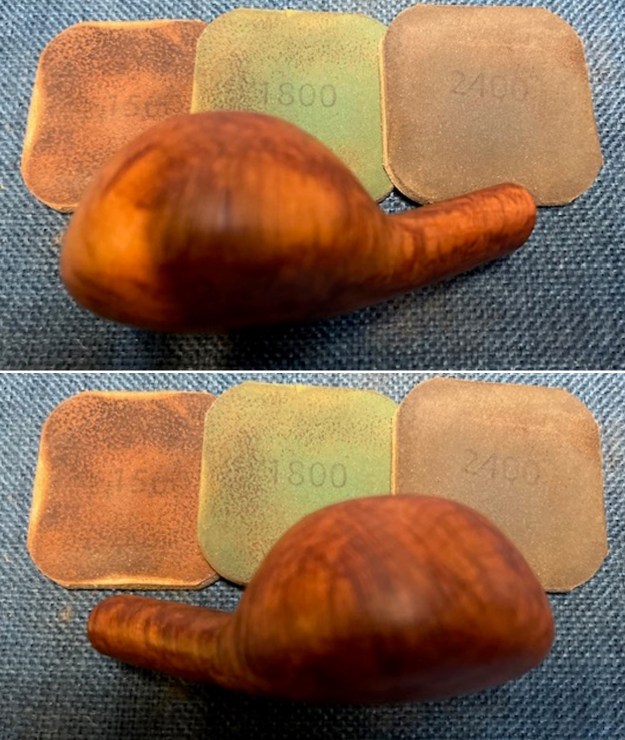
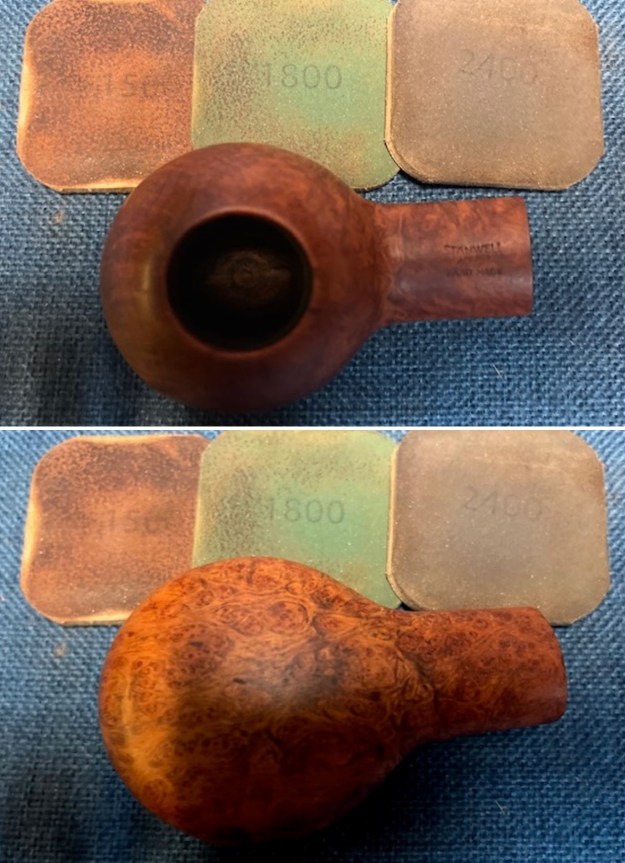
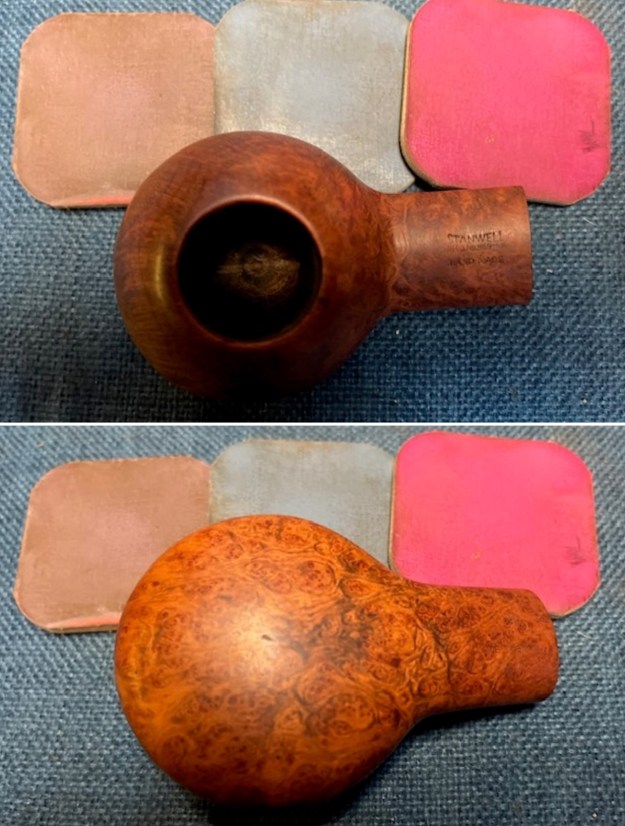
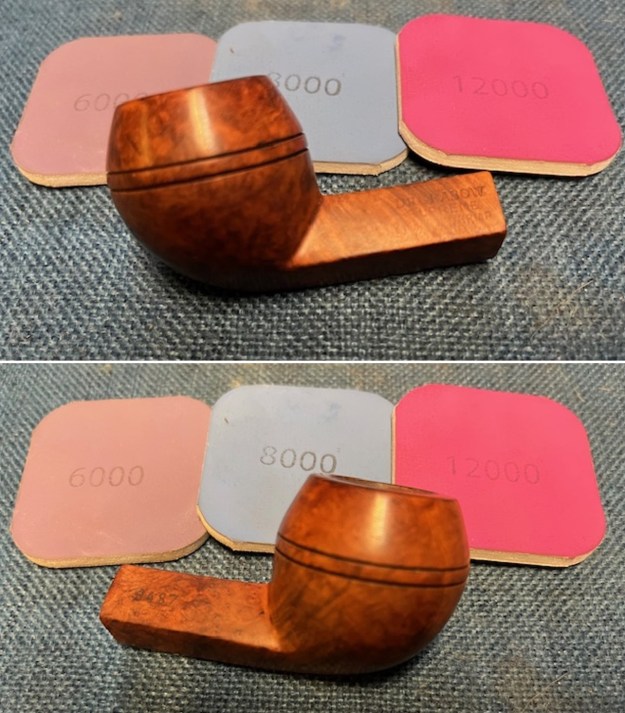
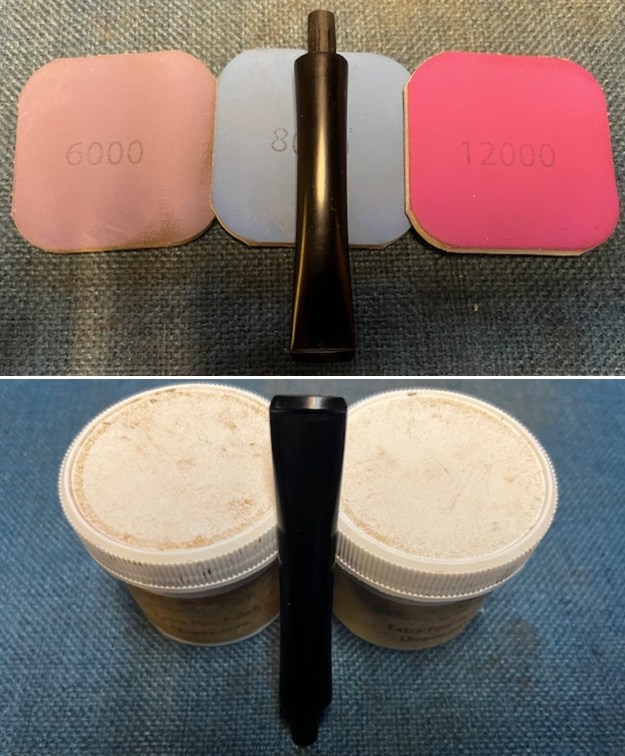
 I polished the rim top and bowl with micromesh sanding pads – dry sanding with 1500-12000 grit sanding pads. I wiped it down with a damp cloth after each sanding pad to remove the dust and debris. The grain stood out more with each set of pads.
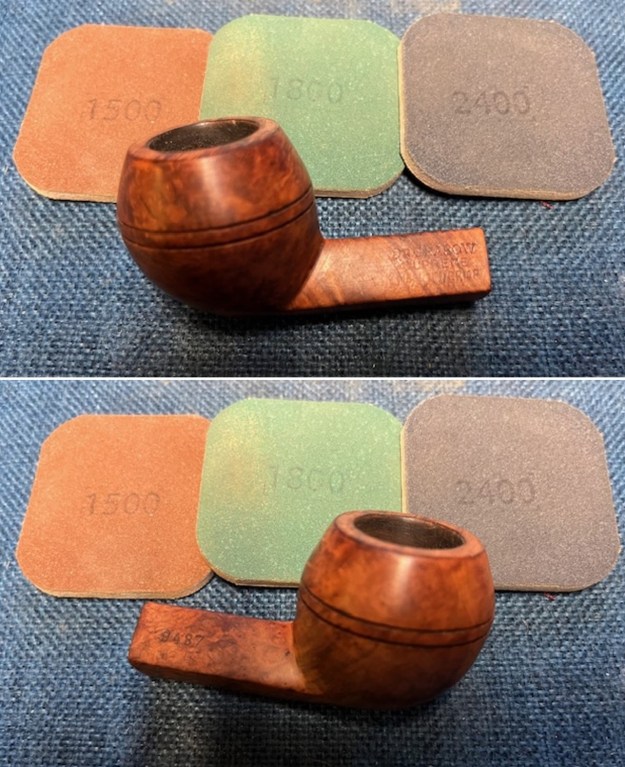
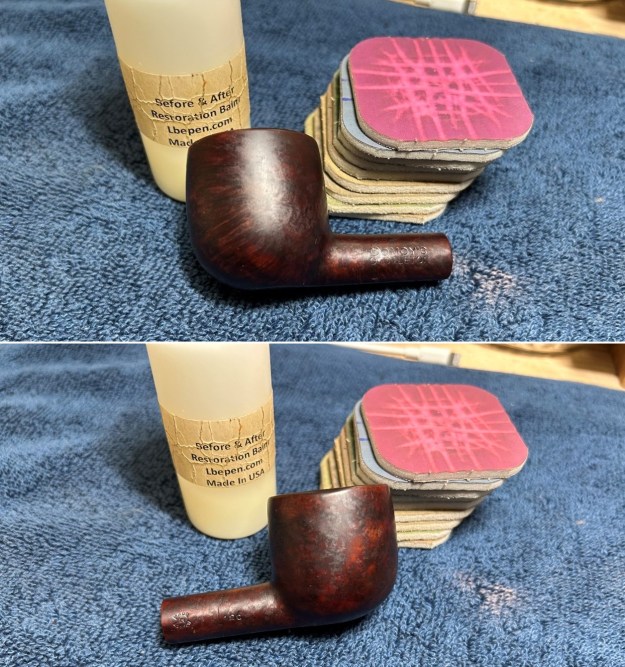
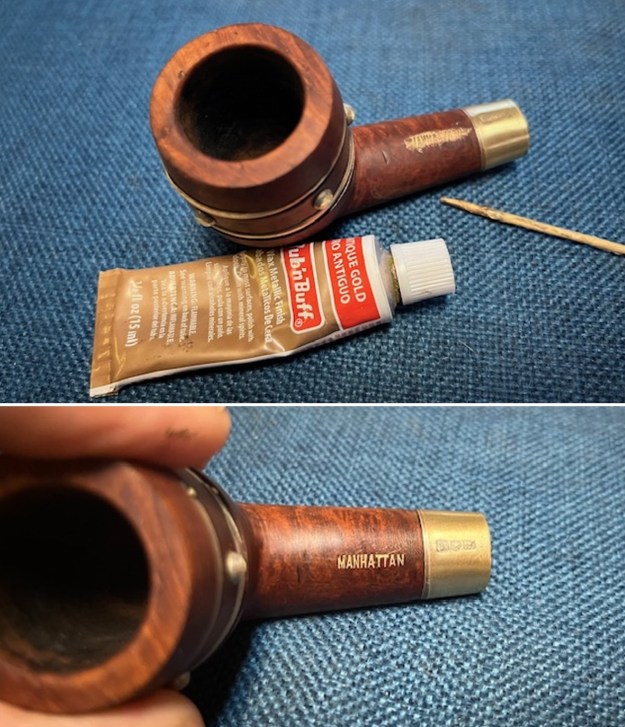
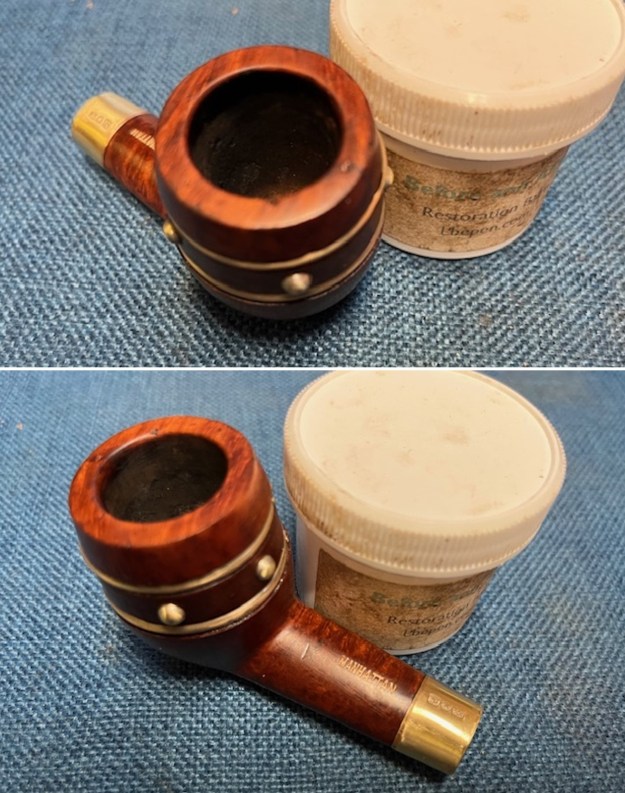
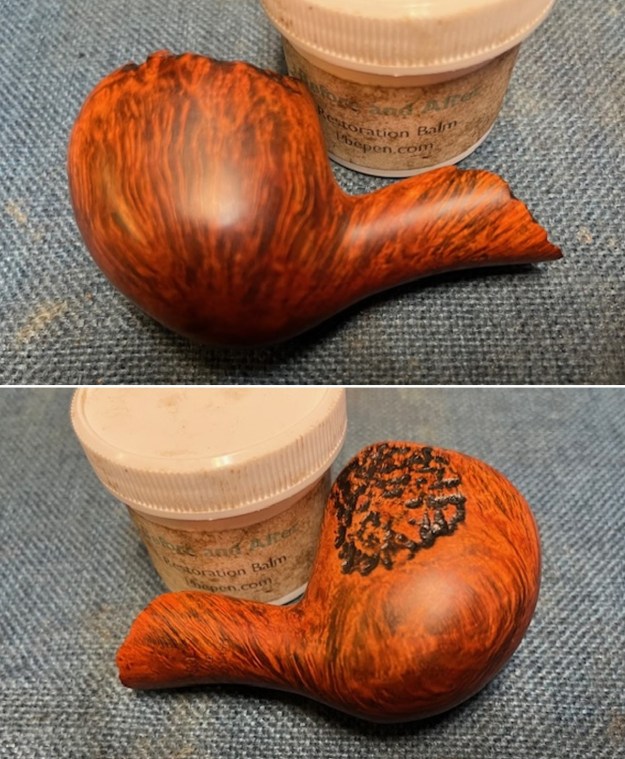
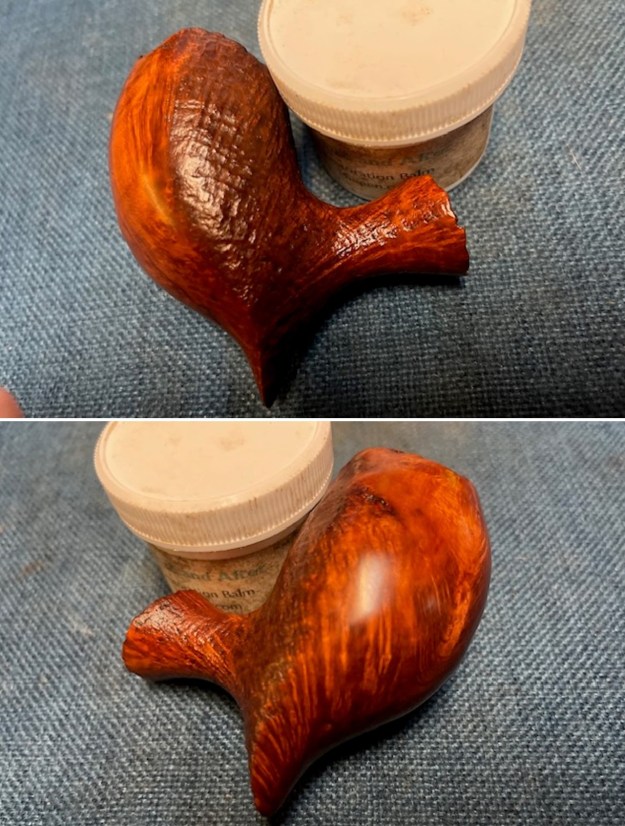
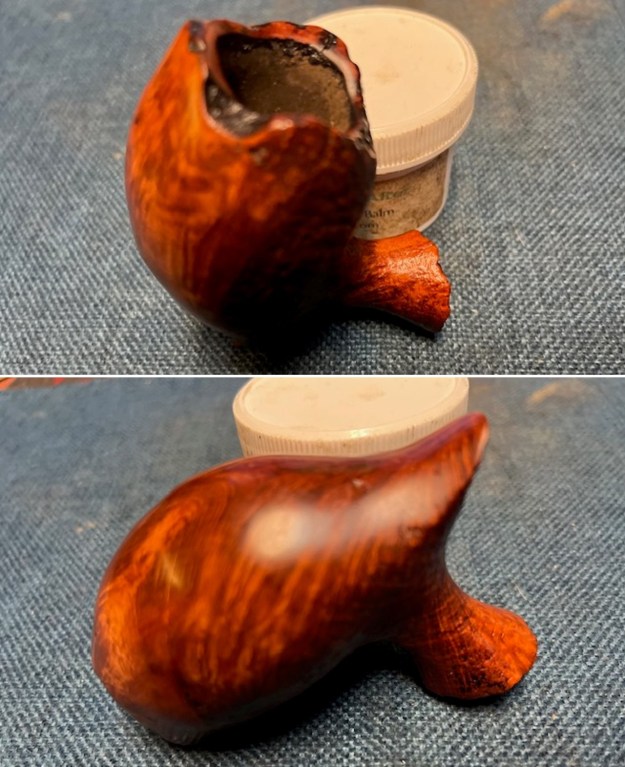
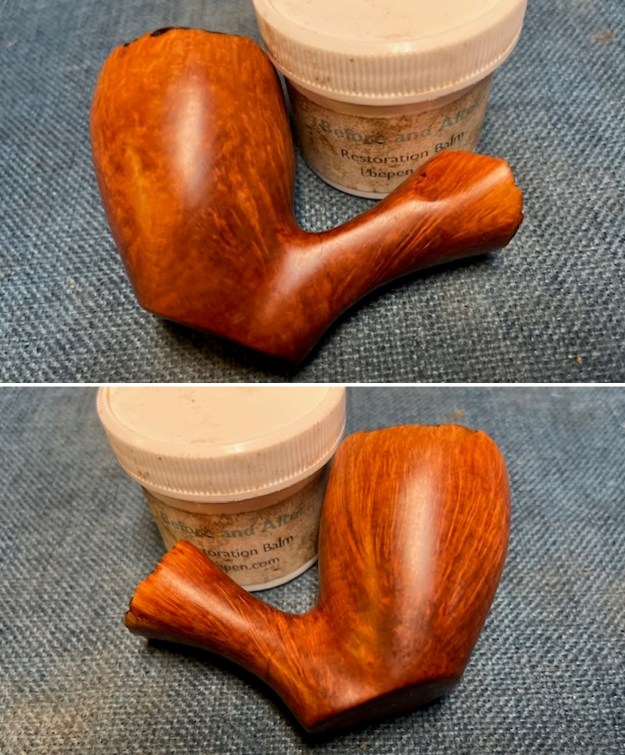
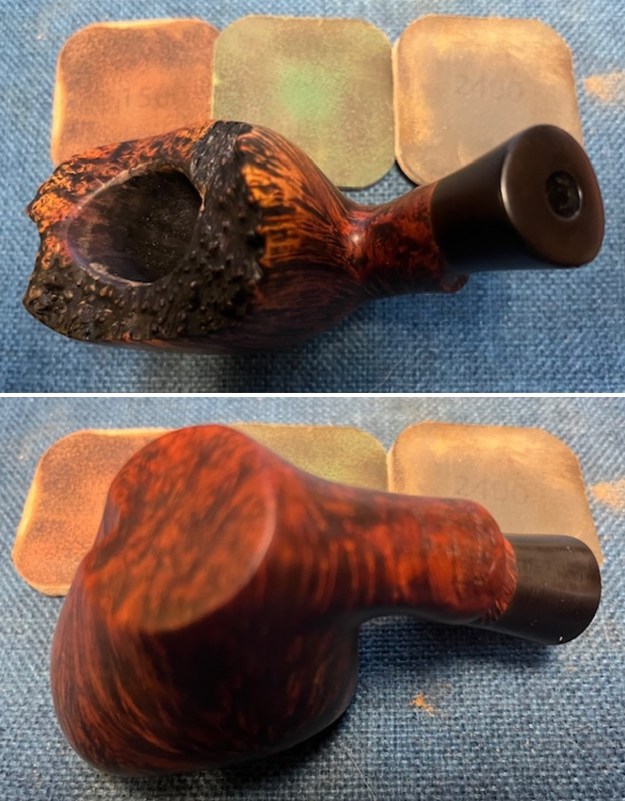
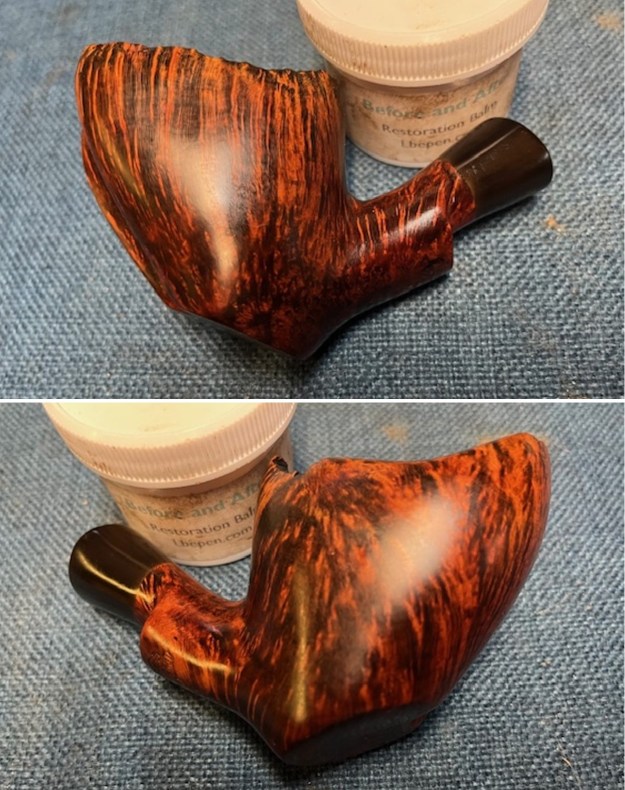
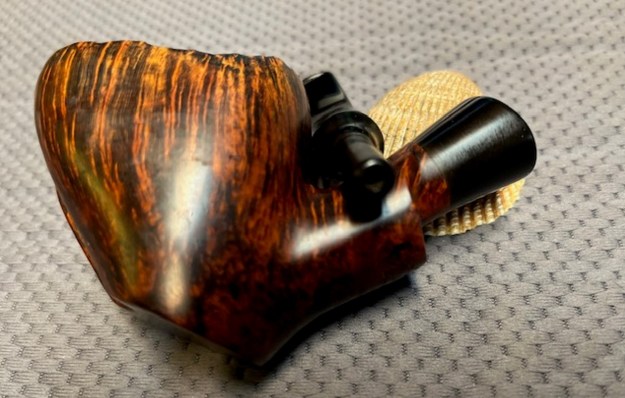
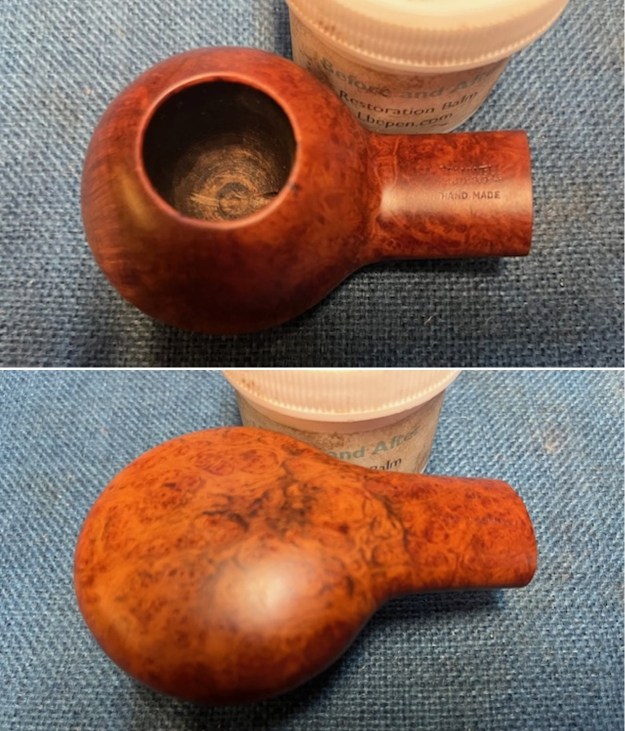
 I worked some Before & After Restoration Balm into the finish of the bowl, rim top and shank with my fingertips to clean, enliven and protect it. I find that the balm really makes the briar come alive again. I let the balm sit for 15 minutes and then buffed with a cotton cloth to raise the shine. The bowl really looks good at this point.
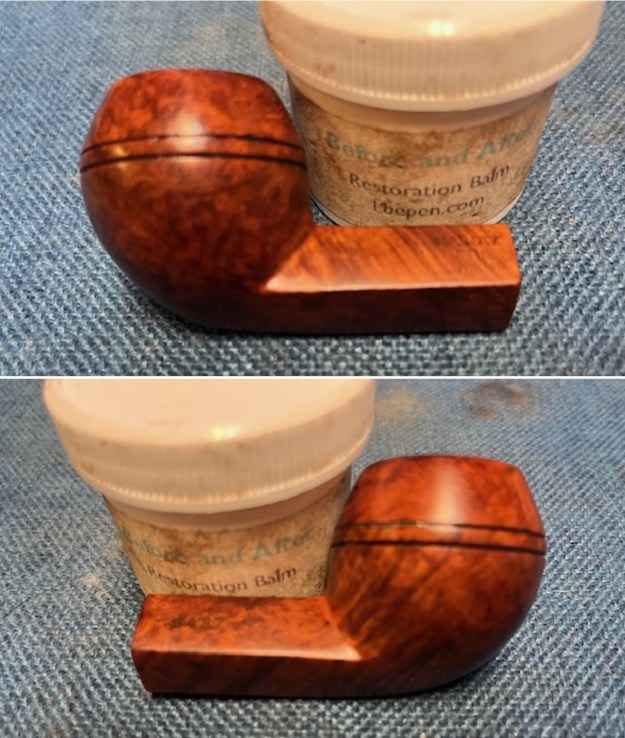
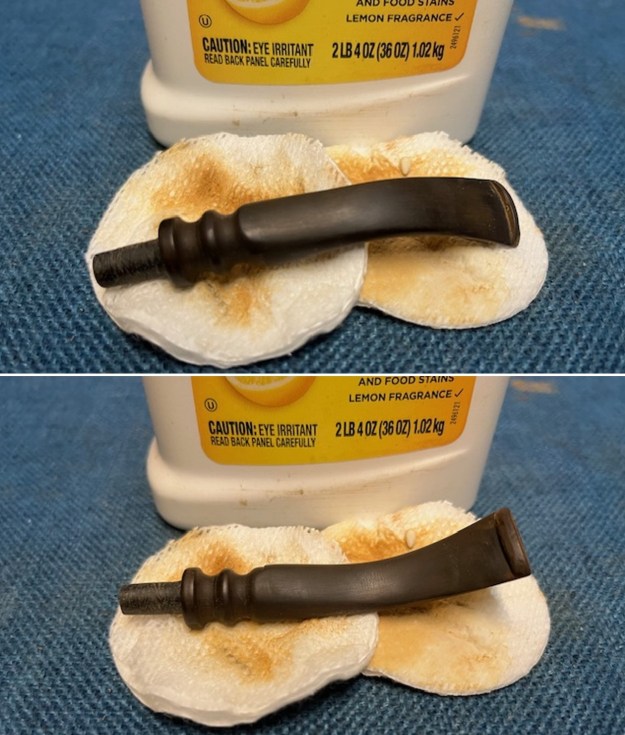
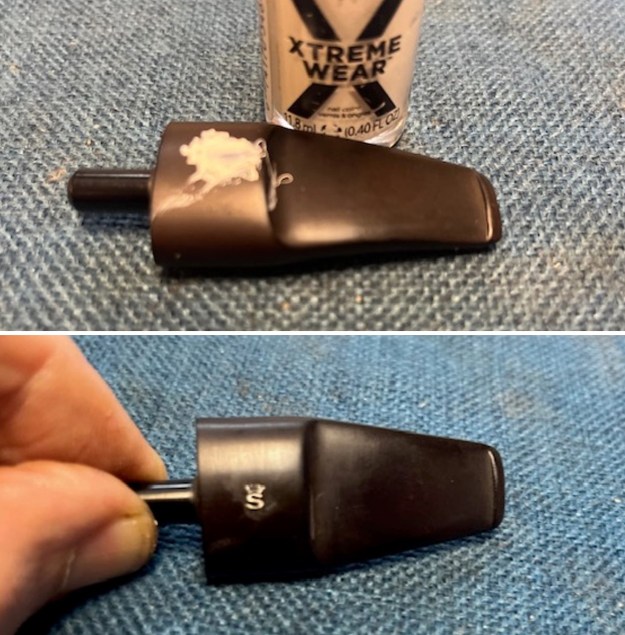
 I set the bowl aside and turned my attention to the stem. I cleaned off the surface of the stem with alcohol on cotton swabs. I filled in the deep tooth marks on the top and underside ahead of the button. I set it aside and let the repairs cure.
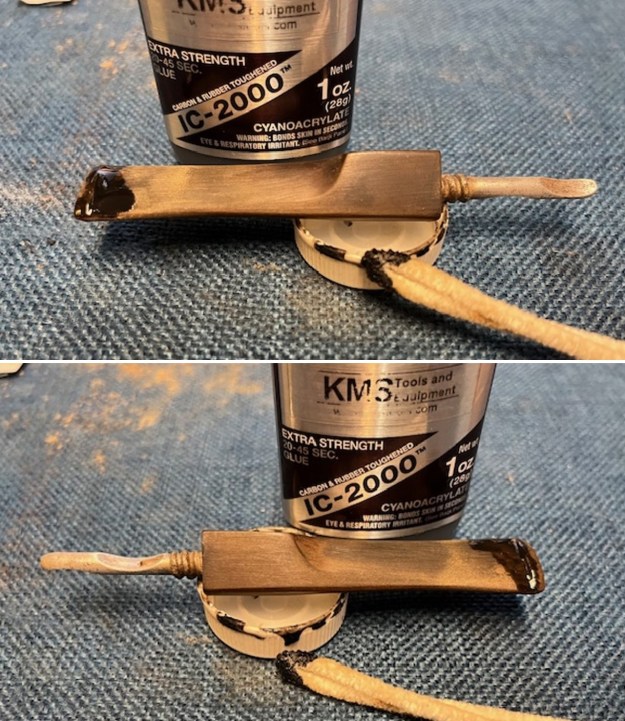 I flattened the repairs with a small file to start the process of blending them into the surface of the vulcanite. I sanded the stem with 220 grit sandpaper to smooth out the repairs and remove the stubborn oxidation in the grooves and against the button edge.
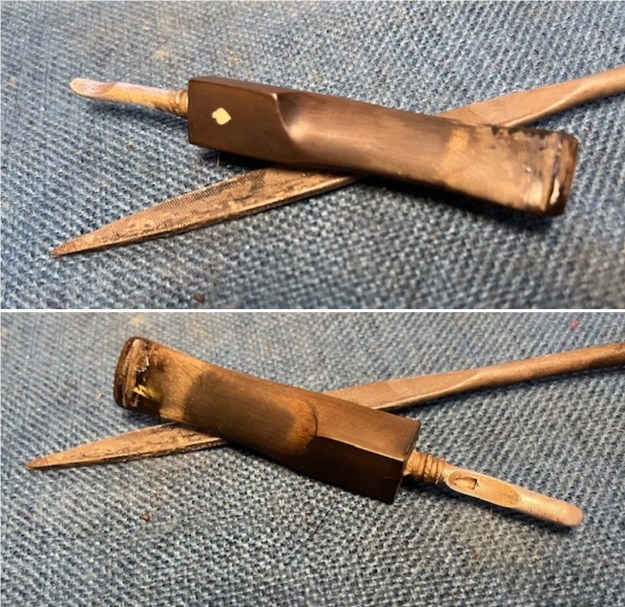
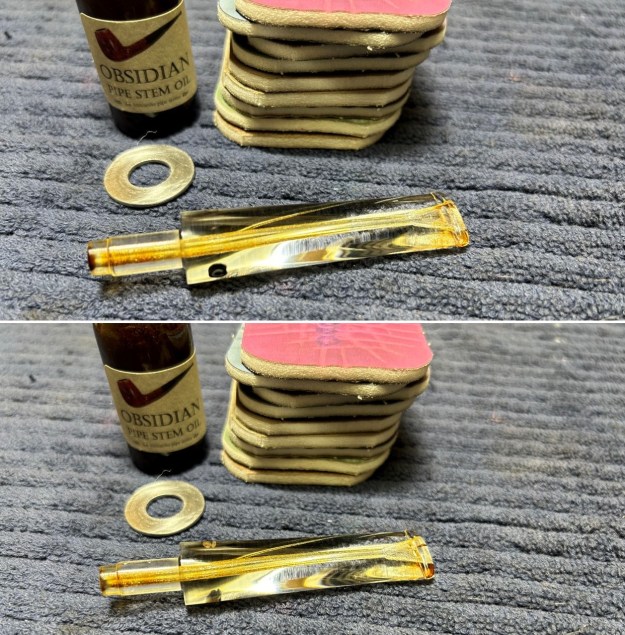
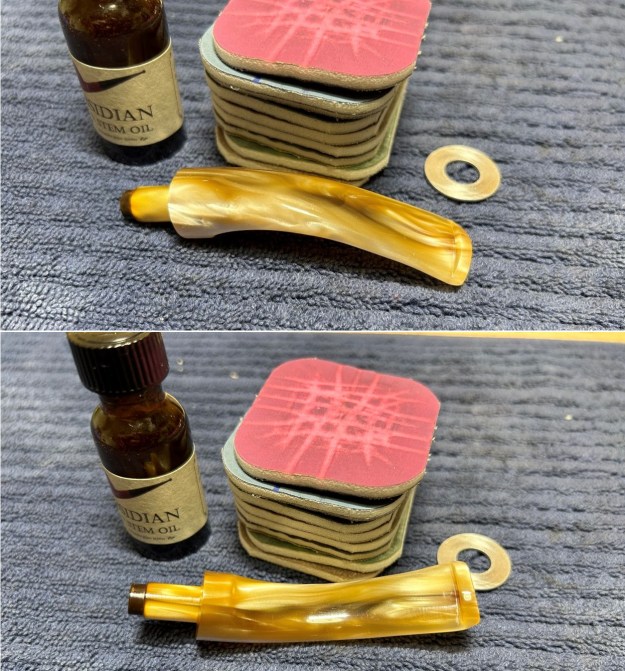
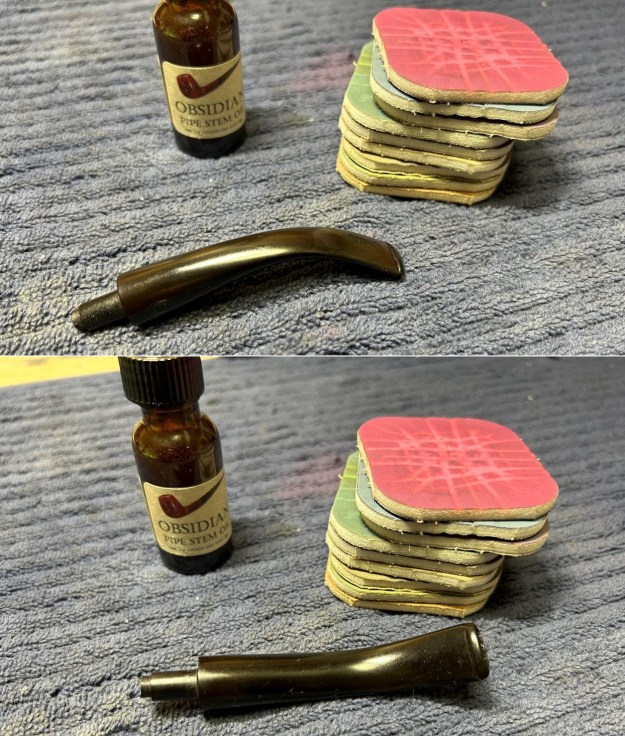
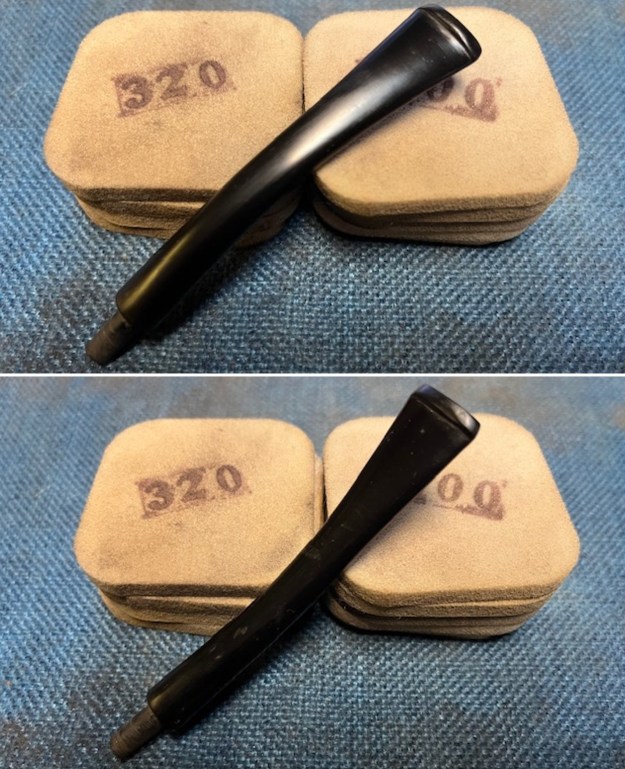
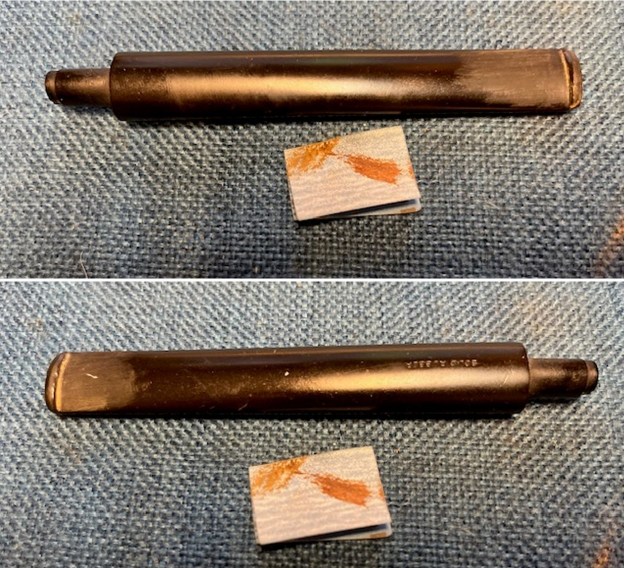
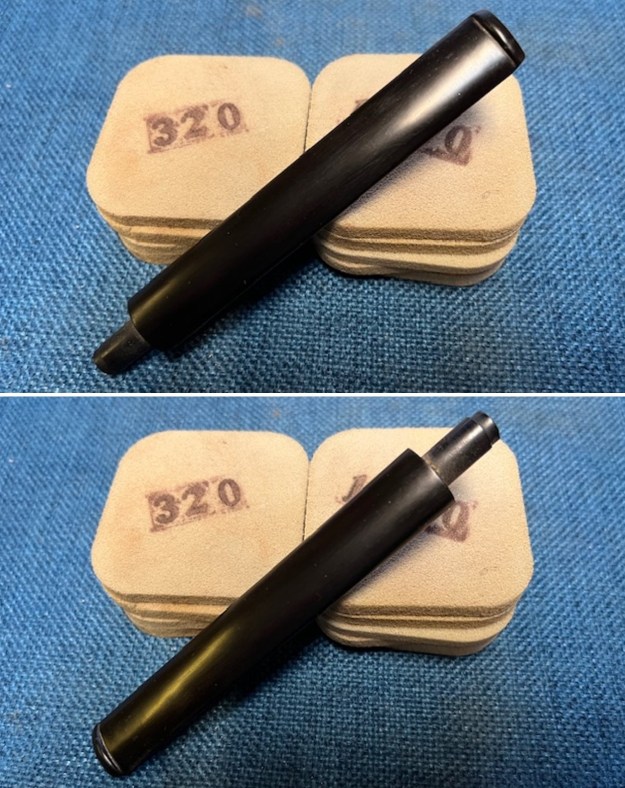
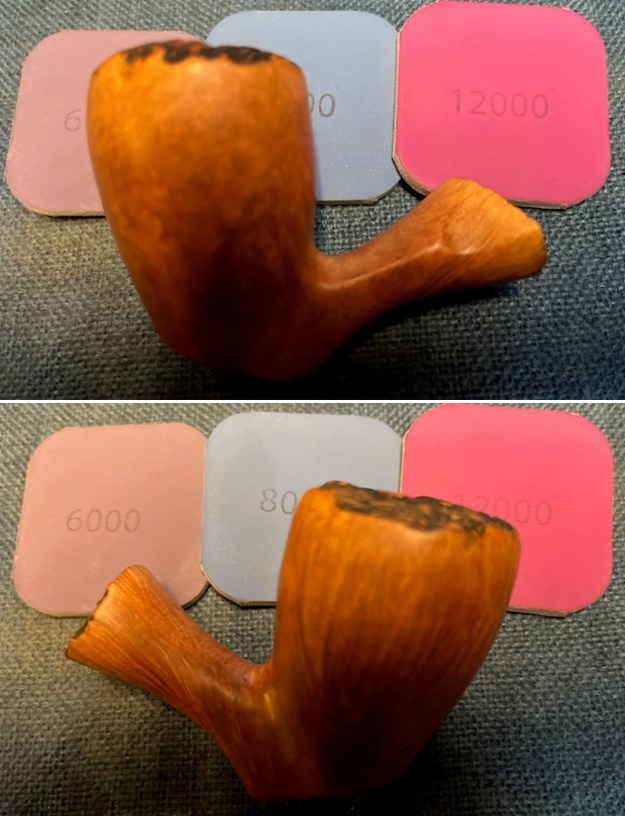
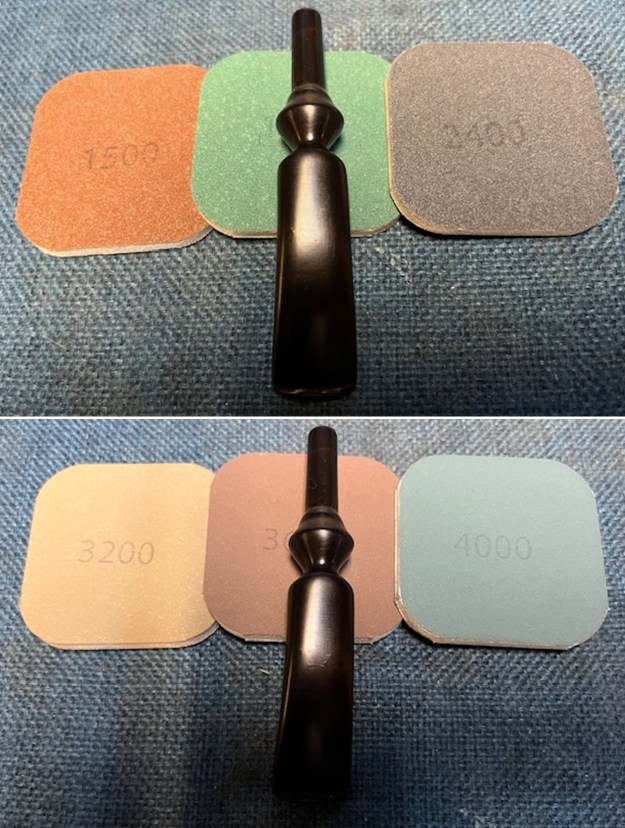
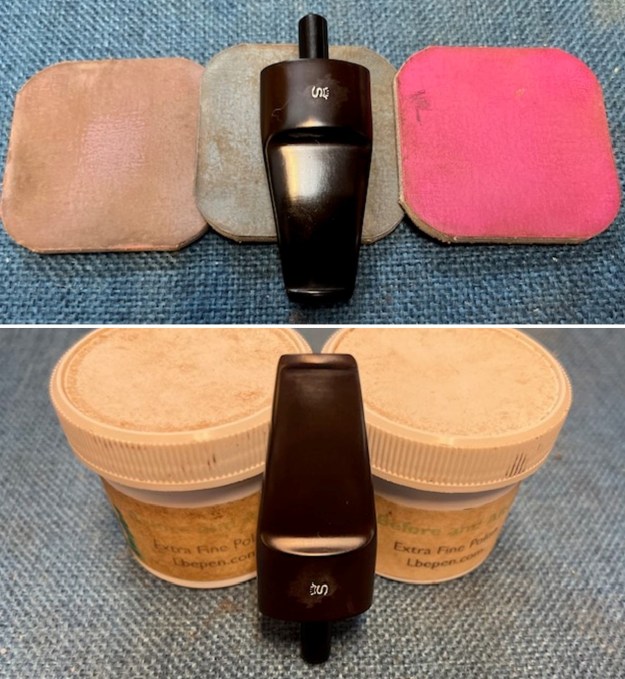
 I sanded the stem with 320-3500 grit sanding pads and wiped the stem down after each pad with an Obsidian Oil saturated cloth to remove the grime and protect the stem.
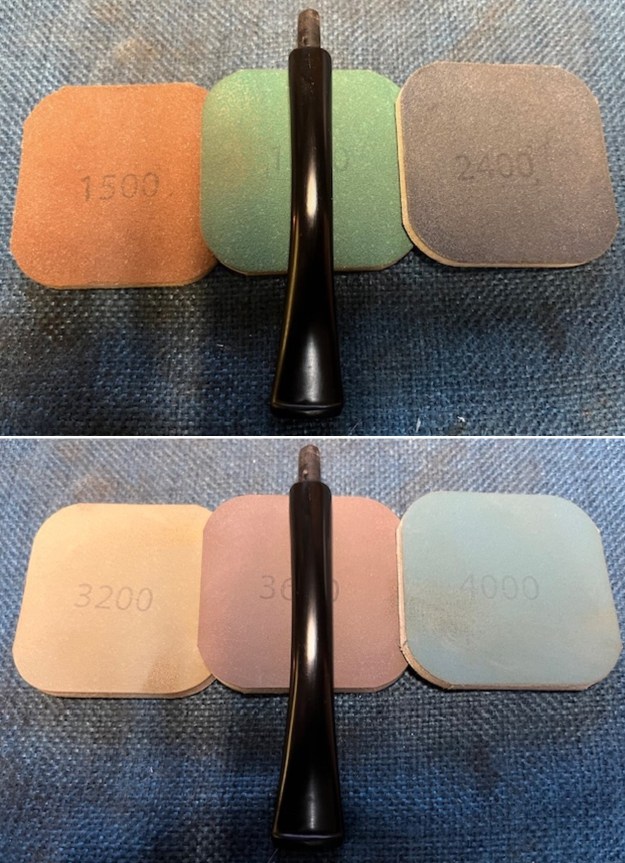
 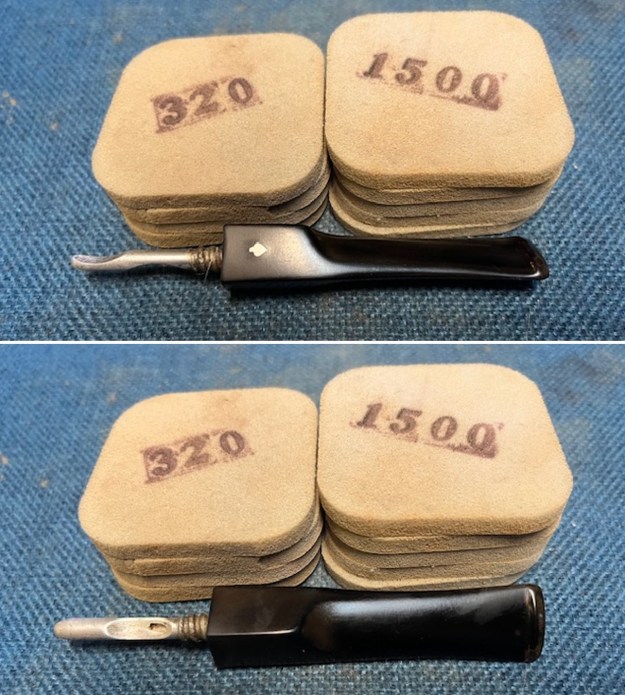 I polished the stem with micromesh sanding pads – dry sanding it with 1500-12000 grit pads. I polished it further with Before & After Pipe Stem Polish – both fine and extra fine.
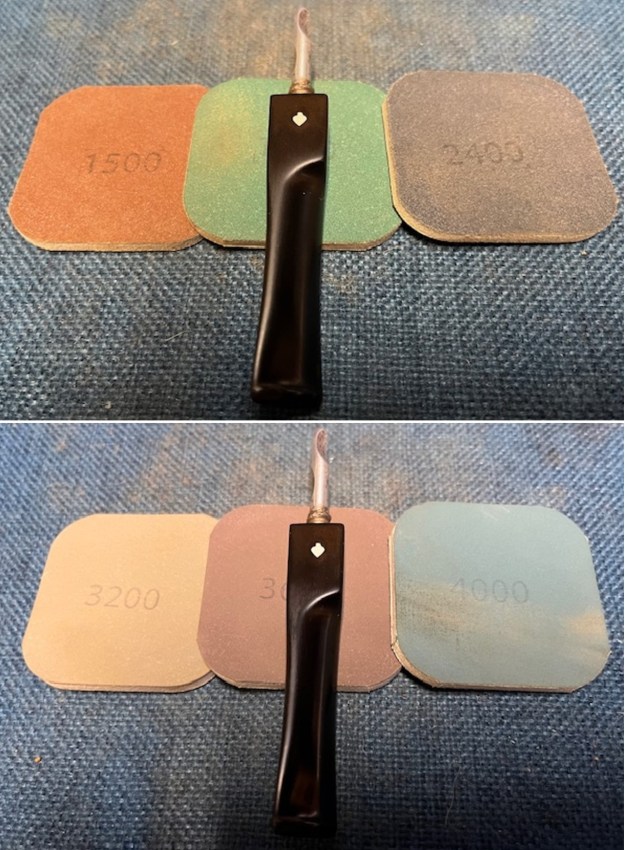
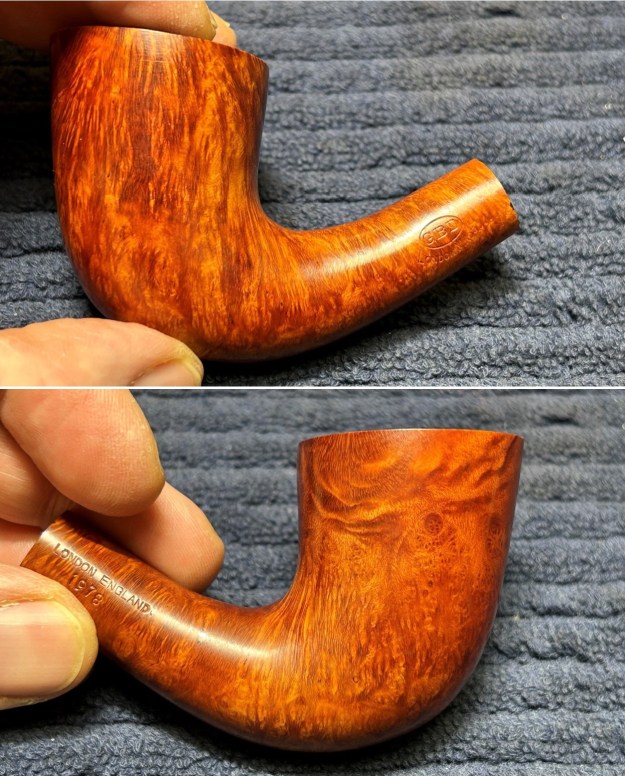
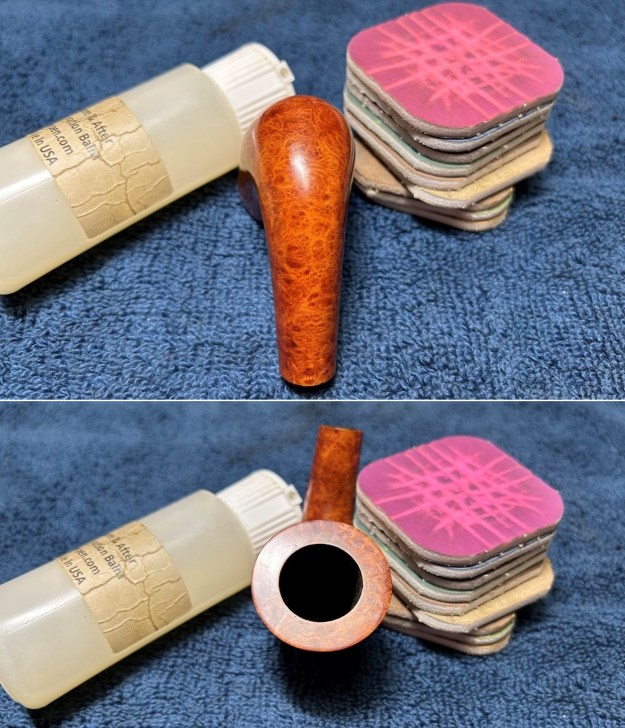
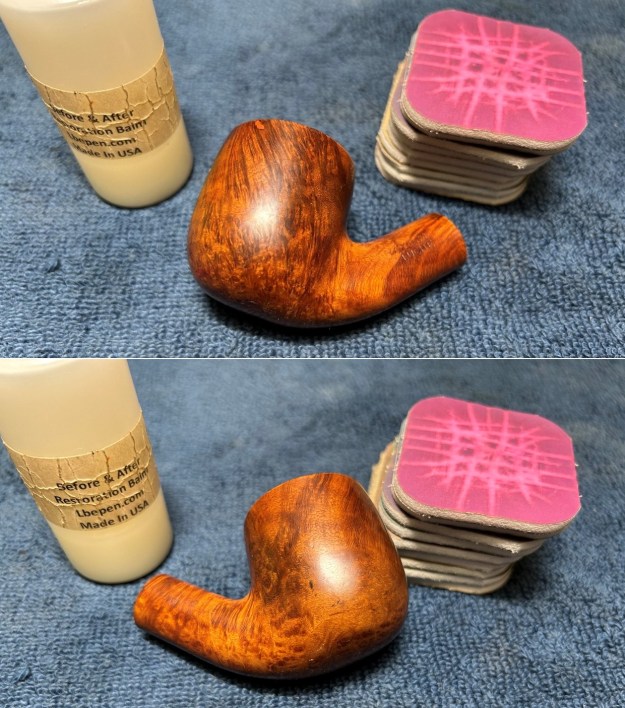
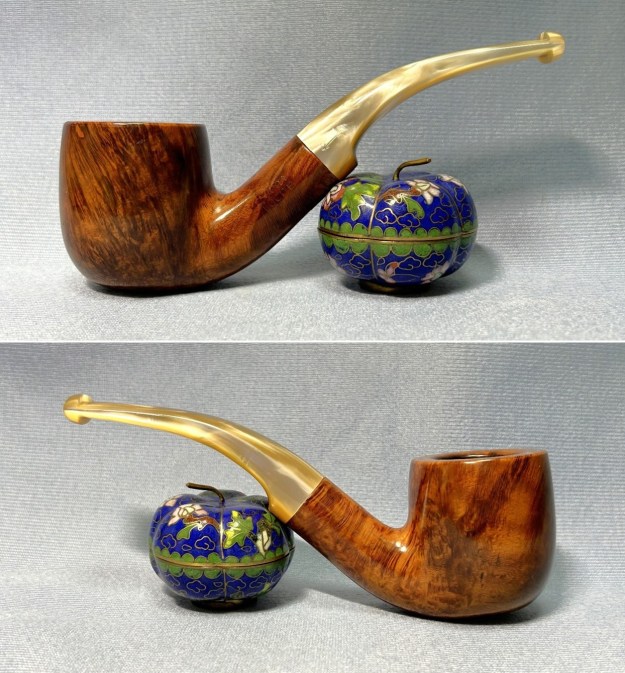
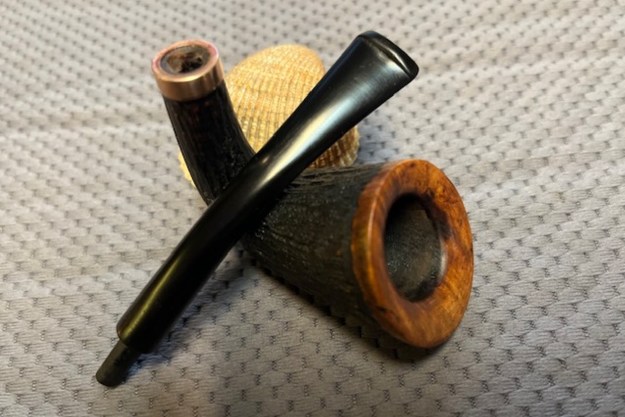
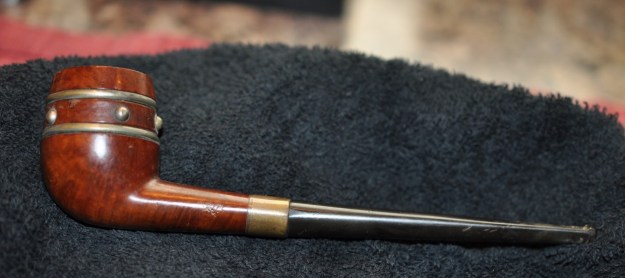
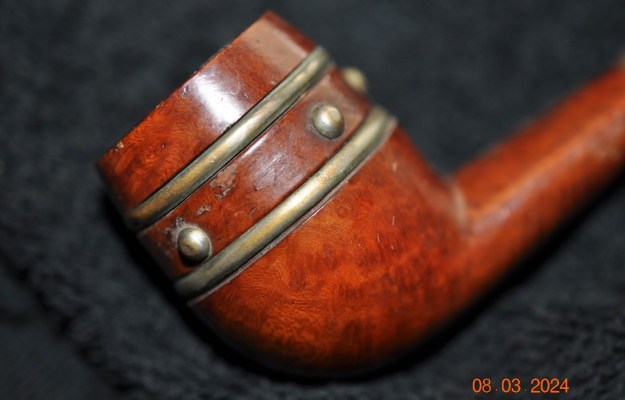
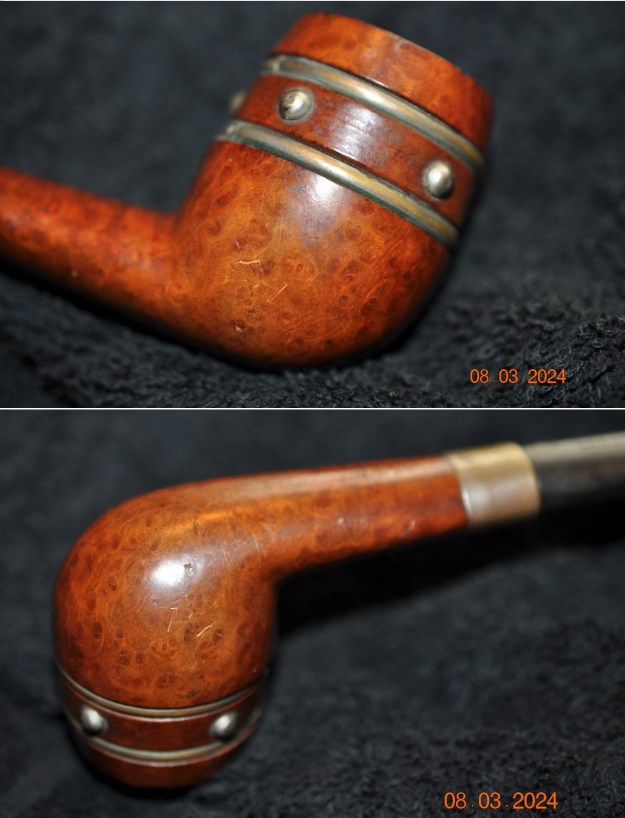
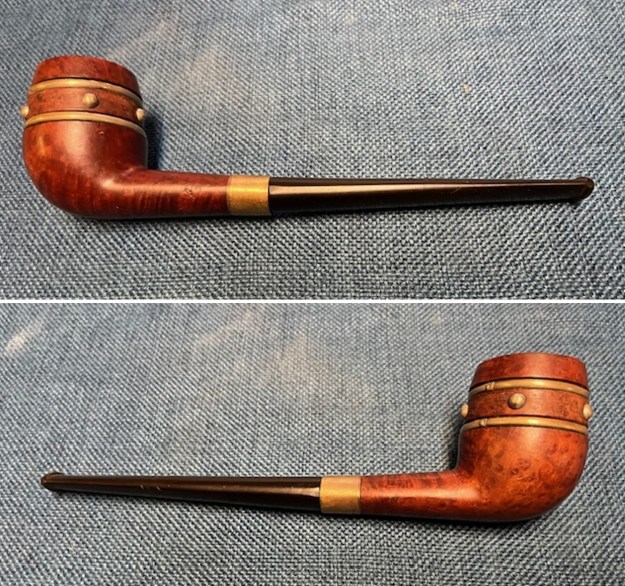
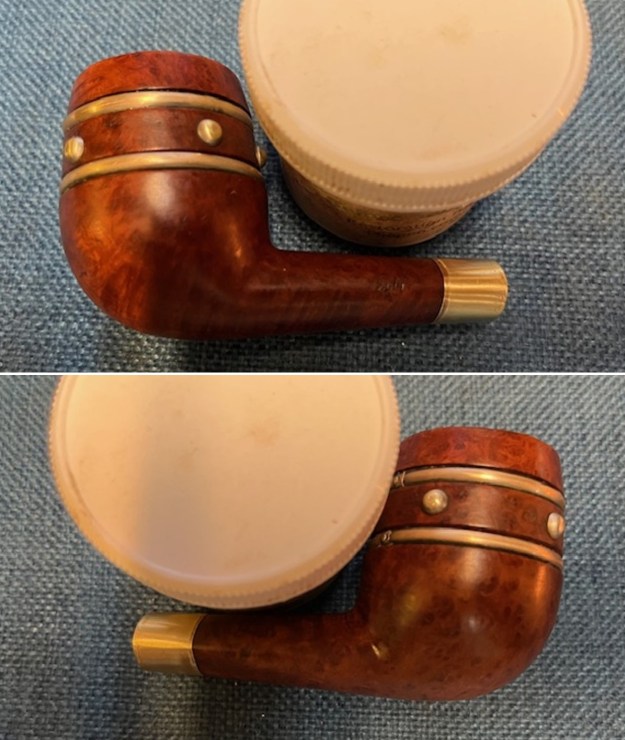
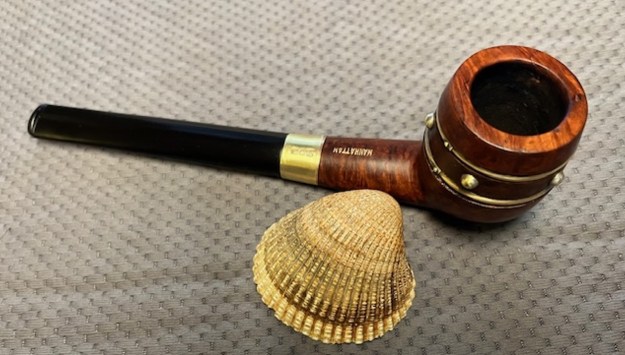
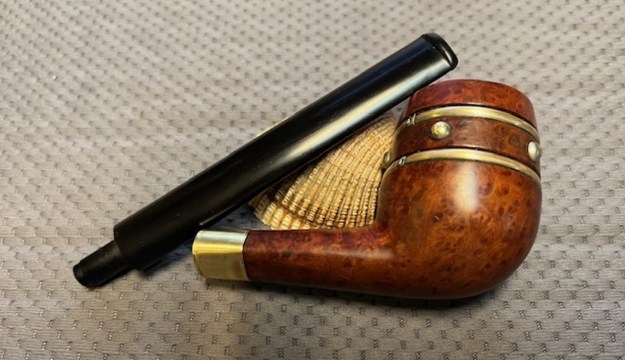
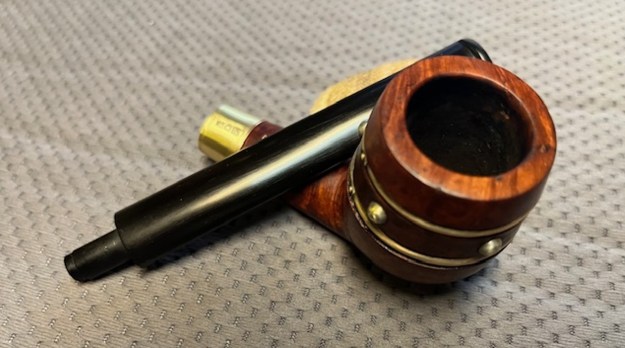
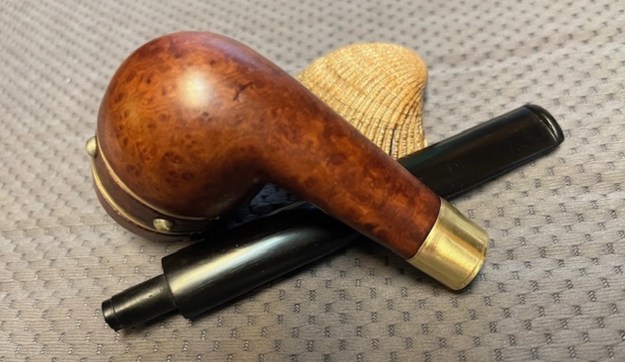
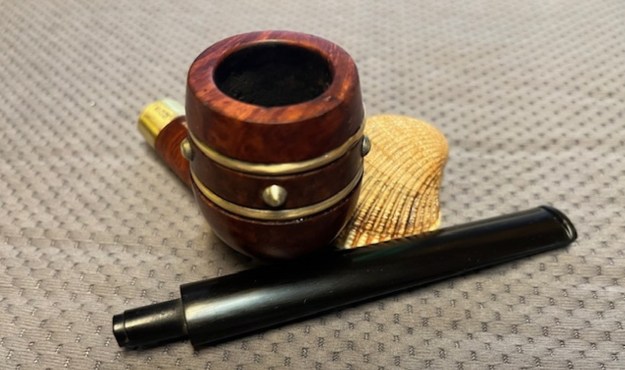
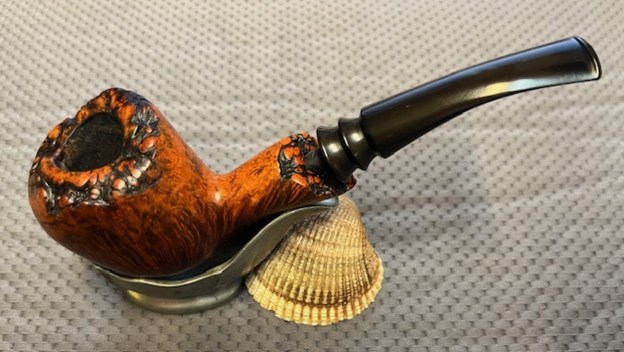
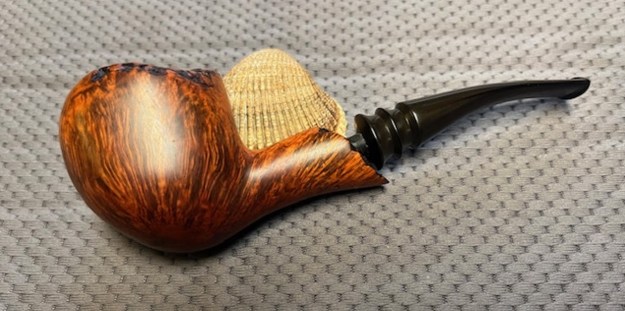
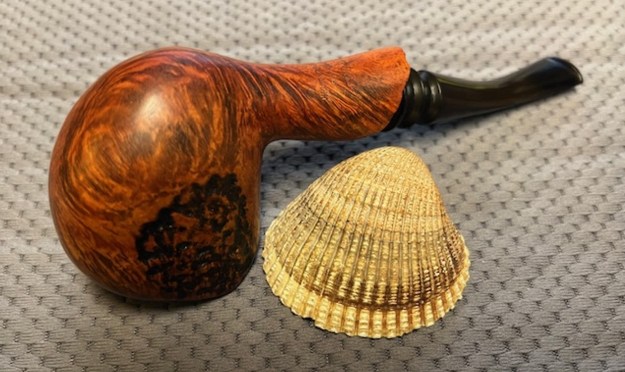
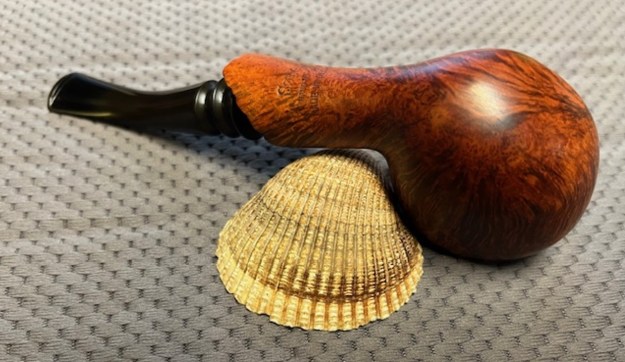
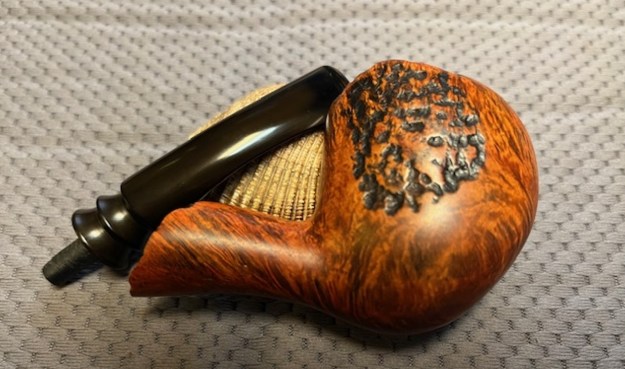
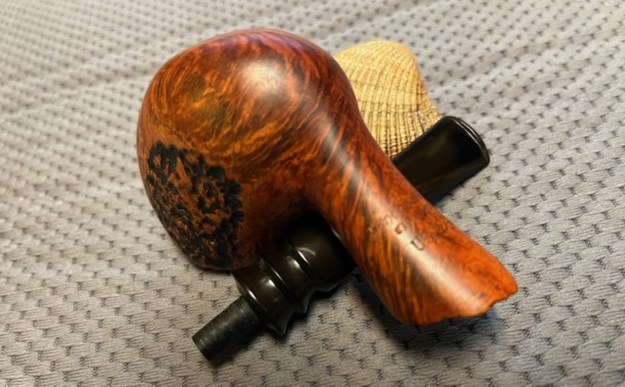
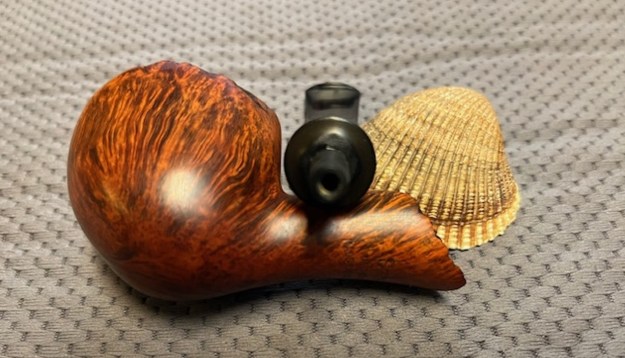
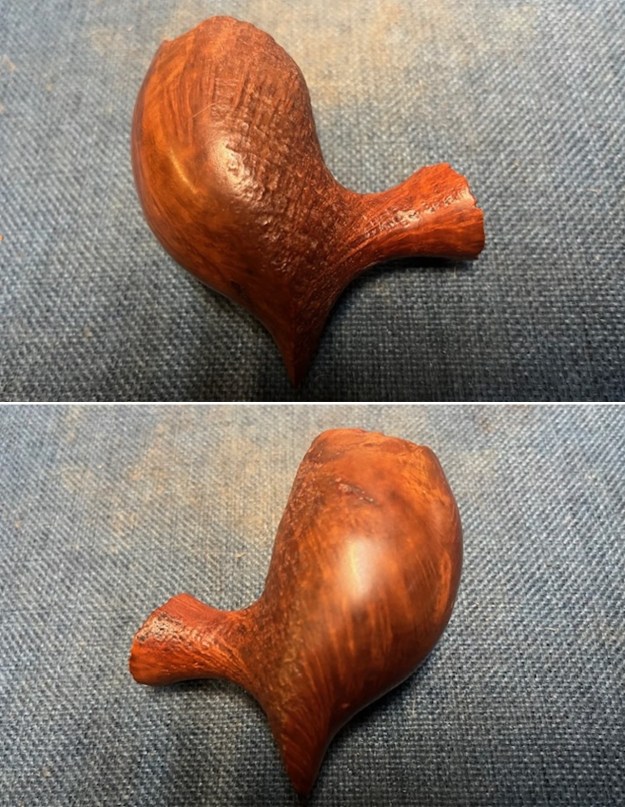
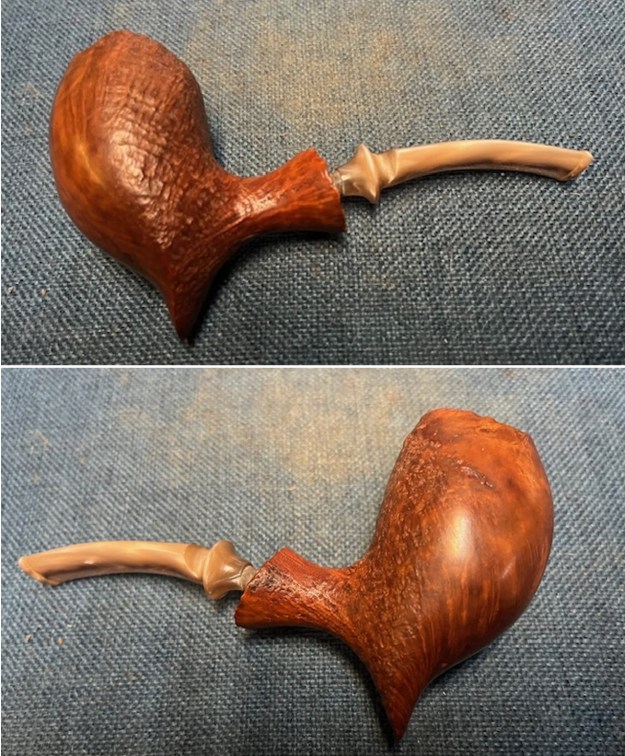
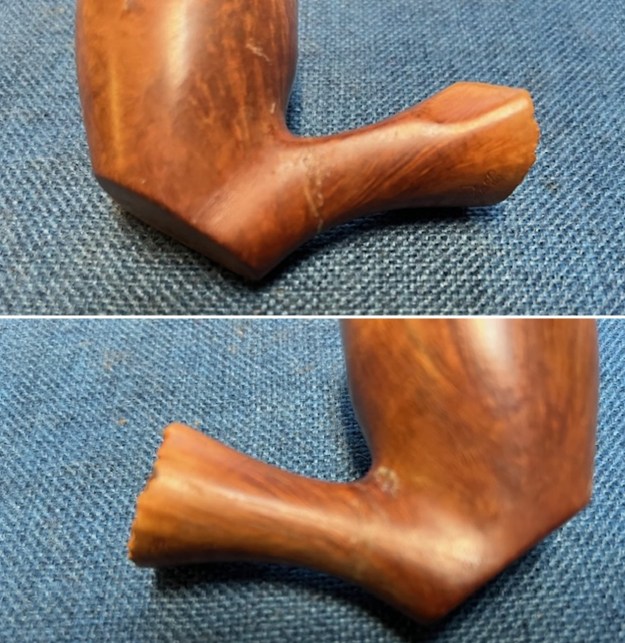
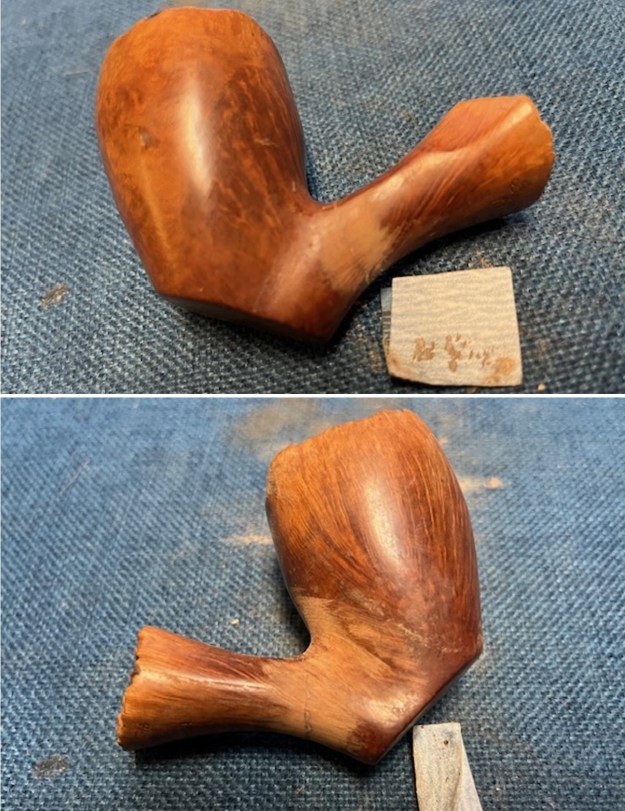
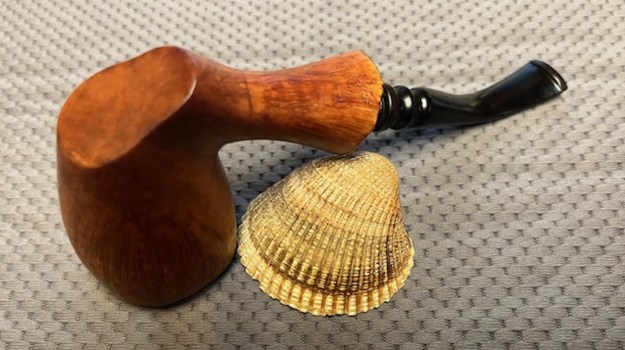
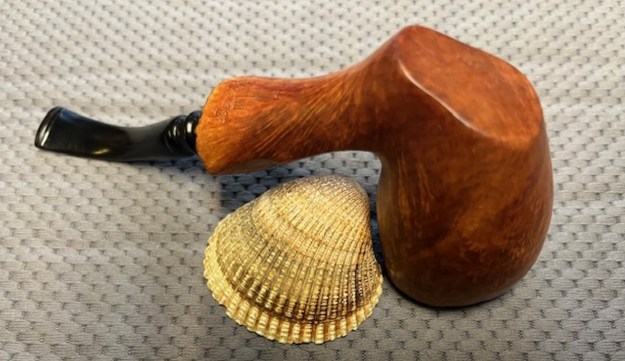
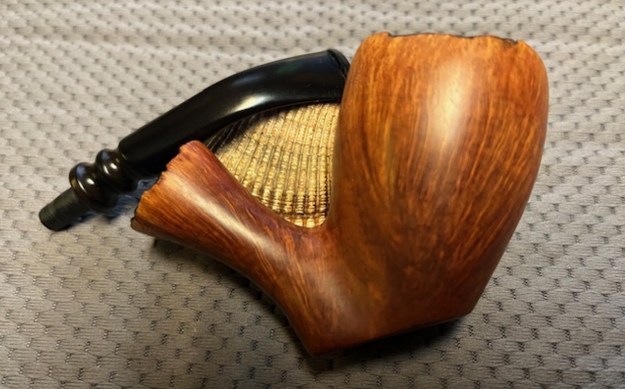
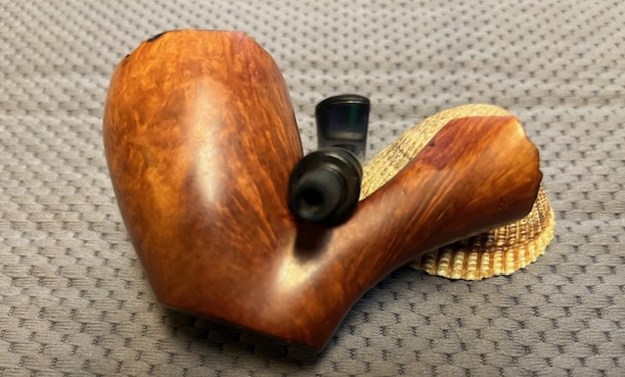
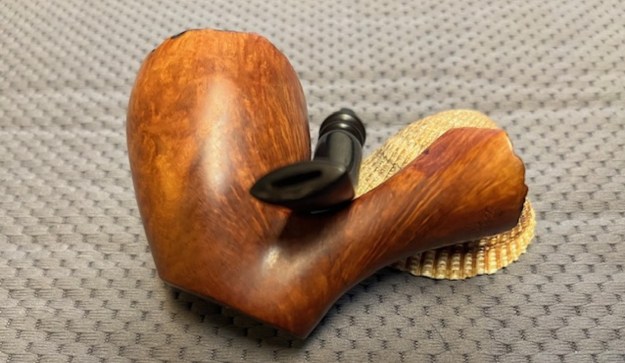
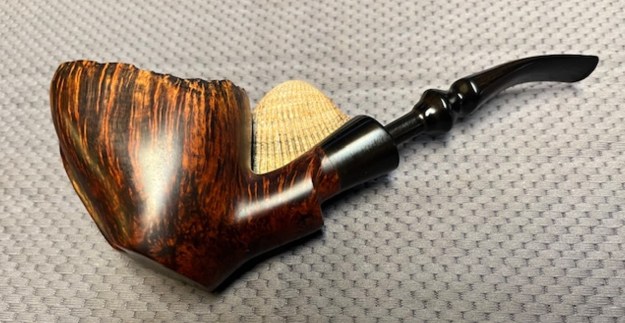
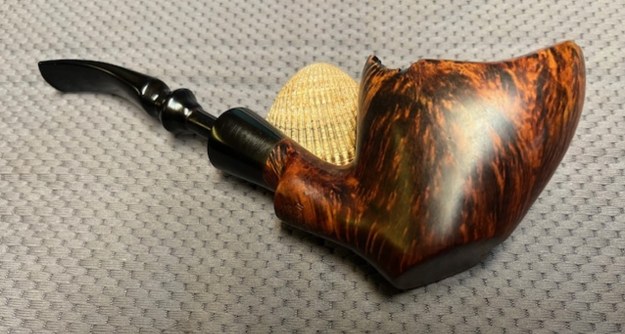
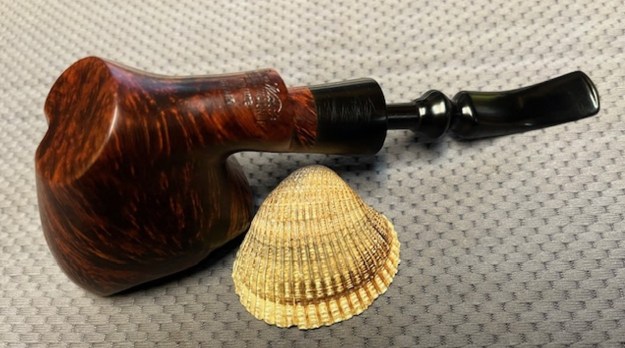
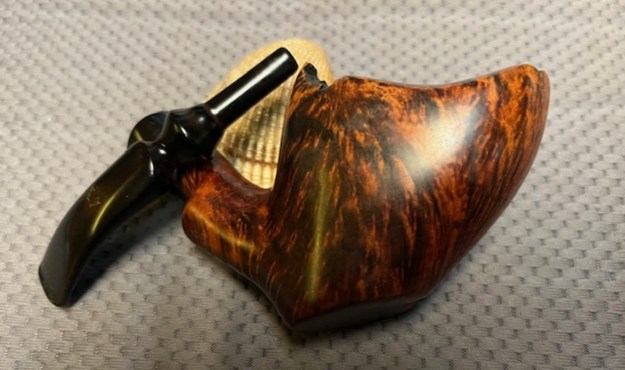
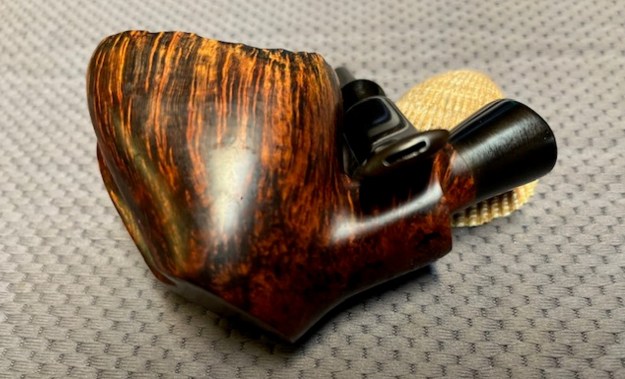
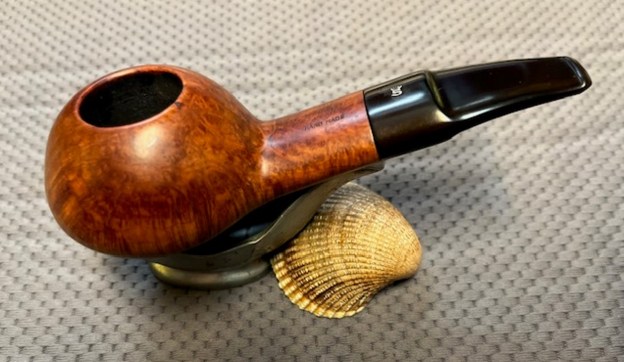
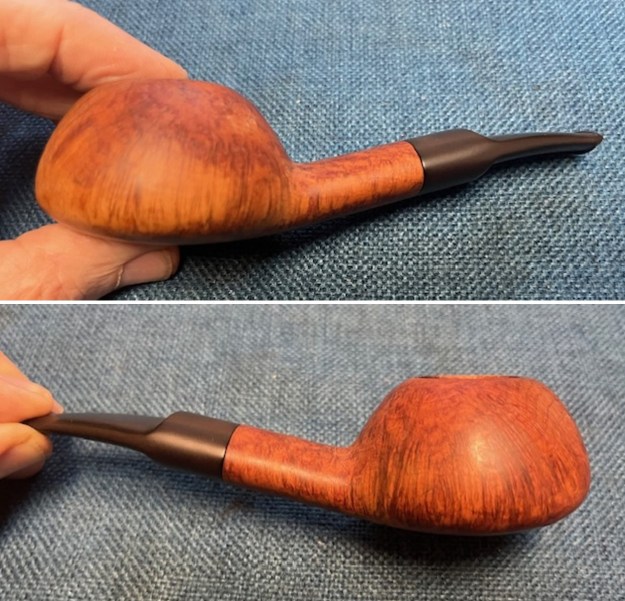
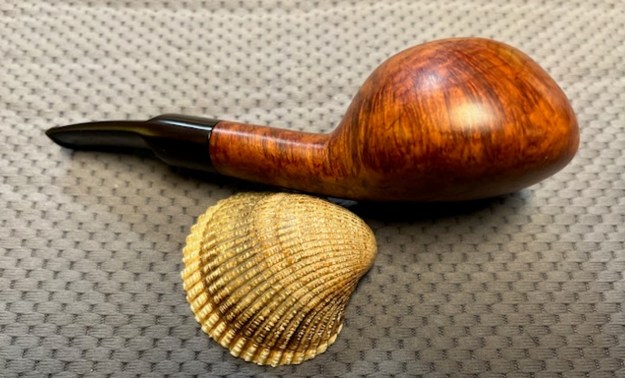
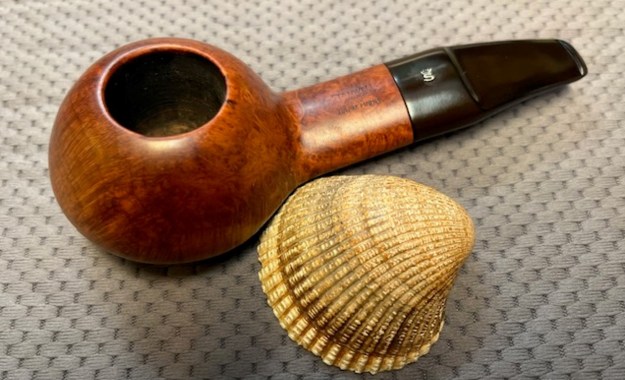
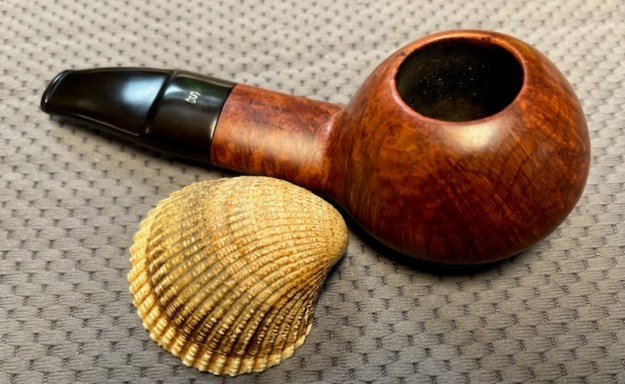
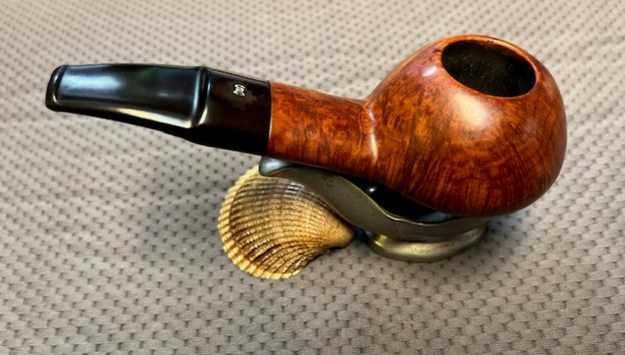
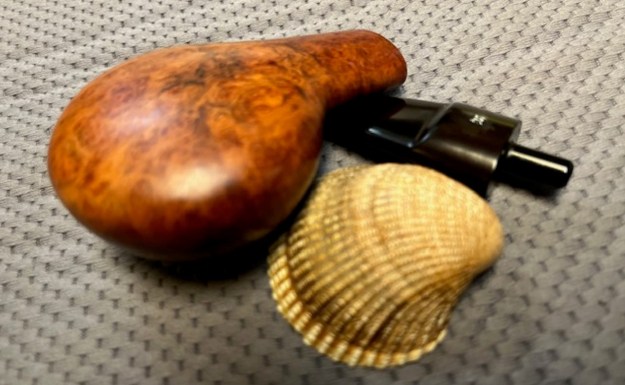
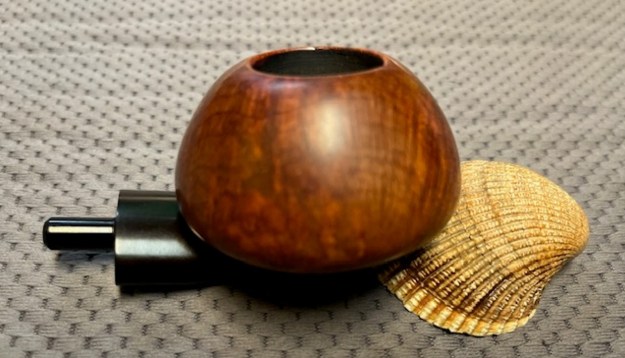
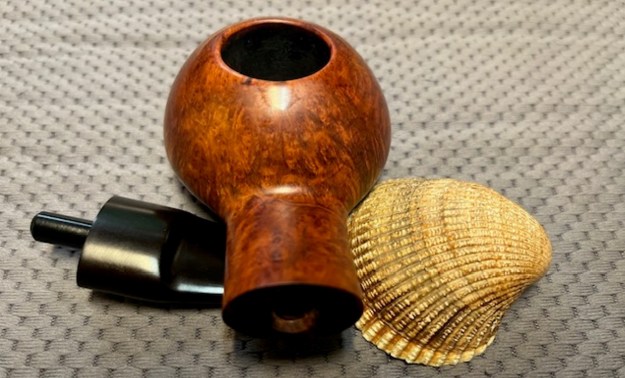
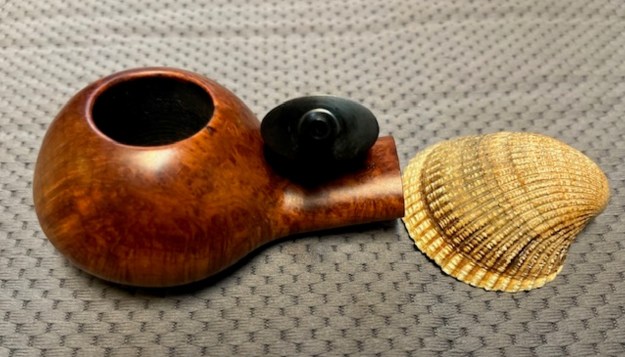
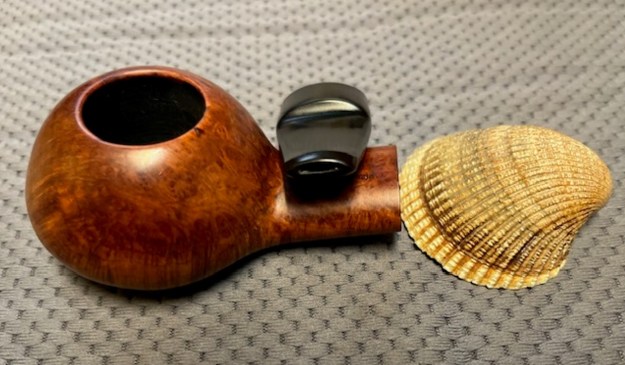
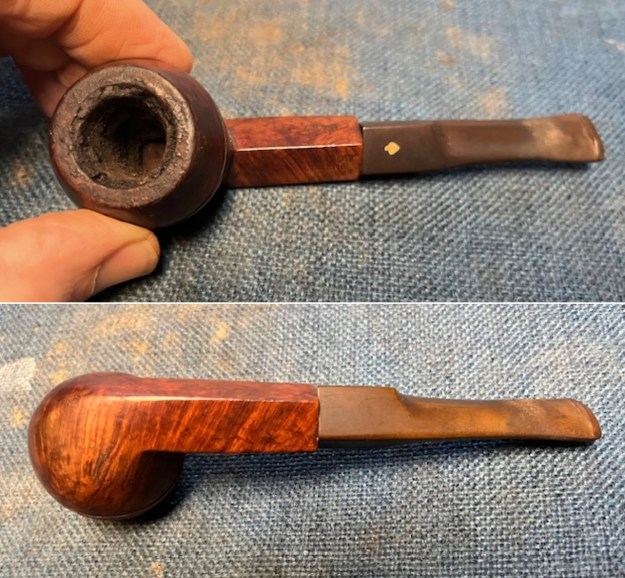
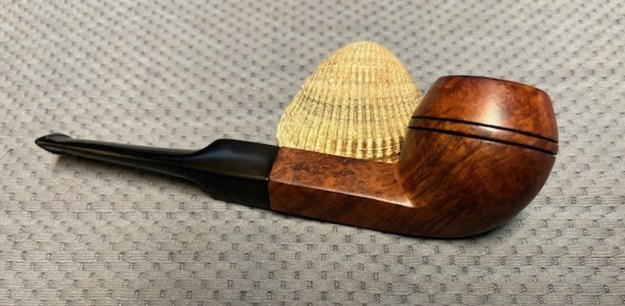
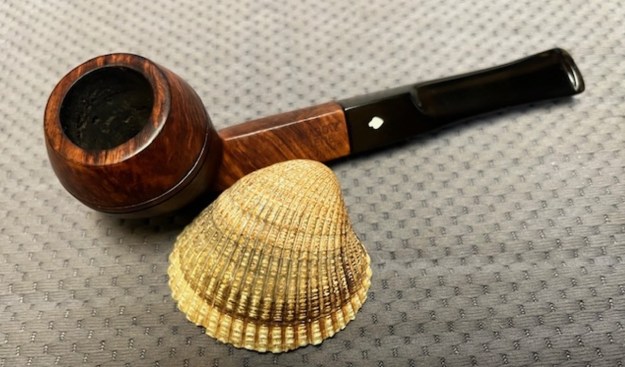
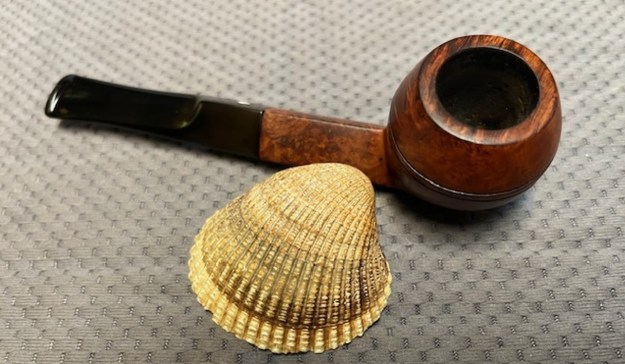
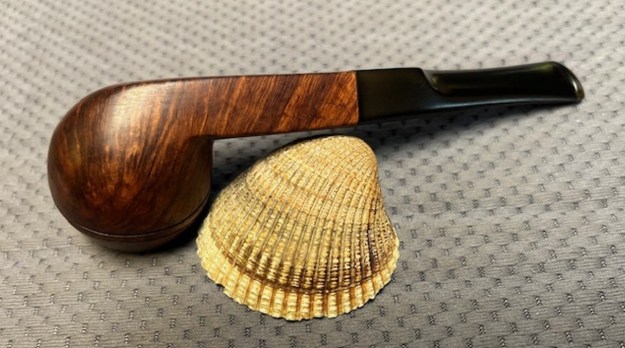
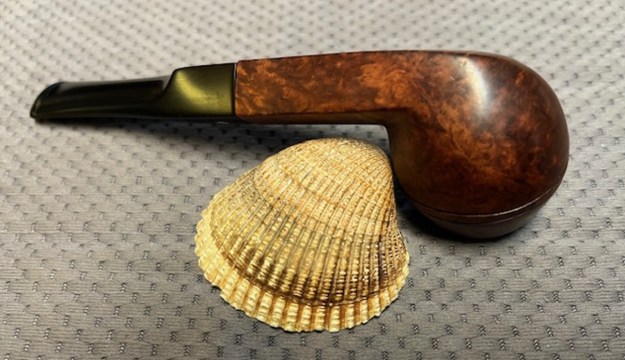
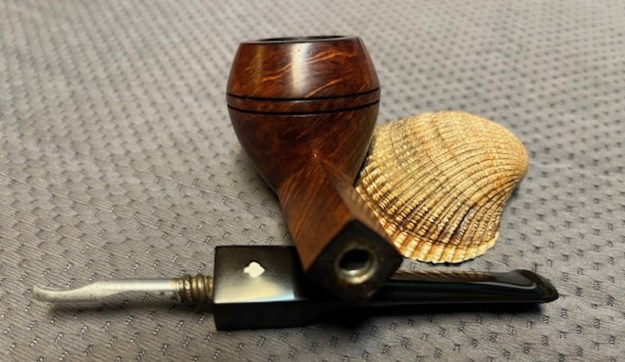
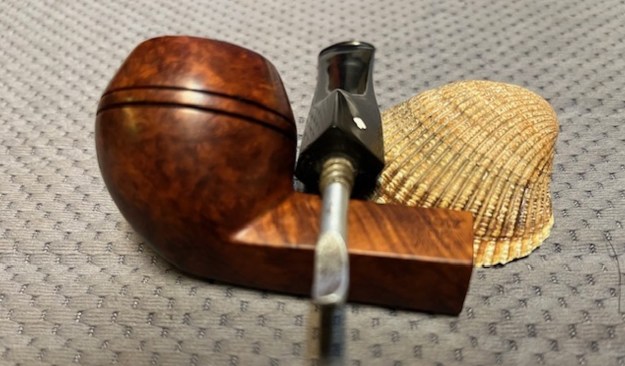
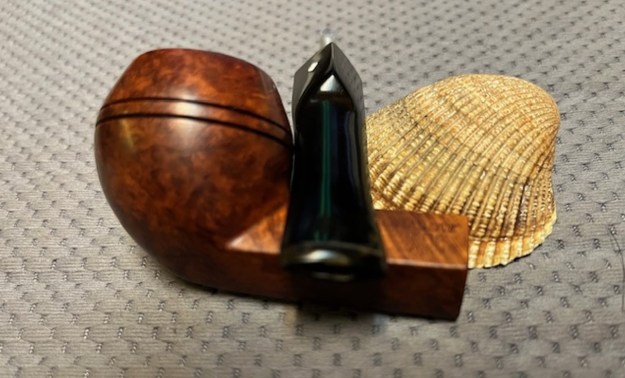
 This once wreck of a pipe turned out to be a beautiful Dr. Grabow Supreme 9437 Straight Bulldog with a black vulcanite saddle stem. It has a great look and feel. The shape fits well in the hand with the curve of the bowl and shank junction a perfect fit for the thumb around the bowl when held. I polished stem and the bowl with Blue Diamond polish on the buffing wheel. I gave the bowl and the stem multiple coats of carnauba wax. I buffed the pipe with a clean buffing pad to raise the shine. I hand buffed it with a microfiber cloth to deepen the shine. The pipe polished up pretty nicely. The rich combination of browns in the smooth finish took on life with the buffing. The rich colour of the briar works well with the polished stem. I like the grain and finished look of this Dr. Grabow Supreme 9437 Straight Bulldog. Have a look at it with the photos below. The shape, finish and flow of the pipe and stem are very well done. The dimensions are Length: 5 ½ inches, Height: 1 ½ inches, Outside diameter of the bowl: 1 inch, Chamber diameter: ¾ of an inch. The weight of the pipe is 1.20 ounces/35 grams. This older American Made Bulldog is a real beauty. Thanks for walking through the restoration with me as I worked over another beautiful pipe. I will set it aside and once I finish the other three pipes that Jack sent to me I will send the lot back to him. Thanks for your time.
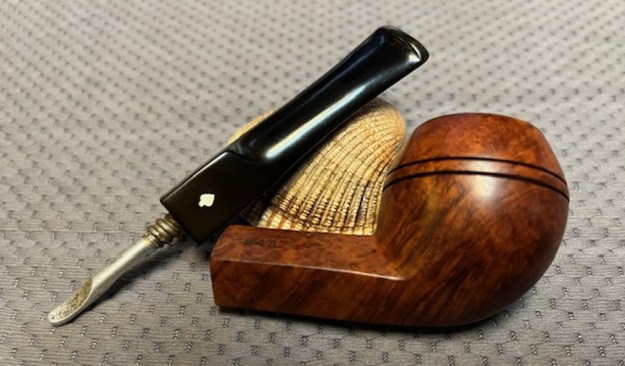
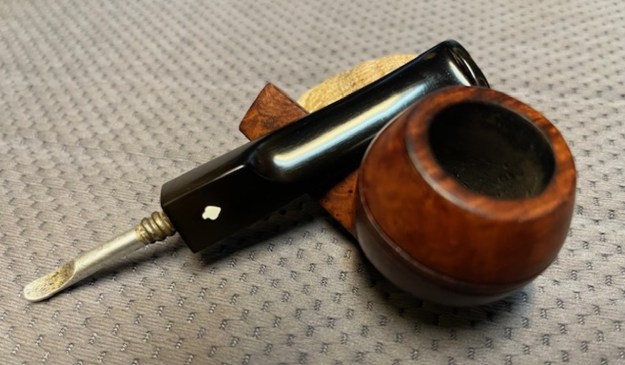

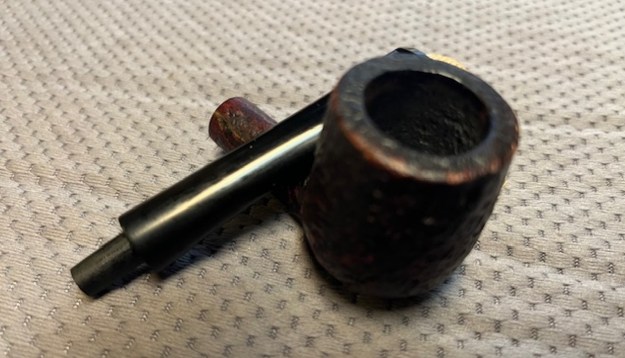
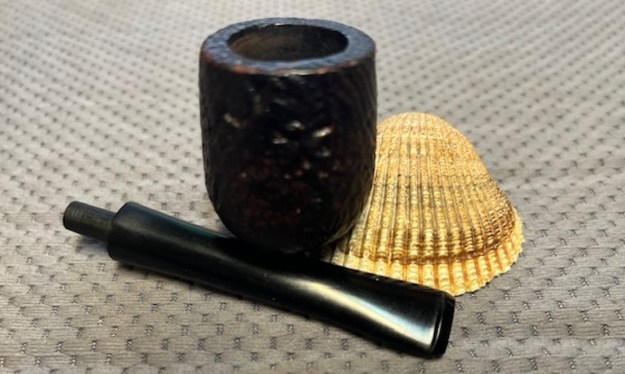
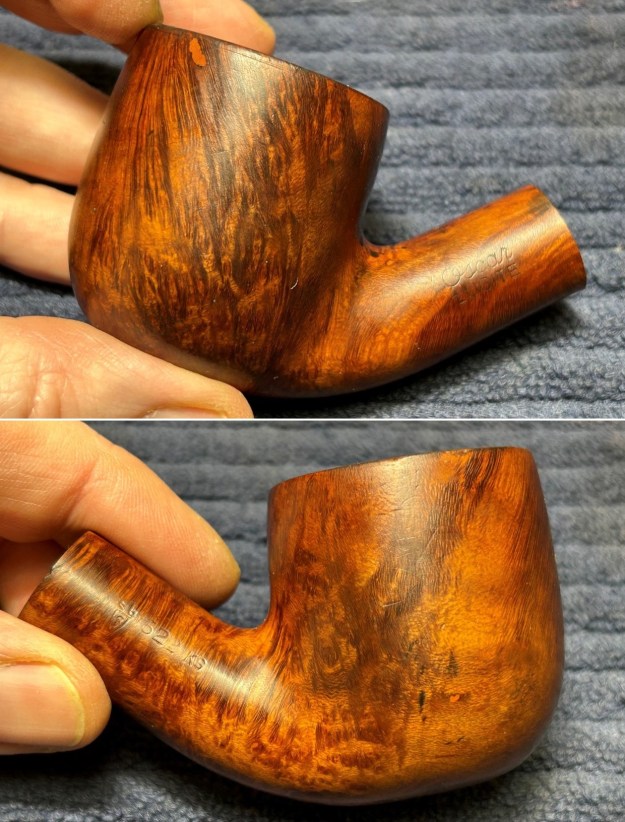
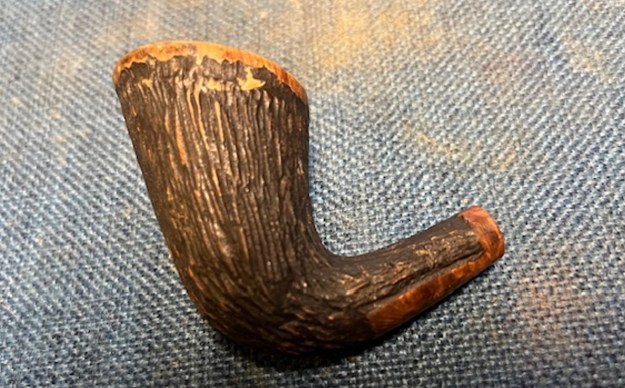
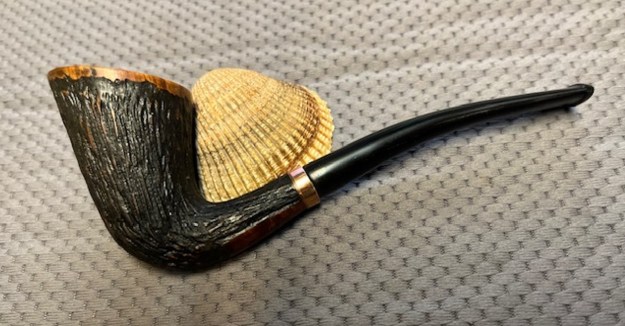
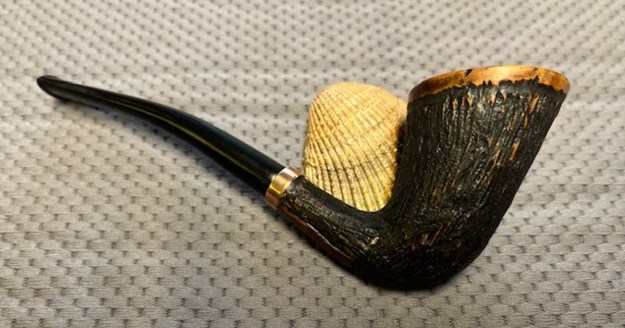
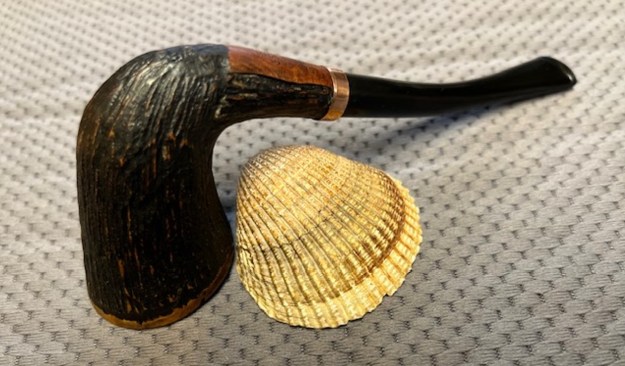
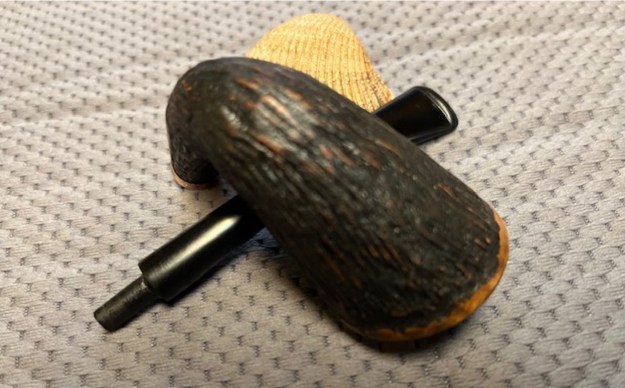
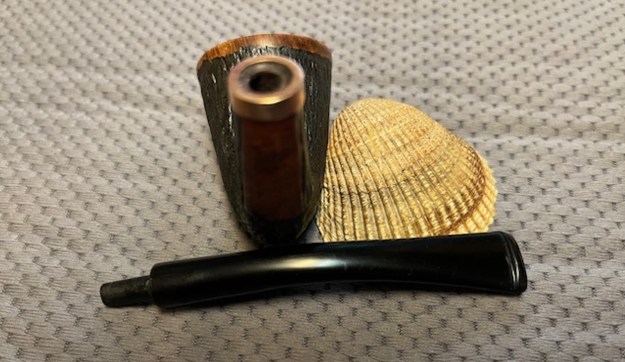
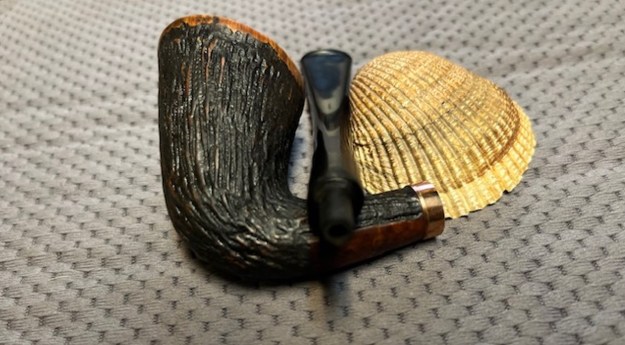
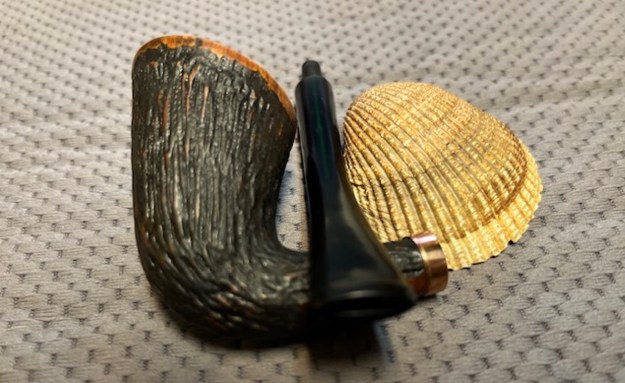
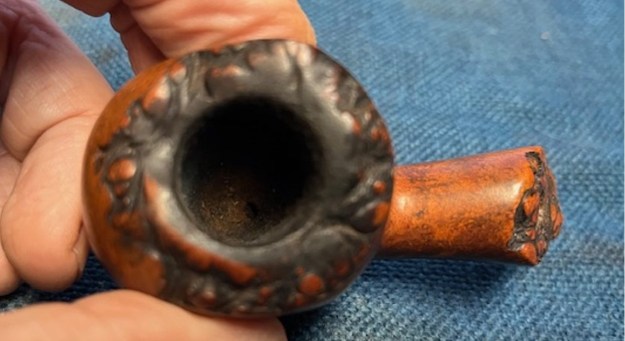
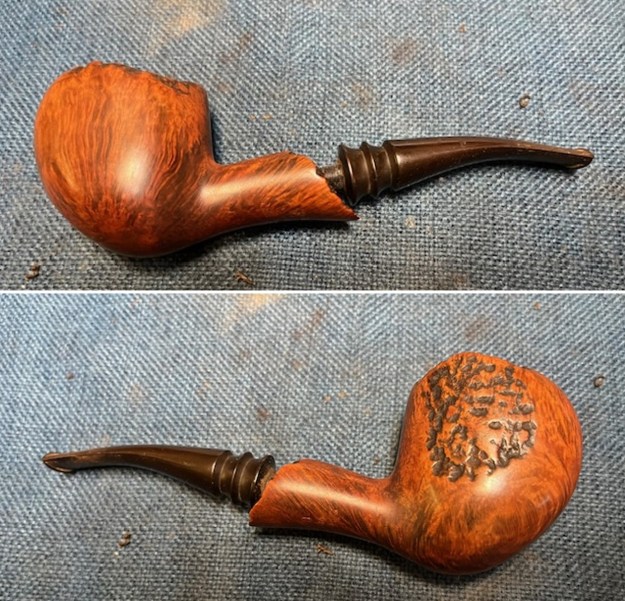
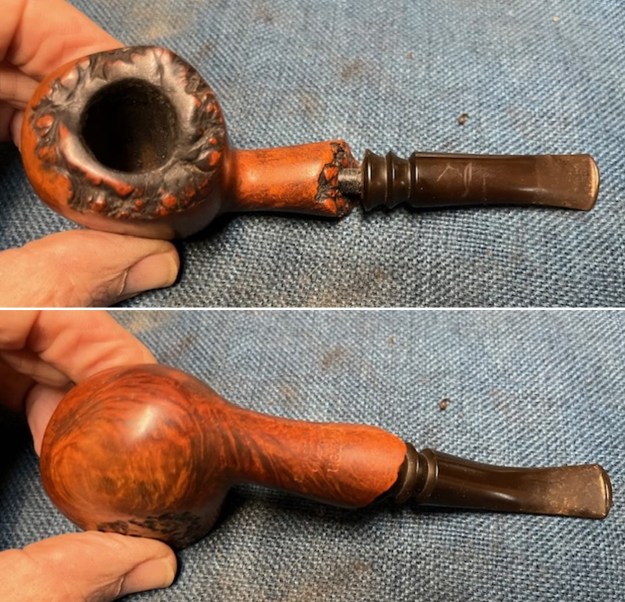
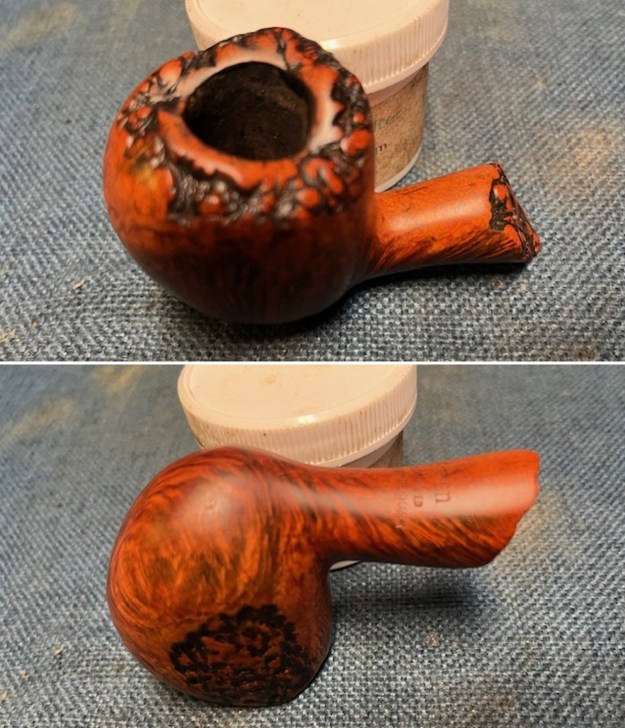
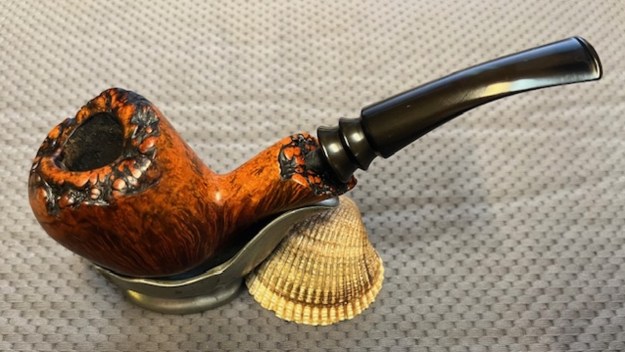
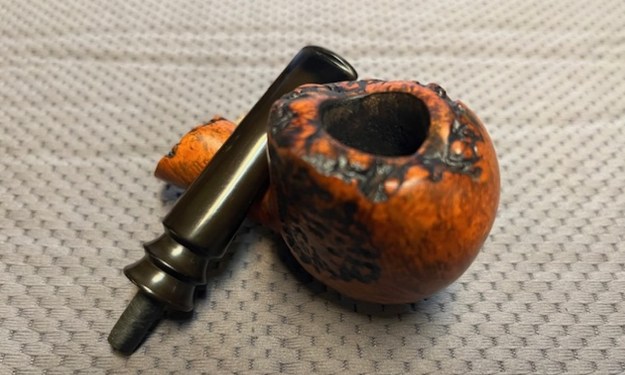
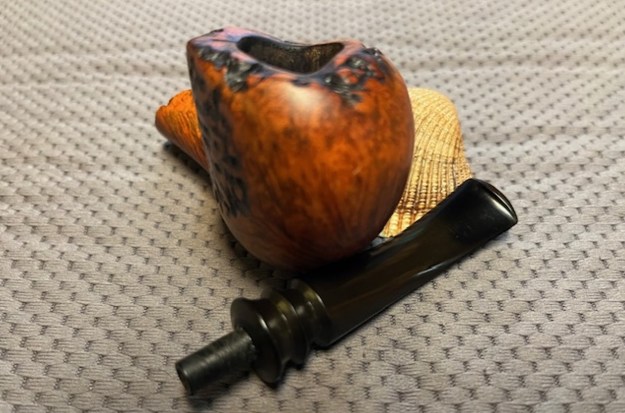
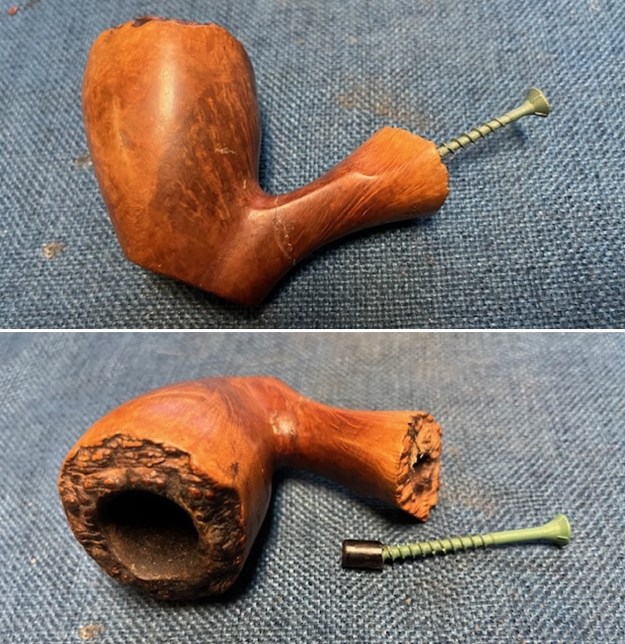
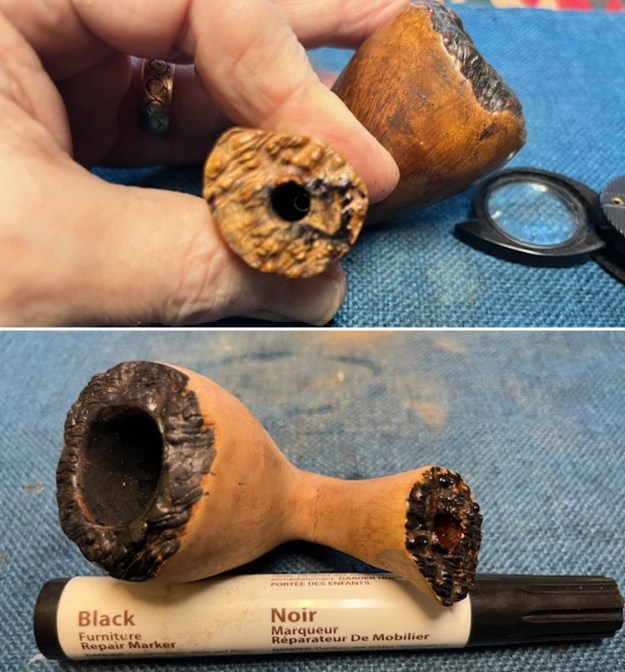
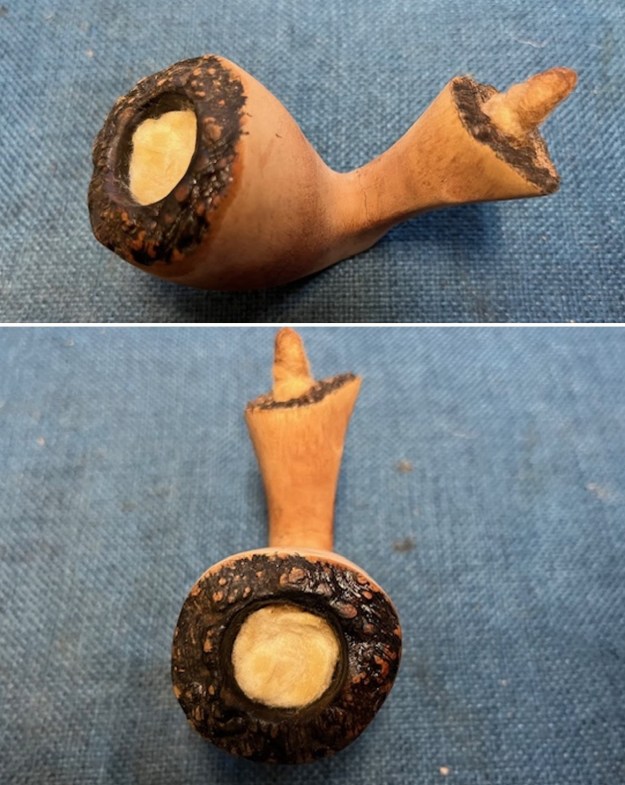
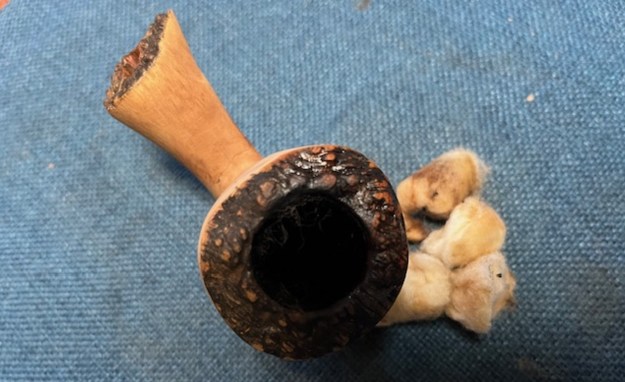
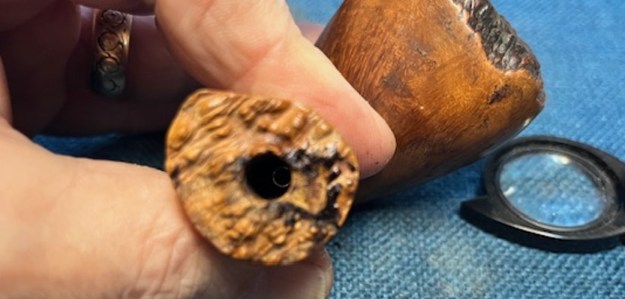
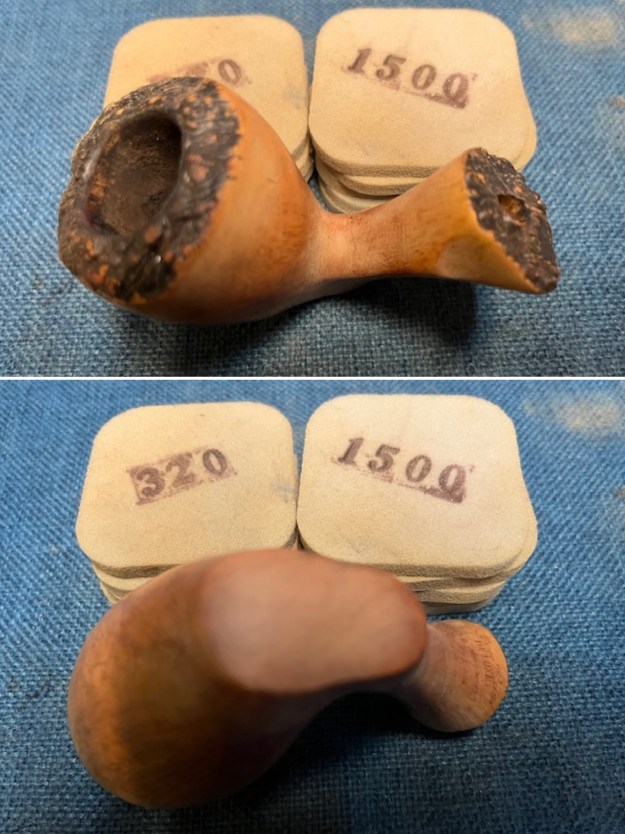
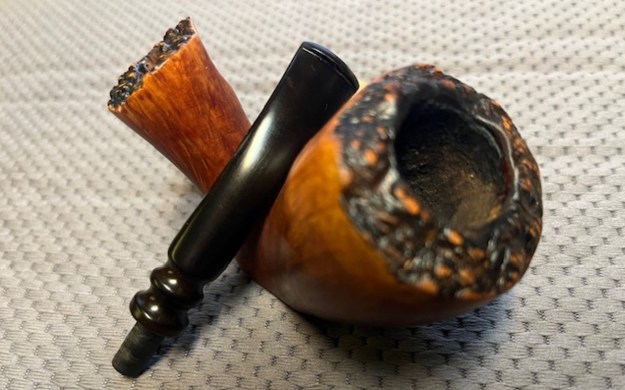
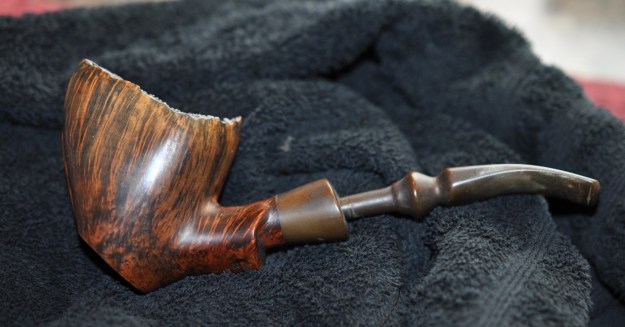
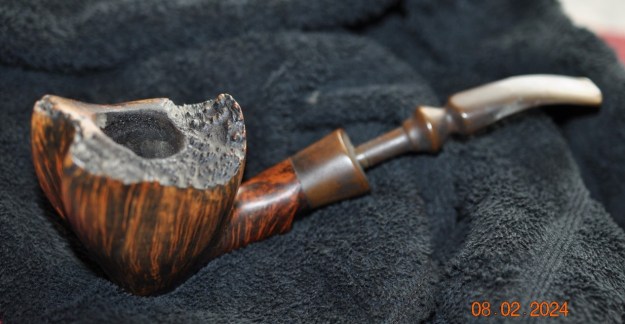
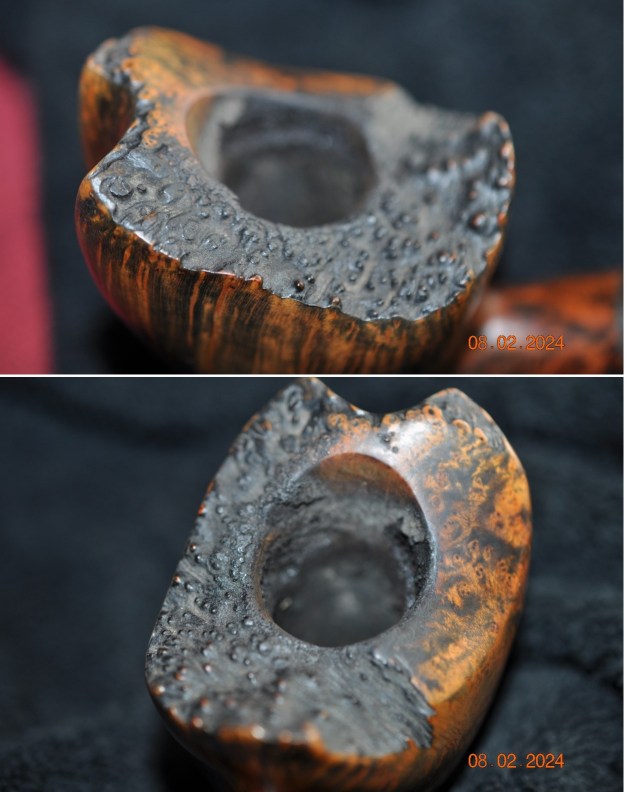
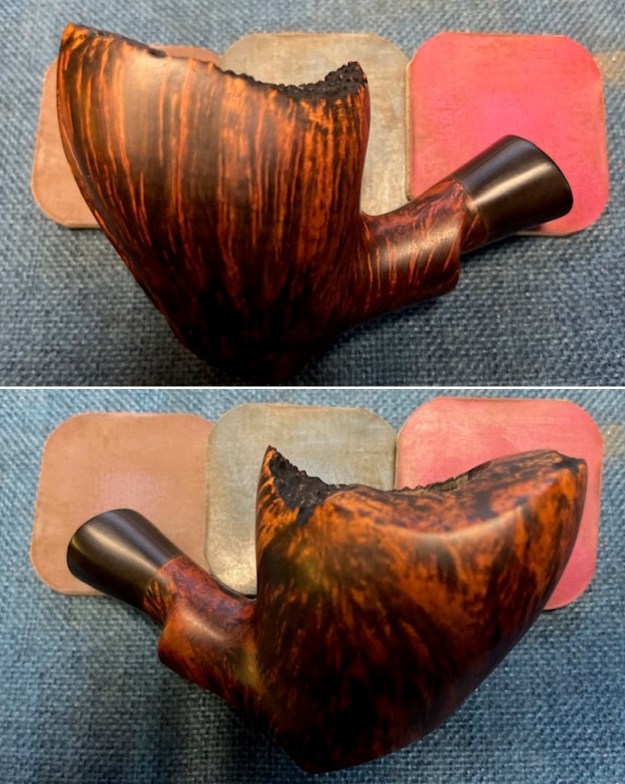
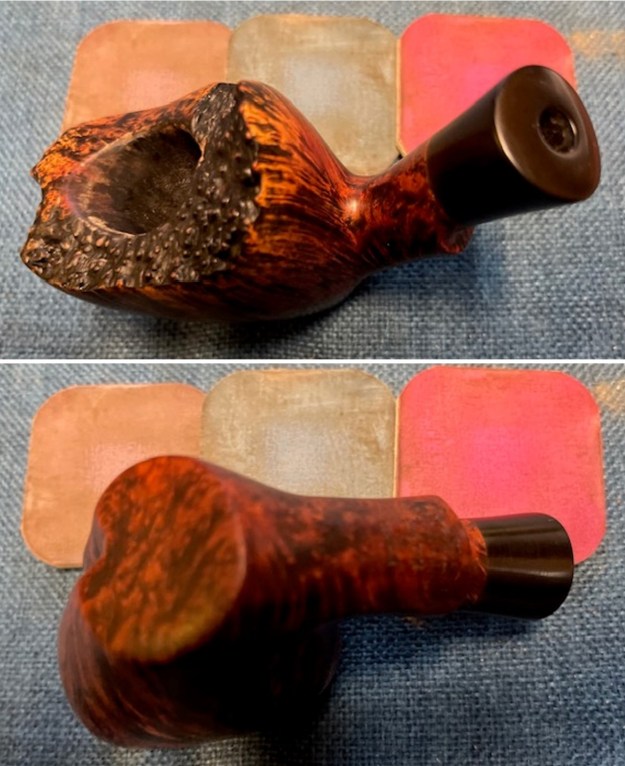
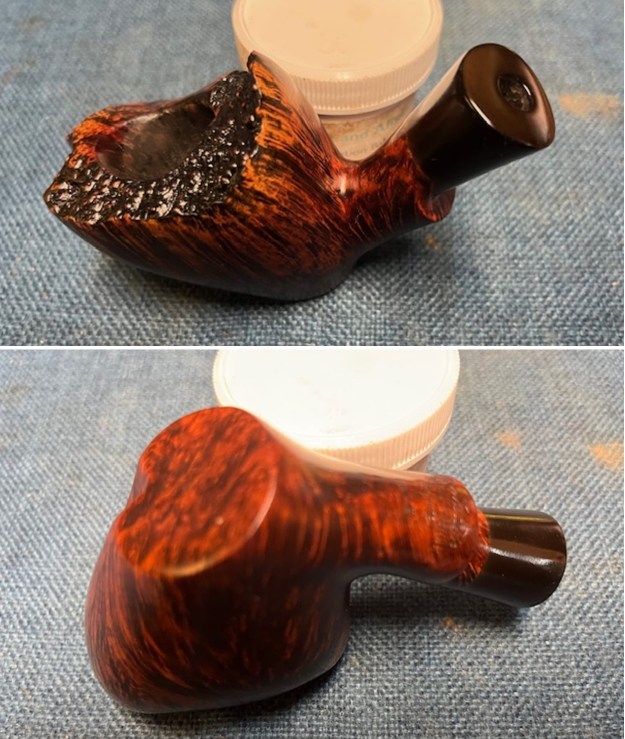
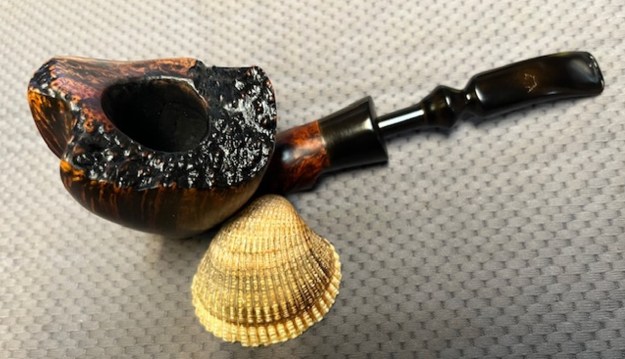
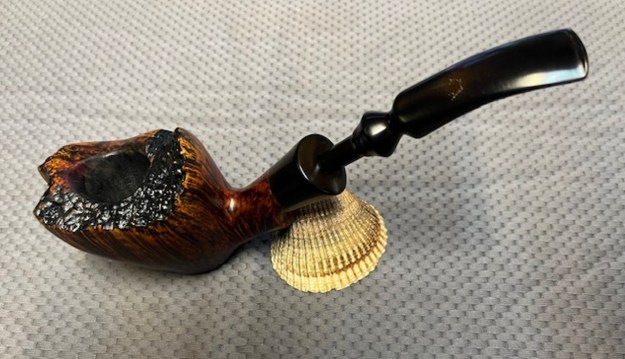
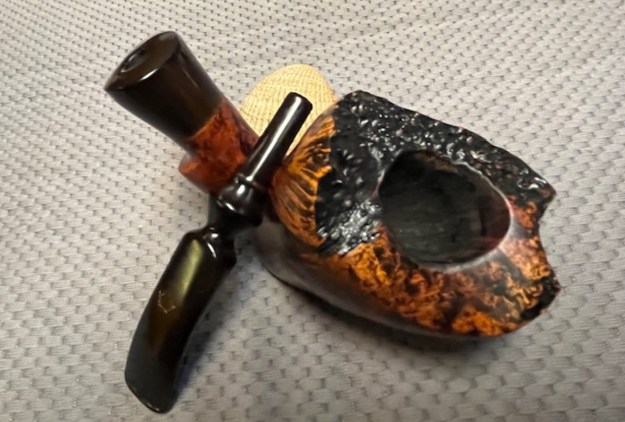
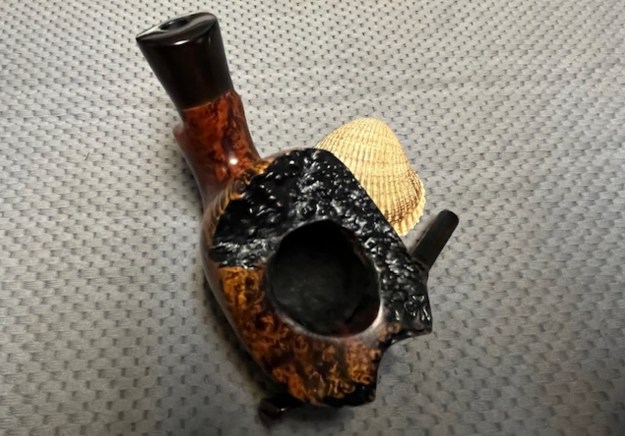
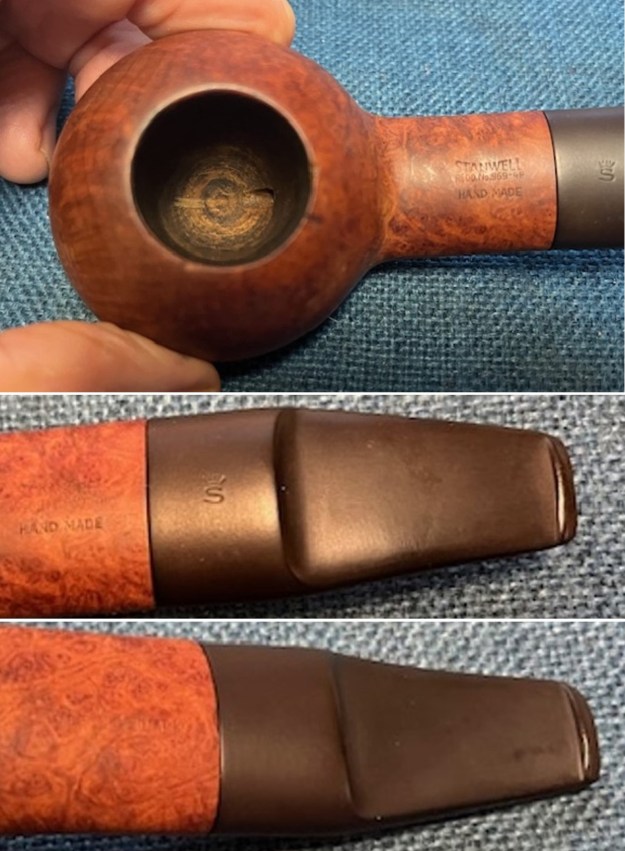
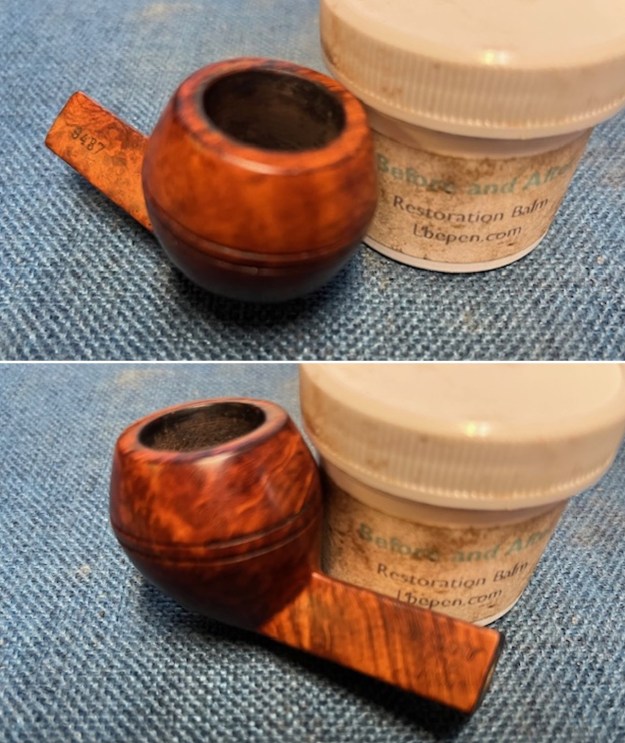
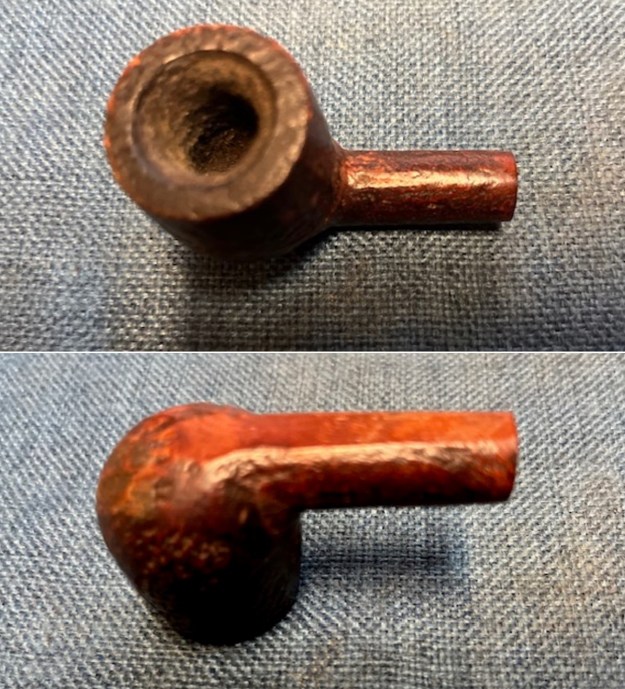 I took a close up photo of the rim top and bowl to give a sense of the thickness of the cake and the lava in the sandblast on the rim. It was a mess but obviously a well loved pipe.
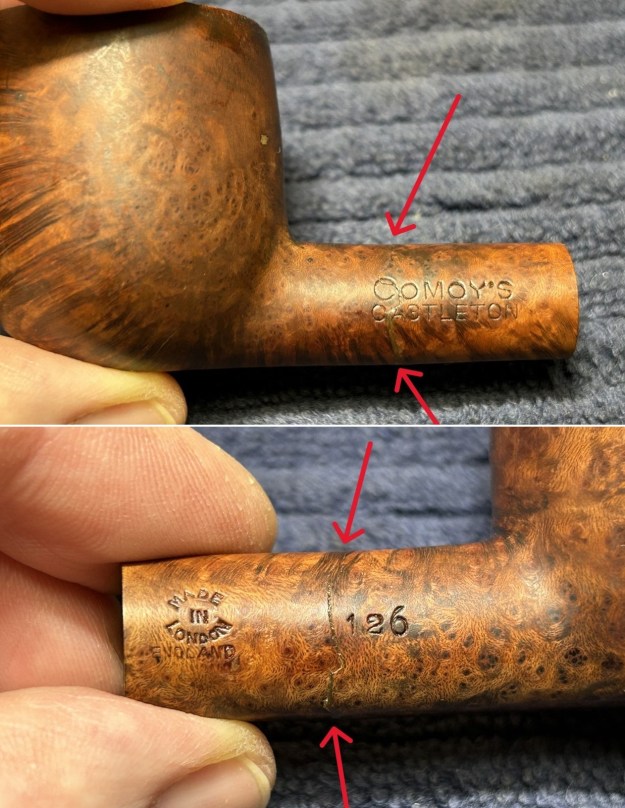
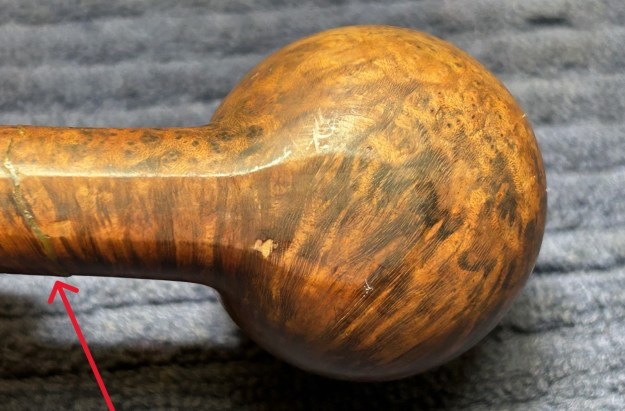
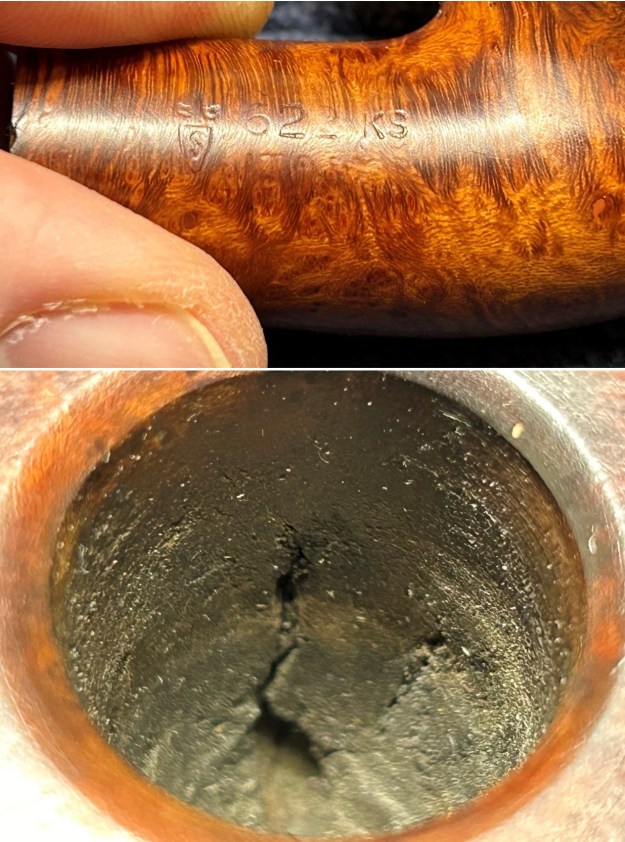
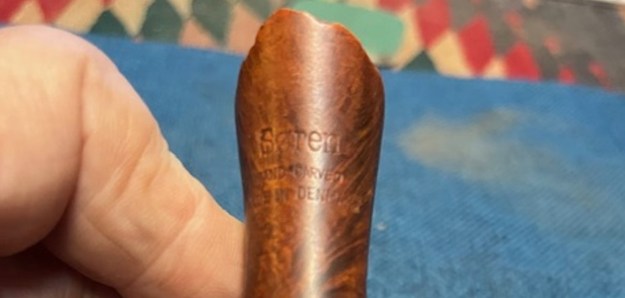
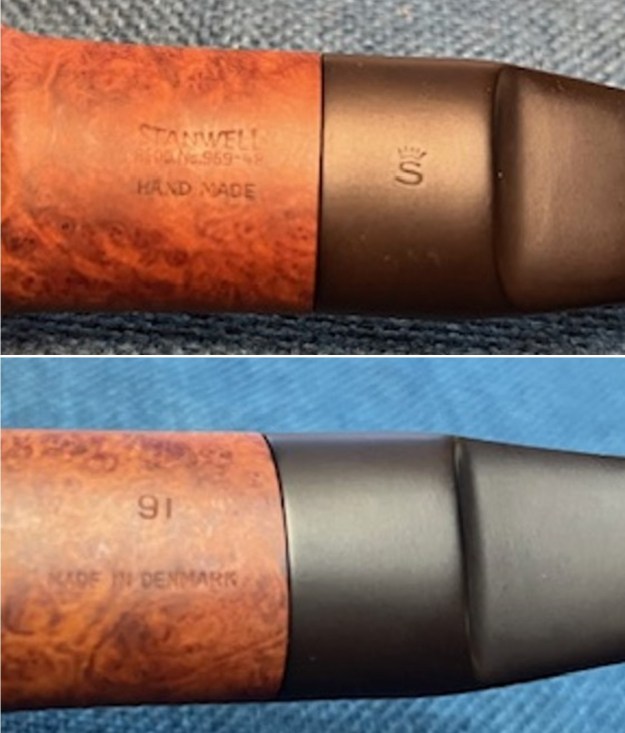
 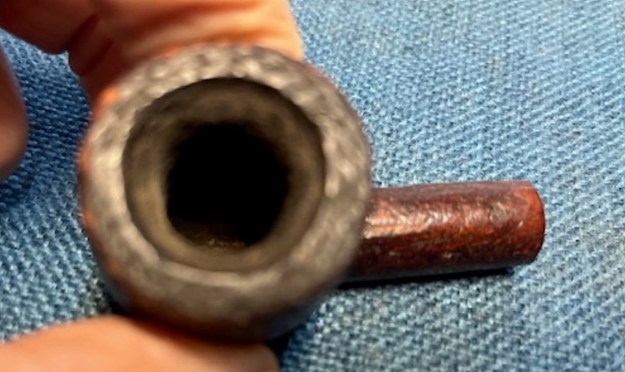 I took a photo of the stamping on the underside of the shank. There is a numeral 2 toward the heel of the bowl and the rest is centered in the shank in two lines as noted above.
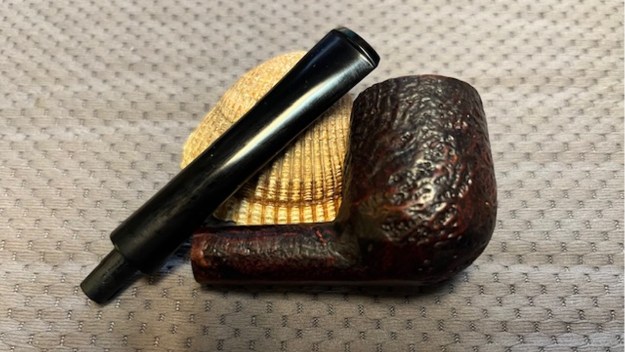
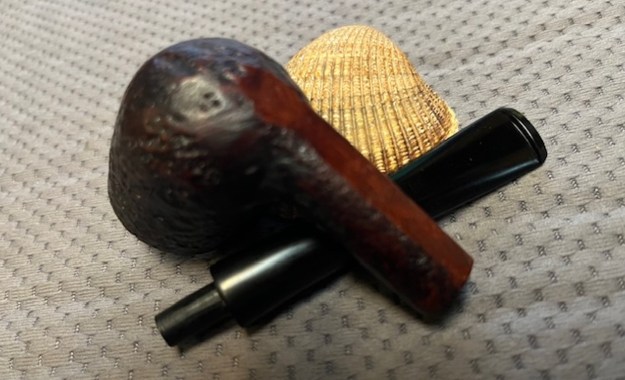
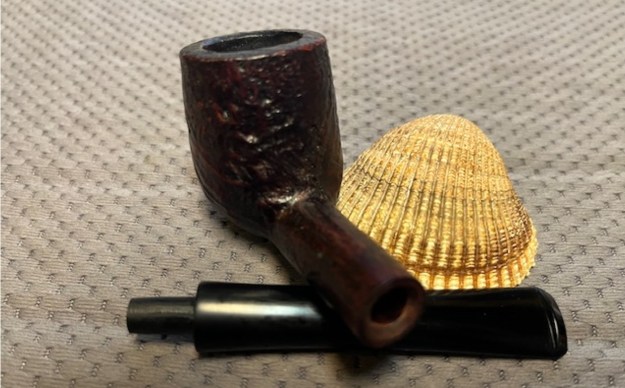
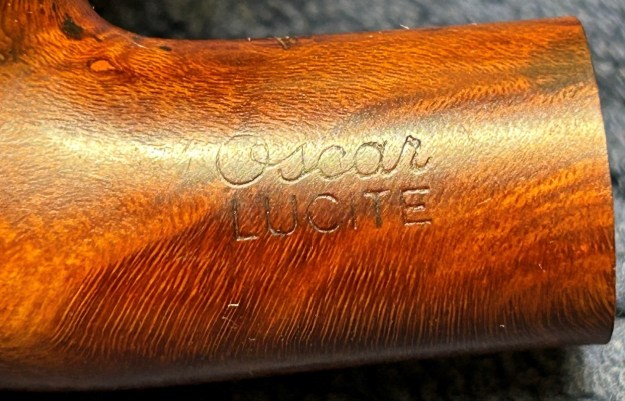
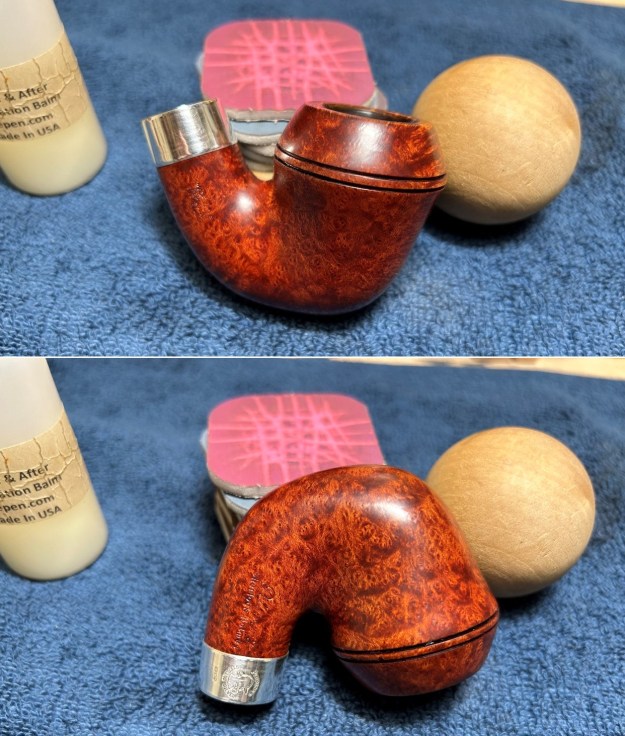
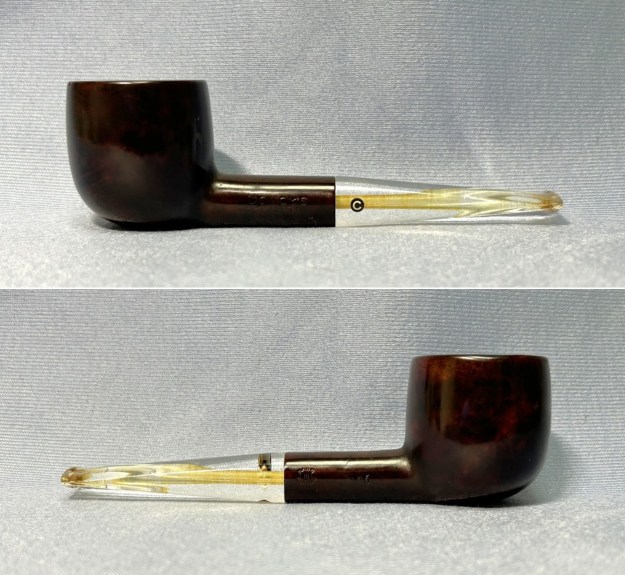
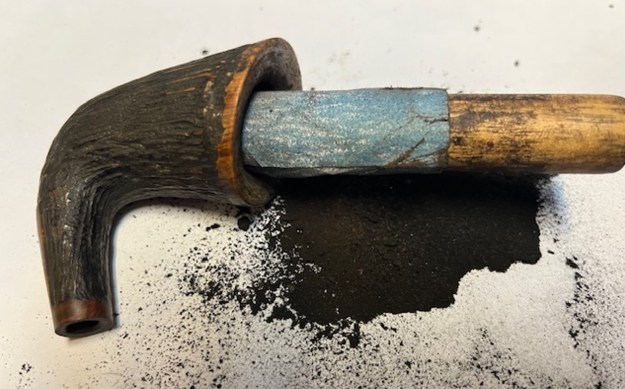
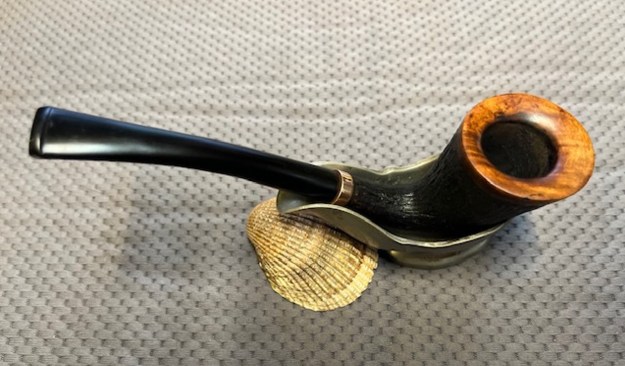
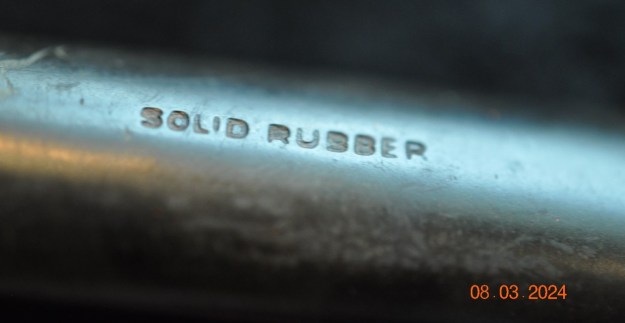
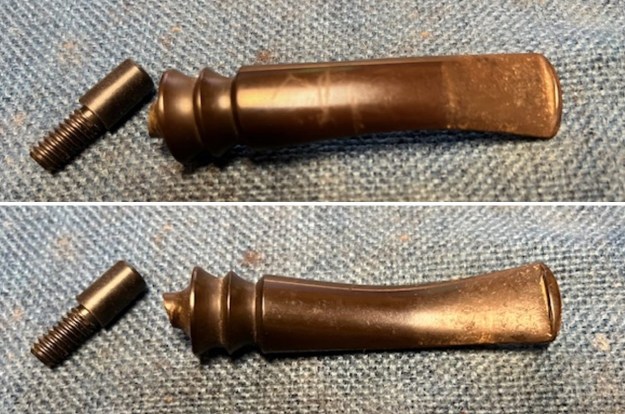
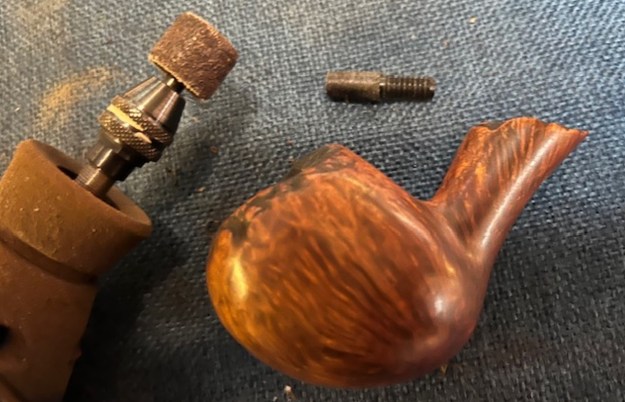
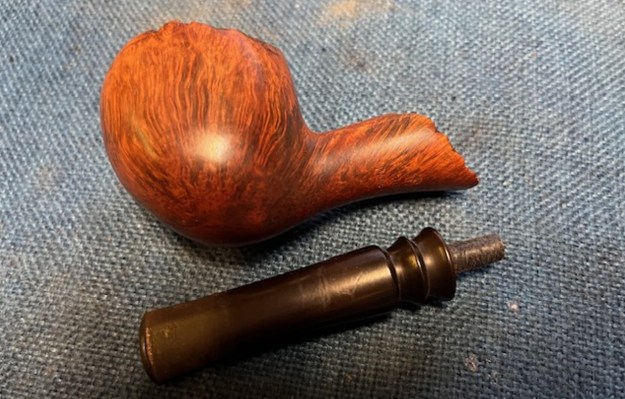
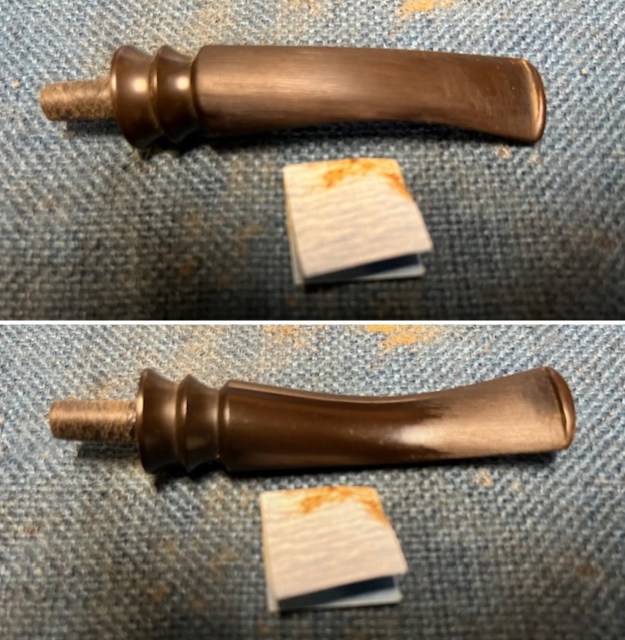
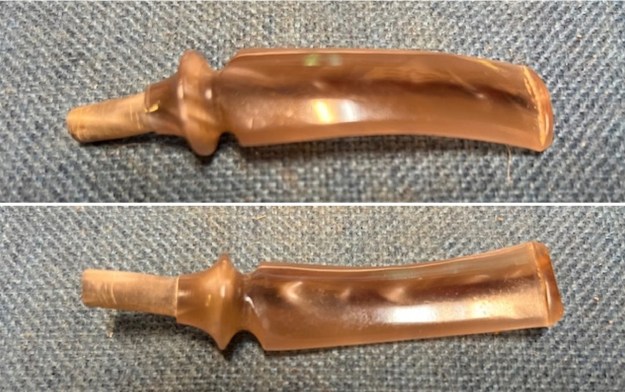
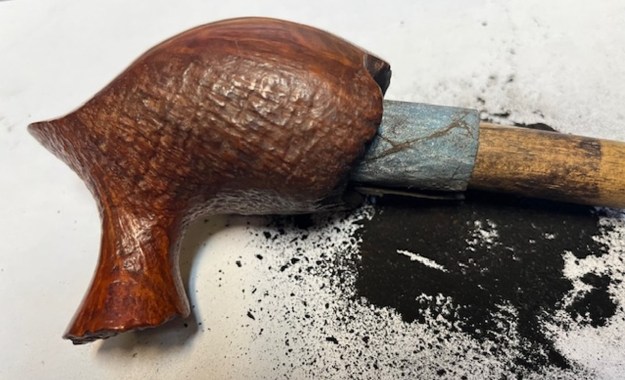
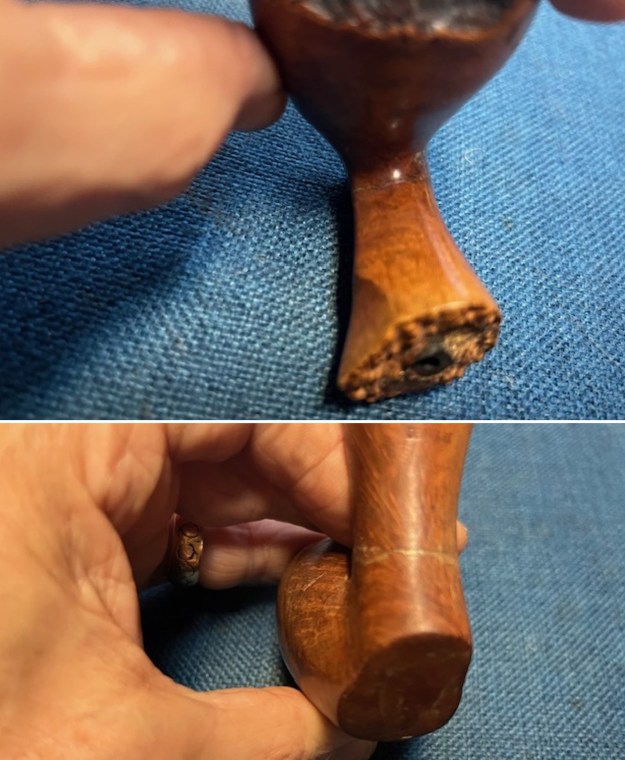
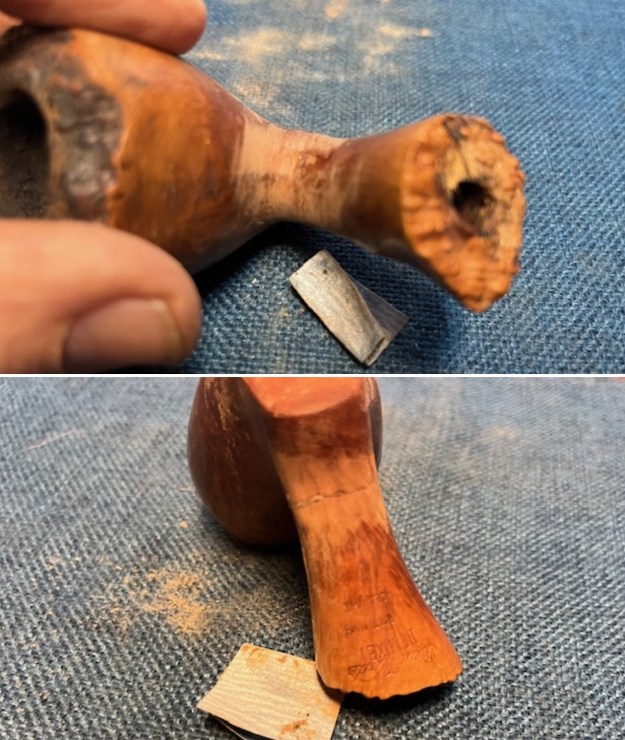
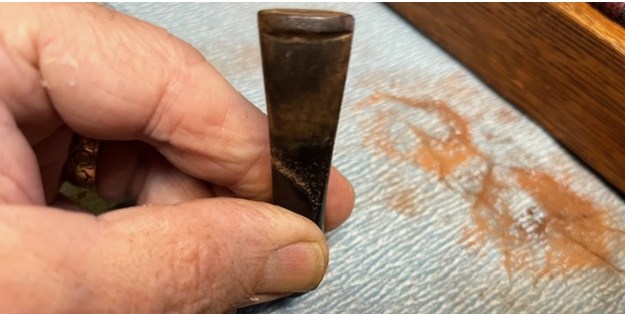
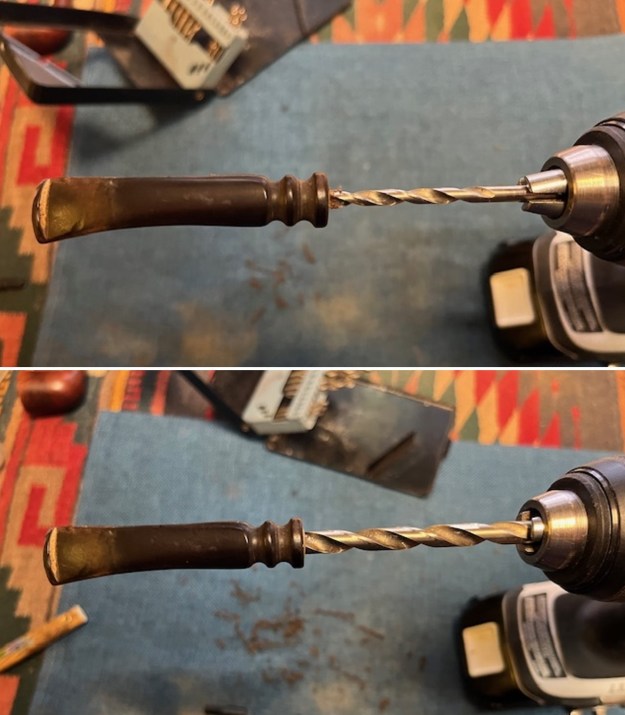
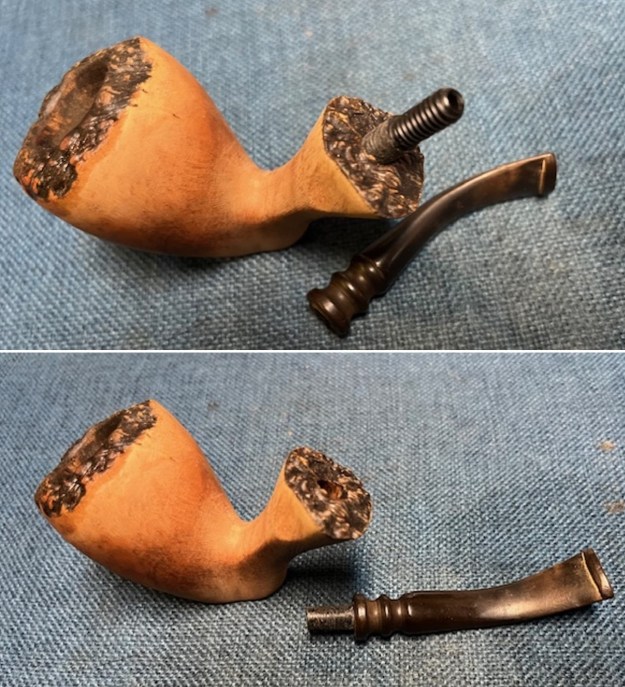
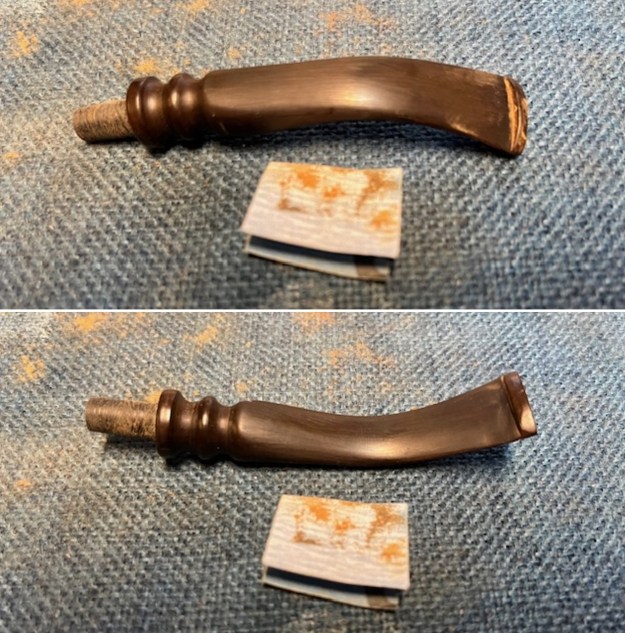
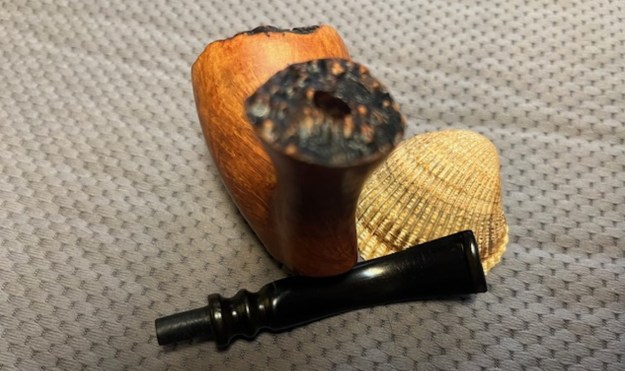
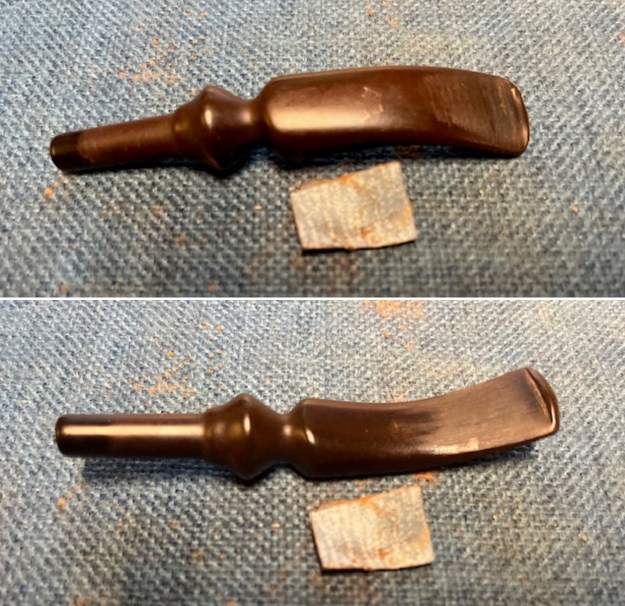
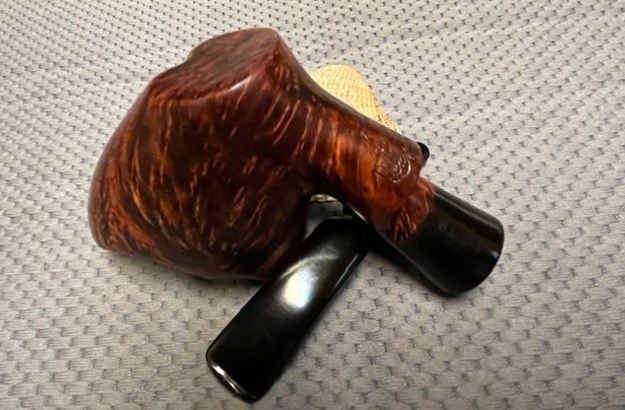
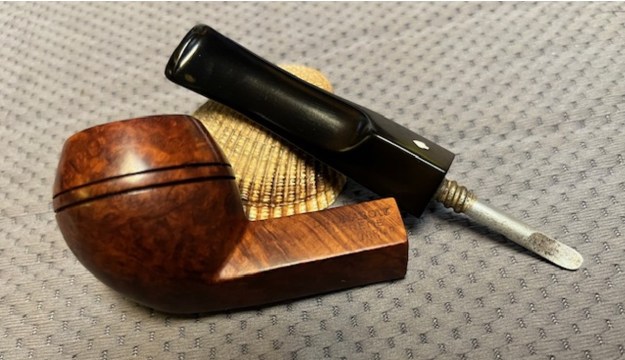
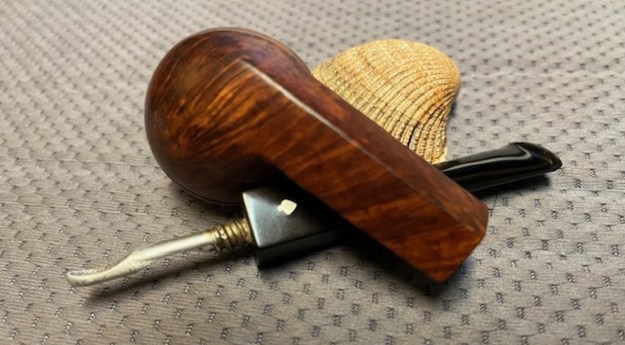
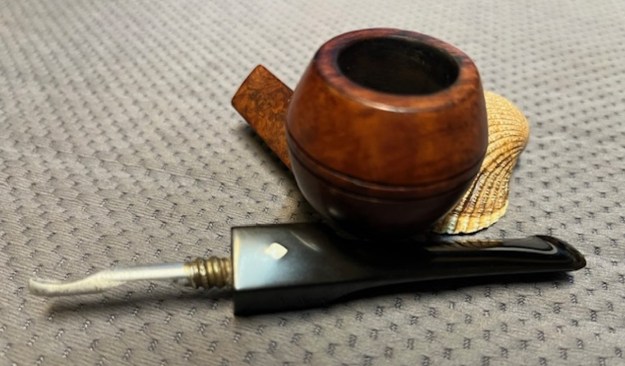
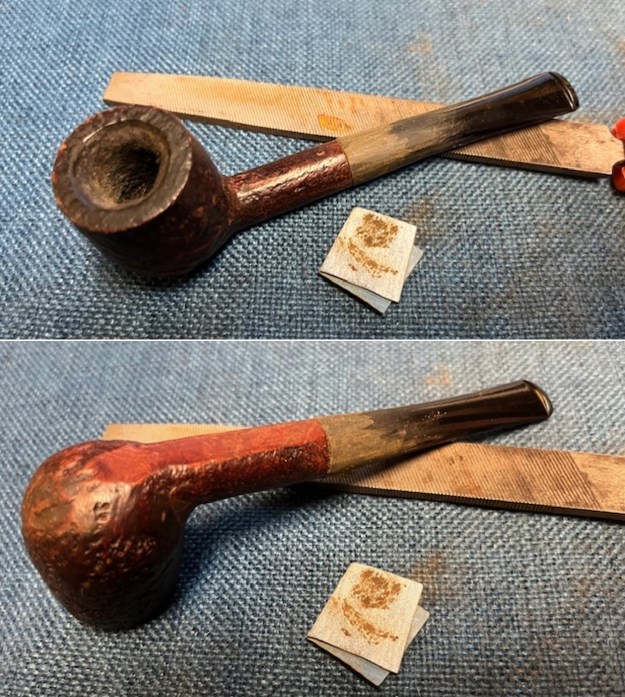
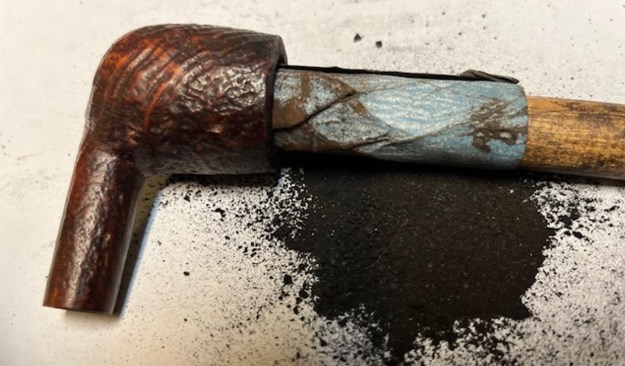
 I took a photo of the stem I had chosen for the pipe next to the bowl so you can see the overall look of the stem and shank. It is slightly larger in diameter than the shank so that will need to be adjusted. The tenon is also slightly larger.
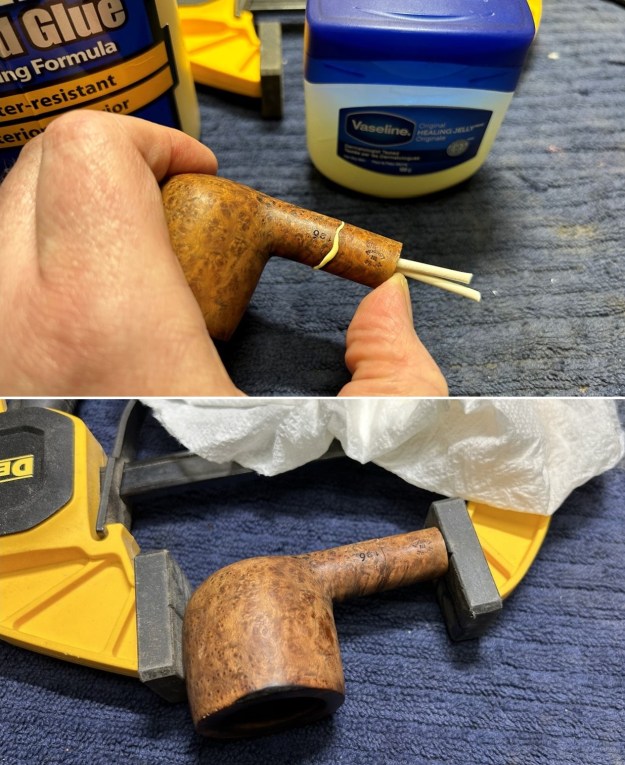
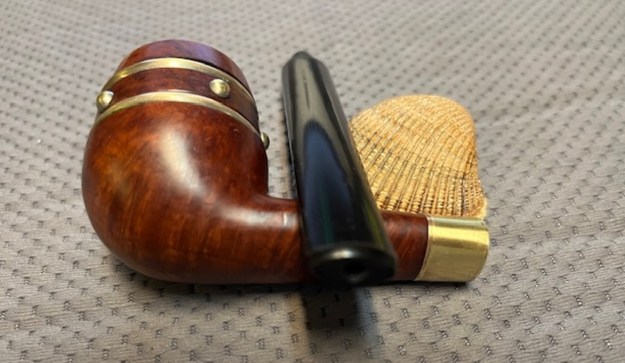
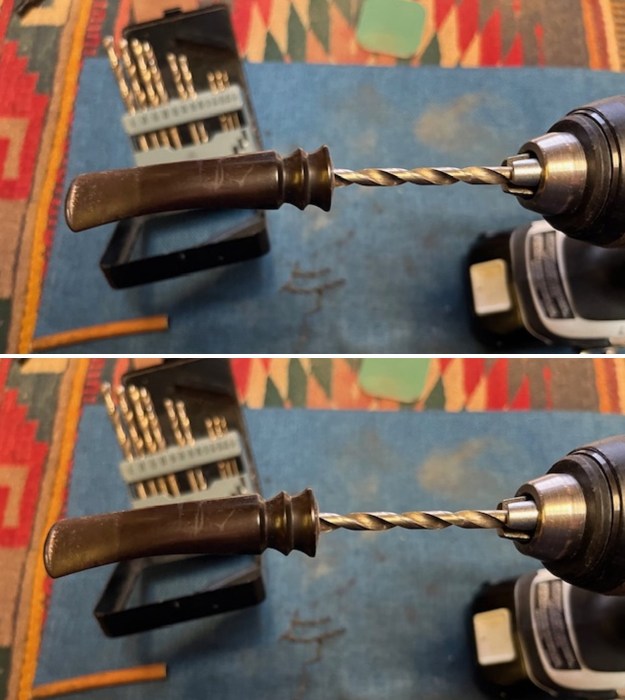
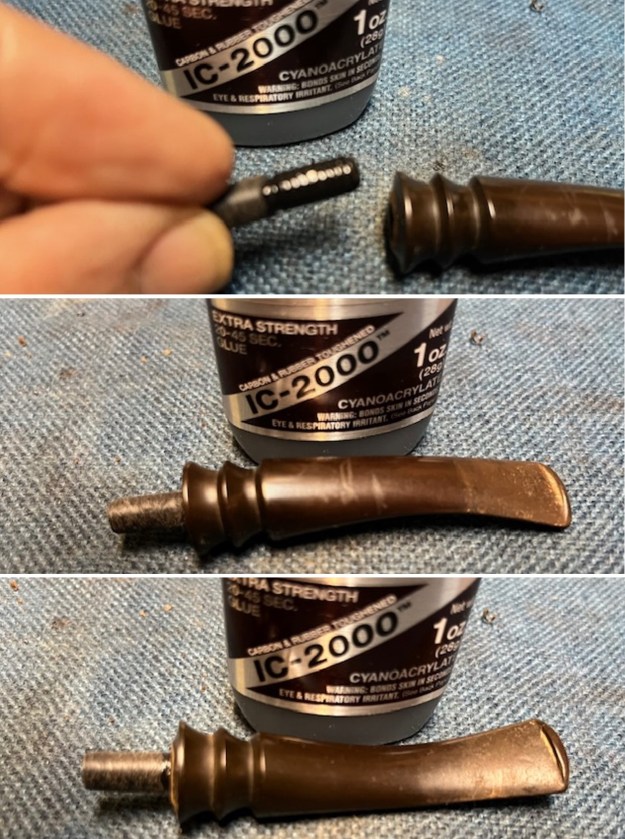
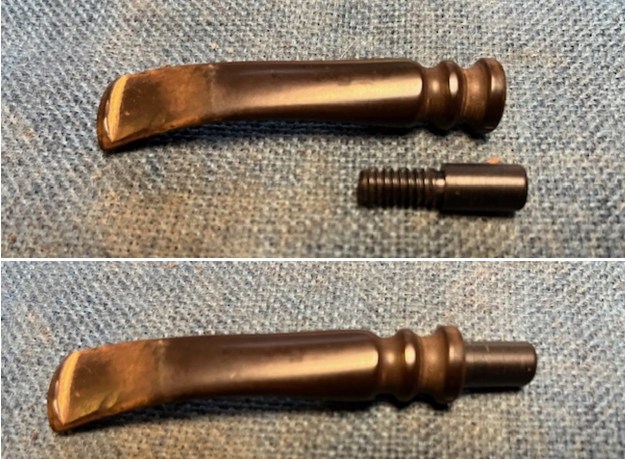
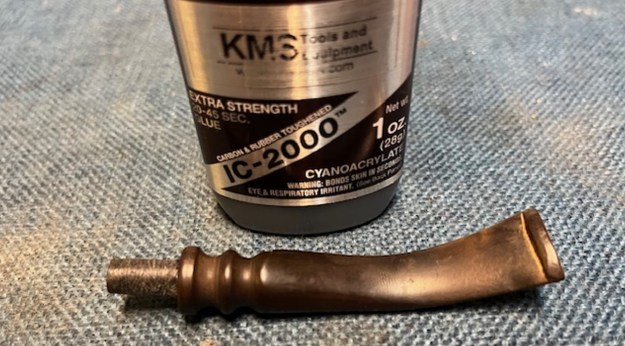
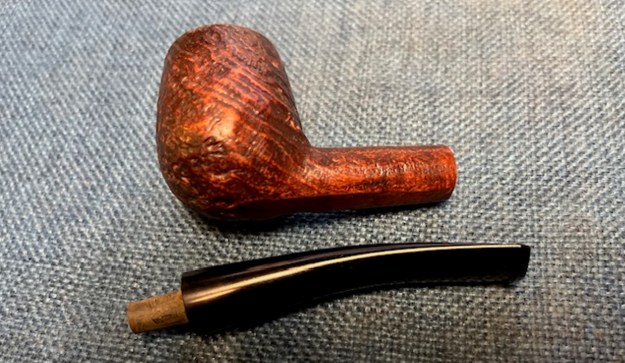 I used a flat needle file to reduce the diameter of the tenon so that it would fit the shank of the pipe. It did not take too much to do and once it was removed it looked very good.
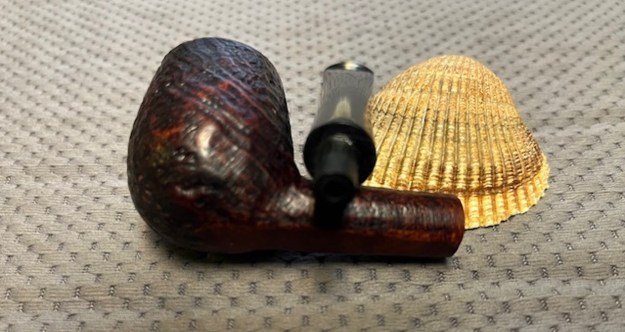
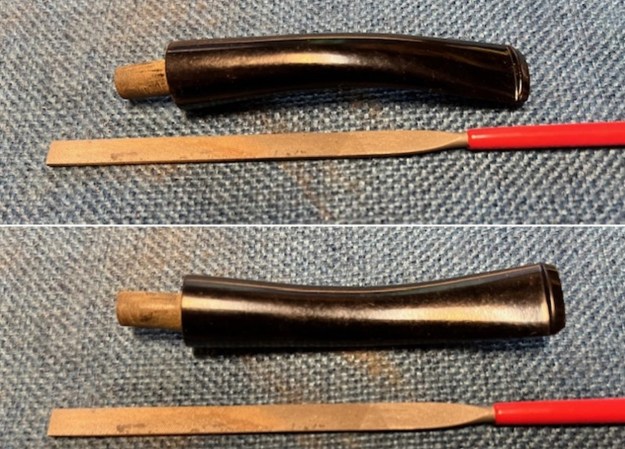 I heated the stem with the flame of a Bic lighter to soften the vulcanite. Once it was soft enough I was able to straighten the stem to the angle that I wanted.
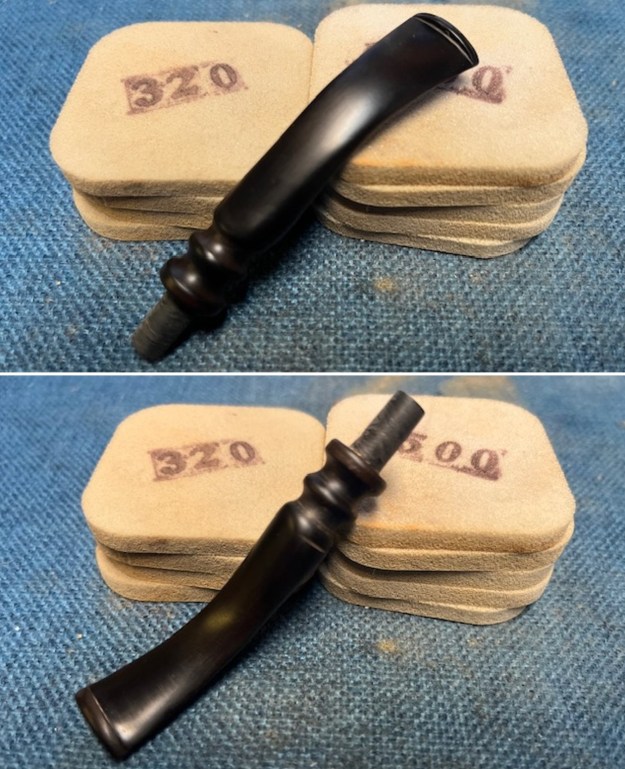
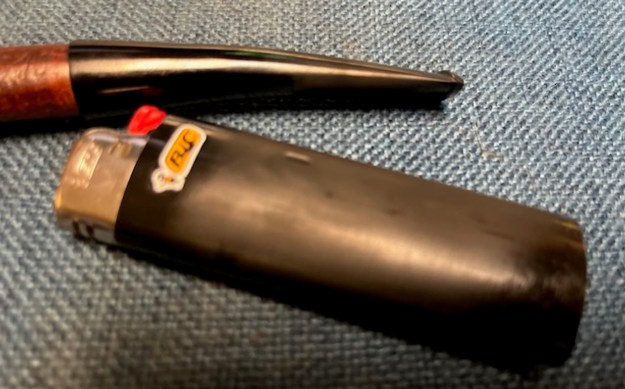 I fit the stem to the shank and used a rasp to reduce the diameter of the stem. I wanted it to be a smooth transition from the shank to the stem. It was looking much better.
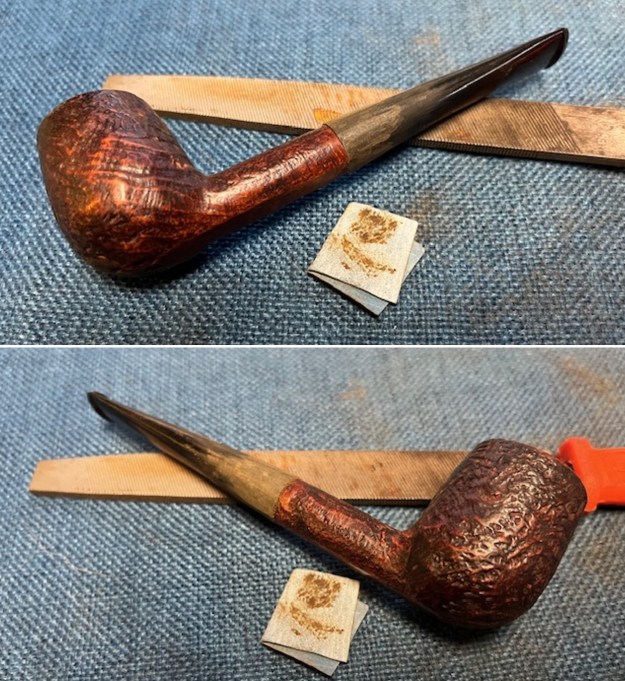
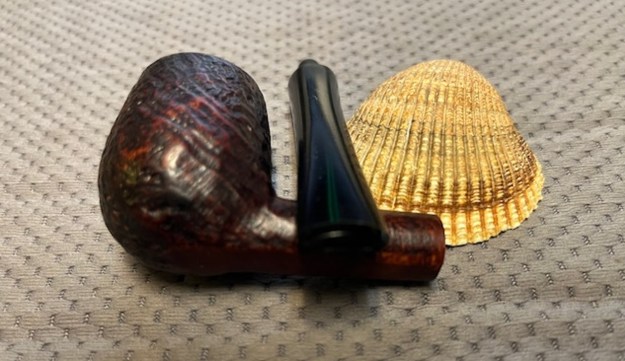
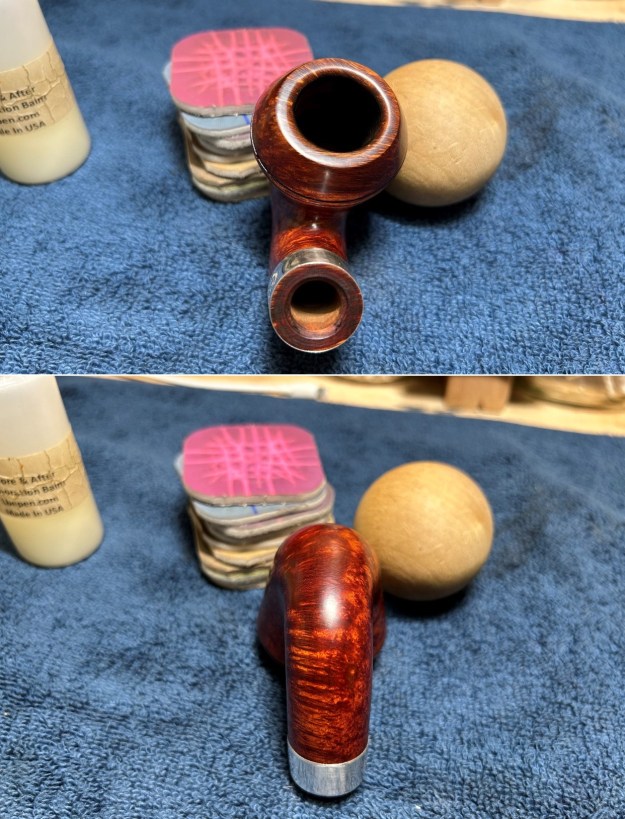
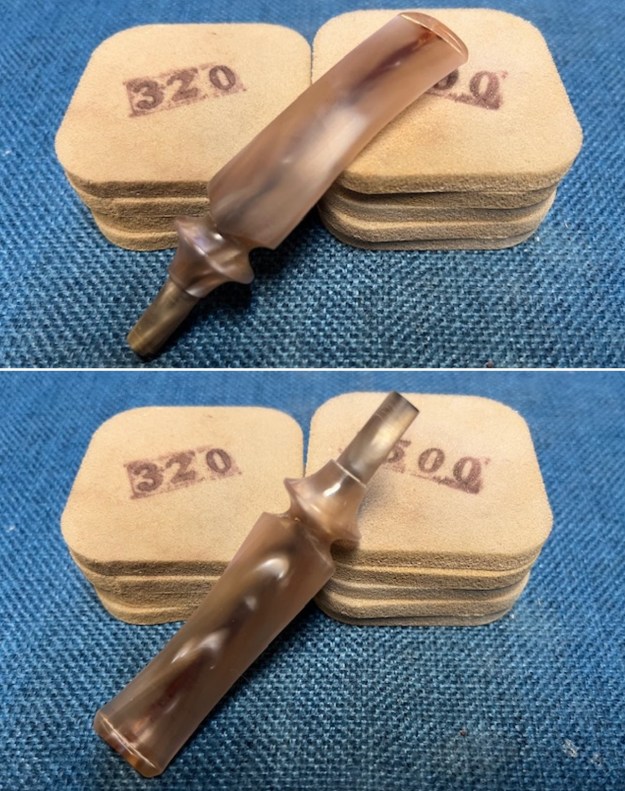
 I sanded the reduced stem diameter with 200 grit sandpaper to remove the file marks and smooth out the scratches. The transition began to really look good and it was smooth to the touch.
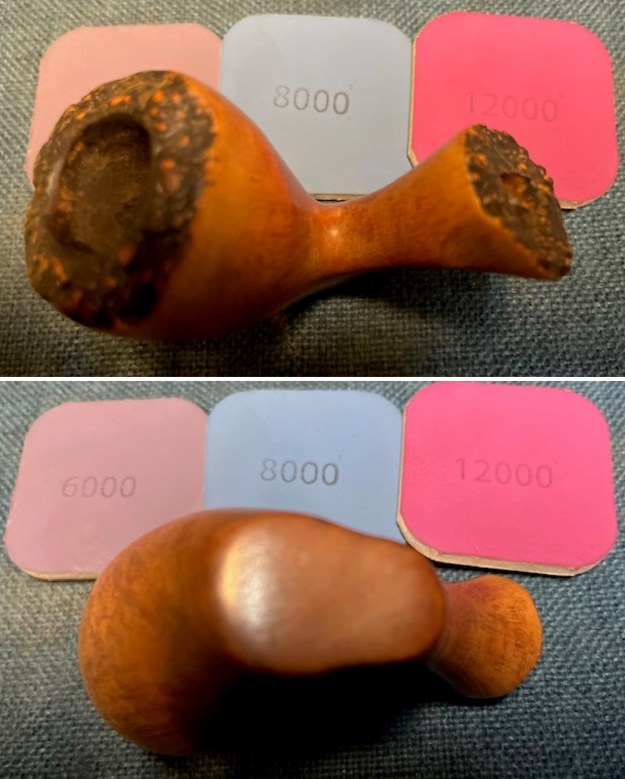
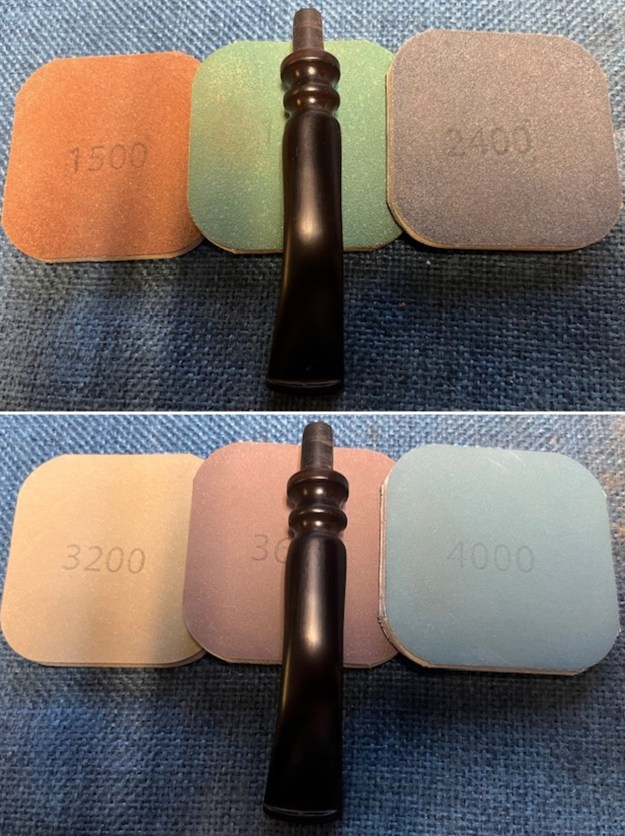
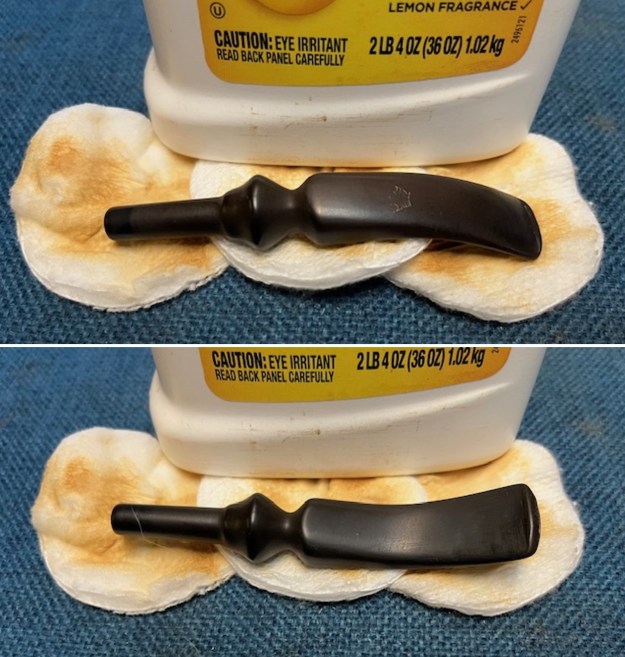
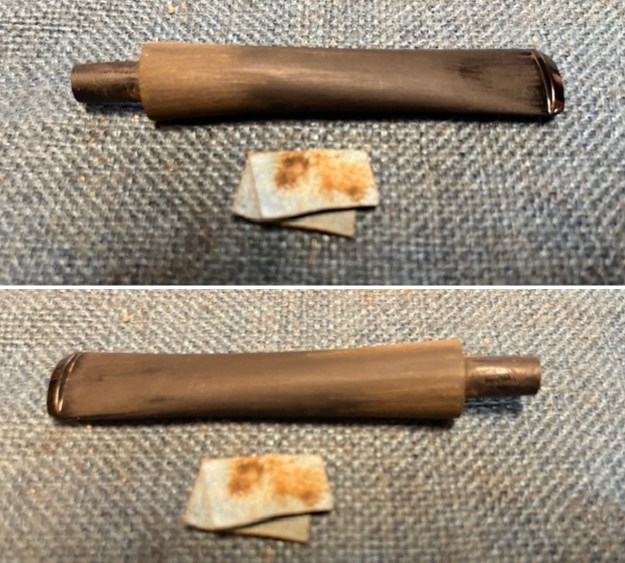 I sanded out the scratches in the vulcanite with 320-3500 grit sanding pads. I wiped the stem down after each sanding pad with a cloth impregnated with Obsidian Oil. It started to take on a deep shine.
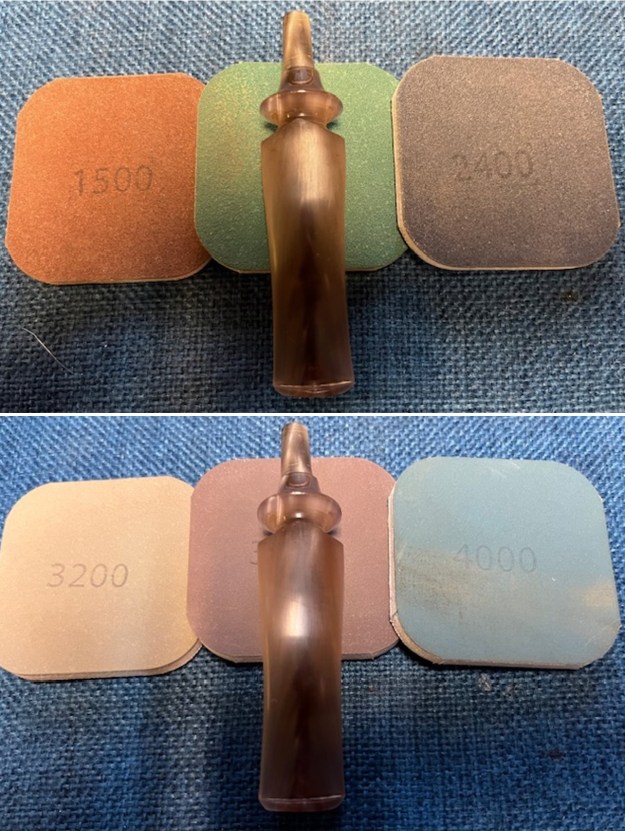
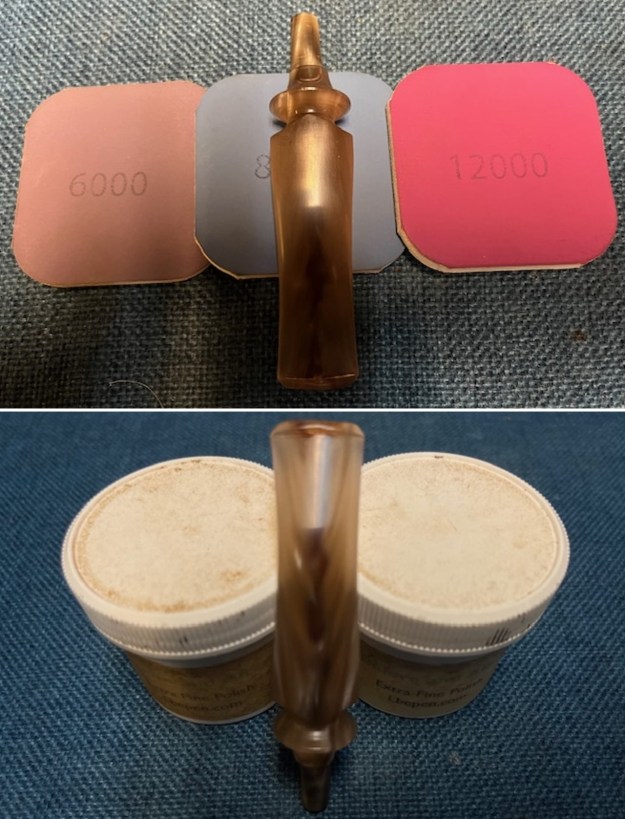
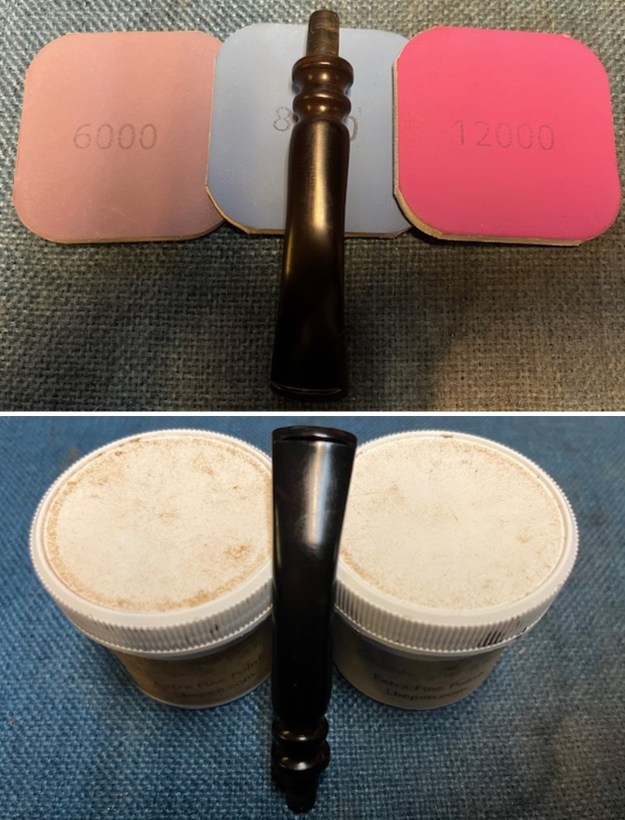
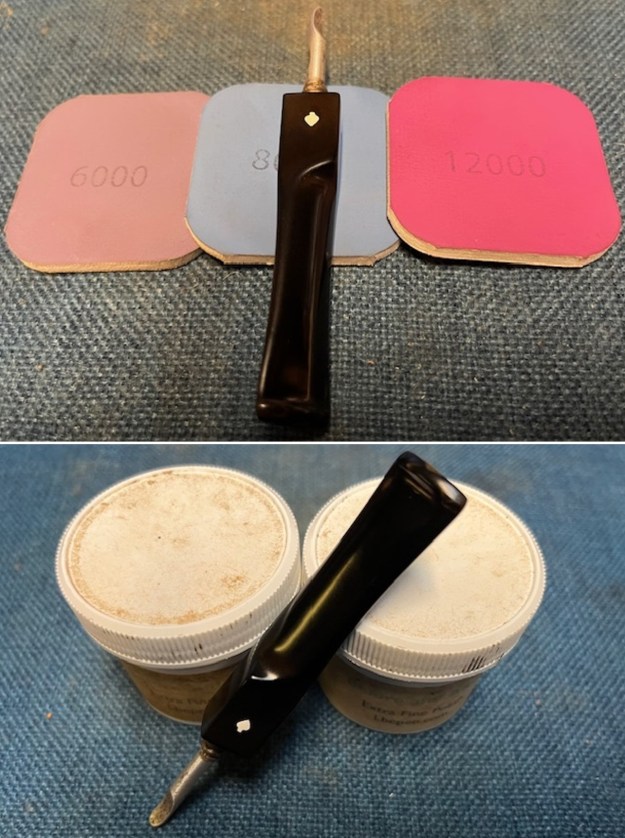
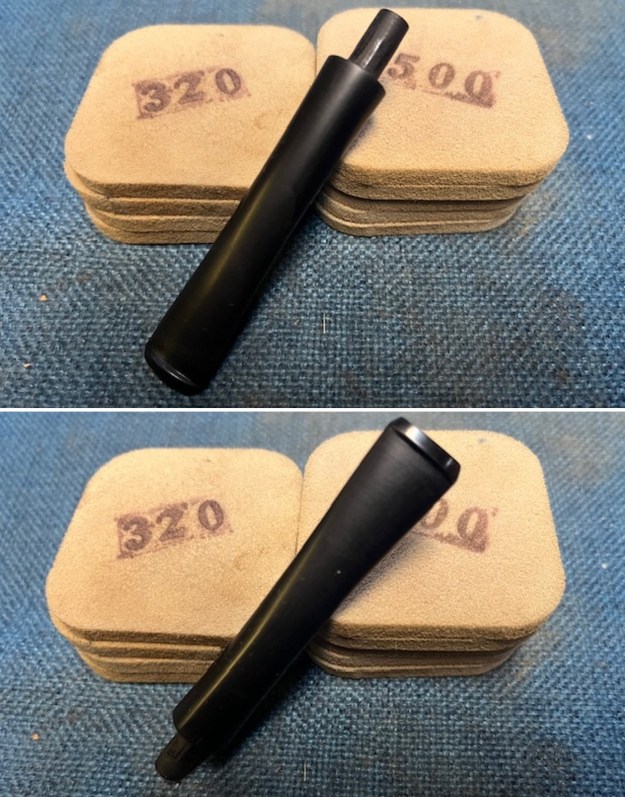 I polished the stem with micromesh sanding pads – 1500-12000 grit pads to remove them. I wiped the stem down with Obsidian Oil after each sanding pad. I used Before & After Pipe Polish – both Fine and Extra Fine to further polish the stem. I rubbed it down with a final coat of Obsidian Oil and let it dry.
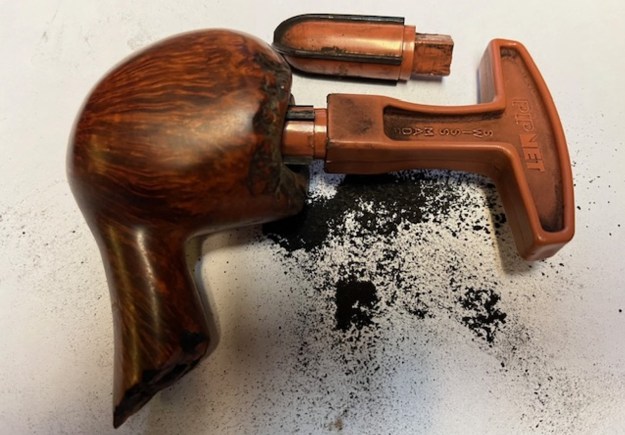
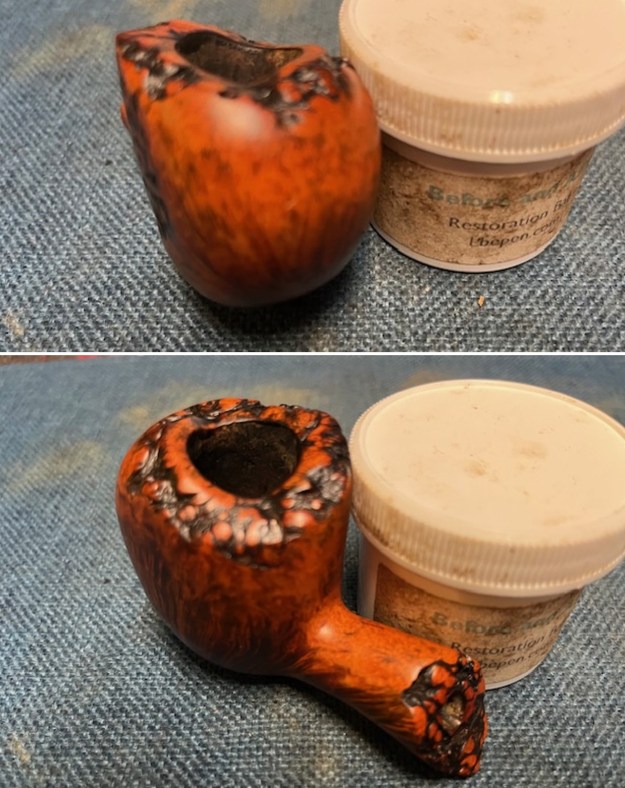
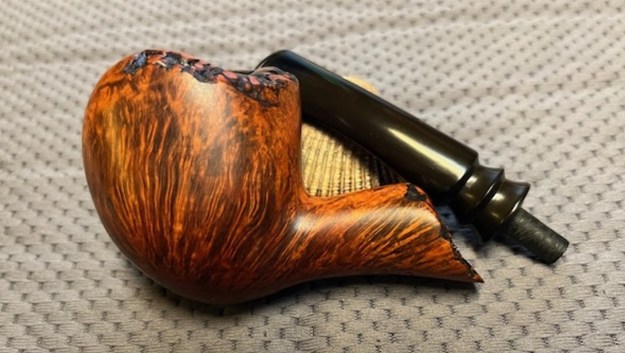
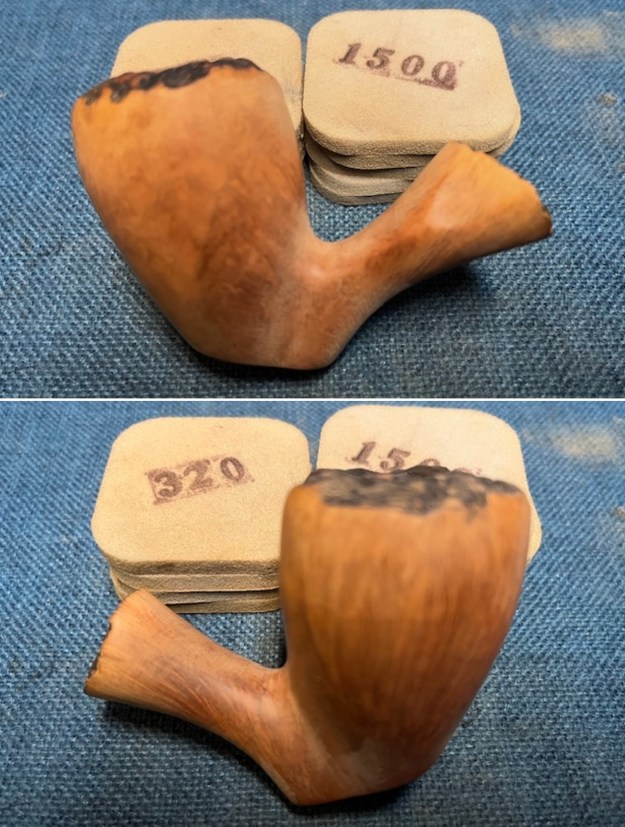
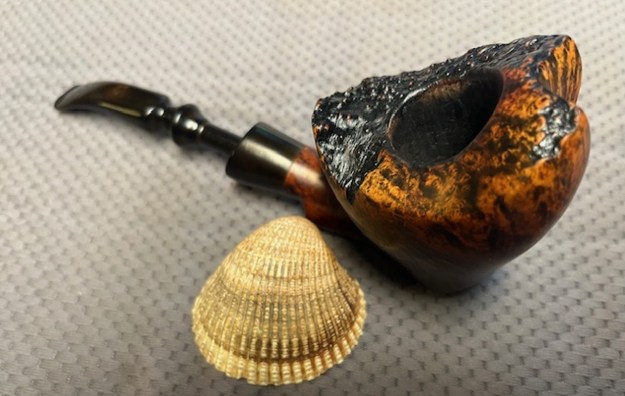
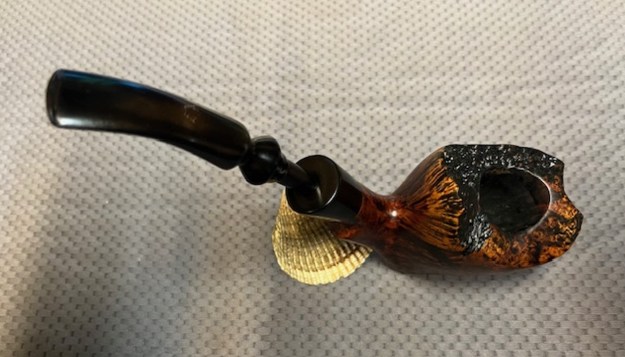
 I turned my attention to the bowl. I used a PipNet Reamer with the first and second cutting heads to take back the heavy cake to bare briar. I cleaned up the reaming with a Savinelli Fitsall Pipe Knife and finally sanded the bowl walls with 220 grit sandpaper wrapped around a dowel. I like to remove all the cake to examine the walls for damage and checking. Great news is that this one is free of any damage!
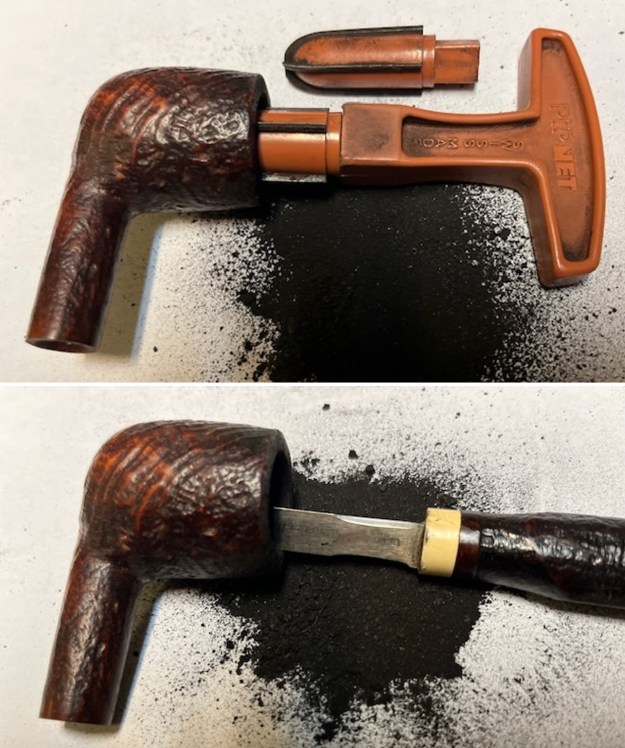
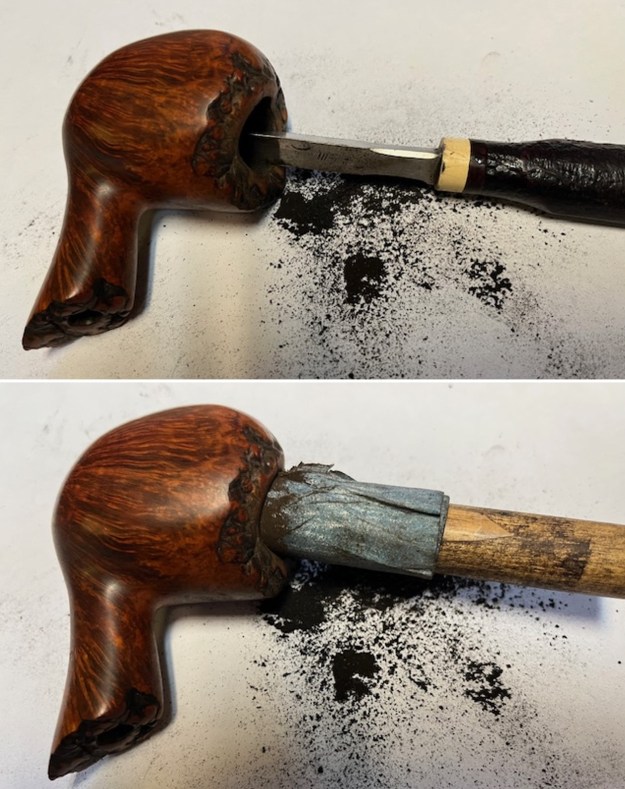
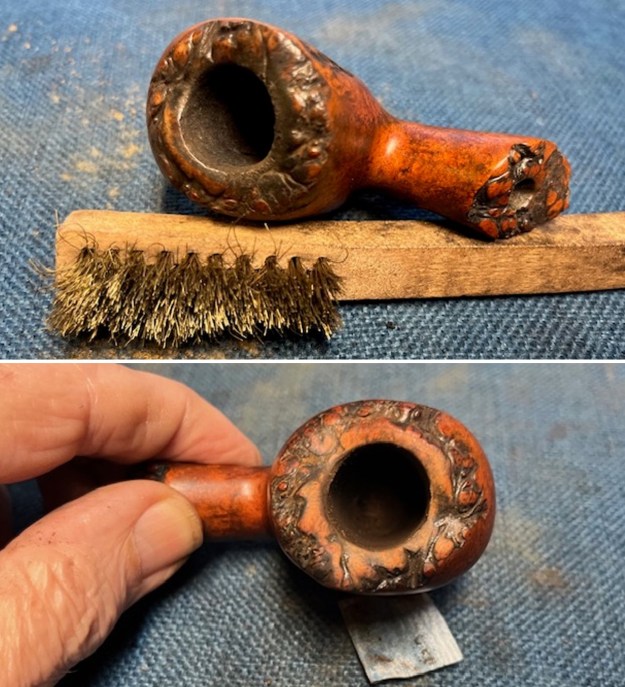
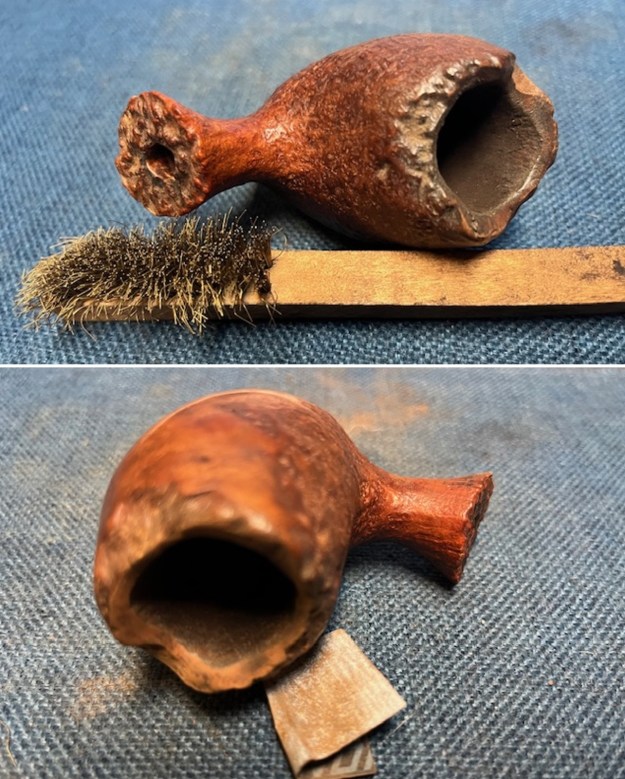
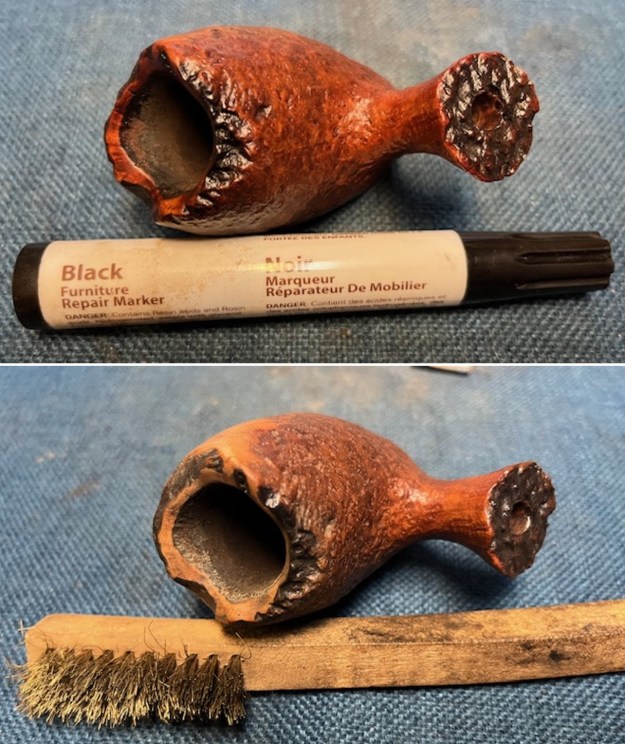
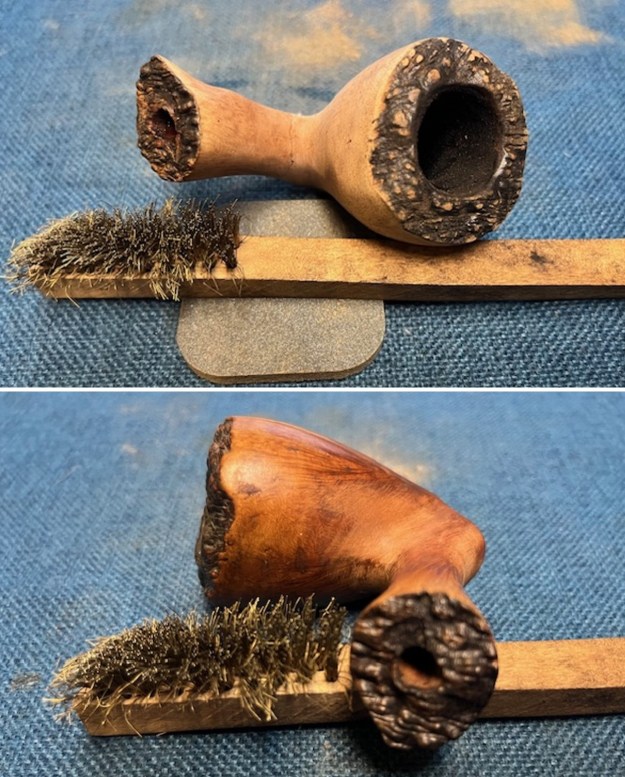
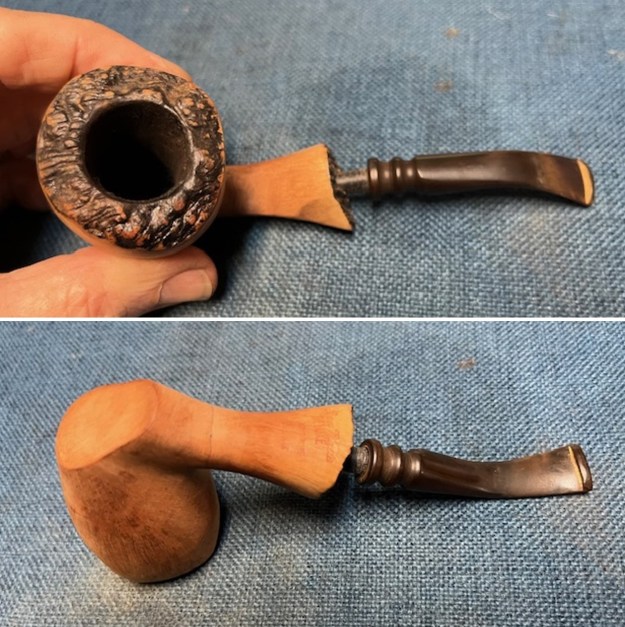
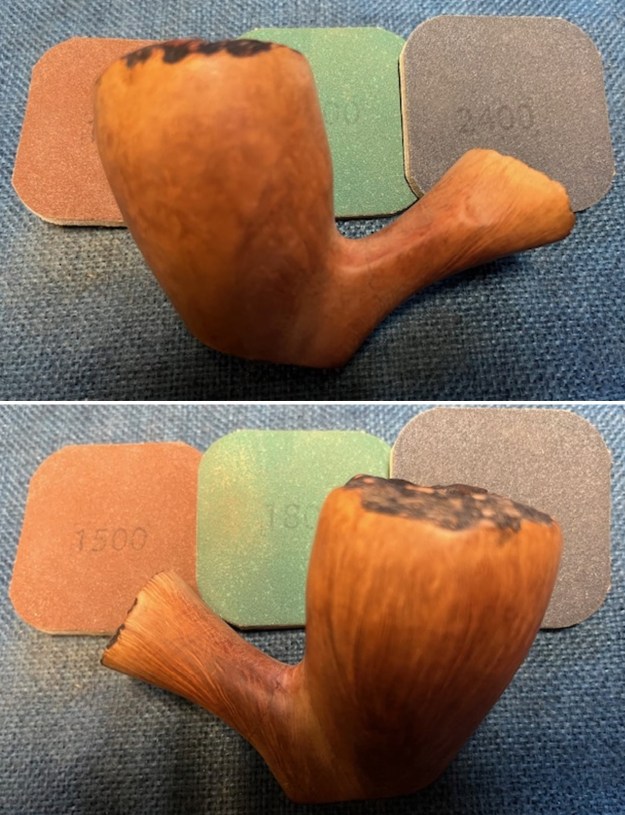
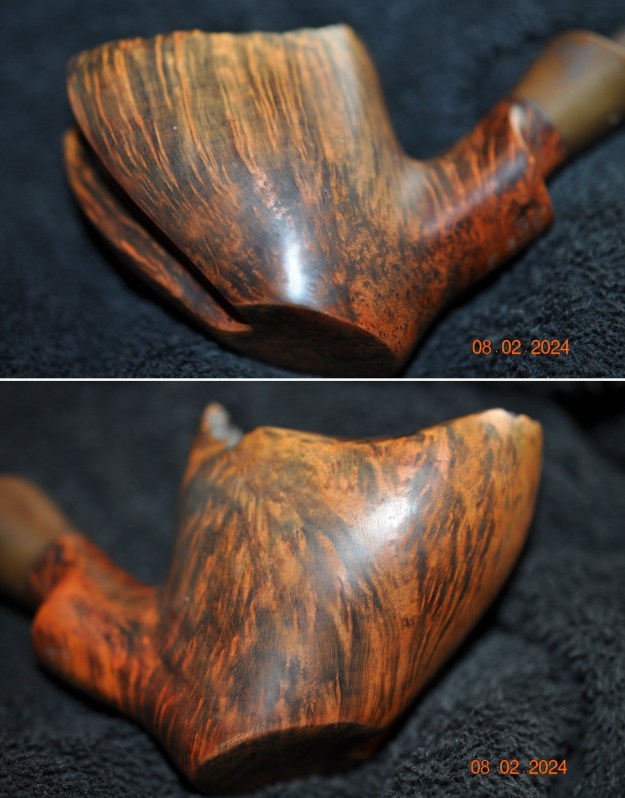
 I used a brass bristle wire brush to work over the sandblast rim top and edges. The inner edge and the top looked to be undamaged.
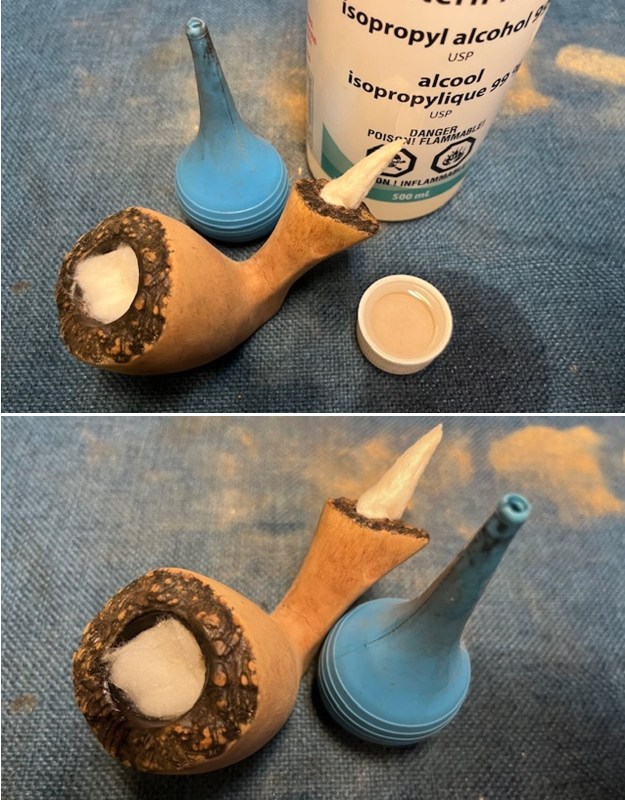
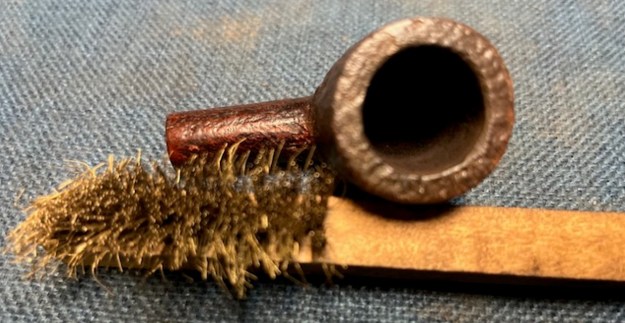 I used alcohol, cotton swabs and pipe cleaners to clean out the internals of the shank and the new stem. Once finished the pipe smelled as clean as it looked.
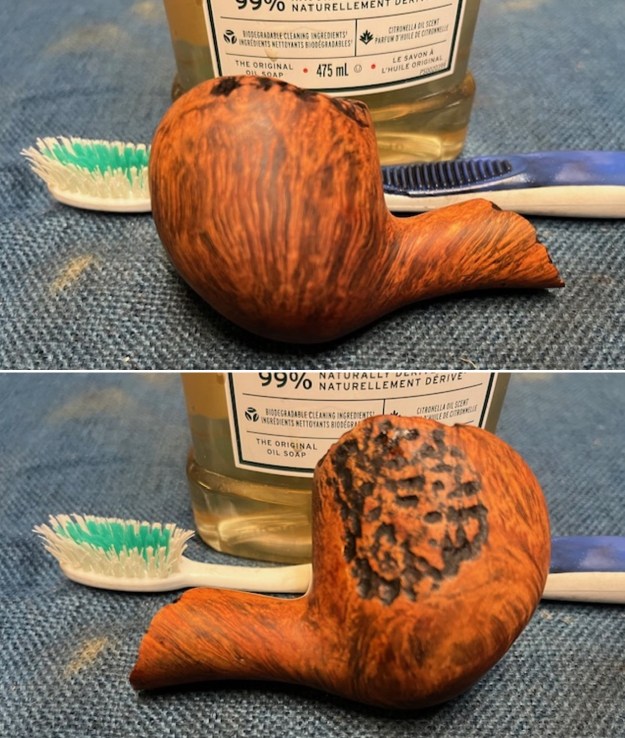
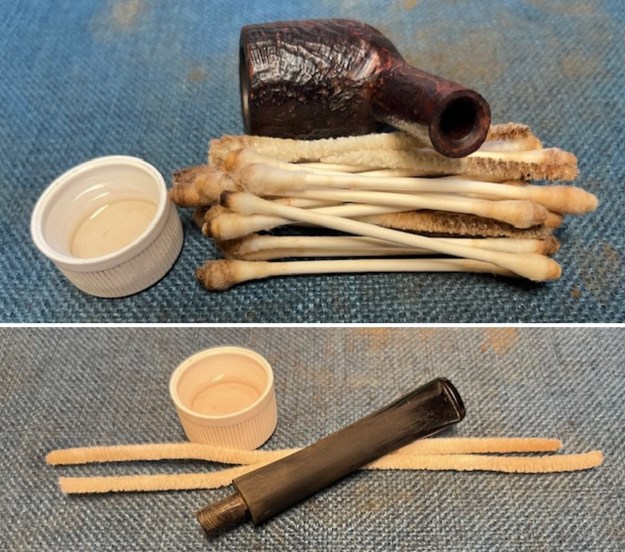 I scrubbed the bowl with a tooth brush and undiluted Murphy’s Oil Soap to remove the debris from the sandblast finish. I rinsed the bowl off with warm running water and dried it with a soft towel. It looked much better at this point.
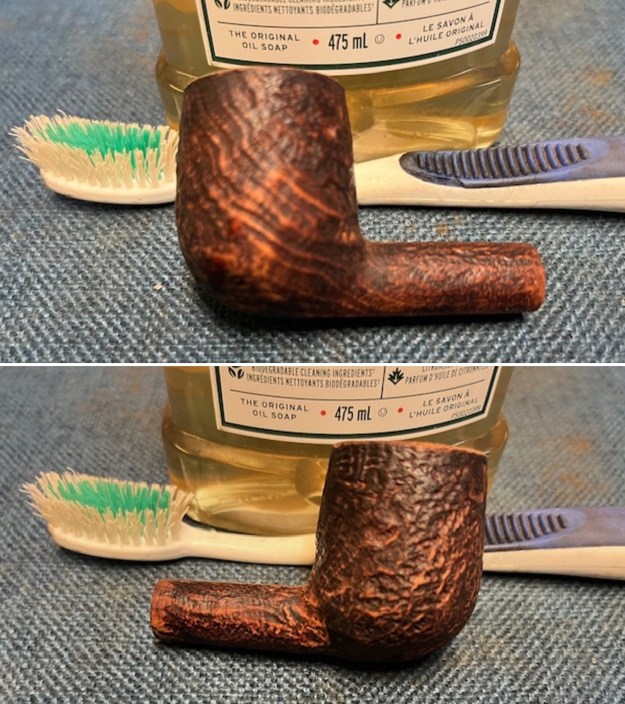
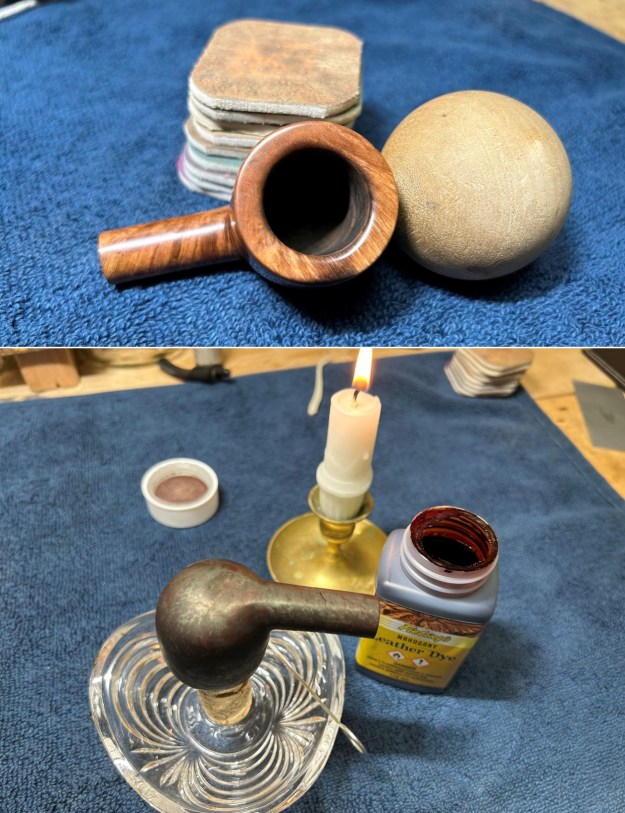
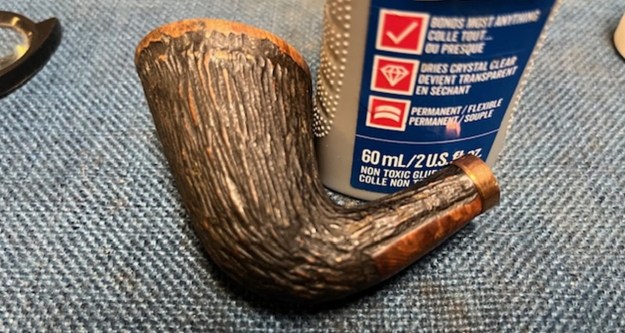
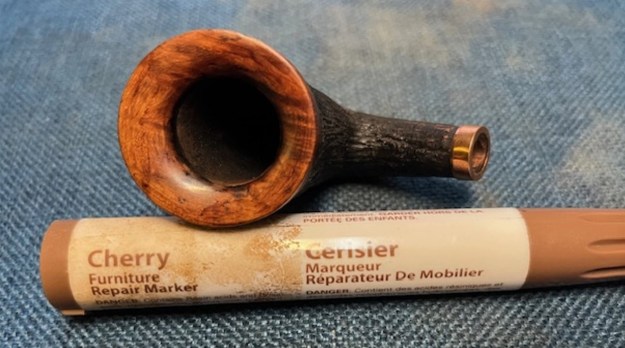
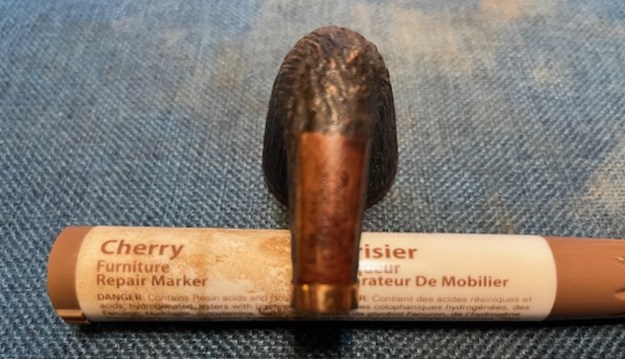
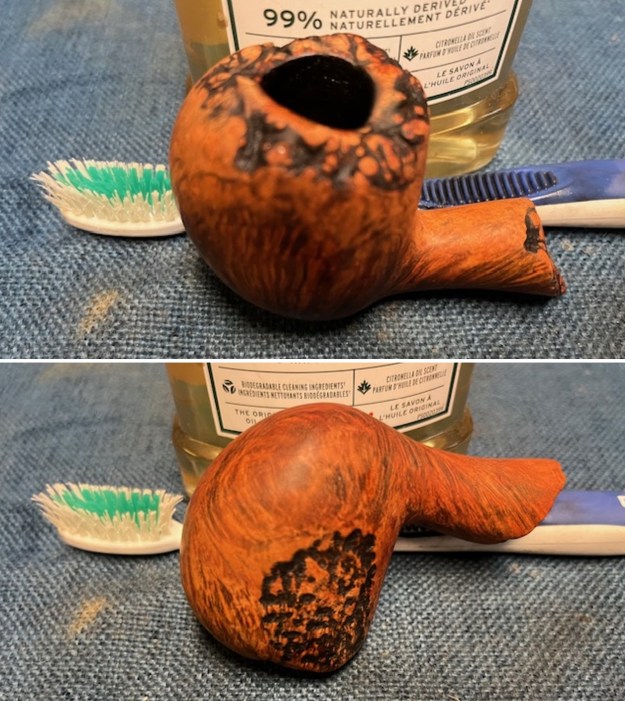
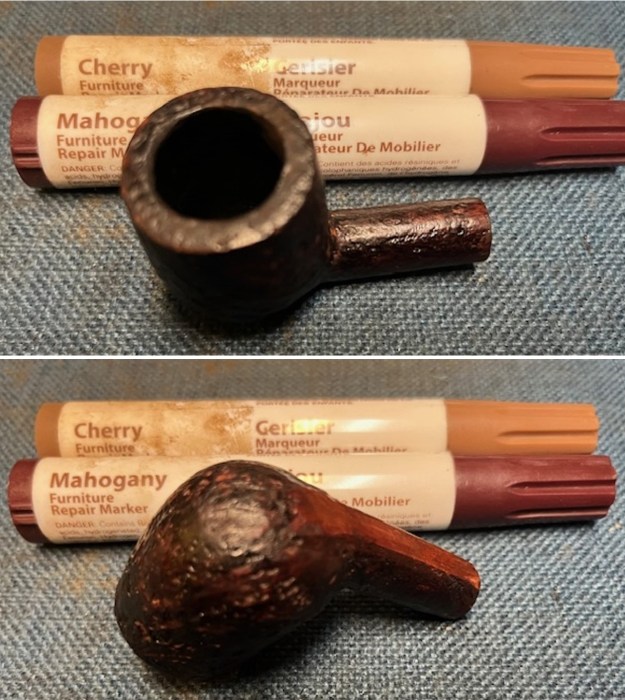
 I restained the faded spots on the bowl sides and heel with a Mahogany and a Cherry stain pen to blend the colours into the sandblast finish. It looked much better at this point.
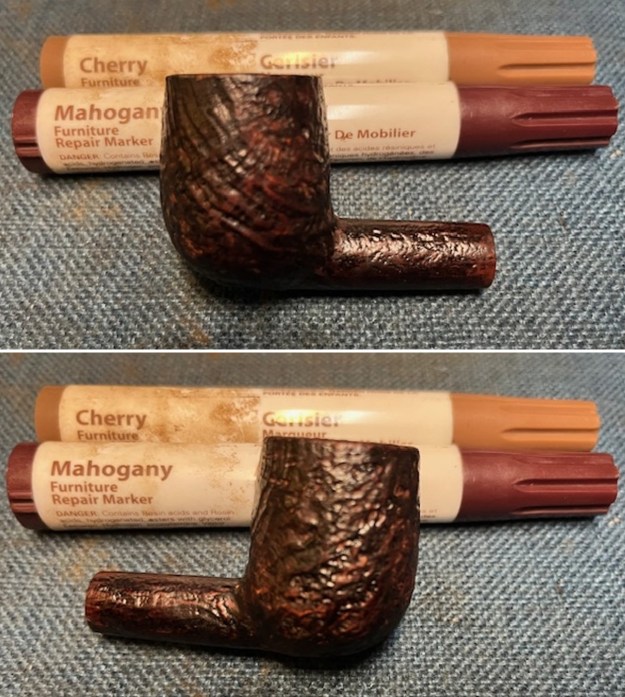
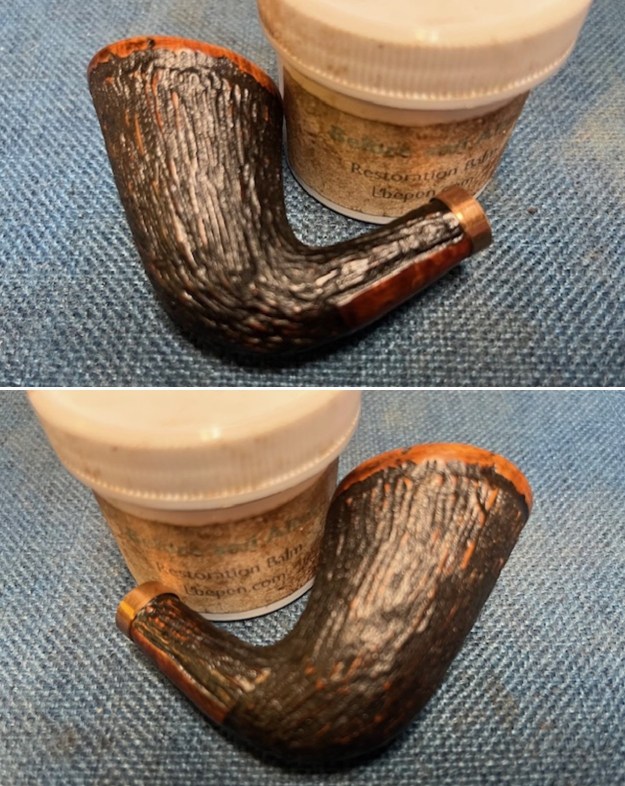
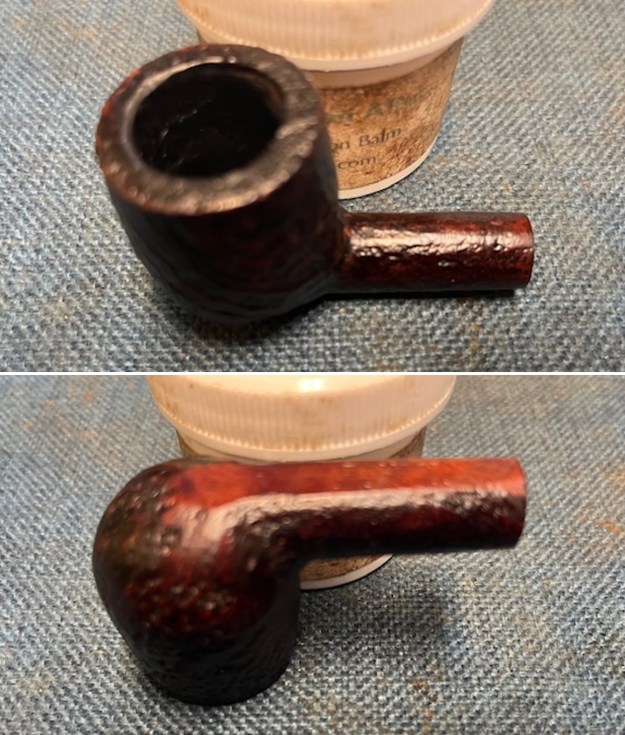
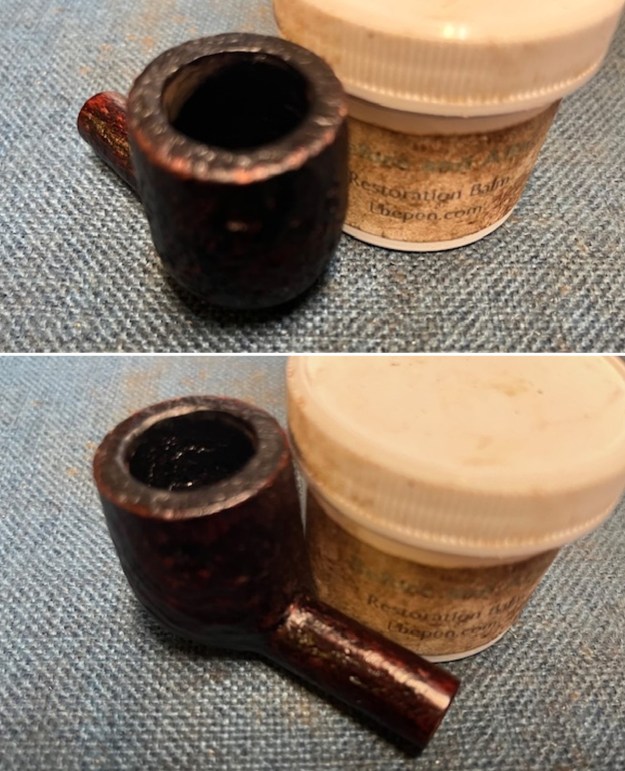
 I rubbed down the briar Before & After Restoration Balm. I worked it into the surface with my fingertips. I used a shoe brush to work the balm into crevices of the sandblast. The product works to clean, enliven and preserve the briar. I let it sit for 15 minutes then I buffed it with a cotton cloth to deepen the shine. The briar really comes alive with the balm.
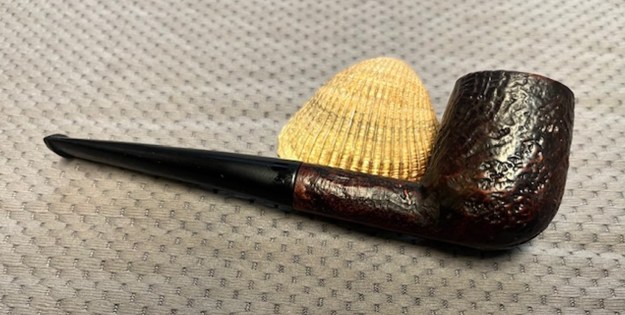
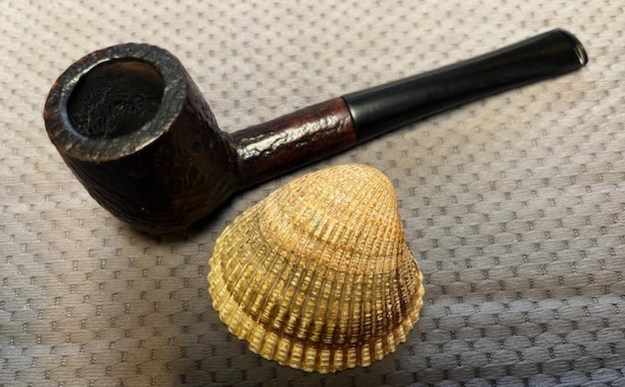
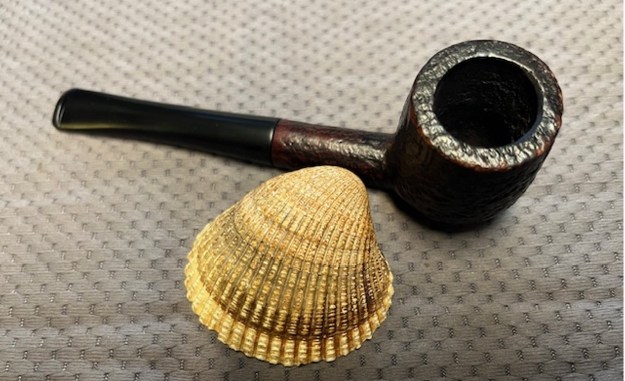
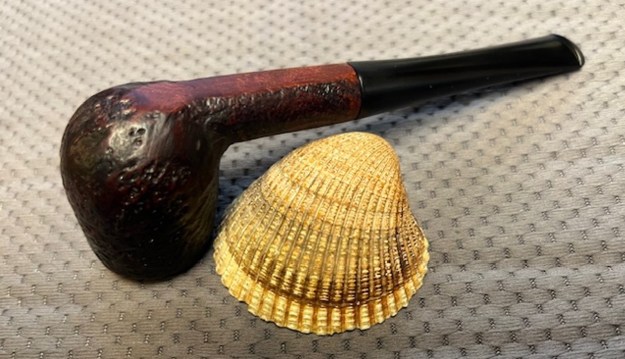
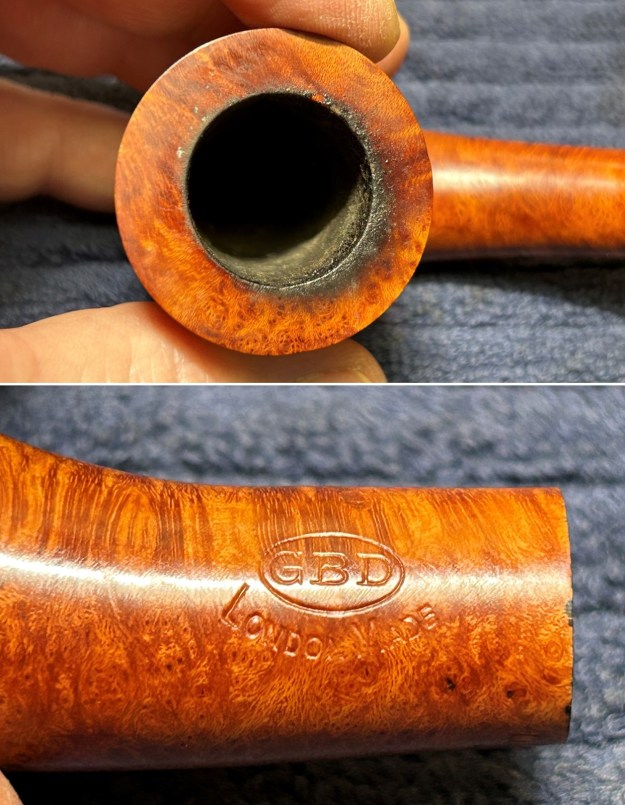
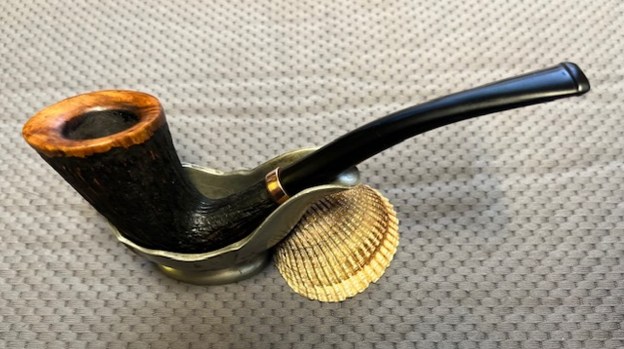
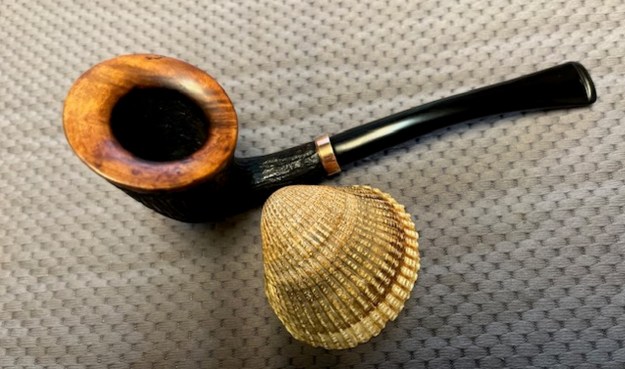
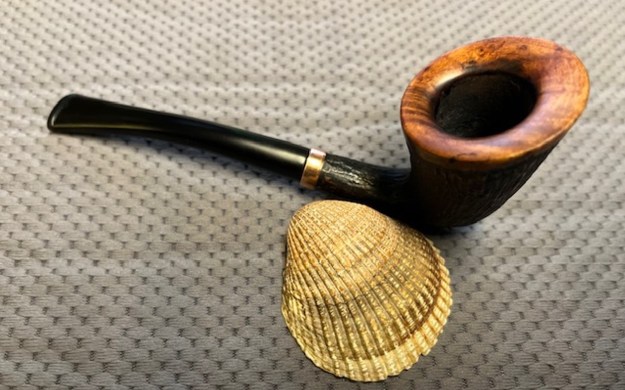
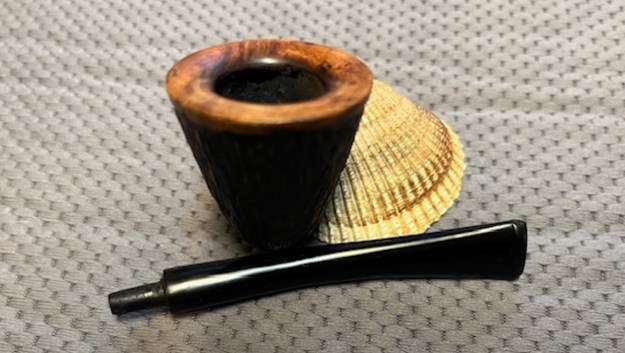
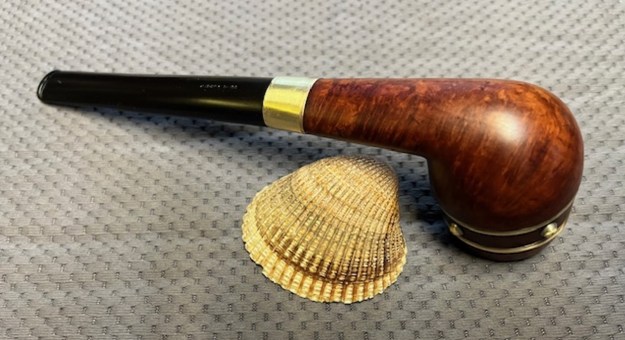
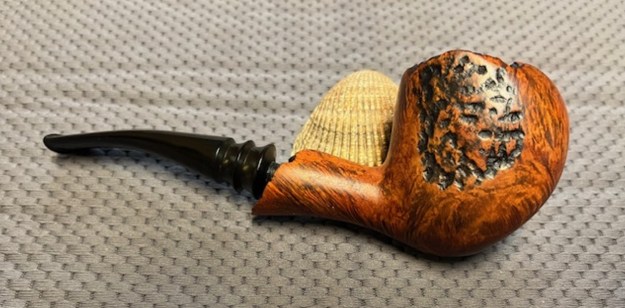
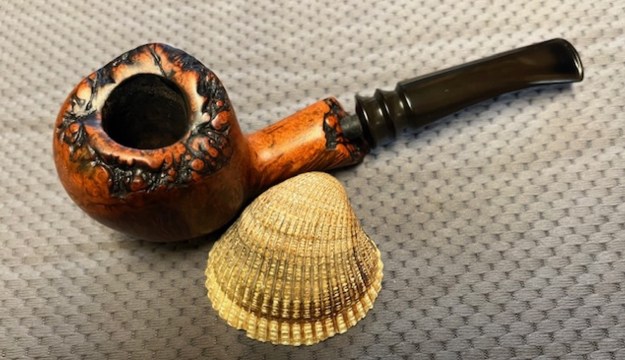
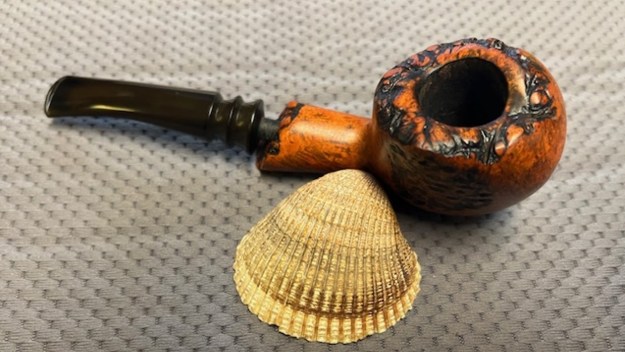
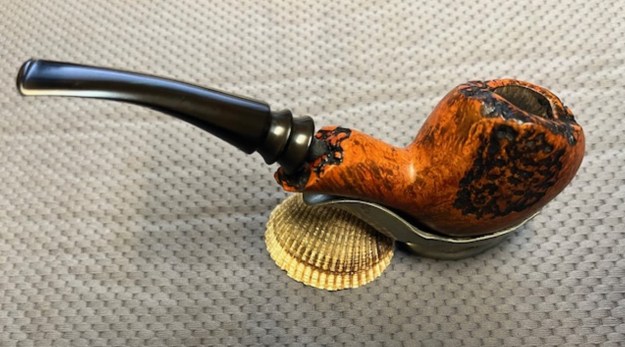
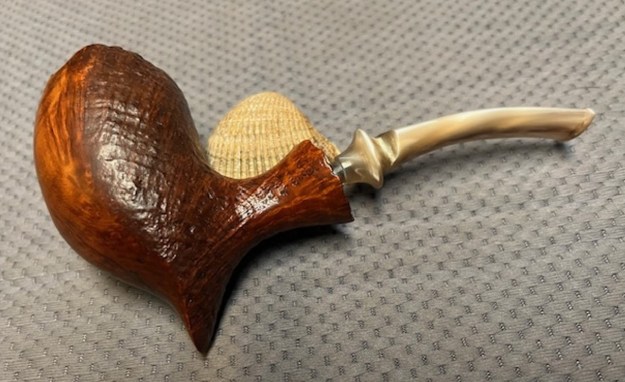
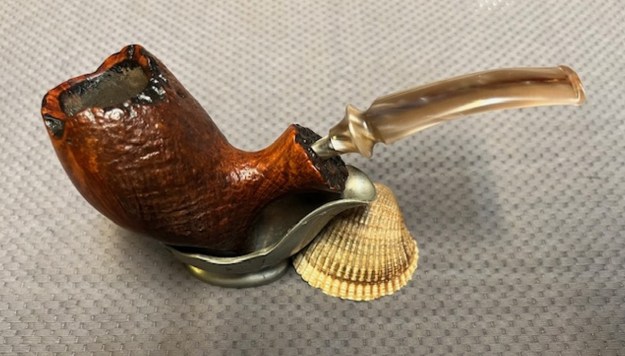
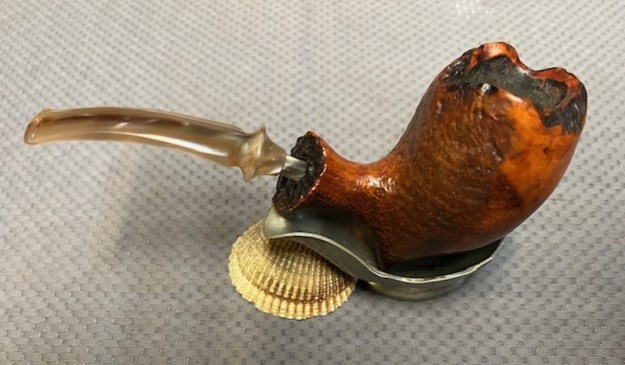
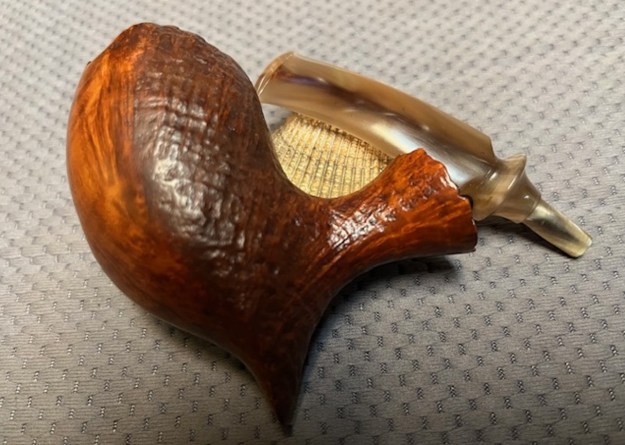
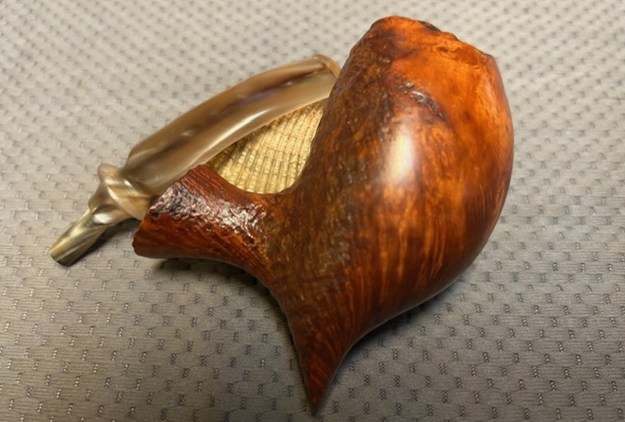
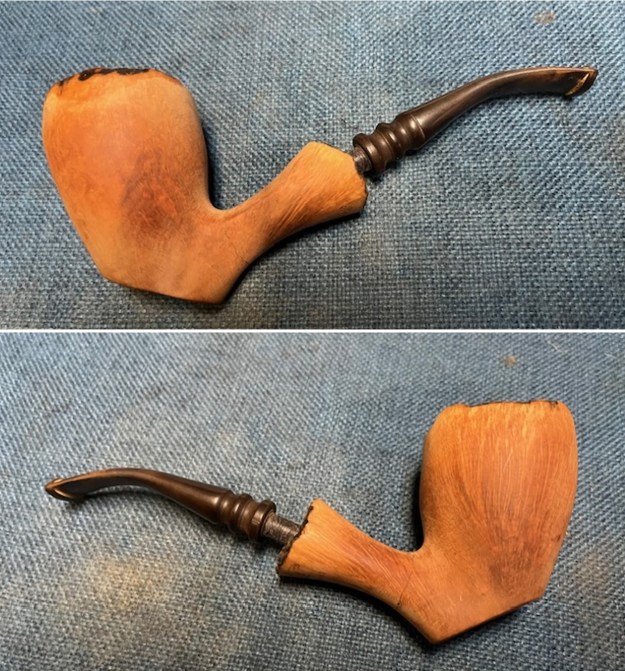
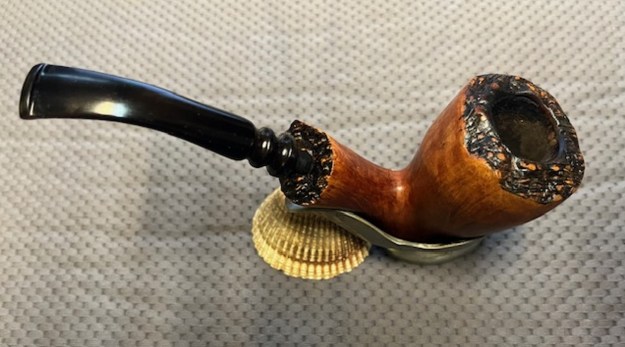
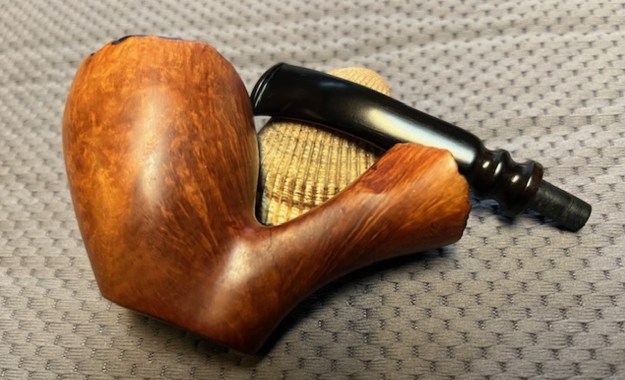
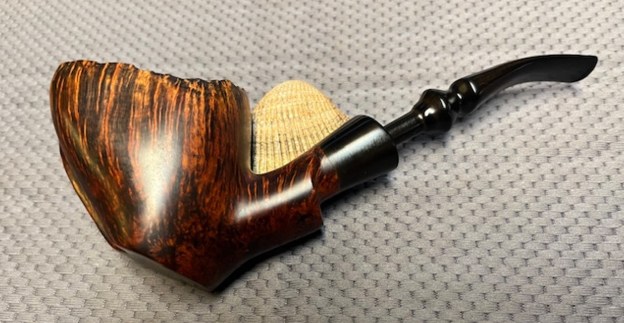
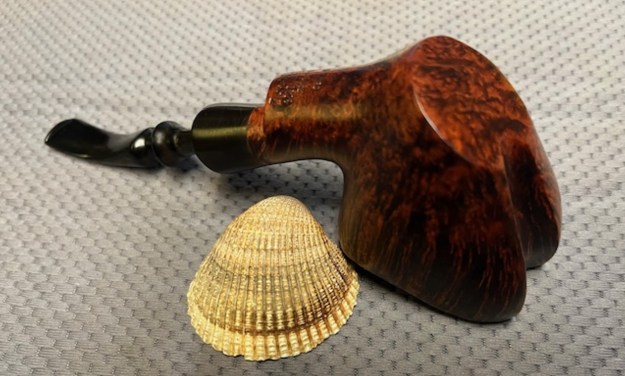
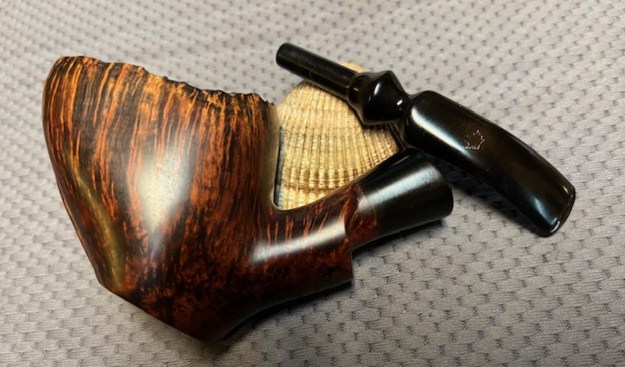
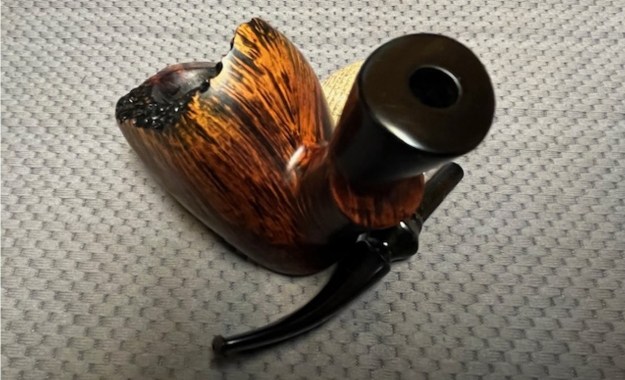
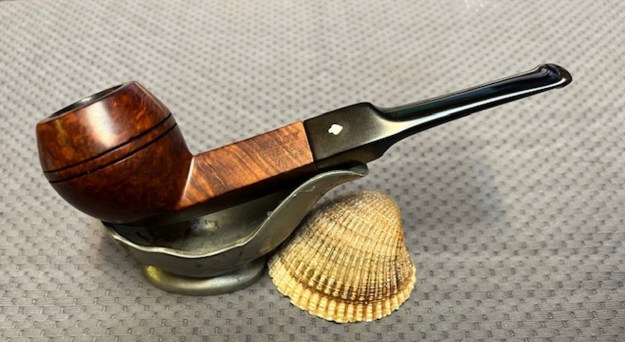
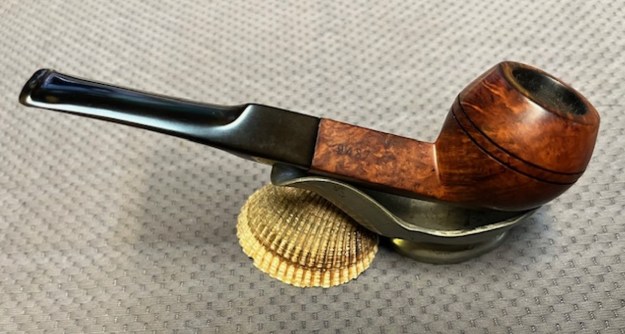
 This is another pipe that I am really happy about the finished restoration. This reborn Sandy 2 London Made Sandblast Billiard turned out really well. I used a vulcanite stem I had here to fit the pipe with a new stem. After restemming I think that it really is a great looking pipe with a great shape and grain. The bowl is a classic English Billiard that looks excellent with the new vulcanite stem. The polished black of the stem works well with the briar. The briar really came alive with the buffing. The rich brown and mahogany stains of the finish make the blast really pop with the polishing and waxing. I put the stem back on the bowl and buffed the pipe with Blue Diamond on the buffing wheel. I gave the bowl and the stem multiple coats of carnauba wax on the buffing wheel. I buffed the pipe with a clean buffing pad to raise the shine. I hand buffed the pipe with a microfiber cloth to deepen the shine. The finished Sandy 2 London Made Billiard really has a unique beauty and feels great in the hand. It looks very good. Give the finished pipe a look in the photos below. The dimensions of the pipe are Length: 5 ½ inches, Height: 1 ½ inches, Outside diameter of the bowl: 1 ¼ inches, Chamber diameter: ¾ of an inch. The weight of the pipe is 28 grams/.99 ounces. The pipe will be going on the rebornpipes store soon. It will be in the British Pipemakers Section if you would like to add it to your collection. Thanks for reading this blog and my reflections on the pipe while I worked on it. It was a fun one to work on!