Tag Archives: contrast staining

Restoring the third Classic Find – a Charatan’s Make 0120 Canadian


Blog by Steve Laug

My brother and I recently purchased some pipes from an estate sale from an old pipeman named Gene in Pocatello, Idaho. There were a lot of great pipes in the lot. I have written about the pipes on a previous blog: (https://rebornpipes.com/2016/10/07/a-good-day-hunting-orchestrated-between-british-columbia-and-idaho/). I wrote of how he had stopped at an antique shop and four found prestigious finds. These included a Four Dot Sasieni Pembroke with a patent number, Pat.No. 150221/20, a Dunhill Root Briar Canadian EC 4R, a Charatan’s Make Canadian Sandblast 0121 and a Jost’s Supreme Diamond Shank bent billiard. I wrote about the restoration of the Sasieni and the Dunhill earlier in two other blogs: (https://rebornpipes.com/2016/11/05/restoring-a-classic-find-a-sasieni-four-dot-london-made-pembroke/) (https://rebornpipes.com/2016/11/06/restoring-another-classic-find-a-dunhill-4r-root-briar-canadian-ec/). The third pipe that I have chosen to restore is the sandblast Charatan’s Make 0120 Canadian.

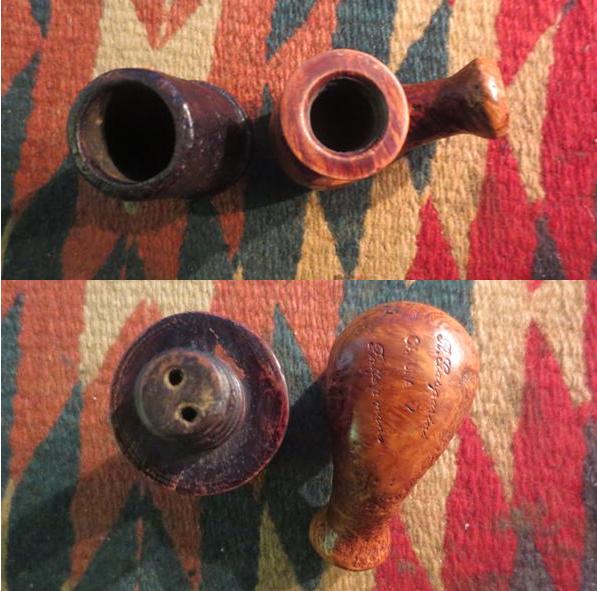
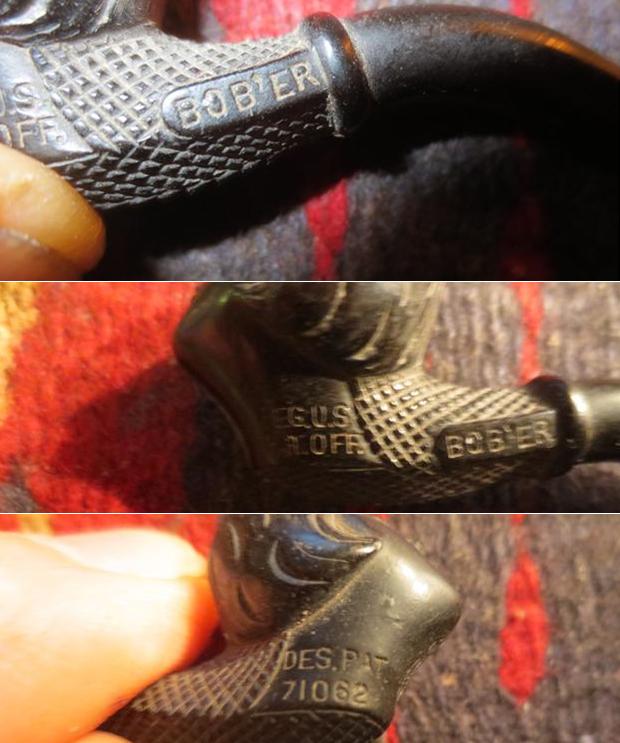
The Charatan pipe also had a replacement stem as there was no sign of a CP logo stamp on the top side. The stamping was on the smooth underside of the shank and it read Charatan’s Make and underneath it read London, England. At the end of the brand stamping was the number 0120 which is the shape number of a Canadian. I did some searching online and read the Charatan’s entry in Pipedia (https://pipedia.org/wiki/Dating_of_Charatans). I quote from there: “Pipes that belong to eras till the 1960 have the engraving ‘CHARATAN’S MAKE LONDON, ENGLAND’ in two lines, the shape code is composed by numbers only. The X and the DC appear only on pipes after 1960.

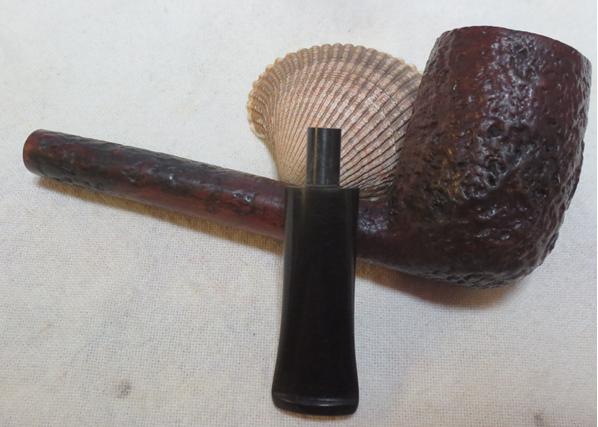
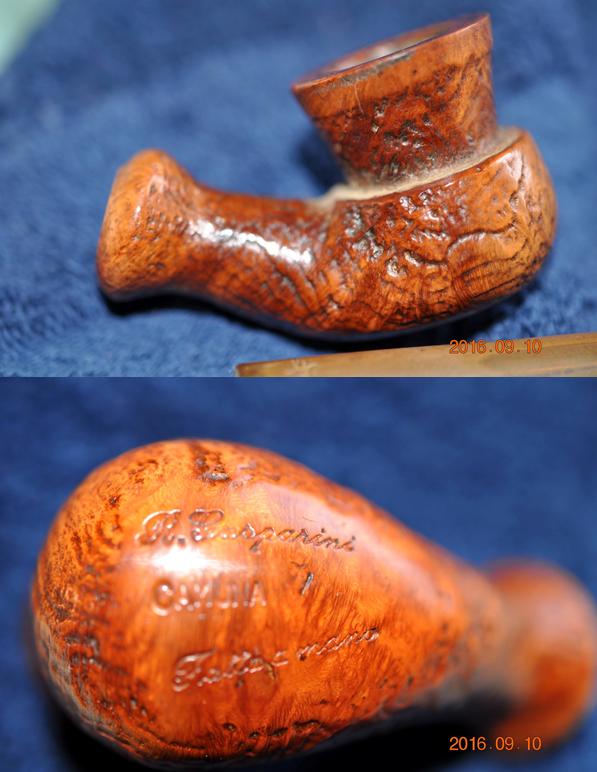
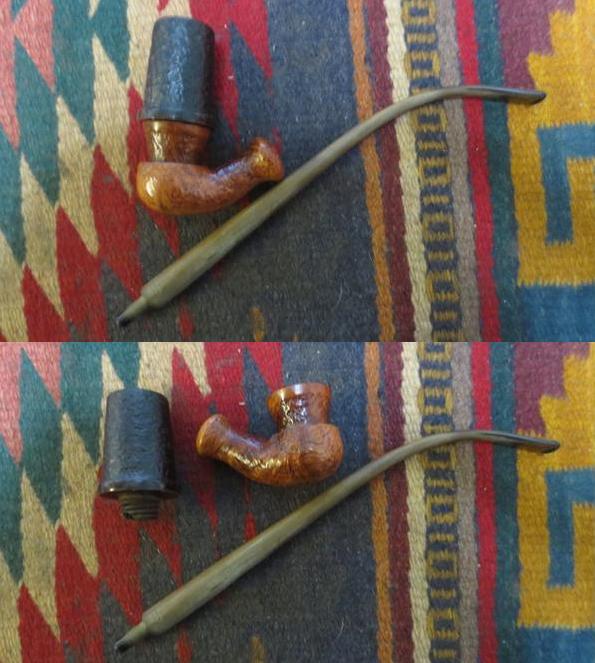
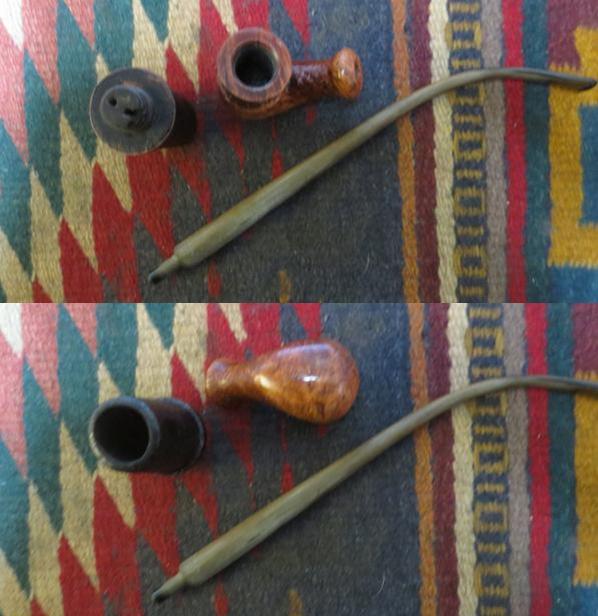
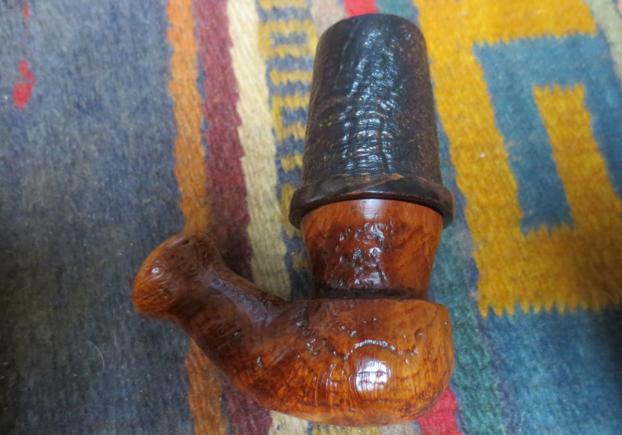
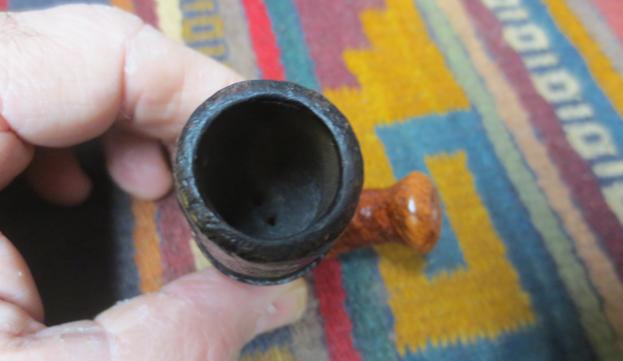
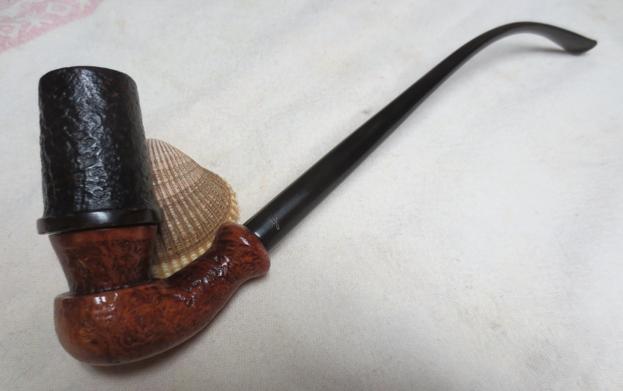
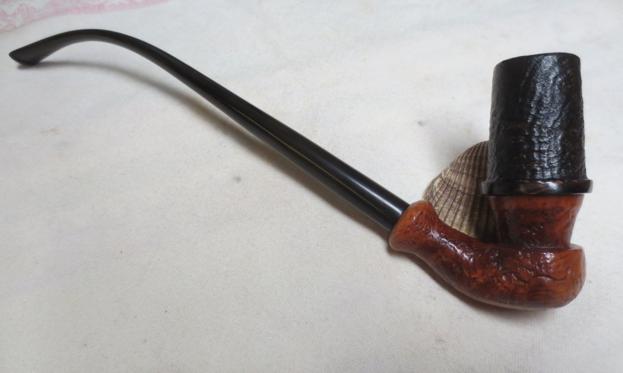
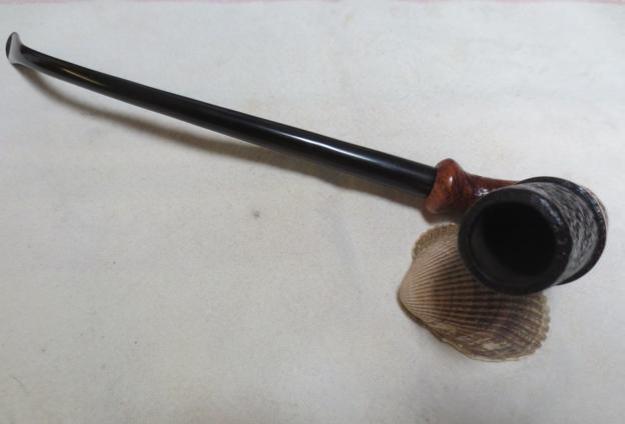
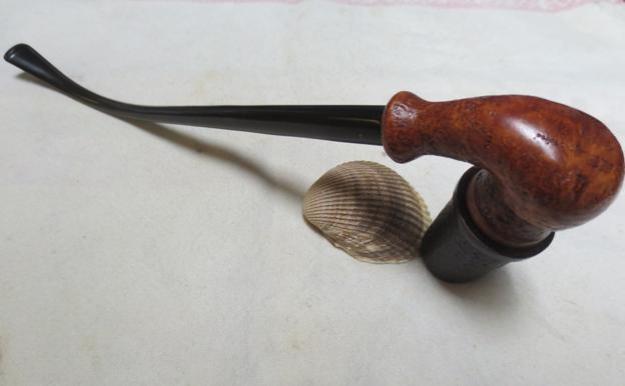
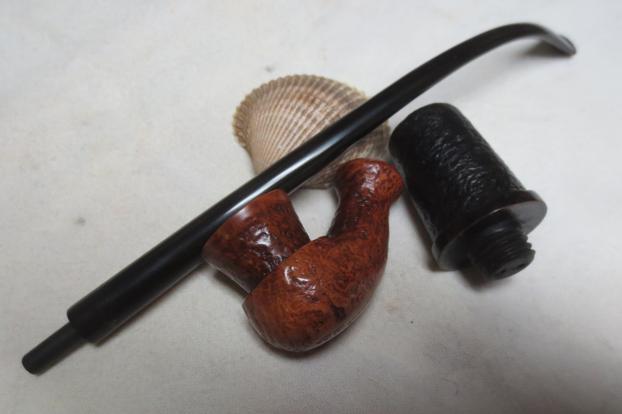
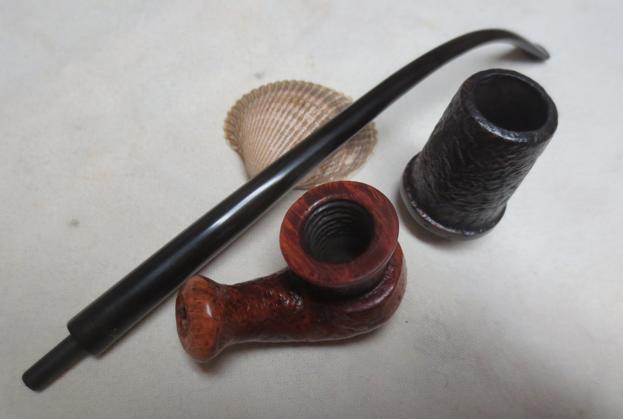
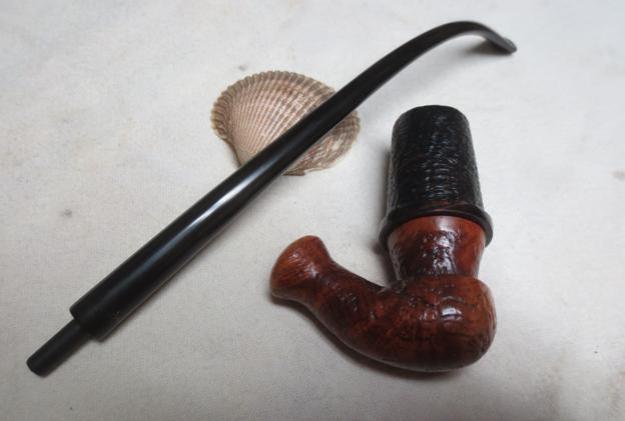
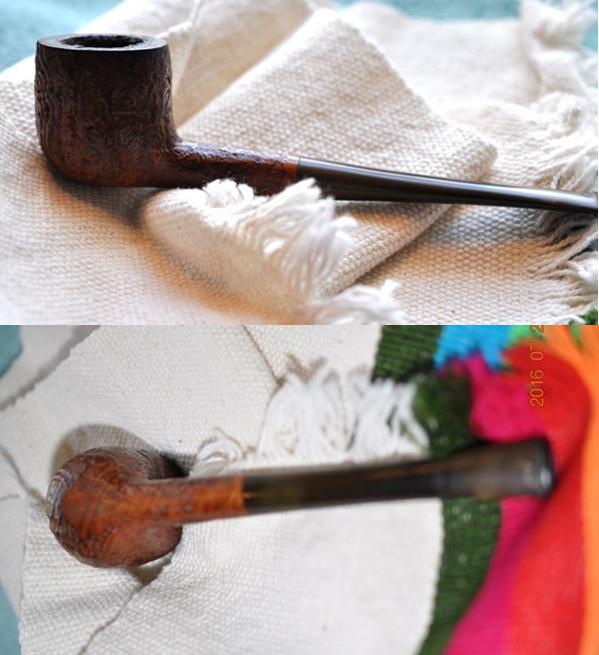
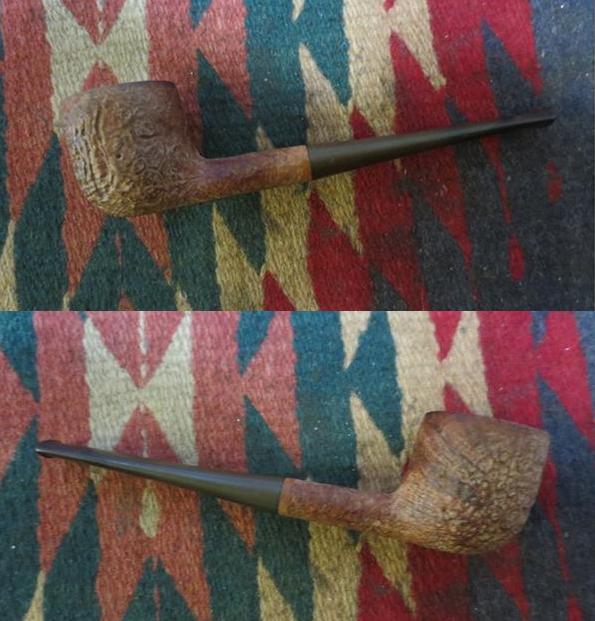
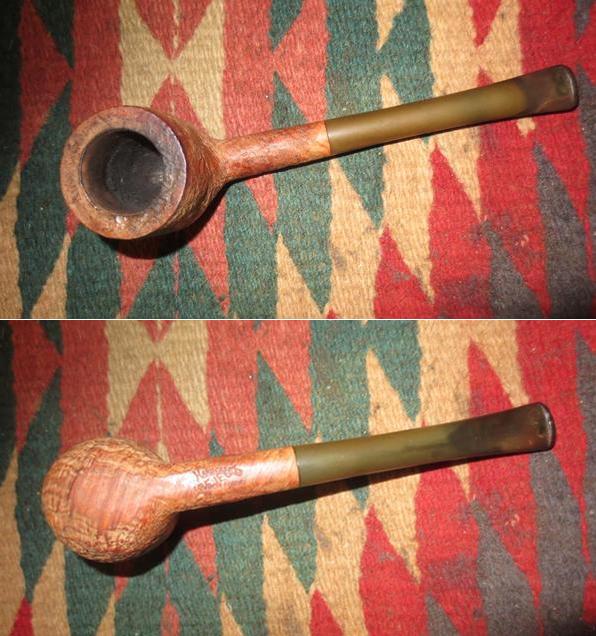
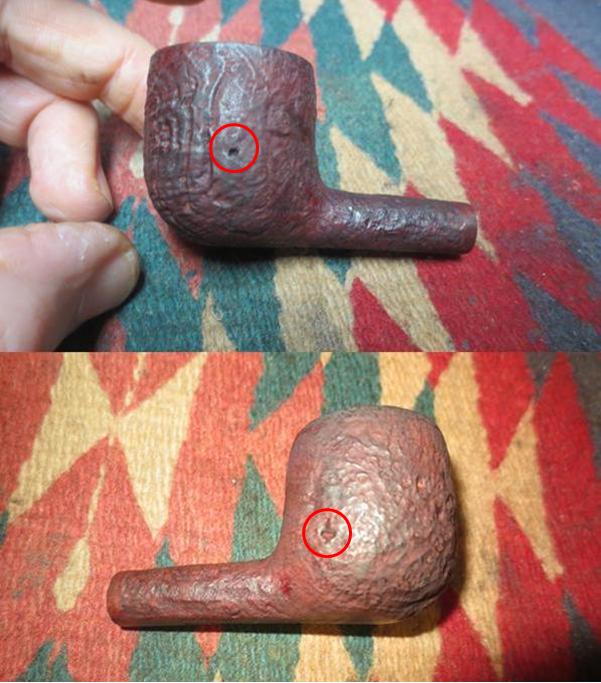
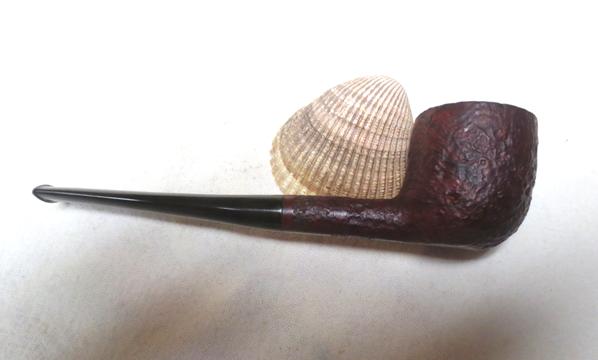
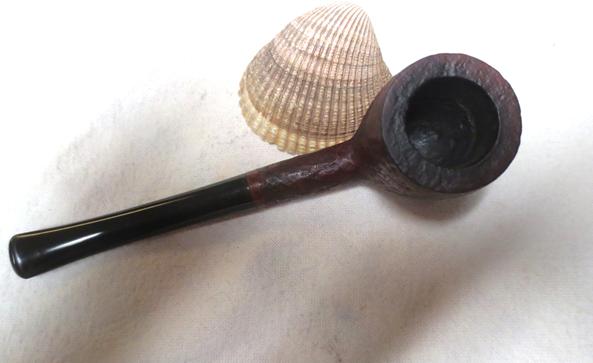
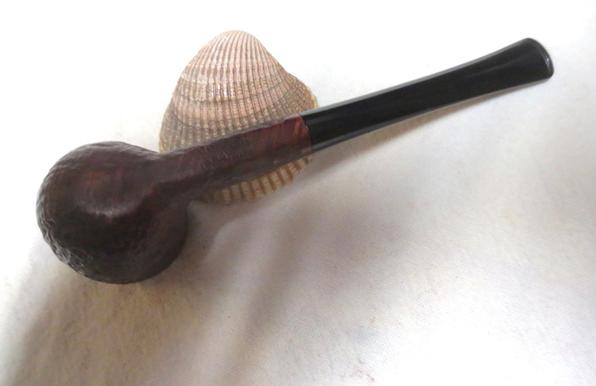
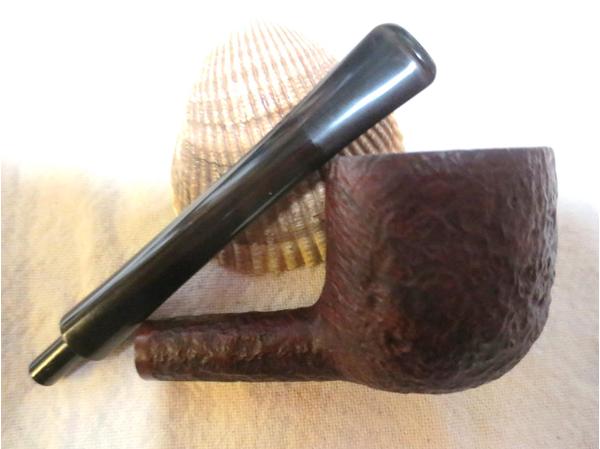
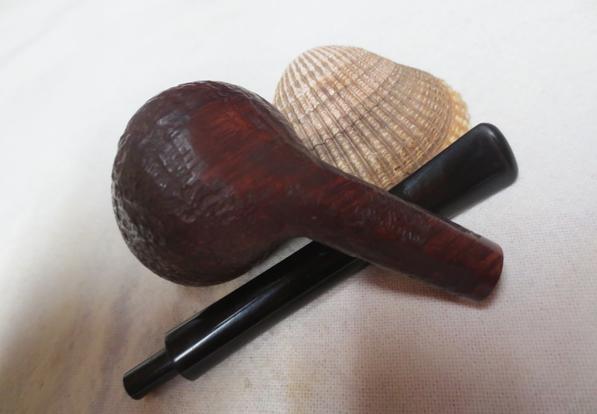
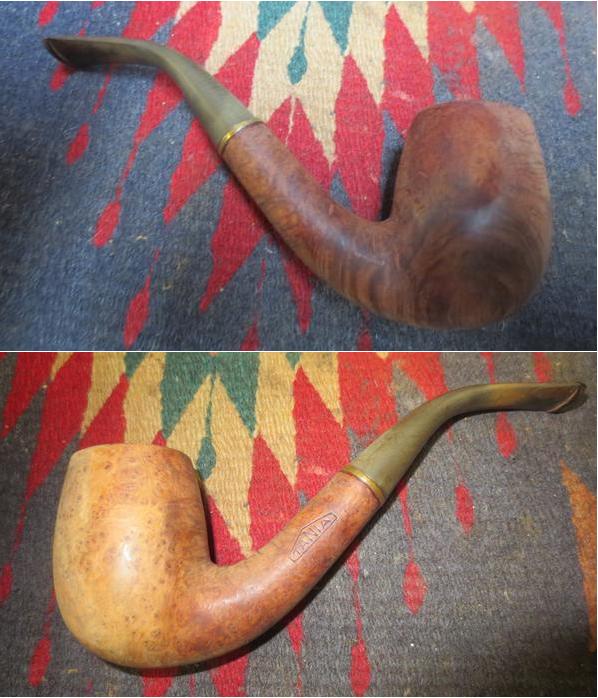
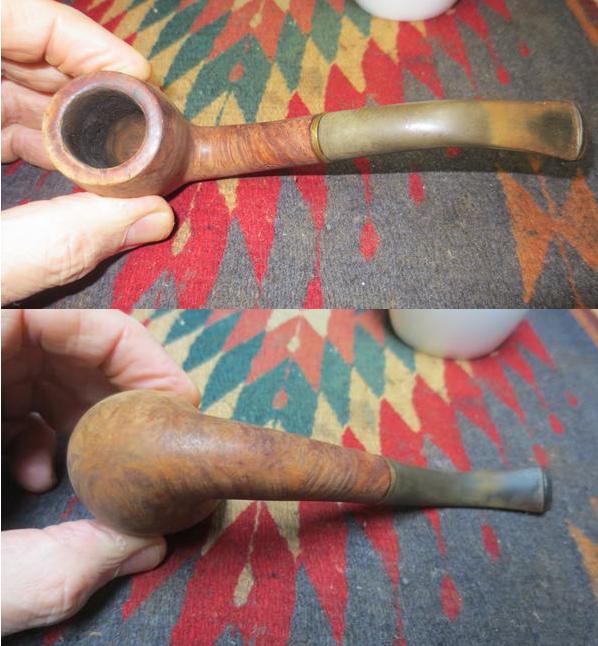
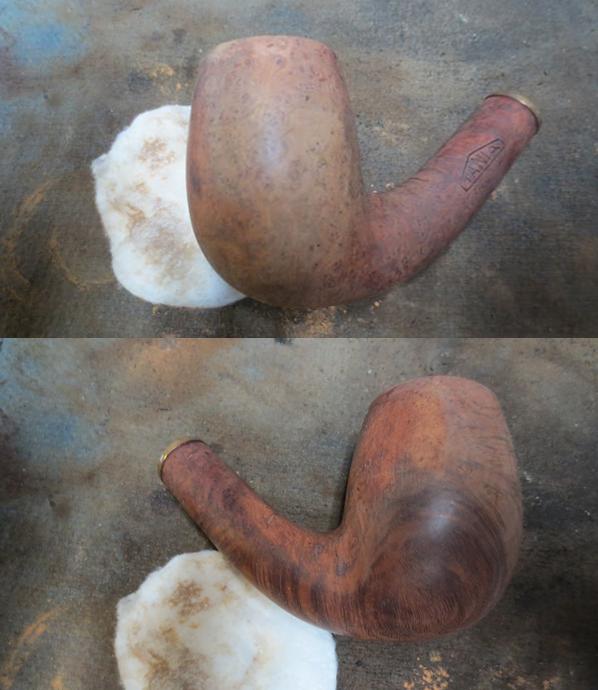
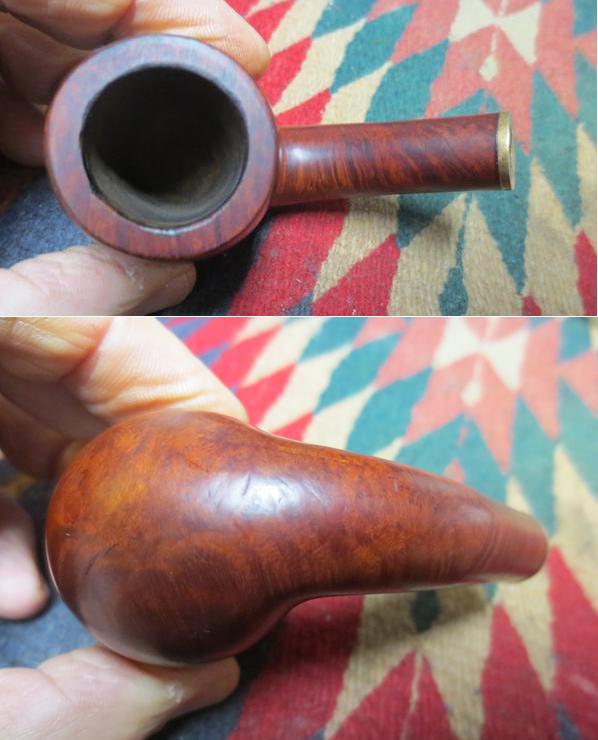
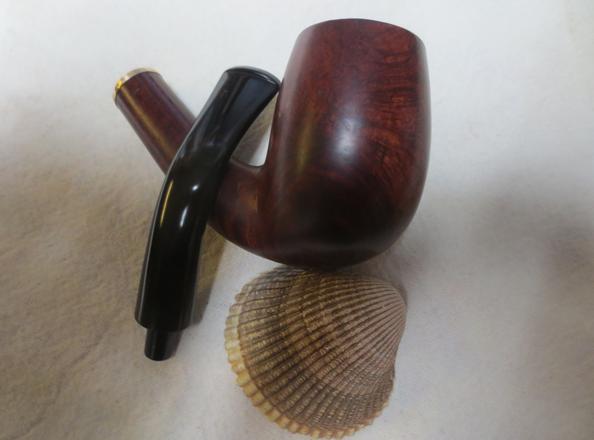
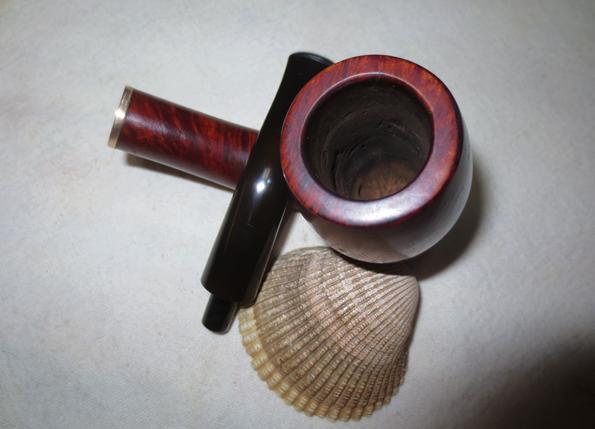
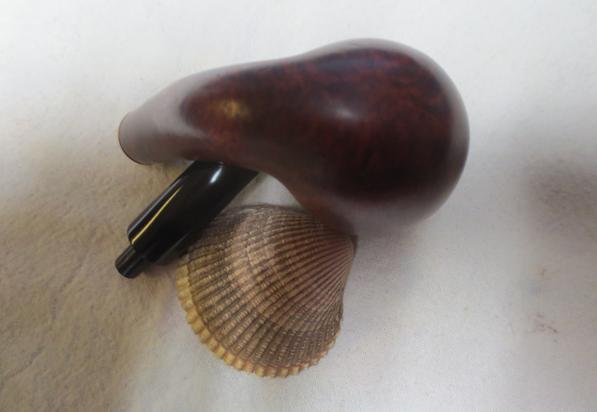
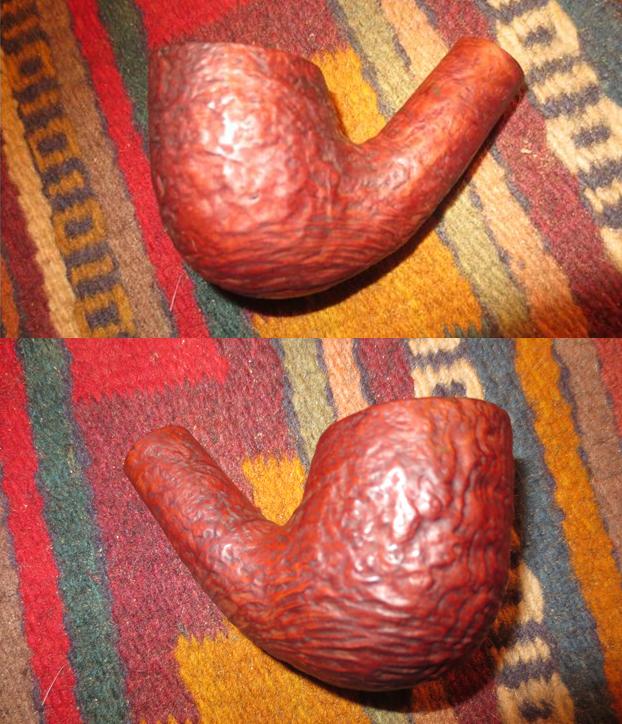
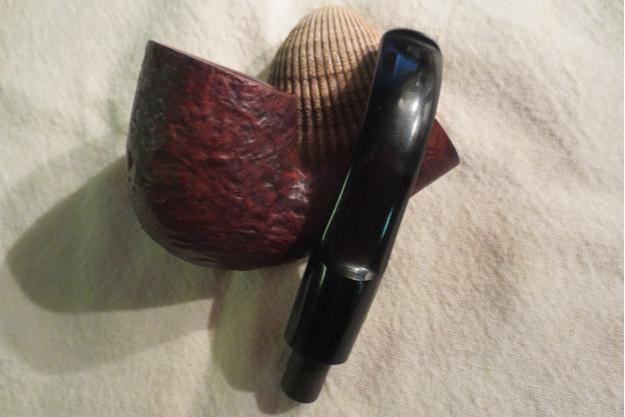
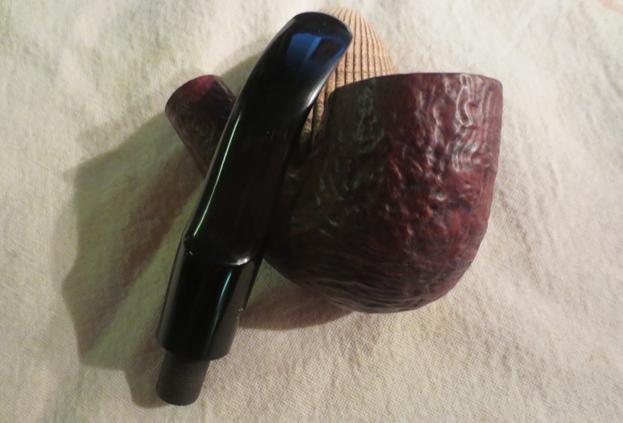
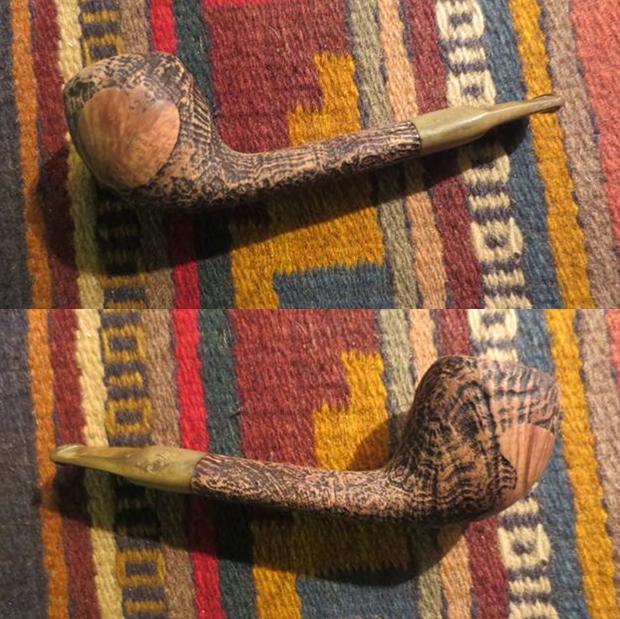
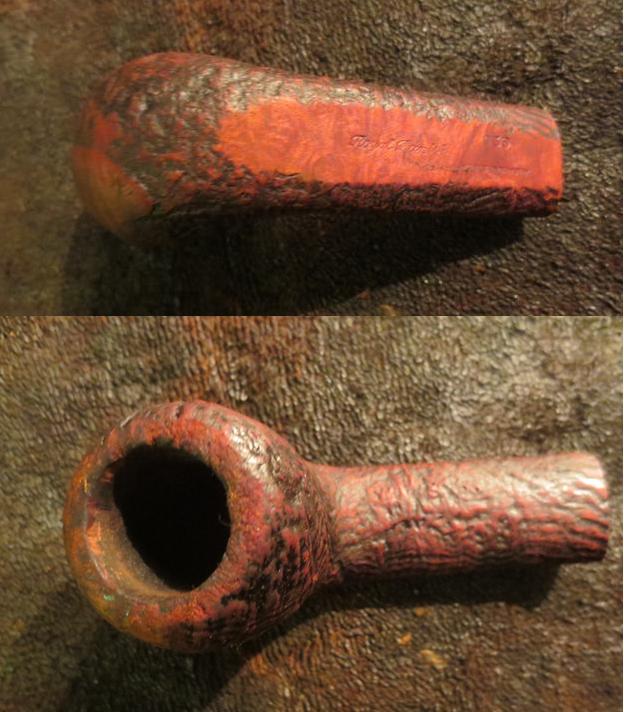
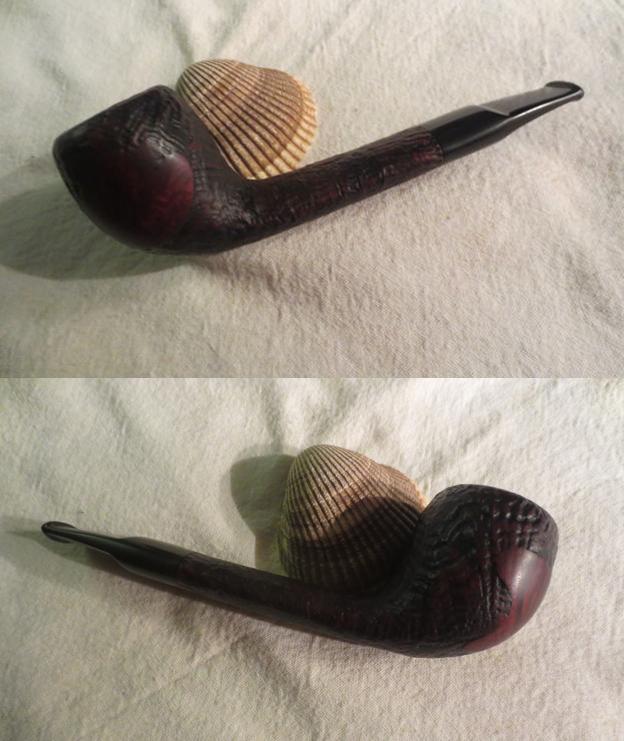
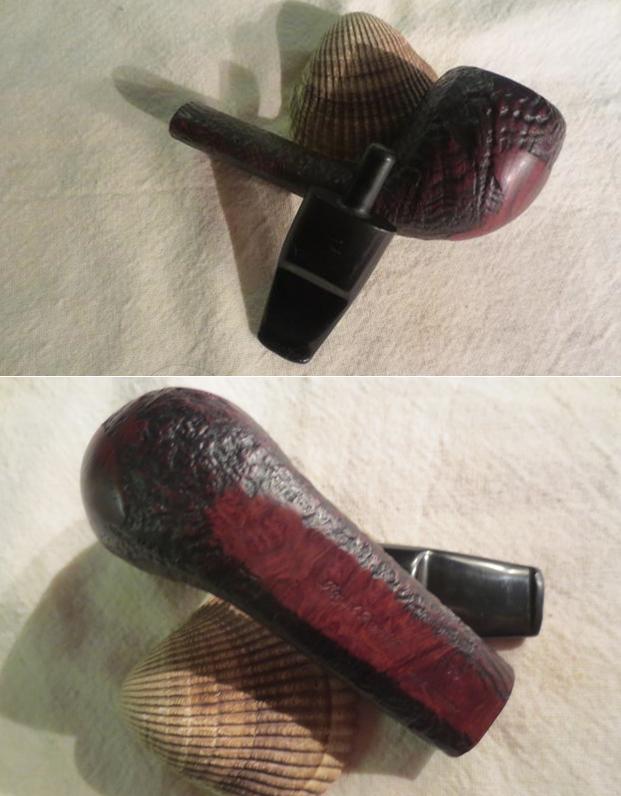
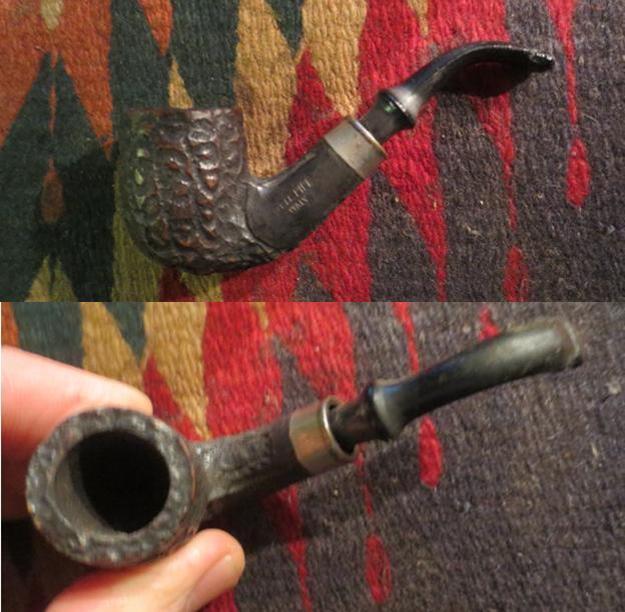
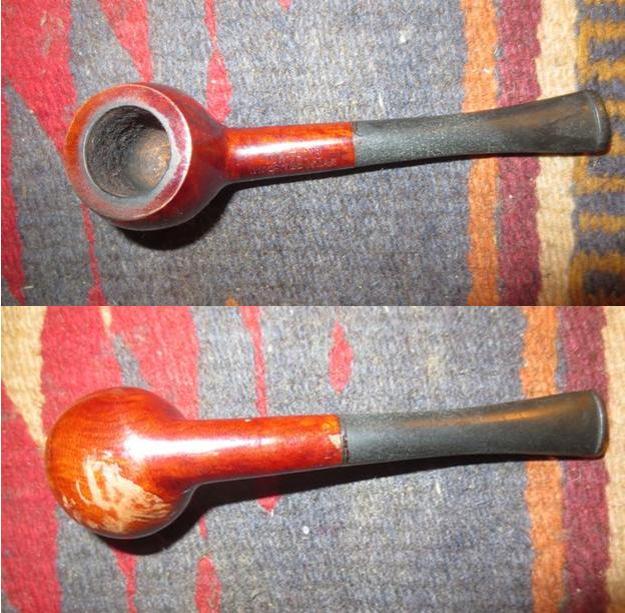
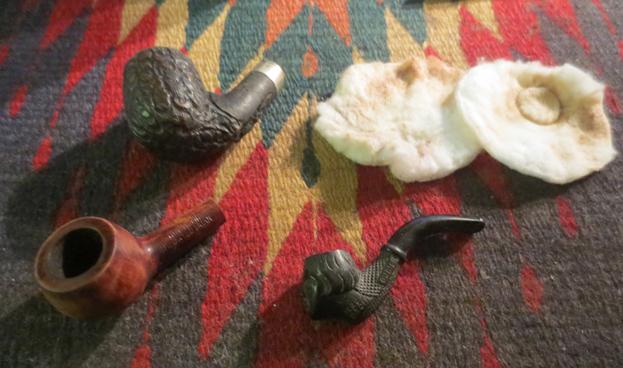
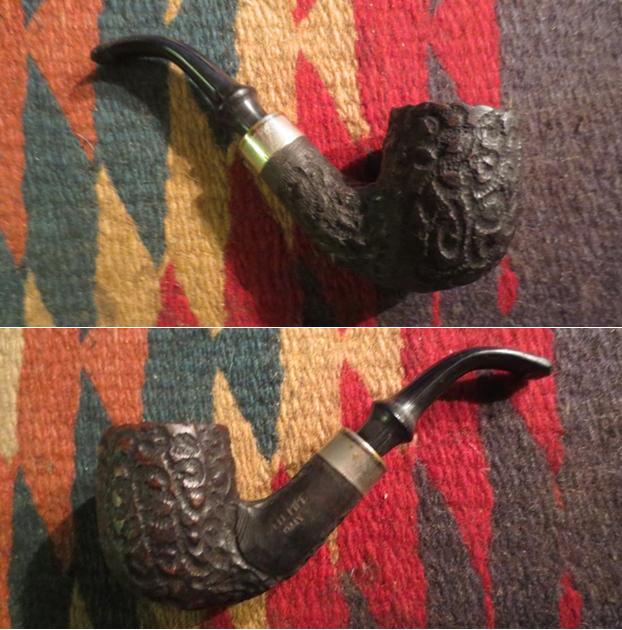
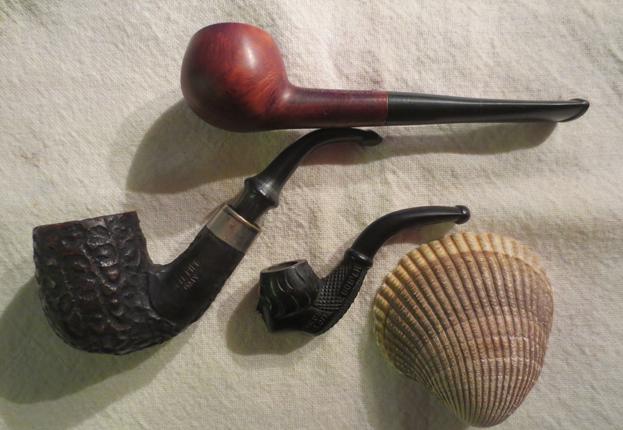
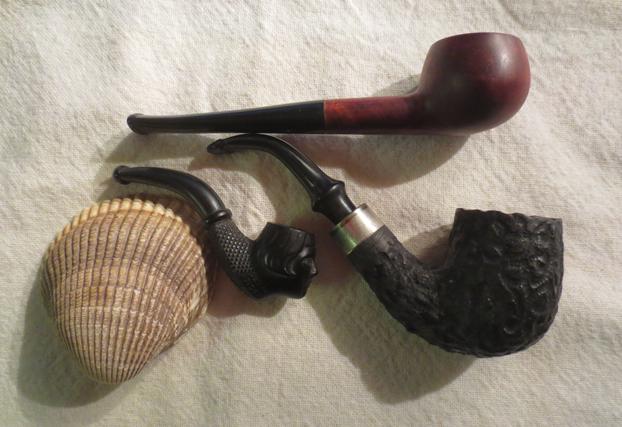
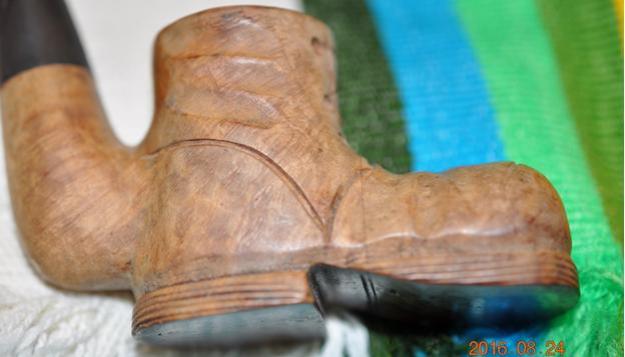
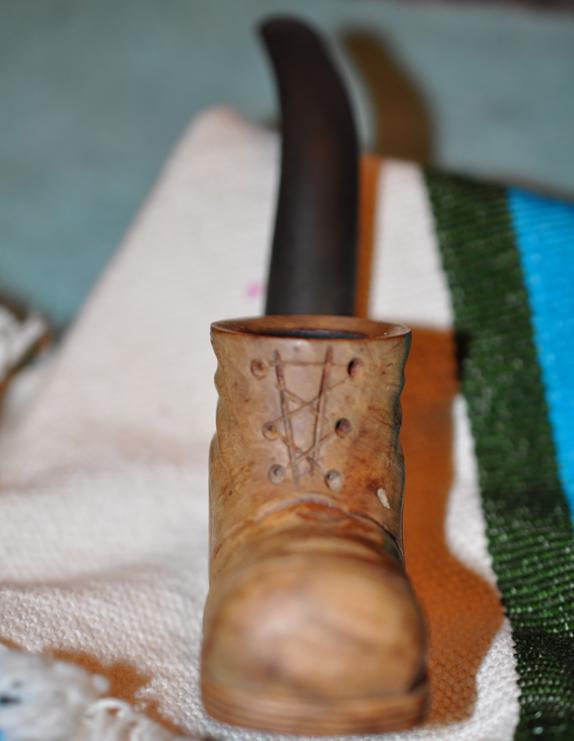
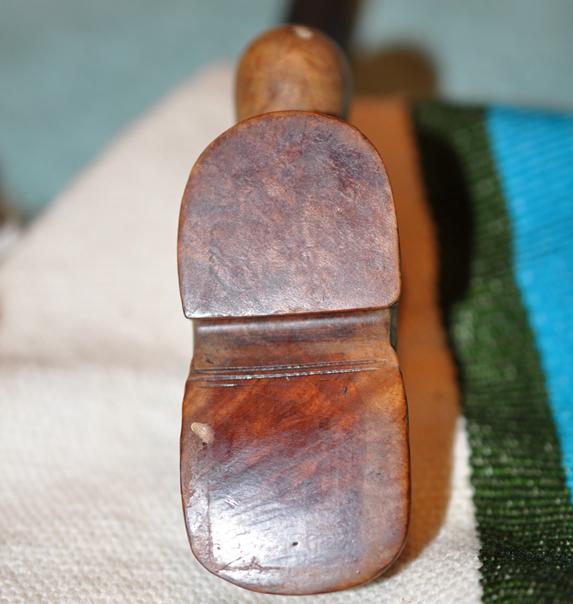
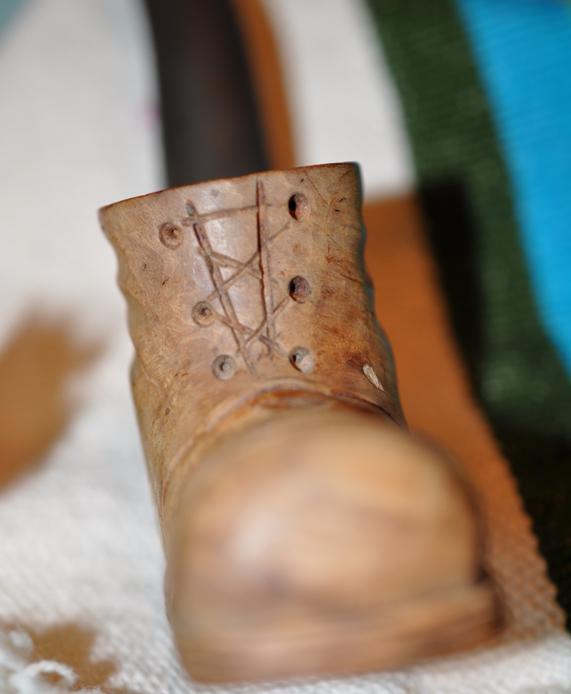
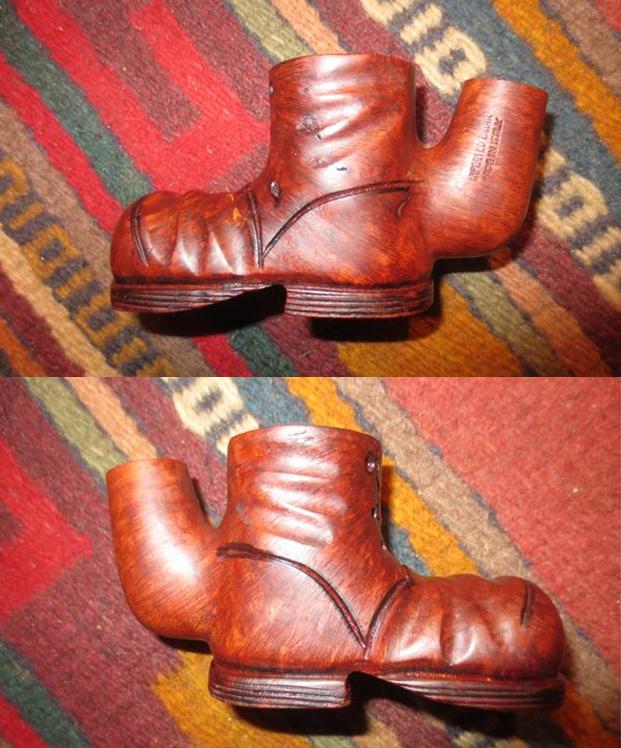
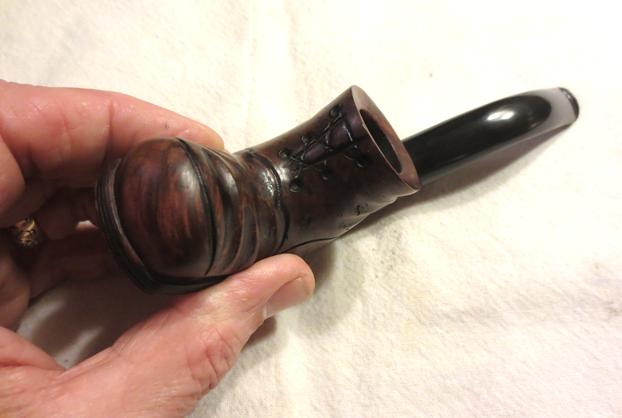
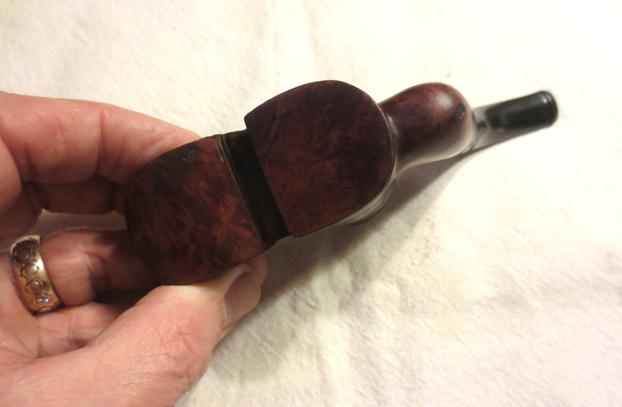
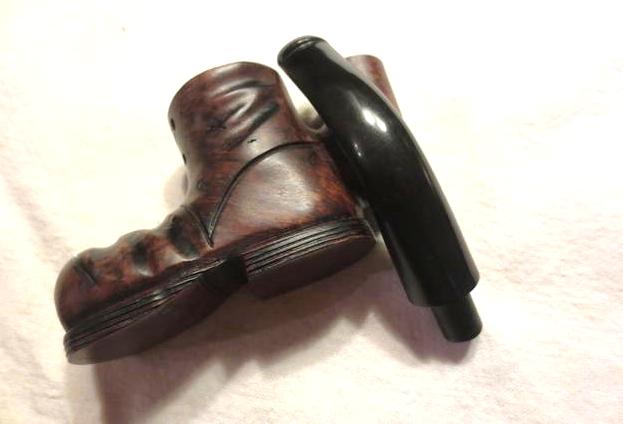
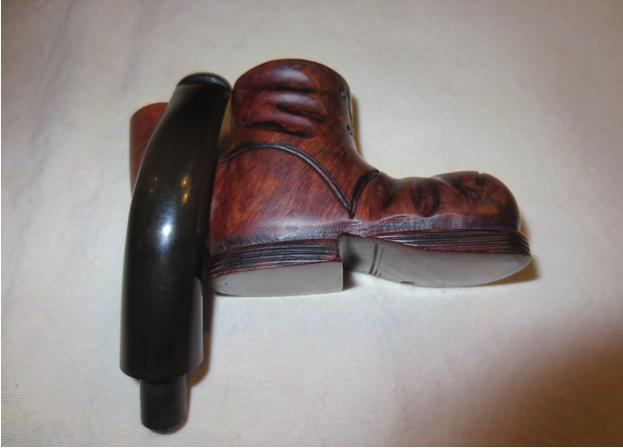
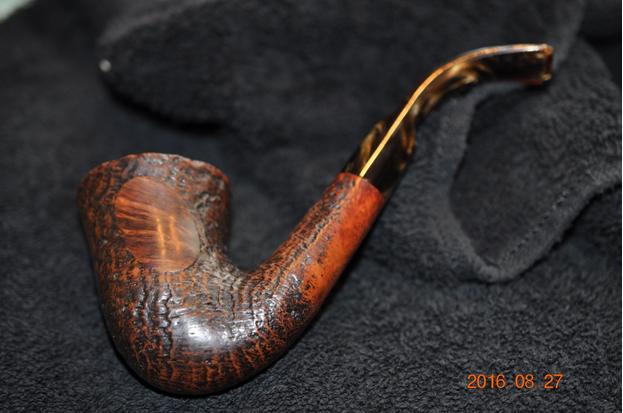
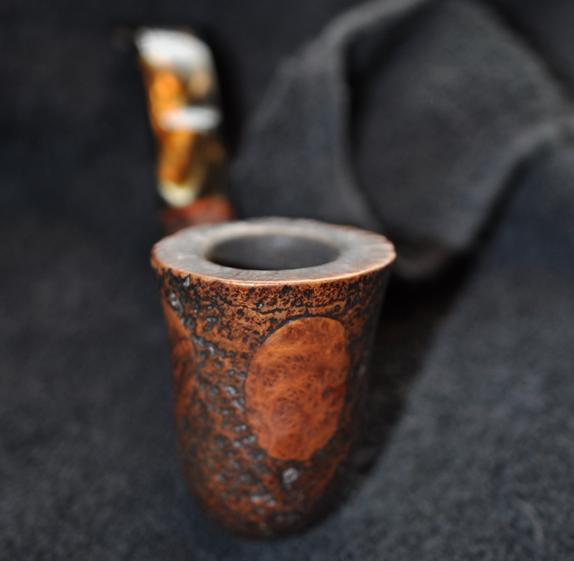
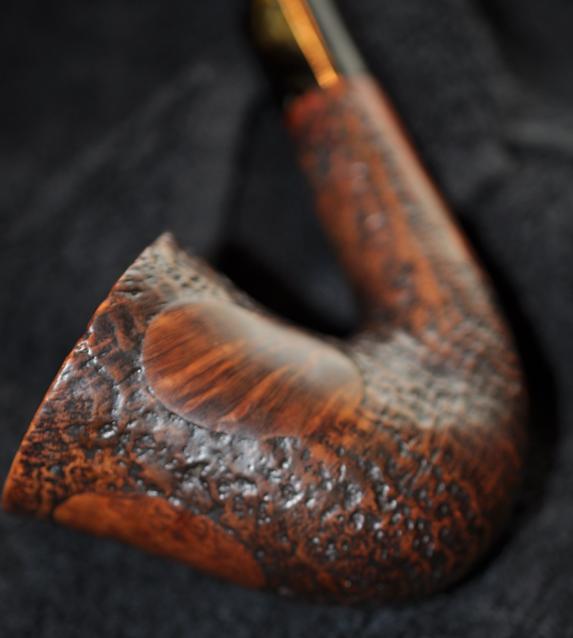
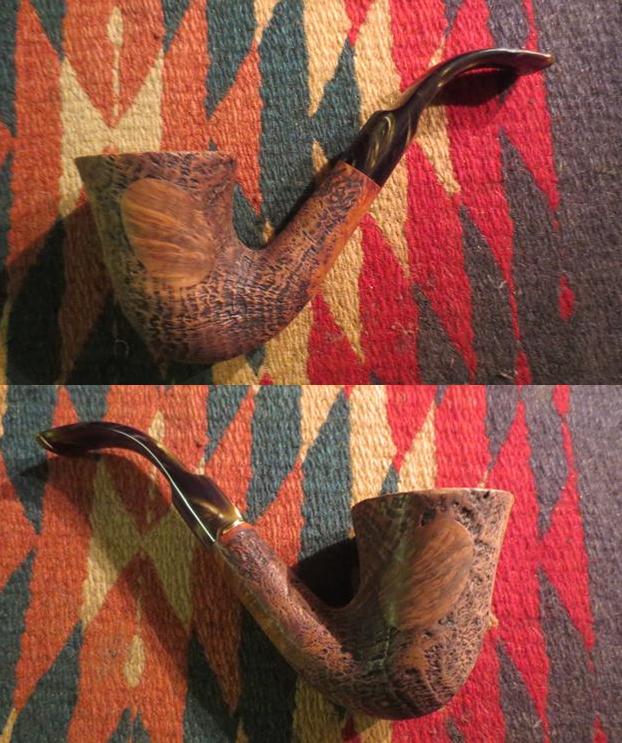
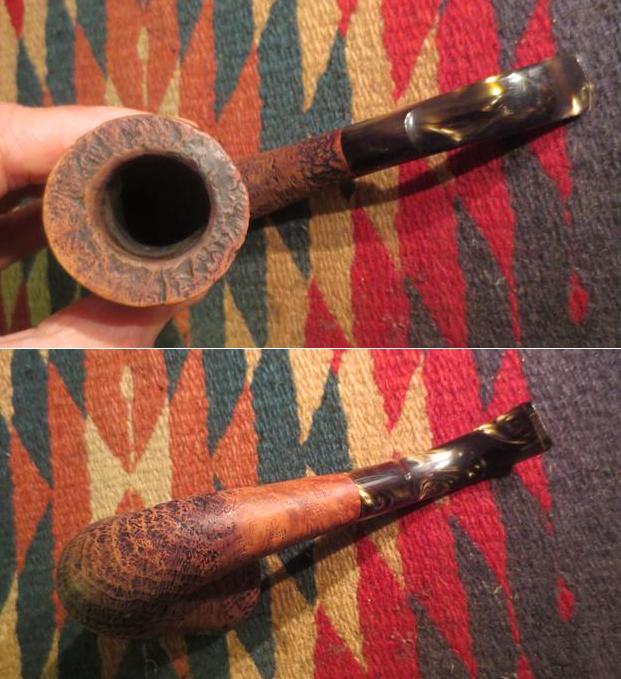
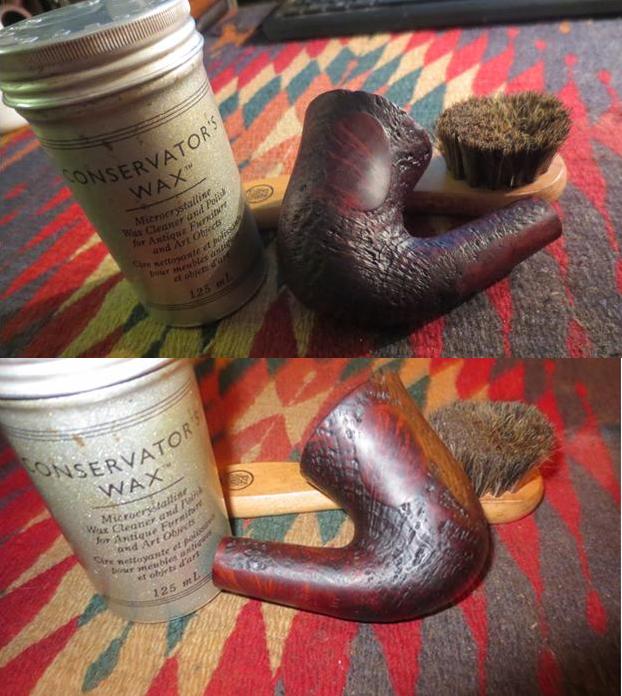
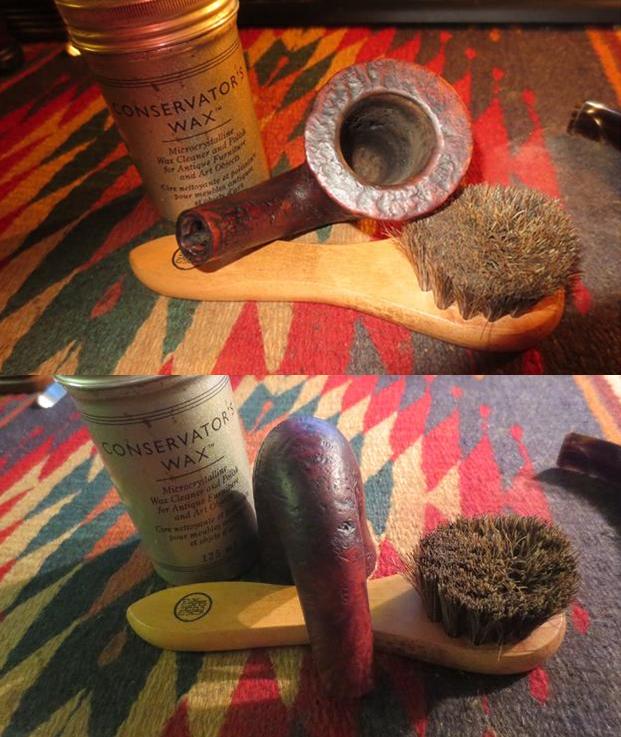
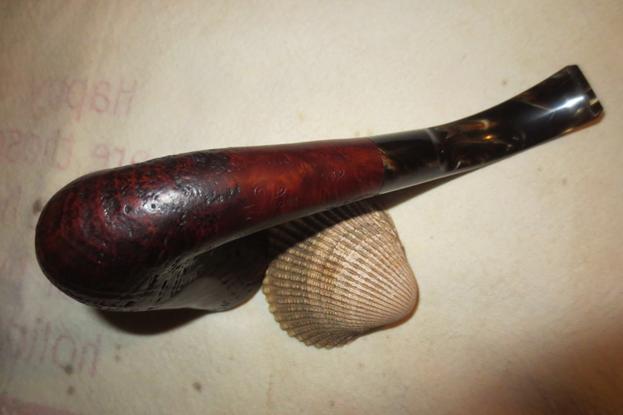
My brother had found another good one. The stamping gave me information about the time frame it was made. I knew that it was made prior to 1960 by the style of the stamping. It came from what the article identified as the Reuben era of Charatans that went from 1910-1960.  Like the Dunhill the only thing that would have been better was if it had come with the original stem. My brother took the photos that follow. They show the pipe before he cleaned it up and sent it to me. It had a nice sandblast that deep and craggy on the bowl and shank. From mid shank back to the stem it appeared that the pipe had been rusticated to match the blast pattern. He took some photos of the pipe to give a feel for the overall look of it when he received it. These photos show the pipe before he cleaned and reamed it.char1
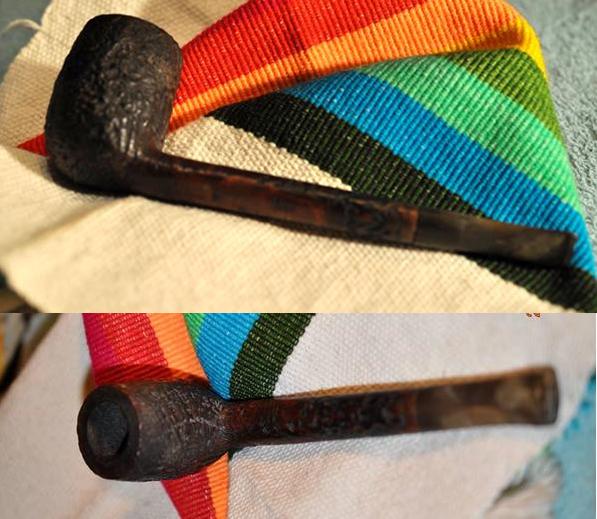
He took some close up photos of the bowl and sandblast on the bottom of the bowl. The bowl had a thick cake that had flowed over the top of the rim in hard tarry lava. It was thick but it appeared that the outer rim was undamaged and with any luck the inner one would be as well. The blast is interesting in that it also has a rustication pattern on the bowl bottom and also on the shank. It follows the pattern of the grain on the bowl.char2
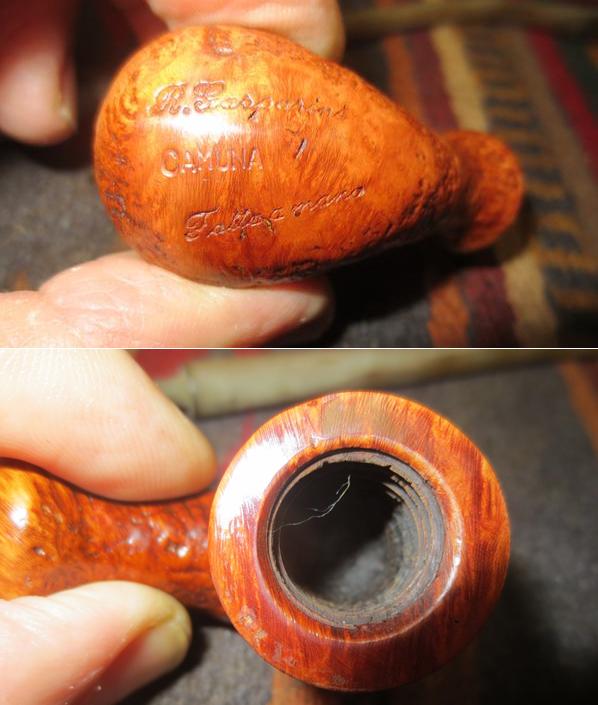
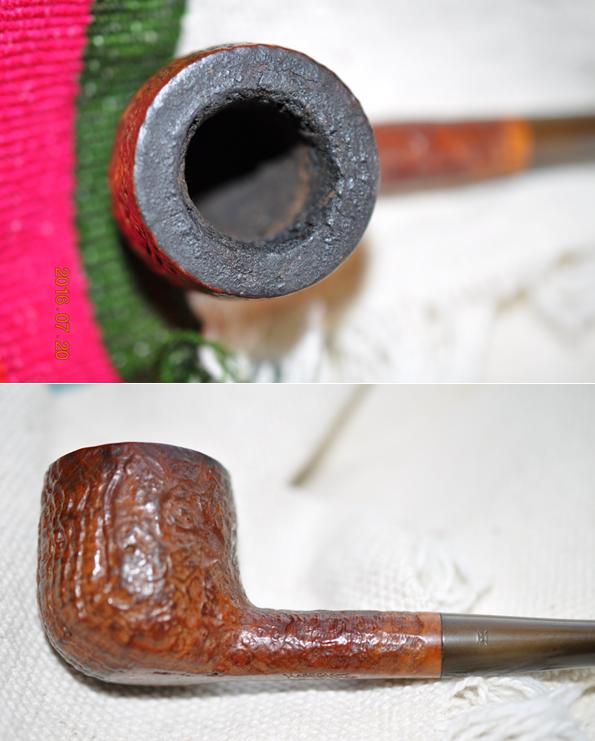
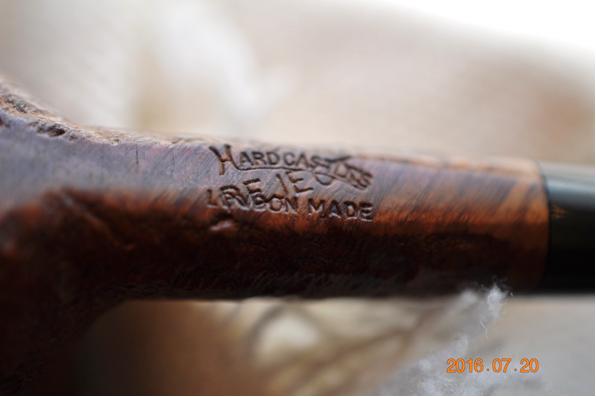
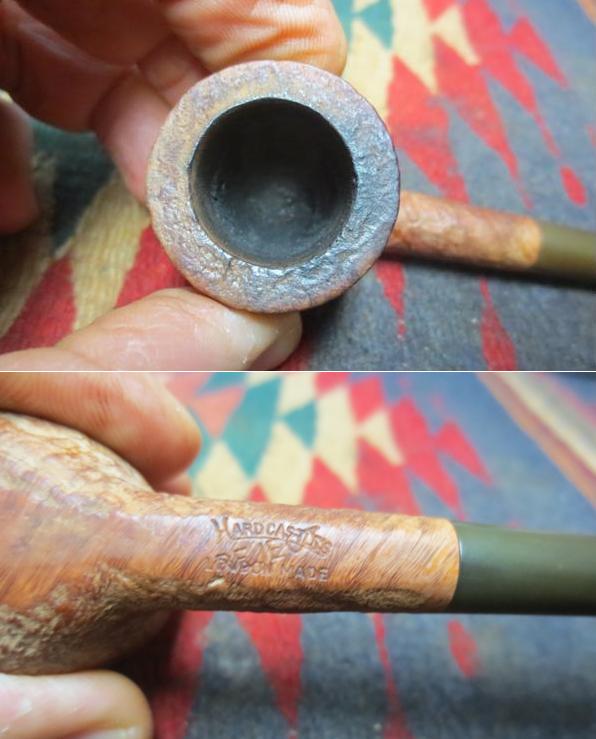
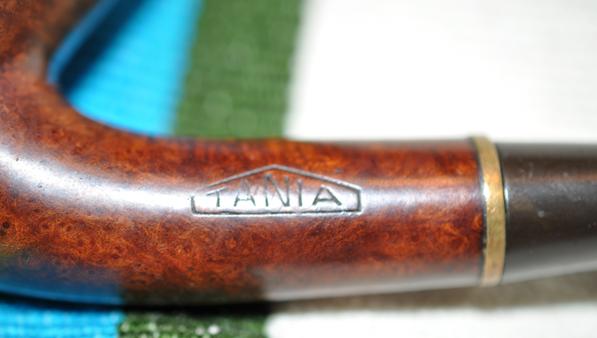
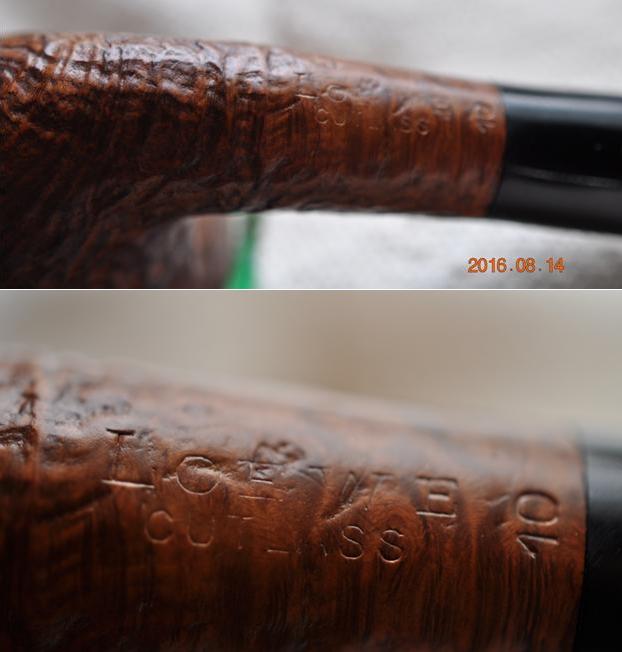
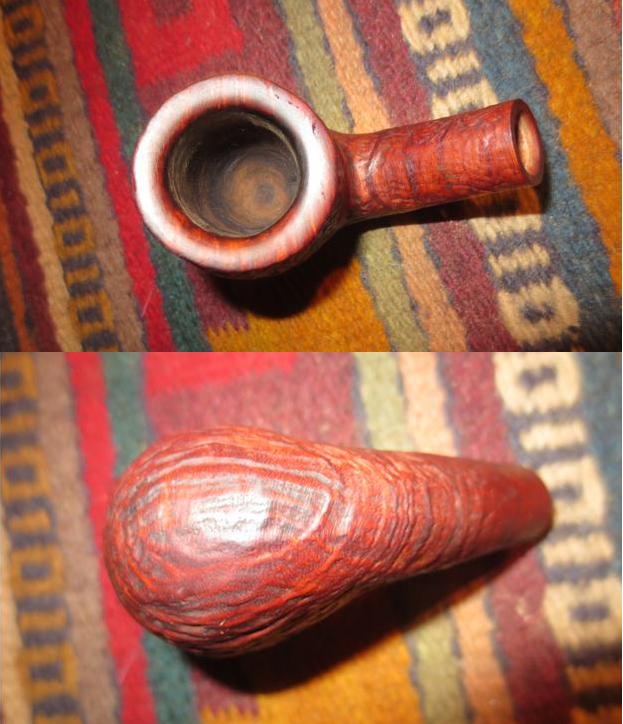
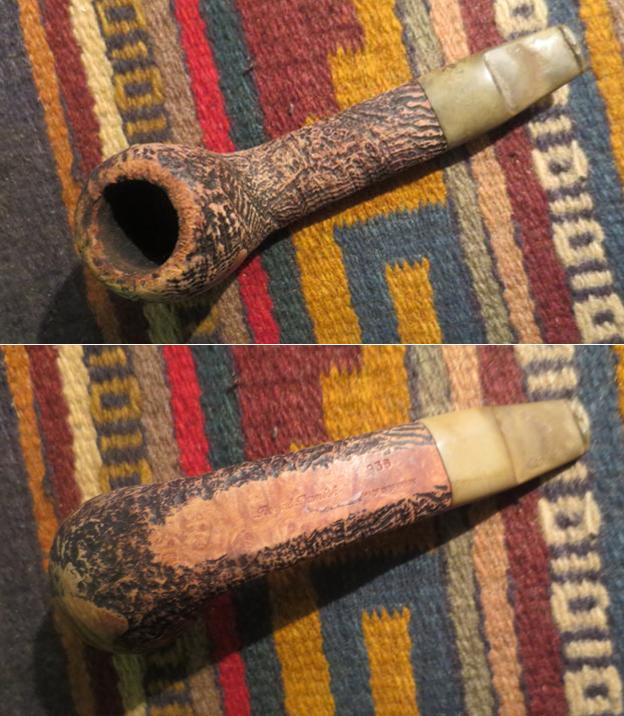
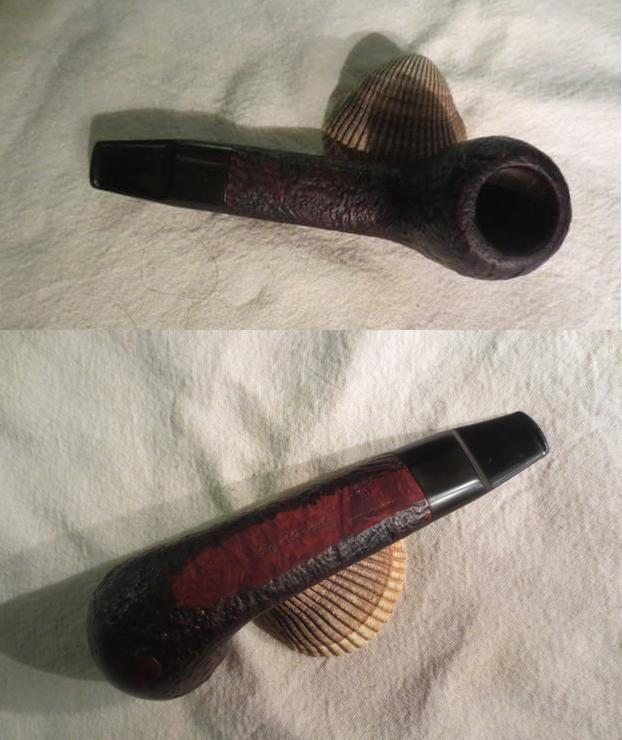
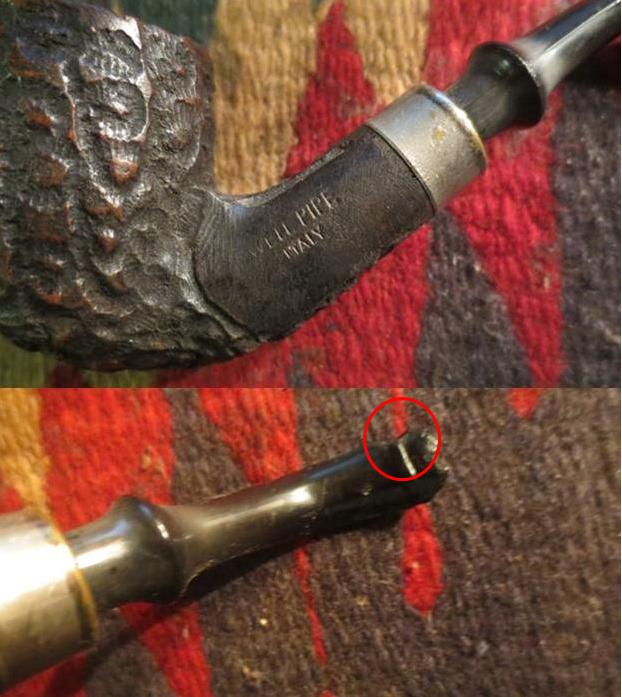
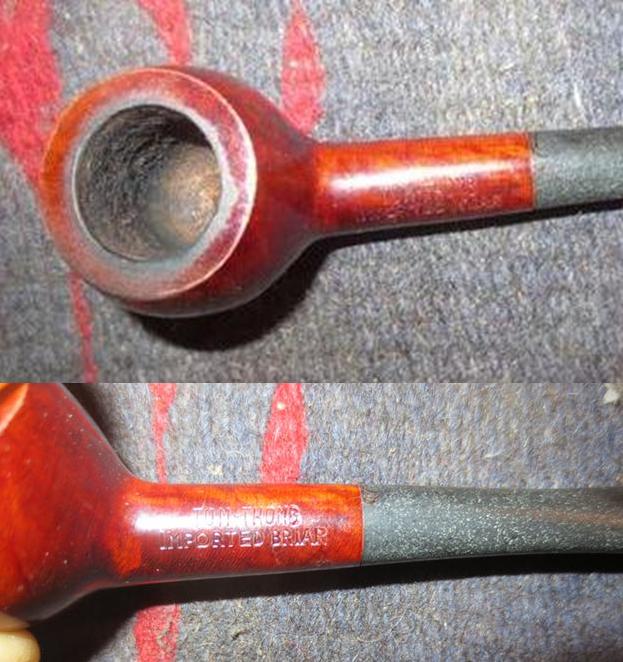
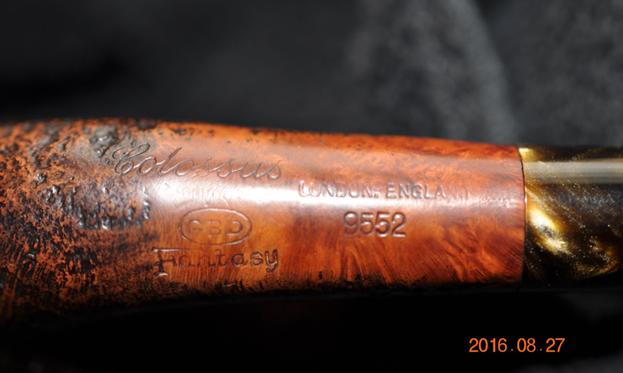
The next photo shows the clear and sharp stamping on smooth underside of the shank. It reads as noted above – Charatan’s Make over London England with the shape number 0120 on the stem end of the shank.char3
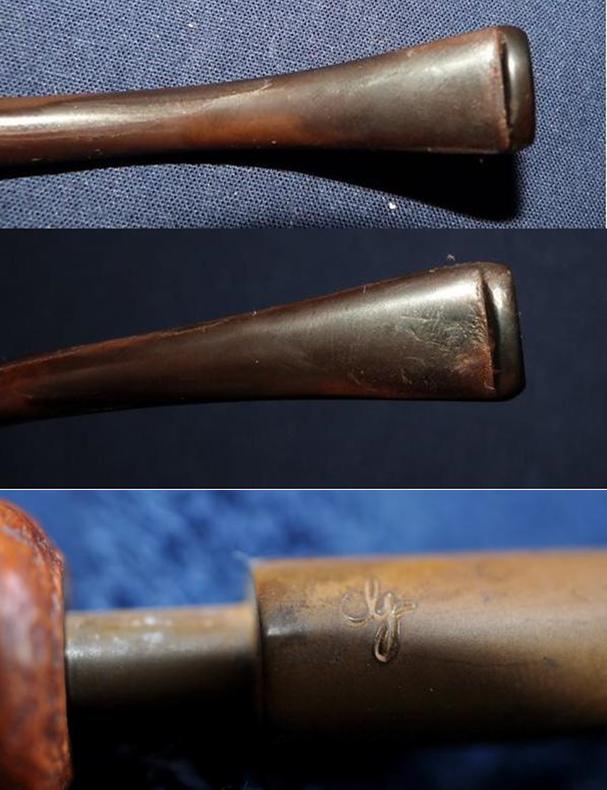
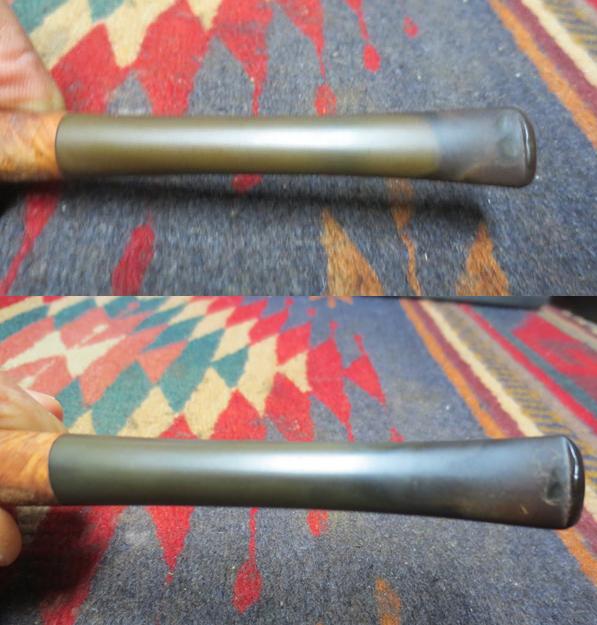
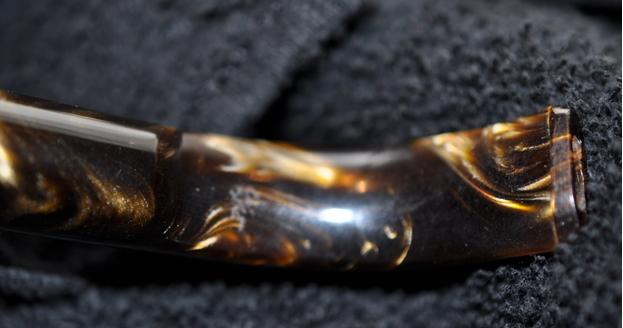
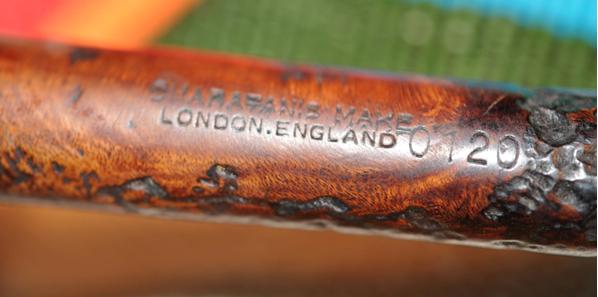
The stem had a lot of tooth chatter and some shallow tooth dents. There was oxidation and also calcification.char4
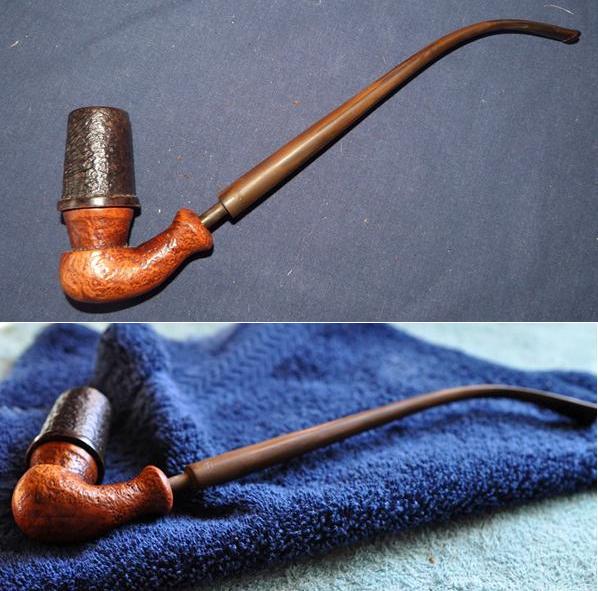
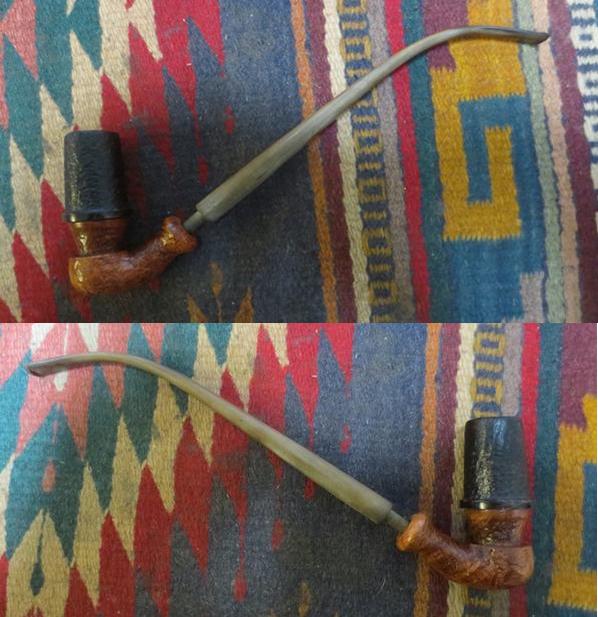
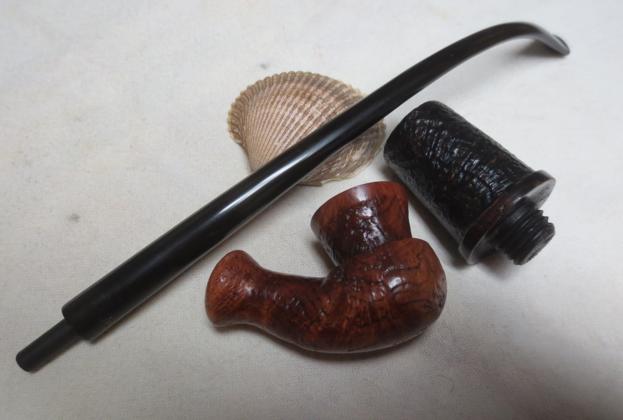
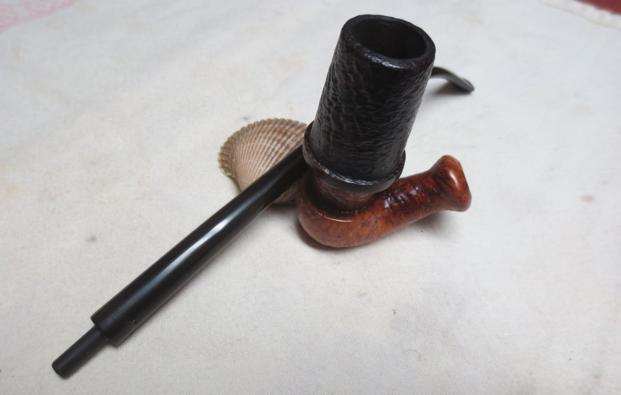
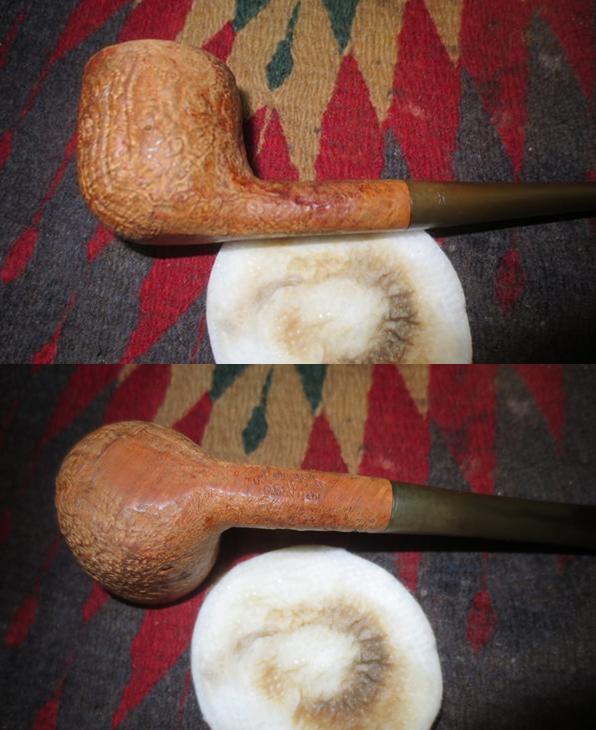
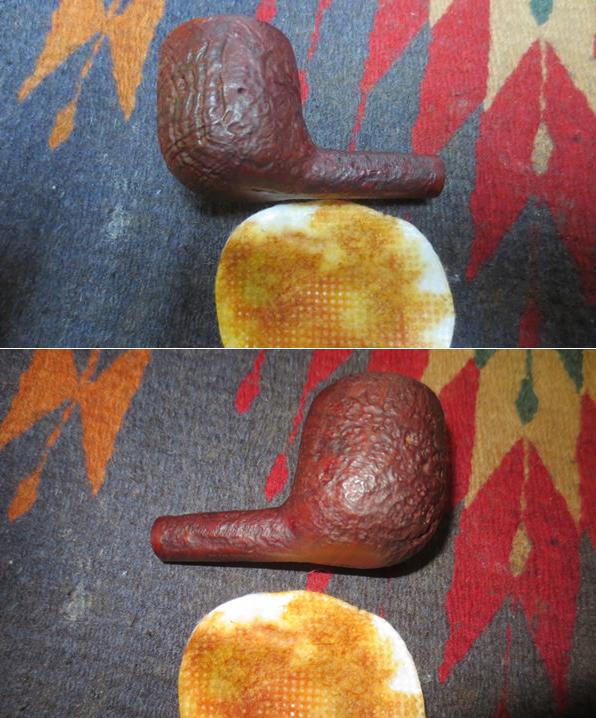
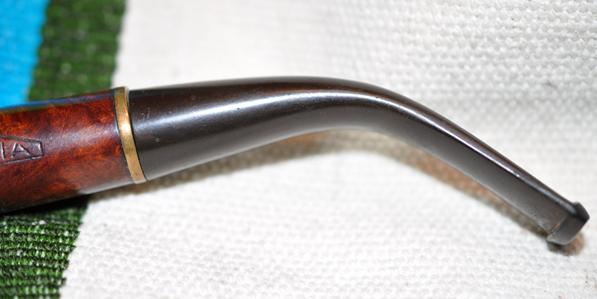
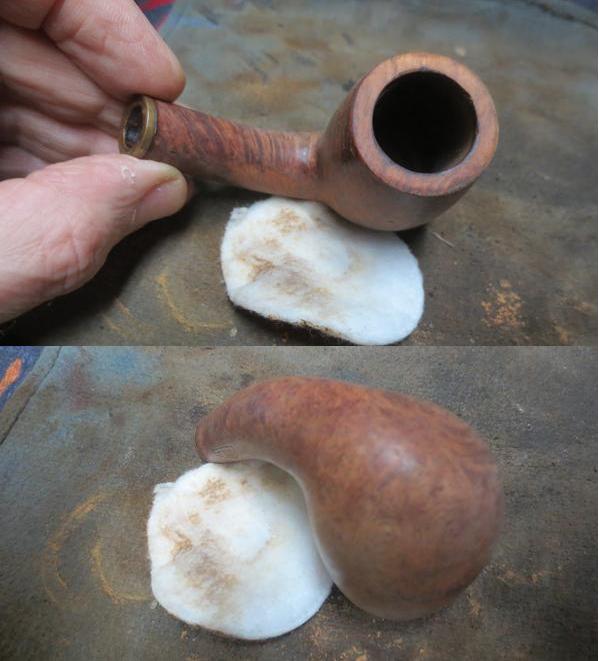
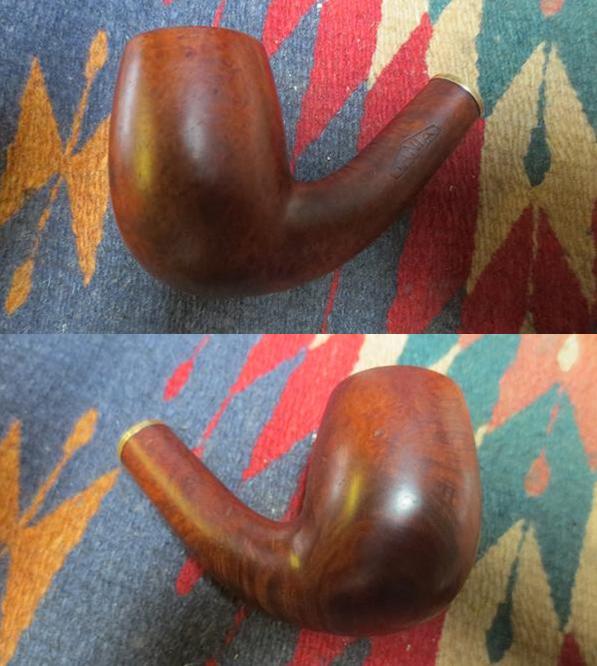
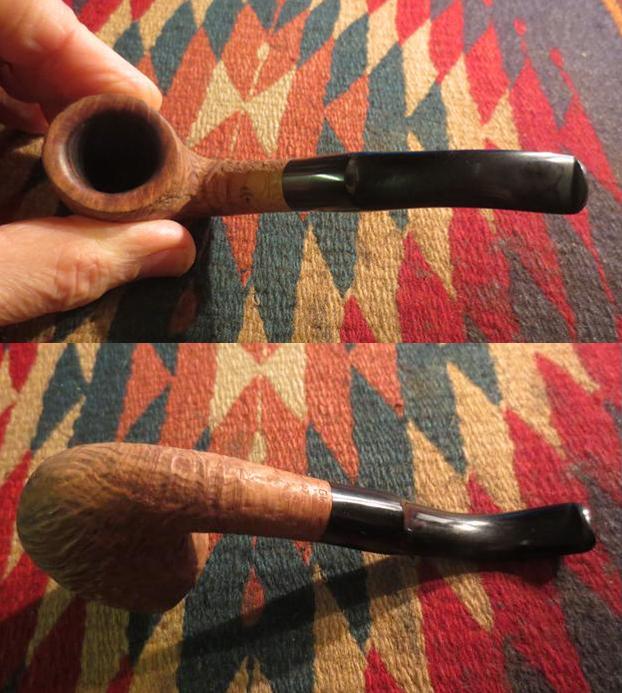
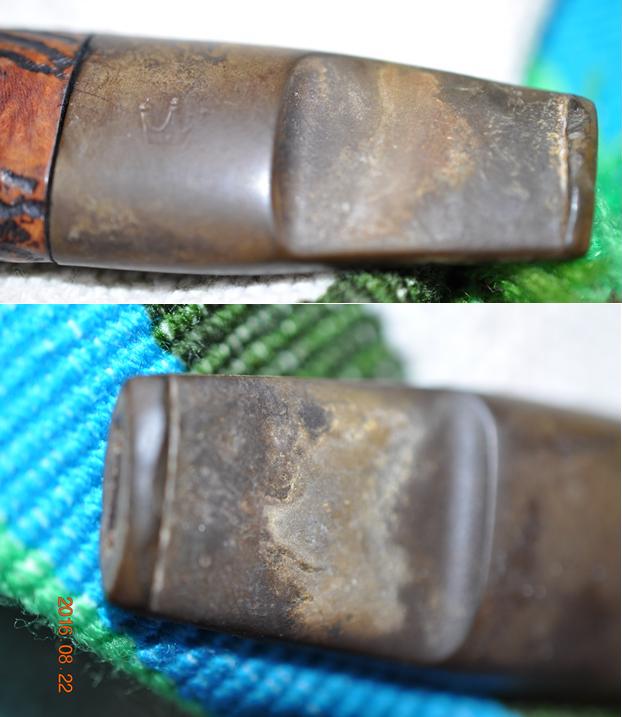
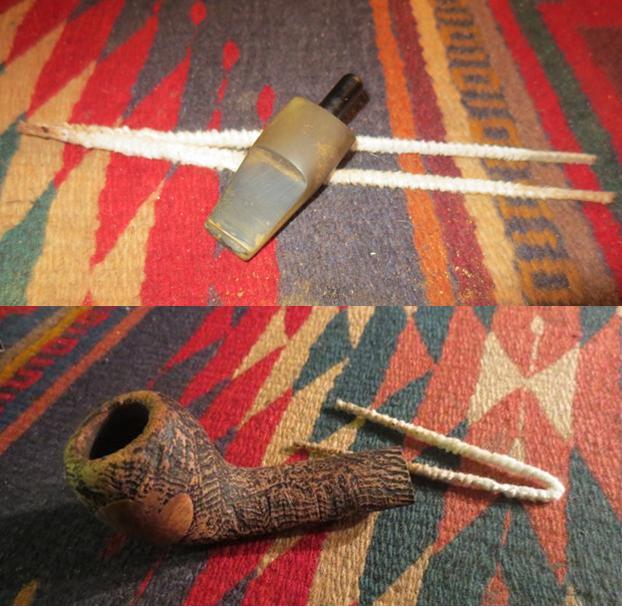
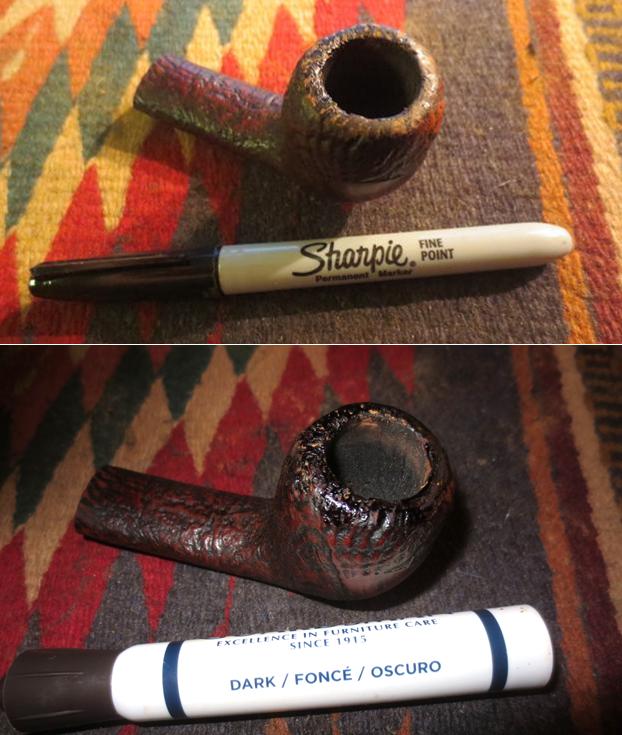
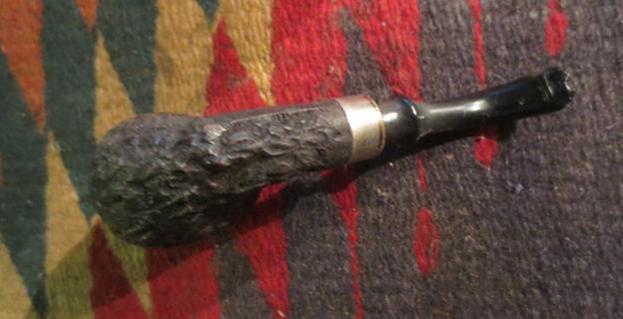
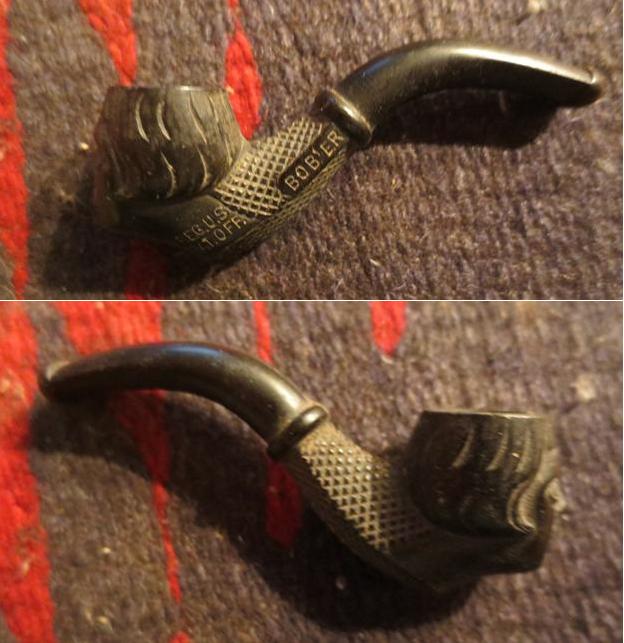
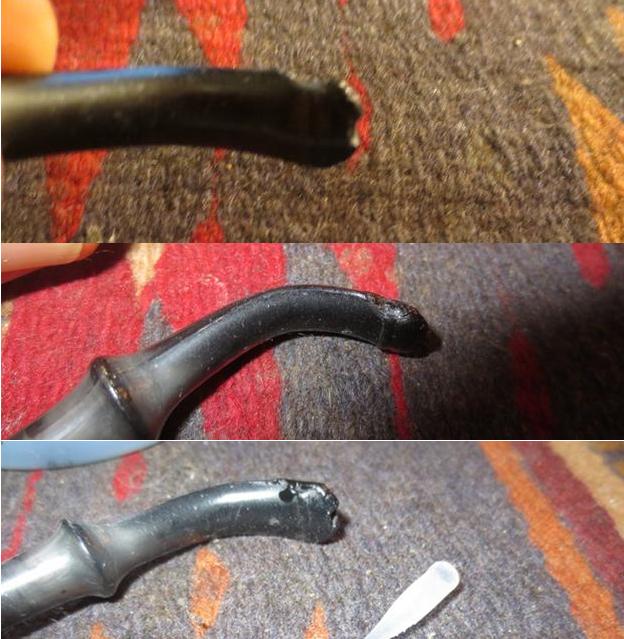
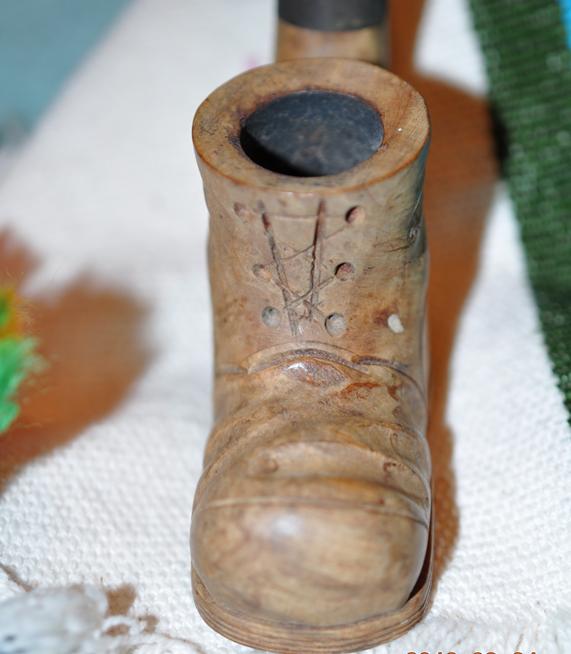
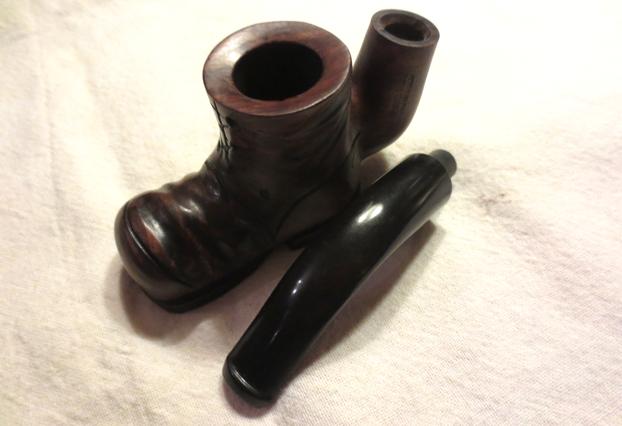
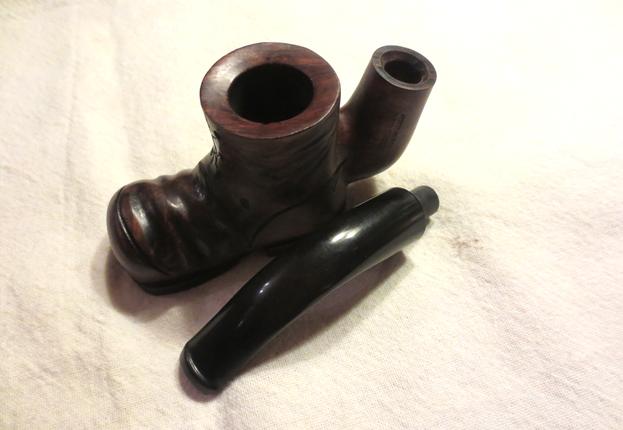
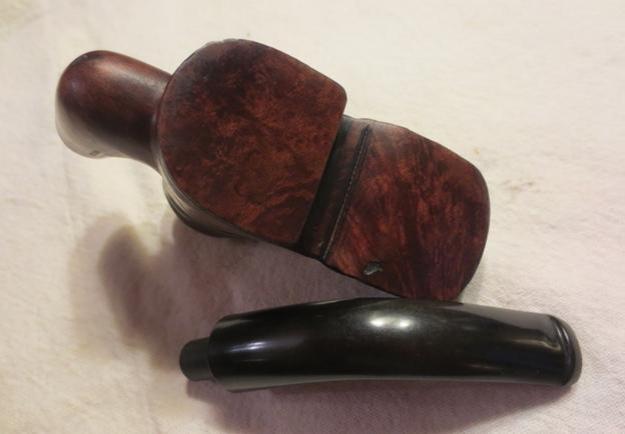
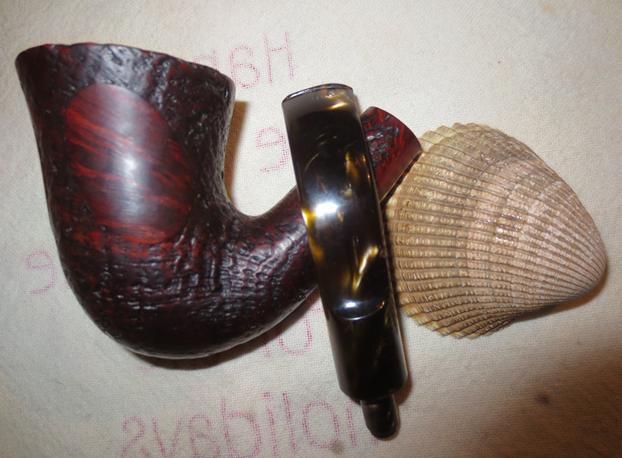
My brother did his normal thorough job of cleaning the pipe. He scrubbed it with a tooth brush and Murphy’s Oil Soap. He cleaned out all of the dust and debris in the grooves and crevices of the “blastication”. The stem does not fit tightly against the shank at this point. The next photos below show the pipe as it looked when I brought it to my work table.char5 char6
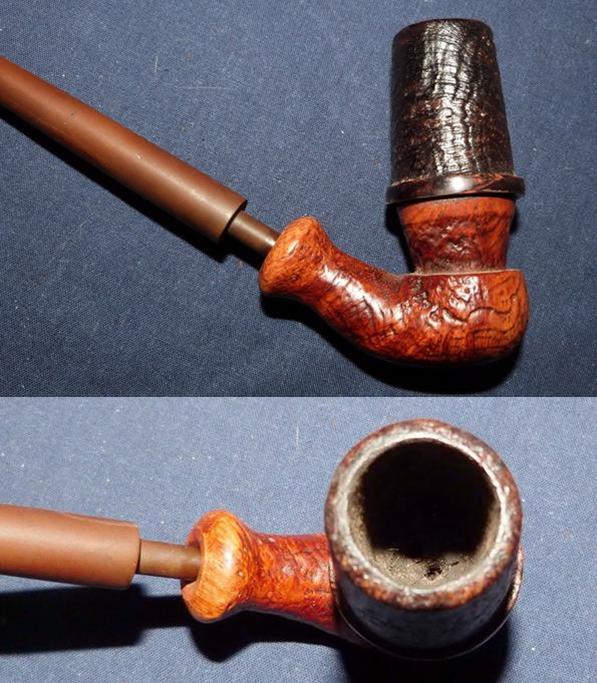
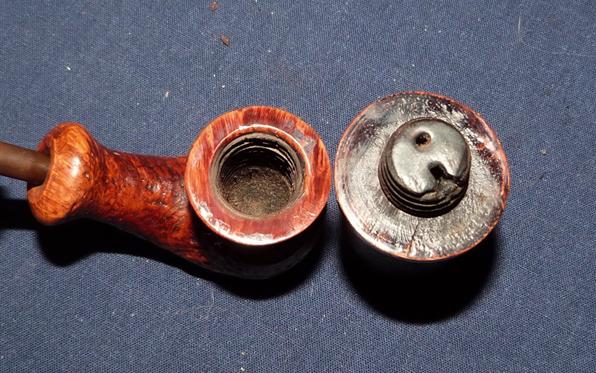
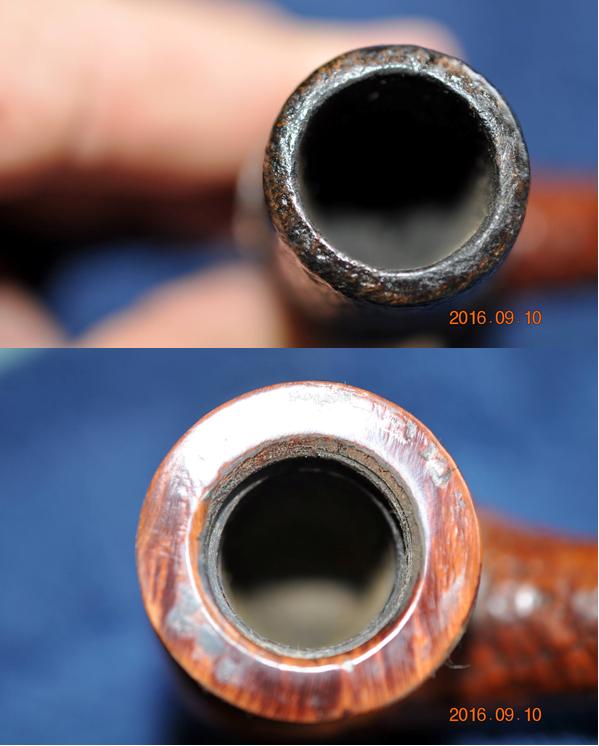
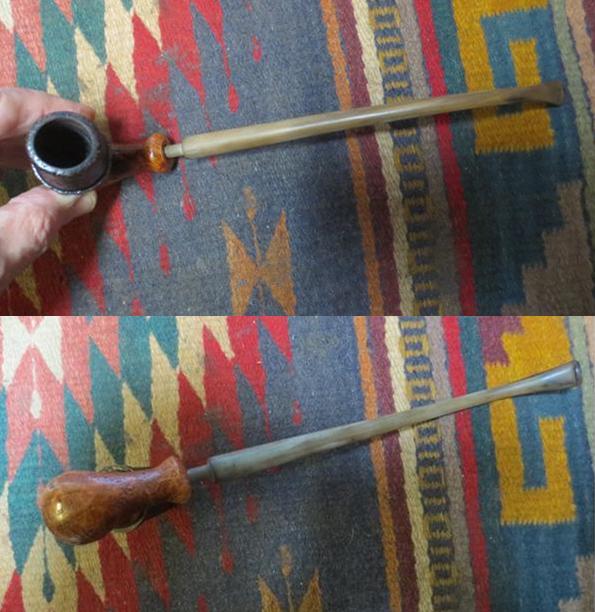
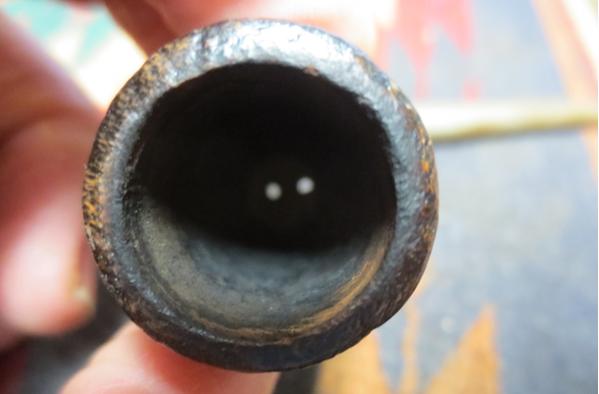
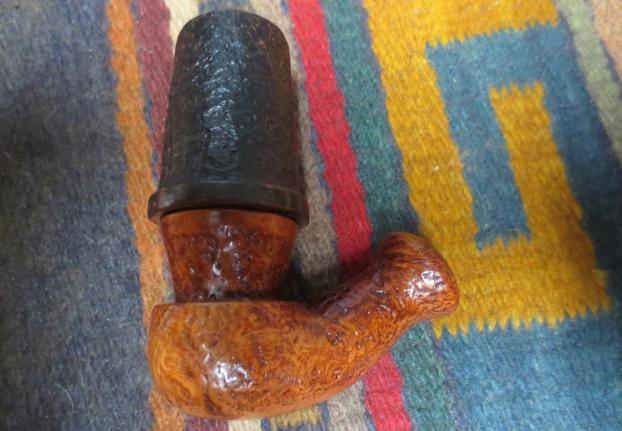
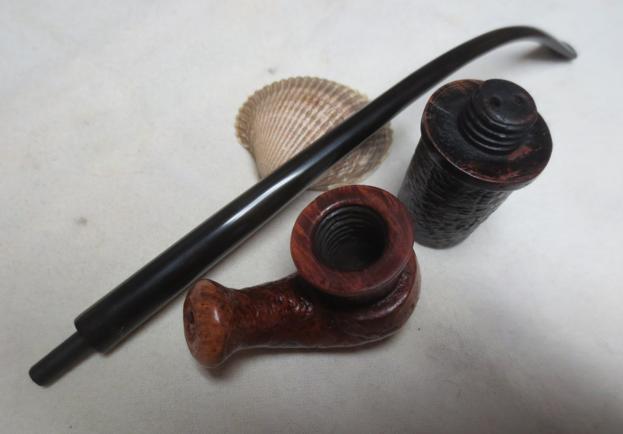
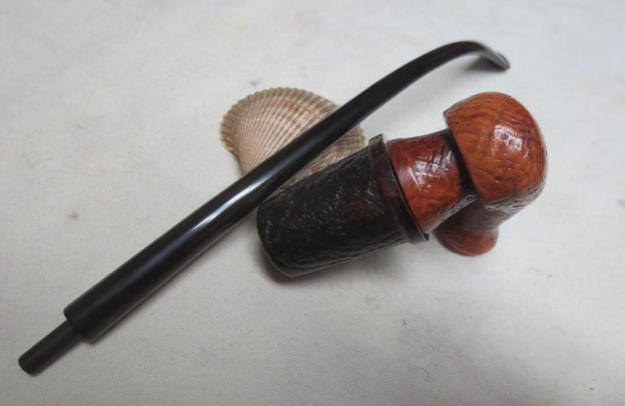
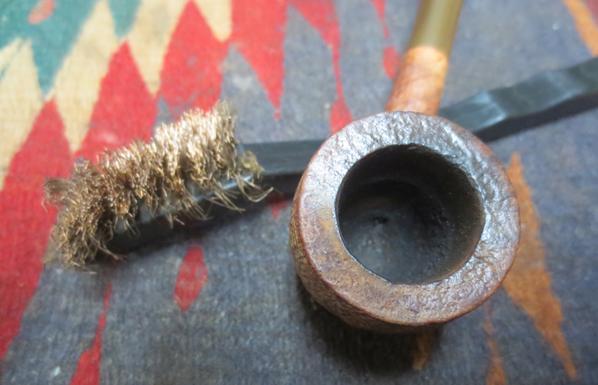
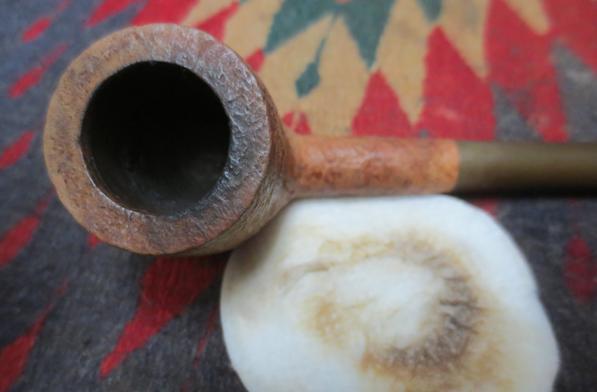
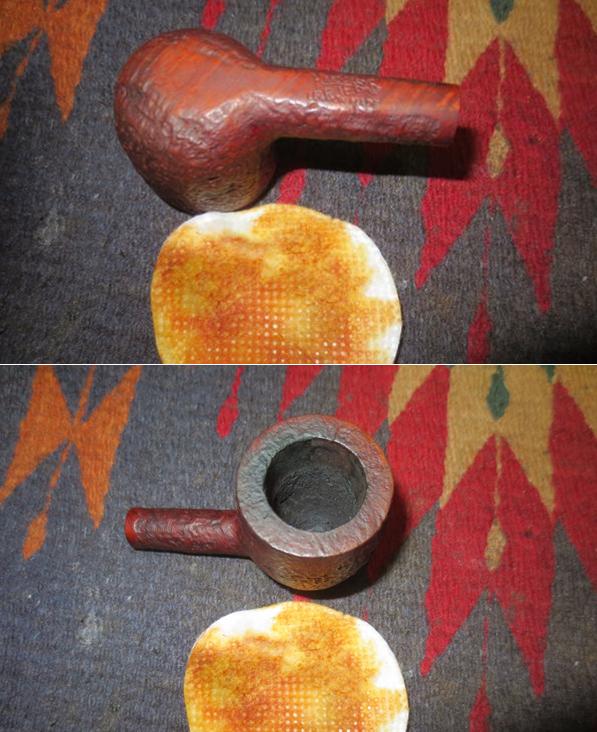
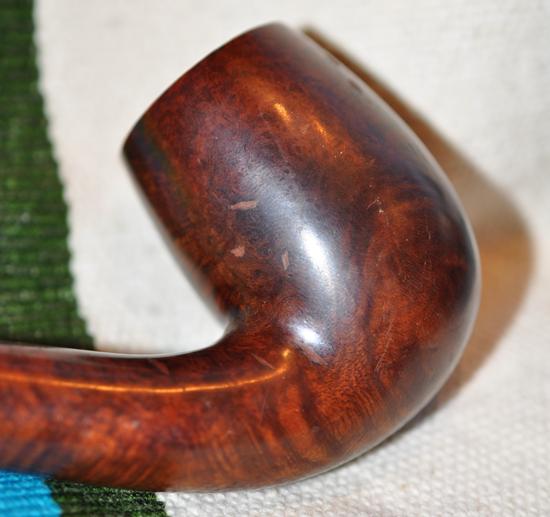
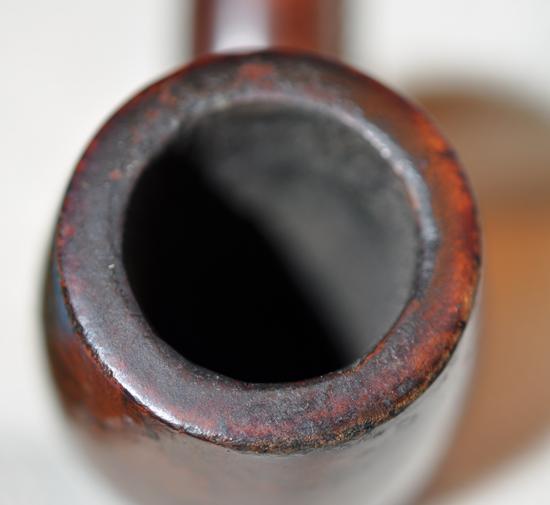
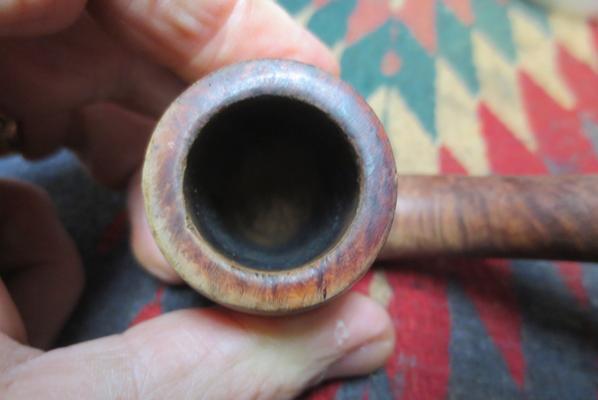
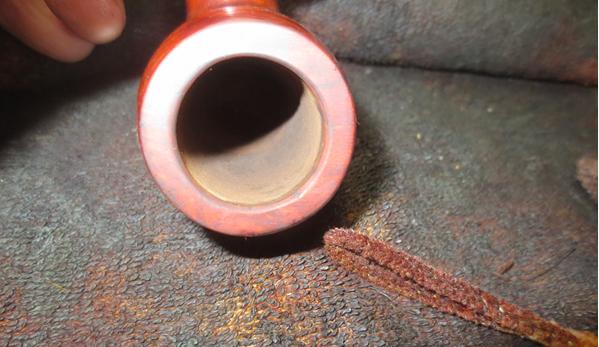
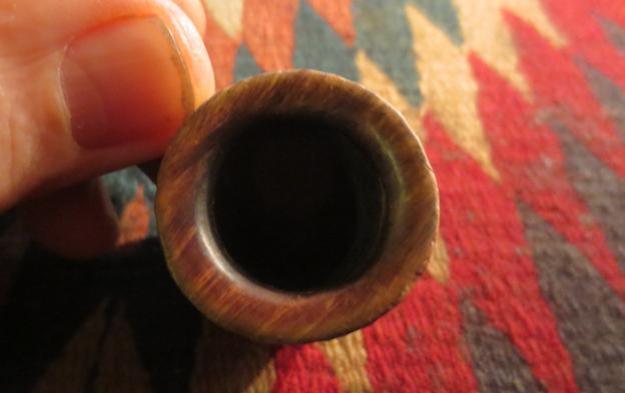
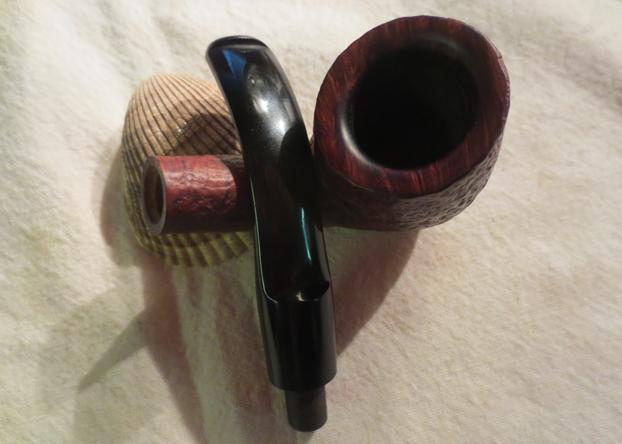
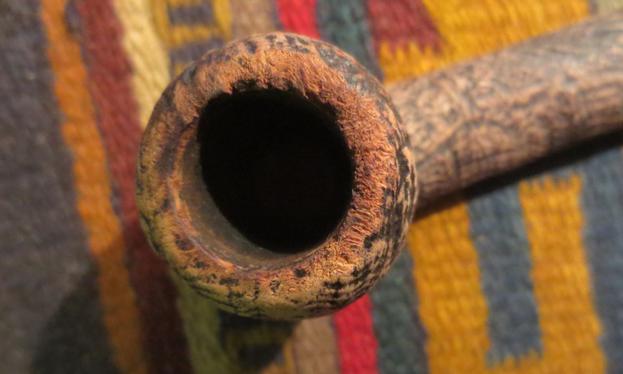
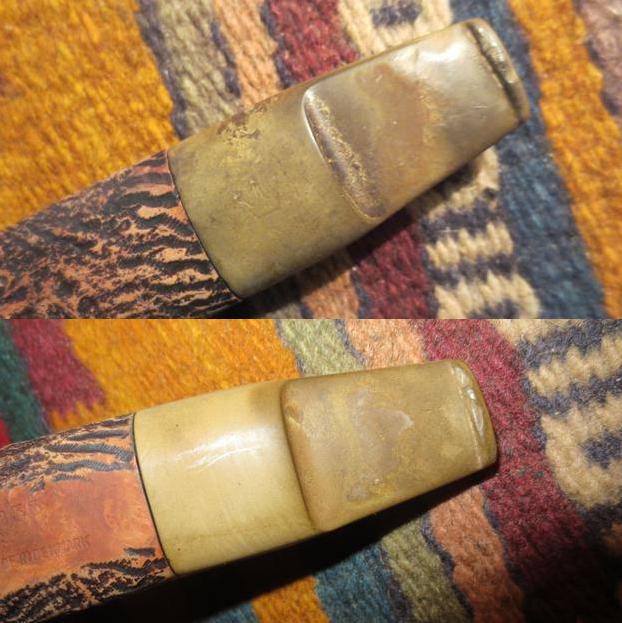
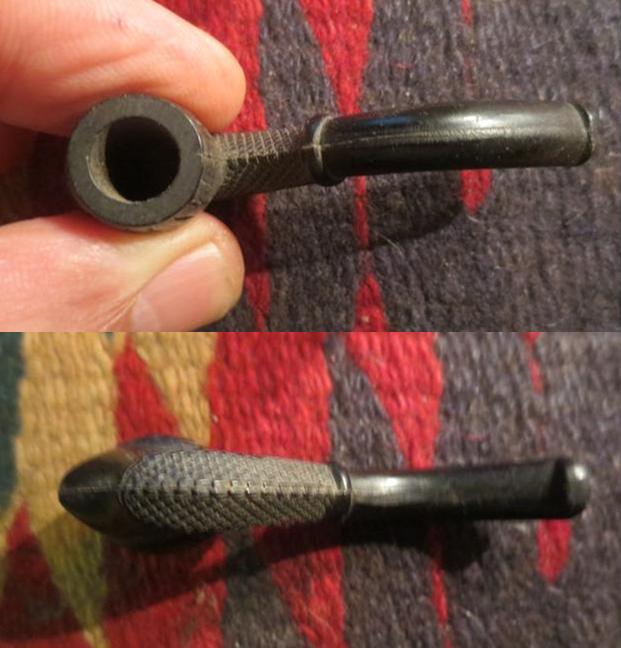
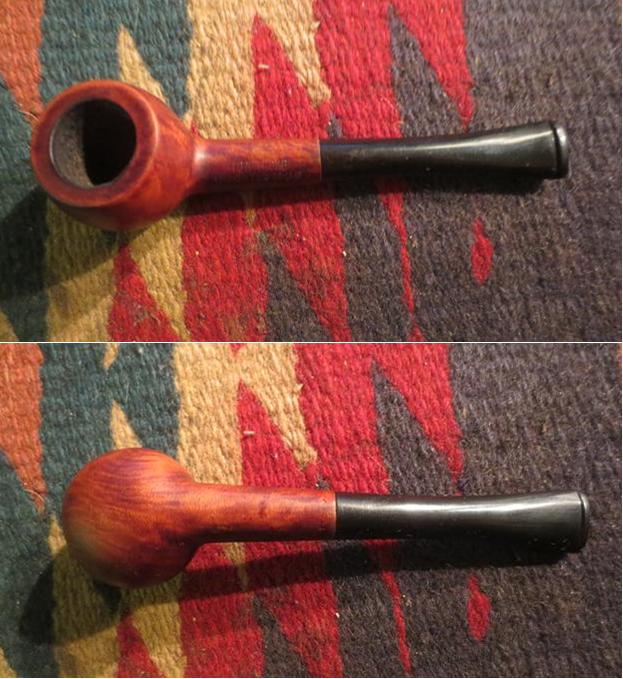
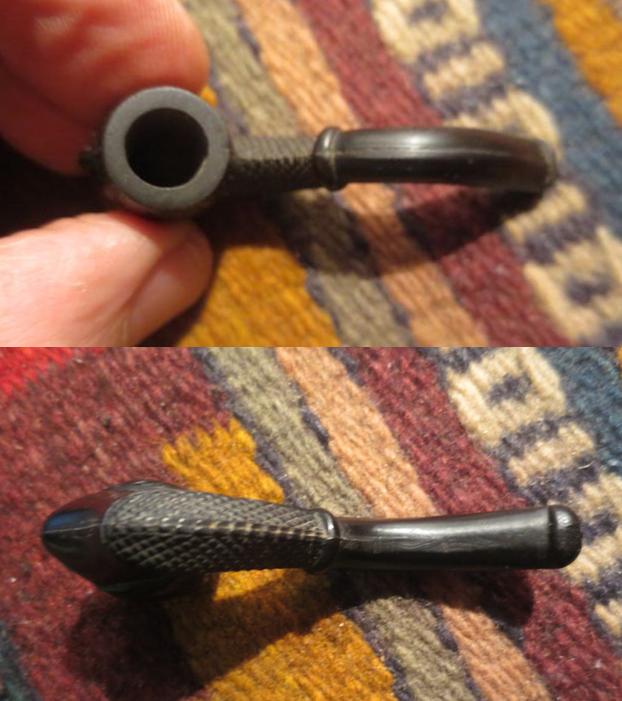
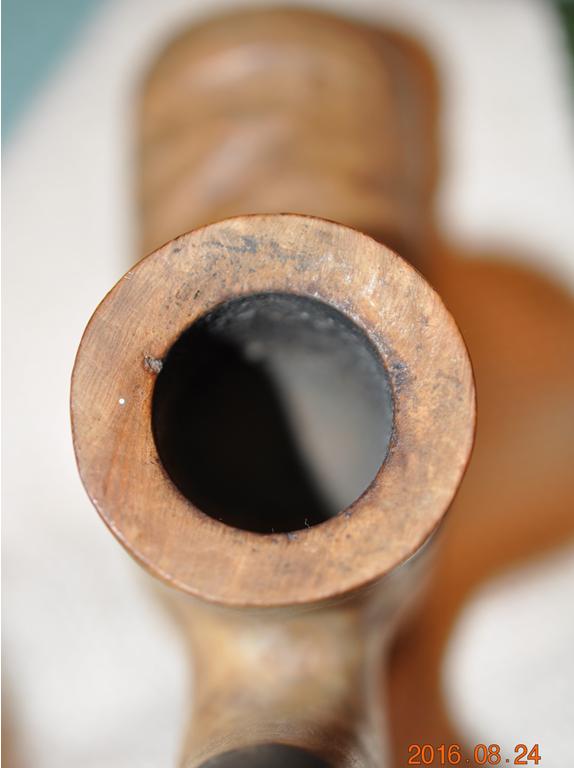
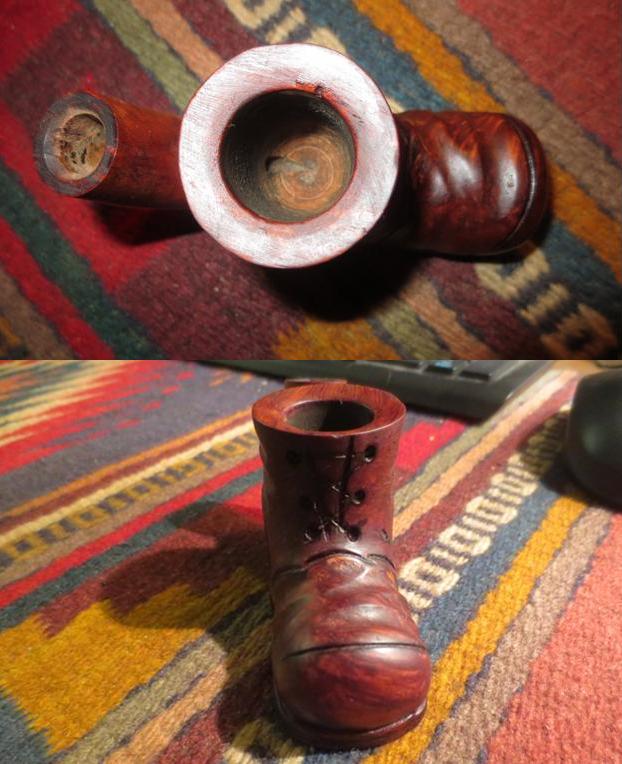
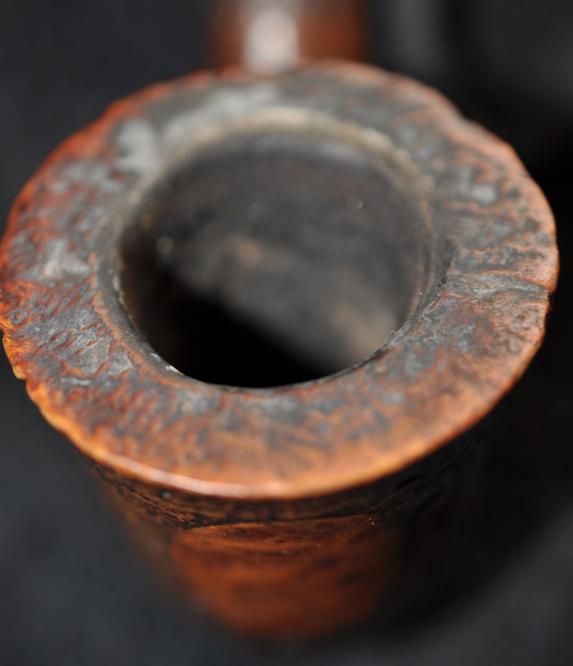
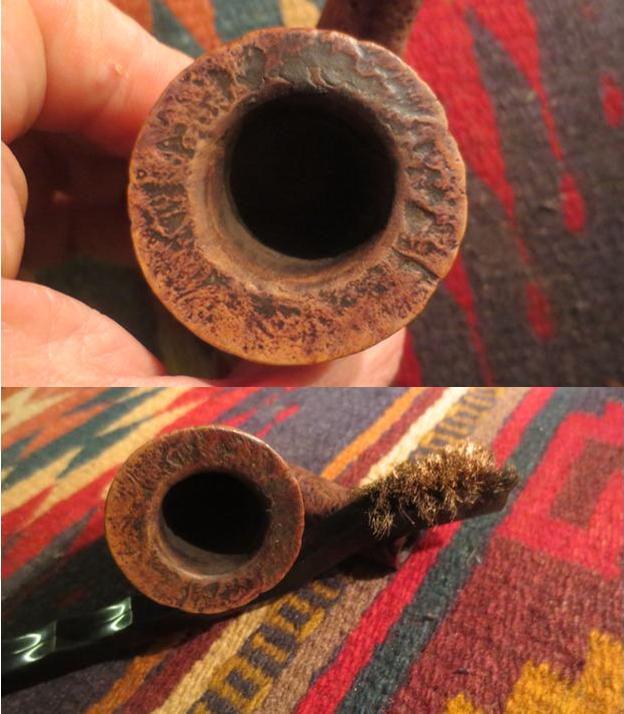
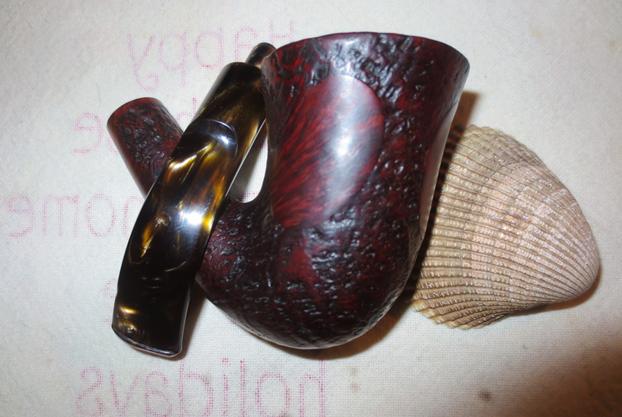
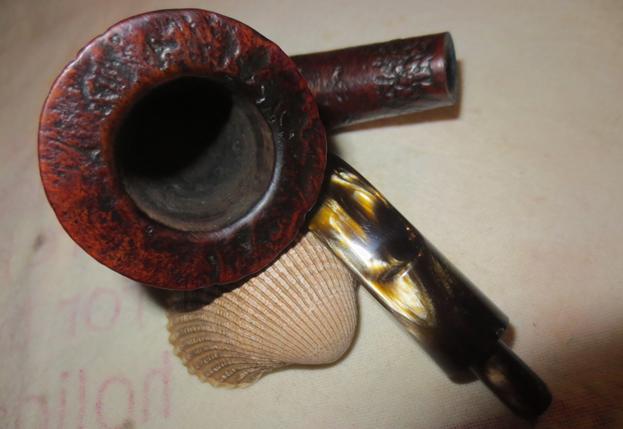
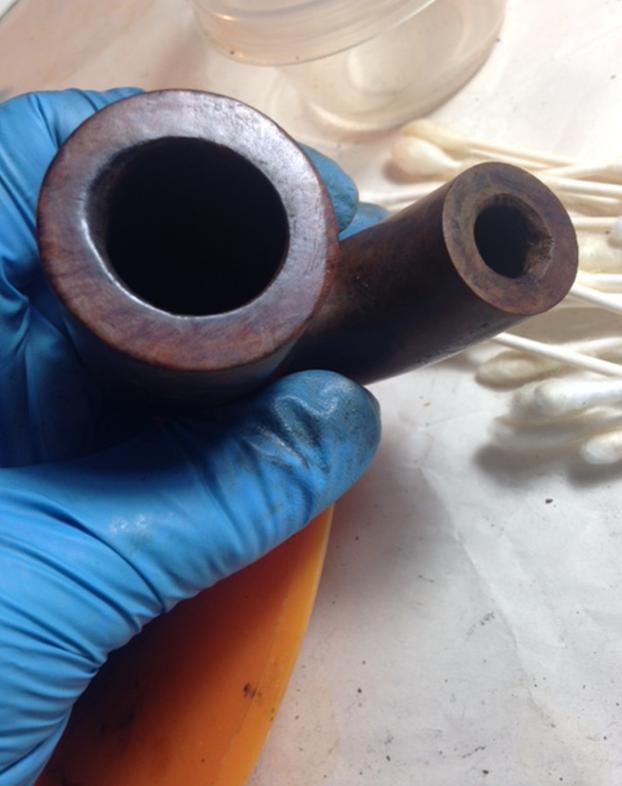
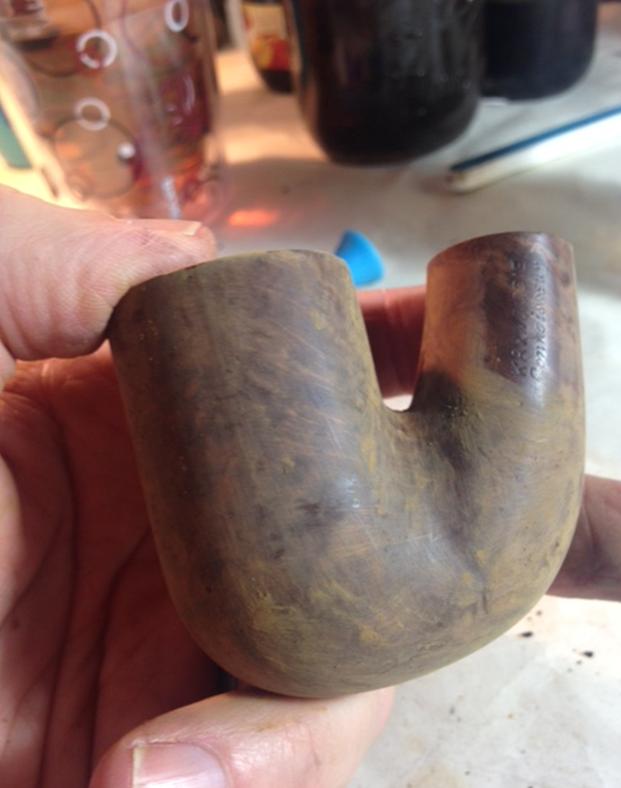
I took some close up photos of the rim to show how well it cleaned up. My brother was able to get the lava out of the grooves on the rim and also on the underside of the shank. The stamping was still very clear.char7
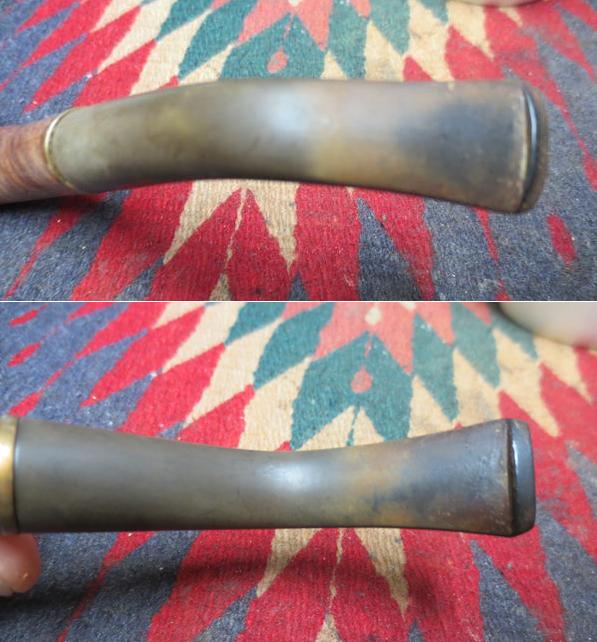
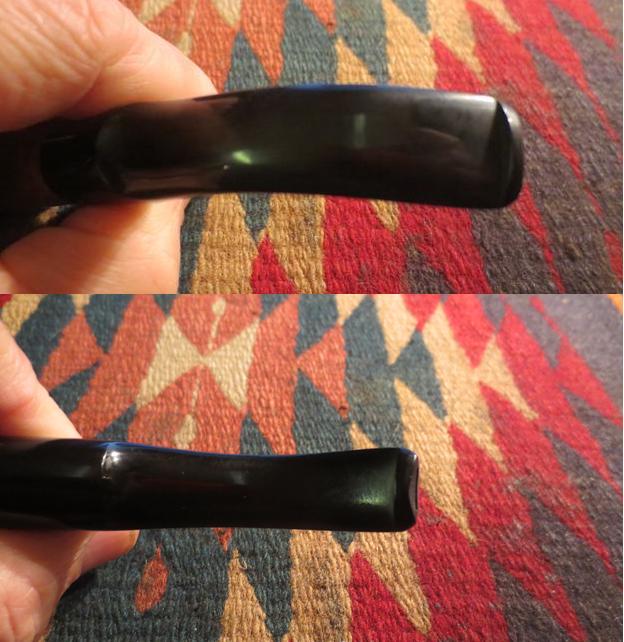
He cleaned out a lot of the gunk in the shank but the stem still did fit tightly against the shank end. He did get the calcification and some of the oxidation off the stem. You can clearly see the tooth chatter and the tooth dents now that the stem was clean.char8
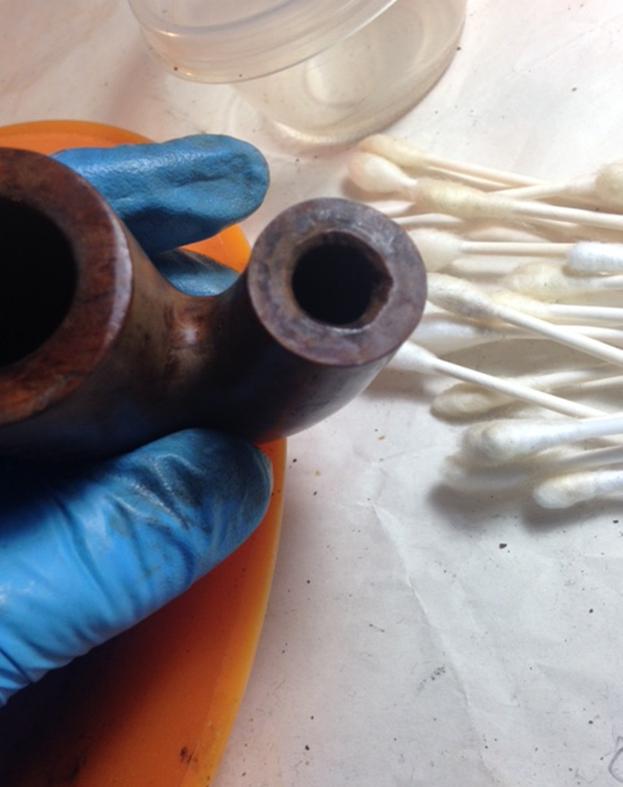
I scraped out the inside of the mortise with a dental pick with a flattened blade end. I scraped the stepped down area of the mortise as it entered the airway in the shank. I took a lot of tar and gunk out the shank area.char9
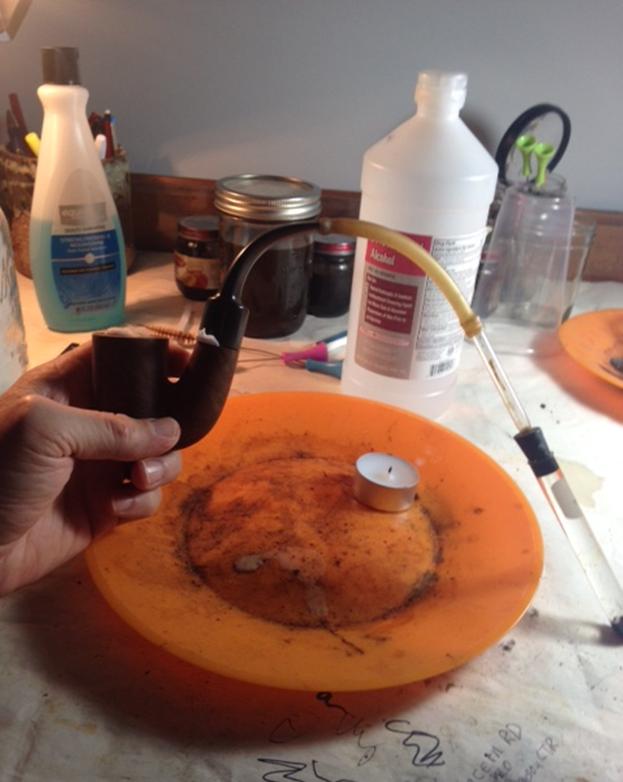
I scrubbed the mortise, the airway in the shank and the stem with cotton swabs, pipe cleaners and alcohol. Once it was clean the stem fit more closely against the end of the shank.char10
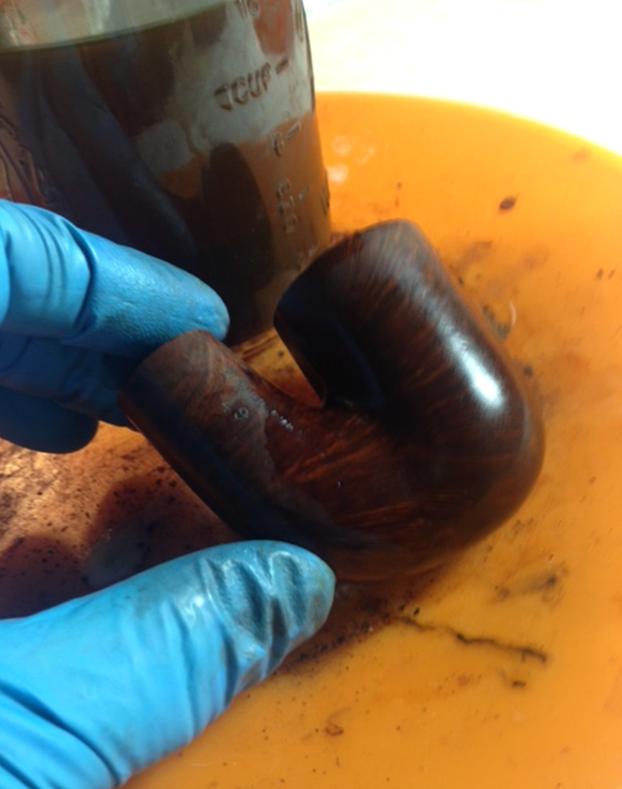
I scrubbed down the bowl and shank with acetone on cotton pads to remove the finish that remained on the pipe.char11 char12
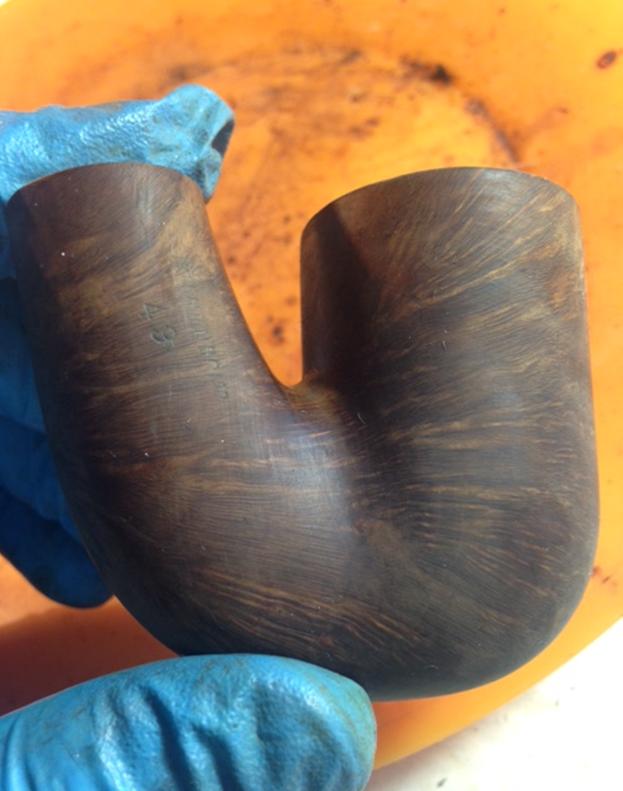
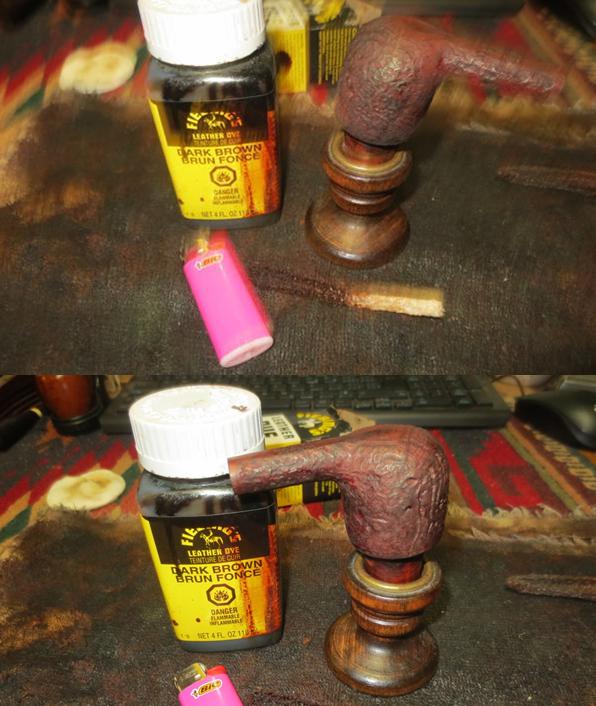
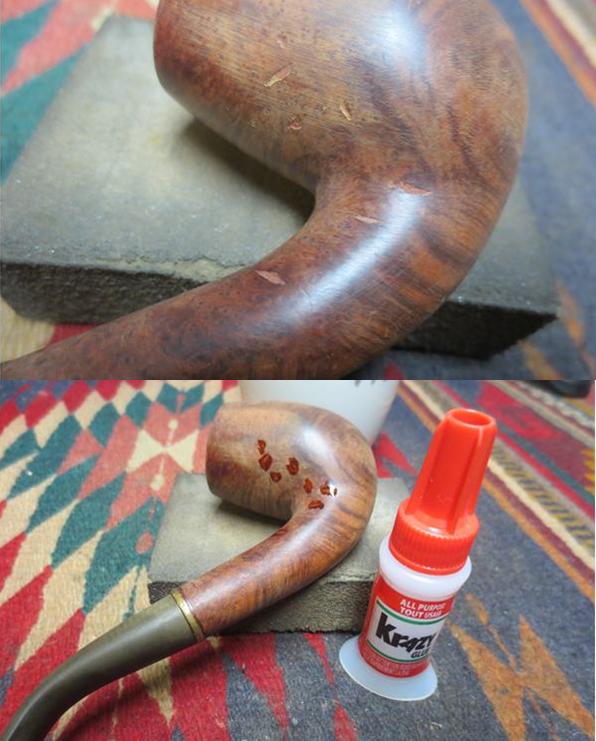
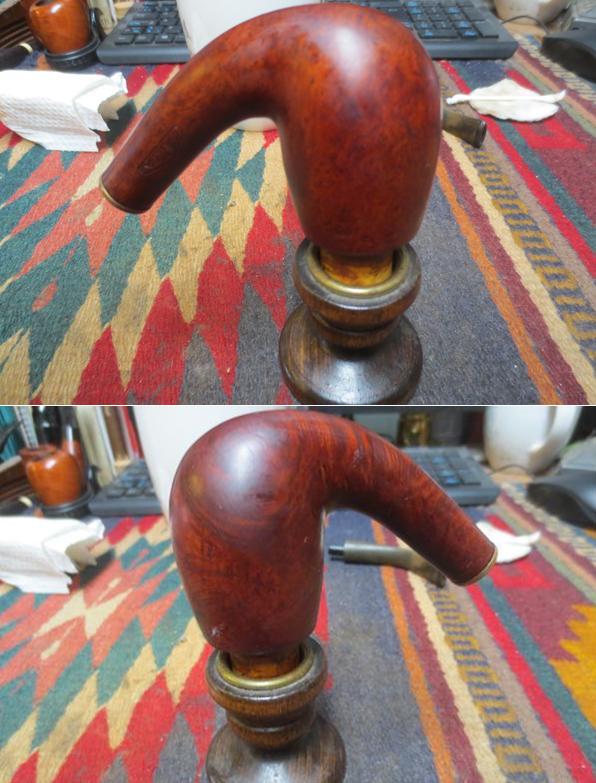
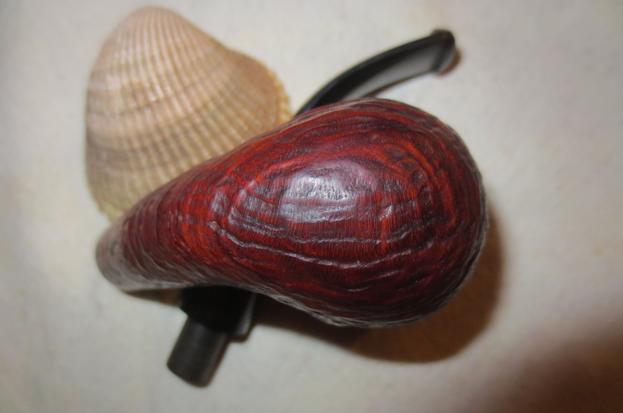
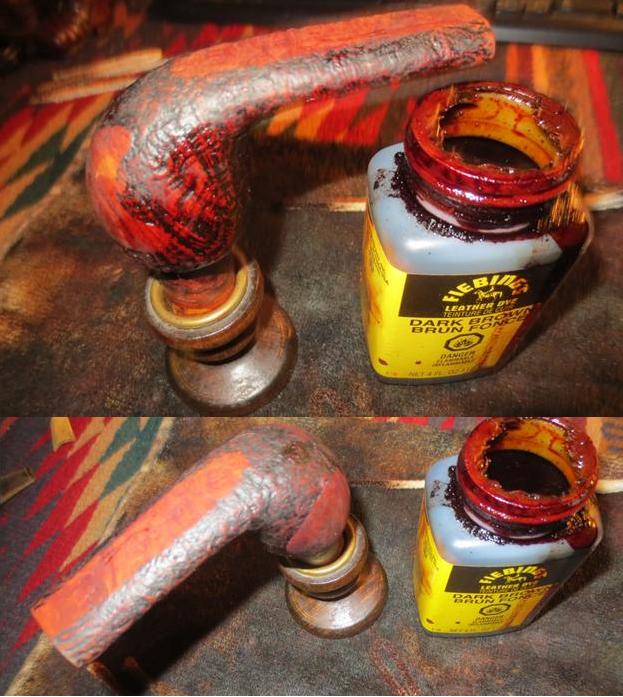
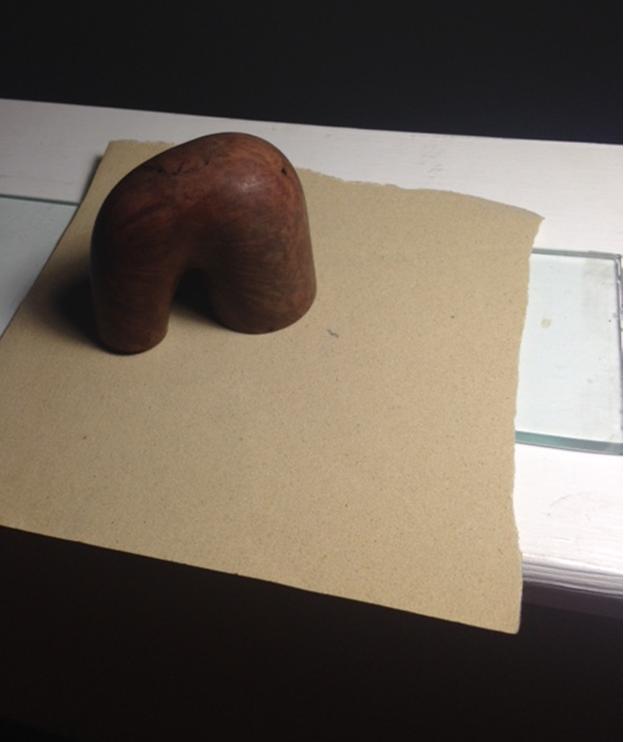
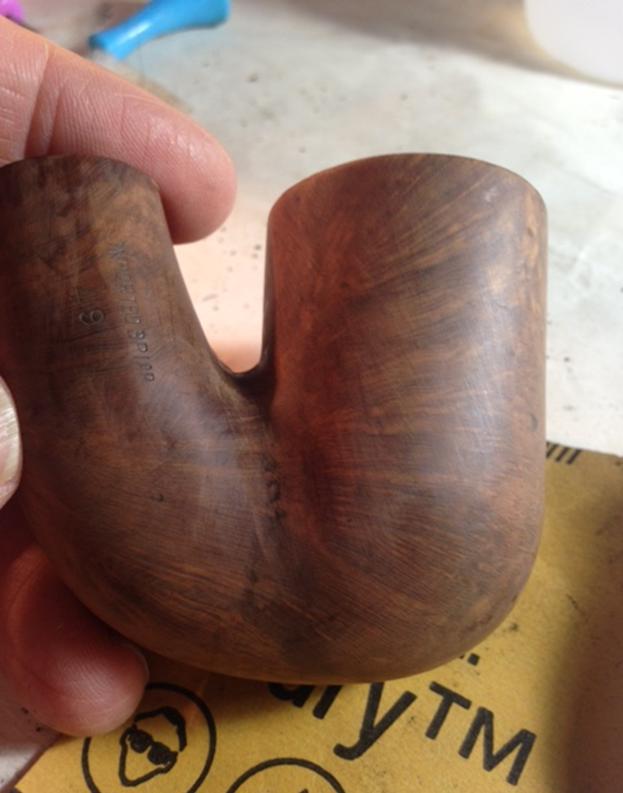
I restained the pipe with a dark brown aniline stain thinned 50/50 with isopropyl alcohol. I flamed the stain and repeated the process until the coverage was even.char13
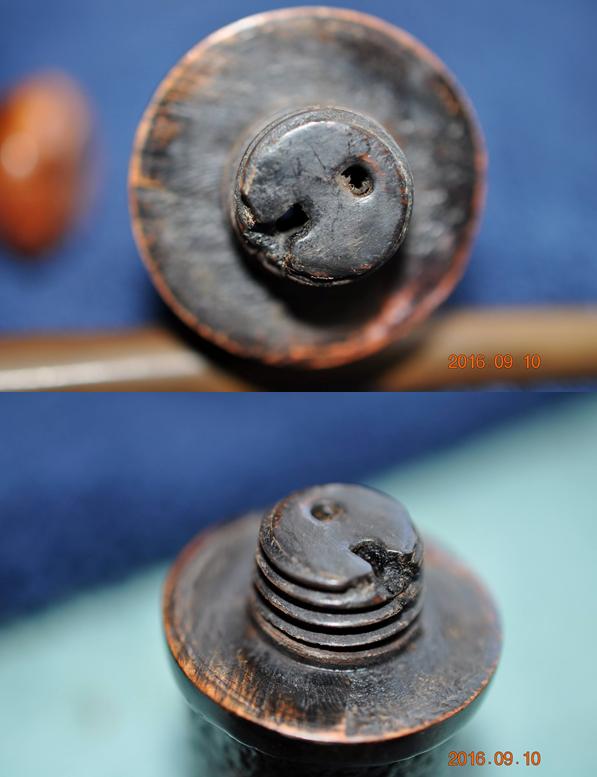
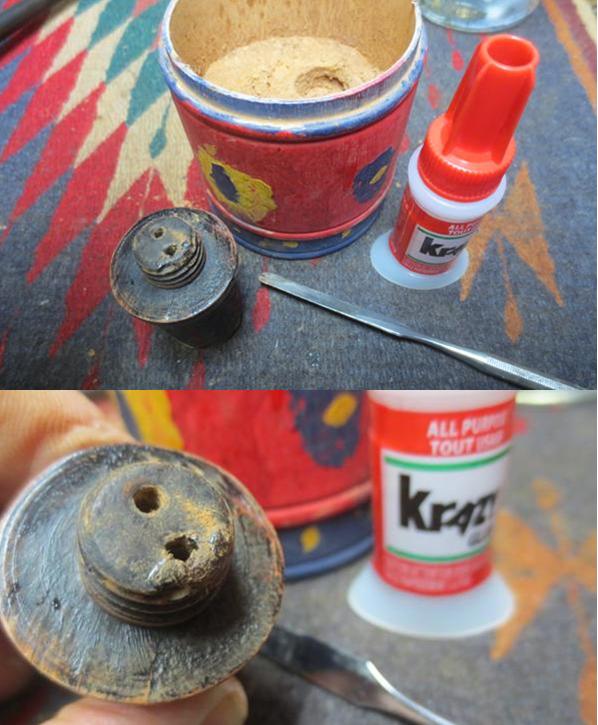
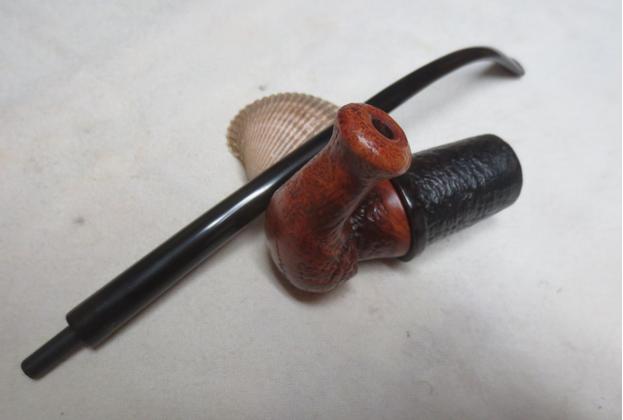
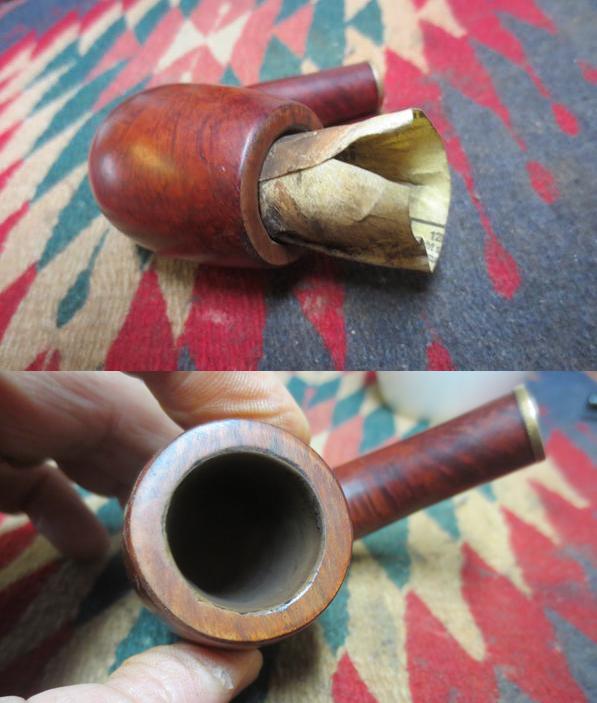
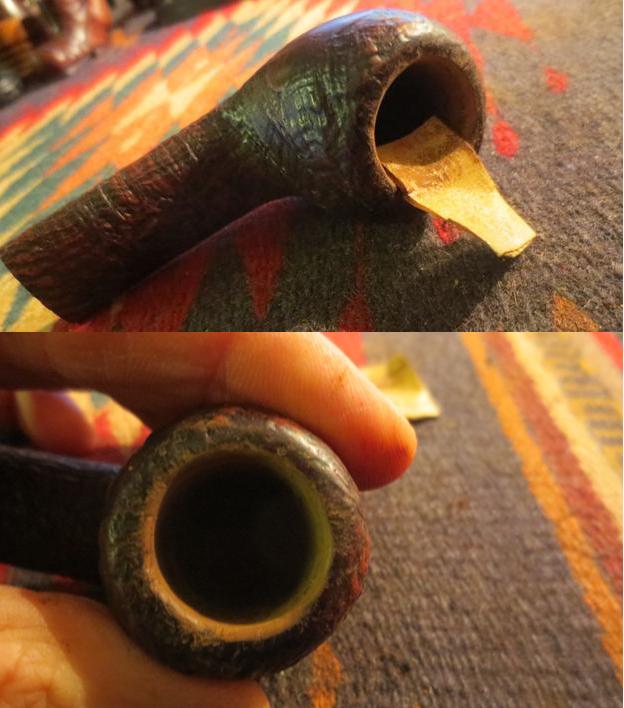
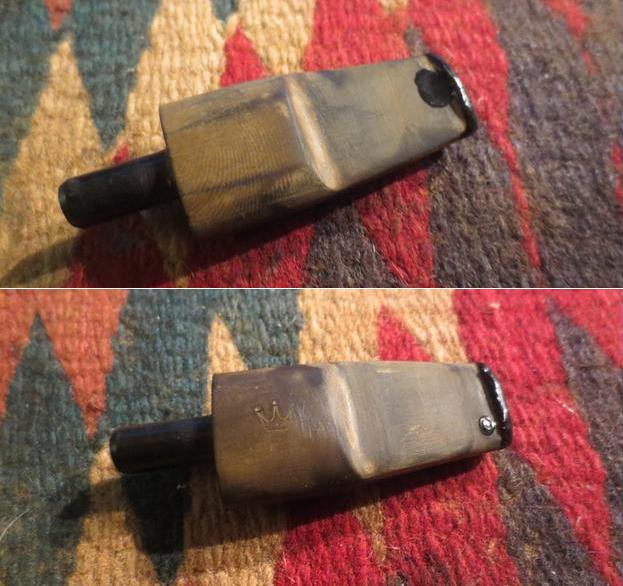
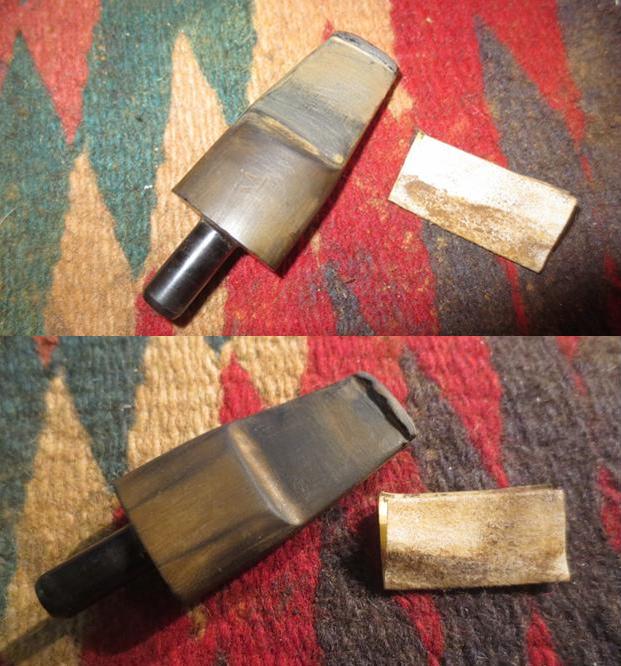
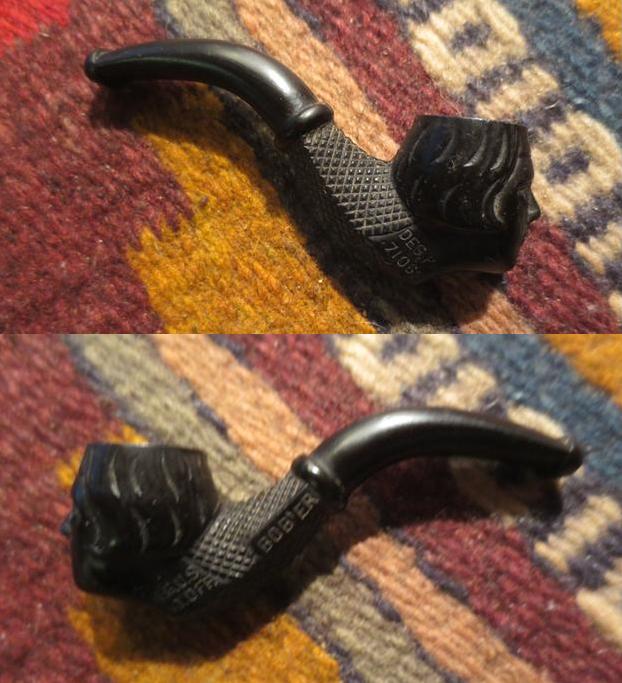
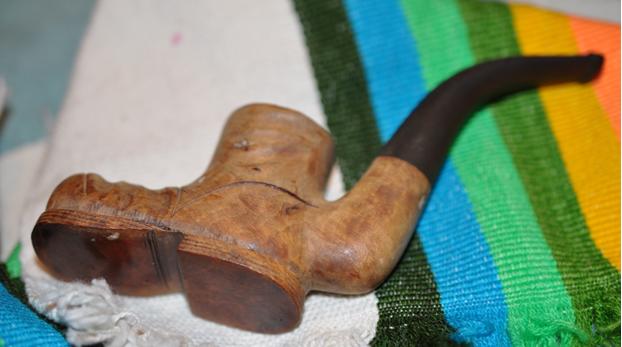
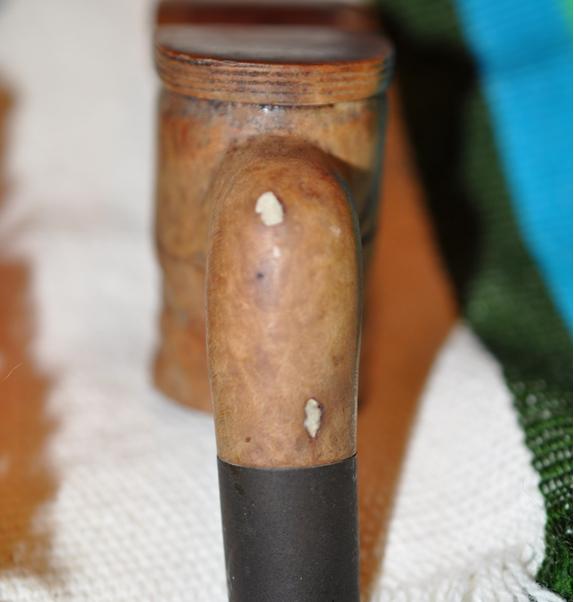
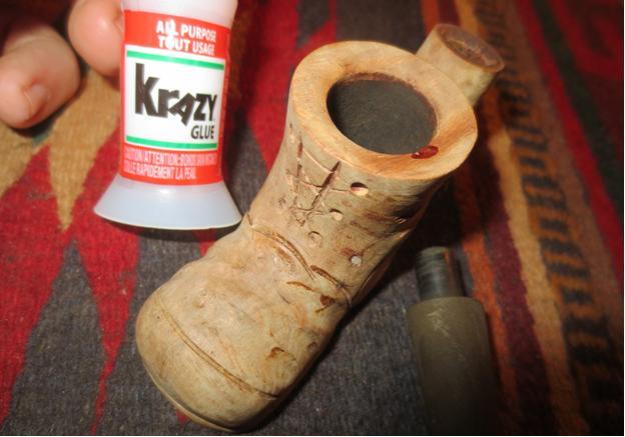
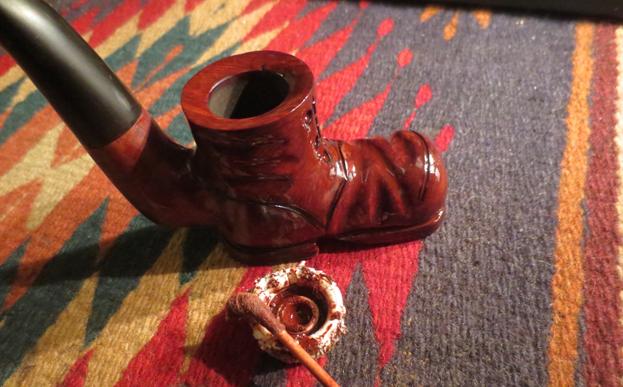
I put the stem in the shank and took the pipe to the buffer. I buffed it to polish the stain. When I was just about finished I could not believe what happened. It is that moment when you are buffing a pipe where you get a sick feeling. The wheel grabbed the pipe out of my hand, off my finger and threw it against the table top under the buffer. It was not far – a mere 2 inches but I heard the snap as the tenon broke. I was sick to my stomach. I was almost finished with the pipe and then this had to happen. I took a photo of the broken tenon once I had pulled it from the shank. It was almost a clean break at the end of the stem. Oh the frustration.

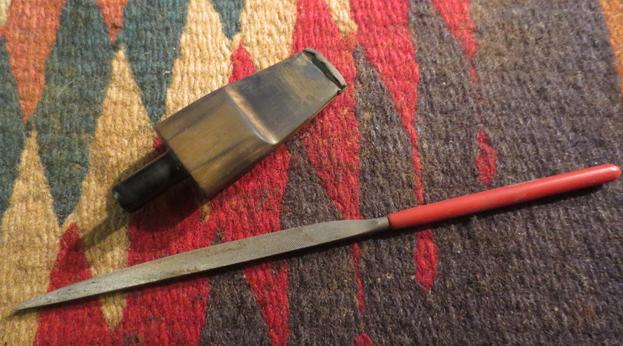
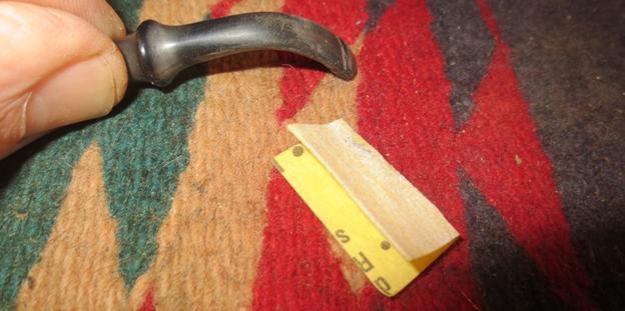
I used a Dremel to flatten the broken edge of the tenon against the face of the shank. It took a few moments to smooth out the broken part. I used the topping board with 220 grit sandpaper to face the end of the stem. I went through my box of threaded tenons and actually had one left in the box that was not a Jobey Link system tenon. It was the same diameter as the broken tenon.char14I chucked a drill bit in the cordless drill that was just a little larger than the air way in the stem. I turned the stem onto the drill bit the length of the threaded portion of the replacement tenon. I put two more drill bits in the drill and turned the stem onto the bits. Once it was the same diameter as the threaded portion I shortened the threaded end slightly so that it would fit tight against the stem. I roughed up the threads with the Dremel and a sanding drum. I left the threads in place so that I could turn it into the stem.char15I screwed it into the stem as far as it would go by hand and then used a pair of pliers to finish turning it tight against the stem face.char16
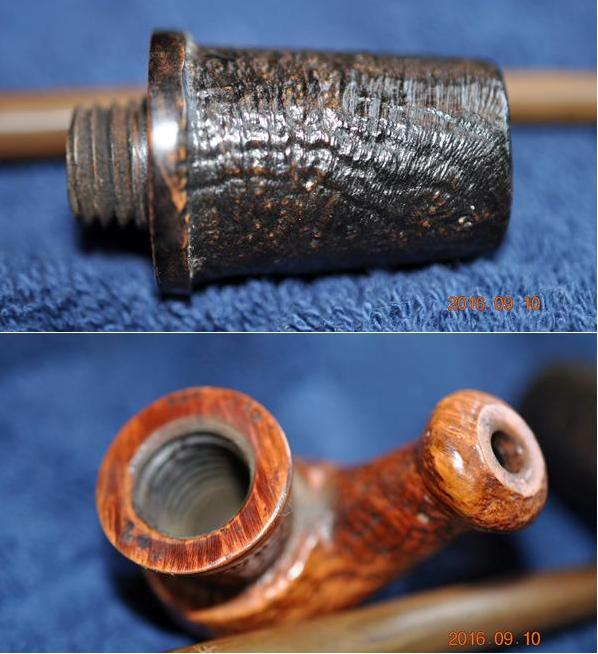
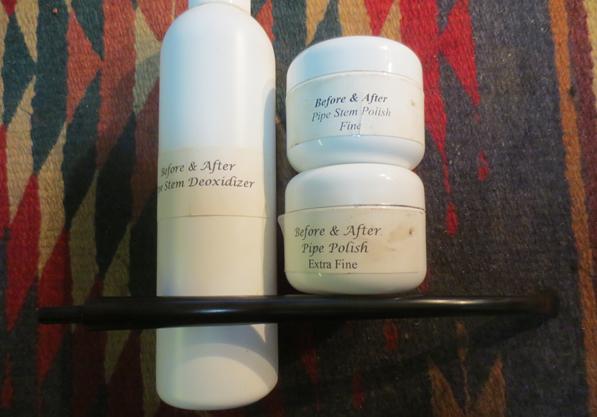
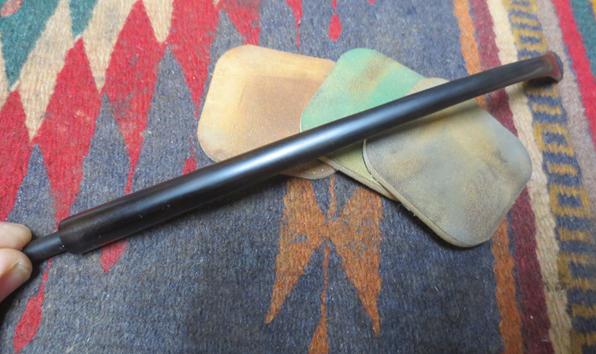
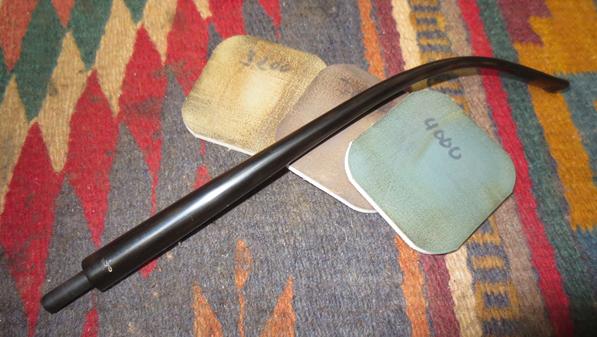
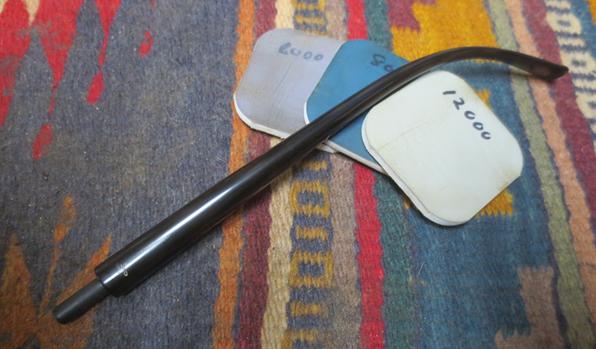
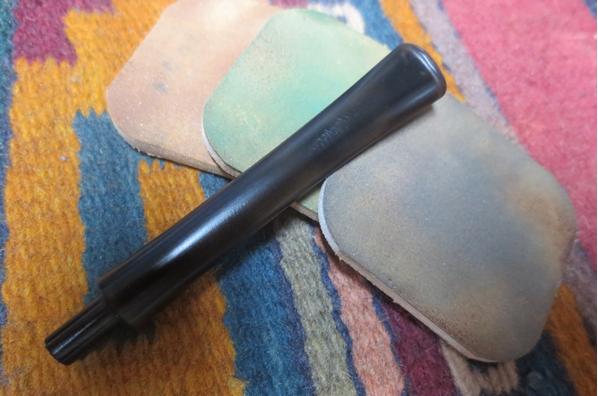
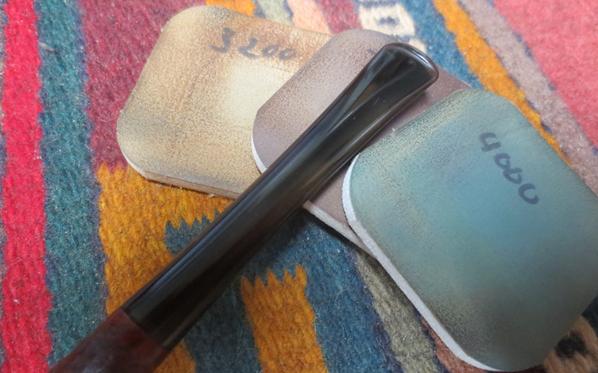
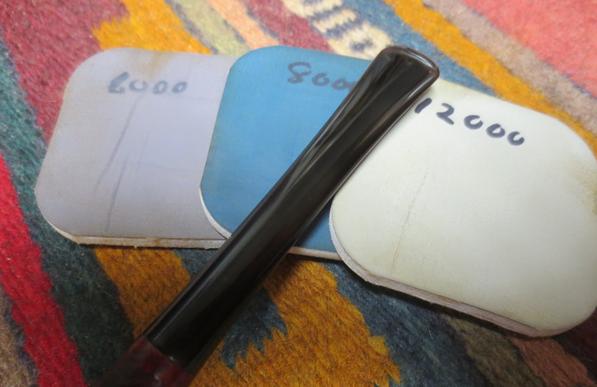
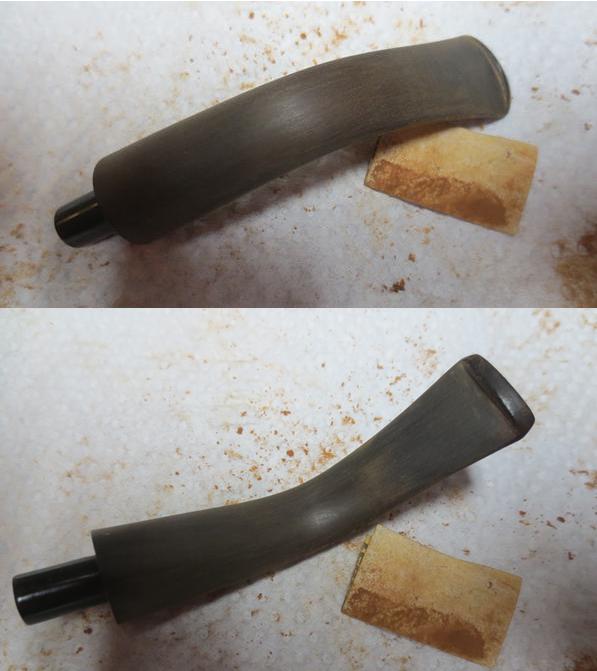
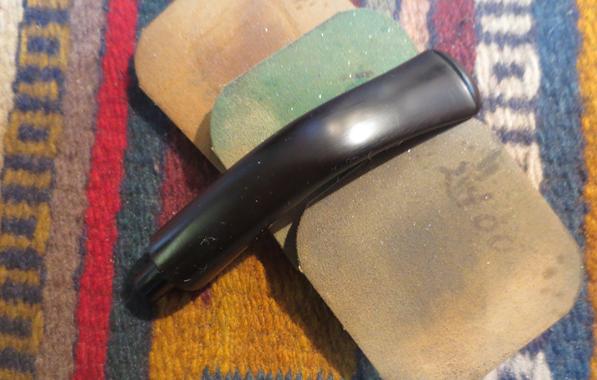
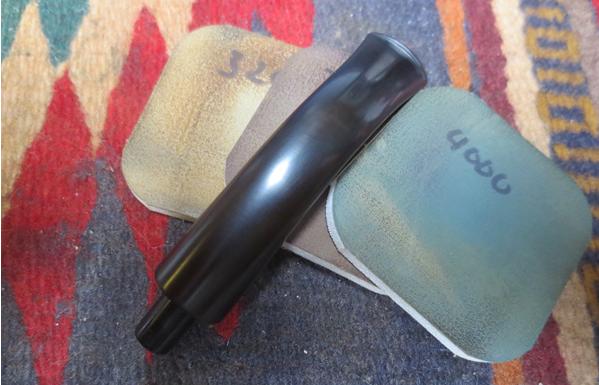
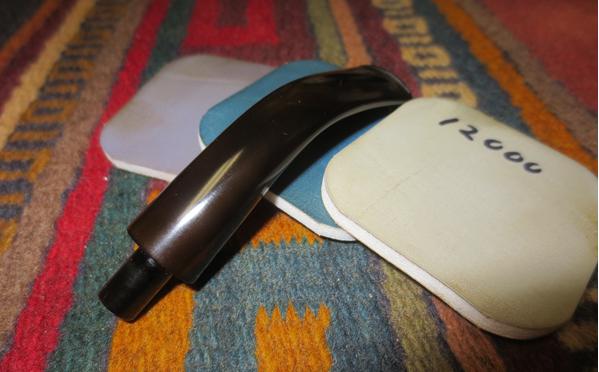
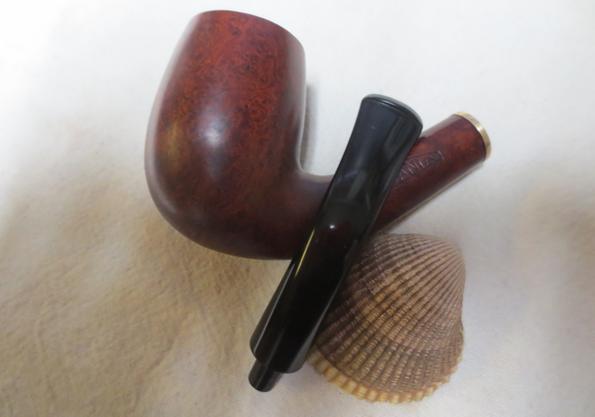
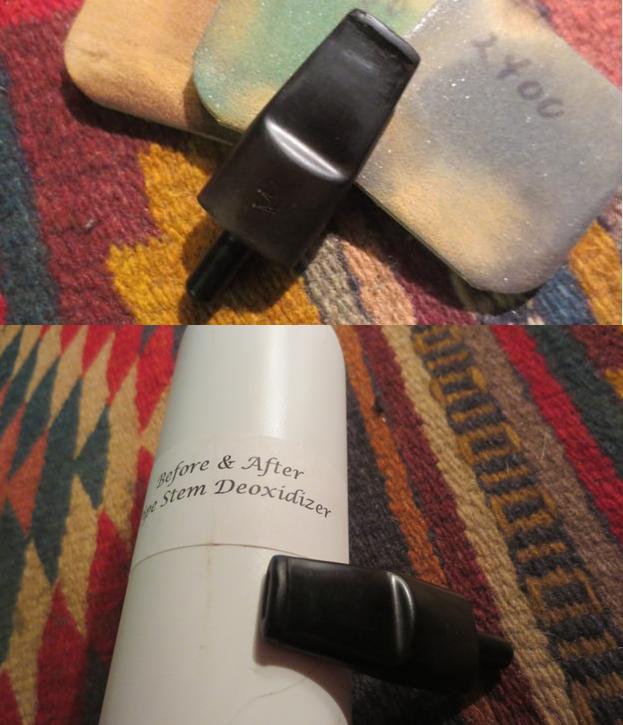
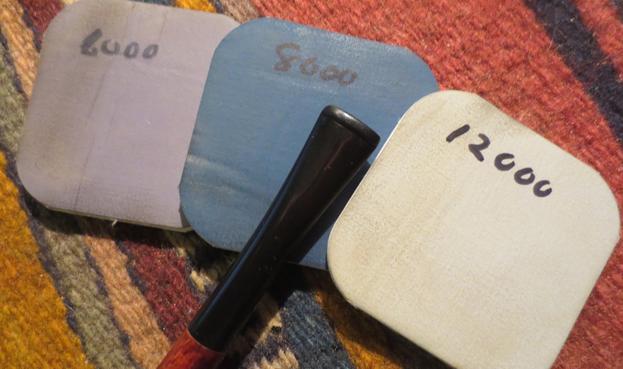
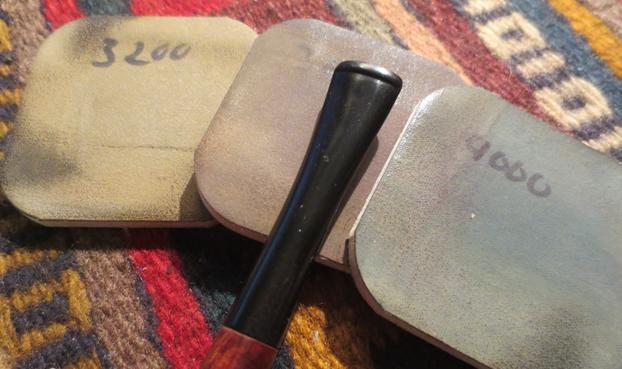
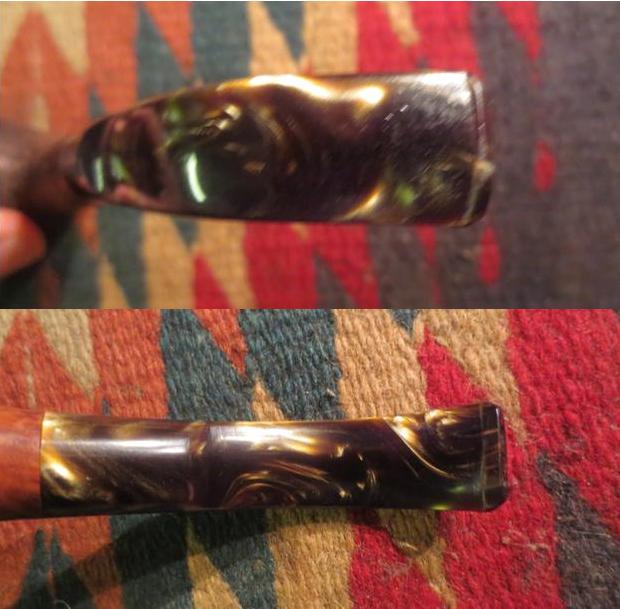
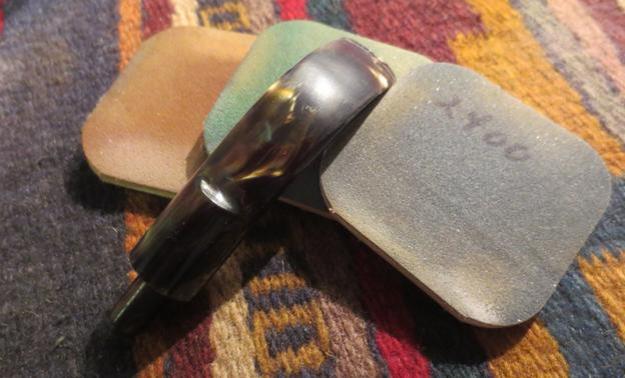
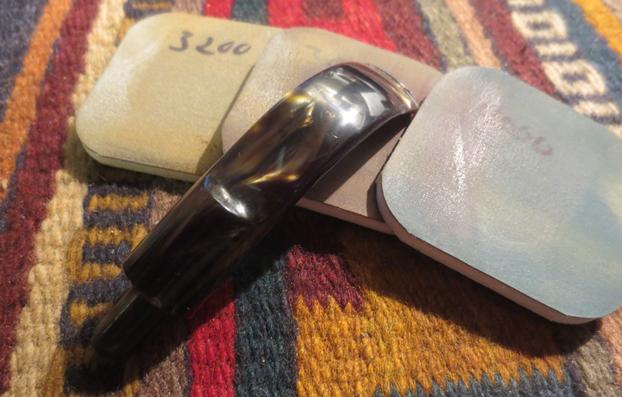
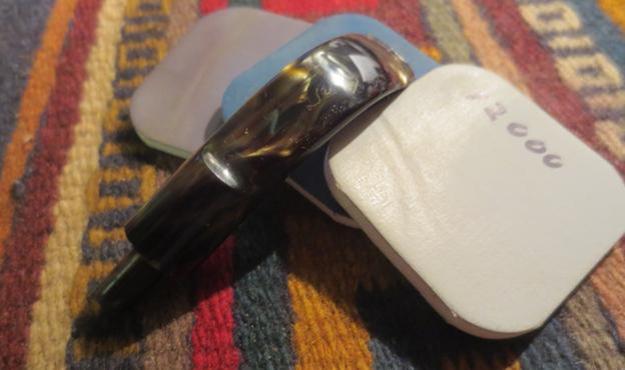
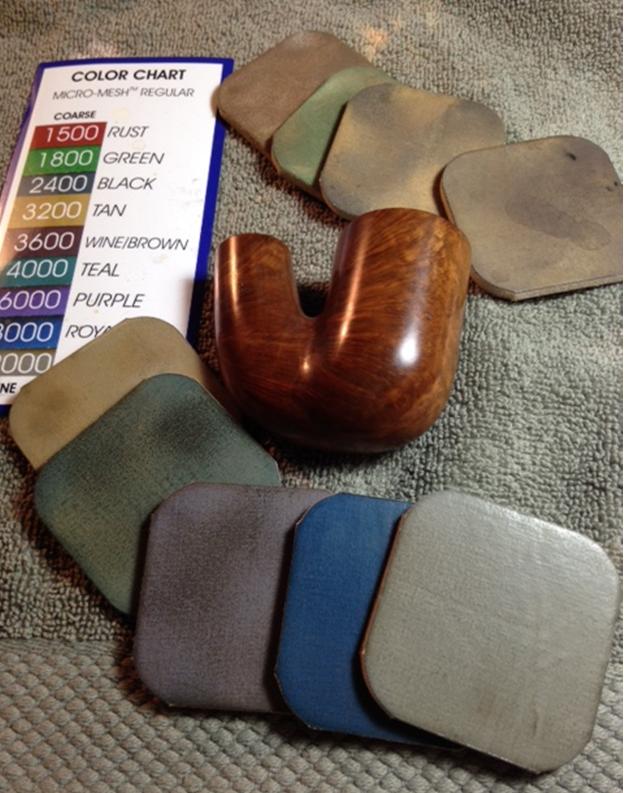
I put the stem in place in the shank and the fit was tight against the shank. I polished the stem with micromesh sanding pads – wet sanding with 1500-2400 grit pads and dry sanding with 3200-12000 grit pads. I rubbed it down with Obsidian Oil after each set of three pads. After the final set I rubbed it down with a last coat of oil. I set the stem aside to dry. (In the photos below of the shank and stem I did not push the stem in against the shank so it shows a small gap at that point. You will notice in the final photos that I pushed it back in place.)char17 char18 char19
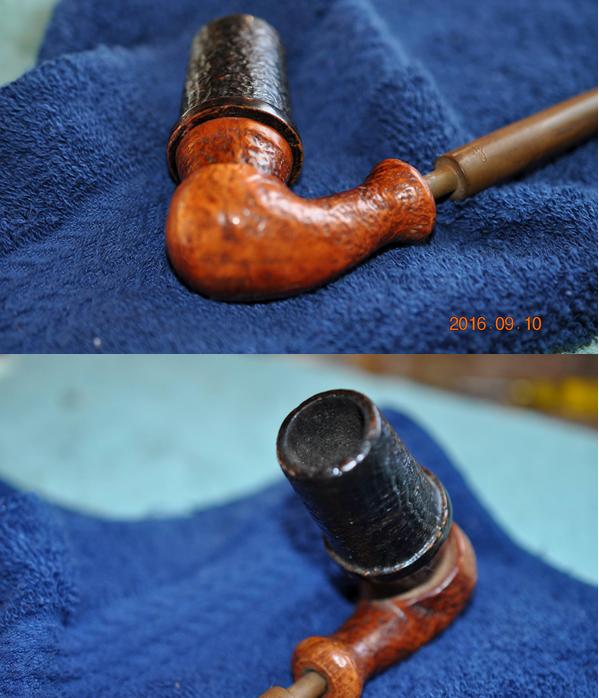
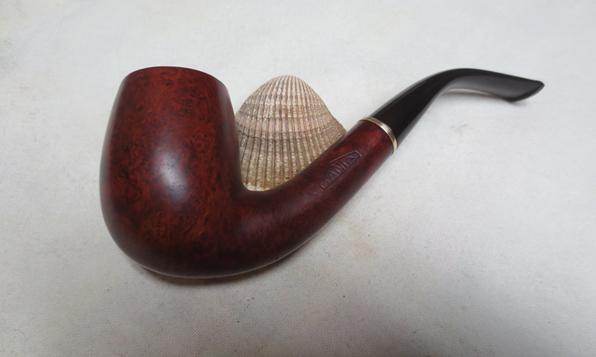
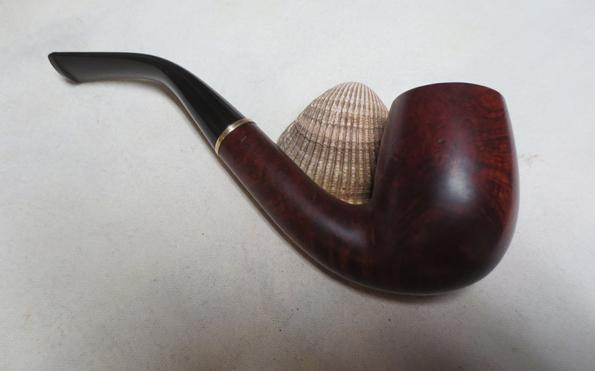
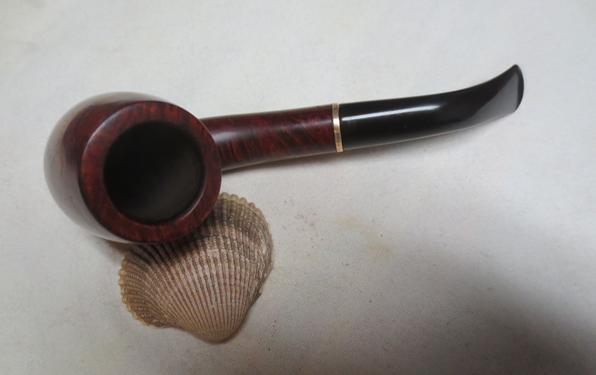
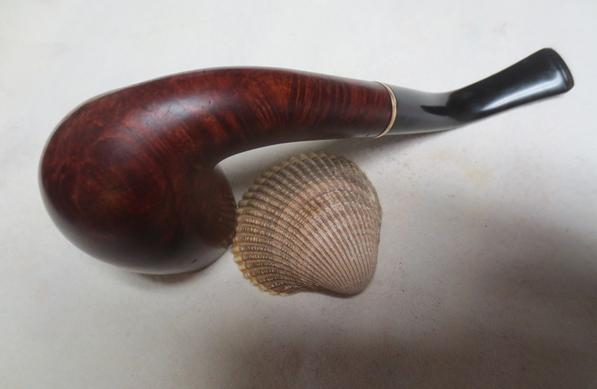
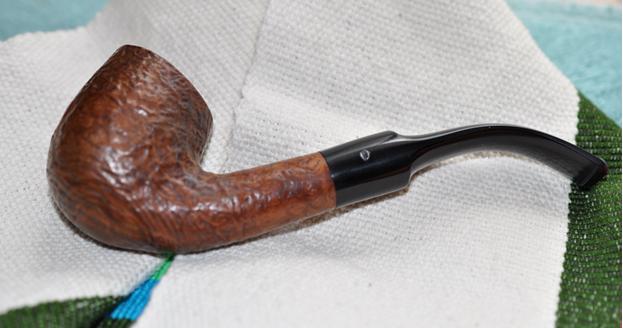
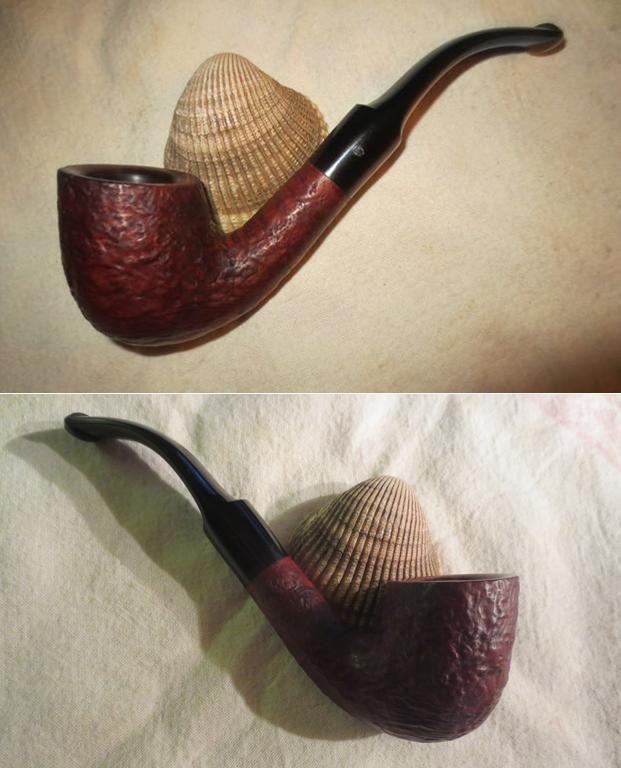
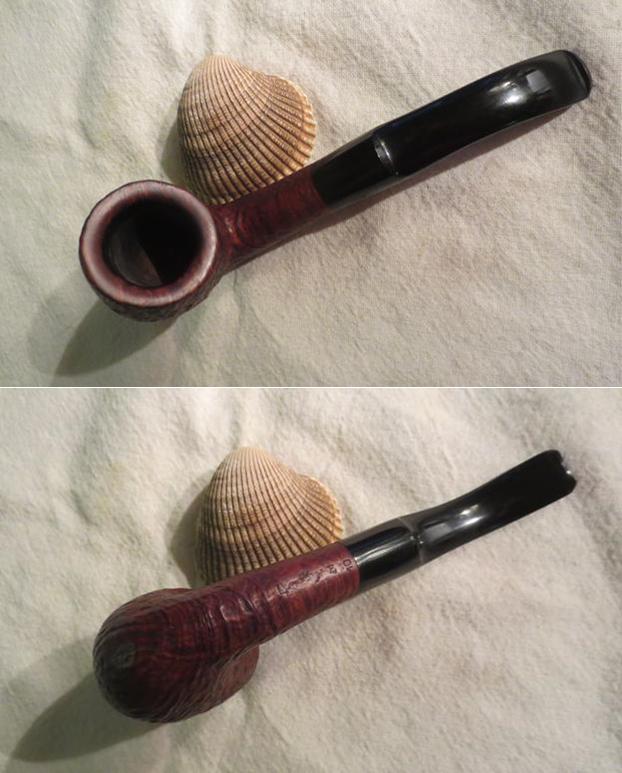
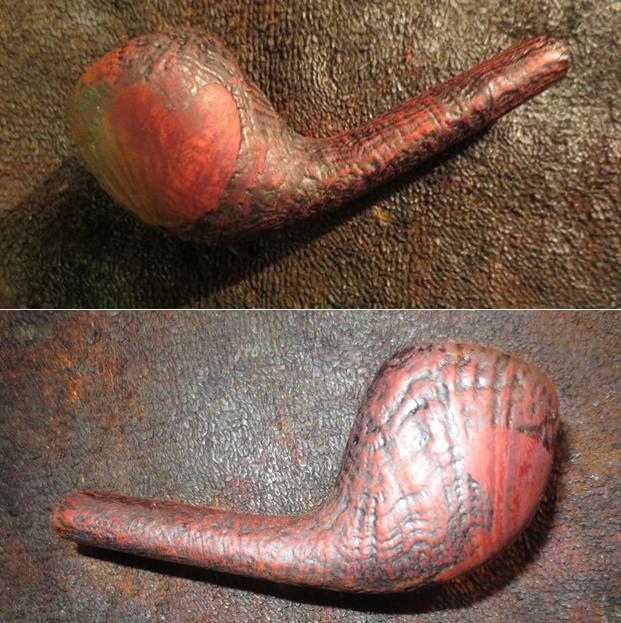
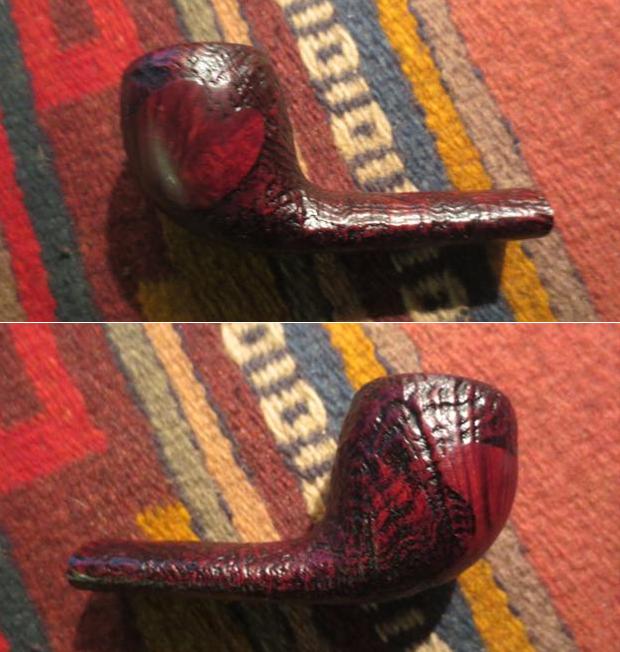
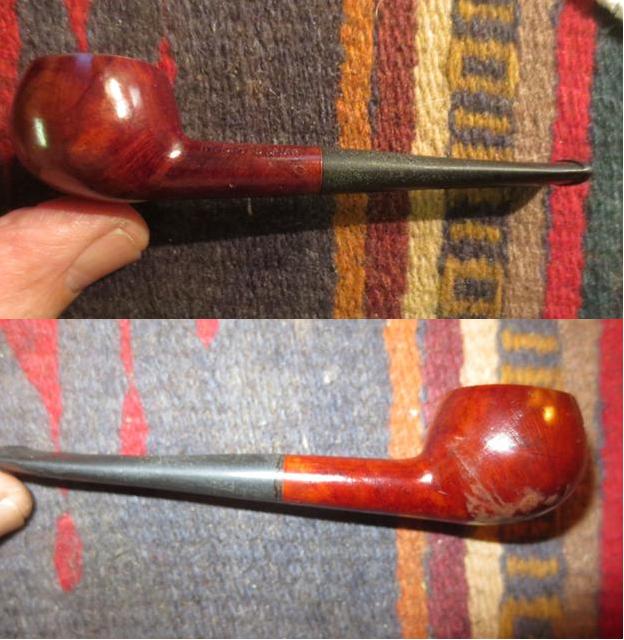
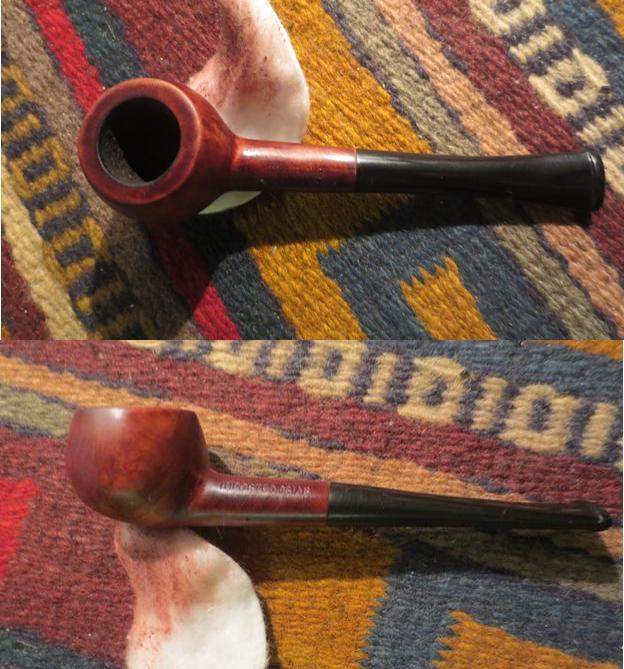
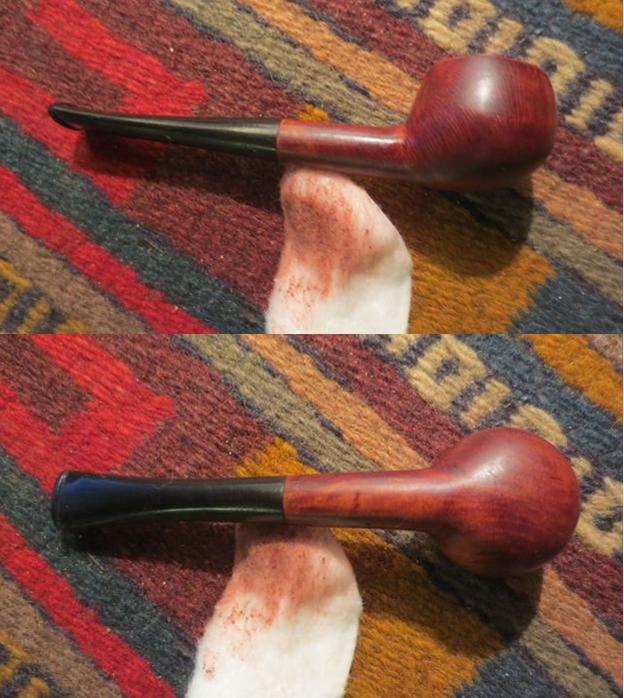
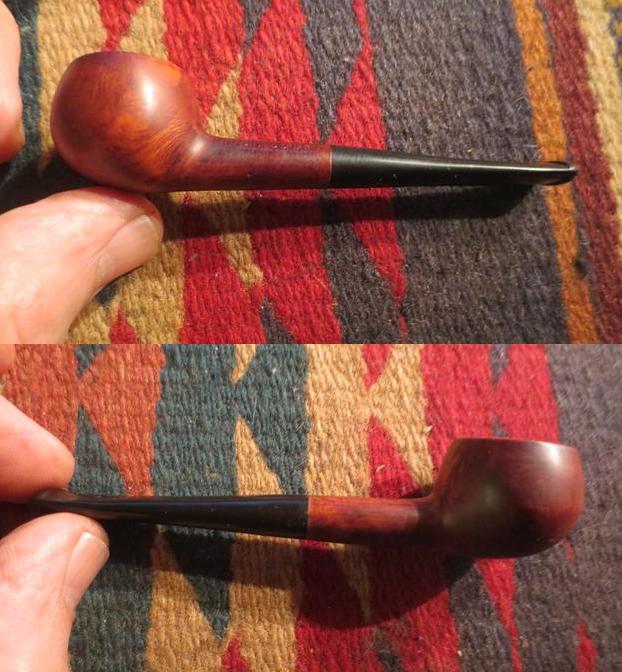
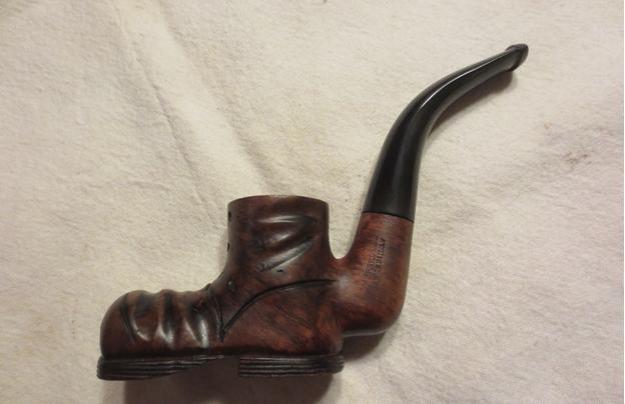
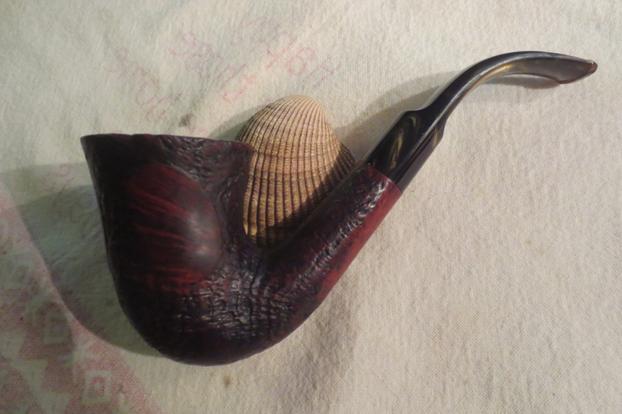
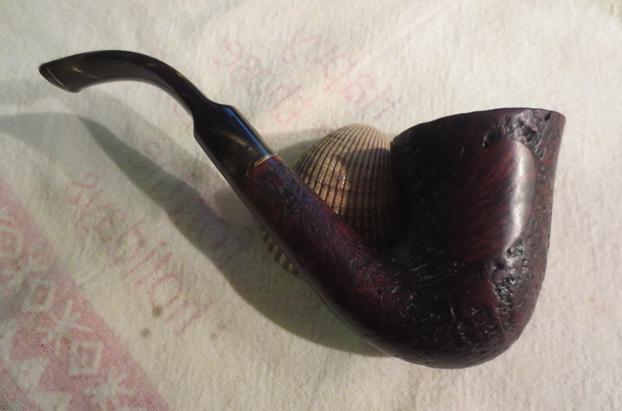
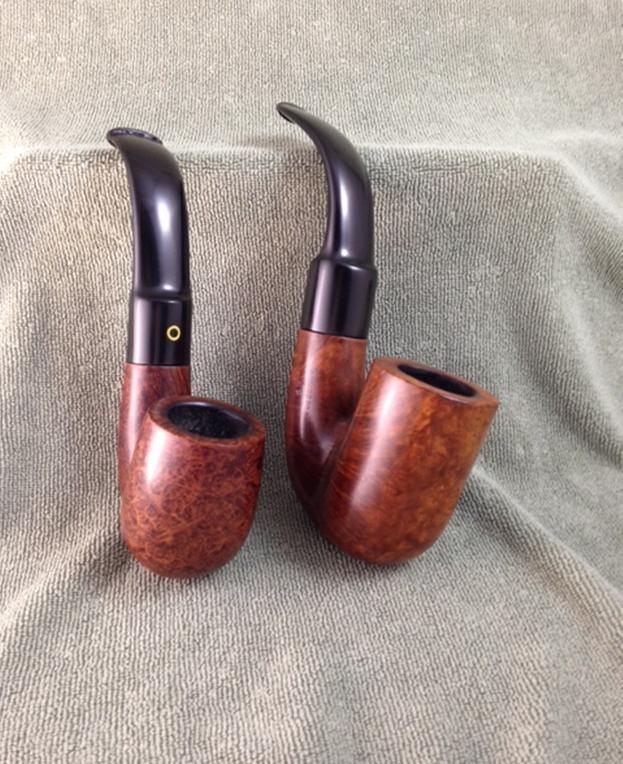
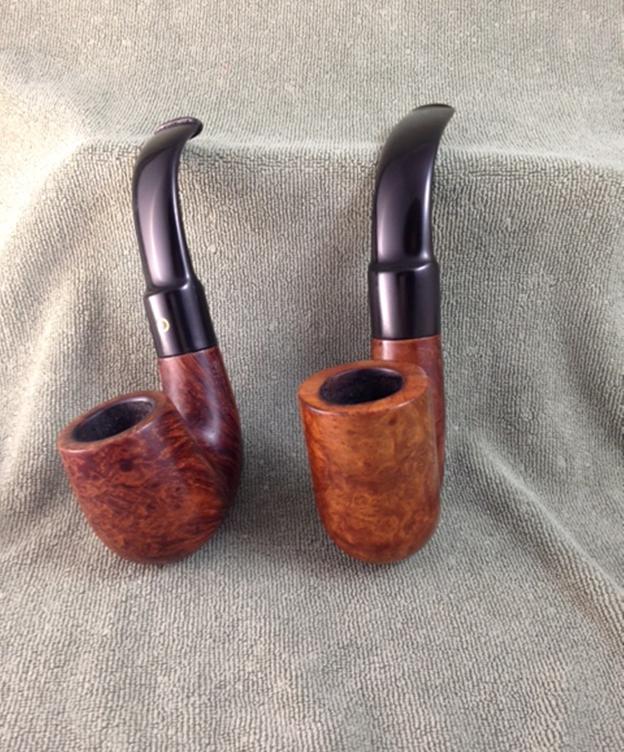
With fear and trepidation I took the pipe back to the buffer. I did not want to repeat the broken tenon so I was very careful. I worked the pipe against the buffing wheel that had been charged with Blue Diamond polish. I buffed it until the stem shone. I lightly buffed the bowl with the polish as well – being careful to not let it build up in the grooves. I polished the stem with carnauba wax and put Conservator’s Wax on the sandblast finish of the bowl and shank. I buffed the pipe with a clean buffing pad to raise the shine. I hand buffed it with a microfibre cloth to deepen the shine. The finished pipe is shown in the photos below. The fit of the stem against the shank was better than when I started. Thanks for walking through the restoration with me and also through the frustrating need to replace the tenon.char20 char21 char22 char23 char24 char25 char26 char27

Rejuvenating a Gasparini “Fatta a Mano” Camuna


Blog by Steve Laug

My brother Jeff has an eye for unusual pipes that he thinks might intrigue me. He outdid himself this time. He found an odd three-part pipe – a base, a bowl and stem that I would classify as a churchwarden. It is about 10 inches long and the bowl is 3 inches tall but at the same time it is dainty, delicate and artsy. It is not a heavy pipe and the thin pencil stem and the bowl and base make it seem smaller than it is. The first two photos below show the unique shape and you can get a sense of how the pipe is both big and delicate at the same time.gas1The next photos give a sense of the artistry of the pipe. The base is stained a light brown and has a shallow sandblast finish. The end of the shank is rounded. The stem should sit against the shank end but the mortise needs to be cleaned and the oxidation on the tenon needs to be removed to make that happen. The bow is threaded and screws into the base. It has a contrasting dark brown and medium brown stain coat that gives contrast in the deeper blast and also with the base.gas2 gas3The next photos are close up pictures of the bowl and base. The first shows the bowl removed from the base. You can see from the photo that the bowl is threaded to be screwed into the base. The base and the bowl are dirty. The bottom of the bowl has two air holes that go into the bowl. The one toward the bottom of the photo below shows that a chunk of briar has broken away from the side of the hole and the threaded portion.gas4The second and third photos show the inside of the base and the cake and rim of the bowl. It is dirty but the rim and base are in excellent condition. There is some build up on the area of the base where the rim sits. It will need to be cleaned. To me it looks like it is a combination of dust and wax.gas5The next two photos give a clear picture of the damage to the base of the threaded portion of the bowl. You can see the damage on the outer edge of the tip and to the threads. It looks like a chunk of briar has broken free and a lot of debris and tars have filled in the damaged area.gas6The next photos show the base and the bowl from different angles. The grain and the blast is quite nice and the contrast of stains on the bowl look really good in contrast to the lighter stained base. The fourth photo shows the stamping on the bottom of the base. It reads R. Gasparini over CALUMA over script that reads “Fatta A Mano” which translates as Made by Hand.gas7 gas8The next photos show the stem with the tooth chatter and marks on the top and bottom side near the button. They also show the oxidation and the loss of colour in the G script logo on the side of the stem.gas9I know nothing about Gasparini brand so I looked up the website of the brand and found that the “Fatta a mano” stamped signified a particular freehand style line that Gasparini did. Here is the link to their website http://www.mgasparini.it/en/category-product/hand-made/.

I also looked up the brand on Pipedia. There is a lot of the history of the brand there for those who want to read the article in full. Here is the link: https://pipedia.org/wiki/Gasparini. I quote from that article in part.

“In 1938 Mario Gasparini, with his wife Ida, took his first steps into the world of the pipe. Today his daughter, Marisa Gasparini, sits at his desk. Since 1977 Marisa and her husband, and now her daughter, carry on the tradition of her family…”

“At the beginning of 1950’s, the building, that still today hosts the production department, was enlarged. In 1971 the offices and the warehouse were moved from Milan (where they were situated for marketing purposes) to Luvinate.”

“During those years the skilled workers and our direct partners have always followed the history of the Gasparini factory, becoming very fond of it and devoting themselves, with care and love, to the making of each pipe, with the personal fantasy and skills of the artist…”

“…The cycle of manufacture is basically divided into two separate branches. Pipes from the first branch (my addition, ed.) the “Fatta a Mano” and “da Collezione” are completely hand made, rigorously produced from the best selected briar; the estrus(?) and fantasy of our masters is surely more evident in these series of pipes.”

“The other branch is (my addition, ed.) …Serial pipes are partially machine made (the bowl, shank and drilling) and they are divided into various categories based on the quality and finish.”
“…during the years we have always made the creation of unique pieces for the series “Fatta a Mano” (Hand Made) and “per Collezionisti” (for collectors).”

At the bottom of the Pipedia article there was an email address for contacting the Gasparini Company with any questions that need to be addressed to them. I took the opportunity last evening to write an email to them regarding the age and provenance of the pipe I had in hand. I also included a photo of the pipe’s condition and look when I got it from my brother. This morning I received a reply from none other than Marisa Gasparini herself. Here is her email in full:

Dear Steve,
The pipe you have is a very old pipe that we produced 35 years ago about, and we made only few pieces.

It’s very different from the normal pipes and we have made in the time other interesting pipes, quite original that we keep in our warehouse.
If you are interested I can send you some photos for next week so you can understand what I mean for original.

I would like to know where you bought that pipe, thanks a lot and best regards,

Marisa Gasparini

That gave me some incredibly helpful information. The pipe in my hand is approximately 35 years old and there were only a few of them made at that time. She is going to send me some photos of some of the original pipes next week. I will post them as an addendum to this blog when I receive them. I wrote Marisa back immediately thanking her and answering her question as to where I found the pipe.

Now I had a feel for the age and provenance of the pipe and I was ready to work on it. I took some photos of it before I worked on it. My brother had done the majority of the clean up work on the bowl, base and shank before he sent it to me. He had reamed it and cleaned out the airways in the bowl, base, shank and stem. He scrubbed the externals and remove a lot of the waxy grime that had collected on the bowl over the years. It looked pretty good when I received it.gas10 gas11I took the stem out of the pipe and unscrewed the bowl from the base and took some photos of the pipe before I worked on it.gas12 gas13I took a photo of the stamping on the bottom of the base to give an idea of how that look – it is the only smooth portion on the base other than the rounded shank end.gas14I took some photos of the damage to the bottom of the bowl on the threaded portion to show what it looked like with the oils and tars removed. I took a top down photo to show the cleaned bowl and also the twin airways in the bottom of the bowl.gas15 gas16I cleaned up the reaming with a Savinelli Pipe Knife and scraped out the bits of cake that still were on the walls and at the bottom of the bowl.gas17I wiped down the bottom of the bowl and the damaged area with alcohol on a cotton swab and cotton pad in preparation for repairing the damage. I used clear super glue and briar dust to build up the area of the missing chunk of briar. I was careful to keep the airway open. I layered the glue and the dust until it was smooth.gas18I used the sanding board to lightly “top” the bottom of the bowl and smooth out the repaired area. After I took the second photo below I used needle files to retrace the threads on the damaged area of the bowl.gas19I gave the bowl and base several coats of Conservator’s Wax and buffed them with a shoe brush. The photos below show the bowl and base at this point in the restoration.gas20 gas21I turned my attention to the oxidation on the stem. I lightly sanded it with 220 grit sandpaper to remove the surface oxidation and remove the tooth marks and chatter from the area around the button. I ran a long pipe cleaner through the stem just to check for debris and oils but my brother had done a great job with the airways. I scrubbed the stem with Before & After Pipe Stem Deoxidizer and the with the Fine and Extra Fine Pipe Stem Polish. I was able to get the majority of the oxidation off the stem.gas22I did a touch up on the “G” logo on the stem with white model paint and a fine bristle artist’s brush. When it dried to touch I used a 1500 grit micromesh sanding pad to remove the excess paint and polish the end of the stem.gas23I polished the stem with micromesh sanding pads – wet sanding with 1500-2400 grit pads and dry sanding with 3200-12000 grit pads. I rubbed the stem down with Obsidian Oil after each set of three pads. After the final set I buffed it with Blue Diamond on the wheel and gave it a last rub down with Obsidian Oil. I set the stem aside to let the oil dry. I buffed the stem with carnauba wax and with a clean buffing pad to raise the shine.gas24 gas25 gas26I lightly buffed the bowl and base with Blue Diamond and then gave it a light coat of carnauba, being careful to not let it build up in the grooves and crevices of the sandblast. I buffed it with a clean buffing pad to raise the shine. gas26a gas26b gas26c gas26dI put the pipe back together and gave it a final buff with a clean buffing pad to shine it. I hand buffed it with a microfibre cloth to deepen the shine. The finished pipe is shown in the photos below. I took photos of the pipe as a whole and also taken apart in the various configurations. I am really pleased with the finished pipe and look forward to giving it a smoke. To me it is a very “Gandalfian” looking pipe and feels great in the hand and the mouth. Thanks for walking with me through the history and the process of bringing the pipe back to life.gas27 gas28 gas29 gas30 gas31 gas32 gas33 gas34 gas35 gas36 gas37 gas38 gas39


New Life for a Hardcastle’s London Made Reject Pot


Blog by Steve Laug

This perfectly shaped little Hardcastle’s sandblast pot was the next pipe to my worktable. It is a small almost pencil shank pot. It is stamped Hardcastle’s London Made and across that it is stamped Reject. It has a rich blast on the sides of the bowl and shank. There is a smooth portion on the bottom of the bowl and shank for the stamping and allowing it to be a sitter. My brother took the next photos to show the condition of the pipe before he cleaned it up.hard1He took some close up photos of the bowl and stamping. The bowl had a thick cake and a large overflow of lava on the rim. The lava covered the light blast finish on the rim completely and it was hard to tell the condition of the bowl at this point. The finish was worn and dirty but there were no chips or dents marring the finish. The stem is oxidized and you can see the Hardcastle’s H stamp on the left side near the shank. You can see the stamping on the shank and clearly see the REJECT stamp across the initial stamping. I am not sure why this pipe was rejected. It appears to be a decent piece of briar. There were two small sandpits on the sides of the bowl that I suppose may have caused it to be a reject but that is not clear to me.hard2 hard3My brother did his usual great clean up on the exterior of the pipe. He scrubbed it with Murphy’s Oil Soap and a tooth brush and was able to remove the finish. He reamed the bowl and removed the lava build up on the rim and left a slightly darkened rim with no burns or damage to the edges. I took the next set of photos to show what the pipe looked like when it arrived in Vancouver.hard4 hard5I took a close up photo of the rim to show the darkening on the back side of the top. It was clean but darkened. There were no burn marks or damaged briar on the edges of the bowl. The stamping is also shown and it remains sharp and distinct.hard6The stem was lightly oxidized and there were tooth dents and chatter on the top and underside near the button. The button had some flattening and wear as well.hard7I used a brass bristle tire brush to scrub the top of the rim and try to clean out some of the darkening on the rim. I was able to remove some of it and make it less pronounced.hard8I wiped the bowl down with acetone on cotton pads to clean of any remnants of the old finish and to remove the debris from the brass brush work on the rim.hard9 hard10 hard11With the bowl cleaned I stained it with a dark brown aniline stain mixed 50/50 with isopropyl alcohol. I flamed the stain and repeated the process until the coverage was even on the bowl and in the deep pits of the sandblast finish.hard12I took some photos of the pipe at this point in the process. The stain had covered well. The colour was a little dark for my liking and would need to be lightened a bit before I was finished. You can see the sand pits on both sides of the bowl that may have made this pipe a reject. I have circled them in red.hard13 hard14I cleaned the mortise with a dental spatula and then cotton swabs, pipe cleaners and alcohol. I also cleaned out the airway into the bowl and in the stem.hard15To lighten the colour of the stain I washed it down with some alcohol on cotton pads until the colour was more to my liking. The finished colour is shown in the photos below.hard17 hard18I painted the dents in the stem with the flame of a Bic lighter and was able to raise them almost smooth. I sanded the stem with 220 grit sandpaper to smooth out the slight dimples that remained in the surface. I wet sanded the stem with 1500-2400 grit micromesh sanding pads and rubbed it down with Obsidian Oil. I dry sanded it with 3200-12000 grit pads and rubbed it down with the oil after each set of three pads. After the final 12000 grit sanding I gave it a final coat of Obsidian Oil and set it aside to dry.hard19 hard20 hard21I buffed the pipe with Blue Diamond on the buffer and gave the stem multiple coats of carnauba wax. I hand waxed the bowl with Conservator’s Wax. I buffed the bowl and stem with a clean buffing pad and again by hand with a microfibre cloth to raise and deepen the shine on the briar. The finished pipe is shown in the photos below. I am pretty happy with the finished pipe. Thanks for looking.hard22 hard23 hard24 hard25 hard26 hard27 hard28 hard29

A Graceful Swan-Necked Tania Billiard


Blog by Steve Laug

The graceful swan neck like bends and curves of this pipe are one of its attractions for me. It is what drew me to work on it as my next restoration project. It is quite a large pipe – 7 inches long, 2 ¼ inches tall, 1 ¼ inches outer diameter of the bowl and 7/8 inch chamber diameter. The briar is quite nice – lots of birdseye around the bowl. The finish was dirty and worn but other than a few dents and dings it was in decent shape. The brand – Tania – is one that I cannot find any information about online. It is a mystery pipe to me.tania1 tania2My brother took some close up photos of the bowl. The first photo shows the large of fills on the right side of the bowl. There are at least 6 or 7 fills on that side and none on the other sides of the bowl. The outer edge of the rim was chipped and worn. There was some wear from knocking it out on something hard. The inner edge of the bowl also was also out of round. The rim top was dented and worn and there were some flecks of tars and oils on it as well.tania3 tania4The next two photos show the stamping on the side of the shank. You can see the name TANIA wrapped with a house shaped frame which peaks at the N. The brass band separating the stem and the shank is actually a ferrule that is bent over the end of the shank. It is dented and tarnished. The final photo shows the oxidation and wear on the stem. Both sides of the stem show the wear and tear on the surface just ahead of the button.tania5 tania6 tania7My brother scrubbed the exterior of the pipe with Murphy’s Oil Soap and removed the finished and left behind some clean briar. He scrubbed the inside of the shank and stem with pipe cleaners, cotton swabs and alcohol. The stem oxidized in the cleanup process. He was able to get much of the tars and oils off the rim of the bowl. I took the next photos when I brought it to the work table.tania8 tania9The rim looked better but it was worn. The outer edge of the rim was in rough shape from knocking it out. The inner edge was damaged with a knife or a sharp object used to scrape the bowl. There were some dents and nicks in the rim top. I took some photos of the stem. It was in very good shape other than oxidation. There were no tooth marks or tooth chatter on the stem.tania10 tania11The fills on the right side of the bowl were not smooth. They were pitted and dented. I sanded the surface of the bowl around the fills and wiped it down with some acetone. I refilled them with clear super glue.tania12I sanded the bowl repairs with 220 grit sandpaper and then with 1500-4000 grit micromesh sanding pads. I sanded it with a medium and a fine grit sanding sponge. I wiped the bowl down with alcohol on cotton pads. I checked the inside of the mortise and airway with pipe cleaners, cotton swabs and alcohol. It was very clean.tania13 tania14I stained the bowl with a dark brown aniline stain cut 50/50 with isopropyl alcohol. I applied it, flamed it and repeated the process until the coverage on the briar was even.tania15The inner edge of the bowl still showed some damage so I sanded it with a tube of 220 grit sandpaper wrapped around my finger. I sanded until the inside was clean and the edge was more round. I sanded the inner edge to bevel it slightly and take care of the knife damage. I sanded it with 1500-2400 grit micromesh sanding pads. I stained the inside edge with stain on a pipe cleaner.tania18 tania19I buffed the bowl with Blue Diamond on the buffing wheel and gave it a light coat of carnauba wax. I buffed it with a clean buffing pad to raise the shine.tania16tania17I sanded the stem with 220 grit sandpaper to remove the oxidation on the stem. I cleaned up the sharp edge of the button with the sand paper and sharpened and reshaped the button.tania22I wet sanded the stem with 1500-2400 grit sanding pads and rubbed it down with Obsidian Oil. I dry sanded it with 3200-12000 grit sanding pads. I rubbed it down with Obsidian Oil after each set of three sanding pads. After the final pad I rubbed it down a final time with oil and set it aside to dry.tania23 tania24 tania25I buffed the pipe with Blue Diamond on the buffing wheel to polish out the scratches. I gave the pipe multiple coats of carnauba wax and buffed it with a clean buffing pad. I took it back to the work table and hand buffed it with a microfibre cloth. The finished pipe is shown in the photos below. If anyone can tell me about the brand – Tania, please leave a response below. I can find nothing regarding the brand online or in my normal reference tools. If you would like to add the pipe to your rack let me know via email at slaug@uniserve.com or in the response area below. Thanks for looking.tania26 tania27 tania28 tania29 tania30 tania31 tania32 tania33

Getting Lazy – A Simple Restore on a Loewe Cutlass 10


Blog by Steve Laug

The last three or four pipes I have taken out of the refurbishing box have been very simple restorations. My brother sent me this Loewe’s pipe that is stamped Loewe over Cutlass on the underside of the shank with the shape number 10 at the shank stem union. In the photos he sent me it appeared to be in pretty decent shape. The finish looked dirty and murky but otherwise good. The rim had some tars and overflow from the cake in the bowl but not too bad. There were some nicks and dings in the rim but none too deep. The stem was virtually flawless with no tooth chatter or tooth marks. The boxed L logo on the stem was worn and almost illegible but with a lens it is clear.loewe1While I have heard of and enjoyed quite a few older Loewe’s pipes the shape of this one and the name were not familiar to me. Even the shape number was not recognizable. I looked on the pipephil site to see if I could find any information on this particular iteration of the brand and found what I was looking for. There on his site (http://www.pipephil.eu/logos/en/logo-l5.html) I found a pipe with the same stamping but a different number. The one in my hands does not have a COM stamploewe2 so I do not know where it was made. I have included the photo of the stamping and the stem logo to the left from that site as it is parallel to the one I have. I have also included some information from the listing there.

The brand was founded 1856 by Emil Loewe and was first bought out by Civic. Eventually the brand became part of Cadogan Group along with BBB, Civic, Comoy, GBD, Loewe and Orlik in about 1979. Judging from the age and the stamping on this pipe I would surmise that it was made after that merger and is a Cadogan pipe.

I also did some reading on the history of the brand on Pipedia and include a short excerpt here that is pertinent to the age and stamping on this pipe: https://pipedia.org/wiki/Loewe_%26_Co.#Bottom_of_shank: “By studying the website of one UK dealer I was able to deduce that the present shape numbers (early 2003) mostly (probably all) differ from those used from 1967. For example, a Billiard is now a 28, a Lovat an 834, a Canadian a 296. Some shape numbers now have 4 digits. But even today, Cadogan will occasionally still stamp a pipe with a shape name instead of a number, though only on request.”

It looks to me that I am dealing with a pipe made around 2003 jusding from the change in shape numbers to a two digit numbering system at some level. Though there is a lot of uncertainty regarding the dating of Loewe pipes after the Cadogan buy out.

My brother took the first and the following photos of the pipe before he did the cleanup. What follows are a series of close up photos of the stamping, the rim and bowl and the sandblast look on the bottom of the bowl. In the bowl bottom photo you can see the dust and debris in the grooves of the blast.loewe3 loewe4 loewe5My brother cleaned out the internals – the mortise and the airways in the shank and stem with pipe cleaners and alcohol. He scrubbed the externals with a tooth brush and Murphy’s Oil Soap and was able to not only remove the grime from the finish but most of the finish also. When it arrived in Vancouver the pipe looked like virgin briar. The stem is acrylic so there was no oxidation on it. The next photos show the pipe when I brought it to my work table. The blast on the briar is quite shallow and shows mixed grain.loewe6 loewe7I took some close up photos of the rim and the stem to show their condition. My brother was able to remove the tars on the rim. There was some slight rim darkening on the inner edge but other than that it was clean. The scratches and dings were also raised. The photos of the stem show how clean it was as well when it arrived.loewe8 loewe9I sanded the inner edge of the rim with 220 grit sandpaper to smooth it out and remove the darkening and light burn marks. I also sanded it with 1500-2400 grit micromesh sanding pads to remove the scratch marks left behind from my sanding.loewe10I wiped the bowl down with acetone on a cotton pad to remove any remnants of the previous finish and the dust from sanding. I stained the bowl with a dark brown aniline stain cut 50/50 with isopropyl alcohol. I flamed it and repeated the process until the coverage on the bowl was even.loewe11I hand buffed the bowl and took the photos below to show what it looked like at this point in the process.loewe12 loewe13I gave the bowl and stem several coats of Conservator’s Wax and buffed it with a clean buffing pad to raise the shine. I hand buffed it with a microfibre cloth to deepen the shine. The finished pipe is shown in the photos below. This one will also soon be on the rebornpipes store. If you are interested in adding it to your rack let me know through email at slaug@uniserve.com or by message on Facebook or a comment here. Thanks for looking.loewe14 loewe15 loewe16 loewe17 loewe18 loewe19

A Worn Royal Danish 936 Wide Oval Shank Pipe given new life


Blog by Steve Laug

When I saw the pictures of the way this pipe looked – at least the first picture I thought it was in pretty decent shape. The finish was a little worn; particularly some of the high spots on the sand blast had worn off. The smooth patches were also worn and lifeless. The back edge of the rim looked really rough – as if the pipe had been knocked about on concrete or another hard surface to remove the dottle from the bowl. It was ragged. The inner edge of the rim also looked worn and the cake in the bowl was a bit odd looking – as if it was partially removed. It seemed heavier on one side than the other. The stem looked okay in the first picture but the second hinted that all was not well with it either.danish1The close up photos reveal the issues that I hinted at above. The first shows the strangely caked bowl – heavily built up toward the left side and rear of the bowl as well as the rough back rim top and edge of the bowl. The inner edge of the rim also looks like it has taken some damage. The second photo shows the slight cap at the stem junction that to my mind spoke of a tarry and caked mortise that kept the stem from seating properly. The finish also shows some wear in the photos. The pipe is stamped Royal Danish and Made in Denmark. The shape number is 936 which is a Stanwell shape.danish2The next two photos show the issues with the stem. There were tooth marks on the top and underside of the stem that went from quite deep to very shallow. The button top and bottom were worn down and had deep tooth marks. There was also a heavy build up of oxidation on the stem. The stem logo on the top is very faint. It made me wonder if I would be able to feel it with my finger once it arrived in Canada.danish3I am so glad my brother does the heavy work on cleaning out these pipes. I have reamed and cleaned out the shanks of a lot of pipes and I can’t say that I miss it. I still get to do my share of cleanups on pipes that I find but these that he sends me come ready for the restoration process. He scrubbed the exterior of the bowl with Murphy’s Oil Soap and was able to remove the wax and tars on bowl and rim. He reamed the bowl back to bare briar and scrubbed out the mortise and the airway in the shank and stem. When it arrived the stain was quite washed out and the stem was really oxidized. The damaged rim top was very visible and it was in rough shape.danish4 danish5I took some close up photos of the rim and the stem when it arrived here. The roughness of the rim top and inner edge are seen in the first photo. The tooth marks and wear on the stem top and underside in the second and third photos. My brother had cleaned out the mortise so the stem fit tightly against the shank so my guess mentioned above about a dirty mortise appears to have been correct. The crown logo on the top of the stem could hardly be felt by touch.danish6 danish7I started sanding the stem then decided to run a few pipe cleaners and alcohol through the airway in the stem and shank as well as in the mortise. They were quite clean and did not take too much work to remove the little bit of debris that was still left.danish8I sanded the rim lightly to take away the roughness but still leave the finish looking like the sand blasted portion of the rim that had not been damaged. I stained the bowl with a dark brown stain mixed 50/50 with isopropyl alcohol. I applied the stain and flamed it and repeated the process until the coverage was what I was looking for. I wanted the dark stain in the deep grain of blast to show through the brown top stain.danish9I hand buffed the bowl with a microfibre cloth to raise a shine and to give an even look to the finish. The photos below show the pipe at this point in the process.danish10In the second photo below the rim surface is visible. There will need to be some contrast applied to the finish to make it blend in and not look merely “less damaged”.danish11To address the contrast issue on the rim mentioned above I used a black Sharpie Pen to provide some darkening in the crevices of the pitted surface. I used a dark brown stain pen to give the top coat over the black stain.danish12I sanded the inner edge of the rim with a folded piece of 220 grit sandpaper to smooth out the roughened inner edge. In retrospect I probably should have done this before staining the bowl but I did not so I put it in the order I did the work. In the second photo below you can see how the contrast stain worked on the rim top.danish13When I finished sanding I stained the inner edge of the rim with the dark brown stain pen and added some streaks of black Sharpie pen to give it some contrast. I buffed the rim lightly Blue Diamond on the buffing wheel and with a microfibre cloth. The photos below show the pipe bowl after buffing. Notice the change to the rim after the sanding, staining and buffing.danish14 danish15I set the bowl aside and worked on the issues with the stem. I sanded the area around the button on both sides of the stem with 220 grit sandpaper and scrubbed the deeper tooth marks with cotton swabs and alcohol. Once they were clean I filled the deeper marks and built up the button surface with black super glue.danish16I sanded the repairs once they had cured with 220 grit sandpaper to smooth them into the surface of the stem. I reshaped the top of the button on both sides of the stem with the sandpaper.danish17The edge of the button on the underside of the stem was still rough so I used a needle file to shape and sharpen the straight edge.danish18I wet sanded the stem with 1500-2400 micromesh sanding pads. I rubbed the stem down with Before & After Pipe Stem Deoxidizer and a paper towel to further remove the oxidation on the stem. I polished the stem with Before & After Pipe Polish both Fine and Extra Fine with paper towels. The stem was beginning to shine.danish19 danish20I sanded the stem once again with the micromesh sanding pads using 1500-12000 grit pads. Each successive grit of sanding pad added more shine and depth to the shine. The more I polished the stem the more the crown logo disappeared.danish21I buffed the pipe with Blue Diamond on the buffing wheel and then gave the stem multiple coats of carnauba wax. I rubbed the bowl down with Conservator’s Wax by hand. I buffed the pipe with a clean buffing pad to raise the shine. I hand buffed the pipe with a microfibre cloth to deepen the shine. The finished pipe is shown in the photos below. The pipe is clean and looks new. The restoration brought it back to life. Thanks for looking.danish22 danish23 danish24 danish25

An odd assortment of tiny Salesmen’s Pipes


Blog by Steve Laug

Over the past six months or so I have been taking the tiny pipes that my brother has sent and stack them to the side of the desk in a “maybe someday” pile. That is a pile that I might work on some day – you know what I mean kind of a cast of pipe pile. Finally last evening I was looking at them again. It may have been triggered by the refurbish I just did on the little KBB Yello-Bole bent billiard that refurbished recently (https://rebornpipes.com/2016/10/08/a-living-tiny-kbb-yello-bole-salesmans-pipe/). I am not sure but whatever it was I picked up the three pipes that were in the pile. The first was a rusticated bent billiard that looks like an old WDC System pipe. It is stamped Well Pipe over Italy on a smooth portion of the left side of the shank. The second one was a straight prince shaped pipe that was stamped Tom Thomb over Imported Briar on the left side and top of the shank. The third was a very unique pipe made of Bakelite I believe. It is a tiny carved figural head of a man who looks like a page. It is stamped Bob’er on the left side of the shank. On the neck and chin of the figural it was stamped on the left side Reg.US.Pat.Off and on the right side neck and chin Des.Pat. 71062. I took two photos of the group of three pipes as they were when I started.tiny1The first pipe, the Well Pipe was a fascinating little fellow. It is 3 ½ inches long, 1 ½ inches tall and the diameter is 1 inch. The chamber diameter is ½ inch. Proportionally, the pipe is very nicely done. The metal rim is oxidized. The bowl had a light cake that my brother had taken out. The stem was cast rubber with a typical P-lip type stem though the airway is directly in the end. The stem was chewed and there was a chunk out of the side of the stem below the button on the left side.tiny2tiny2aI took some close up photos of the stamping on the side of the shank and the condition of the stem. The bowl and stamping were in great shape. The nickel band was dirty and oxidized. The stem has a chunk missing out of the end of the stem. I have circled it in in red.tiny4The second pipe, the Tom Thomb prince was in decent shape. The bowl had a light cake that my brother reamed before sending it to me. The finish was peeling off the bowl on the right side and the bottom of the bowl. The rim had a tar buildup and some cake over flow. It is 4 inches long, 1 inch tall and the diameter is 1 inch. The chamber diameter is ½ inch. Proportionally, the pipe is very nicely done. The vulcanite stem was oxidized and there were two blisters on the top and bottom left side ahead of the button.tiny5 tiny6I took a close up photo of the rim to show the condition and the stamping to show its location on the shank. You can also see the oxidation in the vulcanite stem.tiny7The third pipe was the unique pipe Bakelite figural head of a man. The carved face is quite well done. It is a cast as the pipe has a seam on the top of the stem across the bowl and down the front and underside of the bowl and shank. It is 2 1/2 inches long, 3/4 inch tall and the diameter is 1/2 inch. The chamber diameter is 1/4 inch. The stem and bowl are pristine. The bowl is unsmoked. There is a cross hatched pattern on the shank. The casting is quite well done.tiny8 tiny9I took some close up photos of the stamping on the pipe. The first photo shows the left side shank stamp shows up clearly as Bob’er. The second photo shows the stamping on the left side of the neck and chin of the figural. The Reg.US.Pat.Off. stamping is very clear. The final photo shows the stamping on the right side neck and chin. Again the Des.Pat. 71062. is very clear.tiny10I wiped down the bowls with alcohol on cotton pads. I scrubbed the prince with acetone on a cotton pad. I was able to remove the grime and build up on the Well and the Bob’er. The acetone barely dented the surface of the peeling finish on the Tom Thomb.tiny11I started working on the stem of the Well pipe. I took a photo of the missing chunk. I cleaned the area with alcohol and then filled it in with black super glue using a tooth pick to place it in the divot.tiny12Once the repair had cured I sanded it with 229 grit sandpaper and shaped it with a needle file. I wanted it to match the right side of the stem and look like it had originally. I also shaped the P-lip on the top and bottom sides.tiny13I wet sanded the stem with 1500-2400 grit micromesh sanding pads and dry sanded it with 3200-12000 grit pads. After each set of three pads I rubbed the stem down with Obsidian Oil. After the final sanding of the 12000 grit pad I gave it a final coat of oil and set it aside to dry.tiny20 tiny21 tiny22I buffed the stem and the bowl with Blue Diamond and gave them multiple coats of carnauba wax. I buffed it with a clean buffing pad and then by hand with a microfibre cloth. The finished Well pipe is shown in the photos below.tiny17 tiny18With the Well Pipe finished I focused on the Tom Thomb prince. I started by sanding out the blisters on the stem. On both the top and the bottom there were blisters on the left side near the button. I forgot to take a photo of the bubbles but after I had started sanding it with 220 grit sandpaper I took the next photo. I sanded out the bubbles and then wet sanded the stem with 1500-2400 grit micromesh sanding pads. I dry sanded it with 3200-12000 grit sanding pads. I rubbed it down with Obsidian Oil after each set of three pads and let it dry after the last pad.tiny19 tiny20 tiny21 tiny22I sanded off the finish on the bowl and shank avoiding the stamping. I wiped it down with acetone on cotton pads to remove the remaining finish. I stained the pipe with Danish Oil and Cherry stain.tiny23 tiny24I buffed the pipe and stem with Blue Diamond on the wheel and gave it multiple coats of carnauba wax. I buffed it with a clean buffing pad and then by hand with a microfibre cloth. The finished Tom Thomb pipe is shown in the photos below.tiny25 tiny26The last pipe, the Bakelite pipe did not take a lot of work. I gave it a coat or Conservator’s Wax and hand buffed it with a shoe brush and a microfibre cloth. The finished pipe is shown in the photos below.tiny27 tiny28I thought I would take some photos of the finished lot. The tiny pipes shine with a new sparkle. As I look at them I wonder if this is what they looked like when the salesmen carried to the pipe shops to sell orders for year’s pipes. Thanks for looking.tiny29 tiny30 tiny31 tiny32


There was an old woman who lived in a shoe…


Blog by Steve Laug

There was an old woman who lived in a shoe.
She had so many children, she didn’t know what to do;
She gave them some broth without any bread;
Then whipped them all soundly and put them to bed.
-Child’s Nursery Rhyme – Mother Goose

When I opened the box and saw this old pipe that my brother sent my first reaction was why? Then I started to look it over and I began to understand the attraction of it. It reminded me of the children’s rhyme, “The old woman who lived in a shoe”, that I used to recite growing up so it led me down memory lane. From what I can find the pipe is probably from the 30’s. The carving and detail of the shoe is quite well done. The lines demarcating the stitching and the worn look of a well broken in shoe add to the attraction. The carver even detailed the sole of the shoe and the bead around the boot. He carved in the laces and the tongue of the shoe. Even the fills added to the worn and well broken in boot look of the pipe.

My brother sent me some photos of the pipe to show what it looked like when it was found. He found it in an antique shop on a recent trip around the Butte and Anaconda, Montana area. He added some other nice pipes and then this one as well. The pipe is not tiny, but is a full-sized smoking pipe. The dimensions will tell the story. It is 7 inches long and the bowl is 2 inches tall. The diameter of the bowl exterior is 1 ¼ inches and the chamber is ¾ inches in diameter. The photos focus in on the details of the carving on the pipe and the placement of the fills – which even give the pipe a worn and broken in feel of a worn boot.shoe1 shoe2 shoe3 shoe4 shoe5 shoe6 shoe7 shoe8I decided to work on the bowl first. The missing fill on the rim of the pipe that is shown in the above photo at the 10 o’clock position (left side of the photo toward the top of the bowl) was the first one I worked on. I cleaned off the rim with some isopropyl alcohol then filled in the divot with some clear super glue and briar dust. Once it dried I sanded the fill smooth to blend it in with the rest of the surface of the rim. I sanded the inside edge as well and smoothed it out.shoe9I used a Black Sharpie pen to mark out the lines used demarcate the stitching and lacing of the boot. I stained the briar with a cherry stain/Danish Oil combination. I rubbed the stain onto the briar and used a cotton swab to apply it in the grooves. I wiped it off with a soft cloth. The first photo below shows the pipe before I wiped it off.shoe10The next five photos show the pipe after I wiped it down. The cherry stain looked really good on the briar. I would need to reapply the black Sharpie to highlight the grooves and do some more highlights of brown into the worn areas of the boot.shoe11 shoe12 shoe13I used the black Sharpie to redefine the grooves in the stitching areas and tongue and laces once again. In the folds I applied some dark brown stain with a stain pen to add shadows. The next photos show the pipe after that. The browns add shadows to the finish and give the folds some depth.shoe14 shoe15I sanded the stem with 220 grit sandpaper to smooth out the roughness of the old vulcanite. It was pitted and rough in texture. The initial sanding smooth out the roughness. I wet sanded it with 1500-2400 grit micromesh sanding pads and the shine began to rise. I rubbed it down with Obsidian Oil. I dry sanded the stem with 3200-12000 grit pads. I rubbed the stem down with the oil after each set of three sanding pads. After sanding with the 12000 grit pad and rubbing it down with Obsidian Oil I set it aside to dry.shoe16 shoe17 shoe18I used a sharper pointed Black Sharpie Pen and a red felt tip pen to highlight more of the shadows in the folds of the boot. I buffed the pipe with Blue Diamond on the buffing wheel and .gave the pipe and stem multiple coats of carnauba wax. I buffed the pipe with a clean buffing pad to raise the shine. I hand buffed it with a microfibre cloth. My goal was to get the pipe looking like it was made out of old soft leather. I wanted the shadows in the folds and the stitch lines to look authentic. Hopefully the stain and the fussing with pens have achieved that. The finished pipe is shown in the photos below and personally I think the old woman’s shoe looks amazing. This was a fun project and really a diversion from the usual routine of pipe restoration. Thanks for looking. Enjoy.shoe19 shoe20 shoe21 shoe22 shoe23 shoe24 shoe25 shoe26 shoe27 shoe28 shoe29

Rejuvenating a GBD Colossus Fantasy 9552 Bell Dublin


Blog by Steve Laug

When I first took this one out of the box I figured it was an Italian made pipe. Something about the look led me to think that way. But I was way off. My brother had told me he was sending along a pipe that might surprise me. This was it. The bent Bell Dublin look did not give me a clue to the stamping that was on the pipe. Here is how it is stamped. Surprised? Maybe not but I sure was. The stamping is really clear (lighter in some spots than others). It reads Colossus over the GBD oval over Fantasy. Next to that it is stamped London, England and the shape number 9552. I had no idea that the pipe was a GBD, a Colossus or a Fantasy. But it is.colossus1Here are some of the photos that my brother sent me to give me a hint. Once I had seen the stamping the combination of smooth panels and sandblast finish fit well. The brown swirled Lucite stem also fit into the GBD Fantasy look. Okay so I should have known it was a GBD but I did not.colossus2 colossus3 colossus4 colossus5 colossus6 colossus7My brother scrubbed the grime off the pipe. When it arrived it was very clean and the rich brown stain was dull and light. The black understain in the pits and crevices still showed through. It would not take too much to bring it back. The bowl and rim were clean and the shank and the inside of the stem were also clean.colossus8 colossus9I took a close up photo of the rim. You can see a little more grime and tar deep in the grooves in the crevices of the rim particularly toward the back of the rim. I used a brass bristle tire brush to clean up the rim. I scrubbed it back and forth until the sandblast was clean.colossus11I took photos of the tooth marks and the tooth chatter on the top and the underside of the stem near the button. None of the marks were deep but they were very present.colossus12I stained the bowl with a dark brown aniline based stain that I mixed 50/50 with isopropyl alcohol. I flamed the stain and repeated the process until the briar was equally covered.colossus13I sanded out the tooth marks and chatter with 220 grit sandpaper.colossus14I wet sanded the stem with 1500-2400 grit micromesh sanding pads. I wiped it down with a damp cotton pad. I dry sanded it with 3200-12000 grit sanding pads and wiped it down once again to remove the sanding dust.colossus15 colossus16 colossus17I gave the bowl several coats of Conservator’s Wax (micro-crystalline wax) and buffed it once it had dried with a shoe brush to raise the shine.colossus18 colossus19I buffed the bowl and stem with Blue Diamond on the buffing wheel. I gave the pipe a light coat of carnauba wax (a very light touch on the bowl). I buffed it with a clean buffing pad to raise the shine. I hand buffed it with a microfibre cloth. The finished pipe is shown in the photos below. The finish is quite nice with the contrast between the medium looking brown stain and the black undercoat. The contrast between the stains on the bowl and the striations of brown on the Lucite stem is amazing and the pipe looks new. Thanks for looking.colossus20 colossus21 colossus22 colossus23 colossus24 colossus25 colossus26 colossus27 colossus28

Kaywoodie Connoisseur 49 Large Oom Paul


Blog by Andrew Selking

It is an honor to once again write an article for Steve’s blog.  For those of you who don’t know me, my name is Andrew and a bit obsessive about Kaywoodie pipes and the entire Kaufman Brothers and Bondy’s (KB&B) family.  Until recently my favorite pipe has been a four-digit Yello Bole 2062 small Oom Paul.  I’ve had this large Oom Paul in the drawer, waiting for restoration, for over a year.  (Sorry I forgot to take a before picture).oom1I start this pipe as always by soaking the bowl in the alcohol bath.  Here is the pipe right after it came out.oom2Next I reamed the bowl.  As you may have noticed this is a rather large bowl, my reamer barely reached the bottom.  This also accounts for the reaming damage done to the rim.oom3The pipe has a replacement push stem, which initially caused me to think it was an export model, but looking at the shank you can see the groves that the stinger originally screwed into.oom4I find that the alcohol bath does a nice job of softening any protective coating or wax.  In order to remove the rest, I used 0000 steel wool and acetone.oom5Here is what the pipe looked like after removing the finish.oom6My next step was to further clean the insides of the pipe and stem using a retort.oom7The average bowl takes two cotton balls to fill it, three if it’s kind of big.  This bowl swallowed four cotton balls.  Here is a picture of them after the retort (notice how the boiling alcohol pulled the tar out of the wood).oom8As you may have noticed in previous pictures, the rim on the bowl was in rough shape; scorching, reaming damage, and deep dents.  I planned to top the rim and the end of the shank to remove some of the worst damage, but I decided to leave the dimensions as close to original as possible; so I refrained from getting crazy with the sand paper.

I used 150 grit sand paper on a piece of glass to top the rim and shank, followed by some 400 grit.  A note of caution when topping an Oom Paul, the shank and the bowl are close to each other.  Be sure not to take off wood where you don’t intend to.oom9Once the rim was to my liking I started on the bowl with the 400 grit wet/dry.  I sanded around the marking on the shank and kept the stem inserted while working on the end of the shank to prevent rounding.oom10 oom11Here is the bowl after the 400 grit.oom12After the 400 grit I turned to a progression of micro-mesh pads (1500-12,000 grit) to polish the wood.oom13I used the same progression on the stem.  I polished the stem using a rotary tool set on the lowest speed with white rouge and carnauba wax.  I used my buffing wheel (aka heartbreaker) with white rouge and carnauba wax on the bowl.  I reassembled the pipe and wiped on a couple of light coats of Halcyon II wax.  Here is the finished result.oom14 oom15 oom16 oom17 oom18Just to give some perspective on the size of this pipe, here is my four-digit yellow bowl for comparison.oom19 oom20 oom21 oom22Normally I wait to smoke a restored pipe until after taking pictures, but we were without power this morning so I loaded the bowl with some Dunhill Early Morning Pipe and commenced to smoke.  The draw is fantastic!  After about an hour I thought I must be getting close to the bottom of the bowl so I got my pipe cleaning tool and started to clean the bowl.  I had only smoked half the bowl!  This the first pipe I’ve encountered that has a basement!

I now have two Oom Paul pipes in my collection.  I imagine they will vie for my attention for a very long time.