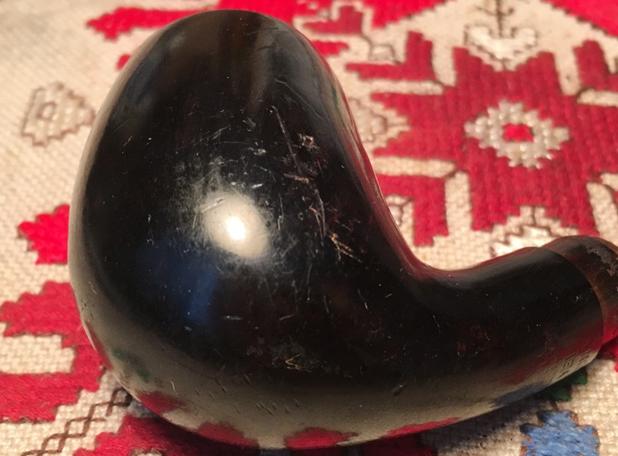
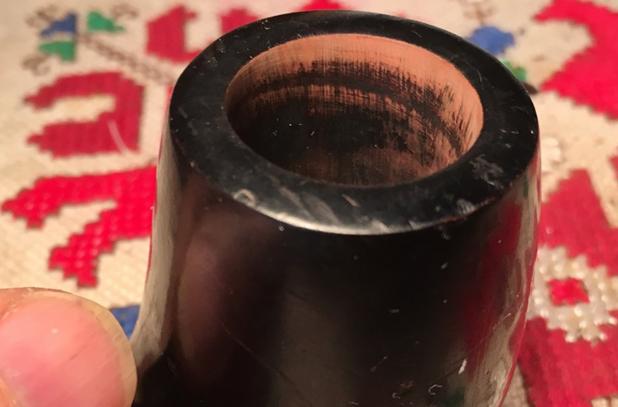
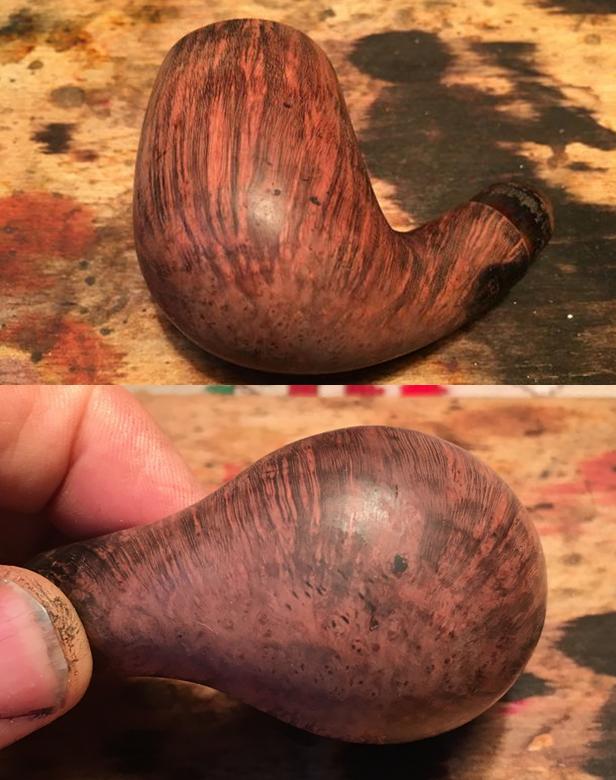
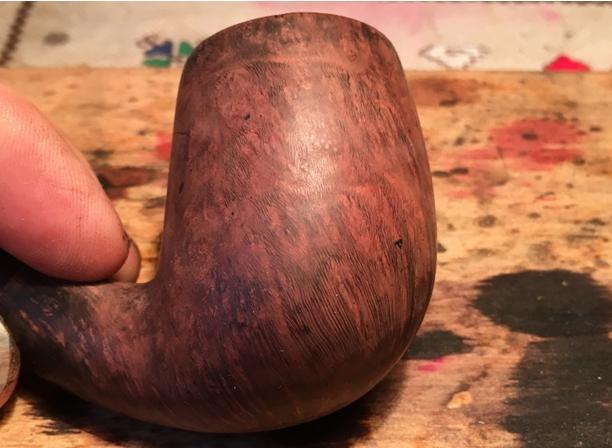
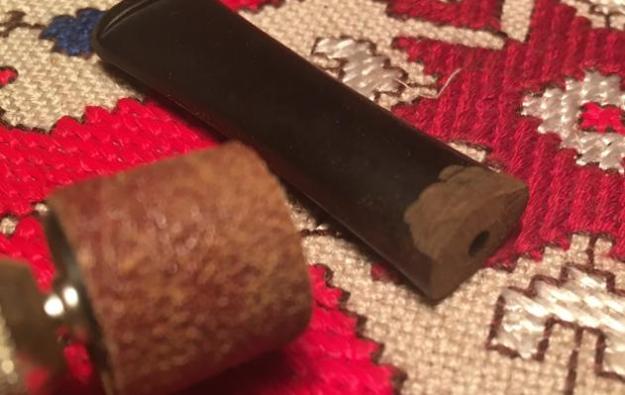
Tag Archives: contrast staining

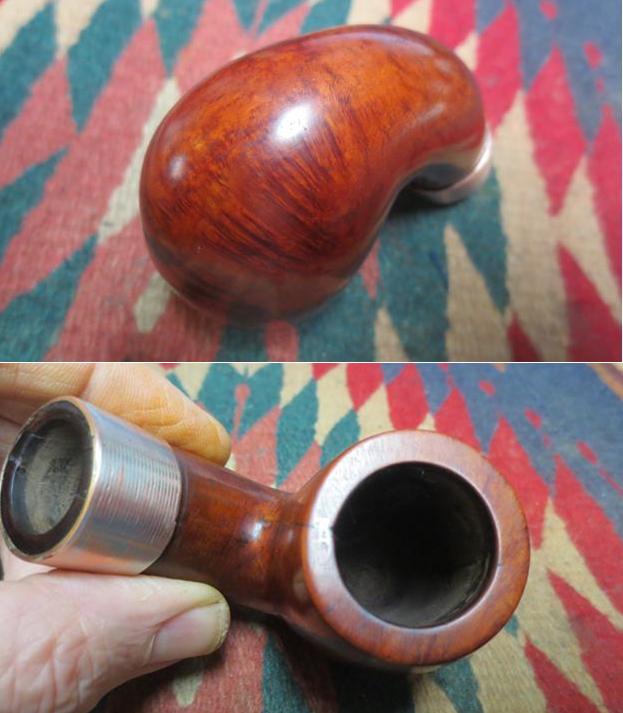
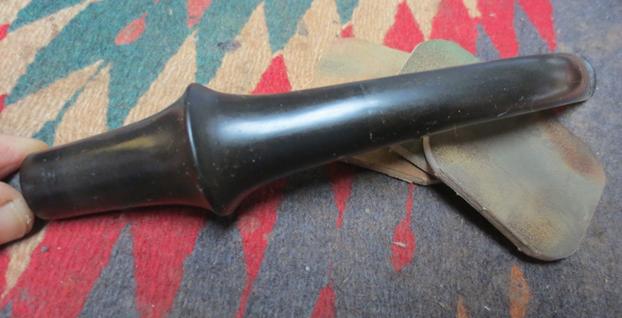
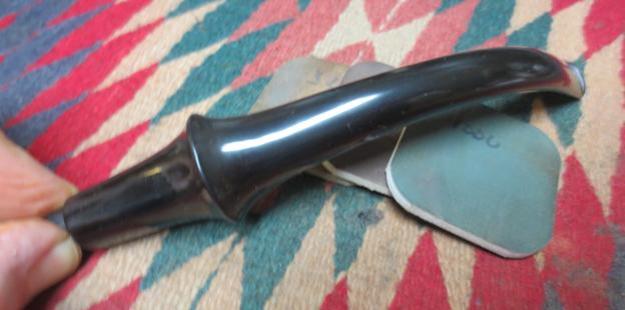
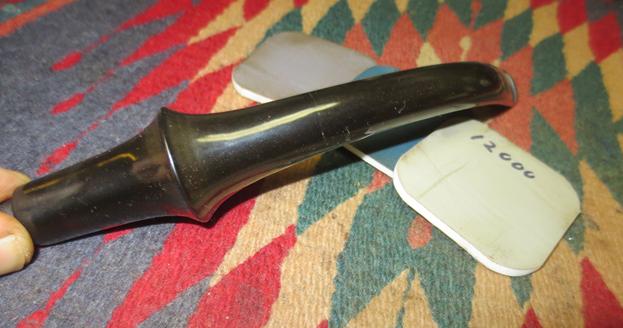
Another Hole in the Wall find! Stanwell Silver Mount 85


Blog by Dal Stanton

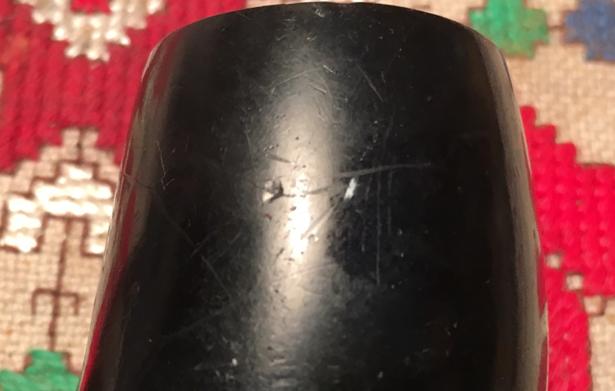
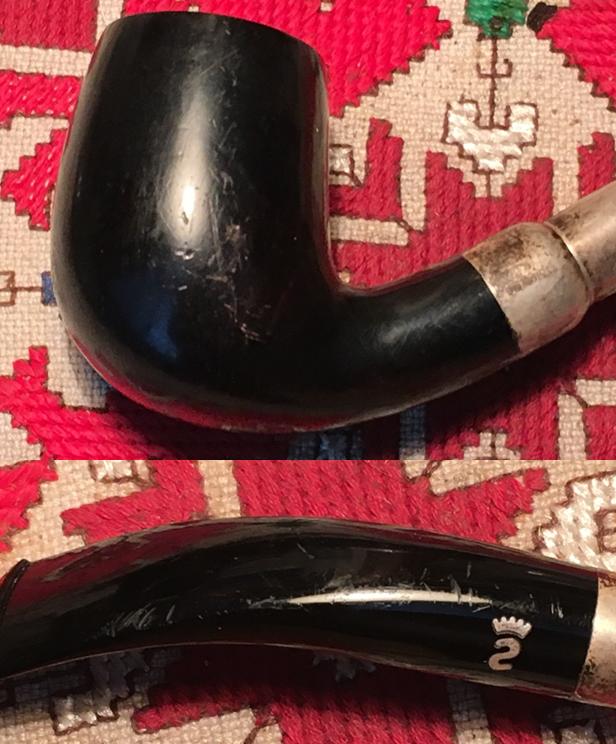
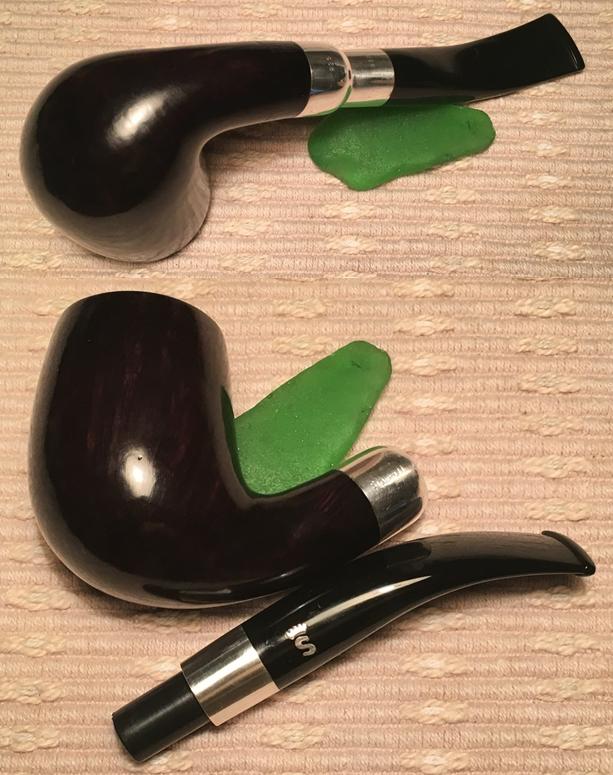
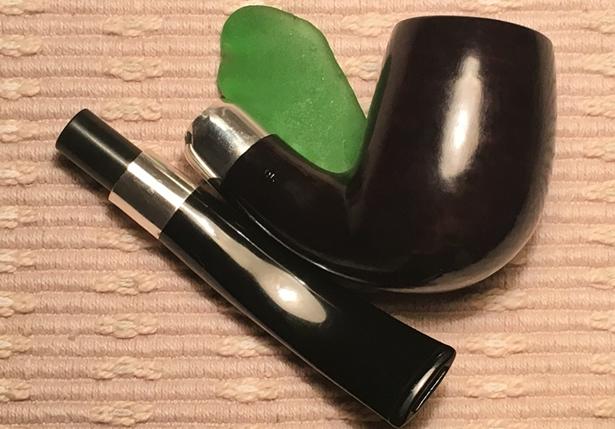
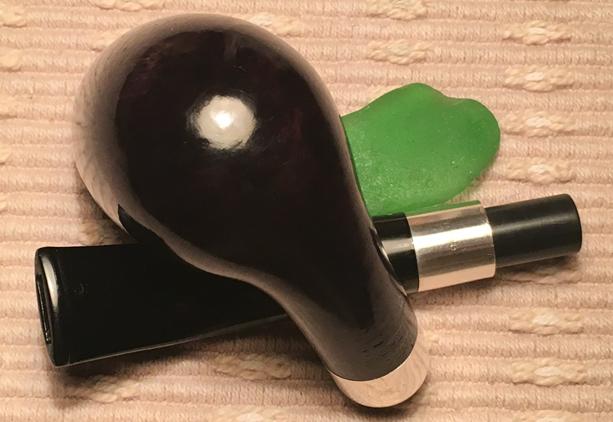
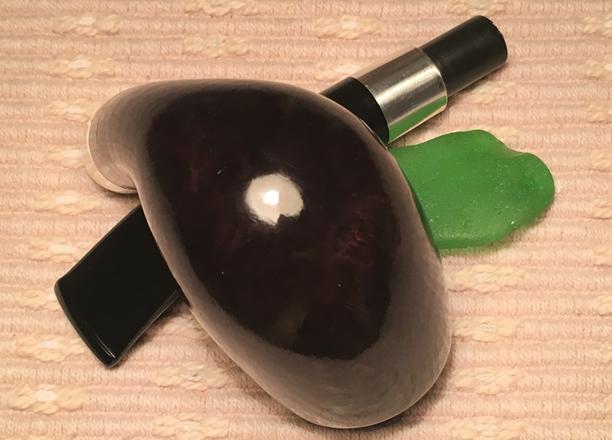
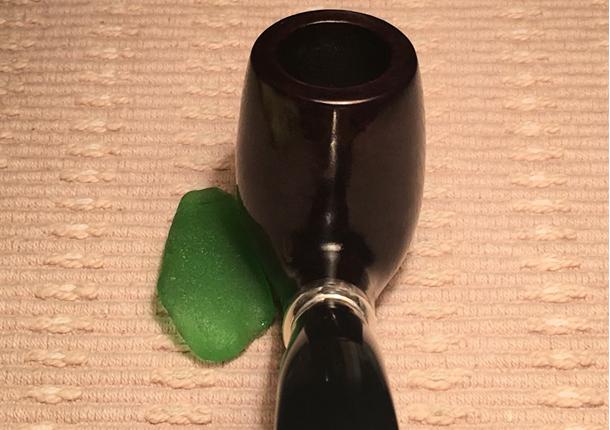
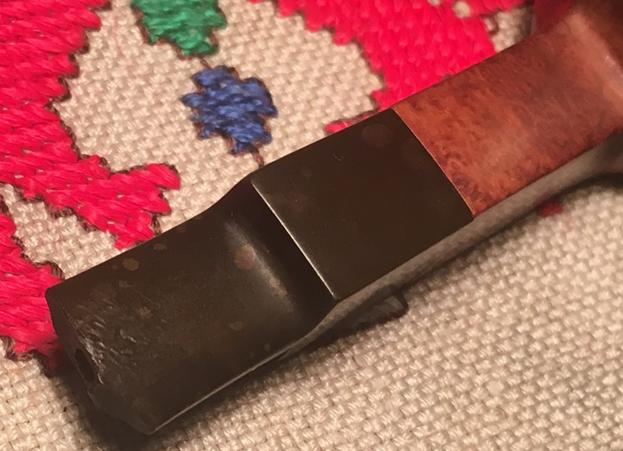
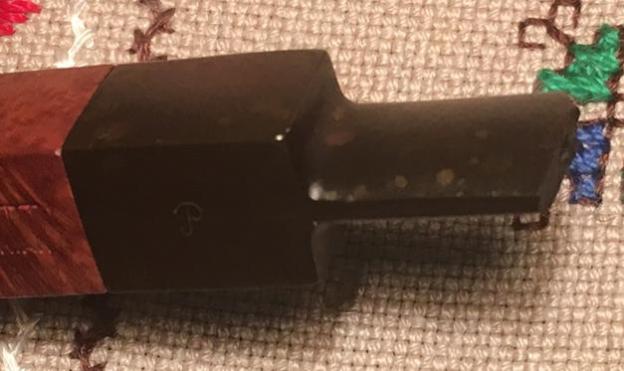
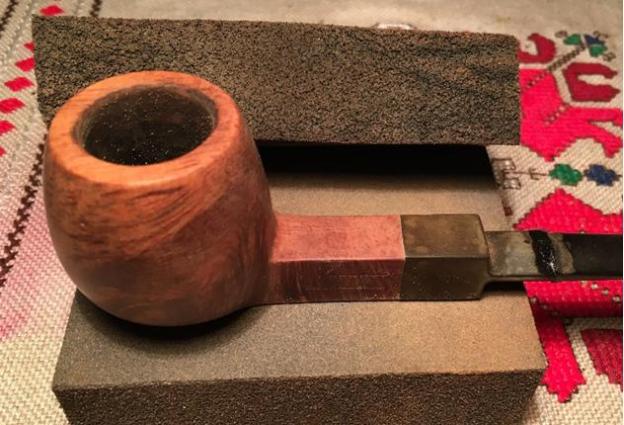
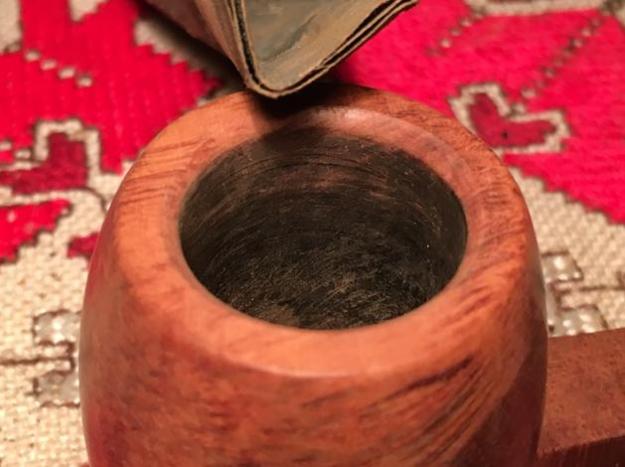
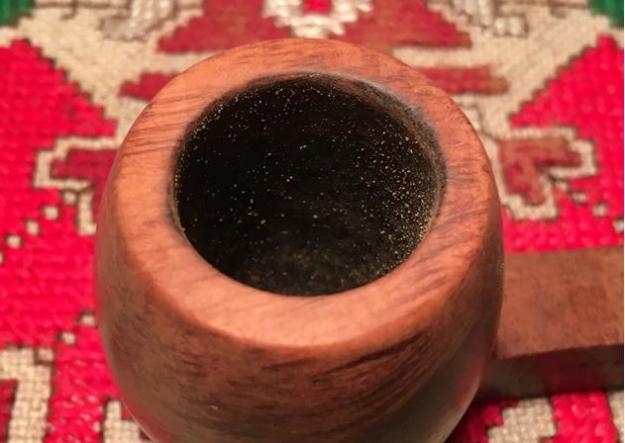
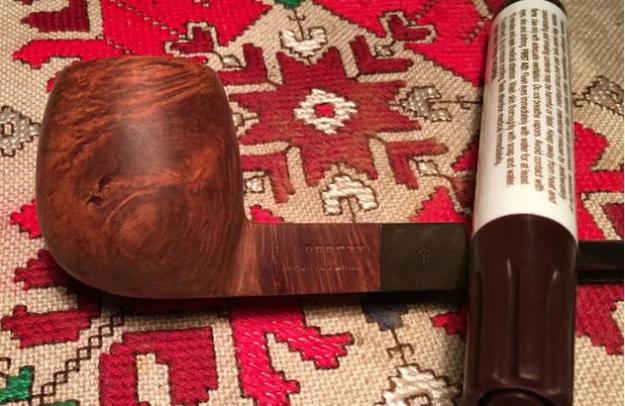
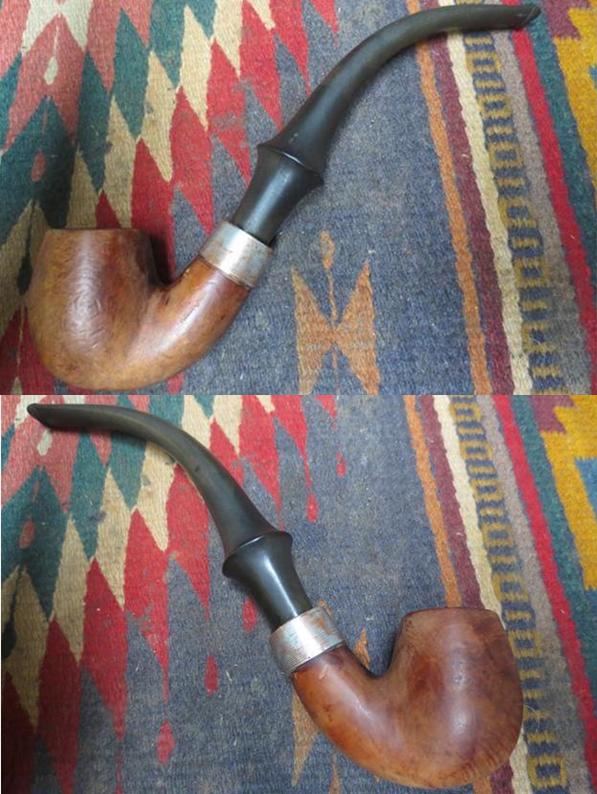
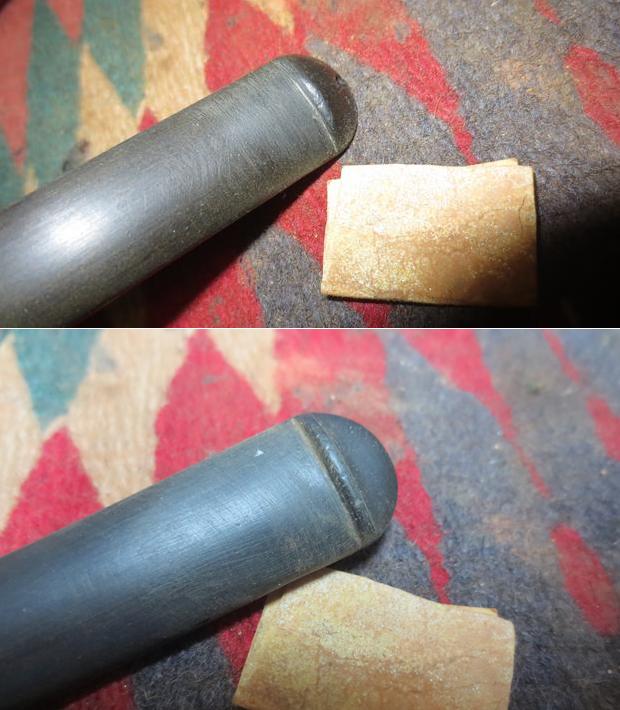
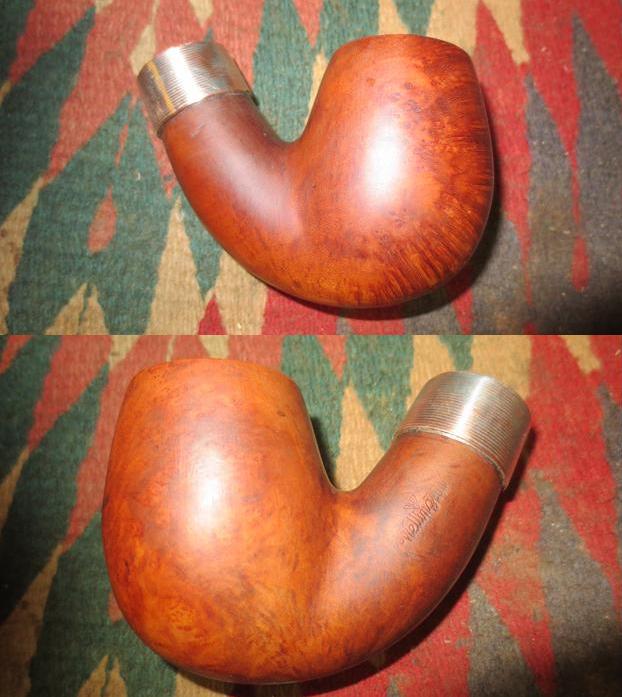
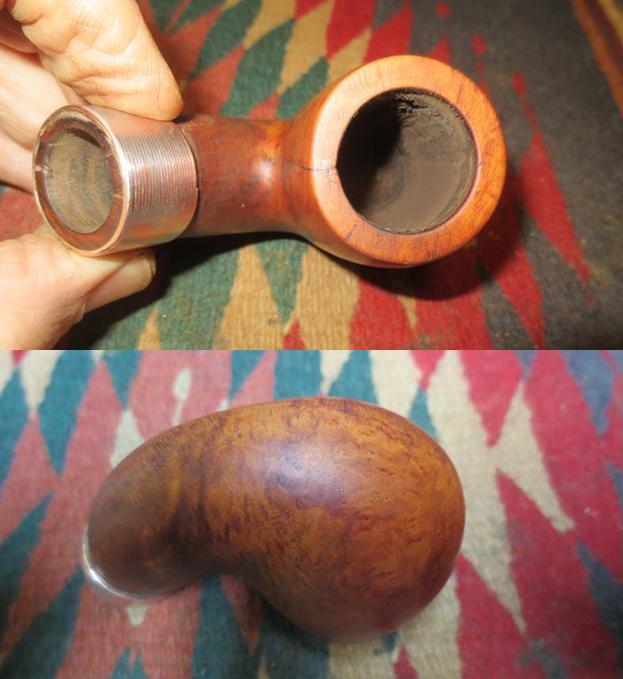
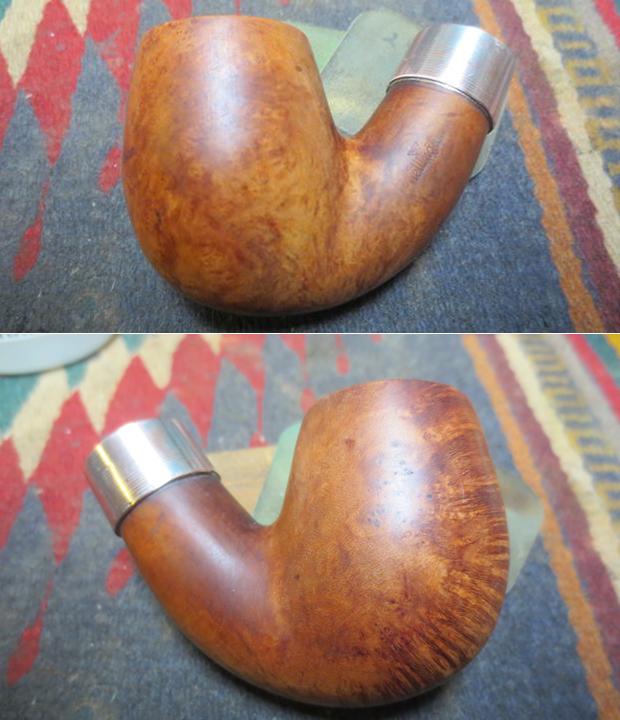
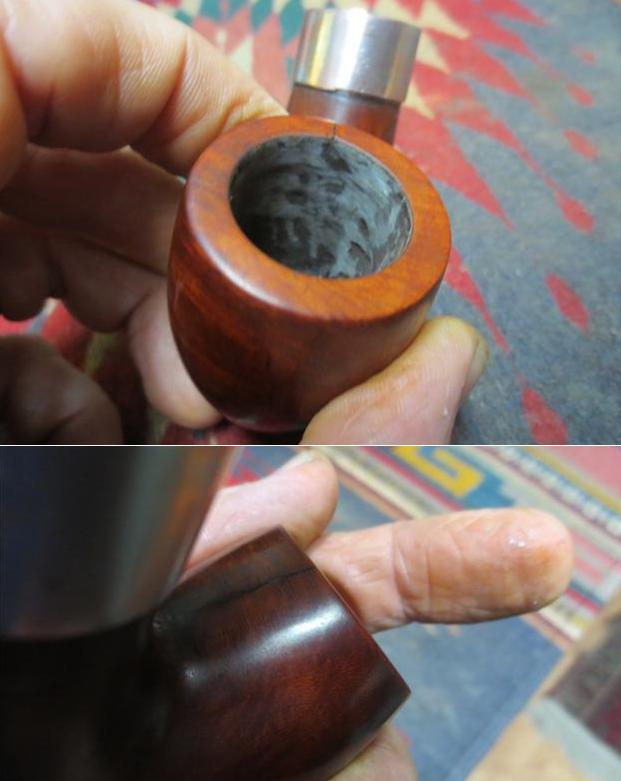
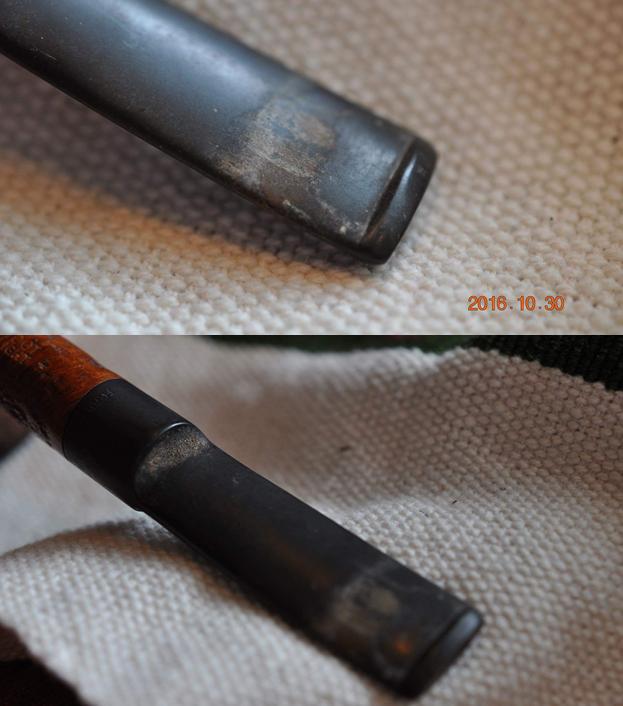
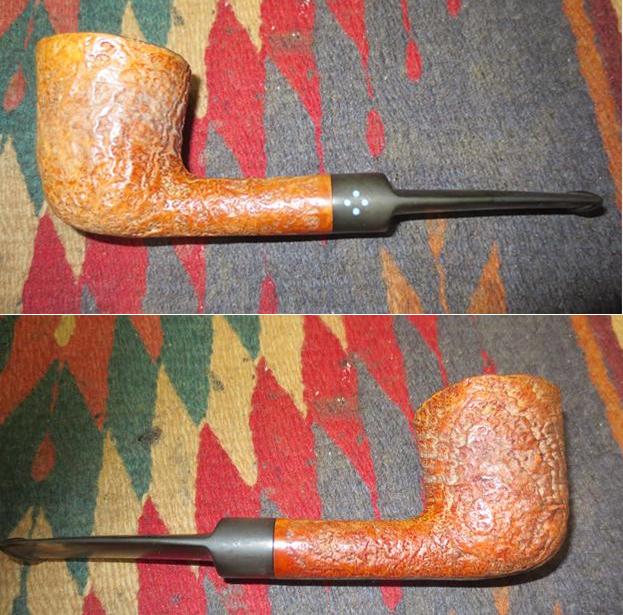
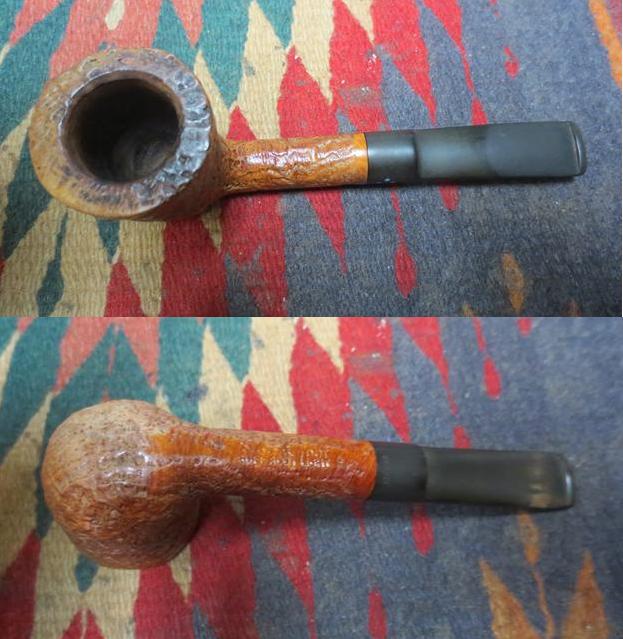
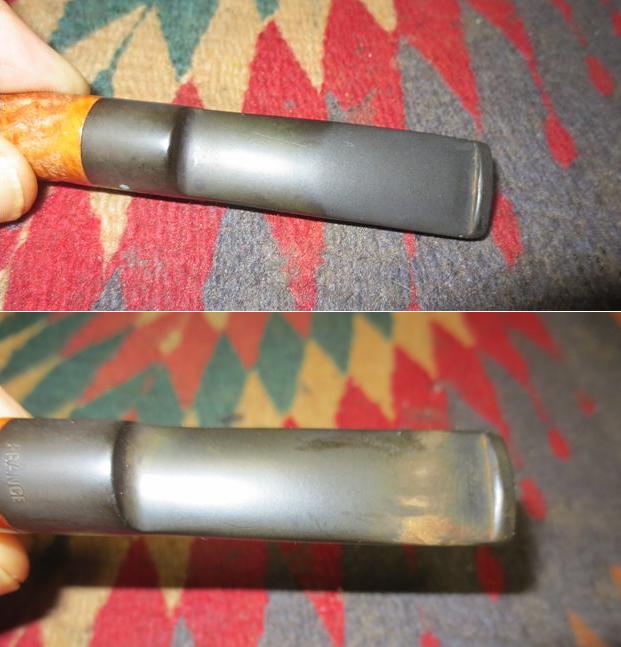
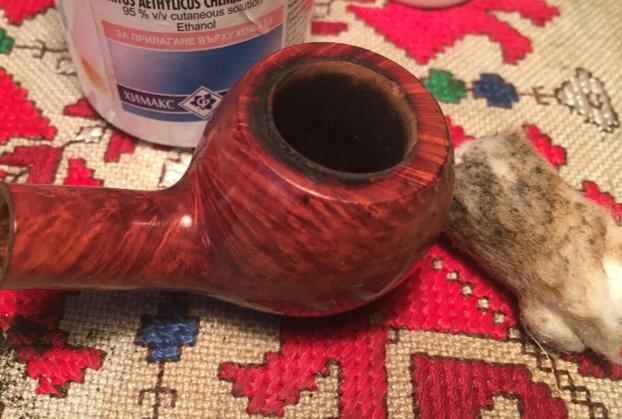
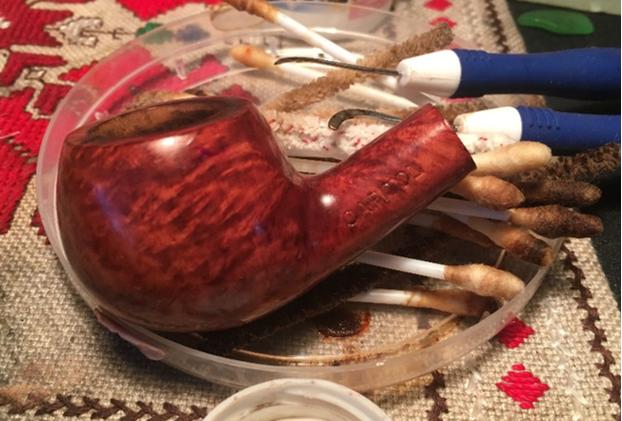
I first laid my eyes on the Danish made, Stanwell Silver Mount a couple of weeks ago, not really knowing what I was seeing.  I was giving a tour to a new team member who had just arrived in Bulgaria.  As part of orientation I take ‘newbies’ on a tour of the center of Sofia – I sprinkle in a bit of history, architecture, politics, religion and culture as we stroll through the streets and boulevards.  The tour was also the perfect opportunity to showcase a ‘typical’ Bulgarian antique shop – I’m always looking for a way to drop by the ‘Hole in the Wall’ where I’ve landed several great pipes in past visits.  As my guest surveyed the shelves of stuff stacked on stuff, I went directly to THE basket, stuffed up into one area among the artifacts, where I started plucking through the newer offerings of pipes added since my last visit – since before Christmas.  I did spy a very nice unmarked Brandy shape with a hearty stummel.  When the shop owner diverted my attention, conspiratorially confiding that there was something he wanted me to see – my curiosity heightened.  He pulled the Stanwell out from a closed cabinet which always is an indicator of a treasure of greater value.  I left the Hole in the Wall with the pipe on my mind but not in my pocket. A week later, I returned to the Hole in the Wall with two other people as part of another tour.  This time, however, I wanted to see the Stanwell again – hoping it was still there.  It was.  This time I took pictures and dickered a bit, but again, left without a pipe.  I wanted to do some research on this Stanwell and send a note off to Steve to get his feedback, including some of the pictures I took at the Hole in the Wall.dress1dress2 dress3
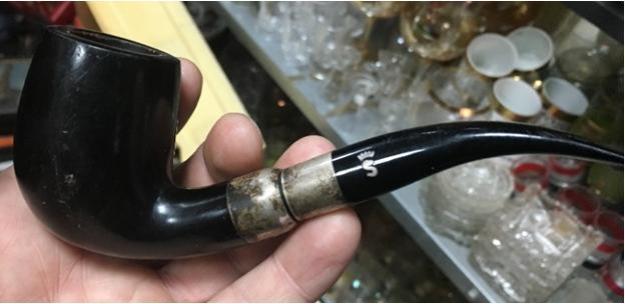
His response was to the point: “That line of Stannies is a pricey one.  Nice find.”  Added to this was confirmation that the asking price was indeed very reasonable! That sealed the deal for me and with resolve (after receiving my wife’s blessings) I returned to the Hole in the Wall the next day and negotiated a favorable deal. Sweetening the transaction of the Stanwell was bundling the Brandy Unmarked I saw in the basket.  I’m a good customer and he agreed to a “good customer” price.  He was happy and I walked out of the Hole in the Wall this time with two nice pipes – but the Stanwell was the find pipe pickers place their hopes!

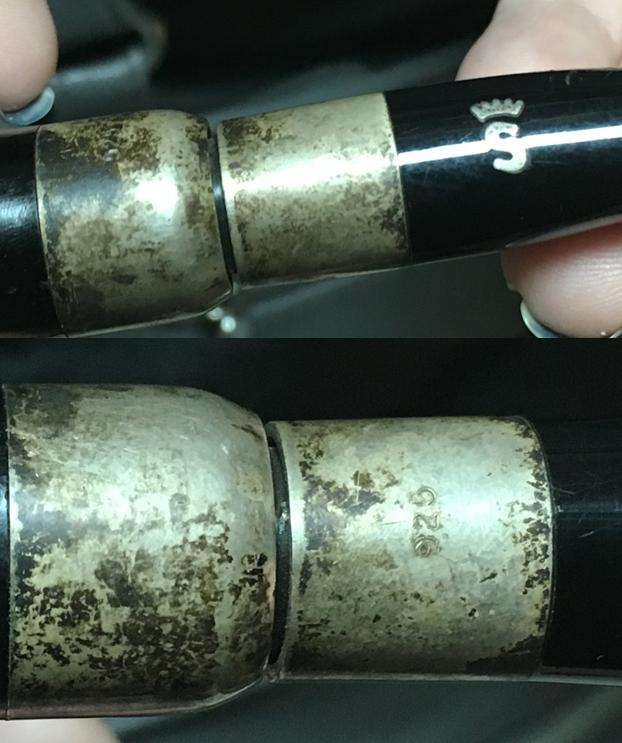
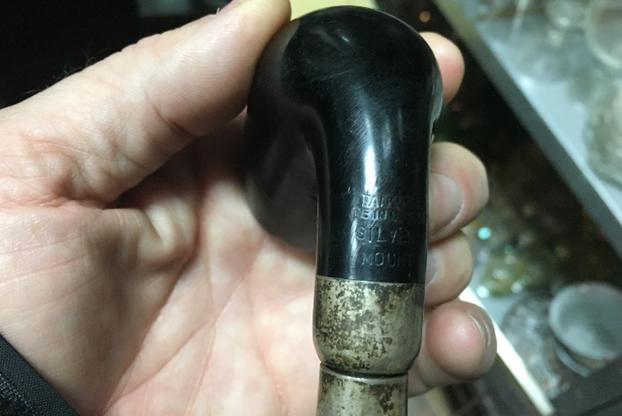
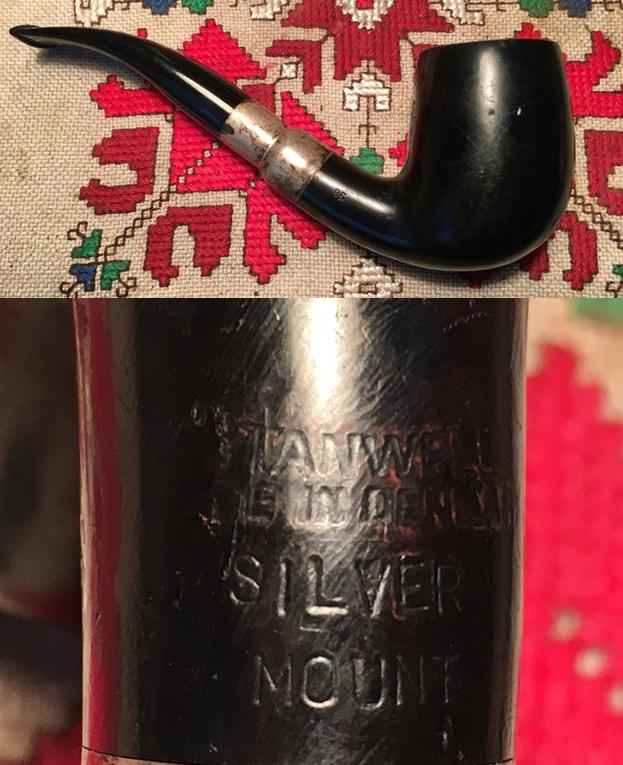
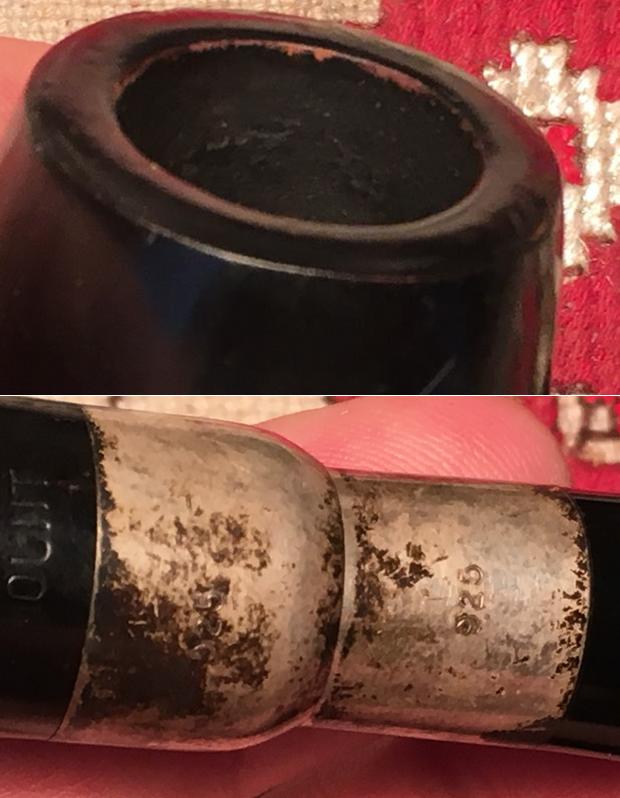
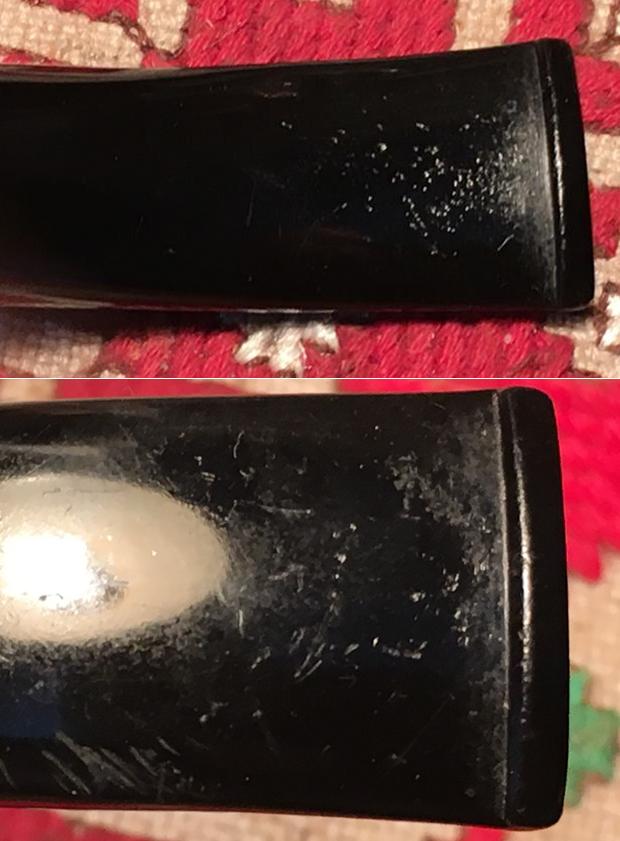
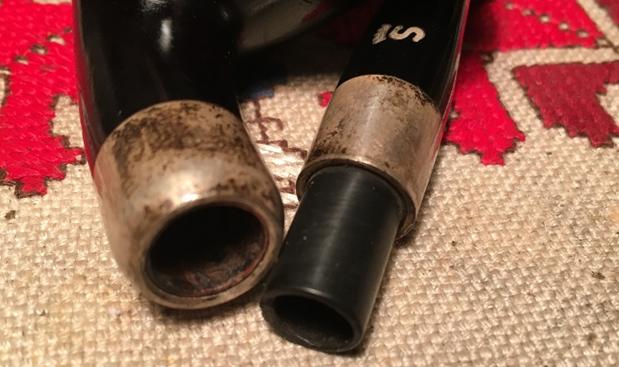
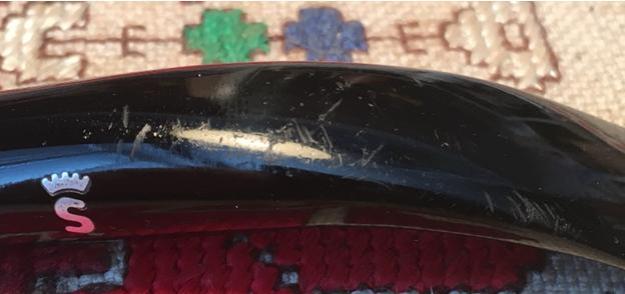
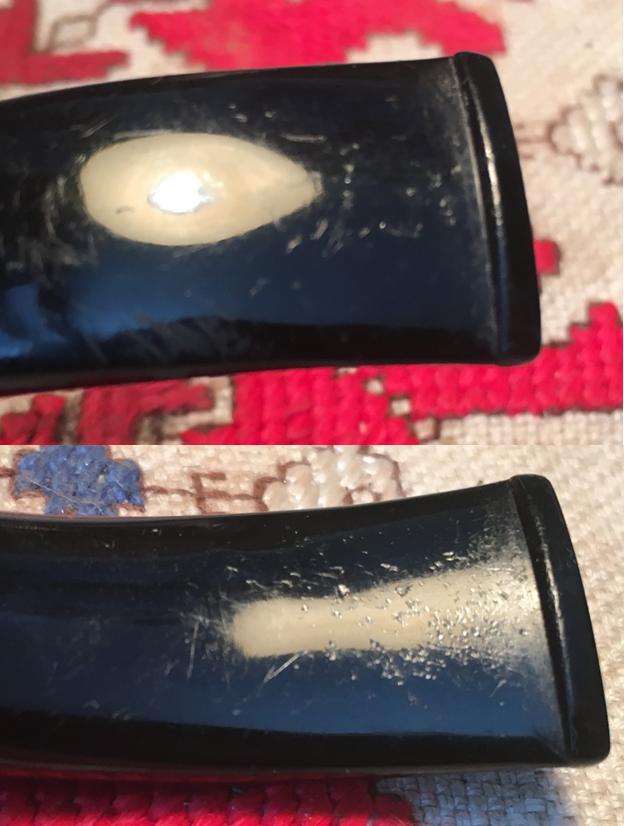
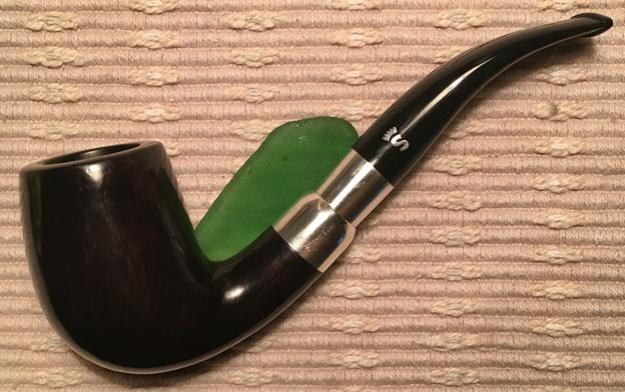
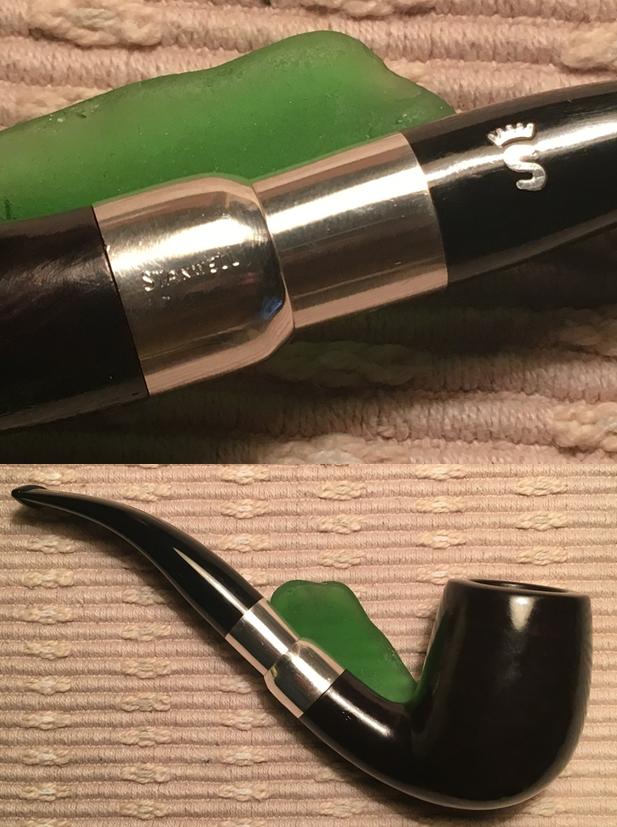
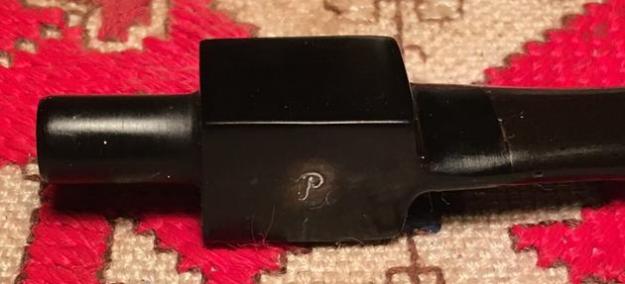
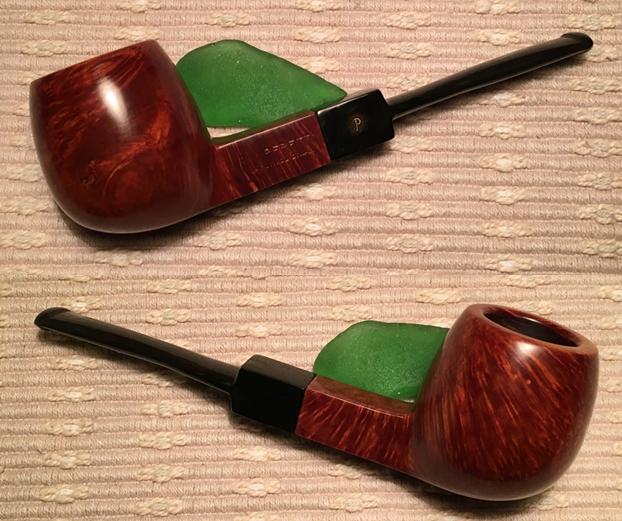
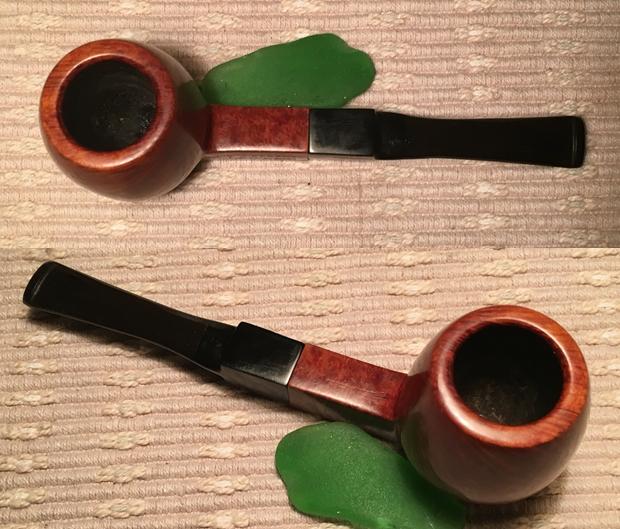
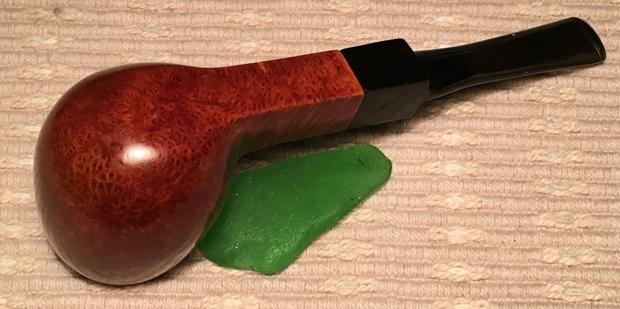
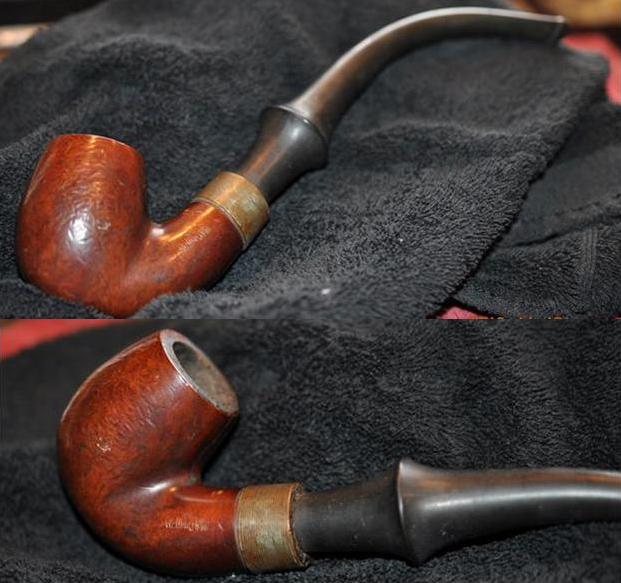
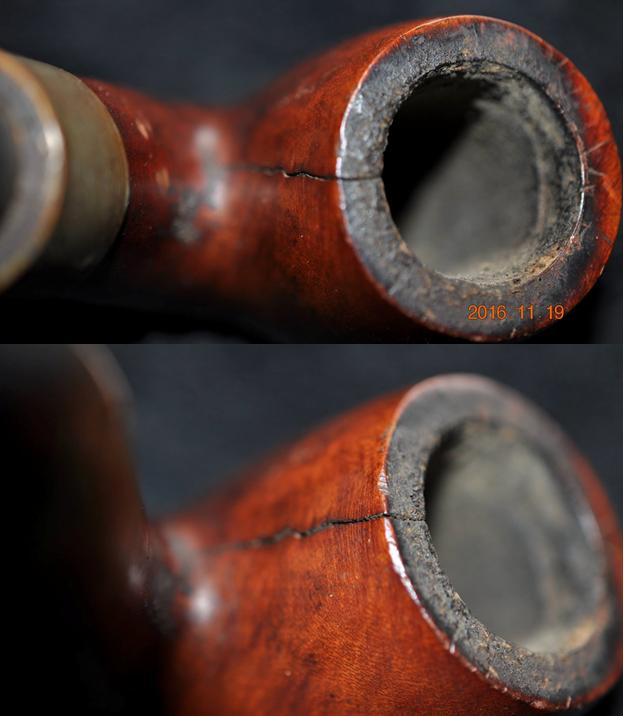
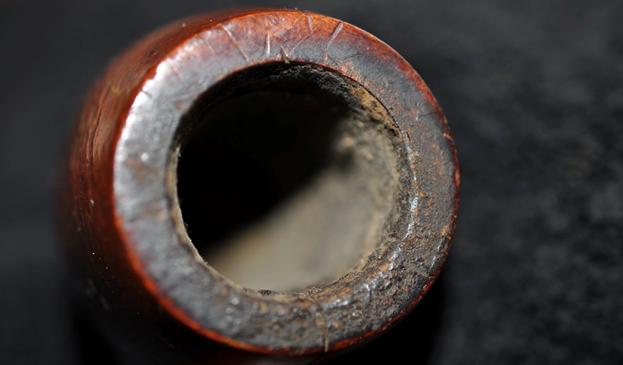
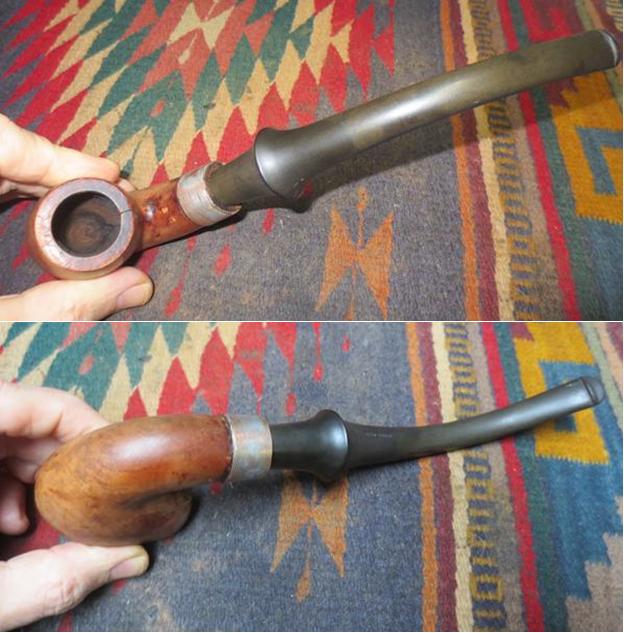
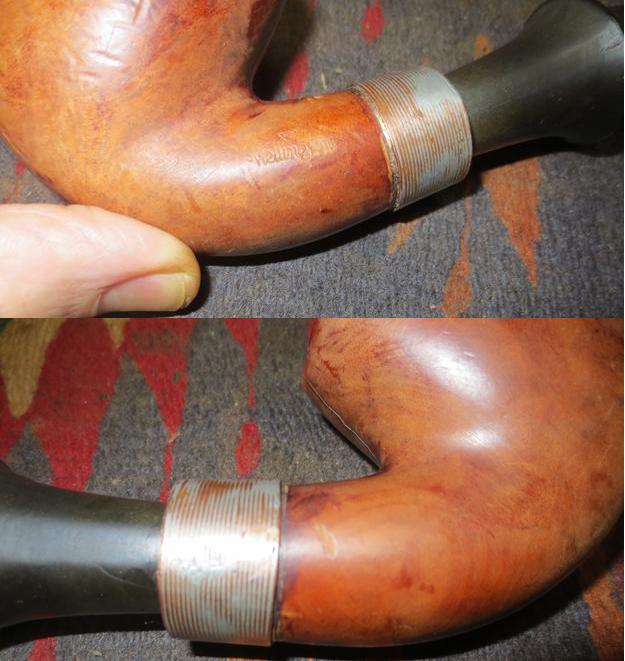
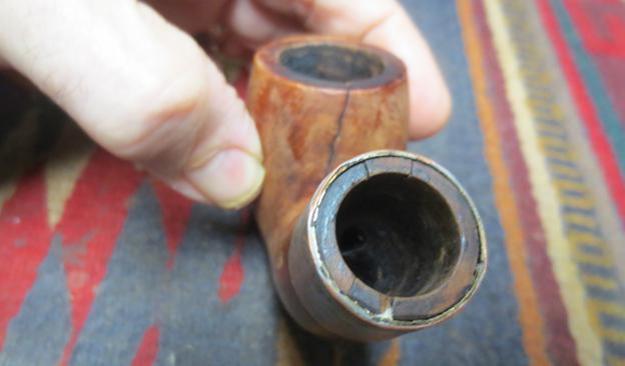
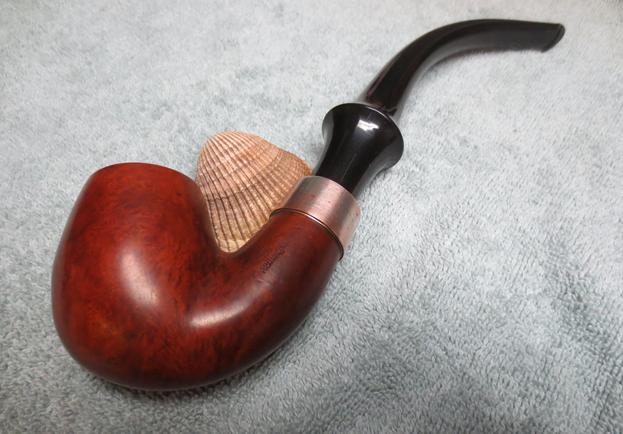
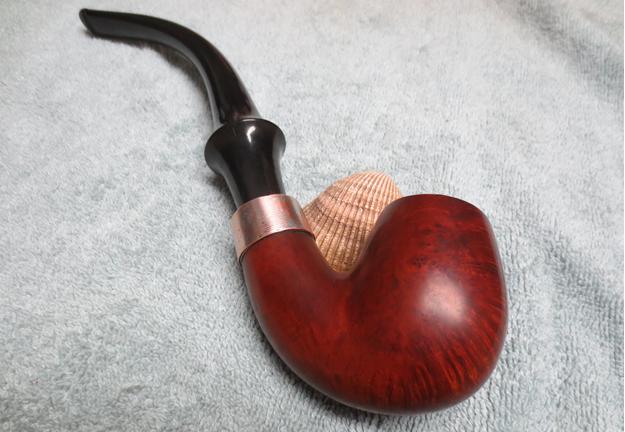
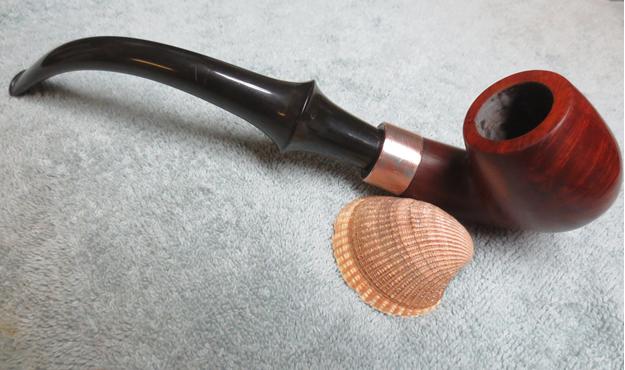
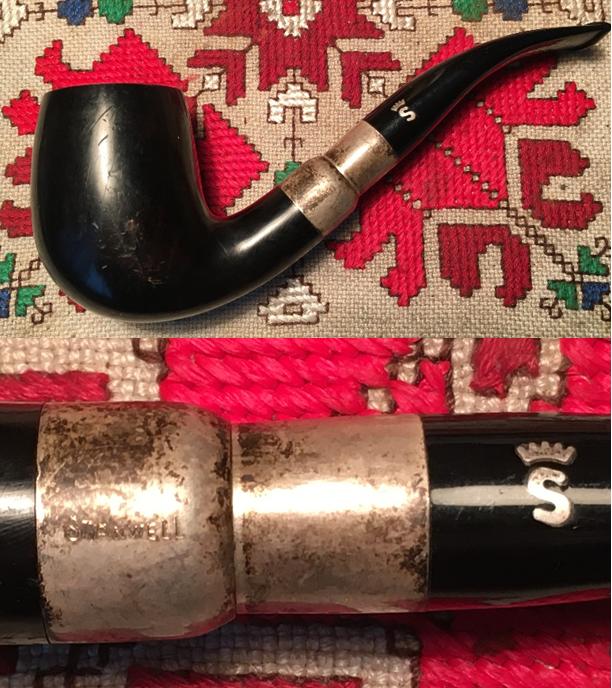
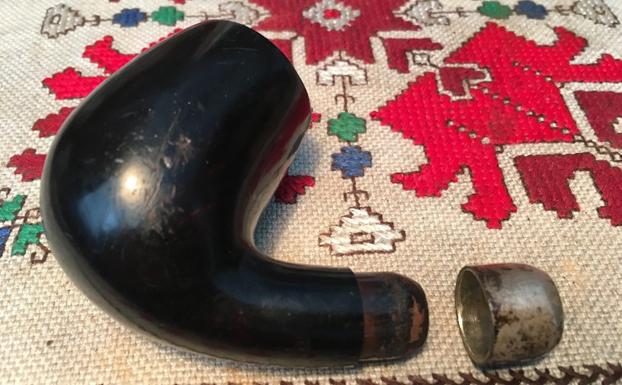
With my newest Hole in the Wall find now in front of me, I take more pictures for evaluation.  On the lower side of the shank is stamped Stanwell over Made in Denmark over Silver over Mount. Unfortunately, through wear or over-aggressive buffing, the ‘S’ of Stanwell and the “Ma” in Made in Denmark are very thin.  There is a shape number on the right side of the shank stamped 85 – I’ll need to research this to see if I can place this pipe with the plethora of information about Stanwell pipes on the internet.  Both the shank’s ferrule and the military or spigot mounted stem’s band, have 925 stamped – the world-wide authentication of sterling silver (.925).  What I did not see in the poor lighting of the Hole in the Wall, was that the mortise ferrule also had Stanwell stamped in the sterling.  The silver inlaid crowned “S” stem cartouche is in good shape.  The acrylic stem has many scuffs and nicks and tooth chatter near the button.  The rim and bowl surfaces also are nicked and dented a good bit.  As a matter of personal taste, I am not too partial to the black finish that hides the briar grain.  These pictures fill in the gaps.dress4 dress5 dress6 dress7 dress8 dress9 dress10My first time dealing with a Stanwell pipe was with a second – a Danske Club Vario, a very nice pipe also landed at the Hole in the Wall.  Pipedia’s article describes the beginning of the well-known Danish pipe making company, Stanwell:
At the end of the war, briar became available again, so Nielsen began importing his own briar and started making briar pipes to compete with the English manufacturers. It must be remembered that in 1948, England was the single great center for pipe making. Therefore, Nielsen changed the name of his pipes to “Stanwell”, which sounded much more like a proper English name than “Nielsen”. He also created the horse-drawn carriage logo for its English connotations. He later changed his own last name from Nielsen to Stanwell, a testament to his devotion to the pipes he made. Stanwell’s relationships with Danish pipe makers goes back to Sixten Ivarsson, who is considered the originator of modern Danish pipe making. Ivarsson was commissioned to design Stanwell shapes. In 1969, the factory was moved to a town called Borup, just outside of Copenhagen to be closer to Ivarsson.

To establish the date of this Stanwell Silver Mount style, thanks to Bas Stevens’ extensive compilation of Stanwell pipe shapes posted on Rebornpipes, the shape number 85 is listed as a bent billiard which was discontinued in 2006 (changed to shape number 246).  I also found the Silver Mount style featured in two Stanwell catalogs listed in Pipedia’s collection.  One ‘Brochure by the Lorup Group’ displayed samplings of the Silver Mount style but I could not establish the date of the brochure.  The other was a Russian catalog of Stanwell offerings including Silver Mounts dated 2001.  This pipe could predate 2001 but the latest possible dating would be 2006 when the shape number was discontinued.  Since Stanwell closed the doors of their manufacturing operations in Denmark and moved it to Italy in 2009 (link above), this confirms the Danish origin of the pipe.  The Silver Mount style is unique, not only because it provides two large sterling silver adornments to the classic bent billiard shape – a shank ferrule and stem band insert, but it creatively immolates a military or spigot stem mount.  I found two different comments on SmokingPipes.com about Stanwell’s Silver Mount line.  The first highlighted Stanwell’s Silver Mount shape 85:

If you like the look of a military or spigot mount but prefer a more conventional tenon/mortise arrangement, this Stanwell offers both — along with an elegant, graceful silhouette and plenty of chamber to boot.

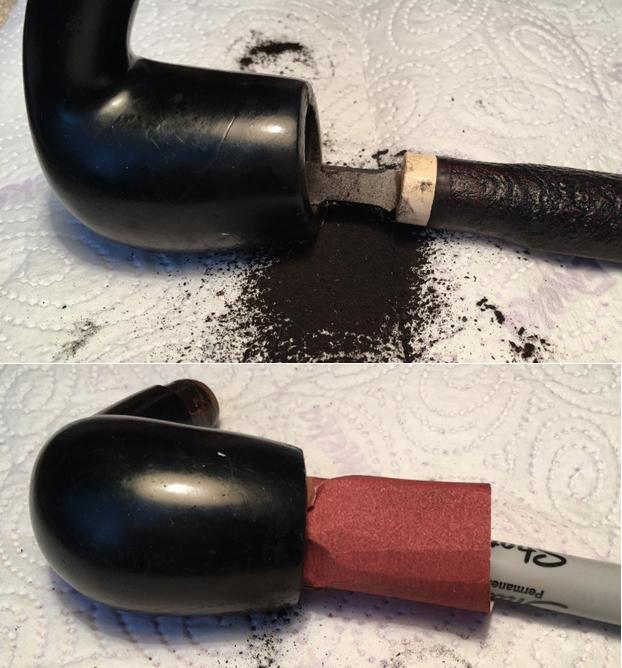
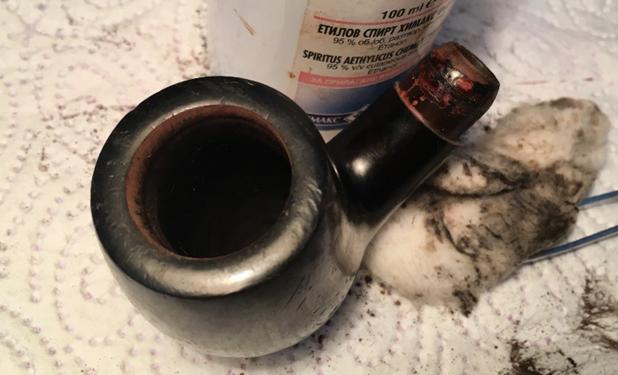
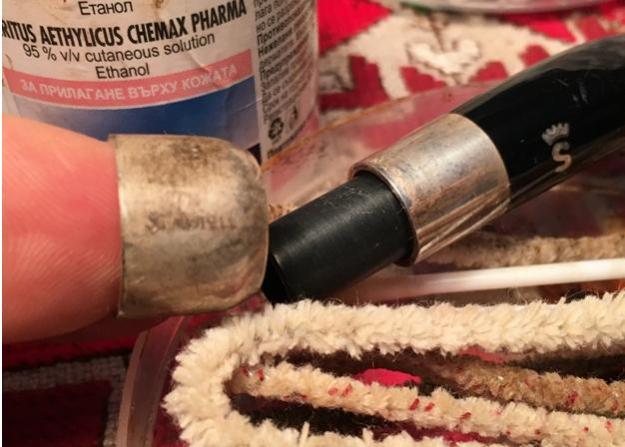
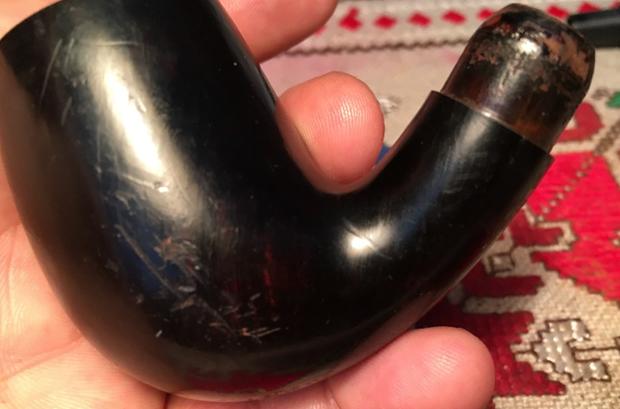
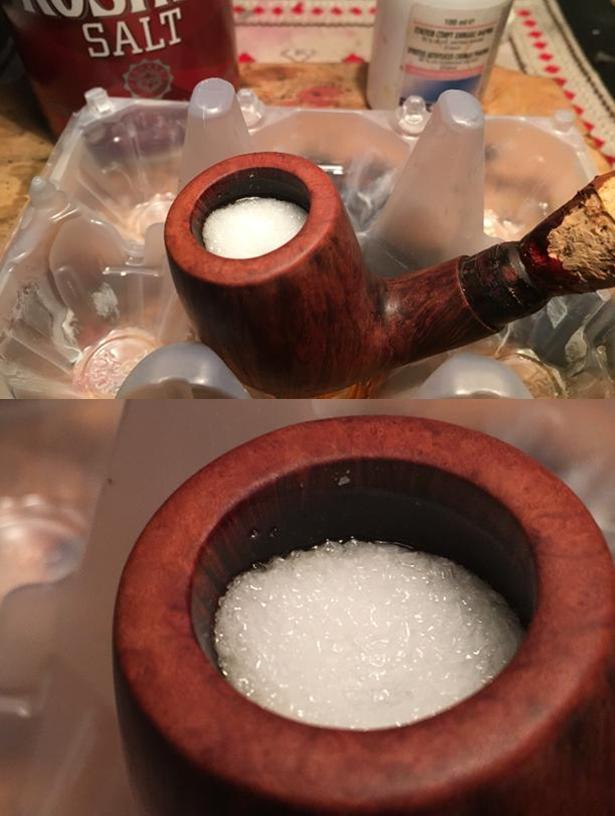
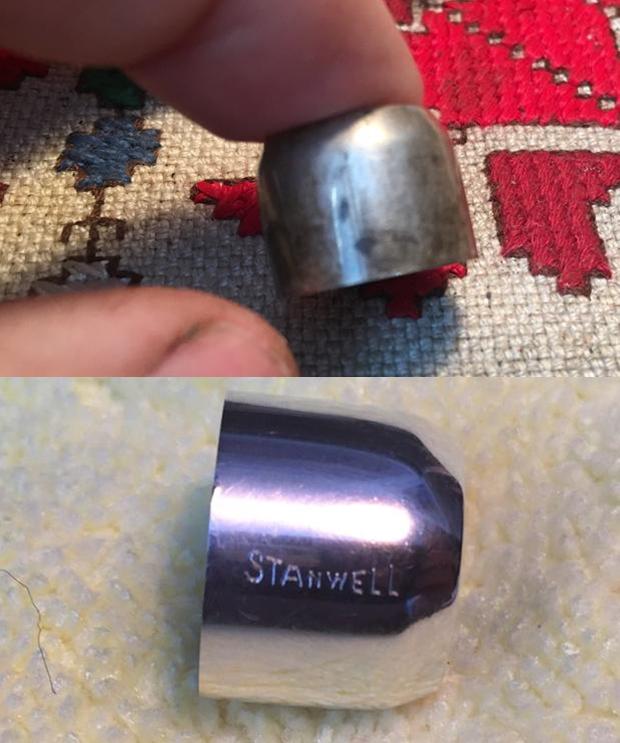
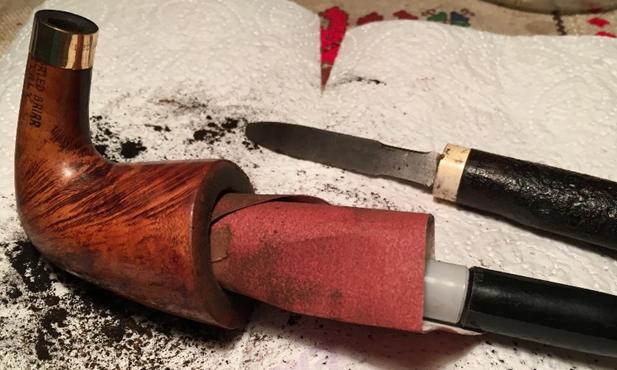
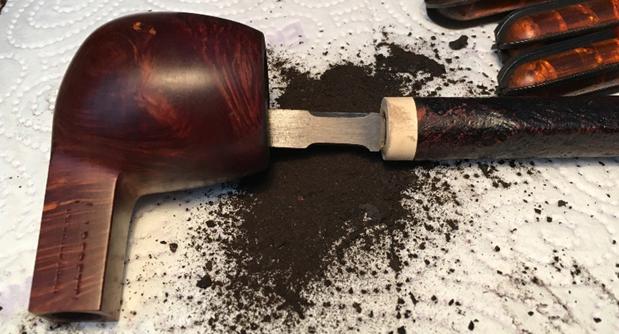
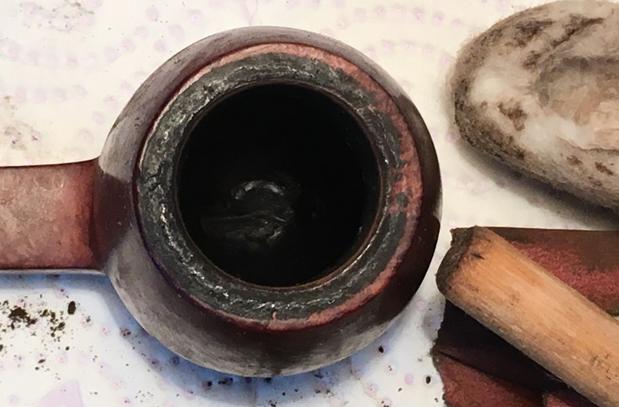
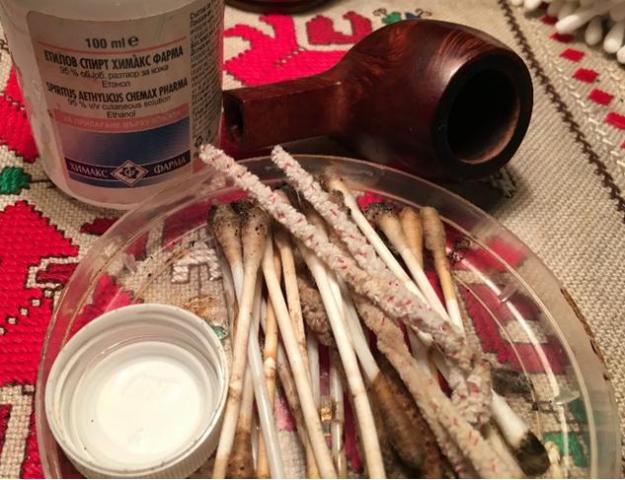
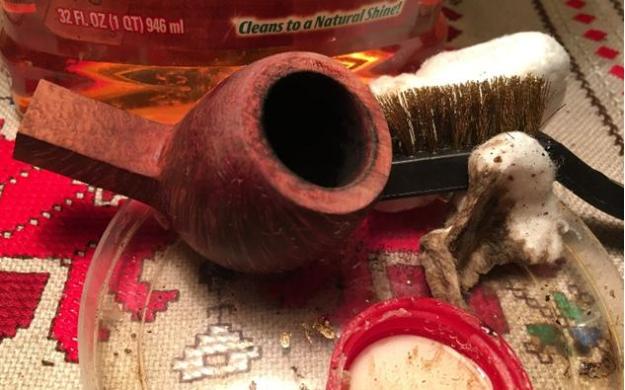
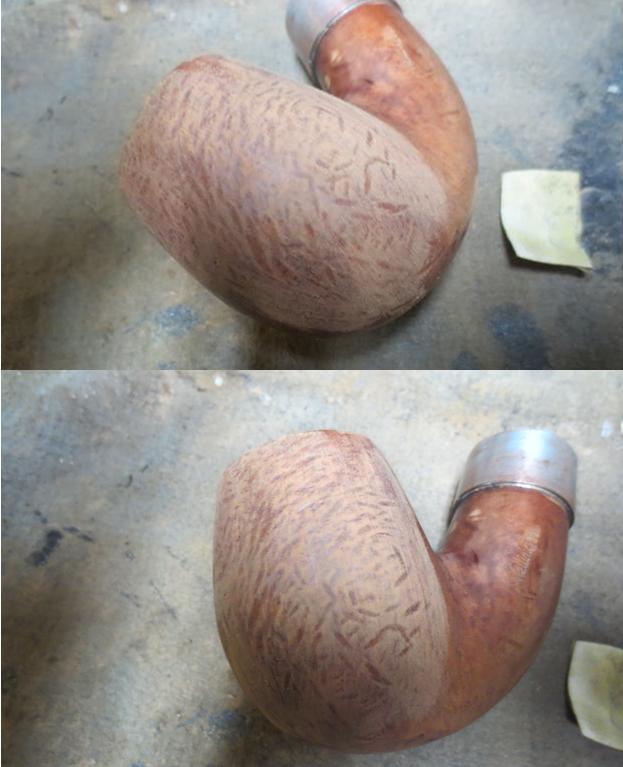
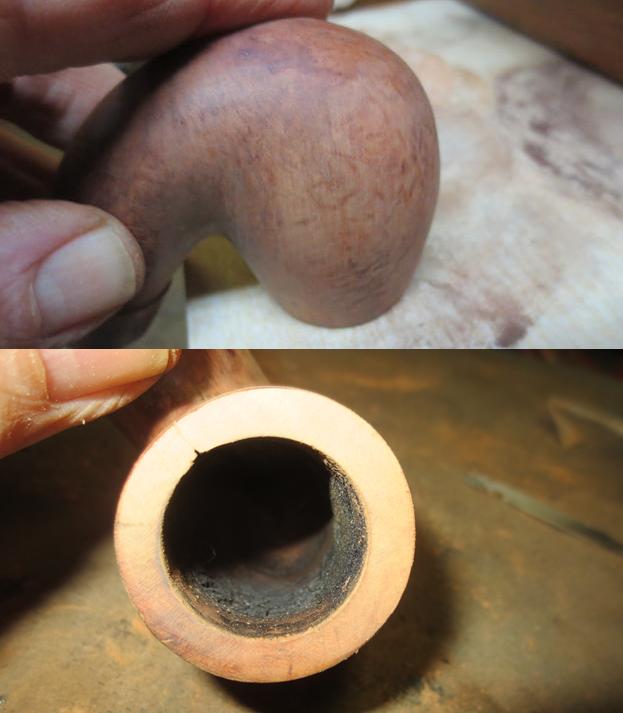
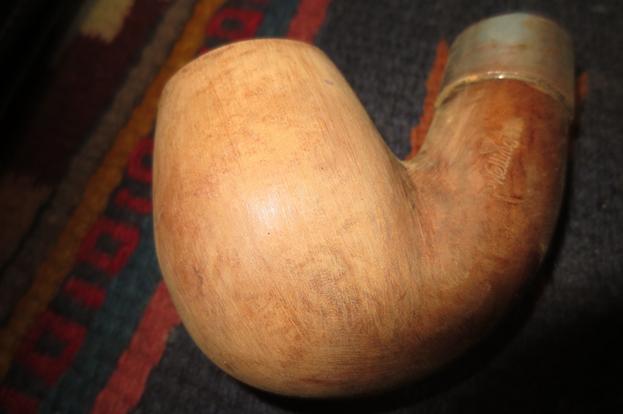
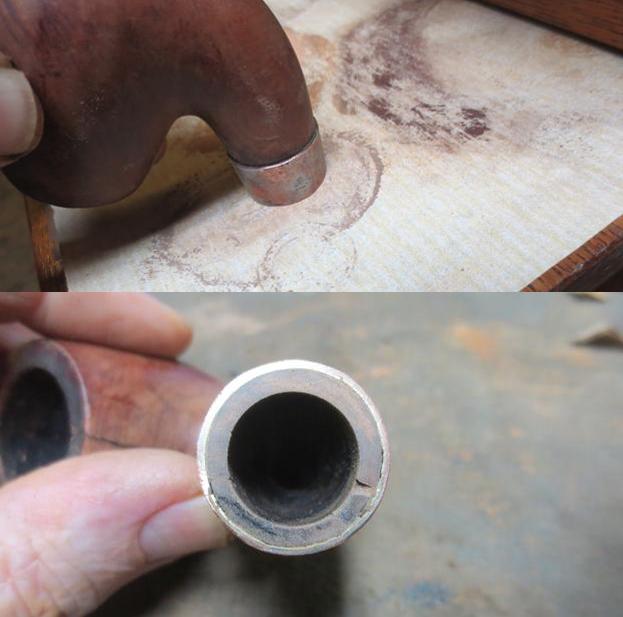
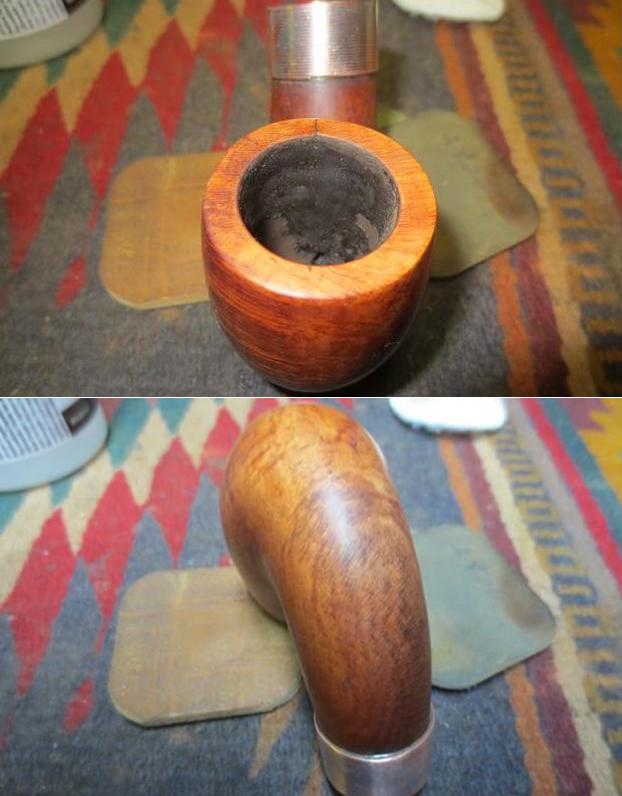
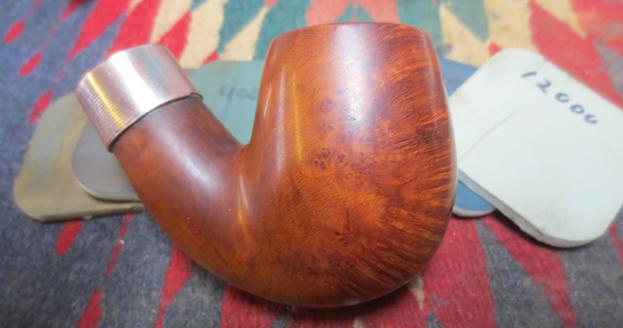
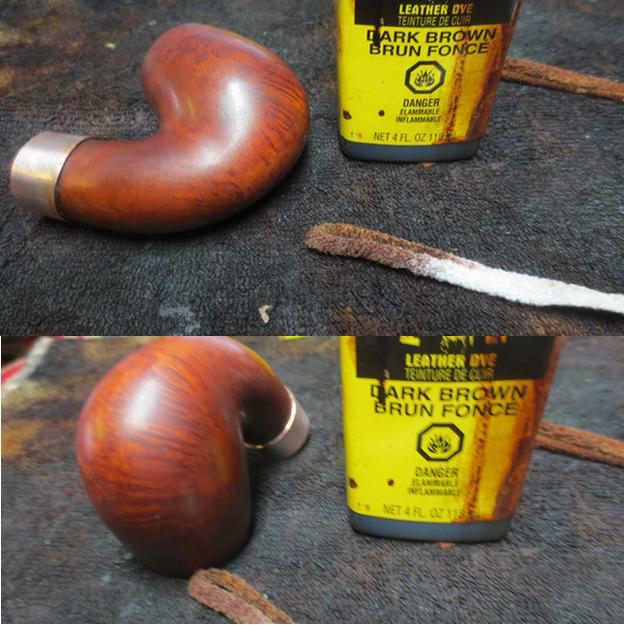
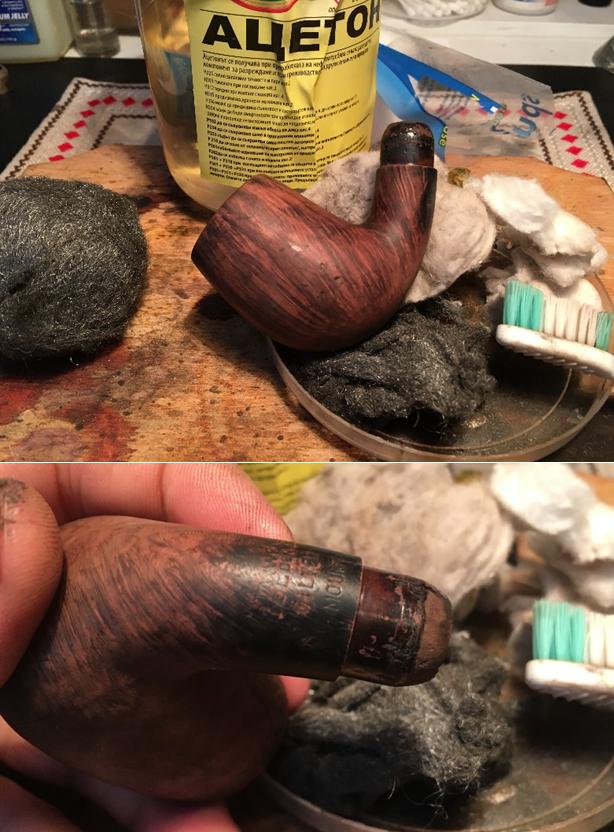
Of the stem style itself, there was this comment, that even though not a true military mount, since it has a tenon instead of a tapered fit, it nonetheless is one of the best faux-military mounts this observer had seen.  The sense I have of the pipe’s design is that it is an interesting mixture of higher class elegance with the ample showcase of sterling silver, but with the military/spigot stem style a ruggedness is also introduced.  My challenge now is to help this Stanwell, a ‘knight in shining armor’, regain its former glory!  The sterling silver ferule mounted on the shank is easily removed.  This will help the ease of the stummel’s cleanup.  The chamber in this billiard is large with a depth measurement of 1 3/4 inches and width of 7/8 inches – a good long smoker able to pack a bowl of one’s favorite blend.  The chamber is lightly caked but I want to clean it down to fresh briar.  I do this with my Savinelli pipe knife working over a paper towel for easy disposal of the carbon.  The reaming did not take long. Then I take a rolled piece of 240 grit sanding paper wrapped around both my index finger and then a Sharpie pen and sand the chamber wall.  I finish the bowl cleaning by using a cotton pad wetted with isopropyl 95% and wash the chamber.  The fire chamber looks good – I see no problems.  The pictures show the progress.dress11 dress12 dress13With isopropyl 95% on the work table, I turn directly to cleaning the stummel internals.  Using pipe cleaners, Q-tips dipped in alcohol, I work cleaning the mortise.  Using the flat edge of a dental spade, I scrape the sides of the mortise walls cleaning the tars and gunk.  The Q-tips and pipe cleaners are doing the job.  Later, I will also give the stummel a Kosher salt and alcohol soak to freshen the internals even more.  On a roll, I take the acrylic stem and clean the internals with pipe cleaners and Q-tips in the 9mm tenon area with alcohol.  There was little resistance.  With a cotton pad wetted with isopropyl, I also give the stem’s and mortise’s sterling silver an initial cleaning and polishing.  The progress is shown.dress14 dress15With internals finished, I take another look at the stummel and take a few close-ups looking closely at the surface and rim.  As I said earlier, personally, I’m not a fan of the solid black finish.  My standing ovations are roused by gazing upon natural briar grains!  In my research looking into the Silver Mount line of Stanwell in catalogs, I came across a similar Stanwell line called the, ‘Silhouette Pipe’, featuring several different shapes with the same black finish.dress16 dress17 dress18 dress19My plan is to remove the black finish and repair the stummel and rim surfaces, then apply a darker stain that is essentially black, but allowing the grain to be seen.  This will maintain the sleek, dark look of the bent billiard and continue to set it off in sharp contrast to the sterling silver ferrule and band along with the classic silver crowned ‘S’ Stanwell inlaid silver cartouche. With this plan before me, I use acetone to remove the finish.  Not knowing how tough the finish will stand, I start with a cotton pad wetted with acetone and see how the work progresses.  The cotton pads wetted with acetone are not making much progress so I add the gentle abrasion of 0000 steel wool.  I am careful to avoid the nomenclature on the lower part of the shank as well as the shape number.  With these areas, I only use cotton pads and a bristled tooth brush, acetone and a lot of elbow grease.  I do not want to erode the stampings!  As the black finish gradually gives way, I’m amazed that Stanwell covered such a beautiful piece of briar!  The straight grains travel vertically up the bowl from the heel of the stummel which holds a nest of bird’s eye grain – the whole effect is like a camp fire flowing upward from the fire pit. dress20 dress21 dress22With the black finish removed, I’m able to see some small pin hole pitting exposed on the surface.  To address this, I use a medium grade sanding sponge followed by a light grade sanding sponge to remove most of the pitting as well as nicks that remained on the rim.  The pictures show the progress.dress23 dress24With the initial stummel prep complete, I decide to use the Kosher Salt and alcohol soak to clean the internal airway and mortise more fully.  Using Kosher salt (versus iodized which can leave an after-taste) I fill the bowl and then after corking the shank opening, I hold my palm over the bowl and give the stummel a shake.  This displaces the salt a bit into the mortise. I then pour isopropyl 95% into the bowl until it fills just over the level of the salt.  I put the stummel in an egg crate for stability and put it aside for 4 to 5 hours to let the salt and alcohol draw out the tars and oils residing in the briar.  The pictures show this process.dress25With the stummel is ‘cooking’ with the salt/alcohol soak, I turn my attention to the stem.  The question and concern that comes to mind is the care in cleaning the stem while protecting the sterling silver band that is attached to the stem?  Will sanding the stem damage the band if the sanding runs over the edge?  Unlike the sterling silver shank ferrule that came off easily, the stem band is not going anywhere.  Just to get an idea how well the silver will clean up before I start on the stem clean up, I take the shank ferrule and apply Weiman Silver Cream to it. As the directions describe, using the sponge in the container, applying the compound, rubbing then rinsing off with tap water.  Wow! It works well.  The pictures show the result!dress26I move forward with caution with the acrylic stem by protecting both the crowned ‘S’ stem mark and the sterling silver band.   I do this by holding my thumb over the areas to keep the sanding instruments at bay.  After taking a few ‘before’ pictures to mark progress, I begin addressing the rough scratches in the acrylic with 240 grit paper to do the heavy lifting.  I also work out the teeth chatter in the bit area – upper and lower.  Following the 240 grit paper, I use 600 grit paper and then 0000 steel wool, taking a picture at each step to mark the progress.  Following the steel wool, I run the stem through the complete 1500 to 12000 micromesh pad treatment, taking a picture at the customary sets of 3.  In the final set, I also apply Weiman Silver Cream to the sterling silver band to spruce it up.  I discovered along the way, that the finer grade micromesh pads were not a problem for either the band or Stanwell stem mark – they shine up quite nicely!  I’m pleased with the progress.dress27 dress28 dress29 dress30With stem completed, I again look to the stummel which is benefiting from a Kosher Salt and alcohol soak.  The salt has darkened somewhat indicating the success of the process.  I dump out the old salt, thumping it on my palm to rid the stummel of the expended salt.  I use a paper towel to clean the bowl and I also utilize bristle brushes and pipe cleaners dipped in isopropyl 95% to further clean the airway and mortise.   dress31 dress32Time to address the finish of the stummel.  I use an Italian stain which is called Wenge’ – it appears to have a black base.  After I heat the stummel with my wife’s hair dryer, I liberally apply the stain to the stummel with a folded over pipe cleaner.  I fire the dye and the alcohol immediately burns off.  After a few minutes, I repeat the process and fire the stain.  Then, within a few minutes, I use a cotton pad and wipe the stummel with isopropyl 95% to blend the stain in the wood.  After wiping the stummel down with alcohol, I decide to switch and use a black water based dye and mix it 50 to 50 with isopropyl 95%.  I apply the mixture to the stummel with a folded over pipe cleaner and fire the stummel again.  With this mixture, it did not ‘fire’ the way an aniline dye will but it did evaporate as I passed it over a lit candle.  This helped to set the dye in the grain.  I set the stummel aside to rest.  The pictures show the progression.dress33 dress34Well, in the interest of full disclosure, what is not pictured are the several iterations of applying ‘black’ stain to this stummel.  When I first ‘unwrapped’ the stummel from the fired crust, buffing with my Dremel using Tripoli and then Blue Diamond compounds with a cotton cloth wheel, I was not satisfied with the hue of black I saw emerge.  I wanted the finish to be a translucent black, allowing grain to show through, but in black spectrum hues.  What I was seeing was the brown of the grain emerging giving more of a dark chocolate brown look.  I repeated the staining several times, changing up the black dye content and alcohol, flaming and then wiping the stummel with a cotton pad wetted in isopropyl 95% to blend the stain with the briar and each time repeated buffing with Blue Diamond with the Dremel cotton cloth wheel.  I finally started seeing emerge a stummel that correlated with the image in my mind – a black stummel, in keeping with the original Stanwell intent, but with subtle grains showing through.  Satisfied finally with the result, I move on and apply several coats of carnauba wax to the stummel and to the acrylic stem with the Dremel’s cotton cloth wheel set to speed 2 (one notch up from the slowest speed).  I also attach the sterling shank ferrule with a bit of super glue to keep it in place and finish with a rigorous hand-buffing of stummel, sterling, and stem with a micromesh cloth.

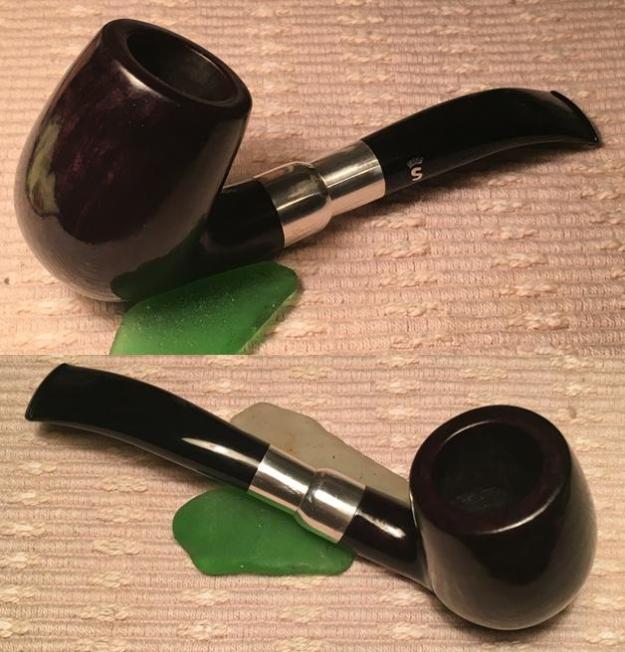
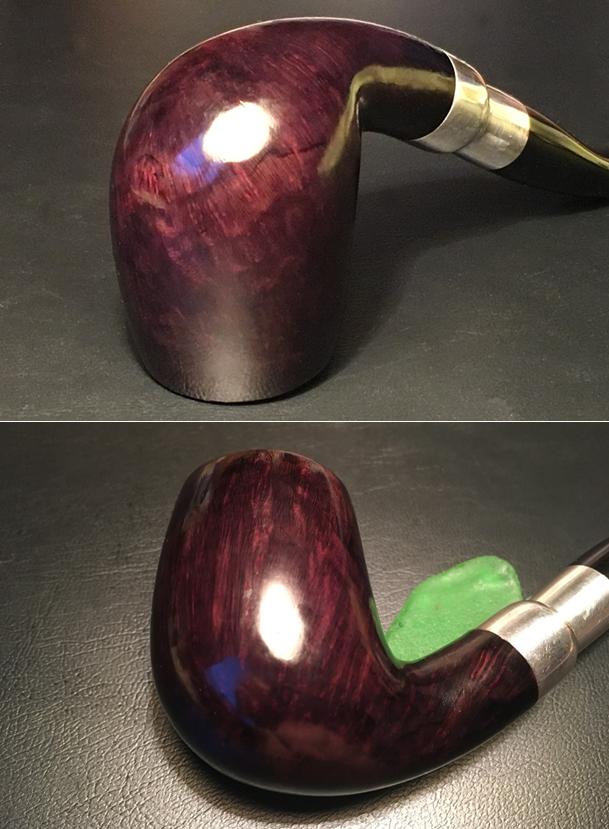
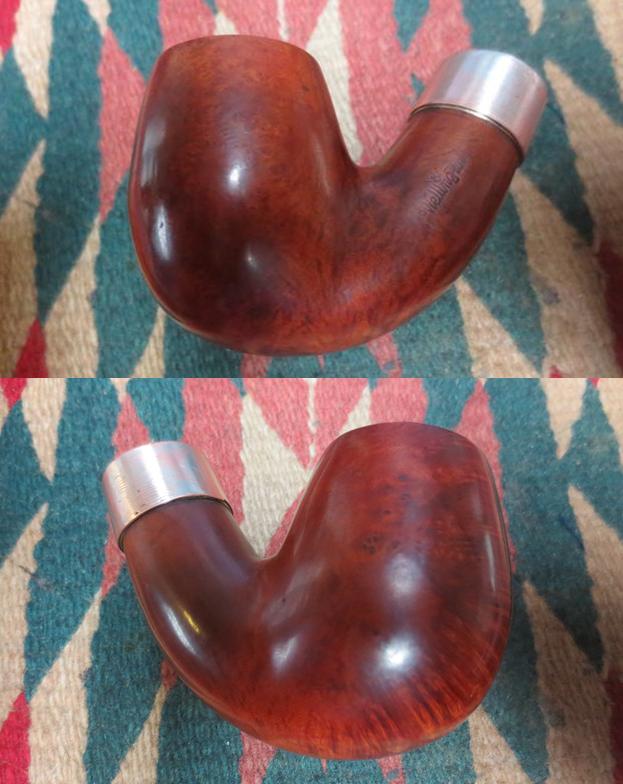
It is true, personal tastes are subjective, but my sense is that I’ve improved this dressy Stanwell Silver Mount bent billiard by transforming the solid black to a translucent finish allowing the natural grains to show through.  This presentation of grain pattern is subtle and I believe it is in keeping with this special line of Stanwell pipes, the Silver Mount.  You’ll notice at the end of the presentation pictures below, I’ve included two pictures taken on a dark surface which enables the grain to be seen more clearly.  Stanwell’s retired shape number 85 is a larger bent billiard with a pleasing feel in the palm. The faux military stem mount brings a rugged look to the pipe but the twin sterling silver adornments, uniting the shank and acrylic stem, places this Stanwell a touch of class.  This Stanwell Silver Mount bent billiard is ready to serve a new steward.  If you’re interested in this pipe, check out the store at my new site, The Pipe Steward. The profits of all pipe sales go to the Daughters of Bulgaria, an organization my wife and I work with helping women and children who have been sexually exploited and trafficked.  Thanks for joining me!dress35 dress36 dress37 dress38 dress39 dress40 dress41 dress42 dress43 dress44


Checkered History and Heritage of an East German Howal Old Briar Rustified Dublin


Blog by Dal Stanton

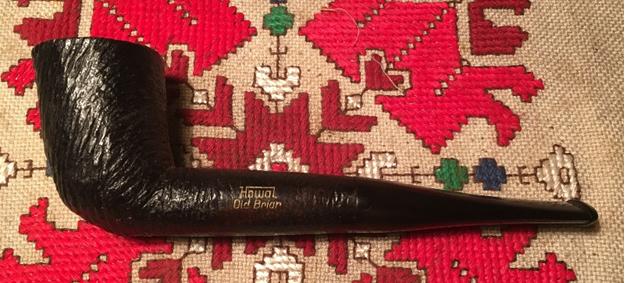
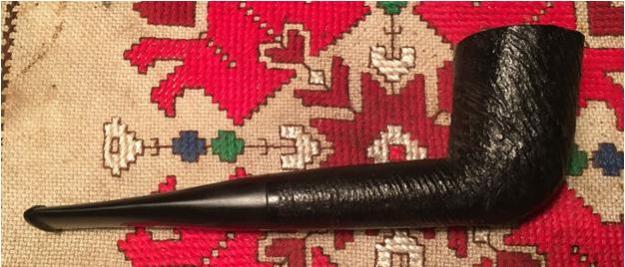
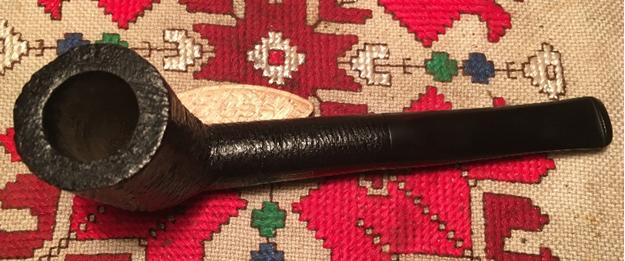
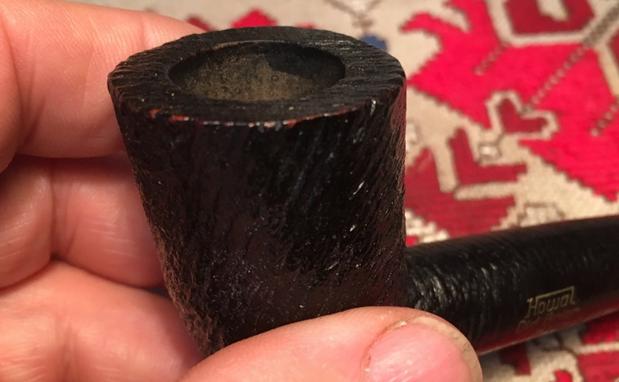
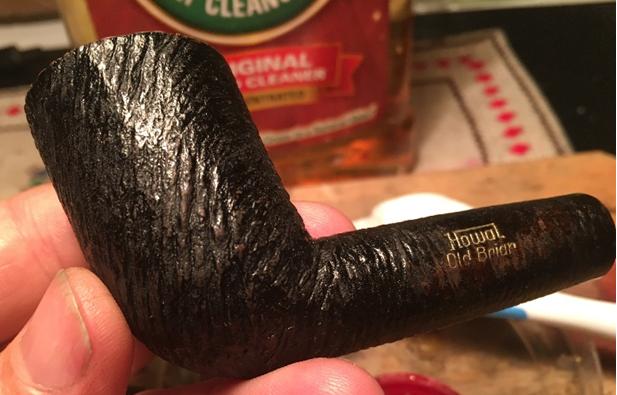
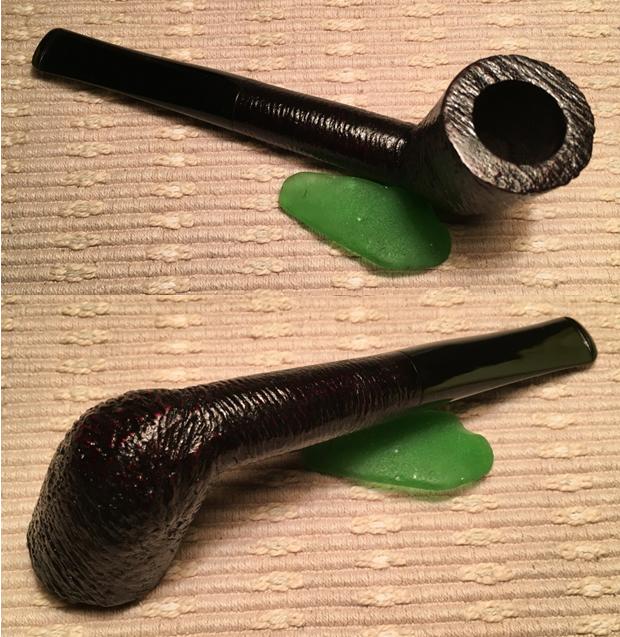
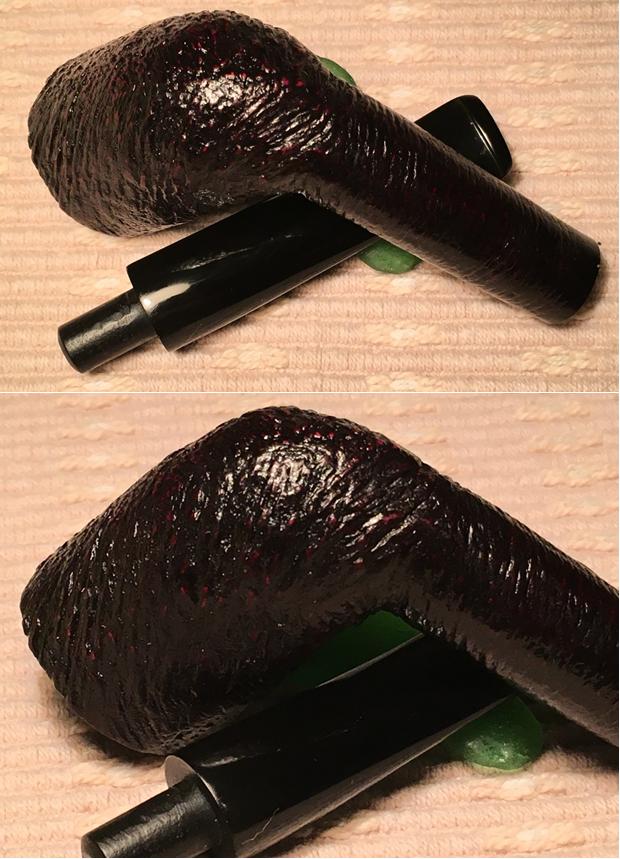
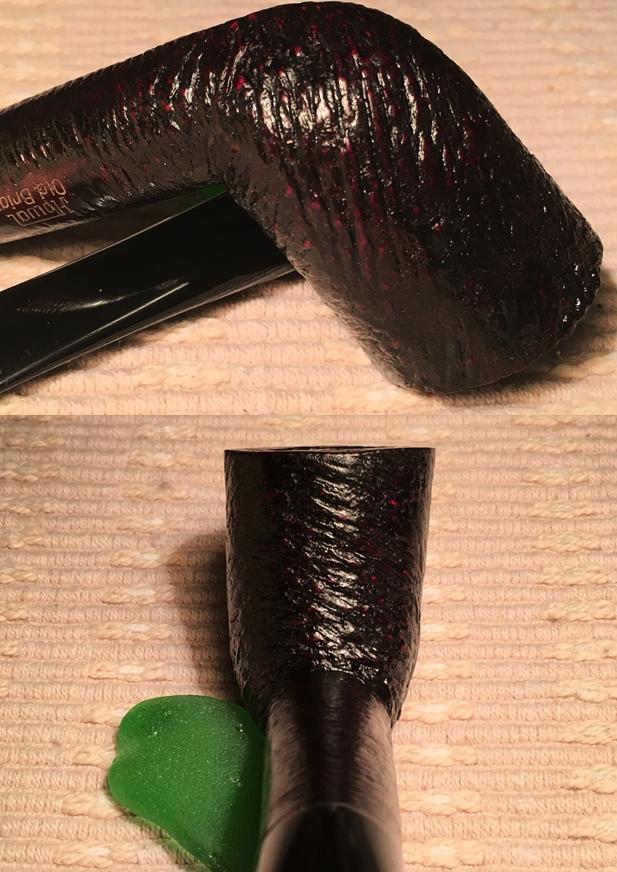
Finally, a ‘simple’ clean up!  Or, so I hope.  The Howal has been in my ‘Help Me!’ basket for some time.  I bought him from a vendor in an antique market, in the shadow of Nevski Cathedral in downtown Sofia, Bulgaria.  It was from the same young man I purchased, out of his bag of pipe parts, an orphaned stummel which became my maiden restoration project published on Reborn Pipes.  I titled it, A Newbie Restore of a Dr. Plumb 9456 Oom Paul – only it wasn’t an Oom Paul.  Al Jones’ (aka, Upshallfan) comment to my first blog observed correctly: “the 9456 is a classic GBD shape, although it is considered to be a Bent Billiard (rather than a Oom-Paul).”  I’m thankful for much ‘newbie’ grace I have received!  Though, the pipe’s name is still Chicho Pavel, Bulgarian for Uncle Paul!  He continues to be a favorite in my rotation and a special friend.  The Howal (over Old Briar) Rustified Dublin now before me is of interest to me partly because of its origins.  The pictures from my work table give an overview of the pipe itself.howal1 howal2 howal3 howal4 howal5 howal6The Howal name is of interest to me because it originated from behind the former ‘Iron Curtain’ in East Germany during a geopolitical climate rife with change and human tragedy.  My wife and I have spent over two decades living behind what was formerly the Iron Curtain and this is the second Howal I’ve found in the same Antique Market here in Bulgaria.  The question that comes to my mind is whether Howals are more commonly found in Eastern Europe where perhaps, they were circulated under the old USSR in an enforced socialist, command economy?  Pipedia’s article was both interesting and helpful in understanding the predecessor of and origins of the Howal name:

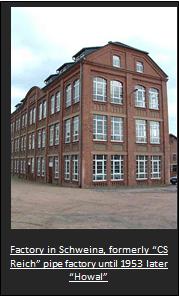
C.S. Reich howal7was founded by Carl Sebastian Reich in Schweina, Germany in 1887. By its 50th jubilee in 1937 C.S. Reich was the biggest pipe factory in Germany.  In 1952, however, the owners of the company were imprisoned and the company itself was nationalized as Howal, an abbreviation of the German words for “wood products Liebenstein” or “Holzwaren Liebenstein”.  By the 1970’s Howal, after acquiring many other smaller pipe making firms, was the sole maker of smoking pipes in East Germany. In 1990, with the fall of the Berlin Wall and reunification of the Germanys, the company was closed.

While helpful for a broad sweep, I discovered much missing from this summary and it raises more questions.  From another interesting source, Edith Raddatz’s lecture on tobacco pipe production in Schweina at the Tobacco Pipe Symposium in 2003, it describes a history of pipe production in this central German village that was reminiscent of my research into France’s pipe mecca, St. Claude.  A strong development of the pipe making industry can be traced in the 1800s to the apex of the C.S. Reich Co. being Germany’s largest pipe producer in 1937, but Raddatz’s lecture reveals that other producers of pipes were also based in the German village of Schweina.  Pipedia’s article above describes how the owners of the C.S. Reich Co. were arrested and imprisoned followed by the nationalization of the Reich Co. and becoming ‘Howal’, an acronym for “Wood Products Liebenstein” – Bad Liebenstein was the town that bordered and absorbed the village of Schweina. The question begs to be asked – which, unfortunately introduces the human tragedy wrapped around the name ‘Howal’ – Why were the owners arrested?  In an unlikely source, the website of the ‘Small Tools Museum’ adds the names of those imprisoned: shareholders Robert Hergert and Karl Reich.

Edith Raddatz’s lecture (referenced above) brings more light to the difficult geopolitical realities these people faced (Google translated from German – brackets my clarifications):

By 1945 the company, which had meanwhile [passed to] the next generation – Kurt Reich And Walter Malsch – [had] about 100 employees.   Among them were many women who mainly did the painting work.  At the beginning of the 1950s, an era ended in Schweina. The first [oldest] tobacco pipe factory in Schweina closed their doors. There were several reasons for this. Kurt Reich passed away in 1941, [and] Walter Malsch [in] 1954.  The political situation in the newly founded GDR made the conditions for private entrepreneurship difficult. The heirs of the company “AR Sons” [Reich family] partly moved to West Germany. The operation was nationalized and later toys were made there.

howal8In post WWII occupied Germany, the Soviet occupied section was declared to be a sovereign state and the German Democratic Republic (GDR) was established in 1949 (See link).  With a rudimentary understanding of Marxism and the economic philosophy undergirding it, it is not difficult to deduce what brought the demise of the C. S. Reich Co. and the formation of Howal.  Solidification of the FDR’s hold on power paralleled the necessity to nationalize private ownership and to institute a State-centered command economy.  These efforts gained momentum and forced companies/workers to work more with no additional pay.  In 1952, the year that the owners of C. S. Reich Co., were arrested, this edict was advanced (See link):

In July 1952 the second party conference of the Socialist Unity Party of Germany (SED) took place in East Berlin. In SED General Secretary Walter Ulbricht‘s words, there was to be the “systematic implementation of Socialism” (planmäßiger Aufbau des Sozialismus); it was decided that the process of  Sovietization should be intensified and the importance of the state expanded. The party was acting on demands made by Soviet premier Joseph Stalin.[2]

howal9As a result, Germany remembers the Uprising of 1953 which started in East Berlin, as factory workers revolted against the repression of the GDR, and spread to all East Germany.  Many lost their lives as Moscow responded to squelch the unrest with tanks on the streets.  In play also, was the mass exodus of people fleeing to West Germany, which included, per Edith Radditz’s lecture, the Reich family, who would have been heirs of the family’s legacy and company – pipe making.  Also in 1953, completing the State forced abolition of any Reich claim, the largest pipe making company of Germany was seized, nationalized, and changed from C. S. Reich Co. to Howal.  As ‘Howal’, pipes continued to be produced, undoubtedly with the same hands and sweat of the people of Schweina, along with other wooden products, such as toys.  In the Pipedia article I quoted above, it said:

By the 1970’s Howal, after acquiring many other smaller pipe making firms, was the sole maker of smoking pipes in East Germany. In 1990, with the fall of the Berlin Wall and reunification of the Germanys, the company was closed.

My curiosity piqued, what does it mean when it says that Howal acquired many other smaller pipe making firms?  Should we question whether these words can be understood in the normal free market enterprise way we are accustomed?  Doubtful.

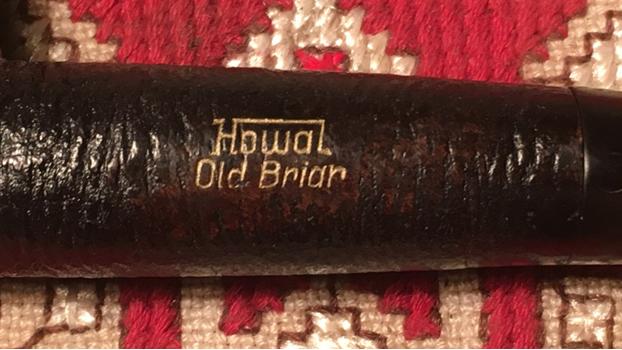
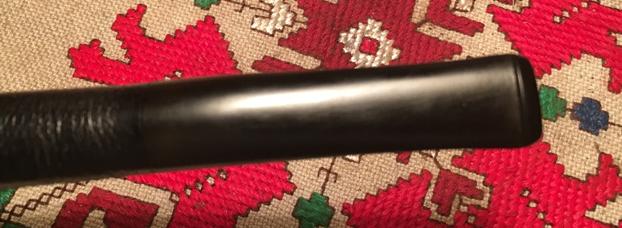
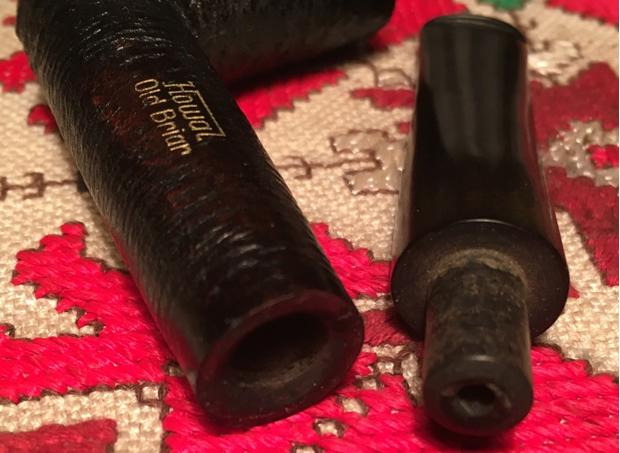
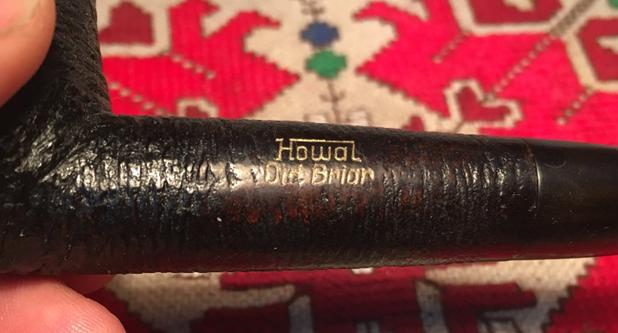
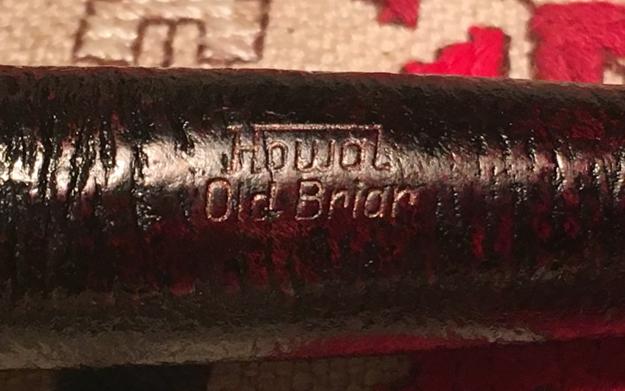
As I now look at this Howal before me, it is with a greater connection to its checkered past, the people of Germany’s pipe making heritage, and specifically, to the hands that drilled, shaped and finished the pipe.  The possible dating of this Howal spans from 1953 to 1990, when the Howal factory was closed for good with the fall of the Berlin Wall and the old USSR (See link).  The Howal markings on the left side of the shank are in very good shape.  The rustification is very attractive in the Dublin style – definitely an ‘olde world’ feel.  There are some marks on the rim.  The bowl is totally free of cake – someone did some clean-up work before coming to me.  The dark color of the stummel appears to be paint or a black stain – I can see brown around the nomenclature on the shank.  I will clean the stummel with Murphy’s and see what happens.  There is no oxidation on the stem nor teeth chatter or dents.  So, could this Howal be only a simple cleaning and freshening?

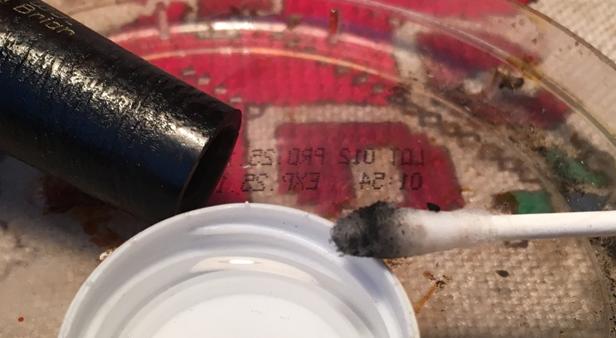
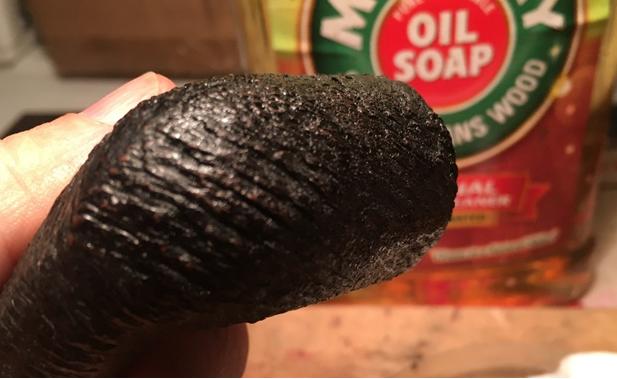
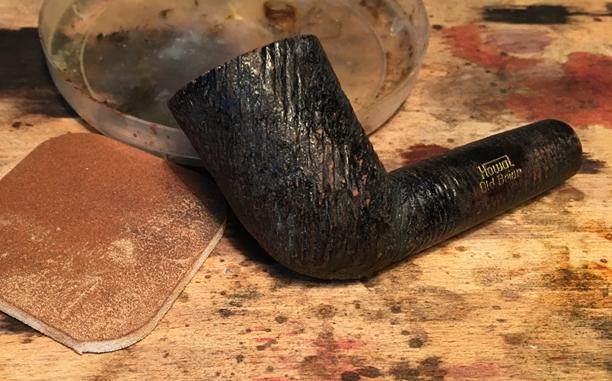
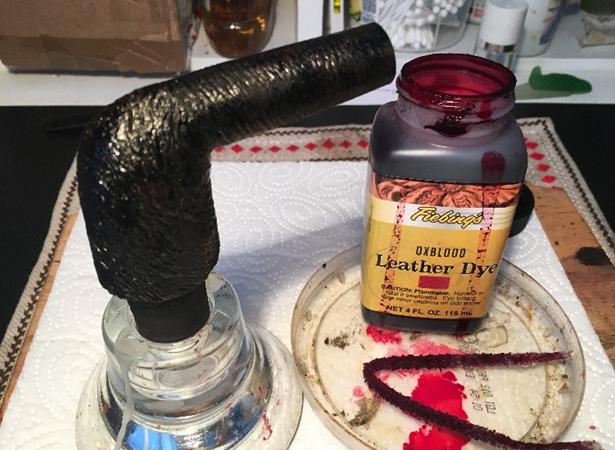
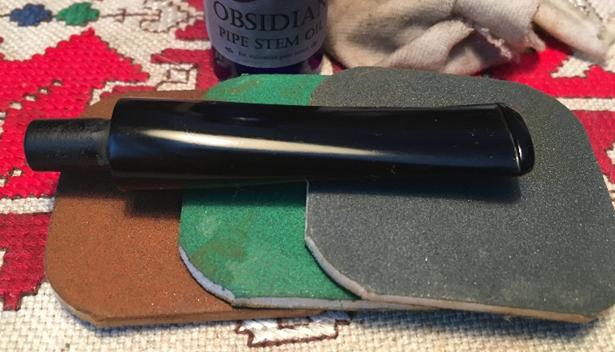
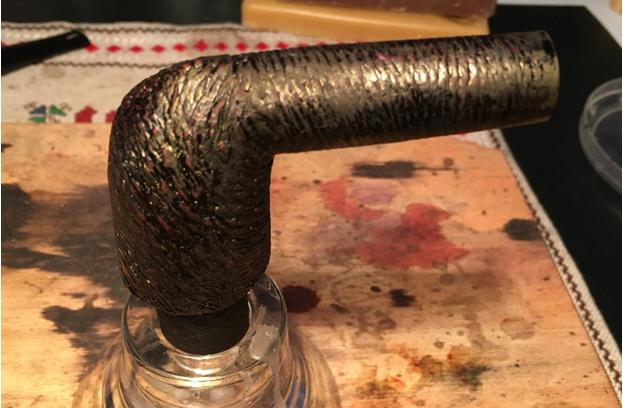
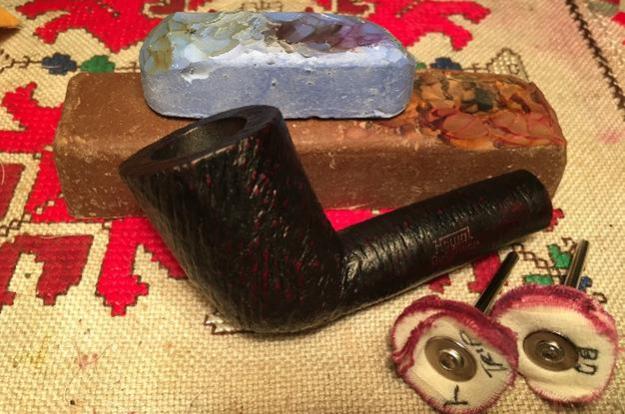
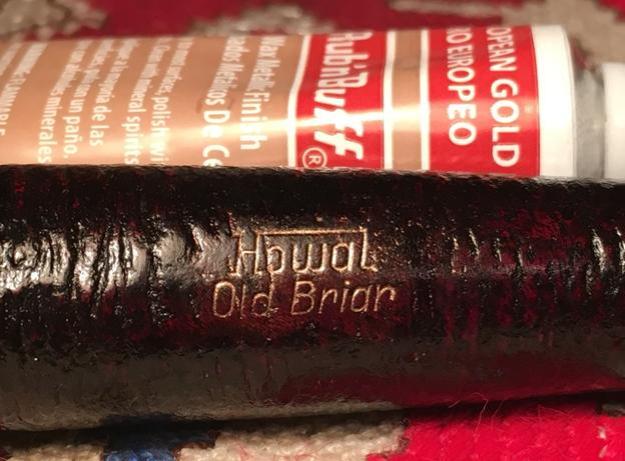
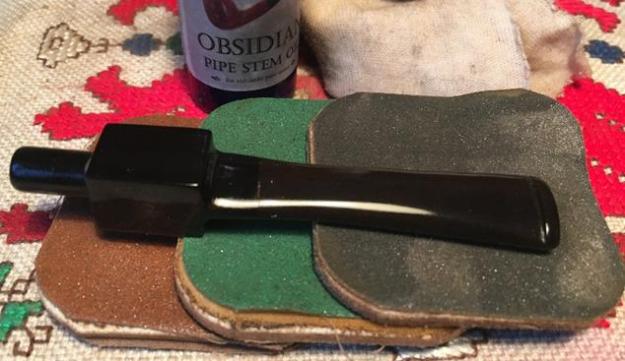
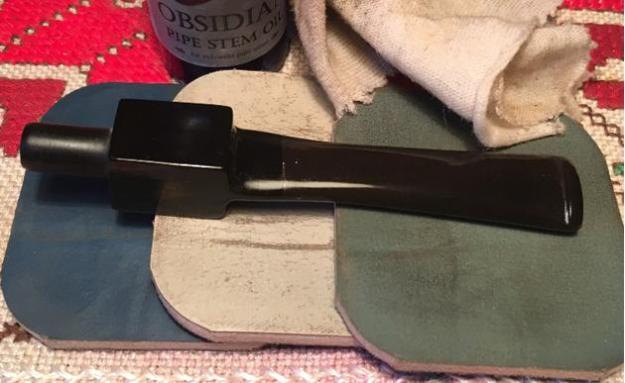
I start by taking a picture of the rim and markings to take a closer look at areas of question.  Then using Q-tips and pipe cleaners with isopropyl 95% I start cleaning the stummel internals.  After only one plunge of a Q-tip, I see that the mortise is full of the black finish that is also on the external surface.  I find no tobacco gunk in the mortise, only black dye – or whatever it is.  After several Q-tips and some pipe cleaners, I decide simple to fill the mortise with isopropyl and let it soak for a few hours.  This did the trick.  After pouring off the dirty isopropyl the Q-tips, after the soak, started coming out clean very quickly.  Stummel done.  The stem required very little effort.  The pictures show the progress.howal10 howal11 howal12 howal13 howal14 howal15I take undiluted Murphy’s Oil Soap and scrub the stummel surface with cotton pads and a bristled brush. I want to test the finish to see how solid it is as well as clean the grime out of the rustification ridges.  After a good scrub, I rinse the soap of the stummel with tap water, careful not to allow water inside. howal16After drying, I have two impressions of the black finish.  First, the splotched glossy areas left over from the Murphy’s scrub remind me of the acrylic finishes that I’ve seen on smooth briars.  Secondly, the finish now is speckled where the briar is coming through.  Decision time.  A plan starts formulating in my mind.  I like the rustification of the Howal Dublin and I very much like the feel of the Dublin in my hand – it has a good ‘meditation’ appeal, which is a good quality for a pipe J.  Yet, truth be known, I’m not a fan of the black finish.  To me it is plain and stark – it lacks depth and interplay with the tight, crisp rustification patterns.   I decide to continue scrubbing the surface with Murphy’s Soap to remove the remaining glossy spots but to leave the black hue in place.  After Murphy’s, I use some isopropyl 95% with a cotton pad and work on the glossy areas.  While not 100% gloss free, the last picture shows sufficient progress.  I will give more thought to the plan at this point.  The pictures tell the story.howal17 howal18 howal19With a night of rest now fueling the thoughts, I decide to use the dark stain on the stummel as a back coat for a subtle Oxblood over-coat.  My goal is to create more depth in the rustification by introducing another hue.  I begin preparation of the stummel by very lightly sanding the top peaks of the rustification ridges with a 1500 grade micromesh pad.  I do this to create entry points for the new dye in raw briar opened by the sanding.  I’m thinking of the restoration I did with the classic rustified Lorenzo Rialto for the basic approach I’m now employing.  I want the surface to be clean so I follow the sanding by wiping the surface with a cotton pad and isopropyl 95%. I use a black Sharpie pen to darken the worn ring of bare briar around the rim of the Dublin for better blending.  I included a picture of the Lorenzo Rialto to get an idea of where I’m hopefully heading!howal20 howal21 howal22 howal23In preparation to apply the stain, I cover the Howal gold lettering stamping with a bit of Petroleum Jelly to protect it. Using my wife’s hair dryer, I warm the stummel to open the briar to the new dye. Using a cork inserted in the bowl as a handle, I liberally apply Fiebing’s Oxblood Leather Dye to the surface of the stummel with a doubled pipe cleaner – careful to cover the entire stummel and rim.  After the initial application, I fire the aniline dye and the alcohol burns off quickly setting the hue in the briar.  After a few minutes, I repeat the process to assure an ample coverage and put the stummel aside to rest. The pictures show the progress.howal24 howal25With the newly dyed stummel resting, since the Howal’s stem came to me in good condition – no tooth chatter or dents, I start wet sanding the stem using micromesh pads 1500 to 2400.  I follow the wet sanding with an application of Obsidian Oil on the hungry vulcanite.  I then dry sand with micromesh pads 3200 to 4000 and then 6000 to 12000 – following each set with an application of Obsidian Oil.  The stem looks great – that newly polished vulcanite pop is very nice.  I put the stem aside to dry.  The pictures show the progress.howal26 howal27 howal28Time to ‘unwrap’ the fired, crusted Oxblood dye I applied to the dark stummel.  I mount a new felt polishing wheel on the Dremel and set the speed to the slowest setting and utilize the fine abrasion of Tripoli compound to take the crusted layer off.  Patiently, I move the wheel across the surface in a circular motion, allowing the RPMs of the Dremel and the compound to do the work – I apply little downward pressure on the briar.  As the results started to appear, I see the Oxblood speckling I was hoping to see, but not as much.  I decide to follow by lightly sanding the rustified surface with a 1500 micromesh pad.  This resulted in the direction I wanted to go, but I wanted the Oxblood hints, beginning to peek out, to be a few shades darker, richer.  Even though I had already put away the stain and cleaned up, I decide to repeat the staining as before – hopefully to realize the results I can envision in my mind.  The bottom picture in the set shows the stummel after the second staining with Frieberg’s Oxblood Leather Dye – not looking much different than before but simply to chronicle my procedure.  The first picture, after the Tripoli then after, the sanding show the developing motif with the Oxblood and the rustification. howal29 howal30 howal31After several hours, admittedly, I was a bit impatient to unwrap the fired crust the second time around.  In the time in between, I had some time to think about the next step. My usual approach is to use a felt polishing wheel with the application of Tripoli compound to smooth briars.  A felt wheel is flatter and firmer than a cotton cloth wheel and therefore, more abrasive than the cotton cloth wheel.  With use on a rustified surface, I’m thinking that the felt wheel might possibly ride more naturally on the peeks of the raised ridges and possible do its work unevenly – at least in theory.  My usual approach with the Dremel is to use a cotton cloth wheel when coming to the carnauba wax polishing stage.  I decide to mount a cotton cloth wheel for both compounds I employ, Tripoli and Blue Diamond, and see how it goes.  With the new cotton cloth wheel mounted on the Dremel, I’m ready to put theory into practice first with the Tripoli compound.  The only problem breaking in a new cotton cloth wheel is that loose fibers run amuck and I’m covered!  I continue to use the slowest speed the Dremel can offer for the compound.  After the Tripoli, again with a new cotton cloth wheel, I apply Blue Diamond compound.  I am truly amazed at the subtle Oxblood texturing that emerges – it is working!  I find that I spent more time with the Tripoli as the Tripoli was the abrasive that created the effects of the Oxblood speckles.  Where there were none or few Oxblood accents, I focused the Tripoli wheel at that area and the highlights would begin to appear.  With the Blue Diamond I spend much less time as it was shining what was already revealed not bringing out more.  I take a picture after the compound phase.howal32 After the compounds, I hand buff the stummel with a cotton cloth, not so much as to shine the stummel but to remove residue compound powders left over.  I do this before the application of carnauba wax, also with a cotton cloth wheel, but with the Dremel increased to number 2 of 5 (being the fastest).  After reuniting the stummel and stem, I give both several applications of carnauba wax.  The only difference in technique with the wax is that with a small, Dremel polishing wheel, I am able strategically to apply the wax so it doesn’t get gunked up in the ridges of the rustification.  I keep the wheel parallel with the grain and follow the ridges/valleys as I apply the carnauba.  With the compounds, you are still sanding and ‘taking off’ from the finish, even though it’s shining things.  With the wax, you’re not taking but leaving something behind – the wax has the purpose of polishing and protecting the finish. After applying the carnauba, I decide to do one more thing to recommission the rustified Dublin.  With Rub ‘n Buff European Gold Wax Metallic Finish, which I just acquired during my Christmas visit to the States, I spruced up the Howal nomenclature.  I applied the Rub ’n Buff with a pointed Q-tip and carefully wiped the excess.  After dried, again I spruced up the area with a few passes of the carnauba wax wheel.  A few pictures show the before and after.howal33 howal34To finish, I give the stummel and stem a rigorous hand buffing with a micromesh cloth to bring out and deepen the shine.

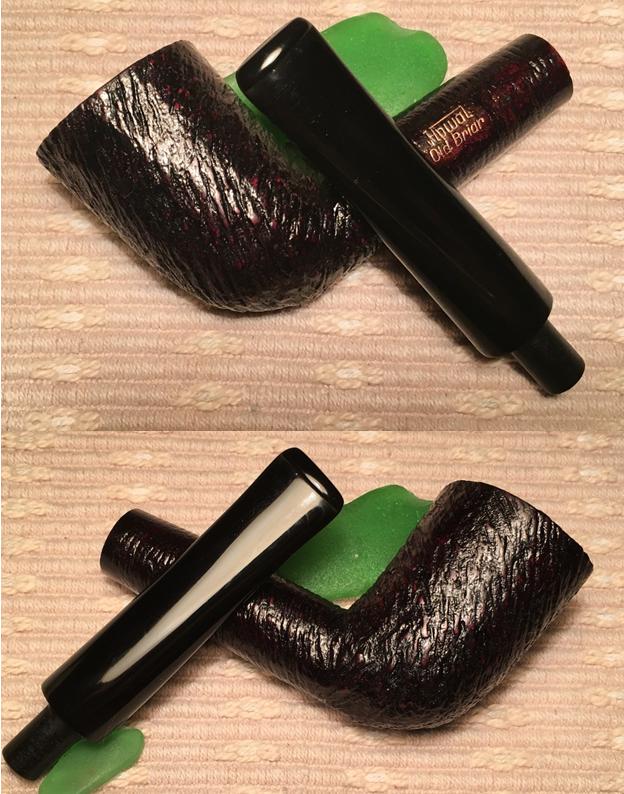
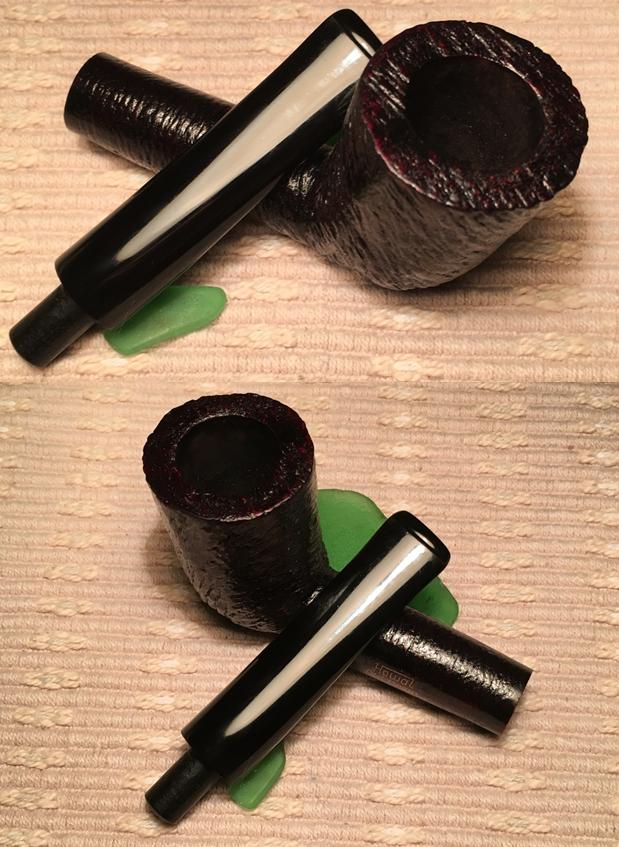
I have a deeper appreciation for the name this rustified Dublin carries.  Understanding the past helps us to stay rooted in the present.  I appreciate better the legacy of the Howal name and the journey of the Carl Sebastian Reich family beginning in Schweina, Germany in 1887.  I’m very pleased with the results of the Oxblood finish.  In the presentation pictures below, I had to take some unusually close shots to see the subtle Oxblood highlights hidden by the reflection of the light.  To me, the finish adds depth and texture to the attractive rustified Dublin.  If you would like to add this Howal Old Briar to your pipe collection and stories, see my blog at The Pipe Steward.  Thanks for joining me!howal35 howal36 howal37 howal38 howal39 howal40


A Gold Banded Bent Dublin Eldorado Lucite of Italy


Blog by Dal Stanton

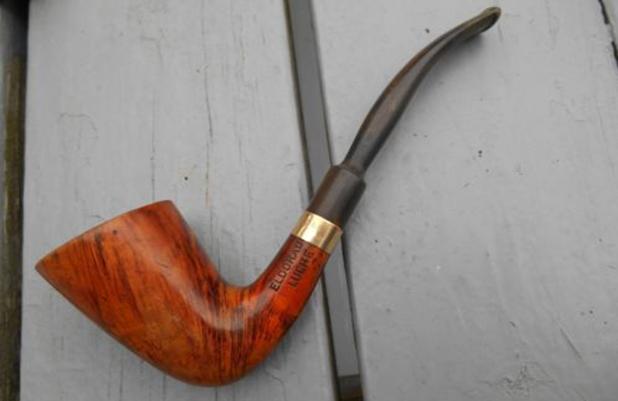
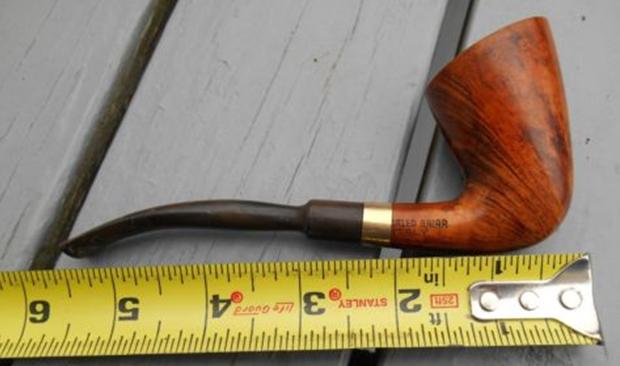
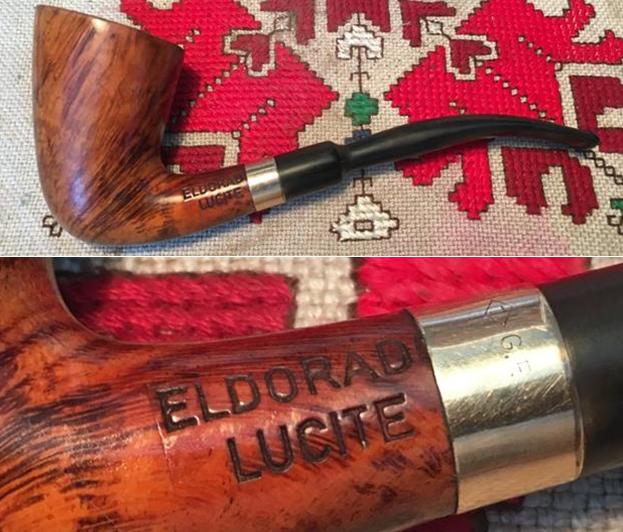
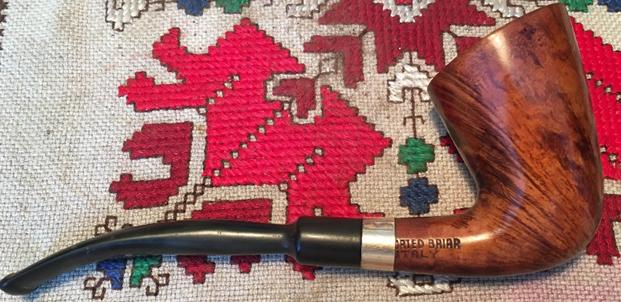
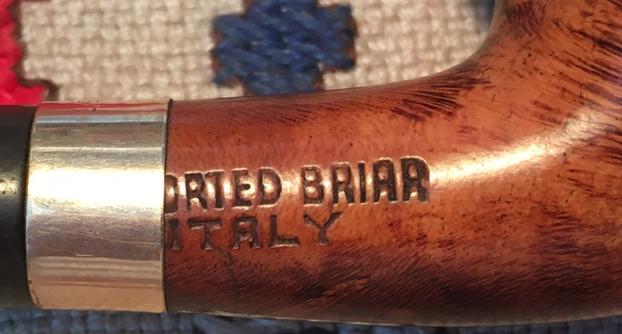
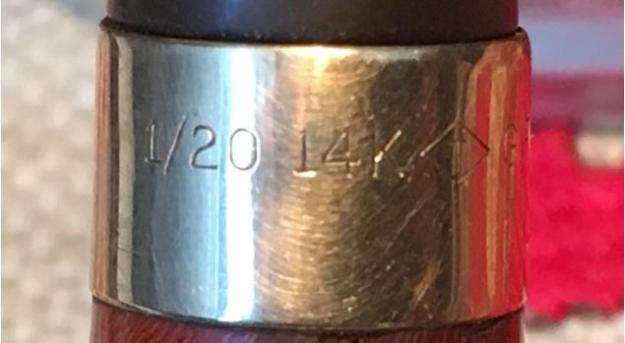
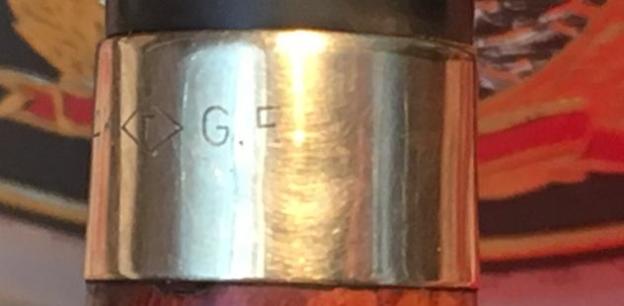
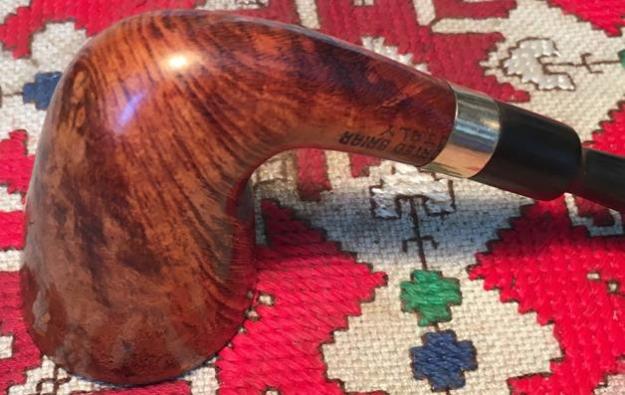
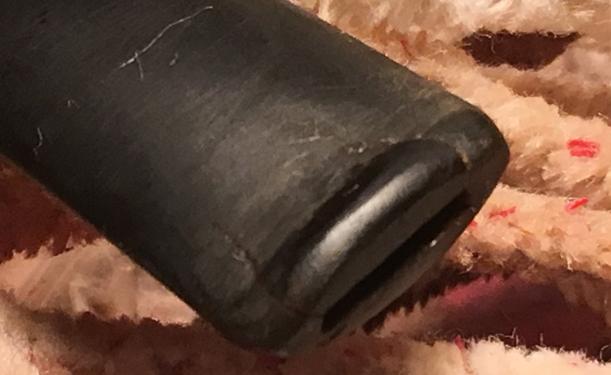
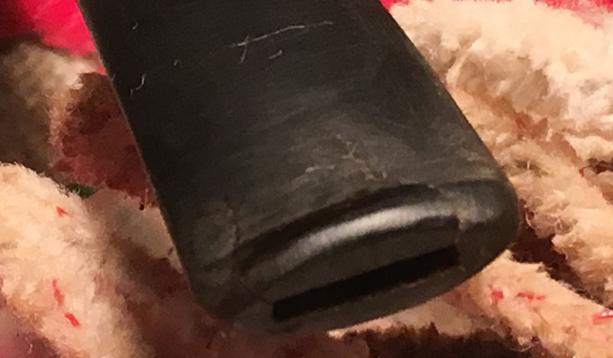
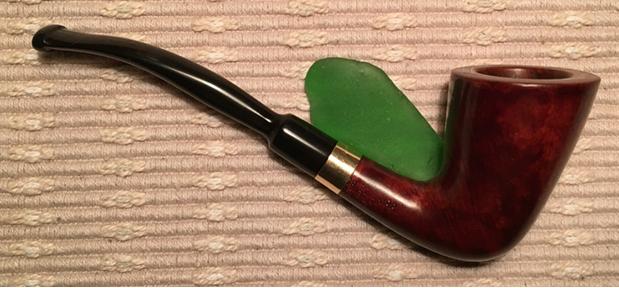
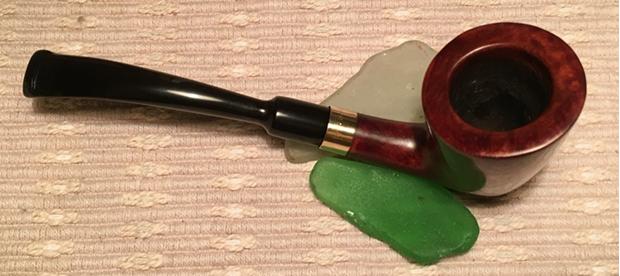
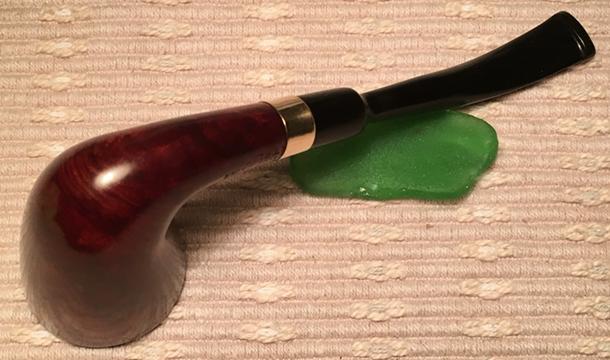
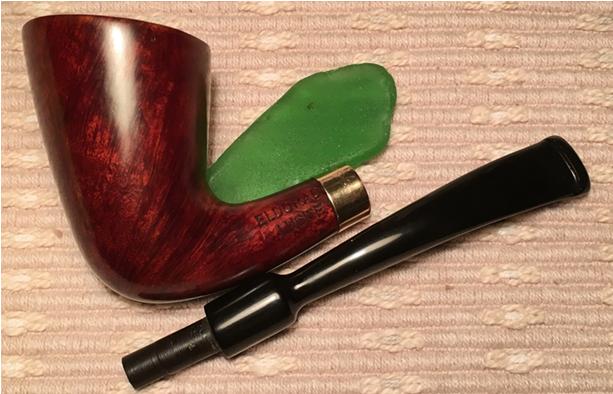
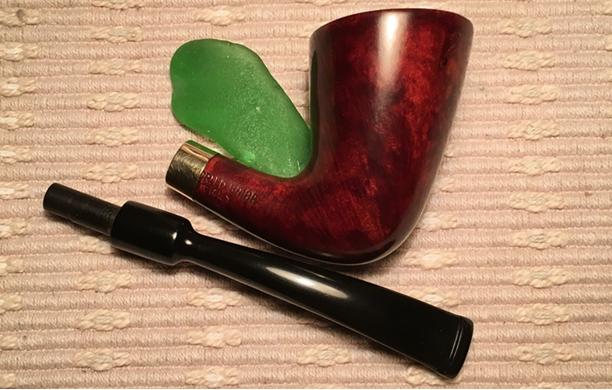
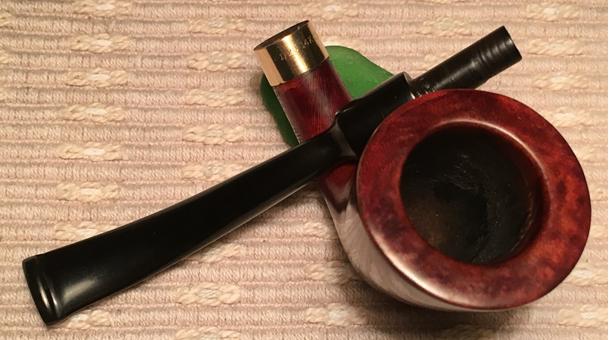
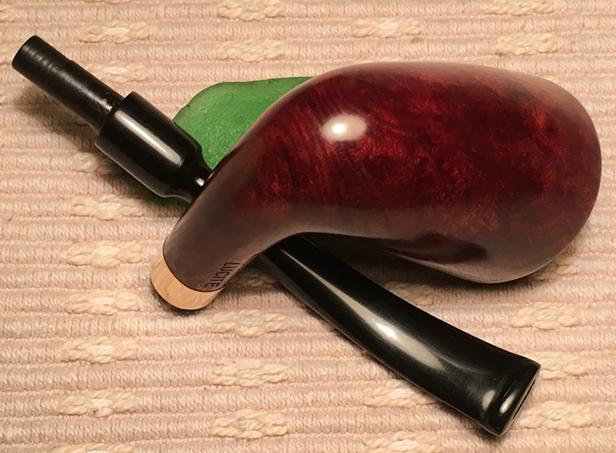
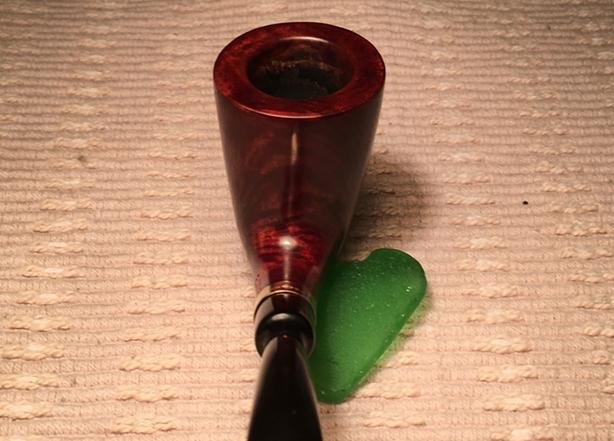
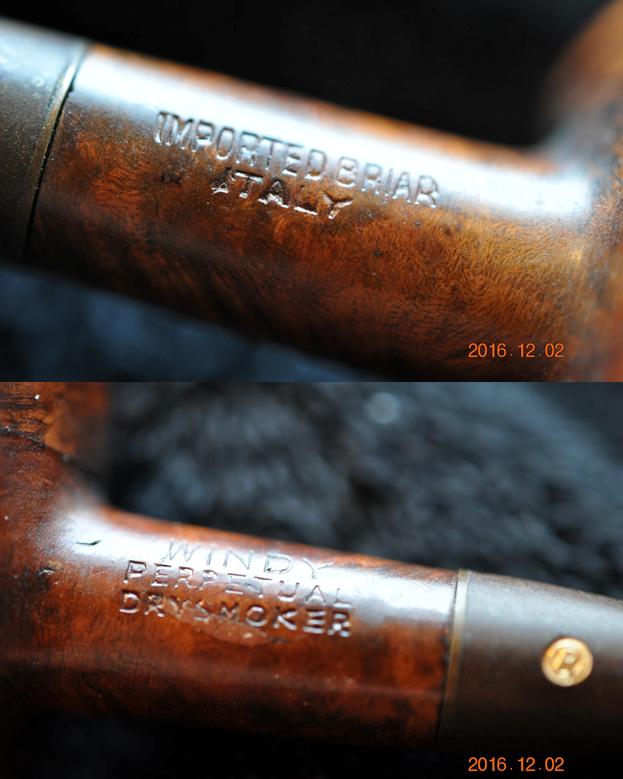
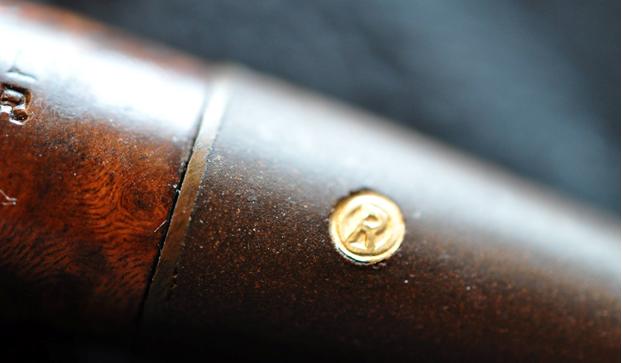
When I first saw this Eldorado Lucite, I believed it to be a Zulu or Woodstock, the Dublin’s smaller cousin.  In the end, I settled on it being a bent Dublin because the stummel was larger than I would expect a Zulu’s to be.  When I saw the Eldorado Lucite bent Dublin on the eBay auction block, two things, no, three things drew my attention motivating me to slog through the bidding and bring this pipe home to Bulgaria.  First, the shape is very attractive – I like the curve of the Dublin’s natural ‘nose-forward’ stummel flowing to and through the stem; an attractive pipe, I wanted to try it out in my palm.  Secondly, the briar’s potential.  I love taking smooth briars and bringing out the grain to encourage a double-take.  The straight grain of the Eldorado is nice.  Thirdly, the band – a touch of class for any pipe, but for this pipe, also raises some questions. The following eBay photos from the seller show what I saw.el1 el2When I retrieved this pipe out of the “Help Me!” basket in Sofia, I take a fresh look at the Eldorado over Lucite – stamped distinctly on the left shank.  The right shank shows Imported Briar over Italy.  Both stamps are obstructed/hidden somewhat by the band which immediately brings into question the possibility of the band being part of a cracked shank repair.  I would not think the original design would include a band hiding part of the nomenclature, but I might be wrong!  After removing the stem, I inspect the mortise and conclude that a crack may be there, but it’s not conclusive – at least to me.  The band is gold and stamped with hallmarks of 1/20 14KT (ensconced in a diamond) G.F.  Looking on the internet, I discover from  RareGoldJewelry.com these hallmarks indicate the ratio of gold in the band is at about 1 to 20.  Rated at 14 karats means that it’s approximately 58% gold and the band is ‘gold filled’ rather than ‘gold plated.’  Regarding gold filled and gold plated, eBay’s buyers’ guide jewelry describes the difference:

Gold-filled jewelry is much more valuable than gold-plated. In fact, there is almost 100 percent more gold in gold-filled items than is found in gold-plated items. Just as gold-plated jewelry is plated with gold, gold-filled jewelry is as well, but there is a big difference between the ways these products are made.  Gold-filled items have a much thicker layer of gold on them, and the gold is a much higher quality. In fact, it is just a step down from solid gold when it comes to quality and value. Speaking of solid gold, pure gold is very soft and is not a good choice for jewelry; that is why an alloy is almost always used for gold jewelry items, even in jewelry pieces worth an incredible amount of money.

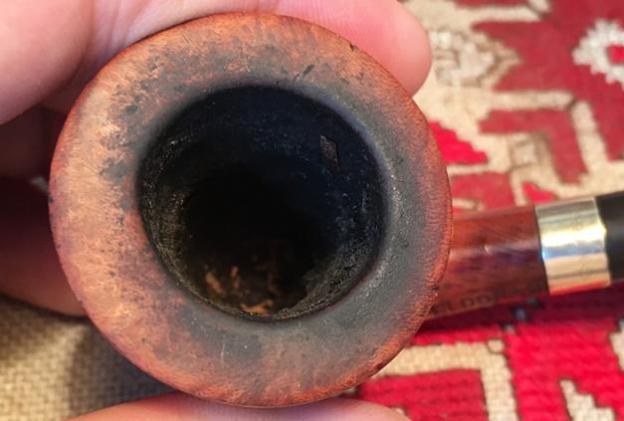
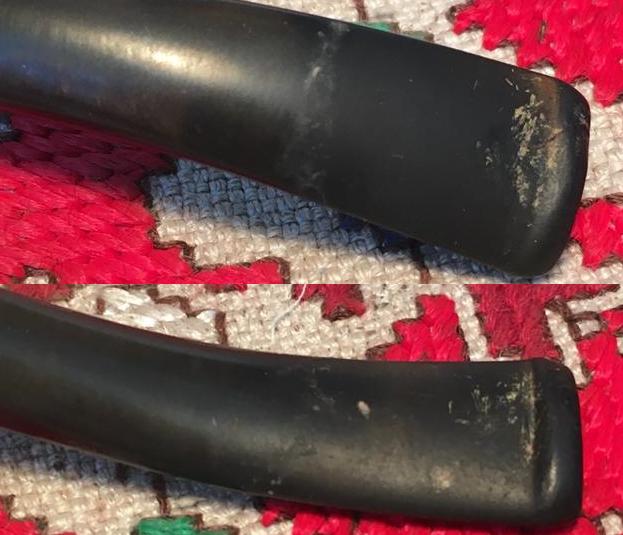
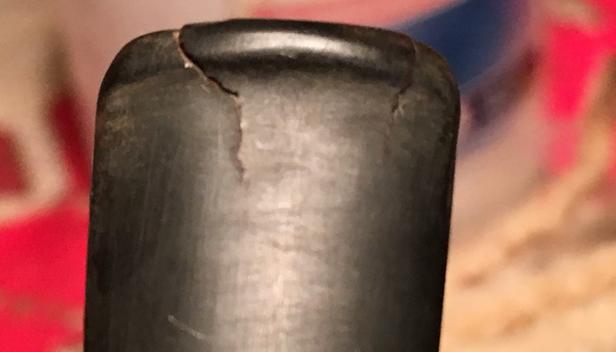
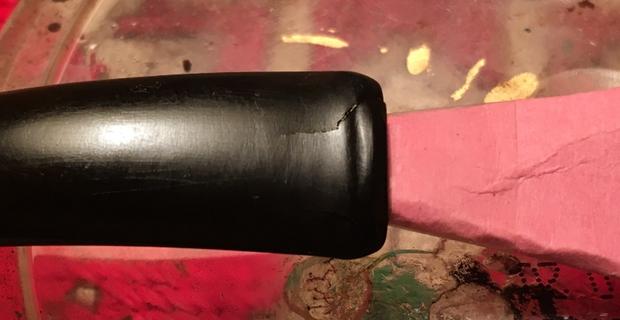
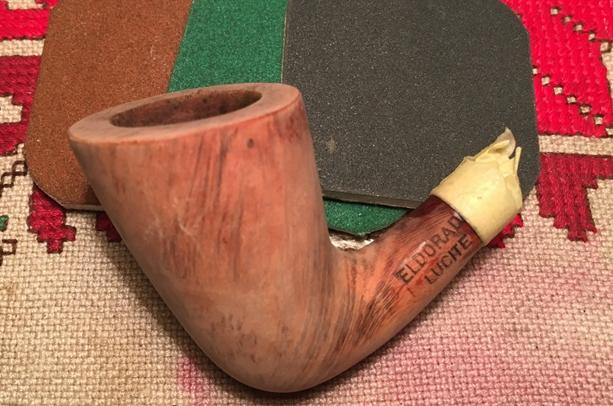
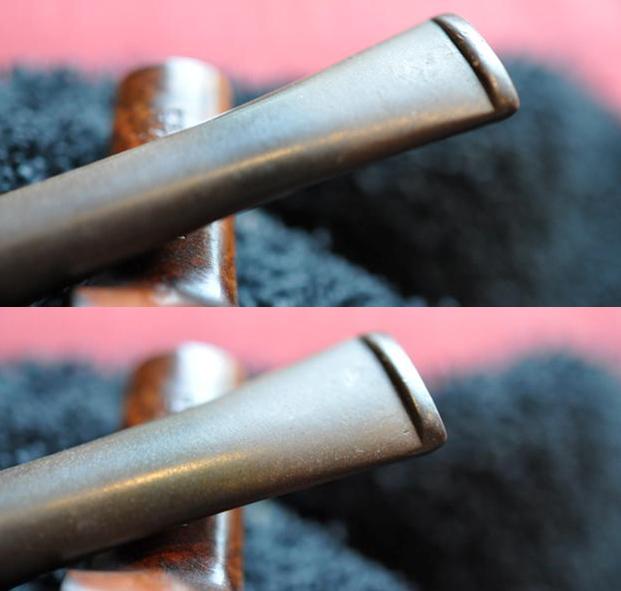
If this band is part of a cracked shank repair, which doesn’t appear to be the case, it seems that whoever had this pipe valued it quite a bit to add a gold band.  Another question is raised regarding the name – Eldorado Lucite.  According to the compilation of Herb Wilczak & Tom Colwell (3/3/97) ‘Who Made That Pipe’ (Yes, Santa brought this!) lists Eldorado as Maker or Seller as the Linkman Co./ Parker Pipe and country USA/ENGL.  My subsequent research into Linkman turned up the connection to Dr. Grabow pipes – ‘Eldorado’ is a high-end pipe of Dr. Grabow – which doesn’t fit the pipe before.  Dr. Grabow pipes are usually marked as such.  Parker Pipe Company turned up nothing too.  This pipe is also stamped, Italy, but does this mean country of manufacturer or source of the briar in this case? – as the right shank has the marking ‘IMPORTED BRIAR’ over ‘ITALY’.   Would the ‘Imported Briar’ indicate a US manufacturing – the usual US marking and spelling?  But this, I found is not always the case.  One more question that doesn’t find answers in my research – Eldorado Lucite – does ‘Lucite’ refer to a unique pipe name or is it referring to the stem material with which it was originally outfitted?  If this is the case, is the stem now with this Dublin a replacement because it certainly isn’t Lucite but vulcanite?  Yet, as I look at the stem, it works VERY well with the stummel and shape – it doesn’t appear to be a replacement stem.  So are the many questions this beautiful pipe creates, but now I turn to the pipe itself and take more pictures to fill in the gaps!el3 el4 el5 el6 el7 el8 el9 el10 el11 el12The stummel appears to be in good condition except I detect what might be an acrylic finish with normal wear marks and scratches on top of it.  I’ll want to clean the old finish off.  The bowl has moderate cake build up and old dottle flakes left in the bottom.  I’ll remove the cake bringing the bowl down to the briar for a fresh start.  The rim looks to be in good condition structurally, but has light lava flow and possibly some scorching.  I need to clean the rim to assess this fully.  The stem is attractive.  I’m not sure if it has a special name, but it flays out from the shank and the button is fanned – a fish tail?  It has minor oxidation.  There are tooth dents on the upper and lower button area and a possible crack on the slot side through the button lip pictured above.  I’ll need to look closely at this.  The band is in good shape – I’ll polish it simply with a clean cloth, no more!

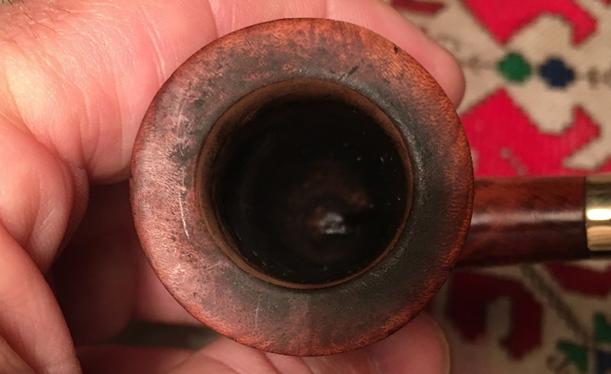
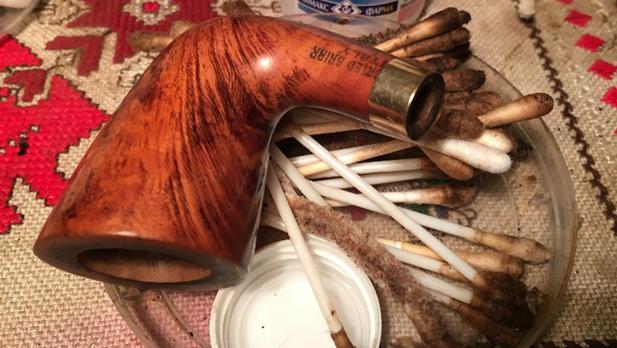
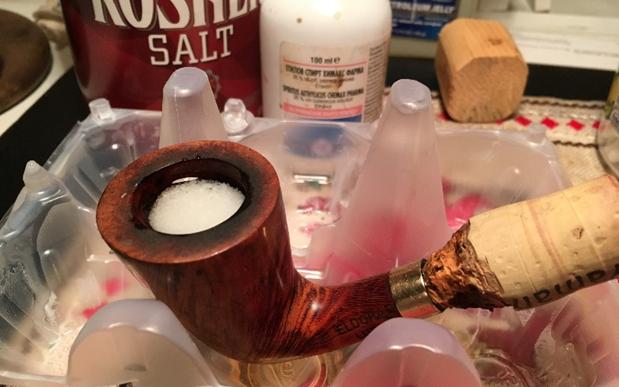
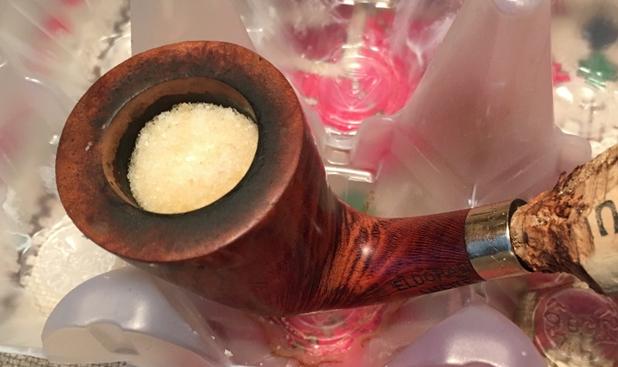
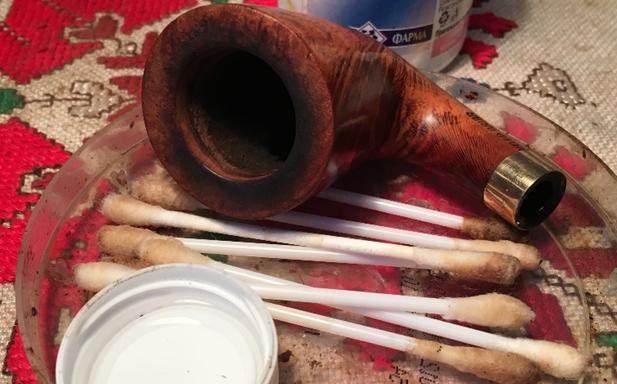
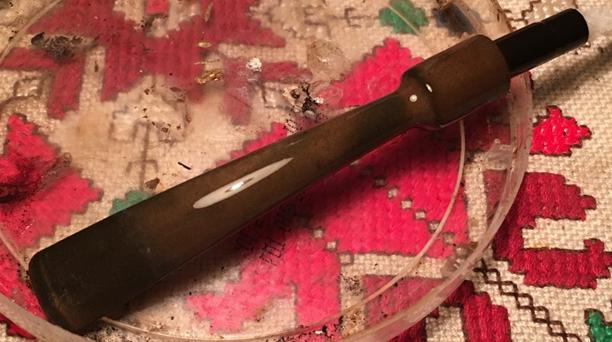
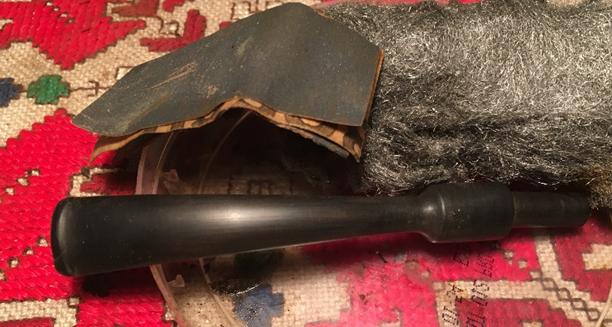
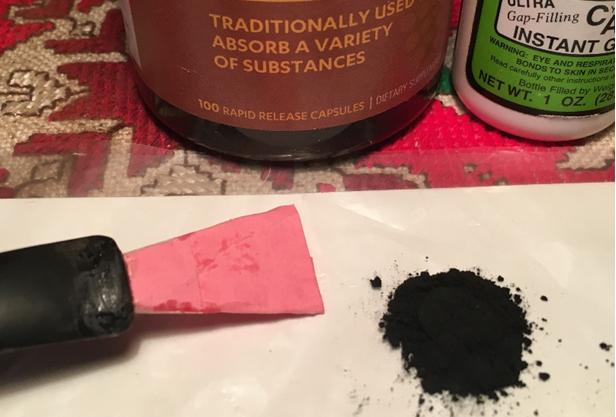
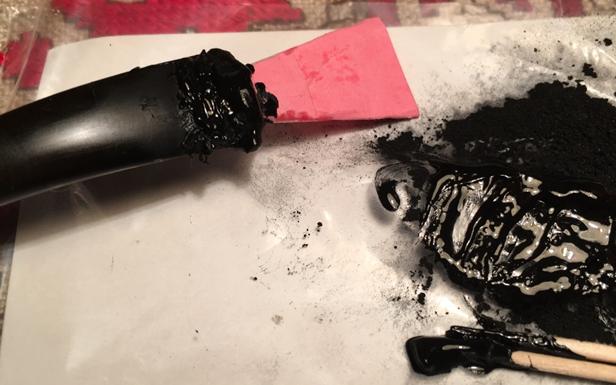
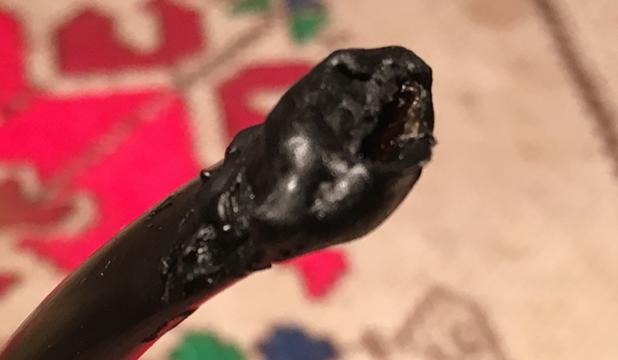
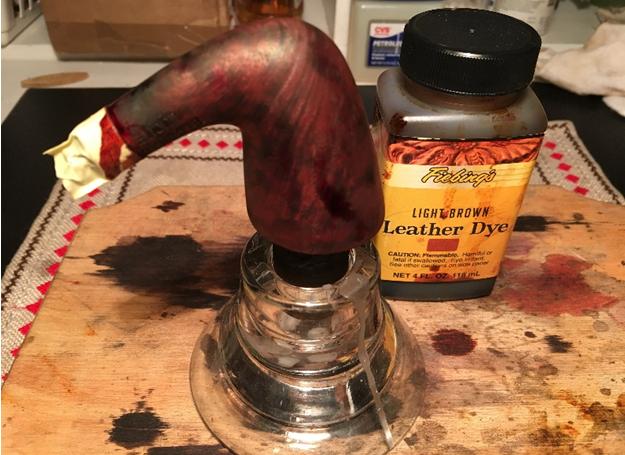
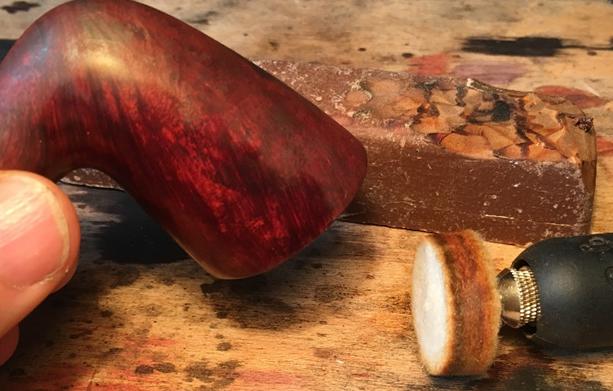
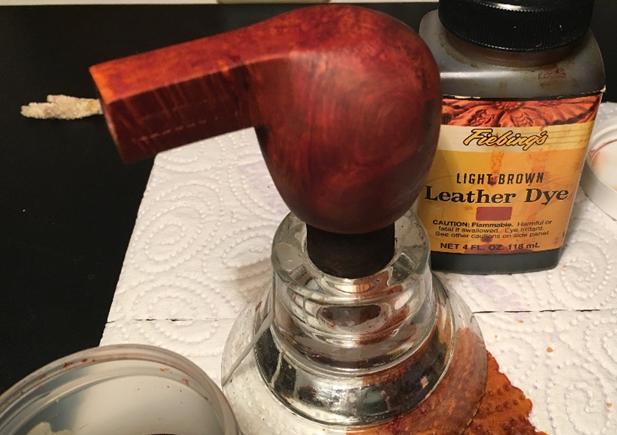
I begin the clean-up of the Eldorado Lucite by plopping the stem into the Oxi-Clean bath to work the oxidation to the surface of the vulcanite.  I take the Pipnet reaming kit out and discover that the conical chamber is too tight and angled in the Dublin’s shape to employ the reaming blades.  I’ll use the Savinelli pipe knife instead to ream the bowl.  With the Savinelli pipe knife I make good progress removing the cake in the tight quarters of this chamber.  Following the reaming, I sand the chamber walls with 240 grit paper wrapped around a Sharpie pen and then finish by wiping the chamber with cotton pads and isopropyl 95% to remove the carbon dust.  The chamber looks good.  The pictures show the progress.el13 el14 el15 el16 el17Before continuing with cleaning the external stummel, I tackle the internals with pipe cleaners and Q-tips and isopropyl 95%.  The cleaning job proves to be a bit more than I expected. I’m not positive about the internal layout and drilling of the mortise but it ‘feels’ like there is a gunk trap slightly below the air passage leading out toward the draft hole in the chamber.  After building a good mountain of expended Q-tips and pipe cleaners, and after looking at the lateness of the hour, I decide to give the stummel a salt soak, and let the Kosher salt and alcohol do some of the work for me.  I put the stummel in an egg crate to keep it stable, and fill the bowl with kosher salt which is not iodized – iodine can leave a taste (Thanks to Charles Lemon of Dad’s Pipes for this information).  I cover the bowl with my hand and give it a bit of a shake to displace the salt.  After corking the shank side, I fill the bowl with isopropyl 95% and turn out the light.  The next morning I see that the salt has darkened a bit and I toss the used salt into the waste basket.  I take a paper towel and wipe out the remaining salt from the bowl and use a bristle bush both in the bowl and the mortise making sure that salt residue is purged.  I then return to cleaning with Q-tips, pipe cleaners and isopropyl and finish the internals very quickly. Done! The pictures show the progress.el18 el19 el20 el21Time to retrieve the stem from the Oxi-Clean bath and I see that the oxidation has risen to the vulcanite surface which is shown very nicely in the first picture below. I attack the oxidation by wet sanding with 600 grit paper.  I follow this by using 0000 steel wool to remove more oxidation and begin the smoothing process as well.  Following this, I work on cleaning the internals of the stem with pipe cleaners and isopropyl.  It was going so well until it wasn’t!  Earlier, you recall, as I was doing the initial inspection of the stem, I identified what appeared to be a crack on the left side of the button.  The pressure exerted by the pipe cleaners exacerbated this crack and now I see fissures developing in the vulcanite – not only at the original crack sighting but now also on the right side of the button.  It would not be difficult to project the path of the fault line and the ultimate stem break if not addressed. Ugh! The pictures tell the story.el22 el23 el24 el25 el26Oh, ‘the best laid plans of mice and men’ – my plan is to apply thin CA Instant Glue to the cracks to seal them and hopefully to stop the fissure’s progress.  I fold a piece of index card and cover it with tape and insert it in the slot to keep glue from possibly entering the airway.  It also serves to ‘torque up’ a bit, and opening the cracks a hair to allow better glue penetration.  After this, I will build up the button with a mixture of charcoal dust and super glue and redefine the bit hopefully to reinforce the area.  I put the stem aside for the glue to cure.  The pictures show the progress.el27 el28After the initial CA glue cures, I start the button rebuild.  I use 240 grit sanding paper to rough up the button area, upper and lower.  Then I clean the area with a cotton pad and isopropyl to prepare for the charcoal/glue putty.  While in the States for Christmas, I picked up a bottle of activated charcoal capsules.  In the past, using a mortar and pestle, I had to grind up granulated charcoal which was sold for an aquarium filtration application for use with charcoal patches.  Generally, I was not satisfied with the results.  After the patches were applied, sanded/shaped, and polished, etc., I found a very porous and speckled result – not smooth as I wanted.  I suspected the cause was that the charcoal grade was not fine enough.  So, we’ll see if better results are realized with current charcoal powder.  I decide to re-use the ‘slot insert’ that I earlier made from an index card.  With the crack going through the lip of the button, I make sure I have sufficient ‘overage’ of charcoal putty to cover the crack.  After opening a charcoal capsule, I empty it onto the index card and then add a puddle of Hot Stuff Special ‘T’ CA glue next to the charcoal.  The ‘T’ stands for extra thick.  Using a toothpick, I begin to draw the charcoal into the glue puddle to form the putty.  I’m aiming at a honey-like viscosity for the putty – not to thin that it won’t remain where I put it and not to thick that it doesn’t shape well.  When I arrive at what looks good, I use the toothpick as a trowel and apply the putty to the button – the top receiving the most attention.  With charcoal putty applied to the button, I put the stem aside giving time for the curing process.  The pictures show the progress.el29 el30 el31 el32I return to the stummel to clean the externals.  I’ve not worked before with a gold band and I don’t believe that any cleaning agents I use will deface the gold, but to stay on the safe side, I cover the band with a few layers of masking tape.  I then take undiluted Murphy’s Soap and cotton pad and clean the stummel surface and rim.  With the help of a brass brush, which will not scratch the briar, the light lava flow on the rim becomes history.  I rinse the stummel with warm tap water keeping the internals dry.  After the Murphy’s Soap, I still can detect the acrylic shine of the finish which is not what I like (2nd picture below).  I prefer the shine of the natural briar and not what I have referred to as a ‘candy apple’ shine finish.  To remove the finish, I use acetone with a cotton pad.  After a few unsuccessful rounds of this, I utilize 0000 steel wool to add a little abrasion to the acetone removal process.  This does the trick, though the candy apple finish did not come off easily.  The pictures show the progress.el33 el34 el35To remove nicks and some pitting in the briar I use a medium grade sanding sponge on the stummel and rim.  I follow this with a light grade sanding sponge.  To remove some damage in the inner rim edge and to clean it up, I use 240 grit sanding paper rolled tightly.  I again follow the 240 grit paper and use the light grade sanding sponge on the rim to smooth things out.el36 el37 el38Before I move forward with sanding and finishing the stummel, I return to the stem and the shaping and repair of the button and slot.  I take another close-up of both the top and bottom to mark the progress.  I begin using a flat needle file and a pointed half-circle needle file to re-shape the slot and to redefine the end of the stem.  I will work from stem end, having established a base line.  When I finish the basic shaping with the needle files I then continue shaping the button with 240 grit paper then 0000 steel wool.  The pictures show the progression.  Near the completion of the button rebuild, I use K-150 Black Medium glue to fill pockets and unevenness in the upper bit area.  After cured, I re-sand the area with 240 grit, then 600 grit papers then complete the process with 0000 steel wool.  The last two pictures show the finished button rebuild.  It took some time, but I think it looks good as well as refortifying a formerly, weak and cracked button.el39 el40 el41 el42 el43 el44 el45 el46 el47 el48With button rebuild completed, I begin the micromesh sanding process first by wet sanding the stem with pads 1500 to 2400 and follow with an application of Obsidian Oil over the entire stem.  I then dry sand the stem using pads 3200 to 4000 and again with pads 6000 to 12000, following each set with a fresh application of Obsidian Oil.  The stem looks great and the button repair has blended well.  I put the stem aside to dry.  The pictures show the progress.el49 el50 el51Turning again to the stummel, I wet sand the surface with micromesh pads 1500 to 2400, then 3200 to 4000, and then 6000 to 12000, taking a picture after each set to show the progress.  The micromesh pads’ work is spectacular by teasing out the beautiful briar straight grain. The briar on this Eldorado Lucite is very nicely showcased cascading down the elongated Dublin canonical stummel.  A very nice choice of briar for this pipe style.el52 el53 el54As I moved through the micromesh cycles, my usual thought processing is to ponder the finish and what approach will best showcase the briar.  Should I leave the natural grain color and apply carnauba wax or apply a stain?  With the 14K gold band on this sleek Dublin, I decide to leverage toward a darker brown than the original.  I think the black stem and the darker stummel will give the gold band an extra pop – standing out very nicely.  To expand the briar and enabling the grain to be more receptive to the dye, I warm the stummel using my wife’s hair dryer.  Then, using a pipe cleaner folded in two, I apply Fiebing’s Light Brown Leather Dye liberally to the stummel and rim.  I cover the surface thoroughly.  When covered, I flame the wet dye using a lit candle and the alcohol in the dye immediately evaporates setting the dye hue in the grain.  After a few minutes, I repeat the process including flaming the dye.  I set the stummel aside for the night to rest.  The picture shows the dye-crusted stummel.el55The next morning, I’m anxious to ‘unwrap’ the crust of the fired dye from the night before.  Since I live in a flat on the 10th floor of former Communist block apartment building, I do not have a lot of room for my work shop.  The Dremel high speed rotary tool is how I solve the problem of not having regular high speed buffing wheels.  To unwrap the stummel, I mount the Dremel with a felt polishing wheel and set the speed of the Dremel to the slowest speed.  The felt material is abrasive and I don’t want to over-heat the wood with the higher speeds.  Each polishing wheel is dedicated to a specific compound used in the buffing process.  I mount the Tripoli wheel, and after purging it from old compound with the edge of the metal wrench, used to tighten the wheels on the Dremel, I apply Tripoli compound to remove the flamed residue of the light brown dye.  I rotate the wheel around the surface of the stummel slowly, not applying much vertical pressure on the surface but allowing the RPMs, felt and compound to do the work.  I use the sheen created on the surface of the briar (reflecting the bright overhead work lamp) to observe the compound’s behavior, which enables me to distribute the compound evenly over the surface.  See my essay, ‘My Dremel Polishing Technique’ if you want more detail.  I took a picture of the ‘unwrapping’ with the Tripoli compound and wheel.  You can see the before and after comparison very easily which demonstrates my typical approach.el56I follow the Tripoli compound with Blue Diamond.  Again, using a dedicated Blue Diamond wheel mounted on the Dremel, I work the compound into the surface in the same manner as Tripoli.  After the Blue Diamond cycle, I hand-buff the stummel with a cotton cloth simply to remove the powdery residue of the compounds from the briar surface.  I do this before applying carnauba wax. Next, I mount the cotton cloth polishing wheel onto the Dremel, increase the speed of the Dremel from 1 to 2 (5 is the fastest) and apply several coats of carnauba wax to both stummel and its reunited stem.  I finish with a rigorous hand-buffing with micromesh cloth not only to deepen the shine but to distribute any pockets of unintegrated carnauba wax.

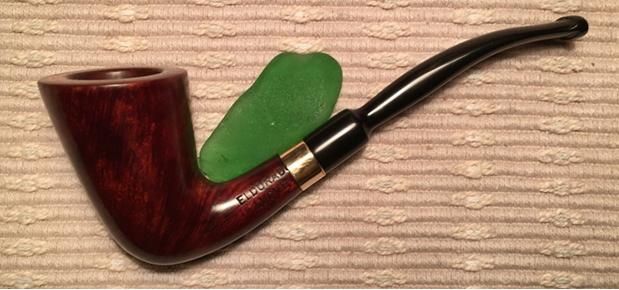
I was hoping to create a pop with the classy gold band linking a slim, gently curving stem with the rich darker brown hues of the Dublin’s cascading briar patterns.  I think what I now see before me effectively does just that!  This gold banded Eldorado Lucite of Italy is an elegant Dublin which feels very comfortable in the hand.  It will be a great addition to some new steward’s collection.

Below, in the comments, I reposted this blog of Reborn Pipes to my new blog site, http://www.ThePipeSteward.com This site is serving not only as a ‘store front’ for pipes I’m selling, but it also describes the work we do in Bulgaria with the Daughters of Bulgaria Foundation – rescuing and restoring women and children who have been trafficked and sexually exploited. To help with this work, the profits of my sales go to the Daughters.  So, if you’re interested in adding this Eldorado Lucite Bent Dublin of Italy to your collection, jump over to The Pipe Steward, and check it out!  Thank you for joining me!el57 el58 el59 el60 el61 el62 el63 el64 el65 el66

A Christmas Gift in need of a stem splice – L J Peretti Squared Shank Billiard


Blog by Dal Stanton

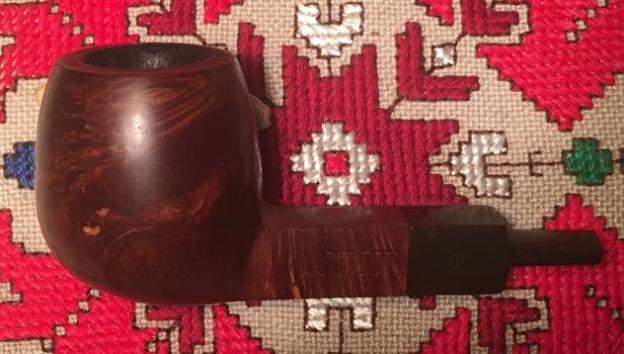
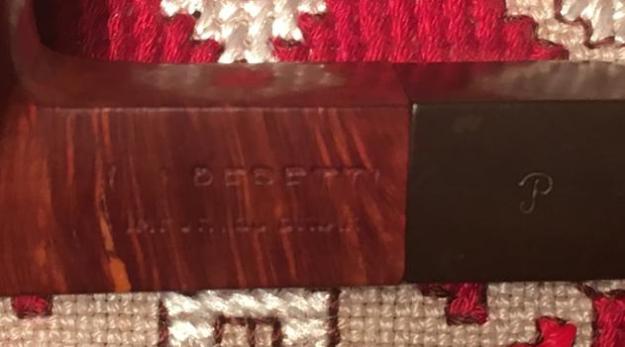
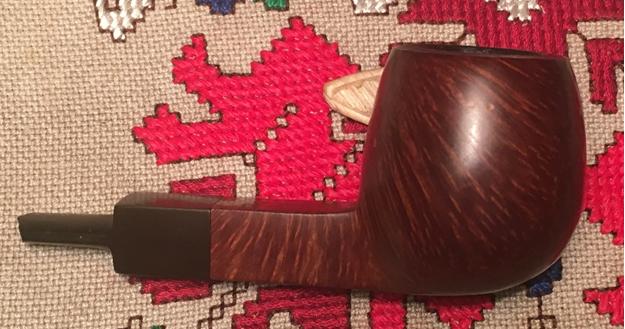
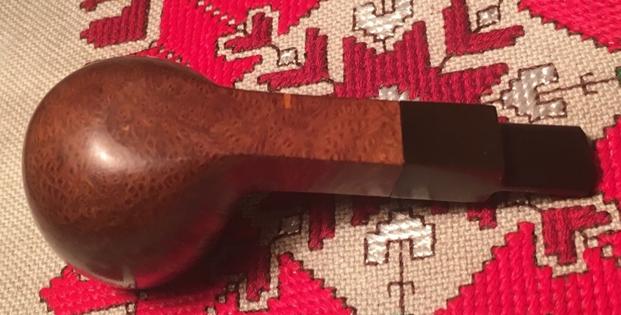
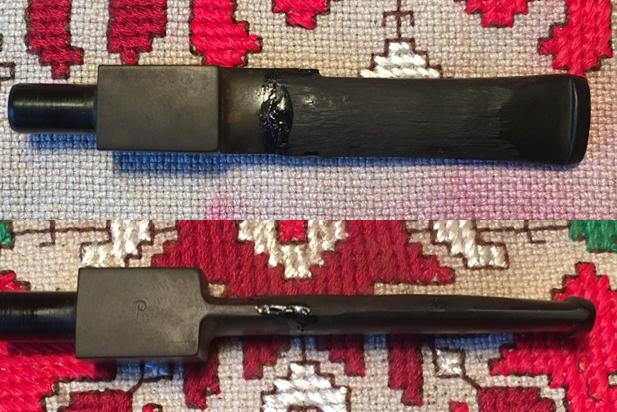
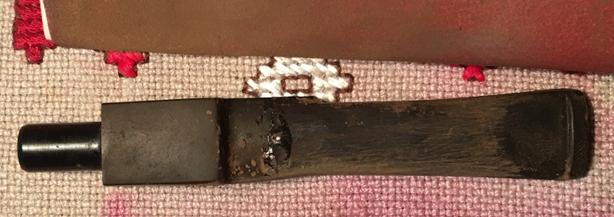
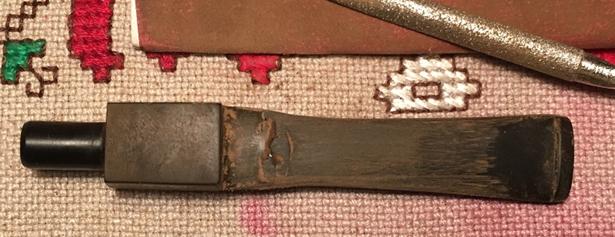
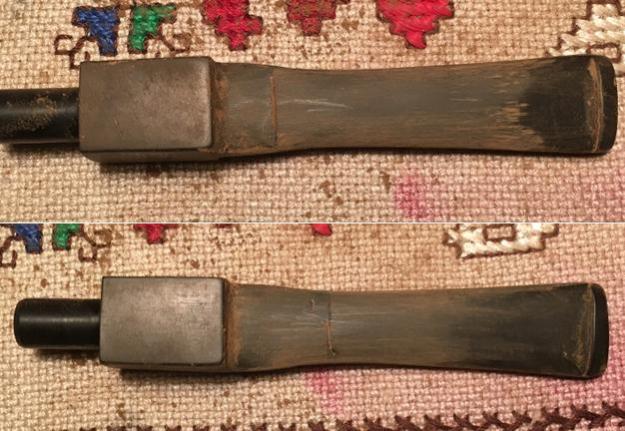
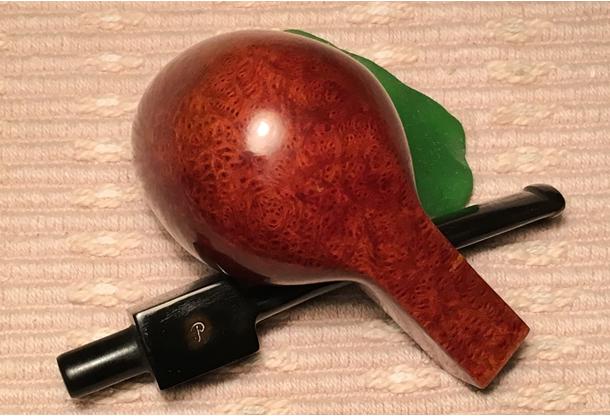
After a wonderful time in the US, sharing Christmas and New Year with our family, and catching up on ‘grandpa time’ with our two grandsons, my wife and I returned to Sofia, Bulgaria, to find as much snow as we left in Denver!  Two memorable ‘piping events’ transpired while in Denver.  First, the inaugural smoke of the restored 1907 McLardy Gourd Calabash (See: Link) which was filled with a tasty bowl of Dark Star recommended by Steve for the special occasion.  It was a wonderful, cool smoke.  The McLardy did admirably. per1The second ‘piping event’ was a pipe-picking expedition several of my family members (guess who this trip was for?) did to Denver’s huge Brass Armadillo Antique Mall!  We had a great time in search but unfortunately, I found no treasures to bring home.  Yet secretly, my youngest son stowed away his Christmas gift for me which I discovered under the tree a few days later!  He got a great deal and I can see why!  He knew I would have fun trying to breathe new life into the L J Peretti now before me on my work table in Sofia.  I am anxious to get back to work on a pipe and this Peretti is a great starting block for 2017!per2 per3 per4 per6 per7 per8With the obvious need to solve the issue of the broken and missing stem piece, I can easily see what attracted my son to this stummel.  The briar swirls stunningly into fire grain and very distinct and tight bird’s eye knots.  There are a few lightened fills that will need attention and the bowl has significant cake and will need to be reamed down to the fresh briar.  The rim shows some thick lava flow and has minor dents.  Unfortunately, the center swatch of the L J Peretti – Imported Briar marking on the squared shank is worn off – over achieving buffing or wear?  The Peretti ‘P’ is visible on the surviving legacy of the original saddle stem.  I’ve grown to appreciate the enduring marks of a pipe’s provenance and for this reason, this surviving piece of this pipes history needs to be protected and restored!  I’ve been thinking for some days – actually, starting with the opened gift (!) about how to splice a new piece of stem to the survivor?  I haven’t done this particular maneuver before, but I’m sure it can be done!

When I began my research on L J Peretti, I was surprised to discover that it is not an Italian pipe as one might expect with such a name!  In fact, I discovered the genesis of a significant story of Americana pipe history with the establishment of the L. J. Peretti Company of Boston in 1870 (Pipedia citing: Pipes, Artisans and Trademarks, by José Manuel Lopes), the second oldest tobacco shop in the US, second only to Iwan Ries & Co. of Chicago established in 1857 (See: Link). per9Going directly to L J Peretti’s website, now president, Stephen L. Willett provides this historical summary of this Boston icon (Link: http://www.ljperetti.com):

In 1870, Libero Joseph Peretti arrived in Boston from Lugano, Switzerland. Filled with an entrepreneurial spirit and a love for fine tobacco, L.J. established the “Peretti Cuban Cigar Co.” in Boston’s historic North End. In the first two decades of business, the company provided a number of contributions to the tobacco industry and began to blend “house cigars”.

1892 marks the establishment of the Peretti Cigar Factory in Park Square, Boston. For over forty years, the company employed fifty rollers who produced some of the finest cigars in New England. Not only did Peretti’s manufacture blended cigars, but they also created Clear Havana Vitolas such as the legendary La Mirendella.

L.J.’s son, Joseph, aka “The Major”, followed his father into the family business. His primary love was pipes and pipe tobacco. Among his notable accomplishments was the creation of the first “English” blend, called British, in the United States; as well as securing the exclusive import rights to Peterson pipes and Sullivan & Powell tobaccos.

After World War II the third generation Peretti’s, Robert, entered the firm. The original store had moved from the North End to the centre of Boston on Massachusetts Avenue and there were additional stores throughout the financial district of Boston. Robert became a tobacco legend in United States and throughout the world. Most of the more than eighty house blends of pipe tobacco were created by Robert Peretti. His reputation as a blender led politicians, actors, celebrities and gentlemen of all callings to seek his tobacco advice.

I enjoyed reading several comments after the interview of Stephen Willett on The Pipes Magazine Radio Show (See: Pipes Magazine Radio Interview) extolling the fact that tobaccos are mixed in house and one could take his pipe to their shop on 2 1/2 Park Square today, and be guided by experienced tobacconists and test several selections before making a decision to purchase.  My son and daughter-in-law, formerly of Boston, also had the opportunity to explore this historic tobacco shop!

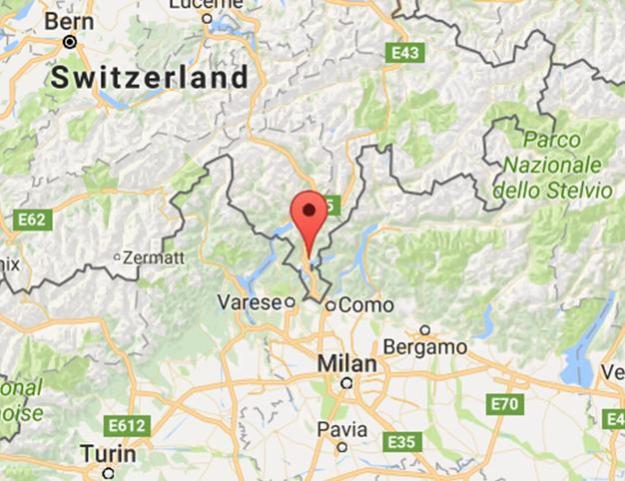
I was still curious about the name, “Peretti”, and its Swiss (not Italian) origins with the patriarch Libero Joseph Peretti’s arrival in the US in 1870 from Lugano, Switzerland.  It did not take long to figure it out when looking at the location of Lugano on a map of Europe thanks to Google Maps.  The Italian influence would be inescapable as Lugano is situated in a slender finger of Swiss land on the southern edge of the Alps with greater topographical access to the Italian planes falling away to its south than to Switzerland proper to the north – through the Alps.  Curiosity satisfied.per10One other question hounds me – the question for each pipe: Where was this particular L J Peretti pipe made?  In Boston?  Per L J Peretti’s website, today pipes with the Peretti stamping are made exclusively by Briar Works in Nashville, TN.  This Peretti, however, predates this association.  Briar Works began operations in 2012.   One possible clue came at the close of Stephen Willett’s interview on the Pipes Magazine Radio Show in April of 2016 referenced above.  Willet was asked about relating a ‘favorite pipe story’.  Willett commented on being in London smoking pipes with a John Redman, who used to make pipes for L. J. Perretti Co.  So, a possible source.  The John Redman Ltd. and British Empire Pipe Co. is cited in Pipephil.eu listing the names produced (Aristocrat, Buckingham, Buckingham Palace, Canberra, Captain Fortune, Dr John, Golden Square, Redonian, Richmond, Smokewell, Twin Bore) but no reference to a L. J. Peretti association.  I sent an email to the L. J. Peretti Tobacconists shop in Boston regarding the provenance of this particular Peretti names-sake before me.  We’ll see if we can learn more.

I was gratified when an email arrived from the L. J. Perretti Co. Tobacconists shop in Boston a few days later.  Here is what I found:

Hello Dal,

We have been sourcing our proprietary pipes from a number of different manufacturers. That said, it is most likely that Arlington Briars made the pipe you have in your possession. Photos would help us identify the pipe further. I will have to look through some of our old content and see what I can find. Hope this helps,

Tom

LJP

Thankful to Tom for his response, I sent on photos.  Per Pipedia,

Arlington Briar Pipes Corporation was founded in 1919 in Brooklyn, New York, and produced the Arlington, Briarlee, Firethorn, Krona and Olde London brands among dozens of others, primarily acting as a subcontractor making pipes to be sold under other brand names. Among others, in the 1950’s, Arlington turned pipes for the famed Wilke Pipe Shop in New York City. The corporation was dissolved by the State of New York as inactive on December 6, 1978. 

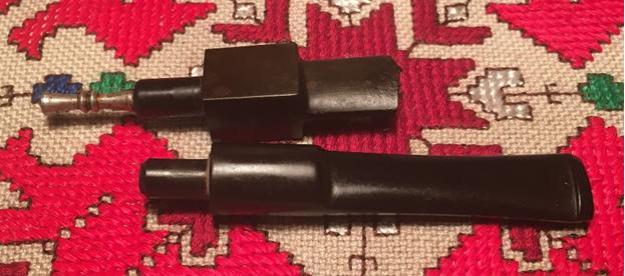
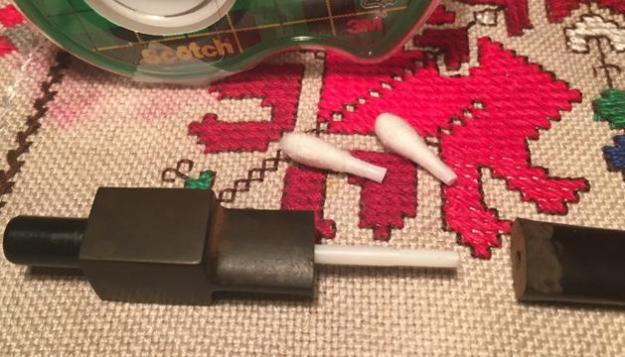
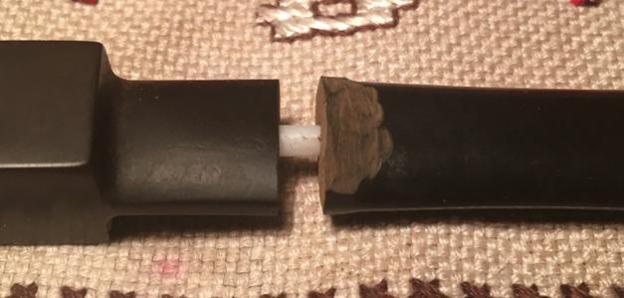
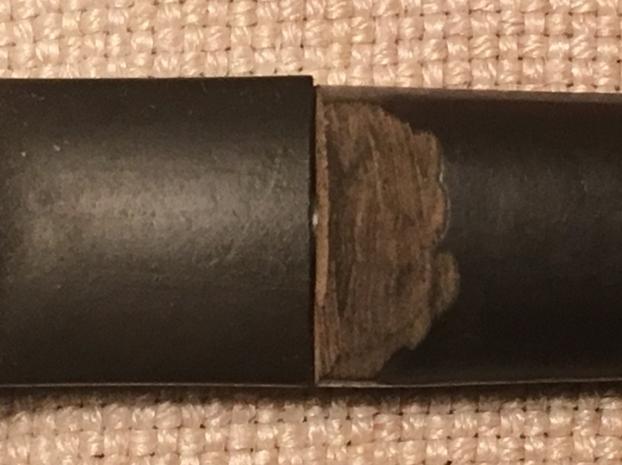
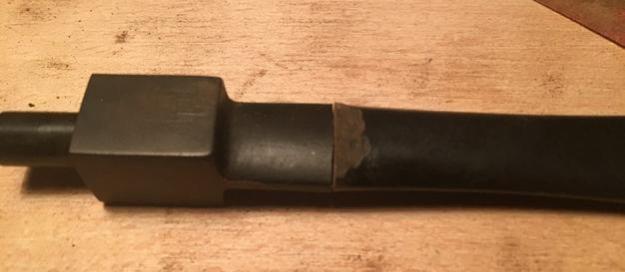
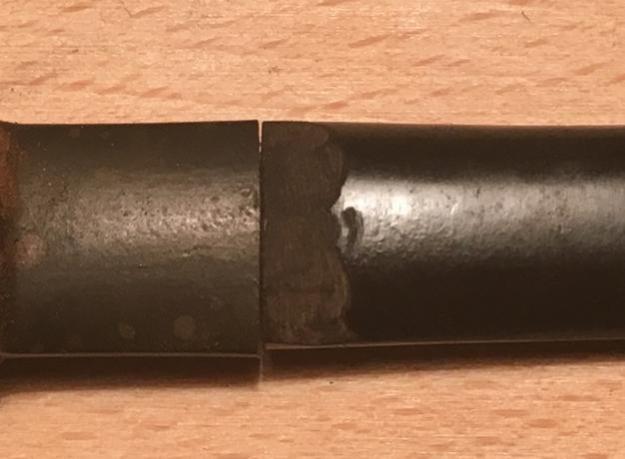
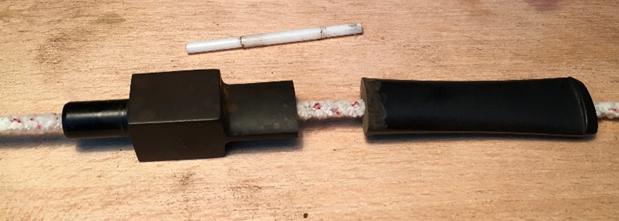
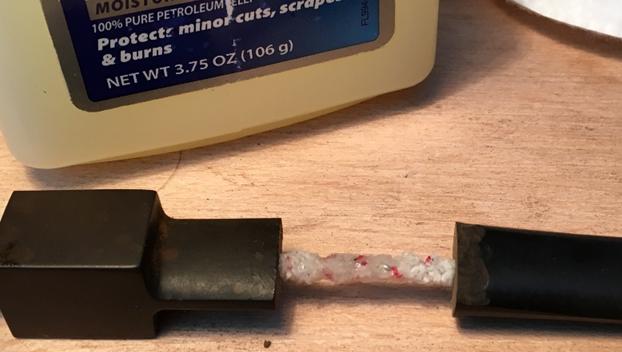
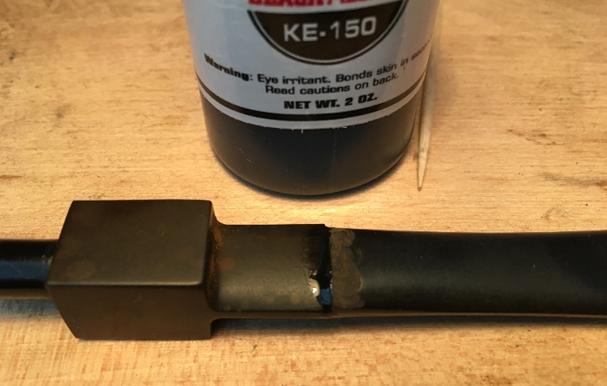
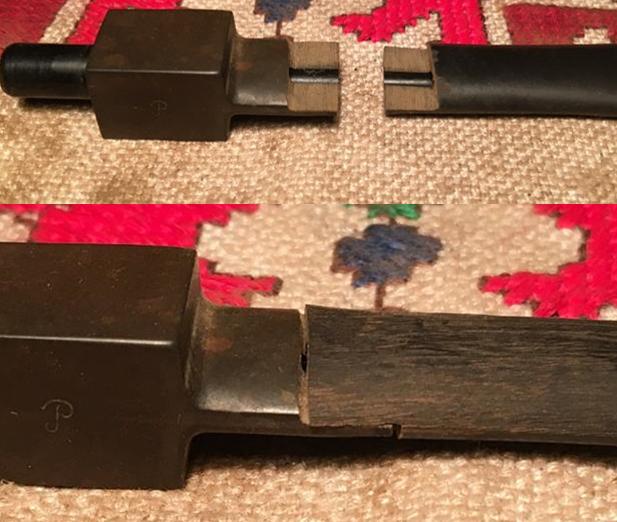
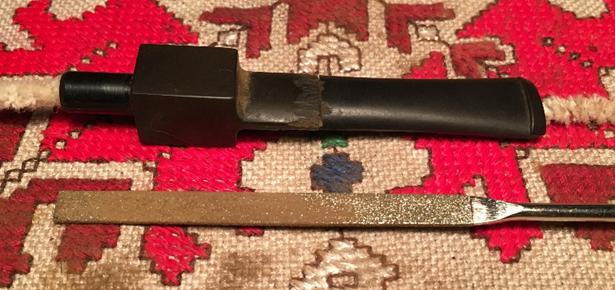
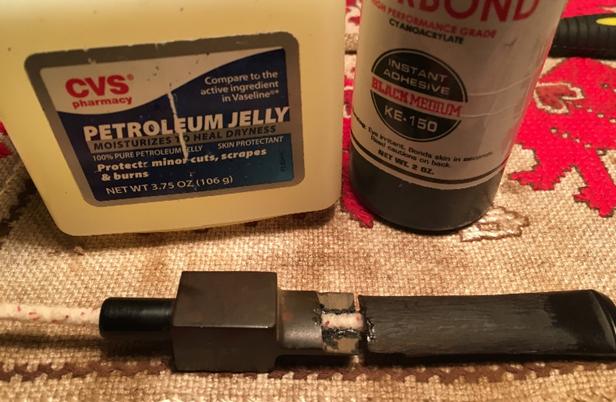
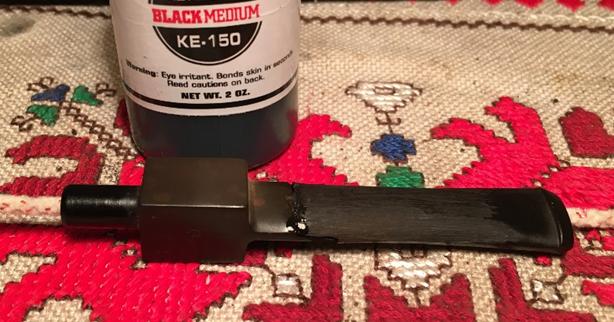
With a greater appreciation for the pipe before me and the rich heritage of the L. J. Peretti name and company, I take another long, hard look at the surviving stem piece.  My goal is to splice the stem by cannibalizing another saddle stem.  My original idea was to see if I could find a piece of stainless steel tubing small enough to insert into the airways of both the survivor stem piece and the new cannibalized piece and connect them – providing a firm connection point and reinforcement for the splice.  Before returning to Bulgaria, I went to a specialized store in Denver with hope of finding such a tube.  They were not able to help me and indicated that I could probably find tubing like I wanted in a medical equipment context….  So, with this idea put aside, my goal is a clean bond using only superglue.  I take another picture of the surviving stem piece and the stem candidate. I want to remove the stinger and after it refuses to budge I heat it with a lighter loosening the vulcanite grip.  It joins the other retired stingers in the bottle. Using a straight edge, block and sharpie pen, I draw a line across the original stem.  It will act as a guide as I cut the vulcanite using the Dremel with a cutting blade.  Well, after starting with a cutting blade, I discovered that it was difficult to maintain control over the blade movement.  I switched to the sanding drum and that worked much better. I’ll fine tune the cut after cutting the second stem. The pictures show the progress.per11 per12 per13 per14 per15I want to cut the donor stem very close to the saddle expansion where the stem is thickest.  This hopefully will give me more wiggle room as I fashion the two stems together.  I use the Dremel blade to do a rough cut to remove the shank side of the stem.  I’ll save this piece to fabricate a breather insert later – waste not want not!  Key to this stem splice working is a proper aligning of the airways while working on shaping the external stem appearance.  Hopefully to accomplish this, to keep the airway stationary, I form a temporary insert stabilizer by cutting off the ends of a Q-tip and wrap the center plastic Q-tip tubing with scotch tape.  I do this to enlarge the circumference of the left-over Q-tip to form a tight fit as each end is inserted into the airways of the adjacent stem pieces.  It took me a few test Q-tips to get the size right.  Now I can gradually shape the external stem and keep things lined up.  In the final picture of the set below, you can see the aligning tube. The pictures show my plan materializing.  I have hope that it will work!per16 per17 per18 per19 per20Now to fine-tune the trueness of the cut stem ends.  I start with the survivor by standing it and eye-balling it next to a straight edge – not perfect!  The first picture shows the leaning tower of Pisa!  Working out of our 10th floor flat, I don’t have all the tools available to me to automate procedures so I must improvise.  I have a miter box that might do the trick.  I take a strip of 240 grit sanding paper and use the miter’s perpendicular position to create a sanding mechanism that should produce a flat, true end.  Moving the sanding paper back and forth while I manually pinch it against the triangle seems to do the job.  After patient, easy back-and-forth motion, the end of the survivor stem piece looks good!  A comparison shot to the leaning Tower of Pisa shot shows the progress.per21 per22 per23 per24The new extension also needed some fine-tuning.  Since there is a taper in the stem and therefore it’s uneven, I cannot use the miter box like before.  I use the topping board with 240 grit paper to bring the angle into proper alignment – I discover that it is not an easy slam dunk to get things right.  It takes several spins on the board following each spin by refitting the extension with the original stem and looking for the gaps between the two pieces.  I need the junction to be as true, tight, and flat as possible for a good bond and a straight stem. After several cycles, I have it about as good as its going to get.  The pictures show the process.per25 per28 per27 per26I replace the temporary Q-tip stabilizing insert with a pipe cleaner inserted through both pieces and linking them up.  The pipe cleaner will serve to keep the airway lined up during gluing as well as guard against glue possibly clogging the airway. I use a narrower, less fuzzy bristled pipe cleaner.  After testing I found that a non-bristled pipe cleaner had too much fuzz and inhibited a tight junction between the pieces.  I apply a little petroleum jelly to the section of the pipe cleaner that may meet the superglue.  This will (hopefully!) keep the pipe cleaner from sticking to the glue.  I wipe off excess jelly because I don’t want it interfering with the glue bonding.  I then apply Starbond Black Medium KE-150 glue to the original stem piece, not too thick and spread it over the junction surface with a toothpick.  My main concern is to allow the bond to settle ‘naturally’ around the airway alignment and have the stem straight.  If gaps appear I can add additional glue later as a fill.  Pulling the pipe cleaner from the shank side I draw the pieces together, align and compress for a few minutes.  I set the spliced stem aside allowing the KE-150 glue to cure.  The pictures show the progress.per29 per30 per31Turning now to the stummel, I take another close-up of the rim and chamber before starting.  I use the Pipnet reaming kit and clean out the moderately thick carbon cake formed in the chamber.  I use 3 of the 4 blades available to me to remove the harder than usual cake.  After the Pipnet blades, I fine tune the chamber surface with the Savinelli pipe knife and then, using my finger and a dowel rod, I sand the internal chamber wall with 240 grit paper.  Finally, I wipe the bowl out with a cotton pad dampened with isopropyl 95%.  The chamber wall looks good – no problems there.per32 per33 per34per35Before cleaning the rim and stummel externals, I take Q-tips and pipe cleaners with isopropyl 95% to clean the internals of the stummel.  Following this, I use Murphy’s Oil Soap undiluted with cotton pads and scrub the rim and surface.  The lava build up on the rim proved to be resistant so I added use of the brass brush to the cleaning job.  The inner rim appears to have burn marks on the front and back of the bowl.  I’ll remove this damage by cutting an inner rim bevel later.  The pictures show the cleaning progress.per36 per37After rejoining the curing spliced stem to the stummel to avoid creating shank shoulders, I take a medium grade sanding sponge and sand the entire stummel surface and rim, avoiding the shank panel containing the L J Peretti stamping.  I follow this with the same regimen using a light grade sanding sponge.  With the sanding sponges, I’m removing small pitting and imperfections from the briar surface.  To clean up the rim further, I cut an initial bevel on the inner rim first using a tightly rolled piece of 120 grade paper.  I follow this using 240 grit then 600.  I closely examine the surface and the sponge sanding did the job so that I did not need to use any super glue for fills. I did use the stain marker and darken fills that had lightened.  The pictures show the initial stummel prep.per38 per40 per39 per41I’m anxious to return to the stem repair to begin the ‘sculpting’ process.  I’m sure that the donor stem that I’m using isn’t the best candidate for a match, but it is the only other saddle stem I have that isn’t already claimed by a stummel here in Bulgaria.  Oh my – it reminds me that I just saw lots of 100 stems being auctioned on eBay!  If only….  I take a few pictures of the spliced stem before I begin. To do the sculpting I use my Dremel high-speed rotary tool and mount the drum sanding tool.  With the Dremel speed set on 2 of 5 (1 being the slowest RPMs) I gently and patiently begin removing vulcanite and shape the stem to give it a uniform look.  The pictures show the progress until…per42 per43…You’ve heard me say before, “As they say, it was going so well until it wasn’t.”  The new superglue bond between the two stem parts simply gave way.  I sat back in my chair looking at the divide and contemplated a visit to my favorite adult beverage.  Before starting this project, I researched through the blogs looking for different approaches and techniques to this specific genre of stem repair – splicing.  Steve has a very helpful Reborn essay, What are the options for repairing a damaged stem?  I could not find anything with the specifics I was facing.  Now with the two pieces before me, I decide to shoot an ‘SOS’ to Steve, even though I know he’s somewhere in the world traveling with his work.  I press the send button, turn off the light,  and head to bed!per44Gratefully, Steve’s reply arrived the next morning referencing another Reborn Pipes contributor, Jacek A. Rochacki, from Poland.  Steve’s email described Jacek’s technique of creating a simple interlocking step between the two stem pieces by filing 90 degree angles out of the upper half of one piece and a corresponding 90 degree angle out of the lower half of the other piece.  Essentially creating a juxtaposed and flipped ‘L’ on each stem piece.  The step will provide more area for the glue to bond as well as distribute the stummel’s weight across the stem rather than at one tension point.  The science behind the technique sounds good, now I need to bring the theory into physical reality!  I decide to use the width of a flat needle file to determine the steps’ widths.  Starting with surviving stem, I score a line to provide a guide for the edge of the step (first picture).  After this, I wedge the stem piece in the miter box and invert the flat needle file and use it as a saw to cut a straight vertical incision half-way into the stem.  Pictures 2 and 3 show this in progress.  I use the Dremel to gradually remove the vulcanite and finish the fine-tuning with the needle file.  The pictures show the progress.per45 per46 per47 per48The other stem piece follows the same protocol.  The whole process took quite a bit of time filing, eye-balling, test fitting and filing again.  The junction I have is not a perfect fit.  Dealing with the odd matching stem pieces presents its own challenges.  The key as before, is to align the airway holes to have as much as possible a seamless airflow.  The final picture in the set below shows the pipe cleaner inserted through the pieces and mimics the natural alignment before bonding with superglue.  In this position, to test the freedom of the pipe cleaner to move, I compressed the pieces at the ‘step junction’ and then pulled the pipe cleaner back and forth to assure as much as possible a good alignment.  The pictures tell the story.per49 per50 per51 per52As before, I use a bristled pipe cleaner with less fuzz, apply petroleum jelly to the pipe cleaner to avoid sticking to the glue, and apply Black KE-150 Glue to the step surfaces. I pull the pipe cleaner from the shank-side to draw the stem pieces together to allow a natural placement favoring a clear airway.  Once the steps fully engage, I compress the steps together to form the bond.  While I apply this pressure, I also give a little pull on the pipe cleaner to assure that it is still moving freely and not crimped at the splice junction.  After curing for 24 hours, I inspect the junction lines and apply additional KE-150 glue where needed to seal the joint.per53-copy per54With the stem splice curing, I turn my attention to the stummel.  Staying clear of the L J Peretti nomenclature on the left shank panel, using micromesh pads 1500 to 2400 I wet sand the stummel.  Following this, I dry sand the stummel using micromesh pads 3200 to 4000 then again with pads 6000 to 12000.  The depth of the briar grain looks good.  The pictures show the progress.per55per56per57I like very much the lighter brown, butterscotch tones of the briar.  I decide to apply a very light stain made up of one part Fiebing’s Light Brown Leather Dye to 4 parts isopropyl 95%.  My desire is to blend the fills on the bowl even though I had already applied stain sticks to these areas.  Using a pipe cleaner folded I apply a generous coat of the dye mixture, making sure to cover the entire stummel.  After applying the dye, while still wet I fire the dye with a lit candle.  This sets the hue of the dye well in the grain.  After a few minutes, I repeat the process concluding with firing the wet dye.  The alcohol in the dye burns off quickly and normally this does not burn the wood.  I did scorch the wood of the rim of a restoration not long ago.  I concluded that the problem was the cork that I had inserted in the bowl to manipulate the stummel while staining – the cork itself was saturated with the alcohol and kept ‘firing’ and scorched the thin wood of the rim…. Ever learning!  Now, I hold the stummel by inserting a couple twisted pipe cleaners in the shank acting as a handle.  The picture shows the final state after the second application of stain.per58I set the stummel aside to allow it to ‘rest’ through the night.  The next day, I’m looking at the stummel and the spliced stem.  I decide to jump into the stem work.  Honestly, as I look at the stem, the word that comes to mind is ‘Frankenstem’.  The stem that I cannibalized was not the best match to begin with.  Changing the positioning of the stem pieces to give the ‘step splice technique’ a chance of working, left a spliced stem with a definite limp.  Yet, I’m not finished and I’ve discovered along the way, there is a lot of forgiveness and flexibility in working with vulcanite.  As the old Timex commercial assured, “Takes a lick’n and keeps on tick’n!”  That will be my mindset as I approach the Frankenstem!  I take some pictures to show the challenges.  The first picture, perspective from the top looking down, shows the greatest challenges.  The stem addition is offset revealing the original stem’s protrusion underneath.  There is also more taper in the stem addition than in the original stem.  My approach as I look at the stem will be to try to create a higher (toward the shank) taper on the original stem (on the lower side in the picture).  This hopefully will blend the mismatch.per59I decide to chronicle the approach I take.  I first work on the ‘straight’ side of the stem (lower) by using a rounded needle file to create a ‘dimple’ that would represent the deepest part of the tapered curve.  It was adjacent to the protrusion on the right side (above in the picture below).  After creating the dimple, I then gradually fan out the dimple with 240 grit sanding paper until I achieve a smooth taper joining the saddle with the button.  I’m pleased with the results of phase 1.per60Phase 2 is creating another dimple on the other side – right at the point of the protrusion sticking out from underneath from the original stem step (pictured better above).  Again, after the dimple is formed with the rounded needle file I use 240 grit sanding paper to fan the taper evenly throughout the stem.  While the stem still is off center a bit, the tapering gives the allusion of a straighter stem.  It seems to me the stem is resembling a fishtail style reminiscent of Stanwell pipes.per61Next, I sanded the upper and lower stem with 240 grit paper to smooth and blend the splice repair.  This is helpful because it enables me to see that there are gaps in the seams of the patch.  In the pictures below you can see the vulcanite dust from sanding lodged in the gaps.  I decide to apply a bit of the Black Medium KE-150 glue to fill the gaps.  Before I do, I wash the stem with water and a bit of dish soap.  I apply the KE-150 then spray the joint with an accelerator that I just brought back to Bulgaria from my time in the US for Christmas. per62per63Putting the stem on the sidelines to cure a bit, I’m anxious to ‘unwrap’ the stummel and look at the briar underneath the fired dye crust.  I take the Dremel and mount a felt wheel and using Tripoli compound, I apply the compound using the slowest speed available on the Dremel.  For detailed ‘how tos’ in using a Dremel for this process, see my essay on Dremel Polishing Technique.  After I finish the cycle with the Tripoli compound, I wipe the bowl lightly with a cotton pad and isopropyl 95% to blend the stain.  After the Tripoli, I change to the Blue Diamond compound felt wheel at the same RPMs and apply Blue Diamond.  Then I take a clean cotton cloth and give the stummel a rubdown removing the excess compound residues which is like powder.  The stummel is looking great even before the carnauba wax application, but I decide to delay the wax application and again turn back to the stem.

To see the big picture, I unite the spliced stem with the stummel.  I like the proportions.  I was concerned that the stem might end up being too short and the L J Perretti becoming a nose warmer.  This is not the case as the picture shows!per64Accelerator is God’s gift to the impatient!  My first time to use it and it is nice – though I understand the downside of using an accelerator is the potential of a weaker bond, at least as I have read. The Black K-150 glue looks good.  I return to sanding the stem to blend the patch and finish the shaping.  With 240 grit paper, I smooth out the superglue fill and even though I can still see the lines, the touch test is the goal.  I can feel no ridge at the junction seams.  Success!  With all this rigorous sanding, the verdict is in – the step splice technique is holding!  I continue sanding moving down the stem removing the sand marks left by the Dremel drum sanding wheel.  I finally arrive at the button and to lower lip is out of line.  I straighten this with a flat needle file and I freshen the button lines while I’m at it.  I use 240 grit paper again to remove the effects of the needle file use in the button area.  Finished with the 240 grit paper, I use 600 grit paper to smooth the stem more and to reveal nicks or gouges that may have been missed.  The last two pictures below show the finished shaping project.  I’m very pleased with the results – the splice is holding well and the newly shaped stem is passable.  Even though the splice seams are visible, they are smooth to the touch and I’m hopeful that as the stem polishing and waxing is completed, the seams will blend more.  I think Frankenstem has been transformed well.  Before bringing out the micromesh pads on the stem, I drop the newly spliced stem into the Oxi-Clean bath to raise the heavy oxidation left in the original stem piece.  Another day is finished. per65 per66 per67The next morning I fish the soaking stem out of the Oxi-Clean bath.  The oxidation has surfaced, and as expected, especially on the original stem piece.  Initially I use 600 grit paper and wet sand the stem removing the top layer of oxidation.  I use a topping board with 600 grit paper to make quick work of 3 of the 4 panels of the saddle stem block (not sure if there is a special name for this part of the stem).  I am careful to protect the Perretti ‘P’ on the other panel by putting my thumb over it as I sanded around it.  I repeated the process using 0000 steel wool.  As always, the most difficult part to rid of oxidation were the vertical ‘rise panels’ above and below the stem.  I’m satisfied with the progress the pictures show.per68 per69 per71 per72With the new day, I’m in the home-stretch!  With so much focus on the stem repair, I only now recall that I have not cleaned the internals of the now spliced stem.  Using pipe cleaners dipped in isopropyl 95% I work on cleaning the internals. After running 2 pipe cleaners through the airway, for a nice change, I discover that all is clean!per73I turn now to the micromesh cycles with the stem.  Beginning with pads 1500 to 2400 I wet sand the stem and follow the set with an application of Obsidian Oil over the stem.  Next, I dry sand using pads 3200 to 4000 followed by 6000 to 12000, following each set with a fresh application of Obsidian Oil. I’m generally pleased with the technique of this splice, but the fine polishing of the two pieces of vulcanite have revealed that not all vulcanite is the same.  I assume the original survivor piece was of better quality than the donor piece.  The polishing reveals that the original is a darker hue of black and it wasn’t evident only until now.  So, we do the best we can with what we have!  The pictures reveal this with a close look.  The stem still looks good and what I’ve been through with it make it even look better!  The pictures show the progress. per74per75per76Before rejoining stummel and stem to apply carnauba wax, I want to re-establish the Perretti ‘P’ stamping on the stem.  Checking with the L. J. Perretti Co. stampings on Pipephil.eu, most stem marks are set with white lettering.  I want to do the same to emulate how this Perretti most likely was commissioned.  Taking white acrylic paint, I dab a bit over the ‘P’ on the stem.  After an hour or so, after dried, I gently scrape the top layer of paint off with a pointed Q-tip which I picked up in the US at Hobby Lobby.  Pictures show the result.per77 per78 per79Rejoining stem and stummel, I apply several coats of carnauba wax to both.  I use a cotton cloth wheel mounted on the Dremel, increase the speed to a setting of 2 and apply the wax moving the wheel in a circular motion over the surface.  After completing the carnauba wax application, I mount a clean cotton cloth wheel on the Dremel and clean buff the stummel and stem.  Following this, I give the entire pipe a hand buffing with microfiber cloth to bring out the luster and depth of the grain even more.

The briar of this L J Perretti is unbelievable – a beautiful display of fire grain and very clear and distinct bird’s eye.  The stem isn’t a perfect rendition mainly because of the unmatched vulcanite creating the splice.  Yet, the ‘step’ technique Jacek provided (via Steve!) is working very well.  The squared shank transitioning into the tapered fishtail-like stem I think is very nice. It works.  I’m thankful to my son for gifting me with this L J Perretti!  I would have enjoyed my inaugural smoke to have been a bowl of a special hand blended mixture from the L. J. Perretti Co. Tobacconists in Boston!  Yet, after taking the presentation pictures following, I settled for a bowl of my favorite Cavendish blend – Lane BCA. Report?  The L J Perretti smoked very well, indeed.  Thanks for joining me!per80 per81 per82 per83 per84 per85 per86 per87 per88

Sprucing up a Home Doctored WDC Wellington House Pipe


Blog by Steve Laug

Have you ever been pipe hunting in an antique shop and in your conversation with the clerk at the checkout have them tell you that they have a pipe at home that they would love to have you see? If not I assure you that you will. It seems to happen to me and certainly to my brother. Sometimes going back to see the pipe is a good thing and sometimes it is not worth the trip. My brother recently went through this very thing in a shop on the Oregon Coast. The clerk said that he had an old pipe – thought it was a churchwarden – at home and he would love to see it go to someone who would restore it. He said it was interesting but it was in rough shape. He told my brother that he would bring it to the shop the next day. He lived a fair ways away from the shop so he could not go and get it at the moment. My brother left the shop knowing that he would need to go back and have a look at the pipe. Two days later he made the drive back to the shop. The seller had left it behind the counter for him. The person at the counter took the pipe out and handed it to him. The clerk had been right – it was in rough shape but it was not a churchwarden but old WDC Wellington House Pipe. (I have included the photos that my brother took of the pipe before he cleaned it and sent it to me in Vancouver.)mess1Even at first glance it was rough but he did not expect what he found as he went over it. As he turned it in his hands he saw that the bowl had a large crack on the back side of the bowl that went from the rim to the shank bowl junction. It went all the way through and ran down the inside back of the bowl to a spot just above the airway. This was not good.mess2The bowl was caked and dirty and the cake had flowed over the top of the rim leaving a hard rough surface. Even through the grit he could see that there were a lot of nicks, scratches and dents in the rim top. On top of that the left side of the bowl was rough and seemed like it had road rash. It appeared that someone had tried to smooth it over but it was till rough to touch.mess3 mess4The Wellington ferrule was gone and had been replaced with a piece of what appeared to be a cut off piece of pipe glued and pressed onto the shank end. Looking at the pipe from the shank end you could see why the band had been as a lot of small cracks could be seen that extended down into the mortise. The cut off piece of pipe literally bound the shank together tightly with no give. The stem was the only part of the pipe that was in excellent condition. It bore the Solid Rubber stamp on the underside but the topside was missing the WDC Wellington stamp. It was obvious to me that someone had loved this old pipe and that they had done whatever was necessary to keep it functioning. The repair work was solid but it really was a mess. After the fellow had gone to the effort to bring the pipe to the shop my brother felt obligated to buy it. The deal was struck and the pipe came home with him.mess5The next two photos show the stamping on the shank. It reads Wellington under the WDC triangle on the left side of the shank. There are a lot of nicks and scratches around the shank that look like damage done when the band was glued in place. The Solid Rubber stamping on the can be seen in the second photo below.mess6The stem was actually in the best condition of the entire pipe. There was very little tooth chatter and marks near the button. There were some marks on the ridge on the underside and there was a spot of metal shining through the rubber there as well. The entire stem was lightly oxidized and pitted.mess7My brother did his usual thorough clean before sending it to Vancouver. He reamed the bowl and removed the cake that was built up on the walls and had overflowed onto the rim of the bowl. He cleaned out the mortise, the airway in the shank and the stem with alcohol, pipe cleaners and cotton swabs. He scrubbed the exterior of the bowl with Murphy’s Oil Soap and was able to remove the grime and dirt and the chipped and damaged finish. The next four photos show what the pipe looked like when it arrived.mess8 mess9I took some close up photos of the shank band. It is obvious to me that the repair on the shank was home done and involved cutting a piece of pipe and gluing and pressing it onto the shank. The third photo shows the shank end and there are at least 4-6 cracks showing that previous owner had glued and repaired with the cut off piece of pipe as a band. The band repair had been finished off with a bevel of glue banked against the band and shank. The piece of pipe that functioned as the band was striated and copper colour peeked out from under the surface oxidation. The crack on the back of the bowl is visible in the second photo below.mess10 mess11I took a close up photo of the left side of the bowl to show the rash on the side of the bowl. It was very rough and scored. It would need to be sanded smooth to repair the amount of damage.mess12I took photos of the crack in the bowl. It is on the back side as noted above. It extends down the back of the bowl to the shank/bowl junction (photo 2). What was interesting to me was that there were two small holes drilled at the twin ends of the crack in the bend of the junction. They had been filled in with glue and sanded smooth. I have circled them in red in the photo below (photo 1). I don’t why the previous repair had not continued with filling in the crack on at least the outside of the bowl but it did not. Possibly it was because the crack went through the bowl and extended down to a spot just above the entrance of the airway in the bowl (photos 3-4). There appeared to be burn damage on the back wall of the bowl on both sides of the crack. The rest of the interior walls of the pipe were solid with no damage.mess13 mess14As I mentioned before the best part of this pipe was the stem. In fact at one point I considered throwing the bowl away and saving the stem for a future repair.mess16With so much work to do on the bowl it was hard to decide where to begin. I turned it over in my hands for a few moments and decided to start by sanding out the rough side of the bowl. I would try to remove all of the damage that had been done in that area. The next two photos show the damaged area after the first sanding with 180 grit sandpaper. You can see how extensive this rash was on the bowl side.mess17I decided to top the bowl to deal with the damaged portion of the rim. I used the topping board and 220 grit sandpaper to remove the damaged rim surface and clean it in preparation for the crack repair. You can see that I needed to do some more reaming in the bowl to clean it up.mess18With the rim finished I went back to sanding the bowl side with 220 grit sandpaper. I worked to remove the damage on the side and worked over the curve of the bowl shank junction. When I finished with the 220 grit sandpaper the bowl side was smooth. The roughness and damage had been removed. The briar needed to be sanded with higher grit sandpapers and sanding sponges to remove the scratches.mess19I topped the shank end with 220 grit sandpaper on the topping board to smooth out the sharp edge of the metal band and prepare the shank end for some repairs.mess20I filled in the chipped areas on the shank end with briar dust and super glue. When the glue dried I topped it further and added a little glue on the long chipped area on the left of the second photo below.mess21I scraped away the excess glue along the edge of the band on the shank with a sharp knife. Once I finished the transition was smoother. I would sand the area along the band to clean up the scratches but the thick glue was removed.mess22There were some deep nicks on the lower front side of the bowl that needed to be filled. I filled them with super glue and briar dust and sanded them smooth to match the surface of the surrounding briar. I sanded around the shank band at the same time to smooth out the scratches and nicks.mess23I moved to the back of the bowl and filled in the exterior part of the crack with super glue and briar dust. The twin drilling at the bottom of the crack by the previous owner had done a good job stopping the crack from going further so I did not need to deal with that issue. There was no movement in the crack when I squeezed it together. It was stable so I moved on to do the surface repair. I put super glue in the crack and then pressed briar dust into the glue to seal the surface of the crack. mess24It was time to address the internal crack at this point. I needed to join the two sides of the crack together inside and also address the burned areas around both sides of the crack. I scraped out the inside of the bowl with a Savinelli Fitsall Pipe Knife to remove the remaining excess cake. I made sure to remove all of the cake. I worked on the area around the crack to remove all of the carbon and picked the area with a dental pick to see how badly the area was burned. I sanded the inside of the bowl with a rolled piece of 220 grit sandpaper to smooth out the walls.mess25I sanded the repair on the exterior of the bowl with 220 grit sandpaper to remove the excess patch material on the exterior of the crack. I smoothed it out to match the surrounding briar. The repair is looking really good on the exterior and the sanded interior of the bowl (also visible in the photo) was in better shape than I expected.mess26I wiped down the inside of the bowl with damp cotton swabs to remove the dust and debris from the bowl sides. With all of the preparations finished the inside crack was ready for repair using JB Weld. I have used it before following the directions from Charles Lemon on Dadspipes blog and had good results. I mixed the two parts of the “goop” together and applied the mixture to the inside of the bowl with a dental spatula. I pressed the mix into the crack and then spread it over the surface of the back wall on both sides of the crack. Once I had good coverage on the wall and in the crack I set the bowl aside to let the glue set.mess27 mess28While the repair in the bowl interior cured I turned to deal with the minimal damage to the stem. I sanded the light tooth chatter and small bite marks on the top and underside of the stem near the button using 220 grit sandpaper. I reshaped the button edge and the straight edge on the underside of the stem at the same time.mess29When the internal repair had dried to touch I could turn my attentions to the sanded exterior once again. I wiped the bowl down with a light coat of olive oil to make the scratched areas stand out and show me where I needed to do more sanding.mess30 mess31I polished the briar and the metal band with micromesh sanding pads – wet sanding it with 1500-2400 grit pads to smooth out all of the scratches and areas that showed up with the olive oil rubdown. The more I sanded it the more the grain began to stand out. There was some great birds-eye and cross grain in the briar. The third photo shows the JB Weld repair on the inside of the bowl very clearly. Once it turns black it will have cured enough to sand.mess32 mess33I continued to polish the briar and band with micromesh sanding pads – dry sanding it with 3200-12000 grit pads until the bowl shone.mess34I stained the pipe with a dark brown aniline stain thinned 50/50 with isopropyl alcohol. I applied the stain, flamed the stain to set it and repeated the process until the coverage was even around the bowl and rim.mess35I gave the bowl several coats of carnauba wax and buffed it with a clean buffing pad. I took the following photos to show what the bowl looked like now that it was stained and waxed. It is a pretty piece of briar and a far cry from the mess I started with.mess36 mess37I set the bowl aside and polished the stem. I buffed it with red Tripoli to remove as much of the light oxidation as possible. I wet sanded the stem with 1500-2400 grit micromesh sanding pads and dry sanded it with 3200-12000 grit pads. (For some reason the last photo of the stem has a yellow tint and makes it look oxidized. It actually shone at this point in the process with no oxidation left. I rubbed it down with Obsidian Oil after each set of three pads. After the final rubdown I set the stem aside to dry.mess38 mess39 mess40By this point in the process the JB Weld had hardened. It had been about 4-5 hours. It was time to smooth out the inside of the bowl and remove the excess JB Weld. I used the Dremel with a sanding drum to smooth out the back side of the bowl. You can see the spots on the bowl wall where I left the material to fill in the damaged areas on the wall. I went on to sand the interior wall with 180 and 220 grit sandpaper to further smooth out the repair and minimize the JB Weld. The repairs had stabilized the cracked bowl and it was usable once again.mess41I have one final step to take to before I can close the book on this repair. I need to mix a bowl coating to paint the inside of the bowl with. It is a mixture of sour cream and activated charcoal powder. I had to order some more as I ran out of the charcoal capsules and my local pharmacy was also out of stock. It may take a while to get some so for now the bowl is finished. Once the bowl coating is applied and has cured the pipe will be ready to smoke and carry on a long life.

At this point in the process when all is basically finished I can honestly say that I am glad I did not scrap bowl to the junk box. It has some beautiful grain and I think it looks good with the scar on the back side of the bowl where the crack used to be. The metal pipe band polished up nicely with hints of copper and silver mingled together giving it a bit of a sparkle. The finished pipe is shown in the photos below. It has been buffed with Blue Diamond a final time and given multiple coats of carnauba wax. I buffed it with a clean buffing pad and then by hand with a microfibre cloth to deepen the shine. The write up is longer and the photos are many this time around. It was a lot of work to give this old timer another chance but I think it was worth the effort. Thanks for bearing with me. mess42 mess43 mess44 mess45 mess46 mess47 mess48 mess49 mess50 mess51

Restoring Another Unique Windy Perpetual Drysmoker


Blog by Steve Laug

Today I have been working on the second Windy Perpetual Dry Smoker that has come across my work table. The first was a gift from Troy who writes here on rebornpipes. I have written the description of the restoration on a previous blog. You can read about the cleanup and restoration on that blog: https://rebornpipes.com/tag/windy-perpetual-drysmoker-pipe/ . In that blog I did some research on the brand, as prior to the first pipe I was gifted I had never heard of or seen one of these pipes. I decided to repeat a portion of that first blog here to give some background on the brand.

Here is the link to one of my favourite informational sites on metal and unique system style wooden pipes. The link will take you to the article as a whole and some photos that show the pipe quite well: http://www.smokingmetal.co.uk/pipe.php?page=508

“WINDY PERPETUAL DRYSMOKER by Stan Wolcott”

“In my travels I recently came across this intriguing pipe on which very little information appears online by Google search. The left side (?) is stamped “Windy Perpetual Drysmoker” and on the right side (?) “Imported Briar/Italy”. The stem has a small round gold medallion on the left side bearing an “R”. Although several similar pipes are pictured online here in the USA and UK, no explanatory information is included with those images. Floyd Norwood of Tennessee, who restored the pipe for me, also had no idea how the pipe was to be smoked. Tony Pringle of the UK, who has one pictured on his website, believes there may be other pieces which are missing from the four present in the images—flat cap, rounded cap with five vent holes (presumably the wind cap) and the pipe bowl and stem. As can be seen from the images, the flat cap has female threads and screws into the bottom (?) onto male threads on the bowl. The wind cap has male threads and screws into the top (?) of the bowl. I have placed the question marks in parentheses following the terms top, bottom, right and left, since I’m not even sure whether the flat cap is intended to be the bottom. Can someone out there enlighten me and the NASPC readership about this “mystery pipe”, its manufacturer and the proper way of smoking it?”

“The “Perpetual” part of the name seems to come from the ability to actually load more tobacco from the bottom of the pipe whilst still alight and of course the dottle etc. gets burnt as the smoking progresses. Rather ingenious. There are at least two possible for makers from the logo, REGIS and EMPIRE STATE and nothing seems to be known of these either.

Tony Pringle of smokingmetal then includes the following photos of the pipe. There is no doubt that it is the same pipe that I have. There are a few variations between the two but the overall design is the same. He shows photos of the pipe as a whole, taken apart and of the stamping.dry1I have only included the first photos as the pipe I have is virtually identical to this one. Mine also has the gold circle R on the logo on the side of the stem. The only difference is that mine is has a brass spacer on the stem that forms a thin band between the shank and stem. Mine is also in better condition than the one in the photos with no cracks or breaks in the bowl, caps or threads. I believe along with Tony from smokingmetal that the pipe was crafted in the late 1940s. Many things about the briar quality, the rubber that is used in the stem etc. point to manufacture of the pipe occurring during or after the conclusion of World War II.

The stamping on the one above and the one I have is simply WINDY over PERPETUAL over DRYSMOKER in caps on what is the left side of the shank. On the right side of shank it is stamped Imported Briar over Italy. The pipe is meant to be smoked with the perforated, rounded cape pointing downward. That is why the stamping is the way it is. If the pipe is held otherwise the stamping is upside down. If the pipe is inverted it can be set upright on a desk or table on the flat top cap and act as a sitter pipe. The pipe is 5 ¼ inches from the front of the bowl to end of bit. The diameter of the outer bowl is 1 3/8 inches. The chamber diameter is just over 5/8 inch and depth is over 1 ¼ inches with both the top and bottom cap removed. The pipe is lit from the bottom and the wind cap cover is screwed in place. I think that more tobacco can be fed in from the top of the bowl with the flat cap removed thus making the pipe a PERPETUAL DRYSMOKER.

The pipe my brother Jeff picked up is shown in the next photos that he took of it before cleaning it and sending it to me in Vancouver. You can see some darkening in the finish around the flat cap on the bowl and some general wear and tear to the finish as a whole. The bowl has quite a few fills in the shank, the left and right front sides and the crowned perforated bottom cap. The stem was oxidized quite heavily and the diameter of the shank and the diameter of the stem did not match.dry2Jeff took some great photos of the bowl taken apart. Contrary to what Tony and Stan mention in the quote article from the website all the parts are present with the pipe. There are no additional pieces needed to make the pipe functional. The first two photos show the rounded bottom cap and the flat top cap removed from the bowl. You can see the wooden threads on the inside of the bowl in the first photo where the bottom cap screwed into it. The second photo shows the threads on the outside of the bowl where the flat top cap screwed onto it. The completed pipe resembled a salt or pepper shaker to my mind – a unique and interesting smoking device. Both caps were darkened by smoking but appeared to be clean. There was a small crack in the rounded bottom cap but it did no effect the fit in the bowl.dry3He also took some photos with the parts laid out together to give an overall idea of what the pipe looked like.dry4My brother also included some close up photos of the sides of the bowl to show the condition of the finish and what would need to be done to clean it up. He included a photo of the flat top cap to show the remarkable grain underneath the staining and grime.dry5 dry6The next two photos show the stamping on both sides of the shank. The third photo shows the brass circle R logo on the stem and also the brass spacer in between the stem and the shank.dry7 dry8The final two photos Jeff included showed me the condition of the stem. It looked really good other than the oxidation. There was no tooth chatter or tooth marks in the surface. The only issue I would need to address was the mismatched diameter of the shank and the stem.dry9My brother did a really thorough job cleaning up this old pipe. When it arrived in Canada the inside of the bowl and both caps was really clean. He had scraped out the light cake in the bowl and cleaned out the mortise and airway in the stem and shank with alcohol, cotton swabs and pipe cleaners. He cleaned off the exterior of the bowl and was able to remove much of the grime on the surface. The brass space was oxidized but would clean up easily when I worked on the diameter of the stem. I took the next four photos to show the condition I found the pipe in when I unpacked it here in Vancouver.dry10 dry11I took the pipe apart and took photos of the parts of the bowl – the centre core, the rounded bottom cap and the flat top cap. In the photos the core is flat side up in the first one and rounded side up in the second one. The bowl and caps were very clean and you could see raw briar inside all of the parts which led me to think that the pipe had not been smoked often.dry12I took some close up photos of the stem to record its condition as well.dry13The fit of the crowned bottom cap to the edge of the core part of the pipe had some damage to it that did not allow the cap to seat tightly against the edge of the core. I topped it with 220 grit sandpaper on the topping board until the cap fit snugly.dry14I put the cap back in place and wiped the bowl down with acetone on cotton pads to remove the finish. The fills on the bowl were dimpled so they would need to be repaired with briar dust and super glue.dry15 dry16With the finish removed I could better assess the darkened areas around the sides and bottom of the flat cap. I could also see areas that needed to be sanded around the edges of the rounded bottom cap also. I sanded the entire pipe with 220 grit sandpaper to remove the damaged areas and smooth out the transitions between the core and the caps. I also smoothed out the edges of the fills to prepare them for repair later in the process.dry17 dry18With that part finished I needed to rework the shank/stem diameter. The right side of the shank was narrower than the right side of the stem. With the stem removed it was easy to see why. That side of the briar shank was thinner in terms of the thickness of the walls of the shank than the left side. The red circle shows the side that needed to be taken down.dry19I used the Dremel with a sanding drum to take down the excess vulcanite and brass of the spacer.dry20I cleaned out the areas around the fills and removed any of the loose debris around them. I rebuilt the areas around the fills with a mixture of clear super glue and briar dust. I overfilled the repairs to allow for shrinkage. I sanded the repairs smooth to match the surface of the bowl.dry21I sanded the repairs smooth and then polished the areas with micromesh sanding pads. I wet sanded the repaired areas with 1500-2400 grit sanding pads and dry sanded them with 3200-12000 grit pads. I wiped the bowl down with a damp cloth. I stained the bowl and the caps with dark brown aniline stain and flamed it to set it. I repeated the process until the coverage was even.dry22 dry23I buffed the bowl with Blue Diamond polish on the buffing pen. I gave it several coats of carnauba wax and buffed it to a shine.dry24 dry25I sanded the stem with 220 grit sandpaper to smooth out the scratch marks on the vulcanite. I polished it with micromesh sanding pads – wet sanding with 1500-2400 grit pads and dry sanding with 3200-12000 grit pads. I rubbed the stem down with Obsidian Oil after each set of three pads. After the final coat of oil I set it aside to dry.dry26 dry27 dry28I buffed the pipe with Blue Diamond once more and then gave the bowl and stem multiple coats of carnauba wax. I buffed it with a clean buffing pad to polish it and then by hand with a microfibre cloth to deepen the shine. The finished pipe is shown in the photos below. Some of the character marks of the pipe that came to me still show and I am sure could tell a story if they were able to speak. I like the finished look – the marks and all give the pipe a sense of history and time. It is not a bad looking old pipe considering that it has traveled from the 1940s into 2016 and who knows how much longer. Thanks for looking.dry29 dry30 dry31 dry32 dry33 dry34 dry35 dry36

Redemption of a Mayfair 1005 Bent Tree Stump Pipe


Blog by Steve Laug

I can see what attracted Jeff to this pipe right away because it also grabs my attention. It has a rugged looking rustication that is somewhere between an aged piece of leather and a gnarled tree stump. There is something very charming about the appearance of the pipe that is for certain. The briar by and large appears to be in decent shape. The stamping on the shank reads MAYFAIR over 1005 with Italy stamped next to the stem shank junction. First thought was it may be a Sasieni or Charatan but I do not think it is. There is something almost Lorenzo like in terms of the look of the carving and the shape. The way the stamping is done and the Italy stamp makes me think that it is a basket pipe made for a pipe shop called the Mayfair Shop. In my I found that there is a shop in Edmonton, Alberta Canada called Mayfair Smoke & Gift Shop. There is also an area on London called Mayfair that at one time housed many pipe and tobacco shops. My own feeling is that the pipe probably came from the shop in Edmonton – the Italy stamp on the shank makes me think that rather than and English shop.may1 may2The next close up photos show more of the carving on the bowl close up and the condition of the rim and cake in the bowl. In the first photo below there is a small chip out of the rim edge that shows up but should be easy to hide in the rustication. The rim top is quite dirty with the overflow of cake from the bowl. It is hard to see under the thick cake on it but there are curved strokes around the rim top that go clockwise. They include larger deeper strokes and fine hairlike strokes that are also in the grooves of the rustication on the bowl sides.may3The next photo shows the stamping on a smooth portion on the bottom of the shank. Does anyone know who made the Mayfair brand of pipe that was stamped like this?may4Other than being deeply oxidized the stem was in decent shape. There were not any tooth marks or deep tooth chatter on the stem surfaces. There was a cursive stylized T on the left side of the saddle portion of the stem.may5My brother cleaned up the pipe and sent it my way in Vancouver. As usual he did a thorough job of reaming and cleaning the inside of the shank, mortise and airway in the stem. They were spotless. I took the next four photos to show what the pipe looked like when it arrived.may6His cleanup of the rim revealed the curved clockwise strokes around the top surface.may7I took a close up picture of the rim top and if you look into the bowl a serious issue that would need further exploring.may8Even after the cleanup the stem looked in decent shape.may9I used a dental pick to probe the serious spidering cracks and crevices on the inside of the bowl. These were far worse than the recent ones that I addressed in the bowl of The Tobacconist Inc. Rhodesian recently using pipe mud (https://rebornpipes.com/2016/12/22/a-reclamation-project-the-tobacconist-inc-made-in-england-rhodesian/). These were deep and intricately burned gouges in the surface of the bowl. I used the Savinelli Fitsall Knife to scrape out as much damage on the walls as possible and without gouging out more and further damaging the surface. The next series of photos show the bowl as I turned it around examining the damage.  may10 may11I have to tell you at this point I was seriously considering throwing the pipe into the discard box and not bothering working any further on it. The stem could be salvaged and parts of the briar may be salvageable for repairs. It really was a desperate looking situation. It appeared to be a bowl on the very edge of being burned out all around – one of the worst messes on the inside of a bowl I had seen. But… and this is where I took a chance. I really like the rustication pattern on the briar and the shape also grabbed me so I decided to try a remedy that Charles Lemon of Dadspipes has used far more than me. I thought it might just work on this old bowl and provide a possible redemption to ongoing service.

I picked at the wood with a dental pick to remove any loose chips or chunks of briar to get the wood back to as solid a base as possible. I cleaned out the interior of the bowl with a cotton swab and alcohol until I removed all of the dust and debris from the cracks.I wanted a clean surface to work with. I set the bowl aside to dry and went to the hardware liquidation store down the street. I picked up some JB Weld (or rather a brand called Steel Weld which was made by JB Weld). I mixed the base and the hardener on a patch of paper with a wire until I had it well blended. Using a dental spatula I pressed the mixture into all of the cracks on the inside of the bowl. I slathered on (technical term) the coat of the mixture until all the inside walls of the bowl were smoothly covered.may12 may13I dampened a cotton pad with alcohol and wiped off the JB Weld that had gotten on the rim top and inner edge of the bowl. I did not want it to harden as then it would be impossible to remove from the strokes on the surface. I set the bowl aside to let the bowl repair harden. Once it was cured overnight I would sand the surface clean leaving the repair only in the cracks themselves.

Being impatient by nature and by choice, I wanted to keep working on the pipe. I know that I have many more to work on but I wanted to see what the exterior of this old timer looked like once it was restained. So when the internal repair had hardened to touch (about an hour later) I decided to stain the briar. I used a Dark Brown aniline stain and applied it to the briar with a folded pipe cleaner. I flamed the stain to set it in the grooves and grain. I repeated the process until the coverage was what I wanted.may14 may15With the stain coat done I took two photos to show the rim and interior of the bowl to show how the repairs looked before I sanded them down. The JB Weld still needed to cure but you can see how the walls looked at this point.may16I wanted to protect the bowl from the dust and the debris that would fly when I sanded out the bowl so I gave it a first coat of Conservator’s Wax. I buffed it with a shoe brush.may17 may18I set the bowl aside until the afternoon to let the repair cure and turned my attention to the stem. I sanded it with 220 grit sandpaper to remove the oxidation on the surface and smooth out the pitting.may19I polished the stem with micromesh sanding pads – wet sanding the stem with 1500-2400 grit pads and dry sanding with 3200-12000 grit pads. After each set of three pads I gave the stem a rub down with Obsidian Oil. After the final rub down I set the stem aside to dry until I had finished the bowl.may19a may19b may19cWhen I came back to the bowl in the afternoon I took some photos of the interior before I sanded it to show what the dried JB Weld looked like. The surface is rough to the touch and hard. The cracks however are completely filled in.may20I used the Dremel and sanding drum to remove much of the excess fill/repair material. I set the Dremel at the lowest speed and slowly worked it over the inside of the bowl walls. I was able to remove much of the overage that way but I could not get all of the material off. My goal was to leave the JB Weld only in the crevices and cracks in the walls and not on the walls themselves. I wrapped a piece of 220 grit sandpaper around a wine cork, roughened the end to give some leverage on it and sanded the inside of the bowl. This further took back the JB Weld. I finished sanding the inside with a piece of 220 grit sandpaper wrapped around my index finger. When I was finished the cracks were filled and the bowl was smooth to touch.may21 may22I wiped down the inside walls of the bowl  with cotton swabs and clean water and the shank with pipe cleaners and clean water to remove all of the sanding dust and debris left behind by my work in the  bowl. The next photos show the repairs on the walls of the bowl. The bowl is solid and feels undamaged. My next step in the repair is to coat the walls with a mixture of sour cream and charcoal powder – a bowl coating. This will further protect the walls and provide insulation until a cake can be formed.may23I walked down to the local supermarket and purchase a small package of sour cream. I put a spoonful of sour cream into a small bowl and broke open the last of my activated charcoal capsules into it. I mixed it with a spoon until the mixture was a dark grey colour and well blended.may24I know at this point many of you are thinking “sour cream in a pipe”. But that is exactly what  I used. I mixed it well and put it on the walls of the pipe with a dental spatula and spread it evenly across the walls with a folded pipe cleaner. I had inserted a pipe cleaner in the shank to keep the airway clear of the bowl coating. I can assure you after many years of using this mixture – one by the way that is used by many pipe makers – that the mixture dries and has no residual smell or tasted. It is absolutely neutral. It provides a good insulator for the bowl while cake is formed. In this case it also covers the lines of JB Weld in the cracks of the bowl interior so it serves a dual purpose.may25 may26I put the bowl aside to let the bowl coating cure and harden. I let it sit overnight to cure. I knew that once it had hardened it would be completely neutral in smell and taste. This morning the bowl coating had dried to a solid black colour with a little grit from the charcoal. The sour cream smell was gone and the bowl was smooth and black to the bottom.may26a may26bThis morning I gave the bowl several more coats of Conservator’s Wax, buffed it with a shoe brush and finished by buffing it with a clean buffing pad to bring a shine to the smooth and rusticated portions of the bowl. I buffed the stem with Blue Diamond Polish on the buffing wheel and gave it several coats of carnauba wax. I buffed it with a clean buffing pad to raise the shine. I hand buffed the whole pipe with a microfibre cloth to deepen the shine and give the pipe a sense of warmth that this last step gives it. The finished pipe is shown in the photos below. It may seem like a lot of work to redeem this old pipe but the look of the finished pipe says it all to me. This one will be a pleasure to fire up and hold. The tactile nature of the rustication is complex and interesting to hold and study. Would you have done this work on one you have on the table? The only way that you will be able to answer that question is when you lay eyes on one that grabs a hold of your attention. Until then you may wonder at my madness. Thanks for walking with me through this exercise. may27 may28 may29 may30 may31 may32 may33 may34

Reclamation Project: The Tobacconist Inc. Rhodesian


Blog by Steve Laug

In the last box of pipe that my brother sent there was a pipe that is of course one of my favourite shapes – a 9438/9242 GBD style Rhodesian though the taper stem makes me think of a 9242 shape. It is not stamped with a shape number or a make but the Made in England stamping on the underside of the shank matches that found on GBD pipes. From first glance at the pictures of the pipe that my brother sent me it looked to be in decent shape. This was to be proved wrong once my brother started to clean it and I received it in Vancouver. But from the photos the contrast finish of blacks and browns looked really good. The rustication on the bowl is a combination of worm trails and “squiggles” that is reminiscent of Custombilt pipes. From the front there is a worm trail that divides the bowl into two hemispheres like a brain (photo 5). Strange humour of the original pipe maker, I think.tob1 tob2The close up photos of the rim and bowl give a bit of a foretaste of the hidden issues in the bowl and on the rim. It is hard to see the inside of the bowl from this photo but there was a light cake in the bowl and it had run over the top edge of the bowl filling in some of the grooves and crevices in the rustication. The second photo below shows the worm trail on the front and underside of the bowl that divides the bowl into two hemispheres.tob3The stamping on the underside of the shank on a smooth portion of briar was faint but could still be read. It said The Tobacconist Inc. over Made in England.tob4The stem was lightly oxidized around the shank end and the button end, though the middle was strangely clean. There were tooth marks on the top and underside near the button. The top edge of the button on both sides had tooth marks as well.tob5I have restored a Liverpool shaped pipe with The Tobacconist Inc. stamping and written a blog on it – (https://rebornpipes.com/2016/07/16/a-liverpool-stamped-tobacconist-inc/). I remember hunting to no avail on information on the brand and finding nothing. I checked once again with my usual sources – the book Who Made that Pipe and the online sites Pipedia and Pipephil. None of the sources had any new information. For that blog, I searched for the name of the shop – The Tobacconist Inc. to see if I could find any information on it and possibly see if they had shop pipes made for them. The name Tobacconist Inc. came up shop a tobacco shop in Chicago. It is called The Tobacconist Inc. and is located at 3524 W. Irving Park Rd. Chicago, Illinois. The phone number is 773-463-8468. I have included two photos from that blog – one of the sign and the other of the shop. The sign says the shop has “Everything for the Smoker” and has been in existence since 1946. Sounds like a place I need to visit one day. Now that I have worked on a second pipe with the name stamped on it I really need to call them and see if they have any information about the pipe. tob7My brother wrote that cleaning out the inside of the pipe was a pain. It took a lot of work to get the buildup of tars and grime out of the bowl and the shank. The rim top also had some damage under the thick tars. When it arrived in Vancouver I could see that the pipe was in pretty rough shape with a poorly fitting stem. The diameter of the stem and the shank don’t match. Not sure if it was because the stem was poorly fitting to start with or if it is a replacement stem. It looks to be original so I am opting for a poor fit. I took some photos of the pipe before I started working on it (well almost – I had done a little sanding at the shank stem union before I remembered to take the photos). tob8 tob9I took a close up photo of the rim and bowl. The rim inner edge had some chips and nicks that would need to blended in to make the rim more balances looking. It is hard to see from the photos but the walls of the bowl are in damaged condition.tob10The tooth dents in the top and underside of the stem near the button were quite deep. I heated the dents with a Bic lighter to raise them as much as possible. I painted them with the flame of the lighter and when I was finished they were not as deep as before. It would not take too much now to sand them out to match the surface of the rest of the stem.tob11I cleaned out the inside of the shank with alcohol, pipe cleaners and cotton swabs to remove the last of the debris on the walls. The bevel on the edge of the mortise was rough and needed to be cleaned up and smoothed out but the wood was solid with no cracks.tob12I used a Dremel and sanding drum to remove the excess briar and vulcanite and get the shank and the bowl to match in diameter. It took some work but it certainly was a better fit once I was finished. I sanded the bevel in the shank end until it was smooth but the stem still did not fit tightly against the shank. I heated the tenon to soften the vulcanite and make it flexible. I pushed the stem carefully into the shank and held it against the shank end to align it until the tenon cooled.tob13I sanded the stem/shank union with 220 grit sandpaper to smooth it out and make the transition clean. I took the following photos to show the restoration at this point.tob14 tob15I used a brass bristle tire brush to work over the rim top. It took some work but I was able to get the grime and grit out of the grooves of the rim.tob16I scrubbed off the finish on the bowl and rim to remove the stain and the remaining varnish coat on the briar. When I finished cleaning the surface the pipe was ready for the stain coat.tob17 tob18I stained the bowl with a dark brown aniline stain and flamed it to set it in the grain. I repeated the process until the stain coverage was even across the bowl.tob19 tob20I used the Savinelli Fitsall pipe knife to scrape out the walls of the bowl. I examined the interior and saw a lot of spidering cracks on the walls of the bowl. While the briar around them was still solid and the briar was not too badly damaged. This would need to be addressed to assure that the briar would be protected until a new cake had formed.tob21I decided to mix up a batch of pipe mud with some tap water and a dental spatula. I applied the mud mixture to the inside of the bowl pressing it into the cracks in the bowl walls. I coated the inside of the bowl with the mud until there was a solid bowl coating.tob23 tob24I set the bowl aside to dry overnight. I took the following photos to show what the inside looked like after the mud had cured.tob25I sanded the stem with 220 grit sandpaper to remove the last remnants of the tooth dents and reshape the button on both sides. It also removed the surface oxidation.tob27I used a black Sharpie Pen to touch up the grooves in briar on the sides and the rim top. I gave briar a touch up coat of dark brown stain. I waxed the rusticated briar with multiple coats of Conservator’s Wax and once it had dried buffed it with a shoe brush to raise the shine.tob28 tob29I polished the stem with micromesh sanding pads – wet sanding with 1500-2400 grit pads and dry sanding with 3200-12000 grit pads. I rubbed the stem down with Obsidian Oil after each set of three pads. I gave it the final coat of oil and set it aside to dry.tob30 tob31 tob32I buffed the bowl and stem with Blue Diamond polish on the wheel. I gave the stem multiple coats of carnauba wax and put another coat of Conservator’s Wax on the briar. I buffed the bowl and stem with a clean buffing pad. I hand buffed the pipe with a microfibre cloth to deepen the shine. The fit of the stem against the shank is far better than it was when I started the cleanup. I like the way the flow is now between the stem and the shank. The finished pipe is shown in the photos below. It had a great feel in hand and I think the rustication will heat up nicely with the next first smoke. I think that the pipe mud will protect the bowl until a new cake is built. Thanks for walking through the restoration with me.tob33 tob34 tob35 tob36 tob37 tob38 tob39 tob40

I wonder how old this Sasieni Ruff Root Light 4 Dot Dublin is?


Blog by Steve Laug

Not being too knowledgeable about the ebb and flow of Sasieni pipe history leaves me with a lot of questions about the latest pipe that my brother sent my way. It is stamped on the underside of the shank Sasieni 4 Dot over Ruff Root Light. There is a 4 stamped at the end of the name stamping next to the stem/shank junction. The stem itself is stamped France. There are four blue dots on the left side of the saddle portion of the stem. He picked it up in a thrift shop in Boise, Idaho along with the Dunhill Shell 5113 I wrote about restoring in an earlier blog (https://rebornpipes.com/2016/12/18/an-unsullied-once-the-paint-was-removed-dunhill-5113-bent-apple/). When my brother first sent the following photos before his cleanup work I was intrigued but the finish looked very spotty. The stem appeared to be in overall good condition with no bite marks or tooth chatter on either side. Can any of you help me regarding the age of the pipe? Any help would be much appreciated.sas1We discussed this a bit and he sent me a photo of the front of the bowl from the bottom side that showed the spotty finish that I noted. There was also a lot of grime in the sandblast grooves on the bowl leaving it with a muddy appearance.sas2The bowl had a thick cake that overflowed over the top of the rim obscuring the blast features on the top side. They also made it hard to tell if there was any damage to the inner or outer edges of the rim.sas3The stamping on the smooth underside of the shank was really quite clear and sharp. The bowl and stem had not been over buffed which were good omens for what it would look like when it was cleaned up.sas4The close up photos of the stem told a little different story than the overall photos. There was light oxidation on the surface and what appeared to be some sticky glue left behind by a price tag from the shop the pipe came from. Just and aside; if you sell pipes in an antique shop or have a booth in an antique mall do not used gummed labels to price your merchandise. It leaves behind residue that is a pain to remove.sas5I was curious to see what the pipe would look like once my brother had worked his cleaning magic on it. I was sure I would be surprised at what it came out looking like. I wondered if the mottled finish would survive the cleanup and whether the stem would be oxidized further as well in the process. When the pipe arrived in Vancouver I took some photos of it to show what it looked like before I worked on it. He had been able to remove much of the mottled finish and the grime in the grooves of the sandblast. The gummy substance on the stem was gone and the stem was not too badly oxidized. There were no tooth marks or chatter on the stem. The reaming job on the bowl had taken care of the cake and the scrubbing had removed most of the buildup on the rim. What remained was a little darkening and some grime deep in the grooves.sas6 sas7I took a close up photo of the rim and bowl. The bowl was reamed clean. The rim needed some more work with a brass bristle brush to clean out the remaining debris deep in the grooves of the blast.sas8I took some photos of the stem to show the overall condition it was in before I started working on it. I was glad to see that there were no deep bite marks or tooth chatter that I would need to deal with on this one. It would be a pleasant change.sas9I scrubbed the rim with a brass bristle tire brush and was able to remove more of the grime in the grooves. I scrubbed down the exterior of the bowl and shank with acetone on a cotton pad to remove the shiny spots of varnish on the finish and even out the mottled appearance.sas10 sas11I used a black Sharpie Pen to add some dark to the rim and to some of the spots on the bowl that appeared to be lighter. I put a cork in the bowl to use as a handle while I stained the bowl with a dark brown aniline stain cut 50/50 with isopropyl alcohol. I was aiming for the brown colour with darker highlights that I had seen on other Ruff Root Light pipes. I flamed the stain and repeat the process until the coverage was even.sas12 sas13Since the oxidation was on the surface and I was not dealing with any tooth marks on the stem I started right away with polishing the stem. I wet sanded it with 1500-2400 grit micromesh sanding pads and rubbed it down with Obsidian Oil. I dry sanded it with 3200-12000 grit pads and gave it a coat of oil after each set of three pads. After the final set of pads I gave it a final coat of oil and set the stem aside to dry.sas14 sas15 sas16I gave the bowl and shank several coats of Conservator’s Wax, let it dry and buffed it with a shoe brush.sas17 sas18I gave the stem multiple coats of carnauba wax and buffed the bowl and stem with a clean buffing pad to raise the shine. I hand buffed it with a microfibre cloth to deepen the shine. The finished pipe is shown in the photos below. I think the look of the finished pipe is pretty close to the original look it must have had when it left the Sasieni factory. The depth of the shine, the multifaceted colours that come through with the browns and black on the sandblast add another dimension to the look of the pipe. The blue four dots on the stem stand out nicely against the shiny and polished vulcanite stem. Overall it is a pleasant looking pipe and one that was a pleasure to restore. Thanks for looking.sas19 sas20 sas21 sas22 sas23 sas24 sas25 sas26

The Last of 4 ‘Hole in the Wall’ finds – a Savinelli Capitol Prince with a secret


Blog by Dal Stanton

I purchased the Savinelli Capitol in June of this year, at the Hole in the Wall antique store near Zhenski Pazar (Women’s Market) located in downtown Sofia.  Steve was visiting Bulgaria from Vancouver in the context of our work and we went to the Hole in the Wall for a mini pipe hunting sortie.  I’d remembered on other occasions the vendor producing a 4-pipe pouch that he kept behind the counter and I asked about it and he still had it with pipes intact.  The leather bag itself was a find.  The 4 pipes revealed after unzipping the bag were a Savinelli Tortuga 628, Danske Club Vario 85 (both occupying a place in my rotation), a Butz-Choquin Rocamar (which became a wedding gift for my new son-in-law), and the Capitol (that I learned was a Savinelli second) now before me.  Above, I linked the restorations of the Tortuga and BC Rocamar to their respective postings.cap1Honestly, when I first acquired the Bag of Four, my sights were fixed on the 3 big brothers of the Capitol which I identified as a Prince shape from Pipedia’s shapes chart.  Per Bill Burney’s description,

The prince, named after the Prince of Wales (Prince Albert, later King Edward VII), has a squat, rounded bowl with a long, usually very slightly bent stem and a short shank.  Compared to other pipes, the shank and stem are thin and delicate, though not necessarily fragile.  This makes for a light and comfortable pipe (Link).

On the internet, I searched high and low through images of Prince Albert (1819-1861) and found no images among the 100s visually linking the prince with the shape now associated with him.  The photo below, one could imagine, has his pipe waiting for him just to his right, reluctantly removing it from the eventual public view of the old ‘sit-still’ camera recording the moments.  Yet, in my search on the internet, one can find 100s of pictures of happy, confident men smoking their pipes with adoring women looking on. How is this possible? – a man would be quick to ask.  Well of course, their pipes are packed with Prince Albert’s tobacco!  So, the secret is out – PA not only stands for Prince Albert but also, and more importantly, Pipe Appeal!  Good to know as Christmas gift lists are being created for this holiday season!cap2With Christmas music playing in the background the ambiance is perfect. The CAPITOL is stamped on the left side of the shank with no other markings.  When I search Pipedia, I discover that Capitol is listed among a robust inventory of other Savinelli made sub-brands, seconds and order productions. At Pipes Website store, I found several Savinelli Capitol shapes for sale.  At The Danish Pipe Shop I discovered several Savinelli Capitols listed and a bit pricy at that!  So, it would seem, the Capitol line of Savinelli has some depth and quality to it.  Unfortunately, I could find no Savinelli listing that brought the entire Capitol line inventory together.  This Capitol Prince has an elegant, slim appearance, boasting a length of 5½ inches, a petite bowl width of 1½ inches and a fire chamber diameter of ¾ of an inch.  The rim has some clunk dents along the edge and the backside shows darkening from oils and perhaps rear-end tobacco lighting over the edge.  The fire chamber has a light cake build up but I will bring it to the briar for a clean, fresh start.  I detect a larger fill on the heel of the bowl near the left junction of the shank. The stem is in great shape with minor teeth chatter on the bit.  I detect a dent in the vulcanite at the shank junction and note that there is day-light between the junction of shank and stem – the mating is not flush, but a good cleaning may take care of this.  Interestingly, I also notice that the stummel is encased in what I call a ‘Candy Apple wrapper’ which I also saw in the Savinelli Tortuga restoration acquired at the same time as the Savinelli Capitol.  I didn’t like the Candy Apple wrapper around the Tortuga then and this Capitol Prince’s natural briar will be liberated as was his big brother’s!  The following pictures on my work table here in Sofia, Bulgaria, show these areas of need and a very handsome pipe.cap3 cap4 cap5 cap6With the stem showing no oxidation, I skip the Oxiclean bath which may be a first for me!  The twisty stinger extending from the tenon is extracted unceremoniously and added to the Lonely Stingers Bottle and is officially retired from active service.  I give my initial focus to the stummel clean-up starting with reaming the bowl.  I use the Pipnet reaming kit camped over a paper towel which enables me to quickly catch and dispose of the powdered carbon – this makes my wife happier as my work table shares our bedroom space in our 10th floor flat!  Often, I go out onto the balcony to do this dirty work but winter has come in Bulgaria.  I use the two smallest reaming blades and I do not use them aggressively – I do not want to dig into the briar.  I follow the reaming blades with the Savinelli pipe knife to scrape and fine tune the cleaning of the cake residue.  I remove what appears as dried dottle at the floor of the bowl.  I finish by using 240 grit paper wrapped around a dowel rod and my index finger to clean and smooth the wall.  Finally, I take a cotton pad with alcohol and wipe the bowl removing the carbon dust.  The pictures show the progress.cap7 cap8 cap9With the isopropyl 95% on the work table, I clean the internals of the stummel.  Using pipe cleaners (bristled and smooth) and Q-tips I go to work.  Dental probes are also helpful to reach into the mortise and scrape the surface dislodging muck.  It was dirtier than I expected, but finally Q-tips start re-emerging ever whiter from the mortise plunges.  Done.  Now, I take the stem and go to work on its airway with pipe cleaners.  I discover very quickly that a reason for lack of cleaning on this stem is that I am not able to move a pipe cleaner through the airway.  The button airhole is too tight and needs to be enlarged to accommodate pipe cleaners.  No one likes fighting with pipe cleaners that refuse to pass through cramped quarters.  I take a round, pointed needle file and begin gradually to enlarge the button airhole.  My method is to insert the file point into the airhole but only as far as the expanding file diameter will allow to enable me to move the file back and forth easily, gradually removing the upper and lower button airhole surfaces.  If I jam the needle file down the airhole too aggressively, not only will it get jammed, it will also damage the vulcanite contours around the airhole.  After some time, the airhole gradually expands allowing the needle file to file more deeply opening the airway.  After some time and testing, pipe cleaners are able successfully to navigate the passage and the stem airway cleans up very quickly.  When I work on the teeth chatter later, I’ll smooth out this work with 240 grit paper.  The pictures show the cleaning and button airhole enlargement processes.cap10 cap11 cap12 cap13 cap14I love working on clean pipes!  With internals clean I know shift my attention to the stummel surface.  I first attack the Candy Apple varnish-like surface.  I start conservatively by first using cotton pads with undiluted Murphy’s Oil Soap to work on the rim and bowl surface.  With the aid of a brass brush, the Murphy’s Soap does a good job cleaning the rim, but it is probable that the surface is an acrylic finish which is difficult to remove.  Next, I use acetone with cotton pads to attack the Candy Apple surface.  As I scrub, and I scrub a good while, it gives me time to study the briar grain on this stummel and on the heel, I find what looks like a spider pattern – beautiful.  I’m ever amazed at God’s gift to us in the design and intricacy of this piece of briar – a ragged bush of a plant that would be called scrub if you saw it on the side of the road as you passed.  As the pictures below reveal, even after acetone scrubbing the shine of the acrylic is still very visible.  To see if I can soften it, I plop the stummel into an acetone bath.  The pictures show the progress.cap15 cap16With the stummel in the acetone bath, I return to the stem and take 240 grit sanding paper and work on the teeth chatter on the lower and upper bit. I also sand the button airhole to remove file markings and to smooth the surface.  Then I apply a dot of Hot Stuff “T” CA glue to the small dent on the shank-side edge of the stem.  I like to use the “T” for thicker, because it beads up on the divot and doesn’t run.  I wait for the superglue to cure before proceeding with more work on the stem.  The pictures show the progress. cap17 cap18 cap19Taking the stummel out of the acetone bath after about 6 hours, I place it on the desk and as the acetone evaporates I can see that the bath will need help.  With the surface softened by the acetone bath, I take 0000 steel wool and dip a small portion in the acetone and rub the steel wool over the shiny surfaces.  This finally does the job of bringing the natural briar to the surface.  Now I can see the true condition of the surface and where I may need to sand and repair.cap20I examine the stummel and invert it looking more closely at the large fill I identified earlier.  I picked at it with a sharp dental probe and dig out the loose fill.  I will need to mix a briar dust and superglue putty to refill this pitting as well as ‘top-off’ some smaller pits around the area.  The heel of the stummel is banged up good and I need to sand those out after applying the briar dust putty patches and after they cure.  I flip the stummel and study the rim.  The briar in this Capitol Prince will be beautiful at the end of the restoration because it already is!  I decide to first take a coarse 120 grit paper rolled up tightly to cut a bevel on the inner rim.  I do this to remove the damaged areas along the edge but also the Prince will look even classier with a gentle bevel enhancing an already handsome bowl.  I follow this initial cut of the bevel with 240 grit paper to smooth the surface further.  I want to apply a very gentle topping to the rim with 600 grit paper.  I take the chopping block out and place a sheet of 600 grit paper, with rim down, in a circular motion, gently I rotate the stummel over the surface.  I check the rim as I proceed to make sure I only take enough surface off to give a clean fresh look and remove minor nicks.  I follow the topping by using rolled up 600 grit paper to finish the bevel matching the smoothness of the rim.  The pictures show the progress.  I’m pleased with the look of the rim.cap21 cap22 cap23 cap24 cap25Time to mix briarwood dust and superglue to make a putty to apply patches to the hole and pits on heel of the stummel.  I take my briar dust can and with a pipe nail, scoop out some dust placing it in a little pile. Using regular clear super glue, I put a little puddle next to the briar dust.  Using a toothpick, I start adding some briar dust to the glue until it gradually reaches a putty/toothpaste-like consistency and then I apply a small dollop over the fill area.  I mash it down to make a tight patch and I leave some excess over the areas to sand down later. cap26With the stummel now out of action for the night, I turn to the stem again taking the flat needle file and freshen the button – upper and lower. I then flip the stem and again taking the flat needle file I remove the excess superglue from the patch I did on the edge of the stem – shank-side.  When the filing brings the excess superglue nearly to the surface level of the vulcanite, I use 240 grit sanding paper to blend the patch further with the vulcanite.  I follow the 240 with 600 grit paper doing the same.  I complete the patch repair by using 0000 steel wool to smooth the patch area as well as the entire stem in preparation of the micromesh polishing process.  The pictures show the progress. cap27 cap28Now for the micromesh phase, using pads 1500 to 2400 I wet sand the stem and follow with an application of Obsidian Oil to rejuvenate the vulcanite.  Following this, I dry sand using pad 3200 to 4000, followed by pads 6000 to 12000.  After each set of 3, I apply an additional coat of Obsidian Oil.  The stem looks good.  I put it aside to dry and call it a day.  The pictures show the micromesh phase.cap29 cap30 cap31Early the next morning before heading to work, I want to work on the briar dust patch applied the night before.  The superglue dust putty has cured.  I take a flat needle file and start filing on the excess mound of cured putty.  I’m careful to file down on the patch footprint only and not wander.  I take a picture illustrating the idea (#2 below).  The idea is that I gradually file the putty excess and ‘sneak up’ on the briar below the patch.  I take the filing down to the briar surface, within the patch footprint.  At this stage, I apply much less pressure to the file, moving the flat file more in a circular motion lightly over the patch footprint.  I want to blend the patched area now with the uncovered briar surface.  The aim is to remove the putty excess not take away briar.  Picture #3 shows the completion of the flat needle file’s service.  I then continue the blending with 240 grit paper expanding the area a bit outside the footprint area (picture #4).  I’m not too concerned about this because I know I have sanding to do to eradicate the numerous dents next to the patch.cap32 cap33As my wife was admiring the stummel and the briar patterns over my shoulder as I worked, she exclaimed about the face of the kitty revealed in the briar!  Raising my eyebrows to refocus my attention to the area captivating her, I see the pattern which is recorded in the picture immediately below.  She describes the two eyes, the whiskers and the forehead, probably in need of a little scratch, I thought!  So, the Savinelli Capitol Prince has a kitty, too.  Then my wife said, with not as much excitement, isn’t that a crack in the middle of the kitty’s face?  I had seen it before but it was small and it followed the contours of the grain pattern.  Yet, her question raised questions in my mind.  I believe the crack is not growing but I elect to apply Hot Stuff CA Glue to the crack just to be on the safe side.  This CA glue’s viscosity is extremely thin and perfect for shoring up cracks as it seeps into to a crack’s crevice in a way that thicker glue is unable.  However, the problem with this thin glue is that it can absolutely take off like a rabbit scampering over the briar surface not in need of CA glue.  To minimize this, I only dabble a bit on a toothpick trying to hold only a small drop at the point of the toothpick.  Then, strategically apply it to the center of the crack which spokes outwardly in four separate veins.  I find that the glue is running off the end of the toothpick because of its liquidity.  I’m finally able to capture a droplet on the toothpick and apply it to the center.  The glue spreads a bit, but I change the pitch of the stummel and use gravity to my favor.  I also use the tip of the toothpick and paint the glue over the spoking cracks by drawing the glue from the center.   The pictures show the progress of shoring up kitty’s nose and whiskers.cap34 cap35 cap36 cap37After the CA Glue cures, I take a small piece of 240 grit paper rolled so that it presents a more solid surface.  I then take the 240 roll and strategically sand the crack fix.  I keep the roll within the shiny patch footprint with a view of removing glue off the surface and to avoid losing briar as collateral activity.  I then take a medium grade sanding sponge and work the patch areas (crack and fill) as well as the multitude of dents on the stummel, but especially on the heel of the stummel.  As I work on bringing out the imperfections set in the briar, the thought surfaces in my mind that I had adopted an approach to this pipe, it’s shape and demeanor, going for of a more pristine look – the look of a pipe that is the favorite of royals.  A pipe having a quietly, self-confident posture, but elegant and humble.  It has a kitty, too!  Some pipes seem more of a rugged disposition and seem to beg for some imperfections as badges of past challenges in life – this Savinelli Capitol Prince says, “Please, put a crease in my trousers” –  or, as it seems to me! The pictures show the progress.cap38 cap39 cap40With the primary patches completed and dents smoothed and blended, I take micromesh pads 1500 to 2400 and wet sand the stummel.  I wet sand with the first set of three because it seems the effect of the water on the briar would soften it a bit, and it seems to give the micromesh pads more bite.  This helps removing any imperfections/dents left over from all the previous sanding.  The latter pads serve to polish what is there more than address imperfections.  Well, I was just thinking about smartly pressed trousers when I finish sanding with the first set of micromesh pads, set to take a picture, when I see that the kitty’s eye had changed.  He appears to be winking at me!  I discover whatever was in the eye before (a small fill?) was no longer there and I am looking at a new royal pit. The latter micromesh cycles must wait as I apply a new ‘T’ Glue patch on the new pit and wait for it to cure and sand and blend it.  So, now the kitty has a black eye.  The pictures show the pause in progress.cap41 cap42When the CA Thick glue cured, I filed it down with a half-circle needle file to the surface and fine-tuned it with 240 grit paper.  I follow this by addressing the patch area with 600 grit paper then 0000 steel wool. cap43 cap44To catch up this patch area with the rest of the stummel, I use micromesh pads 1500-2400.  At this point I return to the micromesh process with pads 3200 to 4000.  I notice the initial fill patch on the heel of the stummel with the micromesh polishing had lightened a bit.  I take a dark walnut stain stick and dab it in the fill patches then I use a cotton pad with some alcohol and press it a few times to blend and lighten the stain stick application.  It looks better now.  I finish with micromesh pads 6000-12000 to further blend the stain stick patch as well as the micromesh phase.  The pictures show the progress.  The grain is looking very good.cap45 cap46 cap47Time to decide.  I have yet to decide upon the next steps – whether to move forward with the natural briar or to apply a stain.  This question I put off to the conclusion of the micromesh phase so I can evaluate the briar’s presentation and the pipe’s personality.  I rejoin the stummel and stem to get a look at the big picture.  Decision made.  Using Fiebing’s Light Brown Leather Dye I mix 1 part dye to about 4 parts isopropyl 95% in a shot glass – aiming for a lighter cast.  I detach the stem and mount the stummel on a cork to handle the stummel.  After wiping the stummel with a cotton pad and alcohol, I heat the stummel with my wife’s hair dryer to expand and open the briar to the dye application.  Using a folded over soft pipe cleaner I coat the stummel with the 1 to 4 dye mixture liberally and immediately flame it with a lit candle waiting for that use.  The alcohol burns off very quickly setting the dye in the grain.  In about 4 or 5 minutes, I repeat the process and set the stummel aside for the night to rest – I as well as the newly stained stummel.  The pictures show the progress.cap48The next morning, anxious to see the results of the newly stained stummel.  Taking the Dremel with the attached hand-held extender, I mount a new felt wheel on the extender, set the Dremel on the lowest RPM setting, and apply Tripoli compound to remove the flamed dye crust to expose the surface.  I’m liking the color a lot and the grain has responded very well.  As I move through the Tripoli process I identify an eye-sore – at least to me.  Circling the outer rim edge is a black ring which the felt wheel charged with Tripoli is not removing.  The second picture I take after focusing the Tripoli wheel for some time on the ring itself, hoping to lighten and blend the black ring.  To me, the ring is unattractive and detracts from the overall appearance of the pipe.  The thoughts floating in my mind at this point are, that it is simply darkened stain at that point that a wipe of alcohol might lighten.  Another, less appealing thought is that this ring was produced by the flaming and perhaps scorched this most vulnerable part of the rim.  I’m thinking that it wasn’t the dye on the rim itself which burned off, but the overflow of dye on the cork that also had burned off did the deed.  I’ll need to check into this with Steve!  My methodology needs a revamp if this is the case.   The pictures show the issue.  The final picture shows the beginning of my corrective approach.  With an approach moving from conservative to less so, I spend more time focusing on the rim with the Tripoli felt wheel buff.  When this did not achieve the desired results, I take a cotton pad with some alcohol in it and wipe strategically around the outer edge of the rim, hanging over the outside slightly.  I do a few cycles around the circumference of the rim with the alcohol then follow again with the Tripoli buff to do a follow-up blending.  When this did not achieve the desired results, I tightly roll a piece of 240 grit paper and lightly make a quasi-bevel cut on the outer edge of the rim to remove the scorched briar.  The results of this are pictured below.  Not pictured is the rest of the process.  I followed the 240 grit with a rolled piece of 600 grit paper – as with 240 bevel, staying directly on the edge.  Then, I jump to mid-range micromesh pads 4000 to 12000, and smooth, polish and blend the outer rim area.  While the tendency for perfectionism would have me try something else, the rim looks much, much better and if I didn’t record this excursion here, 99% of onlookers would not see an issue!  cap49 cap50I move on to complete the polishing process by attaching the Blue Diamond felt wheel to the Dremel hand-extender and working this lesser abrasive compound over the briar surface.  Completing the compounds, I wipe/buff the stummel with a cotton cloth to remove left-over compound dust before moving to apply the wax.  I reunite the stem and stummel of the Savinelli Capitol Prince.  After mounting a cotton wheel to the Dremel, I increase the RPMs to the next number and apply several coats of carnauba wax to the stummel and stem.  After the carnauba wax application, I mount a clean cotton wheel with the same RPM setting on the Dremel as with the carnauba and provide a clean wheel buff to the entire pipe.  Finally, I give the pipe a rigorous hand-buffing with a micro-fiber cloth to deepen the 3-dimensional-appearing gloss already shining through this happy piece of briar.
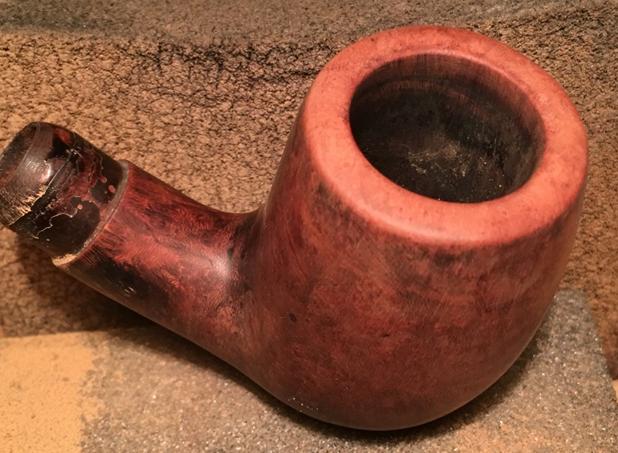
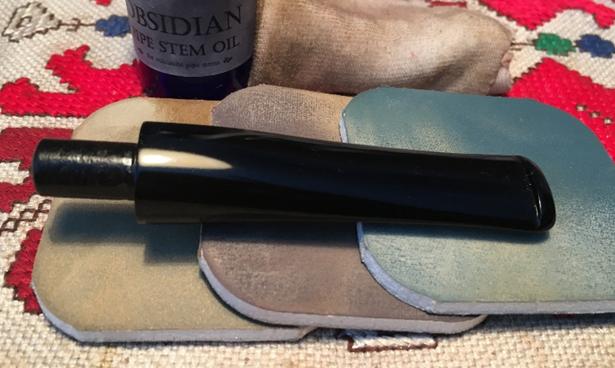
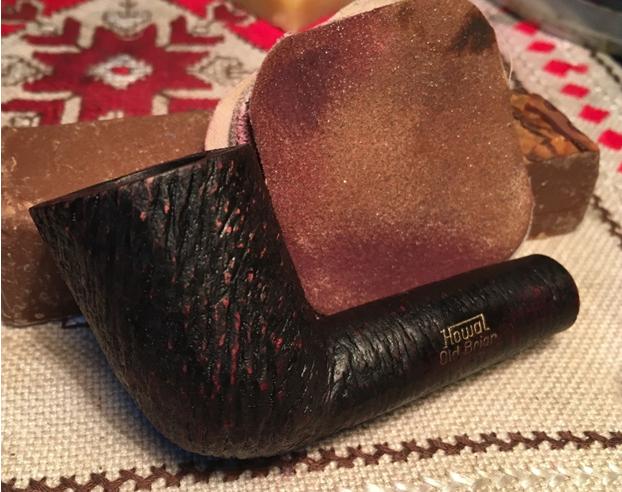
The grain on this small Prince bowl is captivating with larger bird’s eye on the front, splaying fans on the heel, and of course, a kitty with whiskers fanning out as he gazes up the shank and stem at his steward – or should I add, stewardess!  The diminutive size of the bowl along with the longer-than-expected sleek shank and stem, would make this Savinelli Capitol Prince – a preferred shape to at least one royal, a wonderful addition to any pipeman’s or pipelady’s collection.  Thank you for joining me!cap51 cap52 cap53 cap54 cap55 cap56 cap57