Blog by Paresh Deshpande
About two years back, I had worked on the only Gourd Calabash pipe that I had inherited, a 1912 William Harrison, and posted it on rebornpipes. I had smoked this pipe after it was restored and was amazed at how different the smoking characteristics of a gourd are when compared to a briar or a meerschaum pipe. Since then I was on a lookout for some good quality and condition gourd calabash estates and snagged a couple at very competitive rates. This is the first of the two gourd calabash pipes that is now on my work table.
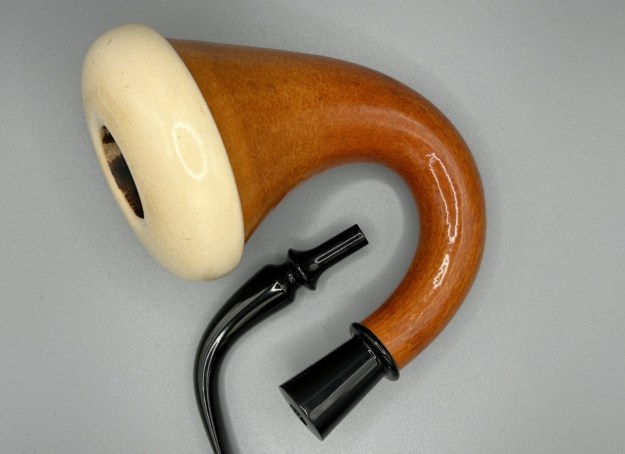
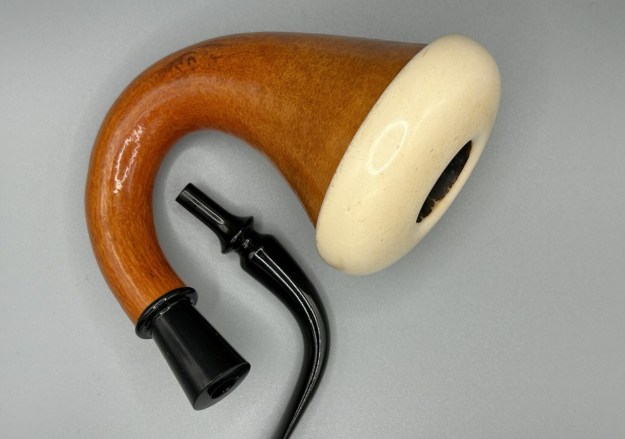
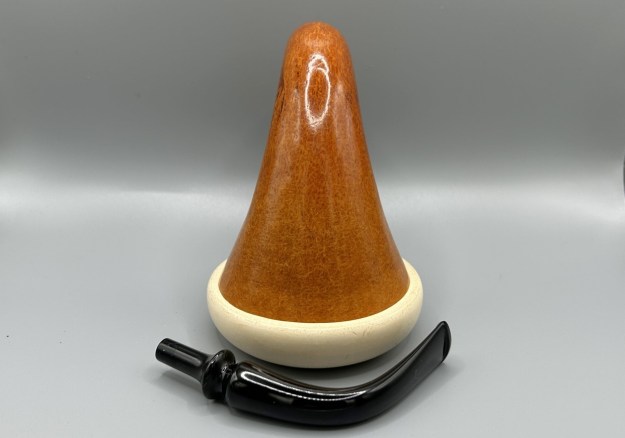
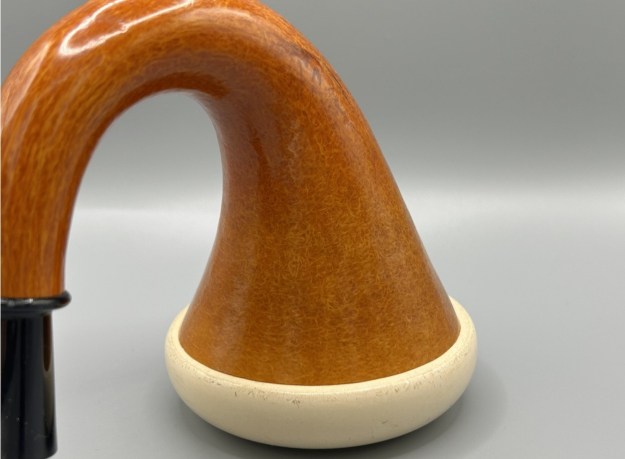
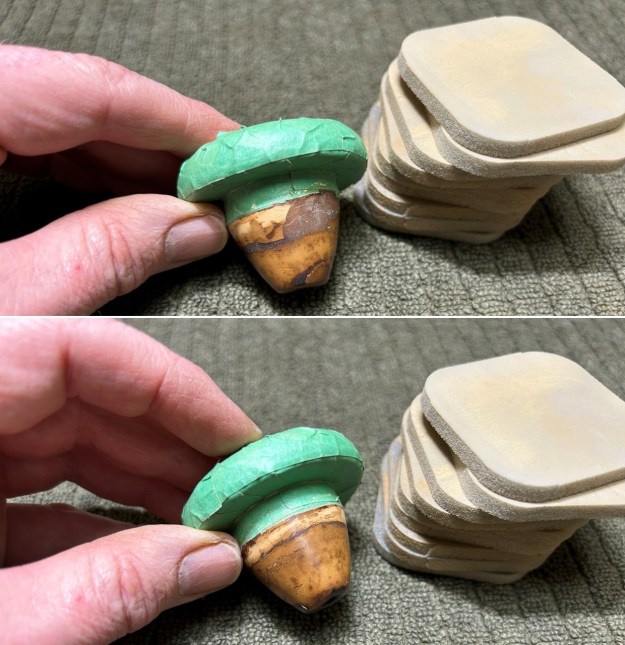
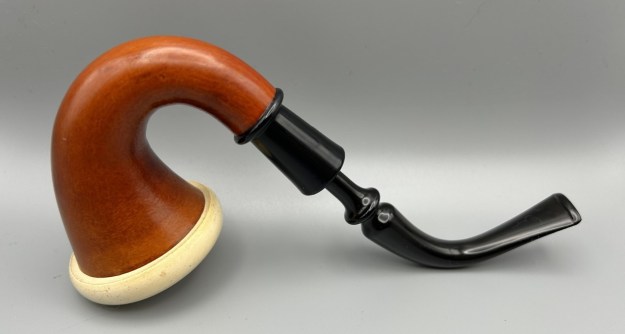
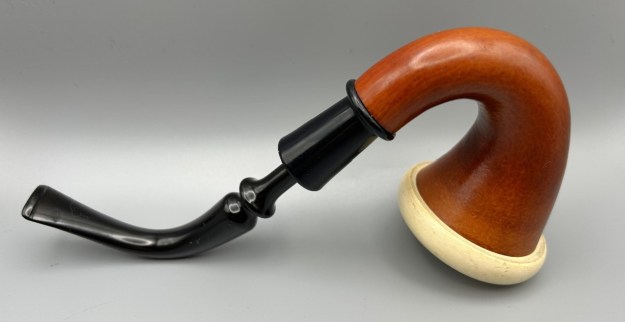
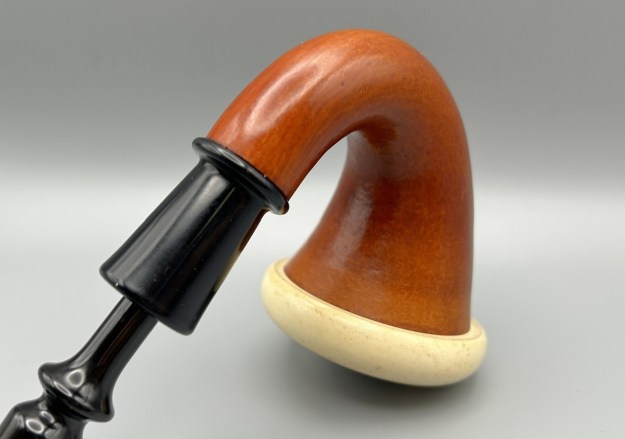
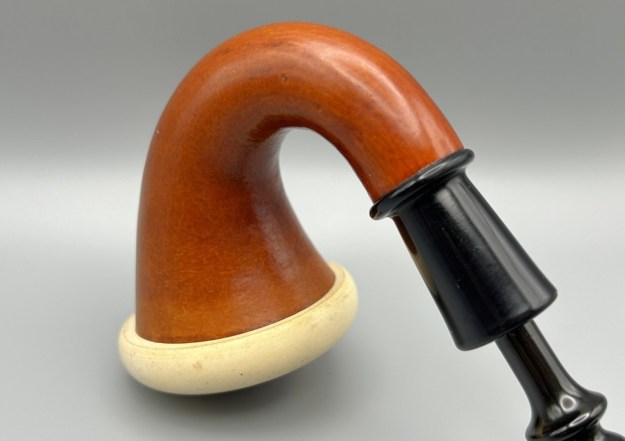
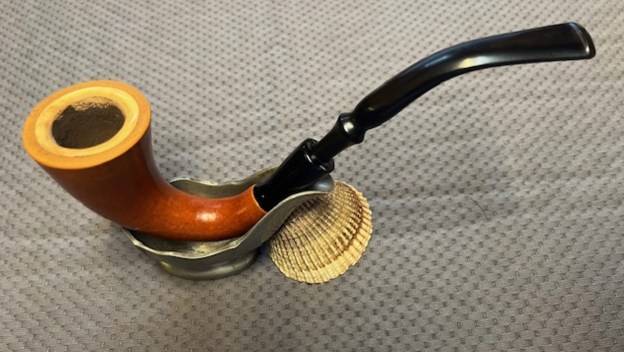
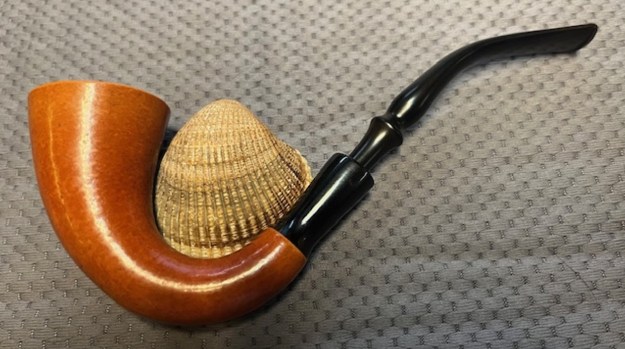
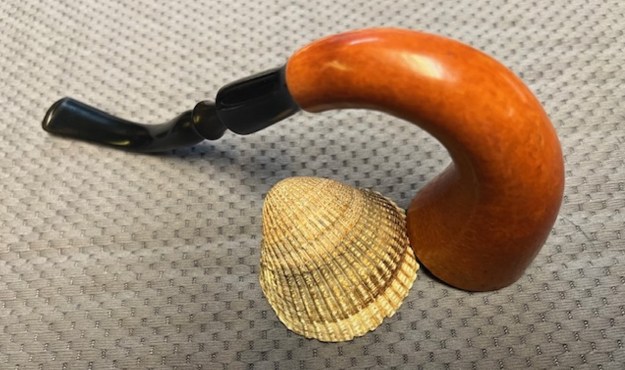
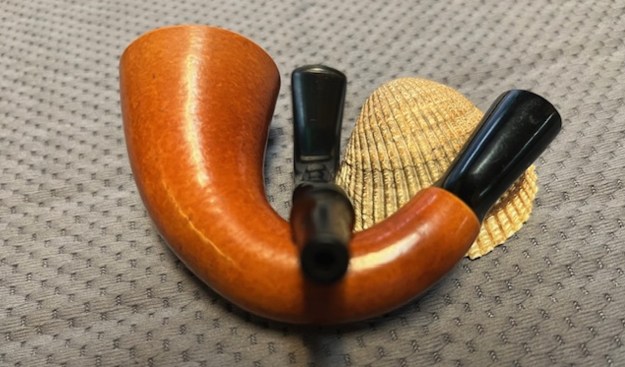
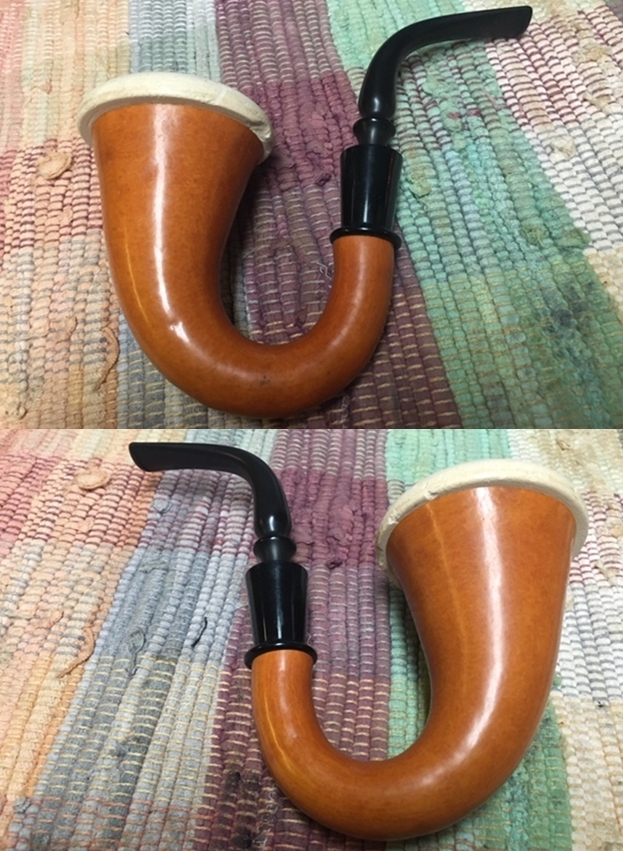
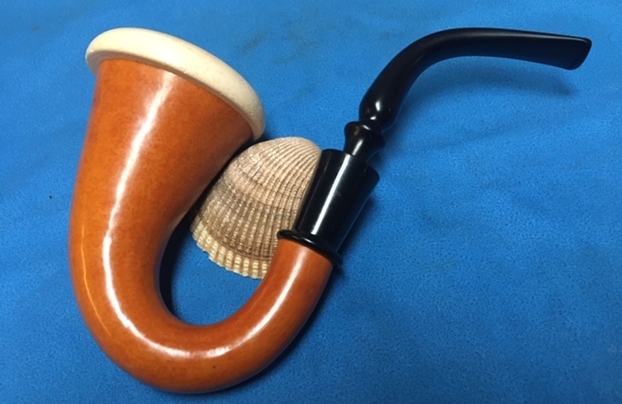
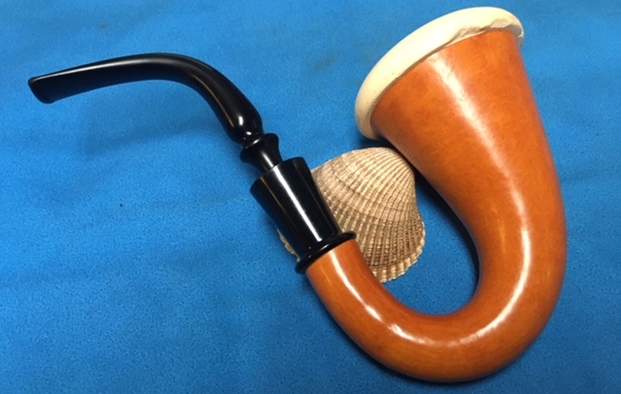
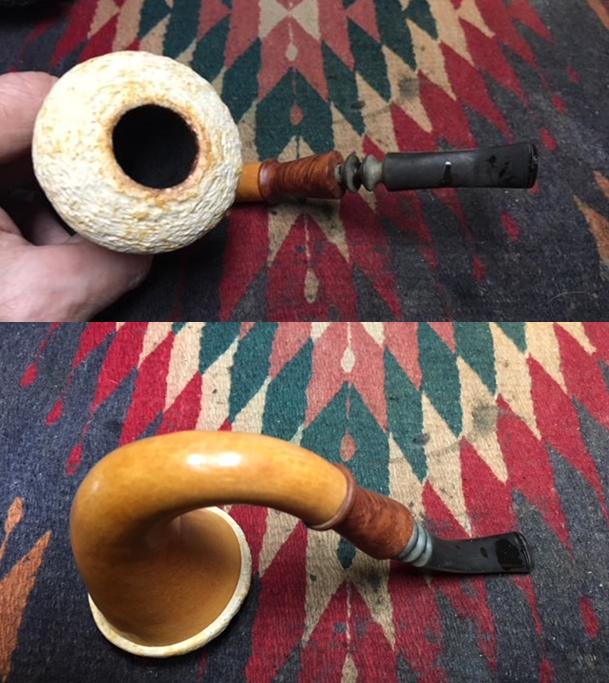
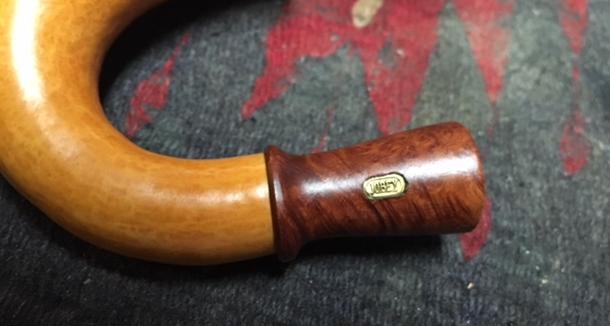
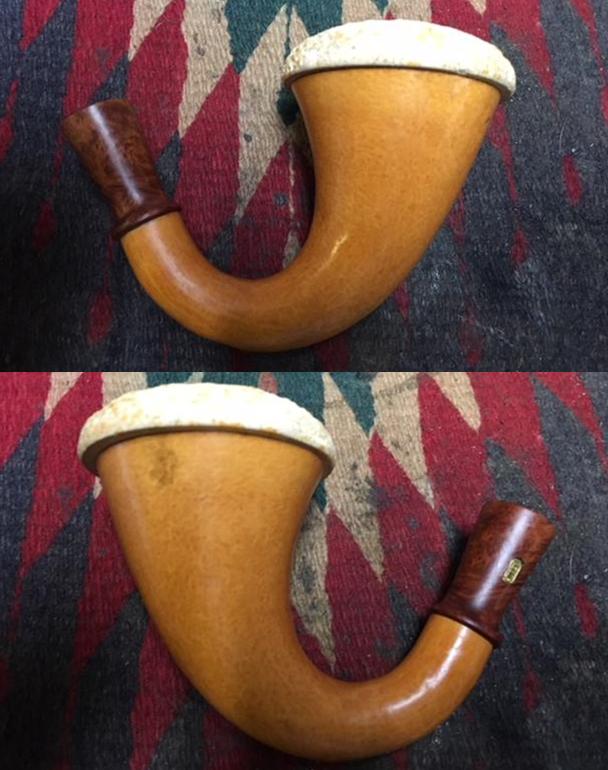
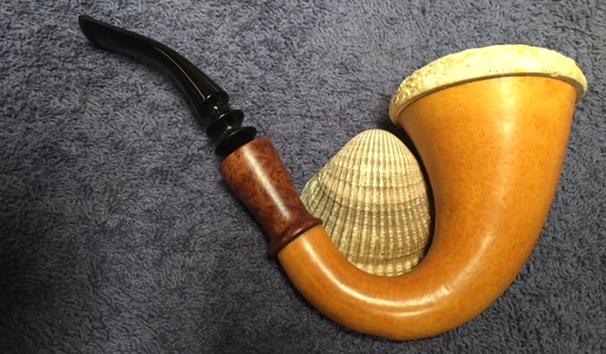
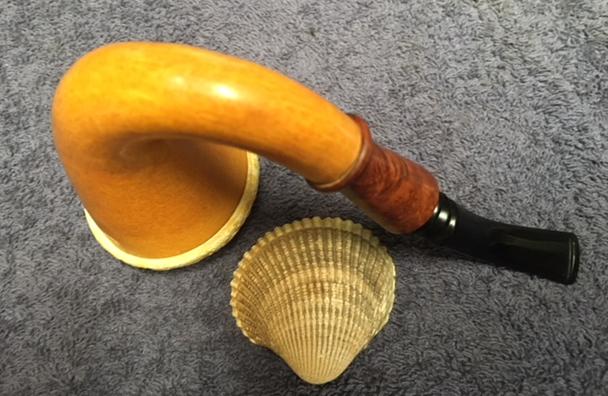
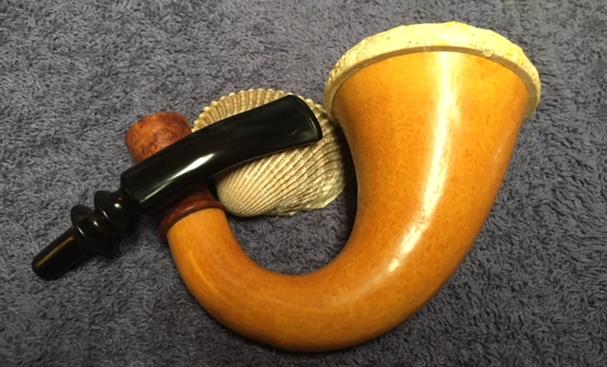
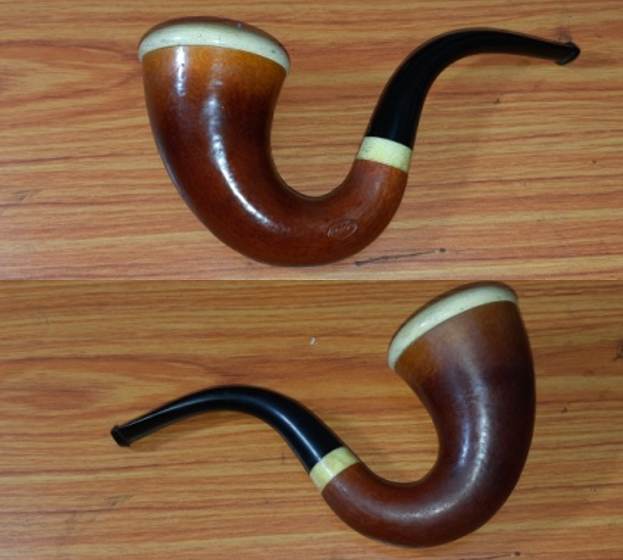
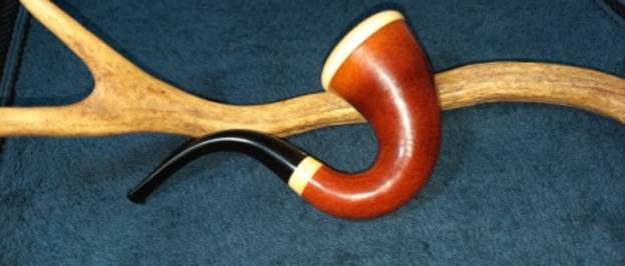
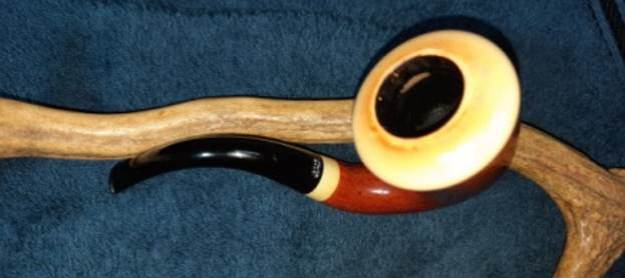
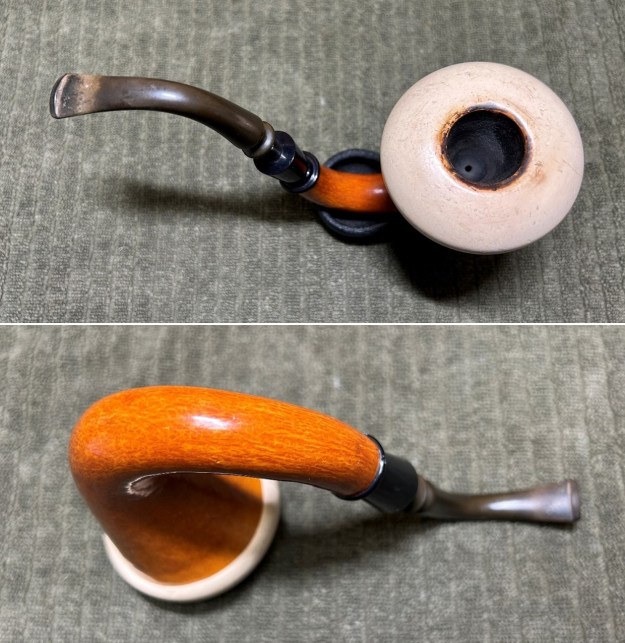
This medium sized gourd calabash came in its original case. The case and the pipe it housed are in good shape and appears to have been well looked after. There is a beautiful ivory colored band with argyle patterns at the shank end that lends it a classy high end feel. It is stamped on the left side of the gourd as “KAROO” in an oval. There is no other stamping seen on the gourd. The vulcanite stem with a threaded bone tenon is stamped on the upper surface as “LONDON” over MADE”. There are no other stampings seen on either the gourd or the stem.  The only knowledge about the pipe I had was that KAROO was an arid region of South Africa where these gourds were grown. However, there was no information on the brand KAROO that was available either on Pipedia.org or pipephil.eu. I couldn’t find any information on this brand even on rebornpipes!!
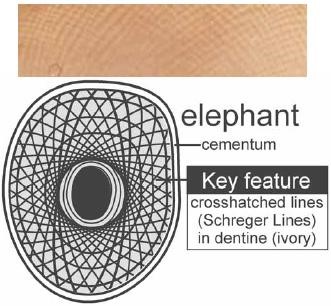 I messaged Steve and shared pictures of this gourd calabash pipe with him. He sent me this link to Pipe Club of London which had information on this brand and the same is being reproduced further down in this write up. There was an interesting discussion on the band that was at the shank end. The possibilities ranged from the band being made of hardened plastic or Bakelite or bone or even African Ivory. However, it was the evenly arranged argyle patterns that made us think on the lines of the band being of some high grade and quality material. Abha, my wife, took close up pictures of the band and patterns and she got on the task of researching the material of the band on the internet. Her research conclusively proved that the band is an Elephant Ivory. Here is the link to a site that was particularly helpful in supporting her conclusions. (https://www.realorrepro.com/article/Ivory-genuine-fake–confusing).
The argyle patterns that I had been mentioning all through are, in fact, Schreger Lines and the patterns perfectly match the ones seen on the shank end band. Having confirmed that the shank extension is elephant ivory, it was time to search for the brand KAROO.
I searched the net as suggested by Steve and found this snippet of information on Pipe Club of London (http://pipecluboflondon.com/members-pipes/calabashes/karoo-calabash/) and reproduce the same information for the benefit of the larger pipe community.
 Calabash gourds (“bottle gourds” – were grown on the Little Karoo River in South Africa by Boer farmers who exported them – cut & dried – to England for fitting with bowls and mouthpieces. The heyday of the calabash was 1905 to 1915 after which the briar began to steal the spotlight.
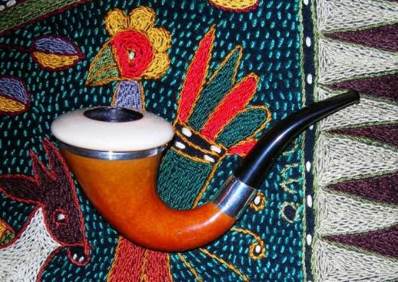
From the Johnny Long collection PCoL #UK603F – pictured on a handmade South African tapestry. Below – the Karoo brand & hallmarks.
There was no further information lead that was worth following that would establish the provenance of this pipe. All that I can say with certainty based on the threaded bone tenon, oval slot at the stem end, Elephant Ivory shank extension and the information reproduced above, this pipe has to be from the early 20th Century, maybe prior to 1920s.
This time period is just a ”guesstimation” and any input from the knowledgeable Readers on this brand and dating is most welcome.
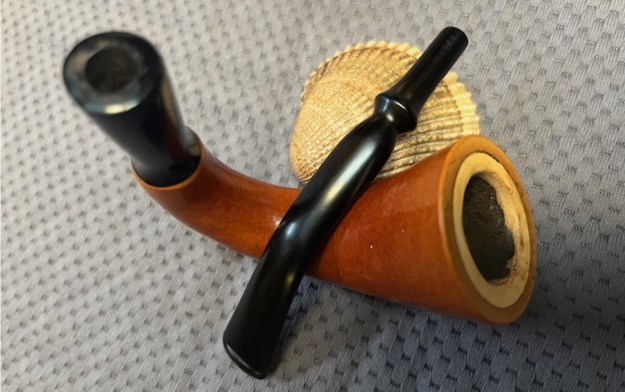
Initial Visual Inspection
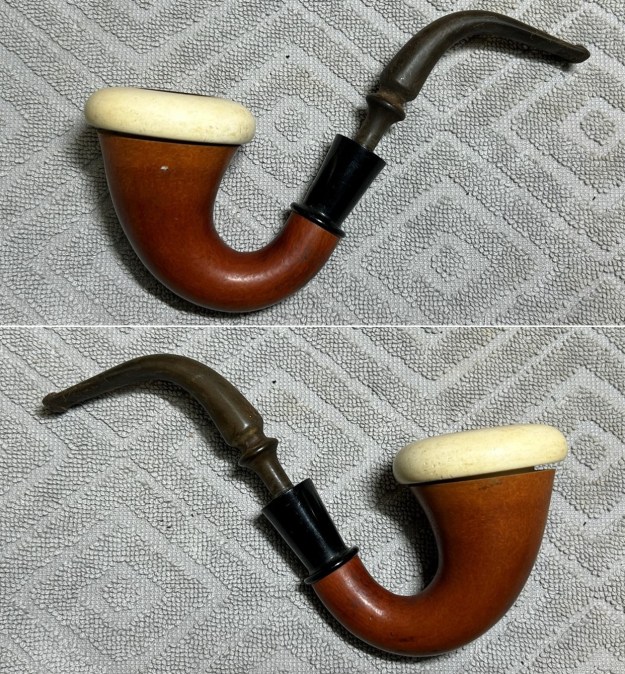
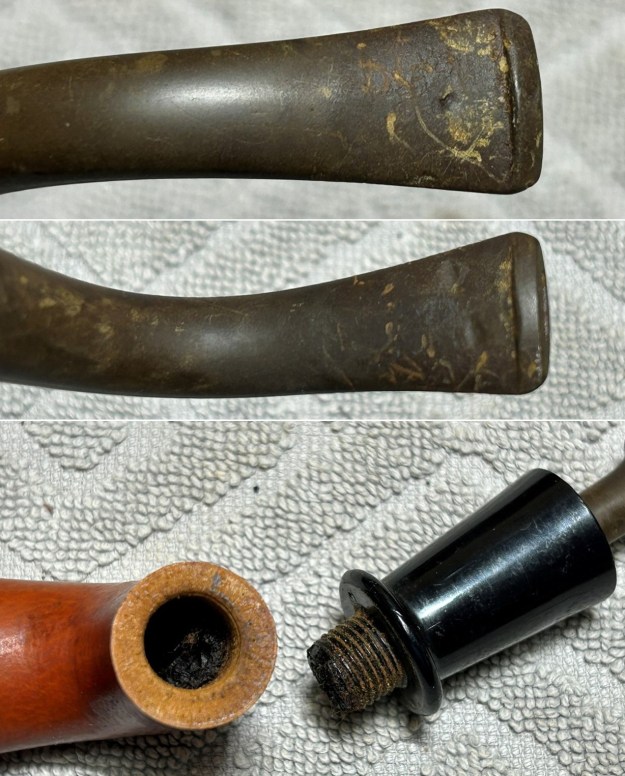
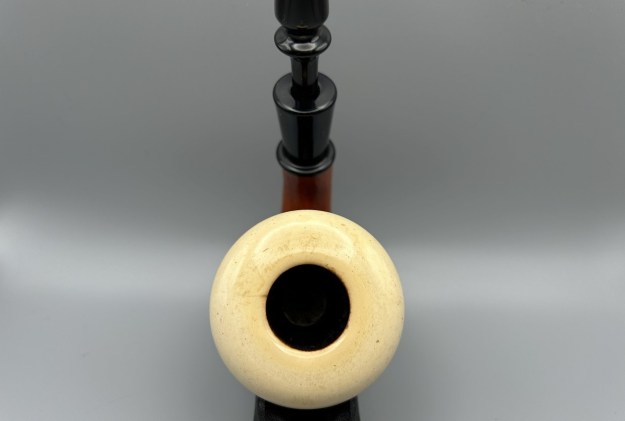
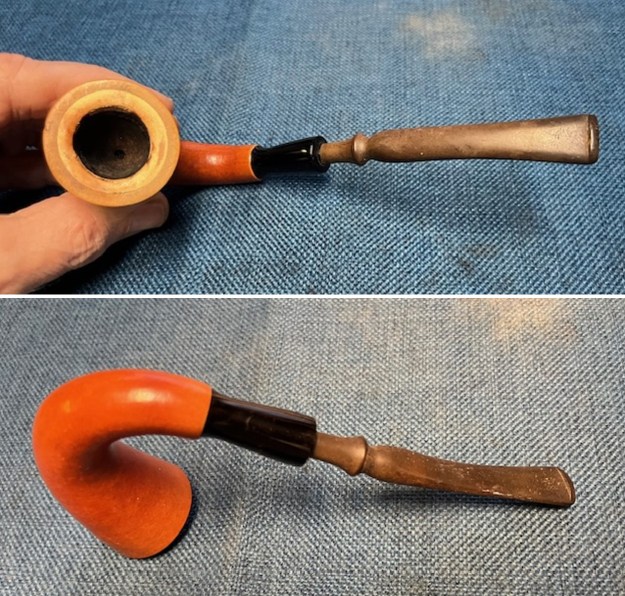
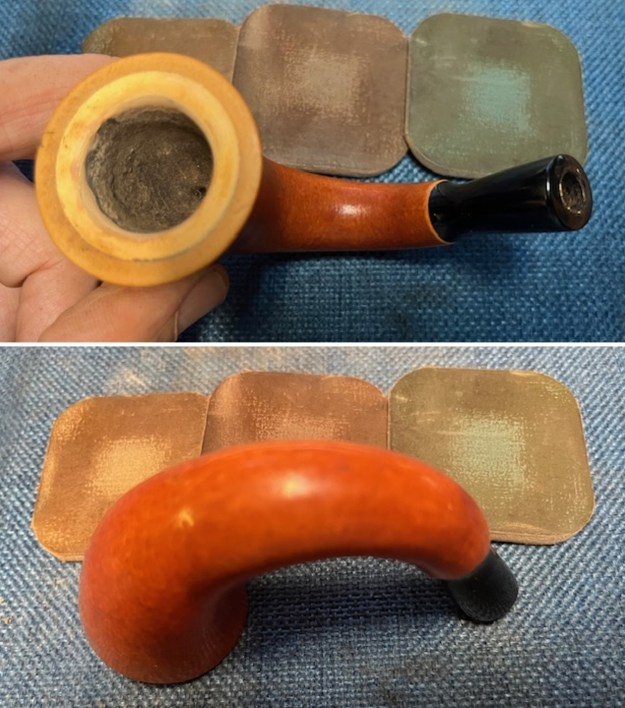
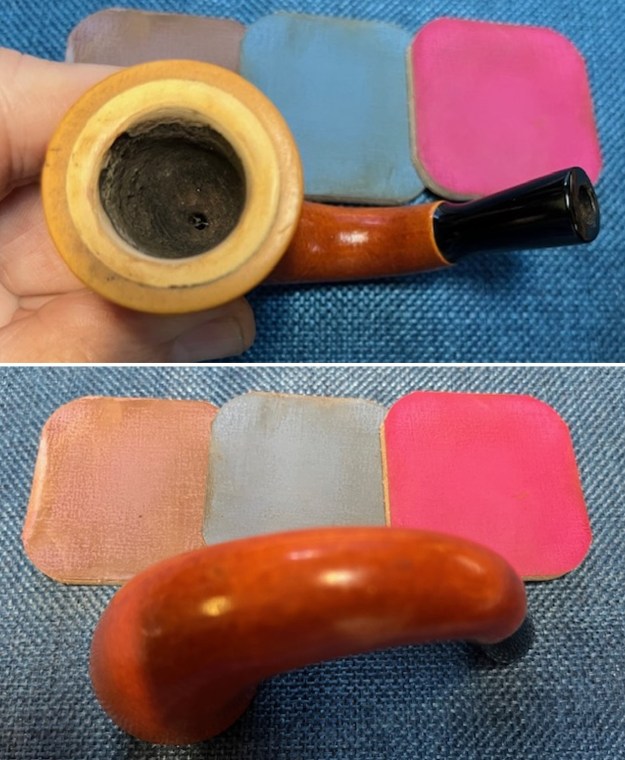
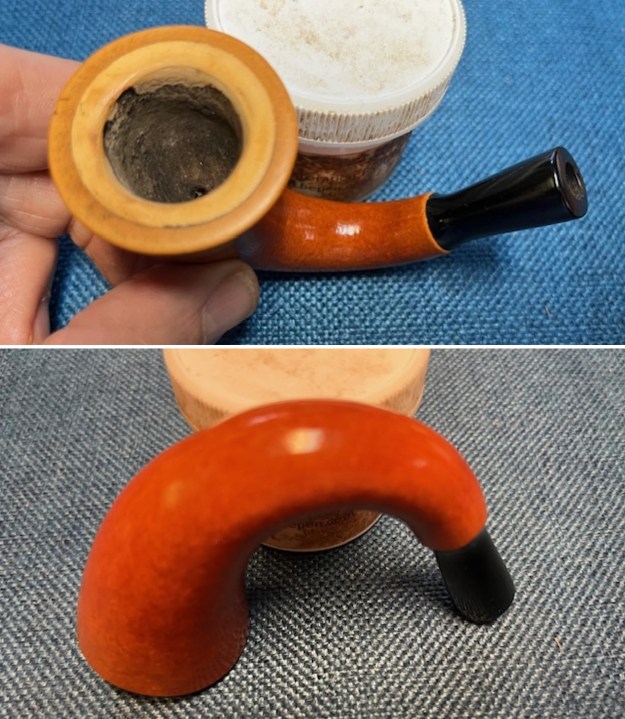
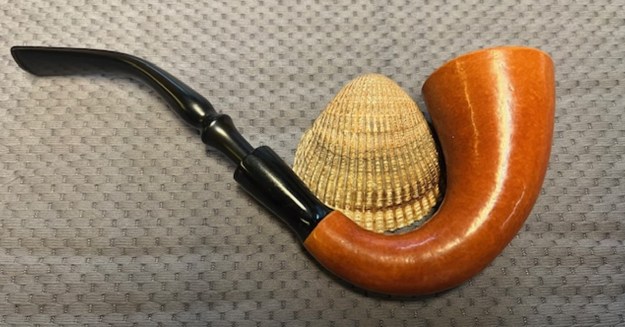
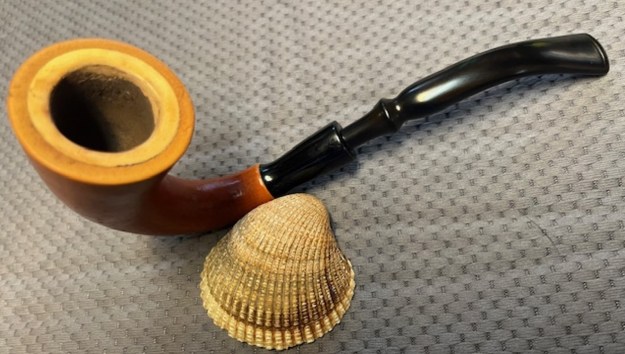
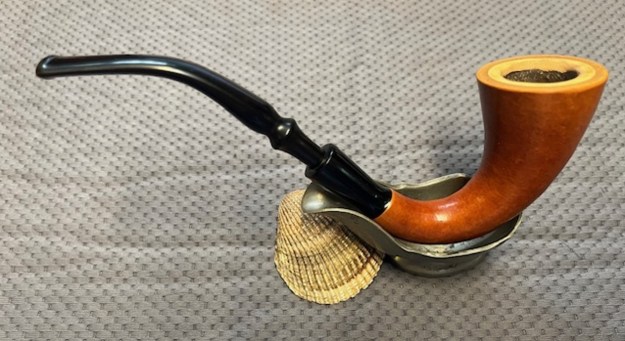
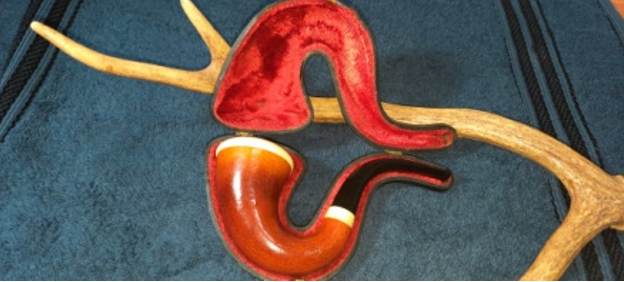
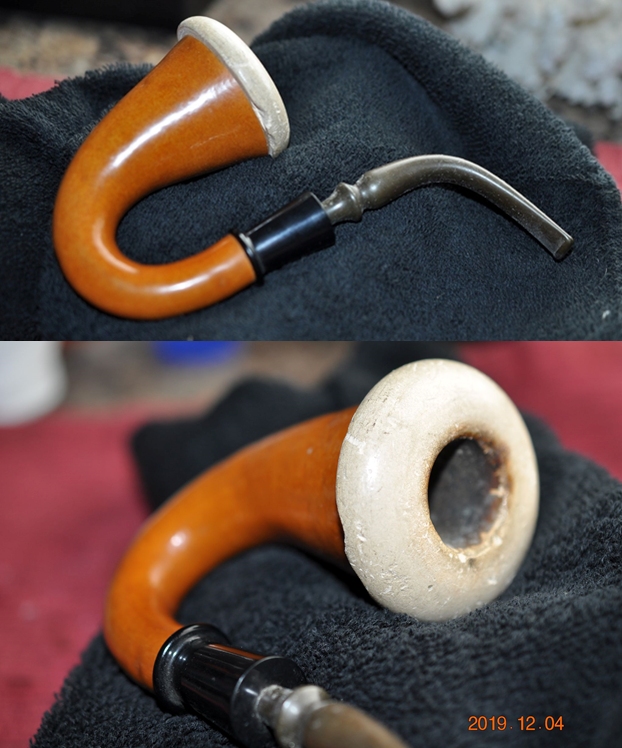
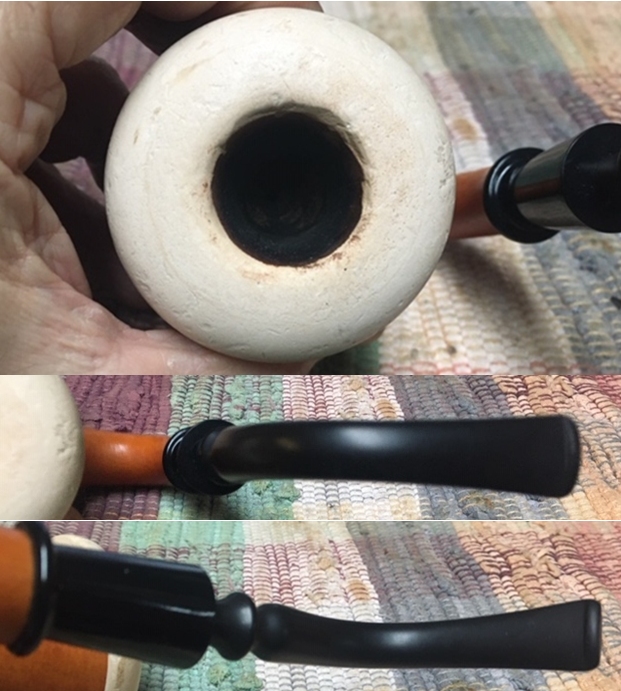
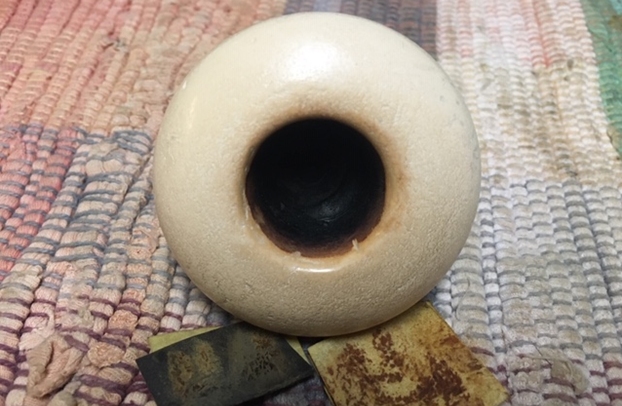
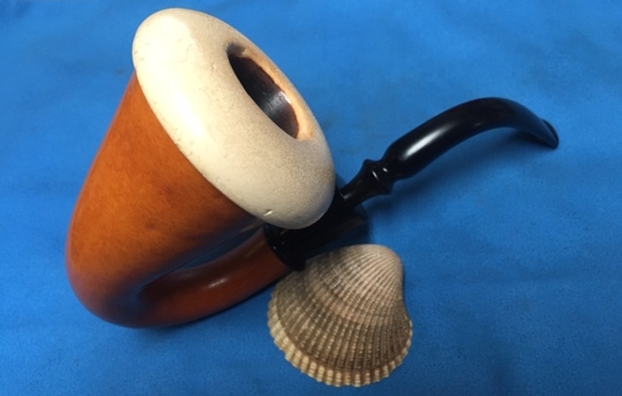
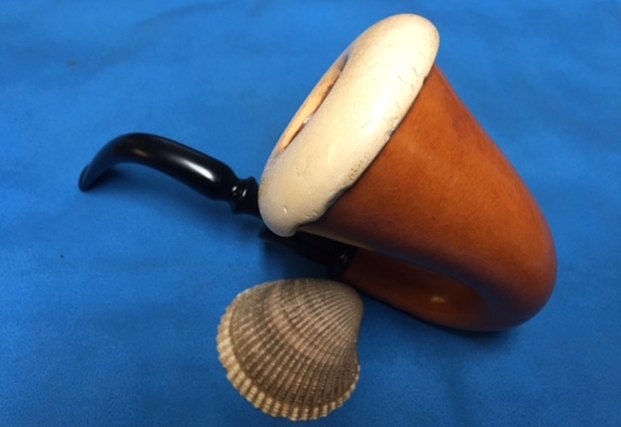
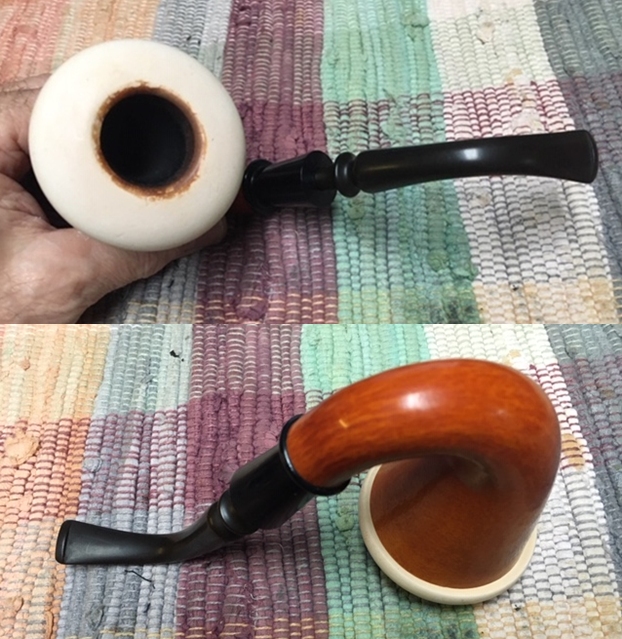
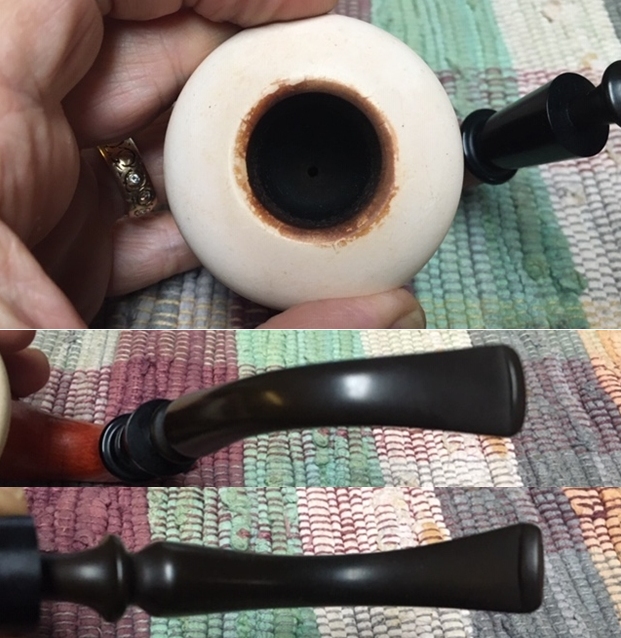
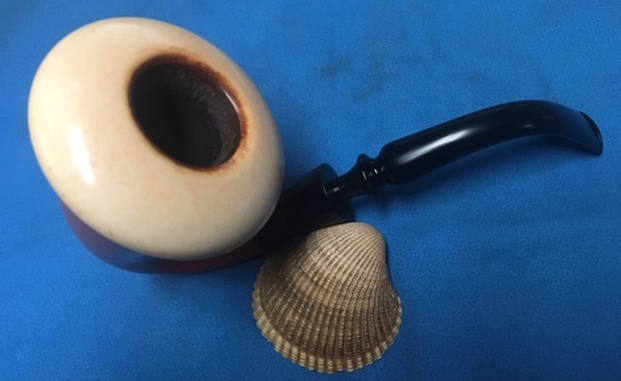
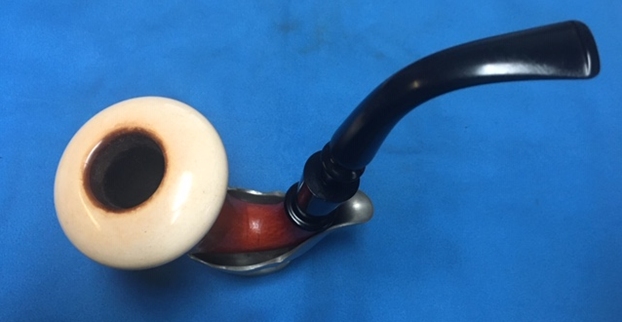
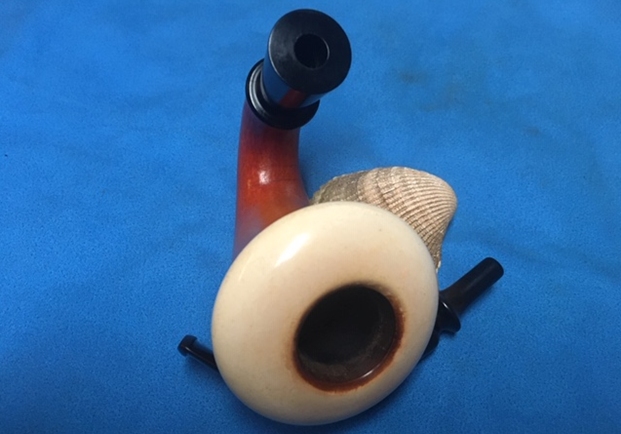
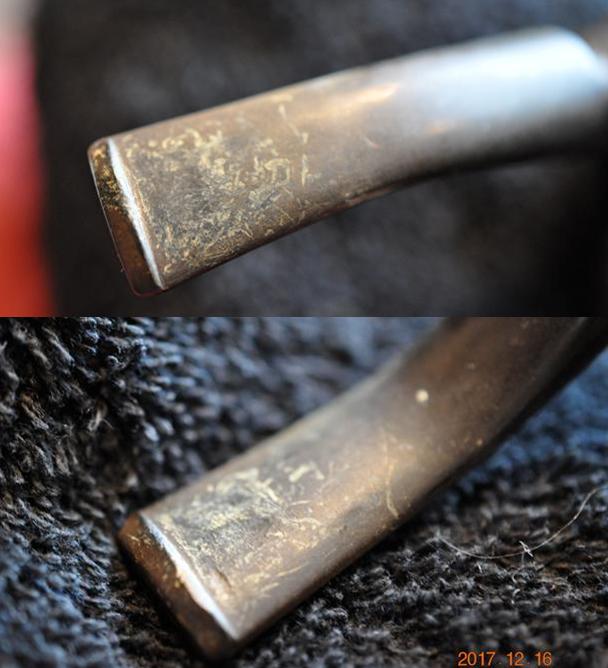
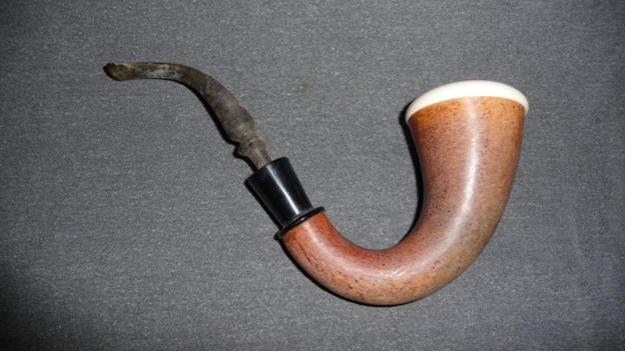
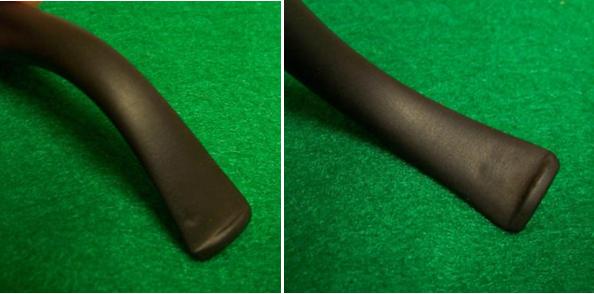
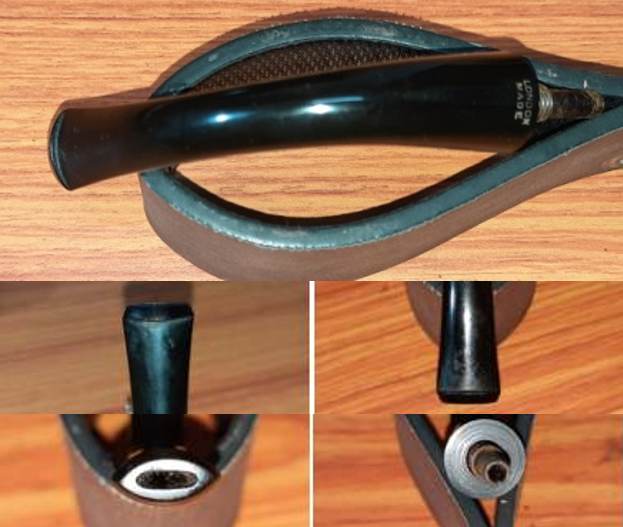
The case and the pipe appear to be well cared for. The case has functional hinges and clasp and closes with a reassuring click. The surface leather on the case is also intact and in good condition. The red velvet internal lining of the case is stained at the place where the rim and mouthpiece rests inside the pipe. There is a lot of debris in the nooks and corners of the case. The pipe sits perfectly inside the case. The gourd has taken on a dark color and its surface is dust covered and dirty. The meerschaum cup has a decent layer of even cake with a darkened rim top that has traces of lava overflow. There are a few minor superficial scratches over the meerschaum cup. The stem is oxidized, has tooth chatter/ bites marks in the bite zone and is under turned to the right. Overall, this old timer has been well looked after and is in great shape considering its perceived age.
 Dimensions Of The Pipe
Length: 5.6 inches
Height: 2.8 inches.
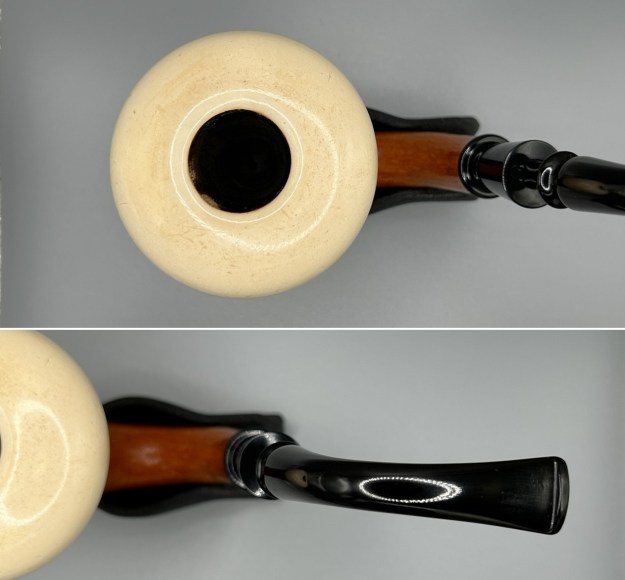
Diameter of the porcelain cup: 1.8 inches.
Diameter of the chamber: 0.9 inch.
Depth of the chamber: 1.3 inches.
Detailed Visual Inspection
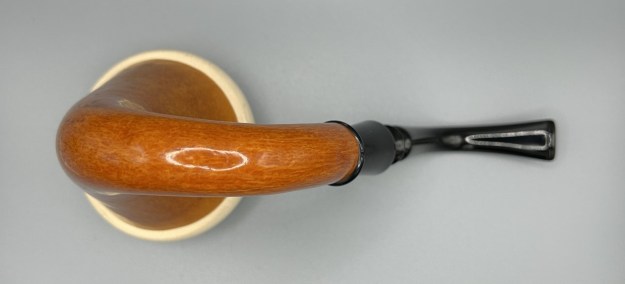
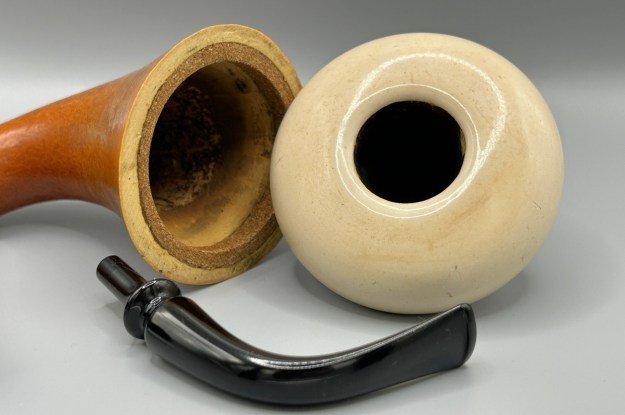
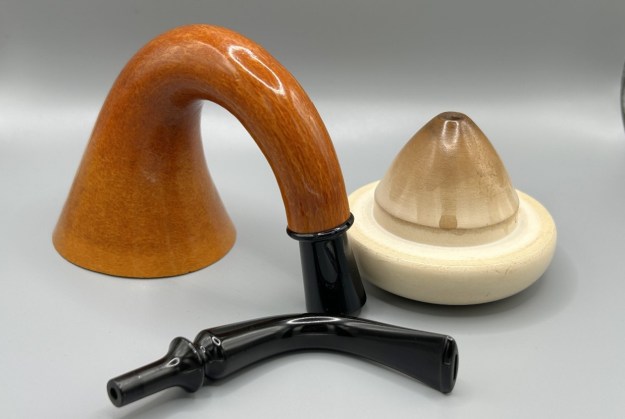
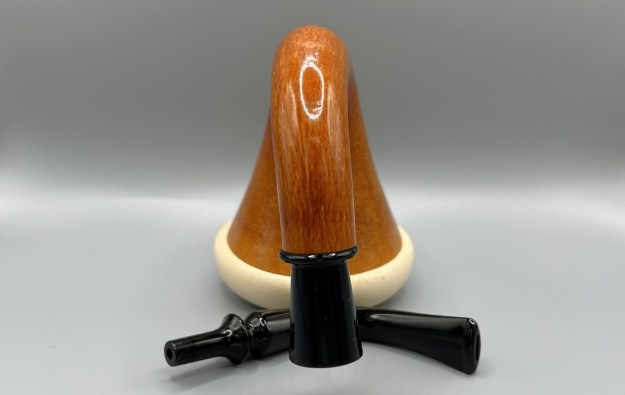
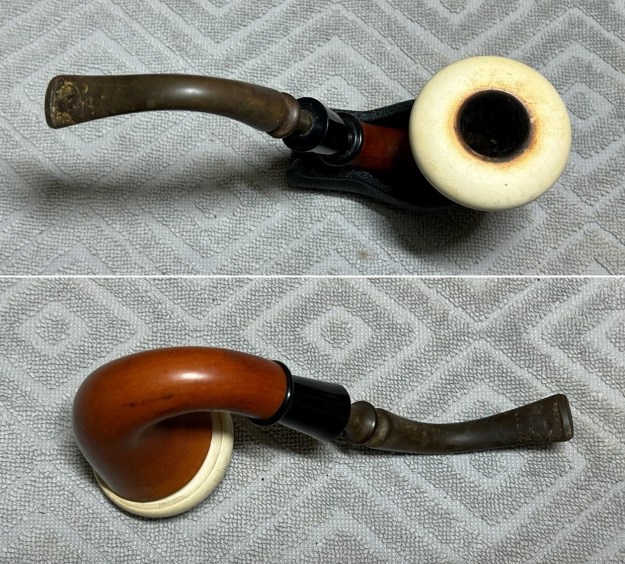
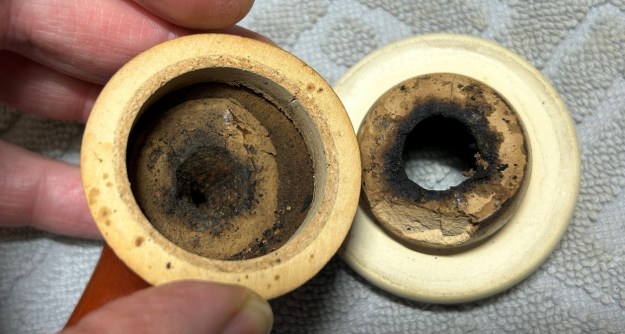
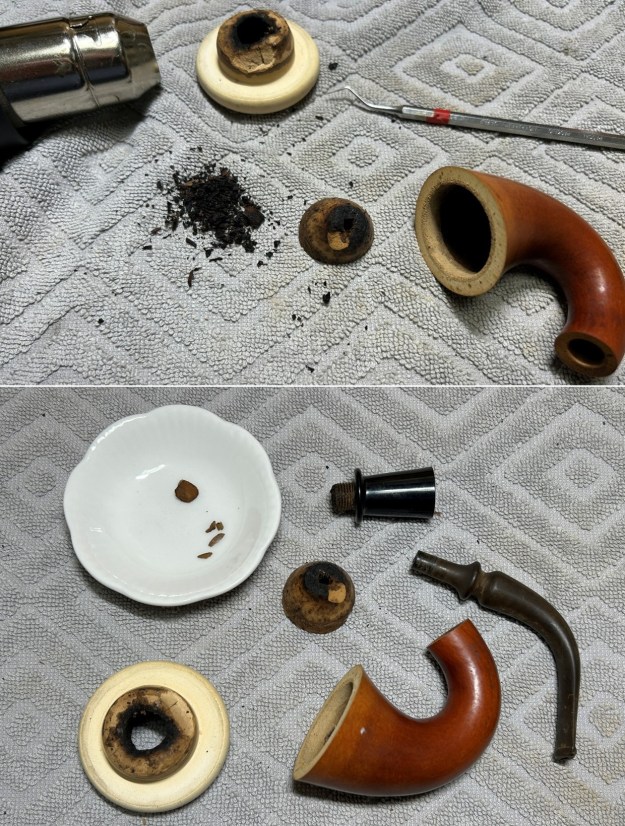
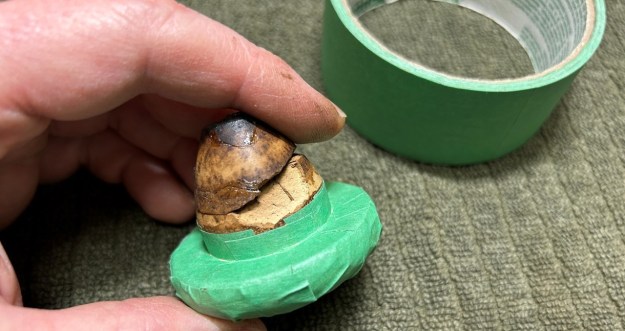
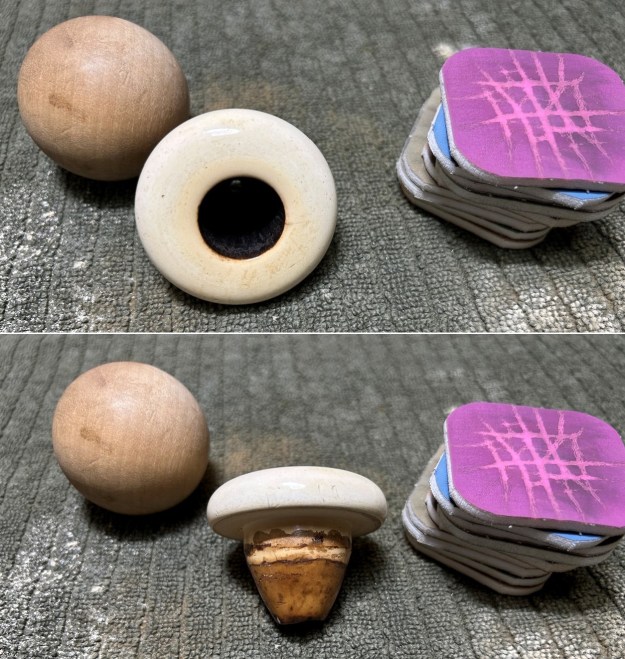
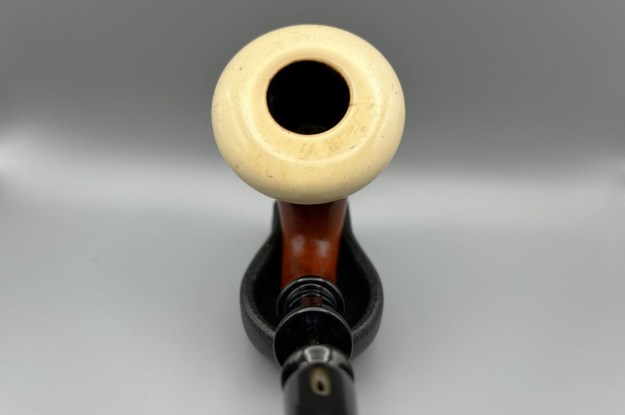
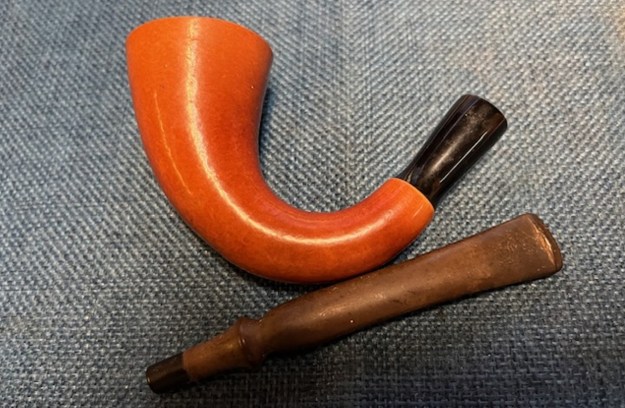
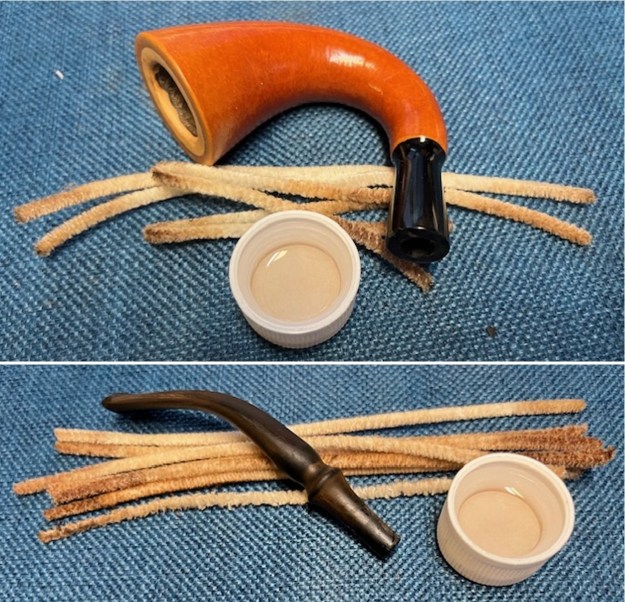
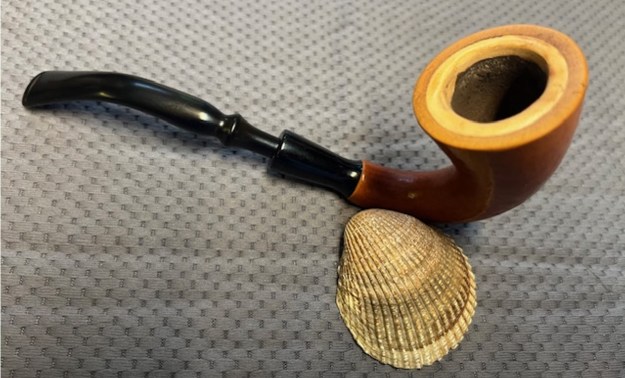
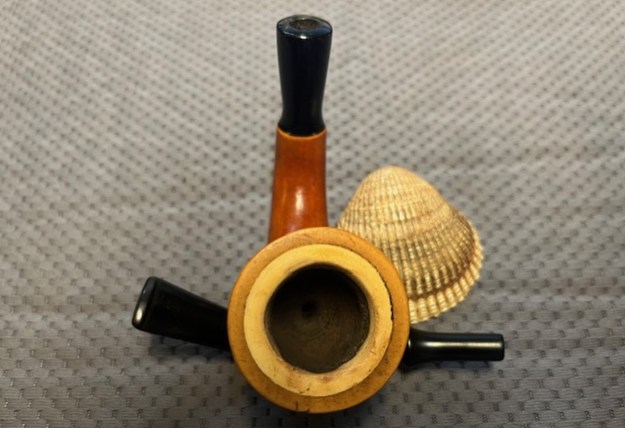
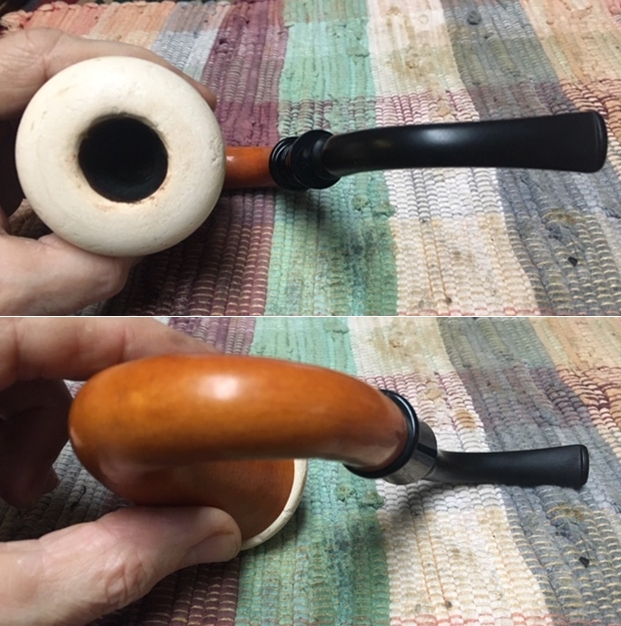
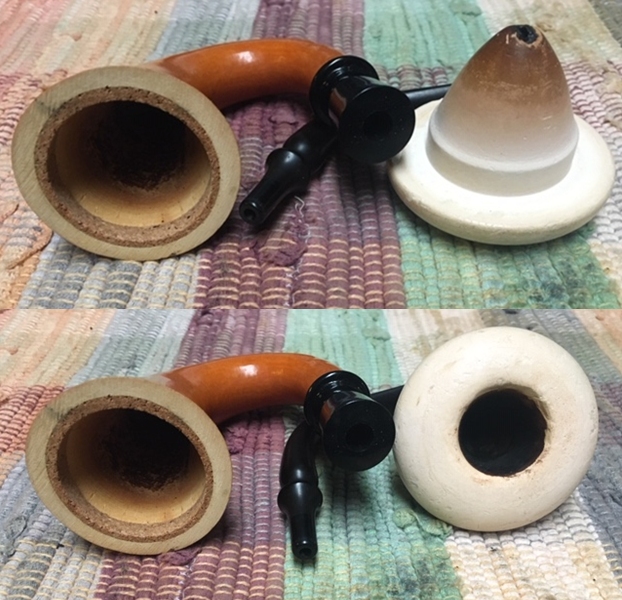
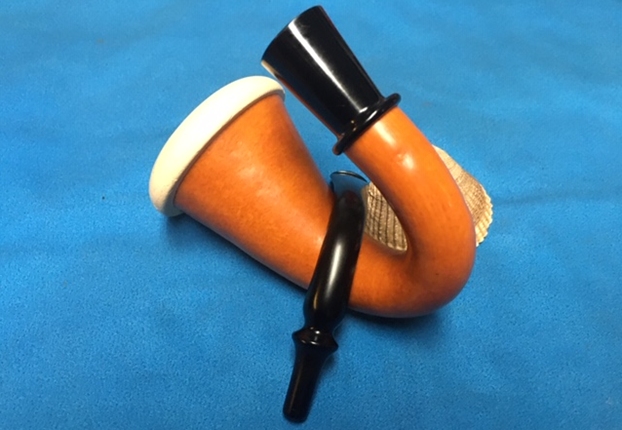
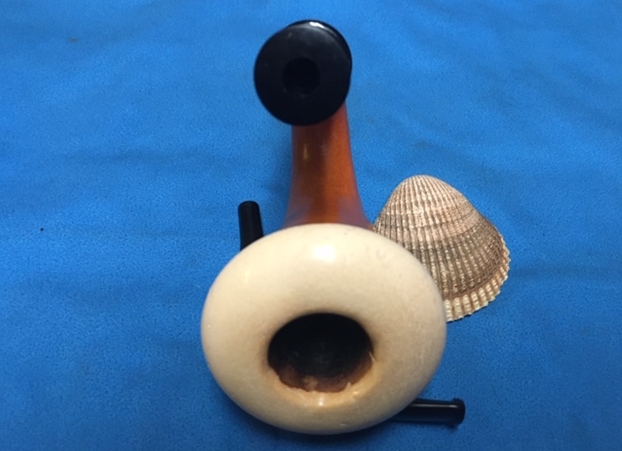
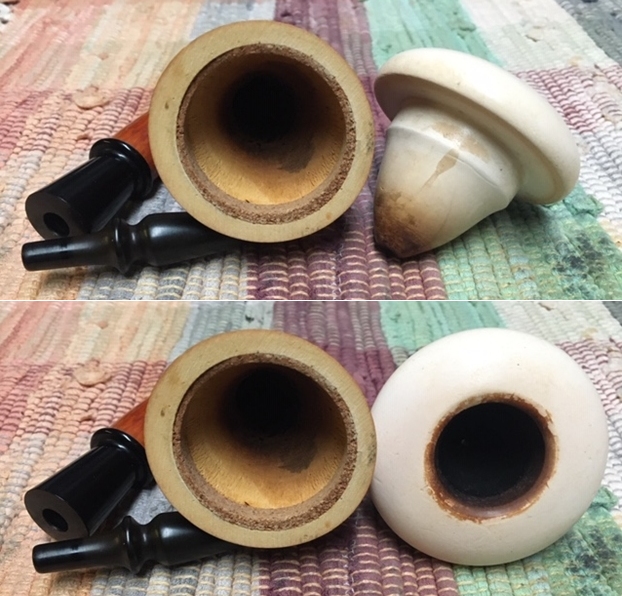
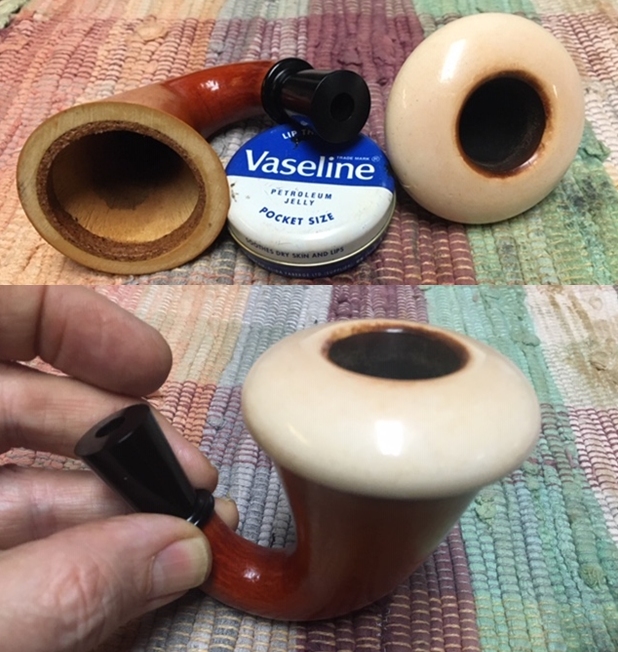
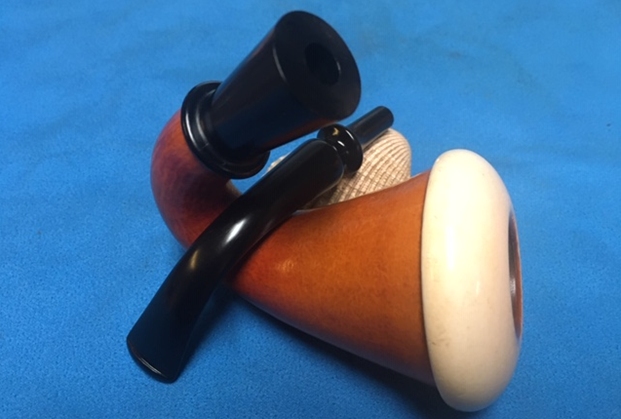
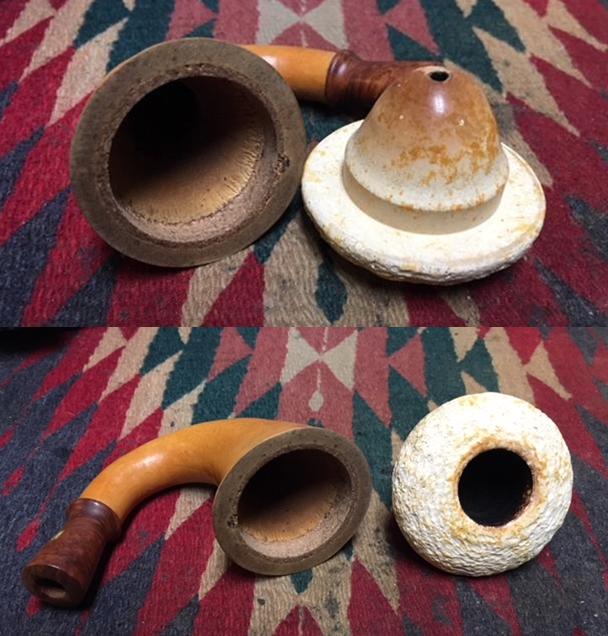
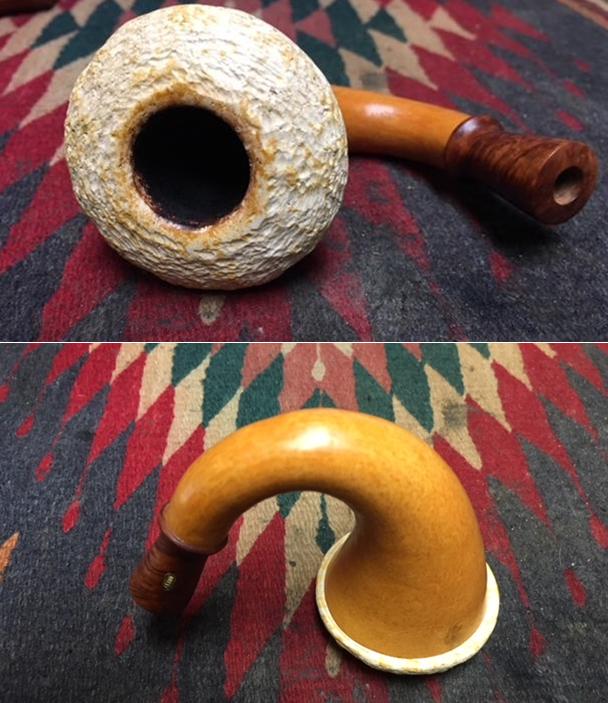
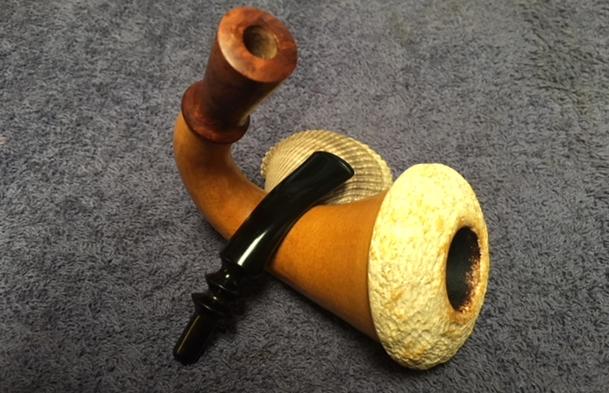
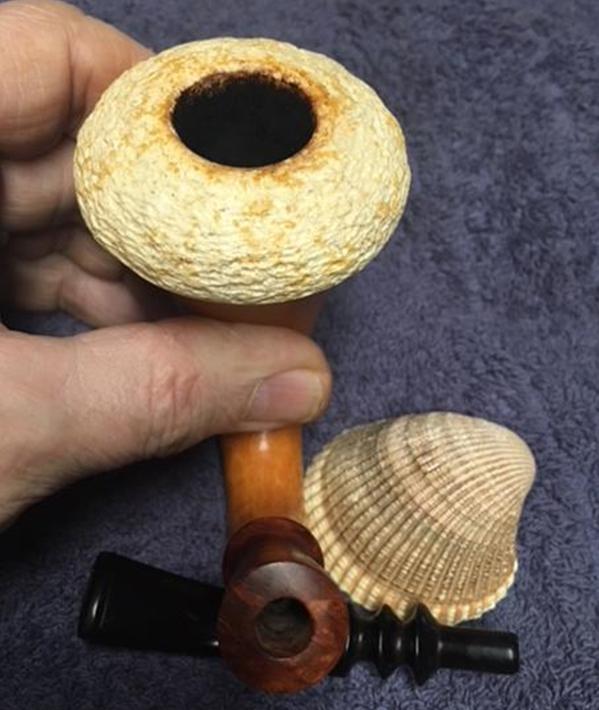
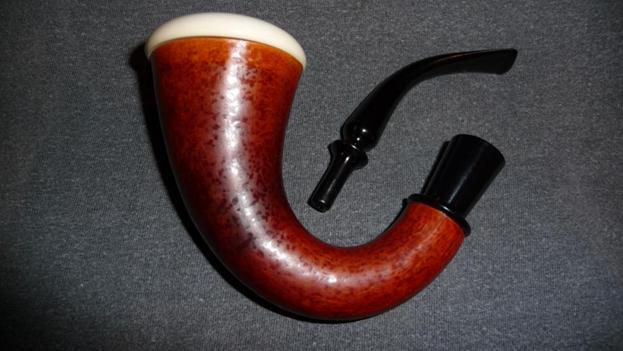
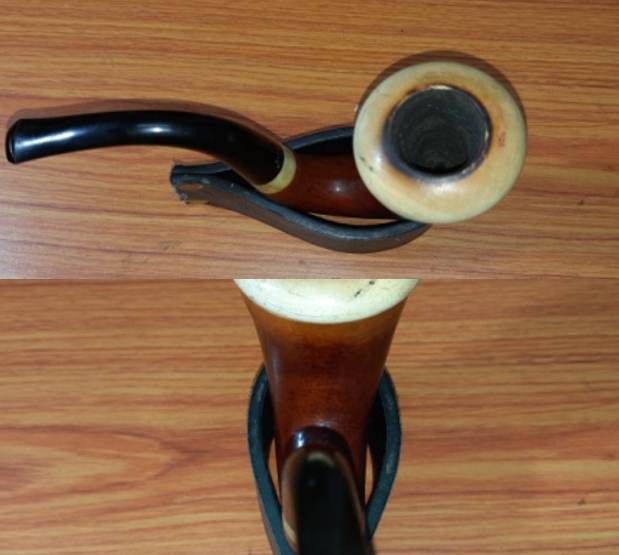
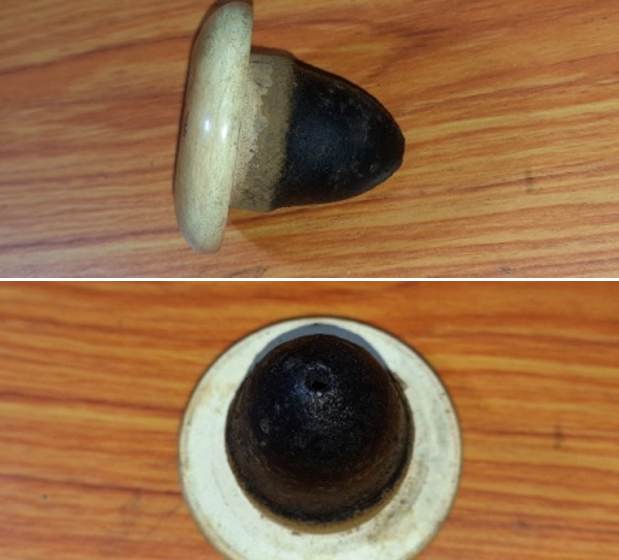
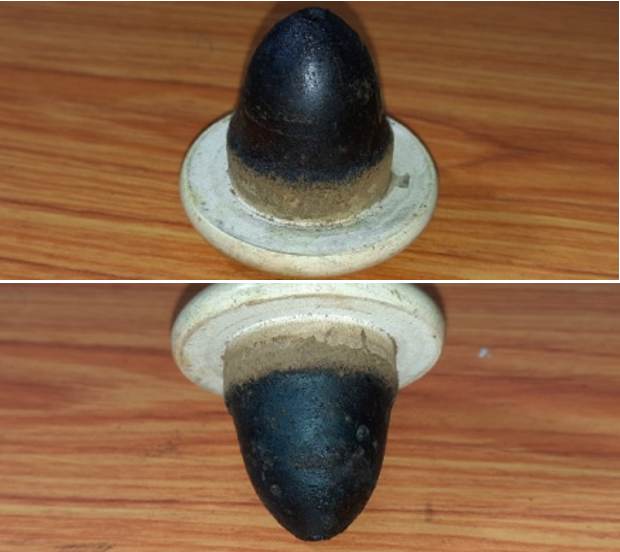
I first dismantled the pipe in to its various components; the Gourd, the meerschaum cup and the threaded bone tenon stem. Here are a couple of pictures.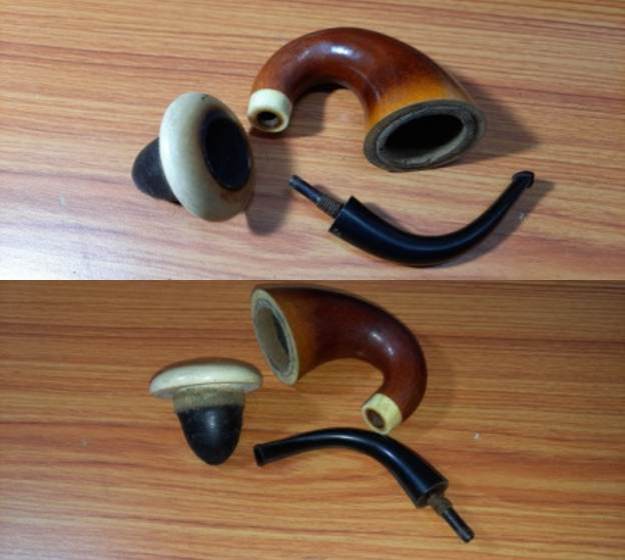
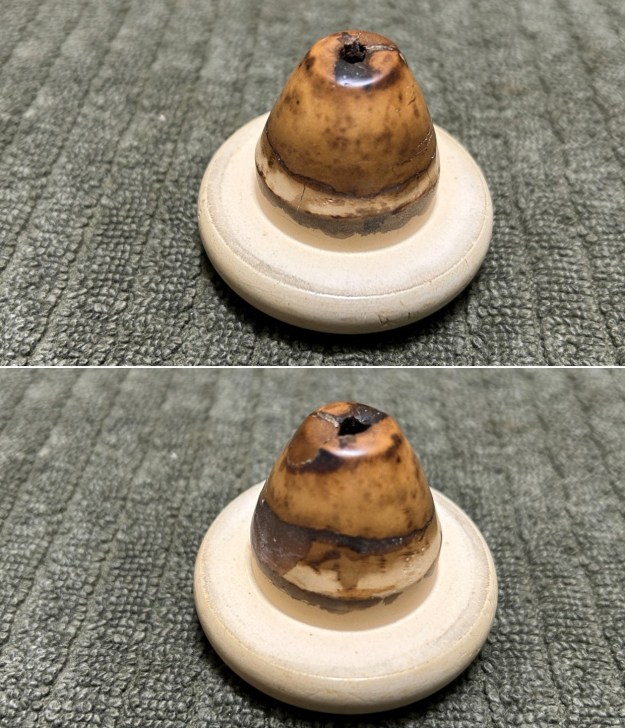
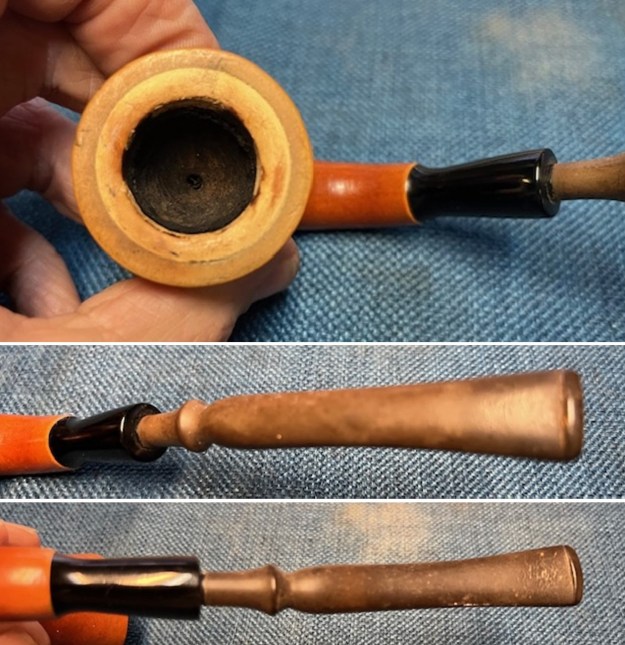
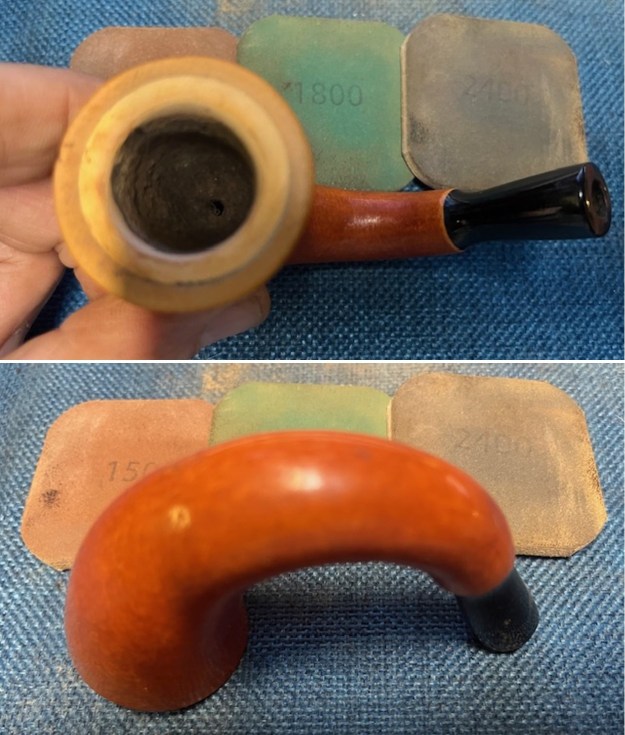
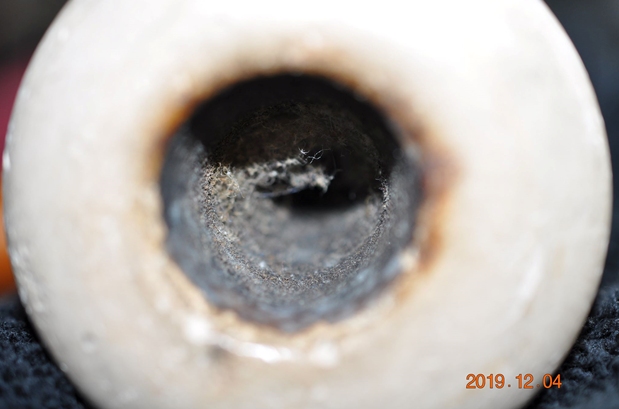
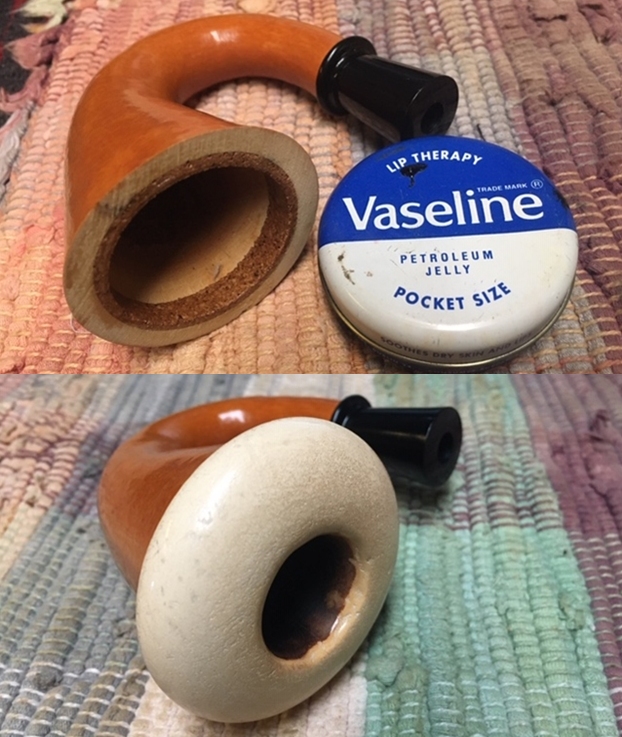
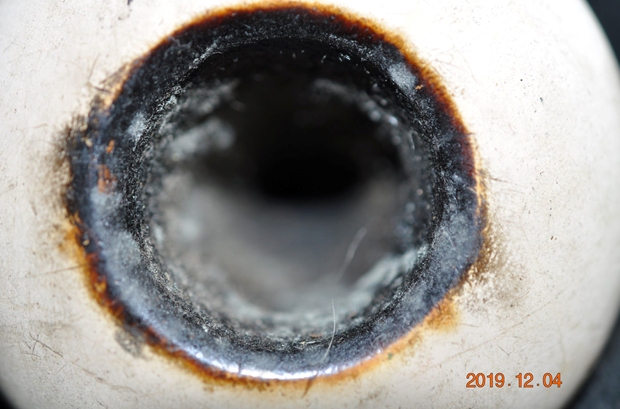
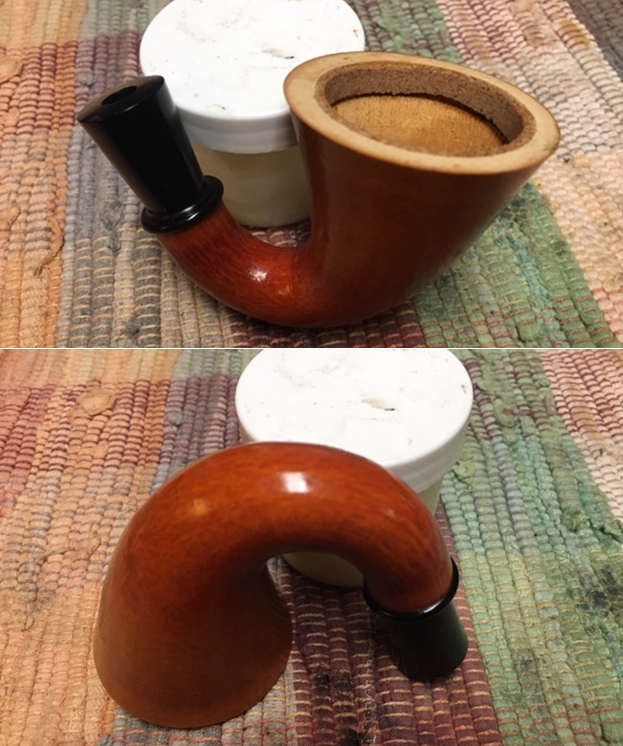
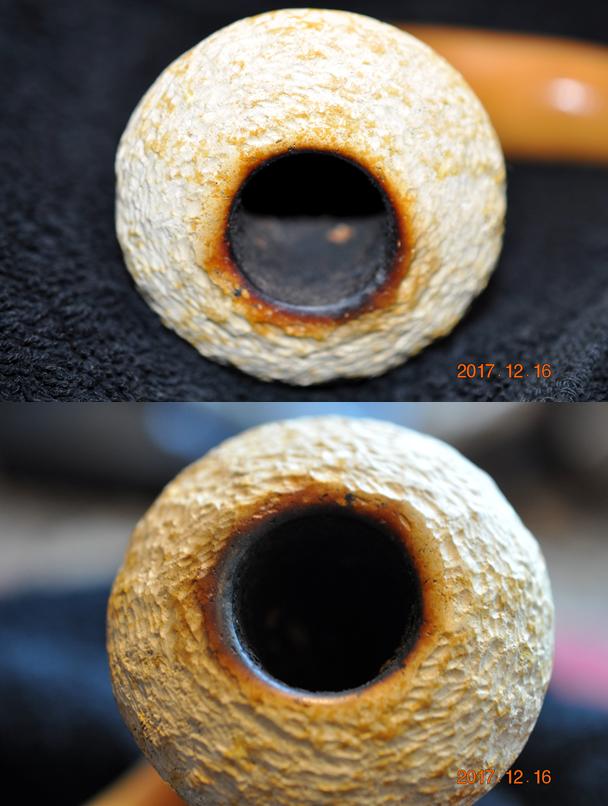
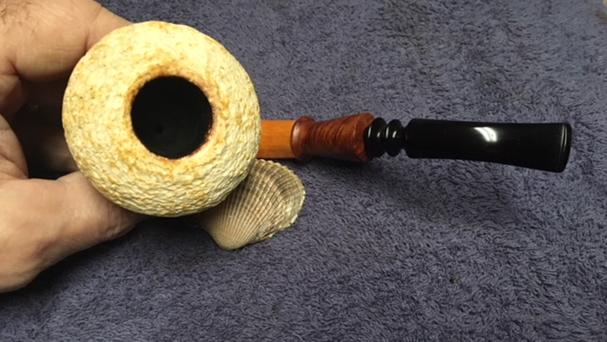
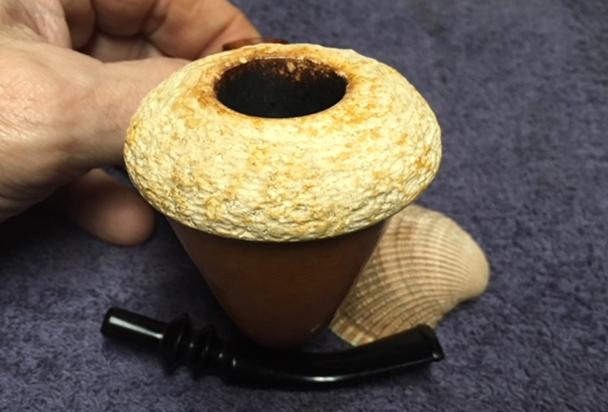
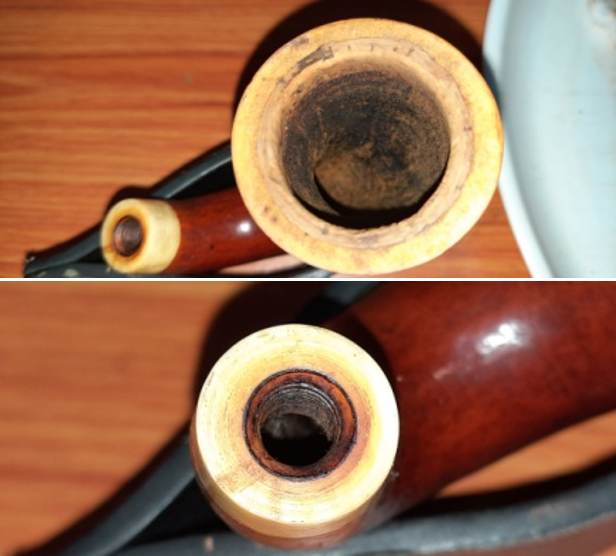
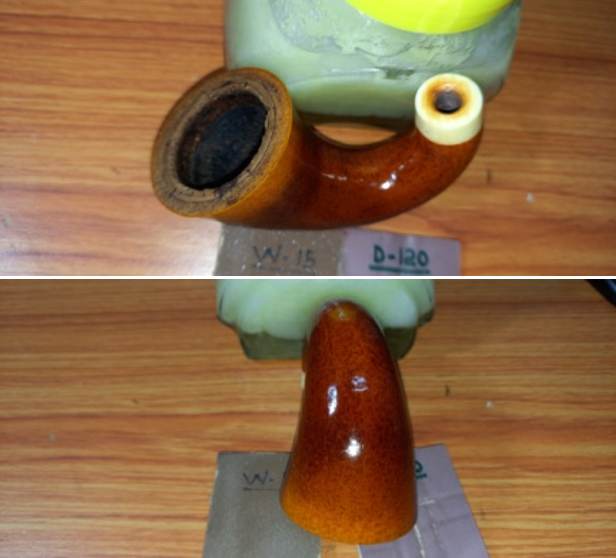
The meerschaum cup is medium sized and has a moderate layer of even cake. The inner rim edge has a thin layer of lava overflow on an otherwise clean rim top surface. There are minor scratches over the rim surface which will be addressed when the meerschaum cup is cleaned and polished. There are no breakages or chipped surfaces or cracks in the cup which is a big relief. The draught hole at the center bottom of the cup is clogged with oils/ tars and gunk. The outer surface of the cup is covered in dried oils, tars and gunk and towards the rim top; there are traces of cork lining which has stuck to the cup (this is actually mysterious!) at the base of the rim. 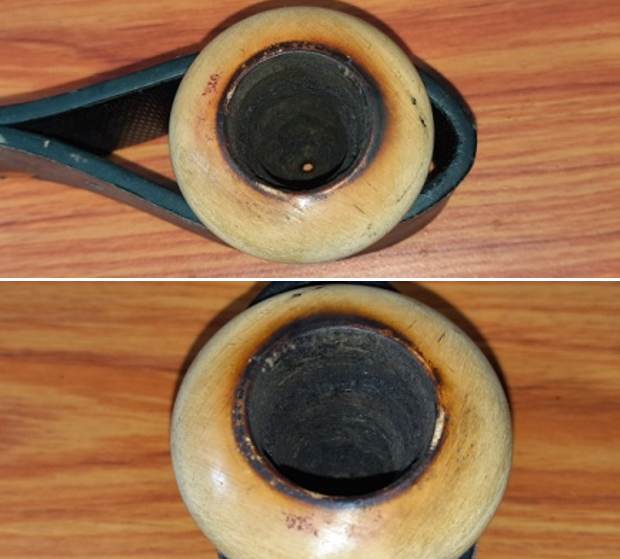
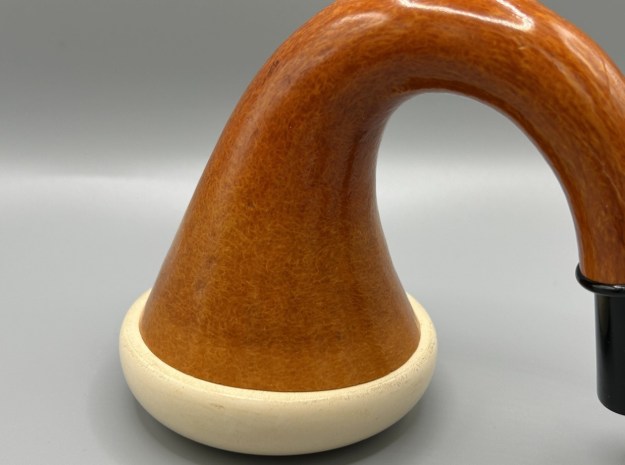
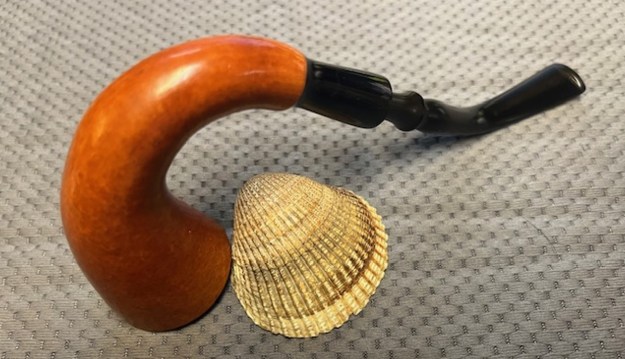
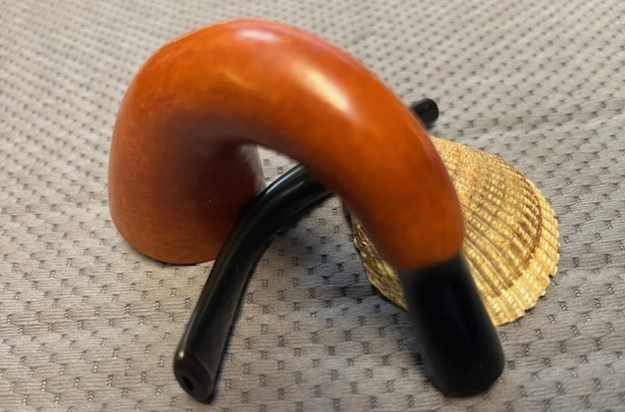
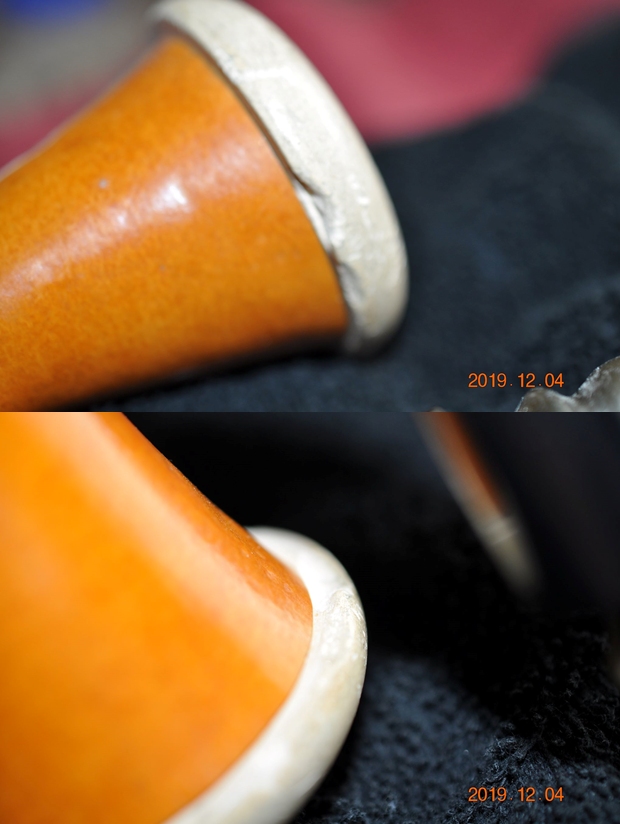
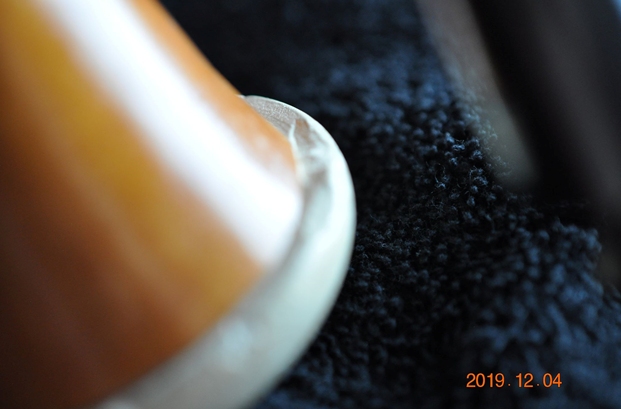
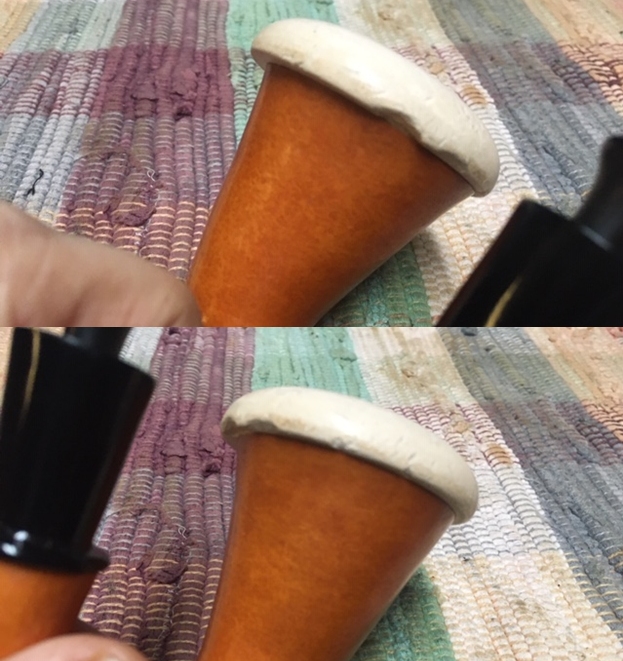
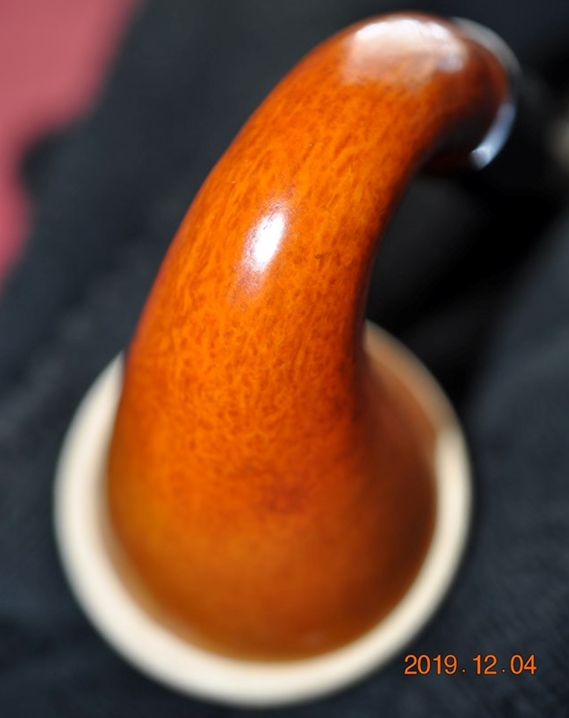
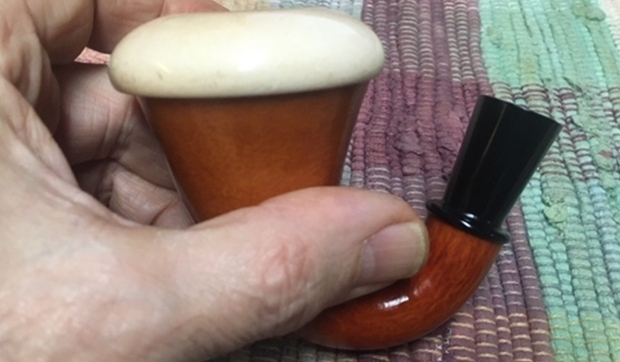
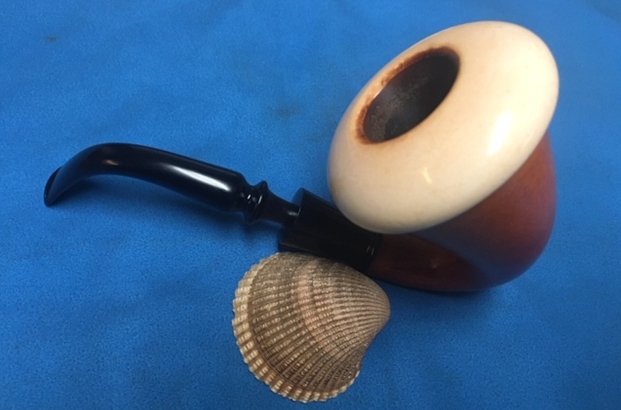
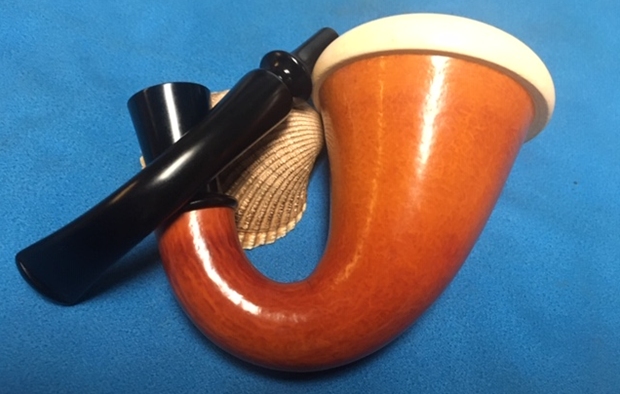
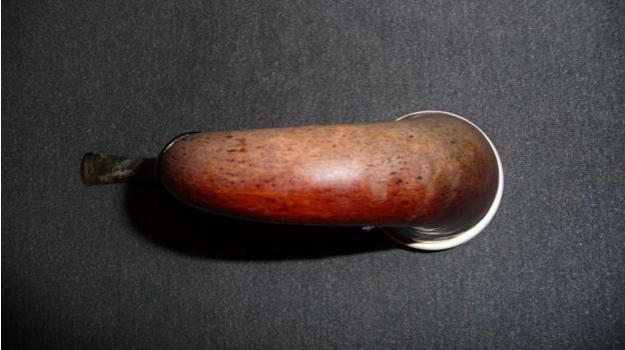
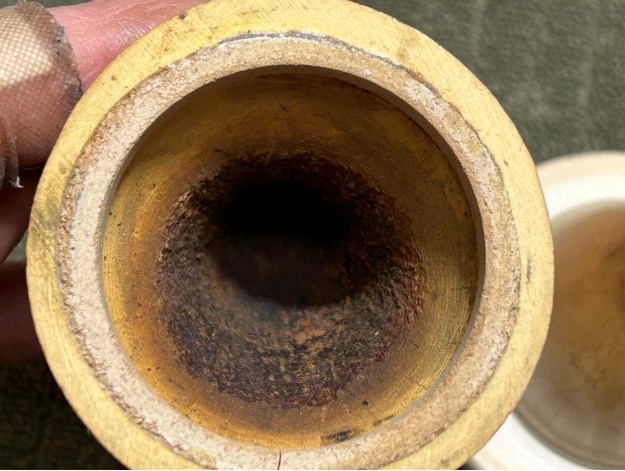
 The gourd surface has colored beautiful and it will be my endeavor to preserve the patina that has developed on the surface due to smoking. The surface is covered in old oils, tars, grime and dirt from all these years. There is no damage to the gourd surface and that’s a big relief. This piece of gourd will look stunningly beautiful and rich once it has been cleaned and polished. The meerschaum bowl is held in place inside the gourd with a cork gasket. This cork gasket was dry with a thin outer surface layer stuck to the meerschaum. This is not a major issue as the bowl still sits firmly in the gourd. The inside of the gourd has depositions of oils and tars and ash and would benefit from a thorough cleaning. The ivory shank extension has yellowed a fraction but is sans any damage.
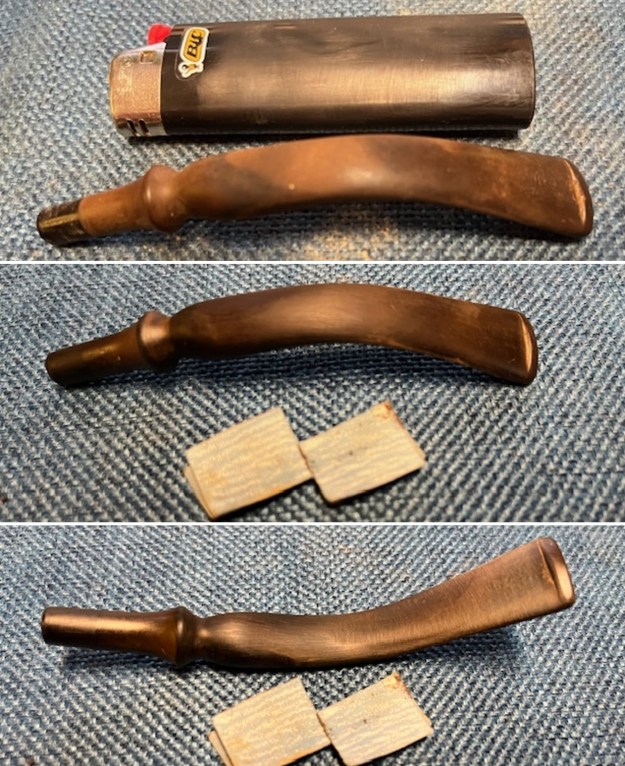
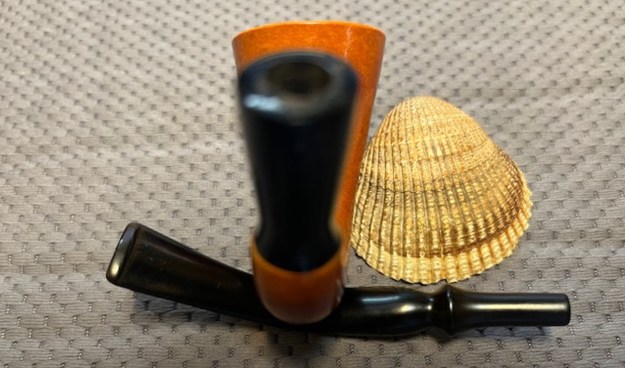
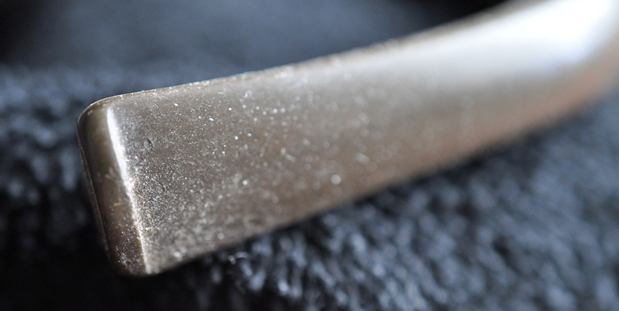
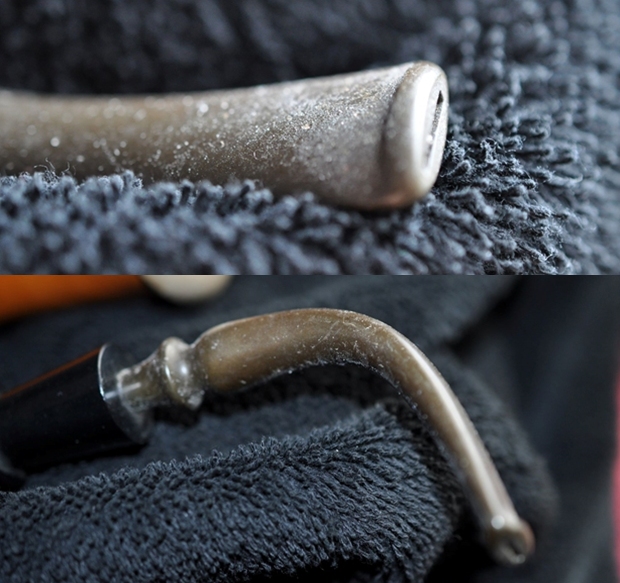
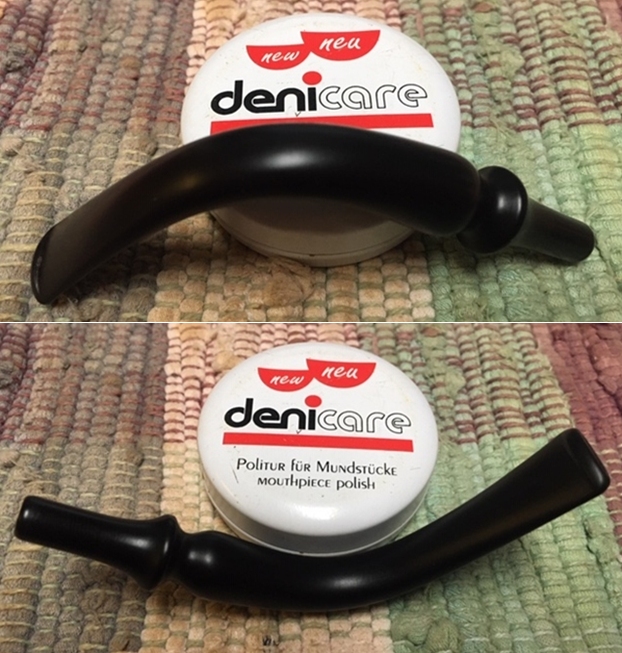
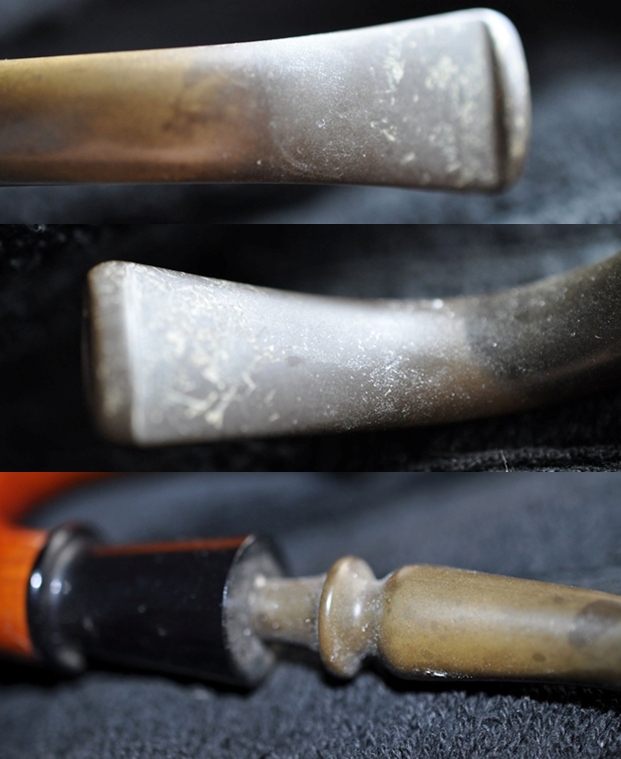
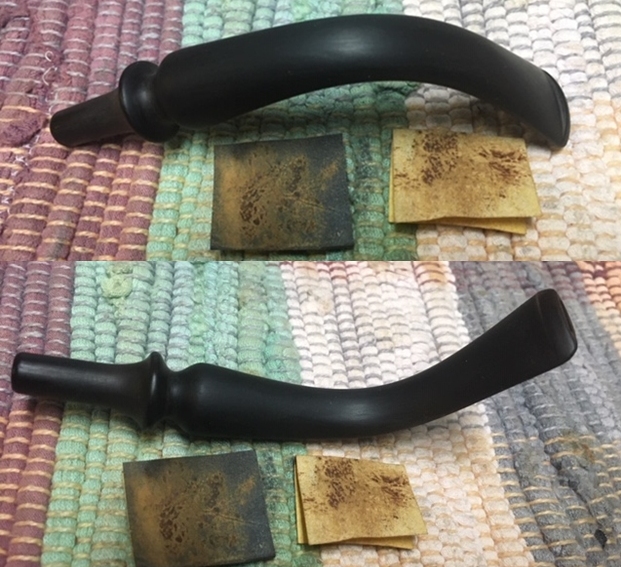
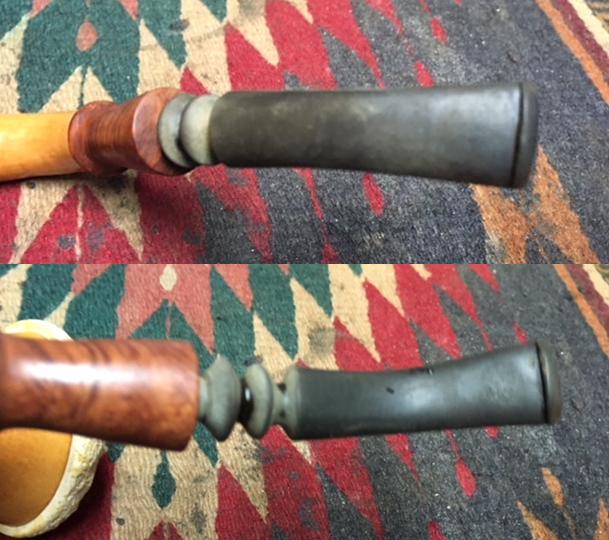
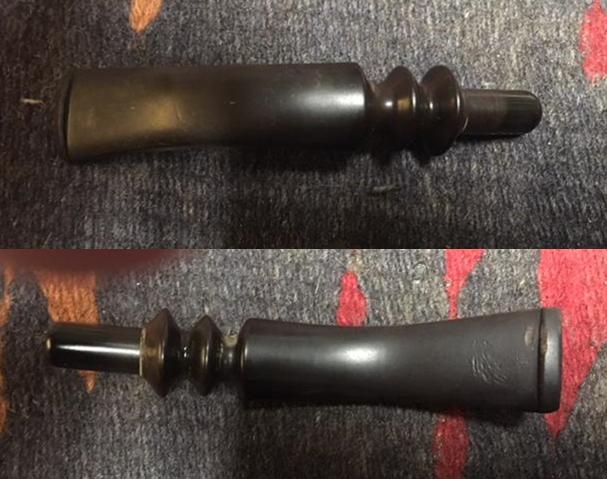
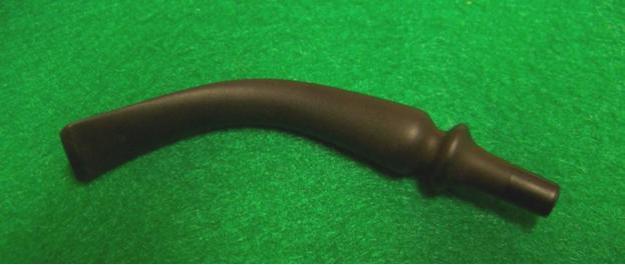
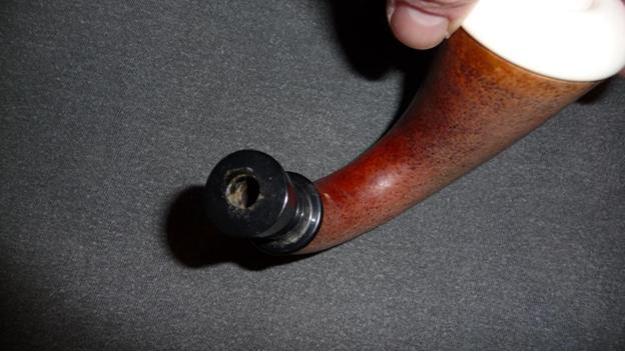
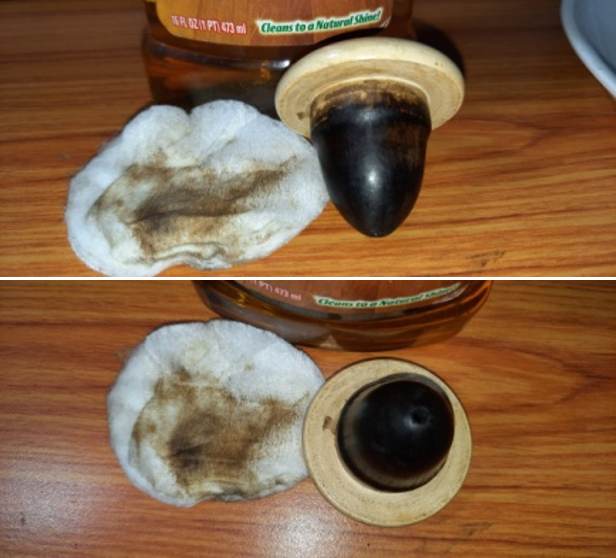
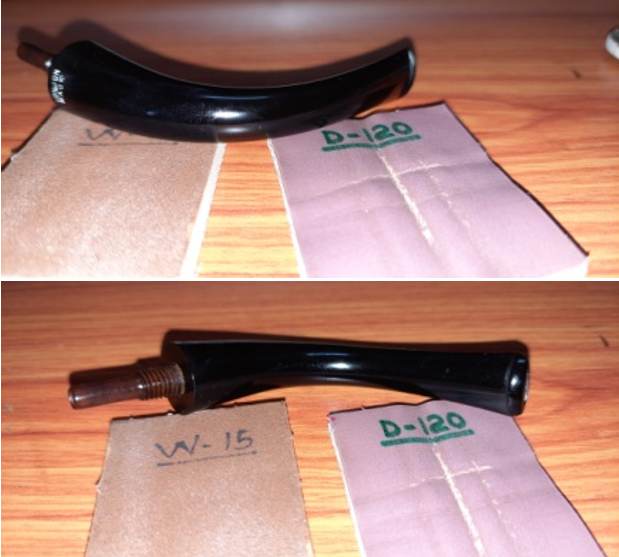
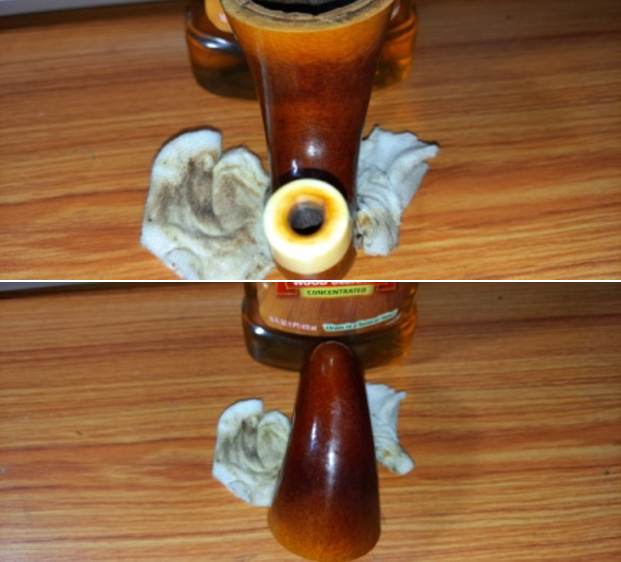
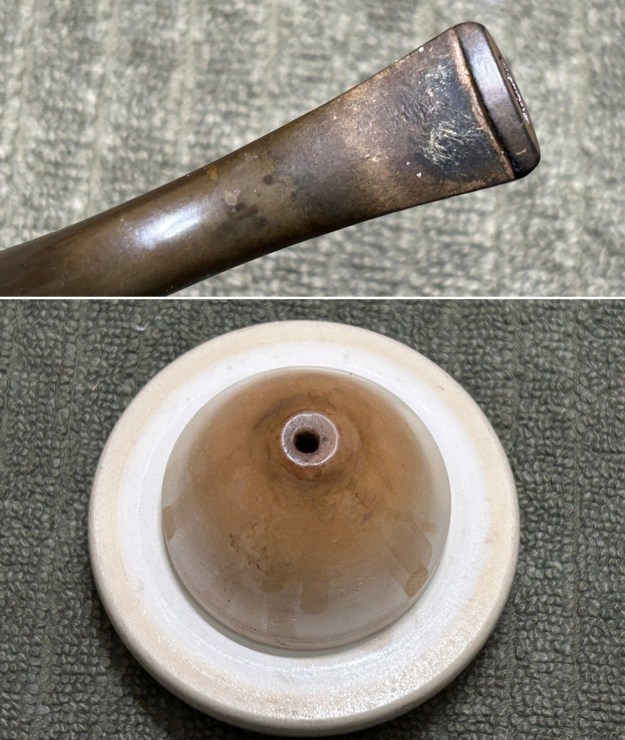
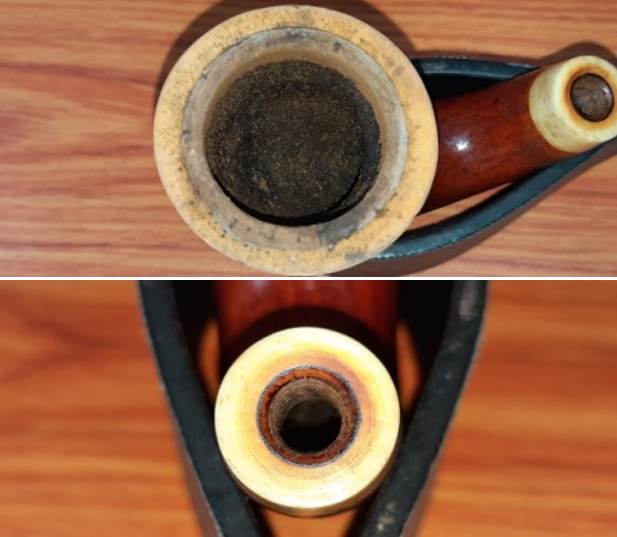 The full bent tapered vulcanite stem is oxidized with tooth chatter on either surface in the bite zone. The threaded long bone tenon is covered in grime and oils and could be a contributing factor for the misaligned seating of the stem in to the shank. The oval opening of the slot and the tenon opening is constricted due to accumulation of old and dried oils/ tars.
 The Process
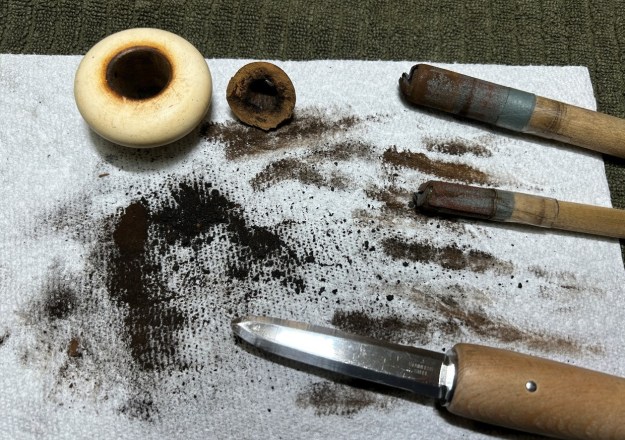
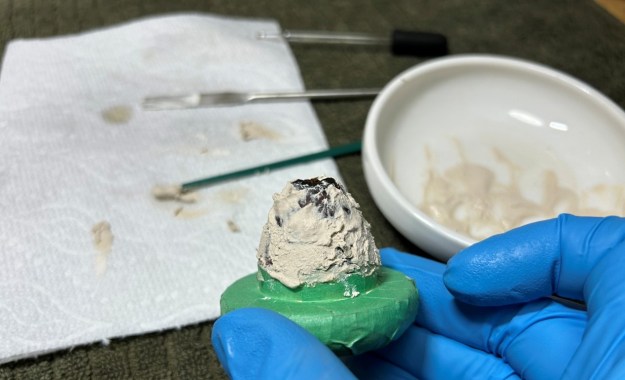
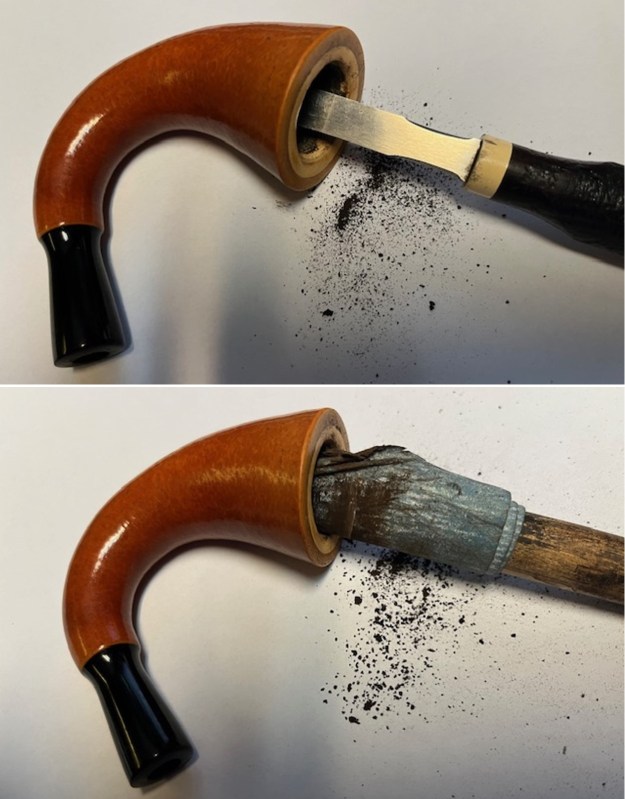
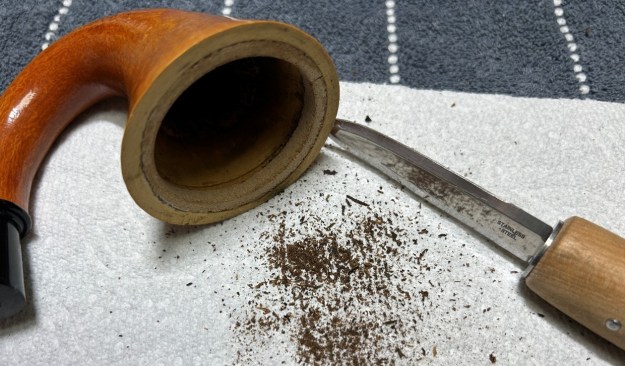
I started the process with reaming the meerschaum cup with PipNet reamer heads 1, 2 and 3. I further cleaned the bowl with my fabricated knife to completely rid the chamber of carbon that couldn’t be reached by the reamer heads. I used a 220 grit sand paper, pinched between my thumb and forefinger, to sand the inner walls of the chamber of the pipe. Once I had reached the bare walls, I wiped the chamber with a cotton pad dipped in isopropyl alcohol. This removed all the residual carbon dust and also rid the chamber of all ghost smells. The walls of the chamber are nice and solid with no signs of heat fissures or cracks.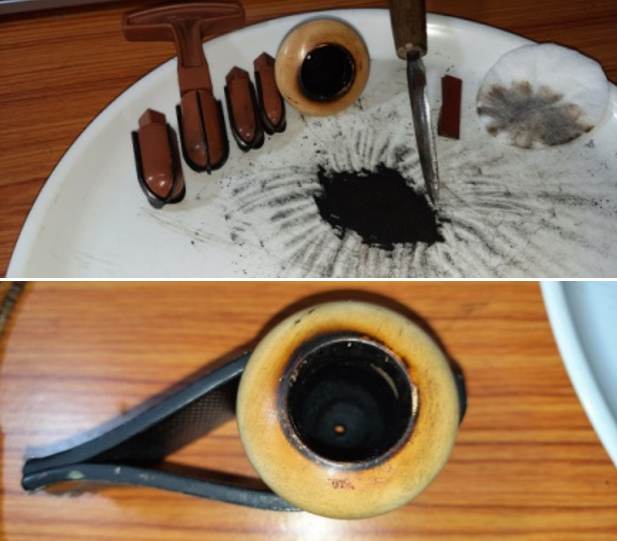 I gently scraped off the dried gunk and remnants of the cork with my sharp fabricated knife. I further cleaned the surface with a cotton swab dipped in alcohol.
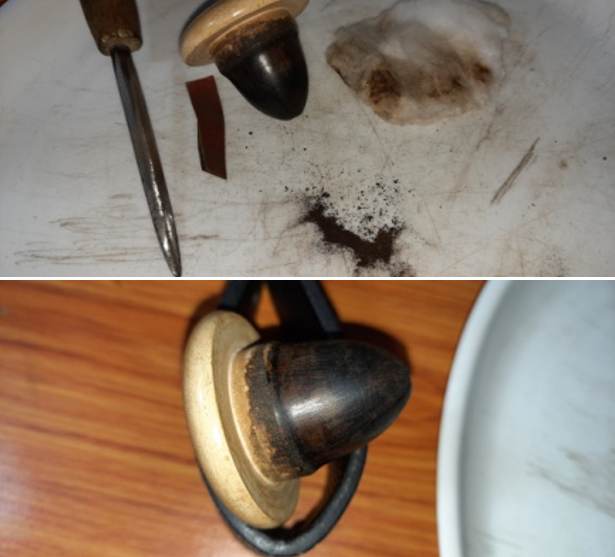
 I cleaned the external surface of the meerschaum cup with a cotton swab and Murphy’s Oil Soap. I further wiped the surface with a moist soft cloth and rid the surface of the soap.
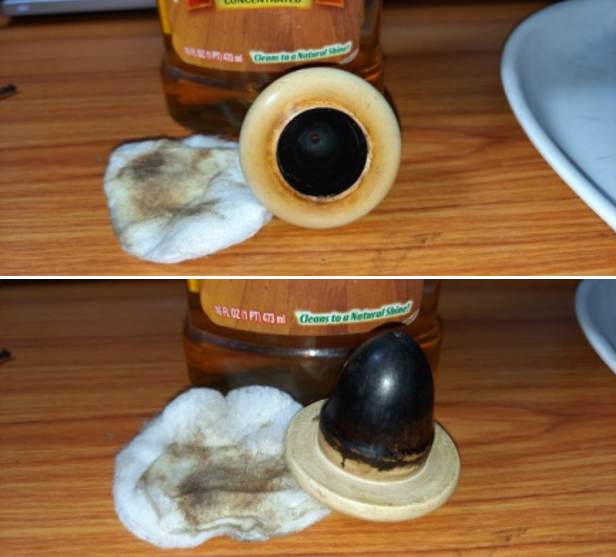
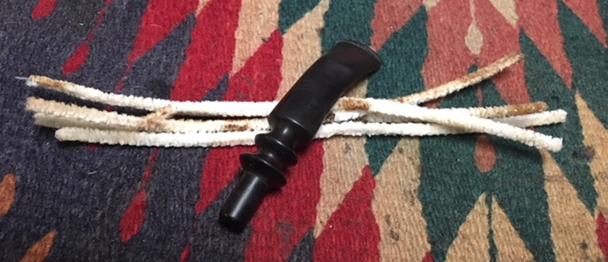
 I ran a couple of hard bristled pipe cleaners dipped in isopropyl alcohol through the draught hole and thoroughly cleaned it. I set the bowl aside to dry out completely.
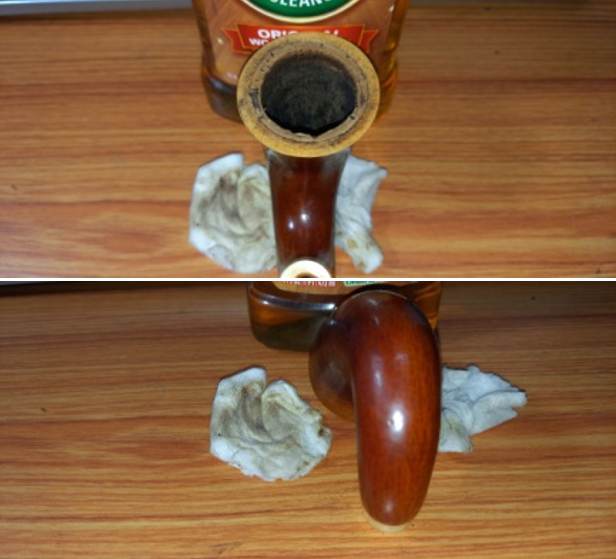
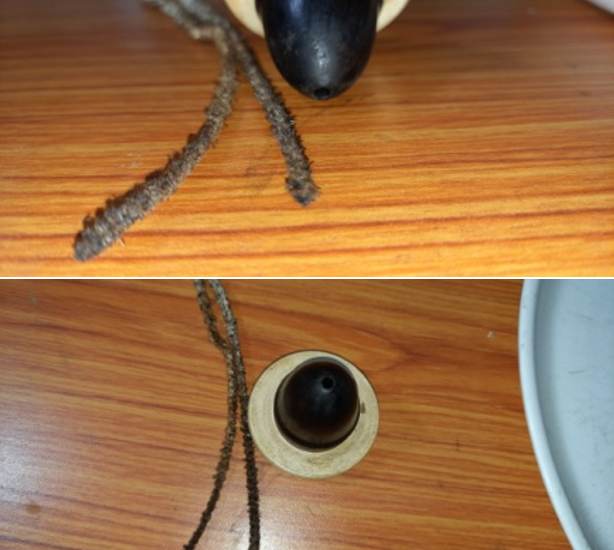 I cleaned the stem airway using thin shank brushes and anti oil dish soap. I also cleaned the tenon surface with the soap and wiped it dry with a paper towel. The tenon opening and the oval slot is now clean.
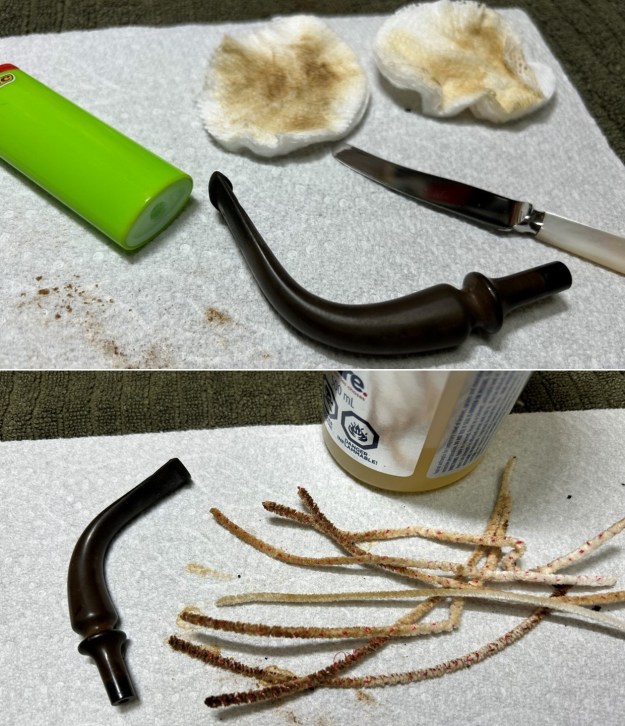
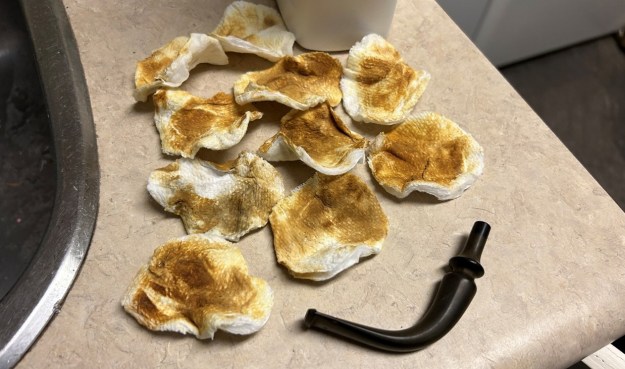
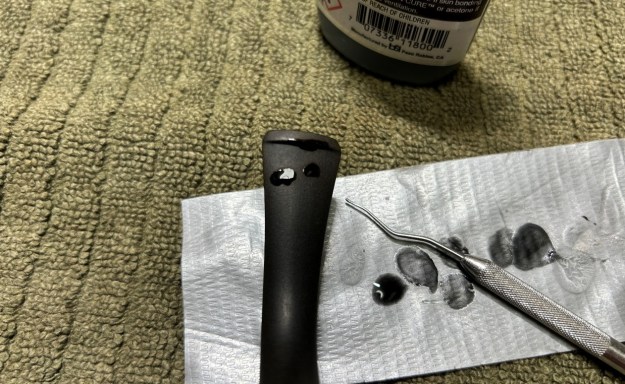
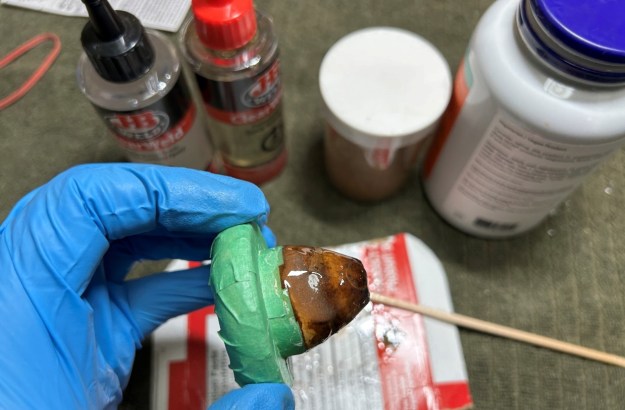
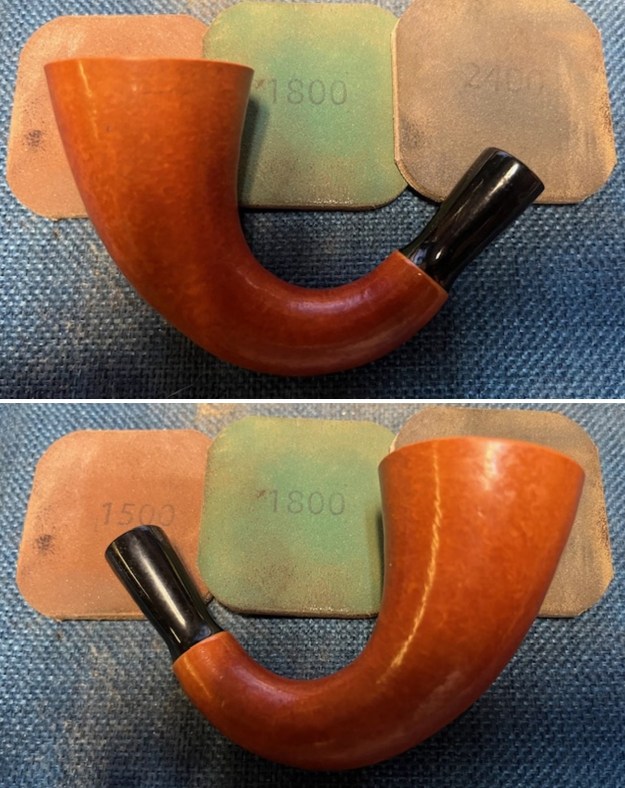
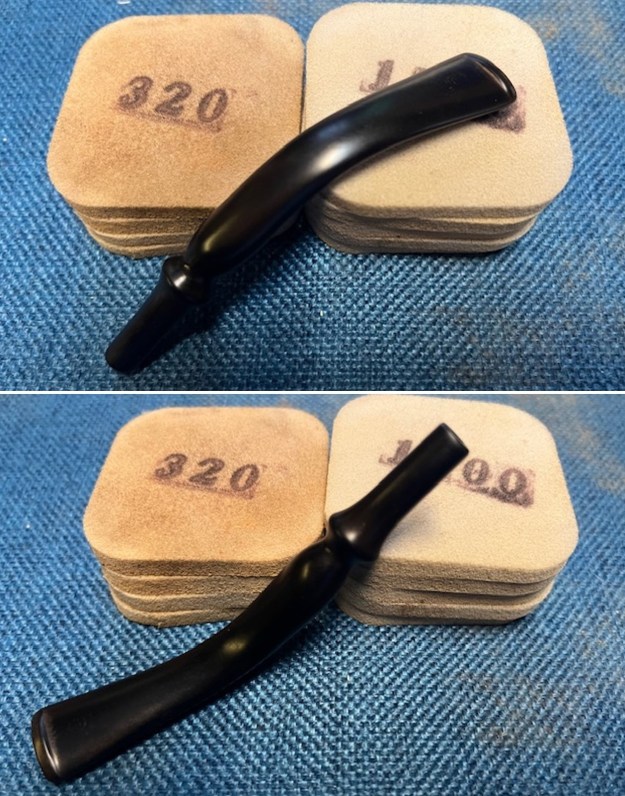
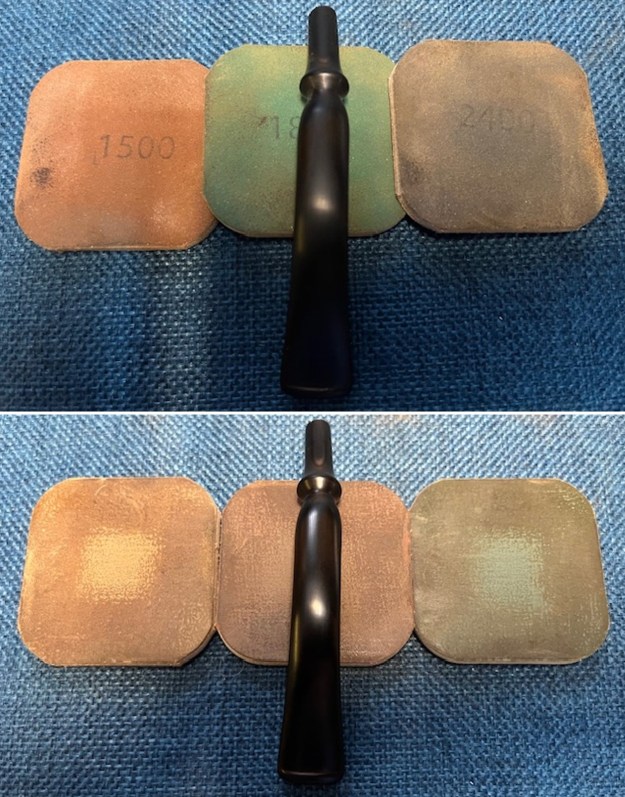
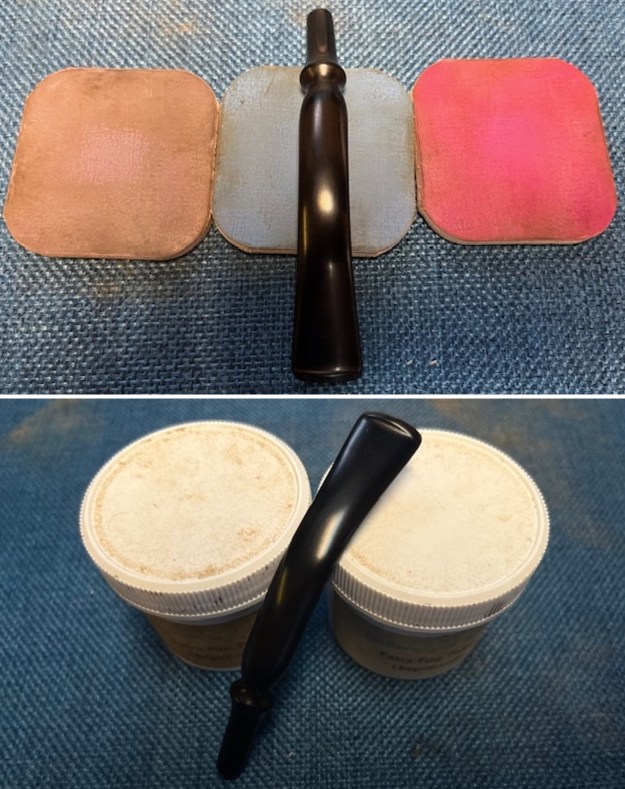
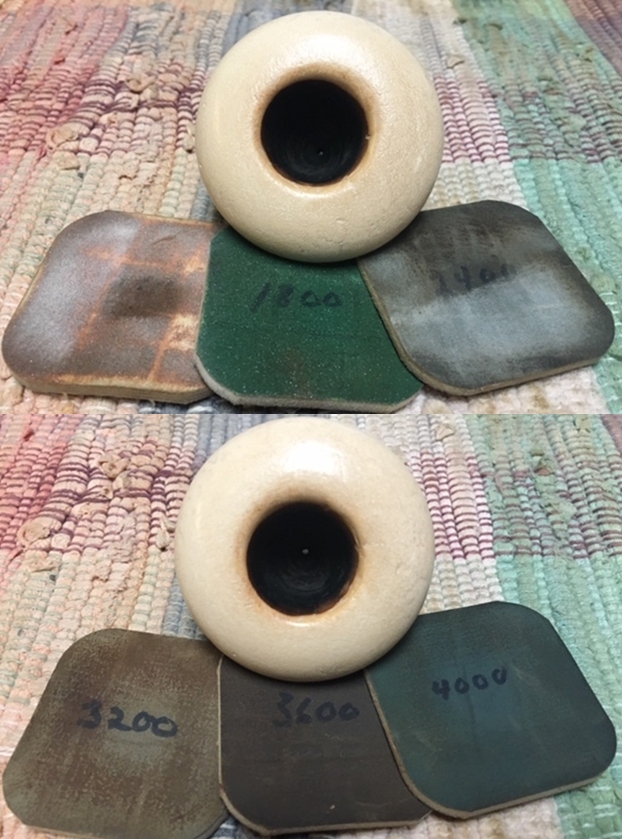
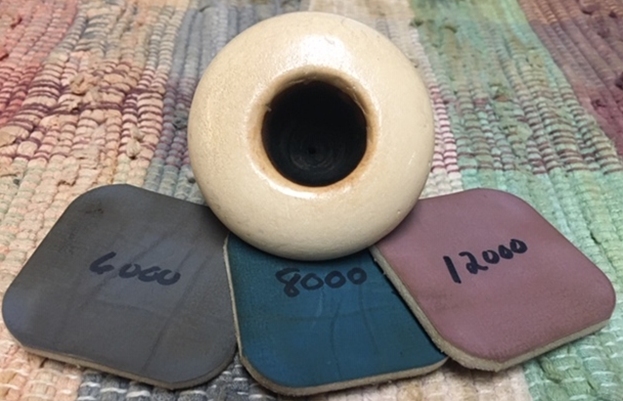
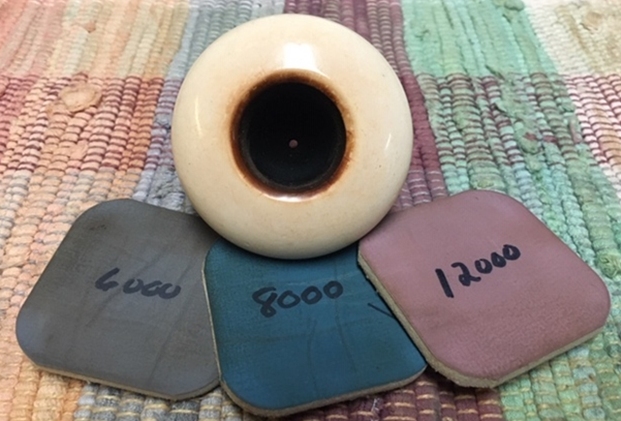
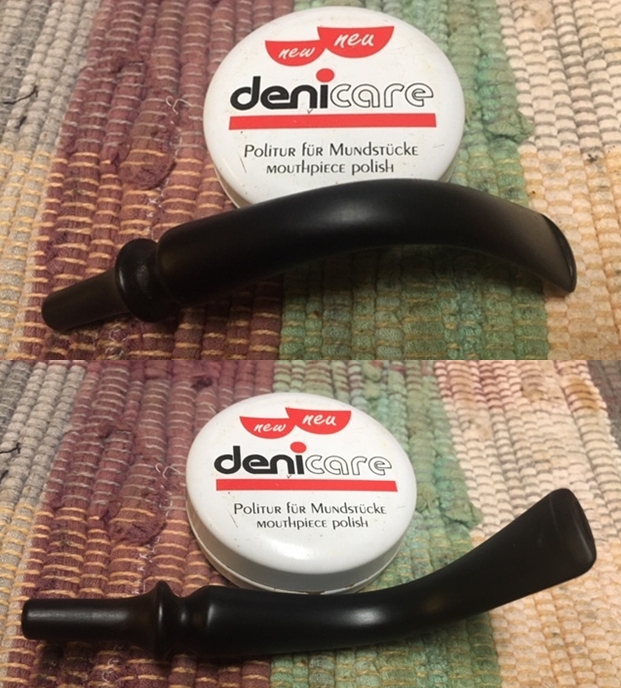
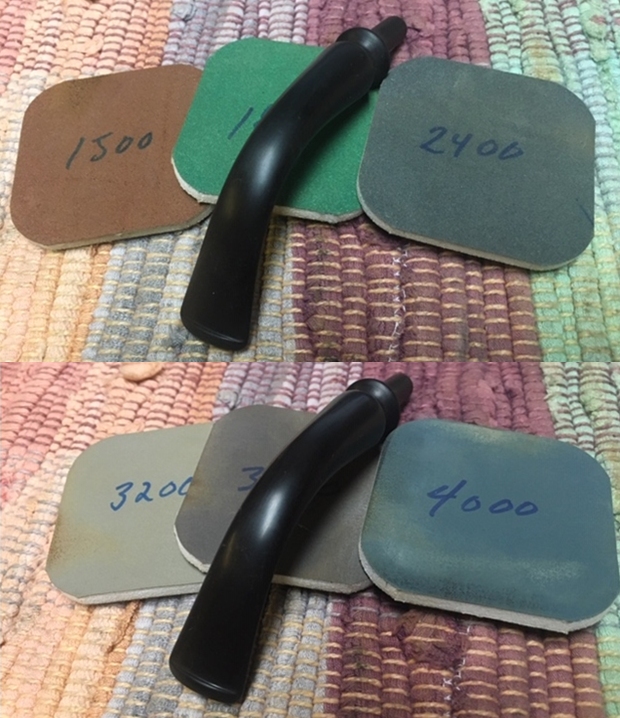
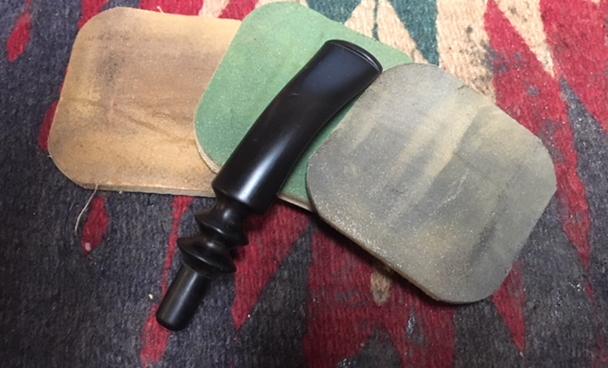
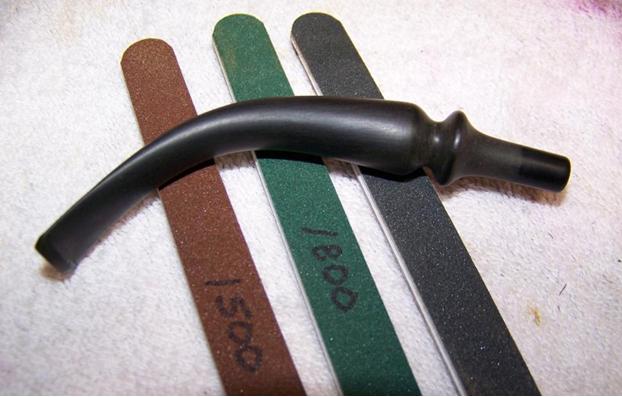
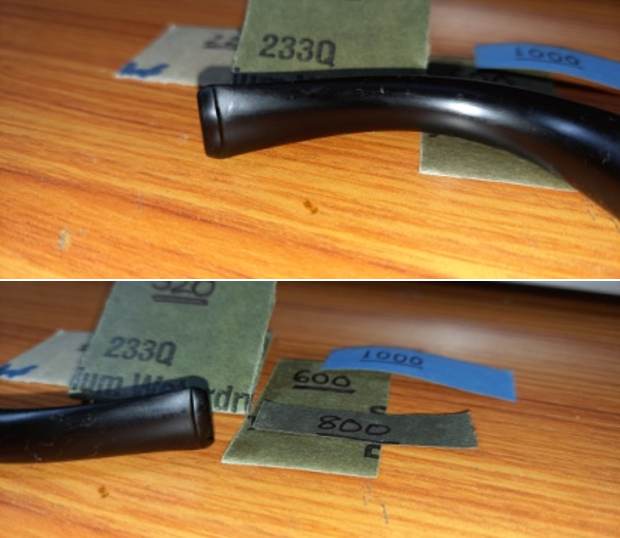
 Since the tooth chatter on upper and lower surface was superficial, I decided to address this issue by sanding down the tooth chatter rather than resorting to the filling method. I sand the bite zone with a 220 grit sandpaper to remove the tooth chatter. I followed it up by further sanding the stem with 320, 600 and 800 grit sand papers. Once I was satisfied that the tooth chatter had perfectly matched the rest of the stem surface, I completed the polishing cycle by wet sanding the surface with 1500 to 12000 grit micromesh pads. The stem looks great with the tooth chatter nicely matched with the rest of the surface. I rub a little quantity of Extra Virgin Olive oil into the stem surface and set it aside to rehydrate the vulcanite.
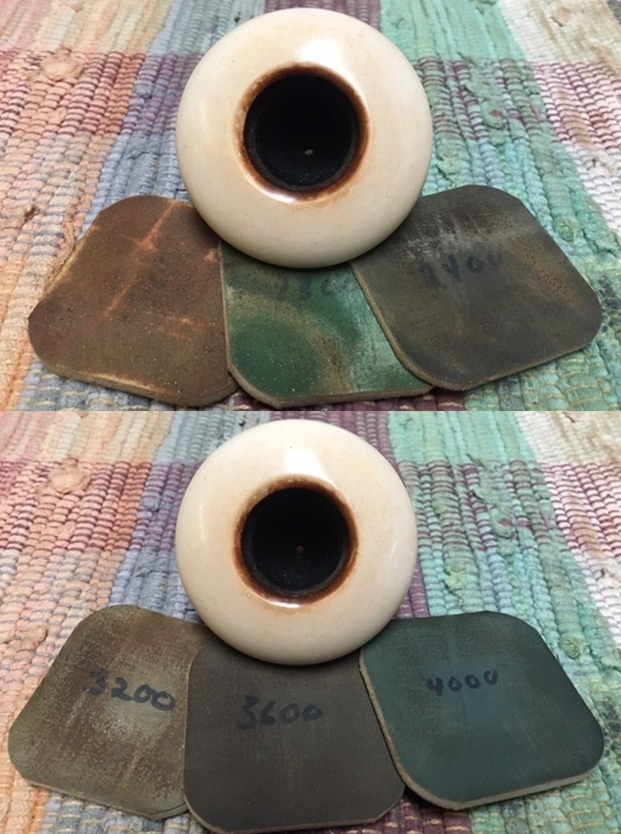
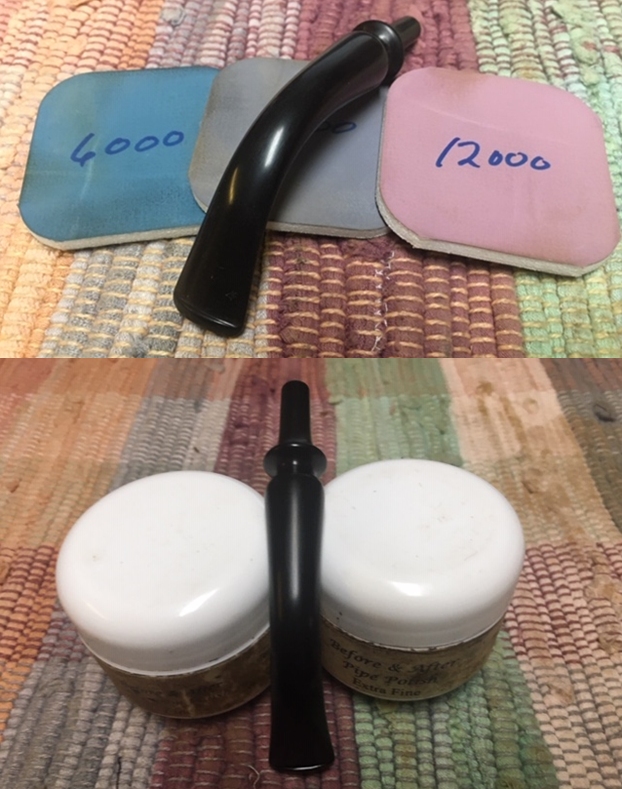
 While I was working on the stem, Abha went about the task of polishing the meerschaum cup. She polished the bowl by dry sanding it with 1500 to 12000 grit micromesh pads. She applied a little Before and After Balm, though it does not affect the meerschaum in any which way, and set it aside. A few minutes later, she buffed it with a microfiber cloth.
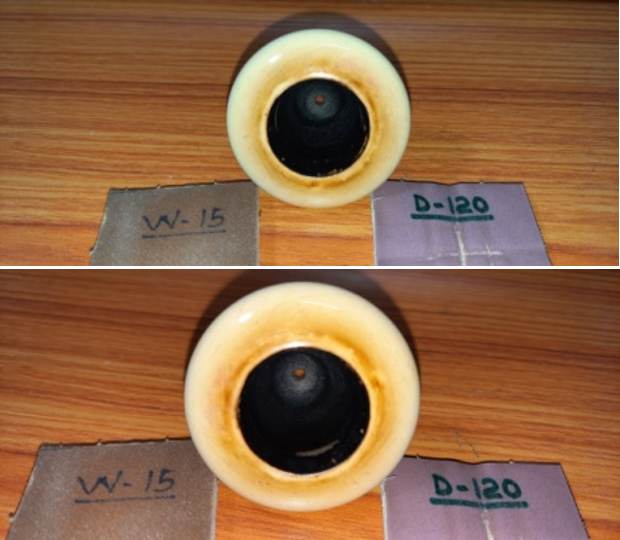 Next in the process was the cleaning and refurbishing of the gourd itself. Using my fabricated dental tool and sharp knife, I carefully, read that as very (2x) carefully, scraped out all the dried gunk and grime from the inner walls of the gourd. I ran a couple of pipe cleaners and q-tips dipped in alcohol through the shank end. I wiped the inner walls with a cotton swab moistened with alcohol.
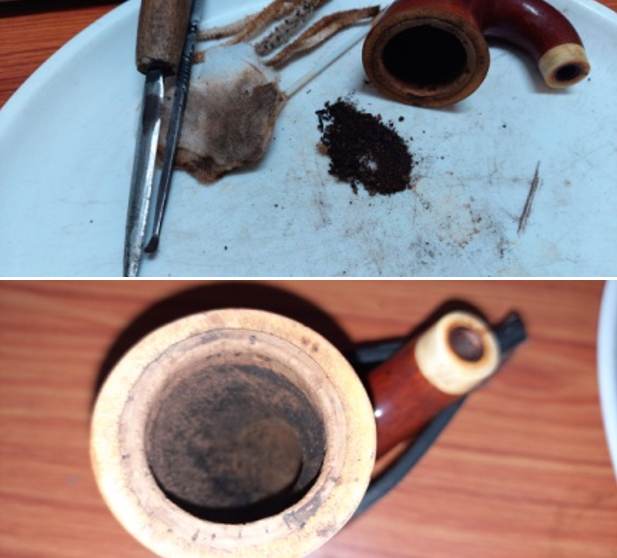
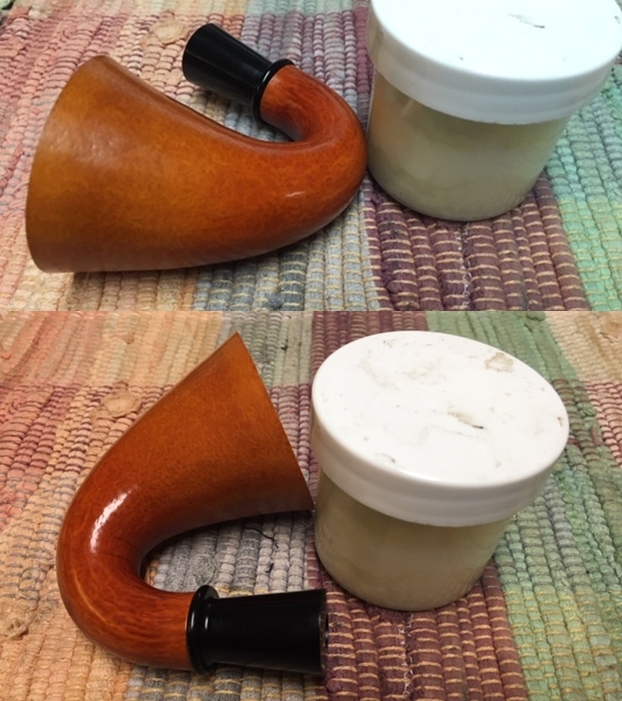
 At this point in restoration, the internal cleaning of the stem, mortise and gourd is completed. The stem repairs and polishing is also completed and so is the refurbishing of the meerschaum cup. Next I decided to clean and polish the external surface of the gourd. I cleaned the external surface of the gourd with Murphy’s Oil soap on cotton swabs. I wiped the surface with a moist cloth and set the gourd aside to dry out completely.
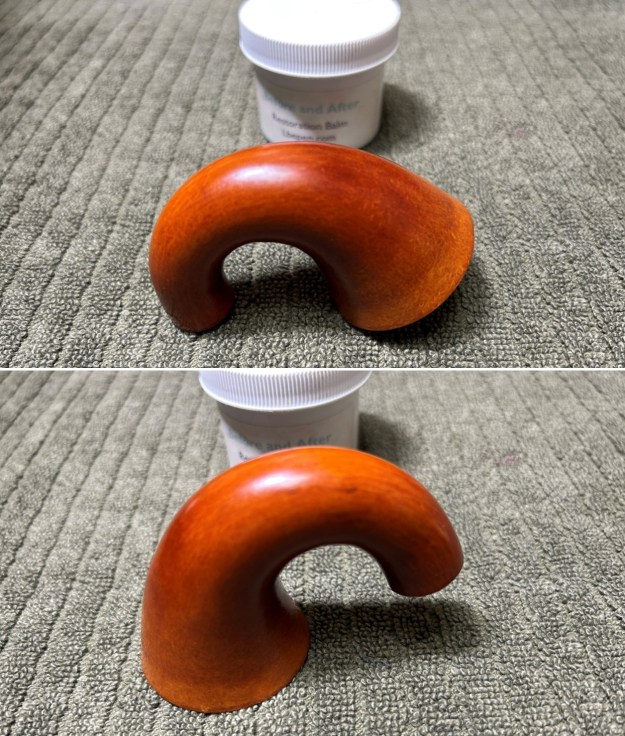
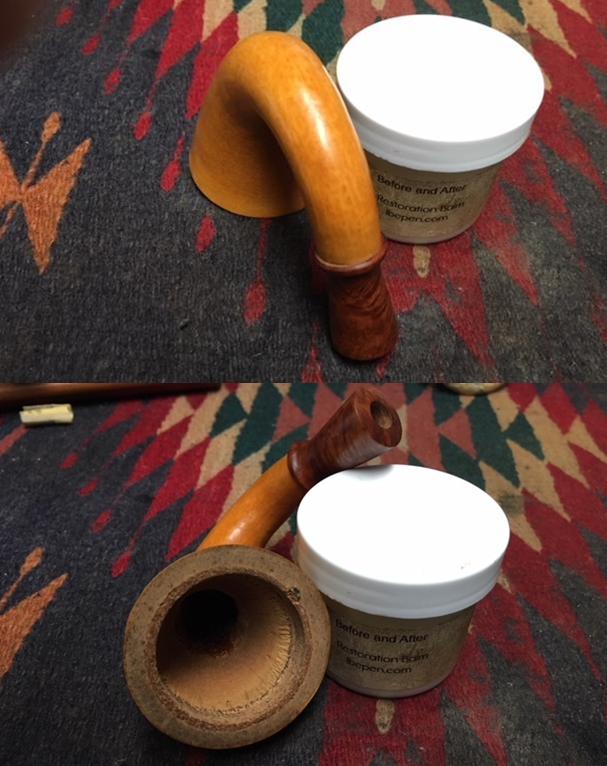
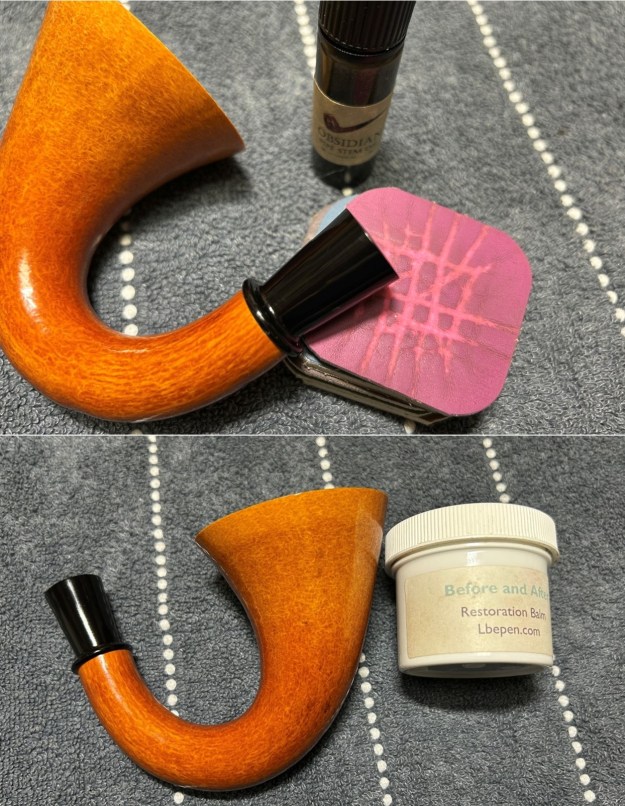
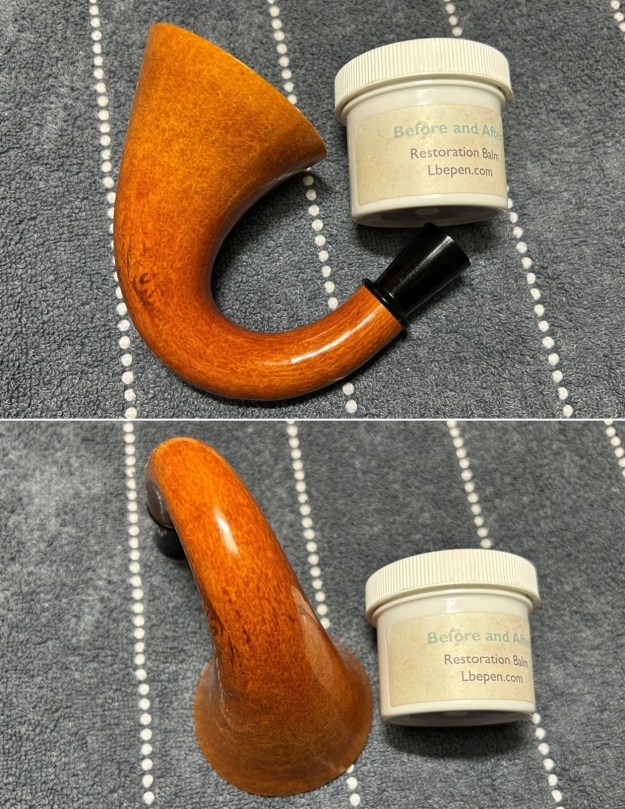
 After the gourd had dried out, I polished the gourd surface with micromesh pads. I wanted to preserve the patina and deep coloration that has developed on the gourd surface and so I dry sand the stummel surface with 1500 to 12000 grit micromesh pads. This is starting to look really nice. I rub a small quantity of “Before and After Restoration Balm” in to the gourd with my finger tips and let it rest for a few minutes. The balm almost immediately works its magic and the gourd now has a nice vibrant appearance with the beautiful darkened colors on full display. I further buff it with a horse hair shoe brush.
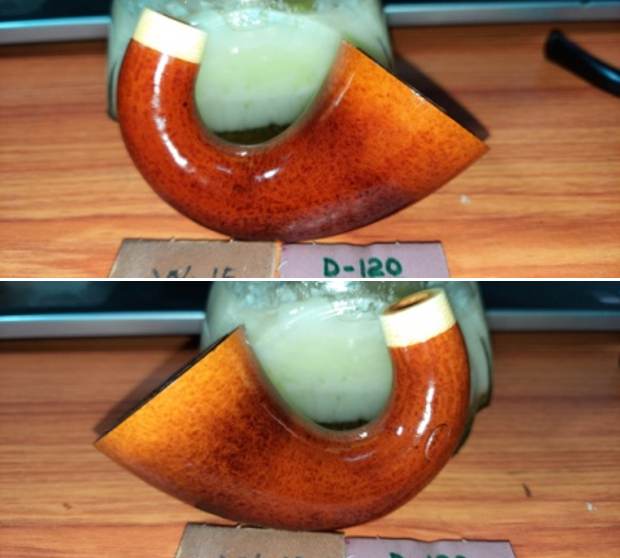
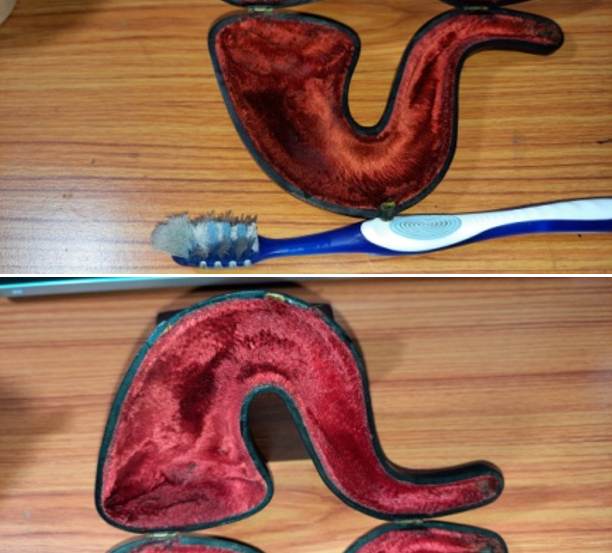
 All that remained was the original case that housed this pipe. Firstly, I reattached all the black linings that had come loose with superglue. I wiped the leather cover with Murphy’s Oil soap on a cotton swab. The color on the swabs should give the readers an idea of how dirty the surface was!! I wanted to further scrub the leather surface, but unsure that I was as to how the leather would hold up to all the scrubbing, I left it at that (remember my mantra… Less is more!!). I cleaned the inner satin and velvet linings of the lid and bottom respectively, with a mild soap in warm water and a soft bristled tooth brush. I was very gentle with this as I had no intention of tearing the lining. I completely dried the lining using paper towels. It now does look nice and rich.
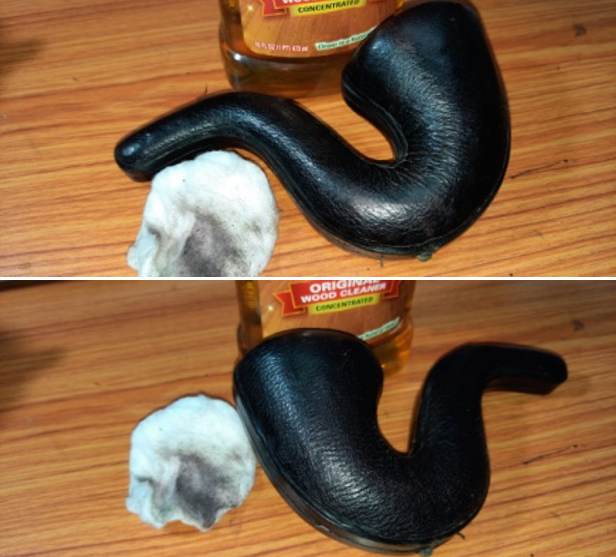
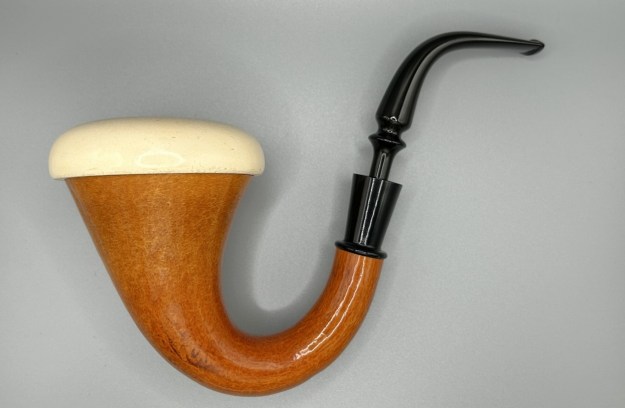
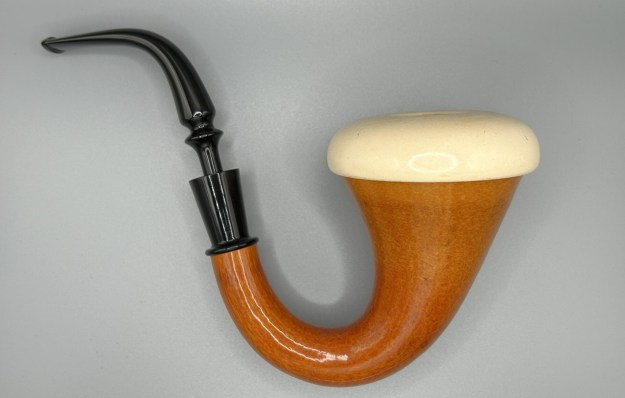
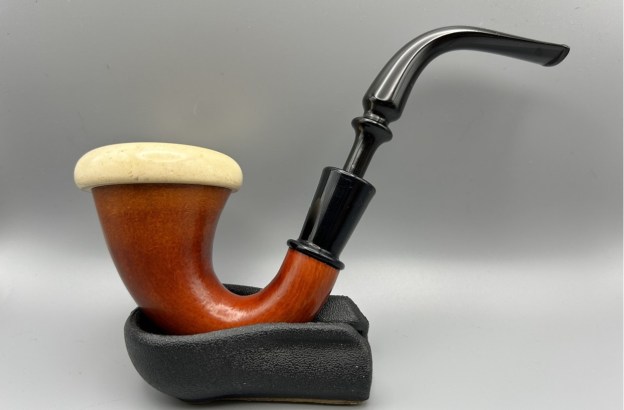
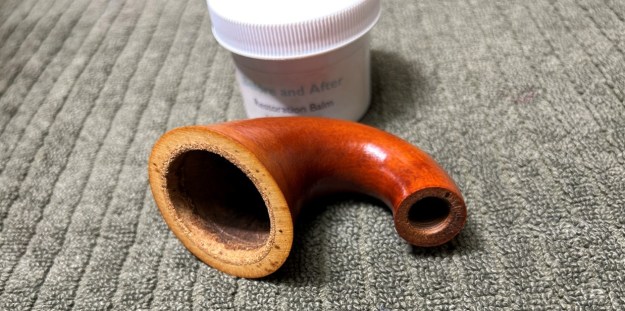
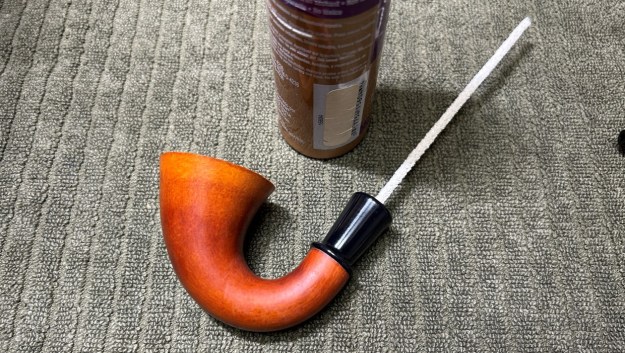
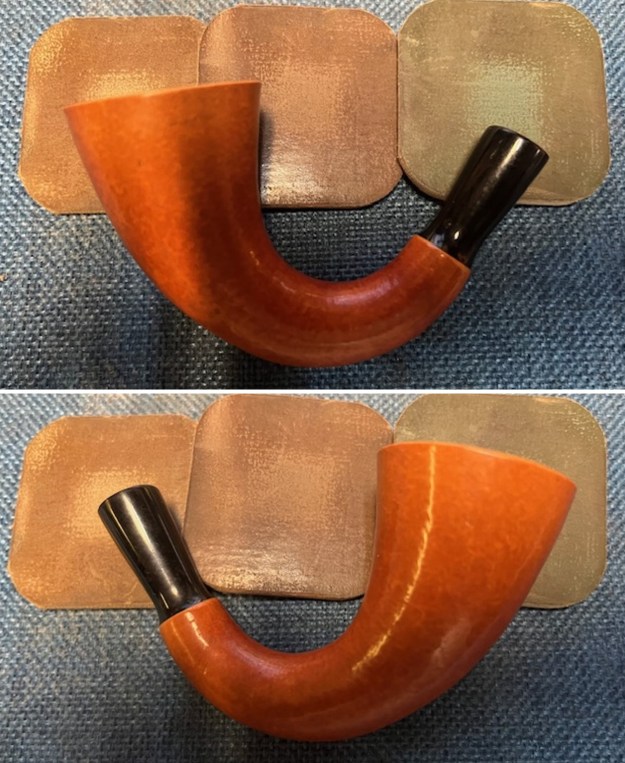
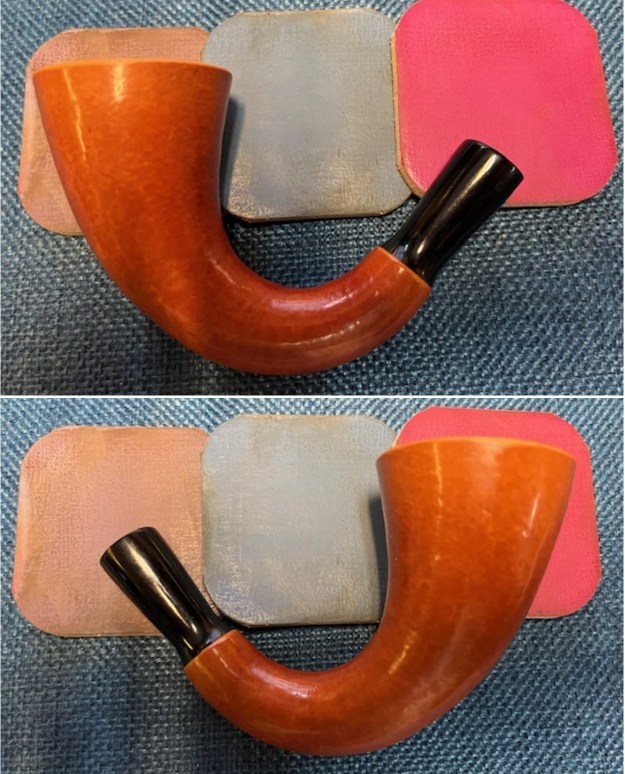
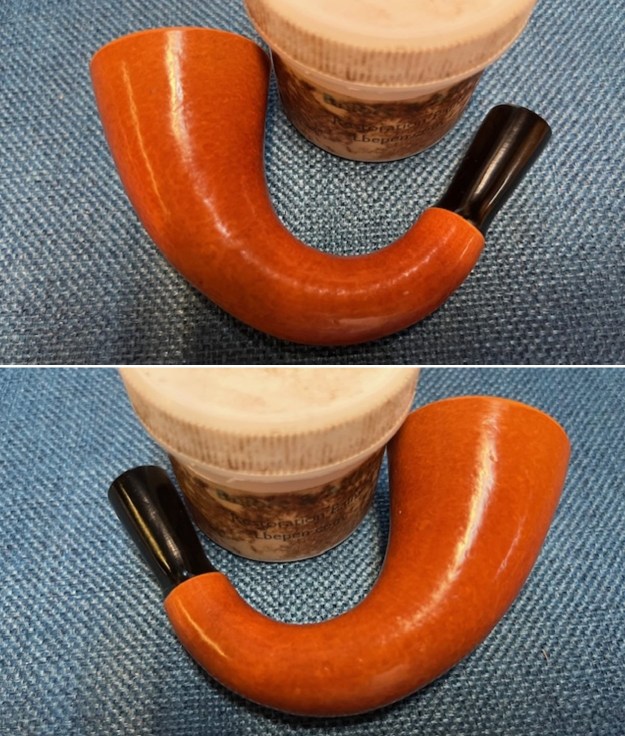
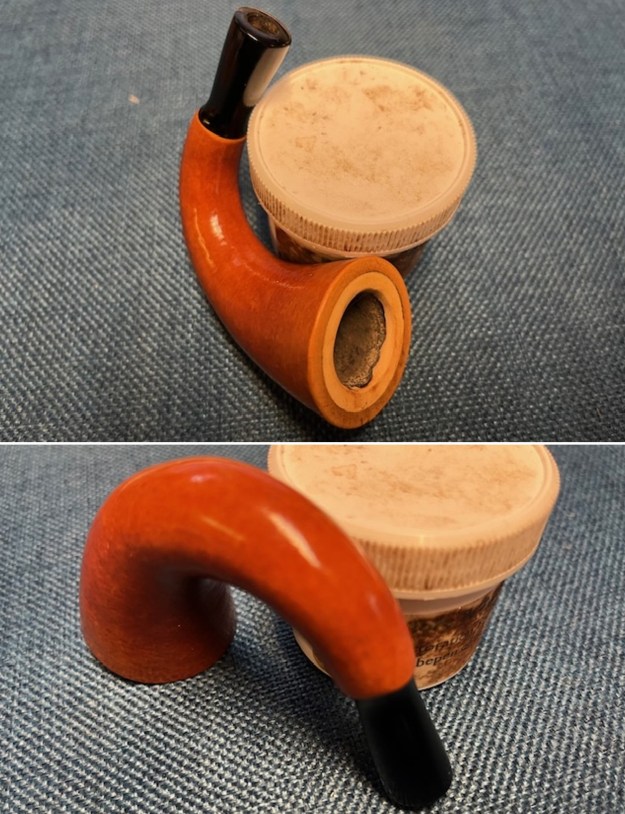
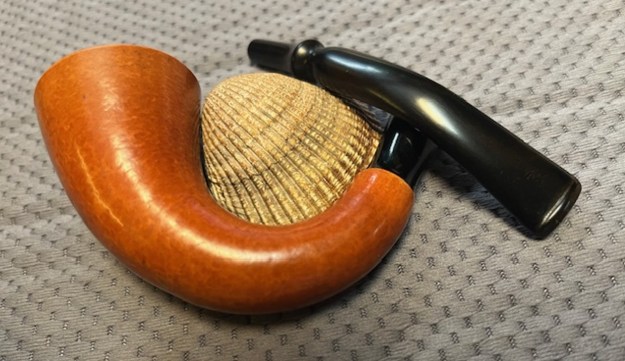
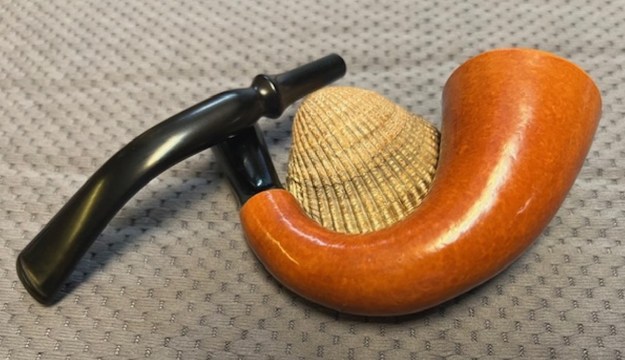
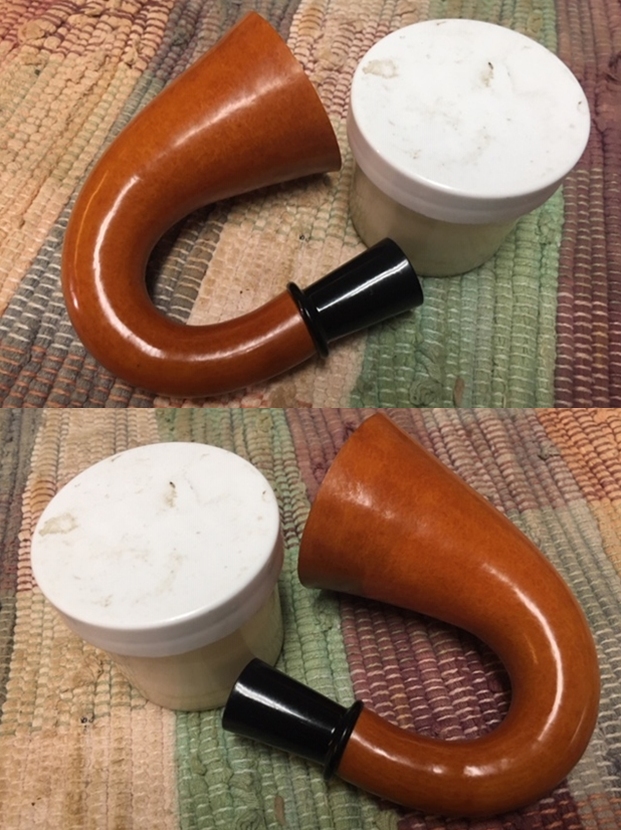
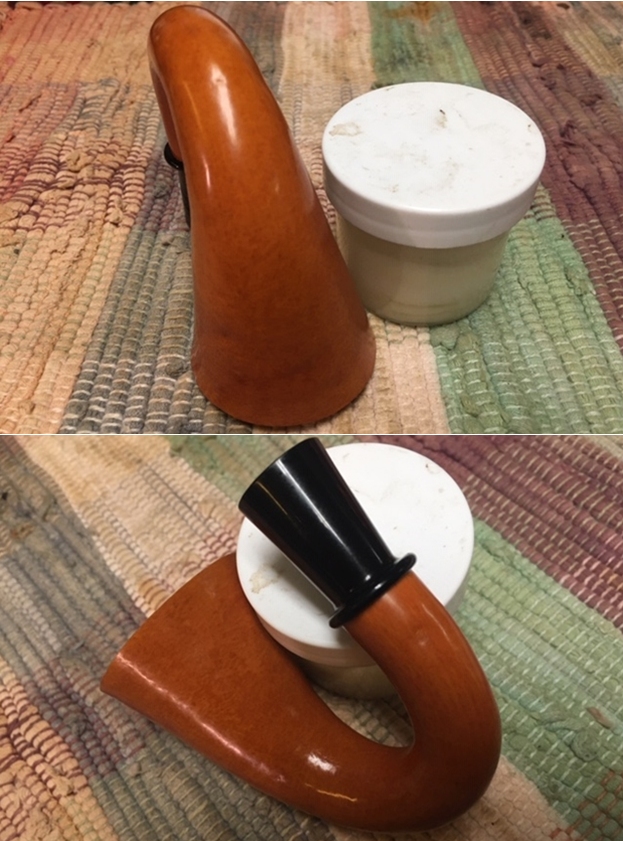
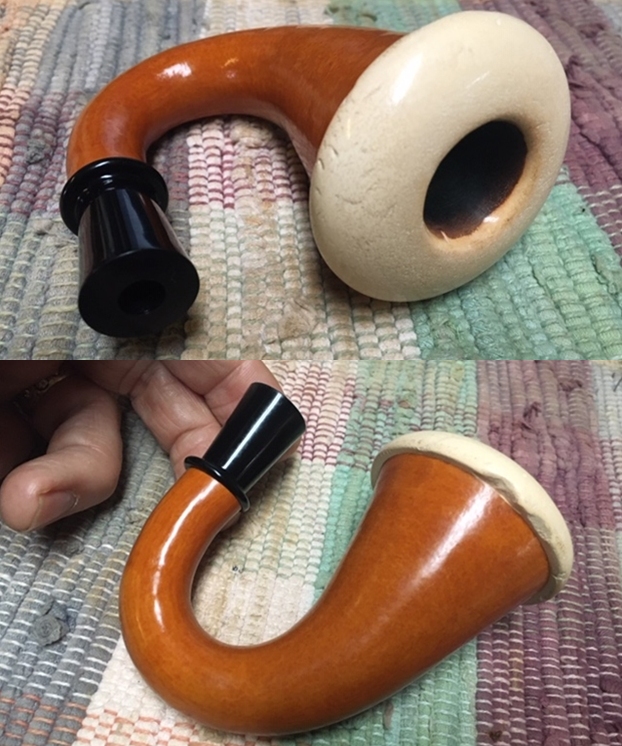
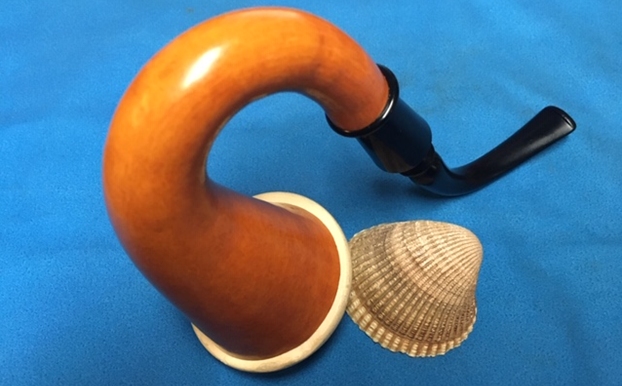
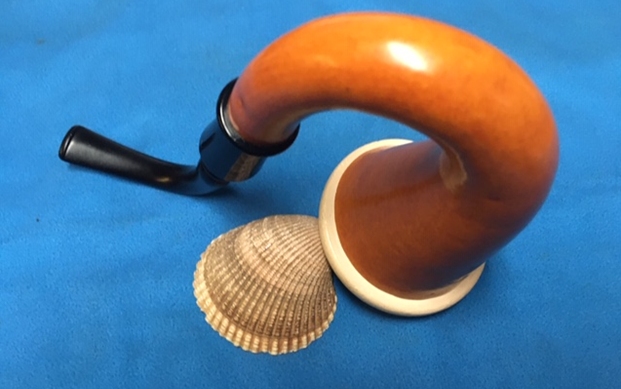
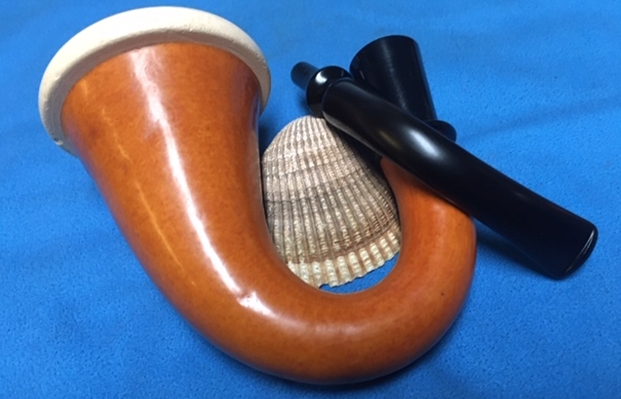
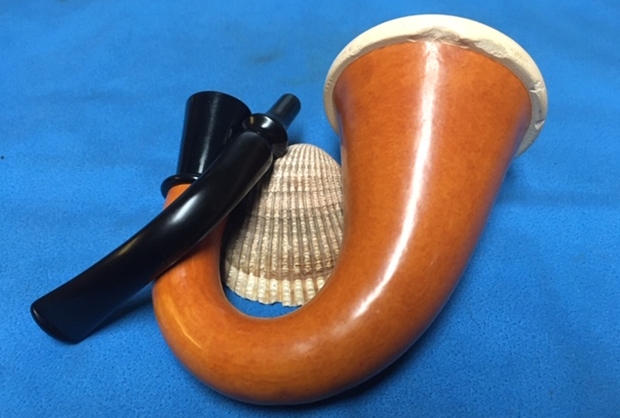
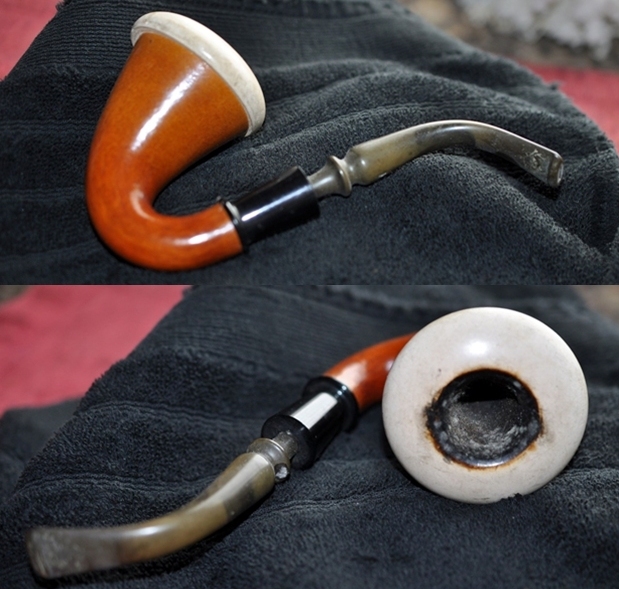
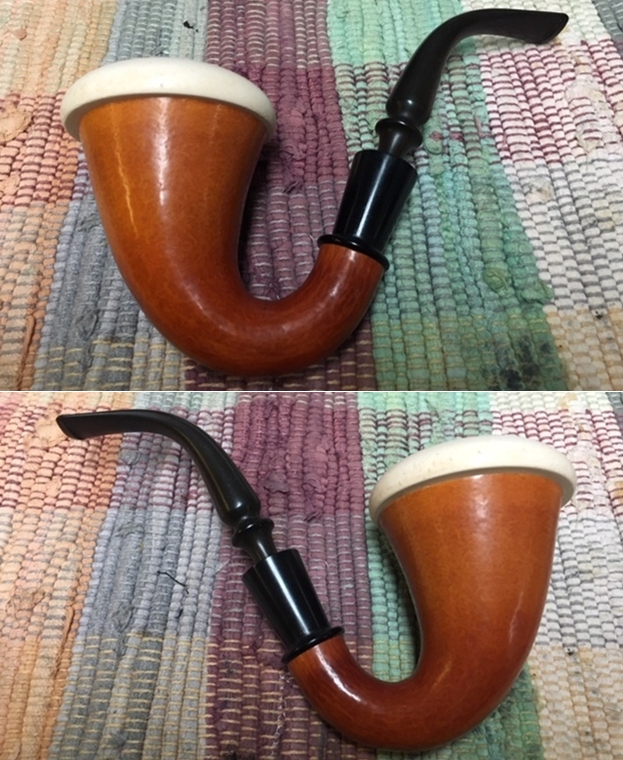
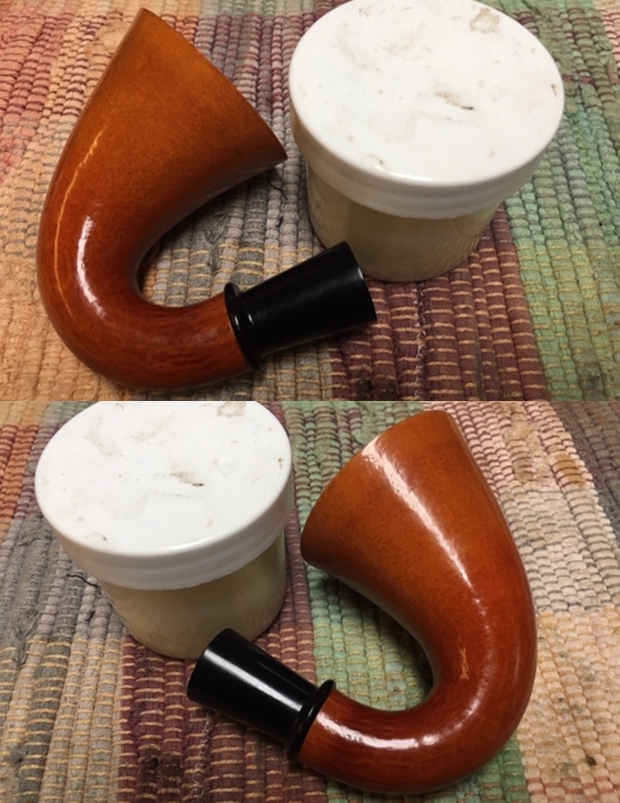
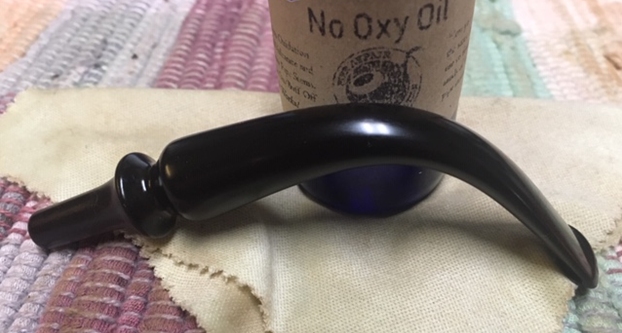
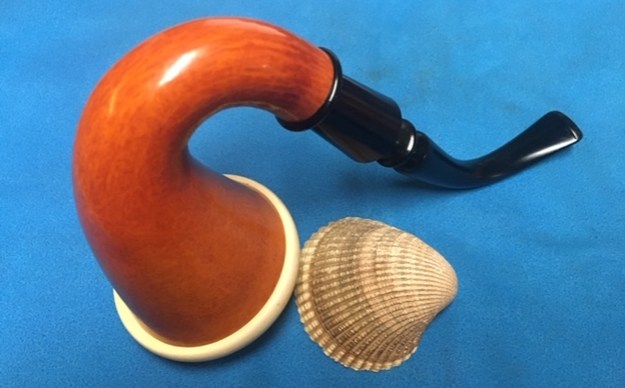
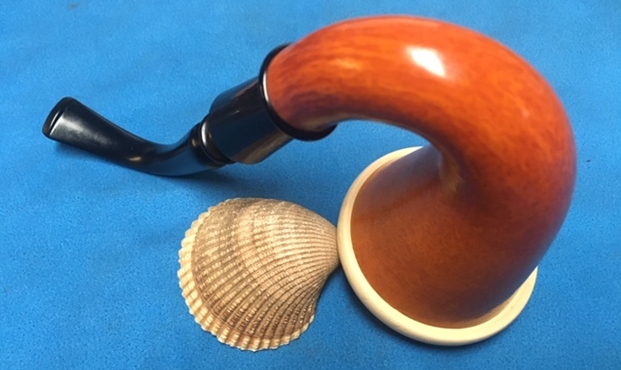
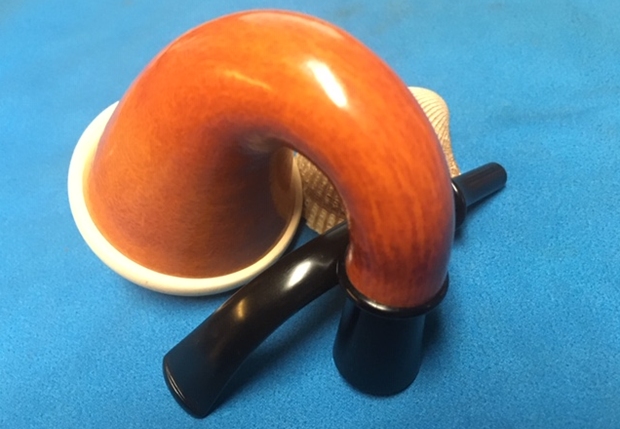
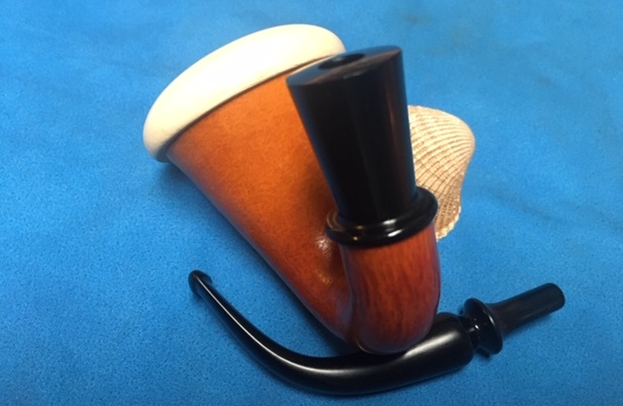
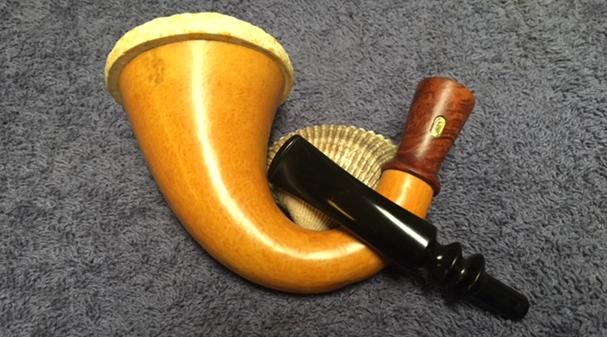
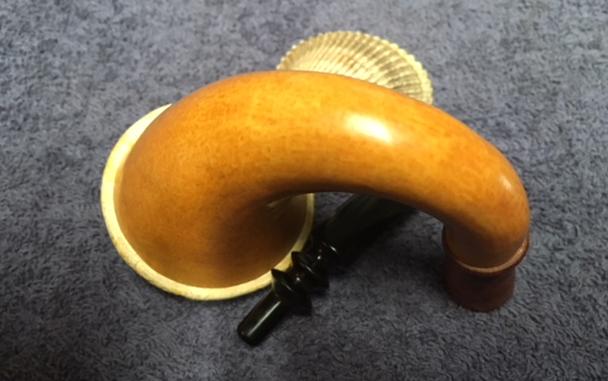
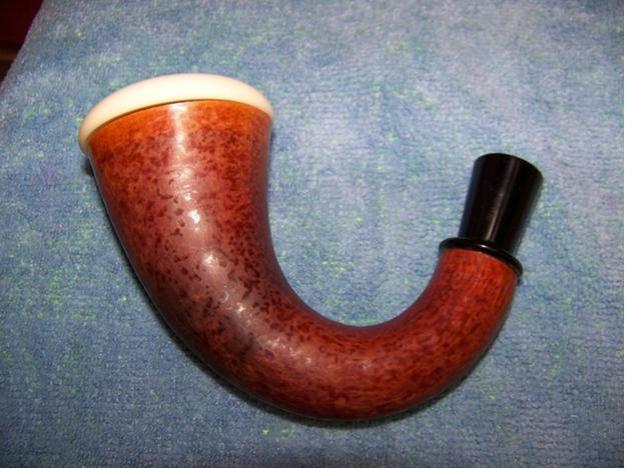
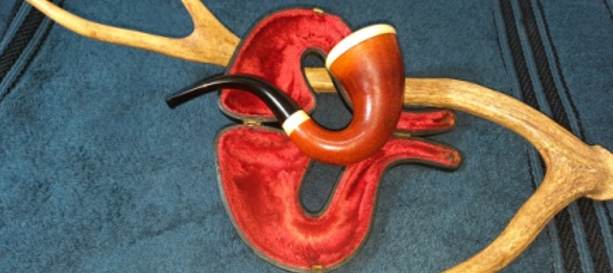
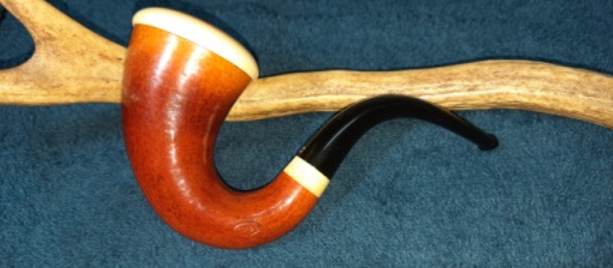
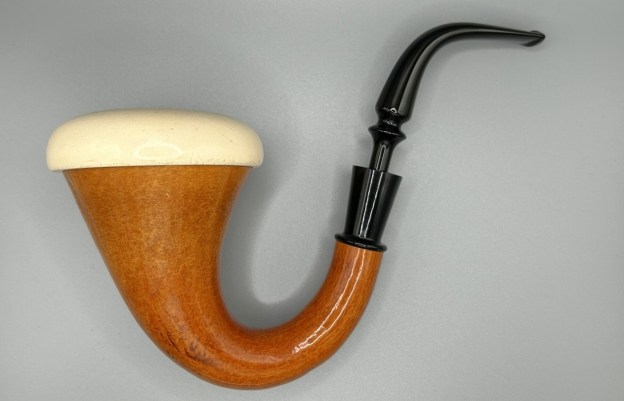
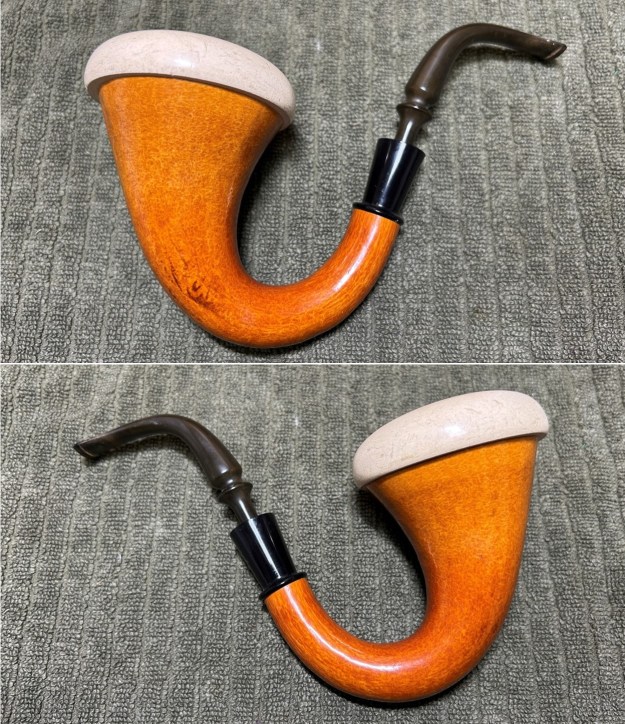
 To apply the finishing touches, I mount a cotton cloth buffing wheel on to my hand held rotary tool and apply a coat of Blue Diamond to the gourd and the stem to polish out the minor scratches. With a cotton buffing wheel that I use for carnauba wax, I apply a coat of the wax and continue to work on it till the complete coat of wax had been polished out. I mount a clean cotton cloth buffing wheel and give the entire pipe a once over buff. I finish the restoration by giving the entire pipe a rigorous hand buffing using a microfiber cloth to raise the shine further. The finished pipe looks beautiful and is ready to be added to my restored pipe collection. When, or if at all I will, smoke this pipe only time will tell!! Here are the pictures of the refurbished pipe.


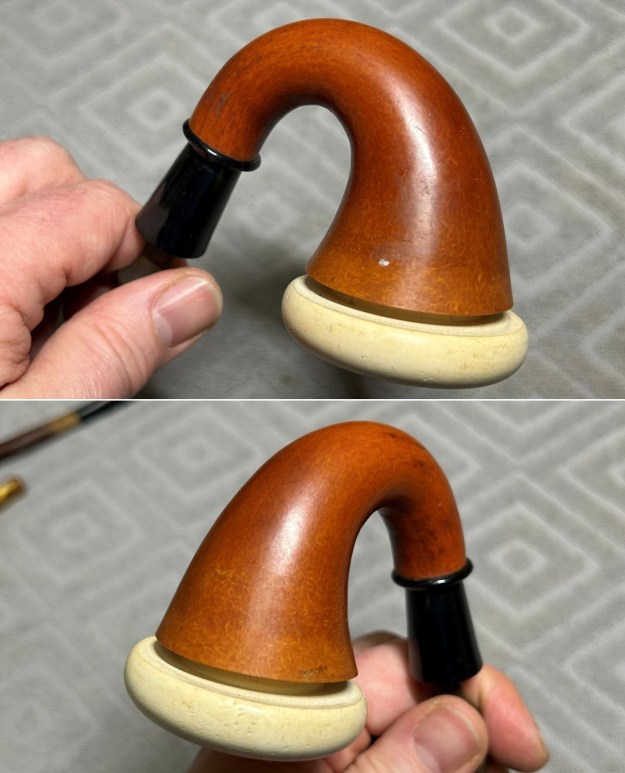
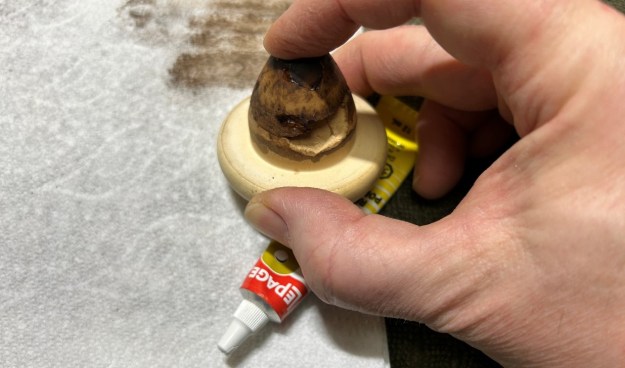
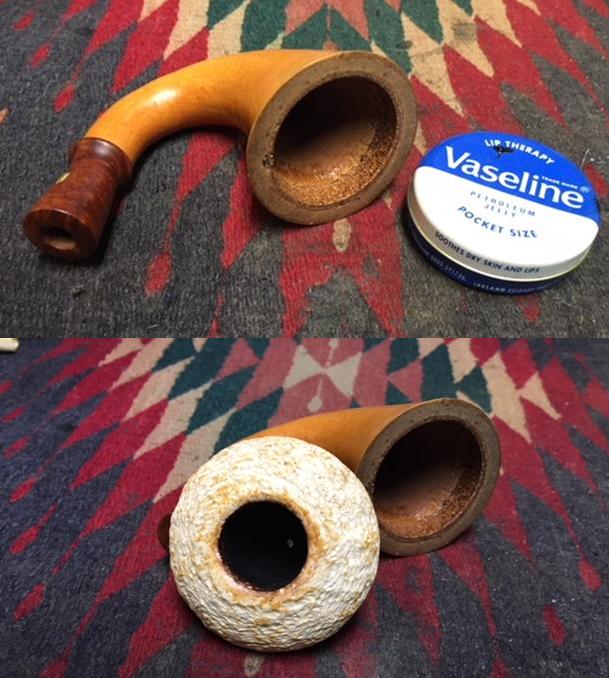
 P.S.: The alignment of the stem with the gourd stummel was restored to perfection once the threads of the bone tenon, threads at the shank end and the internals of the gourd was thoroughly cleaned. I rejuvenated and hydrated the cork gasket by applying a generous layer of natural Petroleum Jelly.
Thanks to all readers of rebornpipes who have spared a moment of their invaluable time in reading through this write up and as is always, your suggestions and advice are always welcome as this would not only help me but also help the new pursuers of this art.
Praying for the safety and well being of all the readers and their loved ones …
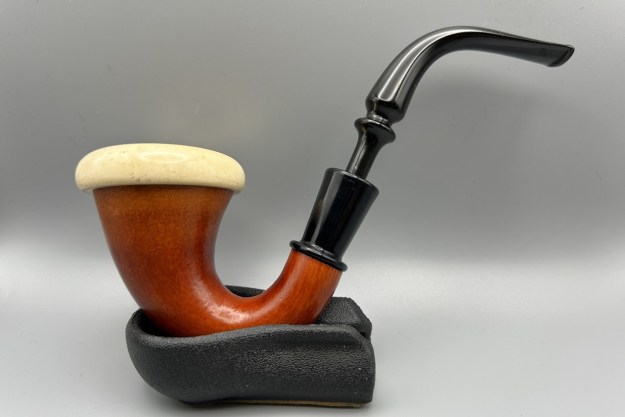
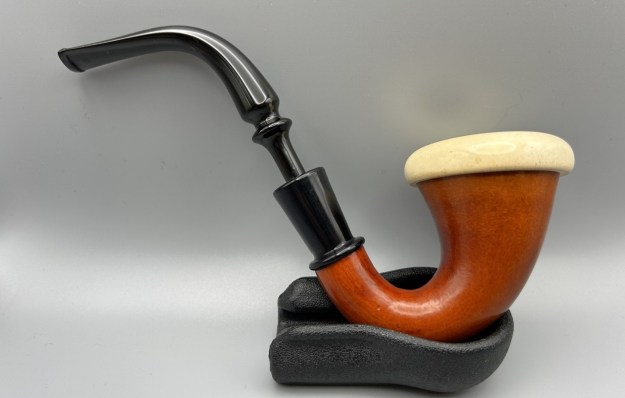
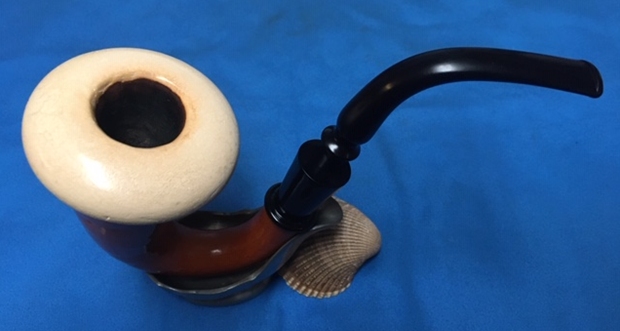
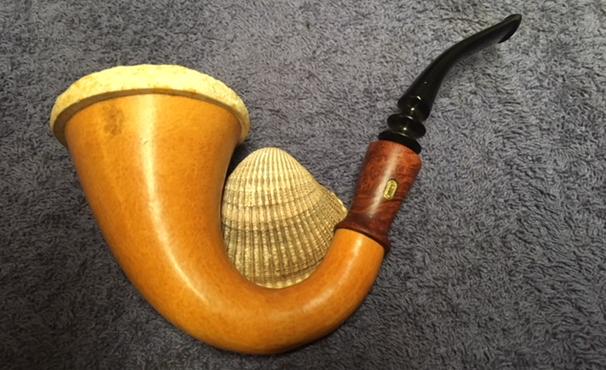
 Let’s take a closer look at it. The bowl is beautifully-shaped meerschaum. It has some minor signs of wear, but nothing serious. Similarly, the gourd is in lovely condition. No wear to speak of and the cork gasket is perfect. The gourd also has an acrylic shank extension in nice shape. Finally, the vulcanite stem is also great. It has some oxidation and some small signs of wear, but nothing to worry about.
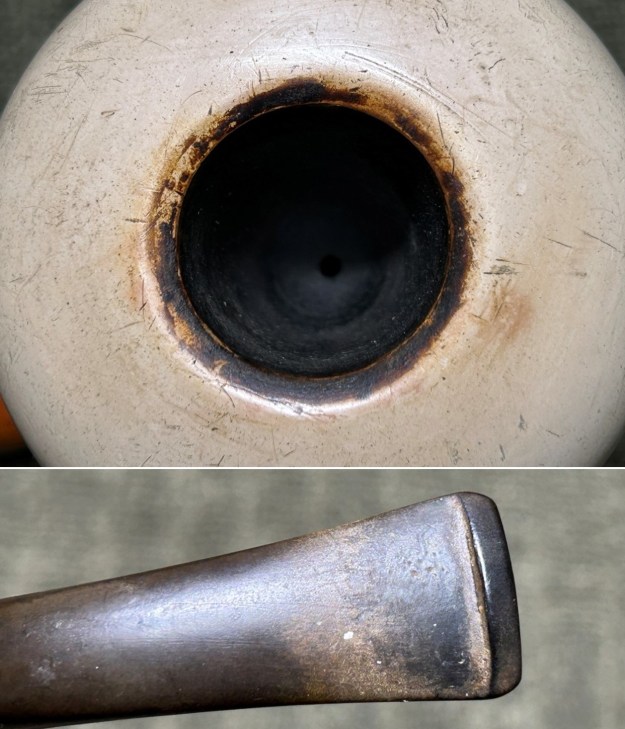
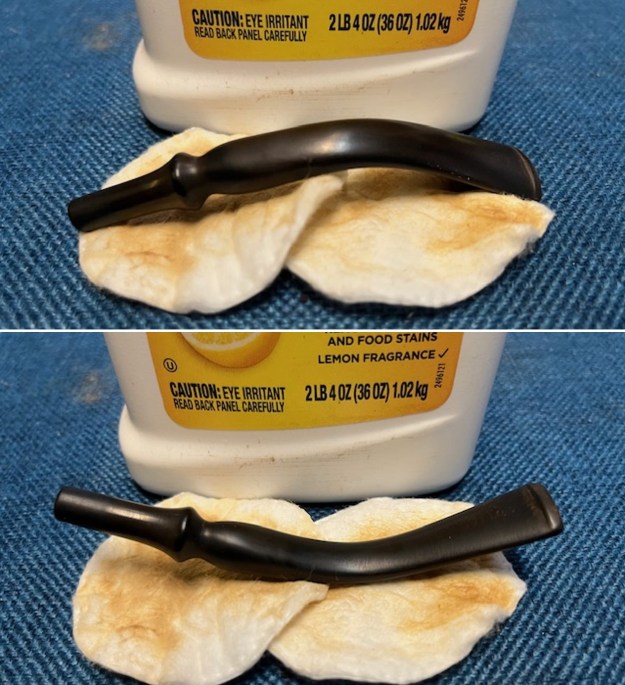
 I used isopropyl alcohol on a few cotton rounds and wiped down the stem to provide an initial cleaning of filth before moving on to the next steps. The primary cleaning came next. I disinfected the inside of the stem with both pipe cleaners and cotton swabs dipped in lemon-infused 99% isopropyl alcohol. I scrubbed thoroughly to make sure the interior was very clean.
 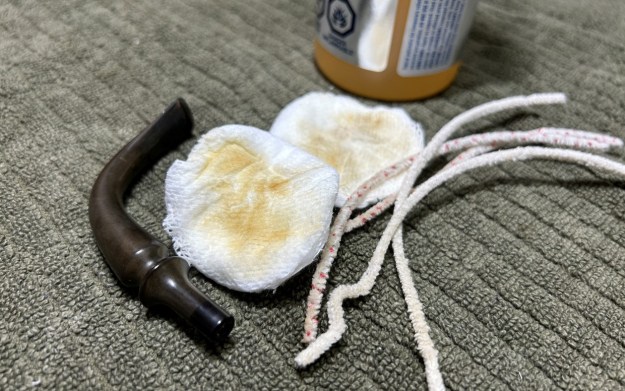 The goal of the next step is the removal (or minimization) of oxidation. Going to my sink, I used cream cleanser, cotton rounds, and a toothbrush, and scoured the stem to remove as much surface oxidation as possible. As the photos show, the result was a hideous, ochre-coloured mess – but better off the stem than on it.
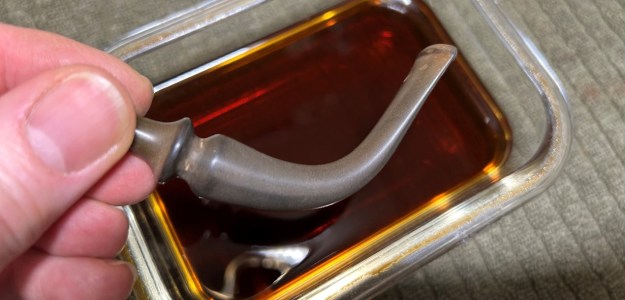
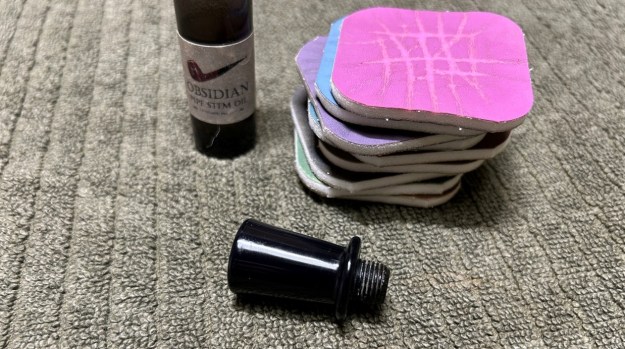
 Once the stem was reasonably clean, I soaked it overnight in some Briarville Stem Oxidation Remover. This solution works to draw oxidation in the stem to the surface of the vulcanite. This is a major aid and an important step in ensuring a clean stem. The following day, I drew out the stem from its bath and scrubbed the lingering fluid with a toothbrush.
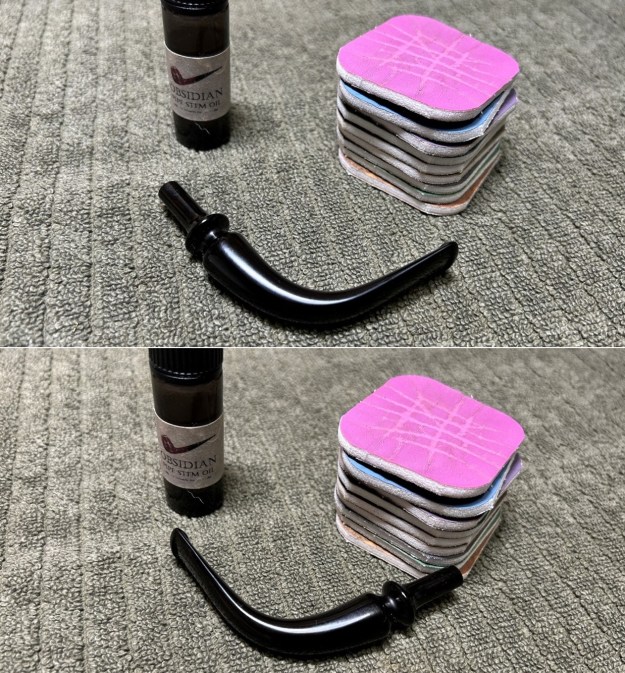
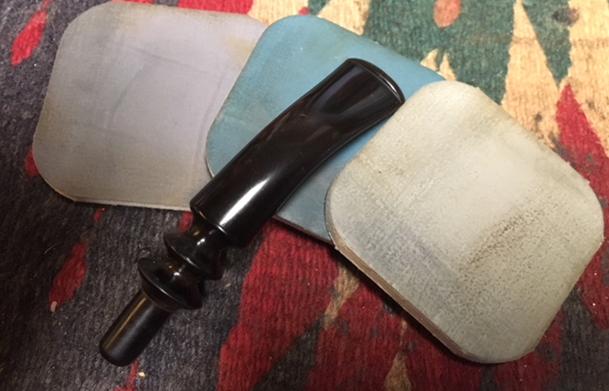
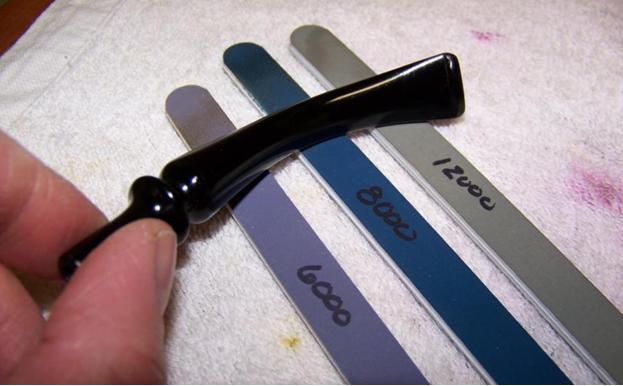
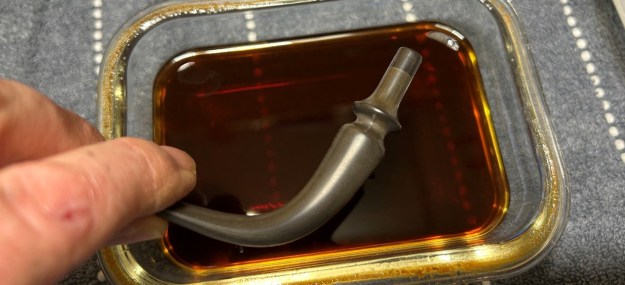 The penultimate step for the stem is sanding. I used all nine of the micromesh sanding pads (1,500 through 12,000 grit) to sand out flaws, even out the vulcanite, and provide gentle polishing of the finished surface. I also applied pipe-stem oil while using the last five micromesh pads. There was a wonderful, deep black shine to the stem when I was done.
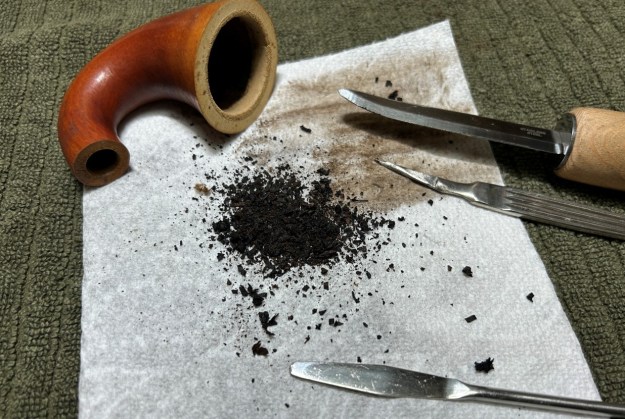
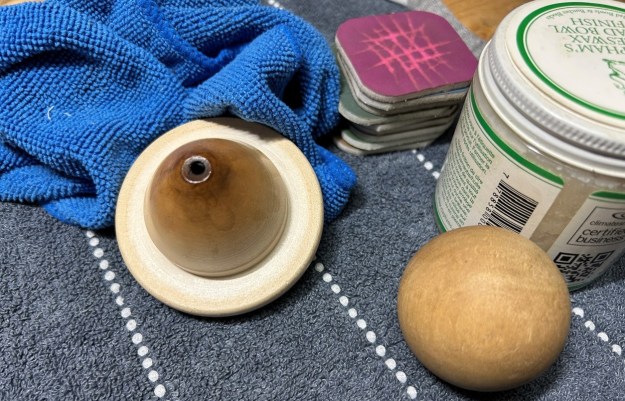
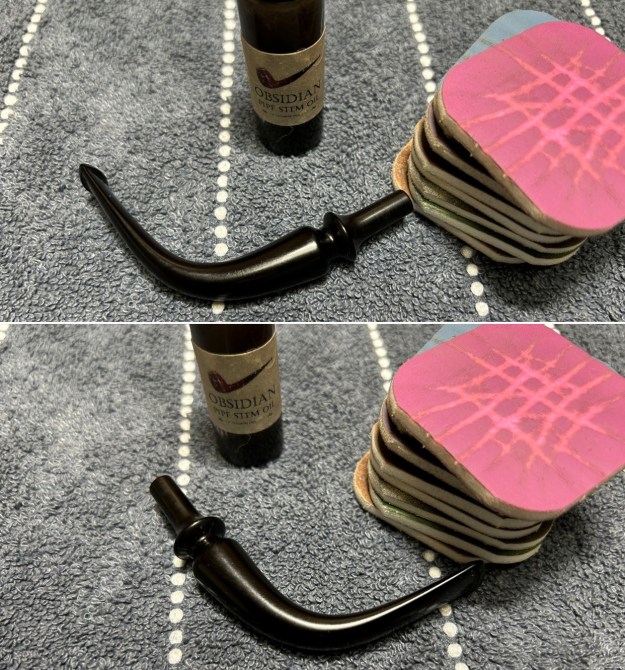 As the stem was (nearly) complete, I moved on to the bowl. The first step was to ream it out – that is to say, remove all the cake inside the bowl. This accomplished a couple of things. First (and most obviously), it cleaned the bowl and provided a refurbished chamber for future smoking. Second, when the old cake was removed, I could inspect the interior walls of the bowl and determine if there was damage or not. Meerschaum is too fragile for a proper reamer, so I used 220-grit sandpaper on the end of a wooden dowel to clean out the bowl and it turned out very well. One of the frustrations of cleaning meerschaum is that once smoked, the stains never go away. However, I did what I could and it definitely improved.
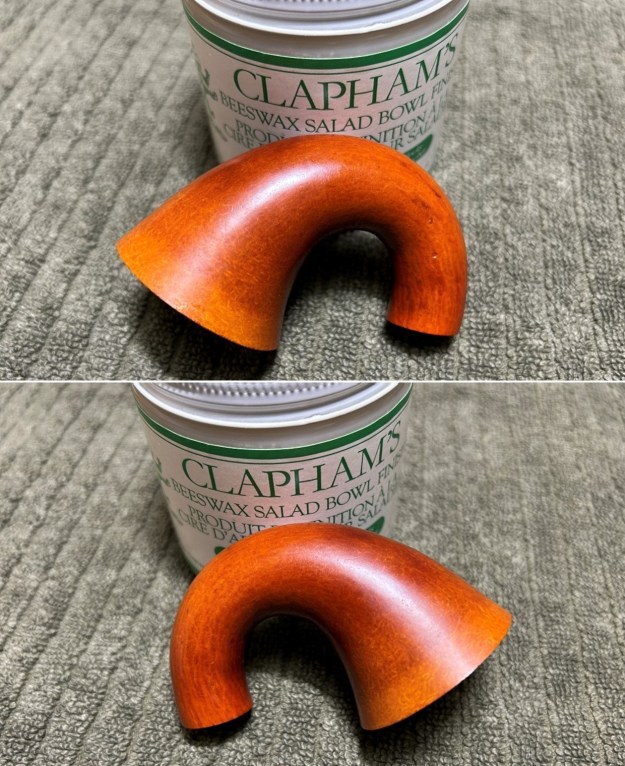
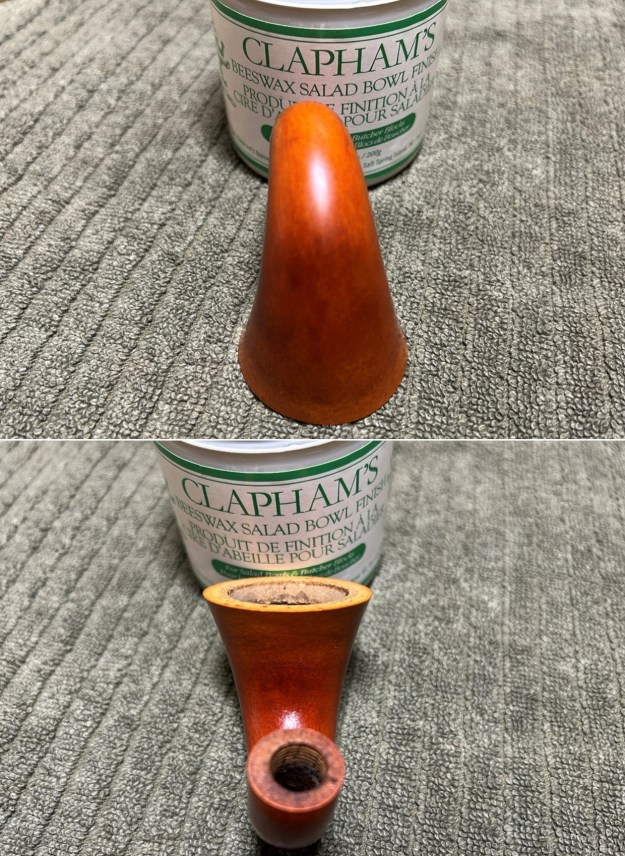
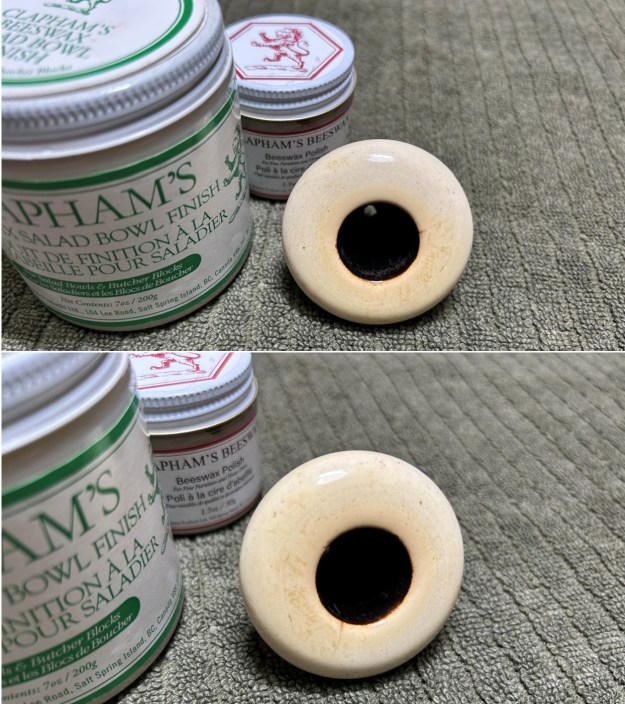
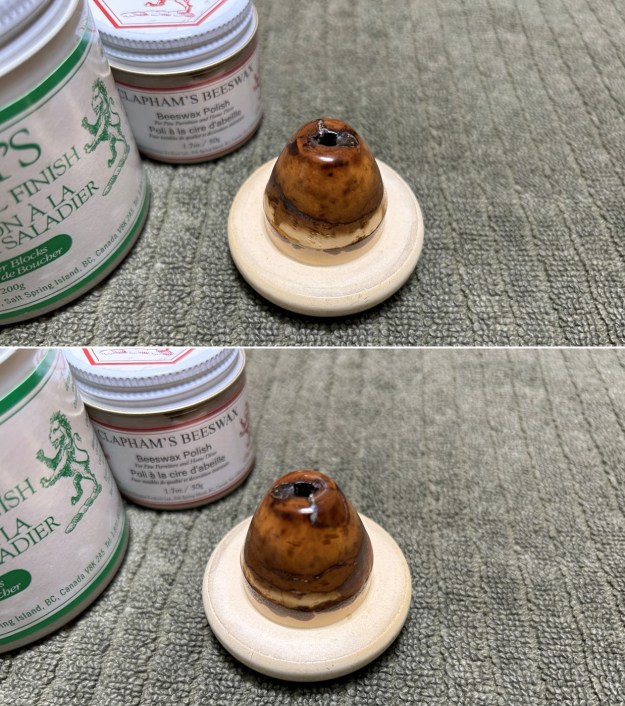
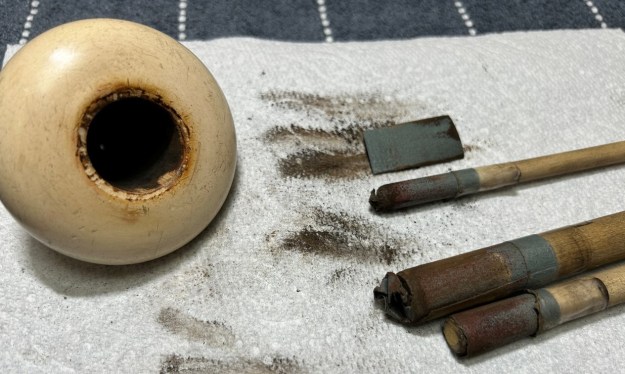 I sanded down the entire piece of meerschaum with my micromesh pads. I also rubbed some Clapham’s Beeswax into the meerschaum. Then I let it sit for 20 minutes, buffed it with a microfiber cloth and then repeated the beeswax process. Worked like a charm!
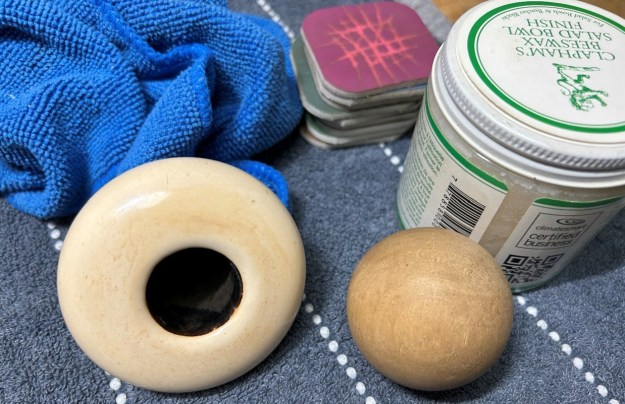
 I wiped down the outside of the gourd, using a solution of a pH-neutral detergent and some distilled water, with cotton rounds. I cleaned inside the gourd gently by scraping with my reaming knife and some tube brushes. I was pleased with the results.
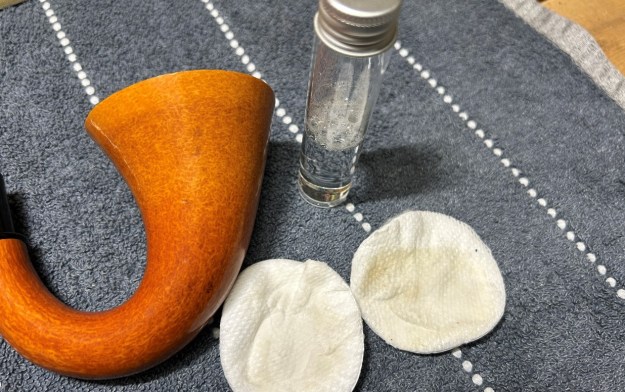
 I sanded down the acrylic shank extension (but not the gourd) with only the finest of the micromesh pads. I also cleaned out the inside with cotton swabs and alcohol. It wasn’t very dirty. I then coated the gourd with LBE Before & After Restoration Balm and let it sit for 30 minutes. After that, I buffed it with the microfibre cloth.
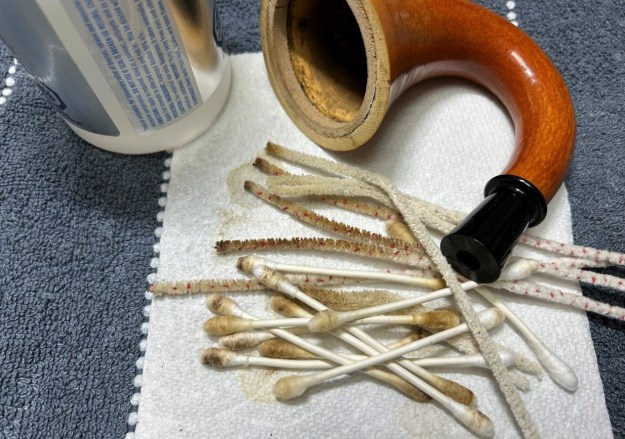
 Finally, I applied some light lubricant to the cork gasket. Even though the gasket was in perfect shape, it’s a good idea to lubricate it in this way in order to maintain its elasticity. I set it aside to absorb and moved on.
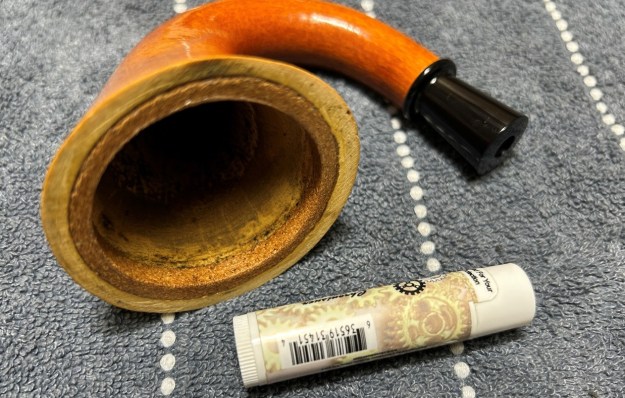 Before I went off to the buffer, I gave the meer and the gourd another going over with Clapham’s beeswax rub. This really worked well. I only took the stem to the buffer, as meerschaum and gourds don’t tolerate those high speeds very well!