Blog by Steve Laug
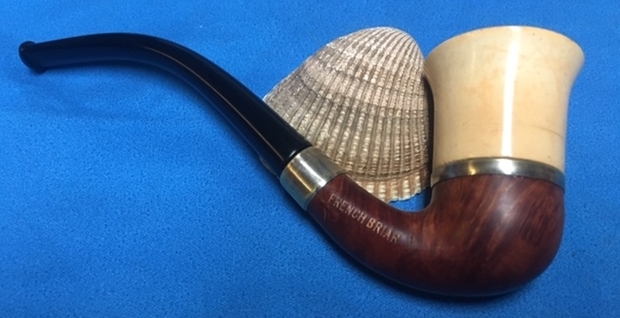
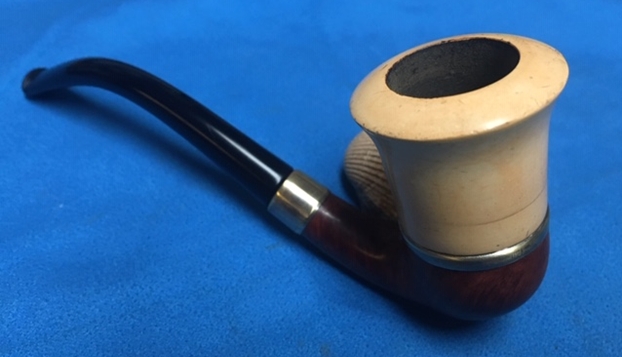
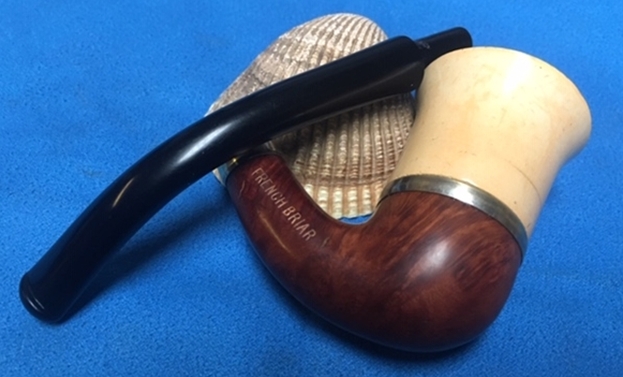
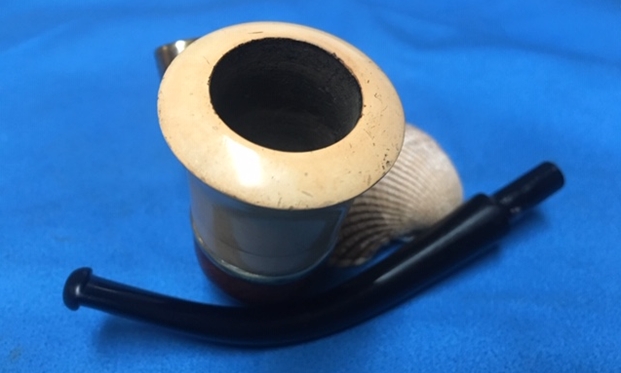
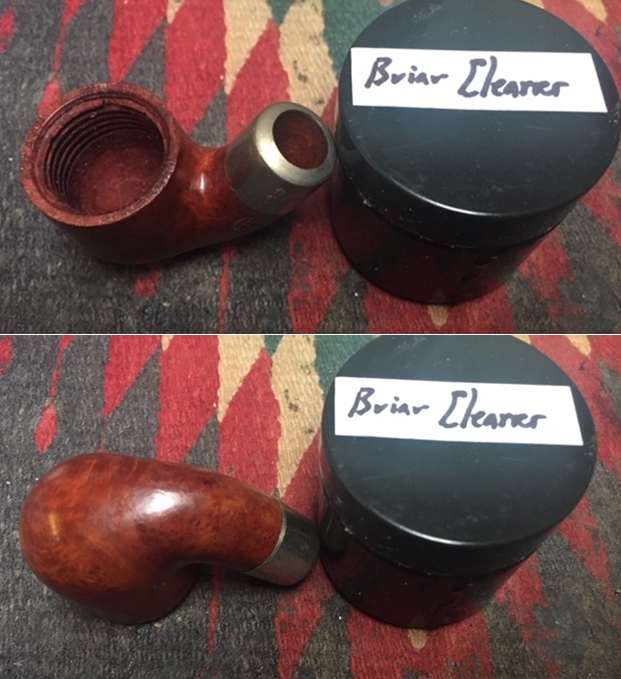
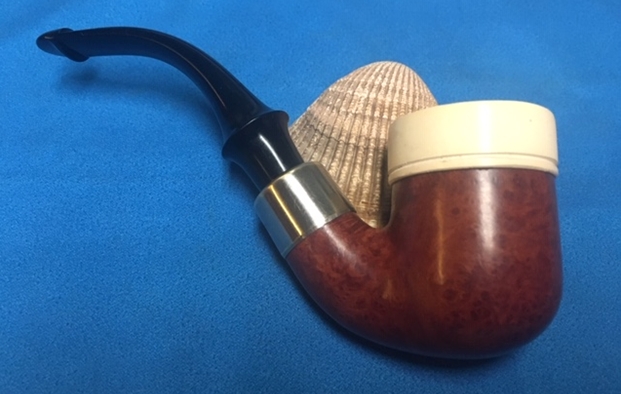
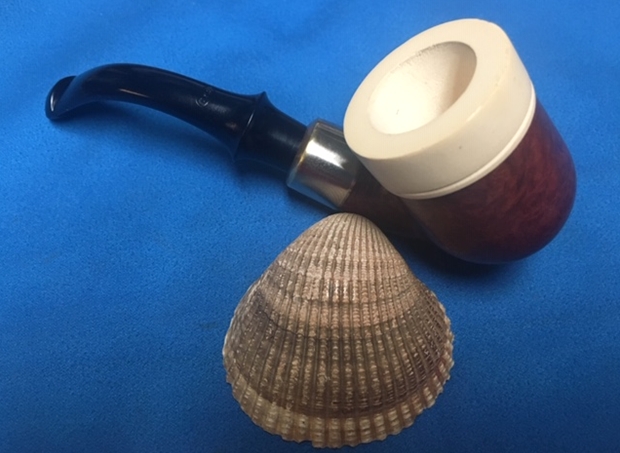
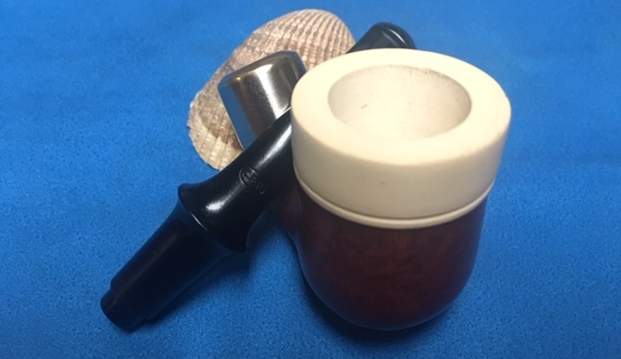
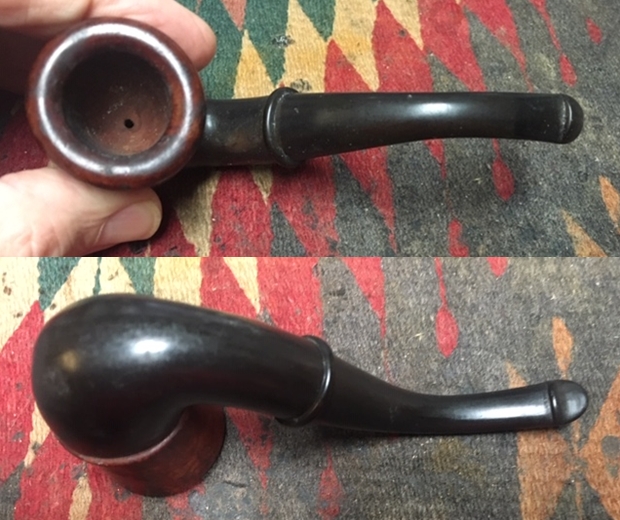
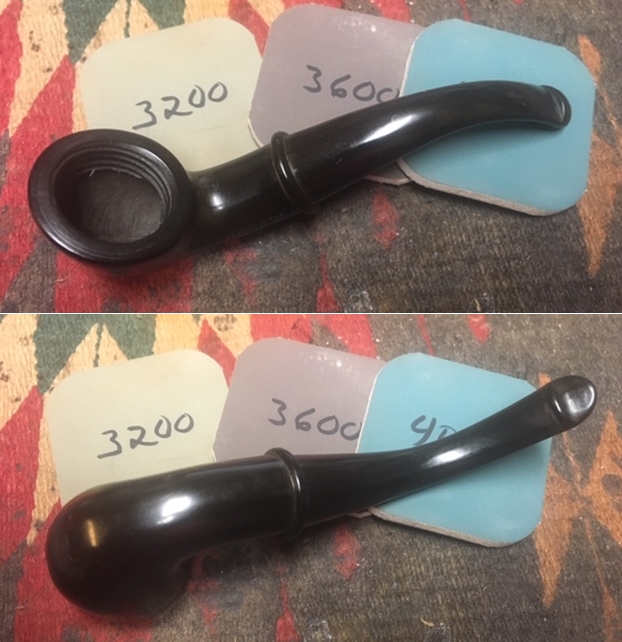
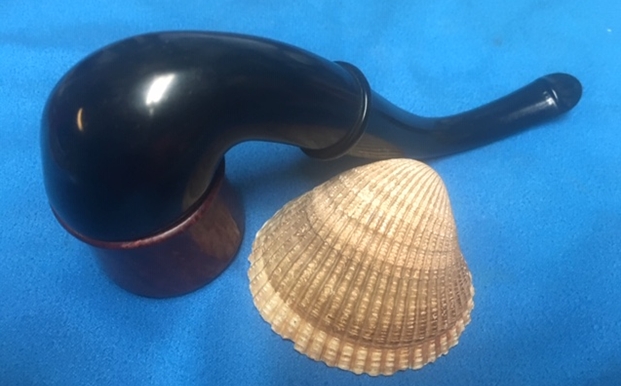
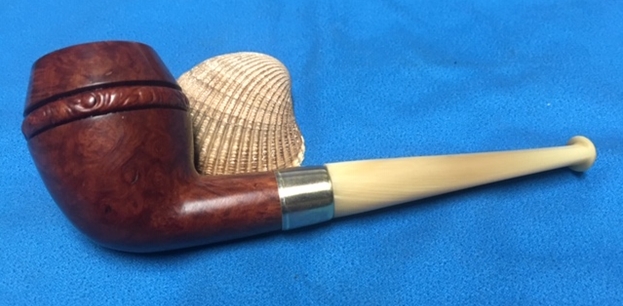
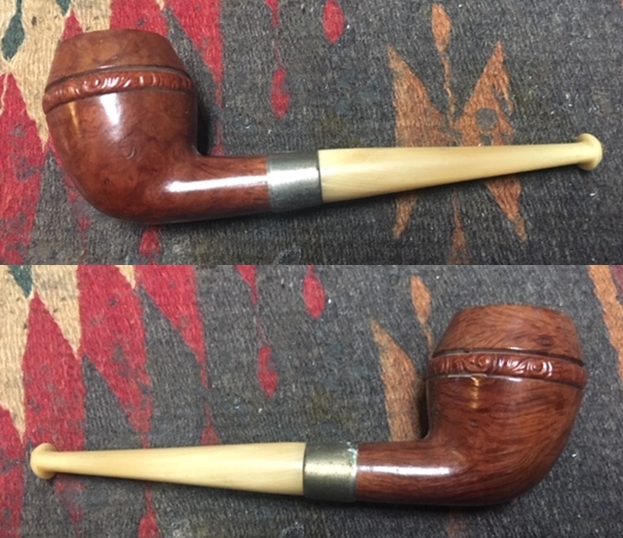
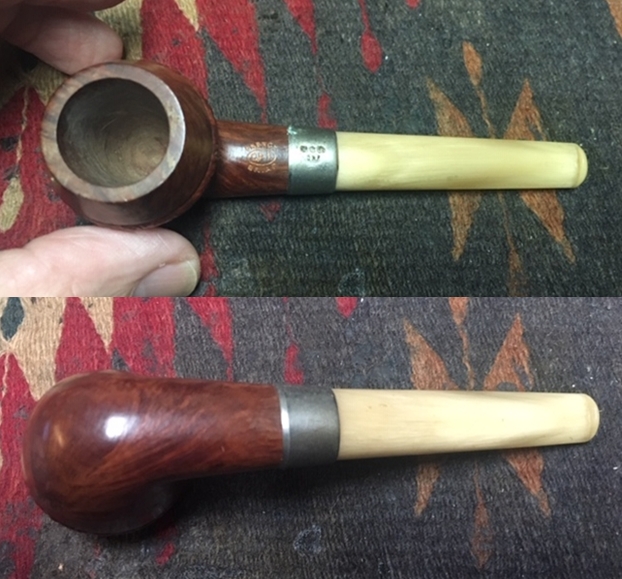
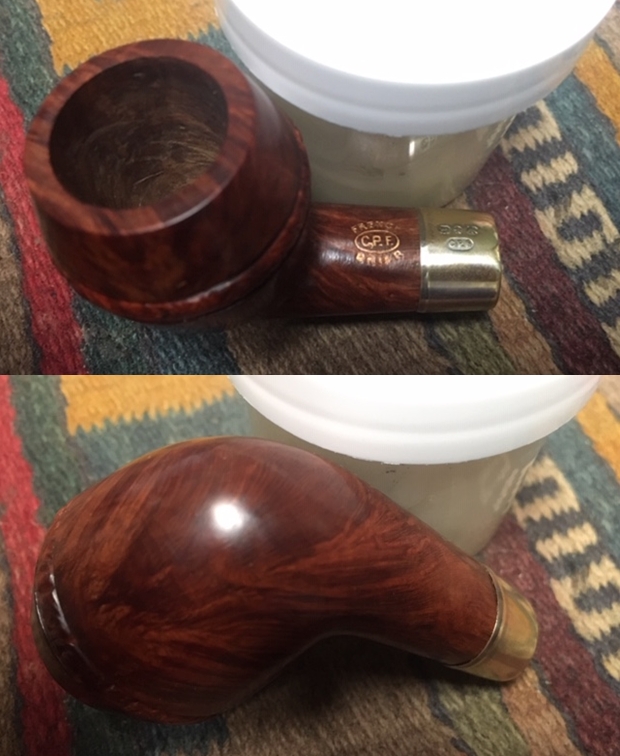
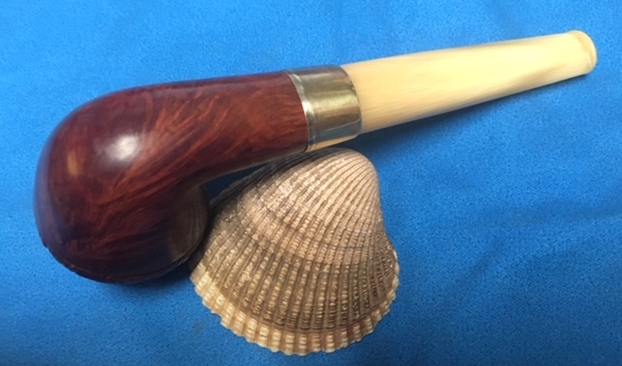
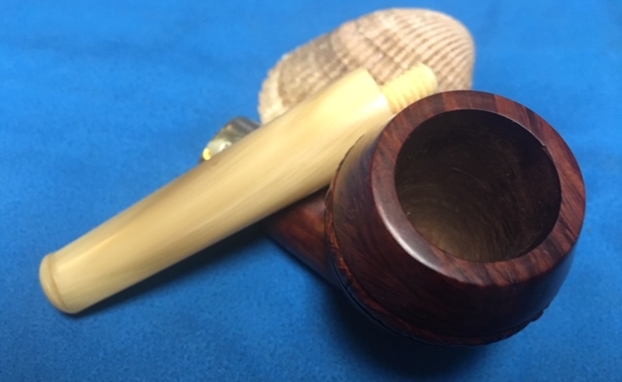
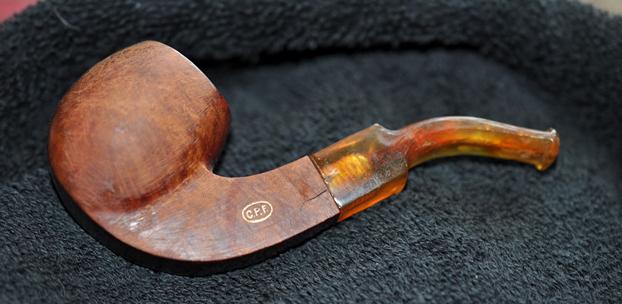
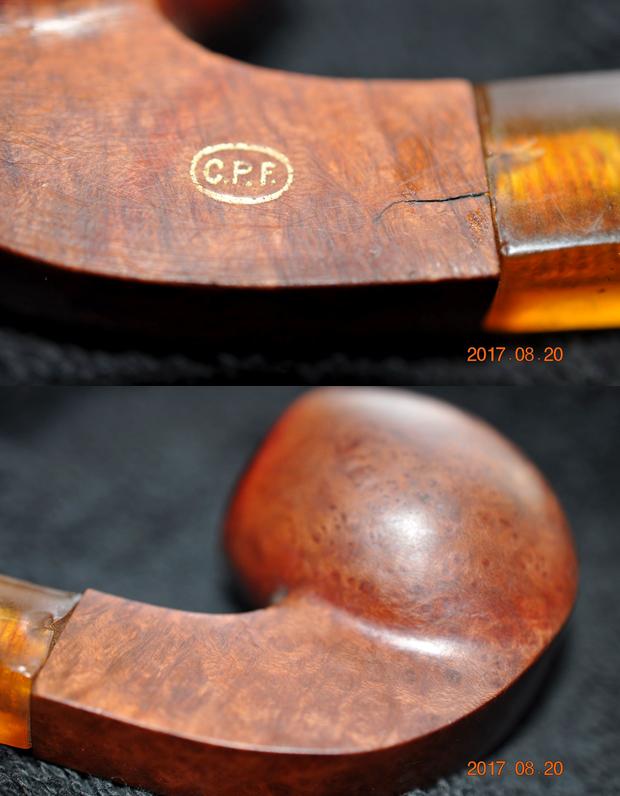
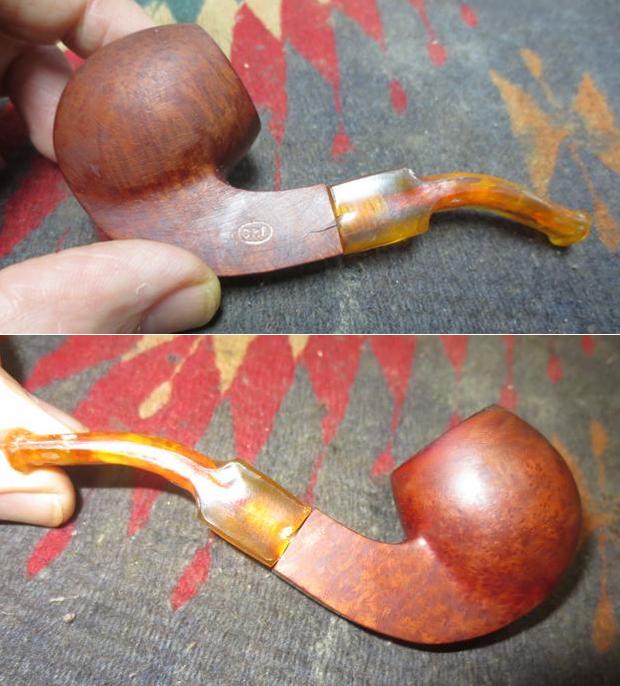
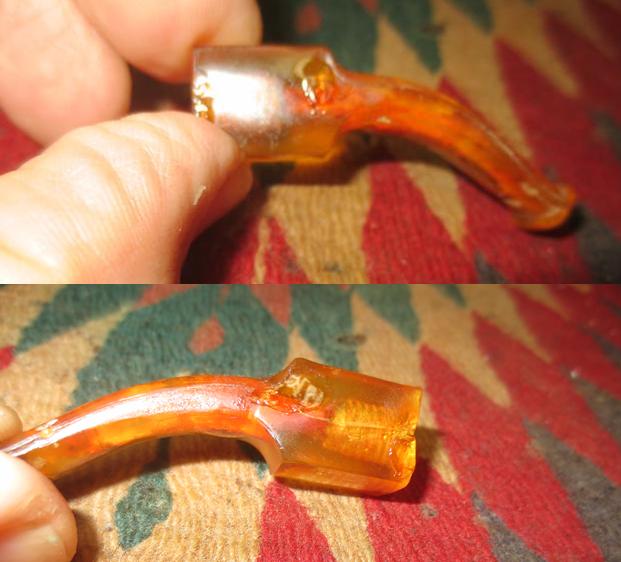
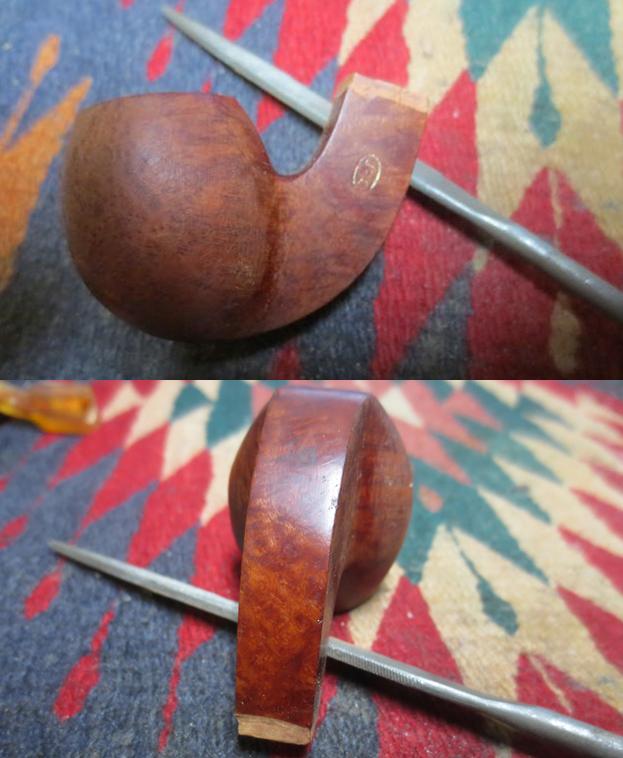
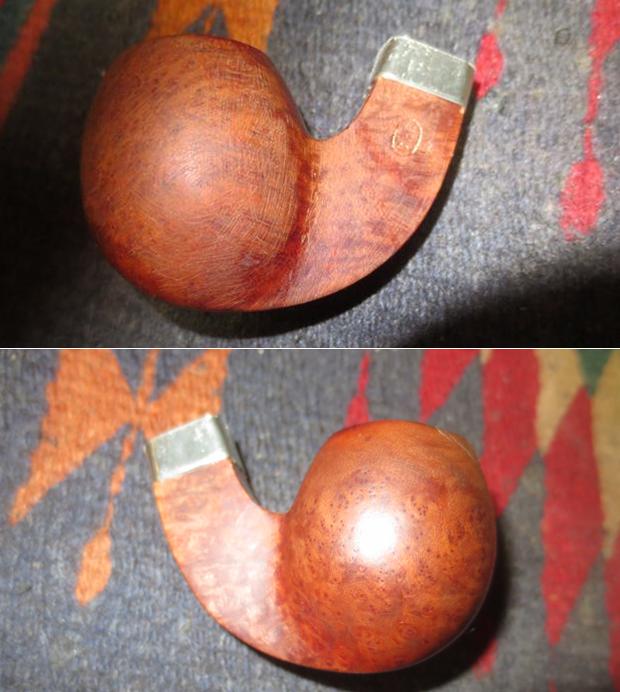
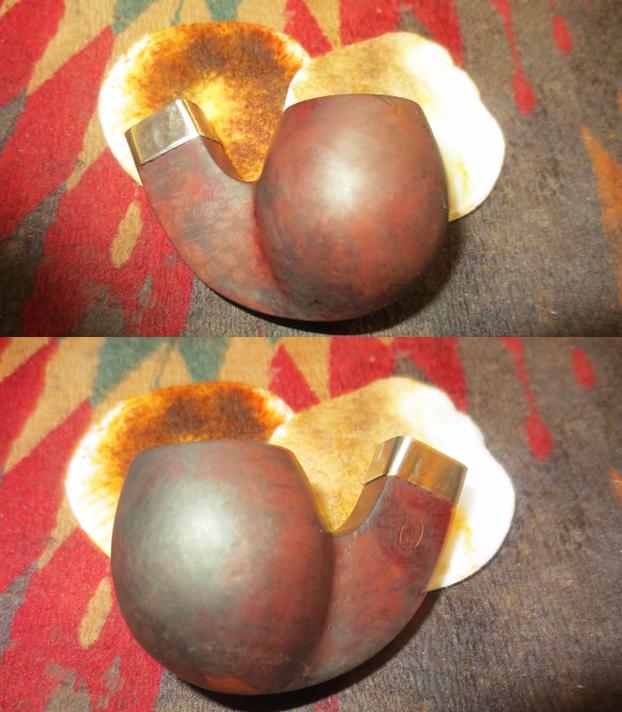
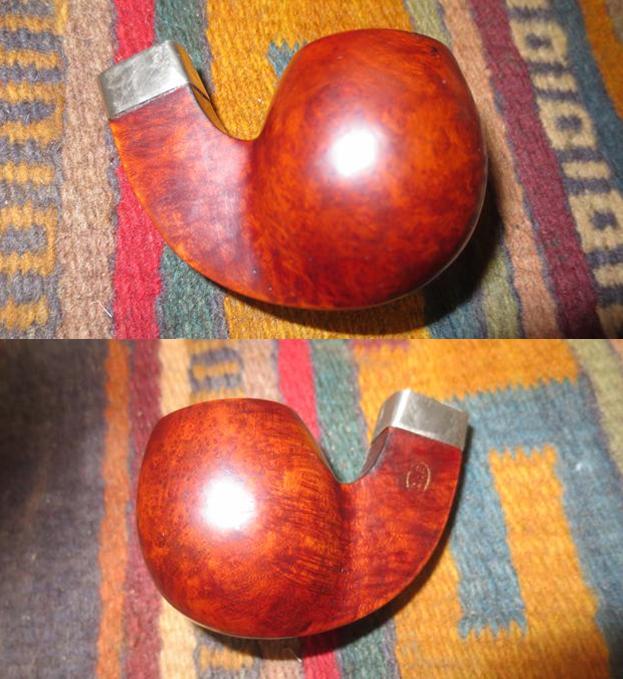
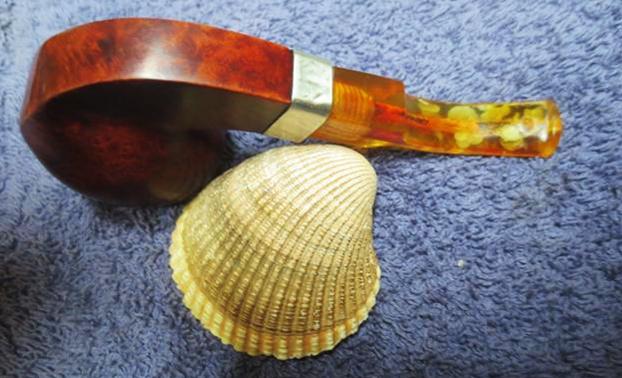
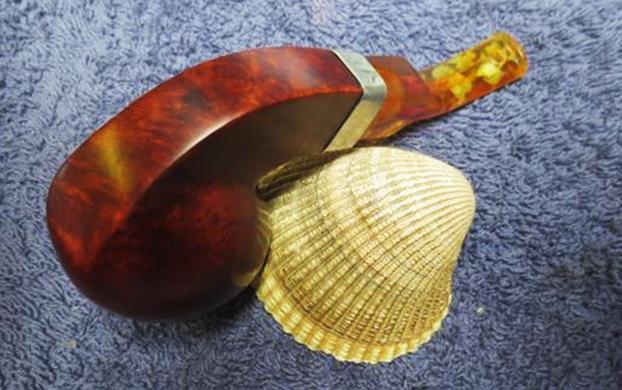
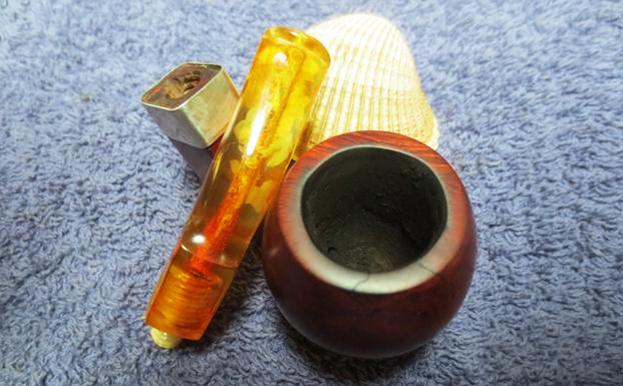
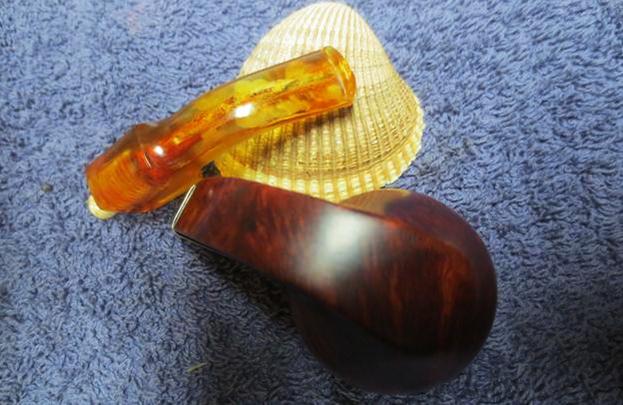
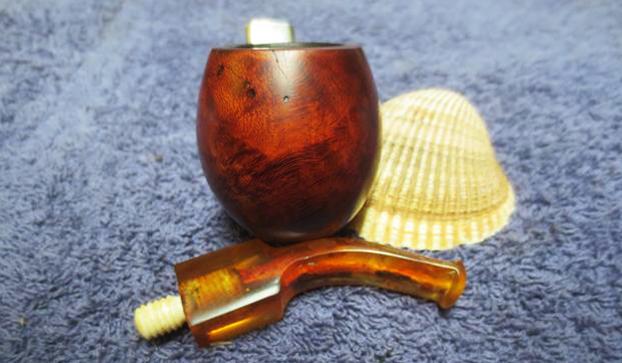
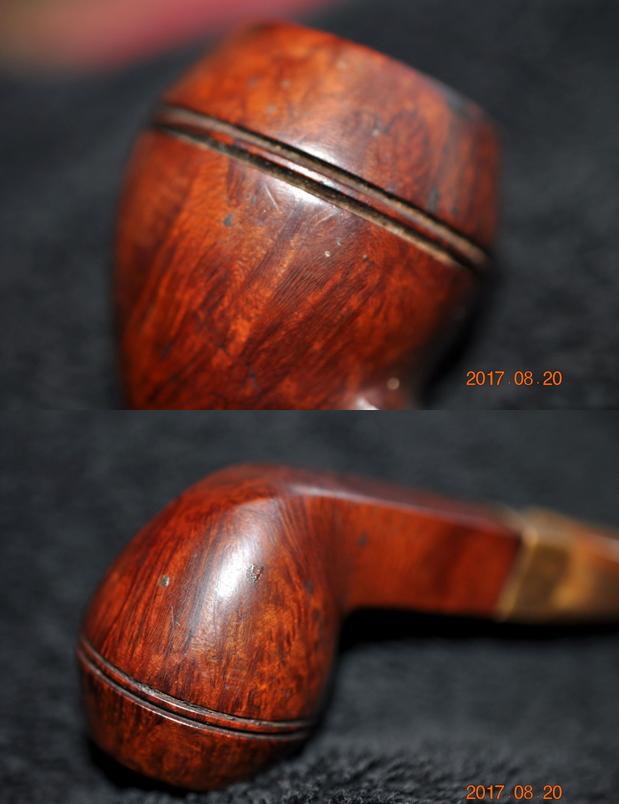
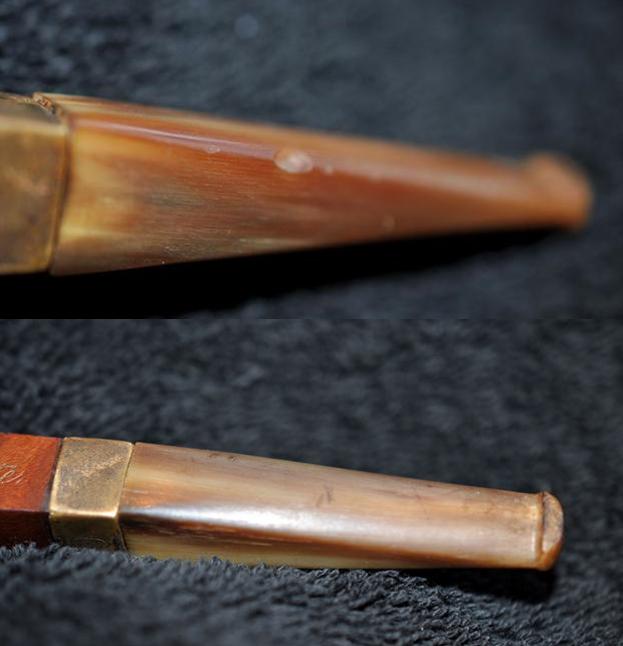
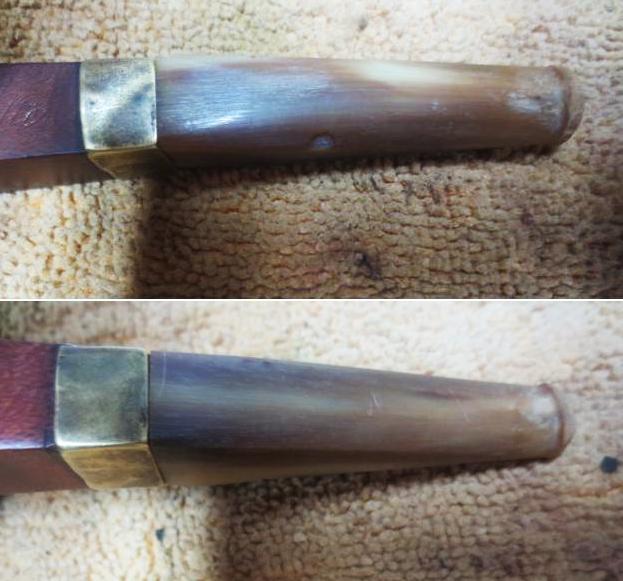
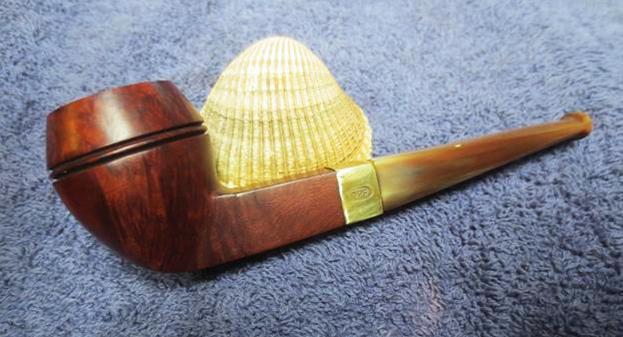
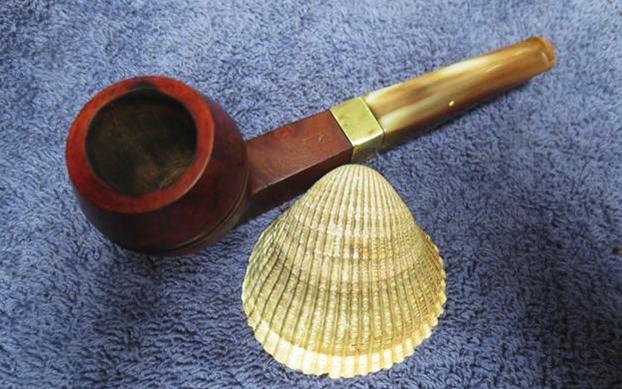
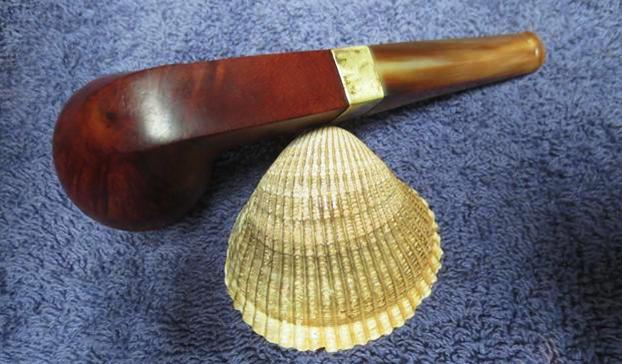
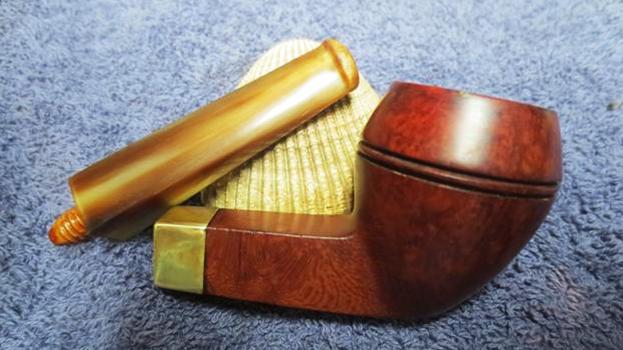
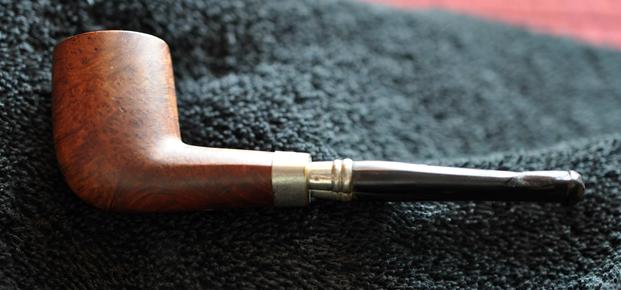
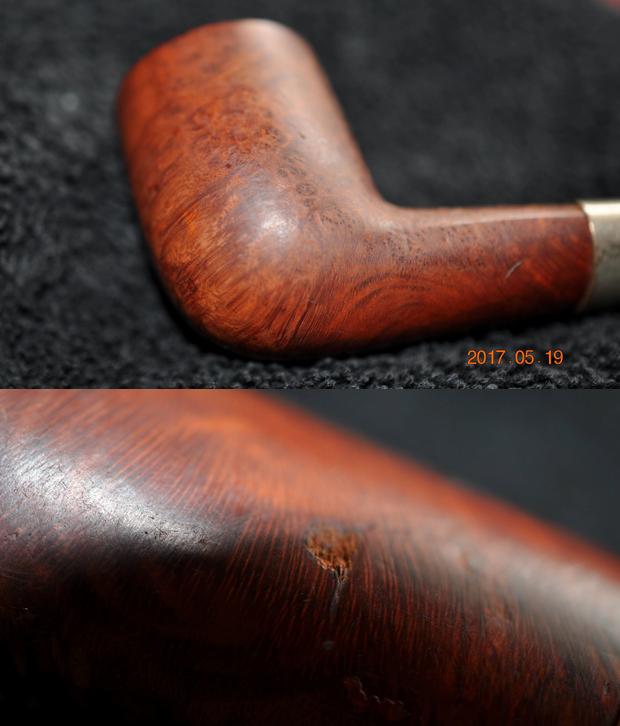
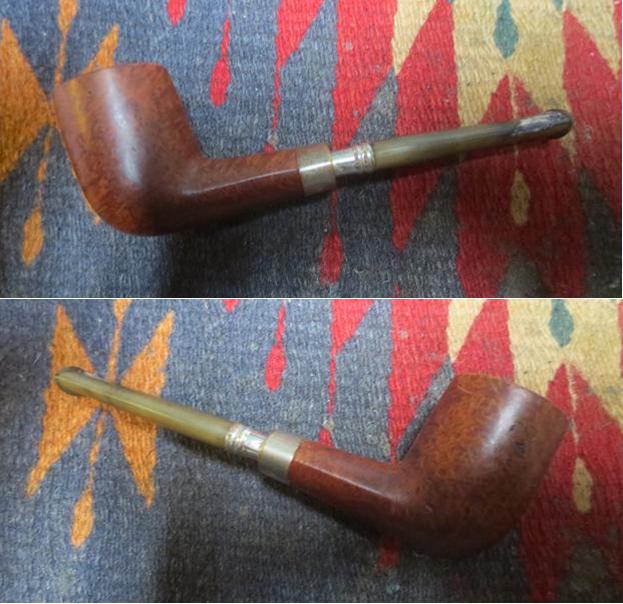
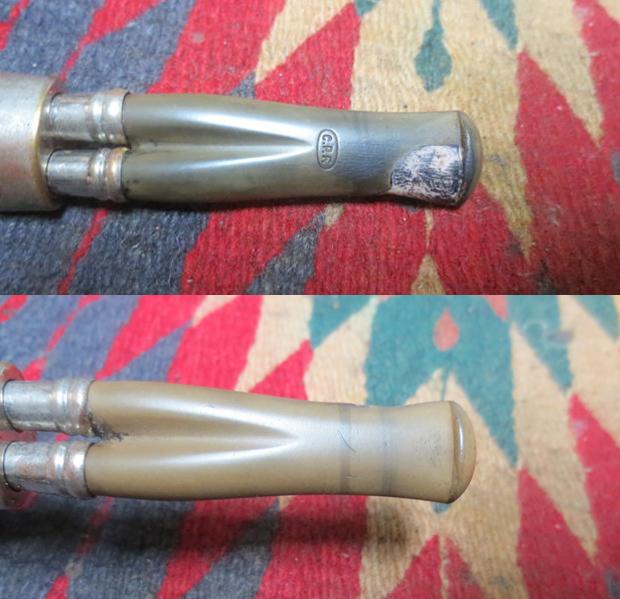
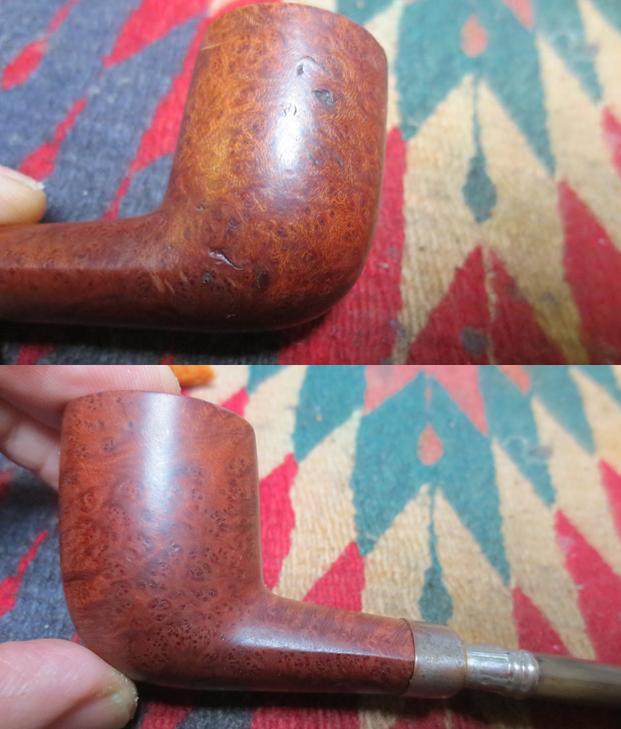
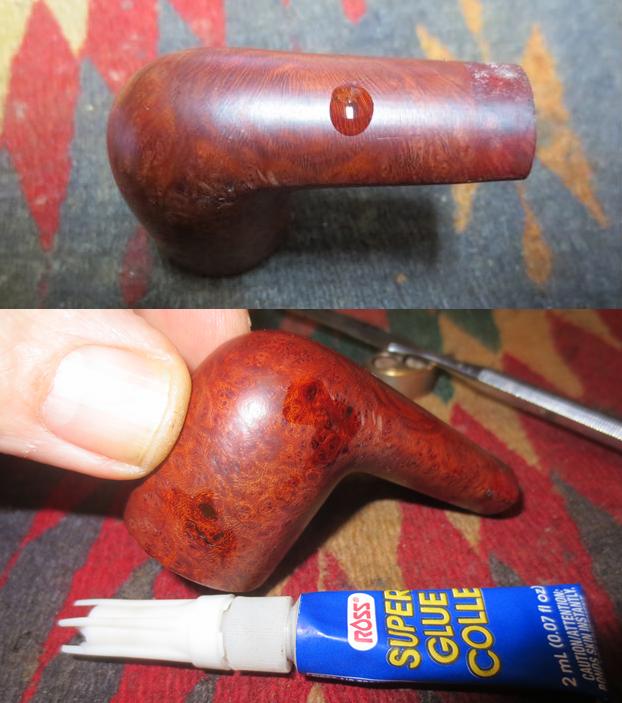
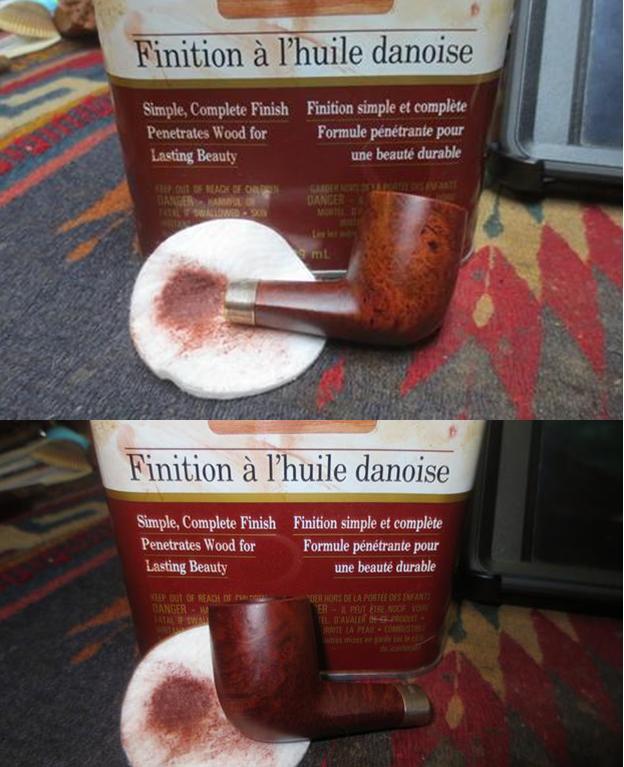
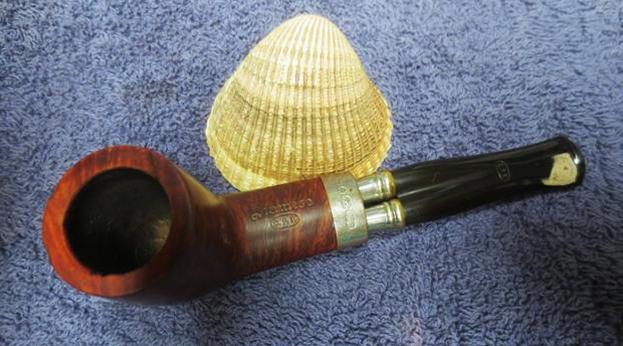
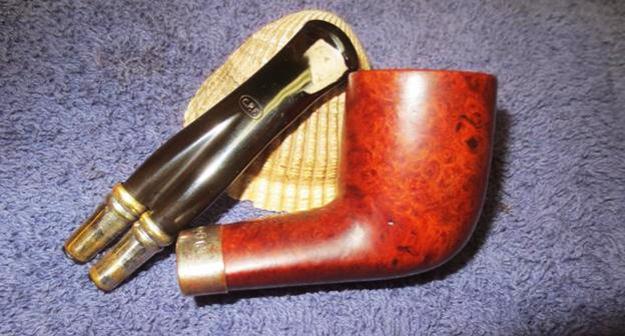
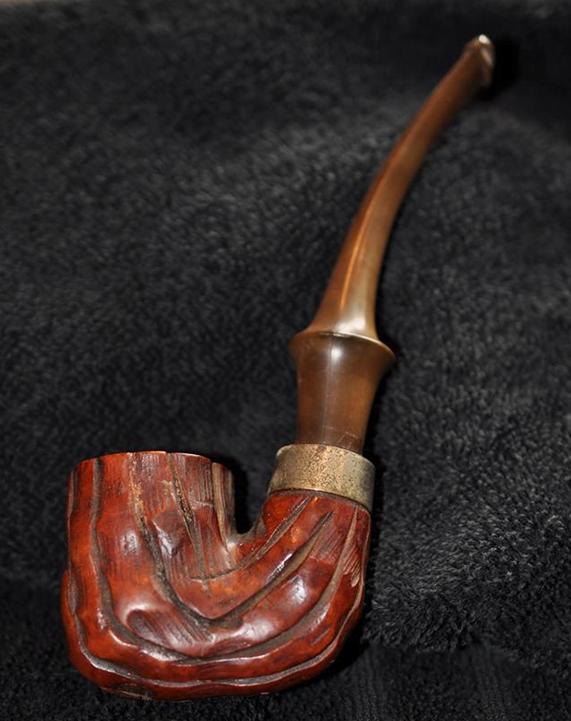
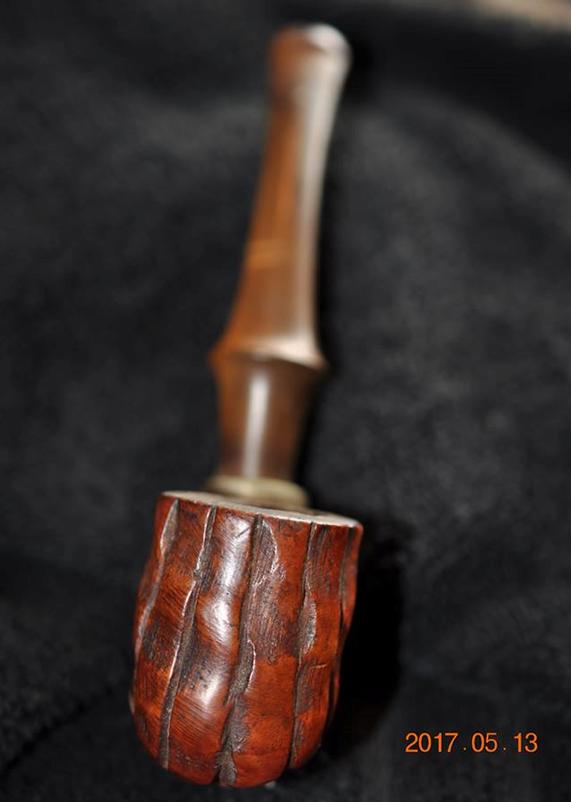
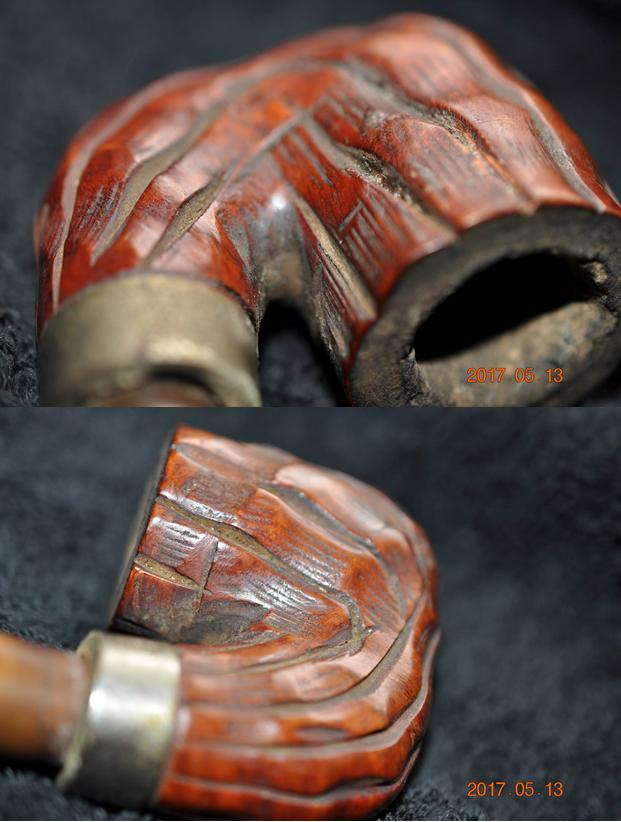
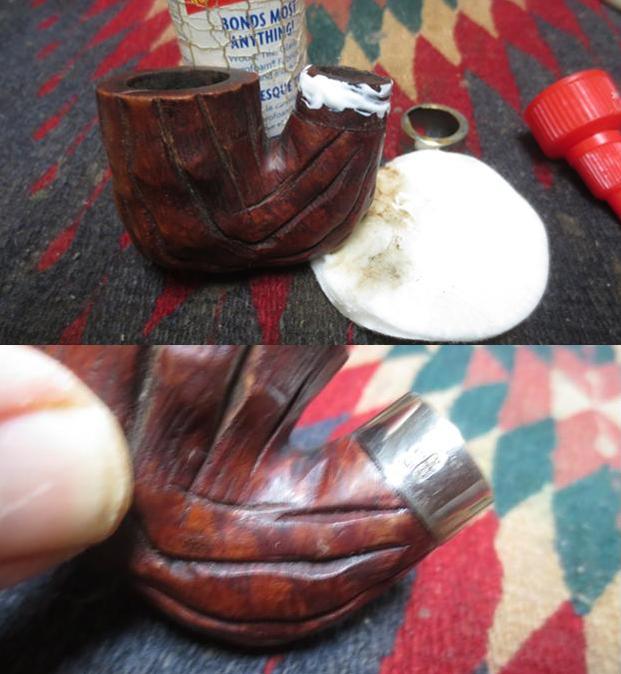
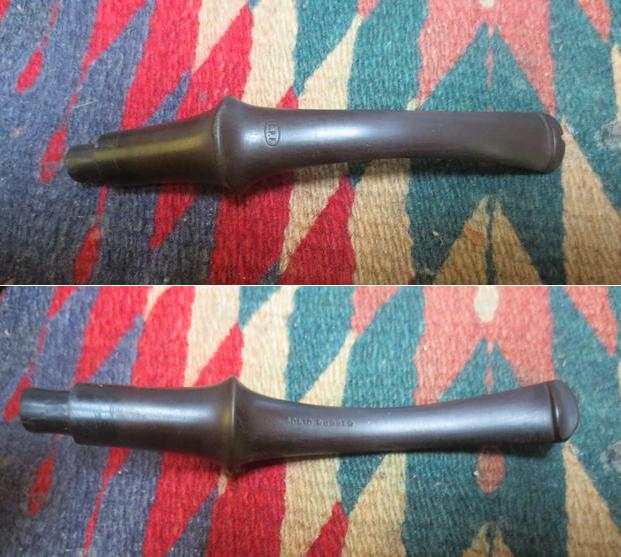
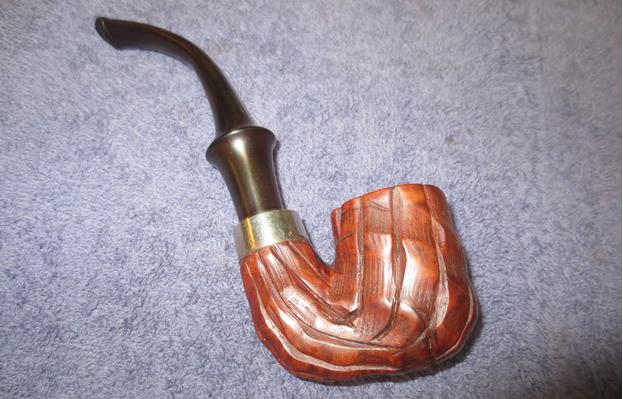
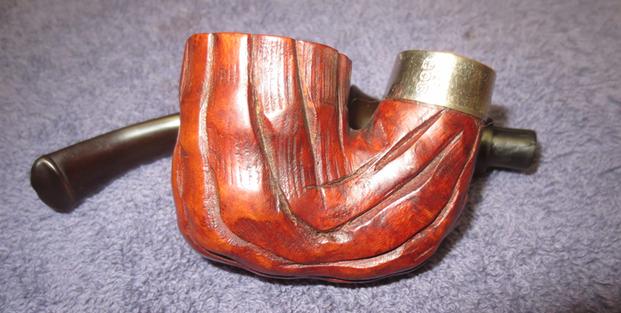
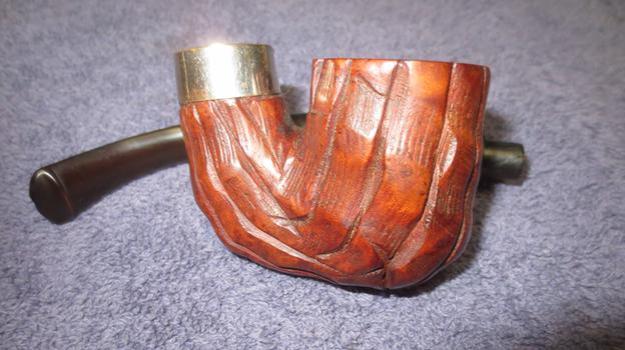
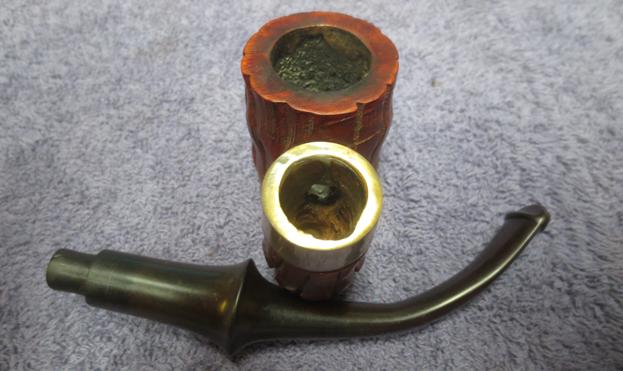
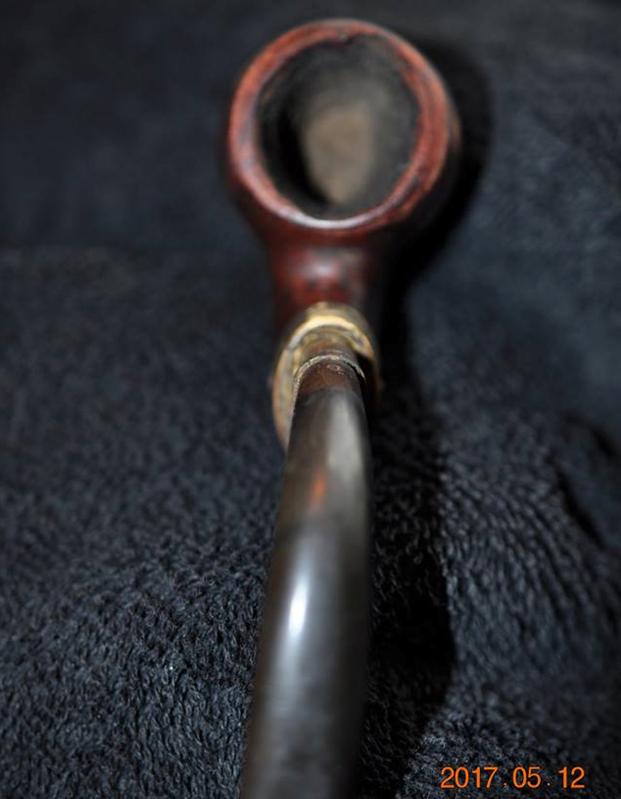
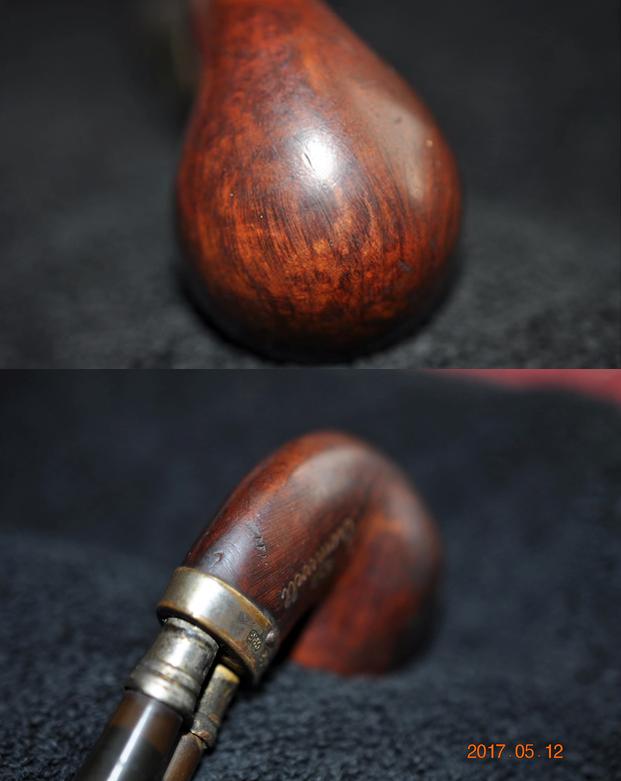
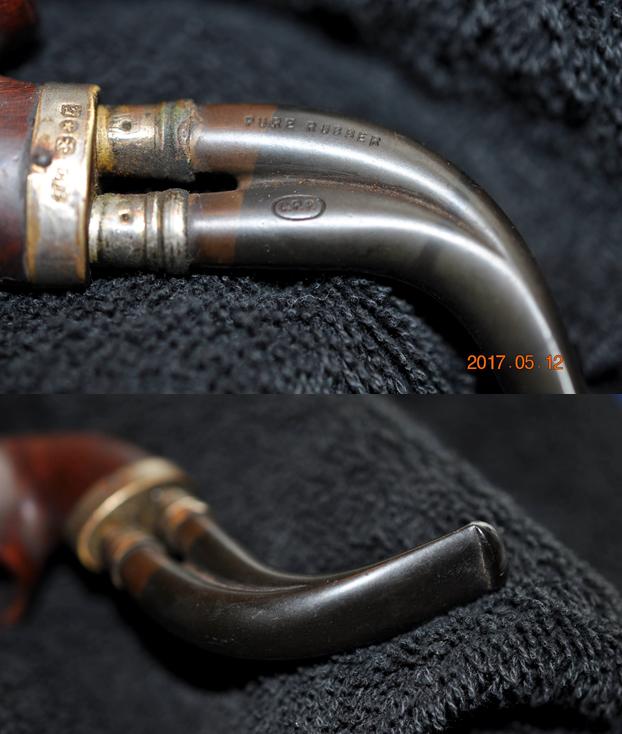
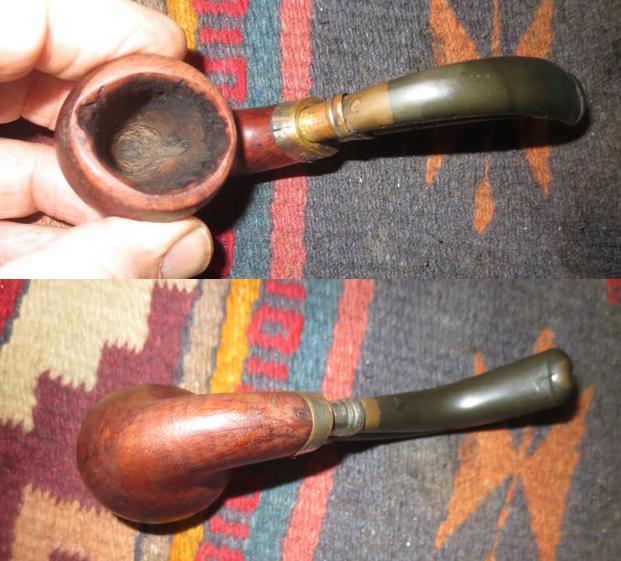
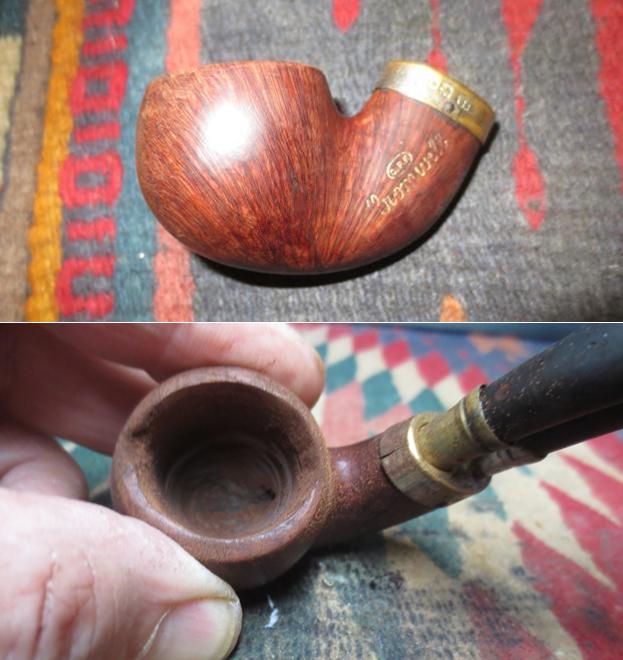
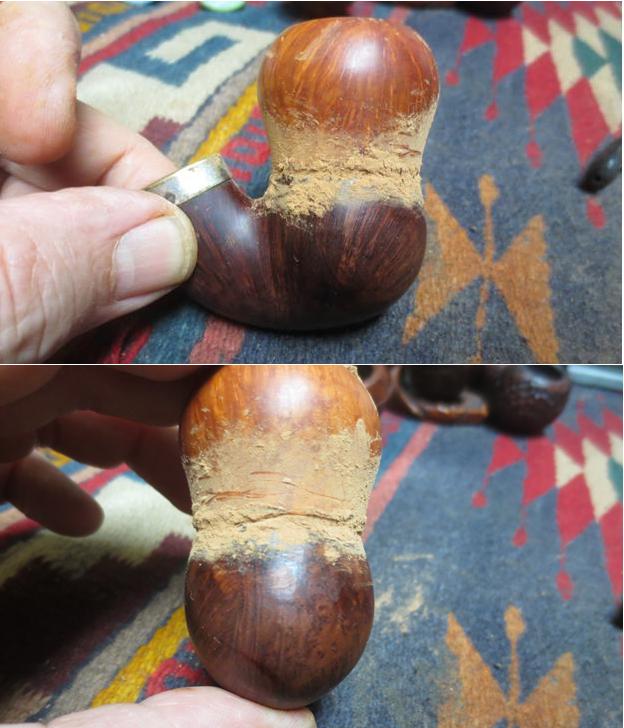
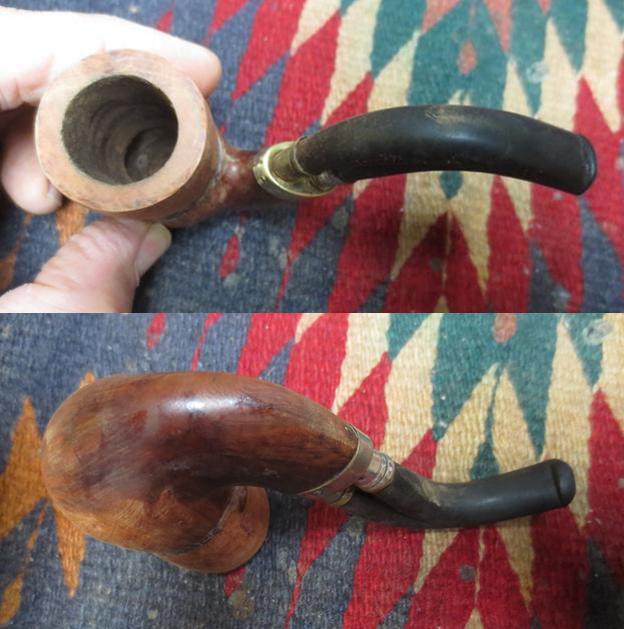
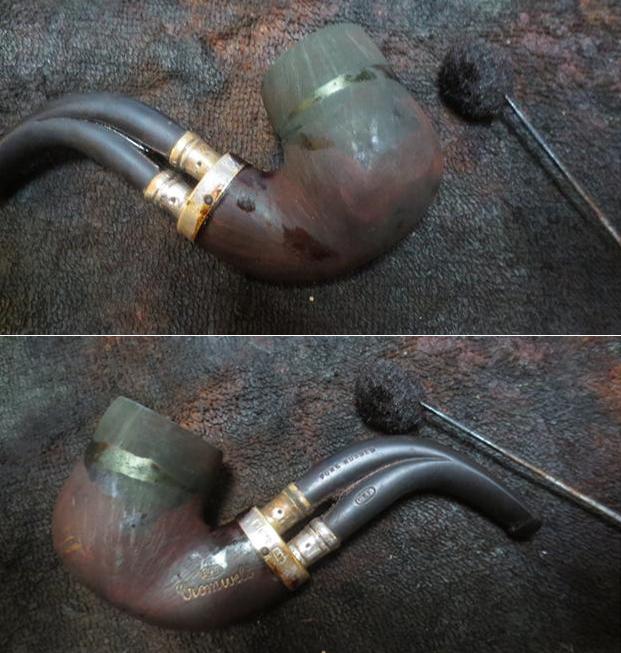
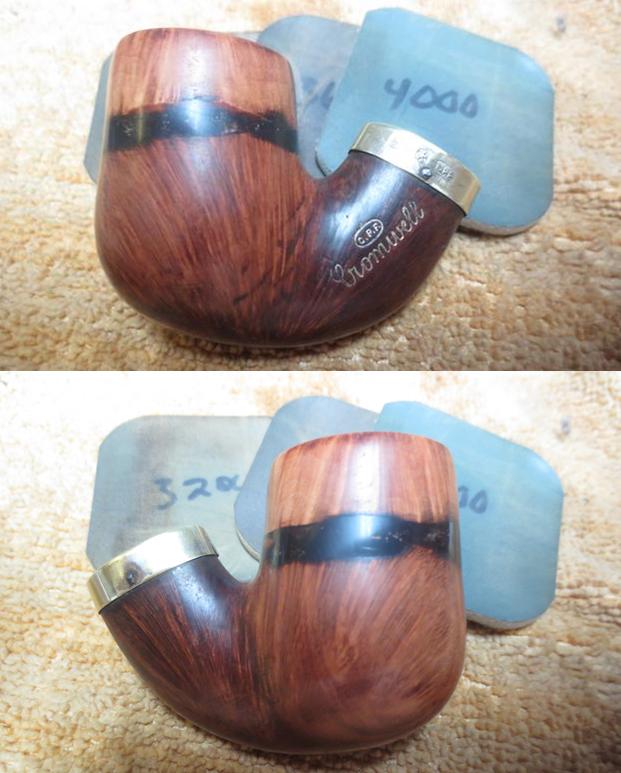
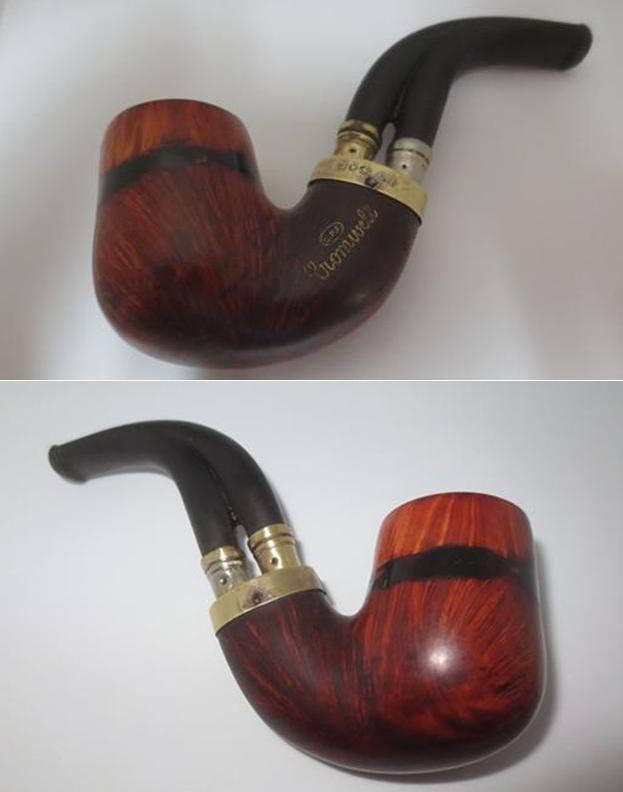
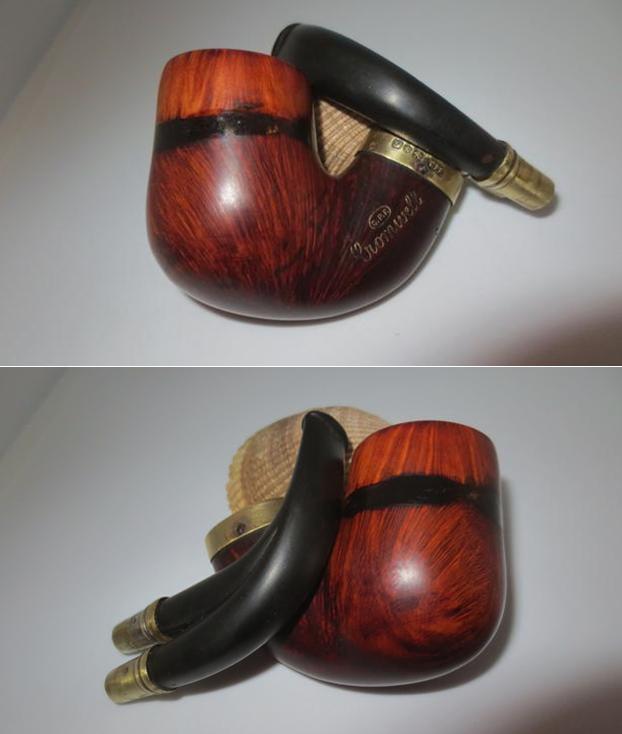
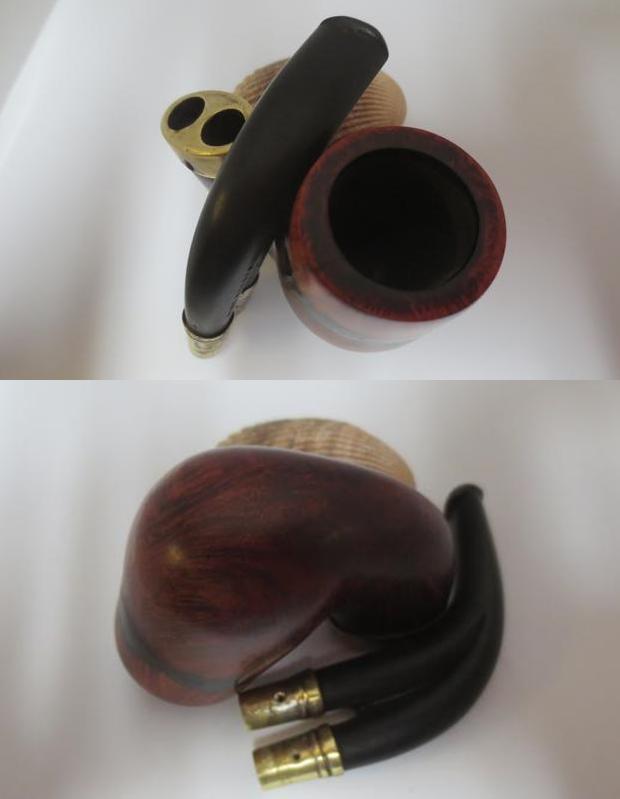
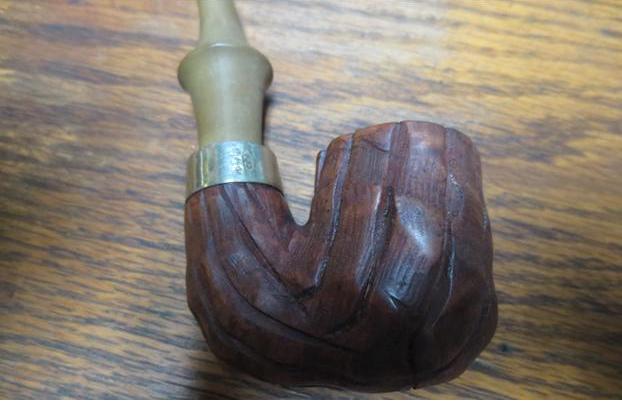
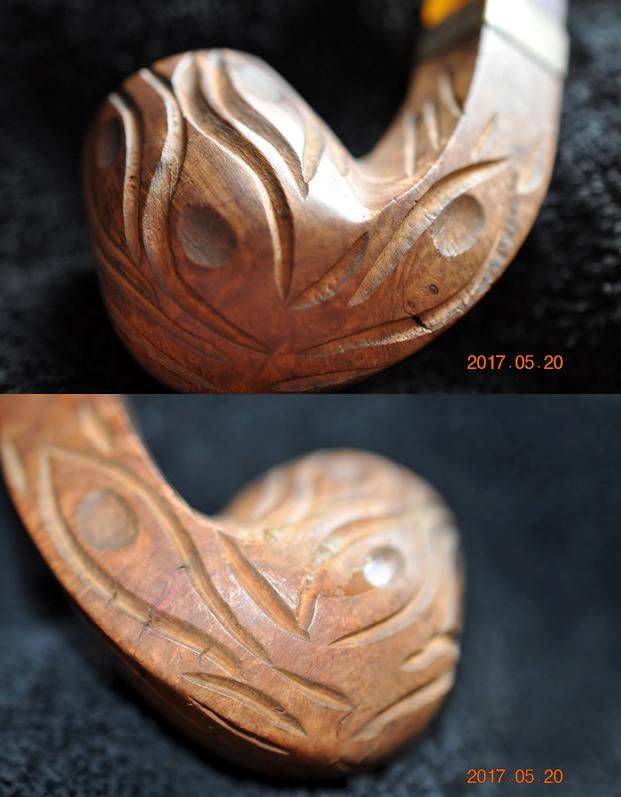
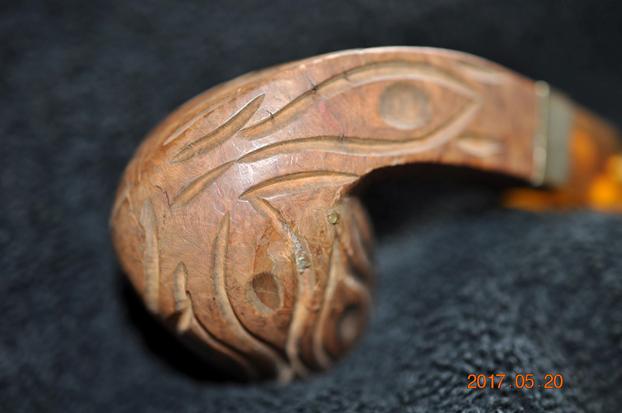
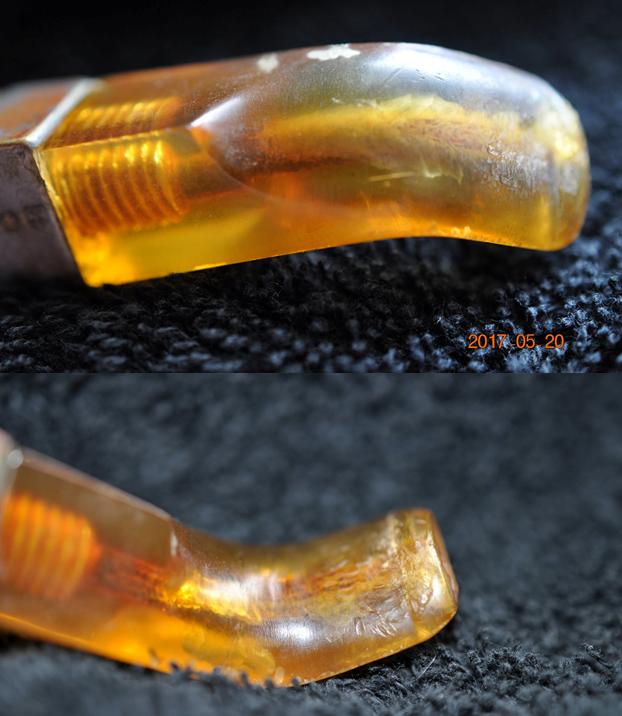
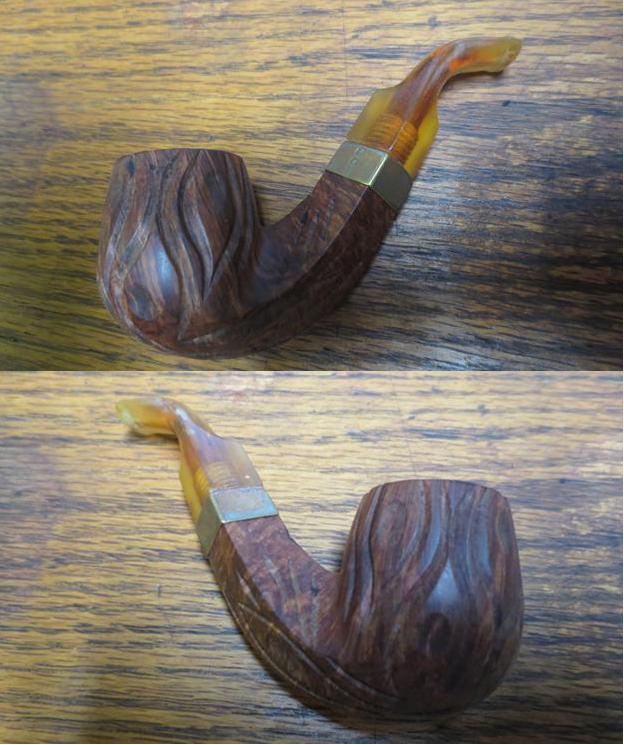
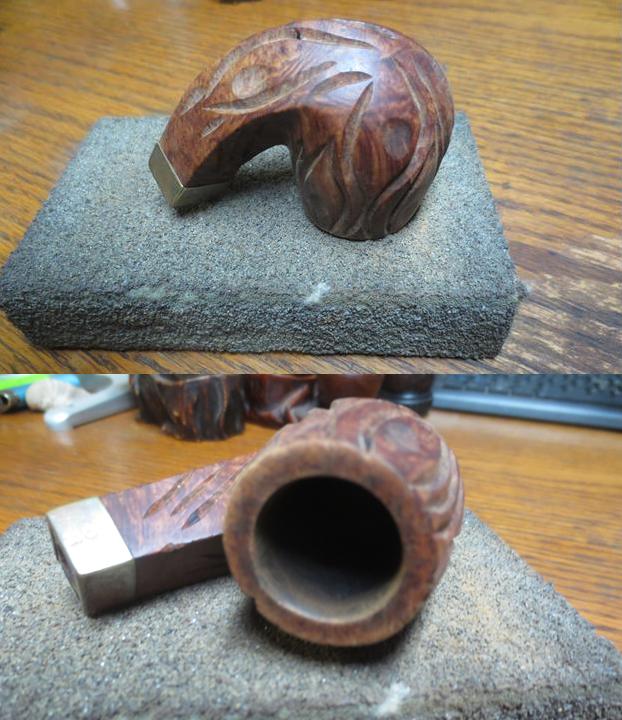
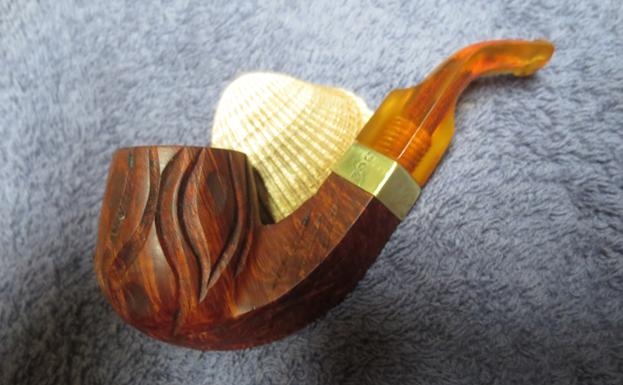
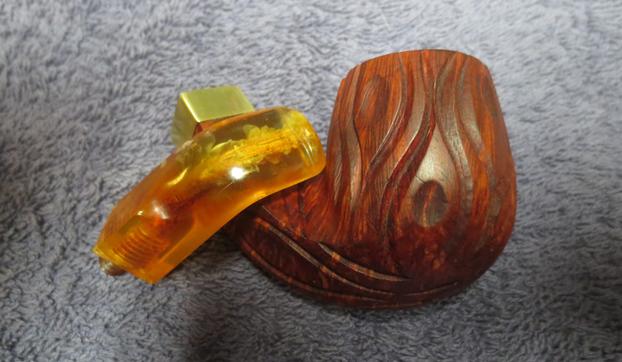
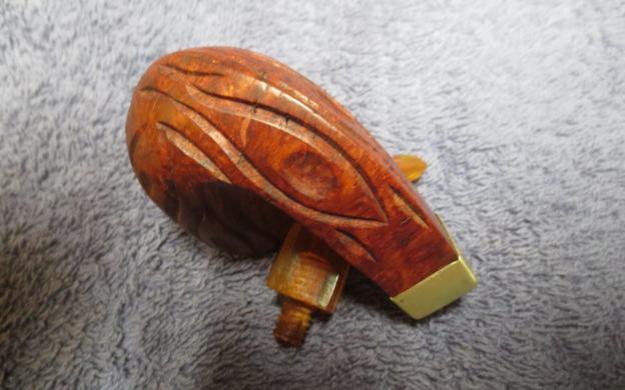
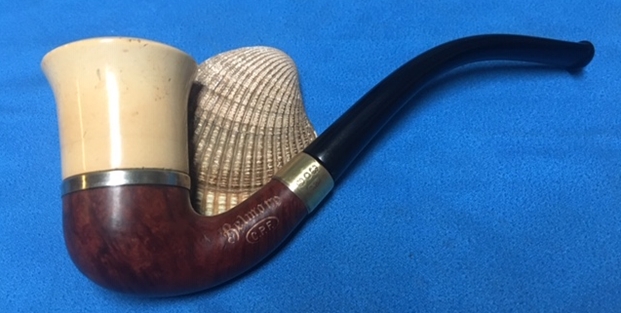
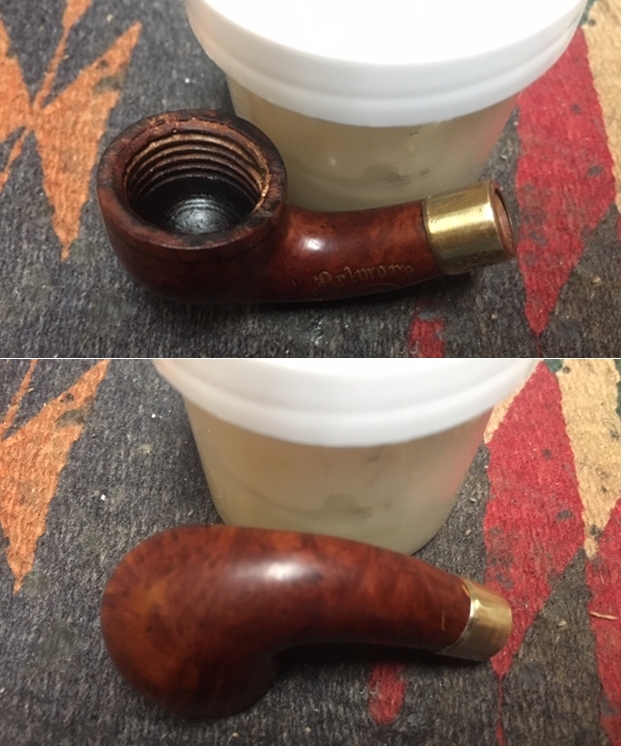
After the last batch of very clean pipes that I brought back from my trip to Idaho in a small bag of unsmoked C.P.F. pipes this pipe comes as a big change. It is the first of the smoked ones from that bag that I am working on. I have to say working on NOS time dusty pipes is a breeze and a pleasure in comparison to this dirty little calabash. The bowl is another screw in meerschaum cup that is almost tulip or funnel shaped. It is dirty and sports a thick cake in the bowl. It has some thick lava on the back side of the rim top and some darkening around the rim and in the bowl. There are no deep chips or nicks in the meer which is unusual in a pipe this age but the bowl is almost grey from use. The base is briar with a brass/metal between the bowl and base. The finish on the briar had a coat of varnish or possibly shellac over it so it had a spotty shiny look to it even under the dirt and grime of years. The left side of the shank is stamped with gold leaf and reads Belmore over C.P.F. in the oval logo. The right side of the shank reads French Briar. There is a brass/silver ferrule on the shank end that is oxidized and also loose. The vulcanite stem had some tooth chatter and light marks near the button. It was oxidized as well. The stem had lost some of its bend over time. The tenon has a chip out of it as well that will need to addressed. I took photos of the pipe to show its condition at the start of the process.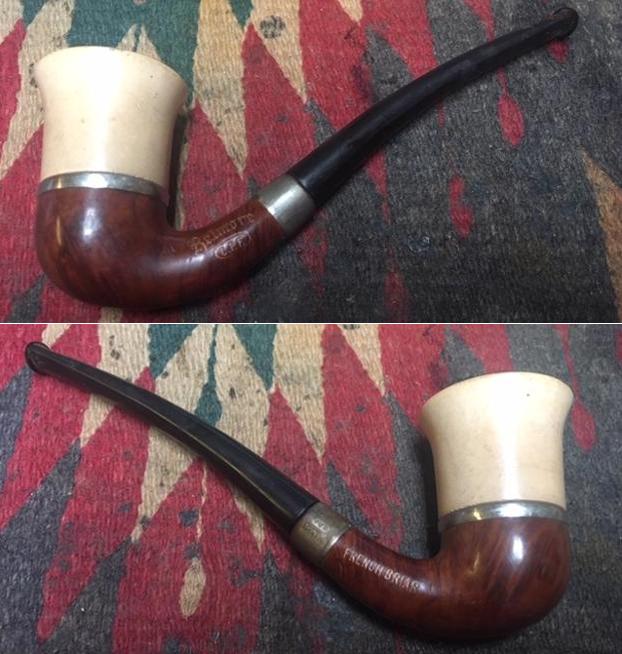
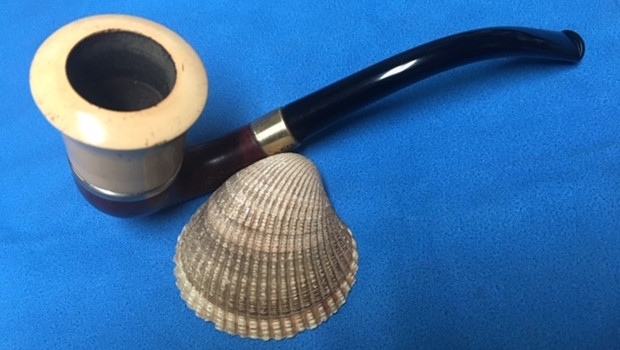
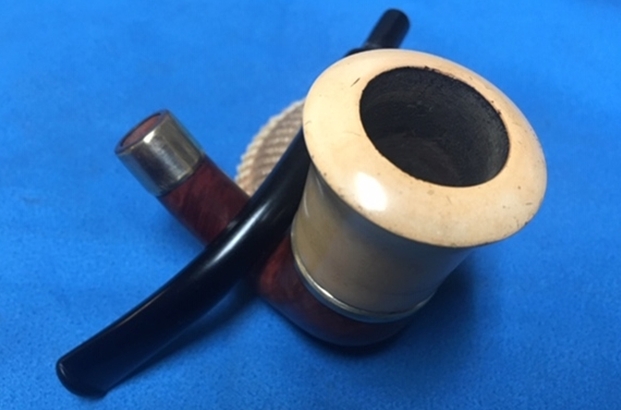
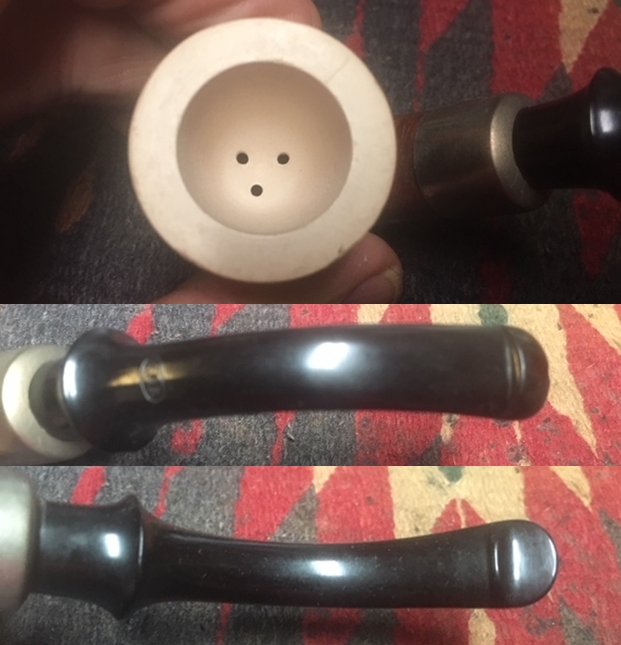
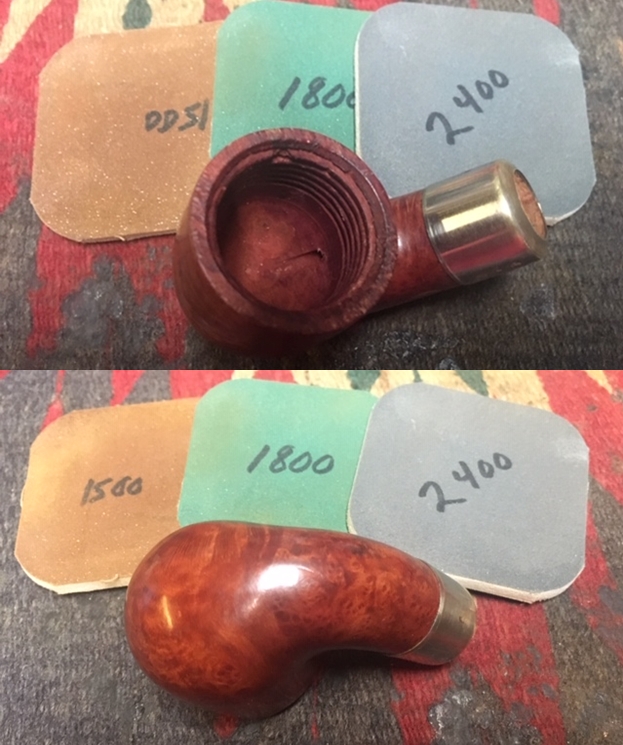
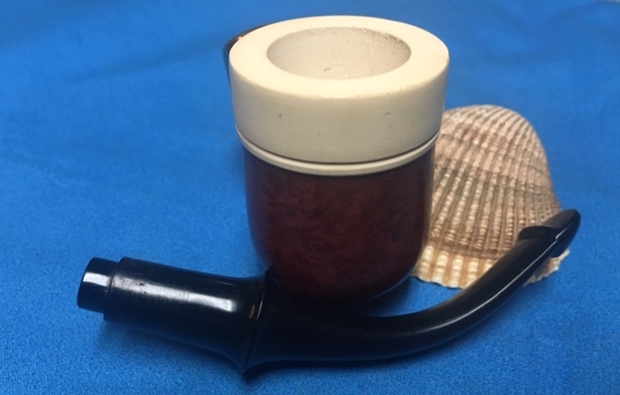
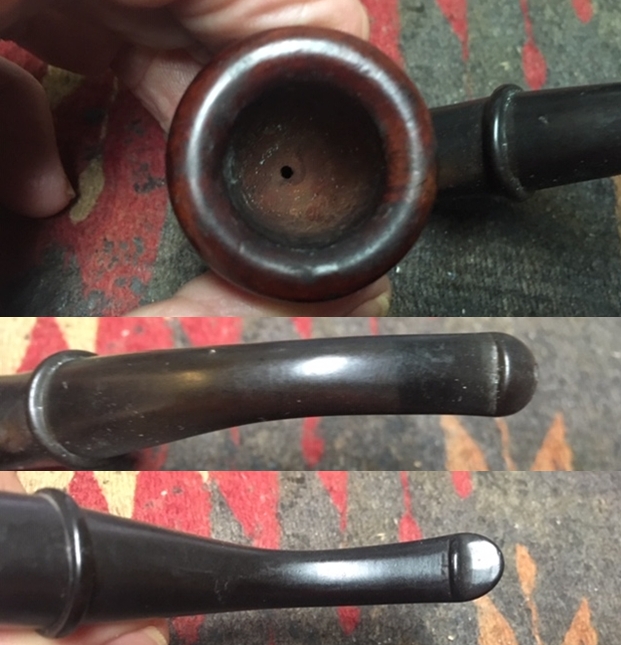
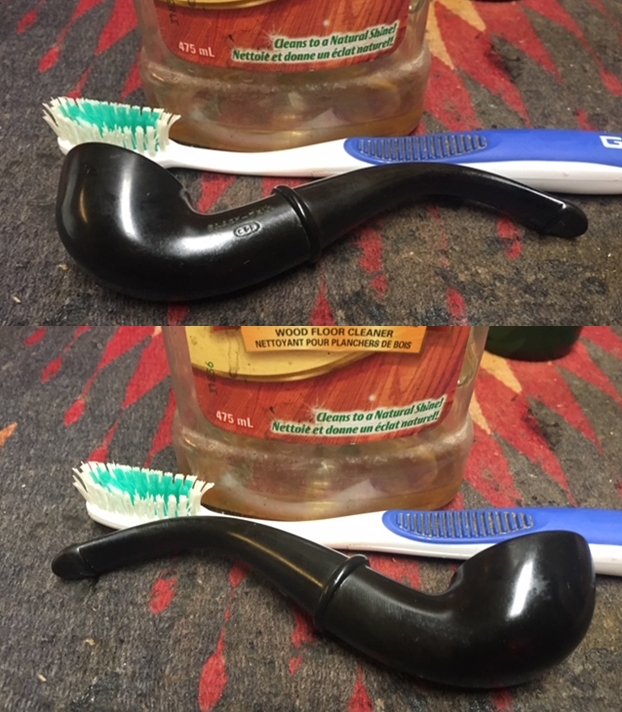
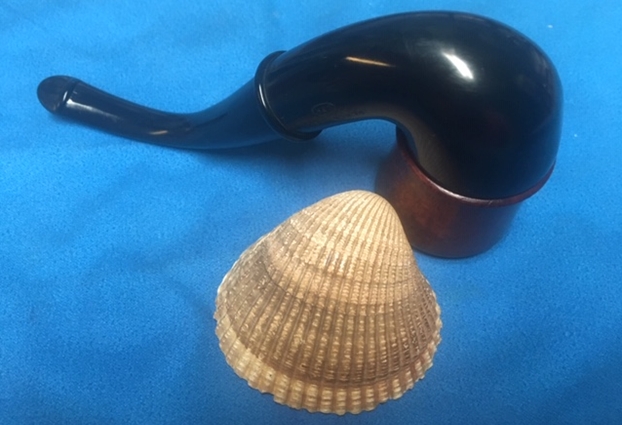
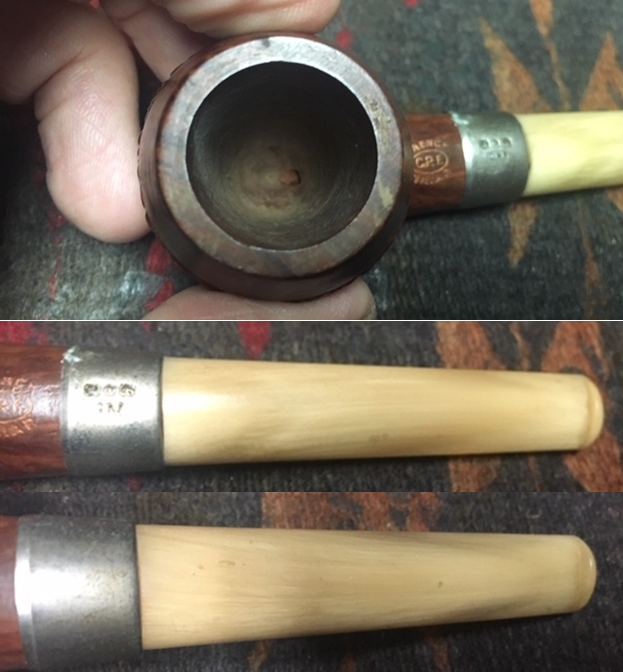
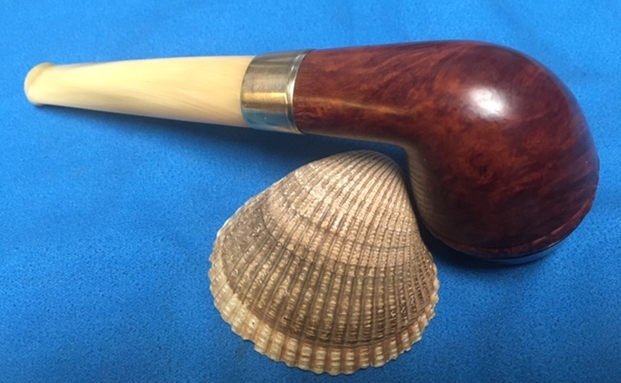
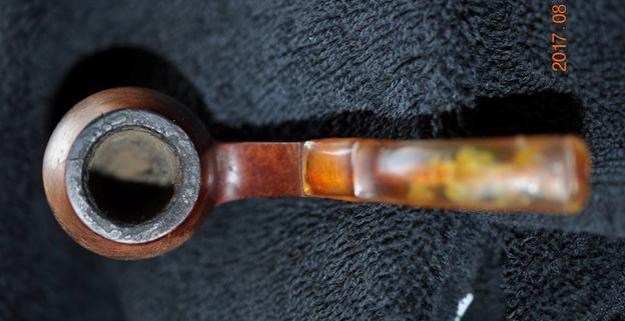
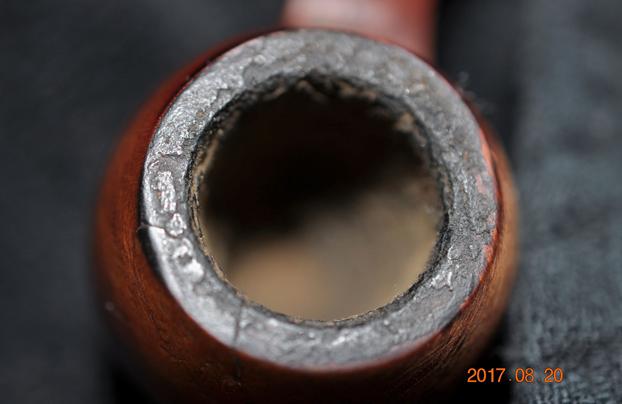
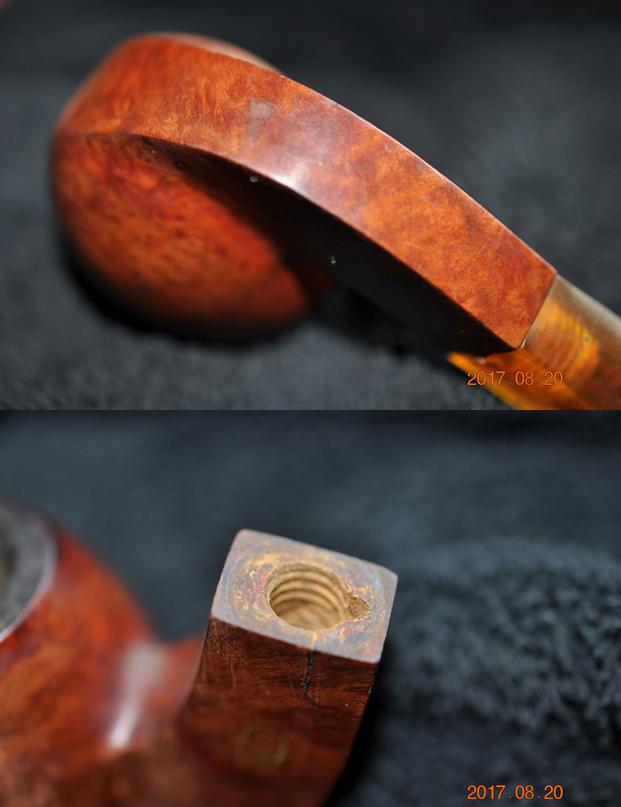
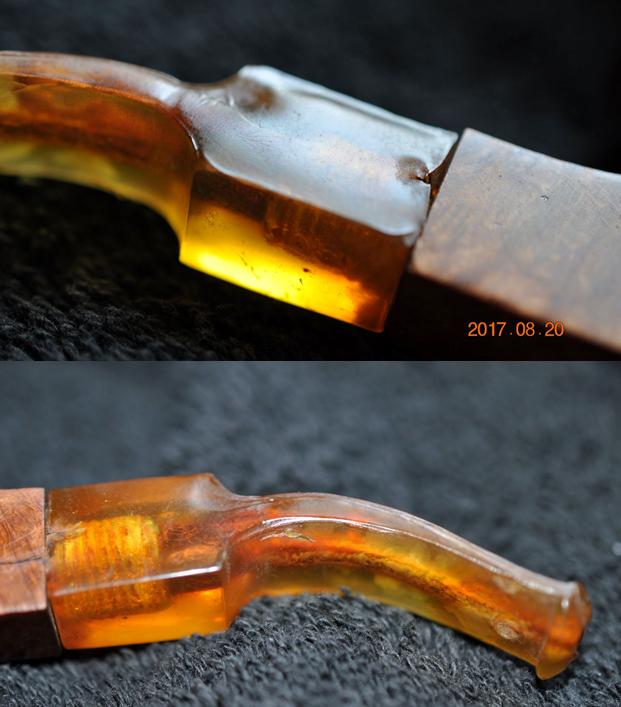
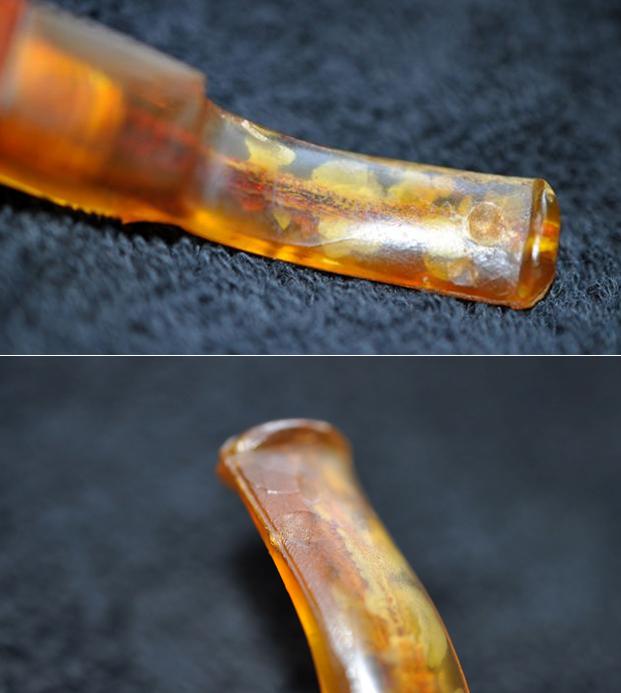
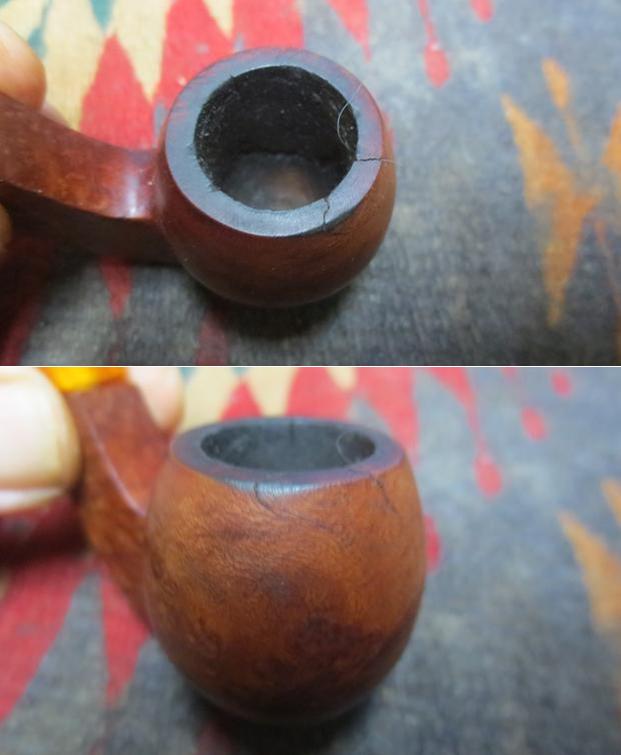
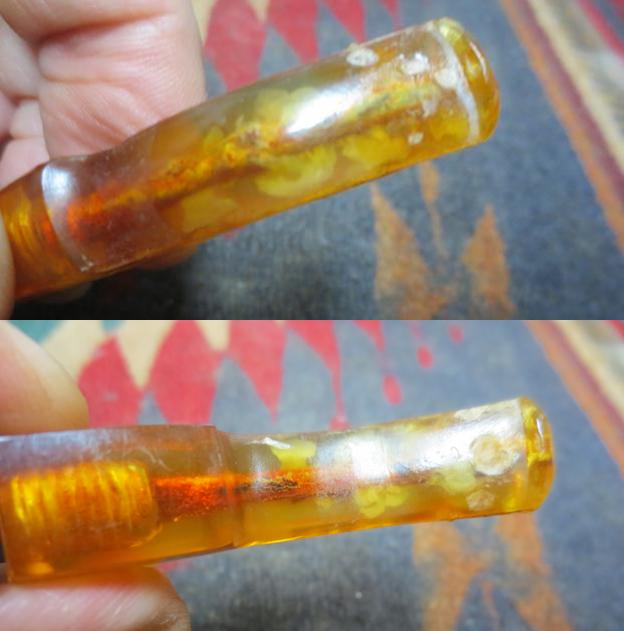
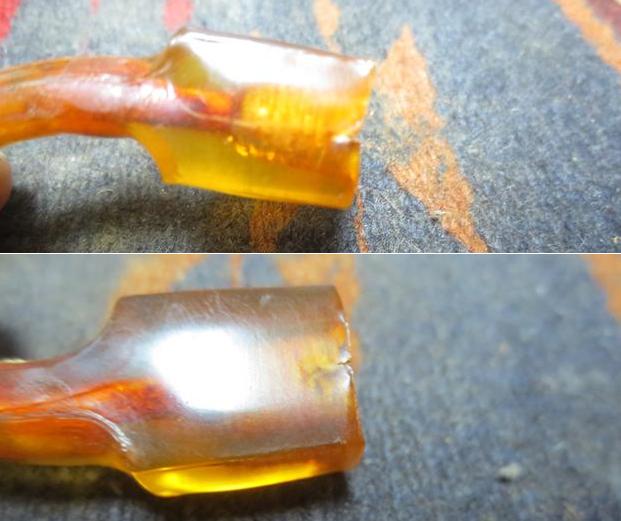
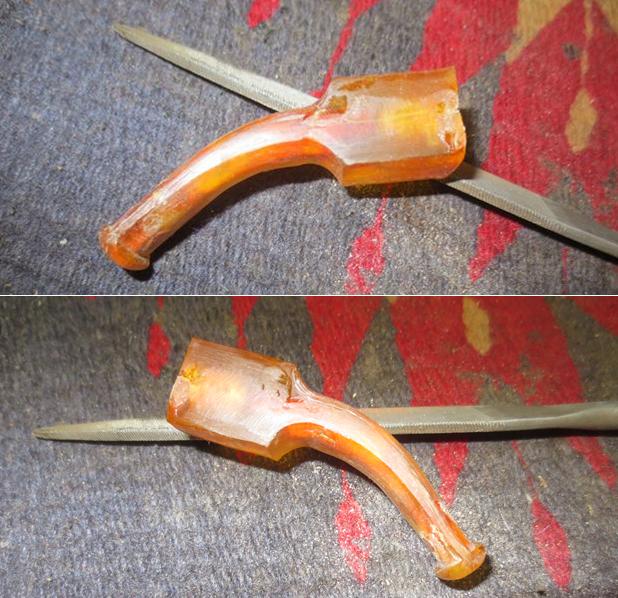
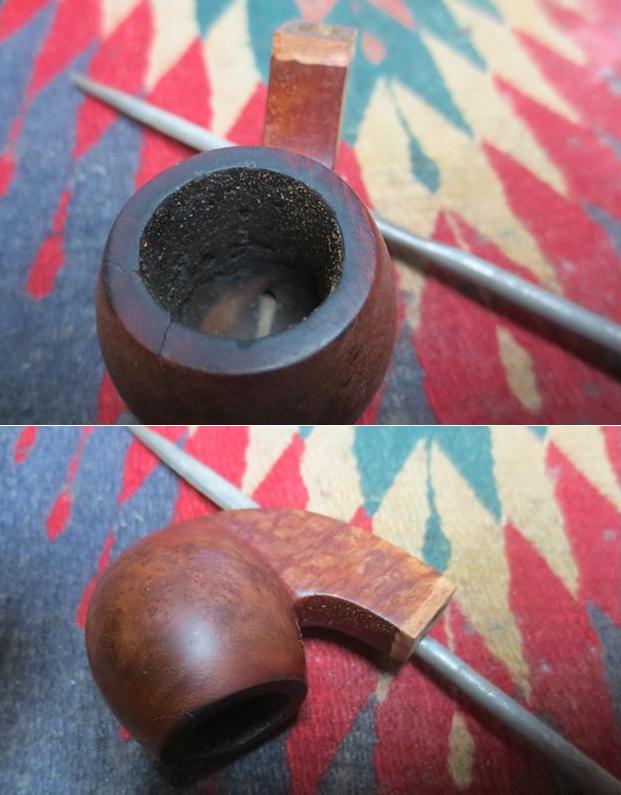
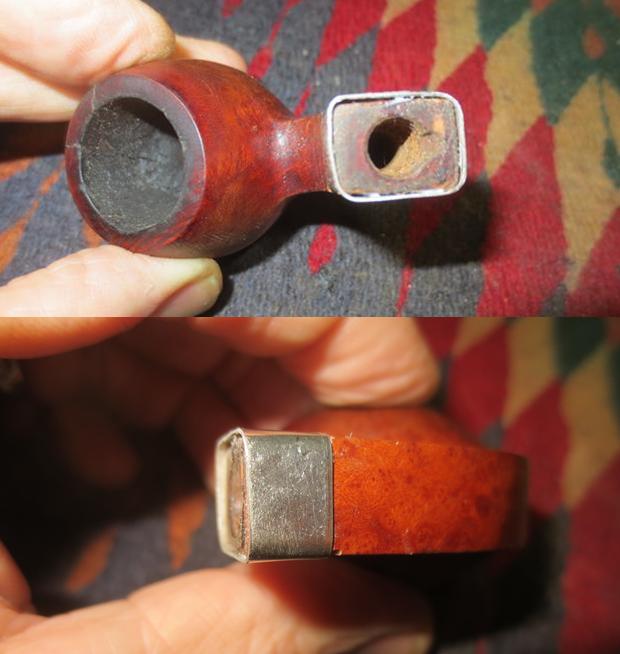
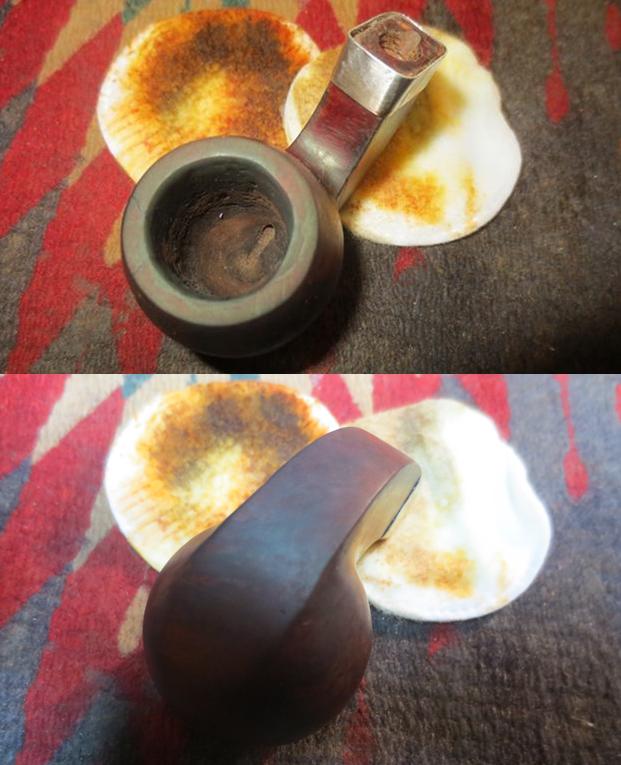
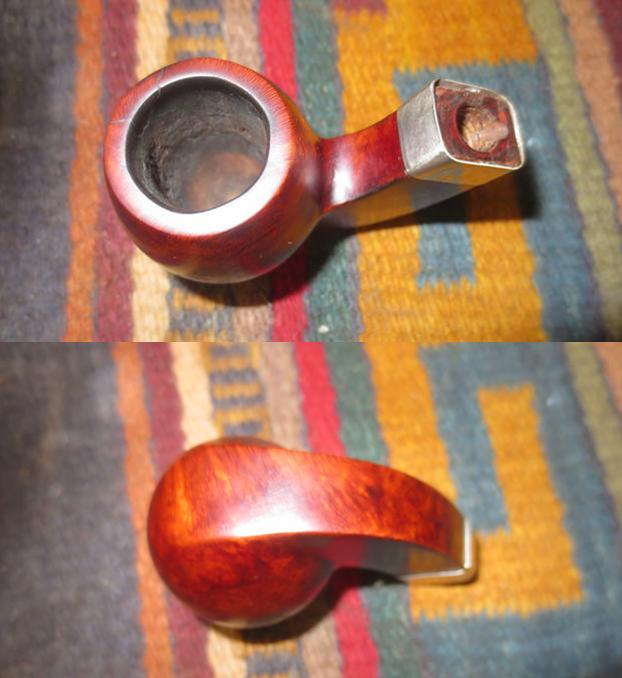
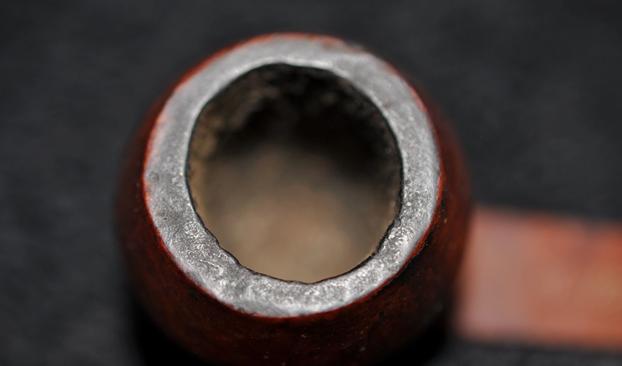
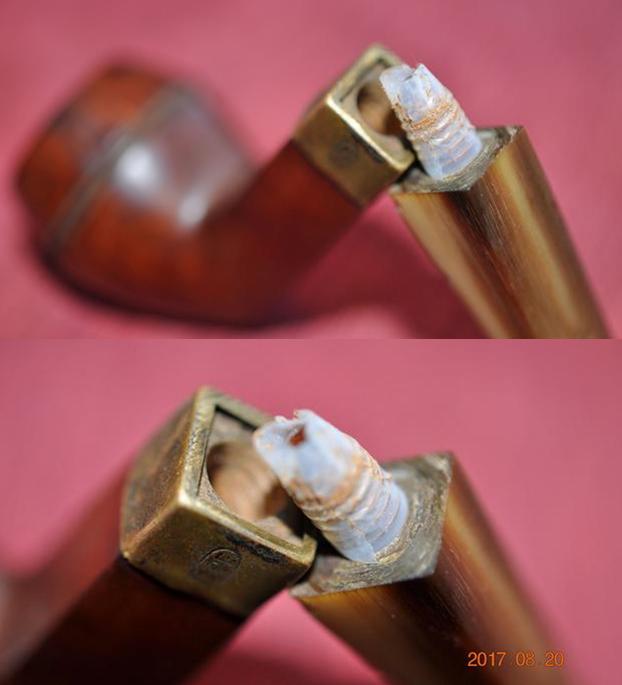
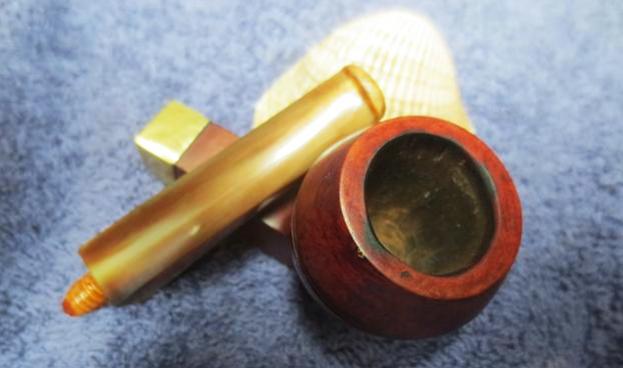
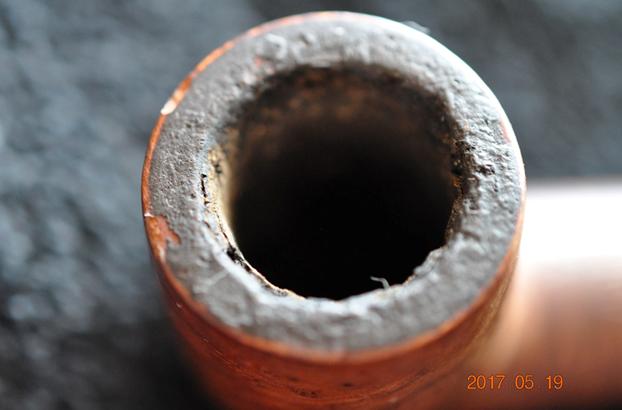
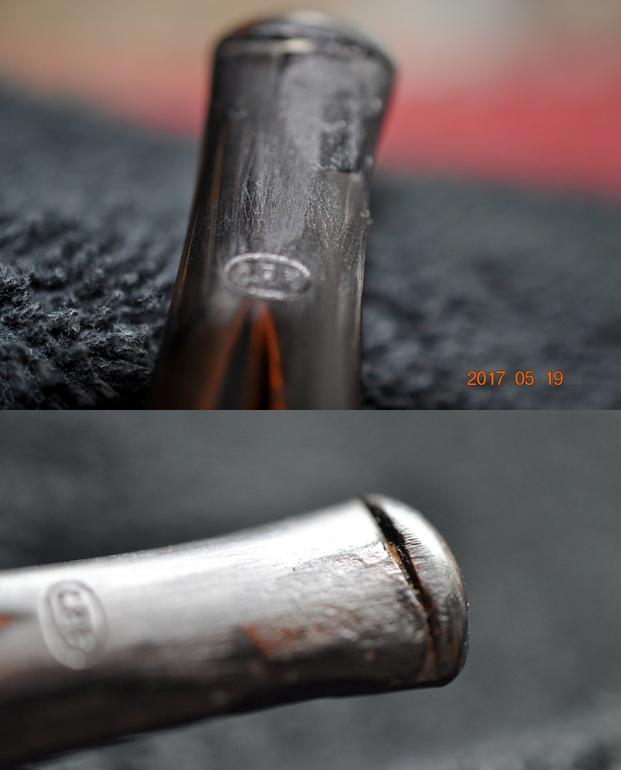
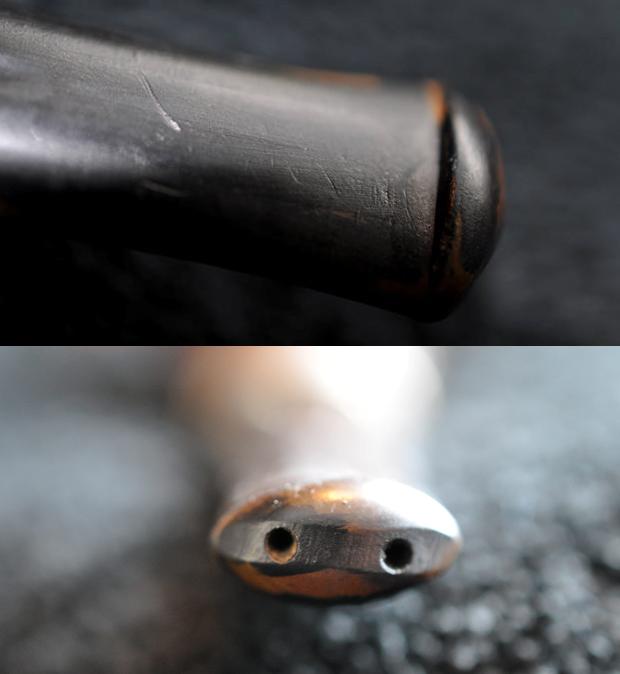
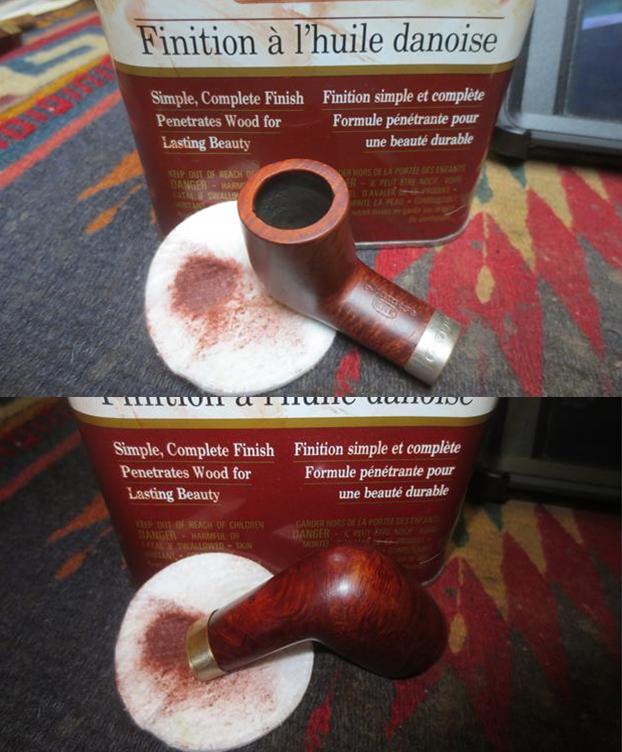
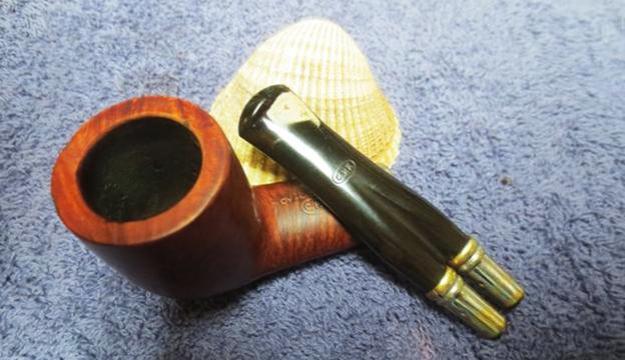
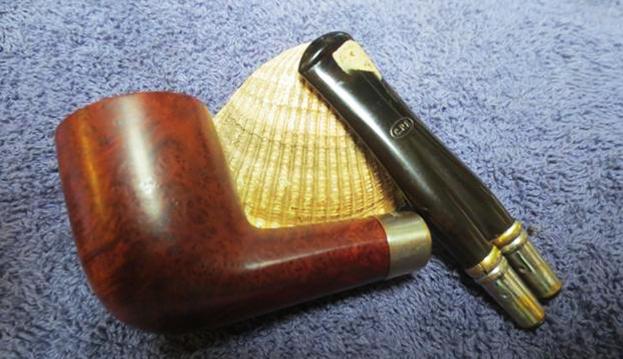
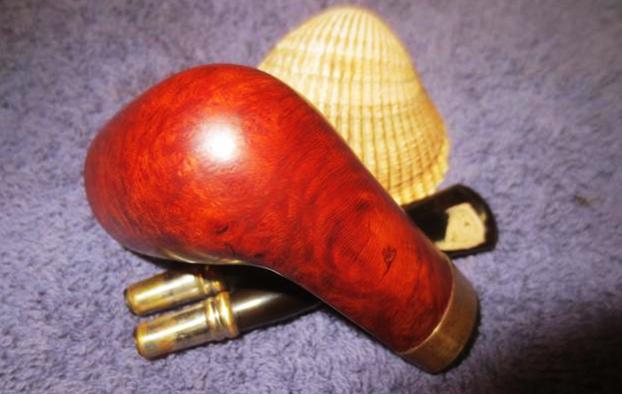
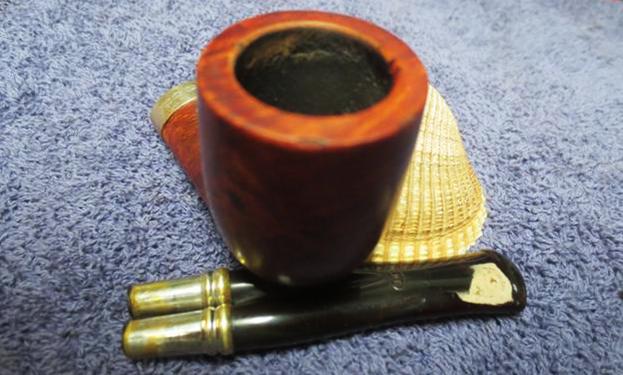
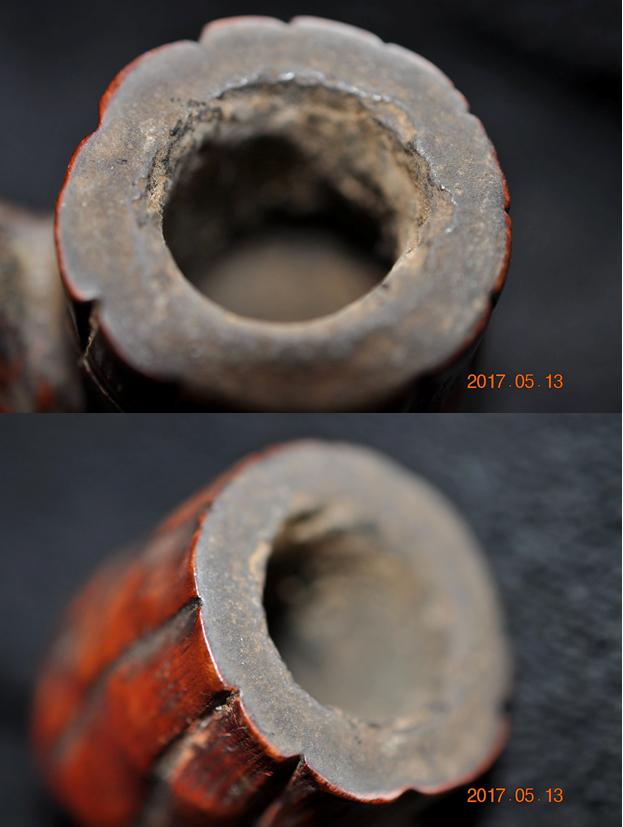
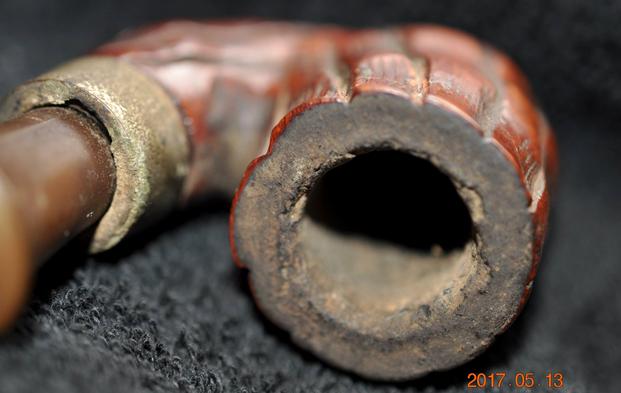
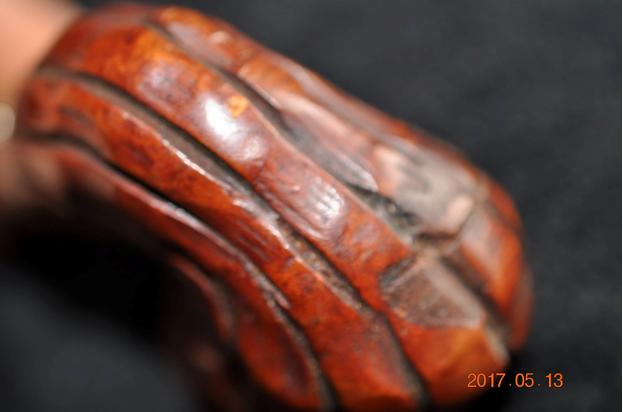
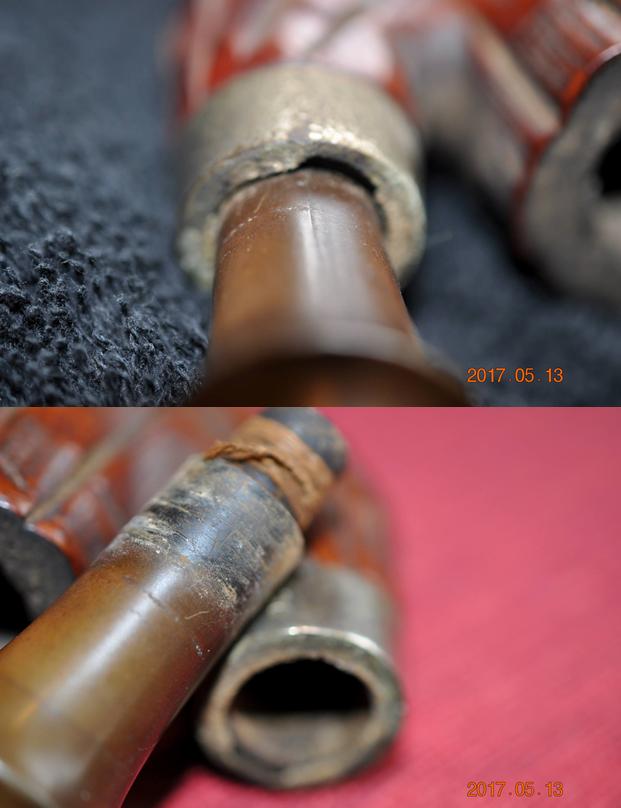
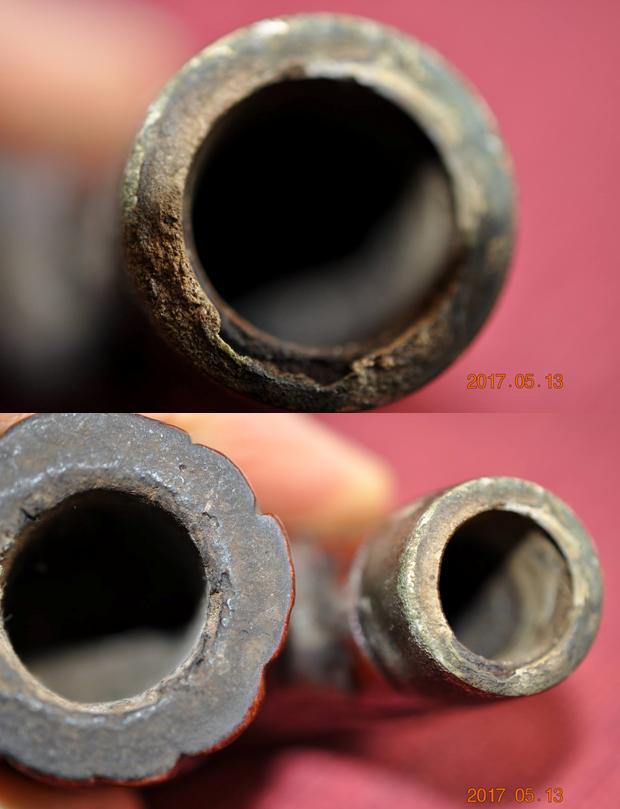
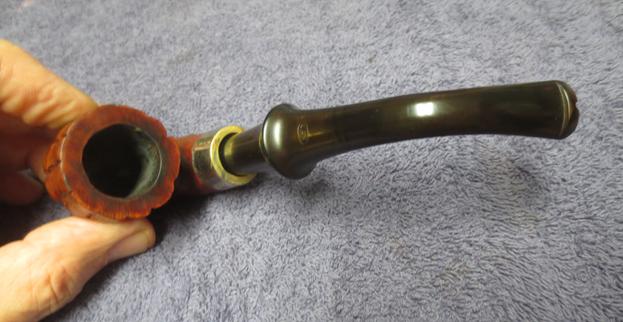
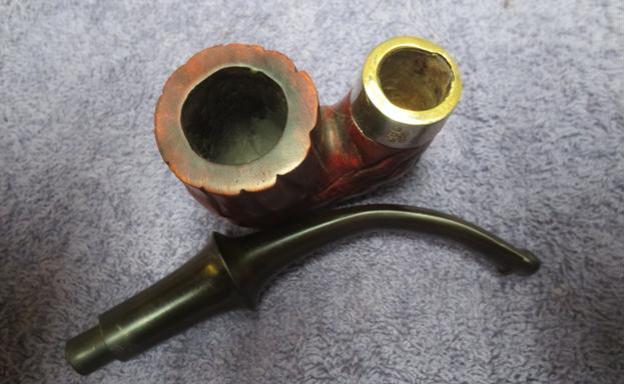
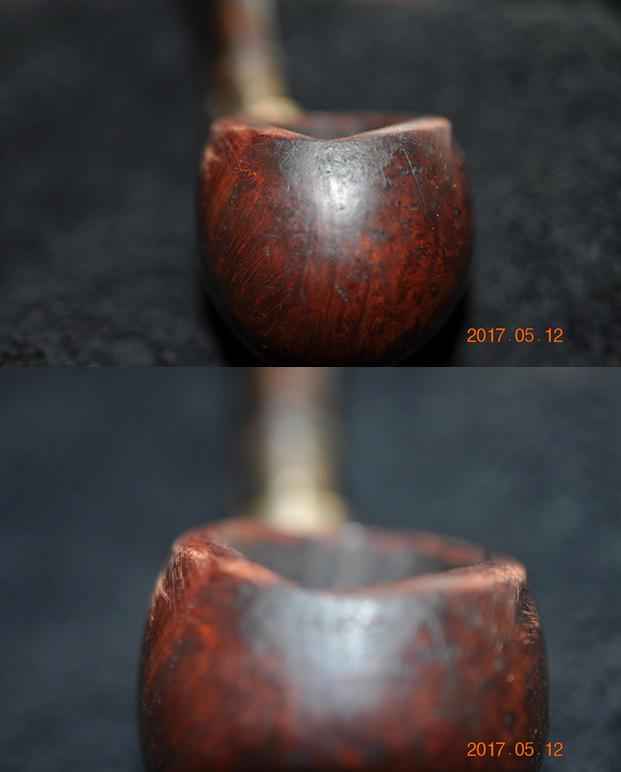
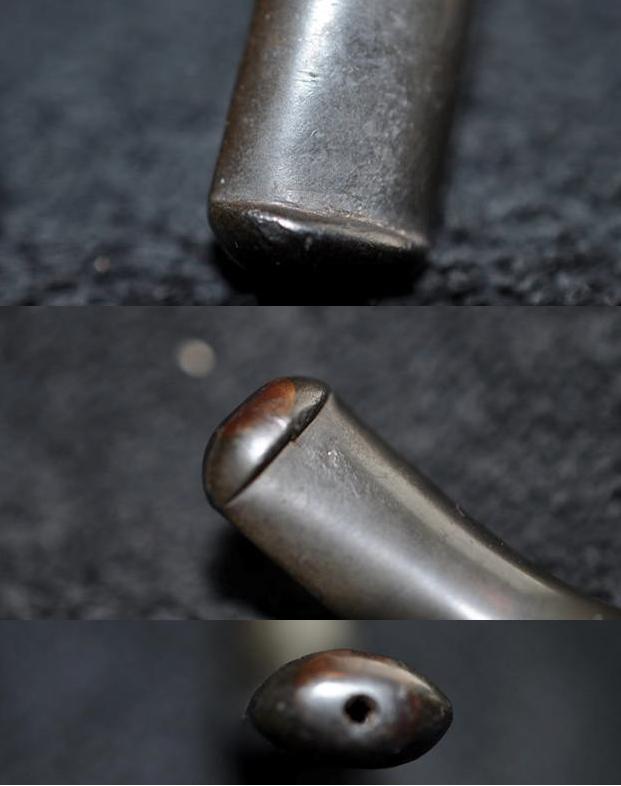
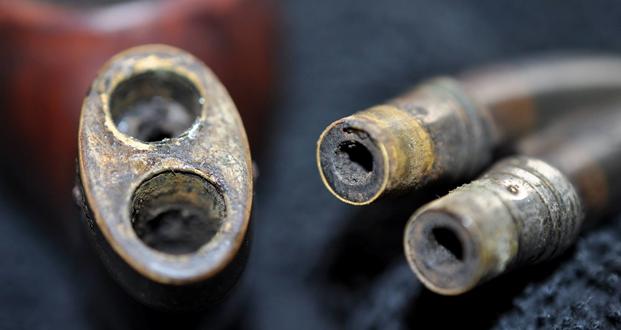
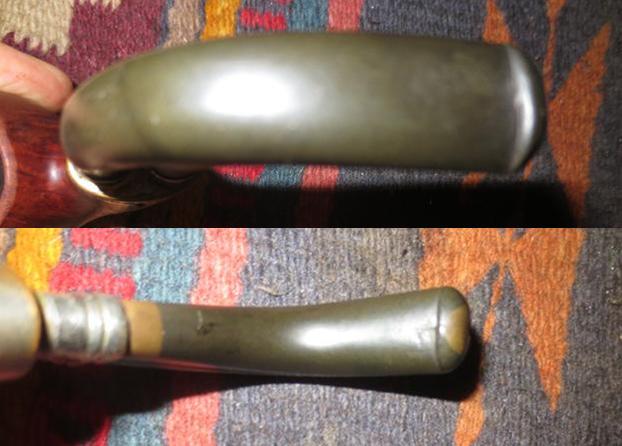
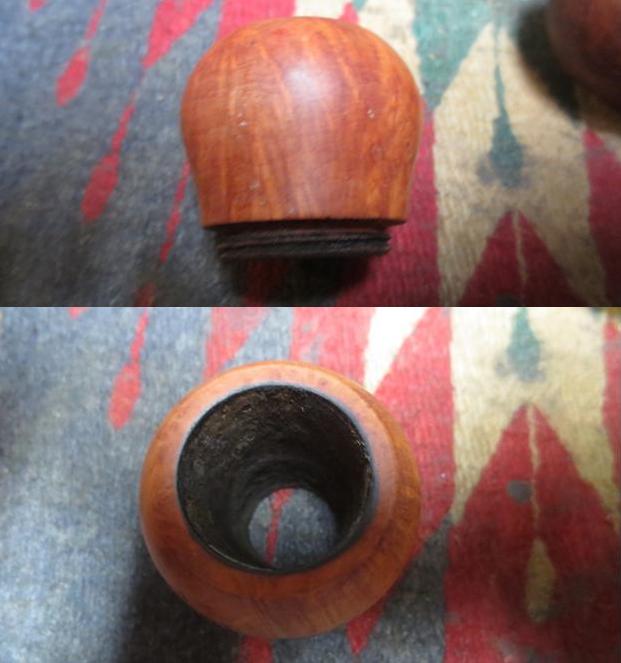
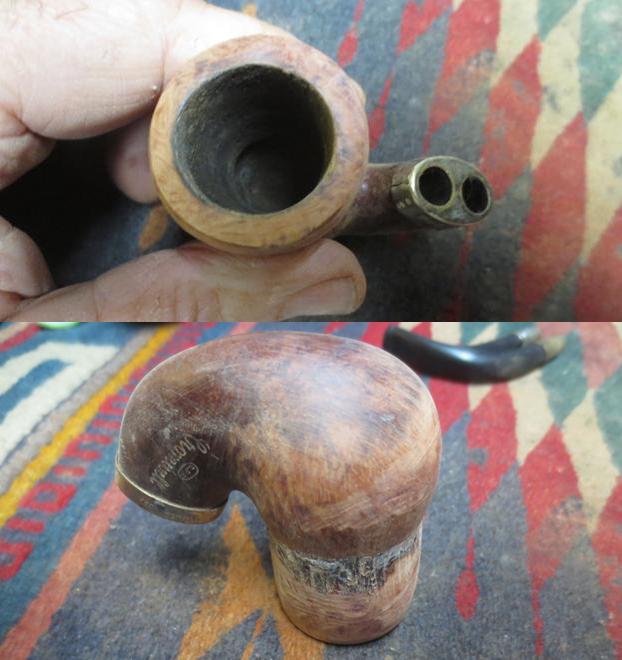
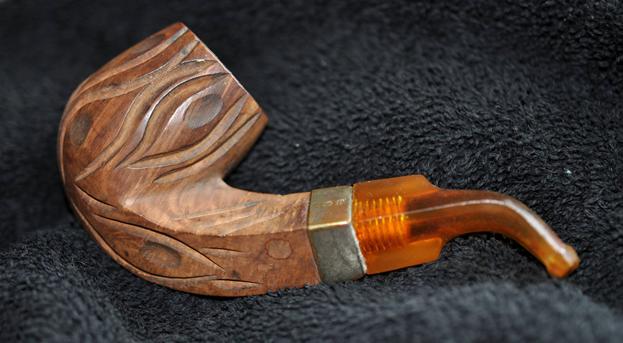
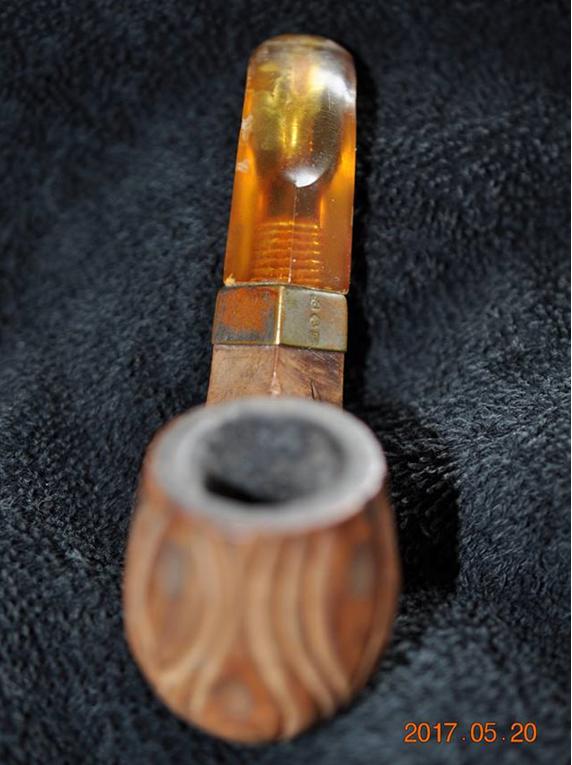
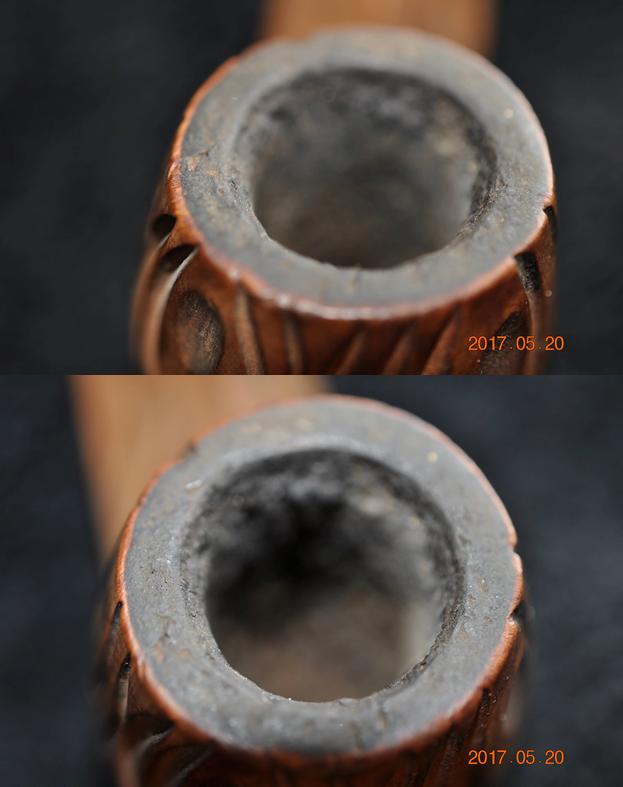
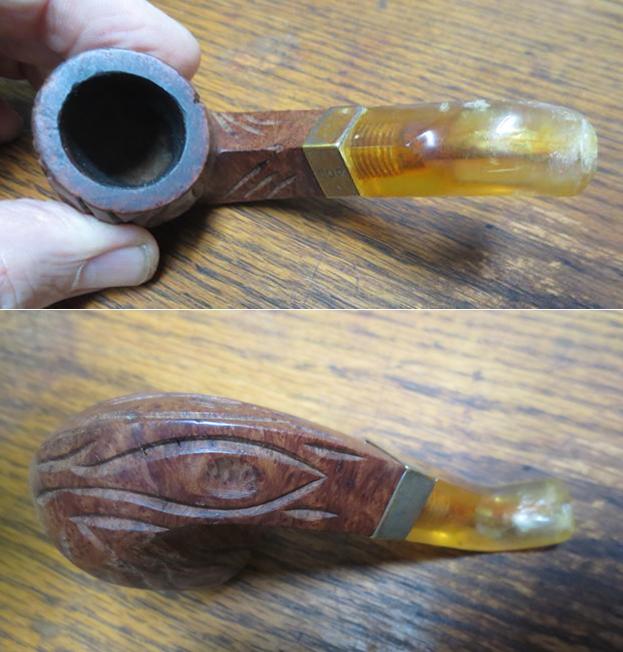
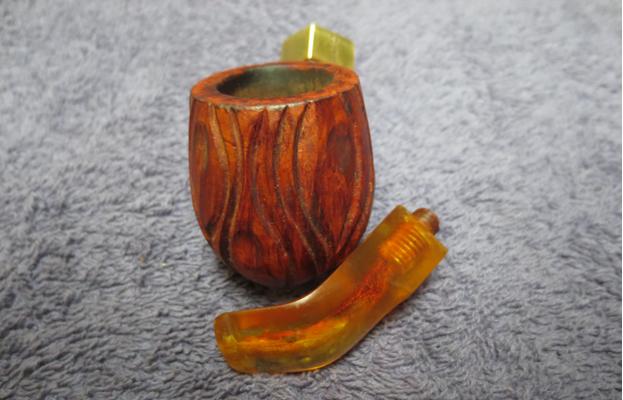
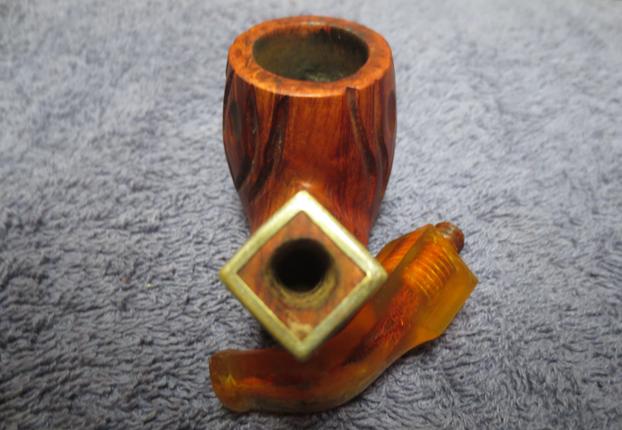
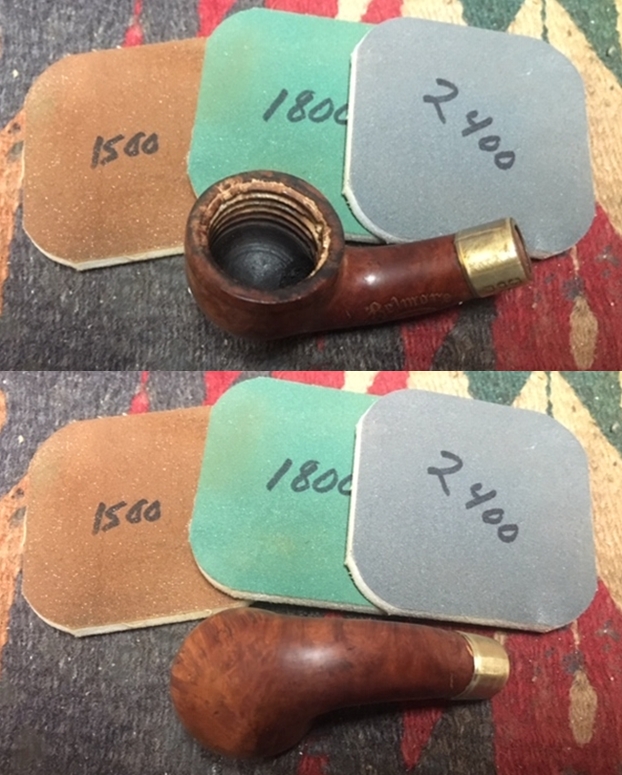
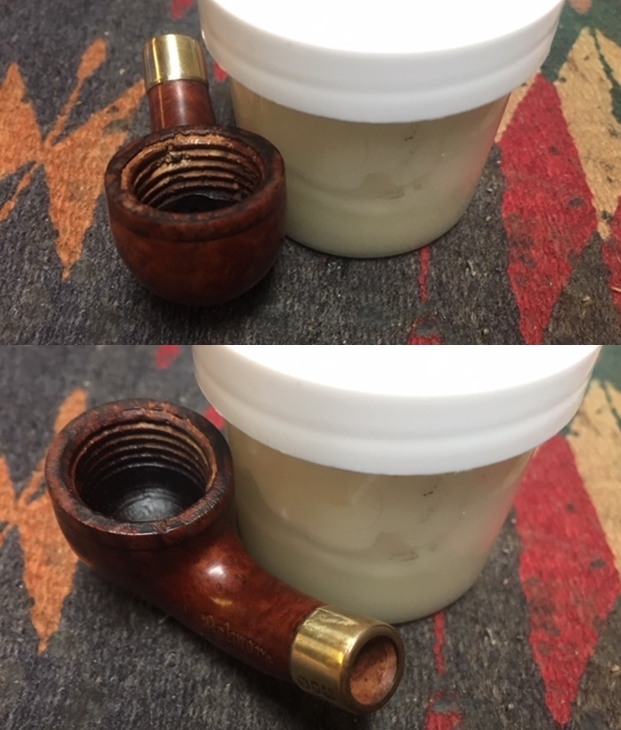
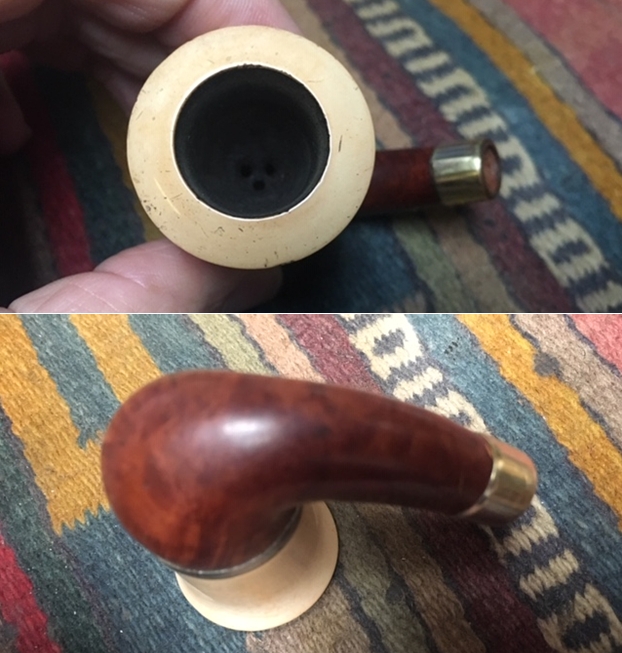
 I took a close up photo of the meerschaum rim top and bowl to show the condition of the meer bowl. It was heavily caked with lava overflow and darkening on the rim top. The airways are at the bottom of the bowl much like a gourd calabash though in this case there are three openings. The metal ferrule is oxidized and dirty. The photos of the vulcanite stem show its general condition. It was oxidized and dirty. There was tooth chatter and marks on both sides near the orifice button. The tenon had a chip on the topside that will need to be addressed.
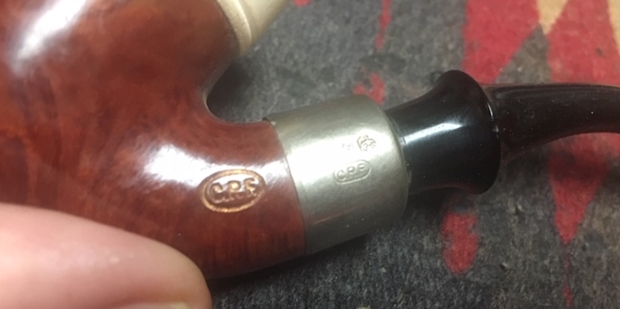
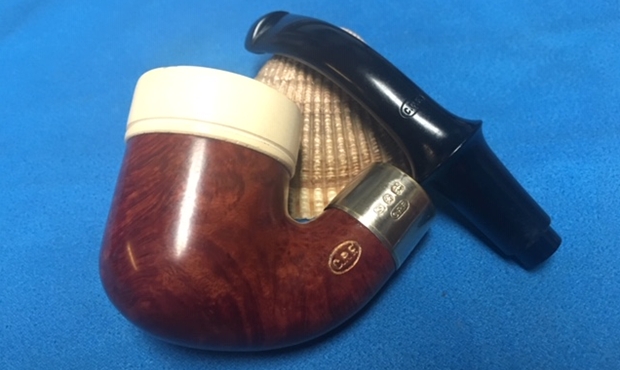
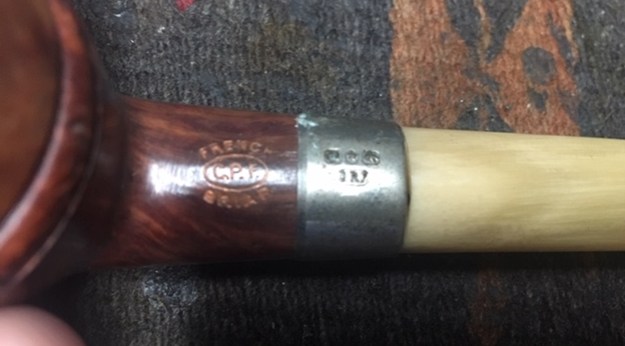
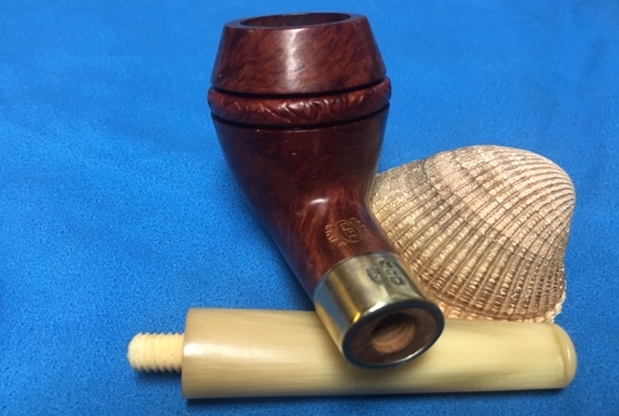
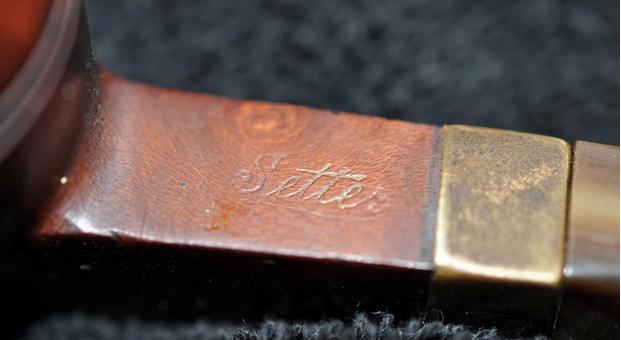
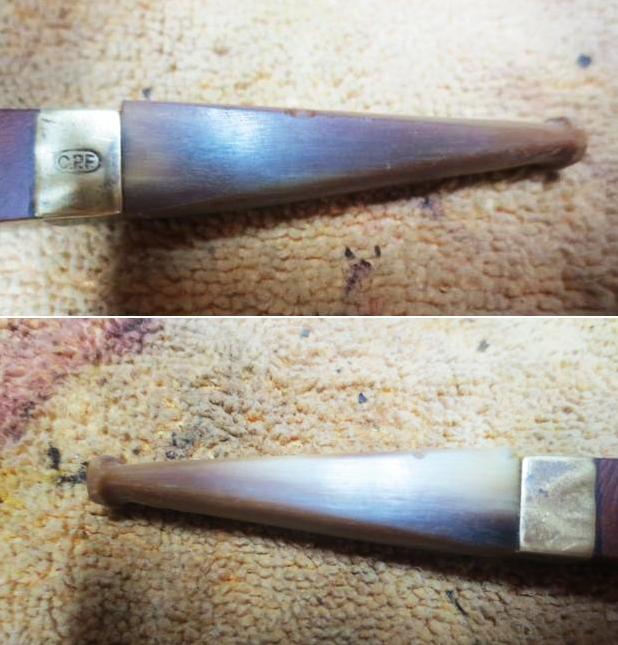
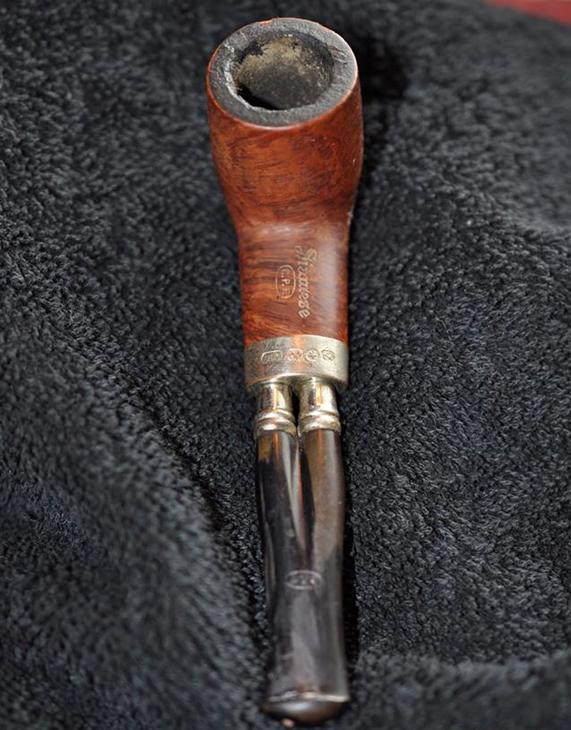
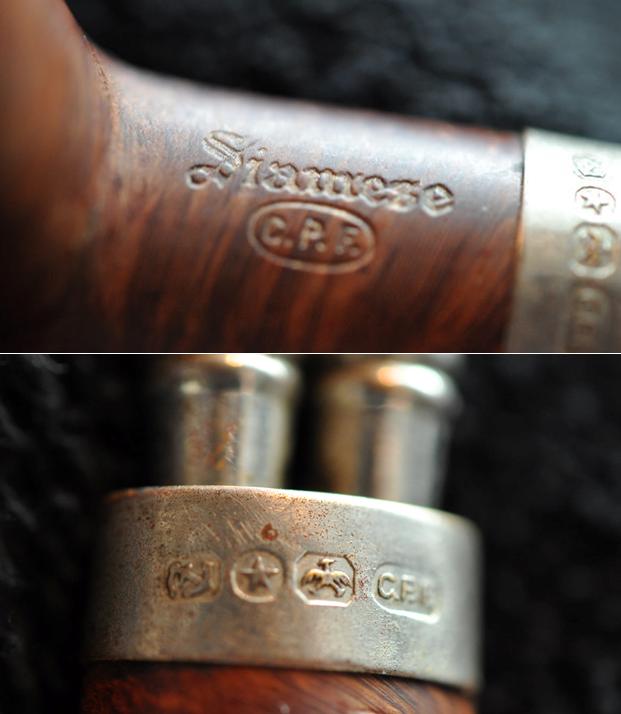
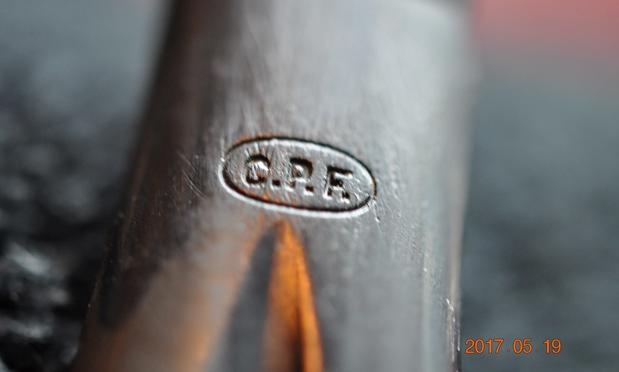
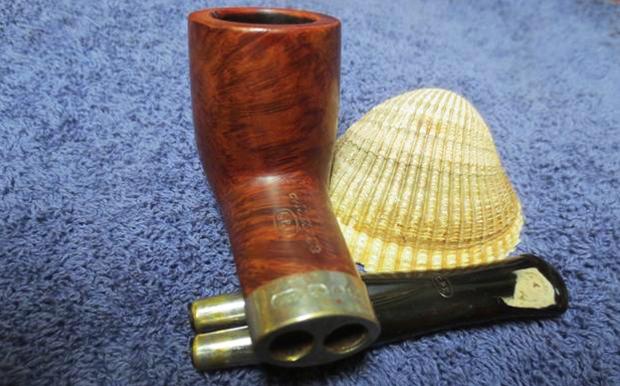
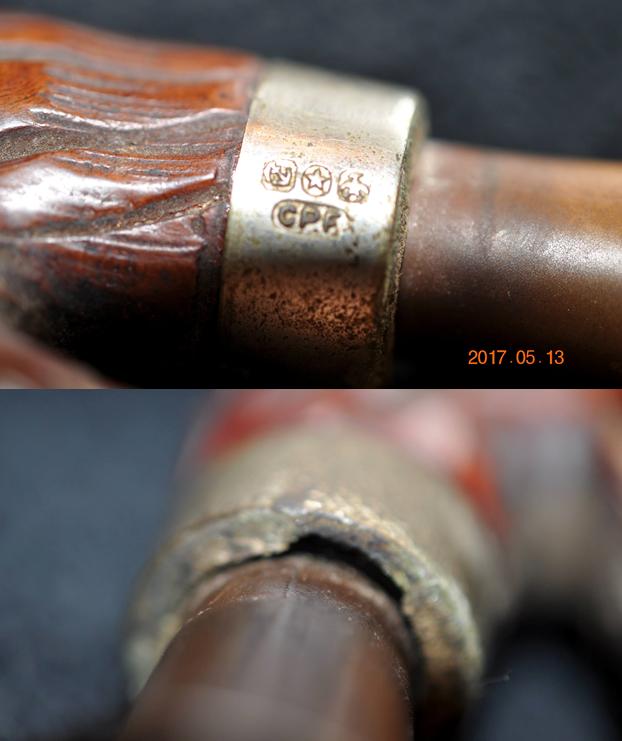
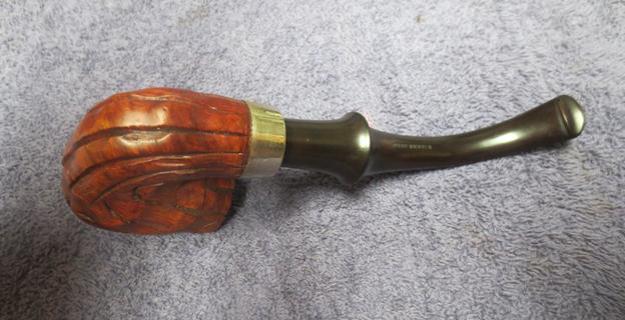
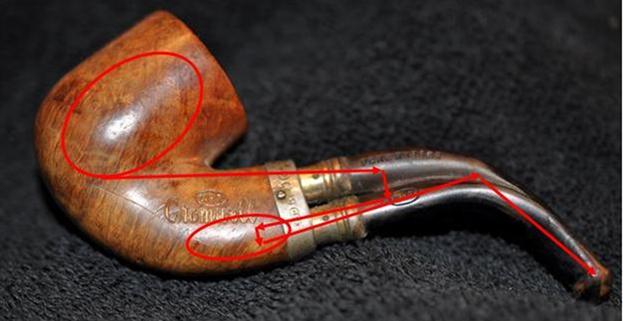
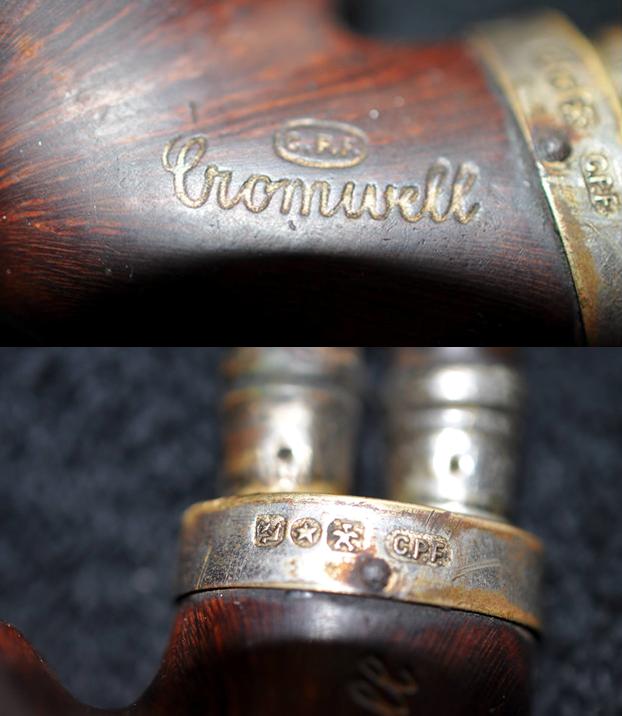
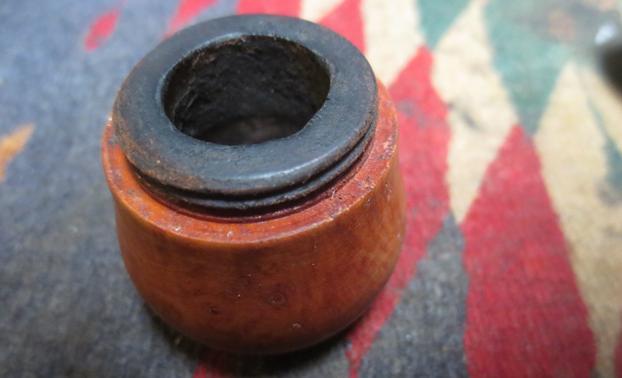
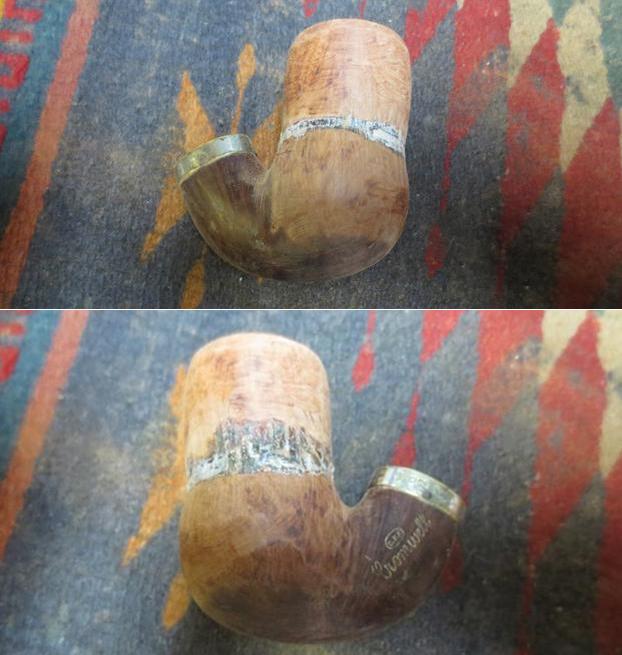
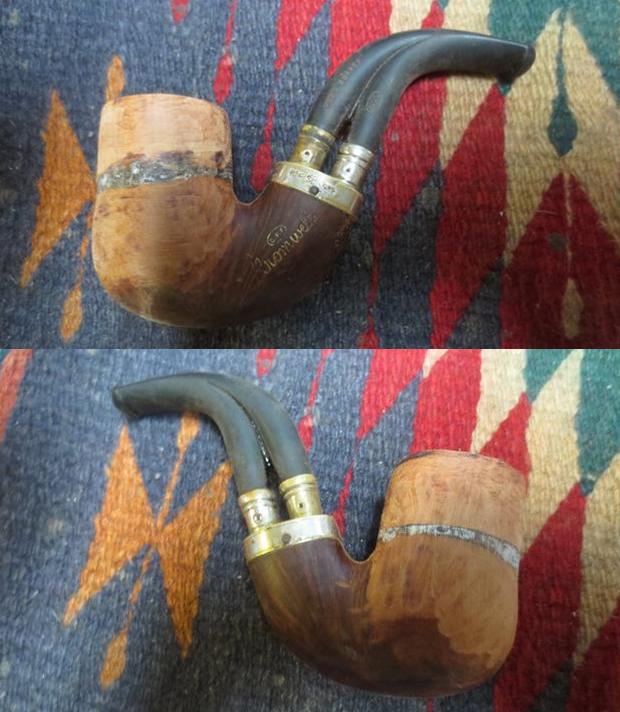
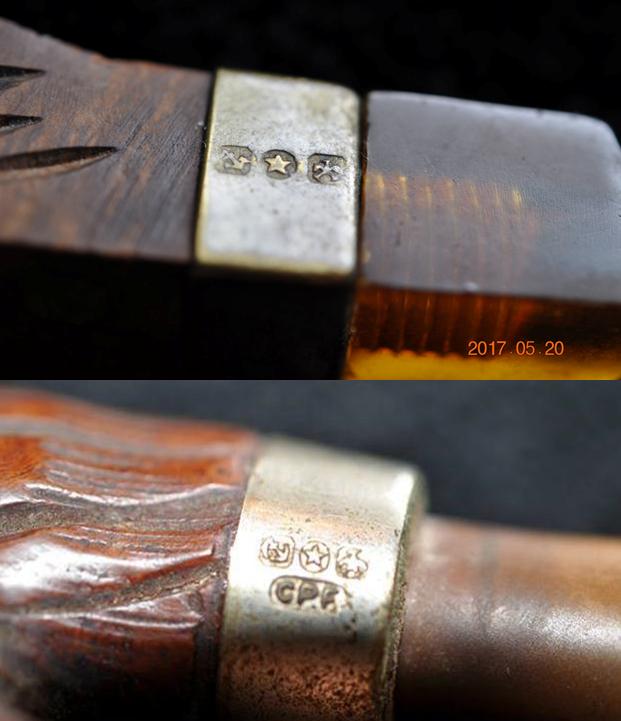
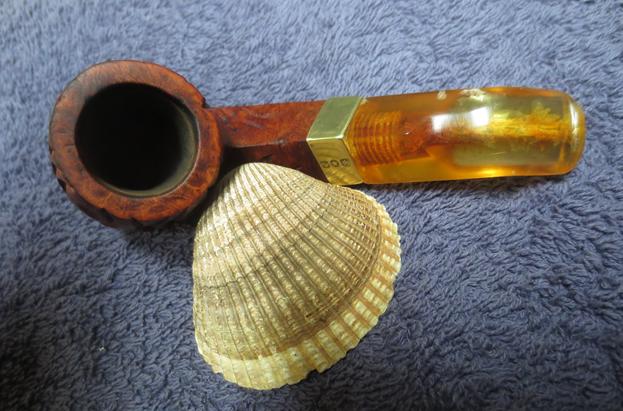
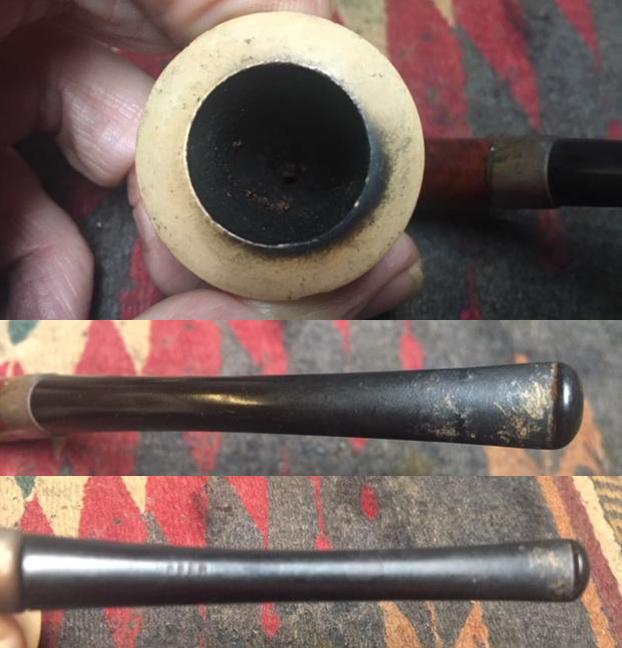 The next photo shows the stamping on the left side of the shank. It is clear and readable. The stamping reads as noted above. The band is loose and is stamped with the C.P.F. in an oval logo with the faux hallmarks that are on all of the metal banded C.P.F. pipes.
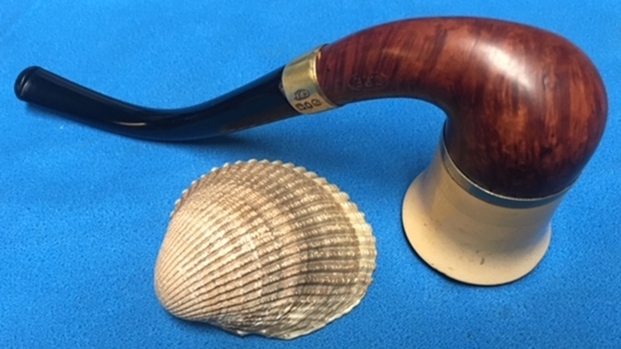
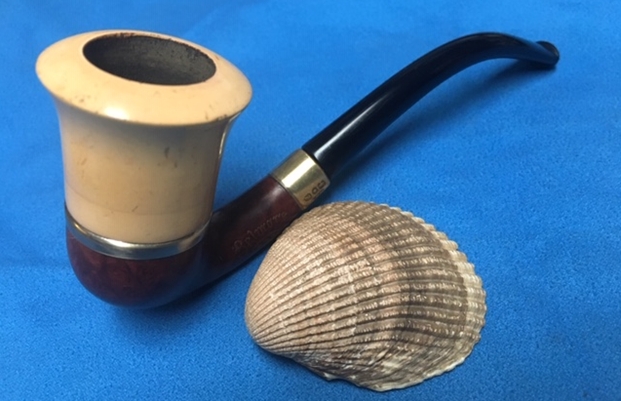
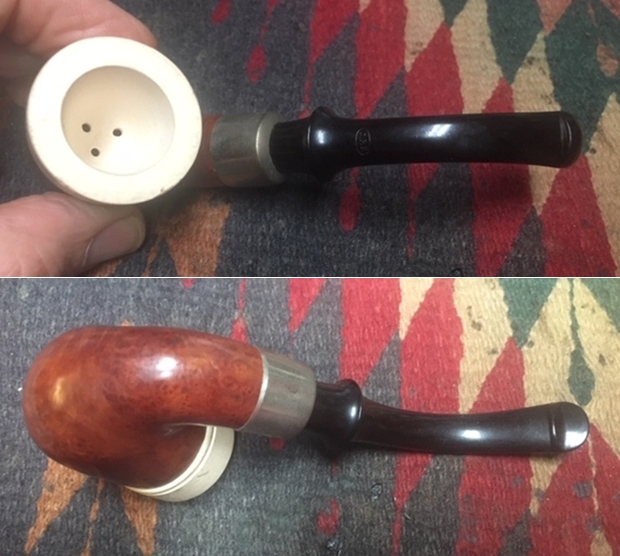
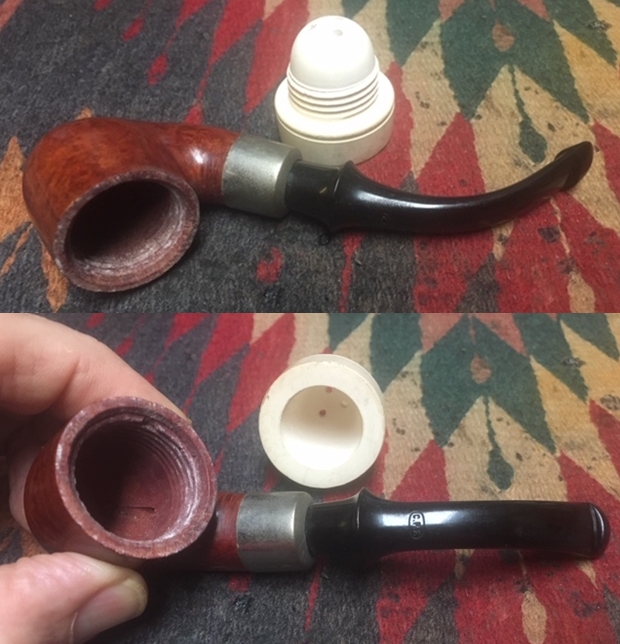
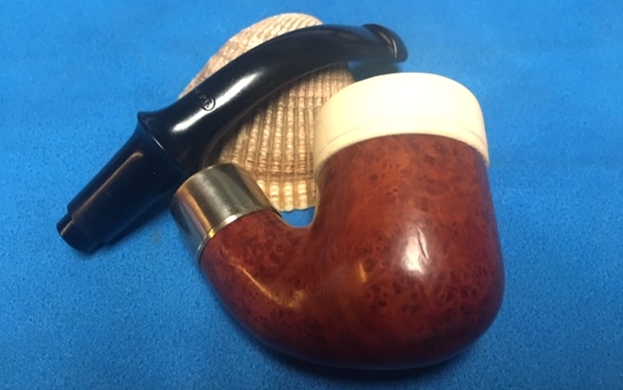
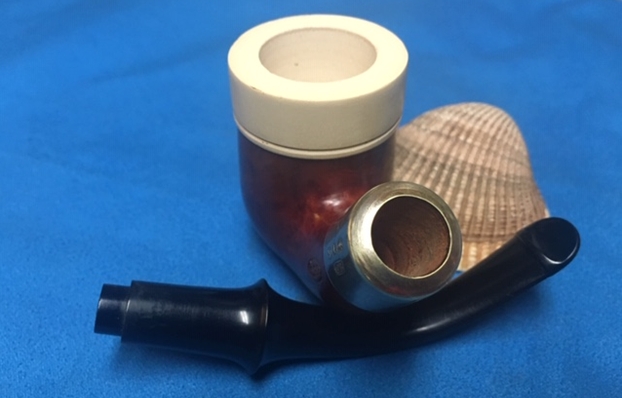
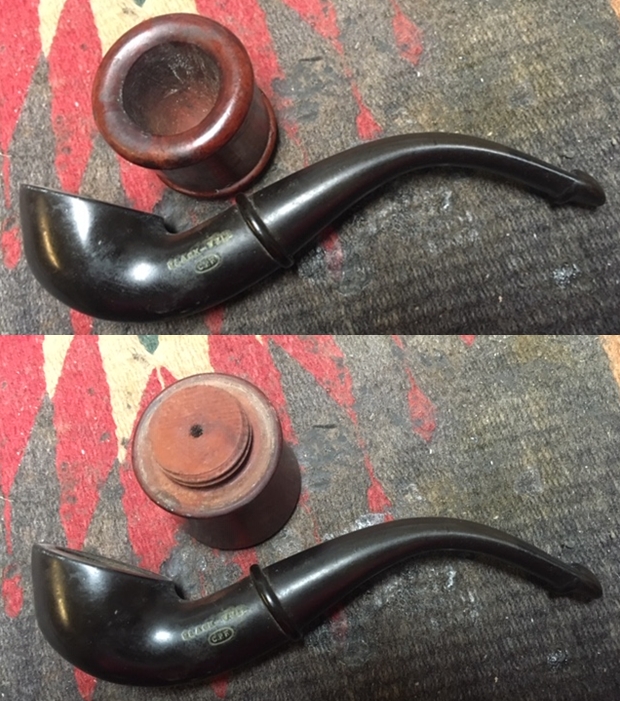
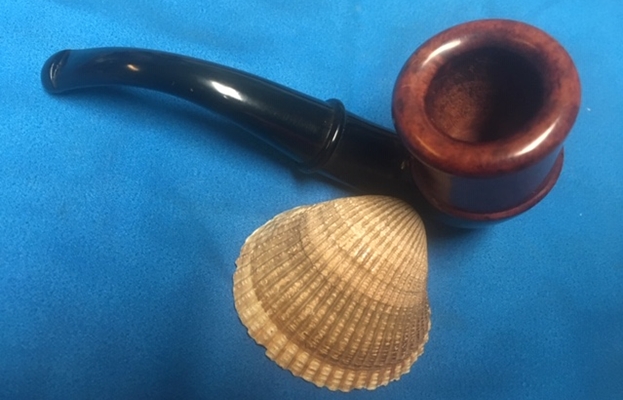
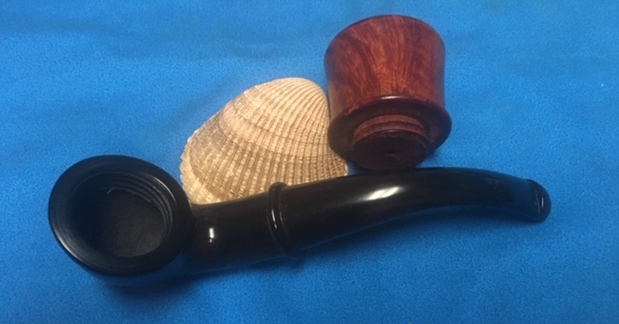
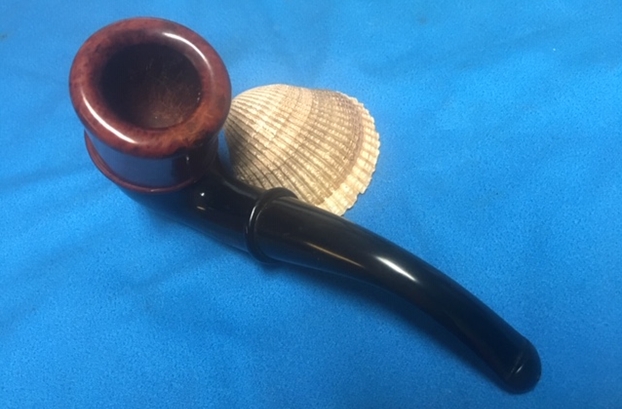
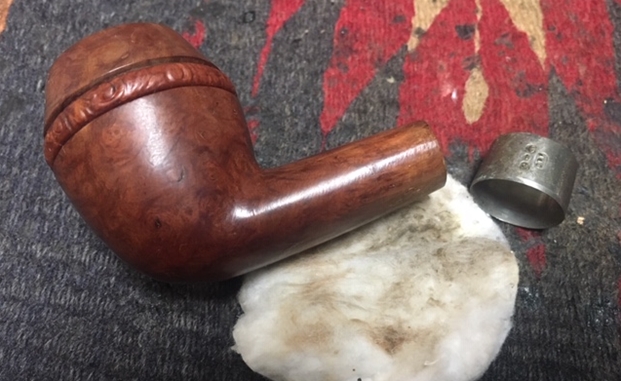
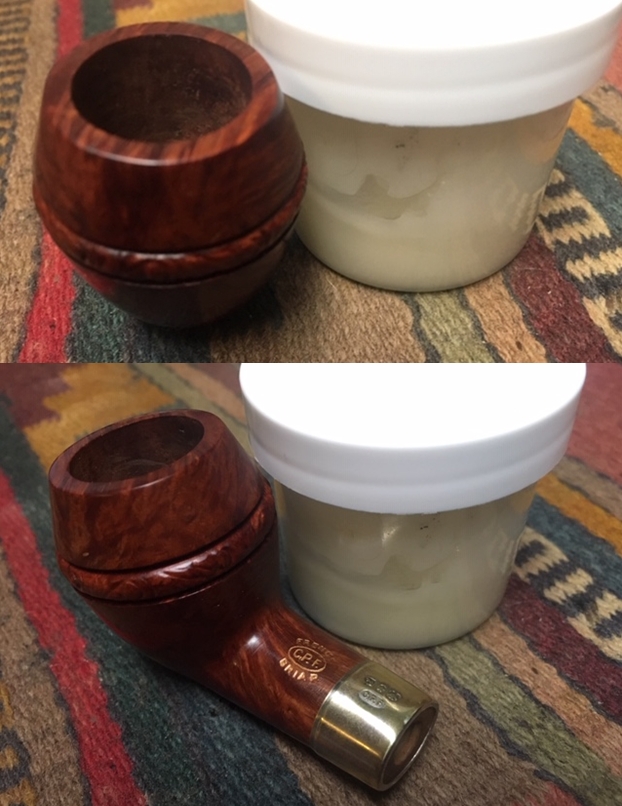
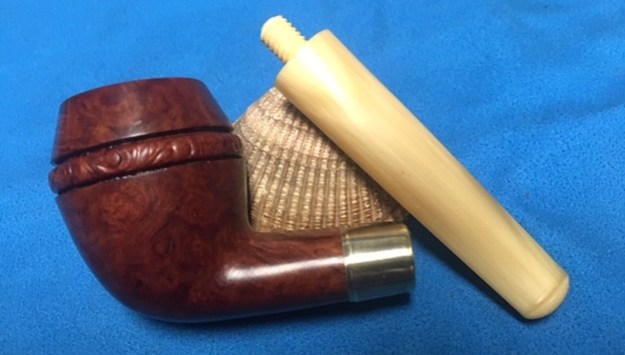
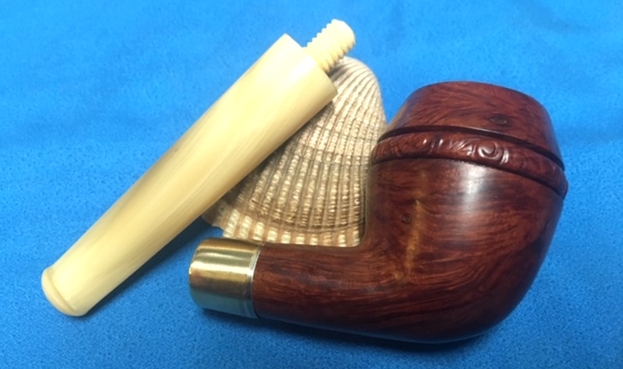
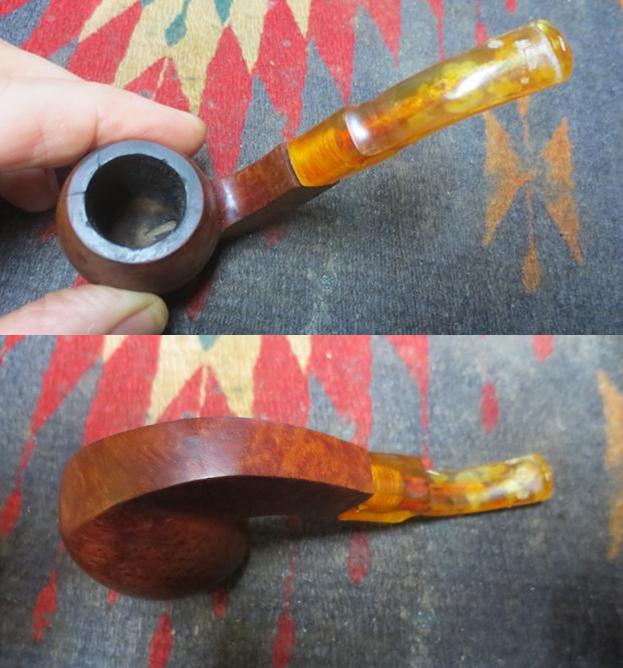
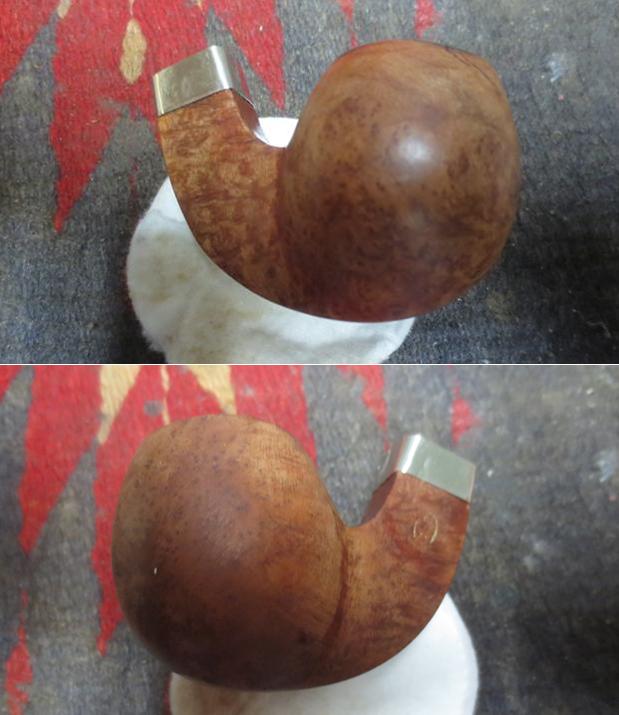
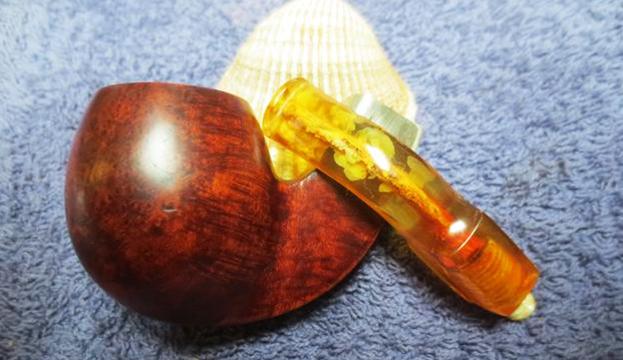
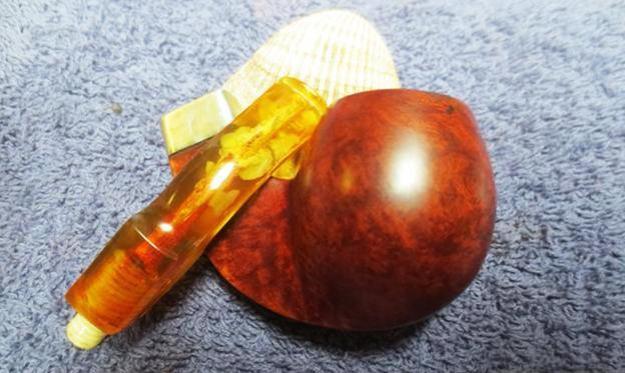
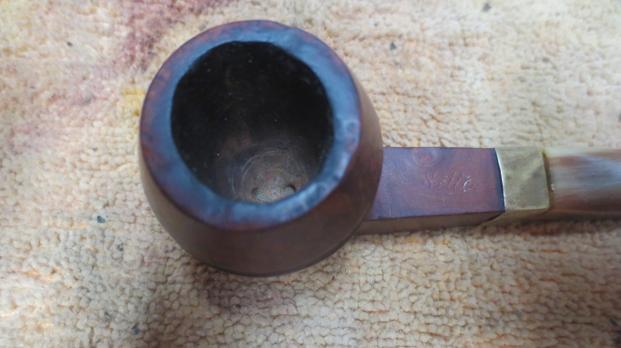
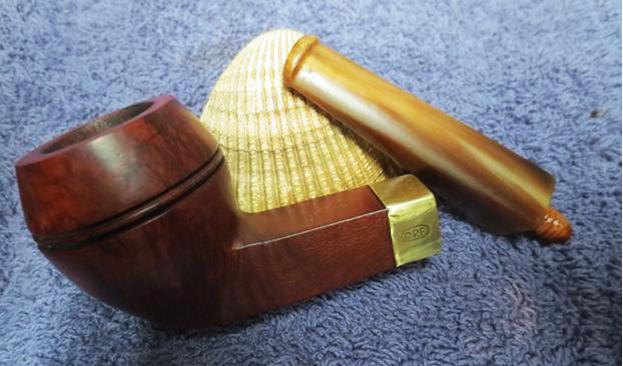
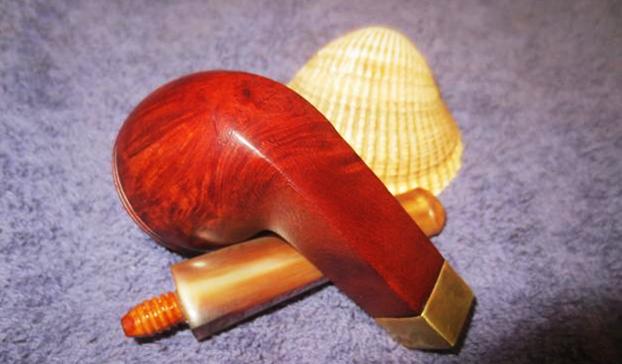
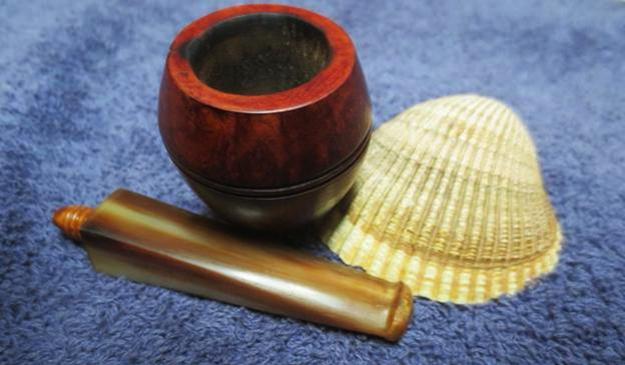
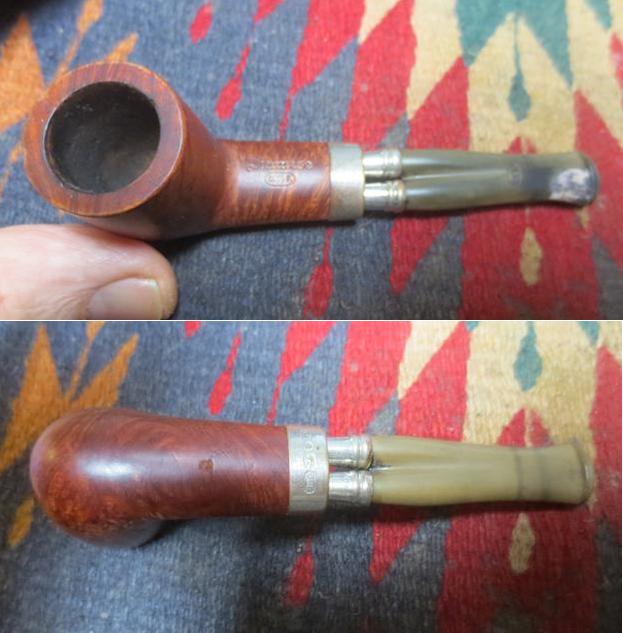
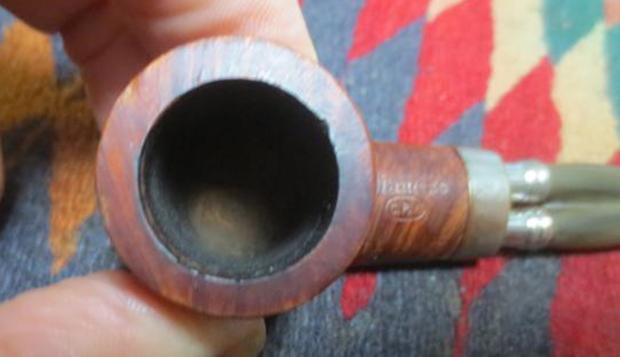
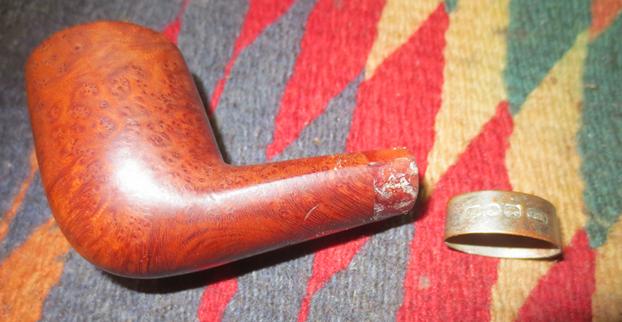
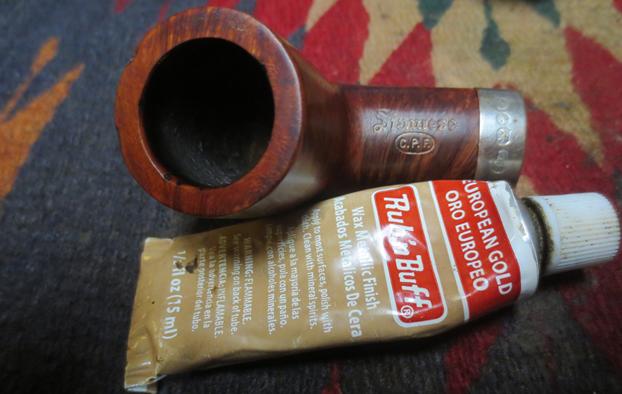
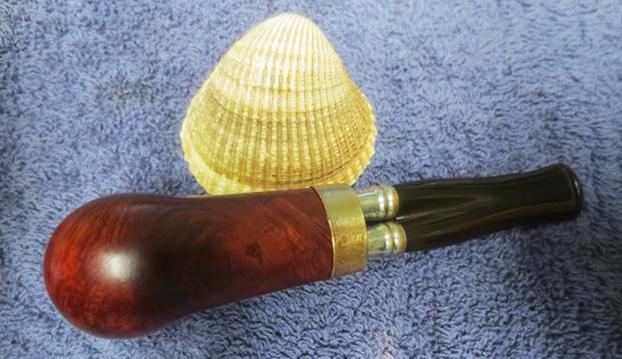
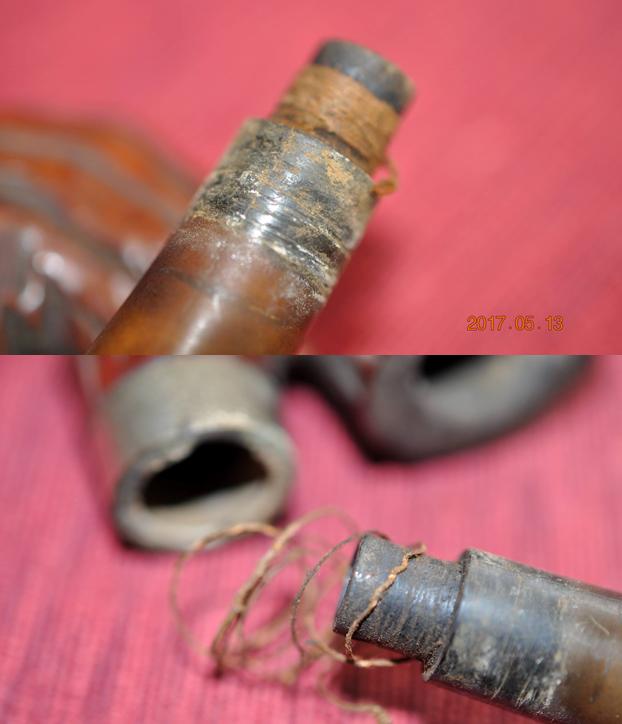
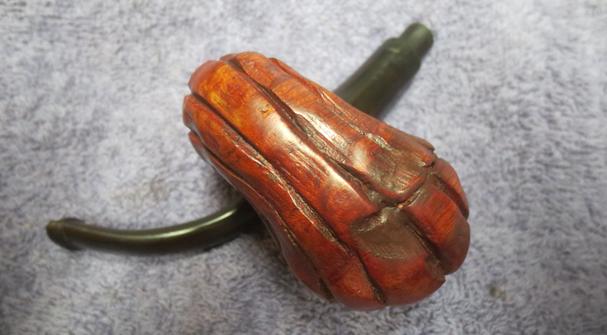
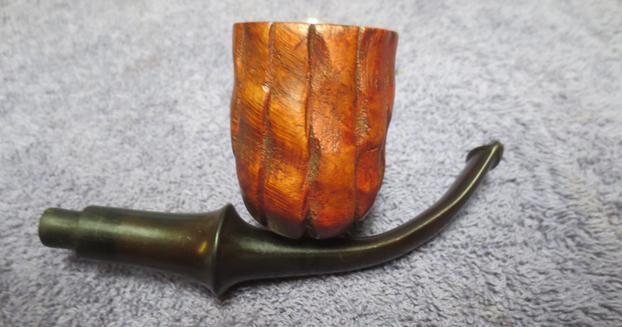
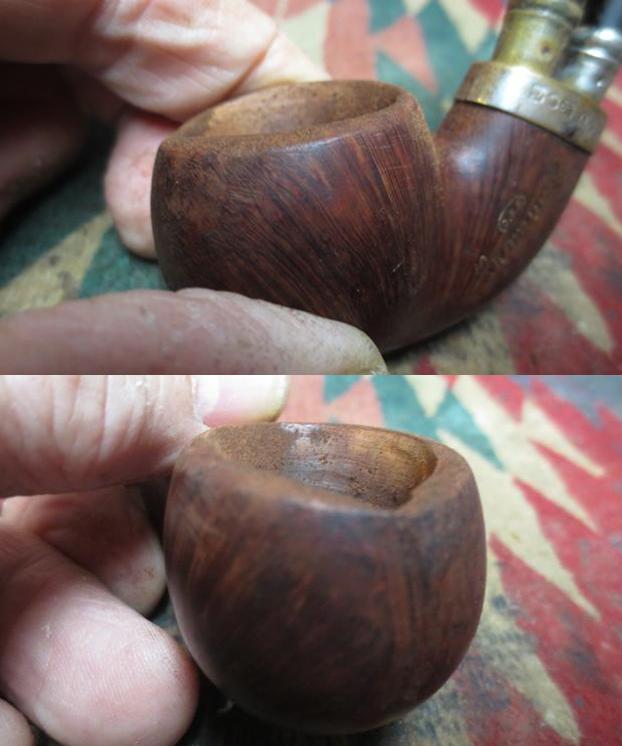
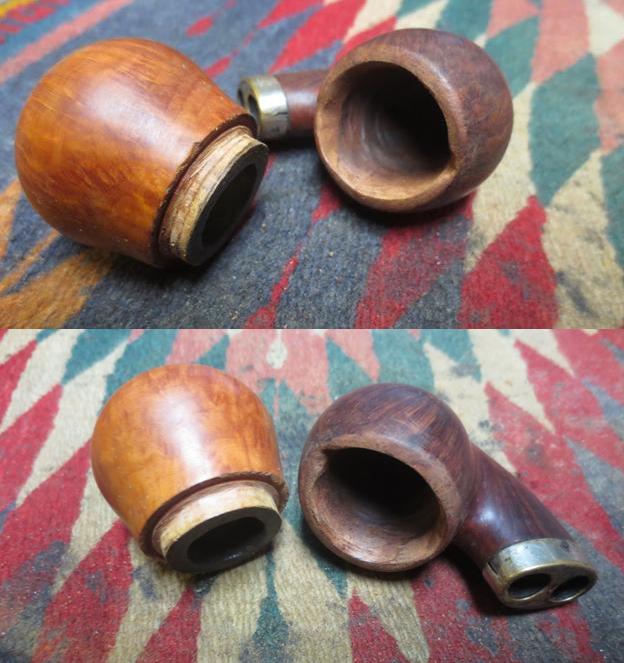
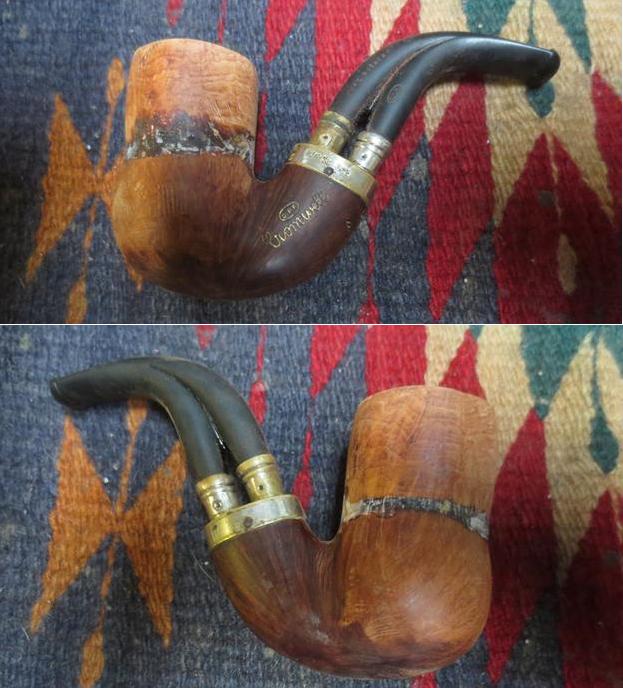
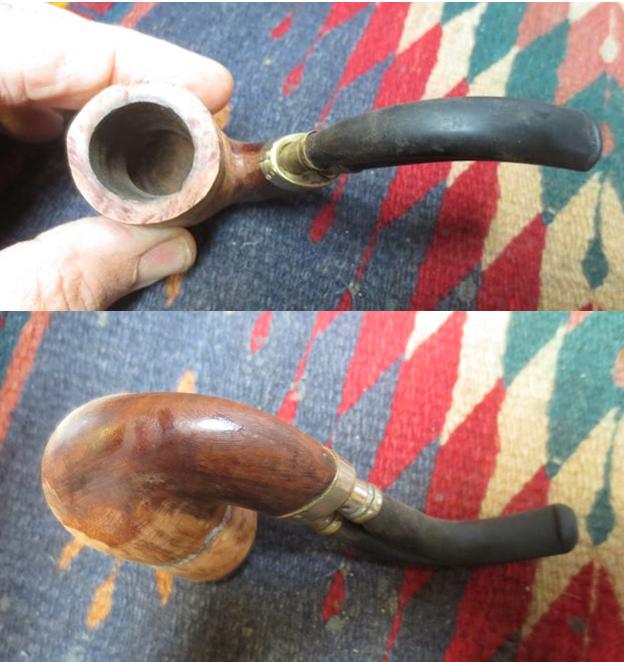
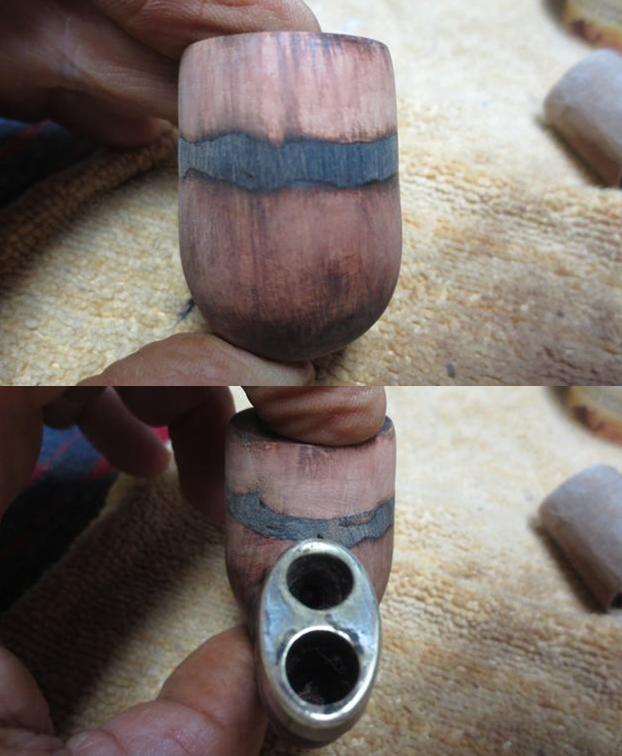
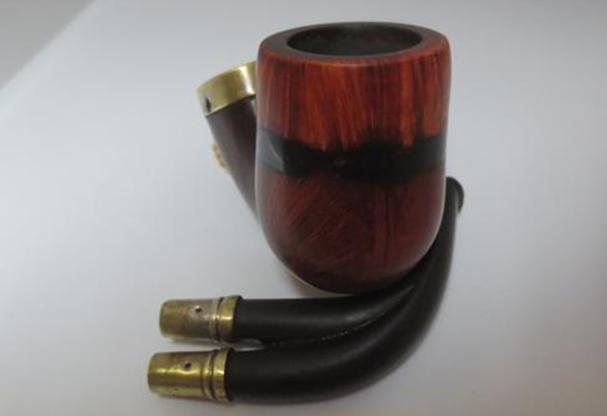
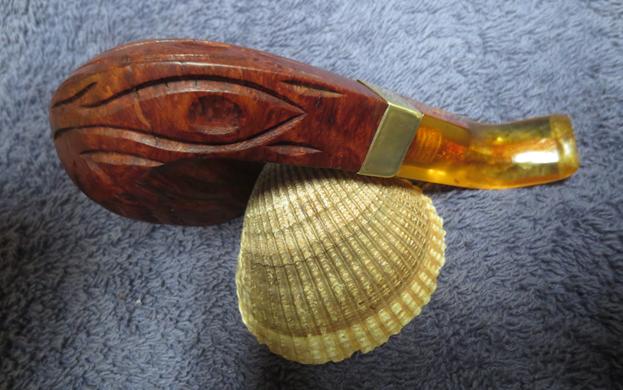
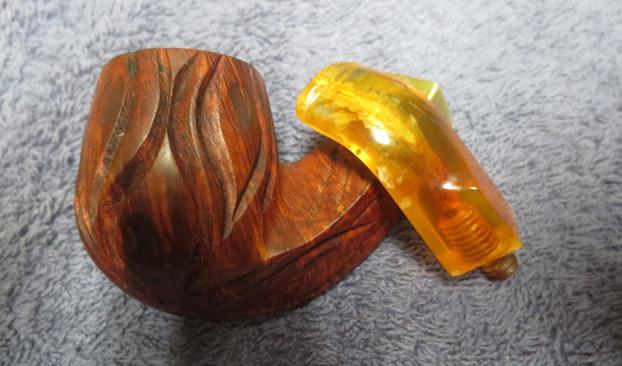
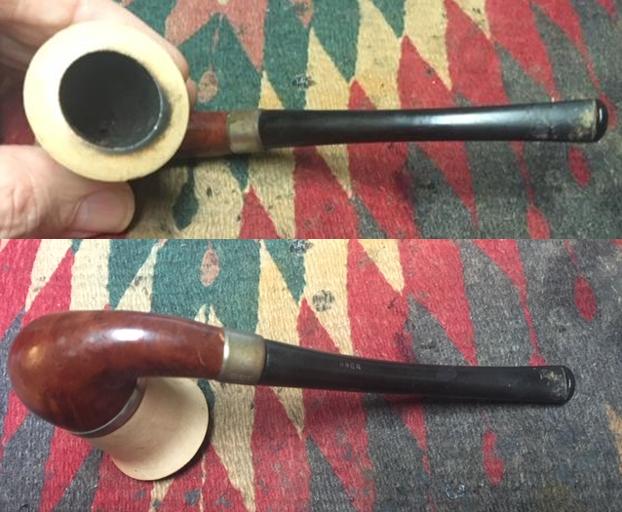
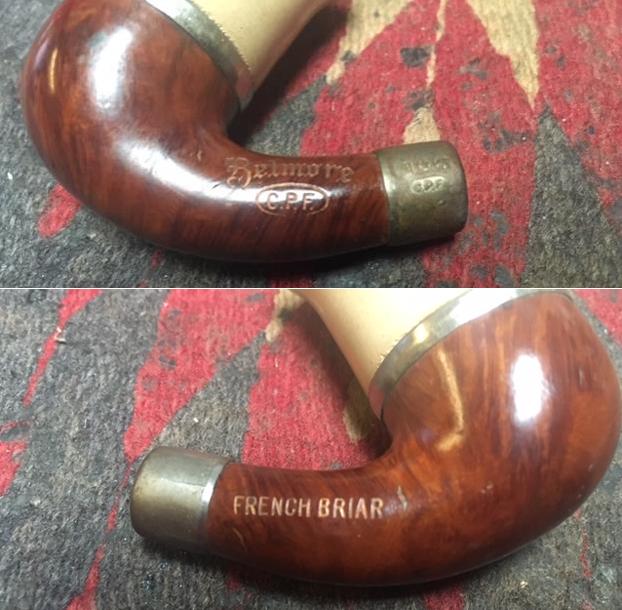 I unscrewed the bowl from the pipe and took photos of the parts – the briar base and the meer bowl as well as all the adornments. It looks good on the inside. The threads in the base and on the meerschaum bowl are in good condition.
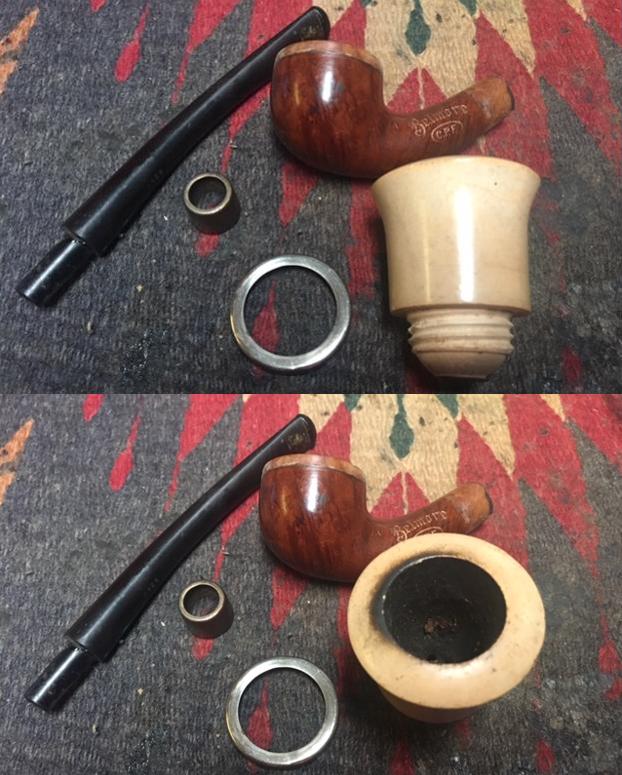
 I have included the following information with each of the blogs on C.P.F. pipes because I always want to keep the historical context in mind as I work on these. The link to the blog follows (https://rebornpipes.com/2013/04/14/some-reflection-on-the-historical-background-on-cpf-pipes/). I quote a pertinent part of the blog below:
From my reading and research it seems to me that CPF brand was discontinued sometime in the 1910-1920 range. Again, turning to Bill Feuerbach I found that he notes the following, which pins down the time frame of the discontinuation of the brand more specifically, “I have a CPF Chesterfield in our office display that has a name tag from way before my time that says 1900 CPF Chesterfield. It looks like most other Chesterfields you’ve seen, including the military type push stem, except this stem is horn and not vulcanite. As far as I have gathered the CPF brand was phased out sometime around 1915.” Interestingly, he noted that the Chesterfield name and style was later introduced in the KB&B, Kaywoodie and Yello-Bole lines. He says that the 1924 KB&B catalog shows KB&B Chesterfields…
… From my research I believe that we can definitively assert that the CPF logo stands for Colossus Pipe Factory. The brand was purchased by KB&B sometime between 1884 and 1898 and that it continued until 1915. That time frame gives help in dating some of the older CPF pipes you or I might find. It can be said that prior to the dual stamping it is fairly certain that the pipe is pre-1884 to 1898. After the dual stamping it can be placed post 1898 until the closure of the brand line in 1915. CPF made beautiful pipes.
From that information I can tentatively date the pipe to the period prior to 1884-1898 because of the single C.P.F. stamp on the shank, ferrule and stem. At any rate it is another old pipe though this one is well smoked. The story of its journey to Jeff and me this long after the date it was made is another mystery. This batch of pipes has made me wish that even one of them could share its story with us. I can only imagine the journey it has had even minimally from the bits that I do know. It traveled from the Colossal Pipe Factory in New York City to Idaho Falls in journey that began in the 1880s and ended in 2019. Now it is has further traveled by air to Vancouver, Canada, as far west as it can go and remain on the same continent… what a well-traveled pipe. Armed with that information it was not time to work on the pipe.
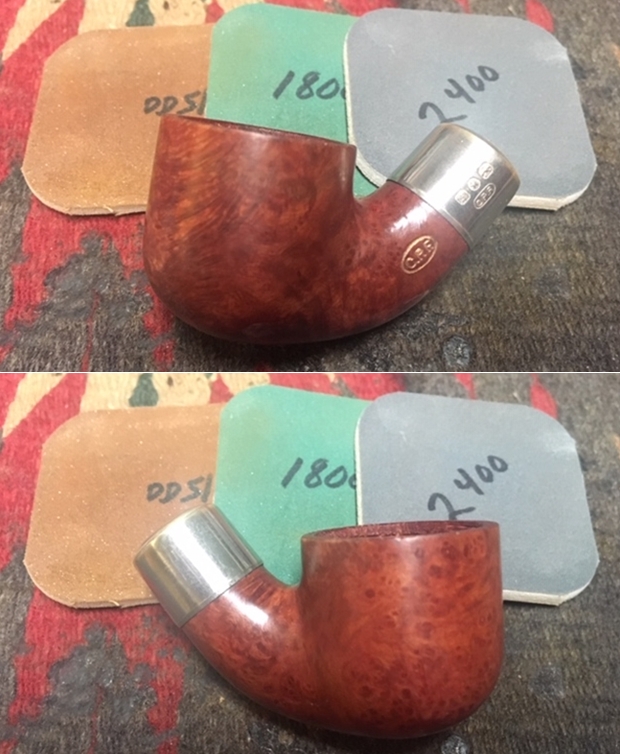
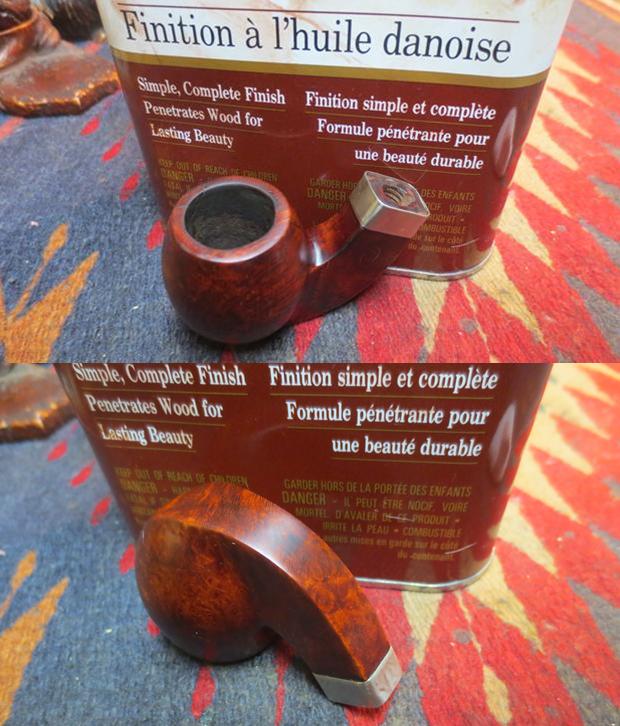
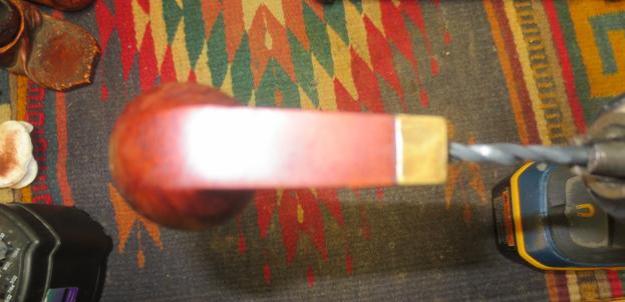
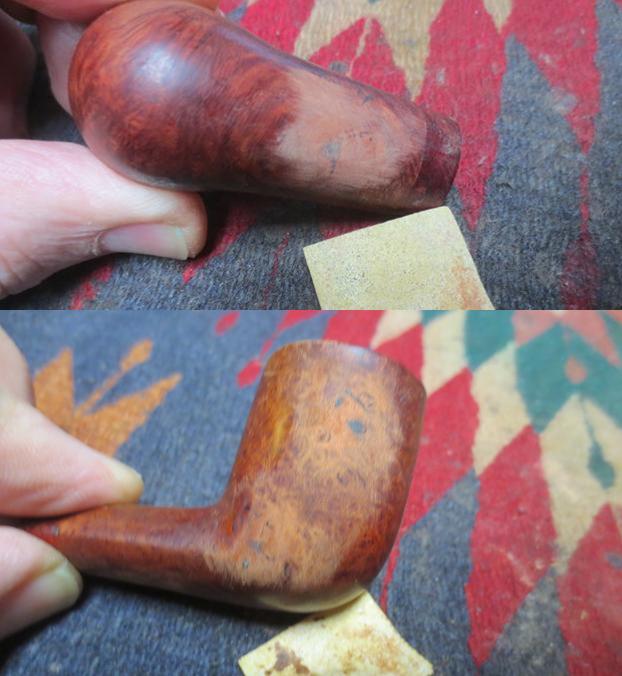
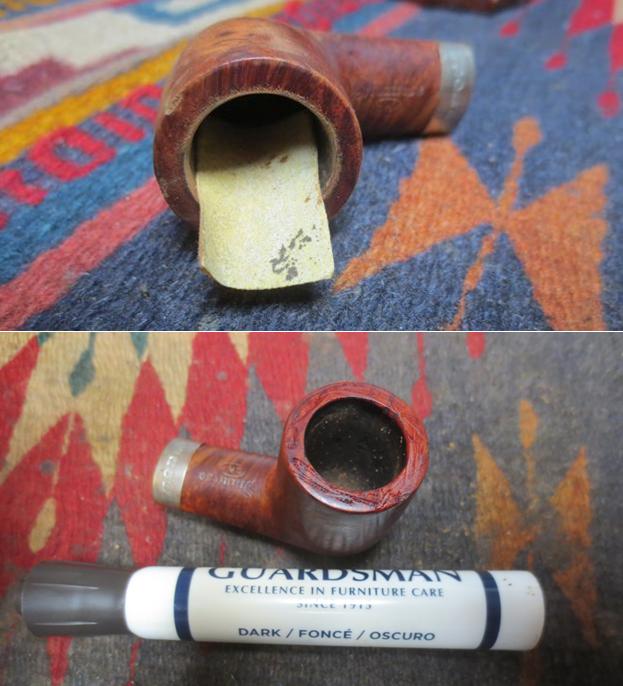
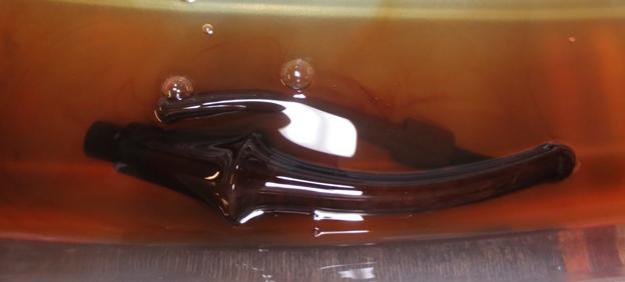
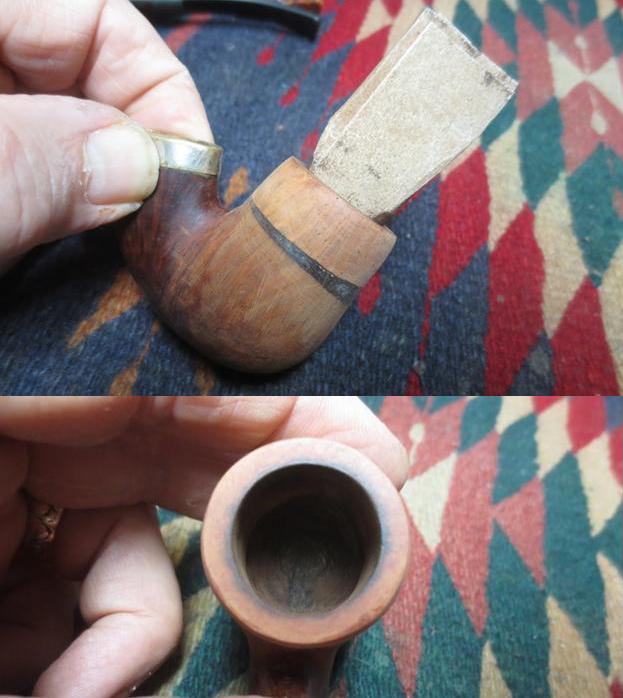
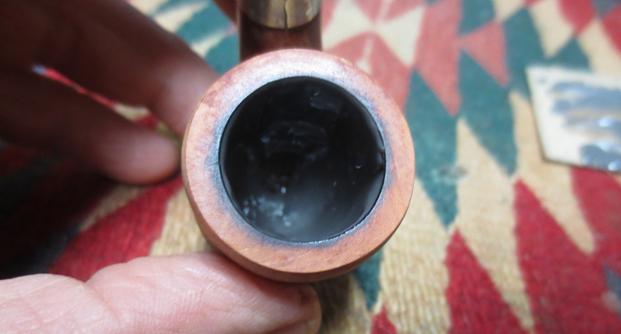
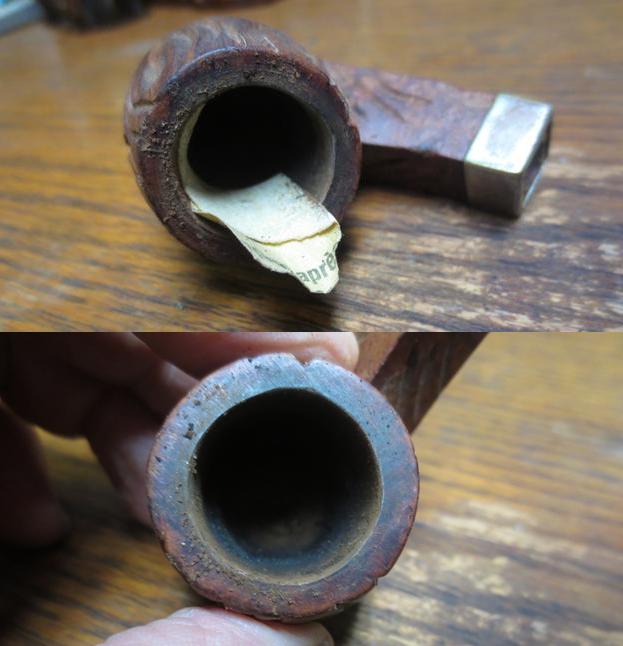
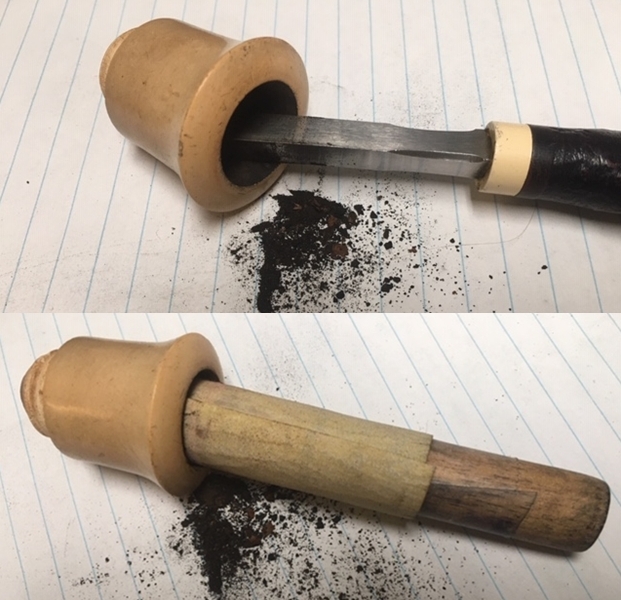
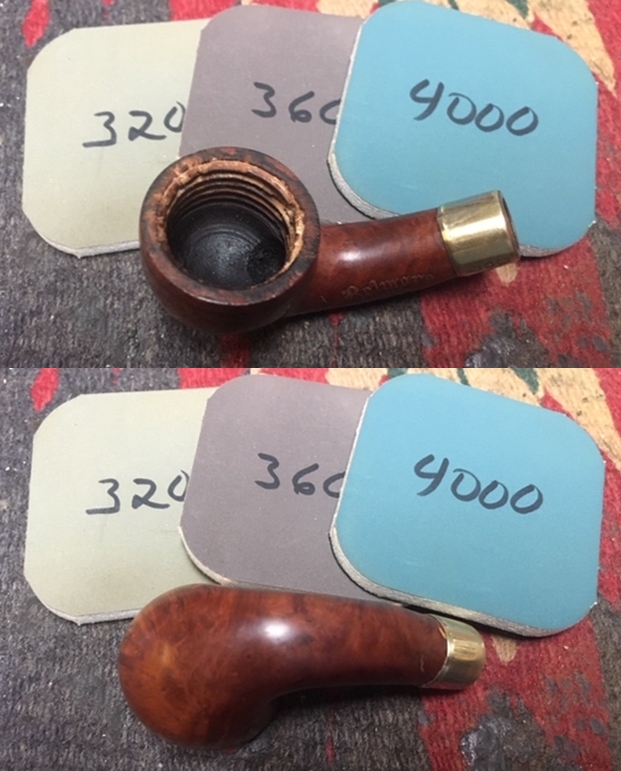
I decided to begin with the bowl. I unscrewed the bowl from the briar base. I carefully scraped the rim top to remove the lava build up. I finished it up with a 1500 grit micromesh pad. I reamed the bowl with a Savinelli Fitsall Pipe knife to scrape away the cake on the walls. I wanted to avoid cracking or damaging the meer in any way so I chose this method. Once it was reamed, I sanded the internal walls with 220 sandpaper wrapped around a dowel until it was smooth. I wiped down the bowl with a damp cotton pad to remove the surface dirt.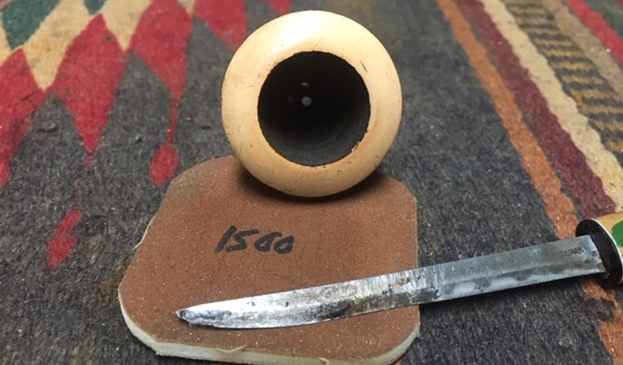
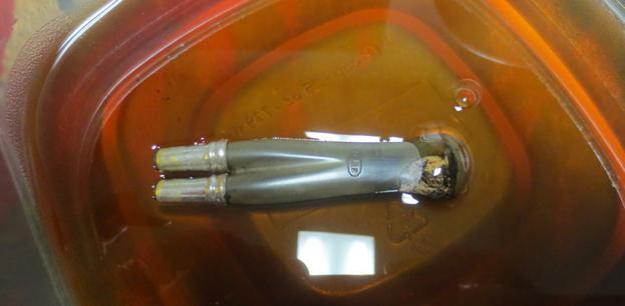
 I cleaned out the sump area in the base with cotton swabs and alcohol. I worked on the airway in the bowl and shank and the mortise with alcohol, cotton swabs and pipe cleaners. I scrubbed until the airway was clean. I cleaned out the airway in the stem with pipe cleaners and alcohol.
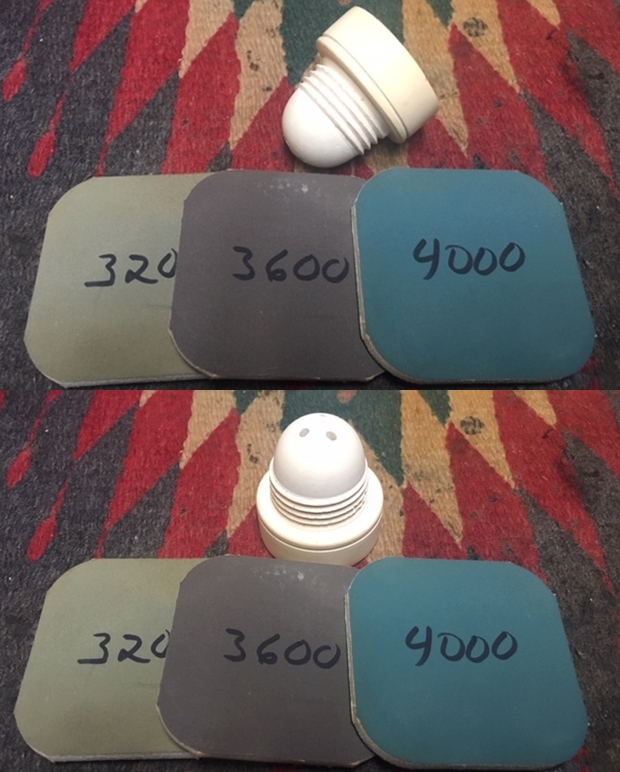
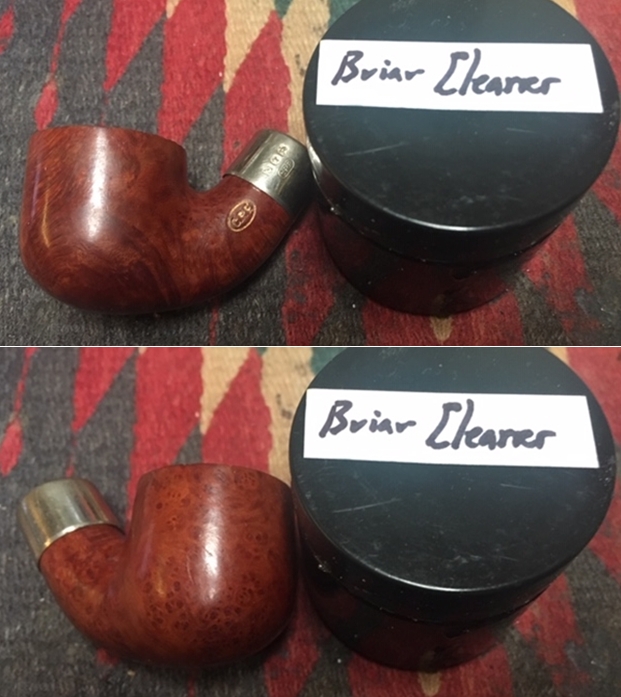
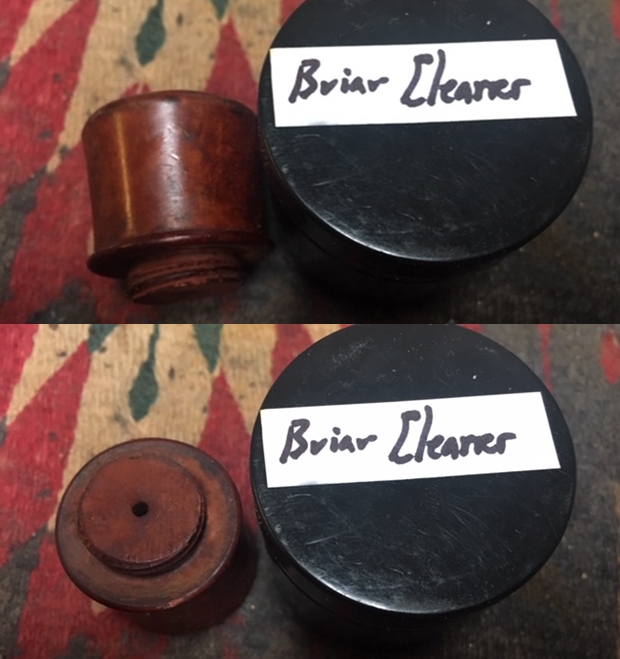
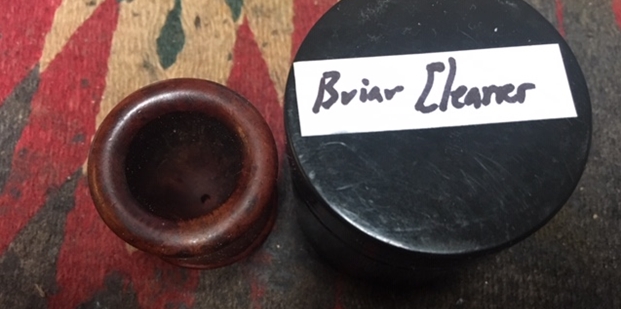
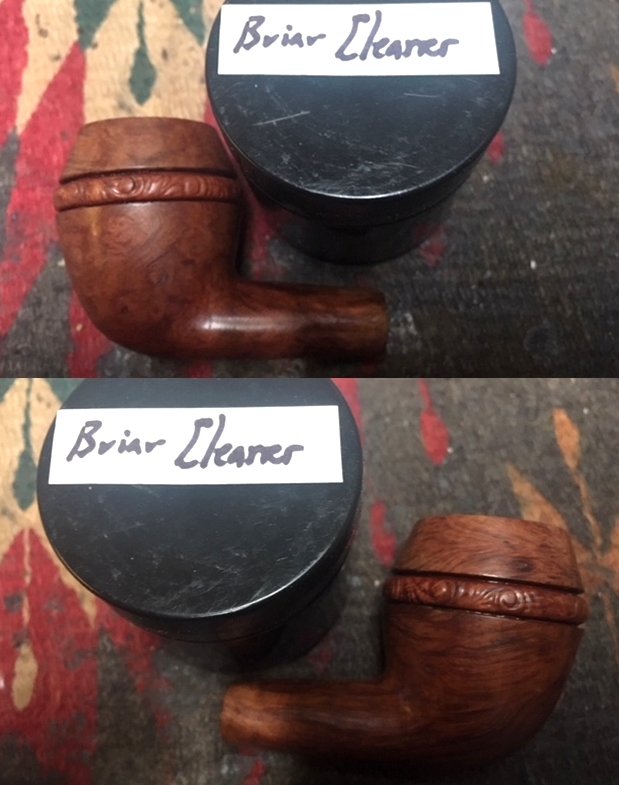
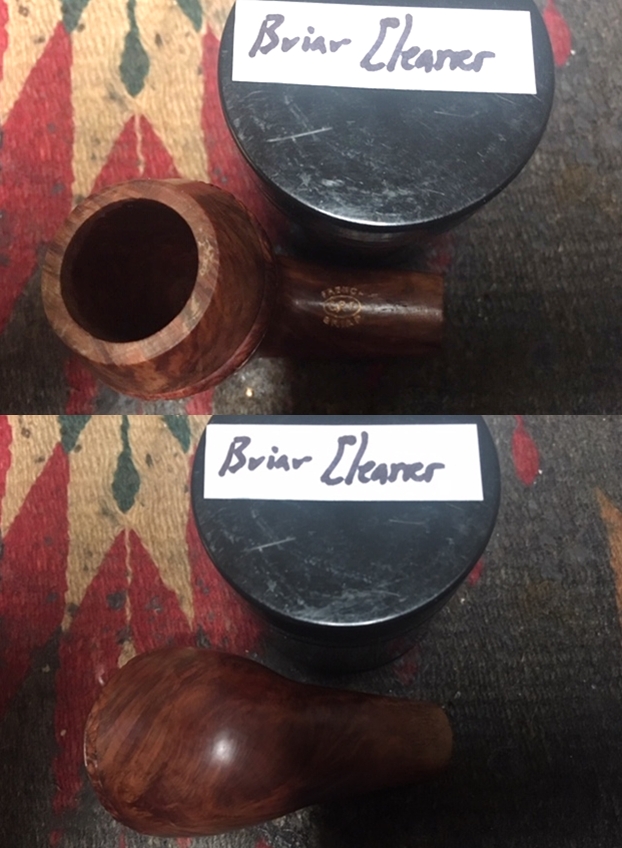
 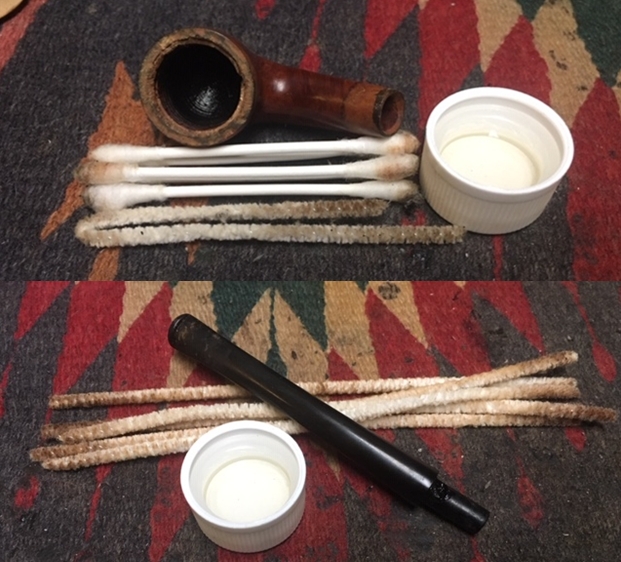 I am still experimenting with Mark Hoover’s Briar Cleaner to see what I think of it as a possible replacement for my usual Murphy’s Oil Soap scrub. I rubbed it onto the briar portion of the pipe and worked it into the grain of the briar. I wiped it off with a clean cloth. There was still a coat of grime and grit from the cleaner left behind so I rinsed it with warm water to remove that and dried it with a microfiber cloth. I am really not sure if this is any better than the Murphy’s but I am committed to working with it. I forgot to take photos of this point in the process.
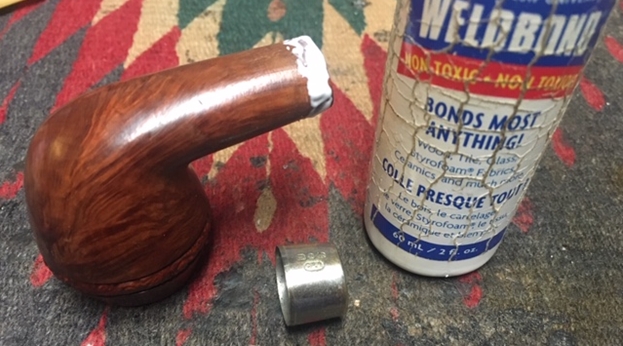
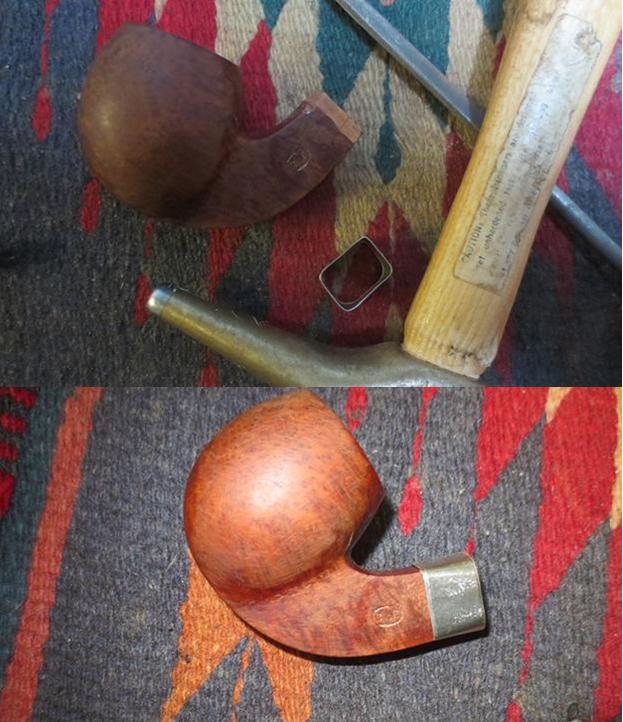
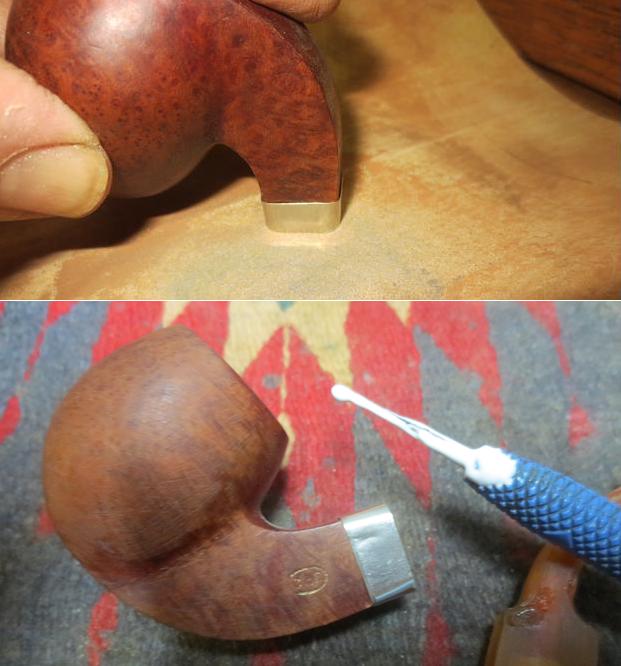
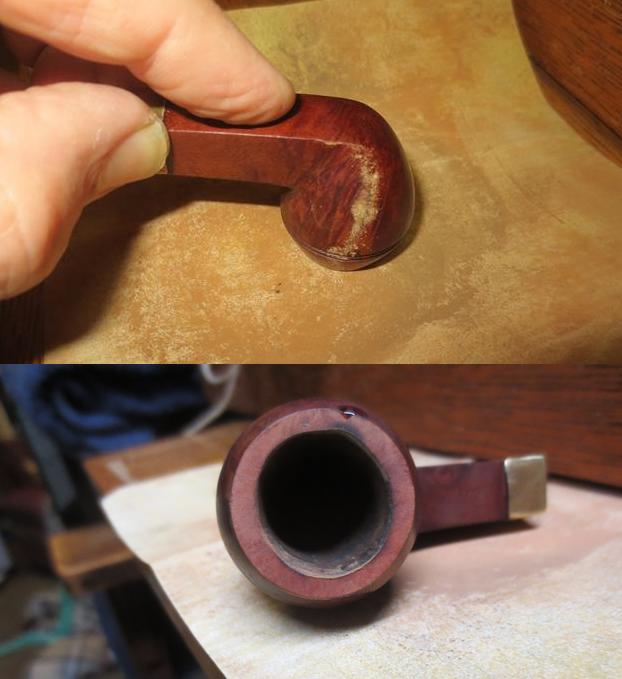
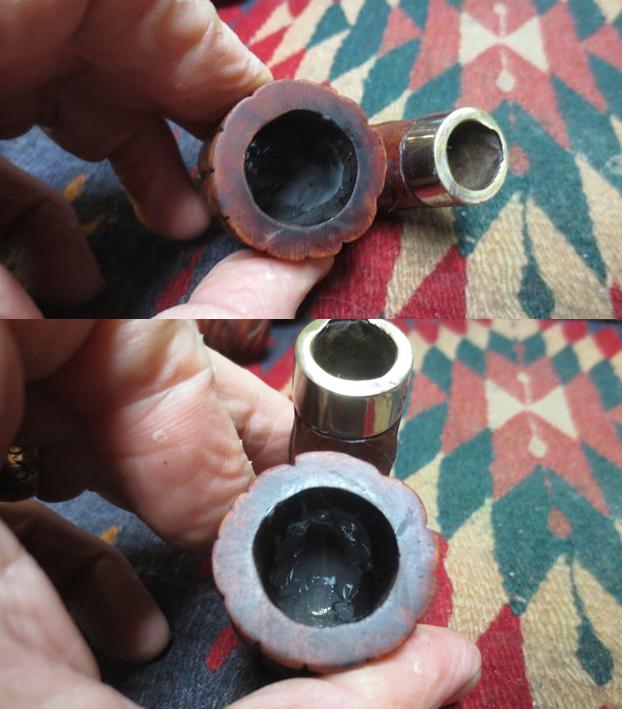
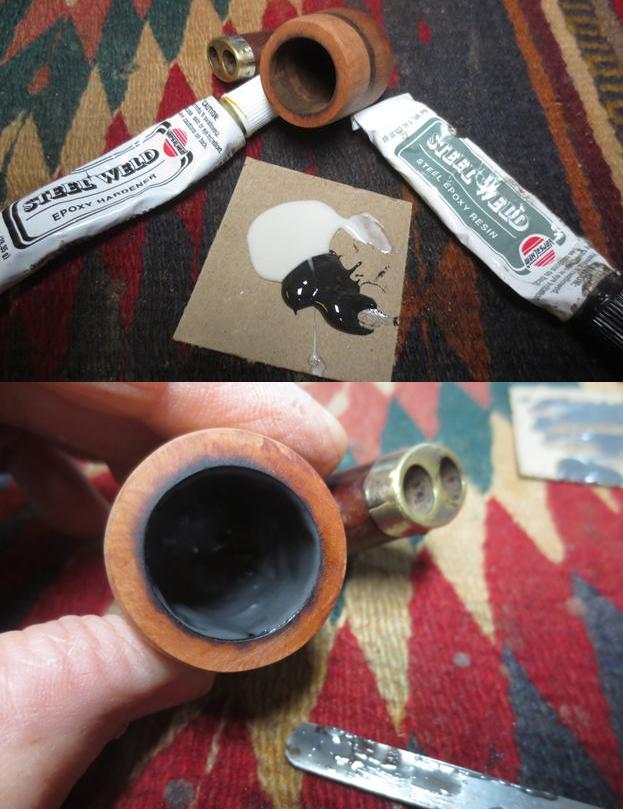
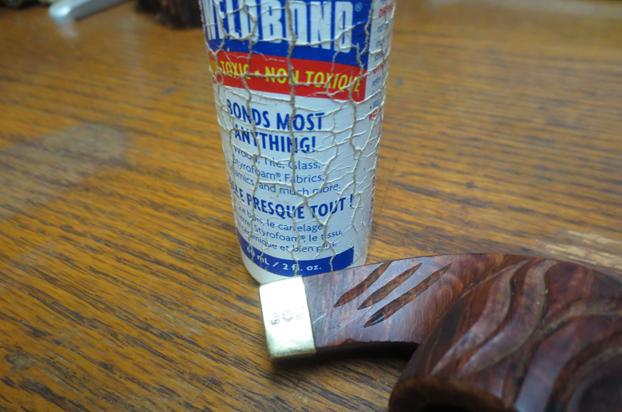
I sanded the old glue and dirt off the shank and then I spread some Weldbond white glue on the shank end. I spread it evenly on the shank end with a tooth pick. I pressed the brass ferrule on the shank end and aligned it so that the C.P.F. oval logo and the faux hallmarks lined up with the stamping on the left side of the shank.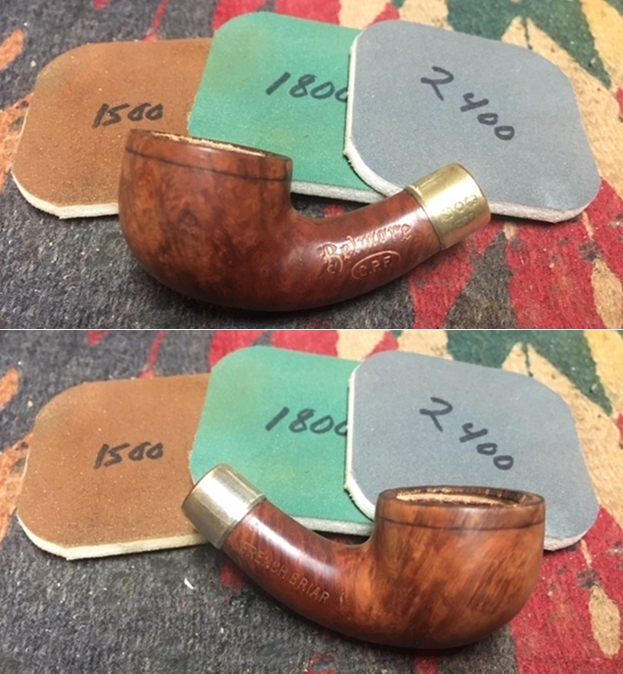
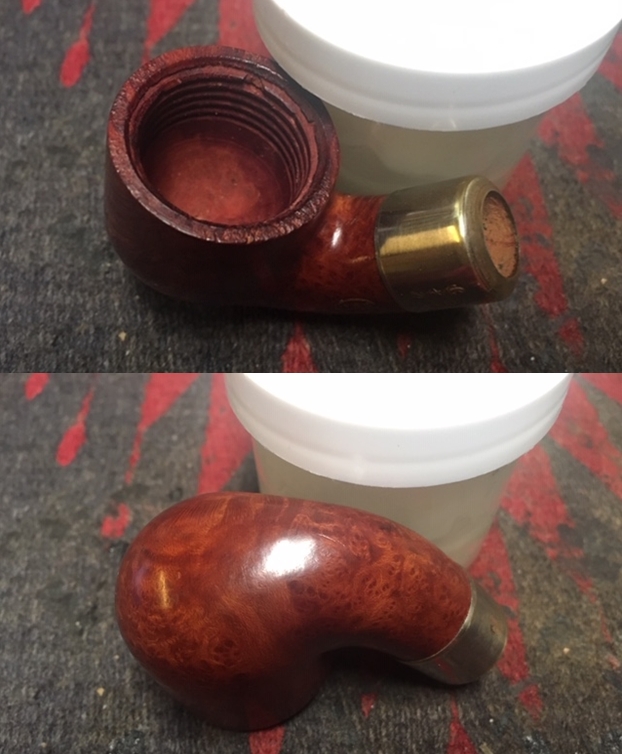
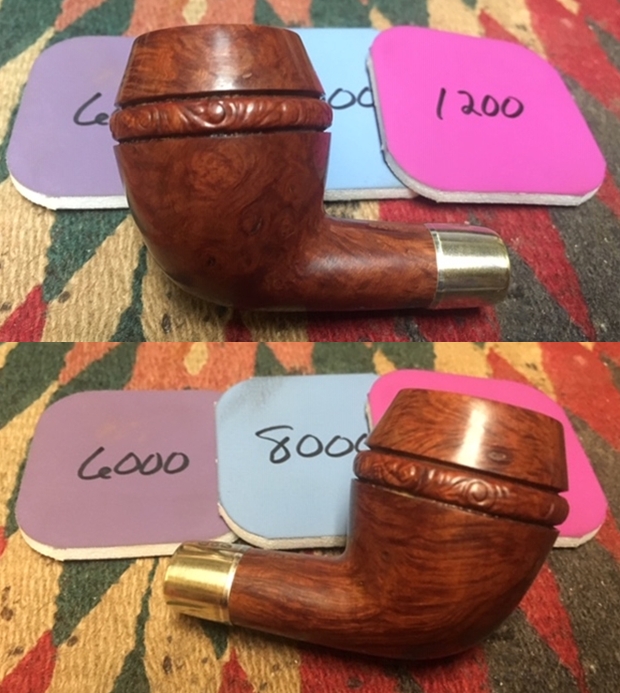
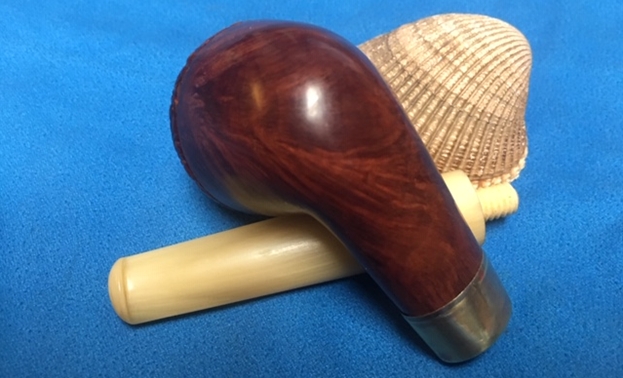
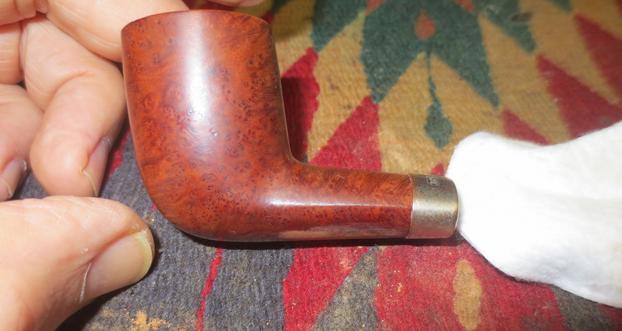
 I rubbed the briar bowl and shank down with a coat of Before & After Restoration Balm. I worked it into the surface of the briar. The product works to clean, enliven and protect the briar. The old briar was dry and it drank up the balm. I buffed the bowl with a soft cloth to raise a shine. I like how the pipe looks as this point in the process.
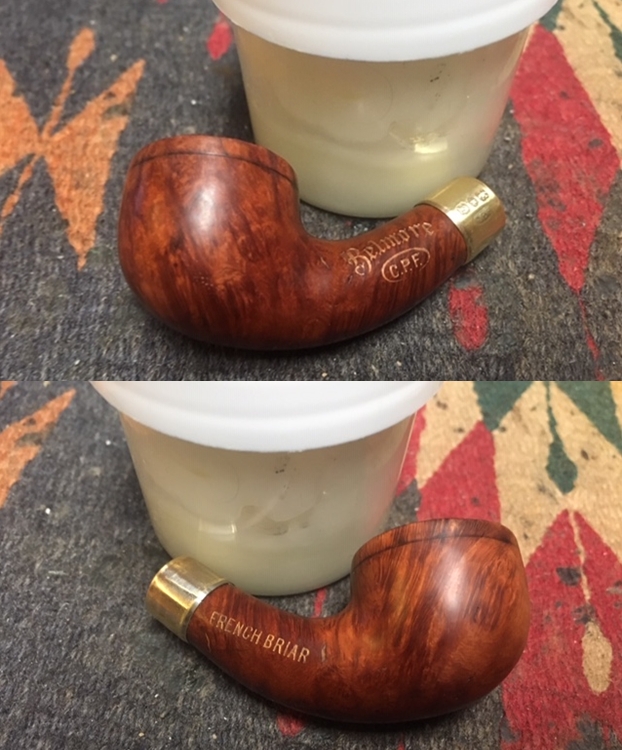
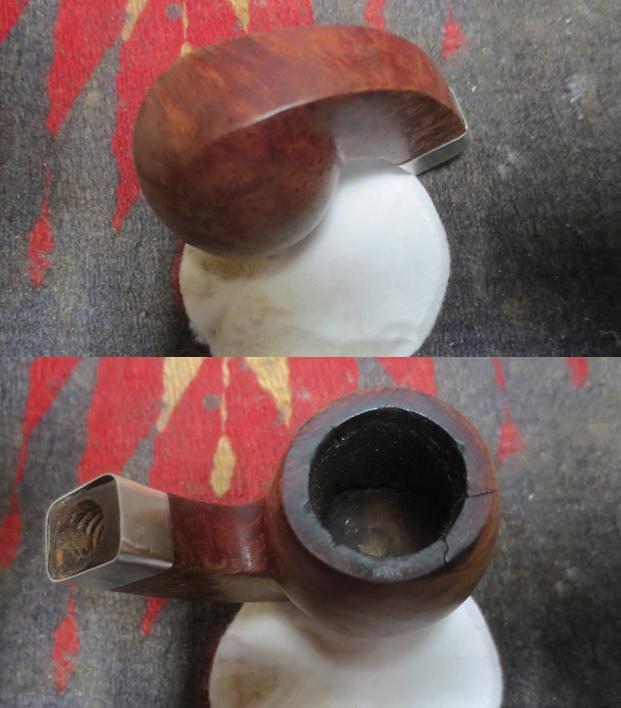
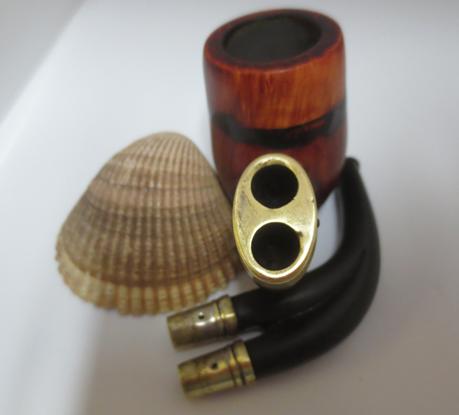
 I glued the metal spacer on top of the base plate making sure all was aligned properly before I pressed them into place.
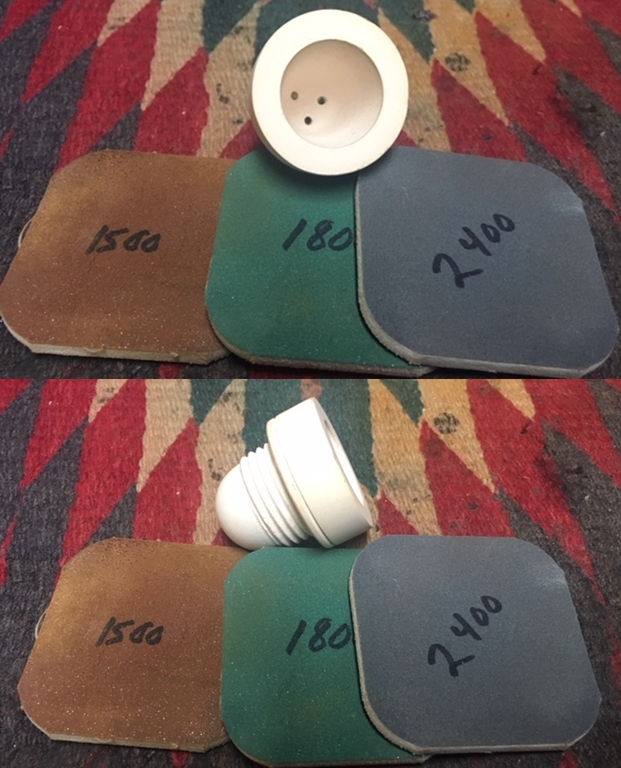
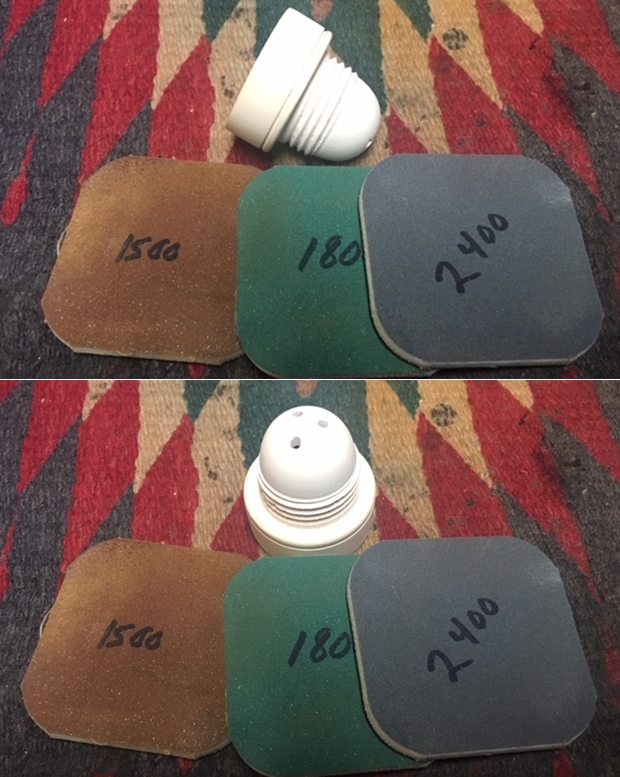
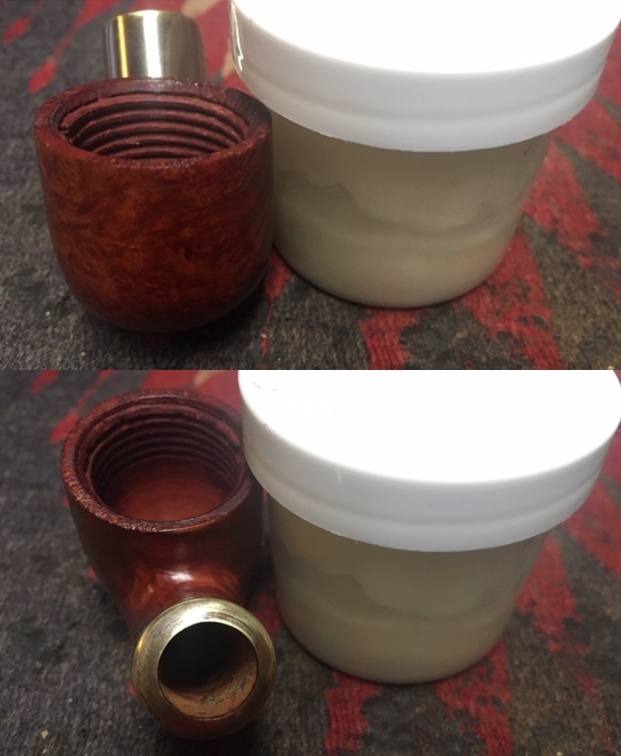
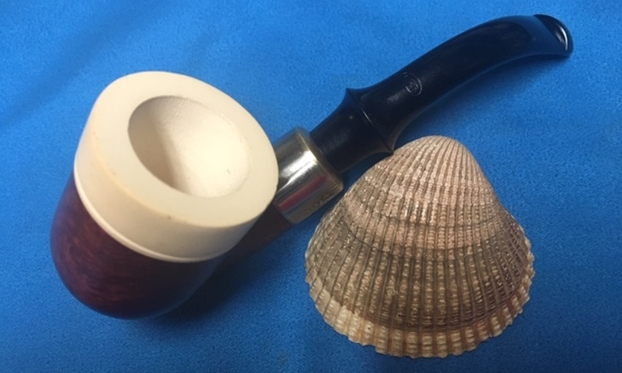
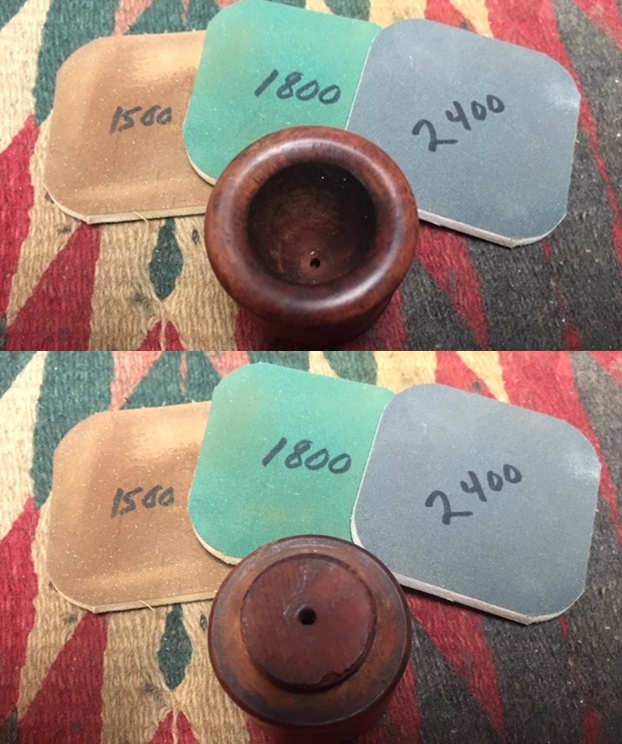
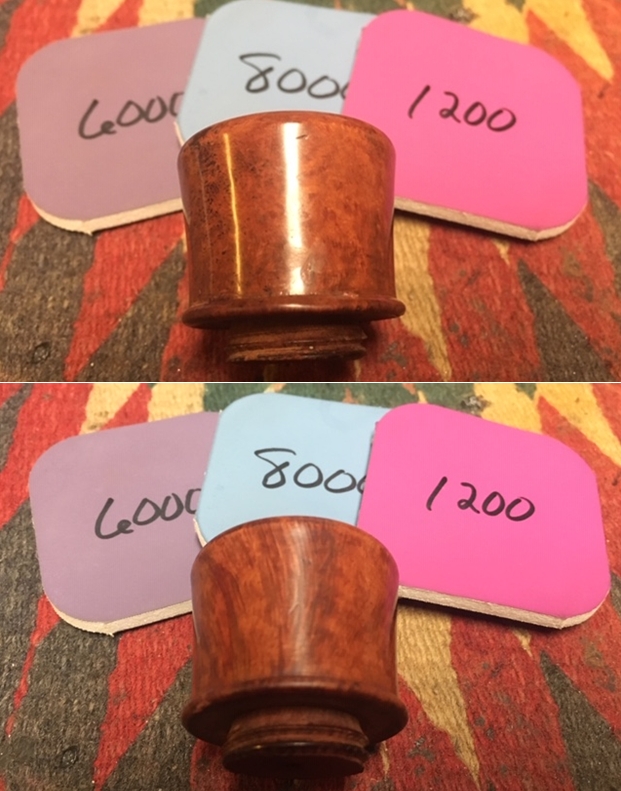
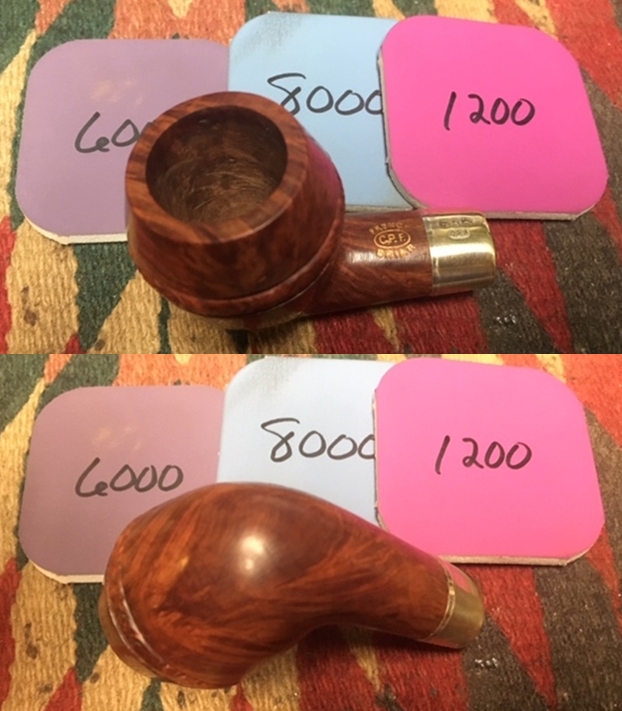
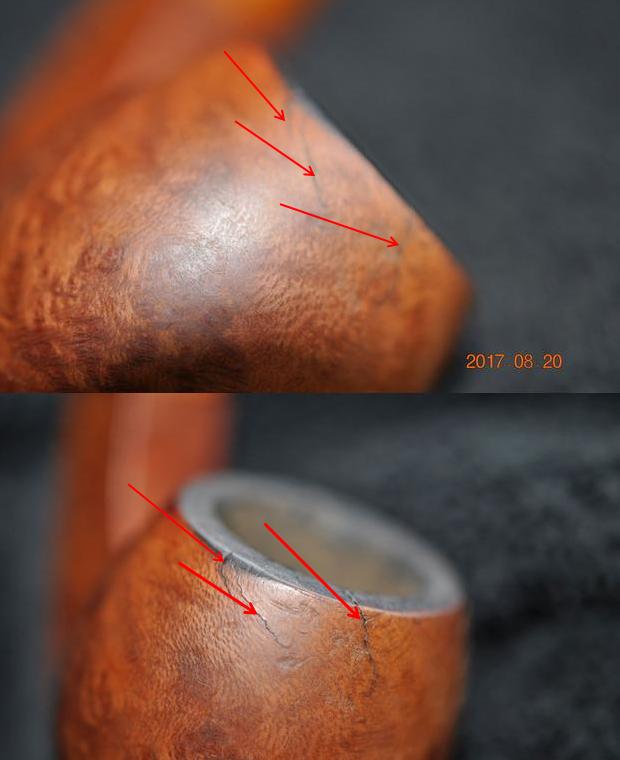
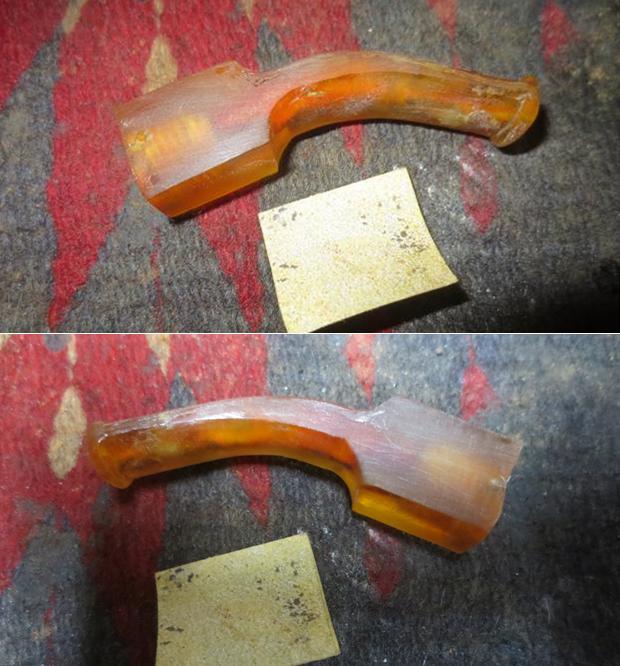
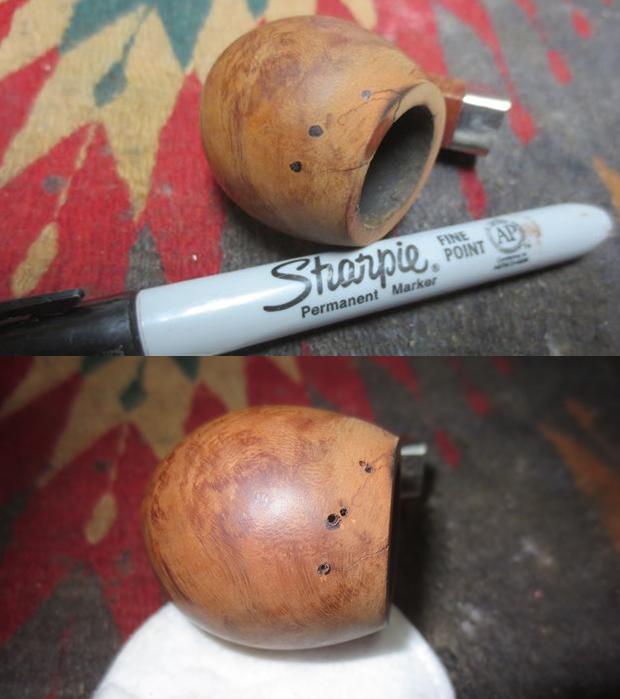
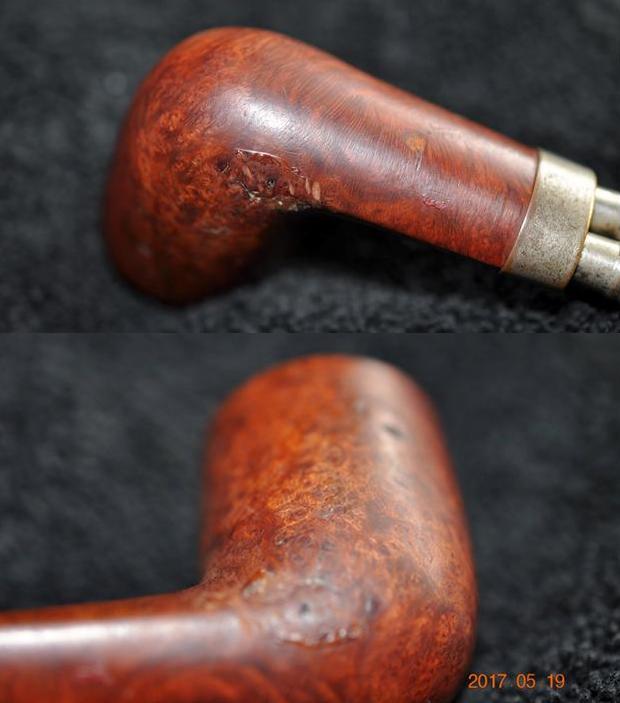
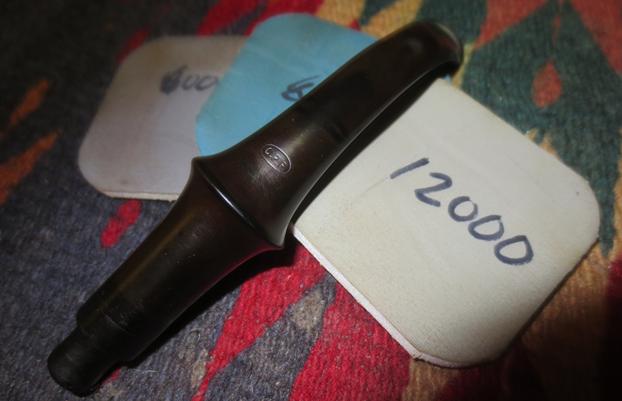
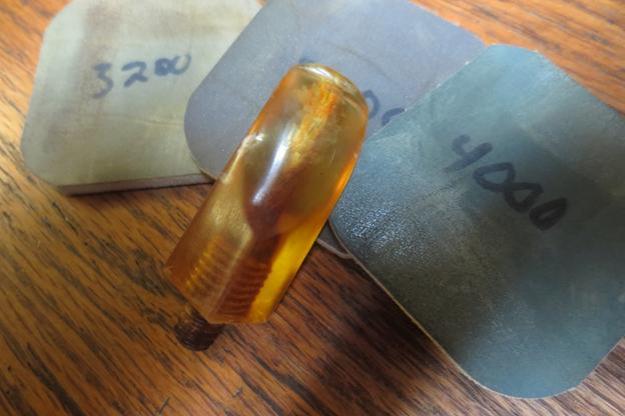
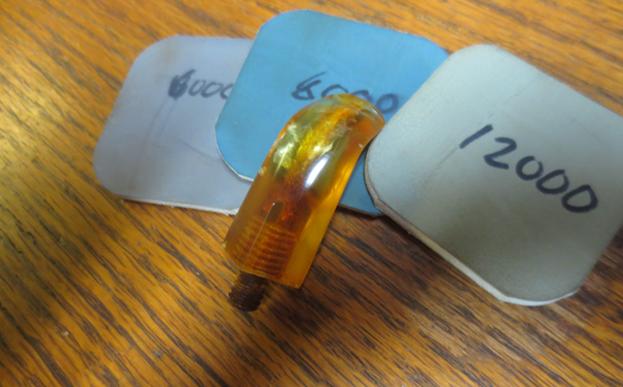
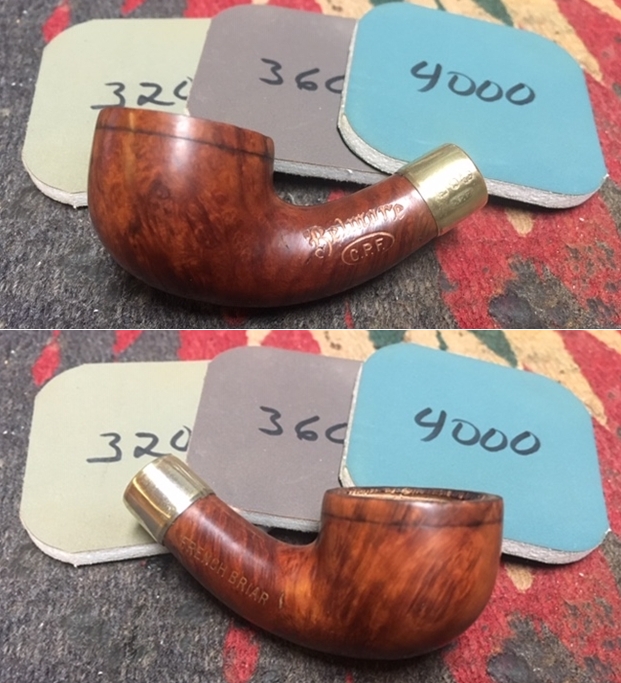
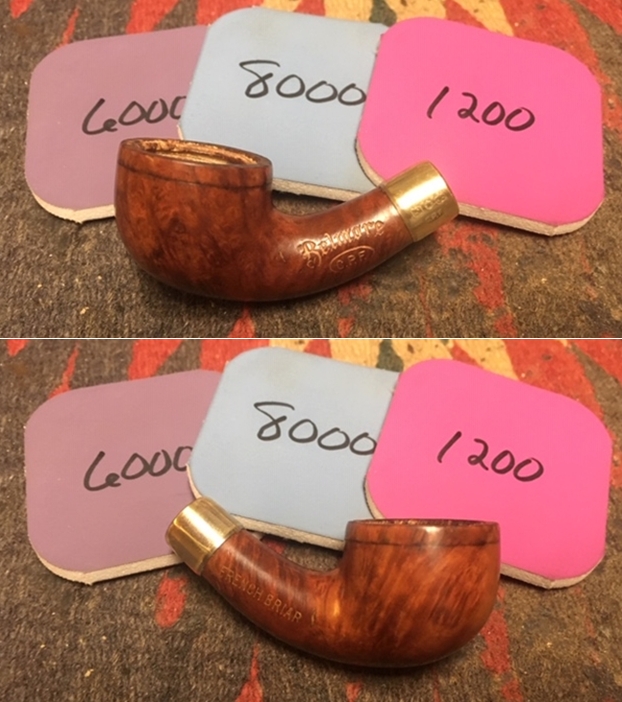
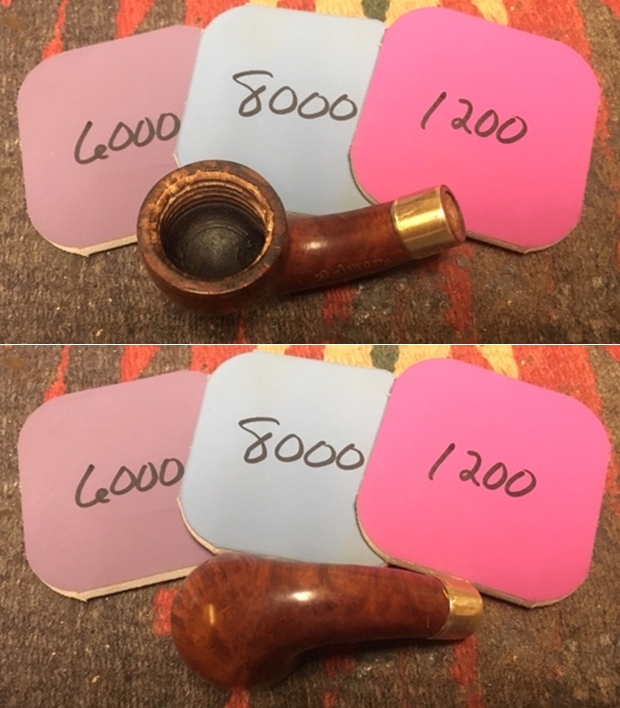
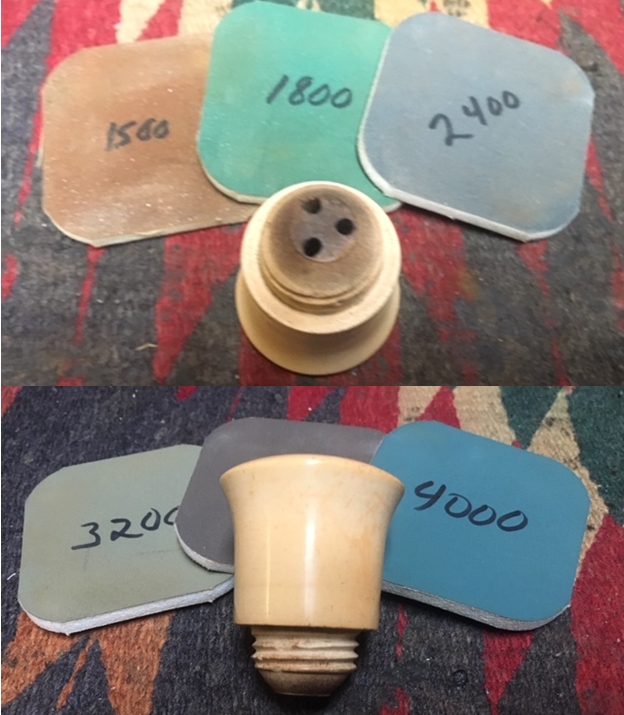
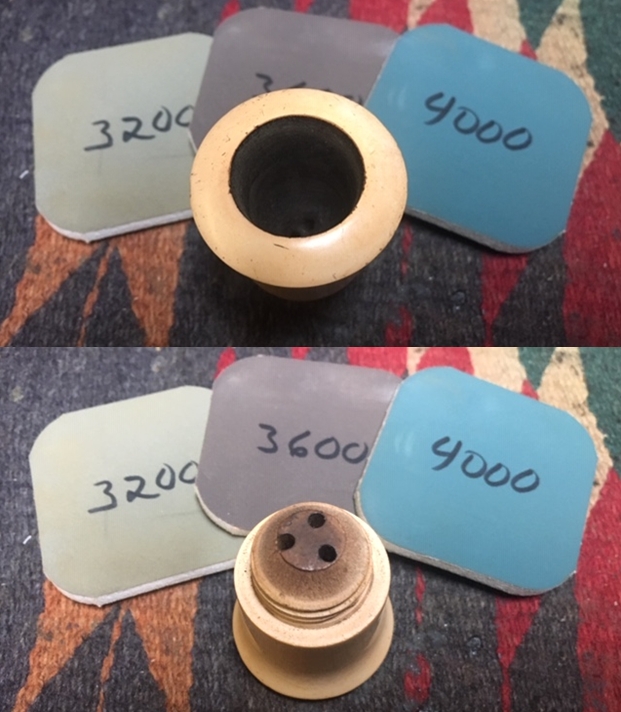
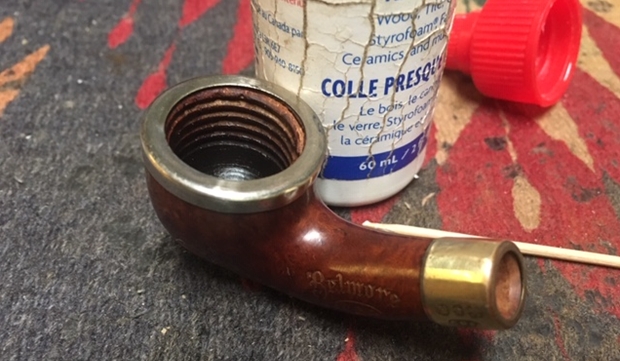 I polished the meerschaum bowl with micromesh sanding pads – wet sanding with 1500-12000 grit pads. I wiped the bowl down after each pad with a damp cloth to remove the dust. Each successive sanding pad brought more shine to the meerschaum. There was a scratch in the meerschaum on one side of the bowl about 1/3 up from the bottom of the bowl. It appears to look like a crack but it is not one. If I had continued to sand it I would have changed the profile of the bowl.
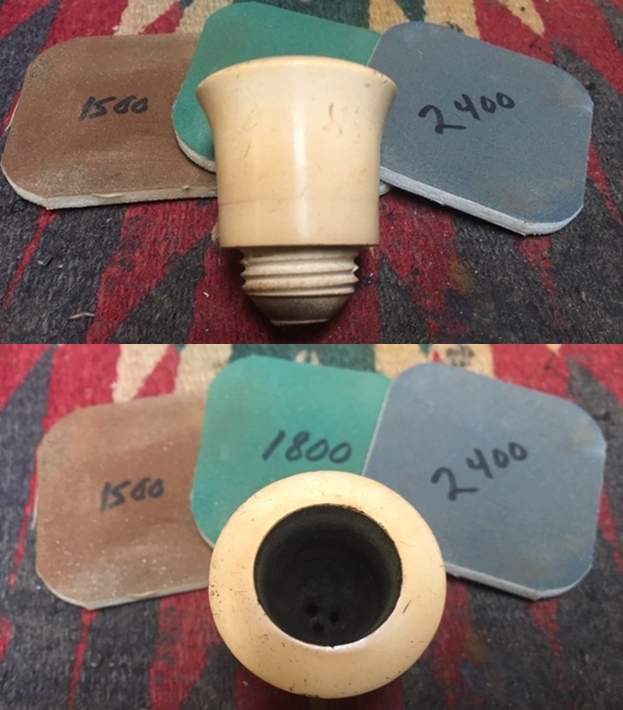
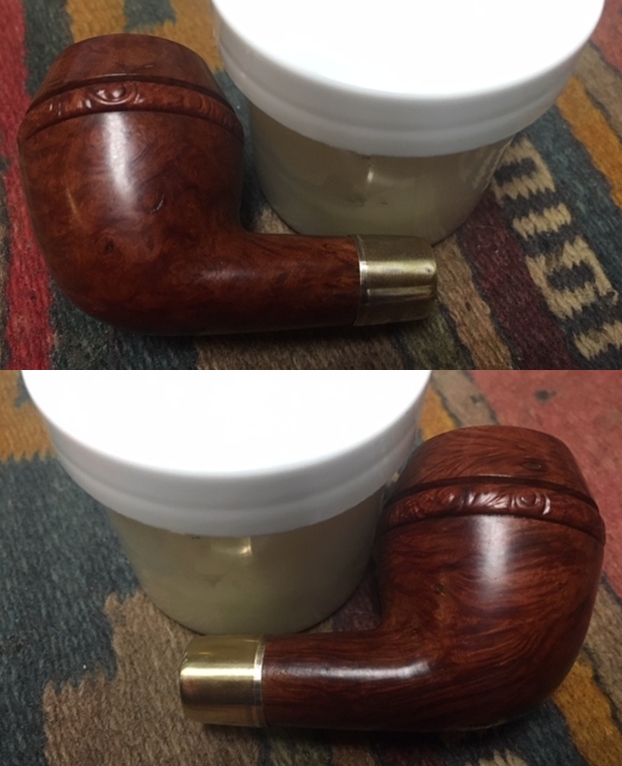
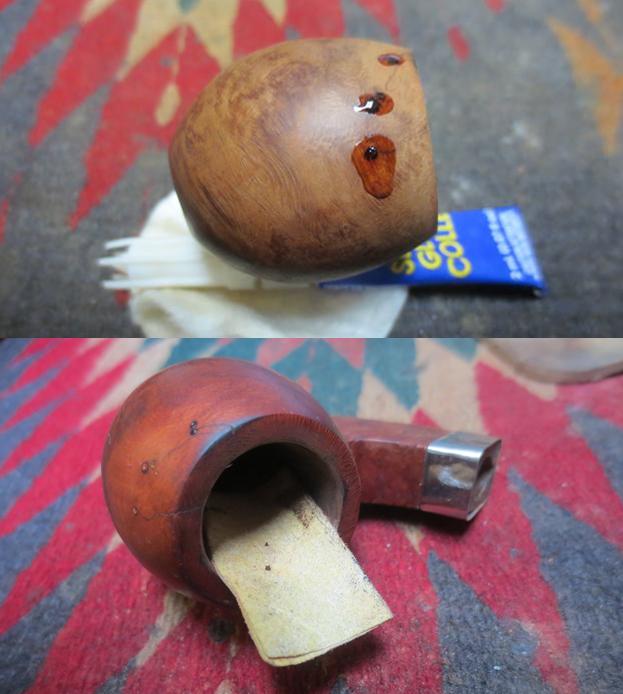
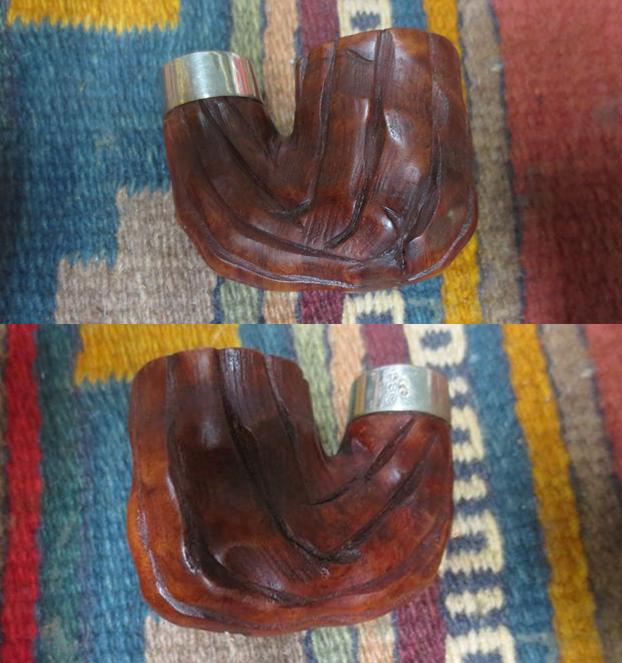
 I put the meerschaum cup back in the briar bowl and buffed it with microfiber cloth to raise a shine. The scratch at the front of the bowl is visible but it is still a beautiful pipe.
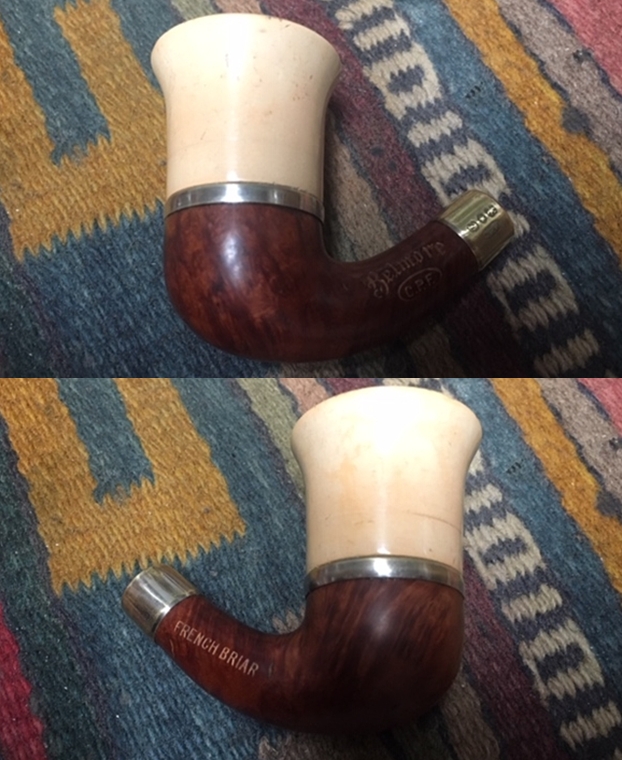
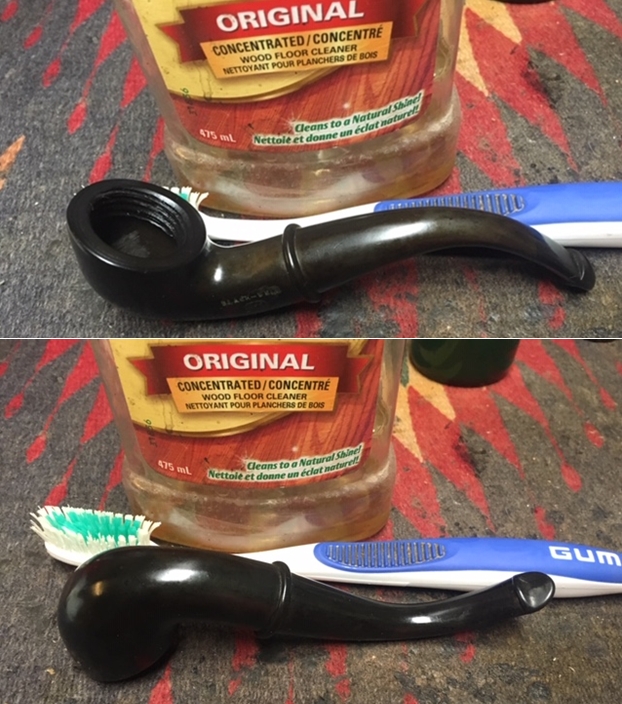
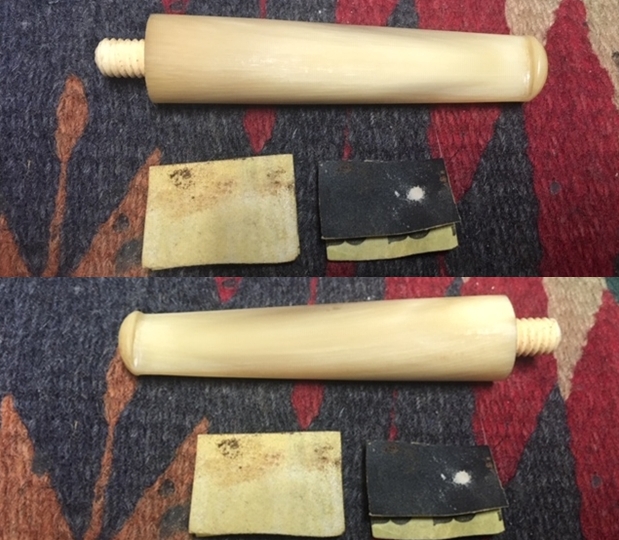
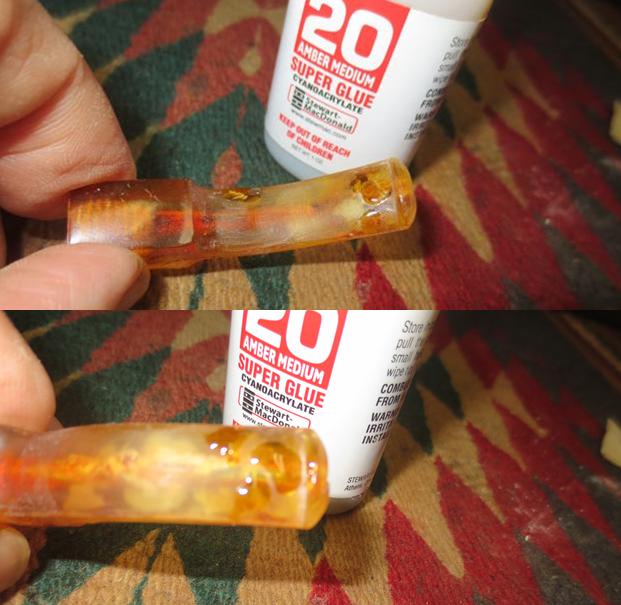
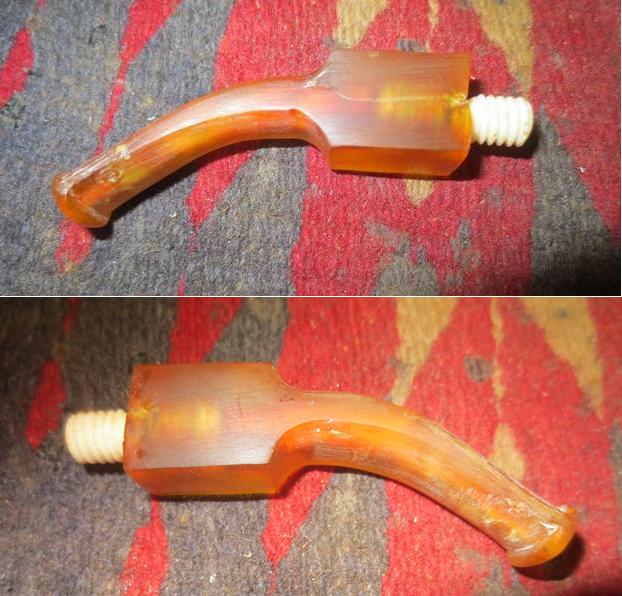
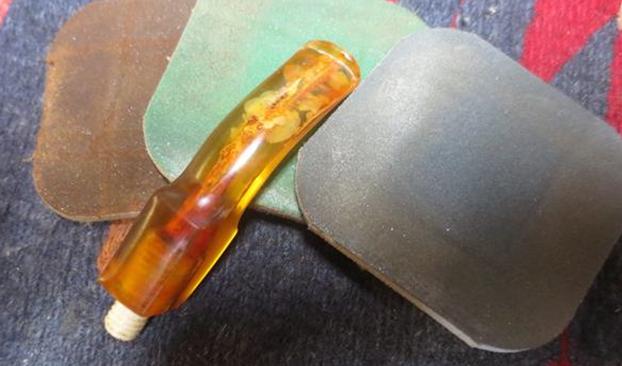
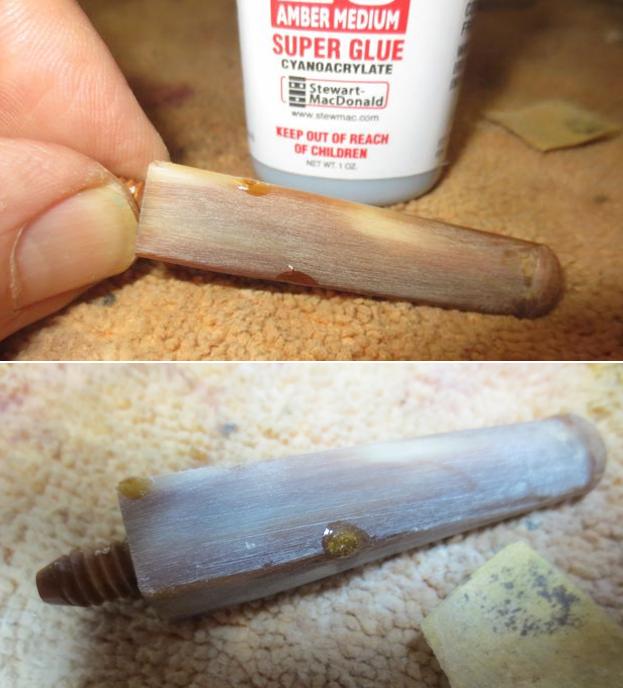
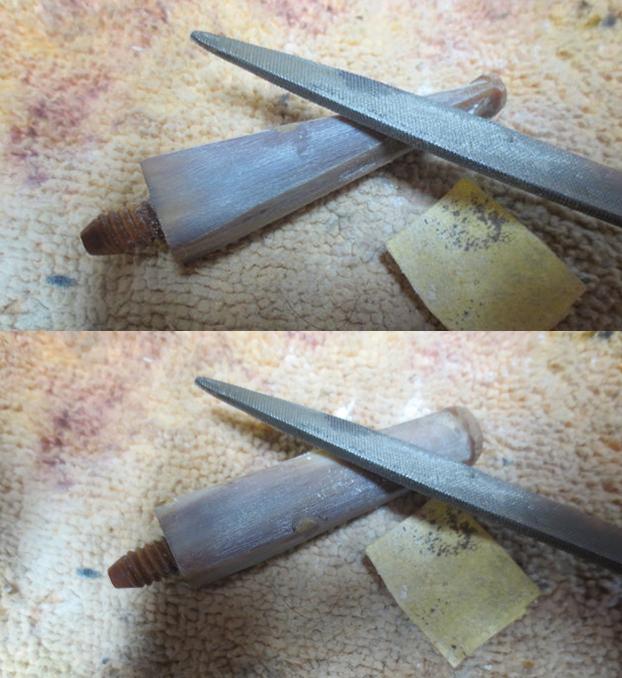
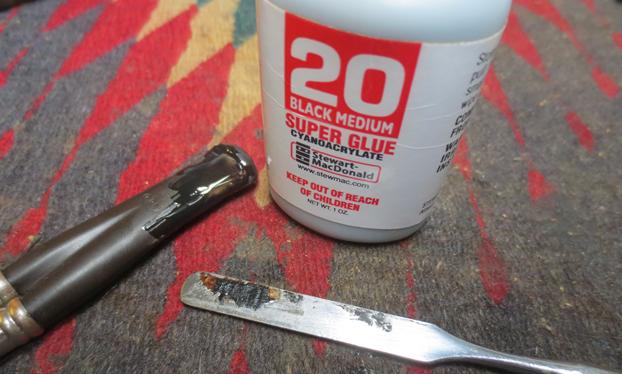
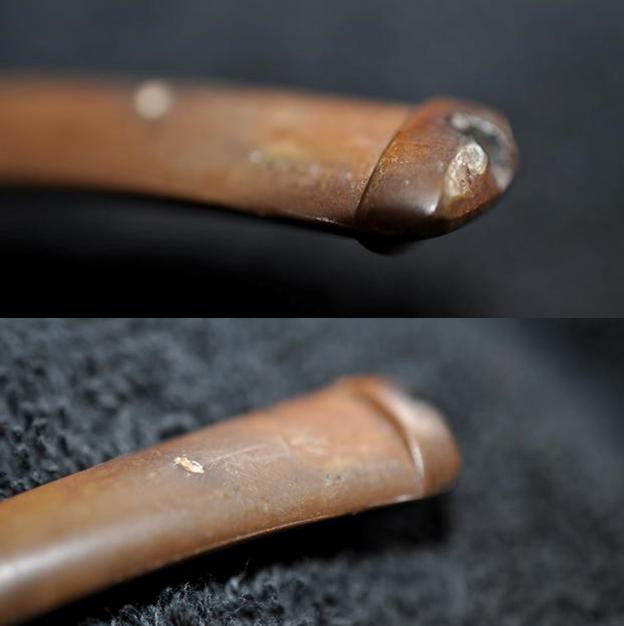
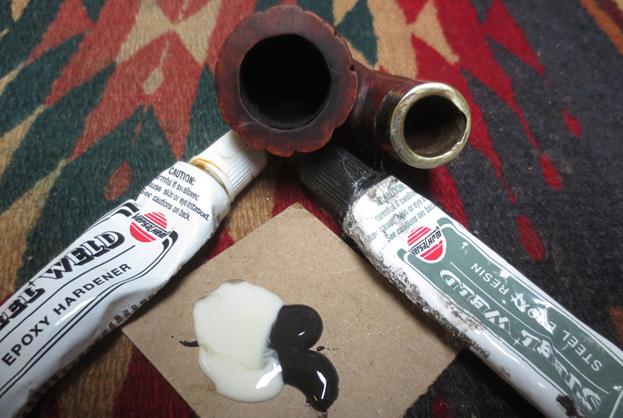
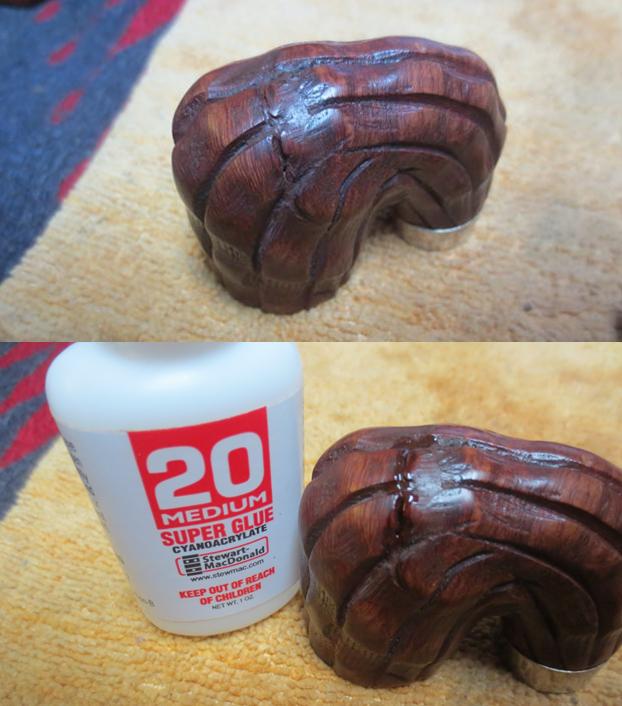
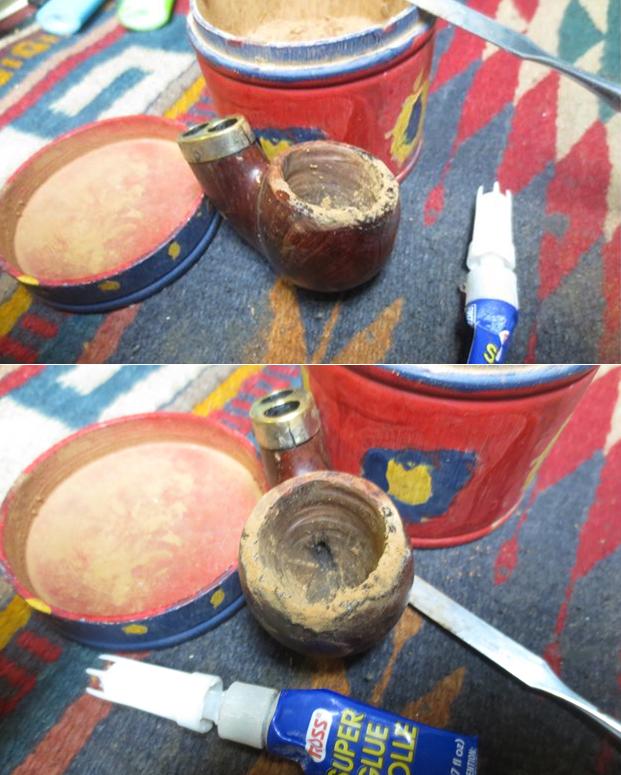
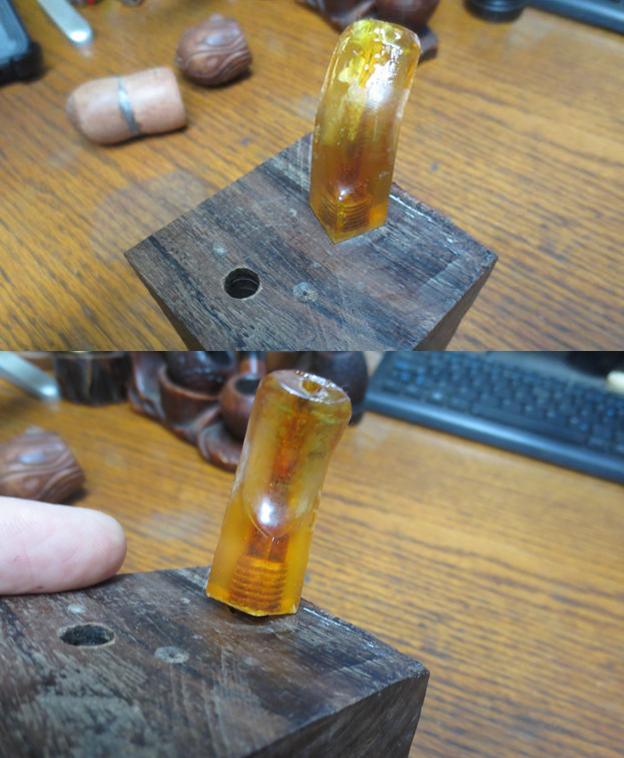
 I set the bowl aside and started working on the stem. I filled in the damaged area on the tenon on the top side with clear super glue. Once the repair cured I used a needle file to smooth out the repaired area.
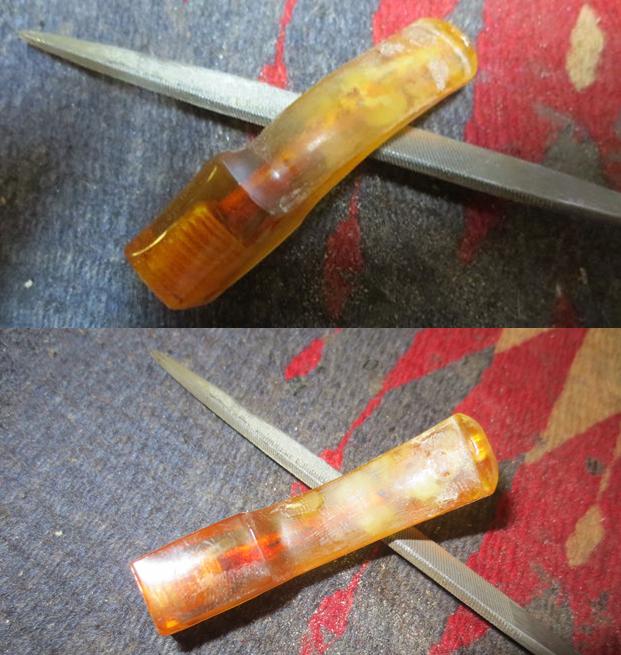
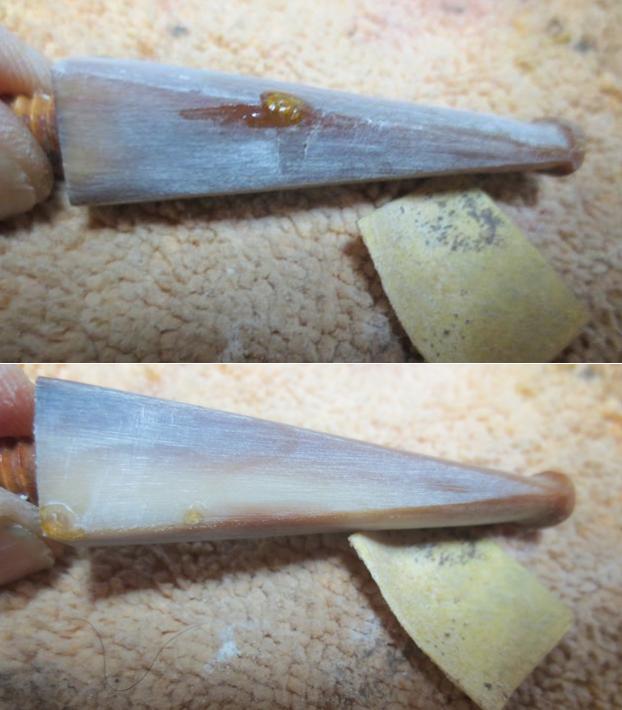
  I smoothed out the tenon repair and sanded out the tooth chatter and marks with 220 grit sandpaper. I sanded out the scratches with 400 grit sandpaper. I wiped the stem down with Obsidian Oil.
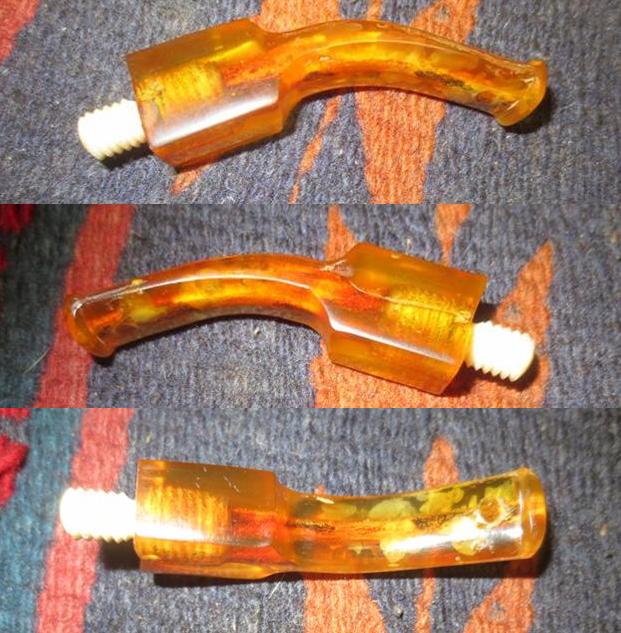
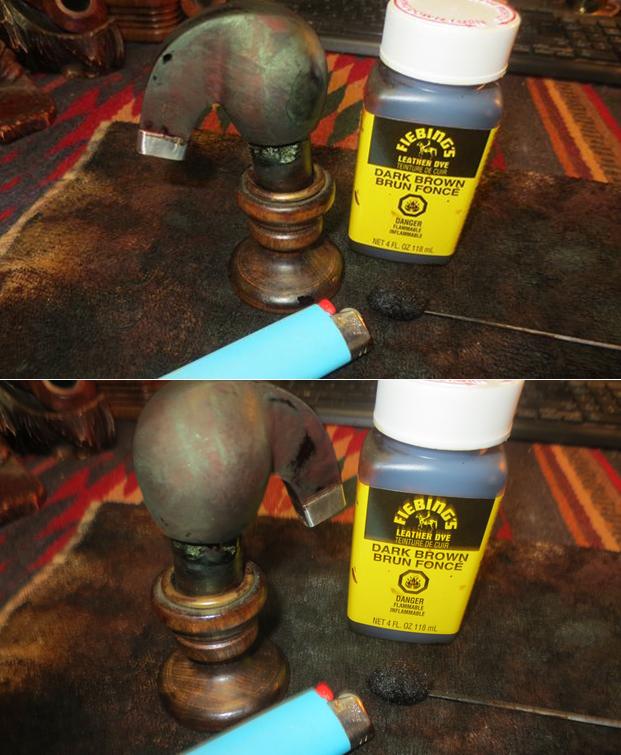
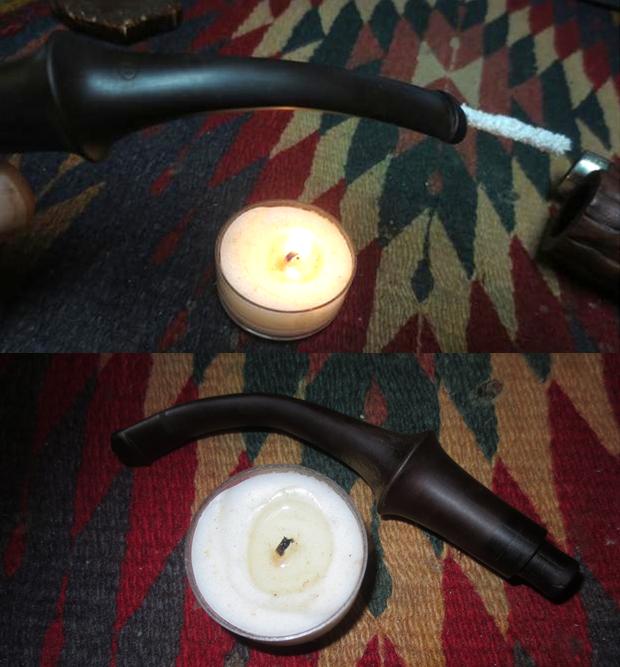
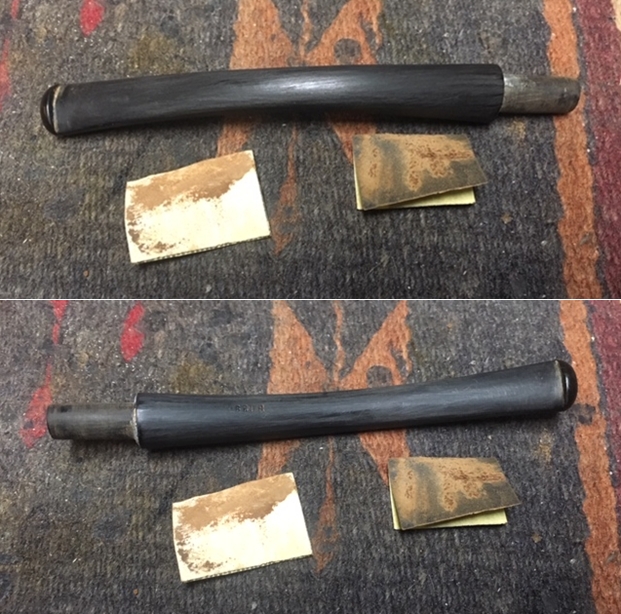 I heated the vulcanite stem over a candle until the rubber had softened and bent the stem to the proper angle to match the curve of the base.
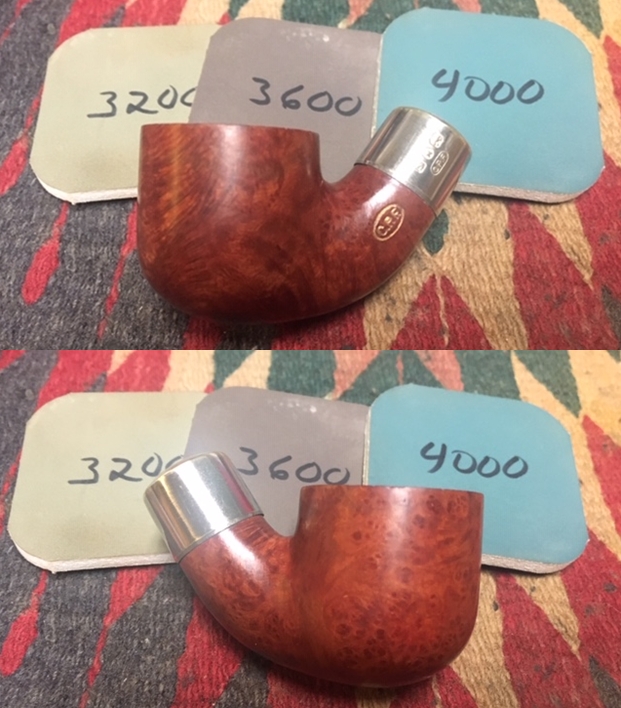
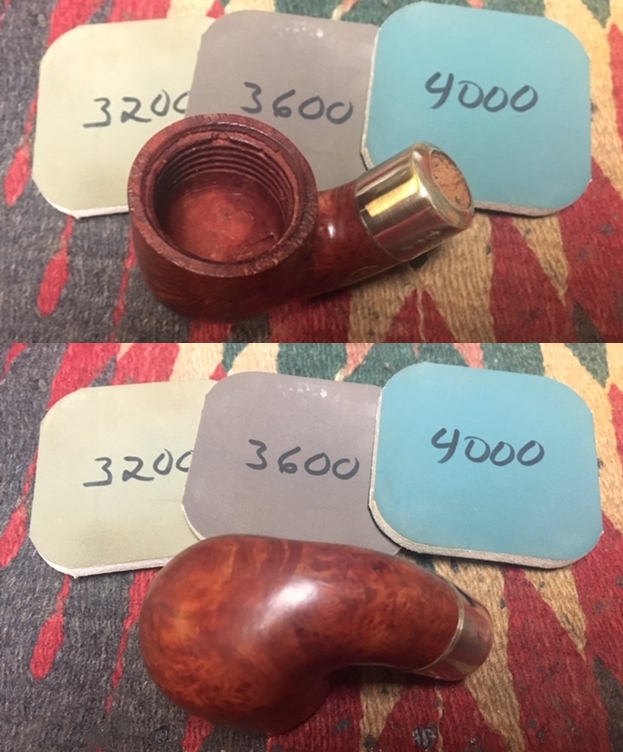
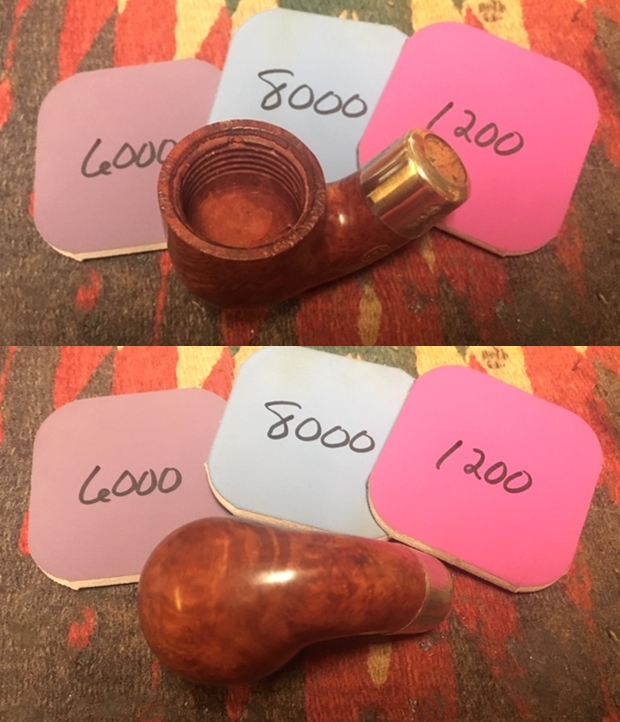
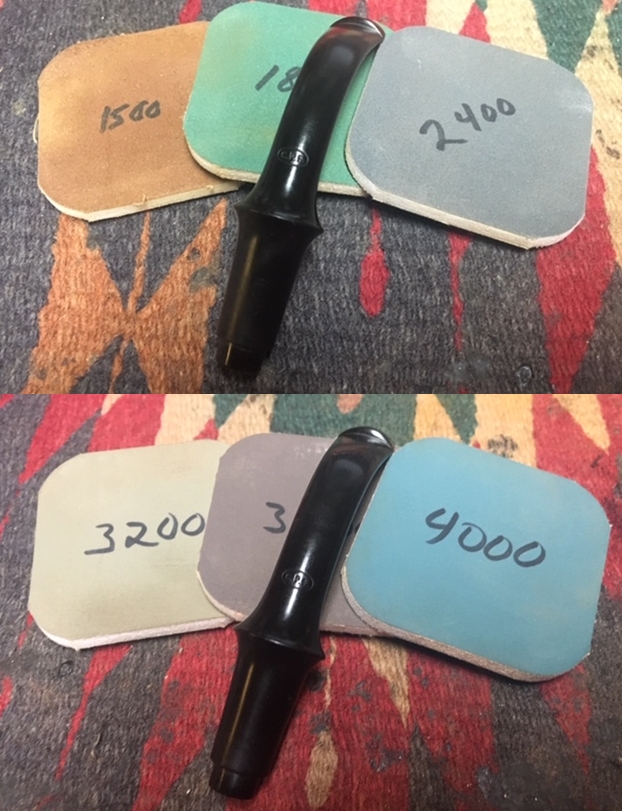
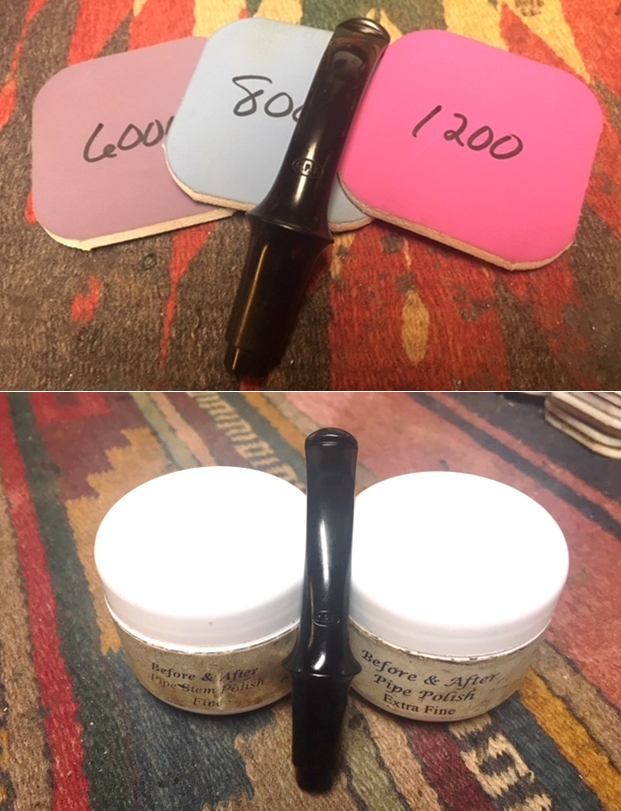
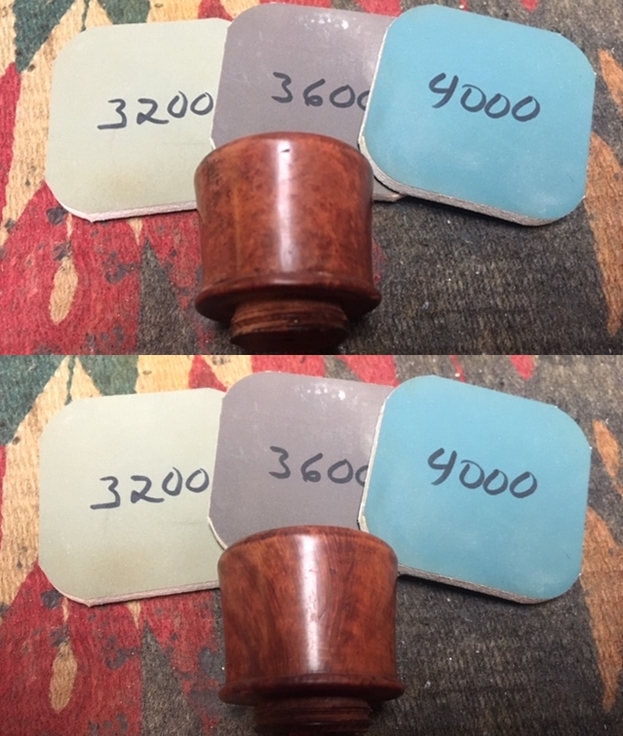
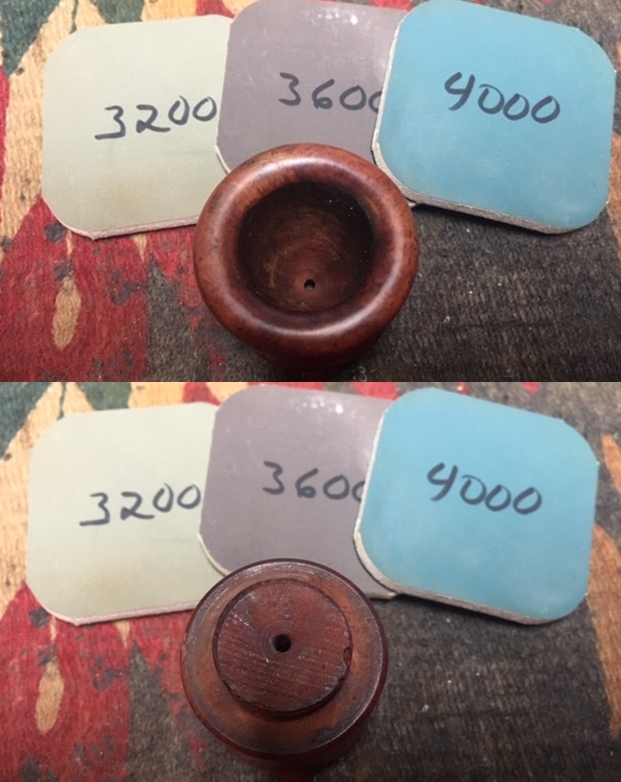
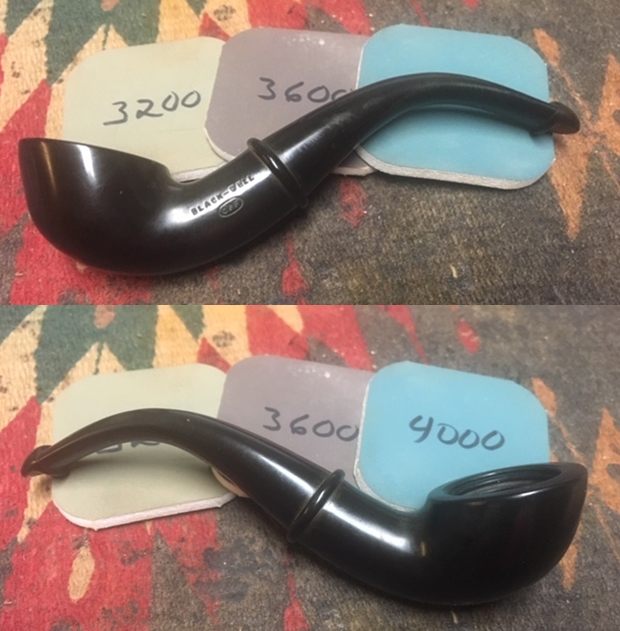
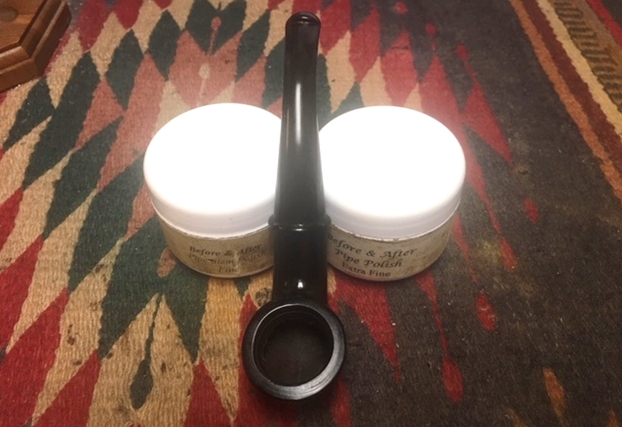
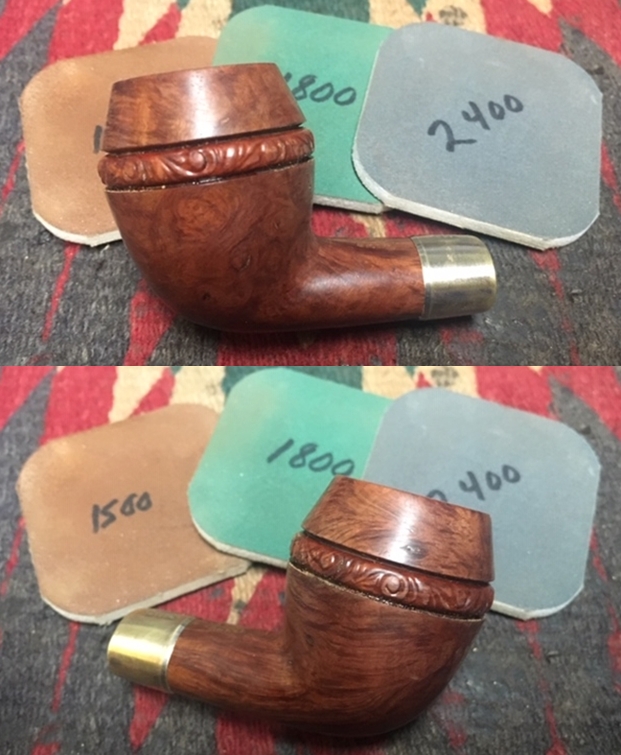
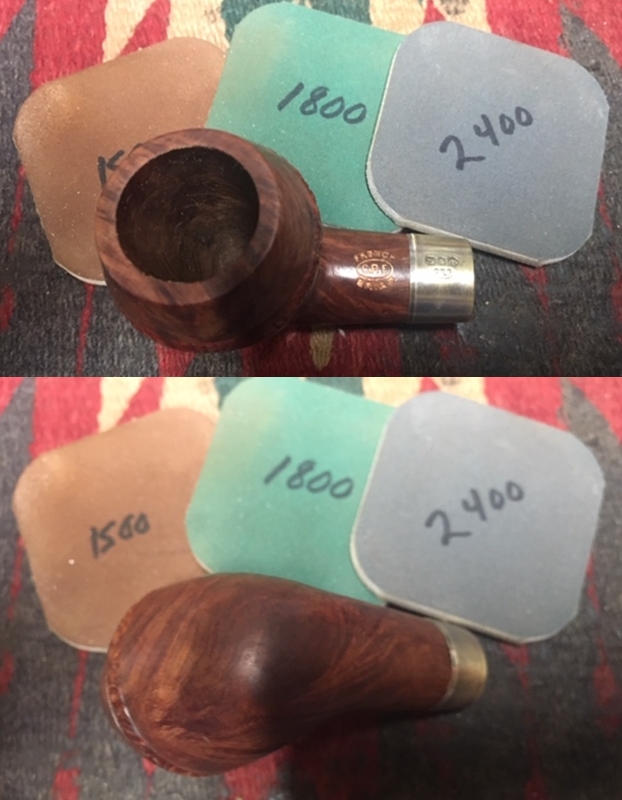
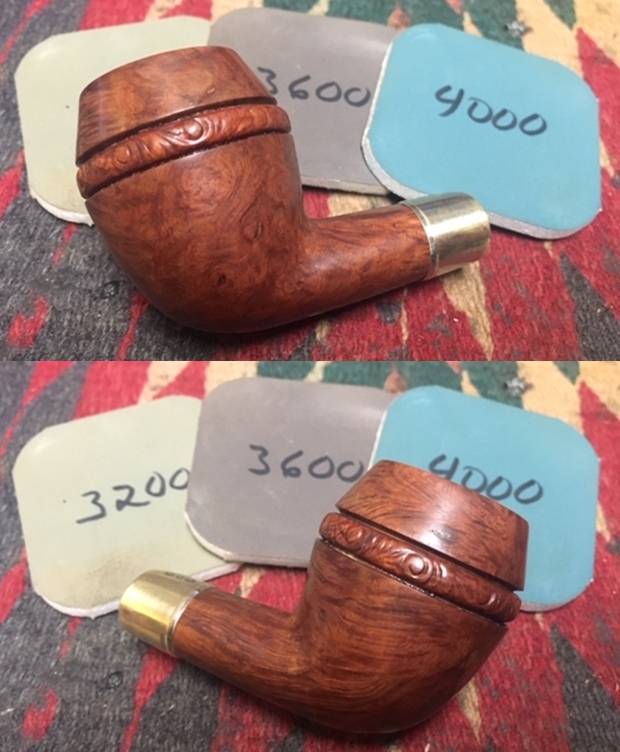
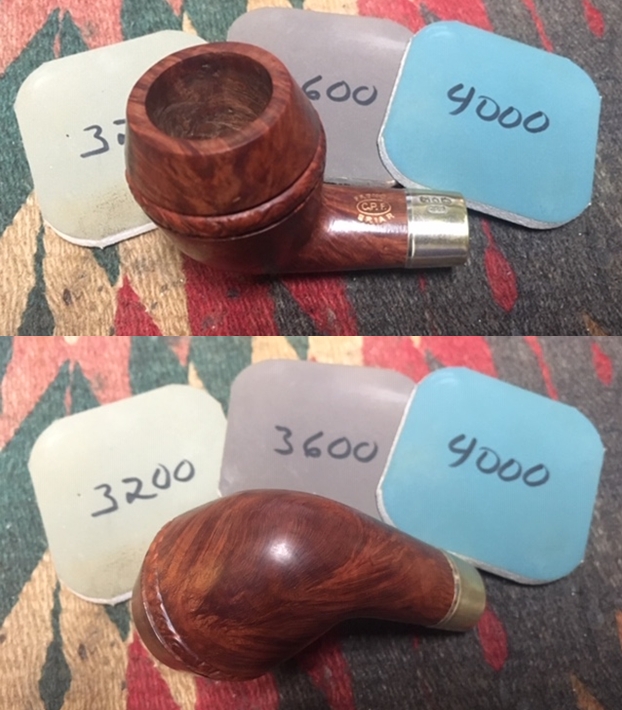
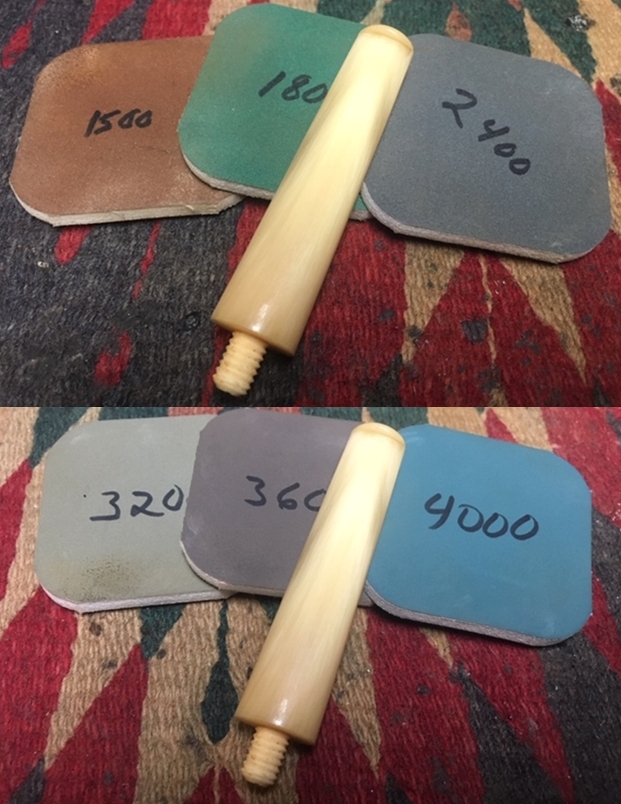
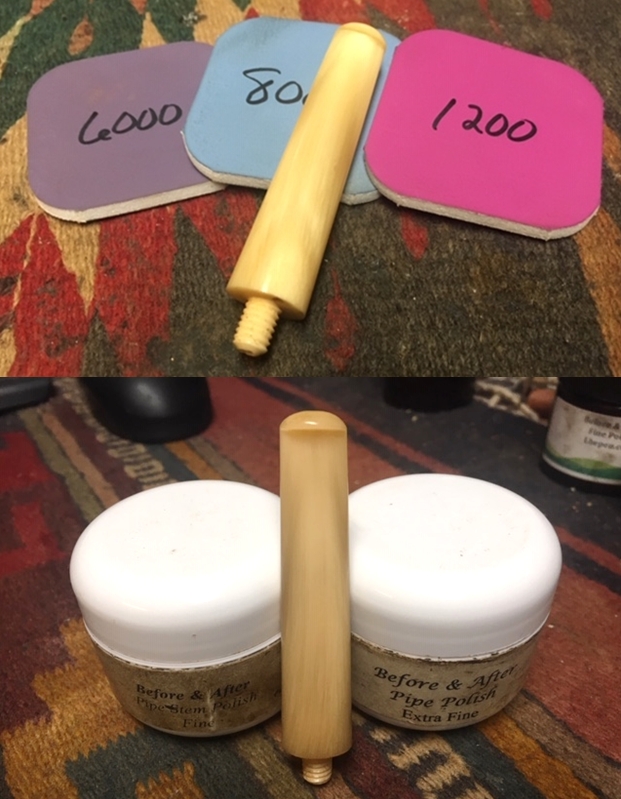
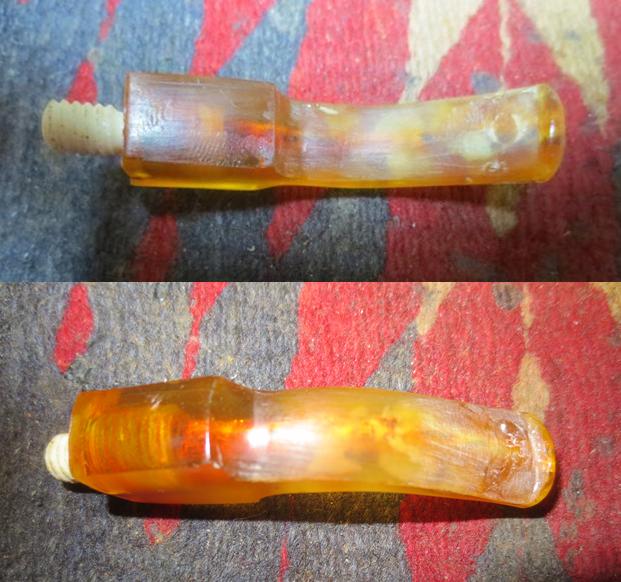
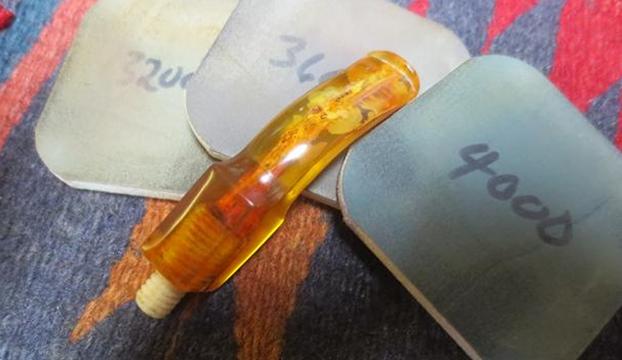
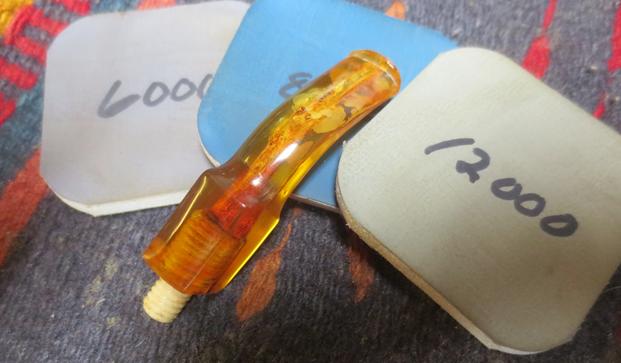
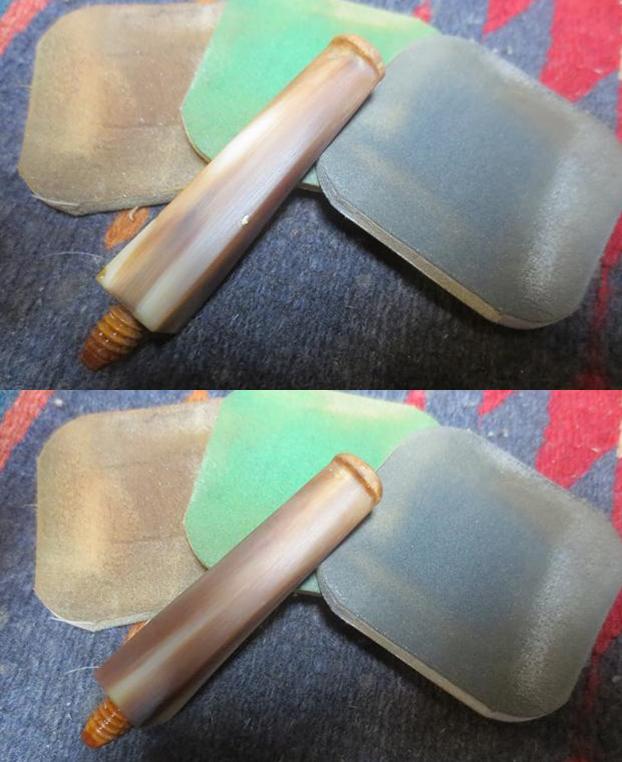
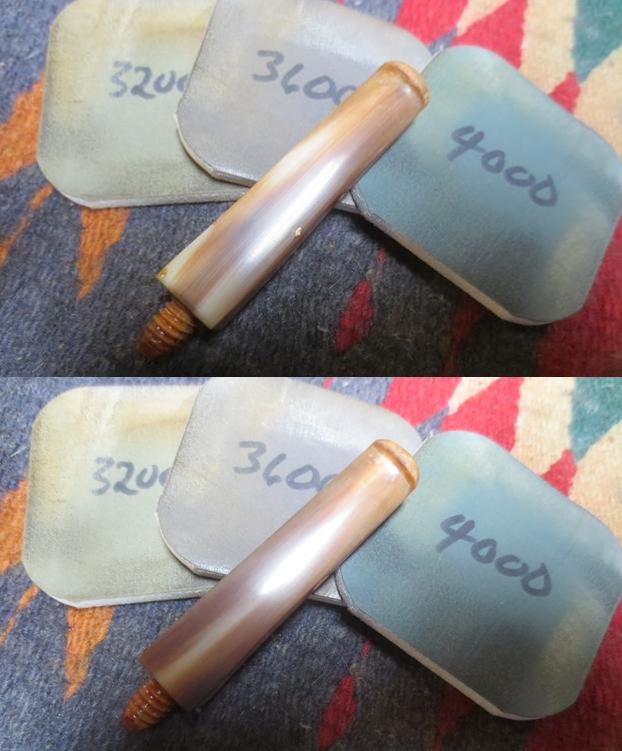
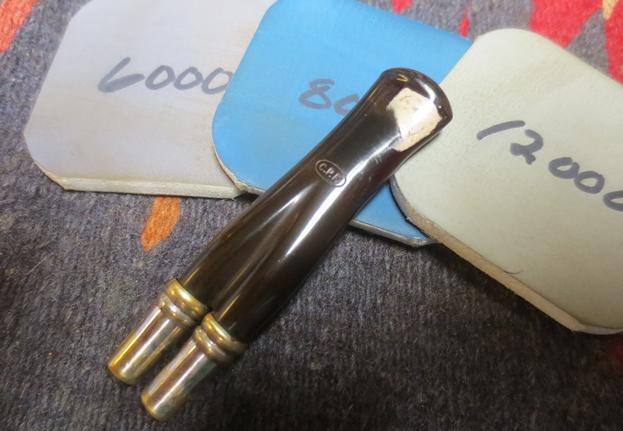
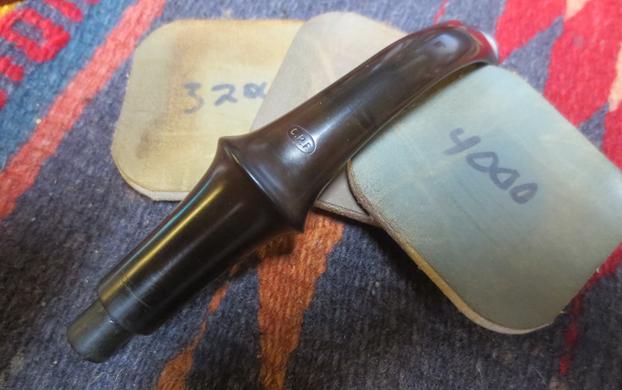
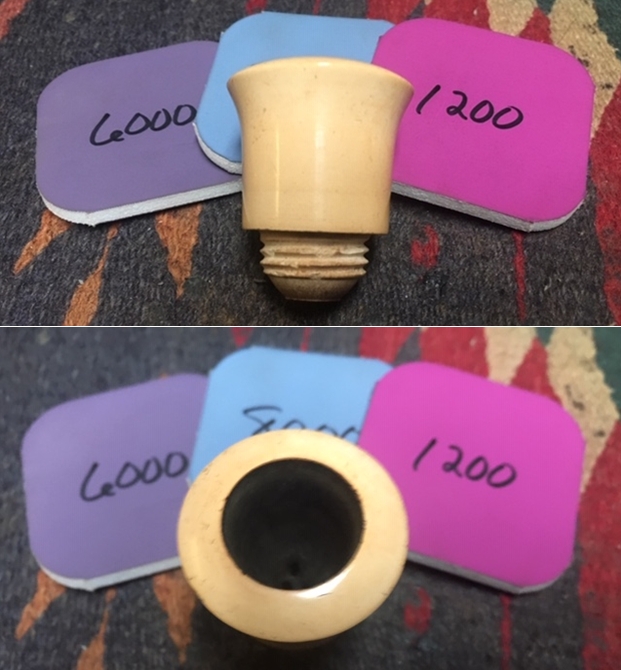
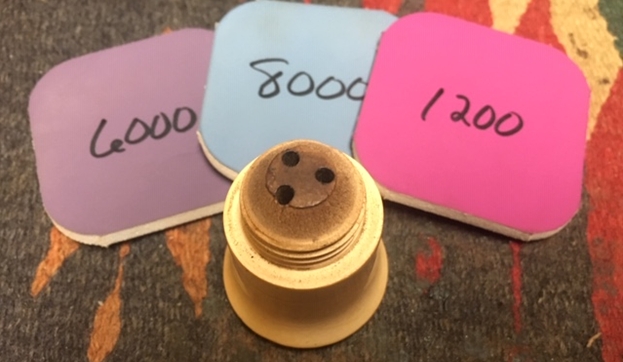
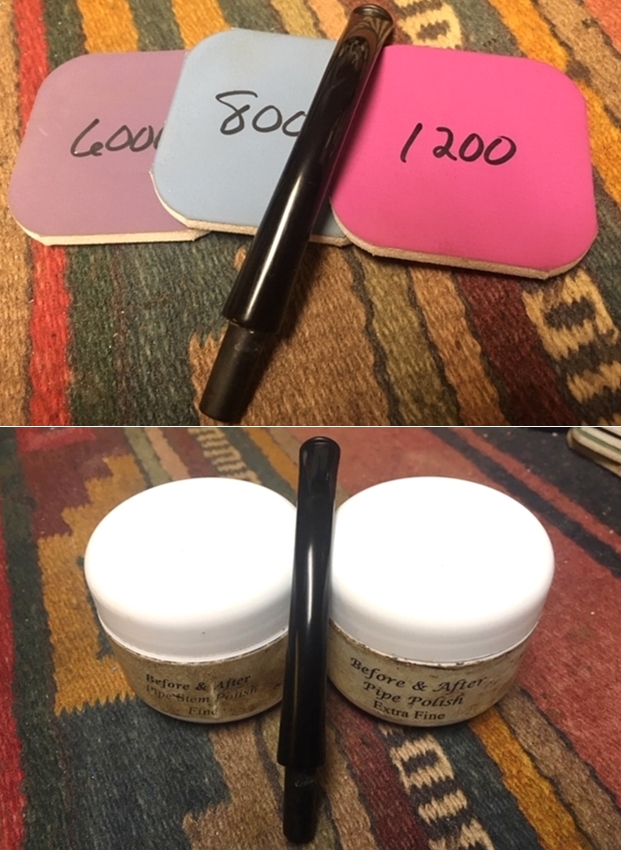
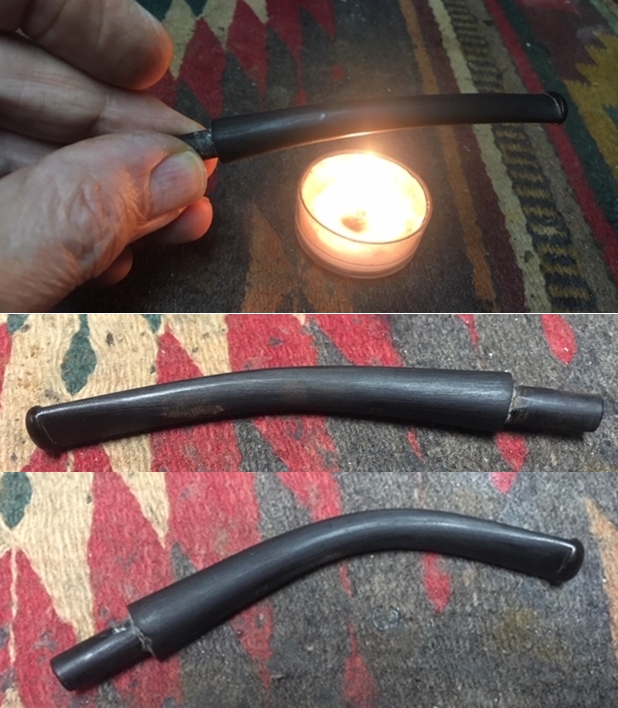 I polished the stem with micromesh sanding pads – wet sanding it with 1500-2400 grit pads and dry sanding it with 3200-12000 grit pads. I wiped it down with Obsidian Oil after each sanding pad. I finished the polishing with Before & After Pipe Polish – both Fine and Extra Fine. I gave it a final coat of Obsidian Oil and set it aside to dry.
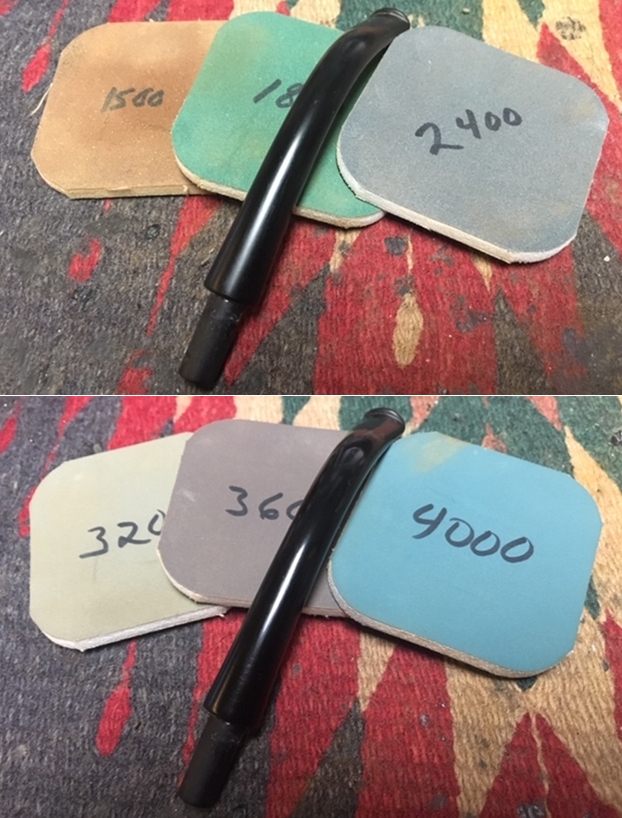
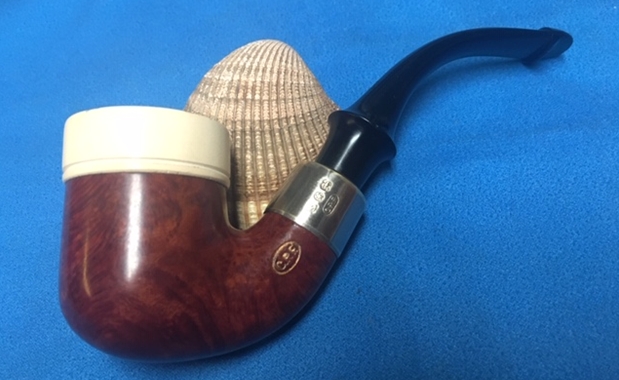
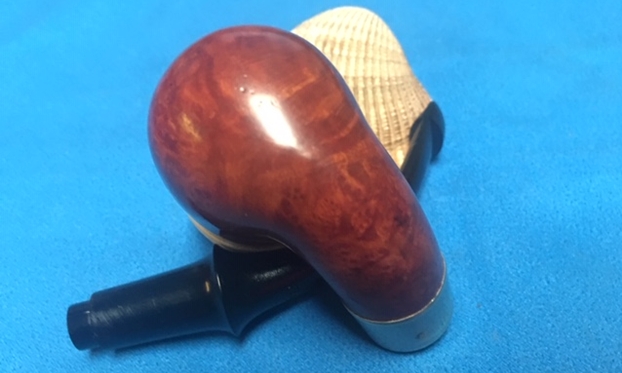
 By now if you have read rebornpipes for very long you know that I love these old C.P.F. pipes. There is some serious thought that they were carved by European trained craftsman who were skilled pipemakers. These pipemakers were brought to the US by the Colossal Pipe Factory to make pipes. Many of the shapes, bands and stems have such high quality workmanship involved that I really think there is truth to this story. This is little bent Meerschaum stacked Calabash is a real beauty.
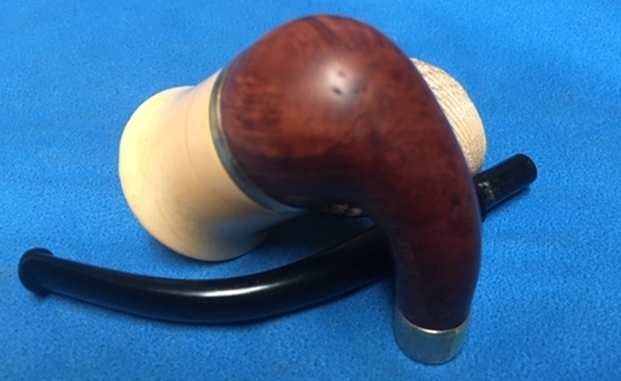
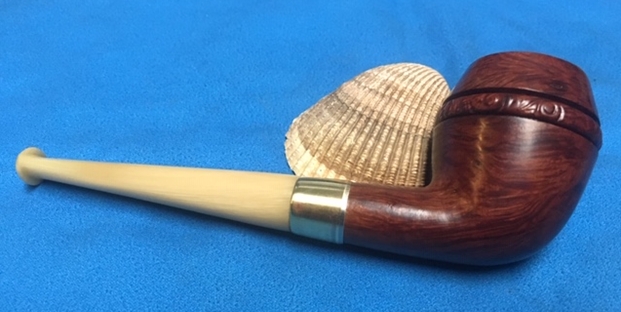
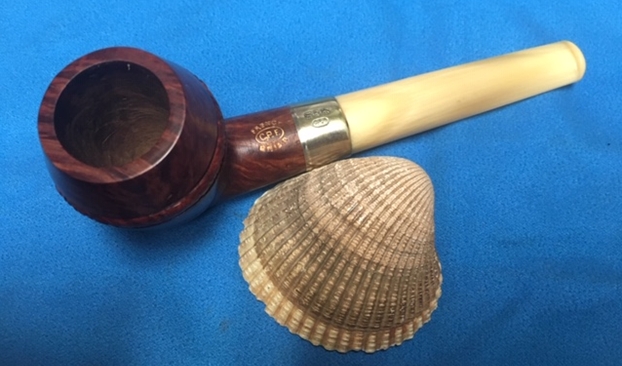
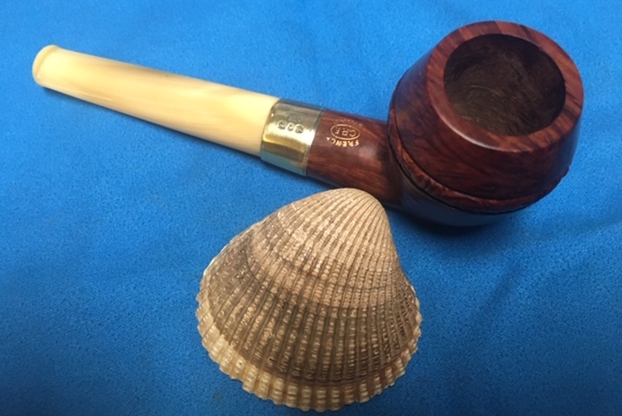
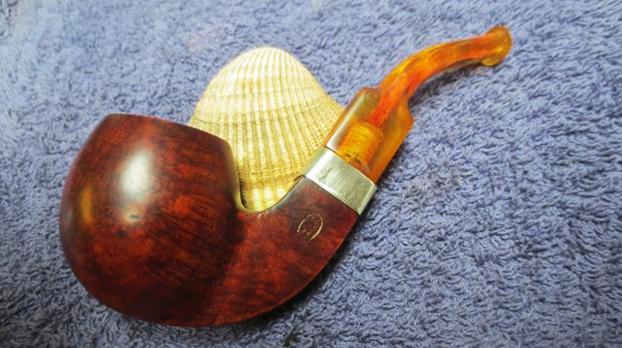
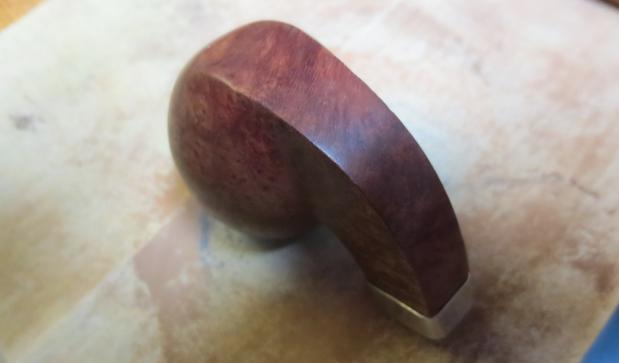
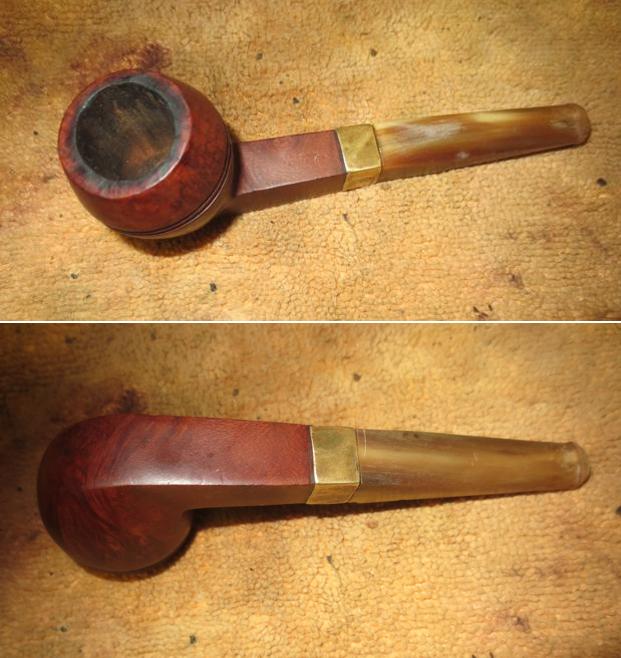
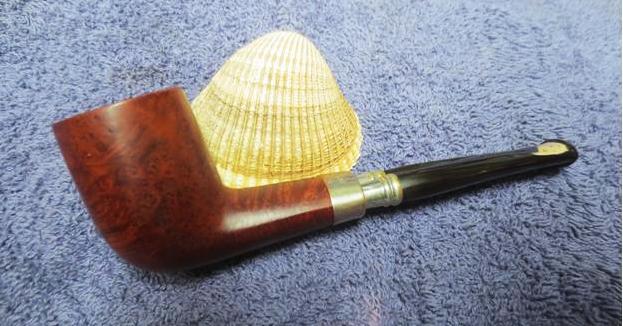
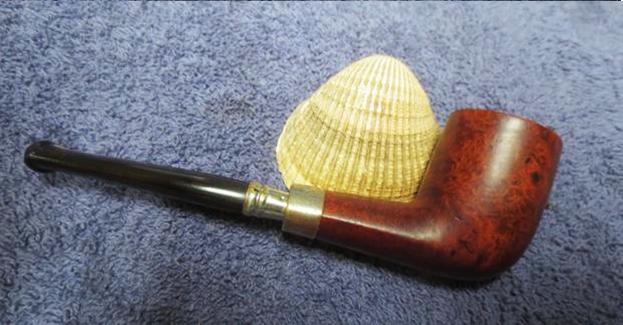
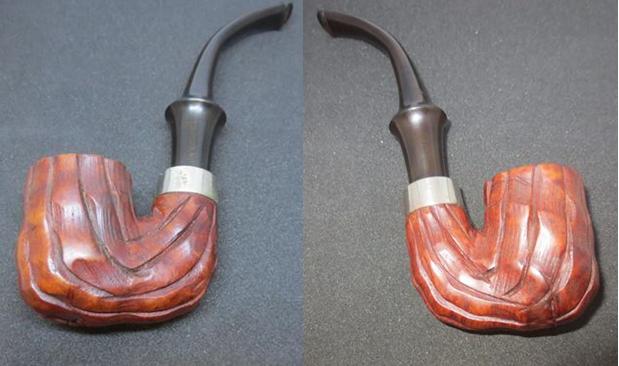
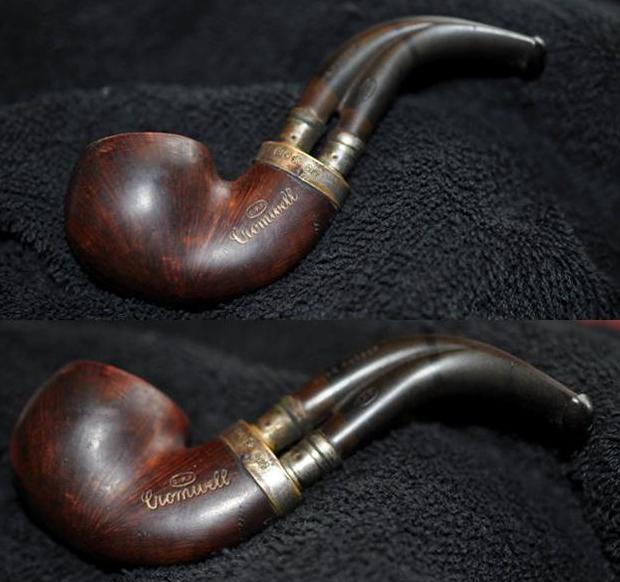
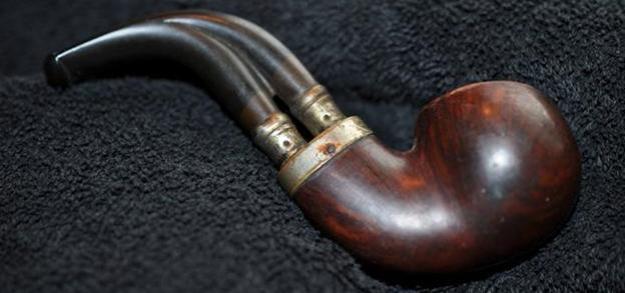
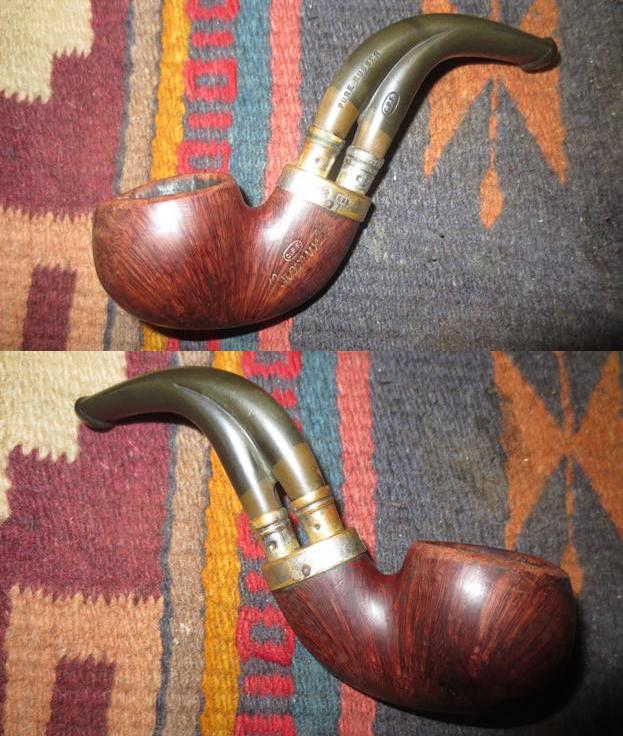
I screwed the bowl back on the base and carefully polished stem and the bowl with Blue Diamond polish on the buffing wheel carefully avoiding the stamping on the shank. I gave the bowl and the stem multiple coats of carnauba wax. I buffed the pipe with a clean buffing pad to raise the shine. I hand buffed it with a microfiber cloth to deepen the shine. The pipe polished up pretty nicely. The grain on the base and shank really began to stand out; it seemed to take on life with the buffing. The rich contrasting brown stain on the bowl works well with the polished Meerschaum bowl that is also beginning to take on colour. The black vulcanite stem also provides contrast. The finished pipe has a rich look that is quite catching. Have a look at it with the photos below. The shape, finish and flow of the pipe and stem are very well done. The dimensions are Length: 5 1/2 inches, Height: 2 1/4 inches, Outside diameter of the bowl: 1 3/8 inches, Chamber diameter: 3/4 of an inch. This is another one that I will be adding to my collection. It fits in the C.P.F. niche group that I have been building. The shape and feel in the hand is perfect. Since this one is already well smoked it will be an easy pipe to load and fire up. Thanks for walking through the restoration with me as I restored and reworked this old meerschaum stack Calabash from 1884-1898. It is always a treat for me to work on a piece of pipe history especially when I have learned a bit of the story behind it.