Tag Archives: Bowls – refinishing

Refurbishing The Guildhall London Pipe 409 Bulldog for Country Squire Radio Host Beau York


Blog by Steve Laug

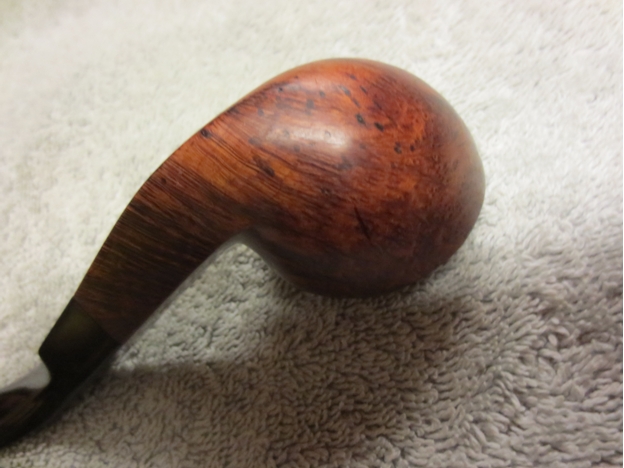
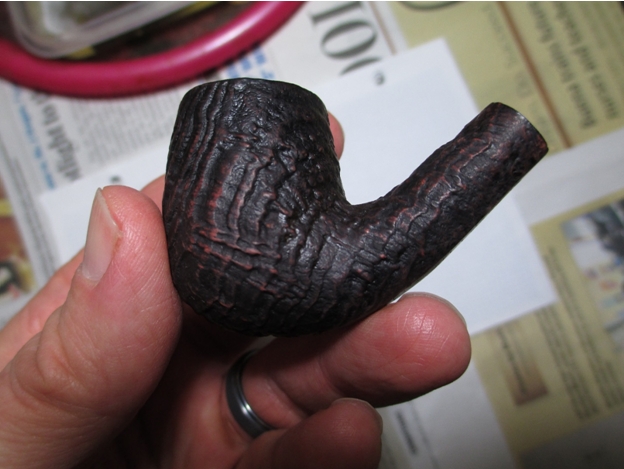
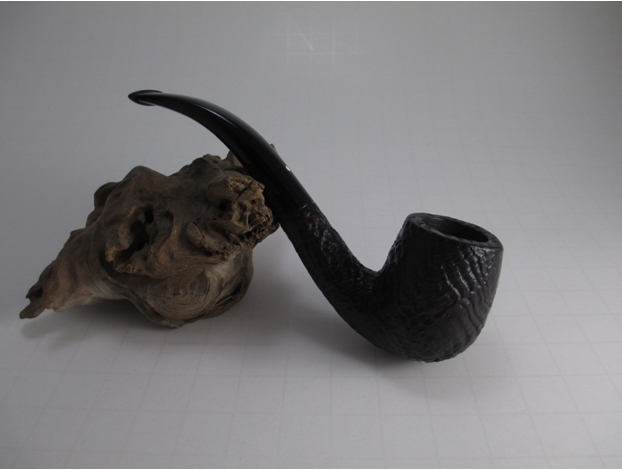
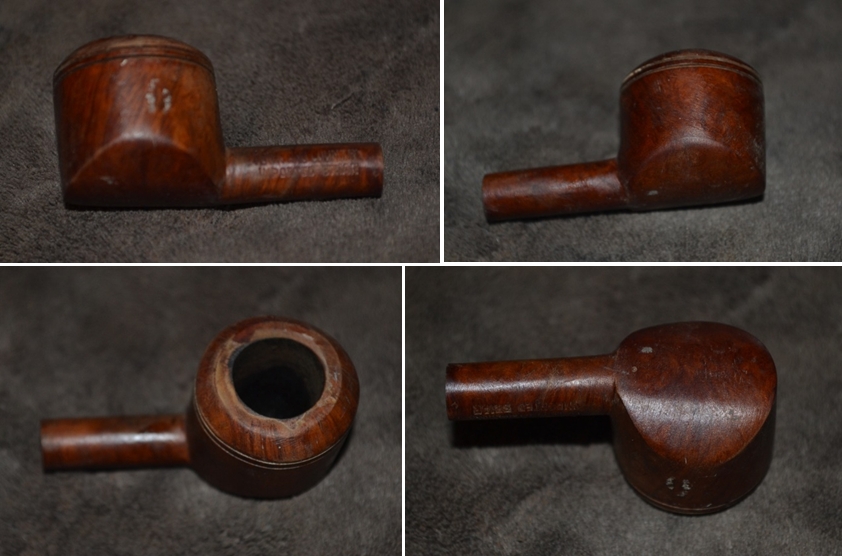
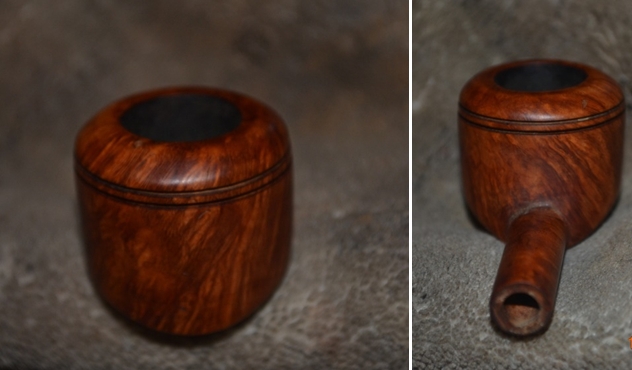
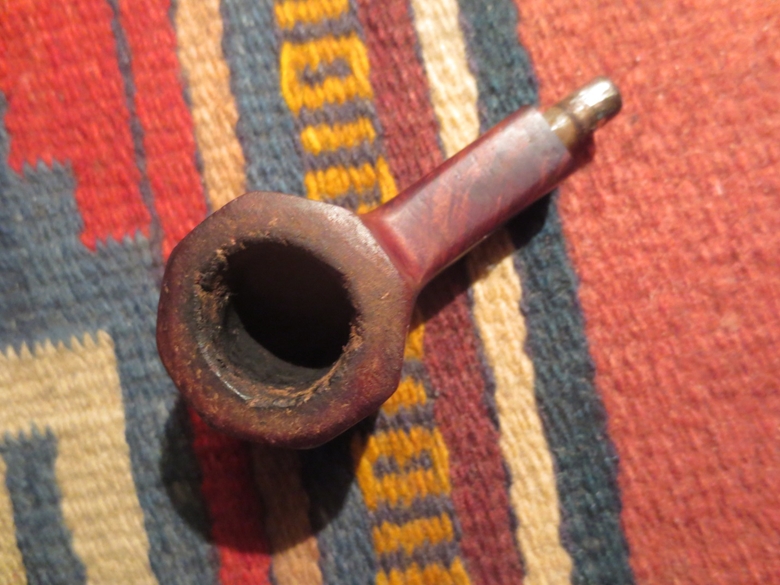
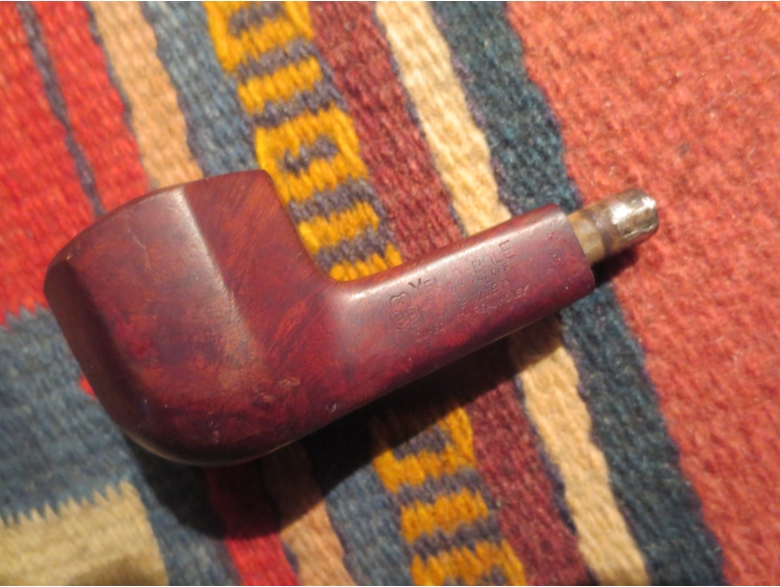
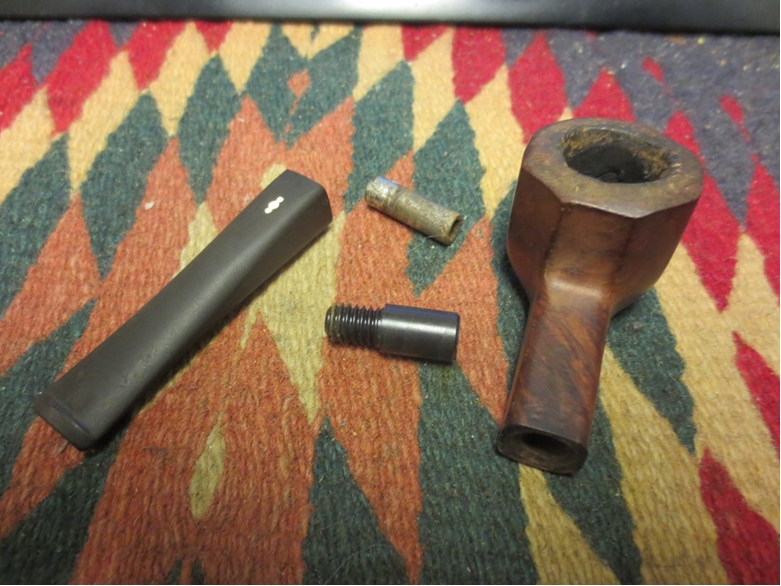
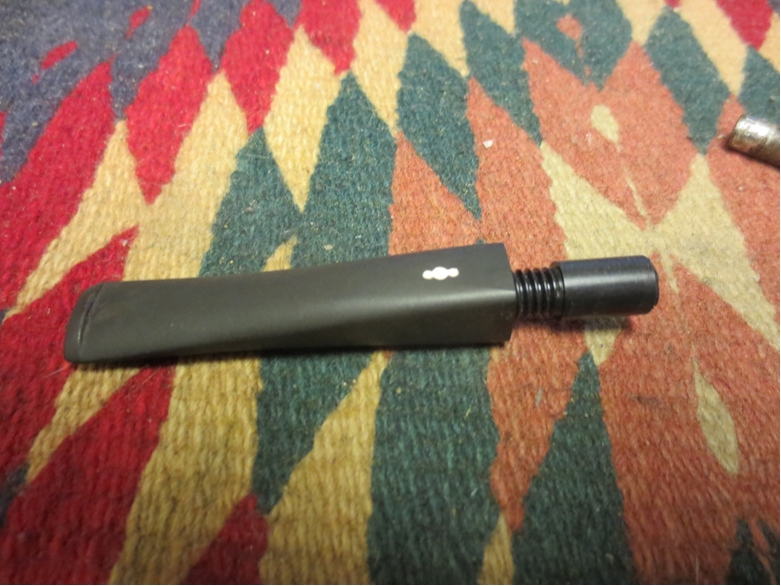
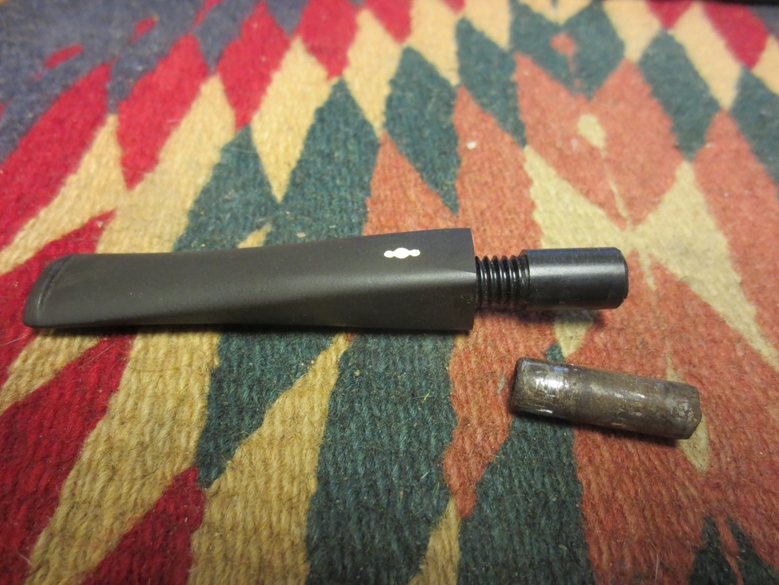
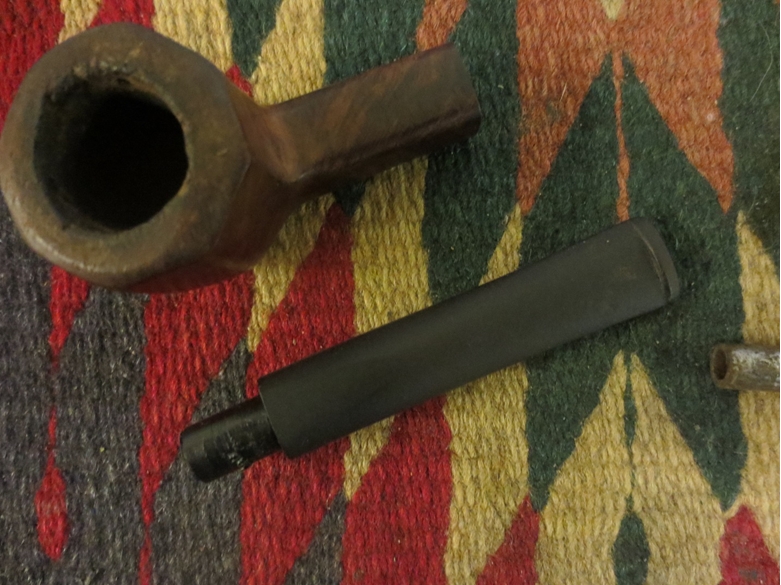
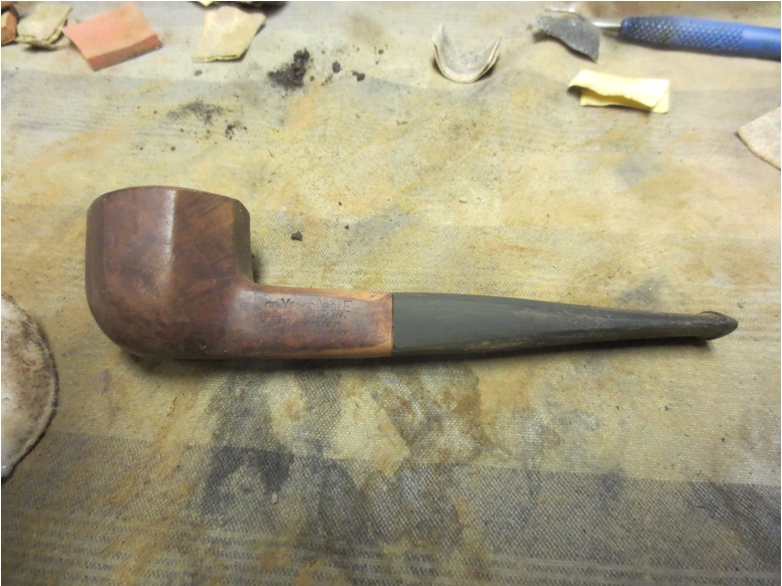
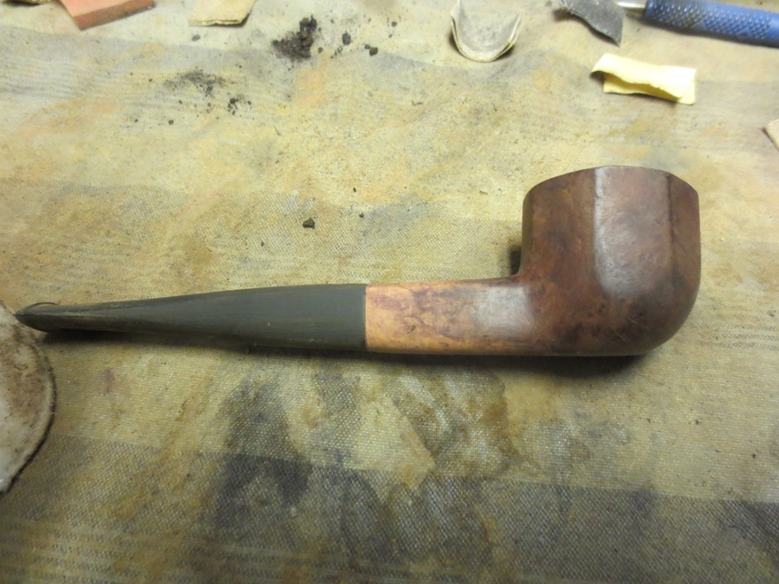
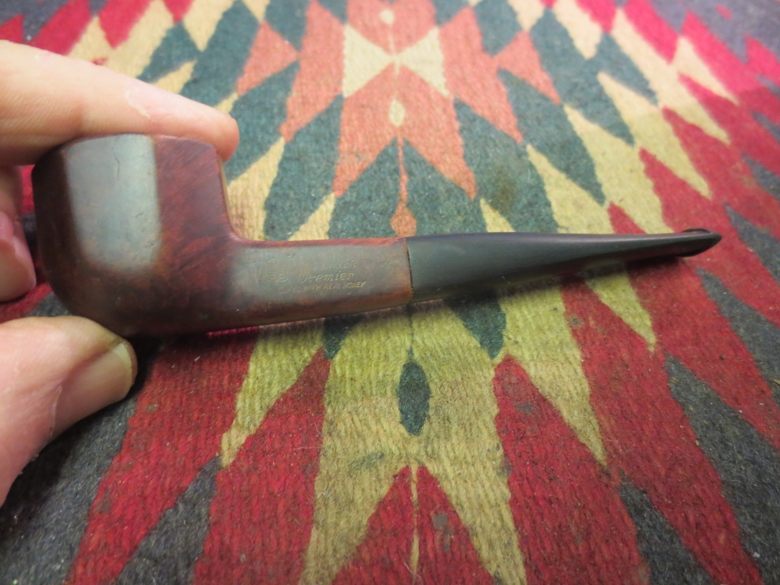
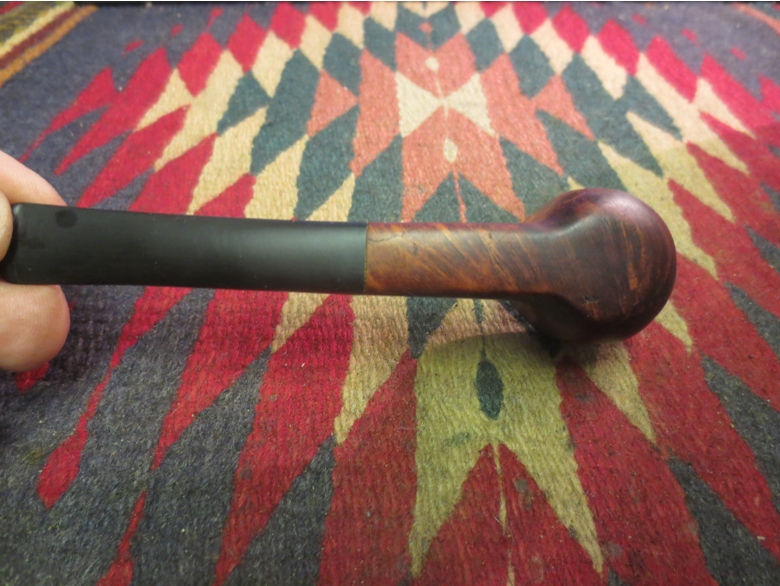
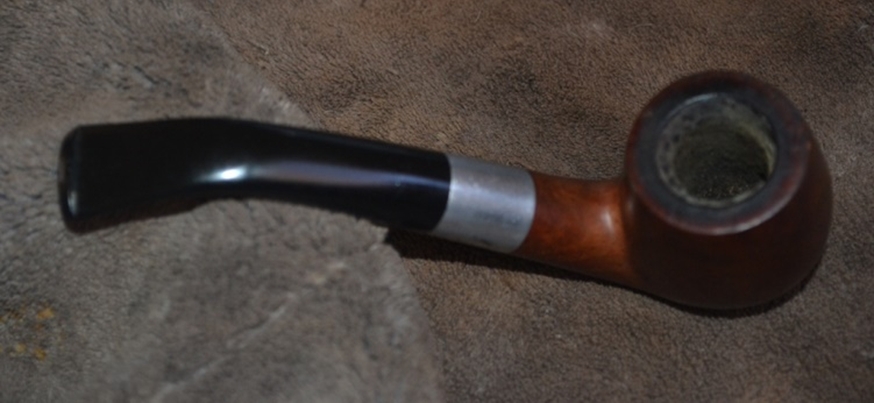
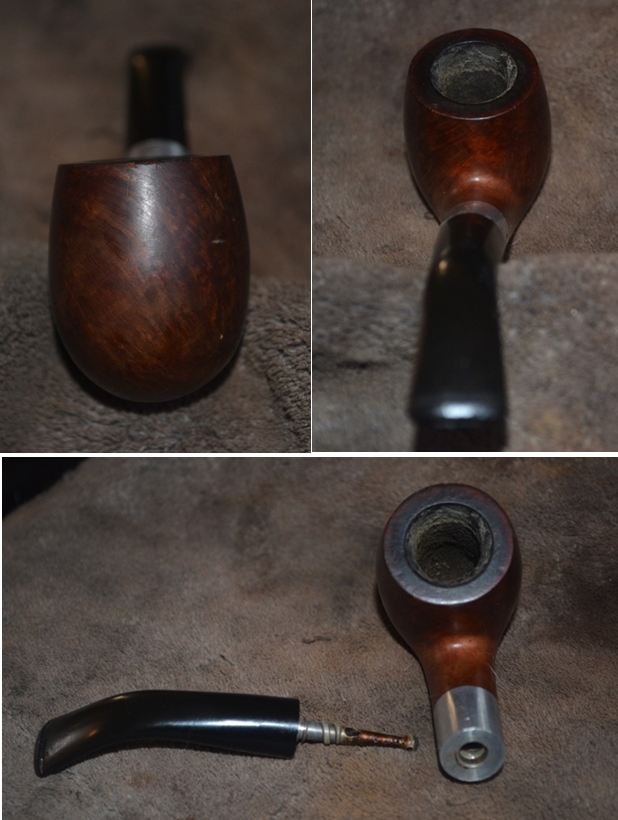
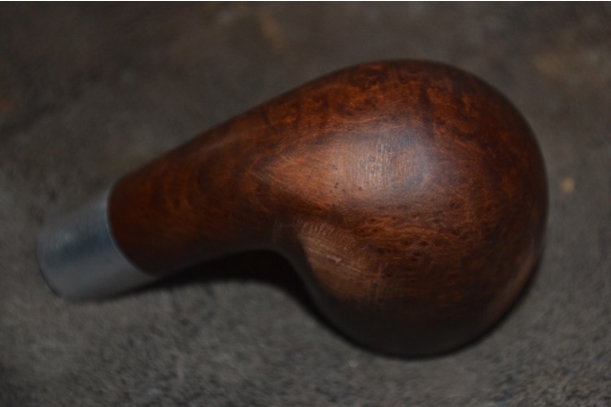
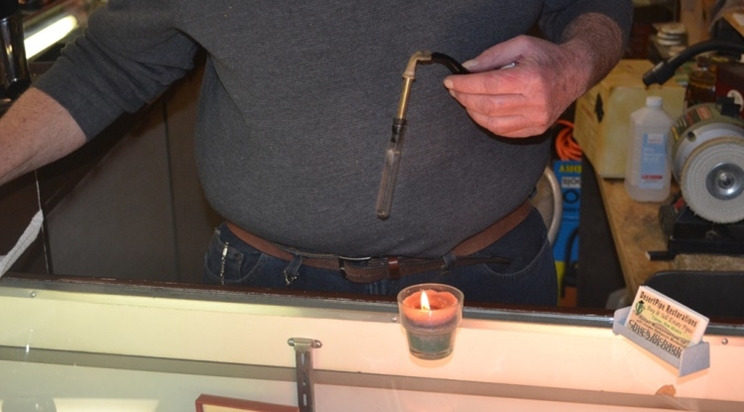
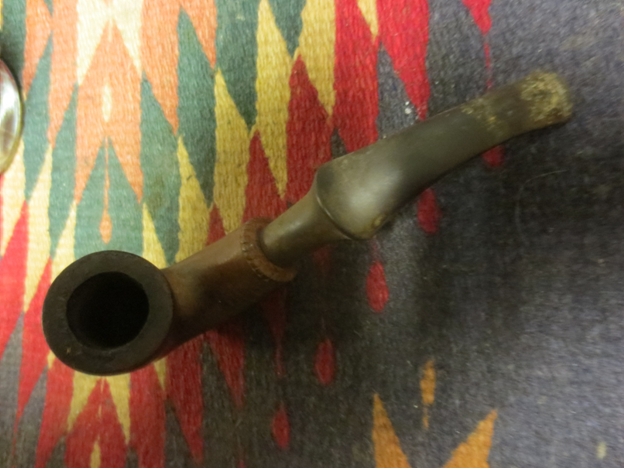
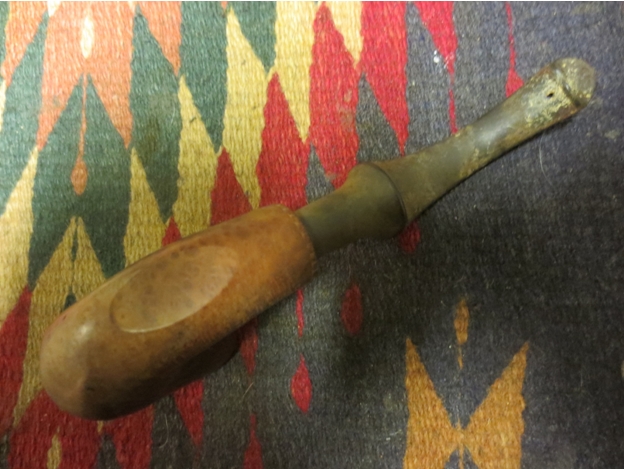
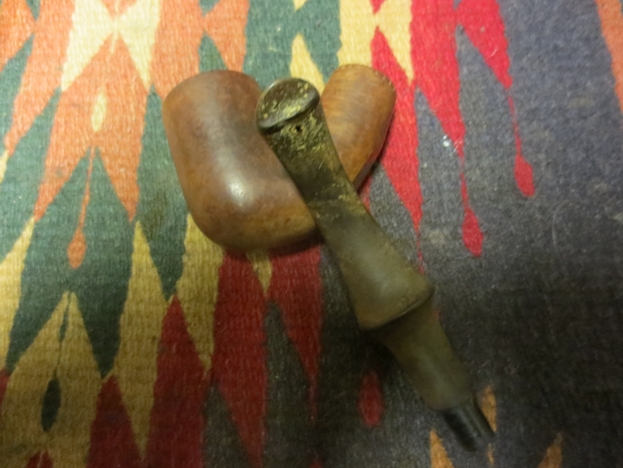
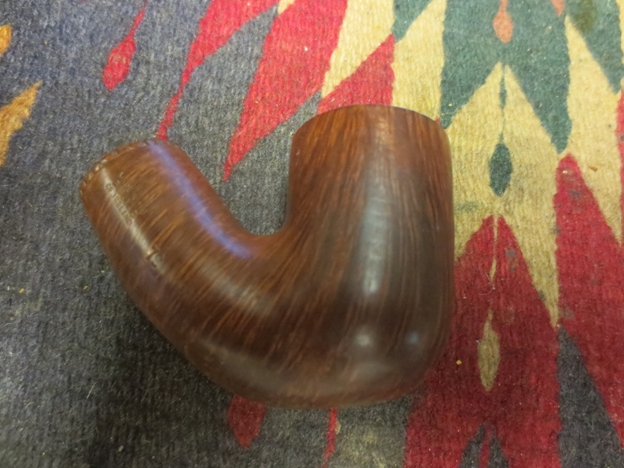
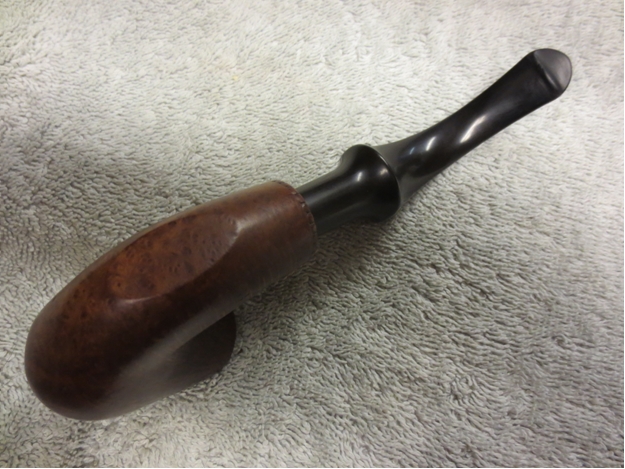
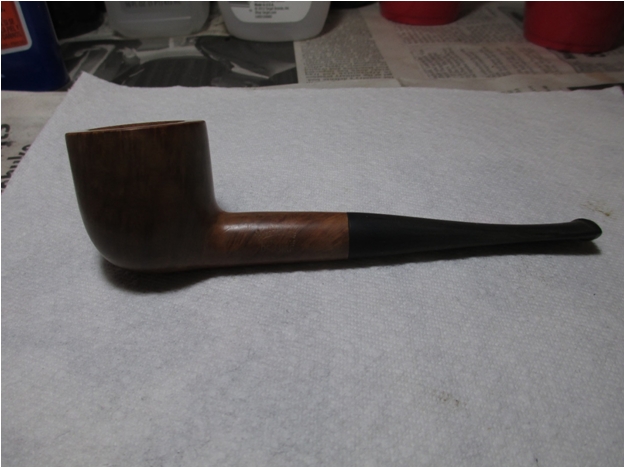
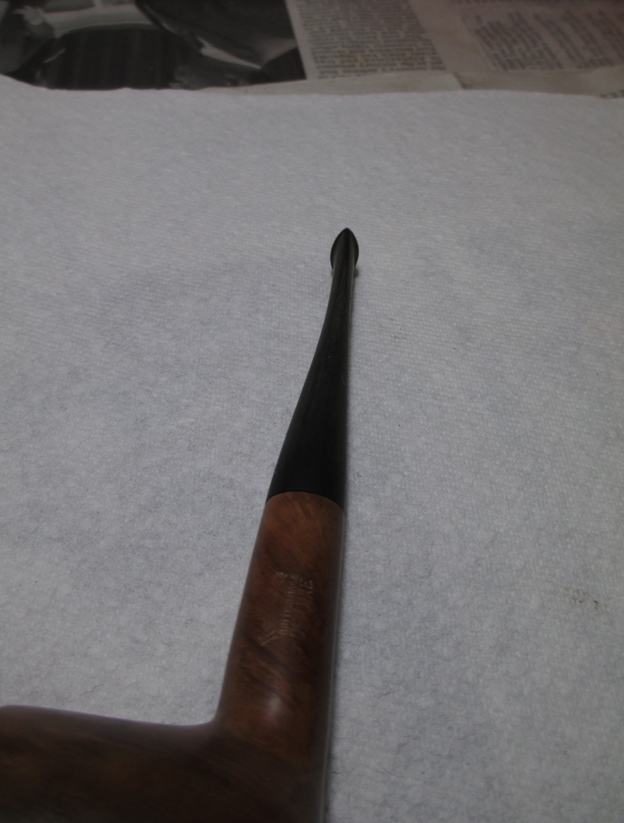
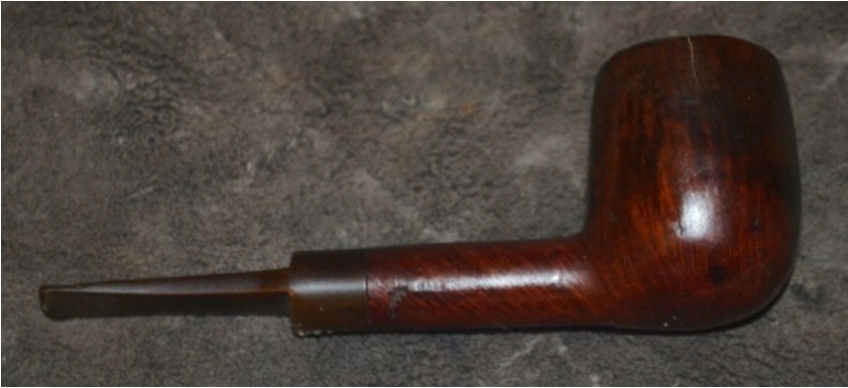
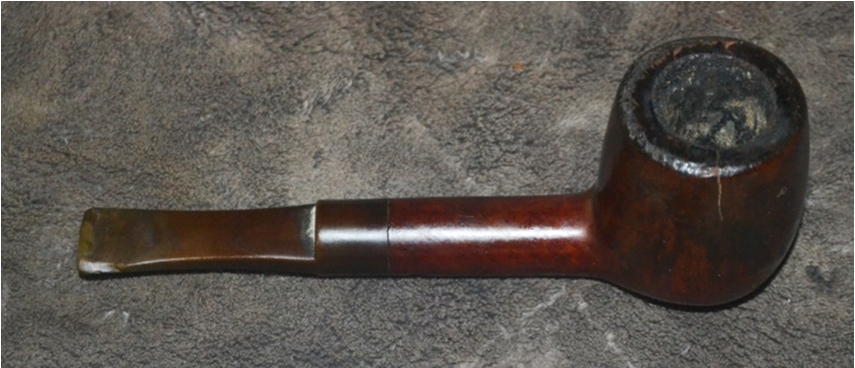
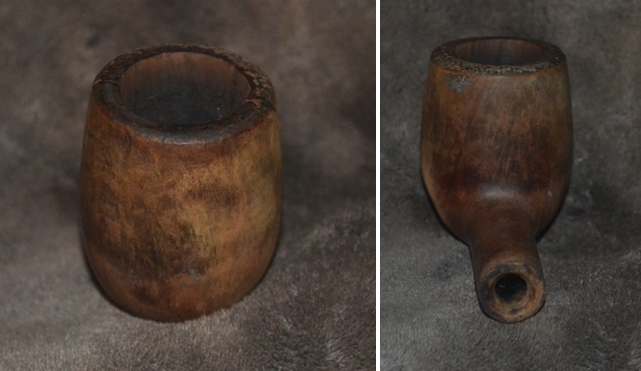
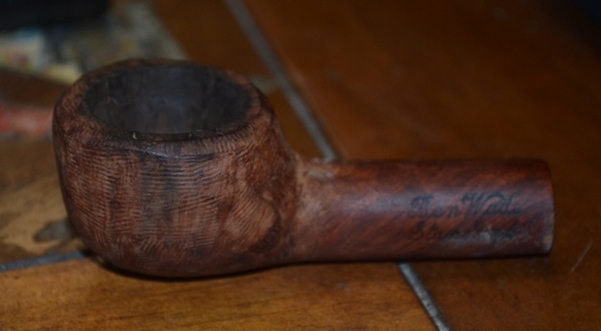
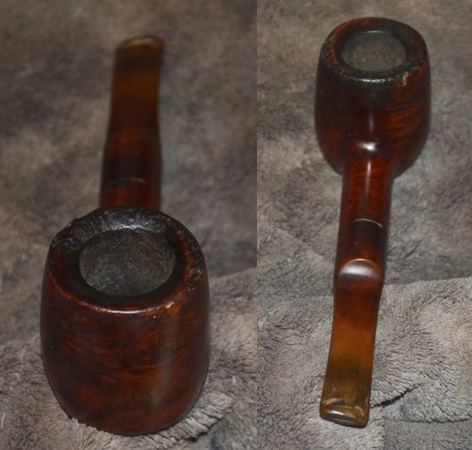
I really like the grain and look of this bulldog. It is made by Comoy’s London and bears the stamping is The Guildhall over London Pipe on the left side of the shank. On the right side is the circular Com stamp Made In London in a circle with the In centered in the circle. Underneath the circle it reads England and to the right of that is the shape stamp 409. The grain on this pipe is a mixed bag but is nonetheless beautiful. There is cross grain, swirls and birdseye that pops on the right side of the bowl. I was listening to the live show when Beau and Jon David talked about this pipe. They showed the condition of it and made some comment about needing to give it some attention as it was looking rough (my recollection). I tweeted them that I would gladly take it on as a project if he sent it my way. Beau packed it up and sent it my way. It arrived early this week after the New Year weekend. When I took it out of the packing envelopes and unwrapped it this is what I found.Beau1 The stem was badly oxidized but did not have any deep bite marks. There was the normal tooth chatter around the button on the top and bottom sides of the stem. There was a distinct line from the button up ½ inch toward the shank that looked like the stem at one time in its life had sported a rubber softie bit over the vulcanite. The finish was worn and spotty and there were some serious issues with dents and marks in the briar.Beau2 
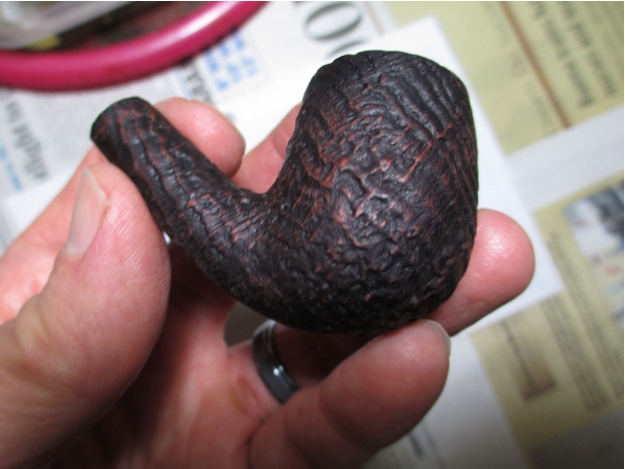
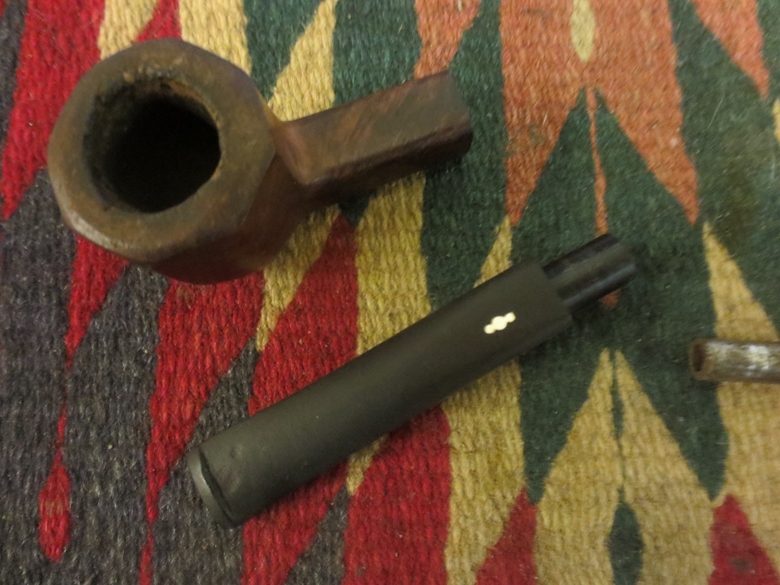
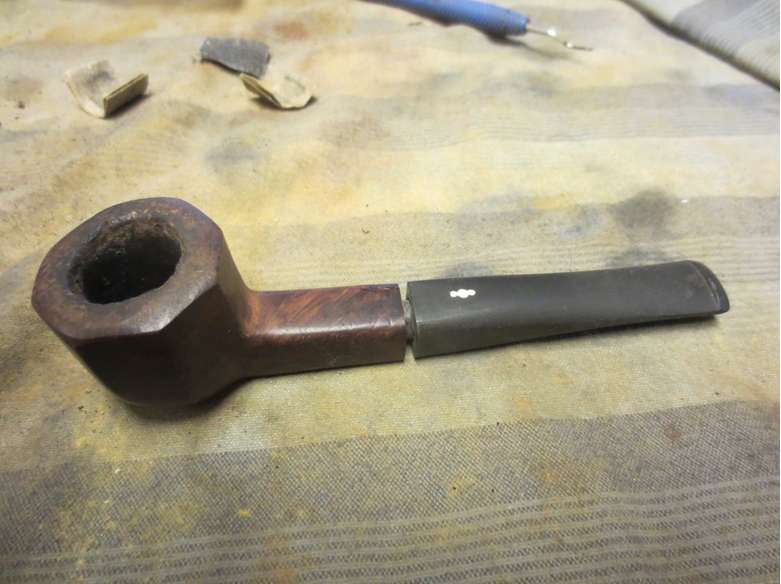
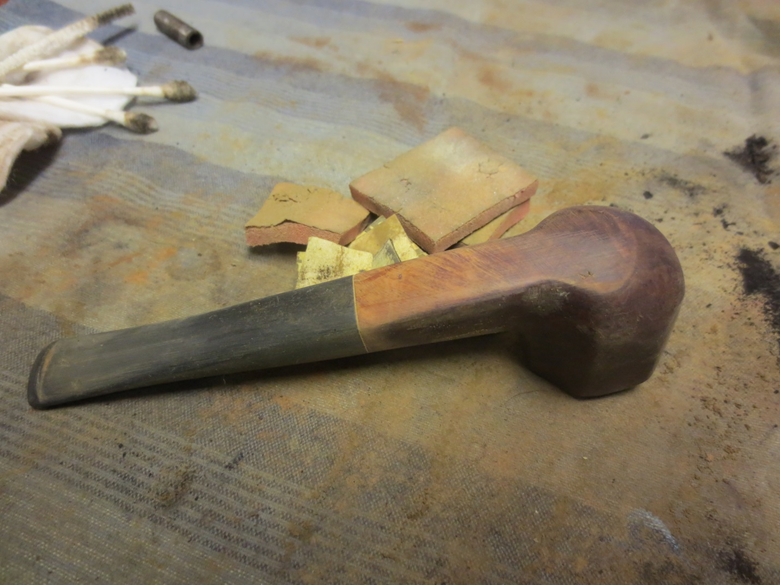
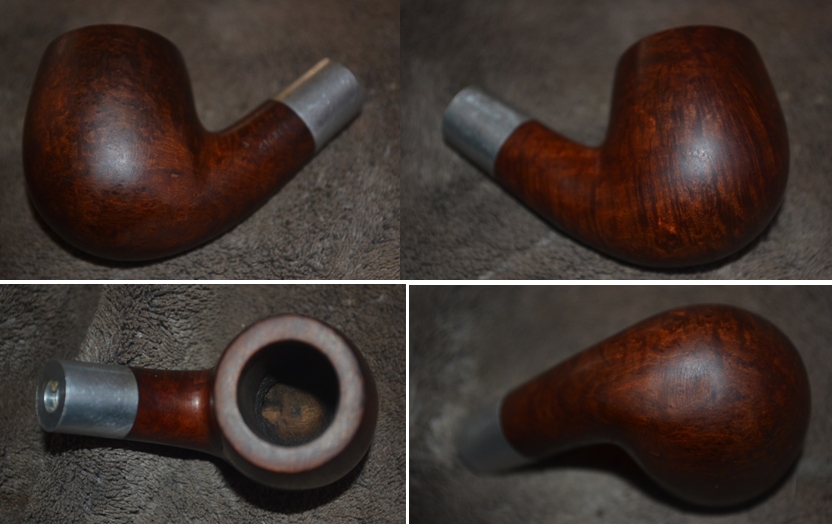
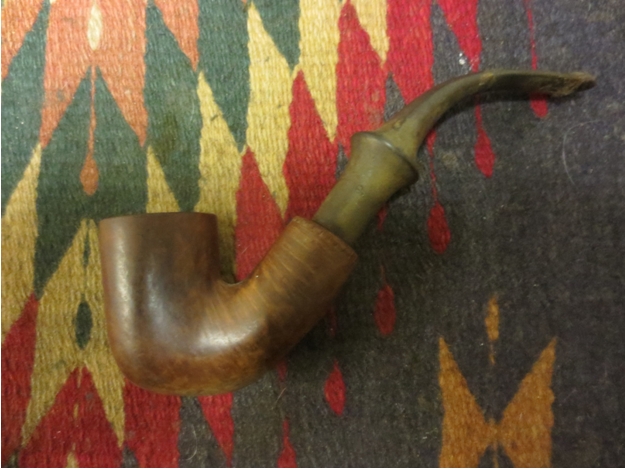
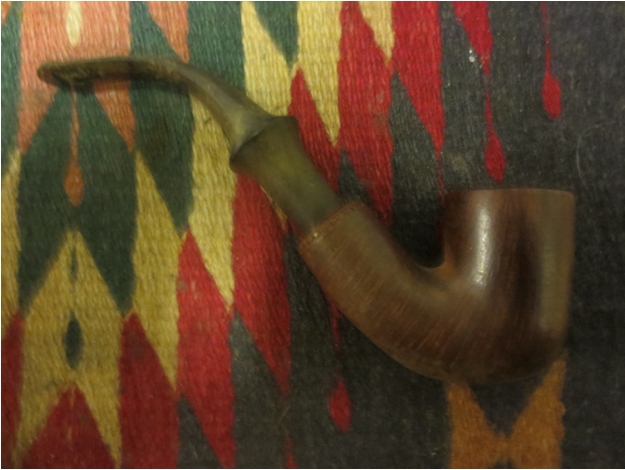
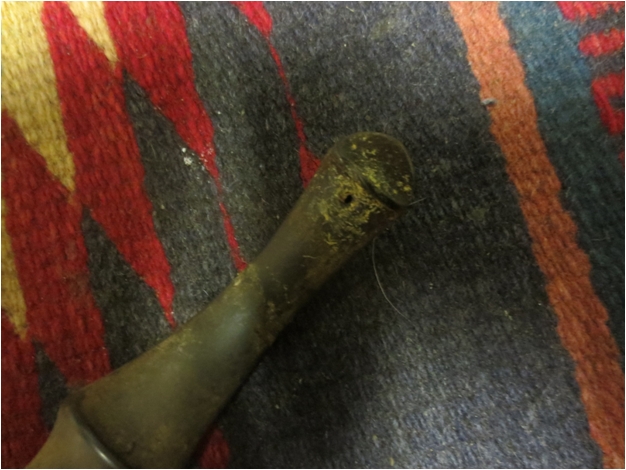
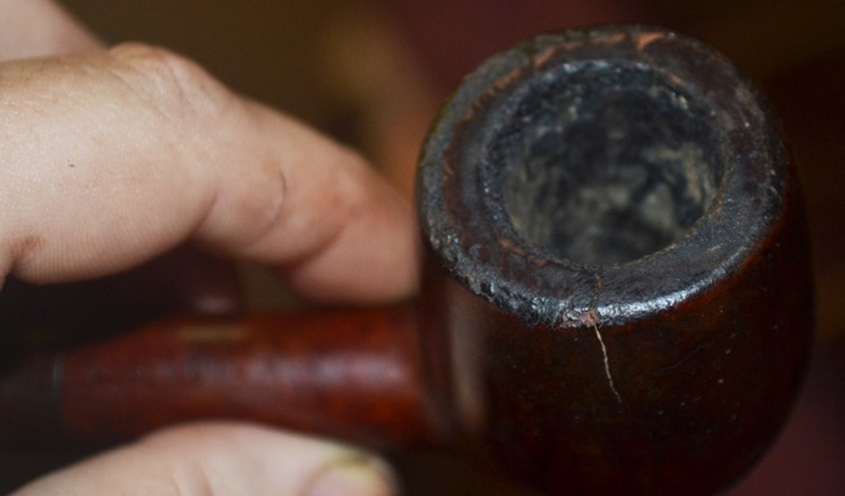
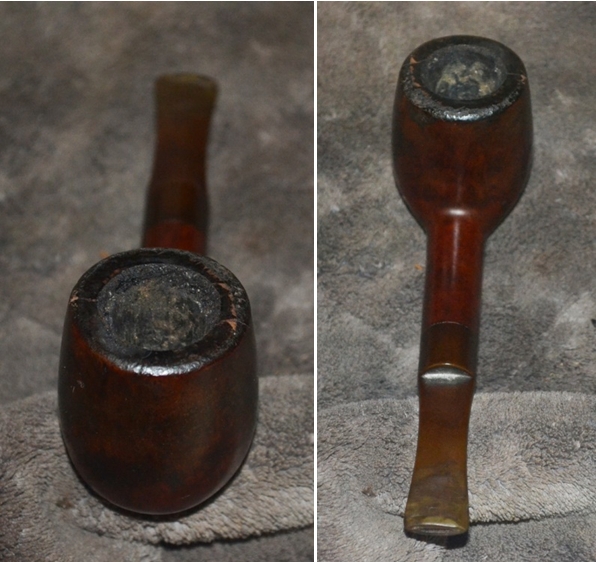
The rim was very rough with a lot of dings and damage to the top surface. Some of the damage went down the cap on the left side of the bowl. The top of the bowl looked as if it had been dropped on asphalt or concrete. There were parallel marks and dings on the left side low on the bowl and on the point at the bottom of the bowl.Beau3

Beau4 
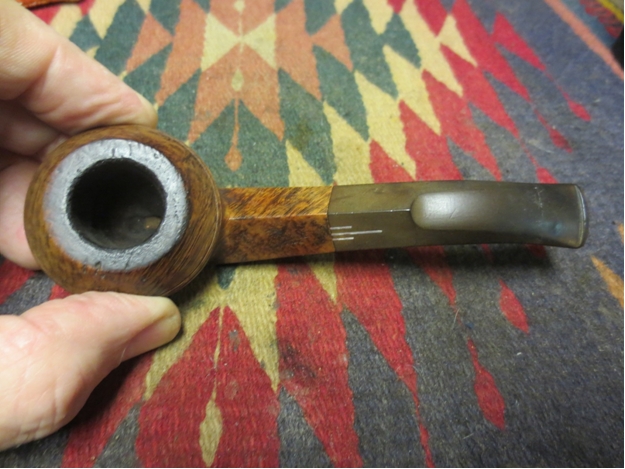
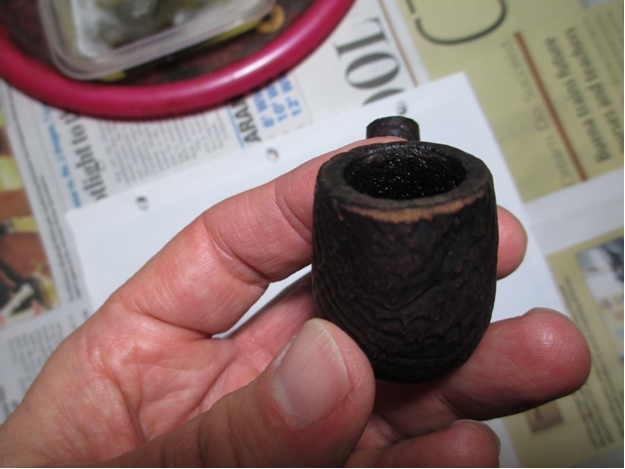
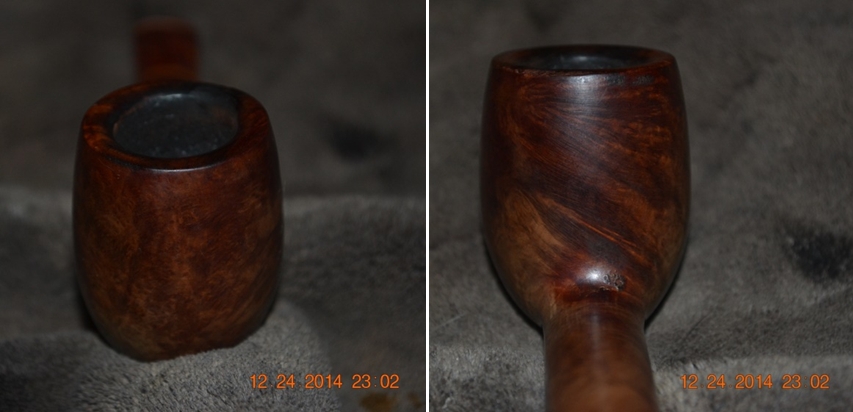
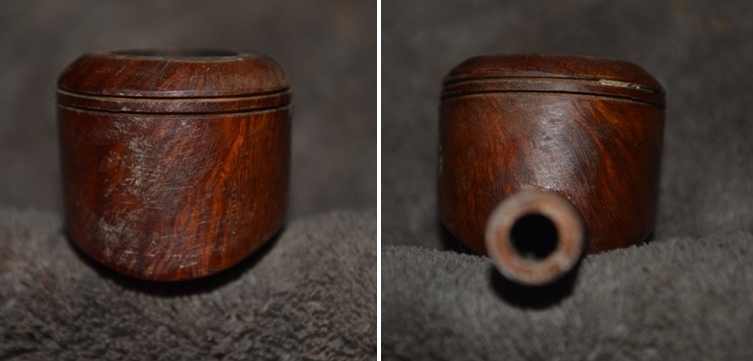
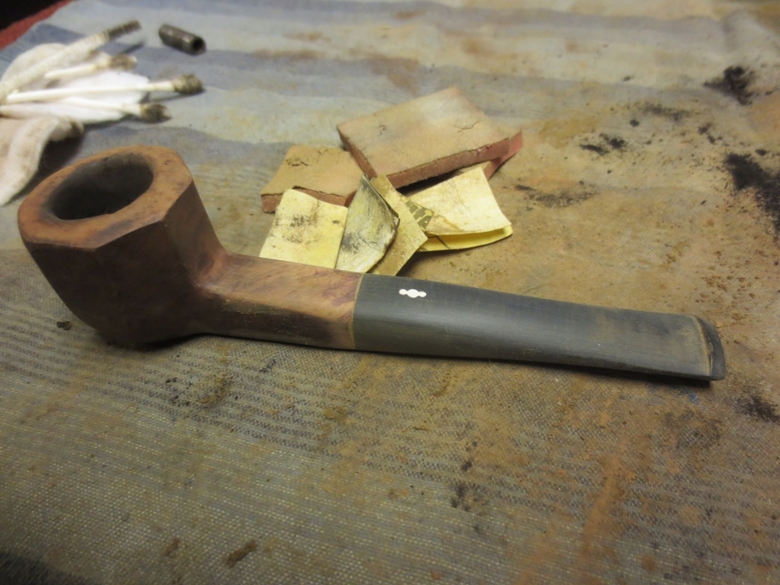
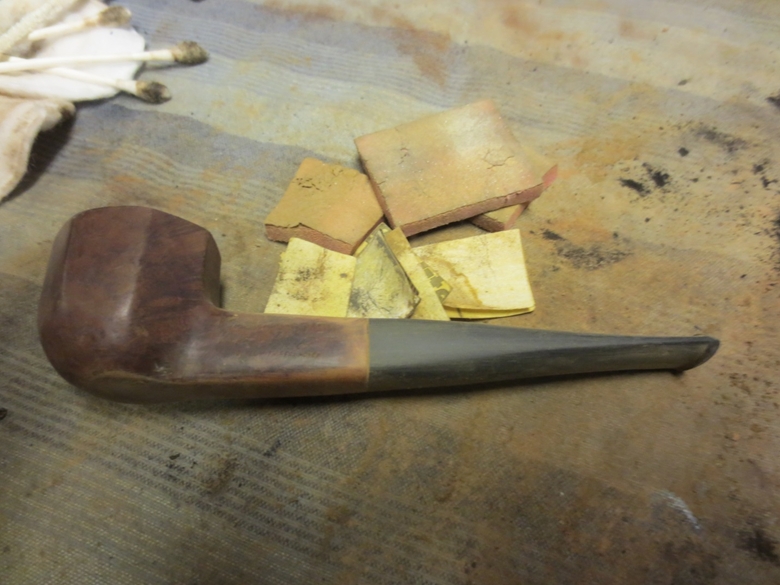
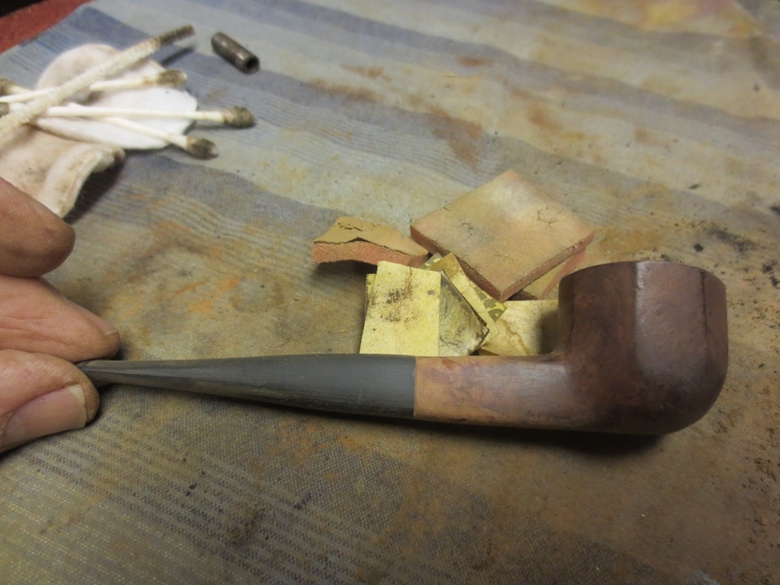
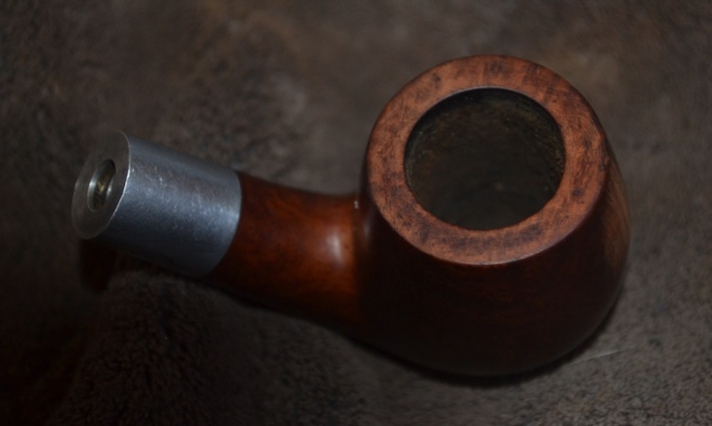
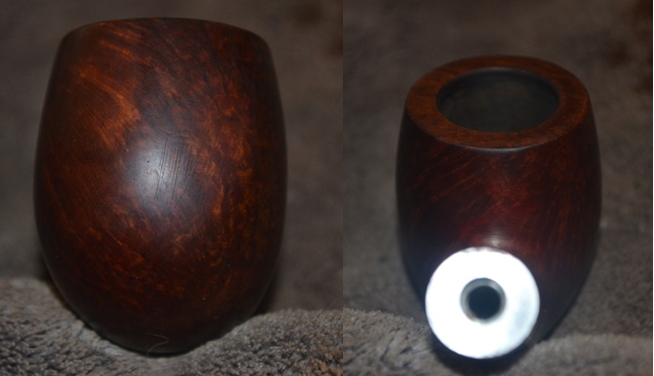
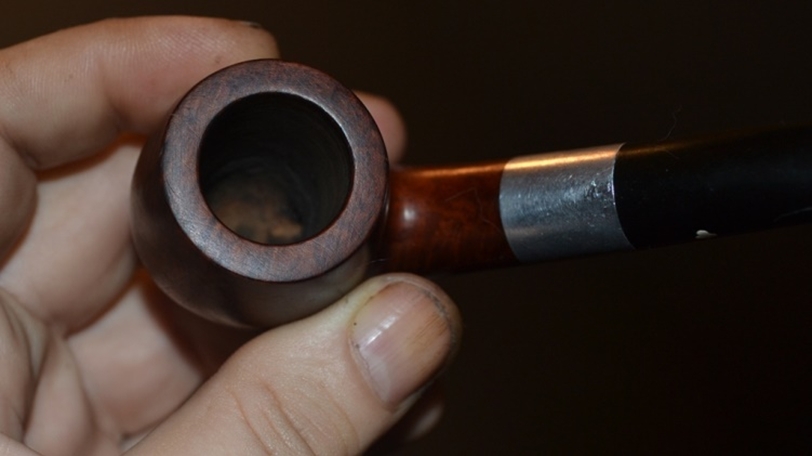
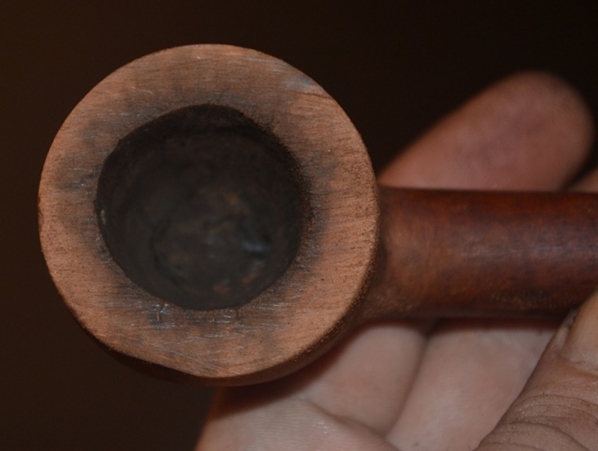
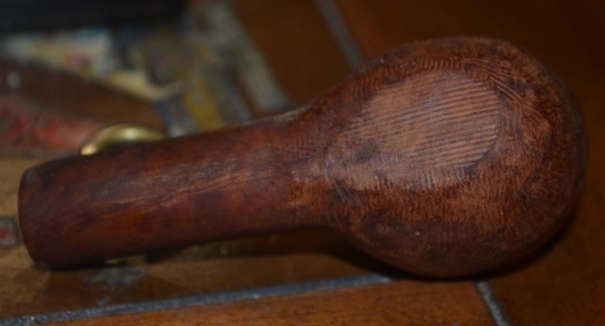
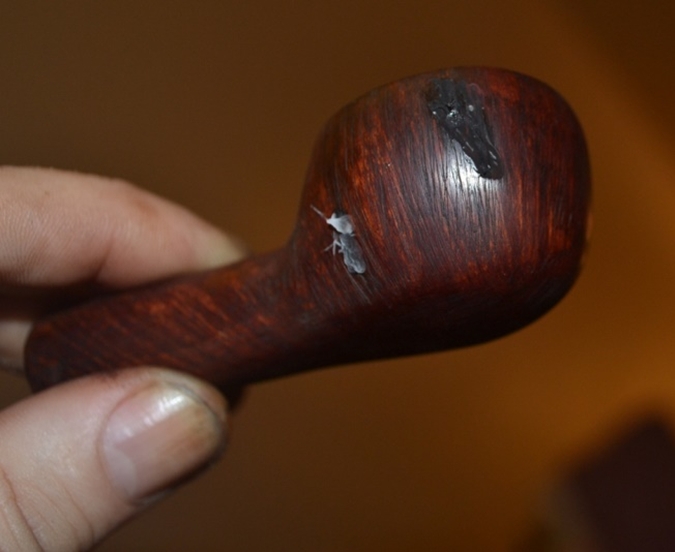
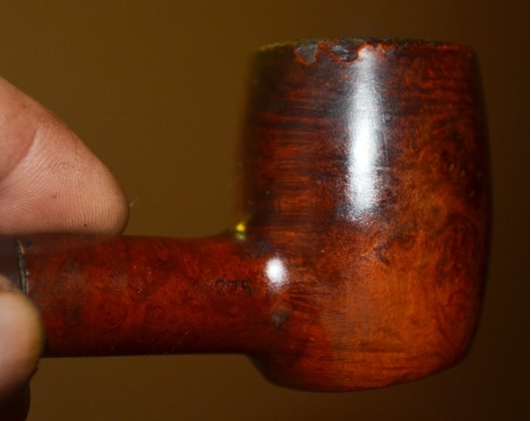
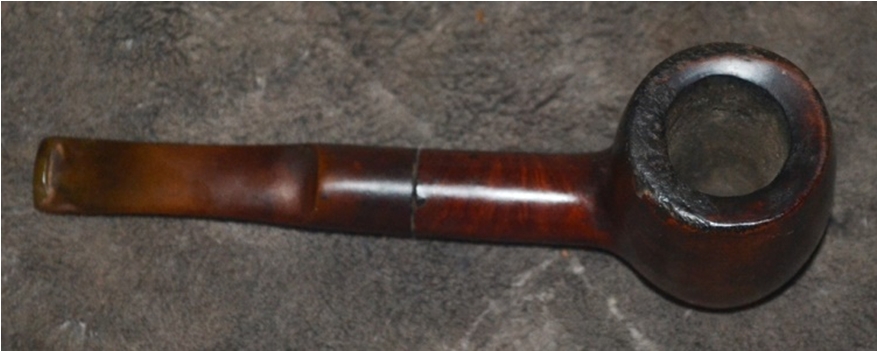
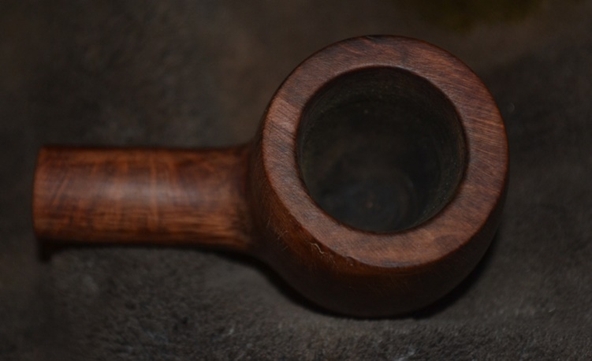
I took the next three close-up photos of the dings on the bowl and rim to show the extent of the damage. Both the inner and outer edge of the rim had damage that made this rim a prime candidate for topping.Beau5

Beau6

Beau7 Andrew, Anthony and others use a piece of glass for their flat smooth surface for topping a bowl. I use a hard piece of finished oak that is part of my work top. I put a piece of 220 grit sandpaper on the board and anchor it in place. Then I turn the bowl clockwise in a circle across the sandpaper to remove the damaged portions. I check frequently to make sure that I remove just the damage and not too much briar. I also make sure that the rim is flat against the board so that I do not change the angles and profile of the rim top and cap.Beau8

Beau9 
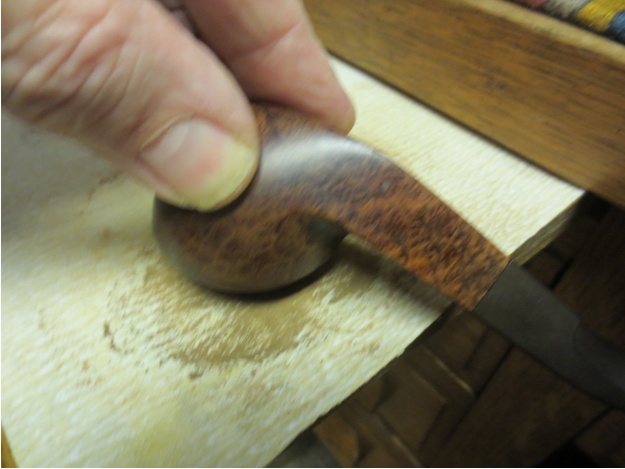
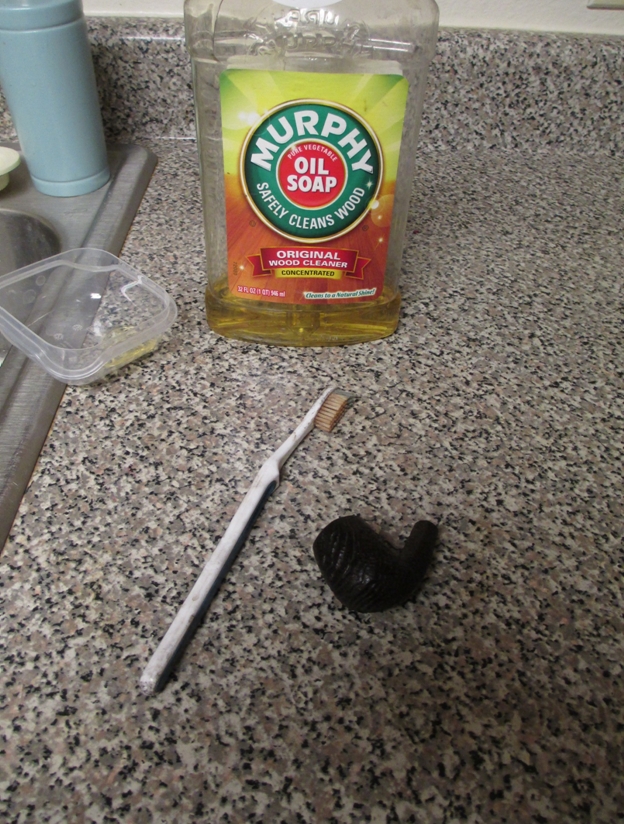
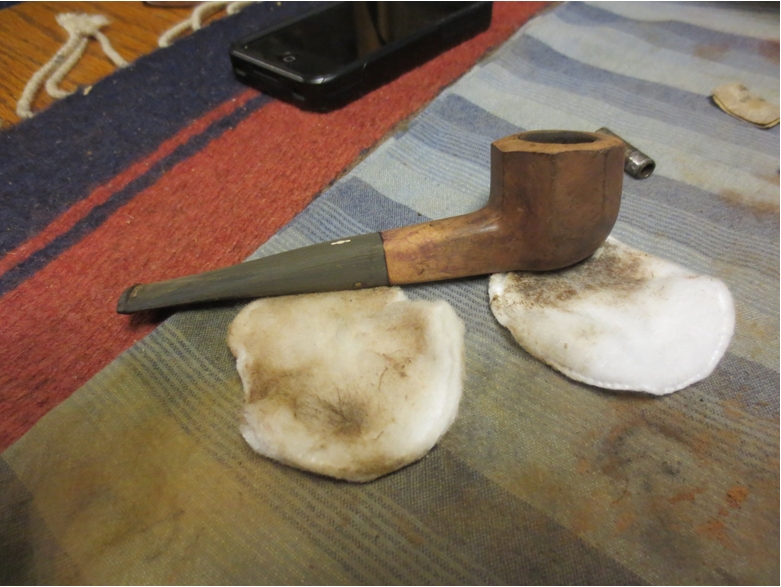
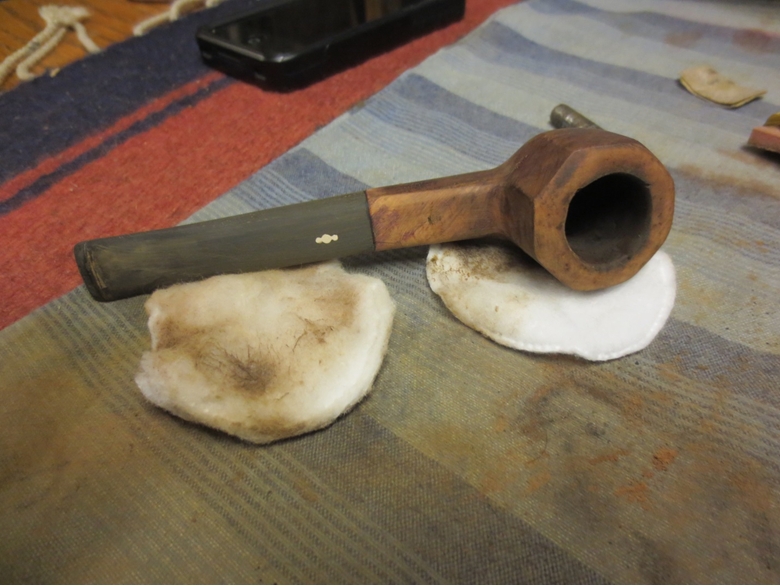
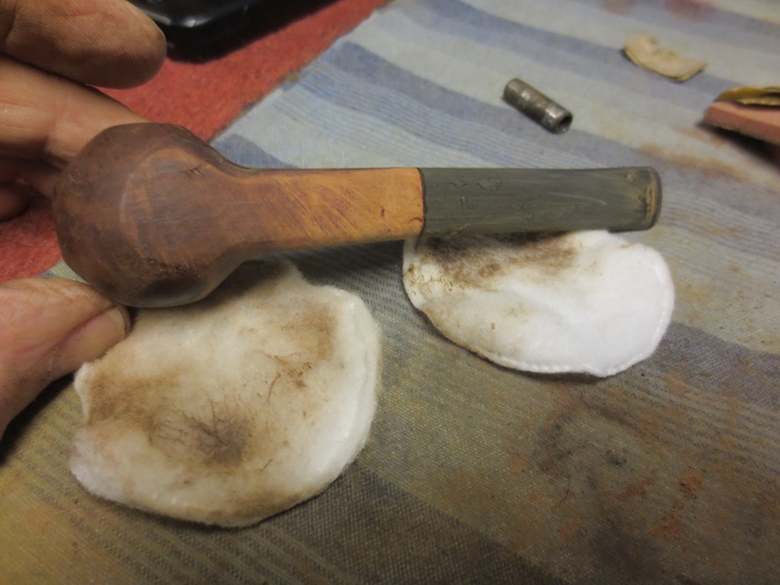
Once I had the top flattened with the 220 grit sandpaper I worked it over with a medium and a fine grit sanding block to remove any of the scratches left behind in the topping of the bowl. I wiped the bowl down with acetone on a cotton pad to remove the spotty finish.Beau10

Beau11

Beau12

Beau13 
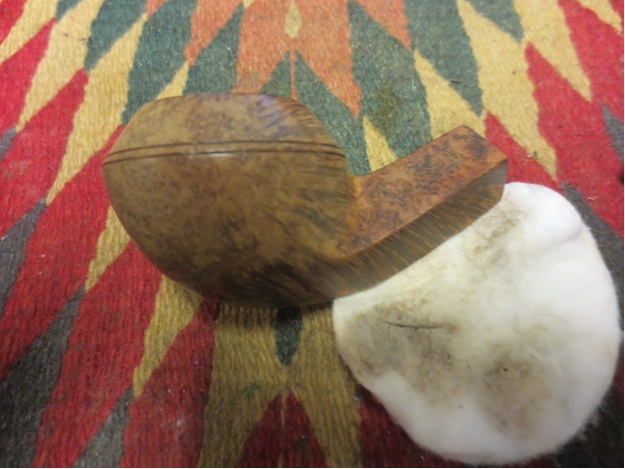
I steamed the dents and marks on the bowl using a wet cloth and the blade of a butter knife that I heated on the flame of our gas range. I put the wet cloth over the dents and touched it with the hot knife blade. The stem generated lifts the dents from the briar. Doing this I was able to remove many of the dents on the sides of the bowl and on the back edge of the cap and rim.Beau14

Beau15

Beau16

Beau17 
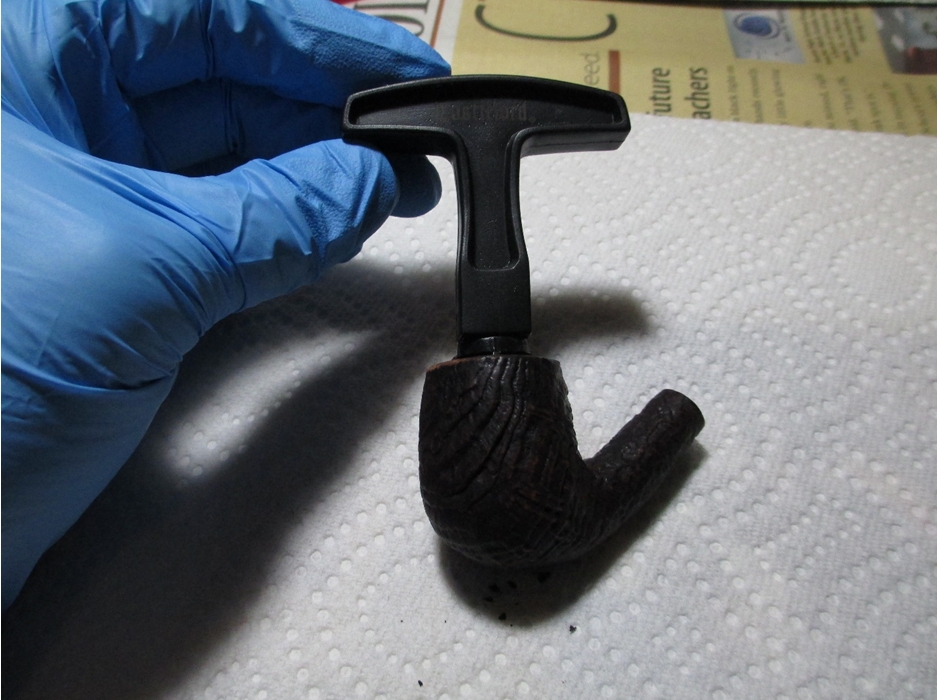
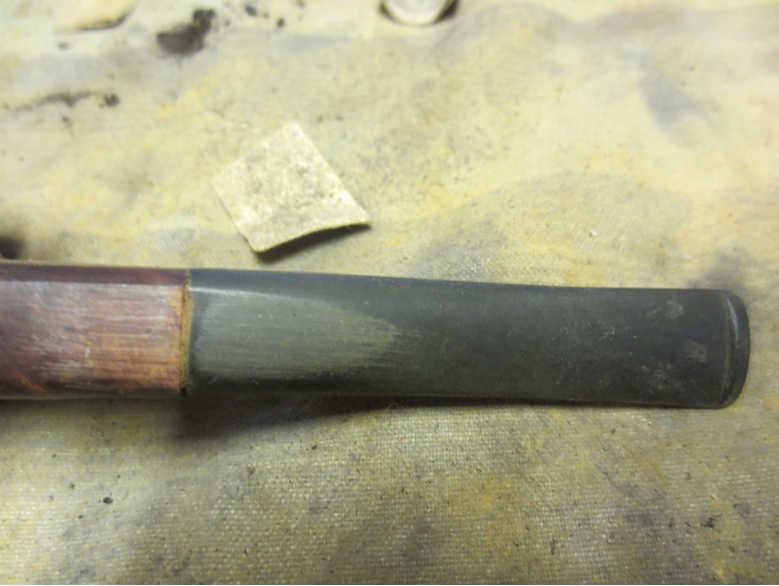
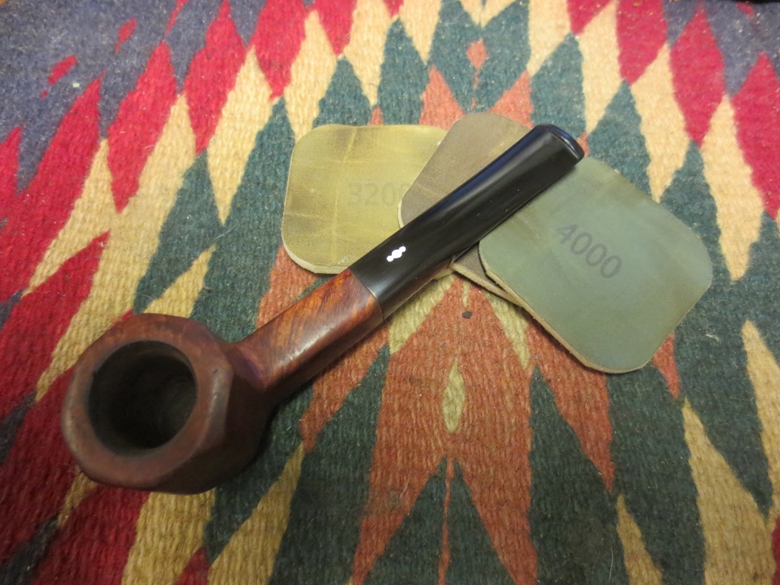
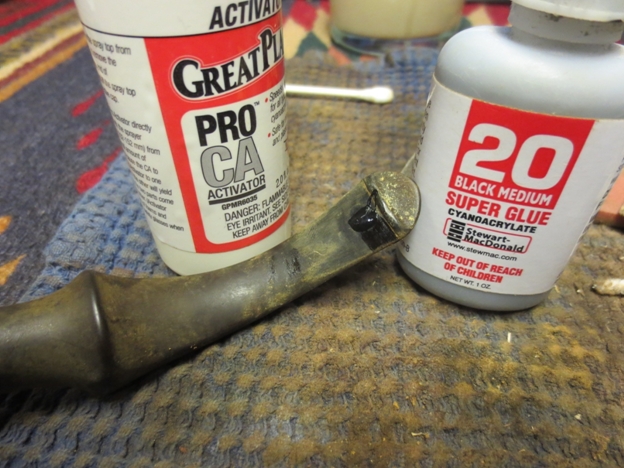
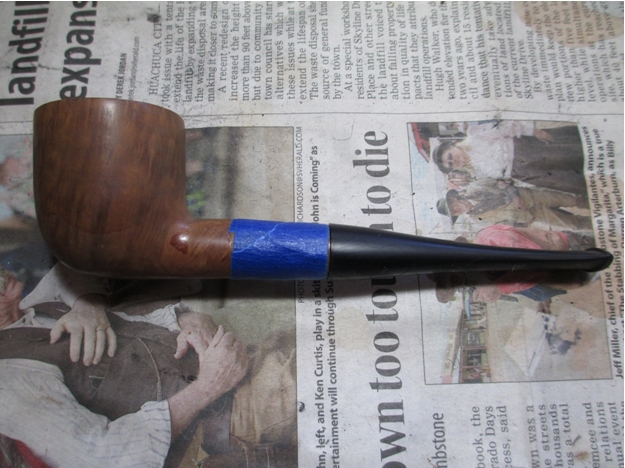
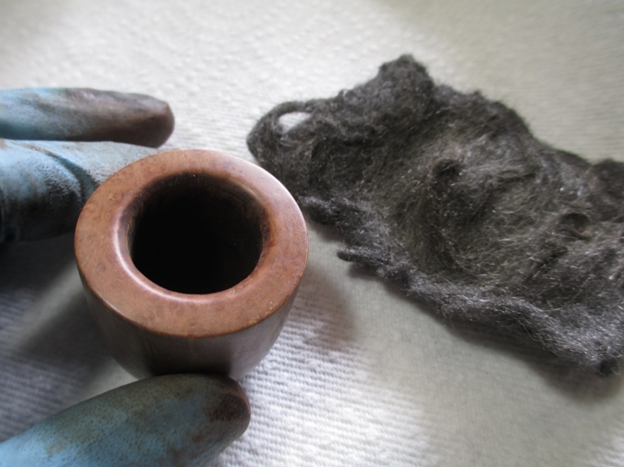
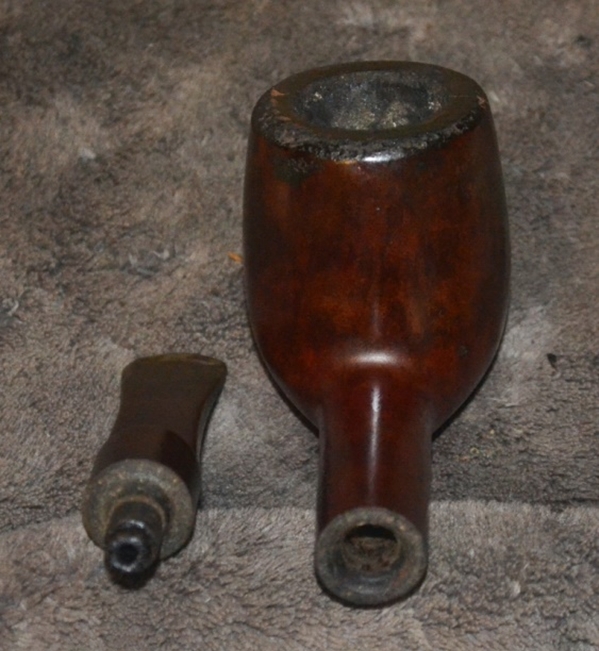
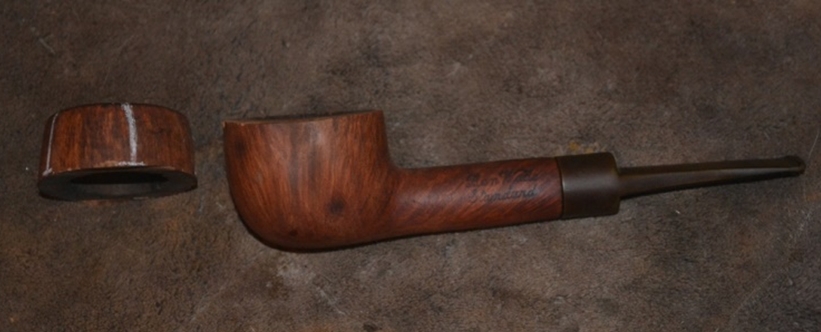
Some of the dents were going to take more drastic measures to try to raise and some of them would need to be filled with a mix of briar and clear superglue to smooth out the surface of the briar. I decided to work on the stem for a break in the process. I sanded the stem with 220 grit sandpaper to break up the oxidation and remove what appeared to be ripples in the vulcanite stem. The more oxidation I removed the more these ripples became apparent. I sanded it with a medium and a fine grit sanding sponge made by 3M. I pick it up in 8×10 sheets and cut it into working squares to sand stems and bowls. I used a plastic washer that I made to sit between the shank and stem to protect the shoulders of the stem from being rounded in the sanding process.Beau18

Beau19

Beau20 
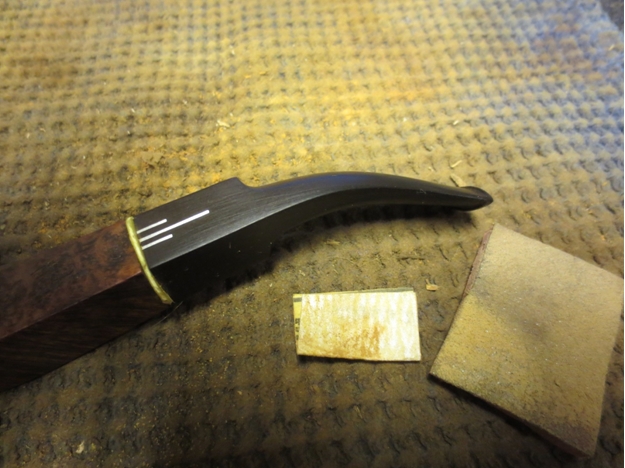
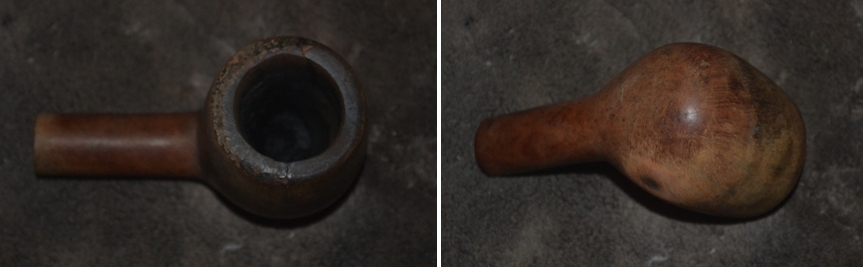
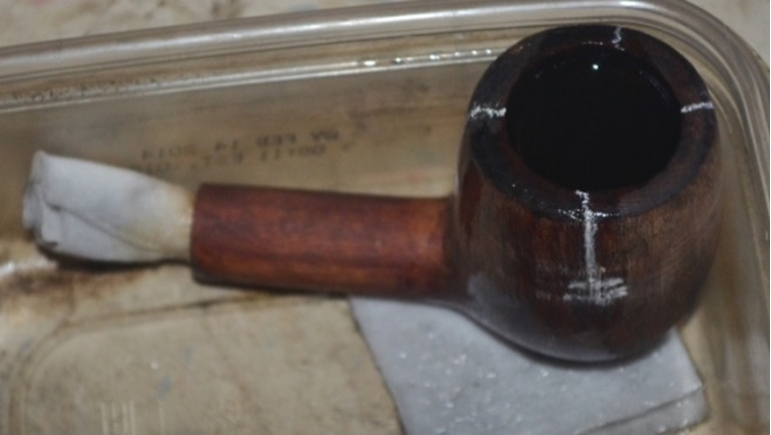
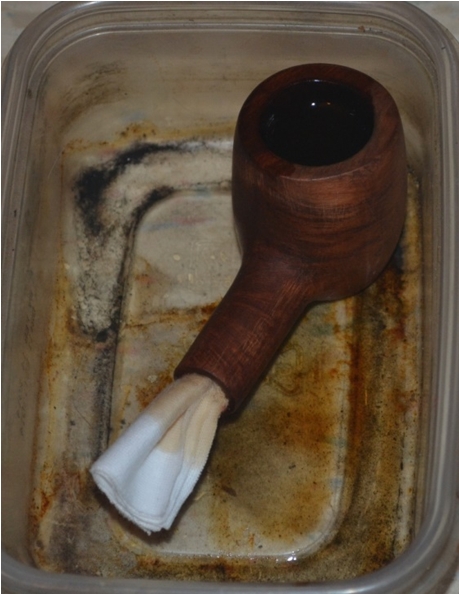
The next photo shows the remaining dents in the bottom of the bowl. It was almost like a road rash left behind by a drop on concrete. Many of the lighter more shallow dents were raised with the steam but these were more stubborn. I decided to soak the dented portion of the bowl in water. I was careful to not get water in the shank or the bowl. I used a small shallow dish filled with about an inch of water and angled the dented bottom and side of the bowl in to the water. I have found in other refinishing work that water will swell dents in the wood and lift them to the surface. While I knew that some of these dents would not move much, I was certain I could raise them all significantly using this method.Beau21

Beau22

Beau23 
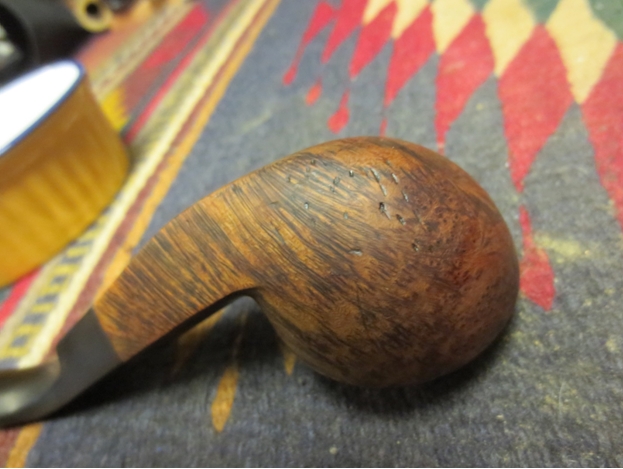
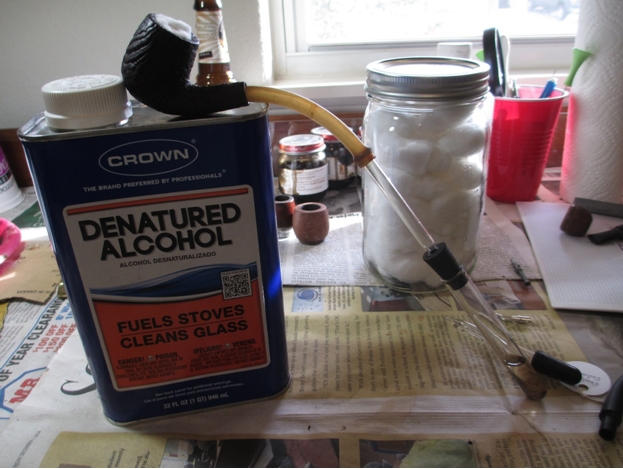
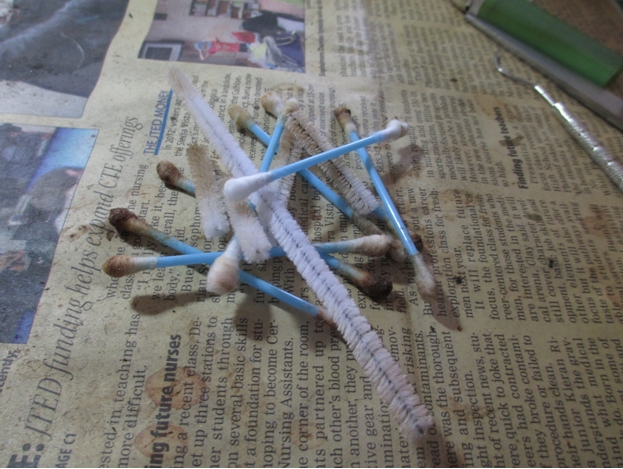
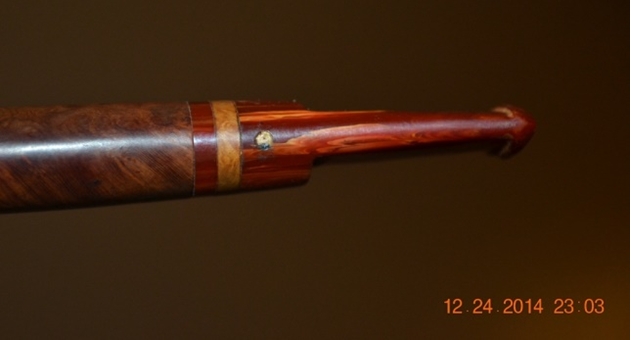
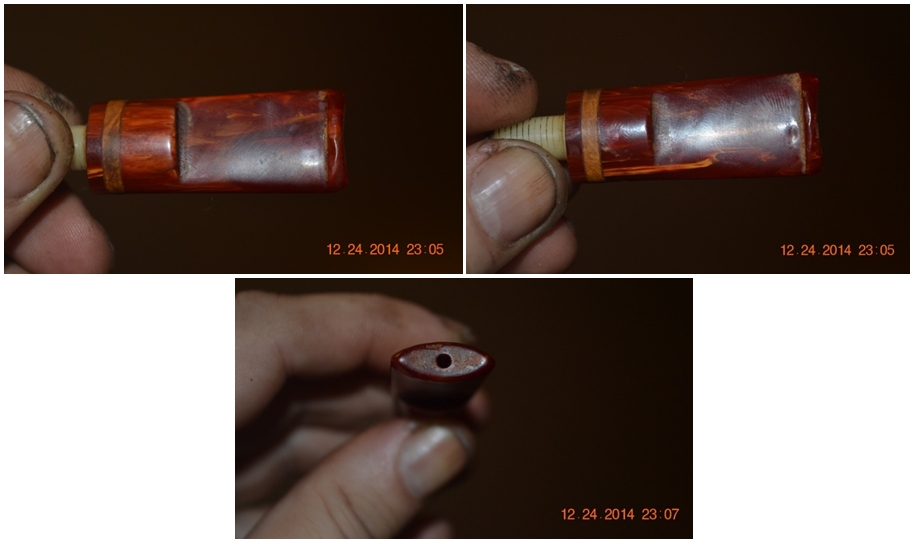
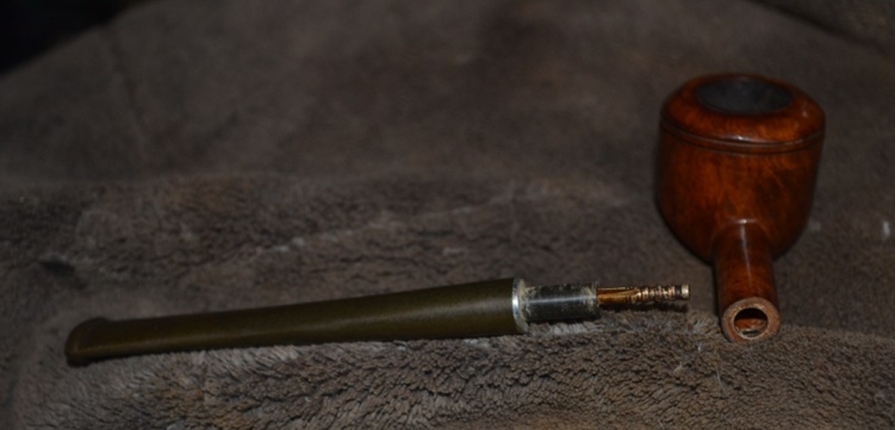
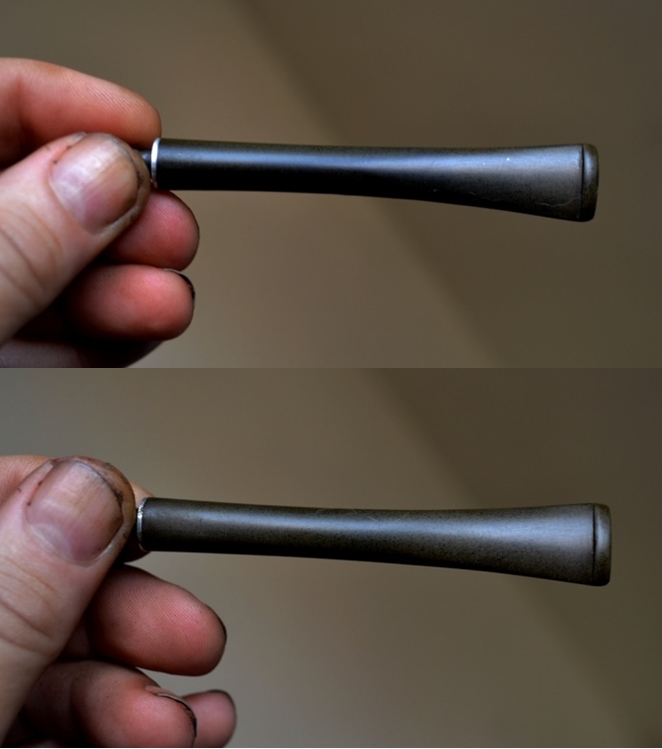
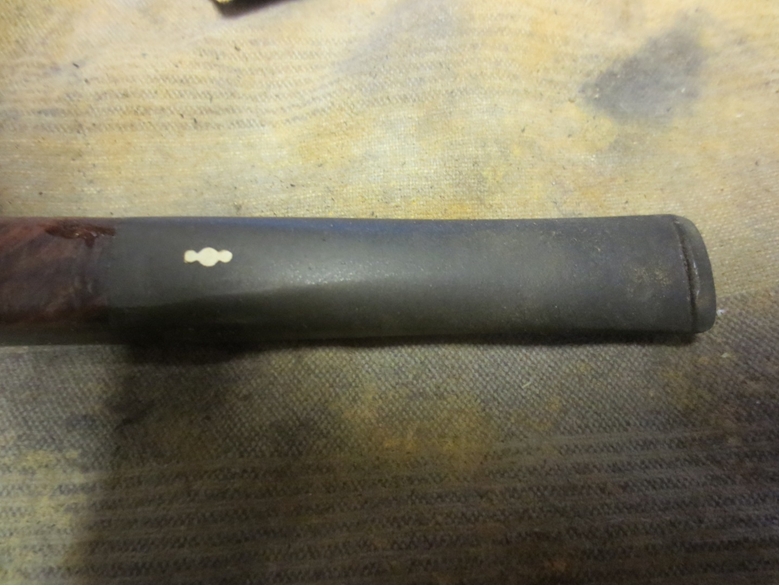
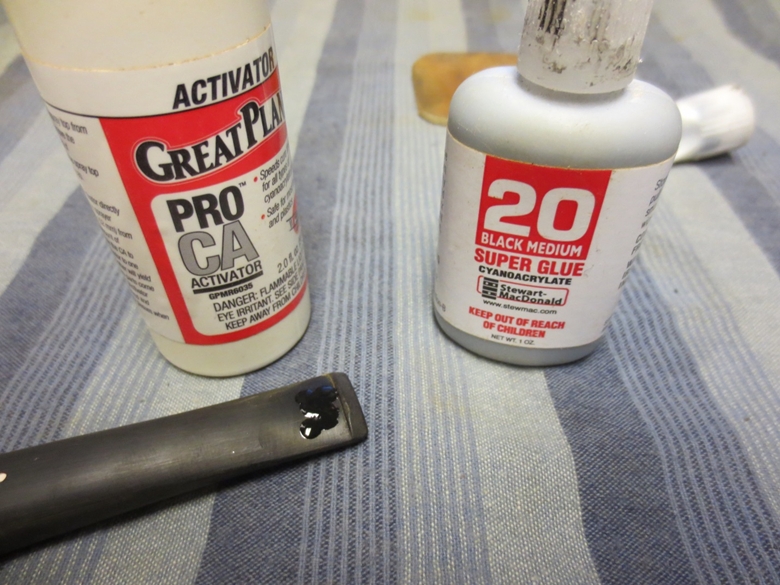
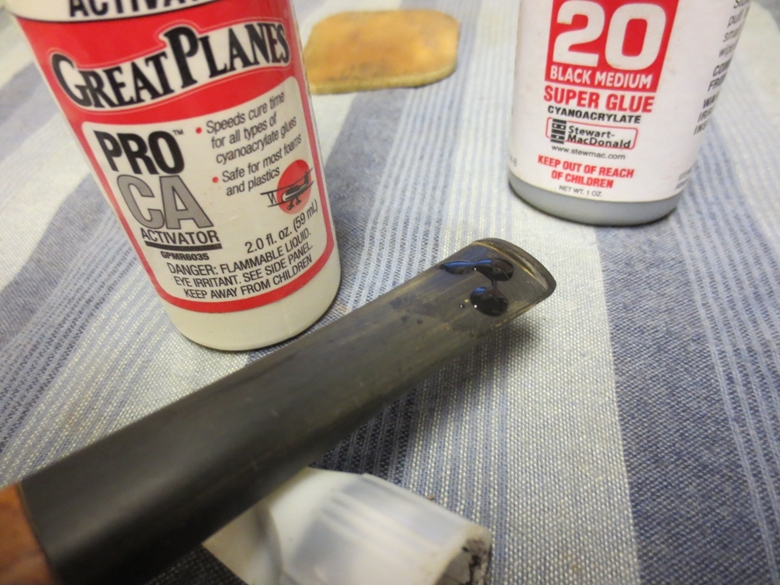
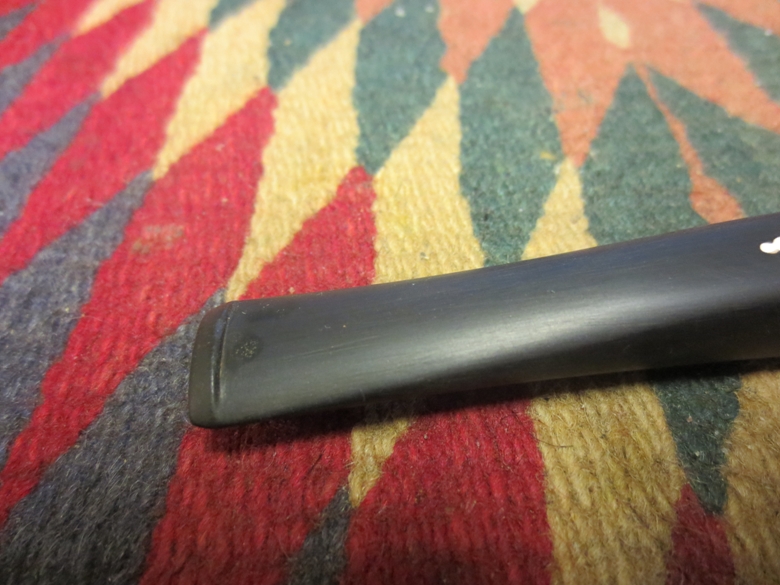
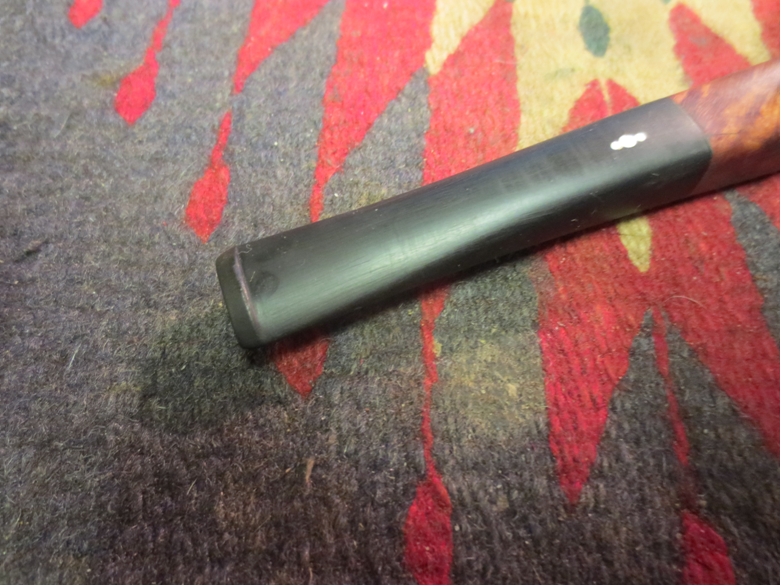
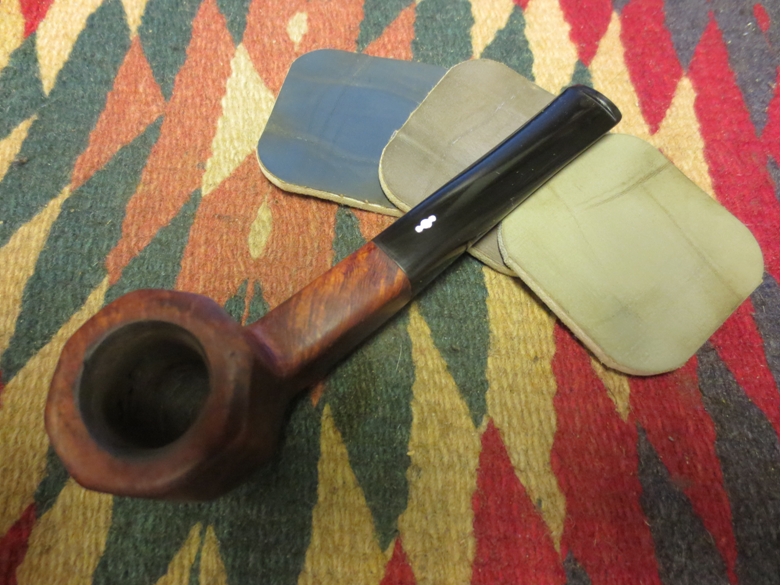
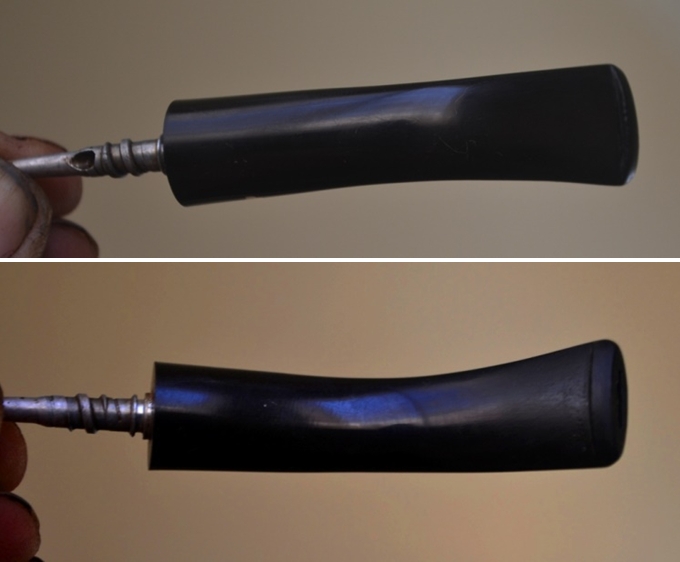
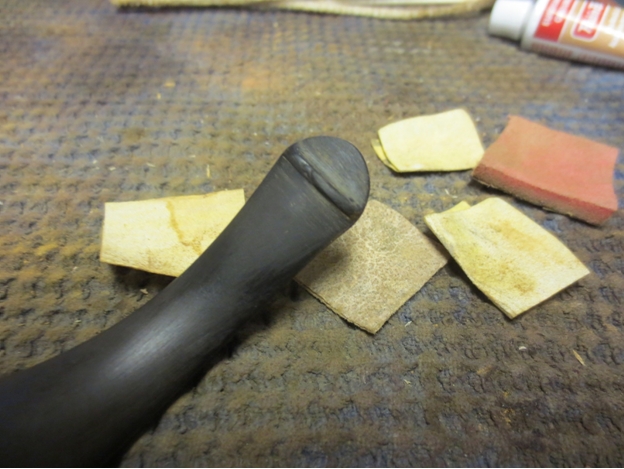
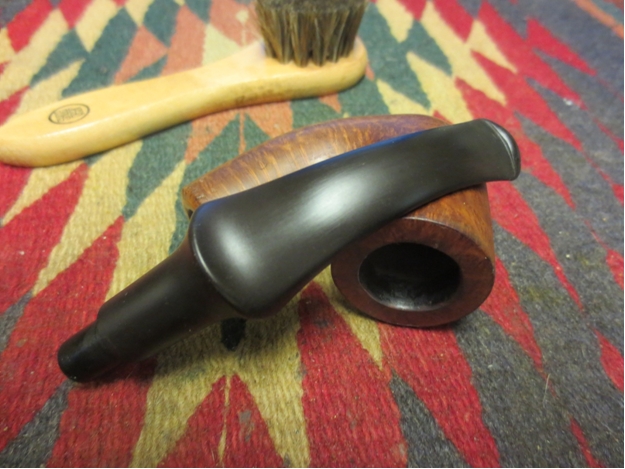
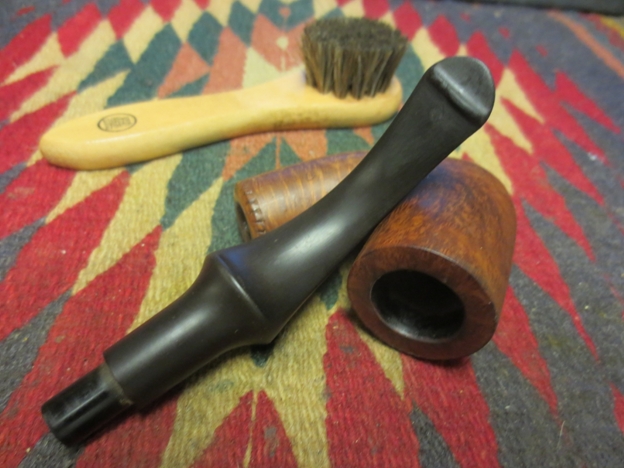
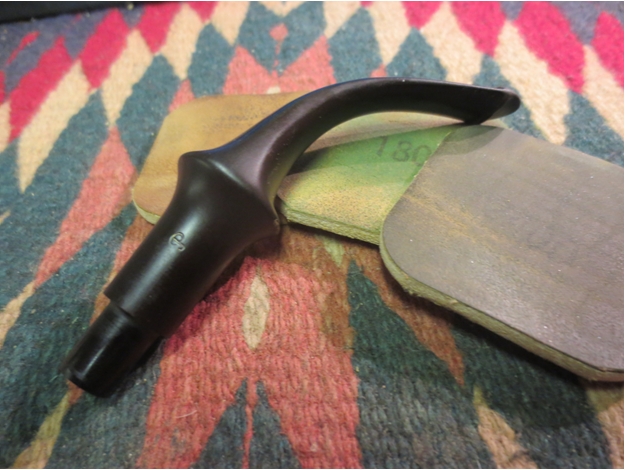
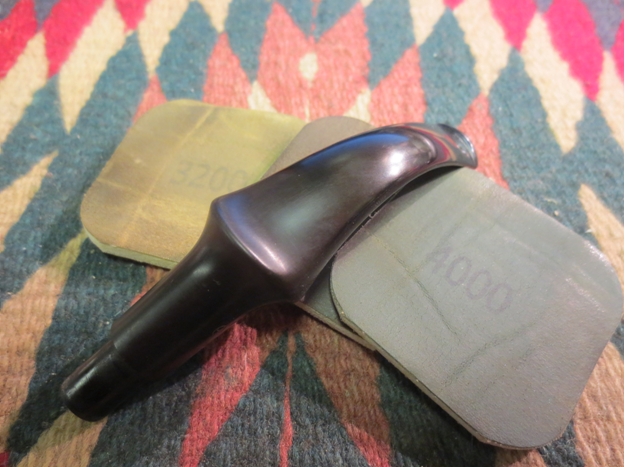
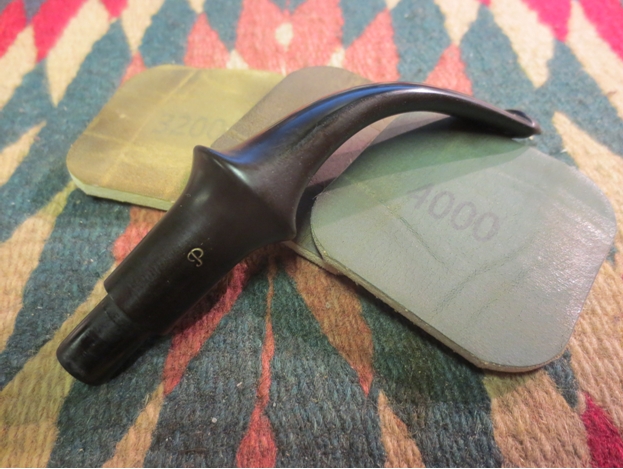
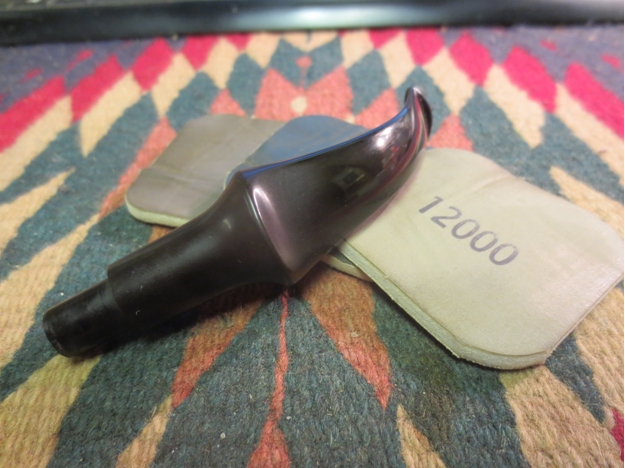
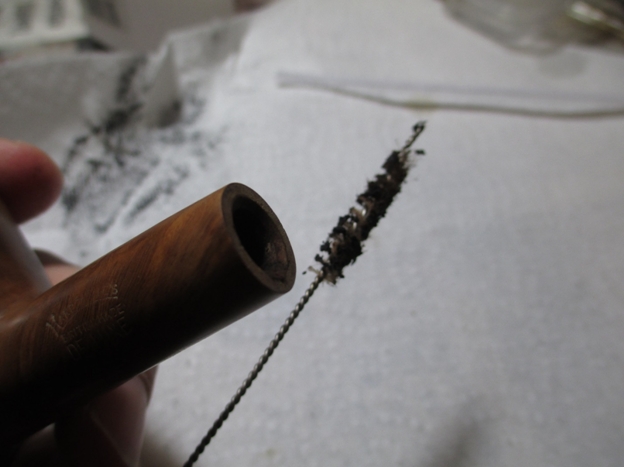
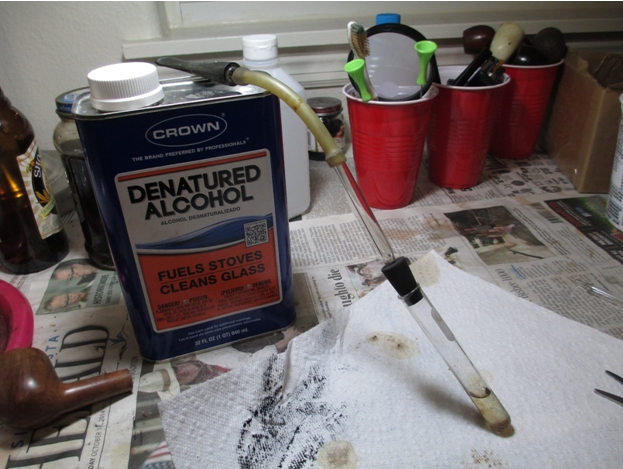
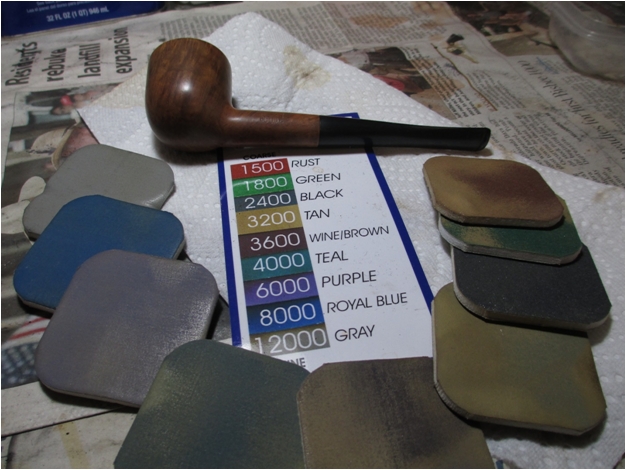
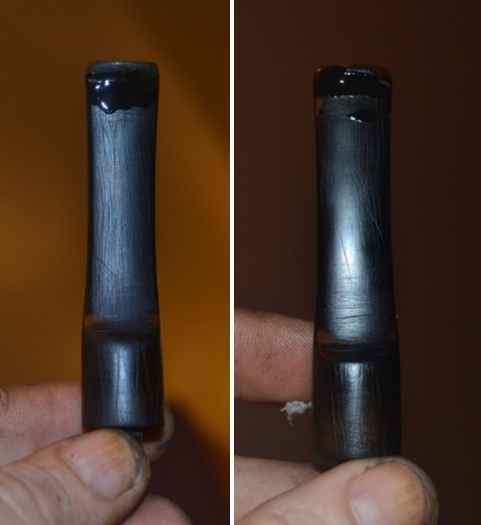
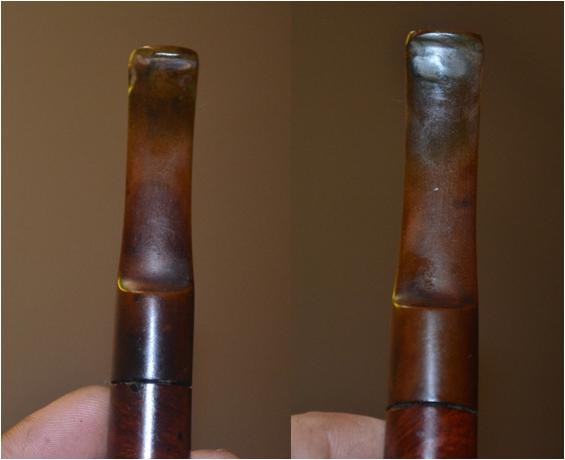
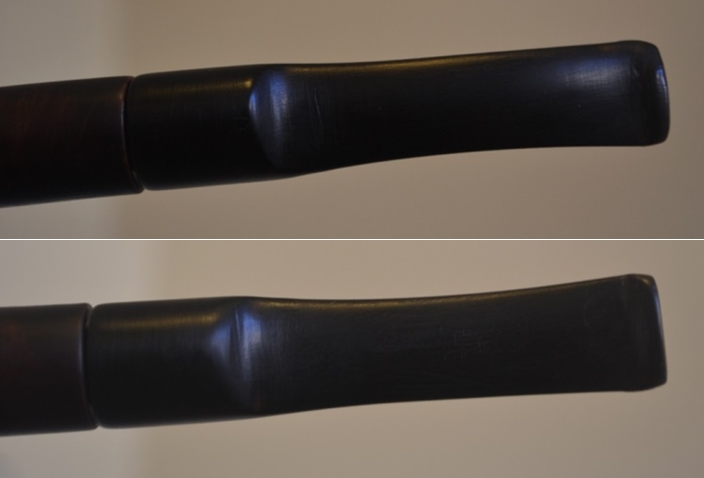
While the bowl soaked in the water I turned my attention to the stem. I find these old Comoy’s stems with the three silver bars inset in them a pain to deal with. Sanding or polishing around them causes the metal to ghost on the surface of the vulcanite. It has to be quickly wiped down with a soft towel to remove it before it penetrates the vulcanite surface. I sanded the stem with micromesh sanding pads – wet sanding with 1500-2400 grit pads and rubbing it down with Obsidian Oil. I dry sanded with 3200-12,000 grit pads again rubbing down the stem with the oil between each group of three pads. I have found that sanding a freshly oiled stem gives teeth to the micromesh and it gives a deeper shine in the process.Beau24

Beau25

Beau26 
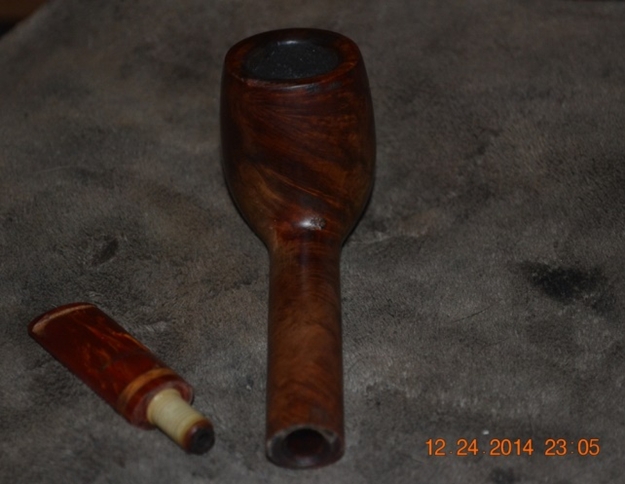
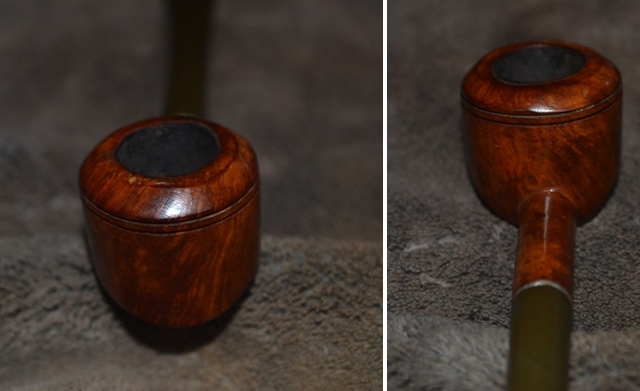
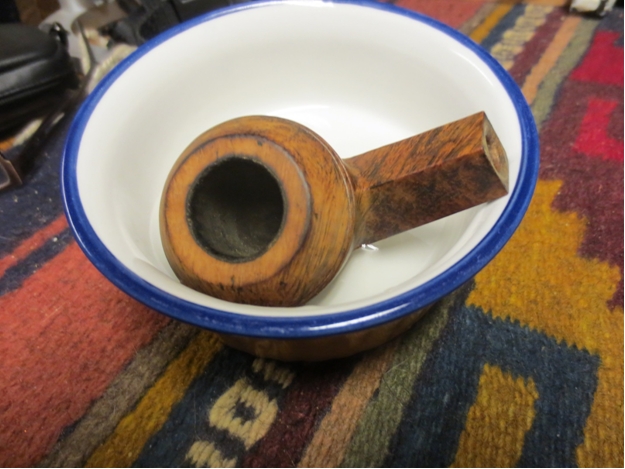
The bowl sat in the water for the entire time I worked on the stem (probably 1 ½ hours). Once I finished the stem with the micromesh I heated the knife and used it and the wet cloth to once again steam the dents. I was able to significantly lift the majority of them this way. The photos below show the pipe after the steaming. The rim dents are all gone. The majority of the ones on the side and bottom are either gone or significantly shallower. The steam on the briar brought out some nice reds in the grain of the briar. I used a soft cloth with a few drops of olive oil to wipe down the bowl and shank after the steaming.Beau27

Beau28

Beau29

Beau30 
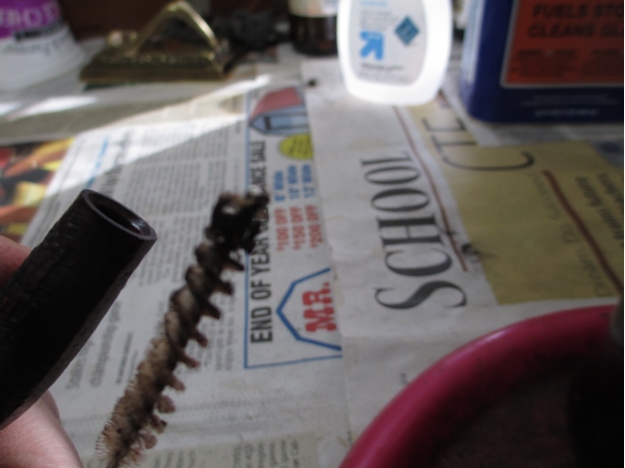
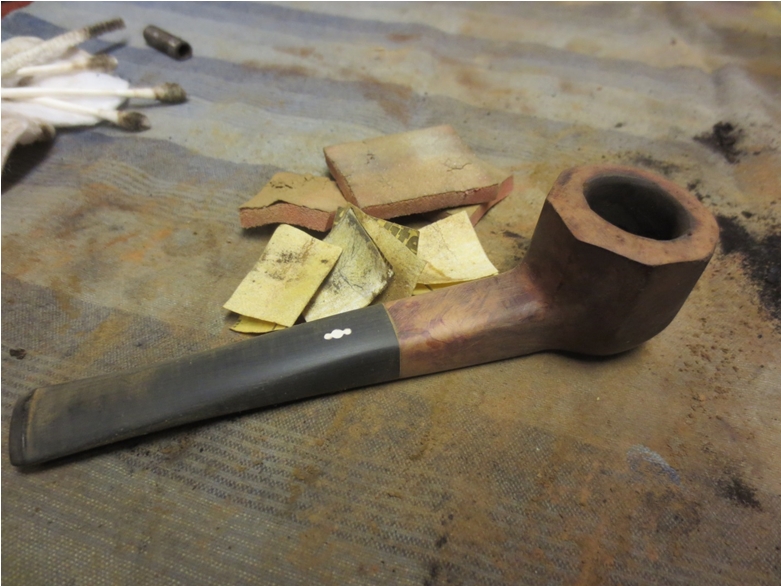
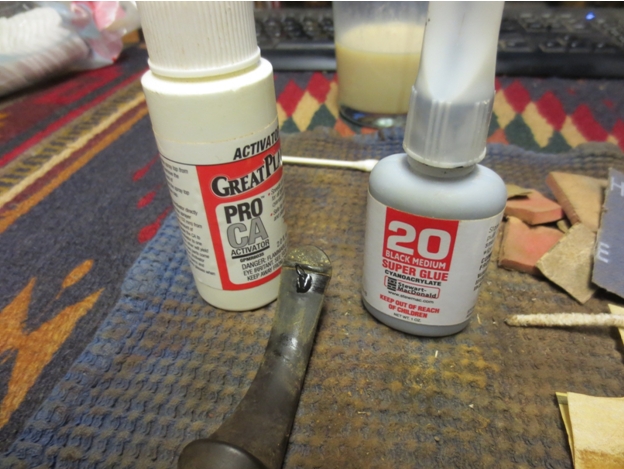
I decided to address the remaining dents with briar dust and clear super glue fills. I sanded the surface of the bowl around the dents. I wiped it down with alcohol on a cotton pad to clean the surface of dust. I packed briar dust into the dents and put a drop of super glue on each repaired area.Beau31

Beau32 
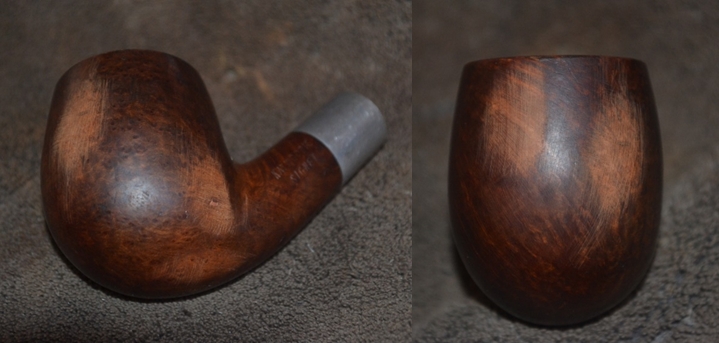
I sanded the patches with 220 grit sandpaper, medium and fine grit sanding sponges to blend the repairs into the briar and to remove the excess glue and briar dust. The next two photos show the bowl after I had sanded the repairs smooth. They appear as dark spots on the bowl but they are smooth to touch. The dents are all gone at this point in the process.Beau33

Beau34 
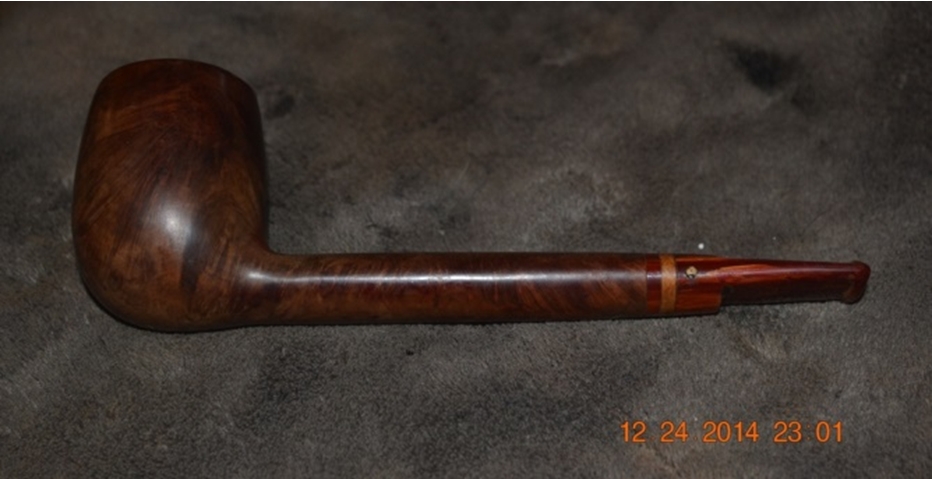
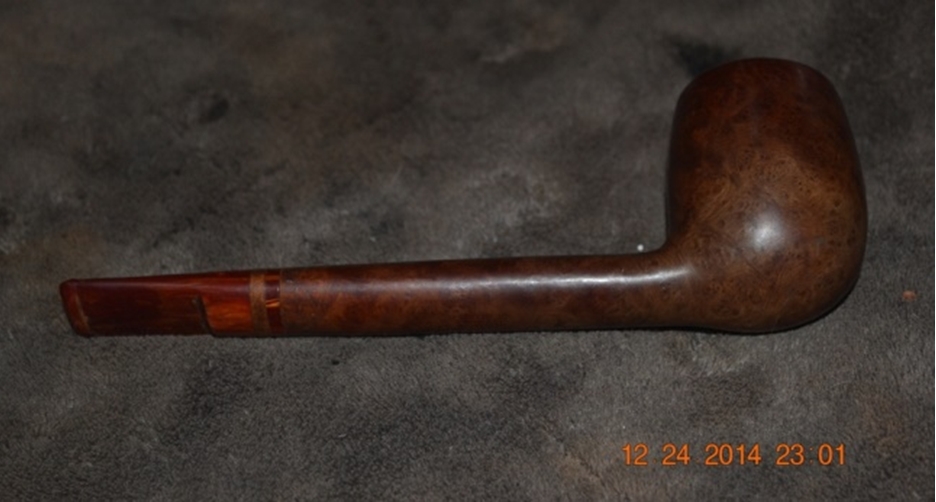
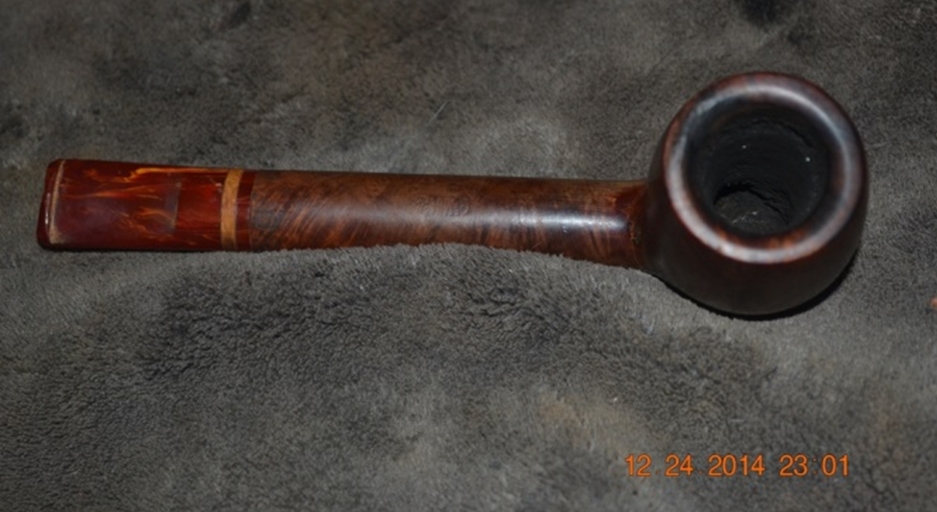
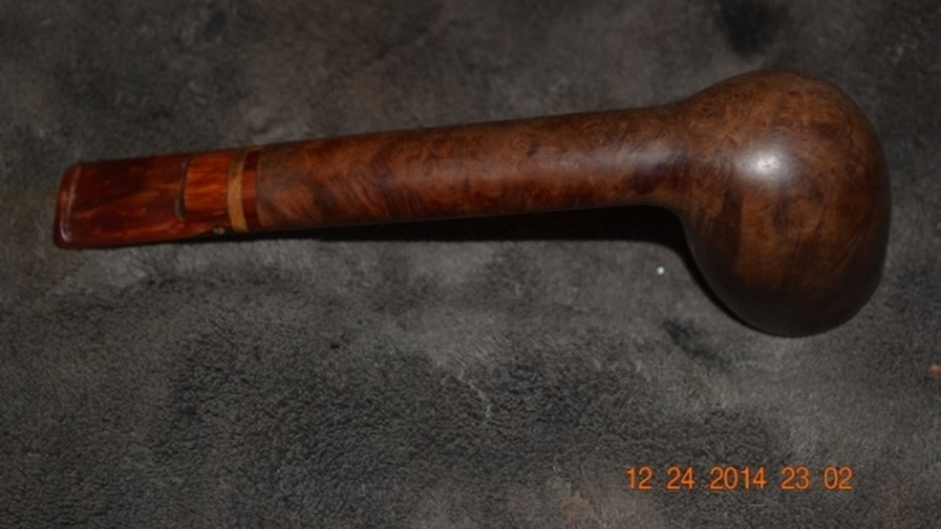
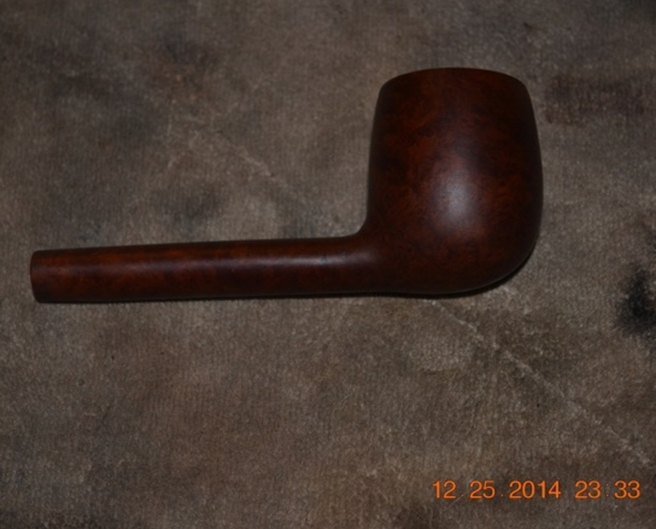
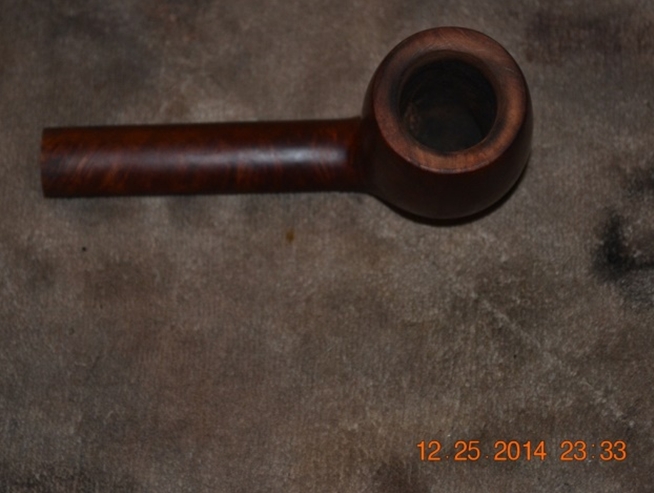
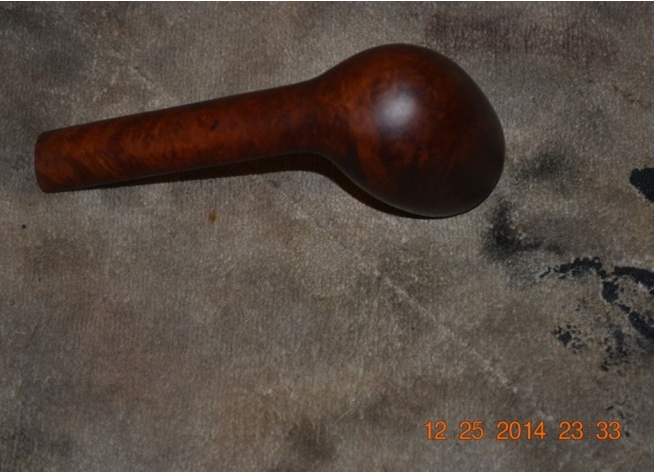
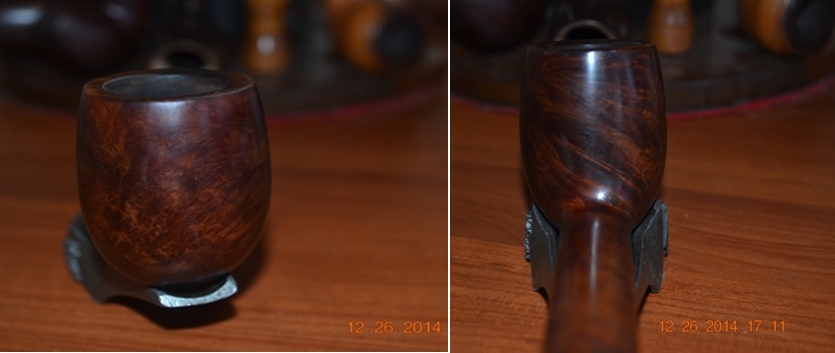
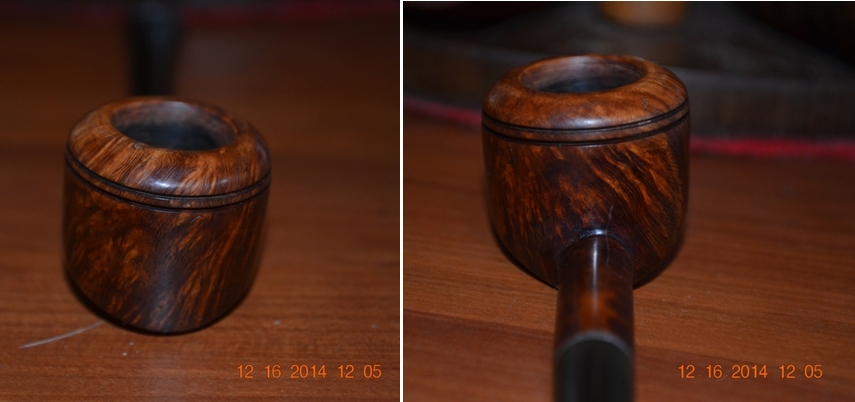
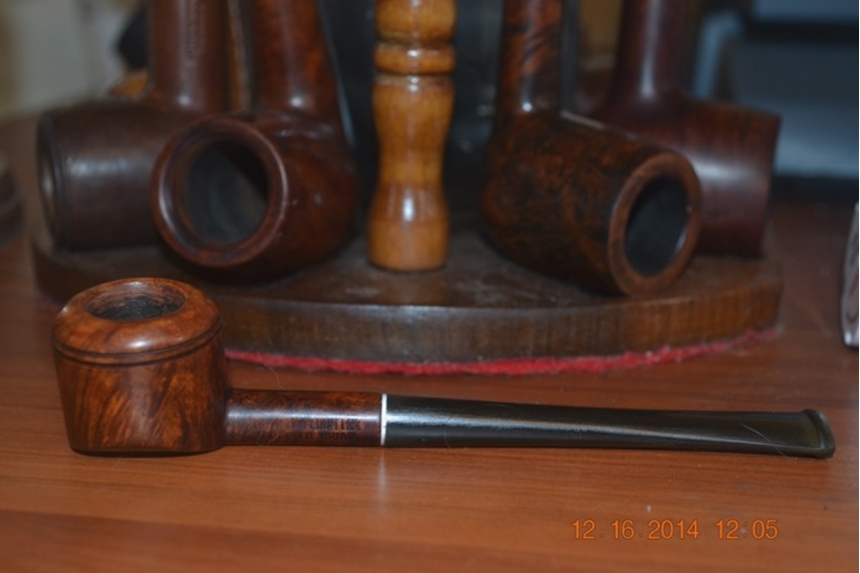
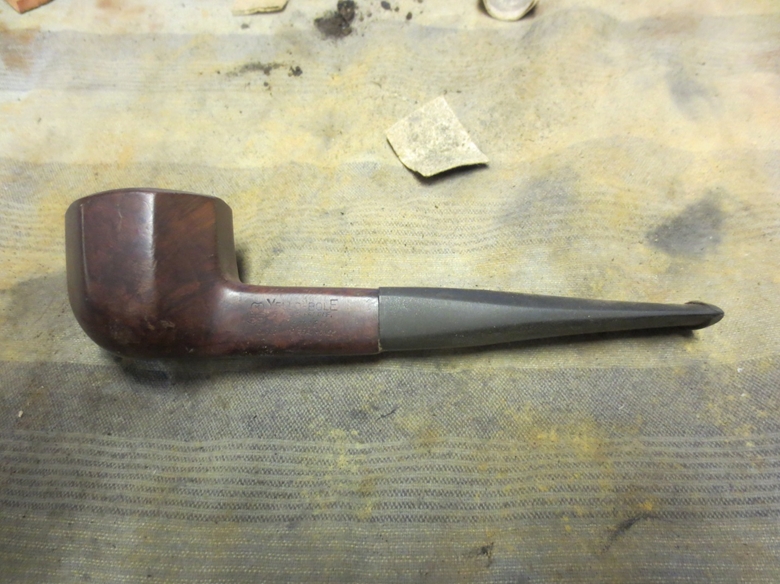
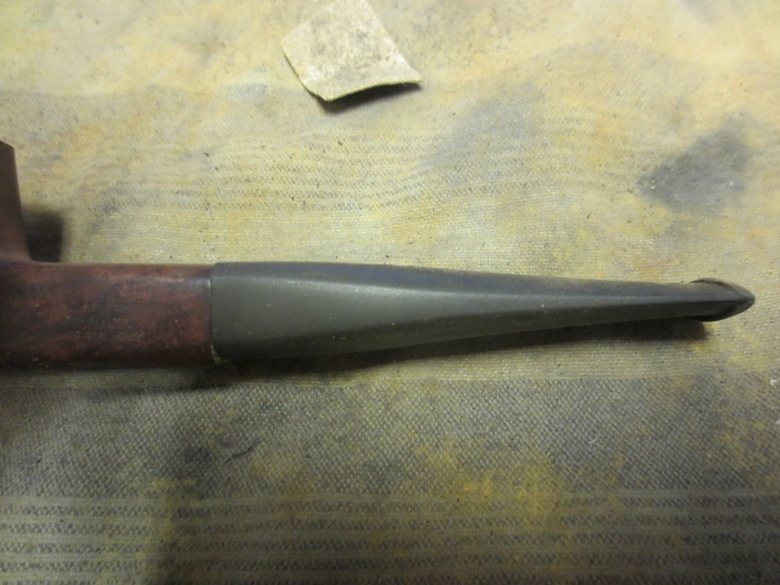
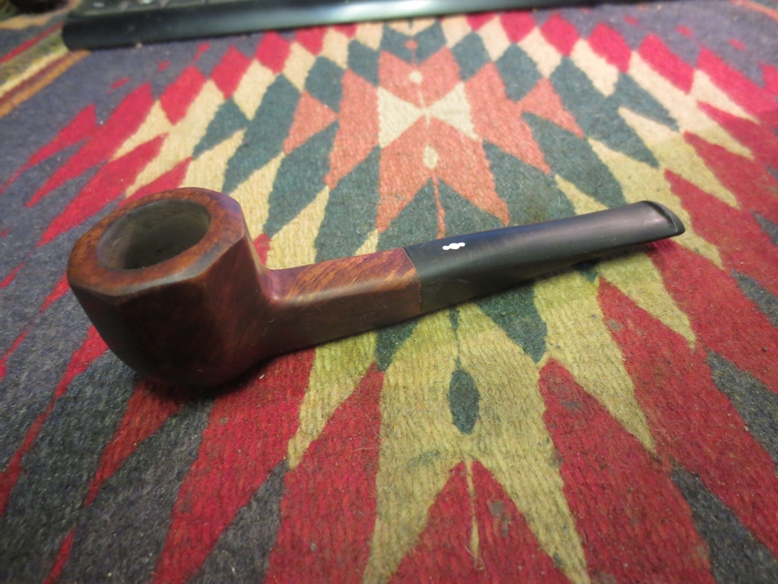
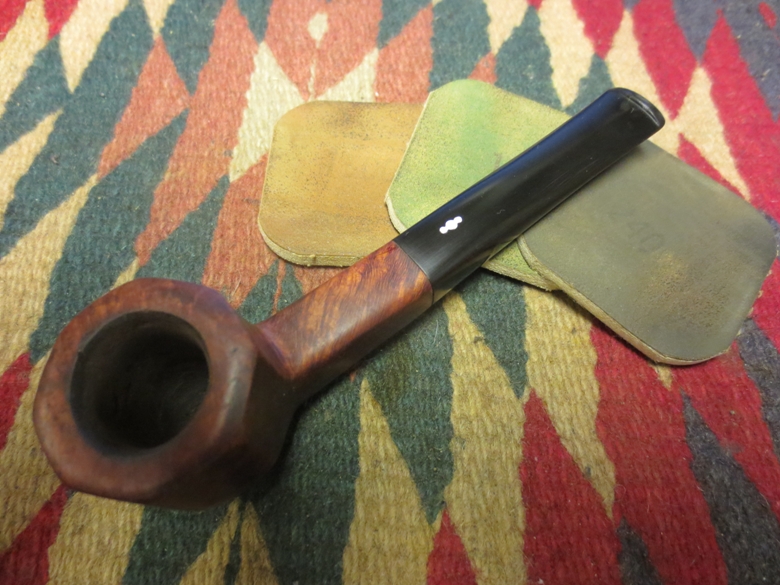
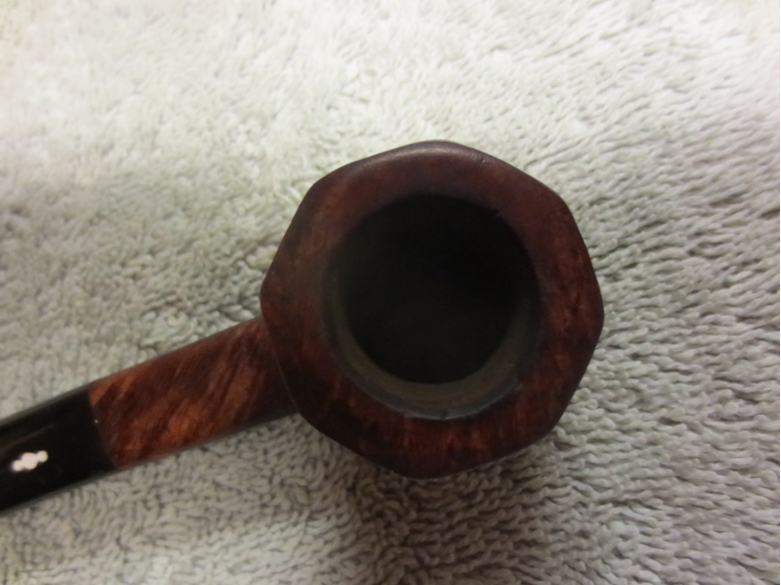
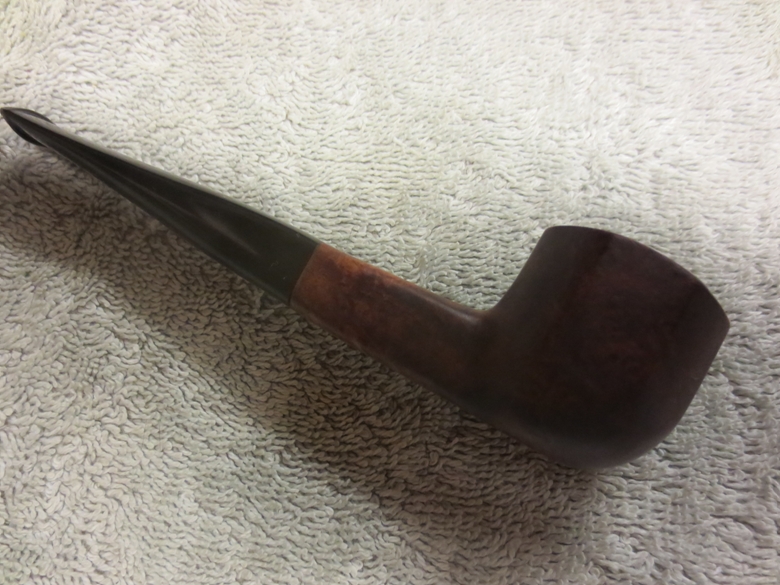
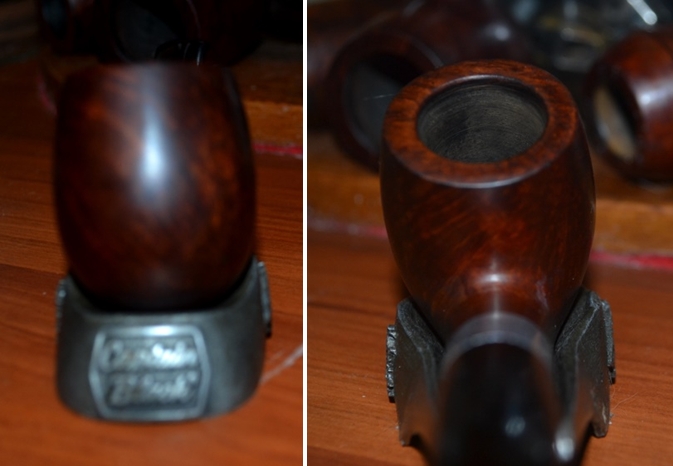
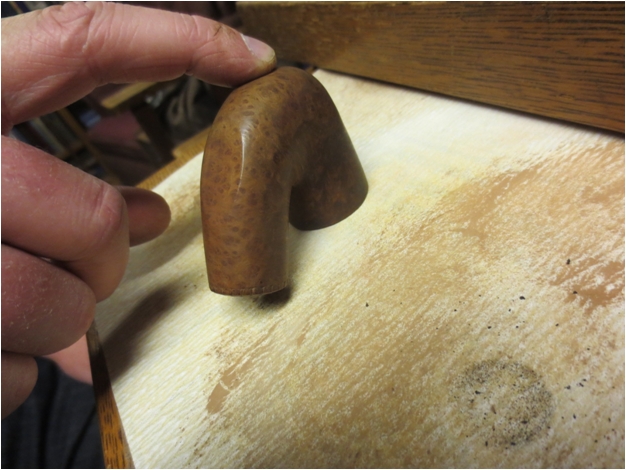
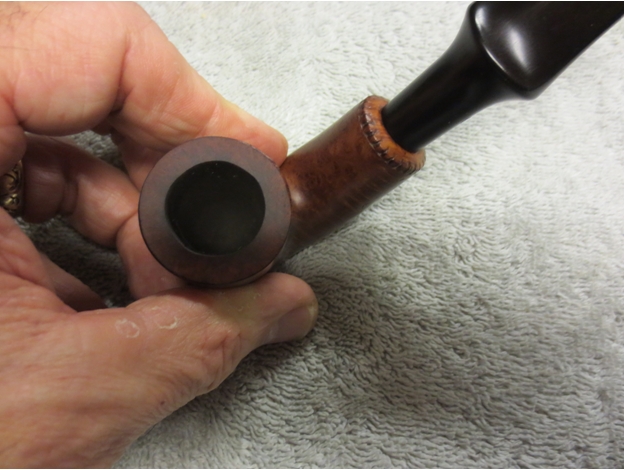
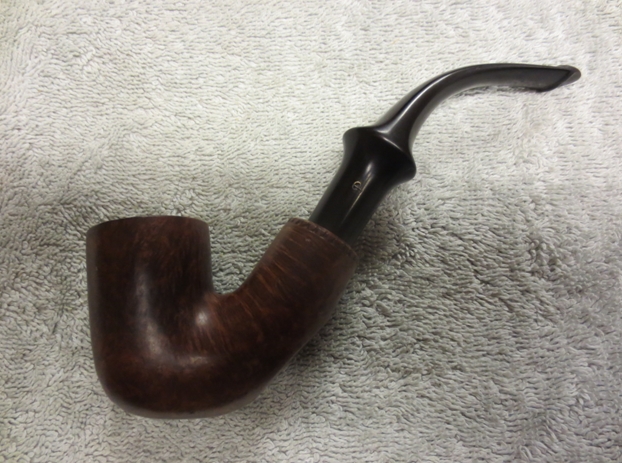
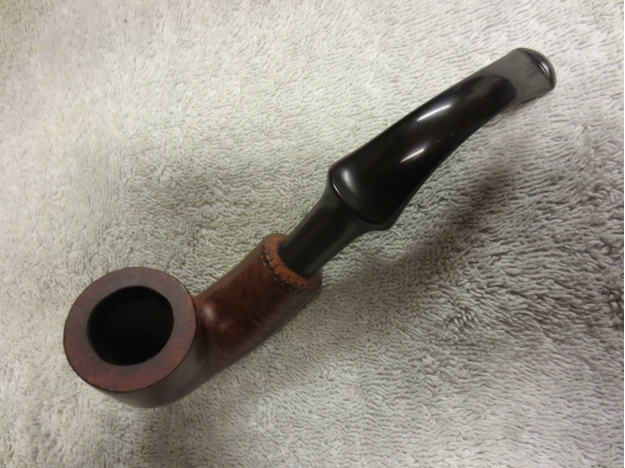
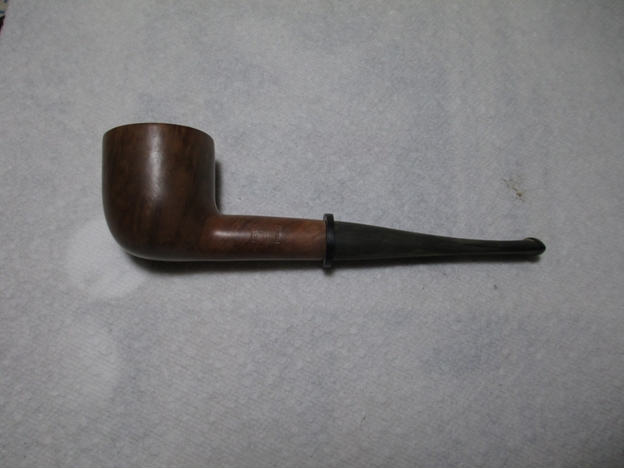
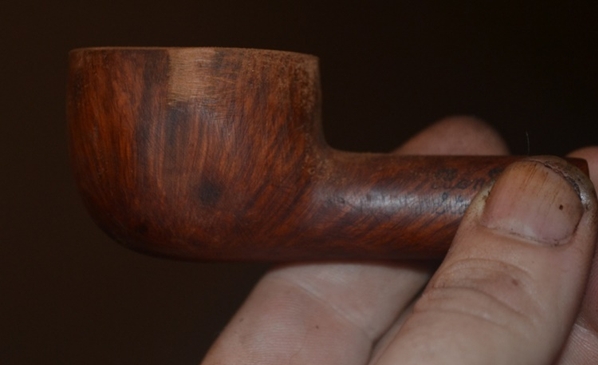
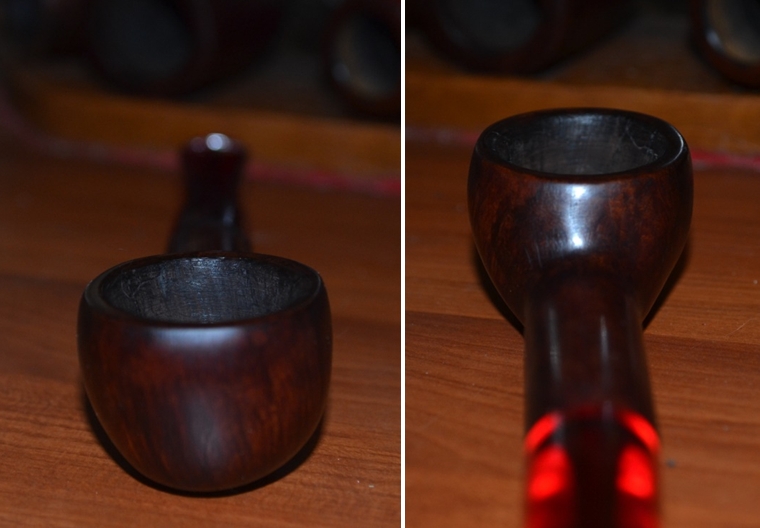
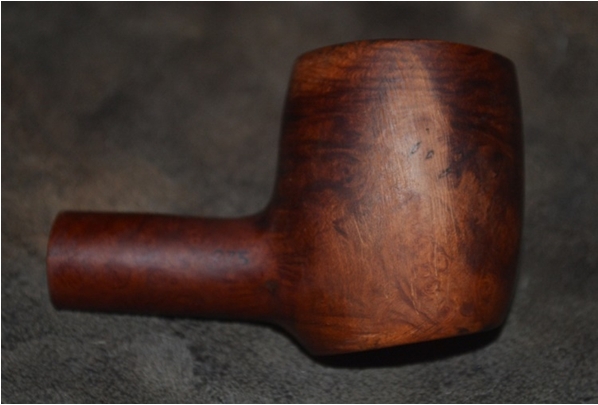
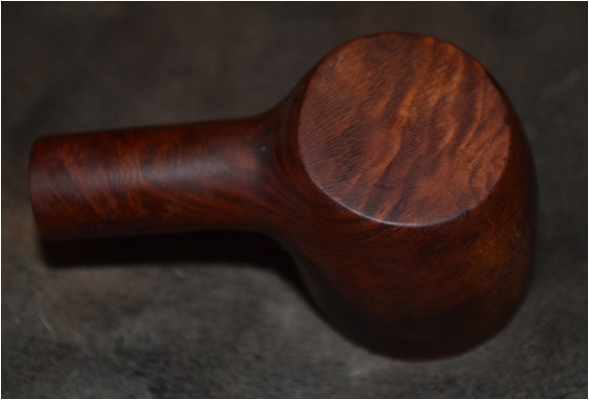
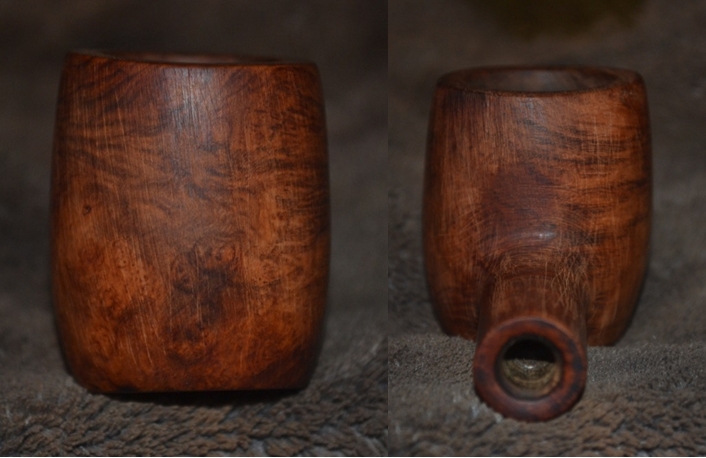
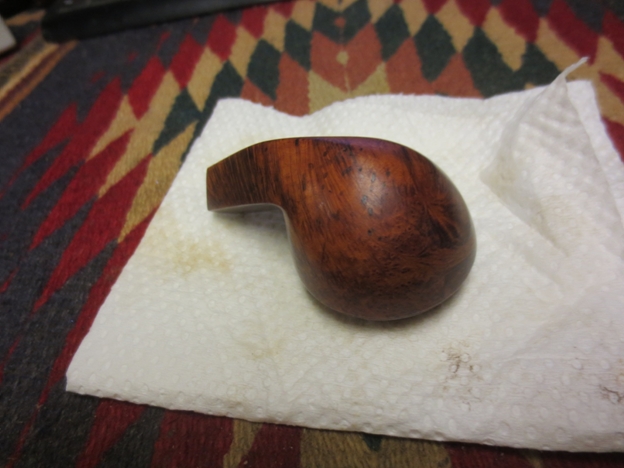
I sanded the bowl with 2400-3600 grit micromesh sanding pads to remove the scratches and prepare the bowl for staining. I wiped it down a final time with alcohol on a cotton pad. I decided to stain it with an aniline based walnut stain. Before staining it I used a dark brown stain pen to go over the areas that were repaired. Once they were covered I applied a coat of the aniline stain and flamed it. Once it was dry to touch I buffed the bowl with White Diamond to polish and even out the stain. The next series of four photos show the bowl before polishing. It is smooth in the hand. All dents have been removed or repaired.Beau35

Beau36

Beau37

Beau38 
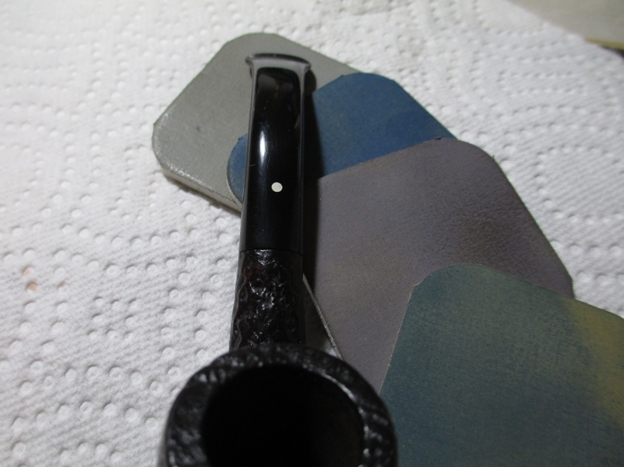
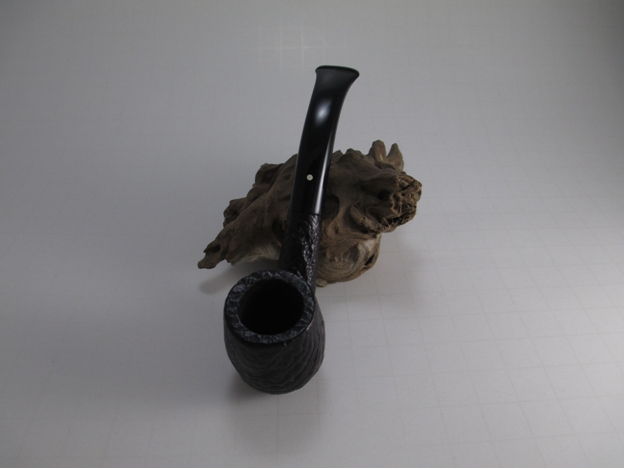
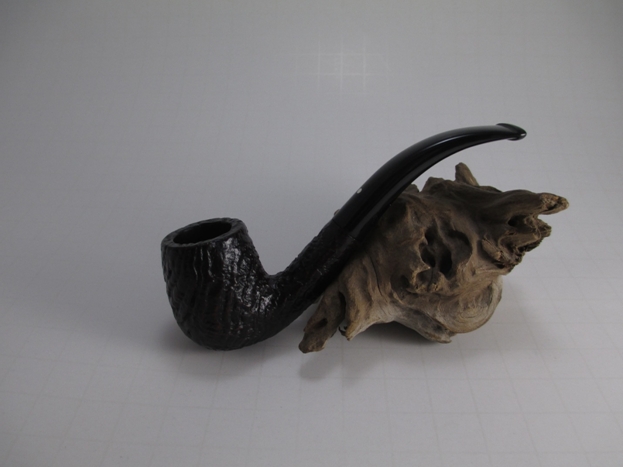
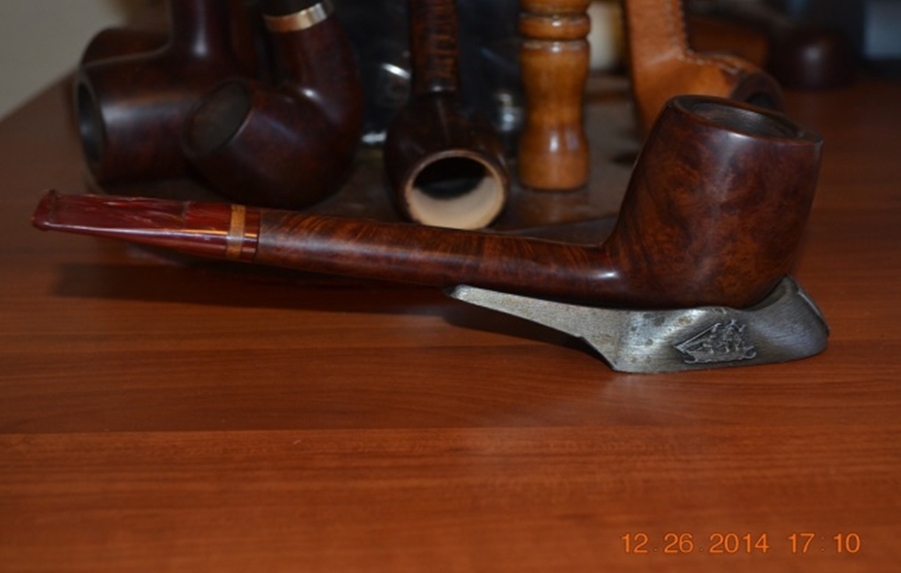
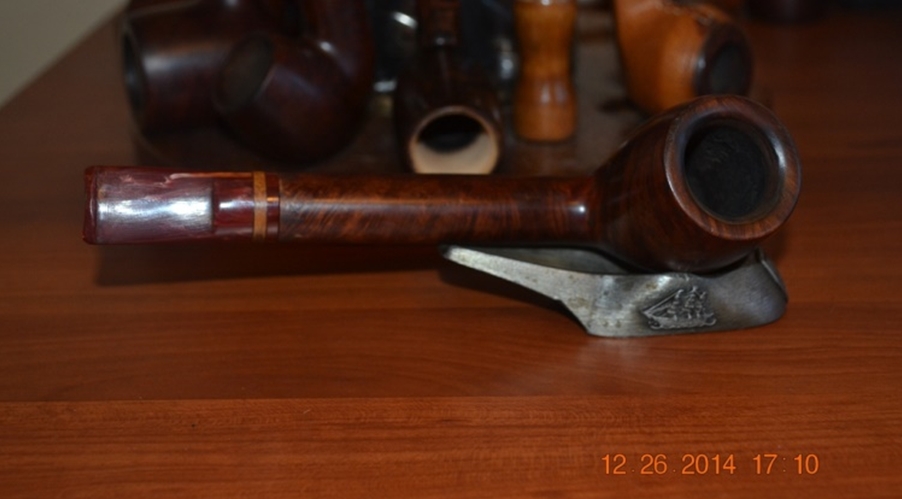
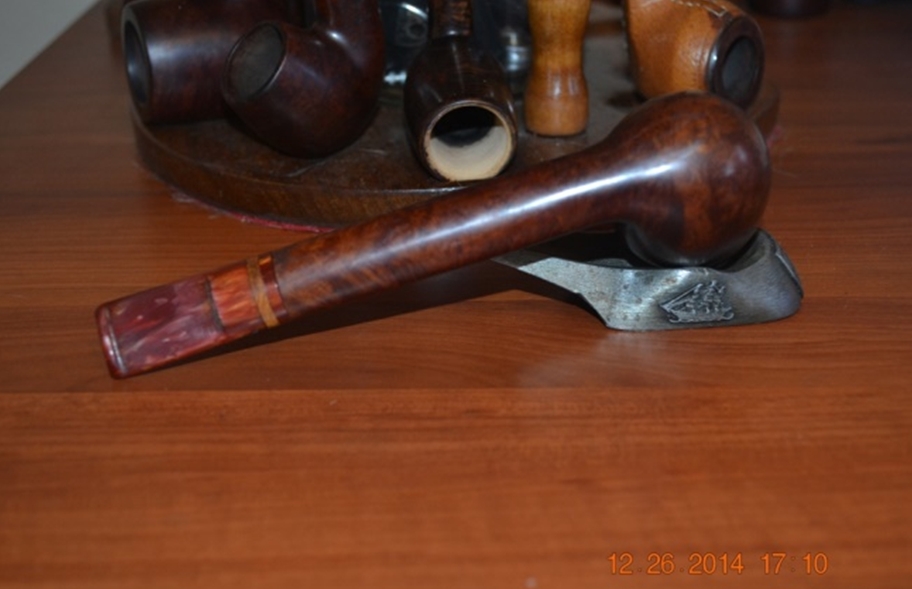
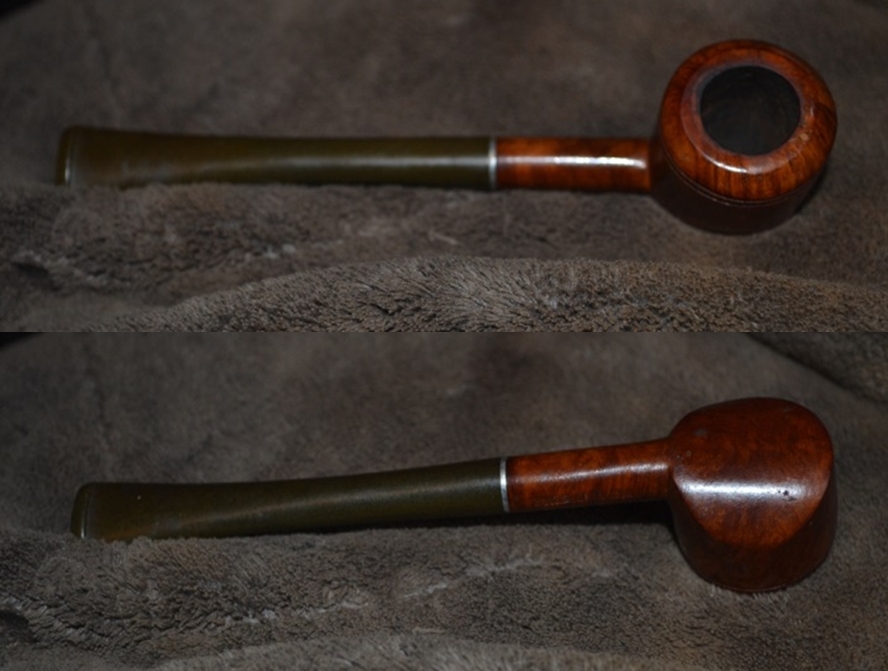
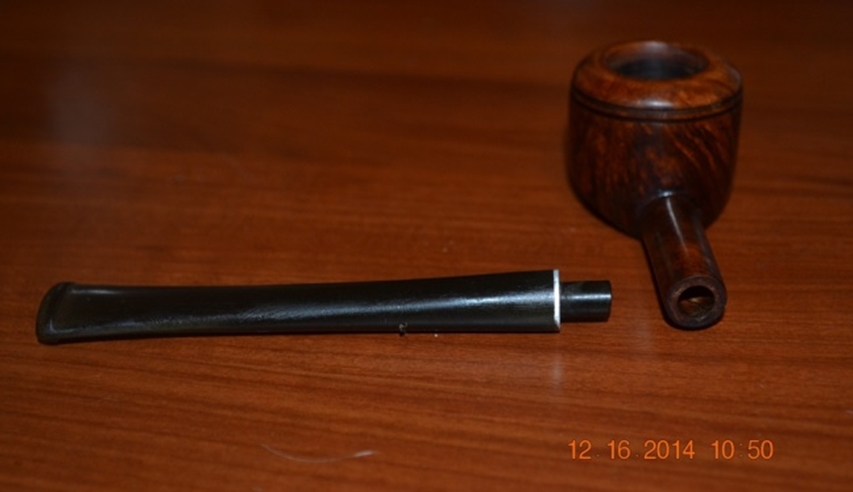
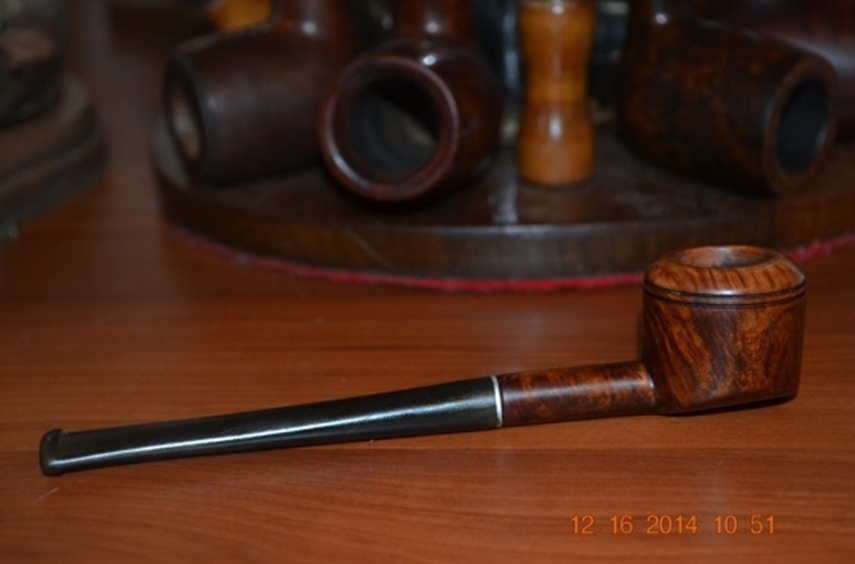
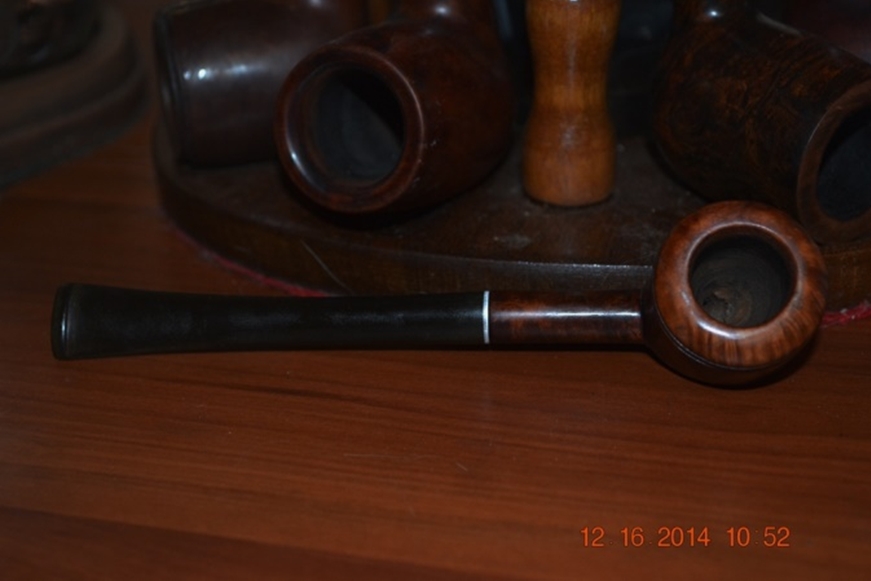
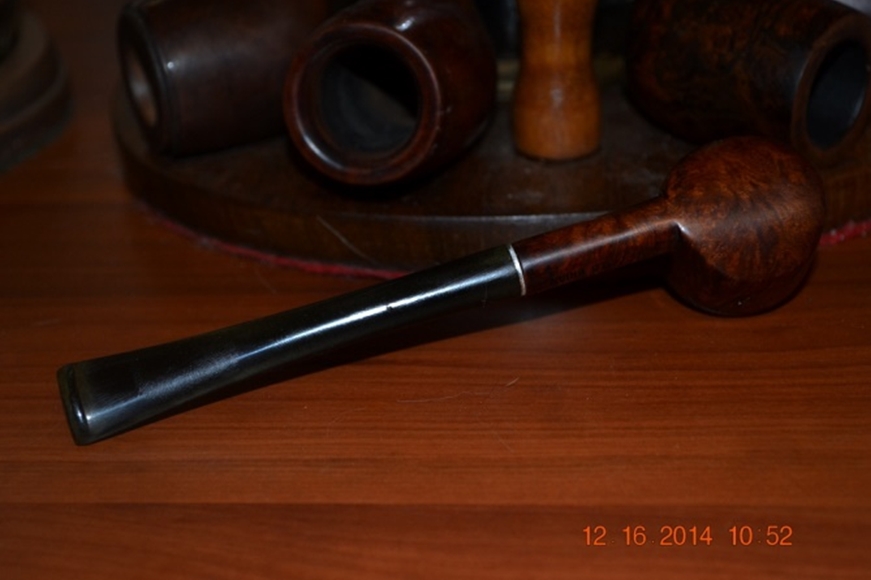
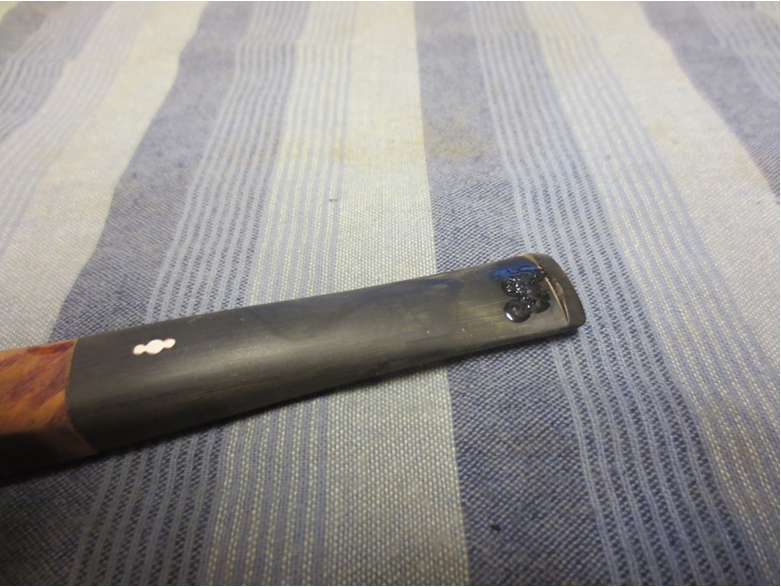
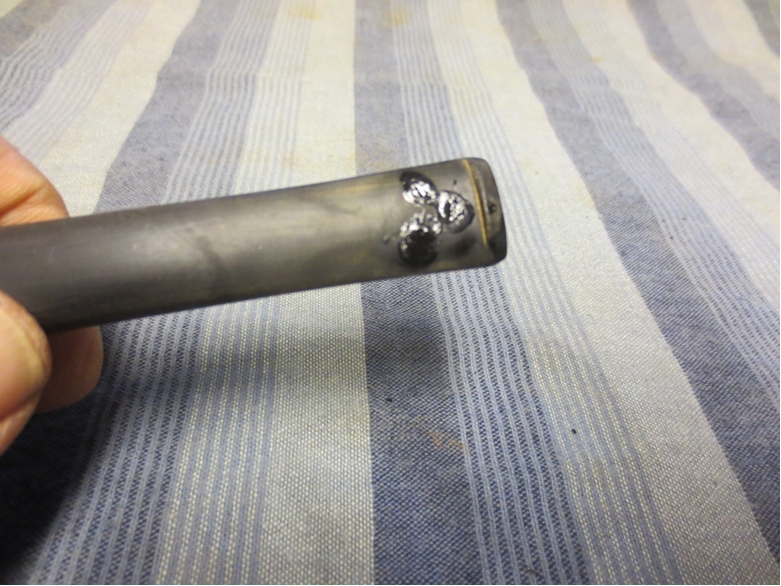
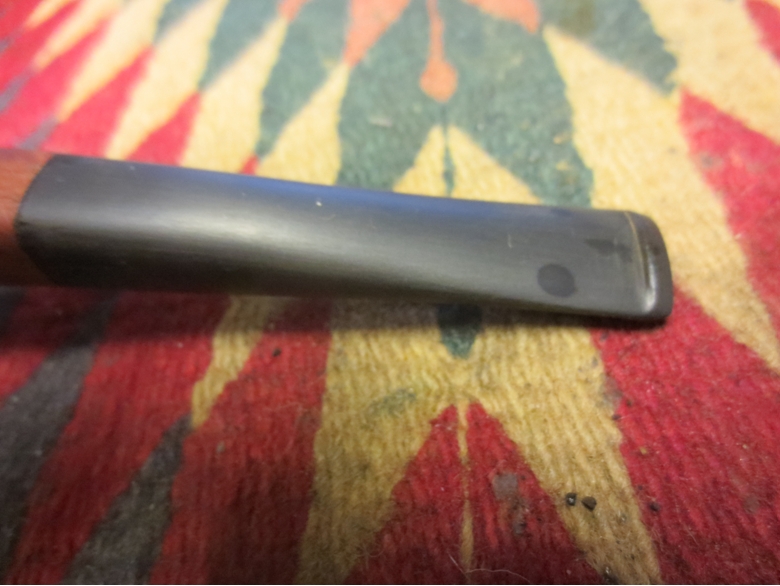
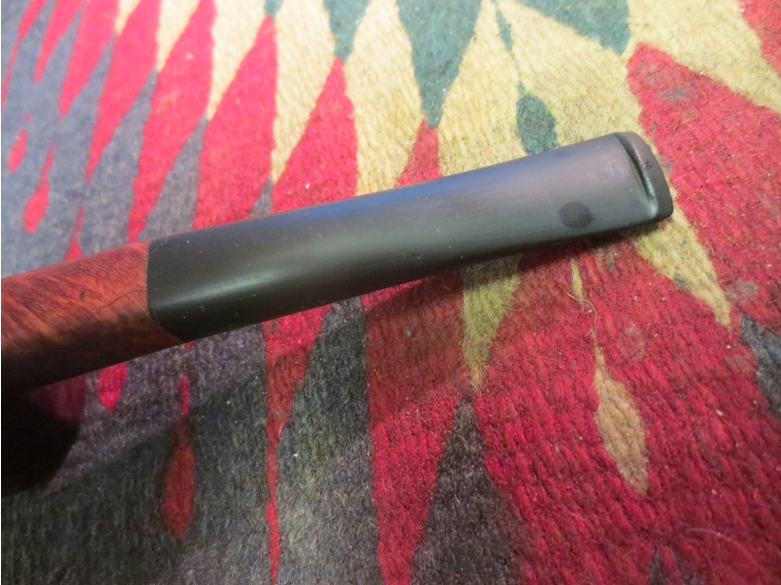
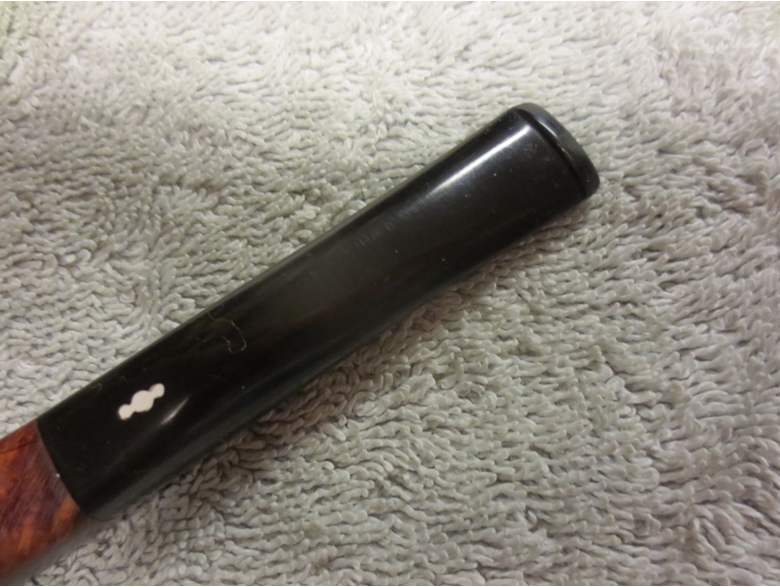
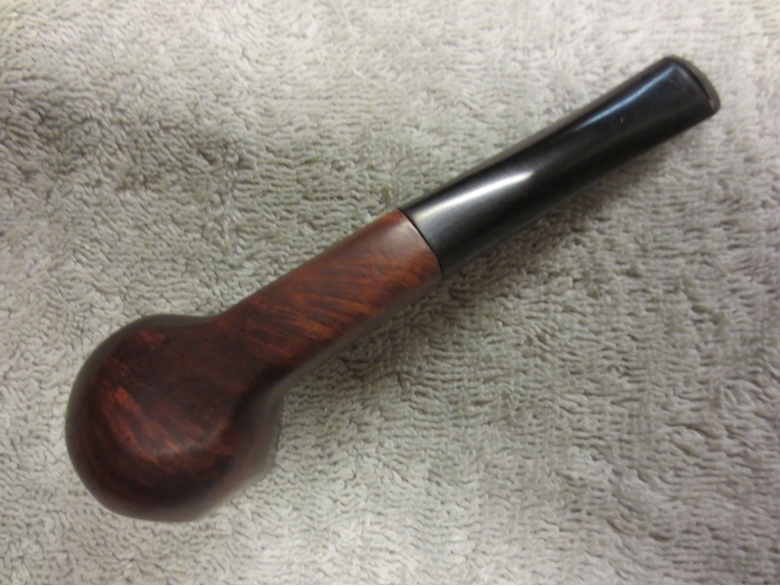
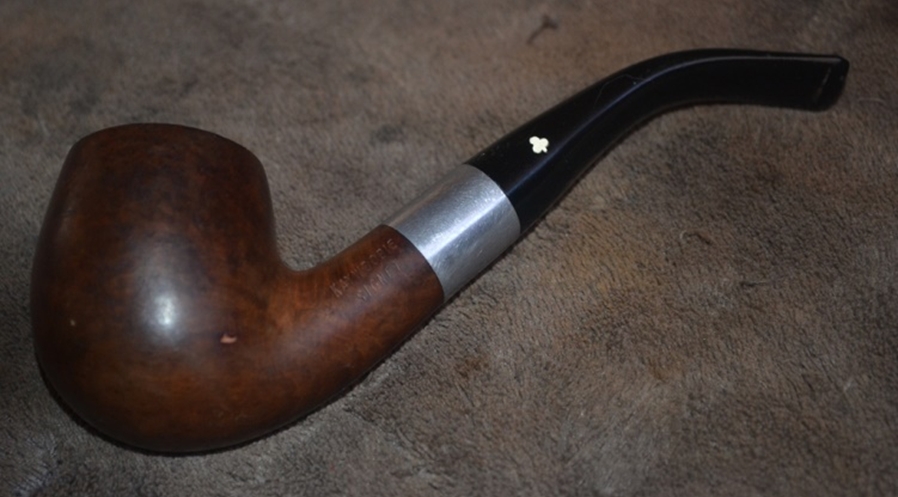
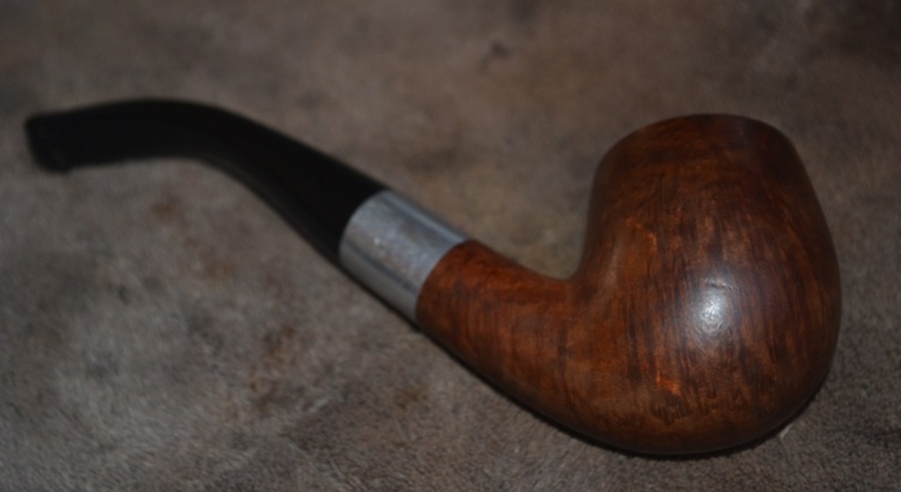
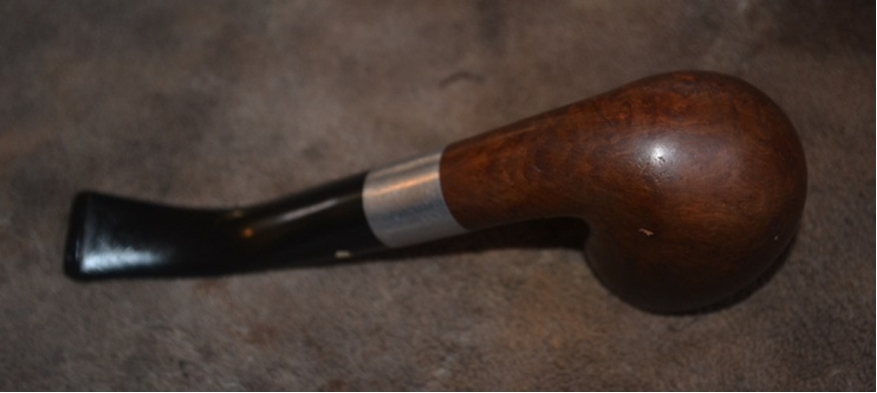
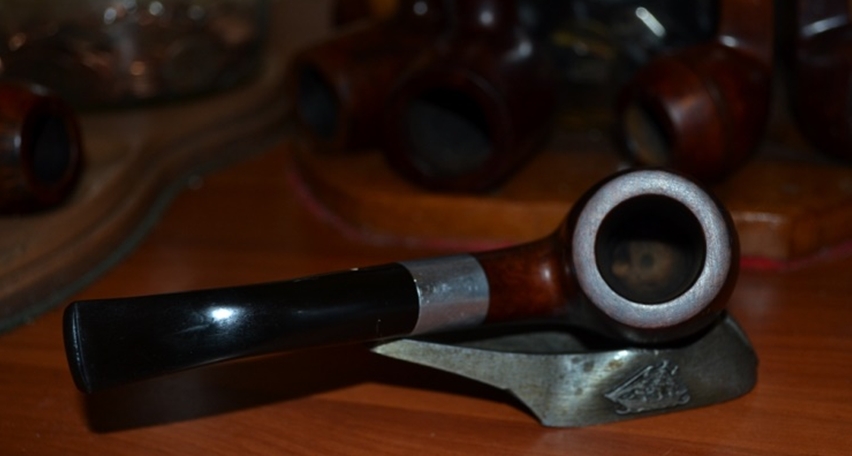
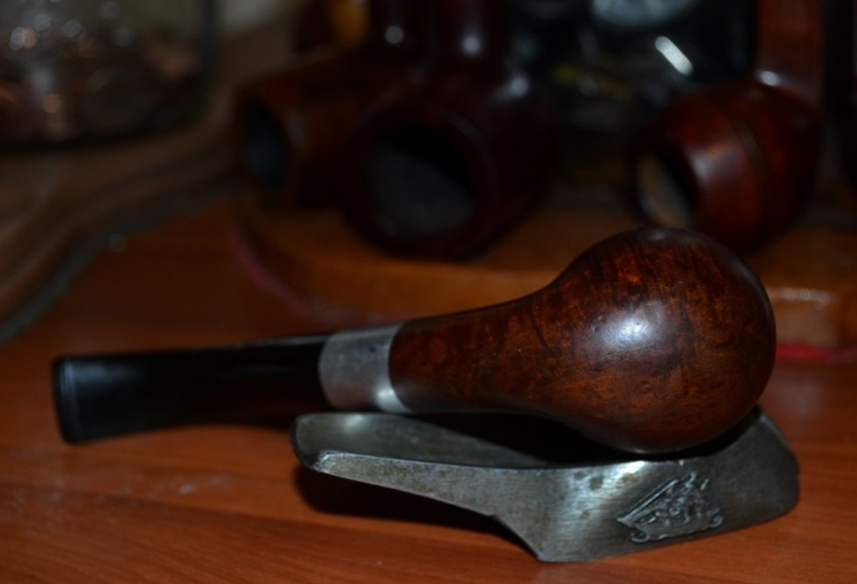
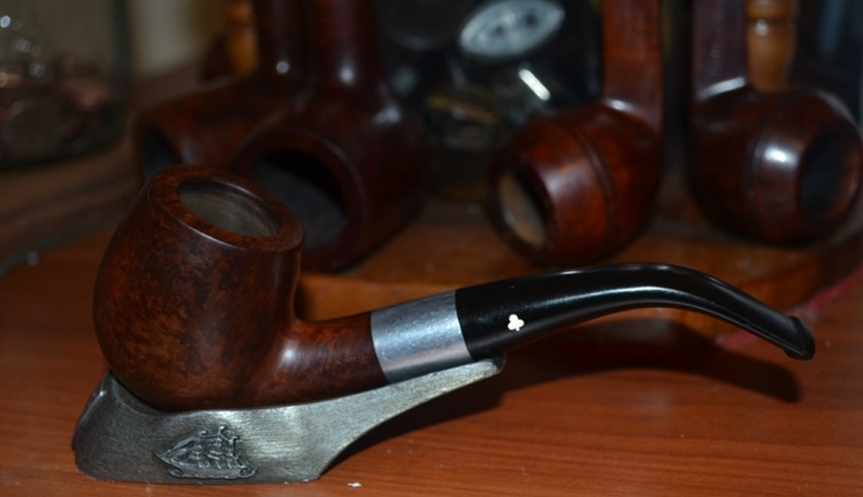
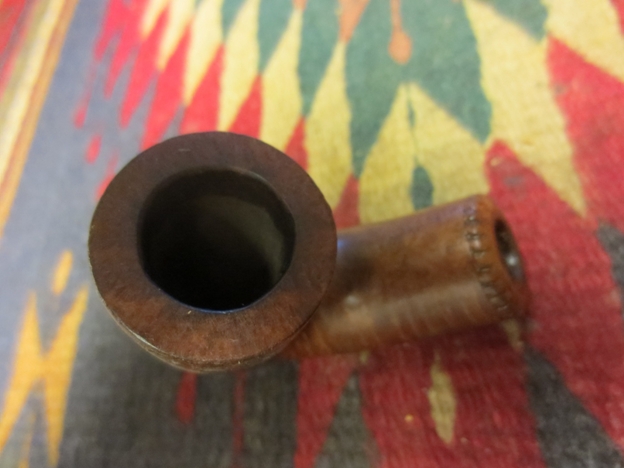
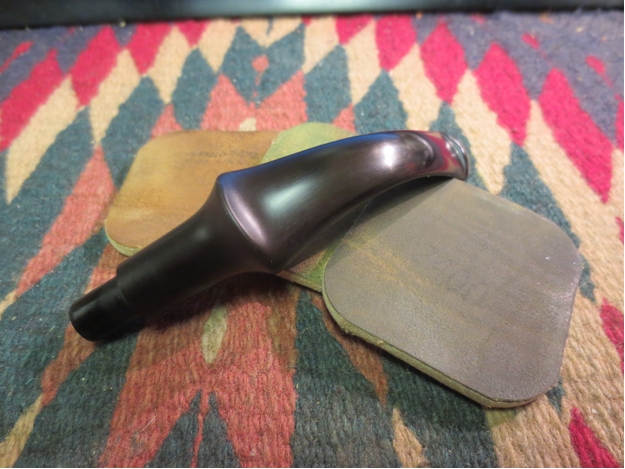
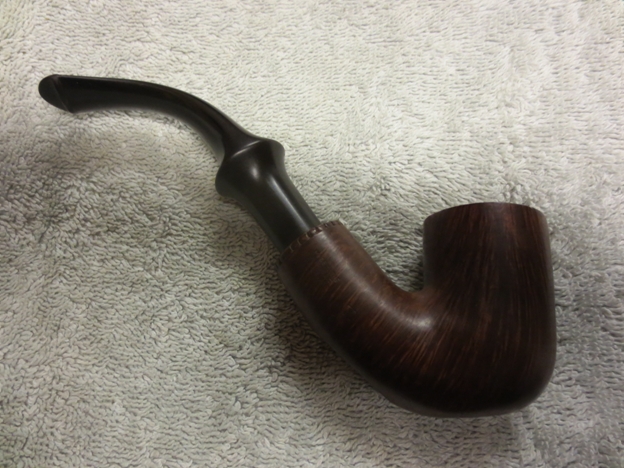
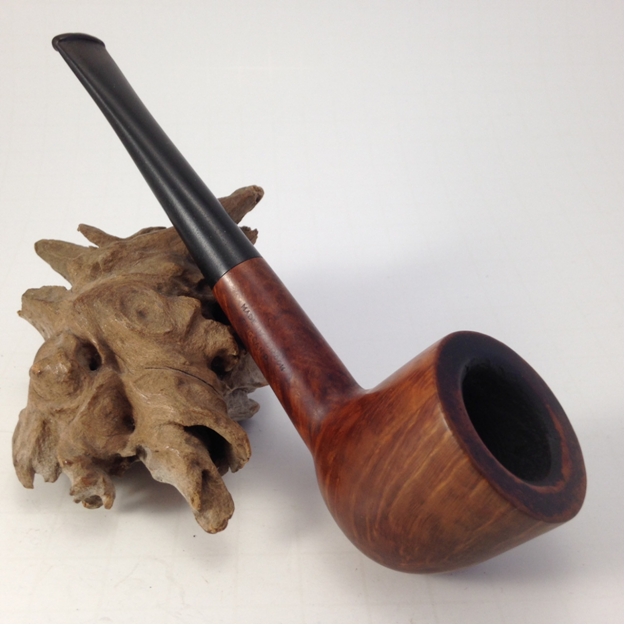
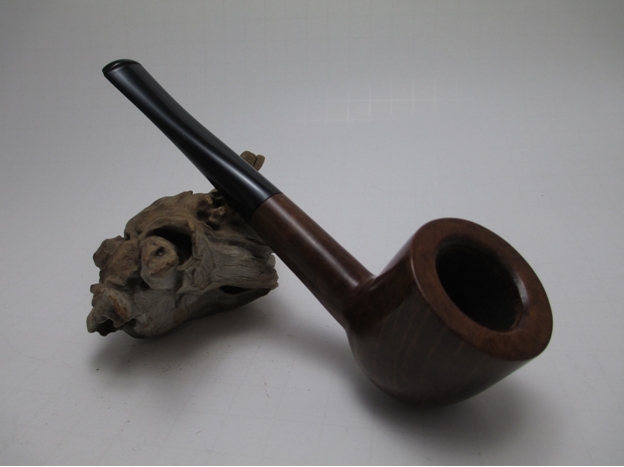
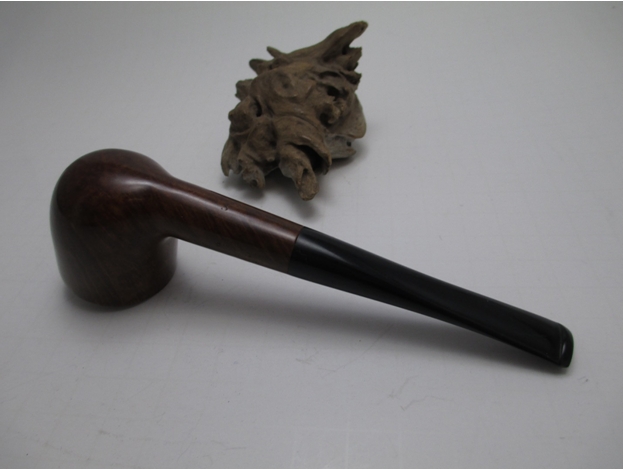
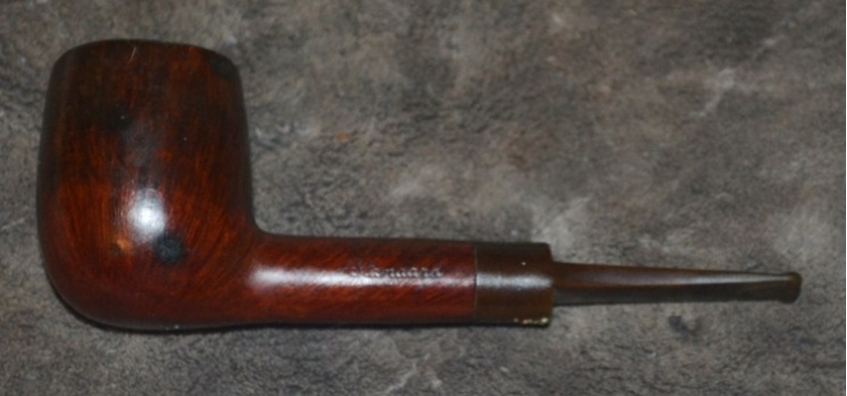
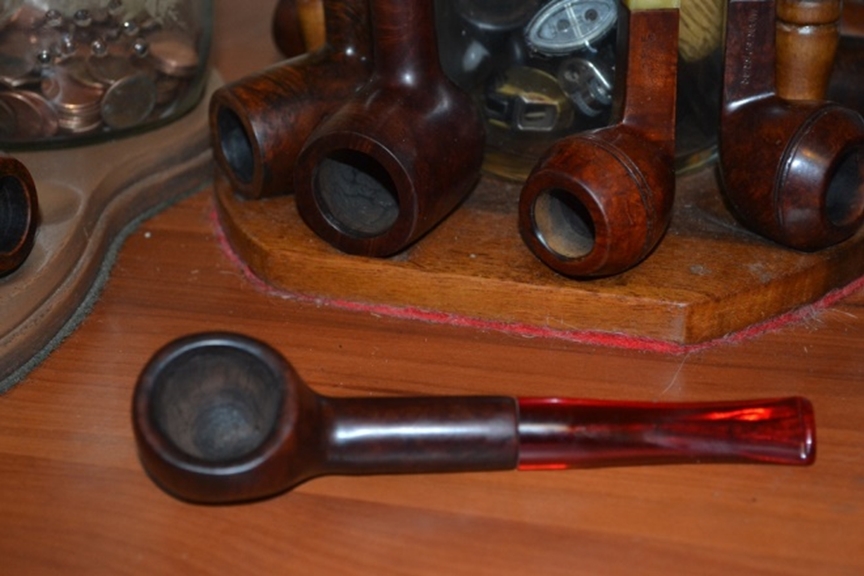
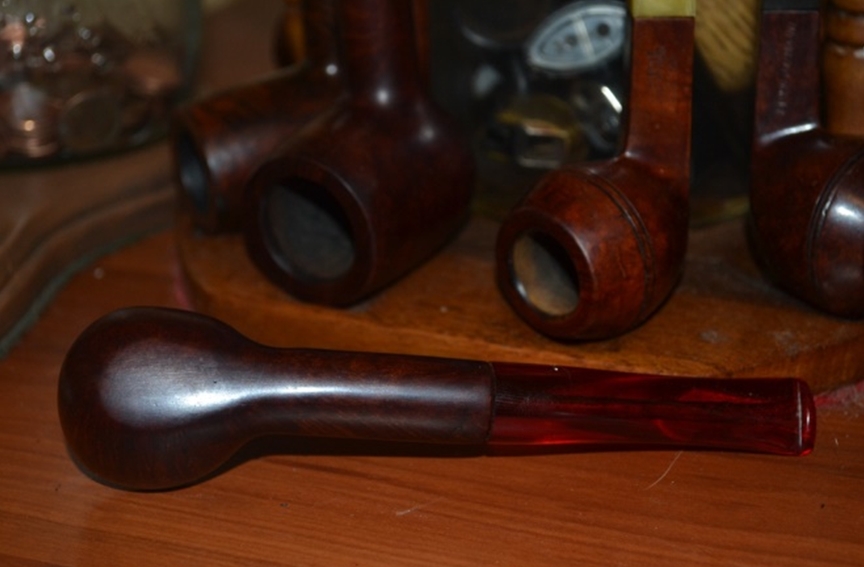
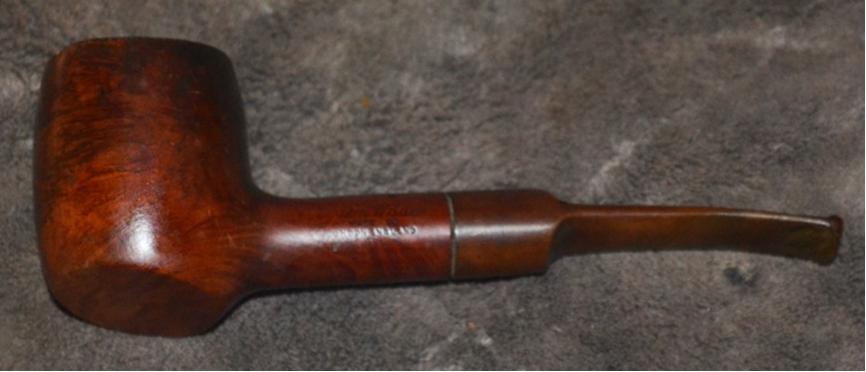
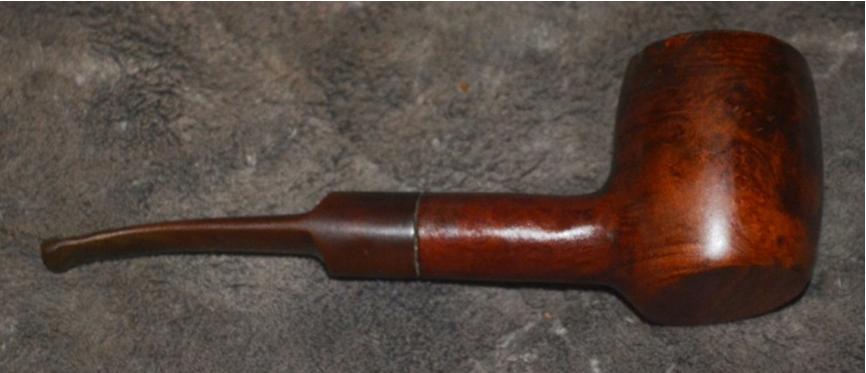
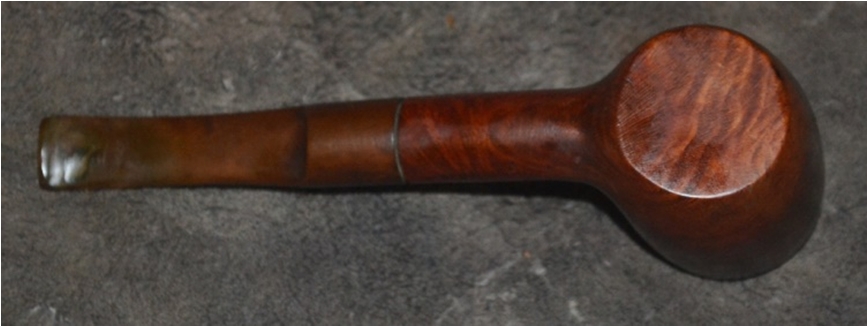
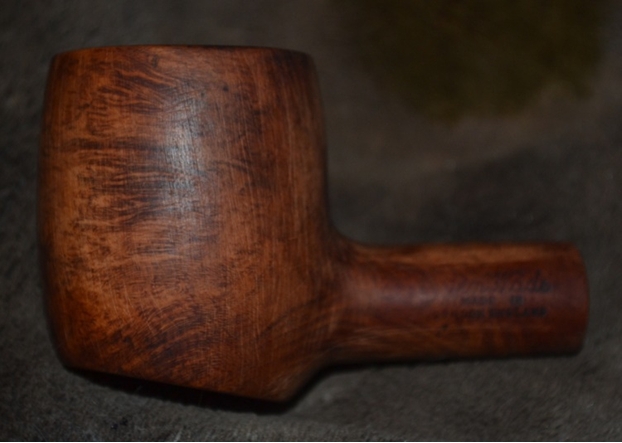
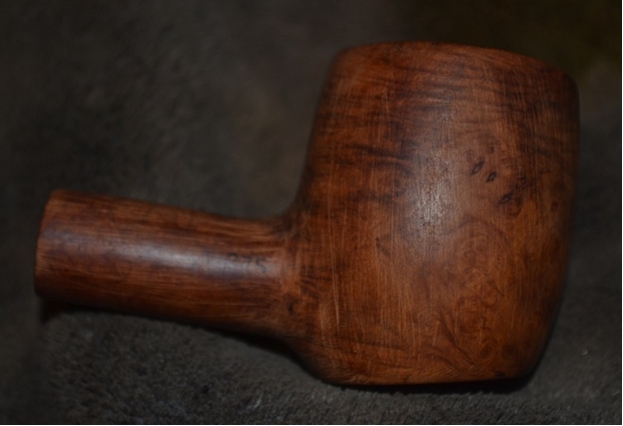
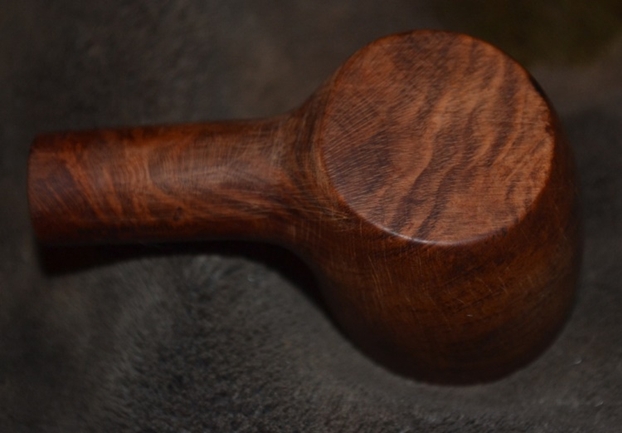
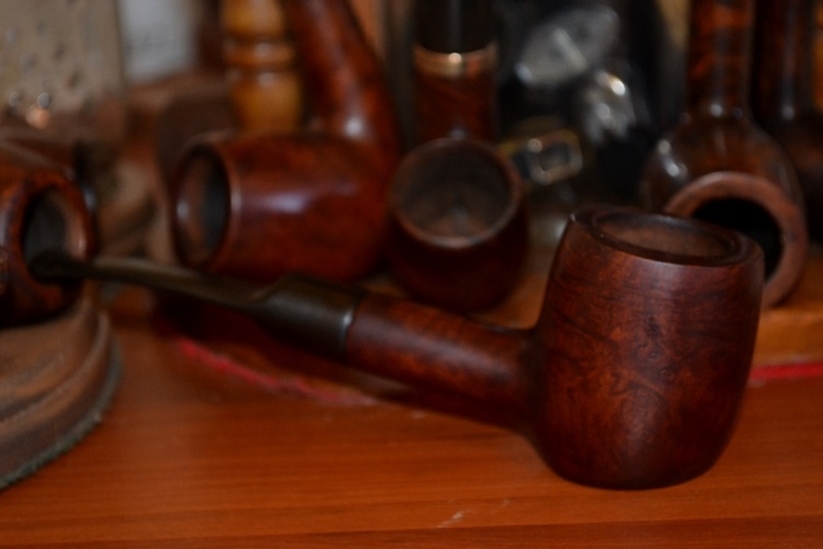
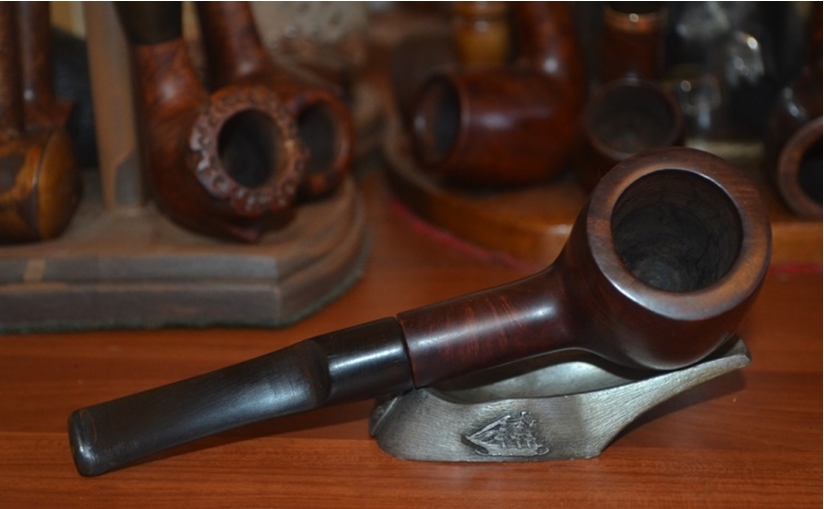
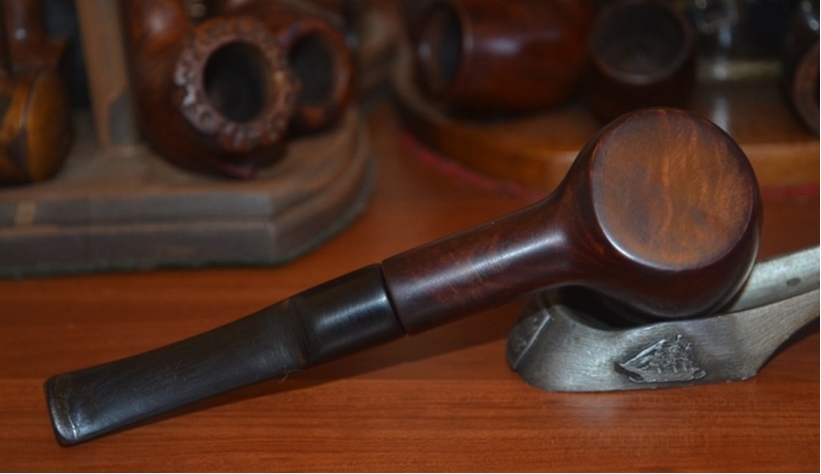
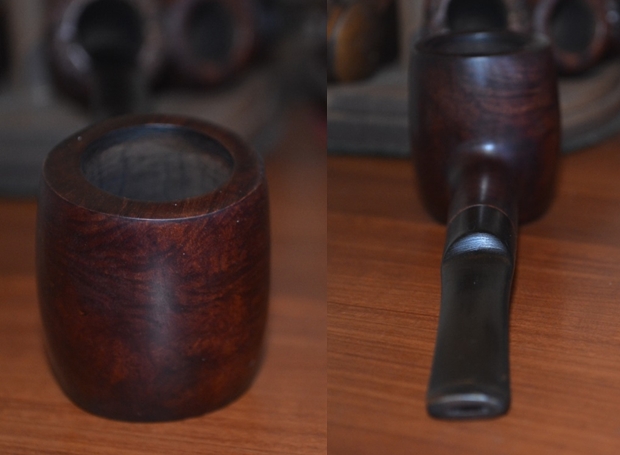
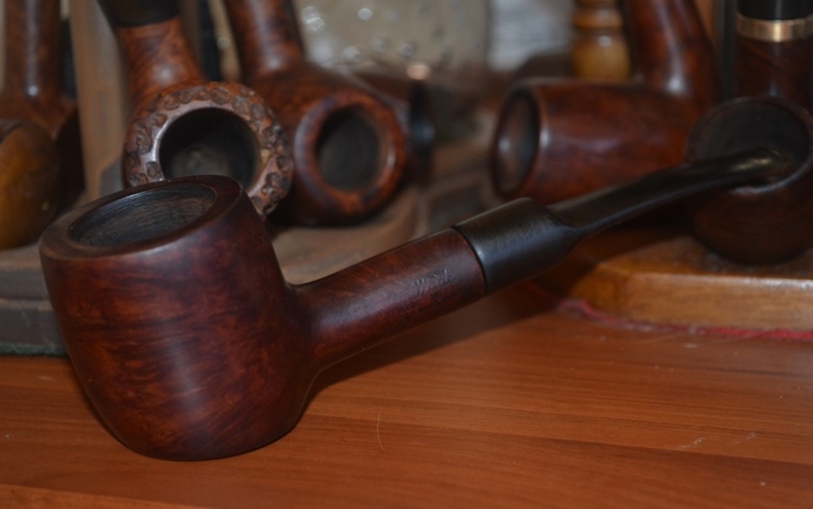
I put the stem back on the bowl and buffed it with White Diamond to raise the shine. I then gave it multiple coats of carnauba wax to protect it. I buffed it with a soft flannel buffing pad as the final touch. The finished pipe is shown below. There is still some remaining oxidation around the three bars on the left side of the stem but it has been minimized.Beau39

Beau40

Beau41

Beau42

Beau43

Beau44

Restoring a 1967 Dunhill 54 F/T Group 2


Blog by Andrew Selking

I’ve had some good luck bidding on Dunhill pipes recently. This little Group 2 came in a lot of five pipes that included four Kaywoodies. With the exception of minor wear on the front of the rim and some oxidation, it looked very nice. Here’s what it looked like prior to restoration.Andrew1

Andrew2 The pipe is so small they stamped the group size on the stem.Andrew3 I began the restoration process by soaking the stem in Oxyclean.Andrew4 While the stem soaked I reamed the bowl with the smallest head of my Castleford reamer. It had a loose cake that came out easily.Andrew5 Next I used undiluted Murphy’s Oil Soap (an all-natural vegetable oil based soap specifically formulated for cleaning wood) with a tooth brush to get the grime out of the blast.Andrew6 This is what the bowl looked like after cleaning.Andrew7

Andrew8 My biggest concern with this pipe was the damage to the front of the rim. I decided to use a furniture touch-up marker (thanks for the tip Steve) to see if I could make it look better.Andrew9 It worked like a champ, the marker was a color match to the rest of the pipe.

Now that the bowl was taken care of, I turned my attention to the stem. As usual, I used a fuzzy stick (that’s the politically correct term for pipe cleaners sold in the craft section of Walmart) to remove as much of the gunk while I still had the Oxyclean solution. If you’ve ever cleaned a black powder rifle it’s the same concept; stick one end in the liquid and draw the fuzzy stick back and forth. When it gets loaded with tar, I swish it in the liquid and wring it out. Here’s what the fuzzy stick looked like after the first pass. The inner tube did a good job of preventing excess tobacco build up.Andrew10 Next I tackled the shank. I use a retort filled with de-natured alcohol to loosen the gunk in the shank and the stem. I usually do the stem and shank separately for two reason, first it works very well and second when you have a wide button (like the one on this pipe) it’s difficult to fit the rubber tube over the end of it. I do the retort until the alcohol that goes back into the eye dropper looks relatively clean. In the case of this pipe, I did it three times.Andrew11 After the retort, I used a brush to scrub out the shank. This is why I like to retort the shank separately.Andrew12 I then used q-tips and fuzzy sticks dipped in isopropyl alcohol to remove the remaining gunk.Andrew13 Next I used the retort on the stem. If you do this make sure to plug the end of the stem, otherwise you will get boiling brown alcohol everywhere.Andrew14 After a couple of fuzzy sticks, the inside of the stem was clean.Andrew15 With the bowl and shank cleaned, my next step was to remove the oxidation from the stem. Any time I do a pipe that has inlays or stamping on the stem, I use 1000 grit wet/dry and water to remove the oxidation. Especially this pipe, with the group size stamped on the bottom of the stem. It takes a while, but the results are worth the effort. When removing oxidation with wet/dry sand paper and water, periodically dry the stem to make sure you’re getting everything. When it’s wet the stem tends to look really good, but when it dries out that’s when you notice everything you missed. After the 1000 grit, I used 2400 grit micro mesh with water.Andrew16 I used a progression of micro mesh pads, from 3200-12000 to prepare the stem for final polishing.Andrew17 I also polished the flat spot with the nomenclature with a progression of 5000-12000 grit micro mesh. I used Halcyon II wax on the bowl, which I buffed out with a shoe brush, and carnauba wax on the buffing wheel for the stem. Here is the final result.Andrew18

Andrew19

Andrew20

Andrew21

Andrew22

The Christmastime Joy of Refurbishing an Old Peterson


Guest Blog by Robert M. Boughton
Member, North American Society of Pipe Collectors
http://www.naspc.org
http://www.roadrunnerpipes.com
http://about.me/boughtonrobert

Photos © the Author

“Smoke your pipe and be silent; there’s only wind and smoke in the world.” – Irish Proverb

INTRODUCTION
Many of the pipe lots I purchased during the past few months were to spruce up and sell at my online restored pipe site, although I admit to liberating a few of the choicer finds here and there for my own collection. However,this fine example of a vintage classic Peterson and a number of other brands I bought as singles in more recent weeks were intended with lust a forethought for my own ultimate and lifelong use. As far as the Pete I just received is concerned, my decision to keep it was not based on the Peterson brand name, 22 of which I already owned.

In fact, I expected to add one of the Pete’s I ordered near the end of November to the trove, which seems to increase at an exponential rate and counts 23 now of this brand alone.I chose instead to list the fine pipe for sale for disparate reasons even I find difficult to explain. My penchant for anything Peterson is so well known that my announcement on the Smokers Forums of my plan to sell the K&P System Standard brought a humorous reply: “I thought you’d never say ‘Enough Petersons.’ ”

My decision to sell the basic K&P System Standard full bent which, when I at last held it in my hands, was similar to some I already have, was based in part on that factor but, more to the point, it somehow lacked the certain element of instant overwhelming attraction which is too complicated to describe in this forum, and besides, I am sure anyone who reads this already knows the butterfly effect all too well. I am also adding higher-end pipes to my site and concluded a shiny new-looking Peterson would provide a nice incentive to someone out there in Cyberland who possess the essential sense of captivation to give it the loving home it deserves and not enjoy it once or twice only to put it in the rack and almost never again give it a serious thought.

Robert1And I should add how any potential rarity or value of the engaging pipe shown here pre-restored is irrelevant to my sentiments for it. No, I reserved the Peterson Dublin Republic Era straight billiard for my own caring use even despite its mixed grain because it, well, possesses the right stuff as defined by my personal sensibilities. Who knows? Maybe the System Standard full bent is an extraordinary find. I just don’t have eyes for every pipe that comes my way as I do for the subject of this blog.Robert2

Robert3

Robert4

Robert5

Robert6

Robert7

Perhaps the strongest tug at the curious side of me was the stem, which is perfect except for one tell-tale sign that it is not the original for this Made in the Republic of Ireland Peterson. Clear as day on the left side is the symbol that identifies it as a Peterson stem made for a pipe manufactured in France: Robert8

Now that’s one kind of oddity that always endears a pipe to me on first sight.

REFURBISH
First, as the word refurbish suggests, this was, for the most part, not a difficult task. The only actual problem was removing the cake buildup from the chamber, where I started.

For the most part, in my experience at least, even cake this bad comes free without a fight and leaves the chamber relatively smooth. The third photo above does not do service to the way the cake tapered downward from more to less. This turned out to be one of the ordeal varieties, not a piece of cake at all. (I know, and tender my apology now.) I started with the 19mm reamer since most of the carbon mess was at the top, and it fit about halfway down with snugness. Several laborious full turns later, applying just enough force to see the reamer moving a bit lower, I paused to dump the carbon dust. Seeing the huge amount that fell out, I took another close look into the chamber and was amazed to see not only that the upper bowl needed much more work, but that the bottom was unfazed.

And so I switched to the 21mm reamer that was barely able to clear the inner diameter and gave the entire area a go with several more intense turns, using pressure again to reach the real bottom. Another massive amount of carbon fled the chamber as I turned it upside-down over a proper receptacle. Then, sticking with the bigger reamer, I engaged the entire enemy for the first time. The biggest load of carbon so far emptied out, and after I blew through the shank, a thick dark cloud of dust flew through the air, reminiscent of Victorian Era London skies as described by Charles Dickens with much greater skill.

I soaked a couple of small squares of cotton cloth with Everclear and folded them around my middle finger to insert into the chamber and scrub away much of the residual grime. I did this with both sides of the cloths. Waste not, want not and all that. Of course the wet cotton came out soaked solid black along with part of my finger, but I allowed the alcohol to dry a little as I halfway cleaned my begrimed digit before sticking my clean index finger all the way in and feeling the walls. They were pocked all over.

Reattaching the 19mm blades, I angled them first against the upper half of the chamber before adjusting them to favor the lower half. Much more carbon was loosened, and more alcohol-soaked cotton cloths wiped away the excess. Again I inserted a clean finger and used it to dig out little chunks of carbon. The chamber was better but still needed work.

I turned to a small piece of 200-grit sandpaper long enough to reach the bottom of the chamber with a little above the rim and wide enough to cover half of the wall. With whatever finger fit inside the chamber leaving enough room to press down against the paper and turn it with roughness 360 degrees a few times, I heard that old familiar fingers-on-chalkboard screech the entire time. But I felt the wall smoothing. The paper came out black, and I wiped it over a rag to remove the dust. Still again, a small mountain of carbon fell from the inverted chamber. Feeling the wall with a bare finger, I knew I had to get rough at last.

A perfect old piece of 150-grit paper presented itself for my use, and I went at the chamber again with real gusto. The fact that another pile of carbon was removed dismayed and discouraged me. I repeated the process several times, cleaned the chamber with cotton cloths and Everclear, and believe it or not, got the reward I had awaited with a clean, smooth finger inspection. So that’s my page and a half on fixing the dang chamber.

Next up on my itinerary was beginning the cleaning process of the shank. After about ten minutes of running a wire-handled bristle cleaner dipped in alcohol over and over through the inner shank, I saw it was having an effect and stopped to prepare for the retort.

At this point I remembered the small stem was Lucite, which can be warped and ruined by alcohol. However, finding the task of attaching the rubber tube of the retort kit directly over the wide shank opening, and also locating no suitable temporary stem, I saw no choice but to take a chance. And so I connected the rubber over the lip of the stem and commenced the retort process.

Several test tubes of Everclear later, the shank at last came clean. Removing the stem as fast as I could and inserting a stem cleaner into it, where I let it stay long enough to dry, I found that it was intact. I completed the retort by removing the cotton balls from the chamber and using more cotton cloth to scour the chamber clean and dry and doing the same to the shank with a soft cleaner.

The stem, as nice as it was, still had a couple of minor bite marks and other blemishes I might have ignored with a pipe I was keeping, but I couldn’t do it.Robert9The ease of removing the bitemarks and other marks with 400-grit paper came as a happy surprise. While the sandpaper was handy, I cleaned the shank opening, as you will see below. After that all I needed to do was micromesh the bowl and shank with 1500, 2400 and 3200.

I was more reluctant than ever before to remove any of the original stain, but had no choice with the rim, which was blackened beyond the help of purified water, steel wool or micromesh. I chose 400-grit paper, which eliminated the blackening, before a three-step micromesh using 1500, 2400 and 3200. That done, I considered which of my modern day stains would best approximate the original, and decided to go with the medium brown. I flamed it and set it aside to cool. After a few minutes, I took out my 2400 micromesh pad and gently rubbed away the ash, followed by a quick wipe with a soft rag.

I’d have to say the greatest surprise with this old pipe was the flawless condition of the bowl and shank, with the exception of the rim as described. Based on the general design, the less familiar shade of brown and the grain that is not as uniform as pipe enjoyers today expect, I estimate that this pipe dates to the 1940s or 1950s. At first I believed the pipe was never waxed until I gave it a good wash with purified water and cotton cloth and was able to make out a couple of thin, shiny streaks on the top of the shank, where it appears its long-time previous owner seldom if ever touched the faithful companion.

Still, to assure its readiness for a smooth buffing, I prepared the wood with micromesh progressing from 1500 to 2400 to 3200 and at last 4000.Robert10

Robert11

Robert12

Robert13

Robert14 Eager to try out this wondrous pipe that, as I noted, was created before I was, I found myself filled with more excitement than usual as the moment to buff the beauty with waxes arrived. Leaving the stem behind, having waxed it with red and white Tripoli followed by White Diamond while the new rim stain dried, I carried the smooth piece of old briar into my workroom. Wanting to bring out as much of the varied grain as possible, I decided to use the whole ball of wax. (I know, I know! Again, I apologize.) Starting with the red Tripoli wheel, I coated it with an easy, light touch before moving to the white Tripoli, followed by White Diamond, and to finish it off, carnauba.Robert15

Robert16

Robert17

Robert18

Robert19 CONCLUSION
I could never describe what it is about a pipe that attracts me to it. My tastes are too eclectic. But when I see it, it is always like love at first sight. I mean that in the literal sense, as with two or three times in my life when I took one look at someone and was instantly light-headed with my stomach full of butterflies and found myself tongue-twisted. Alas, none of those relationships worked out in the end. With pipes, at least, love is forever – and perhaps a bit lecherously, I have quite the stable of mistresses.

The author enjoying the pipe.

The author enjoying the pipe.

A Unique Town and Country Squat Round Bottom Rhodesian – Robert M. Boughton


Guest Blog by Robert M. Boughton
Member, North American Society of Pipe Collectors
http://www.naspc.org
http://www.roadrunnerpipes.com
http://about.me/boughtonrobert
Photos © the Author

The pipe with solemn interposing puff,
Makes half a sentence at a time enough;
The dozing sages drop the drowsy strain,
Then, pause and puff – and speak, and pause again.
— William Cowper (1731-1800), English poet, in “Conversation,” 1782

INTRODUCTION
When this odd little pipe arrived in the mail a couple of months ago, as part of an estate lot, it stood out, to be sure. Amongst a beautiful Kaywoodie Standard mixed Sandblast/Smooth Grain Billiard, an elegant LHS Park Lane DeLuxe Dublin, a vintage WDC Full Bent Billiard with 14K ring, an Ehrlich Rusticated Billiard and two others – yes, it stood out. I will leave it to the reader to determine the nature of the deviation.

Still, it did force me to reconsider the true form and figure of a Rhodesian, and to imagine the turmoil I could incite if I threw this pipe as an example into the ongoing brouhaha that is the Bulldog versus Rhodesian debate. I do have a touch of Old Nick in me that way (and I don’t mean St. Nick).

Yet how else can I describe this weird pipe, at its basest, but as a Rhodesian, despite the squatness of its stature and the roundness of the bottom of the bowl? The fact is that this Town and Country (made by the Bradberry Briar Pipe Corp. of New York) has a rounded bowl with two slits carved into its upper end below the rim and a round shank.Rob1

Rob2

Rob3

Rob4 RESTORATION
Part of me did not want to mess with the original stain, but some impulse screamed at me, “Drown this thing in Everclear and see what lies beneath!” And so, that I did. As it turned out, the voice was right. All kinds of scratches and other flaws became apparent where they were obscured before.Rob5

Rob6 Beginning the process of removing the various blemishes with a thorough sanding (except for the nomenclature)using 220-grit paper, I was careful to make smooth, even runs in the directions of the grain. After some time at this task, rubbing the fine briar dust away with a rag as I progressed, I was at last satisfied with the results.

To prep the wood for staining, I brushed the surface with super fine steel wool, which returned the natural color of the briar and created a light sheen. Then I commenced a thorough de-wrinkling treatment with micromesh pads, starting with 1500, then 1800, 2400, 3200 and 4000. Again, I rubbed the wood clear of any residue between each micromesh pad.Rob7

Rob8 The obvious next step seemed to be a full cleaning of the pipe’s interior. Expecting to find the usual massive buildup of crud associated with the shanks of most estate pipes, I was in fact shocked to see the wire-handled, heavy-duty bristly cleaner, dipped in Everclear, emerge from the exercise almost un-befouled the first time and spotless the second.

Still wary, I sanded the pinky-sized circumference of the chamber with a Lilliputian-sized scrap of 220-grit paper and succeeded in removing a fair amount of carbon. Then I inserted an alcohol-soaked square of gun cleaning cotton cloth and twirled it with the aforementioned pinky until most of the carbon residue was cleared from the chamber.

Despite the failure of the wire cleaner to dig up more than trace elements of old tobacco, and determined to assure the shank was truly ready to pass anyone’s test, I employed my newly acquired proficiency in retorting. To my utter dismay, despite my certainty that I had performed the retort without error, the remainder of the boiling alcohol – which had surged all the way into the chamber and left the cotton there somewhat dirtier than it started – returned to the Pyrex test tube clear enough to drink, if I were so inclined. Disbelieving the unheard of result, I re-boiled the alcohol in a second and sent it packing again whence it had returned once empty-handed, so to speak. The second try came back as clean as the first.

At last, my mind exploded in dizzying exultation, a clean shank at the outset!

I turned to the stem, which, other than being a uniform military green, was all but devoid of scratches or chatter. There was one small ding, but given the usual mauling of stems I encounter, this one was a gift from Heaven. As I have yet to come up with a formula for a solution in which to treat stems, I was compelled to do it the old fashioned way: by hand, using 320-grit paper to restore the stem from green to black. This step required several passes, more and more localized each time.

Next I turned to micromesh and gave the stem the same care I provided the wood: 1500, 1800, 2400, 3200 and 4000.Rob9 I tend to enjoy re-staining the wood of a pipe when necessary, and my biggest question so far had been what shade of brown to use if not marine (burgundy) red. This pipe I wanted to do as a two-tone, with the beautiful natural color and grain of the rounded rim left unchanged and the rest of the bowl and shank dark enough to show the difference. And so the only question was whether to use medium brown, which is darker than it sounds, or marine? I admit to having a fluttery, nervous feeling in my stomach when I opted for the marine. Although the result was better than okay, I won’t be showing it here for reasons that will soon be apparent.

Having stained the majority of the wood marine and left the round rim plain, I flamed out the alcohol from the boot stain, buffed the greater part of the wood with its resulting ash using 3200 micromesh and then waxed the wood and stem – from which I had removed the superfluous metal tenon extension by heating it with my Bic and yanking it out – and achieved a definite high contrast. The grain still showed through the stain, but I knew it wasn’t right.

Therefore, wishing to have a little fun and test my mentor, Chuck Richards, I took the “almost finished” product to him for his opinion. True to form, Chuck scrutinized every angle of the pipe through his glasses and handed it back to me. His critique was like the ultimate New Yorker bad book review: no comment. He still has no idea how good that made me feel!

Pleased with myself, I later returned home with the dark red body of the pipe topped by a blond head and with care again applied the super fine steel wool to remove the wax and stain on all of the wood but the rim. Ready for the correct approach, I re-stained most of the wood medium brown, went through all of the steps as before to prepare it for waxing on my two buffer machines, and applied white and red Tripoli, White Diamond and carnauba. The result was much more satisfying, and I felt no need to run it by Chuck again before submitting this blog, as I had already messed with him enough, albeit unbeknownst to my good friend.Rob10

Rob11

Rob12

Rob13

Rob14

Rob15 CONCLUSION
All fun and pranks with my big-hearted but not coddling mentor aside, I ended this restoration with more work than was necessary. I should have learned by now not to disregard the advice of that little fluttery feeling of unease I had in my stomach when I chose marine over medium brown. In the end, the stomach almost always wins in all matters over the mind.

The Resurrection of an old KBB Yello-Bole Premier Panel


Blog by Steve Laug

In a recent trade with Andrew Selking I received an older KBB Yello Bole Paneled billiard. When I removed it from the box there was something about the older KBB Panel that grabbed my attention. It was stamped on the left side of the shank with the familiar KBB logo and the Yello-Bole next to it. Underneath that it bore the stamp Reg. US Pat. Off. Directly below that was stamped Premier over Cured with Real Honey. The pipe had been repaired at some time in its ragged existence with what appeared to be a homemade repair job. The tenon had broken somewhere along the line and a previous owner had drilled out the stem and used a piece of stainless steel tubing to make a new tenon. The metal tenon was stuck in the shank of the pipe and the stem just sat loosely on it. The fit of the stem to the shank was off with the stem sitting high and to the right. The previous owner had tried to compensate for the off centered stem by sanding flat spots on the stem sides and bottom that broke the smooth lines of the square shank and stem. There were two small hairline cracks on the shank – top right and bottom left that would need to be repaired once the tenon was removed. The bowl was out of round with damage to the inner edge of the rim and a tarry build-up on the surface. The outer edge rim crown of the bowl was also compromised and would need some work. The stem was not too badly oxidized but it had tooth marks on the top and bottom near the button.YB1

YB2

YB3 Background Information
I wrote about the history of the KBB stamped Yello-Bole Pipes. The following link will give you the details: https://rebornpipes.com/2014/07/21/renewing-an-old-kbb-yello-bole-honey-cured-briar-billiard/
Yello-Bole pipes are one of my favorite older US brands doing the research would be enjoyable. As with other early brands made in the states I have found that older is better. A KBB in a cloverleaf stamp will date them back to the ’30’s. I have found through my reading that the 4 digit shape numbers are older than 2 digit ones. The pipes with the logo on top of the stem are older than ones that have them on the side. That is just some of the information that I found with a cursory read through the forums and a variety of websites.

The SM Frank website http://www.smfrankcoinc.com/home/?page_id=2 gives a wealth of historical information on Kaywoodies, Yello-Boles and the merger between KBB and SM Frank and later Demuth. It was a great read and I would encourage others to give the website a read. I also wanted to find some help in dating my old Yello-Bole Pipes and I came across this link to the Kaywoodie Forum: http://kaywoodie.myfreeforum.org/archive/dating-yello-bole-pipes__o_t__t_86.html . I am including some of the information I found there as it gives the only information that I found in my hunt to this point.
“…there isn’t a lot of dating information for Yello-Bole pipes but here is what I have learned so far.

– If it has the KBB stamped in the clover leaf it was made 1955 or earlier as they stopped the stamping after being acquired by S.M. Frank.
– From 1933-1936 they were stamped Honey Cured Briar.
– Pipes stems stamped with the propeller logo they were made in the 30s or 40s no propellers were used after the 40s.
– Yello-Bole also used a 4 digit code stamped on the pipe in the 30s.
– If the pipe had the Yello-Bole circle stamped on the shank it was made in the 30s this stopped after 1939.
– If the pipe was stamped BRUYERE rather than briar it was made in the 30s.”
Given the above information I discovered that the pipe I was working on was made sometime between 1930 and 1940. Thus it was an early Yello-Bole from the 1930s or 40s.

Restoration Process

I took the stem off the bowl and tried to remove the inserted metal tenon. It was firmly stuck in place and I could not move it even with pliers. I put the bowl in the freezer overnight hoping that the cold would contract the metal and briar differently (as is the case with the varied material and density). In the morning I took it out of the freezer and was able to turn the tenon out of the shank with pliers. Once it was removed it was clear to see that it had not been glued in the shank but merely stuck with the tars and oils of the tobacco in the shank.YB4 I found a threaded Delrin tenon in my box of tenon parts and it was a workable replacement for the metal tenon. I tapped the drilled out hole in the stem and screwed the threaded tenon into the hole. It was a perfect fit. I removed it once again and put some glue on the threads and screwed it into place and let the glue set. The diameter of the tenon would need to be adjusted as it was too big for the mortise. This was actually ideal in that I would be able to adjust the fit against the shank on the sides and the top. The bottom of the shank would take work to make a smooth transition.YB5

YB6

YB7

YB8

YB9

YB10 I sanded the tenon with a Dremel and sanding drum to remove the excess Delrin. I hand sanded it with 180 grit and 220 grit sandpaper to smooth out and fine tune the fit. I spread the hairline cracks with a dental pick and dripped superglue along the cracks and pressed them together until the glue set.YB11 The stem fit in the shank nicely. The photos below show the damage that had been done to the stem in the previous repair. It is especially visible in the photos of the pipe from the side and the bottom. The stem had been modified to the misfit of the previous tenon so work would need to be done to realign the fit against the end of the shank.YB12

YB13

YB14

YB15

YB16

YB17 I sanded the bottom, top and right side of the shank until the transition between the briar and the vulcanite was smooth. The left side was touchier in that I did not want to damage the stamping. I sanded this area while covering the stamping. The trick was to smooth out the transition without making a drastic dip in the briar – it just needed to be re-tapered until it flowed naturally into the stem. Sanding the top of the stem also took care as it had the insert of the white propeller. Too much sanding on the top would damage and compromise the insert. The photos below show the newly sanded and tapered shank/stem. I sanded with 220 grit sandpaper, medium and fine grit sanding sponges and a fine grit sanding block. I sanded the rim and curves of the rim with the same sandpapers. I folded a piece of 220 grit sandpaper and worked on the out of round bowl to clean it up as much as possible.YB18

YB19

YB20

YB21 I wiped the bowl and shank down with acetone on a cotton pad to remove the finish from the bowl.YB22

YB23

YB24

YB25 I cleaned out the bowl and shank with isopropyl alcohol, cotton swabs and pipe cleaners. I cleaned out the stem as well at the same time. I sanded the bite marks on the top and bottom of the stem with 220 grit sandpaper to minimize the damage and remove the tooth chatter. There were still some tooth marks that needed to be repaired.YB26

YB27

YB28

YB29

YB30 I scrubbed the areas around the bite marks with alcohol to clean the sanding dust and grit from around them. I then used black superglue to fill the bite marks and sprayed it with and activator/accelerator to harden it.YB31

YB32

YB33

YB34 When it dried I sanded the filled areas with 220 grit sandpaper to level them out with the surface of the stem. I sanded the stem with a medium and fine grit sanding sponge and a fine grit sanding block to further blend the patches into the stem surface. In the next two photos the patches are blended into the stem but the blackness of the super glue and the blackness of the unpolished stem do not match so they show up as spots on the stem.YB35

YB36 I stained the bowl and shank with a medium brown aniline stain thinned 50/50 with isopropyl alcohol. I wanted a medium brown wash to highlight the grain and show contrast in the finish. The wash provided just what I was looking for.YB37

YB38

YB39

YB40

YB41 I sanded the stem further with fine grit sanding blocks and also sanded the flat areas on the transition between the shank and stem to work towards a more seamless look. The next photos show the smooth transition and the smooth stem. The patches are fading more into the vulcanite of the stem as well at this point in the process.YB42

YB43 I moved on to sand the stem with micromesh sanding pads – wet sanding with 1500-2400 grit pads and dry sanding with 3200-12,000 grit pads. I rubbed down the stem between each set of three pads with Obsidian Oil and then continued sanding. I have found that sanding the stem while the oil is freshly applied allows the grit on the pads to cut into the finish and raise a shine.YB44

YB45

YB46The next two photos show the finished stem. After the final sanding I rubbed it down with Obsidian Oil and let it soak in before polishing it with the buffer. I gave it several coats of carnauba wax. The patches on the stem by this point are fully blended into the vulcanite and cannot be identified.YB47

YB48 The next photo shows the reworked inner edge of the rim to show my repairs on the out of round bowl. I sanded until it was as close to round as I could get it by hand. I bevelled the inner edge of the bowl with the sandpaper to make the transition smooth.YB49 The finished pipe is shown below. Thanks to Andrew for sending me this challenge. I really enjoyed bringing this old timer back to life. It will occupy a special spot in my older American pipe maker collection and join my other KBB Yello-Boles as favourites that I enjoy smoking. I buffed it with White Diamond and gave it multiple coats of carnauba wax and finished by buffing it with a soft flannel buffing pad to raise the shine. All that remains is to sit back and enjoy a bowl of an aged Virginia tobacco and read a good story!YB50

YB51

YB52

YB53

In Retort to Claims of Unclean Restored Pipes – Robert M. Boughton


Guest Blog by Robert M. Boughton
Member, North American Society of Pipe Collectors
http://www.naspc.org
http://www.roadrunnerpipes.com
http://about.me/boughtonrobert
Photos © the Author

“A thick skin is a gift from God.” —Konrad Adenauer (1876-1967), first Chancellor of West Germany

INTRODUCTION
During the course of my serious restorations, and by that I mean the short period of time since I created an online store with the primary goal of selling estate pipes I repair, direct feedback from my local customers has been 100% positive. That, of course, is always gratifying, and I did appreciate it.But those who have read my previous blogs know I am not in the business to be gratified by elliptical, kind words of others. The real motivation is my love of all things tobacco-related and in particular returning a well-used or even battered pipe to its original beauty, or as close as I can come.But being somewhat more thick-skinned than most folks (if everyone grew up in my dysfunctional household, the whole world would have my hide), I always prefer the truth, the whole truth and nothing but the truth. So help me God. That last phrase might better be read, God help me.

In the last couple of months, you see, word has reached me of an alleged problem with the cleanliness of pipes I sold. Now, don’t get me wrong. I only use the word alleged because, having as thick of a head as my dermis and consequent confidence in my work with pipes or on any other subject for that matter, until proven wrong, my impulse was to resist the claim. The problem was that I was not hearing any complaints from customers. Such forthright criticisms might have been disappointing, but being constructive would have been treated as any direct reports: with the professionalism I apply to the daily conduct of my business.

The most unpleasant part of this experience, which as I mentioned went on (and on and on) for a couple of months, was that the feedback I kept getting was not from any friends or fellow pipe club members to whom I sold pipes, but instead from my good friend and mentor, Chuck Richards, who, to my great surprise and initial sadness, was the only person my customers, without exception, seemed to trust with such vital information.

Thus I received the first “word” that I needed to be more careful cleaning my pipes. I can tell you, my pipes almost cleaned themselves when that was all Chuck could say before he was distracted and had to tend to something, giving me just enough time to become more than a tad miffed. Being familiar with Chuck’s occasional terseness, I knew he was only passing on the information and had my interests at heart. Still, my breath grew short, and the heat rose under my collar. Soon enough, I got more details, including the first name of the customer, which I didn’t recognize, and then a description of the pipe – a Londoner black rusticated bent bulldog – that I connected right away to a different first name because I had bent a rule by accepting his check. I realized he went by his second name.Robert1 Yes, I recalled the pipe and its delighted new owner, when he bought it, with clarity. The nice, rough little black bulldog was one of the few I took from my private collection, having enjoyed it for a while and then allowed it to fall back into a corner, unused and not of particular interest to my personal tastes. Could I have forgotten to clean it? The possibility existed, and although I wanted to remember following my usual routine of cleaning and sanitizing the pipe, I had no blog on which to fall back and check since it was in good condition when I decided to sell it for my growing business and dwindling selection.

Therefore, I explained this scenario to Chuck, and, having the address of the nice older gentleman who had purchased it, went to my bank for a cashier’s cheque in full refund and put it in the mail with a letter of sincere apology. I wrote that I also wished for him to keep the pipe and offered a 20% discount on his next purchase should he choose to give me a second chance. I even asked Chuck, who lived in the same neighborhood and was friends with the man, to tell him not to return the refund, as I knew where he banked and would only deposit it myself.

And so I thought the issue settled – but no. Word of my well-restored pipes with unclean shanks kept coming in, via Chuck. I think it is understandable that my mood simmered until, in time, the situation boiled over. When at last, one afternoon at the tobacconist’s, I grew so heated that I broke out in a sweat, I regret to admit I snapped at Chuck, the only person with the nerve to tell me to my face that a problem indeed appeared to exist. Of course, Chuck was only going by the words of others, but enough instances of the same complaint from a sufficient number of witnesses would convince almost anyone.

“I’m just telling you what I’ve been hearing, and not from one or two people but a good number now,” he said, and the grin, which had never left his face during my account of how many bristly cleaners soaked in Everclear I average per pipe until they come out clean, broke into his full gale force smile. I have always been, was then and suspect I ever will be defenseless against that wonderful expression of delighted amusement. It was, indeed, the best retort to my argument he could have made.
Robert2And that is how Chuck came to explain to me the relative inefficacy of bristles versus the boiled alcohol retort method that he had demonstrated to our pipe group a couple of years ago before I would have even thought of taking notes.

But enough of all that. This blog also concerns the restoration of a Kaywoodie Signet Bent Billiard, including a validation of the retort method by Chuck on the pipe I had thought was finished. I will describe and illustrate that process when the time arrives.

RESTORATION
I started this restoration under the impression that it would be just a typical exercise on a better than average estate pipe I bought, with the rim and chamber seeming to be the greatest challenges, except that the other problems (some minor scratches that disappeared with 1500-grade micromesh and deeper blemishes I fixed with high-grit sandpaper) were far fewer than usual.Robert3

Robert4

Robert5

Robert6

Robert7 I bought a new Castleford five-piece reamer set (with a T-handle and four attachable reamers ranging from 17-23mm) to see if it might be up to filling the boots of my old Senior Reamer, which fell in action during a restoration I blogged not long ago. Choosing the 17mm reamer, I went to work at a slower than usual pace to test the tool that was new to me, and seeing it worked quite well, I finished its part on the chamber.

Then I switched to 220-grit paper and sanded the inner wood to a smoothness relative to the mess it was in when I began, tamped out most of the remaining carbon, blew through the shank to clear some of the rest and rubbed a couple of small cotton squares soaked in Everclear around the chamber to pick up all but particles of the remainder. To the touch of a finger that I ran around the walls, the surface was still rough but could be finished later.

The rim burn came off with super fine steel wool, and scratches and pits uncovered from beneath the blackness were easy to deal with using 400-grit paper followed by 600, then micro-meshing using new 1500, 2400 and 3200 pads.Robert8 After finishing the chamber with 500-grit paper, dumping most of the carbon as I went, I blew through the shank to clear more and soaked a couple of thin squares of cotton cloth in Everclear to scrub the chamber. Only a small amount of residue remained, and to the touch of my finger the sides of the chamber felt silky and polished.

That was when I commenced what was my old way of cleaning the pipe. One after another, I dipped first one end of a bristly cleaner in Everclear and ran it through the shank, then the other end. After more than a dozen cleaners lay filthy in a pile and two more came out white, I repeated the process with the stem, except that it only seemed to require two or three cleaners.

To mix things up, compared to my usual routine, I followed my impulse to finish the stem and be done with it. I started with 600-grade micromesh on both sides just below the bit, and switched to 800, 1000, 1800, 2400 and 3200 micromesh. I buffed it on the wheel with red Tripoli and White Diamond.Robert9 I sanded small areas of the bowl with 400-grit paper to remove the deeper scratches, dings and pits.Robert10

Robert11 To remove the marks of sanding from the wood, I used super fine steel wool followed by my normal progression from 1500-3200 micromesh. I followed the same micromesh procedure on the entire bowl and shank.Robert12

Robert13 Finishing the wood with a buff of white and red Tripoli, White Diamond and carnauba, here is what I handed over to Chuck.Robert14

Robert15

Robert16

Robert17

Robert18 The time, at last, has arrived for Chuck’s brilliant demonstration and invaluable contribution to the restoration of this Kaywoodie Signet Bent Billiard, and my further education in pipe restoring, shown step-by-step in the following nine photos: 1) Chuck has prepared the pipe by filling the chamber with a piece of a paper towel, having no cotton available. He has also connected the retort’s Pyrex test tube, almost filled with 190-proof Everclear, and plugged with a stopper. The stopper leads to a copper tube which in turn attaches to a rubber passage that is connected to the pipe’s stem. 2)Chuck begins to heat the alcohol in the test tube at the base. 3) The alcohol begins to boil. 4) As the alcohol soon reaches full boil, Chuck tilts the test tube slightly to allow the hot liquid to bubble through the retort apparatus and into the pipe stem, and from there all the way to the chamber. The paper towel begins its rapid transformation from white to nasty brown. 5) When the test tube is empty, Chuck tilts the pipe back enough for the remaining, filthy alcohol to drain back into the test tube. 6) The lighter product of a second run with fresh Everclear. 7) After wiping dry the chamber, this is the residue. 8) Chuck snakes the other end of the piece of paper towel into the shank and twists it.
9) The residue from that.Robert19

Robert20

Robert21

Robert1

Robert22 And I take a close look inside the chamber of the Kaywoodie that is clean all the way to the bottom.Robert23 CONCLUSION
Although my skin is tough, like a fault on the mail of a dragon of legend, my weak spot was pierced. The wound was neither superficial nor deep but still stings a bit, being inflicted as it was by so many of my friends’ and associates’ lack of trust to confide in me. Had my experiences selling restored estate pipes until now been a scientific experiment, an analysis of the data would support the conclusion that friends are unwilling to express their findings of any serious flaws to the one person who could prevent the same mistakes from being repeated.

This reluctance, of course, is created by the risk of hurting the feelings of the friend whose sensibilities the paying customers would rather spare. Such a reaction by the person on the receiving end of the message is indeed real but necessary for a demonstration of true friendship. An unfortunate fact is that too few people understand how criticism is a two-sided razor, one cutting for the positive and the other for the negative. My mind has always been open to constructive, helpful criticism while it shuts like a steel trap against anything senseless and cruel.

Now, thanks to the good but misguided intentions of some of my friends, I am compelled by dual senses of honor and good business to contact everyone who has purchased a pipe from me, in person or online, with a carefully written explanation of the error and an offer of a free correction, postage included. But also thanks to these friends, and in particular my good friend and mentor, Chuck, I now have a backlog of “completed” restores on which I can practice retorting.

So far, they’re coming along well, with some new restores thrown in.

Reviving a Peterson Dunmore 79 with my Son in Law


Blog by Steve Laug

This past weekend my son in law came over with the Peterson Dunmore pipe that he had purchased on a recent pipe hunt in the US. He picked it up for $15USD so it was a good purchase. We finally got around to working on it. In a previous post on the Dunmore line I had found that the line from Peterson really is a stripped down pipe. The one that we worked on this weekend was in essence a system pipe. The lack of a ferrule is made up for by a stylized carving around the shank end. The stem sits snugly against the end of the shank but is not flush with the diameter of the shank. The saddle on the stem has a slightly different flair than a regular Peterson pipe. It had a Plip stem. It bore the stamping Peterson’s over “Dunmore” on the left side of the shank and Made in the Republic of Ireland and the number 79 on the right side of the shank.Dun1

Dun2

Dun3

Dun4 The pipe was in pretty decent shape under the grime and tars on the bowl and rim. It had some beautiful birdseye grain under the grime that would really stand out with a bit of work. The rim was damaged along the back outer edge with small nicks. The build up on the rim was hard and uneven. The bowl itself was out of round and would need to be adjusted. The stem was oxidized but under the oxidation on the saddle it bore the stylized P stamp. The top of the stem near the button had a few small bite marks and some tooth chatter. The underside of the stem near the button had a pin hole in it that would need to be patched.Dun5

Dun6 While my son in law, Lance worked on the bowl scrubbing and cleaning it I worked on the stem. I sanded it with 220 grit sandpaper to clean up the tooth marks. I wiped it down with alcohol to clean the areas around the hole. I daubed Vaseline on a pipe cleaner and inserted it from the tenon end of the stem and then used black superglue to repair the hole. I gave it several coats of glue to build up the repair, sprayed it with accelerator and let it dry between applications. Once I had the patch solidly in place I set it aside and let it cure. After curing for about 30 minutes I sanded the patch with 220 grit sandpaper to blend it into the surface of the stem. I sanded it with a medium and a fine grit sanding sponge to remove the scratches and further blend it. Dun7

Dun8

Dun9 Lance worked on the bowl while this was going on. He washed down the bowl with acetone on cotton pads to remove the grime and the remaining finish on the pipe. He softened the buildup on the rim surface and then lightly topped the bowl to remove the damage and the buildup. Once it was smooth, he sanded it with a fine grit sanding sponge and then wiped the bowl down with another wash of acetone.Dun10 We gave the bowl a coat of medium walnut stain mixed with Danish Oil and rubbed it onto the bowl and off again with a soft cotton pad. The bowl looked good when I had finished wiping it down and buffing it with a shoe brush. The grain is quite stunning.Dun11

Dun12

Dun13 I buffed the stem with red Tripoli and White Diamond to remove more of the oxidation. I rubbed it down with some Obsidian Oil and set it aside for the pictures below. At this point in the refurbishing the stem is looking quite good. I still need to sand with micromesh pads and then reapply the gold in the P stamp on the left side of the stem.Dun14

Dun15 I wet sanded the stem with 1500-2400 grit micromesh pads and then dry sanded with 3200-12,000 grit pads. In between each set of three pads I wiped the stem down with Obsidian Oil. I finished by buffing the stem with White Diamond and then gave it multiple coats of carnauba wax and buffed it with a soft flannel buffing pad.Dun16

Dun17

Dun18 After sanding it with 3200-4000 grit pads I used a gold paint and applied it to the P logo on the stem and then sanded it again with the same three grits of pad.Dun19

Dun20 I put the stem back in the shank and buffed the entire pipe with carnauba wax and with a soft flannel buffing pad. The finished pipe is shown below. The first four photos give a close up look at the bowl so that you can appreciate the beautiful grain on the pipe. The last four photos show the pipe in its entirety. It is truly a stunning piece of briar with no fills or pits. It is ready for its inaugural smoke by my son in law. It looks as good as new and the stunning birdseye grain gives the pipe a rich look. I look forward to hearing what he thinks of his restored pipe and even more what he thinks once he has smoked it.Dun21

Dun22

Dun23

Dun24

Dun25

Dun26

Dun27

Dun28

Re-stemming a Hardcastle Pot – Andrew Selking


Blog by Andrew Selking

I picked up this nice looking Hardcastle pot, but when it arrived I realized that it did not have the proper stem.Hardcastle1

Hardcastle2 Fortunately Steve bailed me out and sent a couple of likely replacements. The stem that I settled on had a slightly smaller tenon diameter and the outside diameter was noticeably bigger. This was going to be a fun challenge. I covered the shank with painter’s tape and started reshaping the stem with 100 grit sand-paper.Hardcastle3 Here is a shot after getting to about 80% completion.Hardcastle4 Next, I took the painter’s tape off and replaced it with Scotch tape (since it is thinner) at the end of the shank. At this point I was using 400 grit wet/dry without water.Hardcastle5 Once I completed that step, I took a rubber washer and placed it on the tenon to protect the end of the stem and shank. I used 400 grit to finish the last little bit, frequently taking the washer out to check the fit.Hardcastle This is what the pipe looked like once I had the stem sanded to fit.Hardcastle6

Hardcastle7

Hardcastle8

Hardcastle9Next I turned my attention to the bowl. I used the largest reamer to get almost to the bottom and finished it with the next smaller one.Hardcastle10 I used OOOO grade steel wool to remove the tar from the rim.Hardcastle11 Once the bowl was clean, I used my retort to clean the shank.Hardcastle12 This is why I am a firm believer in the retort, pipe cleaners dipped in alcohol came clean, but all this gunk was still inside.Hardcastle13 I used the retort on the stem. Although this picture does not show it, always plug the end of the stem to prevent the retort from boiling over and spitting nasty tobacco juice everywhere (ask me how I know this).Hardcastle14 After the stem was cleaned, I worked on polishing it. I started with 400 grit, then moved to 1500 through 2400 grit micro mesh with water.Hardcastle15 I used the 1500 grit through 2400 grit without water on the bowl, then finished both with a progression through 12,000 grit.Hardcastle16 Now the pipe was ready for stain. This time I used an aniline dye (light walnut) from Pimo Pipe Supply. I diluted the dye by 50% with denatured alcohol, applied it with a cotton ball, flamed it with a lighter, and repeated until I had the coverage I wanted.

After an uneventful trip to the buffer, where I used white diamond and carnauba wax on both the stem and bowl, this is the result. I am really happy how this turned out. Thanks again to Steve for his generosity in providing the donor stem.Hardcastle17

Hardcastle18

Hardcastle19

Hardcastle20

Hardcastle21

Radical Surgery, Amputation Extend Ben Wade’s Life


Patient in Operating Room for 14 Days
by ROBERT M. BOUGHTON
RP Blogger

(Albuquerque, NM, USA) Two weeks after entering a restorer’s shop for a routine checkup, a tall billiard was released following emergency surgery to amputate more than half of its upper bowl and perform cosmetic adjustments, the restorer announced Wednesday.

Claiming the likely sole previous owner of the victim, a Ben Wade Standard, was suspected of chronic abuse of the English-born pipe for an unspecified number of years, the restorer, who wished to remain anonymous, said the identity of the perpetrator remained unknown.

“This is the worst, most depraved example of tobacco pipe abuse I have ever encountered,” the restorer said. “The briar pipe presented with first-degree burns on the rim and a chamber stuffed with carbon cake as well as acute scratches, pits, gouges and grime covering the outside of its body, and other mayhem of the stem.”

New Mexico law defines mayhem as the “malicious intent to maim or disfigure” any part of a body by means including cutting, mutilating or otherwise disabling.

Further examination revealed an almost fatal crack through the chamber to the outside of the bowl extending almost an inch downward from the right side of the rim, the restorer said, and added that was the wound requiring amputation of about half of the victim’s main body.

“Never before have I seen such a horrific case of compound commutated fracture,” the restorer said, showing photographs taken at the time of the initial examination.Rob1

Rob2

Rob3

Rob4

Rob5

Rob6

Rob7 “After the first look, the prognosis for this unfortunate former billiard was terminal,” the restorer said.“However, upon consulting some of my colleagues, we agreed that a combination of amputation, which was unavoidable if the pipe’s vital functions were to continue at all, and radical reconstructive surgery was the only viable course of action.”

Calling the complex work involved “a Hail Mary toss,” the restorer described the plan to remove half of the bowl and reshape the stump into a “squat pot.” Preliminary measures to determine the pipe’s structural ability to survive this highly invasive operation – including a thorough cleansing, soaking the chamber and shank with 190-proof alcohol and the beginning of a rigorous course of sanding the outside and the “mangled guts” – began immediately.Rob8

Rob9

Rob10 According to the restorer, the possibility that the pipe would reject the amputation and reconstruction was serious.

“Imagine if one day you awoke to find your head flattened to less than half its original size, but the rest of your body proportional to the way you had been,” the restorer said.“The shock of it could be devastating, dare I say catastrophic, not to mention the way you would stand out in public and the resulting open pointing, name-calling and general ridicule.”

The restorer said the ultimate decision to proceed with the surgery was his alone and based on a desire to save the pipe’s life if possible.

“Before I soaked the chamber and shank with alcohol, I drew incision lines downward at intervals around the rim, to the highest point of the bowl possible and yet still clear of the long scar of the crack, to guide me,” the restorer said.Rob11 Choosing a hacksaw for the amputation phase, the restorer said no anæsthesia was used as the pipe was unconscious.Rob12

Rob13

Rob14 “Lopping off the dome of that tall, proud billiard was the most extreme measure I hope I ever have to take in the name of restoration,” the restorer said. “But the removal was clean, and the deed done, it was easy to see the problems I still faced to reshape the resulting bowl, from something that could not even be called a short billiard, into at least a passable pot.”

The restorer added that sanding down the shank until it was proportionate to the bowl was possible only by erasing Ben Wade’s identity, and therefore was never seriously considered.

“No, our friend Ben Wade will just have to learn to adjust to his new body,” the restorer, who was drenched in sweat and appeared haggard, said. “I have done everything possible, although there were complications.”

Using an electric Dremel for the first time, with a smooth sander bit and set at the lowest speed, the restorer began the process of increasing the curve of the bowl. He said he applied the least pressure possible to the wood but still noticed the tendency of the tool to remove uneven layers of briar.

When the restorer had made his first full circle of the bowl and observed the jagged beginning of the reshaping into what would become a very short pot due to the amount of wood on which he could work, he said he switched to a rasp for a fast initial leveling of the bowl’s underside to make it a “sitter.” Rob15

Rob16

Rob17

Rob18 To finish the basic reshaping, the restorer said, he returned to the Dremel for a “touch-up of the rougher spots” before taking the rasp and using it with smooth, upward strokes from the bottom of the bowl to the top to make the shape still more curved.

“At the end of this phase, I was left with a very rough surface that I knew could be smoothed with sandpaper and micromesh pads,” the restorer said. “But the rim was uneven and required careful leveling. The hardest aspect of this part of the cosmetic work was moving the rasp in the correct direction to make the thickness of the rim uniform all around.”

The chamber was still coated with what the restorer called “never-ending cake.” He said he took a chance with the Dremel again and used it to loosen some of the carbon buildup.

“This was successful, but also revealed the beginning of another crack that in time was certain to work its way all the way through the bowl,” the restorer said and sighed. “This was when I knew the best I could do was to extend the life of the once whole and healthy pipe. Only God can say how long that life will be.” Rob19 The restorer then sanded the remaining scratches from the bowl and made the chamber as smooth and free of the old cake as he could before starting what he thought would be the finishing touches: buffing the outer pipe with several grades of micromesh, re-staining the wood a dark red color and polishing the pipe with four kinds of wax.

“It’s funny how sometimes going all the way through the regular steps of restoration will reveal new problems,” the restorer said. “In this case, two blemishes in the forms of gashes showed up.”

The restorer explained how he used a black marker over the damaged areas to simulate the grain color and then applied small amounts of Super Glue, which he let dry.Rob20 Once the glue dried and hardened, the restorer added, he rubbed it away with three grades of micromesh. The tenon of the replacement stem that was on the pipe when it arrived, despite the restorer’s attempts to fix it with Black Super Glue, no longer fit the shank.

“It was way too small, and I hated the idea of using beeswax to force it to fit,” the restorer said. “It is my belief that the previous owner, instead of cleaning the pipe regularly if ever, let the crud in the shank accrete until the stem became stuck and then sanded down the tenon to fit the goop. I guess it takes all kinds.” Rob21 Finding a good Lucite replacement stem that fit the shank as if it were made for it, the restorer said he only needed to remove some minor scratches with high-grade micromesh and buff it with some waxes before re-finishing the bowl and shank. Rob22

Rob23

Rob24

Rob25 “I decided to adopt the Ben Wade and care for it however long it has to live,” the restorer said with a hopeful smile. “But of course I wouldn’t dream of having its name legally changed to mine.”

http://www.naspc.org
http://www.roadrunnerpipes.com
http://about.me/boughtonrobert
Photos © the Author

Ben Wade and the Chamber of Horrors – Robert M. Boughton


Guest Blog by Robert M. Boughton
Member, North American Society of Pipe Collectors
http://www.naspc.org
http://www.roadrunnerpipes.com
http://about.me/boughtonrobert
Photos © the Author

“It is our choices, Harry, that show what we truly are, far more than our abilities.” —J.K. Rowling, “Harry Potter and the Chamber of Secrets” (1998 U.K.)

INTRODUCTION
Never has one of the quotes with which I like to begin my blogs spoken with more directness to the heart of the matter at hand than the words of J.K. Rowling above. At the risk of kicking a dead horse, I must point out how the choices of the prior owner of the Ben Wade Tall Poker (Made in London England) effected this description of its harrowing restoration. I am sure the individual lacked not in ability, only decision-making. But where do I begin? Ah, the stem pops into mind.Rob1 Just try to take in the scope of the mauling the perp inflicted on the bit and downward, from these photos alone: the complete gnashing away of the bottom lip and the gash in the upper side as shown on the left, and the chips in the top of the bit and great flat plain below it on the right. The only true cure for this degree of chewing, like a single piranha in frenzy that has been chased away by a bigger fish with no interest in pipes, is total replacement.

I believe someone even re-stemmed this pipe at some point during the old owner’s possession of it, as the bottom of the bowl is flat with ample room to stabilize it in a canted position yet the stem’s weight topples it. But that probability only serves to compound the undeserving person’s culpability. After all, imagine the debasement the original stem must have suffered. However, with another replacement in mind for the future, for now I took the mayhem as a challenge for some serious Black Super Glue practice.

Then there was the liberal, to use a kind adjective, distribution of deep pits and scratches covering the bowl and shank.Rob2

Rob3

Rob4

Rob5

Rob6

Rob7 And at last, I come to the reason for the name of this blog: the chamber and rim.Rob8 When I first saw this angle on the site where I ordered a three-pipe lot of Ben Wades (one of which, when it arrived, was a tall billiard with a huge crack extending down the side of the bowl that required amputation and is therefore now undergoing the trauma of drastic re-shaping, and the other a small apple, which I restored with success and already blogged), I thought the rim would be the biggest challenge of the project.

Although the rim did indeed present considerable obstacles to overcome, the greatest battle proved to be with the chamber of horrors itself, from which I emerged, torn and bleeding, but victorious – if there can be any genuine victory in war.

REFURBISH
Following my initial structural inspection with a couple of bristly cleaners soaked in Everclear 190-proof that I ran through the stem and shank, I concluded the pipe somehow was intact but filthy almost to the point of total clogging with black resinous goop. In fact, when I looked at the shank opening as shown in the second to last photo above and then tried to blow through it only to meet extreme resistance, I got my first clue that many sturdy cleaners would make the ultimate sacrifice before this BW was fit to enjoy.

I proceeded with the part of the restoration that has always been my first step: reaming the chamber. But this time, after about an hour of sweaty, hand- and arm-weakening cranking, I only prevailed, with repeated efforts applying the reamer at different levels and angles of attack, in dislodging multiple layers of cake that slowly made a pile of fine carbon amounting to more than half a dozen bowls. Even sanding with 80-grit paper only added another few bowls of carbon to the growing heap. It’s too bad all the pipe cake out there waiting to be converted to powder by folks of my persuasion isn’t recyclable as tobacco, but then again, there seem to be plenty of another kind of folk who enjoy the taste of massive congestion from carbon and other nasty accretions.

Deciding, based on the horrible pocks and craters remaining in the chamber, that the hallowed space would take work throughout the restoration process, I launched a concerted offensive on the rim, at first believing with reason based on experience that I would be able to salvage the nice inward curve of the briar there. However, after another considerable chunk of time flew away with each level of char I banished, all that I had done was reveal wounds so deep and close-spaced along the inside curve of the rim and several bad wounds at the top of the bowl that I knew I would have to level the rim.
Drastic situations call for equal measures, and so, not having a power sander, I chose the best weapon I possessed, said tool being a metal rasp. Thus began another arduous labor removing the once elegant curve of the rim, with heavy mental protest. I was filled with sadness as I applied the rough edge of the rasp with slow care to the rim and watched the slope disappear more and more over time.

That stage finished and the rim flat, I sanded the well-grained wood with 220-grit paper followed by 400 and then micro-meshed using 600, then 800, 1000, 1500, 2400 and ending with 3600.Rob9 Even this view does not reveal the insidious nature of the cake buildup inside the chamber from hell. The ongoing task of removing all of the cake, every time I thought I achieved smoothness all around, only uncovered still more hidden holes, similar to microcosmic pits and craters on the moon, only black.

I decided the time had come to remove all of the dings and other rough spots in the bowl and shank and used 220 paper again for the worst areas, then 2400 micromesh followed by 3600.Rob10

Rob11

Rob12

Rob13 Seeing the nice, lighter wood that lay beneath, but suspecting the dark stain was used for a reason (e.g., hiding fills), I nevertheless embarked on a removal of the original stain by hand using 400-grit paper.Rob14

Rob15

Rob16

Rob17 I know, I know! I see here and noted at the time the scratches left by my removal method, but careful, even sanding and then buffing with several levels of micromesh took them off quite well. Two important goals were accomplished by this roughness. One, I satisfied my curiosity about the potential for fills. Yes, as you can see, they are present, but nowhere near to the extent that I anticipated. Two, I removed the dings, divots, dents and most of the other defects. Of course, some might reverse the order of significance of these resolved issues.

At this juncture, I became resolved to eradicate the stubborn, troublesome cake no matter what it might take. The determination was born not only of my own obdurate nature that exceeds that of any piece of wood, but from the fact that the Ben Wade Chamber of Horrors had managed to destroy my Senior Reamer – no joke. Not wanting to discard the fallen reamer, which had been so faithful to me until it met The Chamber That Must Not Be Named, by such callous means as tossing it in the garbage, I chose rather to retire it to a place of honor on my bench. But now I had to avenge my defeated brother in restoration, not to mention buy a replacement. I already ordered a new-in-box Castleford Five-Piece Multi-Fit Reamer Kit and a full set of micromesh pads (no more paper for me) online for just more than $30, postage included.

With no small sense of retribution fuelling me, I girded myself with an entire large sheet of the coarsest sandpaper I had and cut off a few small strips before bending one into the right shape to begin the ugly but necessary task with a vengeance. Unbelievable amounts of carbon spilling from the demon chamber every time I emptied it, and my fingers blackened with soot, I kept at it with gusto, thinking I must have made progress. My left index finger was developing scrapes and calluses.

Still, the evil chamber walls in spots felt like the bowels of a volcano. In desperation, I turned to a Dremel I borrowed for the amputated Ben Wade Billiard’s re-shaping. I changed the Dremel bit to a small, fine rounded piece of sandpaper and, at the slowest speed, began making circular turns around the chamber walls.

As some of you with more experience might imagine, this approach almost led to disaster, but instead turned the tables in my favor. Granted, the Dremel (not I) left several new chinked spots where none existed before. But these occurring after the power tool caught a scent of the pure briar, the cake crisis was solved with a bit more rapid sanding that also repaired the new nicks.

With the chamber vanquished of the dreadful cake as well as it ever would be, and the hollow area covered in blackness, and the shank still needing to be purged of its mess, I plugged the shank opening with several small squares of cotton and flooded the chamber with Everclear. I set the big chunk of briar aside for about 20 minutes.Rob18 In the meantime, I felt a keen sting in my right index finger and noticed that under the True Coat of soot there appeared to be some blood and loose skin. I thought it wise to scrub my hands forthwith, with soap and water as hot as I could stand, and this ordeal ended up lasting about 15 minutes. When I was done, I realized I had no hydrogen peroxide to sterilize the cut caused by so much sanding of the wicked chamber.

But I did have Everclear, the pouring of which onto my already burning sore did not excite me. Better safe than sorry, I just got it over with.

Oh, my gosh, did it burn!Rob19 I pulled the cotton plug from the shank and let the remaining coal-black liquid ooze from it like a suppurating wound, and began the still serious business of running both ends of so many bristly cleaners dipped in alcohol through the shank that I lost count. While the darker part of my brain, made meaner by the frequent sting of more Everclear running onto my exposed wound, whispered that the little hole would never come clean, the rational side assured me that before I knew it the job would be done.

But it wasn’t happening fast enough, and so I resorted to digging through my growing and a bit disordered supplies for the wire bristle brush I knew was there. At last I found it buried in the bottom of a drawer and at once started the repetitious but effective process of wetting it with alcohol, scrubbing the inner shank, rinsing it in a shallow bowl of alcohol that grew fouler each time, squeezing the bristles clean and dry, and repeating all of these steps over and over. Of course, my reward did come when I switched back to a normal cleaner soaked in alcohol and it came out clean.

Somewhere along the line, I finished the stem work by sanding down the excess Black Super Glue and smoothing the Vulcanite with vigorous rubbings of three grades of micromesh.

After inspecting the briar for any missed flaws I could fix and finding none, I gave the bowl and shank a final purified water bath, which proved to be necessary from all of the black powder that had transferred from my formerly dirty fingers.

Ready for the final countdown, I opened a brand-new bottle of burgundy-colored Lincoln boot stain and coated the entire outer area of wood using the small, damp applicator. As fast as I could manage, I flamed it all over with my Bic, reveling in the great poofs of blue flame that rose and dissipated as the alcohol in the stain burned off.

I rubbed off the char with a piece of 2400 micromesh until I could see the good grain through the fresh, dark red stain and then put on my magnifier glasses to do the finish work with 3600. It looked good to me, so I put it aside with the stem on a thick cotton cloth for about a half-hour.

That was all I could stand before taking the pieces to my bedroom/office/shop and focusing on the two buffing wheels I use to bring out the ever-anticipated shine. Taking a deep breath to steady myself for the always risky business of touching anything fragile to the high speed wheels, I turned them both on.

Starting with the stem, I turned it with all due respect and care first on the red Tripoli wheel and looked it over as I rubbed it with the cotton cloth, then the white Tripoli wheel on the other machine, and back to the first for the final coat of White Diamond. Much better, I thought and set it aside.Rob20 To the wood I applied quick, thorough coats of white Tripoli, White Diamond and carnauba.I looked it over, noticed a spot that was duller than the rest and repeated the process there.Rob21

Rob22

Rob23

Rob24

Rob25 CONCLUSION
Fixing this pipe took me the greater part of a week, by far the longest I have spent on a project since my first real restoration two years ago. That is the reason why the concept of being finished with the Ben Wade Tall Poker is still taking time to sink in. After all the time I have spent with the BW – before the project began to make a plan of action I ended up throwing out the window, during the circuitous restoration itself and now afterward, writing about the experience – I have grown attached to the curious example of pipe craft. I would like to keep it to myself, to add it to my growing collection of Ben Wades. I have no doubt it will smoke at least as well as the others.

But I have decided to let someone else discover the accuracy of that prediction.