Blog by Dal Stanton
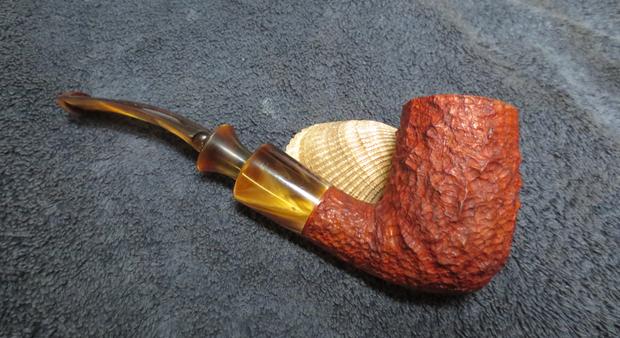
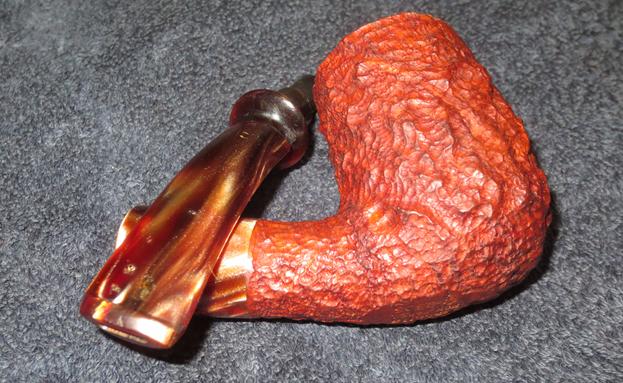
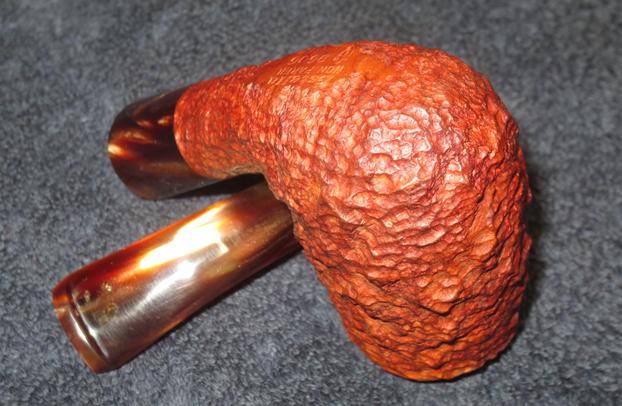
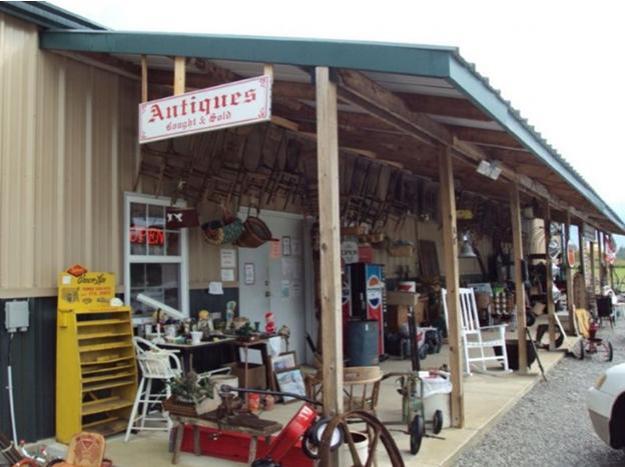
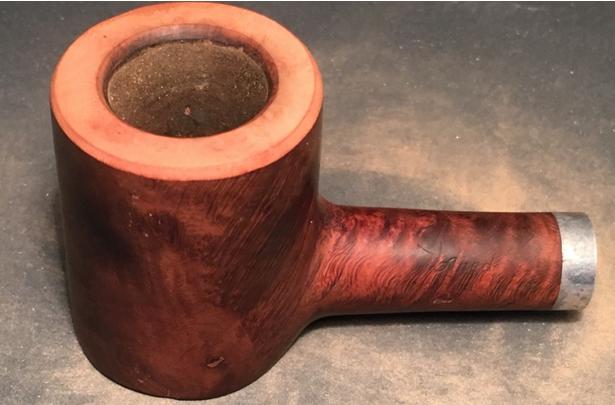
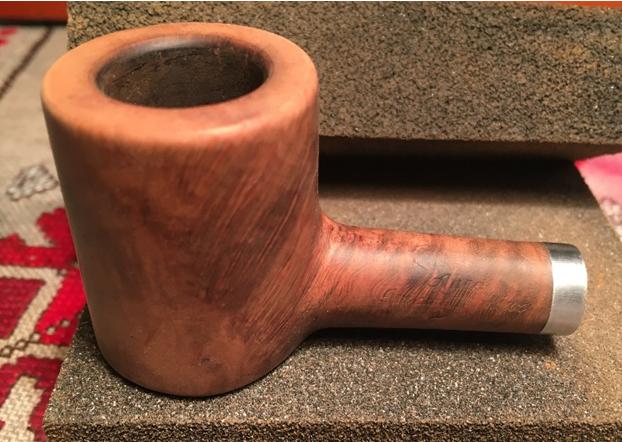
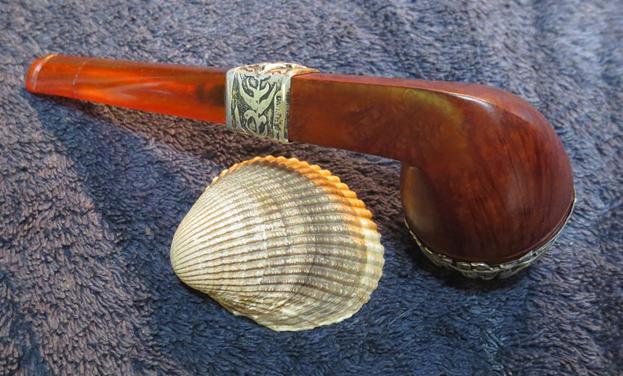
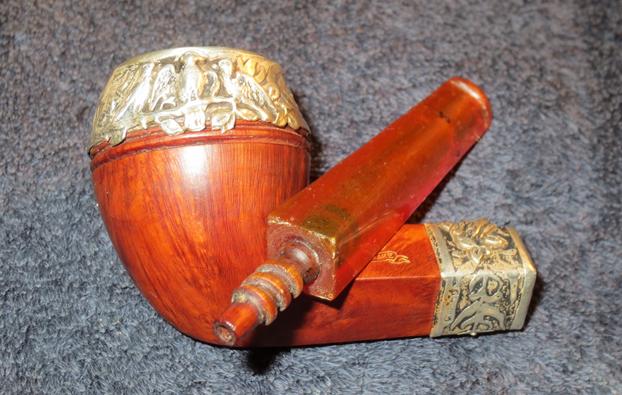
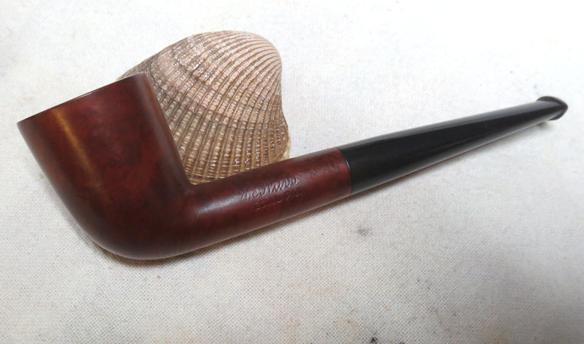
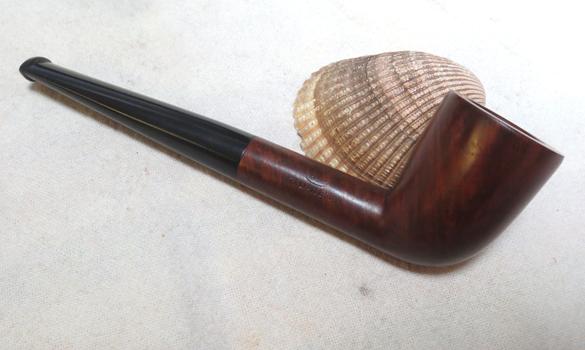
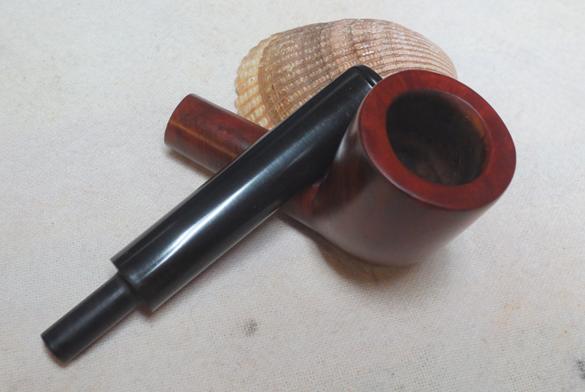
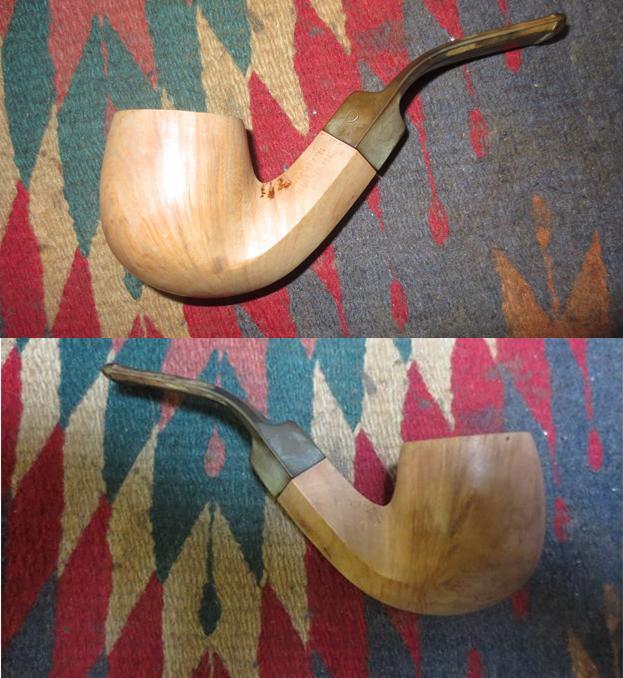
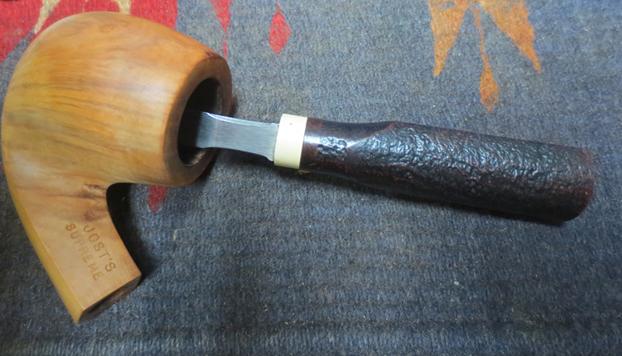
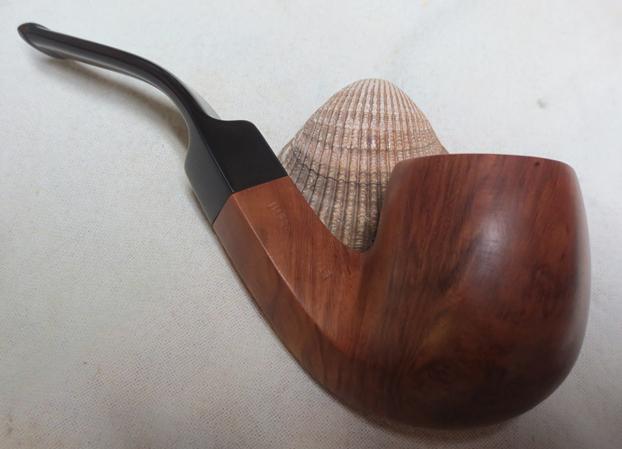
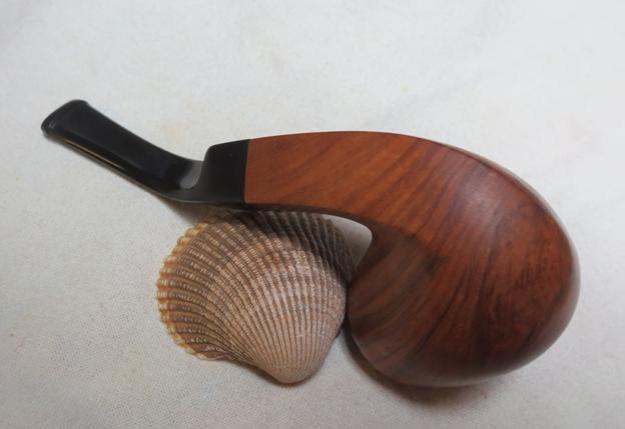
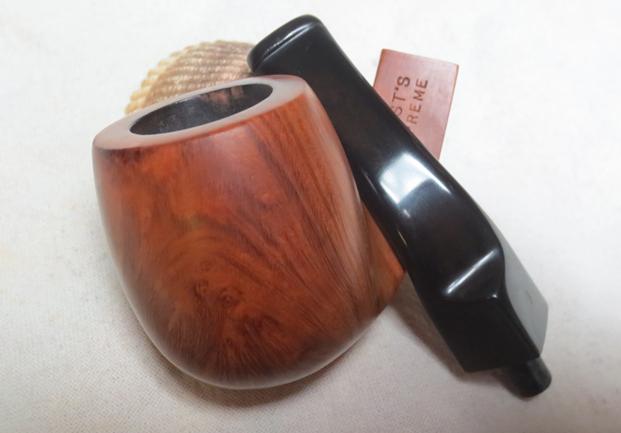
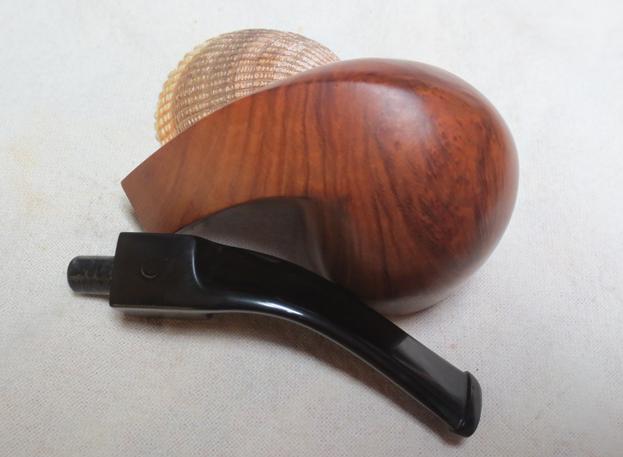
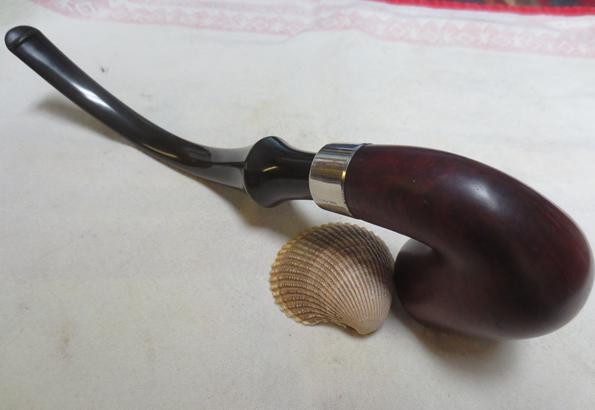
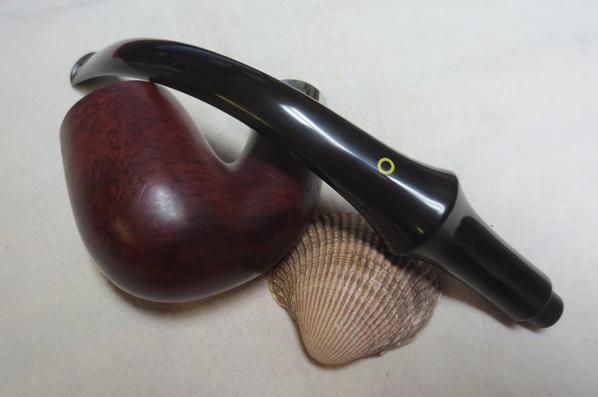
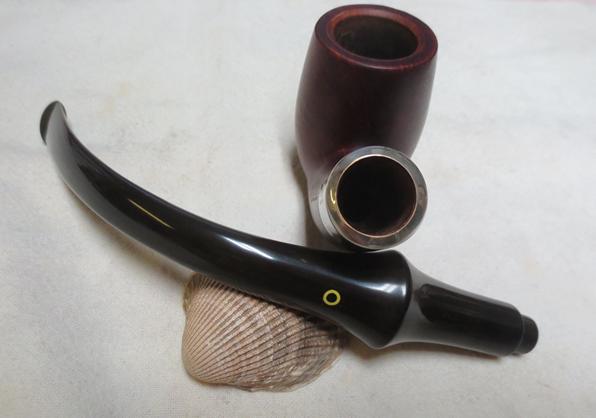
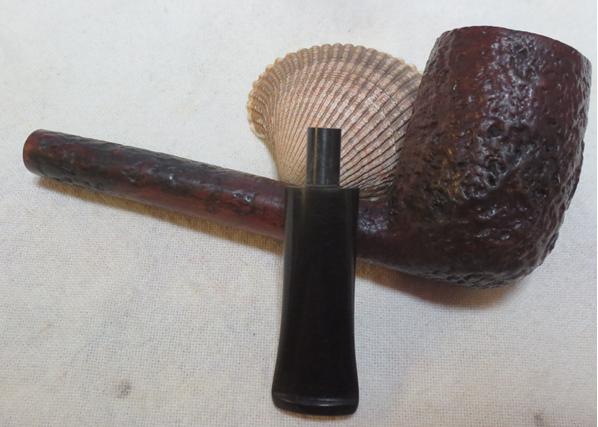
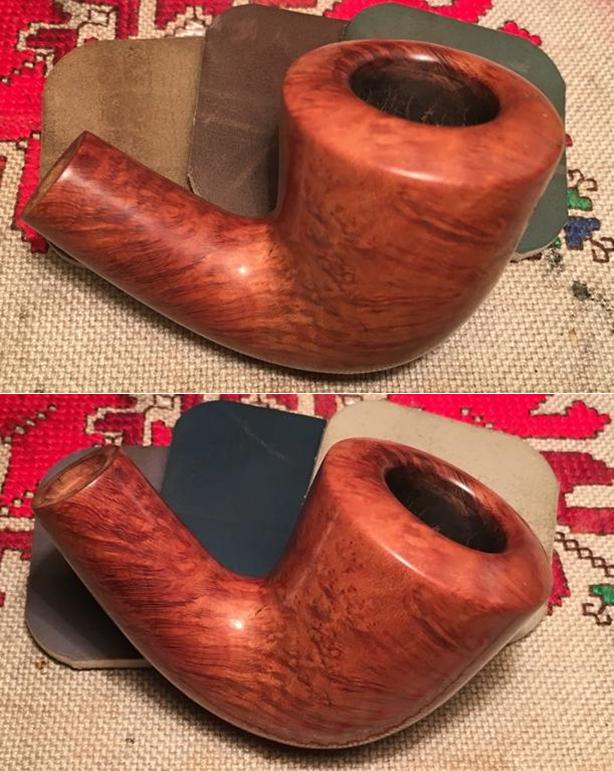
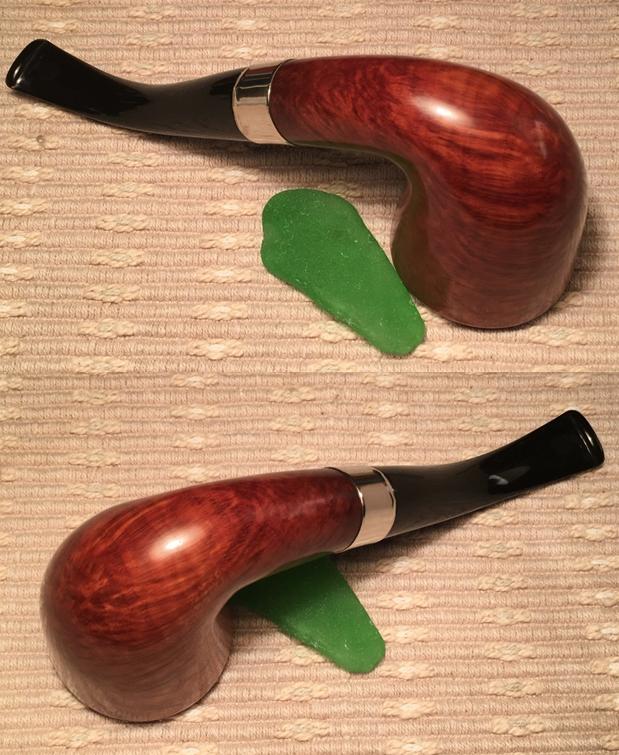
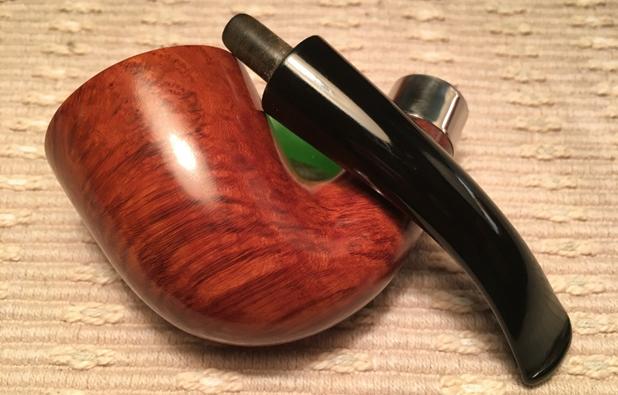
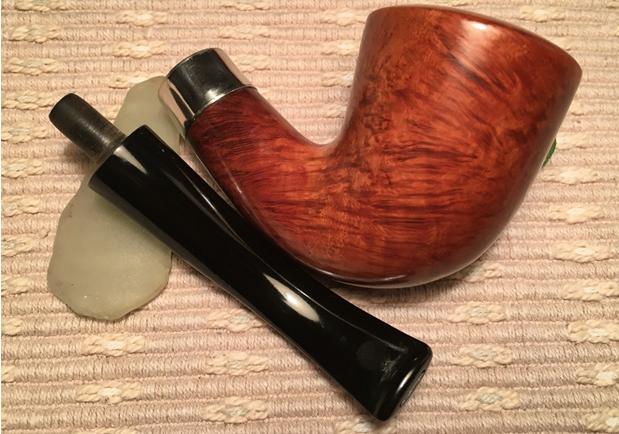
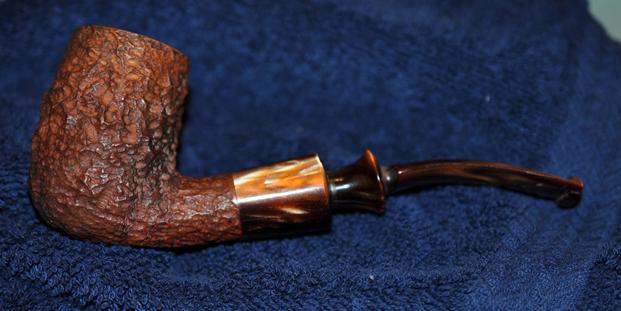
After celebrating our daughter’s wedding and family reunion in the US and returning to Bulgaria, I was anxious to begin a new restoration. While in the US, I added a few pipes to the pool when my wife and I stopped at an antique store advertised on an interstate billboard between Nashville and Chattanooga – this story for the future. I’ve developed a bit of an eBay purchases trove and I found in the ‘Help Me!’ basket what I believe is a Calabash shaped unmarked briar from a seller in New Mexico. I was drawn by the shape and the lateral movement of grain – a very nice looking piece of briar with great potential. I wasn’t sure on the shape and checked out Pipedia’s Pipe Shapes Chart (Link) and Calabash seems to be the best fit – please let me know if I missed! The seller’s pictures provided a descent chronicle of the pipe’s strengths and needs.
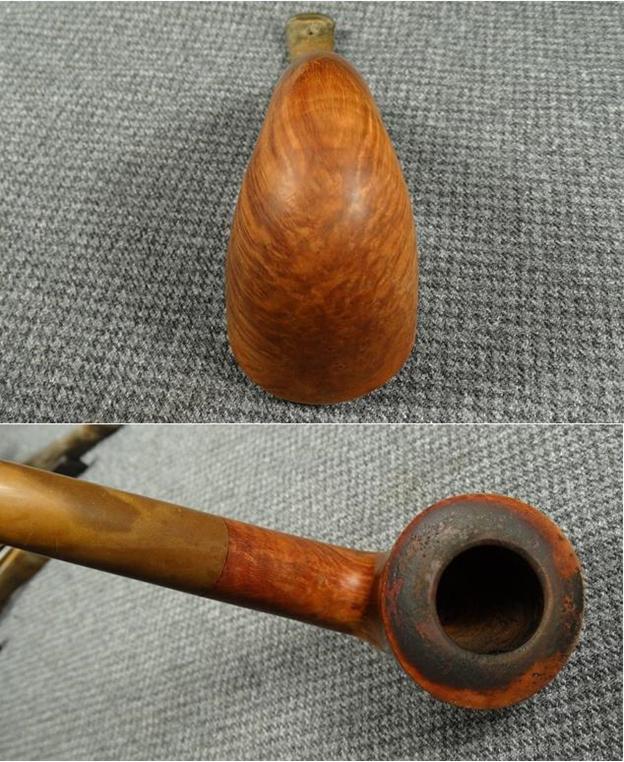
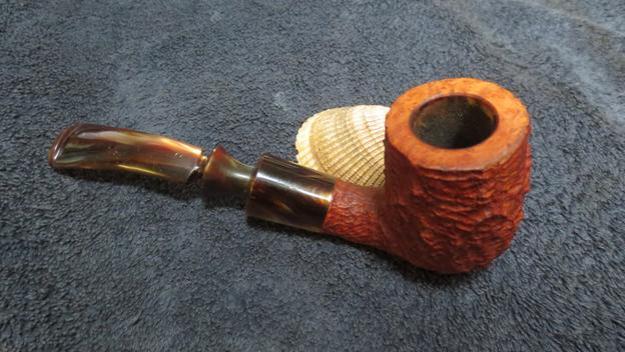
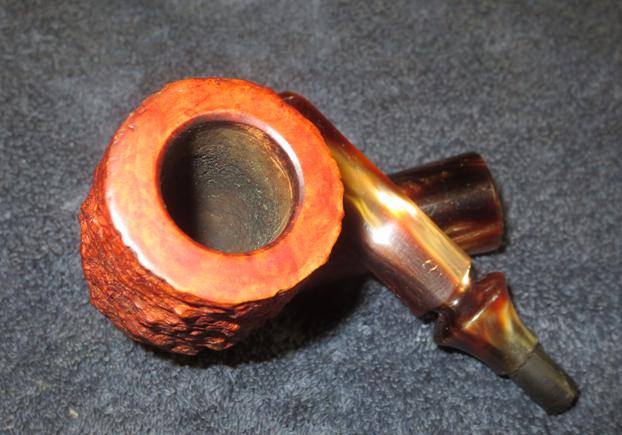
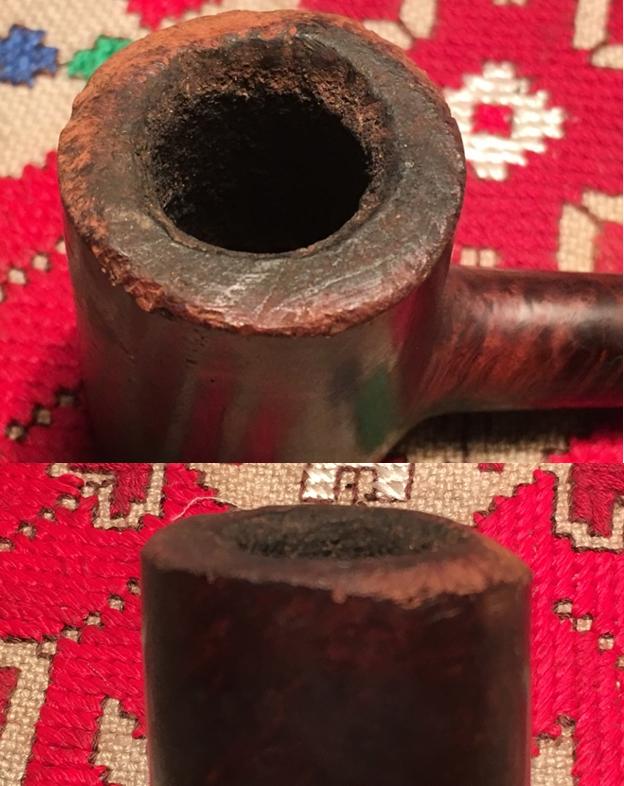
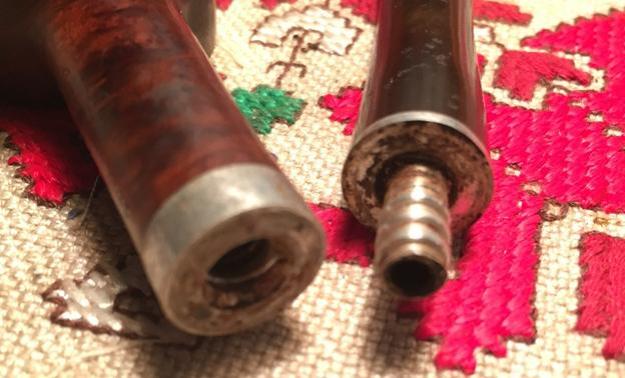
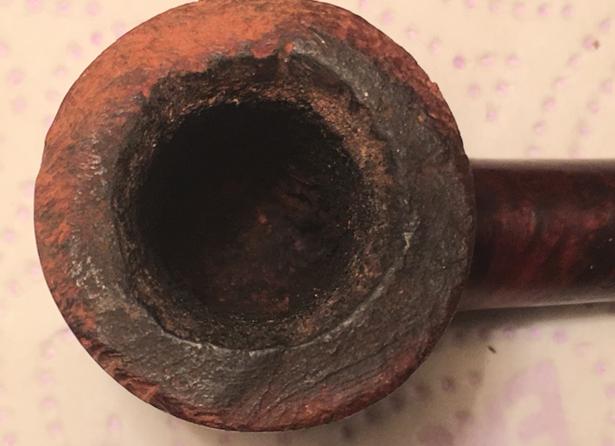
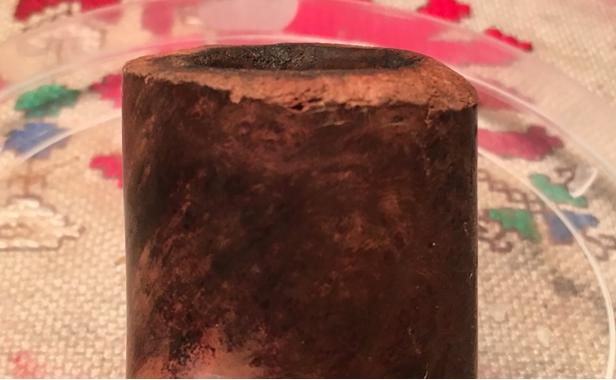
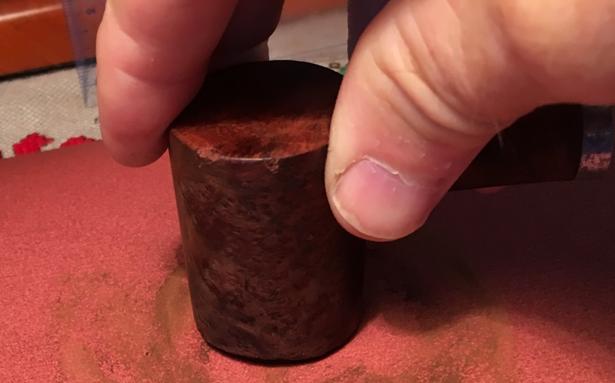
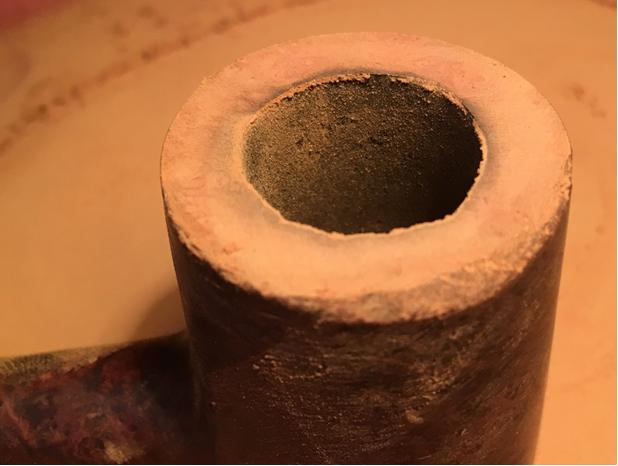
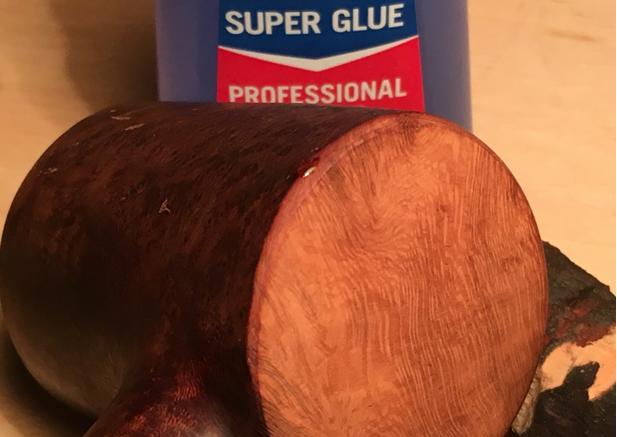
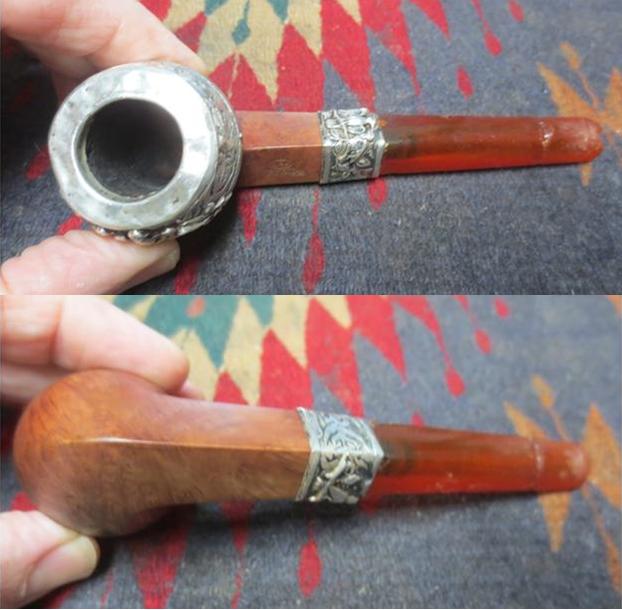
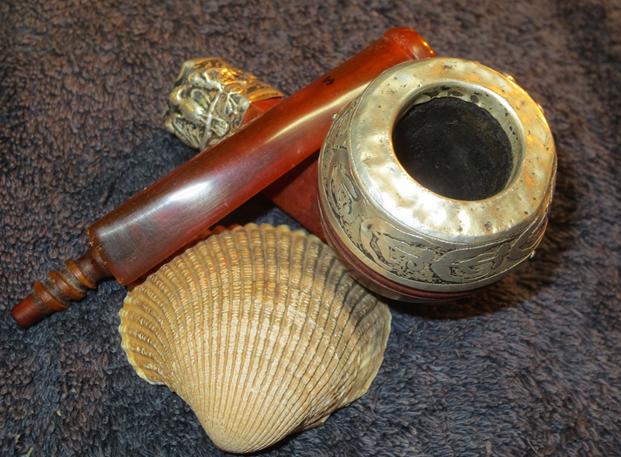
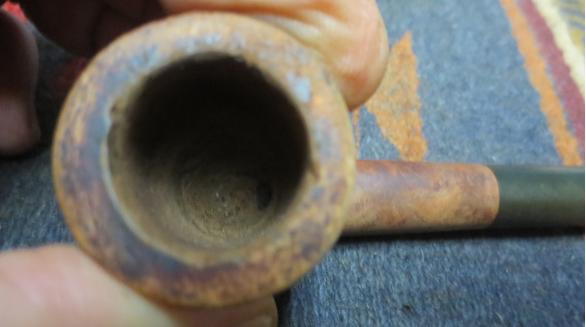
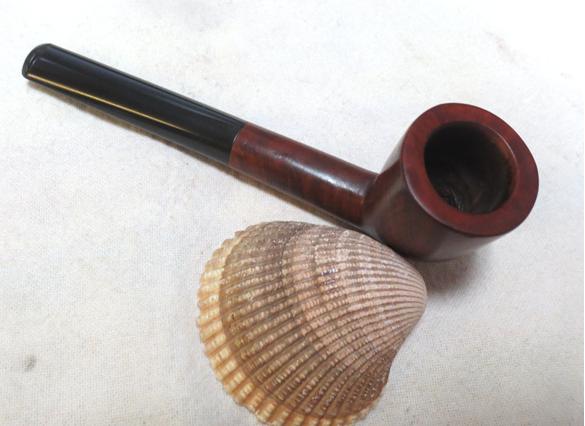
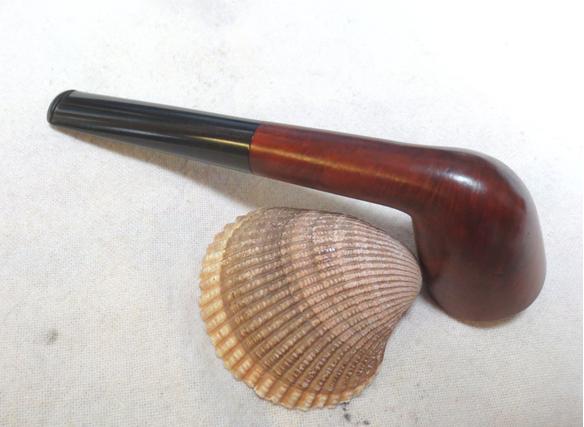
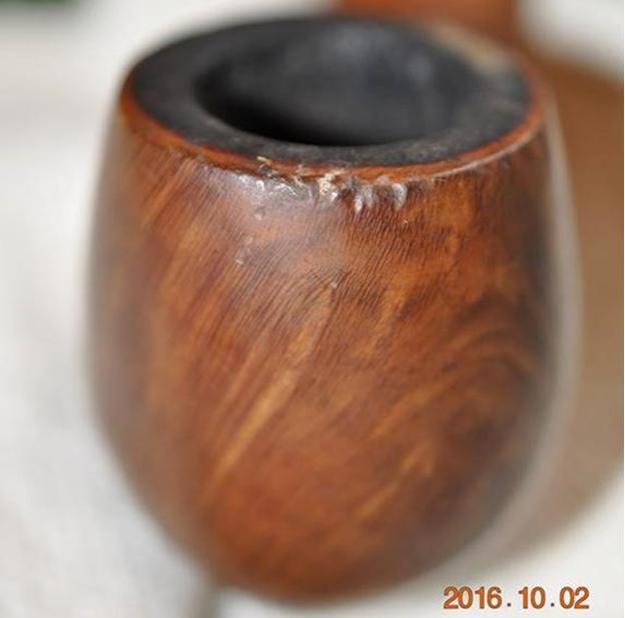
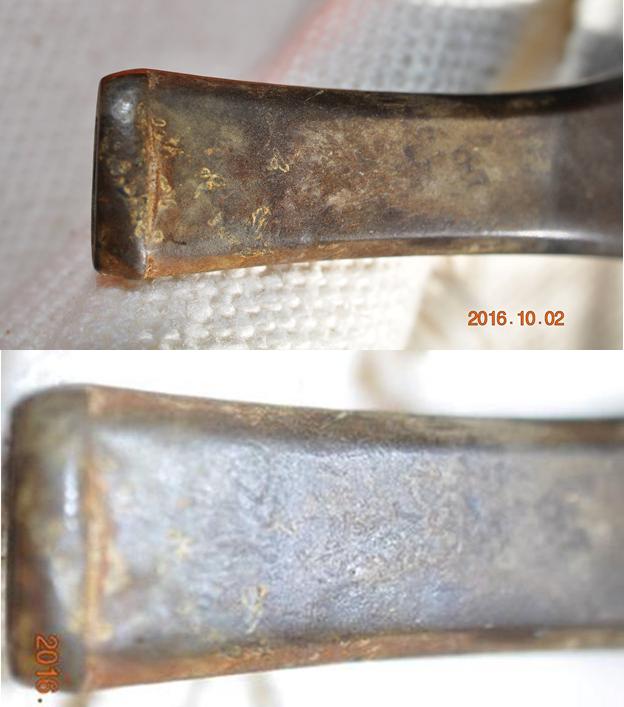
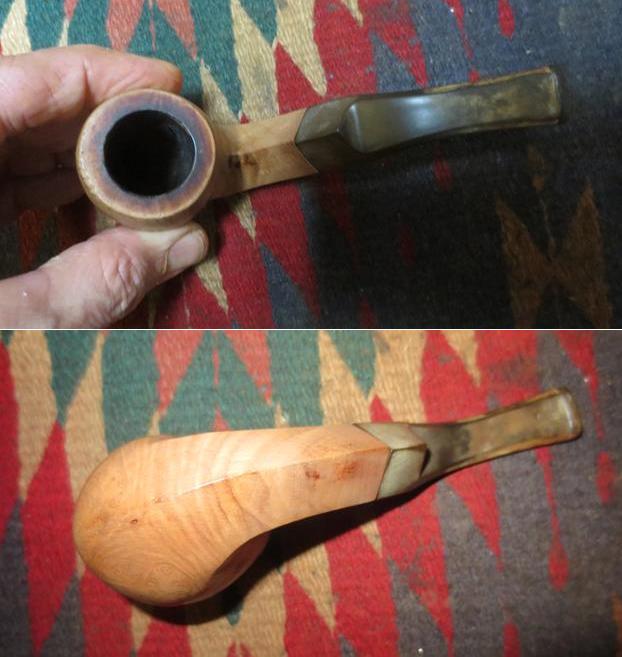
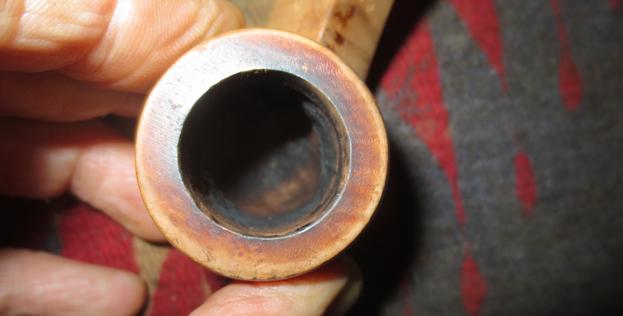
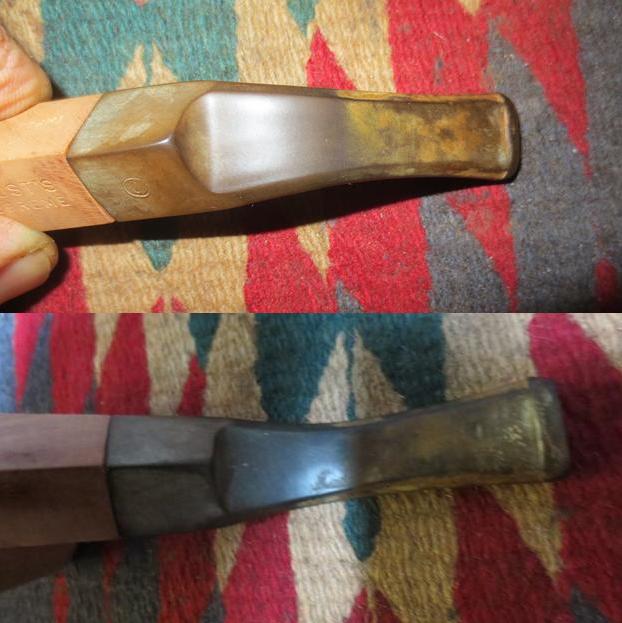
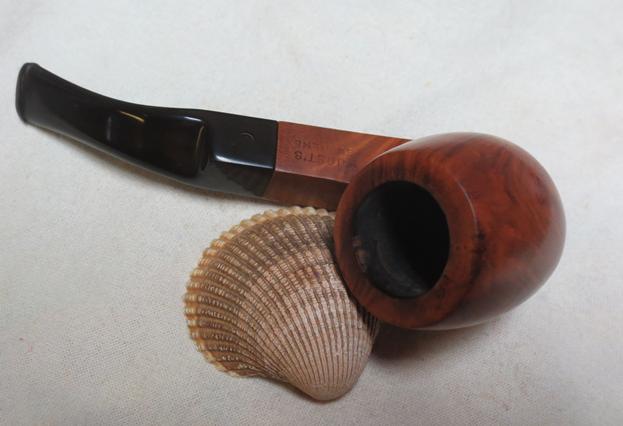
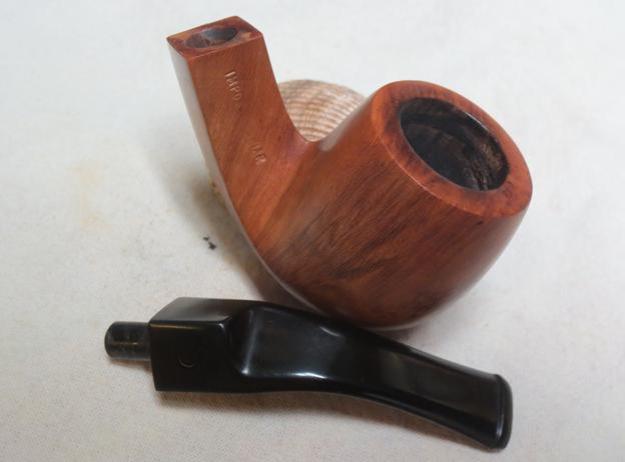
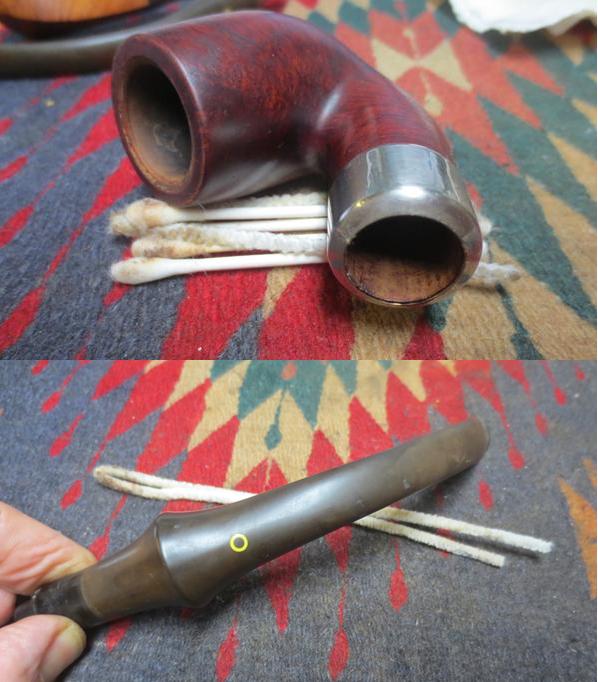
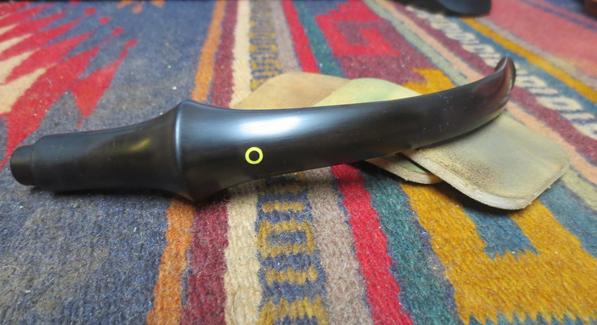
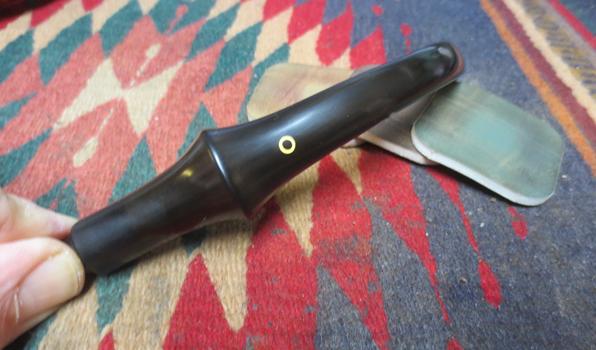
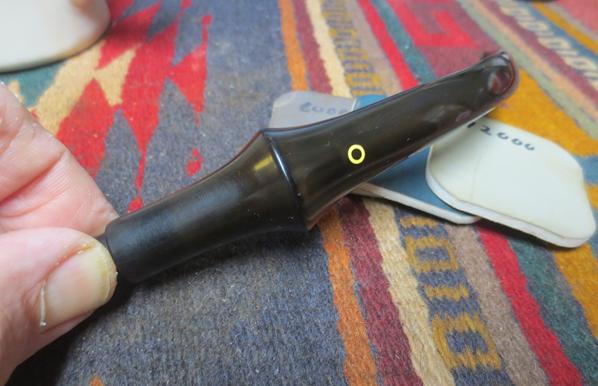
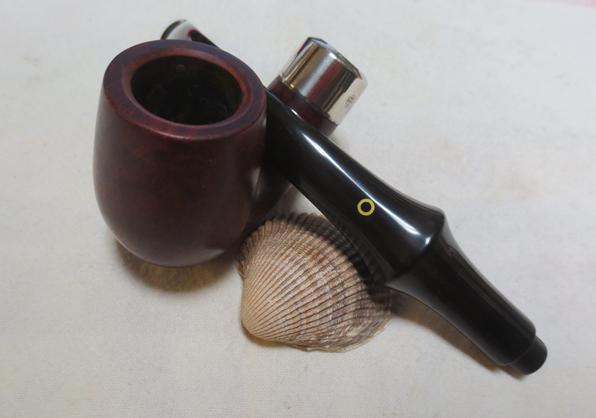
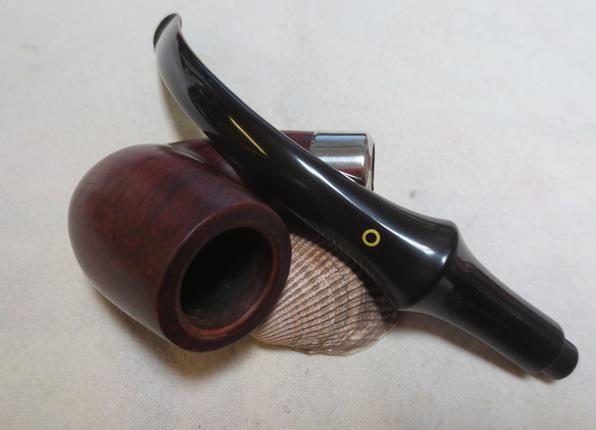
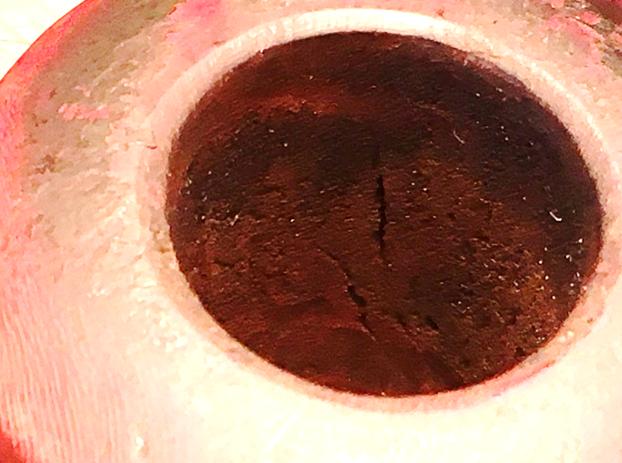
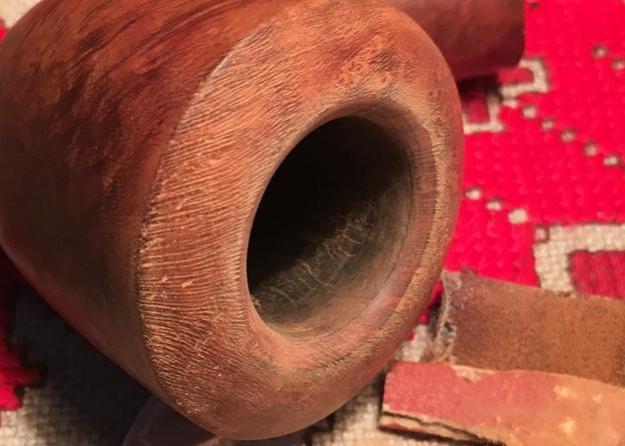
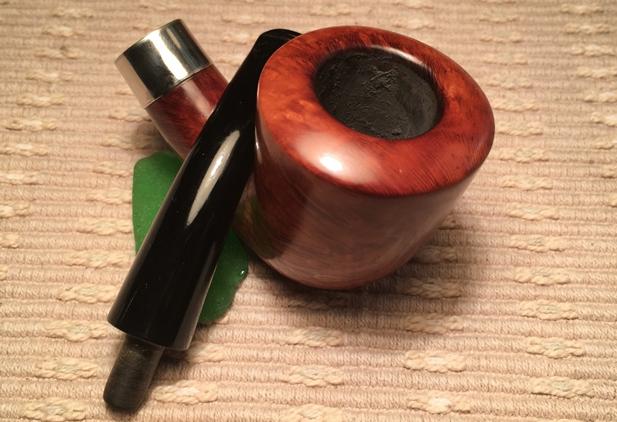
 The pictures reveal stummel externals in very good shape except for heavy oil and lava overflow on the rim. The stem is heavily oxidized and has a tooth hole on the underside of the bit – definitely an eye tooth hanger! Both upper and lower button areas have teeth bites and significant chatter. The button lip will also need smoothing and redefinition. By the looks of this pipe, it was someone’s well-loved and used partner in life. When I put the Calabash on my worktable I take some additional close-ups to focus on the problem areas and I take a closer look. In the bowl, I discover what appear to be cracks in the briar in the front and backsides. At this point, I’m not sure if this is only superficial within the cake or if it presents other problems. I also take a closer look at the stem hole after inserting a pipe cleaner.
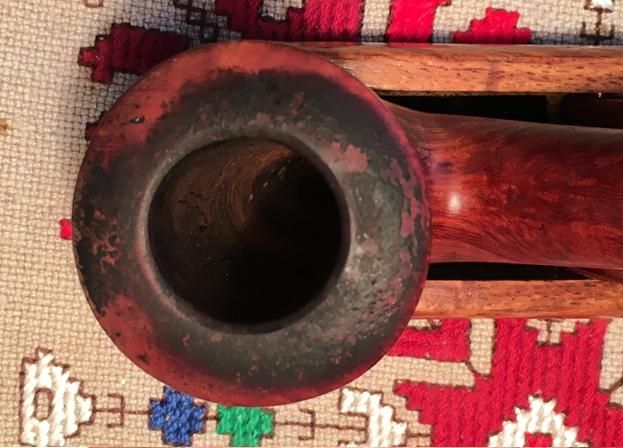
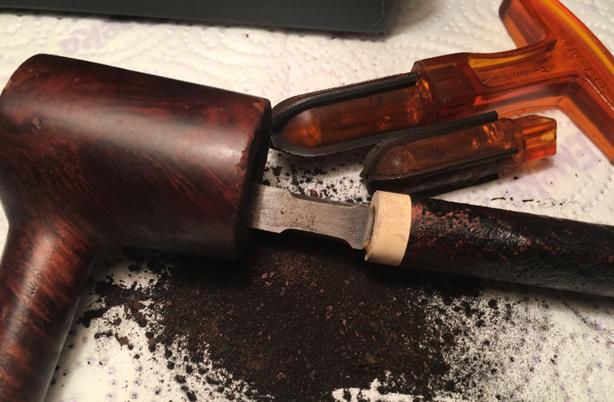
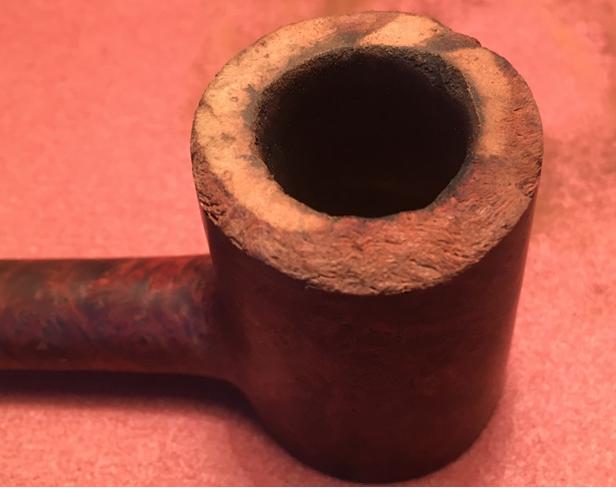
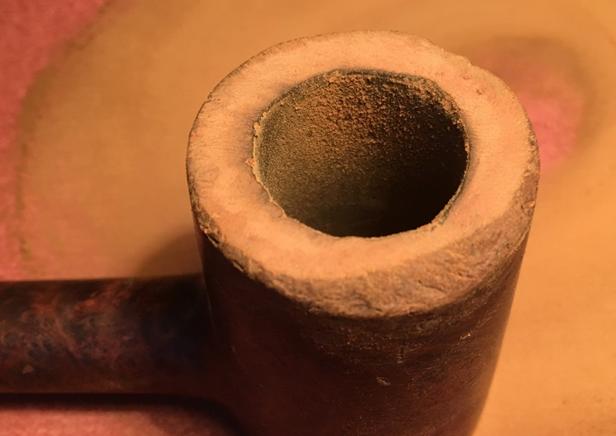
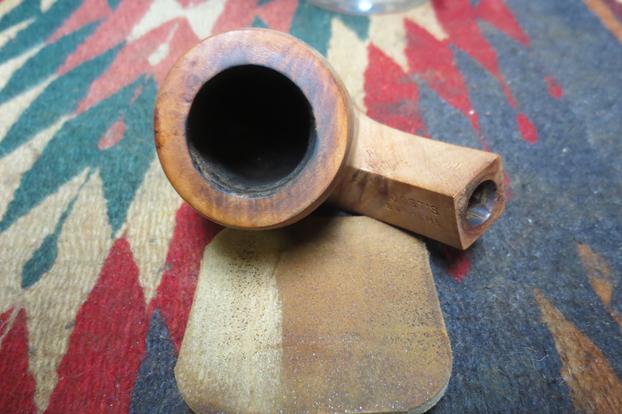
 Before I can make a clear assessment of the bowl and the cracks, I decide first to ream the bowl with the Pipnet reaming kit to reveal the wall’s condition and to clean up the rim. I also remove the stem and plop it in a bath of Oxy-Clean to begin softening the heavy oxidation in the vulcanite. I use 3 of the 4 blades available in the Pipnet kit. The cake was light. I finish the reaming process using the Savinelli pipe knife and clean the walls by sanding with 240 grit paper pinched with the Savinelli knife.
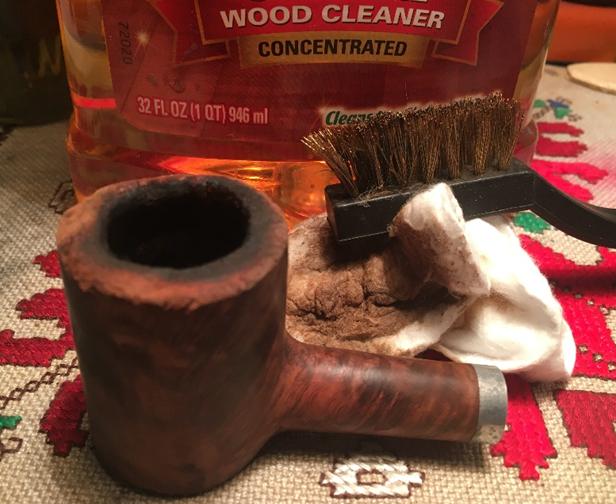
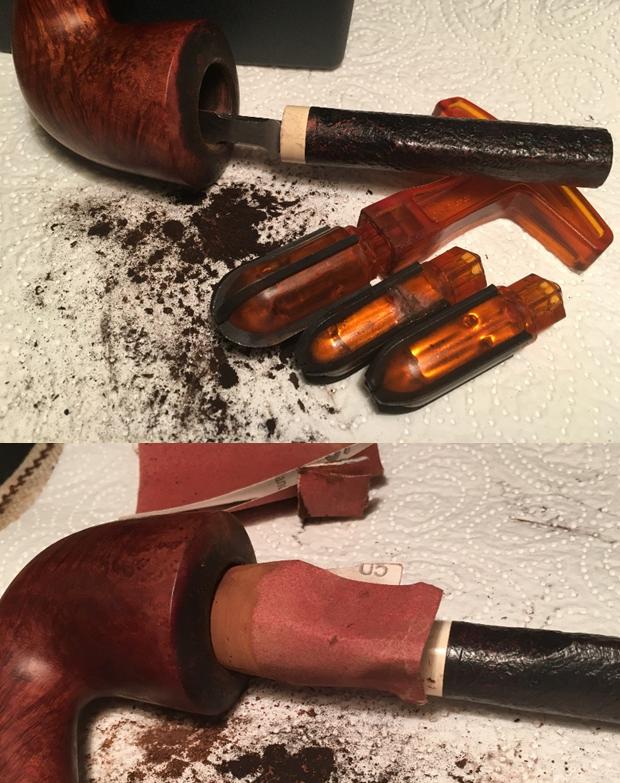 inspect the cracks in the bowl and decide to shoot a question off and some pics to Steve to get his input. I then use undiluted Murphy’s Oil Soap and clean the stummel surface with cotton pads. In addition, to remove the thick lava on the rim, I utilize a brass brush which will not scratch the wood.
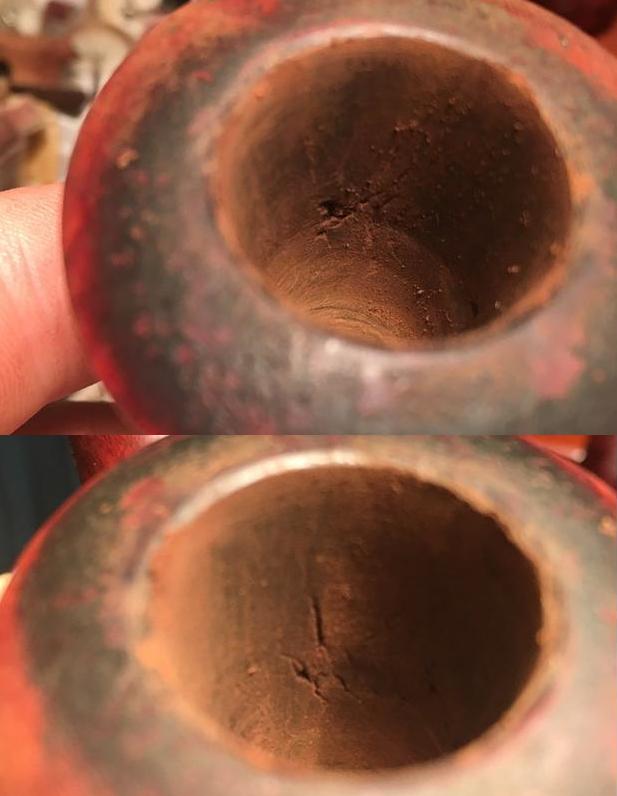
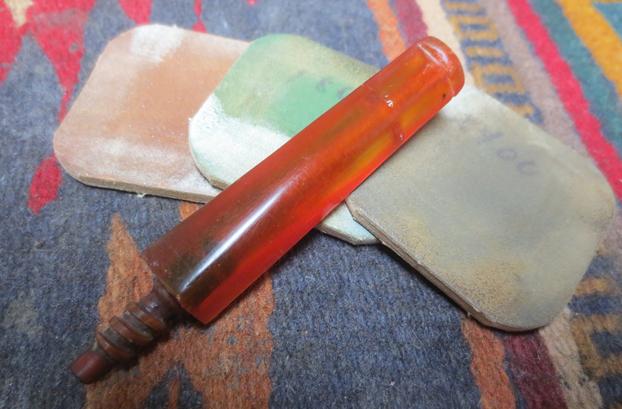
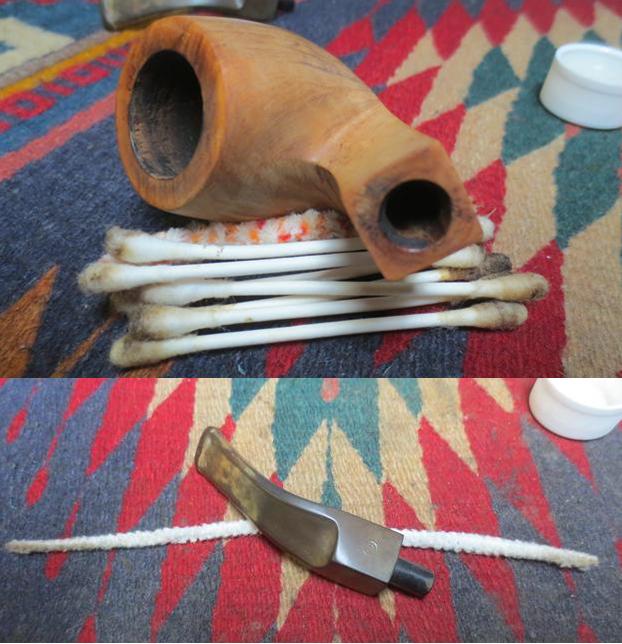
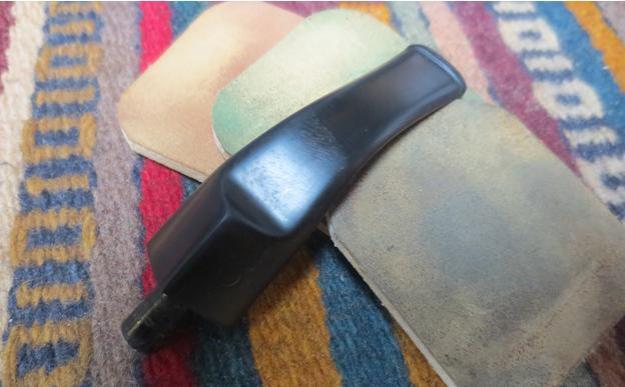
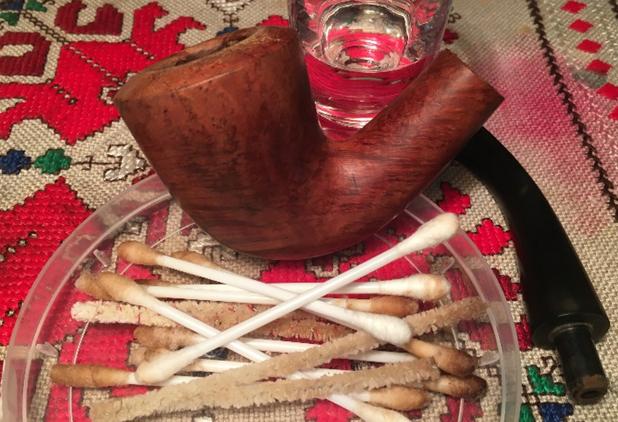
 Putting the stummel aside, I retrieve the stem from the Oxyclean bath and wet sand the raised oxidation with 600 grit paper and follow dry sanding with 0000 steel wool. In anticipation of working on the patch for the tooth hole I want to clean the internals of the stem. I use several pipe cleaners dipped in isopropyl 95% and things are cleaning up well.
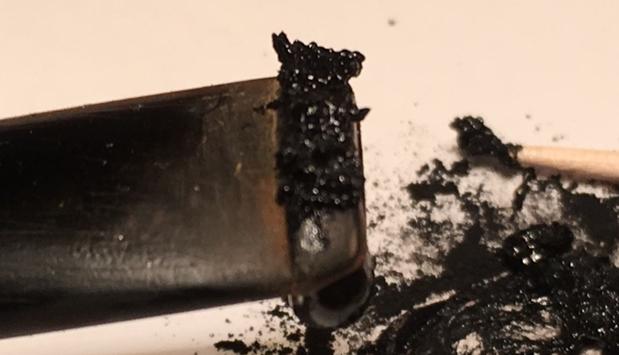
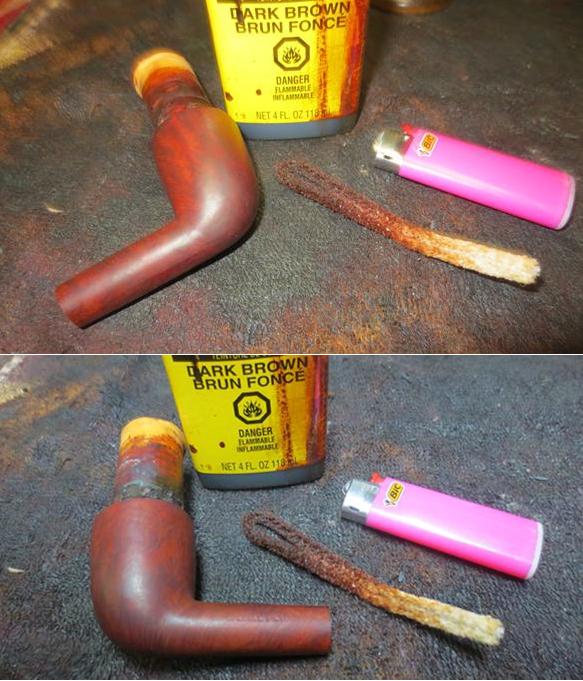
 With the stem cleaned up from I move to repair the tooth hole. This is a first time for me so I fill my mental cup reading several different blogs regarding hole repair and techniques. One of the necessary ingredients for a repair is activated charcoal powder mixed with superglue to create a putty for the hole patch. Living in Bulgaria, I was not able locate activated charcoal in powder state but we do have pet stores and we do have aquariums which require charcoal for the filtering system. The problem is that this charcoal comes in a granulated form. This problem was solved with a technique and tool going back some millennia with the use of a pestle and mortar. I pictured a comparison of before and after below. My only concern is that the charcoal powder I am producing with the pestle and mortar is fine enough to form a smooth blended patch. We will see.
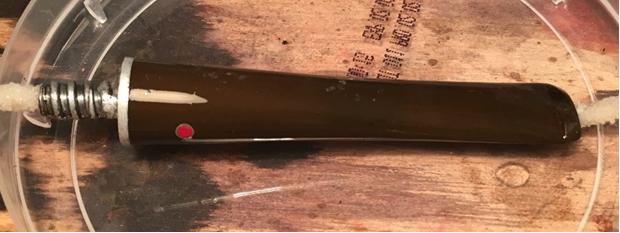
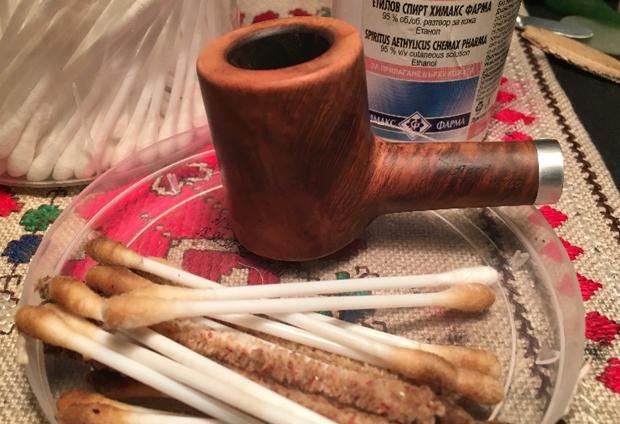
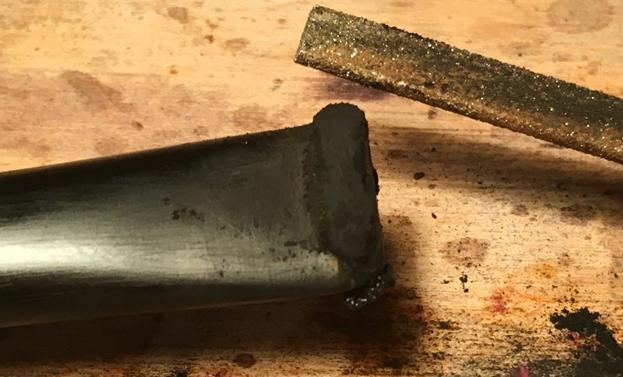
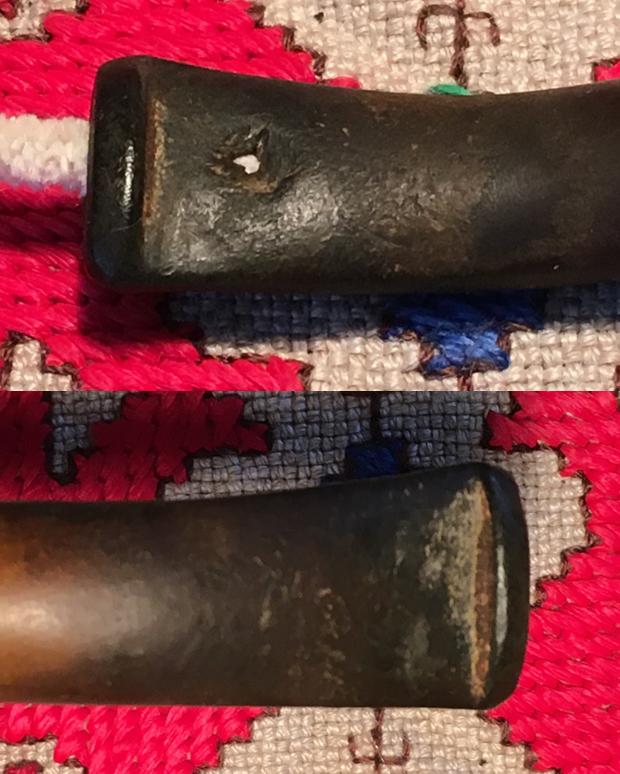
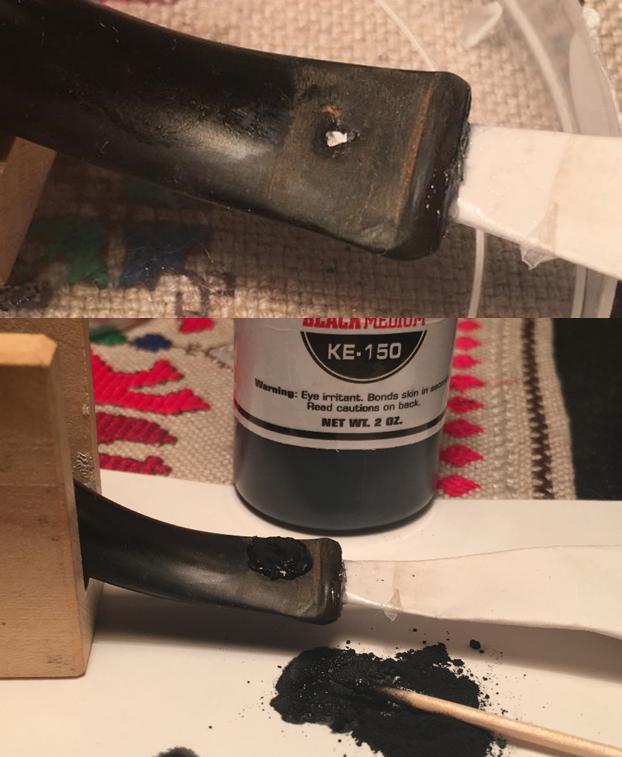
 With activated charcoal powder now in hand, I take another close-up of the damaged bit. To provide a good bond between the patch and vulcanite I score and roughen the area with 240 grit sanding paper, working the paper around the hole and to loosen and remove debris in the hole itself. I follow that with a Q-tip cleaning dipped in alcohol. I want the area clean. I cut a piece of an index card, fold it into a hard point that will fit in the button and wrap the end with tape and then put Vaseline over it to assure that the patch has a solid surface underneath so putty doesn’t leak into the airway and will easily slide out after the patch sets. I pour a small mound of charcoal on an index card then I drip a small puddle of Starbond Black Medium KE-150 glue next to the charcoal. Using a toothpick, I begin to mix the glue and charcoal a bit at a time so that I can judge the viscosity of the emerging putty – I’m aiming for a honey-like thickness. When the putty begins to thicken as I add charcoal, I arrive at what I hope is the accurate brew! Using the toothpick as a trowel, I apply charcoal putty to the hole, tamping each application and making sure I reach the depths of the hole and over-cover the damaged area building a bit of a mound. After the patch cures, I will remove the excess putty. I’ll give it a full 48 hours before continuing the work to assure the patch is solid and good for years to come. After the patch sets a bit, I flip the stem and apply drops of Starbond Black Medium KE-150 to the tooth dents on the upper bit area. The pictures show the progress.
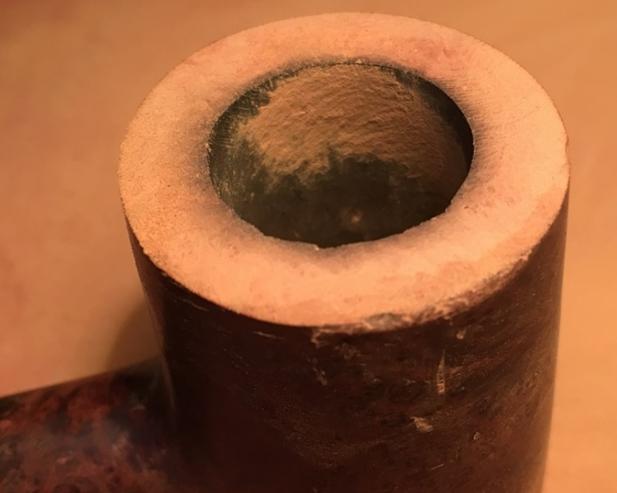
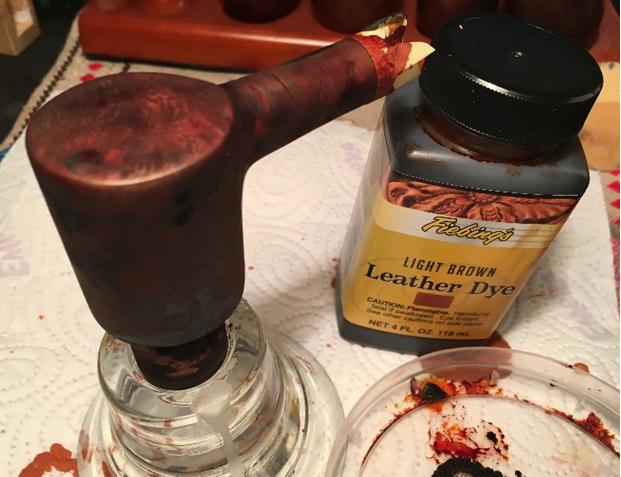
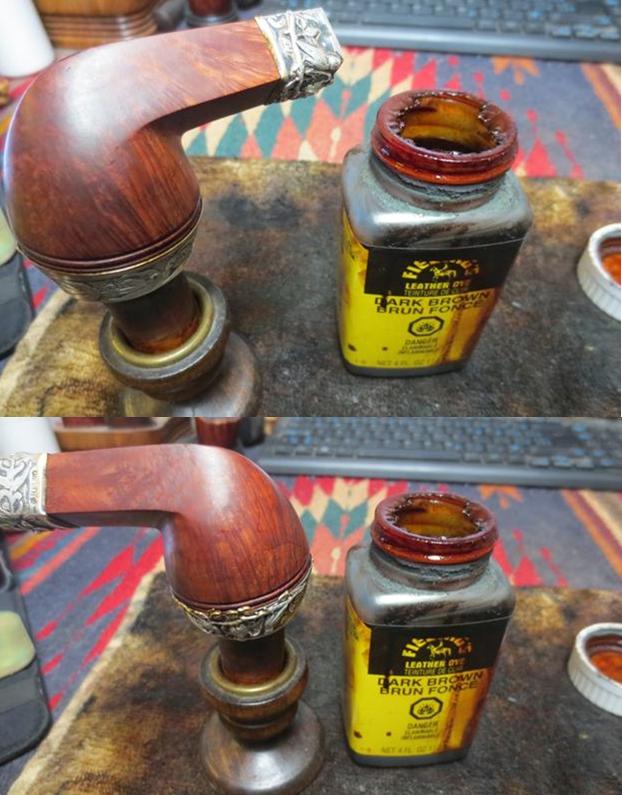
 With the stem patches curing I return to the stummel. Steve’s email arrived with his reply to my questions about dealing with the cracks in the inner bowl. He described his method of applying a paste made from a mixture of cigar ash and water to the cracks and bowl wall. Yes, I remember previously reading about this in one of his restores! This will come later after I’m able to collect some cigar ash – Cubans are readily available in Bulgaria. I want high quality ash! I take another close-up of the stummel as I re-inspect the surface. I find one small crevice which I will fill with clear super-glue. First, using a cotton pad I clean the surface of the stummel with acetone to remove any residual finish. I then apply a drop of super glue on the small crevice above the shank junction and put the stummel down for the night to let the superglue fill to cure.
 The next day, ready to move forward, I strategically sand down the superglue fill with 240 grit paper removing the excess glue bringing the patch down to the briar surface assuring a good blend.
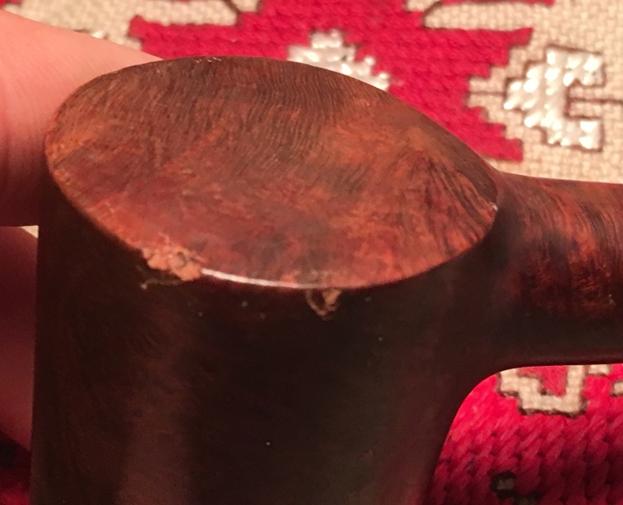
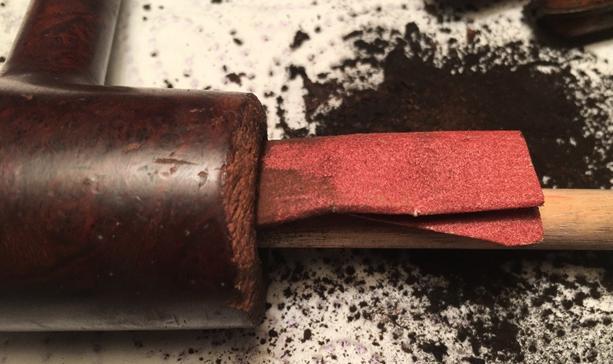
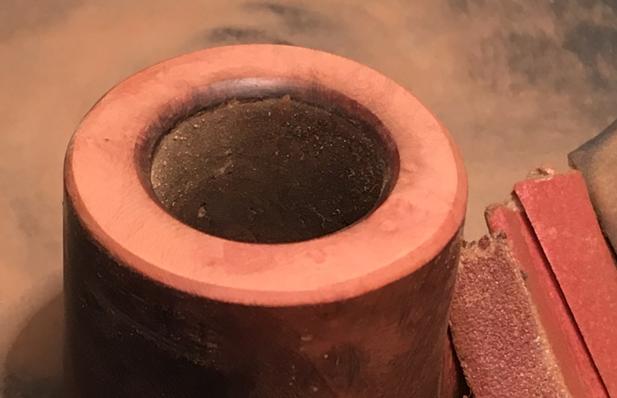
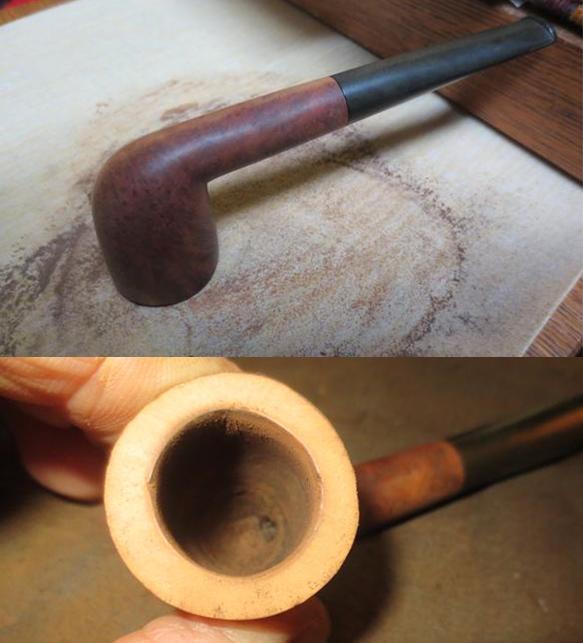
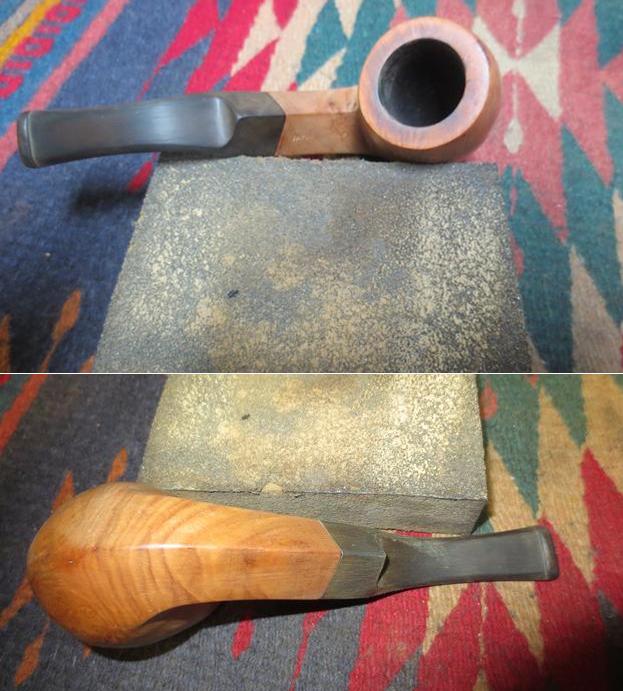
 When I think of the classic Calabash look, the stummel shape is crowned with a distinct cap. To enhance this look and to remove some damaged, colored briar around the inner rim, I want to enhance and augment the bevel already present. Using a coarser 120 grit paper tightly rolled, I cut the fresh bevel then I follow using a rolled-up piece of 240 grit paper to smooth the new bevel. Pictures show the progress.
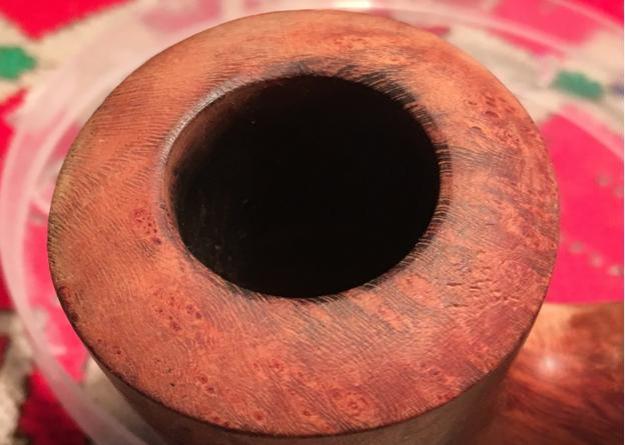
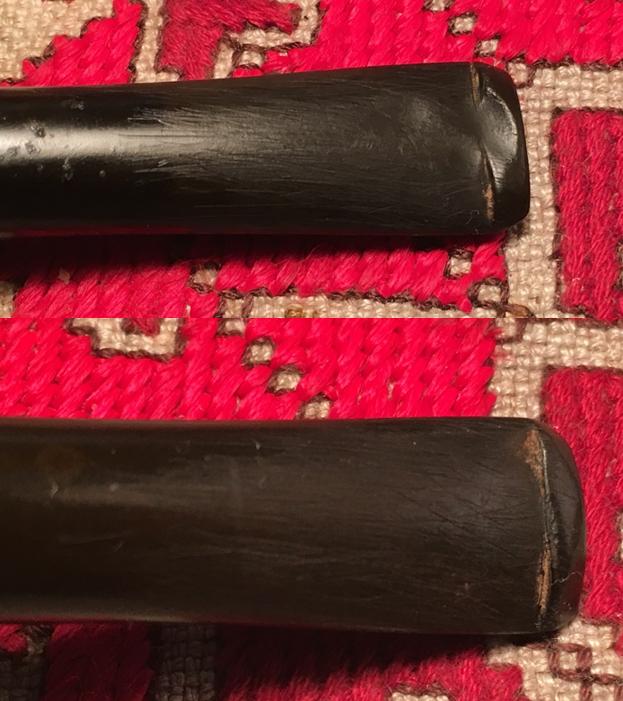
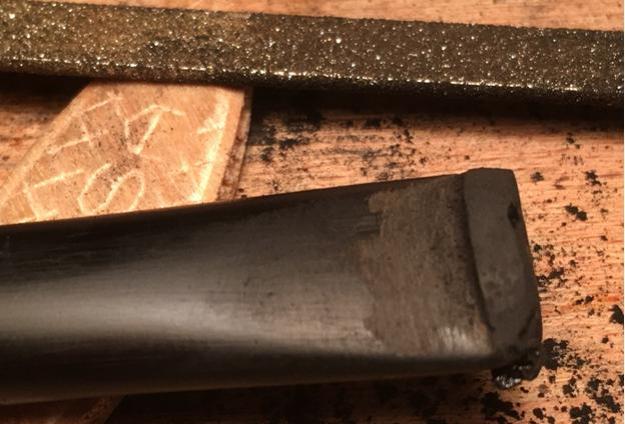
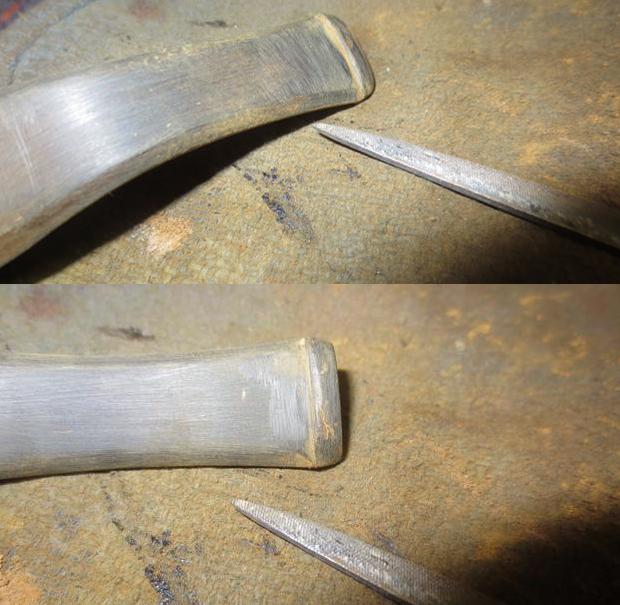
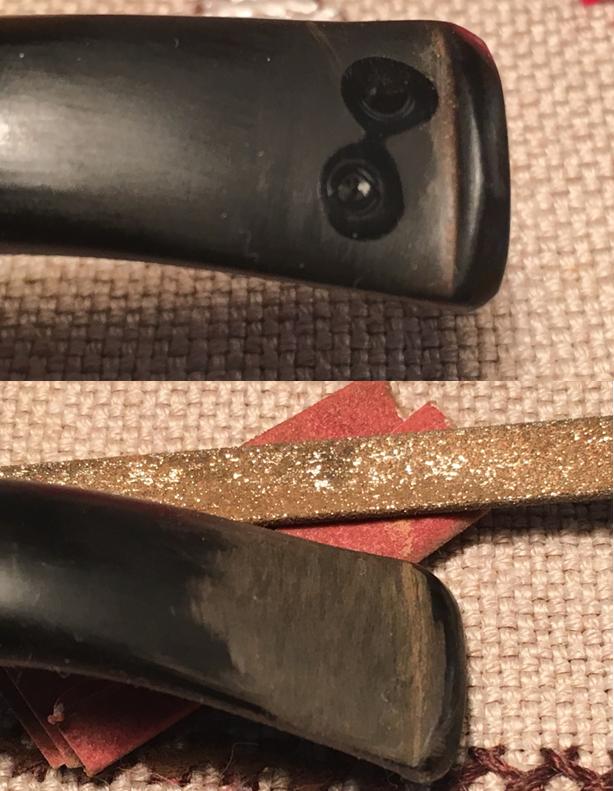
 Before continuing with the rim repair and the stummel finish, I want to clean the stummel internals with a retort but I’ll need to return to the stem bit repair and do the sanding on the patches first. The retort’s rubber hose will not expand enough to attach directly to the shank so I need to utilize the stem. I am anxious to see how my first attempt at a hole repair faired. Utilizing a flat needle file and 240 grit paper I sand the patch down to the stem surface. The patch is blending well but I detect very small, what I assume are air pockets, emerge during the sanding. From my reading, I found that this is normal, but these appear to be too small to treat with a bit of superglue. I’ll keep my eye on this during the stem finishing phase. On the upper bit, I also sand the superglue patches of the tooth dents to the stem surface with 240 grit paper. With a needle file, I redefine the button lip a bit smoothing out where there were tooth bites. The pictures show the progress on both the underside and the upperside of the bit – I’m liking what I see.
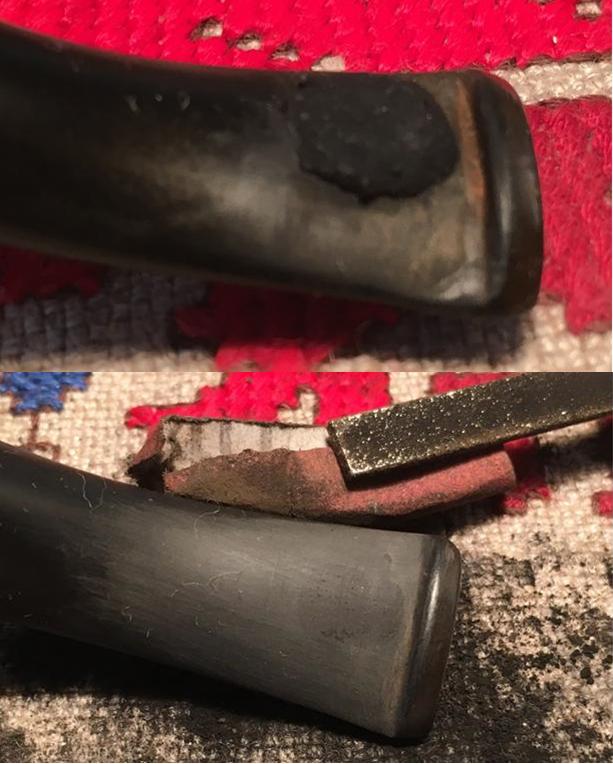
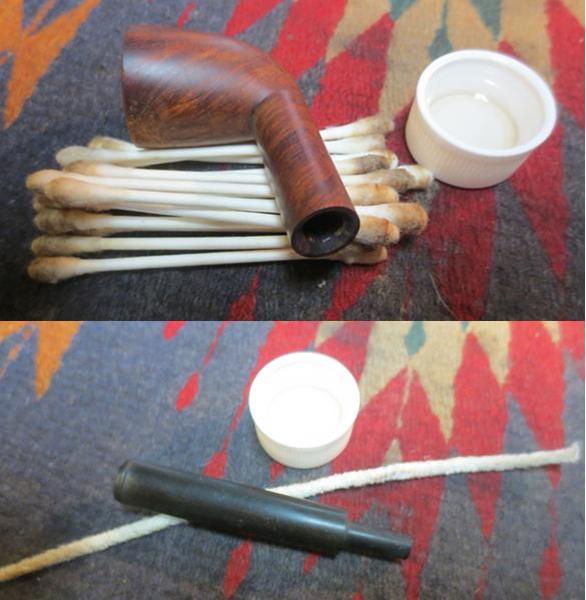
 I don’t want to proceed any further until cleaning the internals of the stummel. I will use the retort to accomplish this. With cotton ball in the bowl, alcohol boiling in the test tube I begin the process. I take a couple of shots of the progressive dirtying of the alcohol. I forgot to take the final where the used alcohol was almost clear. After the pipe cools from the retort, I remove the stem and finish the internal cleaning with some Q-tips and pipe cleaners dipped in alcohol 95%. Internals are clean!
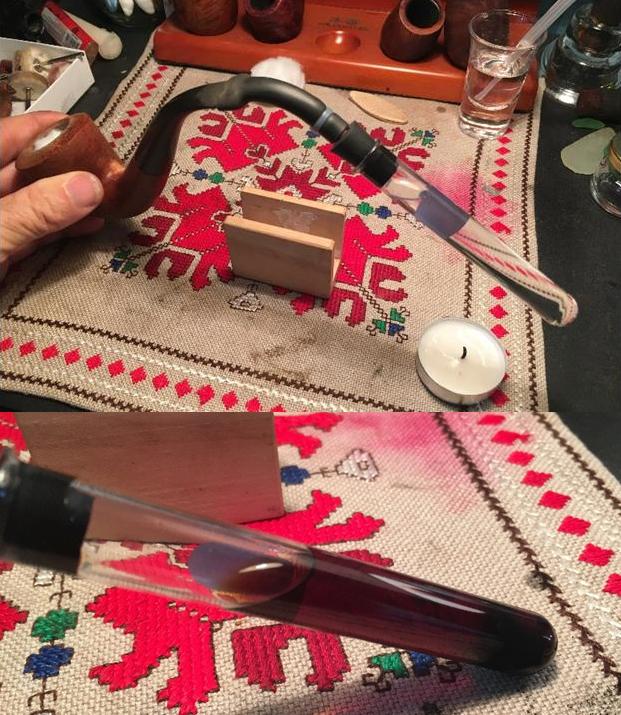

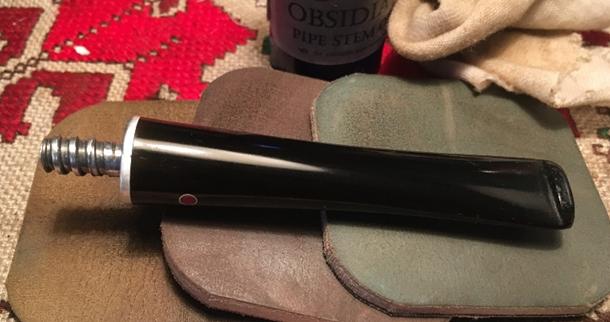
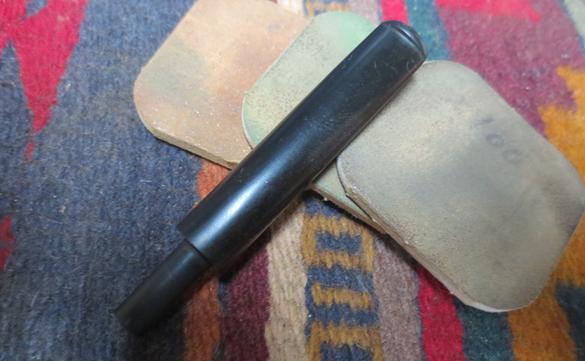
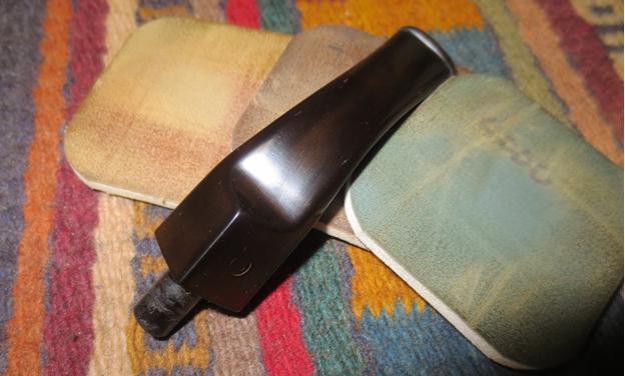
 Turning again to the stem, I begin the micromesh process. I wet sand with micromesh pads 1500 to 2400. Before applying Obsidian Oil, I want to take a close look at the tooth hole patch on the underside of the bit. I’m not happy with what I find. With the first set of micromesh sanding pads the pocketing in the patch is more pronounced. Air pockets? Or, perhaps my charcoal powder was too coarse? I’m not satisfied with these results so, even though it is a detour, I want to try to rectify the problem. I apply a thin coat of CA Instant Glue over the area. I’m hoping that the glue will fill the pocket and allow a smoother surface to emerge – enhancing the blend with the native vulcanite. I clean the area with a bit of alcohol on a cotton pad then I apply the CA Glue. I’m hopeful that this will do the trick.
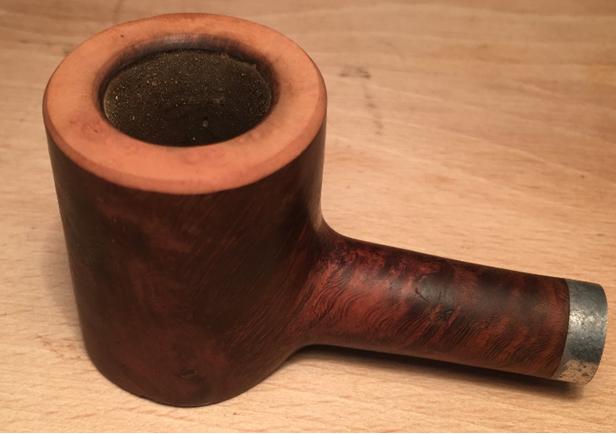
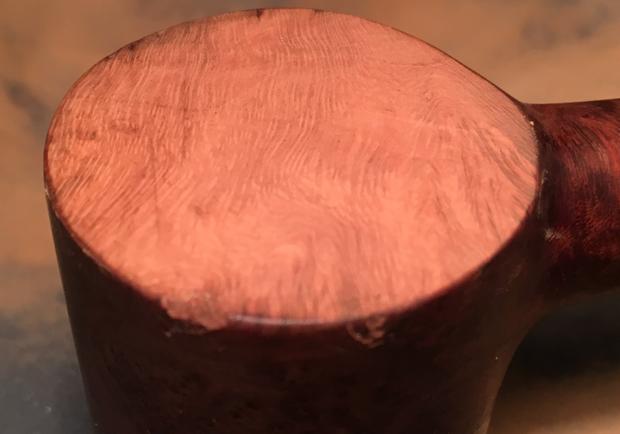
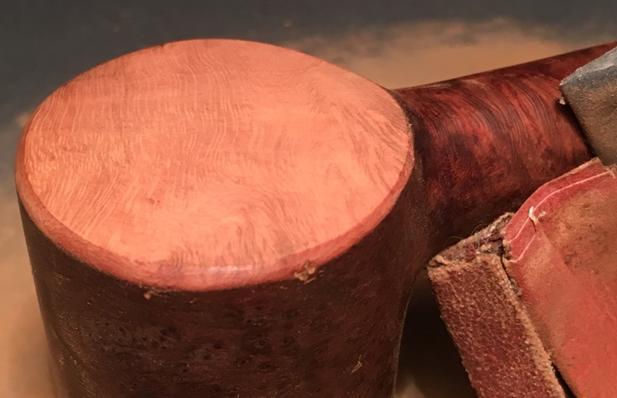
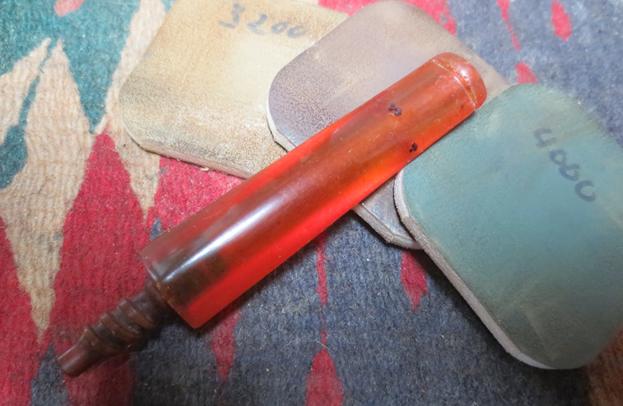
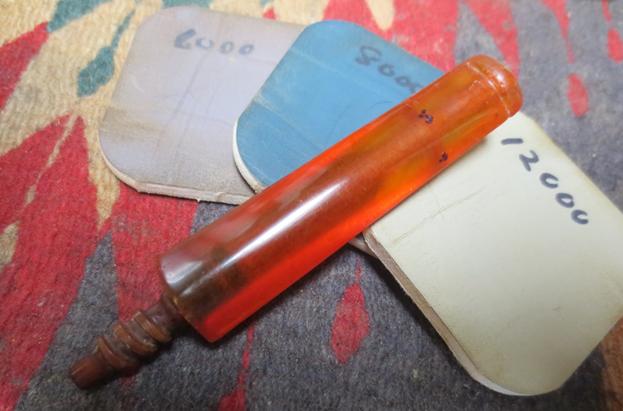
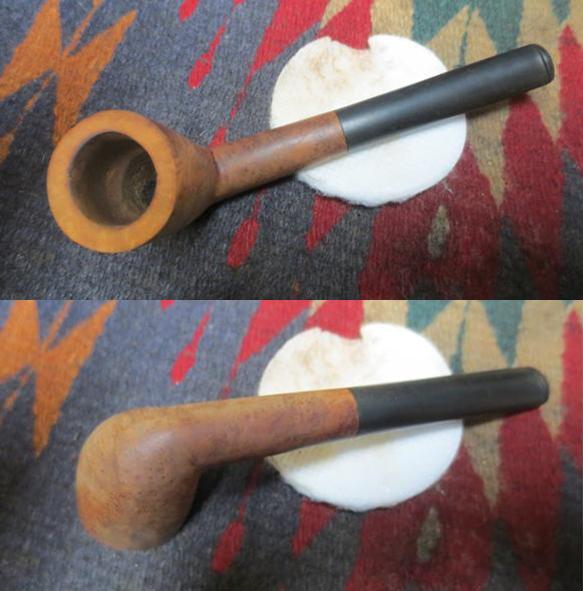
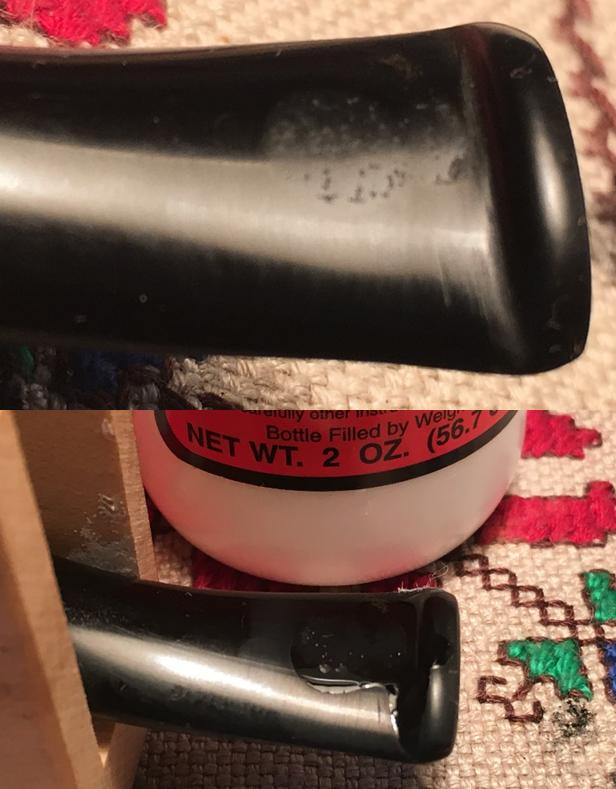 Turning now to the stummel externals, I first use a medium and then a light grade sanding sponge, focusing on the rim to work out pits and roughness left over from the lava clean up. Following the sanding sponges, I wet sand the stummel using micromesh pads 1500 to 2400, then dry sanding with pads 3200 to 4000 and 6000 to 12000. As I watched the beauty of the grain emerge, I made the decision not to apply a stain but to keep the natural briar – a rich, thick, swirl of honey. This no name Calabash is dressing up nicely.
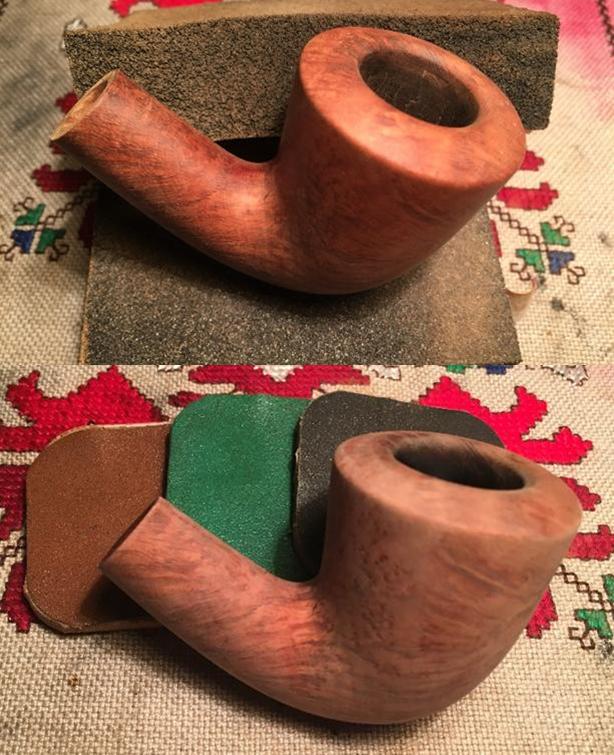
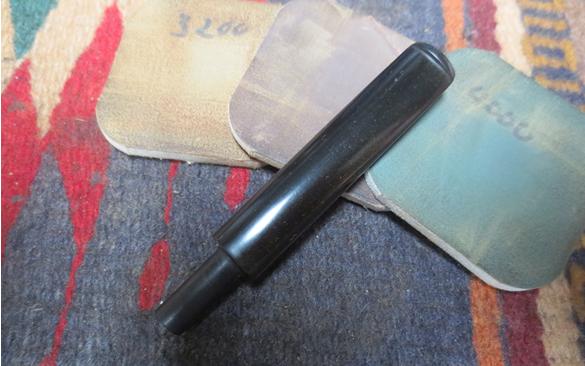
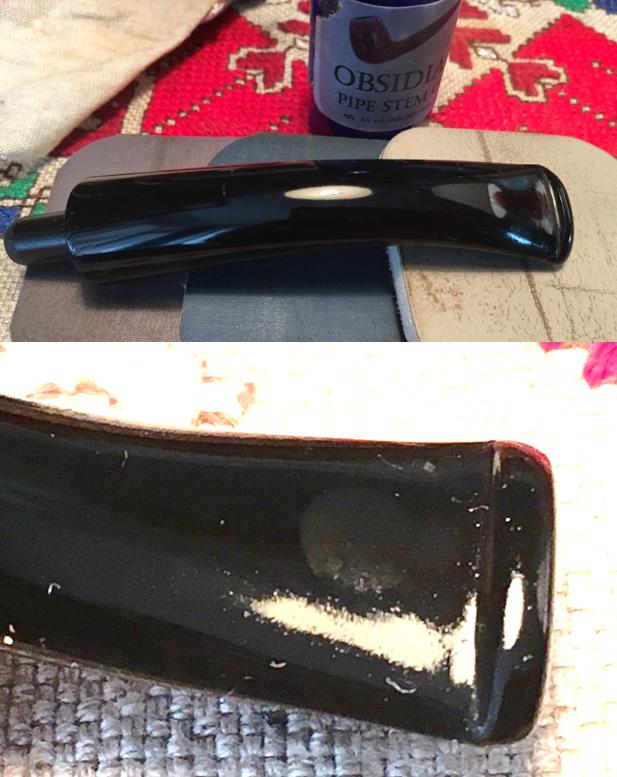
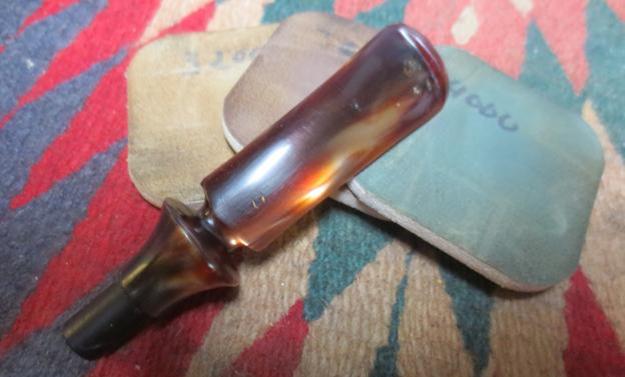
 Time to return to the stem and complete the lower bit tooth hole patch and to prepare the stem for the waiting bowl. I ‘gently’ approach the sanding with 240 grit paper to lightly smooth the re-superglued patch down to the stem surface. The ‘gentleness’ is due to not wanting to sand deeper than the reapplication, increasing the potential of uncovering new pockets. I also again apply the flat needle file to define the lower button lip and then remove the file marks with the 240 grit paper. I follow with 600 grit sanding paper and finally, I finish with 0000 steel wool. I think the hole patch is improved and now I’ll trust the rest of the finishing and polishing process to blend the patch as much as possible. In the picture below one can still detect the patch boundaries but the surface is much smoother.
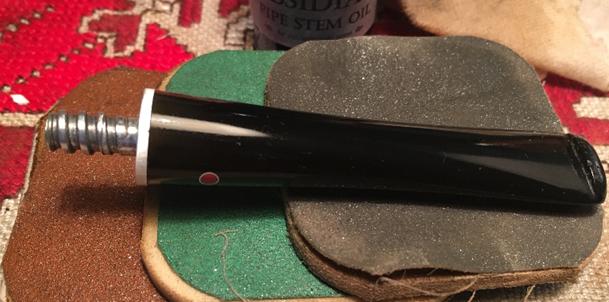
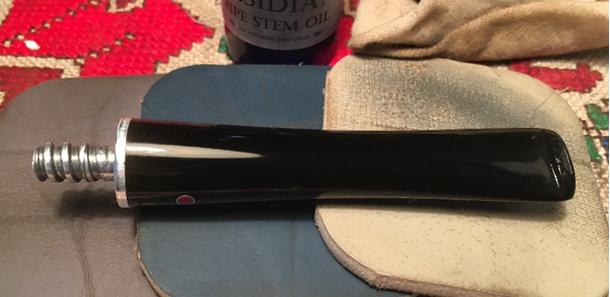
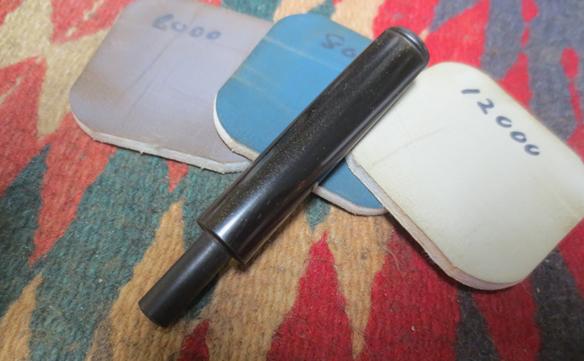
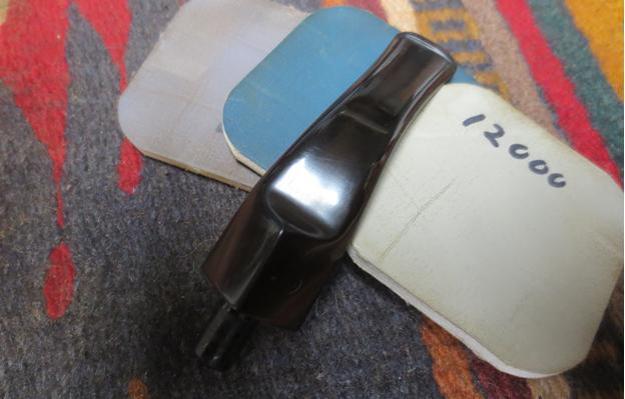
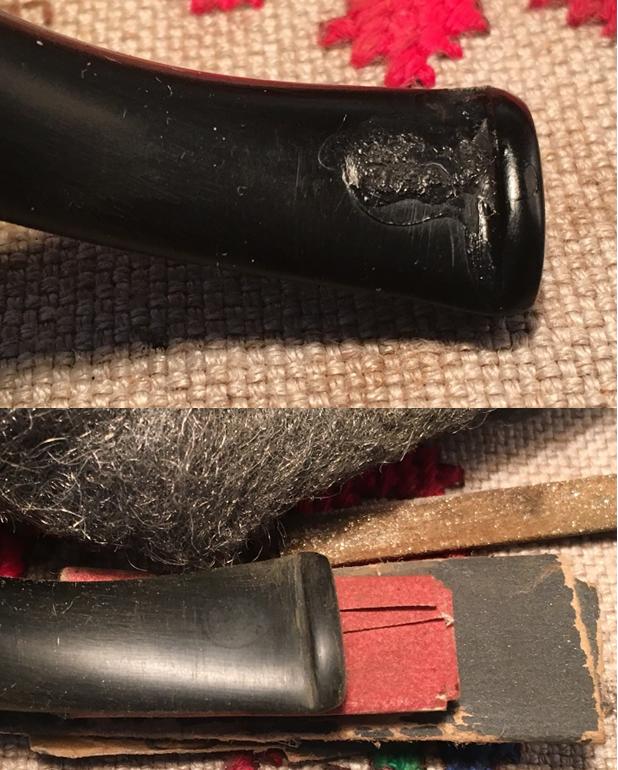 With tooth hole charcoal superglue putty patch officially completed, I restart the micromesh sanding process by wet sanding with pads 1500 to 2400 followed by an application of Obsidian Oil to absorb into the vulcanite surface. Then dry sanding with micromesh pads 3200 to 4000 and 6000 to 12000, completing each set with an application of Obsidian Oil. The pictures show the progress. The last picture in this set I flip the stem to show the hole repair. I think it’s ok, and as they say, “It is what it is.”
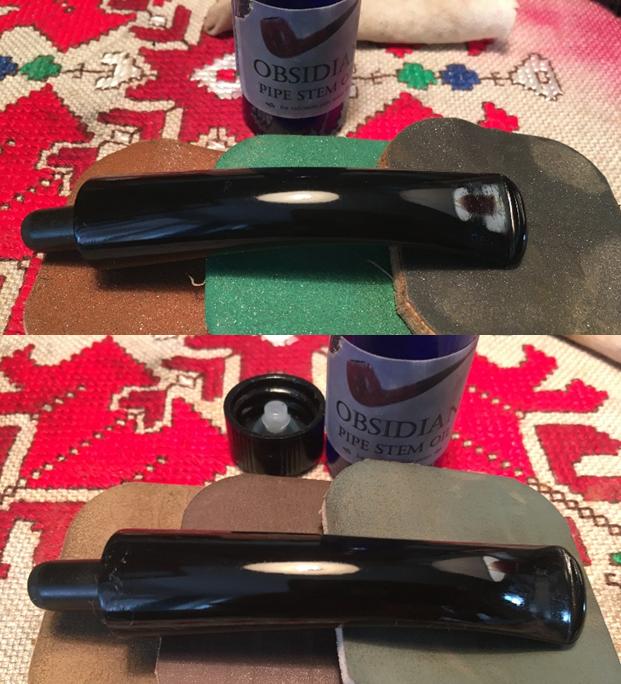
 I have two mini-projects left before I begin the final polishing and waxing processes with the Dremel. I want to dress up this ‘No Name’ Calabash with a band. The beauty of this pipe emerged along the way and the classy Calabash shape just cries out, “Band!” So, band it is. I think it will look great. The other project is to fill the cracks in the bowl with ‘Pipe Mud’ per Steve’s email response to my questions earlier in the restoration. I recalled reading about ‘Pipe Mud’ before and it didn’t take long to find it in the vast Rebornpipes.com archives. Steve’s tutorial was helpful and to the point by point as usual (See: Link), but also of value for newbies to the hobby are the comments following – more links and practices to add to the mix!
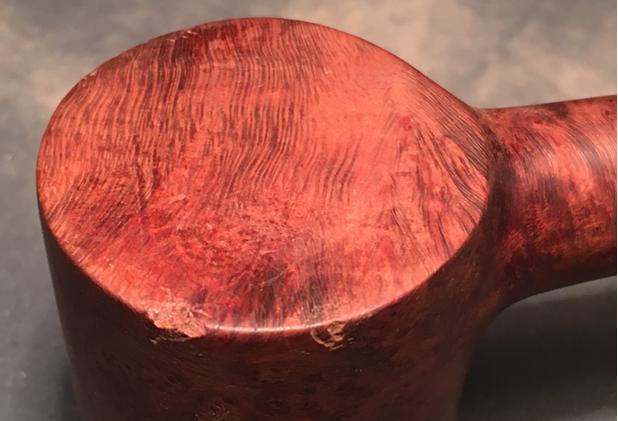
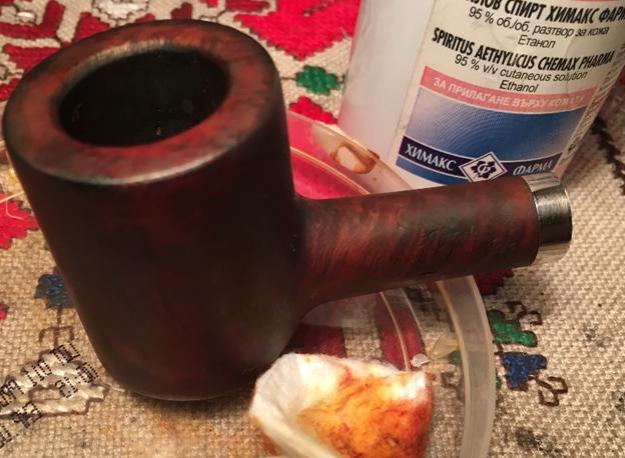
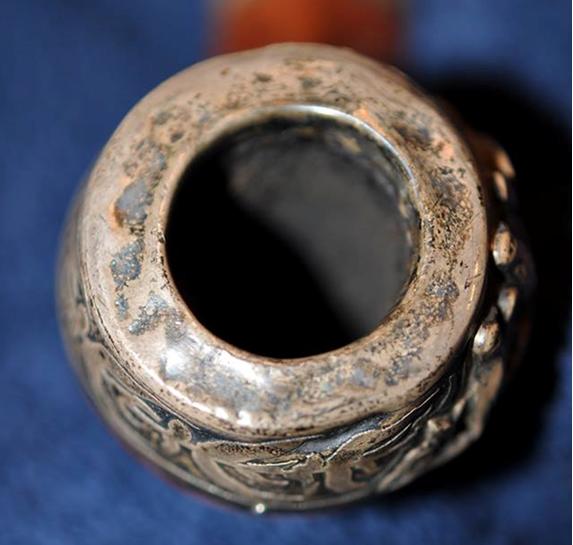
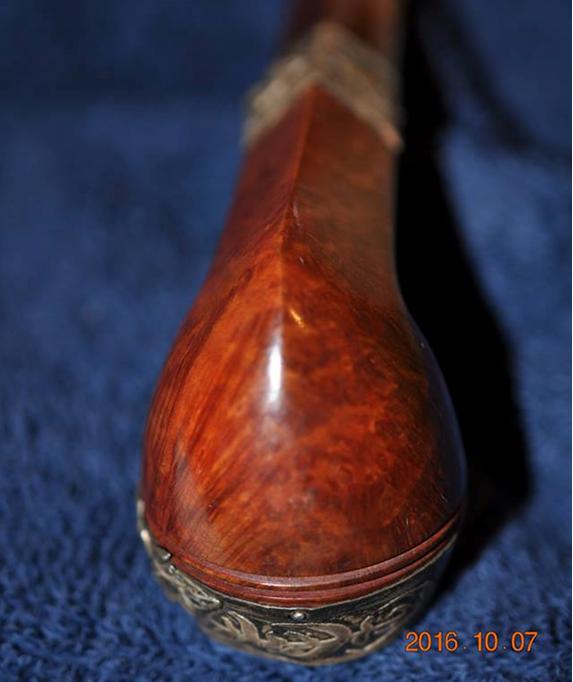
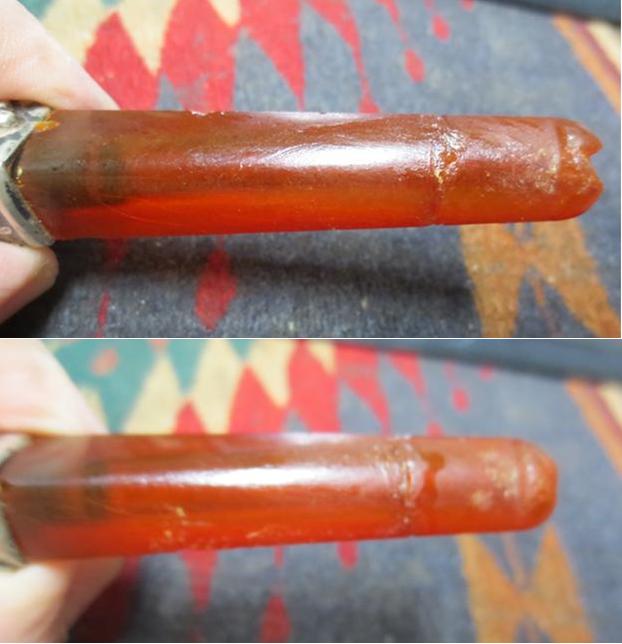
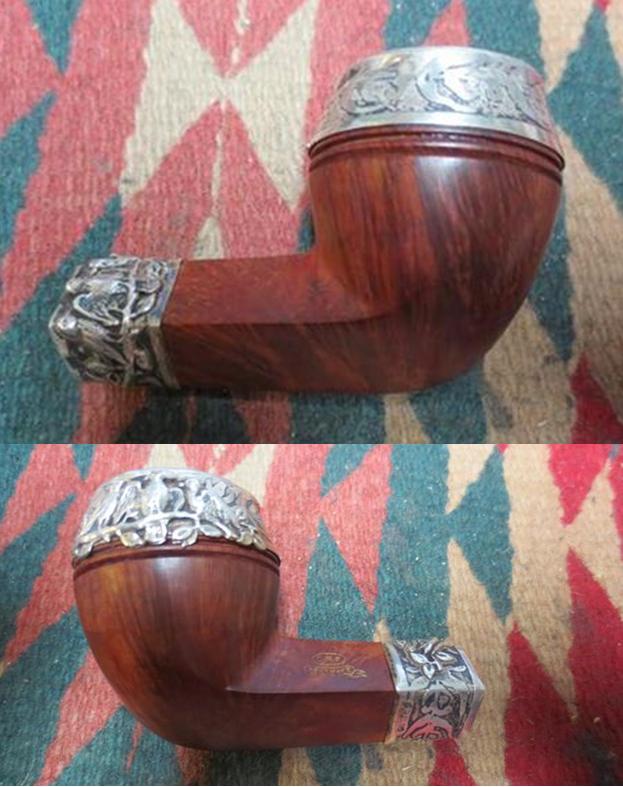
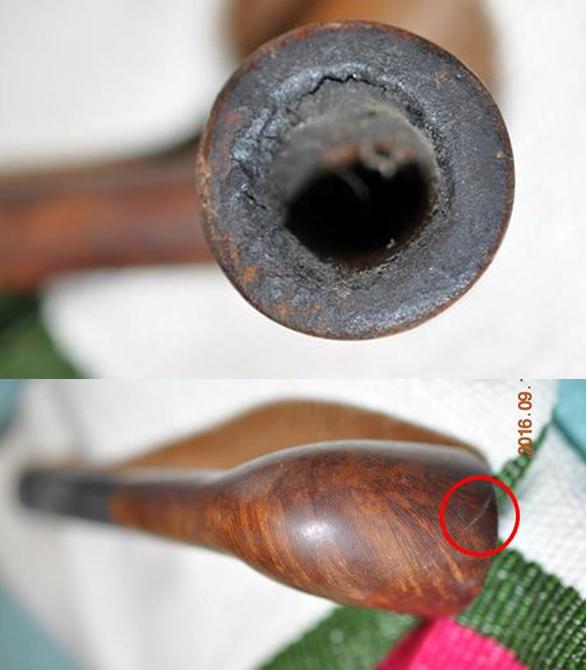
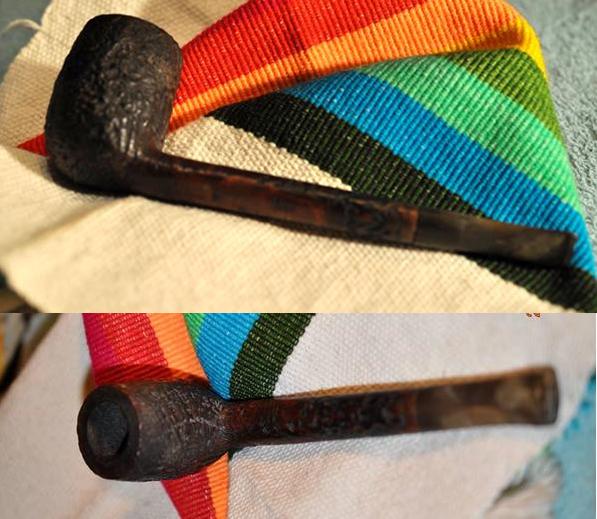
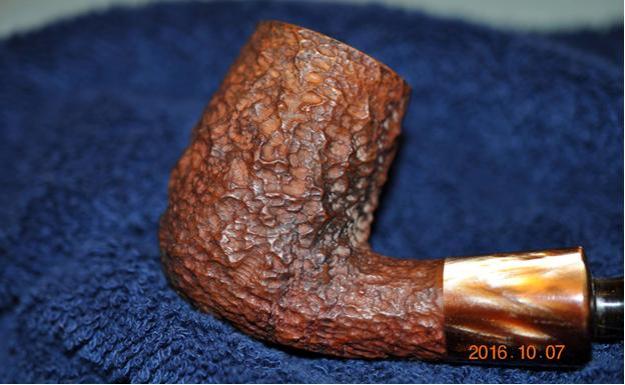
Gary, my friend and colleague who lives in Plovdiv, Bulgaria, happily responded to my plea for ‘quality’ cigar ash. I am now in possession of ash the byproduct of 2 Cubans – the second of which he smoked with me Thanksgiving Day evening as we gathered to celebrate together in Sofia – I smoked my favorite black Cavendish blend, Lane BCA, in the pipe I call, Ole Pot. I take a couple close-ups to get a look at the cracks in the bowl. I’m not sure the source of these crevices but they appear to be grouped mid-way down the bowl both in the front and back of the bowl wall. On a hunch, I look at the exterior and I think my hunch is correct. The grain of the stummel moves horizontally though the bowl. When I look at the front and back of the external grain patterns, I find birds eye grain pattern – which represent the cut through, perpendicular perspective of the grain. The sides of the stummel reveal the side of the grain – the horizontal flow. So, these cracks appear to me to be the grain splitting – it appears like dry split wood. Not sure ‘why?’ but this is my theory. The third and fourth pictures below show the external theory:
 First, to prepare to make the pipe mud, I take the Cuban ash and crush it with the end of a pipe nail. With tweezers, I picked out debris and make sure there are no large chunks. The gray powder in the pictures is the aim.
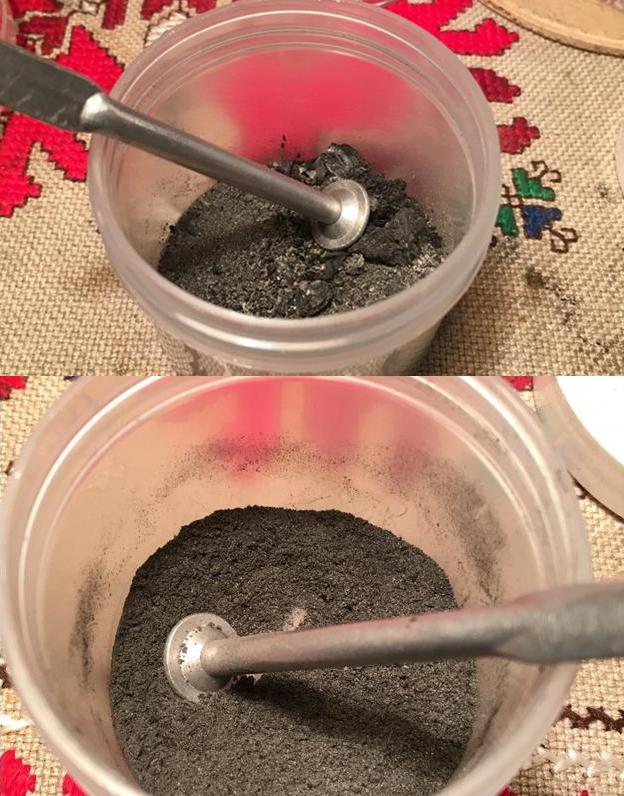 Next, I use a dental probe to dig a bit in the cracks to make sure there is no loose debris. Then I take a few bent pipe cleaners dipped in isopropyl and clean the bowl wall. I put the ash in a shot glass and slowly add water with an eyedropper and mix the mud with the pipe nail. When the consistency of the mud is like paste, I use a bent pipe cleaner to paint the mud on the wall – careful to tamp in to fill the crevices. I keep an eye on the areas with crevices as the mud dries in the bowl, making sure that it doesn’t shrink, but remains even with the bowl wall – as Steve’s tutorial instructed. In about a half hour the mud is dry and forms a pretty hard surface. The pipe mud will form a foundation for a cake to develop which provides a protective layer for the briar. Until this happens, care is given to not ream or aggressively scrape the bowl wall. The pictures show the progress.
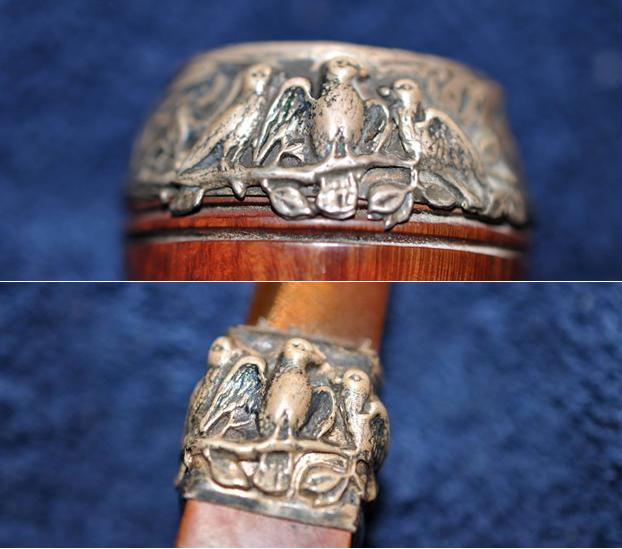
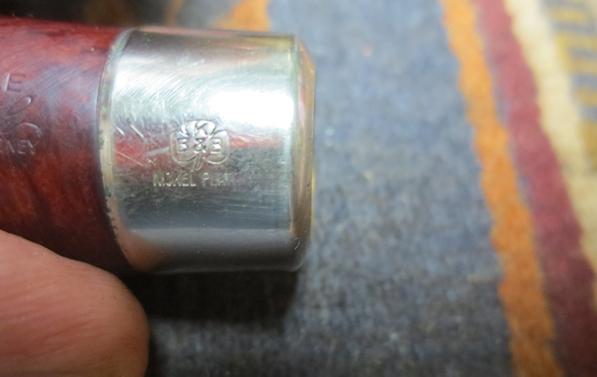
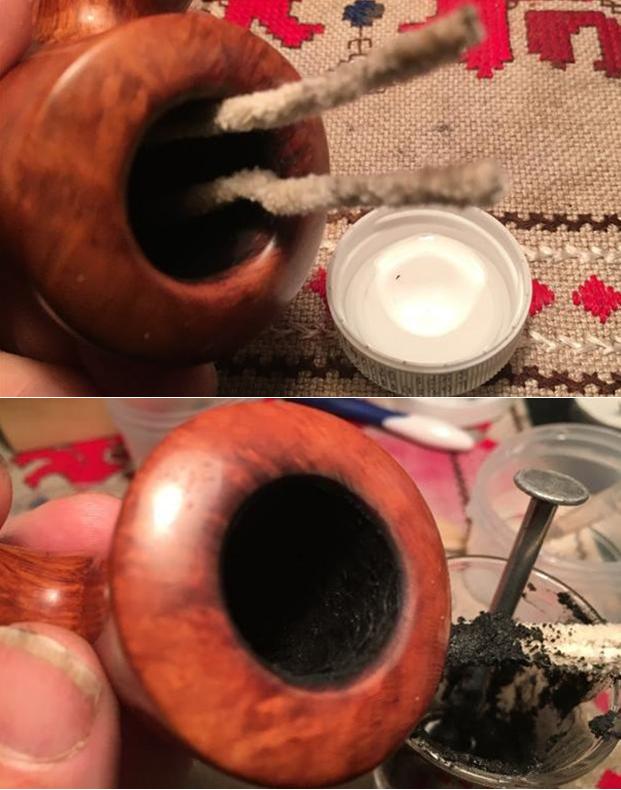 The next project is adding a band to dress up the No Name Calabash – a touch of class. The shank diameter is 17.5 millimeters in diameter and I fish out a 17.5 band to match the diameter. Some months ago, I purchased an assortment of bands to have on hand from J. H. Lowe’s online store. I’ve done one band previous to this, my first restoration which Steve published on rebornpipes (A Newbie Restore of a Dr. Plumb 9456) which went well. The mantra I remember from Steve’s tutorial on banding (Link) was the need for patience in applying heat and micro-inching the band up the shank – a hot band could tear if forced to quickly. I set up a handy work station on a solid wooden stool that I can straddle. I fold a towel and place it over a chopping block to provide a firm, but soft foundation to use as I press the stummel inching the heated band up the shank. My air gun fits nicely on the platform as well. About 1/10th of the band fit over the end of the shank at the beginning. I heat the band rotating it, careful not to burn the wood then put it to the toweled surface and press – firmly but only a bit. Repeating the process several times. The pictures below show this. The last in the set shows the progress of the band’s movement up the shank – almost home!
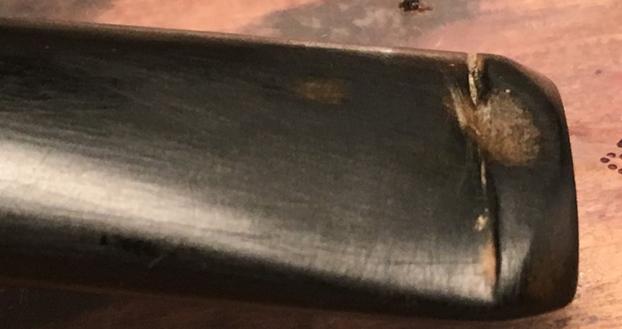
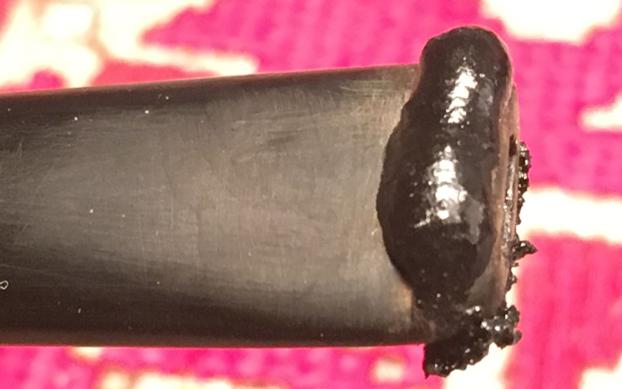
 It was going so well, until it wasn’t! With millimeters left before the band was flush with the shank, a press against the surface caused a portion of the band to crimp (pictured). This was not part of the plan. Different possible scenarios fill my mind for next steps to try to back out of the situation and to salvage the banding project. I’m concerned that the band has torn at one of the crimp points because I can detect a sharp edge to the touch. Time for an ‘SOS’ message to Steve with the picture below.
 Steve’s response was helpful – to heat the band as before and with a small flat screw driver, straighten out the crimping and then continue again with the heating and pressing to bring the end of the band flush with the shank. The following pictures show the salvage operation. I begin by heating and bringing the bent edge back out using a small flat head screw driver. As this progressed, I improvised, using the round head of a pipe nail to help reestablish the round of the band by heating and placing the head in the lip of the band and rolling it like a wheel while rotating the stummel. Once things start regaining normal, I use a needle file gently filing the edge to remove sharp splinters. I also filed a bit on the external ‘pucker points’ that help reestablish roundness and a smoother surface, but not perfect.

 As I return now to heating and pressing to complete mounting the band on the shank, my concern is the weakened area of the band will simply crimp again with the process. I decide to heat the band up a bit more than I did before, hopefully to enable the band expansion more economically and to add more towel padding between the band and the hard surface below. I return to heating and pressing and thankfully, the result is a seated band with a few battle scars along the way!
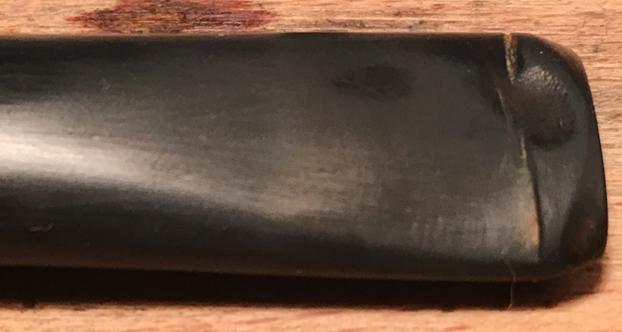
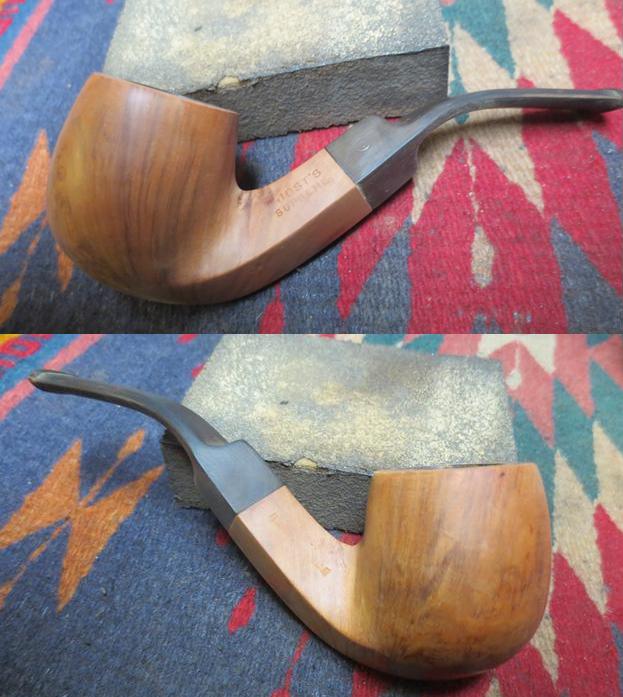
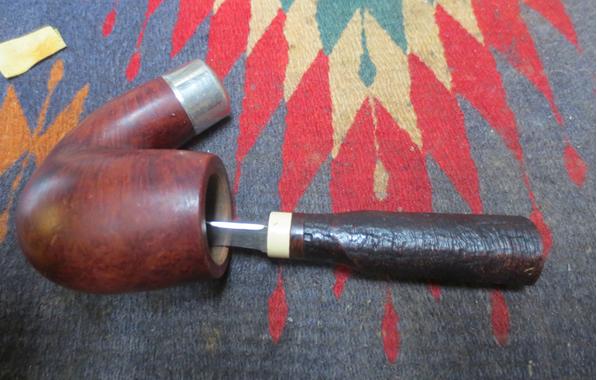
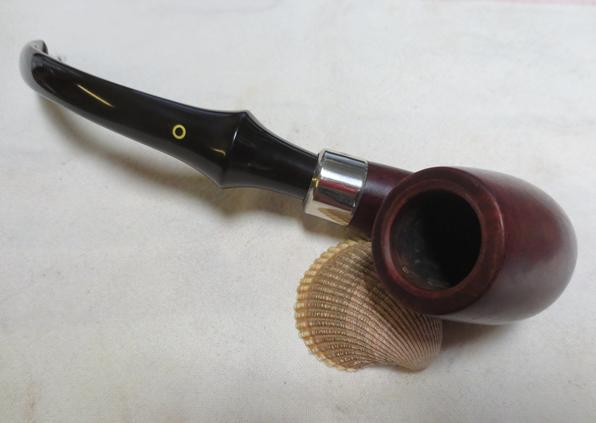
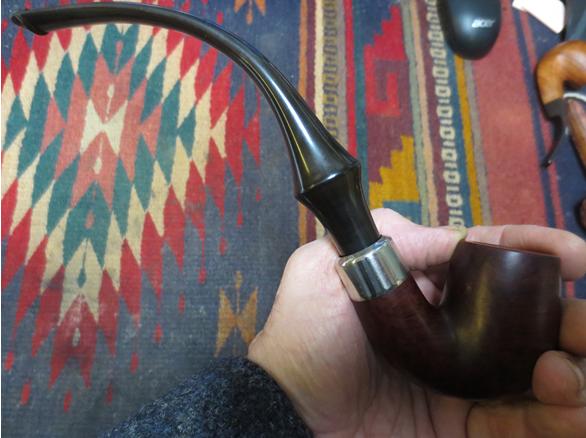
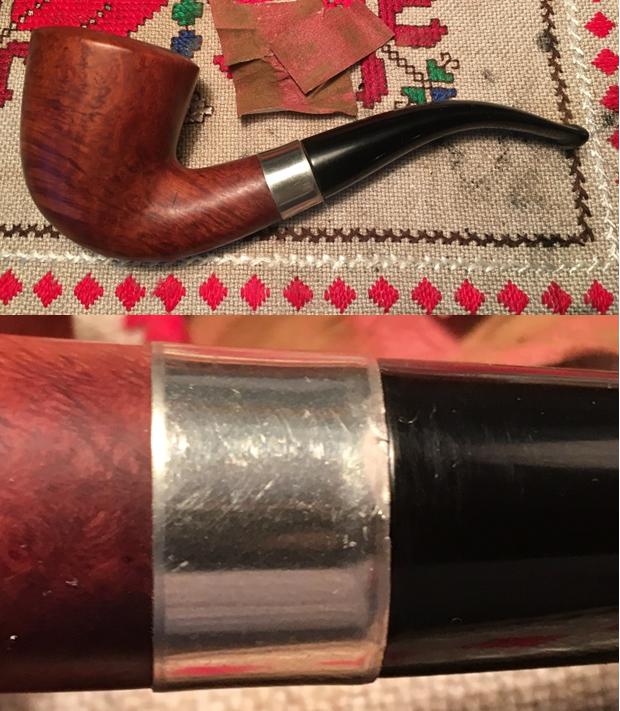
 When I attempt to rejoin the stem and new banded stummel, I find that increased compression on the shank from the new band has created a tighter mortise/tenon fit. To release some of the tightness of this fit I wrap the tenon with 240 grit paper and rotate it to reduce the size of the tenon but keep it in round. I rotate and test the new fit several times until I get it right. I don’t want to take too much off the tenon and have a loose fit. I get my first look at the reunited stummel and stem and I like what is before me! I take a close-up on the underside of the shank to show the area of the band crimp and repair. I’m satisfied now with the repair job; I will see if I can improve it through the polishing process.
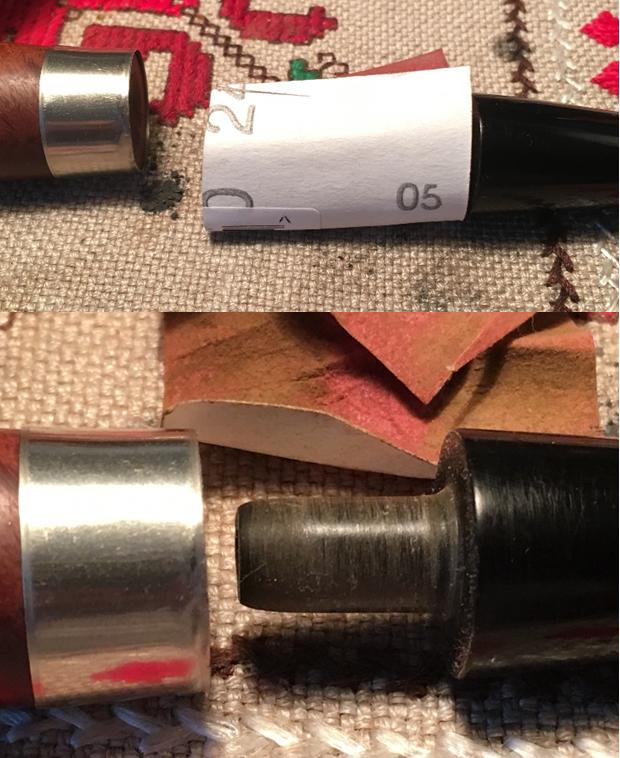
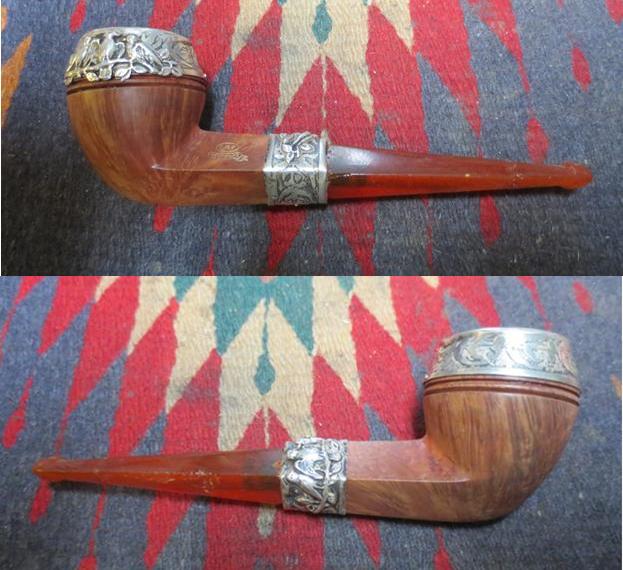
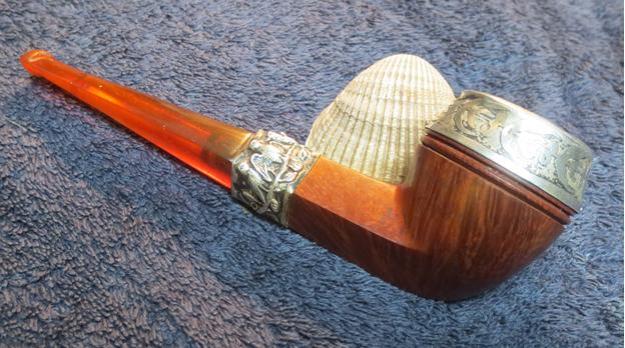
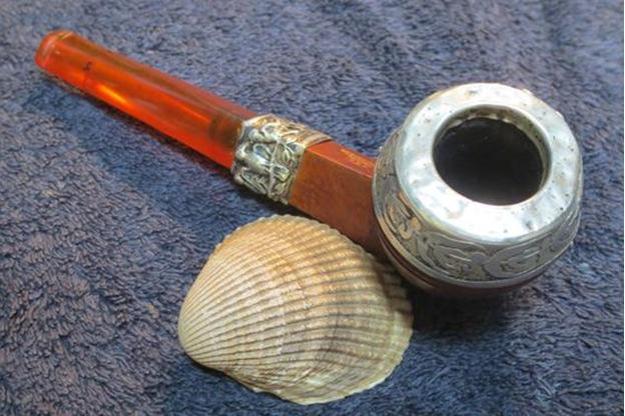
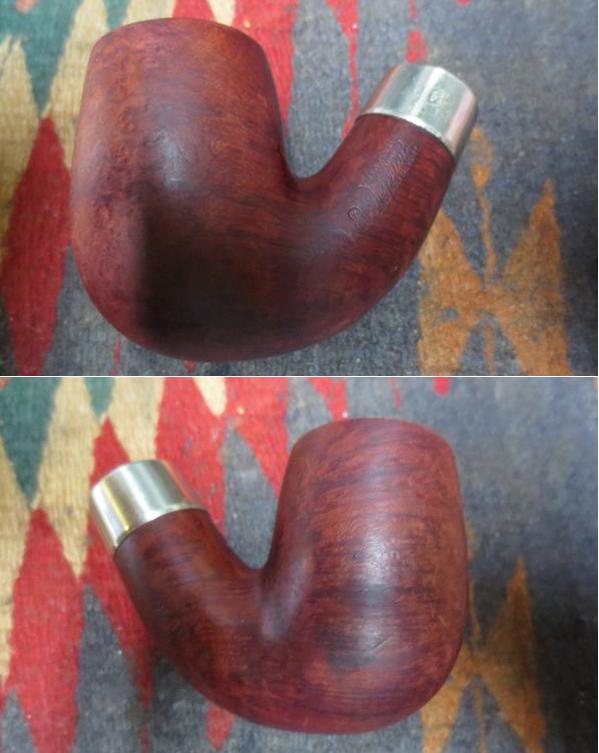
 Now the fun begins! With stem and stummel united, I begin the polishing phase using Tripoli over stummel and band. I mount the Tripoli wheel in the Dremel’s hand-held extender and power it up at the lowest setting (RPMs) and after purging the wheel with the tightening tool, I light tap the wheel on the Tripoli bar and apply it to the surface. With all the compounds, I do not apply too much vertical pressure to the wheel but allow the speed of the Dremel and compound to do the work. After the Tripoli, I switch to the Blue Diamond wheel and repeat the process above but include the stem as well as stummel and band. After this, I give the pipe a good rub down to remove powder left over from the compounds. With the carnauba wheel mounted (after purging) I apply several applications of carnauba wax then change the Dremel to a clean wheel and buff the entire stem and stummel. I complete the polishing with a brisk buff with a micromesh cloth to bring out the depth of the briar even more.
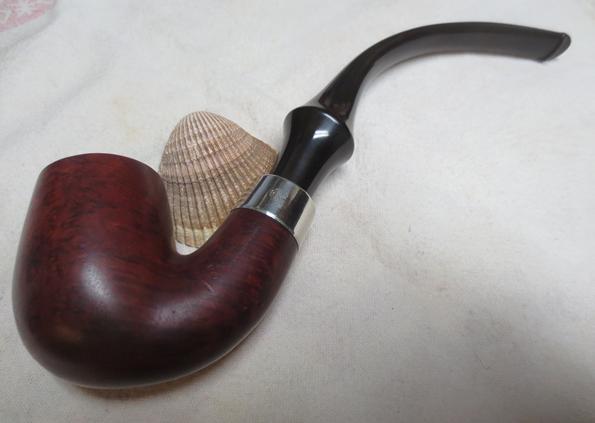
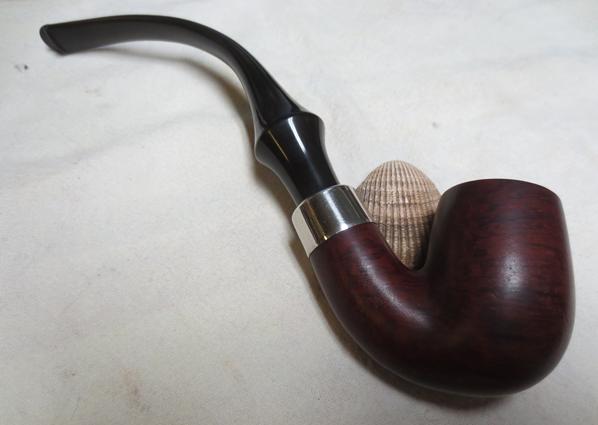
I learned three new skills to put in my tool box – making and applying Pipe Mud, rescuing a botched band mounting, and repairing a tooth hole using a charcoal super glue putty. Not bad. I’m very pleased with this ‘No Name Calabash’. The honey-colored briar is stunning as it flows through the stummel – the depth of the grain almost appears 3-dimensional. The band is a nice addition – it dresses it up, like putting on a tux. I trust that this pipe finds a good home. Thank you for joining me!

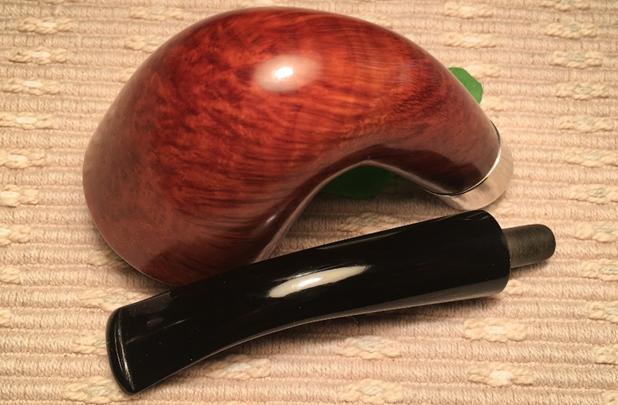

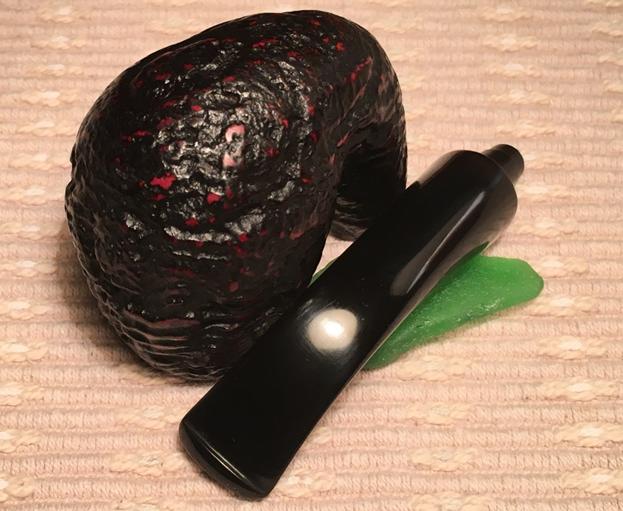
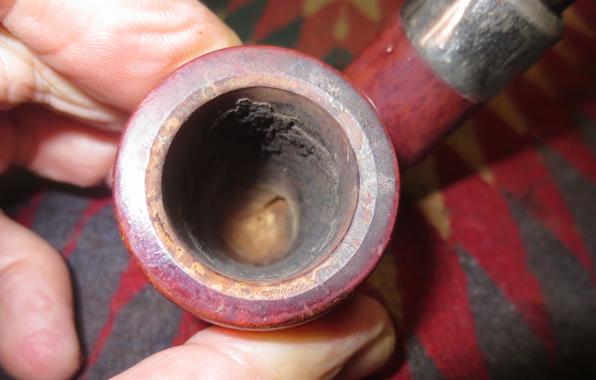
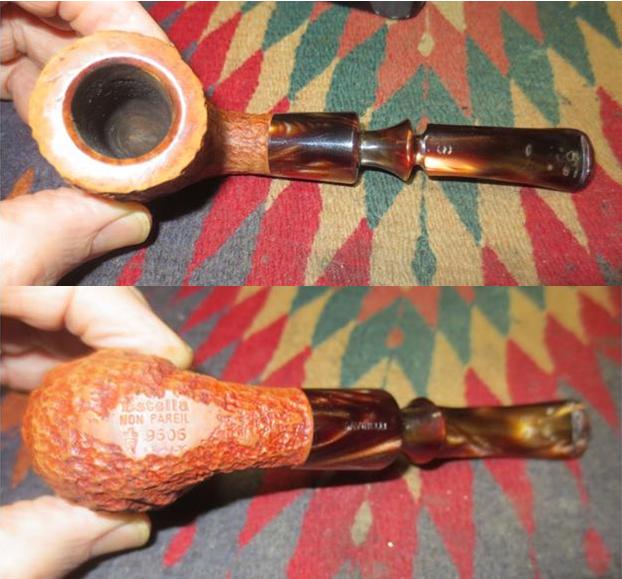
 The cake in the bowl had overflowed on to the rim top and left behind a black and pitted mess. The right front outer edge of the bowl also had a large scrape from a drop or a badly chosen knock to remove the dottle. The close up photos of the rim and the side of the bowl show the condition of the pipe. In the last photo in this series you can see the darkening where the hand wrapped around the side of the bowl.
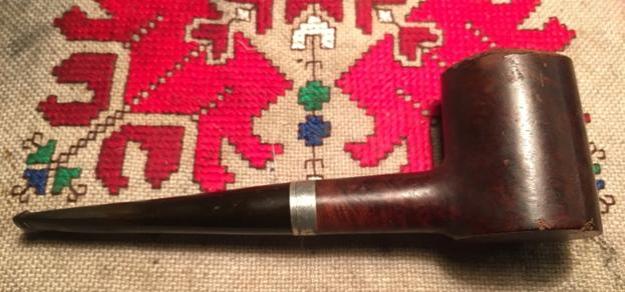
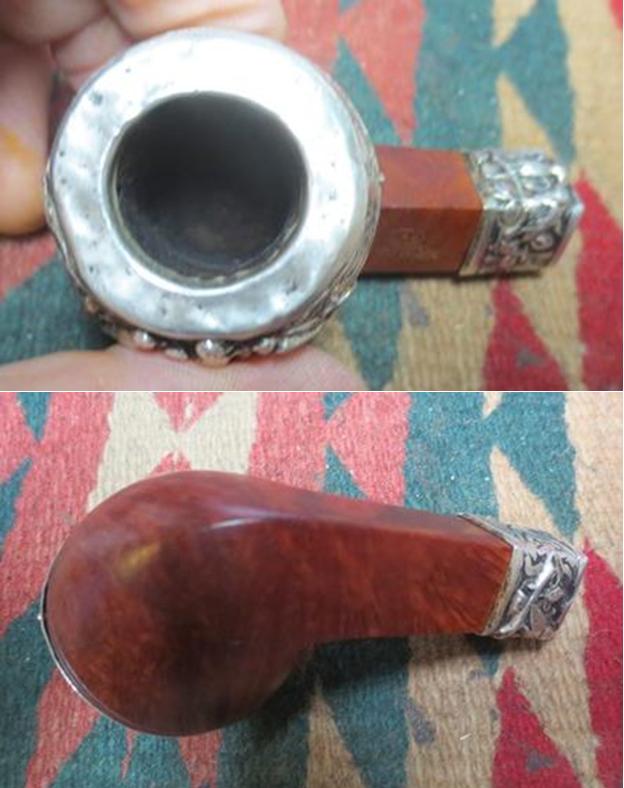
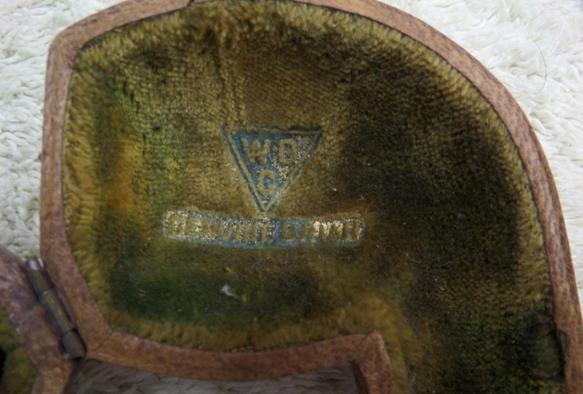
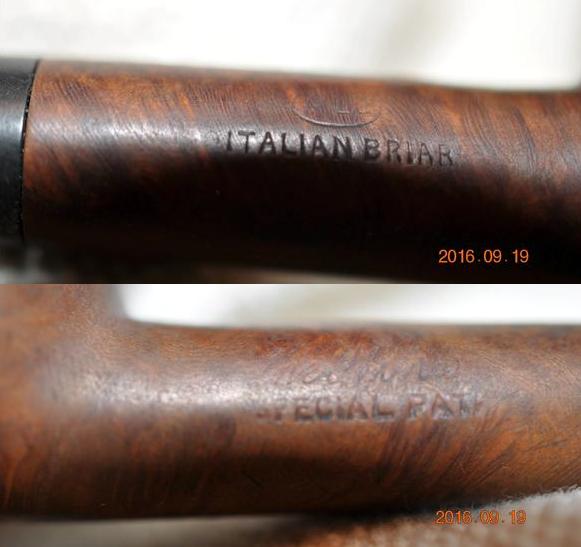
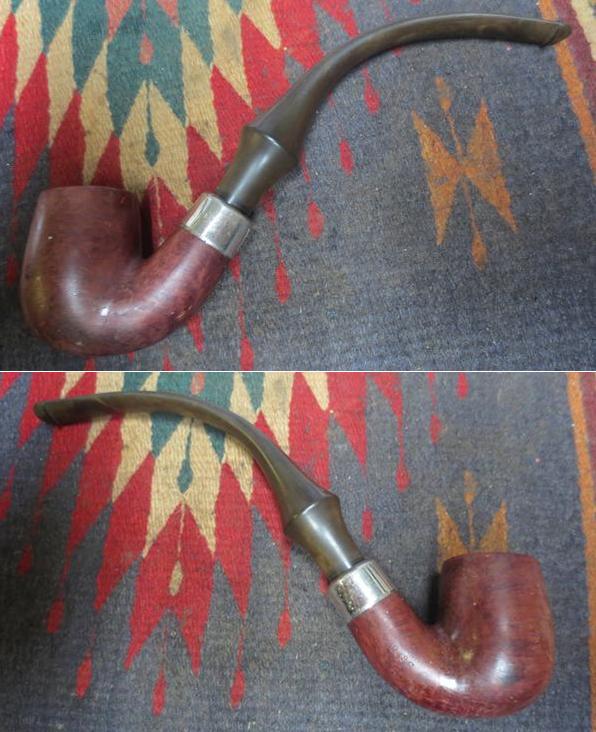
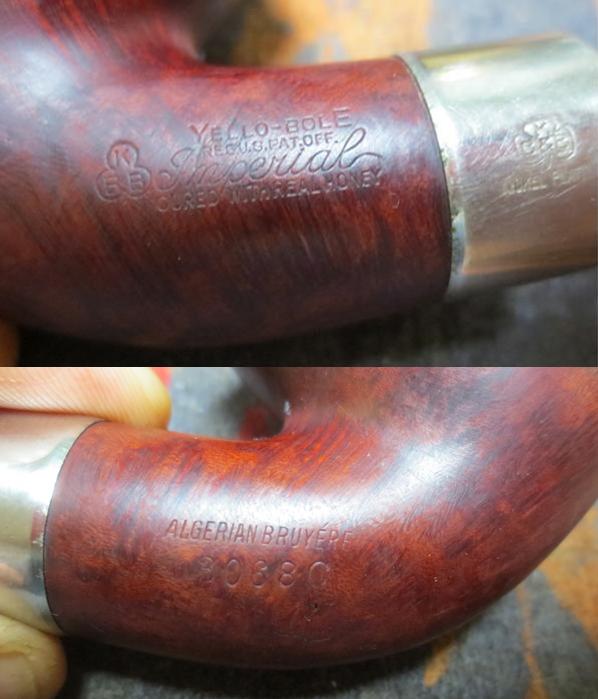
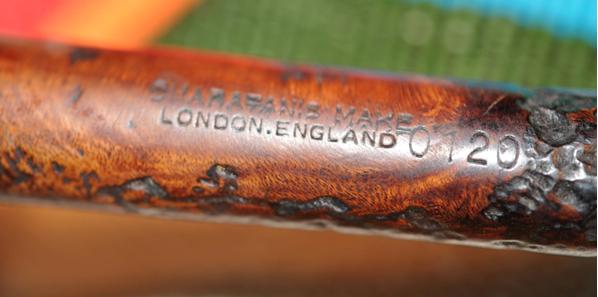
 The next photo shows the stamping on the bottom of the bowl and the shank extension. Other than the S shield logo connecting the Estella and Savinelli the stamping on the Lucite certified the connection.
 The mortise in the shank extension showed damage and wear as well. It appeared that the mortise was lined with a Delrin tube to go with the Delrin tenon on the stem.
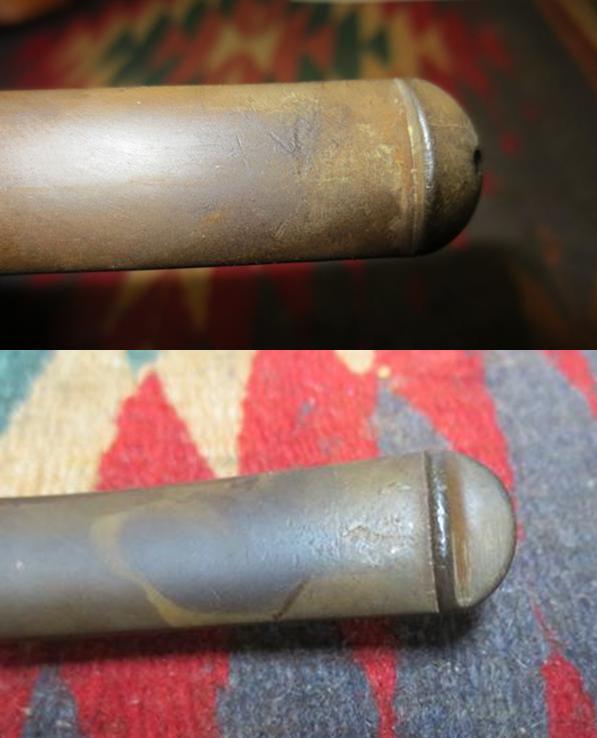
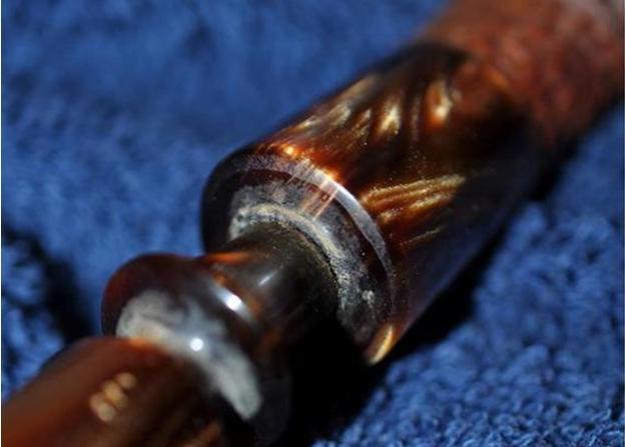 Now I am ready to show you the meaning of the word Jaws in the title of this blog. The two photos after the portrait below show the tooth marks left behind by the “shark” who owned this pipe. Lucite stems are really hard material so for him to leave behind this kind of deep gouges in the stem he must have had quite a pair of choppers. Maybe the teeth were like those on one of the villains on James Bond known as Jaws.
 Whatever then previous pipeman’s choppers were like they left behind a legacy of damage on both sides of this hard Lucite stem that needed a lot of work and would never really disappear.
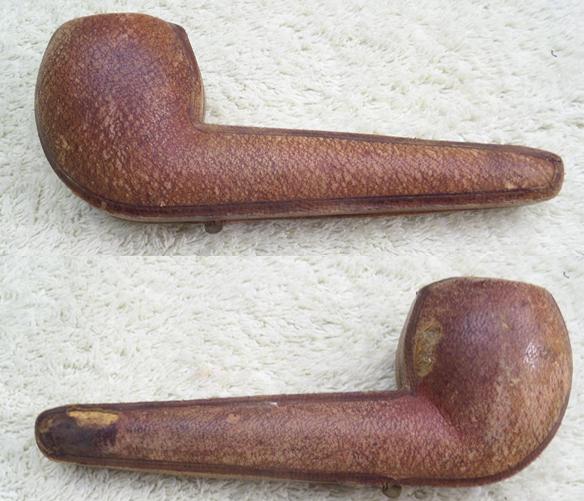
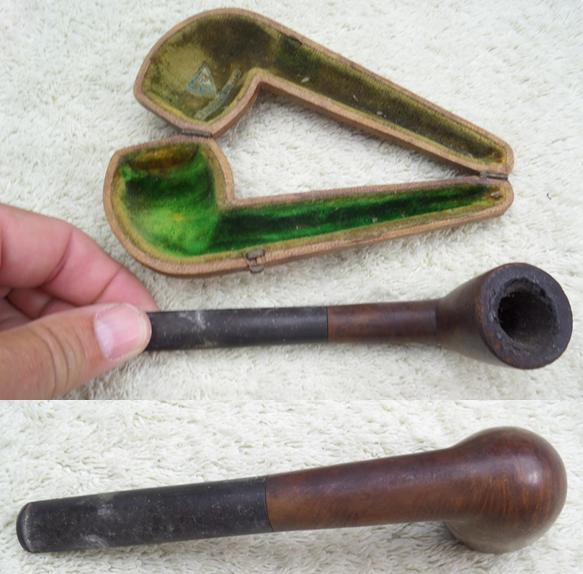
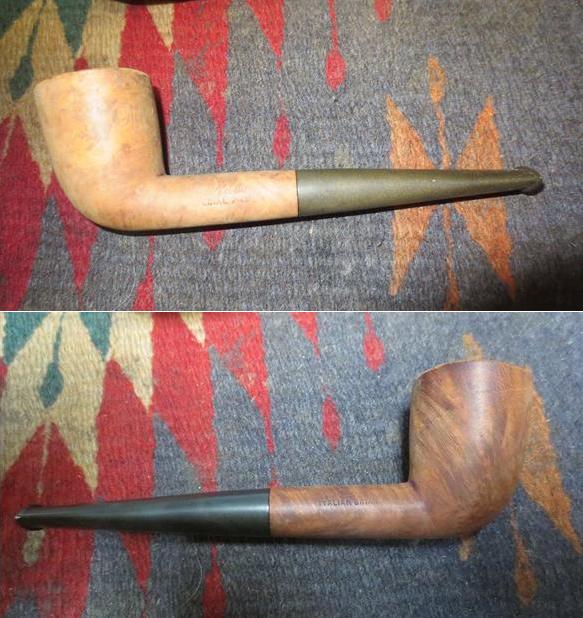
 My brother did his usual thorough clean up on the pipe. He reamed the bowl and scrubbed the externals with Murphy’s Oil Soap and a soft tooth brush. He was able to remove all of the buildup on the rim top. He cleaned the internals of the mortise and the airway in the shank and the stem with pipe cleaners and alcohol. He wiped down the stem so that when the pipe came to me it was ready to restore. The next four photos show the pipe when I brought it to my work table.
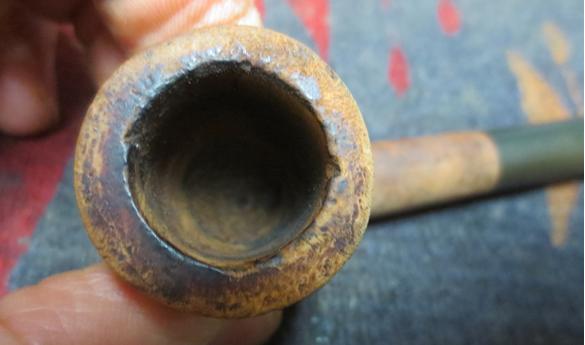
 I took a close up photo of the rim top to show the pitting and the damage on the right front outer edge of the bowl.
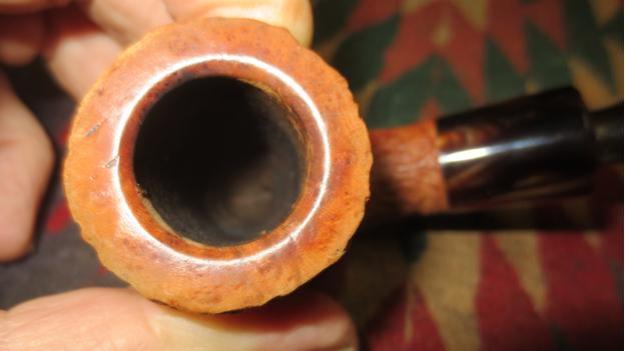 I took close up photos of the chomped on stem. It was truly a mess and one that would be a challenge to blend in the repairs on the variegated browns and tans of the Lucite.
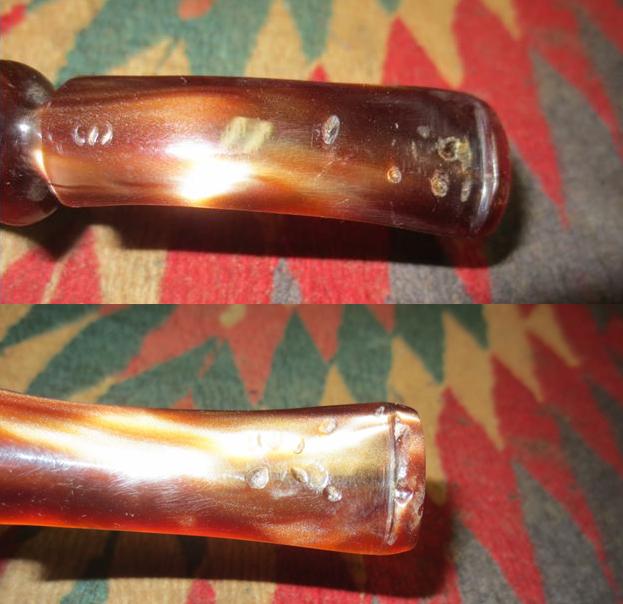 The stem had a partial stamp of an S on the topside near the saddle. Now the challenge began. I examined the tooth marks and saw clearly that they were sharp cuts in the material and not just dents. Heating the stem and trying to raise them would not work. I looked through my super glue options and I had clear and amber superglue that might work. My guess was that no matter what I used would stand out to some degree because of the striations in the browns of the Lucite. I cleaned out the divots with a cotton swab and alcohol to make sure there was no debris in them and put a drop of amber super glue in the divots on both sides of the stem.
 Once the glue dried I sanded it with 220 grit sandpaper to smooth out the repairs to the surface of the stem. So far the topside was looking better than the underside.
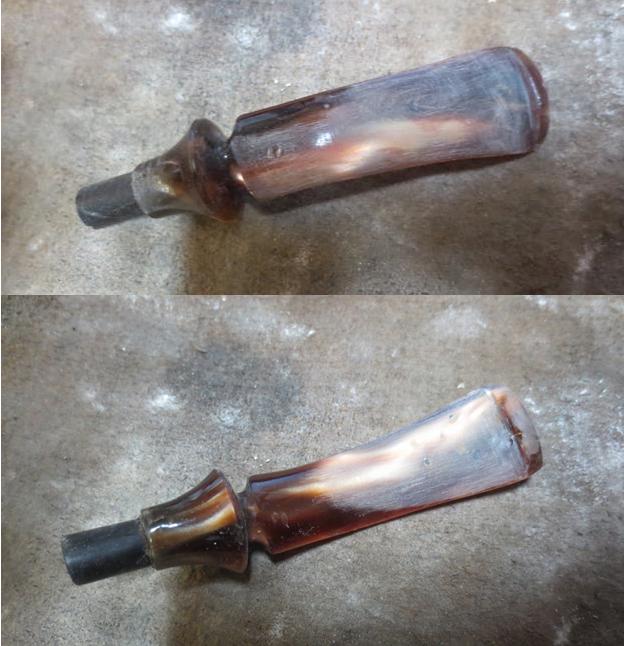 I decided to see if I could remove more of the darkening around the spot where the hand of the previous owner clasped the bowl. I used some undiluted Murphy’s Oil Soap and scrubbed it with a tooth brush. I rinsed the pipe under running water avoiding getting water in the bowl. I was able to remove the remainder of the darkening.
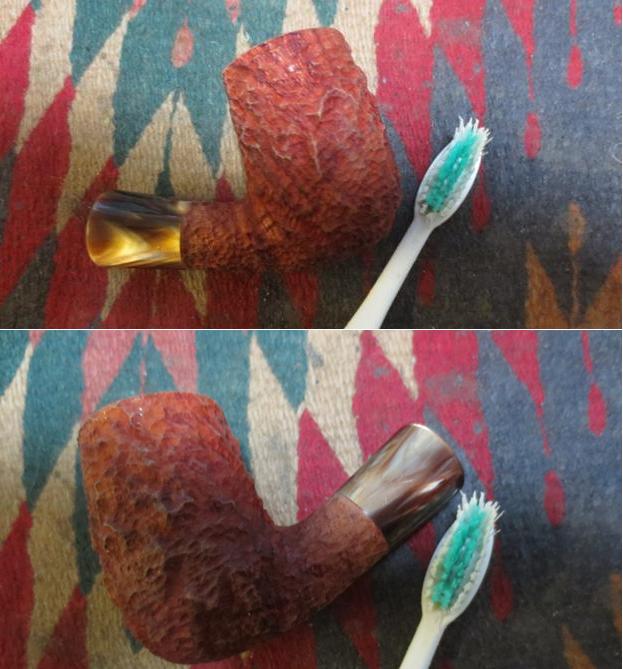
 To remove the nicks and gouges from the rim top and to remedy the rough outer edge on the front right I topped the bowl on a topping board until the damage was gone and the rough edge was minimized.
 I cleaned off the exterior of the stem with a damp cotton pad and cleaned out the stem with a pipe cleaner. You can see the ghosts of the repairs in the variations of the colour in the stem material.
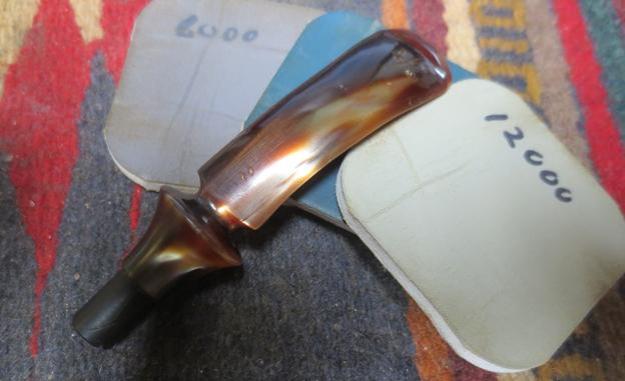
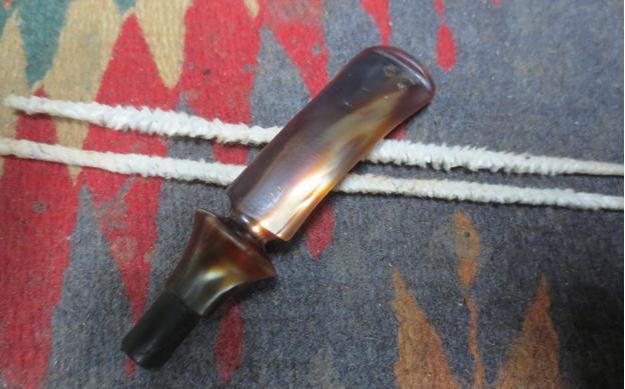 I polished the stem with micromesh sanding pads – wet sanding it with 1500-2400 grit pads and dry sanding it with 3200-12000 grit pads. After each set of three pads I wiped the stem down with the damp cotton pad to check the progress. The repairs certainly were smooth to the touch but nonetheless they were visible against the variations of the colour of the stem. I had been able to blend in the repairs on the upper portion of the stem but the closer I got to the button the more they seemed to stand out on both the top and the bottom sides.
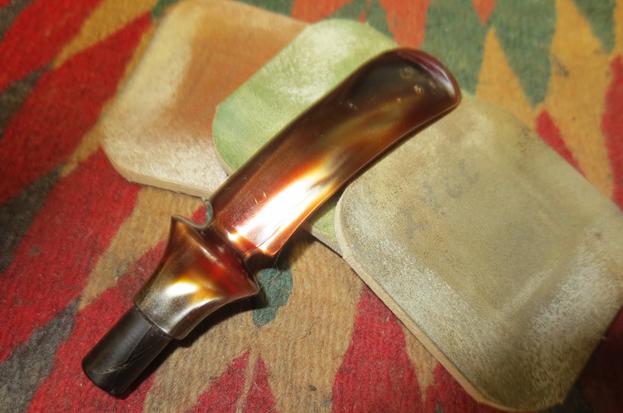
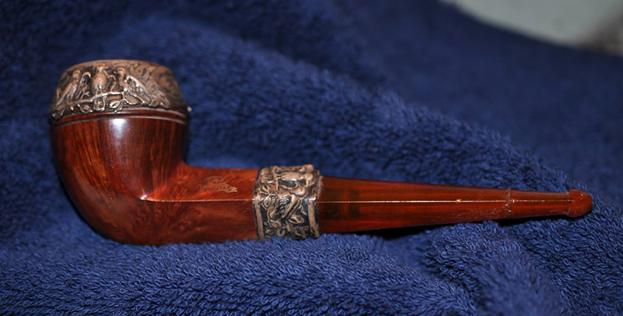
 I gave the bowl a coat of Conservator’s Wax and buffed it with a shoe brush. I buffed the stem with Blue Diamond on the wheel to see if I could further smooth and blend the repairs. I buffed the entire pipe with a clean buffing pad and then once again by hand with a microfibre cloth. The finished pipe is shown in the photos below. The bowl and rim look really good and the finish is clean and as good as new. The stem and shank extension have a rich glow and from the side they look amazing. The top and underside of the stem with the repairs is absolutely smooth to touch and has a glow. The repairs do show but only because of the swirls of the Lucite. It was a pain to repair but I am happy with the overall finished product. Thanks for journeying with me on this chomped stem and knocked about pipe.