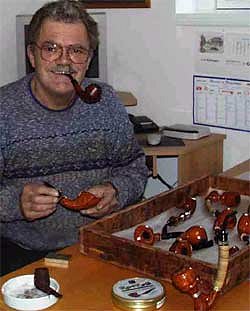
Blog by Dal Stanton
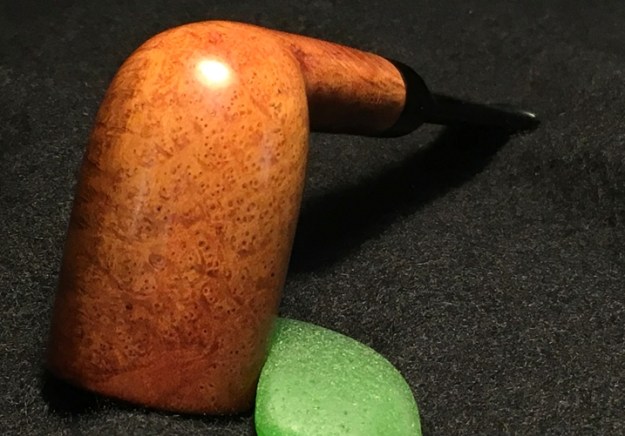
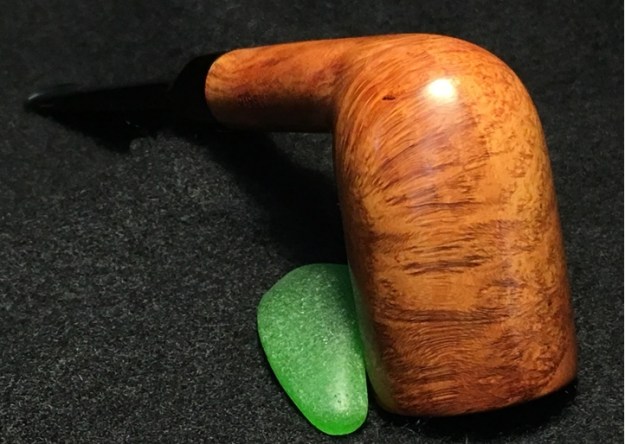
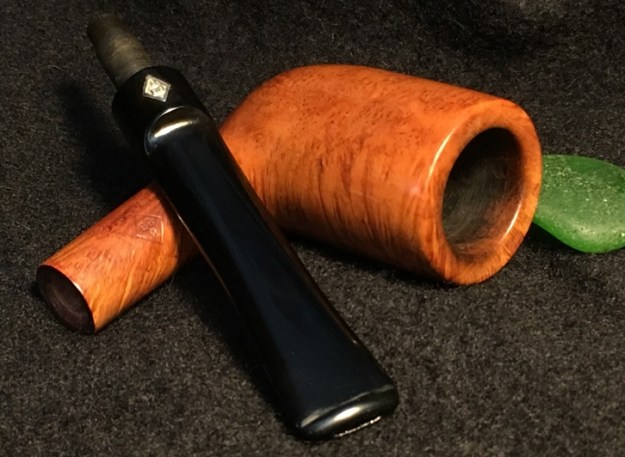
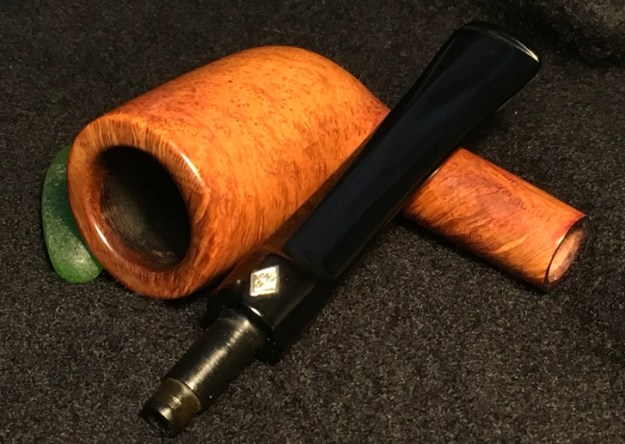
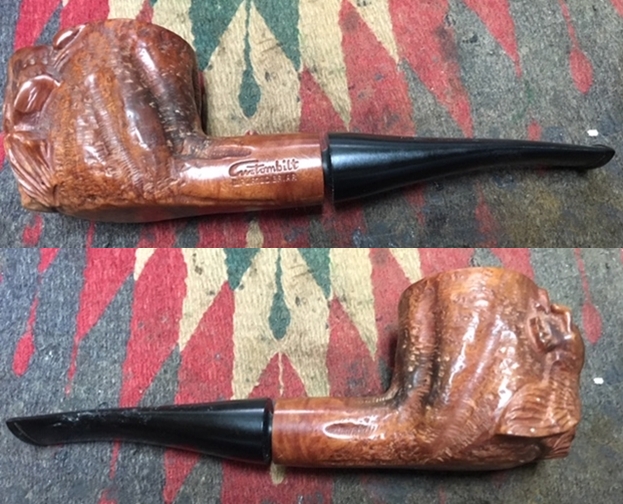
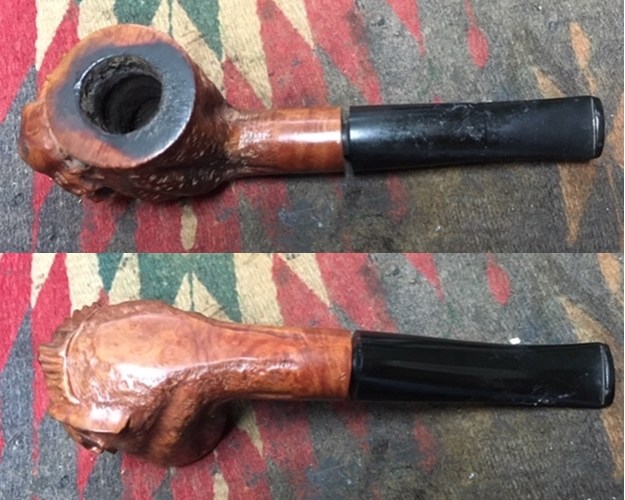
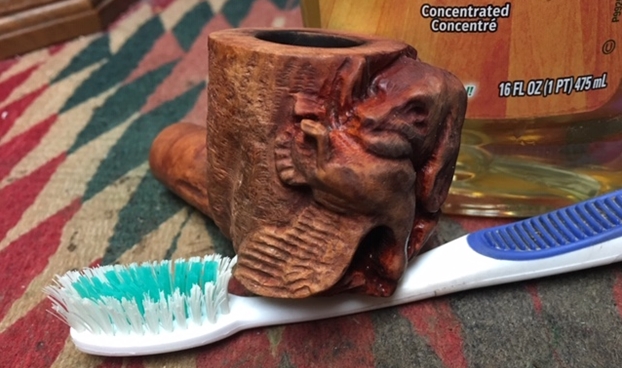
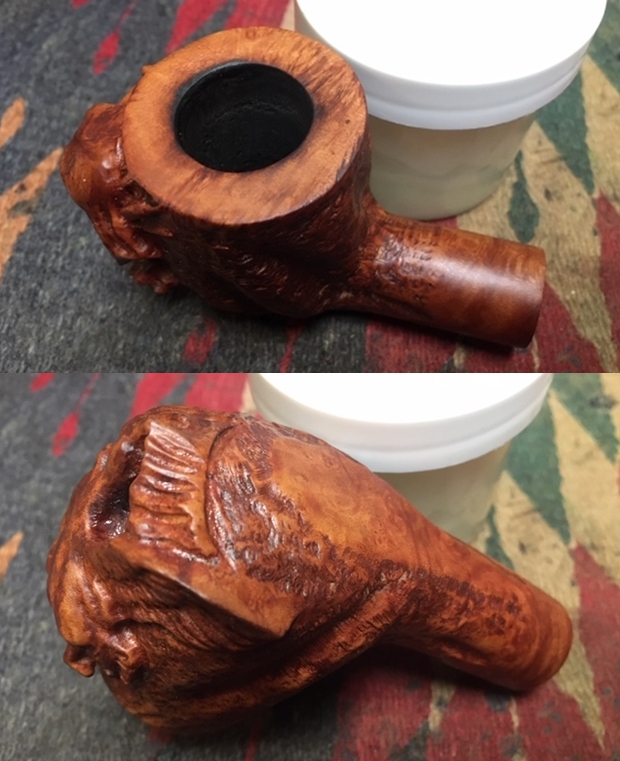
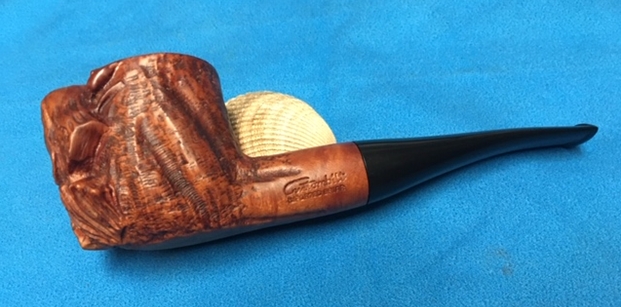
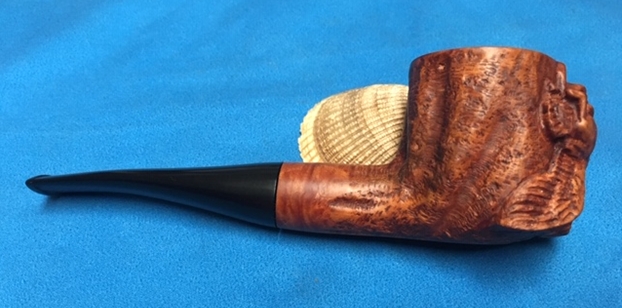
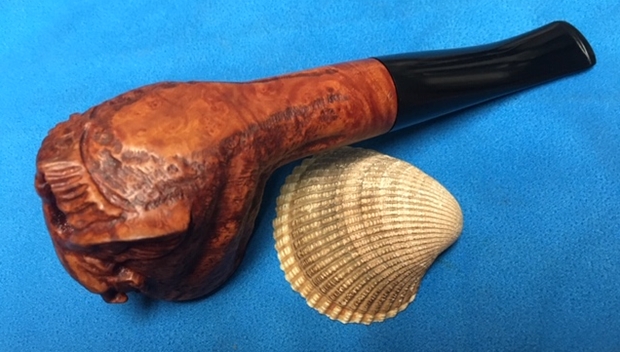
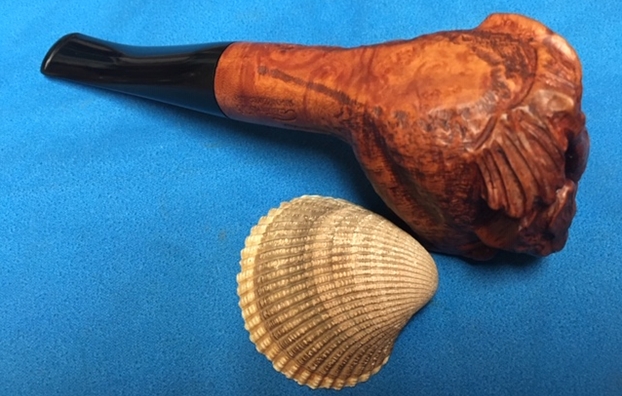
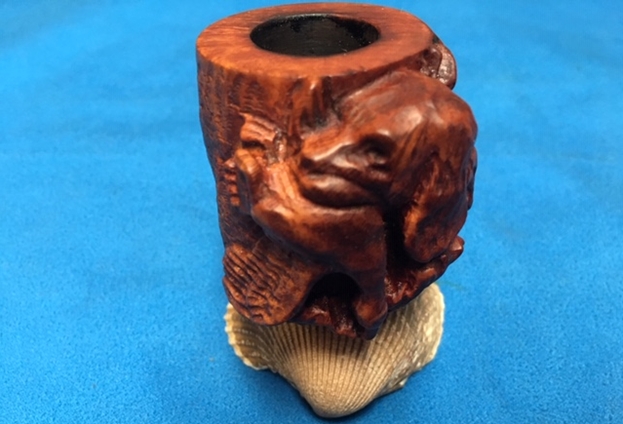
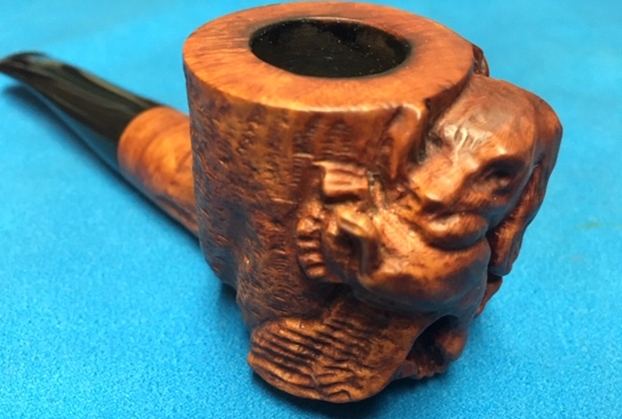
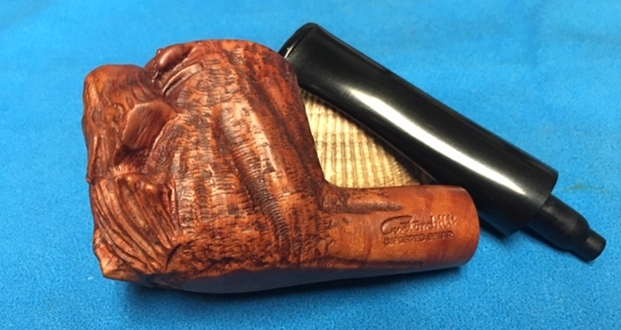
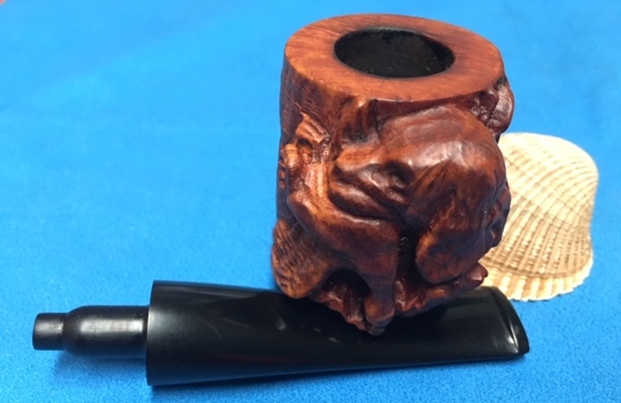
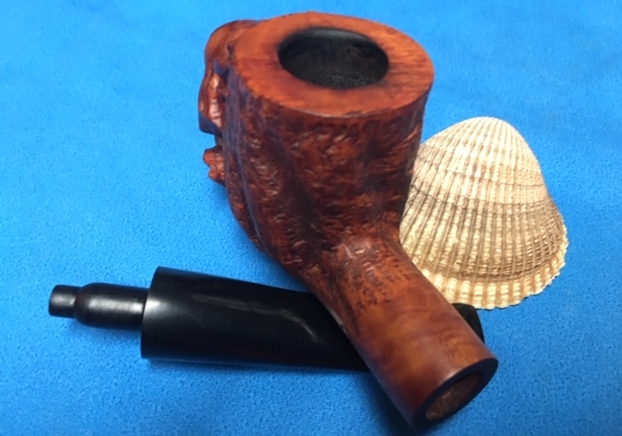
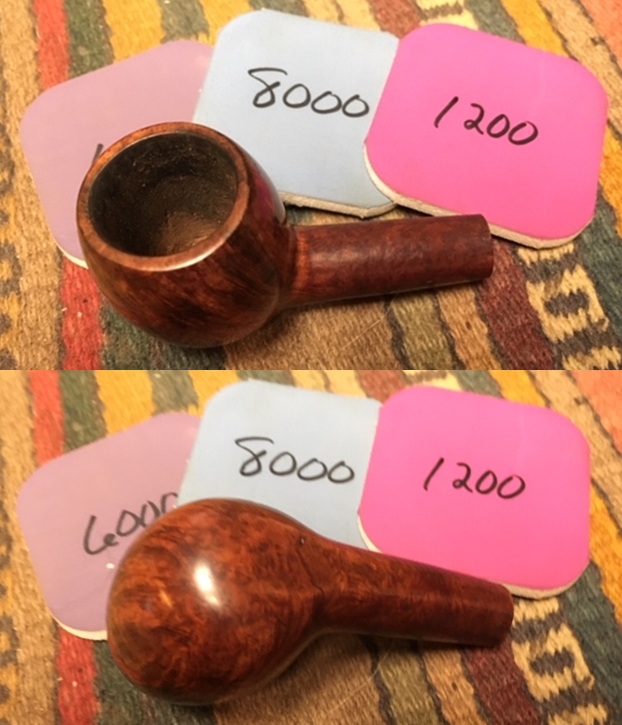
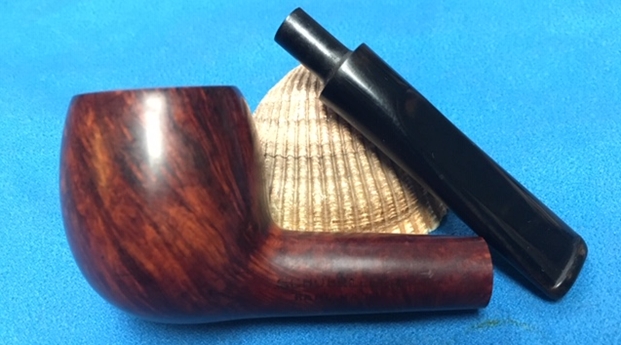
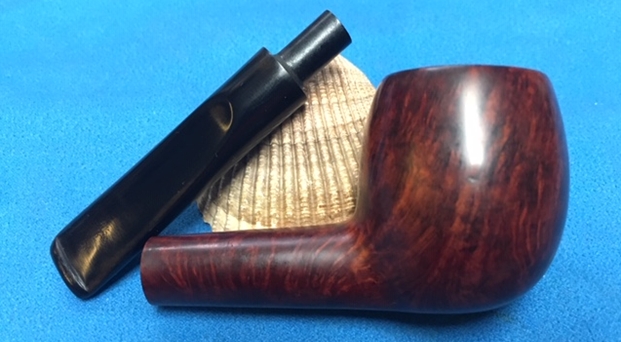
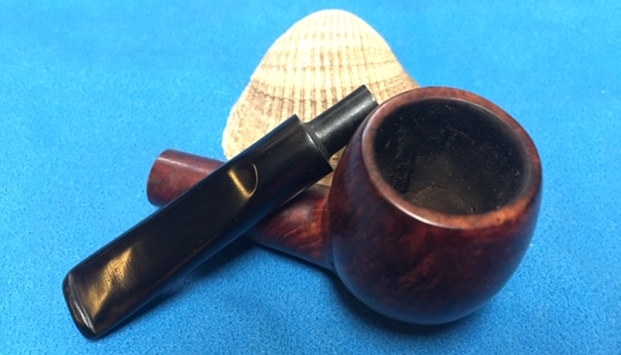
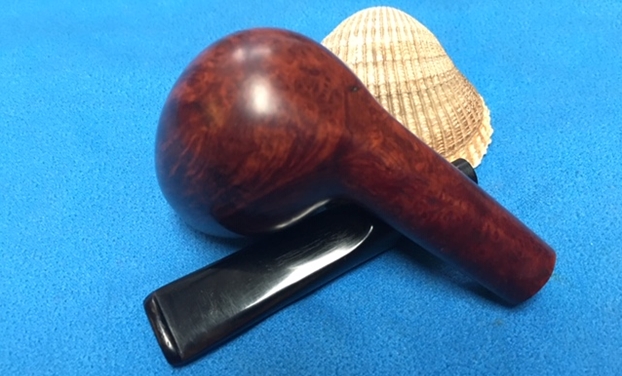
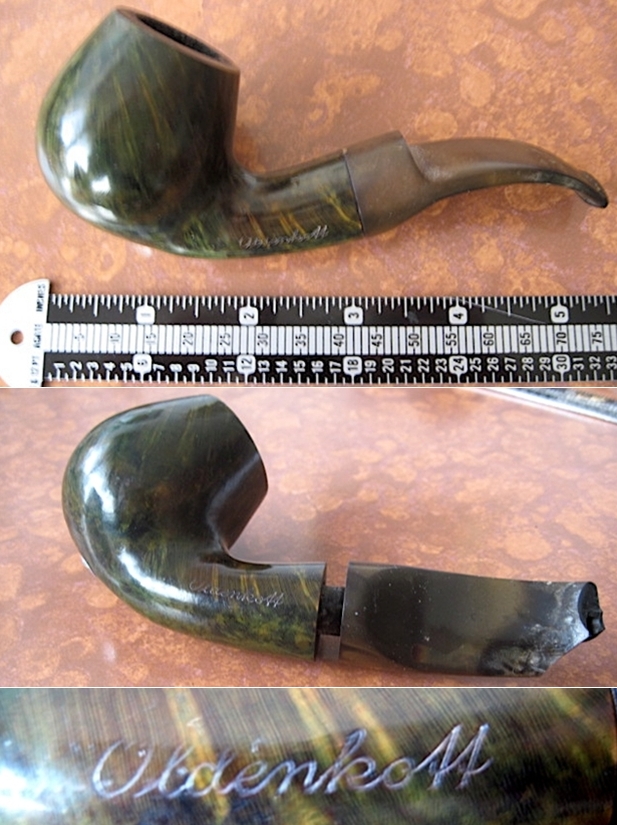
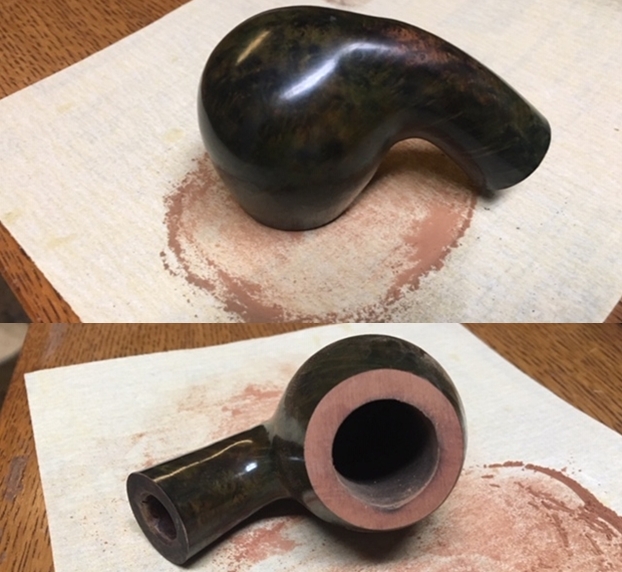
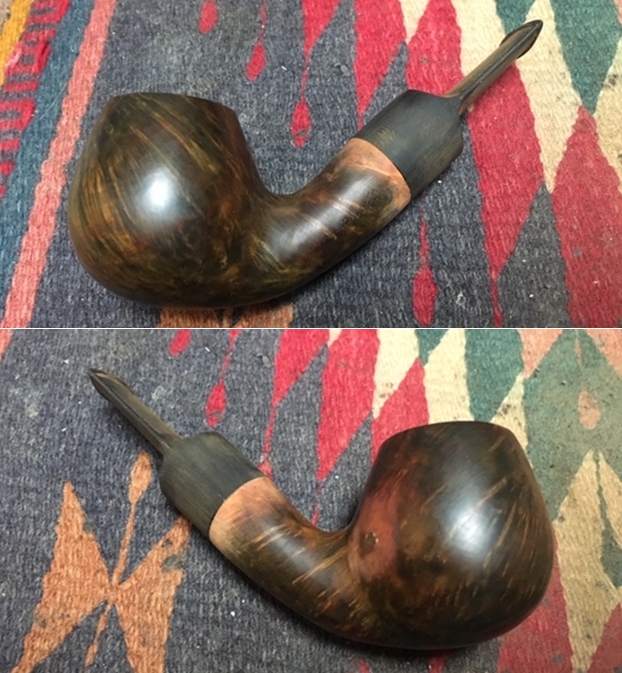
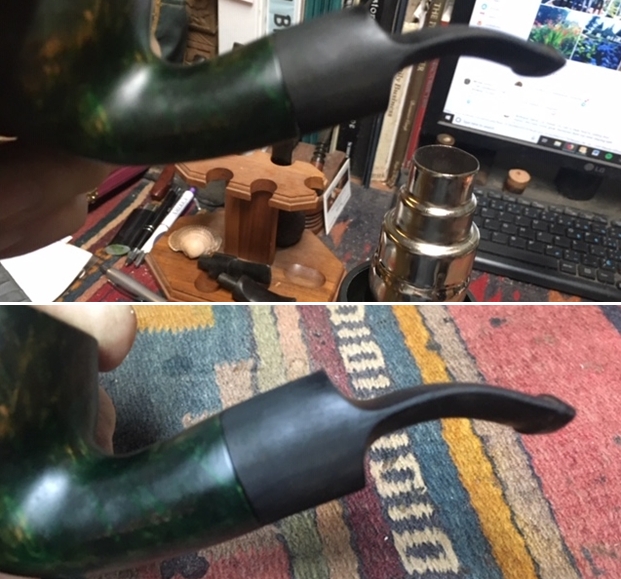
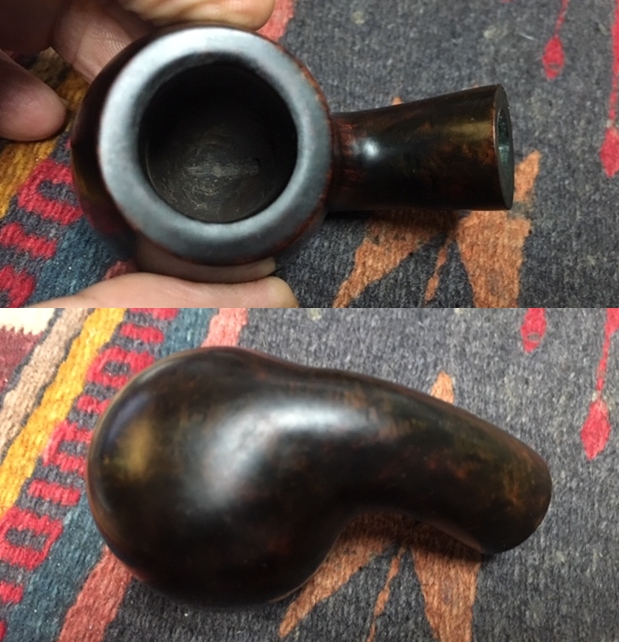
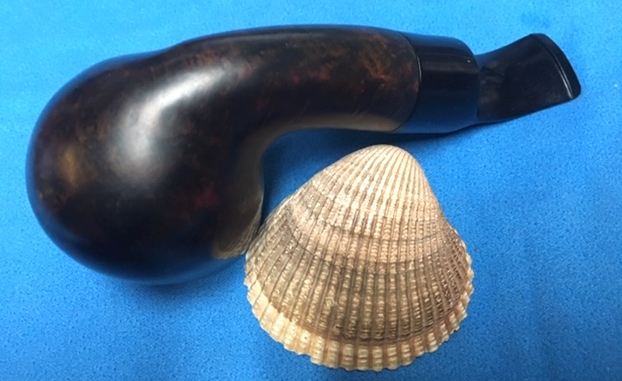
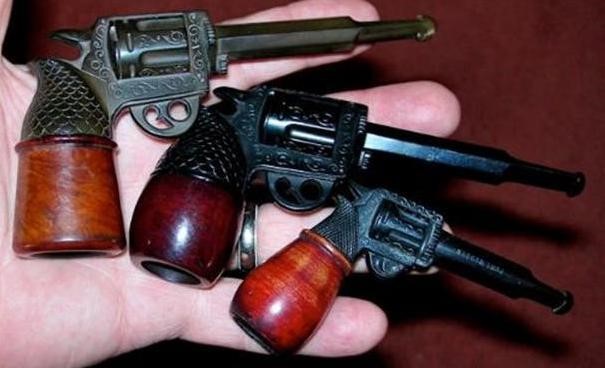
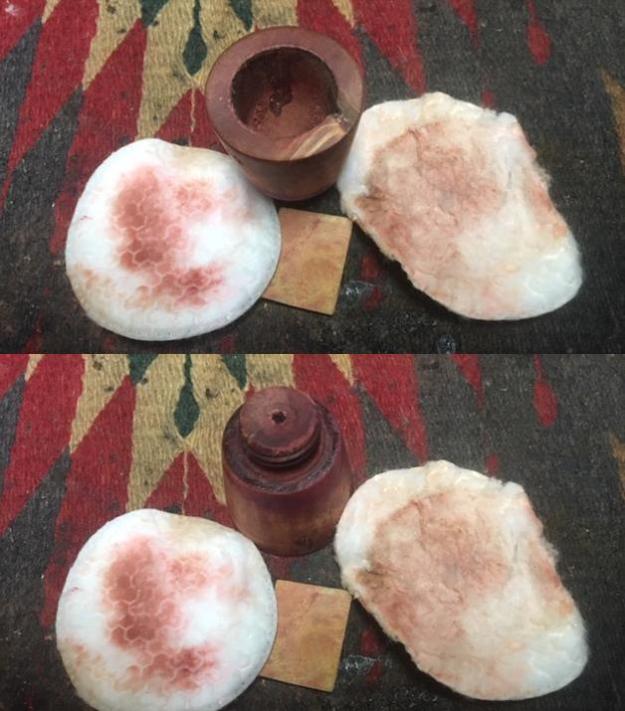
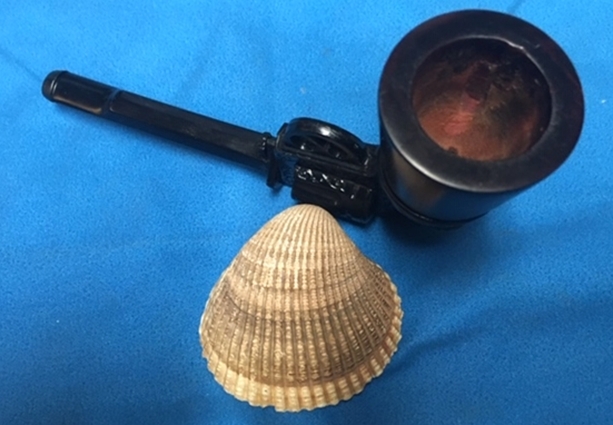
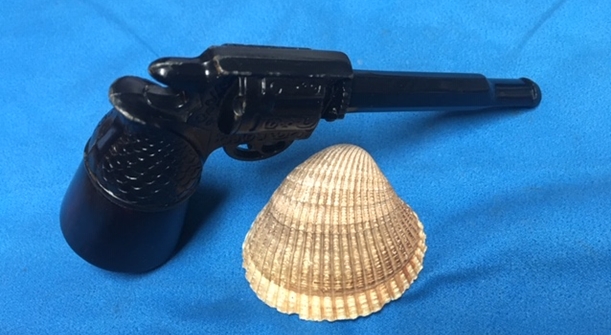
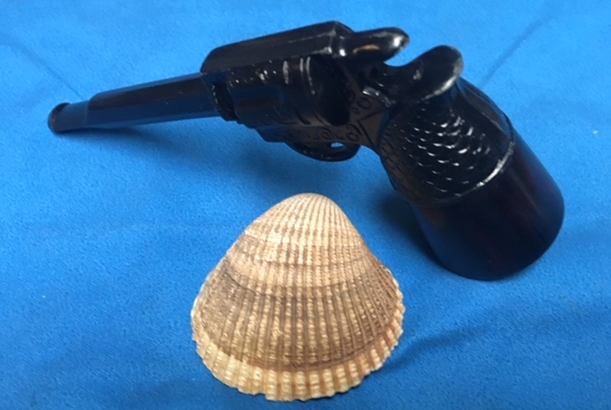
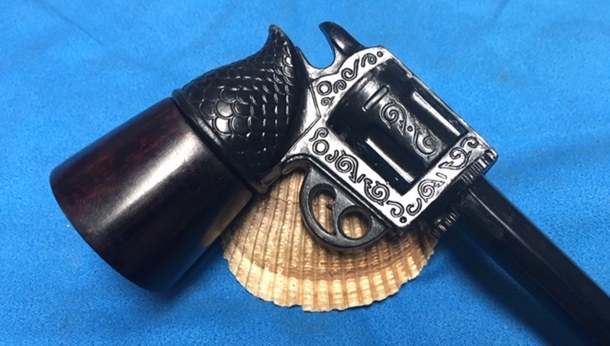
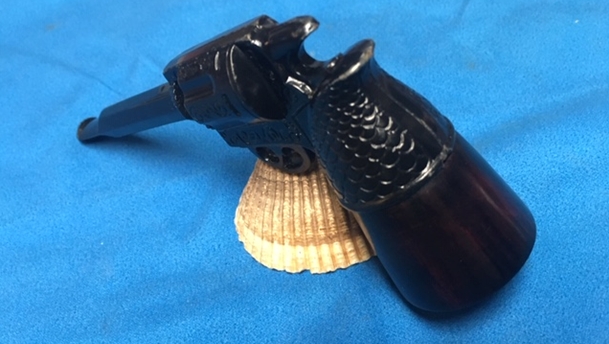
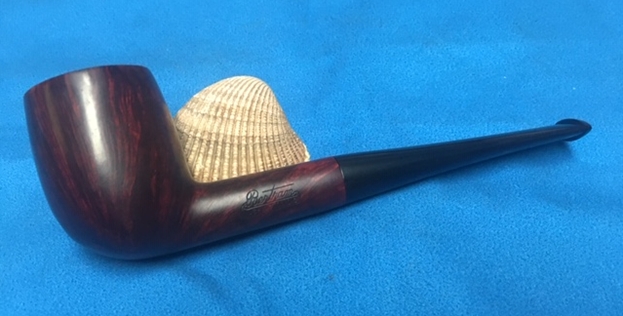
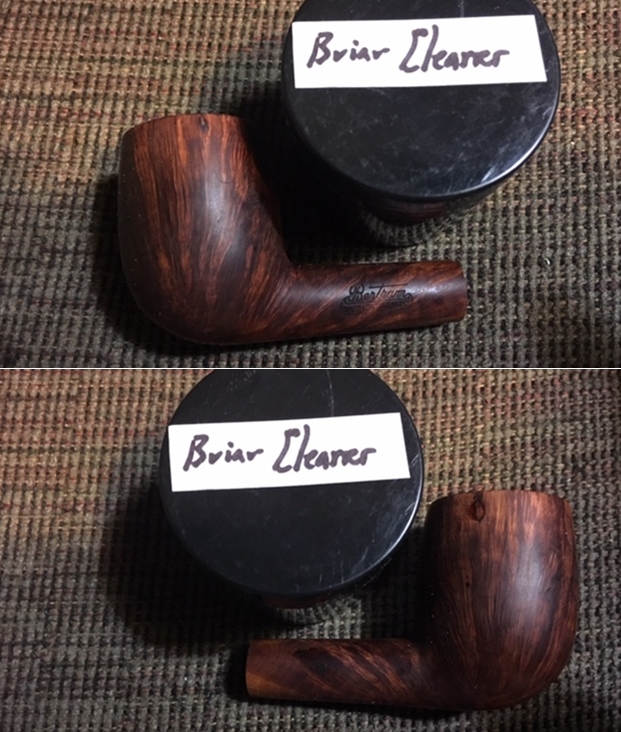
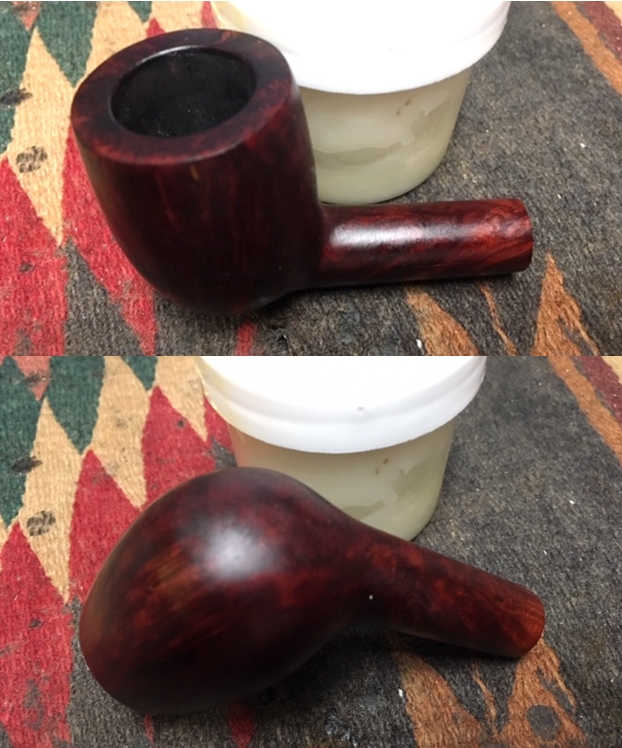
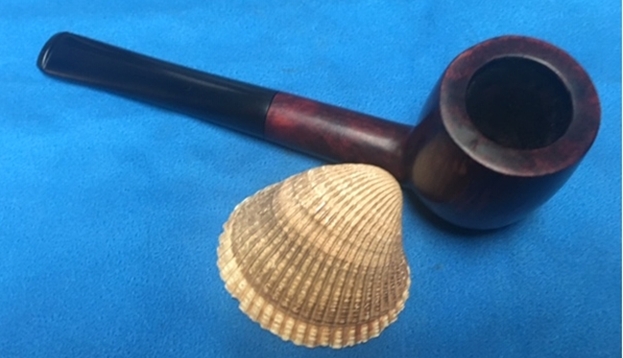
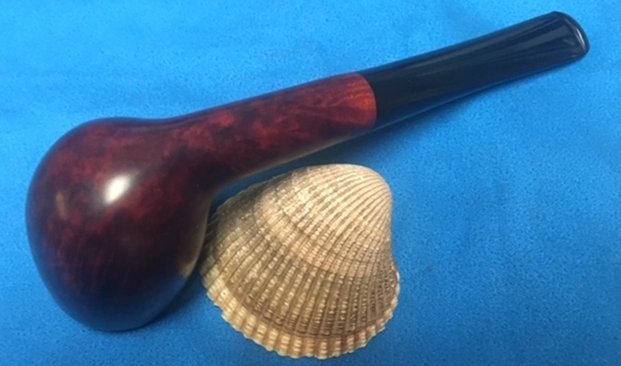
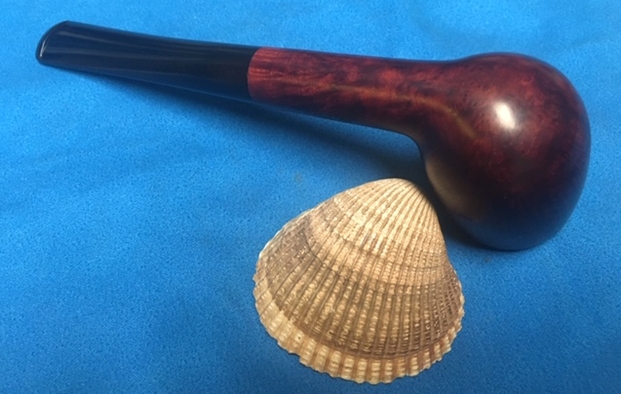
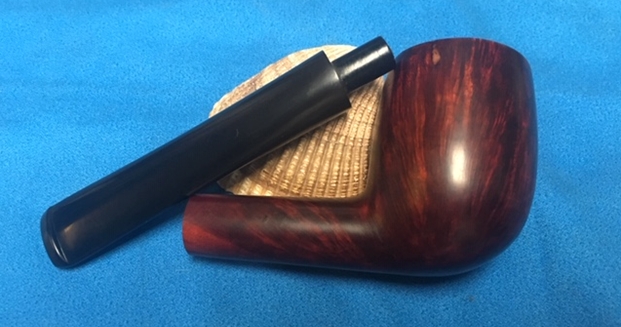
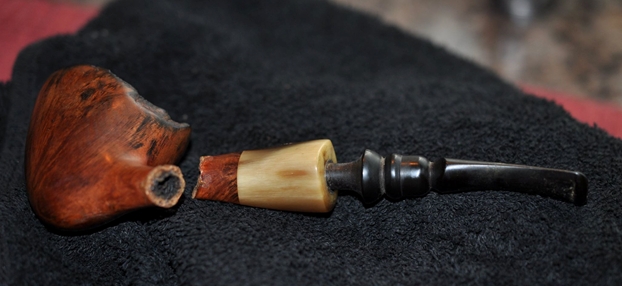
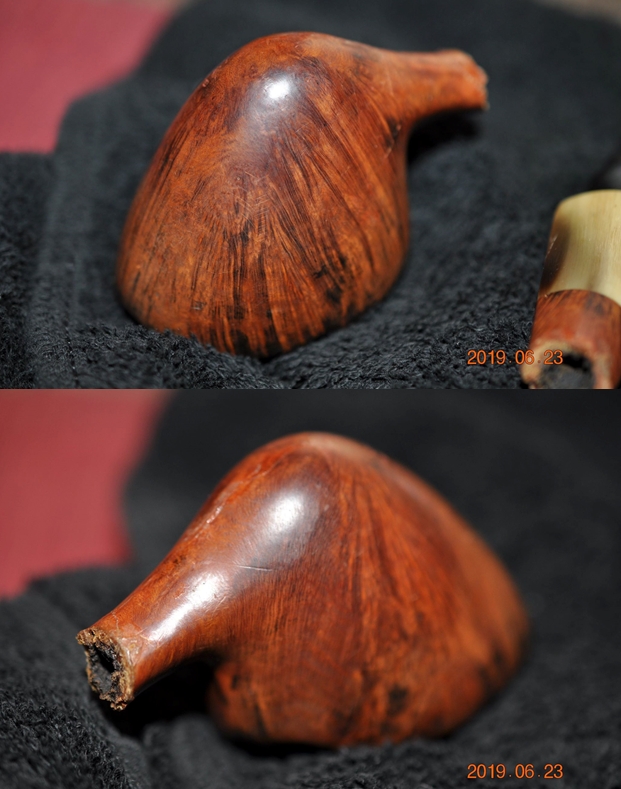
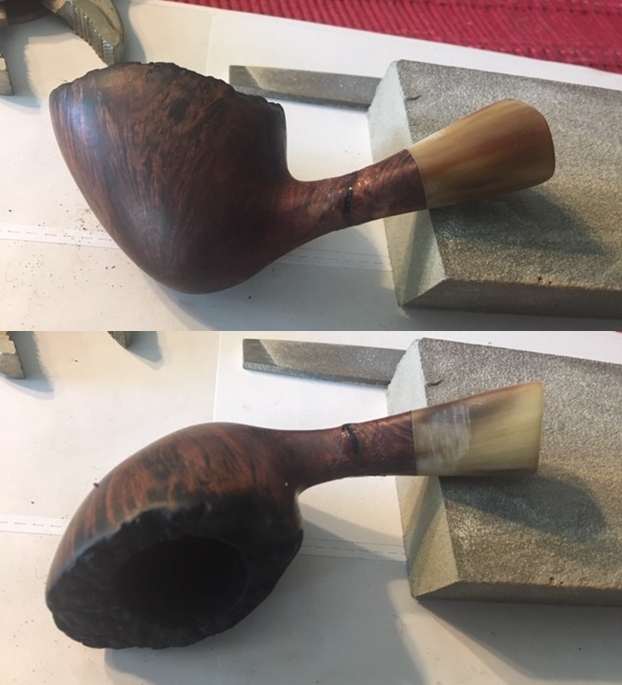
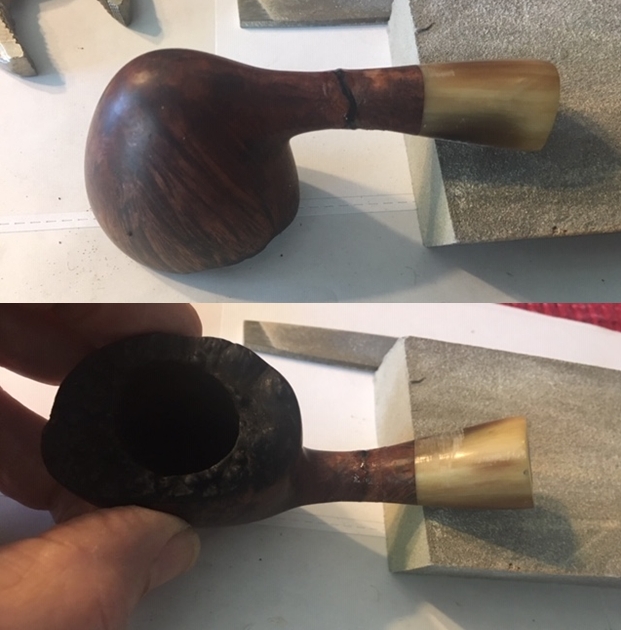
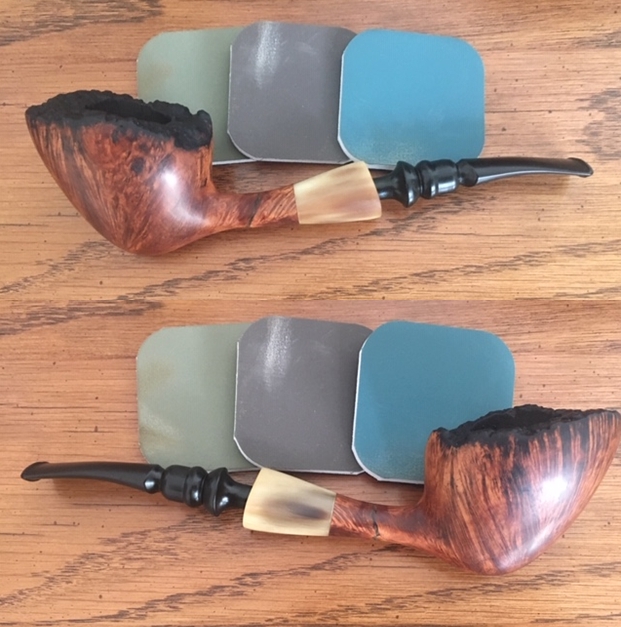
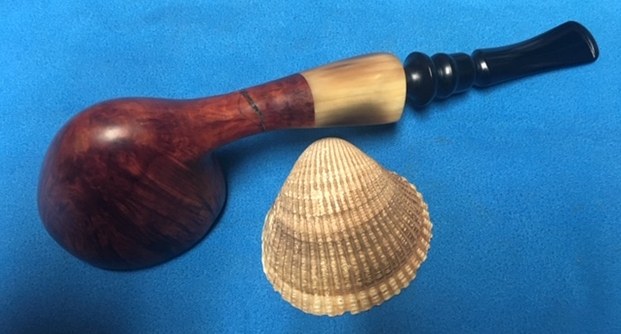
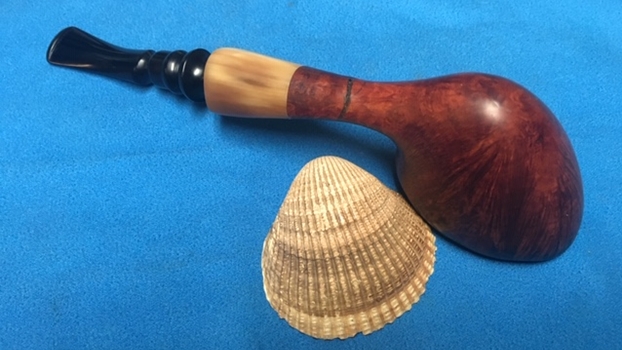
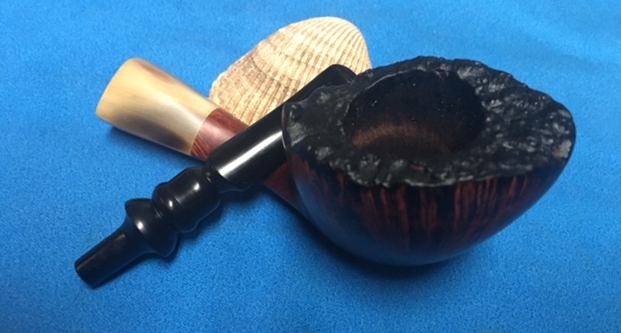
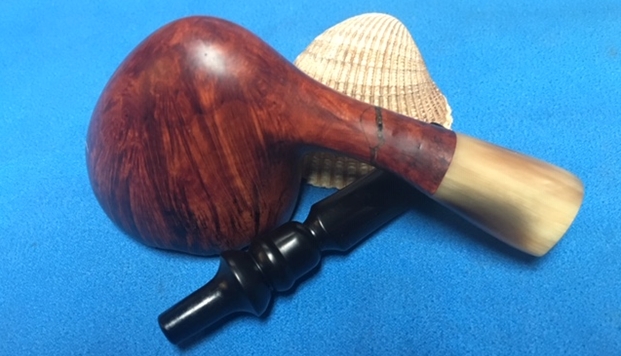
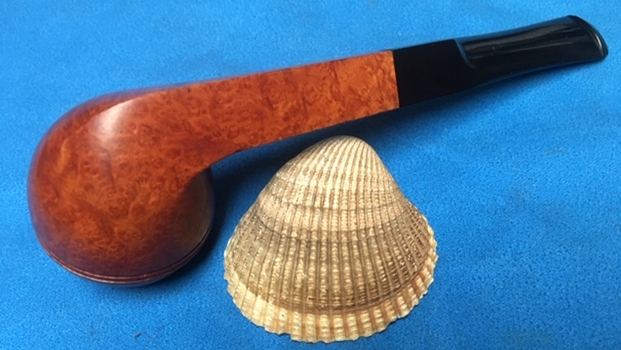
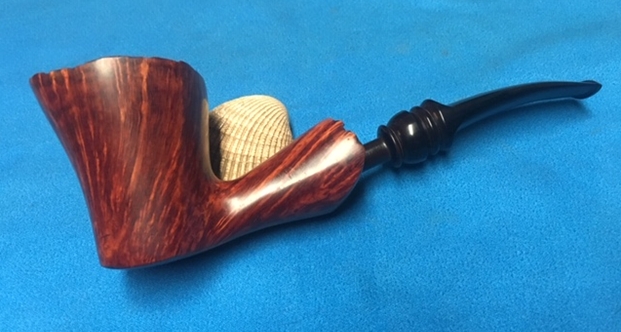
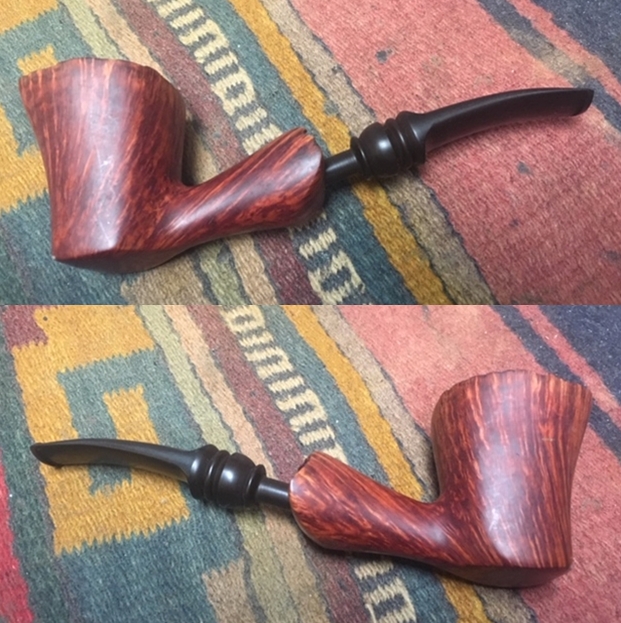
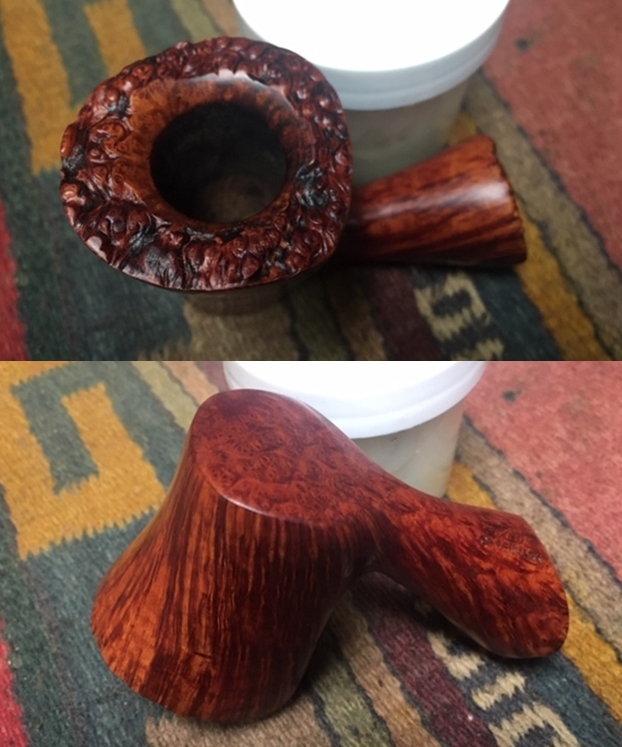
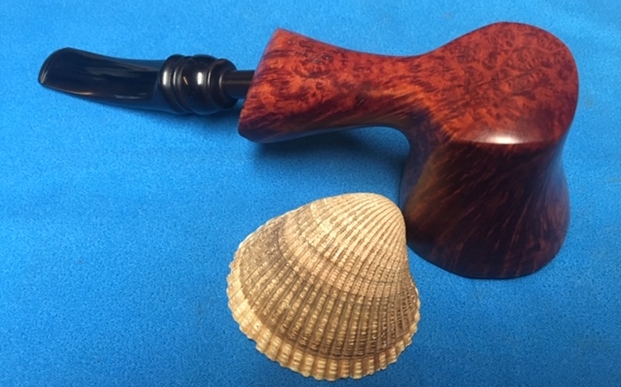
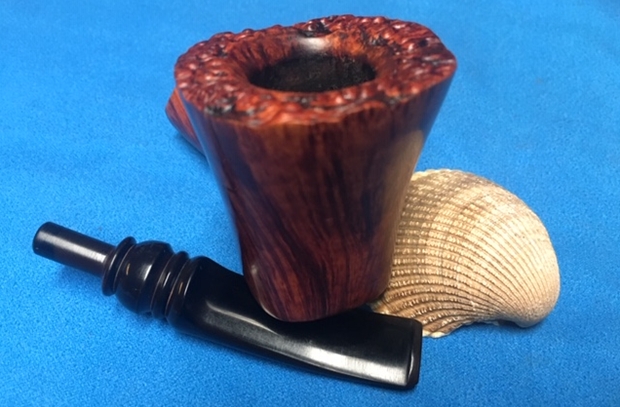
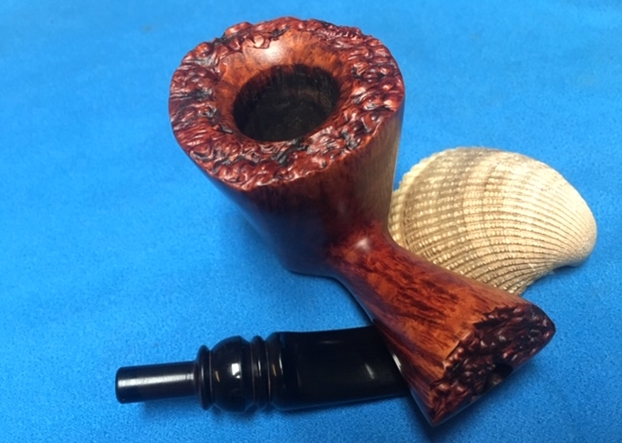
My good friend in India, Paresh, commissioned 3 pipes from the ‘For “Pipe Dreamers” Only!’ collection. To have him commission pipes is a privilege after being with him and his family in India not long ago. I will not forget the hospitality that Paresh and Abha provided to me, Steve and Jeff when we all converged in Pune. Paresh has commissioned some pipes before and it’s no secret that he is drawn to large pipes. One of the three he chose is perhaps the largest pipe that I’ve ever handled, and it also offers a good bit of weightiness as it rests in the hand – note, I didn’t say, “palm”. This guy is for the hand! I took a picture of the three he commissioned to show the comparison with normal sized pipes – with the Kilimanjaro is a French CPF Chesterfield and a BBB Classic Chimney which are next in the queue. The dimensions of the Kilimanjaro are an impressive, Length: 7 inches, Height: 2 5/8 inches, Rim width: 1 1/2 inches, Chamber width: 1 inch, Chamber depth: 2 3/16 inches. Here are more pictures of the Kilimanjaro now on the worktable.
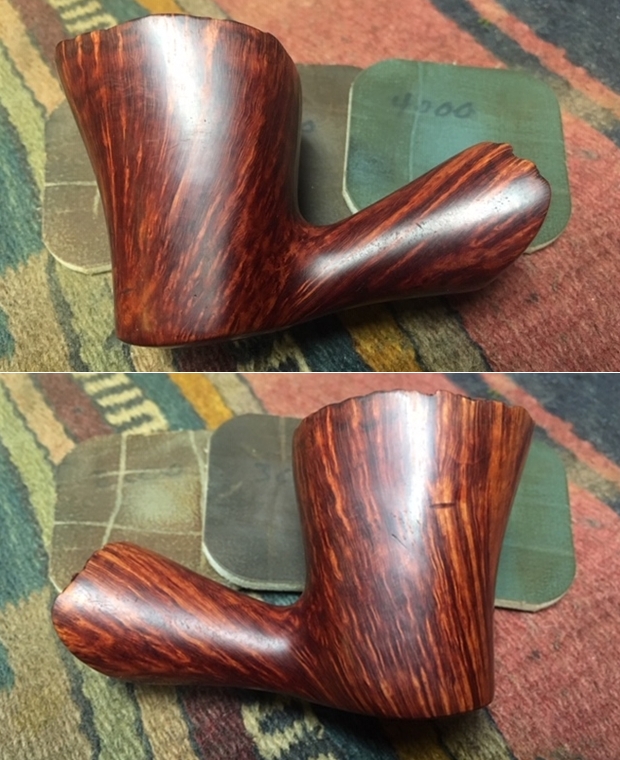


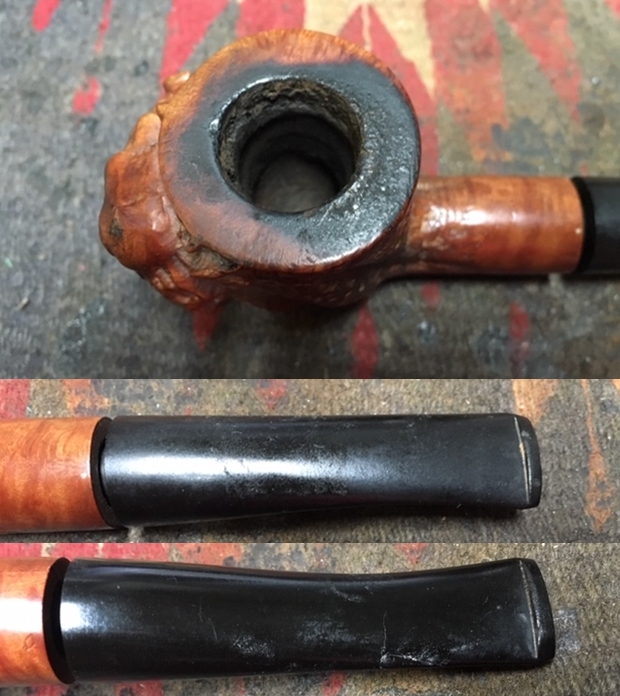
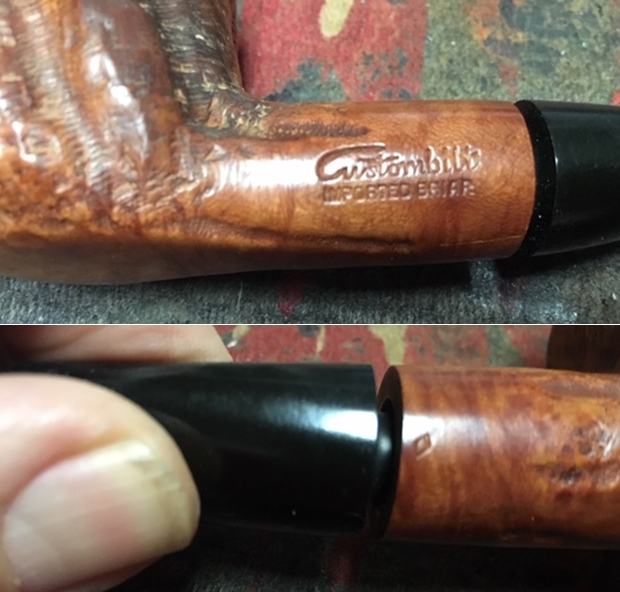
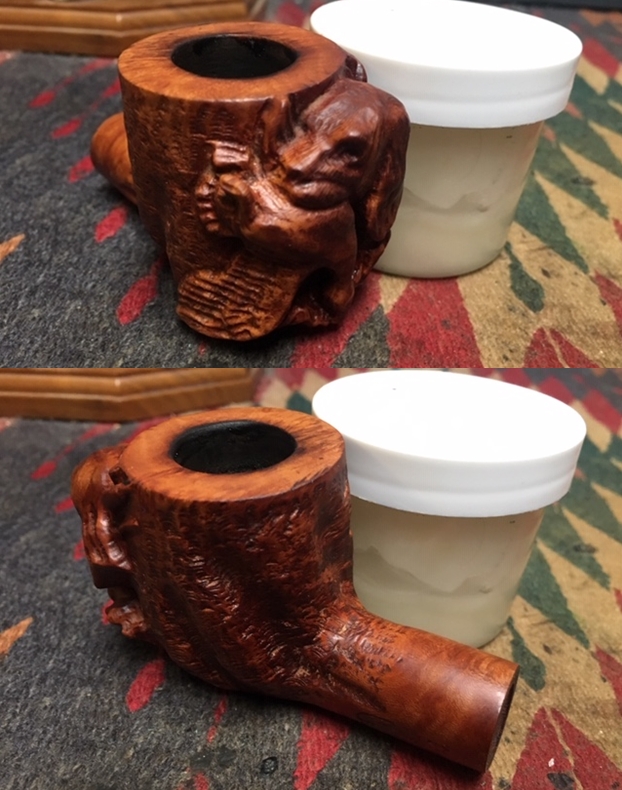
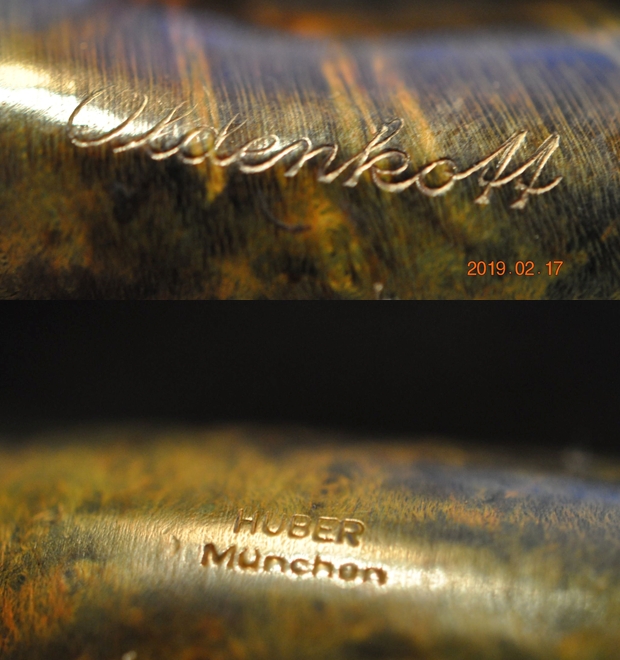
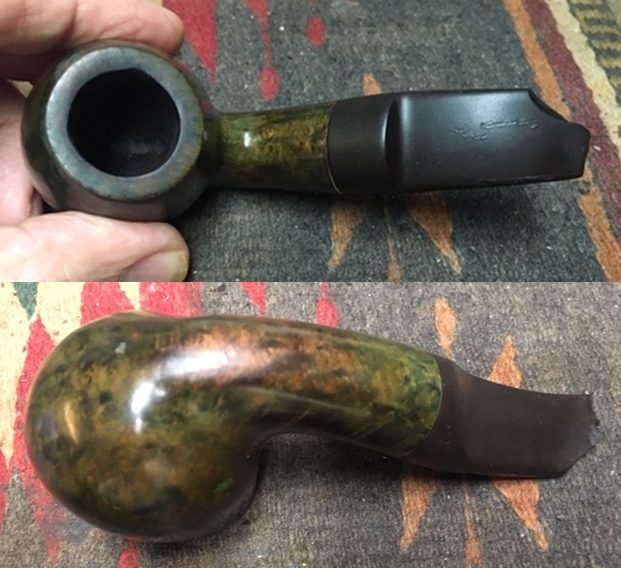
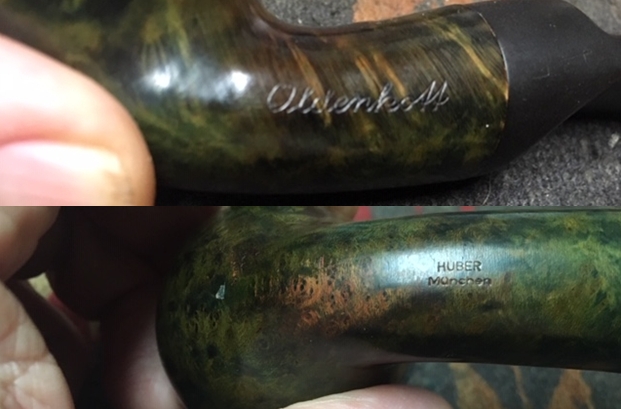
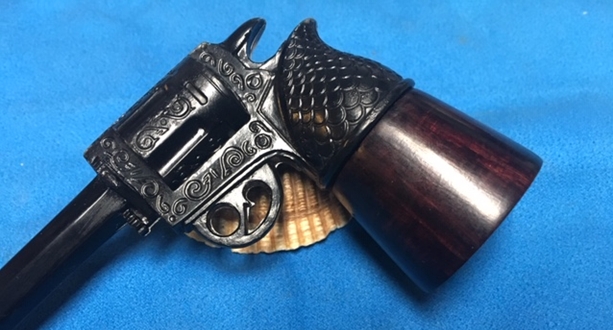
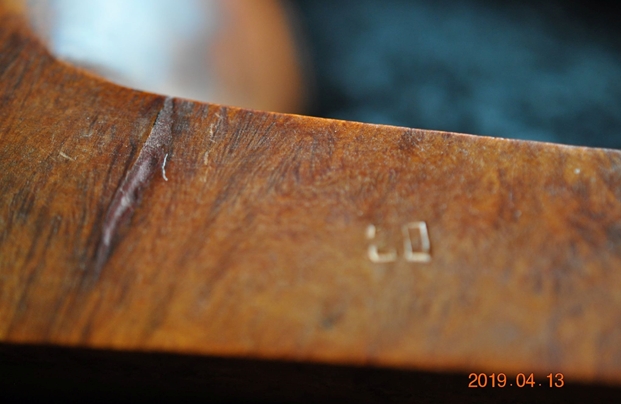
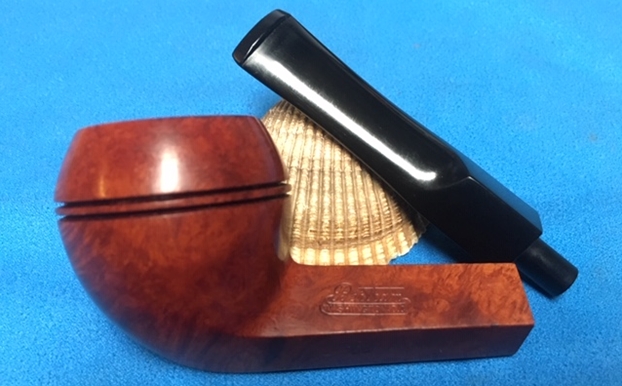
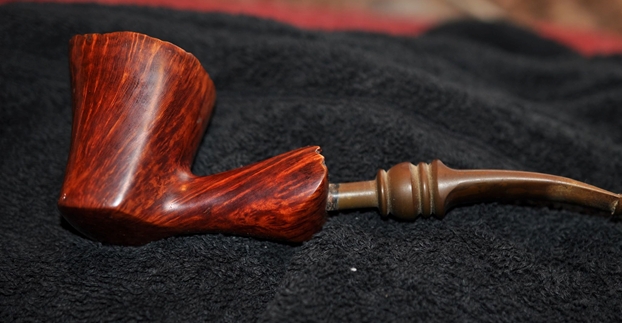
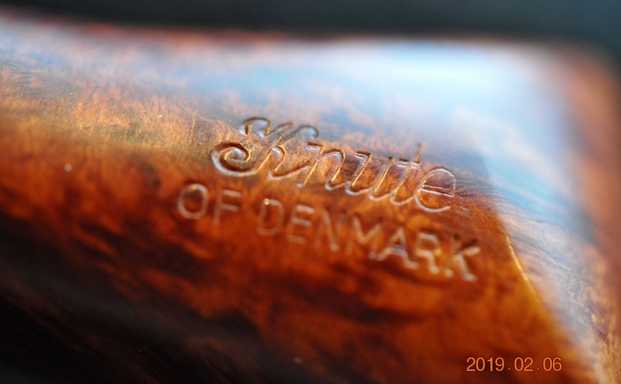
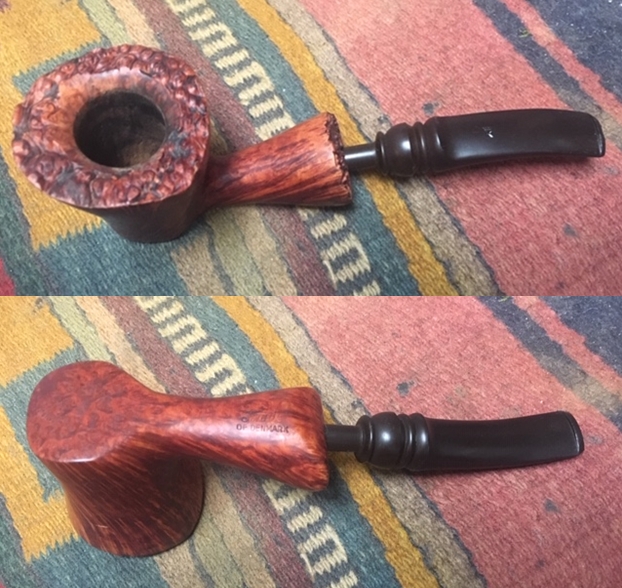
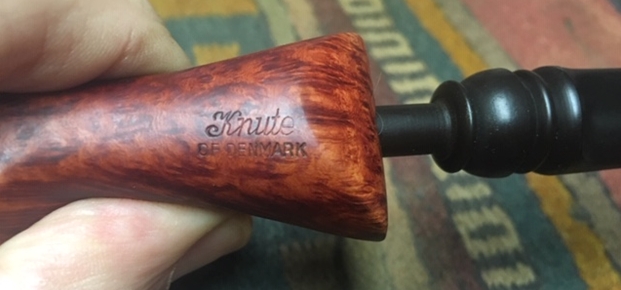
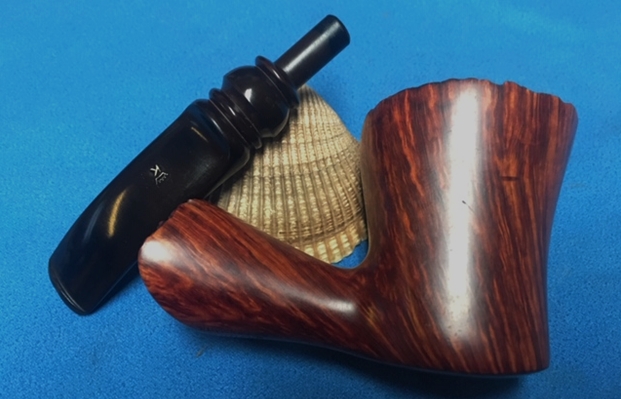
 The nomenclature is on the lower shank panel with ‘KILIMANJARO’ to the immediate left of, ‘MADE IN TANGANYIKA’. To the fore of these stampings, almost on the heel of the stummel is the shape number of 104.
Pipedia has a good amount of information about this pipe’s provenance in the article about the Tanganyika Meerschaum Corporation:
From Pipes, Artisans and Trademarks, by José Manuel Lopes
Tanganyika Meerschaum Corporation is a company that formed in 1955 by Kenyan businessmen from Nairobi after the discovery of a meerschaum mine relatively close to the surface on Kilimanjaro. The meerschaum is tougher, less porous, and cheaper than the Turkish variety. Another mine was soon discovered in Sinya, in the famous Amboseli Game Park.
The company, previously based in Arusha (Tanzania), became an associate of a Belgium firm, but closed some years after. It produced the Caveman, Countryman, Kiko, Killimanjaro, Sportsman, Townsman, and Wiga brands. It maintained a link with GBD for the making of the GBD Block Meerschaum series, and after its closure, the English firms, London Meerschaum and Manx Pipes (Manx Meerschaum) continued producing with African meerschaum.
This additional information about the better-known subsidiary, Kiko, is from Pipedia’s ‘Kiko’ article:
Kiko, meaning “pipe” in Swahili-Kiswahili to English translation, is probably the best known of the various brands listed below . In East Africa Meerschaum is found in Tanganyika, once known as German East Africa, and since 1964 part of the United Republic of Tanzania. The main deposit comes from the Amboseli basin surrounding the Lake Amboseli. Tanganyika Meerschaum is normally stained in shades of brown, black and yellow, and is considered to be inferior to Meerschaum from Turkey. Even though, the raw material is mined by the Tanganyika Meerschaum Corporation and to a large extent used for pipe making.
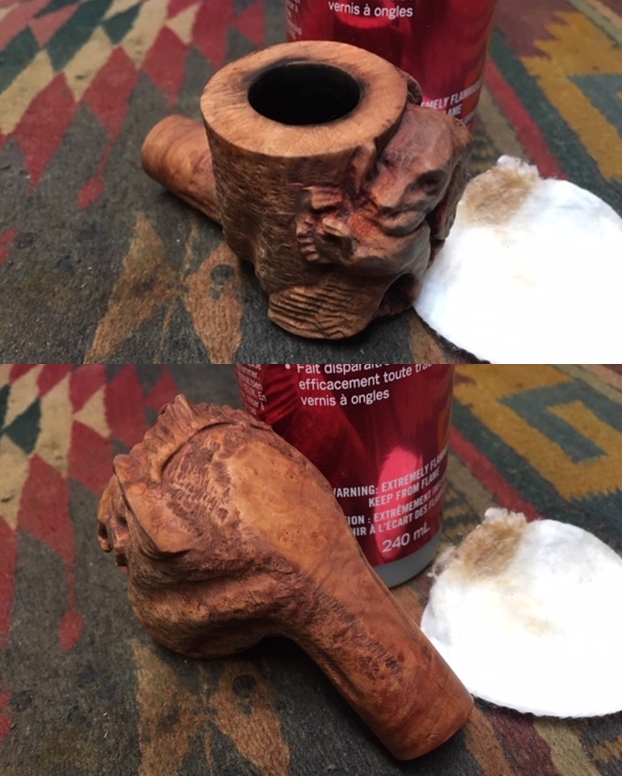
The same Pipedia ‘Kiko’ article referenced the specific line of ‘Kilimanjaro’ as being an old brand from Amboseli Pipes that belonged to the parent Tanganyika Meerschaum Corporation and provided a picture of a Kilimanjaro sporting the designator for that line, a rhinoceros, which the Kilimanjaro on my worktable unfortunately shows no evidence of having survived its journey. The box that carried the Kilimanjaro in the picture is very cool! The description of the Kilimanjaro line also includes this interesting information: “East African pipewood Meerschaum lined and individually boxed. Available in black rough finish and natural smooth or rough finish.” The finish looks like a blasted finish, but I’m not sure if it is not also rusticated – perhaps it is a ‘blasticated’ finish – a combination of both, but either way, it’s an attractive, tactile surface. ‘Pipewood’ is the description above and I’m sure the wood is not briar. I find no ‘pipewood’ of African origin doing a quick search on the internet. So, it’s East African ‘Pipewood’ whatever that is.
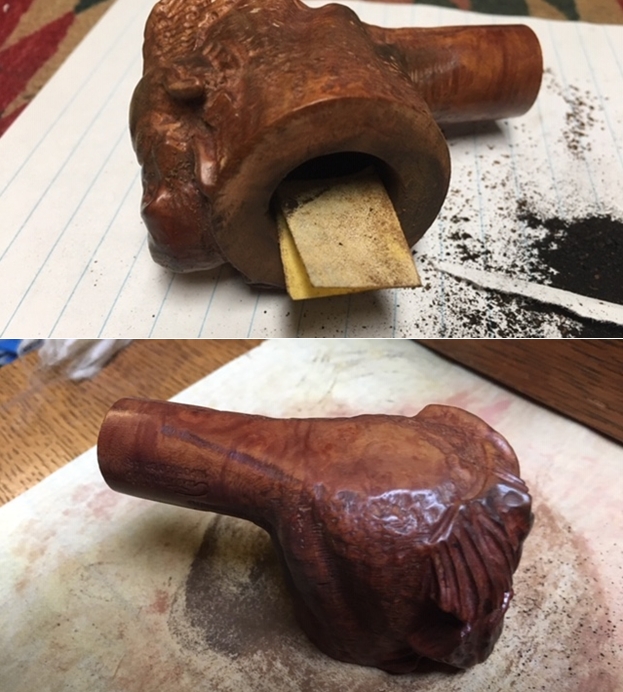
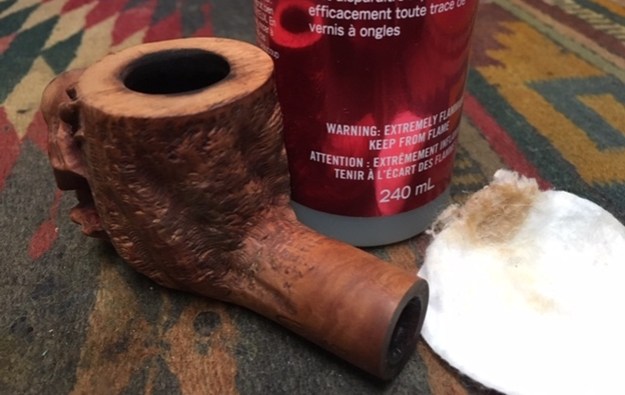
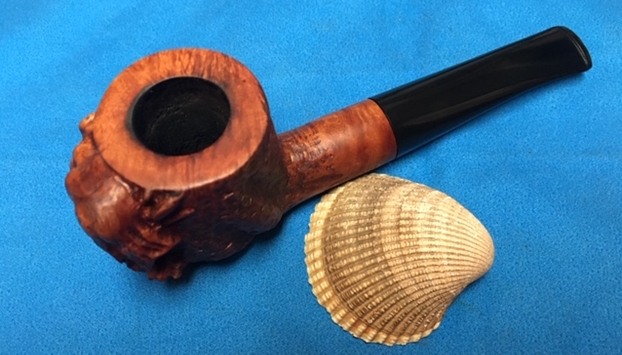
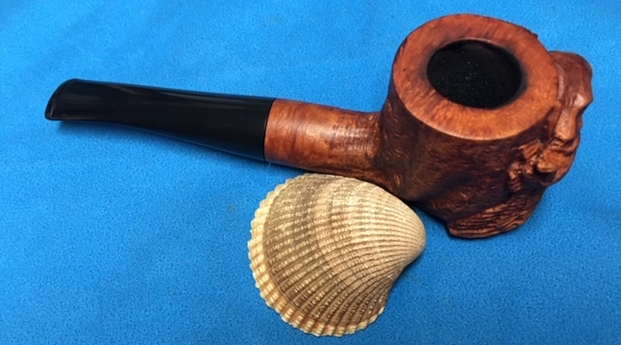
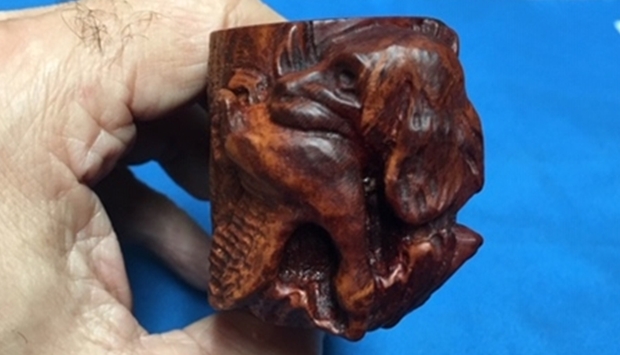
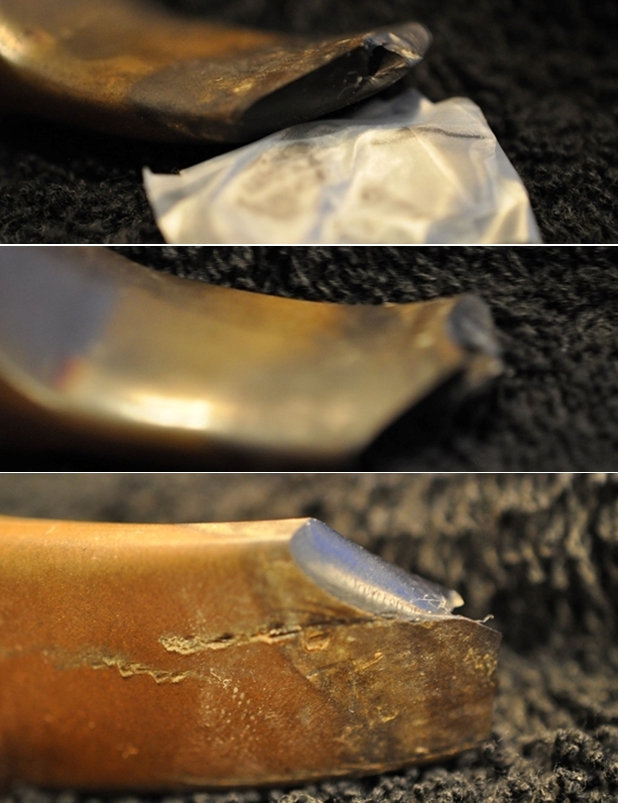
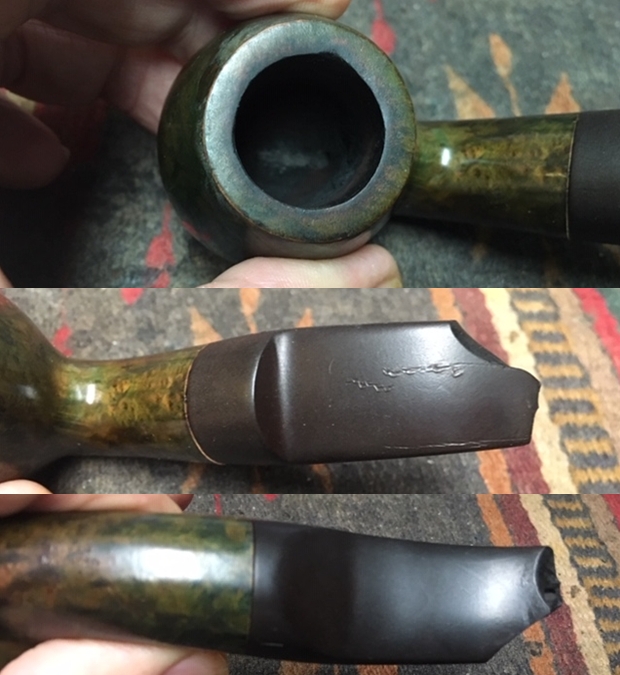
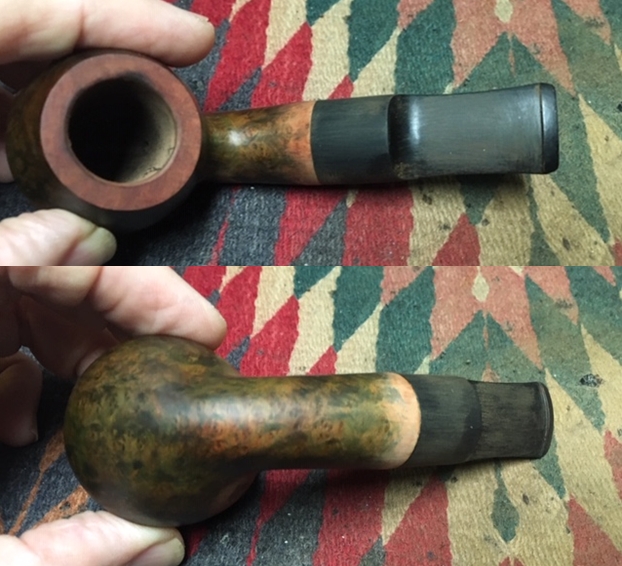
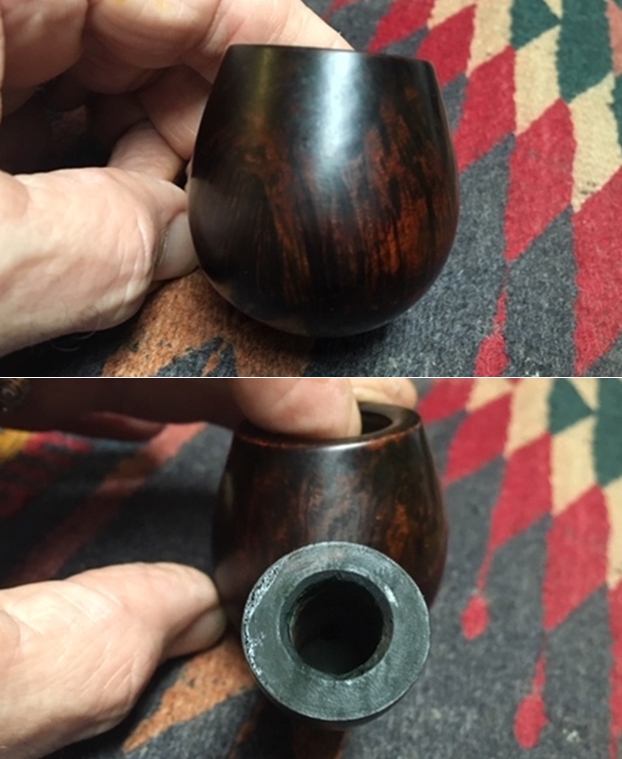
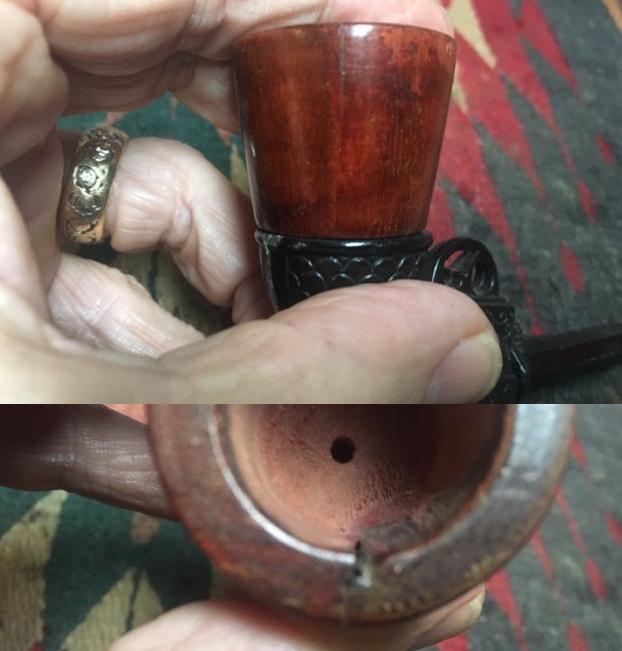
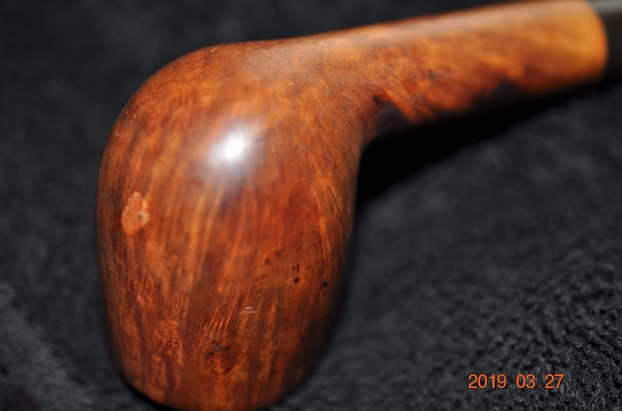
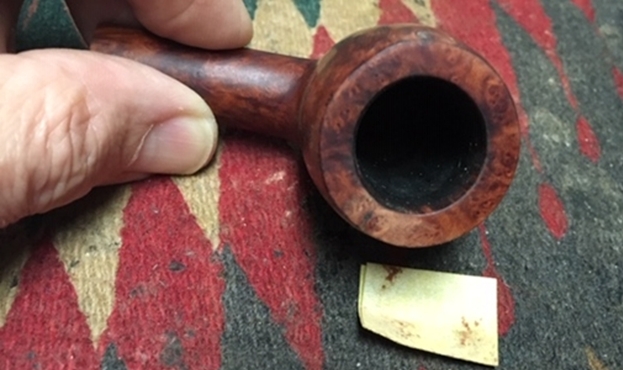
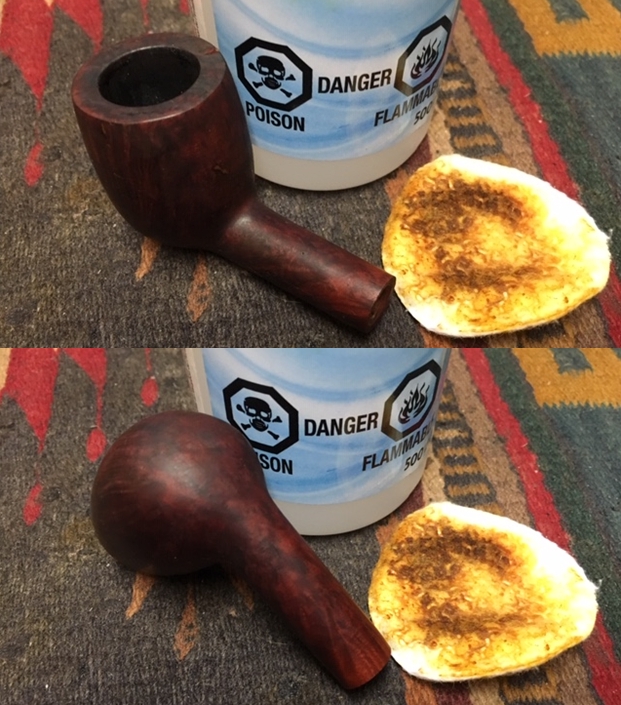
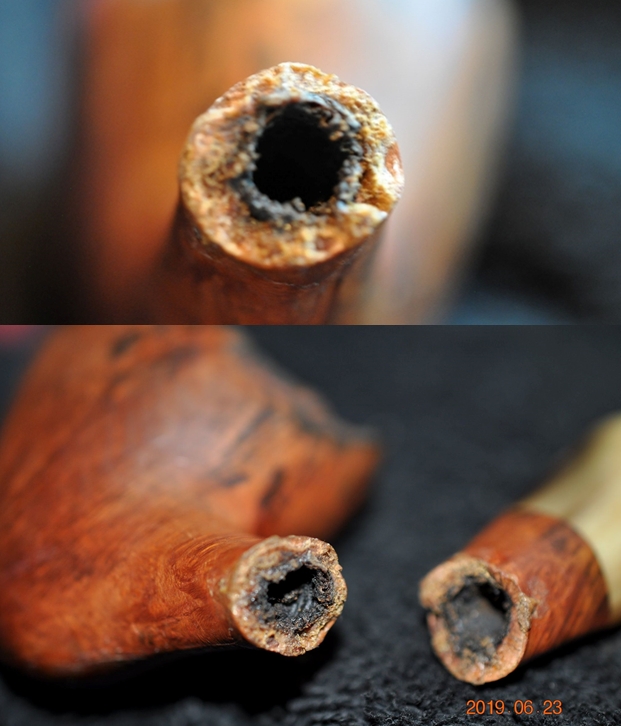
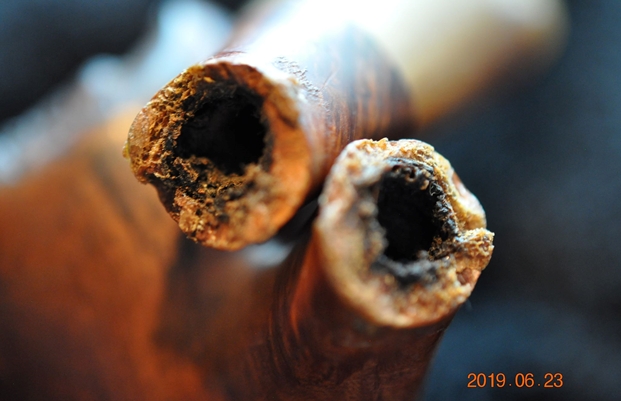
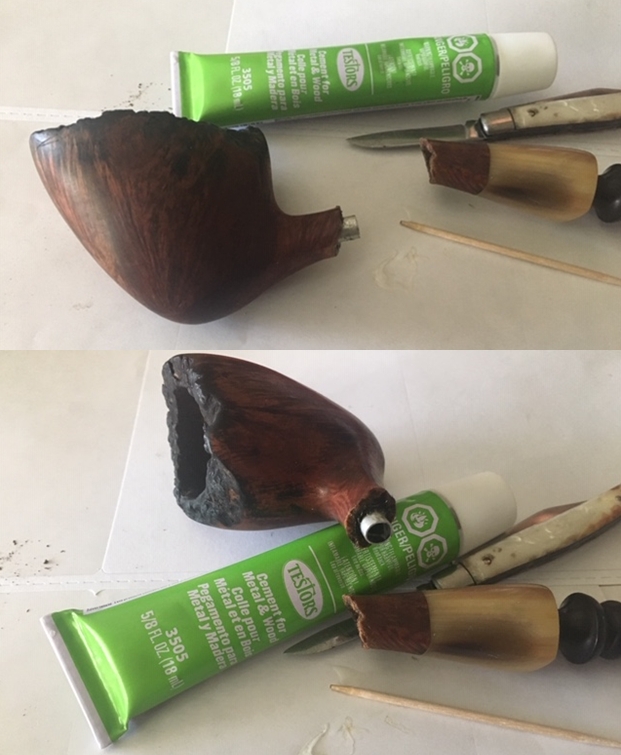
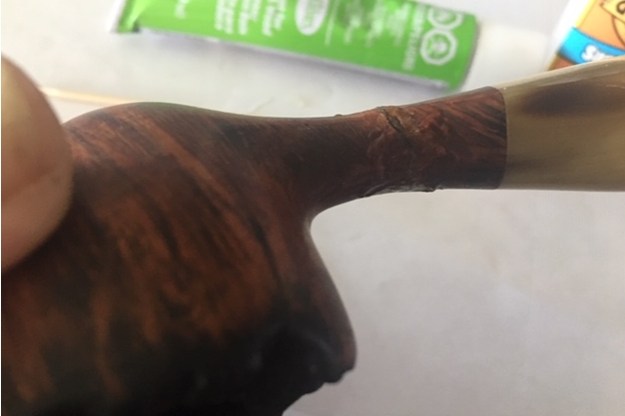
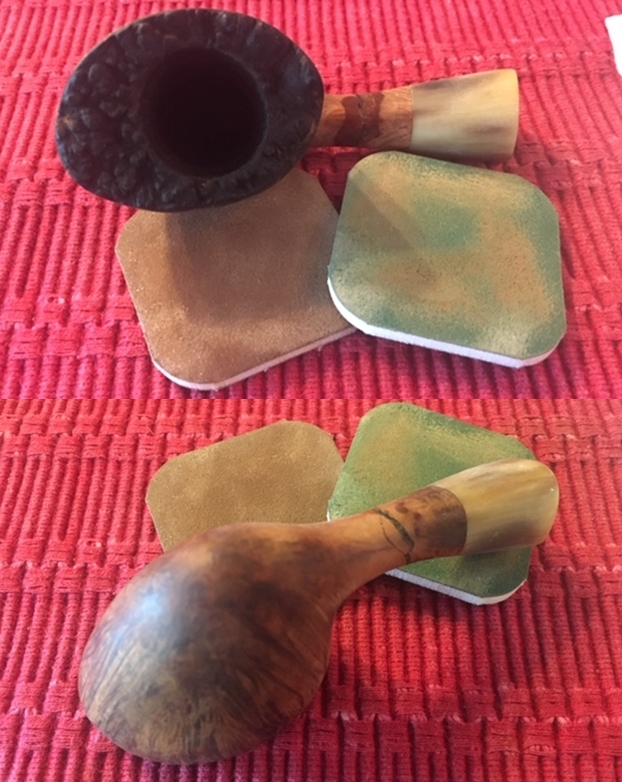
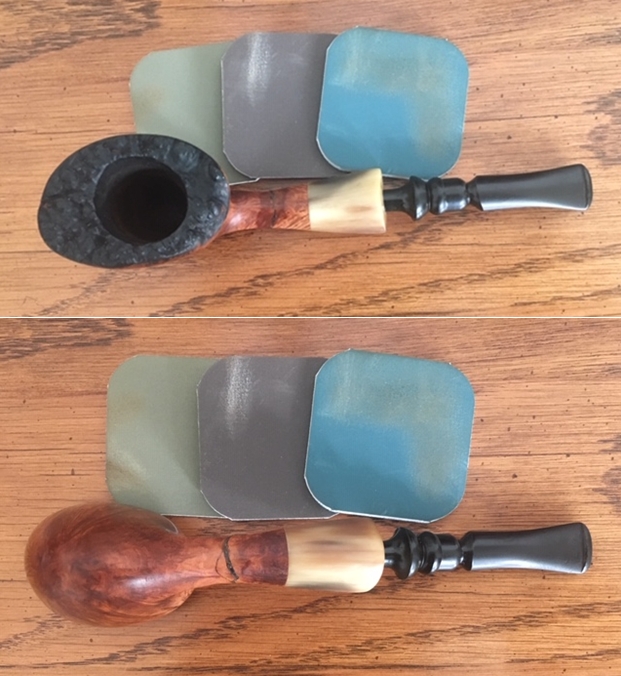
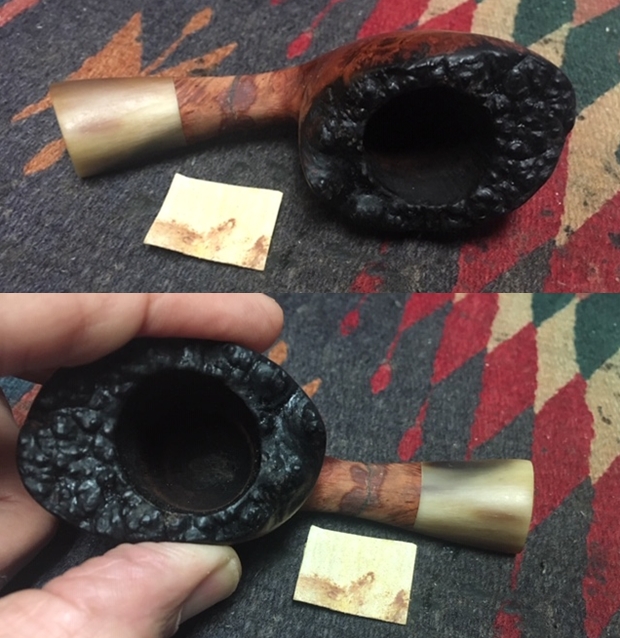
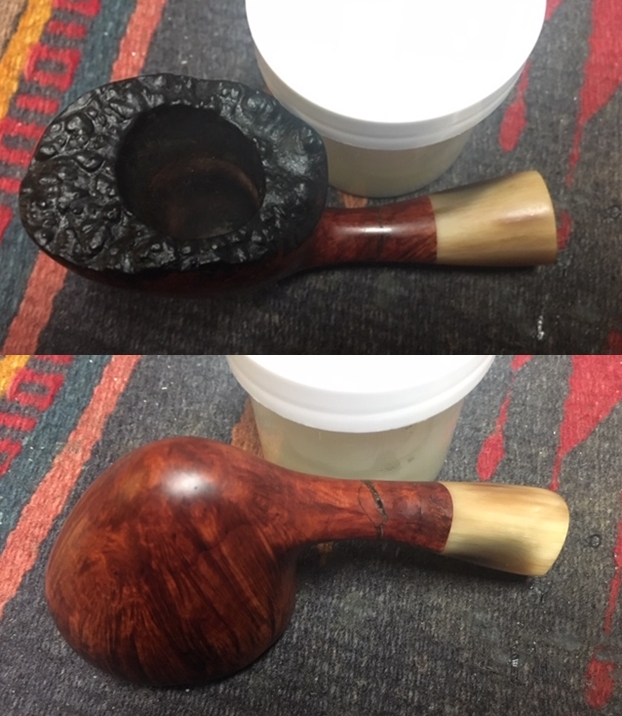
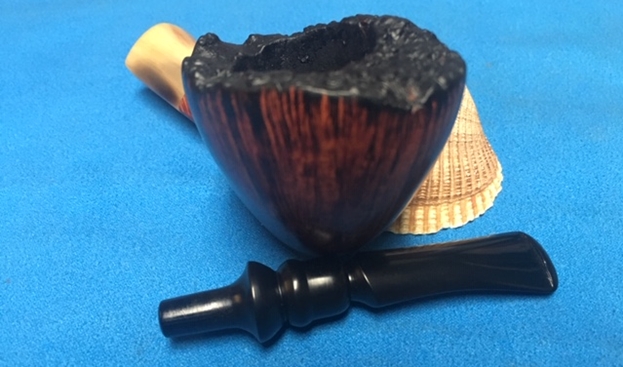
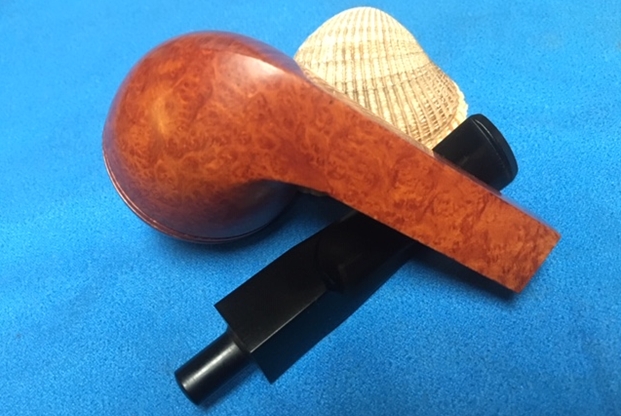
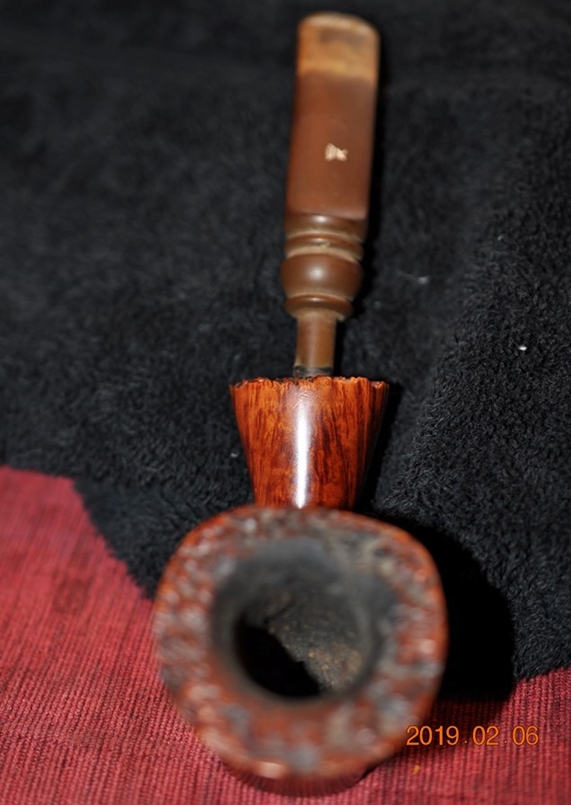
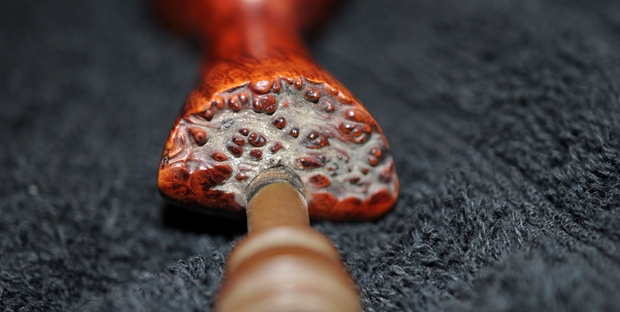
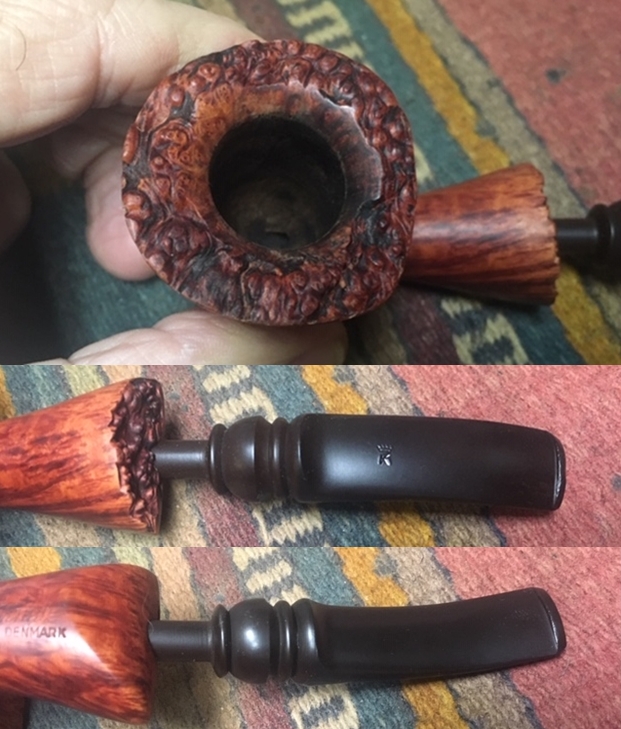
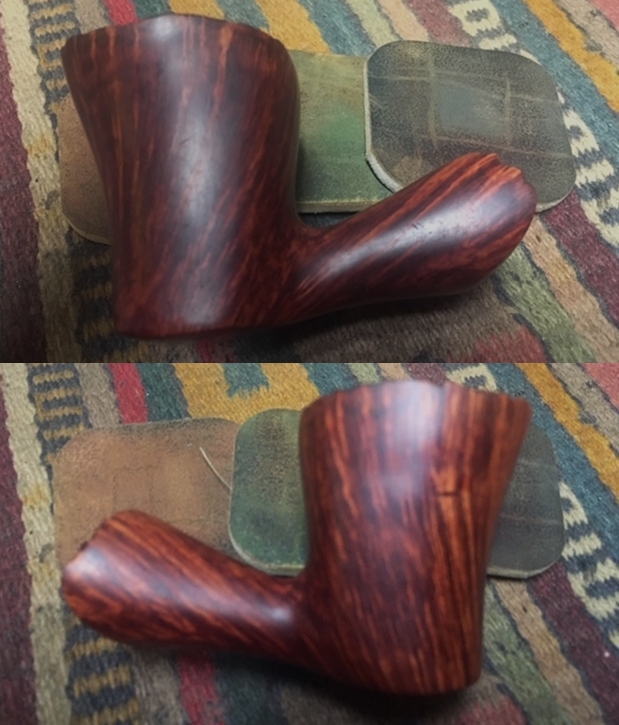
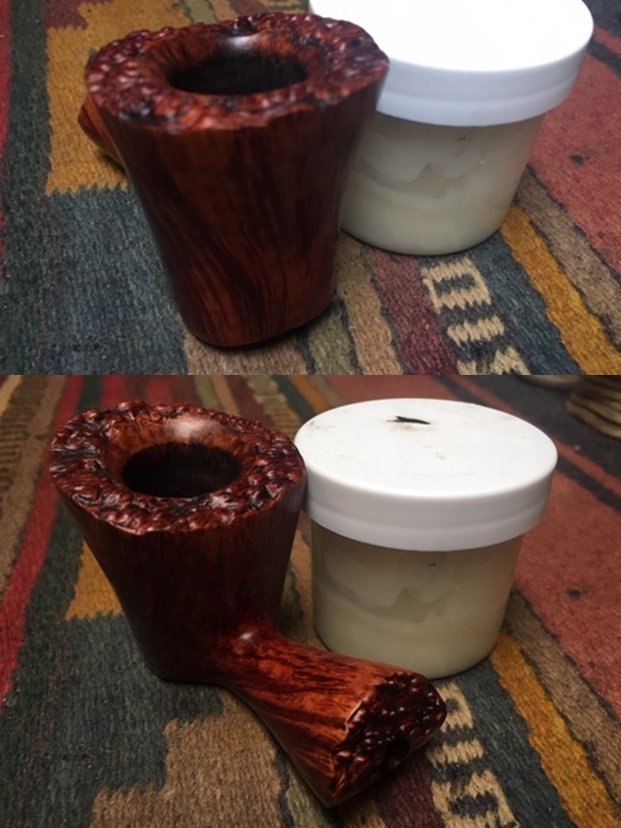
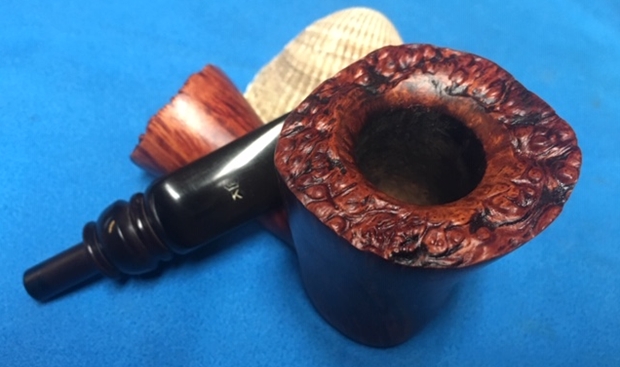
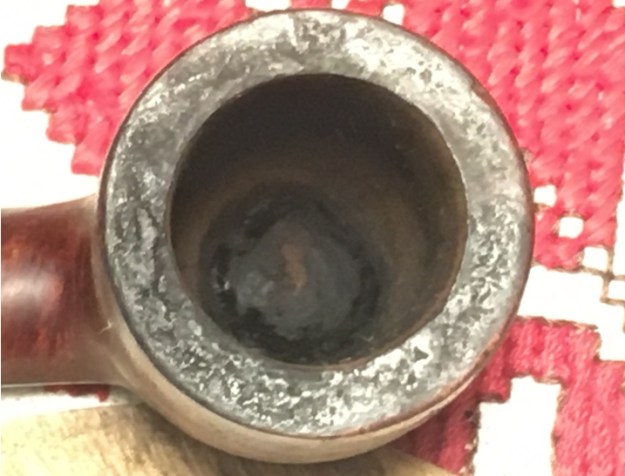
The issues facing this Kilimanjaro giant are significant. When Paresh commissioned this pipe with a full awareness of the issues it faces, said to me that he was not only attracted to the size, but he was also looking forward to seeing what I did to rescue this giant pipe! No pressure! To be sure, I’m not sure that the remedies I employ will provide a long-term resolution, but I’m hopeful. The first and fundamental issue is the vertical crack that runs for ‘miles’ along the left side of the pipewood bowl. The first picture below shows ‘daylight’ coming through the crack at the rim level.  The following pictures show the crack as it disappears into the ‘moon surface’ crags and crevasses of the pipewood finish. To find the terminus point of the crack will require a magnifying glass. The question that I ask myself is what caused the crack?
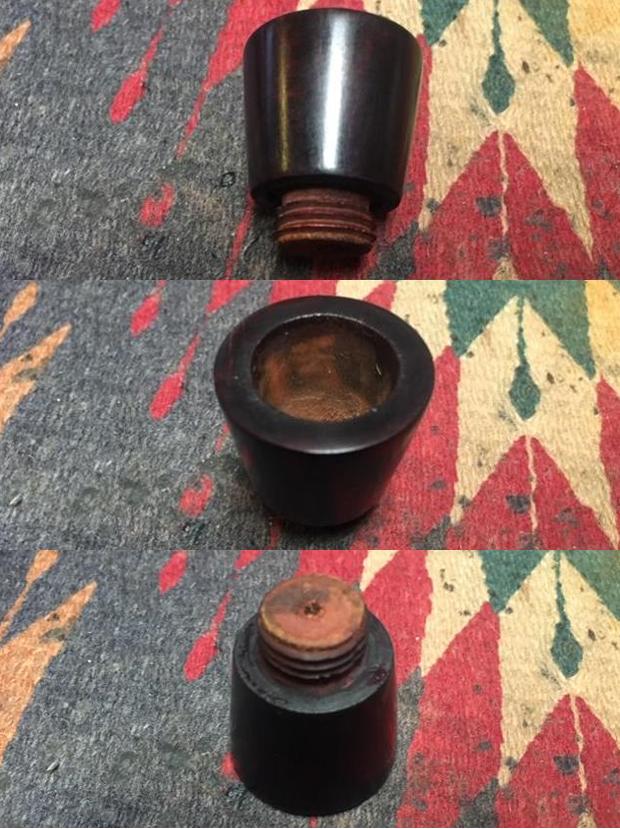
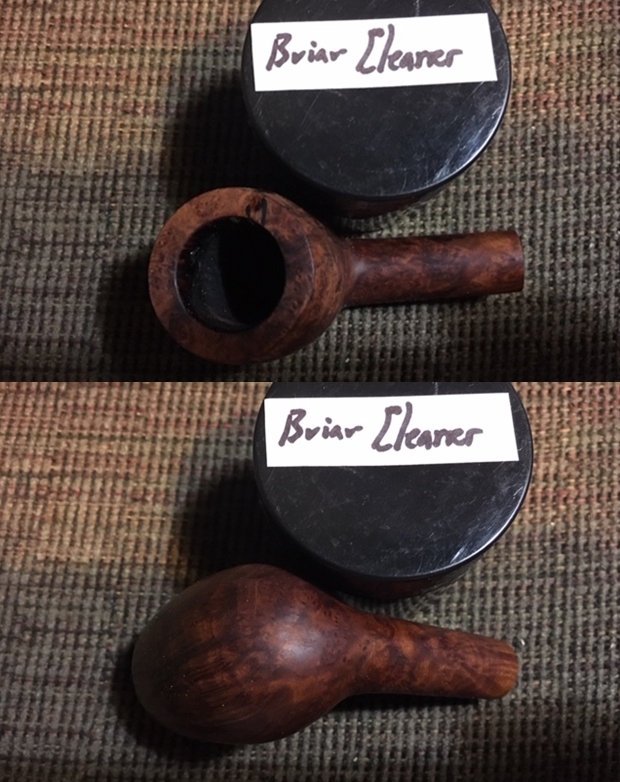
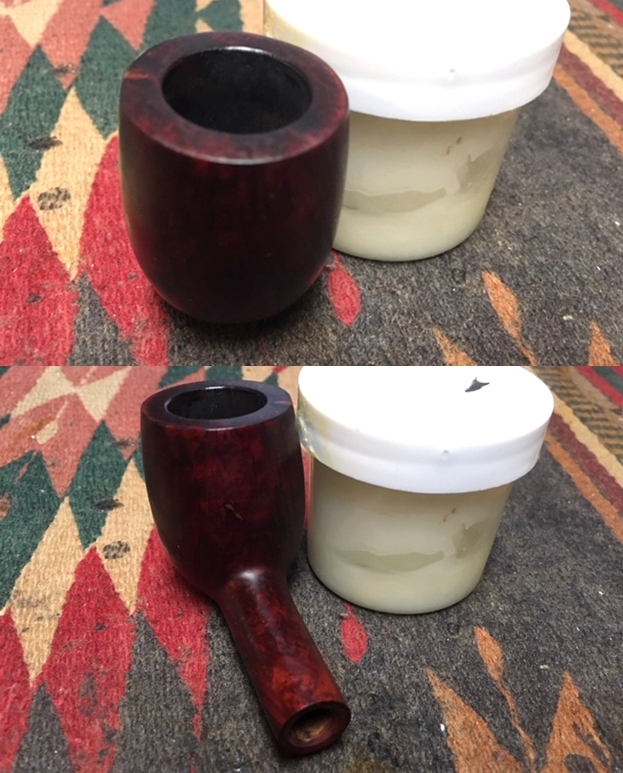
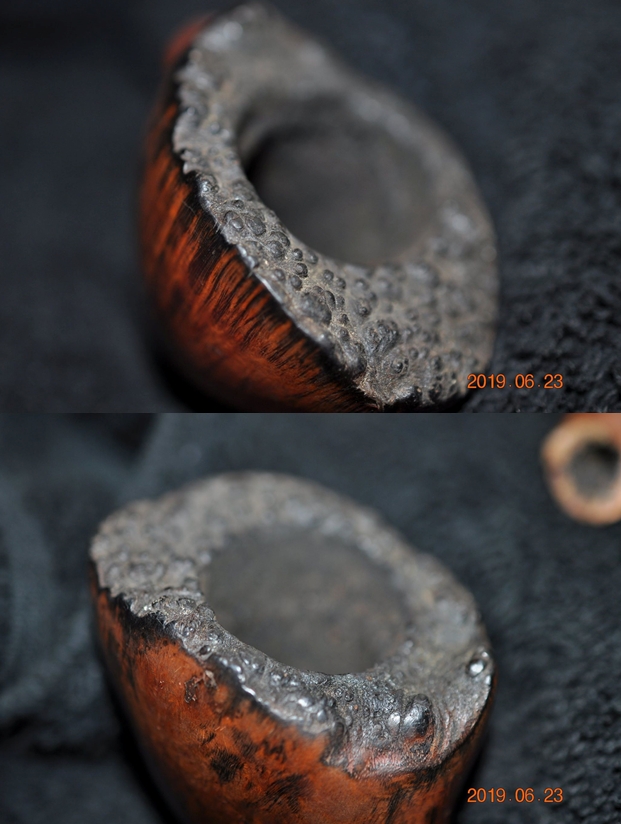
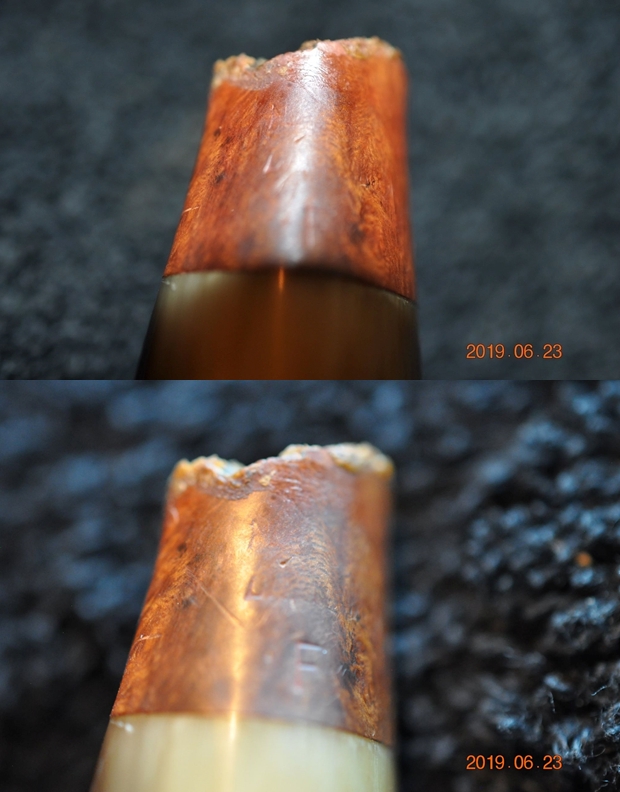
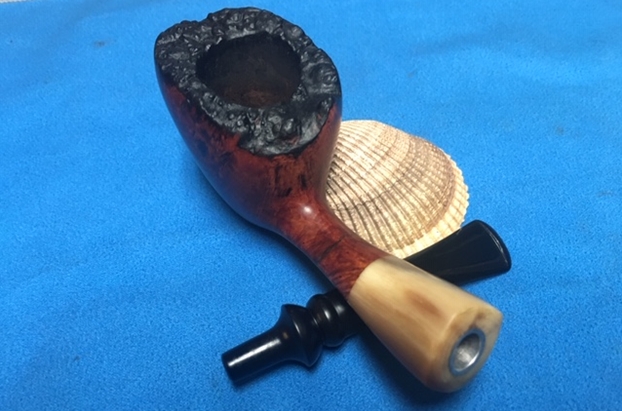
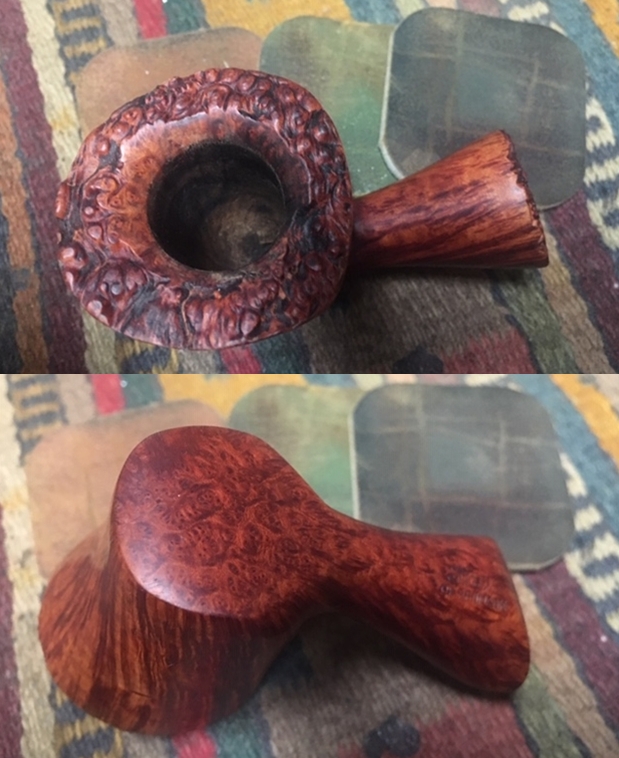
 The other major issue is the Meerschaum lining. The trauma, whatever the source was, cracked and broke off the upper part of the Meer-lining. The Meer breakage appears to correlate to the crack-side which would indicate that the crack and the Meer breakage go together. The question that comes to my mind again is, what caused the crack and the breakage? To ‘Sherlock’ the scene shows no trauma to the surrounding pipewood, which I would expect to see if the trauma were caused by a dropping of the pipe. Inspection of the rim leaves me with the impression that it is thin for the size of the pipe. This observation leads me to postulate that the crack was possibly caused by the expansion of the wood as the Meerschaum heated, but how much does Meerschaum expand as it heats? If so, even microscopically, this would suggest that the expansion could have contributed to the pressure on the encasing pipewood contributing to the crack. But what explains the breakage of the Meer? The vertical crack is set almost center between the widest break points of the Meerschaum.
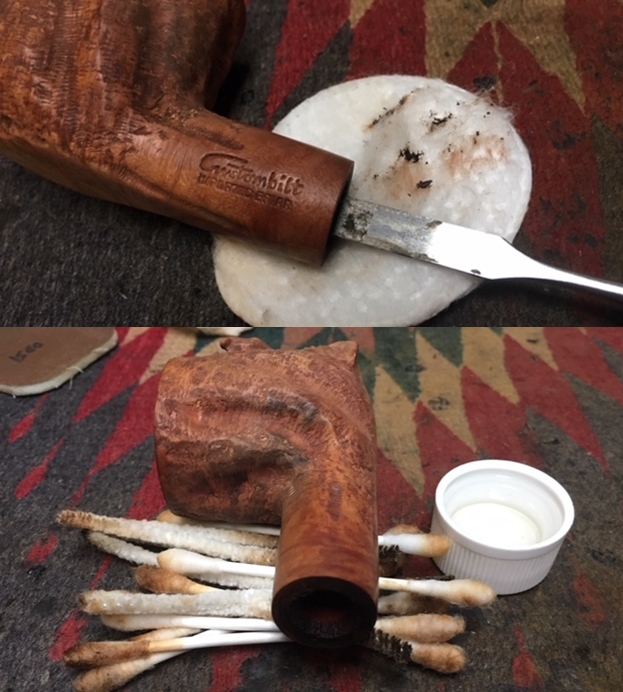
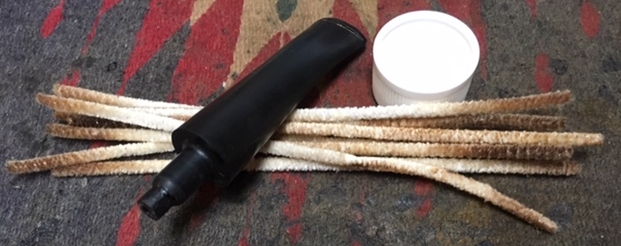
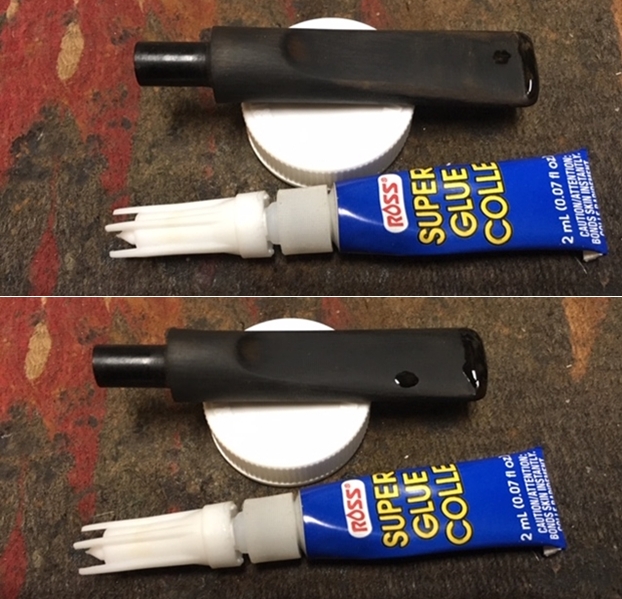
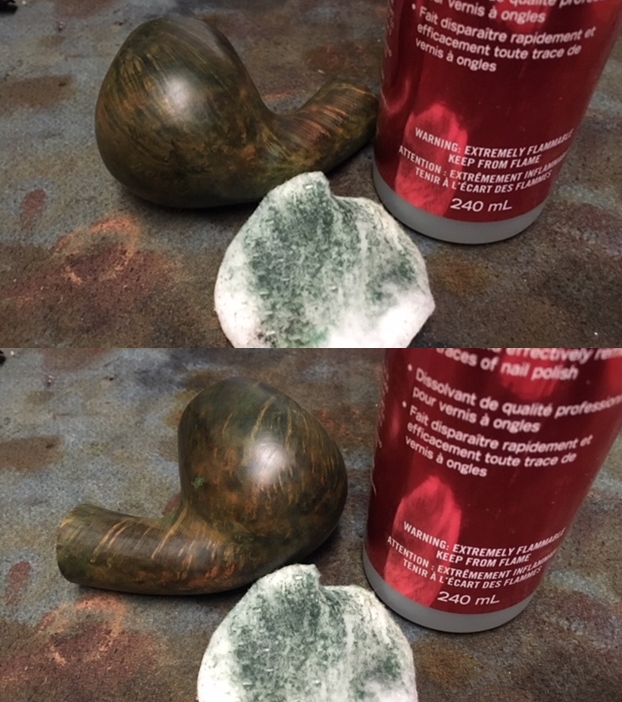
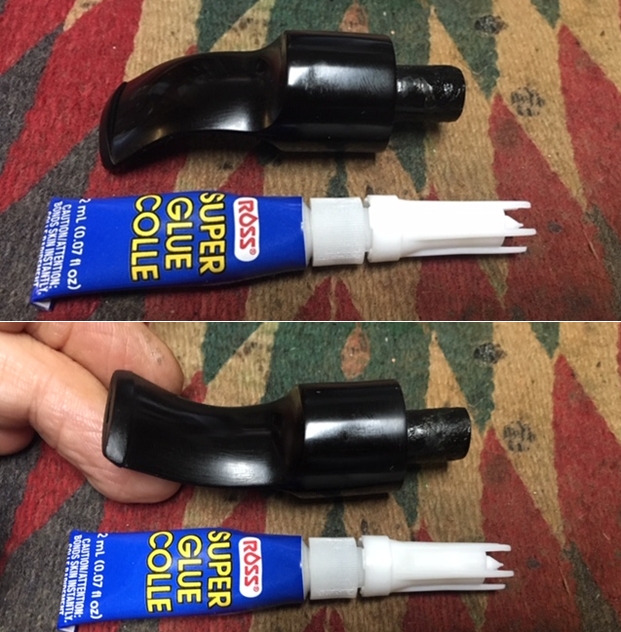
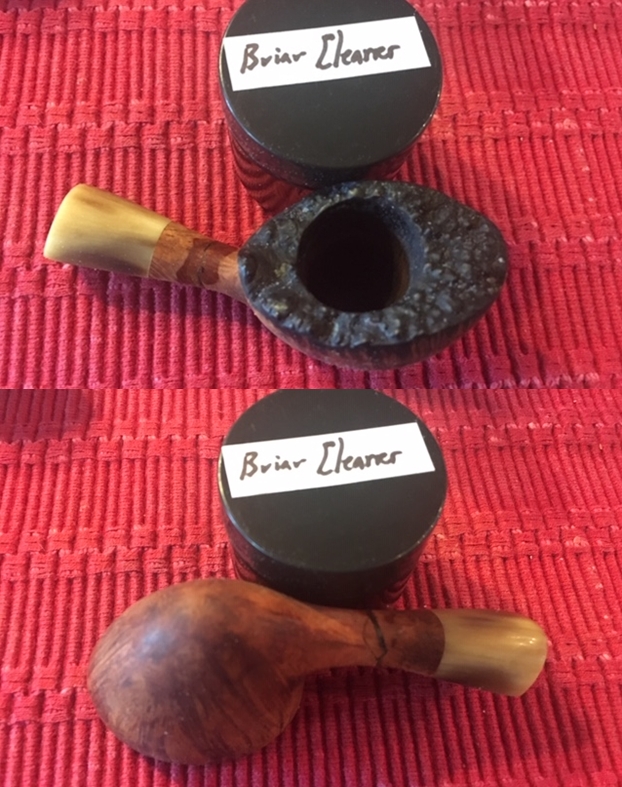
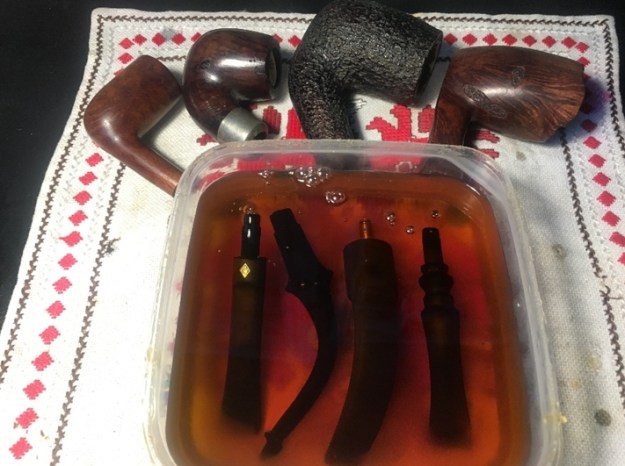
  This question prompted me to write Steve with the question regarding how a Meer-lining was installed. Was the Meer-lining a result of compacted or pressed Meerschaum that was formed to the chamber or was it a cut piece of Meerschaum that was inserted as a separate piece? Steve’s response was that Meer-linings generally were cut in a lathe and drilled and inserted to fit the chamber. This information was helpful because it would indicate then that the Meer-lining remaining in this Kilimanjaro was essentially one piece, and barring any large hidden cracks in the surviving Meer, should be structurally intact. I’ll need to clean the surviving Meerschaum lining to make sure that the rest is intact and then begin the repair from the outside working in. With this initial assessment of the serious issues standing in the way, I begin the clean-up by running pipe cleaners dipped in isopropyl 95% through the stem and then into a soak with Before & After Deoxidizer along with other pipes in the queue.
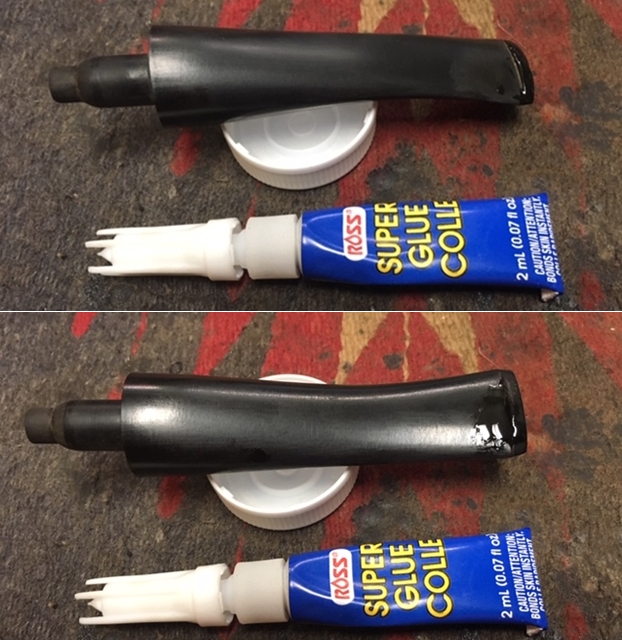
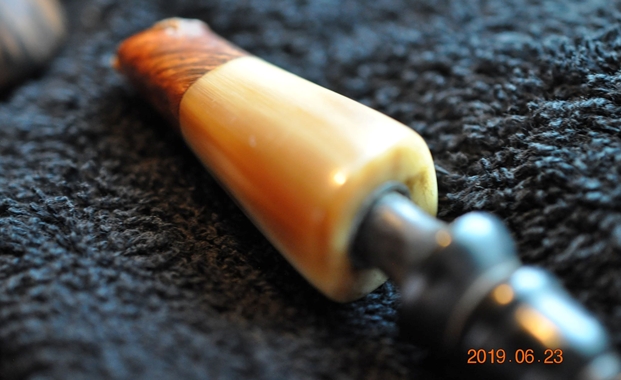
 After several hours in the soak, I extract the Kilimanjaro’s stem and run pipe cleaners dipped in isopropyl 95% to clear the Deoxidizer from the airway. I then wipe the stem down with cotton pads wetted with alcohol to remove the raised oxidation. I missed taking pictures of this part, but the aftermath shows residual oxidation in the stem after the Before & After Deoxidizer soak.
 I follow by scrubbing the stem with Mr. Clean Magic Eraser to see if it would deep clean the oxidation. There is some additional improvement but, in the end, I’ll need to sand the stem to remove more oxidation.
 At this point, I apply paraffin oil to the stem to hydrate and condition it. I open the aperture on the iPhone App and take another picture showing the deep oxidation that can still be detected. I put the stem aside for the time to look again at the stummel.
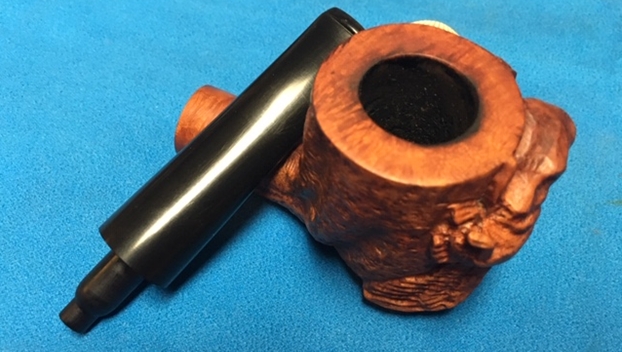
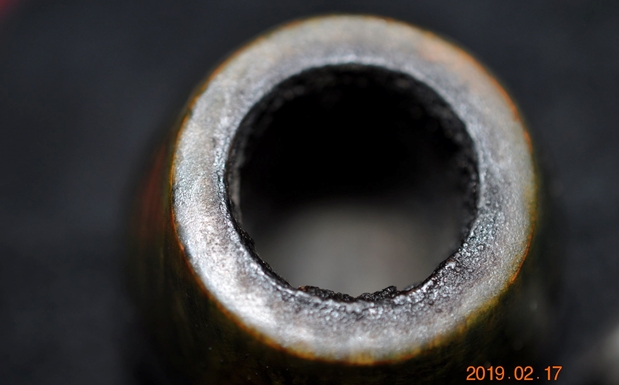
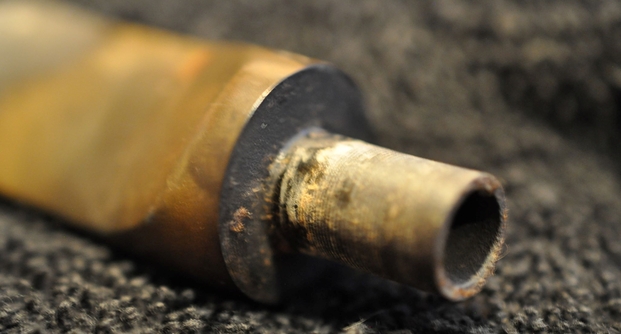
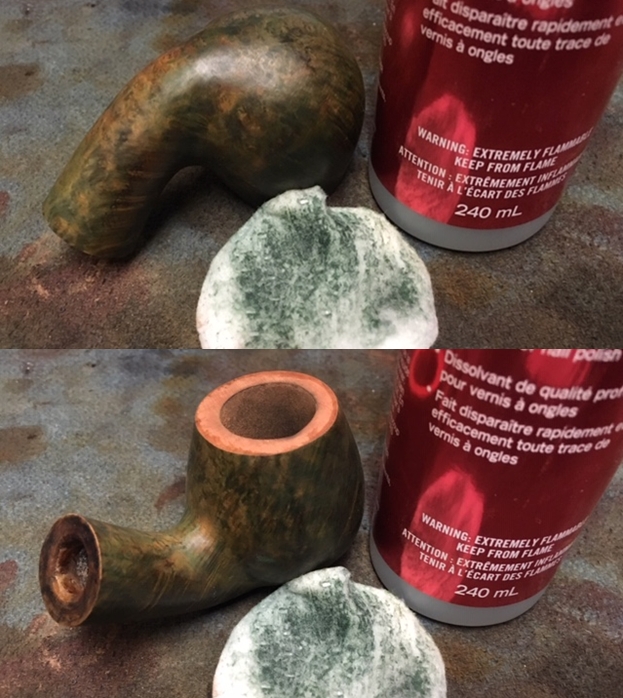
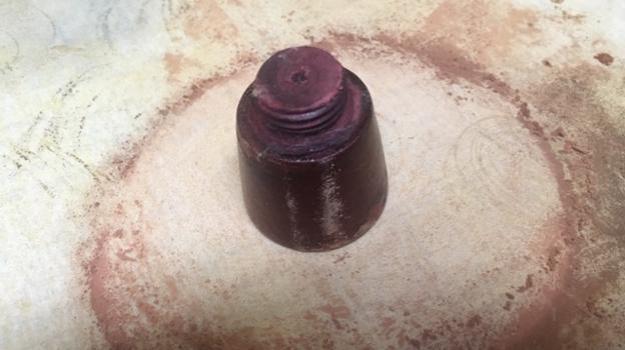
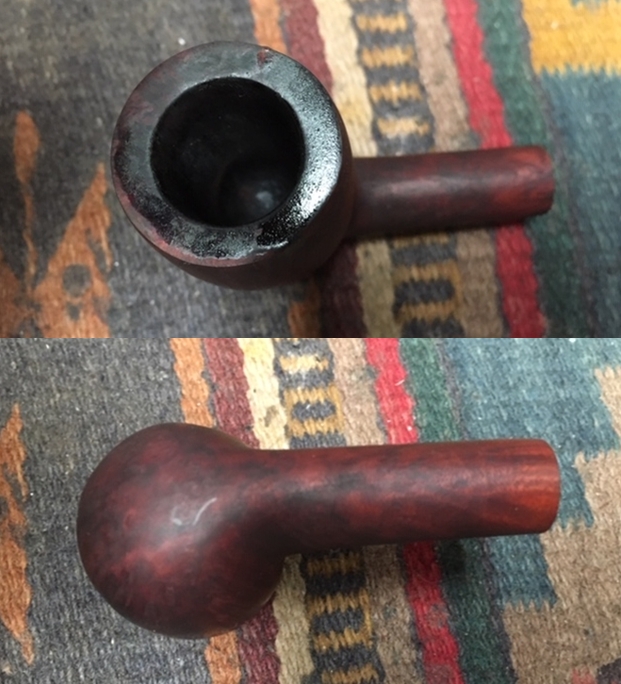
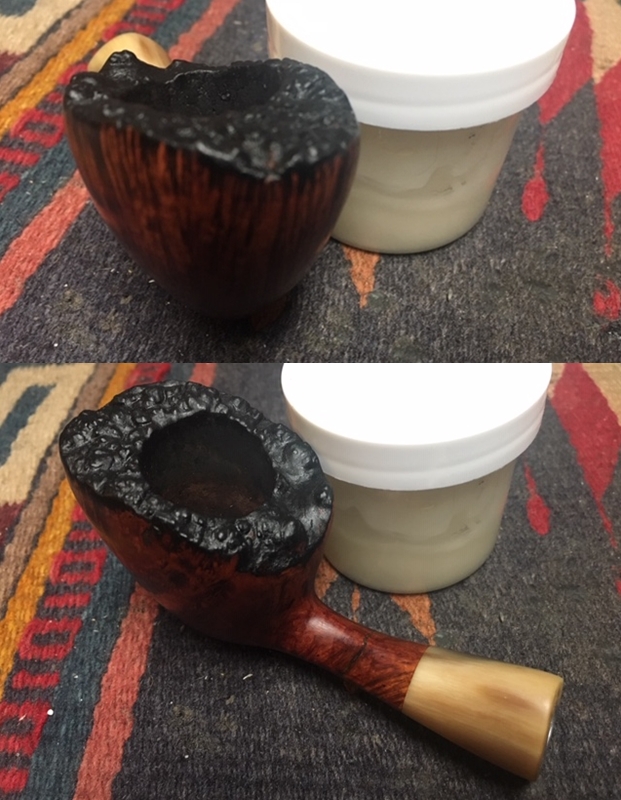
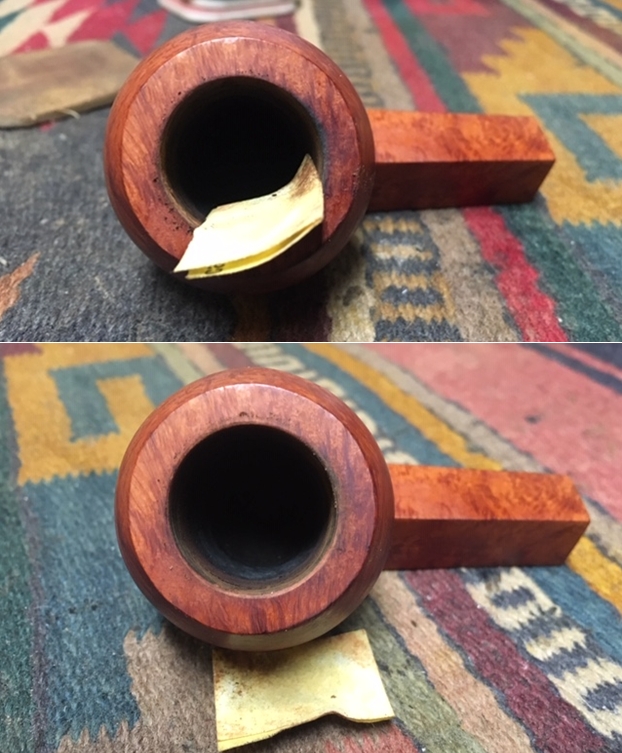
 Before beginning on the stummel repair, I need to clean the Meerschaum lining to be able to get a closer look at its condition. I see something obstructing the draft hole. After unsuccessfully trying to push a pipe cleaner through the draft hole via the mortise, I take a dental probe and am able to pop it out. It appears to be an old hunk of dottle that had hardened.
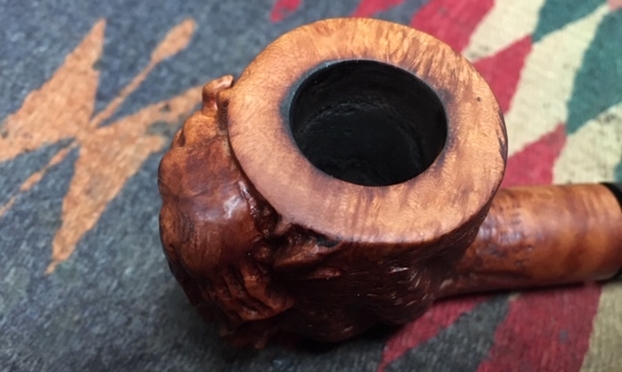
  I take additional pictures of the chamber walls moving up to the rim where the Meerschaum breakage is. The floor of the chamber is clear of carbon buildup. This is the moment of truth for this pipe – to remove the carbon to examine the condition of the Meerschaum. If it has more substantial cracks underneath it could raise questions about the integrity of the remaining Meer and the wisdom of a repair, but we will see.


 Patience is the key as I gingerly scrape the carbon layer off the remaining Meer surface. I use the Savinelli Fitsall Tool to do the scraping. I don’t work on it like I would a briar chamber. This scraping is more akin to rubbing with the edge to dislodge the buildup.
 After the scraping, I use 240 grade sanding paper wrapped around a Sharpie Pen to reach down into the huge chamber to continue to clean.
 When I’ve sanded sufficiently, I give the chamber a wipe with a cotton pad wetted with isopropyl 95% to remove left over carbon dust.
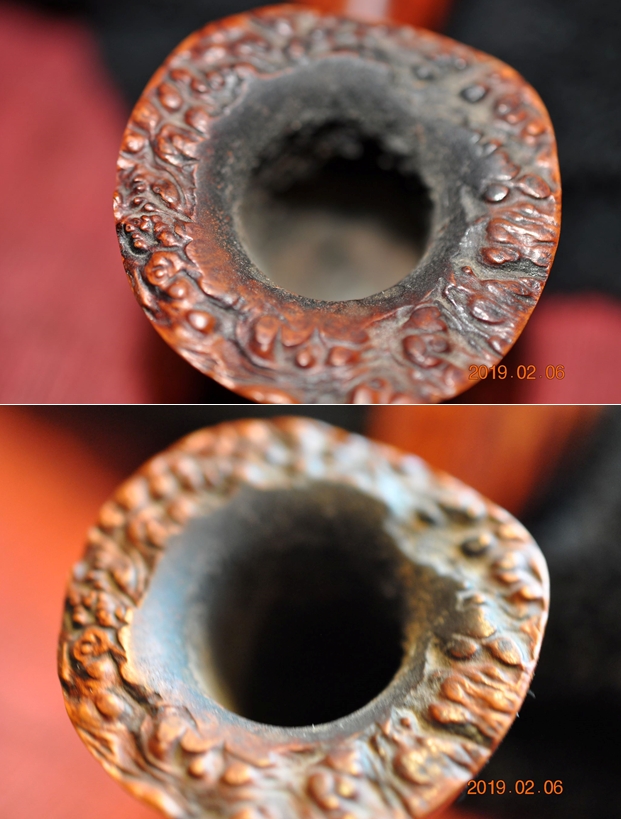
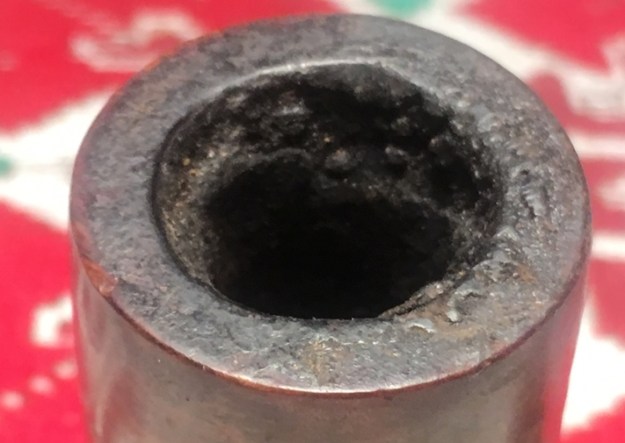
 With the carbon layer cleared and the Meer surface exposed, I find an almost perfectly uniform hairline crack, which almost looks like a seam, halfway down the chamber running in a full circle around the circumference of the chamber. It is so uniform that it looks like the Meerschaum was constructed in halves – a lower half bowl and the upper half ring.
  I also detect another hairline originating at the uniform crack running downwardly and then curving as it nears the floor. The good news, if there’s good news to be had, is that these are tight hairline cracks, there’s no crumbling. The Meerschaum below the rim seems to be solid. To the touch, the hairlines are imperceptible. With a sharp dental probe, I was able to detect a slight bump as I drew the point across the hairlines.
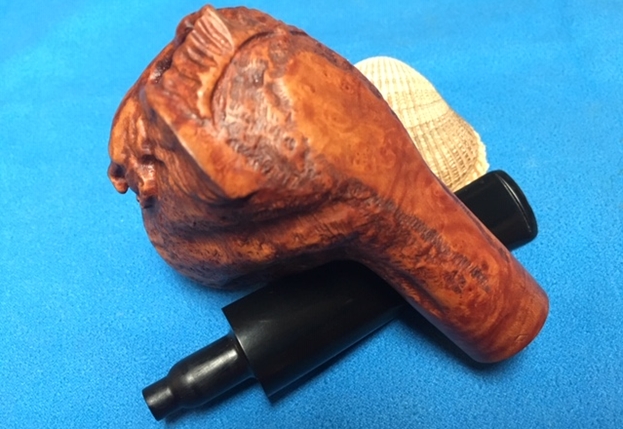
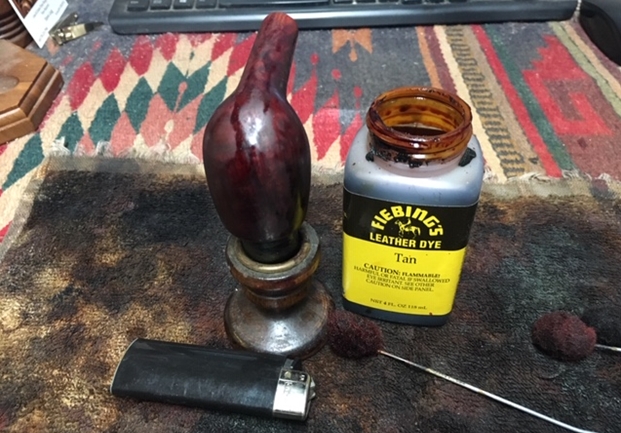
  I’ve already decided what I will do. I’ve been waiting some time for this Meer-lined repair to come to the top of the queue. I want to give this Kilimanjaro a shot at continuing to serve. I worked on a previous Meer-lining repair of a Zulu (see: An Italian Croc-skin Zulu and a Bear of a Meer-Lining Repair) where I discovered an old timers’ approach to addressing Meerschaum problems. In the Zulu repair, Steve told me about Troy’s approach on Baccy Pipes. Troy’s method of using chalk and egg whites to repair Meer surfaces worked with the Zulu and I had this in mind from the beginning looking at the Kilimanjaro’s issues. Steve had reposted Troy’s blog on the methodology, and I had saved it as a keeper in my resource bucket. Steve’s repost can be found here: Old Time Meer Lining Repair Method On a Kaywoodie Shellcraft #5651 | Baccy Pipes which will then take you over to Troy’s site. Troy’s mixture of egg white and chalk is an amazing Meer-looking and feeling composite which holds up very well. Troy’s approach of patient, layering of the mixture fills and reinforces the existing Meerschaum. I’m looking forward to seeing what it will do again, but first, I must address the daunting ‘pipewood’ crack running down the side of the bowl. This is critical to reestablish a solid ‘frame’ around the Meerschaum. I take a few fresh pictures of this ‘Grand Crack Canyon’ which runs down and disappears in the lower craggy regions – everything about this pipe is BIG! You can see ‘day-light’ at the upper, rim-part of the crack.
 I don’t know with certainty the reason for the crack and the Meer breakage, but my best guess is that it was heating expansion. If this is correct, the good news is that the bowl has expanded causing the crack. Theoretically, this should be good news for the repair of the crack, filling it at this expanded point will provide a better framework for the Meerschaum and overall stability of the pipe – theoretically. Even though the crack and the Meerschaum repairs are large undertakings, the current condition of the Kilimanjaro Giant makes it unusable, and so there’s absolutely nothing to lose for this big guy. He’s already in the ICU! If after the repairs are completed, and if Paresh decides he doesn’t want him, he can convalesce in my racks for as long as he wishes 😊.
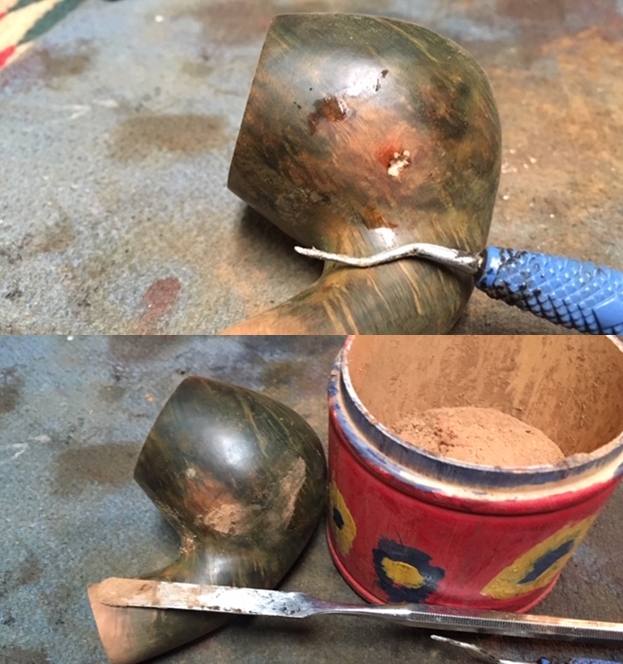
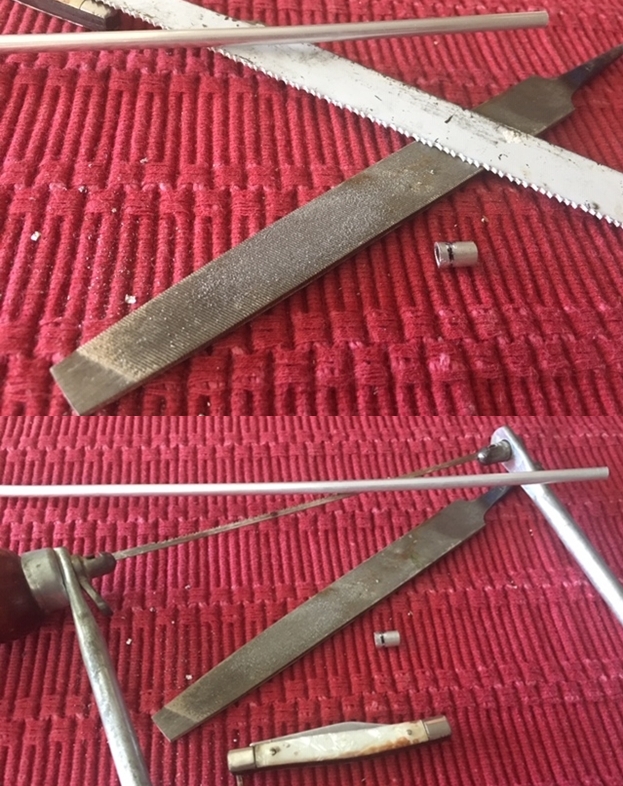
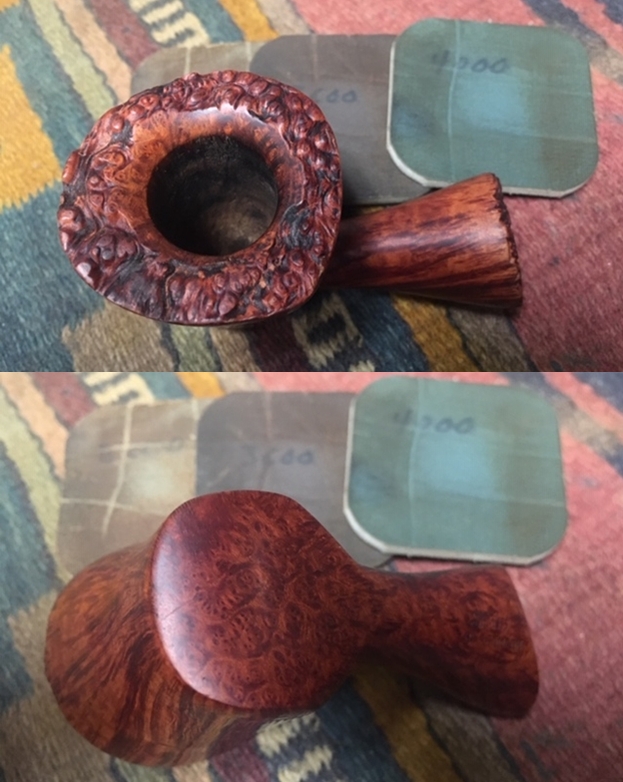
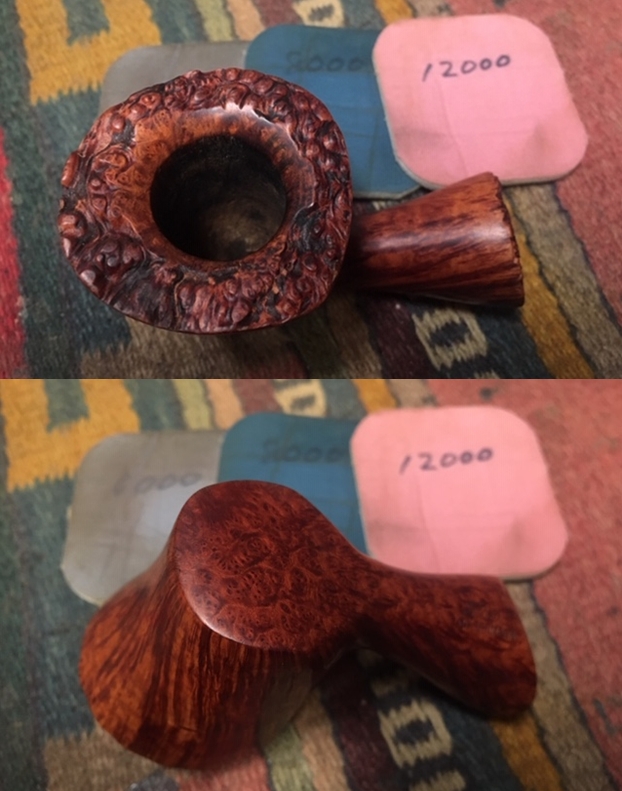
I decide to do this repair before cleaning the stummel in the normal order of things, but I didn’t want to dampen the pipewood in the crack or mess with the Meerschaum butting up to the crack. The first order of business is to identify and mark the lower termination point of the crack. This is critical to keep the crack from growing through the southern pole of the bowl. Taking a magnifying glass, I follow the crack until I find the endpoint and I use a sharp dental probe to mark that spot. This helps me to find it again as well as to help guide the 1mm drill bit when I drill a counter-creep hole. I take a very close-up picture of the inverted stummel to show the difficulty of tracing the crack as it becomes less distinct and blends into the moon-scape cragginess. I mark the crack and circle what appears to be the end of the crack. Again, I recheck with the magnifying glass and then mark the point with the sharp dental probe. I then mount the 1mm drill bit onto the Dremel and with nerves of steel, drill a hole freehand! It’s amazing how shaky the hand gets when you’re trying to do precision drilling. I intentionally make the counter-creep hole a little bigger than usual to make sure the crack is arrested. I have no worries about blending in the rough blasted surface.

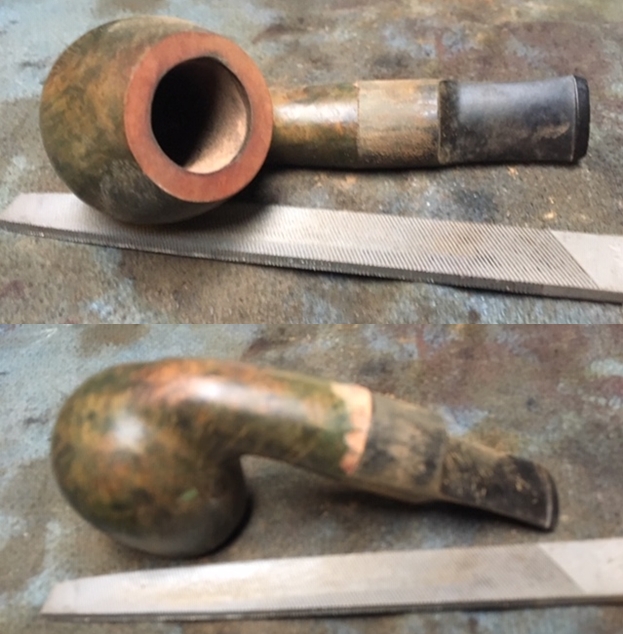
 Before applying thin CA glue, I use a Sharpie Pen to darken the hole I just drilled. This will help blending after I apply the clear CA glue.
 Next, I use the thinnest CA glue in my inventory with a precision nozzle on it. I use thin CA glue to maximize the seepage of glue deeply into the crack. I don’t want the glue congealing on the surface but curing deeply in the pipewood crack to reinforce the strength. After waiting a while, I apply another line of CA down the crack. I also apply CA to the inside of the rim where the crack is exposed above the Meerschaum.
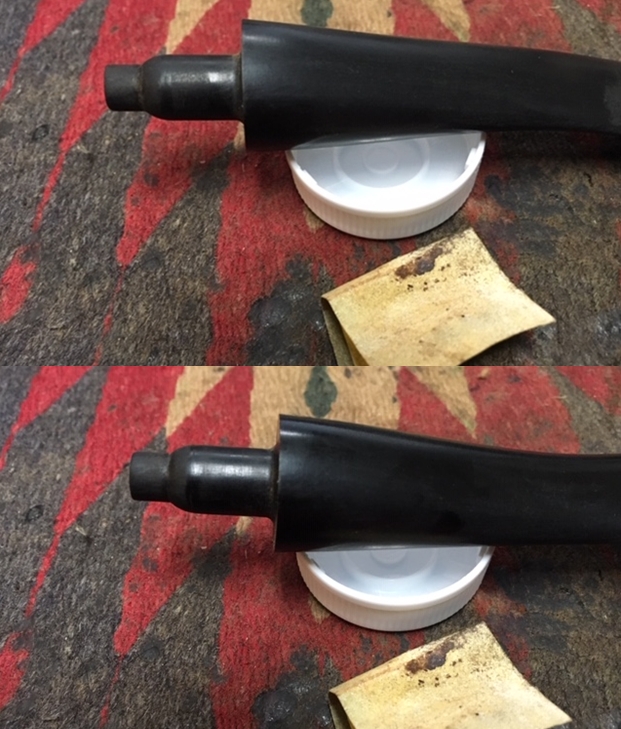
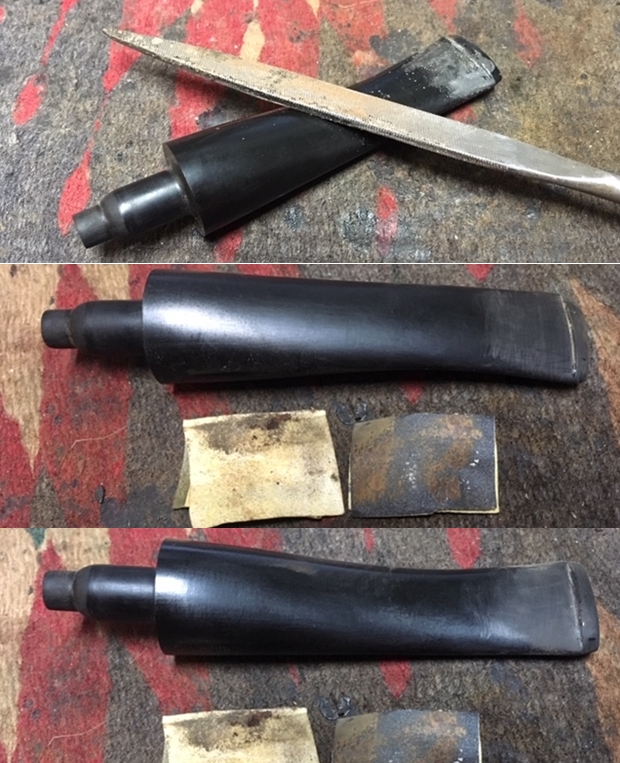
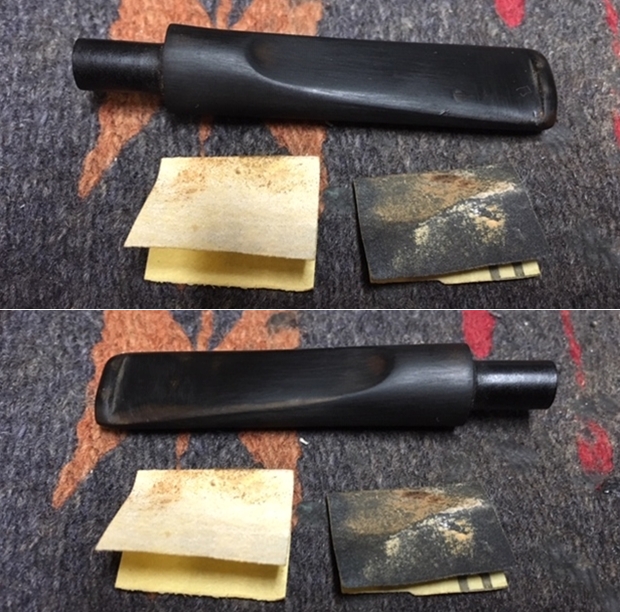
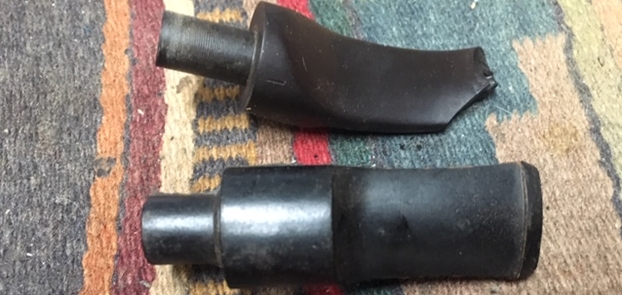
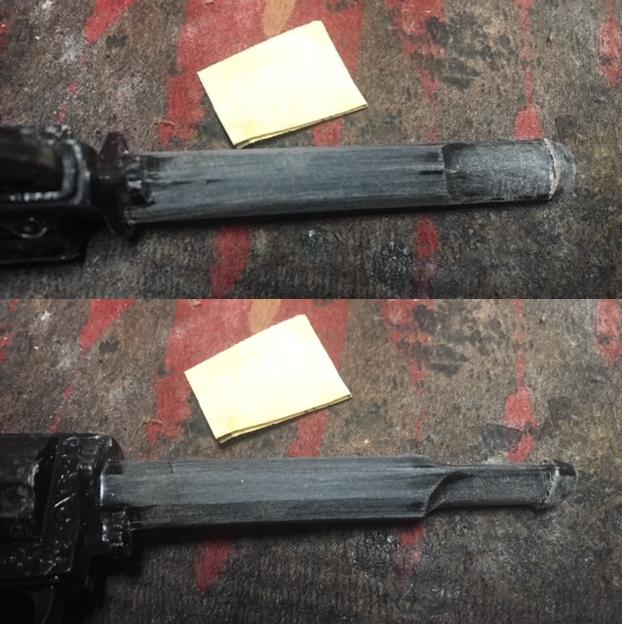
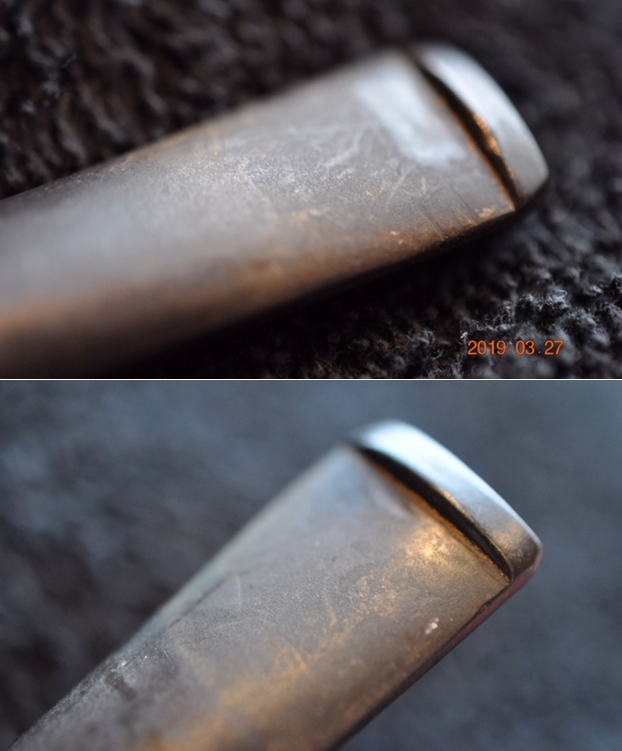
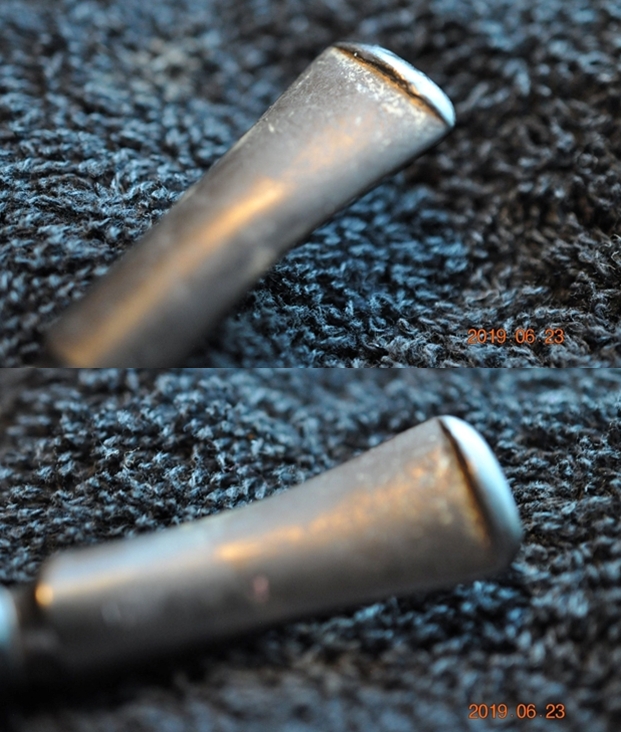
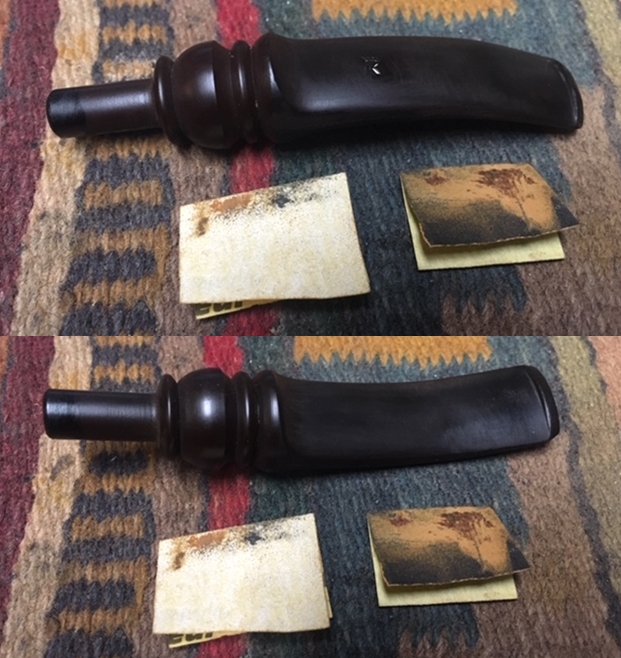
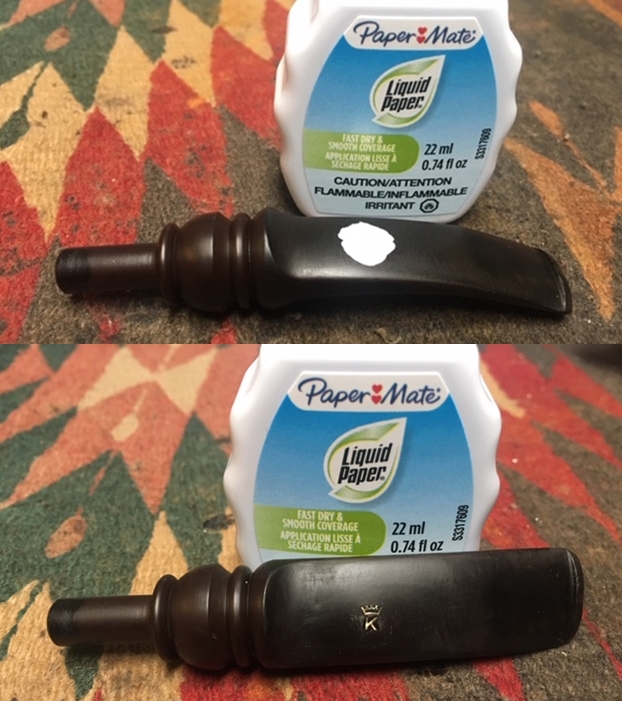
 While I apply additional coats of CA glue to the stummel crack repair and the CA glue cures, I switch focus to the stem. Even after soaking in the Before & After Deoxidizer, the oxidation in the stem is significant as the pictures show. On the first picture, the saddle has a round section where the vulcanite appears burnt or something – like a wart almost. I move directly to sanding the entire stem with 240 grade paper to remove the oxidation.
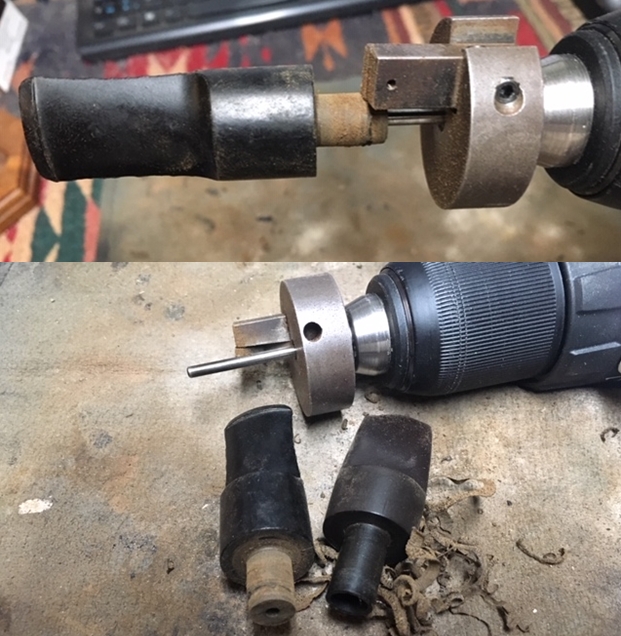
 To guard against shouldering the saddle stem’s shank facing I employ a disc that I fashioned to keep the sanding in check.
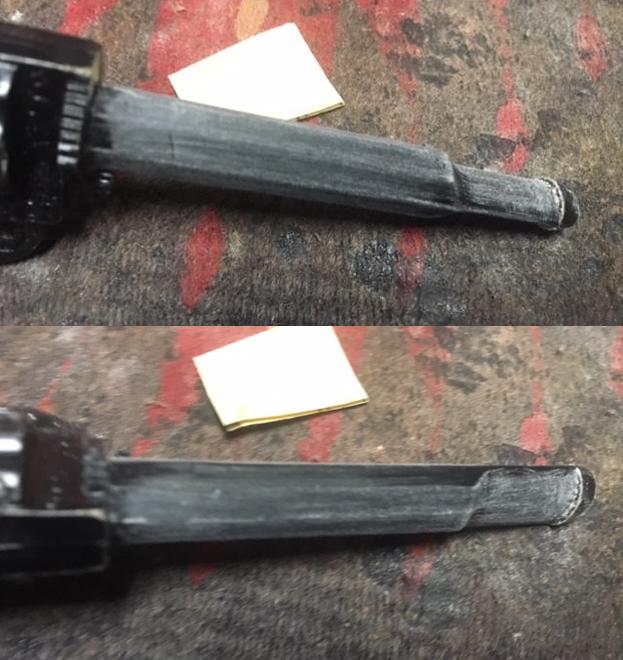
 After the first round of sanding with 240 grade paper I follow by wet sanding using 600 grade paper. On the dark surface it’s easier to take pictures that show the oxidation holding on. The second picture shows a close-up of the ‘wart’ after sanding. It shows pitting and even after sanding, the area appears rough and clouded.
 I return to sanding with 240 grade paper on the areas that continue to show oxidation and then finally move on to wet sanding with 600 grade paper and then apply 000 steel wool. I also use Mr. Clean Magic Eraser to clean further. The stem is much improved even though the ‘wart’ is still visible.
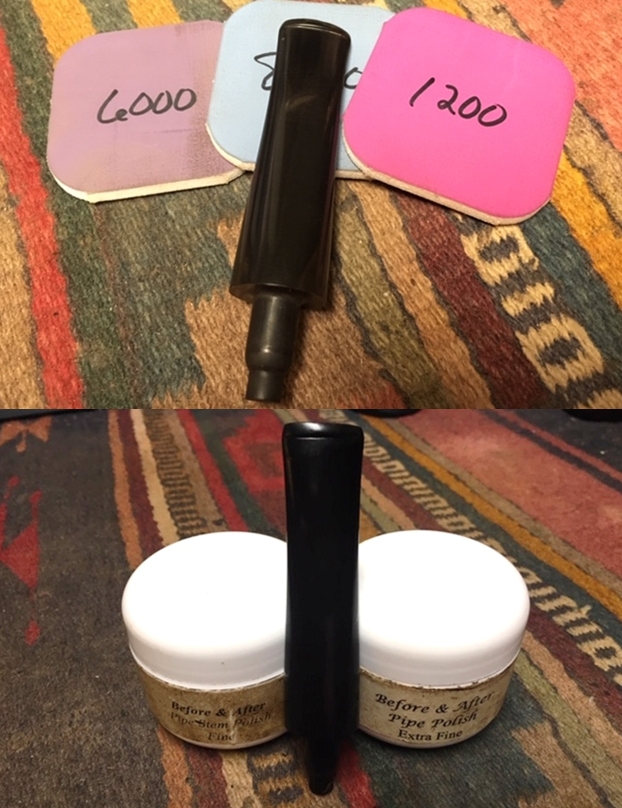
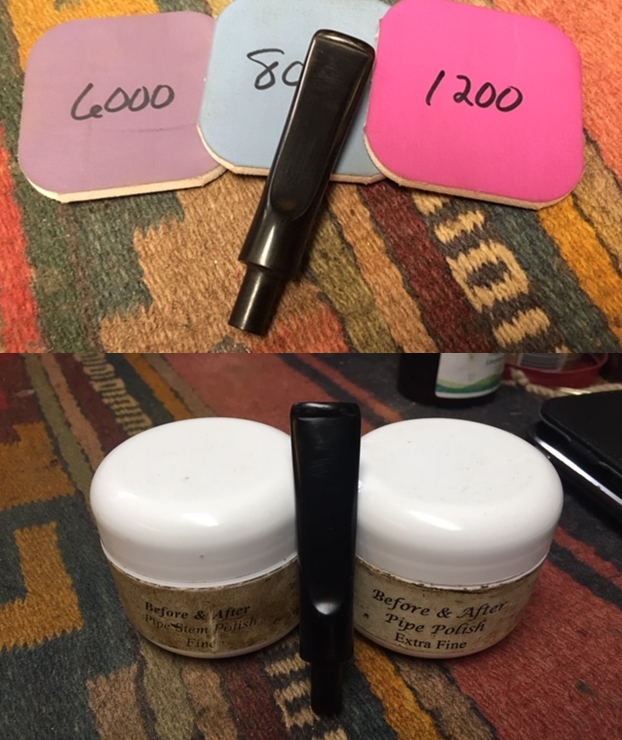
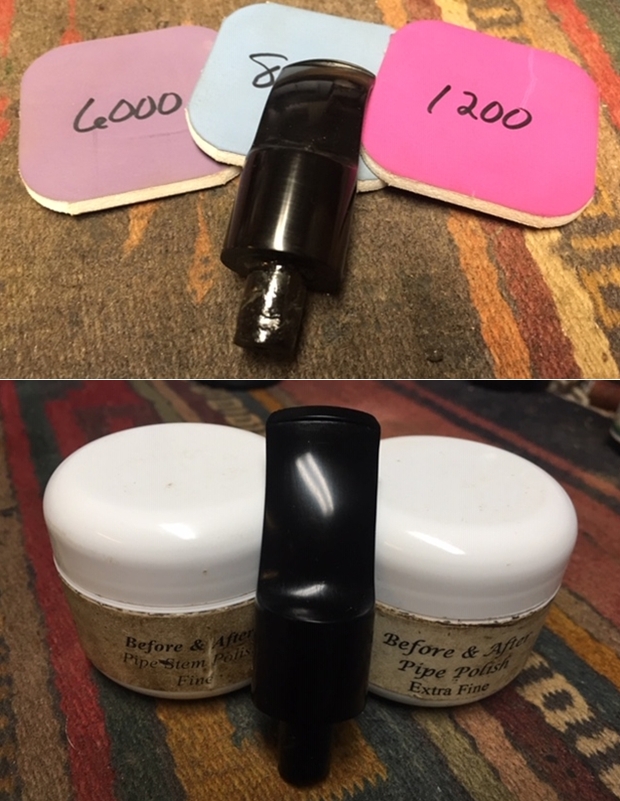
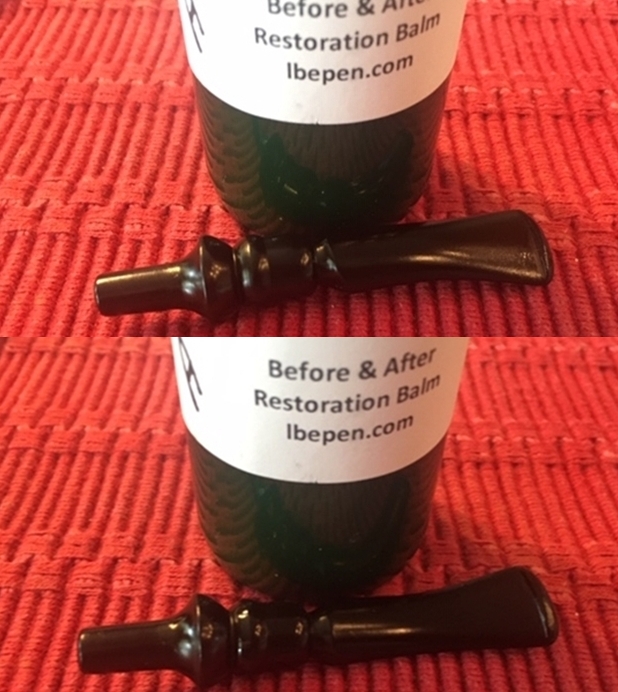
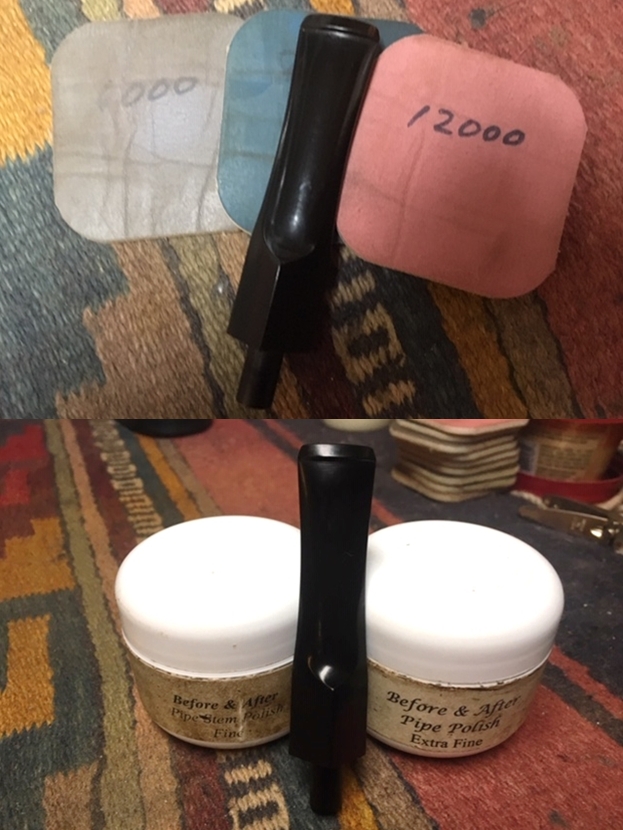
 I then apply Before & After Fine and Extra Fine Polish to further clean and condition the vulcanite stem. In succession I apply the polishes with my fingers and rub them in. Between each coat, I allow some time – about 10 minutes, for the polish to absorb. I then wipe the stem clean using paper towels and then buff some with a microfiber cloth and put the stem aside.
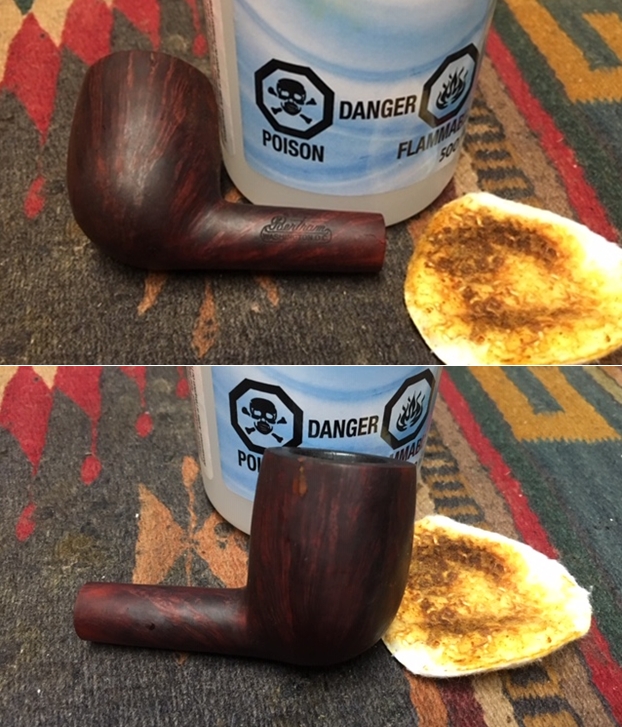
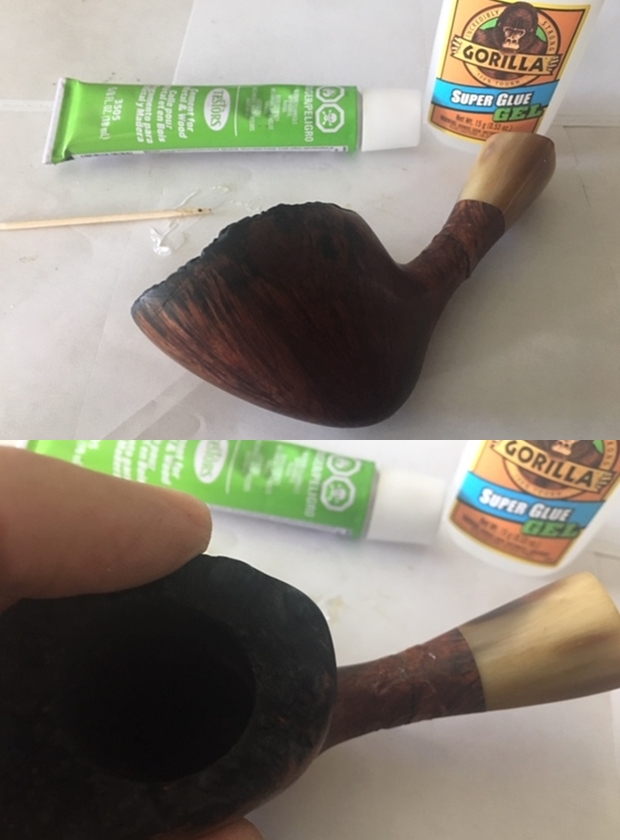
 After applying several applications of thin CA glue to the stummel crack, the crack is filled, and the glue cured. To blend the ‘glue line’ I take a cotton bud and dip it in acetone and rub it over the glue line. This removes much of the excess CA glue on the surface running along the crack line while not bothering the glue in the crack itself. Doing this helps blend the crack in the craggy stummel surface. I’m pleased with this crack repair and where I used acetone to clean, the hue of the pipewood is somewhat lightened. I’ll address this later.
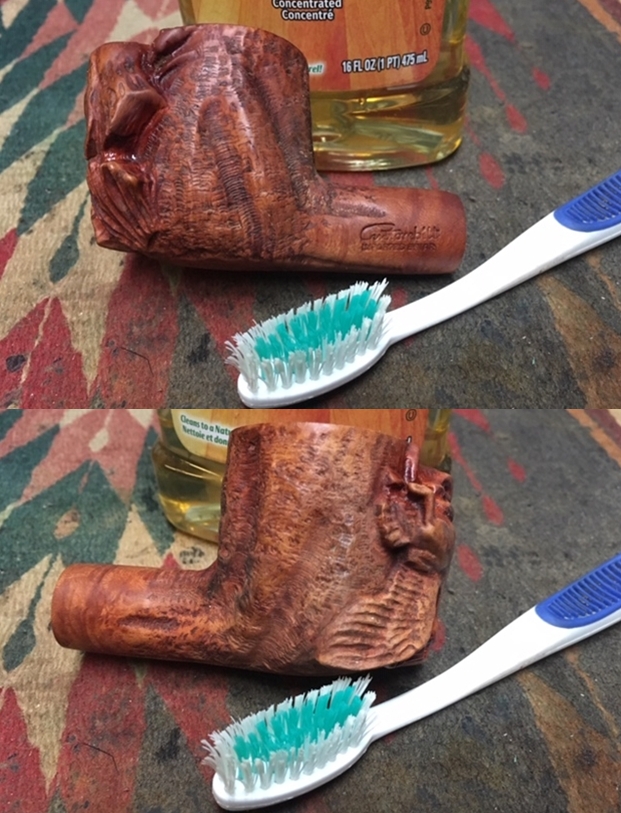
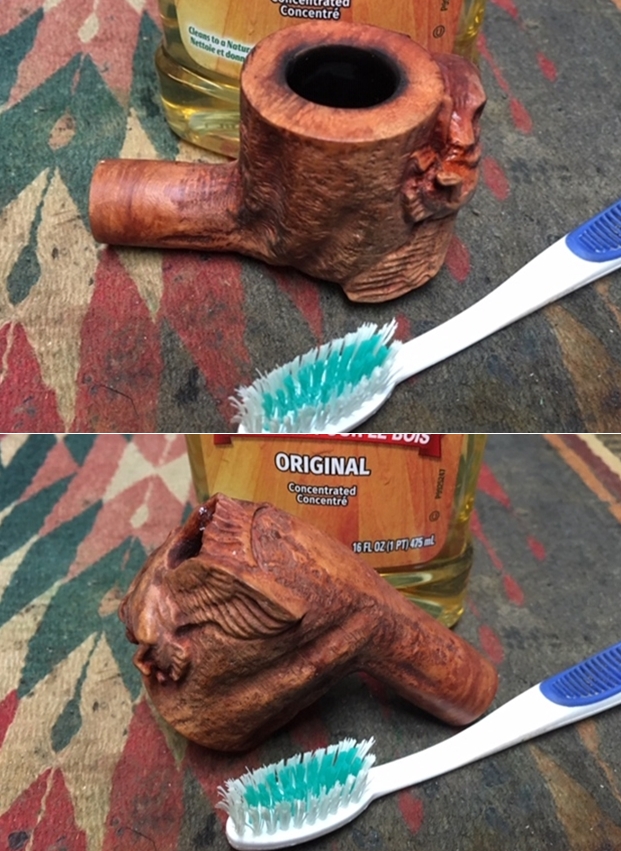
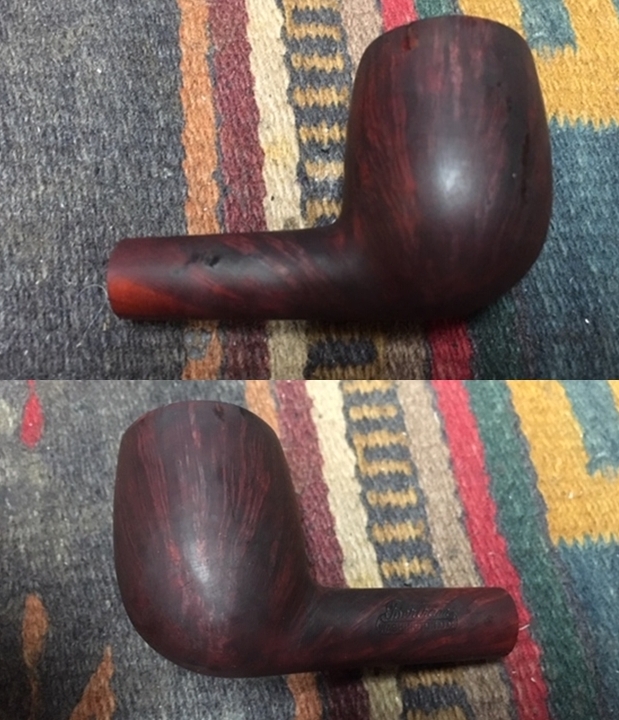
 With the stummel crack now stabilized, and before working on the Meerschaum lining patch project, I continue with the normal cleaning regimen. I would rather finish with a clean pipe and not have to clean it at the end! The stummel surface is dirty and grimy. Now that the crack is repaired, I’m looking at the stummel surface and I see hints of oxblood coloring. Using undiluted Murphy, I scrub the blasted surface with a bristled toothbrush. I scrub well getting into the crags of the blasting.
 After cleaning the external surface, I go to work on the internals. Using pipe cleaners – bristled and soft and cotton buds dipped in isopropyl 95%, I work on the mortise. I also employ shank brushes and a small dental scoop to help clean. I’m not able to reach far into the mortise with the dental tool because the threaded mortise narrows. I discover that the mortise threading is cut into the wood. I thought at first that it would be metal like the threaded tenon, but the threads are hewn out of the mortise. I’m careful not to wear them down through the cleaning. After some time and effort, the pipe cleaners start emerging lighter and I move on.
 I’m getting ready to head to the Black Sea for a few days on the beach with my wife for some R&R from our work here in Sofia. Before putting the stummel aside, I apply paraffin oil to the pipewood to help rehydrate the blasted or perhaps, blasticated pipewood. It looks good and gives me a sneak peak of what the bowl will look like in the later stages of the restoration – I like what I see!
 The time was wonderful, the beach was superb and I’m thankful for the time of R&R with my lovely bride. We enjoy the Black Sea immensely and find the slower pace rejuvenating to the soul. I took along with me the newest addition to my collection that I purchased in a trip to Istanbul a few weeks ago.
  I love this carved block Altinay Meerschaum sculpted Billiard with the burgundy acrylic silver banded stem. I looked at 100s of carved Meerschaums at the Grand Bazaar in Istanbul, but this was the pipe that called my name and chose me 😊. I guess I’m a ‘classic shape’ pipe man at heart.
 While on the beach, I thought a lot about how to approach the next step in this gargantuan Meer-lined Kilimanjaro. The method I will be using to repair the Meerschaum I discovered from Troy (of Baccy Pipes) who posted this methodology on his website: Old Time Meer Lining Repair Method on a 1930s Kaywoodie Shellcraft #5651 described in his blog how he came upon this strategy as he approached repairing his first Meer lining:
I had read and heard from other pipe restores that an old late 19th-early 20th century druggist recipe for fixing broken meerschaum was egg whites and finely ground chalk, so that was what I was going to try and fix the meerlined rim with. It is said to have about the same porous properties of meerschaum and imparts no taste to the tobacco.
Troy also affirms in the comments section on his blog that the mixture of egg white and chalk is ‘neutral’ and presents no difference in aftertaste compared to native Meerschaum. I used this methodology with great success in the restoration An Italian Croc Skin Zulu and a Bear of a Meer Lining Repair. This Zulu came out well. I want to state for the record: the Meerschaum is NOT being repaired but emulated. The process reinforces and strengthens the faults of the Meerschaum as well as masking the problems. When I did the Zulu repair, I was taken to task by a commenter that it wasn’t a Meer repair…. True indeed. But the alternative in this case will be that the pipe is never used again. The method is without doubt a patch to the existing native Meerschaum, but with no better alternative, I’m willing to go with it.
To begin, I take a picture looking at the rim-top and the upper condition of the Meer. I use a piece of 240 grade paper and lightly sand the top side of the Meerschaum to clean it and to show better the imperfections. I also do a quick sanding over the internal pipewood that is exposed.  I follow Troy’s lead in masking the stummel to protect it from the chalk/egg white mixture because it sets up very hard – not something I want on the Kilimanjaro’s blasted surface!
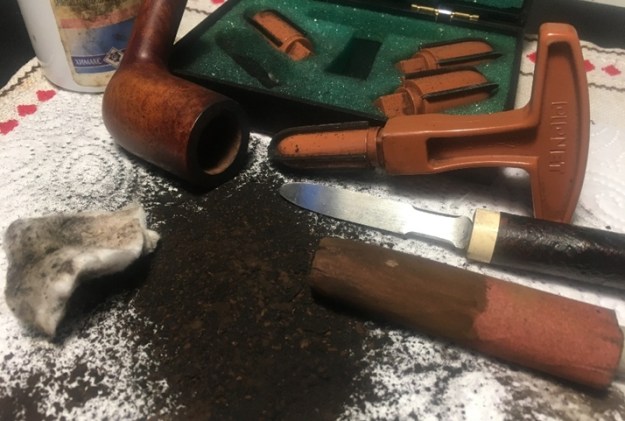
  With the Zulu repair I found some chalk from a Kindergarten teacher (of course) who is a fellow team member here in Bulgaria. I used the old-fashioned way of pulverizing the chalk as finely as I could with the mortar and pestle to do the job.
  After putting a pipe cleaner in the airway and through the draft hole to keep it free of ‘Ole Timer’ mixture, I apply an initial thin coating of the mixture using my finger to fill in the cracks in the fire chamber and over the broken area at the rim – filling the gaps and cracks is important at the beginning. Later after this first, thin coat sets, I will build up the lining toward the rim so that it will cover the cracks as well as provide a uniform surface as I build out the rim breakage. For the first application, I mix 1 egg white to about 3 tablespoons of chalk to create the initial mixture to get into and fill the cracks for the first two applications. I save the remaining mixture and put it in the fridge and put the stummel aside for several hours for the ‘Ole Timer’ mixture to set. The key to Troy’s approach, I believe, is the patient layering of the mixture allowing it to set and build, layer by layer – not putting the mixture on too thick which I believe would be more prone to trapping air pockets and cracking. The pictures show the process.


 After a few more hours, the first picture shows the state of the Ole Timer mix. With my finger, I again add a coat of the mixture to the chamber and let it set for several hours for it to set up, dry and harden more.

 After several hours, the layering is taking hold.
 I add another tablespoon of chalk to the current thin mixture to thicken it some. Again, using my finger, I add another coat to the chamber, rim and over the breakage area. This time I let the application cure overnight.
 The next morning, I take another picture to show the progress.
  I add one additional coating of the Ole Timer mixture to the entire chamber at the current thickness. Again, I let it set for a few hours for it to dry and harden.
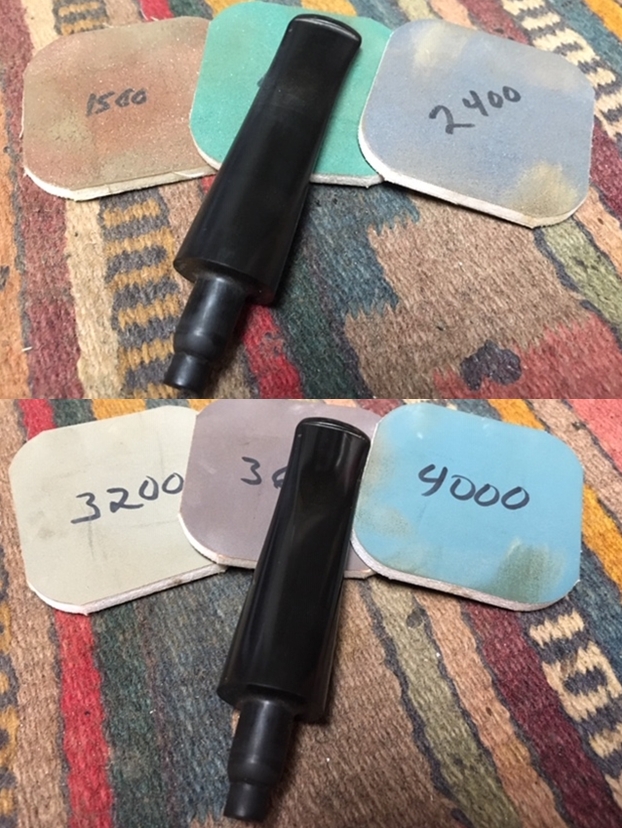
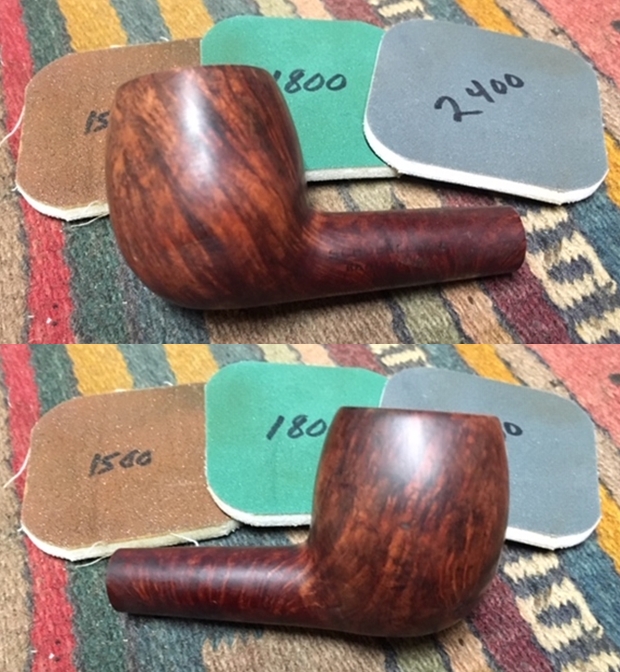
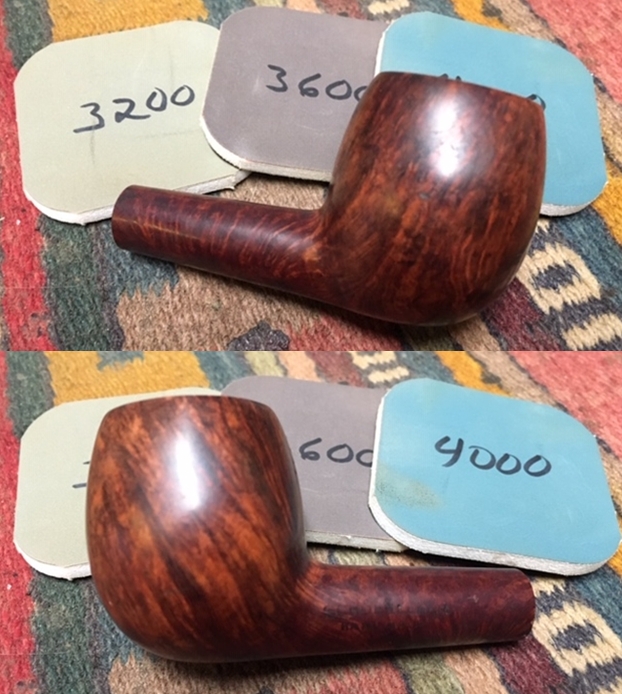
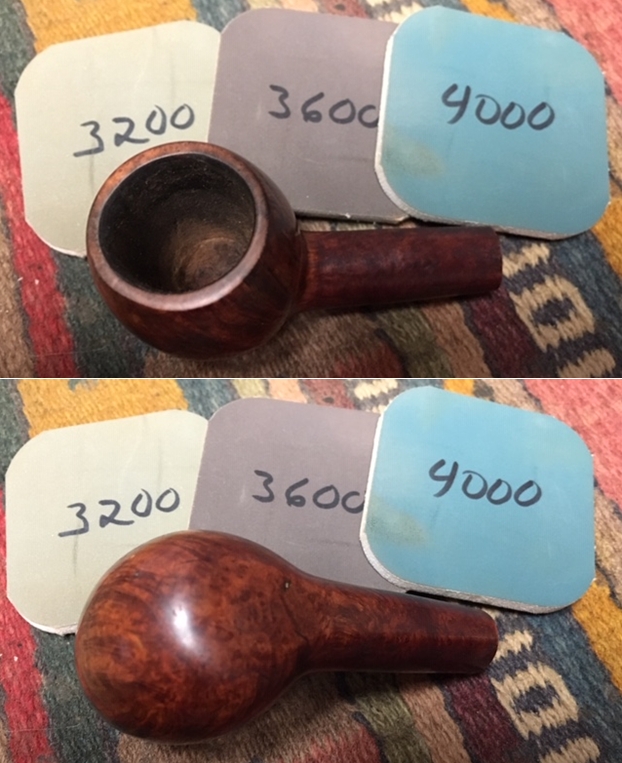
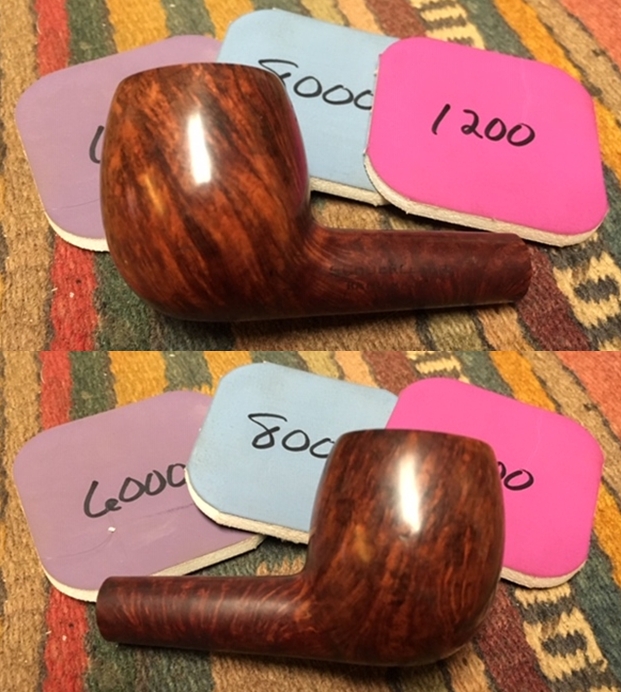
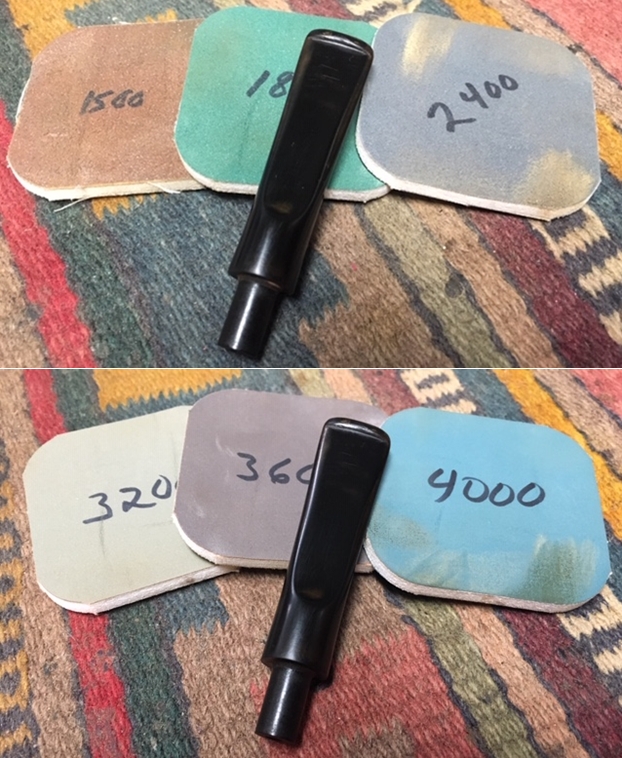
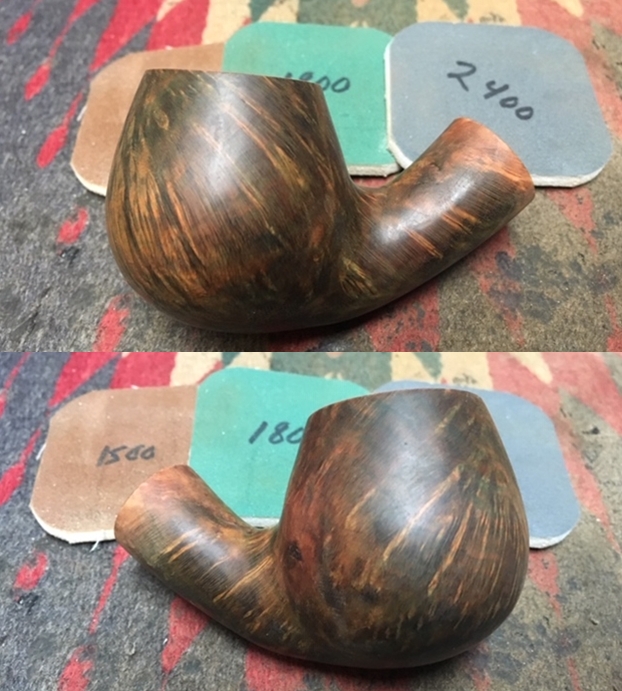
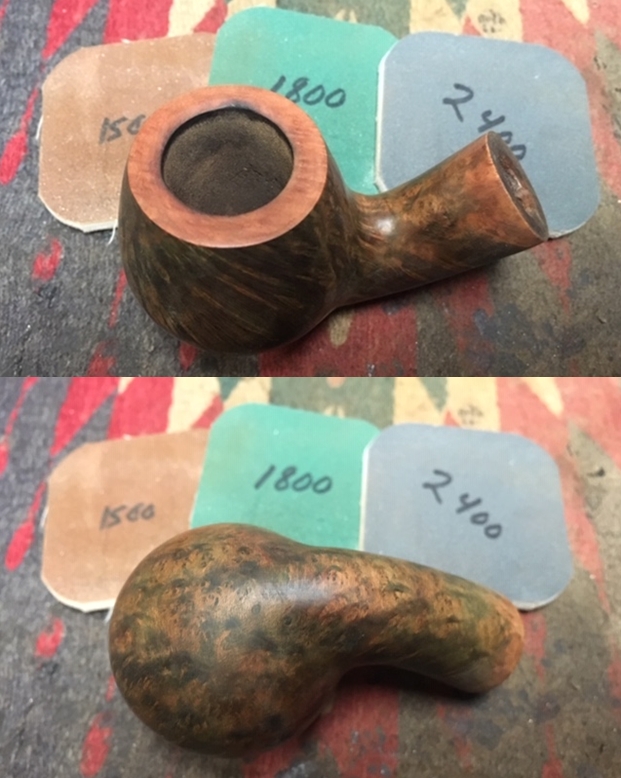
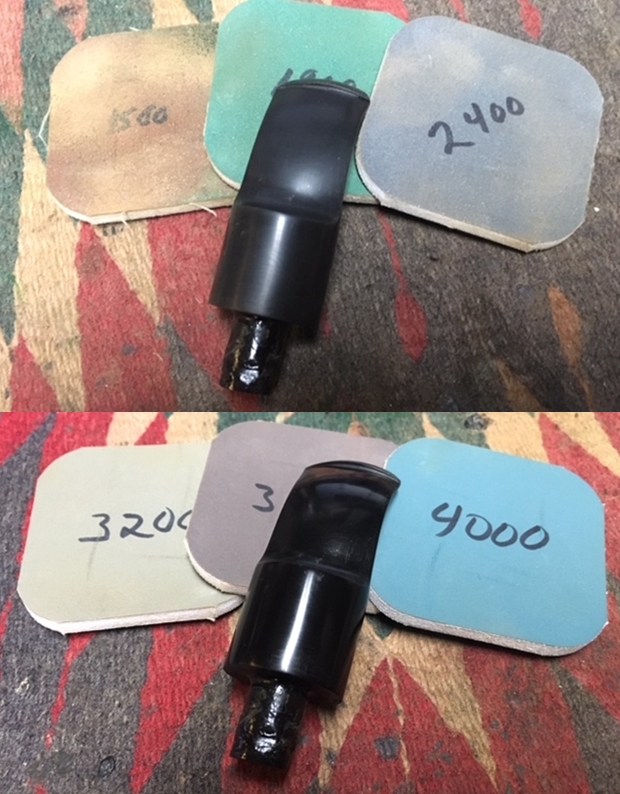
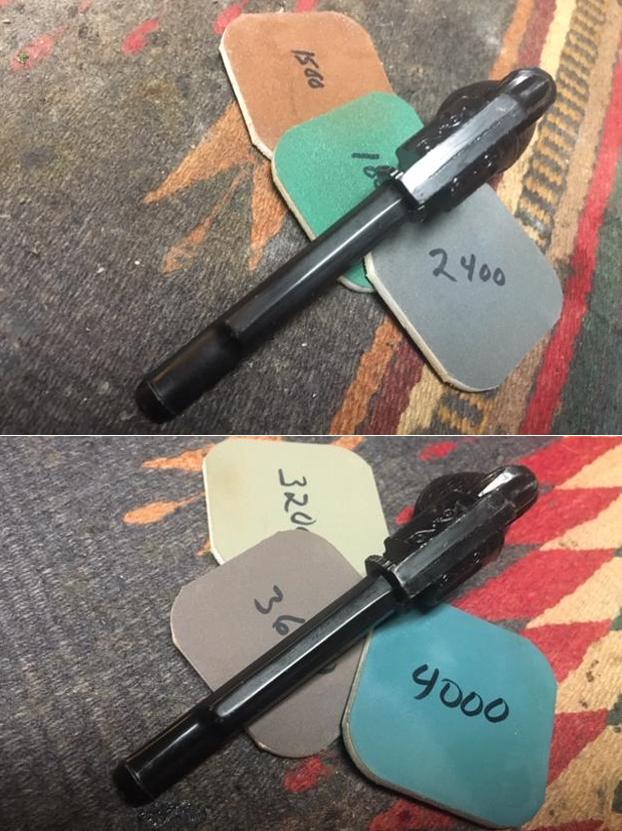
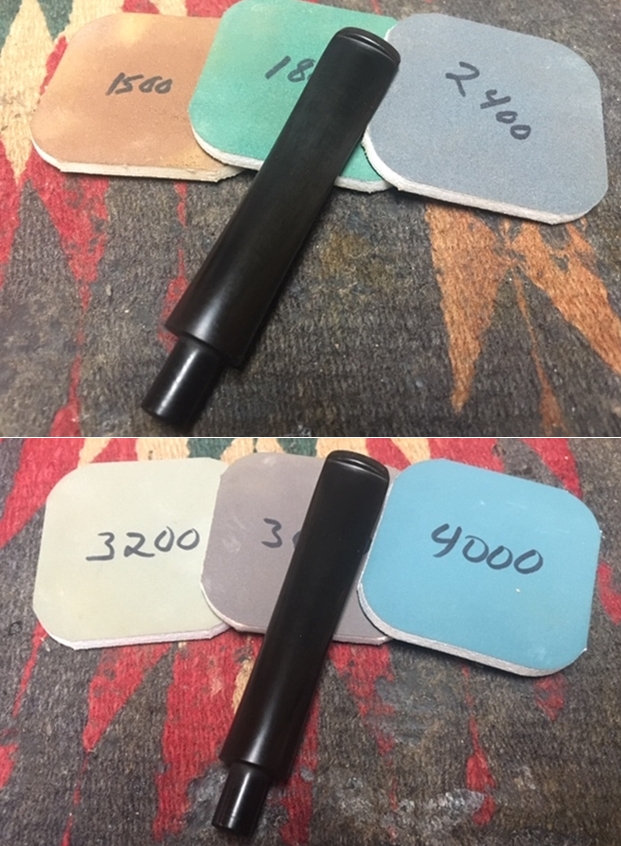
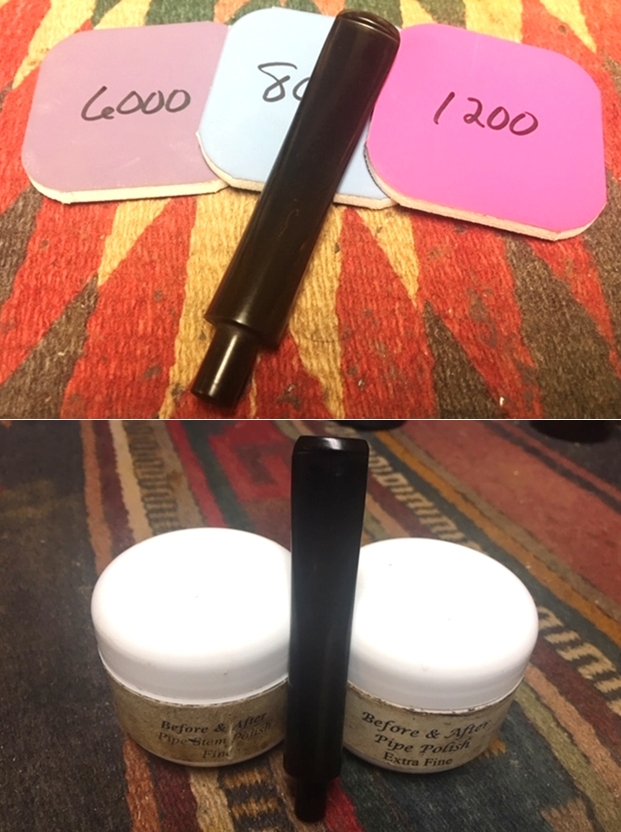
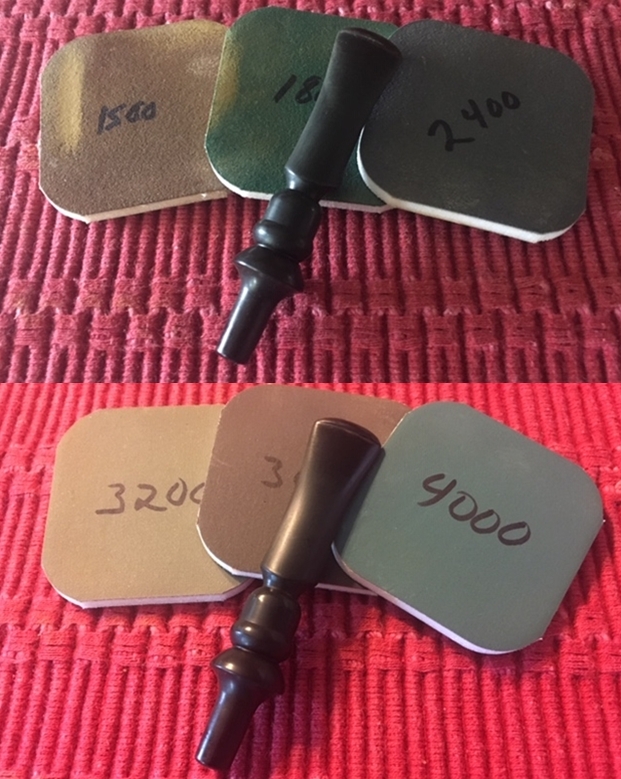
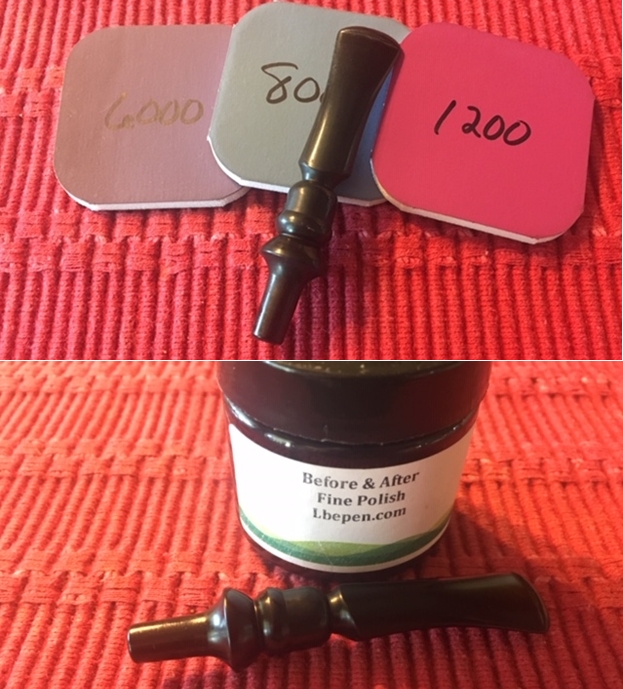
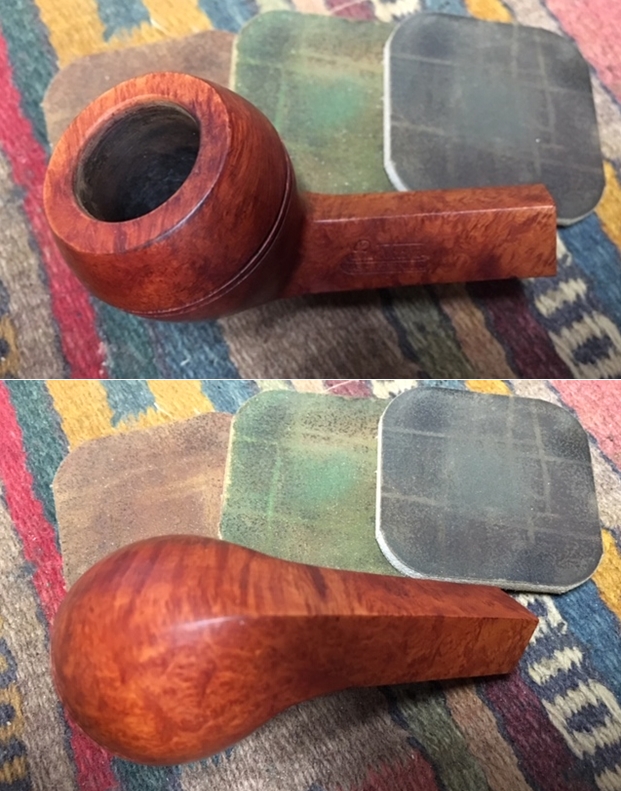
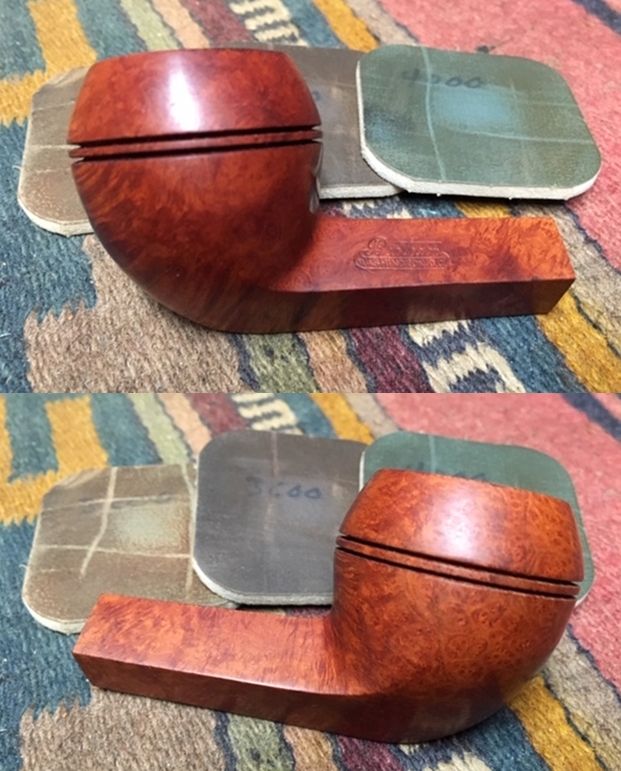
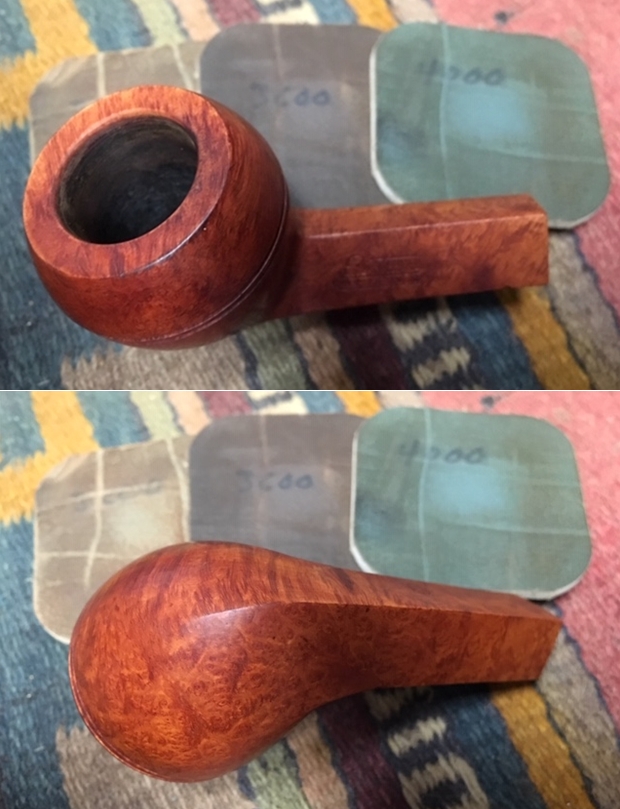
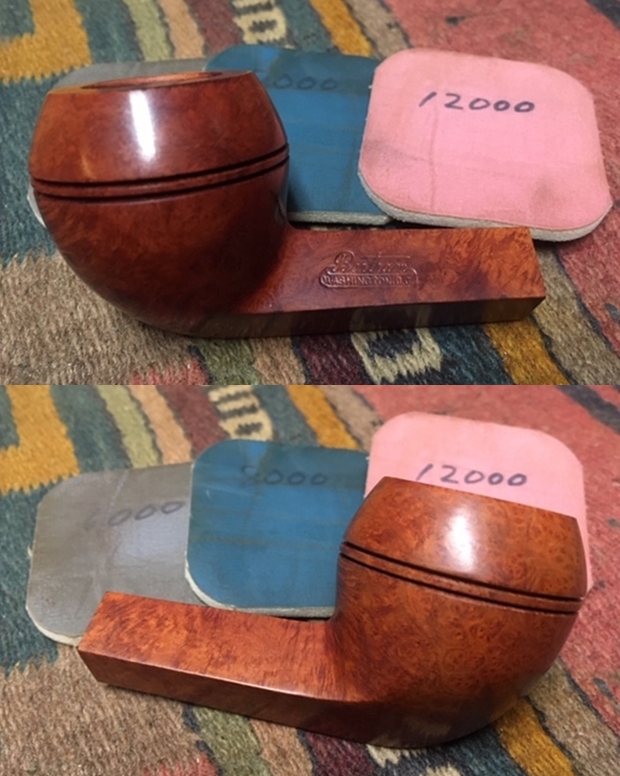
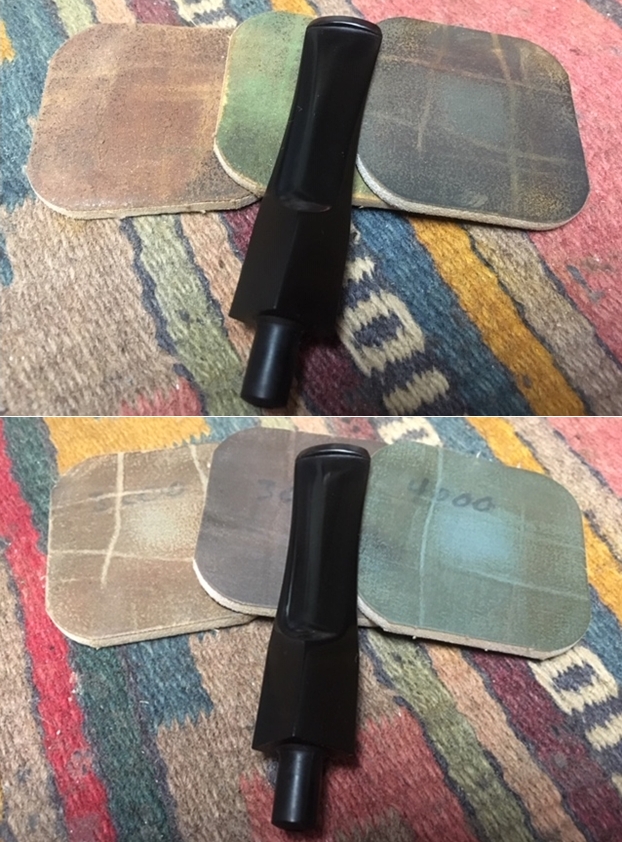
 With the stummel on the side again, I turn to the stem and apply the full regimen of nine micromesh pads. I begin by wet sanding with pads 1500 to 2400, then dry sand with pads 3200 to 4000 and 6000 to 12000. Between each set of three pads, I apply a coat of Obsidian Oil to continue rejuvenating the vulcanite stem. It looks good!
 Now it’s time to work directly on the main Meerschaum breakage on the rim. I’ve built the layering over the exposed area with the previous coats of the Ole Timer mix of chalk and egg whites. I separate a smaller portion of the remaining mixture in a container and again add more powdered chalk to thicken it a bit more. When it seems about the right viscosity to stand more firmly in the break cavity, I apply the mixture to the rim. I keep the stummel on its side, with the breakage on the bottom to use gravity to settle the mixture in the break cavity. I first take a before picture then an after. I don’t want to ‘over’ fill but allow more time to apply an additional coat of the thicker mixture. I again put the stummel aside for several hours for the thicker mixture to dry and harden. Again, I put all the Ole Timer mix back into the fridge to use again.

 Suffice it to say, I did several more coatings using the Old Timer mixture to build up the rim – I’m passing on more pictures of this process! My goal was to build out the chamber wall to the rim and to fill out the rim, including the breakage gap, so that the chamber is a uniform cylinder. From this reestablished uniform platform, I will then sand back to the original Meerschaum wall and reshape the rim to hopefully mask the breakage and produce an attractive rim presentation of darker pipewood meeting the new reinforced and repaired lining. That “meeting” to me is what makes Meer-lined pipes attractive – the contrasting themes of color and texture. The picture is the final after curing through the night to fully dry and harden.
  I start sanding the top of the stummel by removing the excess Old Timer mix to bring it down to the masking tape level. I do this patiently to have a gradual approach to the rim surface. At this point, I’m careful to guard the internal repair to make sure I leave room for shaping the repaired rim. Fine tuning comes later. To be sure, working with this material is not tidy! The dried mixture is extremely strong and durable, but it makes for a very dusty work space especially in the sanding phase.
 The masking tape is now showing through letting me know I’m down to the ‘show me the money’ area of the rim. It shows me how much depth exists in the repaired lining and it shows me if I’m possibly too thin. I’m wondering this when I look at the exact bottom of the picture – which represents the right-most edge of the Meer breakage. The edge of the fill dips in there. I decide to move on and see how things shape up.
 I transition to sanding from the bottom of the chamber working up toward the rim. I wrap a piece of 240 grade paper around a Sharpie pen for reach. My aim is to clean out the floor of the chamber and sand a smooth transition from the Meer floor moving upward toward the Old Timer material surface.
 Well, it was going so well until it wasn’t. One of the things that I learned when I first started restoring pipes is that learning from what doesn’t work is as valuable as what does. As I sand, I see the cracks emerge in the Old Timer surface. When I first see that a major problem was in progress, two things come to my mind – this Kilimanjaro has perhaps transitioned from a commission benefitting the Daughters of Bulgaria (sorry Paresh!) to a personal project. The second was to continue sanding to see what remained intact.
 When the cracked sections started forming, I also use a sharp dental probe to aid the controlled destruction.
 As the following pictures show, the surprising part is that the current problems with the Ole Timer surface isn’t with the area of the major Meer breakage gap, but along the rim where the Meer has deteriorated and there was little for the Ole Timer mixture to grip.

 When there isn’t anything to lose but time, I decide to proceed to see what can be done. My wife actually proposed the present path when I showed her the meltdown and explained that it was the thin deteriorating Meer at the top of the rim that the Ole Timer mix was not able to adhere. Her suggestion was to top the stummel to mine down to a healthier and more solid foundation for the rim. This sounded like a good option to me and perhaps would have been the better path at the beginning to clean out the deteriorated area more. Of course, there is no telling how the rest of the rim, Meer and Ole Timer surface will like this idea. To prepare for the topping adventure, I remove the masking tape from the top of the stummel.
 Using 240 grade paper on the chopping board, I very gently begin the topping process. At first I’m not sure what will result.
  After a few rotations, I check the progress and the remaining Ole Timer mixture appears to be solid. This emboldens me and I continue to rotate the stummel several more rotations.
 Very interestingly, I the grain of the pipewood emerges during the topping. After several rotations, the emerging wood is not smooth like briar, but a naturally ‘rusticated looking’ presentation appears as the pictures below show very clearly. I continue to top the stummel and the pictures following show the gradually change in the appearance of the rim as the sanding does its work.
 The mysterious ‘pipewood’ continues to dog me. What is pipewood anyway? I did a bit of snooping in my research bucket and remembered that Charles Lemon had worked on a Kilimanjaro (see: Resurrecting a Giant Kilimanjaro War Club Billiard) and he had raised the same question about the type of wood he was working on – definitely not briar. In the comments section of that blog we went back and forth about the wood and Johan came up with the mysterious ‘Pipewood’ designation in Pipedia’s article which I referenced above. Charles didn’t resolve what ‘pipewood’ actually was either. I decided to ask my wife what she made of this ‘East African Pipewood’. She’s pretty amazing with plants and is a horticulturalist hobbiest in her own right. She looked at the grain I had uncovered on the rim and with little thought observed that that it looked like bamboo. With her curiosity piqued, she did a bit of online research and sent me a link with a picture (see LINK) labeled, ‘bamboo end grain flooring’. The cheetah-like spotting is very much like the Kilimanjaro’s rim. Then, a little later, as if to produce exhibit “2”, my wife handed me one of our throw-away bamboo chopsticks we get from our favorite Bulgarian Chinese home delivery restaurant. I managed to take a closely focused picture again to show the uniformed ‘tubular’ grain structure of a bamboo specimen. The case for East African Pipewood being some strain of bamboo is looking pretty strong. As Charles remarked in his blog noted above, whatever the wood is, it would not be good to use in direct contact with fire, like with briar, but would of necessity need to be paired with a Meershaum lining to work. Thanks to my gifted wife, I think I have a better handle on what pipewood actually is. What I’m seeing on the rim is a cross-section cut of this wood. The LONG crack down the side of the stummel makes more sense with the straightness of it – this wood it structured in long, straight grains. It would not, therefore, have a lot of resistance to an expansion from heating… it would seem! Curiosity satisfied, I move on.
 At this point I’ve come to a place where more topping will not help. The deteriorated and crumbling part or the rim and Meerschaum has been removed and solid Meer has emerged. I circle the one place that the Meer shows a residual chip. To remove this area would require more ‘Pipewood’ to be sacrificed than I’m willing to give.
  This next pictures shows clearly the depth of the Meer chip and how much of the top would need to be removed to erase the chip – not an option. As I look at the integrity of the remaining Old Timer faux Meer material, it appears to be strong but aesthetically, not very pretty! At this point, strength wins over pretty! With nothing to lose, I will again apply more coats of the Ole Timer mixture to fill this area and hopefully to solidify a stronger foundation.
 I give the area a quick cleaning with a cotton bud dipped in alcohol.
 Again, I apply the mixture of egg white and chalk – applying several coats over a few days gradually to build up the area arriving at the point to start sanding again. I’m amazed that as often as I’ve gone back to my original mixture of egg white and chalk, it has only taken one egg white and it has done quite well being refrigerated after each application.
 I come to the point of sanding once more. The gradual building of the Ole Timer mix looks good. I use 240 grade paper wrapped around a Sharpie Pen to provide the firm backing to the sanding. I want the chamber straight and I don’t want to inadvertently bevel off the internal edge at the rim.
 I then take the stummel back to the topping board using 240 grade paper. This does a good job cleaning the rim surface again exposing the unique cheetah-like grain pattern of the pipewood.
  I follow the 240 grade paper by rotating the stummel a few more times on 600 grade paper.
 After the topping, I use pieces of 240 then 600 grade papers to further smooth the chamber walls – blending the edges of the differing layers of the Old Timer material. Smoothing the rim more also seems to harden the material more – making both the native Meerschaum lining and the Ole Timer more durable. I also give the inner rim edge a subtle rounding which protects the edge from chipping. Looking closely at where the native Meer and Ole Timer Faux Meer meet, I see a few gaps that the Ole Timer mixture did not close. These are marked with the arrows.
 One more time I bring out the chalk and egg white mixture and after mixing it, I apply more on the rim with my finger to close the gaps and then let it set for a few hours to harden.
 Again, I sand…
 …and declare that the Meerschaum chamber repair is complete! I’m pleased with the what I’m seeing – as I said before, it ain’t pretty, but this pipe has a chance for another lifetime and that makes this long, methodical process worth the trouble. Altogether, I’ve been working on this Meer-lining repair about a week or so. The true test for both the stummel’s crack repair and the Meerschaum, and how well the Old Timer Faux Meer holds up, will come after the chamber is put into service. The physics of the heat – expansion and contraction – will show no favorites and we’ll see what the result will be!
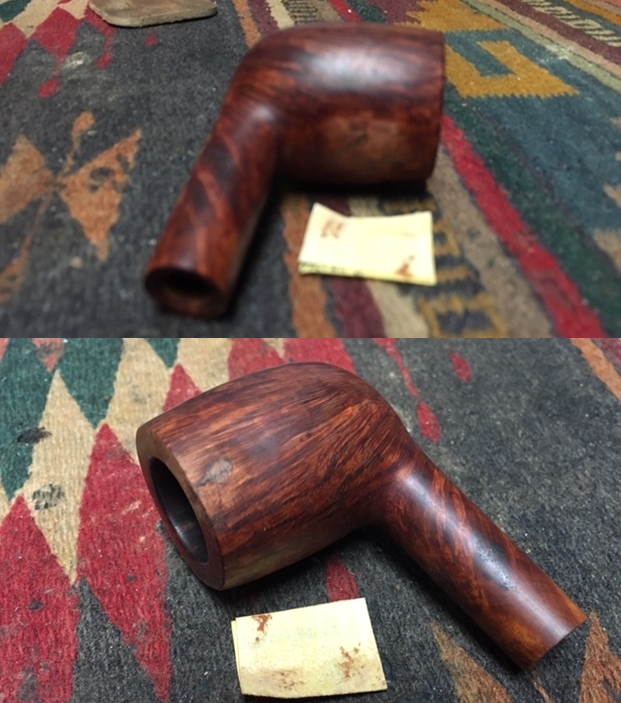
 Anxious to see the stem and stummel reunited, I peel away the masking tape and clean the exposed stummel with a cotton pad wetted with alcohol. Not bad!
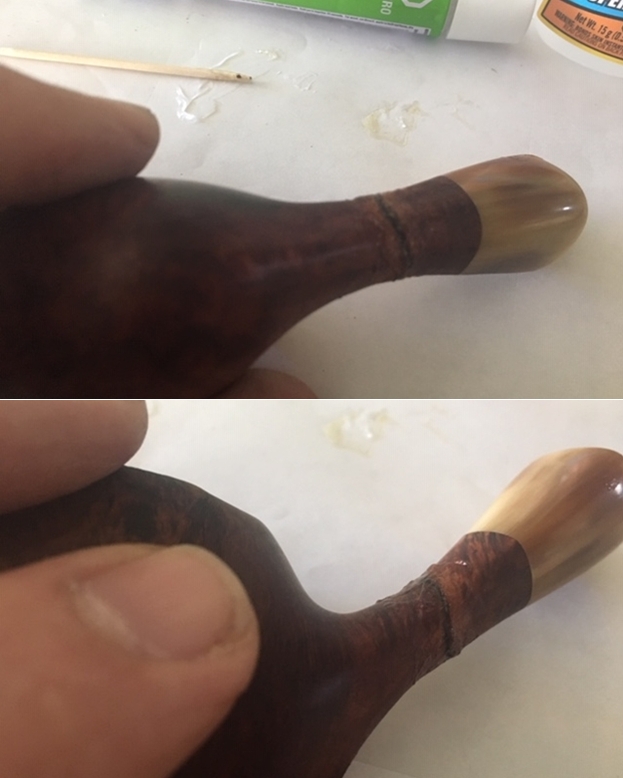
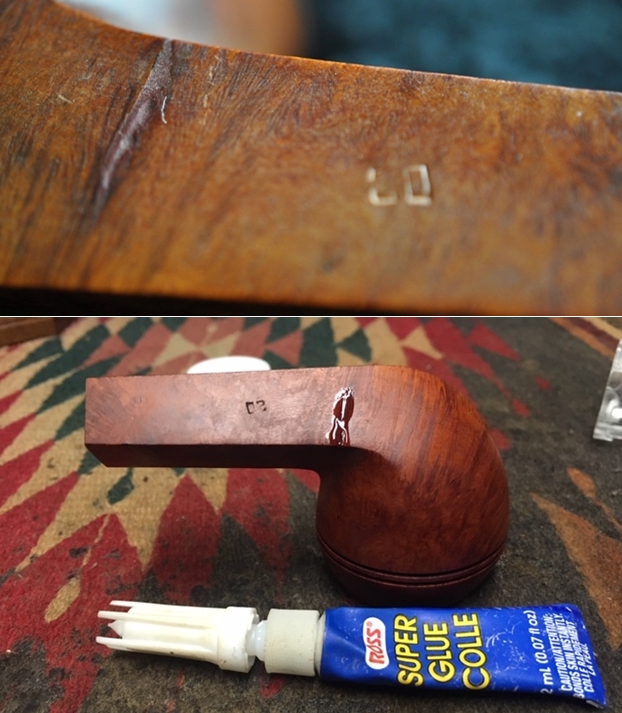
 I look closely at the crack repair (formerly the Grand Crack Canyon) and it is solid, but I notice again that the crack line itself and the pipewood in the immediate area running along the crack has lightened a wee bit. It’s not surprising after using acetone to clean away the excess CA glue from the crack repair. The picture shows this well.
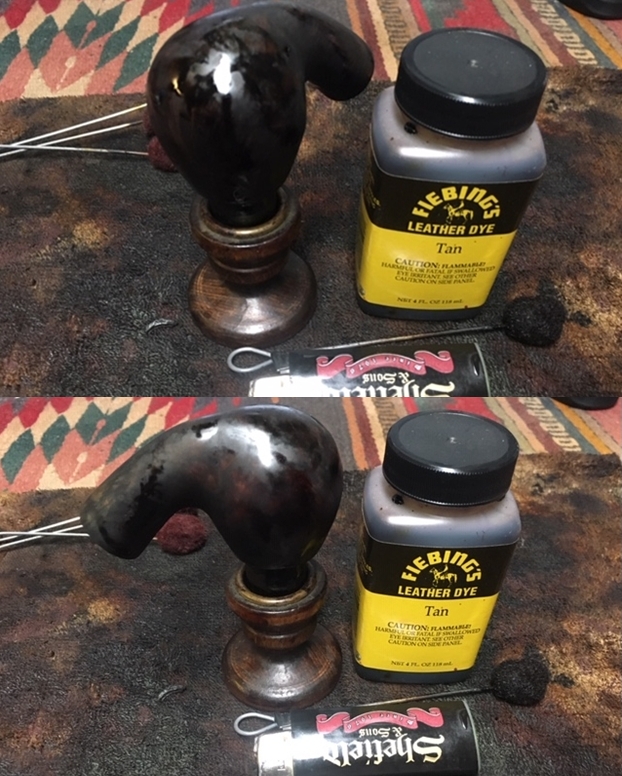
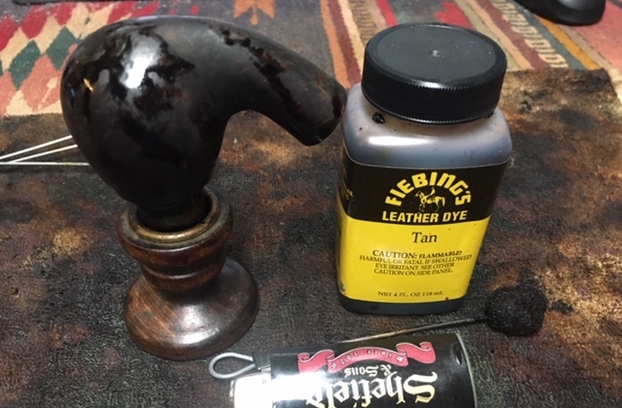
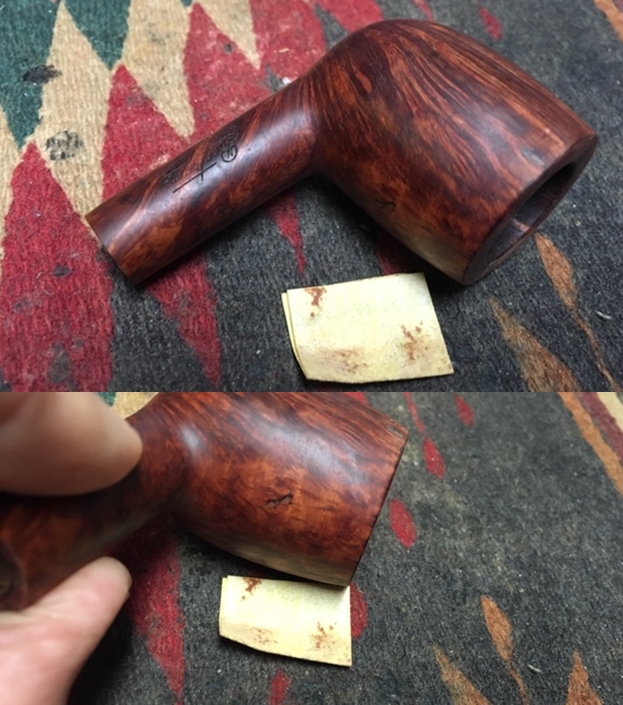
 To remedy this, I use an Italian made dye stick labeled, Noce Medio (Medium Night) that does a great job blending the area with the stummel.
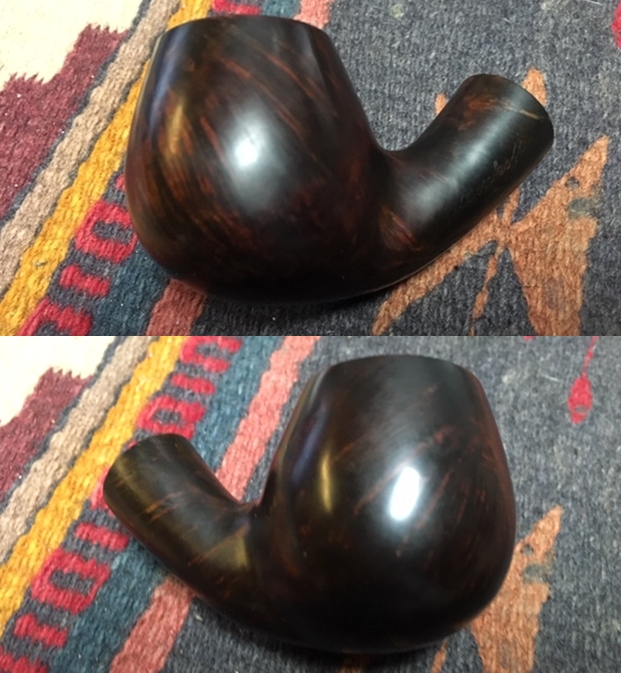
 The surface looks great and I enhance this by applying a goodly portion of Before & After Restoration Balm to bring out the depth of the dark, burgundy speckled, blasted surface. After rubbing the Balm into the craggy surface with my fingers, I set the stummel aside for about 20 minutes allowing the Balm to do its thing.
 And I like what it did! After 20 minutes I use a cotton cloth to wipe the excess Balm and then I follow by hand buffing with a microfiber cloth.
 After reattaching the stem, I mount the Dremel with a cotton cloth buffing wheel and set the speed at 40% full power. I then apply Blue Diamond compound to the stem. I also apply the compound to the rim surface as well as the smooth surface on the underside of the shank holding the nomenclature.
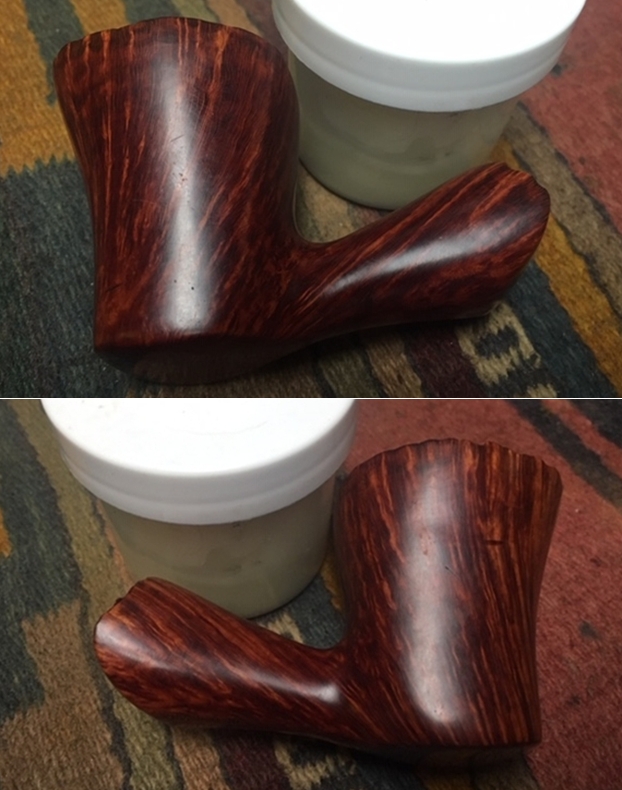
 After applying the compound, I mount another cotton cloth buffing wheel to the Dremel maintaining the same speed and apply a few coats of carnauba wax to the stem and as well a light application to the stummel. The craggy stummel surface will get gummed up if I apply too much wax, but a small amount spreads nicely with the Dremel action and brings out the luster of the dark hues of the pipewood. I finish the restoration by giving the pipe a rigorous hand buffing using a microfiber cloth.
This restoration was a labor of love – this gargantuan pipe wanted another opportunity to serve and I hope my repairs have given him a fighting chance! As I said earlier, the proof of this pudding will be in the heating and cooling of the stummel. The Old Timer Faux Meerschaum is a durable material after it sets up and hardens. The key will be if the Ole Timer material bonds and moves with the native Meerschaum during the heating and cooling. We’ll see! My good friend in India, Paresh, commissioned this giant Kilimanjaro to benefit the work we do here in Bulgaria with the Daughters of Bulgaria – women and girls who have been trafficked and sexually exploited. I’m going to propose to Paresh that if he would like, I can send the Kilimanjaro to him to put it into service for a few months to see how the repairs fair then settle up 😊. If not, I’ll keep the Kilimanjaro in my own collection and see how he does! Thanks for joining me! It’s not pretty! ThePipeSteward 


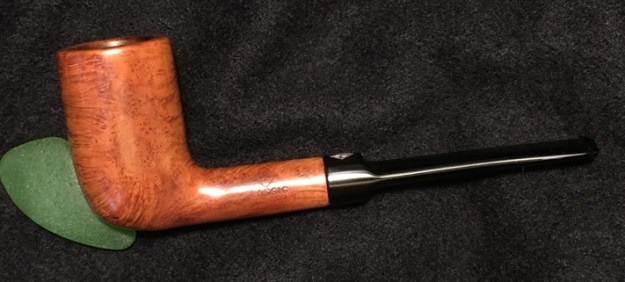
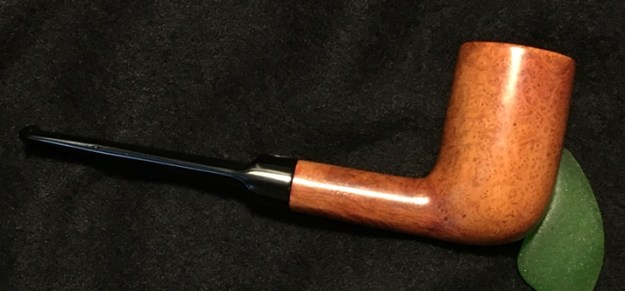
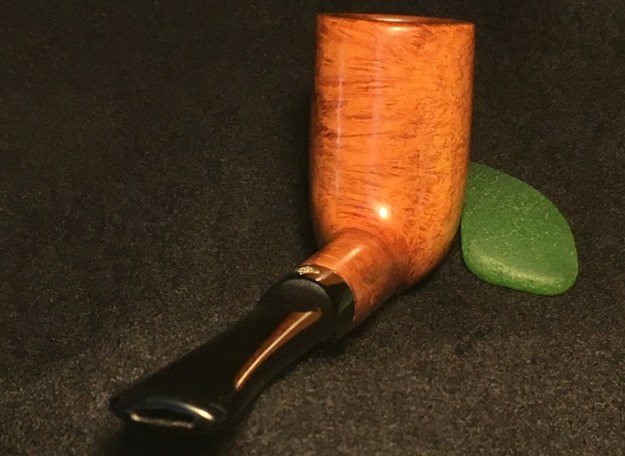
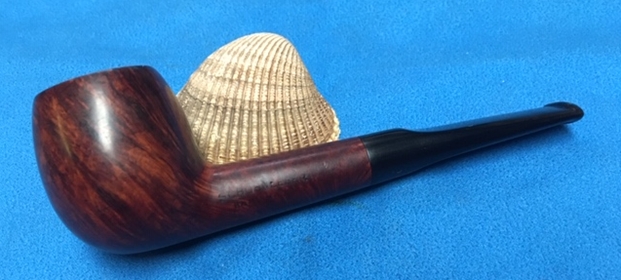
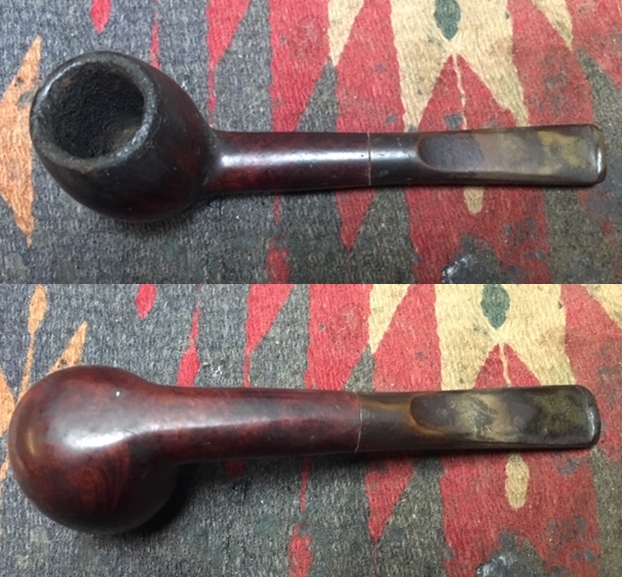
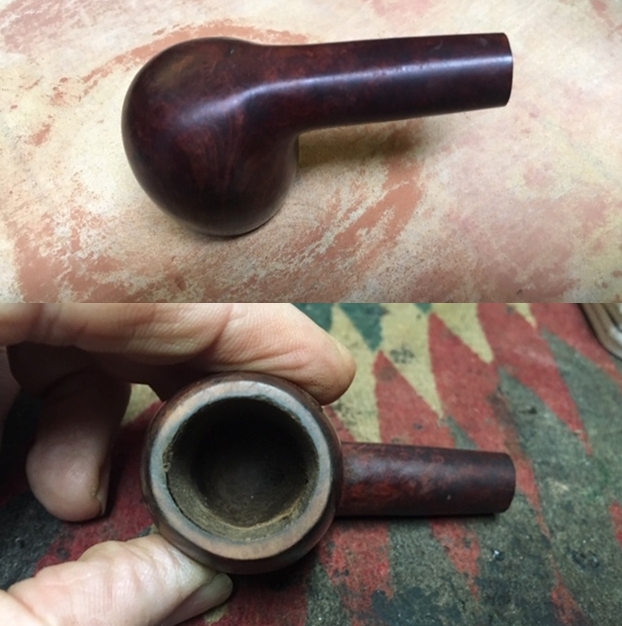
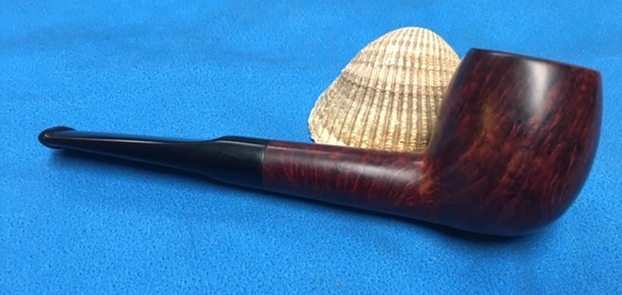
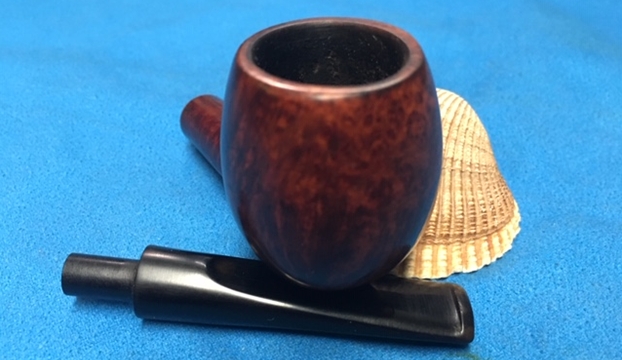
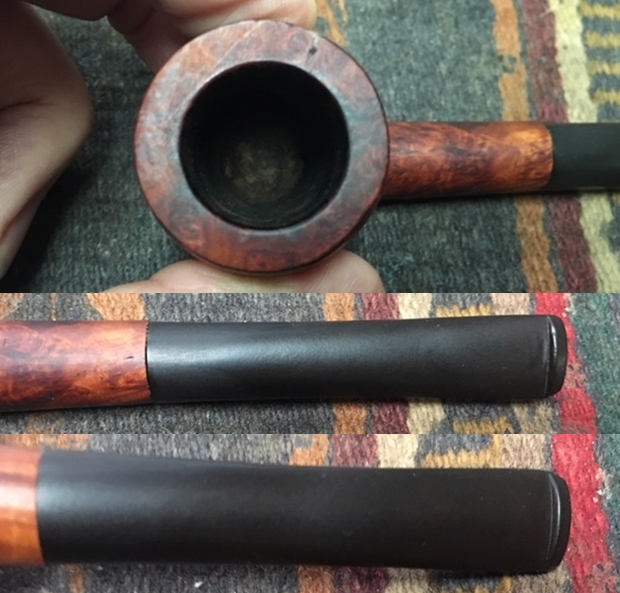
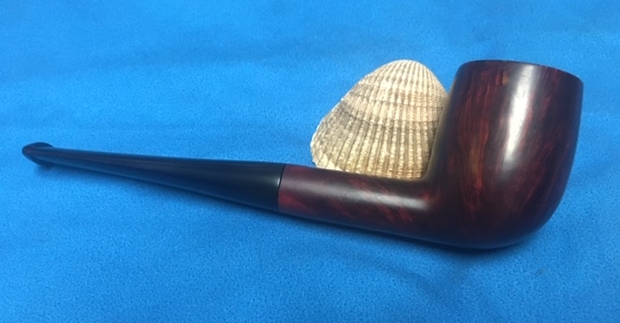
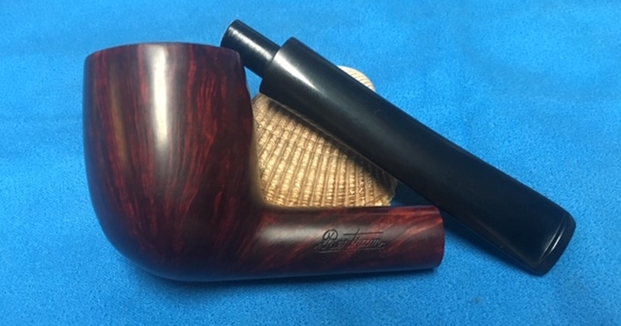
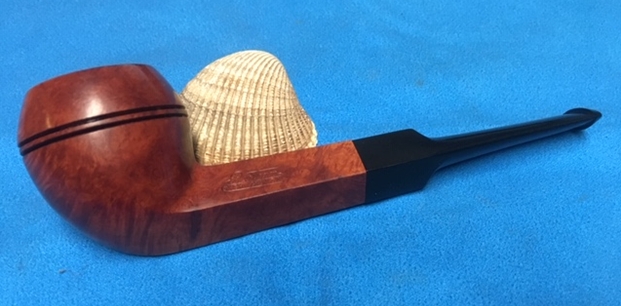
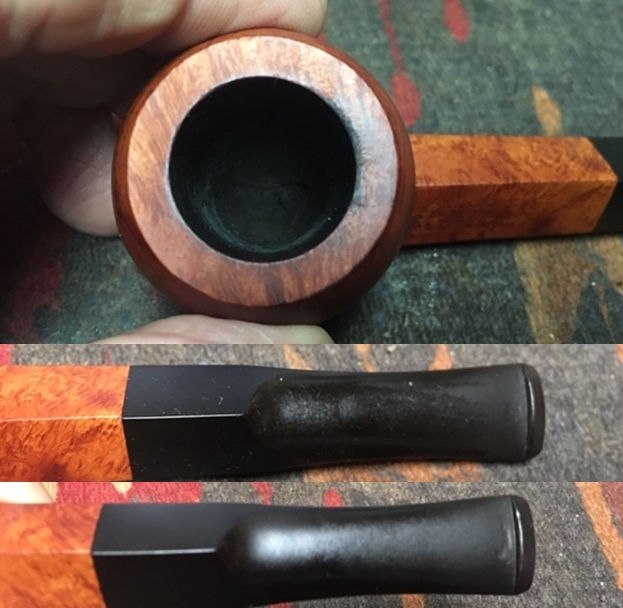
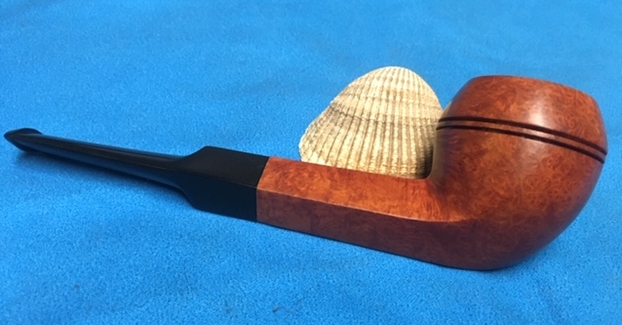
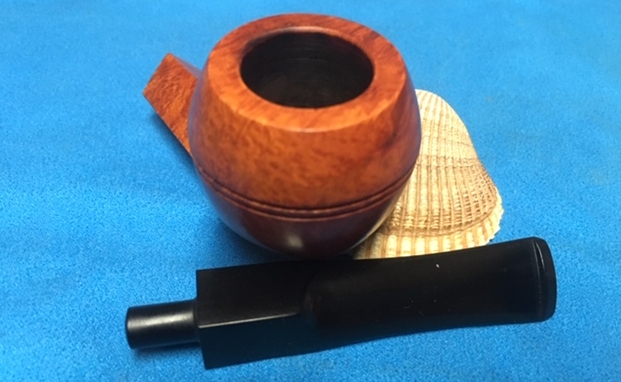
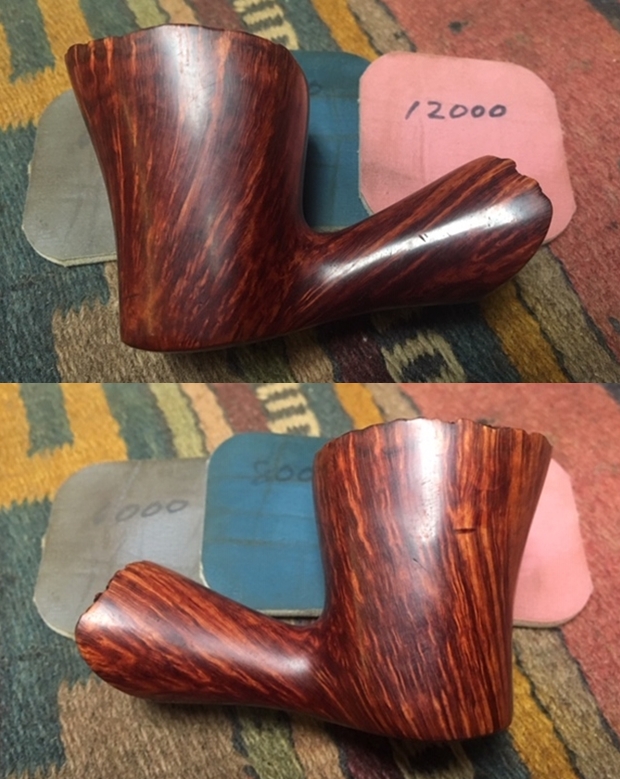
 With the pipe now on my worktable here in Sofia, Bulgaria, I take more pictures to show what got Paresh’s attention. In prototypical English style, the pipe is on diminutive side measuring, Length: 5 3/8 inches, Height: 1 7/8 inches, Rim width: 1 1/8 inches, Chamber width: 3/4 inches, and Chamber depth: 1 3/4 inches.

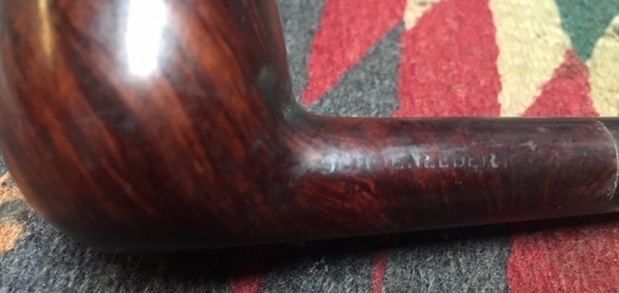
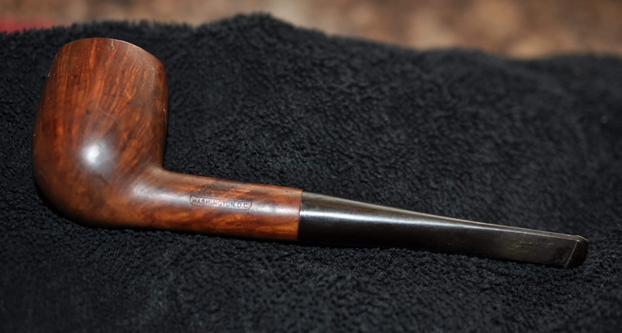
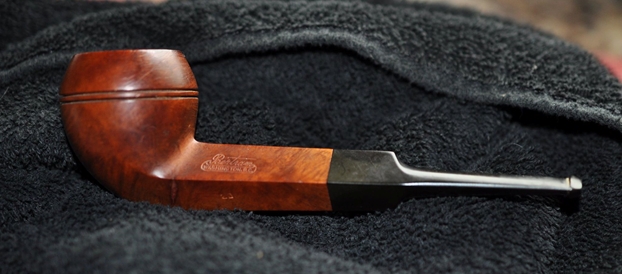
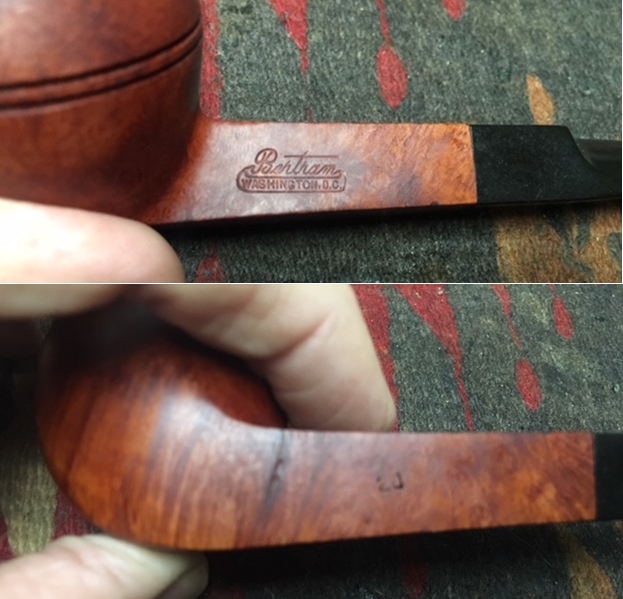
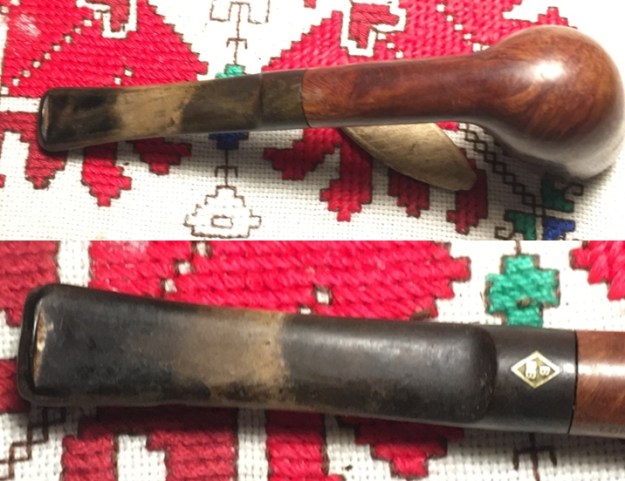 The left side of the shank is stamped with the classic ‘BBB’ ensconced in the rhombus [over] ‘CLASSIC’. The right side of the shank is stamped, ‘LONDON, ENGLAND’ [over] 106S – what I’m assuming is the BBB shape number designation. The shape of the stummel I would label as a Chimney sporting a saddle stem. In my research I could unearth no BBB Shapes Chart that corroborates my designation matching the 106S.
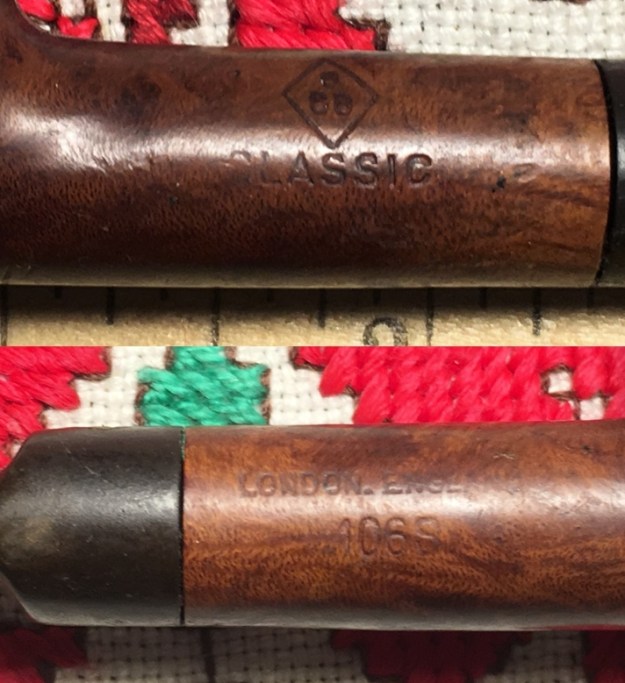 I love the look and feel of this pipe and its distinctive brass rondel embedded on the topside of the stem placing this ‘Best British Briar’ Classic in the 1950s and 1960s. Below is pictured the evolution of the BBB stem markings which is included in an extensive article on the History of BBB Pipes by Fiona Adler that Steve reposted in rebornpipes after translating from the original French.
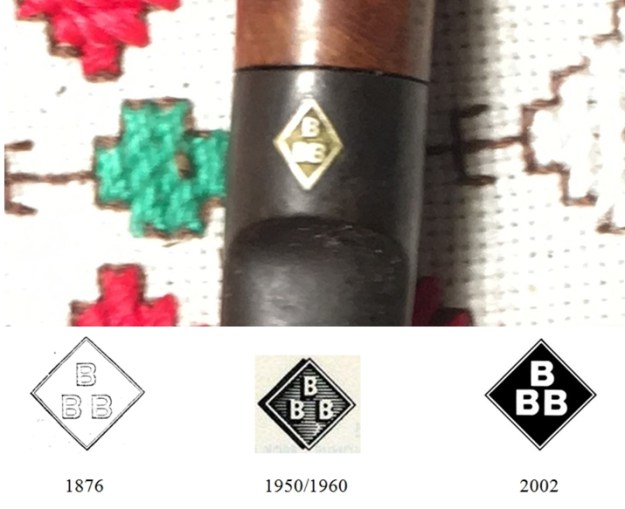 Pipephil provides a very brief description of ‘BBB’:
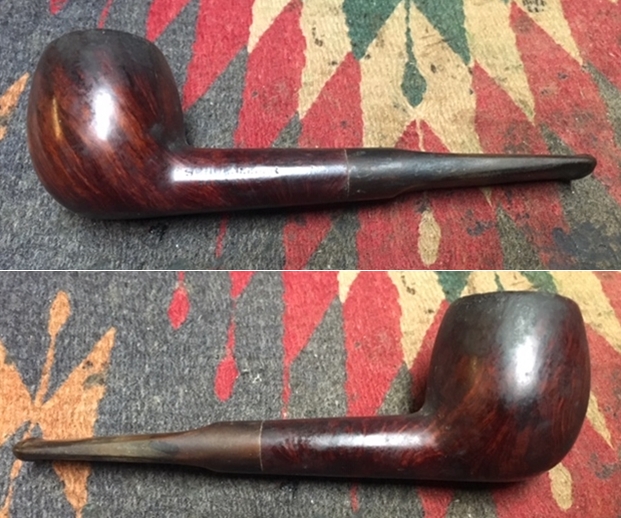
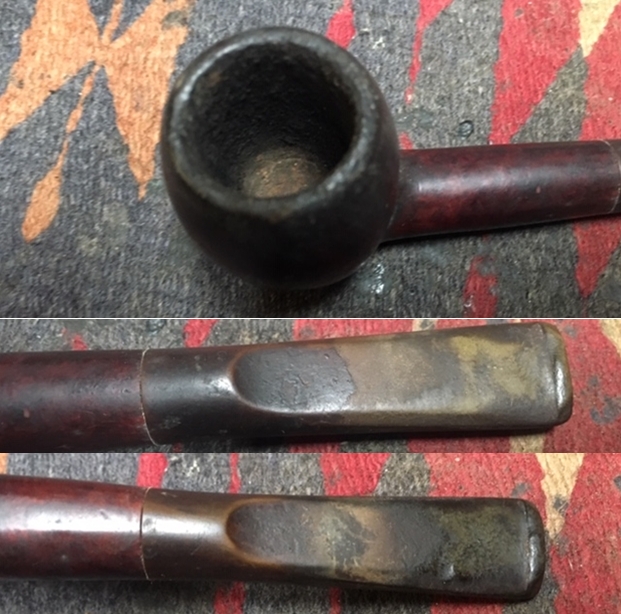
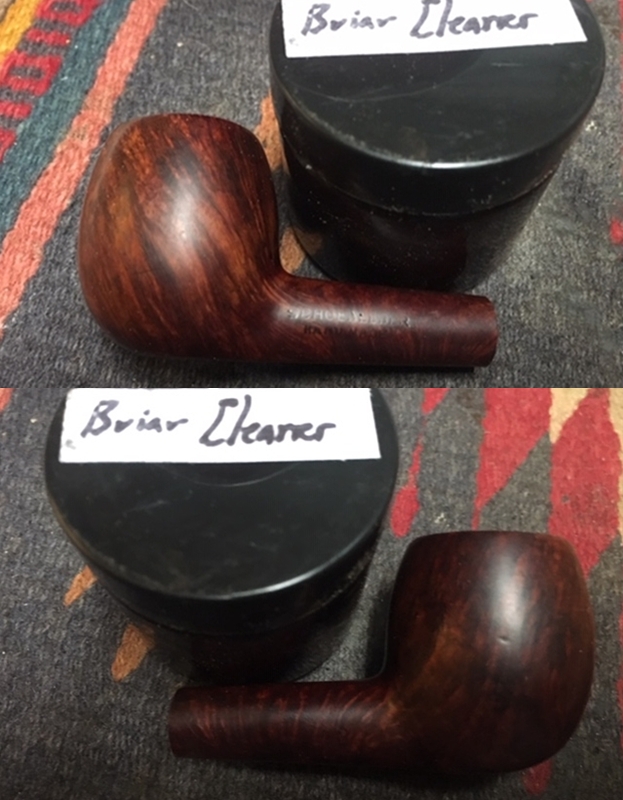
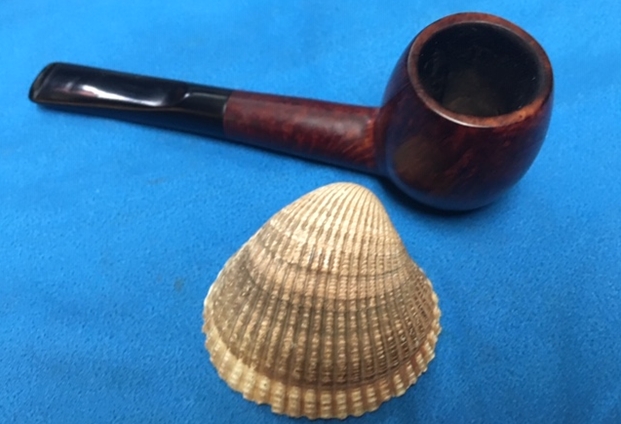
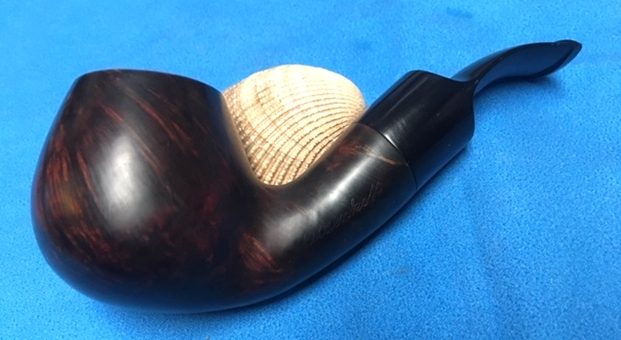
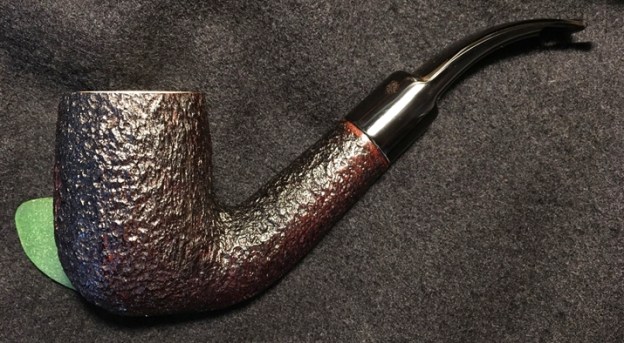
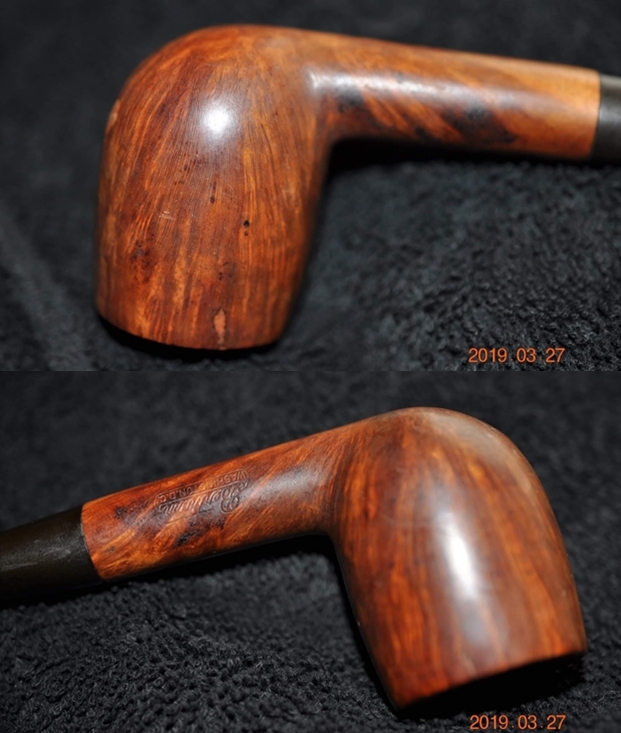
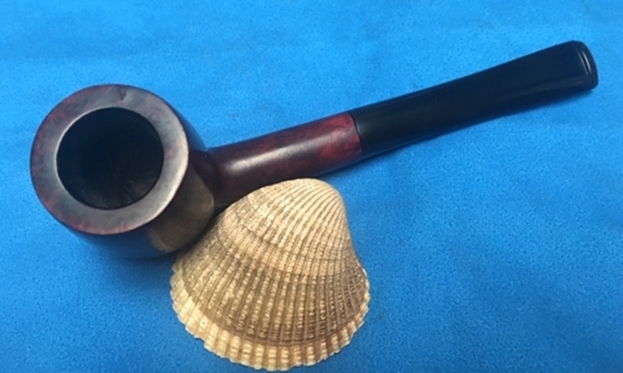
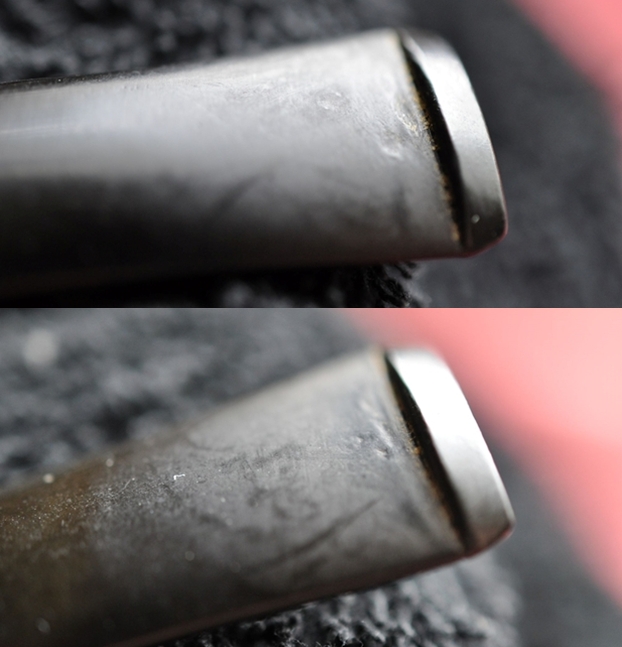
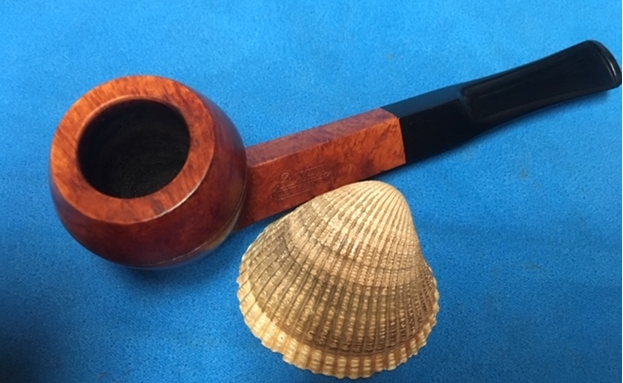
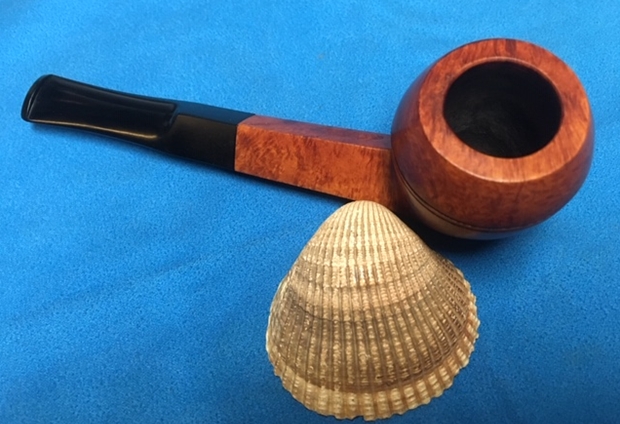
 The Chimney stummel is in very good condition – the grain pattern shows great promise after the stummel is cleaned of normal dirt and grime buildup. The chamber has a thick cake and the lava overflow matches the fact that this pipe was well smoked and served his steward well. I will remove the cake to give the briar a fresh start and to inspect the chamber walls for heating problems. The saddle stem has heavy oxidation but very little tooth chatter on the bit. I’m looking forward to seeing how the very nice-looking BBB Classic Chimney cleans up.
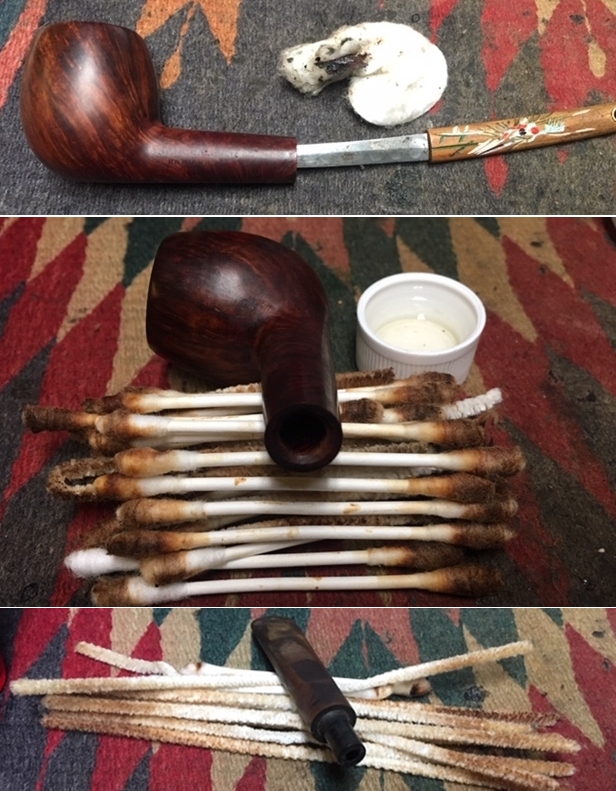
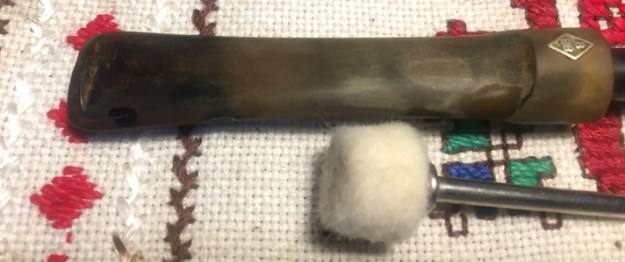 I add paraffin oil to the mix. I wet the felt wheel with the mineral oil and buff the stem trying to break up the oxidation in anticipation of putting the stem in the B&A Deoxidizer soak.
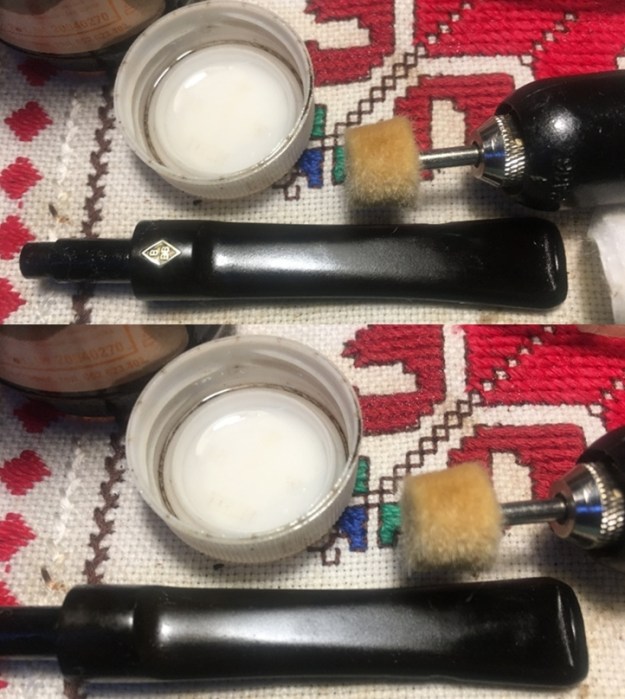 After buffing, I wipe the stem down with a cloth and put it aside and allow it to dry. After drying, the next two pictures show that the buffing did help, but there is still oxidation.
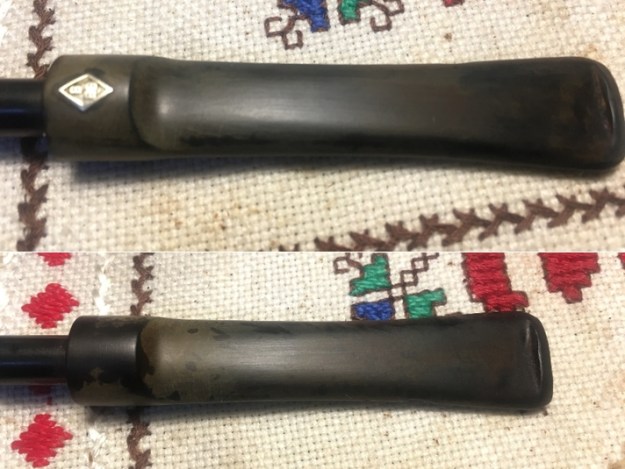 I continue by cleaning the airway of the stem with a pipe cleaner wetted with isopropyl 95%. Once clean, I add it to a bath of Before & After Deoxidizer with other pipes in the queue. I’m hopeful that the Deoxidizer will now be more efficient after the aggressive buffing I did.
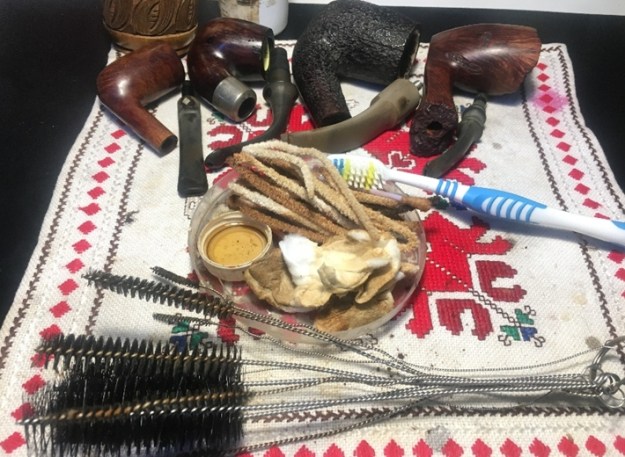
 After some hours in the Deoxidizer soak, I fish out the BBB saddle stem and after draining off the excess Deoxidizer, I use cotton pads wetted with isopropyl to wipe off the raised oxidation. I also run a pipe cleaner wetted with alcohol to clean the airway of the fluid. The pictures show improvement, but I’m not satisfied.
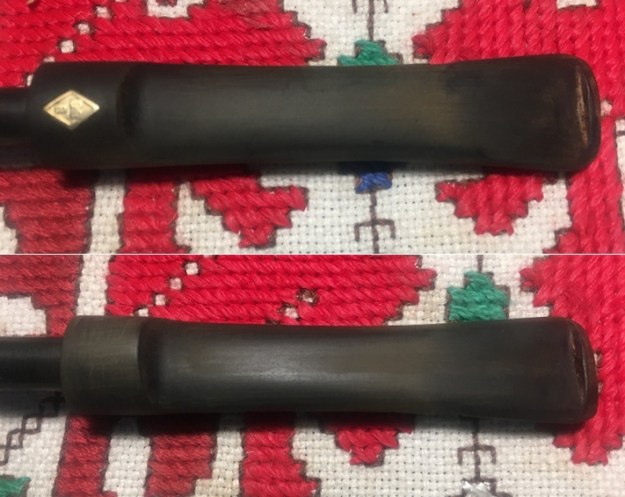 Next, I employ Mr. Clean Magic Eraser to address the oxidation further. I’m satisfied with the results – the vulcanite appears to be free of the oxidation.
 To rejuvenate the stem, I apply paraffin oil to the vulcanite with a cotton pad and put the stem aside to absorb and dry. I’m pleased with the results.
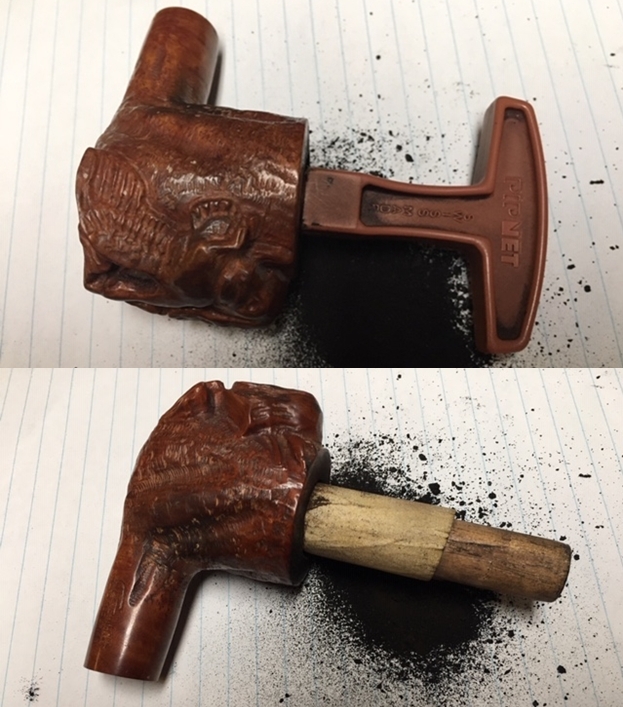
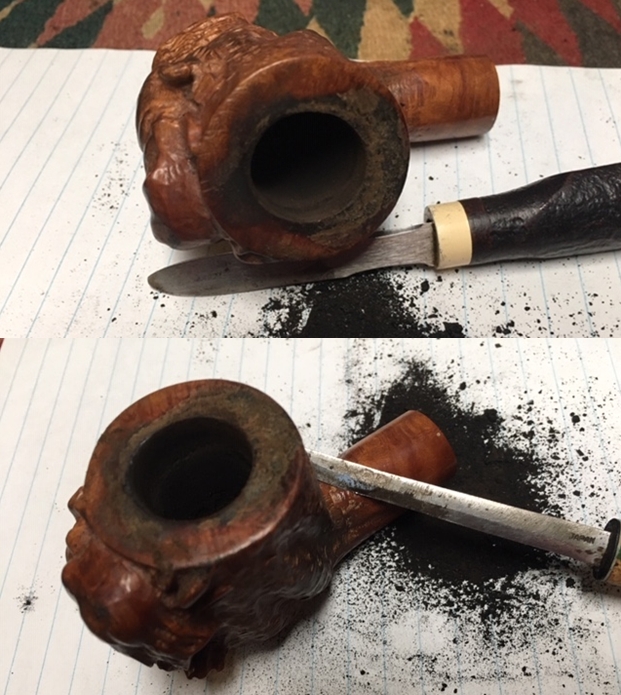
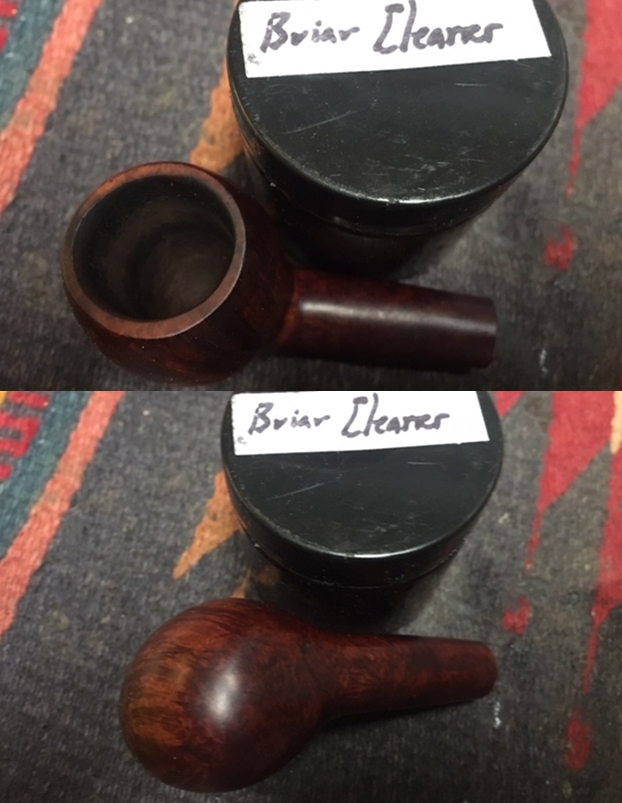
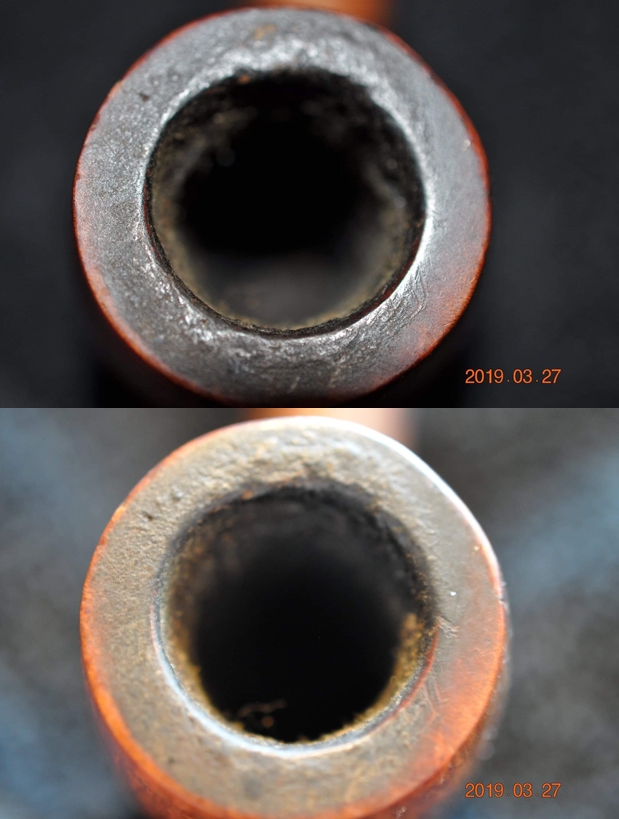
 Turning now to the BBB stummel, I take a few pictures to show the heavy build up both in the chamber and the rim. I use only the smallest of the Pipnet Reaming Kit’s blade heads to ream the carbon cake out of the chamber. This will give the briar a fresh start. I transition to the Savinelli Fitsall Tool to do the fine tuning by scraping the chamber walls more, and then wrap 240 grade paper around a Sharpie Pen and sand the chamber to clean it further of carbon cake residue. Finally, I wipe the chamber with a cotton pad wetted with alcohol to rid the chamber of carbon dust. I take a final picture of the cleaned chamber and after inspection, I see know problems in the chamber with heating cracks or fissures.
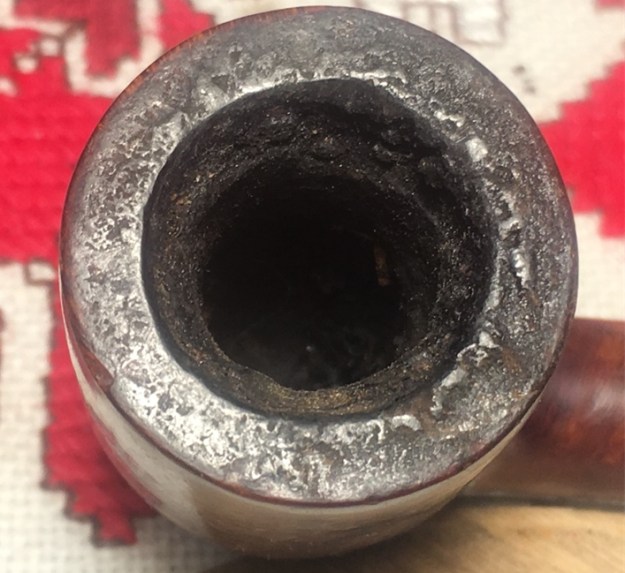
 Turning now to the external briar cleaning, I use undiluted Murphy’s Oil Soap with a cotton pad to scrub the surface. I also work on the rim using my thumbnail to scrape the rim to remove the buildup and then with a brass wire brush. I then take the stummel to the sink and using a bristled toothbrush I brush and further clean the surface under the warm water. Using shank brushes and anti-oil dish liquid soap as well I clean the internals of the stummel rinsing with warm water.
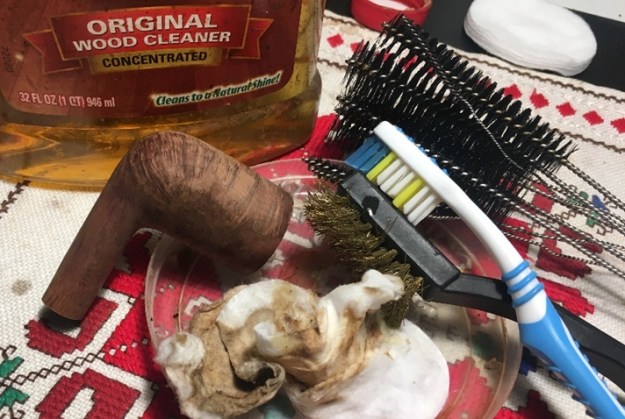 Next, using pipe cleaners and cotton buds wetted with isopropyl 95%, I continue the internal cleaning. I also scrape the mortise walls with a small dental spoon. This does a great job removing the thicker tars and oils that are hanging on. After a time, the cotton buds begin to emerge cleaner.
 To continue the internal cleaning process, I use the kosher salt and alcohol soak. To form a ‘wick’ to draw out the tars and oils, I twist and pull a cotton ball to form the wick. A stiff wire helps to insert and push the wick into the mortise. Then the bowl is filled with kosher salt, which leaves no aftertaste and freshens the bowl, and I set the stummel in an egg crate to keep it steady. A large eyedropper is used to fill the chamber with isopropyl 95% until it surfaces over the salt. After a few minutes, I top the alcohol off after it has absorbed into the internals. I set the stummel aside for it to soak through the night. It’s late, I also turn out the lights!
 The next morning, the kosher salt and isopropyl 95% soak has done the job. The wick and salt are soiled having drawn more tar and oils from the internal cavity. I thump the expended salt into the waste and wipe the chamber with a paper towel as well as blow through the shank to remove expended salt crystals. To make sure the internals are clean, I use a few more cotton buds dipped in isopropyl 95%. As hoped and expected, they come out clean and I move on.
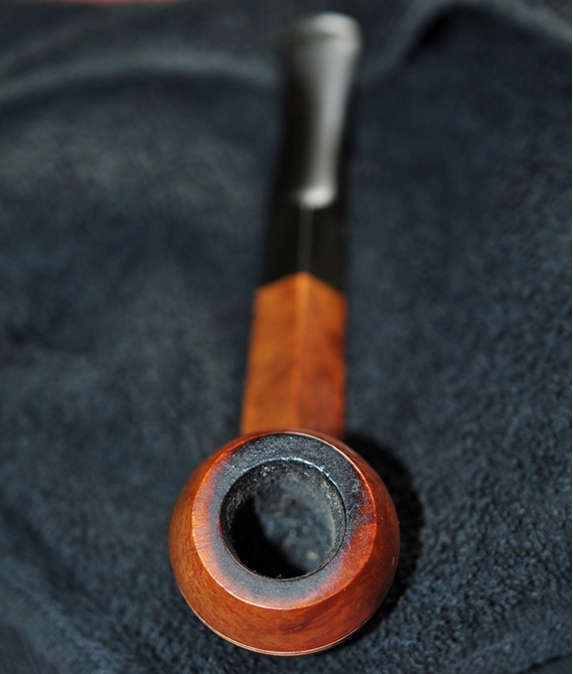
 With the cleaning complete, I turn my attention to the rim’s condition. The cleaning did a great job removing the grime and lava over the rim, but the discoloration and skins and nicks on the edge of the rim remain. I take a couple close-ups picturing both sides of the rim and nicking is evident.
 To address the rim condition, I bring out the chopping board and put 240 grade paper on it to serve as a topping board. I top the stummel very lightly – just enough to clean the rim and allow me to erase the rim edge nicks with a simple, inconsequential beveling.
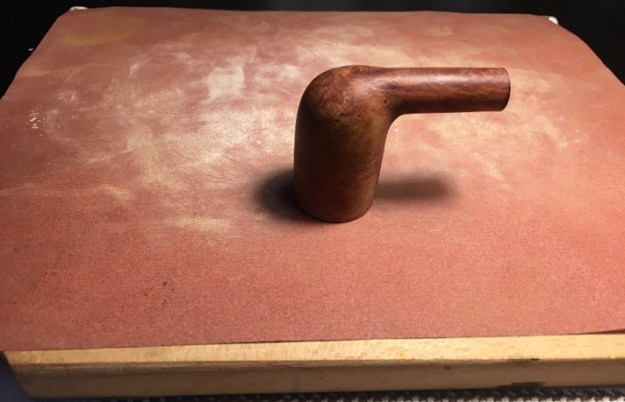 After a few rotations on the board I take a picture.
 After a few more rotations, I’m satisfied with the 240 topping. On the lower right of the rim you can see the remaining rim edge issues that I’ll rectify with a gentle beveling or sanding.
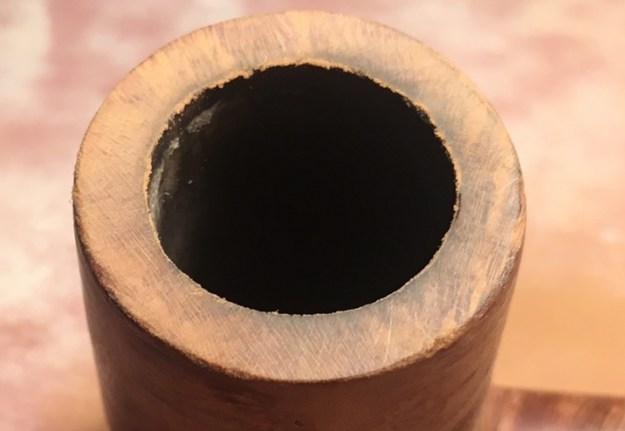 To smooth the rim further, I exchange the 240 paper for 600 grade paper and go a few more rotations.
 Next, I introduce outer and inner edge bevels to erase the remaining damage and to give the Chimney’s top a smoother softer appearance. I use 240 grade then 600 grade papers rolled to do the beveling. I think it looks great.
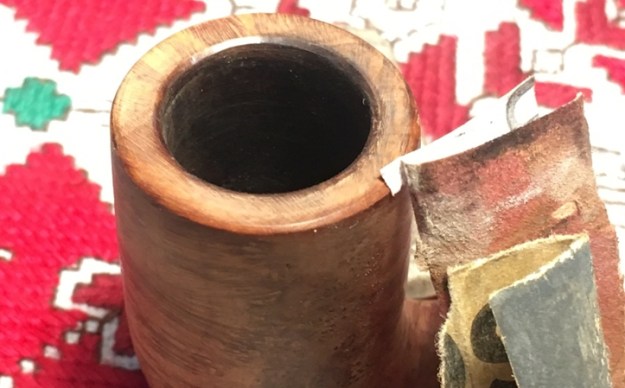 With the rim repair completed, I take the stummel through the full regimen of 9 micromesh pads. First, I wet sand using pads 1500 to 2400 then dry sand using pads 3200 to 4000 and 6000 to 12000. I take a picture between each set of 3 pads to mark the change in the briar. It amazes me how the grain emerges. This BBB Classic’s grain is striking. As I track the grain around the bowls, the horizontal grain gradually transitions to bird’s eye grain as the stummel position pivots. There are no fills in the stummel that I can see – a beautifully crafted block of briar!
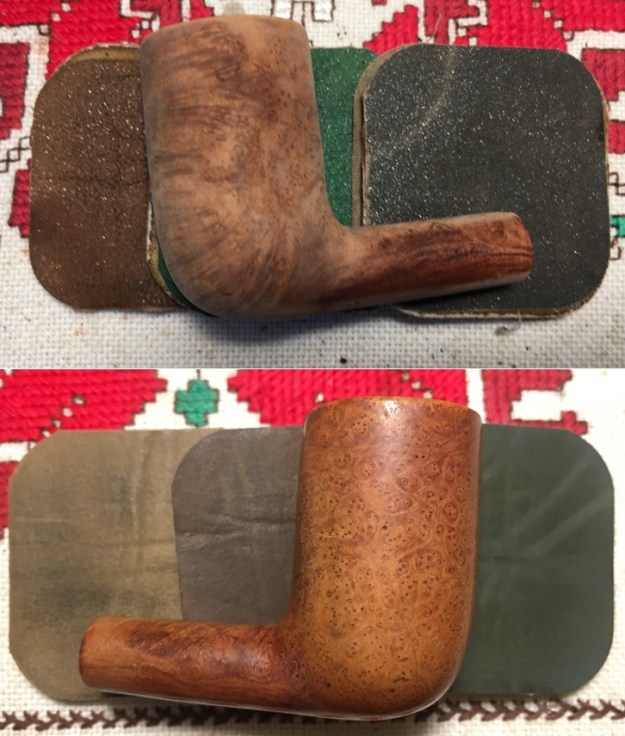
 Before returning to the stem to catch it up with the stummel, I’m anxious to apply Before & After Restoration Balm to this BBB Classic Chimney stummel. I place some Balm on my fingers, and I work it into the briar thoroughly. The Balm starts with a cream-like consistency but then thickens into more of a wax-like consistency. I like the Balm because it seems to draw out the deeper tones of the briar – nothing earth shattering, but the subtle enhancement of the natural briar grain is what I like most. After applying the Balm, I put the stummel aside for about 20 minutes before wiping off the excess and then buffing it up with a micromesh cloth. The picture shows the Balm at work.
 Next, I turn back to the BBB saddle stem. The tooth chatter is minimal, but the button has some compressions. The skin of the stem is rough as well.
 I begin by refreshing the button lips using a flat needle file. I also work on the bit with 240 grade paper sanding out the imperfections.
 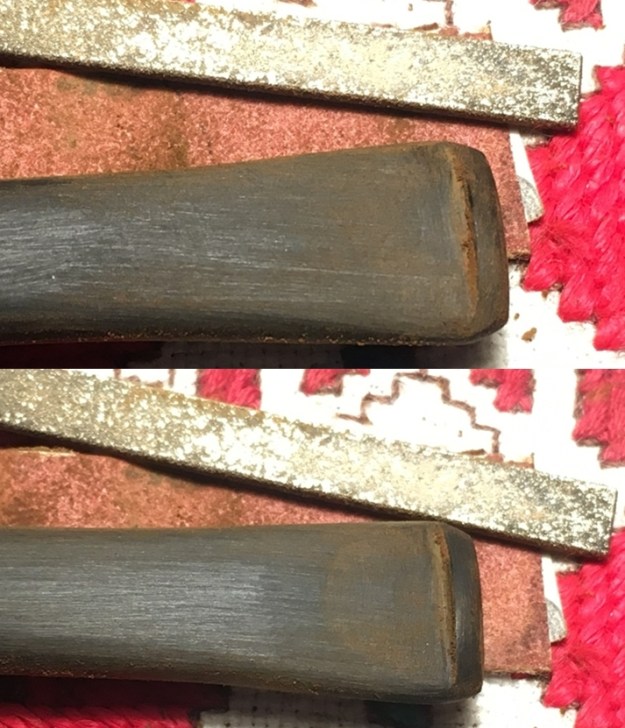 The slot is also a bit out of shape. I use a sharp needle file to file the edges to balance the slot.
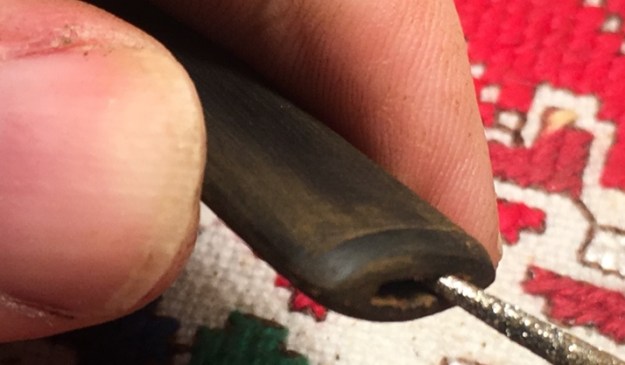 While sanding, I see a pit on the edge of the stem that I didn’t see before. I try sanding it out, but soon realize is too deep. I remedy the situation quickly using a spot-drop of regular CA glue on the pit after cleaning it with a cotton pad and alcohol. I use an accelerator to quicken the curing process and then sand it with 240 grade paper.
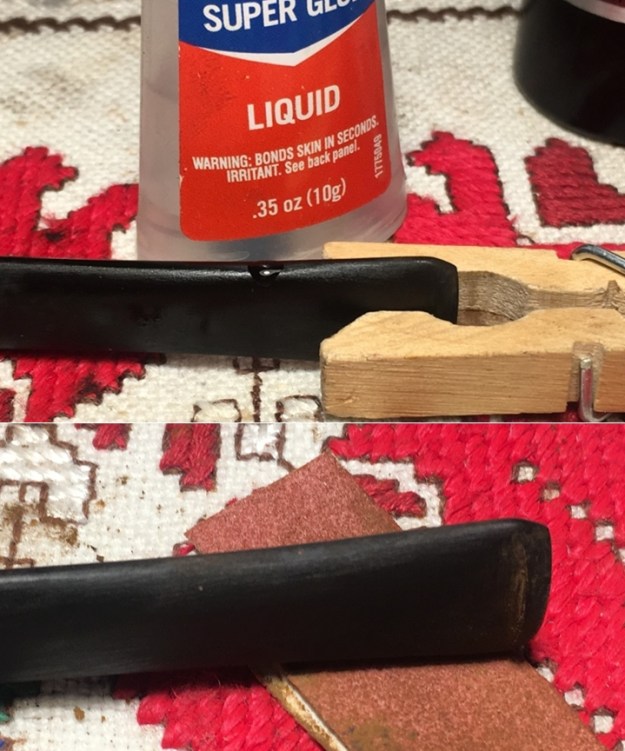 I then wet sand the entire stem with 600 grade paper and follow by applying 000 steel wool to the whole stem.
 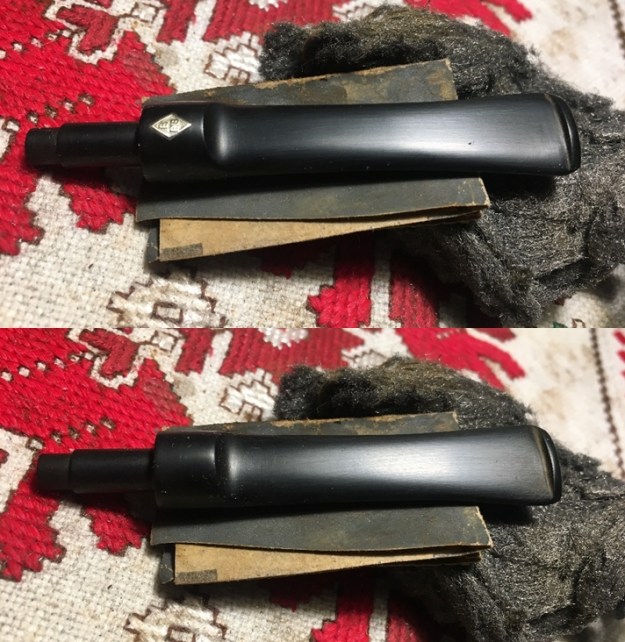 The next step is applying the regimen of micromesh pads to the stem starting by wet sanding using pads 1500 to 2400. This is followed by dry sanding with pads 3200 to 4000 and 6000 to 12000. Between each set of 3 pads a coat of Obsidian Oil is applied to further enrich and condition the vulcanite. The freshly sanded pop of the vulcanite contrasted with the embedded BBB Rondel is great!
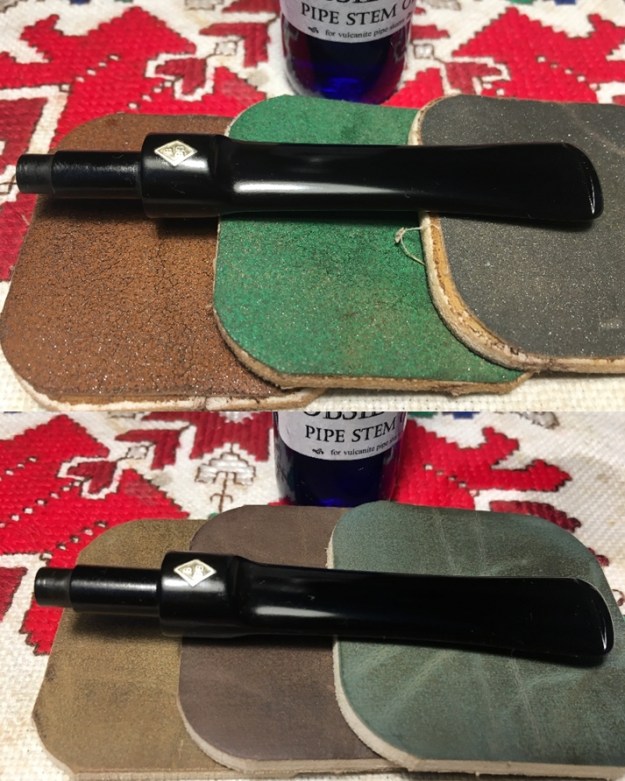
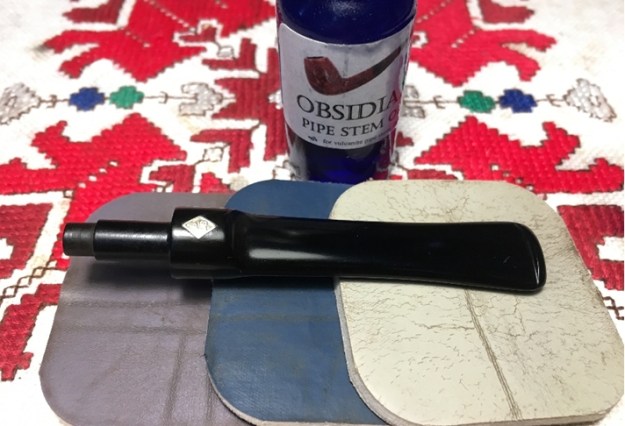 While trying to reunite the stem and the stummel before applying Blue Diamond compound, it becomes evident that the cleaning of the stummel has expanded the briar making the fit of the tenon in the mortise a bit too tight and forcing the issue could easily result in a cracked shank! Nothing desired at this point. To remedy this, utilizing a combination of filing the mortise with a half-circle needle file and sanding the tenon down by wrapping a piece of 240 grade paper around the tenon and rotating the paper does the trick. The combination approach now allows the tenon fit to be snug but not too tight.
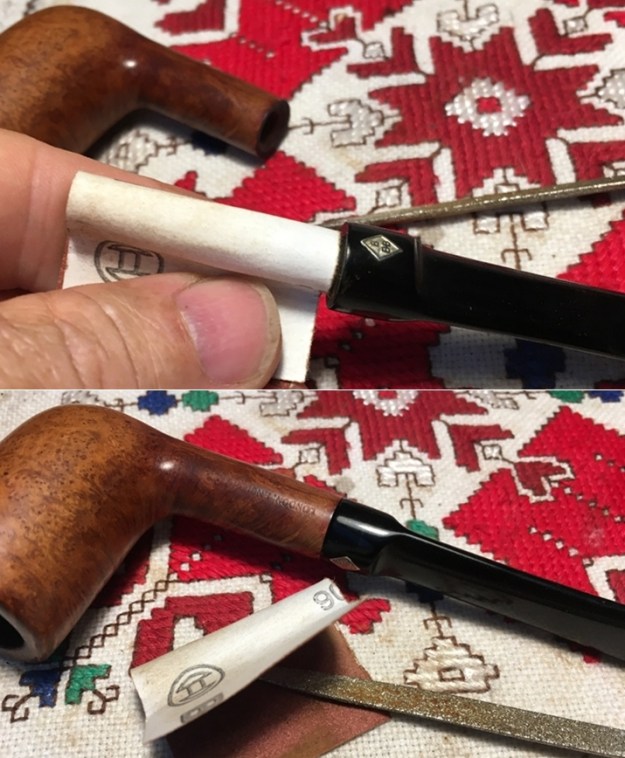 With the BBB Classic stem and stummel reunited, after mounting a cotton cloth buffing wheel onto the Dremel, and setting the speed at about 40% full power, Blue Diamond compound is applied to the stem and stummel.
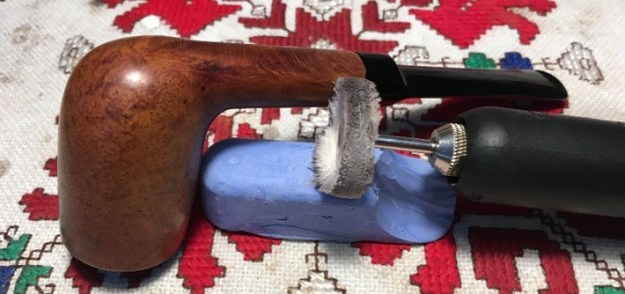 After the application of Blue Diamond compound, I wipe the pipe with a felt cloth to remove the compound dust in preparation of applying the wax. Then, after mounting another cotton cloth buffing wheel on the Dremel, and maintaining the speed at 40%, carnauba wax is applied to the stem and stummel. The restoration is finished with a hand buffing using a microfiber cloth to raise the shine.