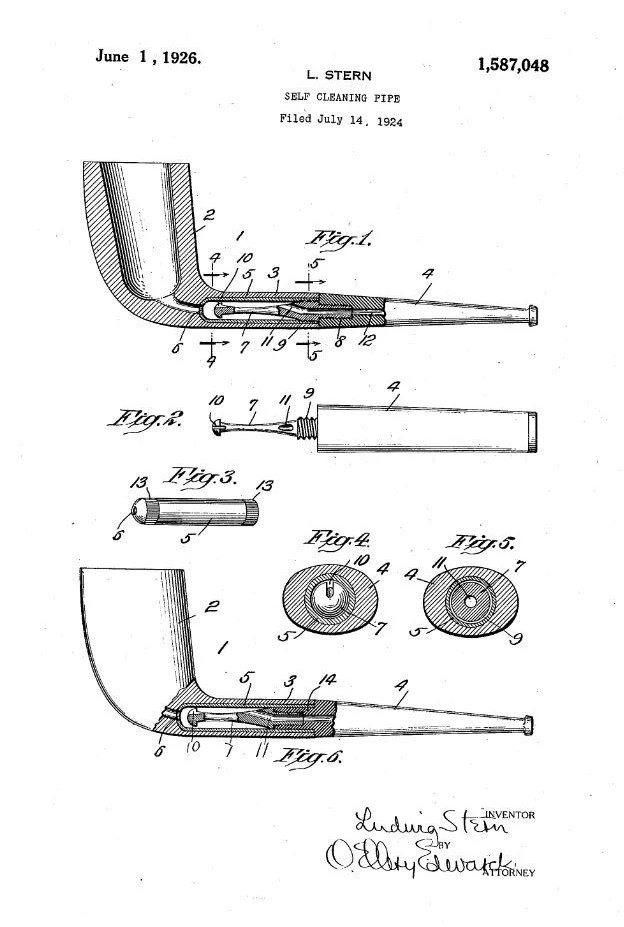
by Steve Laug
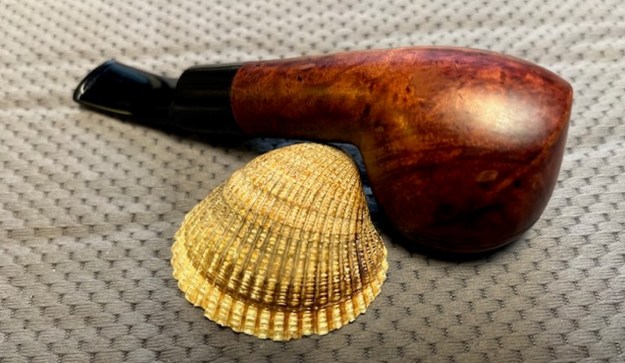
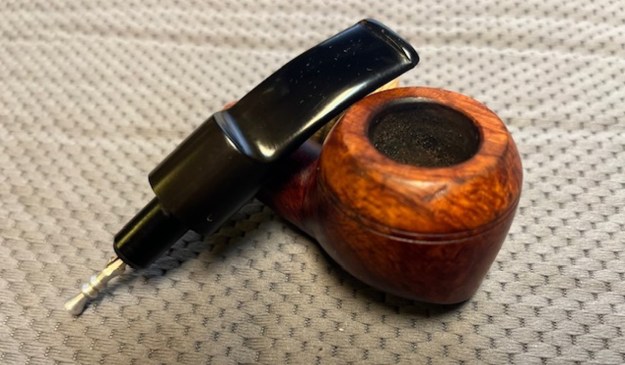
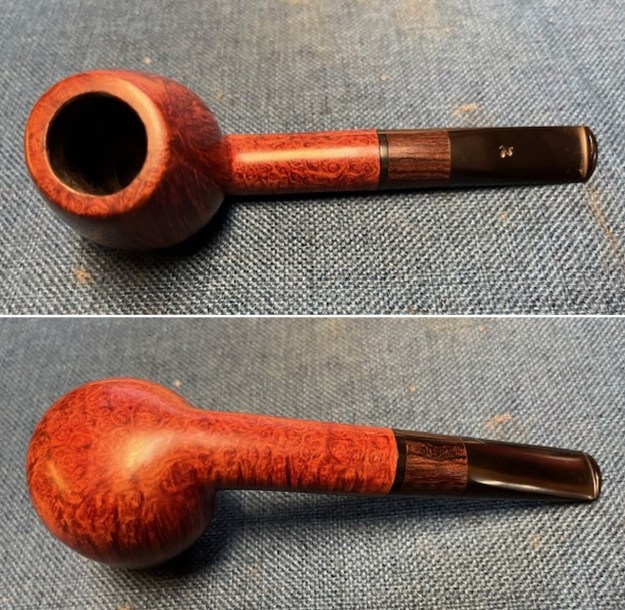
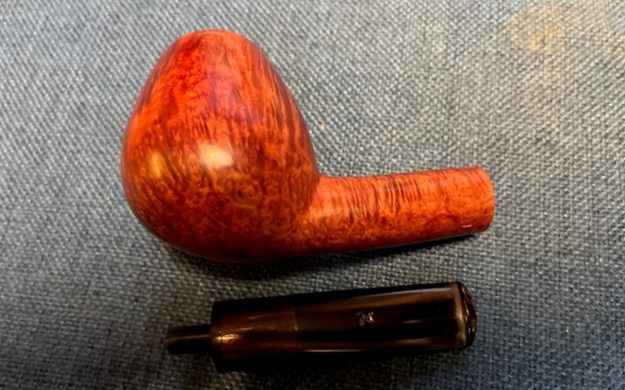
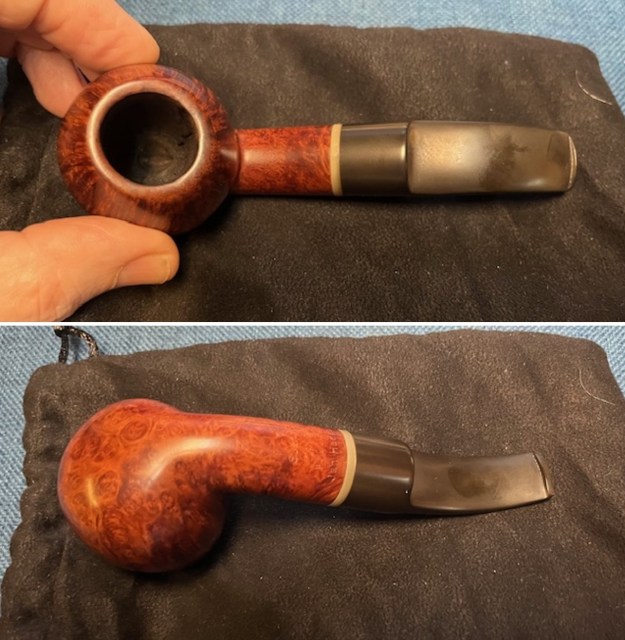
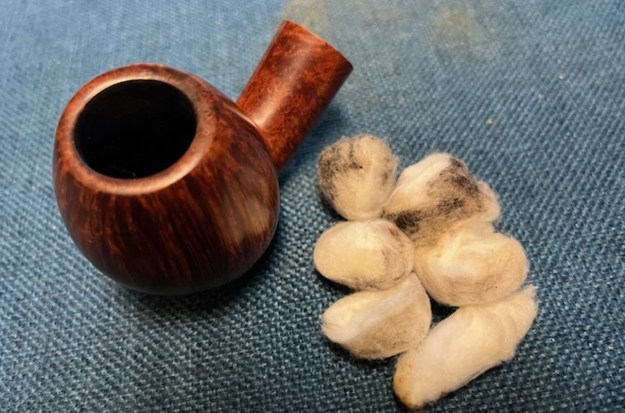
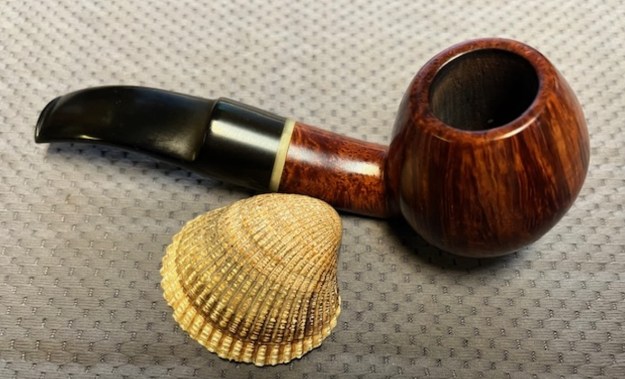
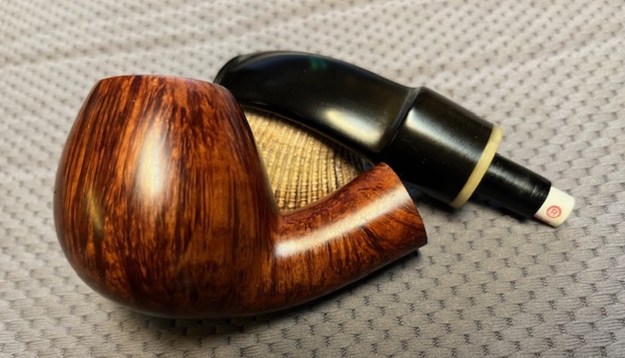
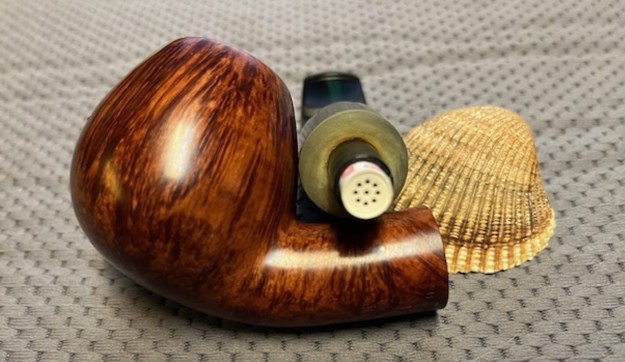
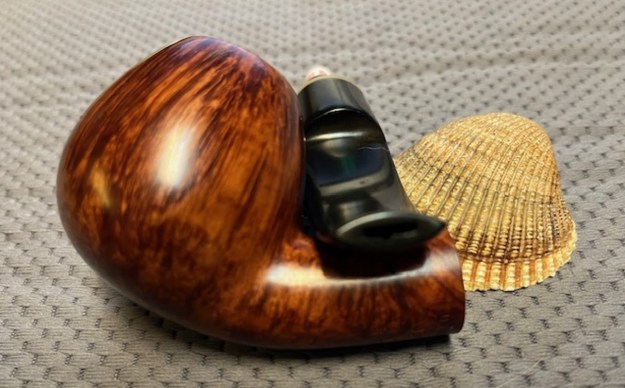
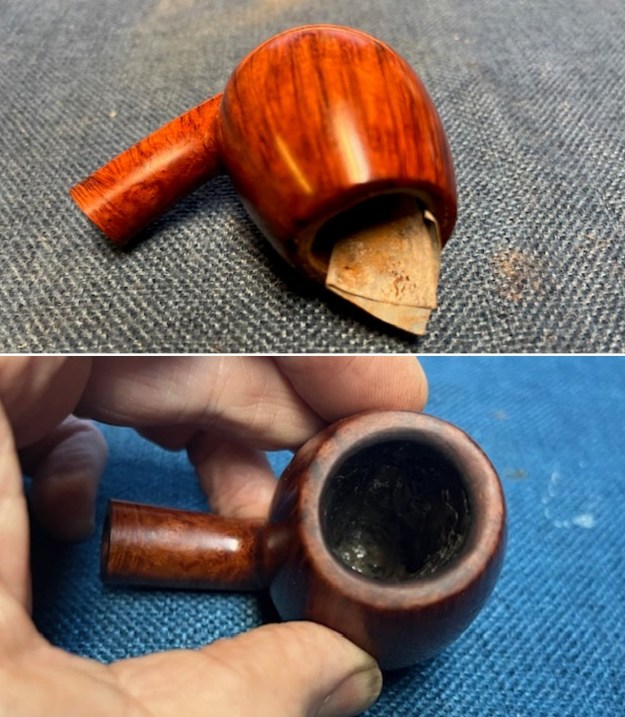
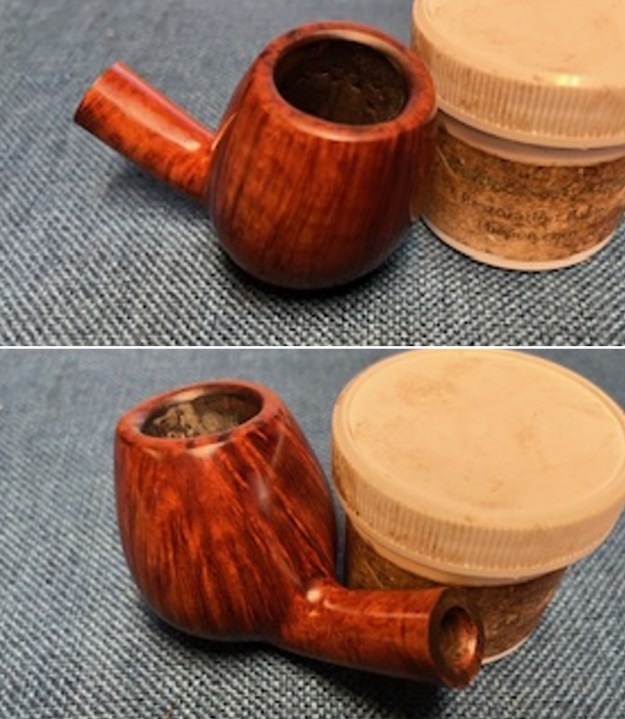
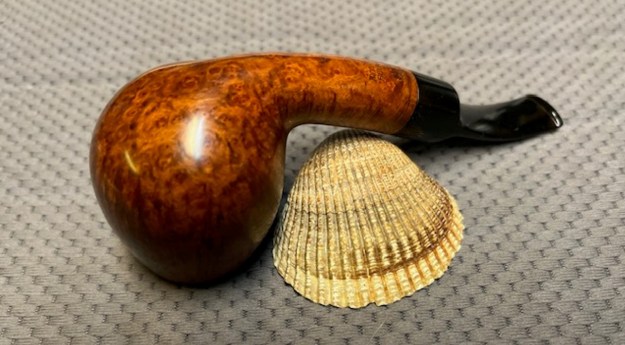
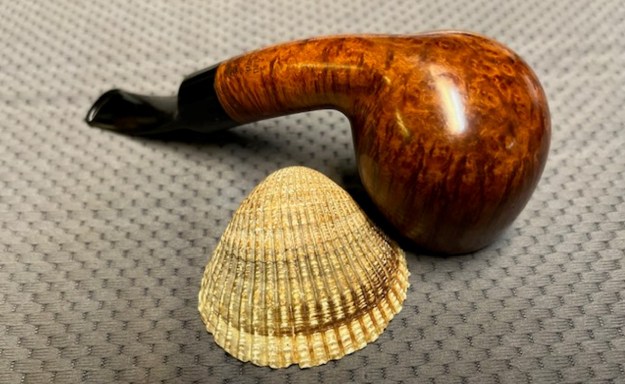
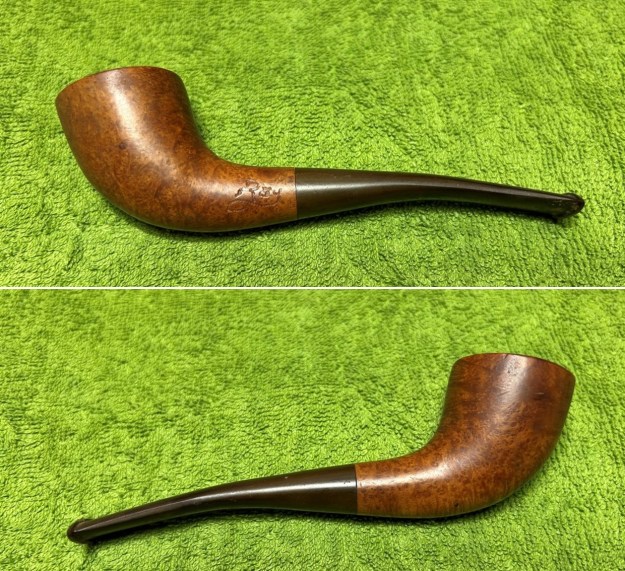
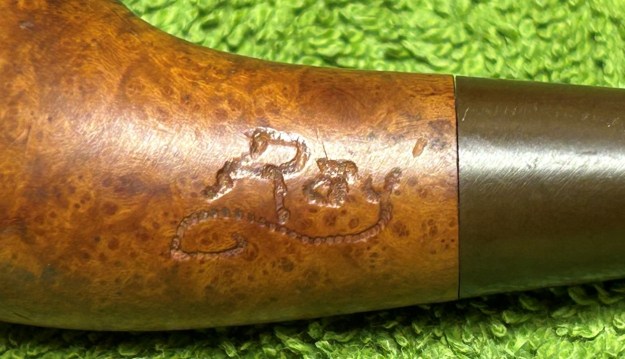
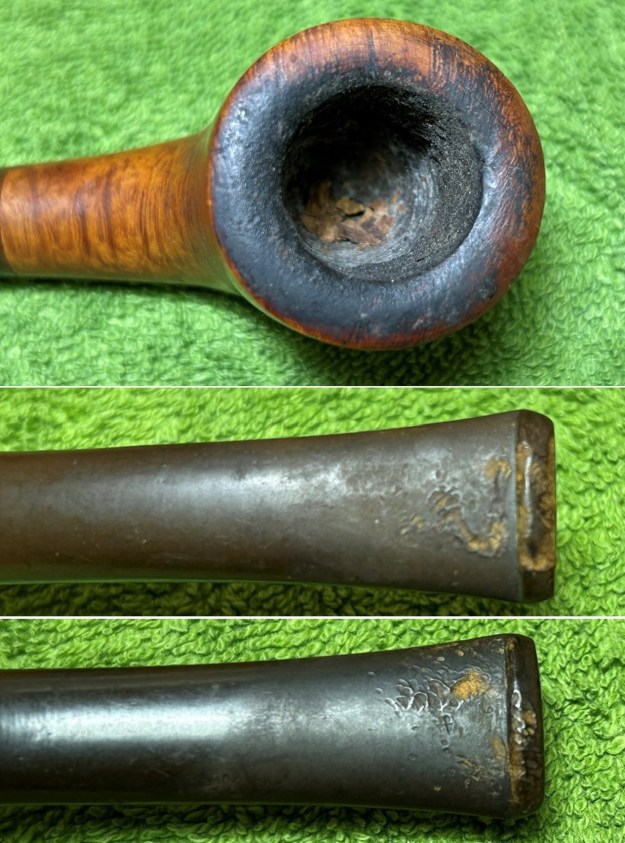
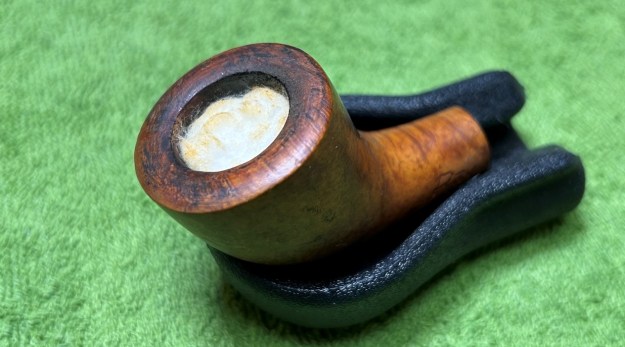
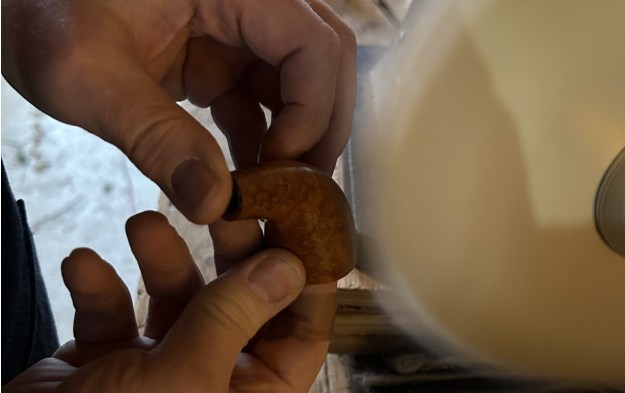
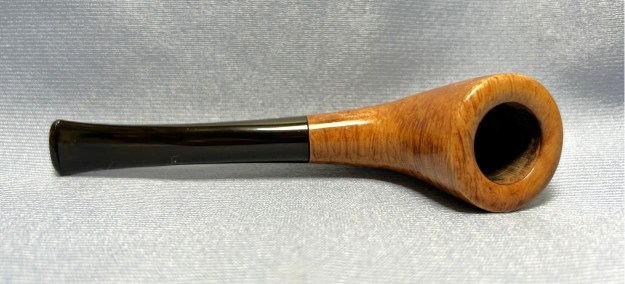
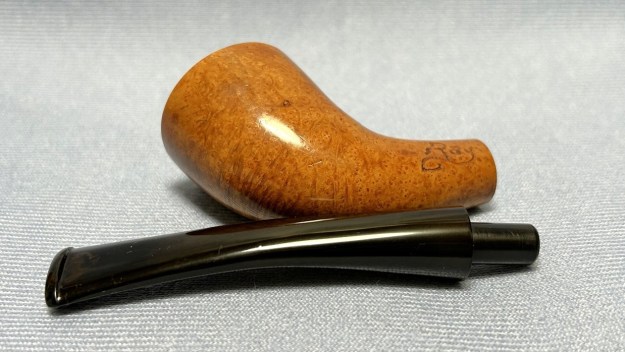
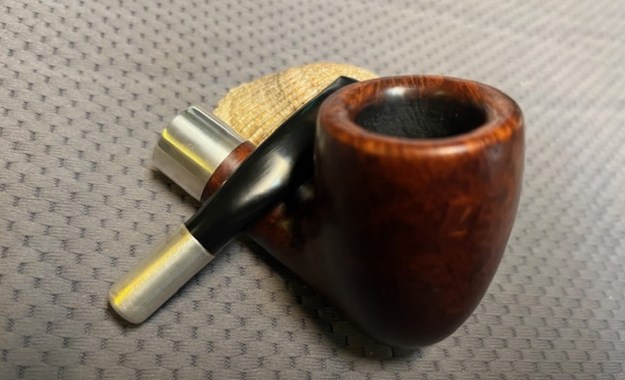
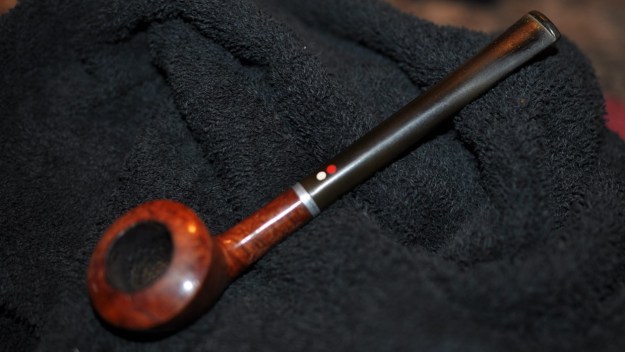
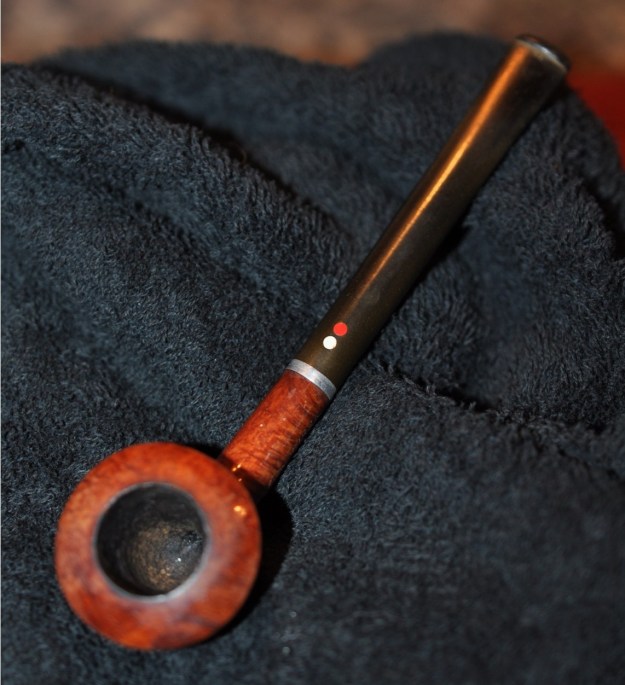
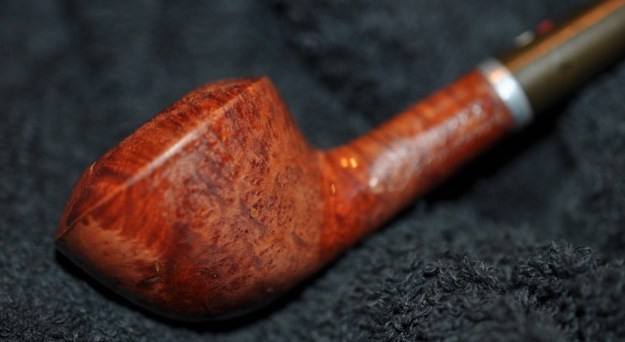
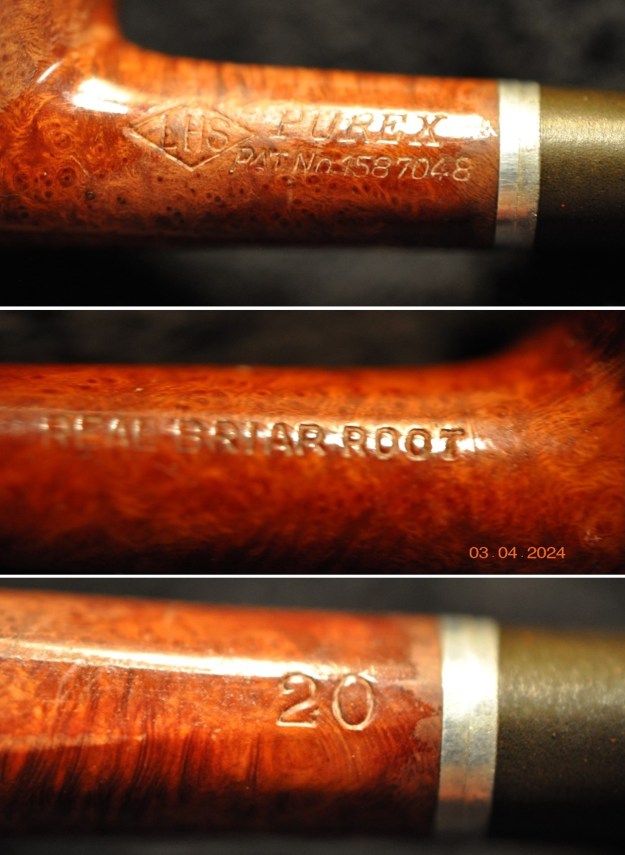
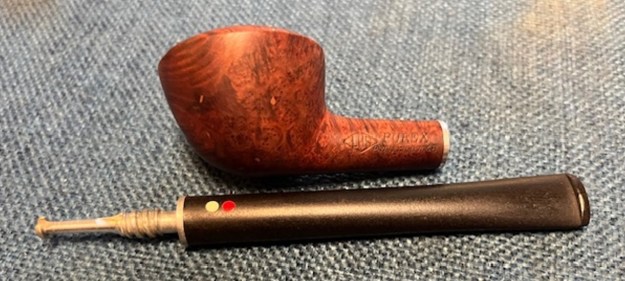
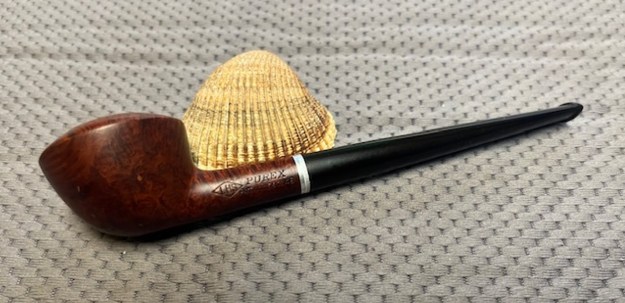
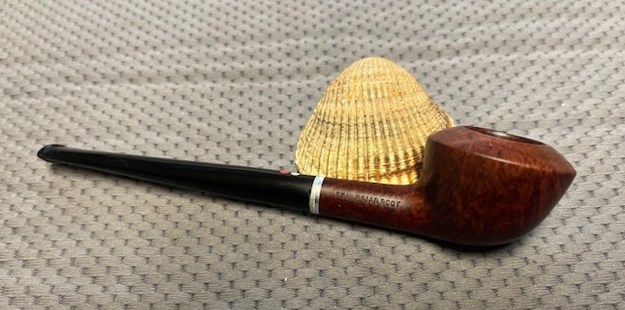
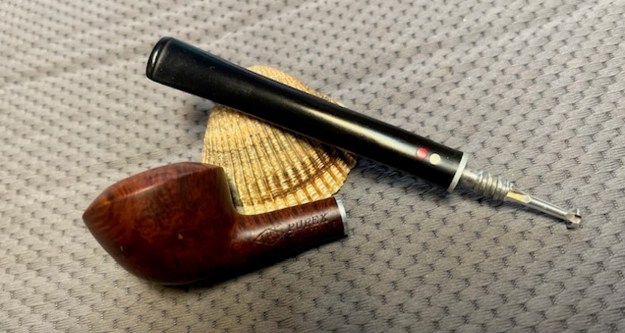
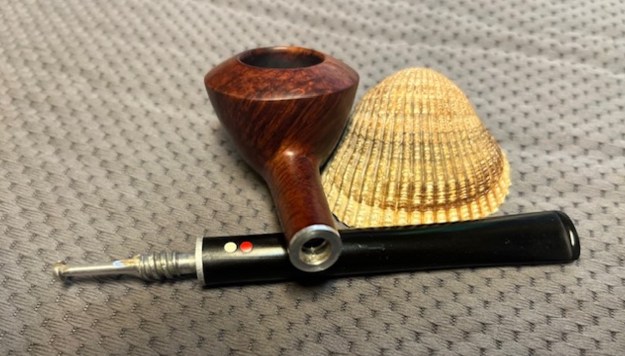
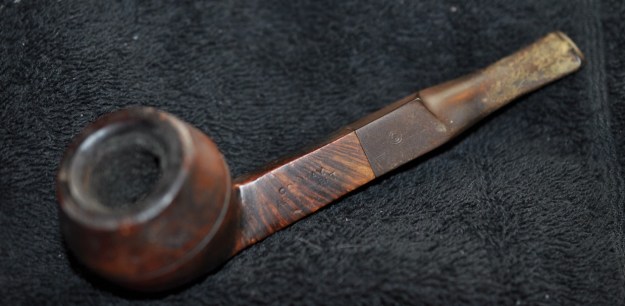
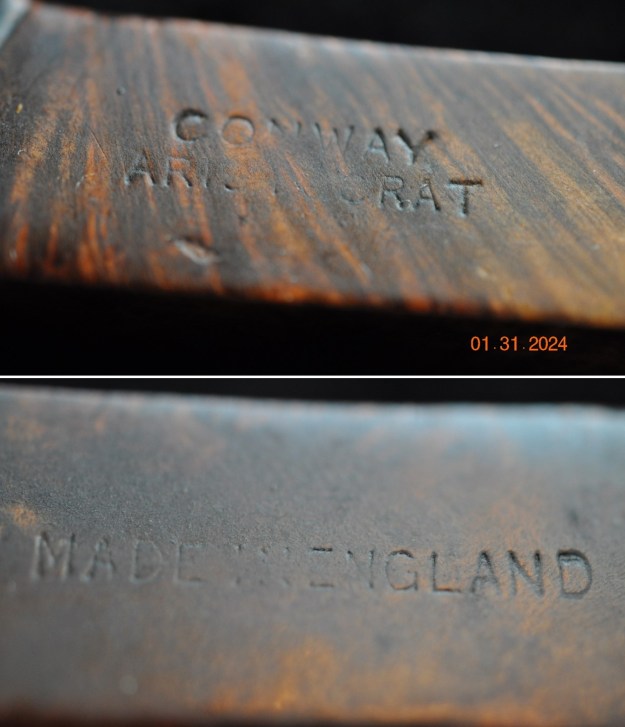
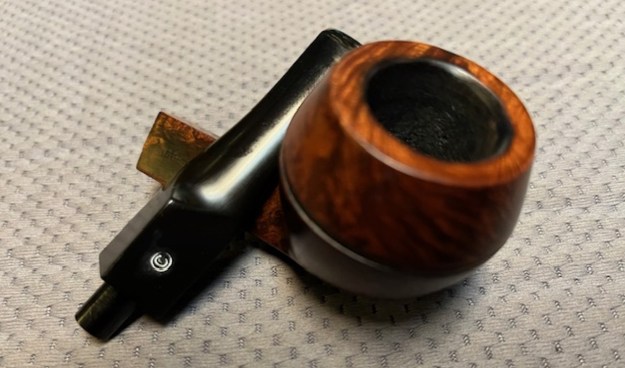
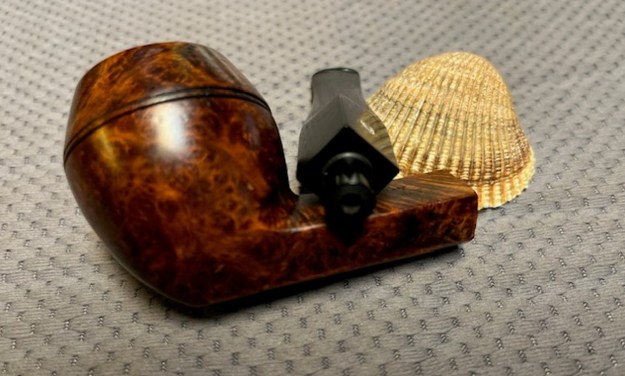
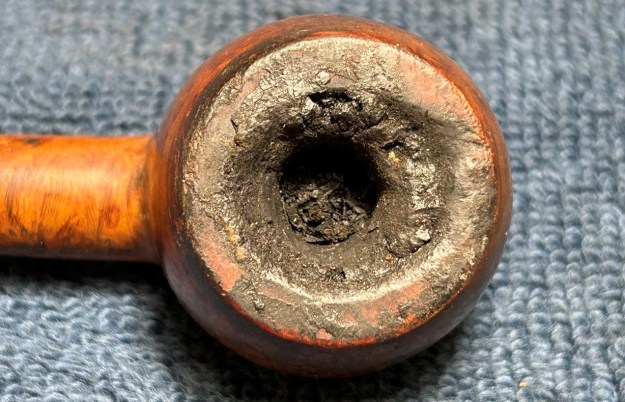
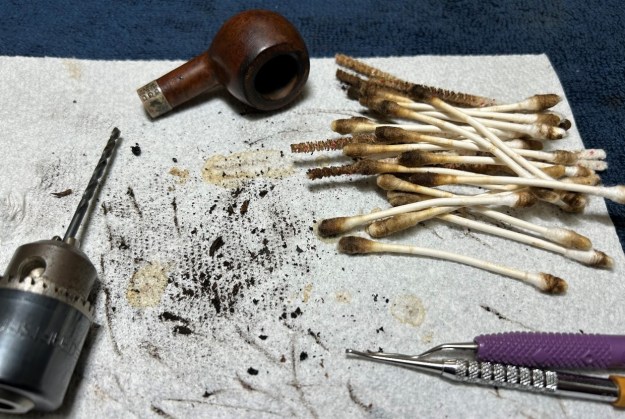
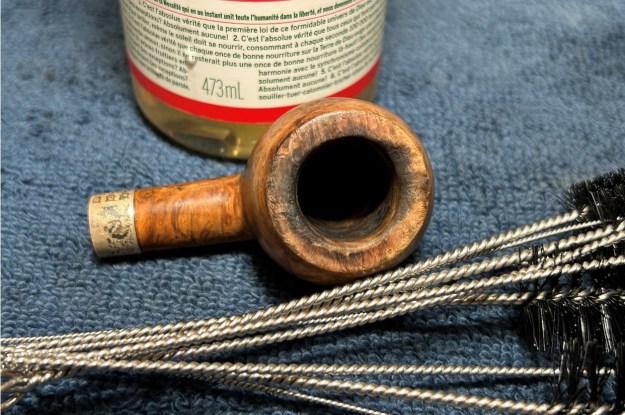
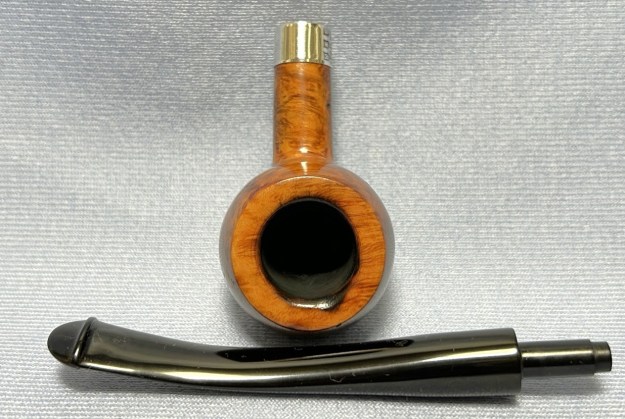
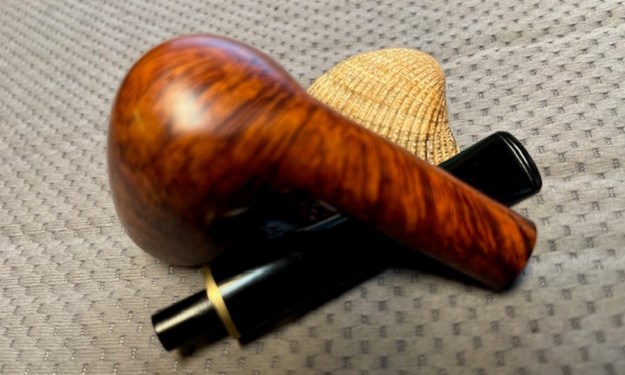
I entitled this blog “A Disappointing Mess…” because when I saw the stamp Connoisseur the brain dropped out and my wish was that this was an Ed Burak made pipe! Of course, it is not one of Ed’s pipes nor does it even look like one. However, in the heat of a pipe hunt it is easy to let the thrill of a find eclipse rational thought processes. It certainly did this time. When I got home and looked at the stamping on the pipe I knew I was probably dealing with an Italian made pipe for import to the USA. It really has all the marks of that including the Imported Briar stamp under the name. On the left side of the shank it is stamped Connoisseur [over] Imported Briar. On the underside of the shank at the shank/stem junction it is stamped Italy. The pipe really was a wreck and if I had been paying attention I probably would have left it in the antique mall where we stumbled across it. The finish on the bowl was a spotty, peeling varnish or perhaps worse and there were nicks and fills in the briar. The bowl had a heavy cake and the rim top was covered in lava. The outer edges of the bowl were a bit beat up and the inner edge was a mystery under the lava. The stem was dirty, oxidized and calcified and had deep tooth marks and chatter on the button surface and ahead of the button on both sides. Here are some photos I took before I started the cleanup.
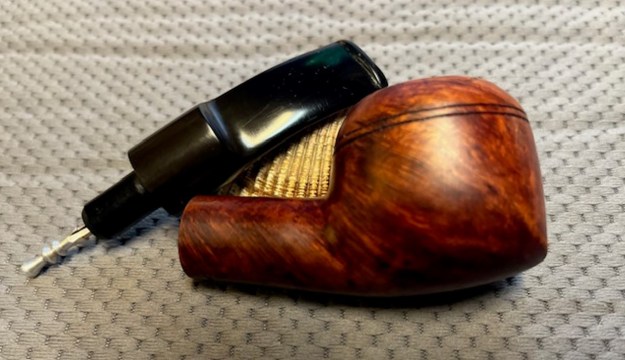
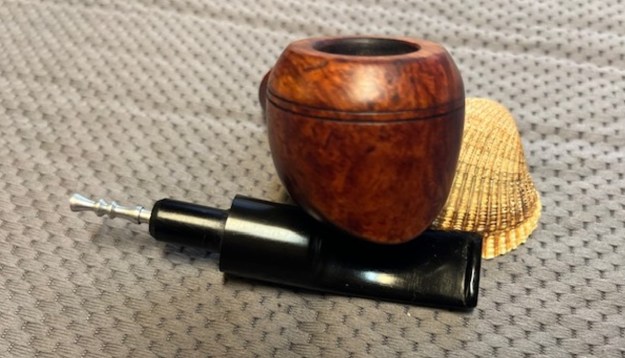
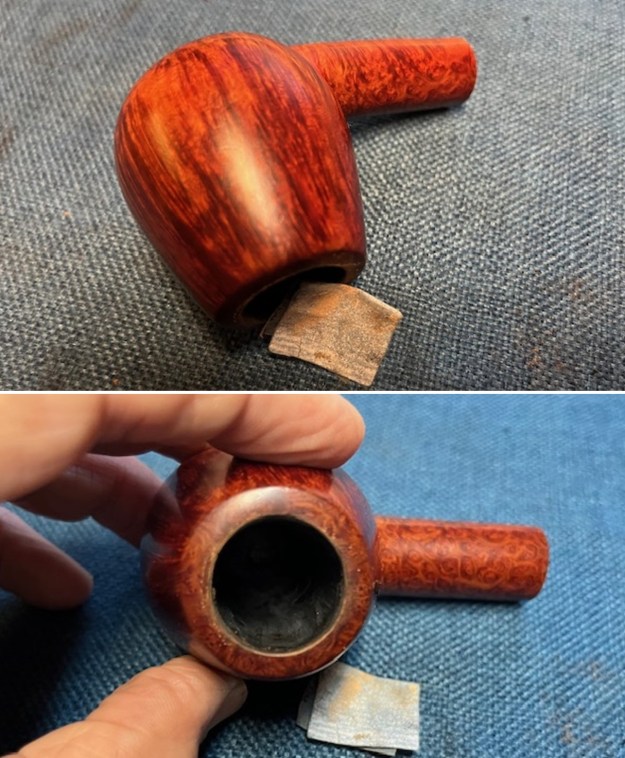
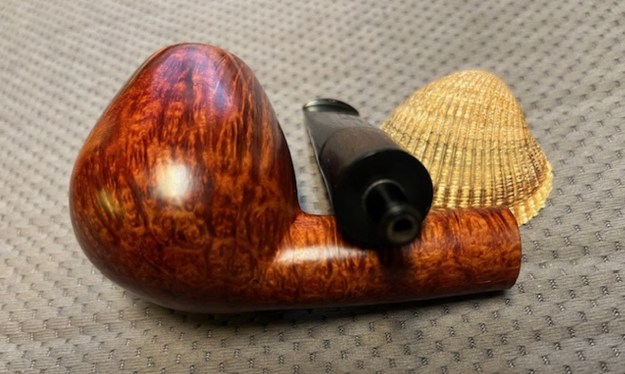
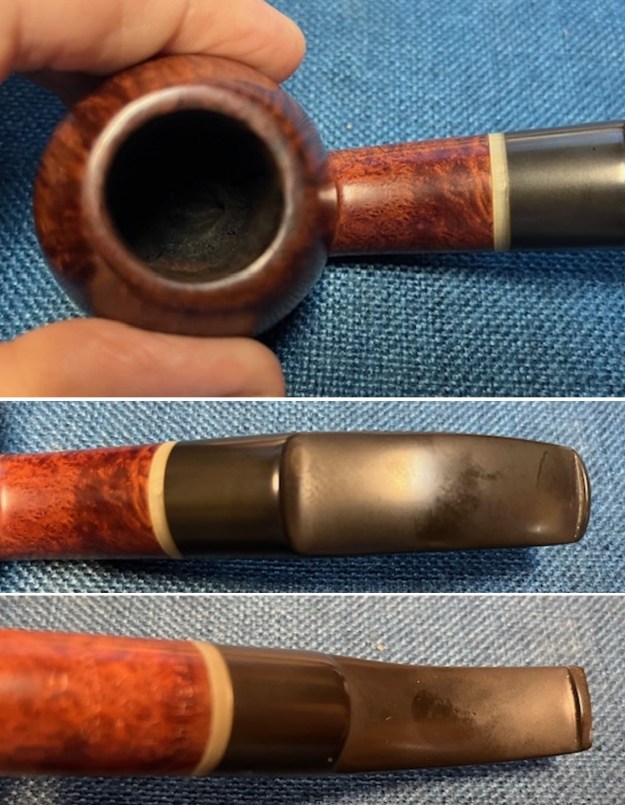
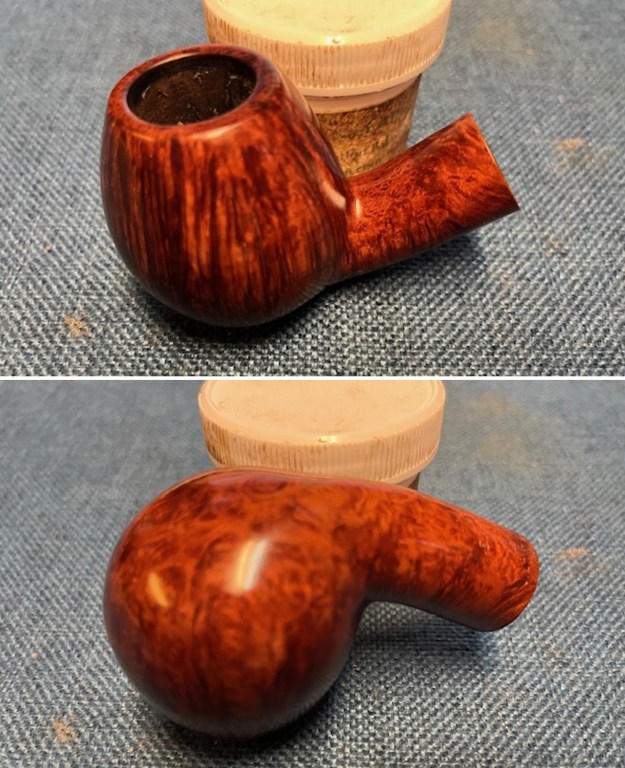
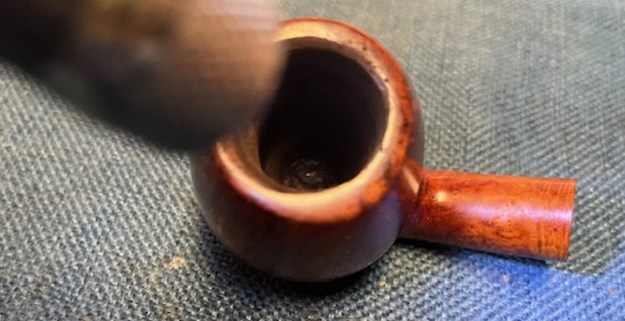
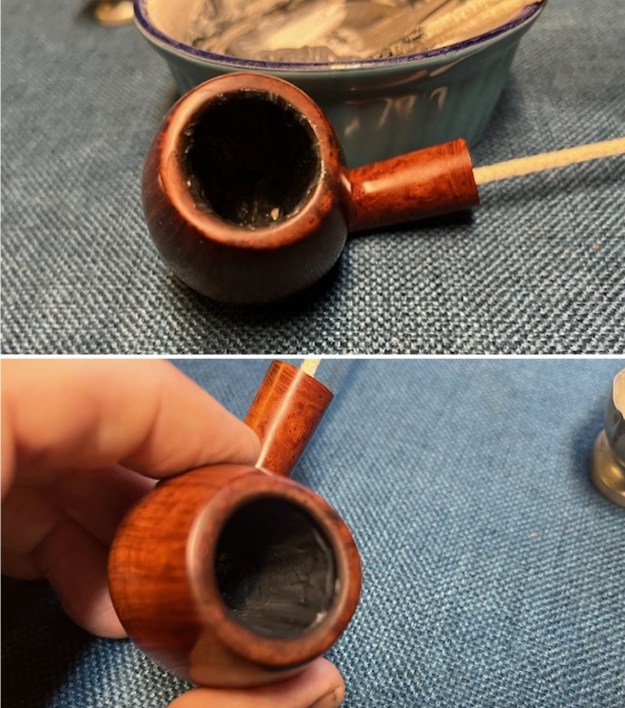
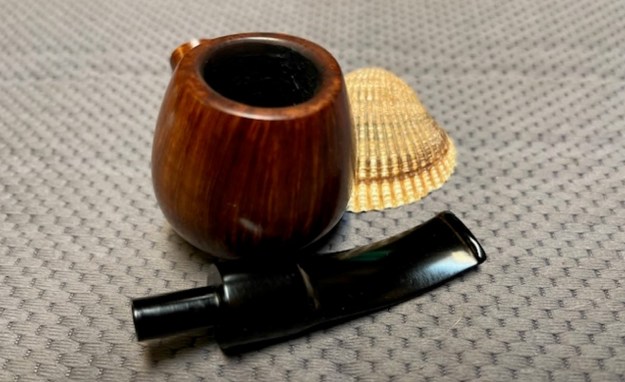
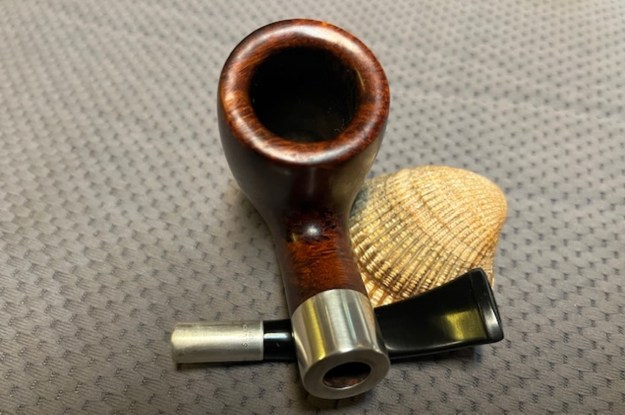
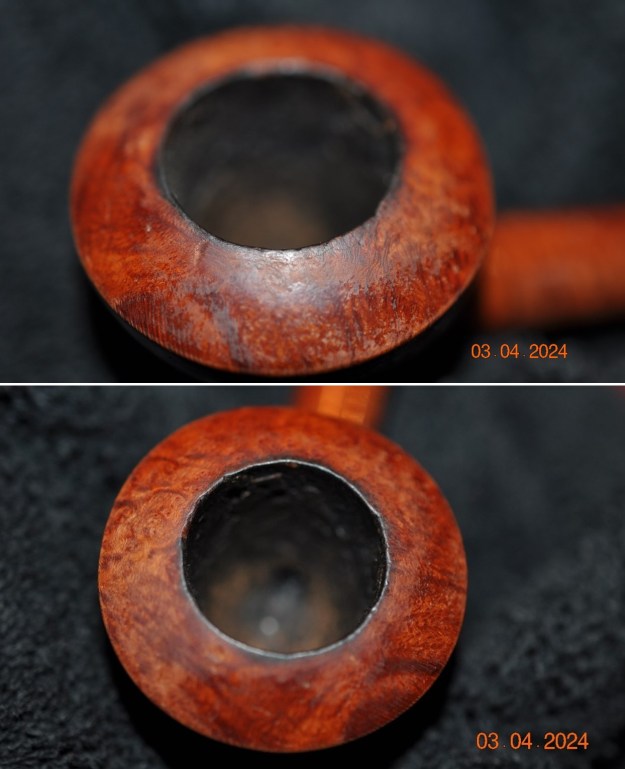
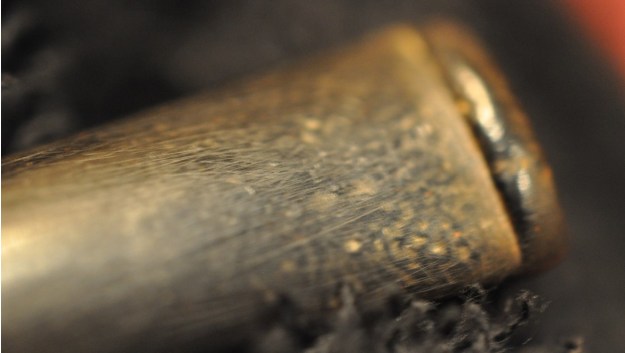
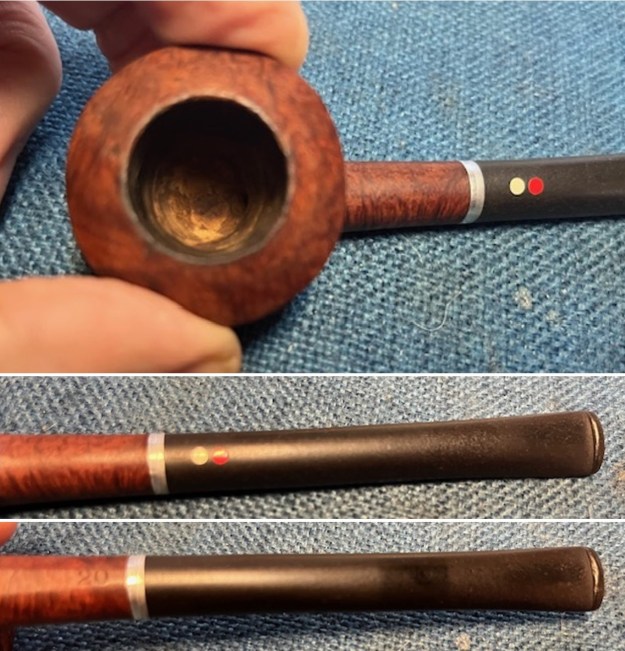
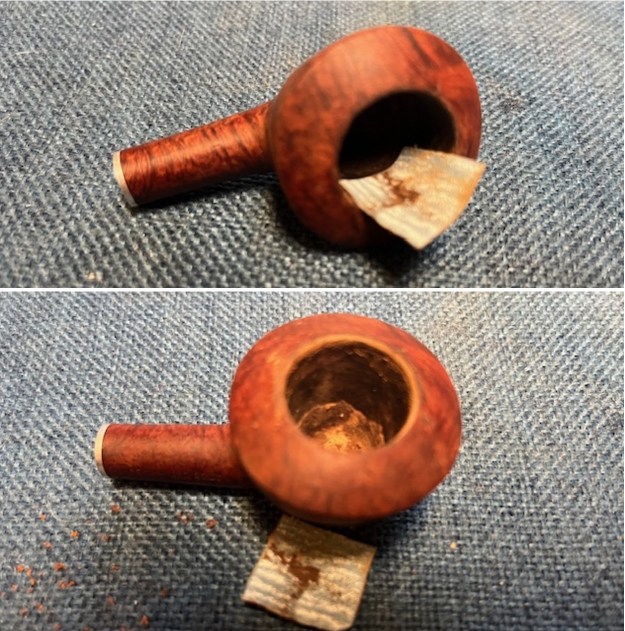
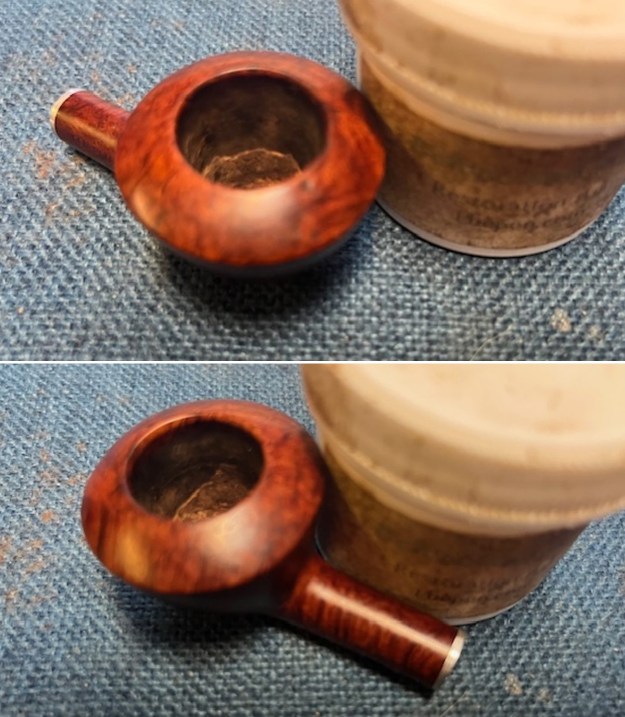
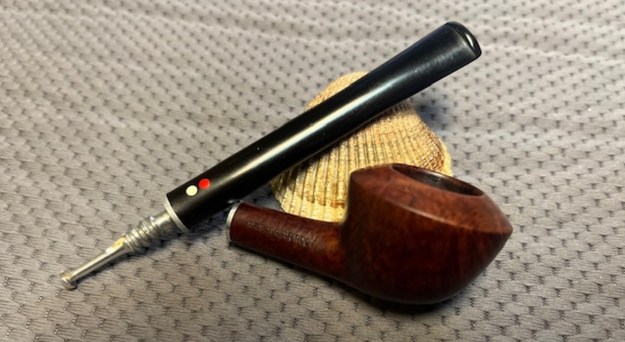
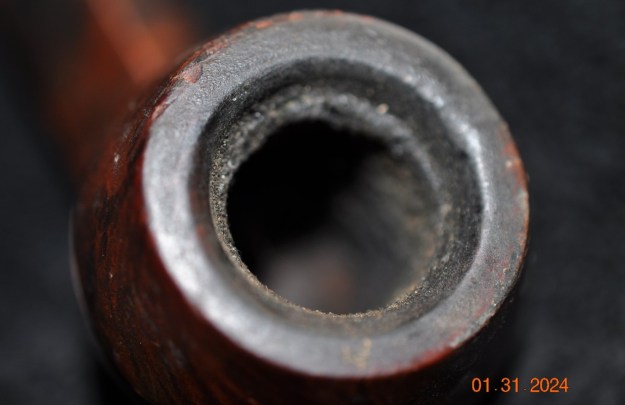
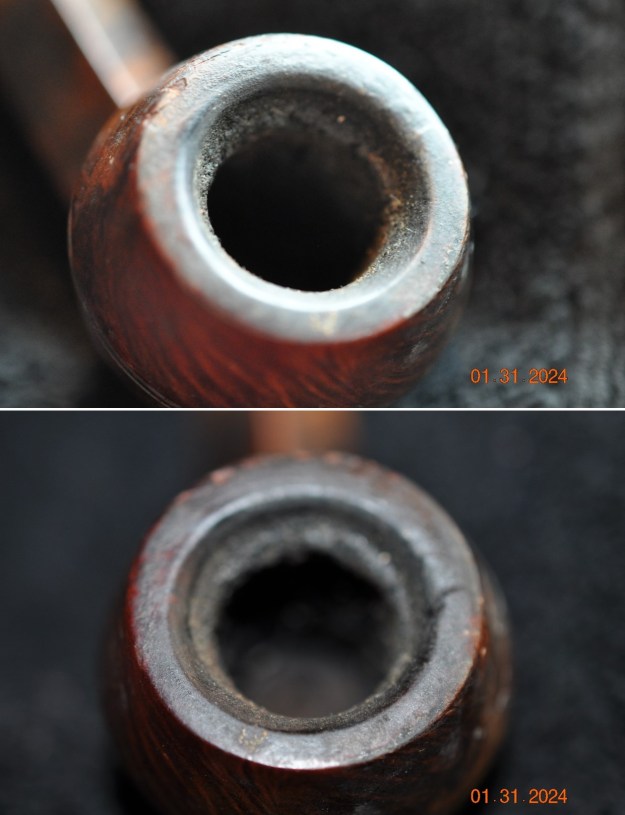
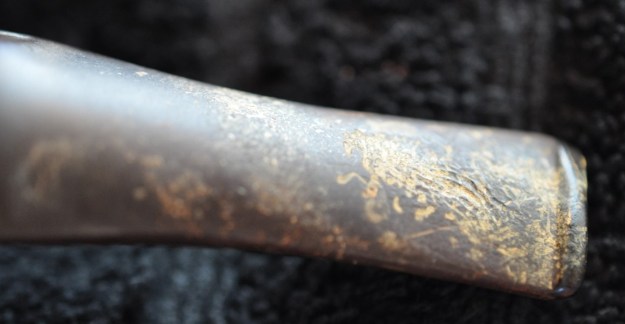
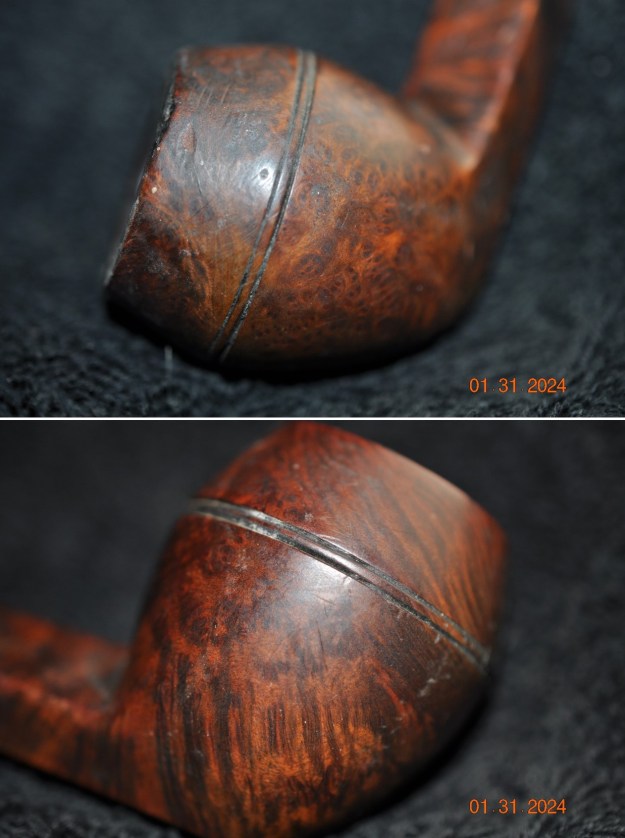
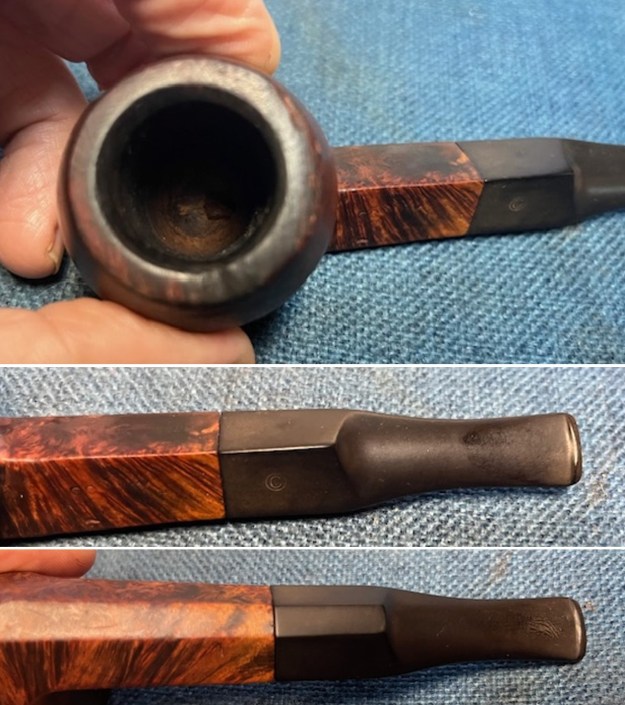
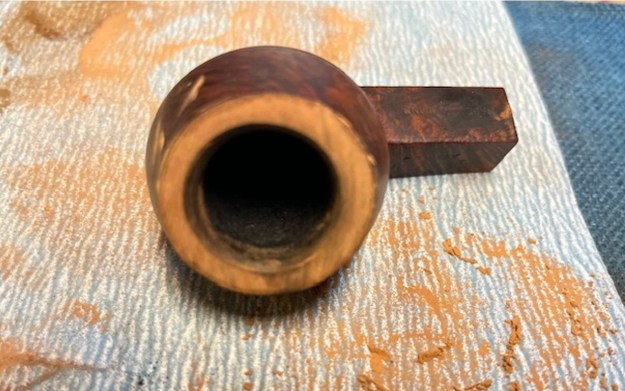
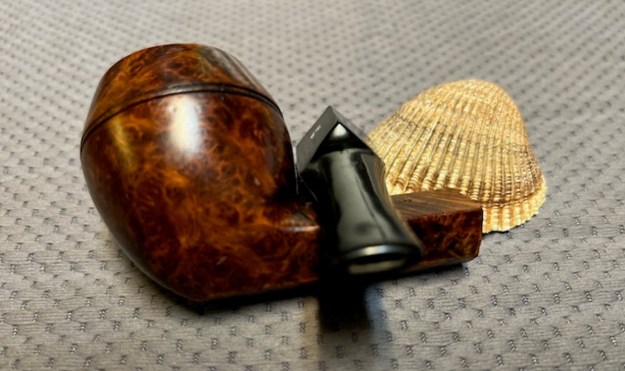
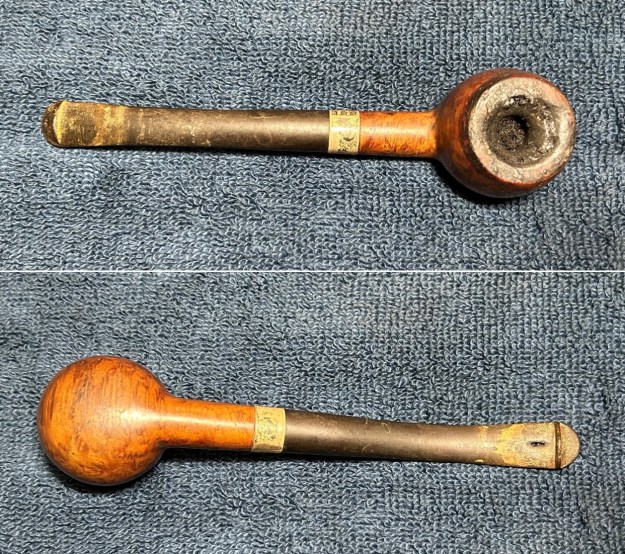
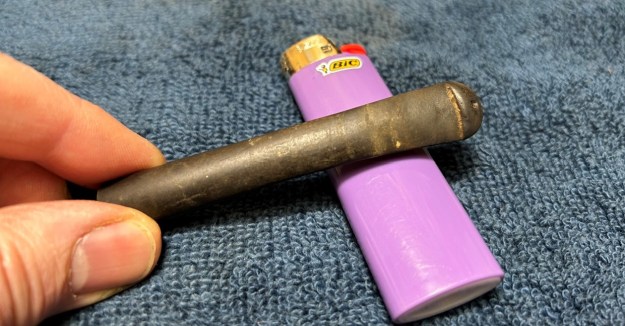
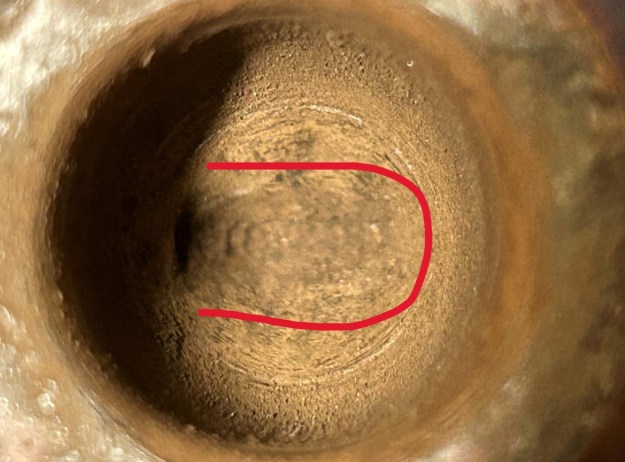
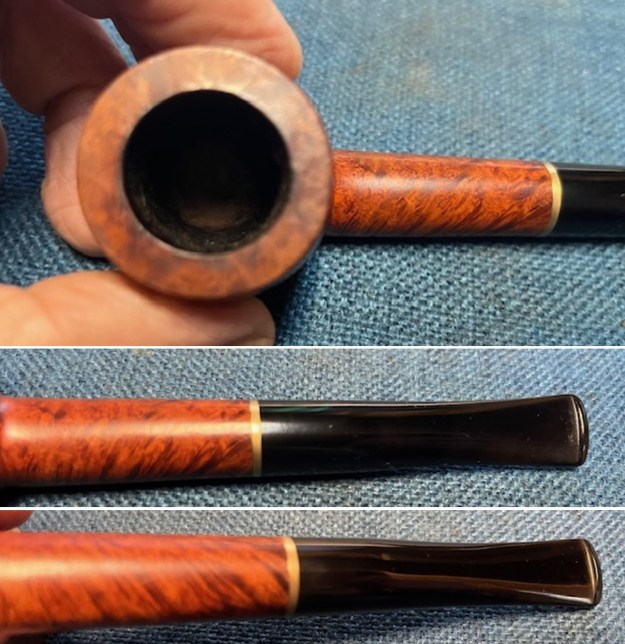
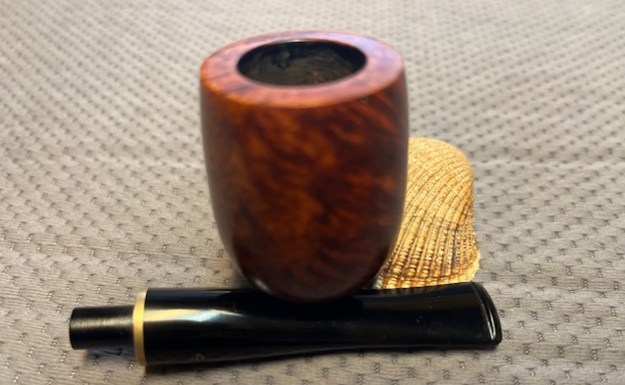
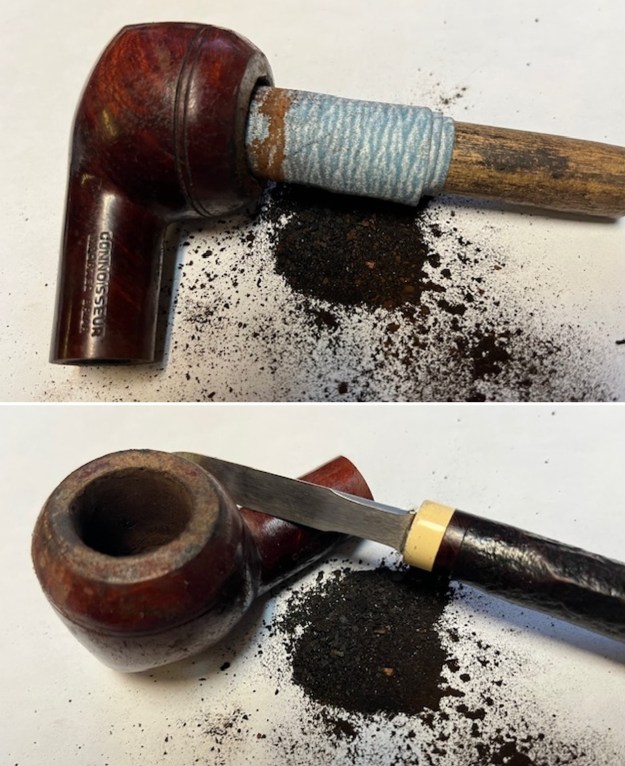
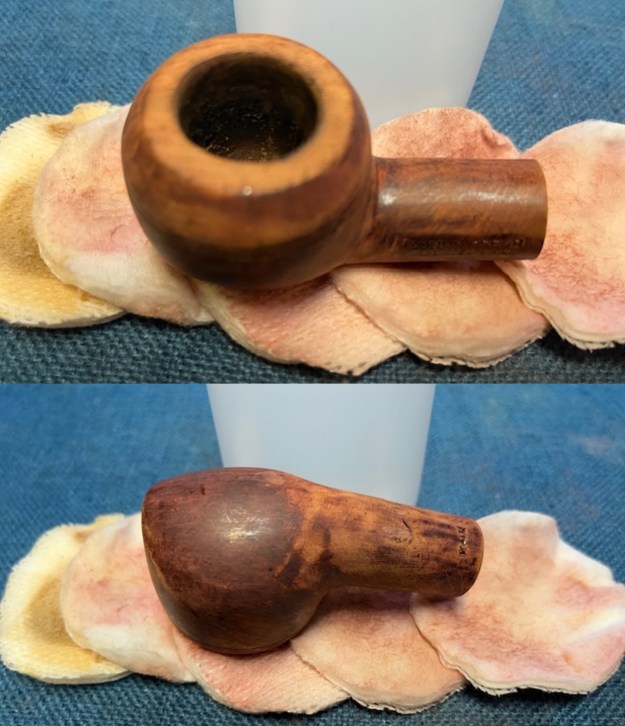
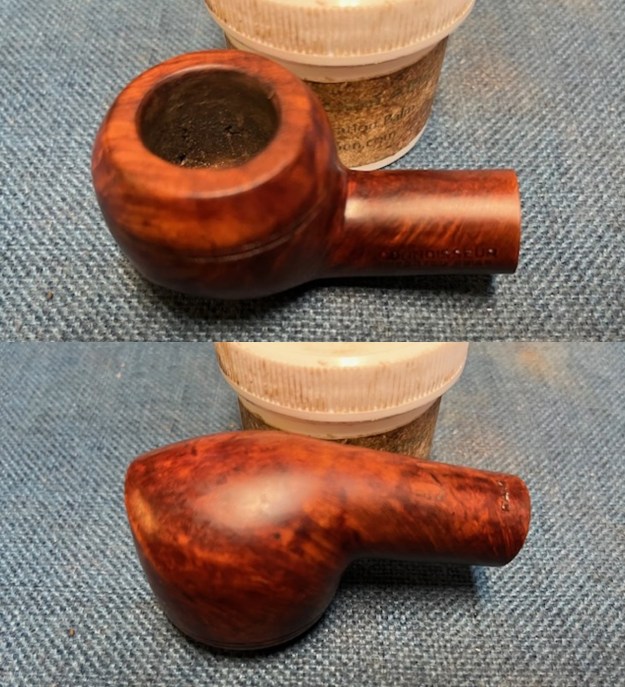
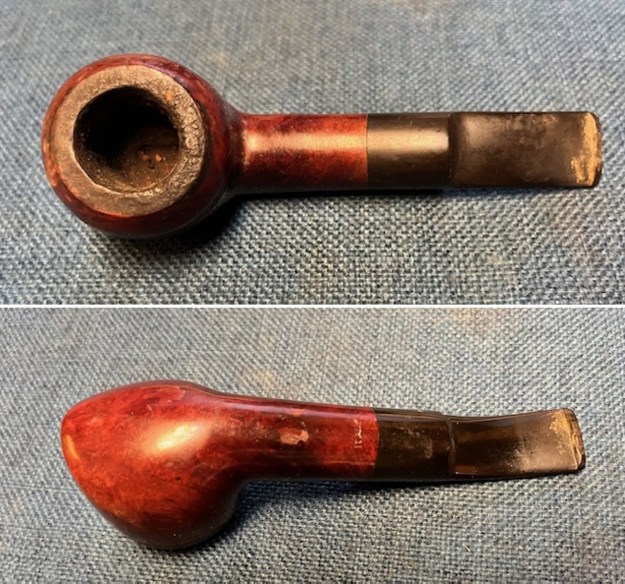 I took a photo of the stem surfaces and the bowl and rim to give a sense of condition of the pipe. You can see the thick cake in bowl and the lava overflow on the edges and rim top of the bowl. It is hard to know if there is any damage as the cake and lava is quite thick. The stem surface is very dirty and you can see the deep tooth marks and chatter covered by the dirt and debris.
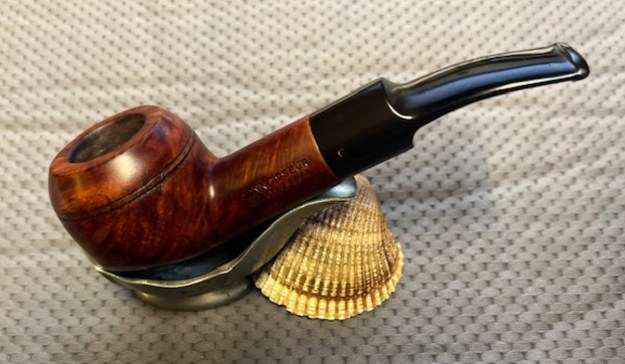
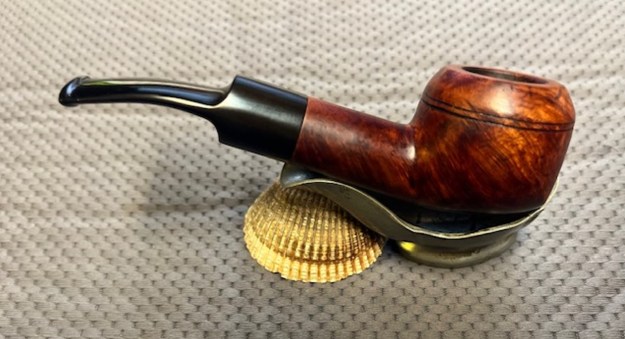
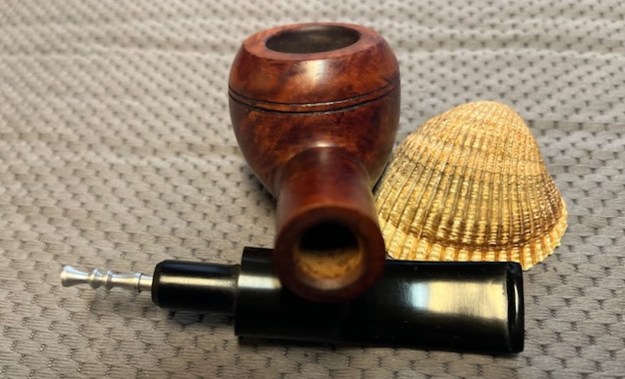
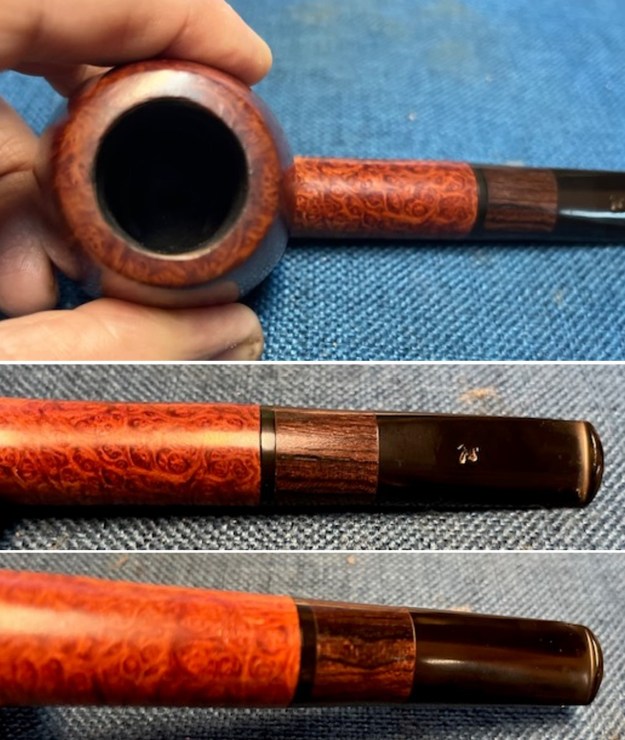
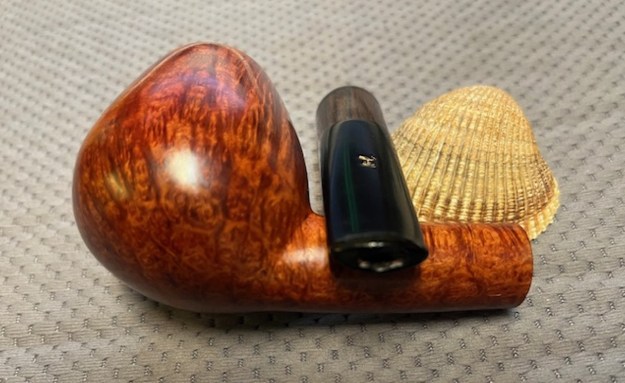
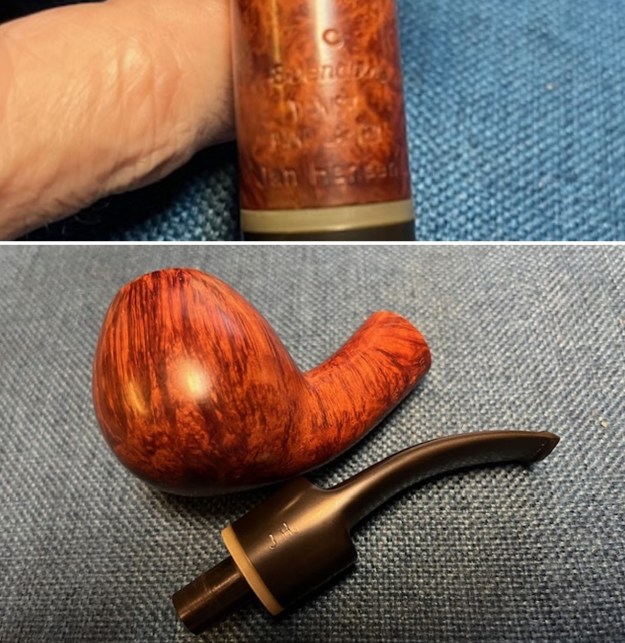
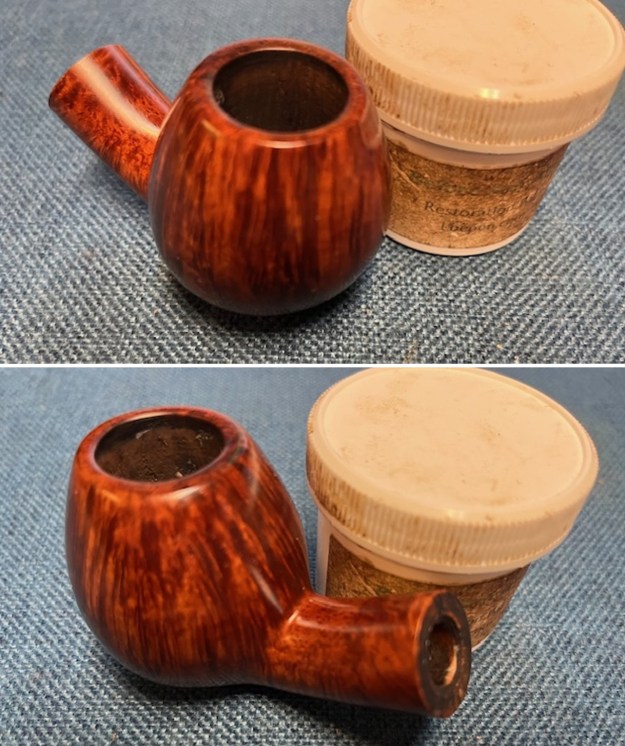
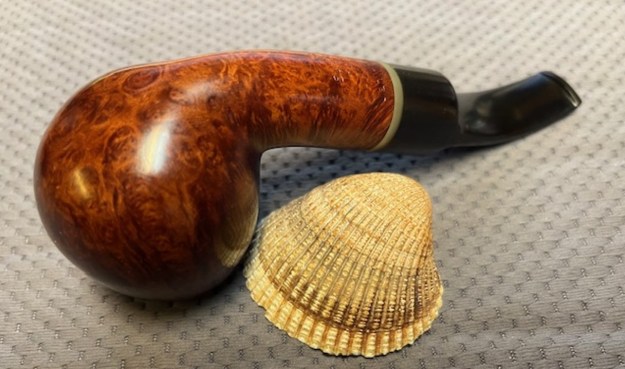
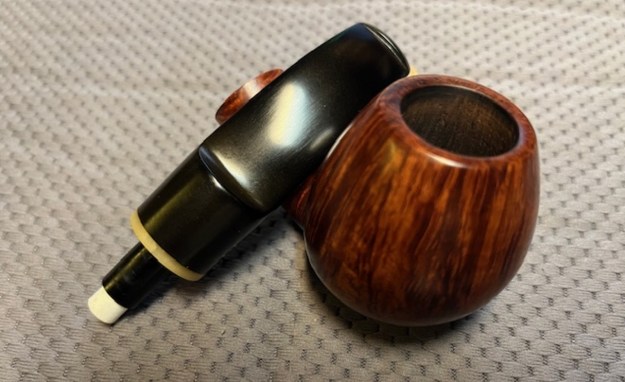
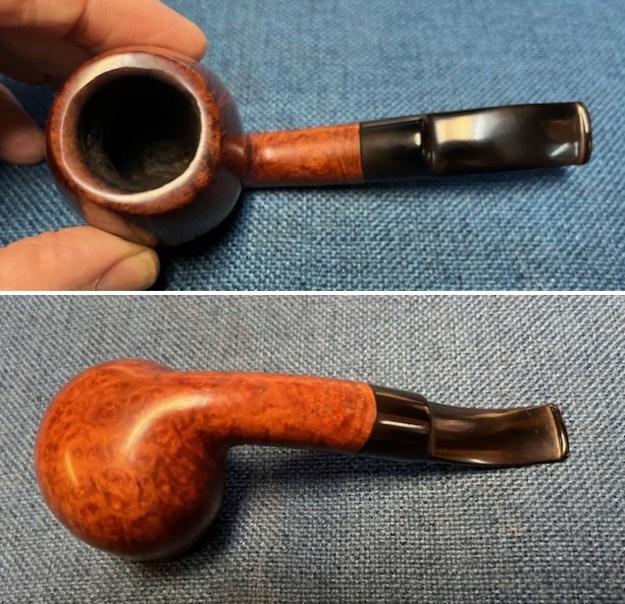
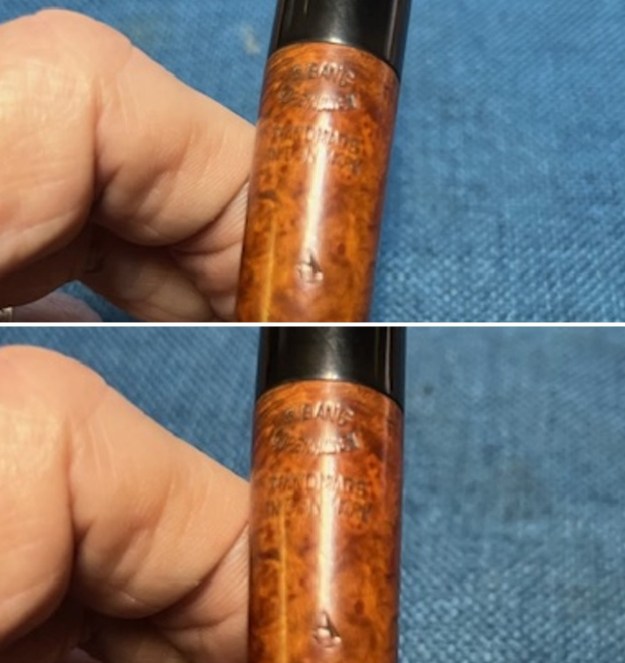
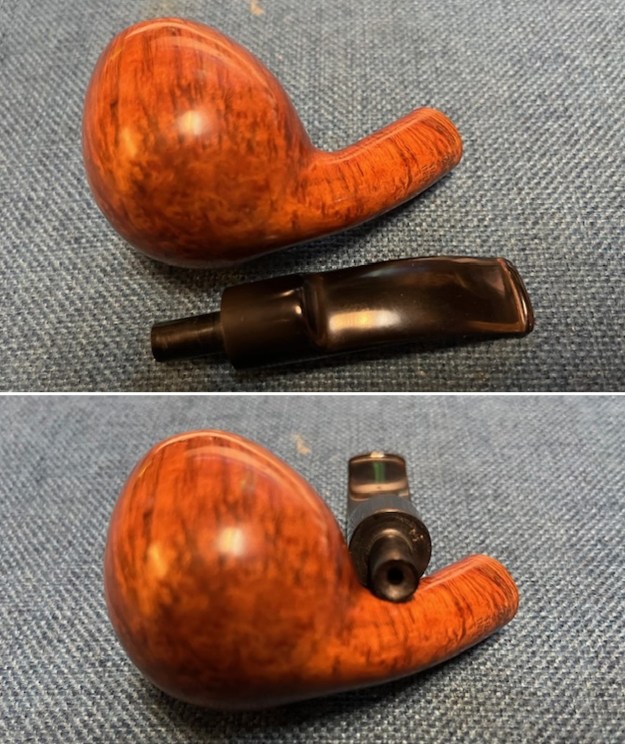
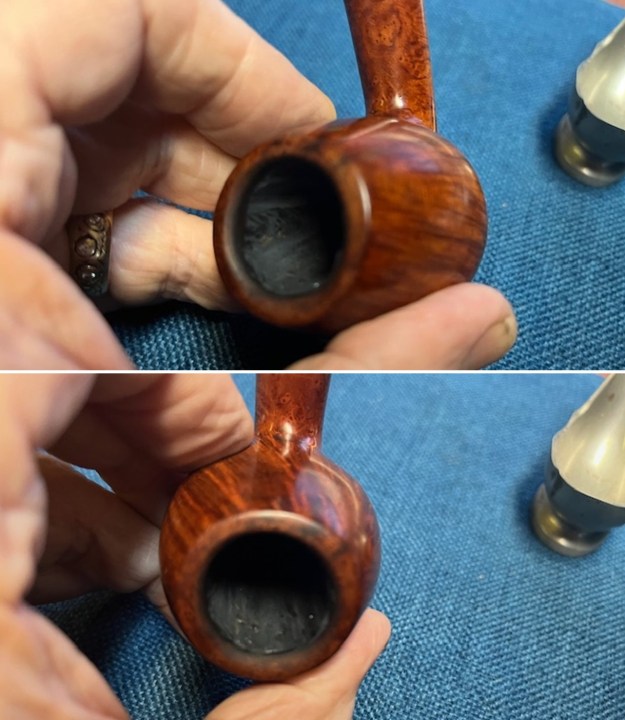
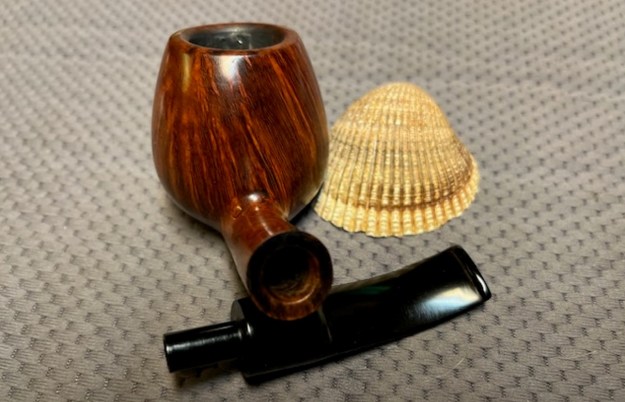
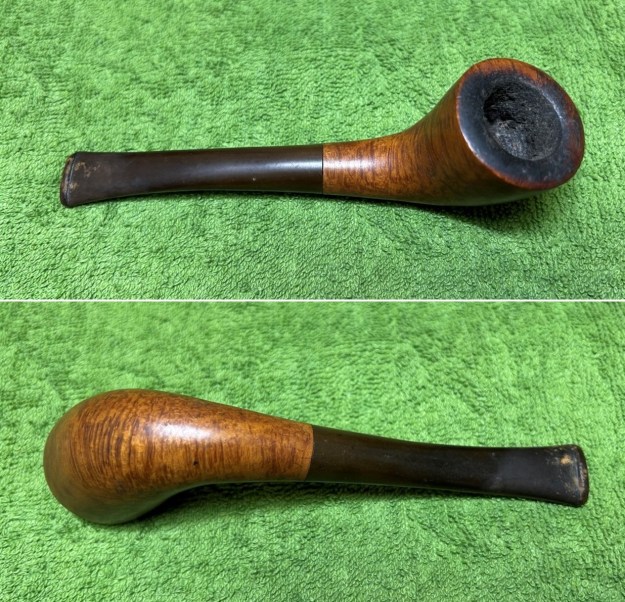
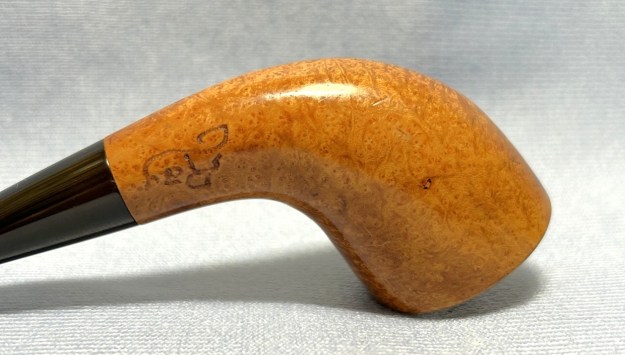
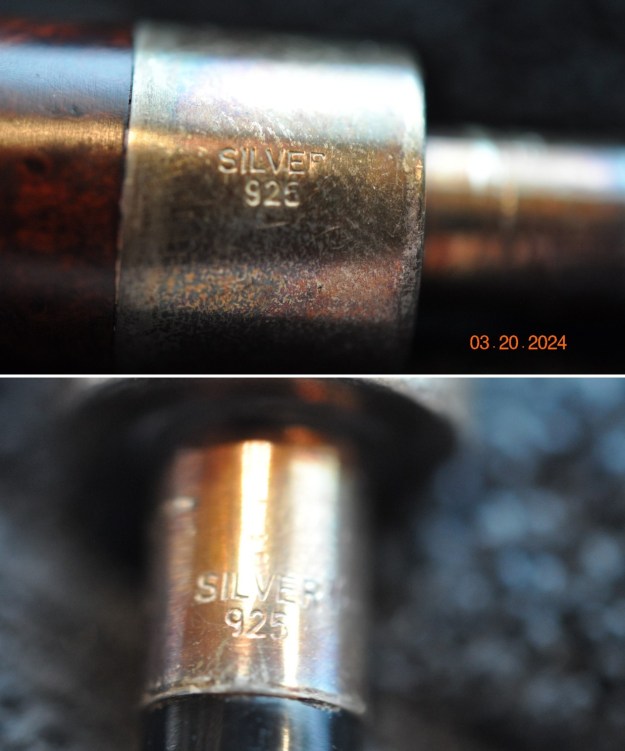
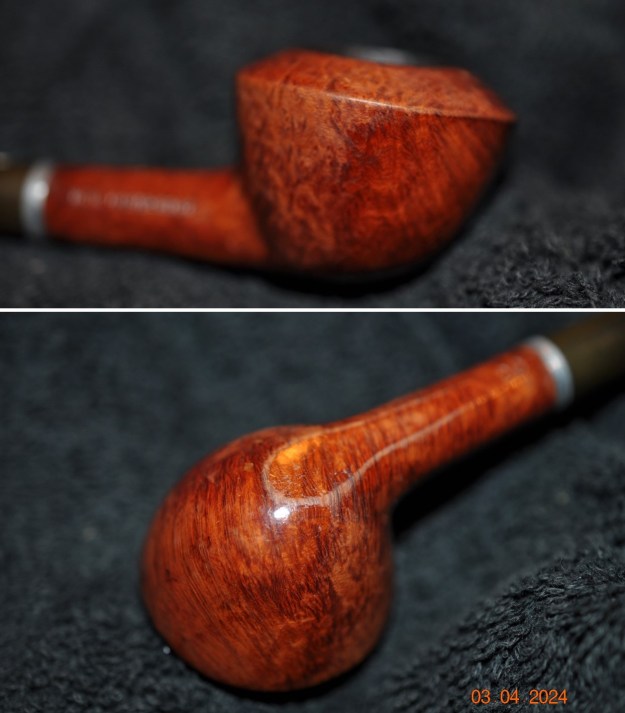
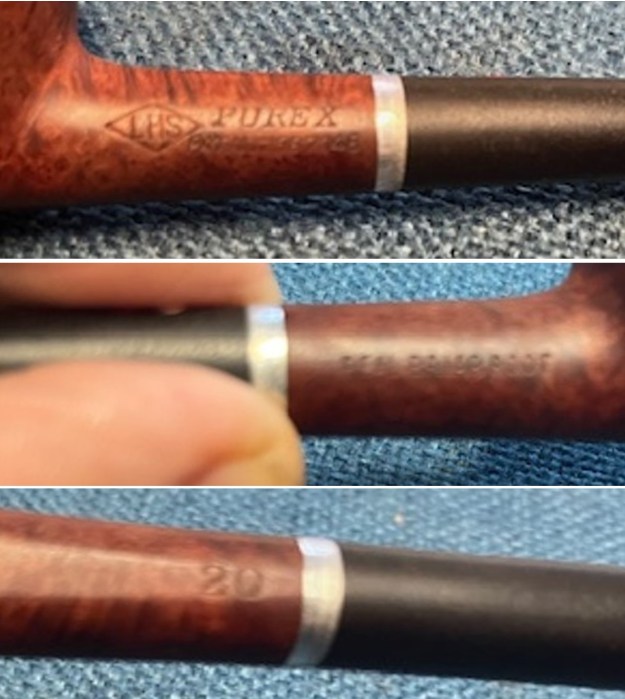
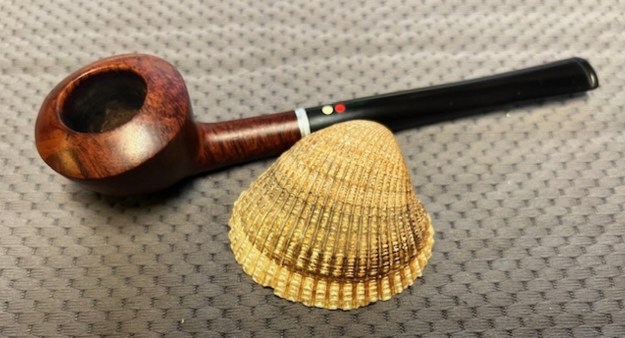
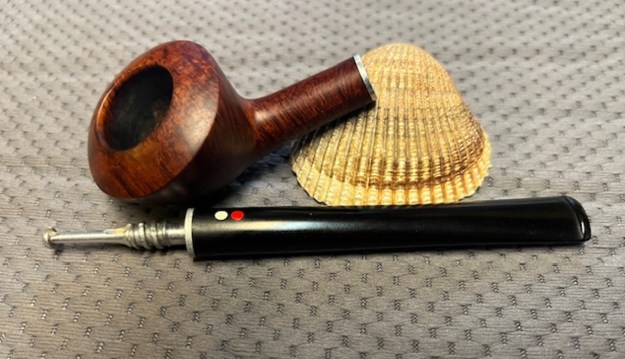
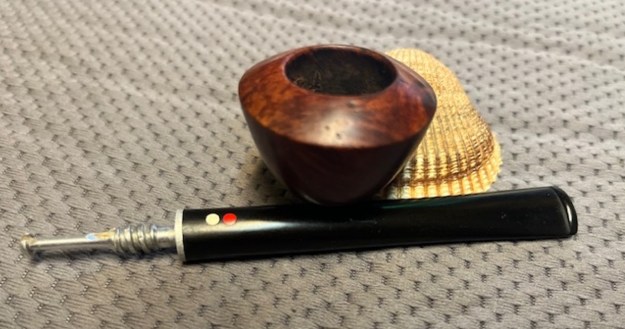
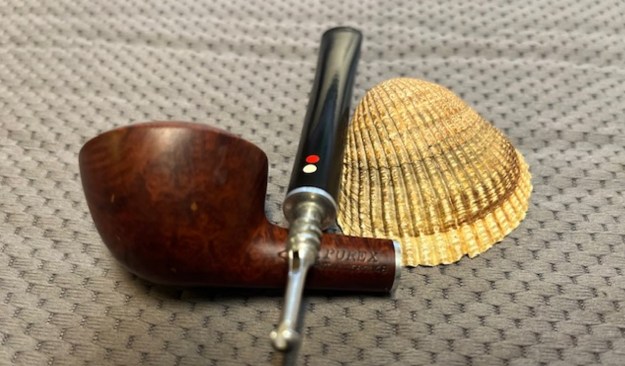
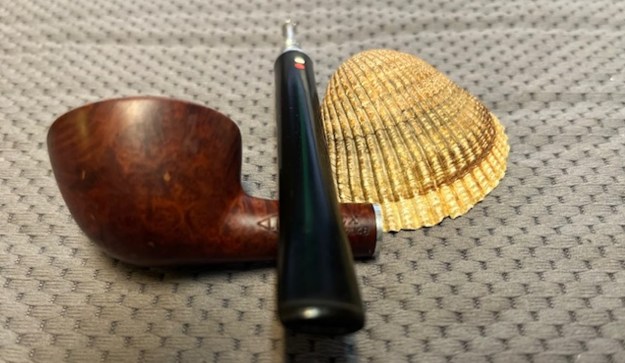
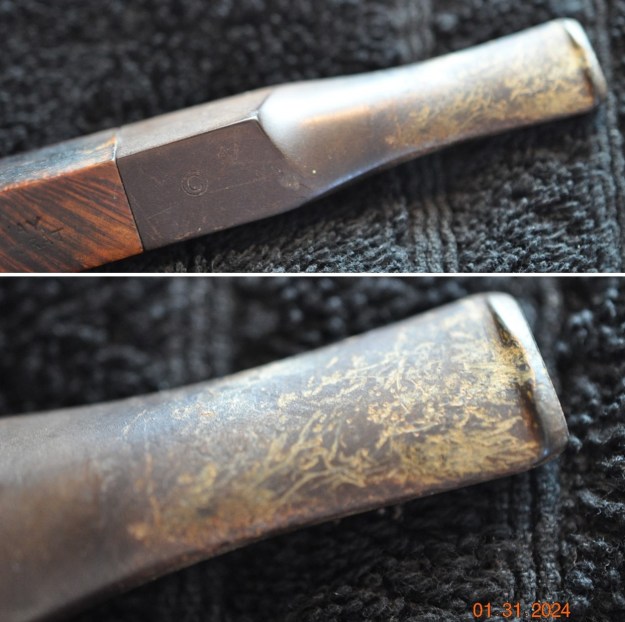
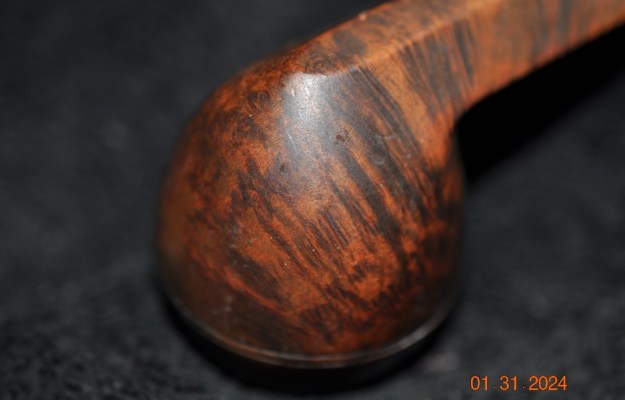
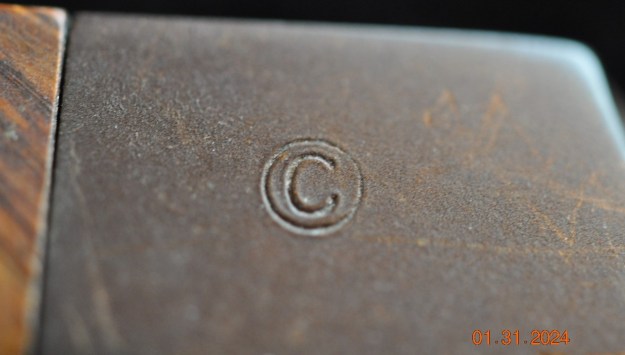
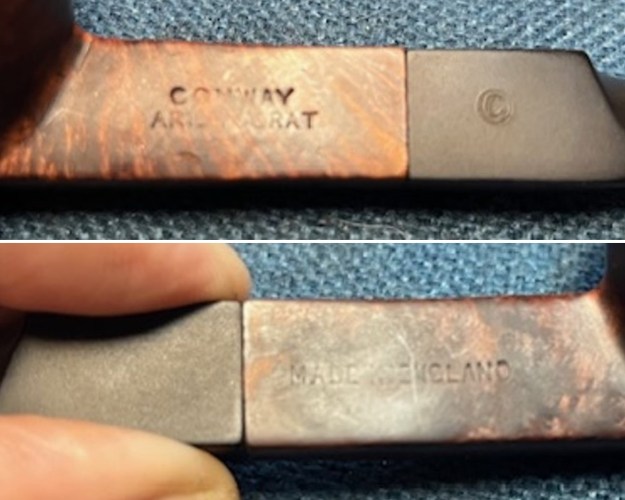
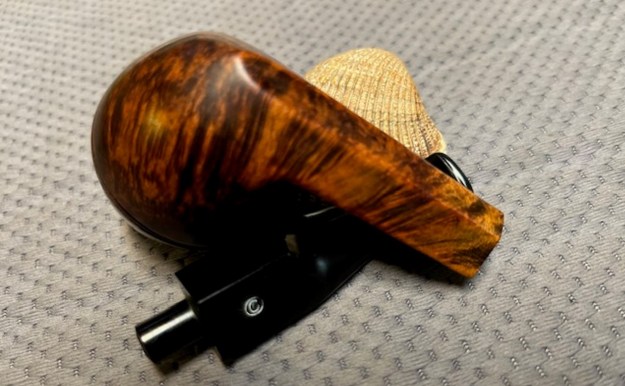
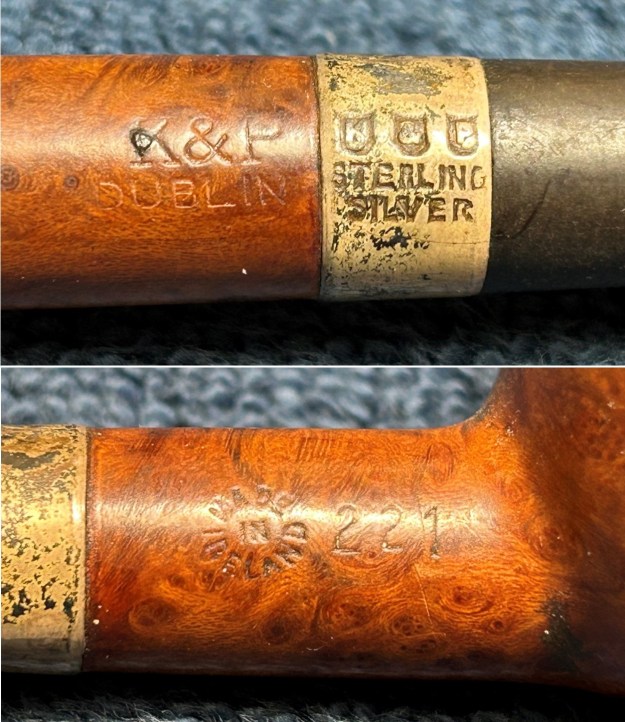
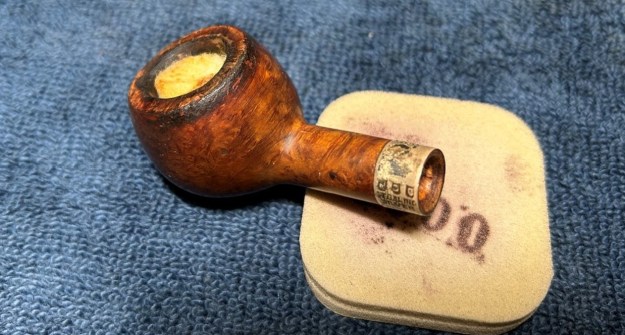
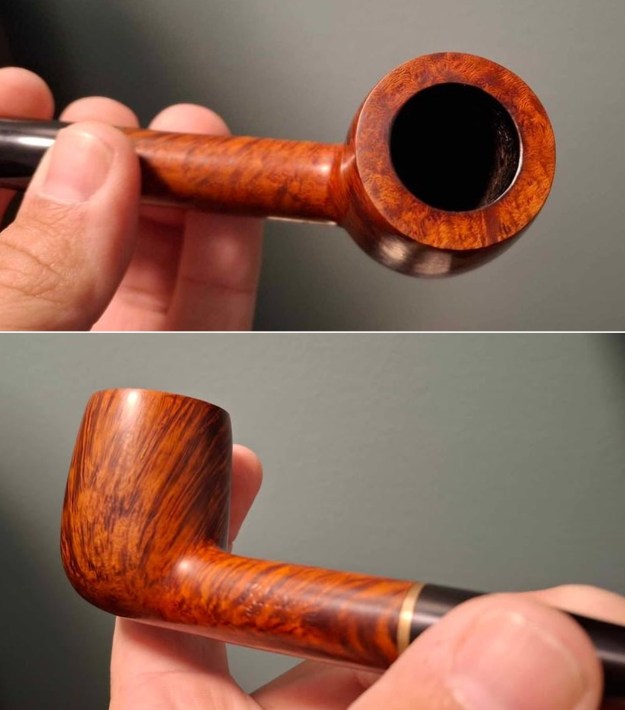
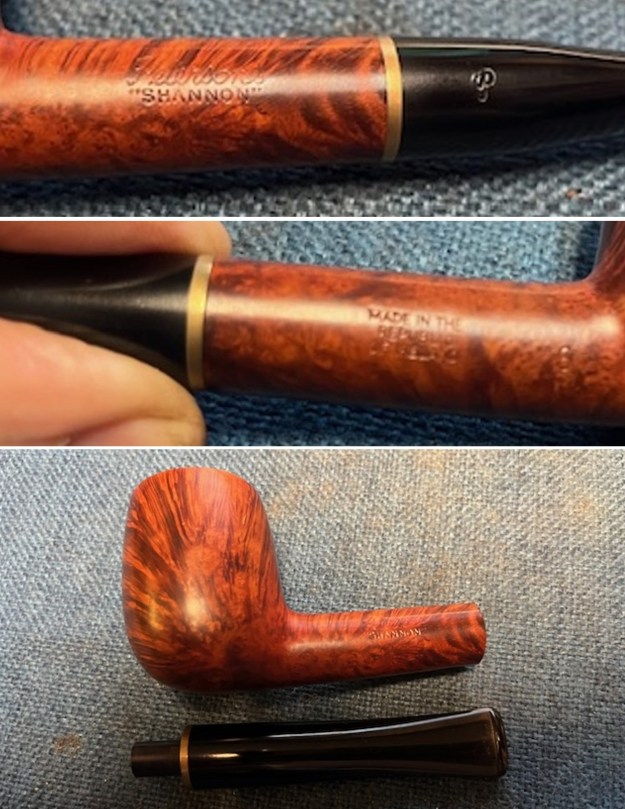
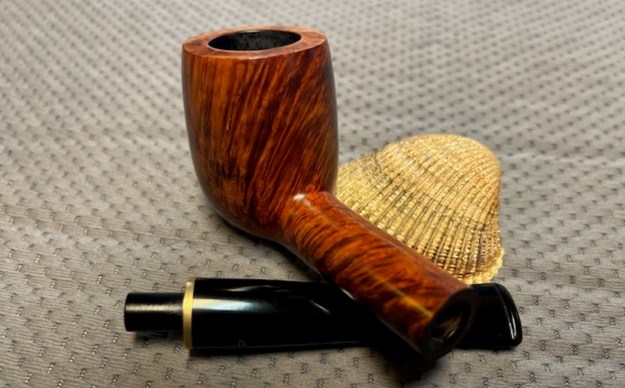
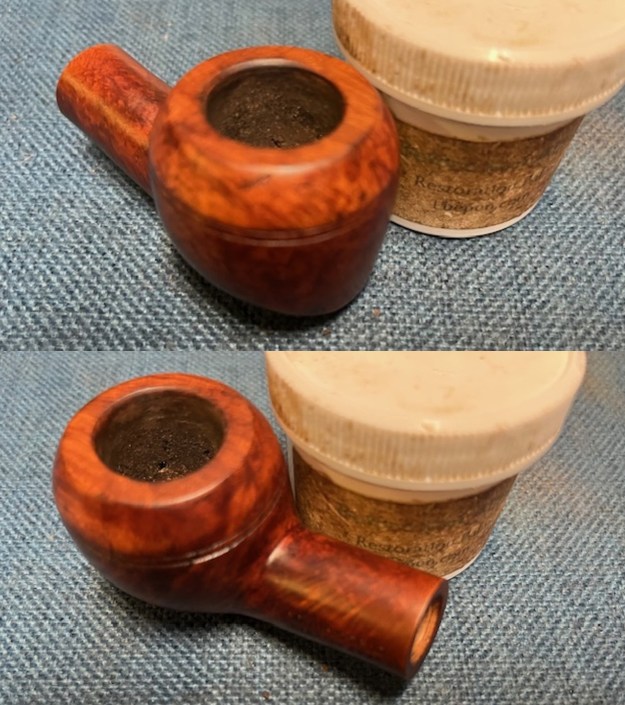
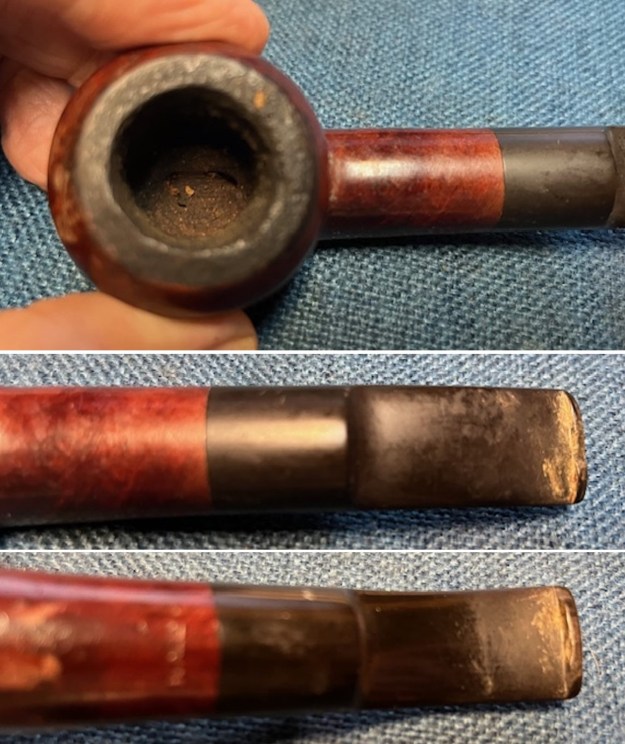 I took photos of the stamping on the sides of the shank. It is clear and readable on all the shank sides as noted above. It also seems that there is a remnant of the C stamp on the side of the stem. It is not deep in vulcanite surface. I also took a photo of the bowl with the stem removed. It is a great looking pipe.
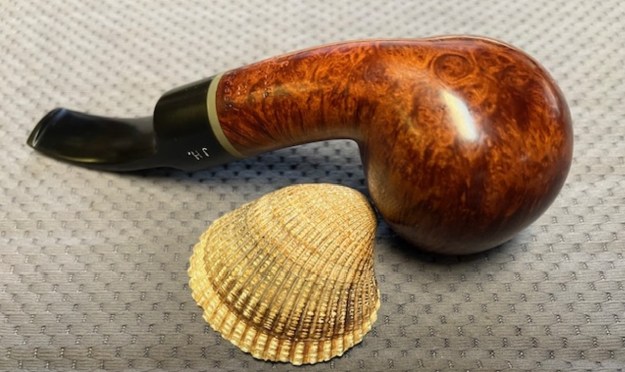
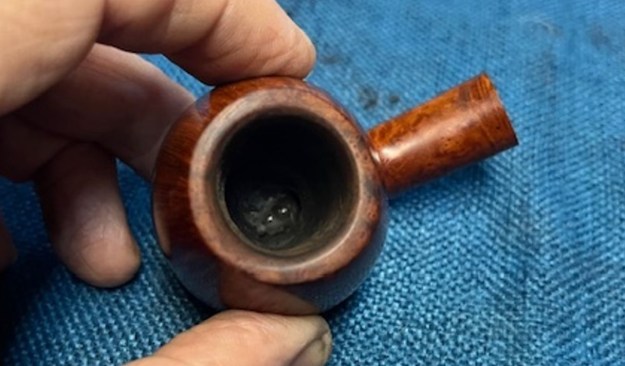
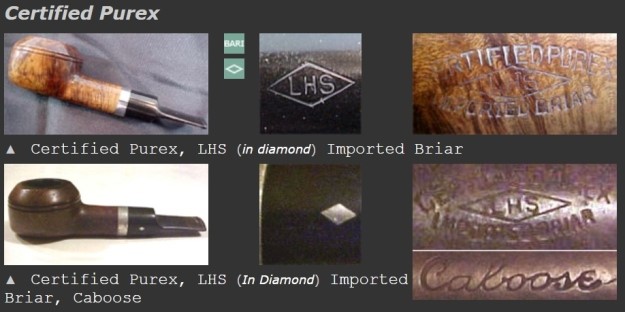
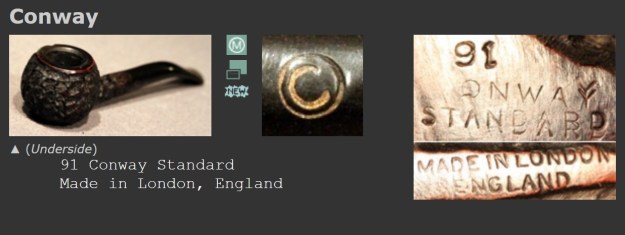
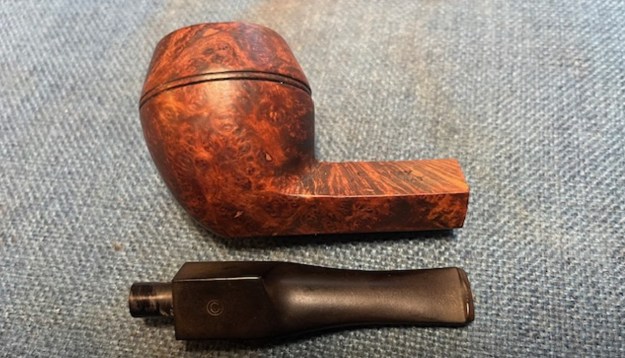
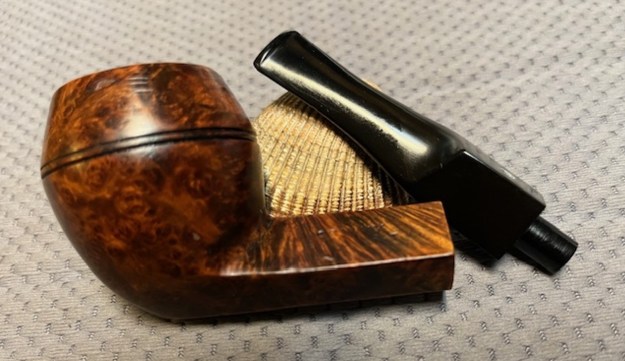
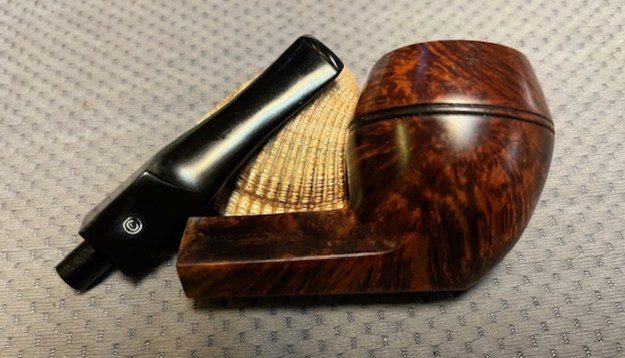
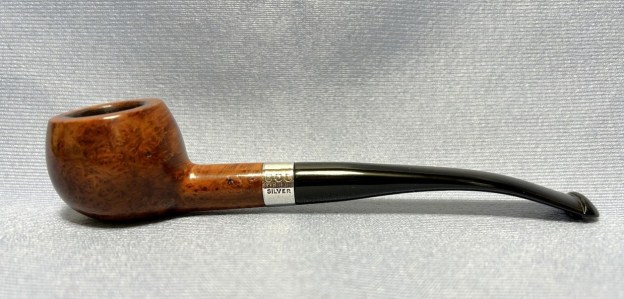
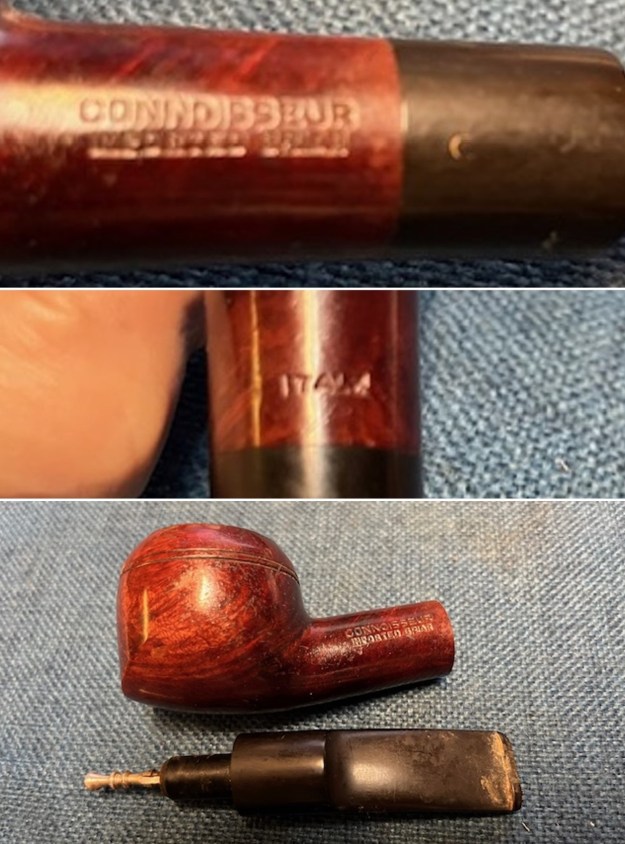 I turned to Pipephil’s site to look for a Connoisseur that was not connected to Ed Burak. I found one that bears the same stamping on the shank sides and was made in Italy. The photo showed the C logo on the stem. The one I am working on is not to clear. I have included a screen capture of the pertinent information below (http://www.pipephil.eu/logos/en/logo-c6.html). I have also included some information from the side bar below the photo below.
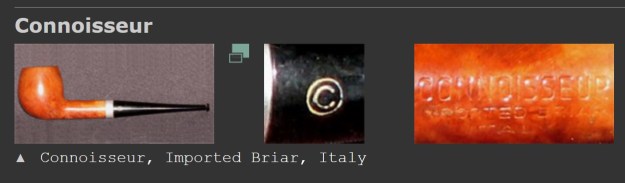 Probably a brand of Hall & Fitzgerald. The “Connoisseur” name has also been used by Lorenzo or Kaywoodie for their pipe lines.
From there I did a Google search on Hall & Fitzgerald. I came across a link on vkpipes to a pipe made by them. There is no specific connection in the notes to the Connoisseur. It is interesting to note that they had quite a few brands in their stable (https://vkpipes.com/pipeline/hall-fitzgerald-straight-grain/). It is at least a very likely connection.
Hall & Fitzgerald is first mentioned in an 1878 Directory of Bristol as a ‘Fancy Goods Warehouse’. Within a few years the company is in the partnership of William Sydney Hall and Edward Thurston Davies trading as Hall & Fitzgerald, of 147 Temple Street, Bristol, Tobacconists and Fancy Goods Merchants. Silver hallmarks for pipe fittings are registered in London in 1899 and in Chester in 1901. Hall & Fitzgerald is making and selling smoking pipes until liquidation and closing in 1982 (except the World War II years). Known brands: Clifton, Dorchester, Excelsior, Hercules, Oxford, Craftsman and Wessex.
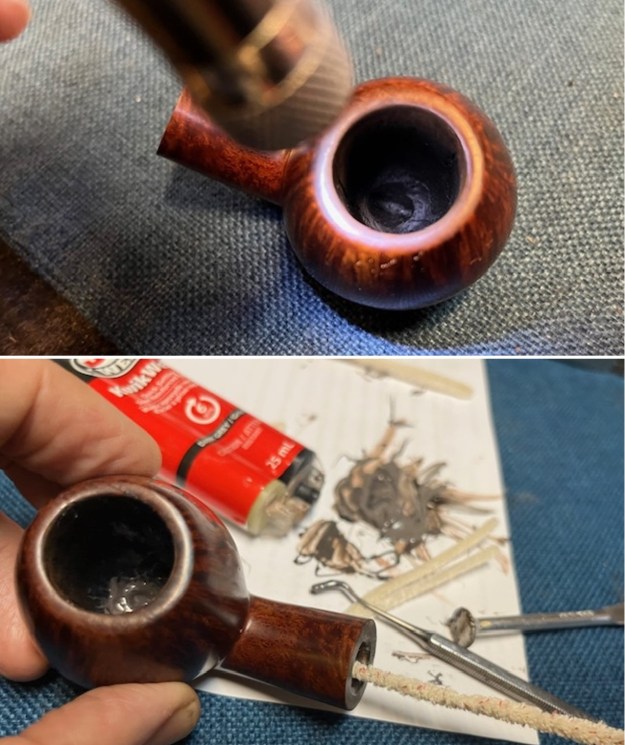
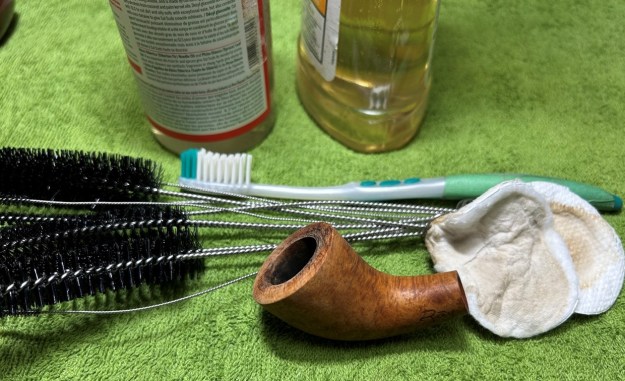
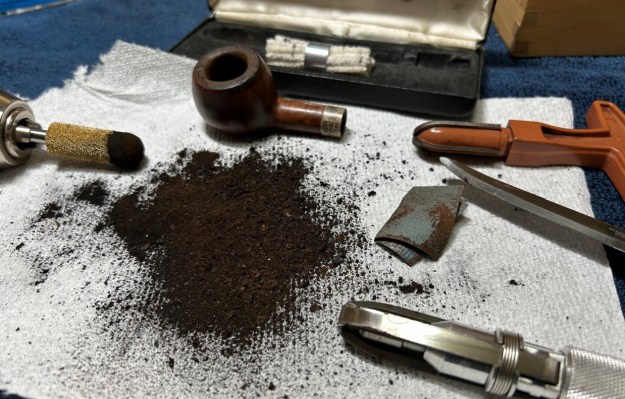
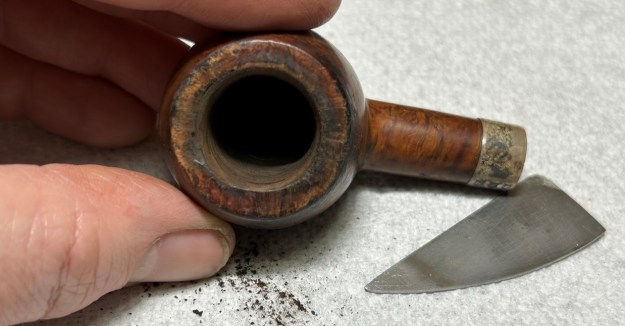
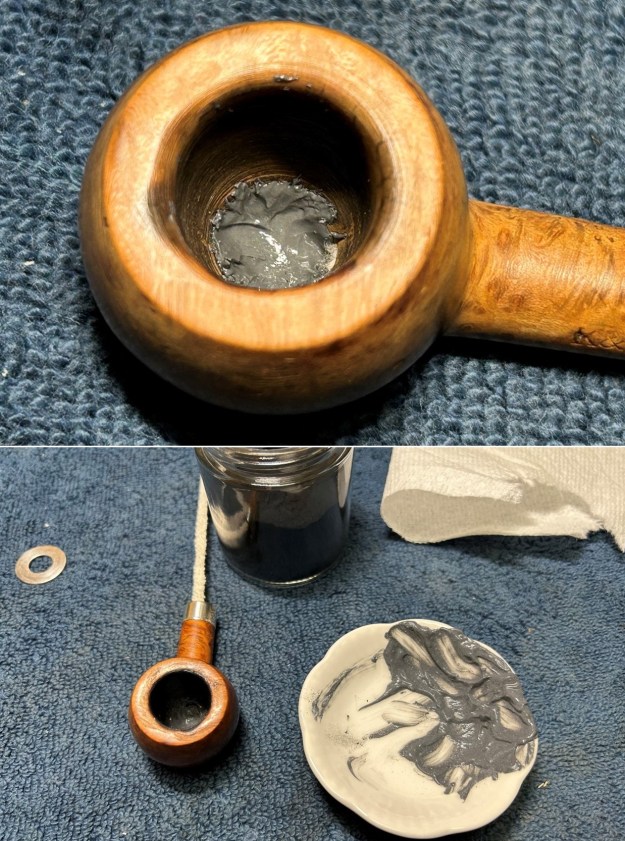
Now it was time to start working on the pipe itself. The bowl was thickly caked so I reamed it with a PipNet pipe reamer using the second and third cutting head to trim the cake back. I used a Savinelli Fitsall Pipe knife to clean up the remnants leaving bare briar. I sanded the bowl walls with 220 grit sandpaper wrapped around a piece of dowel. The bowl was significantly cleaner. I scraped the heavy lava coat on the rim top with the edge of the Fitsall knife.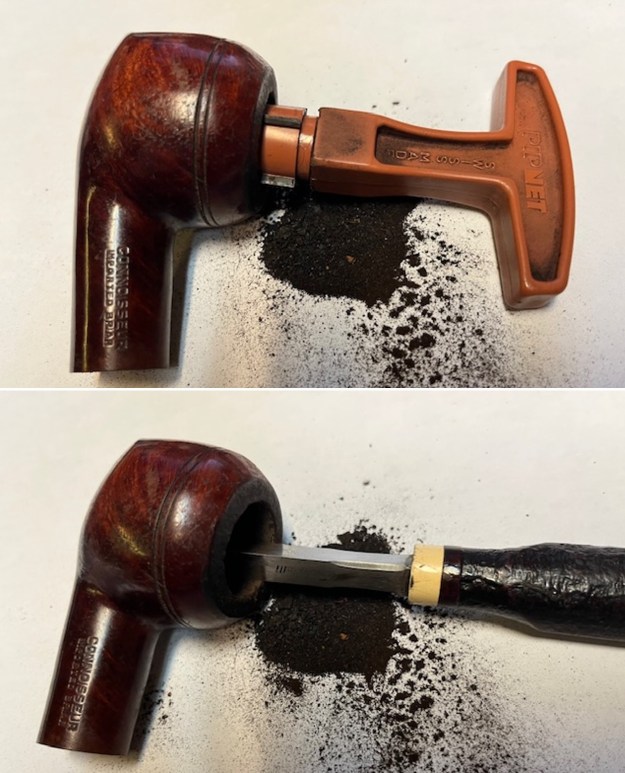
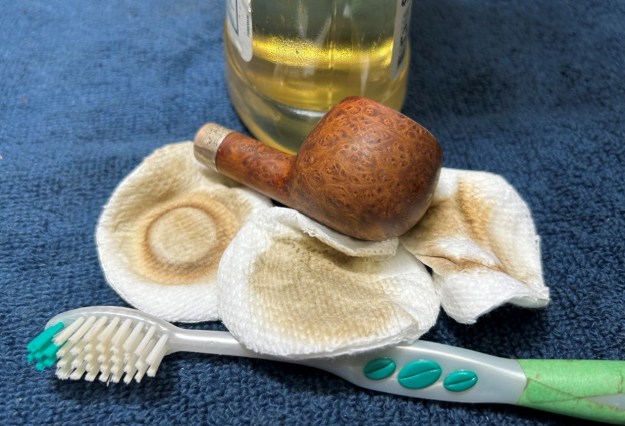
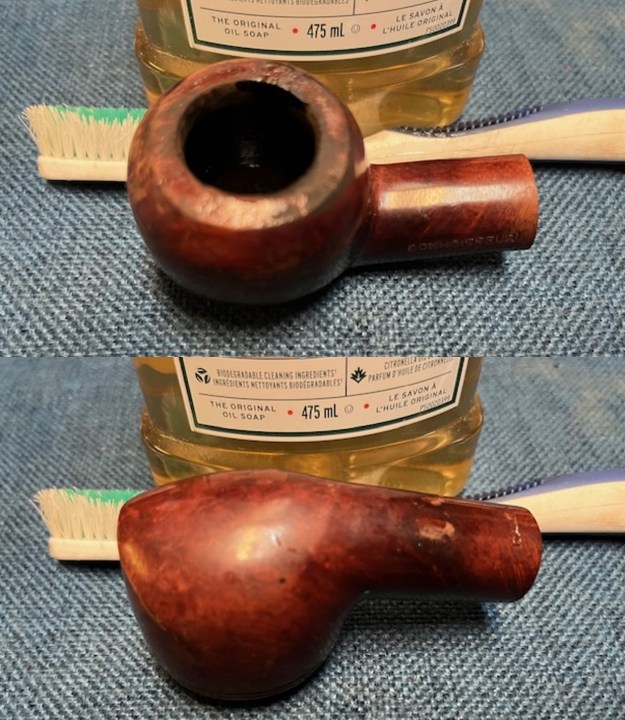
 I scrubbed the exterior of the bowl with a tooth brush and undiluted Murphy’s Oil Soap. I scrubbed the bowl and rim with the toothbrush. I rinsed it off with warm running water and dried it with a soft towel. It looked much better and the rim top looked clean. The grain under the heavy varnish coat shone clearly once the grime was removed.
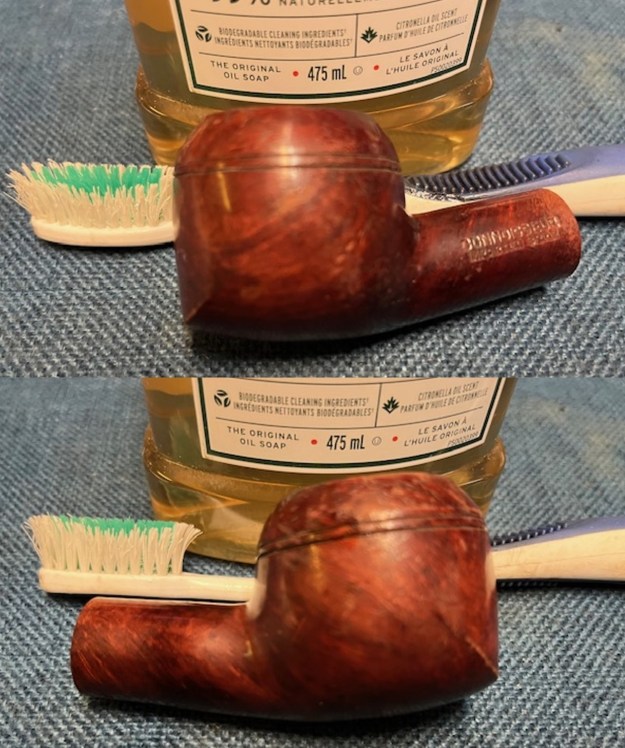
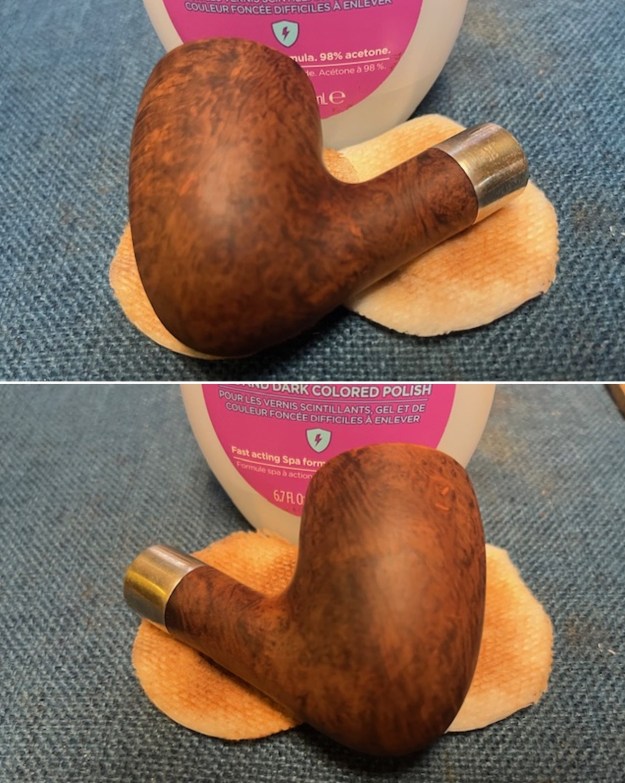
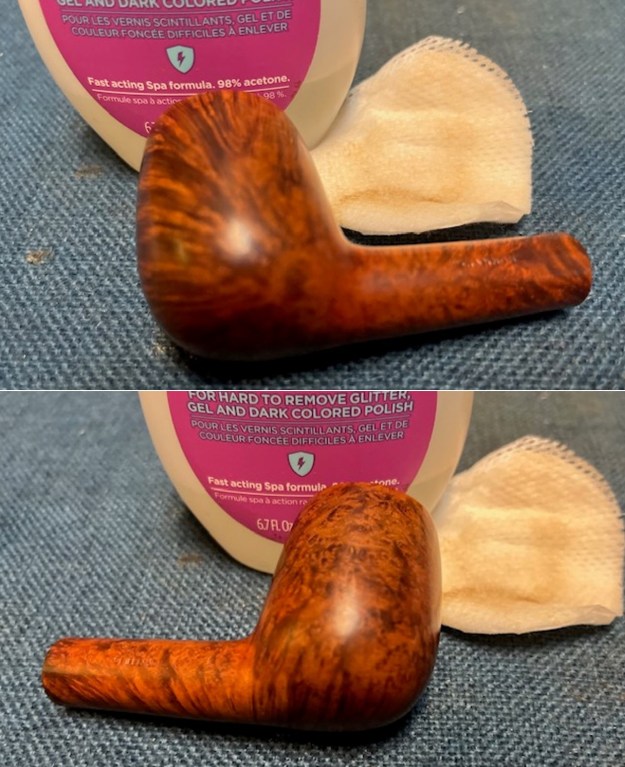
 I wiped the bowl down with acetone to remove the finish from the bowl. It did not work very well. It made a bit of progress but the coat was very thick.
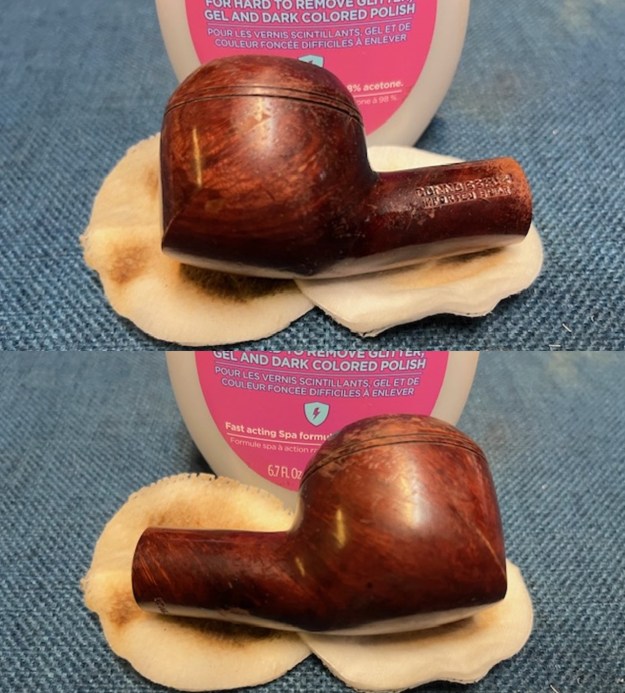
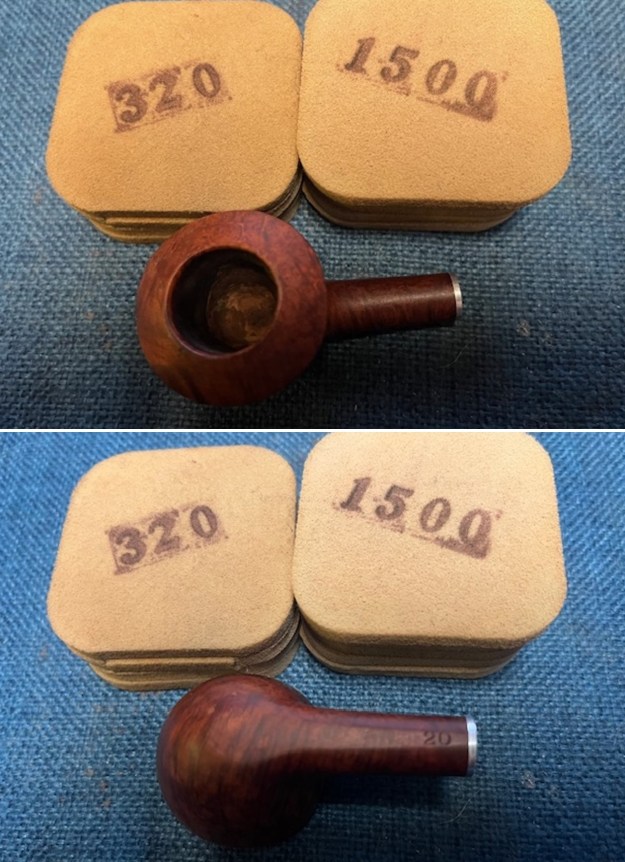
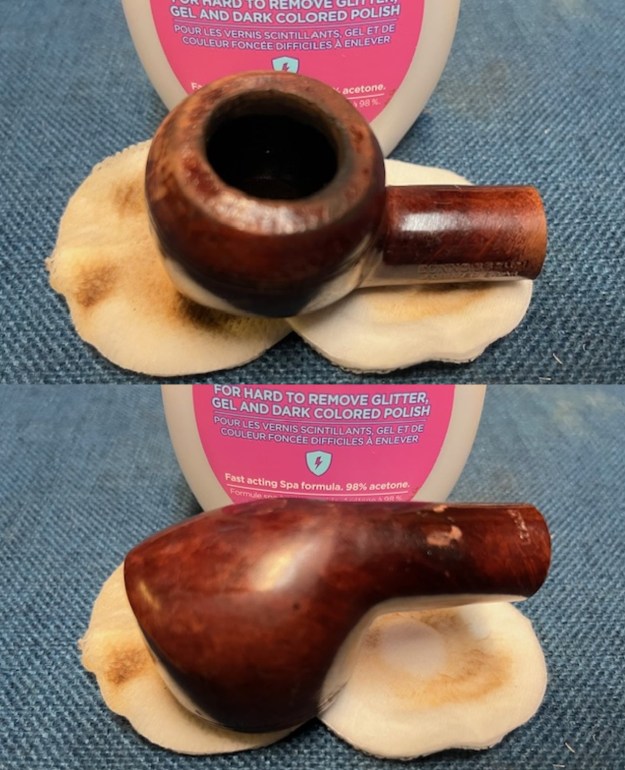 I gently topped the bowl on a topping board with 320 grit sandpaper and worked over the rest of the briar bowl and shank with 320 grit sandpaper to break the varnish surface.
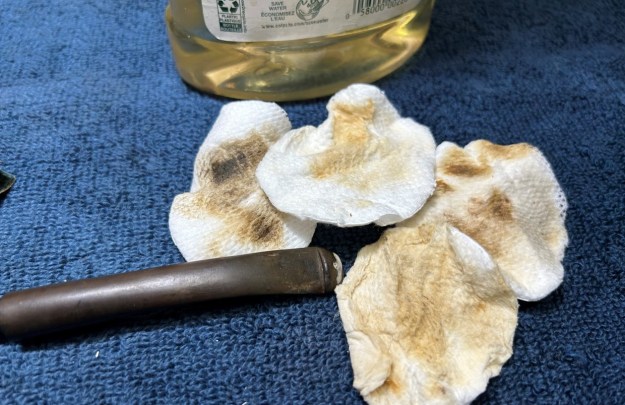
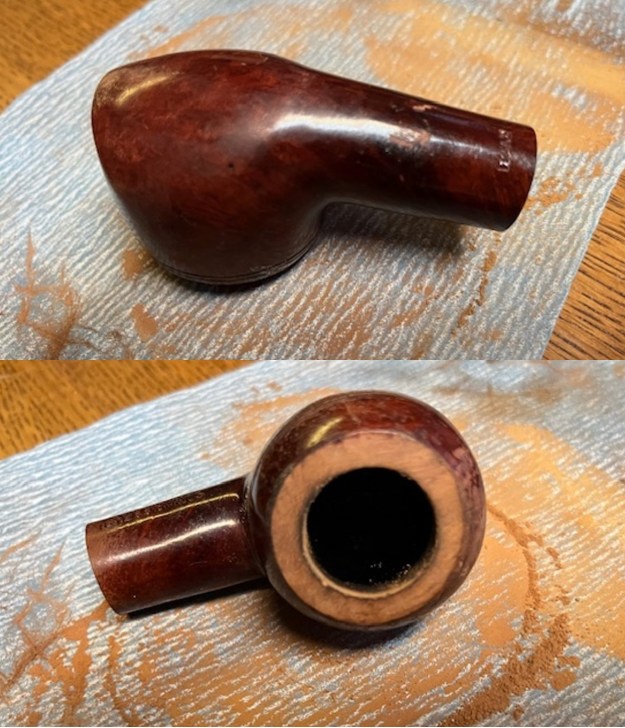 I used some straight acetone and cotton pads to wipe the bowl down a second time. This time I had much better success. It removed much of the varnish coat. You can see the varnish and stain on the cotton pads.
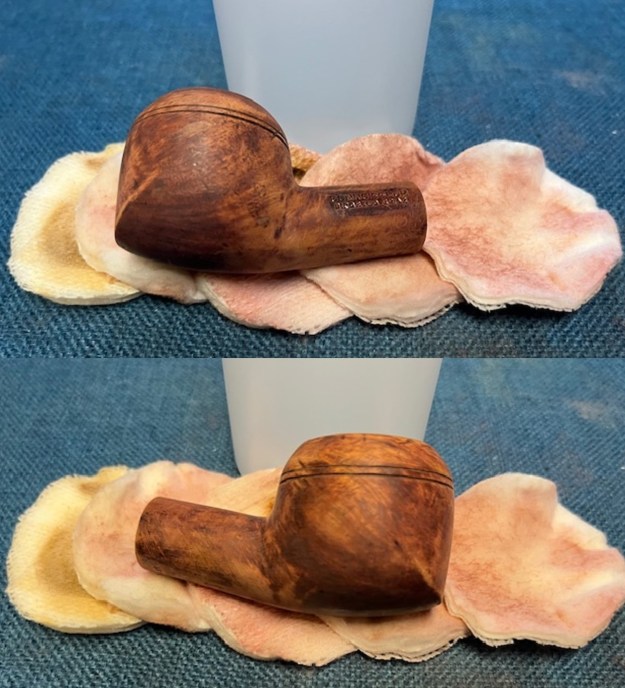
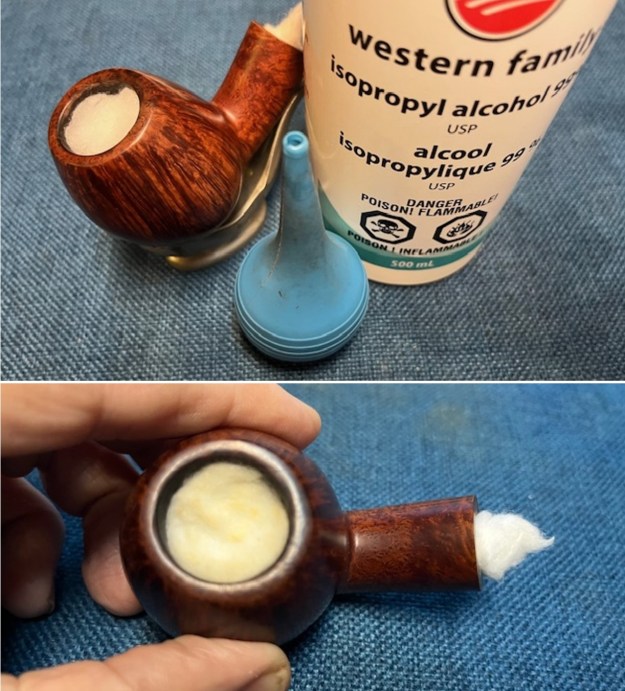
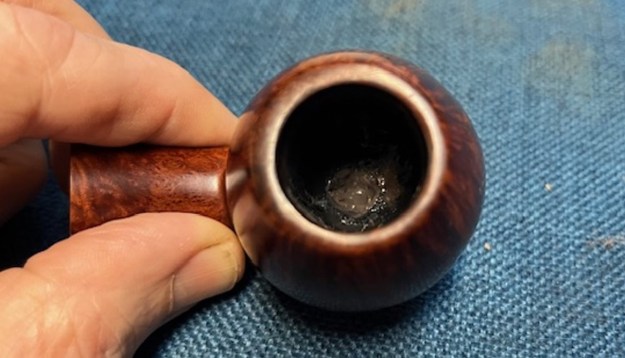
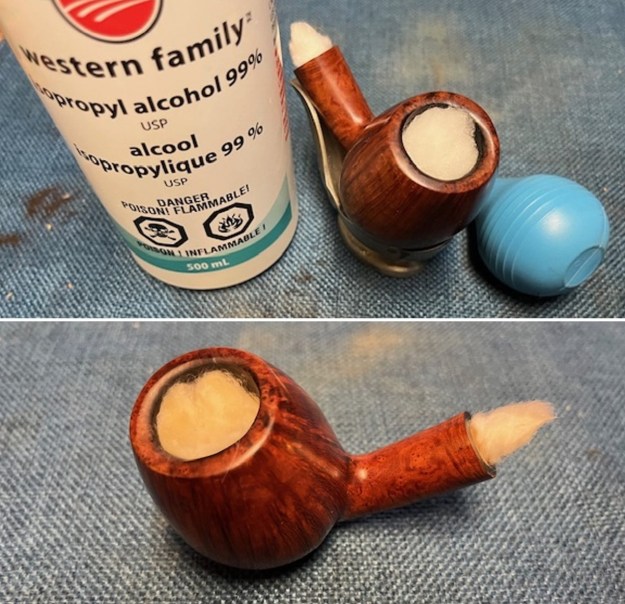
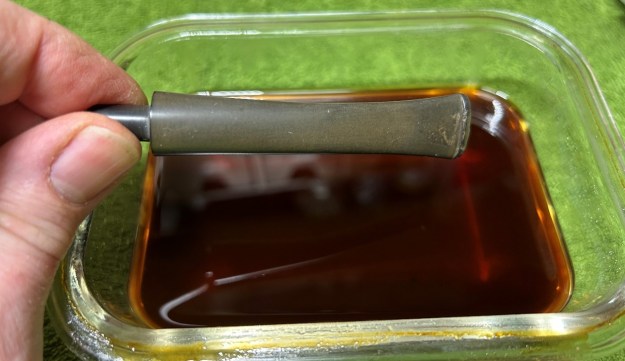
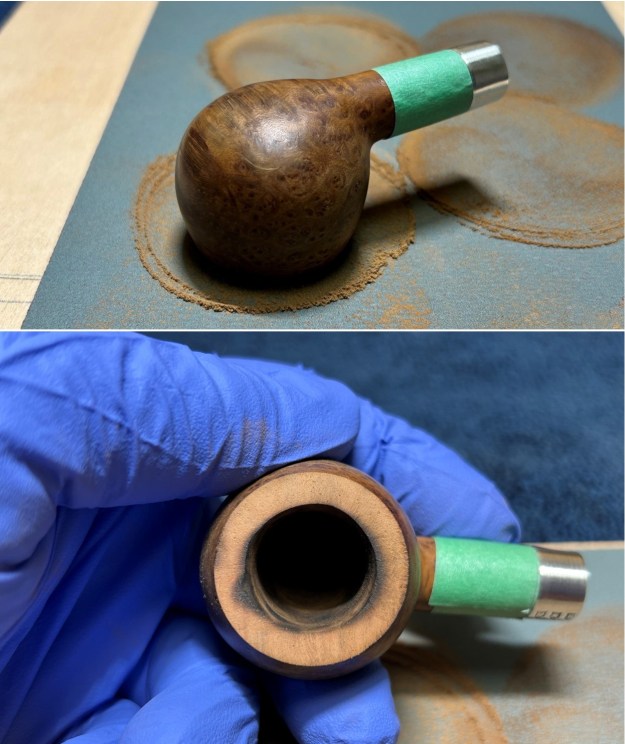
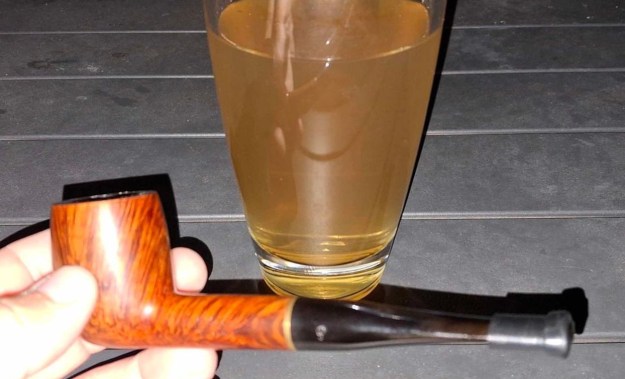
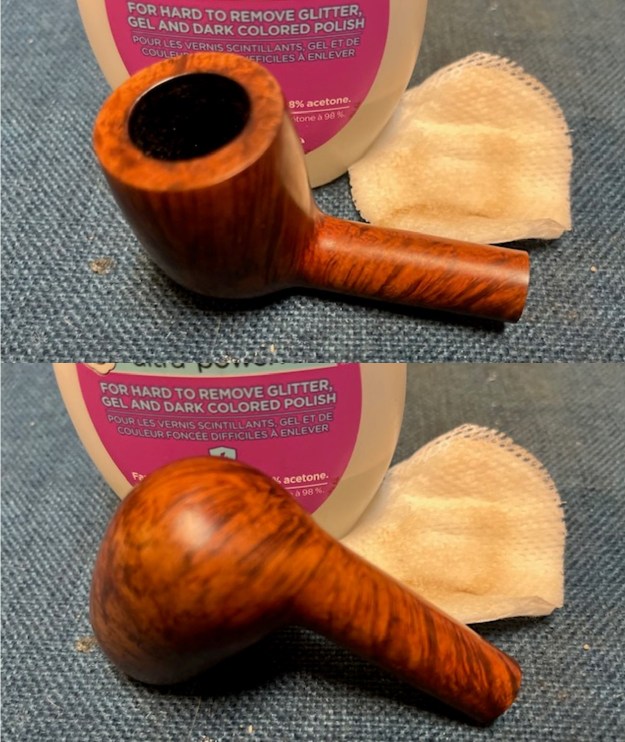
 At this point I dropped the bowl in an alcohol bath that I have here. It is one that I have and refilled for many years. It is straight 99% isopropyl alcohol. I have soaked a lot of pipes in it and over the years it has picked up a bit of patina. I have found that when a bowl soaks in it the alcohol helps remove older varnish coats and also adds some of that rich patina to the raw briar like the rim top in this case.
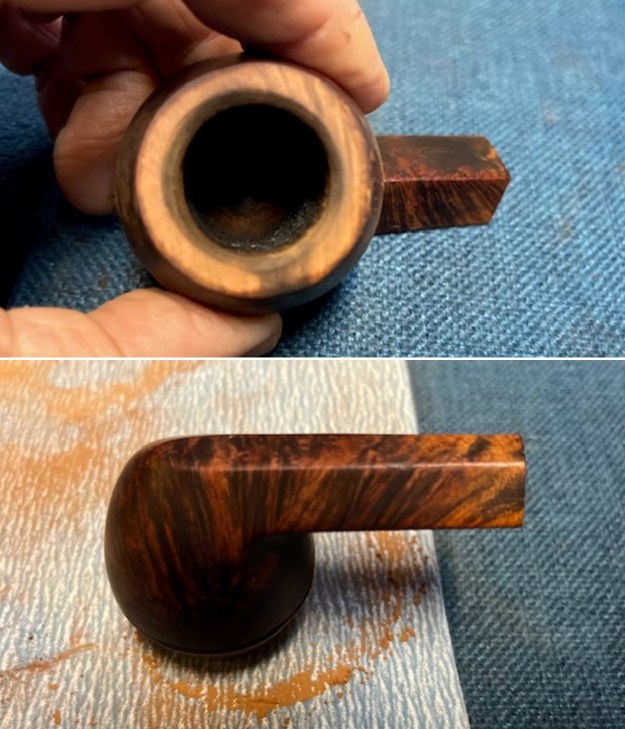
 I let it sit in the bath overnight. I removed the bowl from the bath in the morning. I dried it off and took photos of the bowl at this point. Overall it looked much better. The varnish coat was basically gone and the rim top had picked up some patina from the bath.
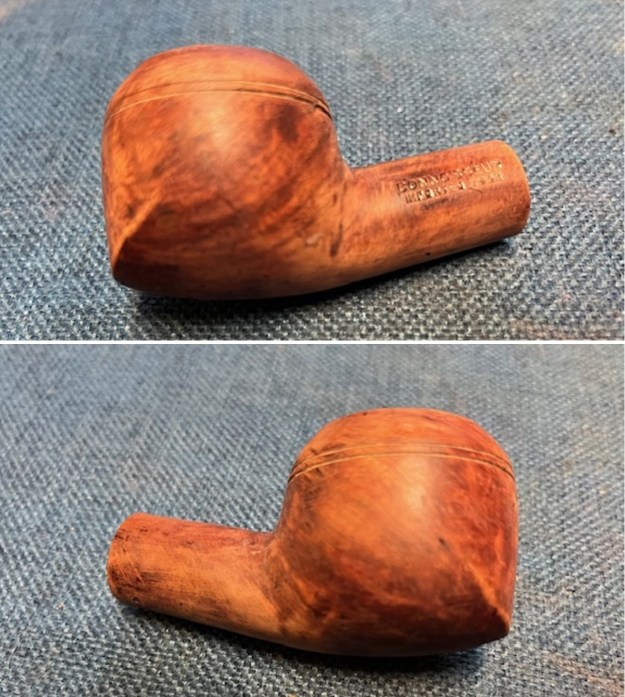
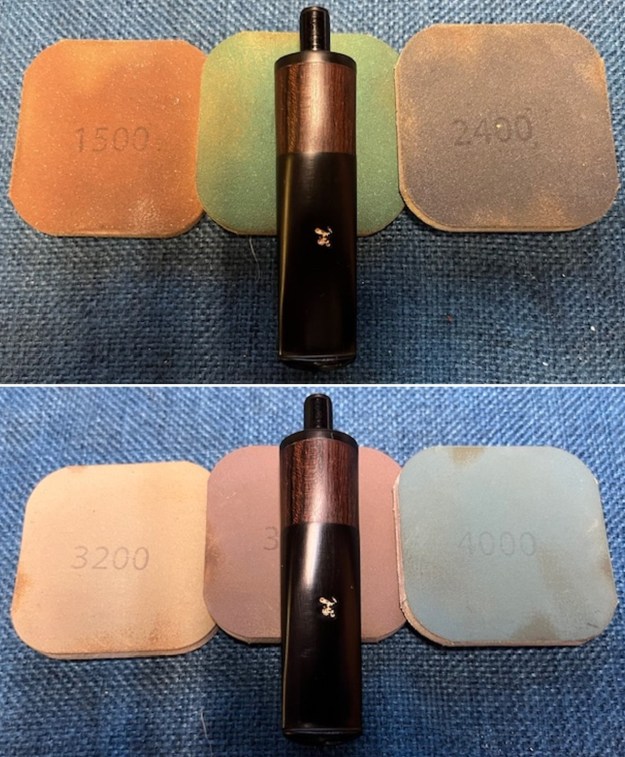
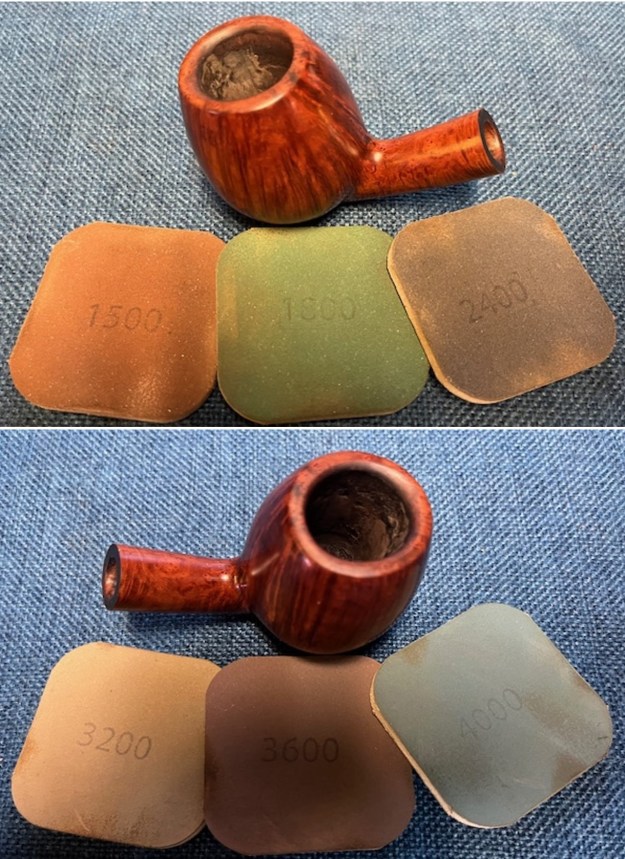
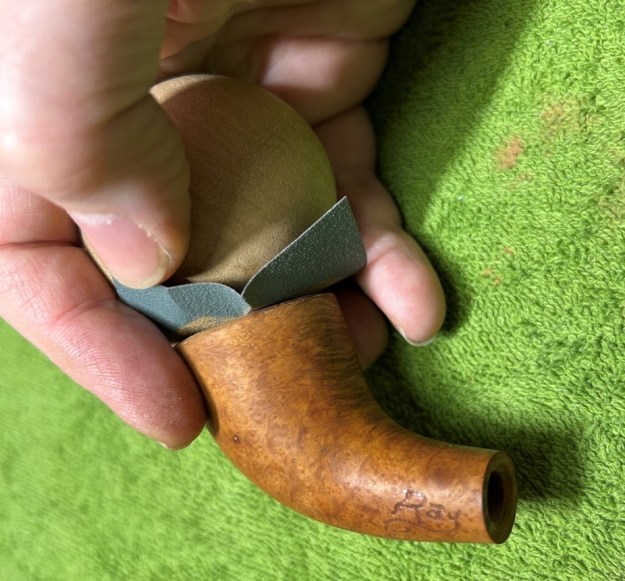
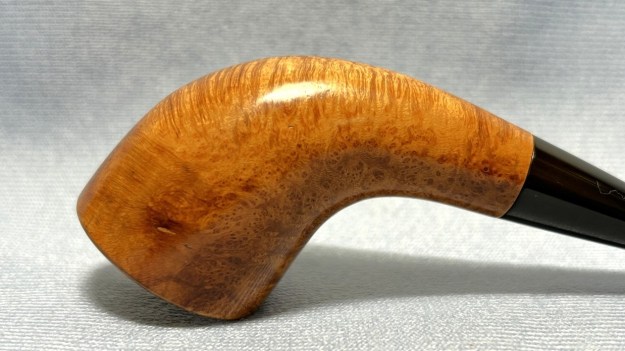
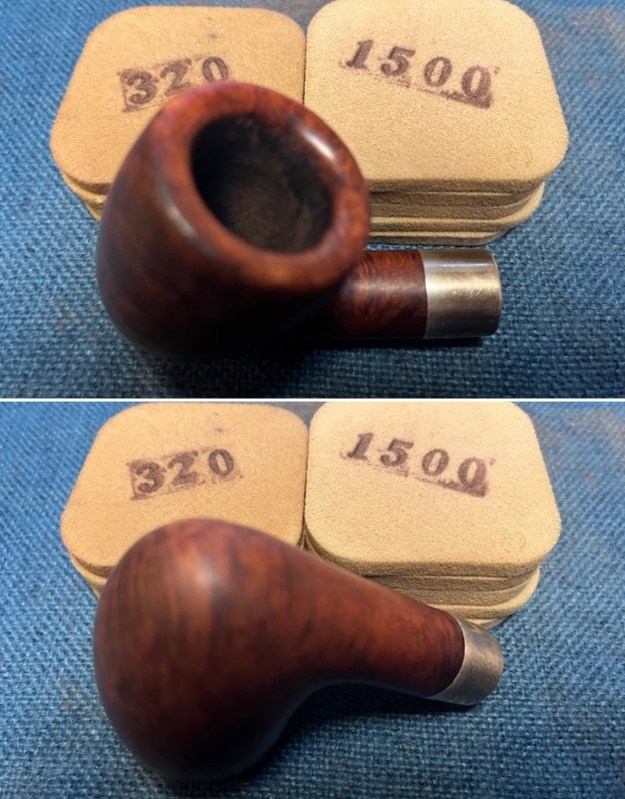
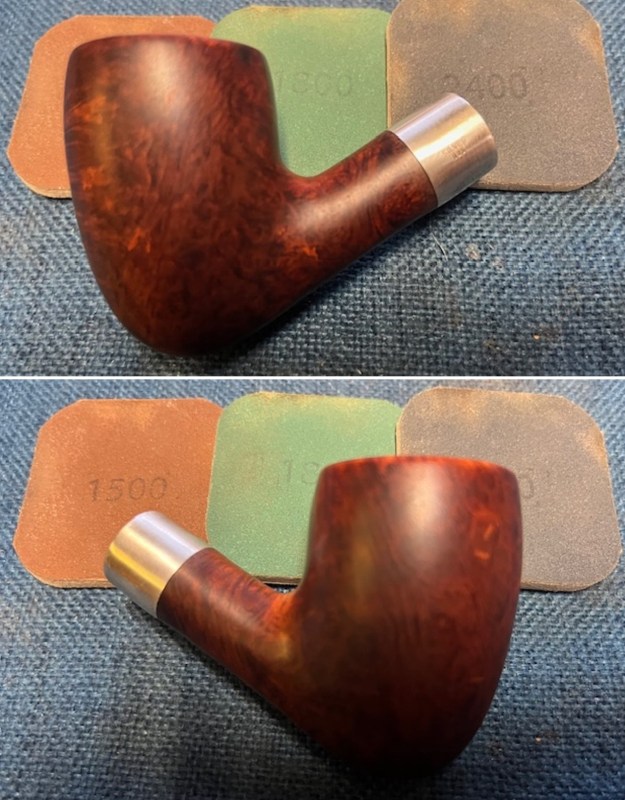
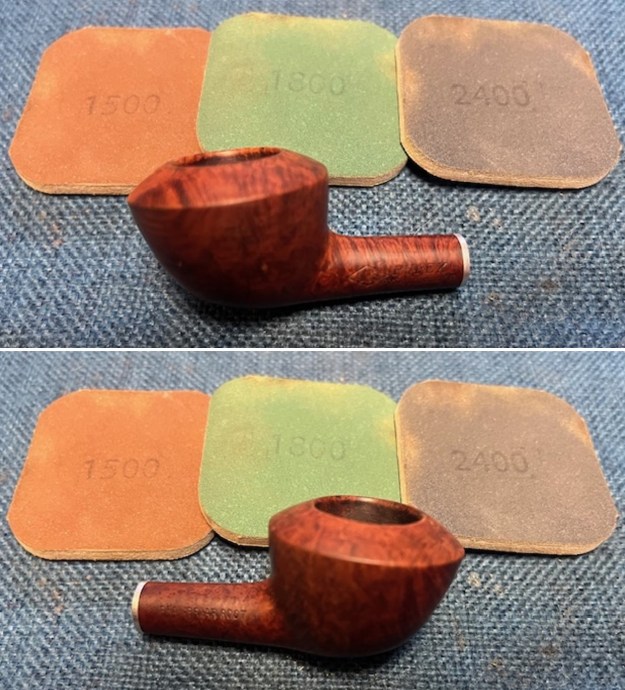
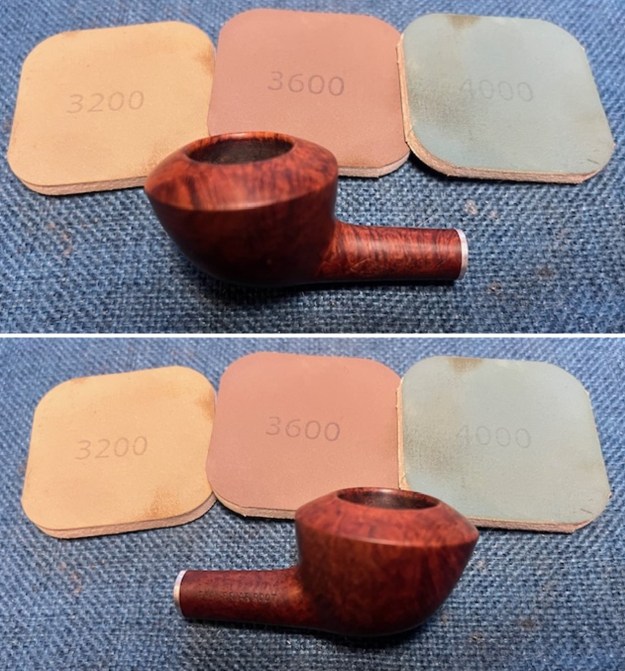
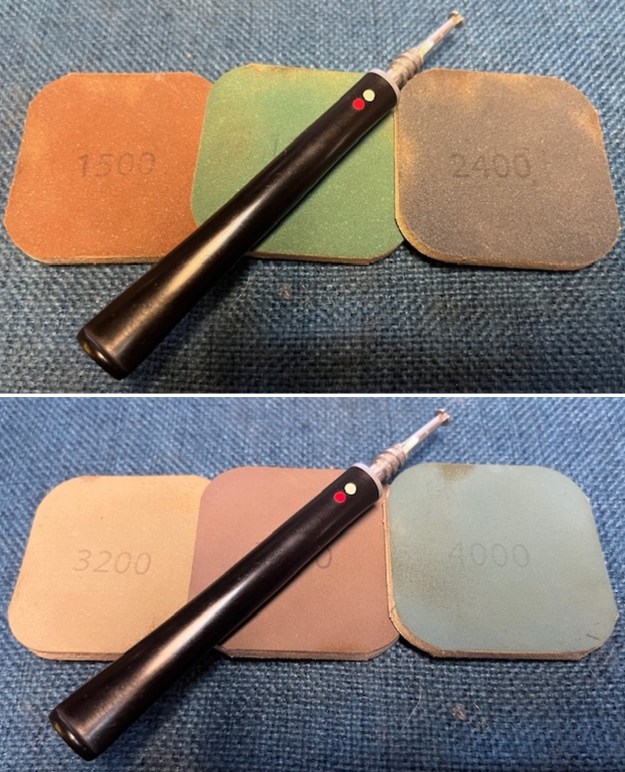
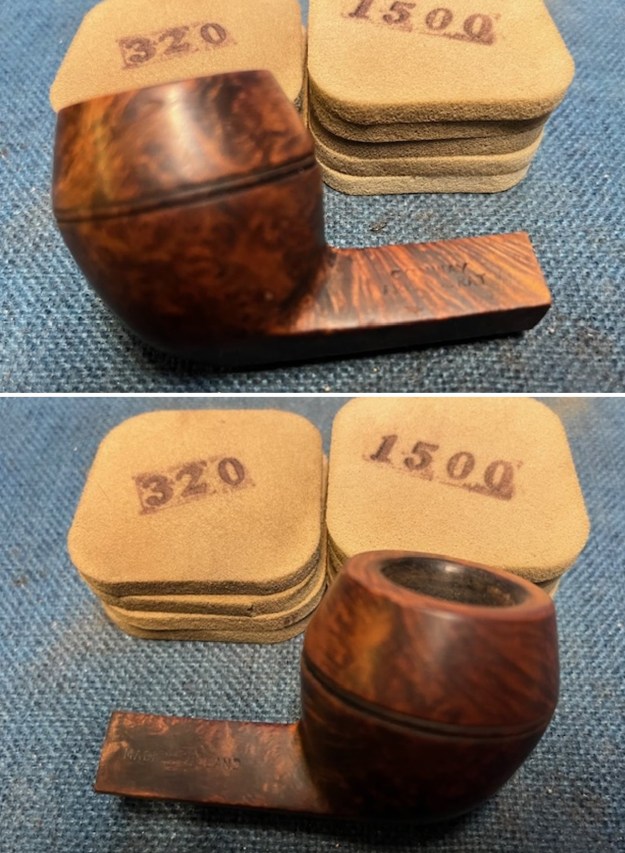
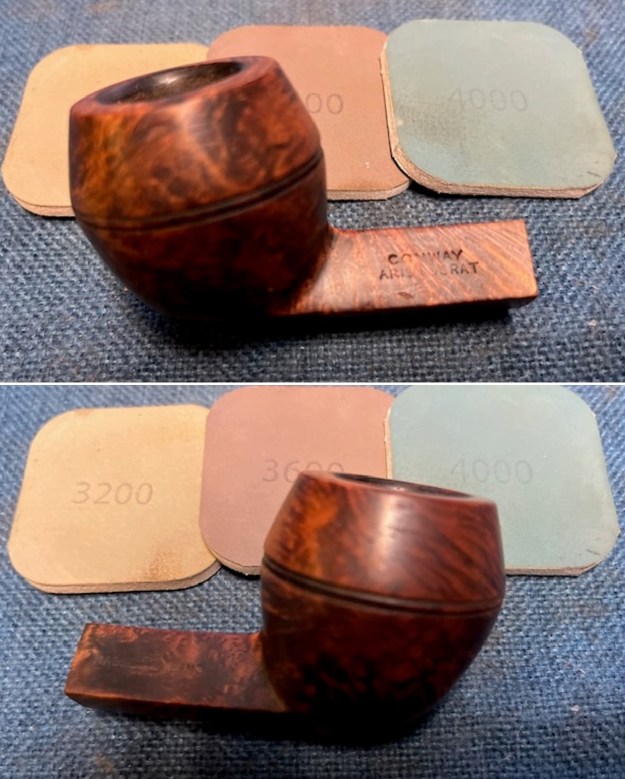
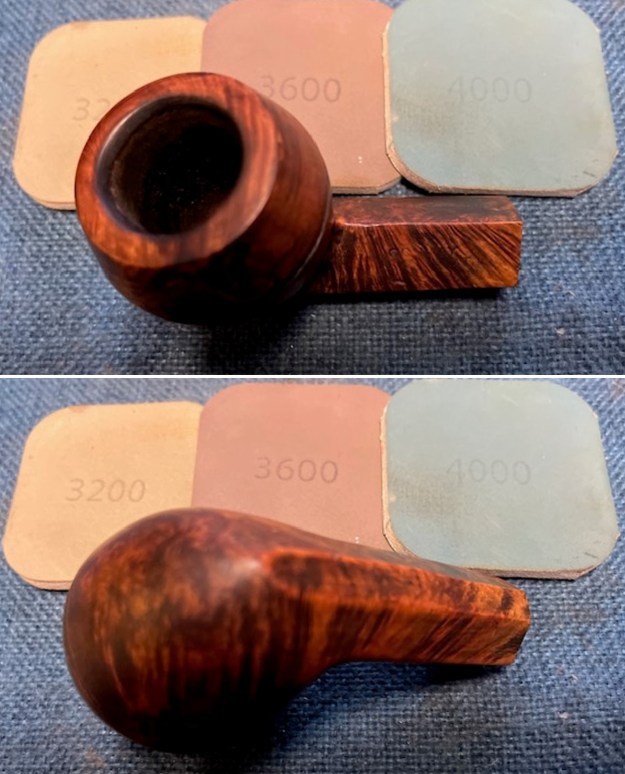
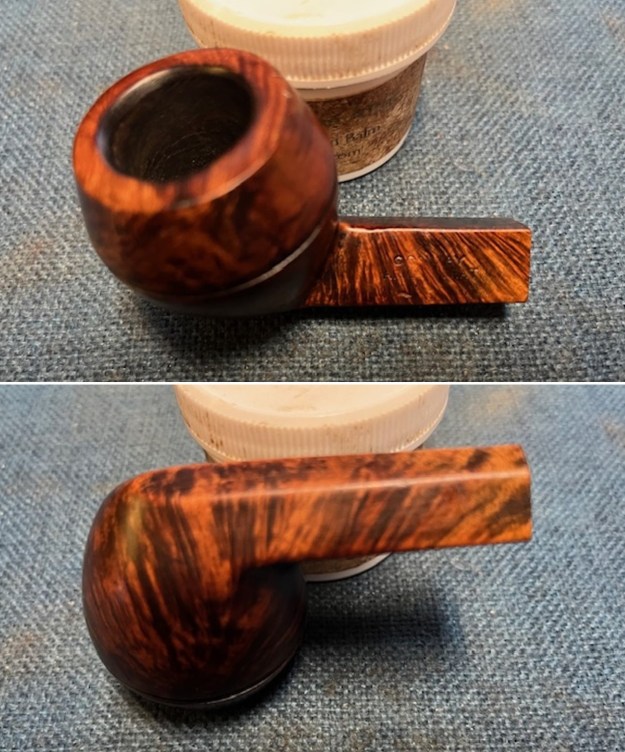
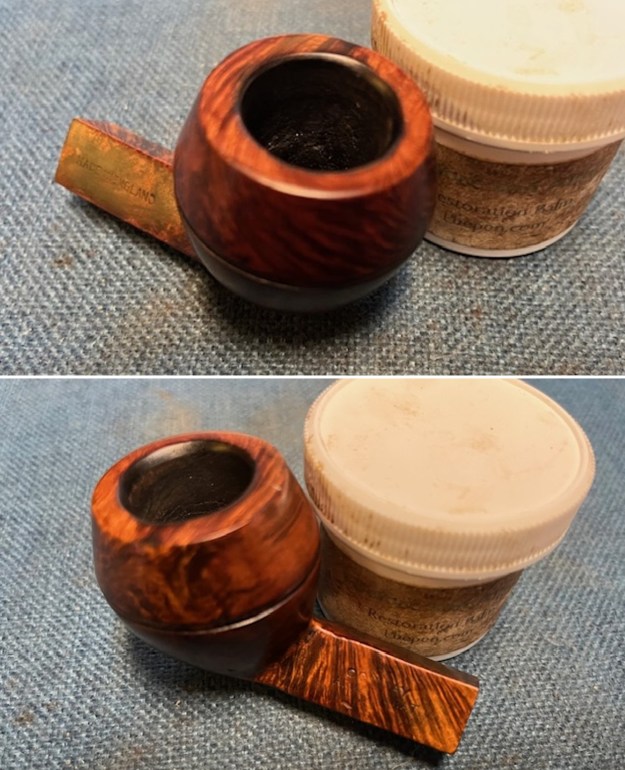
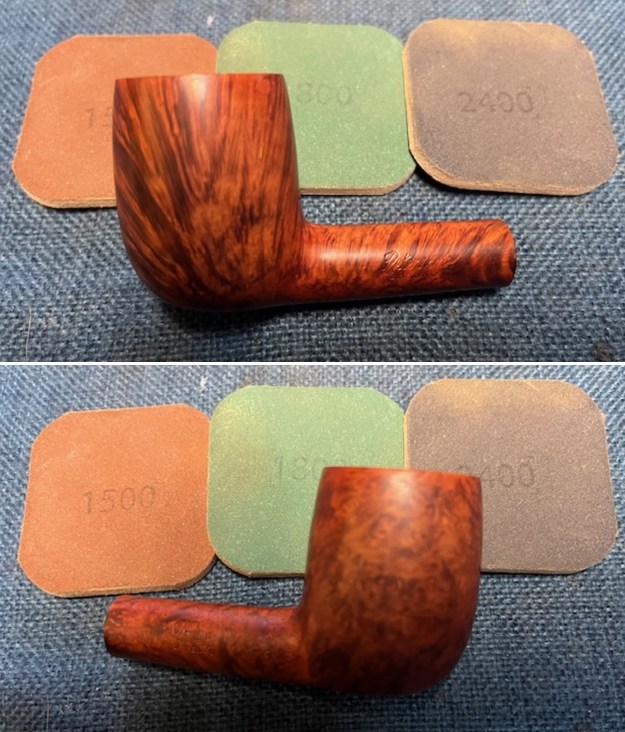
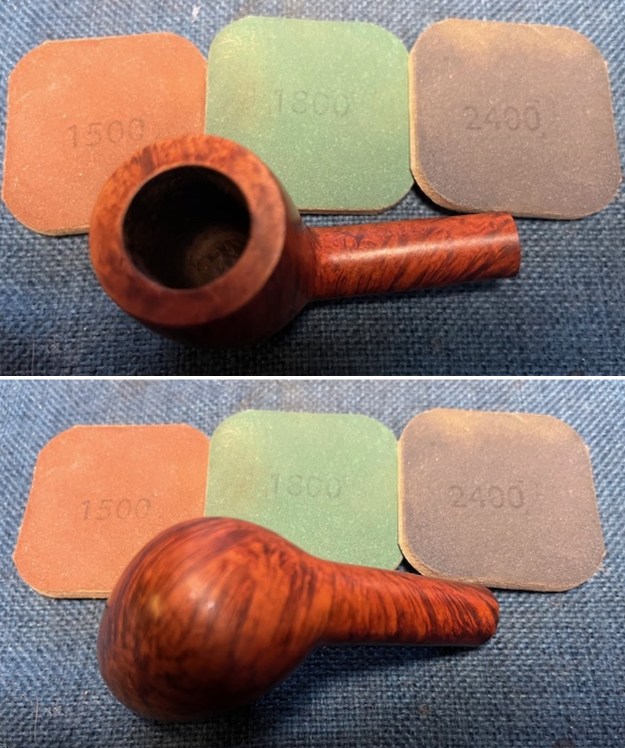
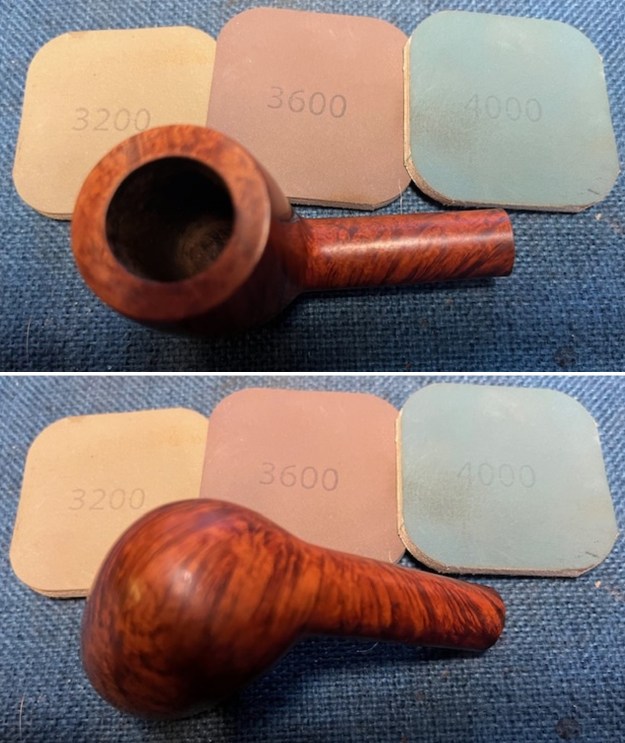
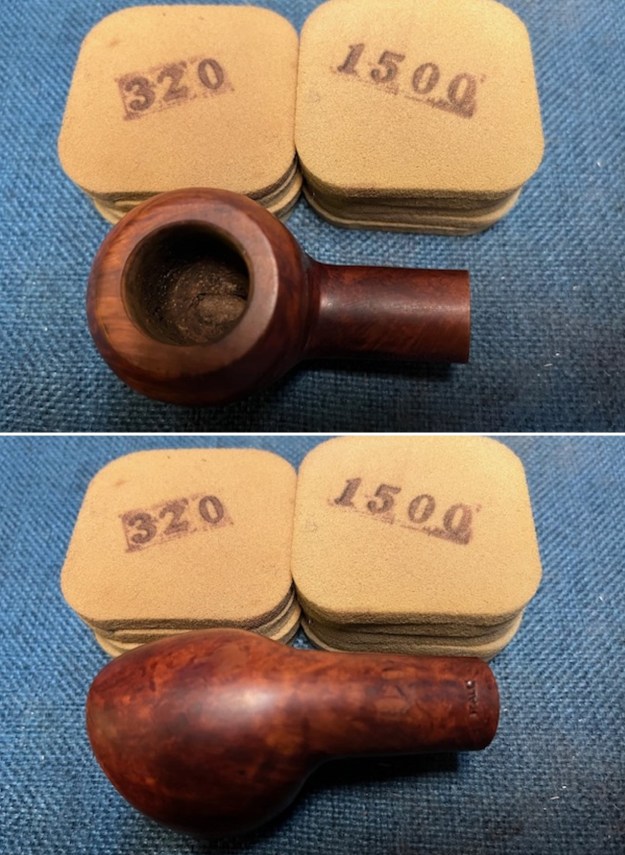
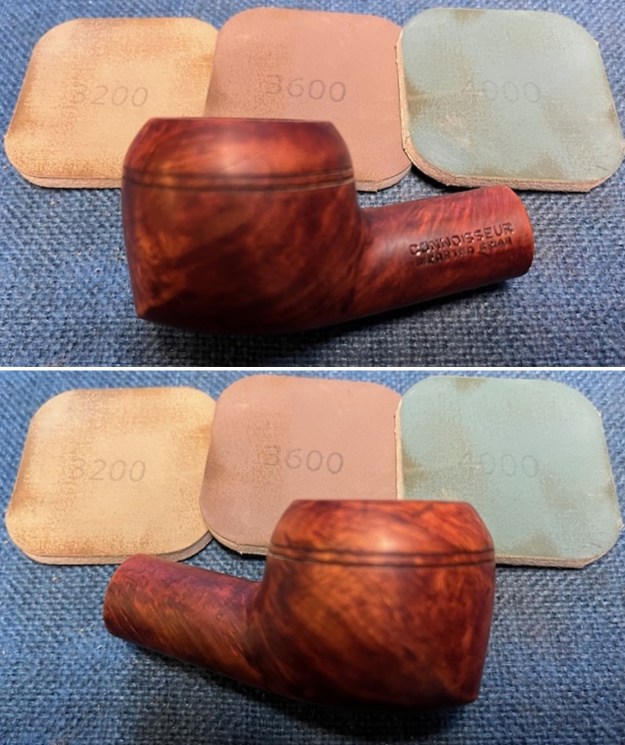
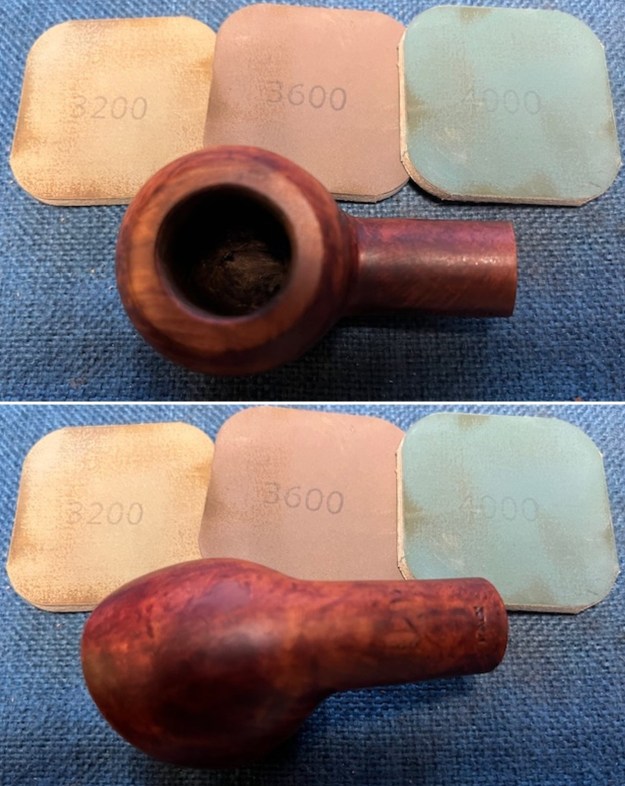
 I sanded the briar rim top and bowl with 320-3500 grit sanding pads. I was able to remove the remnants of stain and also varnish on the bowl. I wiped the bowl down after each sanding pad using a paper towel and a drop of olive oil. I really liked the way the briar looked at this point in the process.
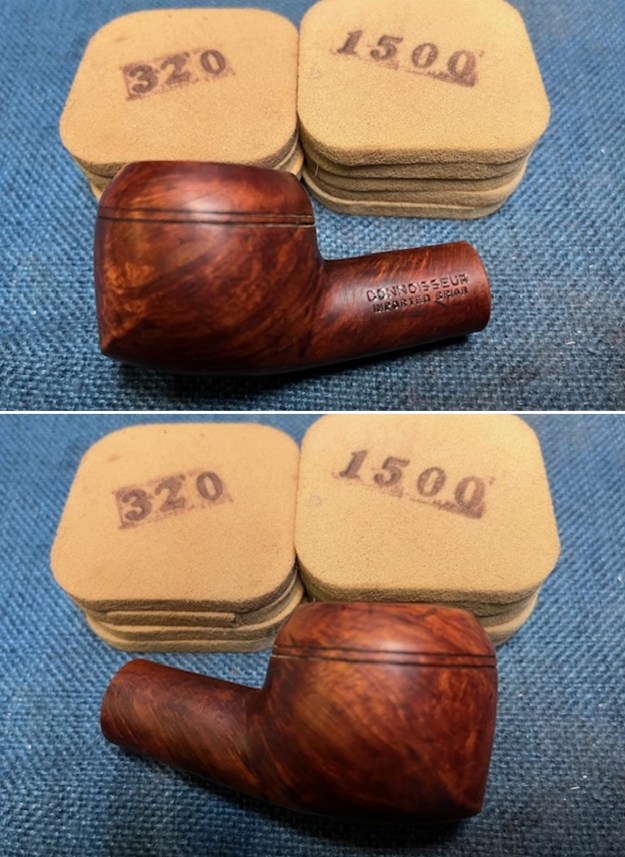
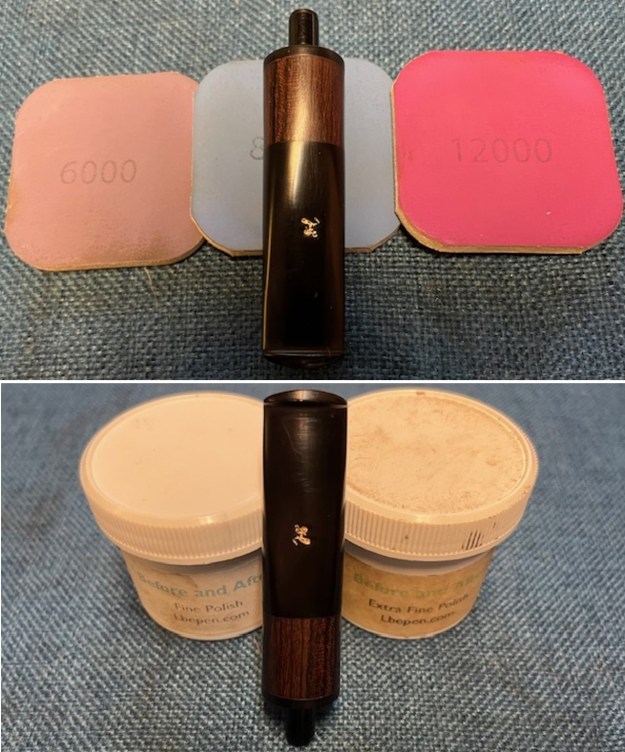
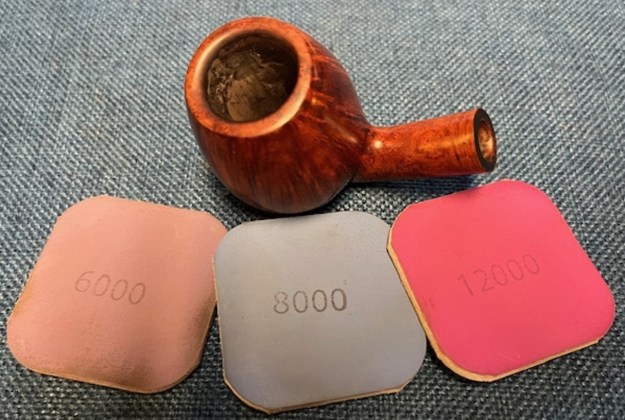
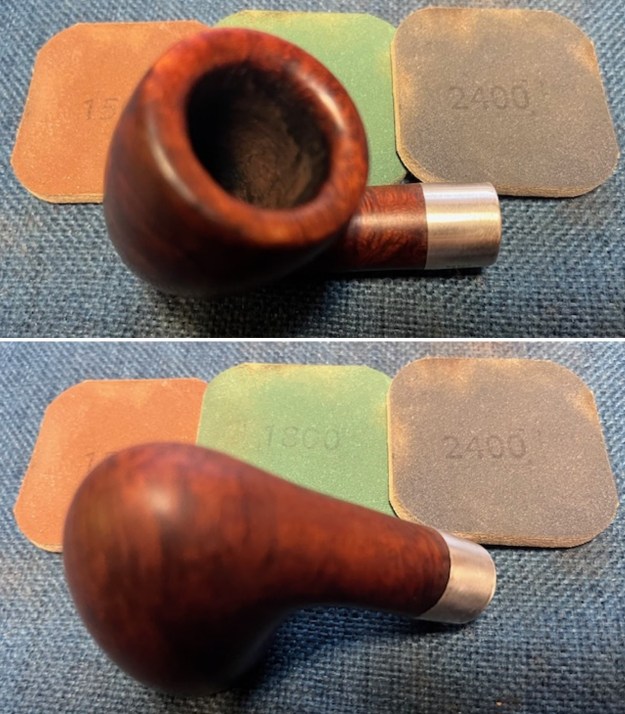
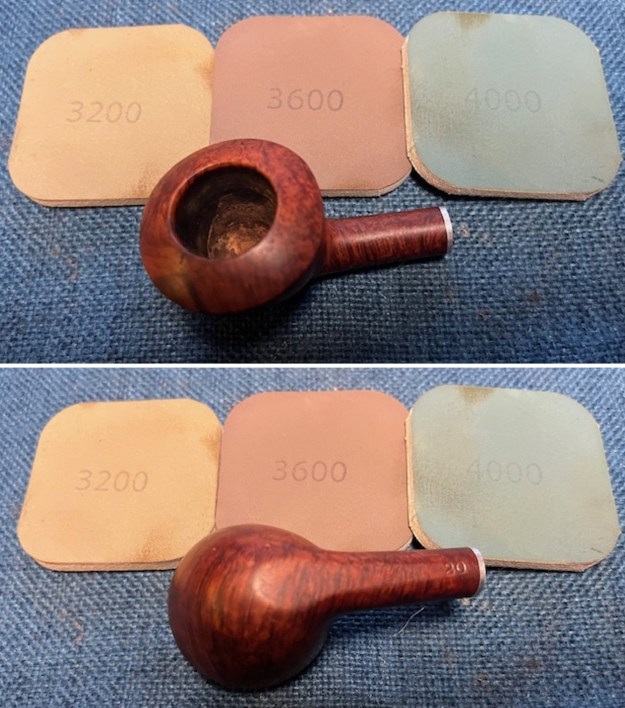
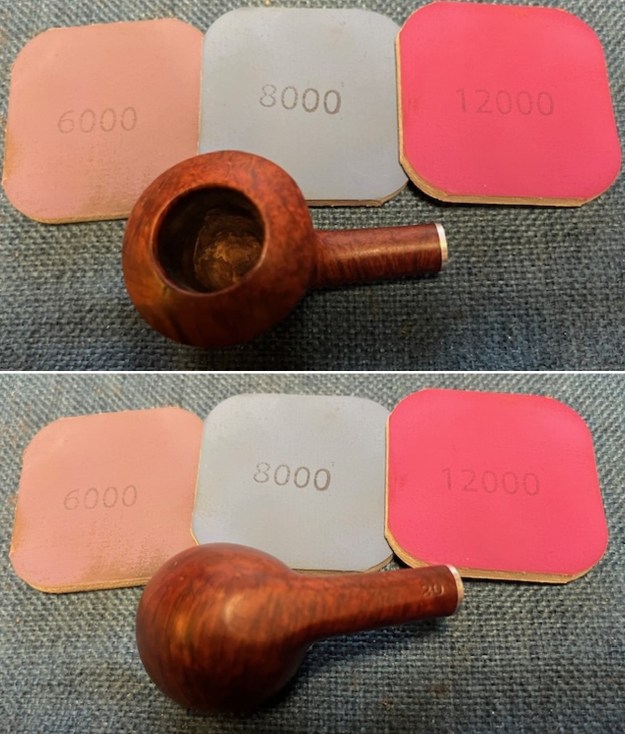
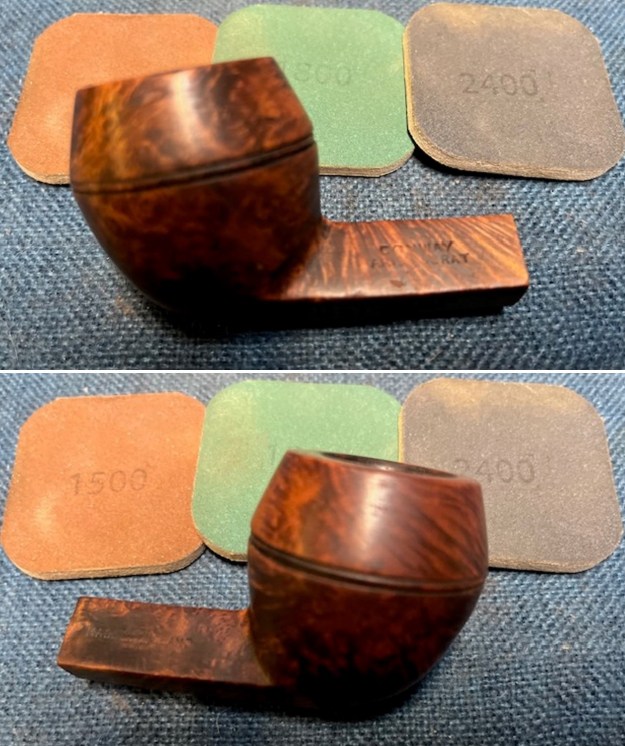
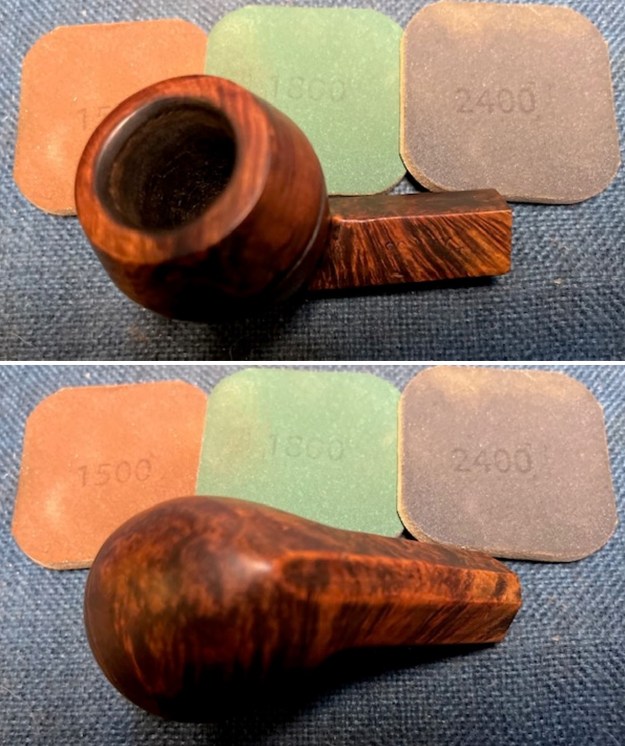
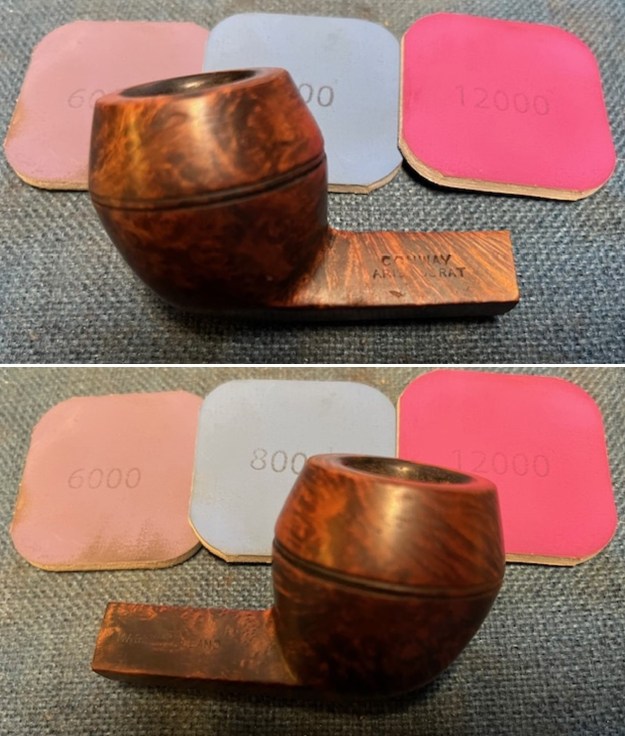
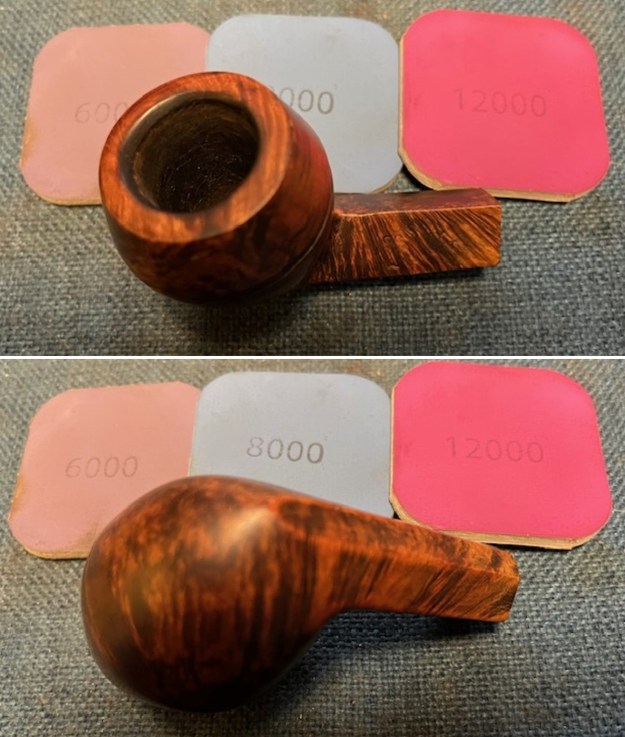
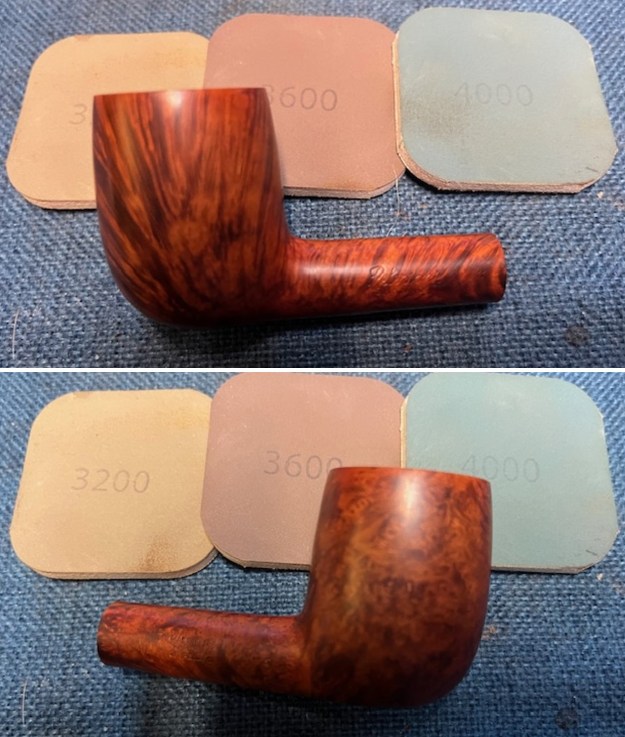
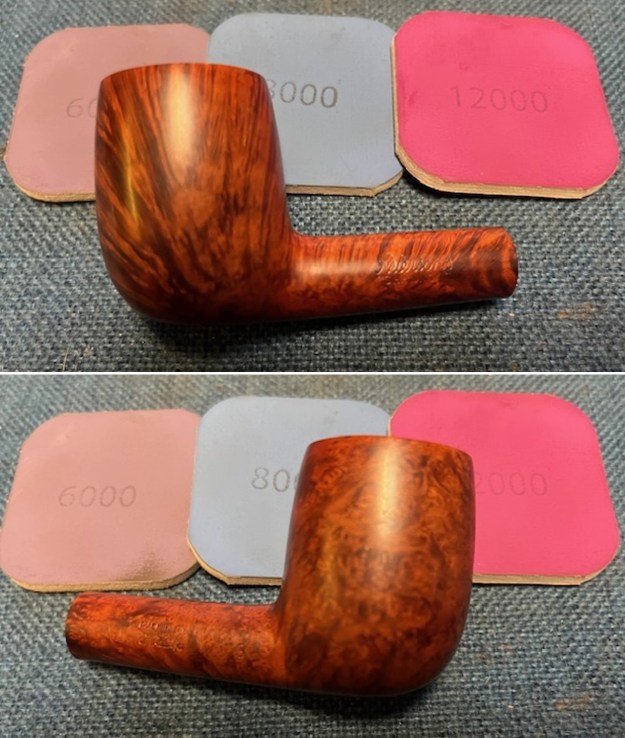
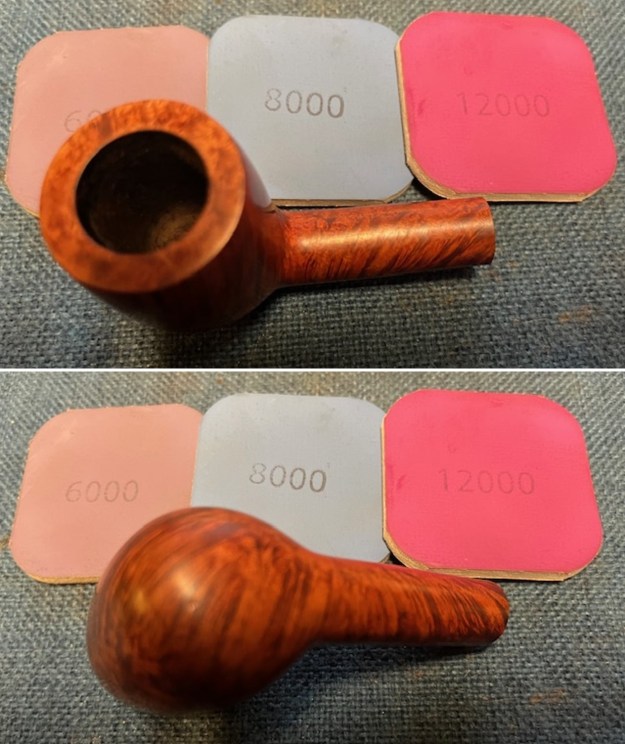
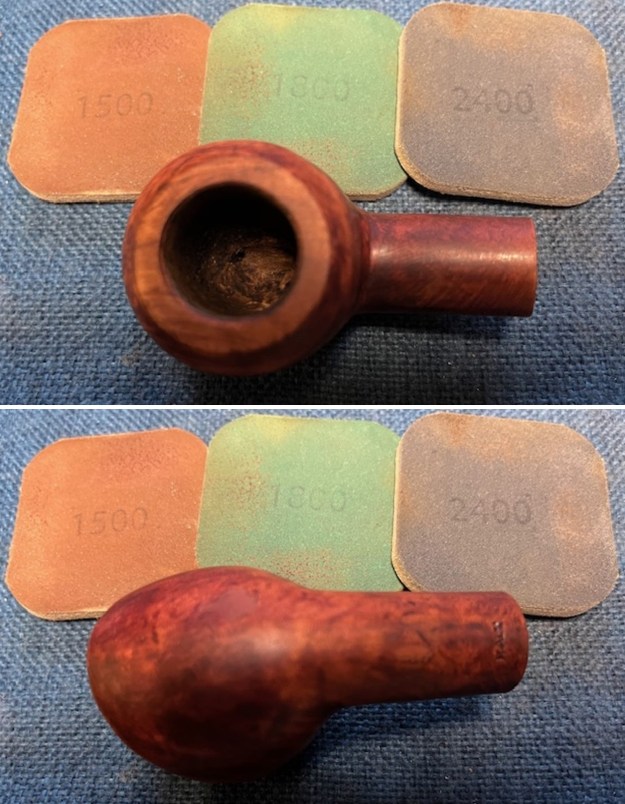
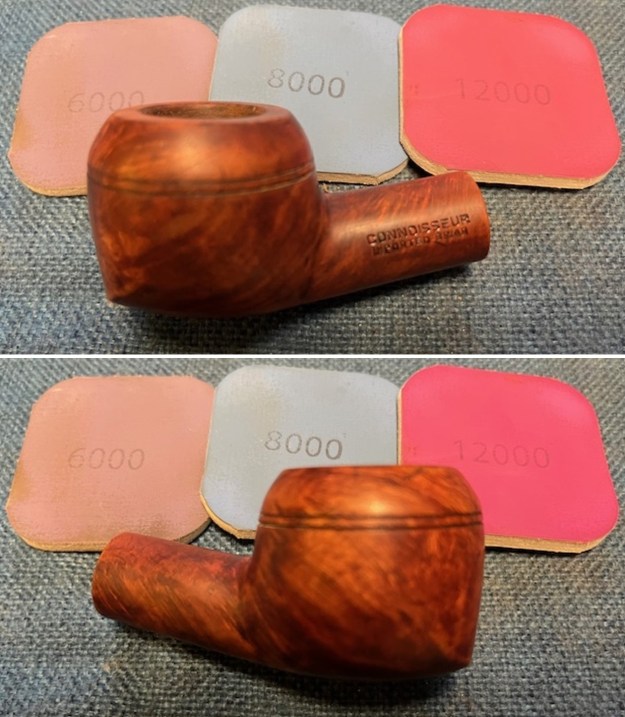
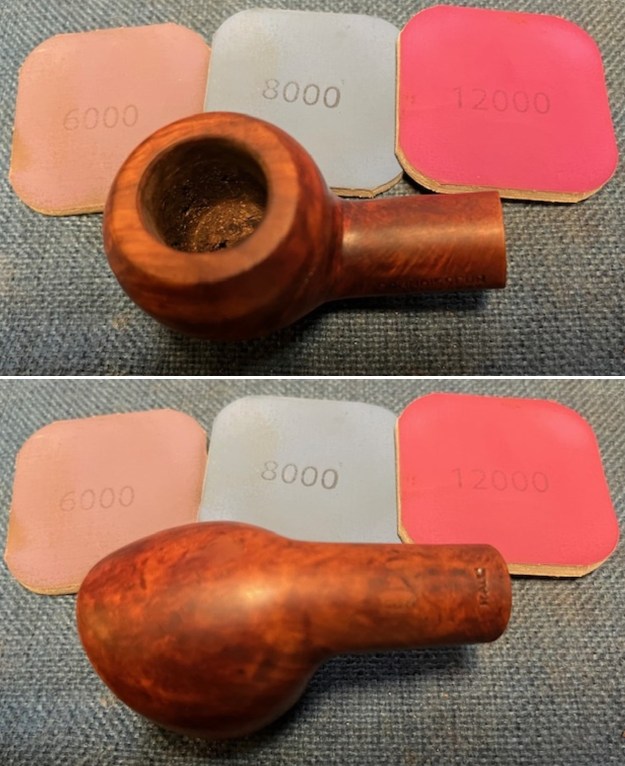
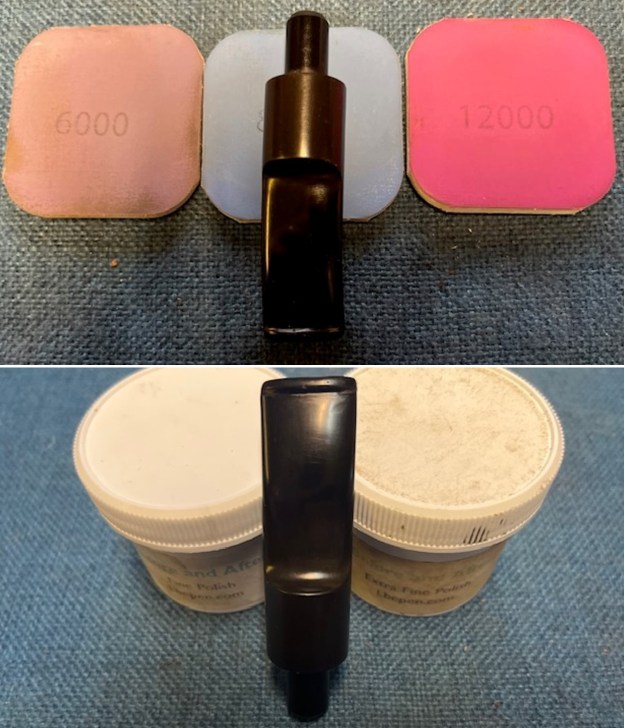
 I polished the briar with 1500-12000 grit micromesh sanding pads – dry sanding with each pad and wiping it down with a damp cloth between pads. It took on a rich shine.
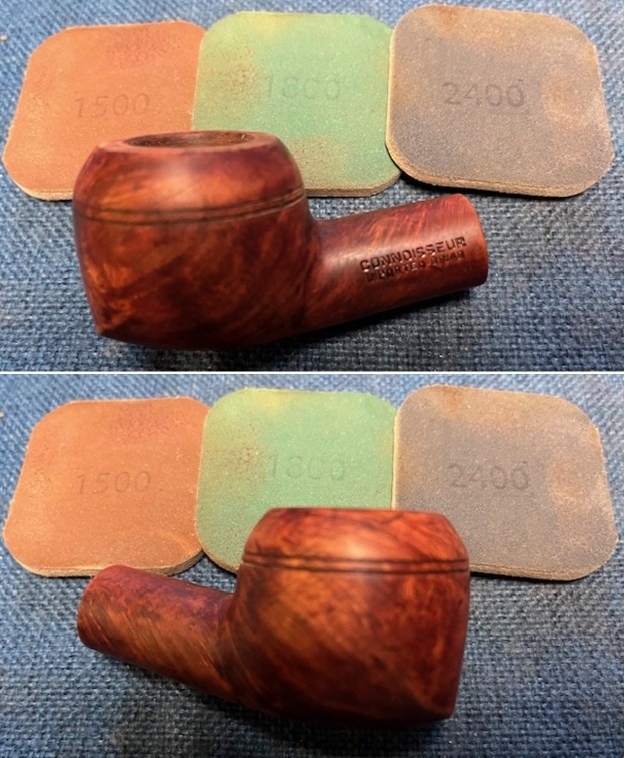
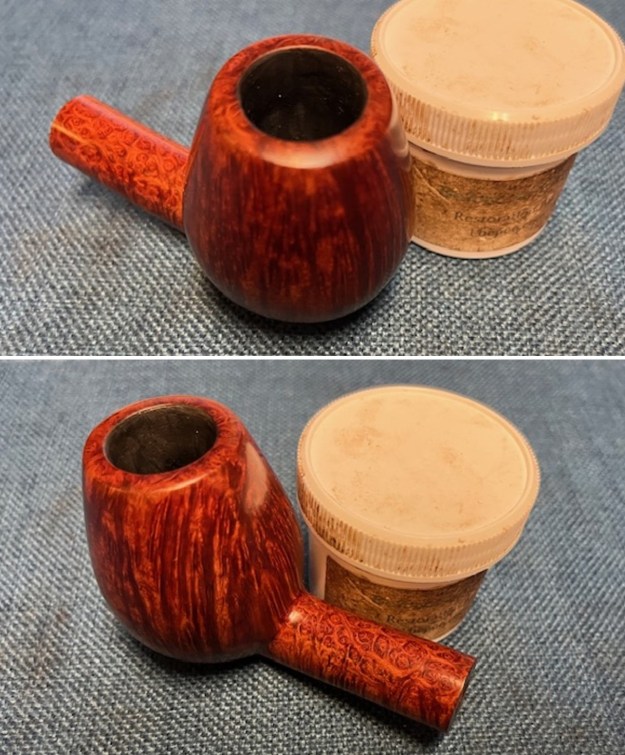
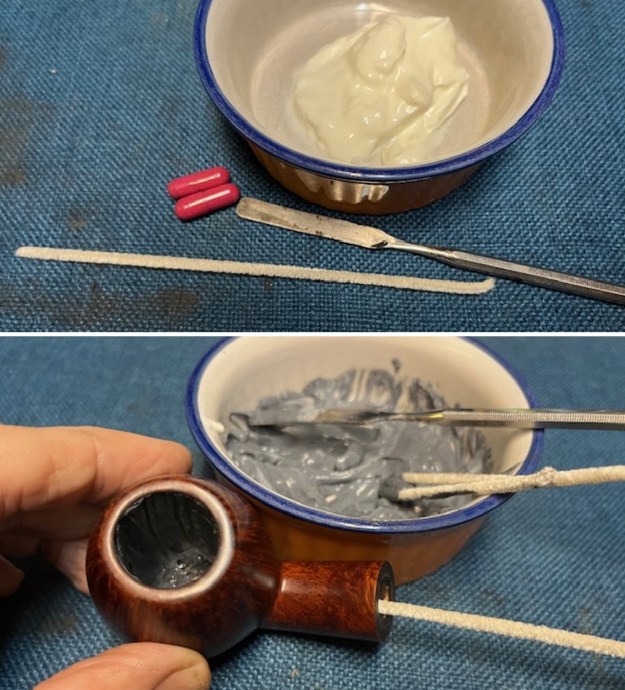
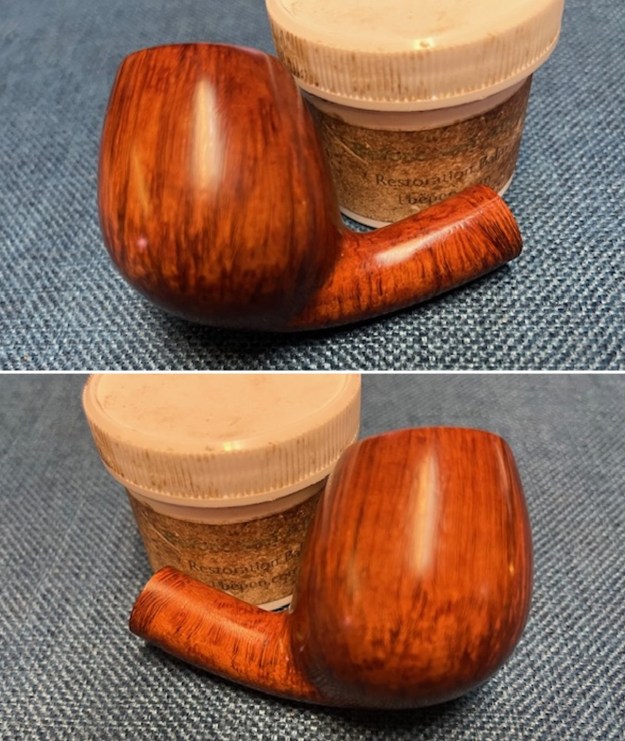
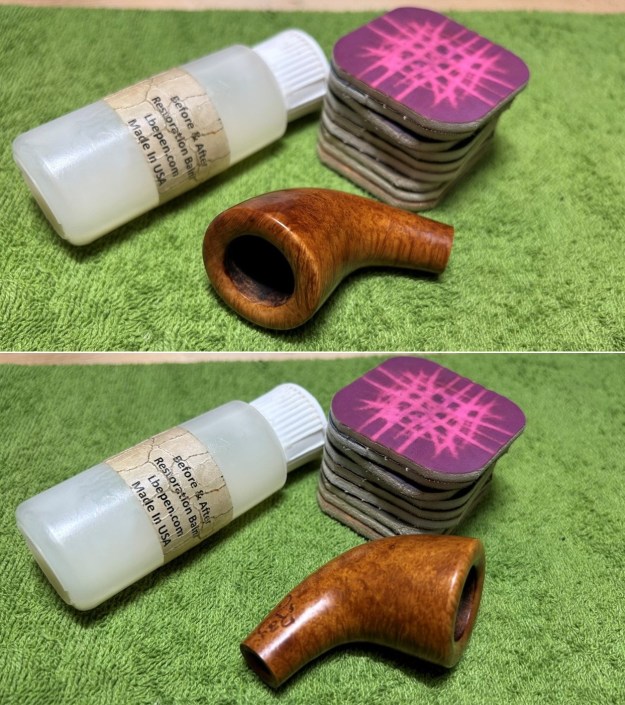
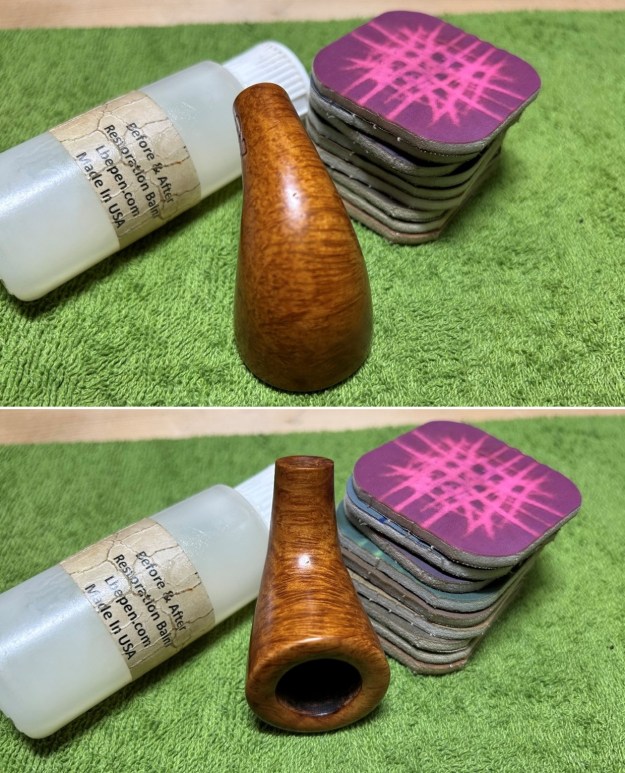
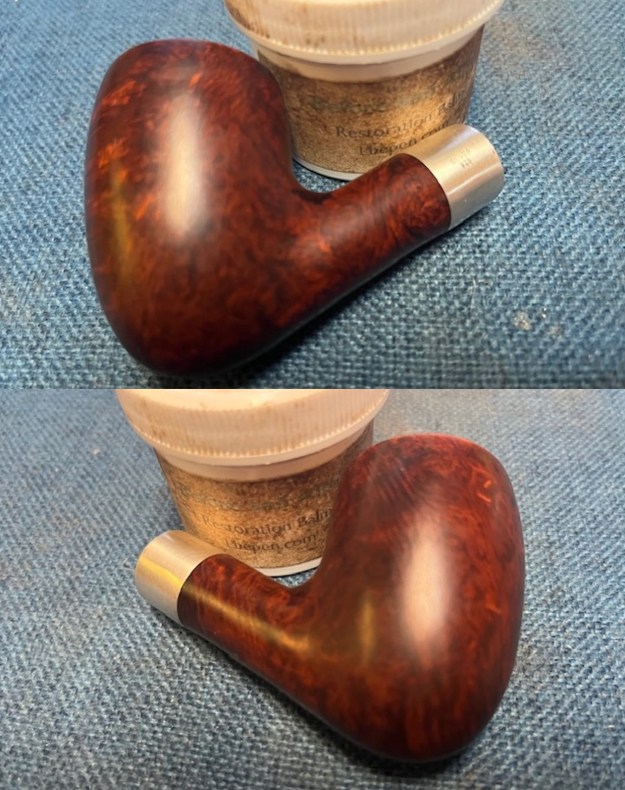
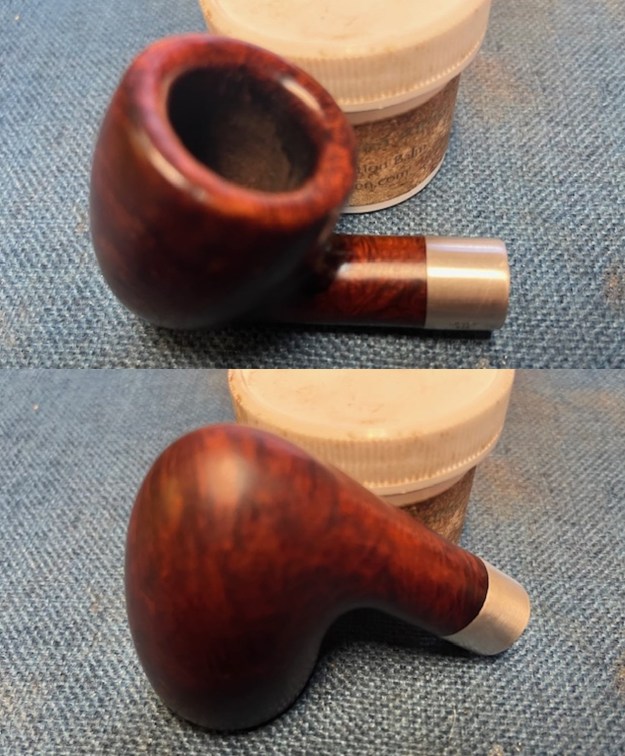
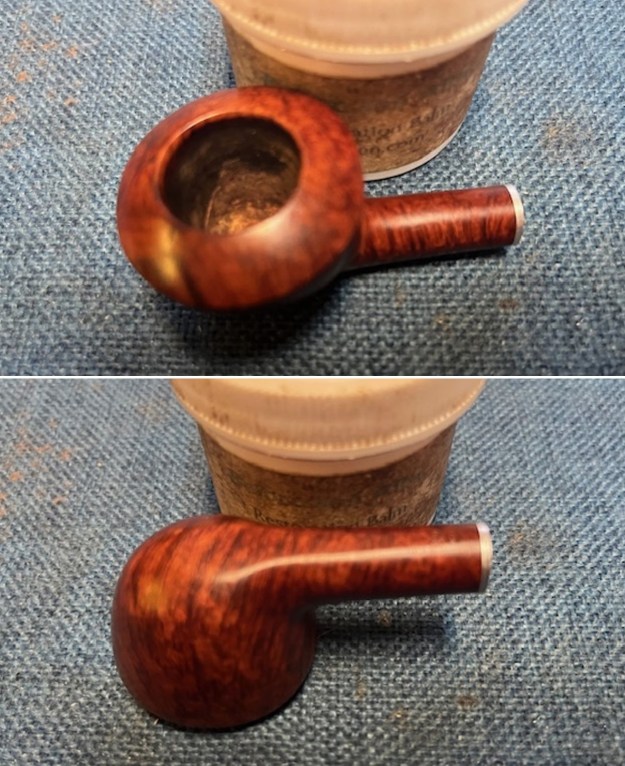
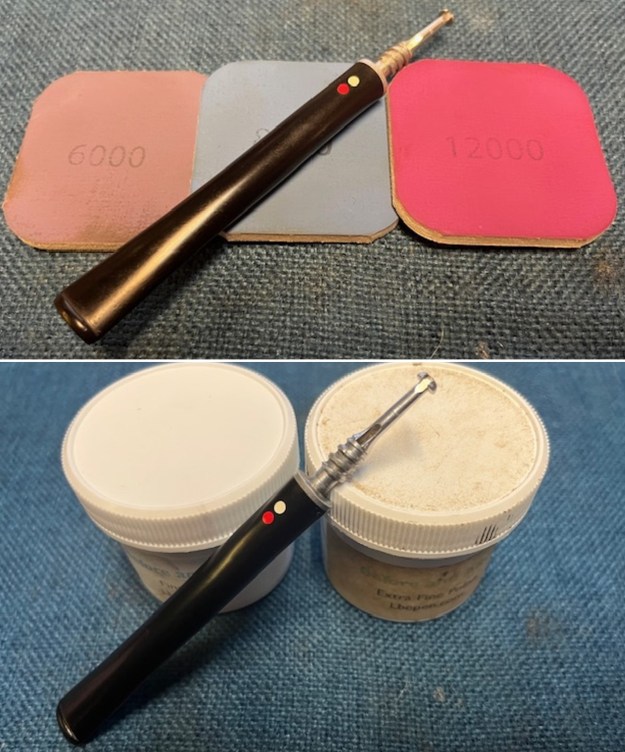
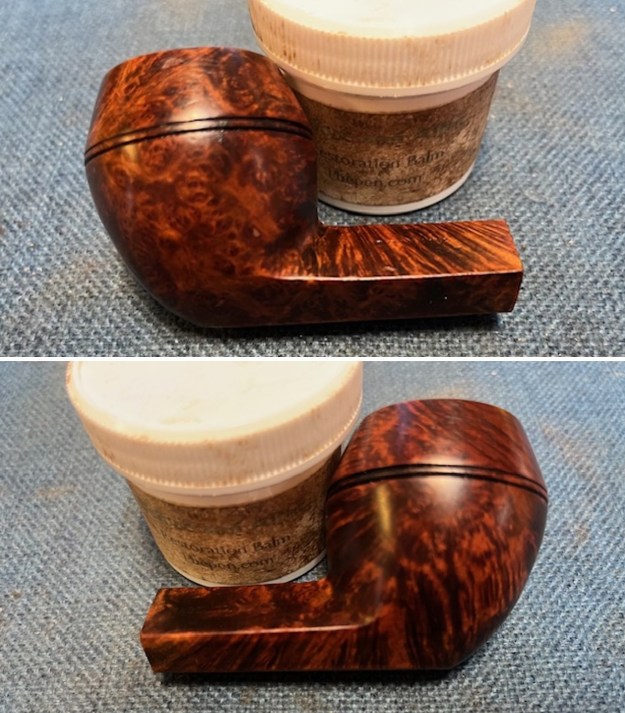
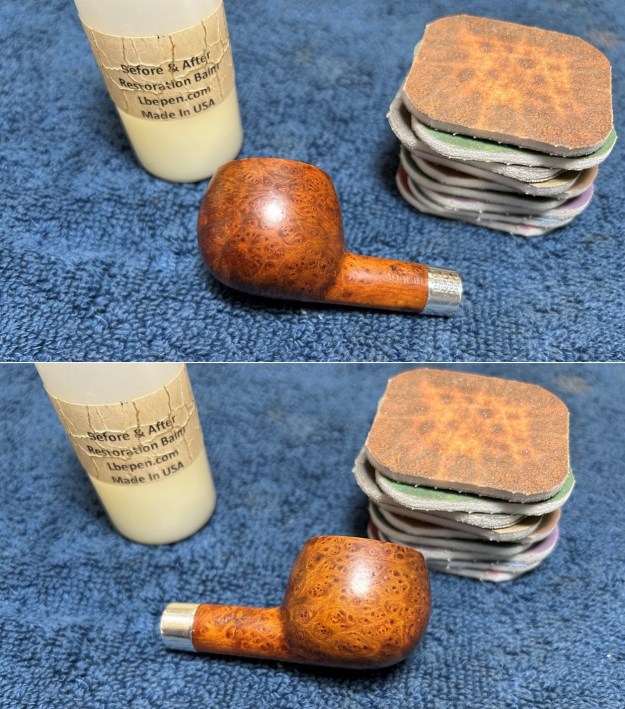
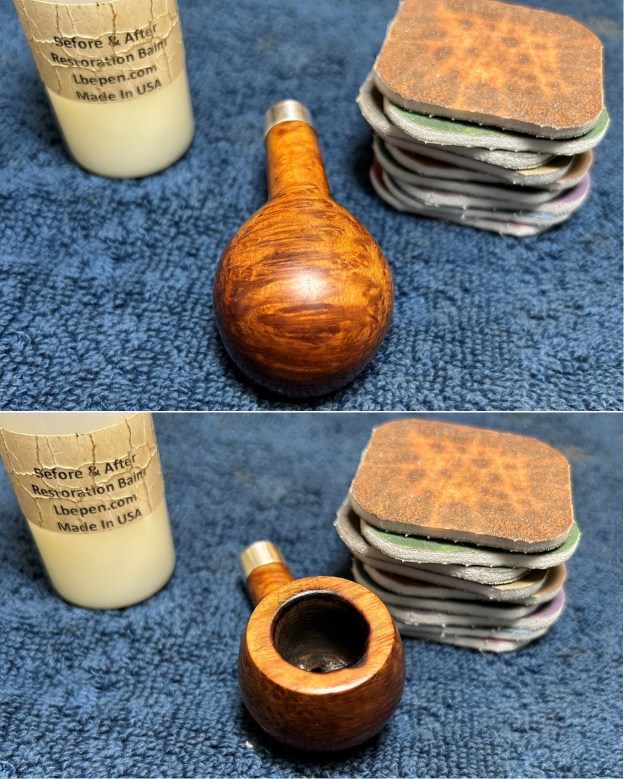
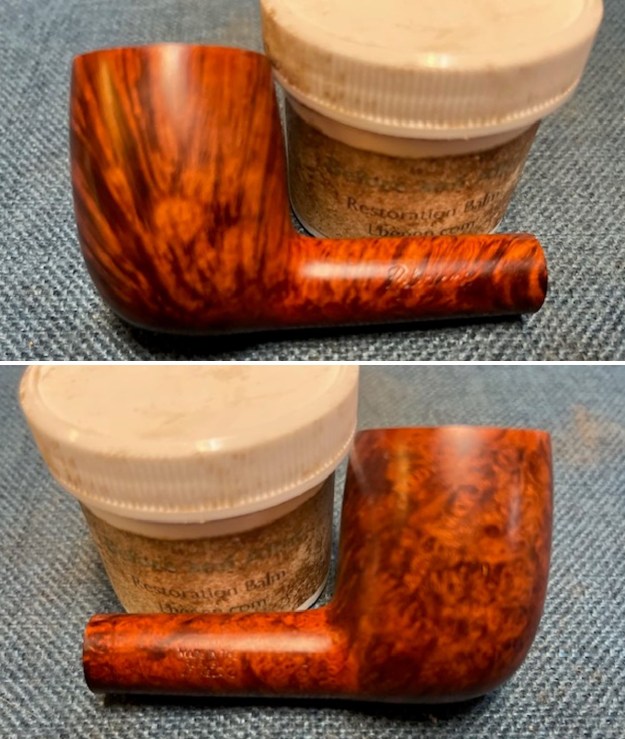
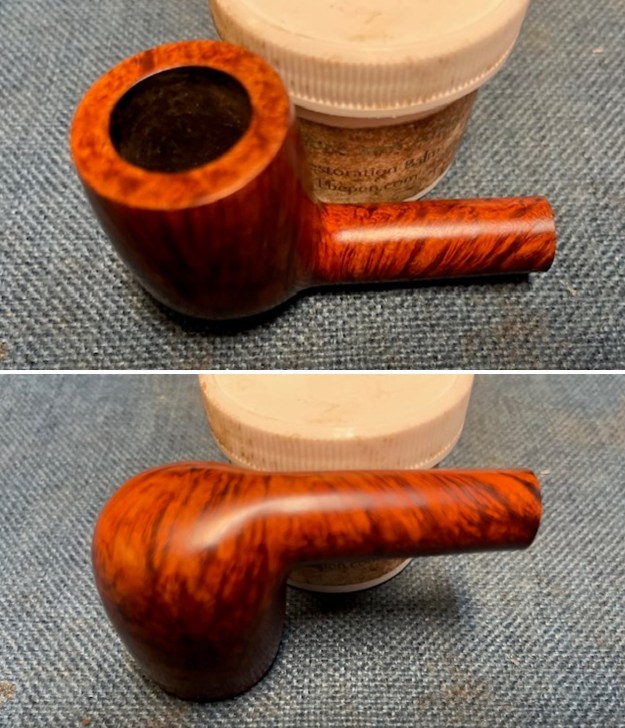
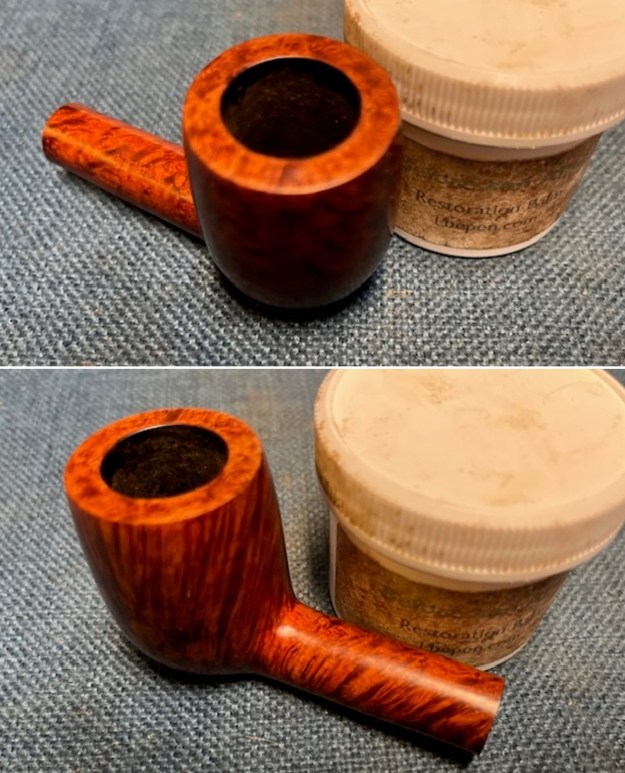
 I rubbed the bowl down with Before & After Restoration Balm. I worked it into the surface of the briar with my fingertips and a shoe brush to get it into the twin rings around the cap. It works to clean, restore and preserve the briar. I let it do its magic for 15 minutes then buffed it off with a cotton cloth. The pipe looks incredibly good at this point in the process.
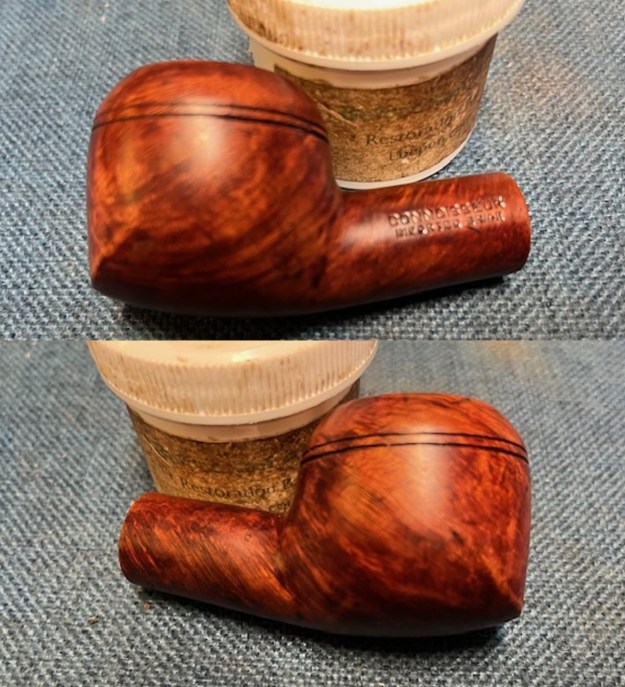
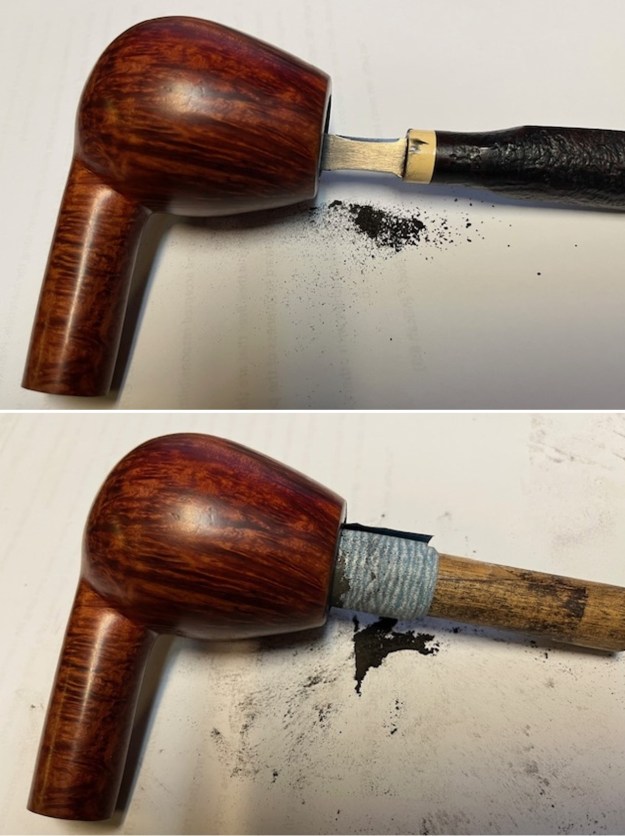
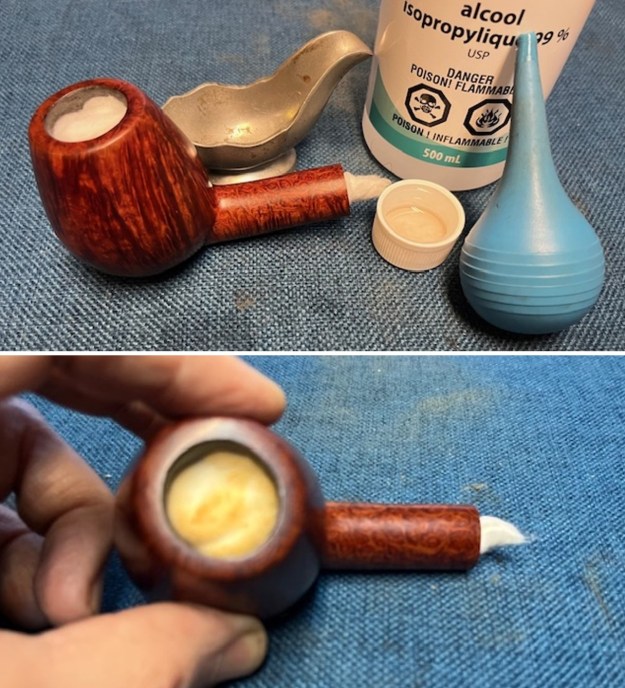
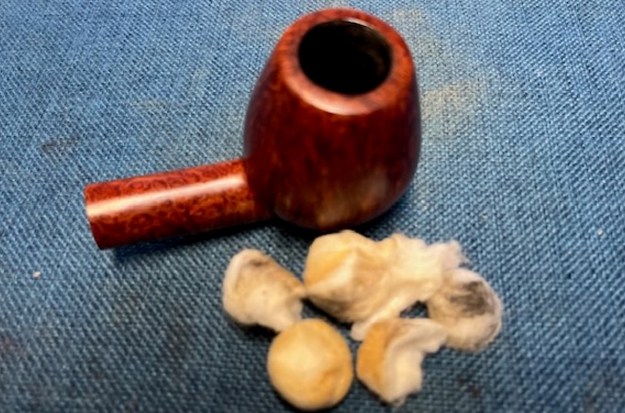
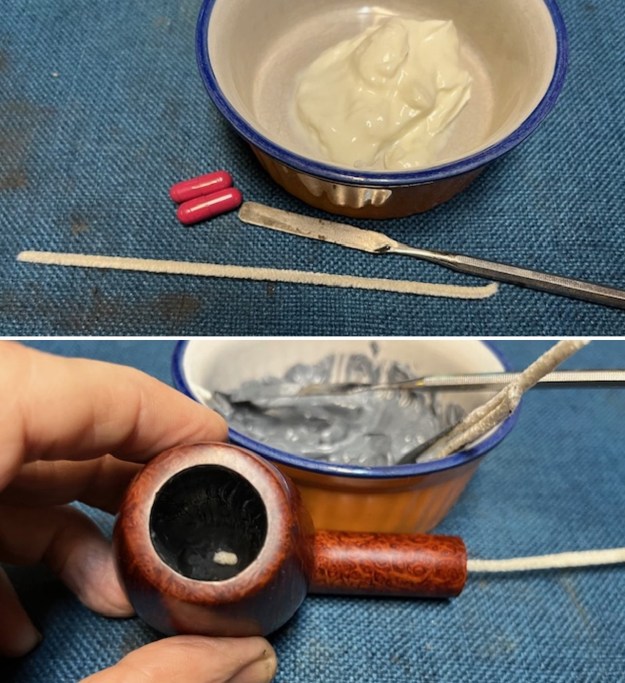
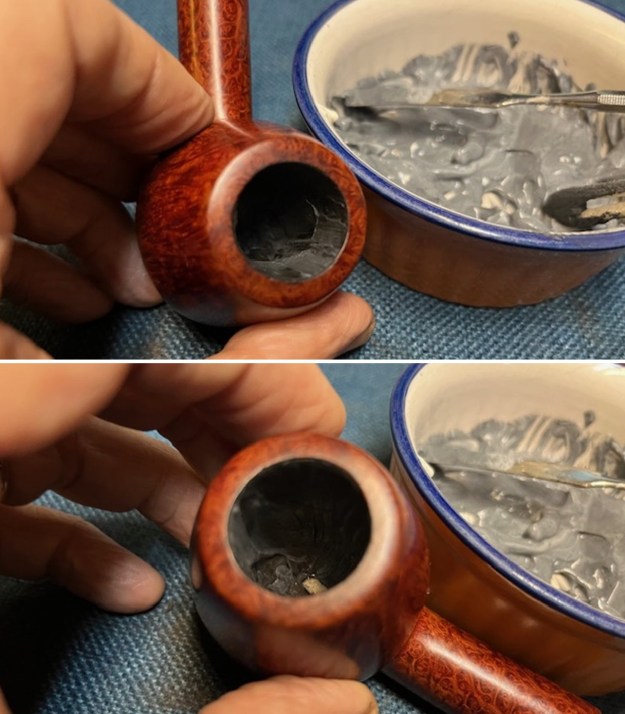
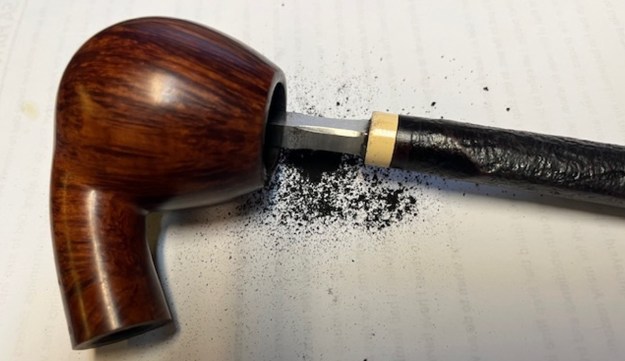
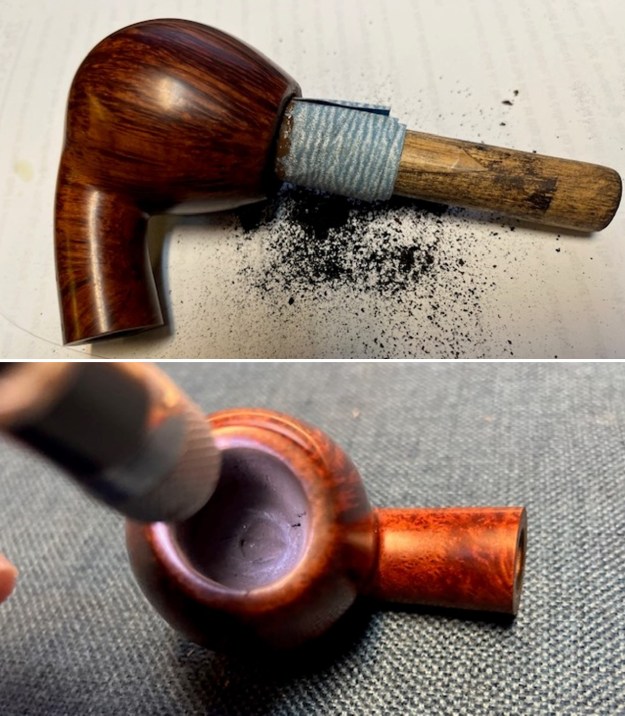
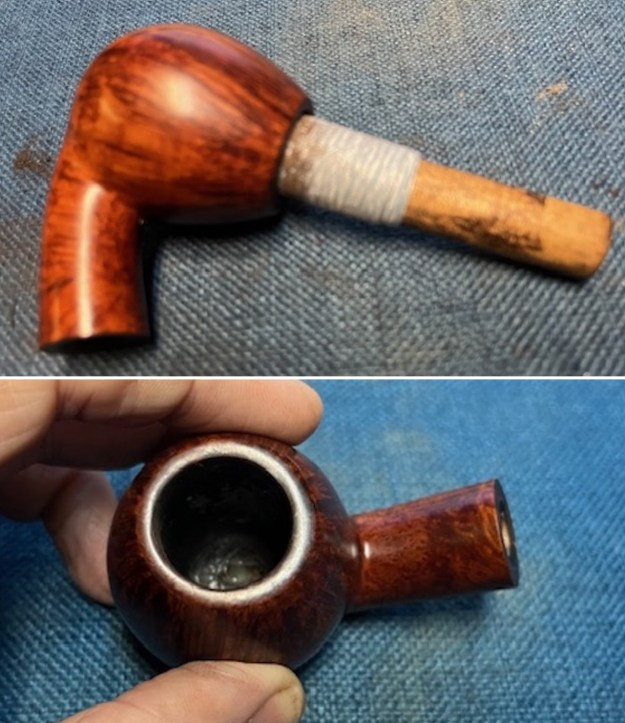
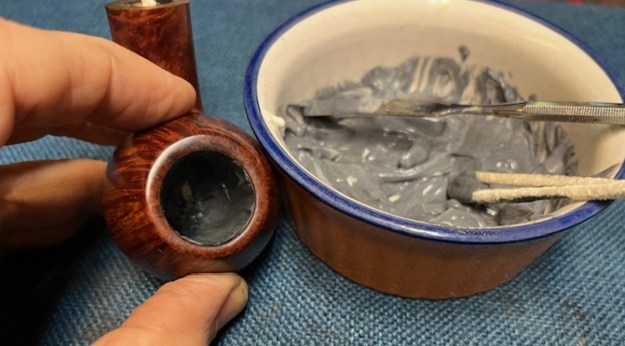
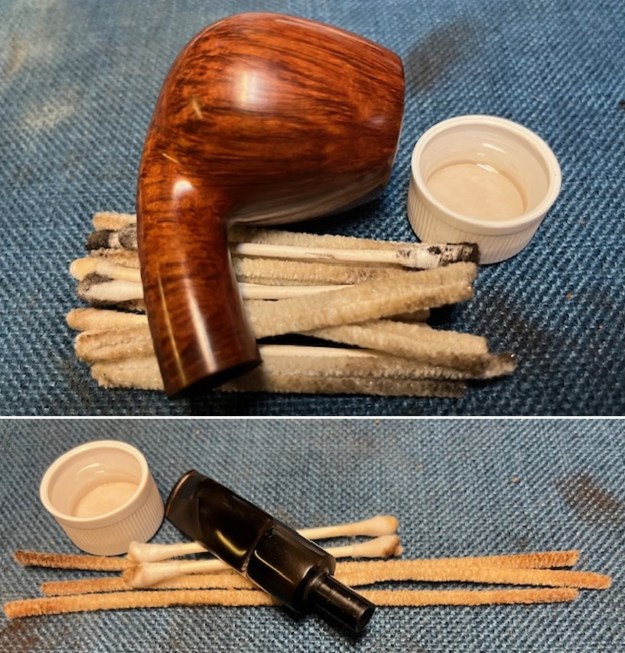
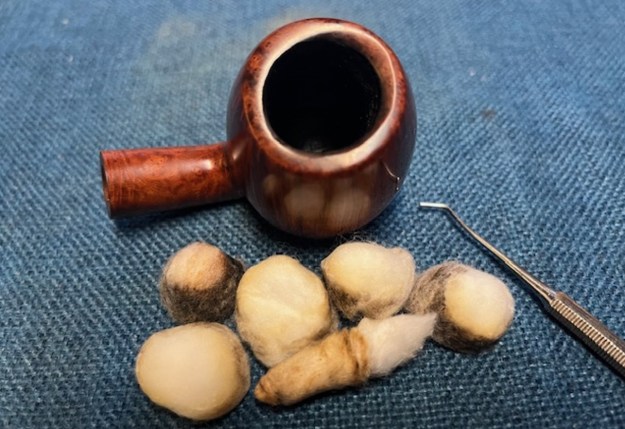
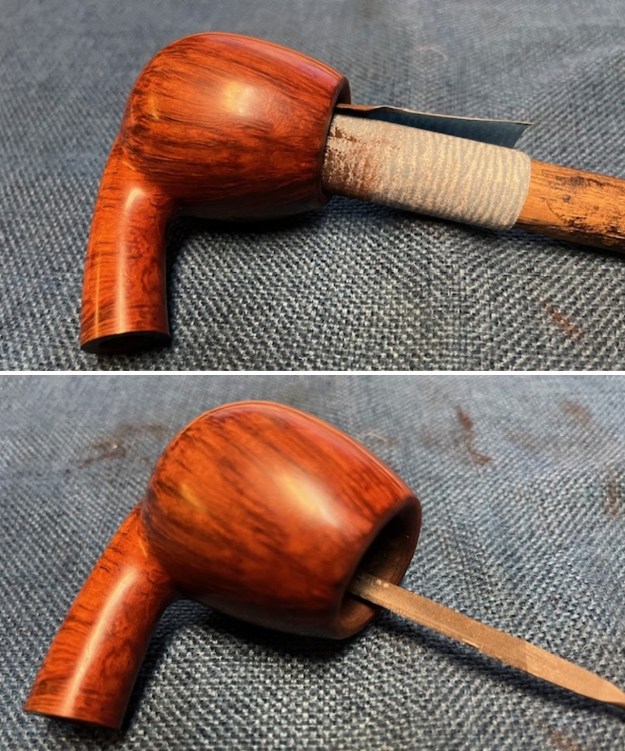
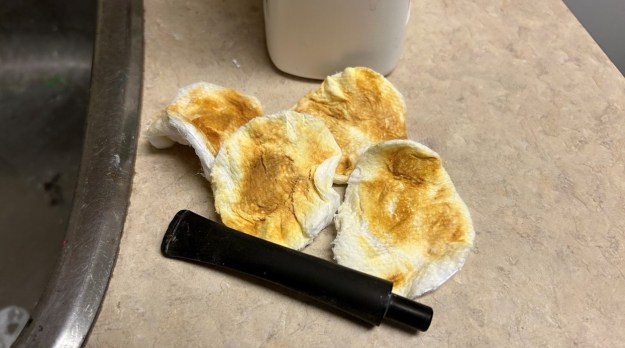
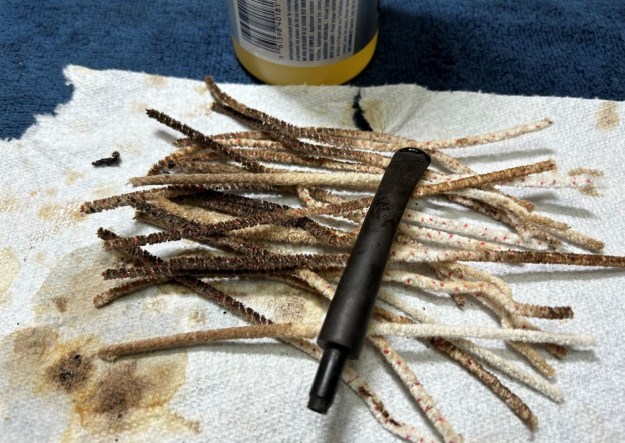
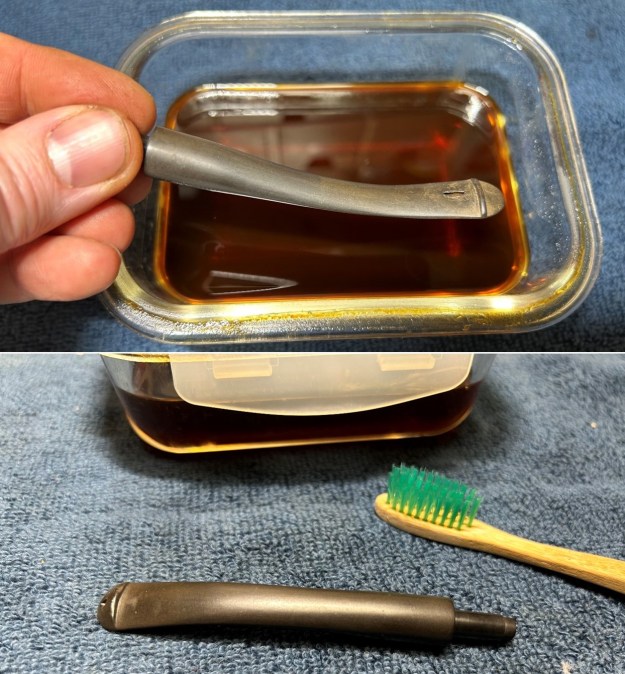
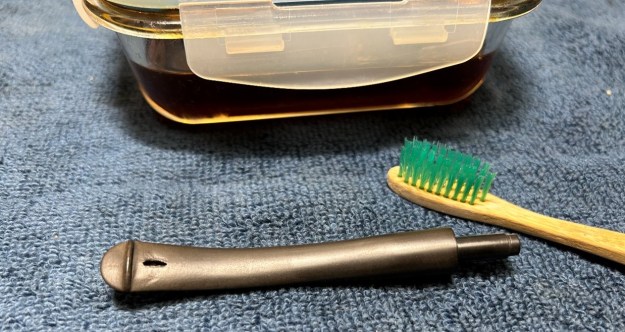
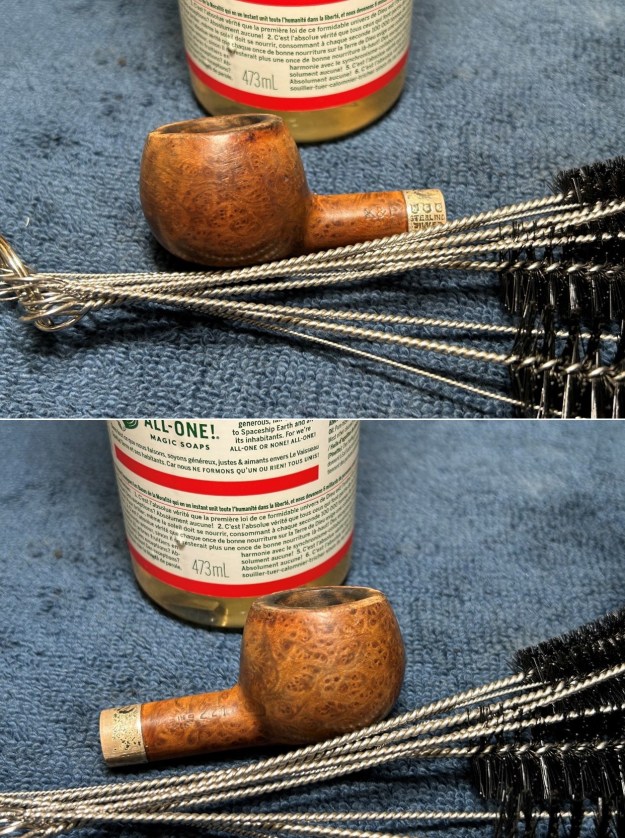
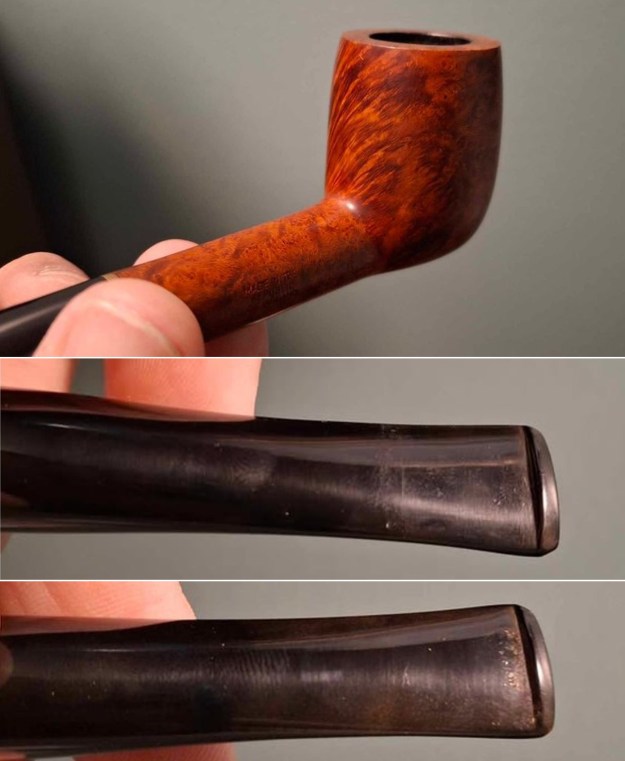
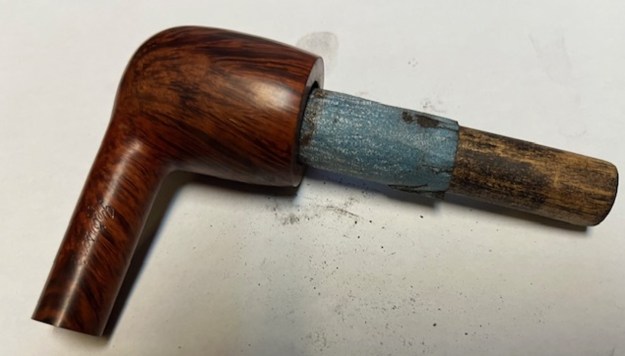
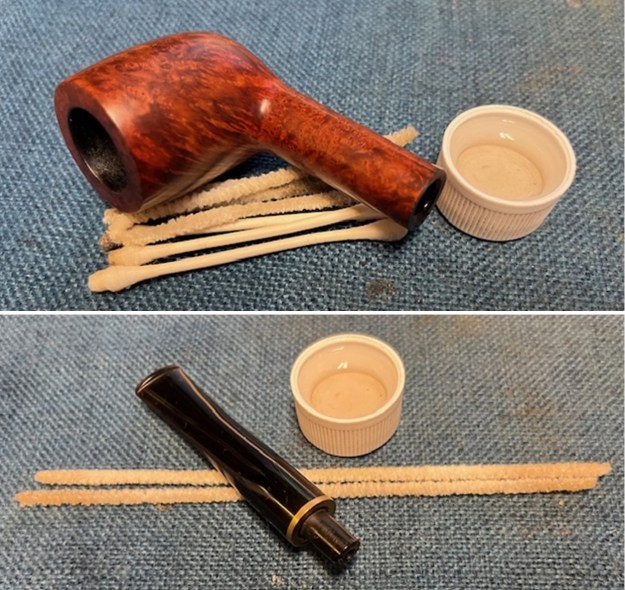
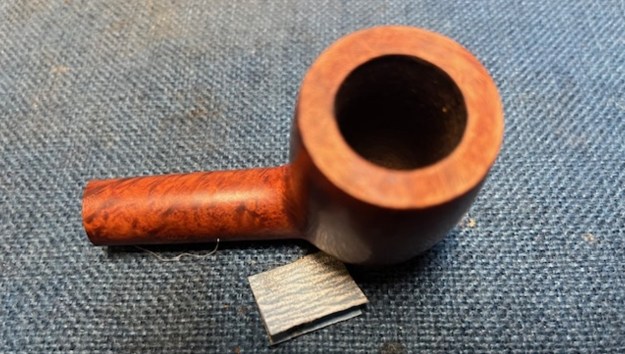
 I had an aha moment and realized I had not cleaned the mortise and shank so I paused in the process to do both the stem and the bowl. I turned the stinger out of the tenon so I could properly clean it. It was pressure fit so it was an easy removal. I cleaned up the metal stinger with a brass bristle wire brush so that the oils and tars were gone. I cleaned out the mortise, the airway in the shank and the stem with pipe cleaners, cotton swabs and isopropyl alcohol. It was not a surprise that it was very dirty.
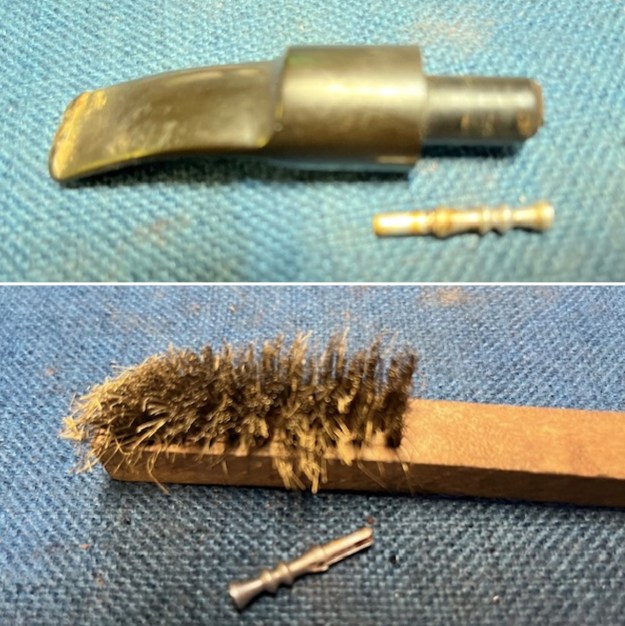
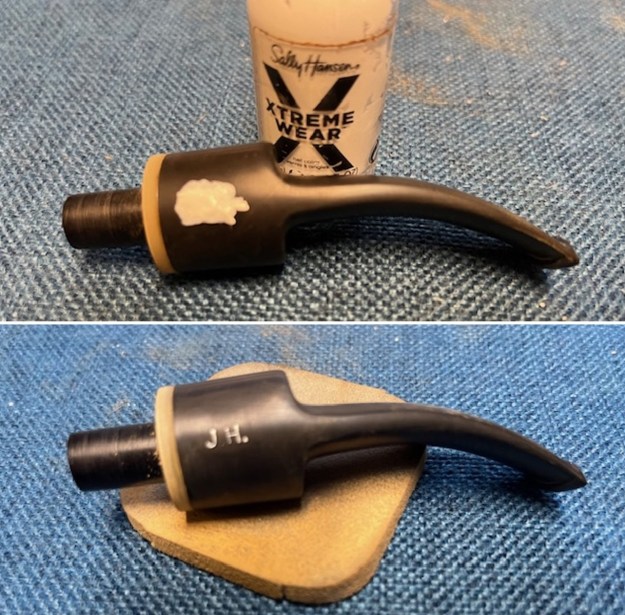
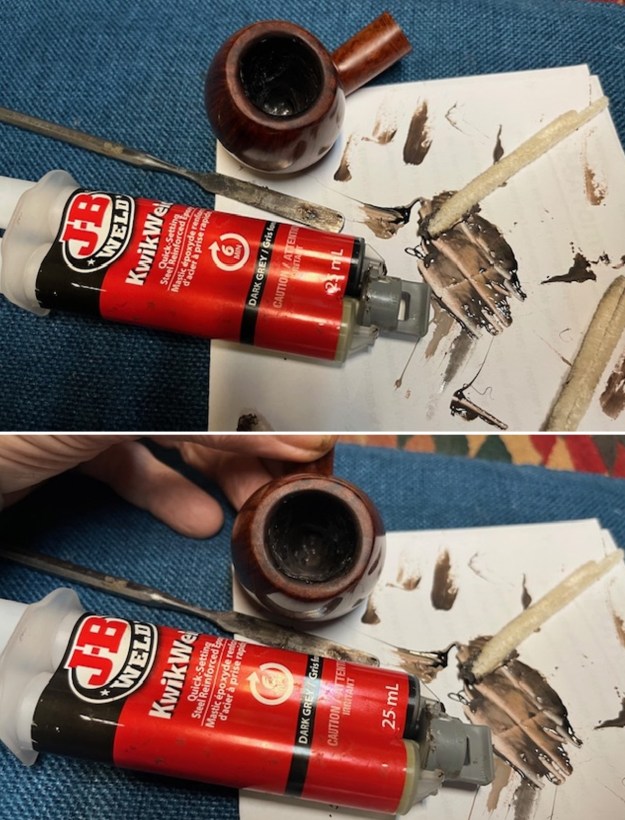
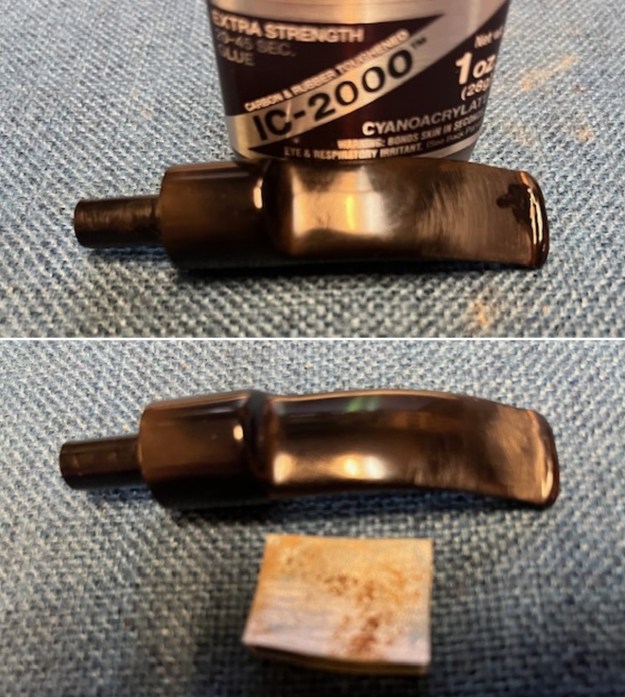
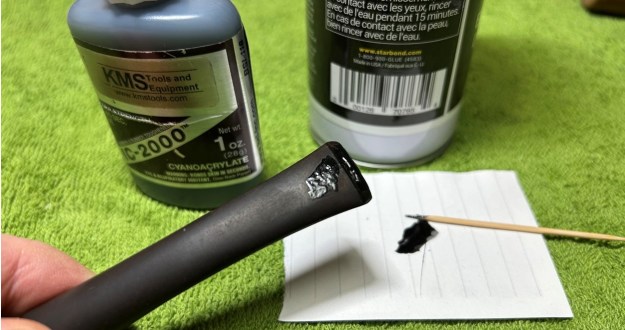
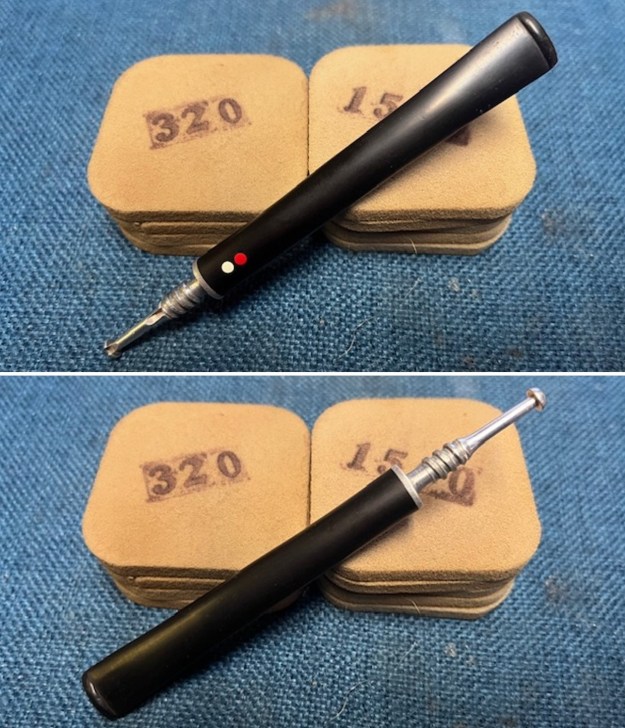
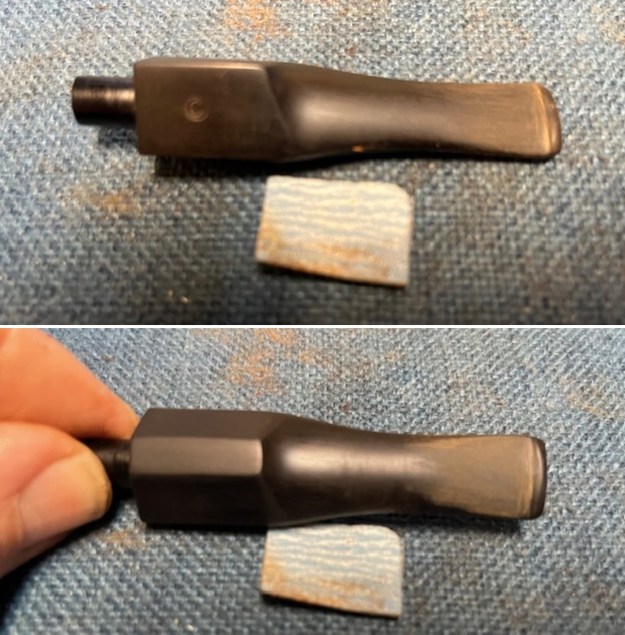
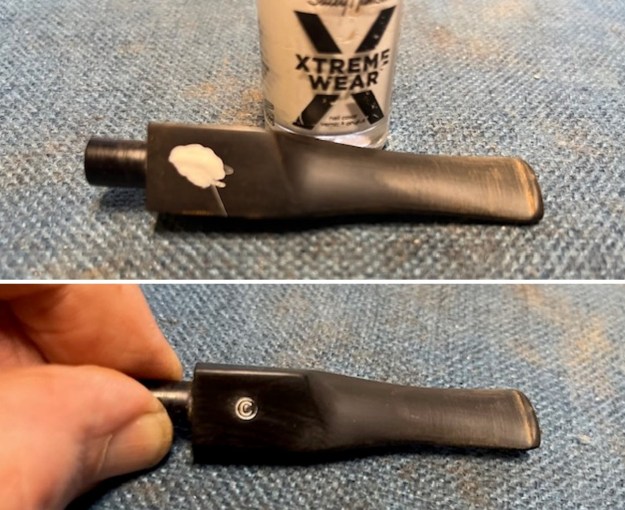
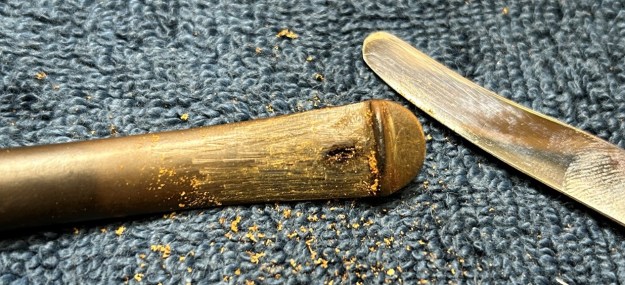
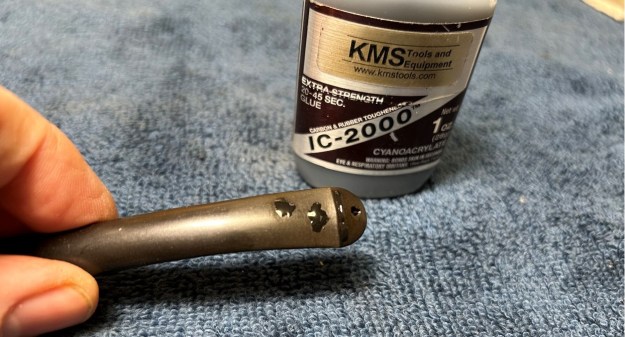
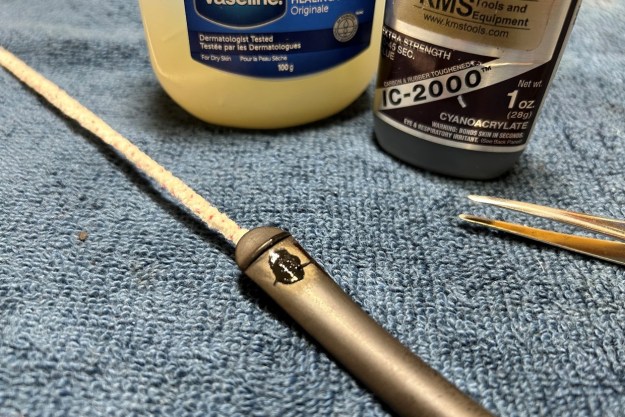
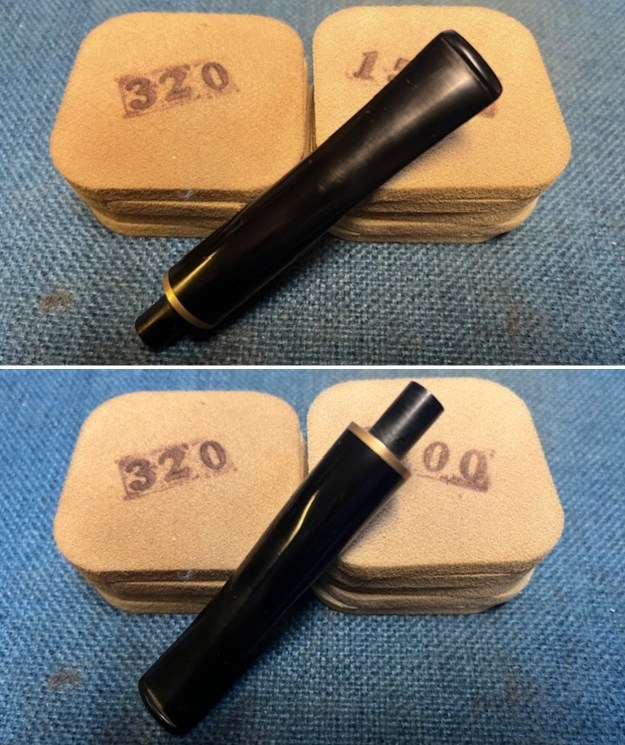
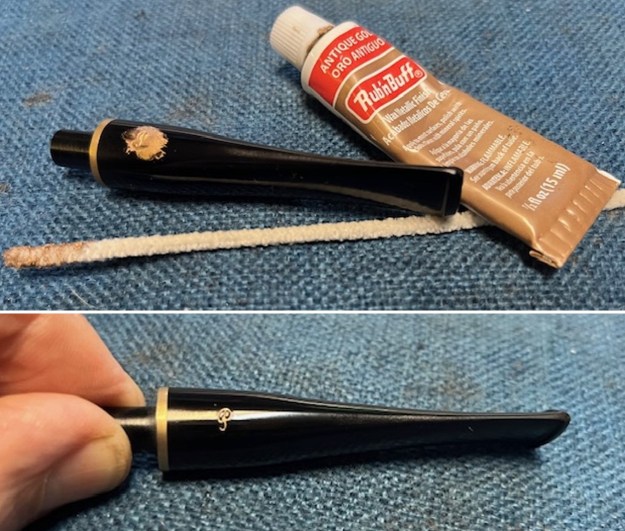
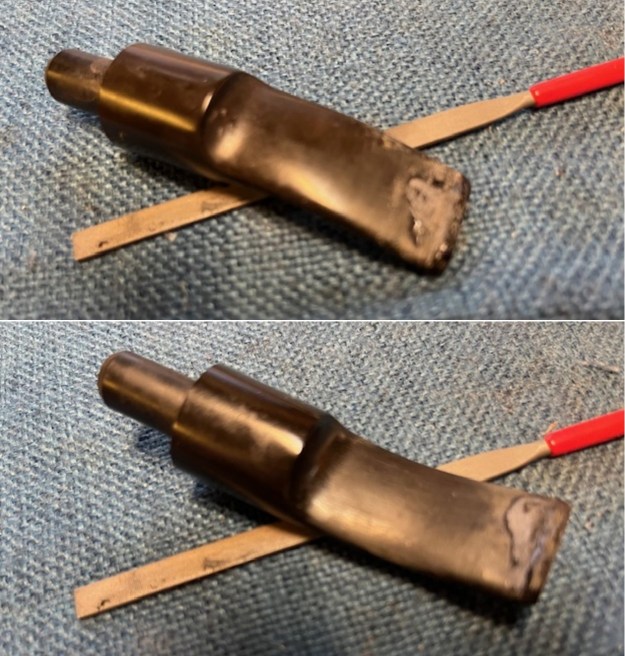
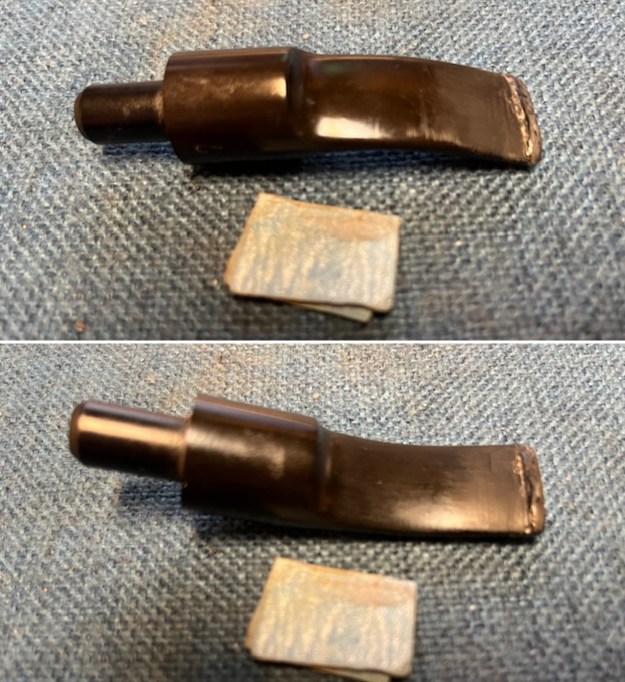
 With everything clean I turned my attention to the stem. I filled in the deep marks in the vulcanite stem with black rubberized CA glue. Once it hardened I flattened the repairs out with a small file. I sanded the stem with 220 grit sandpaper to blend them into the rest of the stem. It was beginning to look good.
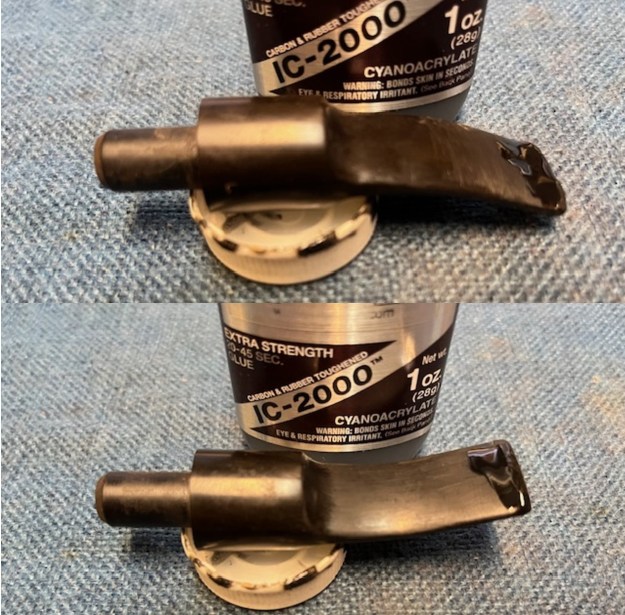
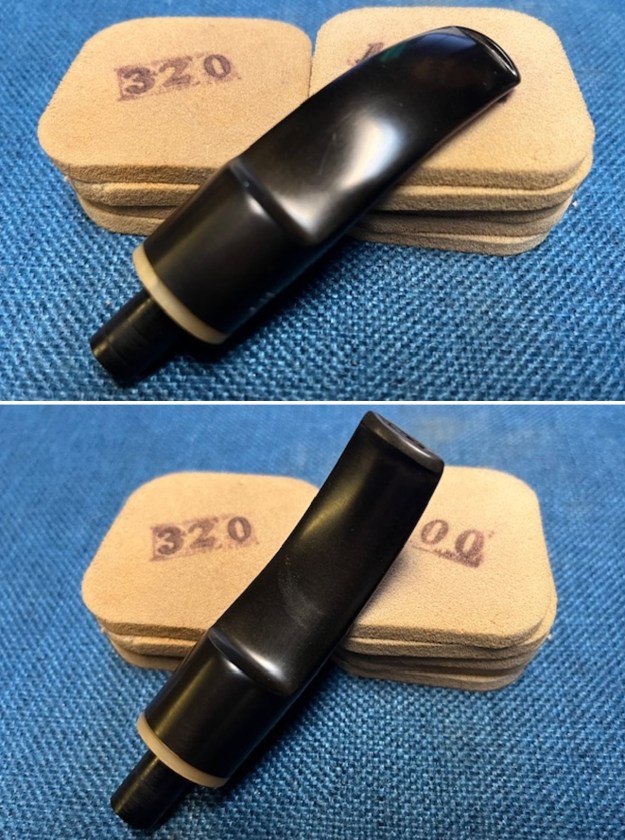
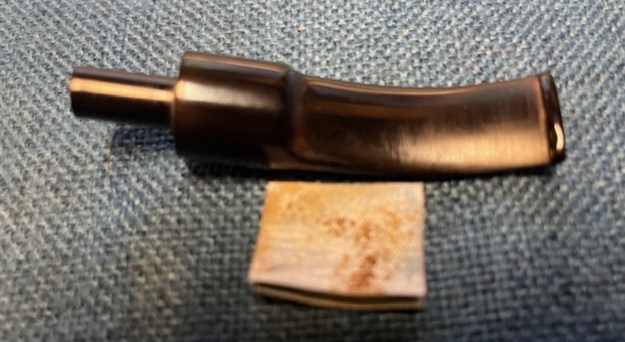
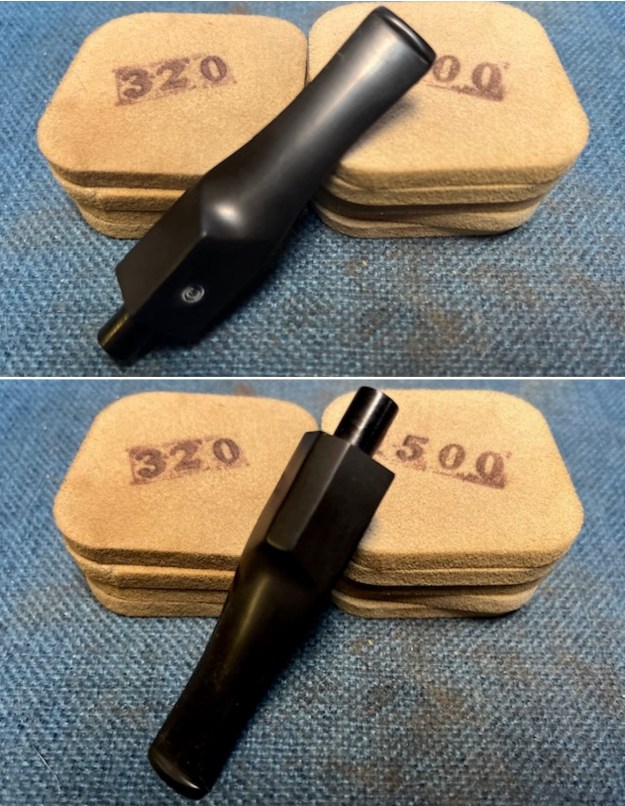
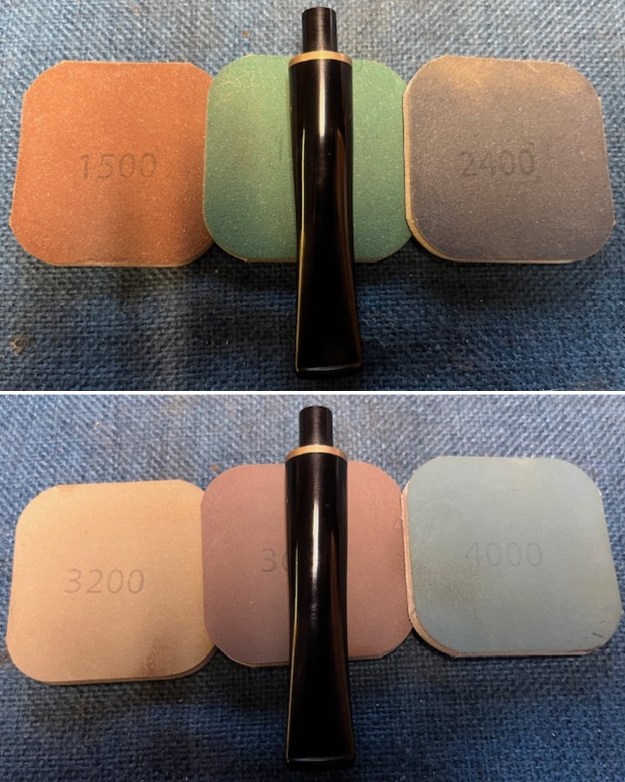
 I sanded the stem with 320-3500 grit sanding pads. I wiped the stem down after each sanding pad to remove the sanding debris and dust. The stem looked very good.
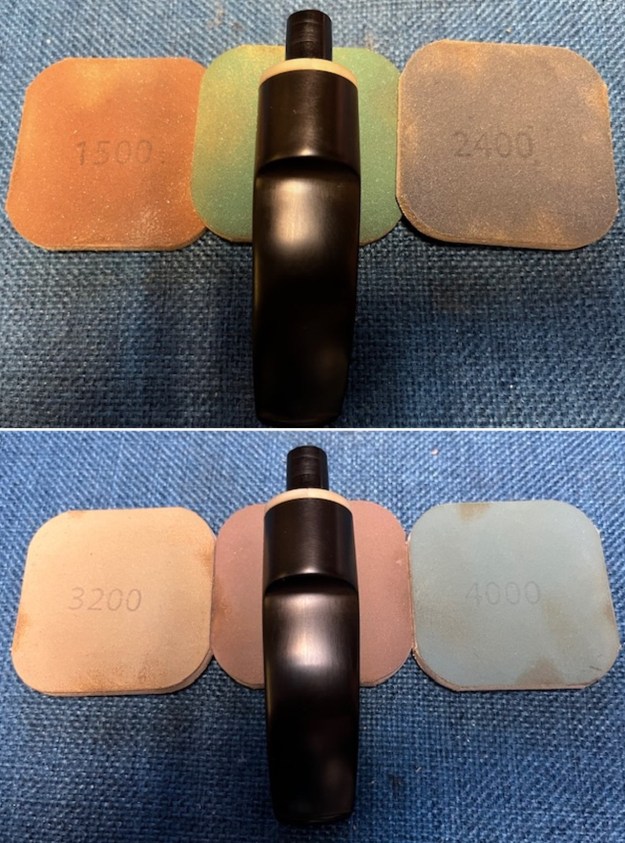
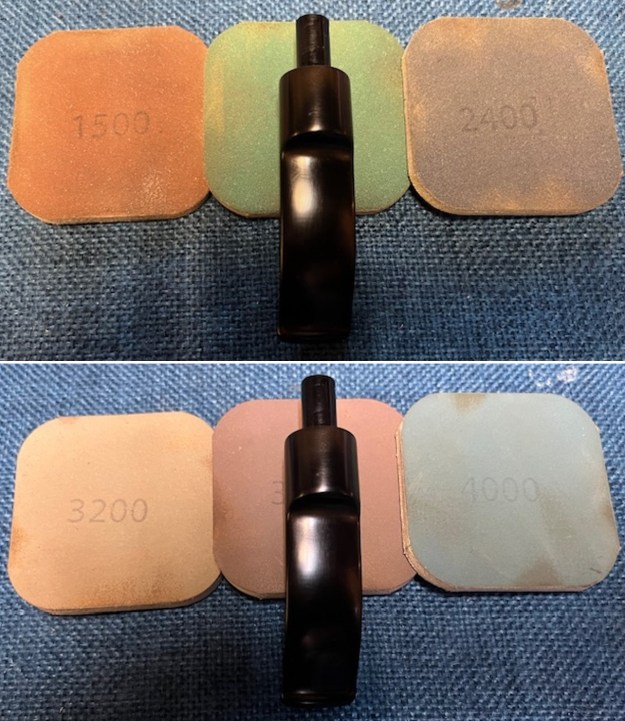
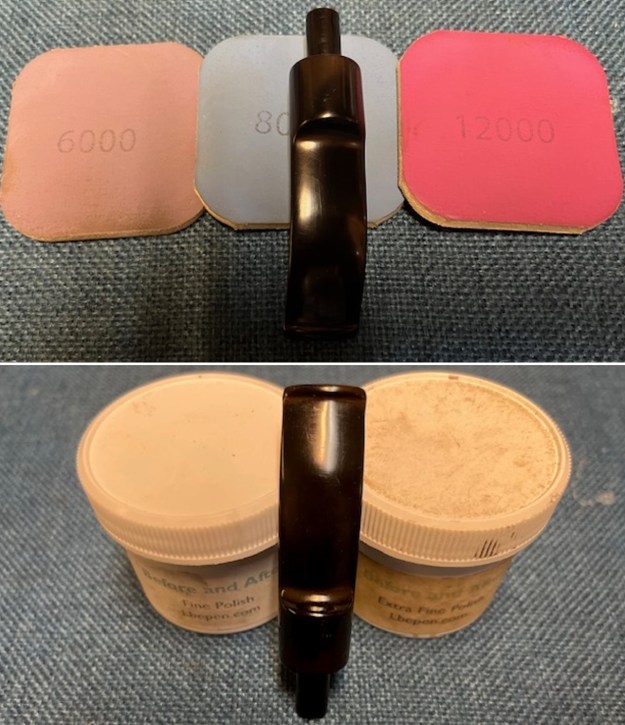
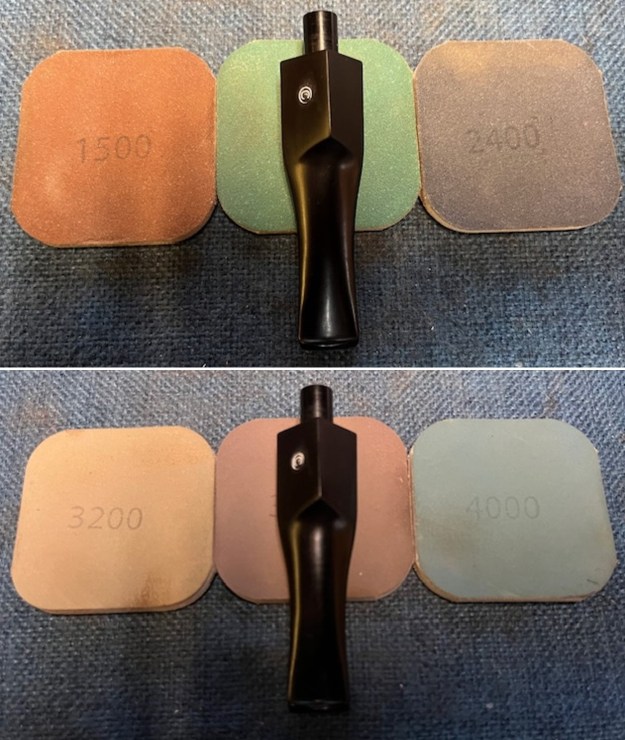
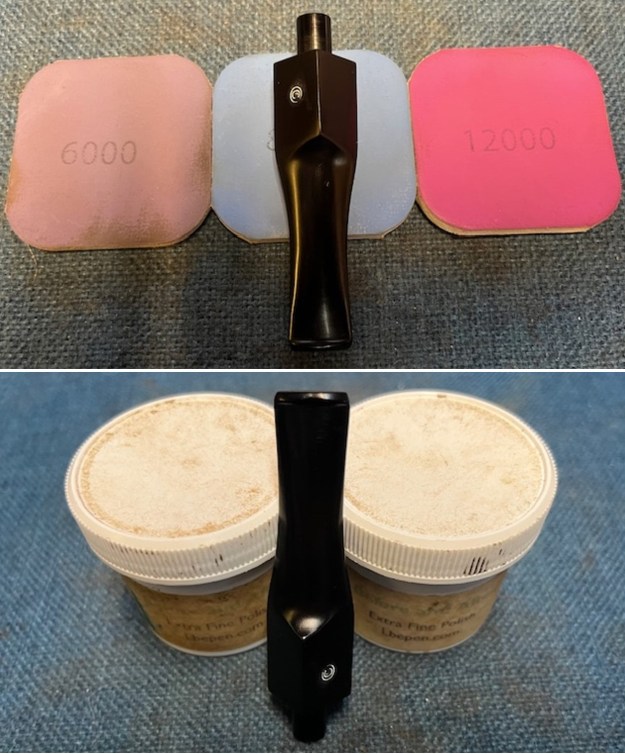
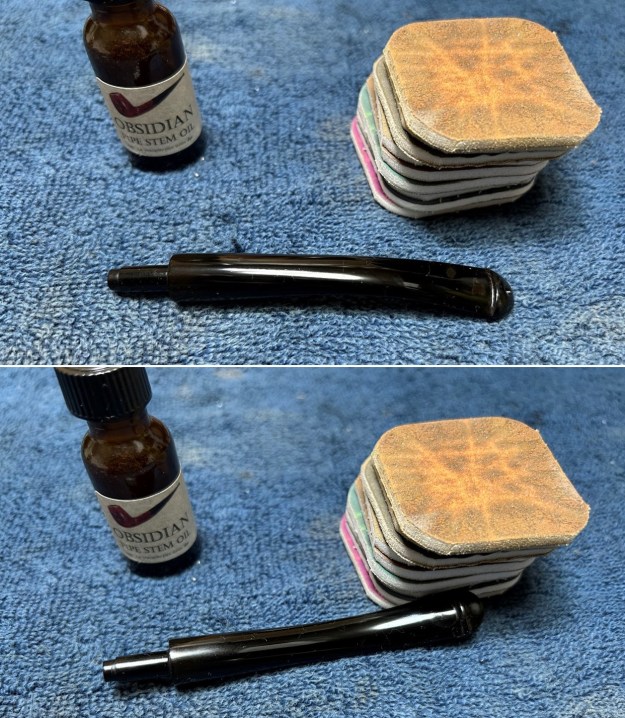
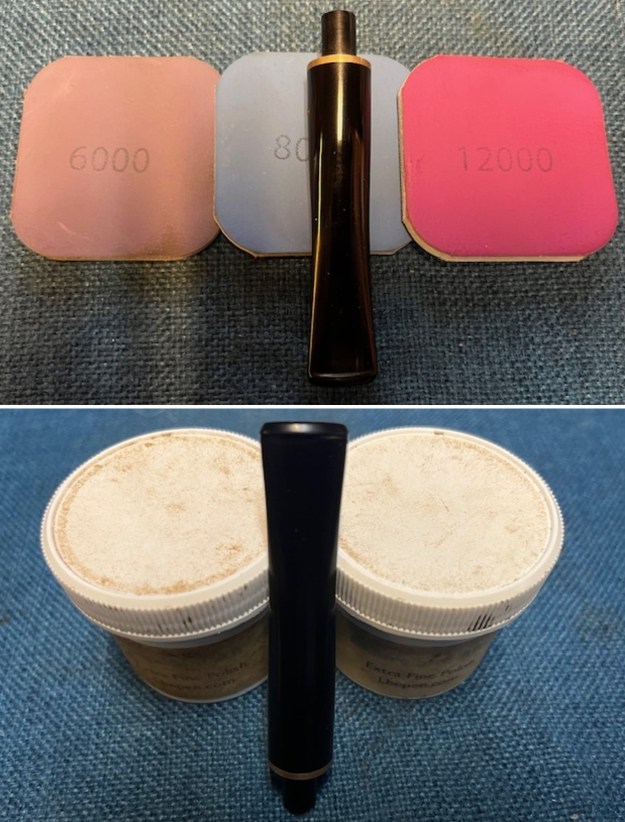
 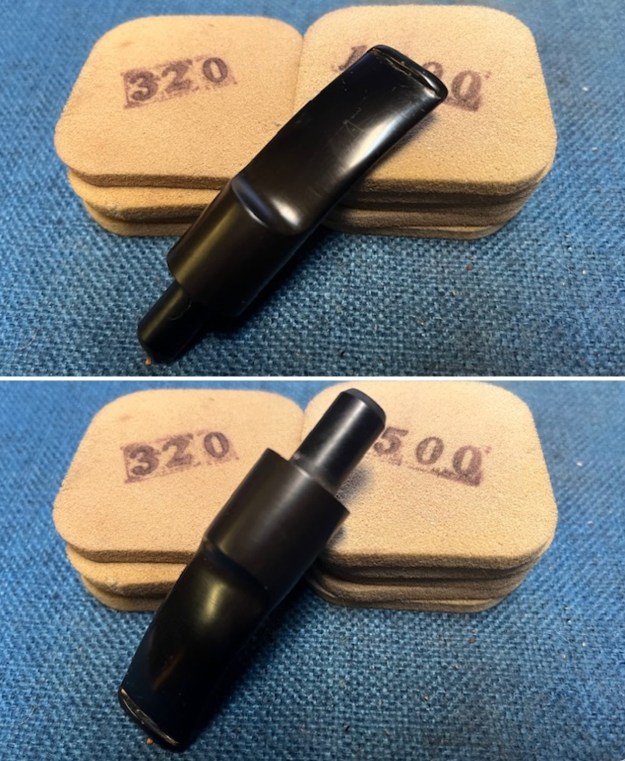 I polished the stem with micromesh sanding pads – 1500-12000 grit pads. I wiped it down with a damp cloth after each sanding pad. I finished polishing it with Before & After Pipe Stem Polish – both Fine and Extra Fine and buffed it off with a cotton cloth. I gave it a coat of Obsidian Oil to preserve and protect the stem.
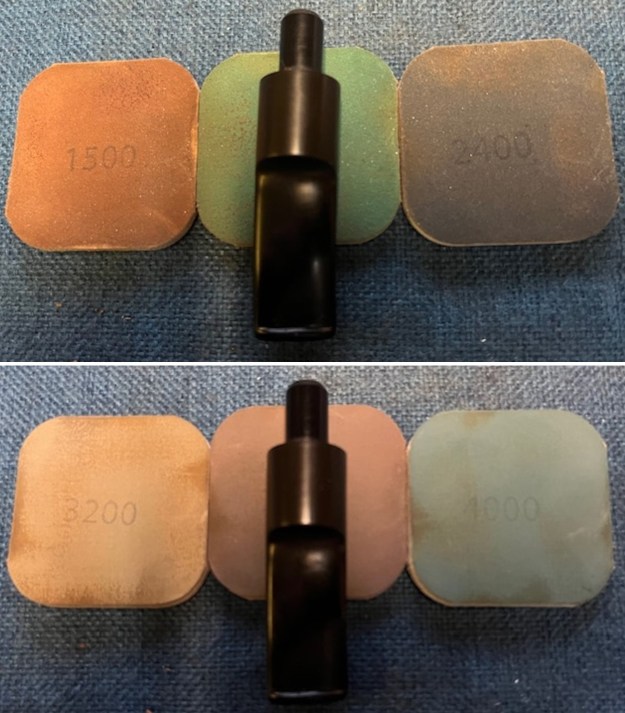
 I reinserted the aluminum stinger in the tenon of the vulcanite saddle stem. It looks very good. It is easily removable should the new pipe man or woman chooses to remove it.
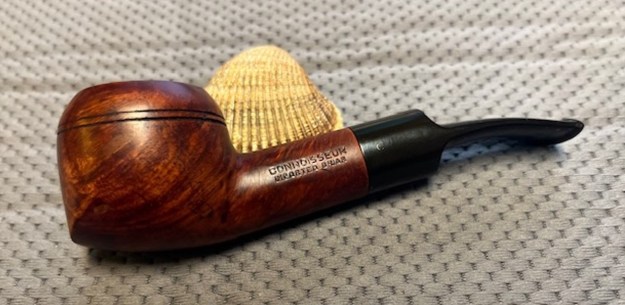
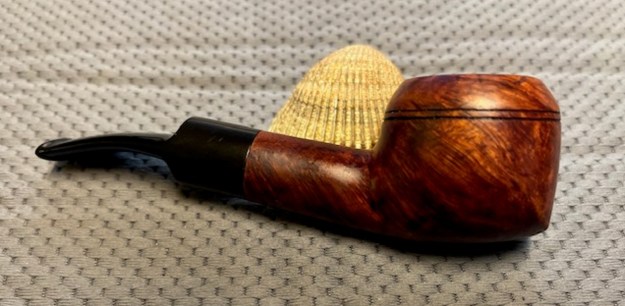
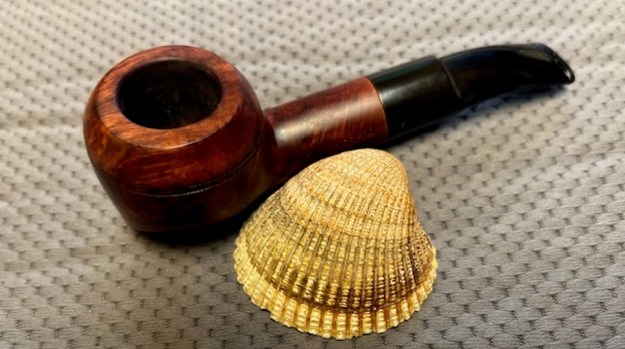
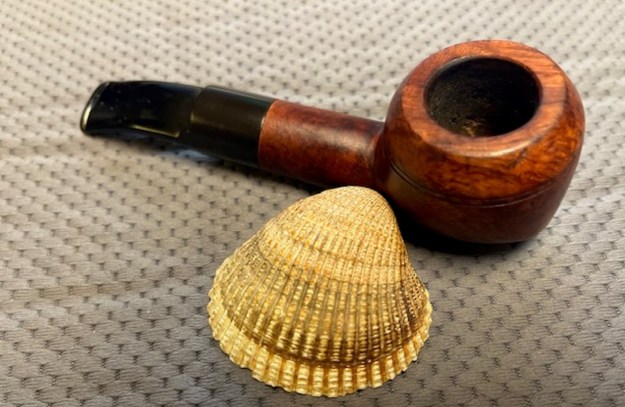
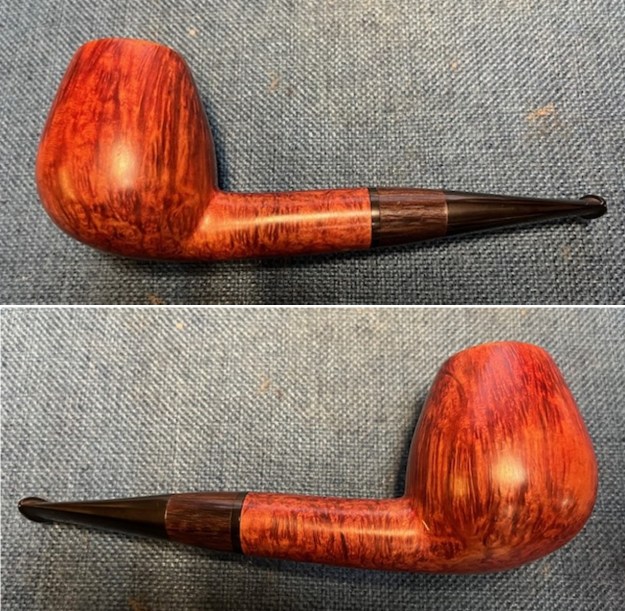
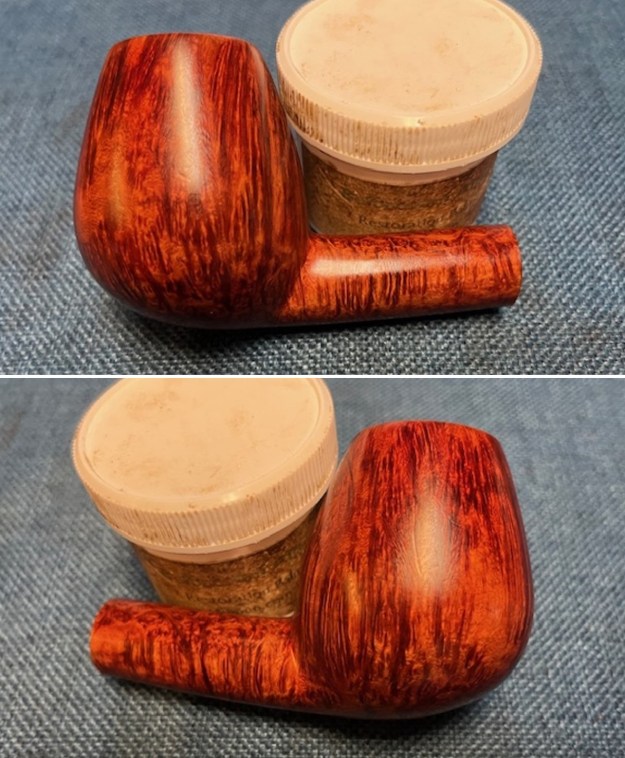
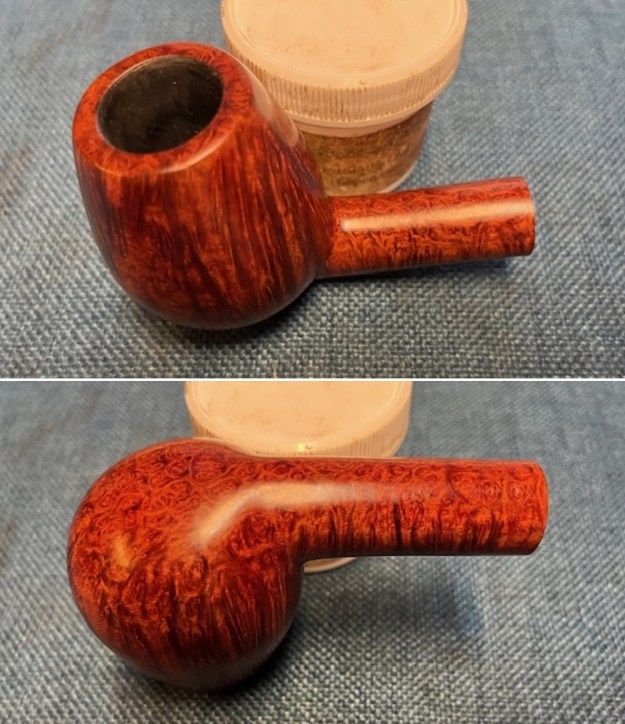
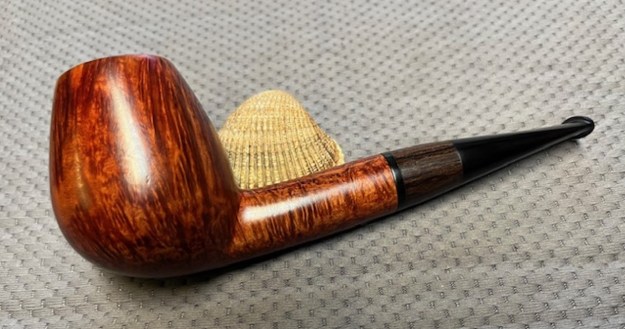
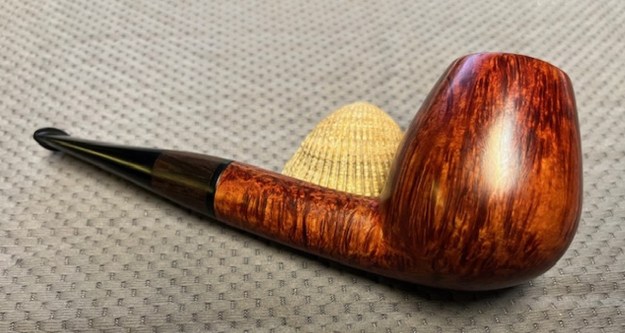
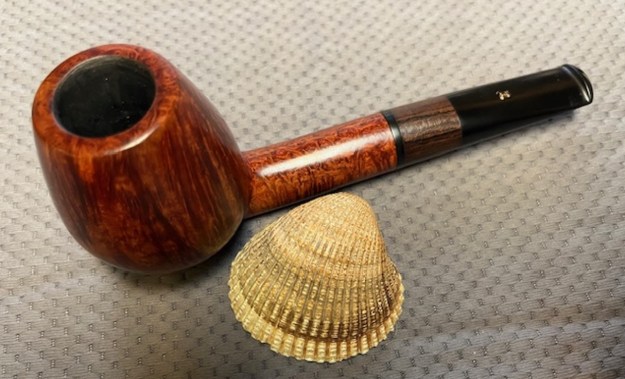
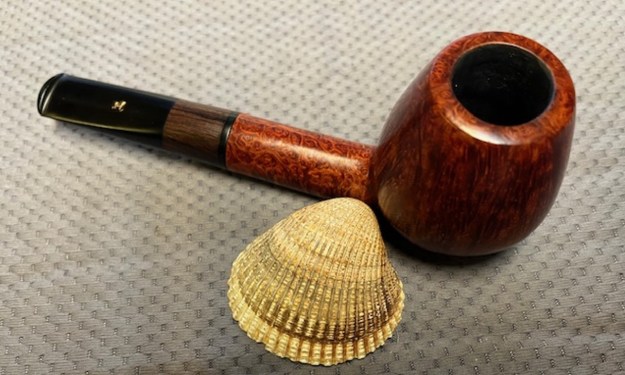
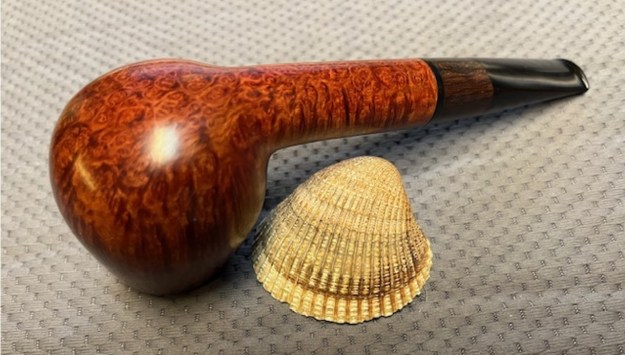
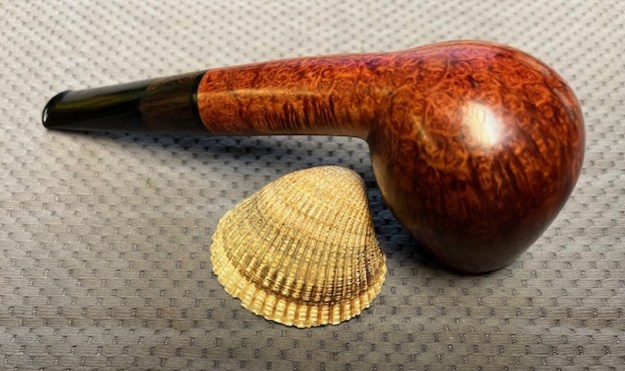
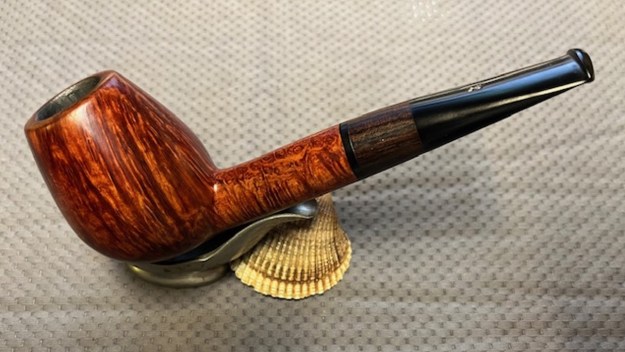
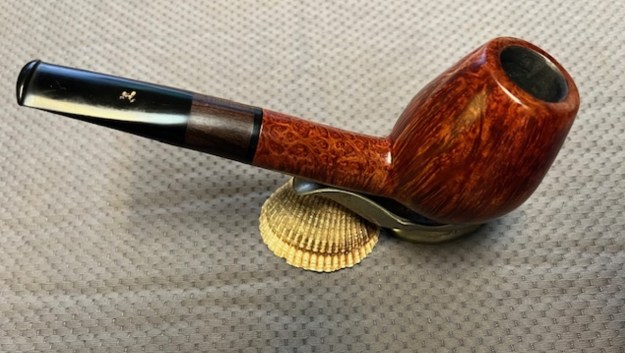
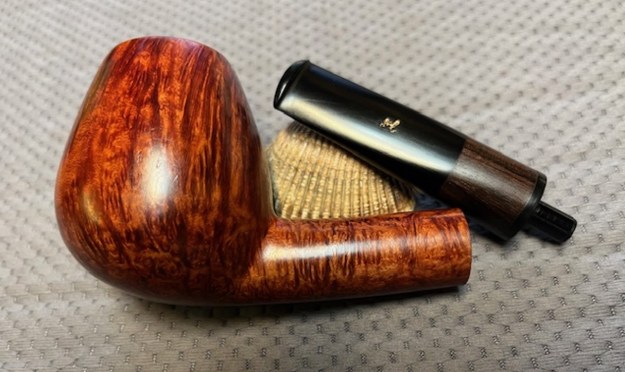
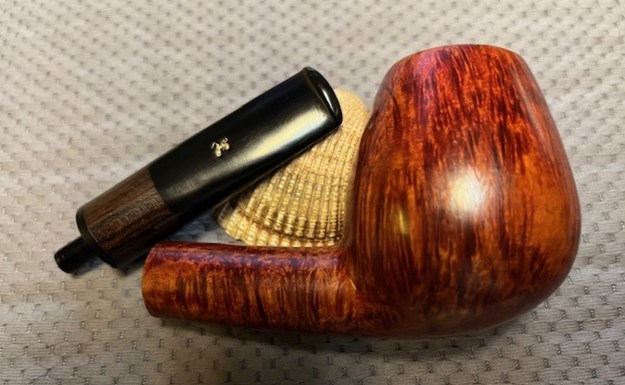
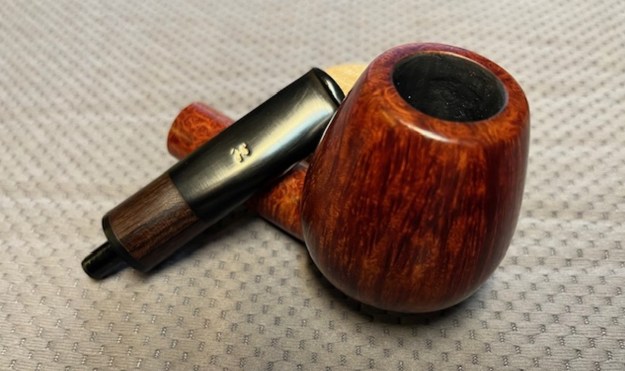
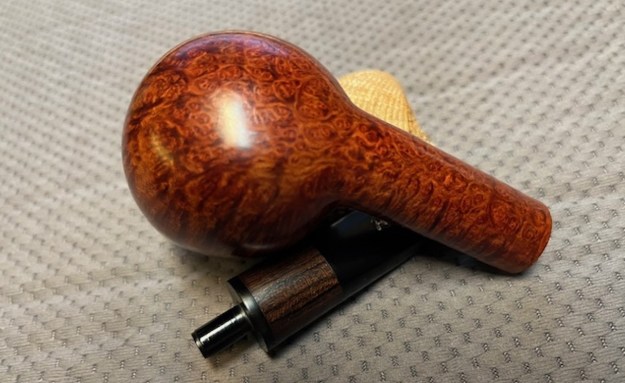
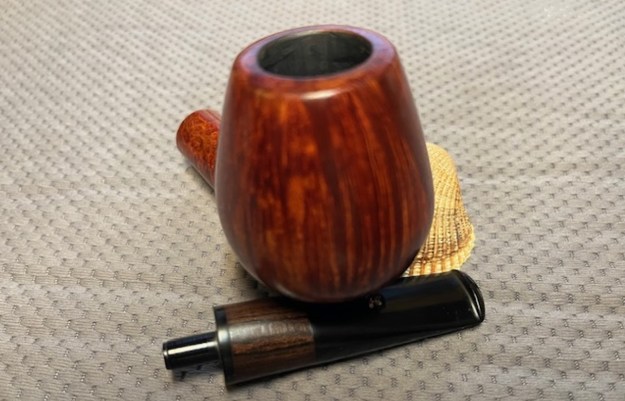
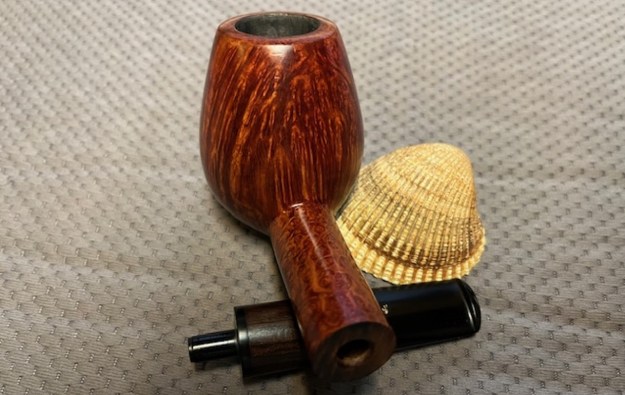
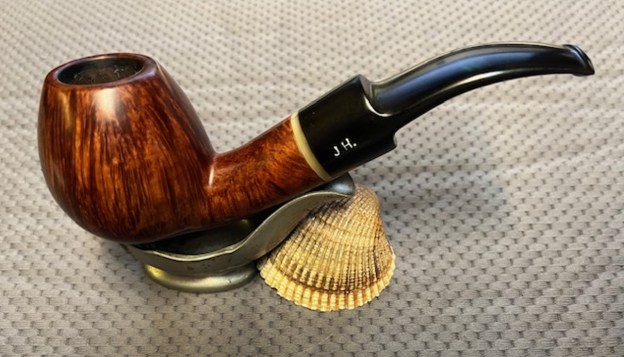
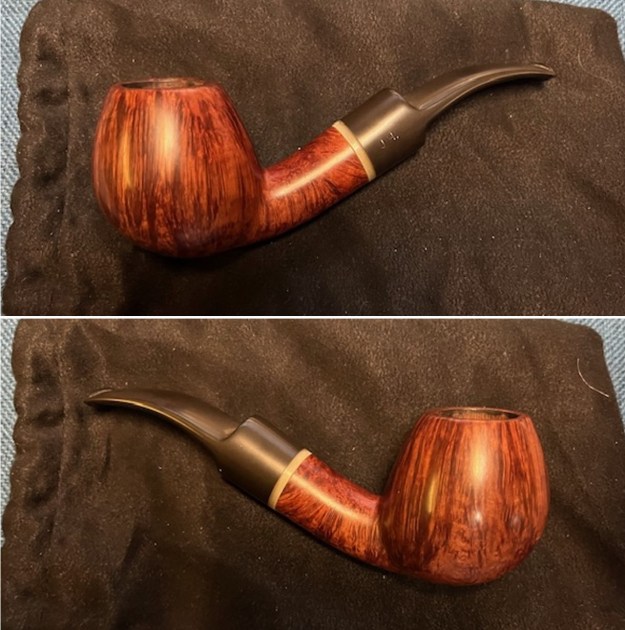
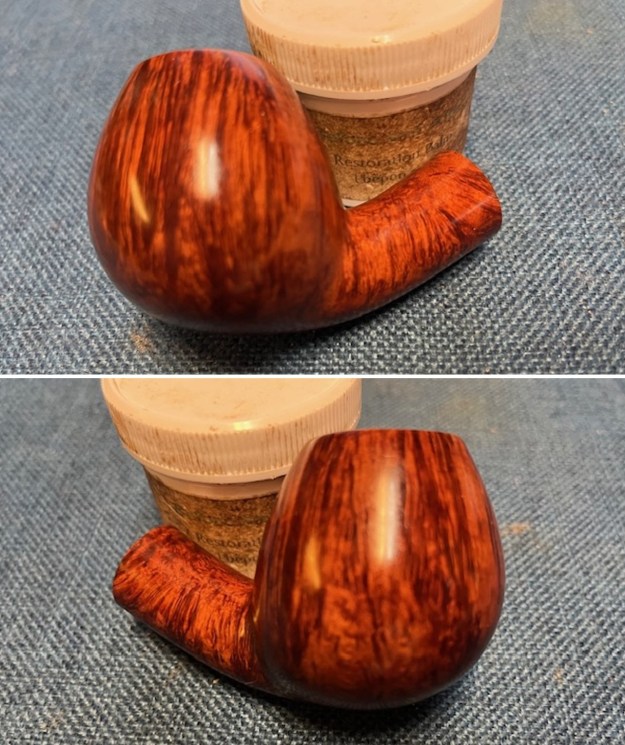
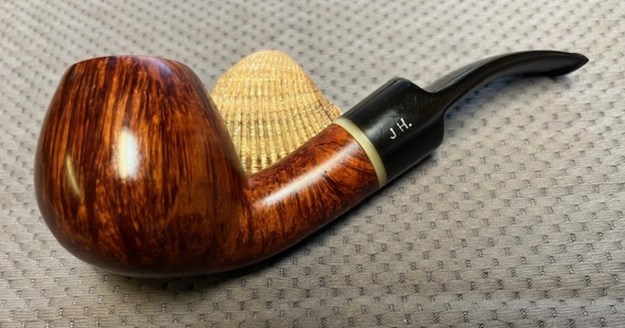
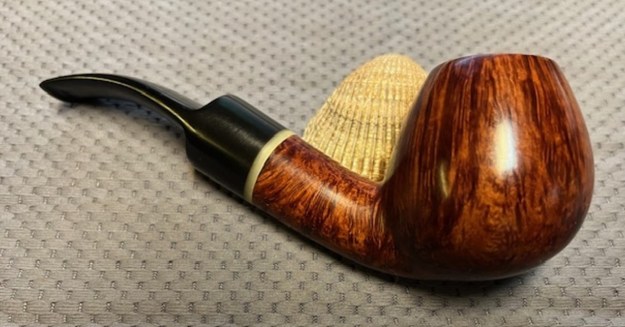
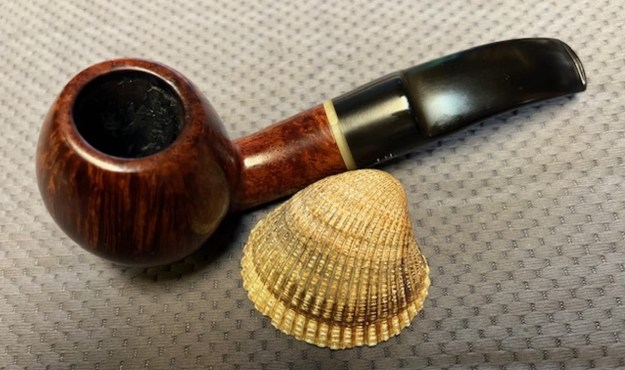
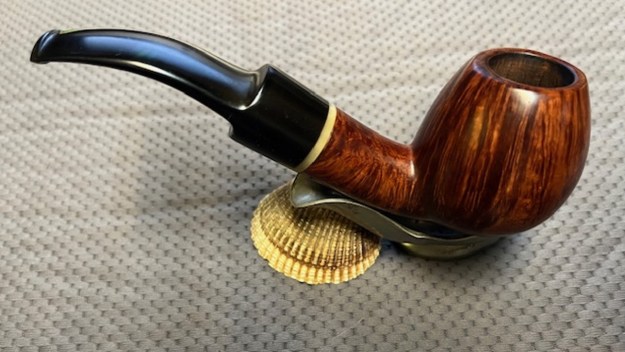
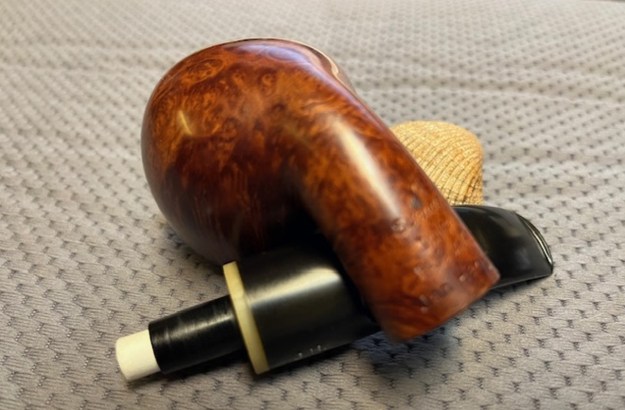
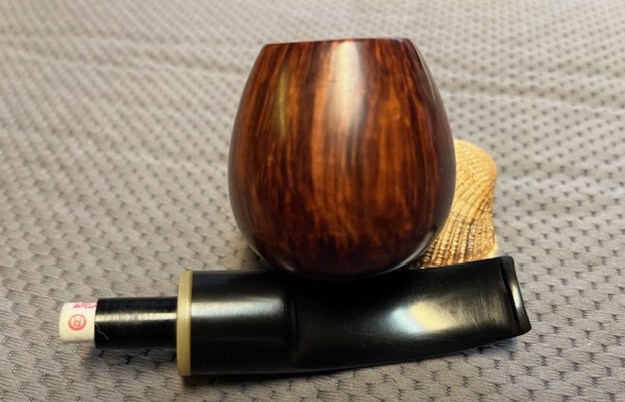
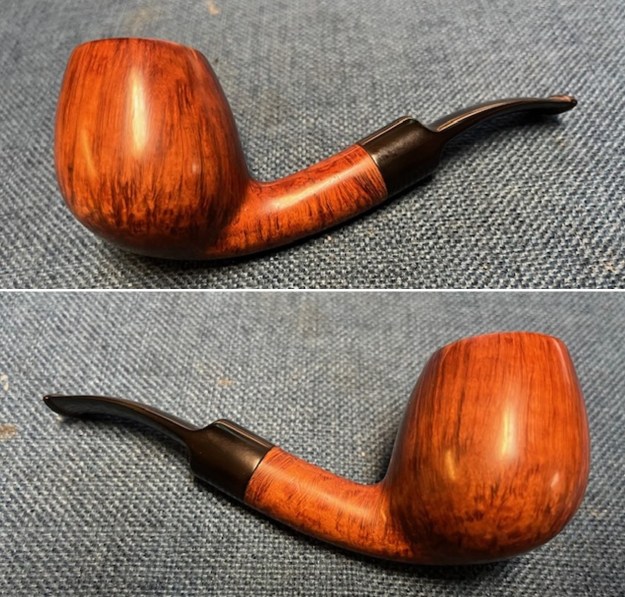
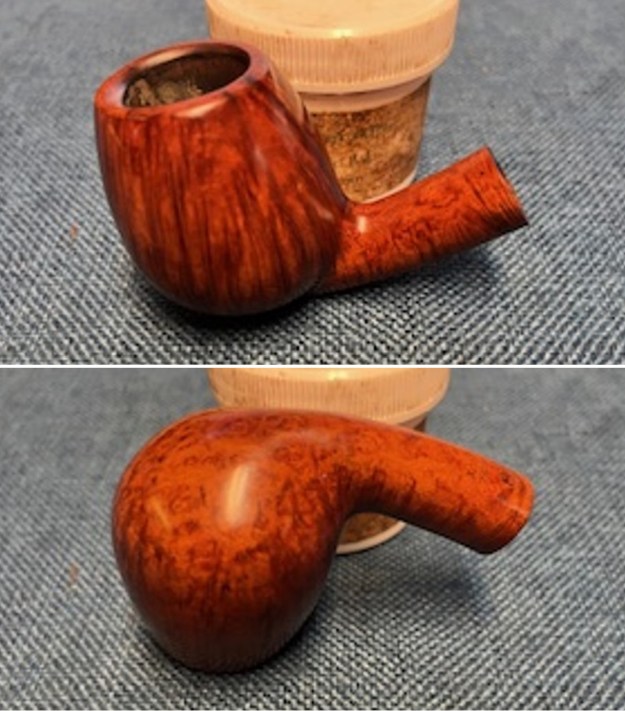
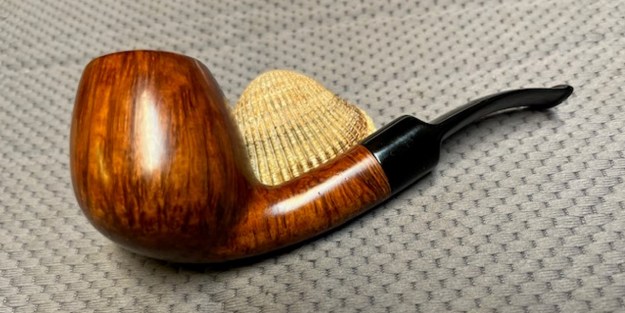
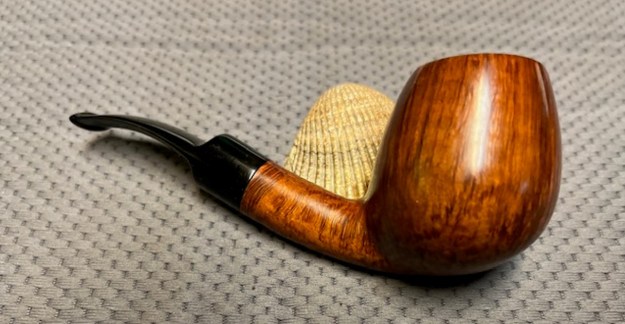
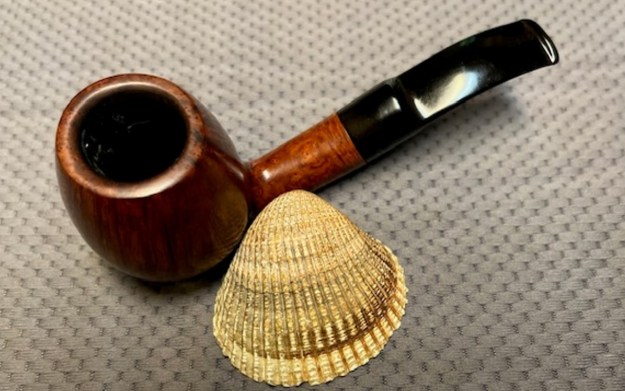
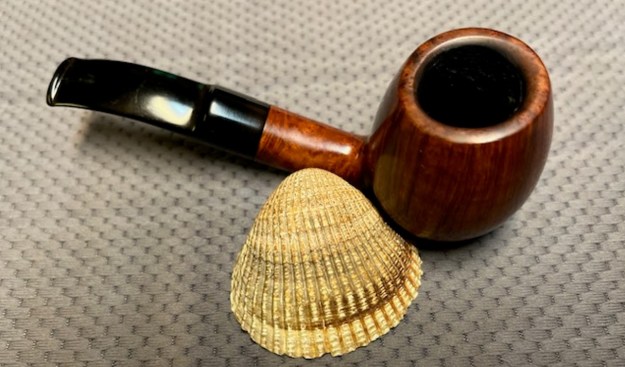
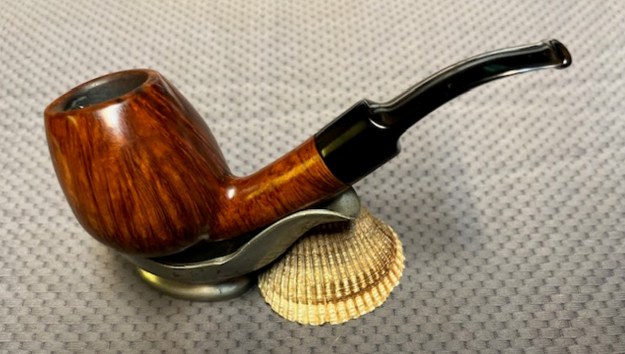
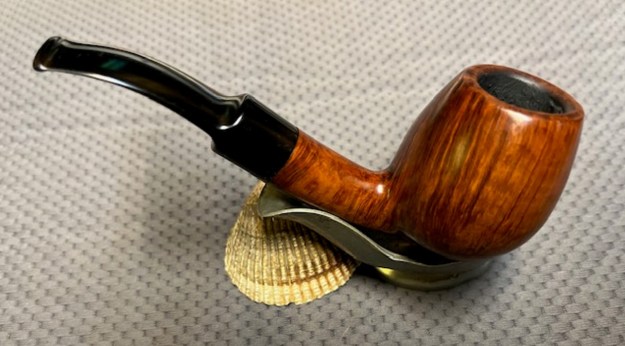
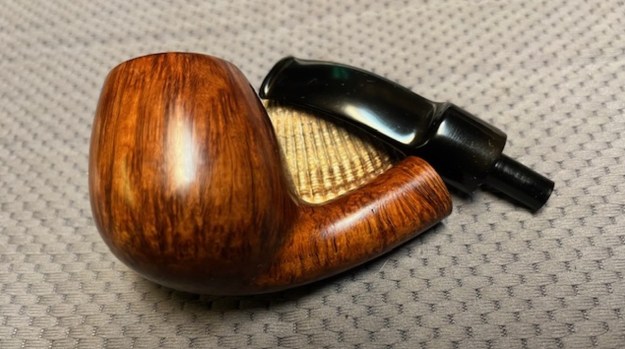
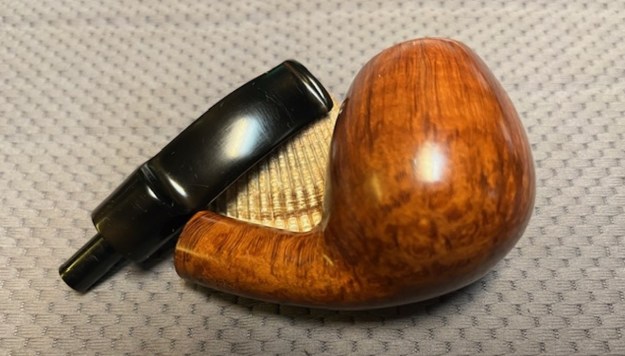
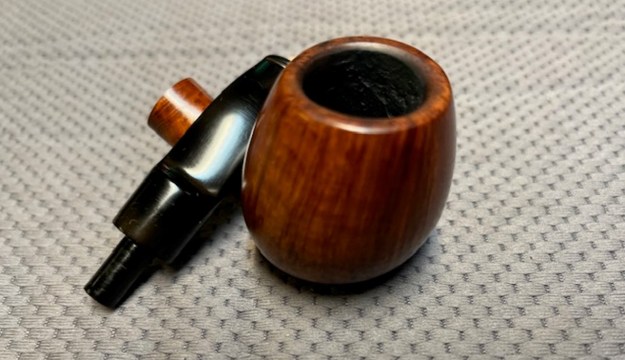
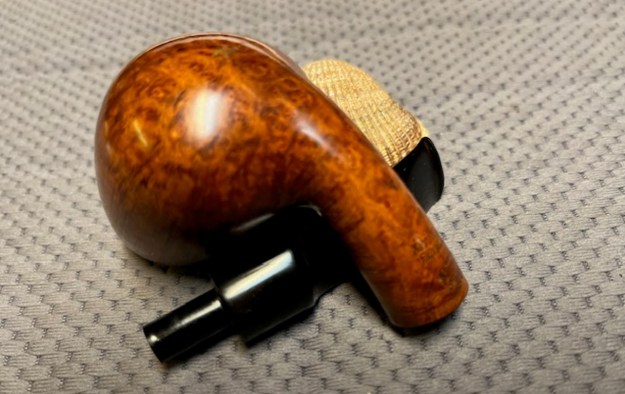
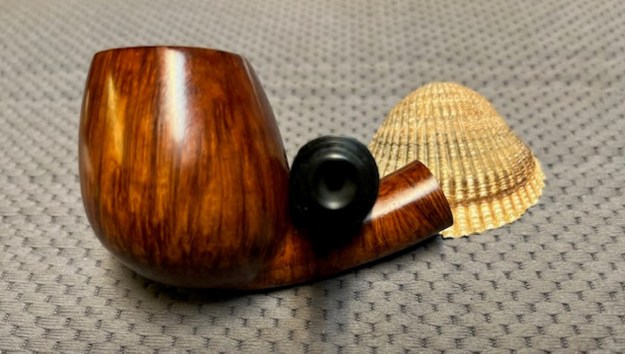
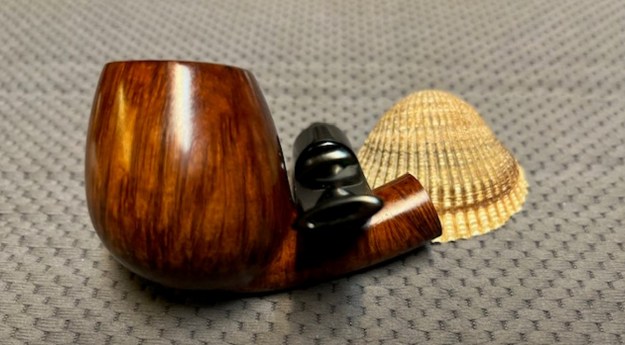
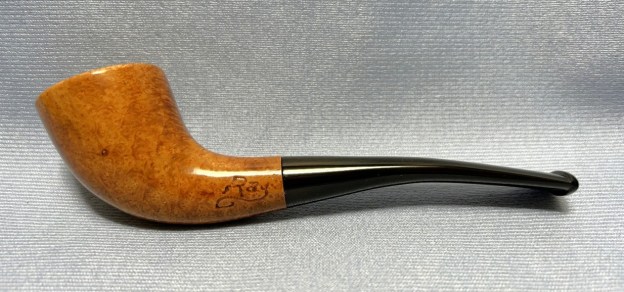
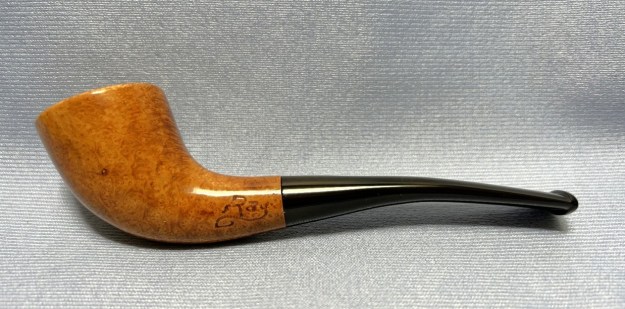
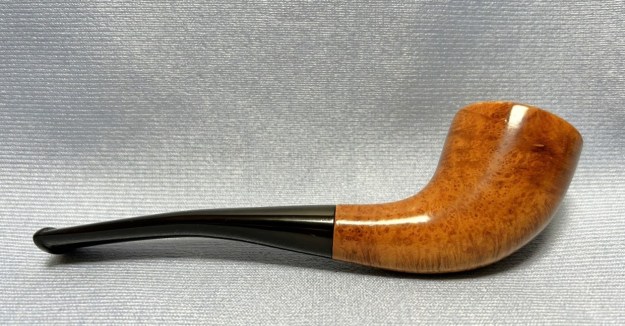
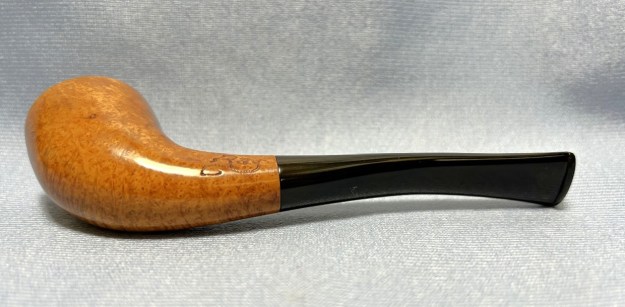
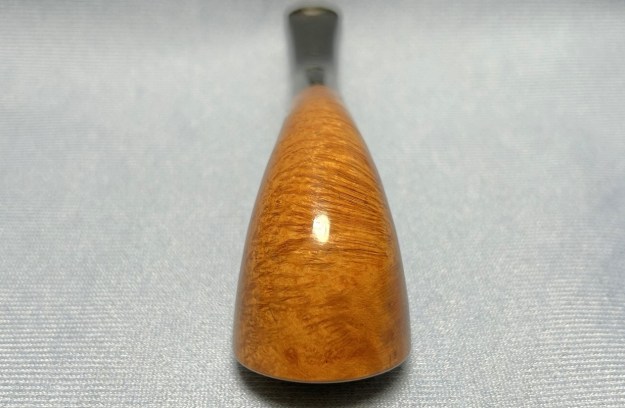
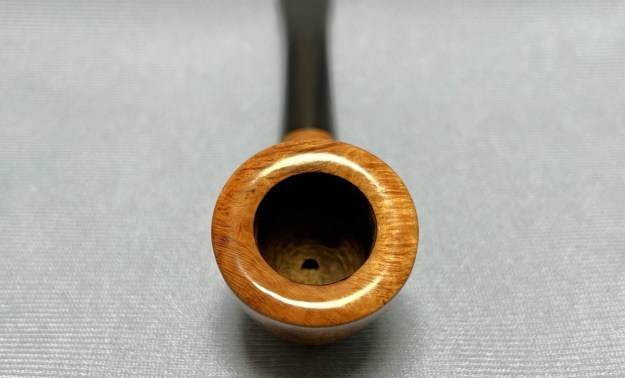
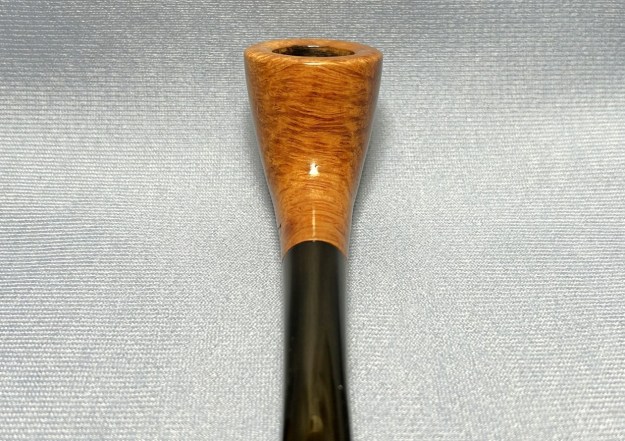
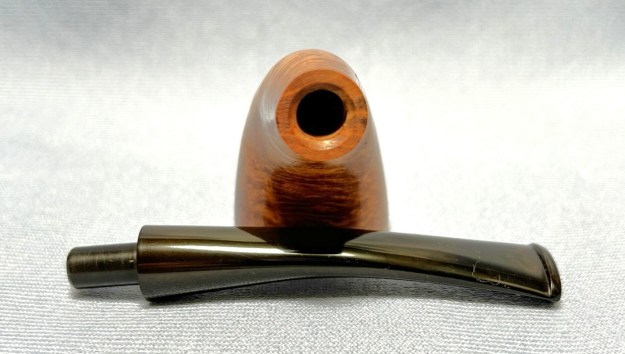
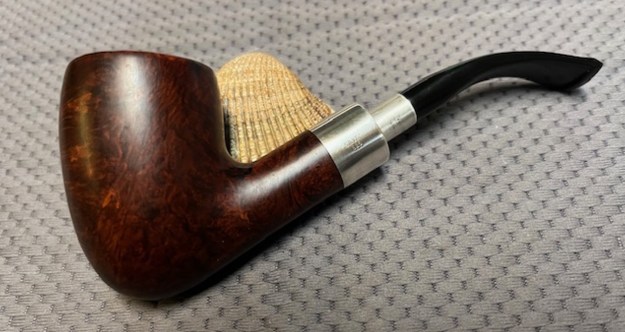
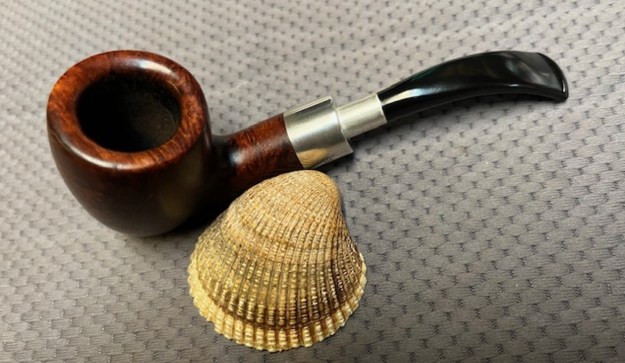
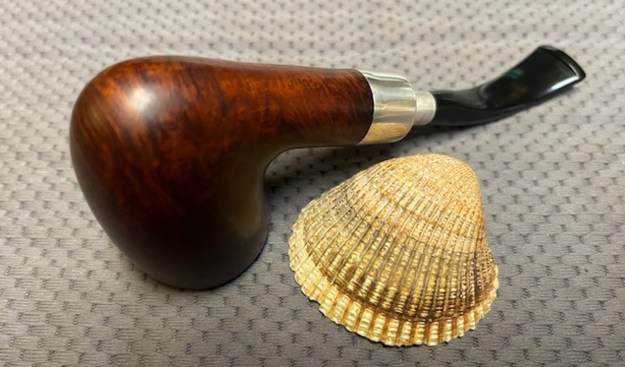
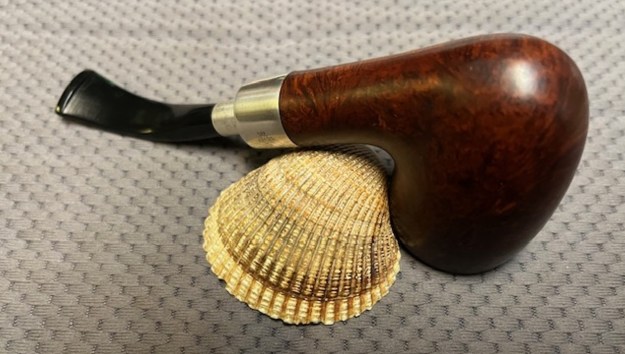
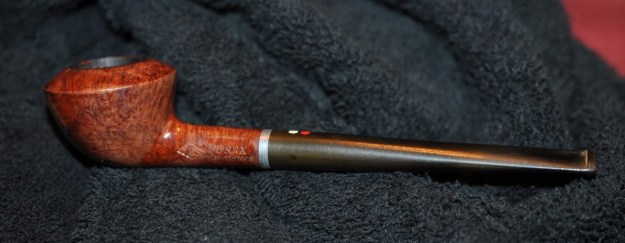
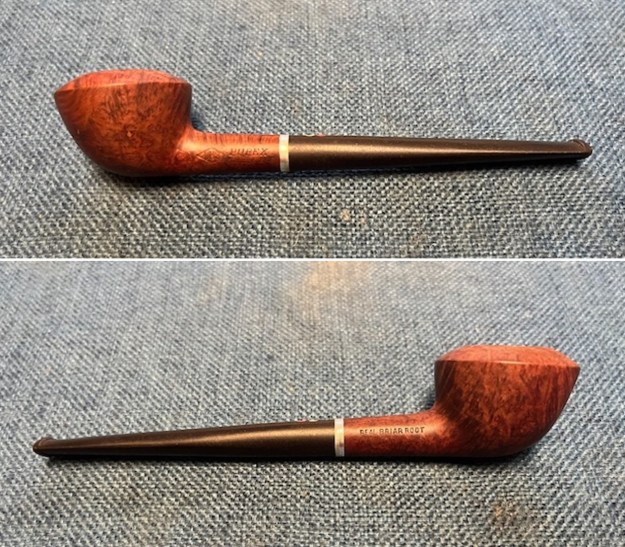
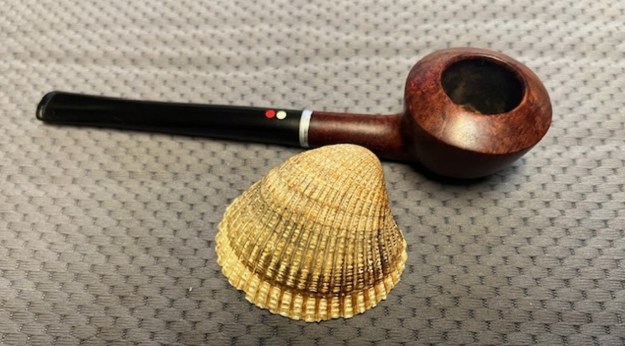
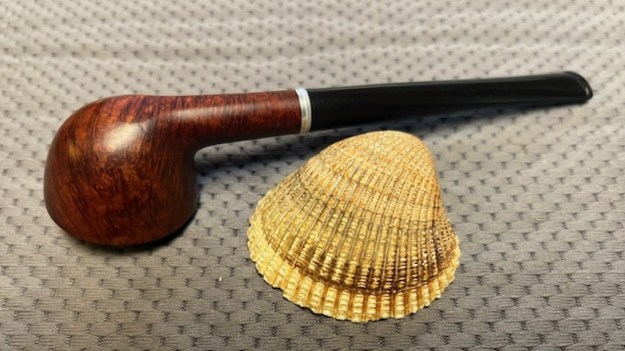
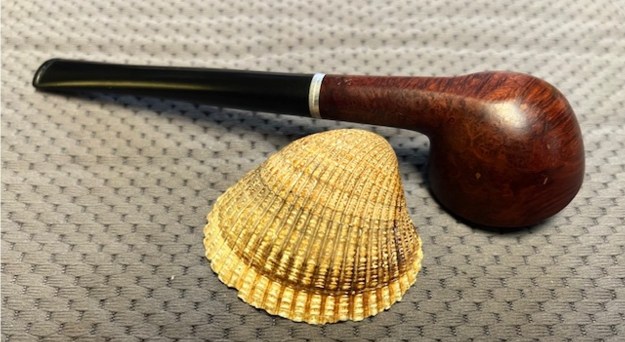
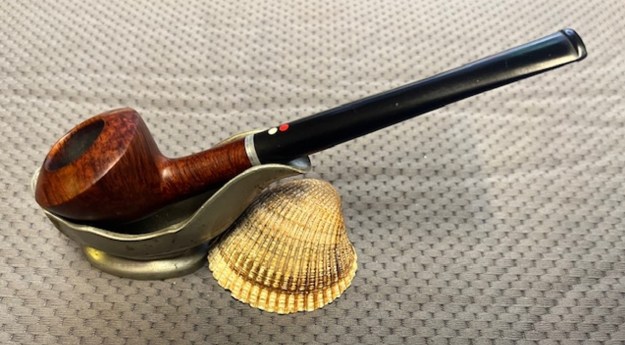
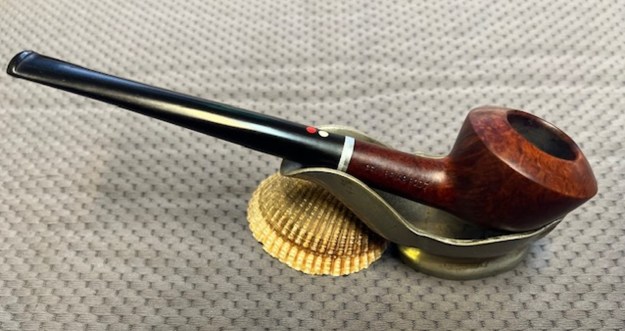
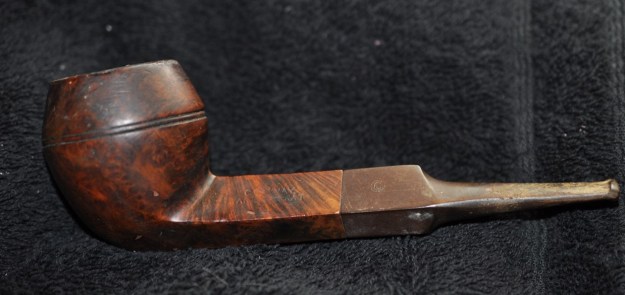
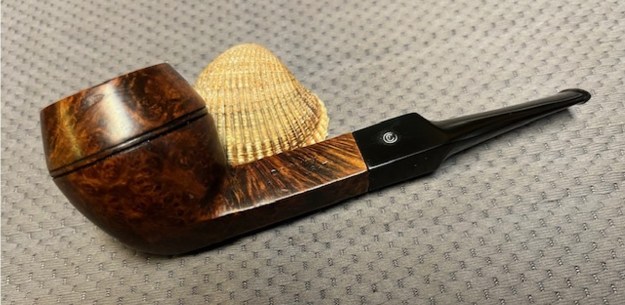
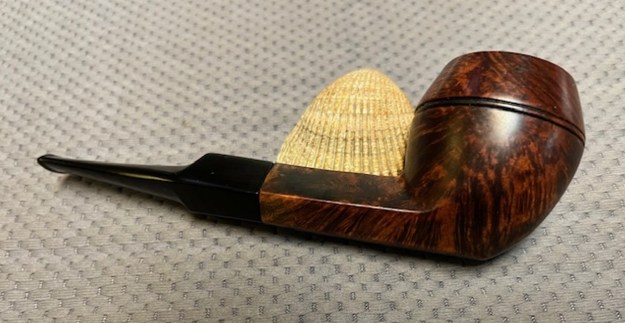
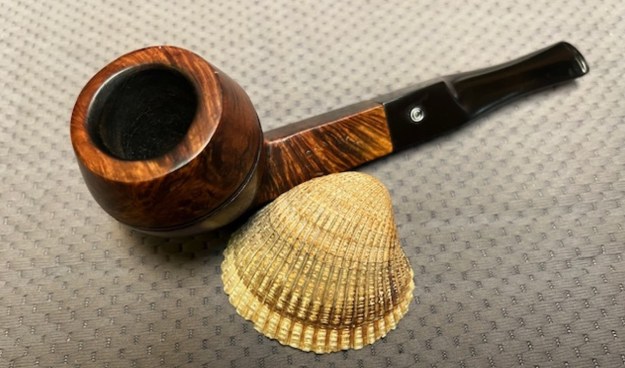
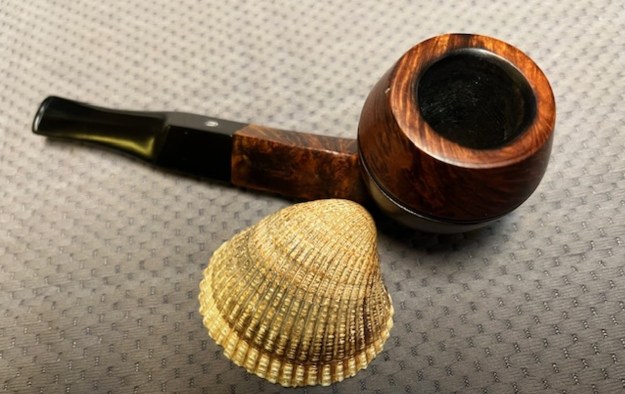
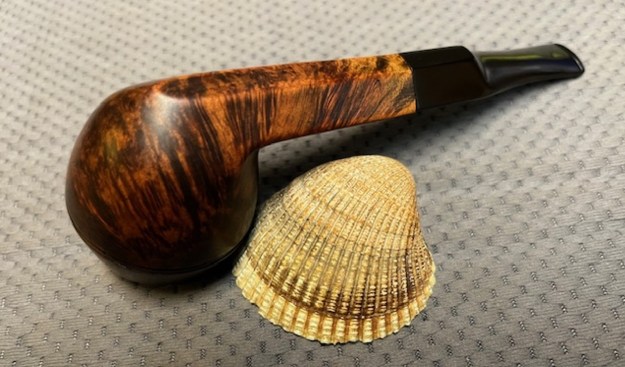
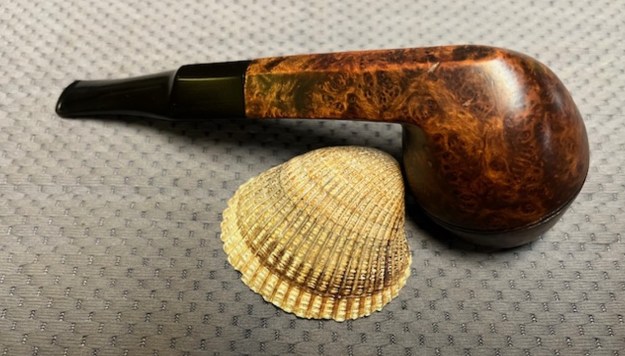
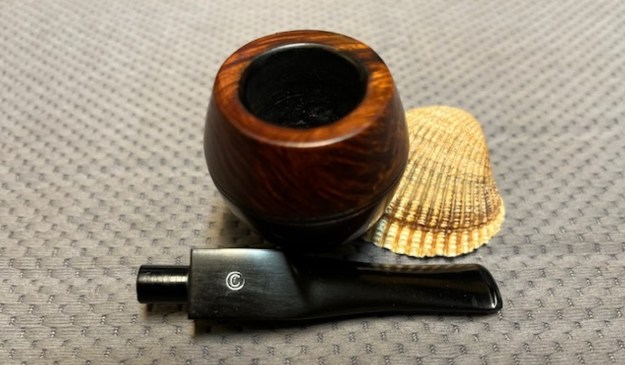
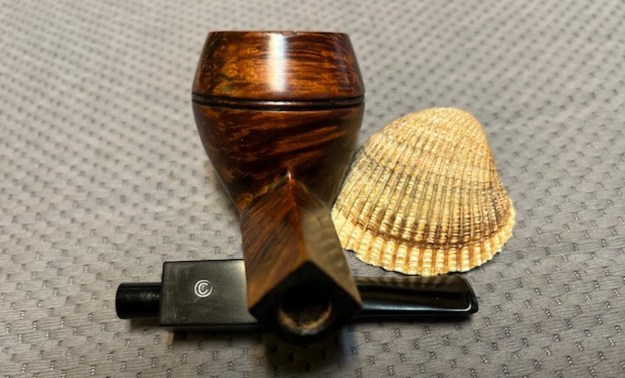
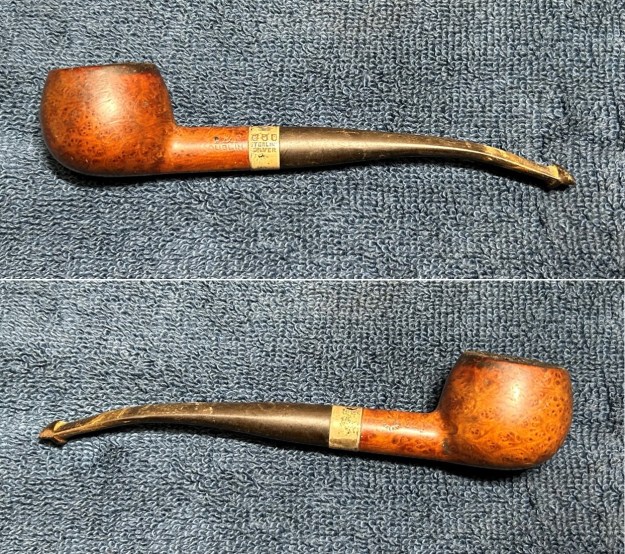
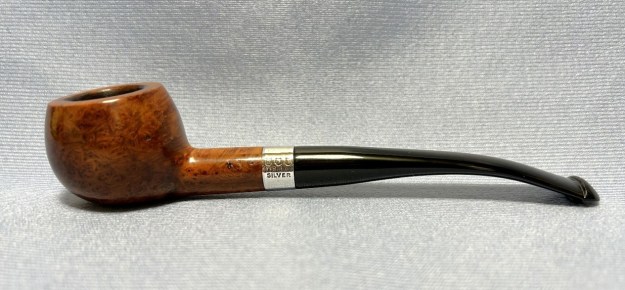
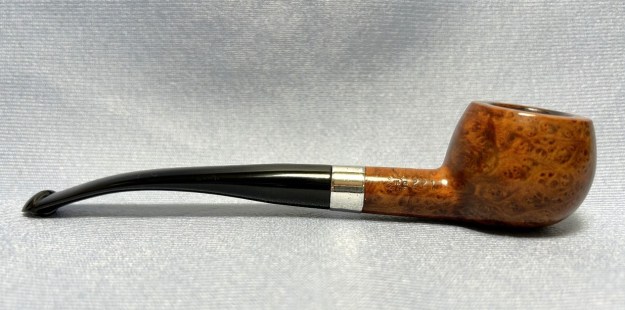
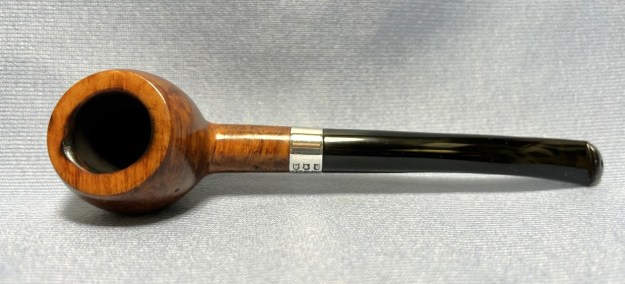
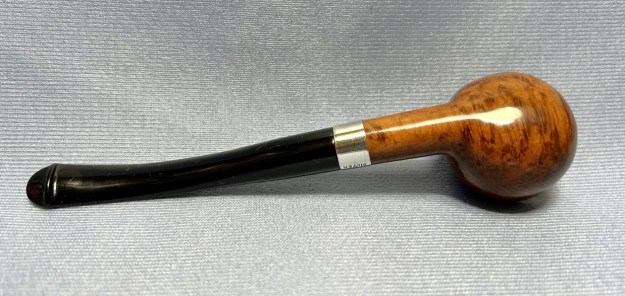
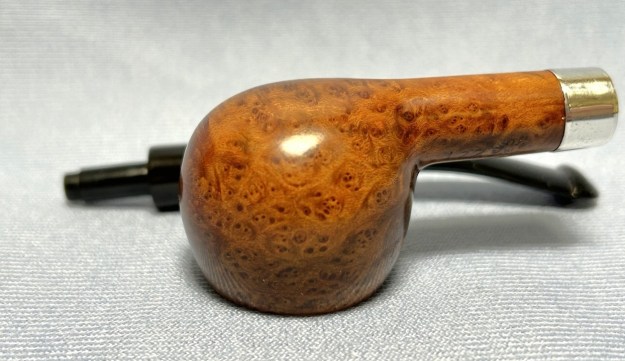
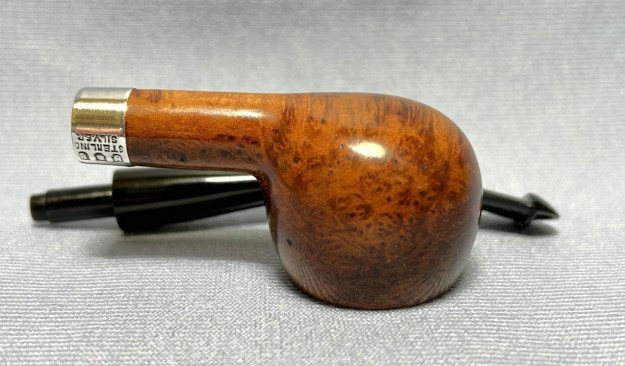
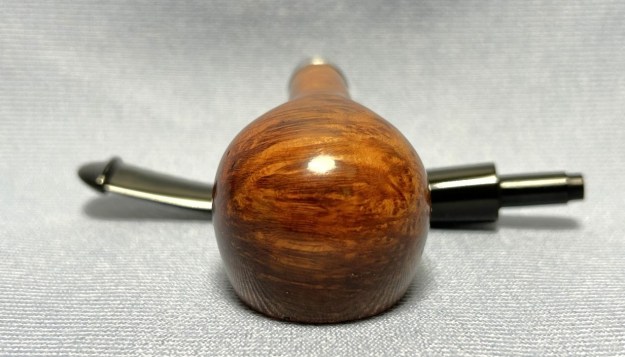
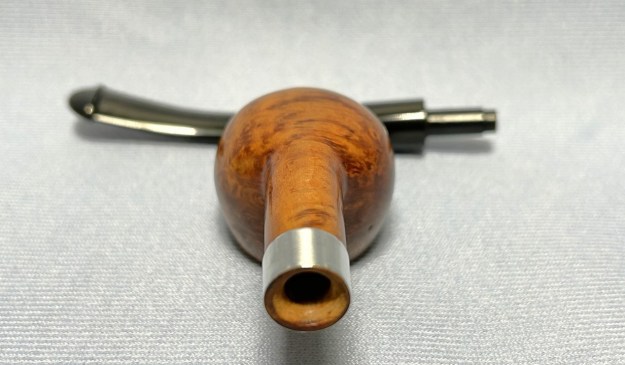
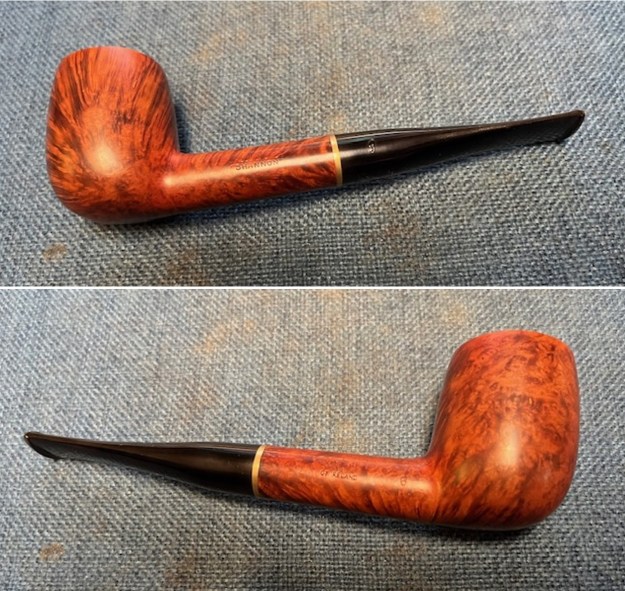
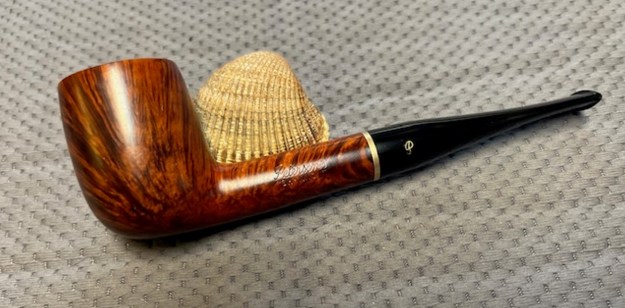
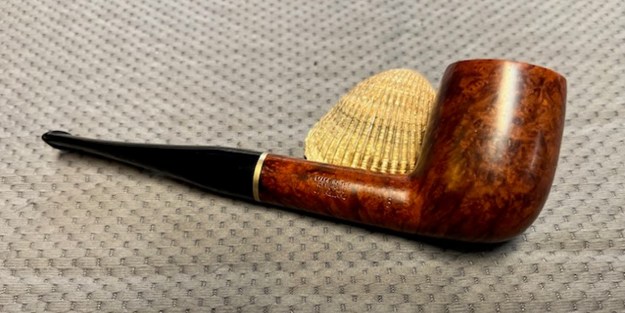
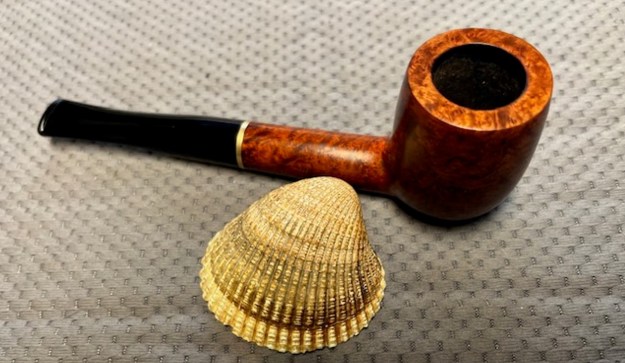
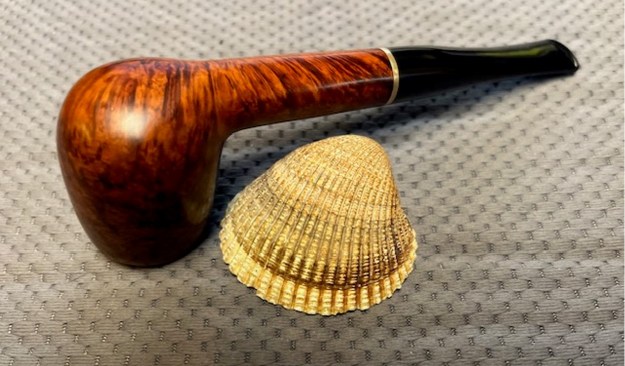
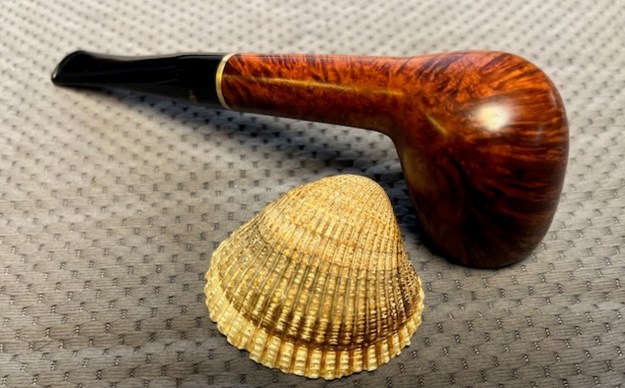
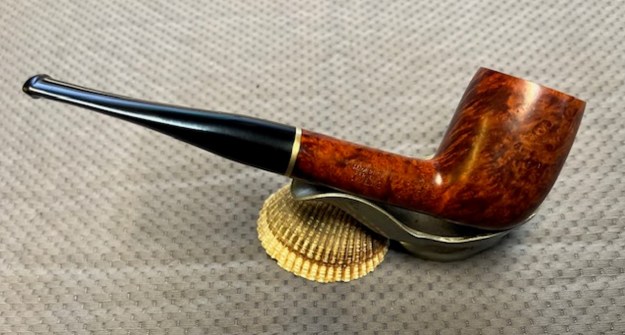
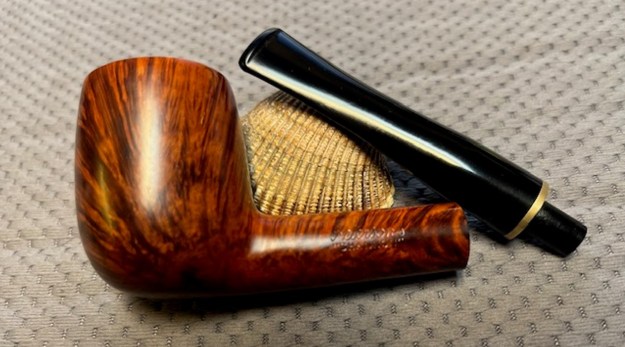
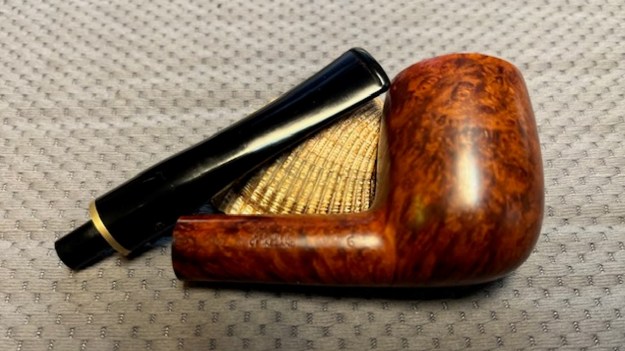
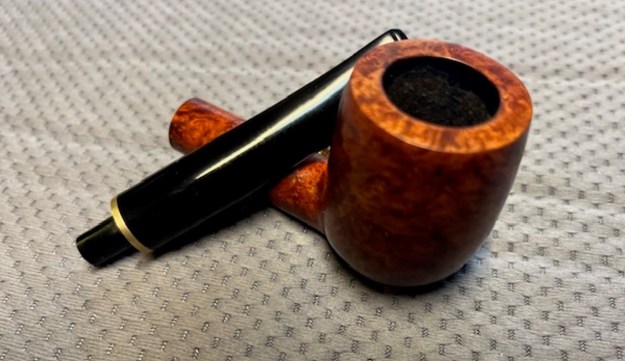
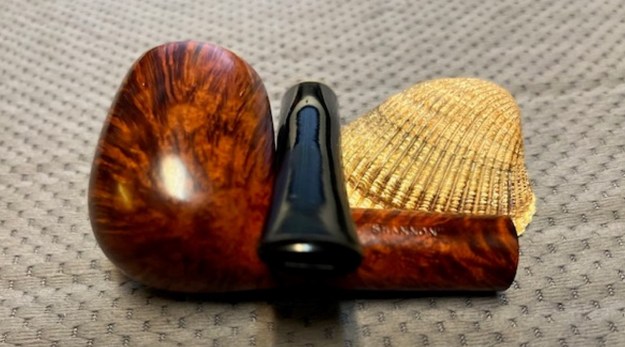
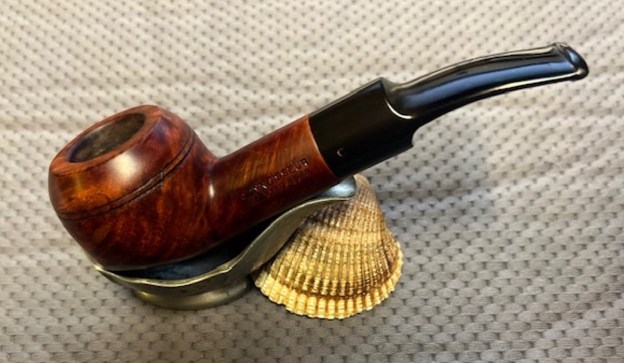
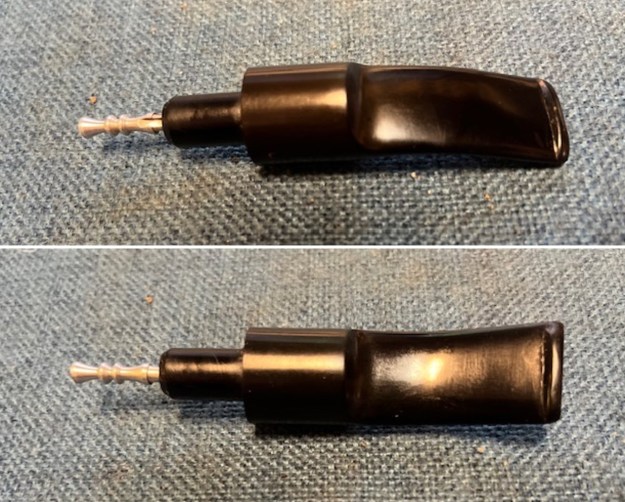 This Connoisseur Imported Briar Bullmoose is a great looking pipe now that it has been restored. The brown stains really highlight the grain and the polished finish is stunning. I put the stem back on the bowl and carefully buffed the pipe with Blue Diamond on the buffing wheel. I gave the bowl and the stem multiple coats of carnauba wax on the buffing wheel and followed that by buffing the entire pipe with a clean buffing pad. I hand buffed the pipe with a microfiber cloth to deepen the shine. The finished Connoisseur Imported Briar Bullmoose fits nicely in the hand and feels great. Give the finished pipe a look in the photos below. The dimensions of the pipe are Length: 5 inches, Height: 1 ½ inches, Outside diameter of the bowl: 1 ¼ inches, Chamber diameter: ¾ of an inch. The weight of the pipe is 50 grams /1.76 ounces. I will be placing it on the rebornpipes store in the Italian Pipemakers Section soon. Thanks for reading this blog and my reflections on the pipe while I worked on it. As always, I encourage your questions and comments as you read the blog. Thanks to each of you who are reading this blog. Remember we are not pipe owners; we are pipe men and women who hold our pipes in trust until they pass on into the trust of those who follow us.