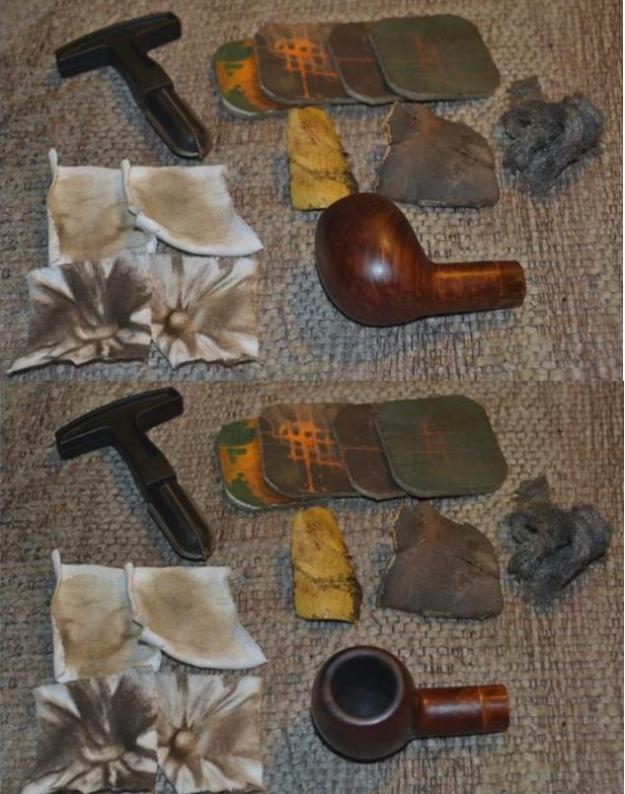
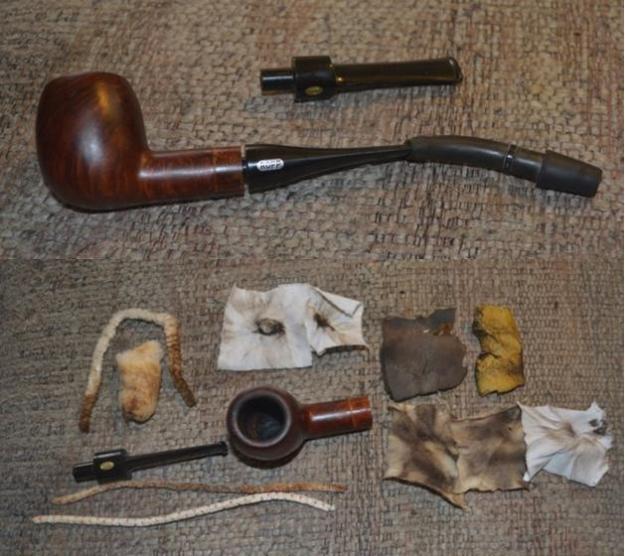
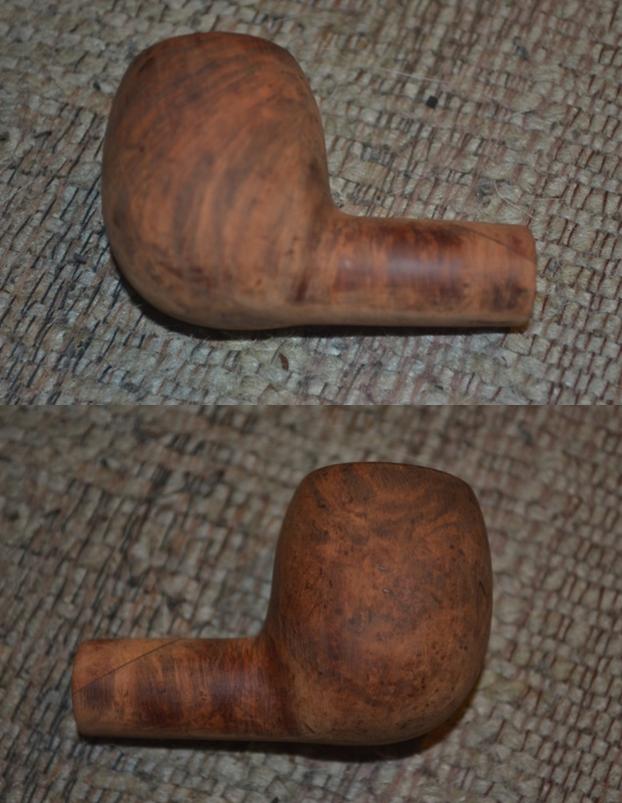
Tag Archives: bowl – refinishing

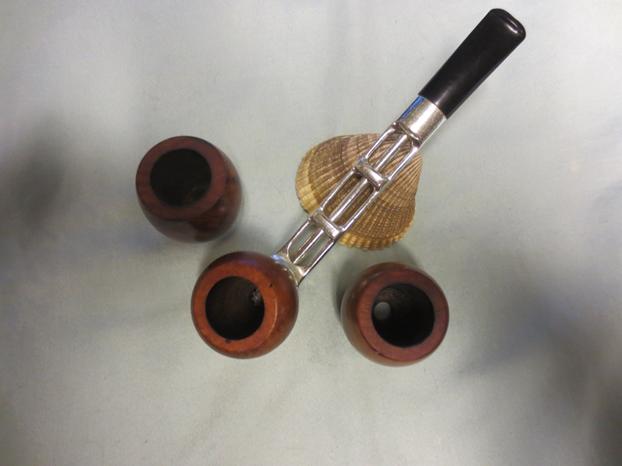
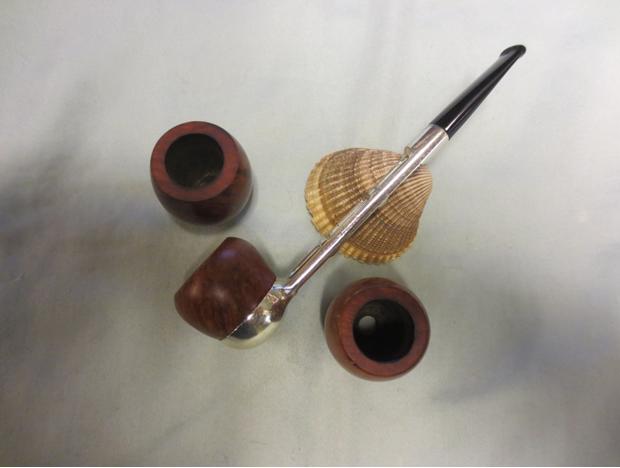
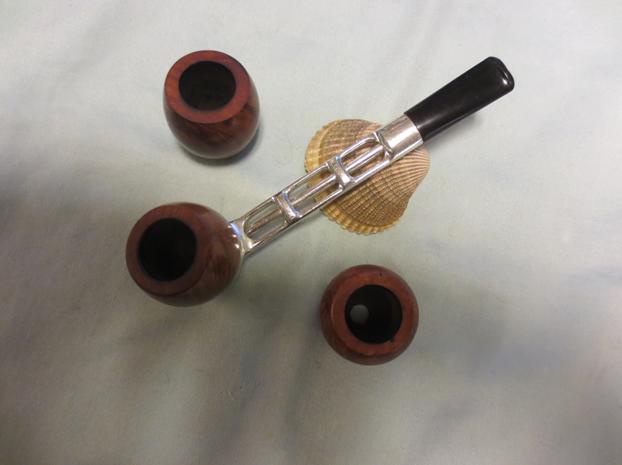
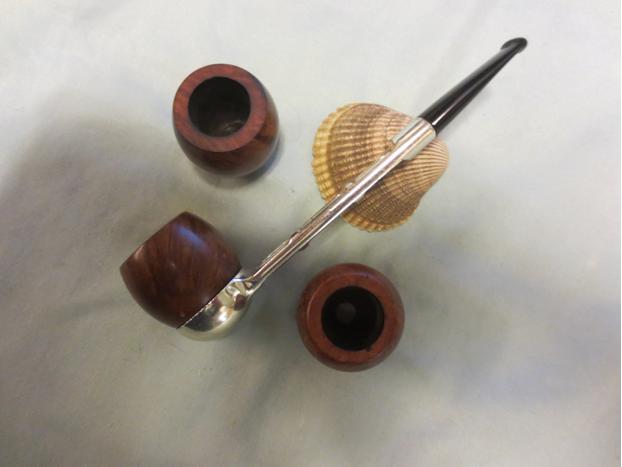
A Sparkling Metallic Dr. Grabow Viking with Three Bowls


Blog by Steve Laug

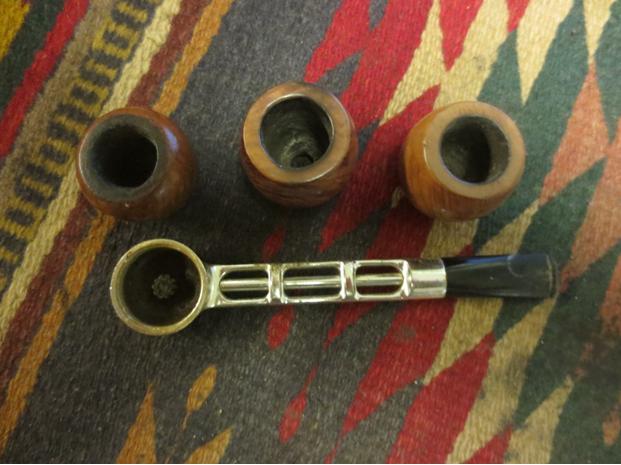
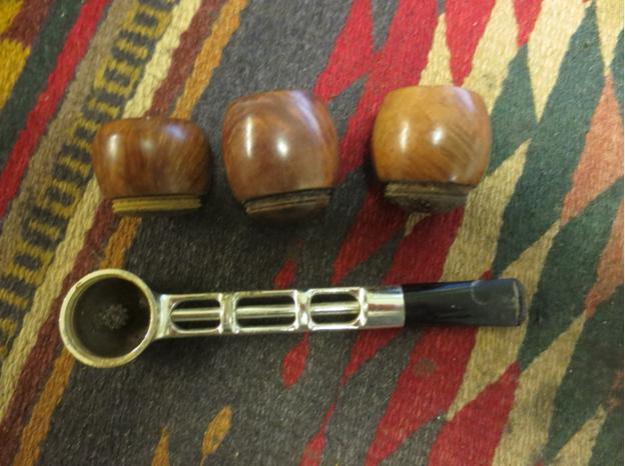
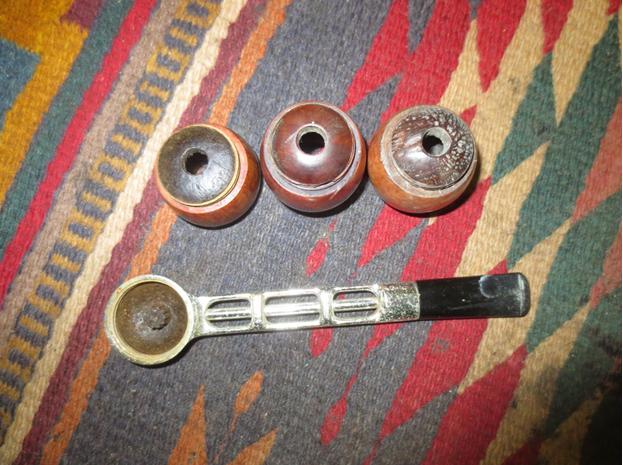
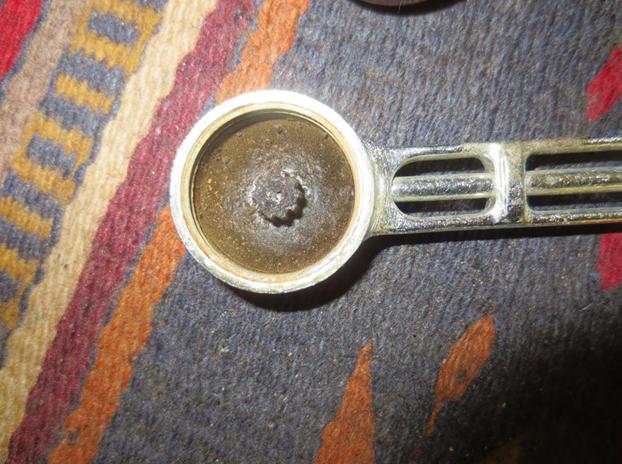
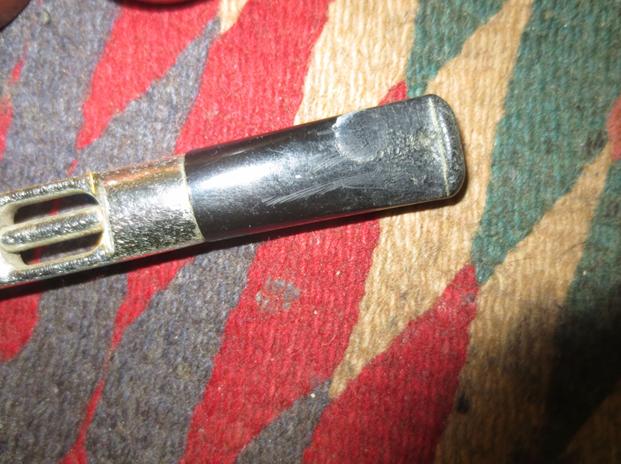
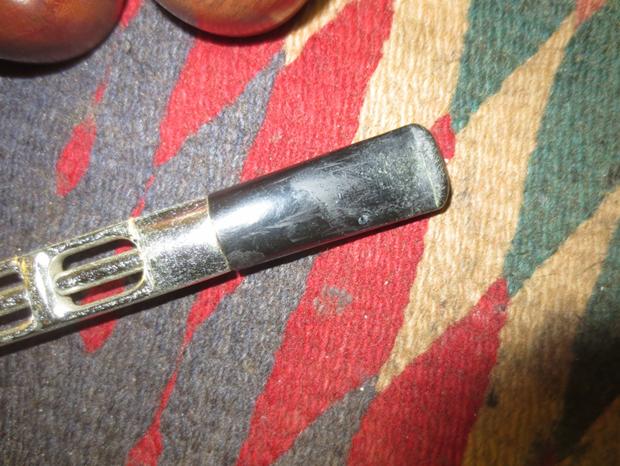
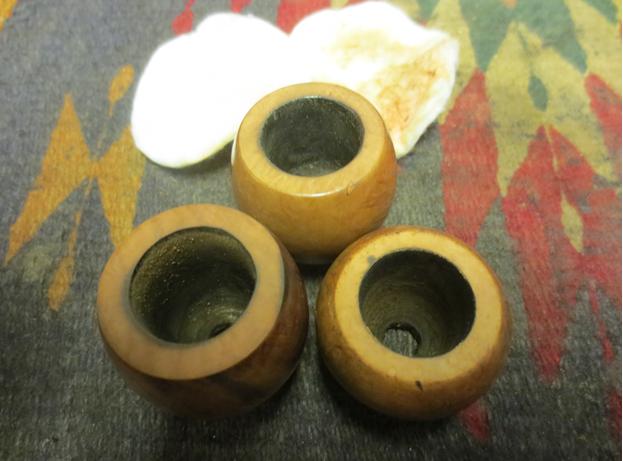
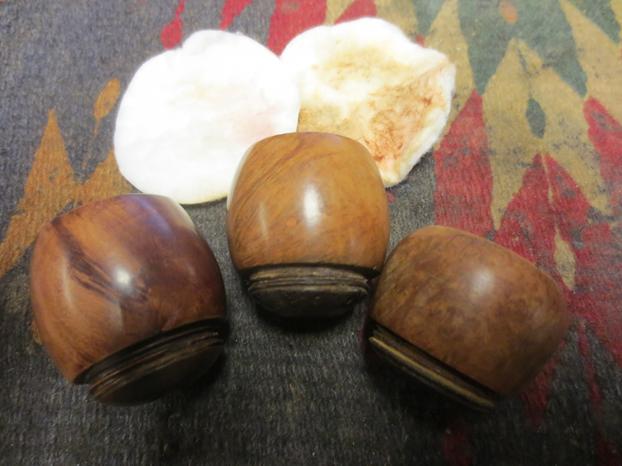
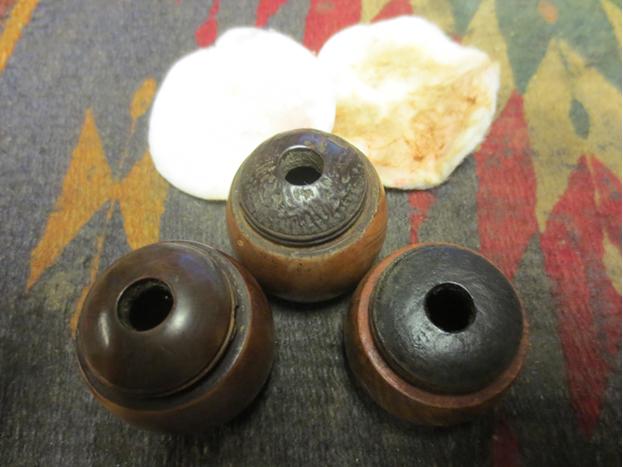
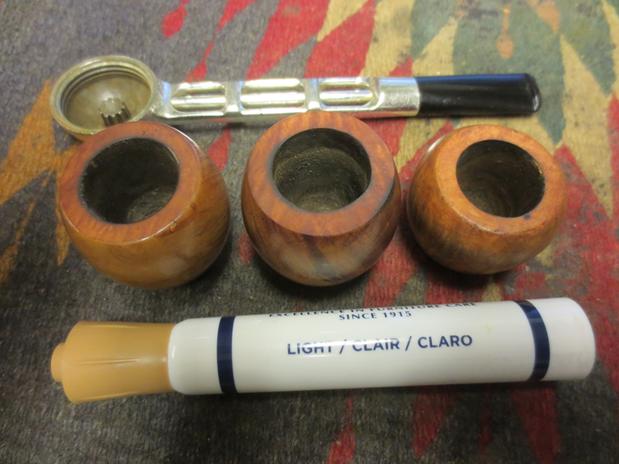
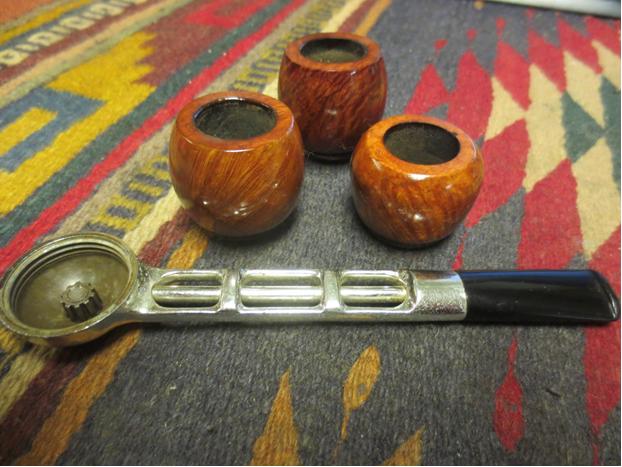
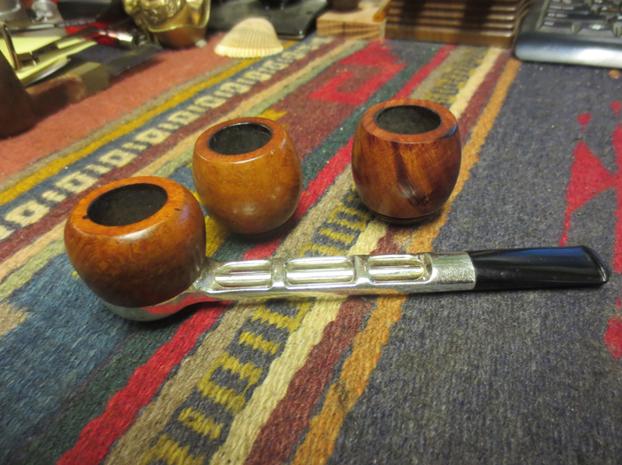
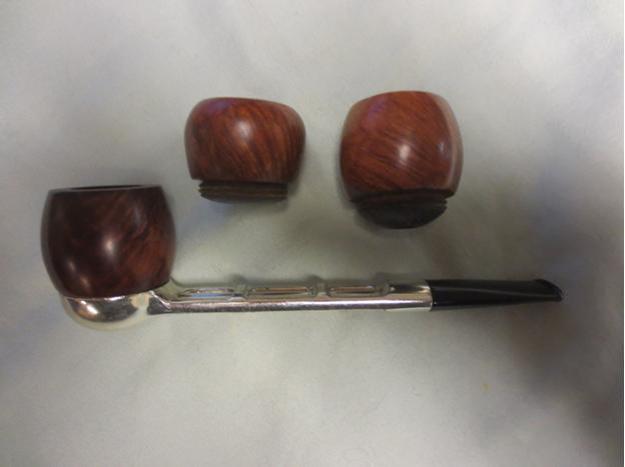
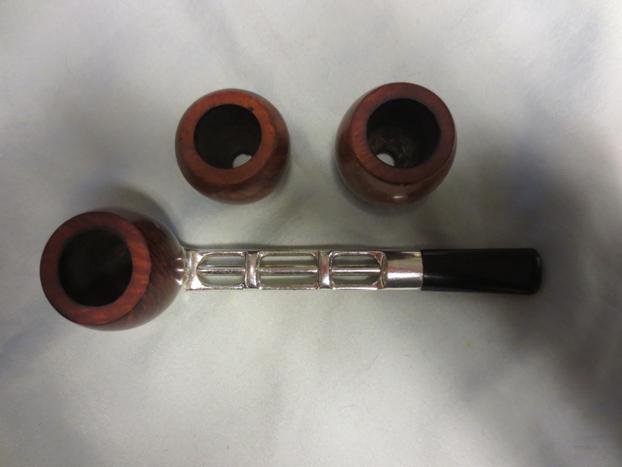
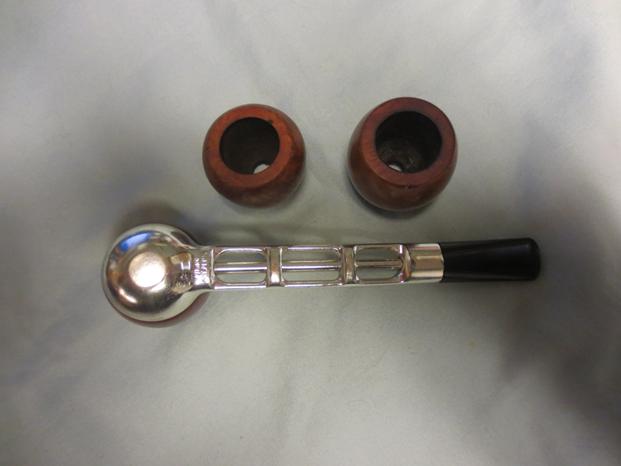
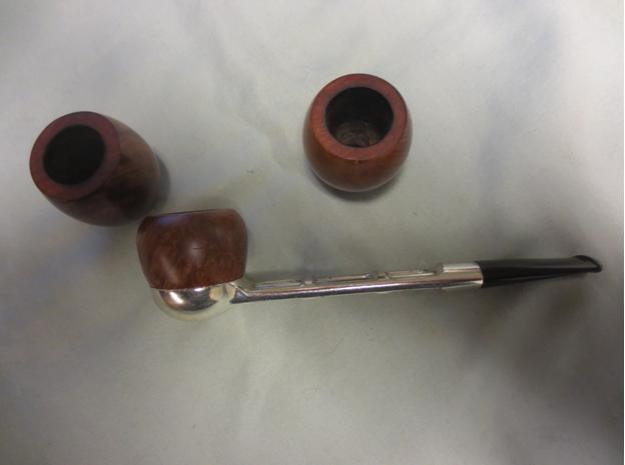
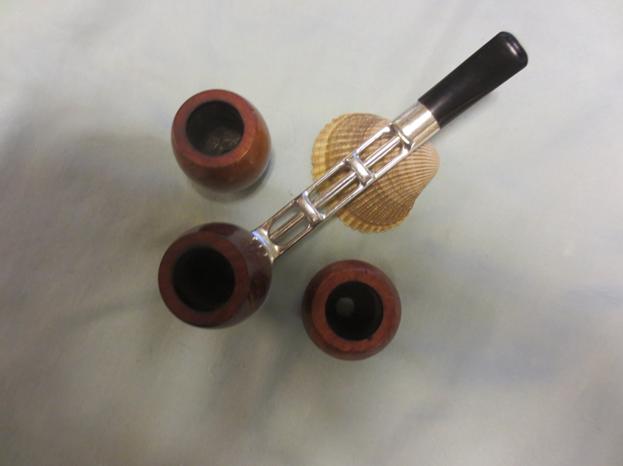
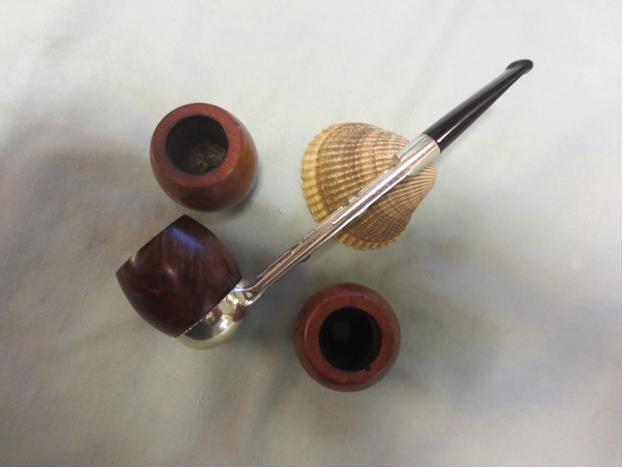
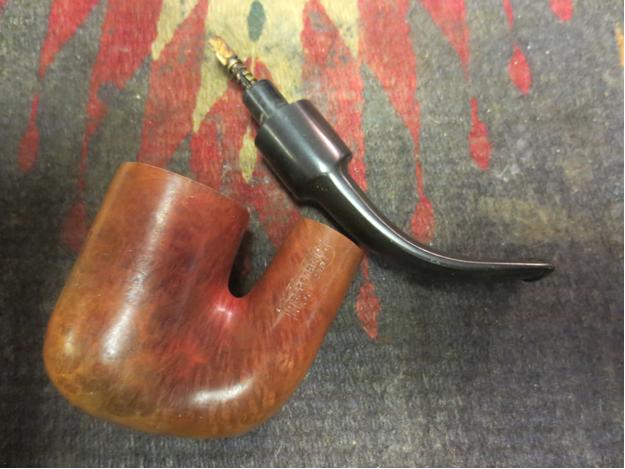
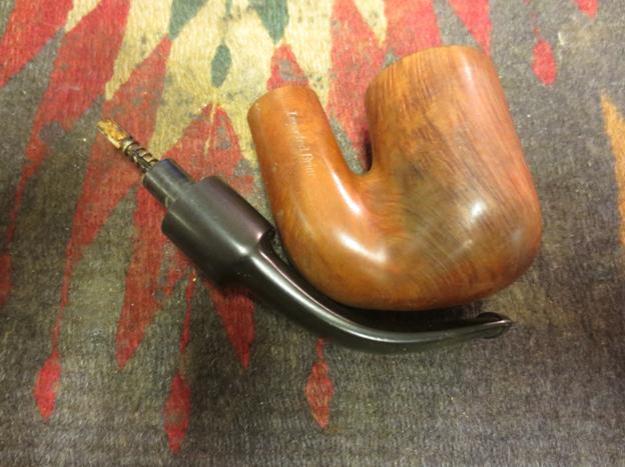
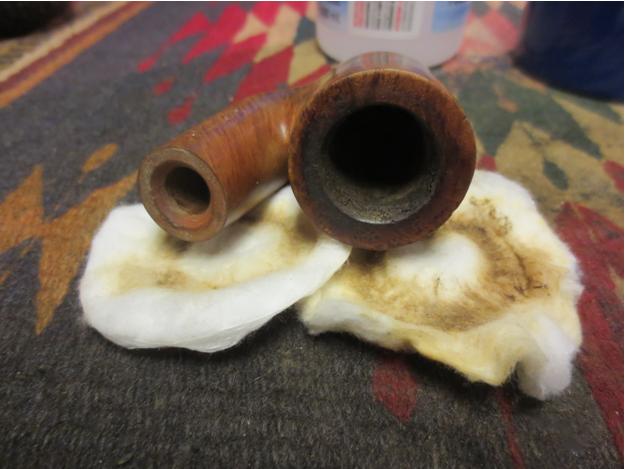
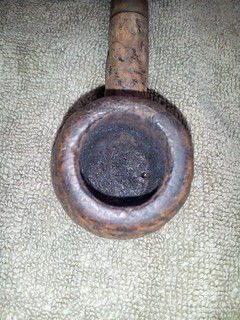
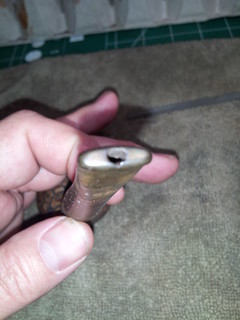
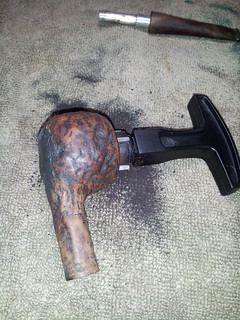
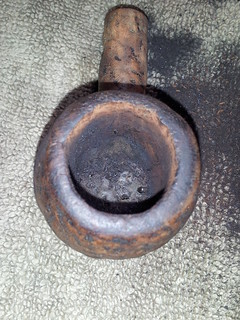
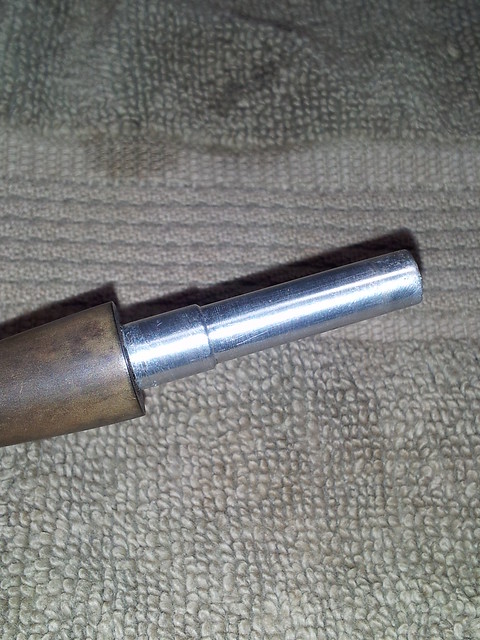
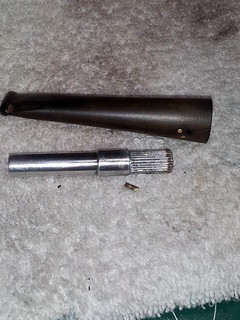
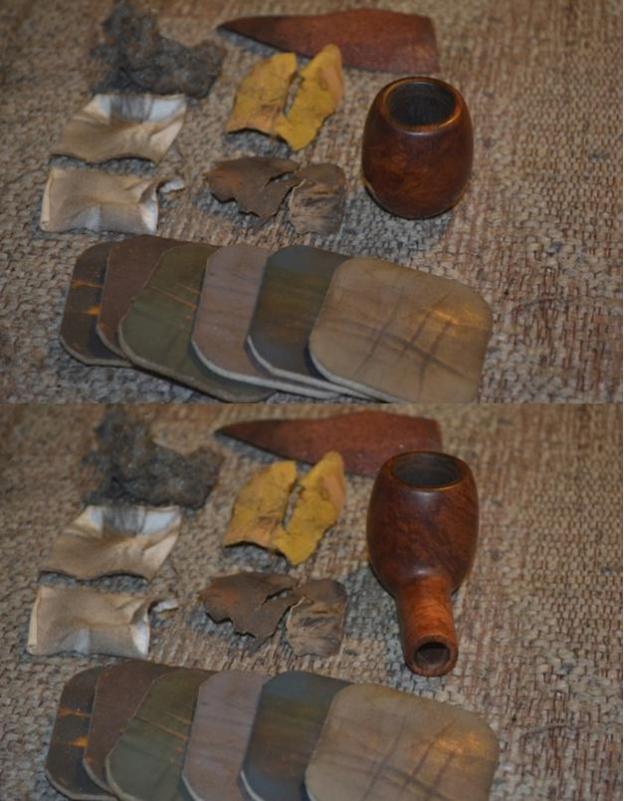
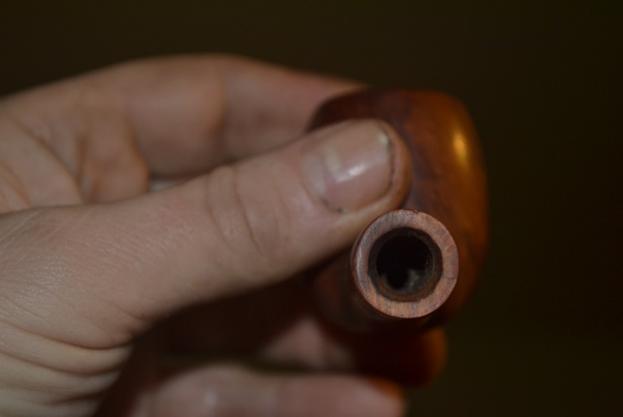
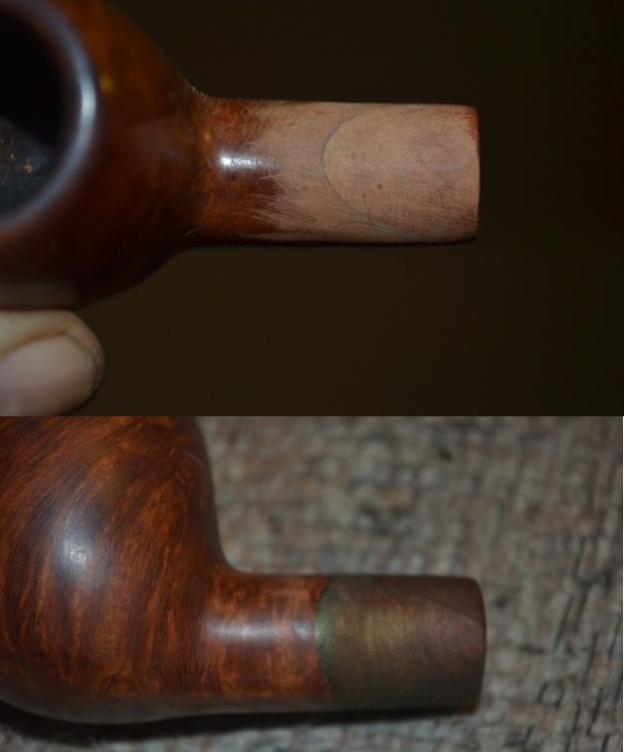
This older Dr. Grabow Viking came to me as a gift from a Facebook friend. He gave it to me along with some other pipes for me to enjoy restoring. This one is stamped next to the heel of the metal base – Viking Pat. Pend. The metal is sparkling metallic silver. It has flecks throughout the paint that make it sparkle and shine. When it came it was together in a plastic sandwich bag. The base unit was tired and dirty. The bowl on the base was caked with an over flow of lava onto the rim. The other two bowls had been reamed and cleaned. The finishes on all three were dirty and dull. The rims on all three bowls show damage from burns or being knocked out on a hard surface. When I removed the bowl the interior of the base was caked with the thick lacquer of the juices of tobacco as it burns. It looked to me like it had not been cleaned in a long time and the black thick oils had hardened like rock in the base. The airway was clogged with debris. The stem had collapsed from being bitten on. The tooth marks were deep but did not go through into the airway. The sharp edge of the button was worn almost smooth. I was not able to push a pipe cleaner through the airway from the button or from the airway in the bottom of the base.

G1G2G3

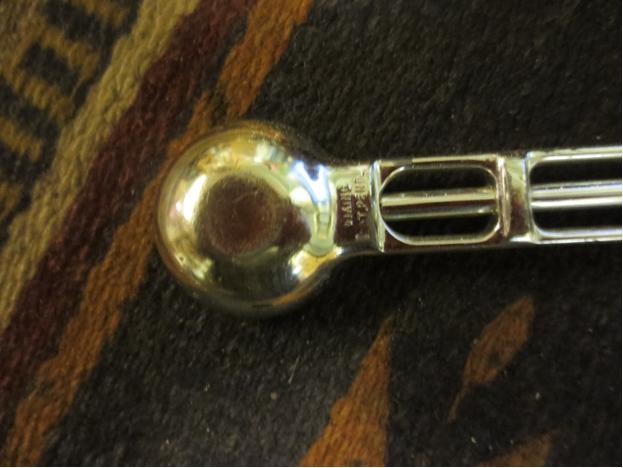
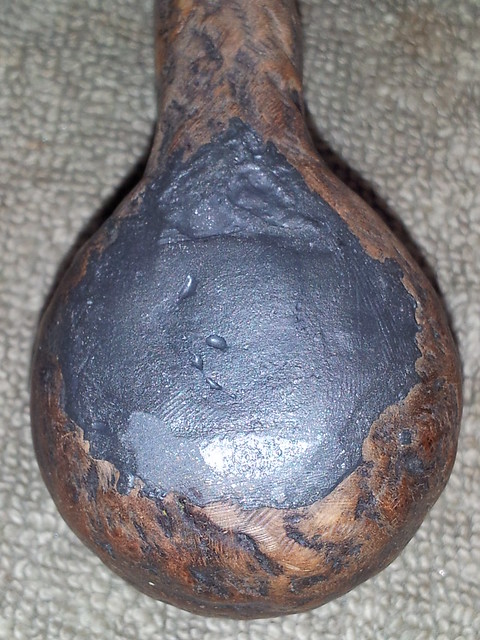
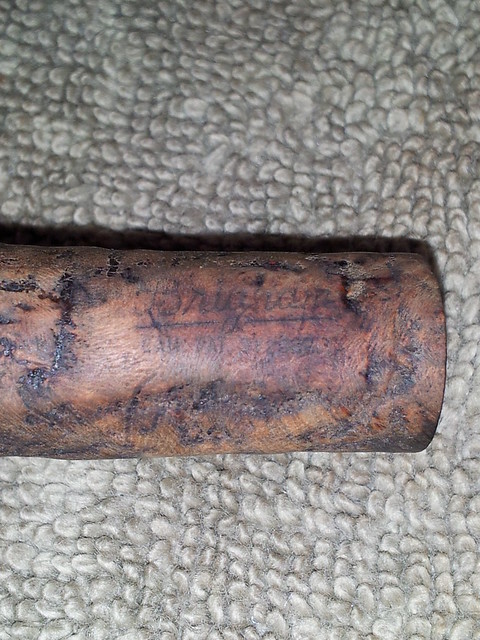
I took a few close-up photos. The first shows the inside of the base and the build up there. The second and third show the bite marks on the stem. The second photo shows the top of the stem and the bite mark on that surface, though not looking bad in the photo, collapsed the airway and made it impossible for a pipe cleaner to pass through. The fourth photo below shows the stamping on the bottom of the base.G4G5G6G7

I scrubbed out the inside of the base with pipe cleaners, cotton swabs and alcohol. I also used a brass bristle brush. I opened the slot and airway in the stem with a flat needle file. I inserted the needle file and pushed the indentation on the top of the stem upward to clear the airway. It took a lot of fiddling with the file to open the slot completely. I cleaned the airway and stem with pipe cleaners and alcohol.

G8

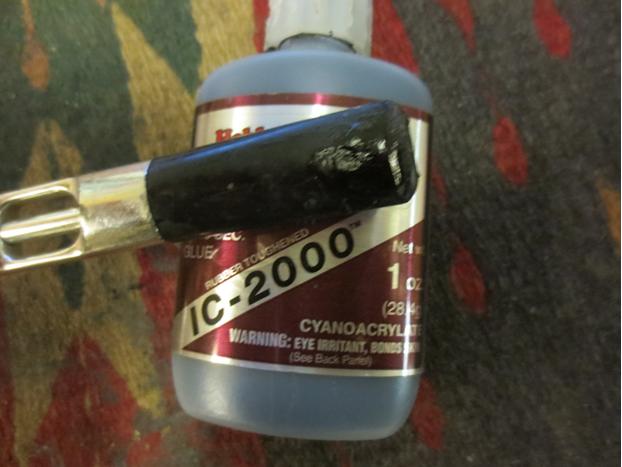
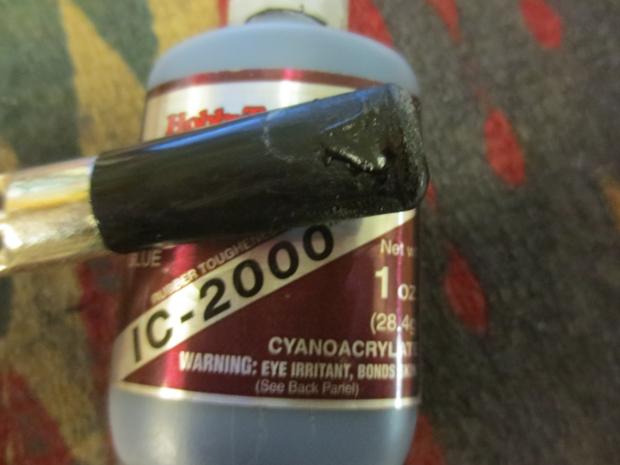
I repaired the tooth marks with black super glue and set the pipe aside for the evening to allow the glue to cure. I have not had good luck with this kind of fill using the accelerator as it tends to cause air bubbles in the dried glue.

G9G10

I reamed the cake in the one bowl with a Pipnet reamer and took the cake back to bare briar.

G11G12

In the morning I sanded the repairs on the stem with 220 grit sandpaper to smooth the surface of the repair and blend it with the stem. I used a needle file to sharpen the edges on the button.

G13G14G15G17

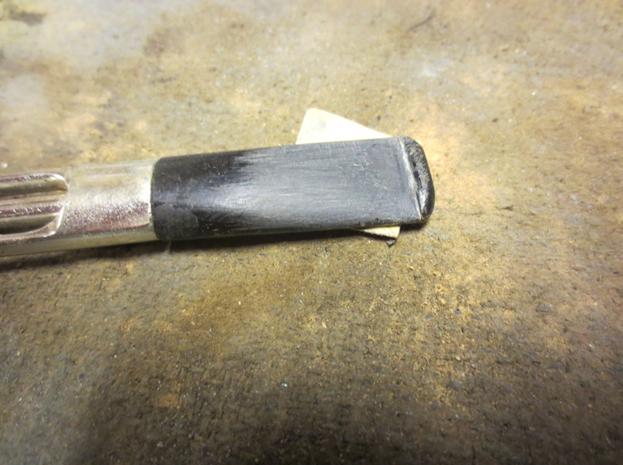
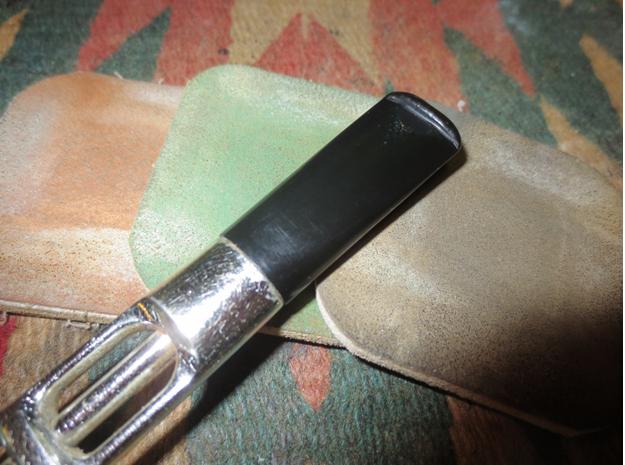
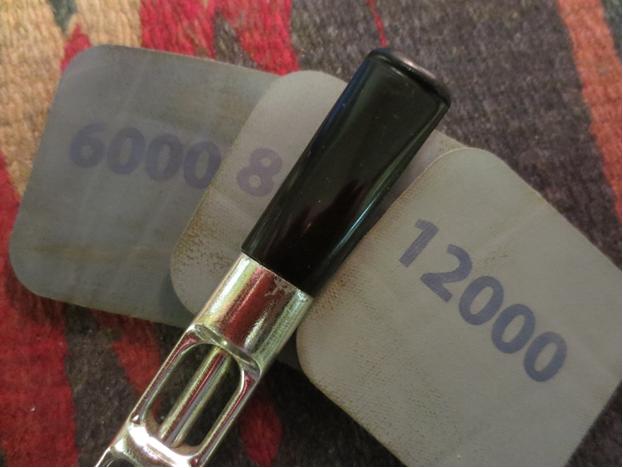
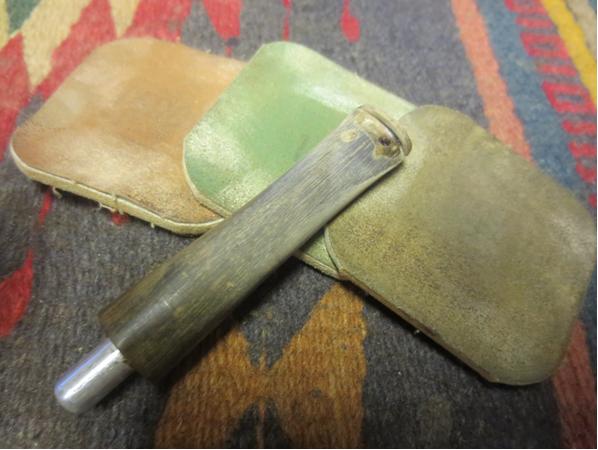
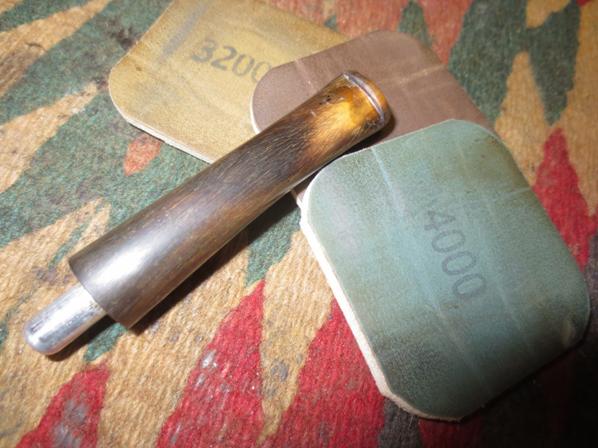
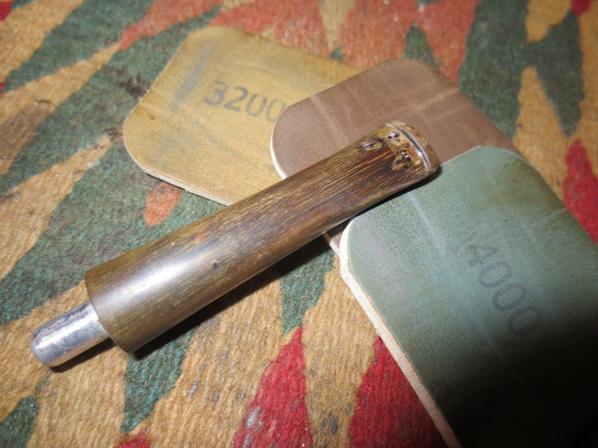
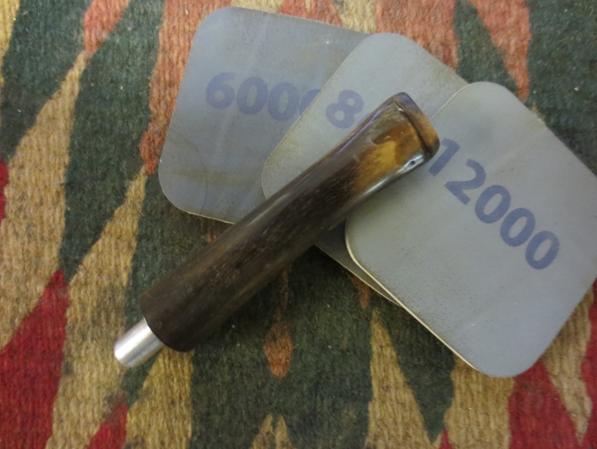
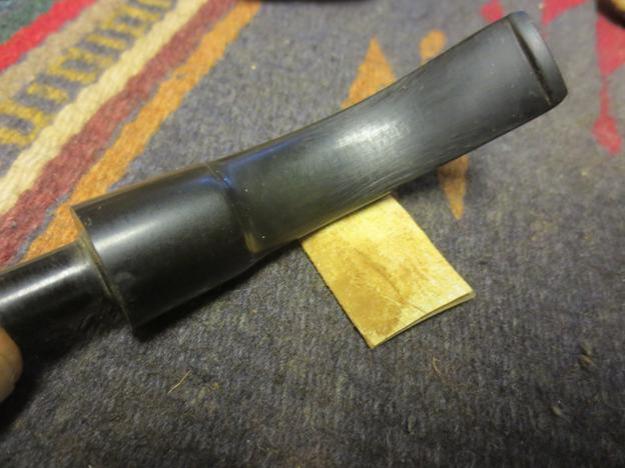
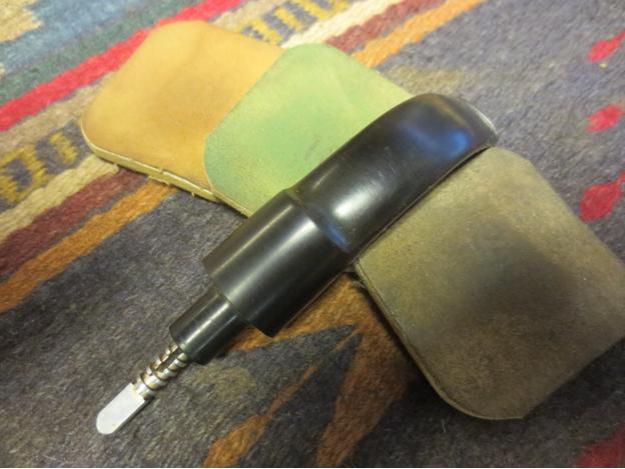
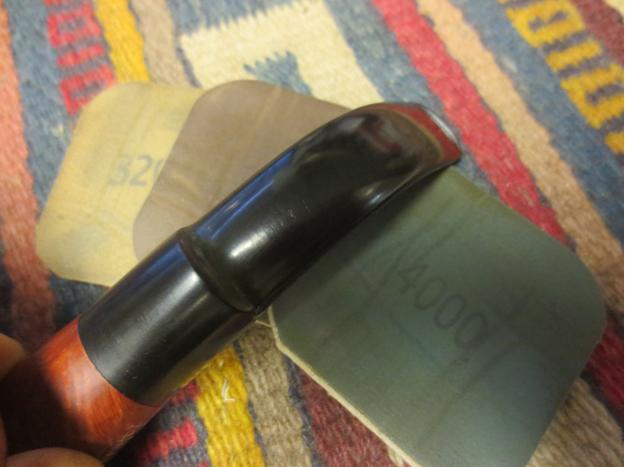
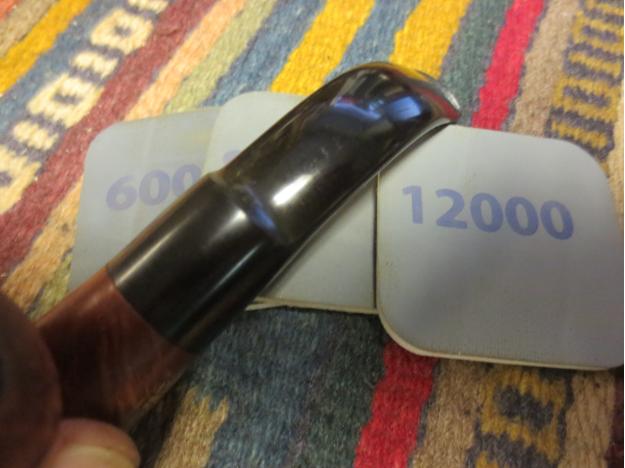
Once I had the surface smooth I sanded the stem with micromesh sanding pads. I wet sanded the stem with 1500-2400 grit pads and then rubbed it down with Obsidian Oil. I dry sanded the stem with 3200-4000 grit pads and gave it another coat of oil. I finished dry sanding it with 6000-12000 grit pads and gave it a final coat of Obsidian Oil. I set it aside to dry.

G18G19G20

With the base finished I set it aside and turned my attention to the bowls. I topped all three bowls on the topping board. The short bowl that I reamed had some dents and rim damage. The other two had burn marks and rounded edges that needed to be cleaned up.

G21G22

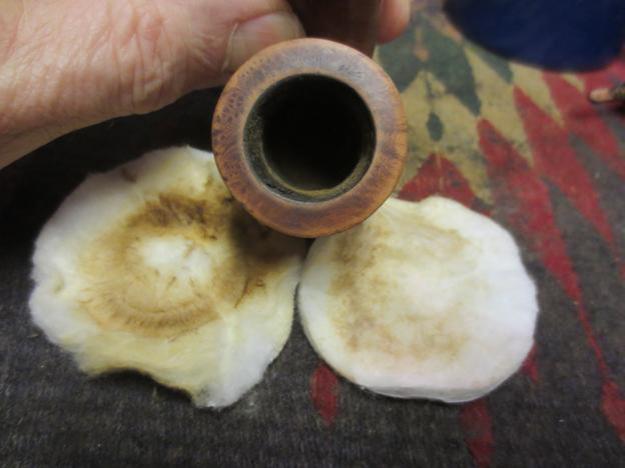
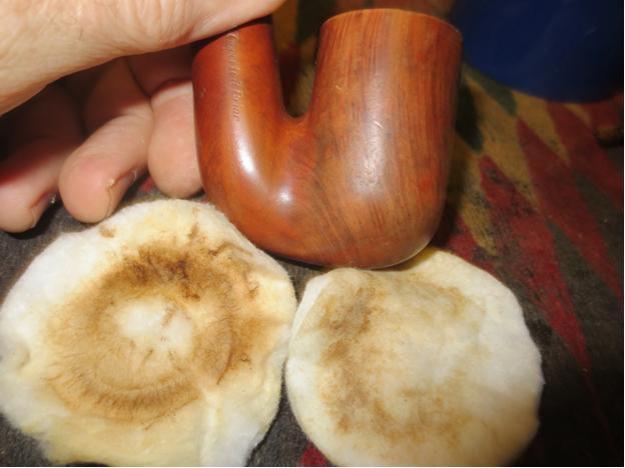
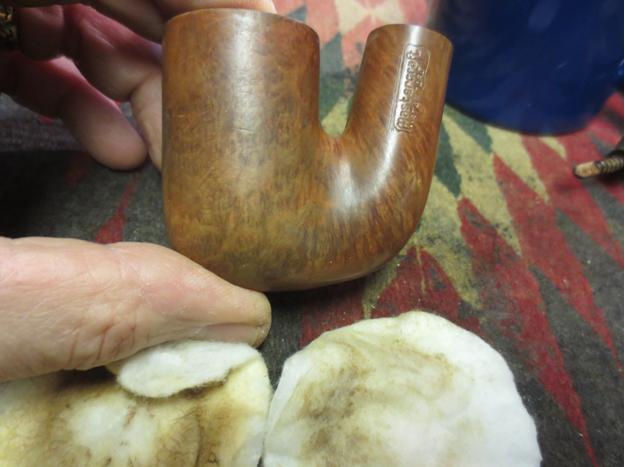
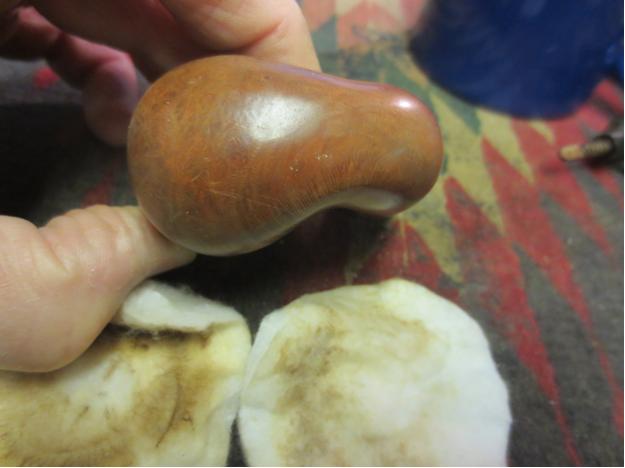
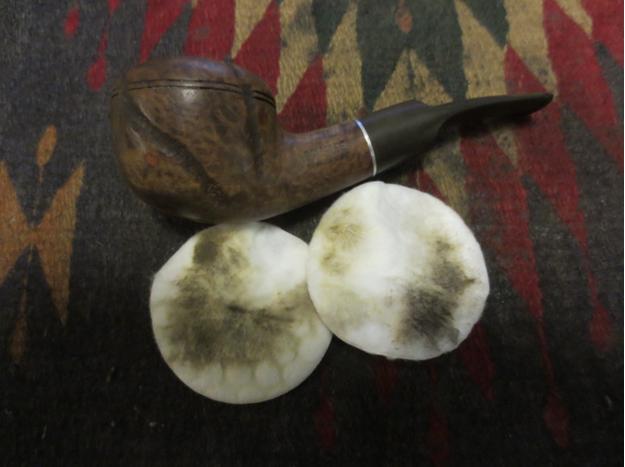
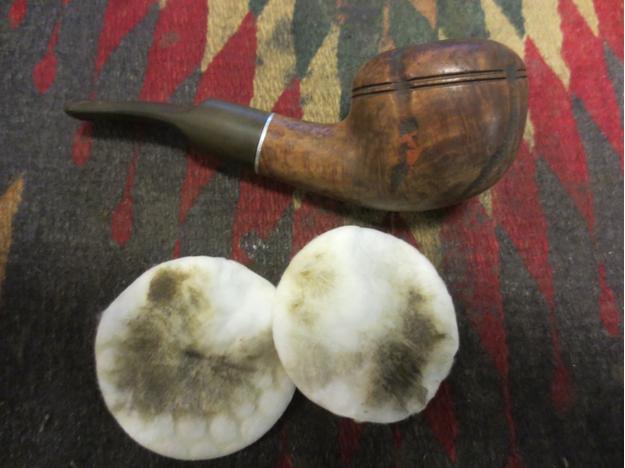
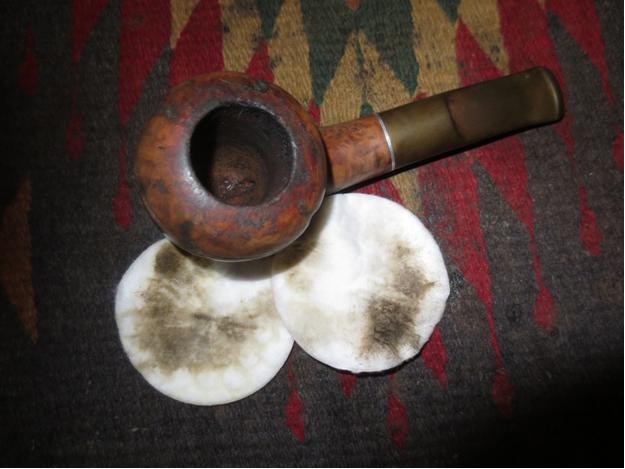
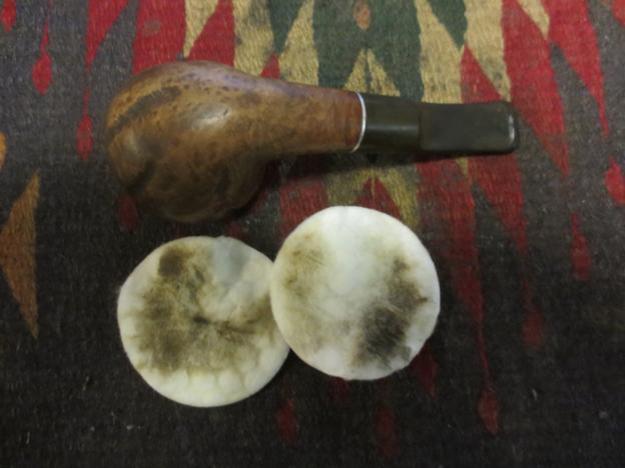
I wiped the bowls down with acetone on cotton pads to remove the finish and the grime.

G23G24

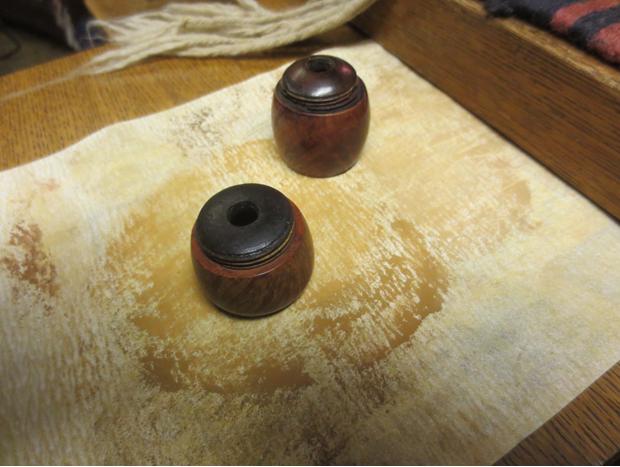
I stained all three rims with the light brown stain pen for the first coat. I then gave all three bowls several coats of Cherry stain Danish Oil and buffed them to a shine.

G25G26G27G28G29

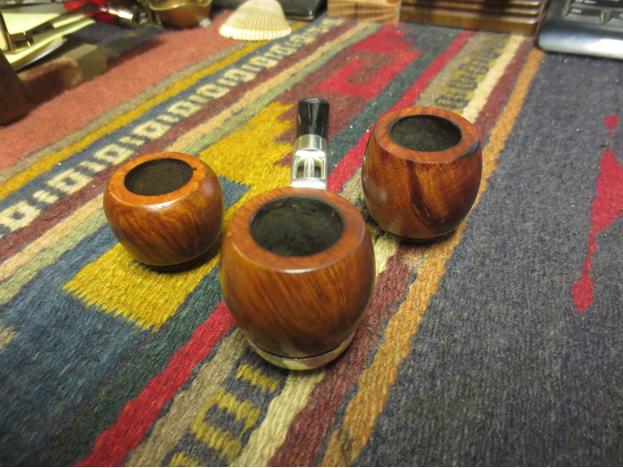
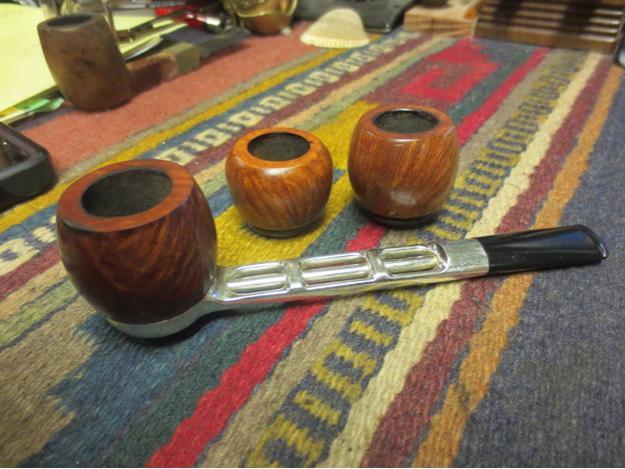
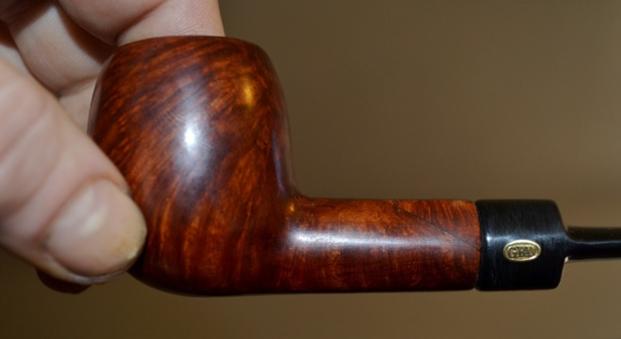
I finished the restoration by buffing the bowls with Blue Diamond and then giving the bowls and the stem several coats of carnauba wax. I buffed the whole pipe with a clean buff and then with a microfibre cloth to raise the shine. The finished pipe is shown in the photos below. Each photo shows a different angle and includes the base with all of the bowls in place.

G30G31G32G33G34G35G36G37G38G39

More Work than I thought – A Real Briar Billiard with a horn stem


Blog by Steve Laug

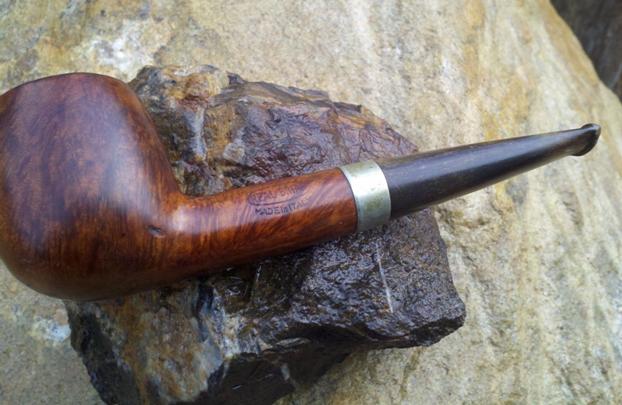
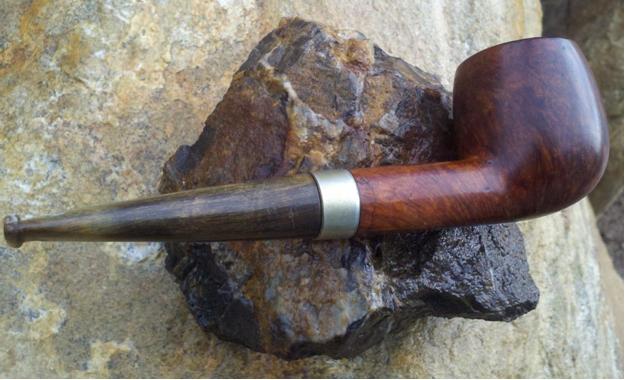
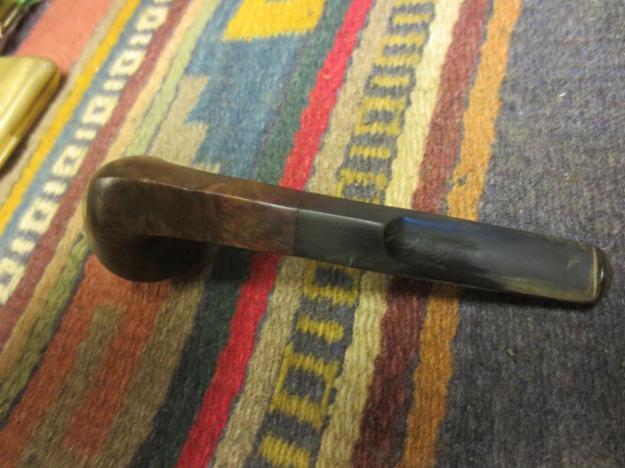
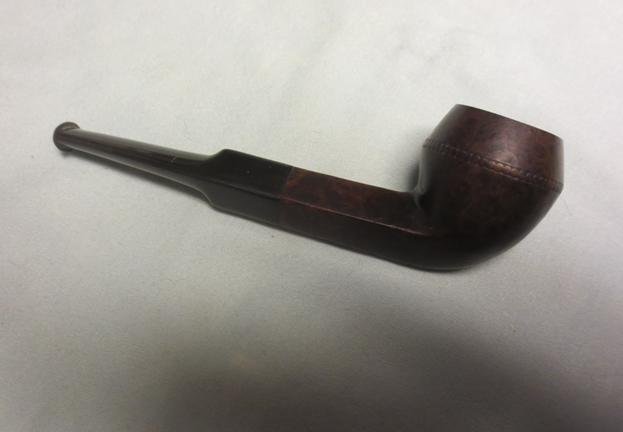
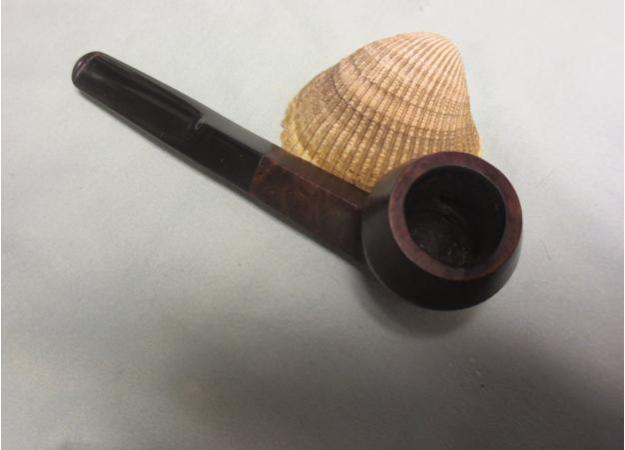
When I saw this pipe on eBay when my brother and I were searching for pipes in the estate pipe area I thought it would be a simple restoration. The briar appeared to be in decent shape and the finish looked very good. The rim was dirty but looked undamaged under the grime and tars. The horn stem did not look too damaged and should also be an easy repair. When the pipe arrived at my brother’s home he took the following photos and sent them to me to have a look at the pipe. It still looked pretty straight forward to me.RB1

RB2

RB3

RB4

RB5 When the pipe arrived here in Canada I was in for a surprise. It definitely looked good but the more I dug deeper the more issues that I found. The rim was tarred and covered with lava and underneath the outer edges were rounded over. The bowl had a light cake at the top and half way down and a deep groove had been cut in the bottom of the bowl by aggressive insertion of the pipe cleaner. The groove or pit was below the airhole entry to the bowl. The shank had been repaired and the crack that I noted in the pictures had been well repaired and the band put in place to strengthen the shank. It would not take much to clean it up. The finish which at first glance looked good had deep gouges in the bottom of the bowl and on the left side of the bowl near the shank union. These were sharp cuts and could not be steamed out. There was a large fill on top of the shank where it met the bowl. It appeared to be pink putty but it was solid and tight. The stem was also nicked quite a bit on the top mid stem and on the left side near the band. The top and bottom sides had some deep tooth marks on them that I could not see from the photos. The stem was very tight in the shank and took some persuasion to remove.RB6

RB7 The next two photos show the repair work on the underside of the shank. It was very well done and would not need to be further dealt with. The third photo shows the rim with the rounded outer edge.RB8

RB9

RB10 I removed the stem from the shank with a bit of pulling and found that the metal tenon was covered with tar and had been stuck in the shank by the tars.RB11 I reamed the bowl back to bare wood to bring the rest of the bowl in line with the bottom half. I used a PipNet reamer with the second cutting head. In the second photo you can see the deep pit in the bottom of the bowl.RB12

RB13 I cleaned out the stem and the tenon with alcohol, cotton swabs and pipe cleaners.RB14 The next two photos show the tooth marks on both sides of the stem. They are quite deep and they will need to be repaired.RB15

RB16 I wiped down the stem with a cotton pad and alcohol and then put drops of super glue in the tooth marks. I sprayed them with accelerator.RB17

RB18 I scrubbed out the mortise, shank and bowl with alcohol, pipe cleaners and cotton swabs. I scrubbed until the pipe cleaners and cotton swabs came out clean.RB19 I topped the bowl to remove the damage to the bowl top and to clean up the round outer edge of the rim. Once again, note the deep pit in the bottom of the bowl that is visible in the second photo.RB20

RB21 I scrubbed the exterior of the bowl with cotton pads and acetone to remove the finish and the grime that was ground into the briar. I was going to need to do some work on the gouges on the bowl sides and bottom so I wanted it clean.RB22

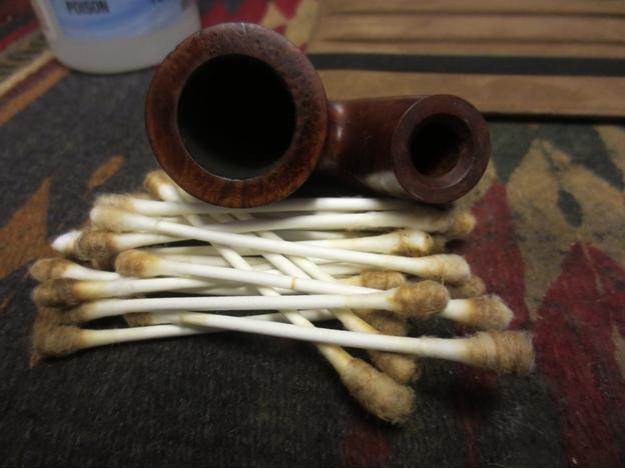
RB23 The stem never sat completely tight against the shank so I beveled the inner edge of the mortise to accommodate the tenon/stem junction.RB24 With the externals cleaned I decided to do the repairs on the gouges on the bowl side and bottom. I put a drop of clear super glue in the divot and then pressed briar dust into the hole with a dental spatula. I pressed the dust deep into the glue to get a good fill. The second photo below shows the bowl side and bottom with what looks like a pox. The briar dust and glue fills are dry at this point and ready to sand. I sanded them with 220 grit sandpaper and then with 1500-2400 grit micromesh sanding pads.RB25

RB26

RB27

RB28 I used a light brown stain pen to give the fresh sanded briar on the bowl bottom and the rim an initial coat. I then stained the entire bowl with a dark brown aniline stain, flamed it and repeated the process. I set it aside to dry for about 30 minutes before buffing with Blue Diamond on the wheel.RB29

RB30

RB31

RB32 I mixed a batch of pipe mud (cigar ash and water) to fill the pit in the bottom of the bowl. I put a pipe cleaner in the airway with just the tip extending into the bowl. I used the spatula to put the mud in the bottom of the bowl and pressed it into the pit with the hand of the spatula. I added the pipe mud until the bowl bottom was level.RB33 I set the bowl aside to so that the pipe mud would cure and worked on the stem. I sanded the stem with 220 grit sandpaper to smooth out all of the nicks and scratches as well as blend in the super glue fills. It took a lot of sanding to smooth out the stem surface and remove as many of the scratches and dents as I could and still keep the profile. The super glue dried hard and the clear glue looks shiny and raises colour in the horn so it is very visible at this point.RB34

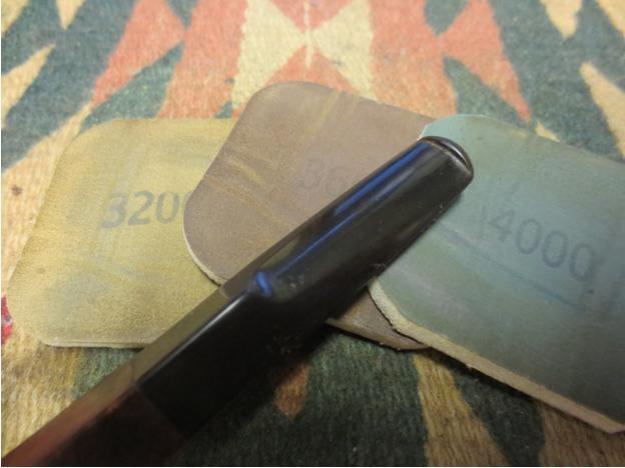
RB35 When I had smoothed out the surface of as many flaws as possible I worked on it with micromesh sanding pads. I wet sanded it with 1500-2400 grit pads. The repairs are starting to blend in. They will never be invisible but they are smooth. I rubbed the stem down with Obsidian Oil before continuing.RB36

RB37 I wet sanded the stem with 3200-4000 grit micromesh and then dry sanded with the same grit pads. I gave it another coat of the oil.RB38

RB39 I finished by dry sanding the stem with 6000-12000 grit micromesh sanding pads and then buffing the stem with Blue Diamond on the wheel. I gave it a final coat of Obsidian Oil and set it aside to dry.RB40

RB41 I polished the silver band with silver polish and brought the parts together. I gave the pipe a final buff on the wheel and gave it multiple coats of carnauba wax. I buffed it with a clean buff and the with a microfibre cloth to raise the final shine. The finished pipe is shown in the photos below. While the patches in the stem still show they are shiny and smooth to the touch and will give protection to the stem. The repairs to the cuts and gouges in the bowl look really good and virtually disappear under the stain and the polish. The pipe should live through at least another life time before it needs this kind of attention again.RB42

RB43

RB44

RB45

RB46

RB47

RB48

RB49

RB50

If it’s good enough for Bing then it’s good enough for me – Mastercraft Standard Oom Paul


Blog by Steve Laug

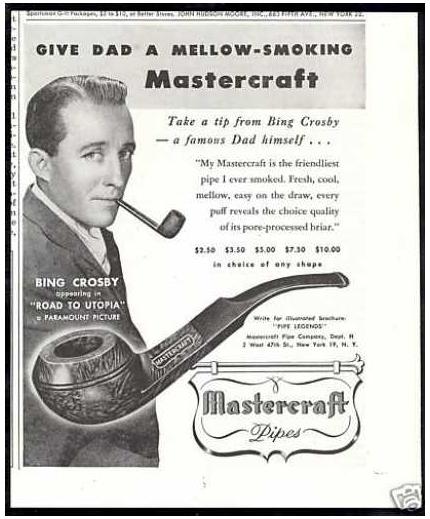
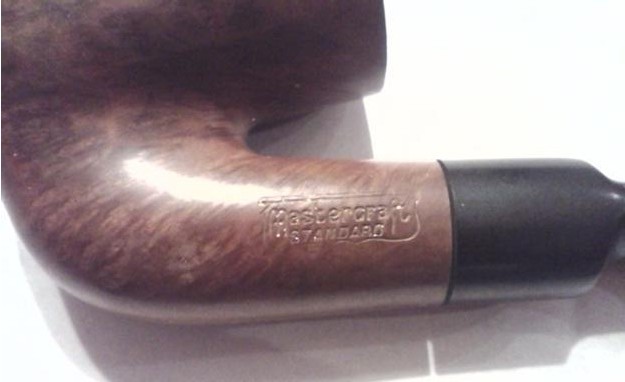
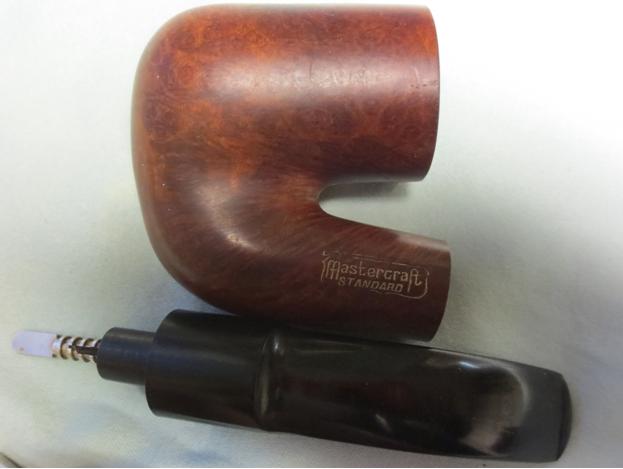
MCOver the years I have cleaned up quite a few Mastercraft pipes. My brother picked one up on Ebay for me recently. It looked like a good one when he sent me the photos of the pipe. I could not wait for it to arrive and I could begin to work on it. In one of my earlier blogs I wrote a bit about the history of the brand (https://rebornpipes.com/2014/06/22/learned-a-bit-of-american-pipe-history-mastercraft-executive-choice-pot-restored/). In that article I made the connection of the brand to Bing Crosby. I posted this old advertisement for the pipes with the old crooner himself.

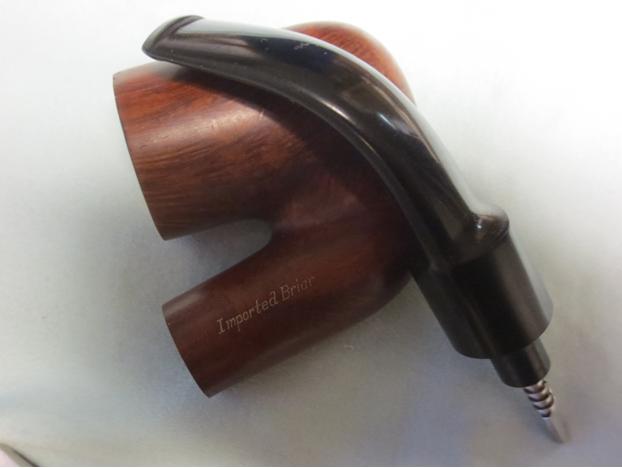
The connection between the pipe in this advert and the Oom Paul I received from my brother. They both bear the same stamping. The both had the shield on the left side of the shank and then bore the same stamping. The Oom Paul was stamped Mastercraft over Standard in the shield. On the right side of the shank it was stamped I continued through the Google list for Mastercraft and one of the next listing was in Pipedia. http://pipedia.org/wiki/Mastercraft

It doesn’t appear that Mastercraft was ever a manufacturer and bought pipes from multiple factories — mostly French and English. It survived briefly the post war recovery and then was acquired by Grabow. As an importer of finished pipes M/C worked with many of the world’s foremost pipe makers and had in inventory finished product from the likes of… England: Hardcastle and Orlik. France: Ropp, Jeantet, Jean LaCroix. Italy: Lorenzo, Gasparini, Federico Rovera, Emilio Rovera, GIGI Pipe, Brebbia, Santambrogio, Fratelli Rossi. Israel: Shalom and Alpha. Plus all the tools, pouches and lighters from Hong Kong and Japan. The list of suppliers is enormous.

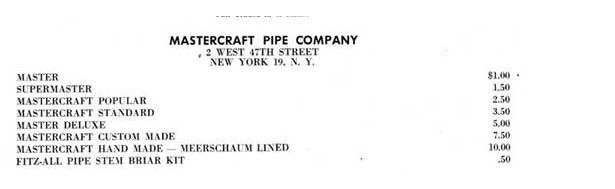
I had also found some older RTDA Almanac pages on Chris’ Pipe Pages site. http://pipepages.com/index.html. The first one of these shows the Mastercraft Standard. It sold for $3.50 and was a midrange pipe value as shown on the list below.The first of these shows the address of the Mastercraft Pipe Company in New York which was where they were prior to moving to North Carolina. I clipped this image from the 1949 RTDA Almanac. It is an early catalogue listing, since the brand was created in 1941.MCa My guess, judging from the previous advertisement and the 1949 RTDA Almanac clipping above, is that the pipe I have is from the period between the beginning of the company and the publication of this catalogue (1941-1949). After that period in the 50’s and 60’s the names of the pipes changed and I was not able to find the Mastercraft Standard in later catalogues.

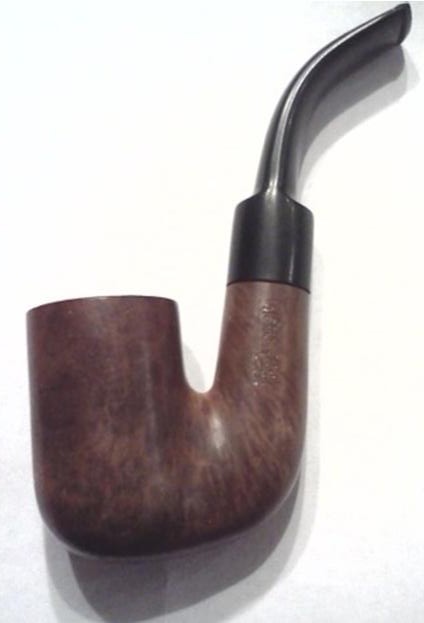
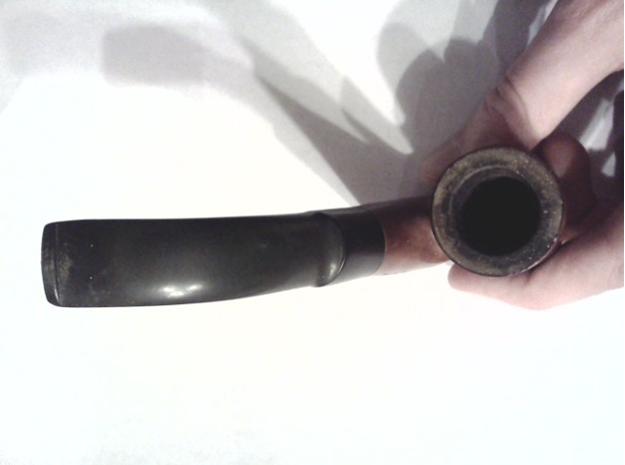
MC1The photo to the left and the next two photos that follow are the ones my brother sent to me before I received the pipe. They give a good idea of the condition of the pipe when I received it. The pipe had a natural finish, no stain on the briar. Over the years the briar takes on a richer colour. This one had taken on a reddish tint. The stamping on the left side still showed the gold stamping in some of the grooves. There were specks of white paint on the bowl, shank and stem. There was also some darkening on the sides at the shank junction with the bowl from oils and soiling from the previous pipe man’s hands. The rim was thickly tarred with lava overflow. The bowl had a thin cake on the top 2/3 and the bottom 1/3 was still fresh briar showing raw briar. The pipe obviously had not been smoked to the heel. The stem was quality rubber and did not show signs of metal fragments in the mix that seem to appear in many of the war year pipes. There was little oxidation but there were tooth marks on the top and underside of the stem near the button. There was tooth chatter on both sides. The stem did not fit tight against the end of the shank.MC2

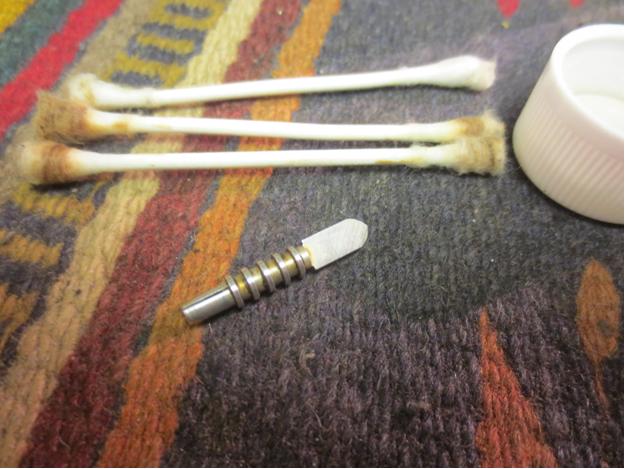
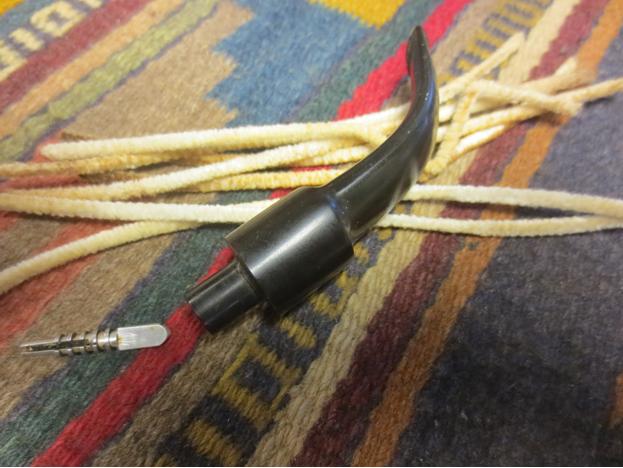
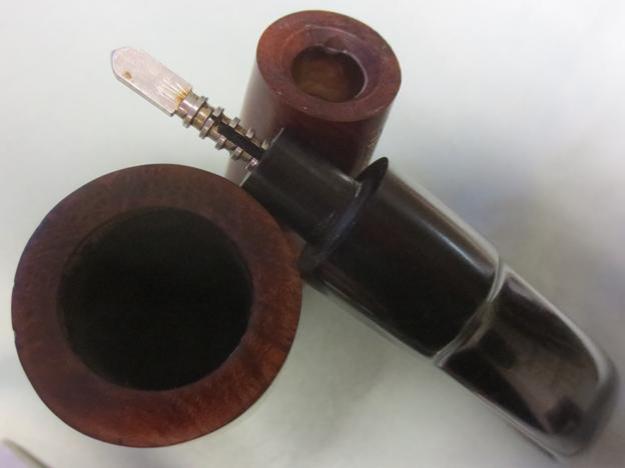
MC3 When the pipe arrived I put it in my refurbishing box and would eventually get to it. Today I took it out of the box to work on it. I removed the stem and was a bit surprised to see the interesting and unusual stinger apparatus in the end of the tenon. It had a flat blade that ended in a point. It was almost a spear point. It sat down in the sump of the shank. It ended at a spiral cylindrical piece with a slot in the last half of the cylinder. It fit into tenon by pressure and was easily twisted free.MC4

MC5 I scrubbed the bowl with acetone on cotton pads to remove the grime and soil in the briar and the white flecks of paint on the bowl and shank. I scrubbed the rim with the acetone as well to try to remove the lava overflow that was present. I used a pen knife and scraped at the lava between wipes of acetone and was able to remove the buildup without damaging the finish on the rim. I did not need to top the bowl!MC6

MC7 The acetone removed the grime from the briar and all of previous coats of wax that had given it a dull finish.MC8

MC9

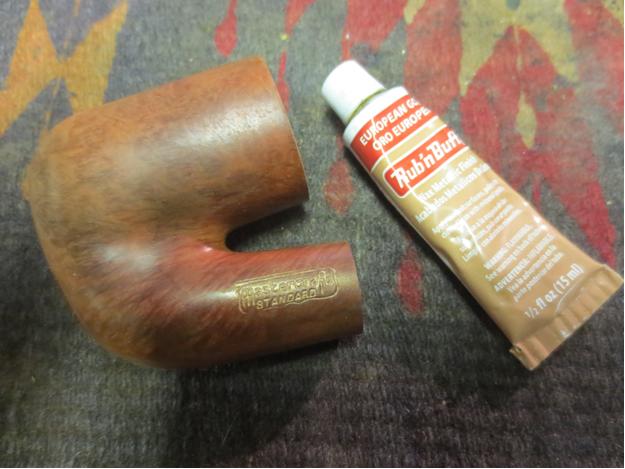
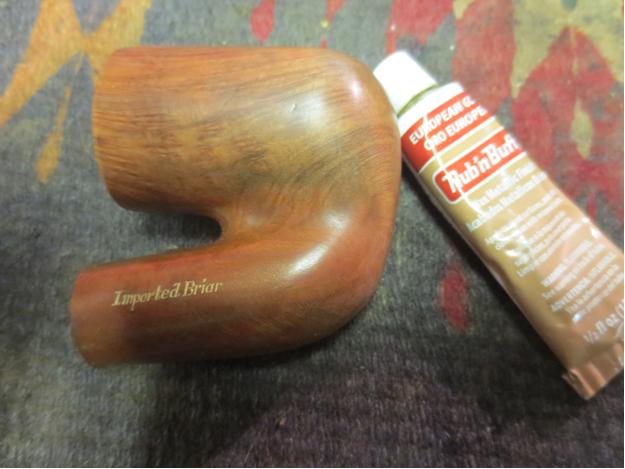
MC10 Once I had cleaned the finish of the bowl and shank with the acetone I washed it down with alcohol and dried it off. I used some antique gold Rub ‘n Buff to restore the stamping to its previous look.MC11

MC12 I hand buffed the bowl with a shoe brush and a little Conservator’s Wax to protect it during the rest of the clean up. Though I probably should have done the next step before the work on the stamping I did not do so. But such is the way things go. I reamed the bowl with a PipNet reamer using the third cutting head to take back the cake to bare briar. Since the bottom 1/3 of the bowl was uncaked I wanted the transition between the sides of the bowl from top to bottom to be smooth.MC13

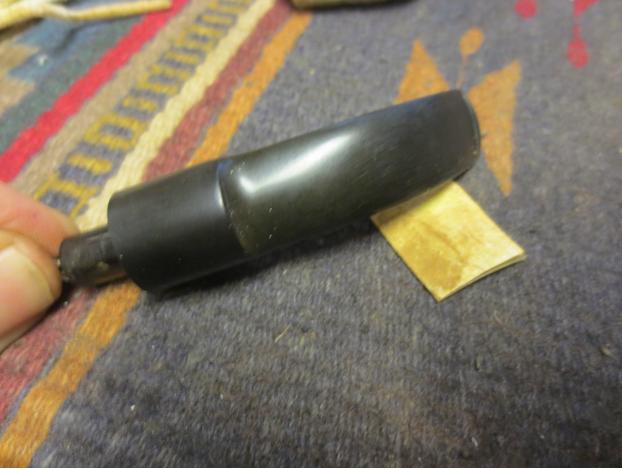
MC14 I scrubbed the stinger with alcohol and cotton swabs to remove the grime. I also scrubbed it with a brass tire brush.MC15 I cleaned out the airway in the stem with pipe cleaner, cotton swabs and alcohol to remove the tars and oils. I was surprised to find that the tenon was lined with an aluminum tube. The stinger pressed against the sides of the tube when it was inserted. I think it was also an attempt to strengthen the tenon.MC16 I scrubbed out the mortise, sump and airway on the bowl with cotton swabs, pipe cleaners and alcohol until they came out clean.MC17 I sanded the tooth chatter and tooth marks on the top and bottom of the stem with 220 grit sandpaper to remove them as they were not too deep.MC18

Mc19 I wet sanded the stem with 1500-2400 grit micromesh sanding pads and rubbed the stem down with Obsidian Oil. I dry sanded it with 3200-4000 grit pads and gave it another coat of oil. I finished sanding it with 6000-12000 grit pads and gave it a final coat of oil, then left it to dry.MC20

MC21

MC22 I rubbed down the bowl with a light coat of olive oil and then buffed it with Blue Diamond. I gave the bowl and stem multiple coats of carnauba wax and then buffed it with a clean buffing pad. I gave it a final buff with a microfiber cloth to raise the shine. The finished pipe is shown in the photos below. It should provide many years of service to the next pipe man whose rack it graces. It will likely outlive both that pipe man and me and be passed on it trust to the next person who will enjoy it companionship for the years that they have it in trust. These old pipes always outlive the pipe man who keeps them company if they are well cared for (and even sometimes when they are not!).MC23

Mc24

MC25

MC26

MC27

MC28

MC29

I love these old timers – this one is a GC Bulldog


Blog by Steve Laug

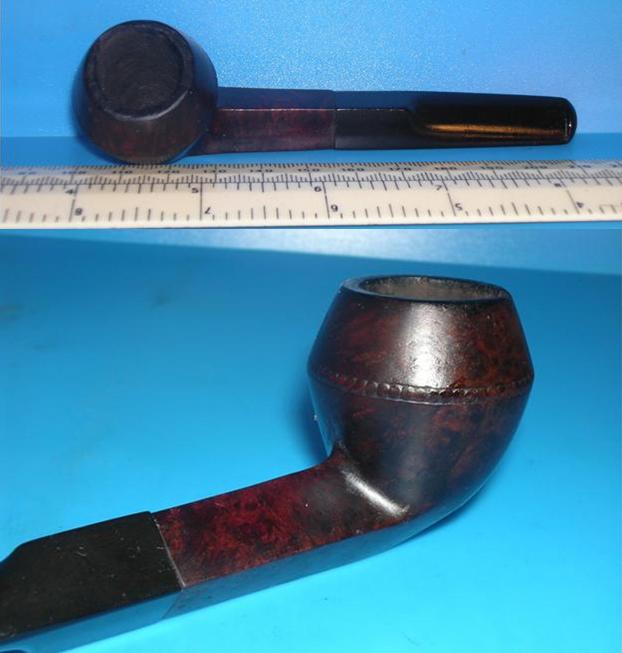
When I found this old bulldog on EBay I was drawn to it and immediately put in a bid. I won it as no one else saw the charm in this one. It was a hard to see the stamping in the photos and many of the photos the seller included were out of focus which even made it harder to figure out the state of the pipe. The seller identified the pipe as a GC Bulldog. The seller’s photos that I have chosen below show the condition of the pipe. The finish is dirty and there are definitely dings and nicks in the briar. The bead around the cap of the bowl is a nice touch and it too is worn. The stem is oversized and is larger in diameter than the bowl so it makes one wonder if it is original. The threaded bone tenon in the stem fits perfectly in the shank with the alignment matching. The angles of the shank and the stem match. The vulcanite stem is just slightly larger than the shank on the left side of the pipe but works on the right side. The button is rounded and has an orific opening that shows that it is the proper age for this pipe. All that I saw was enough for me.G1

G2

G3 When the pipe arrived my assessment from the photos was correct. The stem was a good fit but it was larger than the shank on the left side. The bone tenon was in excellent shape with no wear and tear on it. It was stained with the tobacco juices of the long smoking. The shank was dirty and the airway in the stem was dirty. The airway in the bowl was clogged so no air would go through it no matter how hard I blew on the shank. The rim had serious damage on the right side front. There was a chunk of briar missing from the inner edge of the bowl and there was a scar running part way down below that. The rim had a divot at that point and also on the front itself that looked to have been caused by overzealous lighting from the exact same point every time the pipe was smoked. The bowl had been reamed and looked clean and smooth other than the damage on the right top side. The finish was dark and dirty. The stem had tooth marks on the underside near the button and tooth chatter on the top side. The next four photos show the pipe when I brought it to the work table.G4

G5

G6 The next photo is a close-up of the rim to show the damage. I decided to top the bowl so I used the topping board and 220 grit sandpaper to remove the top surface damage to the rim edge. When I had topped as much as I could without changing the profile of the bowl it was time to decide how to address the damage. I set that aside for a bit and worked on the fit of the stem.G7

G8

G9 I sanded the stem sides with 220 grit sandpaper to bring it to the same height and dimensions as the shank. It took work on the left sides and some adjustments to the right side. I also needed to work over the points of the diamond to make the alignment straight and flowing. I sanded the tooth marks and tooth chatter at the same time and was able to remove it.G10

G11

G12

G13 I wiped the bowl down with acetone on cotton pads to remove the damaged and dirty finish that remained on the bowl. With these old finishes the grime and some of the clouded top coat disappears and the grain begins to poke through as the bowl is scrubbed.G14

G15 I worked on the internals of the mortise, airway and the airway in the stem. Since the airway in the mortise was plugged I used a round dental pick to push through the grime that plugged the airway. I reamed out the airway with the pick and then scrubbed it with pipe cleaners and a shank brush until it was clean. I scrubbed out the mortise with pipe cleaners, cotton swabs and alcohol until it was clean and smelled fresh. I swabbed out the inside of the bowl with cotton swabs and alcohol. I used pipe cleaners and alcohol in the stem airway and cleaned the threads on the bone tenon with cotton swabs.G16

G17

G18 With the interior of the bowl clean I lightly sanded the inner edge of the bowl in the damaged area. I put some small drops of super glue on the rim and inner edge and used a dental spatula to press briar dust into the glue.G19

G20 I retopped the bowl to smooth out the repair and sanded the inside with a folded piece of 220 grit sandpaper to smooth out the curve of the inner edge.G21

G22 I sanded the top and rim edge with 400 grit wet dry sandpaper and then with 1500 grit micromesh in preparation for staining. I stained the areas where I had sanded the shank to match the stem and the rim with a dark brown stain pen.G23

G24

G25 I hand buffed the stained areas and the rim and took the following photos.G26

G27

G28

G29 I wet sanded the stem with 1500-2400 grit micromesh sanding pads and then rubbed the stem down with Obsidian Oil. I dry sanded the stem with 3200-4000 grit pads and gave it another coat of oil. I finished sanding with 6000-12000 grit pads and gave it a final coat of oil. I set the stem aside until the oil dried.G30

G31

G32 I gave the bowl and stem several coats of Conservator’s Wax and hand buffed the pipe and stem with a shoe brush and a microfibre cloth to raise the shine. The finished pipe is shown in the photos below. There are still some dents and dings on the sides of the shank and bowl that I chose to leave there. Some of them are the very faint stampings that remain on the right and left topside of the diamond shank. Some of them are beauty marks that came with the long life and hard travel of this little pipe. I chose to leave them as they were and imagine the stories that go along with them. Thanks for looking.G33

G34

G35

G36

G37

G38

Mission Impossible: Operation Long Shot


Blog by Charles Lemon and Steve Laug

Charles posted this on his Dadspipes blog this morning and I reblogged it here on rebornpipes. I was thinking about it this evening and thought it was worth saving in total on both blogs so not only have I reblogged it but I also have put it here in the archives of this blog. That way it is easily accessible on both blogs. This was a fun project for both of us to do. We spoke this afternoon and already are working on another collaboration… Keep an eye out for it on both blogs.

The door opened and a man walked into the bar, pausing briefly in the doorway to allow his eyes to adapt to the dim light inside. The place was what optimists would euphemistically call a dive. The establishment was empty except for a few drunks and a large, bored-looking man behind the counter wiping glasses with a rag that was presumably once white but was now an indeterminate shade of grey.

The man walked through the room, turned in at a doorway marked “Gents” and scanned the room – two stalls, a urinal and a grimy sink – before spotting what he sought. Moving across the room, he fed a handful of coins into a coin-operated machine advertising cheap cologne. There was a rattle and then a small rectangular device dropped into a waiting hand. The man pushed his thumb against a small pad on the otherwise blank rectangle. A laser washed briefly up and down the pad and then a voice was heard.

“Good morning, Agent. You have been selected to join a small, two-man strike force for a delicate and potentially disastrous assignment. Your mission, should you choose to accept it…..”


A while back, Steve Laug of Reborn Pipes and I had a conversation about the limits of pipe restorations. Was a pipe ever truly beyond repair? We responded in the negative, and decided to put our theory to the test with this mission, code-named Operation Long Shot. We wanted a pipe that was so far gone that most people would immediately write it off as firewood or worse, the sort of thing barely recognizable as a pipe.

We selected as our test subject this Brigham 3-Dot Prince. As you can see in the photos below, it was in terrible condition when I came across it in a jumble of estate pipes I picked up about six months ago. I had been holding onto it with some vague notion of using it for spare parts.

The pipe was filthy, crusted with dirt and debris. The old finish was long gone, and the nomenclature was almost entirely worn away. Wiping the shank with a bit of water, however, revealed the thin, flowing script of the early Brigham logo stamped over “Can Pat 372982”. That stamp places the production date of this old warrior in the 1938-1955 range.

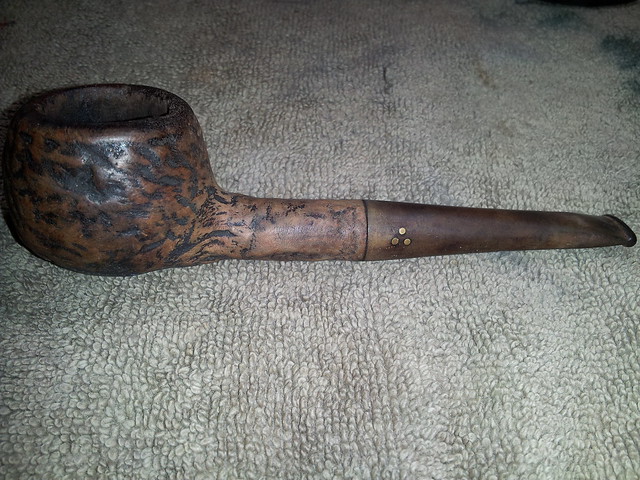
The pipe stem carried the three brass dots of Brigham’s mid-grade 300 series, but was deeply oxidized a gruesome yellow/green colour. It had been brutally chopped off at the bit and a crude button cut into the raw end. To add insult to injury, the bowl had suffered a burnout through the bottom, which had been “repaired” as delicately as the stem with a large clod of epoxy which spread over most of the bottom bowl surface. The interior of the bowl was in no better shape – the epoxy fill had been roughly wiped around the chamber floor, and the draft hole had been worn or burnt open to about double its original diameter. All in, this pipe was a train wreck, though evidently much prized by its previous owner who had refused to give up on it.

20160106_141017 20160106_141026
20160106_141059 20160106_141052
20160106_163456 20160106_163435

Mission Log: Agent Lemon. Phase I – Cleanup and Salvage

This restoration would be a great challenge, but Steve and I were up for it. We agreed to tag-team the job: I would clean up the stummel and salvage what I could from the hacked up stem, and then mail the briar across the country to Steve in Vancouver, BC. He would plug the burnout and tidy up the stummel and then send the pipe home to me in Kitchener, ON for re-stemming and the final fit and finish.

Wanting to get the pipe off to Steve as quickly as possible, I got going on the reaming and cleaning work. I used my Castleford reamer to remove as much carbon from the bowl as I could. I reamed very carefully, expecting the bowl to crumble in my hands, but the old girl held together. I think most of what came out was actually more dirt than cake, but at least the chamber walls looked ok except for the enlarged draft hole. I scrubbed the exterior of the stummel with Murphy’s Oil Soap and a soft toothbrush, and then dropped the briar into an isopropyl alcohol bath to soak overnight.

20160106_16380120160106_163811

While the stummel soaked, I had a good look at the stem. I have another Prince shape in my Brigham collection, and a quick comparison showed that the stem for this old pipe was missing about an inch of length. I decided that I would need to work up a new stem to replace the old one. A vulcanite stem would be relatively easy to get hold of, but an aluminum Brigham tenon was quite another matter. As the tenon on the junk stem was still in good shape (or would be after a good cleaning), I decided to salvage it to implant in the replacement stem. I heated the tenon and the end of the stem over a lighter flame until the vulcanite softened, then gently twisted the aluminum tenon out of the stem. One of the brass dots decided to come with it, demonstrating how Brigham used the first brass pin to help hold the tenon/filter holder in the stem.

20160106_164539
20160113_19515920160113_195700

The next morning, I pulled the stummel out of the alcohol bath and scrubbed it down with an old towel. This is when I ran into the first bit of luck on this project – the alcohol soak had softened the wide but thin patch of epoxy spread across the bottom of the bowl. I quickly grabbed a dental pick and scraped as much of the old adhesive from the briar as I could. I managed to remove most of the softened epoxy, revealing a central core of harder fill about 5/8″ in diameter. This then, was the original burnout.

20160108_09121920160108_091823
20160108_092022

I drilled out the core epoxy and used a tapered reamer to trip the opening to an even circle with fresh briar all around. This would be the hole Steve would need to plug.

20160110_10033420160110_101105
20160110_10120020160110_101206

My first stage of the mission was complete, so I packed the stummel securely and entrusted it to Canada Post for shipment to Steve in Vancouver.

Mission Log: Agent Laug. Phase II – Bowl Repair & Refinish

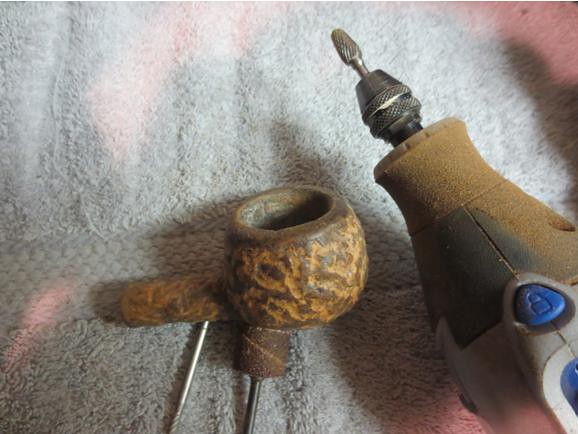
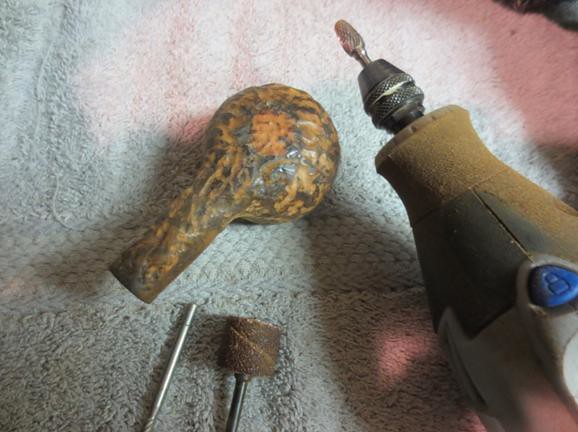
Charles Lemon of DadsPipes and I decided to collaborate on a refurbish that captured some of the essence of our conversation that we shared on our blogs regarding restoration. This old Brigham had major issues with the stem and the bowl. Charles tackled the stem and did the cleanup work on the bowl and then sent the stummel to me to work on. When it arrived I took it out of the small box and had a look at what he had sent to me. He had cleaned out the bowl which had been plugged with JB Weld and opened up the burn out in the bottom of the bowl. He drilled out the plug and when I got it the bowl had pretty much most of the bottom missing. I cut the side out of an old briar bowl I cannibalized for parts and shaped it for the plug. It was thick enough and big enough for me to cut the plug. I cut it and shaped it with a Dremel and sanding drum. The next two photos below shows the plug after the initial shaping. It is still too large in diameter and also needs to be flattened on the inside.

Steve 1Steve 2

I continued to shape and fine tune the plug until it fit into the hole in the bottom of the bowl. I flattened the inside surface to match the angles of the bowl bottom. The next two photos show that the plug is just about ready to press into place. Just a little more material needs to be sanded off the edges before it is a fit.

Steve 3Steve 4

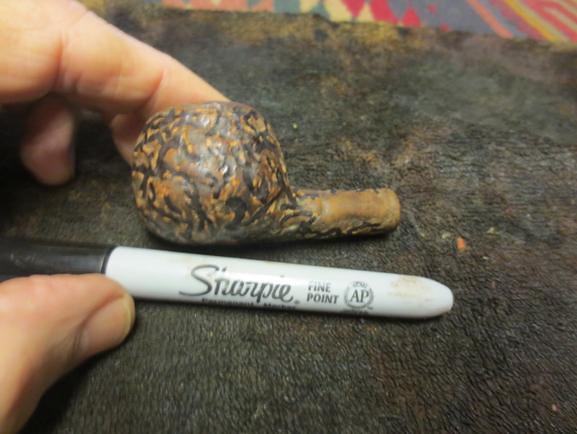
I sanded the edges with the Dremel and sanding drum until I had a good fit and then pressed it into the bottom of the bowl. I sanded the outer surface of the plug with the Dremel and sanding drum until it was flush with the surface of the bowl. I used a black sharpie to draw a cross on the bottom of the bowl so that I could align the plug once I put the glue on and pressed it into place. I then coated the edges of the plug with slow drying super glue and pressed it into the hole in the bowl. The next two photos show how the plug looked in place from the outside and the inside of the bowl.

Steve 5
Steve 6

I used a dental pick to clean out the edges of the plug and bowl on the outside and then filled them with super glue and briar dust to take care of the chips and damage to the bowl bottom. Once it dried I sanded the bottom of the bowl with 220 grit sandpaper to blend in the plug.

Steve 7Steve 8

The next two photos show the state of the bowl repair at this point in the process. The plug has been set in the bowl and the crevices around the plug have been filled and repaired. The inside of the bowl is smooth and the plug sits nicely in place.

Steve 9
Steve 10

At this point in the process others may use JB Weld or Pipe Mud to finish up the bottom but I have found that a thin coat of Plaster of Paris gives a little bit of added protection to the bowl and also levels out the bowl bottom. In this case the bowl had a low spot in front of the entrance to the airway. I mixed a batch of Plaster, put a pipe cleaner in the airway and put it in the bottom of the bowl to level it out.

Steve 11 Steve 12

When the Plaster dried I applied a coat of pipe mud to the bowl bottom and sides, filling in some of the crevices in the bowl sides and smoothing out the surface. I used a dental spatula to press the pipe mud in place on the bowl sides and a pipe nail to press it into the bottom of the bowl.

Steve 13

I set the bowl aside at this point to cure for two days and then worked on the rustication of the bowl. I used a dental burr to follow the pattern on the bowl sides and deepen them. I cut a similar pattern on the bottom of the bowl with the burr. I used the burr to clean up the rustication on the shank as well – carefully avoiding the area where the faint Brigham stamping remained.

Steve 14
Steve 15

I used a black Sharpie permanent marker to stain the grooves in the bowl. I wanted a dark under tone to the bowl after I stained it. I like the way the stain looks with this underneath in the grooves.

Steve 18

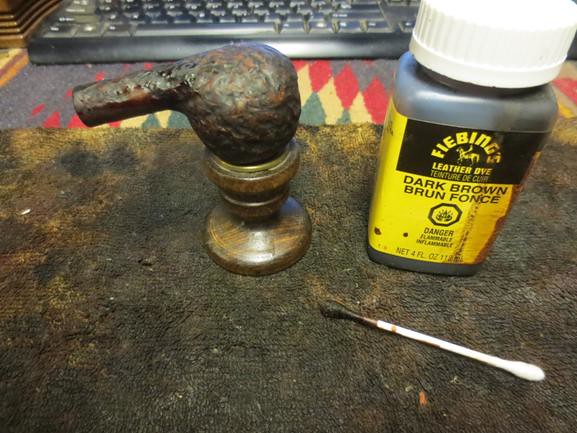
I stained the bowl with a dark brown aniline stain and flamed it.

Steve 23
Steve 24

I wiped it down with alcohol on cotton pads to give it some more transparency and create the contrast with the black in the grooves of the rustication. I sanded the rim with a 1500-2400 grit micromesh sanding pad to smooth it out and to add to the contrast of the smooth rim.

Steve 27

I hand rubbed in several coats of Conservators Wax and then buffed the bowl with a shoe brush.

Steve 31
Steve 33

I mixed up a bowl coating of charcoal powder and sour cream and painted it on the inside walls of the bowl to give it further protection. When the bowl coating dried, it was time to pack the stummel back up for its return trip to Ontario.

Steve 38
Steve 40s

Mission Log: Agent Lemon. Phase III – Stem Work

Recreating a Patent Era Brigham stem requires only a few items – a vulcanite stem of appropriate length and sufficient diameter to hold a Brigham rock maple filter, an aluminum Brigham tenon/filter holder, a few drill bits and some epoxy.

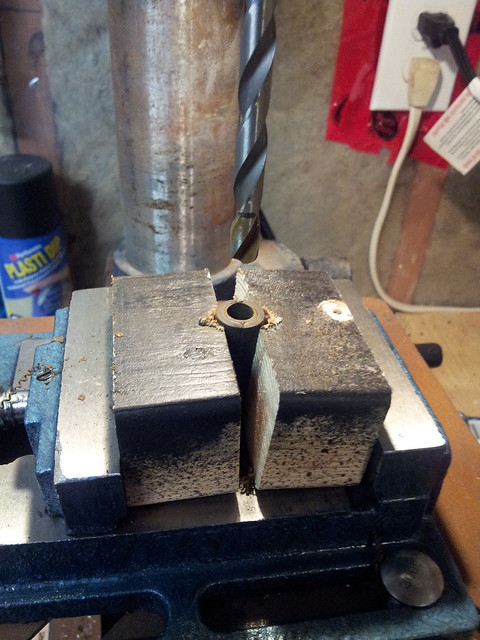
I found a suitable stem in my box of stems, using a Brigham Prince pipe from my collection as a reference. I used a hacksaw to remove the vulcanite tenon, and then clamped the stem into a simple drilling jig in my drill press. The stem must be perfectly aligned in the press or you risk drilling through the side of the stem instead of down the airway. The goal is to enlarge the airway to make room for the filter, and then drill out a mortise in the face of the stem to accept the aluminum tenon/filter holder. A quick test fit verified my drilling, so I glued the original tenon into the new stem with a bit of JB Weld and let the assembly cure.

20160130_130036
20160130_13071720160130_130755
20160130_133236

When the repaired stummel arrived from Vancouver, I could fit the replacement stem. As I was working with the original tenon, it wasn’t a great surprise when the stem fit nicely into the shank. A little bit of filing and sanding to remove the stem’s molding marks and reduce the diameter to match the shank, and I was ready to install the Brigham dots.

20160201_094109
20160201_094840

The dots are made by inserting 1/16″ brass rod into holes drilled in the side of the stem. The first pin is located approximately 5/16″ from the end of the stem at the centre line, and the other pins in the 2, 3, and 4-dot patterns are built off the first dot. As this was a 300-level pipe, I’d be installing three pins in a triangle pattern. The first pin is the bottom left dot of the triangle.

I marked out the pinning pattern with a Sharpie and then drilled the holes, being careful not to drill through into the stem’s airway. Short segments of brass rod were then glued into the holes with clear CA glue. When the glue had cured, I used a combination of files and sandpapers to bring the dots flush with the surface of the stem. A final polishing with micromesh pads to remove any remaining scratches prepped the stem for buffing. Just before doing so, I gave the stem a 1/8th bend by holding it over the heat gun until pliable and shaping it over a round form. A dip in cool water set the bend in place.

20160201_204450
20160201_205613

Mission Log: Impossible Accomplished

The restored pipe sits on the desk in front of me. I hardly recognize it as being even remotely related to the broken-down shell of a pipe Steve and I started with only a few short weeks ago. Shipping the patient back and forth took a lot of time, but the results of this cross-country collaboration speak for themselves. This Patent Era Brigham 313 looks ready for another 60 years of smoking pleasure. Steve did a truly magnificent job on the stummel, and the new stem looks like it’s been there all along. I think we both learned something new during this restoration, and we proved our theory (in grand fashion) as we did it – every pipe, no matter the condition, can be restored to useful service with the right combination of skill and will.

I hope this project inspires other pipe refurbishers to take a second look at that written-off pipe you’ve held onto for some reason. I’m willing to bet there’s still a great smoke hiding in that old briar somewhere. It’s up to you to find it.

Here’s the finished pipe.

20160202_102012
20160202_102027
20160202_101927
20160202_101920
20160202_10193320160202_102106 20160202_10203920160202_102055

Breathing New Life into a Briarlee Scoop


Blog by Steve Laug

My brother Jeff and I were looking through Ebay and came upon this old Briarlee Scoop. The stem was badly overturned as these old pipes had a threaded metal tenon and shank insert. This one was turned upside down. Something about these 1960s era chunky pipes grabs my attention. They are very Minceresque, strongly resembling Custombilts. They have anice vintage look. Briarlee pipes were made by the Arlington Pipe Company.

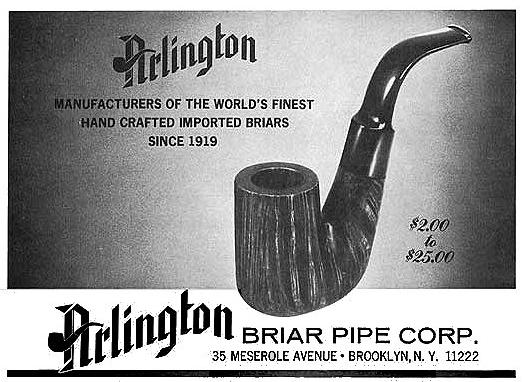
I wanted to refresh my memory of the brand since it had been a while since I had worked on an Arlington made pipe. I checked my usual sources and found that Pipedia had some quick and helpful reminders for me https://pipedia.org/wiki/Arlington. The next photo came from that site and is a great advertisement for the brand.Briar1 I quote from Pipedia: “Arlington Briar Pipes Corporation was founded in 1919 in Brooklyn, New York, and produced the Arlington, Briarlee, Firethorn, Krona and Olde London brands among dozens of others, primarily acting as a subcontractor making pipes to be sold under other brand names. Among others, in the 1950’s, Arlington turned pipes for the famed Wilke Pipe Shop in New York City. The corporation was dissolved by the State of New York as inactive on December 6, 1978. Arlington Briar Pipe Corporation, located at 200 Kosciusko Street, Brooklyn, New York, registered only a single brand trademark, the Arlington brand, the trademark for which was applied for on November 13, 1962 and granted on February 25, 1964. Jack Kaye, of Arlington Briar, was also granted a patent for a combined mirror and stand in 1967.”

Pipedia also quotes José Manuel Lopes, Pipes Artisans and Trademarks; “Arlington is a North American brand that belonged to Arlington Briar Pipes Corp., Brooklyn, New York, founded in 1919. In the 1940s, Ludwig Rosenberger gave the company new life, and it continued until the 70s. His son, Mel Rosenberger, has recently launched the DiMonte brand. Jack Uhle was also linked to Arlington.” Arlington, as far as known, mainly operated as a sub-contractor for other brands. The Jobey pipes are said to be made by Arlington at an unknown point of time. Arlington’s own pipes are seldom seen.”

Now I had the information in hand and I started to work on this pipe. The next set of photos was the ones that the EBay seller posted. They give a good reference point for the state of the pipe.Briar2

Briar3

Briar4

Briar5 When it arrived I brought it to the work table and took my own set of photos. The overturned stem makes the pipe look awkward.Briar6

Briar7

Briar8

Briar9 I unscrewed the stem and heated the stinger and tenon with a lighter until the glue softened in the stem. Once it was warm the stem was quite easy to turn and align.Briar10 I took the next two close-up photos to show the size of the pink putty fills on both the right and left side of the bowl. These pink fills would have to go as they are very hard to stain or mask.Briar11

Briar12 I reamed the bowl with a PipNet reamer using the largest cutting head. I was able to ream back the cake to briar and at the same time clean up the inner edge of the rim. The edge was not as damaged as I thought it might have been.Briar13

Briar14 I cleaned the surface of the bowl with acetone on cotton pads to remove the finish and the grime. I scrubbed the lava on the rim to see if I could remove it.Briar15Briar16Briar17Briar18

I lightly sanded the rim to remove the hard tars on the surface while not scratching or damaging the bowl. I also sanded the inner edge of the rim to clean up the rough edges.

Briar19

I removed the pink putty fills with a dental pick and refilled them with briar dust and clear super glue.

Briar20Briar21

I sanded the repairs smooth and then used a black Sharpie permanent marker to stain the grooves on the sides and top of the bowl.

Briar22Briar23Briar24

I stained the bowl with a dark brown aniline stain for a top coat to contrast with the black trails in the briar.

Briar25Briar26

I buffed the bowl with White Diamond to give it a shine and get a feel for the coverage of the stains.

Briar27Briar28

Now it was time to work on the stem. I sanded the stem with 220 grit sand paper to remove the tooth chatter and bite marks on the underside near the button. I followed up by sanding with a medium grit sanding sponge.

Briar29Briar30

The inside of the shank was a mess as is often the case with these pipes with metal mortise fitments. It took a lot of scrubbing before I could remove the oils. The pile of cotton swabs is about half of what I used to clean out the shank. Cleaning the stem was a challenge as the stinger was not removable. I fit pipe cleaners through the slot in the stinger and drew them through the airway in the stem until it was clean. I scrubbed the stinger with alcohol and a brass bristle brush to remove the hardened tars that had collected and dried there. I wet sanded the stem with 1500-2400 grit micromesh pads but forgot to take a picture of the stem after the sanding. The effect of that sanding can be seen in the second photo below.

Briar31Briar32

With the internals clean I polished the stem with micromesh sanding pads. I dry sanded with 3200-4000 grit pads and then rubbed the stem down with Obsidian Oil. I continued sanding with 6000-12000 grit pads and gave the stem a final coat of oil and set it aside to dry.

Briar33Briar34

I buffed the bowl and stem with Blue Diamond on the wheel and then gave them both multiple coats of carnauba wax. I buffed them with a clean flannel buff and then hand buffed them with a microfibre cloth to raise the shine in the briar and the stem. The finished pipe is shown in the photos below. The old warrior is ready for ongoing service. Once again, thanks for looking.

Briar35Briar36Briar37Briar38Briar39Briar40Briar41


It was A Kaywoodie Metal Pipe that I had never seen before


Blog by Steve Laug

My brother, Jeff has caught the pipe hunting bug and that is a great thing for me. It won’t kill him and he won’t suffer too much harm from it unless he gets carried away and gets in trouble with the wife. But it is good news for me. It means that with him we can cover twice the ground looking for old pipes than I used to do by myself. It also means that he comes on things that I have never seen. He is in the US and I am in Canada and we have different stomping grounds for our hunt other than the odd time we are in the same place. I don’t remember if we found this one while we were looking at eBay together using Facetime or if it was a find on a hunt. But it does not really matter as we got it. It is an old Kaywoodie the style of which I have never seen before. The base unit is the typical long metal shank but rather than a cup the bowl threads into this one has a ring on the end. It is split on the end of the bowl and goes around the base of the bowl. When I first looked at it I was hooked. I wanted to see it and work on it. The thing that caught my eye was the unusual look of the pipe. I wanted to see how the bowl was held in the ring.Filter1

Filter2

Filter3

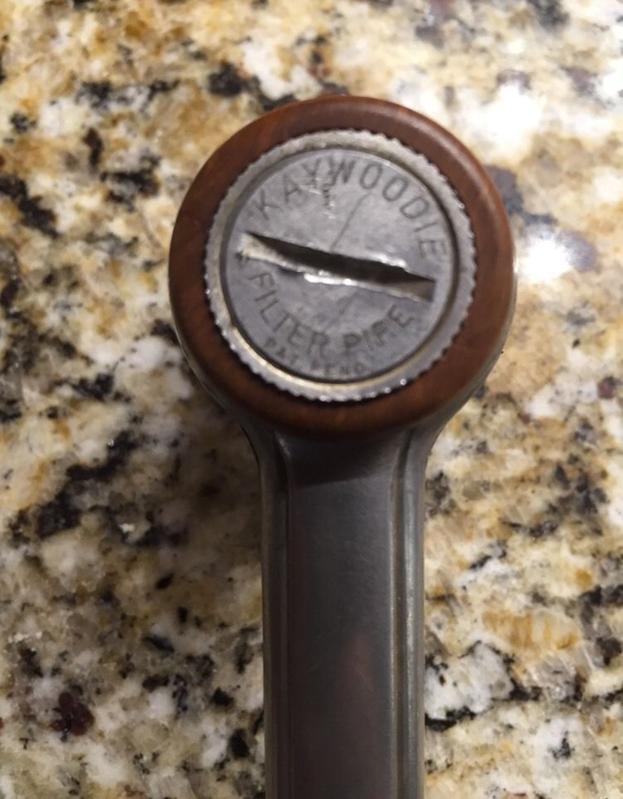
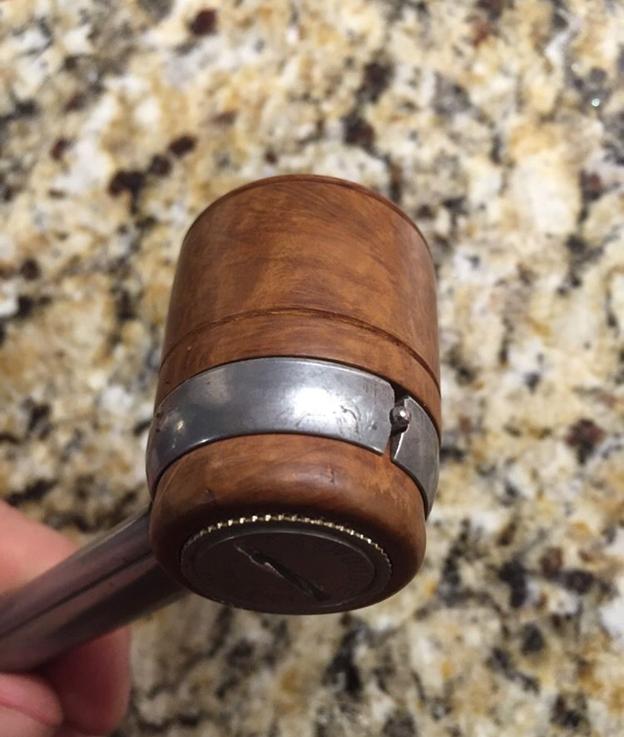
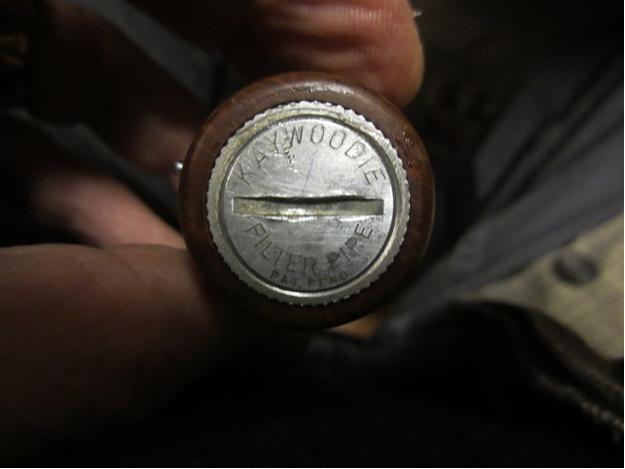
Filter4 The pipe was in pretty decent shape from the photos. The stem had the usual tooth chatter and oxidation around the button. The Kaywoodie club emblem on the stem looked rough. The embossed emblem in the aluminum shank was really clean. The entire base unit was oxidized but clean. The briar also was very clean. There was some darkening and lava on the back edge of hte rim and a thin cake in the bowl but no inner or outer edge rim damage.Filter5 The base plate was stamped Kaywoodie Filter Pipe Pat. Pend and there was a slot in the bowl. It appeared that someone had tried to use a screwdriver to turn the base plate and damaged it. To me the slot looks like it was made for a coin to turn the base.Filter6 The next photo shows the pin on the front of the briar bowl and the split in the ring of the base unit. To me it is hard to figure out how the bowl is to be removed.Filter7 While my brother had it in hand in the states looking it over and trying to figure out how to remove the bowl I did a quick search and found the pipe on the Smoking Metal site (http://www.smokingmetal.co.uk/pipe.php?page=132). The site had the following information and pictures that I have copied to use here. The first paragraph gave me the information I was searching for on how to remove the bowl. I read it to my brother and he tried it and bowl came free. He showed me the pieces on Facetime. I was fascinated.

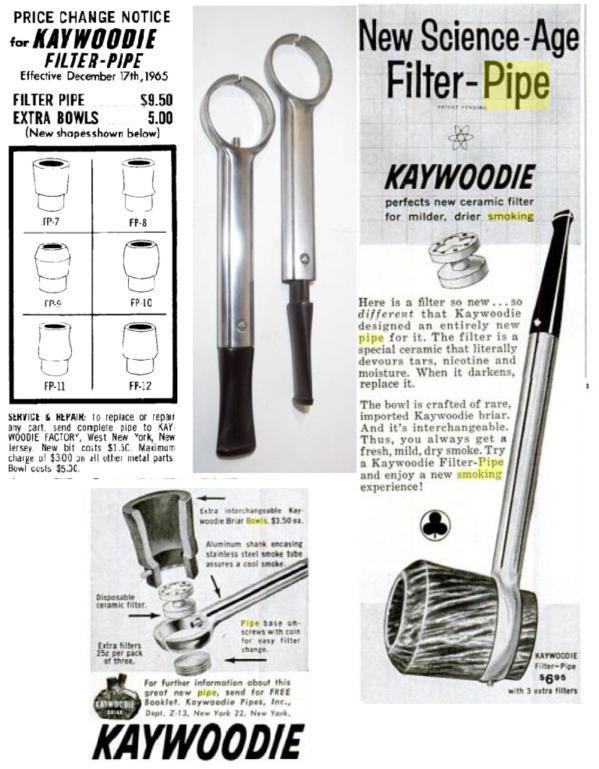
“Many of these wrecked by folk not realising how the bowl is released. Pulling the bit out of the stem and twisting half turn in either direction releases the retaining pin and allows the bowl to come free of the stem. The lower and right hand adverts are from October 1962 Flying Magazine
The pipes were $6.95, bowls @ $3.50 and 3 filters were 25 cents.”

“In the base of the bowl is a screw cap which when undone releases a ceramic filter. These filters came in plastic tubes containing three filters. As with all metal pipes, frequent cleaning is advisable to prevent any screws from becoming irretrievably sealed into pipe. The filters are at times available on eBay, but I have been told by Rob that soaking in alcohol (Everclear or IPA) can extend their life.”

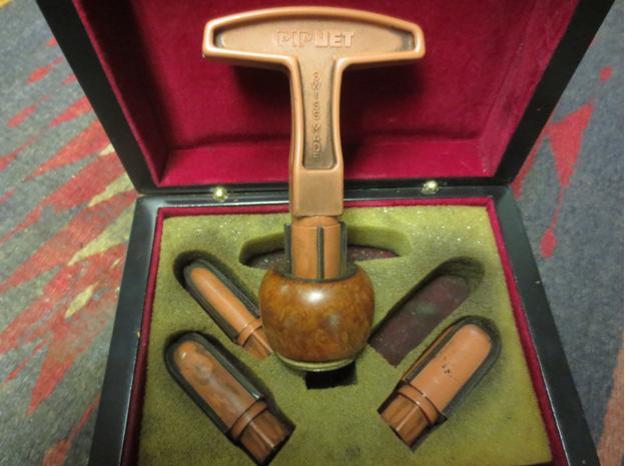
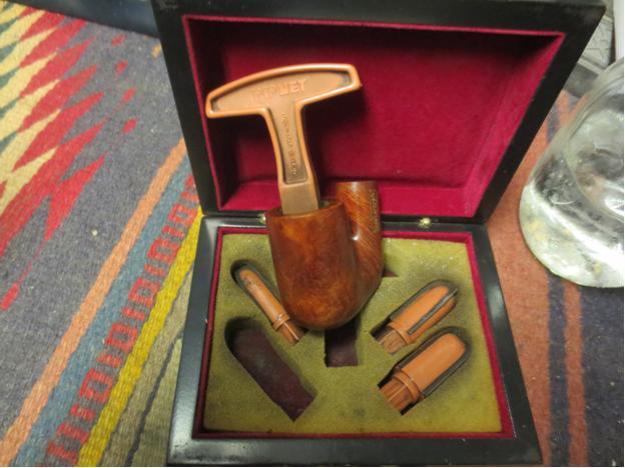
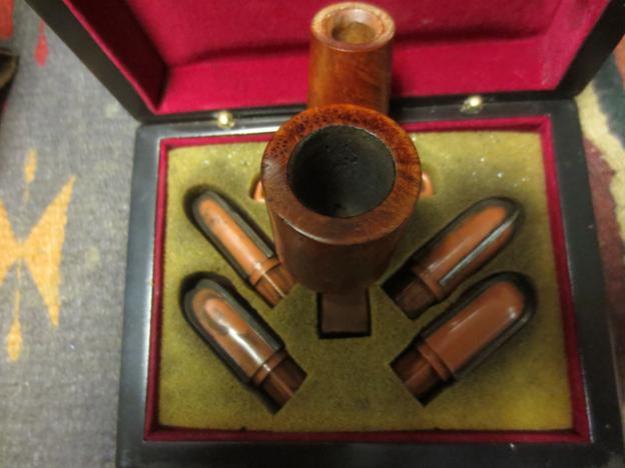
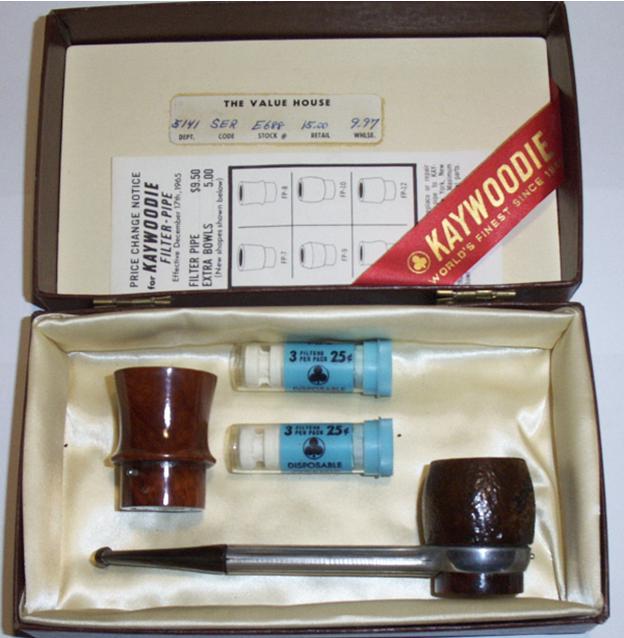
The second photo below of the bowls and the third photo of the boxed set also come from the Smoking Metals website. In the photo of the bowls you can see the clay filter piece that sits in the bottom of the bowl. It is shaped like a flattened spool and there are holes in the top of the spool as well as a stamped Kaywoodie Club emblem. The bottom of the spool is indented and sits in the metal threaded base cap. In the third photo you can see how the filters were sold in plastic tubes that held three filters and sold for $.25.

Given all of information found in these photos I could not wait until the pipe arrived in Canada and I could take it apart and clean it up.Filter8

Filter9

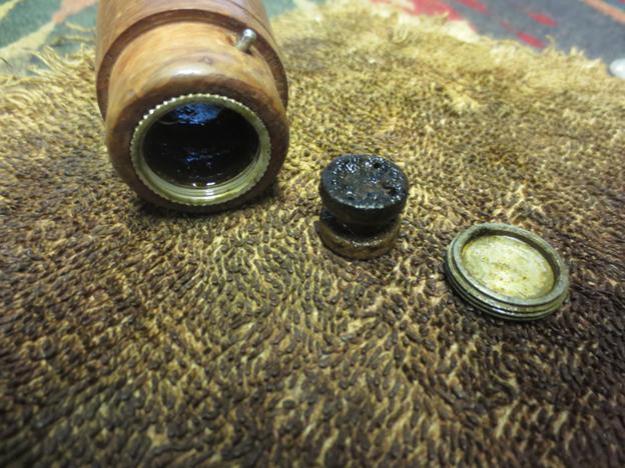
Filter10 When the pipe arrived I took the bowl off per the above instructions and it worked quite simply. I could easily see why the Smoking Metal website said that many of the pipes were damaged by improperly removing the bowl. Fortunately this one was not damaged by me. The metal base plate was solidly stuck in place and I read above that the clay filter was not damaged by alcohol so I dropped the bowl in an alcohol bath and let it sit all morning while I finished up some repairs I was doing. I took it out this afternoon and dried it off with a cotton cloth. The grime on the finish was gone and the bowl was clean. The lava on the rim was softened so I could work on it with more ease. It looked like I would not have to top the bowl to remove the lava. That is always a good thing. The rim edge was also not charred or burned which was a bonus as well.Filter11

Filter12

Filter13

Filter14

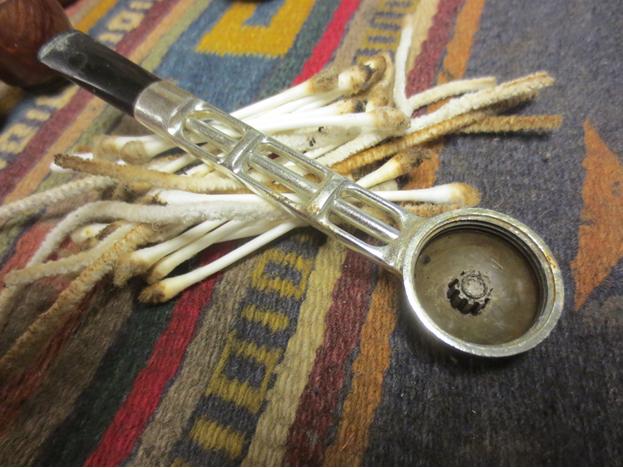
Filter15 I decided to take the bowl apart before working on cleaning it up. I inserted a quarter in the slot in the bottom plate and twisted it both directions until it came loose. Then I unscrewed it and took out the clay filter. The inside of the base and cap were thick with tars. The clay filter was black and goopy.Filter16

Filter17

Filter18

Filter19 I cleaned out the bottom half of the bowl, the filter and the base cap with alcohol and cotton swabs. I picked the threads clean with a dental pick and then scrubbed them with the cotton swabs. I scrubbed the clay filter and used the pick to clean out the holes in the top of the spool and also the build up on the middle and bottom of the spool. I wiped it down with alcohol and cotton swabs.Filter20

Filter21 I wiped down the outside of the bowl with alcohol and cleaned out the air hole on the side of the bowl. I used 0000 steel wool to scrub the inside of the base cap.Filter22 With the bottom half of the bowl cleaned I reamed the top half of the bowl with a PipNet reamer. I took the cake back to bare wood.Filter23

Filter24 I scrubbed the rim clean with cotton pads and saliva and was able to remove the lava build up. I sanded it lightly with a 3200 grit micromesh sanding pad and brought some shine to the rim.Filter25

Filter26 I set the bowl aside and went to work on the metal base and vulcanite stem. I cleaned out the interior of the shank and stem with pipe cleaners and alcohol. The stem is spring loaded and cannot be removed from the base without potential damage so I ran many pipe cleaners through to clean out the tars and oils.Filter27

Filter28 I sanded the stem to remove the oxidation and the tooth chatter. I used 220 grit sandpaper to break through the surface and then a medium grit sanding sponge.Filter29

Filter30 I rubbed down the stem with Obsidian Oil and then put the pipe back together. I dropped the filter into the bottom of the bowl with the holes upward, lubricated the threads on the bottom cap with Vaseline and screwed it in place. I pulled the stem back and turned it to retract the aluminum tube into the shank and dropped the bowl in place. I let the stem reseat and the tube entered the bowl. The bowl was anchored in place. Now I had a bit of a handle on the pipe while I worked over the stem with micromesh sanding pads.Filter31

Filter32

Filter33

Filter34 I started wet sanding with 1500-2400 grit micromesh pads and quickly found that the club logo was just pieces in the indent in the stem. It was broken and not complete. The ragged look that I had noted earlier was the grit and grim holding the broken logo in place.Filter35 I cleaned out the old pieces of logo with a dental pick and blew out the dust. I had a broken Kaywoodie stem with a club logo the same size as this one so I carefully liberated it from the broken stem for use on this one (it visible at the bottom of the first photo) I cleaned out the indent on the stem with air and then put some all purpose glue in the hole with the end of the dental pick. I pressed the new logo into the hole with the rounded handle of a dental spatula. The new logo looked good and it was smooth when you ran a finger over that area of the stem.Filter36

Filter37 I reworked the stem with the 1500-2400 grit micromesh, this time dry sanding it. There was no need to wet sand it again. I was careful while sanding around the newly set logo so as not to risk lifting it from the stem. I rubbed the stem down with Obsidian Oil and then dry sanded with 3200-4000 grit micromesh pads. The stem was beginning to take on a shine. I continued to polish it with 6000-12000 grit pads and gave it a final wipe down with Obsidian Oil. I let it dry.Filter38

Filter39 I gave the stem several coats of Conservator’s Wax and hand buffed the stem by hand so as not to damage to the logo. I also hand buffed the bowl and metal base by hand with the wax and then rubbed it down with a microfiber cloth to finish the shine. The finished pipe is shown in the photos below. I really like the looks and mechanics of this old Kaywoodie. It is a pleasure to add it to my collection of metal pipes.Filter40

Filter41

Filter42

Filter43

A Challenging Restoration of a Tsuge Second Small Billiard


Guest Blog by Robert M. Boughton
Member, International Society of Codgers
Member, North American Society of Pipe Collectors
http://www.naspc.org
http://www.roadrunnerpipesnm.biz
http://about.me/boughtonrobert
Photos © the Author

“You will never learn enough looking for only the good things in life; you will always be a pupil.”
― Japanese proverb
“Ay, now the plot thickens very much upon us.”
― Bayes, a playwright within the play “The Rehearsal” (1671), a satirical mockery of heroic plays, by Sir George Villiers (1628-1687), 2nd duke of Buckingham, de facto King of England during the end and the beginning of two rightful monarchs, debaucher, poet, playwright

INTRODUCTION
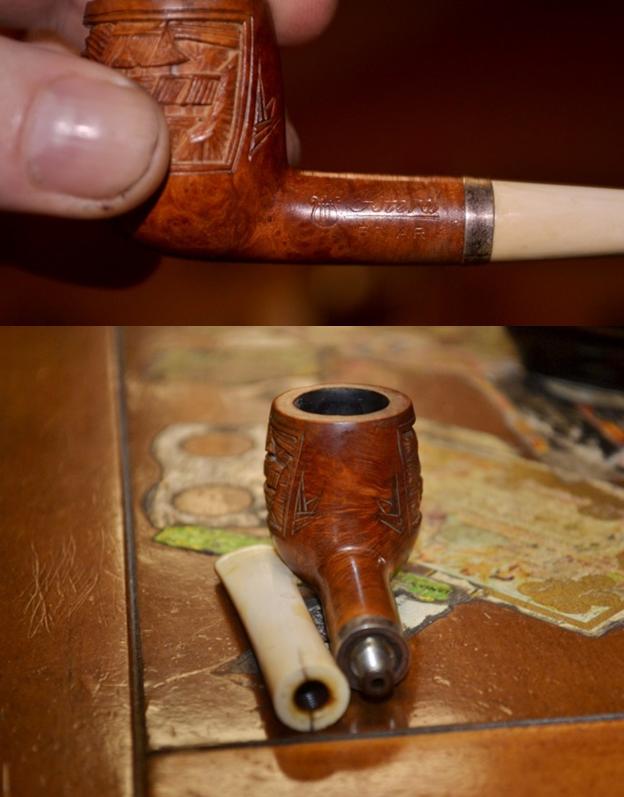
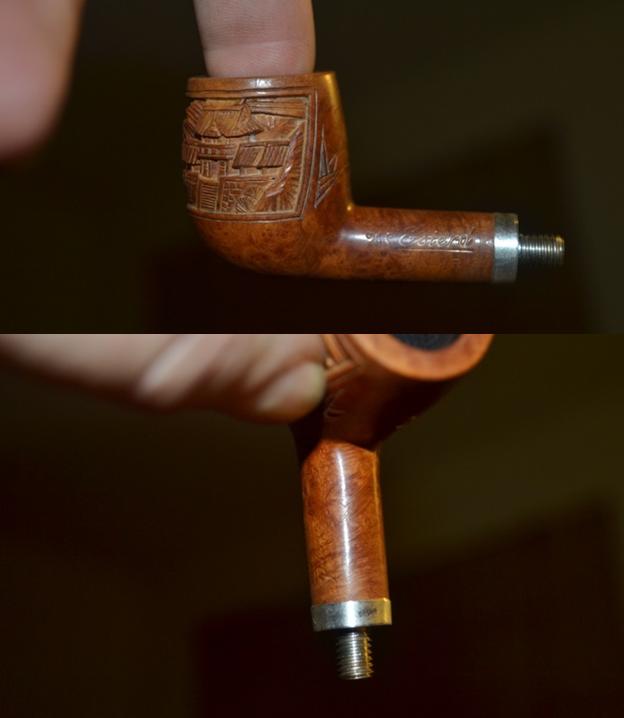
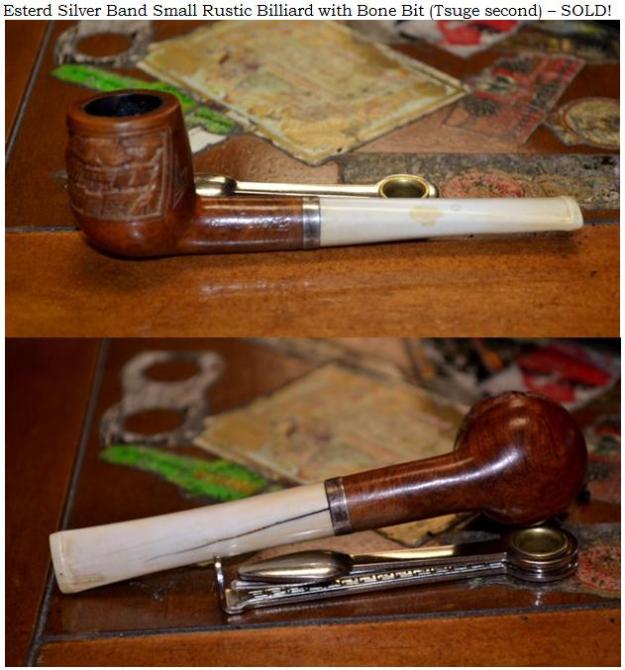
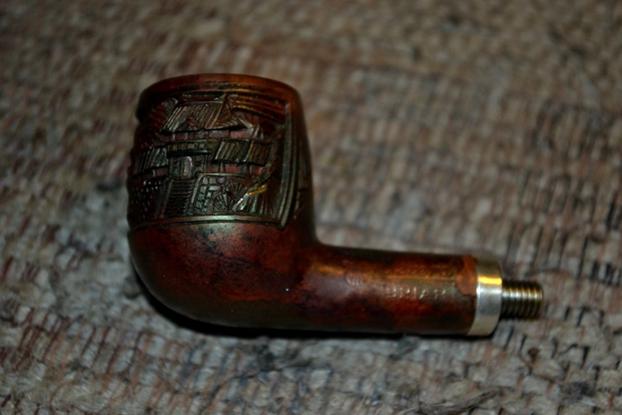
This Esterd silver banded small billiard with a bone bit that screws onto a metal shank insert was another inexplicable find on eBay. The seller had listed it as a vintage hand-carved pipe with a silver band and horn bit, and believed it might have been made in the Philippines. The starting bid was $9.99, with nobody biting. Tempted to enter the fray based only on the elegant design – intricate, carved images of an old, Oriental-style house or palace on the left side, mountains on the front, another landscape of some sort on the right with four tiny marks that could be a language, and two reversed images on the back, maybe symbolic – I exercised control over my index finger that likes to click the Place Bid Now button on its own and opened a new window to browse to pipephil.eu.

Pipephil is good, but it doesn’t list every brand. Although Esterd is but one of thousands of names of which I have never heard, I was prepared not to find a match. Nevertheless, there it was: Esterd, Tsuge second. Here’s where the inexplicable, if not outright spooky, aspect of the find comes in. I reviewed one of the Tsuge non-aromatic lines of pipe tobaccos not long ago on the Smokers Forums UK. Tsuge Pipe Company of Japan, having ultimate control over its tobaccos, nixed milder, less flavorful versions of the blends that are made by “Drew Estate, Tsuge and Daughters & Ryan in North Carolina…[e]xclusively for Tsuge.” The operative name in the list is D&R, and it was Mark Ryan’s blend that was approved by Tsuge.

Looking into the tobacco brand, I discovered the existence of the Tsuge Pipe Company, founded in Japan in 1936 after a grueling 25-year apprenticeship in pipe crafting by Kyoichiro Tsuge. The company makes very fine, hand-crafted pipes of various designs and using different materials. Some of them are priced in what I consider the middle range ($200-$300), but many excellent examples of the craftsmanship that goes into their construction are on the end that is more affordable to most of us. Tsuge, translated to English, means box tree or boxwood, and is also the name of an old Samurai family from which the father of Kyoichiro was descended.Esterd1
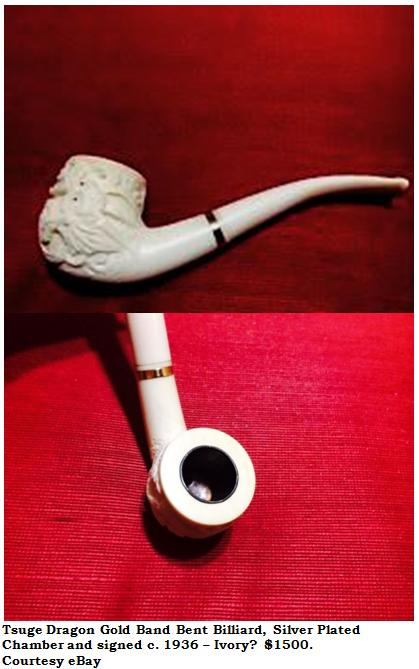
Esterd2 Of course, I returned to eBay, where I had no further qualms bidding for the wonderful pipe at such a low price. At the time, two days remained for bidding, but no one else seems to have gotten past the seller’s unfortunate description of the pipe’s construction and origin with a simple Google search for the brand. As a result, I won it for $14 with S&H.

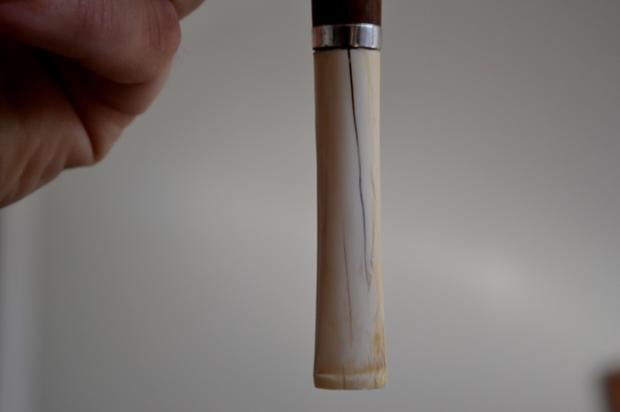
I was aware of the evil crack on the bottom of the bit, but figured I had nothing to lose at that price. I expected to list it on my site for $100 after restoring and fixing the crack that my friend and mentor, Chuck Richards, assured me could be repaired with an unusual process that would leave the bit looking like new. Instead, I made my first ever sale of a pipe before I restored it, to a friend in my pipe club who held the Esterd in his hands with an unmistakable flush of longing on his face, in particular the eyes that were fixed on the delicate beauty. Ah, how well I know that look!

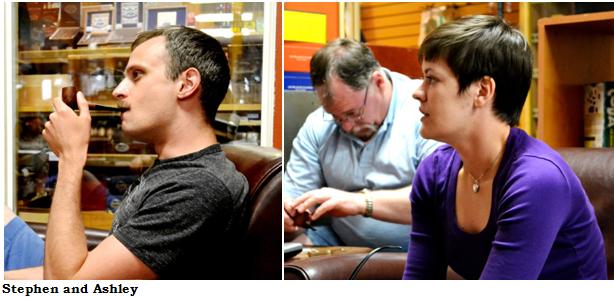
Familiar with the deserved reputation of Tsuge pipes, my friend, Stephen, said he has always wanted one but never found any he could afford. He asked in a somewhat faltering voice how much I would sell it for. Teasing him, perhaps with a bit too little shame, I mentioned the anticipated list price, and watching his eyes saw I could get that much from him. But Chuck’s unparalleled generosity in offering his restored pipes at fantastic deals rubbed off on me, and I told Stephen he could have the work of art (I didn’t put it that way) for $50. He was so surprised that he looked to his wife, Ashley (of course), for approval. She just said, “You have the card, don’t you?” Stephen reached in his pocket to get it, amazing me with his clear intention to buy it right there. [Ashley, by the way, was in my first blog on Reborn Pipes, about a unique Chinese churchwarden that I found in a – ahem – head shop. When the cheap bit broke as I was savoring the great taste of my first chamber-full in it, I was not yet aware I could buy a replacement bit and instead chose a replacement for the pipe, which in fact was cheaper, anyway. But that bit broke also, leading to a friendly competition between Chuck and me, although there was little doubt his restore of one for me would be better than mine, which I gave to Ashley.]

I reminded Stephen it still needed a light cleaning and serious restoration, but he wanted to make sure it would go to him when it was ready and insisted on paying up front. And so I reached for my cell phone, which I had left at home since it is not working, and then attempted to find a way to download the PayPal Here app onto my laptop. This endeavor failed. Therefore, I went to my website editor and listed the pipe so that he could purchase it online. I encountered yet another obstacle when I found that my store, set up to accept PayPal, for some reason only allowed members to use it, unlike my previous site which permitted guests to use the service. Stephen drew the line at having to sign up for PayPal.

Therefore, the transaction was not finalized until two days later, last Saturday, after I copied and pasted the necessary HTML code into my site’s store page and got ahold of Stephen using my friendly neighbor’s cell phone. I would not have been so eager had I not needed the money to buy the key material in Chuck’s instructions to make the bit like new, not to mention less important things like food and gas. I told Stephen to let me know by email if he had any problems navigating the PayPal system to the newly-added guest mode, but before I read his reply saw that the payment had gone through on PayPal.Esterd3 In his email, Stephen told me not to rush the restore for him. I replied that my desire to start it right away was for my own eagerness to see Chuck’s promise of excellent results come true. This blog, therefore, will show the real-time steps I need to take to prepare the lovely Tsuge second to a condition worthy of handing over to its buyer.
RESTORATION

SATURDAY

I place an order on eBay for the uncommon special something I will need for the completion of this task I am about to begin. The much anticipated package is due to arrive, via First Class Mail, in several days if I’m lucky and literally God knows when if the USPS conducts business as usual. Therefore, I await it with all of the patience and faith I have, and open my photo files to the Esterd folder, where I find the original shots of it I took at my favorite tobacconist when it came in the mail, far faster than usual with Priority Mail 1-Day Delivery.Esterd4
Esterd5

Esterd6

Esterd7

Esterd8

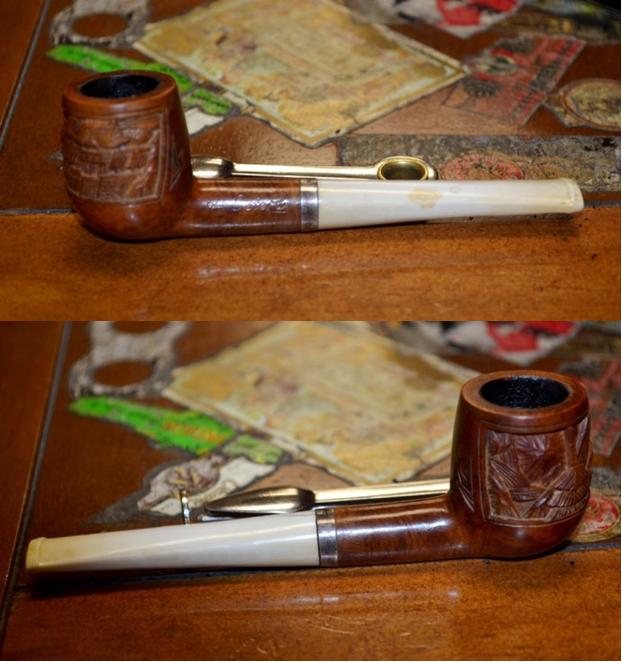
Esterd9 Clearly, as shown by the presence of tobacco in the chamber in the third photo above, the Esterd was so clean upon arrival that I was forced to sample some good tobacco in it – and then, amazed by the mellowness and great flavor of the one tobacco, I had to test it with another. Both tries get the highest rating I can give any pipe.

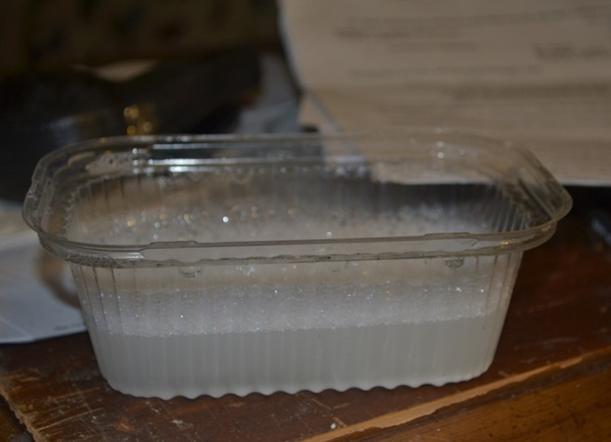
As the bit is the only difficult part of this restore, I start with it. Chuck has already talked me through the peculiar process for fixing the bit, telling me to soak it in a solution first to clean it, inside and out. Knowing he has his own formula, I asked if the OxiClean I use would be okay. He said that would be fine but emphasized that the entire pipe had to be thoroughly clean before the bit repair could begin.Esterd10 I remove the bit from the OxiClean after a long bath, rinse and wipe it dry, run a bristly cleaner through the air hole and let it dry more.Esterd11 The next step is to use an old toothbrush on the crack. I am uncertain how to go about this, but I give it the old college try, deciding on two toothbrushes, one firmer than the other, and also to employ a very fine fingernail file from an old, unused package of every kind of device for nail care. I throw in a 12000 micromesh pad as an afterthought.Esterd12 After alternating between both brushes, trying from every direction to work the little pieces into the big crack on the bottom of the bit and where they extend to the open end, I begin to be able to see all the way through the wider part of the crack. I use the fingernail brush on the more difficult dental chatter on the lip and below it – as well as to remove as much of the nice patina that has developed considering the ultimate mystery step I will need to take to put the final touch on this project – and then clear the fine dust from the soft bone with a toothbrush again. I finish this step with the micromesh to make the entire surface ultra-smooth again. By George, the old fart was right!Esterd13 Instead of proceeding to the next of Chuck’s stated steps with the bit, I switch to the easy stummel cleaning and preparation. I wipe a miniscule amount of dirt from the outside of the briar with a couple of soft, white, cotton gun cleaner cloths and purified water. Next I use a tiny piece of superfine steel wool on the rim, which has minor scratches, and the full range of micromesh pads on the entire wooden surface. Finally, I clean the chamber with 320- and 500-grit paper and remove the excess carbon with alcohol-soaked cotton cloths.Esterd14
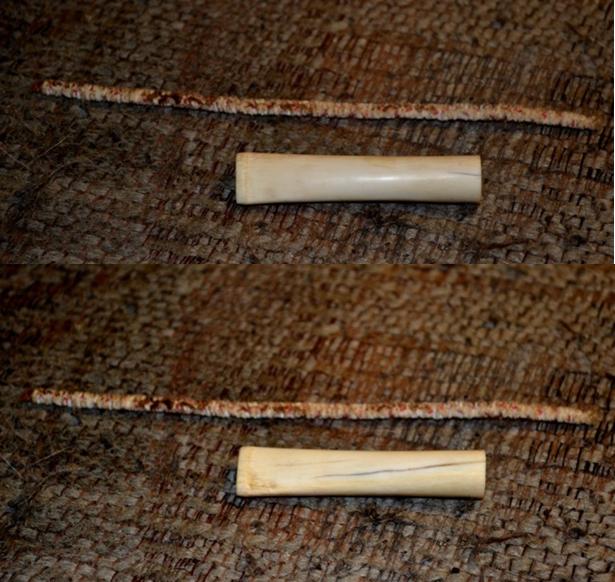
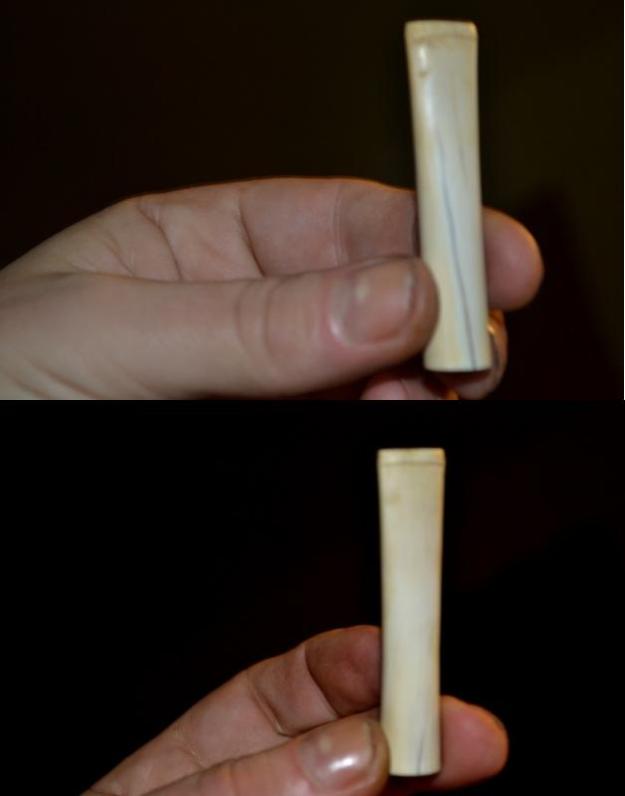
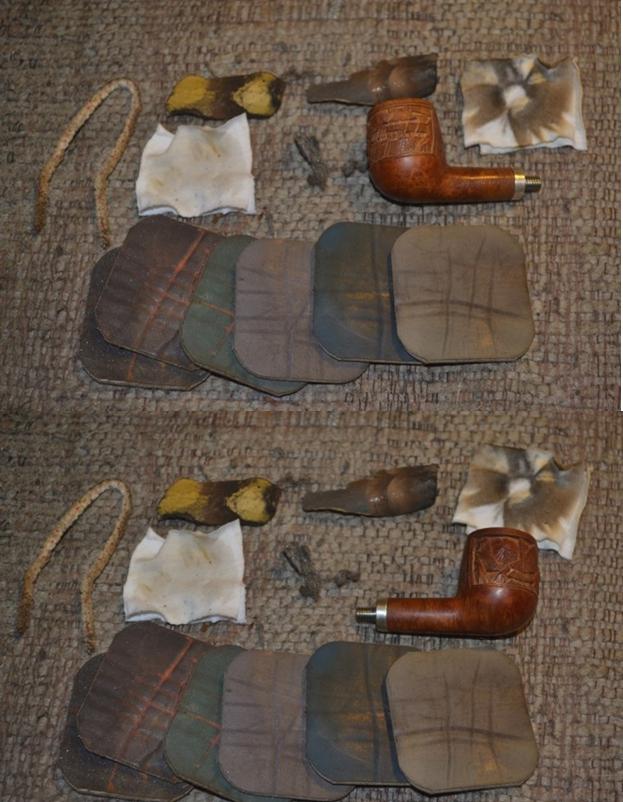
Esterd15

Esterd16

Esterd17

Esterd18 The retort of this pipe is going to be very difficult as I cannot, under and circumstances, run Everclear through the bit, as usual, and I possess no other that will connect to the unique threaded shank connector. I must do something. But what? Aha! My synapses snap, and I devise a scheme to make a try at it without a bit at all – filling the test tube with Everclear, plugging it with the rubber tube, and then placing the small open end of the tube over the metal shank connector just-so. I set everything down for a moment to get my big cotton cloth and wrap a corner of it over the rubber tube-covered shank connector. Pinching it as tightly as I can with three fingers, no matter how hard I try (and believe me I did my darndest), I can’t manipulate a fourth finger to hold the final side of the tube, under the cloth, shut. Go ahead and try it. Oh, well, I’m not about to give up now. Never surrender!

In this bizarre fashion, I flick my Bic with my free hand and light the flame of a small candle. With both hands occupied beyond their design, I hold the rounded end of the test tube above the flame, having to contort still more to balance the side of my left arm against the small table in order to stop the shaking of the Pyrex tube that keeps almost snuffing out the flame. At last I have it under full control. If anyone believes that, as George Strait sings it, I’ve got some ocean front property in Arizona for sale. Honestly, I’m reminded of certain scenes from “Fear and Loathing in Las Vegas,” with Johnny Depp as the late great though drug and alcohol synergized Hunter S. Thompson, and, I am forced to admit, a memorable scene or two from the 1931 classic “Frankenstein,” with Colin Clive as the unstable doctor and of course Boris Karloff as his Monster.

My only regret is that I have but two hands to give to this effort at snapping a shot of the spectacular scene! In my fervor to record the feat, I even consider asking my good neighbor with the cell phone to come in and catch the unprecedented event with my Nikon – but it is a bit late, and he might not appreciate the request, not to mention what he should think of me if he catches sight of what I am doing in my living room.

Thus, two test tubes full of Everclear later, the rag somewhat wet with alcohol that didn’t reach its destination, the ordeal of the Retort of the Esterd is behind me, and the stummel is clean.Esterd19 Yes, there are still times in life when even I am flabbergasted by my ruthless determination to do something. I have not sold a briar pipe un-retorted since I learned my lesson on that score the hard way some time ago, and I’ll be tarred and feathered and run out of town on a rail if I ever will. I rest my case on this point with the above photo.
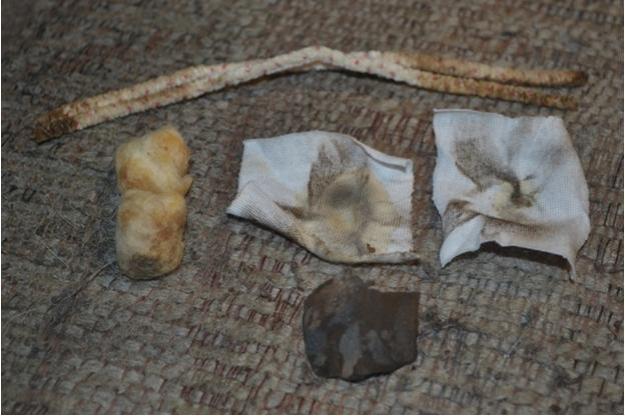
I seem to recall writing something earlier about the easy clean-up of the stummel. Perhaps I was mistaken a tad.

Now, I can sleep.

SUNDAY

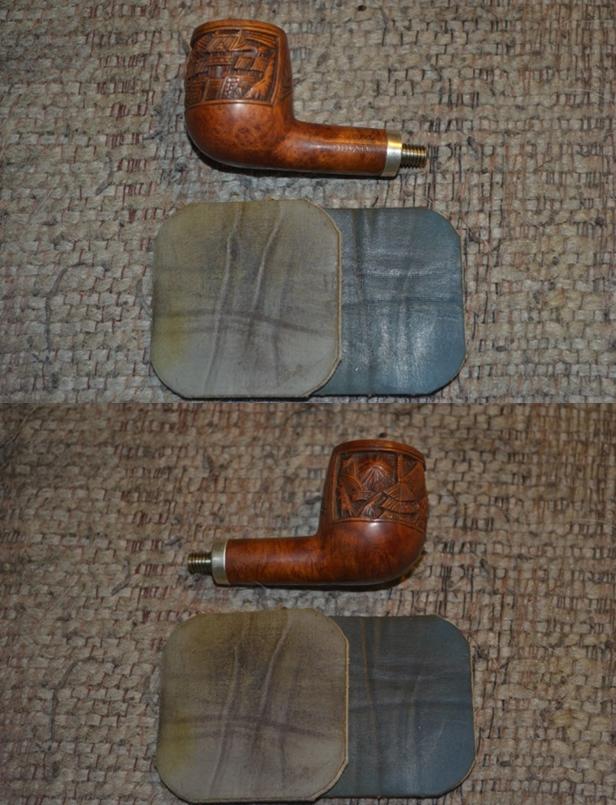
Regarding the dainty stummel, deftly crafted by loving hands unknown years ago, I see that the carved areas are all faded. I’ve been mulling over what I thought might turn into an option between re-staining or not and now know I’ll have to do the former, but what color? I dismiss Lincoln burgundy as too dark almost before the thought occurs to me, and consider lighter or darker brown. Mentally flipping a coin, I choose the darker, Lincoln Medium Brown, and apply a coat, brushing it with special attention into the tiny grooves of the carving. I flame it straight away, enjoying the puff of blue flame that envelops the stummel and dissipates, fixing the color into the wood and leaving only a light, even coat of char behind. I set it aside to cool.Esterd20 A few minutes have passed. I choose 8000 and 12000 micromesh for the gentle removal of the char and use first the lower number, then the higher. Still, the color is too dark. I take out the 3200 pad and rub the smooth surface of the stummel, which lightens nicely, and for the artwork use another small piece of superfine steel wool, first over the raised areas and then focusing with necessarily more pressure into the difficult grooves. It’s amazing how many there are in this testimonial to the mastery Japanese artists have over such detailed work.Esterd21
Esterd22

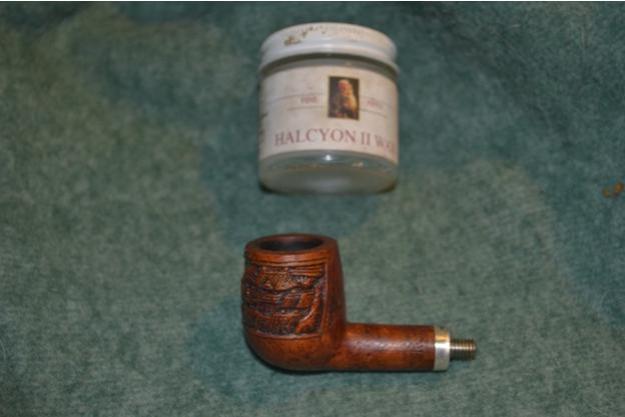
Esterd23 I must have put away the steel wool for the photos above, but trust me, I didn’t make the carved parts of the stummel so light without it. It is time to coat the briar with a small finger of Halcyon II wax and set it aside awhile to dry.Esterd24 When the Halcyon II has set into the smooth and carved areas of this excellent small billiard (it measures 4¾” in length with a chamber diameter of ⅝” x 1”), I buff it by hand with a clean cotton rag and set it aside, with the utmost care, where the cats will not disturb it. I will wait until later to photograph the finished pipe as a whole. I have completed the stummel and now have only the bit to restore to vibrant life.
Only the bit! Again I have reached a critical stage of this wholly strange process that hinges on the successful “removal,” or more aptly, mending and covering of the creeping cracks in the shank. I freely confess my justified fear of blowing this all-important feature of the restoration. After all, it is the only real challenge I face with the Esterd, and if I botch it, I will have to reverse the next step and try again, a prospect I do not at all relish. Ultimate failure is not possible, I know, because I will do it as many times as it takes to get it right.

I take a break. After a moment’s thought I choose, with a weird and flippant flair I do not begin to feel in my stomach, the GBD Prestige Apple, which caused so much heartache and twisting difficulty in my previous, dubious trip through the sometimes treacherous and bewitched path of pipe restoring. I decided to keep the GBD as much as a reminder of my mistakes as anything else. I savor some Gawith Bracken Flake, an intact tin of which I bought about two years ago and put in my cellar after rehydrating and trying two tins that were popped open at my occasional secondary tobacconist here, and which the young son of the owner, the heir to the family operation, had the business acumen to give to me. At my preferred tobacco shop, I like to refer to the competition as “the Tobacconist that Must Not Be Named” when it needs to be mentioned at all.

Not impressed with the first two tins that rehydrated well enough but still had something missing, like Frankenstein’s Monster reanimated, I have many times almost donated the last tin to my pipe club for the monthly raffle. Something stayed the urge, and when I at last popped the tin open and uncovered the moist, rich, dark brown Kentucky burley and Virginia flakes, the flecks of crystallized white sugar suggested it was packaged well before I bought it two years ago. This break, it appears, is a desperate attempt to chill out, as my generation calls the often difficult discipline of relaxing.

Nevertheless, the magic that is the essence of pipe enjoyment begins to pervade my body and mind as the rich flavor and pleasant wreaths of smoke envelop me. My mind drifts to the meaning of bracken. In terms of the tobacco in my GBD, it is a reference, not to the wild ferns that grow freely in some places of the world, but to the “shade of brown resembling the colour of turning brown; a warm orangey-brown.” (I like the repetition there and have looked it up in the OED to be sure.)

Okay, then. With that thought, I am heartened to return to the bit. I should get on with the next and cardinal phase of the Esterd restoration. I collect the tools I will need.Esterd25 Indeed, the plot thickens, so to say. Here is the first true step in repairing the pipe: applying regular, clear Super Glue into the large crack on the bottom of the bit and over the smaller one on the top that is just forming, as well as both of their beginnings on the open end of the bit. Although the task may sound easy, it is not. Aware of the risk of smearing the quick-drying stuff where it is not needed – beyond the lines of the cracks – and the equal need to avoid, above all, allowing the glue to seep inside the threaded opening, I did procrastinate the unavoidable step as long as I could.
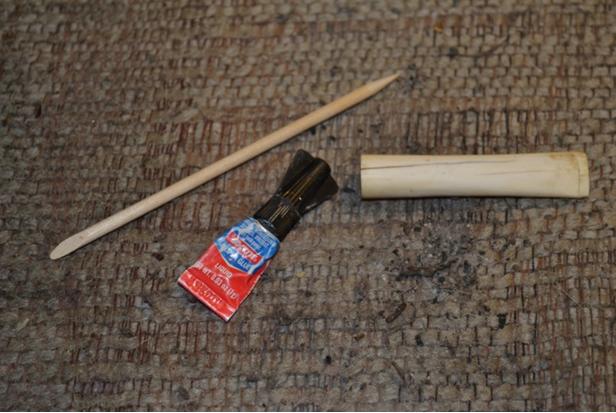
And so, facing the music – another interesting phrase probably originating from the centuries old practice of disgraced officers being drummed out of their regiments – I approach my duty with the soldier’s wise combination of trepidation and exhilaration. I choose the single weapon that seems best suited for the battle, a short wooden fingernail care pick with one pointed end and the other chisel-edged. I feel somewhat as a young boy with a tiny toy quarterstaff harkening back to medieval England.

First addressing the primary targeted weakness of the bit, the long crack in its armor, using the pointed end of my pick tipped with a small squeeze of the Super Glue, I lay down a line of the sticky stuff, following as closely as I can the uneven course of the wound. Then, spinning the pick around to its dry, chisel-edged side, I poke it deftly into the widest part of the gap at the open end of the bit and scrape the excess glue from the sides of the fissure and running down into the still-sealed but breaching length to halt any future attack from that end. I survey the inner bit, focusing on the corresponding fault along the threads, and note that light no longer shows through, but it is still not sealed.

Daring not to venture inside the bit, I opt for a compromise, adding more glue to the pointed edge of the pick and capping off both short lines on the round end of its entrance. Returning to the front line, I repeat the same process as before, and in checking the interior of the bit am gratified by the apparent victory within sight. The glue has crept all the way to the inside boundary of the threads and halted, already firming up against any future onslaught by the enemy.

I turn the bit top up to coat the short, closed line of early crack formation there with a preemptive strike against further growth. The Super Glue seal is almost imperceptible in the photos below, but it is looking strong to my eyes.Esterd26 Now begins the two-day siege as I must wait and see if my blows to the enemy fortify and take hold.
TUESDAY

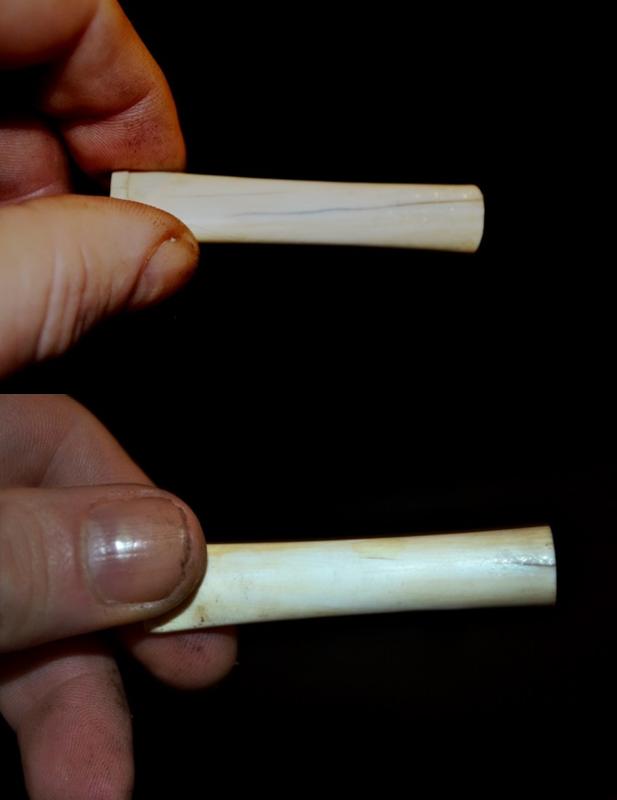
The clear instructions from Chuck, my warlord, were to retreat and wait a full 48 hours after the Super Glue assault before returning to the scene of the battle. I followed his orders to the letter and briefed him on the situation earlier tonight at his HQ. He reaffirmed the last step I must take before the final death blow, the ammunition for which still has not arrived in the mail. This time, however, when I mention making the bit pure white, Chuck added, “You do the best you can.” Ignoring this modifier at the moment, I return home and with stealth take the bit in hand to gloat over the impending unconditional victory.

In final preparation for the extreme but morally justified coup de grâce I hope to deliver tomorrow, should the required reinforcement arrive by then, I clean up the battlefield, again using the very fine fingernail smoother to remove the minimal amount of Super Glue that has dried and hardened on the top and bottom of the bit, over and surrounding the sealed cracks.Esterd27
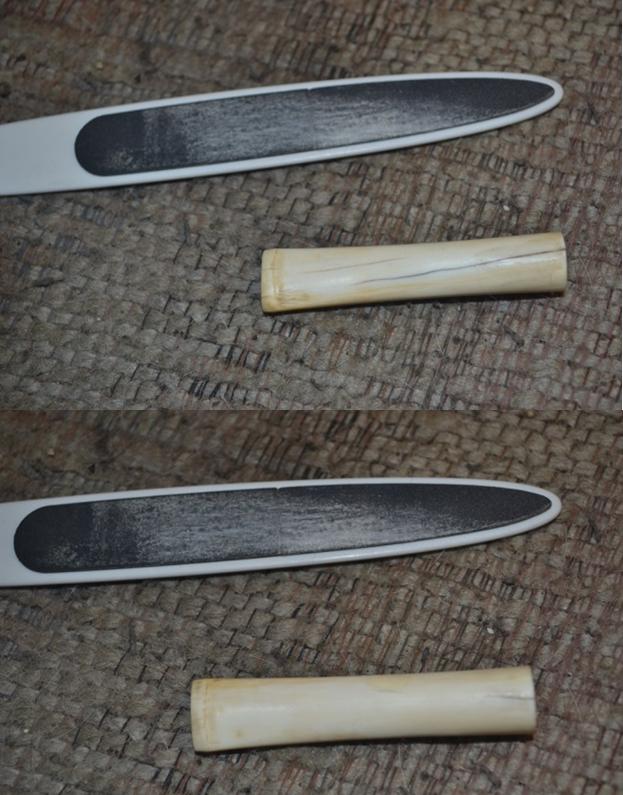
Esterd28 For the last, uncertain time, I can only await the arrival of the final weapon. War, indeed, is not Hell, but Purgatory.

THURSDAY – 4:30 p.m.

The state of the USPS being as it is, the package I have awaited, I see online by checking the Tracking Number, has arrived this day. I pick it up and make a pit stop at my tobacconist.Esterd29 The special weapon: white jeweler’s rouge, which Chuck tells me – and I confirm online, not with unbecoming doubt of my mentor’s knowledge but so that I can cite a second authority in my table of Sources below – is vital because of its lack of oils used in regular pipe waxes. Oil-based waxes will not hold to the surface of the bone, and thus, with my anxious hope, render the bit pure white again and remove any appearances of cracks. We shall soon see, together.

8:00 p.m.

Vancouver, there’s been a problem here. I have turned on my electric buffer with the so-called “clean wheel” and applied enough of the jeweler’s rouge to make it nice and white. This is not what Chuck told me to do. Aware of my barely adequate set-up, he said gently, “You will probably want to clean one of your buffers if not get a new one entirely before you put the rouge on.”

I have already admitted that is not what I did and prefer not to dwell on it. Needless to say, when I buff the bit, the jeweler’s rouge does the best it can by bringing most of the bone to an intense white shine. But despite my frantic attempts – extending to using every angle and side of the buffer, turning the small bit lengthwise and doing the same (in the process almost burning my fingers on the high-speed cloth), and even going so far as to rub the block of rouge by hand directly to the bit and then pressing it in with a cotton cloth – of course I am unable to cover the Super Glued and micro-meshed seals of the cracks completely.

This, I confess to myself, is what I deserve for trying to do something my own way. And so I am forced, almost at the point of kicking and screaming, to delay this paramount stage of my progress at least another day as I give the “clean buffer” a soak in hot water before removing it, squeezing out as much of the wetness as I can and placing it near the bottom of the single gas heater in my living room.

FRIDAY

The buffer, amazingly enough, is clean and dry by late morning. With baited breath I return to my office/workshop proper and reattach the cloth to the machine. I plug it in again, having taken the prudent precaution of disconnecting the electrical source lest some crazy but in my experience still possible freak accident occur. I am not willing to risk losing part of a finger or worse for this or any other pipe.

Taking another of many deep breaths in this project and exhaling, I push the switch that restores life to the machine and apply the white jeweler’s rouge to the cloth spinning in a blur on the wheel. With confidence, I first pick up the little stummel to polish the silver band still more, as I noticed in the description of the polishing compound its usefulness in working on metals as well. This task ends well with a lustrous band.

Now the ultimate moment of truth has arrived. I put the elegant and fragile piece of bone to the buffer once more, aspiring for the best results but emotionally prepared for a lesser return on my attempts.

My late roommate, who possessed an unwavering confidence in the supernatural that I truly admired, would have blamed the ensuing conclusion on my incomplete conviction. I want to believe, as Mulder’s poster on “The X-Files” reads, but it is not enough. The bone bit, though strengthened by my meticulous best efforts to make it so, is indeed structurally sound again and burnished. Nevertheless, the cracks still show. The harshest analysis reveals the bit’s integrity, but the ensured durability is still betrayed by faint traces of its incorrigible flaws.Esterd30
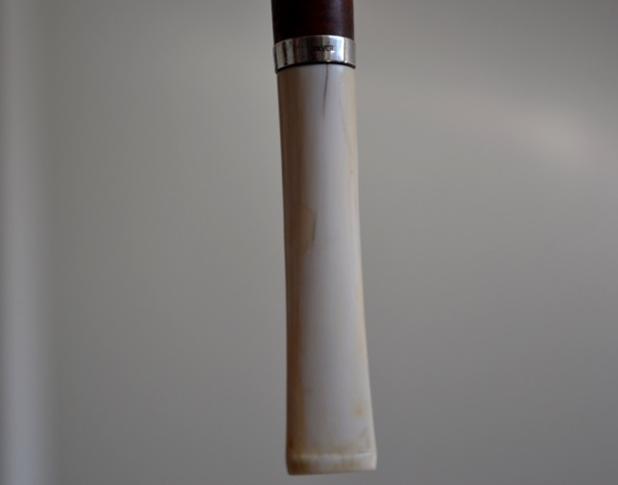
Esterd31

Esterd32

Esterd33

Esterd34
CONCLUSION
I am disappointed, to say the least, with the less than perfect closure of this arduous restoration, but I take solace from the Japanese tradition in artwork, which they call Wabi-Sabi, to leave one flaw in any endeavor. The Buddhist author, Taro Gold, describes it as “the appreciation of the value and beauty of imperfection.” Okay, so my work shows more than one flaw. No doubt the Japanese would do better. This is not Chuck’s fault. Maybe he could make it right, also, but I am at peace.

A distant part of my brain assumes someone, surely, must have expressed the same thought I wrote at the close of Tuesday, about war not being Hell but Purgatory. I Google the words and find I am correct. Drat! Keith Staskiewicz of “Entertainment Weekly,” reviewing Kevin Powers’ Iraq War novel, “The Yellow Birds,” wrote: “Powers effectively shows how, for these soldiers, war isn’t hell. It’s purgatory.” So he didn’t capitalize hell and purgatory and put a period in between. Ah, well! All’s fair in love and war. I’ll have to read that book. Or maybe I’ll see the movie, due out this year.

SOURCES
http://www.slate.com/blogs/browbeat/2014/03/12/_the_plot_thickens_the_phrase_s_etymology_and_origin_at_the_request_of_grand.html
http://www.enotes.com/topics/george-second-duke-buckingham-villiers
http://www.pipephil.eu/logos/en/logo-e4.html Esterd
https://translate.google.com/translate?hl=en&sl=ja&tl=en&u=http%3A%2F%2Fwww.tsugepipe.co.jp%2F Tsuge Pipe Co.
http://www.ebay.com/itm/RARE-Collectible-Vintage-TSUGE-Signed-Carved-DRAGON-Tobacco-Pipe-/351638968227?hash=item51df50d7a3:g:lOIAAOSw4HVWEv6T Tsuge Dragon Gold Band Bent Billiard
https://www.smokingpipes.com/pipes/new/tsuge/ Tsuge Pipes
https://avaiaartisticjewelry.wordpress.com/2011/08/07/how-to-care-for-organic-bone-jewelry/ Polishing bone materials
http://www.phrases.org.uk/meanings/face-the-music.html
http://www.medievalwarfare.info/weapons.htm Re: quarterstaves

http://www.imdb.com/title/tt3739110/ Yellow Birds movie
http://www.tarogold.com/2008/02/13/living-wabi-sabi/

UPCOMING RESTORES
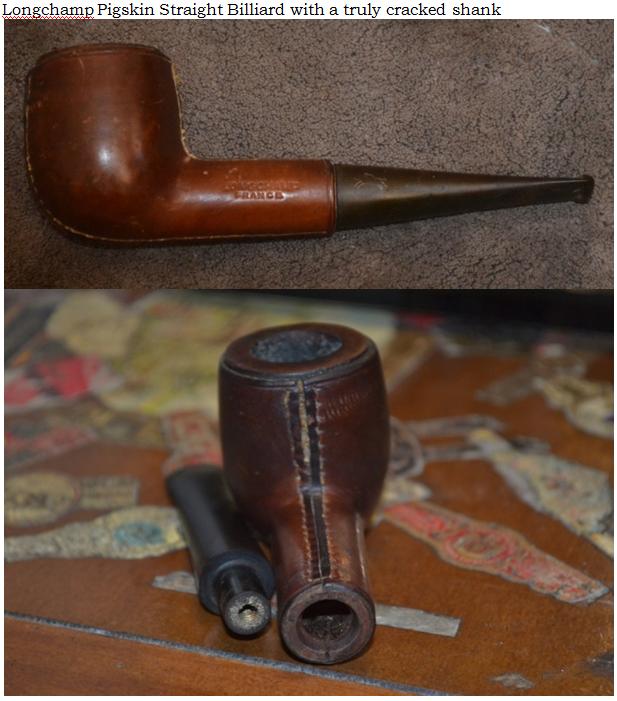
Esterd35

Esterd36

Esterd37

Breathing new life into this Dusky Dulcet Bulldog


Blog by Geoff Carmell

It is a pleasure for me to post this first blog by Geoff Carmell. I have followed his work on Facebook and we have communicated via Messenger and email now for a while. We have common friends in the small pipe community of Calgary. I saw his work on this bulldog and knew it was going to a common friend so I asked him to do a blog on the restoration. Geoff, it is great to have this piece here. You have done some great work on that old pipe. Thanks for sharing it with us all. Welcome to rebornpipes.
Geoff1Hello everyone, this is my first attempt at blogging about one of my pipe refinishing projects.

Before I begin, our host Steve Laug wanted me to give a brief introduction about myself. I am still quite a novice when it comes to the world of pipes but that hasn’t quelled my desire to keep collecting, refinishing and smoking pipes. For me it truly started while going to local antique shops last fall while my parents were visiting. I was hooked when I refinished one of those antique store finds and haven’t looked back since.

I wanted to take a moment and say that refinishing pipes as a hobby has really helped me in more ways than one. I live in Southern Alberta and I am a crane truck operator in the oil and gas industry. Last year was an extremely slow year for me and 2016 isn’t looking any better. As such, I needed an outlet to keep myself from going crazy worrying about all the “what if’s” in life.

This began my journey into the world of pipe refinishing. This nice little bulldog was one of my first eBay purchases and was really in decent shape needing very little work, or so I thought…

My first step was to thoroughly clean the bowl inside and out. I did my usual salt/alcohol soak to get rid of any “ghosts” in the bowl. Before I did that though, I used Q-tips and pipe cleaners dipped in alcohol to clean the shank. Once the bowl was sanitized I turned my attention to the outside of the bowl by using a lightly dampened patch of “0000” steel wool to clean off the grime. To my dismay, this “cleaning” uncovered a crack in the rim.Geoff2 Not sure of what to do I just began sanding the rim down to the point that the crack was no longer visible. After I finished sanding the rim, I turned my attention to the grooves on the front of the bowl which had all but disappeared due to the wood swelling. After lots of filing with my newly acquired needle files the grooves started to take shape again. With the rim and grooves in good shape again I sanded the bowl with 400 and 600 grit sandpaper. I then proceeded to dye the bowl with Fiebings mahogany leather dye. I set the dye by flaming it and then left that to sit overnight. I turned once again to my steel wool to help strip off the dye to reveal the beautiful grain underneath. The bowl seemed lacking, I decided to sand the rim of the bowl once more if only to reveal the original briar again, although it’s not noticeable in the pictures, I sanded the ridge between the two grooves as well to show some contrast.Geoff3 Once the sanding was complete I used my buffing wheel with brown Tripoli to further bring out the shine and then applied a couple of coats of carnauba wax to protect the finish.

After the bowl was done I used the buffing wheels to put a shine on the stem as well. After all the buffing and waxing is done I like to use a clean microfiber clothe to hand rub the bowl and stem. This really helps to get rid of any wax buildup.Geoff4 After all is said and done I really enjoyed this refinishing project and I was pleased that it turned out to be my first pipe that would go to a great guy in our church.
Thanks for looking.
Best regards,
Geoff

A Sad Lesson from a Botched GBD Repair (by Someone Else) I Tried to Mend


Guest Blog by Robert M. Boughton
Member, International Society of Codgers
Member, North American Society of Pipe Collectors
http://www.naspc.org
http://www.roadrunnerpipesnm.biz
http://about.me/boughtonrobert
Photos © the Author

If it ain’t broke, don’t fix it.
― Thomas Bertram “Bert” Lance (1931-2013), U.S. bank teller to president and Director of the Office of Management and Budget under President Jimmy Carter, in the May 1977 issue of “Nation’s Business” magazine

INTRODUCTION
This is a sad tale for all involved: the eBay seller from whom I purchased the GBD straight apple sitter this blog concerns, for $39.99 in April of last year, which the good lady in England refunded five days later; me, as the buyer who requested the refund after receiving the pipe and finding that the photos posted by the seller did not reveal the hidden nomenclature from a previous silver banding to fix an apparent crack in the shank, and at last, in a very real way, the person or persons unknown responsible for the banding itself that, nine months later, I have only just discovered was unnecessary. At least the last of the concerned parties is/are blithely unaware.

That’s right, you read correctly. Although I was justified in asking for the refund, and intended to pay the high postage required to return it to the seller beforehand, she responded, to my gentle but detailed account of the reasoning, with a message that can only be described as hysterical from an obvious sense of unjustified guilt for having “falsely advertised” the GBD. I never used that phrase in my request.

As I recall – though I can’t locate the exchange of emails between the Englishwoman and me that followed my awaiting the arrival of the GBD, with great expectations that were dashed by its clear flaws upon receipt – she wrote back that I should not bother returning it at all, but instead that she would promptly refund my money and I should “keep it, sell it for whatever you can, or throw it away, I don’t care.”

At that point, I was filled with remorse over the anguish in the tone and content of her message that literally rang in my ears, even without an exclamation point. I nevertheless attempted, in a final, unanswered message, to express my intent merely to let her know, in order to sell this pipe or any other (they are not her specialty), that she only needed to add a brief note of the band work and its effect on the nomenclature, as these are important details to collectors and sellers, and perhaps lower her asking price.

After showing the pipe to Chuck Richards, my good friend and mentor, before the emails described above and allowing him to discover on his own the same flaws I detected, he concluded that if I paid more than $10 for it, I should immediately ask for a refund, as I had bought it for my own estate pipe business with the prospect of a quick clean-up for resale. When I told Chuck the actual amount I had shelled out, he was speechless for a moment before all but insisting I seek the refund.

I have been unable to get the shame-riddled emailed words of the kind seller, who as far as I’m concerned made an honest mistake and acted, throughout the transaction, in absolute good faith, out of my mind ever since. I have entertained various options concerning the ultimate disposition of the pipe’s rightful ownership. Of course, I could (A) keep the still beautiful pipe and restore it as best I could to put in my own collection or sell with appropriate disclaimers; (B) clean it up and return it, like a good gentleman, to the grief-stricken lady, with the emphatic suggestion that she give it to a friend who enjoys pipes and would likely treasure this one, if she still didn’t wish to sell it on eBay with a lower price and notices, or (C) complete the work that could be done to fix the damages wrought on the hapless GBD, keep it or sell it but under no circumstances toss it in the trash as the seller advocated, and write the blog now presented as a full and sincere apology to the lady, with the intent of depositing the refunded money back into her PayPal account and forwarding her the link to the blog.

With great effort, I at last located the transaction numbers and dates of the original purchase and refund, and with them was able to obtain the lady’s name and email address.

I will save my final decision for later in this account of the restoration of the GBD Prestige straight apple sitter, which research has disclosed was made prior to the acquisition of GBD (an abbreviation of the three founders of the brand in 1850 in Paris – Ganneval, Bondier and Donninger) by Cadogan of the Oppenheimer group in the 1970s. The imprint “London England” in a straight line on the right side of the shank, almost half of which was obliterated by the band, narrowed the pipe to the pre-Cadogan era and also signified that it might have been made in France despite the nomenclature. GBD was last taken over in 1981 by Comoy’s.

The other nomenclature on the Prestige was critically faint, before I started work on it, and included on the left shank the small letters GBD in an oval, barely visible beside the band, and the model name in cursive that took hours to decipher enough to make out the first uncovered letters, “Prest,” which led the excellent Englishwoman to suspect Presto, but I Googled and found the full correct name. On the right shank, equally as light as the left and below “on England,” were three numbers for the shape, 448, which I understood was 9448. Here is what another version of the pipe looked like.GBD1 The apple of my eyes in this blog is remarkably similar, discounting the nomenclature.

RESTORATION
GBD2

GBD3

GBD4

GBD5

GBD6 [Note the unusual, perfect, pale half oval indentation in the top of the shank in the sixth photo above: I have.no rational explanation for the presence of this mark other than the appearance that it is neither a natural aspect of the wood nor any type of damage, such as a crack. I believe the previous restorer attempted to use a self-made metal band, with the idea of reinforcing the top of the shank without covering any of the nomenclature. If this admittedly crazy-sounding guess is correct, the restorer likely intended to do the same on the bottom of the shank but aborted the idea altogether after failing with the top piece. Call me nuts, but this mark is not an accident.]

Already considering re-banding the apple with a shorter sterling variety, I tugged at the one used in the first place, without much hope that it might be loose, and was surprised when it flew off of the shank and onto my lap.GBD7 Now that was fortunate indeed, for, upon closer inspection, I was able to see that the tiny line in the shank’s opening, which ignited some daft restorer’s passion to fix something that wasn’t broken, was a mere blemish that led nowhere and, in fact, disappeared with a few seconds of sanding. I have to add an acknowledgement of my simultaneous relief that the shank was not cracked and disgust with the previous restorer who desecrated the otherwise weathered but fine pipe by ruining so much of the invaluable nomenclature. The only remaining imprints were the indentations left from the hallmarks and sterling silver designation on the once tight band. I scoffed out loud after my brain digested this enormous error in judgment that more or less ended any real value – and prestige, so to say – this GBD might have had.

Not yet wanting to deal with the majority of the stummel’s outer area, I decided to start by removing the years of accumulated dirt and whatnot from the wood with small soft white pieces of cotton gun cleaner cloths and much of the rim char with wet micromesh pads and a light touch of superfine steel wool. I followed those tasks by clearing the small amount of excess carbon in the chamber with a 19mm reamer and 200- and 500-grit paper, swabbing with Everclear-soaked cotton cloth pieces, and a retort of the pipe.

The retort turned out to be the hardest part of these preliminary steps, as neither of the two rubber tubes that span the few inches from the boiling Everclear to the lip of the bit would fit the extra wide mouthpiece that was part of the GBD. And so, ad-libbing somewhat, I sought out another bit from my collection with a tenon that fit the GBD and a lip that matched the rubber tube. Of course, the last possible pipe I checked was a match – or closely enough. It was from a favorite Ropp. I had no trouble cleaning the metal inlaid GBD bit with a couple of alcohol-soaked bristly cleaners.GBD8

GBD9

GBD10 The photos above show the surprising cleanliness of the well-worn sitter, and by inference, the degree of care its fortunate owner once accorded the bijou. The later of two test tubes full of Everclear used in the retort was almost clear, with only a few small, solid pieces of flotsam at the bottom.

Here, alas, is where I erred, and will have to accept the consequences, until the day I die, for the heartbreaking lesson they provided. In hindsight, I suppose I might, at this critical stage, have sought the guidance of Chuck or Steve (my second if unofficial mentor in this ever-evolving process of learning). But, as Jesse Eisenberg’s character in “Zombieland,” Columbus (for the city in Ohio where he was born), repeated slowly as a sort of mantra: “Shoulda-coulda-woulda.” Much as Columbus had come up with rules for surviving a zombie apocalypse, so have I adopted a set of guidelines, from my own experiences and those of others, for pipe restoring.

Sometimes I ignore one of these, for the most part with success, and sometimes I have to learn the hard way, on my own. Still, as I type this, I find myself experiencing emotions I prefer to avoid. Recognizing my harshness with the previous restorer, and my own share of fault for the apple’s present condition, I nevertheless tell myself I did my best, alone, to return the splendid pipe to its potential glory. My mistake, although unintentionally made in the pursuit of correcting one more egregious that I believed necessitated my next step, is on me.

To the point, and in spite of a note in my previous blog that I try my best to avoid full stripping of a pipe’s original stain and waxes with an Everclear bath, that is what I did.GBD11

GBD12

GBD13 These photos show two things: the wonderful success in removing the remaining rim char and reducing the wood to its natural smoothness, and, as an unexpected result of the latter, also eliminating almost every vestige of the remaining nomenclature. Anyone who loves pipes with all of his heart, as I do, will comprehend the complete hollowness, in the pit of my stomach and consuming my mind, I experienced upon seeing with my own eyes the gaff I had committed. I sat there on my couch awhile, stunned, until I forced myself to snap out of the melancholy reverie and get on with it.

Flashing on memories of a few pipes restored by Chuck, and which I bought despite the blemishes I detected and wondered why he let them remain, I knew the full answer he omitted, in his enigmatic way, when I asked him. Some flaws, as battles, are better left unfought. Before I reached this conclusion – as my mind was still rampaging with thoughts of how I should have approached the same notion of stripping the original stain and waxes from just the bowl and chamber, or could have accomplished the goal better, or would have saved the fragile markings that could now be visible – I had to suffer the unavoidable fact of my misdeed. Shoulda-coulda-woulda.

Thus I embarked on the only course of action I had left – to re-smooth and finish cleaning the chamber with 150-, 200- and 500-grit papers followed by small cotton cloths soaked with alcohol, and returning the sheen of the wood using superfine steel wool and then 3600-12000 micromesh pads. I then re-stained the briar, first trying Lincoln Medium Brown leather dye and flaming it before buffing with 6000 and 8000 micromesh.GBD14

GBD15

GBD16

GBD17

GBD18 I saw that the clear, pale half-oval shape, from the suspected attempt by the previous restorer to use an adornment band to fix the misperceived shank crack, remained stubbornly. And so, having nothing to lose, I sanded the open end of the shank with 150-, 200-, 320- and 500-grit papers before micro-meshing and staining again. I’ll tell you straight out, this was not the end of the struggle to fix the single blemish.GBD19 Of course, I buffed off the char from flaming the end of the shank with 6000 and 8000 micromesh, and reattached the bit to the shank with the band removed, to check the fit. The bit was still a match with the shank!GBD20 Grateful to have something go right, I turned in that direction and went after the bit. The photos below show before, as it arrived in the mail, and after I worked on it with the tools displayed.GBD21

GBD22 This blog is nothing if not a cautionary tale about the horrors of reversing someone else’s mistakes – of which mine, unfortunately, cannot be undone. I return to the battle of the pernicious, aborted oval pipe band, at the very moment I concluded that maybe a darker staining, adding Lincoln’s version of burgundy red to the medium brown I applied earlier, would help me be out, out with the foul spot. I was wrong, but here’s what it looked like after flaming the alcohol out of the stain.GBD23 However, this was, at least, a step in the right direction. I concluded that, despite my deepest desire not to be forced to re-shackle the apple sitter with the excellent but unnecessary sterling band that caused this ruckus in the first place, I had no choice. I Super Glued the band firmly back onto the shank, with the hallmarks on the left side, and it did serve to obscure most of the oval shape. Before I snapped the next photos, I added another spot stain using more of the medium brown, flamed it and buffed with 8000 micromesh. That was pretty much the end of the oval spot!GBD24

GBD25 At long last, I was ready for the final buffing on my electric wheels, which as always involved the clean buffer after each of the waxes. For the bit, I used the regular red and white Tripoli and White Diamond. Having let every other convention fly in the wind, the thought occurred to me to wax the stummel with the red Tripoli as well as white, followed by White Diamond and a slow double-coat of carnauba.GBD26

GBD27

GBD28
CONCLUSION
The foul spot still remains enough for a good eye to catch, if not the camera for once. I’m going to sum this up with the note that I sincerely hope I succeeded in creating a final result that, despite its one glaring disaster, reveals a more beautiful grain than the original darker version. And one more thing: I have decided to return the money the Englishwoman who gave me this fine GBD refunded to me last April, and then forward the link to this explanation. At this point in the whole experience with the cursed and enchanted apple sitter, I am happy to take a loss for once, and will try to sell the pipe for $25. I have no doubt the lady in England is lovely. How could she not be, given her obvious love of pipes that equals mine?

SOURCES
http://www.pipephil.eu/logos/en/logo-gbd.html
http://yeoldebriars.com/gbd013.html
https://www.youtube.com/watch?v=LPIuIfAywvY Zombieland Rules (AC, AL, GL, V)

UPCOMING RESTORES
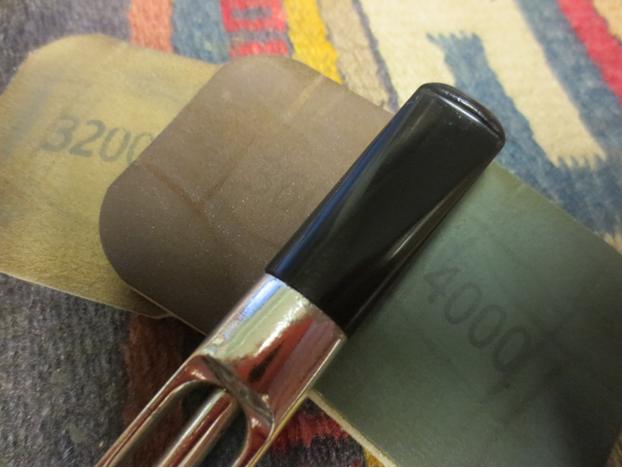
GBD29

GBD30

GBD31

GBD32