Tag Archives: bowl – refinishing

New Life for a Unique Kaywoodie Original Imported Briar Freehand Stack


Blog by Steve Laug

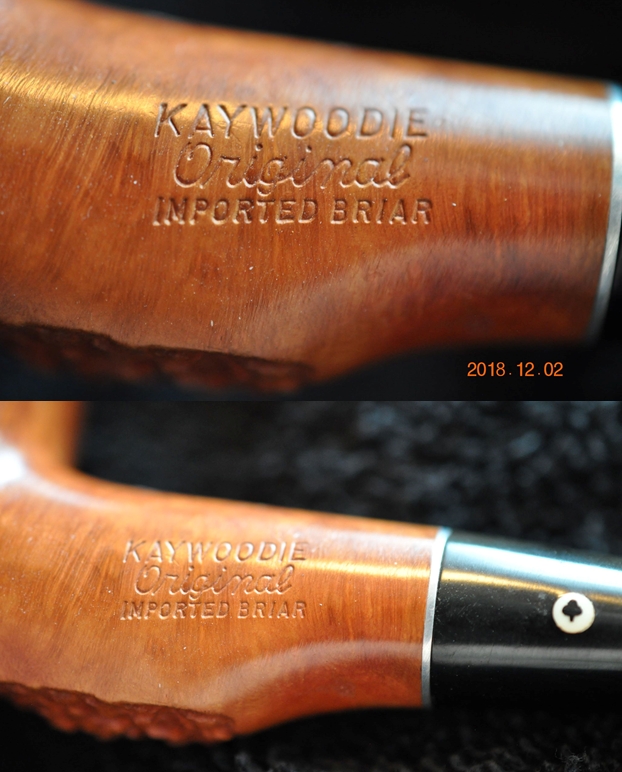
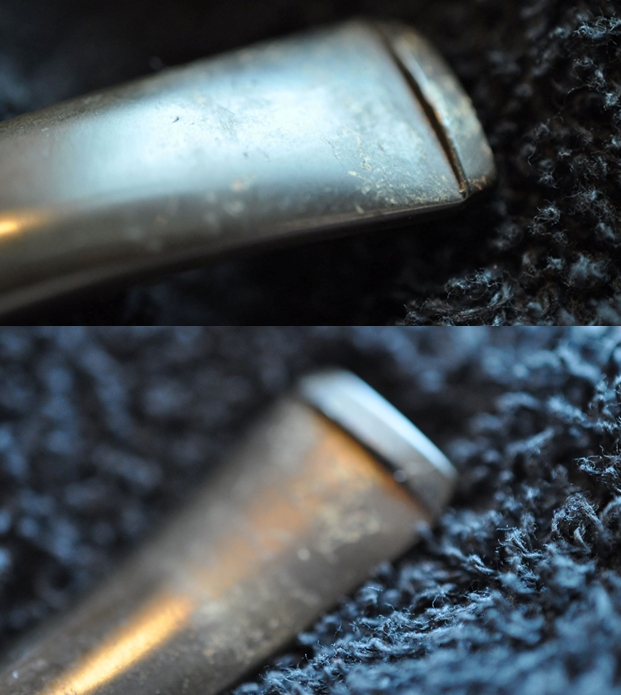
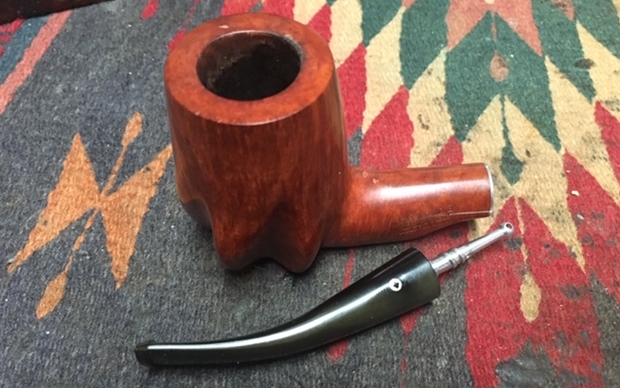
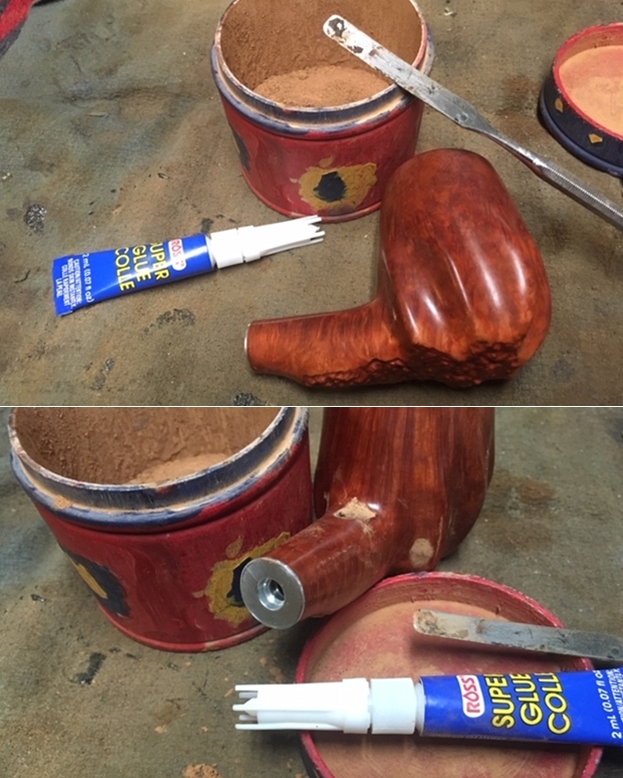
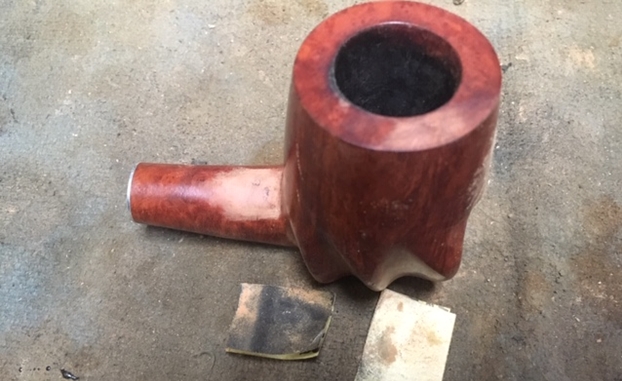
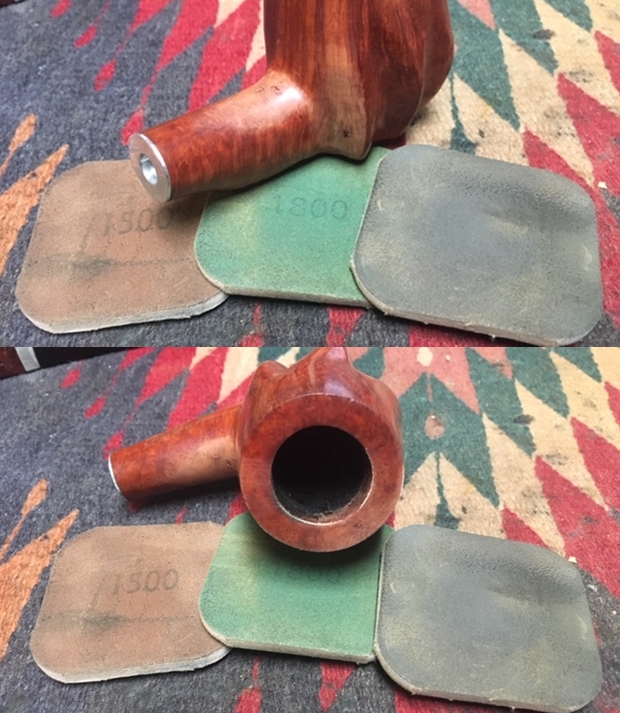
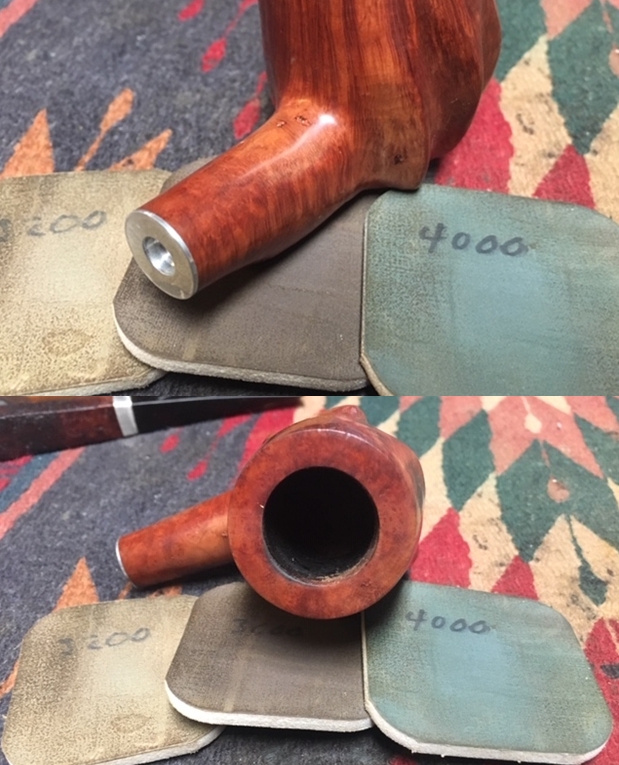
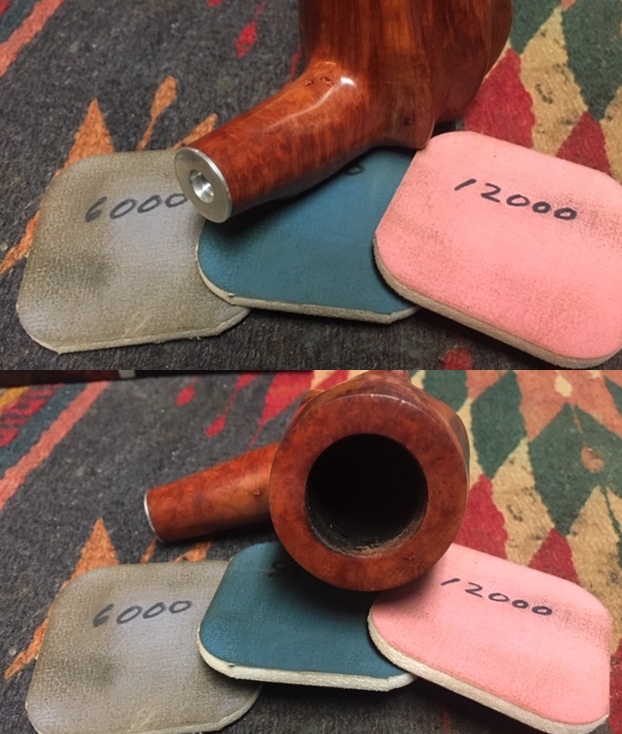
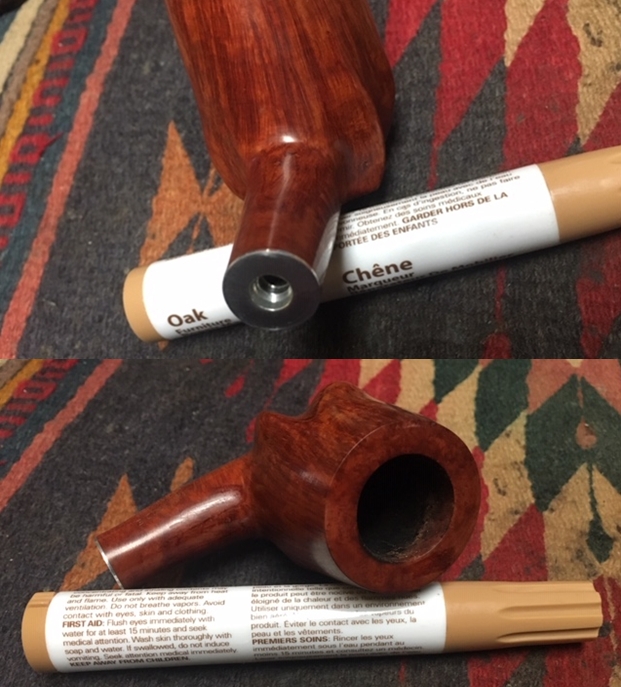
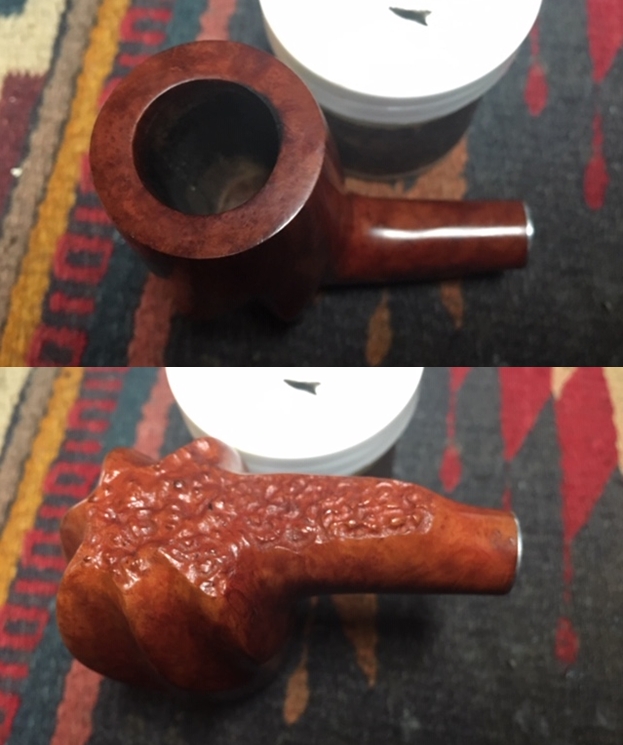
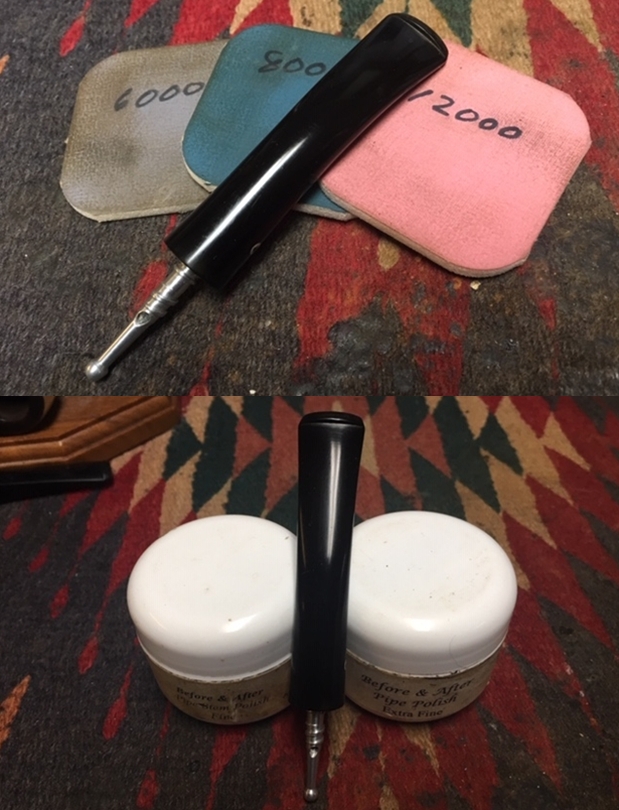
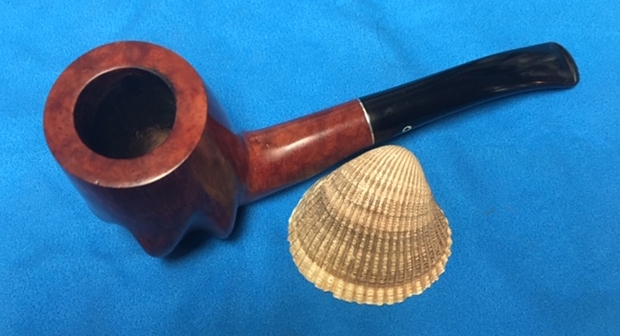
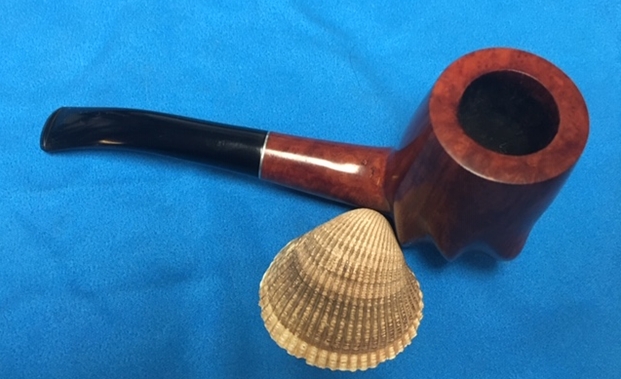
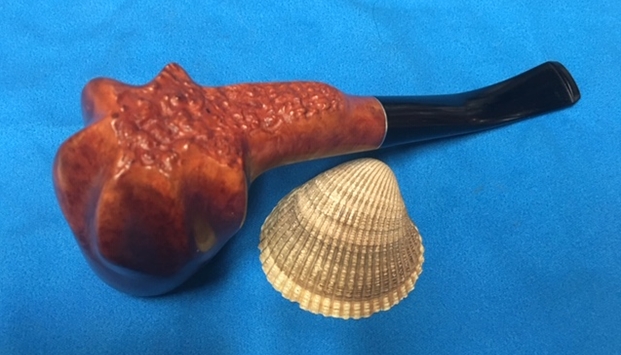
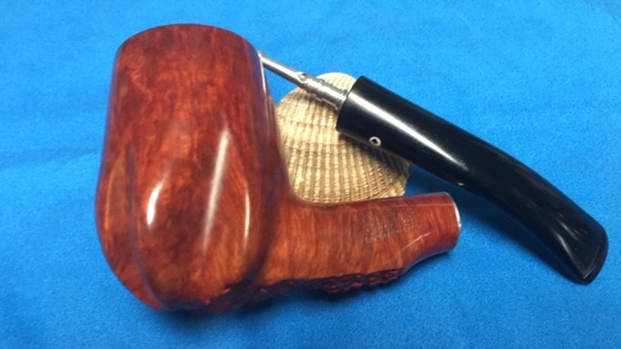
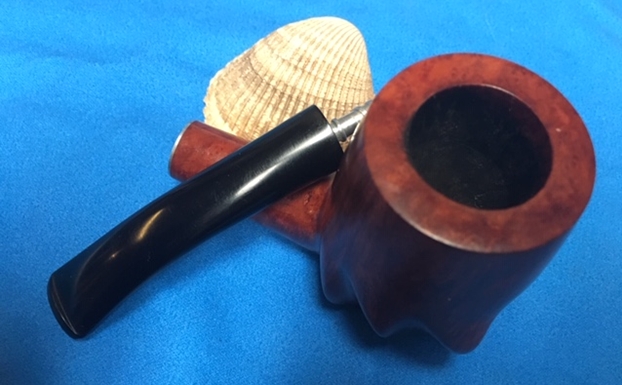
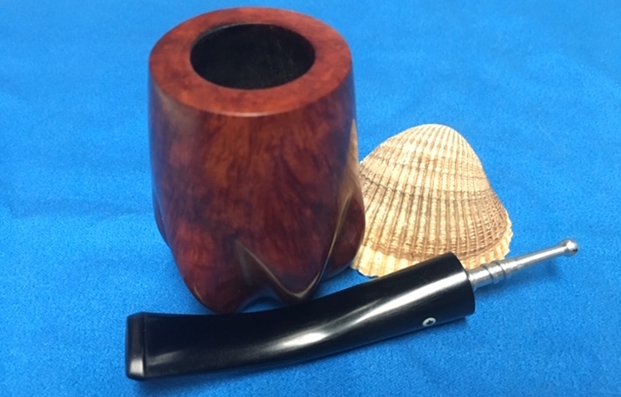
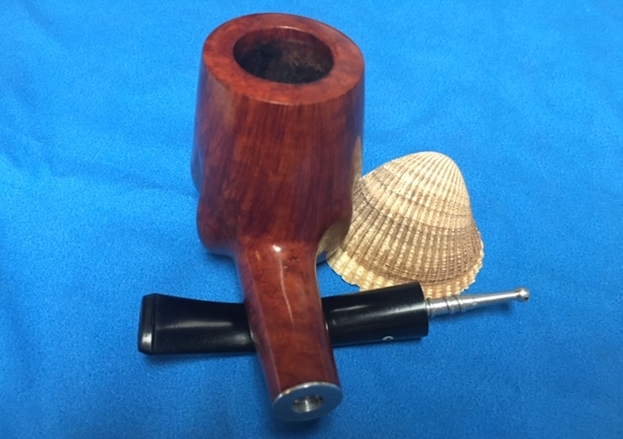
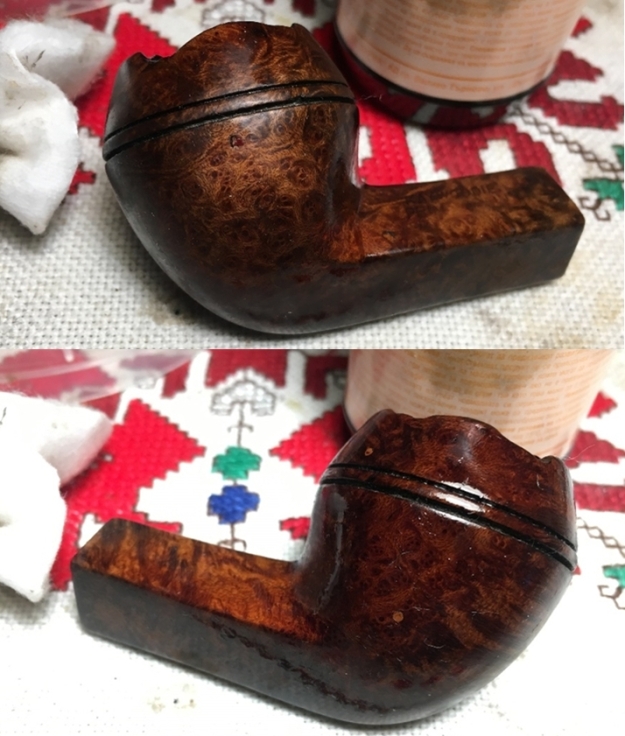
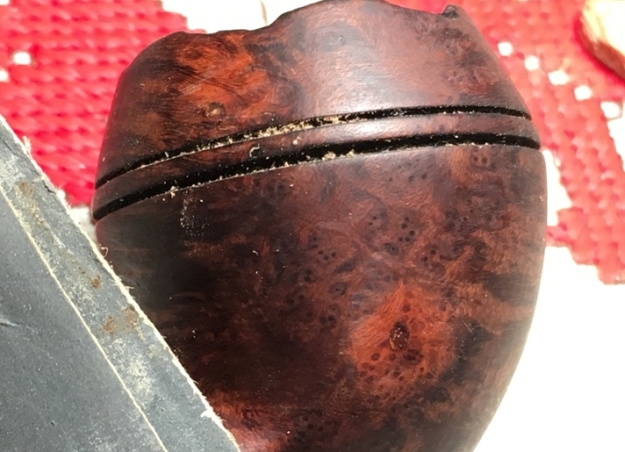
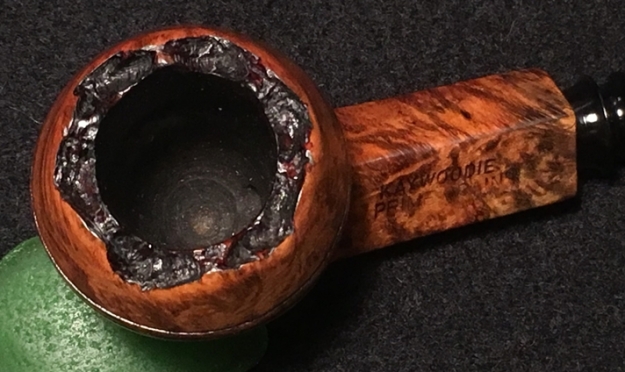
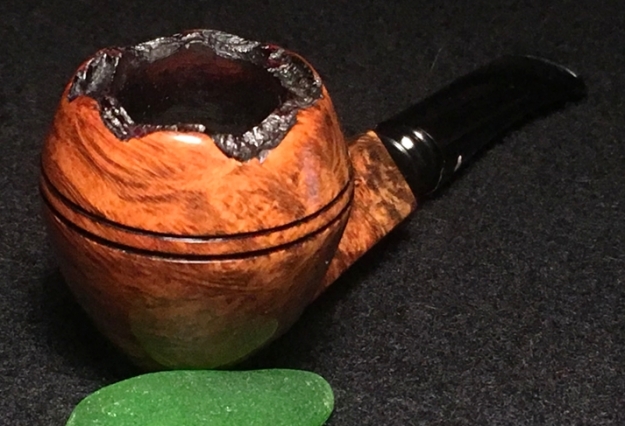
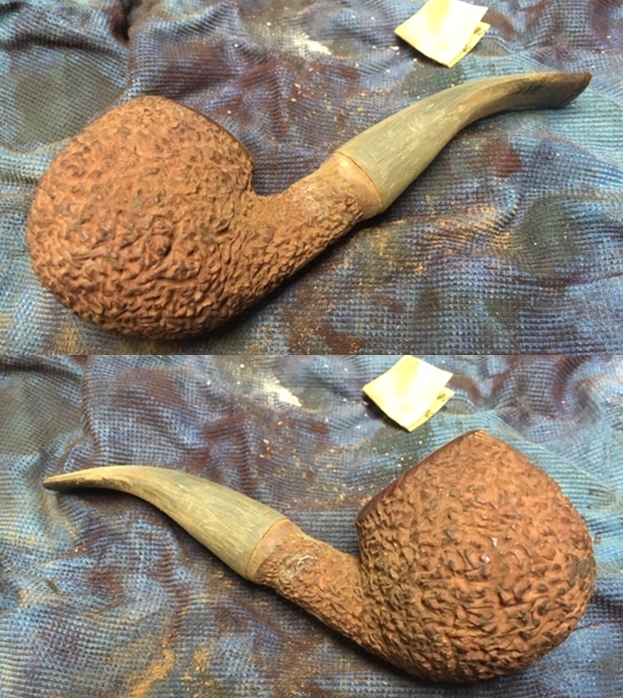
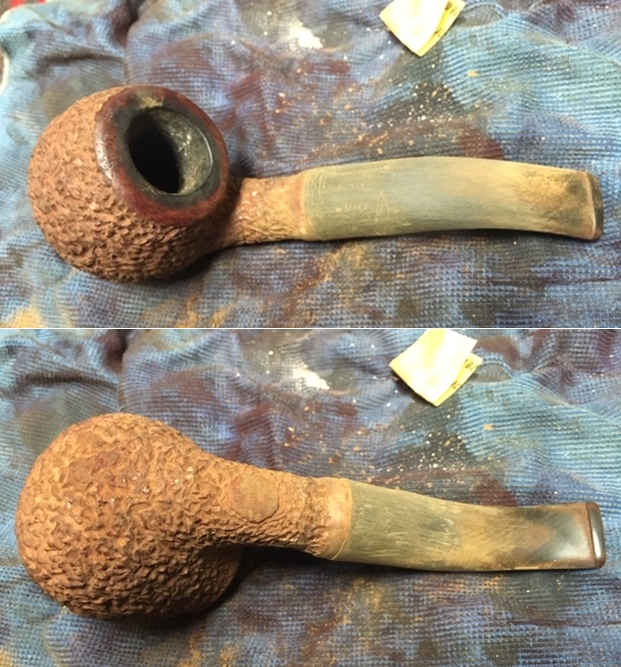
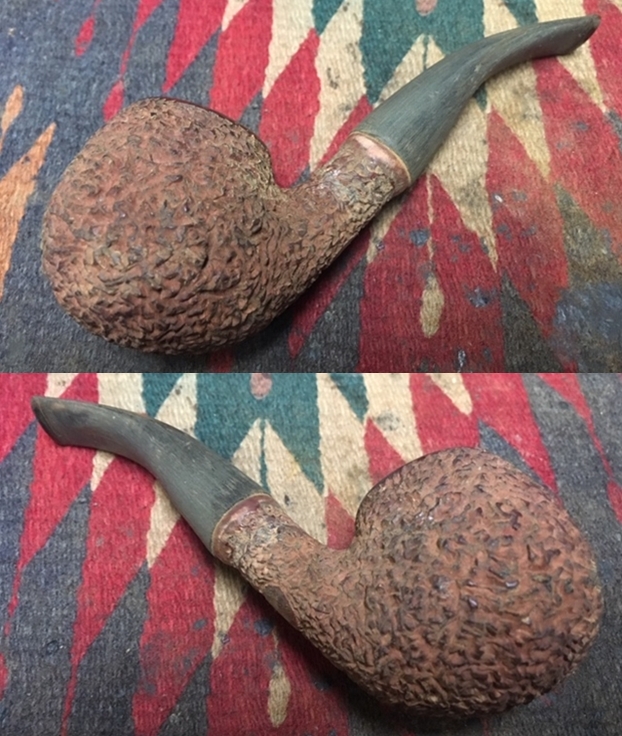
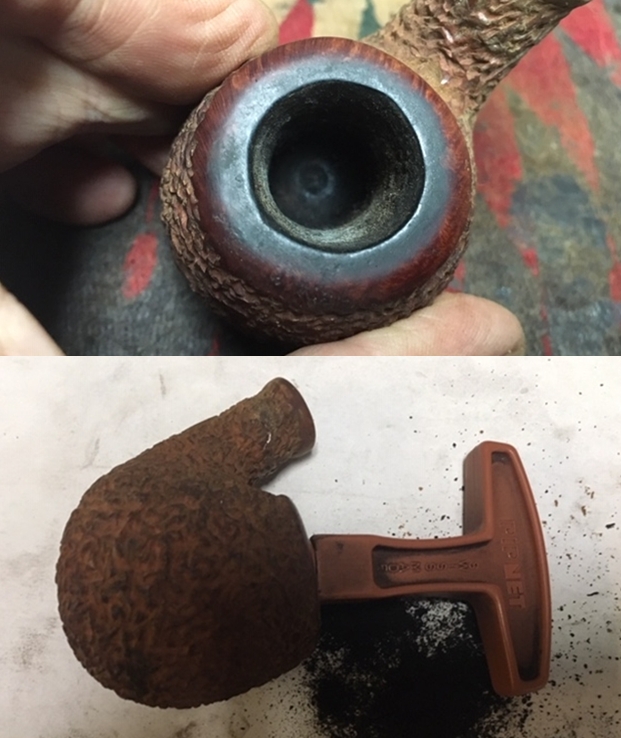
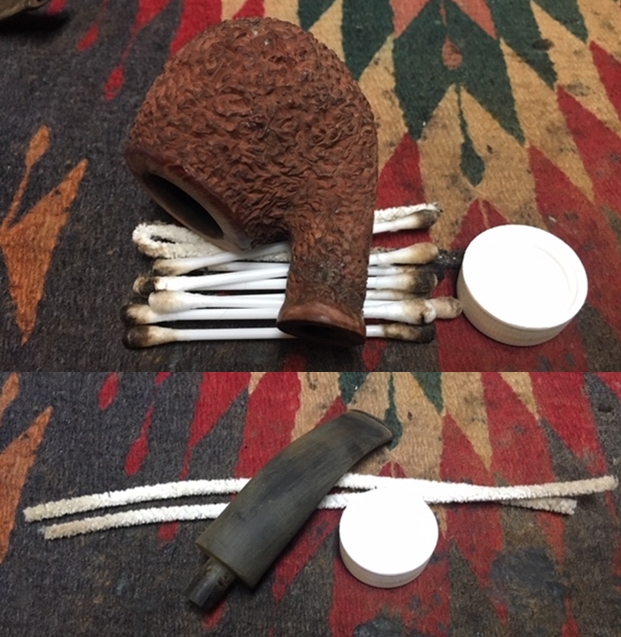
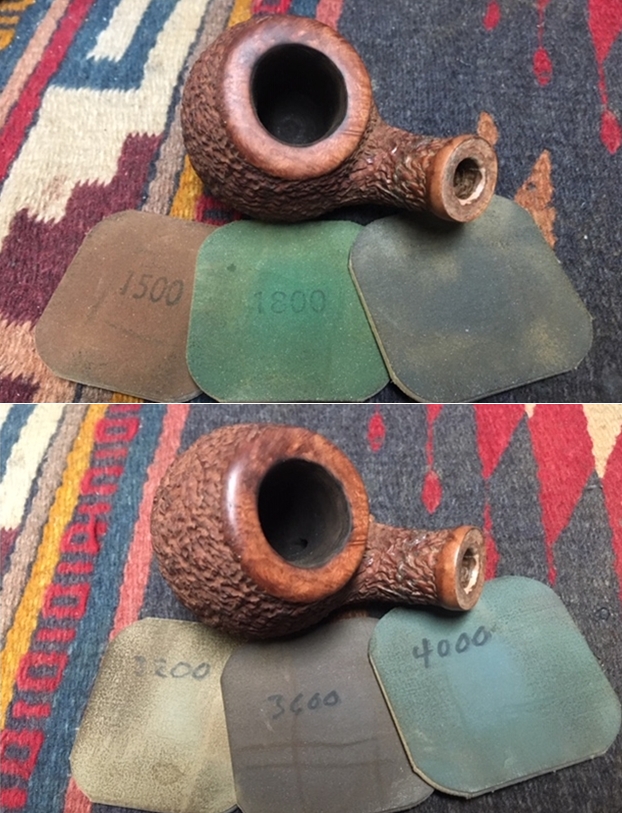
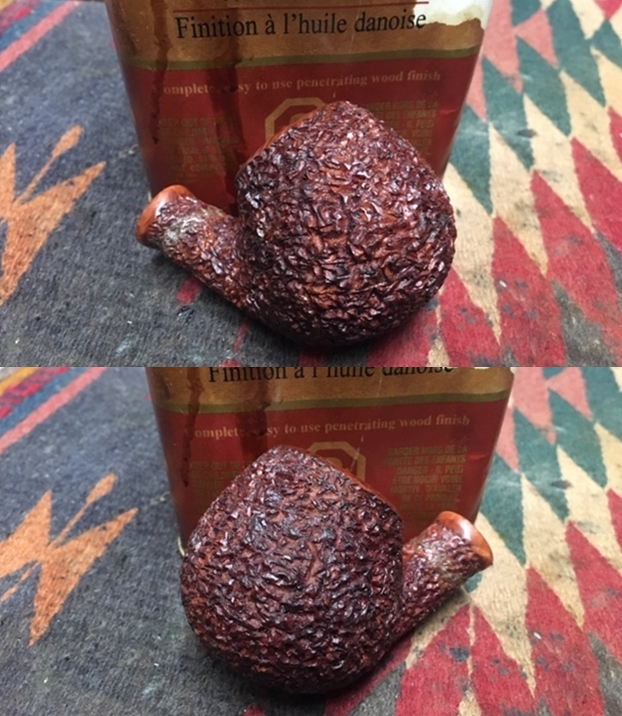
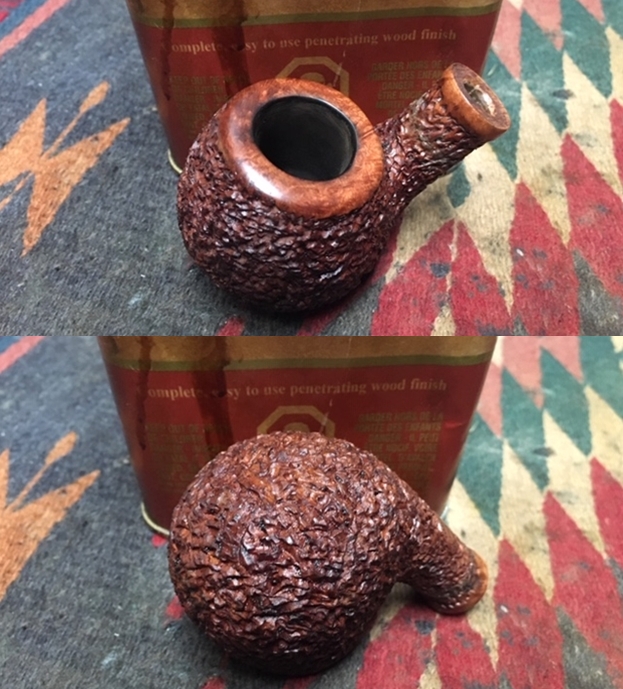
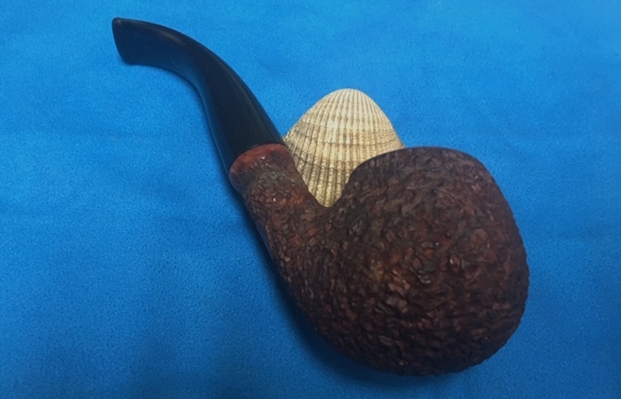
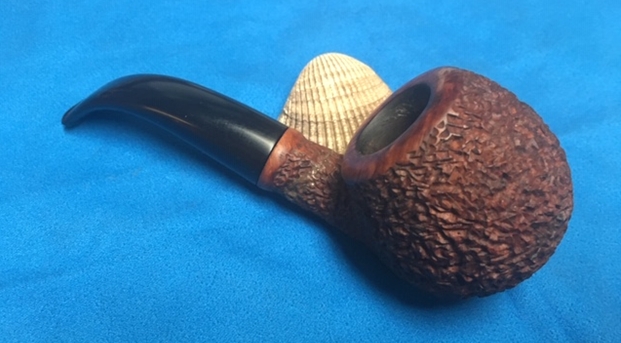
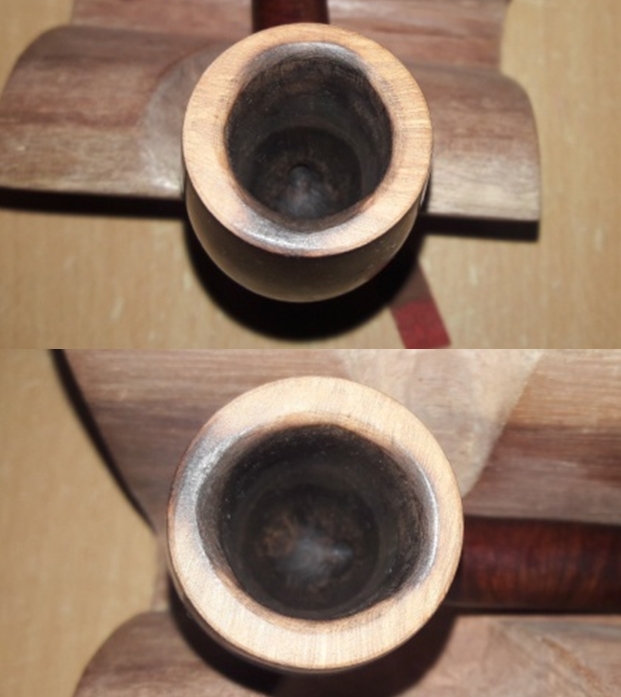
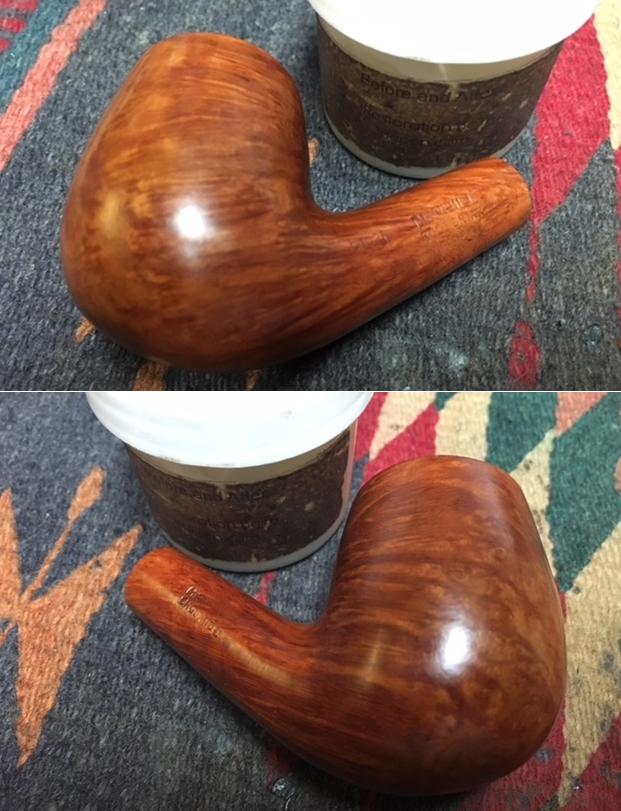
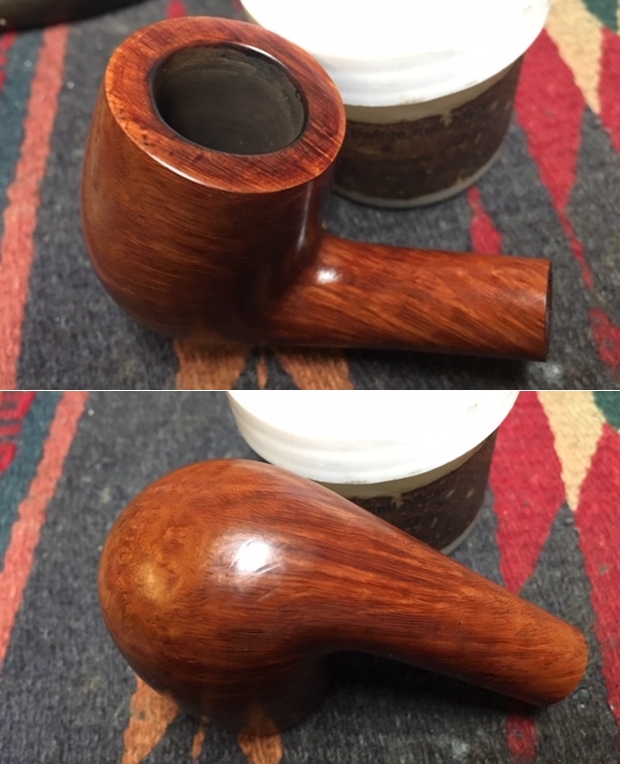
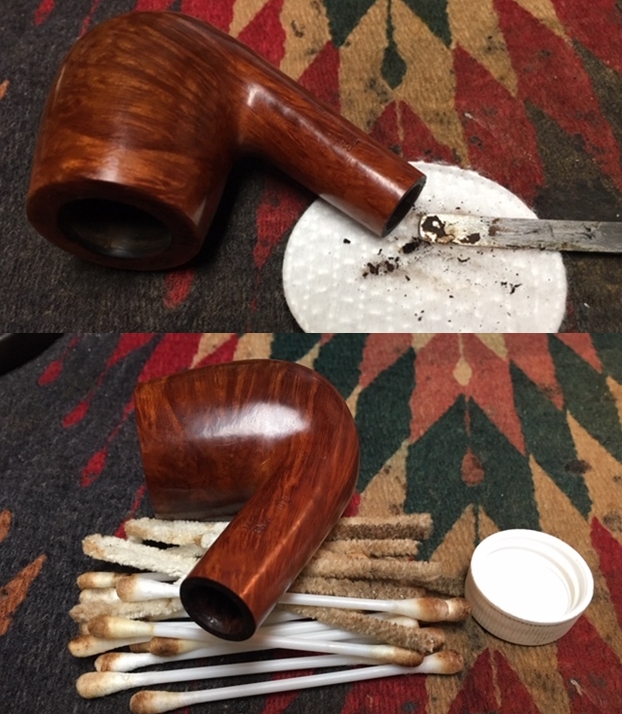
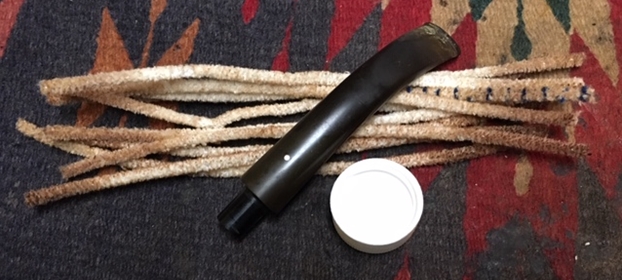
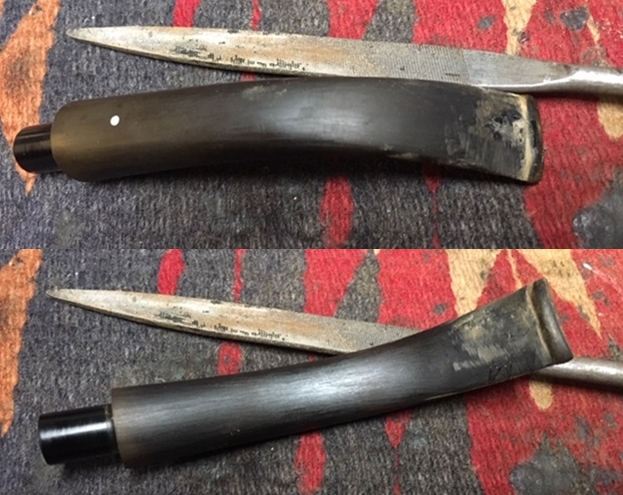
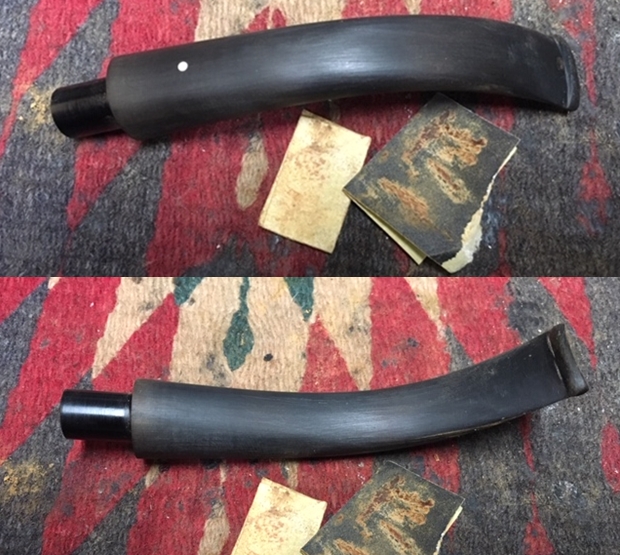
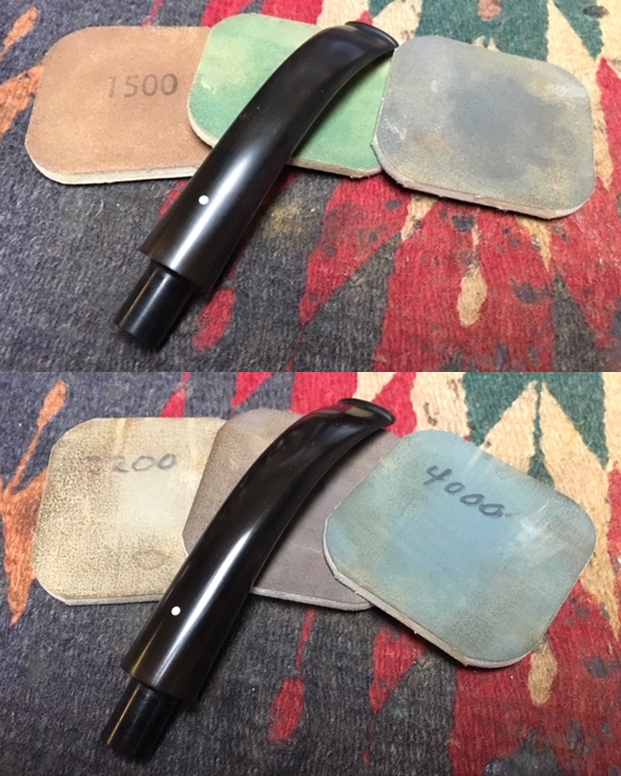
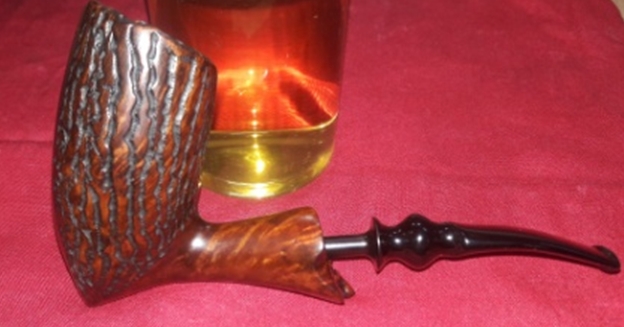
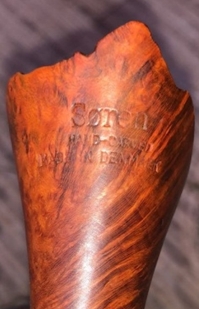
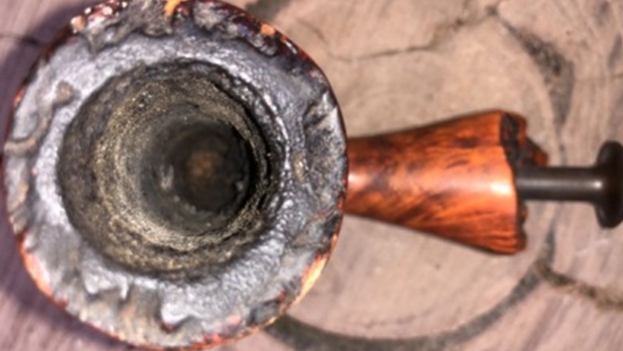
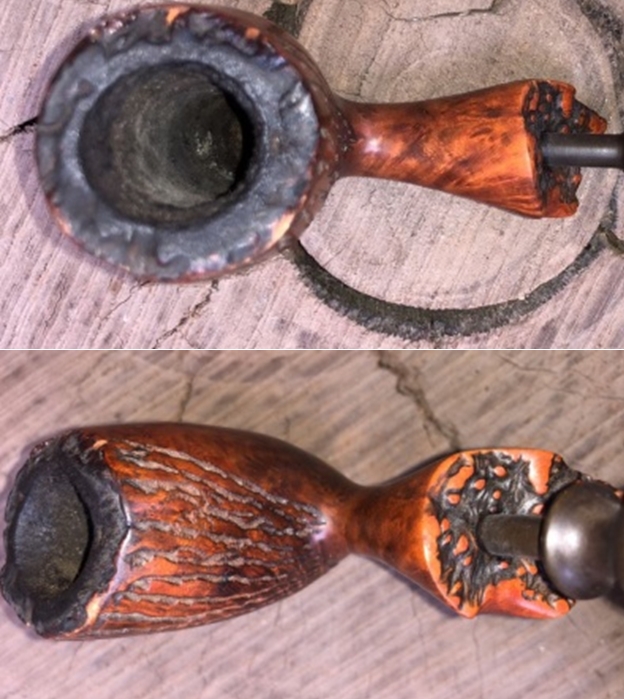
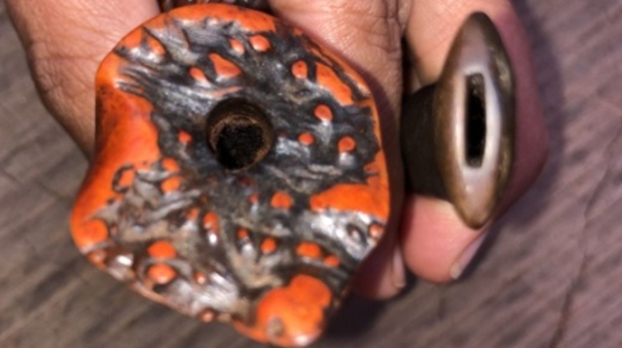
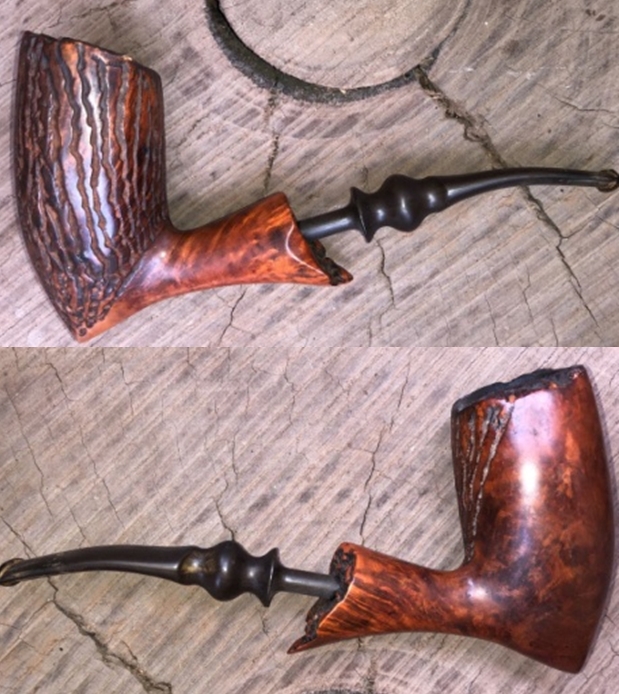
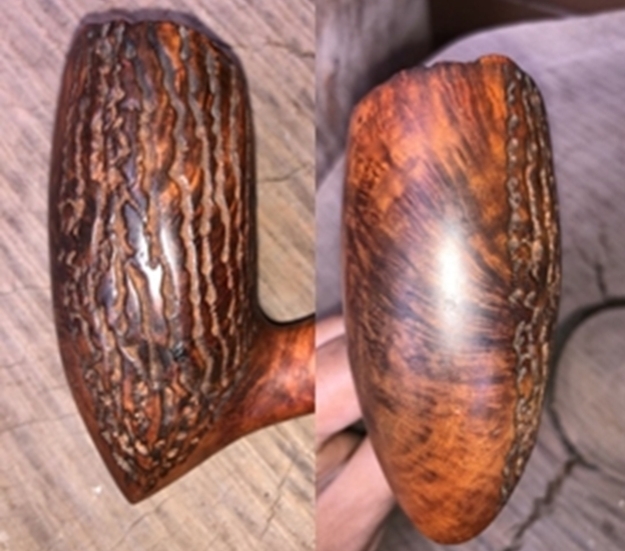
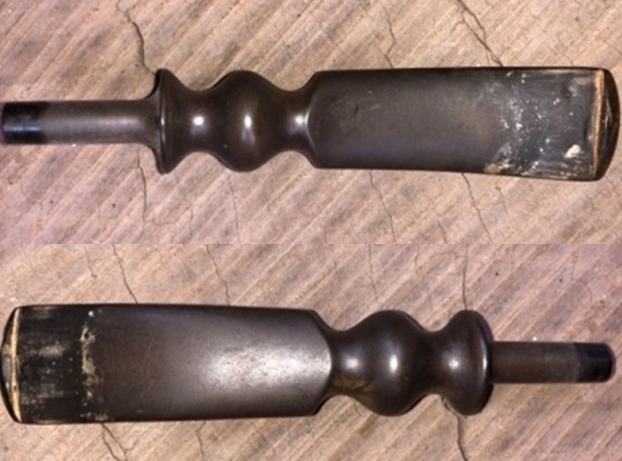
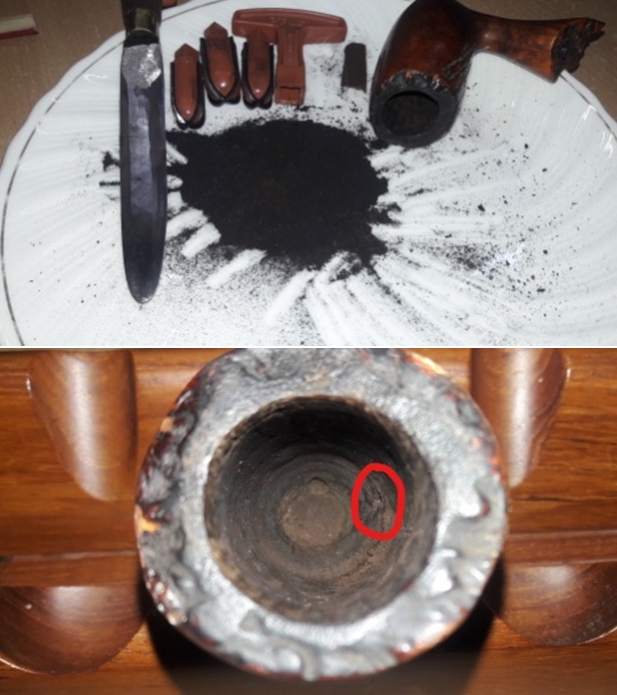
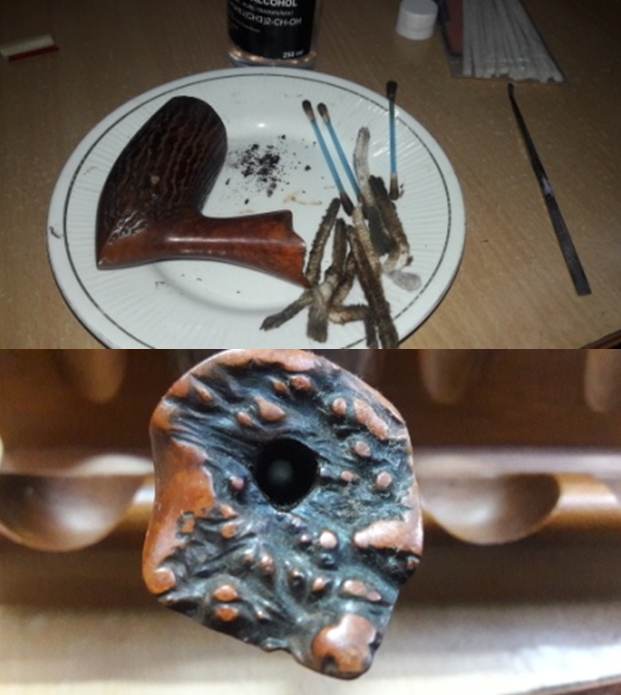
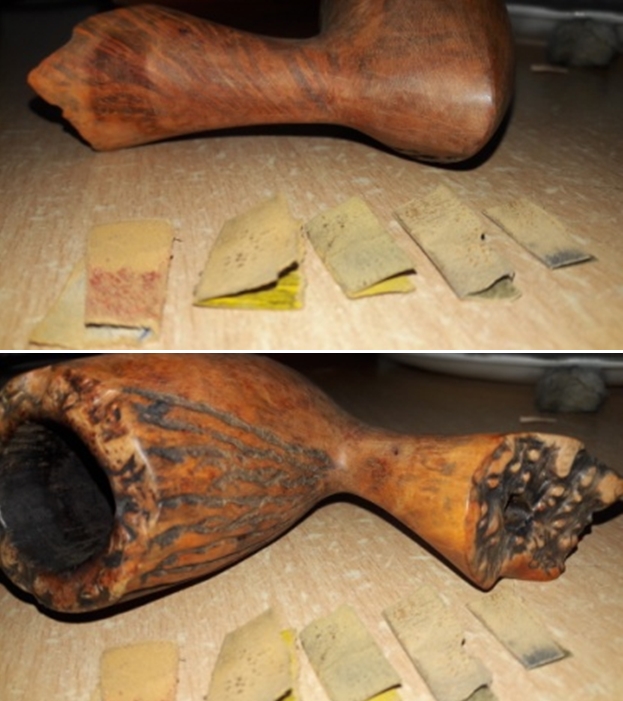
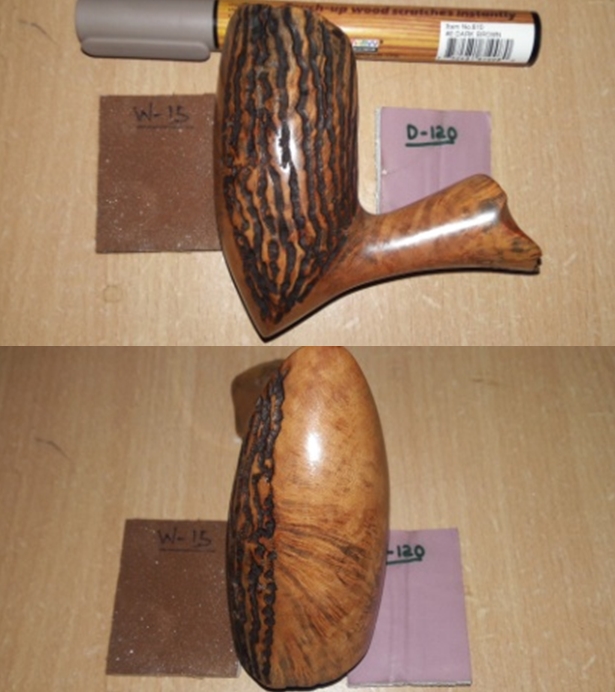
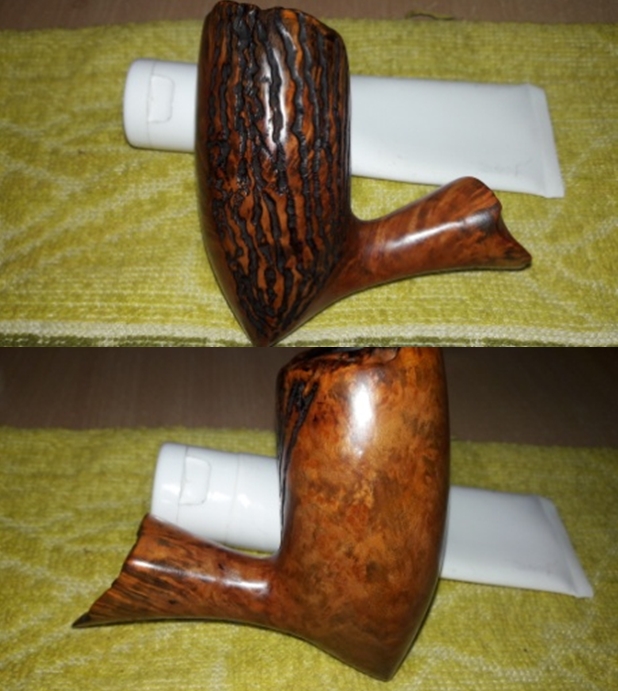
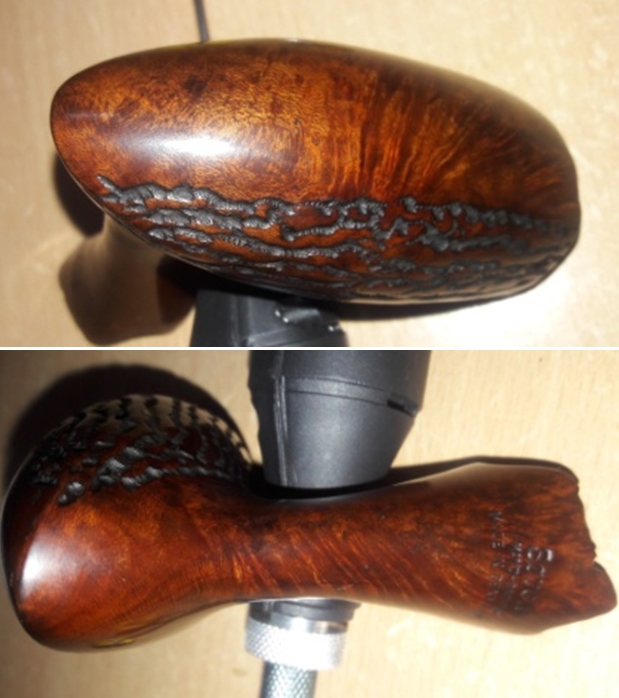
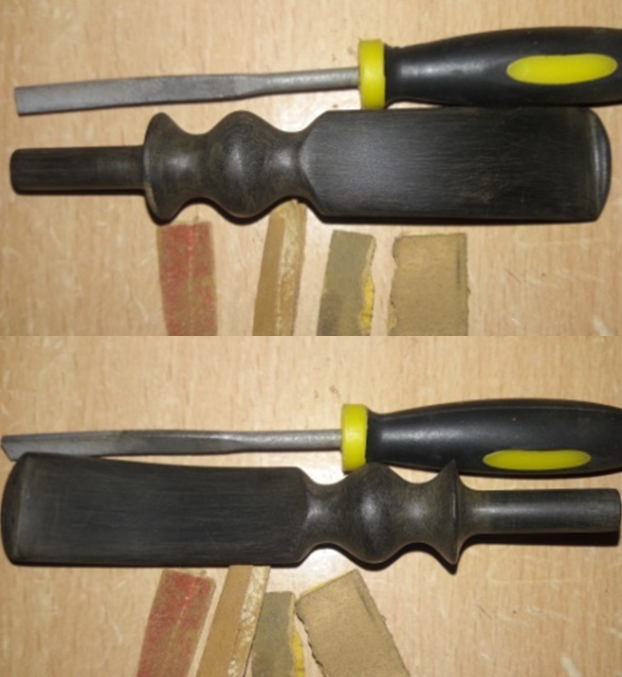
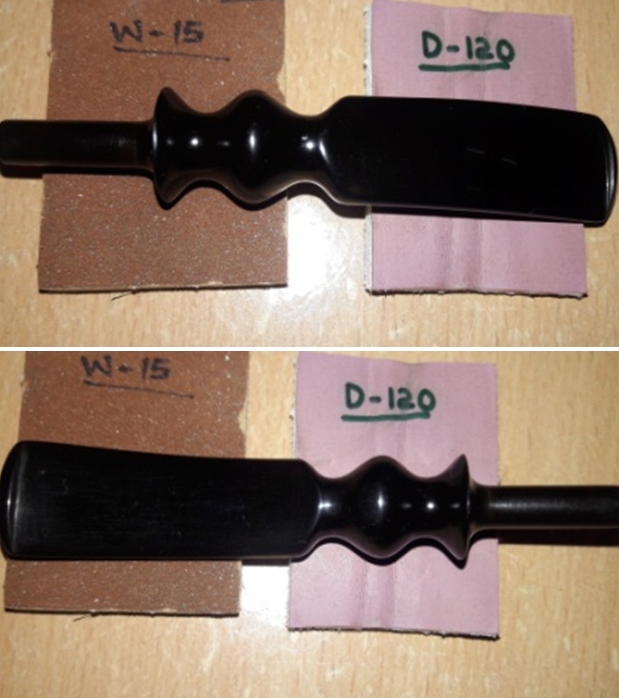
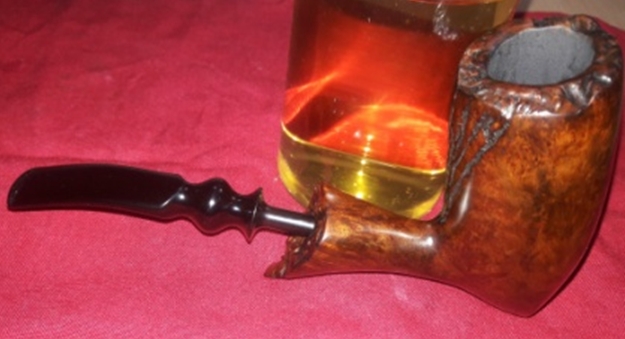
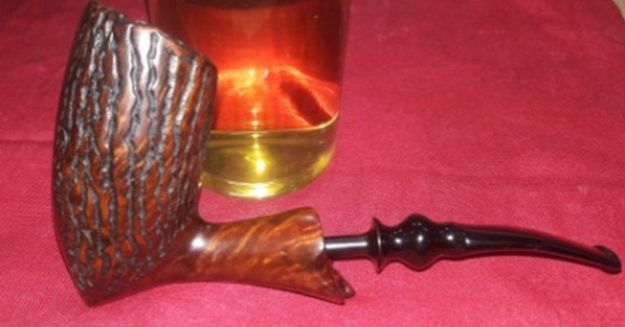
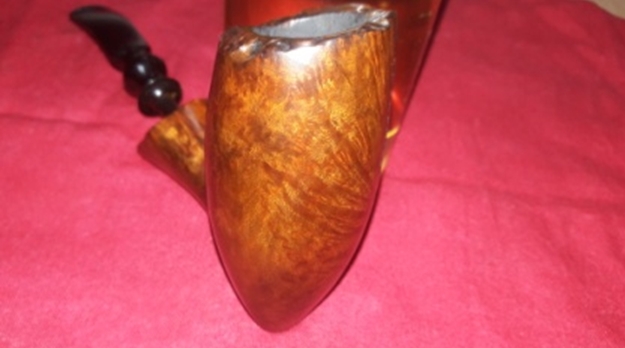
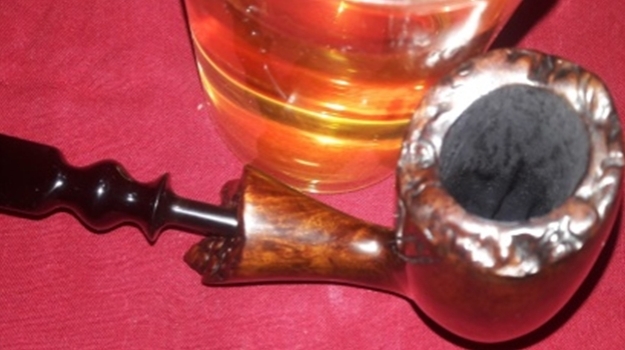
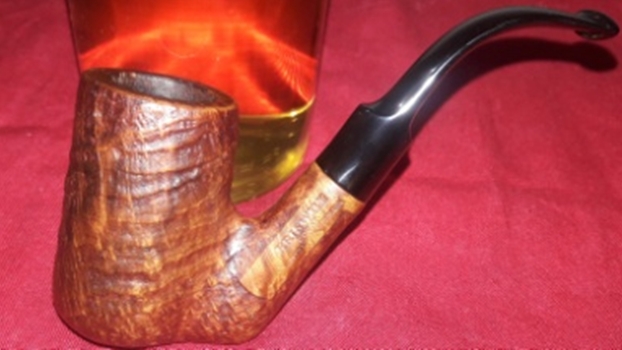
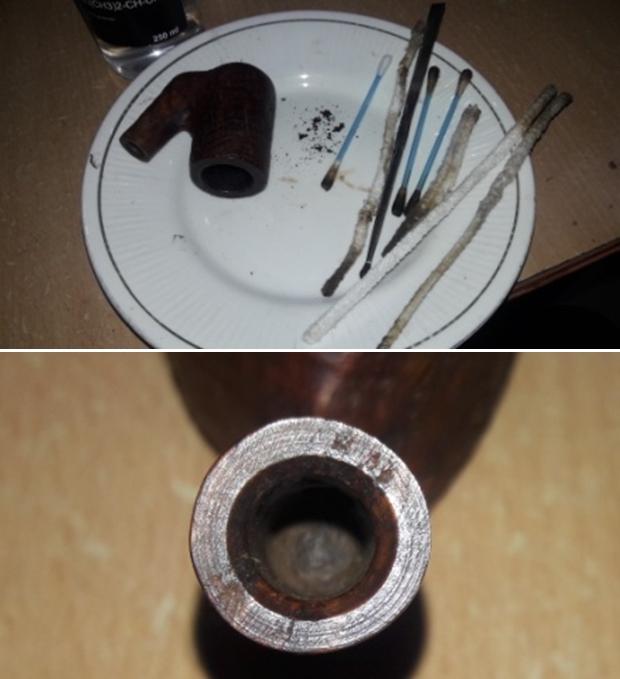
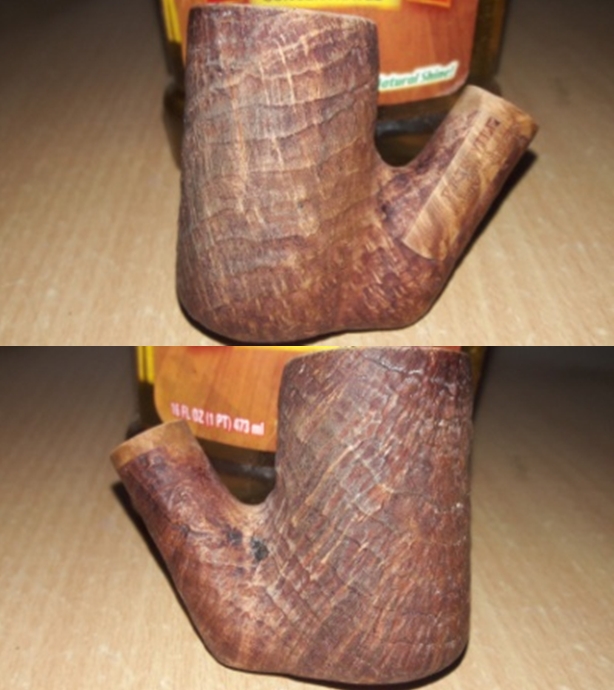
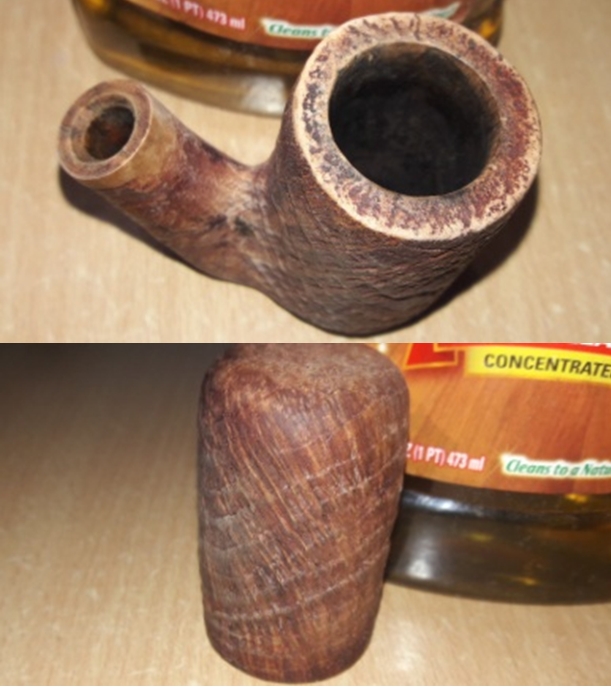
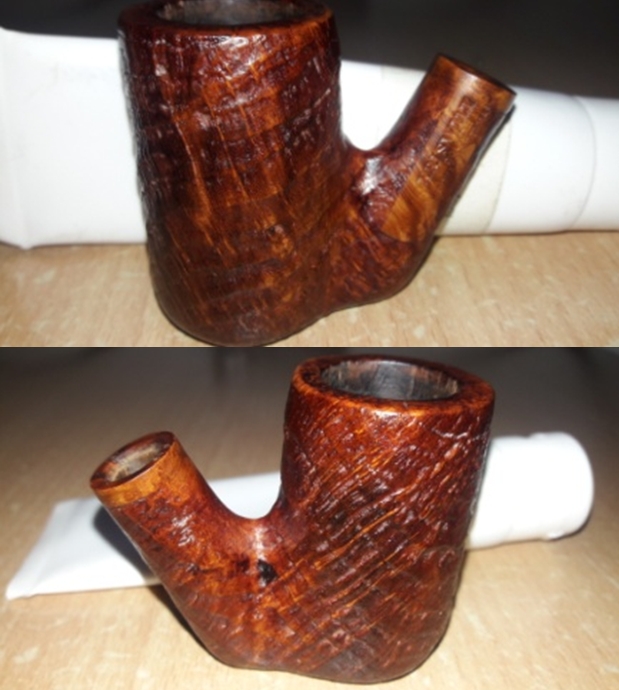
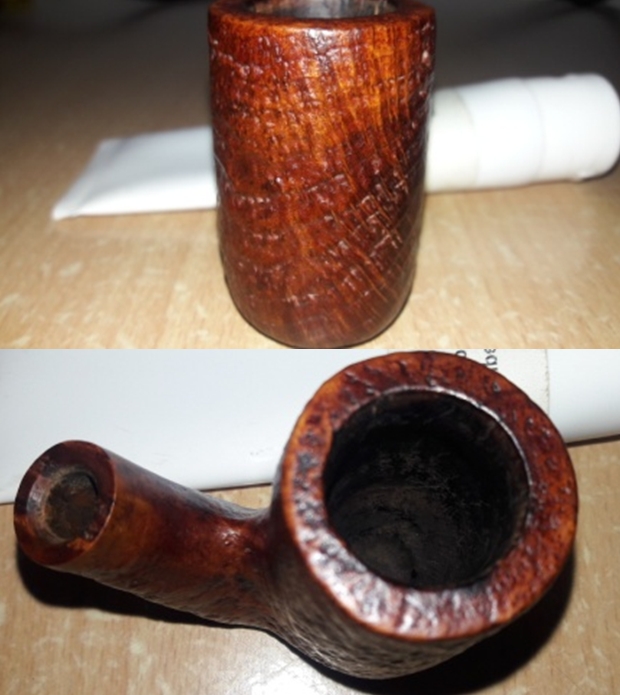
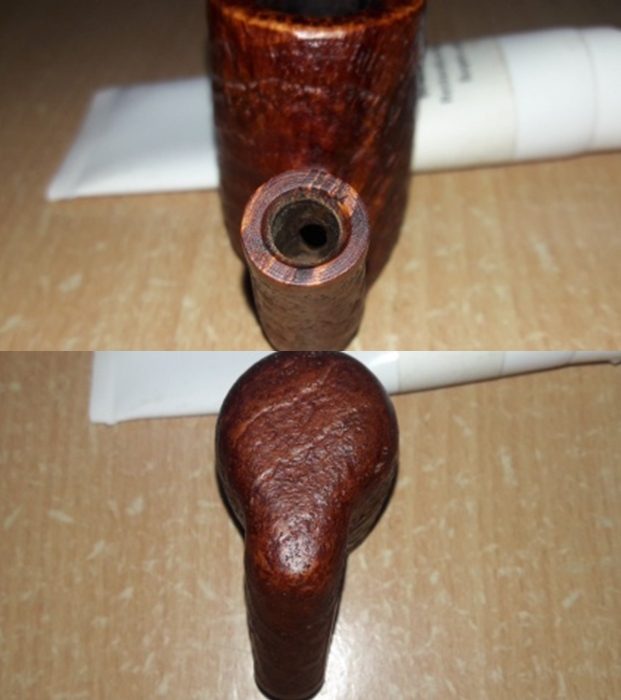
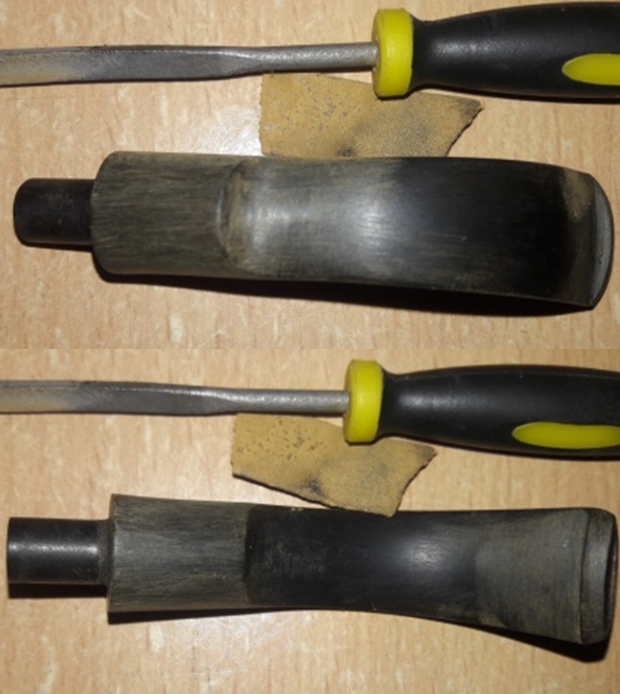
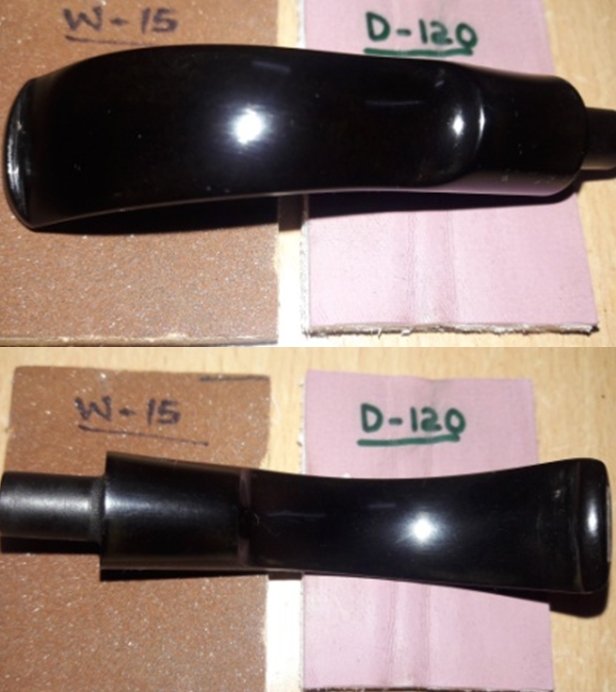
Recently my brother Jeff sent me a very interesting pipe. It has a plateau bottom on the shank and bowl with fluted sides merging upward with a stack shape billiard bowl. The shank looks quite normal but it has plateau on the bottom. It is quite unique looking and combines some of the features of a freehand and some of the features of a stack. The left side of the shank was stamped Kaywoodie over Original over Imported Briar. There is no other stamping on the shank or the bowl. When Jeff received the pipe it was in pretty decent condition – dirty but really not too bad. The finish was dusty and dirty with grime worked into the lovely grain of the briar and particularly into the underside plateau. The bowl had a moderate cake in it but it did not go all the way to the bottom of the bowl – in fact the pipe was not even broken in. The rim top was free of lava but there was some darkening on the backside of the rim top. The inner and outer edges of the bowl were in great condition. The stem had a white circle with the Kaywoodie Club on the left side of the taper stem. It had a Kaywoodie 3 hole stinger and a threaded metal shank that screwed into a metal mortise and spacer ring. The stem had some light tooth marks on both sides at the button. It was oxidized but in decent condition. Jeff took these pictures of the pipe to show its condition before he started his cleanup work. On the left side of the shank the stamping was very clear and readable. You can see that the pipe has some interesting grain even on the shank.He took photos of the stem to show the oxidation and tooth marks and chatter on the stem. Surprisingly the marks and chatter were on the surface.Jeff had reamed the bowl with a PipNet pipe reamer and followed up with a Savinelli Fitsall pipe knife to remove the cake. He scrubbed out the mortise and the airway in the shank and the stem with alcohol, cotton swabs and pipe cleaners. He scrubbed the exterior of the bowl, rim, shank and stem with a tooth brush and Murphy’s Oil Soap to remove the oils and tars on the bowl, rim and shank. He rinsed it under running water. He dried it off with a soft cloth. He was able to remove the majority of darkening on the rim top without harming the finish underneath it. Without the grime the finish looked good. There some large and ugly pink fills in the finish. There was one on the rim top on the right side, there was a pair of them on the top of the shank at the joint of the shank and bowl and the final one was in the fluted area to the right of the shank near the bottom of the bowl. Other than the oxidation and chatter the stem was actually in pretty good condition and would only need to be polished. I took photos of the pipe to show its condition before I started my work on it. I took close up photos of the rim top that shows the clean bowl and the light burn damage around the inner edge toward the back of the bowl. (You can also see the small fill on the top of the rim at the top of the photo, right side of the pipe.) The stem was clean and Jeff had used Before & After Deoxidizer to soak and remove much of the oxidation. He rinsed out the inside of the stem and rinsed off the exterior as well. The photos of the stem show how good the stem actually looked after this treatment.I unscrewed the stem to show the three hole stinger and the threaded tenon.I took some photos of the pink putty fills in the briar on the rim top and on the shank and on the lower right side of the bowl near the shank.I picked out the fills on the bowl and shank with a dental pick and a sharp pen knife point to remove as much of the putty as I could.I filled in the freshly dug out fills with briar dust and clear super glue. I put glue in the fills and used a dental spatula to fill briar dust into the glue repairs. When the fills had cured I used a needle file to flatten the repairs and sanded the patches with a folded piece of 220 grit sandpaper. I followed that by sanding with a folded piece of 400 grit wet dry sandpaper. I polished the repaired areas with micromesh sanding pads – wet sanding them with 1500-2400 grit pads and dry sanding with 3200-12000 grit pads. I wiped the areas down with a damp cloth to clean off the sanding dust. I touched up the sanded and polished areas with an Oak coloured stain pen. It matched really well with the rest of the bowl and shank. Once it is waxed and polished they will blend in a lot better than the pink ones.I rubbed the bowl down with Before & After Restoration Balm to deep clean the briar, particularly the sanded areas. I worked it into the plateau on the bottom of the bowl. The product works to clean, enliven and protect the briar. I hand rubbed it with my fingers and wiped it off with a soft cloth. I buffed the bowl with a horsehair shoe brush to polish it. The briar really began to have a rich shine. I took some photos of the bowl at this point to mark the progress in the restoration. I set the bowl aside and turned my attention to the stem. I sanded the stem with 220 grit sandpaper to remove the tooth chatter and marks as well as the oxidation.I polished the stem with micromesh sanding pads – wet sanding it with 1500-2400 grit pads and dry sanding it with 3200-12000 grit pads. I wiped the stem down after each pad with a damp cloth to remove the sanding dust. I used the Before & After Pipe Polish to remove the small minute scratches left in the vulcanite. I finished by wiping the stem down with a final coat of Obsidian Oil and set it aside to dry. I polished the stem and bowl with Blue Diamond to polish out the remaining small scratches. I gave the bowl and the stem several coats of carnauba wax and buffed the pipe with a clean buffing pad to raise the shine. I worked some Conservator’s Wax into the plateau on the underside of the bowl and shank. I hand buffed it with a microfiber cloth to deepen the shine. The pipe polished up pretty nicely. The finished pipe is shown in the photos below. I have never seen a Kaywoodie quite like this one. It is not only unique in having the plateau on the underside but also the fluting on the side of the bowl. The stamping Kaywoodie Original is also a new one for me. The dimensions are Length: 6 1/4 inches, Height: 2 1/2 inches, Outside diameter of the bowl: 1 1/2 inches, Chamber diameter: ¾ of an inch. I will be adding it to the rebornpipes store shortly. If you are interested in adding it to your collection email me at slaug@uniserve.com or send me a message on Facebook. Thanks for walking through the restoration with me as I worked over this Kaywoodie Original.

Recommissioning a Stubborn Kaywoodie Prime Grain 205R ‘Fancy’ Bulldog


Blog by Dal Stanton

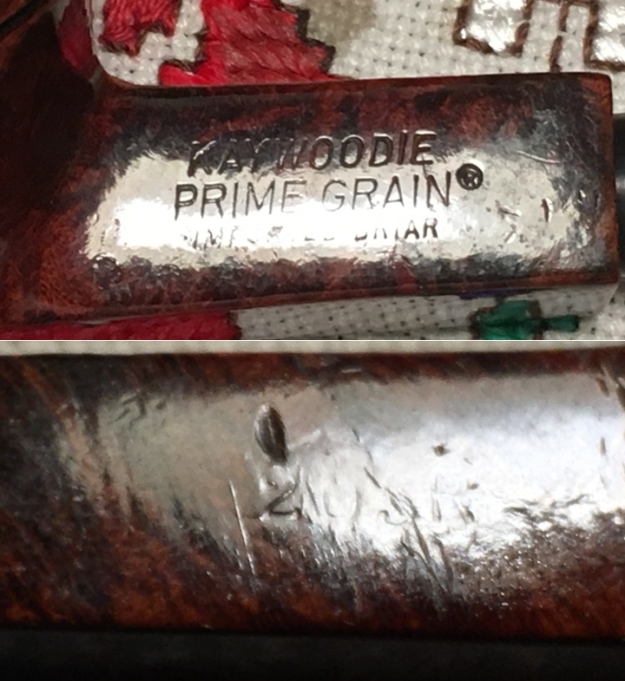
I acquired this Kaywoodie as a solo in an eBay auction, December of 2017, while my wife and I were on a Christmas trip from Bulgaria to be with family in the United States.   True confession – while in the US I indulged in a few eBay auctions!  They’re exciting, what can I say.  But this Bulldog got my attention. Why?  True confession #2: I’m not a Kaywoodie connoisseur, but I was drawn to the profile of this stout Bulldog bowl proudly cresting with what looked like a crown and reminded me of one of my favorite chess pieces – the Rook or Castle.  The Rook is one of the strongest pieces on the board if properly moved – usually waiting patiently through much of the combat until, strike!  Yes, this is what drew me in to look at the details of the Kaywoodie Prime Grain. The slightly bent fancy stem added class to the Rook and the hue of the pipe leaned somewhat reddish – the complete warrior pipe!  So, I bid and now this guy is on the worktable here in Sofia, Bulgaria, after Paul saw him on The Pipe Steward site in the For “Pipe Dreamers” Only! collection and commissioned him along with the last pipe I restored, a Mastersen Freestyle, which turned out great.  Here are a few of the pictures I saw on eBay of the Kaywoodie Prime Grain Bulldog. With the Bulldog now on my worktable, I take more pictures to get a better look at the condition of the pipe. The nomenclature is stamped on the upper left shank side with KAYWOODIE [over] PRIME GRAIN [over] IMPORTED BRIAR.  The name is marked to the right with the encircled ‘R’ indicating a registered trademark.  The upper right shank side has the ghost of a shape number remaining.  After using a magnifying glass and after several pictures I was able to make it out as, ‘205R’.According to the extremely useful Kaywoodie thread entitled 3 Digit Shape numbers submitted by ‘kwguy’ (who I suspect is the major Pipedia Kaywoodie contributor Bill Feuerbach III, because many who responded to the thread with huge thanks, directed the comments to ‘Bill’), the general dating of this Kaywoodie is pretty straight forward.  Three-digit shape numbers were introduced to Kaywoodie pipes in 1972.  According to kwguy:

Maybe a little background is in order.  In 1972, we closed the West New York factory having completed construction of our new 197,000 square foot factory in Yapank on Long Island.  The plan was to move all pipe production there, but in the interim, the Medico factory in Richmond Hill Queens would handle the final sanding and finishing of all of the Kaywoodie, Yello-Bole and Medico pipes. The thought was eventually those operations would also shift to Yapank as skilled workers could be trained to handle those operations.  (A down turn in the pipe market in the seventies doomed the new plant, but that’s another story)

Having the three lines being finished in one building, would create confusion if there were two shape numbering systems.  So a new 3 digit system was adopted.  The Medico 3 digit system was also changed at this time.  This list will have three columns of numbers.  The first will be the “new” three digit number, used on all Kaywoodie and Medico pipes from 1972-1980.  (We stopped stamping shape numbers in 1980)  The second column is the Kaywoodie two-digit number and the third column is the original Medico 3 digit number, all of which refer to the same shape.

The 205R places this Kaywoodie between 1972 and 1980 according to this information.  Also, in the article, the addition of the ‘R’ indicated a ‘wavy or rusticated rim’.  I found the 205 shape number in the list referenced and I clipped all the Bulldog numbers for comparison and interest:So, the shape number tells me that I have before me a Kaywoodie medium Bulldog with a rusticated or wavy rim and was manufactured in the Medico factory in Richmond Hill Queens between 1972 and 1980.  One additional piece of information comes from the Kaywoodie – My Free Forum, called the “Kaywoodie Master List”.  This is a great resource compiling all the different Kaywoodie lines in alphabetic order.  Through this I found that the ‘Prime Grain’ line was produced between 1958 and 1976.  This information narrows the dating further by lowering the later date – therefore, this Kaywoodie was manufactured between 1972 and 1976 – Ha!, when I graduated from high school in South Florida and the cost of gas to fill my 1968 VW Bug was about .40 US cents/gallon! – of course, this was before the Euro was thought of.  This was also a period of time when huge decisions impacted my life and, like well-placed dominos falling, would bring me to Bulgaria some 45 years later working with the Daughters of Bulgaria and restoring pipes for them!

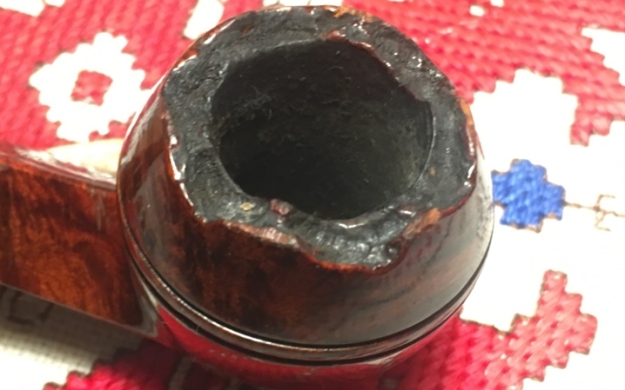
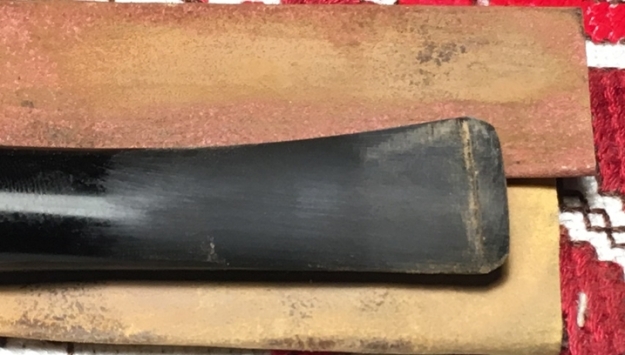
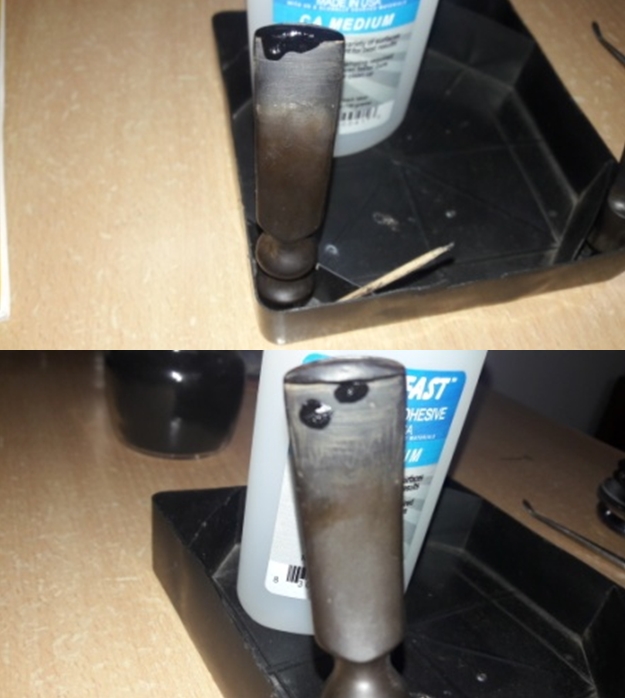
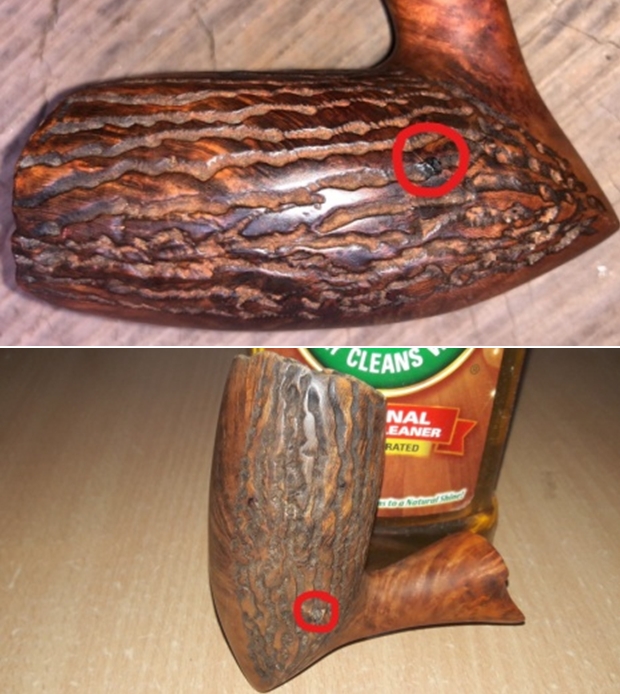
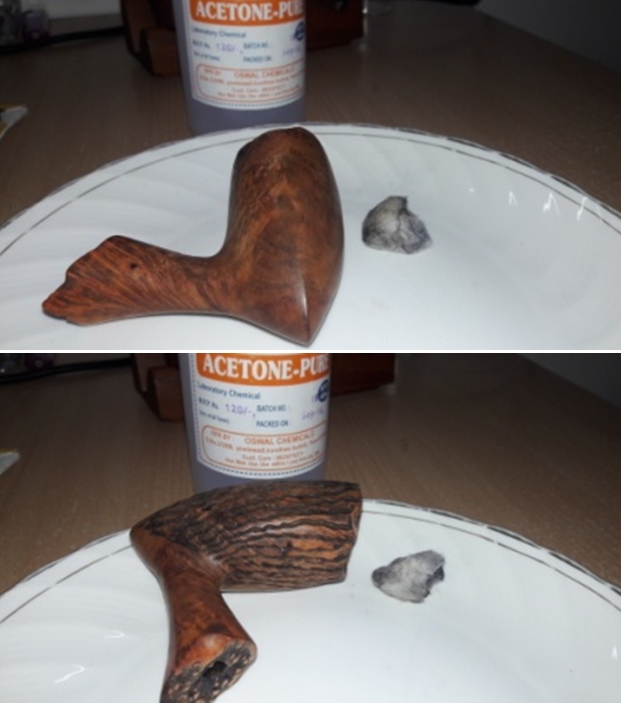
With a better understanding of this Kaywoodie Prime Grain Bulldog, I take a closer look at the condition.  There is almost no cake build up in the chamber.  The surface of the bowl has chips here and there – a few on the shank.  The biggest issue I see at this point for the stummel restoration is what I unlovingly refer to as the ‘candy apple’ finish that encompasses the stummel.  When you start working on a pipe this shiny, the concern is that the finish is acrylic which is a bear to remove.  I much prefer natural grain showcased without the artificial candy apple sheen that this Kaywoodie has.  The grain underneath the surface looks good.  The fancy stem is attractive but has light tooth chatter and very minor oxidation.  I take a couple of pictures to highlight the chips and the finish.I begin the reclamation of this Kaywoodie Bulldog by cleaning the airway with pipe cleaners dipped in isopropyl 95%.  I then add the fancy stem to a soak of Before & After Deoxidizer with other stems of pipes in the queue.  After the stem soaks for several hours, I fish the Kaywoodie stem out and allow the Deoxidizer to drain off the stem.  With a cotton pad wetted with alcohol, I wipe the stem along with the raised oxidation and the stem looks good.  I then apply paraffin oil (a mineral oil) to the stem to begin its revitalization.  The pictures show the progress.With the stem taking a respite, I turn now to the internals of the Bulldog stummel by reaming the chamber. Even thought the cake is light, I still utilize the two smaller Pipnet Reaming blade heads to do the initial cleaning.  To fine tune the removal, the Savinelli Fitsall Tool does a great job of scraping the wall and reaching down to the floor removing carbon in the hard-reached areas.  Lastly, with a piece of 240 grit paper wrapped around a Sharpie Pen for leverage, the final step to clean the chamber is accomplished with sanding followed by wiping the chamber with a cotton pad wetted with alcohol to remove the remaining carbon dust.  After an examination of the cleaned chamber, all looks good.  No heat cracking or fissures are visible.  The pictures show the progress from start to completion. Moving to cleaning the external, even though I’m pretty sure that Murphy’s Oil Soap will not make a dent on the candy apple finish itself, I use a cotton pad and work on the surface as well as the rusticated rim using a bristled tooth brush.  As I suspected, the finish is clean on top but still very much intact, but the rusticated rim cleaned up quite nicely.Before addressing the finish issue further, I complete the cleaning regimen by now working on the internals of the stummel.  Using pipe cleaners and cotton buds dipped in isopropyl 95%, I go to work.  With the Kaywoodie Synchro-Stem shanking fitting in place, access to the mortise to clean is a bit frustrated.  I don’t use any pipe cleaners as the space is short.  To reach through the metal stinger insert hole I utilize some sharp dental probes to scrape the mortise walls to loosen the oils and tars that have collected.  After many cotton buds, progress is made and I’m satisfied with the cleaning and it’s time to move on.Now, back to the stummel surface and the removal of the acrylic finish.  First, I try the more conservative approach using alcohol with a cotton pad to see if the finish can be removed.  The picture shows that the answer is no with isopropyl 95%.Then, switching to acetone, I again use a cotton pad and focus only on one area to see if it would make a dent.  It did not after concentration for several minutes on a single shank panel.  The next step is simply to allow the stummel to soak for several hours in acetone.  Often, it takes this much time to allow the chemicals to break down the composition of the finish.  Into the acetone soak it goes and I turn my attention to the stem.With the stummel in the cooker, I work on the stem.  The tooth chatter is addressed first with heating the vulcanite by painting the upper- and lower-bit area with a flame.  The button lips are chewed as well.  I use a Bic lighter to do the job.  As the vulcanite heats it should expand recovering to a degree the original shape of the vulcanite.  After heating, the results are not great.  The texture of the vulcanite is harder, more plastic-like than normal.  So, I resort to first refreshing the button with a flat needle file and then sanding out the chatter using 240 grit paper followed by 470 grit. Continuing the process of erasing the scratches of the coarser grade papers with finer grade, I wet sand the entire stem with 600 grit paper then complete this phase using 0000 steel wool.With a closer look at the results, I’m not satisfied with the results on the lower bit area.  I can still see cross-scratches from filing and the coarser grade sanding papers.  I know that there are differing grades of vulcanite/rubber compounds used in fashioning stems, and I’ve not really studied it.  However, in restoring pipes, stems have differing responses to the work done on them.  As I said earlier, this material is harder than usual and begrudgingly gives up his imperfections!  For the lower bit, I back up and dry sand the area using 240, 600, 470 grade papers and 0000 steel wool.  I also try something that I believe I read about on Dad’s Pipes, where Charles Lemon uses the buffing wheel and Tripoli compound – a coarser compound, to work on the removal of oxidation from the stems.  I decide to give it a try – not to remove oxidation per se, but to clear up the scratches left over and also to reach into the forward curves/valleys of the fancy stem. These pictures show more favorable results. The stummel has been soaking in the acetone bath overnight hopefully to loosen the acrylic ‘candy apple’ finish.  I fish it out and am surprised by the fact that the finish looks to be still intact!  I use a cotton pad on the surface and, oh my, this is nasty stuff.  I quickly switch to using steel wool to work on the finish.  The soaking did accomplish one thing – it softened the acrylic surface that allowed the finish to be removed with more force.  The pictures show the different stages – and it wasn’t easy! The most difficult part was removing the acrylic finish from the upper shank panels that held the nomenclature and the ghost of a shape number.  I used steel wool around the edges, but the only abrasion used over the stampings themselves was a cotton pad – this made for a long bout!The candy apple acrylic finish is finally removed after hours of soaking and elbow grease, as they say.  To rehydrate the stummel after all the chemical activity, I wipe paraffin oil on the surface and let it absorb through the night.  The final two pictures in below show this. With the stubborn acrylic finish removed, I now investigate the stummel and identify areas that need addressing. I find 2 old fills on the nomenclature panel.  Using a sharp dental probe, I test and then dig out the old fill material.  I’m thankful that I invested in a legit set of dental tools that are a huge help!  Two more small fills are cleaned out on the right bowl side and small dent just above the ghosting shape number on the upper right shank panel. I take a picture of these areas to chronicle the progress.  Next, to address these areas, I mix a batch of briar dust putty to fill the pits.  To do this I mix some briar dust and thick CA glue.  I place some briar dust on an index card and add a small puddle of thick CA glue next to it.  I then draw briar dust into the CA glue with a tooth pick mixing it as I go. I continue to draw more briar dust into the CA until the mixture thickens to about the consistency of molasses.  I then apply the putty to fill the pits and tamp down, making sure the hole is filled with a bit of excess that will be sanded down when cured.  After filling the pits, I set the stummel aside for the patches to cure. Turning now to the stem, I wet sand using micromesh pads 1500 to 2400.  Following this with pads 3200 to 4000 and 6000 to 12000 I dry sand.  Between each set of 3 I apply Obsidian Oil to help revitalize the vulcanite. With several hours having passed, the briar dust putty patches are fully cured.  I first begin removing the excess putty using a flat needle file.  I file each patch mound to near the briar surface.  Then I switch to sanding with 240 grit paper bringing the patches flush with the surface.  I finish with 600 grit paper.  The pictures show the progress.Filing.240 grit paper. 600 grit paper.With the patches completed and sanded, I now switch to the entire bowl.  I’m anxious to see what the grain does after the micromesh process cleans, blends and buffs out the grain.  I wet sand using micromesh pads 1500 to 2400 and then dry sand with pads 3200 to 4000 and 6000 to 12000.  I like this process.  The pictures show the emerging complexion of the briar landscape. The grain is now able to be seen from underneath the acrylic candy apple finish with the micromesh process also teasing out the grain picture.  I like what I see.  The bird’s eye grain is distinct, but it’s joined with a lot of movement.  When I compare the reddish hue that I originally saw on eBay (picture below) to the natural grain presentation pictured above, hands down I choose the natural grain.  A decision is made – I decide not to color the stummel but to stay with the natural briar hue.With this decided, I will apply Before & After Restoration Balm to the stummel.  Before doing this, I use a dental probe and do a quick clean up of the twin grooves circling the bowl.  I then squeeze a bit of the Balm on my fingers and work it into the briar surface.  I set it aside for about 20 or so minutes while the Balm does its thing.  I like the B&A Restoration Balm because it deepens the rich natural tones of the briar.  I take a picture of the ‘absorbing’ phase.  I then wipe off the Balm with a clean cloth, buffing as I go. Next, using Before & After Fine and Extra Fine Polish, I apply each in succession to the stem.  I work each in with my fingers to further condition and polish the stem.  I wipe both polishes off with a cotton pad and then with a microfiber cloth.I rejoin stummel and stem and I’m thankful that the stem is clocked perfectly.  Usually, with time, the stem can begin to over-clock and not be true.  This stem is ready to go.  I then mount a cotton cloth buffing wheel to the Dremel and with it set at about 40% of full power, I apply Blue Diamond to both the stummel and the fancy stem.  After applying the compound, I wipe the pipe down with a felt cloth to remove leftover compound dust.  Then, after mounting another cotton cloth wheel to the Dremel, I apply a few coats of carnauba wax to the stem and stummel.  With both Blue Diamond and carnauba, I also work into the rusticated rim and curves of the fancy stem – both which are looking great.

I’m very pleased with the results of the Kaywoodie Prime Grain Bulldog.  I went with the natural grain hue rather than coloring the briar and I like the results.  The grain is very active with large, distinct bird’s eye grain populating the landscape.  I also like the horizontal grain running along part of the dome.  The fancy stem with the Kaywoodie ‘shamrock’ looks good.  Paul commissioned this Kaywoodie Prime Grain Bulldog which benefits the Daughters of Bulgaria and since he is the commissioner, he has the first opportunity to acquire the Bulldog from The Pipe Steward Store.  Thank you for joining me!


Restemming and Rebirthing a Landry 2013 Bent Ball


Blog by Steve Laug

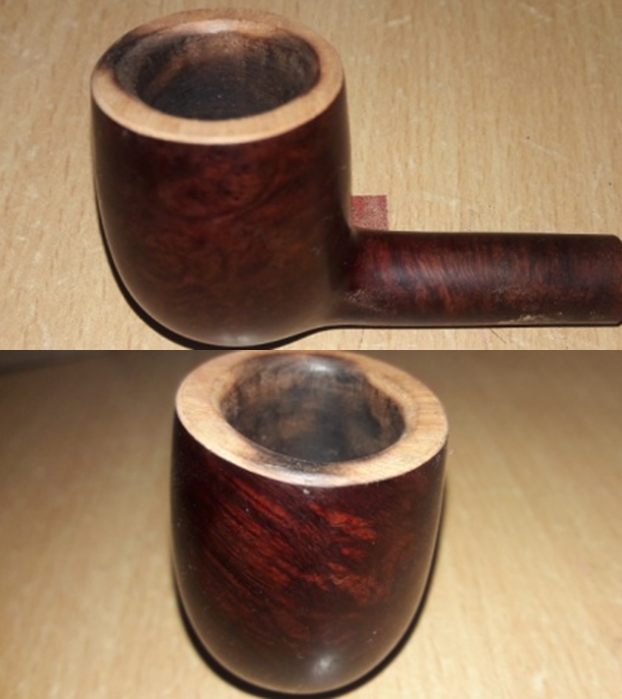
Last evening I had a fellow drop by the house with three pipes for repair. Two of them were not worth repairing – broken shanks and Chinese knockoff pipes. Neither was made of briar and one had the beginning of a large burn out on the back of the bowl. I discouraged the fellow from fixing either of those two as the cost of repair would be more than he paid when he purchased them. However the third one was interesting to me. It was a bent ball bowl without a stem. It was a real mess. He had broken the stem in half and lost it. The shank had also been broken but he was a bit of a wood worker and had clamped and glued it. He had done a decent job and the repair was solid. The bowl had a cake that was thick and soft – made from the heavily case aromatic that he smoked. The airway in the shank was clogged with tars and oils and I could not even blow through it. The rusticated finish was rugged and sharp with a smooth rim and shank band. The bowl and rim were very dirty and the briar looked lifeless. The shank flared at the stem/shank junction.

When I examined the pipe while he was there I found that it had a makers stamp on an oval smooth patch on the underside of the shank. It was clearly stamped LANDRY arched at the top of the oval. The year it was made, 2013 was in the middle of the oval and the letters U.I.O.G.D were arched at the bottom of the oval. When I asked the owner of the pipe what those letters were he said that I was some Latin phrase. When I examined it with a loupe I found that there were periods between the letters and that probably I was dealing with an acronym of some kind. I went with his notion of it being Latin, Googled the acronym and found that it stood for the five words making up the Benedictine motto: Ut In Omnibus Glorificetur Dei (translated from Latin it means: So that in all things God may be glorified). That made sense as he had been given the pipe by a Benedictine Priest a while ago when he had first started smoking a pipe and he had broken it after smoking it quite heavily.

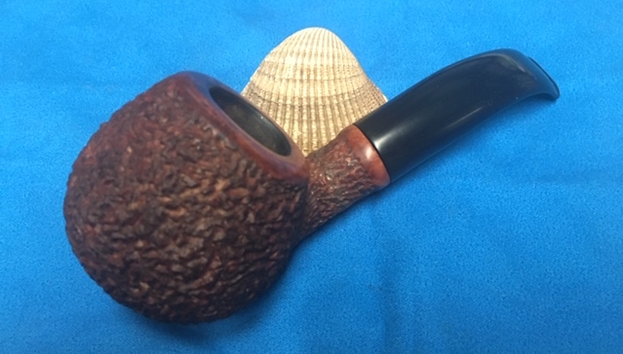
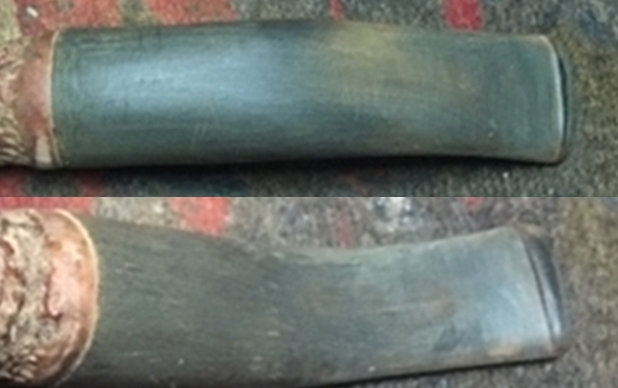
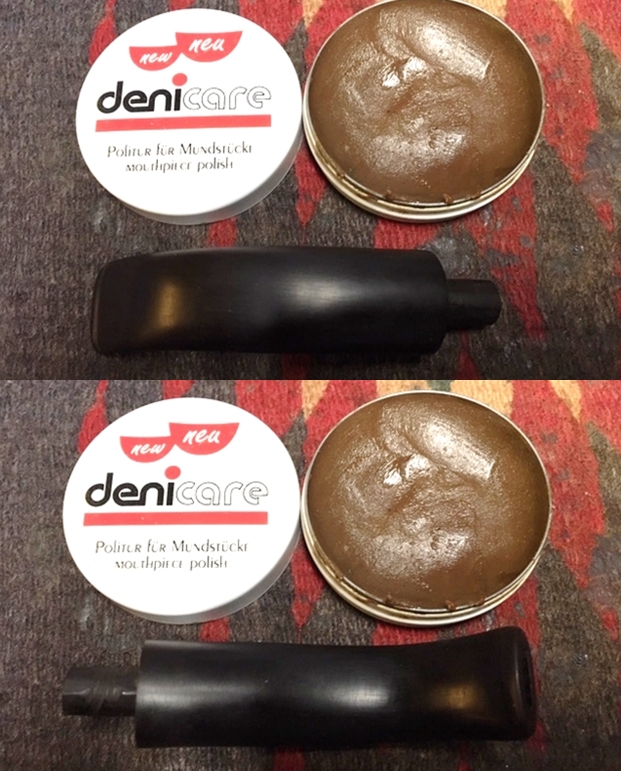
I took photos of the bowl before I started to work on it. You can see the repair on the shank. The rustication is very dirty and the rim top is coated with an overflow of lava from the bowl. The entire pipe reeked of a sweet cherry aromatic. The shank was heavily gummed up and I could not blow air through the shank into the bowl. It was clogged. The bowl also appeared to be drilled at an angle and from a quick glance seemed to be drilled crooked. The pipe was a mess! I took a photo of the oval and the stamping on the shank. You can also see the glue repair on the shank. It was a solid repair but a bit sloppy.There were some gaps in the glue around the circumference of the shank so I used a wire brush to clean up excess glue from the repair. I wanted to remove all of the excess glue so that it would look cleaner once I finished. I then filled in the gaps in the repair with clear super glue and filled in those areas with briar dust to build up the area ahead of the smooth band at the shank end.Restemming this old bowl would be a bit tricky. The shank actually flared to a smooth hip at the end where the stem sat. It was wider in diameter than the rusticated shank just below it. It was obvious from the way the shank end and mortise were made that it required a flush fit stem and not a freehand style stem. I would need to find a stem that had a wide enough diameter for me to work with and give the pipe the kind of look that it must have had originally. I went through my can of old stems and found one that was going to work. The tenon was almost perfect. I sanded it lightly with the sanding drum on the Dremel and cleaned it up with a file and the fit was just right. I would need to reduce the diameter of the stem slightly to match the shank but I think it was going to work for me. I took photos of the fit of the “new” stem to show you what I saw. Bear with me for the moment. It was quite ugly and my brother said it looked like a muffin top of a tight belt (or something like that). But I thought it had potential… time will tell. I trimmed the excess diameter of the stem with a sanding drum on my Dremel. I worked on it until the diameter was very close to the right size. I brought it back to the work table and sanded it smooth with a folded piece of 220 grit sandpaper to remove the scratches from the Dremel. I took photos of the stem and shank at this point. I wiped down the stem with Obsidian Oil to clean off the dust and get a sense of how it was looking. I sanded the band around the shank a bit too as it had some glue on it from the repair that had been done. I took photos of the pipe at this point in the process. I decided it was time to set the stem aside for a bit and work on the bowl. I took a photo of the bowl and rim to show what it looked like when I started. The bowl is thickly caked and there was damage to the inner edge of the rim. The lava overflow was quite thick on the rim top as well. I reamed the bowl with a PipNet pipe reamer. You can see the angle of the bowl from the way that the reamer is sitting in the second photo below. I cleaned up the reaming with a Savinelli Fitsall pipe knife and then sanded the walls of the bowl with sandpaper wrapped around a piece of dowel. With the bowl reamed I turned my attention to the dirty exterior of the bowl. I scrubbed it with a tooth brush and undiluted Murphy’s Oil Soap. I worked over the rim top with the tooth brush and a piece of sandpaper to remove the tars and lava there. I rinsed it off with running water to remove the soap and debris in the finish. Now it was time to address the thick tars and oils in the shank and open the airway into the bowl. I worked on the mortise and the airway in the shank with a paper clip, pipe cleaners, cotton swabs and alcohol. Once I had opened the airway I scrubbed it until it was clean. I also cleaned out the airway in the new stem with alcohol and pipe cleaners. It was not nearly as dirty as the shank.I polished the rim top and the smooth shank end with micromesh sanding pads – wet sanding with 1500-2400 grit pads and dry sanding with 3200-12000 grit pads. I wiped the polished areas with a damp cloth after each sanding pad. The rim and shank end began to really look good. I decided to stain the bowl and shank with some Medium Walnut Danish Oil. It has the translucence I wanted to let the natural colour of the briar shine through while allowing me to hide the repairs to the shank. I applied the stain with a cotton pad and daubed it deep into the grooves of the rustication. I kept applying it until the coverage was good. I waxed the bowl with several coats of  Conservator’s Wax and buffed it out with a horsehair shoe brush. The bowl and rim looked really good. I really liked the look of the bowl at this point in the process. The shine and the finish looked very good. I set the bowl aside and turned my attention to the new stem. I sanded it with 220 grit sandpaper to remove the oxidation and the scratch marks from fitting the stem. I wiped the stem down with Obsidian Oil to remove the sanding dust and get a feel for the scratching. I polished the stem with Denicare Mouthpiece Polish. I applied it with my finger and rubbed it in and then off with a cotton pad. I find that it is gritty enough to remove the residual oxidation after sanding (besides I have about three tins of the stuff to get through so I use it on each pipe).I polished the stem with micromesh sanding pads – wet sanding with 1500-2400 grit pads and dry sanding with 3200-12000 grit pads. I wiped the stem down with Obsidian Oil after each sanding pad. I finished polishing the stem with Before & After Pipe Polish – Fine and Extra Fine. I gave it a final coat of Obsidian Oil and set it aside to dry. I bent the stem with a heat gun to get it to follow the lines of the top of the bowl so that it can hang in the mouth with the bowl top straight. I polished the stem with Blue Diamond on the buffing wheel and gave it multiple coats of carnauba wax. I put it back on the shank and buffed the entire pipe with a clean buffing pad to raise the shine on the bowl. The heavy rustication works well with the stain I chose to use on it and the combination looks really good with the polished vulcanite stem. The flared shank end and the thick stem work well together to my mind to create an interesting pipe. The finished pipe is shown in the photos below. Its dimensions are – Length: 6 inches, Height: 2 inches, Outer diameter of the bowl: 1 ½ inches, Chamber diameter: 7/8 of an inch. I will give it another coat of Conservator’s Wax and then call the fellow who dropped it off for repair. I am hoping he likes the look of his pipe. Thanks for reading this blog.

New Life for another B.P. Jum War Club


Blog by Steve Laug

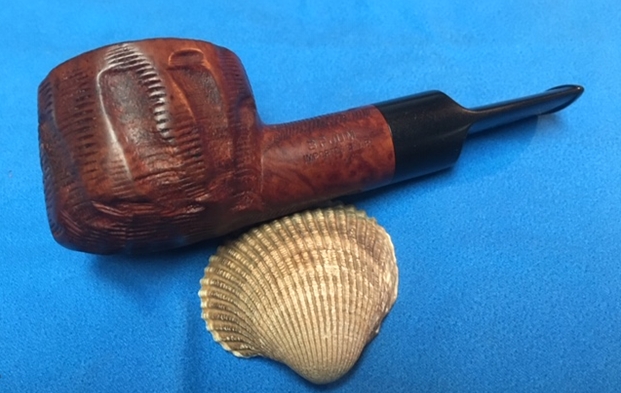
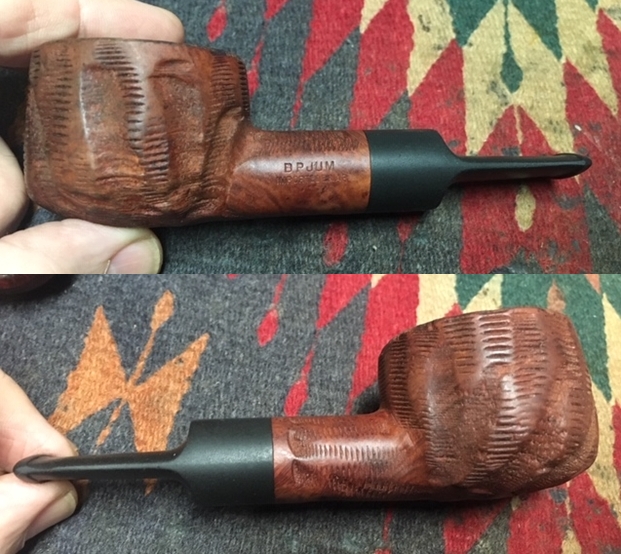
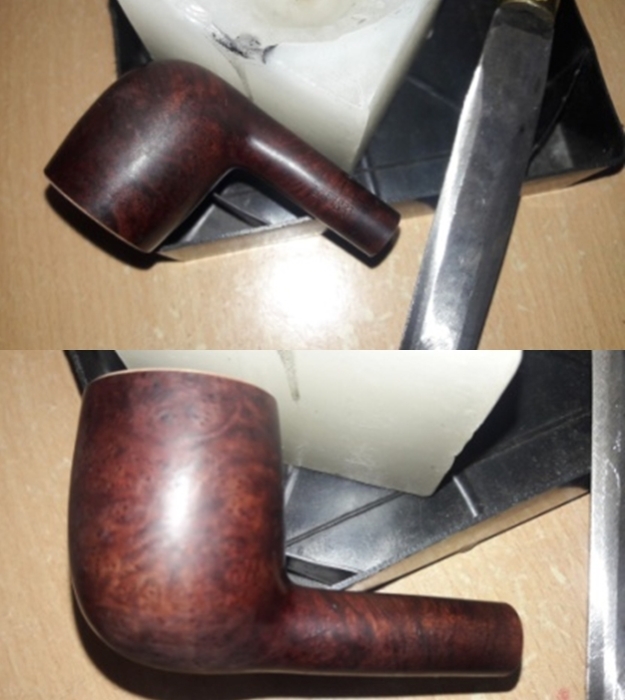
I was sorting through another one of the boxes of pipes that my brother Jeff sent me and found another B.P. Jum pipe. In a previous blog (https://rebornpipes.com/2018/06/02/breathing-new-life-into-a-b-p-jum-war-club/) I had restored one that was very similar. I had called it a war club because of the size and heft of the pipe. This B.P. Jum was also a large, hefty carved pipe. It too had the shape and a carved finish that was similar to the Custombilt pipes such as the ones that I have worked on lately. It is the same size as the previous Jum that I had worked on – 5 ½ inches long, 1 ½ inches tall, outside wall diameter 2 inches and the chamber diameter 1 inch. The shank diameter is 7/8 inches. The stem is 2 ¼ inches long. The briar was very dirty with grit and grime in the depths of the carvings. The rim top had a thick coat of lava and tars in the carving of the rim. There was a thick cake built up on the walls of the bowl. Interestingly this pipe did not have any visible fills that I have come to expect on the B.P. Jum line. The stem was oxidized and dirty and there were no tooth marks or chatter on either side of the stem. The internals of the both the airway in the stem and shank and the mortise were very dirty with tars and oils. Jeff took photos of the pipe before he started his cleanup work on it. Jeff took a photo of the rim top and inside of the bowl to show the condition. You can see the thick cake in the bowl and the heavy lava overflowing over the surface of the rim top. He also took a photo the underside of the bowl and shank. I have included it here as well.There was a smooth portion of briar on the underside of the shank that was stamped BP JUM over IMPORTED BRIAR. You can see that the pipe has some interesting grain even on the shank.He took photos of the stem to show the oxidation and calcification on the stem. Surprisingly there were no tooth marks or chatter on the surface.When I worked on the previous B.P. Jum I did some research to try to find out information on the brand. There was a lot of conjecture as to whether the brand was made by Tracy Mincer of Custombilt fame. There is no definitive proof other than the common shapes, sizes and look of the pipes. Bill Unger, of Custombilt fame and author of a history of the brand, mentions BP Jum but cannot definitively connect the two. So the maker remains a mystery that is still unsolved. Do any of you reading this have information on the brand? Send me a message or an email if you can help. Thanks ahead of time.

Jeff had reamed the bowl with a PipNet pipe reamer and followed up with a Savinelli Fitsall pipe knife to remove the cake. He scrubbed out the mortise and the airway in the shank and the stem with alcohol, cotton swabs and pipe cleaners. He scrubbed the exterior of the bowl, rim, shank and stem with a tooth brush and Murphy’s Oil Soap to remove the oils and tars on the bowl, rim and shank. He rinsed it under running water. He dried it off with a soft cloth. The lava mess on the rim was thoroughly removed without harming the finish underneath it. Without the grime the finish looked good. The inner edge of the bowl showed some burn damage and was out of round. The stem was actually in pretty good condition and would only need to be polished. I took photos of the pipe to show its condition before I started my work on it. I took close up photos of the rim top that shows the clean bowl and the burn damage around the inner edge of the bowl. The stem was clean and Jeff had used Before & After Deoxidizer to soak and remove much of the oxidation. He rinsed out the inside of the stem and rinsed off the exterior as well. The photos of the stem show how good the stem actually looked after this treatment.The BP JUM stamp is very clean and readable. You can see from the photo that there are no visible fills in the shank or the portion of the bowl showing. The rest of the bowl is clean in the same way – no fills in the briar. That is a first for the B.P. Jum pipes that I have worked on.There was a small nick in the edge of the rim that I filled in with clear super glue. Once the glue dried I scraped away the excess with a pen knife and then used a brass bristle wire brush to clean up the grooves in the rim.I used a folded piece of 220 grit sandpaper to smooth out the burn damage and nicks in the inner edge of the rim. I gave the inner edge a slight bevel to mask the damage.I rubbed the bowl down with Before & After Restoration Balm to deep clean the briar and particularly the sanded areas. The product works to clean, enliven and protect the briar. I hand rubbed it with my fingers and wiped it off with a soft cloth. I buffed the bowl with a horsehair shoe brush to polish it. The briar really began to have a rich shine. I took some photos of the bowl at this point to mark the progress in the restoration. I waxed the cleaned and polished bowl with Conservator’s Wax and worked it into the rusticated finish. I buffed it with a shoe brush and a soft cloth. The bowl is finished other than the final buffing that I will do once the stem is finished. I set the bowl aside and turned my attention to the stem. Since the stem was in such good condition and there was no oxidation or tooth marks I could immediately turn polishing it with micromesh sanding pads. I wet sanded it with 1500-2400 grit pads and dry sanded it with 3200-12000 grit pads. I wiped the stem down after each pad with a damp cloth to remove the sanding dust. I used the Before & After Pipe Polish to remove the small minute scratches left in the vulcanite. I finished by wiping the stem down with a final coat of Obsidian Oil and set it aside to dry. I polished the stem and bowl with Blue Diamond to polish out the remaining small scratches. I gave the bowl multiple coats of Conservator’s Wax and the stem several coats of carnauba wax and buffed the pipe with a clean buffing pad to raise the shine. I hand buffed it with a microfiber cloth to deepen the shine. The pipe polished up pretty nicely. The finished pipe is shown in the photos below. It is an interesting looking pipe that may have been carved by Tracy Mincer. It certainly bears a lot of resemblance to Custombilt/Custom-Bilt pipes. The dimensions are Length: 5 ½ inches, Height: 1 1/2 inches, Outside diameter of the bowl: 2 inches, Chamber diameter: 1 inch. I will be adding it to the rebornpipes store shortly. If you are interested in adding it to your collection email me at slaug@uniserve.com or send me a message on Facebook. Thanks for walking through the restoration with me as I worked over this B.P. Jum.

On the table – a Clipper High Class Briar Bent Churchwarden


Blog by Steve Laug

Over the past several years my brother Jeff has picked up some very interesting Churchwarden pipes. They have varied from classic shapes to Freehands. They have been anywhere from 7 to 10 inches long and have had straight, ¼, ½ and almost full bent stems. Each box he sends has at least one of these pipes – at least it seems so. In one of the recent boxes there was a beautiful little half bent Churchwarden. I have been keeping an eye out for one that I thought Paresh would like and this seemed like it was the one. When I showed it Paresh during one of our Whatsapp calls he fell in love with it and I added it to his box.

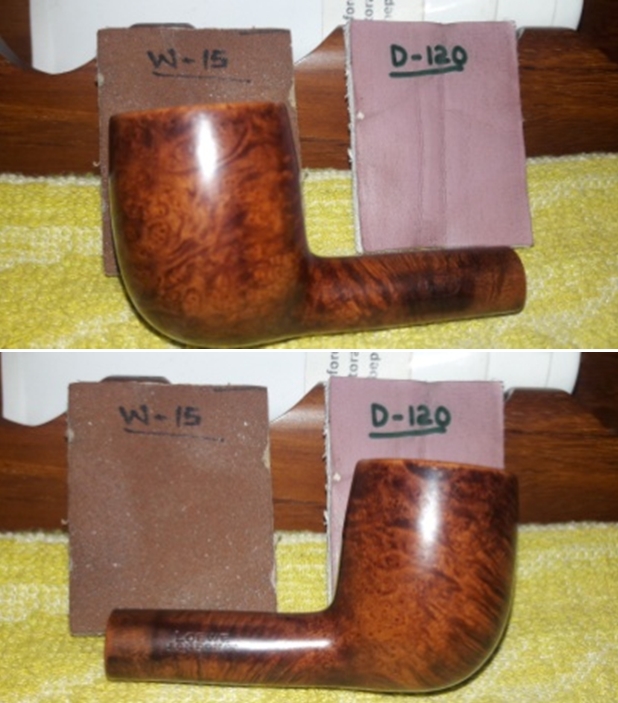
When Jeff received the pipe it was in pretty decent condition – dirty but really not too bad. The finish was dusty and dirty with grime worked into the lovely grain of the briar. The bowl had a moderate cake in it but the rim top was free of lava. The inner edge of the bowl was in great condition other than what appeared to be a small burned area toward to the front. That would not be clear until it was reamed. The rim top had some nicks and scratches as did the outer edge of the bowl. The left side of the shank was stamped Clipper over High Class Briar over IBERPIPSA. On the right side of the shank it had a square box with a pipe and puff of smoke as a logo. The underside at the stem/shank union it had the shape number 512. The stem did not seat in the shank due to the buildup of tars and oils. At the shank the stem had two vertical dots on the topside. The stem had some deep tooth marks on both sides at the button. It was oxidized but in decent condition. Jeff took these pictures of the pipe to show its condition before he started his cleanup work. He took close up photos of the rim top and the side and bottom of the bowl to show the condition of the briar and the bowl. You can see the cake in the bowl and the slight burn mark toward the front of the inner edge of the rim. You can also see the small nicks around the outer edge of the bowl. The finish is pretty but quite dirty. He took a photo of the stamping on the left, right and underside of the shank as well as the two vertical dots on the stem. The photos of the stem show the tooth chatter and marks on both sides of the stem near the button and the wear on the button itself.I did some research on the brand and found many different pipes that bore this stamping. They also seemed to have the name Swensson stamped on the shank as well. This link shows the same stamping with the addition of the Swensson name (https://en.todocoleccion.net/collectable-smoking-pipes/pipa-swensson-iberpipsa-car07~x111057347). Here is a second link that shows the box that the brand came in as well as a leaflet (https://en.todocoleccion.net/collectable-smoking-pipes/pipa-clipper-5740-iberpipsa~x33567017). I have included that photo for the information that it includes. There were other references to the brand with lots of photos of pipes in a variety of classic shapes. However there was nothing on either Pipedia or Pipephil that I could find. All of the examples of pipes bearing this brand that I saw were well made and showed beautiful grain.Armed with little bit of information that I could find it was time to start working on this pipe. Jeff had cleaned the pipe with his usual thoroughness – reaming the bowl with a PipNet pipe reamer and cleaning up the remnants with a Savinelli Fitsall Pipe Knife. He scrubbed the internals of the bowl, shank and stem with alcohol, cotton swabs and pipe cleaners. He scrubbed the exterior with Murphy’s Oil Soap to clean off the dust and grime on the finish. The rim top looked very good other than the small burned inner edge at the front of the bowl. The inside of the bowl itself looked great. The pipe had some beautiful grain all around the bowl and the cut of the briar maximized that. The stem was in great condition other than the oxidation and tooth marks on both sides near the button. I took photos of the pipe before I started working on it. I took some close up photos of the rim top, bowl and stem to show what they looked like after Jeff’s cleanup. The two different photos show the damage at the front inner edge of the rim from different angles. The stem was in good shape other than the tooth marks and chatter on both sides near the button.I took some photos of the stampings around the shank to give a picture of what they looked like after the cleanup. I worked on the damage to the front of  inner edge first. I used a folded piece of 220 grit sandpaper to smooth out the burned area and bevel the inner edge slightly to minimize the damage there. I polished the rim edges – both inner and outer with micromesh sanding pads – wet sanding with 1500-2400 and dry sanding with 3200-12000 grit pads. I worked on the nicked edges on the outside of the bowl to smooth them out. I polished the entire bowl avoiding the stamping with the pads. I wiped it down with a damp cloth after each sanding pad. You can see the progress in the photos below.  I worked some Before & After Restoration Balm into the smooth finish of the bowl and the rim top. I worked it into the surface of the briar with my fingertips to clean, enliven and protect the wood. Once the bowl was covered with the balm I let it sit for about 20 minutes and buffed it off with a soft cotton cloth and then polished it with a microfiber cloth. I took photos of the pipe at this point in the process to show what the bowl looked like at this point. I set the bowl aside and turned my attention to the stem. I decided to address the oxidation and the tooth marks on both sides of the stem ahead of the button. I sanded the tooth marks and chatter with 220 grit sandpaper and was able to remove them all. I sanded the stem surface with the 220 grit sandpaper and removed the majority of the oxidation. I polished the stem with Denicare Mouthpiece Polish to take out the oxidation at the button edge and on the end of the mouthpiece. I also worked hard to scrub it from the surface of the stem at the tenon end.I polished the stem, button and blade with micromesh sanding pads – wet sanding with 1500-2400 grit pads and dry sanding with 3200-12000 grit pads. I wiped the stem down after each sanding pad with Obsidian Oil. I polished it with Before & After Pipe Stem Polish – both Fine and Extra Fine. Once I had finished the polishing I gave it a final coat of oil and set it aside to dry. I put the bowl and stem back together. I buffed the bowl and stem with Blue Diamond to polish the briar and the vulcanite. I gave the bowl and the stem multiple coats of carnauba wax. I buffed the pipe with a clean buffing pad to raise the shine. I hand buffed it with a microfiber cloth to deepen the shine. The pipe polished up pretty nicely. The pipe turned out very well and shows the grain shining through. The contrast of the various grains – birdseye, flame and straight swirling around the bowl and shank looked good with the polished, long black vulcanite. This Churchwarden will soon be joining the other pipes I have boxed up for Paresh. The finished pipe is shown in the photos below. The dimensions of the pipe are Length: 10 inches, Height: 1 3/4 inches, Outside diameter of the bowl: 1 1/4 inches, Chamber diameter: 3/4 of an inch. I am looking forward to hearing what Paresh thinks of the pipe now. Thanks for reading this blog and my reflections on the pipe while I worked on it. Addendum: I posted on Facebook Tobacco Pipe Restorers Group and asked questions about the brand. I received this response from Sam Vior, a member there:      Iberpipsa: Iberica de Pipas, SA it was founded late 1980’s and made several lines: Swenson, Everest, Clipper, Brio, Coral, Commodore. In Spain.

That led me to a page on Pipedia (https://pipedia.org/wiki/Iberica_de_Pipas). I quote from that article in full.

“Founded in 1919, Iberica de Pipas is a company dedicated to the manufacture of pipes and gift items in wood. More than eighty years of presence in the market guarantee our products. Our accumulated experience has strengthened and allowed us to both continue making improvements and maintain the professional standards which our name inspires throughout the years.

In our effort to maintain client satisfaction, we offer an increased variety of quality products ranging from smoking to gift and home articles at an excellent price-quality relationship. Thanks to our professional standards and transparency, we can also manufacture any personally designed specialty items that our clients so desire. Contact us, we are eager to discuss how we can fulfil your needs.”

Brands (afak):

Sprucing up the first of my WDC; a Demuth Gold Dot #77 Bulldog


Blog by Paresh Deshpande

There a quite a few WDCs that I have inherited from my old man and the one on my table now is a “Demuth, Gold Dot”. I love the classic Bulldog and Rhodesian shape in pipes and am naturally attracted to pipes with this shape. Thus, no surprise here that I chose to work on this WDC Demuth Gold Dot in a classic Bulldog shape!!

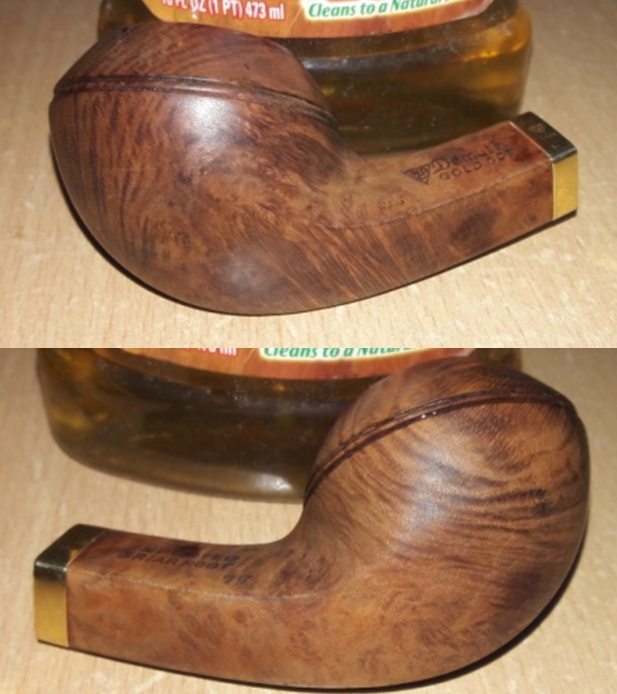
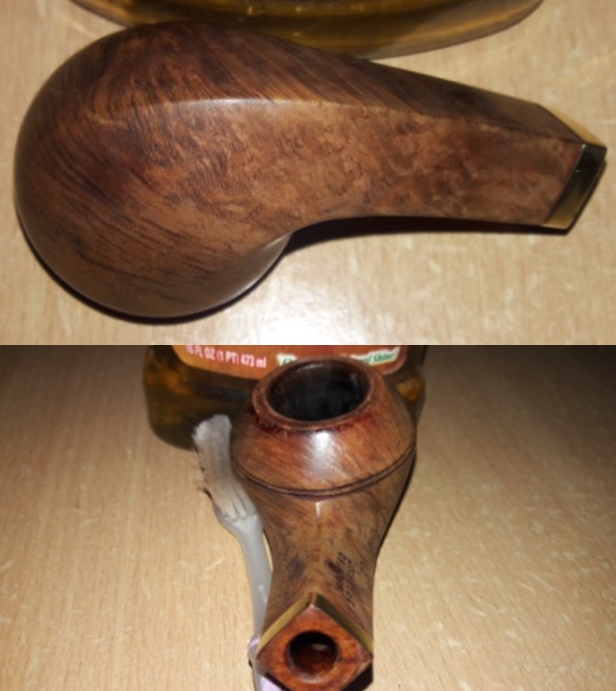
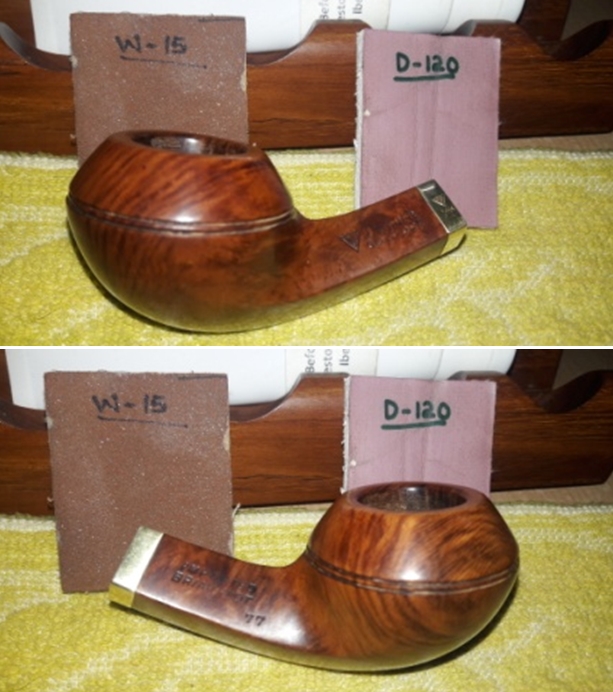
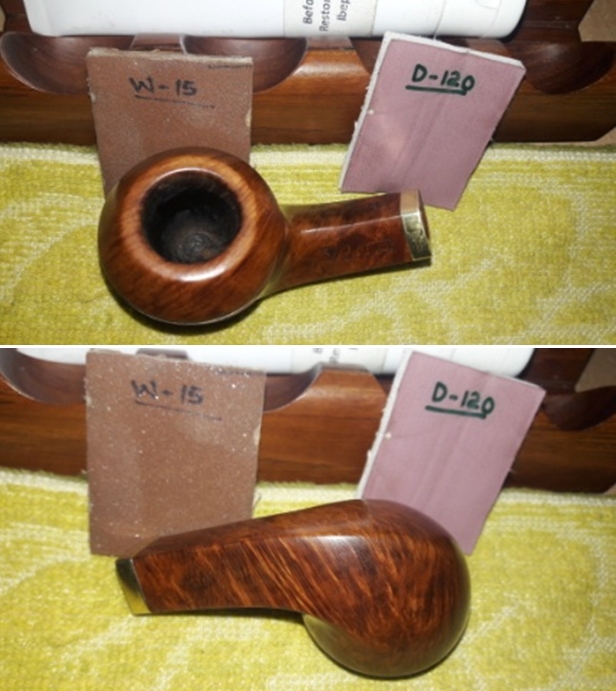
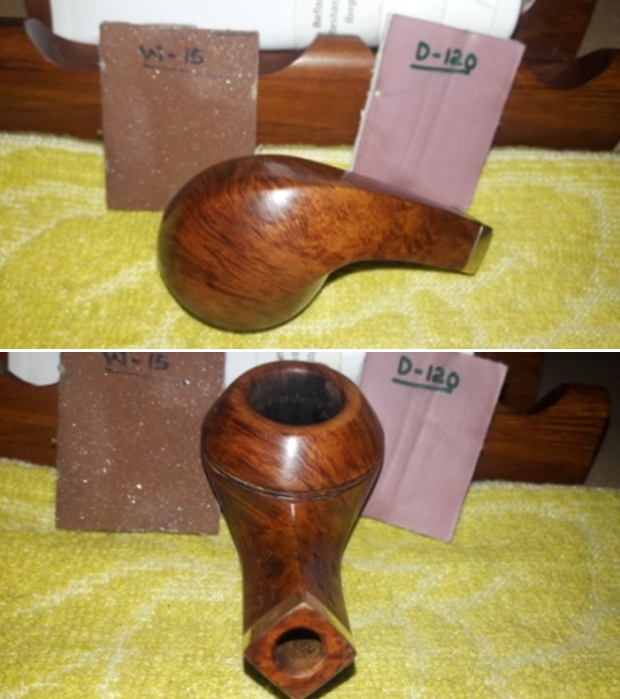
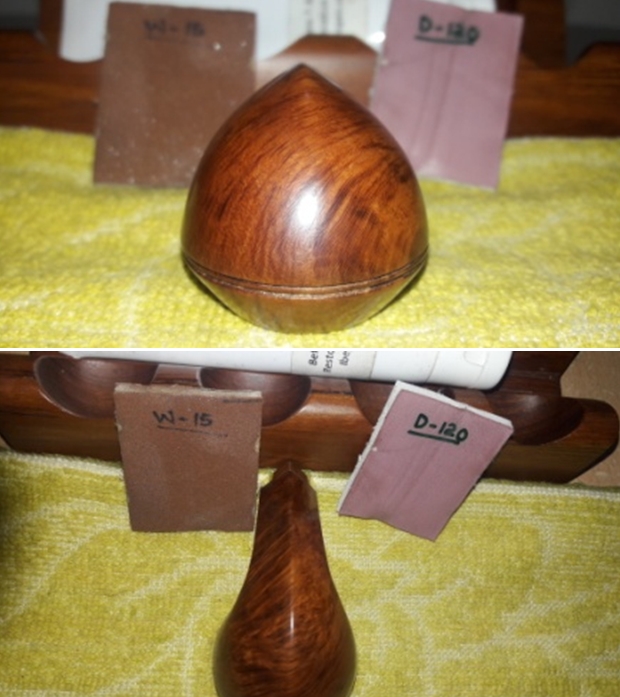
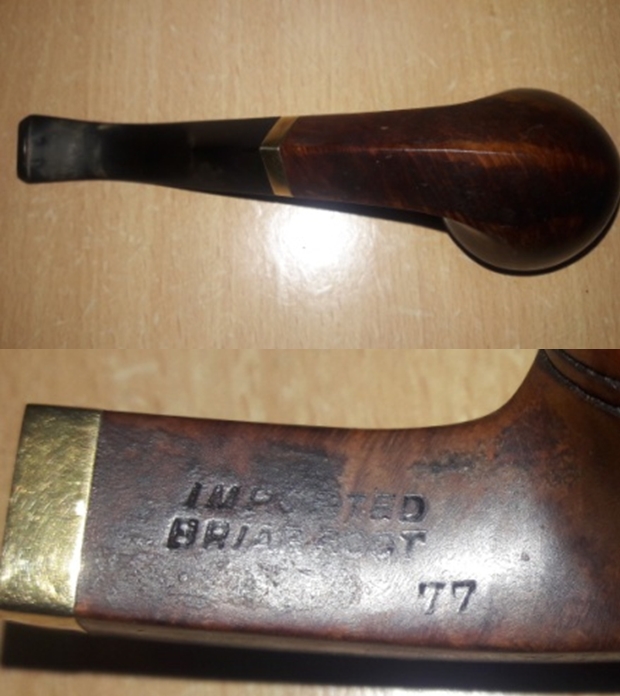
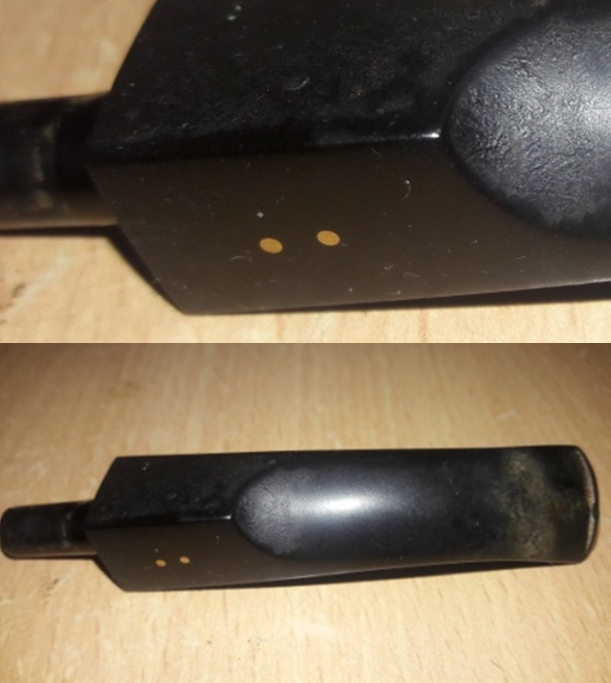
This is the first WDC from my grandfather’s collection, a smooth Gold Dot in an impressive Bulldog shape. The beautiful straight grain follow a circular pattern on the right and front of the bowl while linear pattern adorns the left side of the bowl and along the diamond shank, neatly divided by the spine on either side. The shank is stamped on the left with the trademark inverted equilateral triangle with letters “WDC” enclosed in it. This is followed by “Demuth” over “GOLD DOT” in block capital letters. On the right, the shank is stamped “IMPORTED” over “BRIAR ROOT” followed by the shape number “77” towards the bowl and shank joint. A half inch thick gold band adorns the shank end and is stamped on the left with the trademark WDC triangle over “14 K”, indicating the purity of the gold band. The ¾ bent saddle stem has two gold filled dots in the center of the saddle portion of the stem on the left side. I searched pipedia.com for more information on this pipe and attempt at estimating the vintage of this pipe. Here is what I have found on pipedia:-
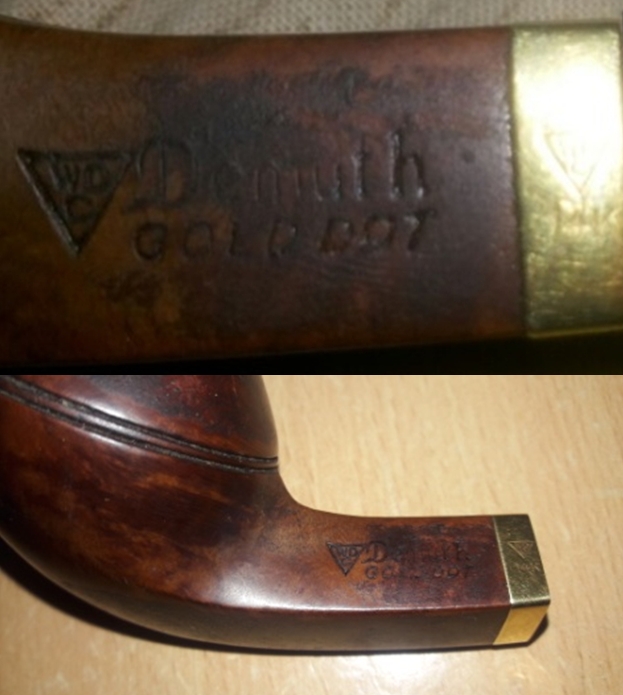
William Demuth. (Wilhelm C. Demuth, 1835-1911), a native of Germany, entered the United States at the age of 16 as a penniless immigrant. After a series of odd jobs he found work as a clerk in the import business of a tobacco tradesman in New York City. In 1862 William established his own company. The William Demuth Company specialized in pipes, smoker’s requisites, cigar-store figures, canes and other carved objects.

The Demuth Company is probably well known for the famous trademark, WDC in an inverted equilateral triangle. William commissioned the figurative meerschaum Presidential series, 29 precision-carved likenesses of John Adams, the second president of the United States (1797-1801) to Herbert Hoover, the 30th president (1929-1933), and “Columbus Landing in America,” a 32-inch-long centennial meerschaum masterpiece that took two years to complete and was exhibited at the World’s Columbian Exposition in Chicago in 1893.

The Presidential series was the result of Demuth’s friendship with President James A. Garfield, a connoisseur of meerschaum pipes. Demuth presented two pipes to Garfield at his inauguration in 1881, one in his likeness, the other in the likeness of the President’s wife. Later, Demuth arranged for another figurative matching the others to be added to the collection as each new president acceded to the White House, terminating with President Hoover.

In early 1937, the City of New York notified S.M. Frank & Co. of their intent to take by eminent domain, part of the land on which the companies pipe factory was located. This was being done to widen two of the adjacent streets. As a result of this, Frank entered into negotiations to purchase the Wm. Demuth Co.’s pipe factory in the Richmond Hill section of Queens. It was agreed upon that Demuth would become a subsidiary of S.M. Frank and all pipe production of the two companies would be moved to DeMuth factory. New Corporate offices were located at 133 Fifth Avenue, NYC.

Demuth pipes continued to be made at the Richmond Hill plant till December 31. 1972. Then the Wm. Demuth Company met its official end as a subsidiary company by liquidation.

I came across an interesting advertisement on the same page on pipedia.com which shows the exact same pipe that I am now working on. It is the same pipe as the first pipe on the left. A close scrutiny of the picture confirms the following:

(a) The Gold Dot line of WDC pipes was offered sometime before 1941 as inferred from the bottom line of this flyer which encourages readers to “WRITE FOR NEW 1941 STYLE BOOKLET”, implying that this flyer was published prior to 1941!!!!!

(b) The Gold Dot line of WDC pipes was at the time their top of the line product as it is the most expensive of all the pipes advertised in the flyer, retailing at $10!!!Pipephil.eu too has the same pipe shown with shape # 77. Here is the link; http://www.pipephil.eu/logos/en/logo-w1.html
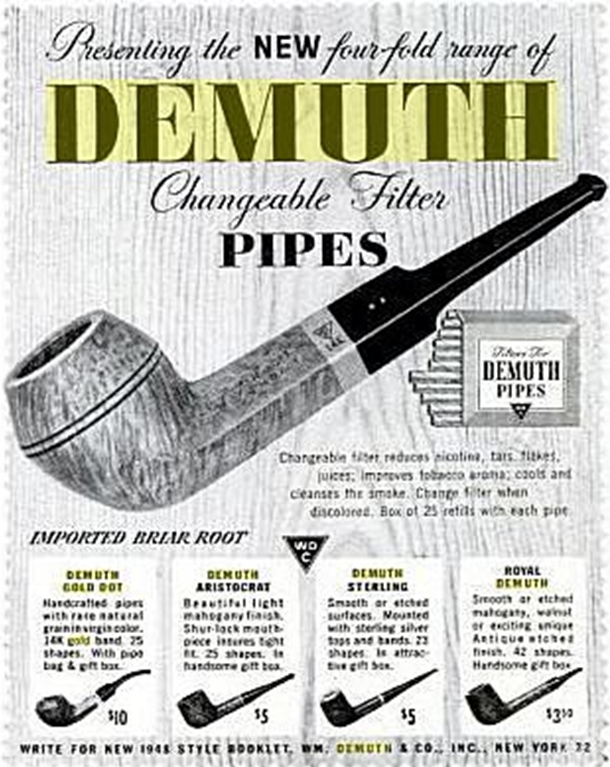
From the above gleaned information, it is safe to conclude that the pipe now on my worktable is of 1940s vintage and at that point in time was WDC’s top-of-the-line offering!!!!

INITIAL VISUAL INSPECTION
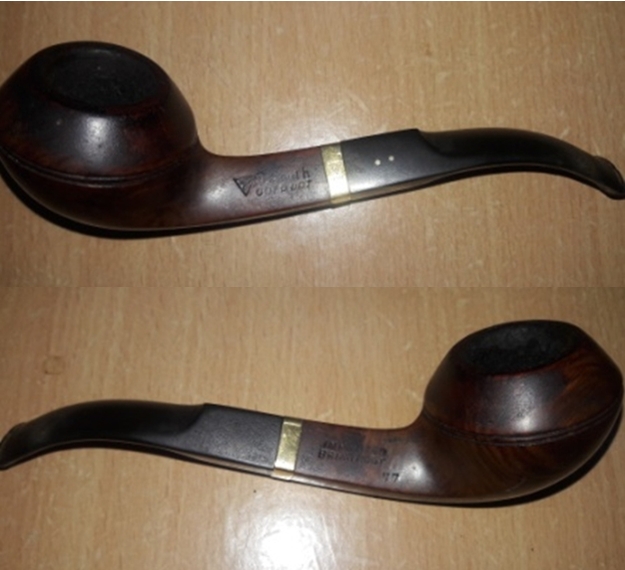
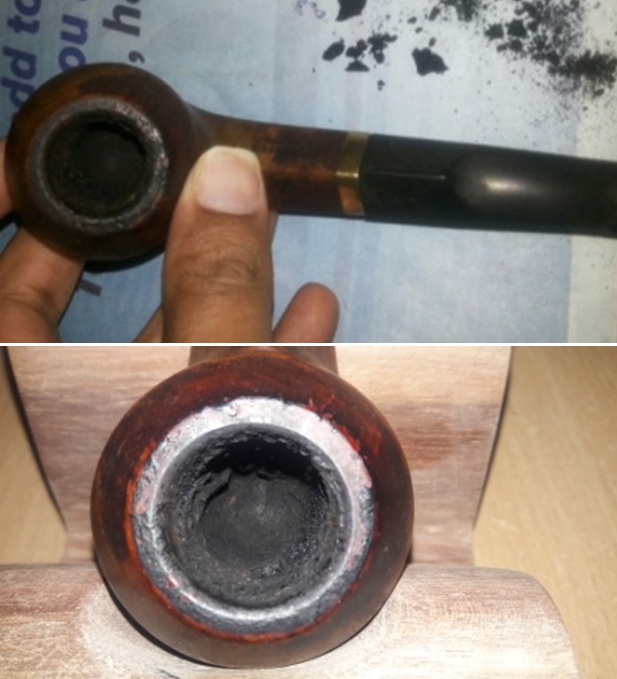
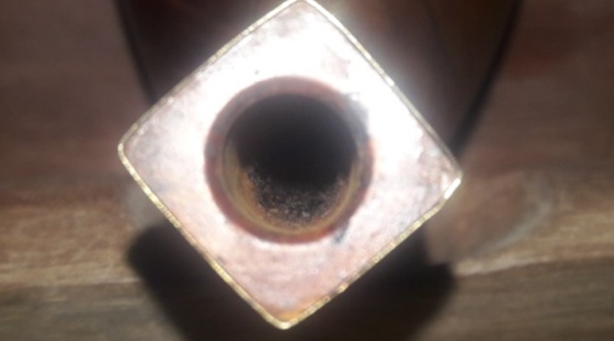
Age definitely shows on the stummel surface!!! The briar is dull and lifeless and has taken on a layer of aged patina, through which one can make out the beautiful straight grain patterns all around. There is a heavy overflow of lava all over the entire stummel surface. The bowl cap, bowl, shank and even the stem is covered in oils, tars and grime accumulated over the years of storage and is sticky to the touch. To be honest, the stummel is filthy to say the least. A thorough cleaning of the stummel followed by polish should accentuate the beautiful straight grain pattern seen on the stummel through all the dirt. The double ring that separates the cap from the rest of the bowl is even and undamaged; however, it is filled with dust, dirt and grime. The chamber exudes a strong, but not definitely unpleasant, smell. I hope that this will be addressed once the chamber has been reamed and internals of the shank and mortise is cleaned with isopropyl alcohol. There is heavy buildup of cake with a thick layer in the chamber. The buildup is such that I am barely able to squeeze my little finger in to the bowl. The condition of the inner walls of the chamber can be ascertained only after the cake has been removed completely and taken down to bare briar. The bowl however, feels robust and solid to the touch from the outside. The rim top has a thick layer of overflowing lava. The condition of the beveled inner and outer edge and rim top can be commented upon once the overflow of lava is removed and the chamber is reamed. The shank end of the pipe is clean. However, the mortise does show signs of accumulated dried oils, tars and remnants of ash, greatly restricting the air flow, or dare I say, completely restricting air flow. These issues should be a breeze to address, unless some hidden gremlins present themselves!! The vulcanite stem has deep tooth indentations and minor tooth chatter on the upper and lower surface. It is heavily oxidized and has traces of overflowing lava, dust, oils and tars on the saddle portion of the stem. The opening of the tenon is filled with dried oils and tars. The air flow through the stem is greatly restricted to say the least. The fit of the stem in to the mortise is very tight, which will loosen further after the mortise and tenon have been cleaned. The metal tenon has a slot like groove extending more than half way towards the stem end on either side; probably to securely seat the “changeable filter” as advertised in the flyer above (actually I was wondering the purpose of the metal tenon, which as it is, was new to me, with slots on either side. This doubt was cleared by the flyer!!). The overall condition of the pipe, with the thick build-up of cake in the chamber, clogged mortises and stem airway, overflowing of lava covering the entire stummel, makes me believe that this would have been one of my grandfather’s favorite pipes.
THE PROCESS
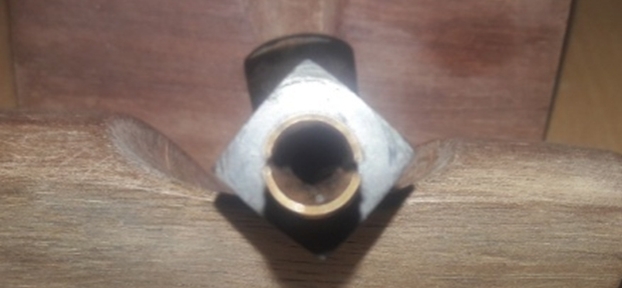
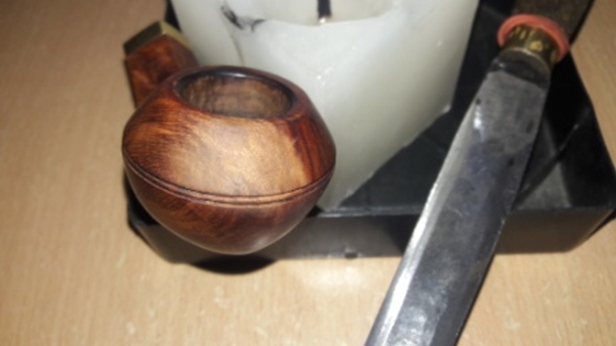
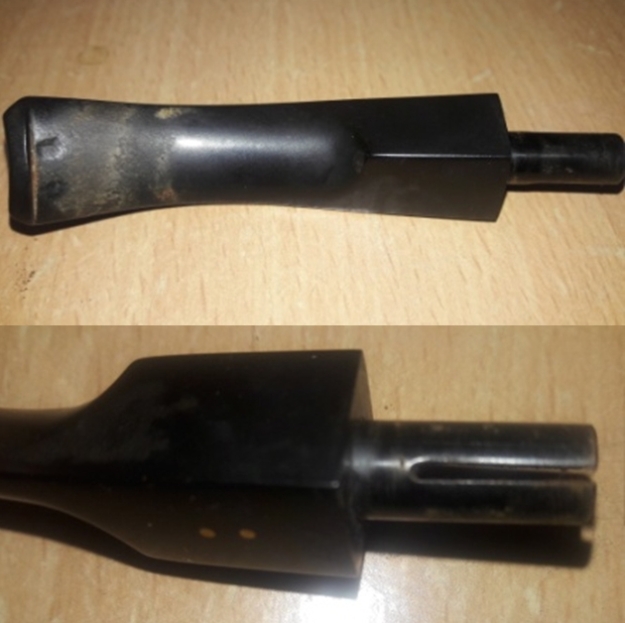
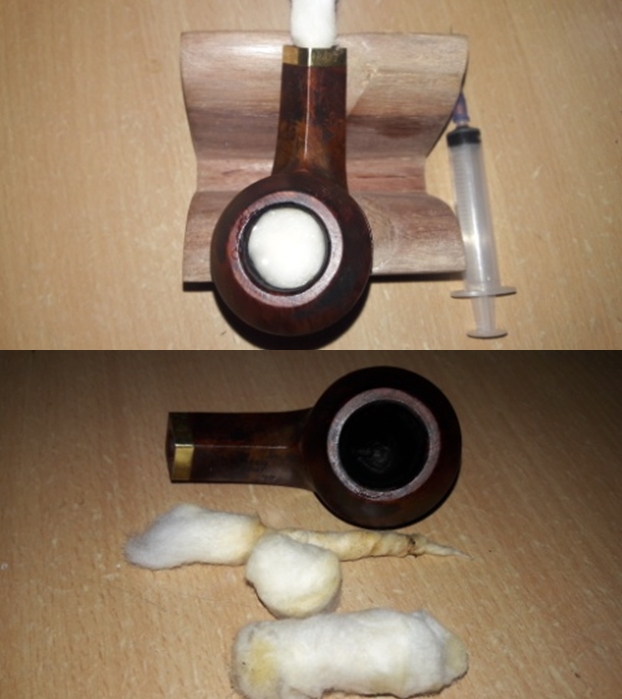
I started this project by reaming the chamber with size 2 and followed it up with size 3 head of PipNet reamer. I used a 220 grit sand paper, pinched between my thumb and forefinger, to sand the inner walls of the chamber of the pipe. Once I had reached the bare briar, I wiped the chamber with a cotton pad dipped in isopropyl alcohol. This removed all the residual carbon dust from the chamber. The walls of the chamber are nice and solid with no signs of heat fissures or cracks. I scrapped out the overflowing lava from the rim top with my fabricated knife. The inner and outer rim edges are pristine and that was a big relief.This was followed by cleaning the mortise and air way of the pipe using hard bristled and regular pipe cleaners, q-tips dipped in alcohol. The mortise and the draught hole were given a final clean with shank brushes dipped in alcohol. I dried the mortise with a rolled paper napkin. The shank internals and the draught hole are now nice and clean with an open and full draw. The gunk in the mortise had hardened to such an extent that I had to resort to using all the tools of the trade to get rid of the accumulated gunk, not to mention the time spent on cleaning it. The crud that was extracted from the mortise can be seen in the picture below. I had expected that the ghosting would be history by this stage. However, that was not to be the case. I had to resort to alcohol treatment to get rid of all the ghosting. I packed a few cotton balls in to the chamber. Drawing out a wick from one cotton ball, I inserted it in to the mortise of the pipe. Using a syringe, I topped the chamber with isopropyl alcohol and set it aside. Half hour later, I topped the chamber again with isopropyl alcohol as the level of alcohol had gone down from spreading inside the stummel. This process is usually done using Kosher salt as it leaves no aftertaste or smells. But here, in my part of the world, Kosher salts costs a huge bomb and from my personal experience, I have realized that cotton works equally well in drawing out all the oils and tars from the internals of the stummel exactly as Kosher salt does, but at a very economical cost. I set the stummel aside overnight to allow the alcohol to do its intended task. Next morning, I discard the wick and cotton balls from the stummel and wipe the bowl clean. Though the cotton balls and the cotton wick did not turn a dirty color as usual, the old smells were completely eliminated. While the stummel was soaking in the alcohol bath, I cleaned out the internals of the stem using hard bristled and regular pipe cleaners dipped in alcohol. Well, that sounds easier than actually done. From the amount of overflowing lava deposits on the stem, I had anticipated a difficult time in cleaning the stem internals. But what really confronted me was a nightmare of a time cleaning it. For starters, the pipe cleaners would not move an inch in to the airway from either ends!!! I soak the internals of the stem, after packing the slot with a pipe cleaner, by filling it with isopropyl alcohol using a syringe. This helped in loosening the hardened oils and tars in the air way. Thereafter began the tedious process of cleaning the stem internals with a straightened paper clip and scrubbing the aluminum tenon with the fabricated dental spatula. The blobs of accumulated gunk removed from the air way could not be photographed as my table and tray was cleaned out by my helper before I could take a few pictures!!!! After a great deal of struggle, time and lots of pipe cleaners, the air way is finally clean with an open draw.The deep bite marks on the stem were flamed using a Bic lighter. However, this did not work. From my experience, I have learnt that getting rid of the oxidation from and around the surface to be filled helps in subsequent better blending of the fill with the stem surface. With a folded piece of used 220 grit sand paper, I sand the area that is required to be filled. I cleaned the sanded portion of the stem with cotton pad dipped in alcohol and spot filled the damaged area with a mixture of activated charcoal and clear superglue. I set the stem aside for the fill to cure. Now, it was the turn of the stummel to get cleaned up. Using a hard bristled tooth brush dipped in undiluted Murphy’s oil soap, I very deliberately scrubbed the stummel, cleaning the surface thoroughly. I was very deliberate on the surface areas which were covered in overflowed lava over which dirt and grime had accumulated over the years. I rinsed the stummel under tap water, taking care that water does not enter the mortise or the chamber. I dried the stummel using cotton cloth and paper napkins. On close inspection, I observed a couple of dents and ding on the front portion of the crown. These would need to be addressed. Other than this, the stummel is now clean and devoid of any grime and dirt. It is really surprising that the rim top, inner bevel and edges and the stummel is in such pristine condition after so many years of storage and without a single fill. Speaks volumes about the quality of this line of pipes from WDC!! I addressed the dents and dings to the front portion of the crown by the steaming process. I heated my fabricated knife over a candle. I placed a soaked Turkish hand towel over the dents and placed the hot knife over the wet towel. The steam that was generated pulled the dents to the surface. The stummel is now without any blemishes.To further clean and highlight the grains, I sand the stummel with micromesh pads, wet sanding with 1500 to 2400 grit pads and dry sanding with 3200 to 12000 grit pads. I wiped the stummel after each wet pad with a moist cloth to remove the resulting dust. I rub a small quantity of “Before and After Restoration Balm” in to briar and let it rest for a few minutes. The balm almost immediately works its magic and the briar now has a nice vibrant appearance. I further buff it with a horse hair shoe brush. The pipe now looks lovely with beautiful grains showing off their beauty in all glory!! With the stummel nice and clean and attractive, I worked the stem of the “GOLD DOT” by sanding the fills with a flat heat needle to achieve a rough match with the surrounding stem surface. I sharpened the lip edges using a needle file and sand the entire stem with 220 followed by 400, 800 and 1000 grit sand paper to perfectly blend the filled surface with the rest of the stem surface. This helps to reduce the sanding marks left behind by the more abrasive 220 grit paper. By mere sanding itself, the minor tooth marks seen on stem surfaces were completely addressed. This process also eliminated the deep oxidation seen on the vulcanite stem. To bring a deep shine to the vulcanite stem, I went through the complete set of micromesh pads, wet sanding with 1500 to 2400 grit pads and dry sanding with 3200 to 12000 grit pads. I rubbed the stem down with Extra Virgin Olive oil after every three pads. I completed the restoration of the stummel by cleaning the grooves between the twin rings separating the crown from the rest of the stummel, of all the dust, grime and polishing compounds accumulated during the restoration process. Lucky me, there is no damage to the rings, which would have been a challenge to restore.To finish, I re-attach the stem with the stummel. I mount a cotton cloth buffing wheel on to my local machine which is similar to a Dremel.  I set the speed at about half of the full power and polished the entire pipe with White Diamond compound. I wiped/ buffed the pipe with a soft cotton cloth to clear it of any leftover compound dust. I then mounted another cotton cloth wheel on to the polishing machine and applied several coats of carnauba wax over the stummel and the stem. I finished the restoration by giving the pipe a rigorous hand buffing using a microfiber cloth to raise the shine further. The completed pipe, with the dark brown hues of the grains on the stummel contrasting with the shiny black stem, looks lovely, fresh and vibrant; the photographs speak for themselves. If only the pipe could tell some of my grand Old man’s stories and recount incidents witnessed while being smoked.…Cheers!! I am grateful to all the readers for their valuable time spent in reading this write up and joining me on this part of the journey in to the world of pipe restoration while I attempt to preserve a heritage and past memories of a part of me. 
Restoring a Classic British Billiard, “Loewe & Co.” Pipe


Blog by Paresh Deshpande

I was surprised to find a pipe in my old man’s collection which was nicely reamed, free of any overflowing lava, clean stummel and mortise and only light tooth chatter on either surfaces of the stem. As with many of his pipes, or dare I say a majority, this one too was a billiard. I have also observed that most of his British made pipes are classic billiard shaped (though a few of his Danish made pipes are also billiard shaped!!!!). Well, at first glance itself I had anticipated this pipe to a London made and Boy was I correct! The pipe that I am now working on is an enigmatic British brand “LOEWE & Co”.

The first thing that amazed me was how light weight this pipe felt in my hands! The second aspect that I noticed was the beautiful cross grains, interspersed with tight Bird’s eye grains on either side of the bowl, that cover the entire stummel. It is stamped on the left side of the shank as “L & Co” in an oval over “STANDARD” in capital letters. On the right side of the shank, it is stamped as “LOEWE” over “LONDON W”. The bottom of the shank is stamped “KENTON”. The vulcanite stem is surprisingly black and shining and bears the stamp “L & Co” in an oval. These stampings are crisp and clear. To be very honest, I had never ever heard of Loewe & Co brand of pipes before this. Even while surfing eBay and other sites, I had not come across this brand. Now that I have one, I wanted to know more about this brand and establish the vintage of this pipe, if possible. As usual, I visited rebornpipes.com and Lo and behold, there was a very similar sized and shaped pipe that Mr. Steve had researched and worked on in Feb 2017. The similarities were to the extent that the condition of the chamber, the damage to the rim top and the stem condition were identical and matched to a “T”. Even the stamping matched to a great extent, the only difference being that the pipe I am working on bears the “KENTON” shape name on shank bottom and “STANDARD” below the oval enclosed “L&Co” on the left side. Here is the link to the write up by Mr. Steve  https://rebornpipes.com/2017/02 /22/refreshing-a-tiny-lco-billiard/

INITIAL VISUAL INSPECTION
The briar has taken on a layer of aged patina, through which one can make out the beautiful cross grains all around interspersed with tightly packed Bird’s eye. There are a few minor dents and dings on the stummel surface, probably due to rubbing against other pipes while being stored for more that 40 years. However, there is not a single fill in the entire stummel, signifying very high quality of pipe for which Loewe pipes were famous. In all probability, I shall let these minor dents and dings remain and avoid the process of sanding the stummel with sand paper in order to preserve the beautiful patina. Maybe, micromesh polishing will address a few of these dents and scratches. There is a very thin and even layer of cake in the chamber. I do not envisage any damage to the inner walls of the chamber. The rim top has darkened due to a slight overflow of lava. There is significant damage to both the inner and outer edge of the rim in 1 o’clock direction in the form of being badly scorched, a result of frequent, continuous and prolonged exposure to the flames of a lighter. The bowl is completely out of round, both inside and from outside, due to this damage. In addressing this issue, though I absolutely hate it unfortunately, I would be losing some briar estate, a price I am willing to pay to resurrect this beauty. The shank end of the pipe is clean and so is the mortise. The draw is smooth, full and open. The vulcanite stem has minor tooth chatter on the upper and lower surface. Both upper and lower button has minor tooth chatter. Surprisingly, the stem has minimum oxidation and is an even black. The step tenon is also clean and sits snugly in to the mortise with all the right noises. The air way is clear and draw is easy and smooth.THE PROCESS
I reamed the bowl with size 2 head of the PipNet reamer and followed it up with my fabricated knife to clean up the chamber of the bowl. The bowl had already been reamed and there were only slight remnants of a cake in the bowl. I gently scrapped away the remnants of lava overflow from the rim top. I used a 220 grit sand paper, pinched between my thumb and forefinger, to sand the inner walls of the chamber of the pipe. Once I had reached the bare briar, I wiped the chamber with a cotton pad dipped in isopropyl alcohol. This removed all the residual carbon dust and also rid the chamber of all ghost smells. The walls of the chamber are nice and solid with no signs of heat fissures or cracks.I followed up the reaming process by cleaning the mortise and air way of the pipe using hard bristled and regular pipe cleaners, q-tips dipped in alcohol. The mortise and the draught hole were given a final clean with shank brushes dipped in alcohol. I dried the mortise with a rolled paper napkin. The shank internals and the draught hole are now nice and freshened up.I cleaned out the internals of the stem using hard bristled and regular pipe cleaners dipped in alcohol. The bite marks on the stem were flamed using a Bic lighter to raise it to the surface. I sand the stem with a folded piece of 220 grit sandpaper to remove the oxidation, tooth marks and chatter. A little bit of sanding smoothed out the damage to the buttons. I polished the stem with micromesh sanding pads – wet sanding with 1500-2400 grit pads and dry sanding with 3200-12000 grit pads. I rubbed the stem down with Extra Virgin Olive Oil after each set of three pads. I set the stem aside to dry. I highlighted the stamping on the stem with a whitener pen. Now, it was the turn of the stummel to get cleaned up. Using a hard bristled tooth brush dipped in undiluted Murphy’s oil soap, I very deliberately scrubbed the stummel, cleaning the surface thoroughly. I was not satisfied with the rim top had cleaned up. I used a Scotch Brite pad and further cleaned the rim top. I dried the stummel with a cotton cloth a paper napkin. At this stage of restoration, there was only one issue remaining to be addressed, that of the charred front rim and one which I did not want to address as I simply detest loosing briar!!!! But as is known in a battle field, sometimes amputation, though painful and traumatic to a soldier as well as the Surgeon, is the only way to save his life. Thus, with a heavy heart, I began the process of topping the rim to reduce the charred surface and bring the bowl back to round. I use a square piece of 220 grit sand paper and firmly hold it with my hand on my work table. I work the rim top on the sand paper in circular motion, frequently checking the progress as I wanted to keep the briar loss to a bare minimum necessity. Once I was satisfied that the charred surface has been reduced and the roundness of the bowl has been restored to the extent possible, I created an inner edge bevel by pinching a folded piece of 180 grid sand paper between my thumb and forefinger and moving along the inner edge with a constant pressure, to minimize the charring on the inner edge of the rim. Similarly, I created a slight bevel on the outer edge of the rim. Thereafter, I moved to the next stage of polishing and revitalizing the entire rim top and the stummel. Before proceeding on to polishing, I steam out all the minor dents and dings by heating my fabricated knife on a candle and placing it on a wet towel covering the dents. The generated steam pulls the dents to the surface. I even out the discoloration and stummel surface by polishing with micromesh pads, wet sanding with 1500 to 2400 grit pads and dry sanding with 3200 to 12000 grit pads. I wiped the stummel with a moist cloth after each wet pad to see the progress. I rub a small quantity of “Before and After Restoration Balm” in to briar and let it rest for a few minutes. I took some extra efforts to work the balm in to the hand carved rustications of the bowl. The balm almost immediately works its magic and the briar now has a nice vibrant appearance. I further buff it with a horse hair shoe brush. After I was through with the polishing and buffing, I realized that the rim top surface was a lighter shade than the rest of the stummel. I used a Chestnut and a Dark Brown stain pen to blend the colors to match the color of the rest of the bowl. The finish turned out to be darker than the stummel!!!! I wiped of excess stain with a pipe cleaner dipped in alcohol to achieve a perfect match. This also helped to further mask the darkened rim surface. I would buff it and blend it in better once the stain dried. To finish, I re-attach the stem with the stummel. I mount a cotton cloth buffing wheel on to my local machine which is similar to a Dremel. I set the speed at about half of the full power and applied White Diamond compound to each of the three pipes. I wiped/ buffed the pipe with a soft cotton cloth to clear it of any leftover compound dust. I then mounted another cotton cloth wheel on to the polishing machine and applied several coats of carnauba wax over the stummel and the stem. I finished the restoration by giving the pipe a rigorous hand buffing using a microfiber cloth to raise the shine further. The completed pipe, with the beautiful grains on the stummel contrasting with the shiny black stem, looks lovely, fresh and vibrant; the photographs speak for themselves. If only the pipe could tell some of my grand Old man’s stories and why was it so clean as compared to other pipes in his collection.…………… Cheers!!

Restoring Pipe #15 from Bob Kerr’s Estate – A Dunhill Root Briar 51021 Bent Billiard


Blog by Steve Laug

With this Dunhill Root Briar my ongoing work on Bob Kerr’s is taking a turn to the smooth finished pipes in the collection. This is the first of the smooth pipes in his Dunhill Collection. I am cleaning them for the family and moving them out into the hands of pipemen and women who will carry on the trust that began with Bob and in some pipes was carried on by Bob. In the collection along with the Dunhills are a good bevy of Petersons, some Comoy’s and Barlings as well as a lot of other pipes – a total of 125 pipes along with a box of parts. This is the largest estate that I have had the opportunity to work on. I put together a spread sheet of the pipes and stampings to create an invoice. I was taking on what would take me a fair amount of time to clean up. I could not pass up the opportunity to work on these pipes though. They were just too tempting.

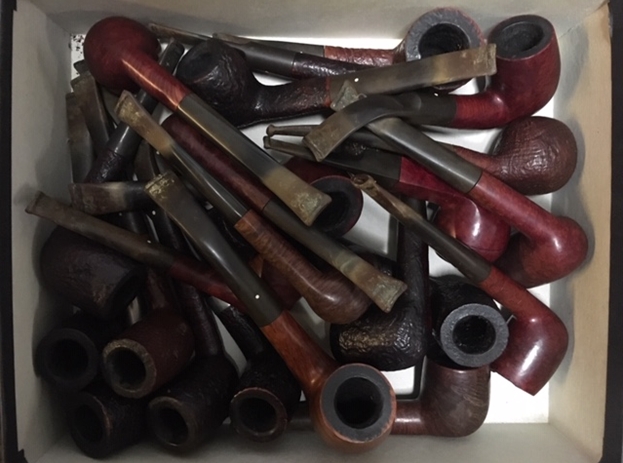
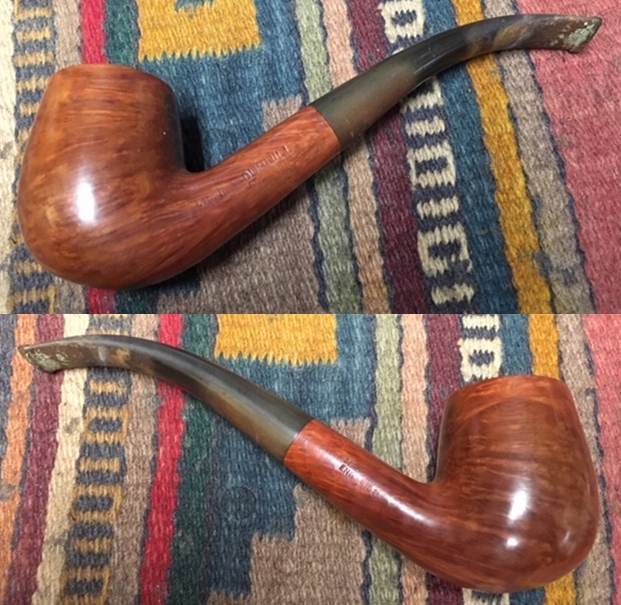
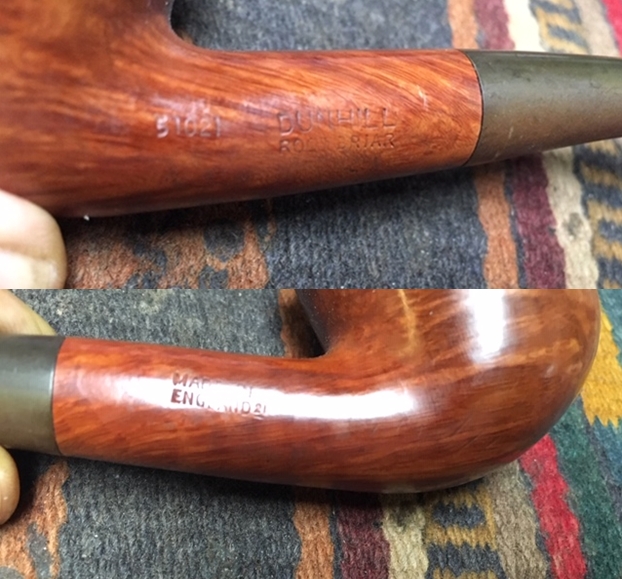
I sorted the pipes into groups of the various brands and had a box of 25 different Dunhill pipes in different shapes, styles and sizes. I decided to work on the Dunhills first. It was a great chance to see the shape variety up close and personal. The photo below shows the box of Dunhill pipes.With the completion of the restoration on this one there are only 11 more Dunhills of the original 25 left to work on – all smooth finished pipes in a variety of shapes. I went through the box of the remaining smooth Dunhills shown above and chose the 15th and first smooth finish pipe to work on – a smooth Root Briar Bent Billiard. It is stamped on the left side of the shank with the shape number 51021 followed by Dunhill over Root Briar. On the right side of the shank it is stamped Made in England 21 which tells me it is made in 1982. The 5 digit stamping gives a lot of pertinent information about the pipe. The first digit, 5 says that the size of the pipe is a Group 5. The second digit 1 identifies the pipe as having a tapered stem. The 02 identifies it as a bent pipe and the final 1 says it is a billiard. The bent round shank flows into a tapered stem that is oxidized and has tooth marks and chatter near the button. There is some calcification on the first inch of the stem ahead of the button and there is some light damage to the top of the button. The smooth Root Briar finish is dirty but like the other pipes in Bob’s collection there is something quite beautiful about the cross grain on the pipe. The bowl had a thick cake and thick lava overflow on the rim top. The bowl appears to be a little out of round with slight damage on the front inner edge of the rim. After cleaning I will know more. I took pictures of the pipe before I started working on it. I took some close up photos of the rim top and the stem to show what I was dealing with. This Root Briar Bent Billiard had some damage on the inner edge of the bowl toward the front as can be seen in the photo. The cake in the bowl was quite thick and the lava on the rim top was also thick. You can see the cake and tobacco in the bowl. The stem was dirty, oxidized, calcified and had a lot of tooth chatter on the top and underside for about an inch ahead of the button.I took a photo of the stamping on both sides of the shank. Part of the stamping was very sharp and readable and other parts were fainter and needed bright light.Since this is the 15th pipe from Bob’s estate I am sure you have read at least some of the other restoration work that has been done on the 14 previous pipes. You have also read what I have included about Bob Kerr, the pipeman who held these pipes in trust before I came to work on them. Also, if you have followed the blog for long you will already know that I like to include background information on the pipeman whose pipes I am restoring. For me, when I am working on an estate I really like to have a sense of the person who held the pipes in trust before I worked on them. It gives me another dimension of the restoration work. I asked Brian if he or his wife would like to write a brief biographical tribute to her father, Bob. His daughter worked on it and I received the following short write up on him and some pictures to go along with the words. Once again I thank you Brian and tell your wife thank you as well.

I am delighted to pass on these beloved pipes of my father’s. I hope each user gets many hours of contemplative pleasure as he did. I remember the aroma of tobacco in the rec room, as he put up his feet on his lazy boy. He’d be first at the paper then, no one could touch it before him. Maybe there would be a movie on with an actor smoking a pipe. He would have very definite opinions on whether the performer was a ‘real’ smoker or not, a distinction which I could never see but it would be very clear to him. He worked by day as a sales manager of a paper products company, a job he hated. What he longed for was the life of an artist, so on the weekends and sometimes mid-week evenings he would journey to his workshop and come out with wood sculptures, all of which he declared as crap but every one of them treasured by my sister and myself. Enjoy the pipes, and maybe a little of his creative spirit will enter you!

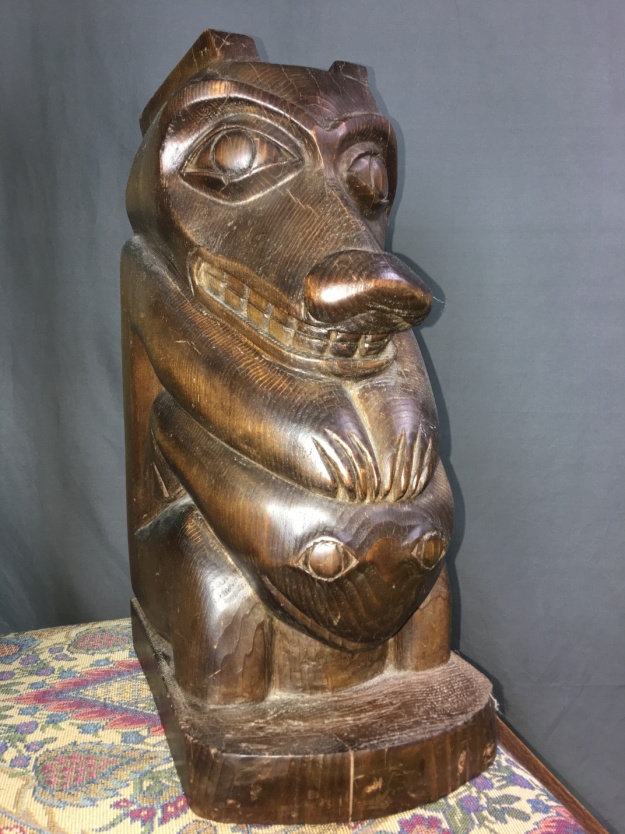
I have included one of Bob’s wood carvings to give you an idea of what he daughter wrote about above. You can see his artistry in the carving that is patterned after British Columbia’s Coastal First Nations people. To me this is a sea otter but perhaps a reader may enlighten us.

Having already worked on 15 other pipes from Bob’s estate I think I understood how he used and viewed his pipes. I am just starting my work on the smooth finished pipes with this Root Briar. I had learned to tell which pipes were his favoured ones and which were his work horses. He really loved his billiards. I could get a sense of the ones that accompanied him into his carving shop. I think this would have been one of his resting pipes – not a shop pipe. In many ways it was as if he was standing over my shoulder while I cleaned up his pipes.

With that in mind I turned to work on the 15th pipe. I reamed the bowl to remove the cake on the walls and the debris of tobacco shards that still remained. I used a PipNet pipe reamer to start the process. I followed that with a Savinelli Fitsall Pipe Knife to clean up the remaining cake in the conical bottom of the bowl. I sanded the bowl with 220 grit sandpaper wrapped around a piece of dowel. It smooths out the walls and also helps bring the inner edges back to round. I cleaned up the rim top and removed the thick lava coat in the rim. I used the Savinelli Fitsall knife to scrape away the high spots of lava and some worn 220 grit sandpaper and a 1500 grit micromesh pad to work on the rim top and remove the buildup there. I worked over the damaged inner edge of the rim with 220 grit sandpaper to bring the bowl back to round and remove the damage. I polished the rim top with micromesh sanding pads – wet sanding with 1500-2400 grit pads and dry sanding with 3200-12000 grit pads. Each successive pad brought more shine to the rim top. I wiped the rim down with a damp cotton pad after each sanding pad. I used an Oak coloured stain pen to blend the polished rim top into the rest of the briar. The oak colour was a perfect match for the colour of the bowl.I worked some Before & After Restoration Balm into the finish of the bowl and the rim top. I worked it into the surface with my fingertips to clean, enliven and protect the wood. I let the balm sit for about 20 minutes and buffed it off with a soft cotton cloth. I took photos of the pipe at this point in the process to show what the bowl looked like at this point. I scraped out the inside of the mortise with a dental spatula to break away the tarry buildup on the walls of the shank. (Sometimes I use a pen knife and sometimes a dental spatula depending on the diameter of the mortise.) I cleaned out the internals of the bowl, shank and the airway in the shank and the stem with alcohol, pipe cleaners and cotton swabs until they came out clean. It was very dirty in the shank and stem but now it not only looks clean but smells clean.  I set the bowl aside and turned my attention to the stem. I cleaned off the stem with a light sanding to remove the oxidation near the tooth marks. I filled in the deep tooth marks on the topside next to the button and the one on the underside as well with black super glue and set the stem aside so the glue could cure.When the repair had cured I used a needle file to redefine the sharp edge of the button and flatten out the patches. I sanded the repaired areas to blend them into the surface of the stem. I also sanded out the tooth marks and chatter on the surface of the vulcanite with a folded piece of 220 grit sandpaper. I followed the 220 grit sandpaper with 400 grit wet dry sandpaper to minimize the scratching. The two papers combined did a pretty decent job of getting rid of the tooth marks and chatter as well as the oxidation and calcification. I polished the stem with Denicare Mouthpiece Polish to take out the oxidation at the button edge and on the end of the mouthpiece. I also worked hard to scrub it from the surface of the stem at the tenon end.  I polished out the scratches with micromesh sanding pads – wet sanding with 1500-2400 grit pads and dry sanding with 3200-12000 grit pads. I wiped the stem down after each sanding pad with Obsidian Oil. I polished it with Before & After Pipe Stem Polish – both Fine and Extra Fine. Once I had finished the polishing I gave it a final coat of oil and set it aside to dry. I put the bowl and stem back together. I polished the bowl and stem with Blue Diamond to polish out the scratches in the briar and the vulcanite. I gave the bowl and the stem multiple coats of carnauba wax. I buffed the pipe with a clean buffing pad to raise the shine. I hand buffed it with a microfiber cloth to deepen the shine. The pipe polished up pretty nicely. The cross grain and birdseye grain that show up in the polished bowl looked good with the polished black vulcanite. This Dunhill Root Briar 51021 Bent Billiard will soon heading off to India to join Paresh’s rotation. It really has that classic Dunhill Bent Billiard look that catches the eye. The finished pipe is shown in the photos below. The dimensions of the pipe are Length: 6 1/2 inches, Height: 2 1/8 inches, Outside diameter of the bowl: 1 ¼ inches, Chamber diameter: 3/4 of an inch. This is the 15th Dunhill Briar from the many pipes that will be coming onto the work table from the estate. With this one I have begun my work on the smooth Dunhill Pipes. What will follow is 10 more smooth finished Dunhills – Root Briar, Bruyere etc. Thanks for reading this blog and my reflections on the pipe while I worked on it. I am having fun working on this estate.

Refurbishing my Inherited Large “Soren” Pickaxe Freehand


Blog by Paresh Deshpande

It’s been two months since I had worked on a free hand pipe that was made in Denmark, the last being a “Soren” sitter. The next pipe that I decided to work on from my grandfather’s collection is again a “SOREN”, but this pipe is a monster sized Pick Axe with a humongous bowl!!

The large pick axe stummel has a combination of smooth and rusticated surface covering the bowl. The cascading water flow like hand carved rustication extends from the front left side of the bowl to the back while the smooth surface covers most of the front and complete right side of the bowl. Beautiful swirls of grains can be seen on the smooth surface interspersed with flame grains extending upwards from half way of the front of the bowl. The plateau shank end is flared towards the shank end and boasts of lovely flame grains on the right side of the shank. The flared shank end bears the only stamping seen on this pipe. It is stamped as “Soren”, name of the carver in script hand over “HAND-CARVED” over “MADE IN DENMARK” in block capital letters. The fancy vulcanite stem is devoid of any stampings.

While working on my Soren sitter free hand, I had referred to pipedia.com for information on this famous pipe carver from Denmark. I reproduce the information available on pipedia.com for a quick read.

 “Søren Refbjerg Rasmussen founded a company in 1969, which employed an average of 8 – 12 craftsmen in the 1970’s. The semi-freehands they produced were traded under his prename Søren. Rasmussen himself finished only the very best pipes. So his way of pipemaking closely resembled the ways of Preben Holm, Karl Erik Ottendahl or Erik Nørding. Altogether more than 1,000,000 pipes were sold.

Today he works alone as Refbjerg and manufactures only a small number of pipes in his workshop in DK-2860 Søborg, which are considered to be tremendously precisely executed. The dimensions mostly range from small to medium sized, corresponding to his personal preferences. The shapes adhere to the classical models, but often he gives them a touch of Danish flair. Refbjerg accepts minor faults but never uses any fillings. “Straight Grain” is the only grading, used for his very best pieces. He likes stem decorations made of exotic woods or metal rings.

As Rainer Barbi once stated “Refbjerg uses only briar from Corsica and more than that, he’s the one and only to import it from there, at least in Europe. He’s supplier to the vast majority of the Danish makers”.

From the above, it can be safely assumed that this pipe was made in the 1970’s as it bears the stamp of the carver’s prename “Soren”!!

INITIAL VISUAL INSPECTION
There is a thick layer of cake in the bowl. The external surface of the stummel feels solid to the touch and I think there are no issues with the condition of the chamber. However, there are always surprises when you least expect them!!! I have learnt my lessons!!! Thus, condition of the inner walls of the chamber will be ascertained once the chamber has been reamed and the cake is taken back to the bare briar. There is a strong sweet smell of tobacco which may reduce once the cake has been reamed out and chamber has been cleaned with isopropyl alcohol.The plateau rim top and shank end is covered in the overflow of lava, dirt and grime. This will have to be cleaned. The condition of the inner edge will be determined only after removing the cake. The air way in the shank is clogged with oils and tars and will require a thorough cleaning. The stummel is covered in a thick layer of dust, dirt, oils and grime. The stummel looks dull and lackluster. The grains on the smooth surface and the sandblast rustications are all covered in tars, oils and grime. To be able to appreciate these grains and rustications, the stummel will have to be cleaned. However, there is not a single fill to be seen on this large briar estate. A few minor dents and dings are seen on the stummel surface, a result of uncared for storage over a prolonged period. This issue can be sorted out by sanding the stummel surface with a sand paper, followed by micromesh sanding and polishing. The fancy quarter bent vulcanite stem is heavily oxidized and two deep bite marks can be seen on the lower surface of the stem. The lips on both upper and lower surface show significant damage due to bite marks and are out of shape. I hope to address these issues by simple heating of the stem with the flame of a Bic lighter. The air way in the stem appears to be clogged and the air flow is laborious to say the least. This will be addressed by thorough internal stem cleaning with pipe cleaners and alcohol. There is calcification seen on either surface about an inch from the button end. The bottom of lip edge shows significant deposition of dirt and oxidation. This will have to be cleaned.THE PROCESS
I started this project by reaming the chamber with size 2 and followed it up to size 4 head of PipNet reamer. I used a 220 grit sand paper, pinched between my thumb and forefinger, to sand the inner walls of the chamber of the pipe. Once I had reached the bare briar, I wiped the chamber with a cotton pad dipped in isopropyl alcohol. This removed all the residual carbon dust but this time not the ghost smells. This cleaning revealed the first (and pray it to be the last!!) surprise. There are a few very thin webs of line seen along the front and left side of the chamber walls and one slightly larger gash on the left side. This gash is highlighted in a red circle. I shall address this issue at the end of the restoration by coating the walls with a mixture of activated charcoal and yogurt. This coating will aid in quicker formation of a fresh cake.I followed up the reaming by cleaning the mortise and air way of the pipe using hard bristled, regular pipe cleaners and q-tips dipped in alcohol. The mortise and the draught hole was so chock-a- block with all the dried tars, oils and gunk that I had to use my fabricated spatula to scrape out all the muck from the mortise and the draught hole!!!! I gave a final clean with shank brushes dipped in alcohol and dried the mortise with a rolled paper napkin. The shank internals and the draught hole are now nice and clean with an open and full draw. The issue of sweet smells of old tobacco was also reduced to a very large extent.I cleaned out the internals of the stem using hard bristled and regular pipe cleaners dipped in alcohol. I scraped the dried oils and tars from the tenon with the sharp edge of my fabricated dental spatula. The deep bite marks on the stem and lip edges were flamed with the flame of a Bic lighter.  This helps to raise the bite marks to the surface. However, this did not work. From my experience, I have learnt that getting rid of the oxidation from and around the surface to be filled helps in subsequent better blending of the fill with the stem surface. With a folded piece of used 150 grit sand paper, I sand the area that is required to be filled. I cleaned the sanded portion of the stem with cotton pad dipped in alcohol and spot filled the damaged area with a mixture of activated charcoal and clear superglue. I set the stem aside for the fill to cure. Now, it was the turn of the stummel of the pipe to get cleaned up. Using a hard bristled tooth brush dipped in undiluted Murphy’s oil soap, I very deliberately scrubbed the stummel, cleaning the surface thoroughly. Special attention was paid to scrub out all the dirt and dust from the crevices in the rustication on the sides and front of the stummel as well as the plateau rim top and shank end. I was surprised to note that while rinsing the pipe under tap water, the water ran a bright orange color. Residual orange color can be seen on the stummel, probably due to a coating of shellac!!! I do not like it and will have to get rid of it, period. The stummel, plateau shank end and rim top were dried using paper napkins and soft cotton cloth. The cleaning of the stummel revealed the second surprise!! There was a sticky and soft spot present in the rusticated portion on the stummel; this has been marked in a red circle below. When I scrubbed the stummel, it was revealed that this fill had gone soft. I dug out the old and soft fill with my fabricated sharp knife. The alignment of this fill roughly matched with that of the larger gash observed on the left side of the chamber wall. I discussed this issue with my guru, Mr. Steve, after he had seen the pictures of the damage. It was decided that the fill would be refreshed and the inner walls of the chamber should be coated with a layer of activated charcoal and yogurt. There were three other very minor fills; two on the shank end and one in the rusticated portion of the stummel at the back of the bowl. These have been circled in red. Before progressing ahead with any further restoration, I decided to address the issues of “fills” in the stummel!!!!! I completely removed the old fills using a sharp, pointed and thin fabricated knife. I press a little briar dust and realizing what a precious commodity it is, I was very careful not to waste even a microgram. I packed it in to the gouges on the stummel, pressing it tightly with the back of a toothpick and spot applied CA superglue over it with the pointed end of the toothpick. I spot filled the shank end fills with only CA superglue as they were not large and deep. With this, I set the stummel aside for the fresh fills to cure.After the fills had cured, I sand these fills using a flat head and a round needle file to achieve a rough match with the surrounding surface. With a folded piece of 180 grit sand paper, I sand the fills in the rusticated portion to match it with the worm trails in the rustication. I wiped the entire stummel with a cotton swab soaked in acetone to remove the coating of shellac, but without the expected results. The stummel still has that orange coloration. I further sand the entire smooth surface of the stummel with a piece of folded 150, 220, 440, 600 and 1000 grit sand paper to perfectly match the fills with the rest of the stummel surface and also to achieve my aim of completely removing the shellac coating, but the coloration still persists. Hopefully, remnants of the shellac coat will be addressed during the micromesh sanding and polishing process. This use of sand paper, however, addressed all issues of the dents and dings from the stummel surface!! I wanted to remove the coating of shellac while highlighting the grains seen on the smooth portion of the stummel. To achieve this aim, I sand down the stummel using micromesh pads, wet sanding with 1500 to 2400 grit pads and dry sanding with 3200 to 12000 grit pads. I wiped the stummel with a moist cloth to clean the surface of all the dust after wet sanding. The orange coloration on the stummel can be gauged by the color of my hand. I was still not happy with the results of the micromesh sanding. Using a dark brown stain pen, I darkened the worm trails in an attempt highlight and add contrast against the raised portions in the rustication. I was not satisfied with the way the pipe looked at this stage. It was still “loud” and appeared gaudy. I rub a small quantity of “Before and After Restoration Balm” in to the briar and let it rest for a few minutes. I took some extra efforts to work the balm in to the hand carved rustications on the bowl. I hand buffed it with a horse hair brush to a deep shine. I had assumed that this would help improve the look of the stummel. Alas!! That was not to be the result. The bowl still appeared ugly and definitely did not measure up to my standards. I was lost for ideas when I shared pictures of the stummel with my guru, Mr. Steve. This is what he saw. In his characteristic style, Mr. Steve suggested that “I would first get rid of the dark stain in the worm trails by wiping the entire stummel and then re-staining it”. This is exactly what I did. I wiped the stummel with a cotton swab dipped in isopropyl alcohol and removed all the stain. Mr. Steve had sent me sachets of easy-to-use stain powder which just needed to be mixed in isopropyl alcohol and applied to the stummel surface. I chose the Walnut stain. Since this was the first time that I would be using a stain, I was a bit apprehensive. I mixed a little quantity of the stain powder and mixed it with a little quantity of 99.9% pure isopropyl alcohol to a liquid consistency. I have purposely not mentioned any specific quantity of each as I had mixed the two just by relying on feel and visual confirmation. I was fortunate that I got the mix spot on in the first attempt. There is a lot of leeway in this process in that if the stain appears too dark after application, desired transparency could be achieved by wiping the stummel with a cotton swab dipped in alcohol!!!! I folded a pipe cleaner and evenly applied the stain over the complete stummel, plateau rim and shank end. This was followed by burning excess of alcohol with the flame of a Bic lighter. This also helps the stain to set on the stummel surface. Just a word of caution to all first timers like me, please wear either plastic or latex rubber gloves if you wish to avoid the struggle of removing the stains from your hands later!!! I wiped the stummel surface with a cotton swab dipped in isopropyl alcohol as the stain was slightly darker and unevenly applied than I would have liked. This helped in bringing more transparency and evenness in the stain application. Once the stain had set, I mount a cotton cloth buffing wheel on to my local machine which is similar to a Dremel.  I set the speed at about half of the full power and applied White Diamond compound to stummel of the pipe. I wiped/ buffed the pipe with another clean cotton cloth buffing wheel to clear it of any leftover compound dust. I then mounted another cotton cloth wheel on to the polishing machine and applied several coats of carnauba wax over the stummel. I finished by giving the stummel a rigorous hand buffing using a microfiber cloth to raise the shine further. The grains on the stummel now look beautiful and peek through the stain. I shared the pictures of the stummel with Mr. Steve who appreciated the look of the stummel at this stage. With the stummel nice and clean and attractive, I worked the stem of the pipe. The fill on the stem had cured nicely and I sand it down with a flat head needle file. I sharpened the lip edges using a needle file and sand the entire stem with 220 followed by 400, 800 and 1000 grit sand paper. This helps to reduce the sanding marks left behind by the more abrasive 220 grit paper, while this process eliminated the deep oxidation seen on the vulcanite stem of the pipe. To bring a deep shine to the vulcanite stem, I went through the complete set of micromesh pads, wet sanding with 1500 to 2400 grit pads and dry sanding with 3200 to 12000 grit pads. I wiped the stem with alcohol after each pad and rubbed it down with Extra Virgin Olive oil. The internals of the stem was cleaned out using alcohol and pipe cleaners. The pictures of the process and final results are shown below. The only issue remaining to be addressed, before I could proceed with the final polish, was the deeper gash seen in the walls of the chamber. I mixed activated charcoal and yogurt to a consistency which would enable an even spread and applied it on the inner walls of the chamber and set it aside to cure it overnight.To finish, I re-attach the stem with the stummel. I mount a cotton cloth buffing wheel on to my local machine which is similar to a Dremel. I set the speed at about half of the full power and applied White Diamond compound to stummel of the pipe. I wiped/ buffed the pipe with a soft cotton cloth to clear it of any leftover compound dust. I then mounted another cotton cloth wheel on to the polishing machine and applied several coats of carnauba wax over the stummel and the stem. I finished the restoration by giving the pipe a rigorous hand buffing using a microfiber cloth to raise the shine further. The completed pipe, with the dark brown hues of the stummel contrasting with the shiny black stem, looks lovely, fresh and vibrant; the photographs speak for themselves. The beauty, size and shape of this pipe make it one of my favorite and will find a place of pride in my modest collection. If only the pipe could tell some of the stories and incidents that it has witnessed while my grand old man puffed away.…………… Cheers!!! PS: The oversized and shape of the stummel coupled with an equally proportionately long stem, posed a challenge while taking pictures of the complete finished pipe!!!! This is one of the many areas where I need to make a lot of progress. If I am unable to capture the beauty of the finished pipe and present it in an attractive manner, I feel my efforts are in vain.
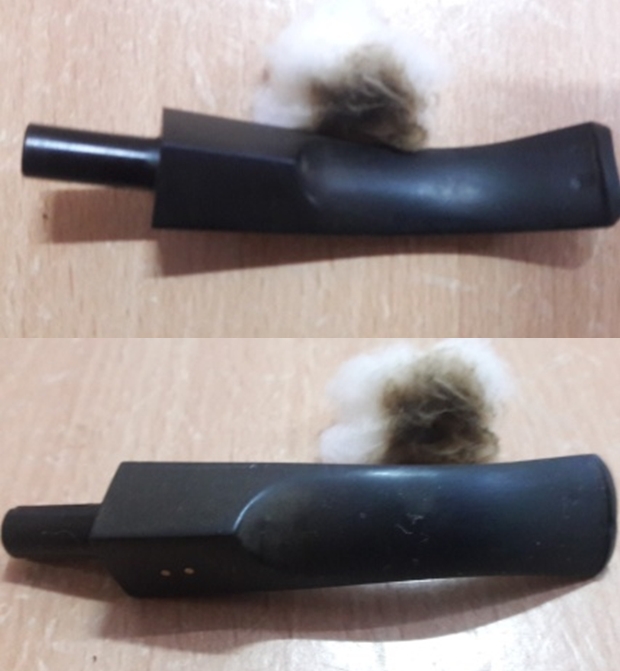
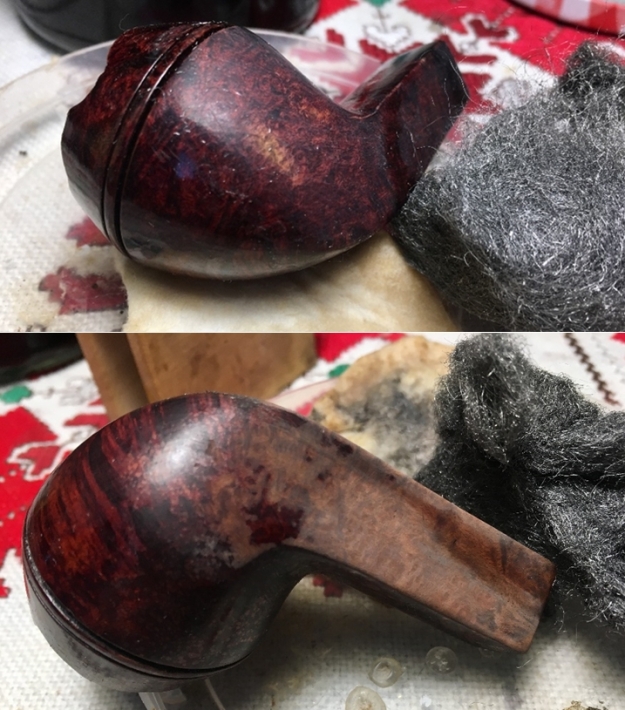
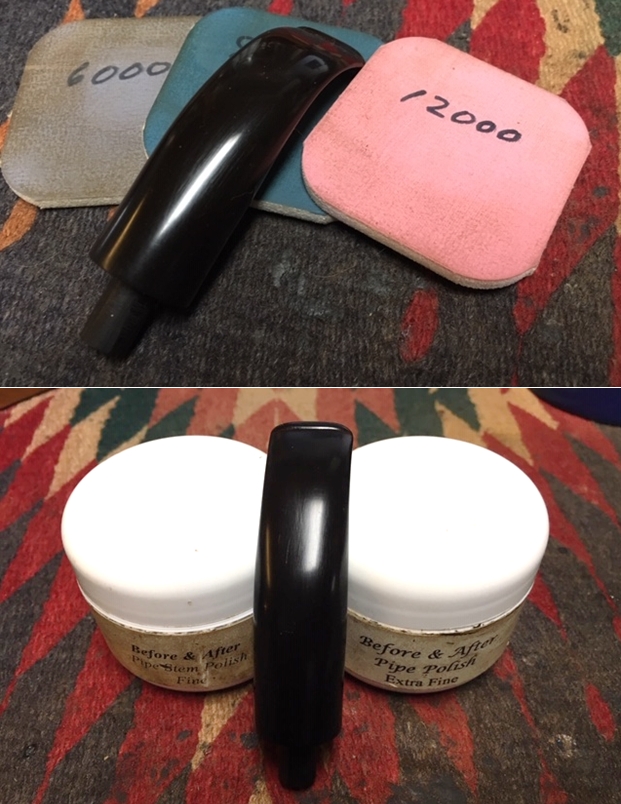
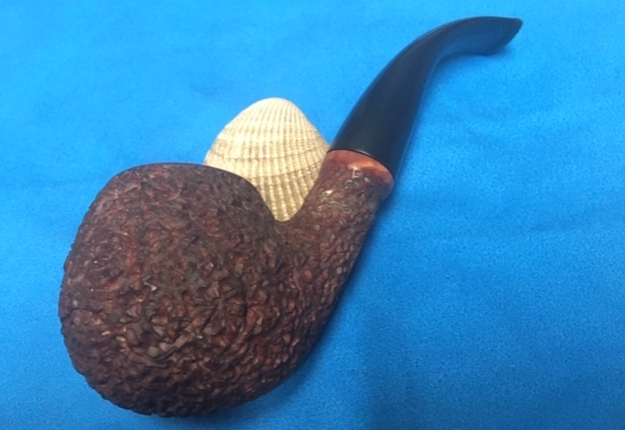
 

A Fresh Lease on Life For a Tired Looking “Count”!


Blog by Paresh Deshpande

A few months back I had restored two Kriswill pipes from my grandfather’s collection; a “CHIEF” and a “GOLDEN CLIPPER”. Both these pipes were a big challenge to restore and took considerable time and effort. However, the end results on both these pipes were highly satisfying!! To those interested in reading the write up on both these pipes, here are the links; https://rebornpipes.com/2018/08/04/breathing-new-life-into-a-kriswill-chief-20/

https://rebornpipes.com/2018/08/11/restoring-a-kriswill-golden-clipper/

This is the third Kriswill from my grandfather’s collection, a sandblasted KRISWILL “COUNT” in an impressive Oom Paul shape. The sandblast follows the beautiful grain pattern on the stummel surface and on the steeply raking shank, save for the smooth portion on the left side of the shank which bears the only stamping visible on the pipe and is stamped as “KRISWILL” over “COUNT” over “HANDMADE IN DENMARK”. This smooth surface extends to the shank end and forms a smooth ring all around. When polished and revitalized, this ring will contrast beautifully against the glossy black of the vulcanite stem. The full bent vulcanite stem is devoid of any stamping.

While working on the Kriswill Chief and Golden Clipper, I had researched the brand and detailed information can be referred to on the links provided above.

INITIAL VISUAL INSPECTION
Age definitely shows on the stummel surface!!! The briar is dull and lifeless and has taken on a layer of aged patina, through which one can make out the beautiful sandblast patterns all around which follow the grains. There is a slight overflow of lava on to the stummel surface. A thorough cleaning of the stummel followed by polish will accentuate the sandblast pattern on the stummel. There is an uneven buildup of cake in the chamber with a thicker layer seen at the bottom half of the chamber. The condition of the inner walls of the chamber can be ascertained only after the cake has been removed completely and taken down to bare briar. The bowl feels robust and solid to the touch from the outside. This issue should be a breeze to address.The rim top has darkened on the due to a slight overflow of lava. This can be seen in pictures above. The condition of the inner and outer edge and rim top is pristine. The shank end of the pipe is clean. However, the mortise does show signs of accumulated dried oils, tars and remnants of ash, greatly restricting the air flow.The vulcanite stem has tooth indentations and minor tooth chatter on the upper and lower surface. It is heavily oxidized. The air flow through the stems is laborious to say the least. The fit of the stem in to the mortise is very loose, which will loosen further after the mortise and tenon have been cleaned. These issues will need to be addressed.THE PROCESS
I started this project by reaming the chamber with size 2 and followed it up with size 3 head of PipNet reamer. I used a 220 grit sand paper, pinched between my thumb and forefinger, to sand the inner walls of the chamber of the pipe. Once I had reached the bare briar, I wiped the chamber with a cotton pad dipped in isopropyl alcohol. This removed all the residual carbon dust and also rid the chamber of all ghost smells. The walls of the chamber are nice and solid with no signs of heat fissures or cracks. I followed up the reaming by cleaning the mortise and air way of the pipe using hard bristled and regular pipe cleaners, q-tips dipped in alcohol. The mortise and the draught hole were given a final clean with shank brushes dipped in alcohol. I dried the mortise with a rolled paper napkin. The shank internals and the draught hole are now nice and clean with an open and full draw.I cleaned out the internals of the stem using hard bristled and regular pipe cleaners dipped in alcohol. I scraped the dried oils and tars from the tenon with the sharp edge of my fabricated dental spatula. The deep bite marks on the stem were flamed using a Bic lighter. However, this did not work. From my experience, I have learnt that getting rid of the oxidation from and around the surface to be filled helps in subsequent better blending of the fill with the stem surface. With a folded piece of used 150 grit sand paper, I sand the area that is required to be filled. I cleaned the sanded portion of the stem with cotton pad dipped in alcohol and spot filled the damaged area with a mixture of activated charcoal and clear superglue. I set the stem aside for the fill to cure.Now, it was the turn of the stummel to get cleaned up. Using a hard bristled tooth brush dipped in undiluted Murphy’s oil soap, I very deliberately scrubbed the stummel, cleaning the surface thoroughly. Special attention was paid to scrub out all the dirt and dust from the crevices in the sandblast on the stummel and shank. I cleaned the plateau rim and shank end too. The stummel, plateau shank end and rim top were dried using paper napkins and soft cotton cloth. I rub a small quantity of “Before and After Restoration Balm” in to briar and let it rest for a few minutes. I took some extra efforts to work the balm in to the sandblast finish of the bowl. The balm almost immediately works its magic and the briar now has a nice vibrant appearance. I further buff it with a horse hair shoe brush. With the stummel nice and clean and attractive, I worked the stem of the “COUNT”. I sharpened the lip edges using a needle file and sand the entire stem with 220 followed by 400, 800 and 1000 grit sand paper. This helps to reduce the sanding marks left behind by the more abrasive 220 grit paper. By mere sanding itself, the minor tooth marks seen on stem surfaces were completely addressed. This process also eliminated the deep oxidation seen on the vulcanite stem. To bring a deep shine to the vulcanite stem, I went through the complete set of micromesh pads, wet sanding with 1500 to 2400 grit pads and dry sanding with 3200 to 12000 grit pads. I wiped the stem with alcohol after each pad and rubbed it down with Extra Virgin Olive oil. The internals of the stem was cleaned out using alcohol and pipe cleaners. The pictures of the process and final results are shown below. To finish, I re-attach the stem with the stummel. I mount a cotton cloth buffing wheel on to my local machine which is similar to a Dremel.  I set the speed at about half of the full power and applied White Diamond compound to each of the three pipes. I wiped/ buffed the pipe with a soft cotton cloth to clear it of any leftover compound dust. I then mounted another cotton cloth wheel on to the polishing machine and applied several coats of carnauba wax over the stummel and the stem. I finished the restoration by giving the pipe a rigorous hand buffing using a microfiber cloth to raise the shine further. The completed pipe, with the dark brown hues of the sandblast stummel contrasting with the shiny black stem, looks lovely, fresh and vibrant; the photographs speak for themselves. If only the pipe could tell some of my grand Old man’s stories and recount incidents witnessed while being smoked.…………… Cheers!!