Blog by Dal Stanton
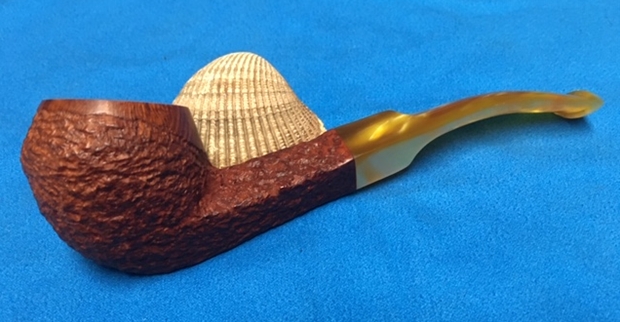
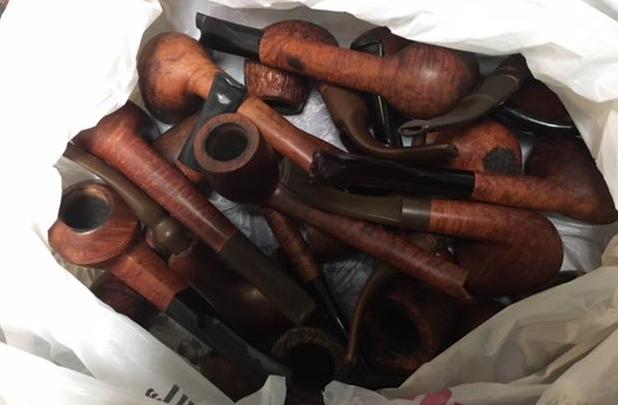
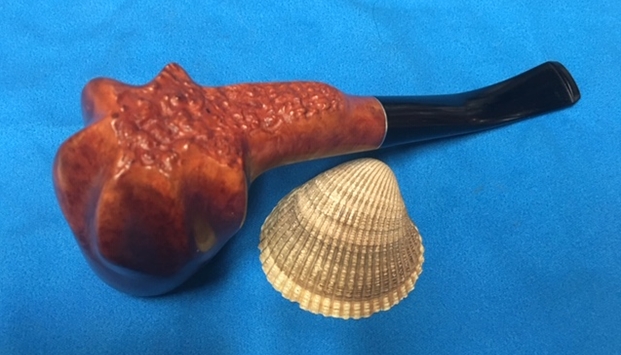
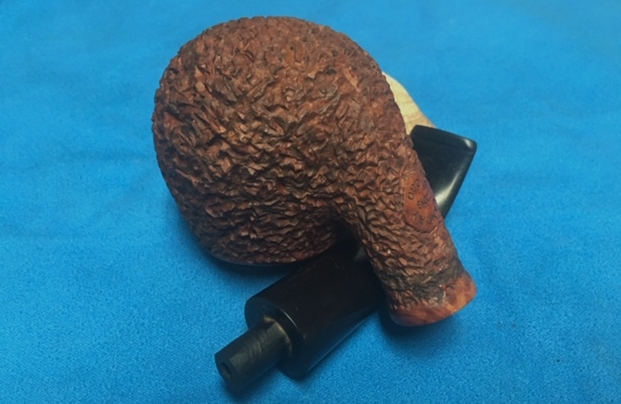
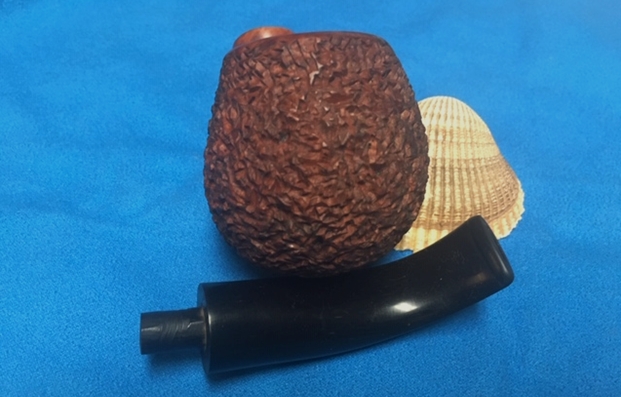
There’s nothing like a Lot picture on the eBay auction block that makes a pipe man salivate with the question, “Are there any treasures in the beautiful, intertwined, chaotic mass of briar, rubber, horn, and acrylic?” I received a message from my good pipe man friend to the north of Bulgaria in Romania, Codruț (aka: Piper O’Beard on FB), a happy steward of a Peretti Oom Paul Sitter I restored (Recommissioning Another L. J. Peretti of Boston: An Oom Paul Sitter). Codruț sent me some links of Lots on the French eBay auction block. With piqued curiosity I looked. Codruț was considering getting into the hunt – he had never purchased a Lot before and he wanted to try his had and restoring. When I saw the French Lot below, I started salivating a bit(!), and asked Codruț if he minded if I went after it. With his blessing, I placed a bid and was fortunate to land the French Lot of 50 and bring it to Bulgaria. What drew my attention to this Lot of 50 initially were all the horn stems that caught my eye. The second was the classy Pencil Stem Cutty Tavern Pipe laying across the top (unbelievably, still available as I write in the For “Pipe Dreamers” Only! collection!!) and the modernistic, deep blue/white Billiard with a fiery blue acrylic stem lying next to the Pencil Stem Cutty Tavern Pipe (available in The Pipe Steward Store as I write!). Then I saw the Churchwarden. All pipe picking scavenging requires one to see through the mass to put together the clues of what is hidden. The P. Viou Warden’s upside-down bowl starts on the left side (just above a horn stem) and you can trace the long stem underneath the mass where it emerges on the far right, upturned – somewhat masked by the star on the print below. Aw! My excitement when the bell rang, and the winning bid was mine! When the French Lot of 50 finally made it to Bulgaria, I opened the box like a young boy opening a treasure! With all my acquisitions, so that I can keep track of everything, I picture and record every pipe and eventually upload them to the ‘For “Pipe Dreamers” Only!’ collection for pipe men and women to see and commission if a pipe happens to choose them. Here are some of the cataloging pictures I took of the French Lot of 50 with a better look at the 3 pipes that hooked me as well as the plethora of horn!

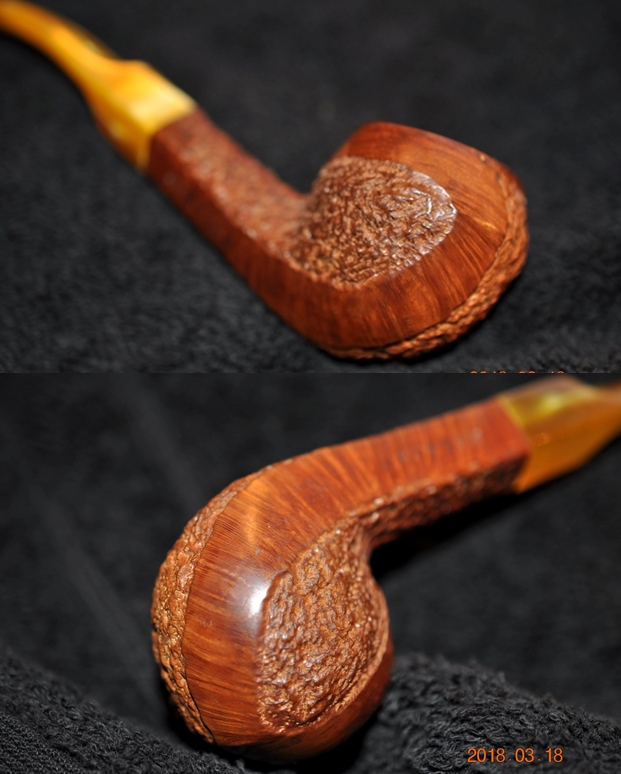
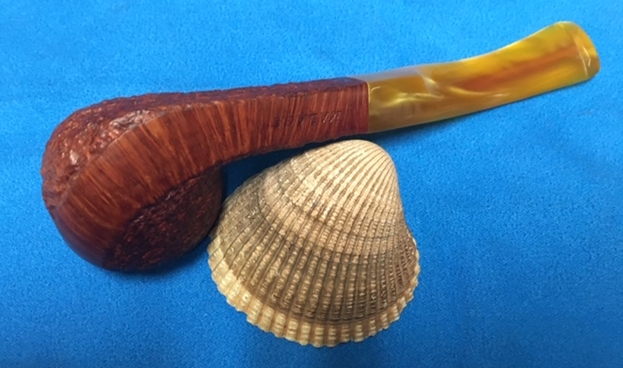
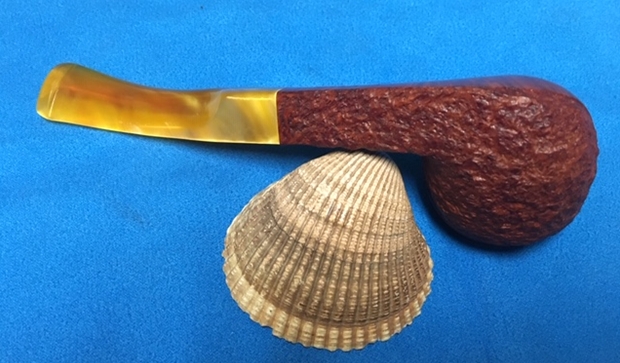
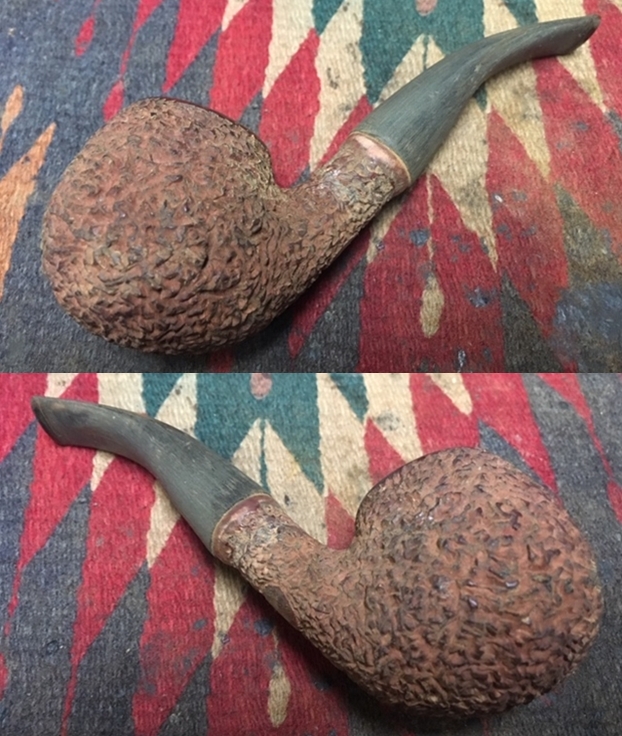
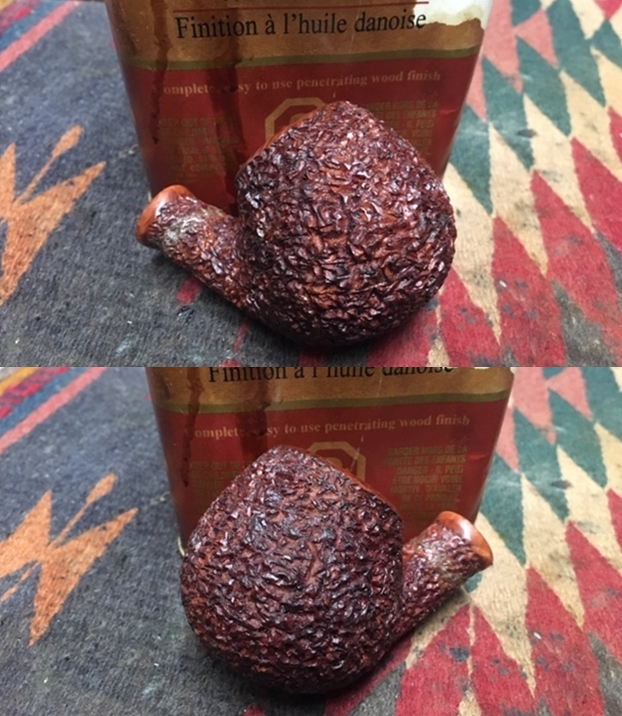
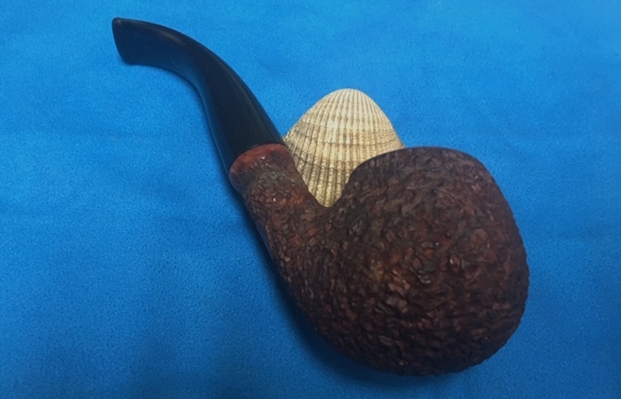
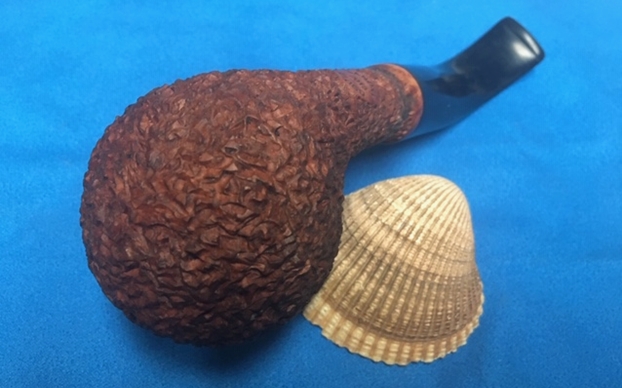
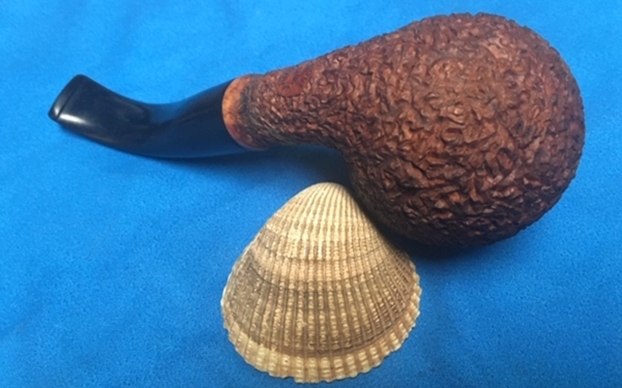
 It didn’t take long for the Churchwarden to find a suitor after he was put online in the ‘For “Pipe Dreamers” Only!’ collection. A new acquaintance, Josh, who visited Bulgaria last summer, saw the Churchwarden and commissioned him and has been waiting so patiently! The Paul Viou Churchwarden finally made it to my worktable, and I take more pictures to get a closer look.


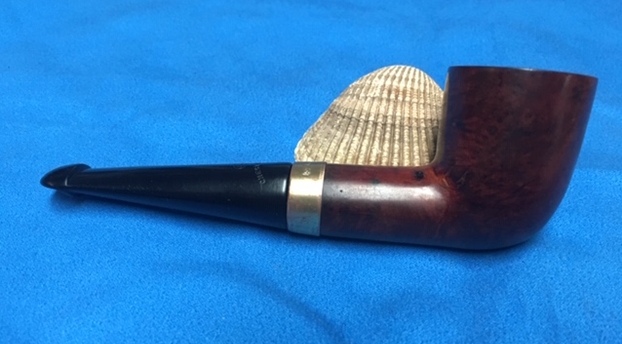
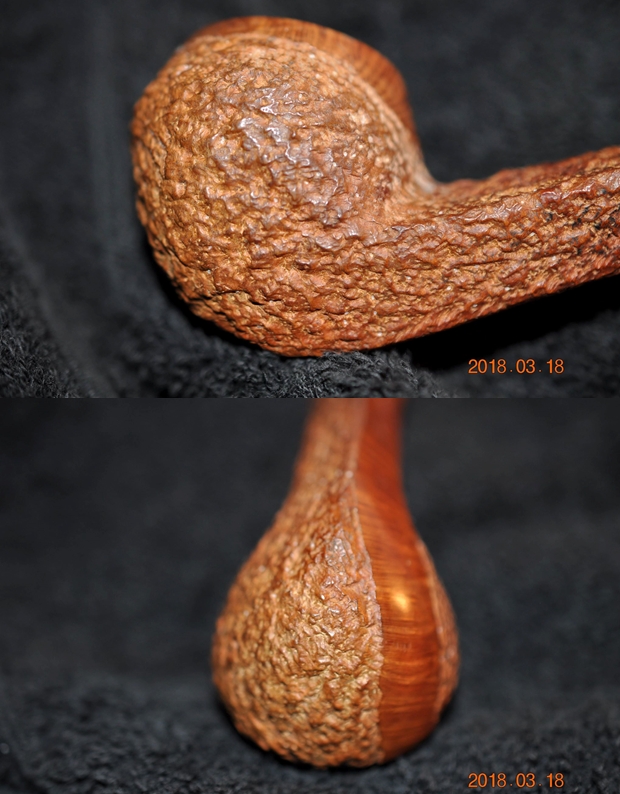
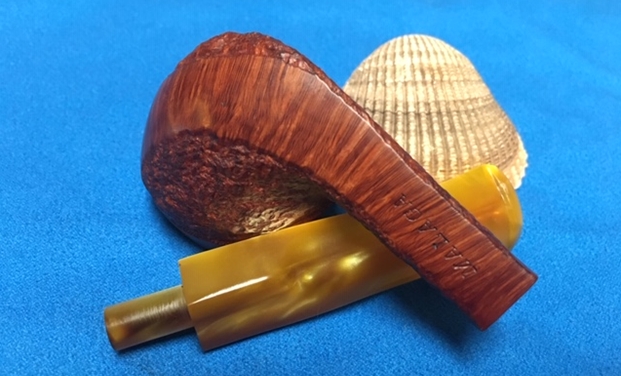
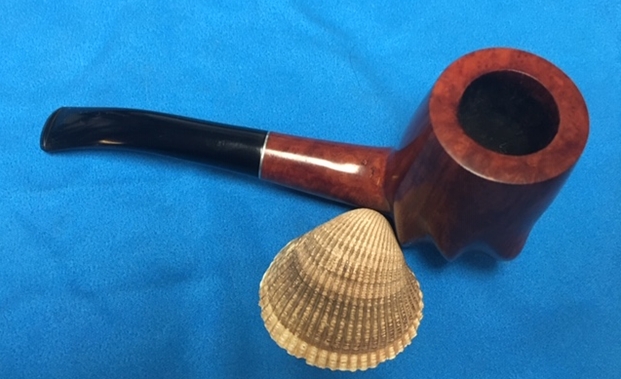
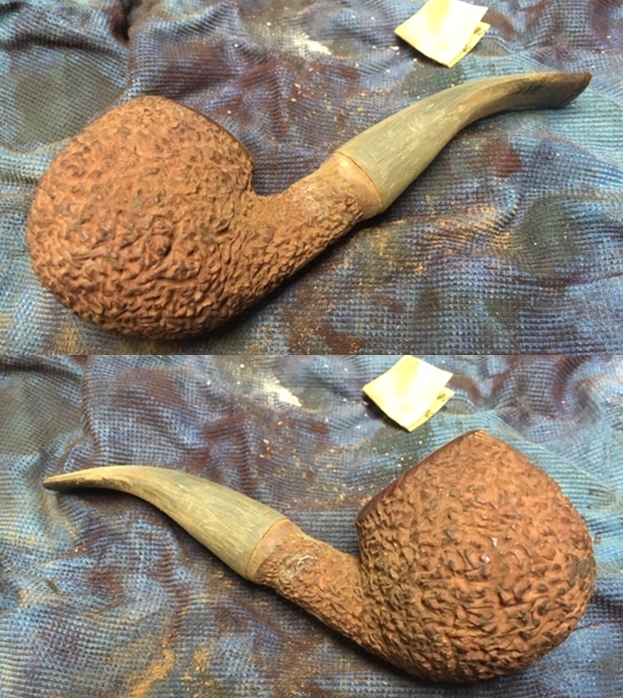
 The reach of the P. Viou’s Churchwarden is 10 1/2 inches (even with an inappropriately tucked stem!) and the height of the bowl is 1 7/8 inches. The nomenclature is a cursive, P. Viou with a flared underline on the left flank of the shank. On the right, is the well-known stamping of ‘ST.CLAUDE’, the French birthplace of the production of briar pipes and historically, the mega-center of French pipe manufacturing with a plethora of names calling it home. There is scant information about the Paul Viou name on the internet that I could find. Pipedia’s article of Paul Viou is brief:
From Pipes, Artisans and Trademarks, by José Manuel Lopes’
Paul Viou was the brand and name of a French artisan who sold his pipes by correspondence and then he was a pipe supplier for military institutions. He also made sculpted pipes and sometime used horn stems.
The brand is currently sold by Jacques Craen and made by Genod in Saint-Claude, after having also belonged to Paul Guilland and Vuillard. They are stamped P. Viou and made primarily for export.
This information is confirmed by Pipephil.eu with the addition of the date of the current holder of the Paul Viou name, Beaud, happening in 2006:  Whether the Churchwarden before me was made under the original artisan or under one of the other eventual holding companies (Guilland, Vuillard, or Genod), I’m not sure how to say with certainty. I have a few other P. Viou pipes in the French Lot of 50, so perhaps I’ll discover more information as I go!
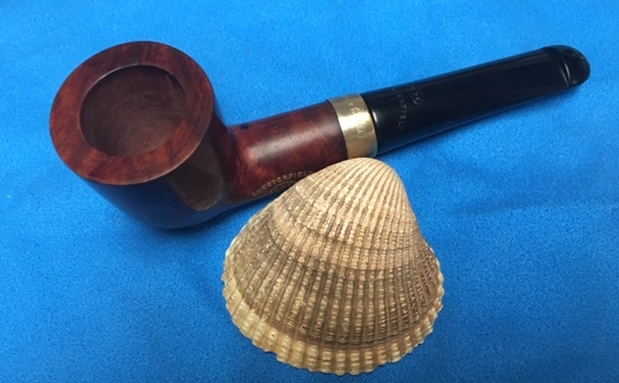
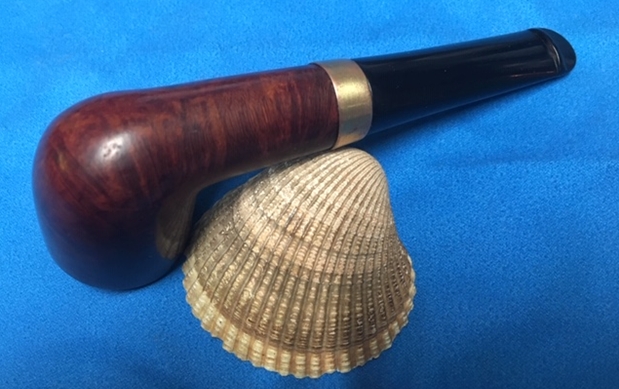
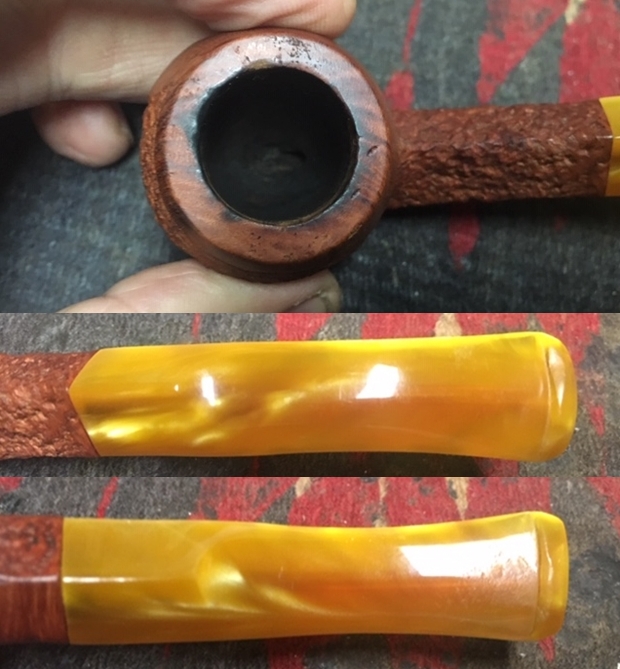
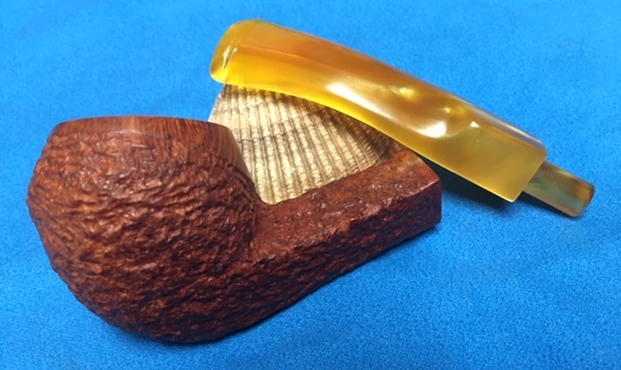
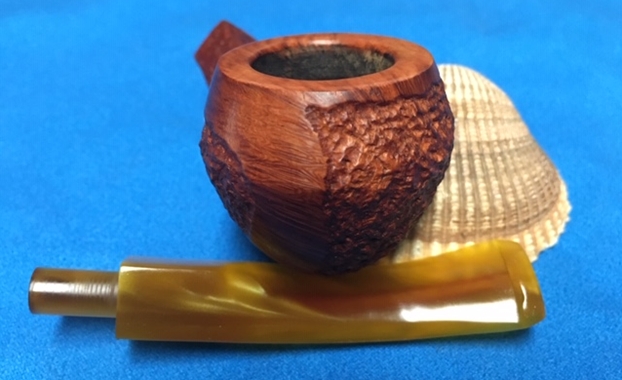
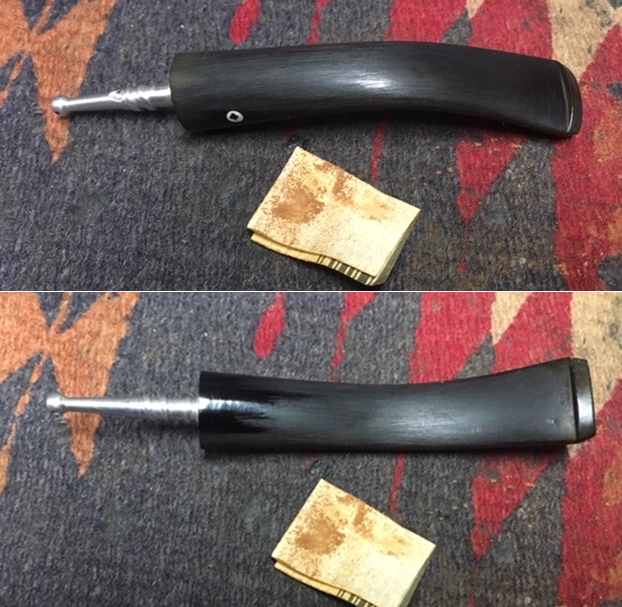
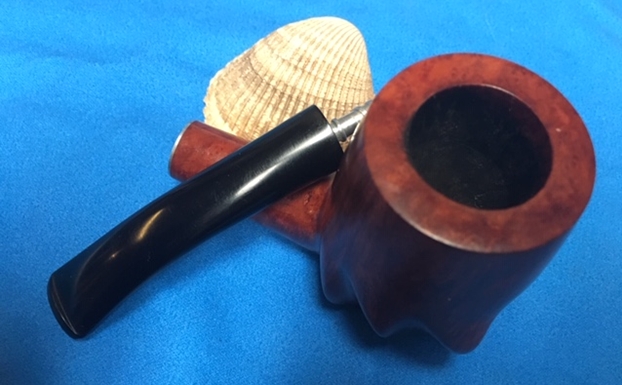
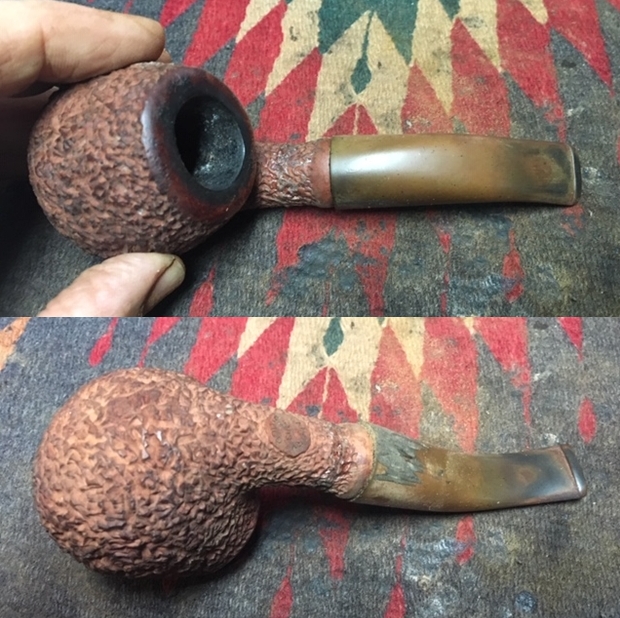
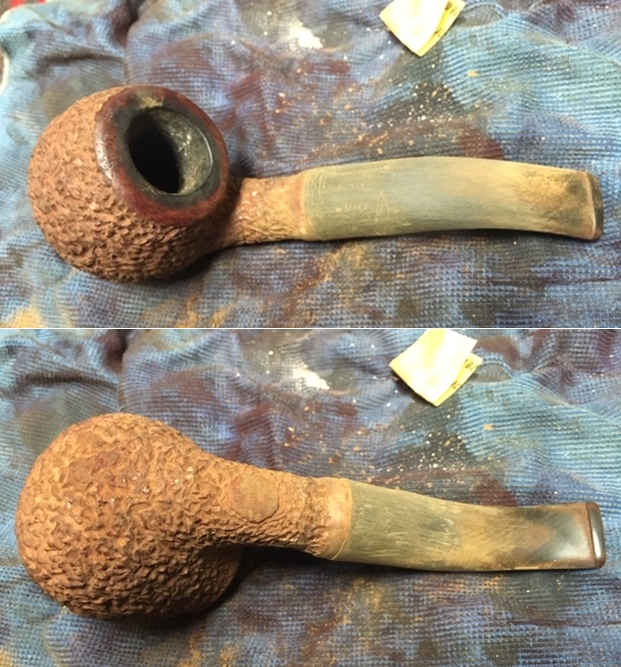
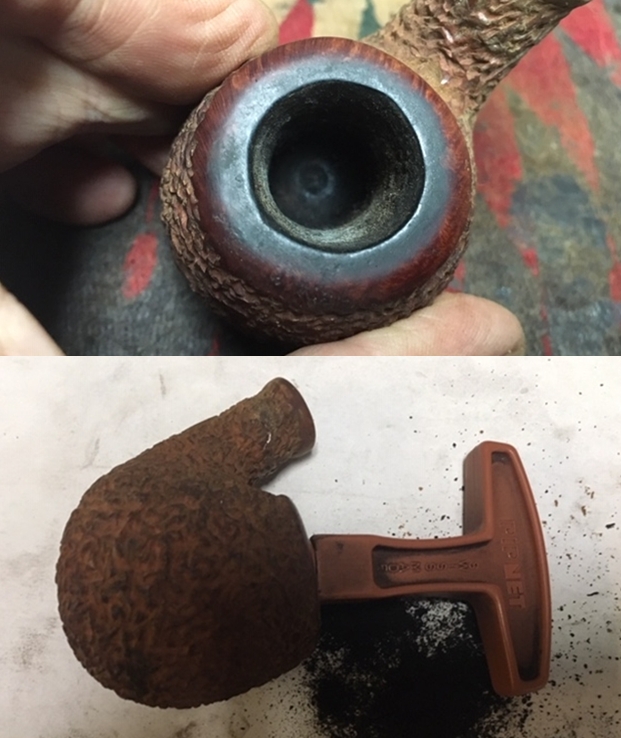
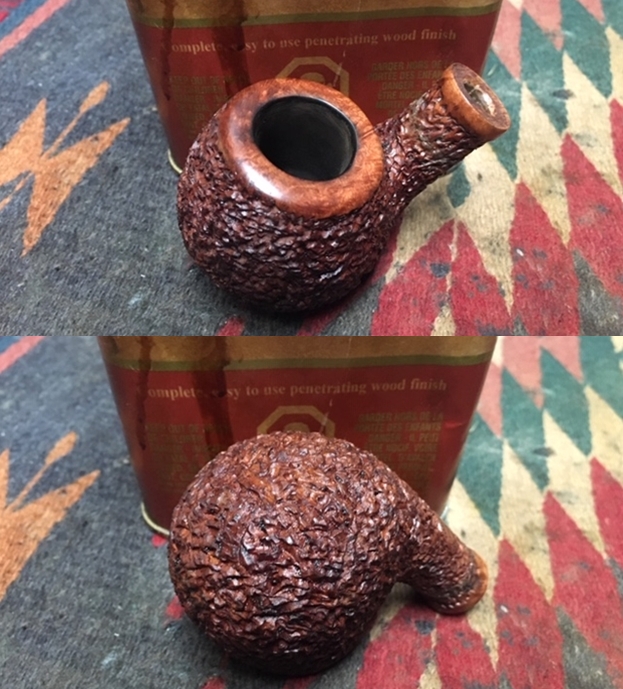
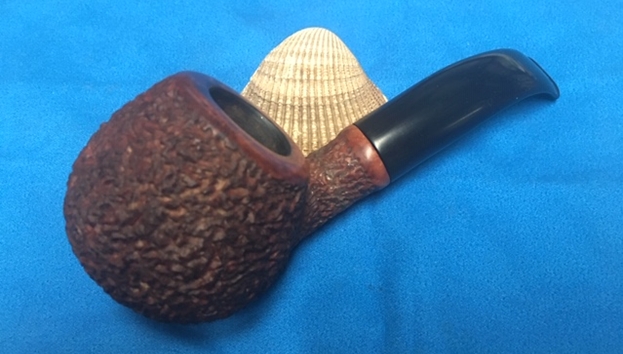
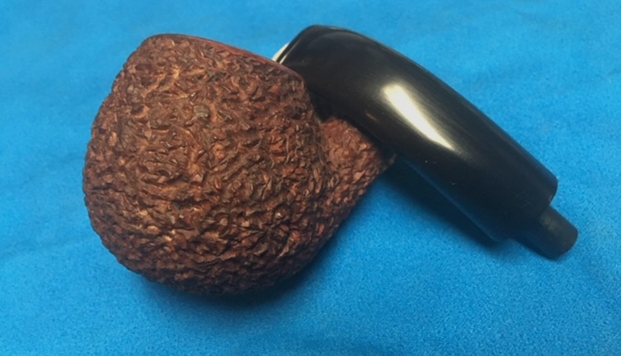
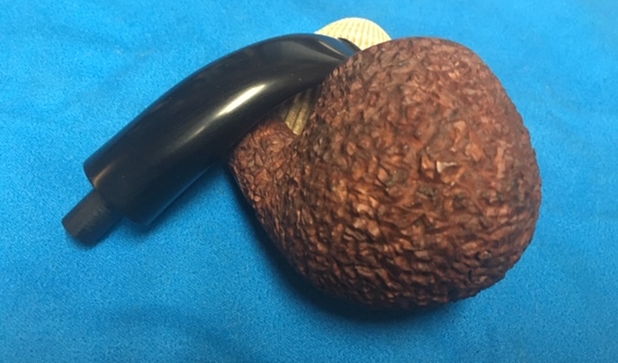
The condition of the overall pipe is good. The bowl is darkened from time and the normal buildup of oils and grime. The chamber has some cake buildup but not much. The Warden stem has some oxidation and the bit is in good condition. I notice also (picture above) that there’s a gap between the stem and shank. Often, a simple cleaning will restore a flush seating of the stem, but I’ll keep my eye on this. The main thing that grabbed my attention when I first held the pipe in my hand was the orientation of the stem. To me, it is over-bent and almost you could say, tucked. Wardens, I’ve found, have different kinds of bends. Most often I’ve observed a sweeping bend where almost the entire stem is engaged in the bend. This P. Viou has a straight extension until it reaches the very end of the stem and then is bent. I like it, but the final orientation of the bend should more closely reflect a parallel orientation with the plane of the rim. For a didactic moment, I trace this concept on a piece of paper to illustrate. Before beginning the cleaning process with the stem, I make this adjustment to the stem. First, just to be on the cautious side, I insert a pipe cleaner into the bit side of the stem to guard the integrity of the airway, which usually isn’t an issue if the bend is being opened instead of tightened. I also trace the original stem orientation on the paper I used above so that when I bend the stem, I can lay it on the flat surface for a straighter result. I then heat the end of the stem with a hot air gun. As it heats, the vulcanite becomes supple and the bend gradually starts straightening on its own. When it expands enough as I eyeball it, holding the stem in place, I take it to the sink and run cold tap water on it to set the bend. After the first attempt, the bend is still too tight, so I repeat the process again and the second time is enough. The pictures show the progression. I like this orientation much better.
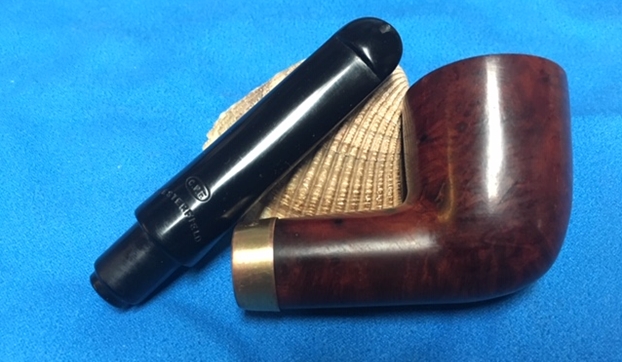
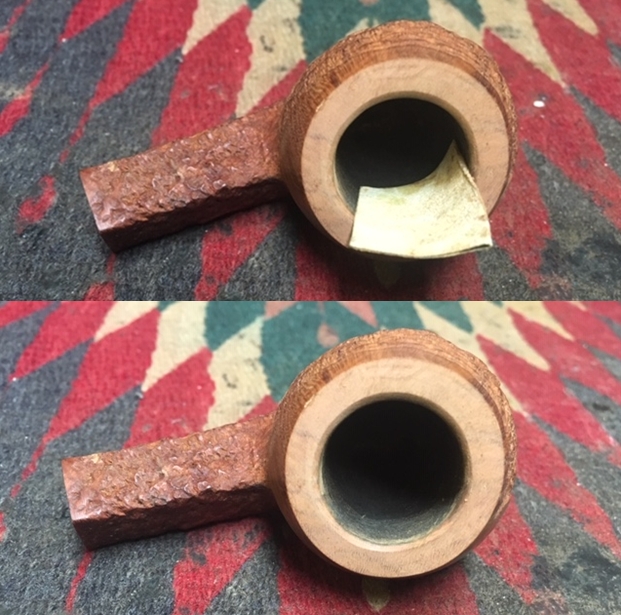
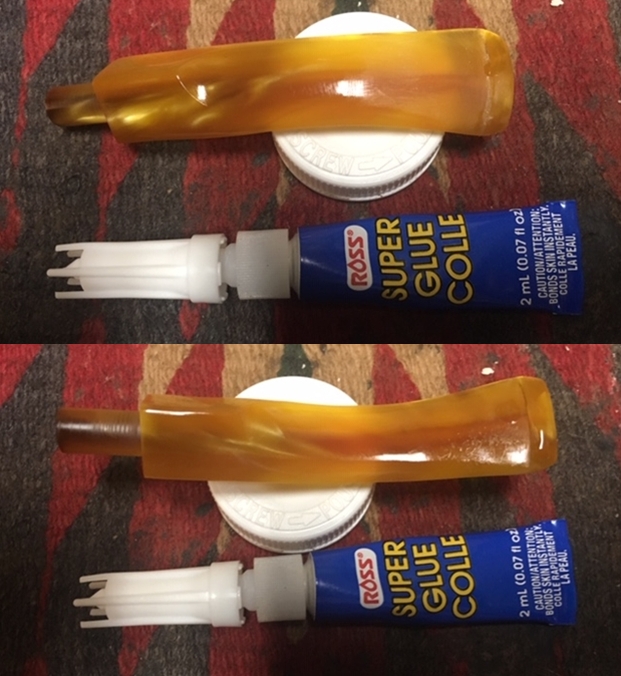
 Before cleaning the stem, I remove the stinger to aid in the cleaning. I heat the stinger with a Bic lighter and after it heats, the vulcanite holding it loosens its grip. I gently extract it with the help of pliers. I personally don’t have a lot of affection for stingers and their role in the smoking experience. I’ll clean the stinger and include it with the finished pipe and allow the future steward to make the call!
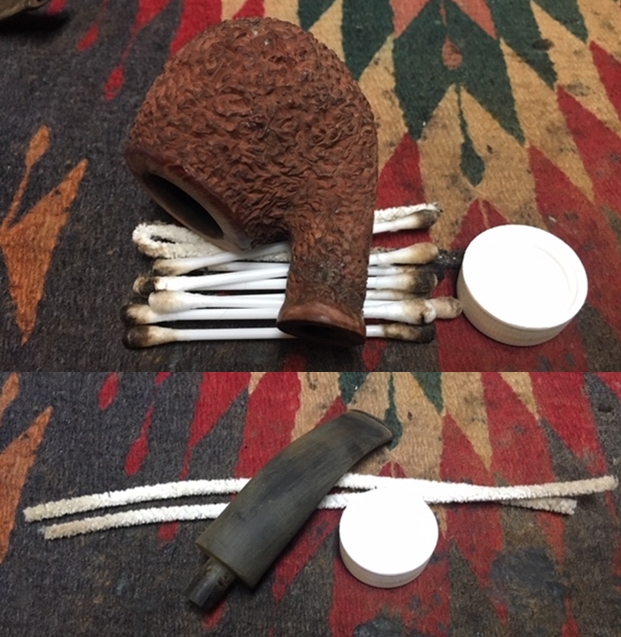
 I don’t have long pipe cleaners, but I do have a selection of shank brushes that easily reach through the stem. I use these dipped in isopropyl 95% to clean the internals of the stem. I also use regular pipe cleaners inserting them from both sides. Well, it didn’t take long after starting to know that this Warden stem had not been cleaned in some time – if ever! The reality of the less than optimal situation was confirmed when my wife came in and said that something was stinking…. I should have had gloves and my apron on, but hindsight! After some cleaning, things are looking better but still not pristine!
  This nastiness helps me decide the next course of action. I use an OxiClean bath to work on the oxidation in the vulcanite, but it also serves to further sanitize the internals, yes! I pour the OxiClean into a larger plastic container that will accommodate the stem. Before putting the stem in the OxiClean bath, I put a little petroleum jelly over the ‘P.Viou’ stamping to protect it and then let the OxiClean to its thing with both internal and external.
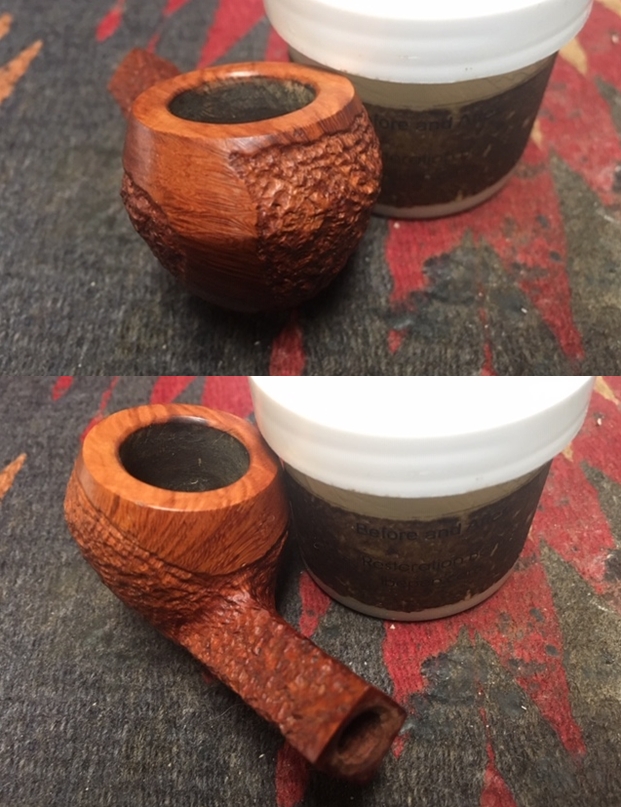
  With the stem in the bath, I turn now to the Paul Viou bowl by reaming the chamber with the Pipnet Reaming kit using two smaller blades. I then fine tune by scraping the chamber with the Savinelli Fitsall tool and follow by sanding the chamber with 240 grit paper wrapped around a Sharpie Pen. After wiping the chamber with a cotton pad and alcohol, I look at the cleaned chamber and it looks good – no signs of heating damage.

 Next, I use undiluted Murphy’s Oil Soap on the external briar surface to work on the bowl and lava flow on the rim. I also use a bristled tooth brush and a brass wire brush on the rim that will not damage the briar. The cleaning reveals two thing. First, by looking at the cotton pad in the picture, the old dye came off during the cleaning. The rim cleaned up well but revealed burn damage from pulling the flame over the rim instead of being over the tobacco! Lighting a Churchwarden can be a bit more difficult, especially the way the stem was originally bent on this Paul Viou – I doubt if the steward could see the top of the bowl with the way it was tucked under. Here are the pictures.
 To complete the general cleaning regimen, I use cotton buds and pipe cleaners dipped in isopropyl 95% to do the job. With the grungy condition of the stem, it shouldn’t have surprised me to find the mortise and airway internals sharing the same grungy condition. Oh my, with the help dental probes and spatulas to scrape the mortise and shank brushes coming in to reinforce the cotton buds and rank and file pipe cleaners, some victory was achieved in this skirmish. With confidence of having total victory, I will later continue the struggle by giving the internals a kosher salt and alcohol bath to further draw the oils and tars out of the internal briar and to remove any lingering odor. The picture shows the carnage and the arsenal of this war.
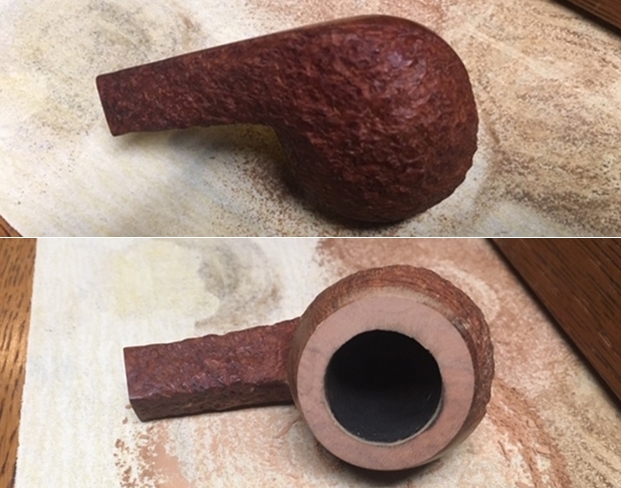
  Next, I take a closer look at the rim damage. The lighting practice has scorched the forward left side of the bowl resulting in the thinning of the rim at that point. I’ve had a lot of experience with this when I restored several L.J. Peretti Oom Pauls from the former steward who was a serial burner and discarder (See for an example: Another LJ Peretti Oom Paul Sitter Recommissioned). My approach is two-fold with the driving value of always trying to save as much briar as possible! First, I will minimally top the stummel to remove as much damage as possible. Then, to blend the internal rim lip damage, I introduce an internal bevel, which in my view, looks good anyway. With the chopping board on my table, I cover it with a sheet of 240 paper. The following pictures show the graduated progress. First, the starting point.
 Interestingly, the topping process reveals a slight inward dropping pitch of the rim. This is shown by the outer portion only making contact with the flat topping board.

 When I decide the 240 grit paper has removed enough of the top, I switch the paper to 600 grit and give the topping a few more rotations to smooth out the rim.
 Now, step two is introducing a bevel to the internal lip to remove more damaged briar and to blend. I start with a tightly rolled piece of coarser 120 grit paper to cut the initial bevel. I follow in succession with 240 and 600 grit papers tightly rolled.
  To soften the sharp outer edge of the rim and to soften the entire rim presentation, I create an external bevel, but a very small bevel using the same progression of sanding papers. I think it looks good. The darkened part of the damage is still visible, but it will be mitigated when the rim is dyed and darkened.
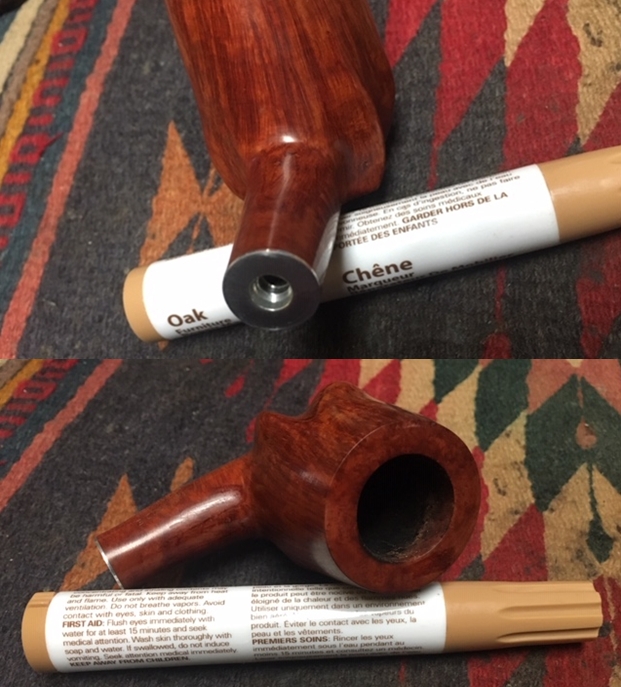
 The condition of the stummel is good. I don’t see any problem fills or pitting. I go with the original finish and aim to match the rim to the bowl. What seems to be a good match is the Mahogany dye stick. After applying it over the rim, I then blend the dye stick coating by wiping it with a cotton pad wetted with alcohol. I think it looks good at this stage.
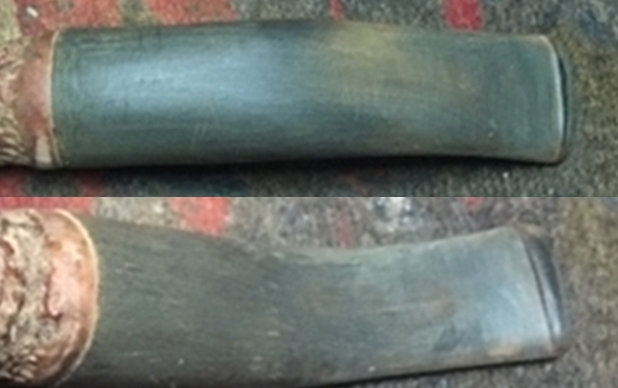
 The Warden stem has been in the OxiClean bath for several hours. I take a few close-up pictures to show the oxidation which had surfaced.
  I wet sand using 600 grade paper to remove the oxidation. I’m careful to stay clear of the ‘P.Viou’ stamp. I follow this with Magic Eraser over the entire stem, including the stamping. The low abrasion of the sponge works well with cleaning up this area.
 In order to hydrate the vulcanite, I then apply a coat of paraffin oil (a mineral oil) over the stem and set it aside.
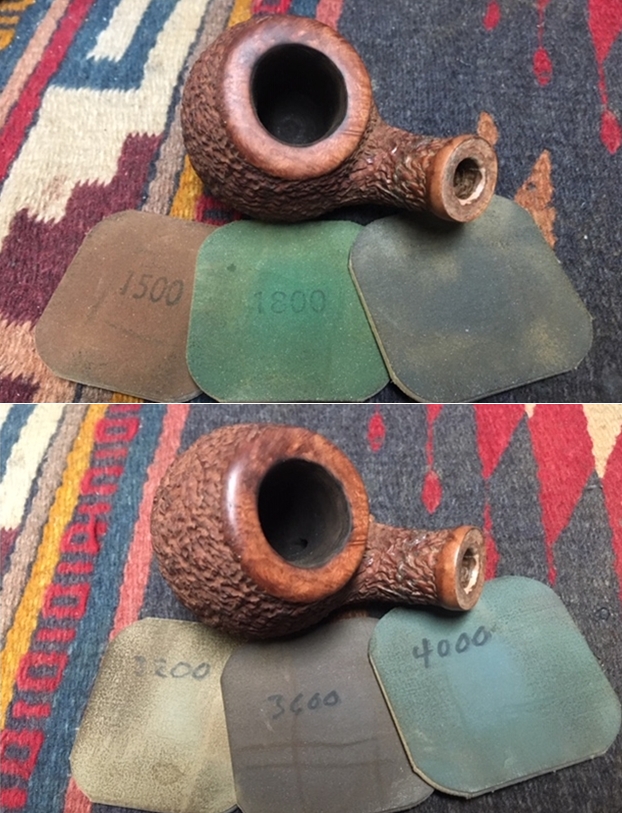
 Next, using micromesh pads 1500 to 2400, I wet sand the stummel to clean it and begin the fine polishing sanding.
Following the first set of 3 pads, I begin dry sanding with the next set of 3 pads and after finishing with the first of these, I don’t like the way the stummel looks. After the wet sanding cycles, the stummel has a pink or mauve hue to it – mauve to me, is sick pink. Just in case you’re wondering what mauve is, from a quick Google search followed by my mauve toned stummel. This doesn’t work for me!
 I placed too much trust in the old stain which is not holding up and leaving behind a less than attractive briar presentation – at least as I look at it. I wipe the stummel with a cotton pad and alcohol and my thoughts are confirmed. Even after wiping with isopropyl 95%, the stummel has the mauve residue in the grain. The reality is, I’m not losing too much traction in the process of this restoration except I will take a detour and put the stummel in an acetone soak to make sure I’m proceeding with the natural briar. This soak in acetone will also preempt the need to do a kosher salt and alcohol soak. I put the stummel in the acetone soak and turn out the lights. Another day is done.
 The next morning, I fish the stummel out of the acetone soak and it is evident that all the remnant finish is gone.
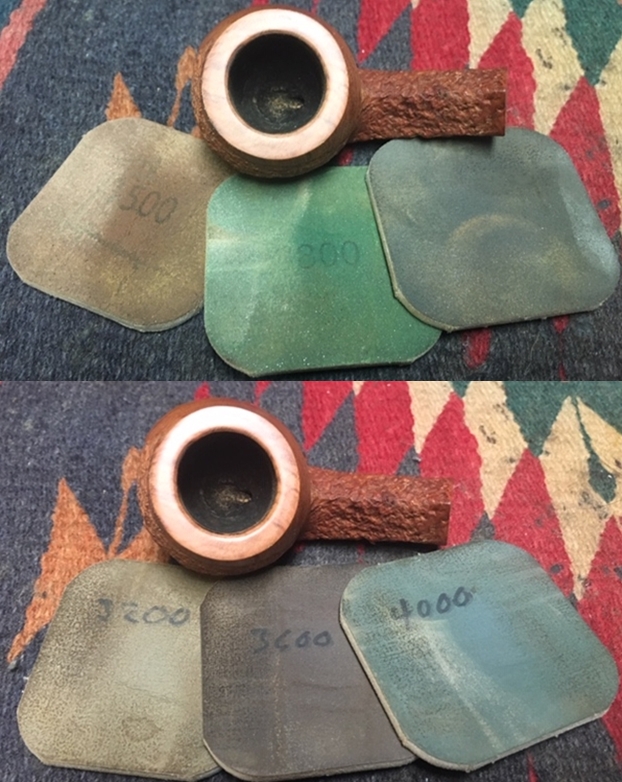
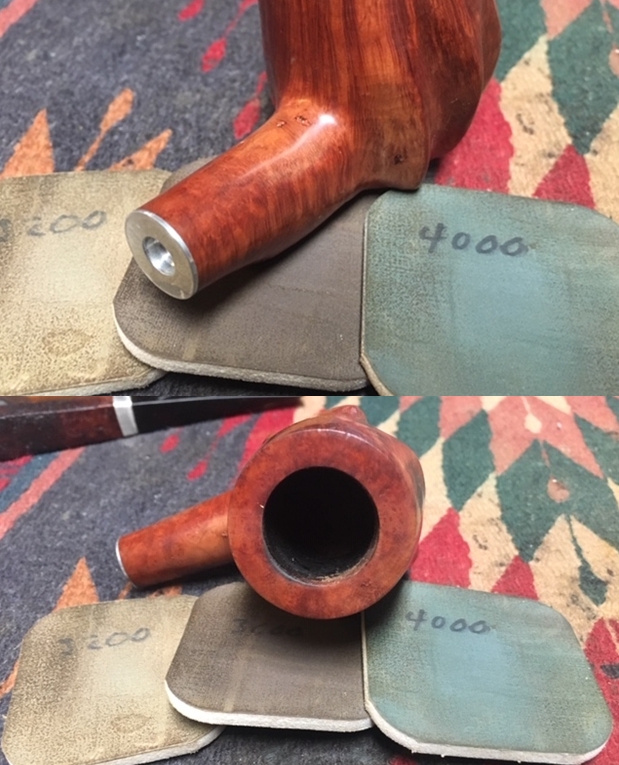
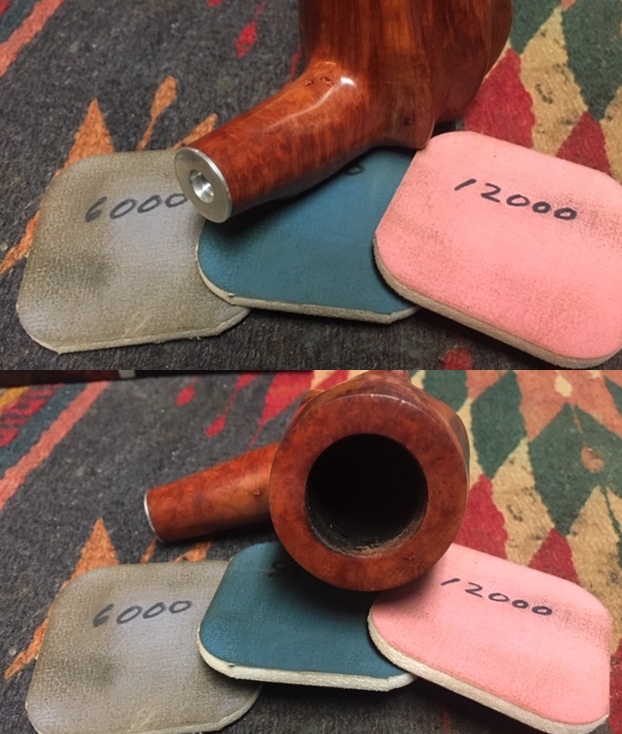
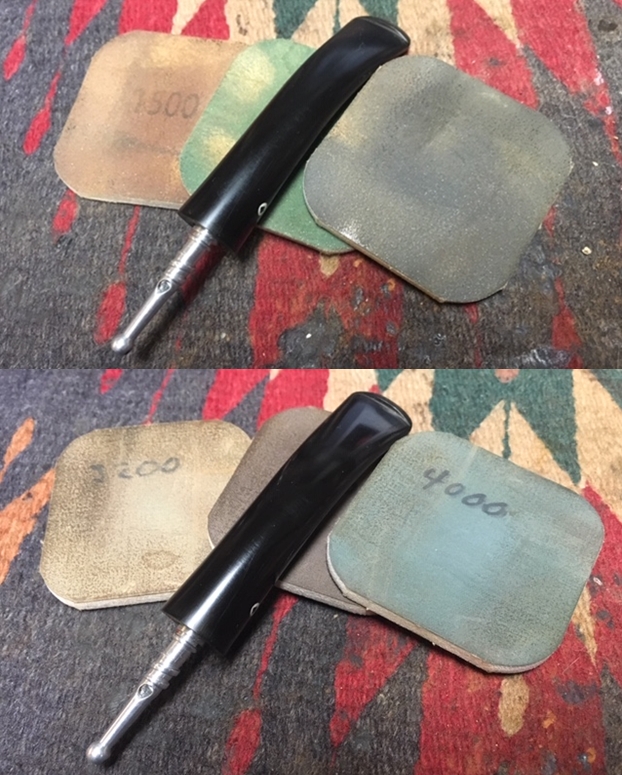
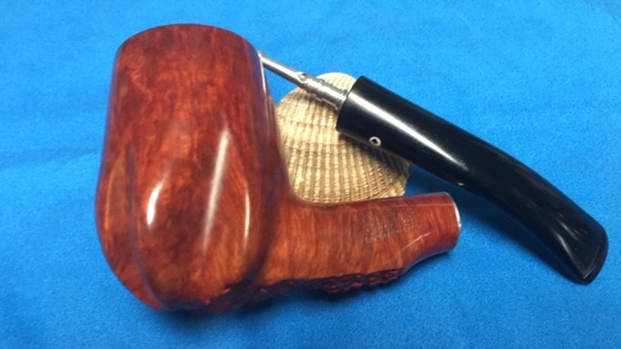
  I return to the micromesh sanding process and start again by wet sanding with the initial set of 3, 1500 to 2400. Following this, using pads 3200 to 4000 and 6000 to 12000, I dry sand the stummel, throughout avoiding the stamped areas on the left and right flanks of the shank. Wow, without the distraction of the finish, the grain I see emerge is nice. I see an eclectic blend of large bird’s eye on the sides of the bowl and the horizontal ‘connector’ grains of the bird’s eye displayed on the foreside of the bowl.
 I still have the Warden stem waiting in the wings for fine tuning, but I want to move forward with the stummel so that it can be ‘resting’ during the stem work. The grain that has emerged is beautiful and to create a little more ‘pop’ to the grain with more contrast between the darker and lighter grain – harder and softer wood, after debating between Dark Brown and Light Brown, I decide to use Fiebing’s Light Brown Leather Dye to provide the base hue in the grain and then through the use of Tripoli compound applied with a felt buffing wheel, the grain is teased out leaving greater contrast. I can lighten as well by wiping the bowl with a cotton pad and alcohol since I’m using an aniline dye.
I assemble all the components of my desktop dying station. I first assure that the stummel is clean by wiping it with a cotton pad wetted with alcohol. After inserting a fashioned cork into the shank to act as a handle, I heat the stummel with a hot air gun to heat the briar and by this, expanding the briar to enable the dye to be absorbed more efficiently. 
 After heated, I apply Fiebing’s Light Brown Leather Dye over the briar surface with a folded over pipe cleaner. When fully covered, I fire the aniline dye with a lit candle which immediately combusts the alcohol and sets the pigment in the grain. After a few minutes I repeat the process and put the fired stummel aside to allow the dye to rest. I discovered that this ‘resting’ process helps to aid the dye to set and not come off on the hands when the pipe initially goes into service and the bowl is heated.
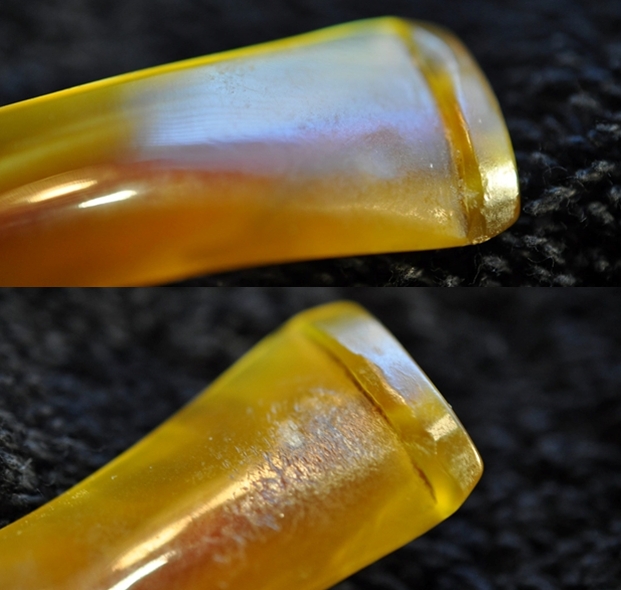
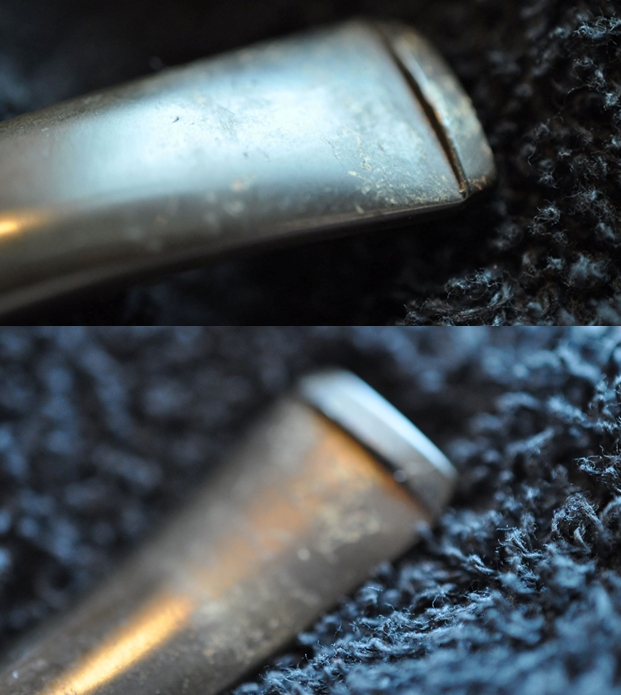
 Now that I completed the staining, I turn my attention to the Warden stem. Taking another close look at the bit area reveals that the sanding to remove the oxidation with 600 grit paper, all but erased any tooth chatter on the bit! On the lower bit (second picture) I do see one very small dimple that I dispatch quickly with 470 then 600 grade papers. I then follow by using 0000 steel wool on the entire stem. I like the results – progress.
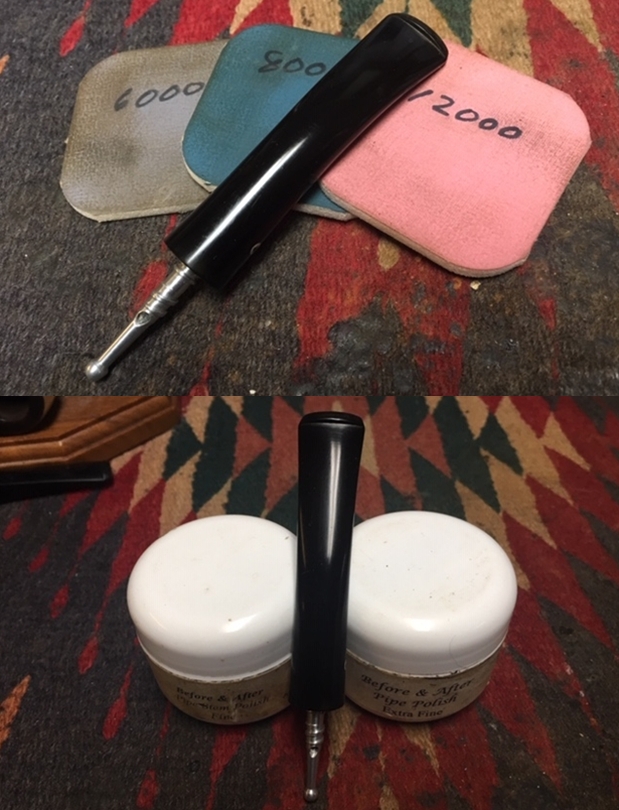
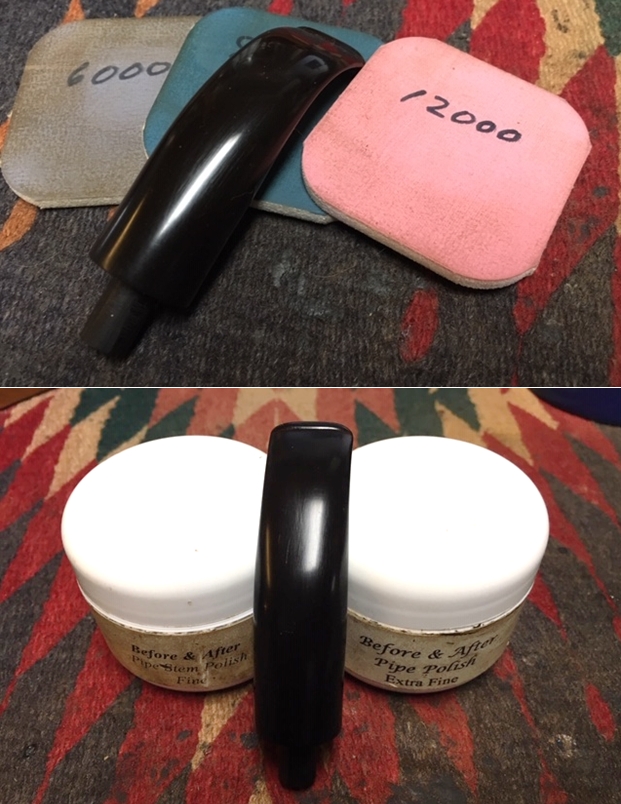
 Before moving on to the micromesh phase, I go the extra mile with the Paul Viou Warden stem. Using Before & After Fine and Extra Fine Polish, in succession, I apply some of the polish on my fingers and then rub the polish into the vulcanite surface. The Fine polish has more of a gritty feel to it. With both polishes, they revitalize the vulcanite as well as continue to extract remnants of oxidation from the rubber compound. I take a picture while the Extra Fine Polish was doing its thing. After the application of each polish, I use a cotton pad to wipe off the excess polish.
 Just when everything was going so well…. After I wipe off the Before & After Extra Fine Polish and was admiring the results, I see a pit on the forward third of the stem…ugh. Just to make sure I was seeing what my eyes were seeing and my brain was arguing that I wasn’t seeing what I was seeing – I took a sharp dental probe and tested.
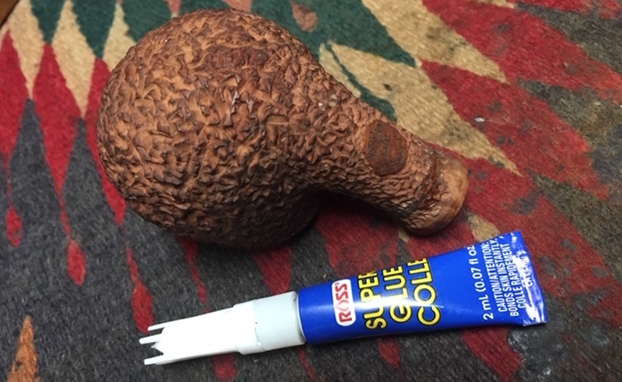
  Well, sometimes you simply must punt the ball – American football slang for just doing what you need to do. So, using Hyper Bond 12000cps Black CA glue, with a toothpick as my drop guidance system, I spot drop some glue on the pit and wait.
 After the patch cures, I gingerly use the flat needle file to file down the patch mound – trying not to slip off and produce more patch work! After the filing, I further remove the excess with 240 grit paper followed by 600 and 0000 steel wool. Finally, in the locale of the patch I again apply Before & After Fine and Extra Fine Polish. Well, the pit is filled, but the coloring of the fill is not black-black so it doesn’t blend with 100% satisfaction. Yet, if one doesn’t know the fill is there, he probably would not see it! Restoration is not perfection, though we try! The pictures show the detour.
 Undaunted, moving forward with the micromesh process, I wet sand with pads 1500 to 2400 and follow by dry sanding with pads 3200 to 4000 and 6000 to 12000. After each set of 3 pads, I apply Obsidian Oil to continue the revitalization of the vulcanite Warden stem. Admittedly, taking distance pictures of a Churchwarden stem is less than satisfying, but what I’m seeing close-up is looking good!
 With the stem on the side, I’m looking forward to ‘unwrapping’ the fired stummel. Using a felt cloth buffing wheel mounted on the Dremel, I set the speed to the slowest setting, so it doesn’t get too hot with friction. I then begin the process of removing the fired shell revealing the grain below.
  My wife helps record the process – my hands are full! I must purge the felt wheel often as it collects the dye crust. I do this quickly by running the wheel along the edge of the cutting board which is my lap desk as I work. The process of using Tripoli compound, which is coarser, and with the felt wheel, which creates more friction than a cotton cloth wheel, is that it can buff off much of the dye that is excess and on softer wood – the lighter part of the grain. The dye pigment tends to be held by the darker grain. The effect is that the grain almost looks luminescent with the contrasting hues in the grains.
 After completing the application of Tripoli, I wet a cotton pad with isopropyl 95% and wipe down the stummel – not really to lighten the color, but to help blend the dye.
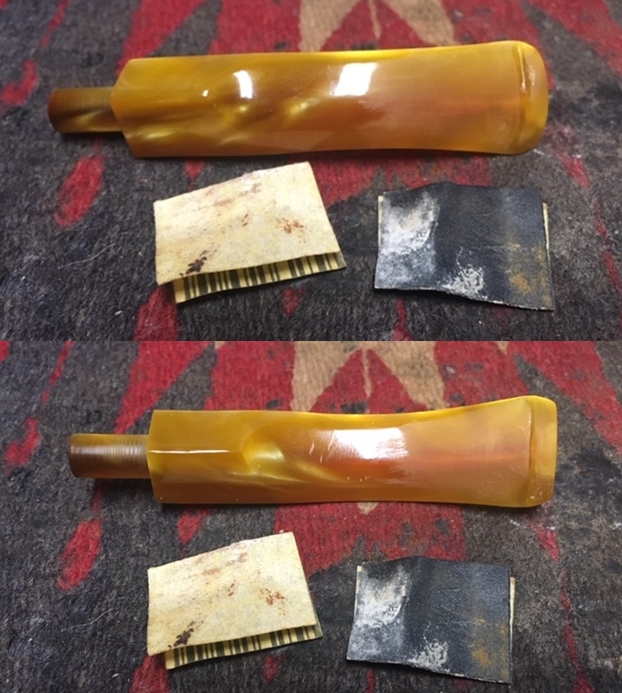
 I then mount a cotton cloth buffing wheel to the Dremel, increase the speed to about 40% full power and apply Blue Diamond to stem and stummel. As I attempt to reunite the stem and stummel, I discover that the fit of the tenon in the shank is too tight – cracking a shank isn’t anything I want to be contemplating now! It’s not surprising that after soaking the stummel in acetone the wood absorbs and expand somewhat. To remedy this, I wrap a piece of 240 grit paper around the tenon and rotate the paper, sanding down the tenon a bit. I follow by doing the same with 600 grit paper. After a few tries, the tenon finds a good, snug seating. I then apply Blue Diamond compound to both stem and stummel. After finishing with the Blue Diamond, I wipe the pipe down well with a felt cloth to clean the compound dust off the surface.
 Before applying carnauba wax, I will freshen the ‘P.Viou’ stem stamping. The condition of the stamp imprint seems good so the paint should hold without problem. Using white acrylic paint, I put some paint over the stamp and then lightly dab the paint with a cotton pad. This absorbs the excess paint so that the thinned layer left on the stem dries quickly. I then scrape the excess paint off by gently scraping with the side of a toothpick. I finish by gently buffing the newly painted stamp with a cotton pad. The pictures show the progression.

 As I said I would do earlier, I clean the stinger with a brass brush and alcohol and a dental probe and give it a quick buff with the Dremel using Blue Diamond compound. I then reinsert it into the tenon.
 I mount another cotton cloth wheel onto the Dremel, set speed at 40%, and apply a few coats of carnauba wax to the Warden stem and stummel. After finishing, I hand buff the pipe with a microfiber cloth to raise the shine.
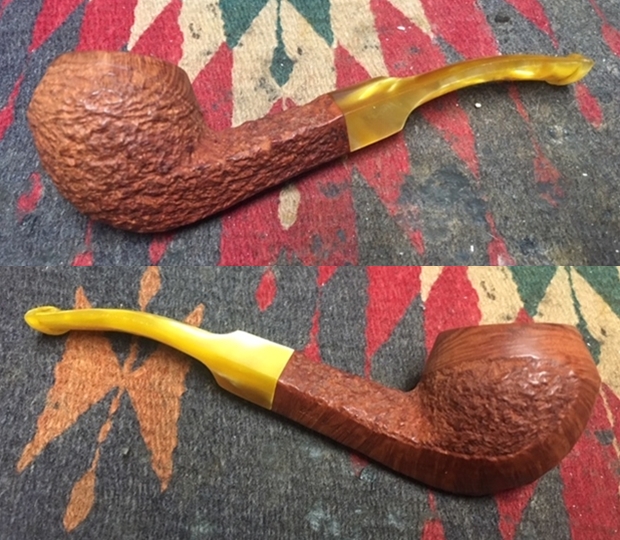
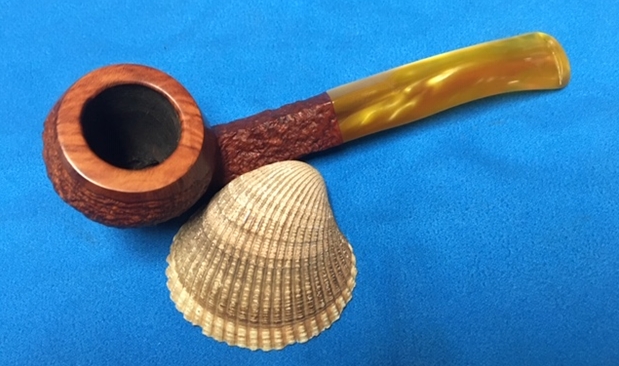
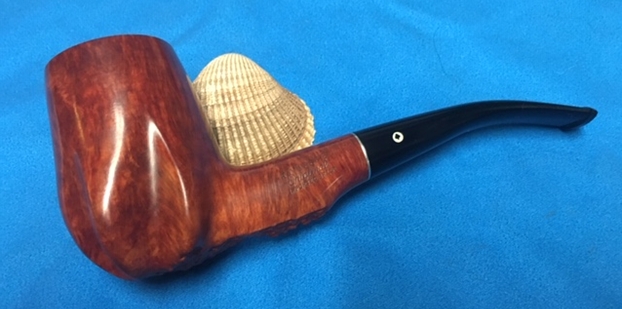
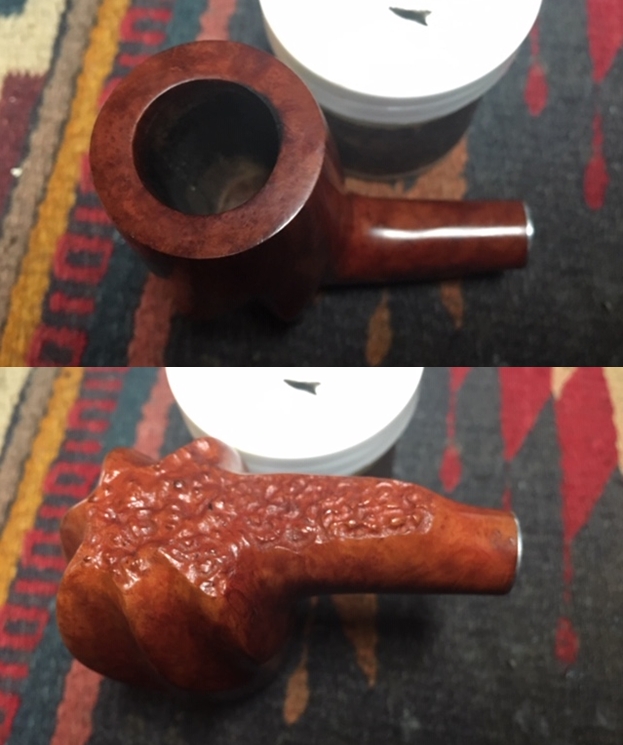
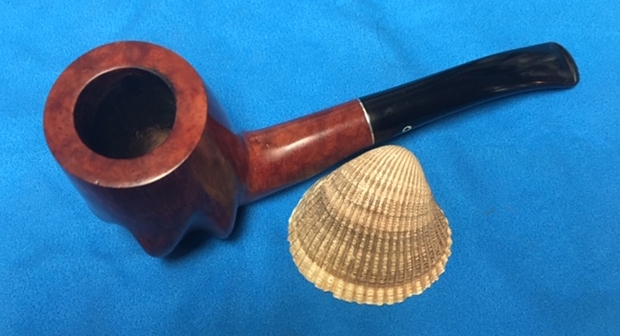
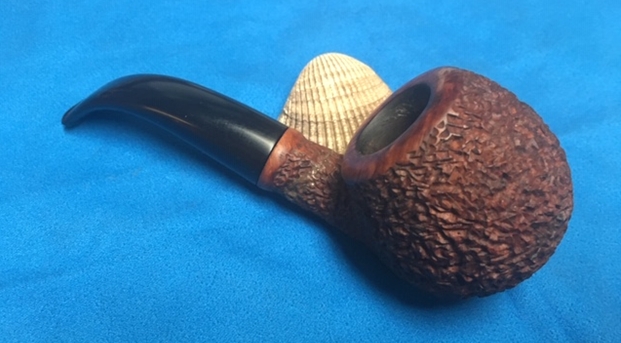
When one first sizes up a Churchwarden, one usually is drawn to the ‘olde world’ sweep of the long, flowing stem with images of Gandalf smoking and blowing magical smoke rings. Secondarily, one is drawn to the bowl attached to the stem. But with this Churchwarden, the bowl is drawing attention as well! The beautiful, distinctive bird’s eye grain interacting with the other grain patterns is mesmerizing. The correction to the stem’s bend was strategic and the rim repair is now invisible. This Churchwarden would be a nice addition to anyone’s collection, and since Josh commissioned the Paul Viou Churchwarden and has the first opportunity to acquire it from The Pipe Steward Store. This pipe, as well as all pipes commissioned from the For “Pipe Dreamers” Only! collection benefit the Daughters of Bulgaria – women and girls who have been trafficked and sexually exploited. Thanks for joining me!


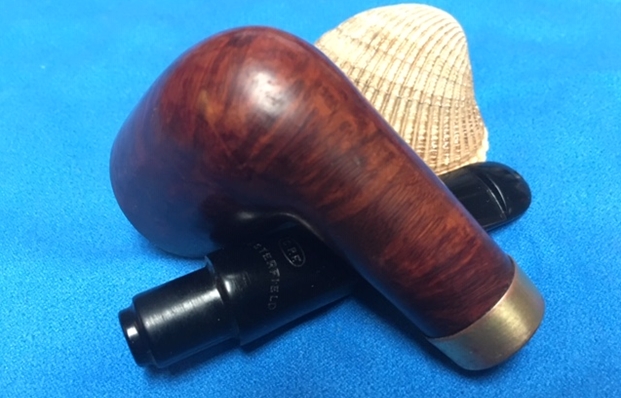
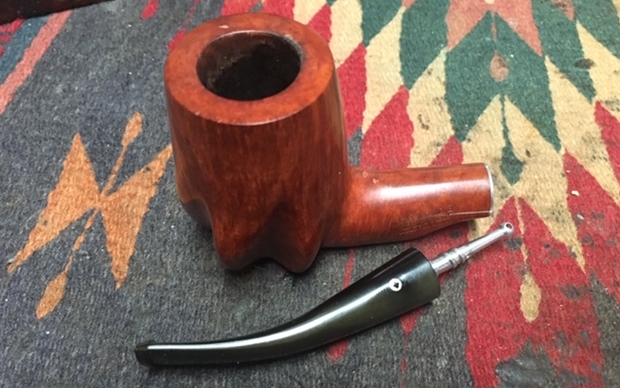
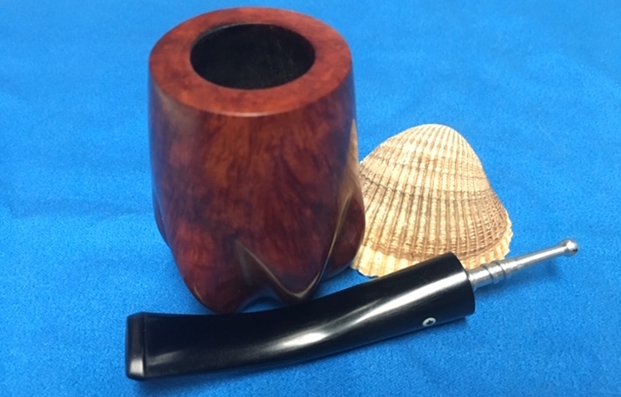
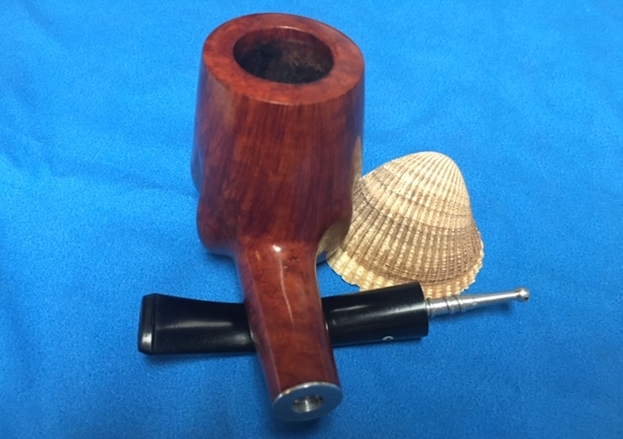
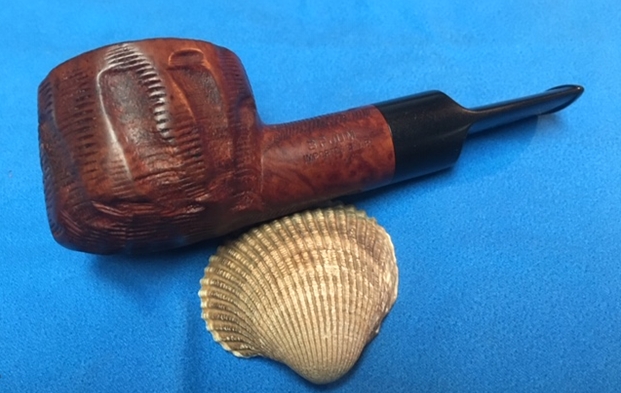
 He said from his research that the pipe came from the 1910s period before 1920. He picked it up from a fellow who said that it (along with other pipes) came from a clean out of an old retail building that used to be a pipe store in the 1940s. He packed the pipe and put it in the mail to me. It did not take too long for it too arrive on the other side of the continent. And when I opened the box and removed the pipe this is what I saw (it did not disappoint). It was a bit shop worn from sitting – nicks and grime on the finish and a loose band but very clean. The stem was not oxidized but the vulcanite had some small nicks in the surface. The stamping on the left side of the shank read Chesterfield in an arch over the CPF in an oval logo. The band had the CPF logo and some faux hallmarks. The stem read Chesterfield over the CPF oval logo on the topside of the taper. I took photos of the pipe when I received it. The bowl was raw briar and totally looked new and unused. You have to admit this is a beauty – I guess that is subjective but it is to me!
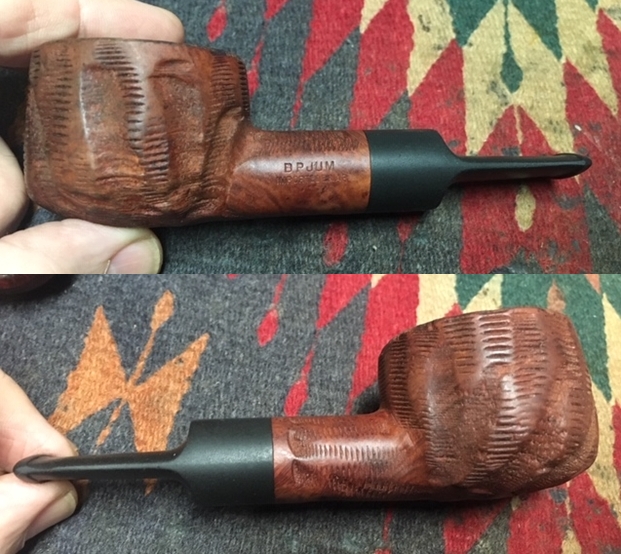
 I took close up photos of the bowl, rim top and stem to show the overall condition of the pipe. The bowl was pristine as noted above. The rim top had some small scratches and very shallow nicks. The shank ahead of the band was discoloured from the brass band and the band had turned to the left from its original centered location on the top. The stem looked really good – no oxidation. There were a lot of minute scratches in the surface on both sides and a little rounding of the shoulders at the stem/shank junction. The gold stamping on the stem top was faint but still present.
 The next photos show the stamping on the shank, band and stem. You can see that they are all quite clear.
 I wrote a piece on the background to the CPF brand earlier on the blog and include the link to that here (https://rebornpipes.com/2013/04/14/some-reflection-on-the-historical-background-on-cpf-pipes/). I quote a pertinent part of the blog below:
 I took the stem off the bowl and the band on the shank came off very easily. I turned it to align it and then decided to take it off to clean up the shank end before I reglued it. I wiped off the old glue and sanded the shank end lightly with a 1500 grit micromesh pad to remove the glue debris. I would need to do a bit more work on it before regluing it but it definitely looked better. I also took photos of the mortise chamber to show what it looked like. It is almost a reverse calabash before those were spoken of, however the tenon filled the chamber completely and negated that function.
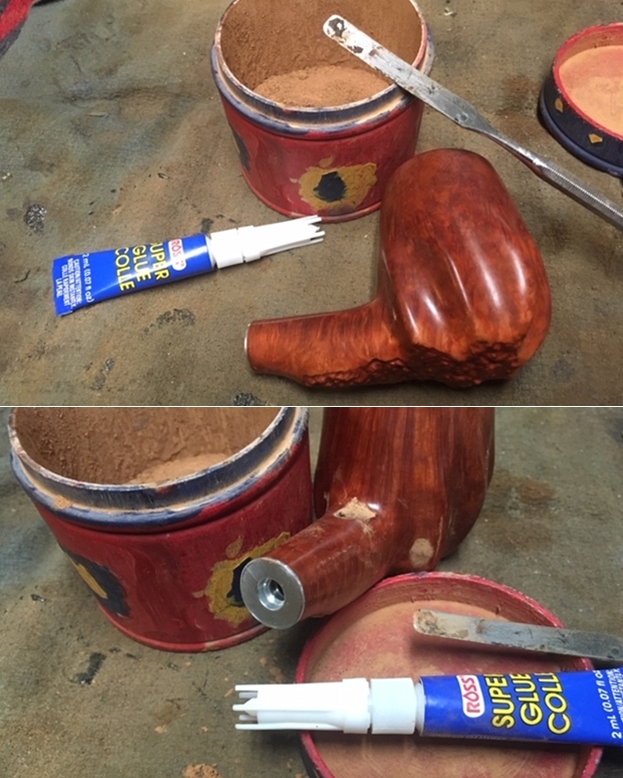
 One of the nice features of working on a NOS pipe is that the internals are very clean. I ran a pipe cleaner through the airway in the stem and shank just to remove dust. I did the same in the mortise with a cotton swab and the internals were finished. I directed my attention to the obnoxious pink putty fills. I picked them out with a dental pick to remove as much of the dried and shrunken putty as possible. It takes some careful work so as not to create more issues than I was trying to cure but it did not take long to remove the offending putty. (Note the band on the shank at this point – to be honest I am not sure why I put it back on. Perhaps to protect the shank end while I was working on the fills?)
 I wiped down the fills with an alcohol dampened cotton pad to remove the debris and filled them in with clear super glue. I used a dental spatula to apply fine briar dust on top of the glue and to press it into the fill area.

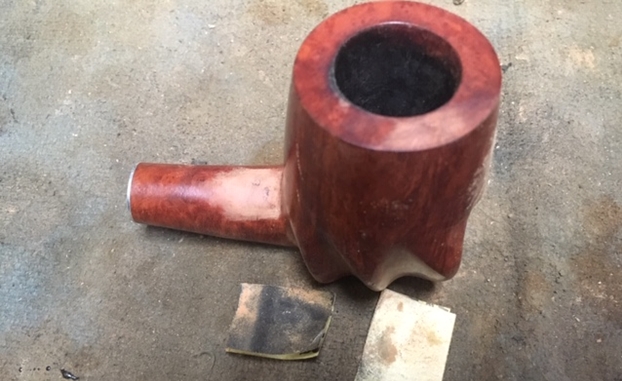
 When the repairs cured I sanded the patches down with 220 grit sandpaper to blend them into the surface of the briar. I sanded the spots smooth and they were already looking better than the pink putty they had replaced. I used a black sharpie pen to touch up the centres of the fills knowing that as I polished and stained the bowl they would blend in quite well. (Note to self: find a dark brown Sharpie pen.)
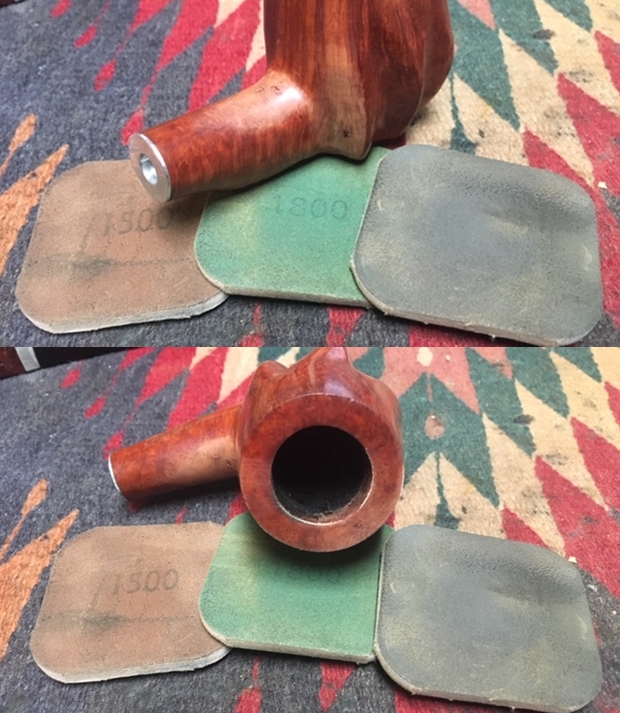
 I polished the repaired areas and the rest of the bowl with micromesh sanding pads – wet sanding with 1500-2400 grit pads and dry sanding with 3200-12000 grit pads. I wiped the bowl down after each pad with a damp cloth to remove the dust. I removed the band again after the first three pads and repeated the sanding on the shank with the first three pads.
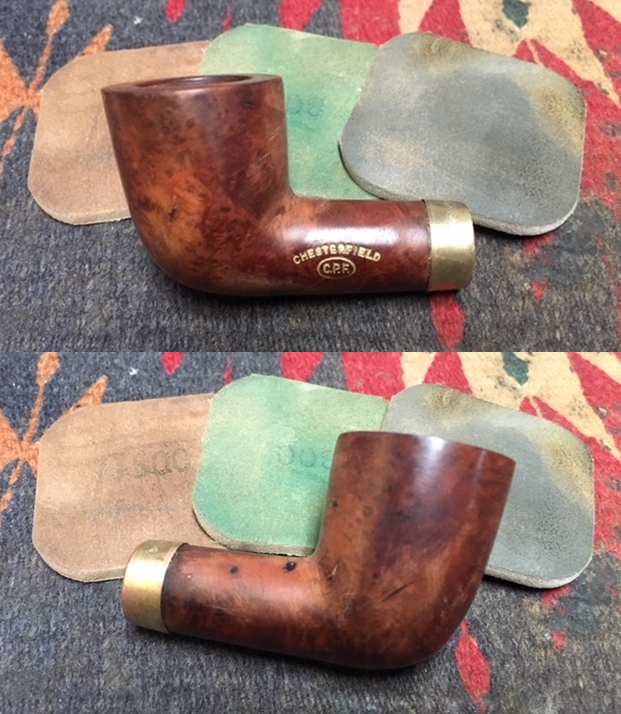


 I decided to combine a Maple and Cherry stain pens to match the colour of the original bowl as much as possible. I colour with the lighter stain and then colour over it with the darker stain.
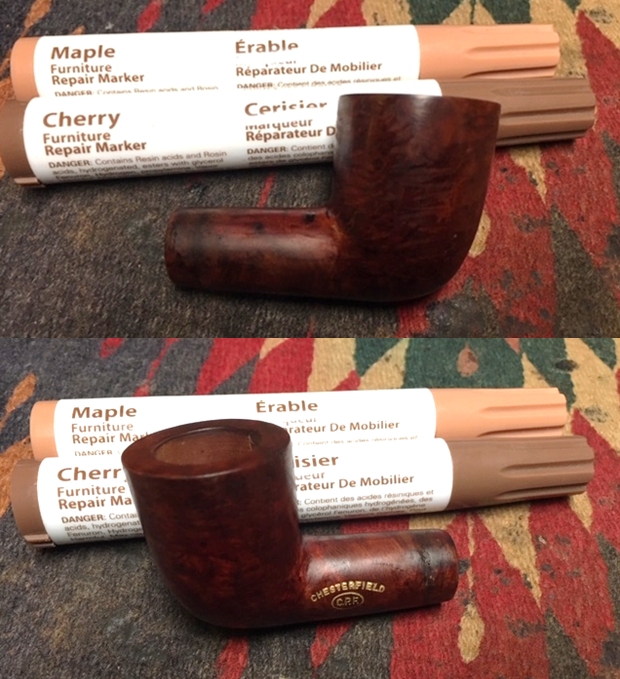
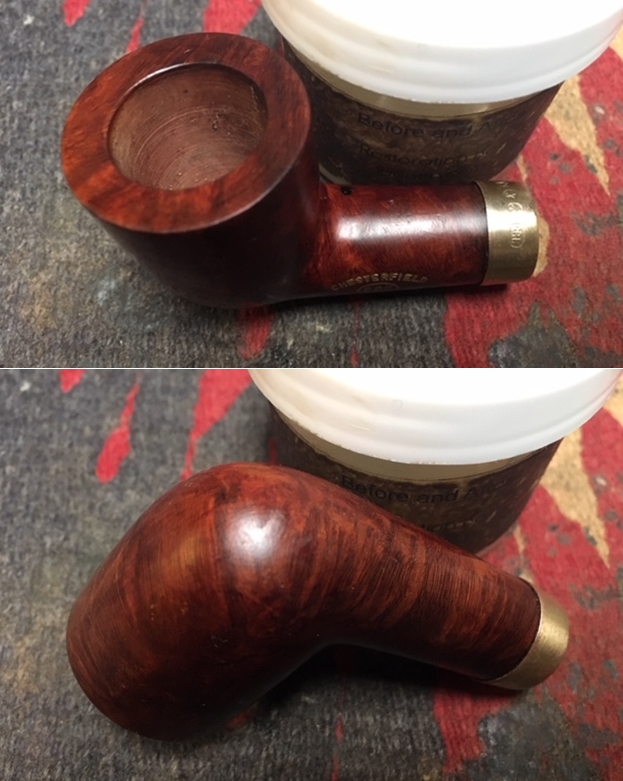
 I rubbed the bowl and shank down with a coat of Before & After Restoration Balm. I worked it into the surface of the briar to clean, enliven and protect the briar. The old briar was dry and it drank up the balm. I also found that it allows me to blend the stain coats together and give an even finish to the bowl. I buffed the bowl with a soft cloth to raise a shine. I am liking how the pipe looks as this point in the process.
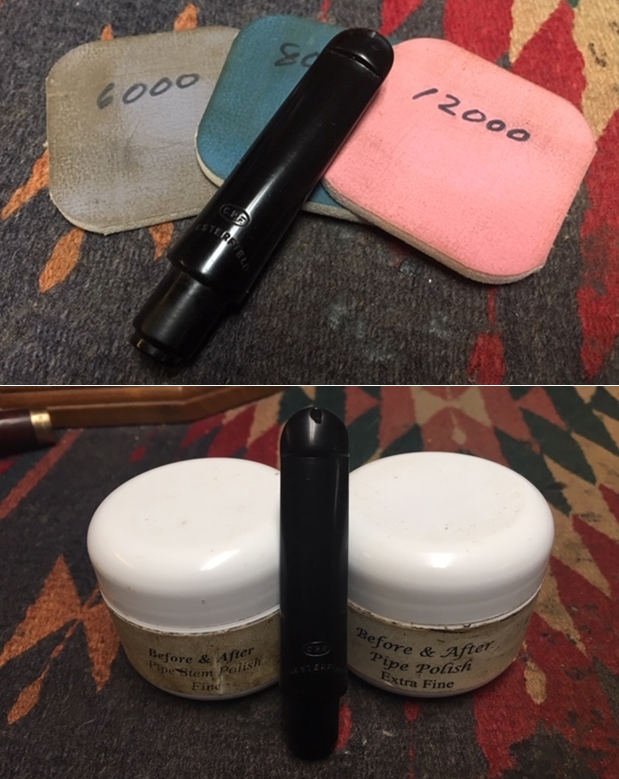
 I set the bowl aside and started working on the stem. The nicks and scratches in the stem were very surface so I decided to polish the stem with micromesh sanding pads – wet sanding it with 1500-2400 grit pads and dry sanding it with 3200-12000 grit pads. I wiped it down with Obsidian Oil after each sanding pad. I finished the polishing with Before & After Pipe Polish – both Fine and Extra Fine. I gave it a final coat of Obsidian Oil and set it aside to dry.
 I love these old CPF pipes. There is some serious thought that they were carved by European trained craftsman who were skilled pipemakers. They were brought to the US by the CPF Company to make pipes. Many of the shapes, bands and stems have the kind of workmanship involved that I really think there is truth to this story. This is little chubby billiard with a classic shape that reminds me of some of the BBB Ultima pipes that I have restored. The stem is a pre-Peterson style P-lip with the airway at the end of the stem rather than on the topside. It had a lot of fills that I have repaired and blended into the bowl for the most part. There are a few fills that still show but they are smooth and not pink. I polished stem and the bowl with Blue Diamond polish on the buffing wheel carefully avoiding the stamping on the shank. I gave the bowl and the stem multiple coats of carnauba wax. I buffed the pipe with a clean buffing pad to raise the shine. I hand buffed it with a microfiber cloth to deepen the shine. The pipe polished up pretty nicely. The contrasting grain really began to stand out; it seemed to take on life with the buffing. The rich contrasting brown colour works well with the polished black vulcanite stem. The finished pipe has a rich look that is quite catching. Have a look at it with the photos below. The shape, finish and flow of the pipe and stem are very well done. The dimensions are Length: 5 inches, Height: 1 5/8 inches, Outside diameter of the bowl: 1 1/4 inches, Chamber diameter: 3/4 of an inch. This one will be joining my collection as it fits in the CPF niche group that I have been building. The shape and feel in the hand is perfect. Now I have to make a hard decision – do I leave it unsmoked or do I load it up with some aged Virginia and break it in. Thanks for walking through the restoration with me as I restored and reworked this old billiard from 1910-1915. It is always a treat for me to work on a piece of pipe history especially when I have learned a bit of the story behind it.