Blog by Steve Laug
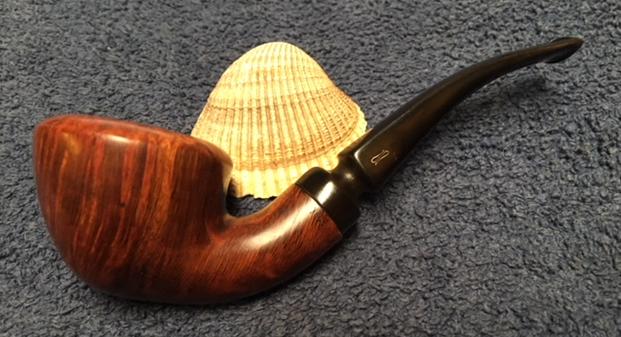
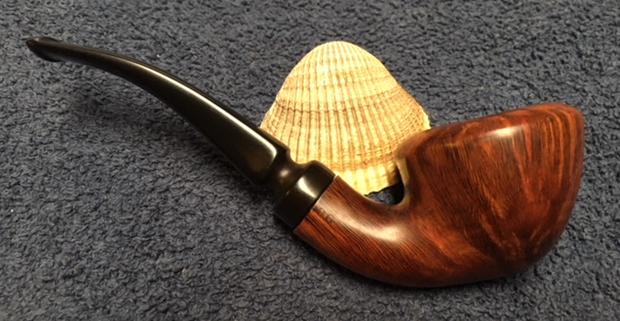
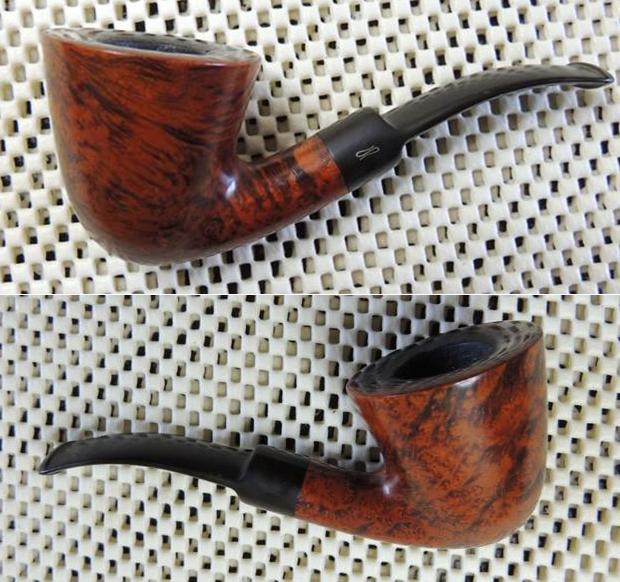
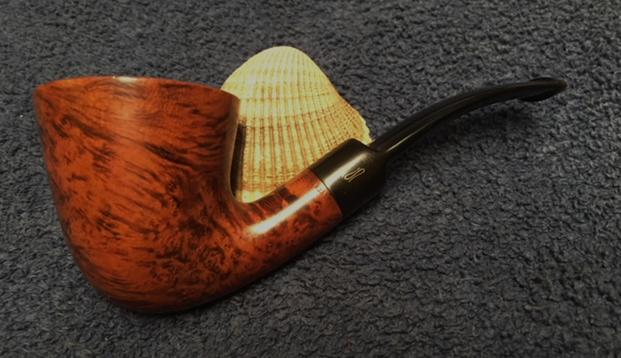
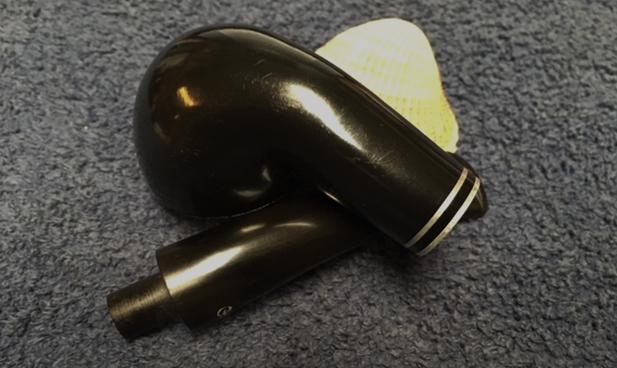
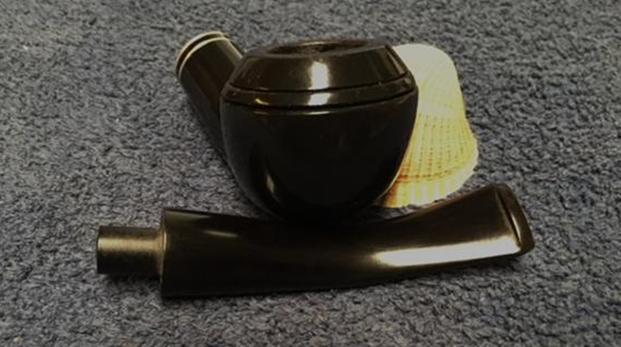
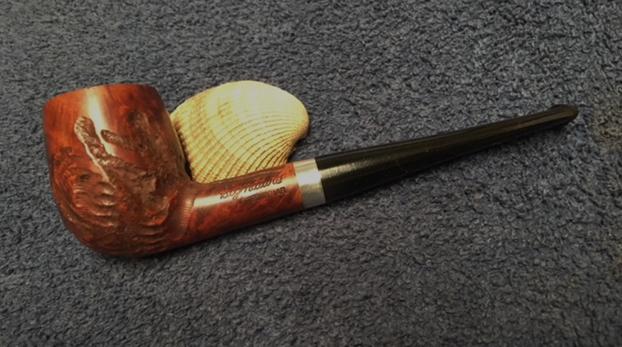
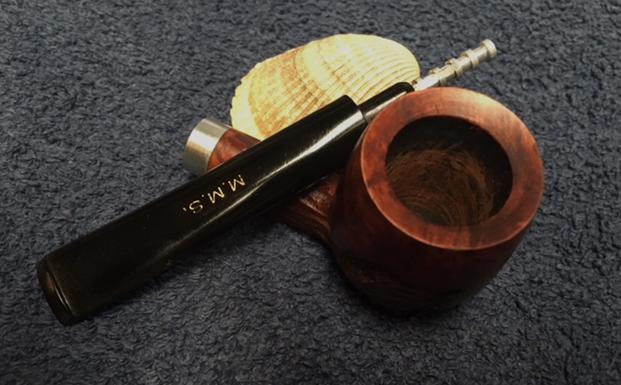
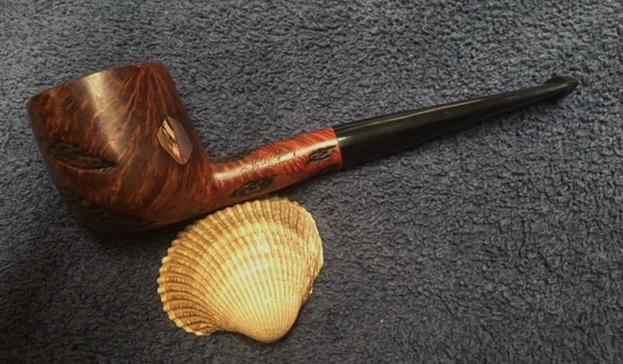
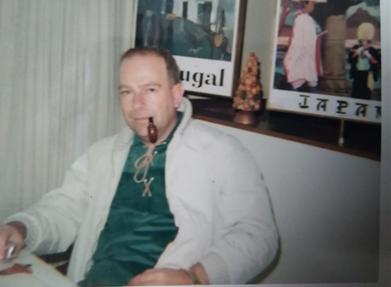
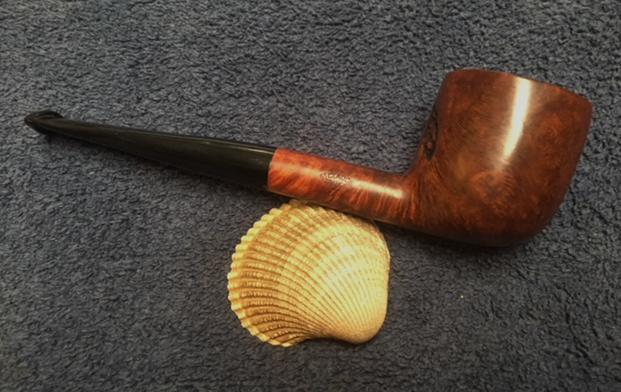
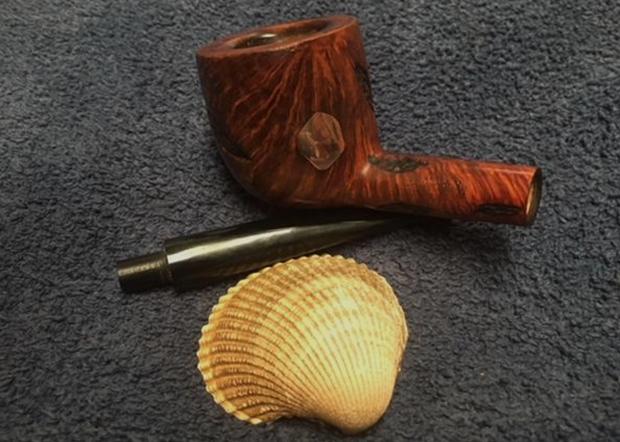
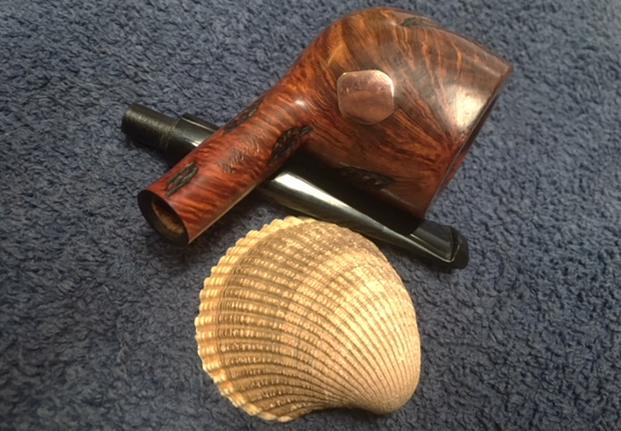
I was emailing back and forth with John, a pipeman in Edmonton who wanted to sell of his pipes. He was cleaning up things and thought he would see if I was interested in them. He said that he had several Baris and a couple of Svendborgs that were in the lot and he wanted to move those out. He sent me photos of the pipes he had and we soon struck a deal. Since we were both in Canada it did not take long for the package to make its way to me. I opened it and went through his pipes to see what I had to work on. There were some pipe racks and accessories in the box as well. I went through the pipes and set them aside. Today I decided it was time to do some more work on the lot. I chose to work on the second of the Svendborg Hand Made Pipes – this one a squat Dublin. I have included the photos of the pipe that he sent to me before I purchased the lot. 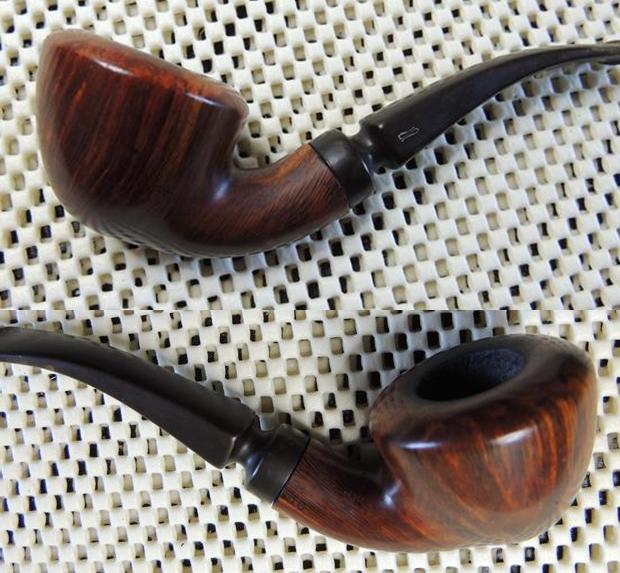
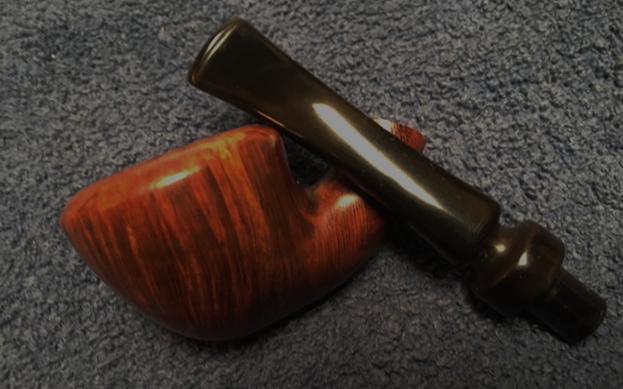
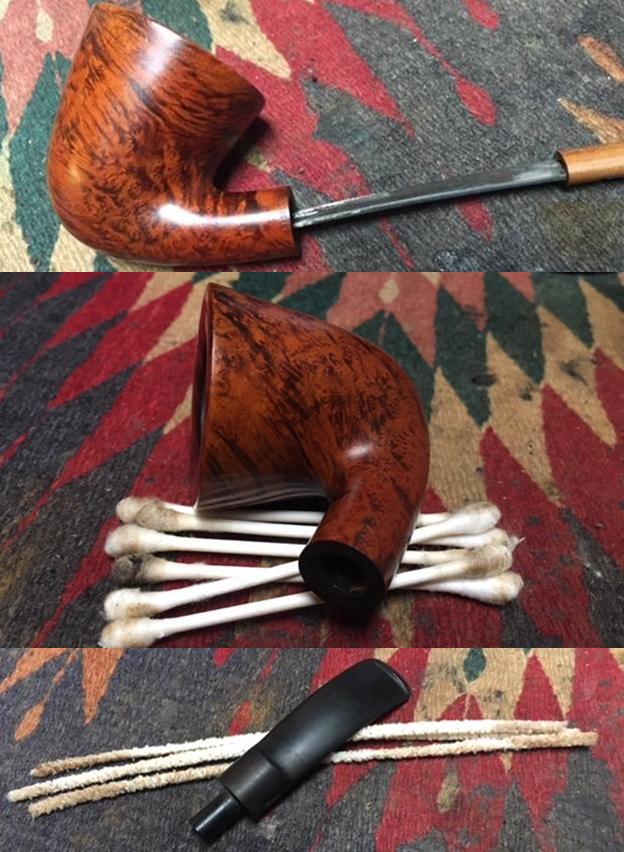
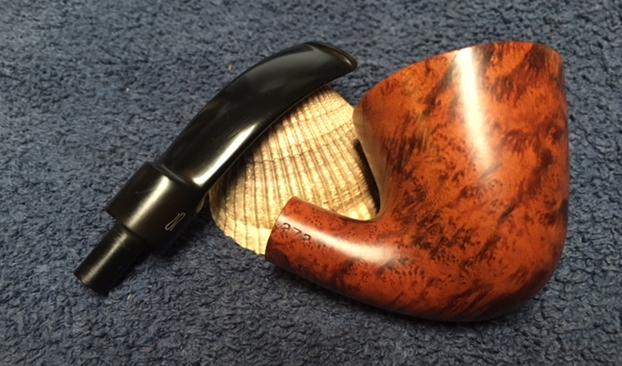
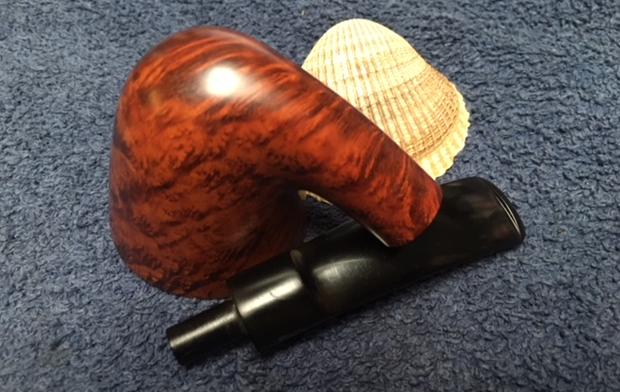
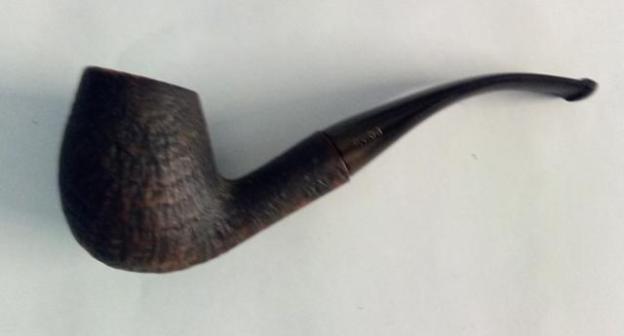
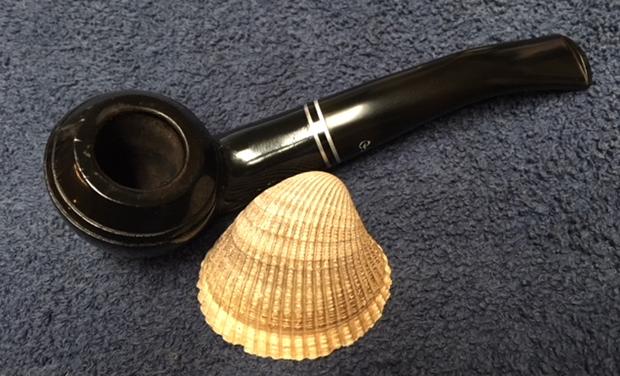
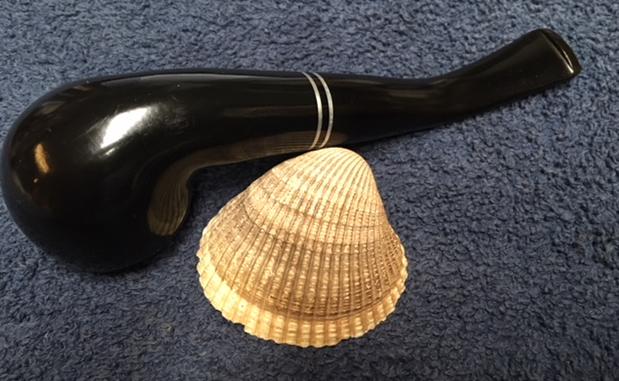
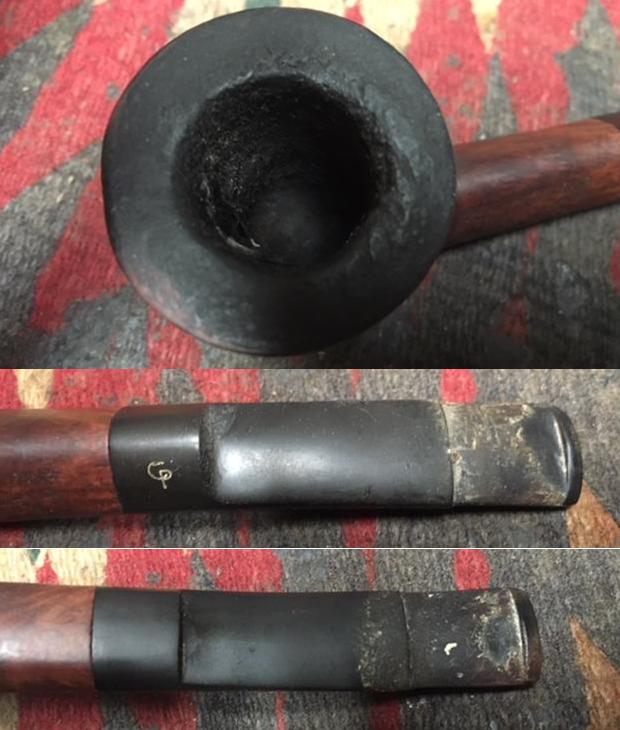
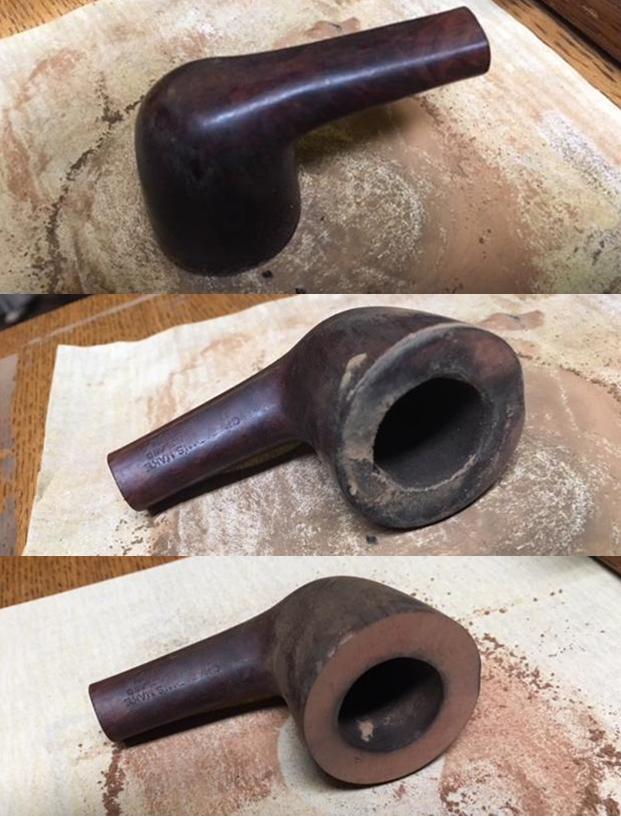
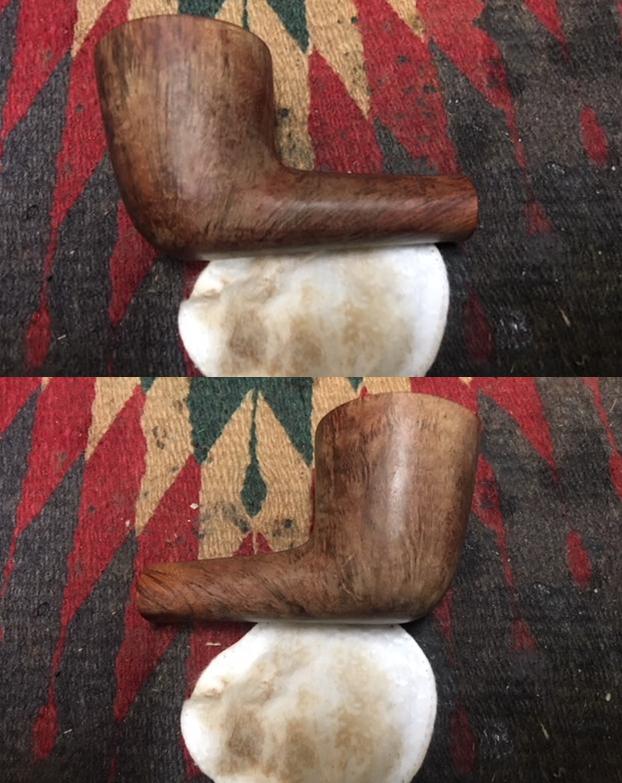
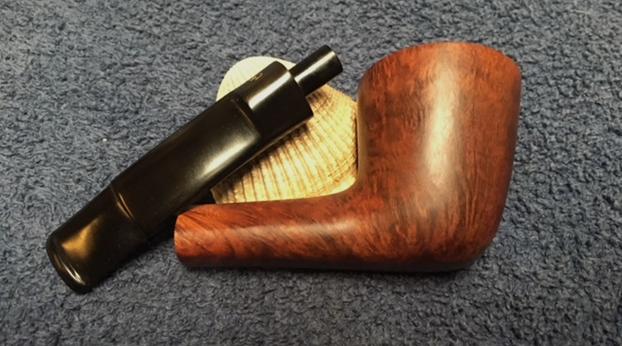
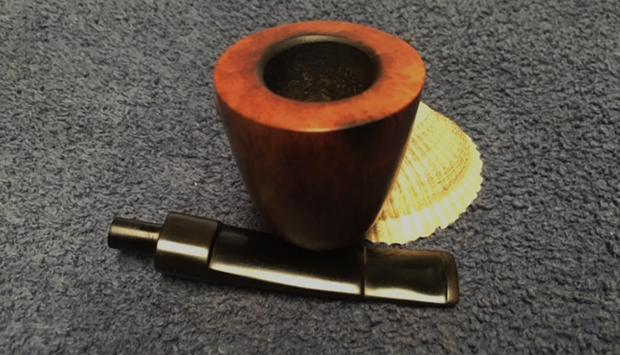
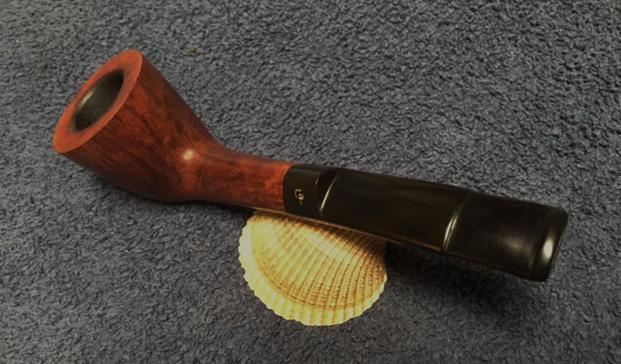
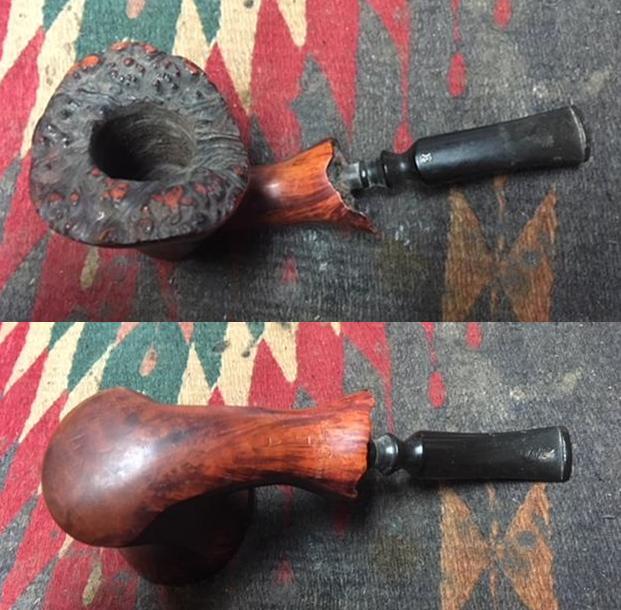
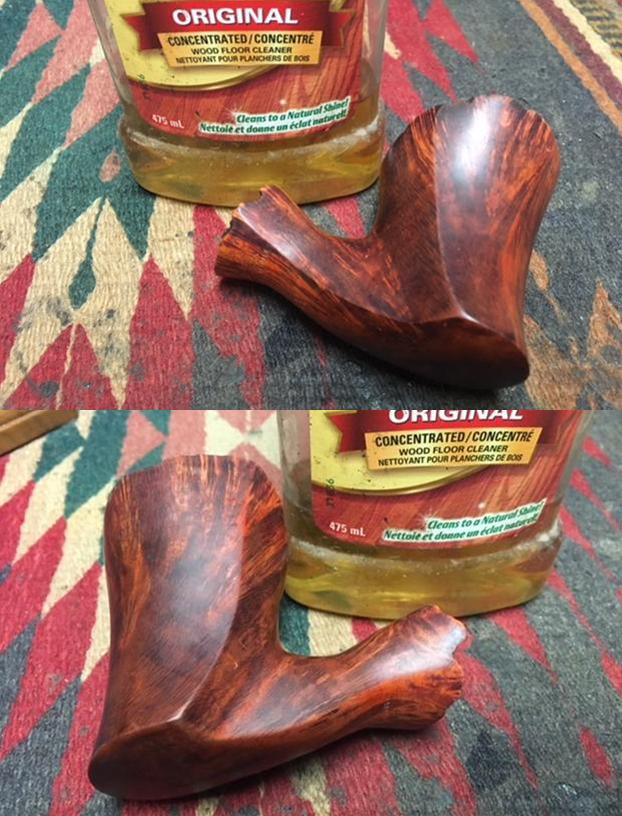
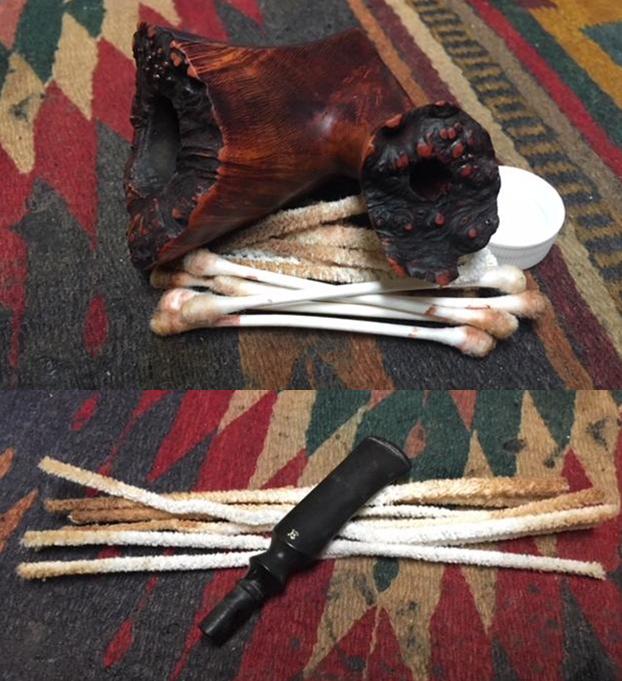
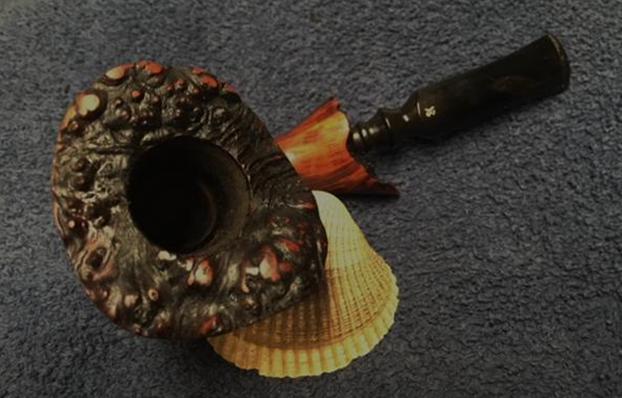
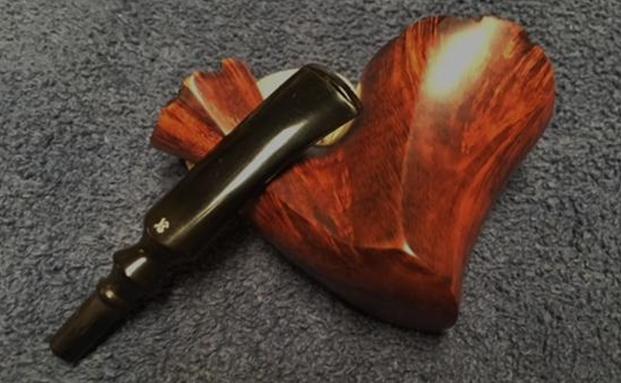
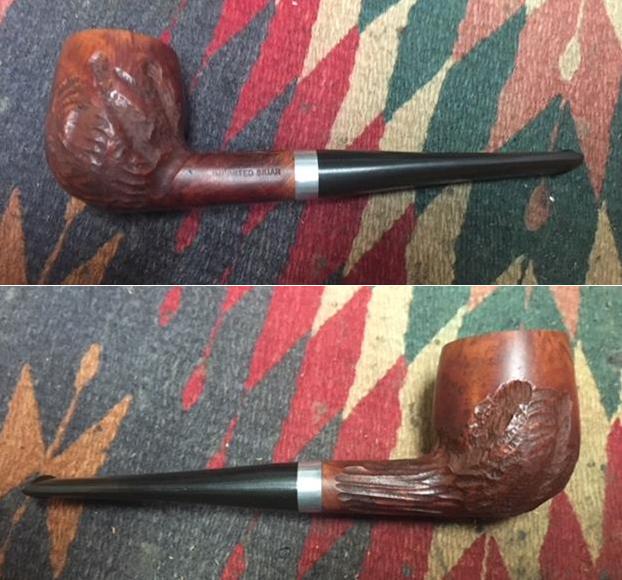
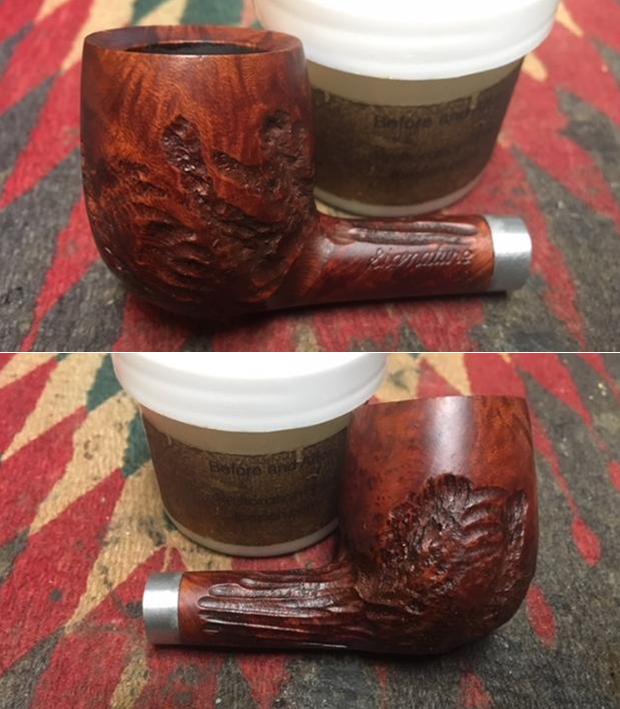
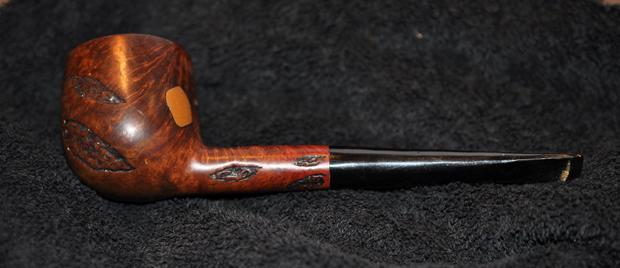
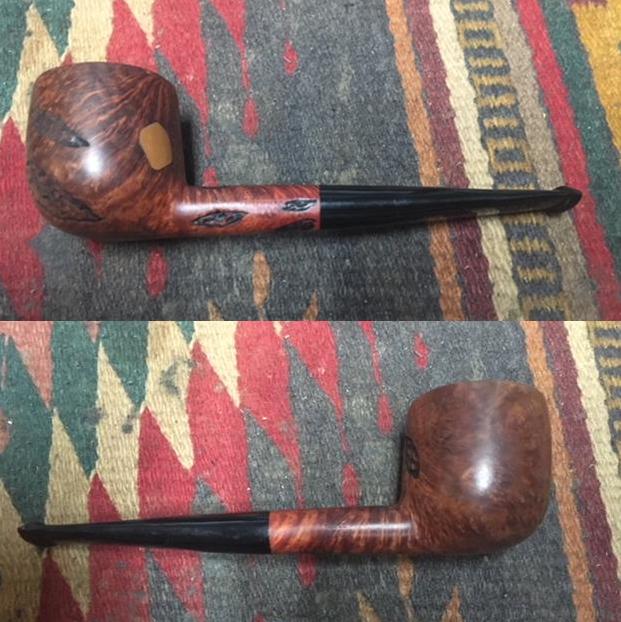
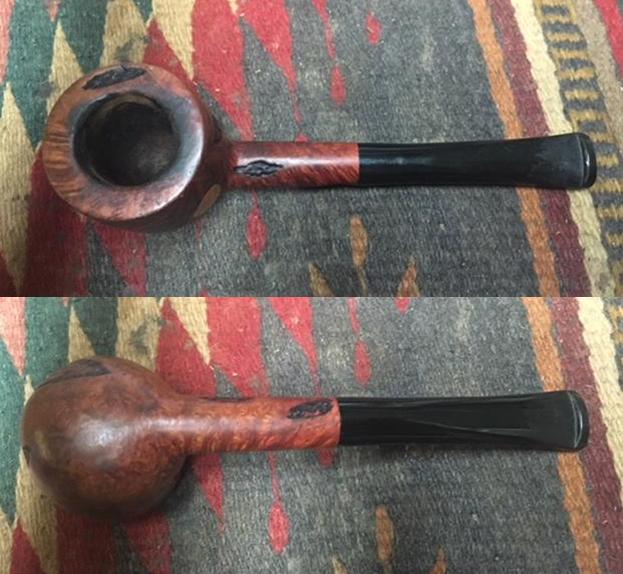
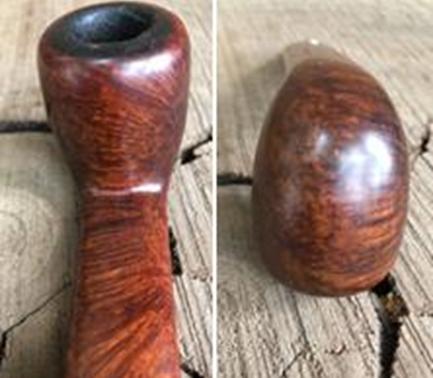
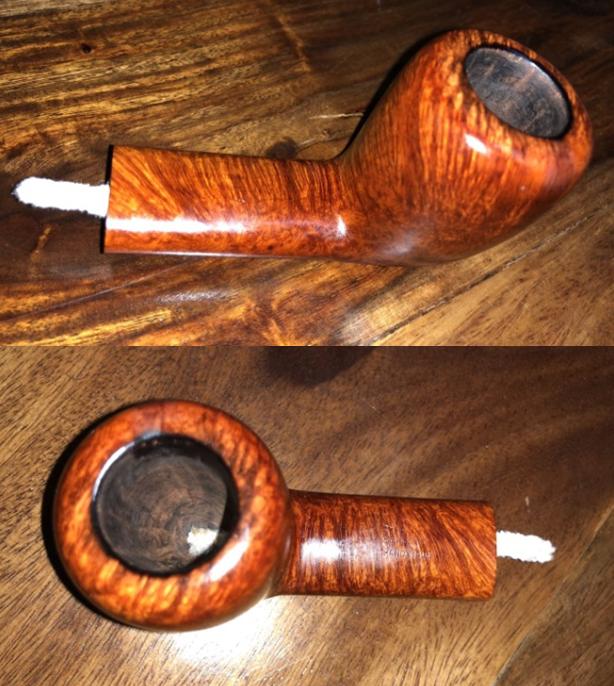
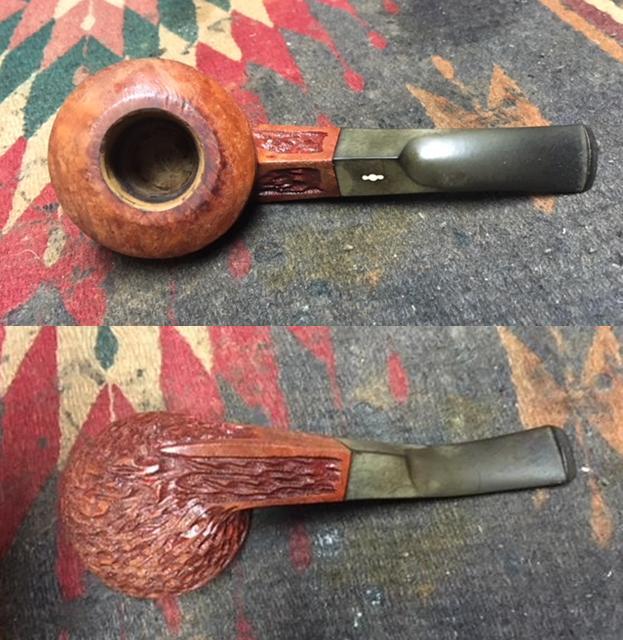
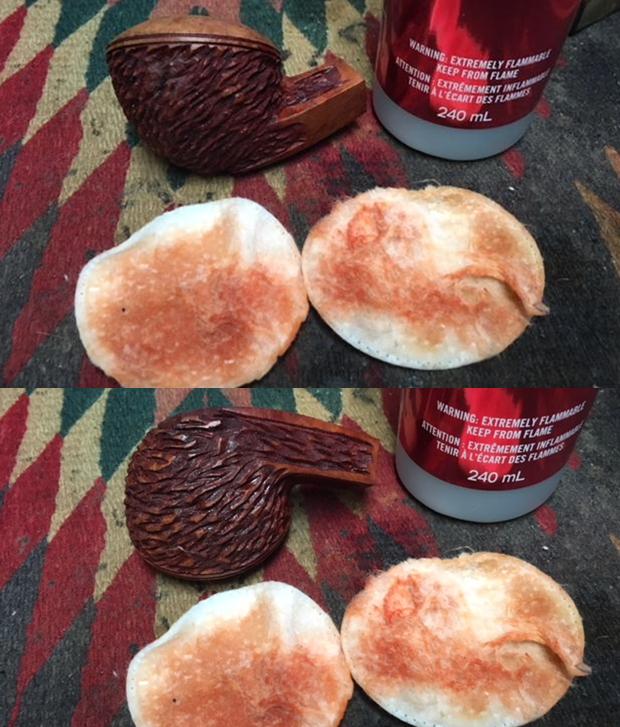
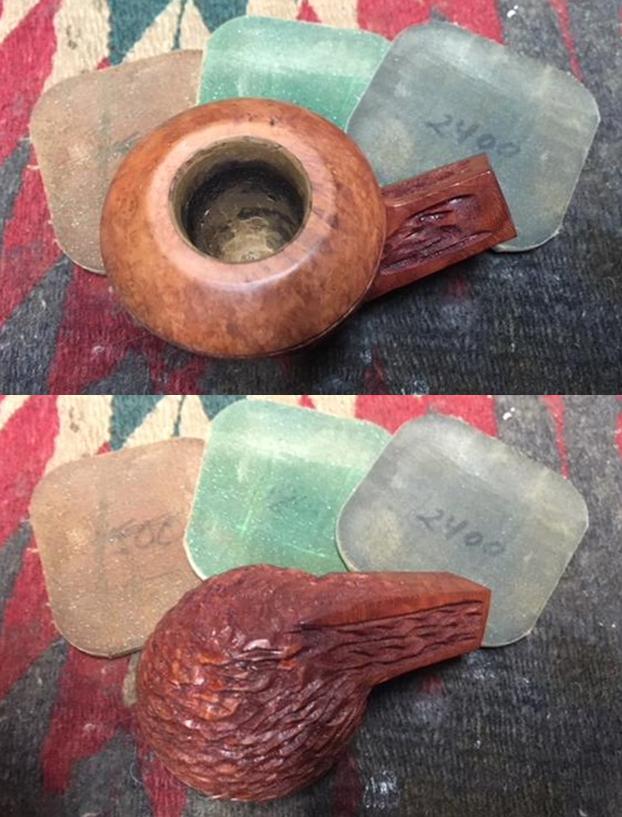
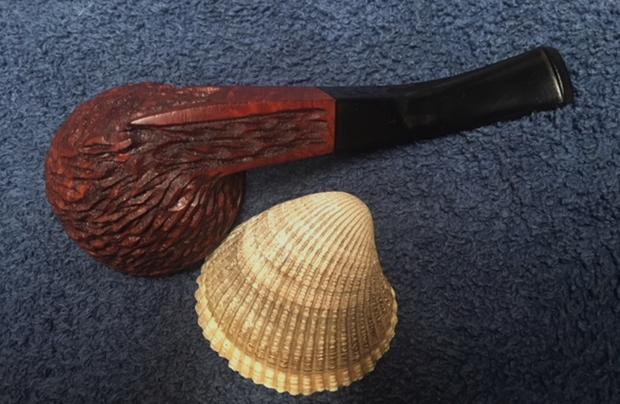
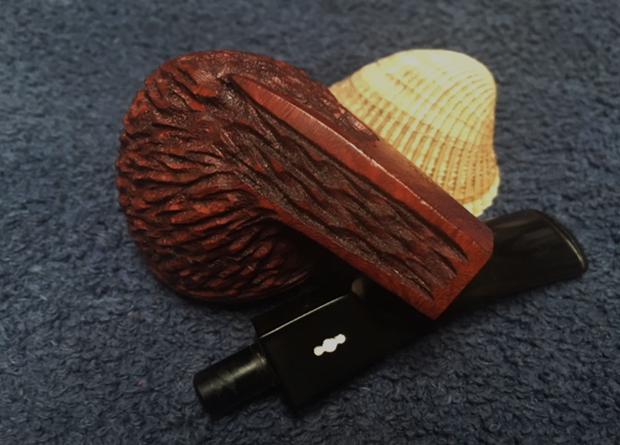
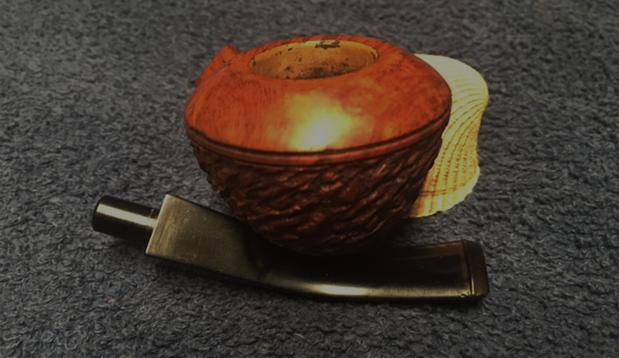
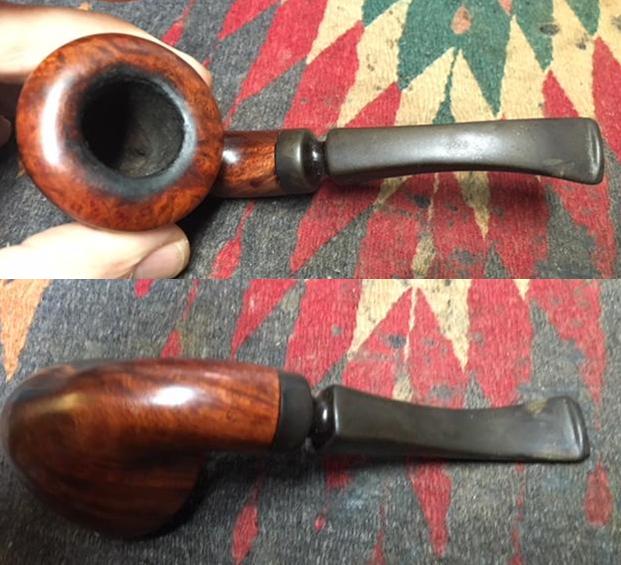
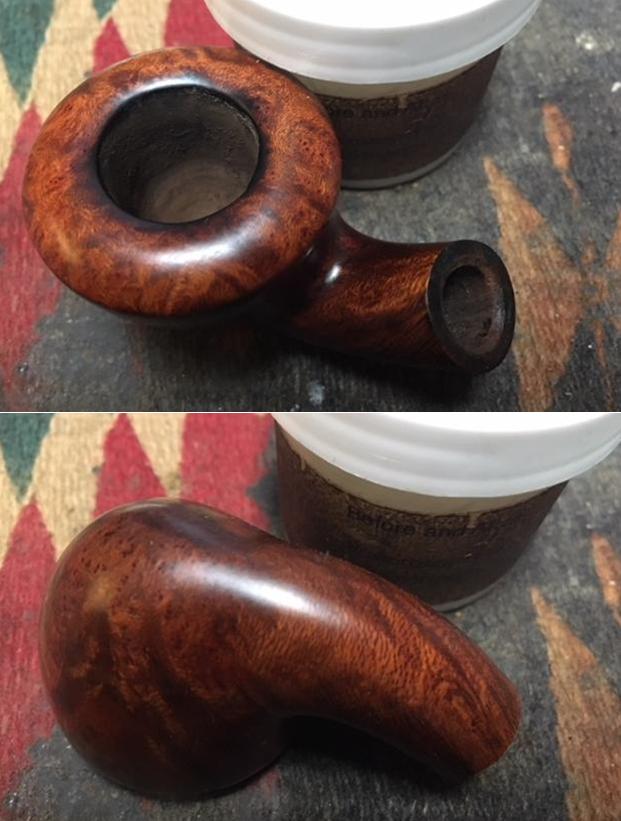
 You can see that this was also a well-loved pipe and one that he smoked often. The finish on the sides and shank was in good condition but dirty. The rim top had an over flow of lava on the top but otherwise looked undamaged on the inner and outer edge. Under the tar and lava it looked like the rim top was in good condition. The contrast stain highlighted the beautiful grain on the briar. The bowl was caked and would need to be reamed but otherwise good condition. The stem was loose in the shank and I was able to move it side to side and up and down. The diameter of the shank and the diameter of the saddle on the stem were slightly different and there is not much that can be done due to the stamping on the underside and around the edge. I will need to tighten it up as much as possible and work on the alignment. The stem was oxidized and lightly pitted from the oxidation. There was tooth chatter on the underside of the stem near the button. I took the following photos of the pipe before I began the cleanup. (The two pipes came in an original Svendborg box that is marked Svendborg Bark. I learned from my work on the first pipe that it was the correct box for the pipe.)
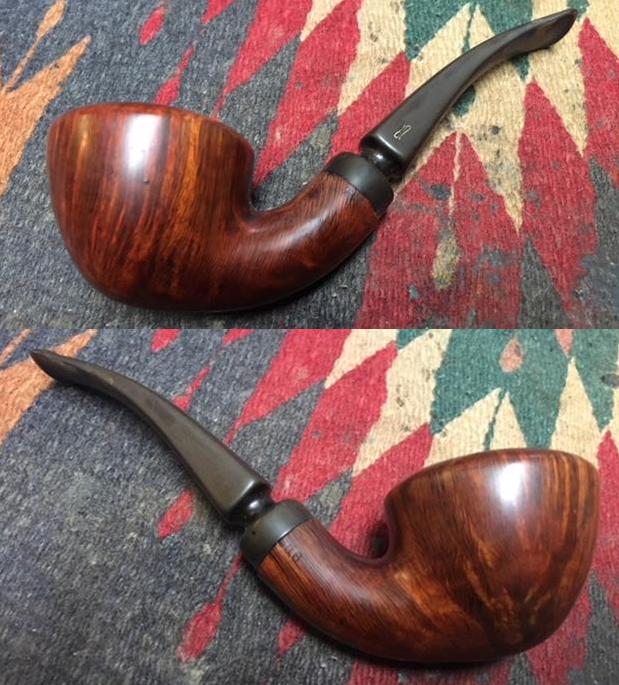
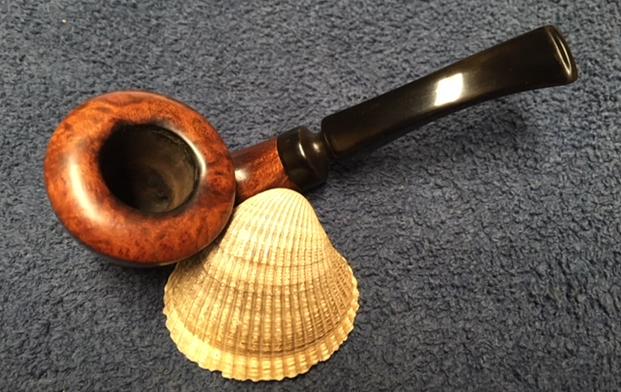
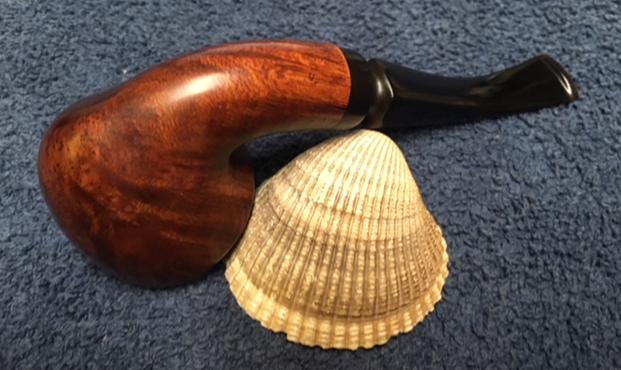
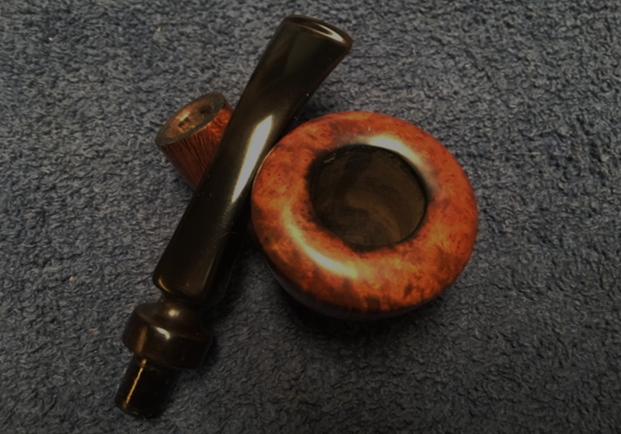
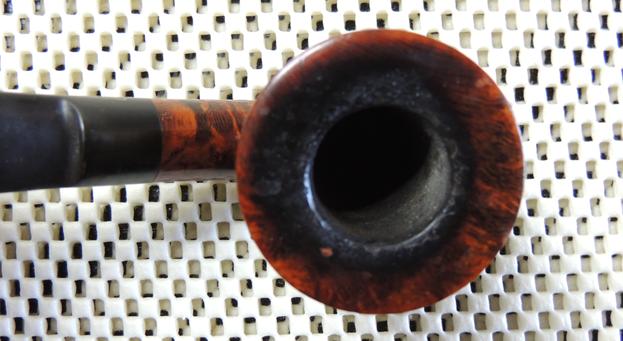
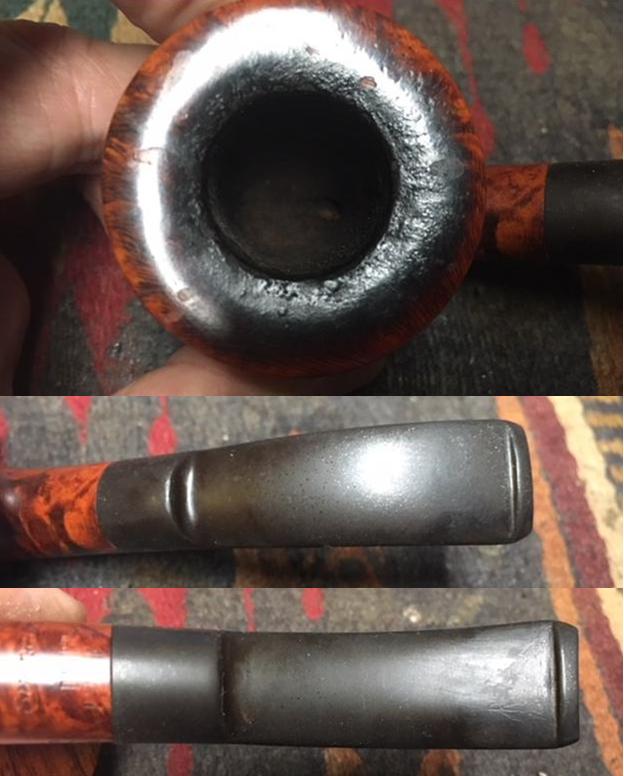
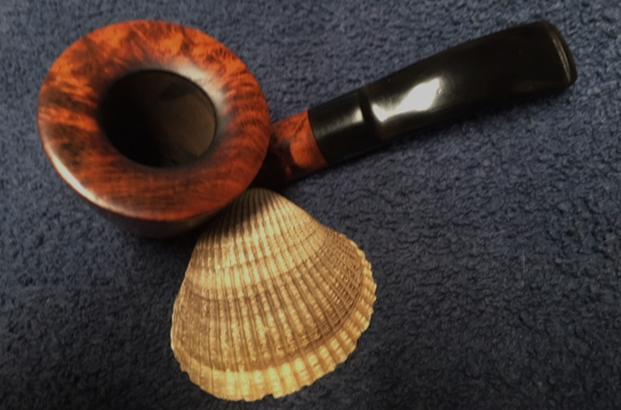
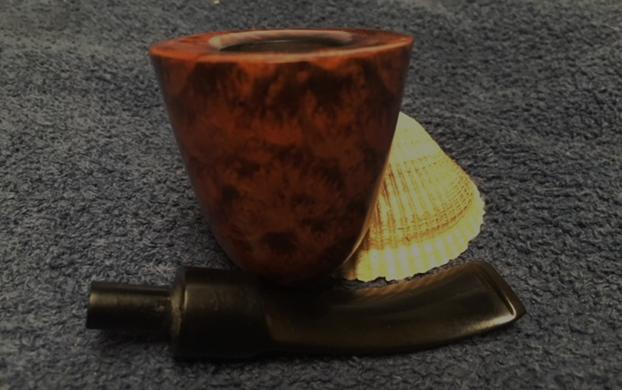
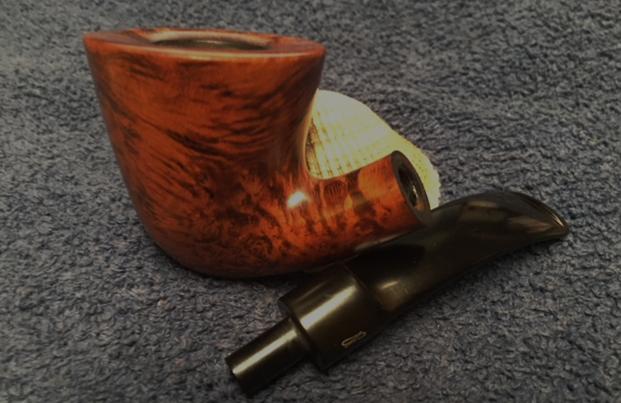
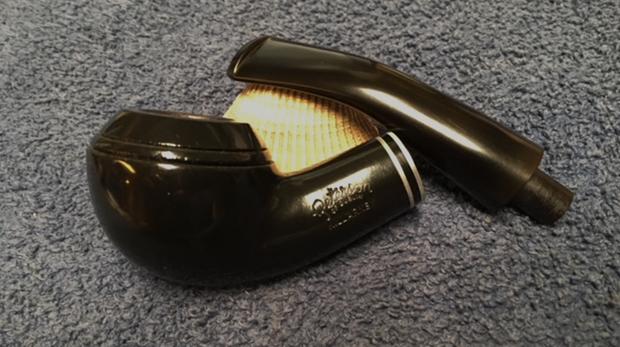
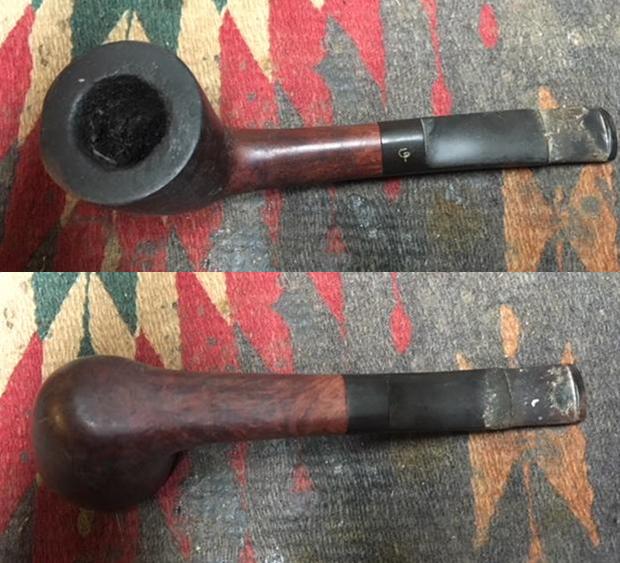
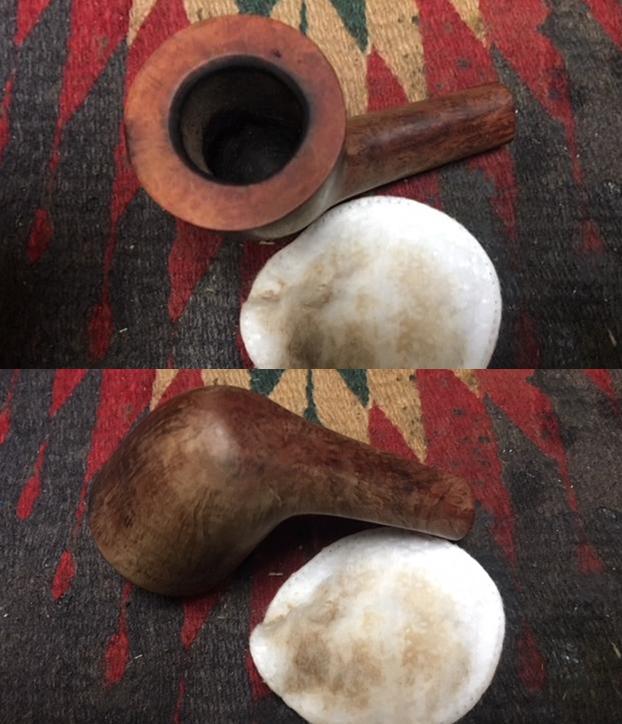
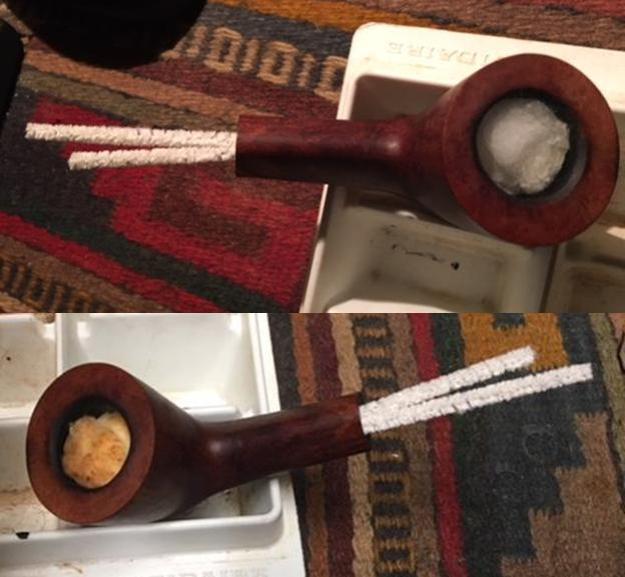
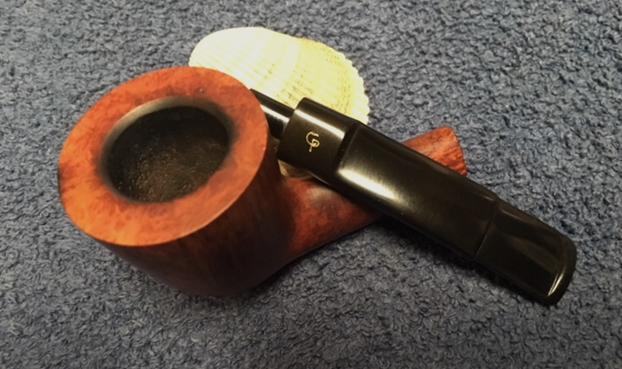
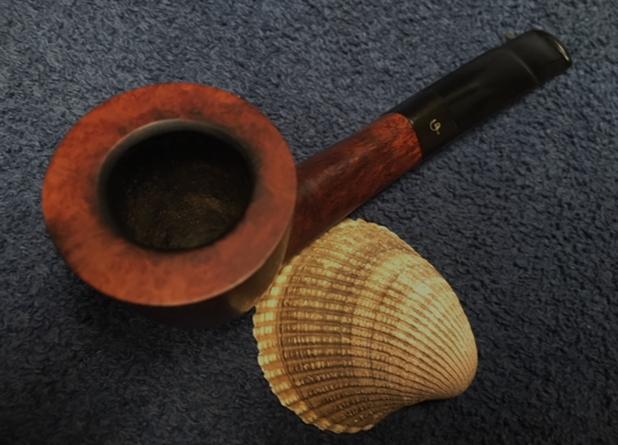
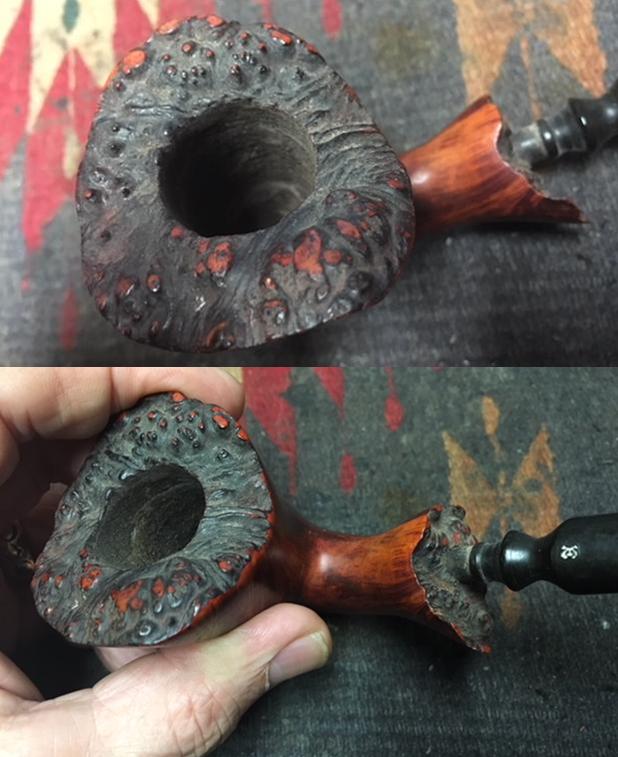
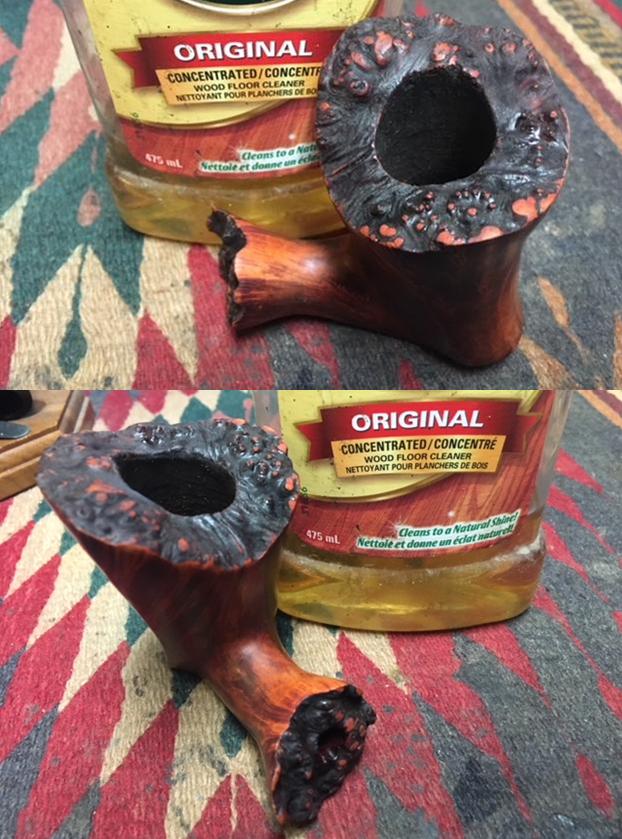
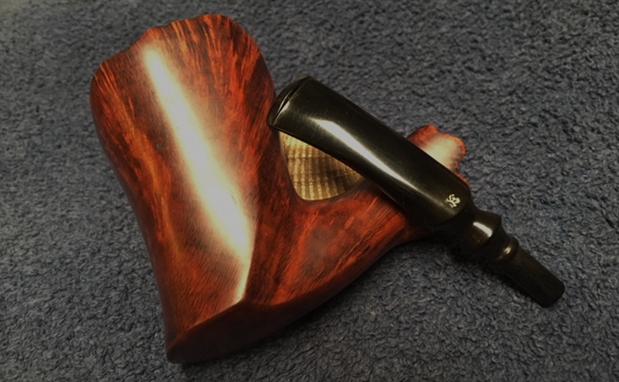
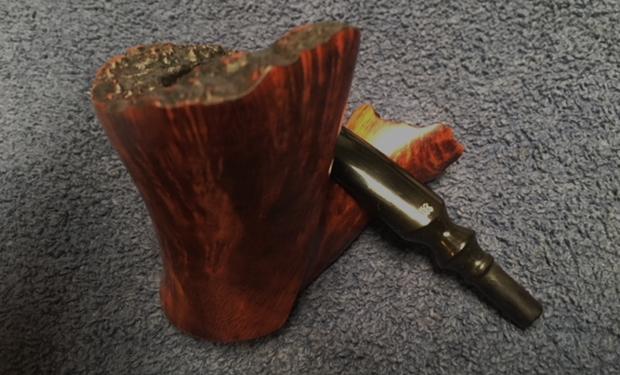
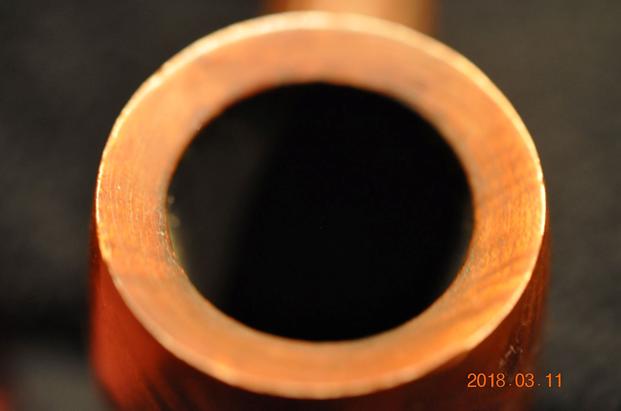
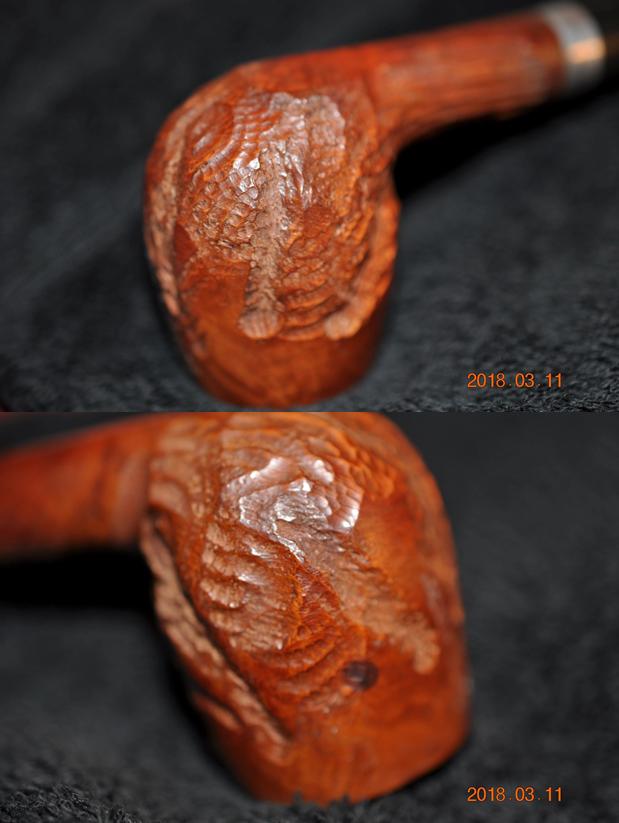
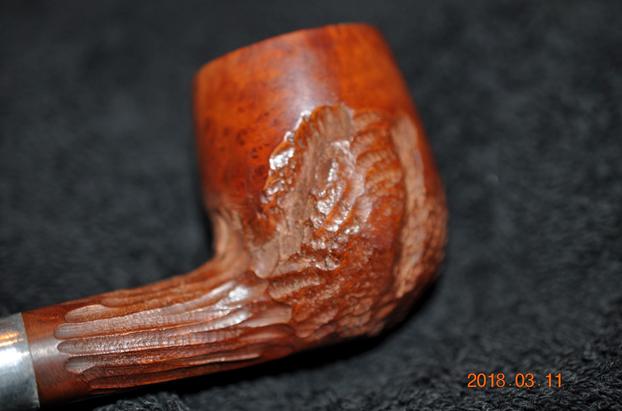
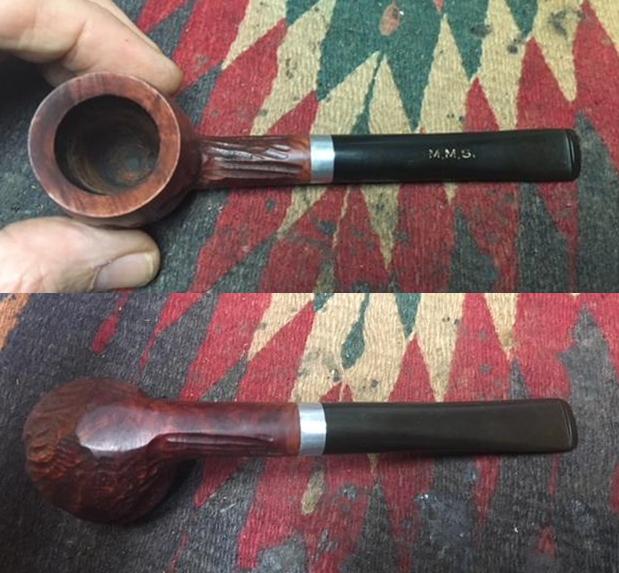
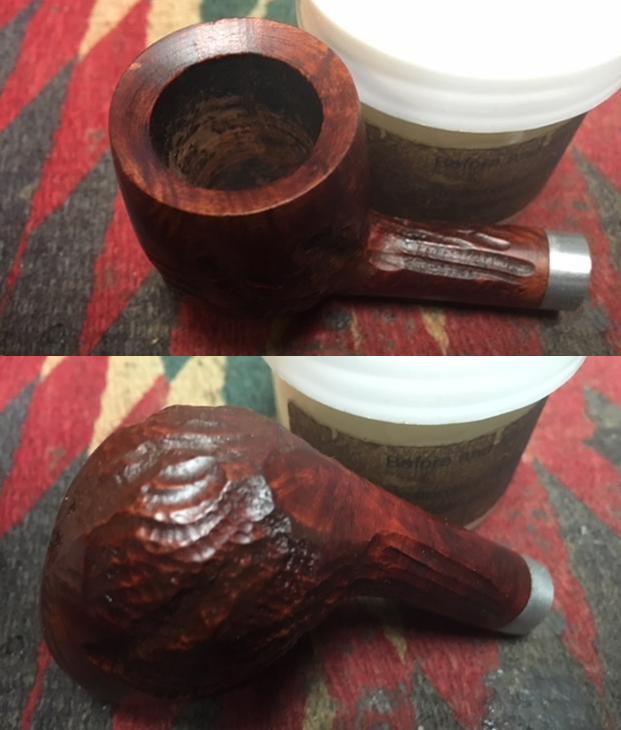
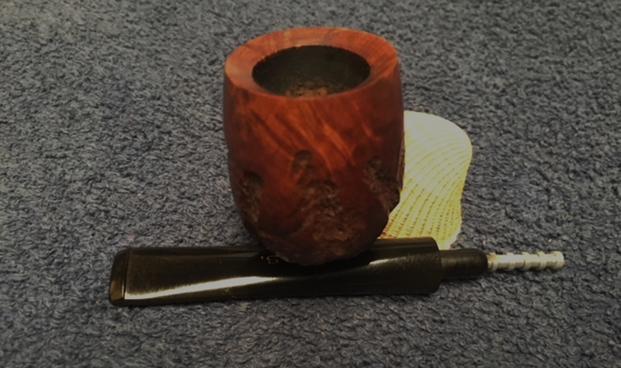
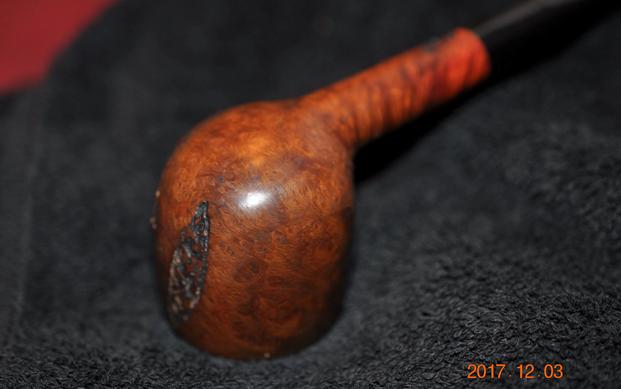
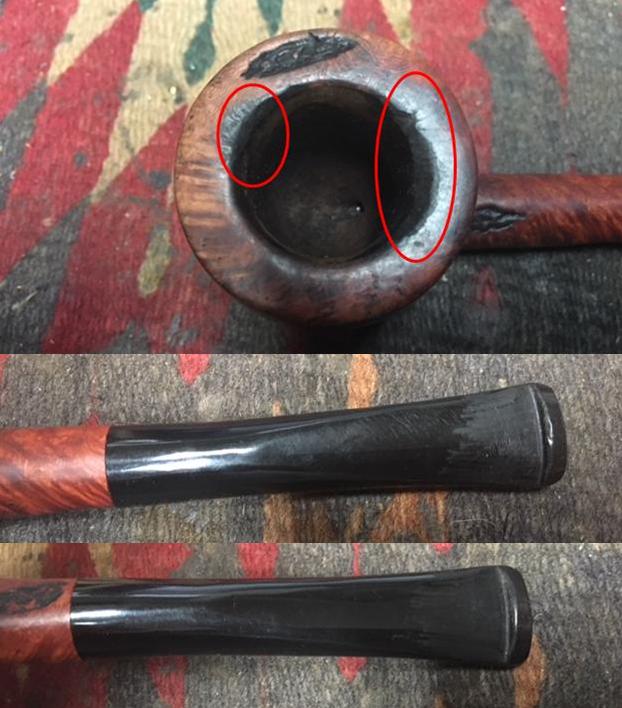
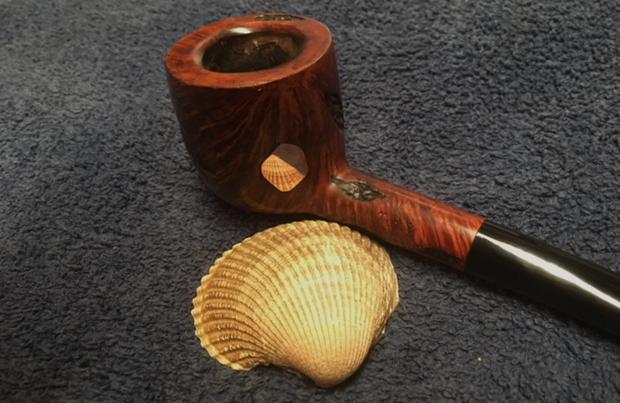
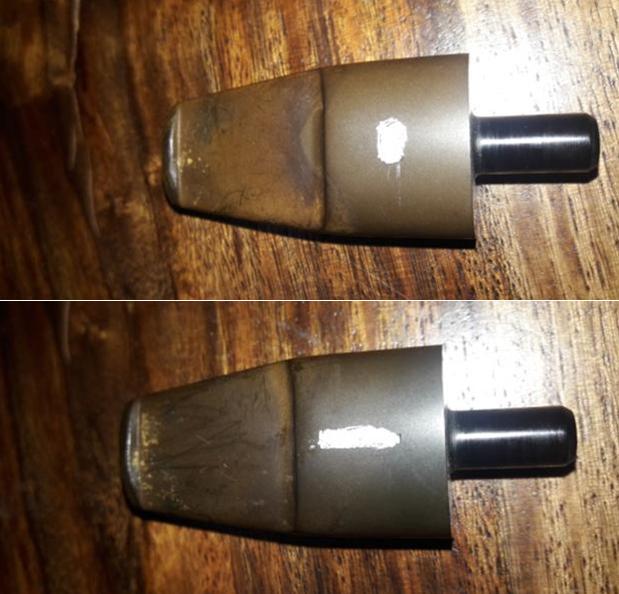
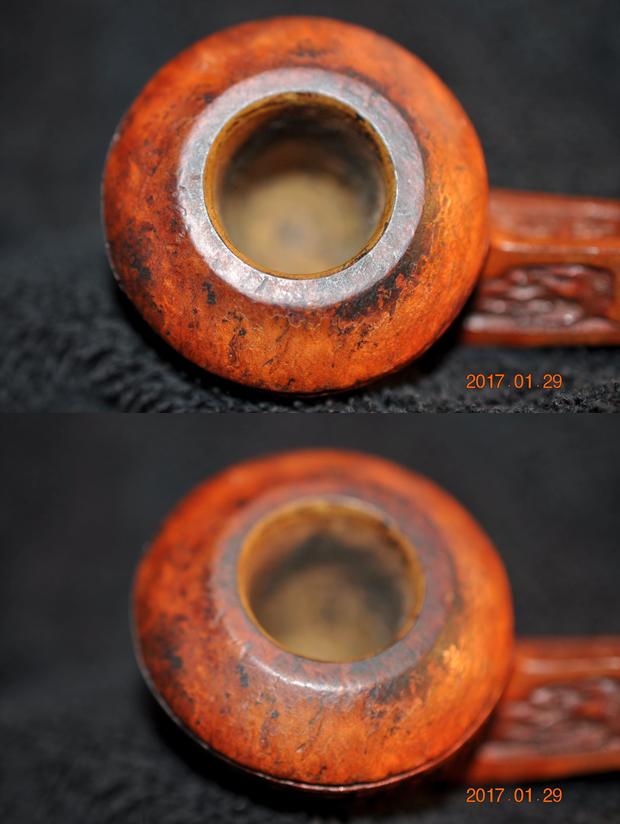
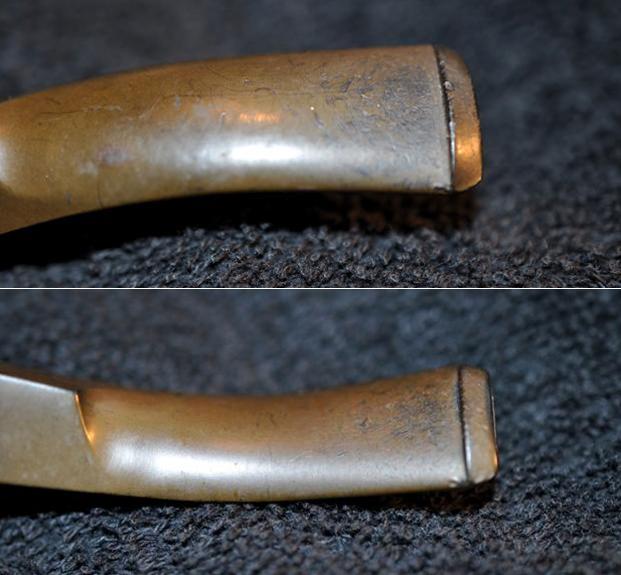
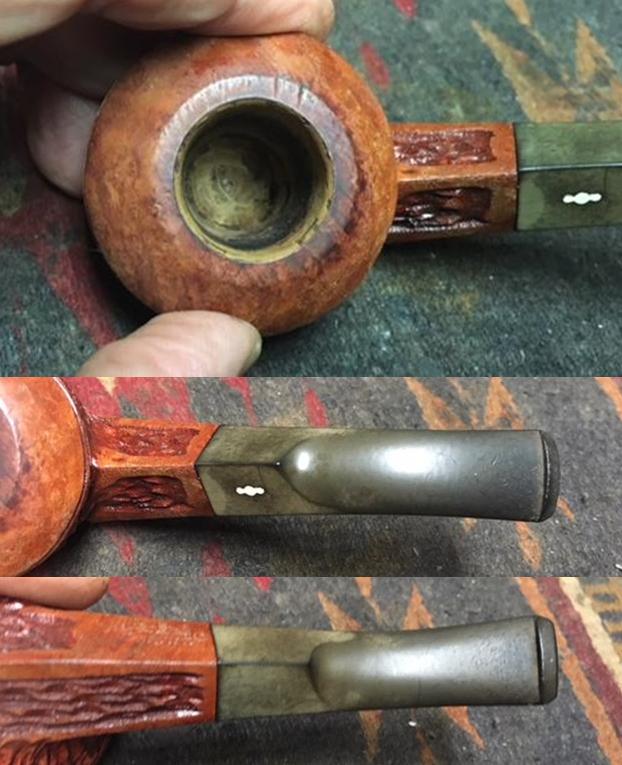
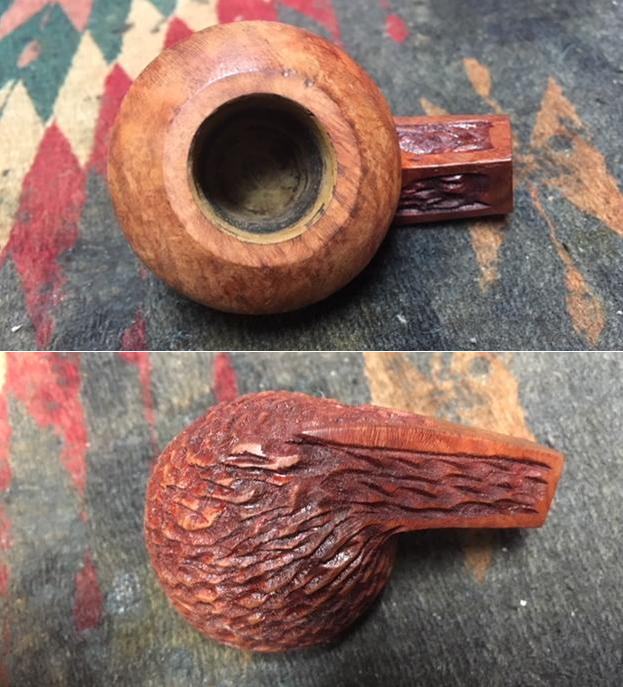
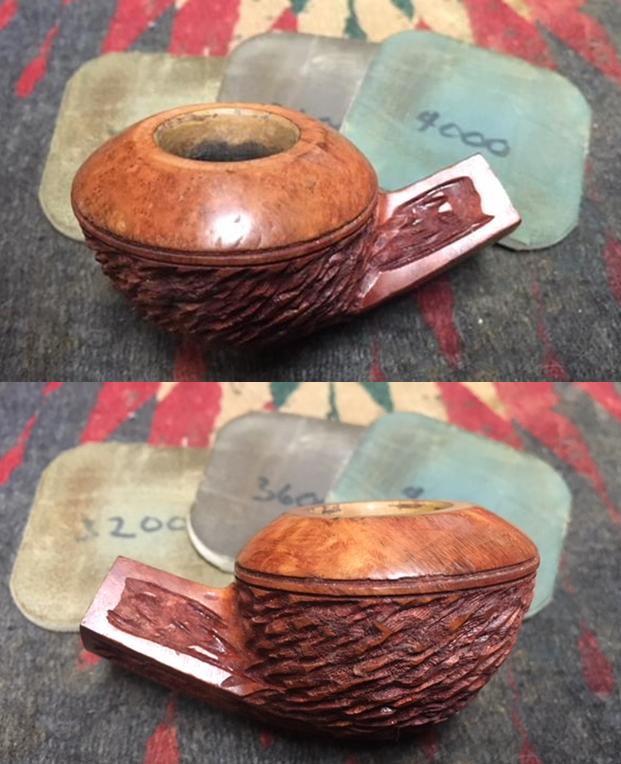
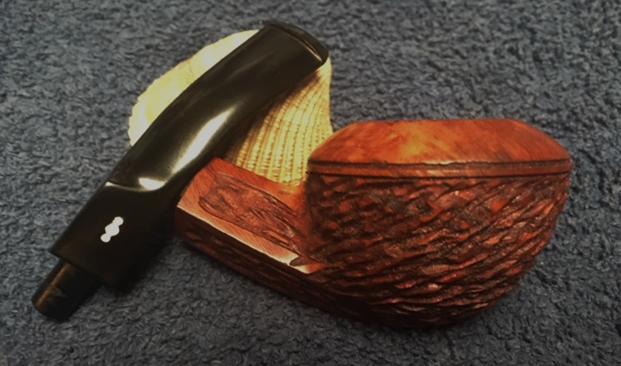
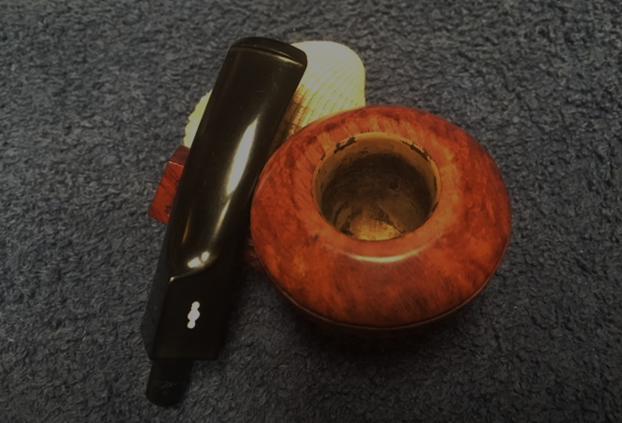
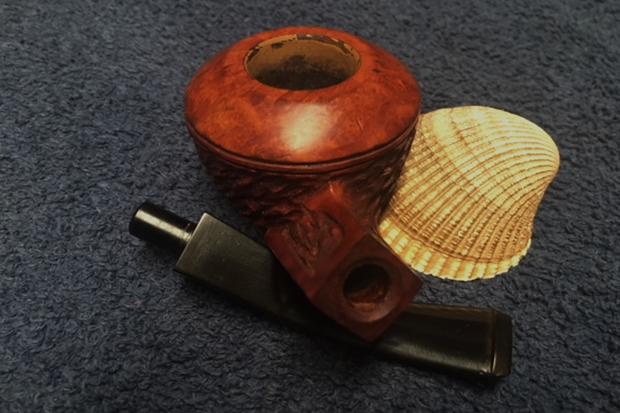
 I took some close up photos of the rim top and the stem to show the condition of the pipe when I started. The rim top shows a thick buildup of tars and oils – lava from the inner edge of the bowl outward over most of the rim top. Other than the tar around the inner edge of the bowl the rim shows some nice grain. The stem surface is in good condition other than some oxidation and pitting on the surface of the blade. There was some tooth chatter on the underside of the stem near the button.
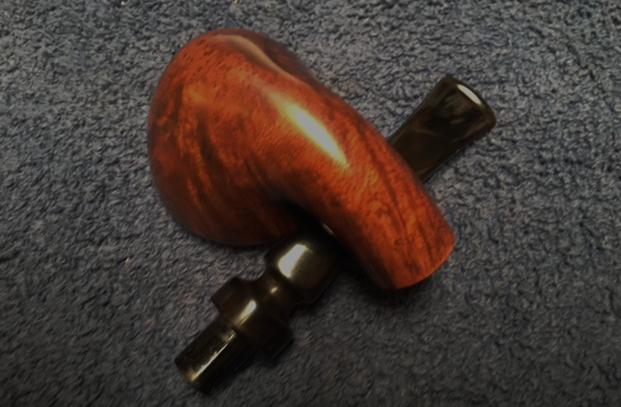
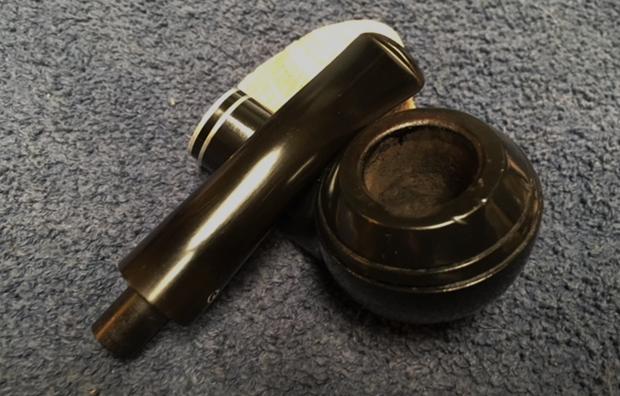
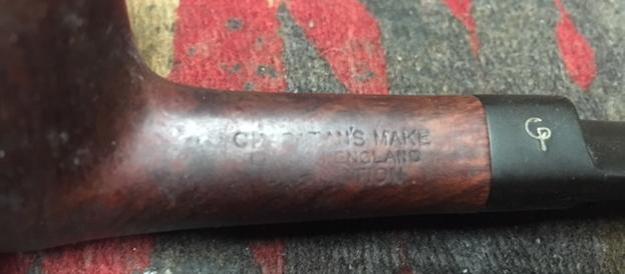
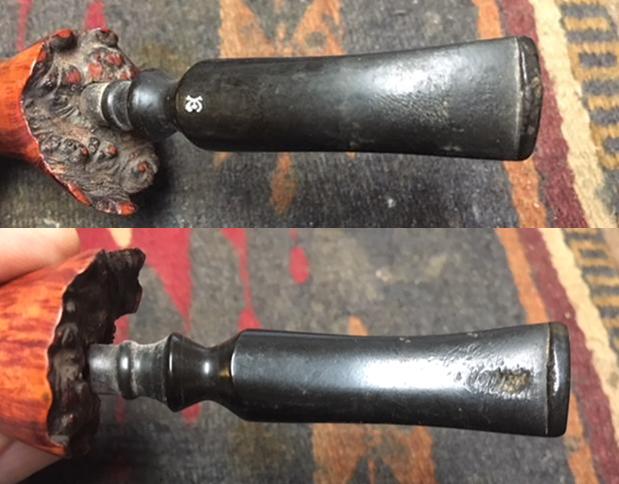
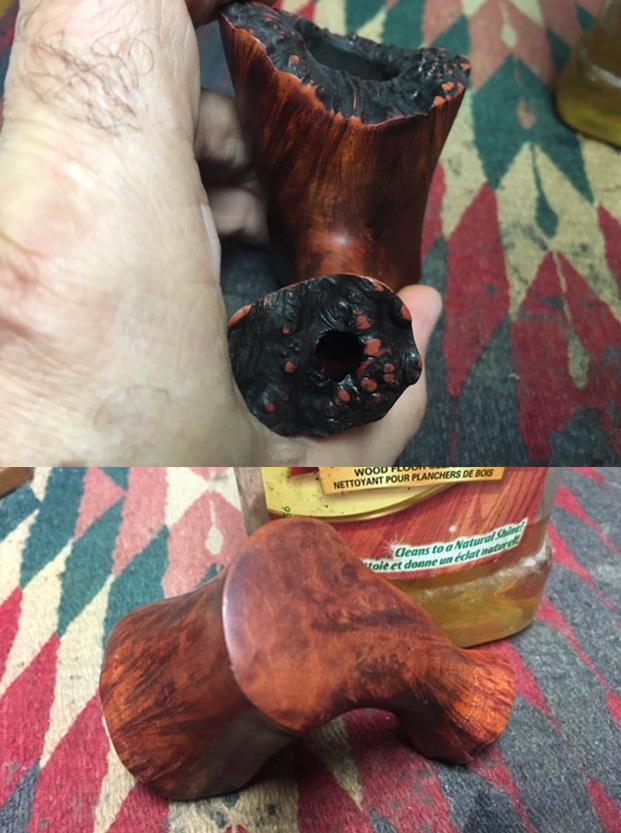
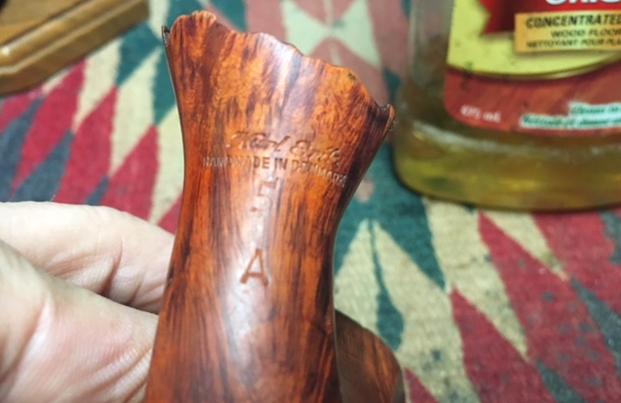
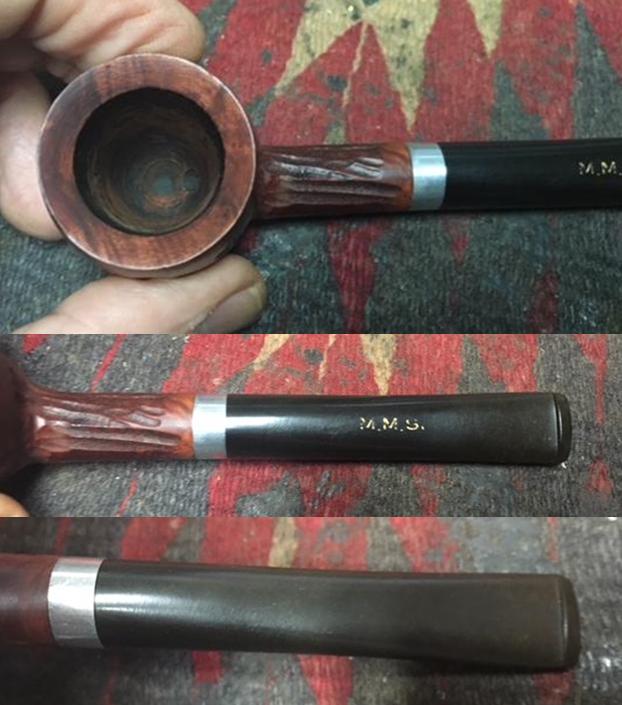
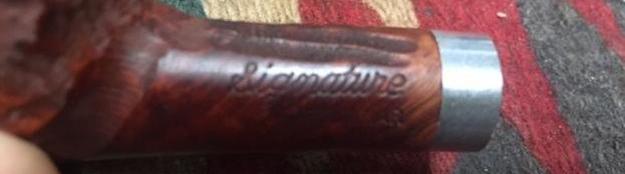
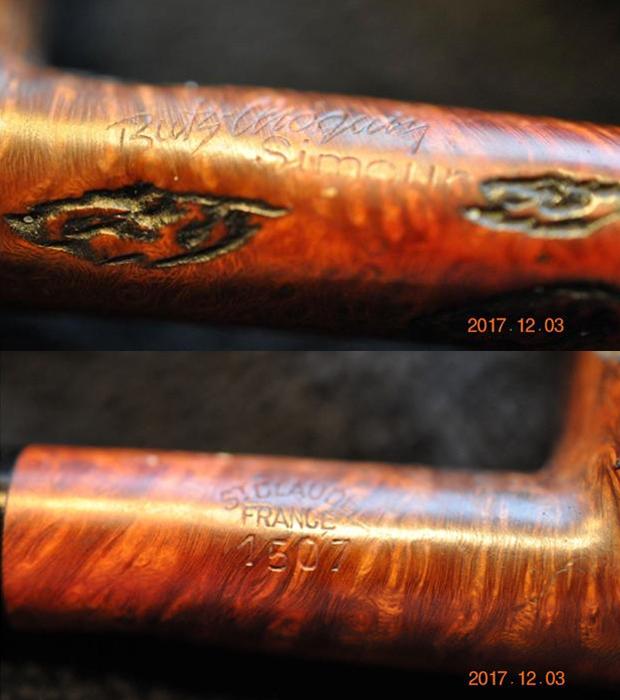
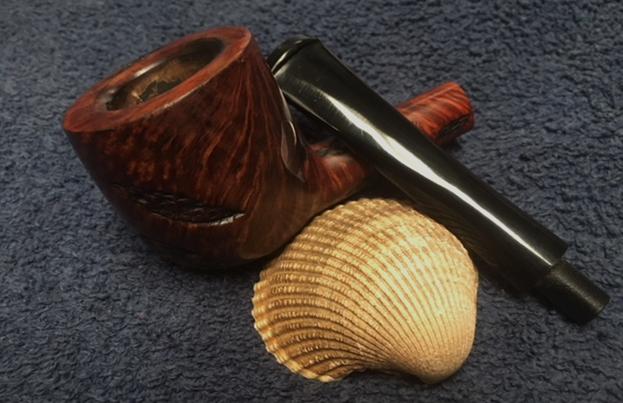
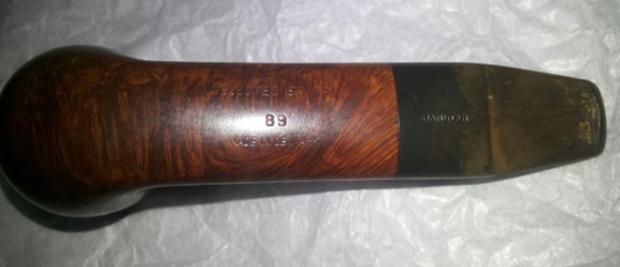
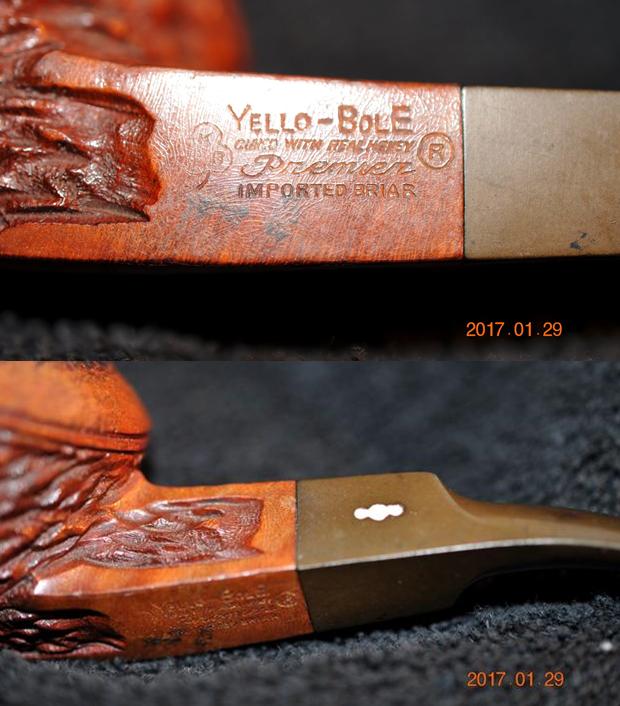
 I took photos of the stamping on the underside of the shank and around the stem/shank junction. On the underside it was stamped Svendborg over Danish over Hand Made. Like the previous Svendborg this one was stamped around the shank from the left side across the top edge it reads Barkentine. (Perhaps this is what the Bark name on the box that came with the pipe refers to.) On the right side it was stamped 06. The stamping was faint on the curves of the shank but was still readable. The left side of the saddle stem has a stylized squashed S stamp. You can see the stem alignment issue I mentioned above in the photos below.
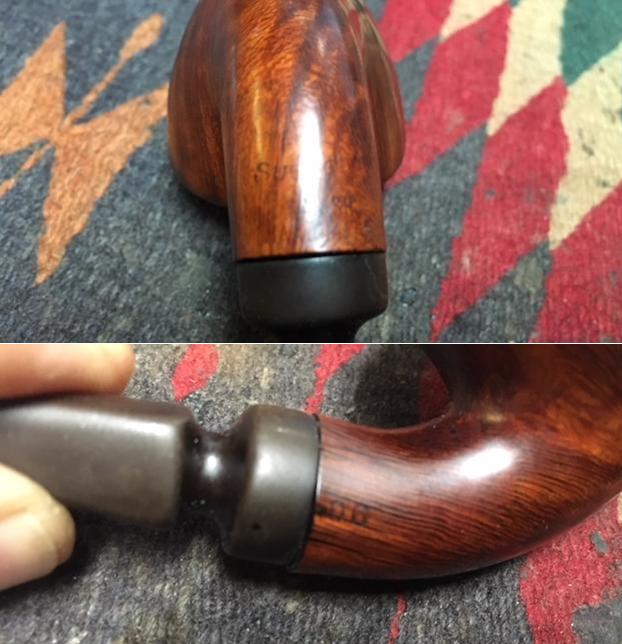 I am requoting the information I found when researching the previous Svendborg pipe.
When I am working on interesting old pipes (even sometimes those not so interesting) I like to know a bit about the background of the brand. I like to “meet” the carver to get a feel for their work and style. I don’t think I have worked on Svendborg pipes before so I felt compelled to do a bit of reading before I started the cleanup of the pipe.
I looked first on the Pipephil website (http://www.pipephil.eu/logos/en/logo-s14.html) to see what I could find. I have found through the years that it gives me a good summary of the information available and some pictures of some of the pipes from the brand. I have included a screen capture of the first pipe in the listing as it shows the logo on the stem and a bit of the stamping that is on the underside of the shank. 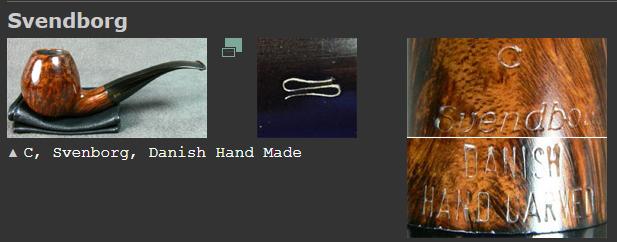 From the site I learned that the “Brand founded in 1970s by Henrik Jørgensen, Poul Ilsted and Tao Nielsen. They bought an old factory (Nordisc Pibefabriker) in Svendborg on Funen Island. Poul and Tao gradually bowed out from machine manufactured pipes (1982) and Henrik Jørgensen manages the brand until its takeover by Design Berlin (D) in the late 90ies. Kaj C. Rasmussen jointed the firm for several years. 17 employees worked for this brand under Henrik Jørgensen direction.
That link gave me a bit of information on the brand – a joint venture of Henrik Jorgensen, Poul Ilsted and Tao Nielsen. I could see from the information that usually the carvers stamped their names on the shank of the pipe. In the case of the one I have there is no name stamp. My assumption is that the pipe was made after Ilsted and Nielsen bowed out which would put the date of the carving between 1982 and the late 90’s when Design Berlin took over. The Danish Hand Made stamping also confirms that assumption.
Next I turn to Pipedia for more information and detail (https://pipedia.org/wiki/Svendborg). I find that the articles there fill in some interesting information on the relationships and history of a given brand. In this case I found that also true. I quote pertinent pieces of the article.
Jens Tao Nielsen and Poul Ilsted Bech met each other when working together for Erik Nørding and soon became close friends. Both felt a bit tired to make nothing but bizarre fancy shapes and agreed they wanted to produce pipes of more style and more classicism. They decided to establish their own brand “Tao & Ilsted” – But how to do it?
A good fortune brought them in contact with Henrik Jørgensen, a passionate pipe lover and a wealthy Copenhagen banker who was willing to retire from bank business and change his career to become a pipemaker. The trio joined in 1969 and decided to start a new pipe brand together. Nielsen and Ilsted started to search for a suitable workshop while Jørgensen took care of the finances. In early 1970 the partners found an old, closed down pipe factory in Svendborg on Funen, and bought it shortly after for a mere 16.500 Danish Kroner. It was the earlier Nordic Pipe Factory – Nordisc Pibefabriker – maybe the oldest Danish pipe factory. And now it became the home of Svendborg Piber.
The young team started with the common difficulties but success came quite rapidly after they travelled Germany in search of a distributor and met Detlef Seiffert, senior partner of Seiffert Import Co., a major German wholesaler in Kassel. Seiffert, insisting on high quality standards, started placing considerable orders with the new factory and began to market the brand very successfully in Germany. Of course Seiffert – a relative of Harry Kapp, partner of Charles Peterson of the famous Dublin pipe house – used his international contacts to promote Svendborg furthermore.
The Funen crew designed many new models for him and after a couple of month (!) they employed up to 17 people. Tao Nielsen later gratefully remembered “the big chief’s whip”: “Without him we wouldn’t have made it, he gave us decisive support. He was like an engine – something that our business lacks today.”
But in spite of it’s magnificent success the trio fell apart after less than two years, when wilful Poul Ilsted stepped out declaring he didn’t want to make serial pipes anymore, but wanted to make individual specimens… Strange enough, he approached this aim returning to Nørding!
Ilsted’s argumentation doesn’t seem to be absolutely fair: even though Svendborg turned to produce mainly serial pipes under Seiffert’s influence each of the three partners was free to work on his very own one of a kind pieces as well! Since it was Seiffert’s basic idea to profit from – especially – Tao ‘s and Ilsted’s creativity to design new shapes. There are many knowledgeable collectors who confirm that these early Svendsborg pipes class among the most individual, innovating and exiting designs Danish pipecrafters created at that time…
The firm developed well and prospered throughout the 1970’s but around 1980 dissensions between Tao and Jørgensen occured. Tao: “Most pipes were delivered to the United States and whereby the Americans tried to dictate us the conditions. It was not only so that their taste and their view on aesthetics were simply horrible – no, moreover they wanted that the pipes should be as cheap as possible. That did not suit my plans at all, for I strove for high quality and artistic freedom in the end.”
Tao and Jørgensen, who tended to accommodate the US customers’ wishes, could not find a compromise on their different opinions, and so Tao left the firm in 1981 and opened his own pipe workshop near the harbour of Svendborg.
…Henrik Jørgensen continued Svendborg Piber bravely for more than a decade on his own until he finally sold the brand to Seiffert around the midst of the 1990’s. Seiffert, focusing on their mainstay brand Sillem’s, sold Svendborg – a ghost brand now – again before 2000 and the current owner is Planta’s Design Berlin.
That gives a good picture of the history and development of the Svendborg brand and the connection to some of the great carvers of Danish pipe history. Armed with that information I turned to work on the pipe in hand.
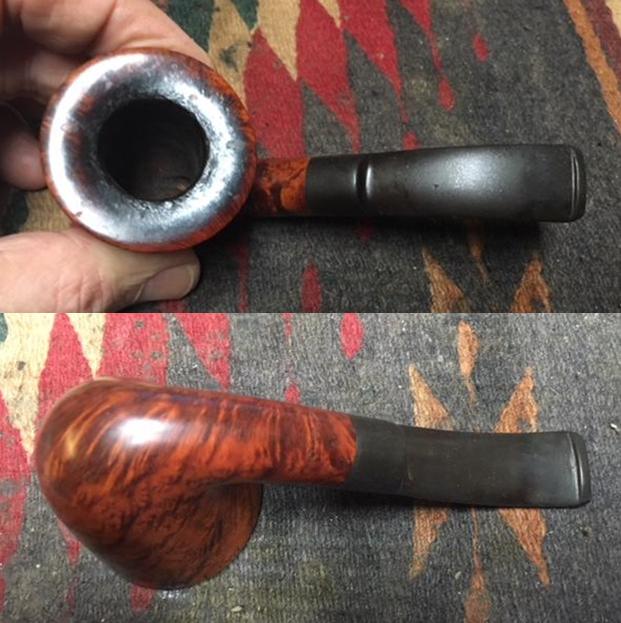
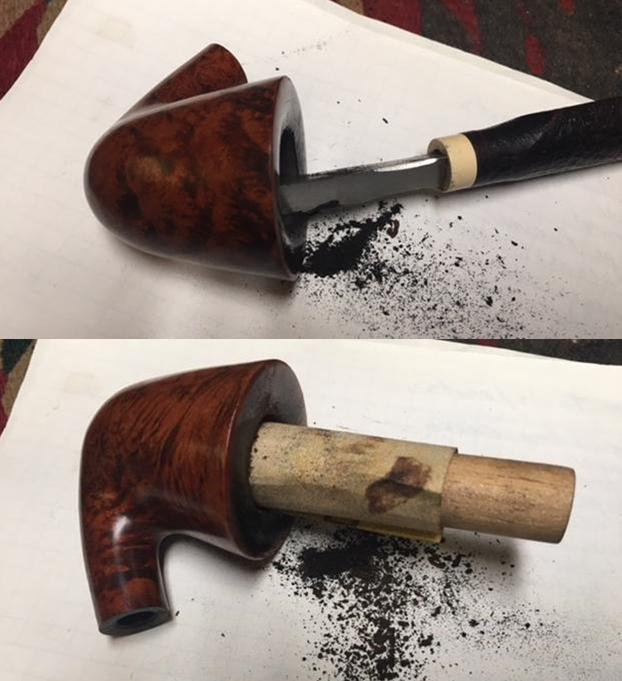
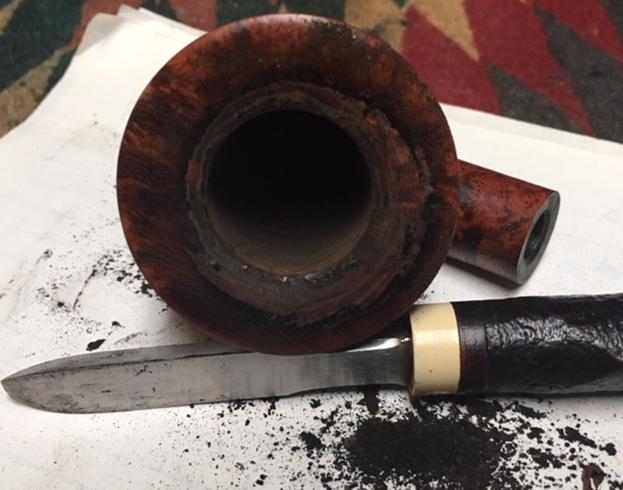
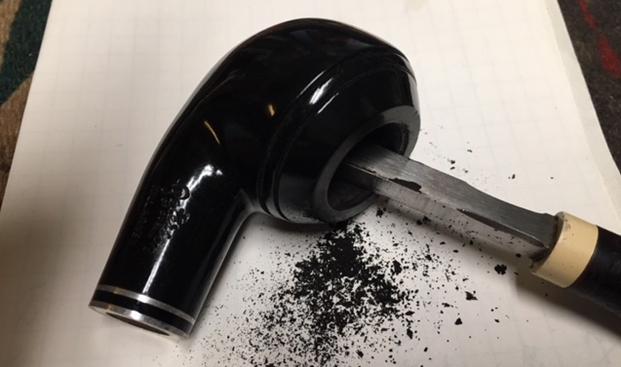
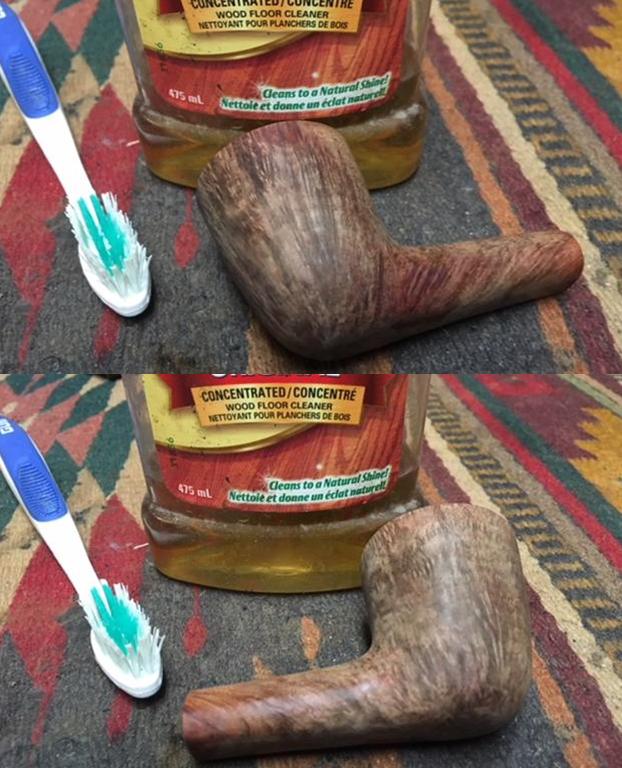
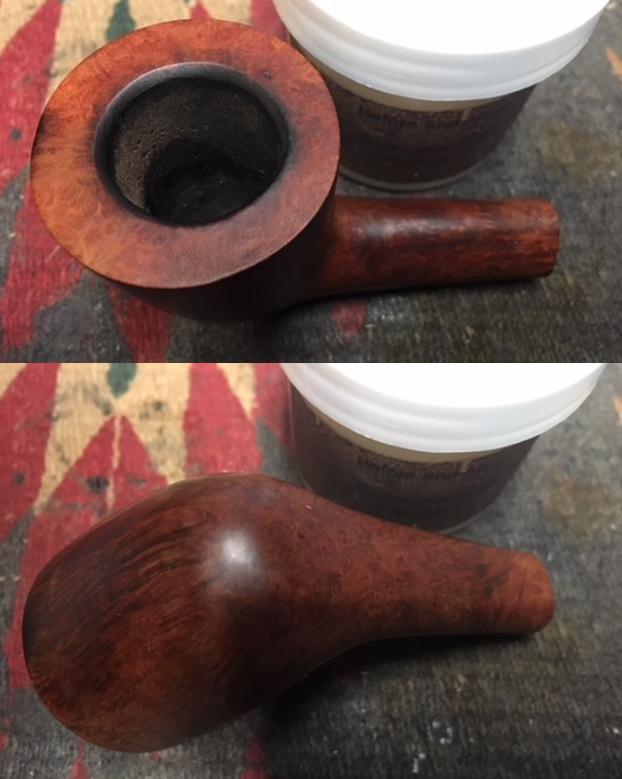
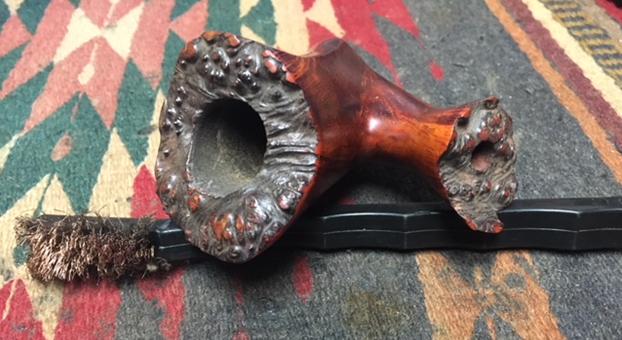
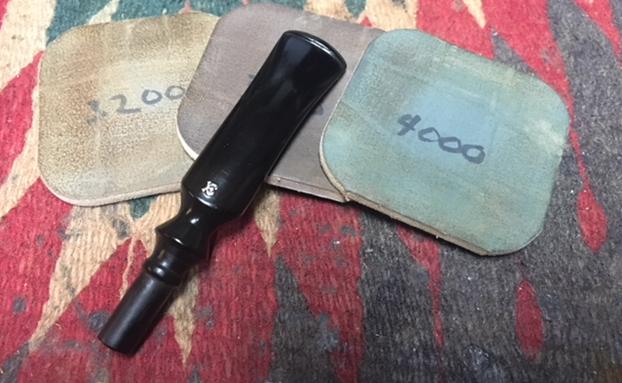
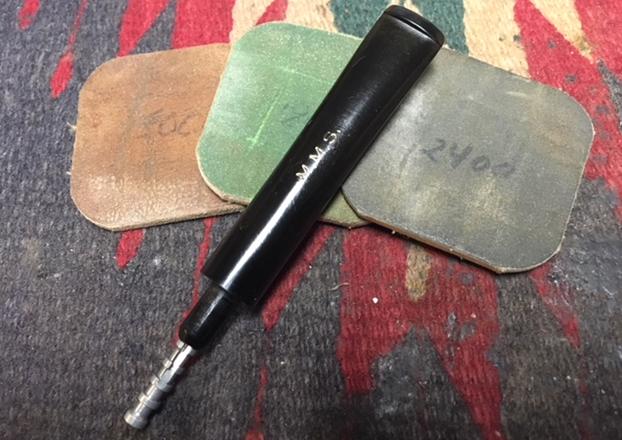
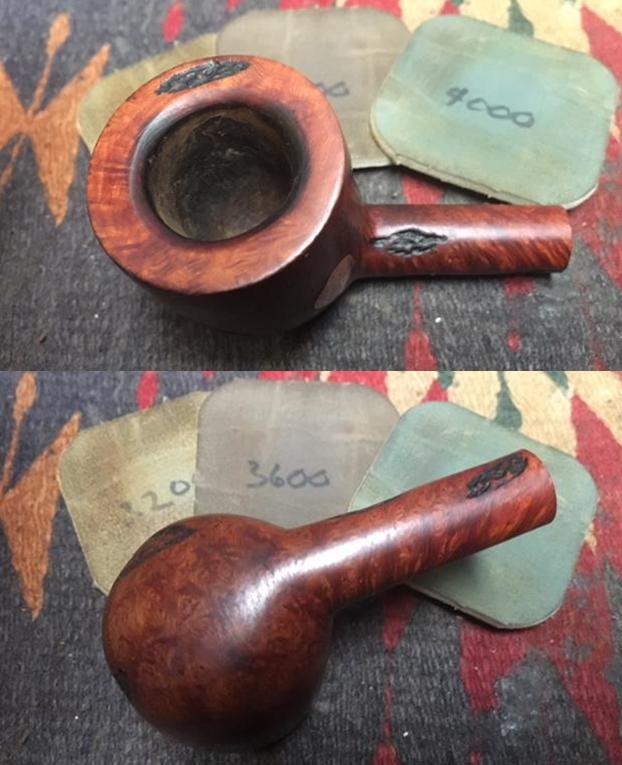
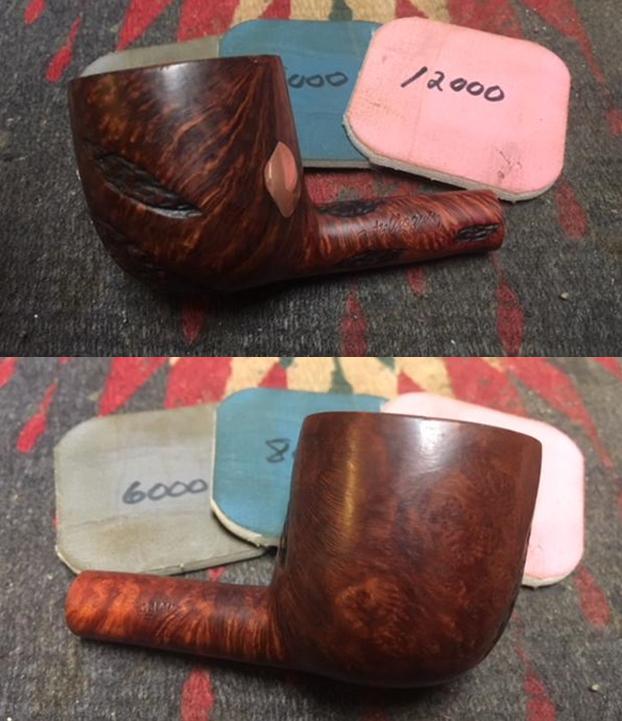
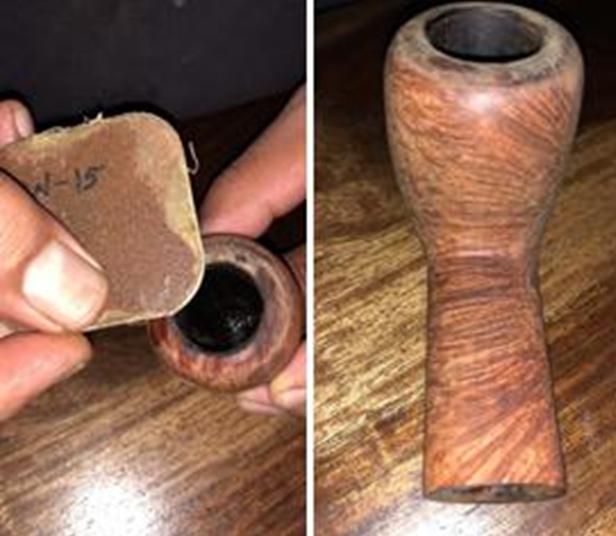
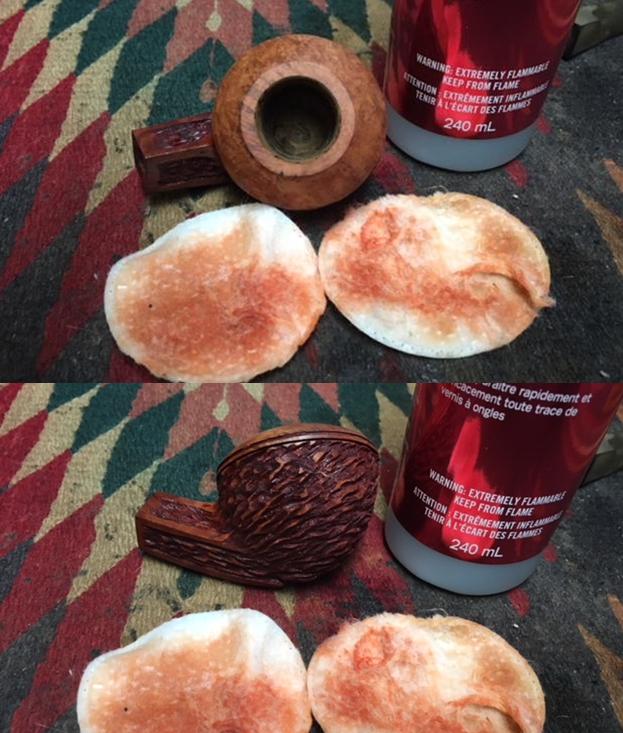
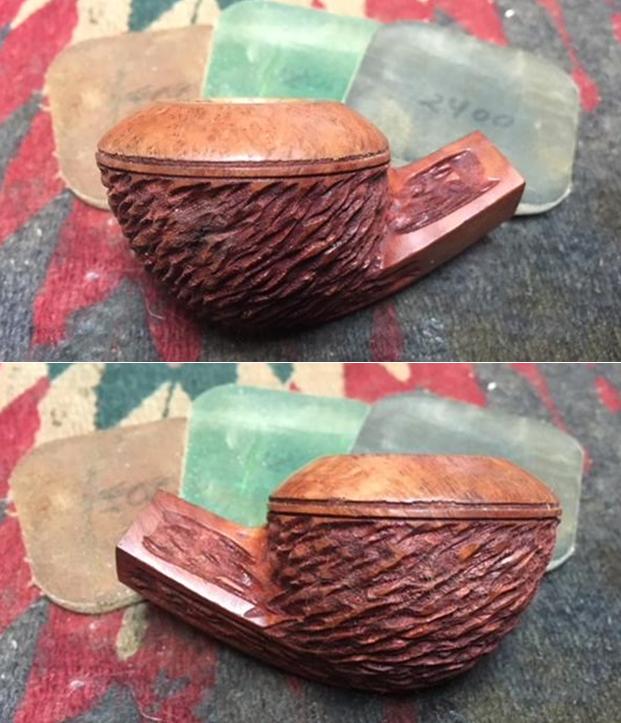
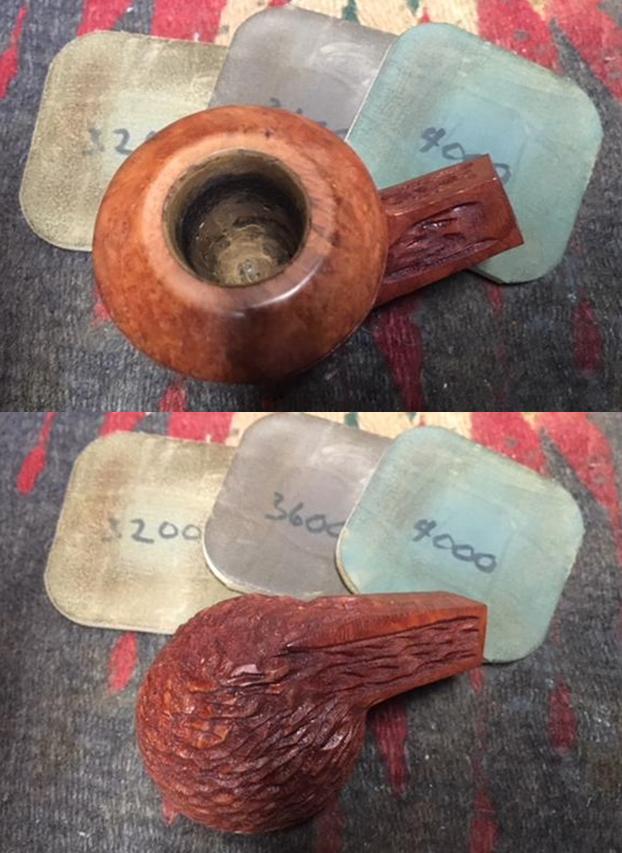
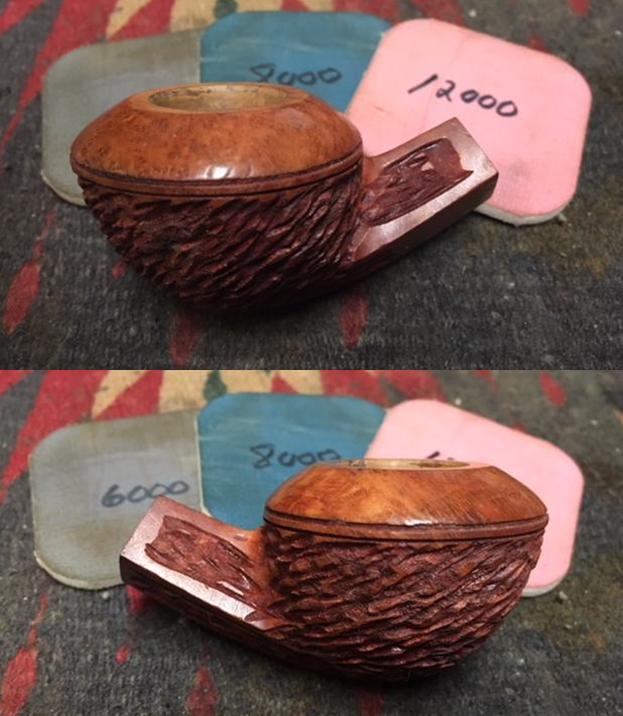
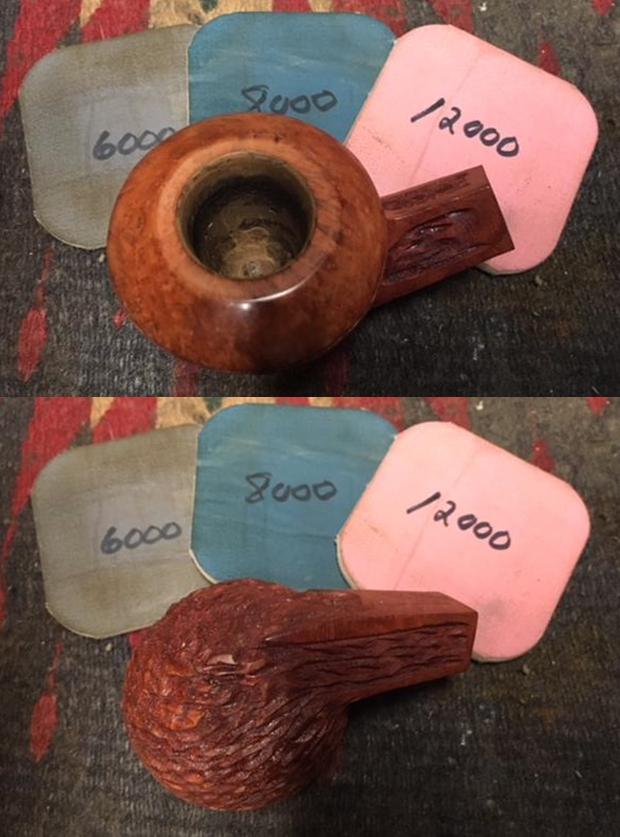
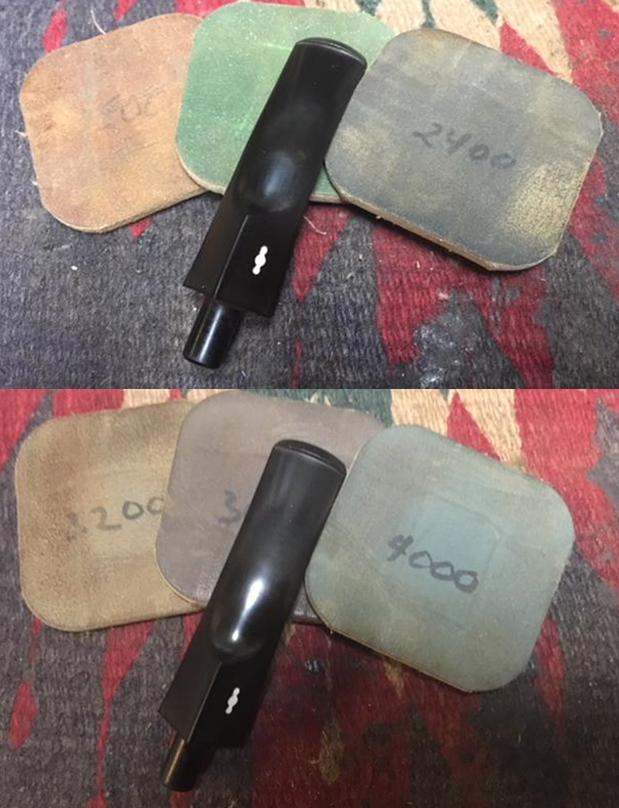
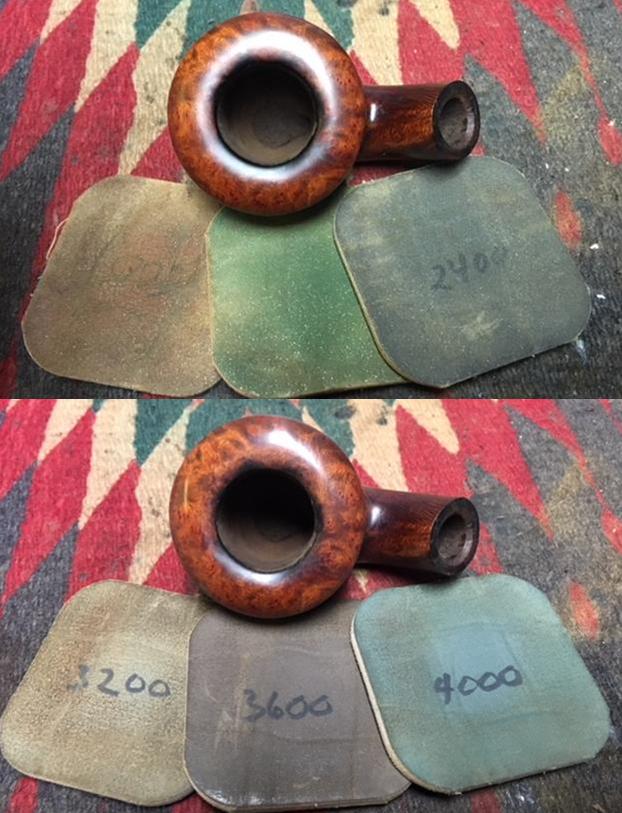
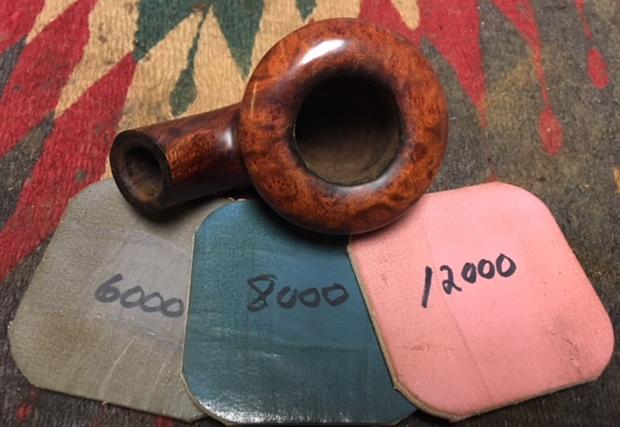
I started my cleanup of this pipe by working on the internals. I reamed out the cake with a Savinelli Fitsall Pipe Knife and took the cake back to the bare briar. I sanded the walls in the bowl with a piece of dowel wrapped with 220 grit sandpaper to smooth the walls.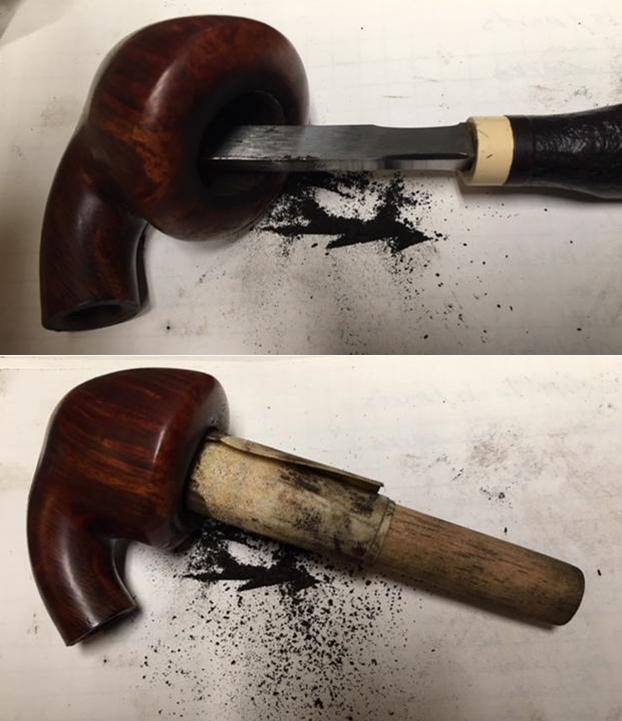 I used the edge of the Savinelli Fitsall knife to scrape away the lava from the top of the rim. It was quite thick so I proceeded cautiously so as not to damage the gentle crown of the rim top. Once I had it scraped away as much as possible I wiped down the surface of the rim with alcohol on a cotton pad and then sanded the rim top with 1500 grit micromesh sanding pads to remove the last vestige of the lava coat. I polished the rim top with micromesh sanding pads – wet sanding with 1500-2400 grit pads and wiping the rim down with a damp cloth after each pad. I continued polishing with micromesh pads – dry sanding with 3200-12000 grit pads, wiping down he rim after each pad. The rim really began to shine.
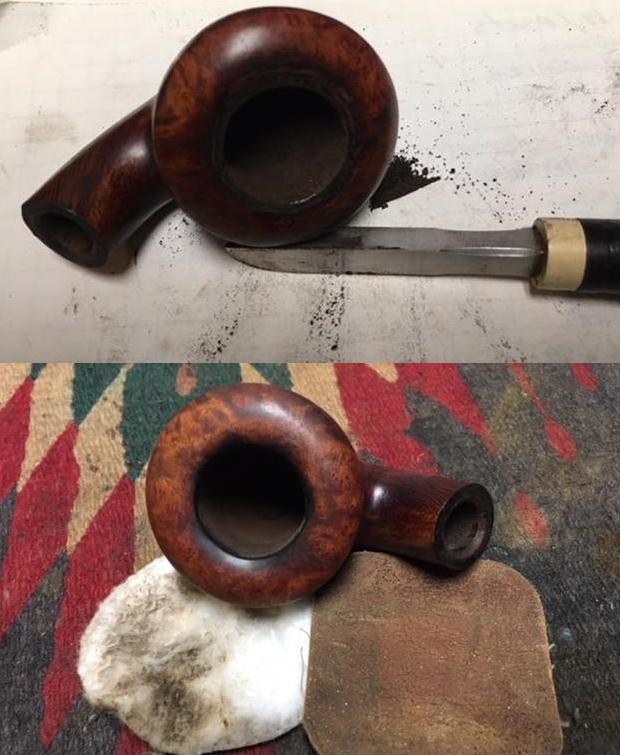
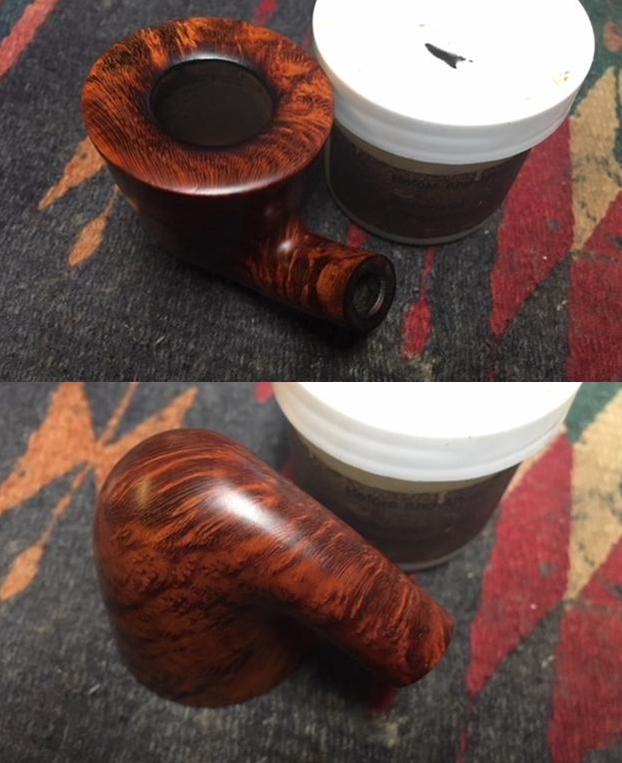
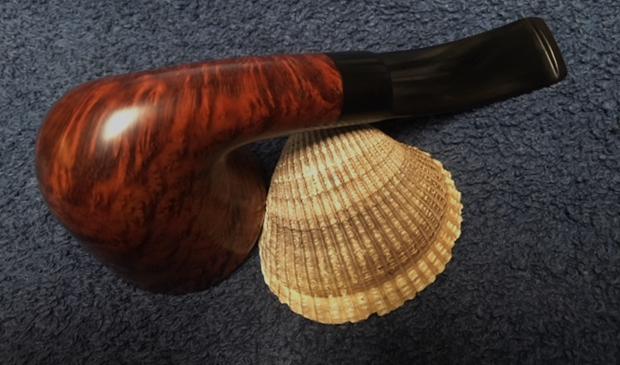
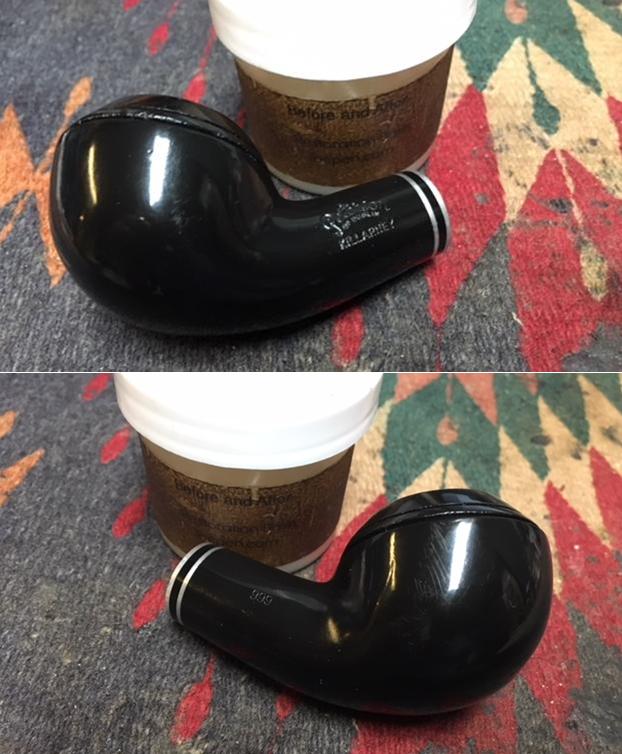
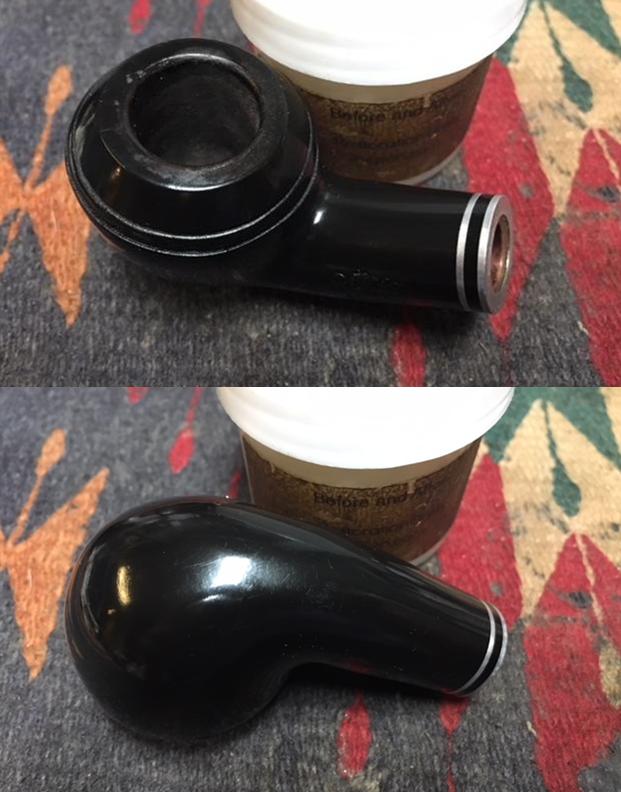
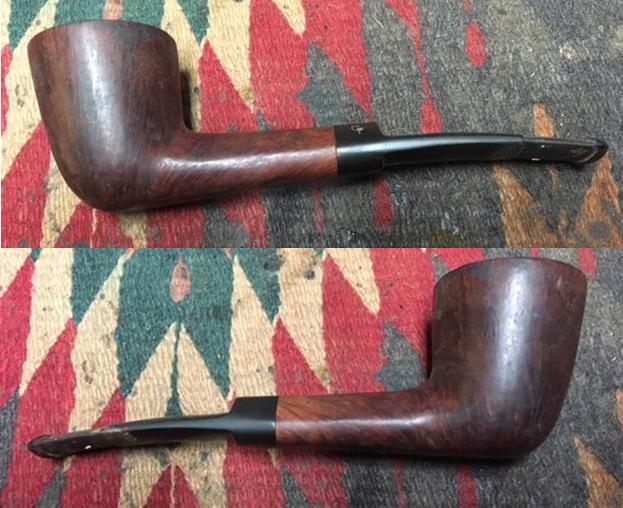
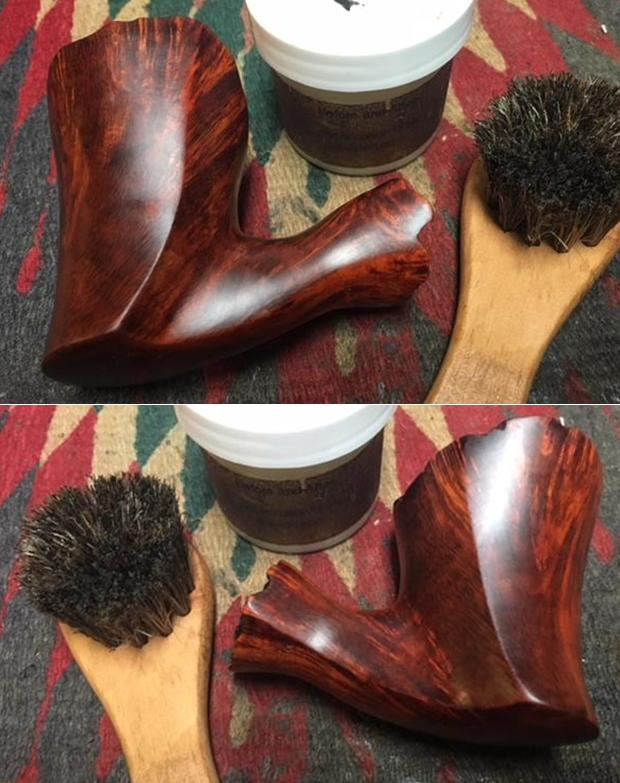
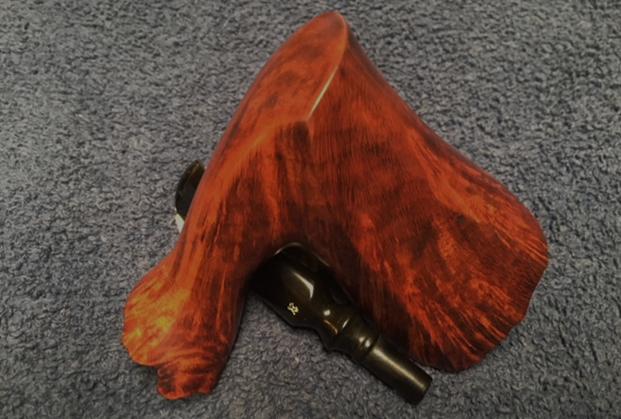
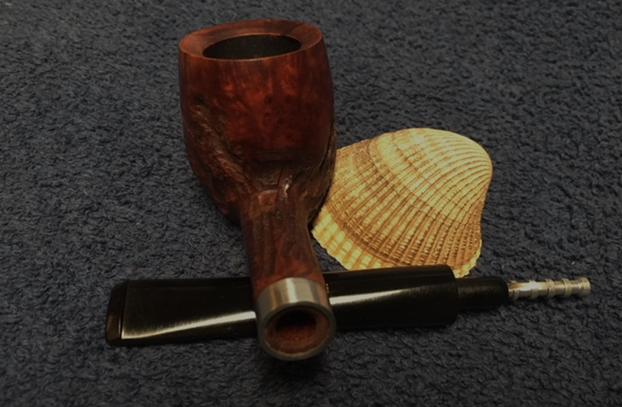
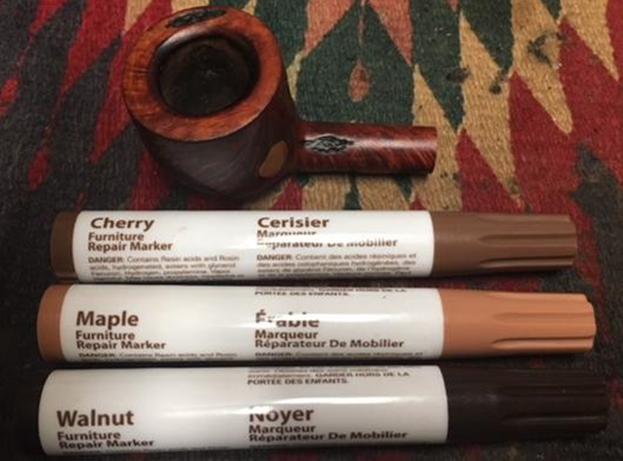
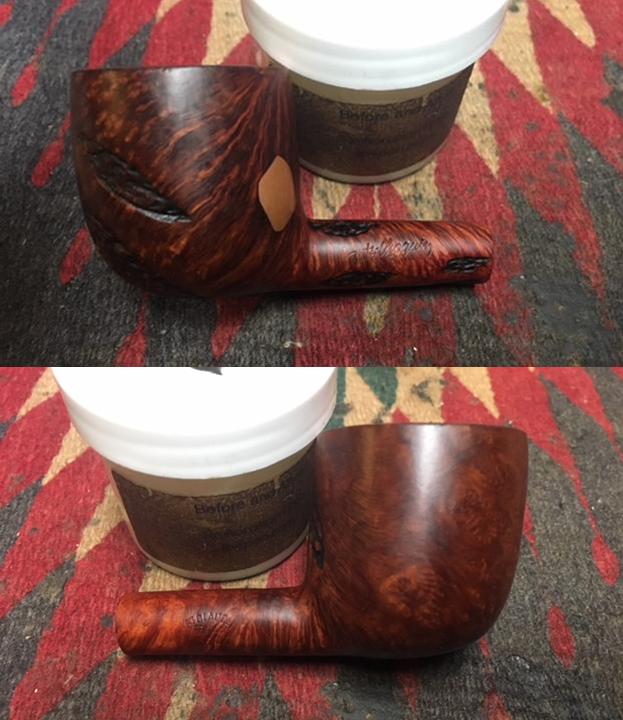
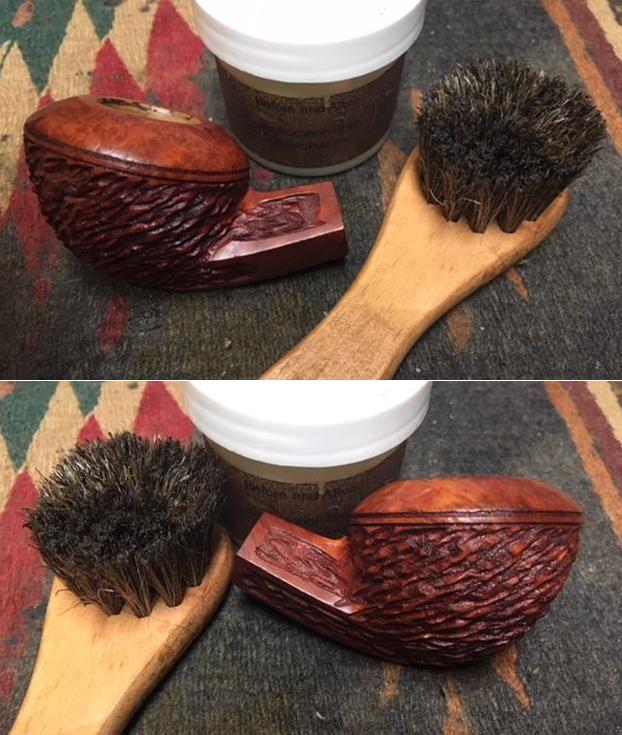
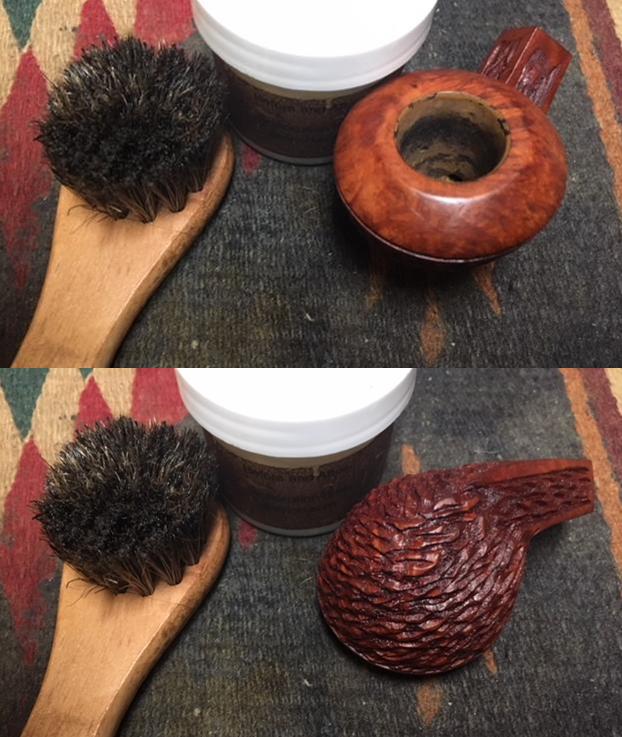
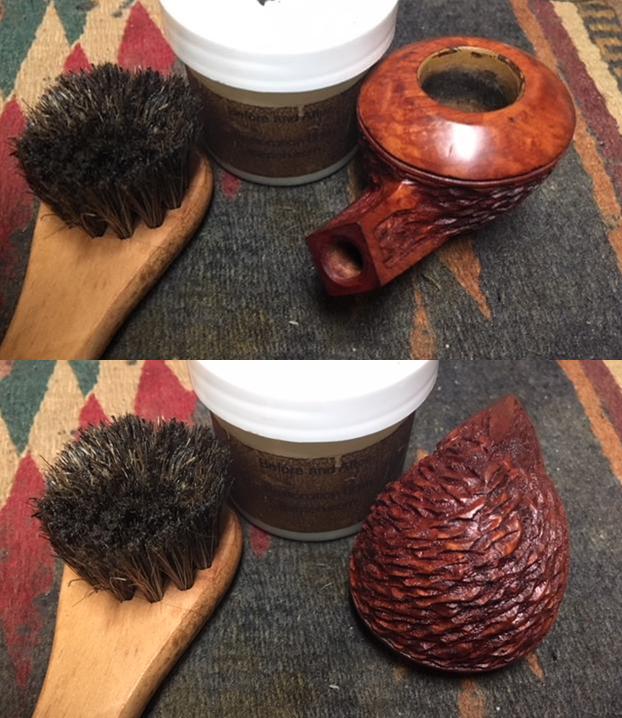
 I rubbed some Before & After Restoration Balm into the surface of the briar to enliven, clean and preserve it. I set it aside for a little while to let the balm do its work. I buffed it off with a cotton cloth and then buffed it with a microfiber cloth. The photos below show the pipe at this point in the restoration process.
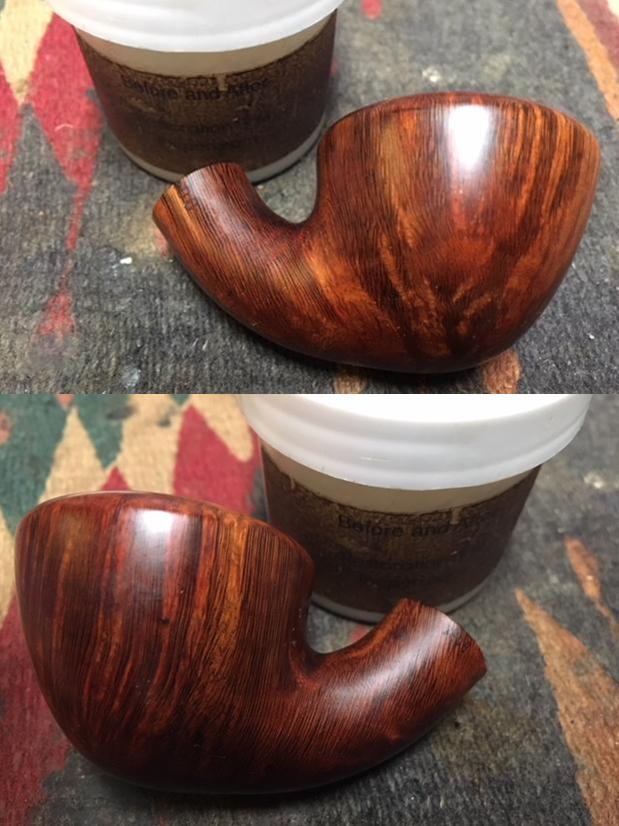
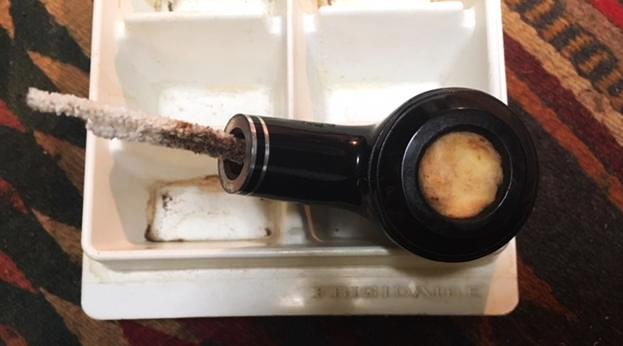
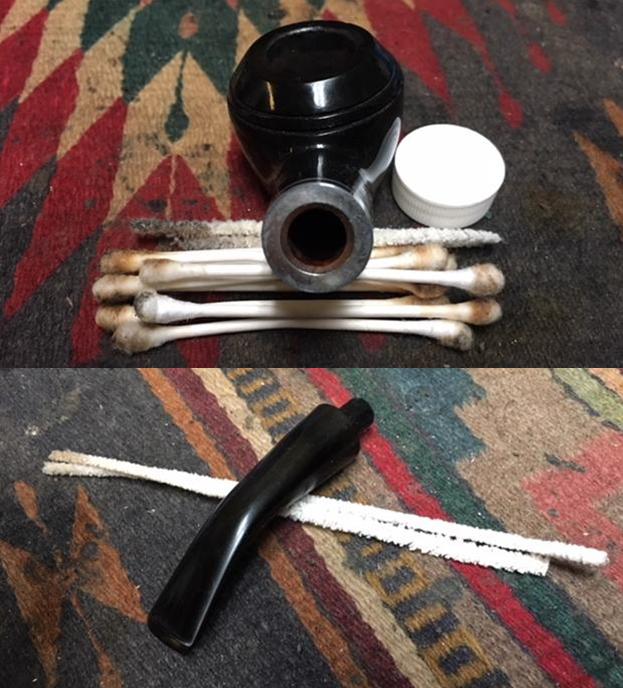
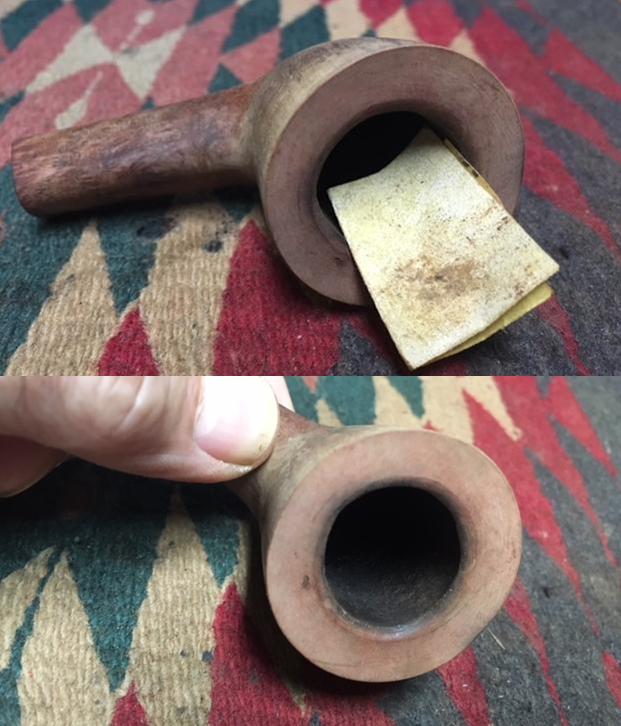
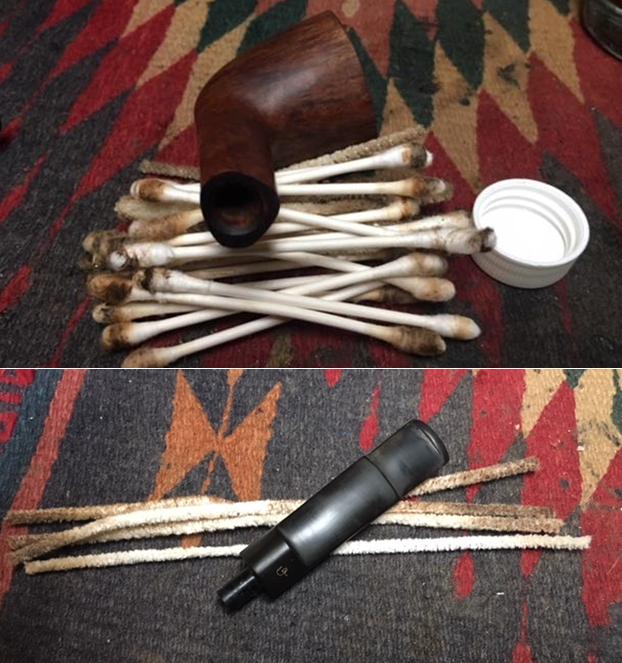
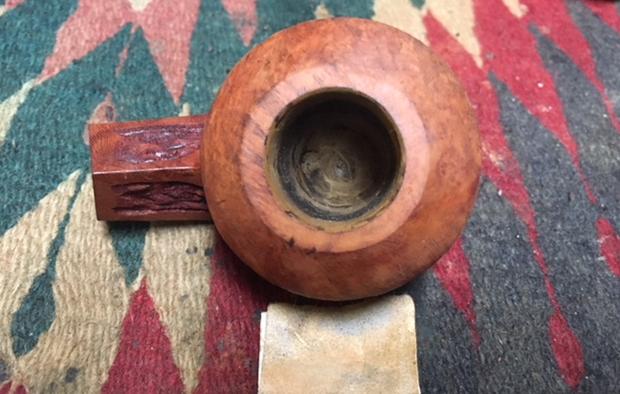
 I scraped the mortise walls with a sharp pen knife to remove the lacquer build up from tobacco juices and oils. It was thickly coated. Once I had that finished I cleaned out the mortise and the airway in the shank with cotton swabs, pipe cleaners and alcohol. It was dirty but I was surprised it was as clean as it was all things considered. I cleaned the airway in the stem the same way as the shank.
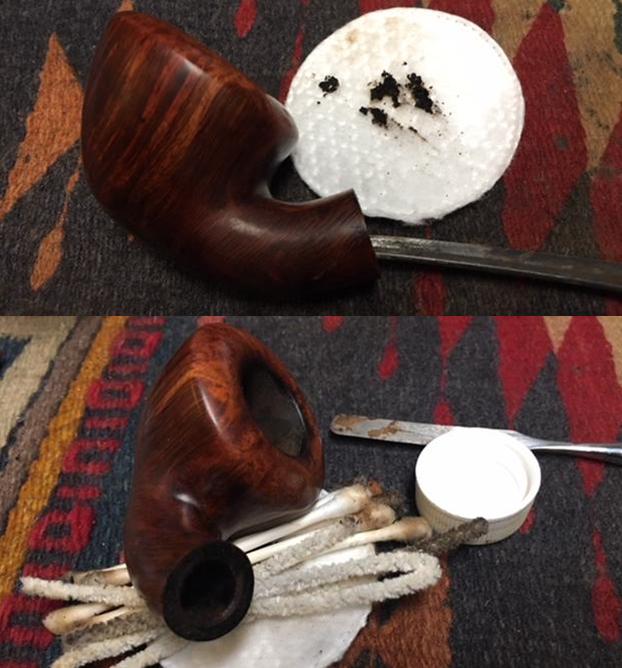
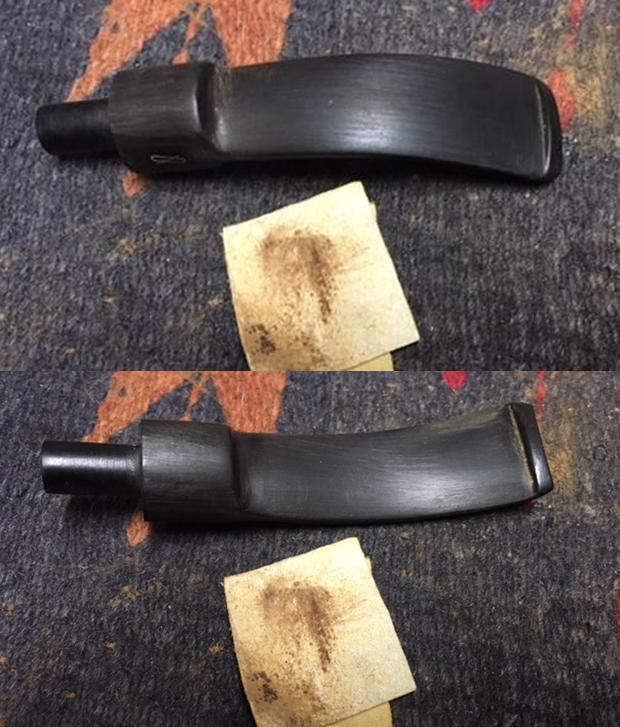
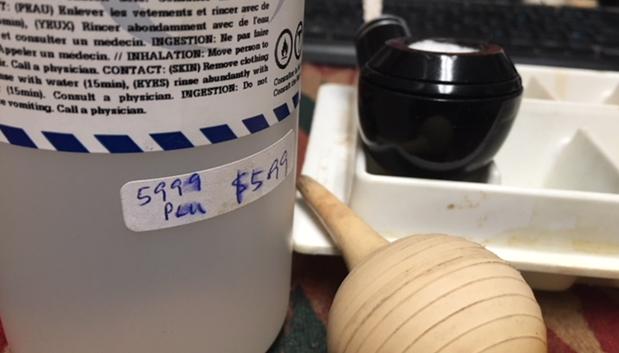
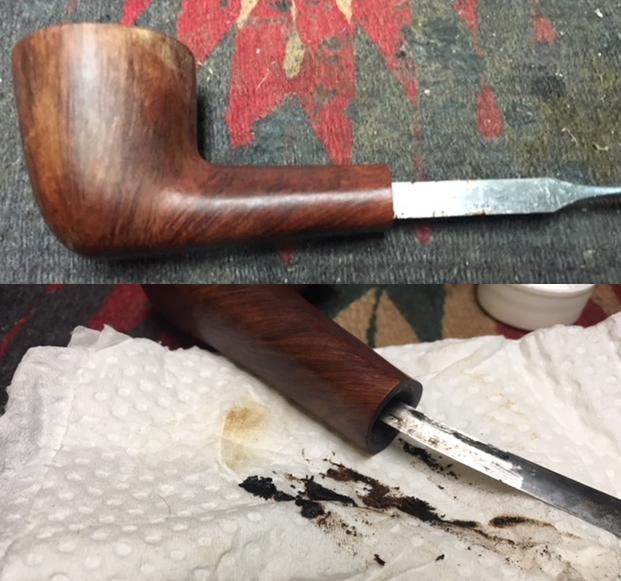
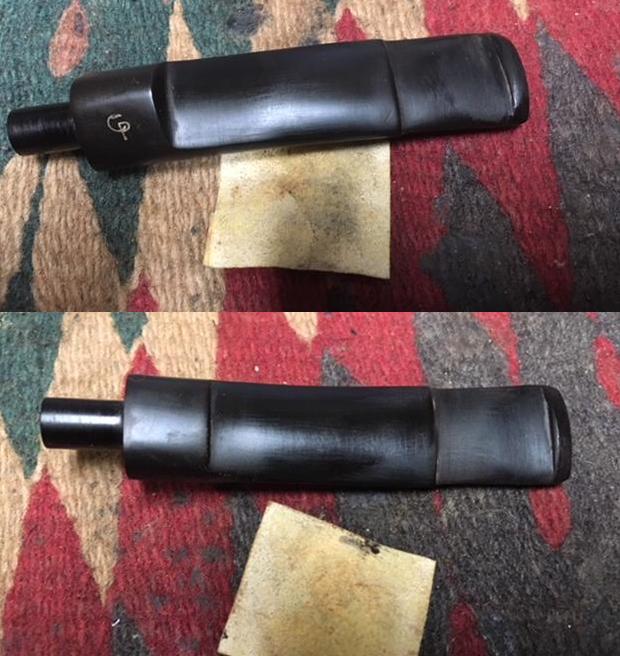
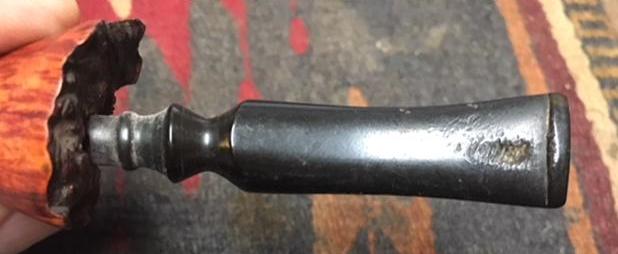
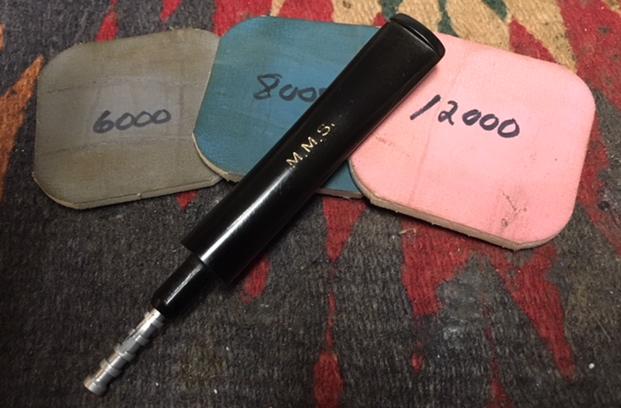
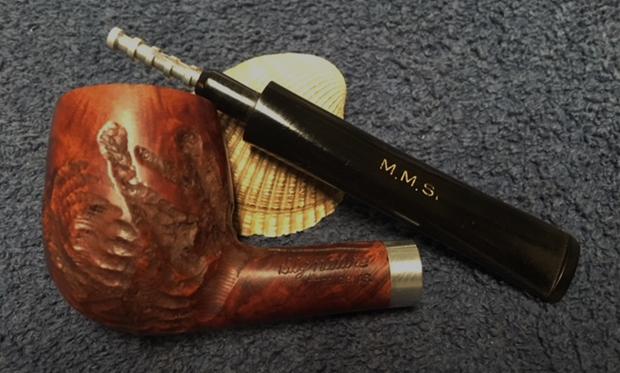
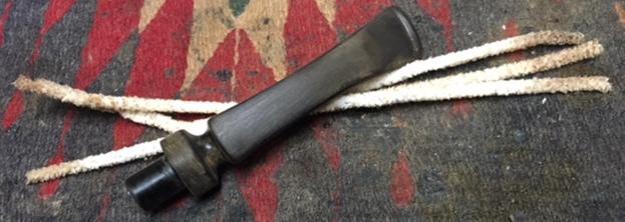 I set the bowl aside and turned my attention to the stem. I sanded the surface of the stem with 220 grit sandpaper to remove the pitting on the top surface of the stem and the light tooth chatter on the underside stem. I wiped the stem down with Obsidian Oil to get a clear picture of how the stem looked at this point.
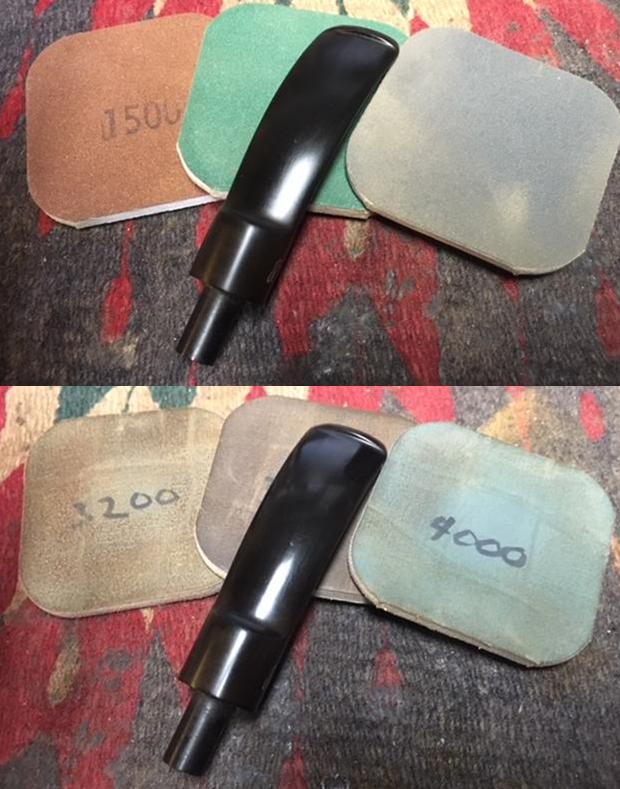
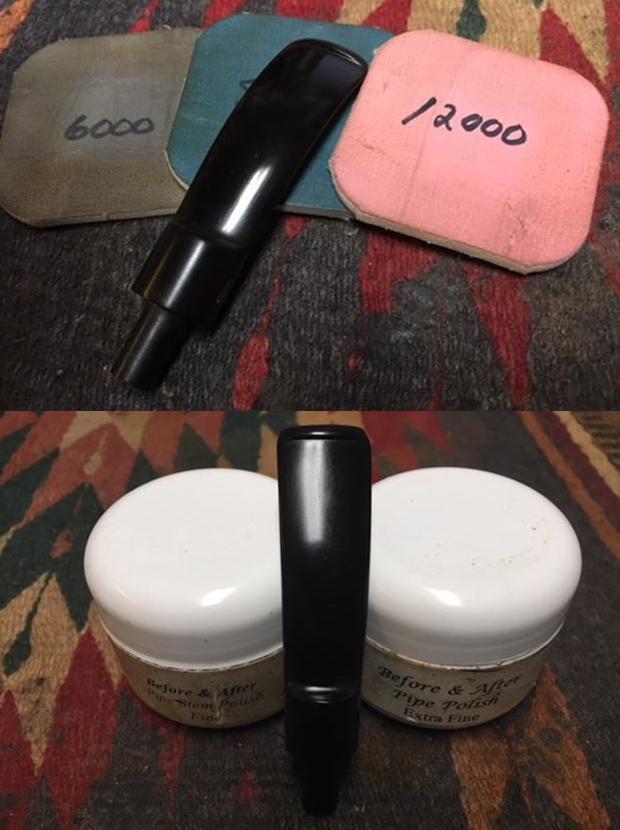
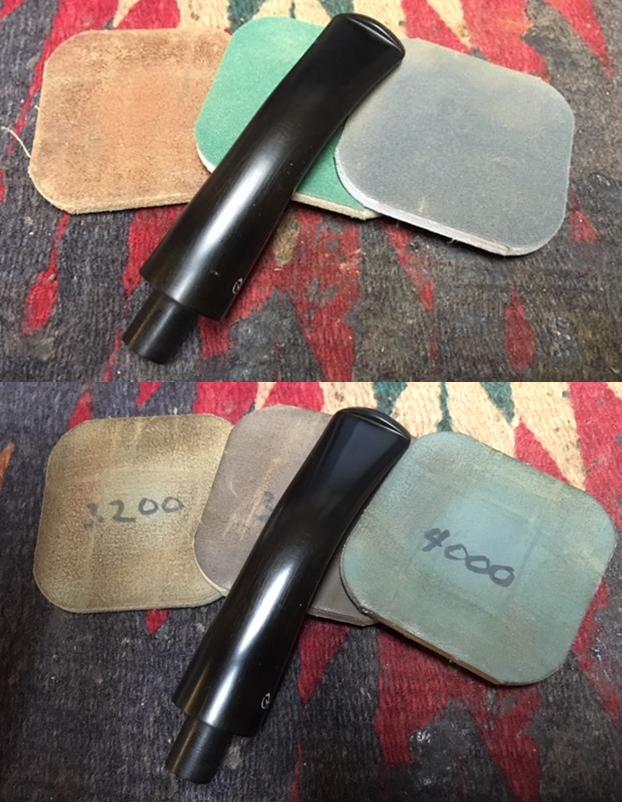
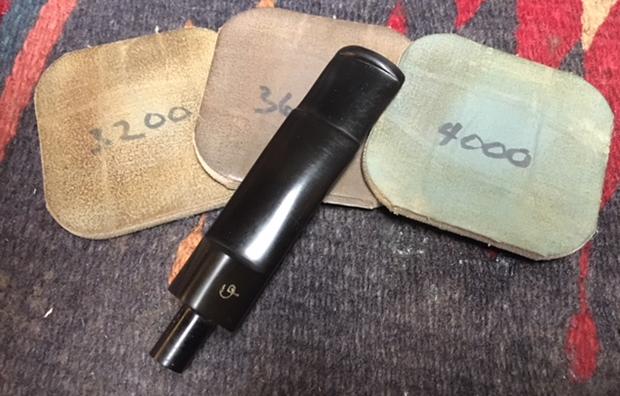
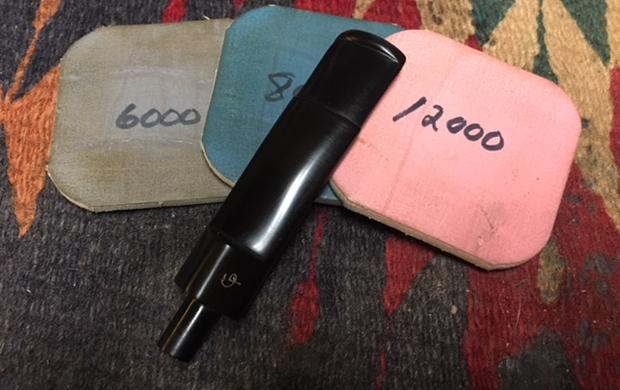
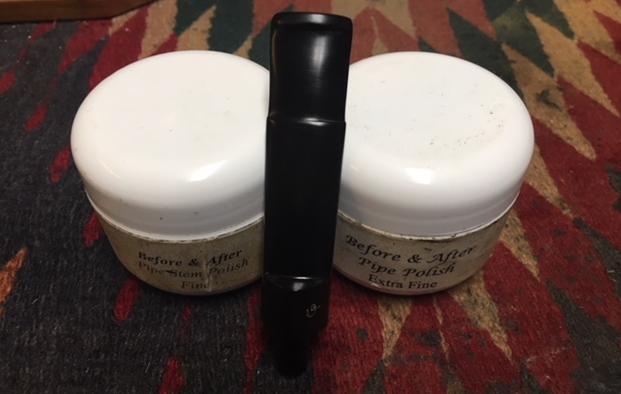
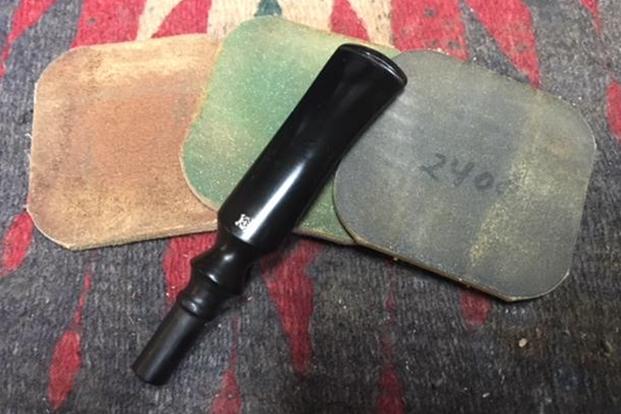
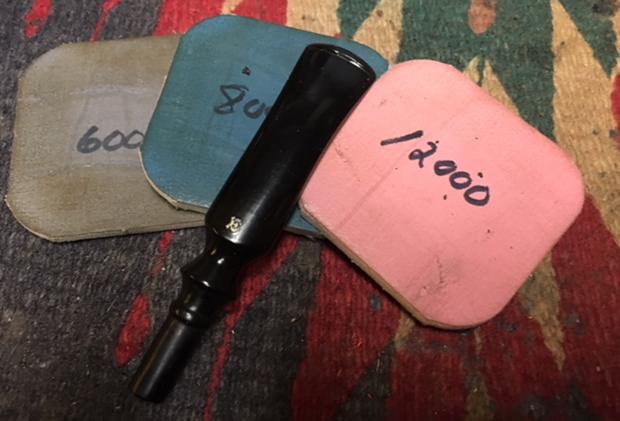
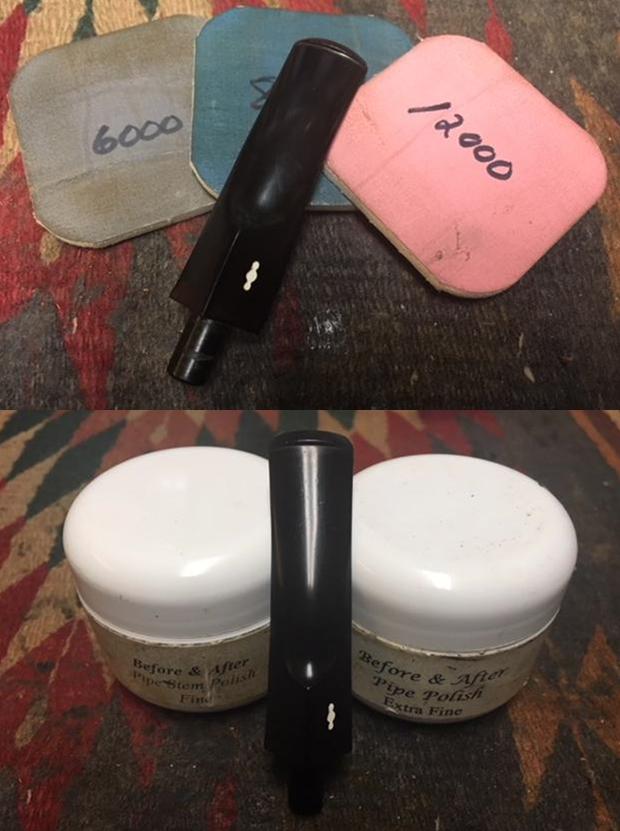
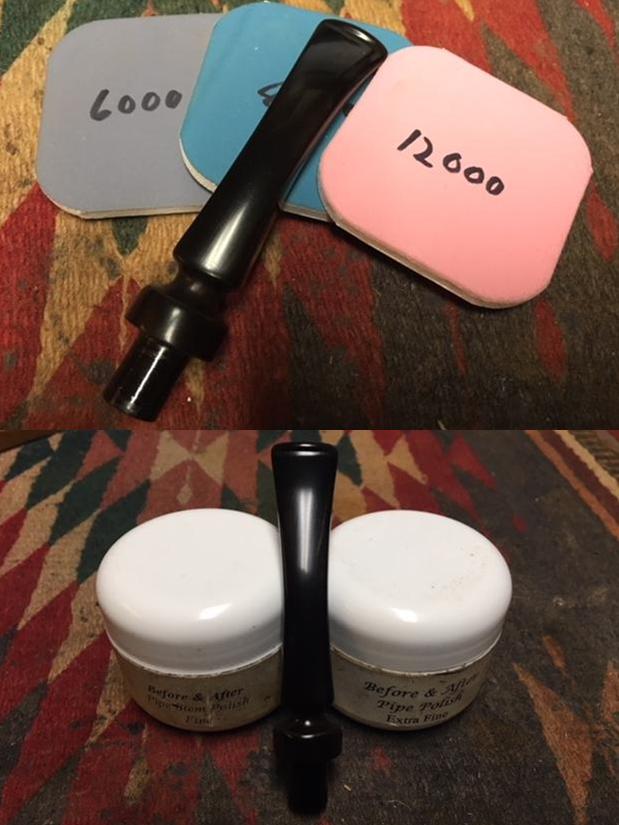
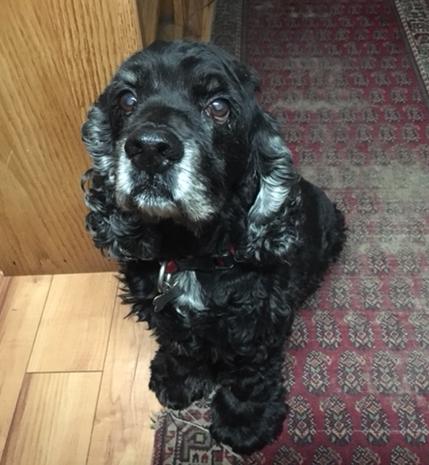 Once again under the watchful eye of my shop supervisor, Spencer (my 14 year old Cocker Spaniel) I polished the stem using micromesh sanding pads – wet sanding with 1500-2400 grit pads dry sanding with 3200-12000 grit pads. After each pad I wiped it down with Obsidian Oil to protect and enliven the stem. Spencer sits next to my desk/work table whenever I am working on pipes. Periodically he will knock me on the leg for a treat I keep on top of the desk just for these occasions. Mostly though he just watches me work and when I get up for a break follows me like a shadow. I will miss his presence once he is gone but for now he continues to go strong. Back to the pipe, I polished it further with Before & After Pipe Polish – both Fine and Extra Fine. When I finished with the polish I gave it a final coat of oil and set it aside to dry.
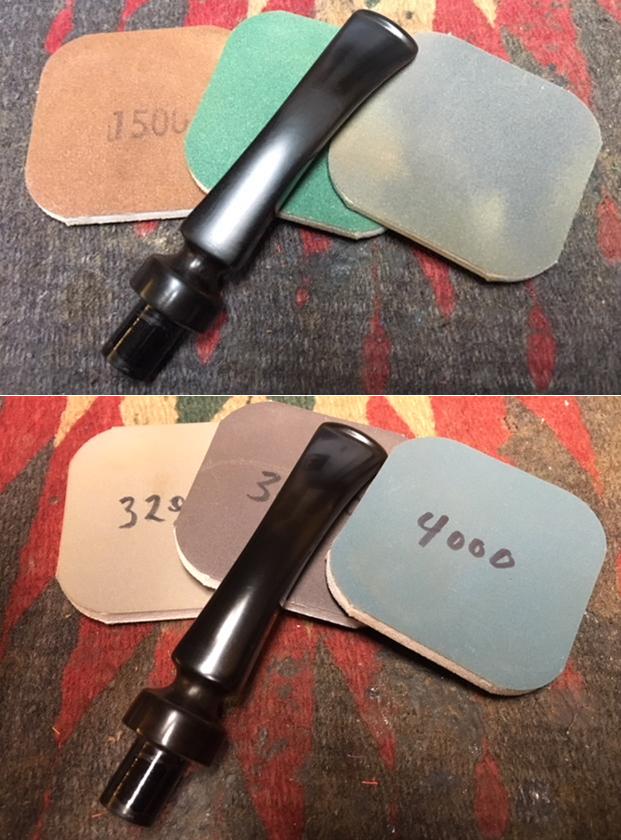
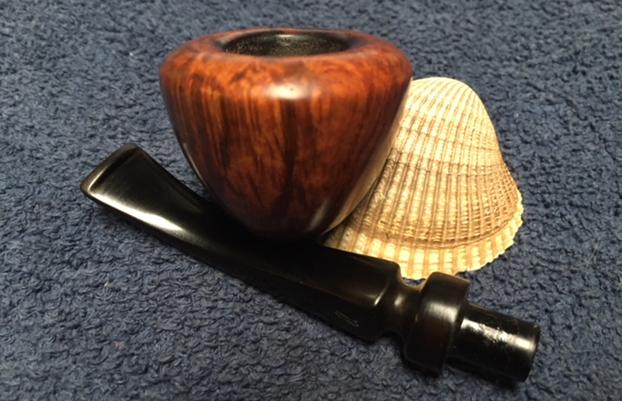
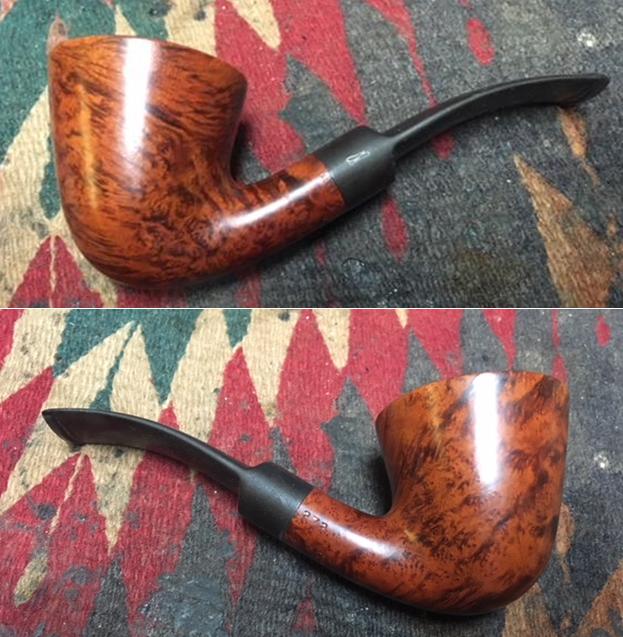
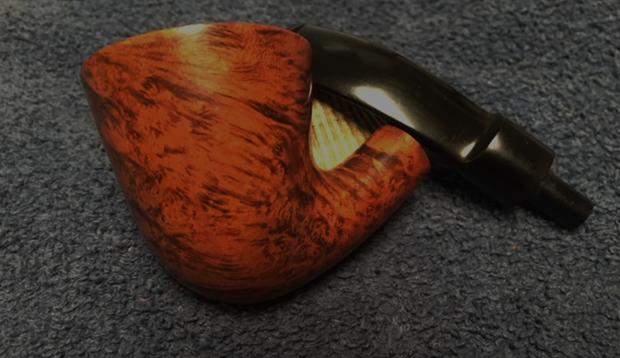
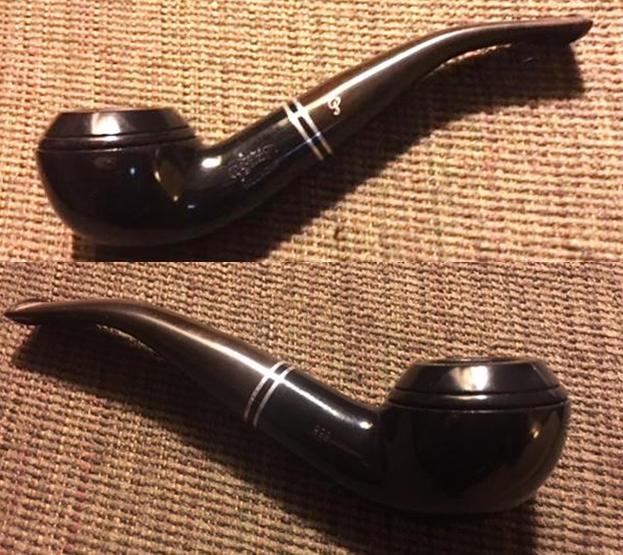
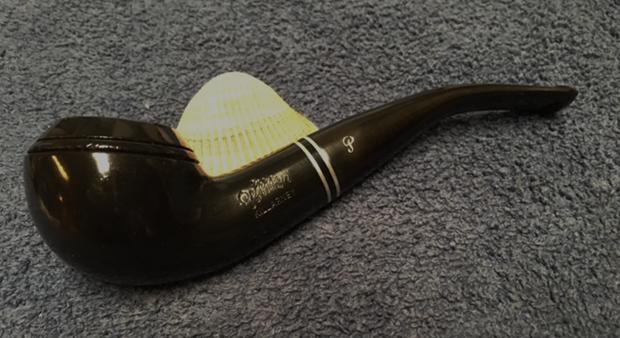
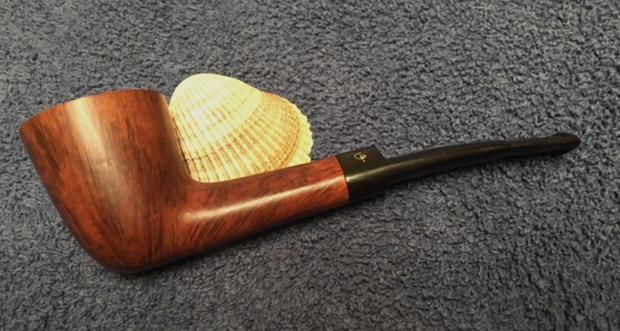
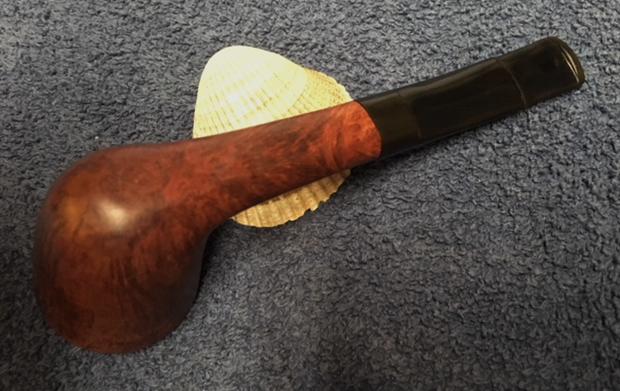
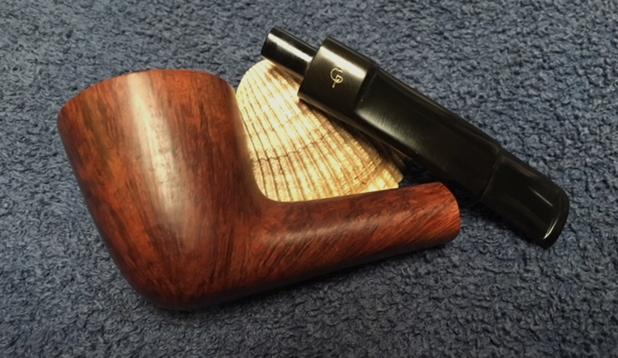
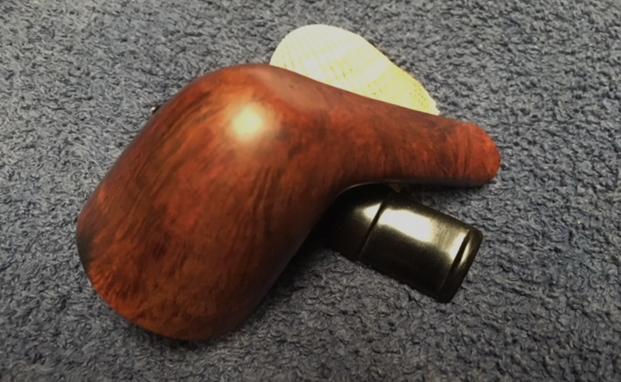
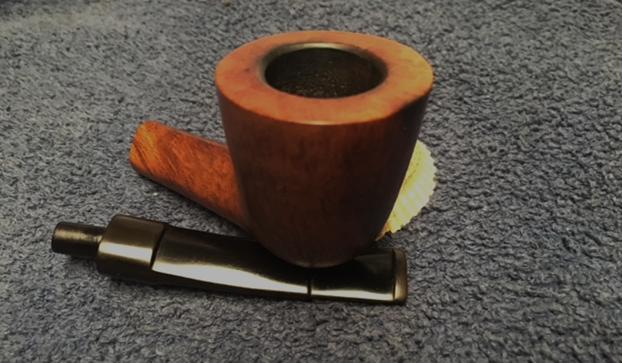
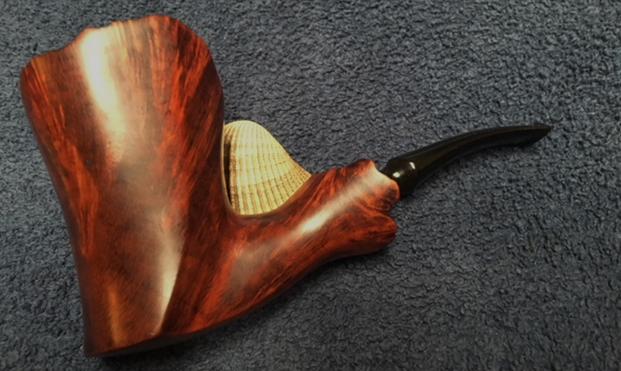
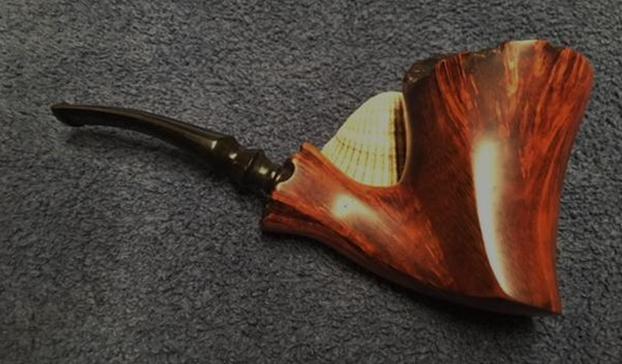
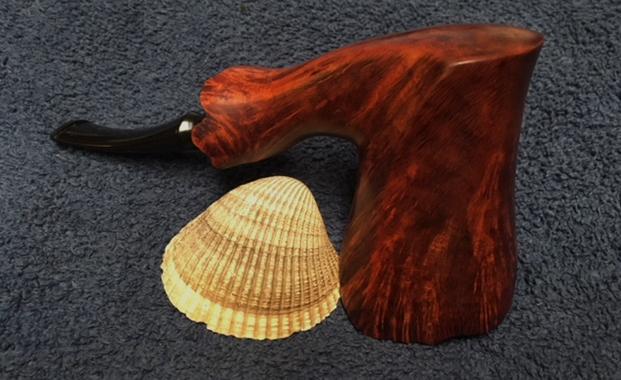
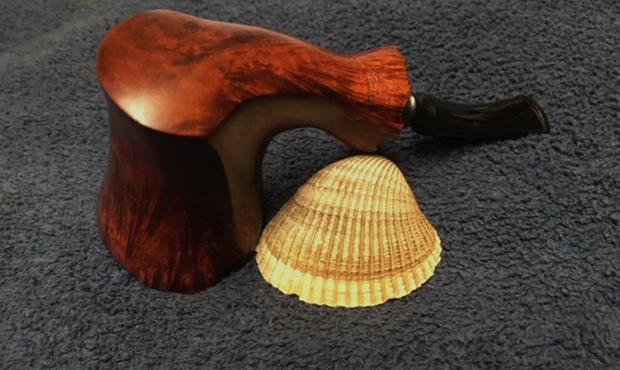
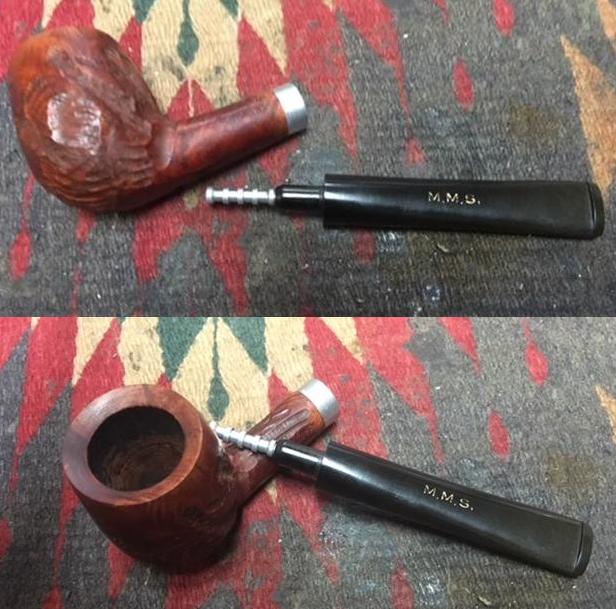
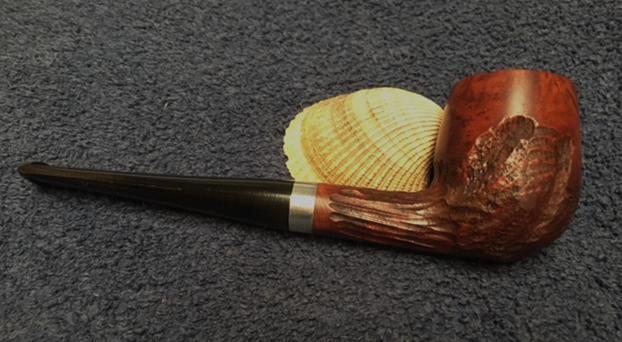
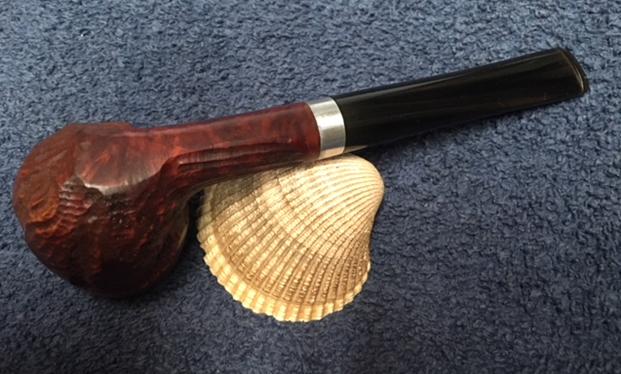
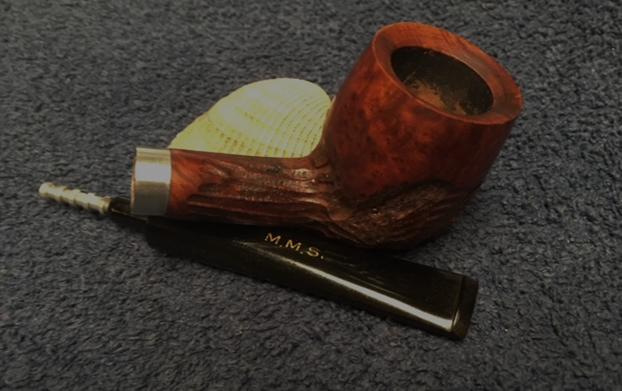
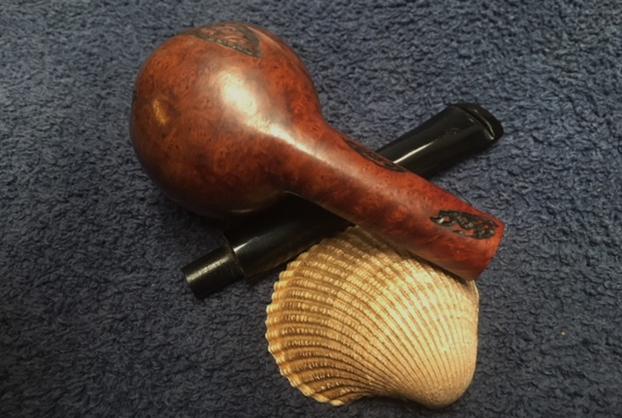
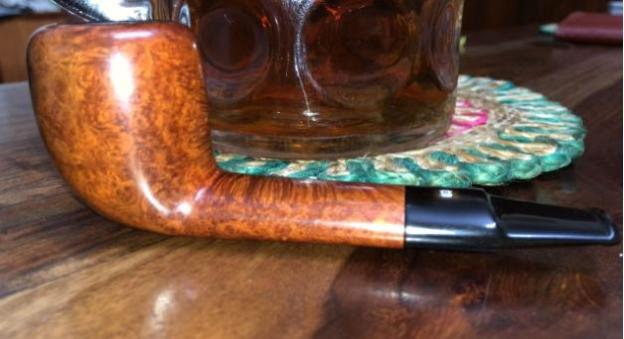
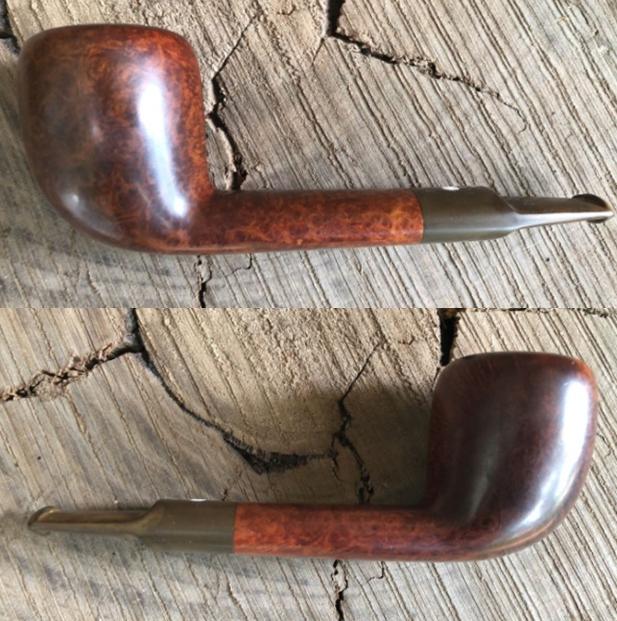
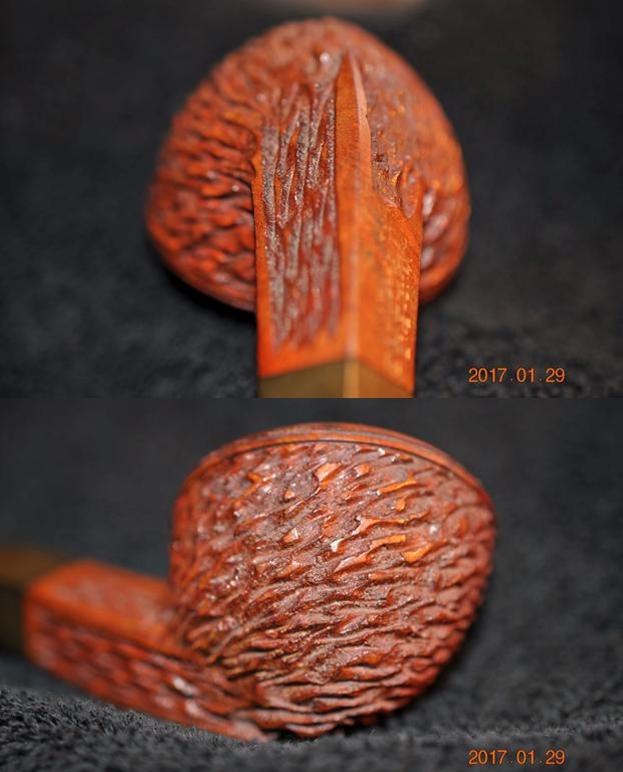
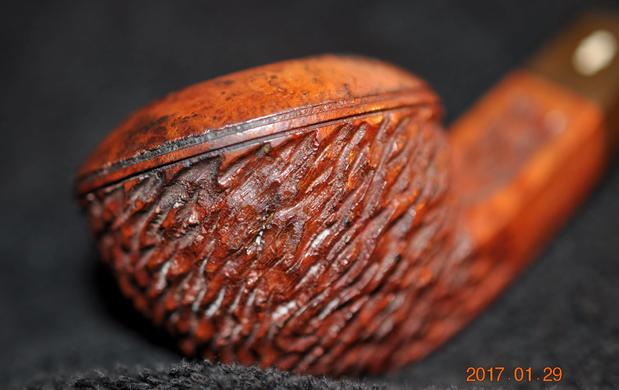
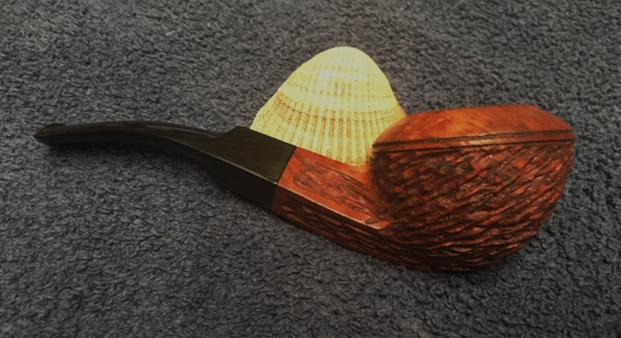
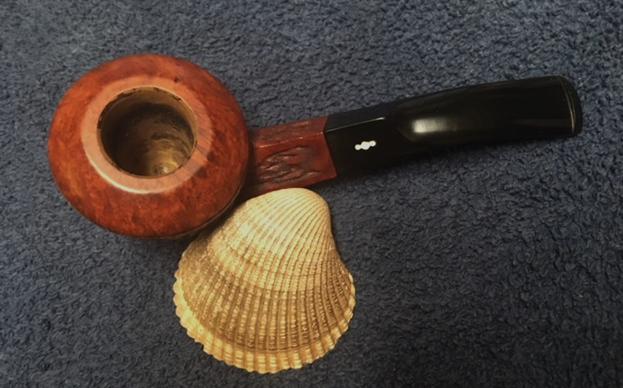
 This second Svendborg Danish Hand Made Dublin is another beauty with swirling, straight and flame grain all around the bowl. As with the other pipe there are spots where birdseye peeks through and highlights the complexity of the grain. The smooth rim is quite nice and has some swirls of grain undulating in the briar. The contrast browns of the bowl look really good with the black of the polished square vulcanite saddle stem. I buffed the bowl and the stem with Blue Diamond polish to raise the shine on the briar and the vulcanite. I was careful to not buff the stamping and damage it. I gave the bowl and stem multiple coats of carnauba wax. I buffed the entire pipe with a clean buffing pad to raise the shine. I hand buffed it with a microfiber cloth to deepen the shine. The finished pipe is shown in the photos below. The dimensions of the pipe are: Length: 5 1/2 inches, Height: 1 1/2 inches, Outside Diameter: 1 3/4 inches, Diameter of the chamber: ¾ of an inch. This is the second of the two Svendborg pipes that I am working on. It is a well-made pipe with interesting finishing and a comfortable stem. I will be adding it to the rebornpipes store shortly if you are interested in adding it to your rack. Thanks for walking through the restoration with me.