Tag Archives: bite marks

Restoring a Square Shank BBB Two Star Apple Shaped Pipe


Blog by Steve Laug

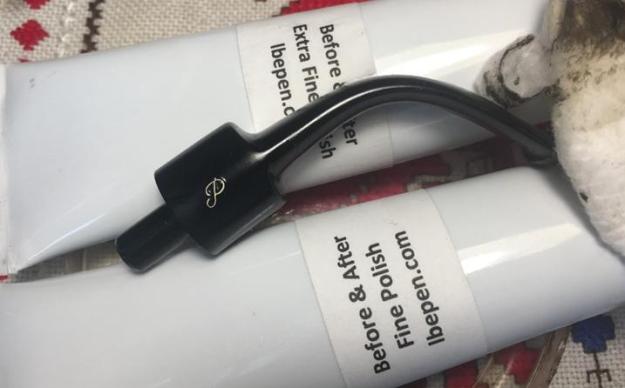
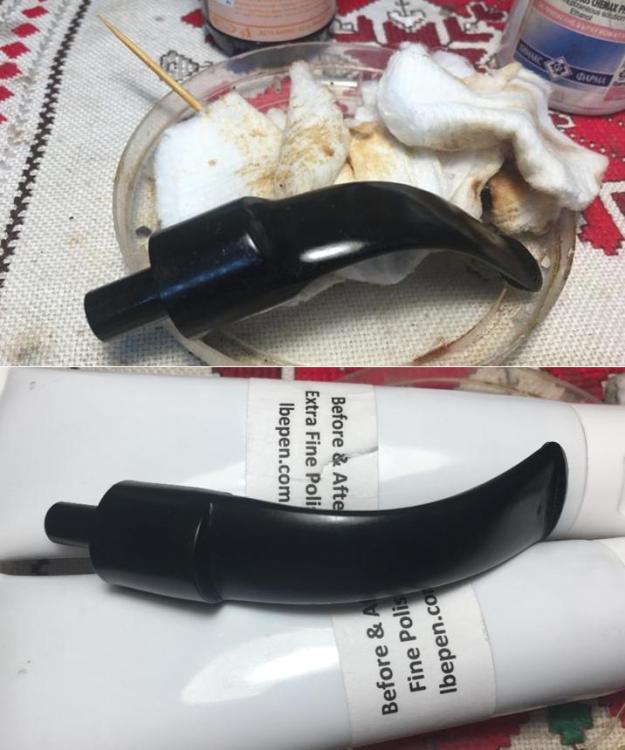
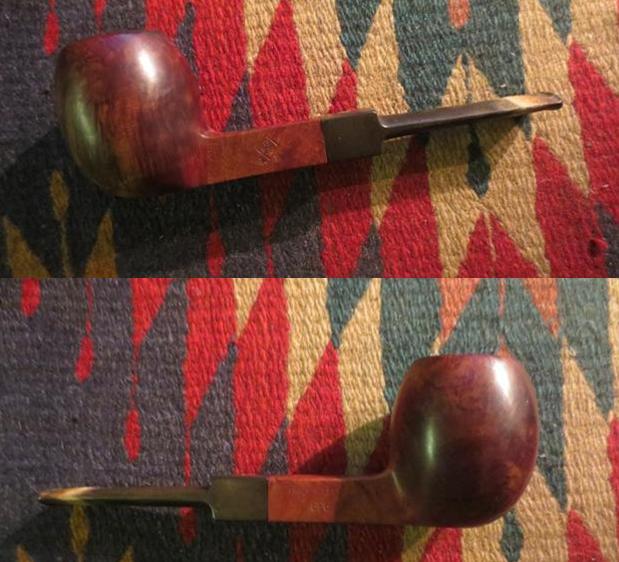
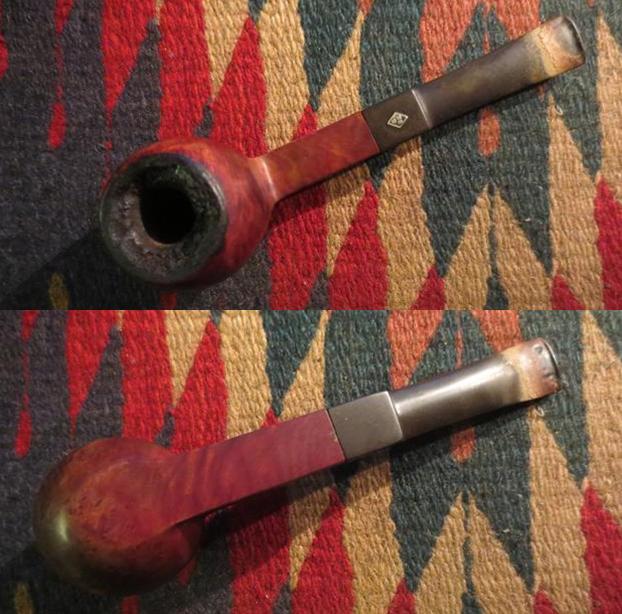
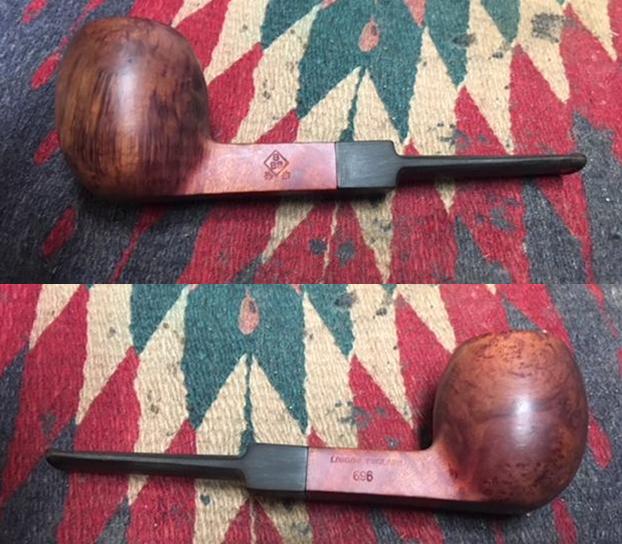
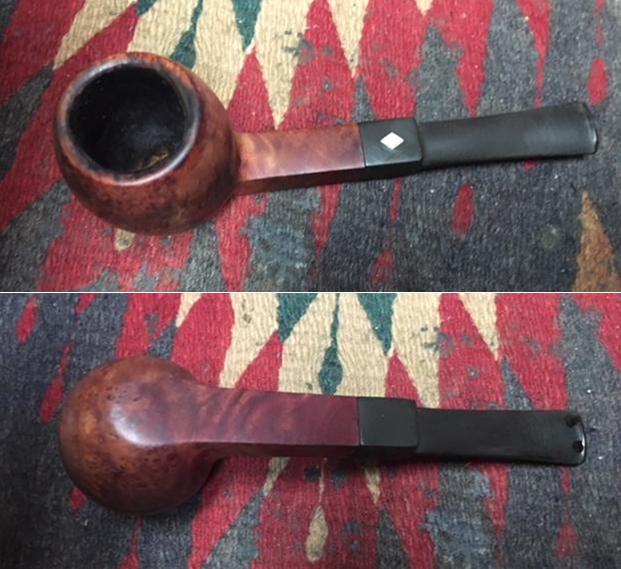
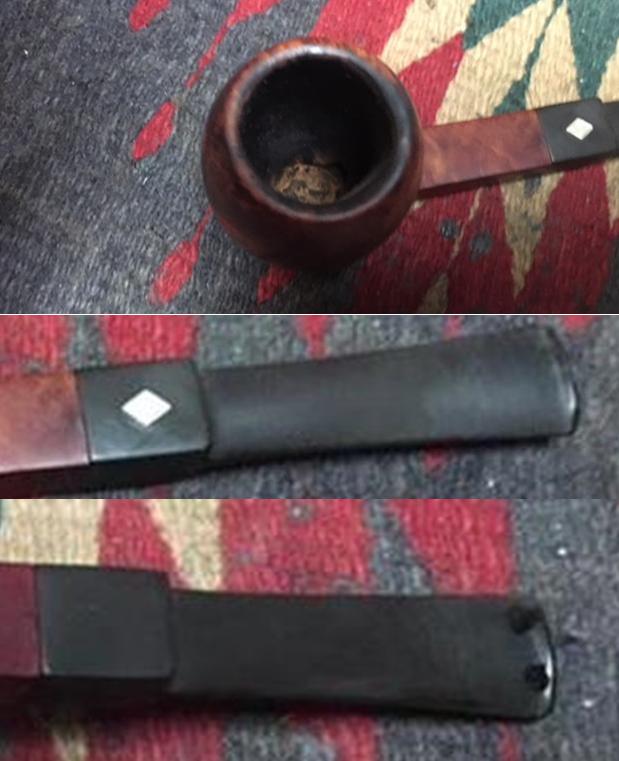
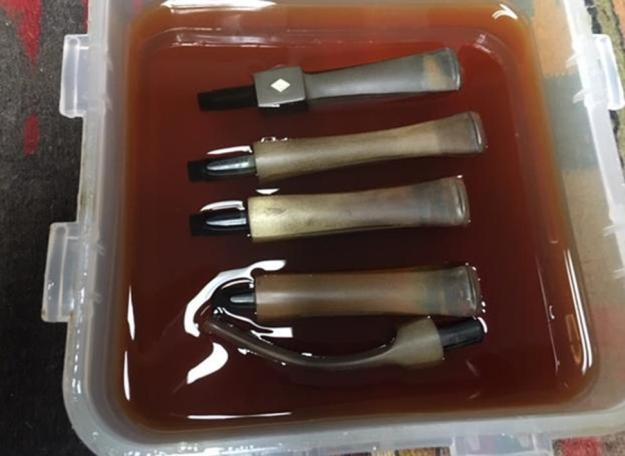
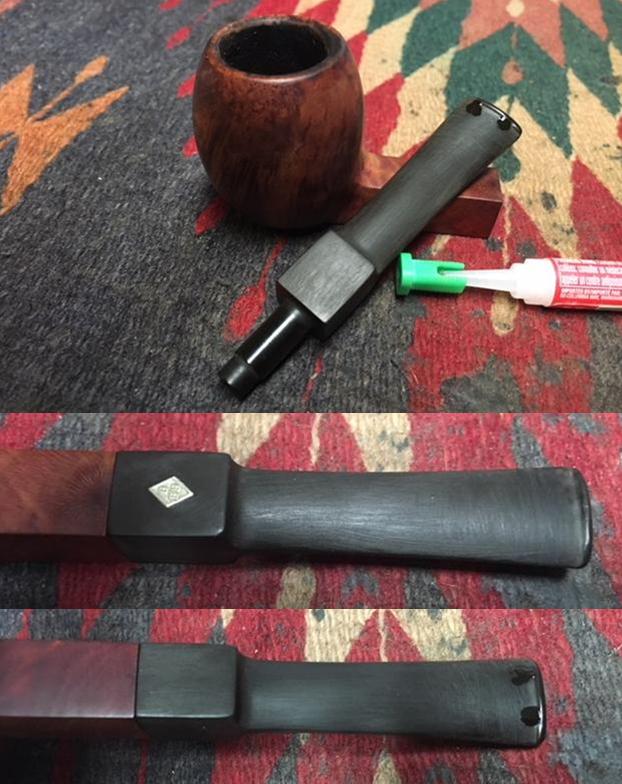
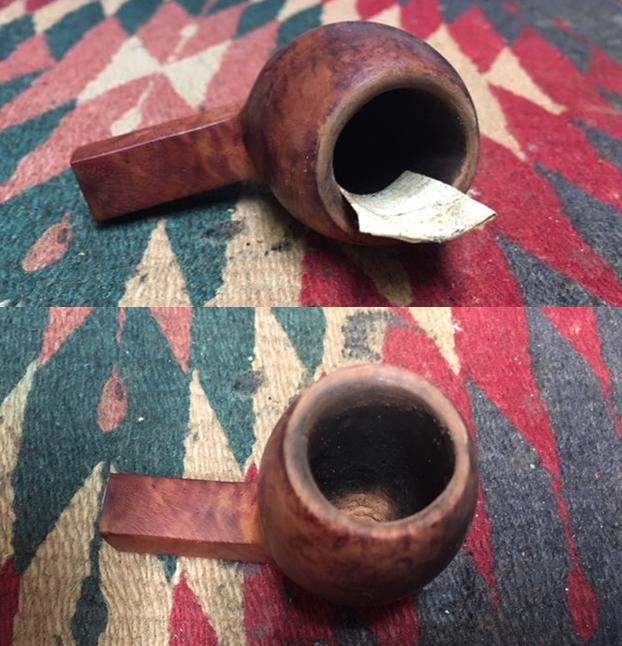
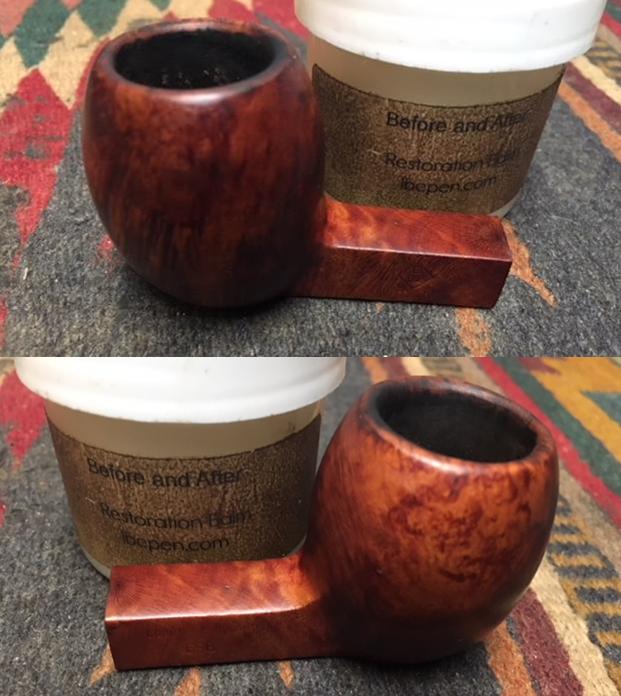
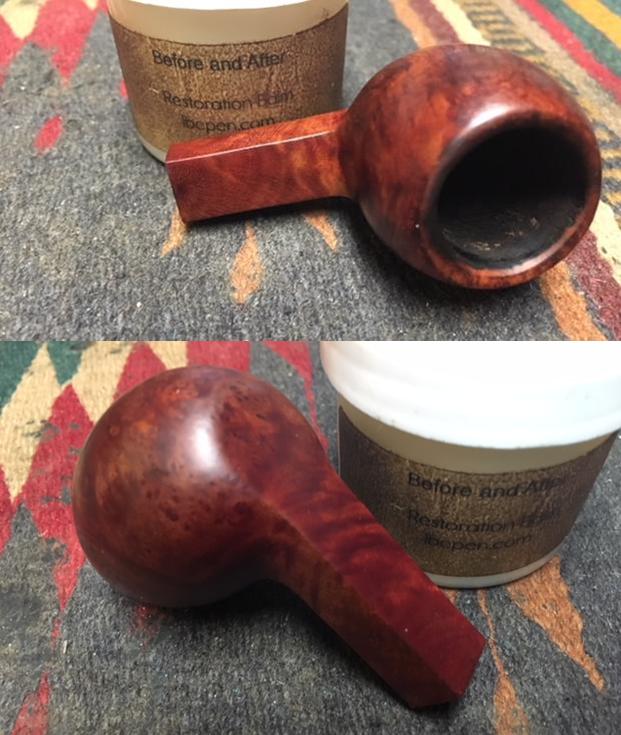
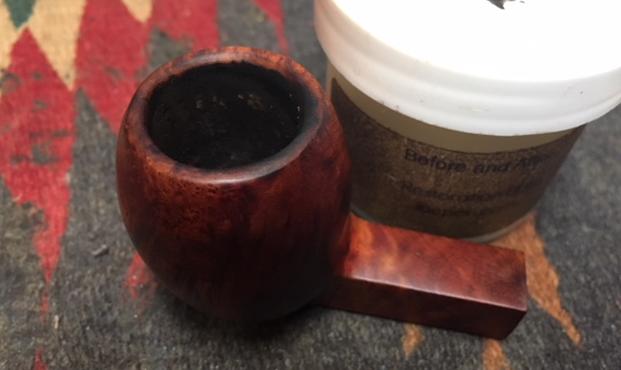
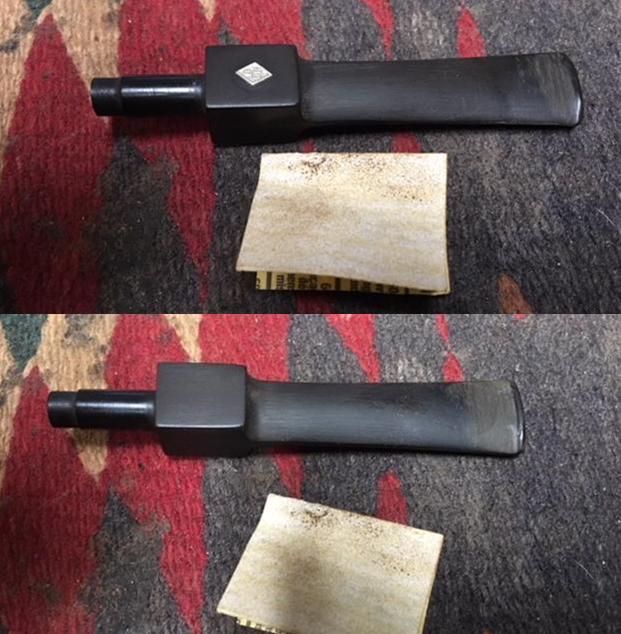
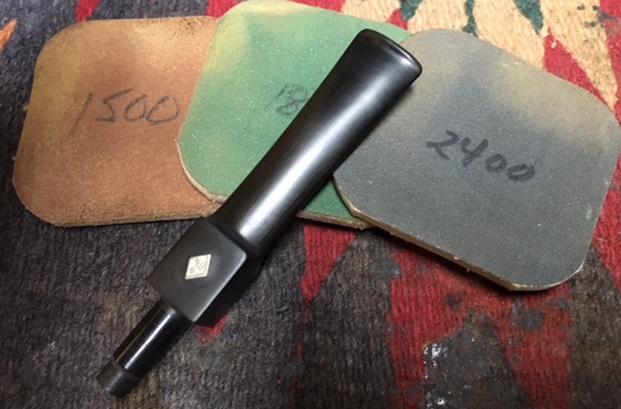
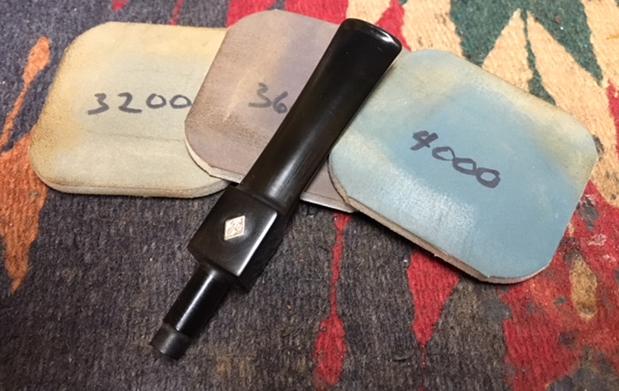
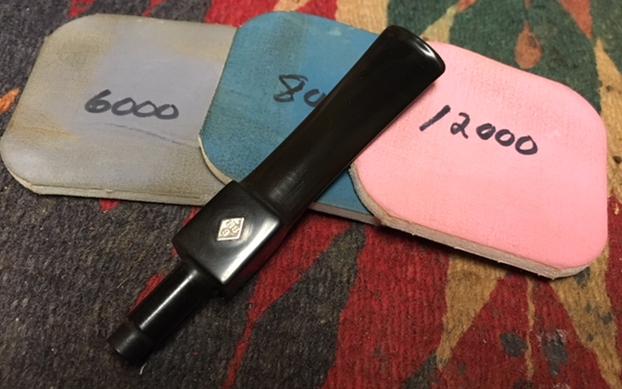
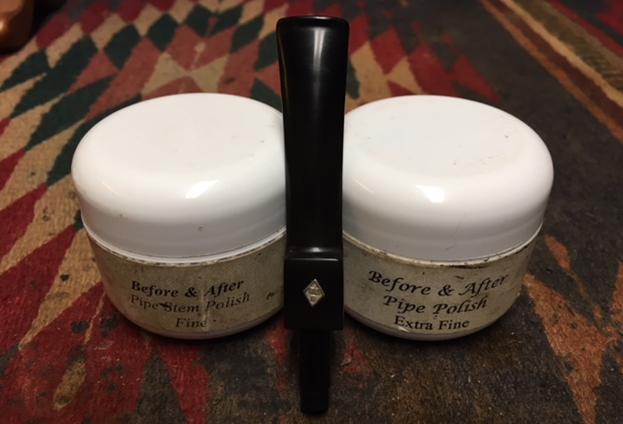
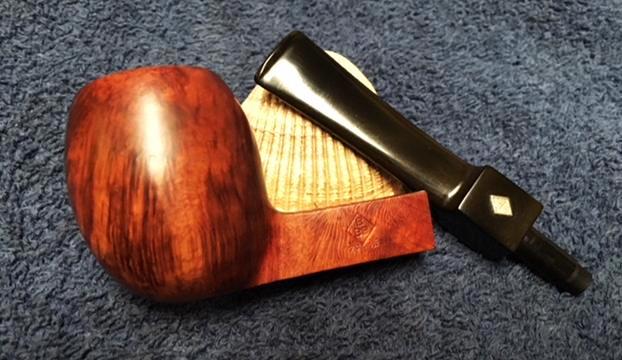
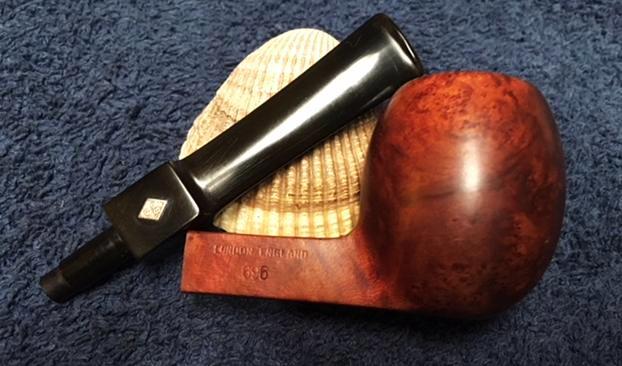
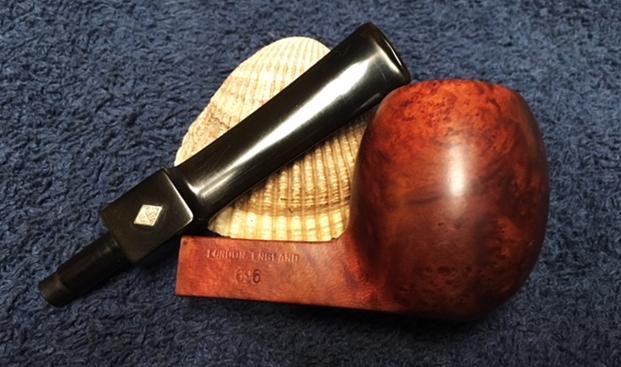
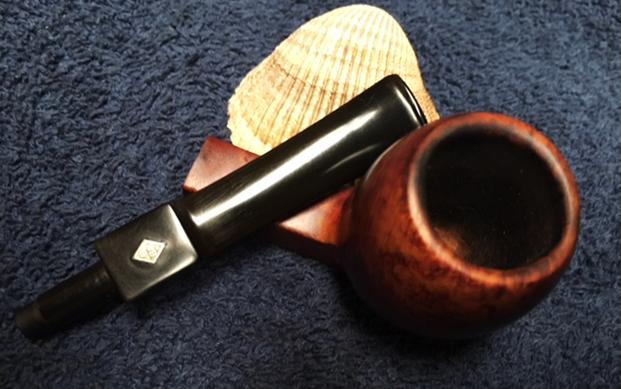
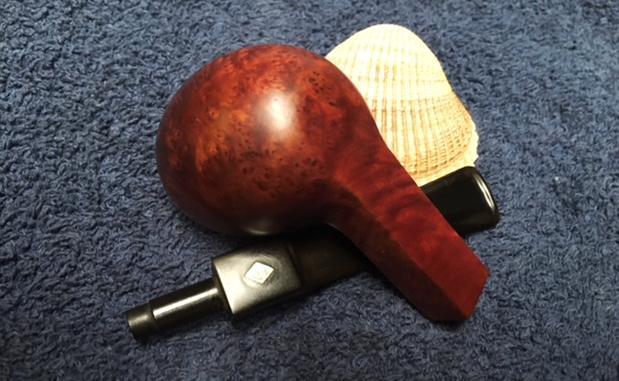
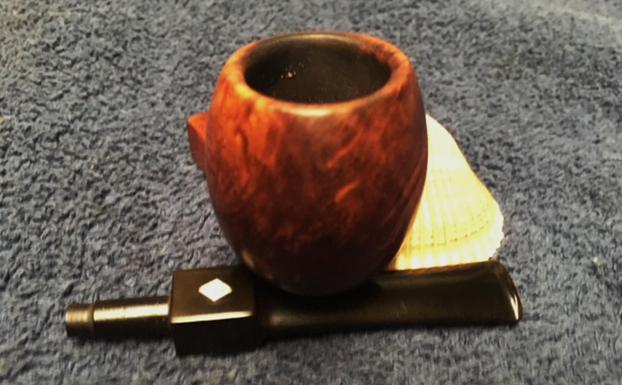
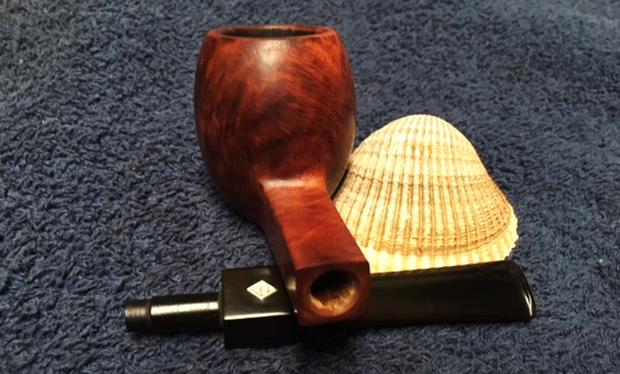
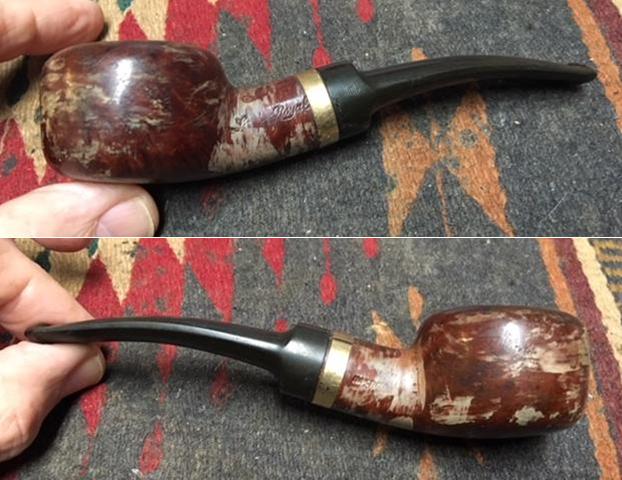
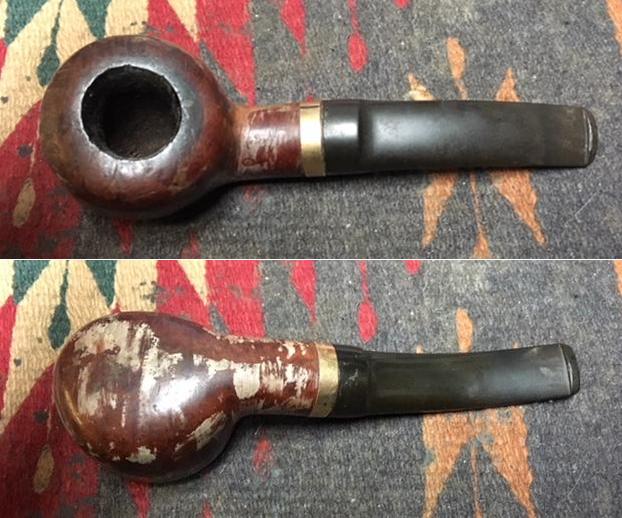
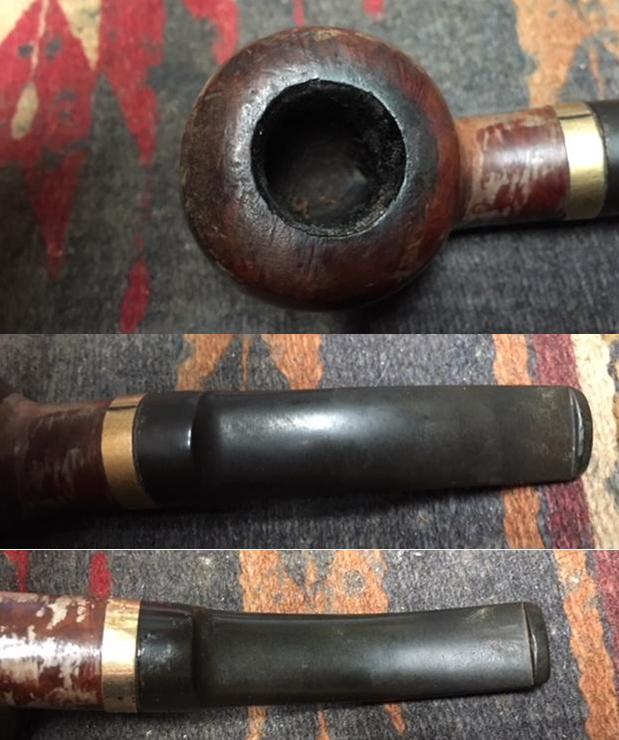
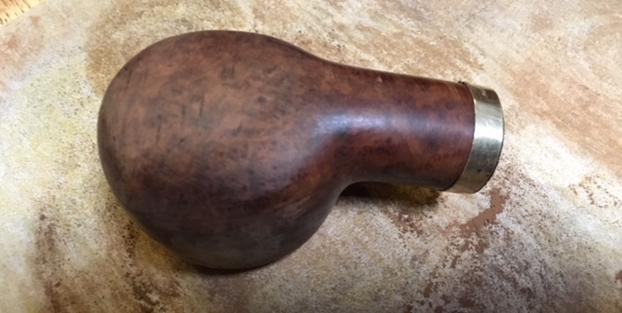
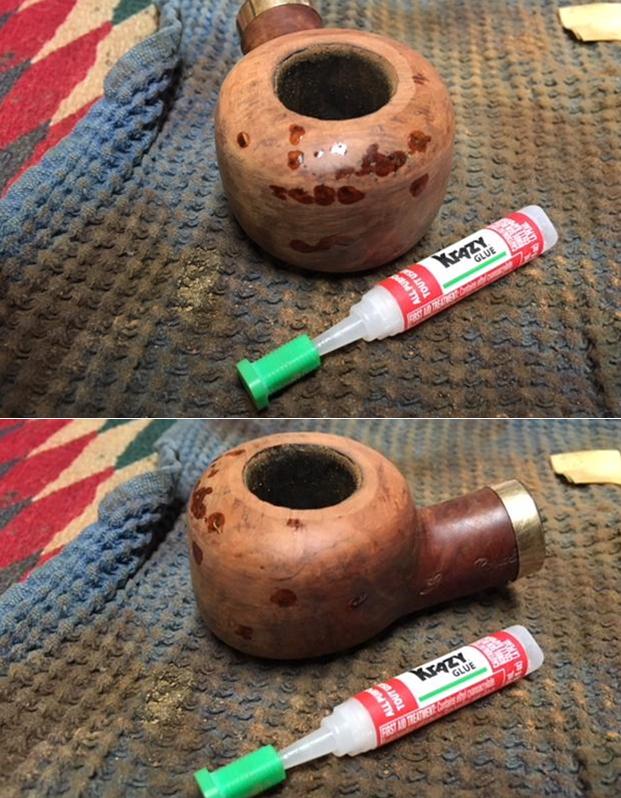
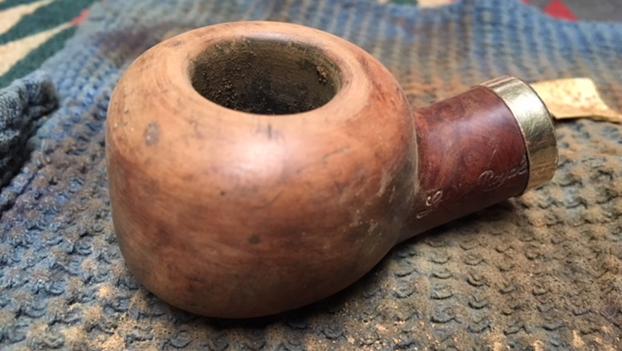
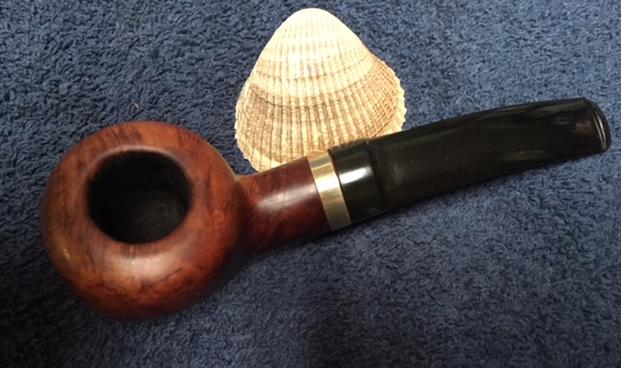
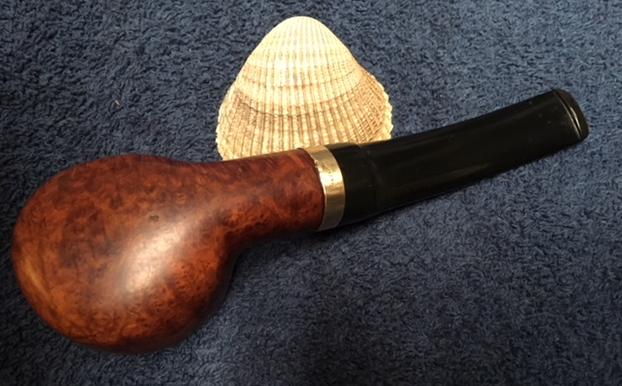
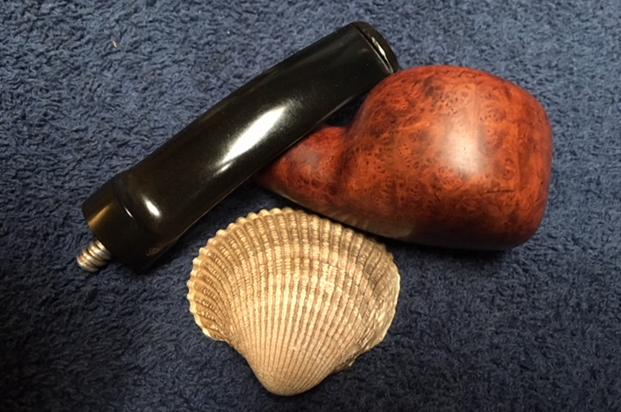
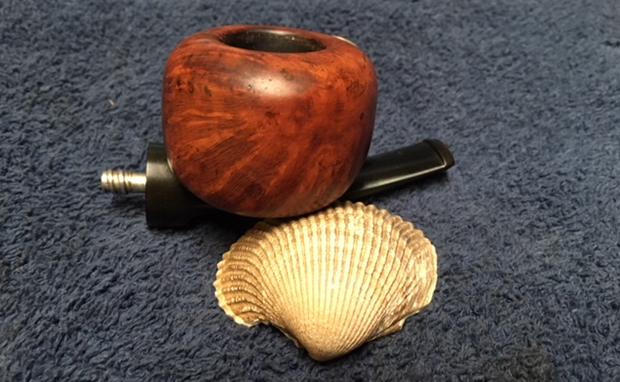
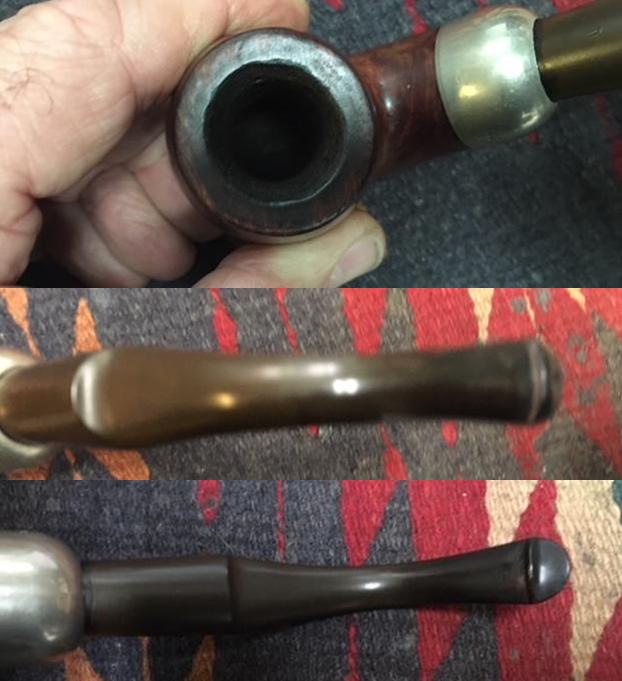
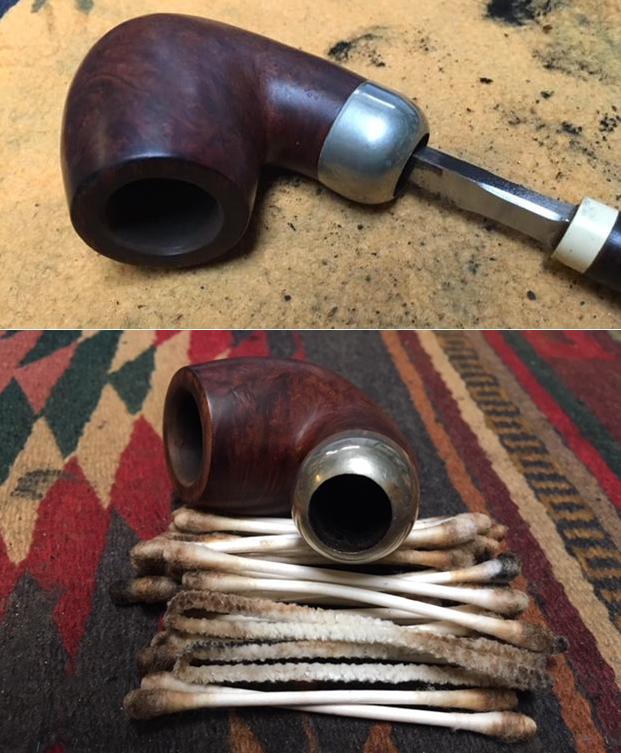
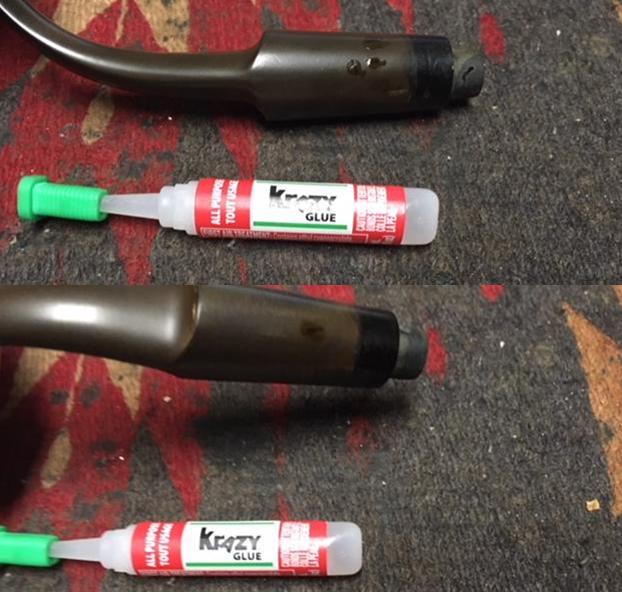
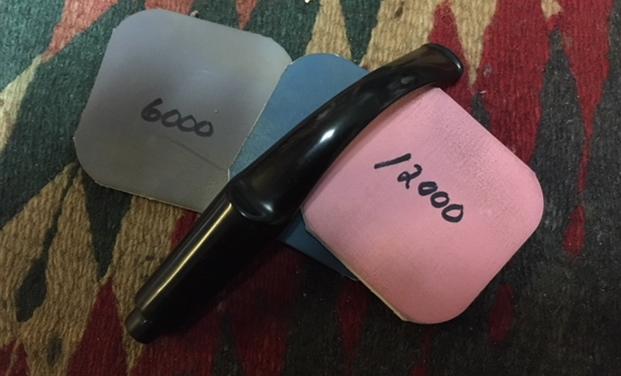
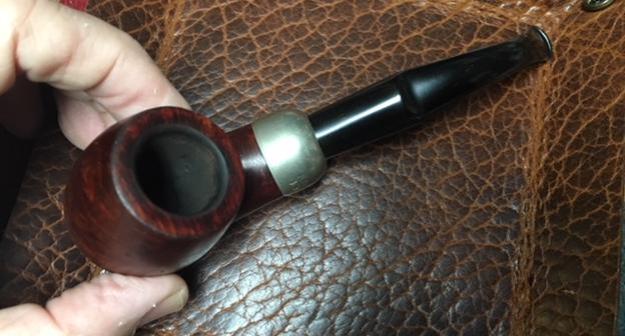
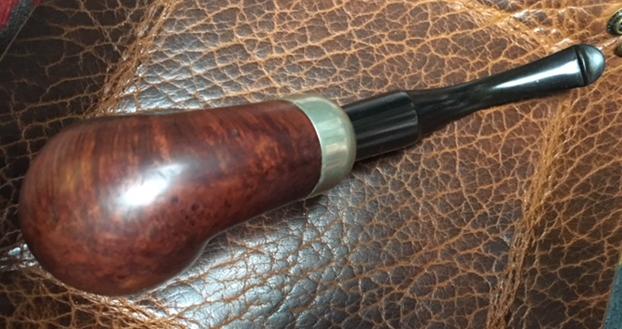
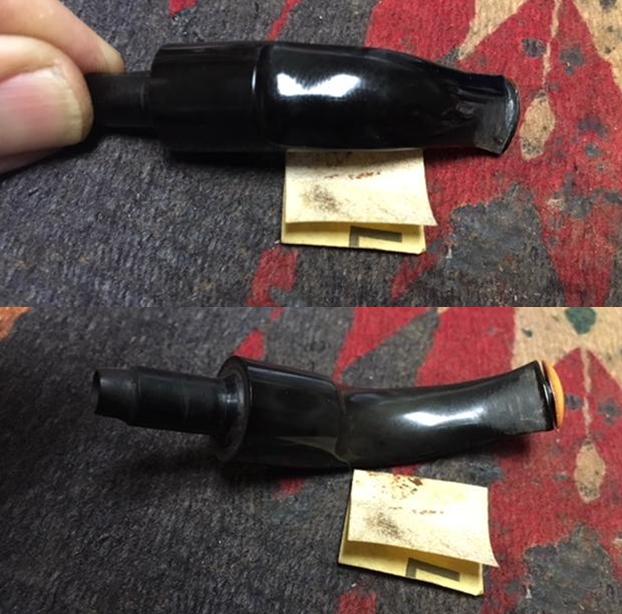
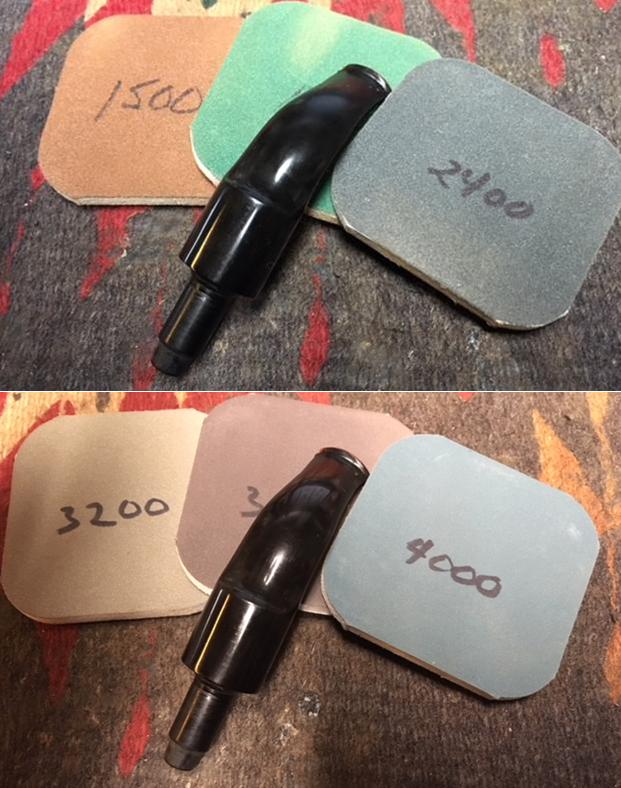
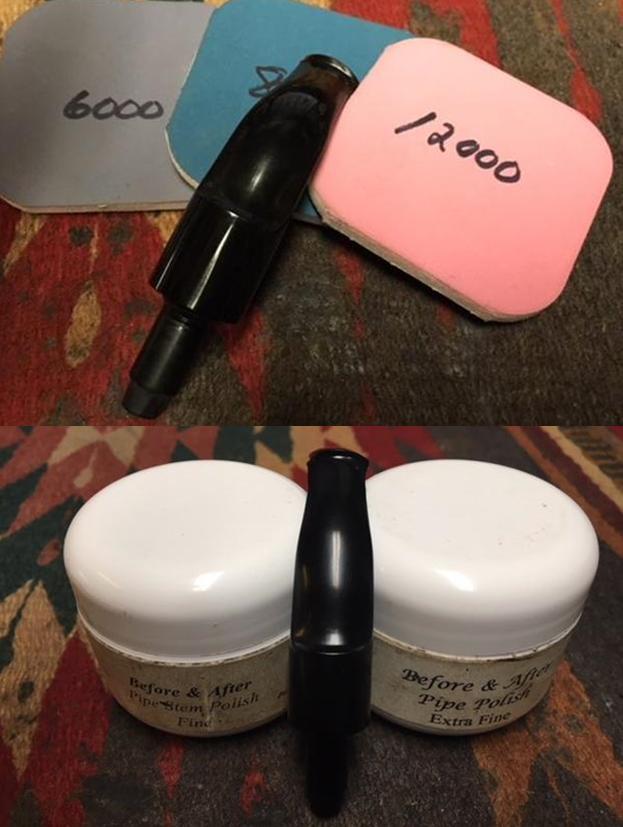
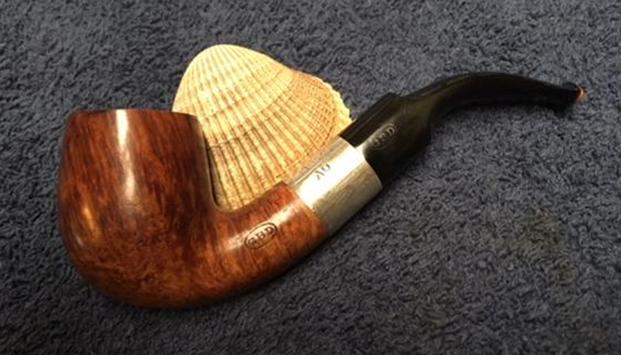
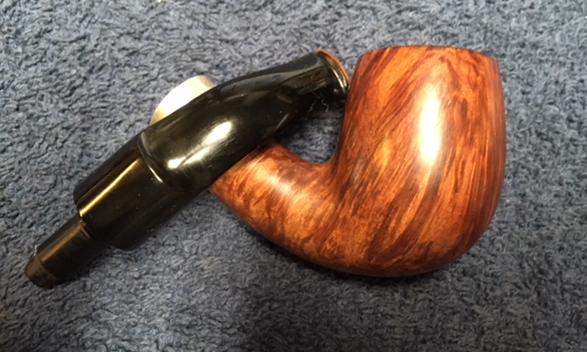
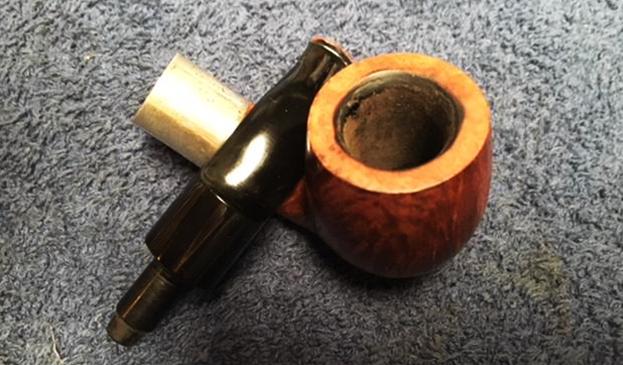
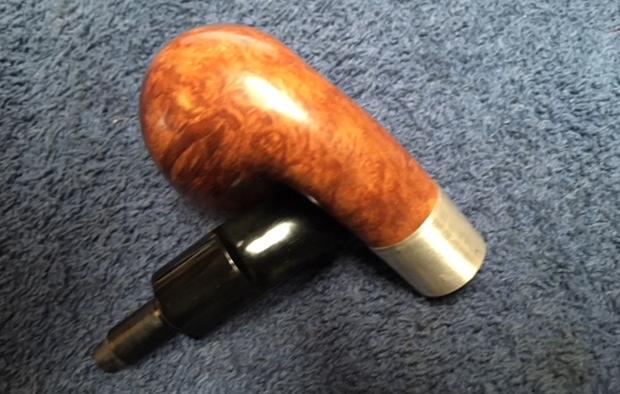
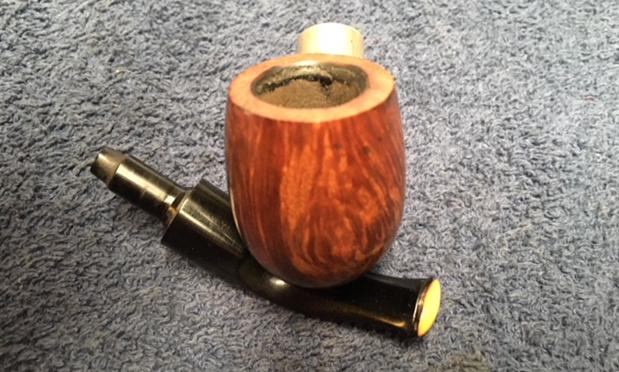
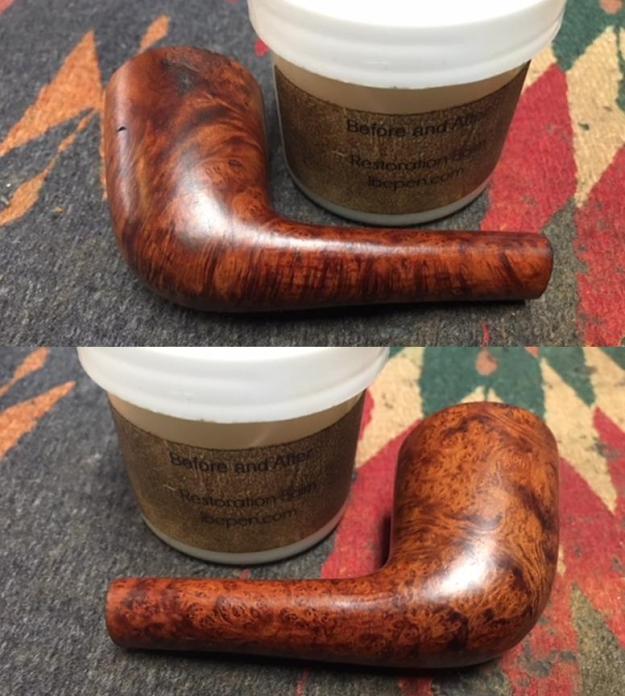
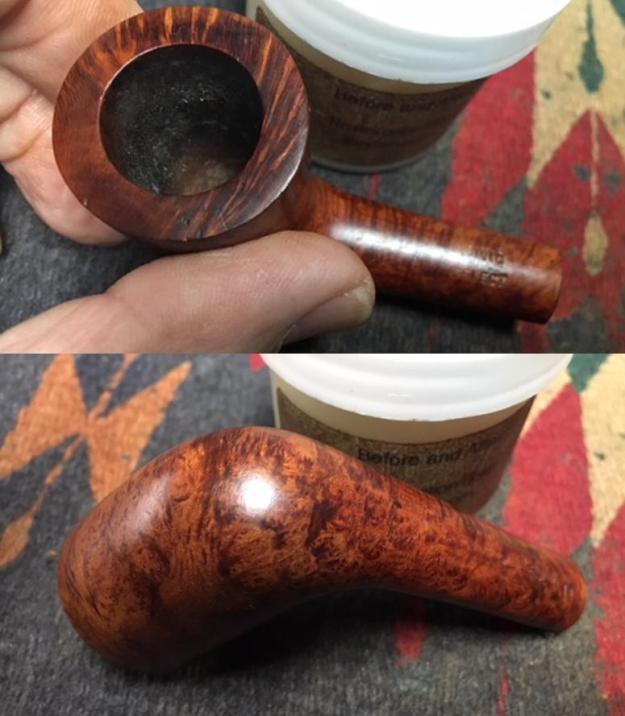
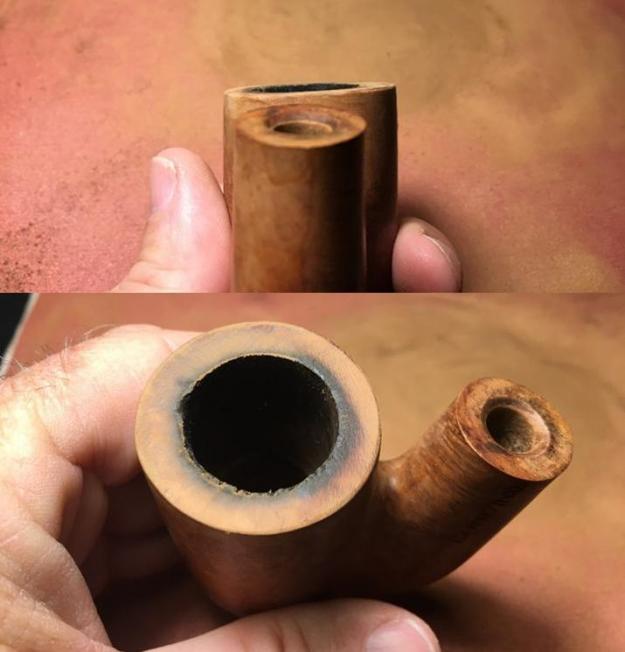
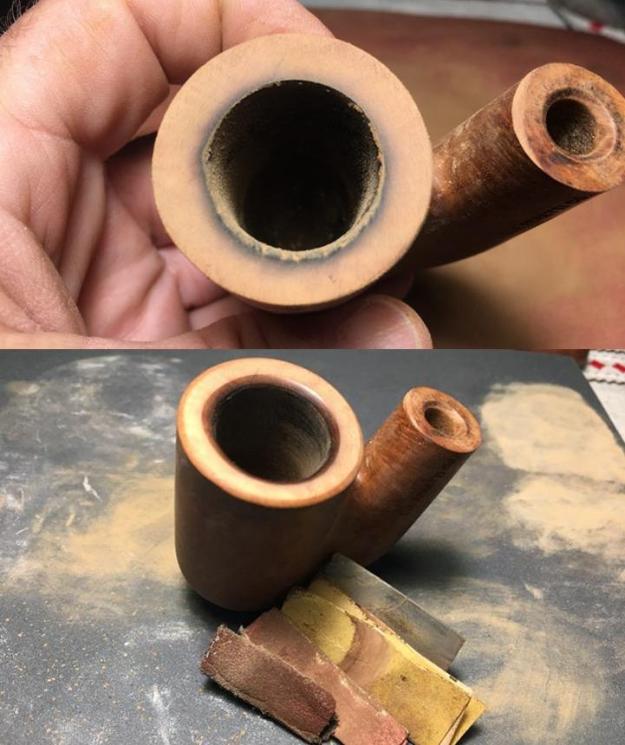
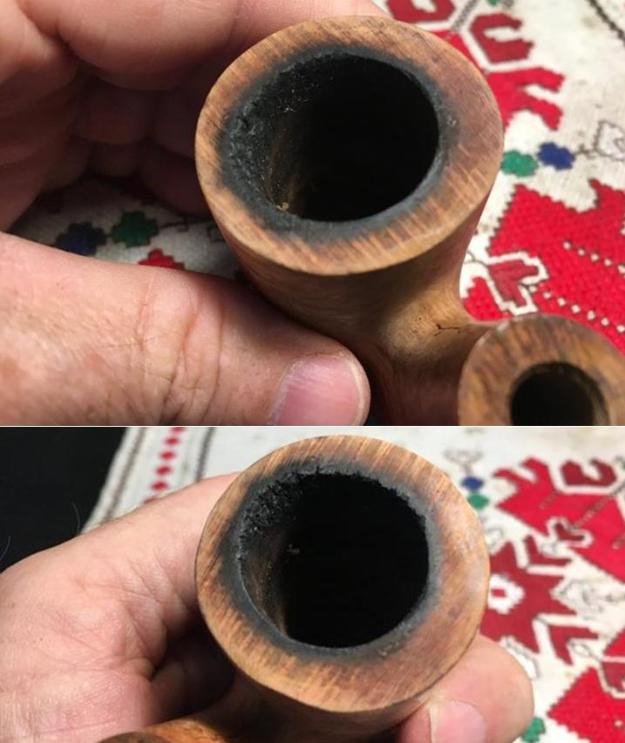
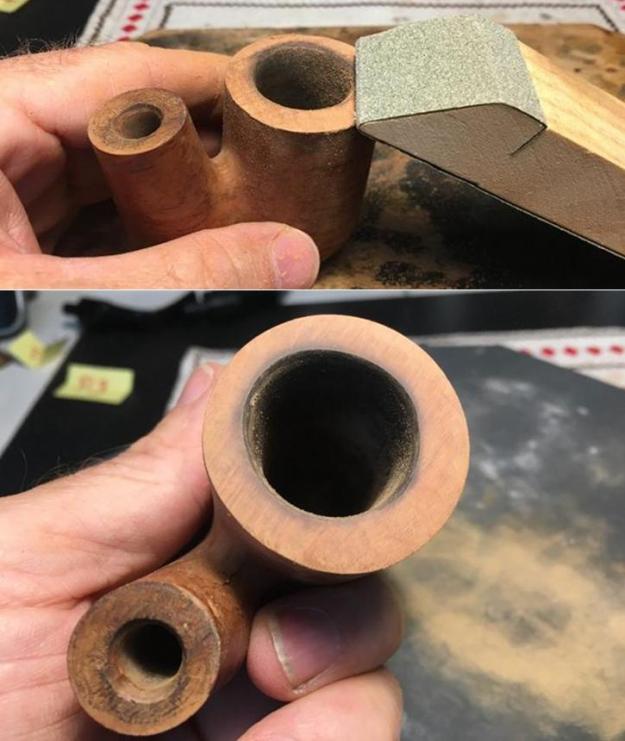
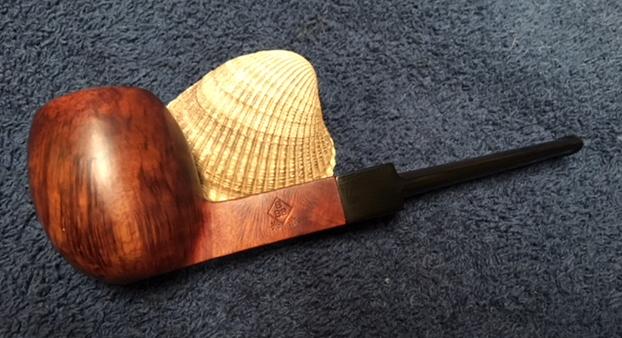
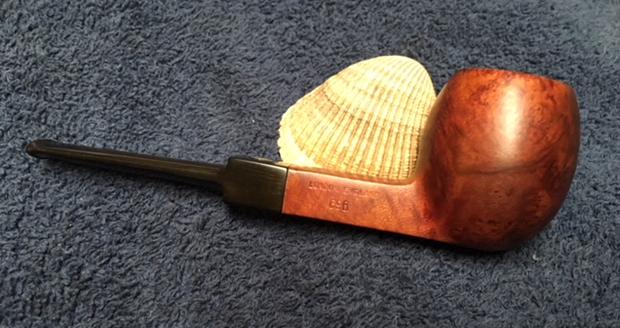
The next pipe on the work table is another pipe from the estate of a Vancouver pipe smoker whose widow left them with a local Pipe Shop. I was asked to clean them and sell them for the shop. The photos show the pipe when I brought it to my work table. It is a nice BBB Square Shank Apple with a smooth finish. The bowl was heavily caked with a lava coat on the top of the rim. It was hard to tell how the inner and outer edge of the rim actually looked until the bowl was reamed. The exterior of the bowl was dirty and covered with grime dust in the deep grooves of the finish. The stem had the same tooth marks and chatter on the top and underside near the button as the rest of the pipes in this estate. There was calcification on the first inch from what looked like a Softee bit. The stem has the BBB Diamond S logo on the top. The pipe is stamped on the left side of the shank with the words BBB in a Diamond with a * on either side. On the right side of the shank it is stamped London England over the shape number 696. It is has a square saddle stem with a flat blade. When I went back to the States after Christmas to visit my parents and brothers I took a box of these pipes with me so that I could have Jeff clean them for me. When they came back to Canada they looked like different pipes. He had reamed the bowl with a PipNet pipe reamer and cleaned it up with a Savinelli Fitsall Pipe Knife. He scrubbed the exterior with Murphy’s Oil Soap and a tooth brush to clean off the grime on the finish and the heavy overflow of lava on the rim top. He cleaned up the internals of the shank, mortise and stem with pipe cleaners, cotton swabs and alcohol to remove all of the oils and tars in the pipe. When it came back to Vancouver it was a quite different pipe. I took pictures of it to show the condition at this point – the bowl looked great and the stem was lightly oxidized. I took photos of the rim top and the stem to show their condition. Jeff was able to clean out the bowl completely and the rim top. He removed the tars and lava and left behind a clean top that showed all of the original rustication and looked very good. The stem was lightly oxidized and there was tooth chatter and marks on both sides near the button and on the surface edges of the button itself.I worked on five of the pipes from that estate at the same time. I put all of the stems in a bath of Before & After Pipe Stem Deoxidizer to soak. I submerged them all of the stems in the bath and let them soak overnight to break down the oxidation.I took the stem out of the deoxidizer and rinsed it under warm water to rinse off the mixture. I blew air through the stem and ran water through it as well to rinse out the mixture there as well. The stem still had some oxidation spots but it was all on the surface as seen in the first two photos below. I painted the surface of the stem with the flame of a Bic lighter to lift the tooth marks. One of the benefits of the lighter is that it burned off the sulfur on the surface of the stem. It did not take too much work for the vulcanite to return to its smooth condition. I sanded out the lighter tooth marks and chatter with 220 grit sandpaper until there were two deep tooth marks on the underside of the stem that remained. I filled those in with clear super glue and laid the stem aside to let the repairs cure.I sanded the top of the rounded rim and the inner edge of the bowl with a folded piece of 220 grit sandpaper to smooth out the finish and remove some of the rim darkening. I polished the rim top with micromesh sanding pads – 1500-12000 grit.While the repairs on the stem were curing I rubbed down the briar with Before & After Restoration Balm. I worked it into the nooks and crannies of the rusticated briar to clean, enliven and protect the finish. I let the balm sit for a little while and then buffed it with a cotton cloth to raise the shine. The following photos show the bowl now. Once the repairs had dried/cured I sanded them smooth with 220 grit sandpaper to blend them into the surface of the bowl. The two large tooth marks on the underside of the stem took a bit of sanding to smooth them out but the tooth chatter disappeared quite quickly.I polished out the scratches in the vulcanite with 400 grit wet dry sandpaper and with micromesh sanding pads. I wet sanded with 1500-2400 grit pads and dry sanded with 3200-12000 grit pads. I wiped the stem down after each pad with Obsidian Oil. After sanding with the 12000 grit pad I polished the stem with Before & After Pipe Stem Polish – both Fine and Extra Fine. With each sanding pad and the polish I worked around the BBB medallion on the top of the stem so as not to smooth us the embossing on the brass. With the stem polished I put it back on the pipe and lightly buffed the bowl with Blue Diamond. I buffed the stem with a more aggressive buff of Blue Diamond. I gave the bowl multiple coats and the stem several coats of carnauba wax and buffed the pipe with a clean buffing pad to raise the shine. I hand buffed it with a microfiber cloth to deepen the shine. The pipe polished up pretty nicely. The finished pipe is shown in the photos below. I will be posting it on the rebornpipes store very soon. It should make a nice addition to your pipe rack if you have been looking for a reasonably priced older BBB pipe with a smooth finish and interesting grain. It should be a great smoking pipe with a good hand feel. The dimensions are Length: 5 ¼ inches, Height: 1 3/4 inches, Outside diameter of the bowl: 1 1/4 inches, Chamber diameter: 3/4 inches. Thanks for walking through the restoration with me as I worked this pipe over.

Restoring a Beautifully Carved OaK Leaf Briar Canadian


Blog by Steve Laug

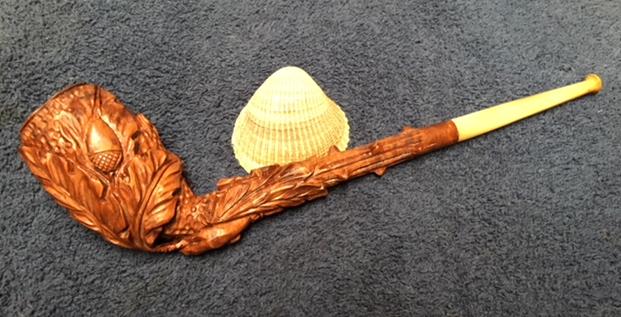
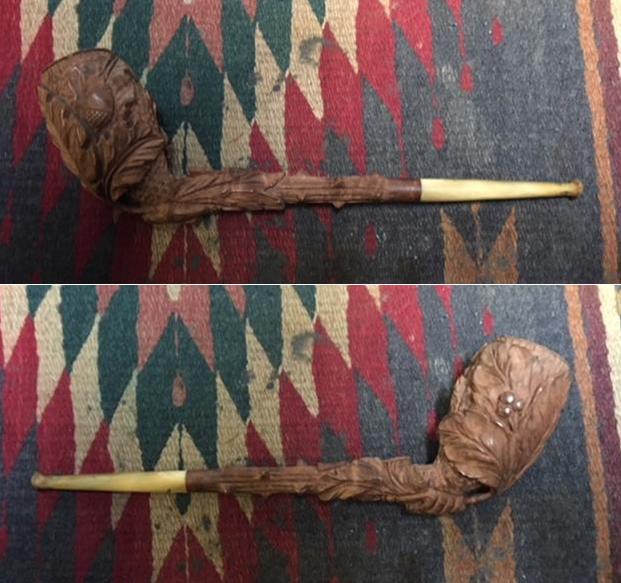
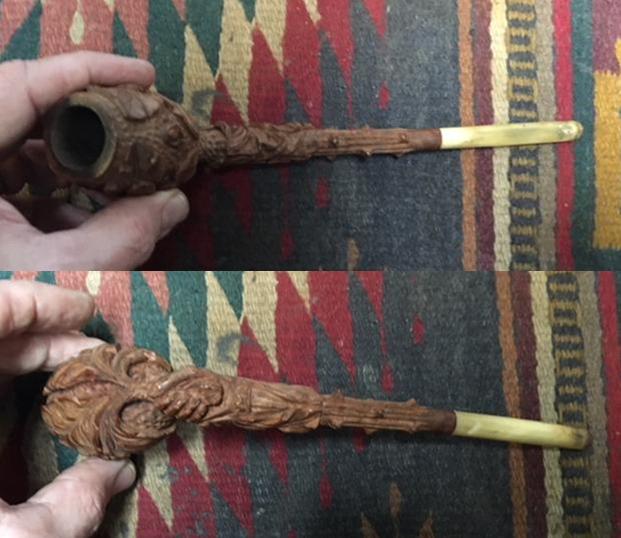
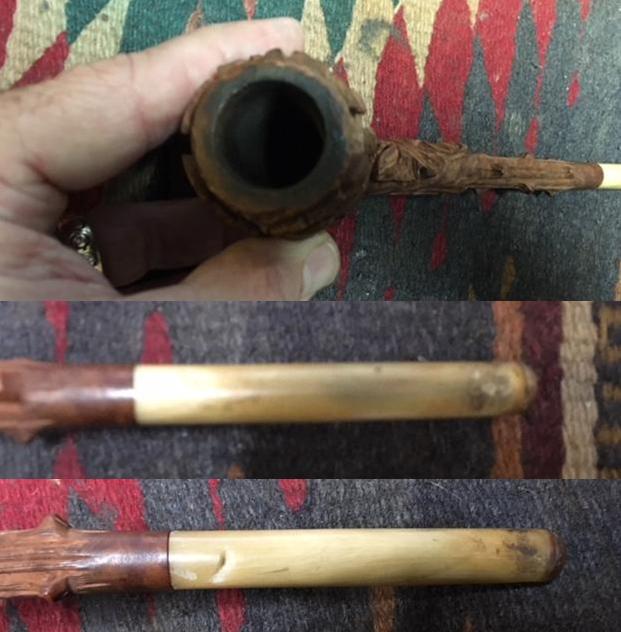
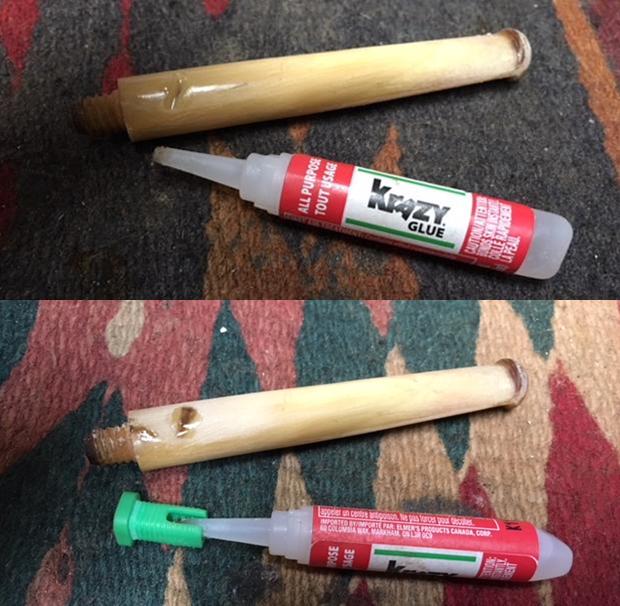
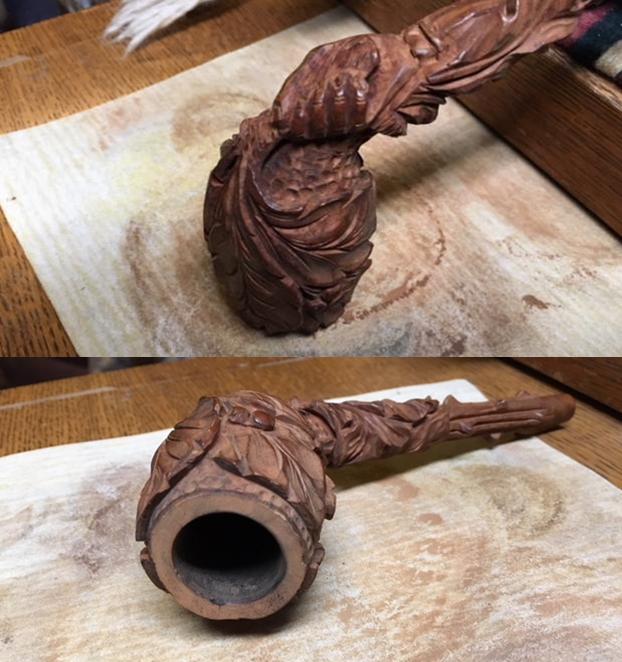
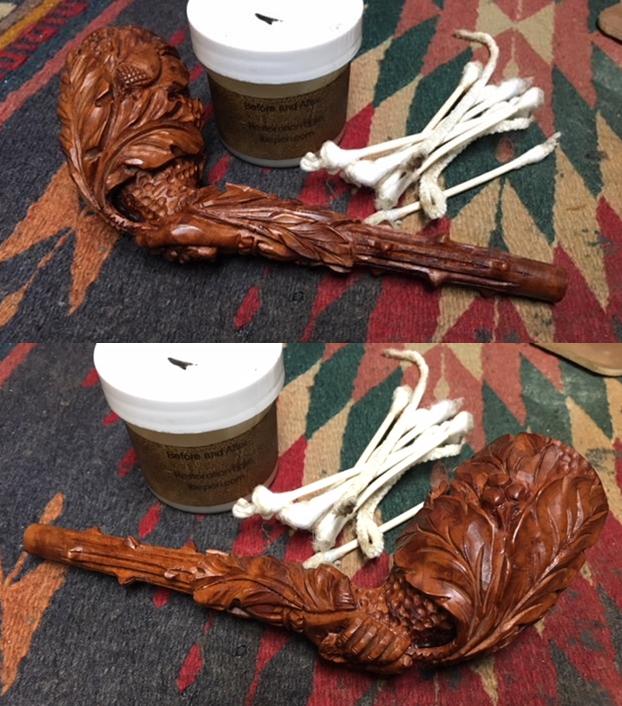
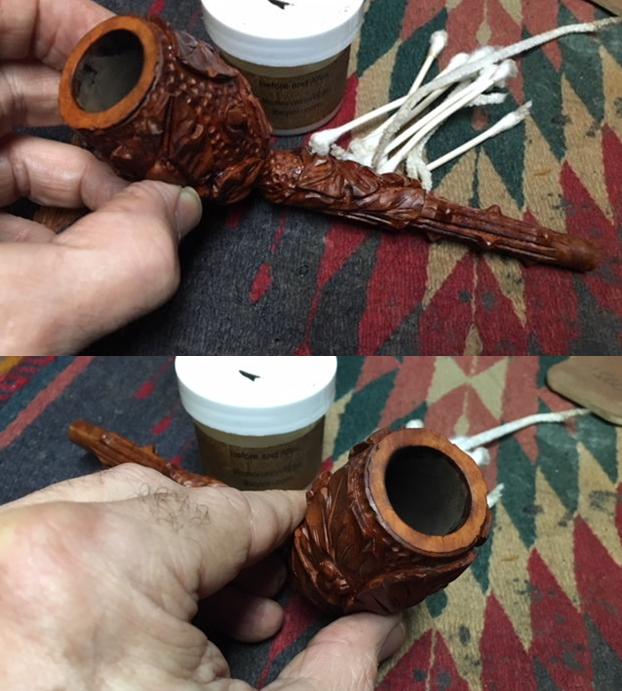
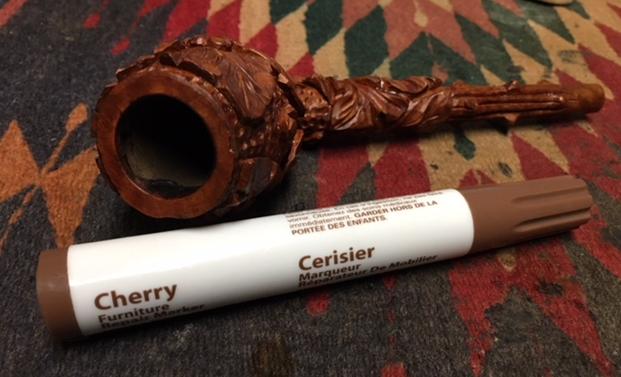
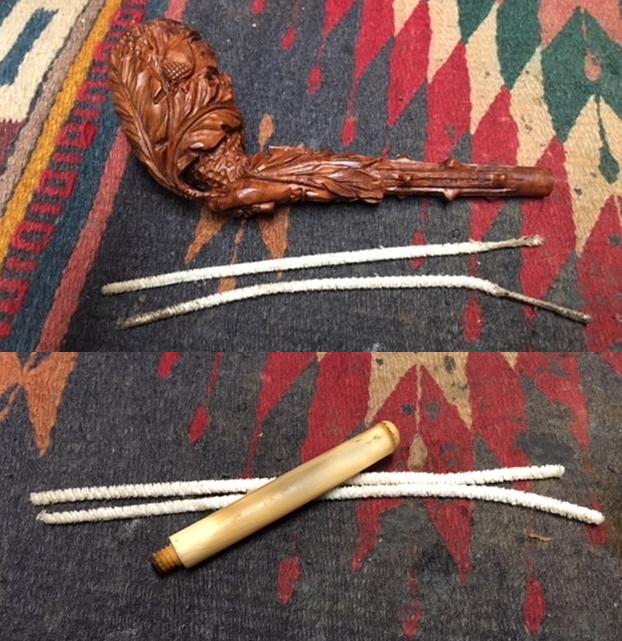
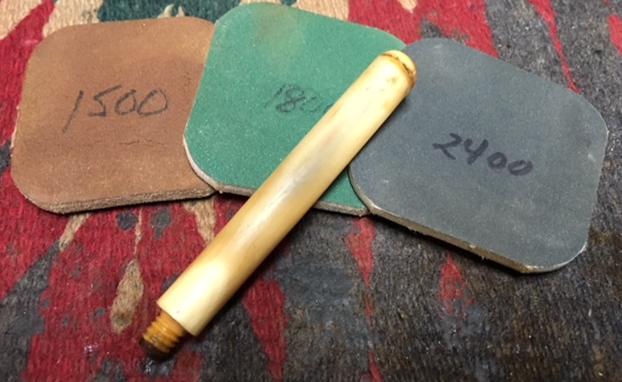
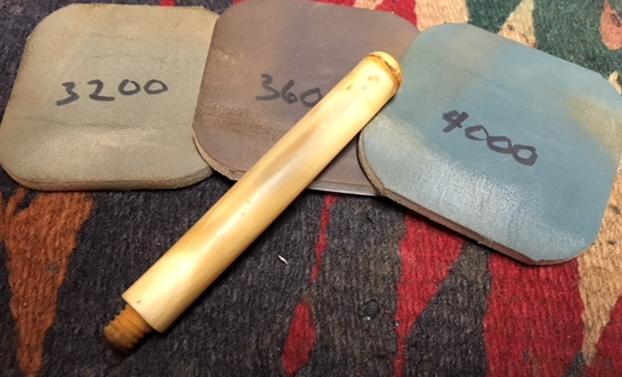
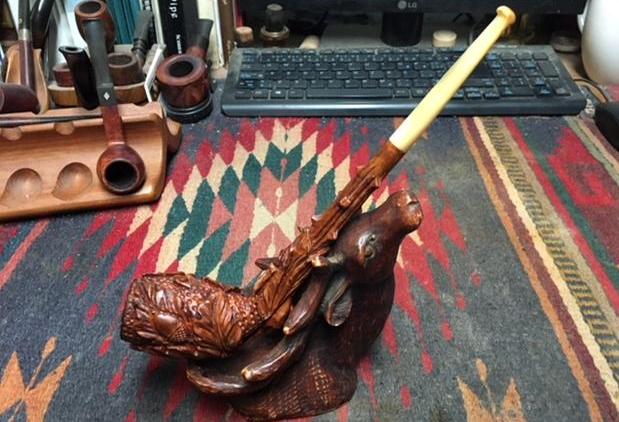
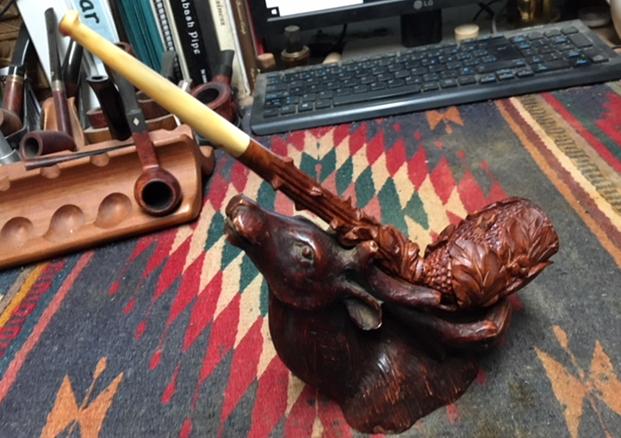
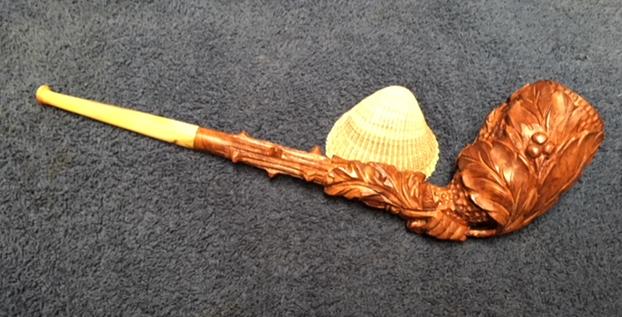
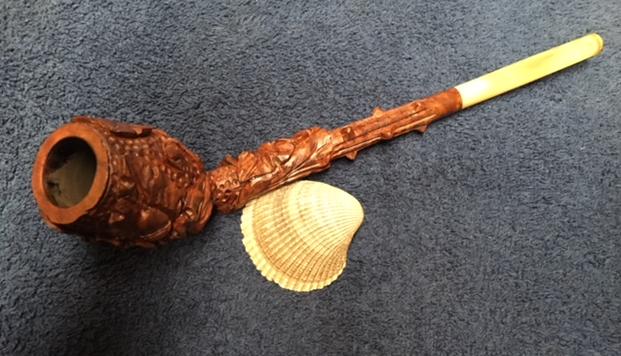
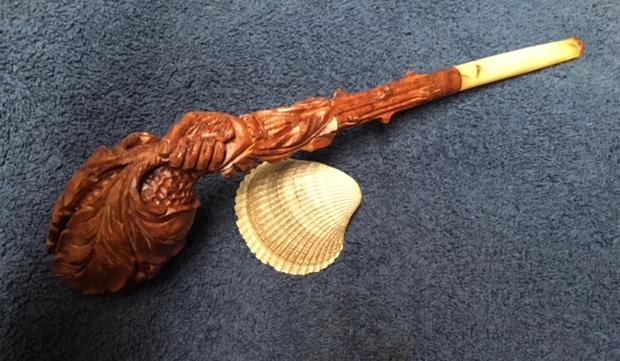
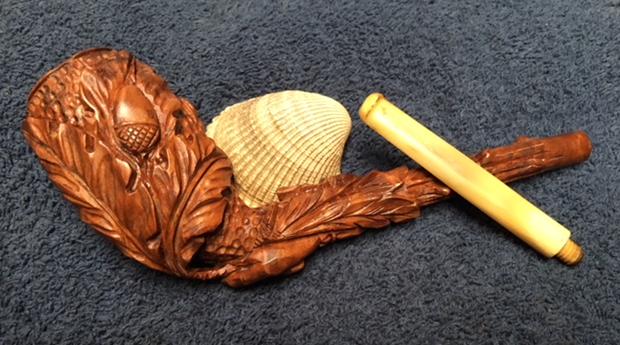
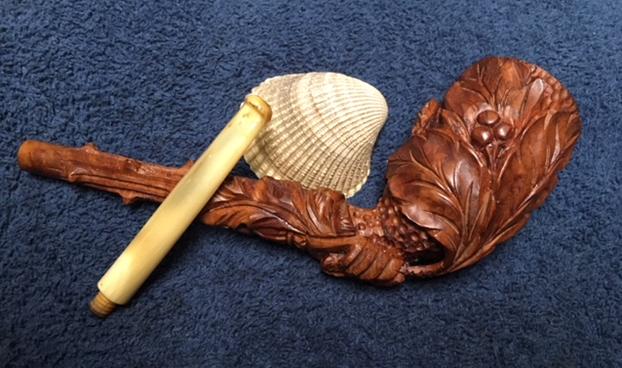
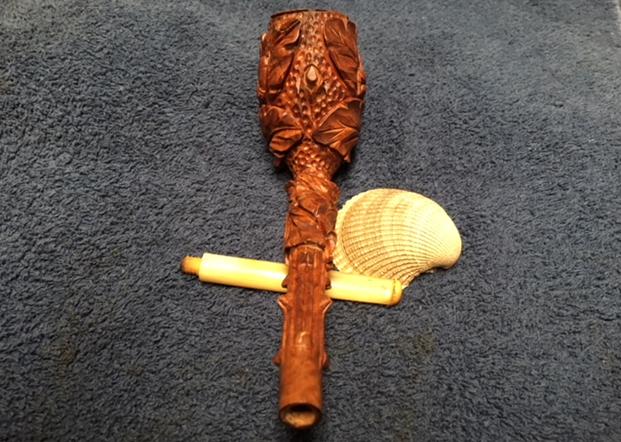
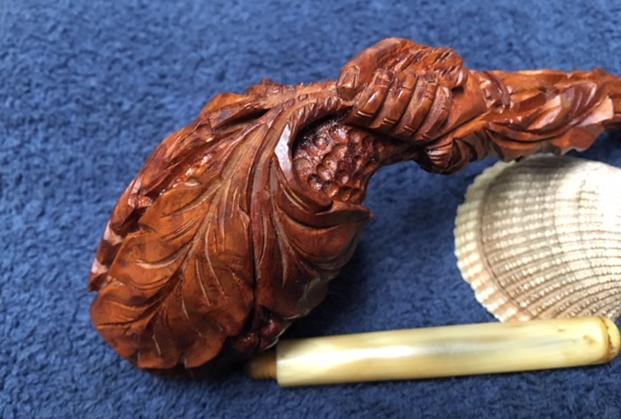
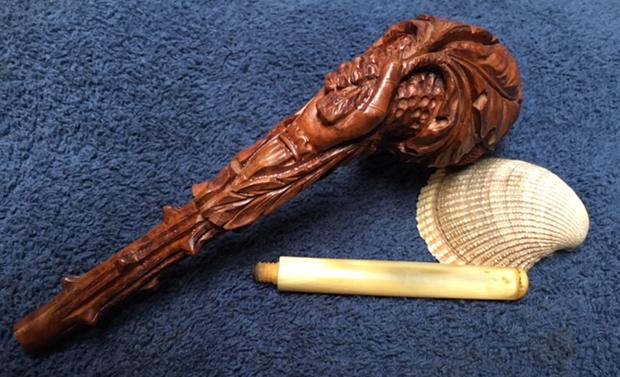
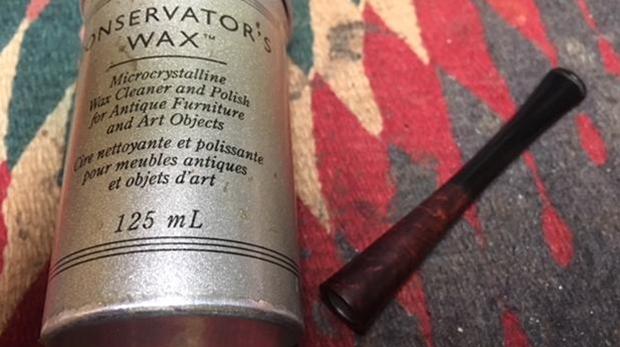
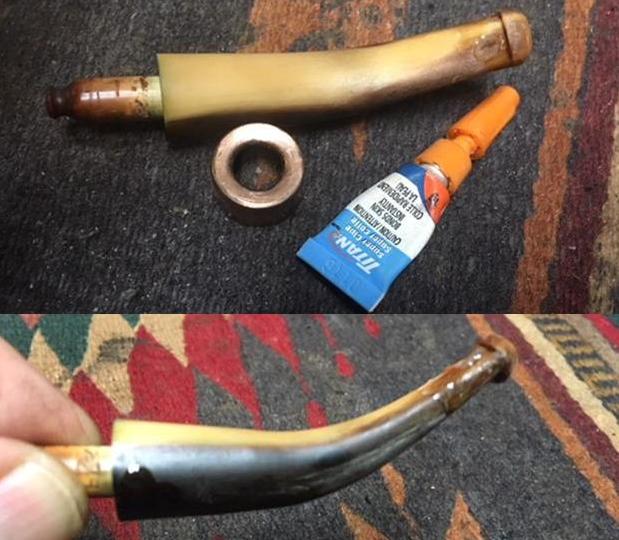
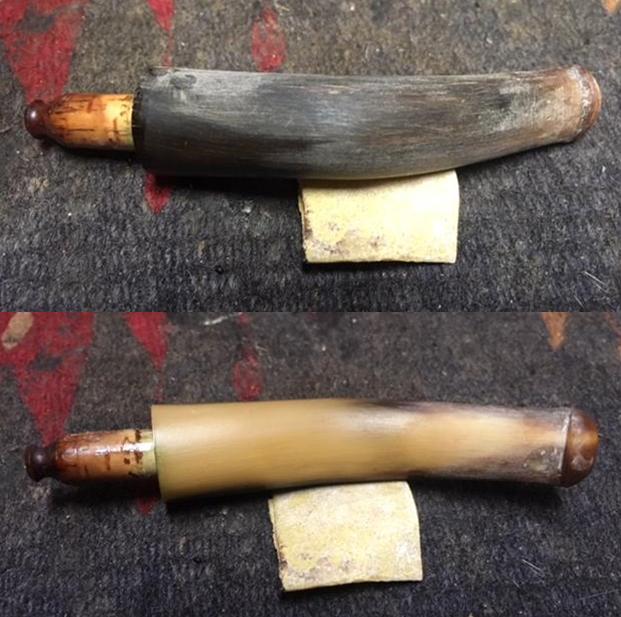
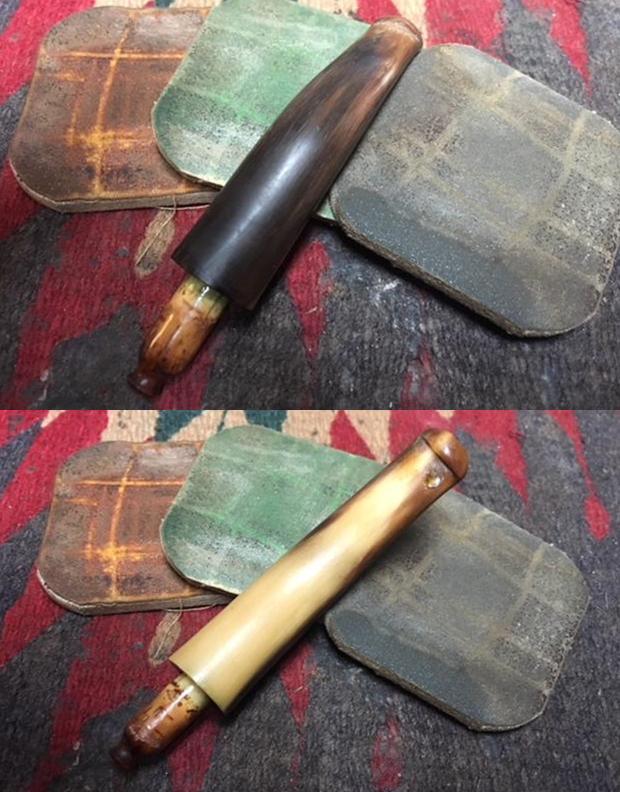
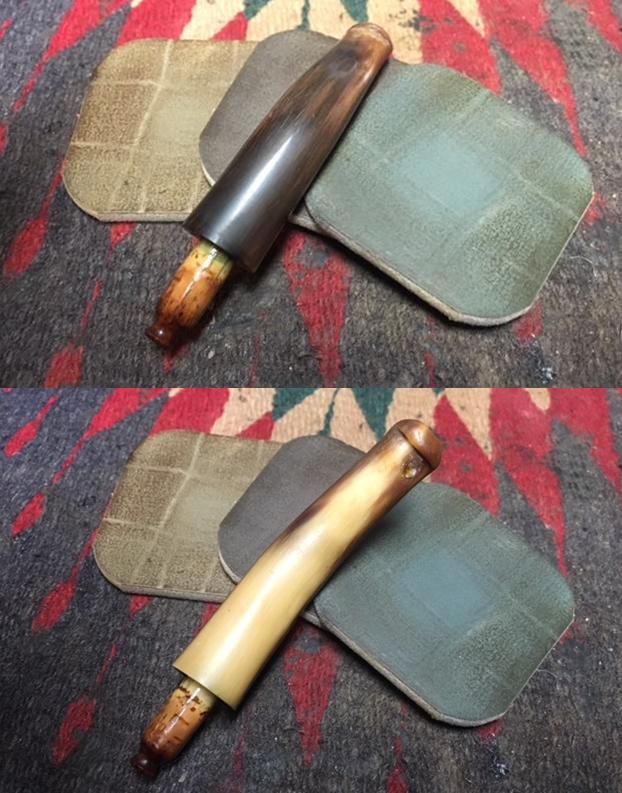
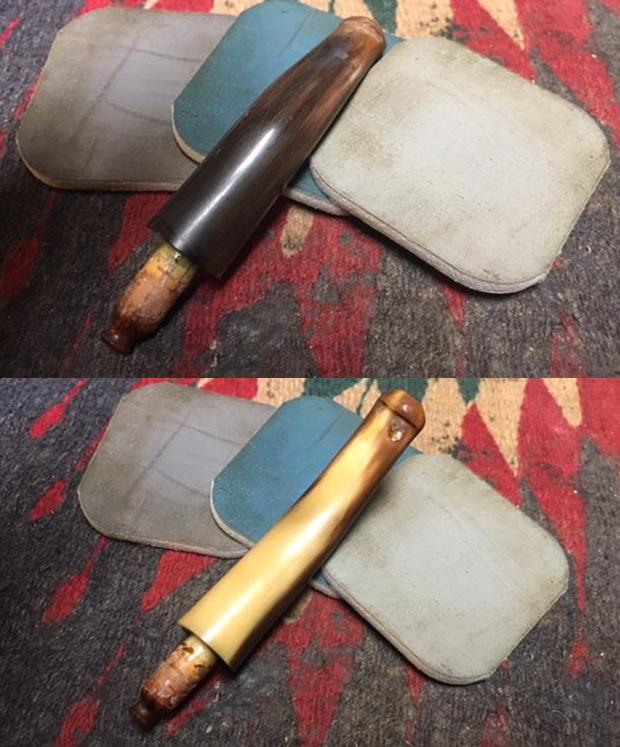
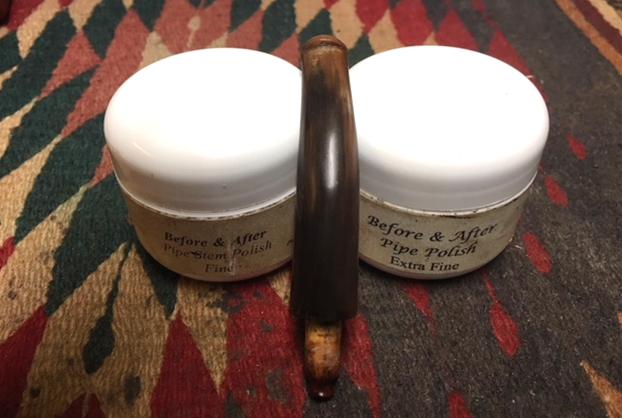
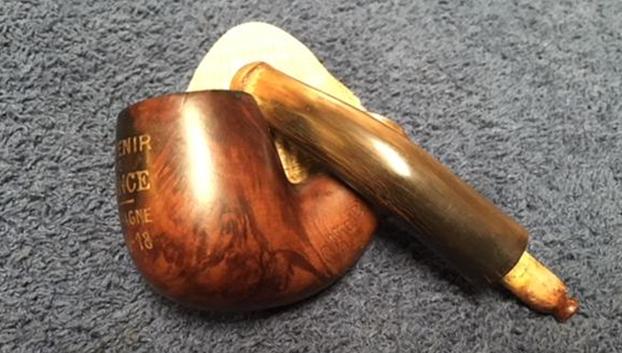
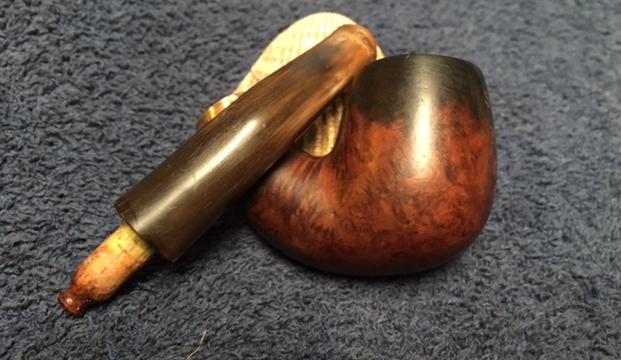
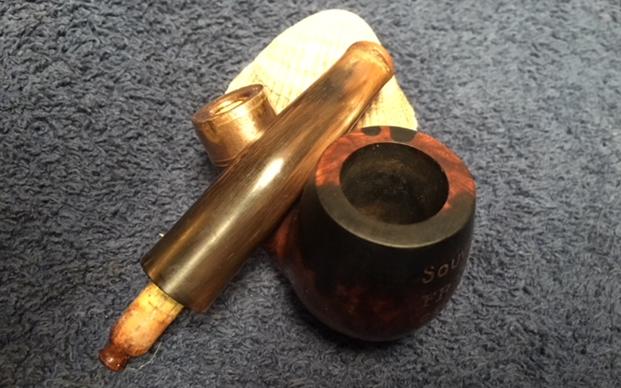
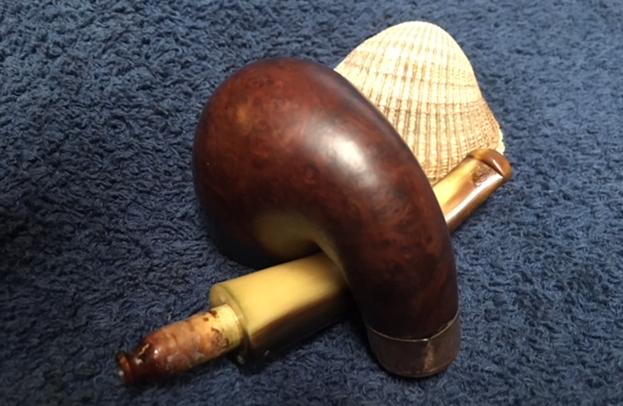
My brother Jeff sent me photos of a pipe that a fellow he knows was selling. The fellow had picked it up on one of his pipe hunting expeditions. It was an intricately carved briar pipe with a horn stem. The bowl was encircled in oak leaves with acorns both fully developed and partially developed. The shank was made up of the stem of the leaves and it was held in a hand. The underside of the shank had fingers and thumb wrapped around the stem on the leaves. There was also bark of a branch. The striations of the bark ran the length of the shank to the oak leaves and stems. The top of the rim had some darkening and a thick overflow of lava on the rim top. The inside of the bowl had a thin coat of cake and some debris in the bottom of the bowl. The horn stem had tooth marks on the top and underside of the stem and some tooth chatter. On the underside there were some worm holes next to the shank/stem junction. One was fairly shallow next to the stem and the other going across the stem was quite a bit deeper. I took photos of the rim top and the stem surfaces both top and underside to show the condition of the pipe when it came to me. You can see the damage on the rim top though the bowl is still in round. There was no damage to the inner or outer edge of the rim. The buildup of lava would need to be scraped away. The stem photos show the tooth chatter on the top and underside near the button and the worm holes near the shank/stem junction.I cleaned the surface of the stem with alcohol on cotton swabs and pads to remove the grime in the holes. I dried them out and then filed them in holes with clear super glue. The small hole was quite simple to fill while the larger one across the stem was deeper and more complicated to repair. It took multiple layers of glue to fill it in until it was even with the surface of the stem. The second photo below shows the filled in holes. The glue dried and turned darker than the rest of the stem. However the surface of the stem was smooth to the touch. I sanded the repairs with 220 grit sandpaper after they had hardened to blend them into the surface of the stem. I wiped the stem down with a cotton pad to remove the sanding dust left behind on the stem surface.I lightly topped the bowl on a piece of 220 grit sandpaper on a topping board to remove the damage and the lava overflow.I rubbed Before & After Restoration Balm into the briar to enliven, clean and protect it. I used cotton swabs and folded pipe cleaners to work the Balm into all of the carved grooves. I buffed it with a soft cotton cloth. I buffed it with a shoe brush to further work the Balm into the grooves and polish it. I polished the rim top with 1500-12000 grit micromesh sanding pads to remove the scratching in the briar left behind by the sandpaper. Once it was polished I touch it up with a Cherry stain touch up pen to match the colour of the rest of the bowl. I buffed the rim top with a soft cotton cloth to bring a shine.I cleaned out the interior of the mortise, shank and airway in the shank and the stem with alcohol, cotton swabs and pipe cleaners. It was dirty but not overly so – the pipe appeared to have been lightly smoked.I polished the horn stem with micromesh sanding pads – wet sanding it with 1200-2400 grit pads and dry sanding it with 3200-12000 grit pads. Each pad brought a deeper shine to the surface of the horn. The tenon appears to be horn and it was pretty clean. I polished it with Before & After Pipe Stem Polish – both Fine and Extra Fine. I buffed the stem with a clean cotton pad. While I was in Idaho I found a cast Elk head pipe rack made by Comoy’s of London. It is a unique one and it works very well to hold this large pipe. I screwed the stem back into the shank and buffed the bowl and shank with a cotton cloth to raise a shine. I put the pipe in the Elk pipe rack and took photos of the pipe. This large, ornately carved oak leaf briar bowl and shank is quite stunning. There a places on the underside of the shank where you could see air through the space between the base of the bowl and shank and the curve of the stems held in the hand. The rim top is smooth and clean and looks much better. The horn stem is of nice quality and after the repairs it shined up well. I hand buffed the bowl and the stem with a shoe brush to raise the shine on the briar and the polished horn stem. I gave the bowl and stem multiple coats of Conservator’s Wax. I buffed the entire pipe with a shoe brush and a microfiber cloth to deepen the shine. The finished pipe is shown in the photos below. The rich brown stain allows the grain to really stand out on this little pipe and it works well with the rich colour of the horn stem. The dimensions of the pipe are: Length: 9 inches, Height: 3 inches, Outside Diameter: 1 7/16 inches, Diameter of the chamber: 7/8 inches. This intricately carved knife will fit really nicely into my collection of antique pipes. I think that this will be a great pipe to smoke and should deliver a clean dry smoke. Thanks for walking through the restoration with me.


Breathing new life into a London Royal Bullmoose Pot


Blog by Steve Laug

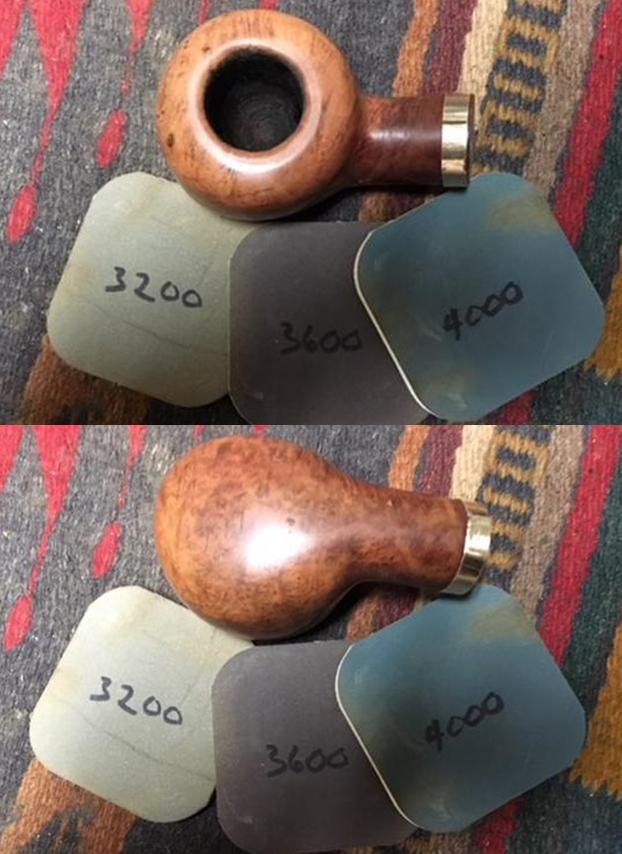
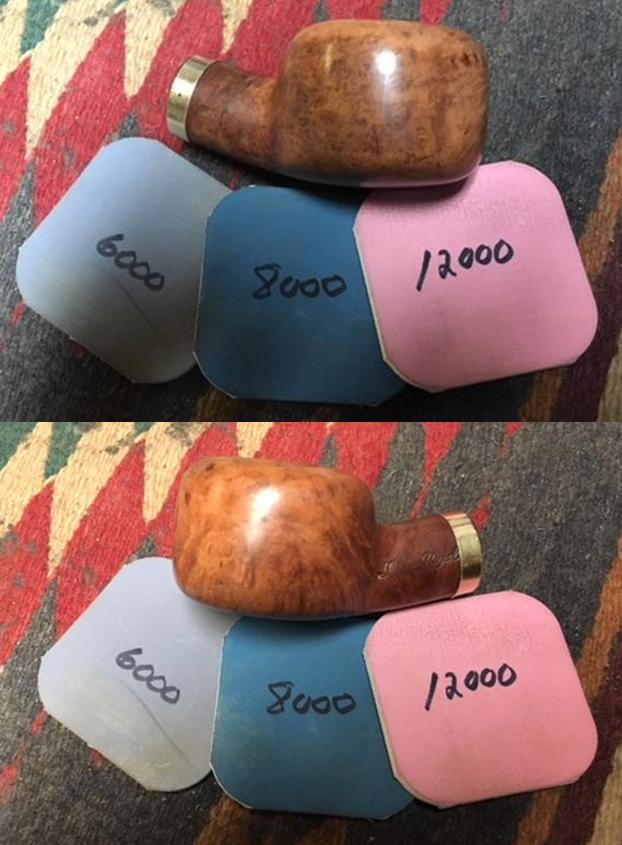
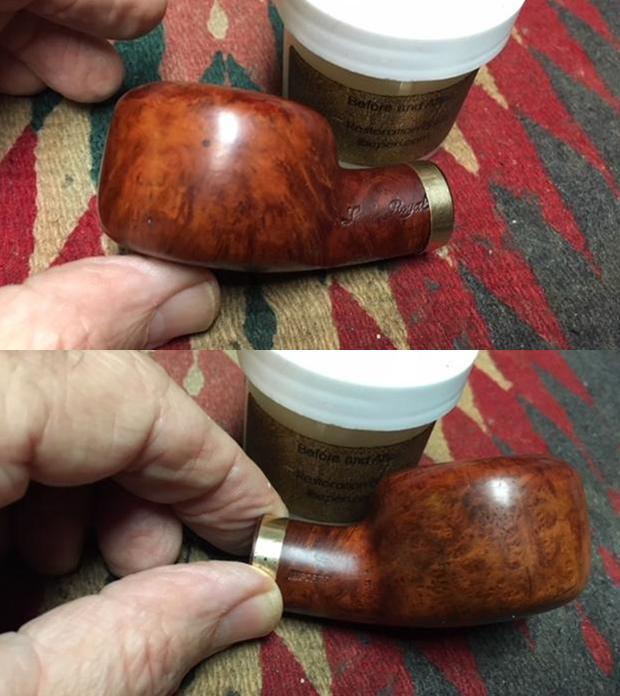
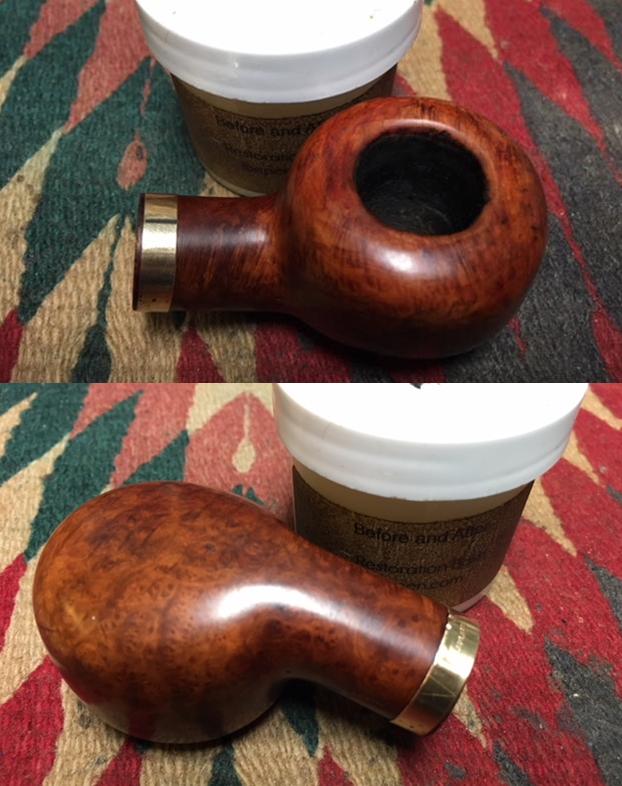
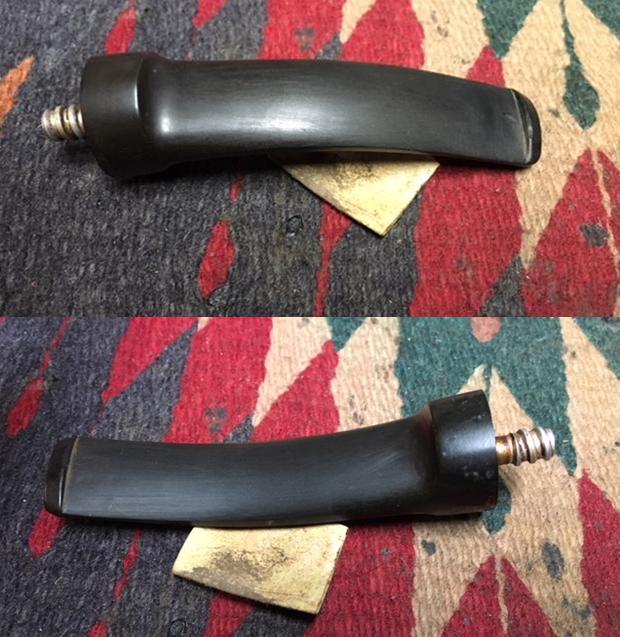
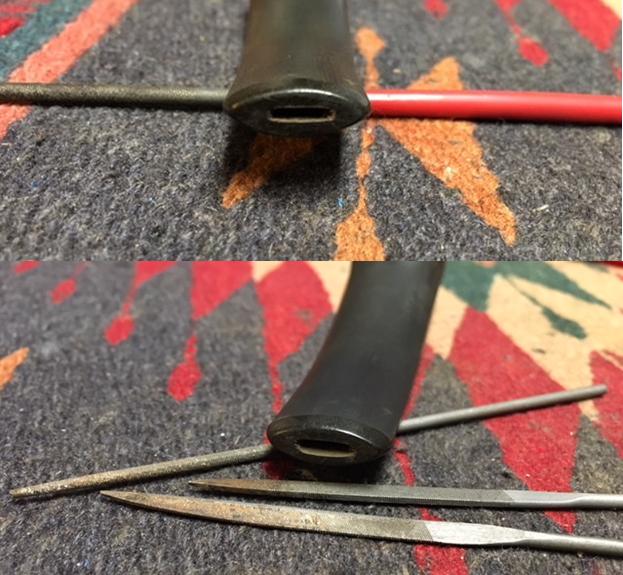
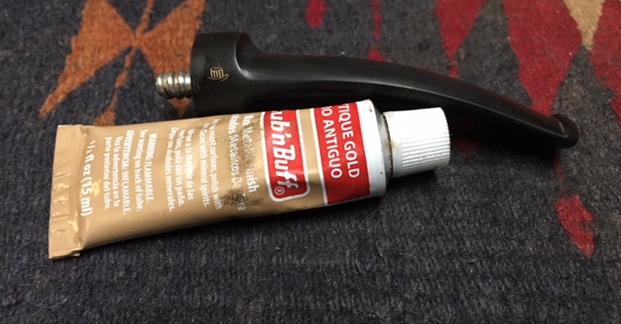
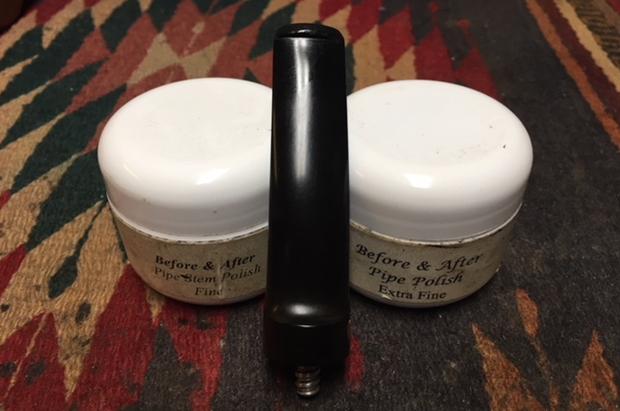
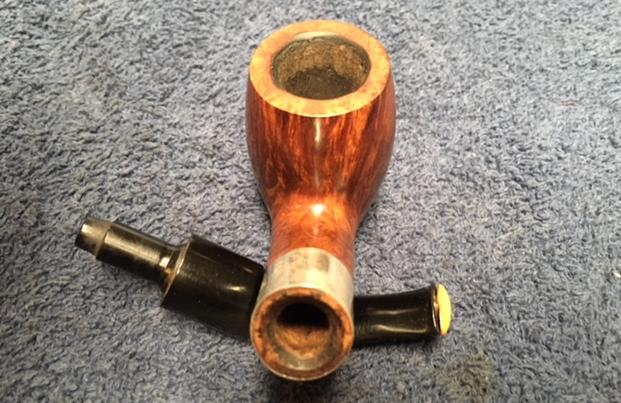
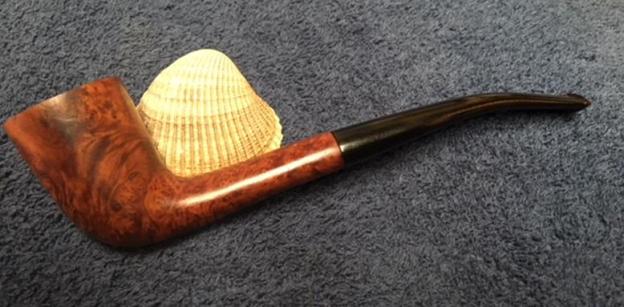
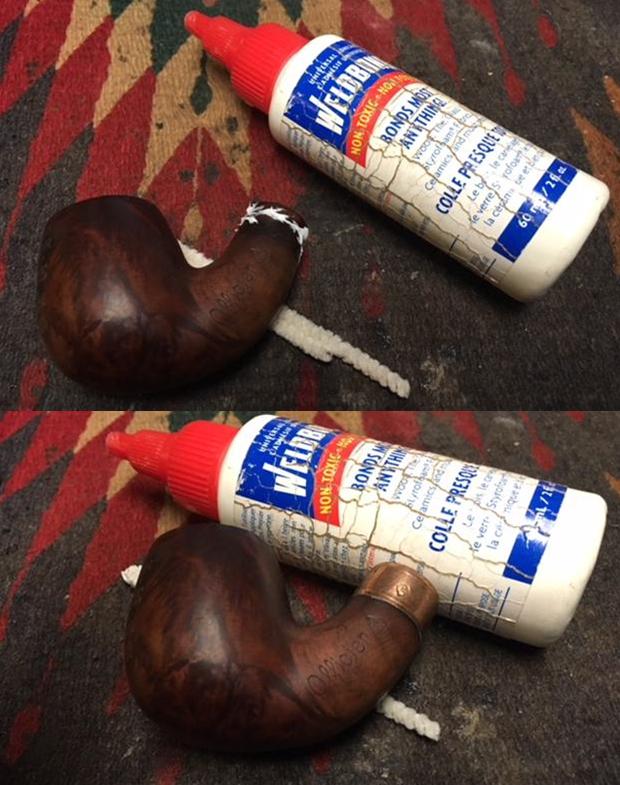
Not too long ago I sent a meerschaum lined pipe to Jim. He received it and sent me a note saying that he had sent two pipes to me to have a look at and refurbish. The first of them was a Bullmoose shaped pot. It was an interesting shaped pipe and was stamped on the left side of the shank with the words London Royal and on the right side Imported Briar. I looked on Pipephil’s website http://www.pipephil.eu/logos/en/logo-l5.html and found the following.It appears that the pipe was made by LH Stern (LHS) in Brooklyn, New York in the US. The pipe that Jim sent to me was in rough shape. The bowl had a thick cake and the rim had a lava overflow and had been hammered out on hard surfaces to the point that the bowl front at the top was beaten and damaged. The inner edge of the rim top was damaged and the bowl was out of round. The finish was in really rough condition as well. It was cloudy and looked like the pipe was water damaged. It had a 14K thin gold band on the shank end and a saddle stem that had some tooth chatter and tooth marks on both the top and underside near the button. There was a faint hat logo on the left side of the saddle. The vulcanite was lightly oxidized but otherwise the damage was quite minimal. Jim included a note in the package that said the slot was too narrow to take a pipe cleaner. The tenon was threaded and still aligned with the shank. With a pipe in this condition I am always looking for pluses. I took close up photos of the rim top and the stem to show the general condition of the bowl and stem surfaces. The close up of the rim top shows the dents and damage to the front of the rim top. The out of round bowl edge is also visible. There is a thick cake in the bowl and lava overflow on the top surface. The stem is in decent condition. There are some tooth marks on the top and underside near the button. The gold band also has some damage to the finish and the band is loose on the shank. It is not torn or split.I unscrewed the stem from the shank and the inside of the mortise and the threaded tenon was dirty and coated with thick tars and oils.I reamed the bowl with a PipNet pipe reamer. I used the third cutting head and took the cake back to bare walls. I cleaned it up with a Savinelli Fitsall Pipe Knife to remove all remaining remnants of cake.I wiped down the outside of the briar with acetone on cotton pads to remove the spotted, water damaged finish on the bowl and shank. I took photos to show how it looked at this point in the process. I topped the bowl lightly on a piece of 220 grit sandpaper on a topping board. I sanded the bowl with folded pieces of 220 grit sandpaper to remove the finish.I wiped the bowl down with alcohol on cotton pads. I filled in the damaged areas on the bowl and rim top with clear super glue.Once the glue dried I sanded the repaired areas back to smooth. I wanted to blend the repaired spots into the surface of the briar. The band was loose on the shank so I removed it and cleaned off the briar and the inside of the band so I could reglue it to the shank.I cleaned out the inside of the shank with pipe cleaners, cotton swabs and alcohol to remove the tars and oils that had built up on the threads of the metal insert and the mortise ahead of the insert.I polished the briar with micromesh sanding pads – wet sanding with 1500-2400 grit pads and dry sanding with 3200-12000 grit pads. I polished the gold band at the same time. The photos that follow show the progress. I used a Maple stain pen to touch up the sanded rim top. I scrubbed the bowl with Before and After Restoration Balm. I rubbed it into the surface of the briar to enliven, clean and protect the briar. It also evened out the stain on the rim top. I buffed the bowl with a cotton cloth to polish the briar. I used some Weldbond all-purpose white glue to reset the band on the shank. I pressed it place and aligned the 14K stamp on the band on the underside of the shank. I wiped off the excess glue with a water dampened cotton pad.I set the bowl aside and turned my attention to the stem. I sanded the stem with 220 grit sandpaper to remove the oxidation on the surface of the vulcanite. I sanded out the tooth chatter and also sanded around the tooth marks on both sides.I used needle files to open the slot in the button of the stem. I reshaped and opened it to make it easier to push a pipe cleaner through the slot. The first photo shows the slot before I had worked on it. The second one shows the opened slot.With the slot opened I was able to clean out the inside of the stem and tenon. I used pipe cleaners, cotton swabs and alcohol to clean out the oils. I scrubbed the threads on the tenon with steel wool and alcohol.I used some Rub’n Buff Antique Gold to touch up the top hat logo on the left side of the saddle stem.I polished the stem with micromesh sanding pads – wet sanding the stem with 1500-2400 grit pads and dry sanding it with 3200-12000 grit pads. The photos show the increasing shine on the stem. I finished by polishing it with Before and After Pipe Stem Polish – both Fine and Extra Fine and hand buffed it with a soft cloth. This Imported Briar London Royal Bullmoose Pot turned out to be a real beauty with a mix of interesting grain underneath the grime and the damaged finish. The grain really is quite stunning. The rim top looks much better. The vulcanite stem is high quality and shined up well. I buffed the bowl and the stem with Blue Diamond polish to raise the shine on the briar and the vulcanite. I was careful to not buff the stamping and damage it. I gave the bowl and stem multiple coats of carnauba wax. I buffed the entire pipe with a clean buffing pad to raise the shine. I hand buffed it with a microfiber cloth to deepen the shine. The finished pipe is shown in the photos below. The rich brown stain allows the grain to really stand out on this little pipe and it works well with the rich black of the vulcanite stem. I will be sending it back to Jim once I finish working on his second pipe. I will be sending it to him soon and I know that he is looking forward to enjoying his first bowl in it. Thanks for walking through the restoration with me.

Two of Boston’s L. J. Peretti Oom Pauls Recommissioned


Blog by Dal Stanton

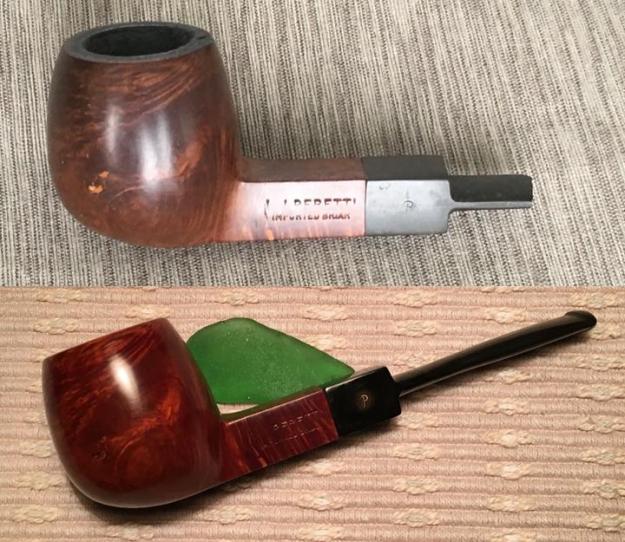
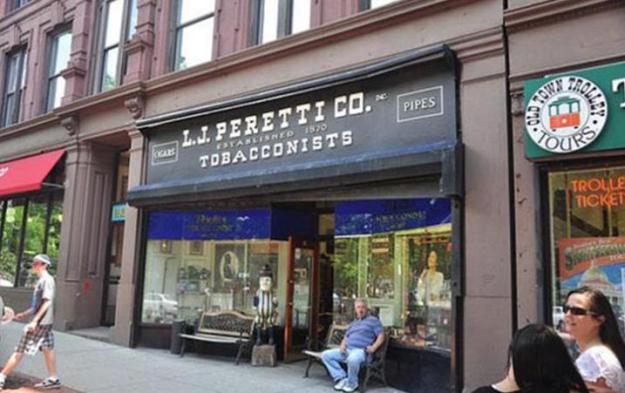
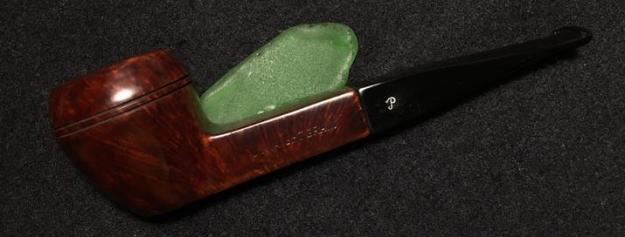
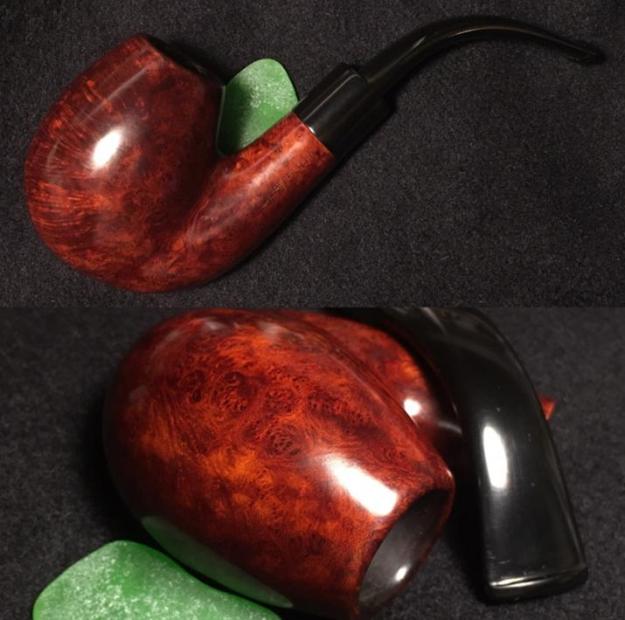
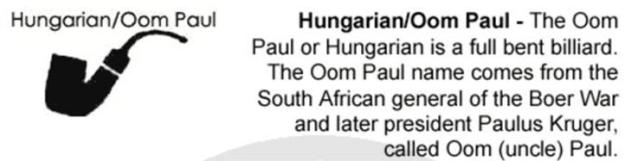
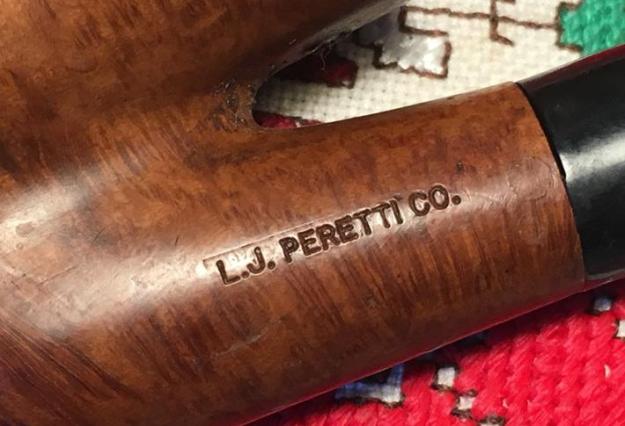
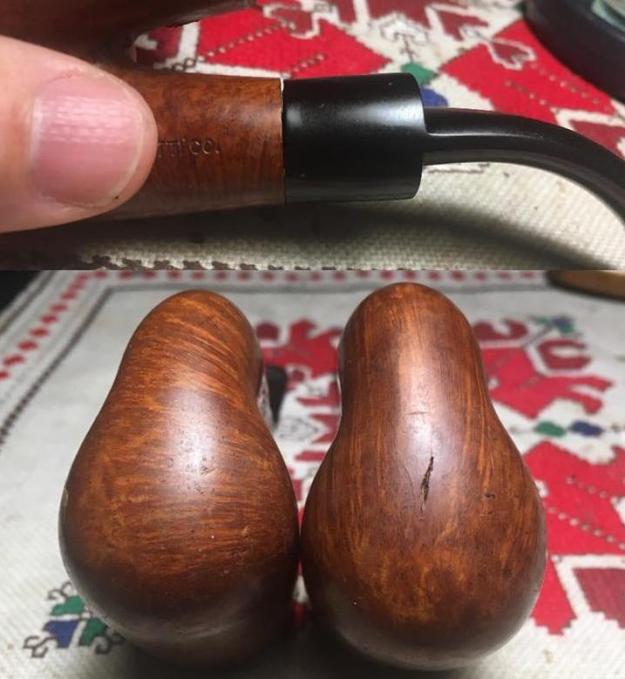
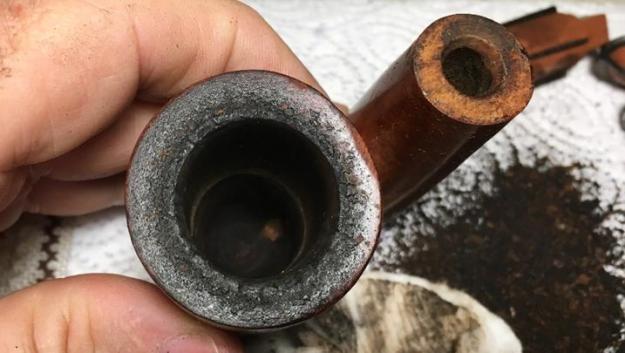
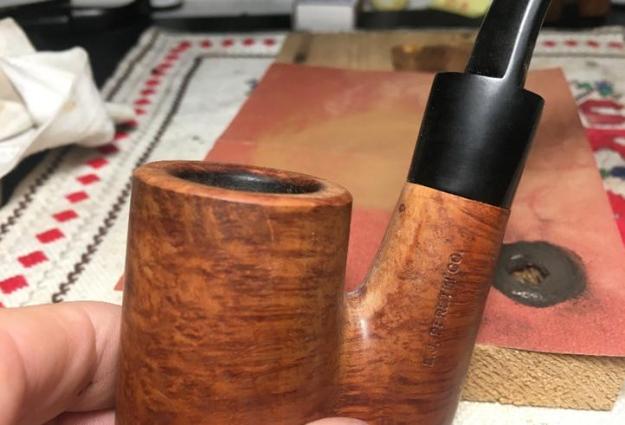
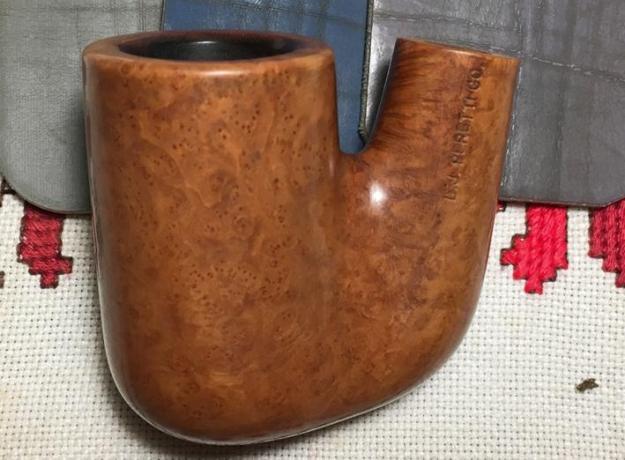
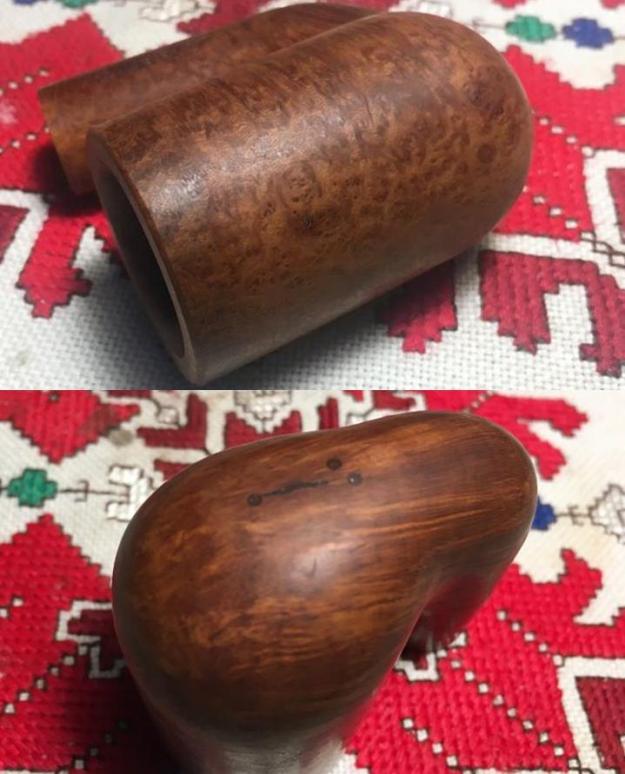
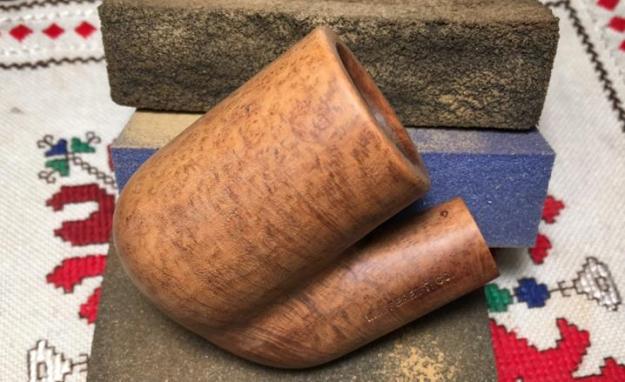
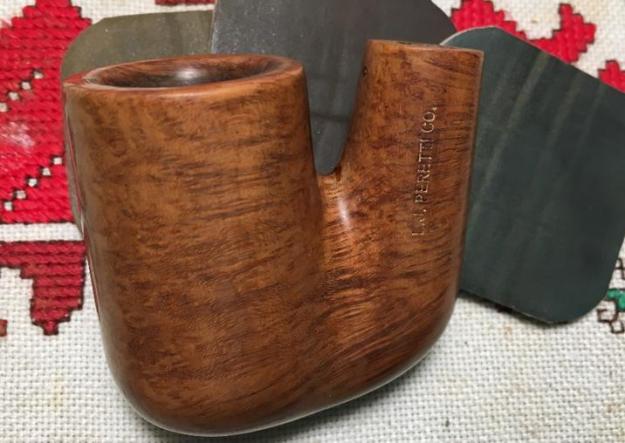
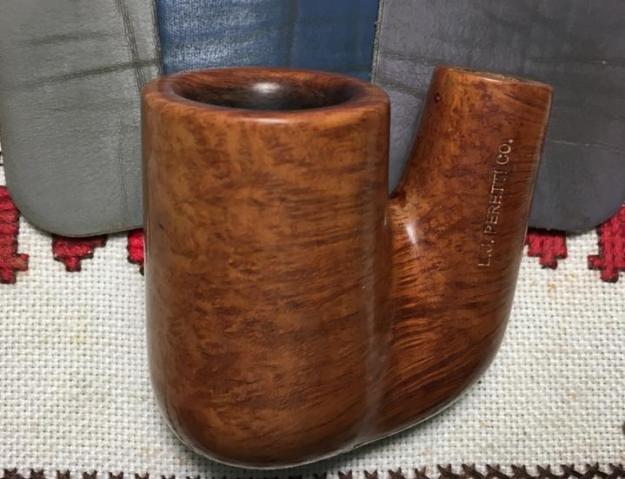
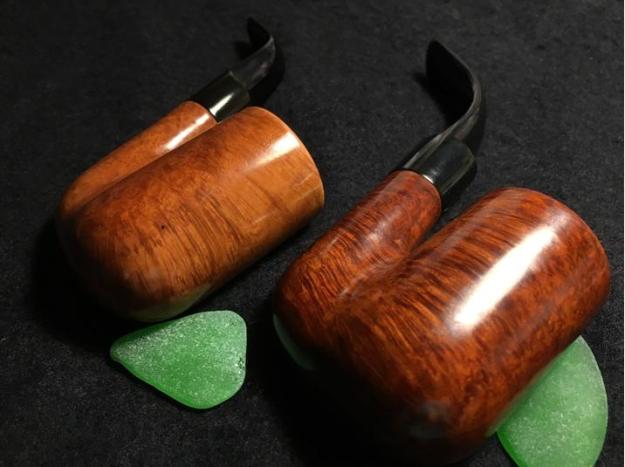
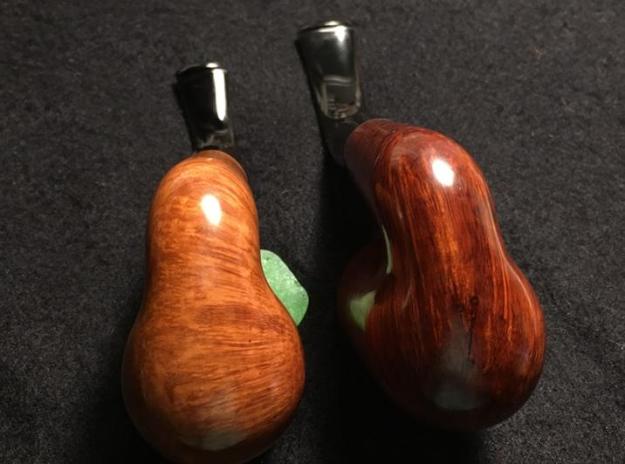
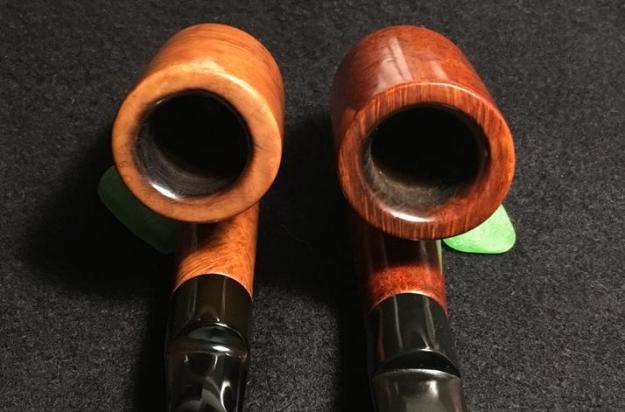
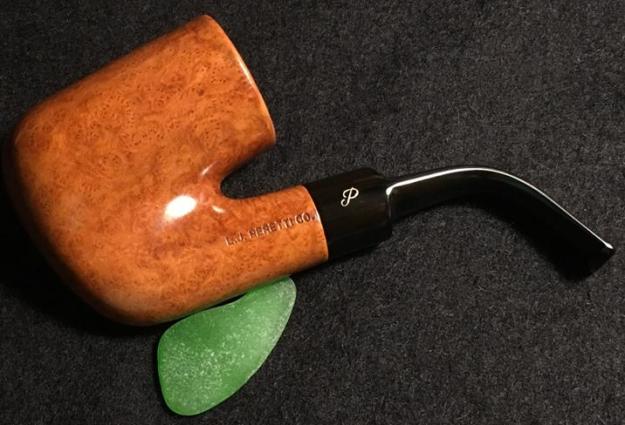
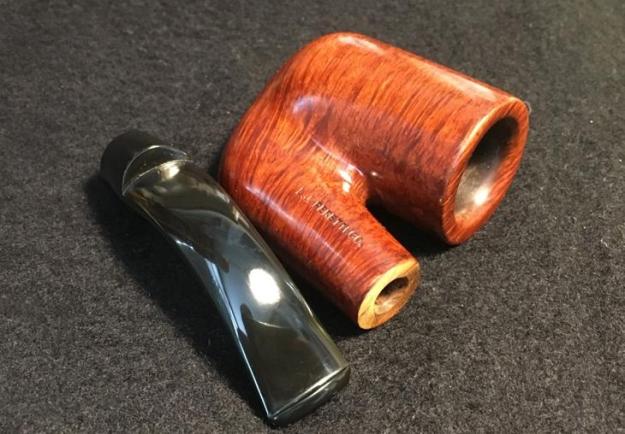
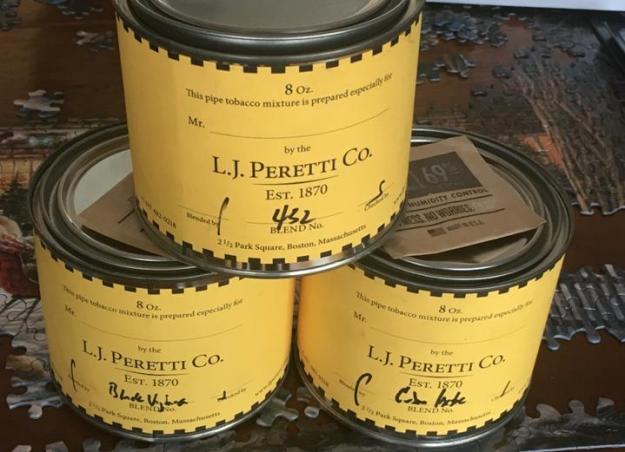
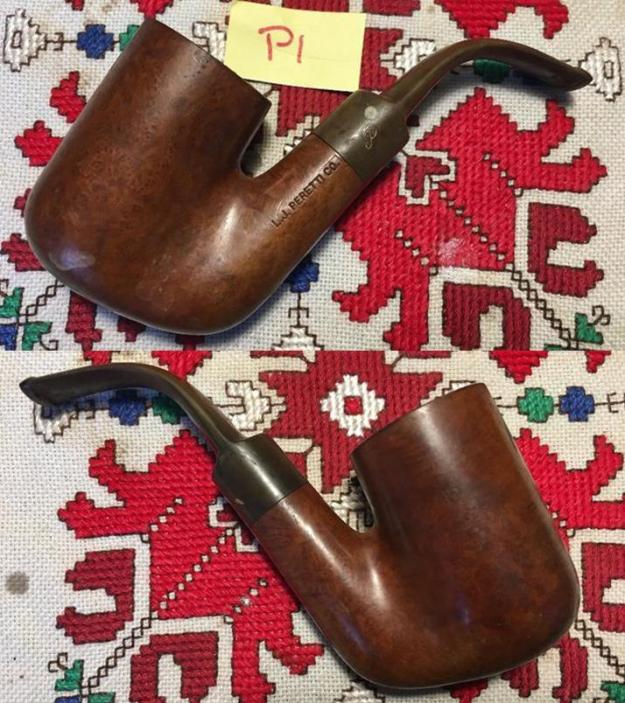
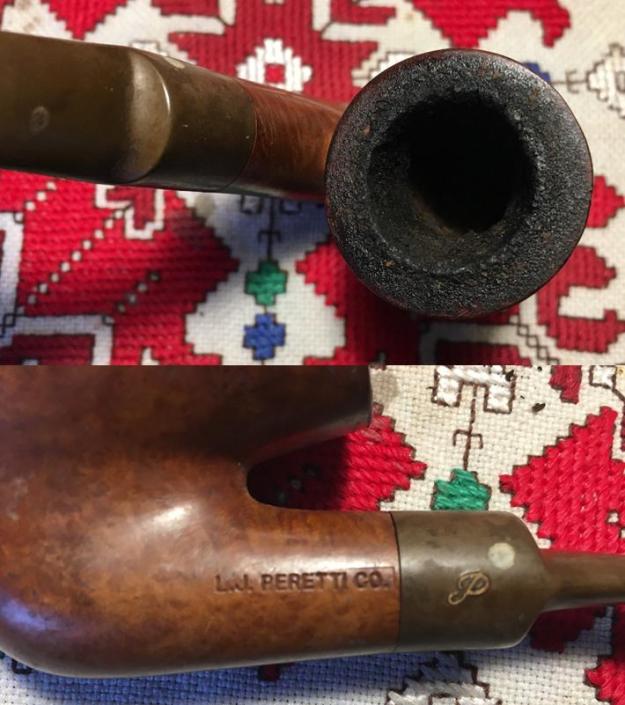
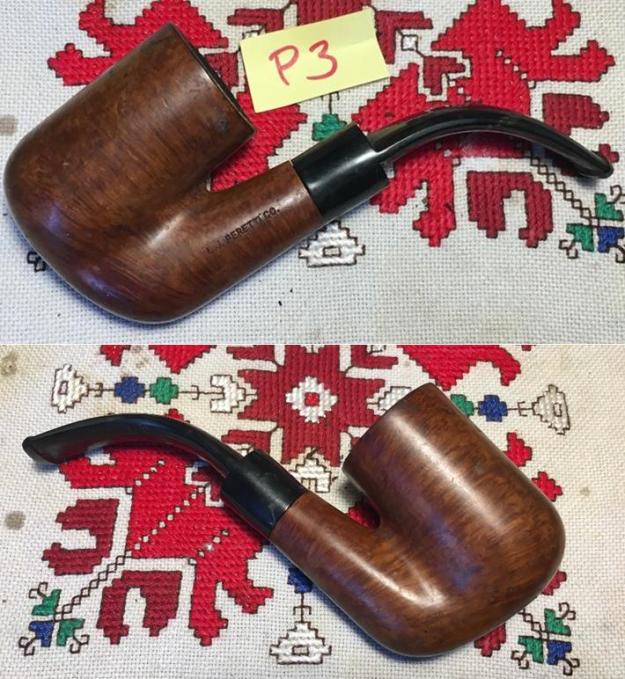
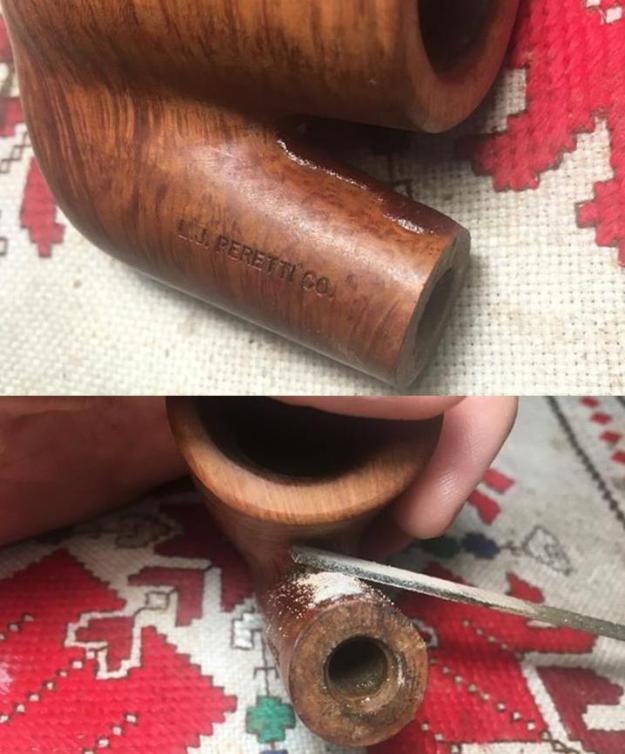
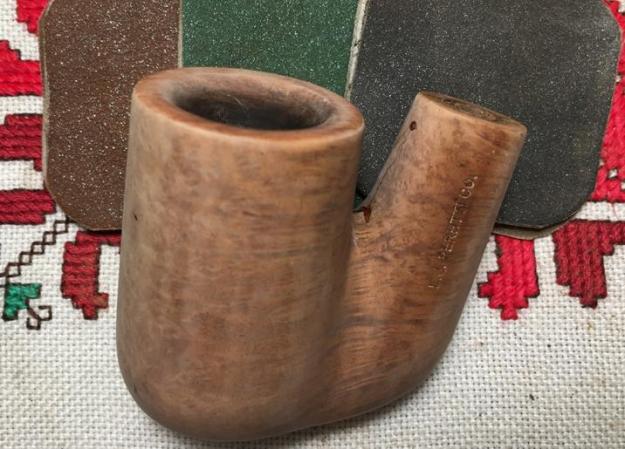
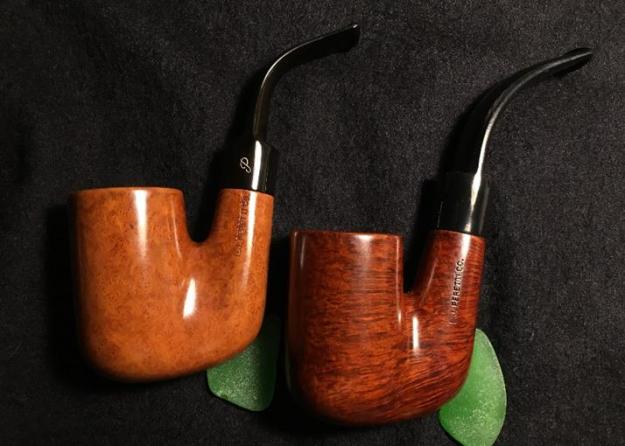
With all pipe man honesty, what could I do?  What would you do if faced with this staring at you on the eBay auction block?J. Peretti Co., all, looking back at me! – the pipe name that I had unintentionally started collecting and liking a lot. The seller was from Everett, Massachusetts, near Boston’s L. J. Peretti Co. Tobacconist, second oldest Tobacconist in the US. Even though Peretti Tobacconist is more known for their 1000s of custom blends of tobacco which I have enjoyed (see below presents from last Christmas from my daughter-in-law!), they have also produced pipes over the years bearing the Peretti name.  It became obvious to me that this seller had Peretti estate pipes which had belonged to a pipe man who loved Peretti pipes, and I was attracted to the Lot for all the Peretti shapes that I do not yet have in my collection.  The massive amount of briar jumping out at me also caught my eye – oh my, Oom Pauls, and some sitters that were borderline Oom Pauls with strong ¾ bent stems and the quint essential long, tight, tall bowls.  Also, in the Lot I saw a large, graceful Bent Egg, a Calabash, a gentle Half Bent Billiard and a huge, colossus of a Billiard!  I was happy to bring this Peretti Lot of 10 back with me to Bulgaria destined for the worktable. My enjoyment of Peretti pipes started Christmas of 2016 with our family gathering in Denver.  My son, Josiah, secured a proud, square shank Billiard bearing the Peretti stamp and an amputated stem from the Armadillo Antique Mall.  I found it under the Christmas tree with Josiah’s encouragement, ‘Dad, I know you can do something with it!’  And I did.  I cannibalized another stem and spliced it on the existing stem – I wanted to save the Peretti ‘P’ stem stamp at all cost!  This stout square shanked Billiard is a good smoker and a regular friend in my rotation!Doing research for the Peretti Christmas gift stem splice restoration (See: LINK), introduced me to the Peretti name which I was surprised to discover is not an Italian pipe name, as I originally assumed!  The family originally came from the southern slopes of the Swiss Alps which would have much Italian influence, just to the south. I discovered the beginning of a significant story of Americana pipe history with the establishment of the L. J. Peretti Company of Boston in 1870 (Pipedia citing: Pipes, Artisans and Trademarks, by José Manuel Lopes), the second oldest tobacco shop in the US, second only to Iwan Ries & Co. of Chicago established in 1857 (See: Link).  Going to the Peretti shop in Boston is on my bucket list where blends are still hand mixed and I’ve read that you can take your pipe and try some blends out before purchasing.  Not bad.My second Peretti found me serendipitously in Oslo, Norway, as I, along with a few other colleagues met to take in the European Biathlon finals (that’s skiing and shooting!).  Jon gave me a very sharp looking square shanked Rhodesian, also bearing the name, Peretti.  He said he wasn’t using it anymore and I welcomed this Peretti into the fold.  I now had what I started calling, the Peretti Brothers.  Here is the restoration of the Peretti Rhodesian.In the Peretti Lot of 10, I’ve already restored the Large Bent Egg and added it to my collection of Perettis.  It is a stunning pipe and fits the palm amply and nicely!  When smoking this pipe, I’ve warded off random hawkers trying to barter him away from me!  I’ve remained strong.I have been looking forward to tackling the Oom Pauls for some time.  I will add one to my collection, and the others are up for adoption and will benefit a good and worthy effort, the Daughters of Bulgaria, helping women and girls (and their children) who have been trafficked and sexually exploited.  As I approach restoring the Oom Pauls, there is no doubt as to the popularity of this shape and that everyone wants to have at least one in their collection.  In Pipedia, Bill Burney’s description of the Oom Party is helpful:He also describes that the Oom Paul is always a full bent, with a large tobacco chamber and relatively heavy.  Yet, because of the way it hangs, it is a comfortable hands-free pipe.  To me, the attraction to the Oom Paul is the solid, massive merger between the bowl and shank – it creates a hefty presence in the palm and it hangs from the mouth great with the full bent style.
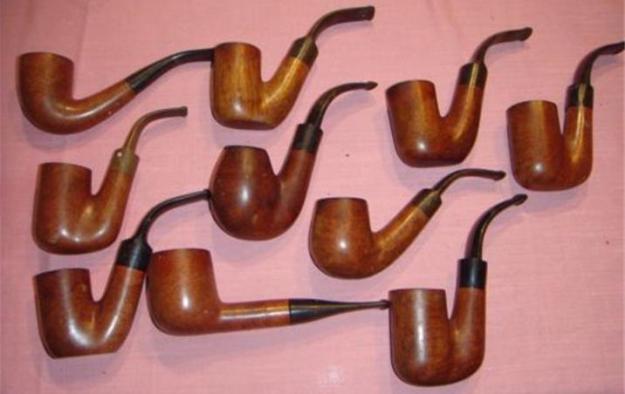
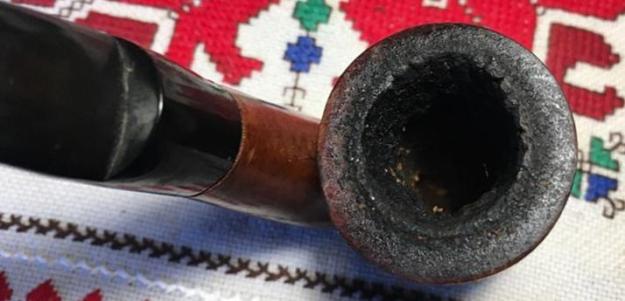
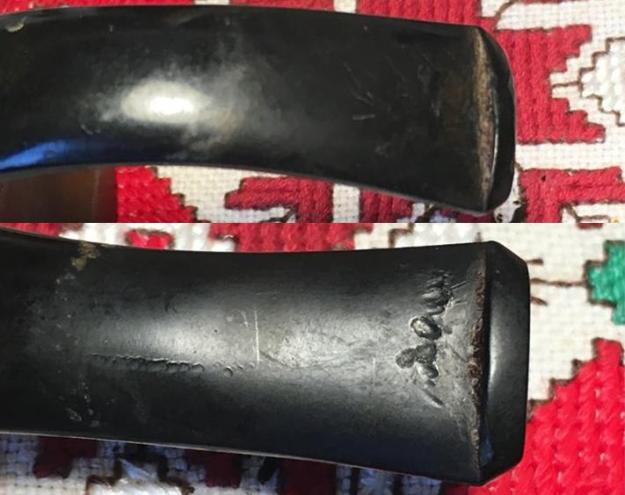
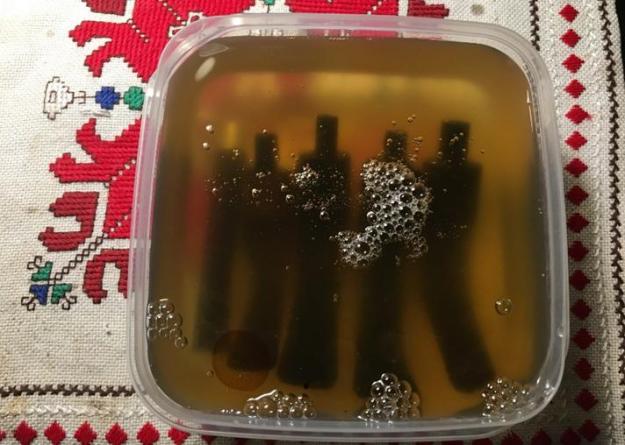
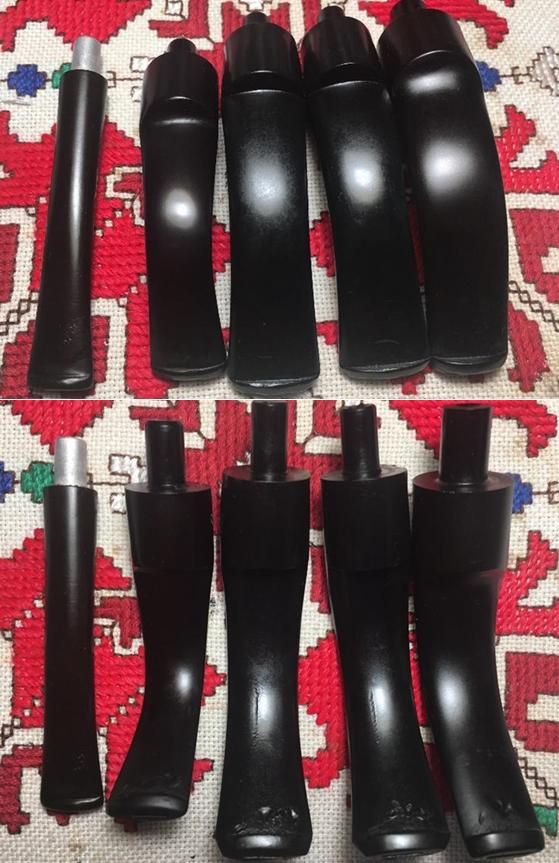
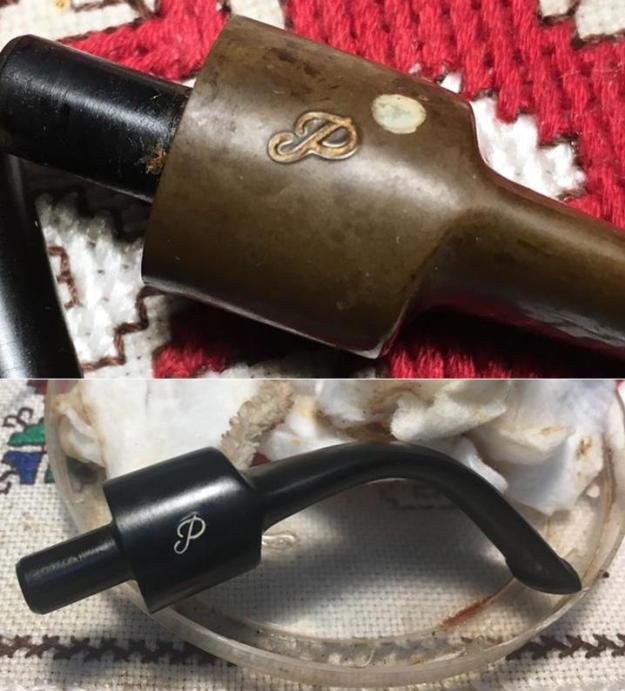
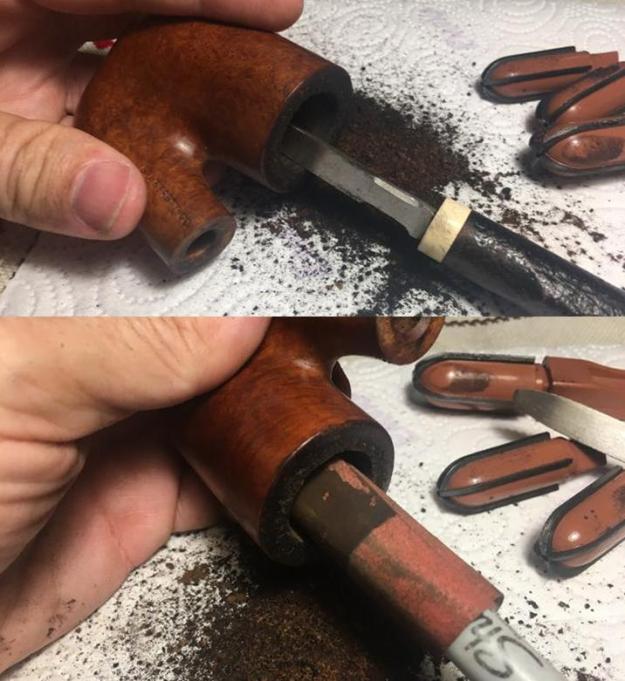
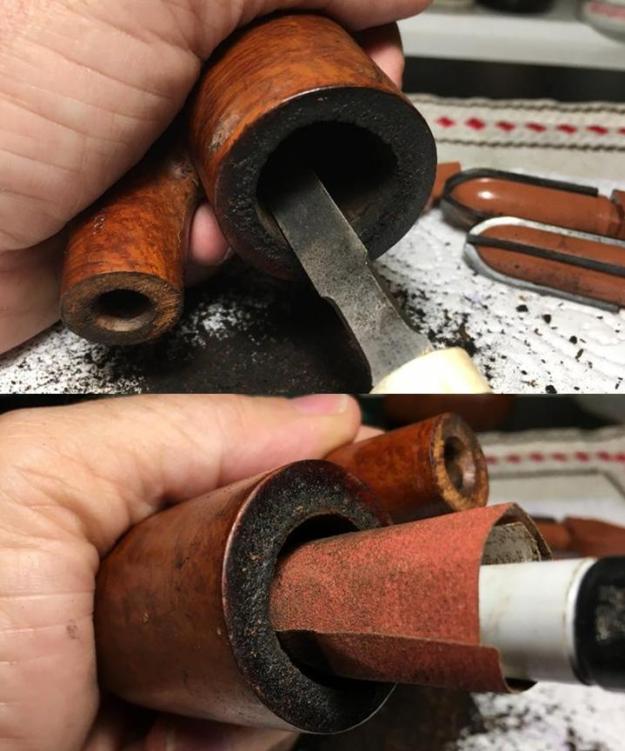
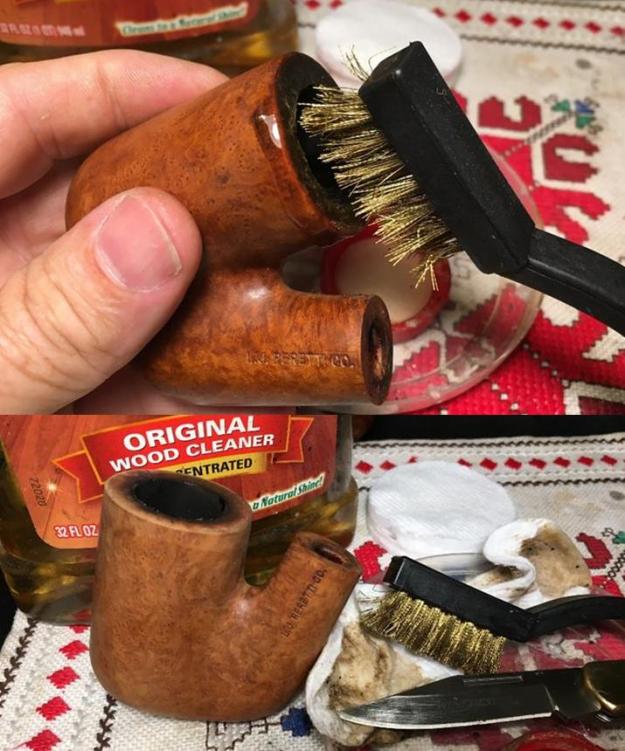
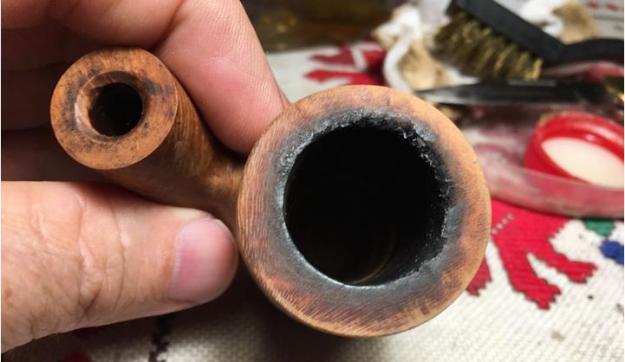
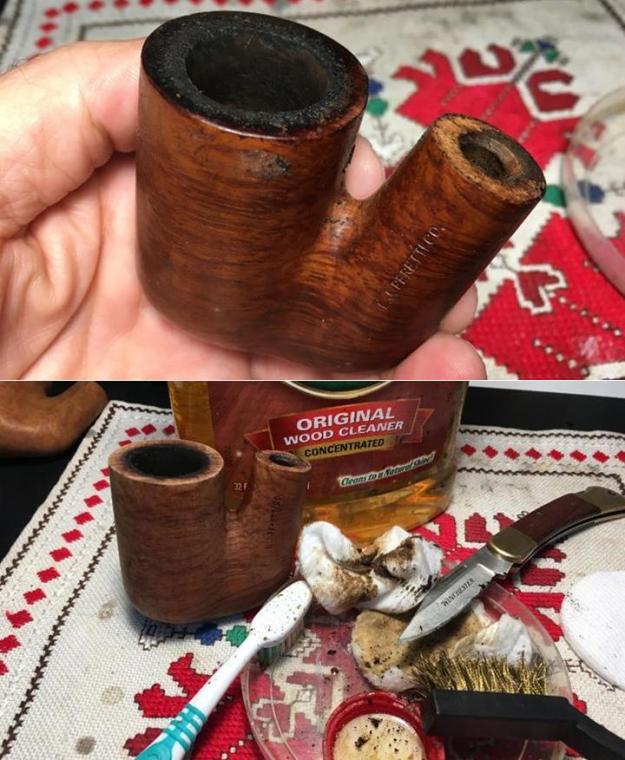
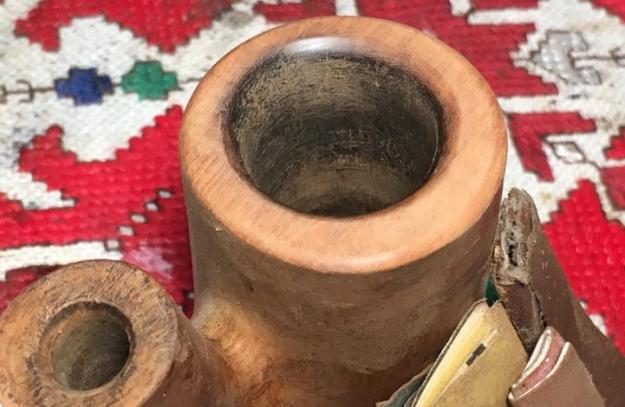
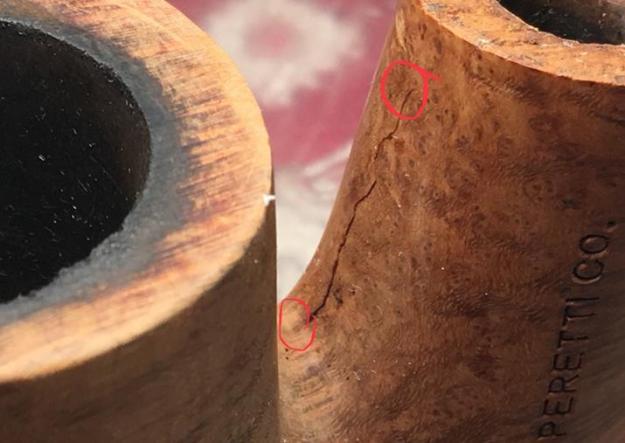
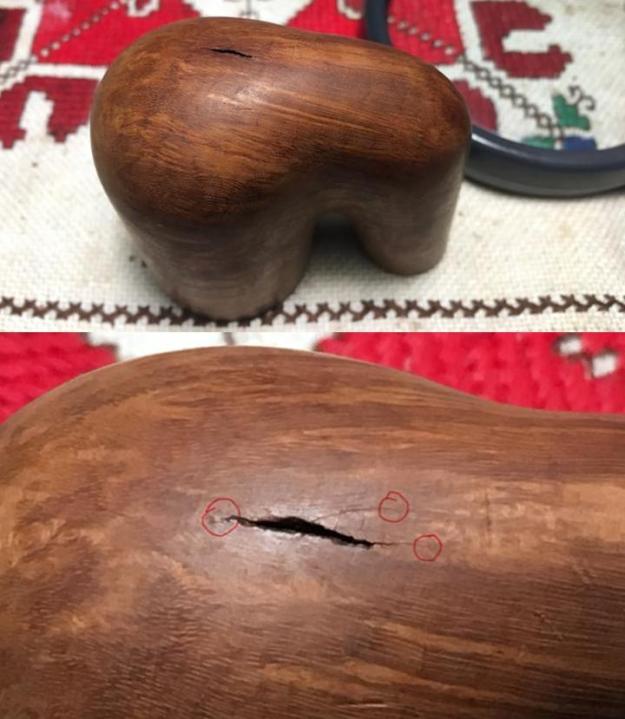
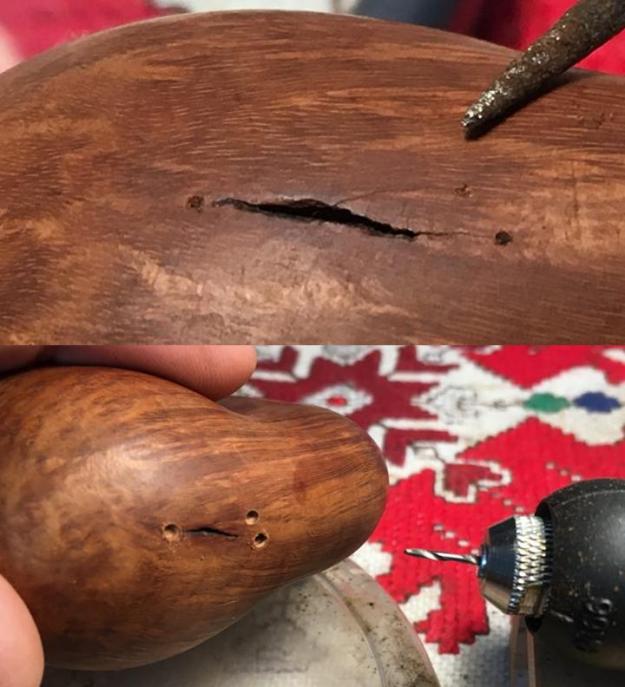
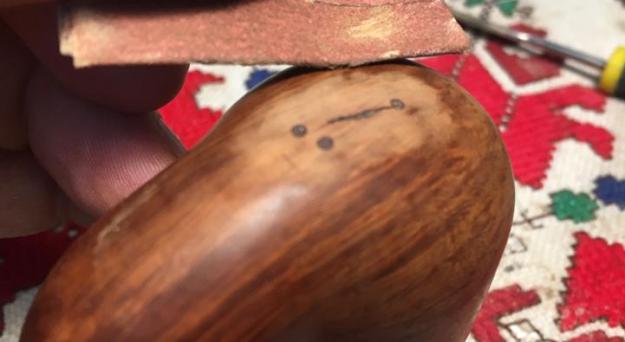
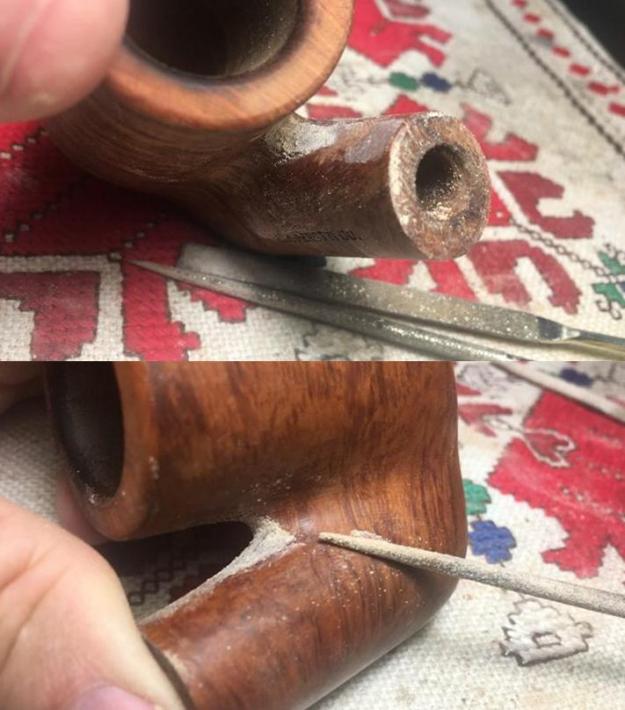
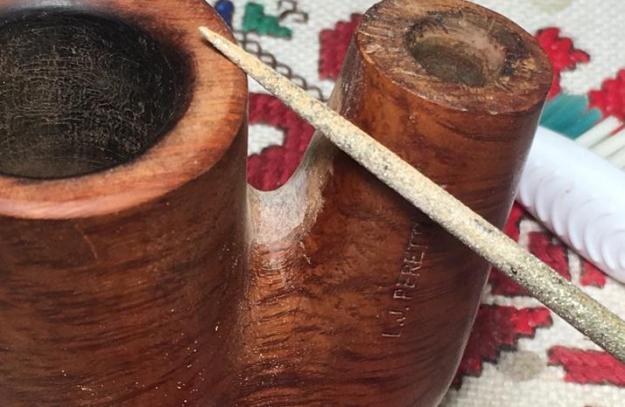
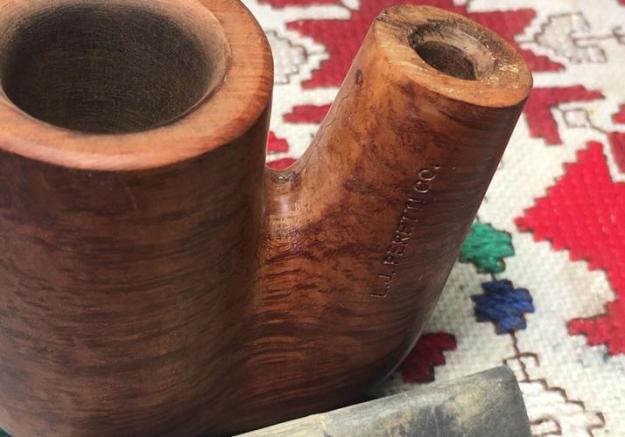
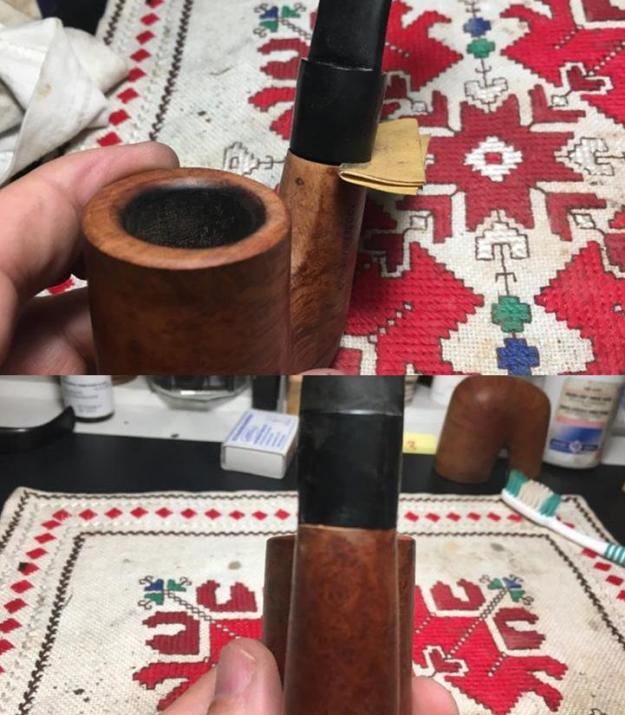
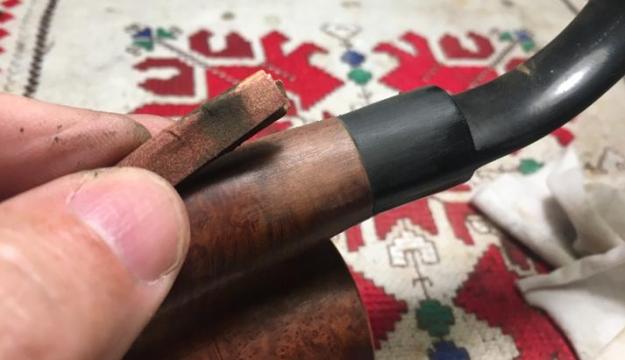
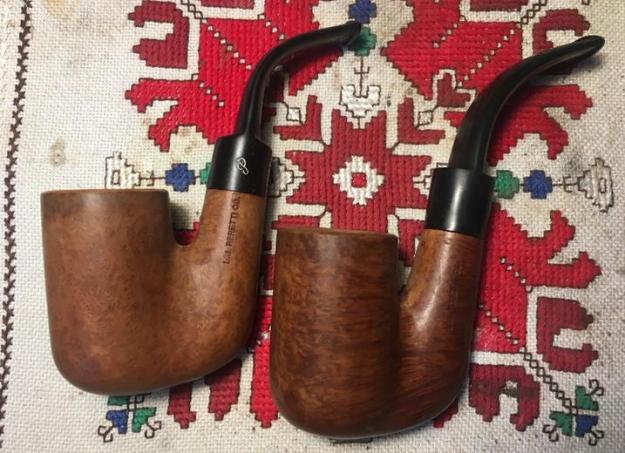
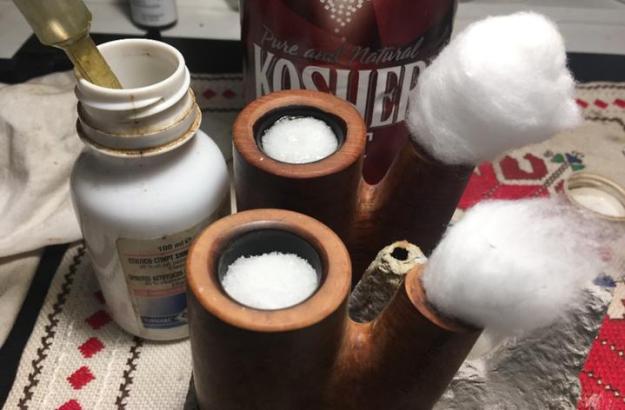
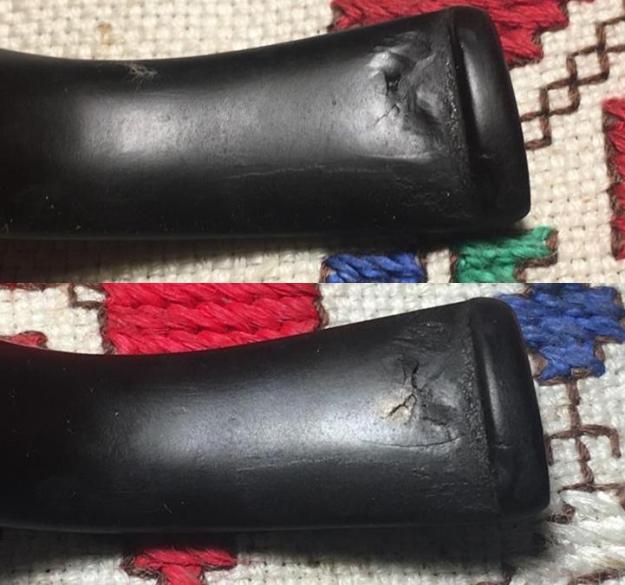
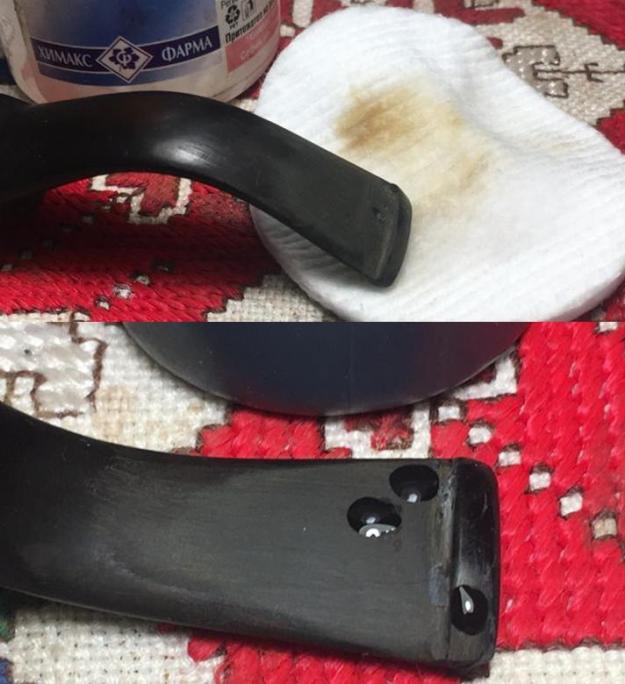
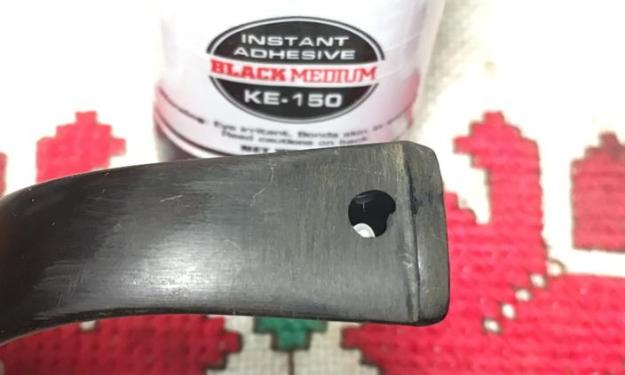
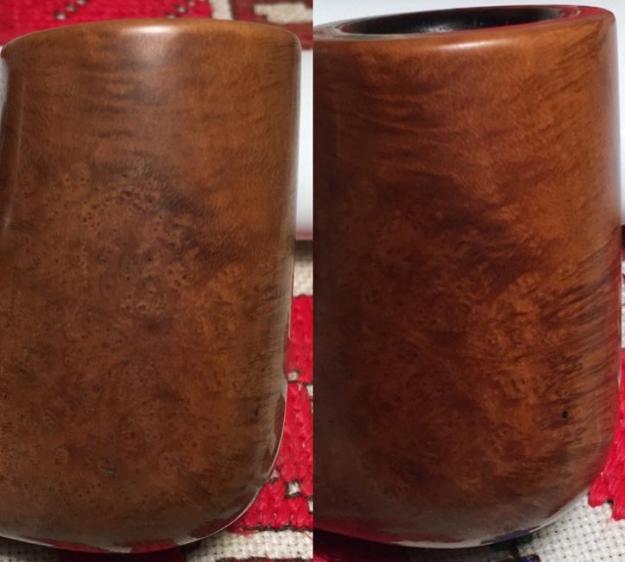
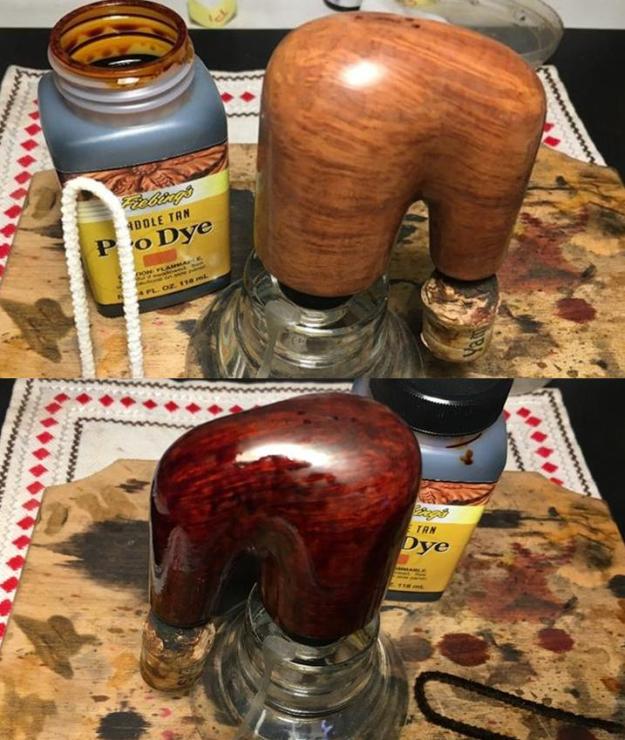
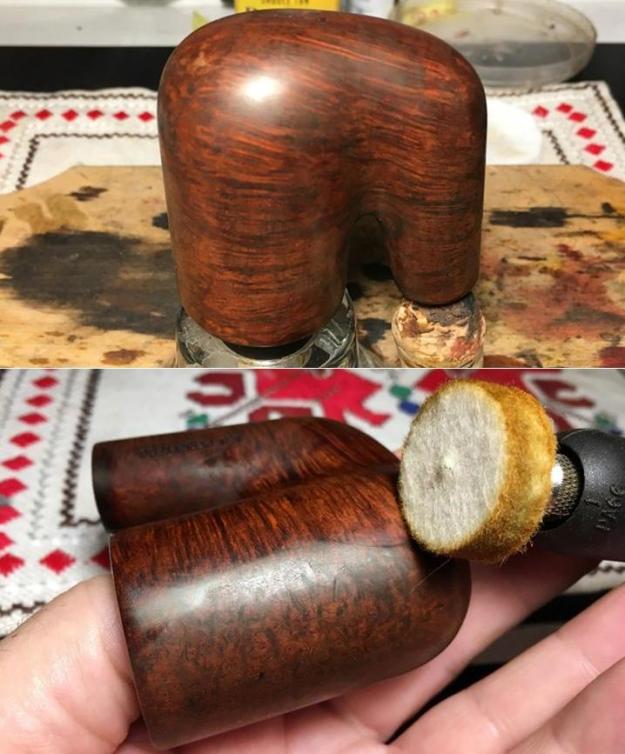
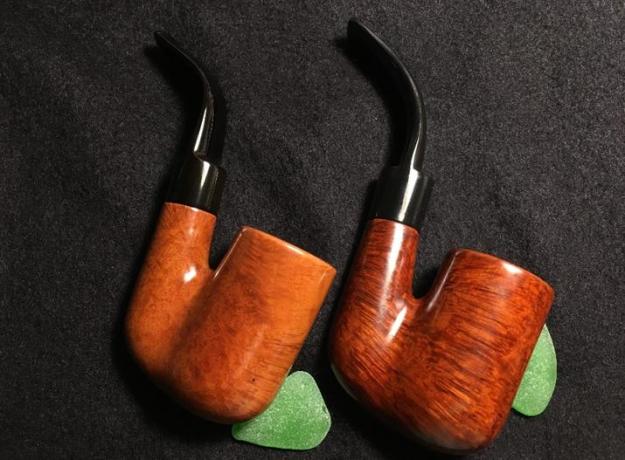
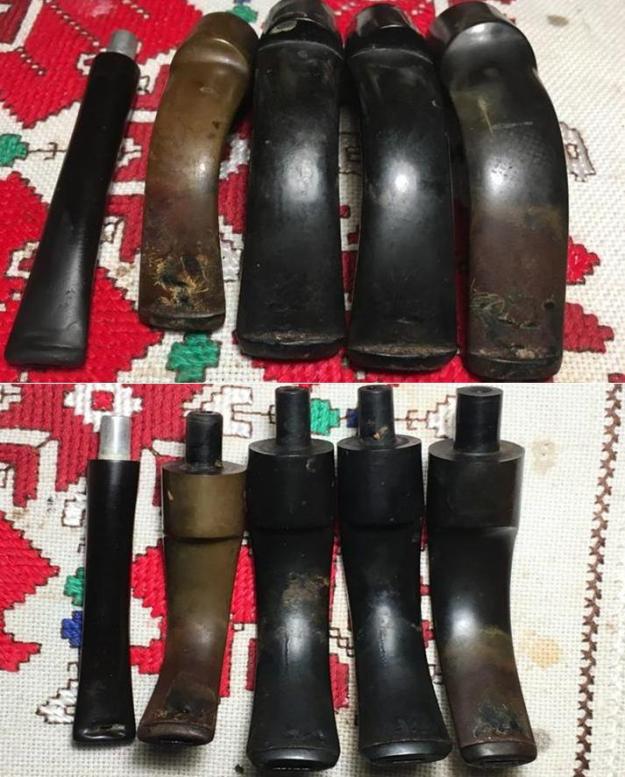
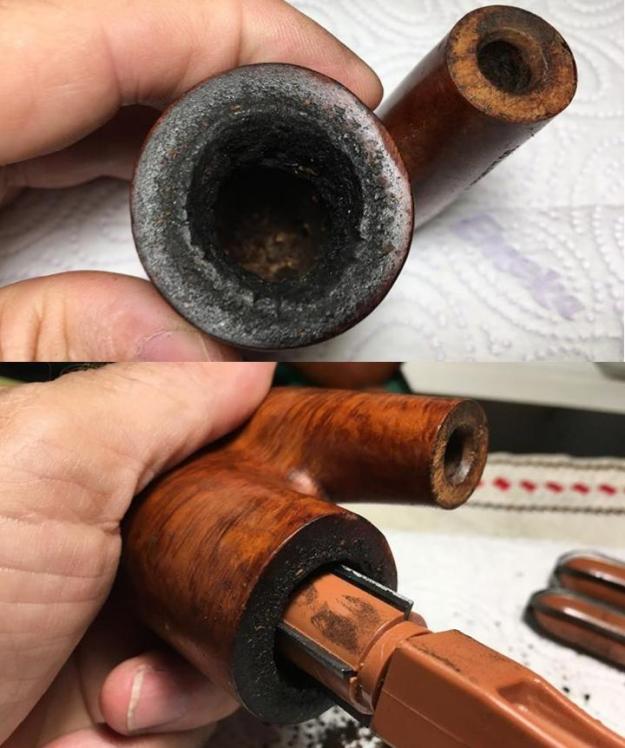
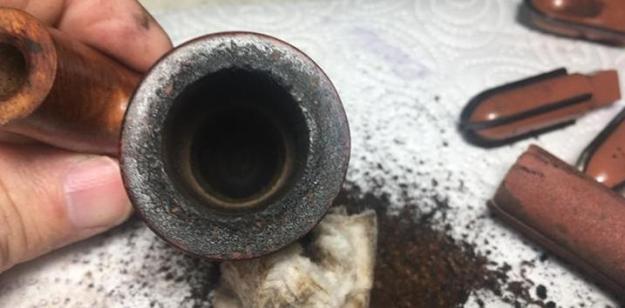
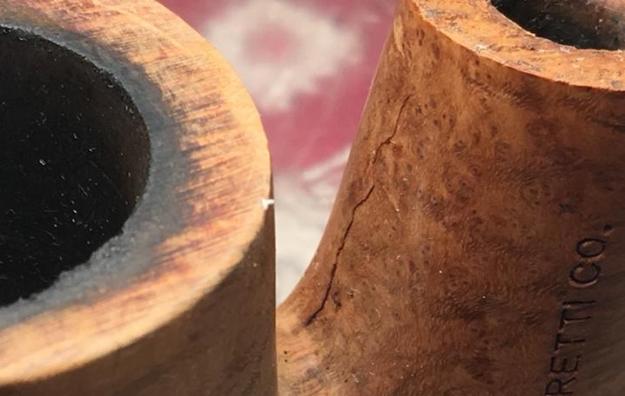
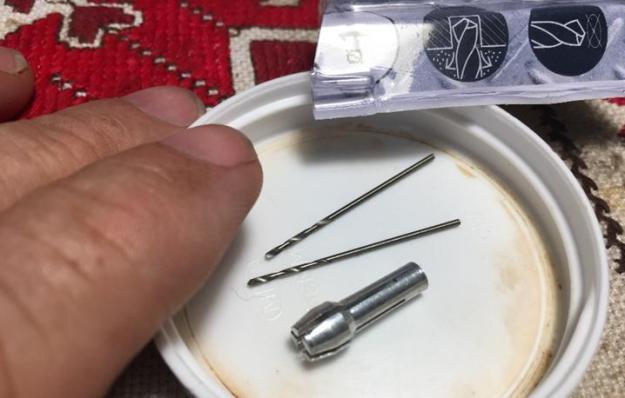
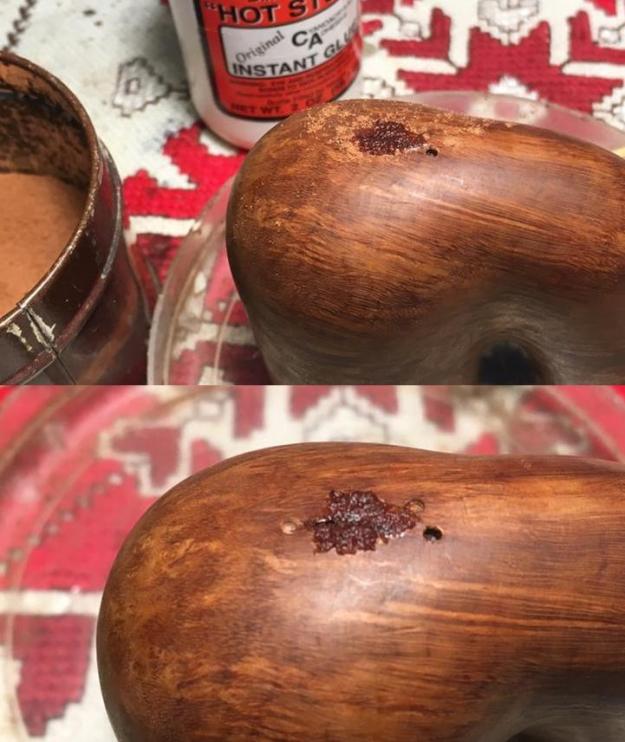
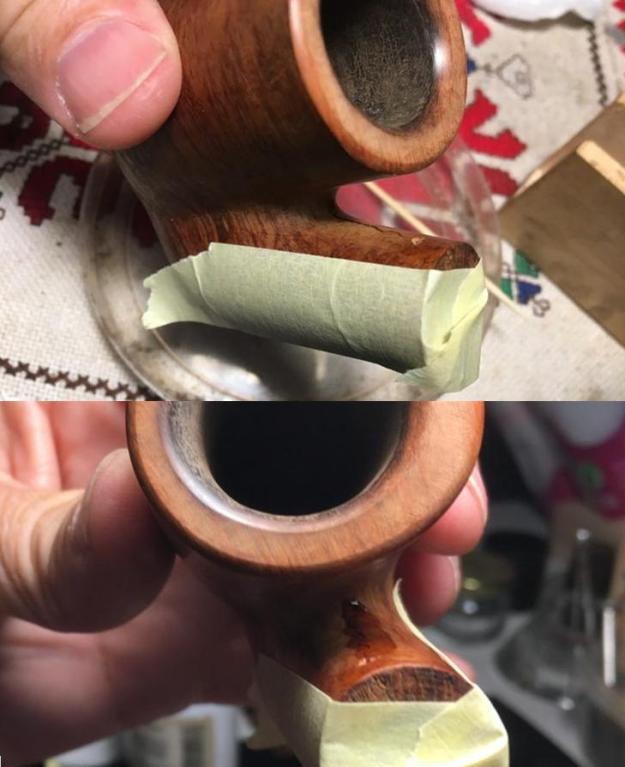
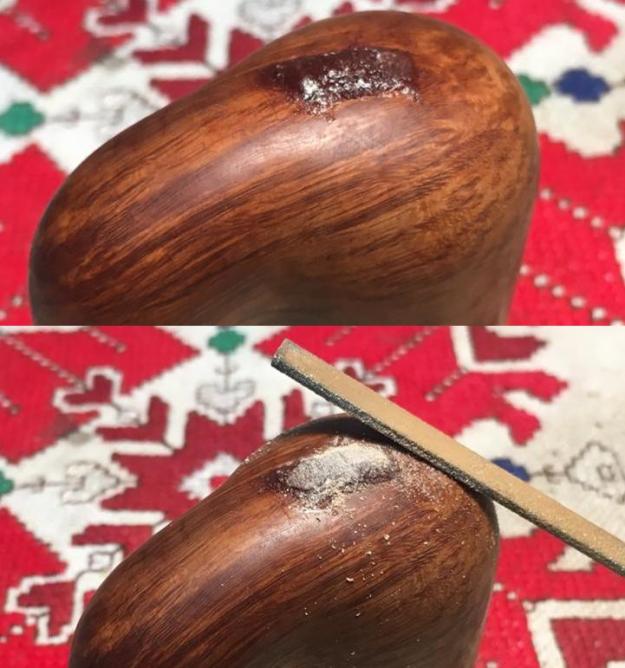
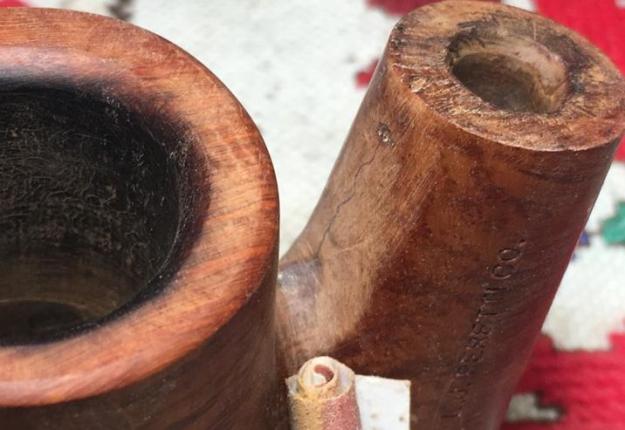
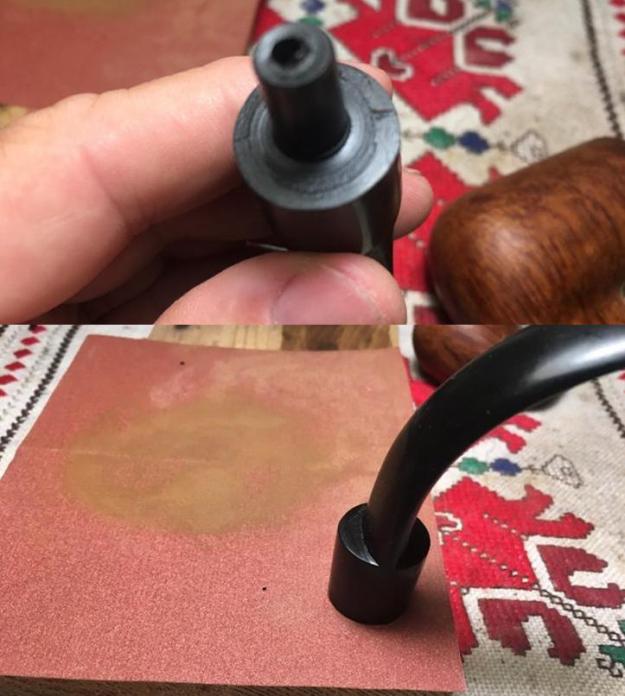
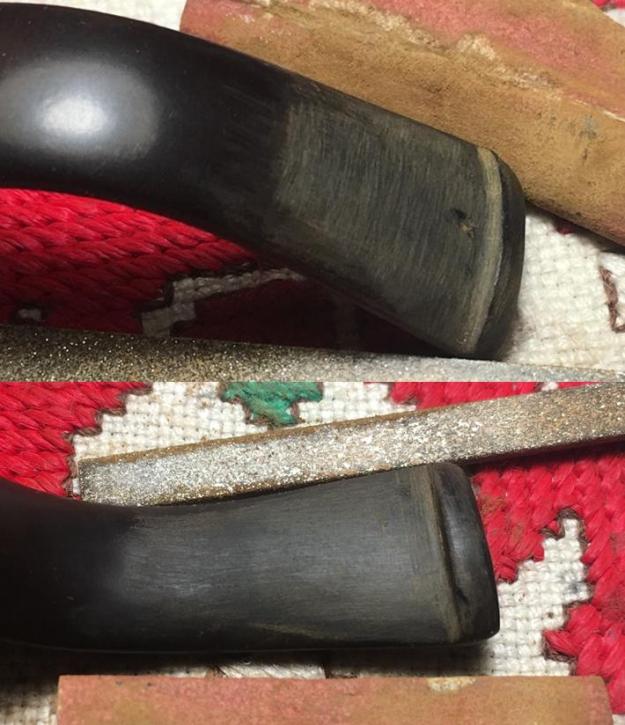
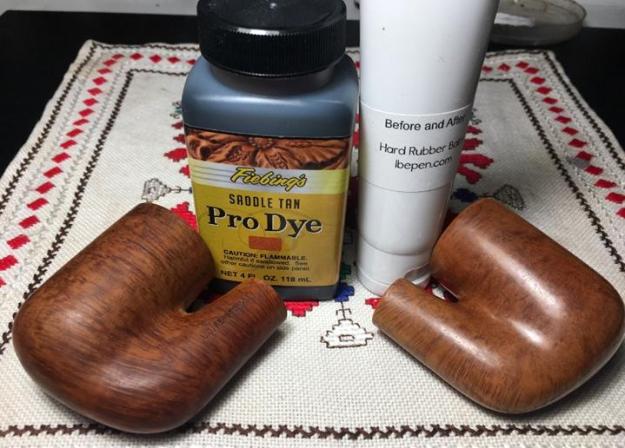
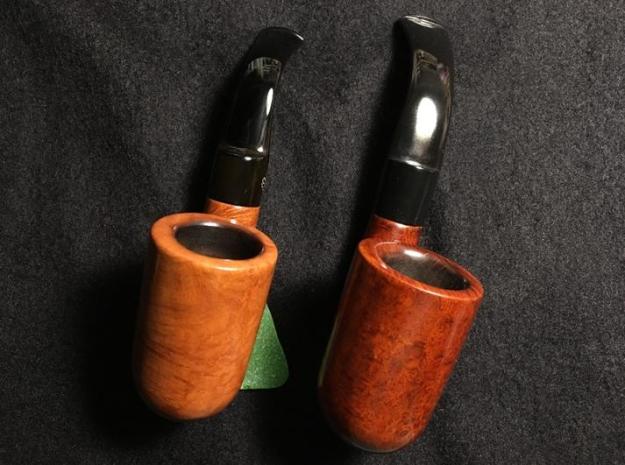
I will attempt something I’ve never done before as I approach the restoration of the Oom Pauls, I’m going to tackle 2 at once – first, the Oom Paul that I’ve chosen to add to my collection and the first Oom Paul that will go in the Pipe Steward Store where a new steward will be sought!  To keep things straight and abbreviated, my Oom Paul will be ‘MOP’ and the available Oom Paul will be ‘OP’!  I want to use MOP to test the overall approach to the hue of the Oom Paul stummels, which I want to keep as close to the original Peretti scheme as much as possible. The pictures below were numbered so that I wouldn’t mix them up while in the ‘Help Me!’ basket.  Here first, is MOP: And now, OP showing beautiful horizontal grain that I think is eye catching on the large Oom Paul stummel: The forensics of all the pipes of the Peretti Lot of 10, show similarities of condition and areas of need, which point to all 10 having had a common steward.  MOP and OP both have thick cake in the long Oom Paul chamber which has run over the rim with crusty lava flow.  Both pipes show deterioration on the right side of the rim where the lighting of the tobacco was faithfully administered.  Both show consistent, tooth chatter and dents on the upper and lower bit – attesting to the great hands-free ‘hanging’ capacity of an Oom Paul but without using a bit guard!  MOP’s stem is severely oxidized, and OP’s is lightly showing oxidation.  MOP enjoys the only stem marking of all the Oom Pauls – the Peretti ‘P’ is crisp but in need of refreshing. I notice that OP’s stem is not snug against the shank and as I rub my finger over the transition from shank to the saddle stem, there is a slight hang of the stem over the shank.  On the stummel heel of OP I see a cut in the briar from some trauma.  I detect a microscopic hairline crack running from the end of the cut toward the shank (on top in the second picture below), a few millimeters.  This needs to be addressed.  I take some pictures to show the stem seating and cut on OP.On my last restoration of an Meer lined Italian Croc Skin Zulu, which has arrived in Edinburgh, Scotland, to meet his new steward, I tested the Before & After Deoxidizer and both of the stems of MOP and OP were among the volunteers for testing.  From pictures above, MOP’s ‘P’ stamped stem shows significant oxidation, while OP is in good shape.  Before & After is also supposed to be stem stamp friendly – which proved to be true.  The stems of Mop and OP are below – of the larger stems in the first picture below, the first and third.  After cleaning each stem with pipe cleaners dipped in isopropyl 95%, I placed all the stems in the Before & After Deoxidizer keeping them in order!    I left them in the soak overnight, though the directions do not require that long. One at a time, I removed them from the Deoxidizer and wiped each with a cotton pad with mineral water (in Bulgaria, its light paraffin oil) buffing each with the cotton pad until all the solution was removed and the residue oxidation.  I am pleased with how the product works.I am especially pleased to see how the Peretti ‘P’ cleaned up and rejuvenated on MOP!  The Before & After Deoxidizer is advertised to be nice to stem stamping and it seems to be the case!  A before and after picture.I then applied Before & After Fine Polish and then Extra Fine Polish.  I put a small amount on my finger and worked it into the vulcanite.  As I work it in, the vulcanite absorbs it.  The results are good causing the vulcanite to look rejuvenated.I do the same for OP’s stem.  It’s looking very nice as well!I now turn to the stummels.  The first thing for both stummels is to clean the internals, starting with reaming the deep Oom Paul chambers.  Before I can determine the condition of the chamber walls the cake will be removed down to the briar.  Using the Pipnet Reaming Kit, I start with the smallest blade, then working to the larger. I start with MOP and take a closer picture of the rim and chamber.  It’s thick and crusty.  I use 3 of the 4 blades available to remove the carbon cake.  I then scrape more of the chamber wall with the Savinelli Fitsall tool and finish with wrapping a piece of 240 grit paper around a Sharpie pen and sand the chamber.  I wet a cotton pad with alcohol and wipe the chamber clean of carbon dust.  The chamber looks great – solid, no cracks or fissures.  Pictures of MOPS: I do the same with OPs.  I take a starting picture, ream with 3 of the 4 blades in the Pipnet Kit.  I fine tune with the Savinelli Fitsall tool, sand the chamber with 240 grit paper and wipe the chamber clean of carbon dust.  The chamber wall looks good as well.  What I do see is what I noted earlier.  The rim on the right side was burned by the lighting of the tobacco and the scorched briar has eroded on that side. Now, to clean the external briar stummel and rim.  Starting with MOP, I use undiluted Murphys Oil Soap with a cotton pad to scrub the surface and rim.  I also use a brass brush to work on the thick cake on the rim.  With my Winchester pen knife, I carefully scrape the old scorched lava crust on the rim.  The stummel of MOP cleaned up nicely and no fills are detected.  The challenge will be to clean up the internal rim, removing all the scorched briar in a way that doesn’t remove a lot of good briar.  Pictures of MOP showing the progress: Now, to clean the externals of OP with Murphys Oil Soap in the same way with the same tools.  The grime is stiff, and I also use a bristled tooth brush to reach into the full bent shank area which is the beauty of an Oom Paul, but a pain to clean.  Again, after employing a brass brush on the thick lava flow on the rim, I carefully scrape using my pin knife to remove the crust, utilizing a fingernail here and there.  I then rinse OP in cool tap water and take a closer look at the stummel.  The stummel of OP cleaned up well.  Like my Oom Paul, the internal rim on OP needs to be cleaned of charred briar down to healthy wood.  I take a picture showing the start and then the cleaned stummel of OP.It was going so well until it wasn’t!  I see what no one restoring a pipe wants to see!  With difficulty I see a crack in the shank nestled in the armpit of the bend, where it’s difficult to clean.  With a magnifying glass I can see it better.  It runs from the very joint of the bend where bowl and shank meet, up the shank about ¾ of the way, but does not run to the top of the shank.  This strikes me as strange.  Most shank cracks are caused by improperly mounting or dismounting the stem and mortise, putting pressure on the thin briar at the junction and the briar gives way and cracks.  These cracks usually start from the top of the shank and run down toward the bowl.  What I’m looking at with OP is that it originates at the elbow of the bend and moves upwardly toward the top of the shank, where the stem is mounted.  My first thought is that this is good news!  It means that the integrity of the shank is still in place at the most vulnerable point – where shank and stem meet.  Yet, however this crack originated, it can continue to creep up the shank if nothing is done to arrest it.  With the magnifying glass I carefully check around the shank and mortise opening to see if there is another crack lurking, but I see nothing.  Here are the pictures of the crack discovery on OP. As I have done in the past to get more input on a challenge, with his wealth of experience shared on Rebornpipes, I send these pictures off to Steve to see what he has to say!  OP has two projects so far catalogued for the stummel – the cut on the heel and now this crack on the lower shank.   I then turn to completing the cleaning of the internals of both stummels.  Using isopropyl 95%, I employ cotton buds, pipe cleaners to clean the mortise and airway.  I also use a bristled shank brush down the airway which does a good job breaking up the tars and oils.  With the design of the drilling for the full bent Oom Paul design, the initial mortise drill going down the shank forms a trap where gunk collects.  Then, the angled airway drilling runs off the initial mortise chamber down to airhole.  To dig gunk out of the trap, I also use a dental spatula to scrape the mortise walls and trap area.  All went well for both my Oom Paul and OP.  The pictures show the results.I want to address the rim issues before moving on.  Both stummels’ rims have scorching issues around the internal lip. With MOP (remember, My Oom Paul), it is engineered slightly different from OP and is a bit smaller.  I pull out the topping board to remove a bit of the rim top to clean up as much as I can.  MOP’s full bent shank barely fits on top of the board without touching.  OP’s shank extends beyond the plane of the rim, that will be a bit more challenging to top but not impossible.  I take a picture of MOP and then take it to the topping board with a sheet of 240 grit paper on it.  I had noticed before that the shank and the plane of the rim were not perpendicular – the rim plane has a left leaning tilt, but I’m not worrying about that – I think.  To correct it would need too much briar to be removed. The more that I look at the rim plane tilt, the more I realize that it will drive me crazy when I’m smoking this guy down the road and wondering why I didn’t correct it!  Since, it IS my Oom Paul, I decide to trade some briar for a bit of sanity.  I start sanding the high right side of the rim down to bring the plane and shank into closer perpendicular alignment.  I use a flat needle file as well as a miniature sanding block to do this. With the rim in closer alignment with the shank, I first cut an internal bevel with a coarse 120 grit paper rolled up tightly.  I pinch the roll over the internal rim with my thumb and remove the charred briar and start shaping the internal lip.  I follow this with 240, 320 and then 600 papers.  Because the rim’s width is not consistent around its circumference, I also introduce a gentle rounding bevel to the external edge of the rim.  This has the effect of making the rim look more balanced and softer, hiding some of the problems with dimension.  I am very pleased with the look of the repaired rim.  The pictures show the progress!  I suppose some briar for a bit of sanity was a good trade! With MOP’s rim work finished for now, I turn to OP’s rim.  The last steward was very consistent in his practices – especially lighting his tobacco.  Again, the left side of the rim has taken the brunt of the flame which was pulled down over the side of the rim.  Pipe ladies and gentlemen, light tobacco ABOVE the chamber – not over the side!! The charring here needs to be removed to uncover healthy briar, but it will leave, as before, an imbalance in the width of the rim.  As with MOP, I take a picture at the beginning to mark the progress and to show the charred area.  I then take the topping board with 240 grit paper and lightly top it on the side of the board – the full bent shank is extending beyond the plane of the rim.  After 240, I use 600 on the board.  Thankfully, OM’s rim is in closer perpendicular alignment than was MOP’s.  After looking at the picture immediately above, I decide to take more top off to regain a precious few millimeters of rim width to help balance the appearance.  I use a miniature sanding block to sand down the surface to build up the left rim width.  I find the sanding block useful when I need to ‘steer’ the rim in a certain direction.  I still have a flat surface, but with pressure can strategically leverage the sanding. I then take the stummel back to the board with 240 and then 600 to level the rim. I think this helped to regain some rim width, but the imbalance is still evident but less so. Now, cutting a bevel as I did before with MOP, on the internal and external rim edges helps round and blend the appearance.  I use 120 grit to do the major shaping then 240, 320, and 600.  It’s as good as I can manage without taking a lot more off the top to even out the rim width.  It does work, and I move on to the next challenge.I had written to Steve earlier to get input on how to approach the crack I discovered in OP’s shank.  His response came with a picture.  I already knew that I needed to drill a counter creep hole at the top of the crack where it was obviously creeping.  Steve said that a counter creep hole was needed at the bottom as well – in the bend itself.  It will be a bit of a challenge with the angle and drilling, but I think possible.  The holes at the end of the cracks arrests the expansion of the crack.  Steve’s picture follows:The other challenge that I’ll attack at the same time is on the cut and creeping crack on the heel of OP’s stummel.  This injury will also need drilling at each end to arrest any growth in the crack or cut.  As Steve did for me, I’ve circled the points where drilling is needed.  I needed a magnifying glass to see the cracks accurately.I use the Dremel for these drillings mounted with a 1mm drill bit.  The great thing working with the Dremel is its flexibility.  The bad thing about using the Dremel, is its flexibility!  In my workspace on the 10th floor of a former Communist block apartment building, I don’t have much room.  So, the Dremel does everything for me, almost!  One of these days I will find a universal mounting system that will allow me to strap the tool in so that I can make precision movements, like this drilling project, which is more difficult in the handheld mode.  In the drilling of the holes, one does not want to break through the briar to the inner chamber or mortise!  The hole depth only needs to be 2 or so mm.  I start with the cut on the heel, the easier of the two projects.  To guide my drilling, with the use of the magnifying glass, I use the sharp point of a needle file to press a guide hole into the briar.  I then follow with drilling the shank crack holes.  The pictures show the results which turn out well despite my handheld approach! Now to apply patch material.  Again, I start with the heel repair.  Using a toothpick to guide, I apply a drop of thin Hot Stuff CA glue directly into the cut.  I want the glue to sink deeply into the fracture to sure things up.  I sprinkle some briar dust on it.  After this, on an index card, I mix a little briar dust with Hot Stuff Special T CA glue – a bit thicker.  This forms a briar dust putty that I mix and apply to the 3 holes I drilled.  I build a mound with the briar dust putty, that after cured, provides thorough coverage over the entire repair area that will be sanded down and blended. After about 45 minutes, the heel patch has set up enough for me to work on the shank crack.  Just to be on the safe side, I mask the sides of the shank to protect from CA glue accidentally running down the sides.  I am especially protective of the L J Peretti Co. stamping. As before, I place a line of thin CA glue along the crack to seep in and fill the open areas in the fracture.  Then, I mix another batch of briar dust putty using thicker CA glue and apply this on the holes and over the full length of the crack.  A toothpick acts a trowel.  It’s time to go to bed so I’ll leave the patches to cure overnight. The pictures show the patch progress on OP’s restoration. The next morning the patches have cured thoroughly and I’m ready to start filing down the patch mounds beginning with a flat edged needle file.  I’ll work down the mound starting first with the heel patch.  The key is to ride the patch mound down as far as possible with the file then switch to sand paper which will be less intrusive to the healthy briar around the patch.  When I near the briar surface with the file, I reduce the pressure I’m exerting on the file.  When down close to the briar surface, I switch to 240 grade sanding paper, again, keeping the sanding on the patch material to remove the excess patch from the briar leaving only the fills.  The patch looks good.  I will blend later. The pictures show the progress with OP. After nearly a week in Athens, Greece, attending a conference and doing some pipe hunting, I return to Sofia and to my worktable where the shank patch and sanding are waiting for me.  It will be a bit more of a challenge.  Not only because of where the crack patch is located, but because sanding in the area will impact the end of the shank, potentially affecting the stem union.  I noted before that I wasn’t satisfied the seating of the stem.  There were small gaps showing between shank base and the stem.  I also could feel lips where the shank and the saddle stem were not flush.  My plan is to address these issues as I sand down the shank crack patch.  I start first with a flat and a rounded needle file to work down the patch. I progress to the crook of the bend and file with a round needle file. When I’m close to the surface with the needle files, I then switch to 240 grade sanding paper to remove more patch material down to the briar.  Then I follow using 600 grade paper to smooth out the coarser sanding scratches and to blend. While I’m sanding in the shank area, I work on the stem/shank alignment. I previously noticed that there was ‘daylight’ between the contact point between the shank and stem.  As much as possible, I want a seamless fit between the shank and the stem.  I notice also that the vulcanite on the end of the stem is not smooth which might be contributing to the stem’s fitting issues.  I decide to ‘top’ the stem at the tenon base using a piece of wood with a hole to accommodate the tenon.  I place a piece of 240 grade sanding paper over the topping board also with a tenon hole, insert the stem and rotate it.  This enables the smoothing of the vulcanite at the tenon base and hopefully, achieve a tighter, more true contact point between stem and shank. That does the job partially – the stem is snugger, but I still see a bit of daylight through the right side of where the shank and stem meet.  To address this, I need to remove the high spot on the left side of the junction to achieve a better seating of the stem in the shank.  I use a piece of 320 grade sanding paper folded and inserted between the shank and stem over the high spot and sand down the area.  I saw this method used by Charles Lemon on Dad’s Pipes to help improve the stem connection.  This does the job very well and after working the sanding paper around the high area, the stem contact looks better.Finally, I want to smooth out the lip that is caused by an overhang of the stem which I can detect by rubbing my finger over the shank and stem junction.  On the lower shank/stem the stem is a bit over the shank.  I use 240 grit paper to sand the lip down so that there is no lip between stem and shank.  After sanding down the area, the fit of the stem is much better all around.  I like it!With the major stummel repair projects completed, I rejoin stems with the stummels of MOP and OM and look.  As I work I’m admiring the briar on these larger Oom Paul bowls.  MOP is dominated by bird’s eye pattern with lateral grain on the bow of the stummel.  While OM has striking horizontal flame grain tying both shank and bowl and culminates at the bow of the stummel with bird’s eye.  Very nice.  What I love about Oom Pauls is the ample briar real estate on display!Before I switch my focus to the stems, while I think about the next steps for the bowl restorations, I decide to augment the internal cleaning of the stummels using a kosher salt and alcohol soak.  For both MOP and OP I fill the bowls with kosher salt.  I then pull and stretch cotton balls to form ‘wicks’ that I stuff down the mortise of each stummel.  The cotton wicks act to draw out the oils and tars left behind.  This method also helps to freshen the briar for a fresher taste for the new steward.  Placing each stummel in an egg crate for stability, with a large eye dropper I fill each bowl with isopropyl 95% and wait a few minutes and top it off again.  It takes a good bit!  I then set the bowls aside for several hours to allow the salt and alcohol to do their work.Turning to the stems, I start with My Oom Paul.  I take a close-up of the upper and lower bit area of MOP.  The former steward of these Oom Pauls was a clencher.  The good news is that he didn’t chew on the button too much – it’s in good shape.  With the dents and chatter, I start by using a flame to heat and expand the dents as much as possible.  I use a cheap Bic lighter.  This does raise and soften the dents.  The before and after of upper and then lower bit pictures follow. Using 240 grit sanding paper, I sand out the dents and chatter.  I also use a flat needle file to re-establish a crisp button. After sanding, I’m able to identify the remaining dents that need to be filled.  One dent on the upper bit with also a small indentation on the button needs attention.  On the lower, two areas need more attention on the bit and a bite on the button. Using cotton pads, I clean the upper and lower bit area with alcohol before applying drops of Starbond Black Medium KE – 150 CA glue to the problem areas on the lower bit.  I will wait an hour or so before turning the bit to apply Black CA glue on the upper bit. After the Black CA cures, I work the patches down on the lower and upper bit with a flat needle file then fine tune with 240 grit paper.Now, turning to OP’s stem, I take close-ups of the upper and lower bit area to show the starting point.  Again, as with MOP, the tooth dents are on both sides.  I paint the bit with fire from a Bic lighter to expand the vulcanite and raise the tooth dents.  As before, the heating did raise the dents so that sanding becomes more effective.  Before and after pictures of the heating for upper bit and then lower bit. As before, using 240 grit sanding paper I sand out as much as possible the dents on the bit and button. I also use a flat needle file to define the button lips more.  That worked out well.  All the dents sanded out except for one small area on the lower bit.  No patch is necessary on the top. After cleaning the area with alcohol, I apply a drop of Black Medium CA Glue to the spot.  I set OP’s stem aside for a few hours for the patch to cure.  When cured I sand the patch with 240 grit paper.  The pictures show the progress with the OP’s stem. Looking back at the stummels, the kosher salt/alcohol soak did the job.  The salt and wicks have discolored indicating that the tars and oils have been drawn out.  I remove the salt, wipe the bowls out with paper towel assuring that all the salt is removed. For the sake of abbreviation in this long blog, both stems proceed through the finishing process.  I use 600 grade paper to erase the 240 grade sanding and then buff up the stems using 0000 grade steel wool.  From here, I take the stems through the full process of 9 micromesh pads from 1500 to 12000, wet sanding 1500 to 2400 then dry sanding with 3200 to 4000 and then 6000 to 12000.  Between each set of three I applied Obsidian Oil to enrich the vulcanite.  The results are good.  The Peretti ‘P’ stamped on my Oom Paul looks great.Now to the stummels.  I begin with MOP.  I start with taking a few pictures to take in the great looking bird’s eye grain.  I love the wide expanse of the briar on the Oom Paul stummel – it goes on and on.  To remove the nicks and minor scratches on the briar surface I use sanding sponges progressing from coarser, medium, and then, light. I follow the sponge sanding by doing a full regimen of micromesh pad sanding.  Using 1500 to 2400, I wet sand, then with the remaining pads, 3200 to 12000 I dry sand.  This process brings out the grain very nicely and I’m liking what I see! As I now look to the OP stummel, I’ve been going back and forth as to what to do with this stage of the process.  OP has two crack/cut repairs to blend into the finished coloring of the bowl.  It also has many normal nicks and scratches which need to be addressed.  I want to keep both L J Peretti pipes as close to the color scheme as possible, but to provide some blending cover for the cut/crack patches, I will need to darken the color some for OP.  Even so, I know that most likely, patches will still be detectable but much subdued.  My thinking now is waffling between staining my Oom Paul with a new color of Fiebing’s leather dye I brought back from the US – Saddle Tan Pro Dye.  I tested it on a raw piece of wood and I like the results.  The other approach I want to test is simply using Before and After Briar Balm or as it’s called on the label, ‘Hard Rubber Balm’.  Steve recommended this approach to me in lieu of stain.  With waffling completed, I will use the Briar Balm on MOP first to see how it turns out.  Then, for OP, which needs more blending activity, I’ll use the Saddle Tan dye. With this decided, I take a few more close-ups of OP to mark the start.  I begin preparing the briar surface using sanding sponges – from coarser, to medium, and to fine to clean the surface of scratches and nicks.  Throughout, I am careful to guard the L. J. Peretti Co. nomenclature on the shank.  As with My Oom Paul, I use micromesh pads following the sponge sanding.  I wet sand using pads 1500 to 2400, then dry sand from 3200 to 12000.  I record the progress after each set of 3.  I love this phase of the process.  The micromesh pads do a great job bringing out the fine detail of the grain.  The OP has a distinctive lateral, horizontal flame grain that spans the bowl and full bent shank.  It culminates in the front with bird’s eye grain – the perpendicular view of the horizontal flow of grain.  Very nice.  The pictures capture a bit of what I’m seeing emerge with OP. Now testing time.  I will apply the Before and After Briar Balm to MOP – My Oom Paul, to see how the briar absorbs and reacts.  I’ve seen Steve apply the balm to several pipes he’s restored on Reborn Pipes with very nice results.  The process is easy.  Apply balm to the briar and work it in with your fingers.  I take a picture of each side of the stummel to show the starting point.  I put some balm on my fingers and I work it in.  The balm is loose and oily when it first begins but as it is worked in, it thickens as it is absorbed into the briar.  After applying the balm, I wait about 10 minutes and wipe/buff the stummel with a clean cotton cloth.  The difference is noticeable – the briar has a deeper, richer appearance.  I like it! I take two ‘after’ pictures to compare.  The first picture is the right side of the bowl and the second, left.  Before the balm is on the left and after application, is on the right.  The pictures speak for themselves. Now, turning to OM, I will apply Fiebing’s Saddle Tan Pro Dye. I first wipe the bowl down with alcohol to make sure it is free of dust and dirt.  I insert a cork into the shank to serve as a handle and heat up the stummel using an air gun to expand the briar making it more receptive to the dye.  Then, I thoroughly apply the aniline based Saddle Tan dye to the stummel with a pipe cleaner and then flame the wet dye which immediately burns off the alcohol setting the pigment into the briar.  I repeat the process and flaming and set the stummel aside to rest overnight allowing the dye to set.  The good thing about aniline dye is that I can use alcohol on a cotton pad to wipe the stummel later to lighten the hue if I choose.  Another day has come to an end.Early the next morning before heading out to another full day of work, I’m anxious to ‘unwrap’ OP’s bowl that rested through the night.  I take a picture of the ‘rested’ stummel.  Using the Dremel, set to the lowest speed, I mount a felt buffing wheel dedicated to applying Red Tripoli compound.  After purging the wheel to soften it and clean it, I methodically work the wheel around the stummel ‘unwrapping’ the fired dye revealing the briar surface.  I do not apply a lot of pressure on the felt wheel but allow the fine abrasive nature of the Tripoli compound, speed of the Dremel and the felt wheel to do the work.  Since the felt buffing wheel is not flexible, I mount a cotton cloth wheel with Tripoli to reach into the crook of the shank’s bend.  I take a picture of the ‘unwrapping’ with the Tripoli compound to give an idea of what I’m seeing.At this point, I yoke both Oom Paul stummels together in the process.  I reunite stems to both and after mounting a cotton cloth buffing wheel, I leave the Dremel’s speed the same slowest setting, and apply Blue Diamond compound to both stummels and stems. When I finish, I buff each with a felt cloth to remove the compound dust from the pipes in preparation for the wax.  I mount a dedicated cotton cloth buffing wheel on the Dremel, increase the speed to about 40% and apply carnauba wax to both MOP and OP, stem and stummel.  After applying several coats of carnauba to each pipe, to finish I give both a good buffing from a micromesh cloth to deepen the shine more.
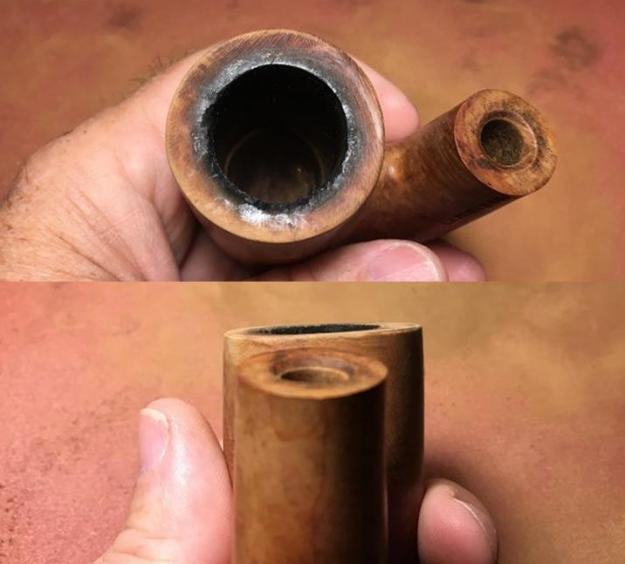
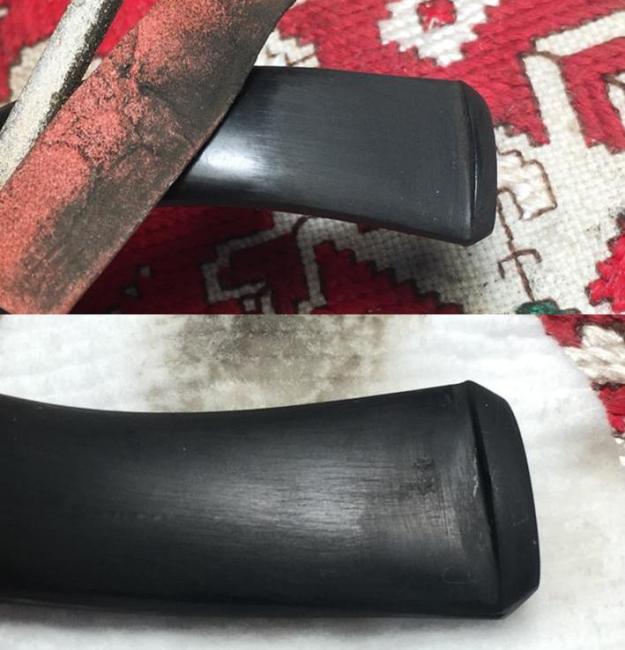
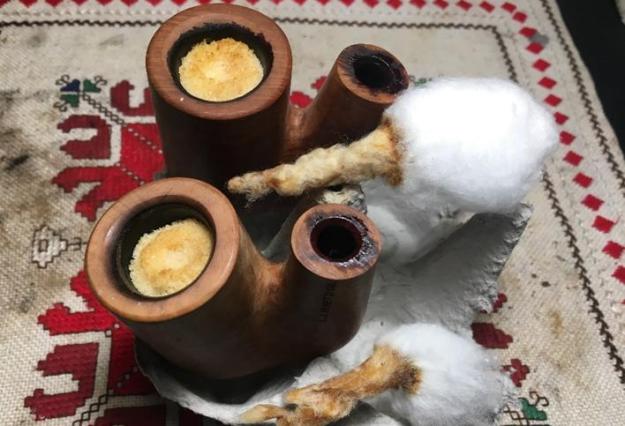
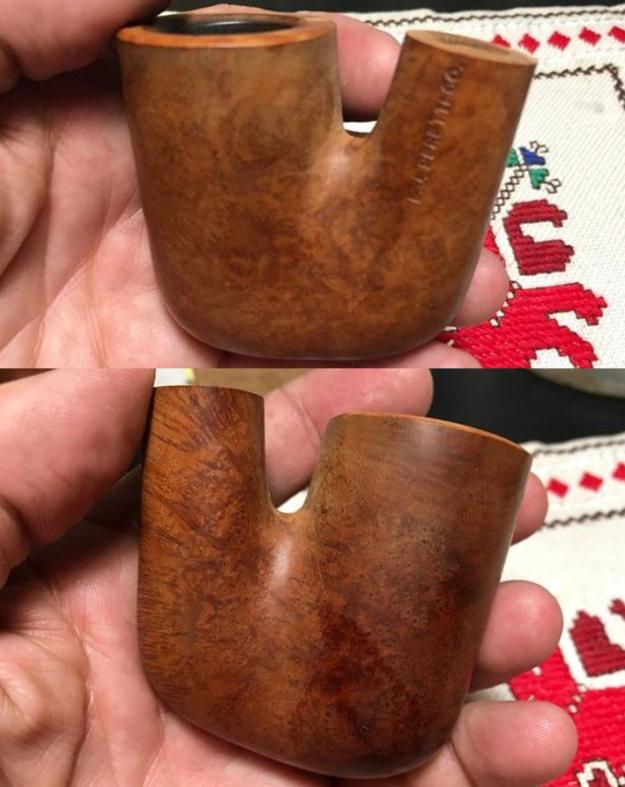
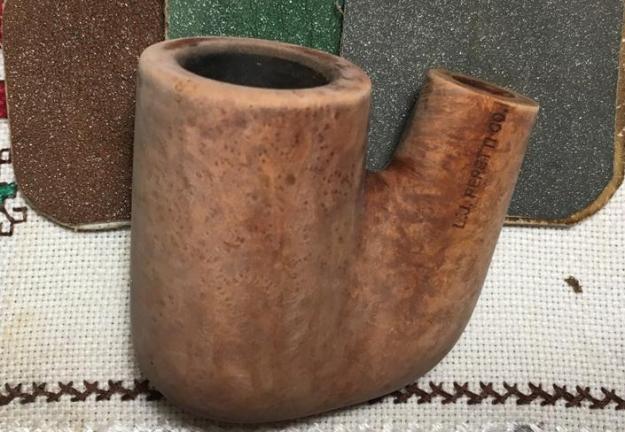
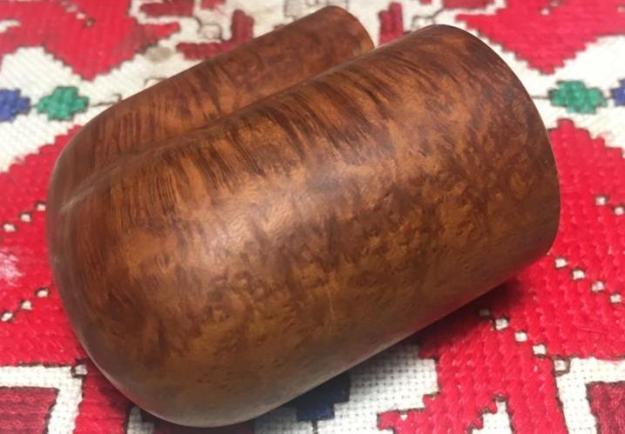
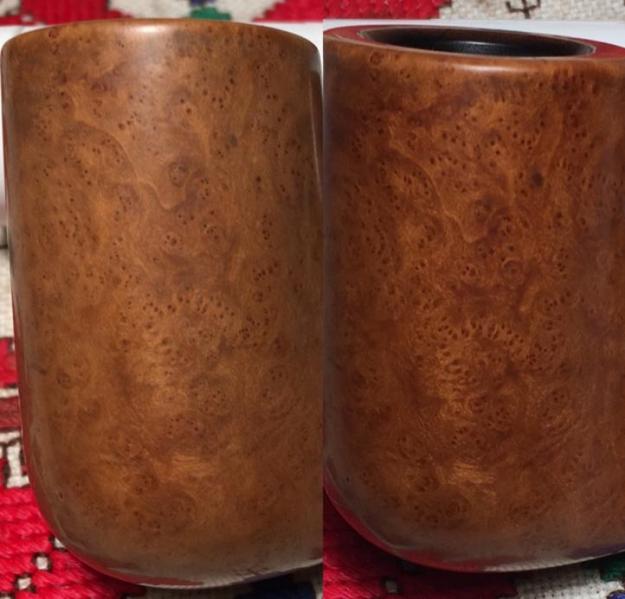
These two Oom Pauls provided some challenges in their restorations, but I am pleased with the results!  After this I don’t believe I will do another ‘double restoration’ write-up – too much!  The grain on both Oom Pauls is striking.  My Oom Paul’s finish came out well using Before and After Briar Balm and the grain is dominated by a large orchard of bird’s eye pattern.  I look forward to his inaugural smoke as I add him to my growing L. J. Peretti Co. collection.

The Oom Paul heading to The Pipe Steward Store had some challenges with cracks and cuts, and loving abuse from his former steward whose practice of lighting over the edge of the rim presented some hurdles.  The Saddle Tan finish looks great – it has masked the cut repair on the heel but not fully hidden – he takes some signs of his past life war wounds into the future! But OH MY, the lateral flame grain flowing through the stummel from the full bent shank to the front of the bowl culminating with a sprinkling of bird’s eye is striking and a beautiful example of God’s handiwork!  He’s bigger than my Oom Paul with the length (in full bent position) is 6 inches, height of the bowl: 2 ½ inches, rim width: 1 ½ inches, chamber width: 15/16 inches, chamber depth: 2 1/8 inches.  He is ready for a new steward and the adoption of this Oom Paul will benefit the Daughters of Bulgaria, our work with women and girls (along with their children!) who have been trafficked and sexually exploited.  The pictures following start with MOP and OP together, two pictures of MOP happily heading to my rack, and then the remaining pictures of the Oom Paul heading to The Pipe Steward Store!  They turned out to be a handsome pair of dudes! Thanks for joining me!
Paresh’s Grandfather’s Pipe #6 – Peterson’s System Standard 307 Made in Eire Pipe


Blog by Steve Laug

I have repaired 5 of the 7 older pipes (1937-1950s) left to Paresh by his Grandfather. I have enjoyed working on them and researching as well. His Grandfather was a pipeman who worked for the Indian Railroad. Paresh only recently learned that his Grandfather smoked a pipe. The 6th pipe is a Peterson’s System Standard 307 Made in Eire with a bent system stem and a smooth finish. I took photos of the pipe before I stated to work on it. It was in good condition, very clean with just a thin bit of lava and tar on the top of the rim. The inner edge of the bowl had some damage and was slightly out of round. The outer edge of the bowl was in excellent condition. The stem had a deep tooth mark on the right of the top just ahead of the P-lip. The underside had a lot of tooth chatter. The tenon had a large chunk out of the extension that went into the shank. The rim top was clean and the bowl reamed. Abha had once again done a great job cleaning the finish. She had scrubbed it with Murphy’s Oil Soap and removed all of the debris and dust from the smooth finish. There was some darkening to the rim top and some light dents in the top surface. The inner edge of the bowl was slightly out of round with some damage from reaming. The bowl had a light cake and it appeared that Abha had removed a lot of the cake in her reaming. I also took a close up photos of both sides of the stem. You can see that there is light tooth chatter on the top and underside of the stem just in front of the button. There is a deep tooth mark on the topside in front of the P-lip. The surface of the stem is lightly oxidized.The stamping is faint and worn but it is readable under a light and with a lens. The stamping on the left side of the shank reads Peterson’s System Standard.  On the right side of the shank it is stamped Made in the Eire in a circle and under that is reads 307 which is the shape number. I looked up the Made in Eire stamp on Pipedia’s section on Peterson pipes to see if I could find out information (https://pipedia.org/wiki/Peterson). There I found out that the Made in Eire era stamps were from 1938 through till 1941. Peterson stamped their pipes with “Made in Eire” in a circle format with “Made” and “Eire” in a circle with the “in” located in the centre of the circle. This was used during the years of 1938 – 41. This is exactly how the pipe I am working on is stamped. I learned that the pipe was made between 1938-1941. After that Peterson stamped their pipes with “Made in Ireland” in a circle format 1945-1947 and still later with “Made in Ireland” in a block format 1947-1949. The “Made in Ireland” block format came in either one or two lines.

With that I reread Paresh’s biographical write up on his Grandfather once again. There Paresh stated that his Grandfather had visited England in 1946 and that later after 1947 the British left India for good. Many of the Superior Officers gave his Grandfather pipes as parting gifts. I am fairly confident that this was one of those gift pipes given to him around 1947. I am including his bio now as part of the background information on this pipe. Here is Paresh’s tribute.

Respected Sir,

Now that the first batch of my Grandfather’s pipes has reached you, I would like to share my memories of him with you, the aim being to provide you with an insight to his personality, the era in which he lived, and a brief history associated with the pipes that I have inherited from him.

My Grandfather, Ananta (named after an exotic seasonal white flower having lovely fragrance), was born in a small coastal town of Konkan region of Maharashtra, India, in 1918. These were very turbulent times when India’s freedom struggle against British rule was gathering momentum and the atmosphere was charged with “Quit India Movement”. Having completed his graduation from Bombay, he joined Railways in 1937. This also marked the beginning of his journey into the world of pipe smoking!!!!!

Having seen his potential, in 1945, he was sponsored by the Government to visit England, for gaining further experience and expertise in his profession. This was a period when India’s Independence was round the corner and efforts were being made to train Indians for various administrative appointments in future Independent India. He returned back to India after a year, in 1946 and with him came some pipes that he had purchased in England. I believe a few of his Petes, Barlings, Charatans and GBDs are from this visit.

In 1947, when the British finally left India for good, my Grandfather was gifted pipes by his British peers, subordinates and Superior Officers as a parting gift. He stayed in touch with a few of them over all these years, even visiting them in 1959-60. Some of his later era Charatans and Barlings and Petes are from this trip. He quit smoking in early 1970s (before I was even born!!!!) and his pipes were packed up. There were a number of pipes which were used as TINDER for lighting fires (CAN’T BELIEVE IT…… I have not overcome my grief of this loss till date!!!!!) due to ignorance!!!!!!

My Grandfather was a very strict disciplinarian and temperamental (I did not know this as he was neither when dealing with me as I am the youngest of all his grandchildren!!!!!! He was always the most understanding and loving person in my life). I later learned that in his office, he was not to be disturbed when his pipe was lit, as he would be in his thinking/ contemplating mode while it was just the opposite as he lit his pipe in the evening while at home, when he would be at his relaxed best!!!!.

The interesting part is that neither of us knew that we each smoked a pipe until after his demise in Jan 2018!!!! In our culture, to this day, smoking or alcohol consumption is socially never talked about (mute acceptance!!!). It was during his last rites that absent mindedly I lighted my pipe and looking into the flickering flames of his funeral pyre, remembered and recollected all the wonderful memories and talks that we had shared. No one said a word to me about my lighting up a pipe!!!!!! Immediately thereafter, I rejoined my duty station. A few days later, my wife, Abha, received a box from my Uncle with a note that said “Grandfather would have loved Paresh to have these”. This box contained a collection of his fountain pens and 8-10 of his pipes (since then as my folks are winding up his belongings, I have received 2-3 packets and a large number of pipes, some in decent condition and some in unspeakable state). Abha immediately messaged me with pictures of these pipes and pens. I had been collecting and restoring (no major repairs, though) fountain pens since long and immediately recognized some of them as highly collectibles, however, pipes were a totally different ball game! I was inexperienced with no knowledge/ information regarding various brands/ pipe makers, shapes and materials. I knew nothing about the value of these pipes, nothing about pipe restorations, nothing about caring for them; I mean zero knowledge about collecting pipes. I smoked some real cheap Chinese pipes which were readily and unfortunately, the only ones, available in India and some inexpensive pipes from eBay India!!!!! Also regular pipe cleaning, pipe rotation, pipe cleaners and such things were unknown to me.

Thus, to know more about the REAL pipes, I embarked upon the journey of exploring finer nuances of pipe brands/ makers, their history and watching “How to videos” on packing a pipe, cleaning, repairing and caring for ones pipes. I found it extremely interesting and satisfying. It was while meandering through this confusing quagmire of pipe world that I came across rebornpipes.com website and eventually established contact with you, Mr Steve, who has since been my mentor, guide and GURU, making this journey a wonderful and satisfying experience.

Sir, there is one more thing that I need to thank you for and that is when you asked me to write a brief about my grandfather and his pipes, I realized how little I knew about him, in fact, knew nothing, as I was not even aware that he was a “pipeman” as no one in my family ever spoke about it being taboo subject and since he had quit a long time before I was even born!!!! This led me to ask the elders in my family, questions on the subject and came to know the above details. I cannot thank you enough for prodding me to get to know my grandfather and his pipes a lot better. Sir, these pipes of his, with your help and guidance, will remain with me forever in mint condition……

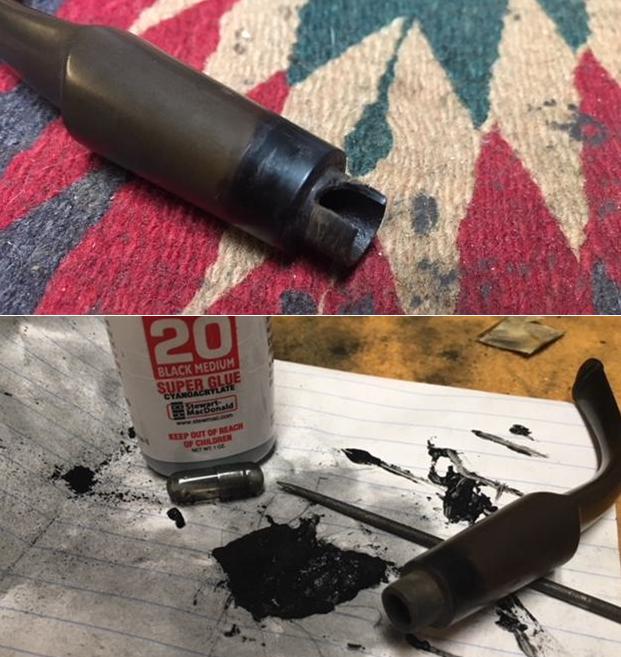
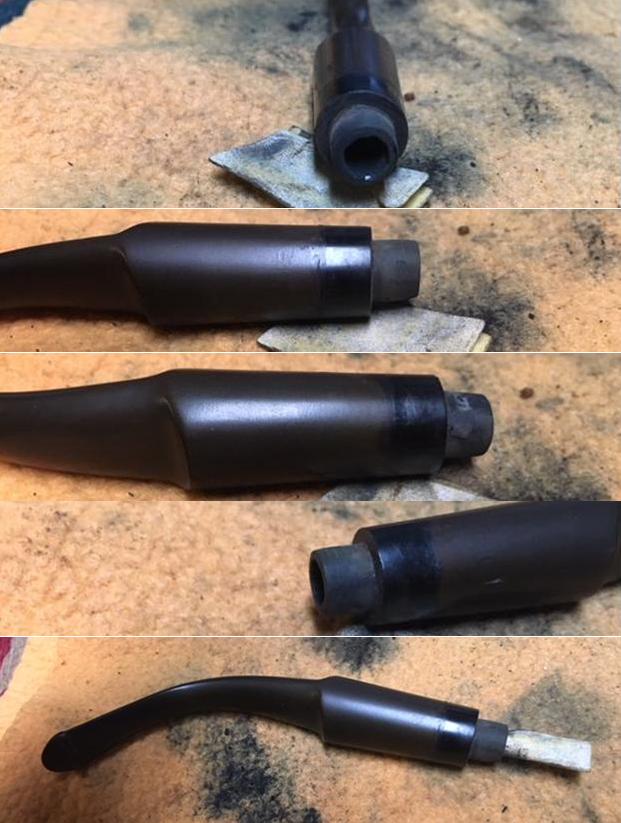
I began work on the pipe by cleaning up the reaming of the bowl first with a PipNet pipe reamer. I began with the smallest cutting head and worked up to the one roughly the same size as the bowl. I finished cleaning it up with a Savinelli Fitsall Pipe Knife to remove the remnants of cake left behind. When I examined the walls of the pipe they looked really good.  I cleaned out the internals of the mortise and shank with the Savinelli Fitsall Pipe Knife, pipe cleaners, cotton swabs and alcohol. I scraped the walls of the sump and the mortise with the pipe knife to get rid of the hard tars and oils on the walls. Once I had removed the hardened cake I cleaned the inside with pipe cleaners, cotton swabs and alcohol until the interior was clean.I worked Before & After Restoration Balm deep into the briar of the bowl and shank to clean, enliven and protect it. I worked it in with my fingertips and set it aside for a few minutes to let the balm work. I wiped it off and buffed it with a soft cloth to polish it. The briar really began to have a deep shine and the grain began to shine through. I took photos of the bowl at this point to mark the progress in the restoration. I set the bowl aside and began the work on the stem. I cleaned up the tenon end of the stem with alcohol and cotton swabs. The first photo below shows the end of the tenon with the large chunk of vulcanite missing. I made a mixture of black super glue and charcoal powder and rebuilt the end of the tenon. I filled in the chipped area and built it up until it was roughly the same size and shape as the rest of the end. It would take several coats to fill in the rough spots in the repair but I layered it in and let it cure between coats. Once the repair had cured, I rough shaped it with a needle file to remove the excess repair. I worked it over until it was close to the right shape. I sanded it with 180 grit sandpaper and with 220 grit sandpaper. I used a half round, a round and a flat blade needle file to reshape the inside of the airway of the tenon end. I reshaped it until it matched the remainder of the existing tenon.There were some deep gouges in the surface of the stem near the tenon end. It looked as if the stem had been twisted out with a pair of pliers. The gouges were deep and visible. I cleaned the areas with alcohol and filled in the marks with super glue. I used a Bic lighter to lift the tooth mark on the right top side of the stem, filled in the tooth marks with super glue and when it dried, sanded it smooth with 220 grit sandpaper. I sanded the repairs on the tenon end of the stem at the same time.I polished the stem with micromesh sanding pads – wet sanding with 1500-2400 grit sanding pads and dry sanding with 3200-12000 grit pads. I wiped the stem down with Obsidian Oil after each sanding pad and set it aside to dry. With the stem polished I put it back on the pipe and lightly buffed the bowl and stem with Blue Diamond. I gave the bowl and stem multiple coats of carnauba wax. I buffed the pipe with a clean buffing pad to raise the shine and hand buffed it with a microfiber cloth to deepen the shine. The pipe polished up pretty nicely. The finished pipe is shown in the photos below. I have one more of Paresh’s Grandfather’s pipes to finish and then I will pack them up and send the whole lot across the sea to India where he can carry on the legacy. I know that he is looking forward to having them in hand and enjoying a bowl of his favourite tobacco in memory of his Grandfather. Thanks for walking through the restoration with me as I worked this pipe over.
Paresh’s Grandfather’s Pipe #5 – A Tiny Peterson Bent Calabash Pipe


Blog by Steve Laug

I have completed the repair of four of the pipes of the seven left to Paresh by his Grandfather. It is an interesting assortment of older pipes that come from the period of 1937-1950s. I am really enjoying not only working on them but doing some research on them as well. His Grandfather worked for the Indian Railroad and was a pipeman. Paresh is also a pipeman and only recently learned that his Grandfather smoked a pipe. The fifth pipe is a petite Peterson’s Calabash pipe with a delicate stem and a rusticated finish around the bowl and rim. It is petite but not small in terms of length – 5 inches long and 1 ½ inches tall. I took the following photos of the pipe before I stated to work on it. It was in excellent condition, very clean with just a thin bit of lava and tar on the top of the rim. The inner and outer edge of the bowl was in excellent condition. I took some photos below show the pipe as it arrived. The rim top was clean and the bowl reamed. Abha had once again done a great job cleaning the finish and the interior of the pipe. She had scrubbed it with Murphy’s Oil Soap and removed all of the debris and dust from the deep crevices of the rustication. There was some darkening to the rim top but it was undamaged. The inner and outer edge of the bowl looks pretty good. The bowl was very clean and smooth on the inside. I also took a close up photos of both sides of the stem. You can see that there is light tooth chatter on the top and underside of the stem just in front of the button. There is a deep grove from teeth on the underside of the stem and a small split and divot in the button on the underside as well. The surface of the stem is lightly oxidized. The stylized P on the left side of the saddle stem is faint but readable.I wanted to know more about the shape and to help pin down the date of the pipe for Paresh so I sent an email to my go to Peterson’s guy Mark Irwin and asked him about identifying the shape and some history. He wrote back quite quickly and gave me the following information.

It’s called a calabash (no shape #, just the name), called a “lady pipe” by Europeans, introduced in 1945 as part of a quartet of “Speciality Shapes” that included the Belgique and Calabash (“lady pipes”) and the Tankard and Barrel. Often thought of by Pete Freaks as “flake pipes.” Couldn’t see any stampings on it, but 1945 seems too early for a rustic finish in this shape. Not impossible, but unlikely. Been in continuous production since ’45.

I sent that information to Paresh who was also doing a bit of research on the pipe. He went to http://thepetersonpipeproject.blogspot.ca/ and came across this piece of information that confirmed my suspicions and potentially filled in the “not impossible” comment Mark wrote above. The pipe in question has the definite P with a forked tail on the smooth patch on the underside of the shank.The stamping is faint and worn but it is there under a light and with a lens. The rest of the stamping reads Made in the Republic of Ireland and next to that is the Peterson’s stamp. Looking up that part of the stamp on Pipedia’s section on Peterson pipes I found that The Republic Era was 1950 – 1989. I was narrowing down the time period for this pipe. About the same time I received another email from Mark saying that he had looked through the 1945 and 1950 catalogues he had and as far as he could tell the rusticated finish was not offered during that time period. He suggested that the pipe was from the late 50s to early 60s.

With that I reread Paresh’s biographical write up on his Grandfather once again. There Paresh stated that his Grandfather had revisited England between 1959 and 1960 so I am pretty certain that we have a pipe that he picked up on this second trip. It is interesting that the forked P as Paresh found states it is a 30s era pipe but the Republic of Ireland stamp put it later after 1950. I am including his bio now as part of the background information on this little pipe. The way the tooth mark sits on the underside of the stem I can almost imagine him sitting at home or in his office contemplating something deeply and rubbing the stem against his teeth. Over time it wore the almost trough like mark in the underside of the stem. Here is Paresh’s tribute.

Respected Sir,

Now that the first batch of my Grandfather’s pipes has reached you, I would like to share my memories of him with you, the aim being to provide you with an insight to his personality, the era in which he lived, and a brief history associated with the pipes that I have inherited from him.

My Grandfather, Ananta (named after an exotic seasonal white flower having lovely fragrance), was born in a small coastal town of Konkan region of Maharashtra, India, in 1918. These were very turbulent times when India’s freedom struggle against British rule was gathering momentum and the atmosphere was charged with “Quit India Movement”. Having completed his graduation from Bombay, he joined Railways in 1937. This also marked the beginning of his journey into the world of pipe smoking!!!!!

Having seen his potential, in 1945, he was sponsored by the Government to visit England, for gaining further experience and expertise in his profession. This was a period when India’s Independence was round the corner and efforts were being made to train Indians for various administrative appointments in future Independent India. He returned back to India after a year, in 1946 and with him came some pipes that he had purchased in England. I believe a few of his Petes, Barlings, Charatans and GBDs are from this visit.

In 1947, when the British finally left India for good, my Grandfather was gifted pipes by his British peers, subordinates and Superior Officers as a parting gift. He stayed in touch with a few of them over all these years, even visiting them in 1959-60. Some of his later era Charatans and Barlings and Petes are from this trip. He quit smoking in early 1970s (before I was even born!!!!) and his pipes were packed up. There were a number of pipes which were used as TINDER for lighting fires (CAN’T BELIEVE IT…… I have not overcome my grief of this loss till date!!!!!) due to ignorance!!!!!!

My Grandfather was a very strict disciplinarian and temperamental (I did not know this as he was neither when dealing with me as I am the youngest of all his grandchildren!!!!!! He was always the most understanding and loving person in my life). I later learned that in his office, he was not to be disturbed when his pipe was lit, as he would be in his thinking/ contemplating mode while it was just the opposite as he lit his pipe in the evening while at home, when he would be at his relaxed best!!!!.

The interesting part is that neither of us knew that we each smoked a pipe until after his demise in Jan 2018!!!! In our culture, to this day, smoking or alcohol consumption is socially never talked about (mute acceptance!!!). It was during his last rites that absent mindedly I lighted my pipe and looking into the flickering flames of his funeral pyre, remembered and recollected all the wonderful memories and talks that we had shared. No one said a word to me about my lighting up a pipe!!!!!! Immediately thereafter, I rejoined my duty station. A few days later, my wife, Abha, received a box from my Uncle with a note that said “Grandfather would have loved Paresh to have these”. This box contained a collection of his fountain pens and 8-10 of his pipes (since then as my folks are winding up his belongings, I have received 2-3 packets and a large number of pipes, some in decent condition and some in unspeakable state). Abha immediately messaged me with pictures of these pipes and pens. I had been collecting and restoring (no major repairs, though) fountain pens since long and immediately recognized some of them as highly collectibles, however, pipes were a totally different ball game! I was inexperienced with no knowledge/ information regarding various brands/ pipe makers, shapes and materials. I knew nothing about the value of these pipes, nothing about pipe restorations, nothing about caring for them; I mean zero knowledge about collecting pipes. I smoked some real cheap Chinese pipes which were readily and unfortunately, the only ones, available in India and some inexpensive pipes from eBay India!!!!! Also regular pipe cleaning, pipe rotation, pipe cleaners and such things were unknown to me.

Thus, to know more about the REAL pipes, I embarked upon the journey of exploring finer nuances of pipe brands/ makers, their history and watching “How to videos” on packing a pipe, cleaning, repairing and caring for ones pipes. I found it extremely interesting and satisfying. It was while meandering through this confusing quagmire of pipe world that I came across rebornpipes.com website and eventually established contact with you, Mr Steve, who has since been my mentor, guide and GURU, making this journey a wonderful and satisfying experience.

Sir, there is one more thing that I need to thank you for and that is when you asked me to write a brief about my grandfather and his pipes, I realized how little I knew about him, in fact, knew nothing, as I was not even aware that he was a “pipeman” as no one in my family ever spoke about it being taboo subject and since he had quit a long time before I was even born!!!! This led me to ask the elders in my family, questions on the subject and came to know the above details. I cannot thank you enough for prodding me to get to know my grandfather and his pipes a lot better. Sir, these pipes of his, with your help and guidance, will remain with me forever in mint condition……

I began my work on the pipe by cleaning up the reaming with a Savinelli Fitsall Pipe Knife to remove the remnants of cake left behind. You can see from the photo that there was very little cake to remove. When I examined the walls of the pipe they looked really good.I worked Before & After Restoration Balm deep into the rusticated finish on the bowl and shank to clean, enliven and protect it. I worked it into the finish with my fingertips and with a horsehair shoe brush. I set it aside for a few minutes to let the balm work. I wiped it off and buffed it with a soft cloth to polish it. The rusticated briar really began to have a deep shine and show the variety of colours in the contrasting brown stains. I took a photo of the bowl at this point to mark the progress in the restoration. This is going to be one of those fine, delicate beauties that Peterson made that really grab my attention. I cleaned out the internals of the mortise and shank with pipe cleaners, cotton swabs and alcohol. The early pipe cleaners came out dirty with tar and oil. Later ones came out with the reddish brown stain from when the bowl was dip stained. The pipe is clean now and ready for a new bowl of tobacco to be run through it.I set the bowl aside and began the work on the stem. I cleaned up the inside of the button and the surface. I opened the crack slightly and filled it in with clear super glue. I pressed together and held it tightly until the repair dried and the crack was sealed. I cleaned out the surface of the tooth groove with alcohol and cotton swabs and then filled it in with black super glue. It would take several coats but I layered it in and let it cure between coats.Once the repair on the underside had cured I sanded it smooth with 220 grit sandpaper to blend it into the surface of the rest of the stem. I also sanded out the tooth chatter and pitting on both sides of the stem at the same time. I added some black super glue to touch up the air bubble spots on the repair and the button and set it aside to dry. Once it had dried I smooth it out with 220 grit sandpaper and blended it into the surface of the vulcanite. I polished the stem with micromesh sanding pads – wet sanding with 1500-2400 grit sanding pads and dry sanding with 3200-12000 grit pads. I wiped the stem down with Obsidian Oil after each sanding pad and set it aside to dry. With the stem polished I put it back on the pipe and lightly buffed the bowl and stem with Blue Diamond. I gave the bowl multiple coats of Conservator’s Wax and the stem several coats of carnauba wax. I buffed the pipe with a clean buffing pad to raise the shine and hand buffed it with a microfiber cloth to deepen the shine. The pipe polished up pretty nicely. The finished pipe is shown in the photos below. I have two more of Paresh’s Grandfather’s pipes to finish and then I will pack them up and send the whole lot across the sea to India where he can carry on the legacy. I know that he is looking forward to having them in hand and enjoying a bowl of his favourite tobacco in memory of his Grandfather. Thanks for walking through the restoration with me as I worked this pipe over.
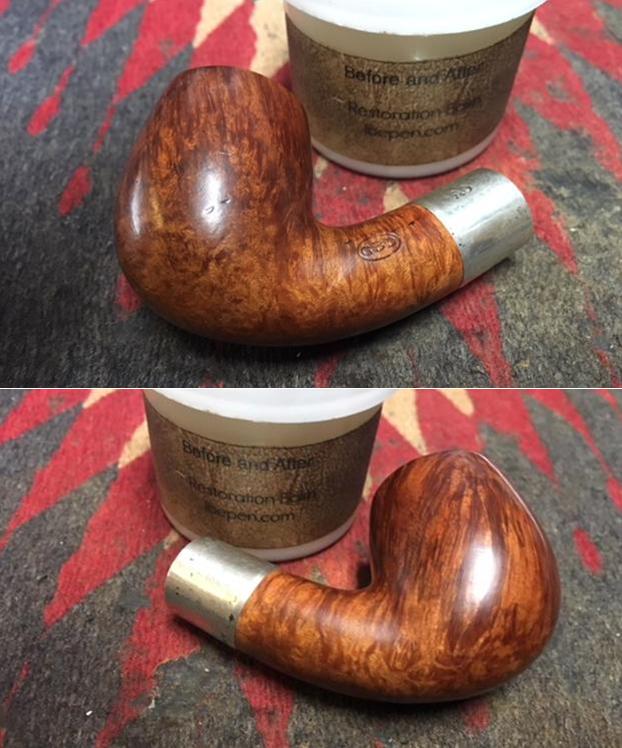
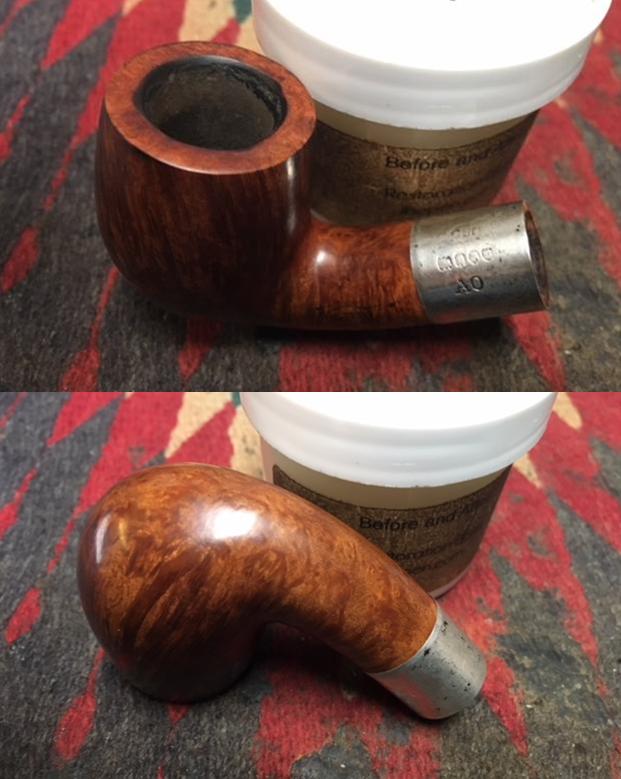
Paresh’s Grandfather’s Pipe #1 – An Early GBD Bent Billiard


Blog by Steve Laug

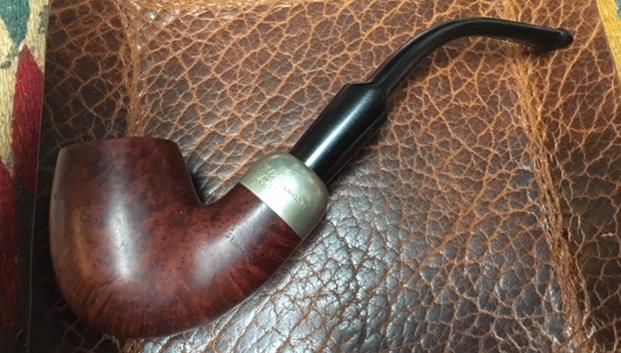
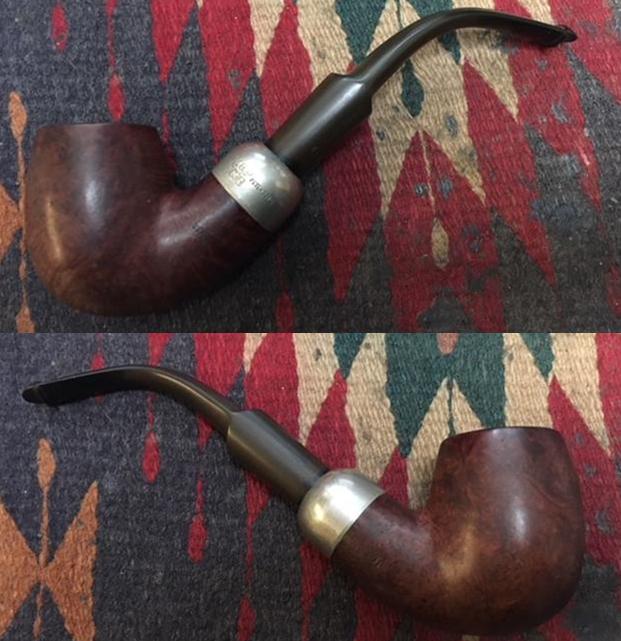
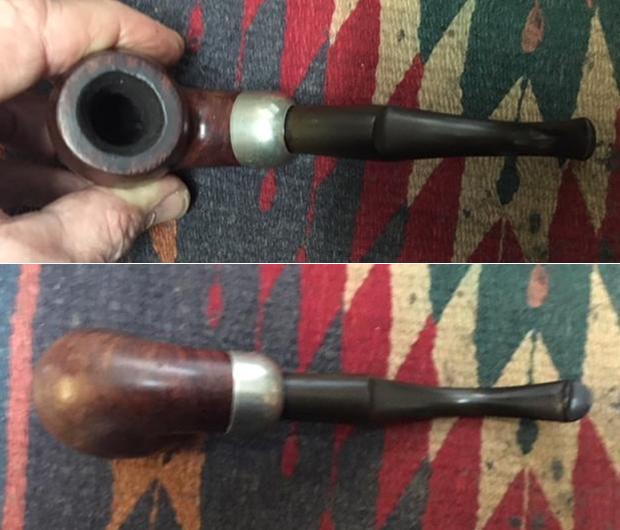
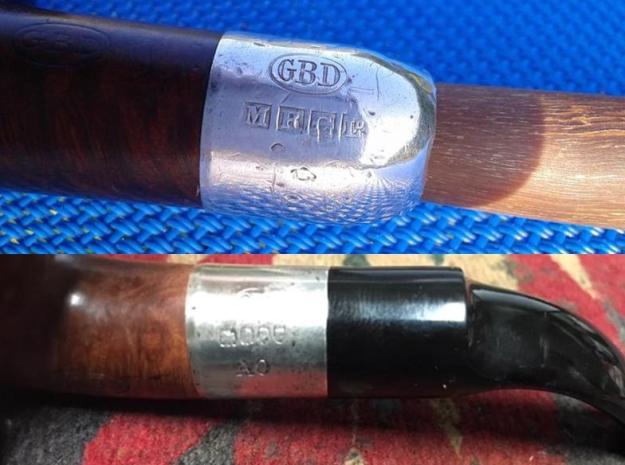
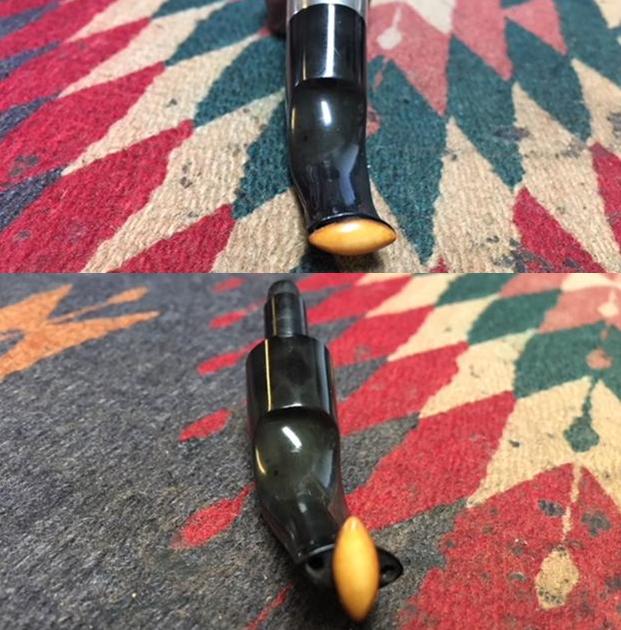
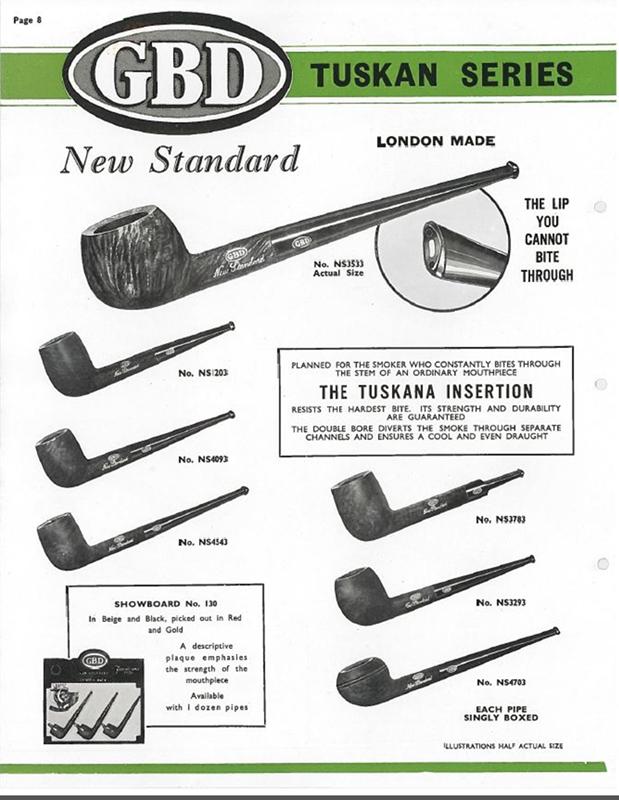
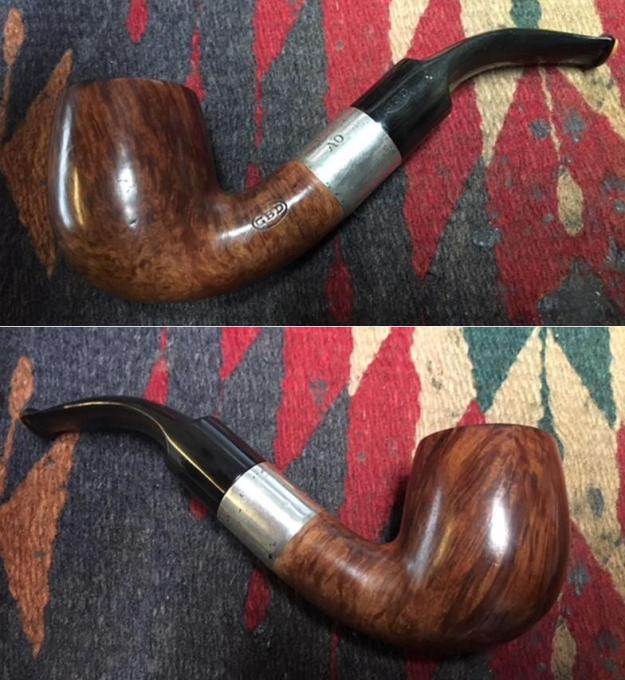
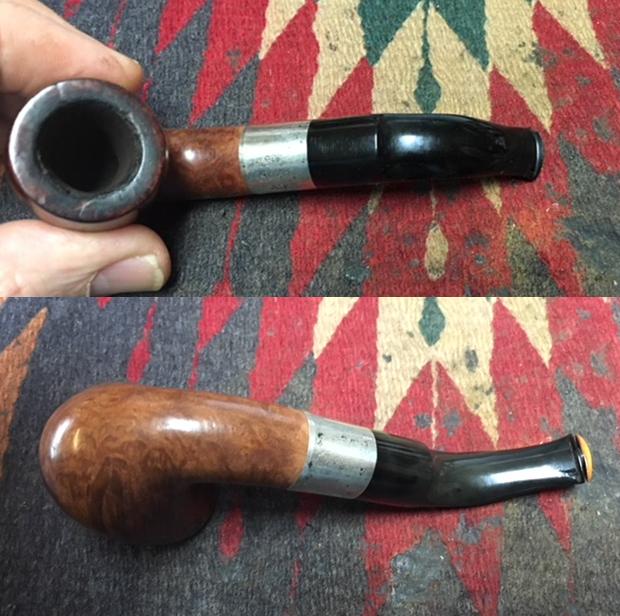
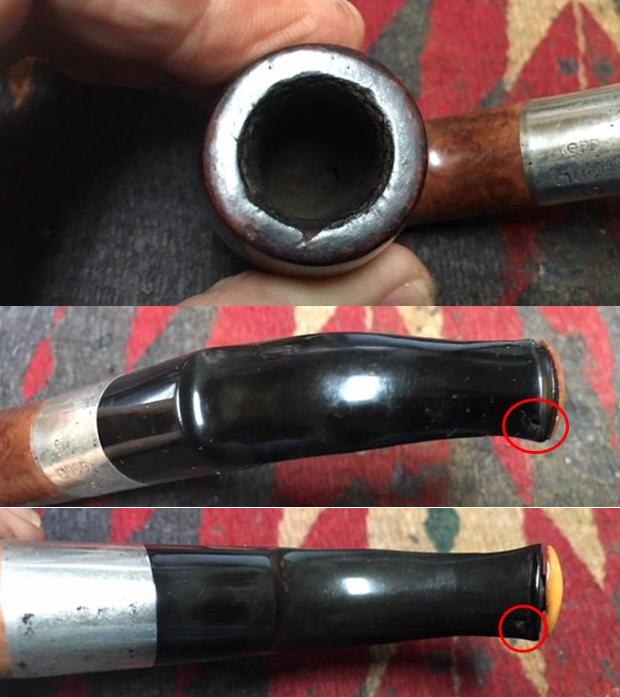
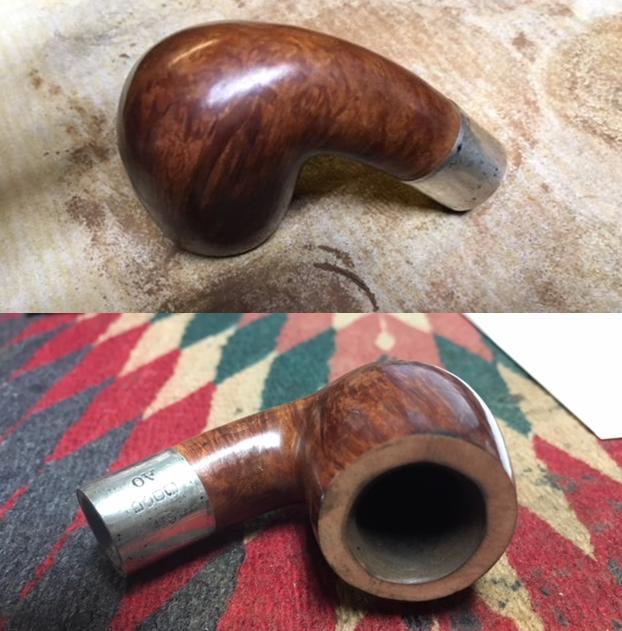
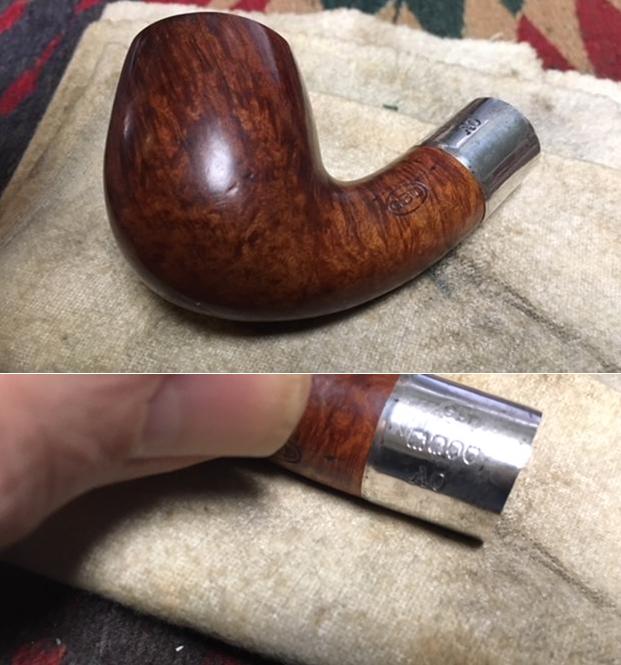
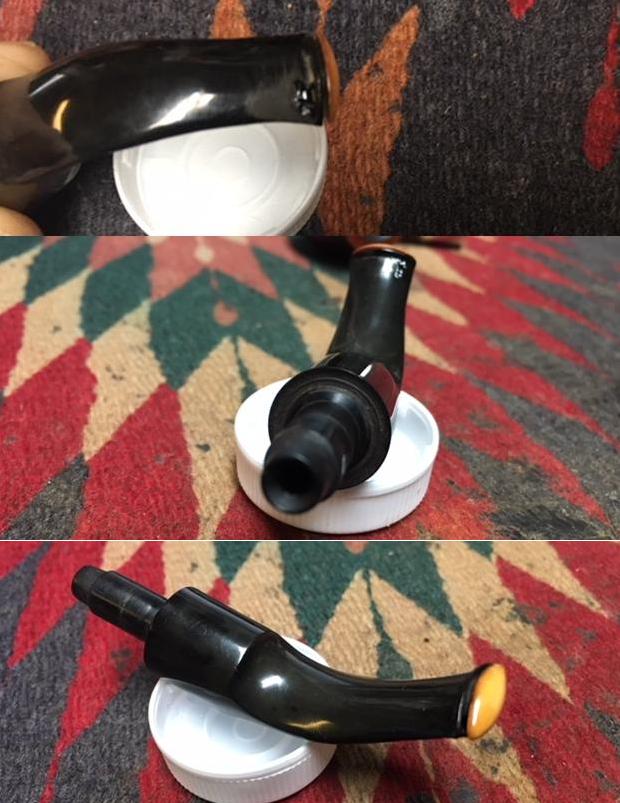
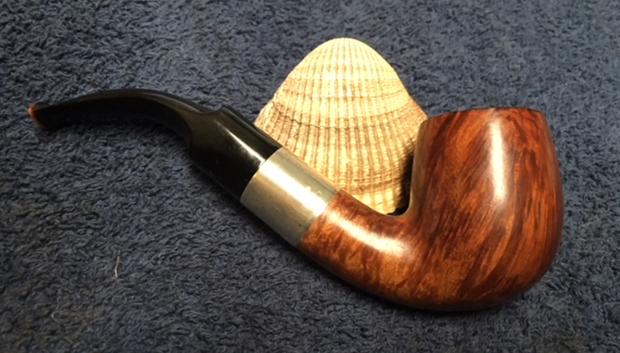
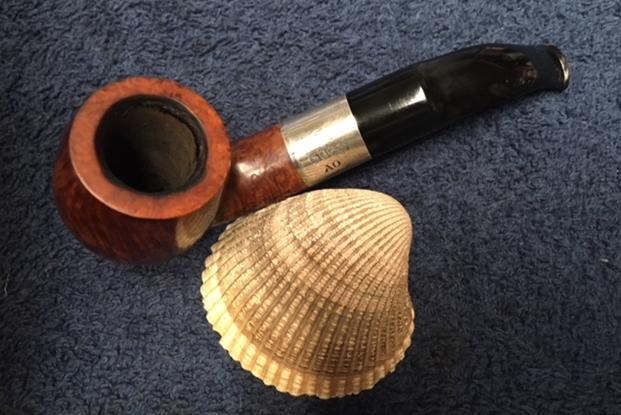
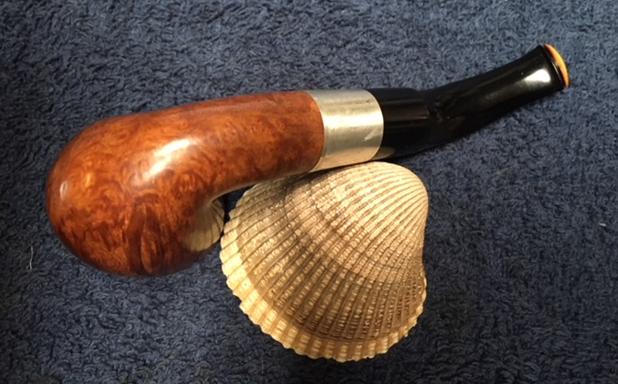
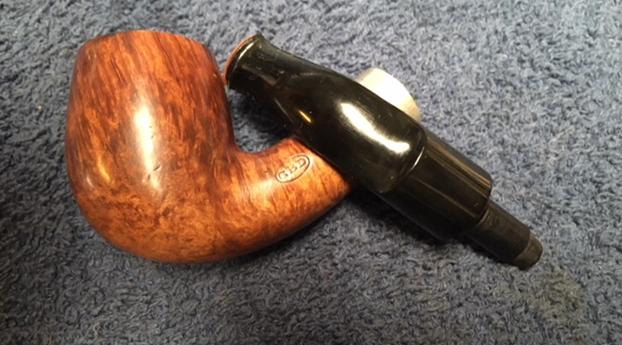
I have repaired several pipes for Paresh in India over the past four months or so and not long ago he sent me a box of seven of his Grandfather’s pipes. There is an interesting assortment of older pipes that come from the time period of 1937-1950s. His Grandfather worked for the Indian Railroad for many years and was a pipeman. Paresh follows in his love of the pipe and just recently found out that his Grandfather smoked a pipe as well. The first of the pipes I am working on for him is a GBD. It is an older one that has a silver band on the shank that is stamped with a GBD oval over four individual boxes – each is worn and hard to read. It is possible that it reads MRCLtd like the one in the first photo below which would identify the pipe as a French made GBD by Marechal, Ruchon & Co. Ltd. It could also be silver hallmarks with a lion (925 silver) and anchor (Birmingham) and two unreadable marks (one of which could give a date). Underneath them AO is stamped. AO could mean Alfred Oppenheimer which would date the pipe as after the Oppenheimer bought the brand in 1902 from MR&C Ltd. This would make it an early English made GBD pipe. The shank is stamped with a GBD Oval. There are no other stampings on the shank sides or the band. There is also a GBD Oval stamped on the left side of the saddle portion of the stem.Paresh’s wife Abha cleaned the pipes before she sent them to me here in Canada and did an amazing job cleaning them up. She reamed the bowl, cleaned the rim and scrubbed the exterior of the pipe and the stem with Murphy’s Oil Soap and cleaned off the buildup on the stem. She also cleaned off the silver band. The finish on the bowl is in very good condition and the GBD oval logo on the bowl was very readable. The silver band was scratched and worn. The GBD oval on the silver was faint but readable. The four hallmarks were very worn but it is possible that the first two are a lion and anchor but not certain. The stem was lightly oxidized on the underside and there was a GBD oval on the left side of the saddle portion of the stem. Interestingly for a stem that purports to be bite proof there is a deep tooth mark on the left side of the top near the button over the left twin bore and on the underside near the button on the right side. Both are directly over the twin bore airways.

The stem is unique and one that I have not come across before. From researching on the internet a bit it appears that the twin bore stem could be an early edition of the Tuskan Series that was London Made. Underneath the movable end cap diffuser it has something like the Tuskana Insertion with the twin bore stem. In the pipe I am working on it has the insert between the twin airways but it also has a diffuser cap at the end of the button. It is an amber coloured piece that covers the end of the button. There is a slight gap between the edge of the button and the cap that functions to diffuse the smoke. The end piece can be turned vertically to reveal the twin bore stem underneath. Like I said it is quite unique and I have not been able to find any other examples of this system on the internet. If any of you have any insight or information on this particular feature on GBD pipes please let me know. Thanks.I found an advertisement on the Pipedia link above which explains the Tuskana Insert. I have included that below.I took photos of the pipe before I started to work on it. It is a beautiful pipe that has some age on it. It has some very great looking grain on the bowl and shank. The rim top is worn, damaged on the surface and also has nicks around the inner edge of the bowl. The bowl was slightly out of round and there was still a light cake on the walls.I took a close up photo of the rim top and both sides of the stem. You can see the damage to the top and inner edge of the rim top in the first photo below. The second and third photo shows the top and underside of the stem. I have circled the tooth marks on both sides of the stem with red.I always enjoy getting some background information on the pipeman whose pipes I am restoring when I am working estate pipes from the family members. If you have followed rebornpipes for a while you have read a few of these summaries from estates like Kathy’s Dad, Barry’s Dad and Farida’s Dad. Each of them did a great job summarizing their fathers’ estates. Since the next group of seven pipes that I will be working came to from India and belonged to the Grandfather of Paresh, I asked him to write a short tribute to his Grandfather. What follows is his writeup.

Respected Sir,

Now that the first batch of my Grandfather’s pipes has reached you, I would like to share my memories of him with you, the aim being to provide you with an insight to his personality, the era in which he lived, and a brief history associated with the pipes that I have inherited from him.

My Grandfather, Ananta (named after an exotic seasonal white flower having lovely fragrance), was born in a small coastal town of Konkan region of Maharashtra, India, in 1918. These were very turbulent times when India’s freedom struggle against British rule was gathering momentum and the atmosphere was charged with “Quit India Movement”. Having completed his graduation from Bombay, he joined Railways in 1937. This also marked the beginning of his journey into the world of pipe smoking!!!!!

Having seen his potential, in 1945, he was sponsored by the Government to visit England, for gaining further experience and expertise in his profession. This was a period when India’s Independence was round the corner and efforts were being made to train Indians for various administrative appointments in future Independent India. He returned back to India after a year, in 1946 and with him came some pipes that he had purchased in England. I believe a few of his Petes, Barlings, Charatans and GBDs are from this visit.

In 1947, when the British finally left India for good, my Grandfather was gifted pipes by his British peers, subordinates and Superior Officers as a parting gift. He stayed in touch with a few of them over all these years, even visiting them in 1959-60. Some of his later era Charatans and Barlings and Pete are from this trip. He quit smoking in early 1970s (before I was even born!!!!) and his pipes were packed up. There were a number of pipes which were used as TINDER for lighting fires (CAN”T BELIEVE IT…… I have not overcome my grief of this loss till date!!!!!) due to ignorance!!!!!!

My Grandfather was a very strict disciplinarian and temperamental (I did not know this as he was neither when dealing with me as I am the youngest of all his grandchildren!!!!!! He was always the most understanding and loving person in my life). I later learned that in his office, he was not to be disturbed when his pipe was lit, as he would be in his thinking/ contemplating mode while it was just the opposite as he lit his pipe in the evening while at home, when he would be at his relaxed best!!!!.

The interesting part is that neither of us knew that we each smoked a pipe until after his demise in Jan 2018!!!! In our culture, to this day, smoking or alcohol consumption is socially never talked about (mute acceptance!!!). It was during his last rites that absent mindedly I lighted my pipe and looking into the flickering flames of his funeral pyre, remembered and recollected all the wonderful memories and talks that we had shared. No one said a word to me about my lighting up a pipe!!!!!! Immediately thereafter, I rejoined my duty station. A few days later, my wife, Abha, received a box from my Uncle with a note that said “Grandfather would have loved Paresh to have these”. This box contained a collection of his fountain pens and 8-10 of his pipes (since then as my folks are winding up his belongings, I have received 2-3 packets and a large number of pipes, some in decent condition and some in unspeakable state). Abha immediately messaged me with pictures of these pipes and pens. I had been collecting and restoring (no major repairs, though) fountain pens since long and immediately recognized some of them as highly collectibles, however, pipes were a totally different ball game! I was inexperienced with no knowledge/ information regarding various brands/ pipe makers, shapes and materials. I knew nothing about the value of these pipes, nothing about pipe restorations, nothing about caring for them; I mean zero knowledge about collecting pipes. I smoked some real cheap Chinese pipes which were readily and unfortunately, the only ones, available in India and some inexpensive pipes from eBay India!!!!! Also regular pipe cleaning, pipe rotation, pipe cleaners and such things were unknown to me.

Thus, to know more about the REAL pipes, I embarked upon the journey of exploring finer nuances of pipe brands/ makers, their history and watching “How to videos” on packing a pipe, cleaning, repairing and caring for ones pipes. I found it extremely interesting and satisfying. It was while meandering through this confusing quagmire of pipe world that I came across rebornpipes.com website and eventually established contact with you, Mr Steve, who has since been my mentor, guide and GURU, making this journey a wonderful and satisfying experience.

Sir, there is one more thing that I need to thank you for and that is when you asked me to write a brief about my grandfather and his pipes, I realized how little I knew about him, in fact, knew nothing, as I was not even aware that he was a “pipeman” as no one in my family ever spoke about it being taboo subject and since he had quit a long time before I was even born!!!! This led me to ask the elders in my family, questions on the subject and came to know the above details. I cannot thank you enough for prodding me to get to know my grandfather and his pipes a lot better. Sir, these pipes of his, with your help and guidance, will remain with me forever in mint condition……

Thanks Paresh for this great descriptive take of your Grandfather. It really gives me a sense of the pipes that you have sent me and what they meant to him. It is obvious from the variety of pipes that you sent and the overall condition that he knew how to choose good quality pipes and obviously enjoyed smoking them throughout most of his life.

I removed the stem from the shank and started my work on the bowl itself. I cleaned up the reaming in the bowl with a Savinelli Fitsall Pipe Knife and took the slight remnant of cake back to the bare briar. I wanted to check out the condition of the interior of the bowl. The inside looked very good once it was cleaned off. There was no checking or cracking on the bowl walls. There was no sign of burn out inside.To remove the damage on the rim top and to minimize the damage to the inner edge of the rim I lightly topped the bowl on a topping board with 220 grit sandpaper. I carefully removed the damage without changing the shape of the bowl. I used a folded piece of 220 grit sandpaper to clean up the inside edge of the bowl. I was able to remove much of the damage to the edge with the sandpaper and smooth out the bevel.  I polished the rim top and bevel with micromesh sanding pads – wet sanding with 1500-2400 grit pads and dry sanding with 3200-12000 grit pads. I wiped it down with a damp cloth to remove the sanding dust and the scratches. I stained the rim with a Cherry stain pen to match the colour of the rest of the bowl and shank.I worked Before & After Restoration Balm deep into the briar to clean, enliven and protect it. I worked it into the finish with my fingertips. I worked it into the rim and shank end. I set it aside for a few minutes to let the balm work. I wiped it off and buffed it with a soft cloth to polish it. The briar really began to have a deep shine. I took some photos of the bowl at this point to mark the progress in the restoration. The grain on the bowl is really beginning to stand out and will only do so more as the pipe is waxed.  I polished the silver band with a jeweler’s cloth to remove the tarnish from the silver and give it a shine. It worked pretty well to bring it back to life. The second photo below shows the stamping on the left side.I set the bowl aside and worked on the stem. I cleaned the deep tooth marks on both sides of the stem with a cotton swab and alcohol and dried it off with a cotton pad. I filled in the tooth marks with clear super glue. I set it aside to cure and called it night.In the morning I sanded out the repairs with 220 grit sandpaper to blend them into the surface of the vulcanite. I polished the stem with micromesh sanding pads – wet sanding with 1500-2400 grit sanding pads and dry sanding with 3200-12000 grit pads. I wiped the stem down with Obsidian Oil after each sanding pad. I finished polishing the stem with Before & After Pipe Stem Polish both Fine and Extra Fine to remove the last of the scratches. I gave it a final coat of Obsidian Oil and set it aside to dry. With the stem polished I put it back on the pipe and lightly buffed the bowl and stem with Blue Diamond. I gave them both multiple coats of carnauba wax and buffed the pipe with a clean buffing pad to raise the shine. I hand buffed it with a microfiber cloth to deepen the shine. The pipe polished up pretty nicely. The finished pipe is shown in the photos below. I have six more of Paresh’s Grandfather’s pipes to finish and then I will pack them up and send across the sea to India where he can carry on the legacy. I know that he is looking forward to having them in hand and enjoying a bowl of his favourite tobacco in memory of his Grandfather. Thanks for walking through the restoration with me as I worked this pipe over.
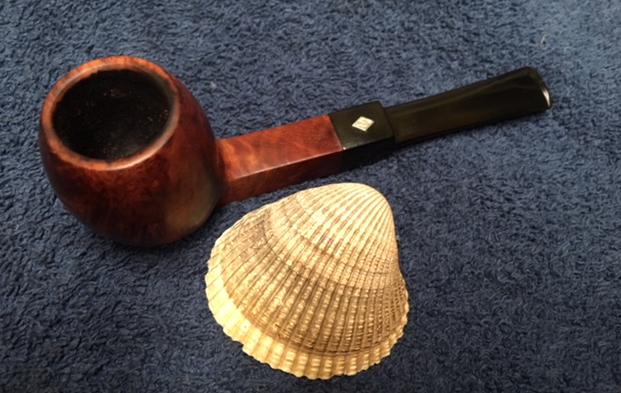
 

Replacing a Broken Tenon on a Civic Select 14 Zulu


Blog by Steve Laug

I received a call from a local fellow who had picked up my phone number from a local pipe and cigar shop. He had just returned from a trip and the tenon on his little Civic Zulu had snapped off. As it was his only pipe he wondered if I would be willing to take on the job of repairing it. He had tried to glue it on with epoxy but it had not worked. The pipe was relatively new and half the bowl was not even darkened by smoking. There was raw briar on the bottom half of the bowl. The briar was dirty on the outside from being pocketed in his coat of backpack.  The stem was oxidized and had tooth chatter on both sides at the button. The oxidation is deep in the vulcanite. I told him I would take on the project. I took photos of the pipe before I started working on it.I found a Delrin tenon replacement in my box that would fit well once the diameter was reduced. We talked and he decided to get rid of the stinger to make it a better smoking pipe. The broken angle on the end of the stem would need to be sanded smooth and faced so that the new tenon would fit well. I took some photos of the pipe, stem, broken tenon and new tenon.In preparation for drilling out the stem for the new tenon I used a sharp knife to open and bevel the edges of the airway in the stem. I have found that doing this keeps the drill bit centred and straight in the airway.I used the Dremel and the sanding drum to reduce the diameter of the new tenon. I sanded it with 220 grit sandpaper to smooth out the tenon. I worked on it until the diameter was the same as the broken tenon and the fit in the mortise was snug.I started drilling the airway with a bit slightly larger than the diameter of the airway. I slowed the speed on the cordless drill to make sure it moved slowly and straight. I worked my way up to a bit that was the same diameter as the new tenon end, but not too large to compromise the strength of the stem.I removed some of the diameter on the threaded end of the tenon to get a proper fit in the stem. I cleaned up the inside of the newly drilled end of the stem with a needle file to smooth out the walls. When it was smooth I cleaned up the new tenon, applied glue to the end and pressed it into place in the stem.I sanded the tenon with 4000 grit wet/dry sandpaper to clean up the marks and scratches in the tenon. Once the glue had cured I put the stem on the shank of the pipe. As is usual with these repairs the alignment was not perfect but close. I sanded the shank/stem junction smooth to clean up the alignment. I took pictures of the newly fit stem. I cleaned out the mortise and the airway in the shank and stem with cotton swabs, pipe cleaners and alcohol. I worked on them until they were clean. Since the pipe was barely smoked it was a pretty simple clean up.I reamed out the debris in the bowl with a Savinelli Fitsall Pipe Knife. I wanted the bowl to be clean and smooth.I stained the area where I had sanded the shank with an oak stain pen to blend it into the rest of the shank. It is a bit streaky at this point in the process but that would blend together once I buffed and polished the pipe. I worked Before & After Restoration Balm deep into the briar to clean, enliven and protect it. I worked it into the finish with my fingertips. I worked it into the rim and shank end. I set it aside for a few minutes to let the balm work. I wiped it off and buffed it with a soft cloth to polish it. The briar really began to have a deep shine. I took some photos of the bowl at this point to mark the progress in the restoration. The grain on the bowl is really beginning to stand out and will only do so more as the pipe is waxed. I polished the stem with micromesh sanding pads – wet sanding with 1500-2400 grit sanding pads and dry sanding with 3200-12000 grit pads. I wiped the stem down with Obsidian Oil after each sanding pad. I finished polishing the stem with Before & After Pipe Stem Polish both Fine and Extra Fine to remove the last of the scratches. I gave it a final coat of Obsidian Oil and set it aside to dry. With the stem polished I put it back on the pipe and lightly buffed the bowl with Blue Diamond. I buffed the stem with a more aggressive buff of Blue Diamond. I gave the bowl and stem multiple coats of carnauba wax and buffed the pipe with a clean buffing pad to raise the shine. I hand buffed it with a microfiber cloth to deepen the shine. The pipe polished up pretty nicely. The finished pipe is shown in the photos below. I will call the pipeman soon so he can pick up his pipe and begin to enjoy it once more. He called several nights ago and said he had ordered some new tobacco and it had arrived. He was excited to try it out with his repaired pipe. Thanks for walking through the restoration with me as I worked this pipe over.
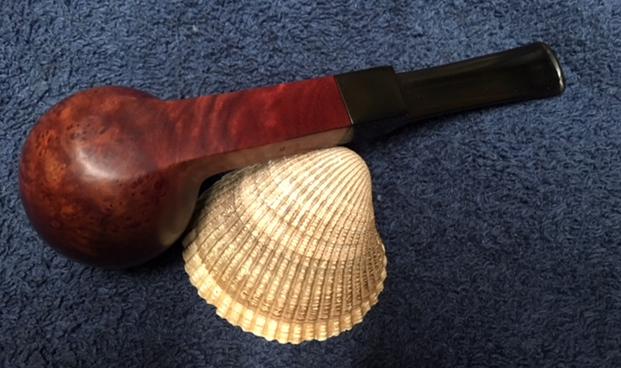
For something a little different – Restoring a Ropp Expello Cigarette Holder


Blog by Steve Laug

I decided to turn my hand to something a little different this time around and work on a small cigarette holder that came in one of the lots of pipes that my brother and I picked up lately. It has a briar holder and a vulcanite stem. The stem turns to the right and the left and as it turns the cigarette is expelled from the holder. Turned to the left and the stem is removable and reveals a metal twisted/spiral stinger apparatus to collect the tars and oils from the then filterless cigarettes. This one is interesting as well in that it is stamped on the left side of the briar shank with the Ropp logo in an oval over the word EXPELLO on the mouth piece next to that are twin horizontal bars. On the right side of the shank is a COM stamp circle Made in France with the word “in” inside of the circle. The briar was nicked and lifeless and the vulcanite oxidized with tooth chatter on both sides at the button. I took photos of the holder after Jeff had cleaned the holder and sent it to me. The holder was designed to EXPEL the cigarette with a turn of the stem. The twisted filter/stinger apparatus turned out of the briar to release the stem and turned into the stem to push or expel the ended of the cigarette from the holder. (The photo below of the parts of the holder was taken after I had cleaned up the stem and briar.)I did a little research on the Ropp brand to see if I could find out any info on the holder. On Pipedia there was a short article on the brand (https://pipedia.org/wiki/Ropp). It read as follows:
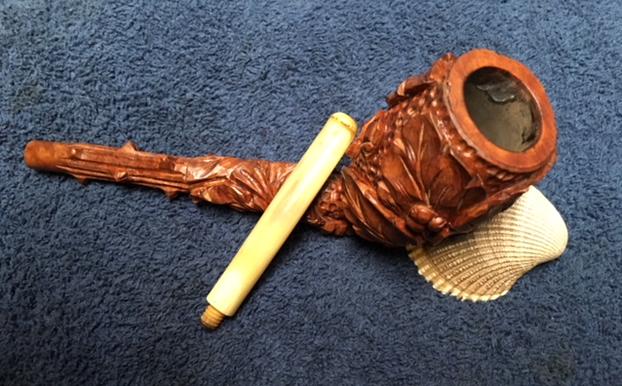
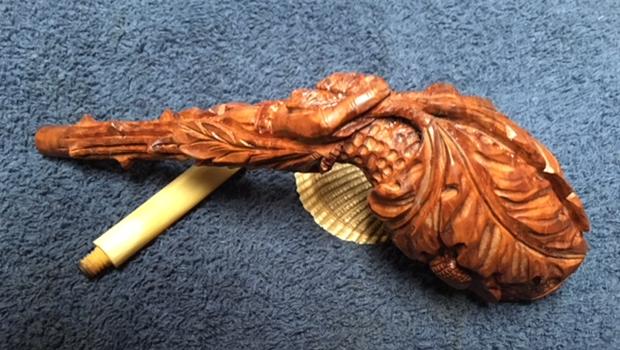
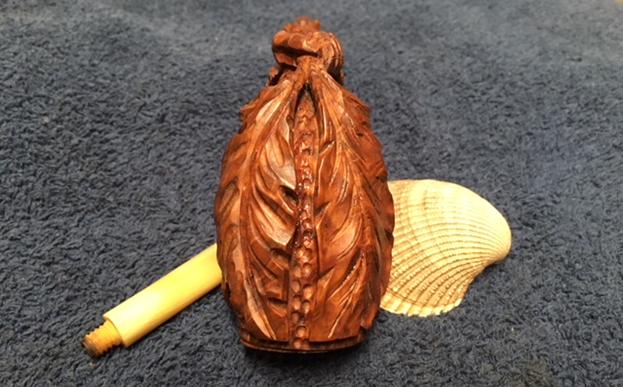
Eugène-Léon Ropp (1830 – 1907) had acquired a patent for a cherrywood pipe (wild cherry, lat.: Prunus avium) in 1869. In 1870 he established a workshop to manufacture such pipes in Büssingen (Bussang, Vosges mountains). Around 1893 the business moved into the former mill of Sicard (part of the community of Baume-les-Dames – Département Doubs, Upper Burgundy – from 1895 on).

The pipes were a big success in the export as well. Shortly before 1914 Ropp designated A. Frankau & Co. (BBB) in to be the exclusive distributor in the UK and it’s colonies.

Probably in 1917 a workshop in Saint-Claude in the Rue du Plan du Moulin 8 was acquired to start the fabrication of briar pipes. In 1923 a small building in the environment of Saint-Claude, serving as a workshop for polishing, was added.

Even though cherrywood pipes were the mainstay of Ropp until the company finally closed down in September 1991. The company was taken over by Cuty-Fort Entreprises (Chacom, Jeantet, Vuillard, Jean Lacroix…) in 1994.

I also found that the brand was distributed by A Frankau & Co. known for making BBB pipes. They were also a sole agent for the pipes Cherry Wood of the Ropp House to cover the United Kingdom and its colonies. They also distributed tobacco, pipe-racks, lighters, equipment of cleaning for pipes, cigar-holder and cigarettes, cases with cigars and cigarettes, humidors). (https://pipedia.org/index.php?search=Ropp+Cigarette+Holder&title=Special%3ASearch&go=Go).

Jeff cleaned up the inside of the briar and the stem. He took the pipe apart and cleaned out the twisted metal stinger apparatus with Murphy’s Oil Soap and a tooth brush. He scrubbed the inside of the piece with pipe cleaners, cotton swabs and alcohol.

I started my cleanup by sanding the stem with 220 grit sandpaper to remove the oxidation. In doing so I found that the stem bore a twin bar inset logo on the left side of the stem next to the Ropp Expello stamp on the briar. I followed that by sanding it with 400 grit sandpaper to smooth out the scratches. I polished the briar and the stem with micromesh sanding pads – wet sanding with 1500-2400 grit pads and dry sanding with 3200-12000 grit pads. I wiped the stem down with Obsidian Oil after each grit of micromesh. After the final pad I gave it a final coat of oil and set it aside to dry. I worked Before & After Restoration Balm deep into the briar to clean, enliven and protect it. I worked it into the smooth finish with my fingertips. I worked it into the edges of the briar on both the end that held the cigarette and the end where the mouth piece was inserted. I set it aside for a few minutes to let the balm work. I buffed it off with a cotton cloth to polish it. The briar really began to have a deep shine. I took some photos of the holder at this point to mark the progress in the restoration. The grain on the briar is really beginning to stand out and will only do so more as it is waxed.  I waxed the briar and vulcanite stem with Conservator’s Wax and after it dried I buffed it with a soft cloth to raise a shine.I buffed the stem and briar portion of the holder with Blue Diamond to polish the briar and the hard rubber. I gave it multiple coats of carnauba wax and buffed it with a clean buffing pad to raise the shine on the piece. I hand buffed it with a microfiber cloth to deepen the shine. The finished piece is shown in the photos below. It is an interesting piece of tobacciana that makes a nice addition to any collection.
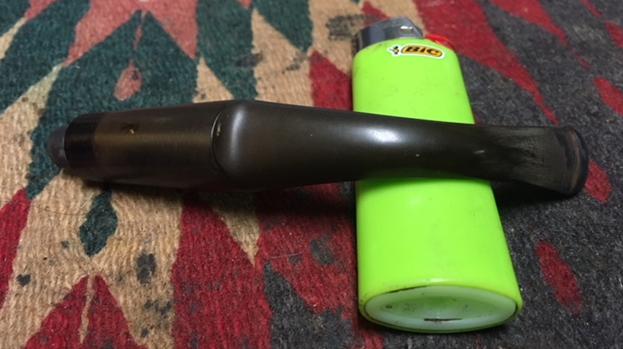


g\fg

m\m


A Piece of WWI History – A CCC Officier’s Pipe from the France Campagne 1914-1918


Blog by Steve Laug

I have been doing quite a few repairs lately and really needed a break to work on some of my own. I decided to work on one that my brother sent recently. It is a horn stemmed briar that is stamped Officier with a CCC triangle logo next to that. There is a copper coloured band on the shank for decoration since the shank is not cracked or damaged. The bowl also has embossed filigree on the front side. It reads Souvenir De France Campagne 1914-18. The band had several dents in the surface and there was a stamp on the band as well – a diamond with something stamped on the inside that is unreadable. The band is more of a ferrule than a band with the shank end cover by the edge of the ferrule. The pipe was incredibly dirty with grime and grit all over the outside of the bowl.  There was also some dark stain on the front and right side of the bowl. The rim also has some dark spots. Removing that damage would also damage the gold lettering on the front of the bowl. There was a light cake in the bowl and some darkening on the top of the rim. The inner and outer edge of the bowl was also in great condition. There were some small nicks around the outer edge. The horn stem had a slight twist to the right side. There were some worm holes on the right side near the union of the stem and band. There was also some worm damage on the underside of the stem next to the button on the left side. There were some rough spots on the top of the stem between the shank and the button – almost some delaminated spots. Jeff took the following photos before he cleaned the pipe. Jeff took close up photos of the rim top, the bottom of the bowl to show their general condition the grain is quite beautiful under the grime. He took a great photo of the front of the bowl to show the gold stamping. It is very readable and in good condition. You can also see the dark stain on the briar underneath the stamping. I have seen this kind of stain on pipes in the past that has been caused by water or some kind of moisture that the pipe was laid in for a long period of time. In this case you can use your imagination and consider that possibly this damage occurred while in the hands of an officer in the French Campaign in WWI in between the years of 1914-18 or possibly after the closing date of the stamping.He took several photos of the stamping on the shank and band. The shank bears a script text with the French spelling Officier and next to that is the rounded edge triangle with three C’s stamped inside. The band has a diamond stamp with something inside of it but it is not discernible. The band/ferrule on the shank was loose on the shank. When the stem was removed the ferrule came off in hand. The tenon on the horn stem was an older nipple style tenon. It appears to be either horn or bone. It was intact but dirty. The next photos show the worm damage to the right side of the stem near the band union and on the underside of stem at the button. Fortunately none of them went all the way through the horn. I was unfamiliar with the triangle CCC brand so I did a bit of research. I looked on PipePhil’s site and did not find any information on the site. I also looked on Pipedia and found a possible link to a CC Paris in a triangle stamp. I followed the link on the French Pipes and Makers page to the CC Paris page. There I found the following information and interestingly photos of an Officier pipe. The only difference in the triangle logo was the stamping of Paris under the CC stamp instead of the CCC stamping. I am fairly confident that the CCC and CC Paris brands are linked together. I quote in full:
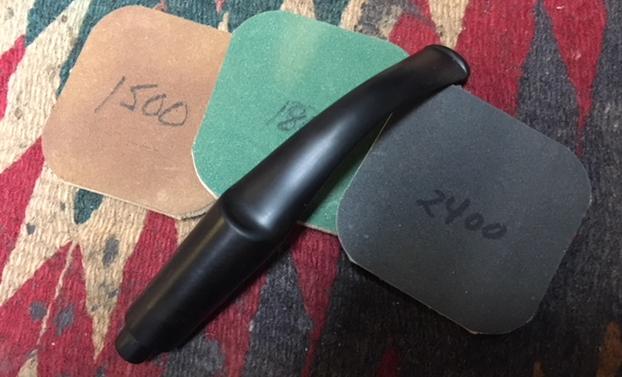
Every collector of antique pipes knows that pipe factory and retail store catalogs from the 1800s – early 1900s are as rare as hen’s teeth to find…and an even rarer occasion, when found complete and in good to better condition. This fragile catalog from this little-known French manufactory, merchandised its pipes with the logo of a triangle bearing the letters “C C Paris” embossed in fitted cases. Cases with this logo are known, but the Wolf and Mathiss name, until now, was not known as the factory behind the retail establishment. Wolf & Mathiss was originally known as Cawley & Henry, a pipe manufacturer founded in 1867. The product line was fairly robust, catering to not only pipe and cigar smokers, but also to cigarette consumers, because the catalog includes cigarette rolling papers that, according to company information, had received silver medals at two expositions, Anvers (1885) and Paris (1889). https://pipedia.org/wiki/CC_Paris
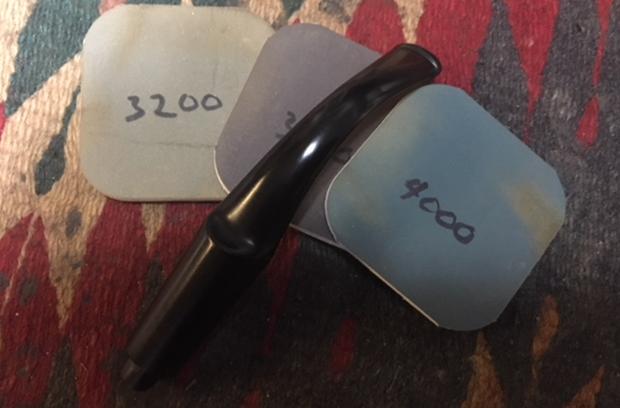
I have included two photos from that website. The first is a photo of the cover of a catalogue of the CC Paris brand. The second is of the left side of the shank revealing the stamping – the Officier with a triangle CC Paris to the right of that. The photos are courtesy of Doug Valitchka.There was also a link to the Tobacco Pipe Artistory blog. That site has a full catalogue of the pipe brand and some interesting information. I have included the link for easy access to the info.

http://tobaccopipeartistory.blogspot.ca/2015/11/wolf-and-mathiss-catalog-paris-1890-1900.html

Jeff once again did his usual great job on cleaning this pipe, leaving it pristine and without damage to the finish. He was very careful to not damage the historic stamping on the front of the bowl. He reamed the bowl with a PipNet pipe reamer and cleaned up the remnants with the Savinelli Fitsall Pipe Knife. He scrubbed out the mortise and the airway in the shank and the stem with alcohol, cotton swabs and pipe cleaners. He carefully cleaned the exterior of the bowl, rim and shank with a tooth brush and Murphy’s Oil Soap to remove the grime of the smooth finish on the bowl and shank. He was able to remove the tars and oil on the rim but the dark stain on the front, the right side and the rim top remained. He wiped off the soap with a damp cloth. He dried it off with a soft cloth. Once the dust and debris were removed the finish looked very good. He cleaned the inside of the stem with alcohol, pipe cleaners and cotton swabs to remove the tars and oils. He washed the exterior of the stem to remove debris from the worm damaged areas. I took photos of the pipe to show its condition before I started my work on it. I took photos of the rim top and stem to show the condition of the pipe and stem when it came to Vancouver from Idaho.I took the pipe apart and took a photo of the parts from the left side and from the front of the bowl. The ferrule was loose as was the fit of the stem in the shank.I used a multi-purpose white glue to reglue the ferrule to the shank. I pressed the ferrule into place and aligned the stamping on the ferrule with the shank stamping. I wiped off the excess glue that squeezed out and let the glue set.I worked Before & After Restoration Balm deep into the briar on the smooth finish to clean, enliven and protect it. I wiped it off with a soft cloth. I worked it into the rim and also on the stamping on the front of the bowl. I set it aside for a few minutes to let the balm work. I buffed it off carefully with a cotton cloth to polish it. The briar really began to have a deep shine. The dark spot though still present does not look bad and really is a part of the pipe’s story. I took some photos of the bowl at this point to mark the progress in the restoration. The grain on the bowl is really beginning to stand out and will only do so more as the pipe is waxed. I cleaned out the worm damage with a qtip and alcohol. I filled in the damaged areas on the right side of the stem near the shank end and on the underside of the stem at the button with clear super glue. I set the stem aside to let the glue cure. Once the glue had cured I sanded the repaired areas with 220 grit sandpaper to blend in the repairs with the surface of the horn. I also sanded out the areas of the stem that were beginning to delaminate. I used a small file to sharpen the edge of the button. I polished stem with micromesh sanding pads – wet sanding with 1500-2400 grit pads and dry sanding with 3200-12000 grit pads. I wiped the stem down with Obsidian Oil after each pad. I polished it with Before & After Pipe Stem Polish, both Fine and Extra Fine. I gave it a final coat of Obsidian Oil and set it aside to dry. I used a dark brown stain pen to touch up the repairs on the horn stem. Somehow they had dried with a white spot in the center of each. The stain blended them into the surface of the horn and though they still showed were much better concealed. The loose tenon was an easy repair. I coated the tenon with several layers of clear fingernail polish to build up the diameter of the tenon.Stem fit snugly in the shank and the pipe was beginning to look really good.I took a photo of the stamping on the front of the bowl. I wanted to try to get more information on the history of the time. I did some research on the Campagne de France between the years 1914-1918 to see if I get a feel for that period – the time of World War I. My initial thinking was that the pipe was a souvenir of the war time intrusion of the Germans through the Alsace into the capital of France itself – Paris.I am quoting in part from two of the articles I found online about that time period. The first is part of a history that was written by Major Hubert Midy looking at the war from the perspective of the French Foreign Legion. It is entitled: HISTORY: The Foreign Legion, French Campaign 1914/1918. I have included a screen capture of the painting that was at the head of the article.…This first world war is a baptism to the horror that will follow and will remain the most deadly century in the history of humanity.

The centenary should be able to refresh our memory; thousands of books are dedicated to this war which still remains enigmatic in comparison with this second war whose motives for triggering are perfectly expressed.

And yet, everything was perfectly orchestrated, the French pointed out the German culprits, the latter accused the Russians, all suffered the latent aggressiveness of Austria and his hostility to his neighbor Serbia; the attack in Sarajevo giving him the opportunity to end once and for all.

As a result of this hostile Austrian act, the Russians take the responsibility to mobilize for Serbia, which immediately leads Germany to come to the aid of Austria.

Kaiser William II certainly did not imagine giving Vienna a “carte blanche” that a European war could take place.

Yet he could not ignore that there was a system of “bloc of alliance” which entailed a solidarity of several countries among them grouped against any external threat.

But in the end, despite this simplistic explanation of the outbreak of conflict, the objective factors are insufficient to understand how Europe threw itself into the furnace. Admittedly, there was indeed a suffocating climate of fear and suspicion, Germany scared and terrorized the French with its 25 million more than it, but nothing justified the entry into the war.

The war, deep down, no one knew what it was after forty years of armed peace. No one imagined the violence of a conflict in the industrial age, all thought that if it took place, it must be necessarily short, rough and brutal and specialists unanimously said that a war would mean total ruin belligerents.

Contrary to expectations, this war was long and marked with the red-hot iron of the blood of the fighters morally and physically destroyed by the destructive power of the heavy artillery which was able to neutralize an army of kilometers before the battlefield.

https://translate.google.ca/translate?hl=en&sl=fr&u=http://legionetrangere.fr/index.php/79-infos-fsale/299-histoire-la-legion-etrangere-campagne-de-france-1914-1918&prev=search

I searched further and found a second article that is a great summary of the war tracing the history from its beginnings in 1914 to its closure in 1918. I have included it for the information it gives.

The international context in which hostilities broke out in 1914 resulted from the profound changes that have affected Europe since the mid-nineteenth century.

The fragility of the Balkans crossed by strong nationalist pushes, the regrouping of the Austro-Hungarian monarchy (1867), the realization of the Italian unity (1870) and that of Germany (1871) destabilize the European equilibrium resulting from the treaty Vienna (1815).

Tensions between France, eager to find Alsace and Lorraine annexed in 1871, and Germany on the one hand, between Austria-Hungary and Russia on the other, not to mention the role of England, always anxious to maintain its global influence, fuel the risk of crises. The Ottoman Empire itself was forced at the Berlin Congress (1878) to recognize the independence of several countries that were integrated into its administration (Serbia, Romania, Bulgaria, Montenegro in particular).

Through the combination of these new divisions and competition between major states (repeated crises between 1904 and 1914), the confrontation could not be avoided.

The war broke out following the assassination on June 28, 1914 in Sarajevo of Franz Ferdinand, nephew and heir to the Emperor of Austria, by a Bosnian student linked to Serbian nationalist circles. Austria, after securing the support of Germany, presents an ultimatum to Serbia: this ultimatum requires that the investigation into the circumstances of the assassination be conducted on the Serbian territory by Austrian officials. Serbia accepts the conditions with the exception of the presence of Austrian agents which would constitute an attack on its sovereignty. Austria-Hungary declares war on July 28, 1914.

The cog of the alliances begins immediately: between the general mobilizations and the reciprocal ultimatums, Germany declares war on Russia on August 1st and on France on August 3rd, causing the reply of England declaring war in turn to Germany on August 4th. Patriotism, long nourished by various public opinions, allows the populations and the political classes of the different belligerents to accept this situation perceived as legitimate by each of the camps.

The German armies, regardless of the neutrality of Belgium, attack France first. This operation will be called the “Battle of the Borders” (7-24 August 1914): the French are moving forward to Mulhouse, Strasbourg and Lorraine. But in Mons and Charleroi the English and French are forced to retreat after fierce battles where they have difficulty coping with the dynamism of the attackers despite the effectiveness of the French artillery (exceptional light gun of 75).

Arrived at the gates of Paris on September 2, the Germans, instead of attempting to seize the capital, try to take the whole of the French battle body by a maneuver encirclement. Then commits the “Battle of the Marne” where Joffre, Chief of Staff, and General Gallieni, commanding the Place de Paris, launch a general counter-offensive marked by great feats of arms: General Foch heroically resisted in the swamps of Saint-Gond, and the army of General Maunoury was transported by Paris taxis to the north of the Marne: noting the failure of their action, the Germans retreated on September 10 to the Aisne; their commander-in-chief, von Moltke, is replaced by von Falkenhayn. Paris is saved.

Then begins the “race to the sea” between October and November 1914. The German army tries to outflank the allies on the left up to the north to reach the ports allowing British troops to disembark. The English and the French face tough and deadly engagements especially in Flanders (1-27 October). The first trenches appear, the soldiers digging them to protect themselves from both the enemy and winter. Finally the front stabilizes between the North Sea and Switzerland for nearly 700 km; 10 French departments are partially or totally occupied. The eastern front at the same time enabled the Germans to secure a victory over the Russians who had taken the offensive (Battle of Tannenberg, August 26-30, 1914); but the necessity of taking troops from the French battlefield weakened German power in the battle of the Marne.

The war of movement, initially planned to quickly defeat France, thus ends at the end of the year 1914 with two unexpected consequences: on the one hand a reciprocal neutralization of the armies in the presence, on the other hand a worldwide extension of the conflict Japan joined the Entente (Great Britain, Russia and France) and the Ottoman Empire and Bulgaria joined Germany and Austria-Hungary (October 1914).

The characteristics of this new conflict appear on both sides: the States must organize a real economy of war mobilizing all the means which they have to avoid the defeat (organization of the resources, supply, production of armaments, massive use of the railways, financing of the war effort).

In July 1918, Foch launched a counter-offensive which gave the signal for a progressive decline of the Germans, whose retreat continued to increase (the German front was sunk in Montdidier in August, the general offensive of Verdun to the Yser is triggered on October 31). The Italians erase on their side the disaster of Caporetto (October 1917) beating the Austrians to Vittorio-Veneto (October 1918). In the Balkans, under the influence of Allied pressure (Franchet d’Esperey, victorious at Uskub), the central empires are taken in reverse; Bulgaria and Turkey are increasingly isolated and demand an armistice (30 October); Austria does the same on November 3rd. Faced with the reversal of the military situation, political agitation spread to Germany: the German fleet revolts in Kiel, the revolution breaks out in Berlin, William II abdicates and the republic is proclaimed on November 9, the armistice is signed in Rethondes the 11th of November.

https://translate.google.ca/translate?hl=en&sl=fr&u=http://www.cheminsdememoire.gouv.fr/fr/la-premiere-guerre-mondiale-1914-1918&prev=search

Given that information I thought it would be helpful to look up the meaning of the French word Souvenir. I expected it to mean the same as the English word and it indeed did have. Here is the definition of the word:

Noun: a thing that is kept as a reminder of a person, place, or event. Synonyms: memento, keepsake, reminder, remembrance, token, memorial; bomboniere; trophy, relic. Use: “keep the key ring as a souvenir”

Verb: souvenir; 3rd person present: souvenirs; past tense: souvenired; past participle: souvenired; gerund or present participle: souveniring. Use: take as a memento -“many parts of the aircraft have been souvenired”

So now I knew that the pipe was a memento, memorial token, or remembrance  of a horrible time in the history of the French. It was a time when Paris itself came under siege of the German army and the world as it was then known came to screeching end. The war forever changed the way people in those days viewed their time in history.

This small CCC Officier bent billiard with a horn stem is a real beauty with a mix of grains around the bowl and shank. The grain really is quite stunning. The rim top and the right side of the bowl have some dark stains that could not be removed without damaging the stamping on the front of the bowl. The horn stem is repaired and polished and has a shine that looks very good with the brass ferrule on the shank end. I buffed the bowl and the stem with Blue Diamond polish being careful to avoid the stamping on the front side of the bowl. The briar and the horn took on a deep and rich looking shine. I gave the bowl and stem multiple coats of Conservator’s Wax and buffed by hand with a microfiber cloth to raise the shine. The finished pipe is shown in the photos below. The rich brown stain allows the grain to really stand out on this little pipe and it works well with the polished richness of the stem. The dimensions of the pipe are: Length: 5 inches, Height: 1 5/8 inches, Outside Diameter: 1 inches, Diameter of the chamber: 5/8 inches. This little commemorative pipe has quite a history. I only wish that it could tell the story of its journey from France, to the US and up to Canada. I am sure that it would be a fascinating tale that would I am sure capture out imaginations. Thanks for walking through the restoration with me.