Blog by Paresh Deshpande
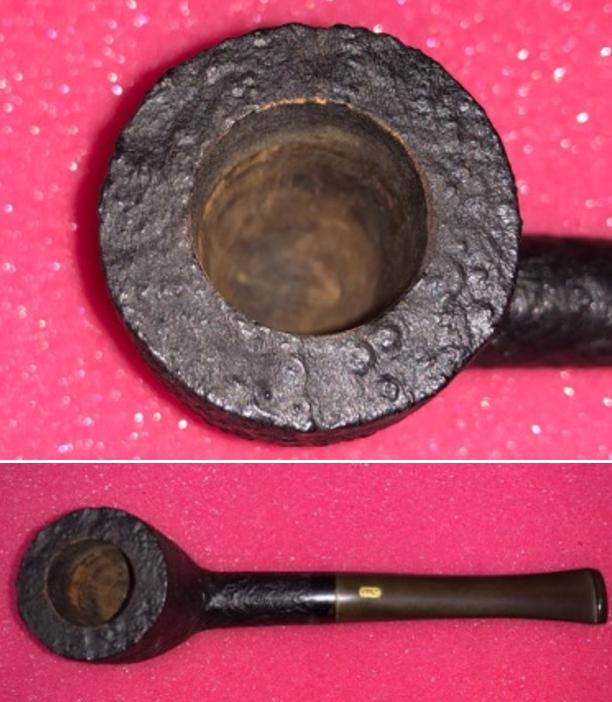
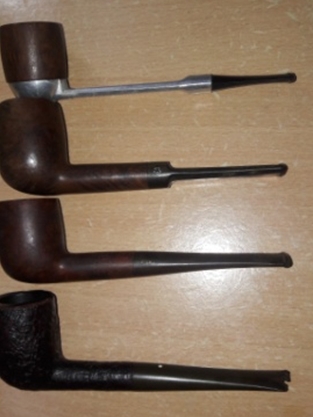
It’s been a while since I have worked on any of my grandfather’s pipe collection that I have inherited after his demise a few years ago. Amongst the collection, this small quaint Ben Wade was beckoning me for a long time. It is now that I decided to work on it. I had one Ben Wade without a stem, that Steve had taken back to Canada from his visit to India to fashion a stem from his bag of spares. This prompted me to fish out this Ben Wade and work towards its restoration.
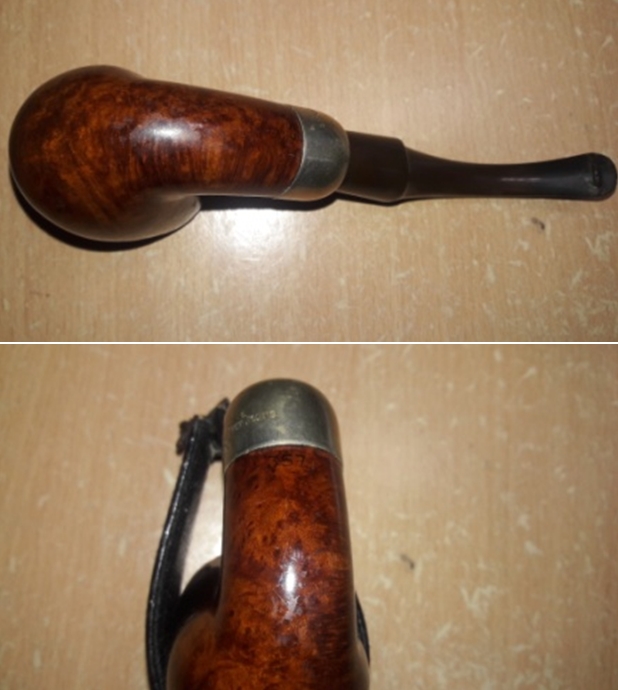
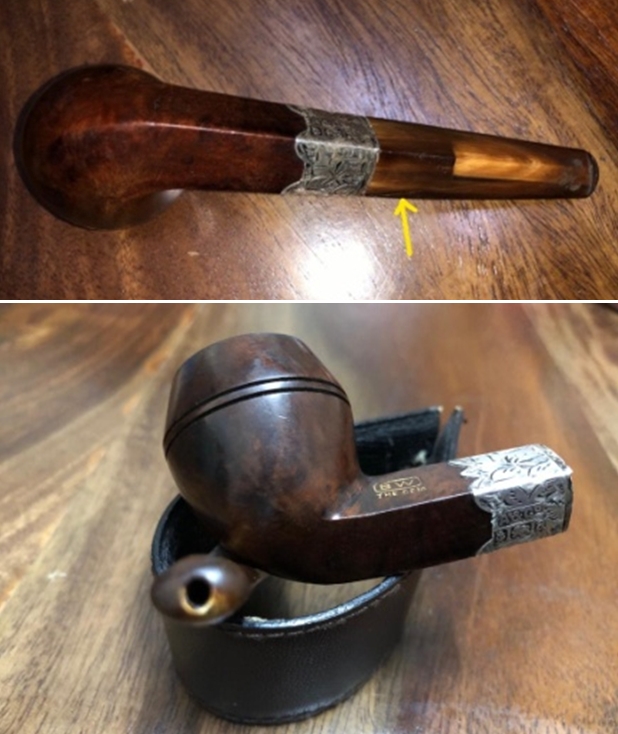
This small sized straight Bulldog is typically classic British shape, with a diamond shank and a horn stem with a threaded bone tenon. The shank end is decorated with a sterling silver ferrule with embossed leaves, which is loose and came off easily. On this ferrule are the stamp details which will help in determining the vintage of this pipe. The silver shank ferrule is stamped as “A & Co” over a series of three hallmarks running from the left near the bowl end to the end of the shank on the right. The first hallmark is an “Anchor” in a shield shaped cartouche and identifies the city of Birmingham in England where the silver was crafted. The second hallmark is a passant Lion in a cartouche which signifies that the band is silver and that it was crafted by a British silversmith. The third hallmark is a square cartouche with the small letter “a” in the box which is a date letter that will give the year of the making of the pipe. Steve had recommended a site which he frequents while dating silver hallmarked pipes. Here is the link which helped me identify the city mark as Birmingham and further following the link on Birmingham date letter chart on the same page brought me to a separate page with all the letters along with the period in which they were stamped. I found the letter which matched to the one seen on the pipe in my hand and I can now say with authority that this silver ferrule is from the year of manufacture1900!! Unfortunately, the site did not allow me to copy/ edit and reproduce the relevant charts for including in this write up.
https://www.925-1000.com/british_marks.html
The next stamp which I researched was the “A & Co” stamp over the three hallmarks. I conferred with The-Beard-of-Knowledge on all things pipe, Steve and he suggested that I visit http://www.silvercollection.it and sure enough I got the information that I was looking for. I reproduce the relevant information from the site and also the link for those who may need to refer when researching their pipes.
http://www.silvercollection.it/englishsilvermarksXA.html
A business which is supposed to have been established in 1781 at Mitcham, Surrey, by William Asprey (died 1827).
CHRONOLOGY:
Francis Kennedy, c. 1804-c. 1841
Kennedy & Asprey, c. 1841-1843
Charles Asprey, 1843-c.1872
purchased the business of Charles Edwards, c.1857
Charles Asprey & Son, c.1872-c.1879
Charles Asprey & Sons, c.1879-c.1888
acquired Leuchars & Sons
C.& G.E. Asprey, c.1888-c.1900
Asprey (& Co), c.1900-1909
acquired Houghton & Gunn, 1906
acquired William Payne & Co, 1908
Asprey & Co Ltd, 1909- 1998
Asprey & Garrard, 1998-2002
Asprey & Co Ltd, 2002
The relevant stamping is highlighted in blue. The period/ vintage of the ferrule now perfectly matches and confirmed that it is from the year 1900.
With the year of make of the ferrule established as 1900, I wanted to confirm if this matched with the year of manufacture of the pipe itself. This is essential since the makers did stock up on such silver ferrule before they even made pipes for them. The stampings on the pipe itself should provide some clues to the link with the vintage of the pipe. The pipe is stamped as “B W” in a rectangle over “THE GEM”, all in golden block capital letters. There are no other markings on this pipe, not even COM stamp. I searched pipedia.org for information on this brand and further confirmation on dating this pipe. There are some interesting details on this brand and makes for an interesting read. I have reproduced some snippets of the information from pipedia.org which are relevant to dating this Ben Wade.
The company was founded by Benjamin Wade in 1860 in Leeds, Yorkshire, where it was located for over a century. Ben Wade started as a pipe trader, but yet in the 1860’s he established a workshop to produce briar pipes. The pipes were made in very many standard shapes – always extensively classic and “very British”. Many models tended to be of smaller dimensions. Ben Wade offered a very high standard of craftsmanship and quality without any fills. Thus the pipes were considered to be high grade and a major competitor to other famous English brands.
In the second World War the factory was destroyed by German air raids on Leeds. But the Ben Wade family decided to re-build it immediately after the war and pipe production was re-started soon and successfully linked to the fame from the pre-war years.
Before the second war Ben Wade clustered their offerings into three price points: “Ben Wade” included the higher end pipes (eg the Larnix, Super Grain, Selected Grain, etc), “BW” included the mid-level pipes (eg Statesman, Natural Grain, County, etc), and “BWL” were the least expensive (eg Hurlingham, Adelphi, Tense Grain). Champion was in the last group, and in the 1930s at least retailed for 2/6.
Even though the owner family decided to leave pipe business and sell off the firm. The family went into negotiations with Herman G. Lane, president of Lane Ltd. in New York at about the same time as the Charatan family. Lane Ltd. bought both firms in 1962.
From the above it is confirmed that the Ben Wade that I have inherited is from the family era and from the era before the second war, placing it before 1939. Now, I had read somewhere that it was common for pipe makers not stamp the pipe with the COM stamp in early 1900s and this was confirmed by Steve. Thus, to sum up all the information researched to date this particular piece, it is safe to conclude that this pipe is likely to have been made in the year 1900!! My inheritance indeed has some very nice and very old pipes.
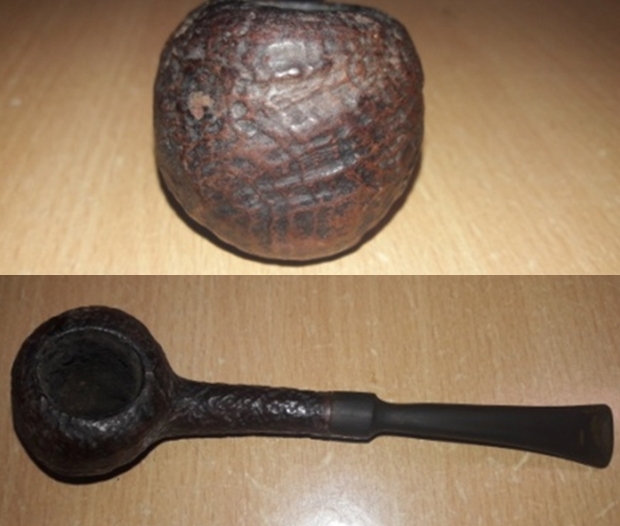
INITIAL VISUAL INSPECTION
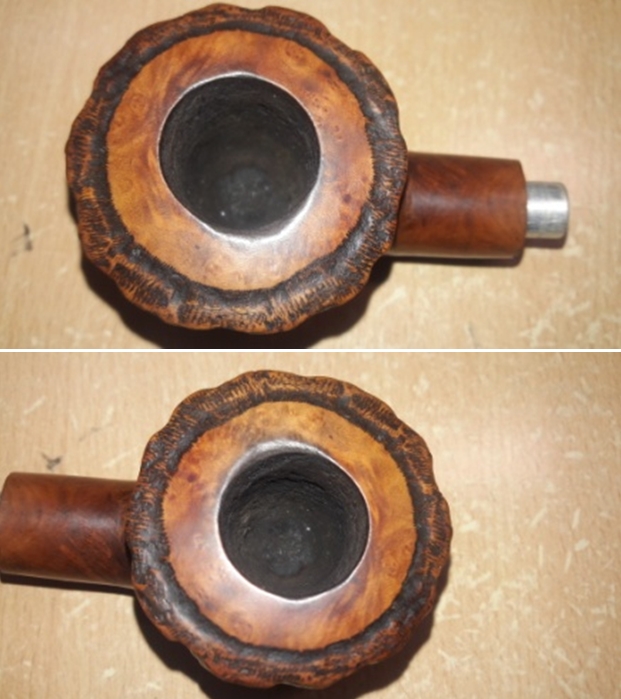
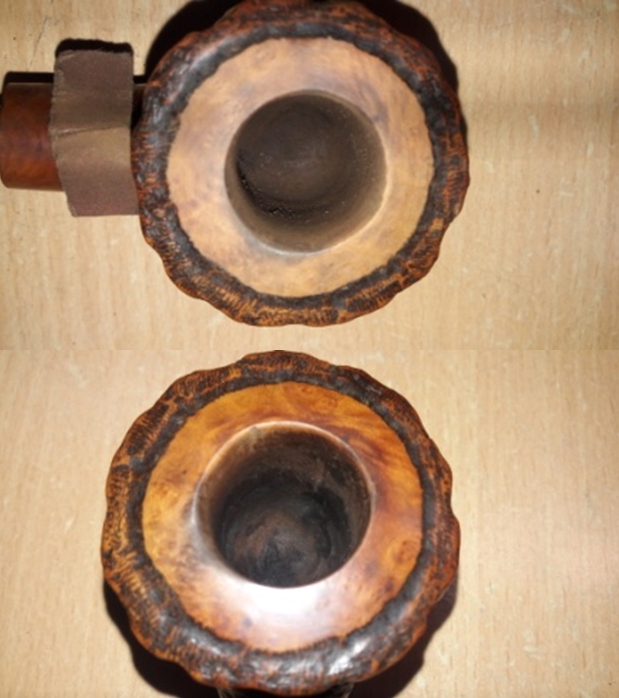
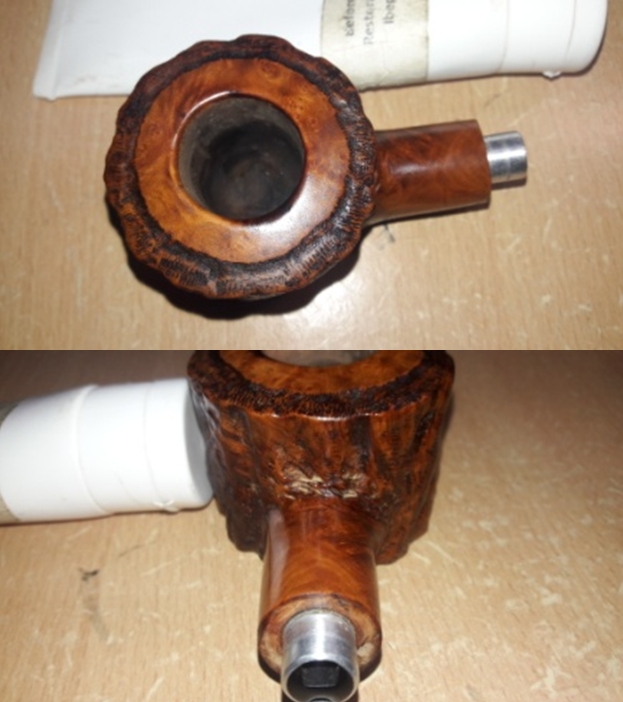
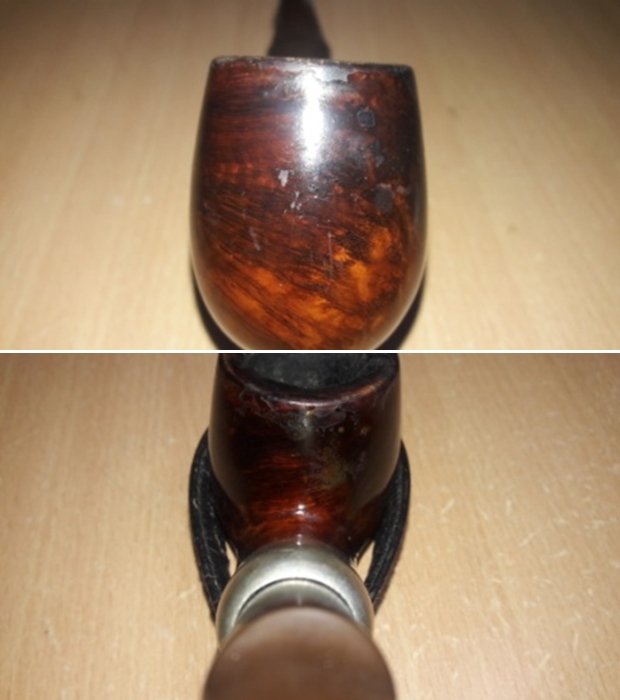
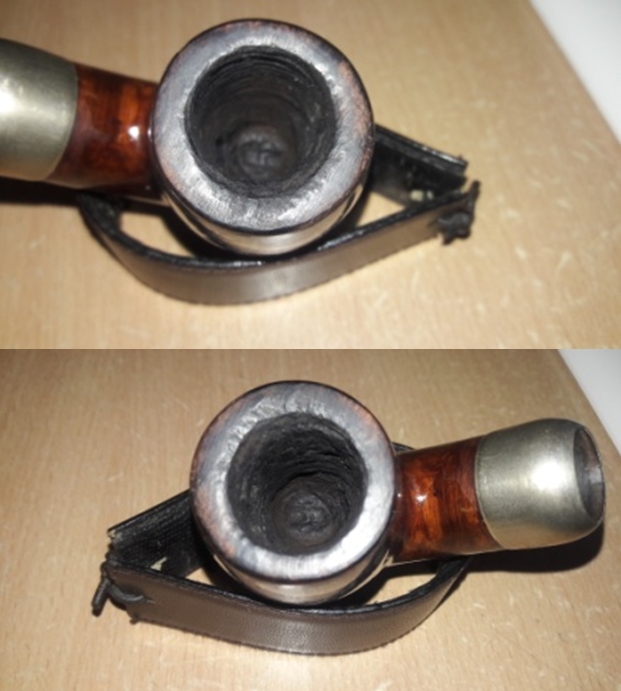
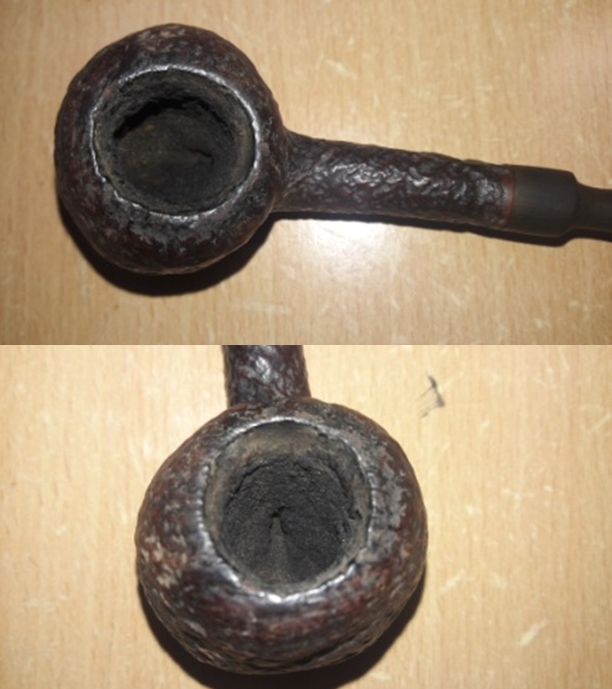
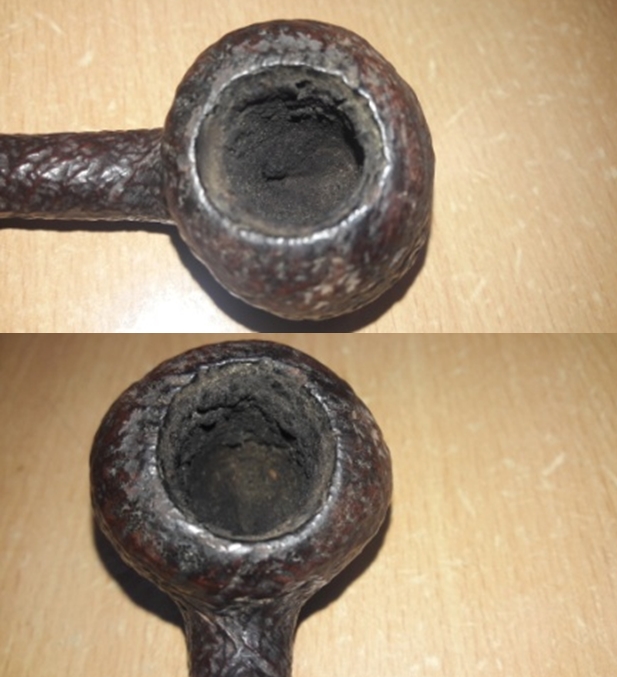
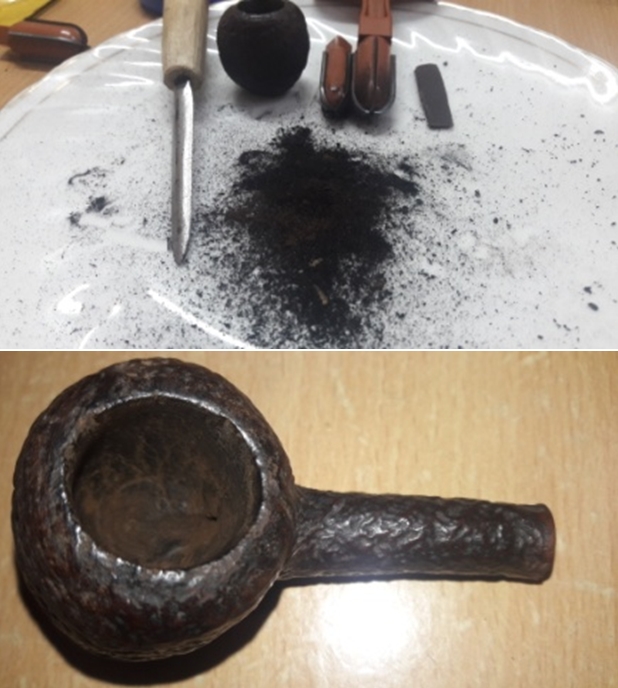
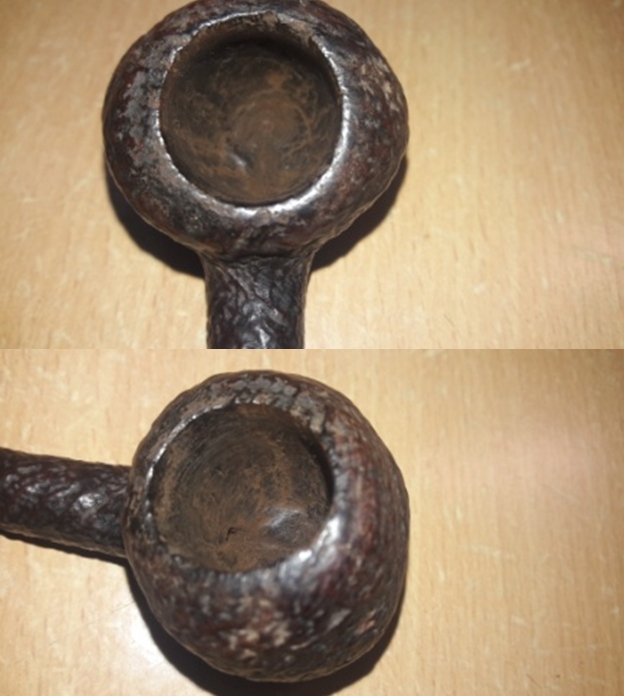
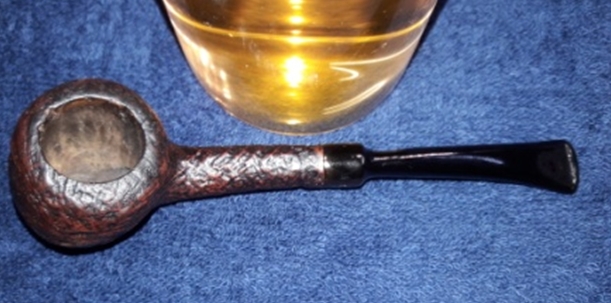
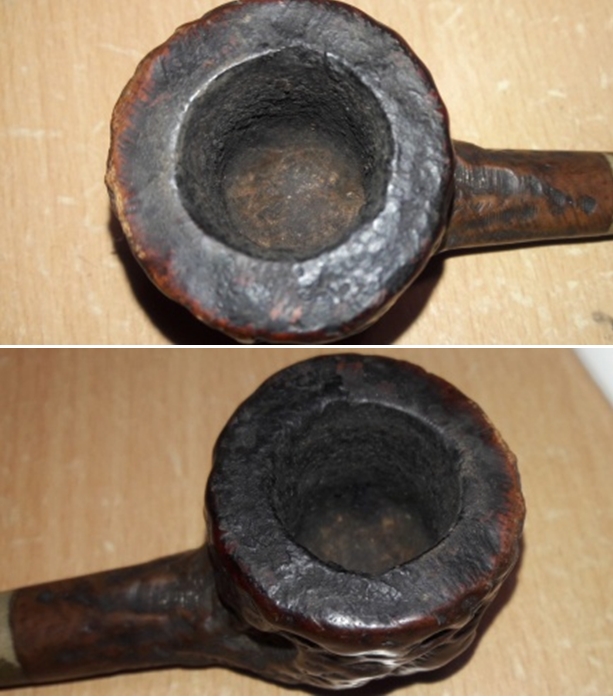
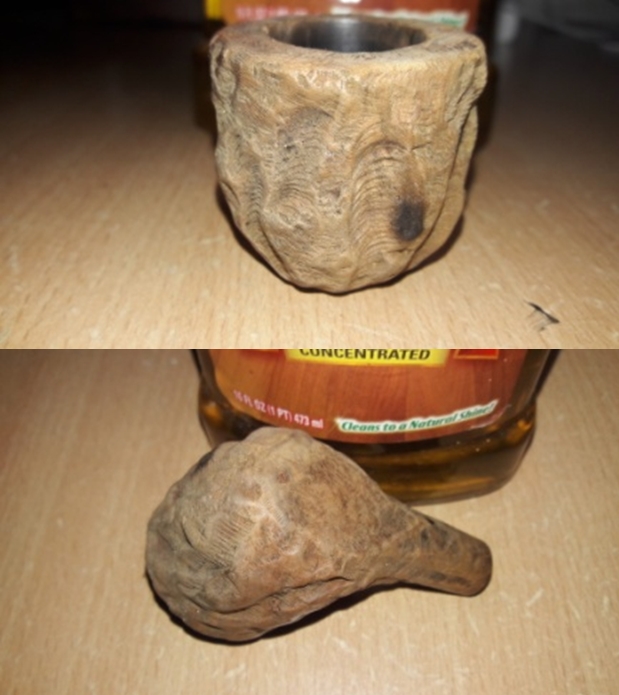
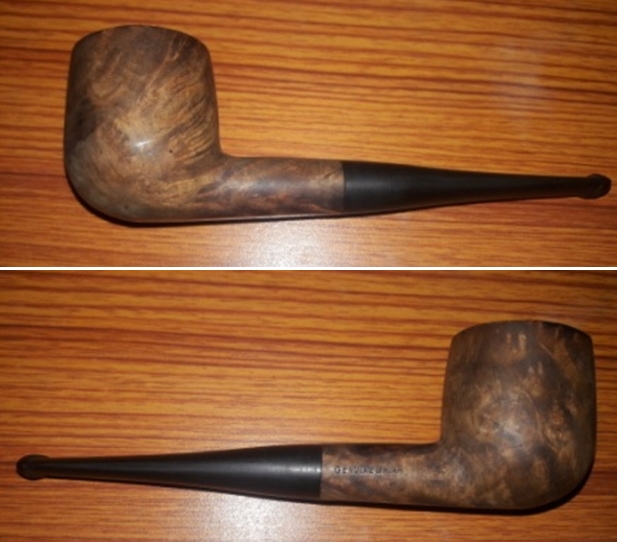
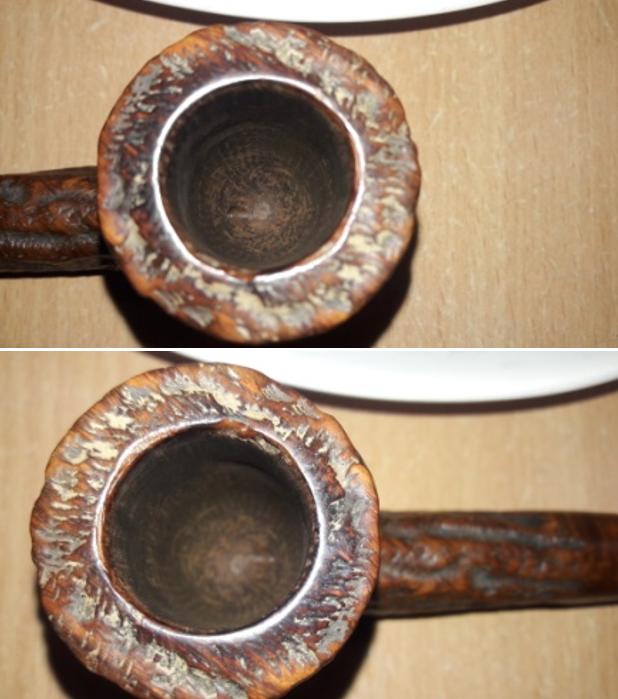
In the month of January this year, I had restored a Loewe Kenton from my inherited pipes that was nicely reamed with no overflowing lava over the rim top (https://rebornpipes.com/2019/01/17/restoring-a-classic-british-billiard-loewe-co-pipe/) and now this is the second pipe which is without a layer of cake in the chamber. However, the rim top surface is darkened and covered with lava overflow. I searched through the remaining large carton of inherited pipe for another pipe which is sans cake, but did not find any. Coming back to the pipe on my work table, the rim inner edge is mighty uneven, most probably a result of using a knife blade and shows signs of darkening due to charring. However, the outer edge is without any damage. The walls of the chamber are in excellent condition with no signs of heat fissures/ lines, but slightly uneven. A little magical touch from Pavni, my daughter who specializes in making the chamber smooth should address this issue.
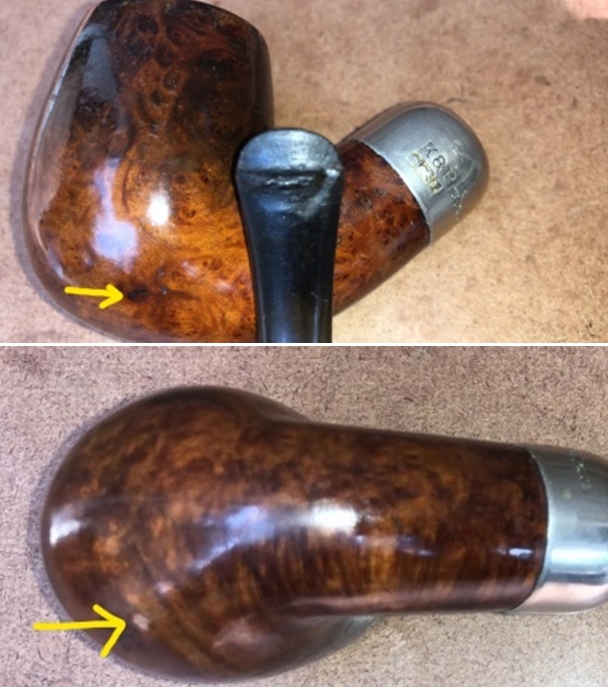
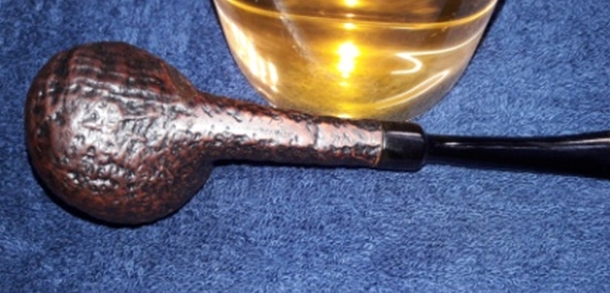
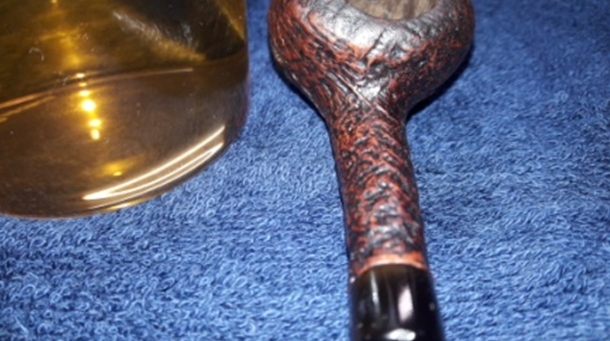
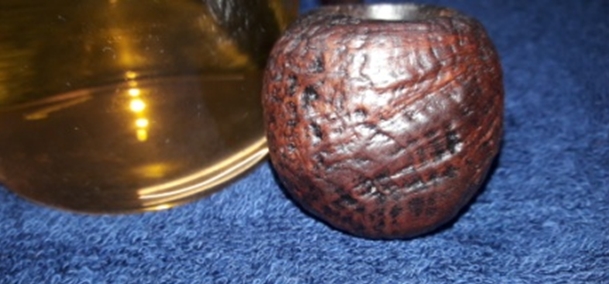
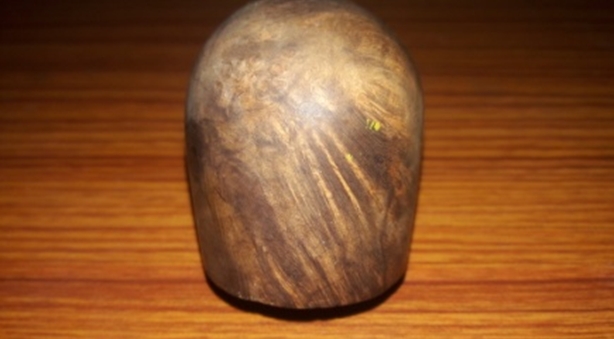
 The stummel surface has developed a nice patina over 119 years of its existence and I have no intentions of destroying it during the restoration. Therefore, the few dents and dings that are visible shall stay and be a part of the pipes history through the years. Maybe, micromesh polishing will address a few of these dents and scratches. I wouldn’t say that this pipe has beautiful grains all round because it does not!! But yes, there is a smattering of some straight grains in the cap of the stummel and few on the shank while rest of the stummel has just some swirls of grains here and there. Even though the stummel is covered in dust, dirt and grime from years of uncared for storage, through it all the pipe still has a feel of quality maybe because of the shape or the proportions, I am not able to pin point exact reasons, but the pipe shouts vintage and quality!! The double ring separating the cap from the rest of the stummel is filled with dirt and dust, but is intact with no chipping or unevenness, which is surprising.

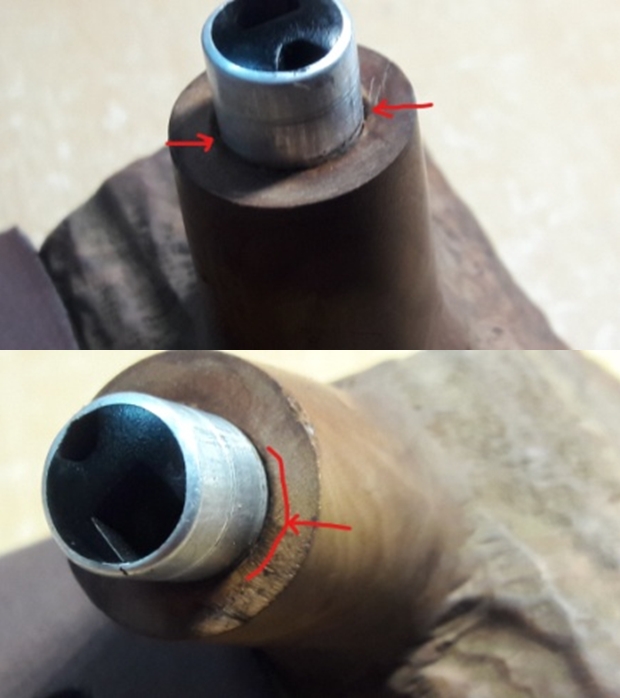
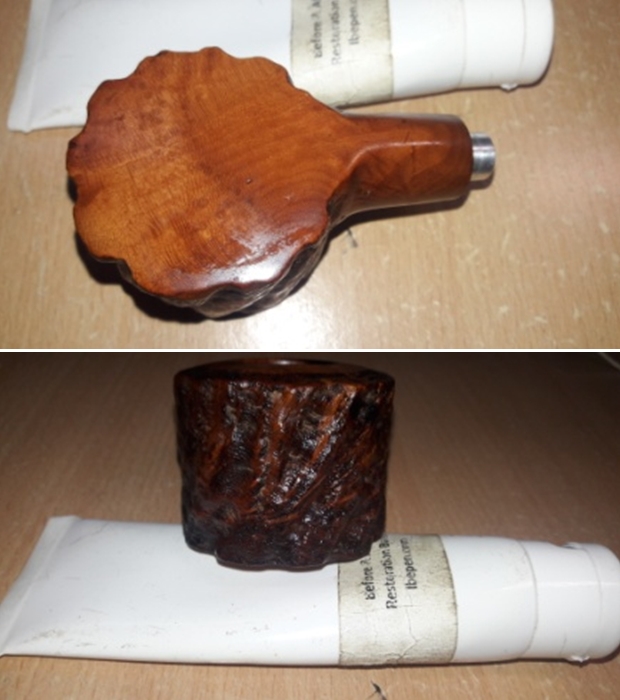
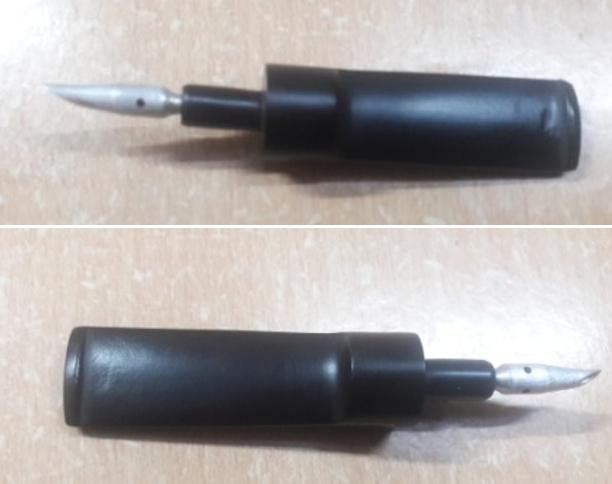
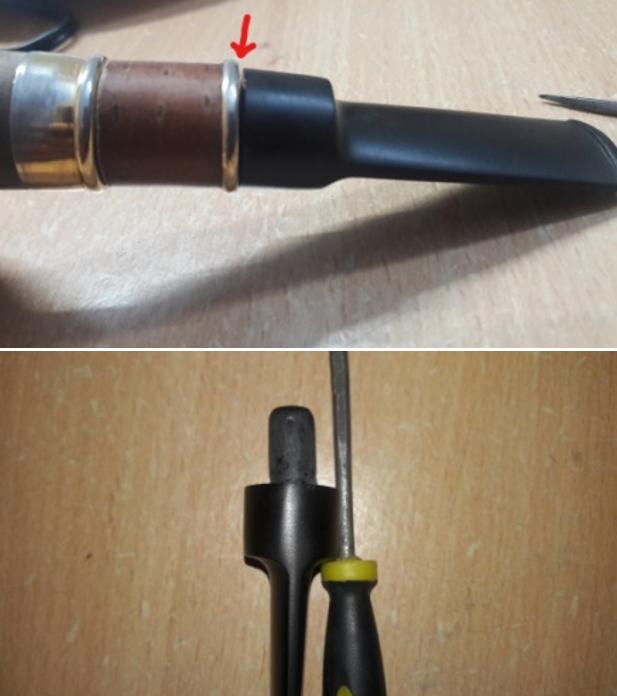
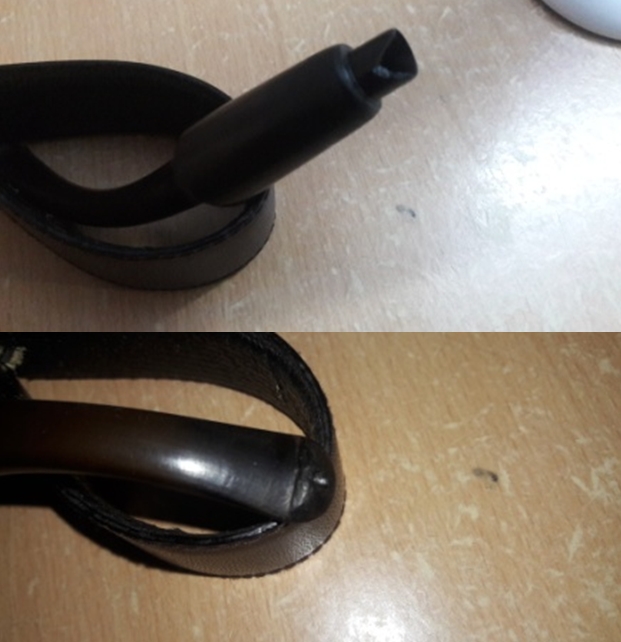
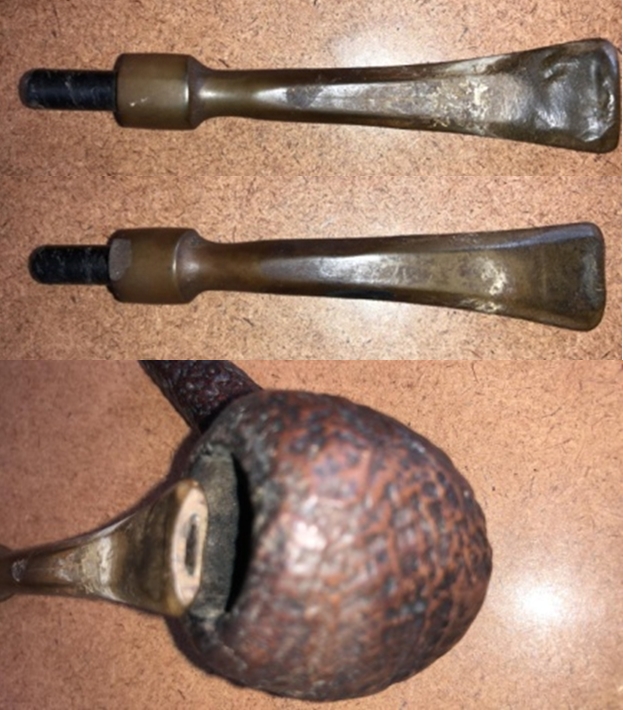
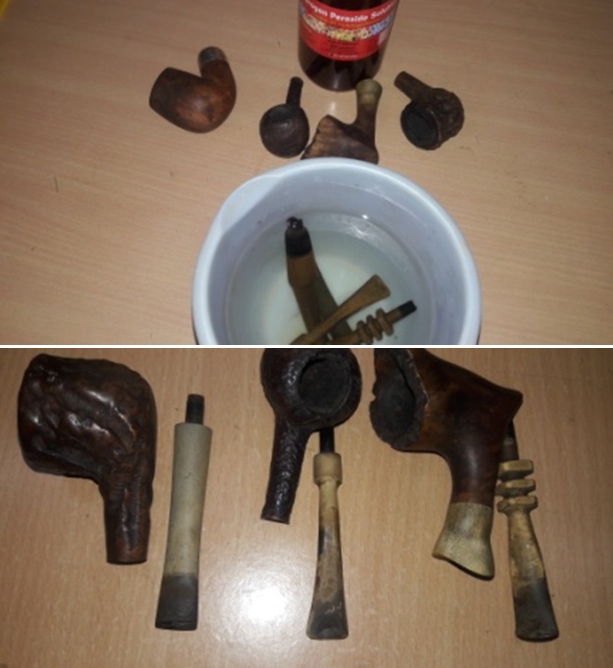
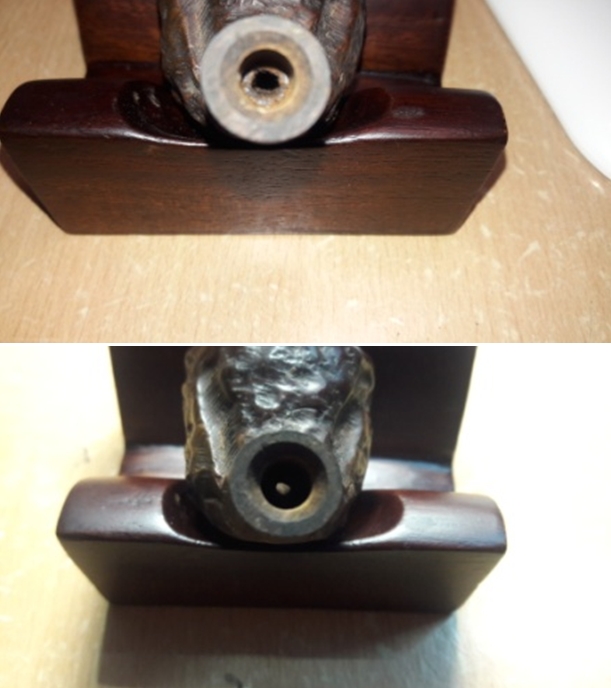
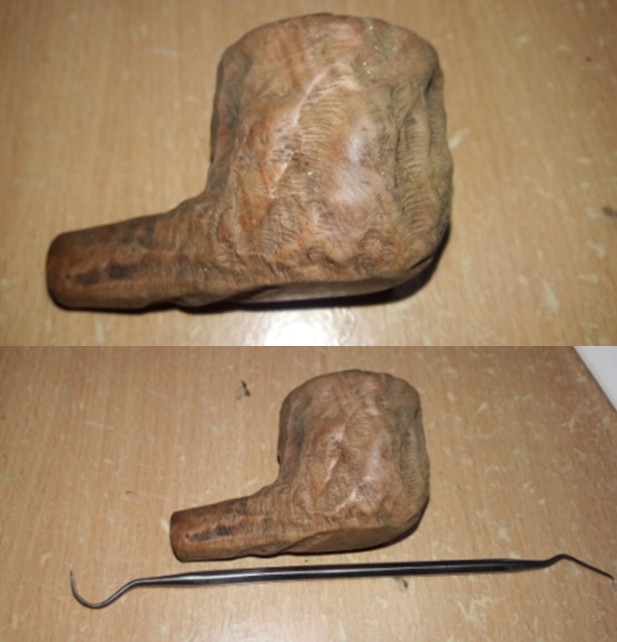
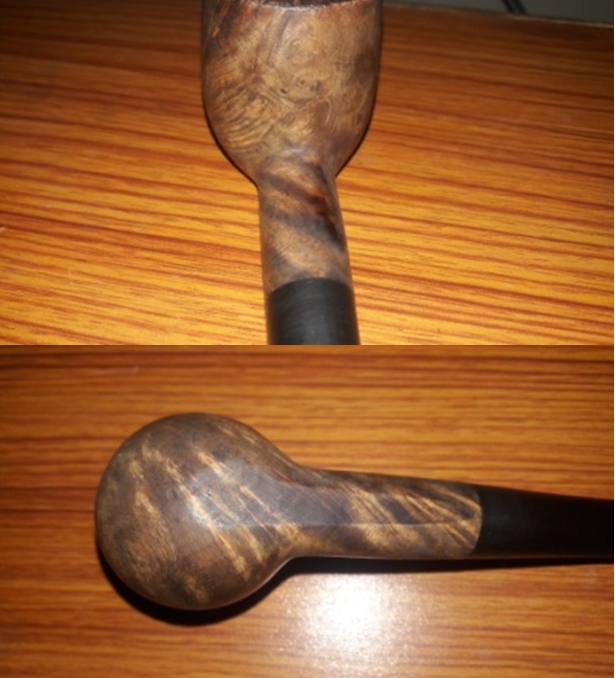
 At this stage of my initial inspection, in order to see the condition of the shank end and mortise, I tried to separate the bone stem from the shank end. The stem would not budge. I had no desire of applying more force for the fear of breaking the bone tenon inside the mortise and this would have really complicated the restoration for me as well as the originality of the pipe would have been compromised. I wanted neither and so in went the entire pipe in to freezer for a chill. A few hours later, I took the pipe out from the freezer and slightly heated the shank end. Once satisfied, I gingerly turned the stem with success. A little coaxing and finally the stem and shank were separated. Whew! What a relief. However, when I tried to reattach the two, there was a slight gap between the stem and the shank end and indicated with red arrows. I am sure that with the cleaning of the shank/ mortise of the entire gunk, the fit should improve.
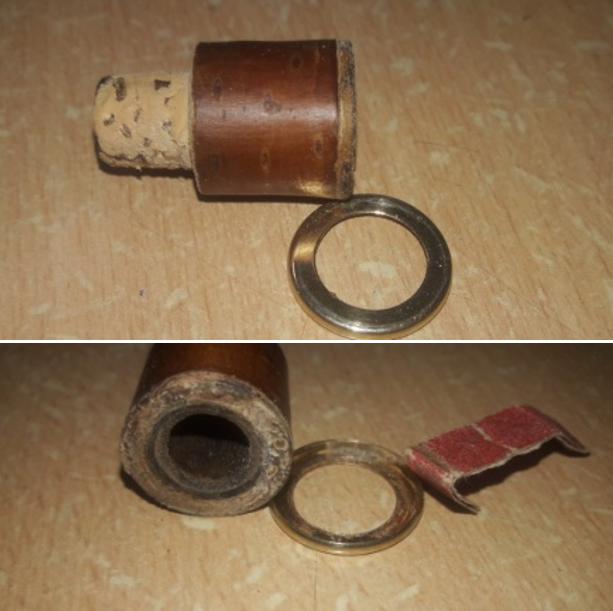
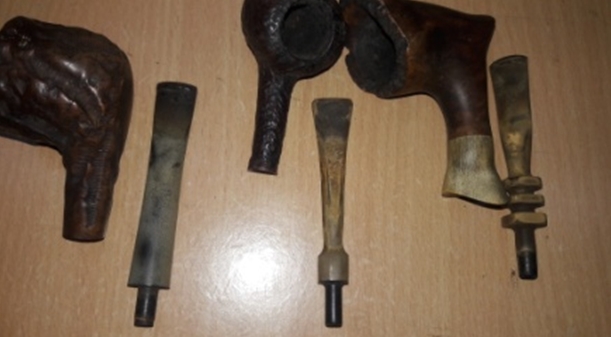
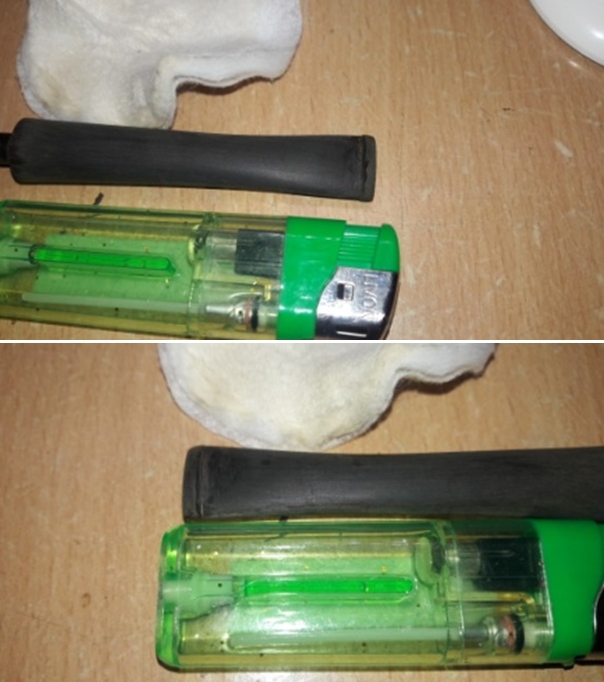
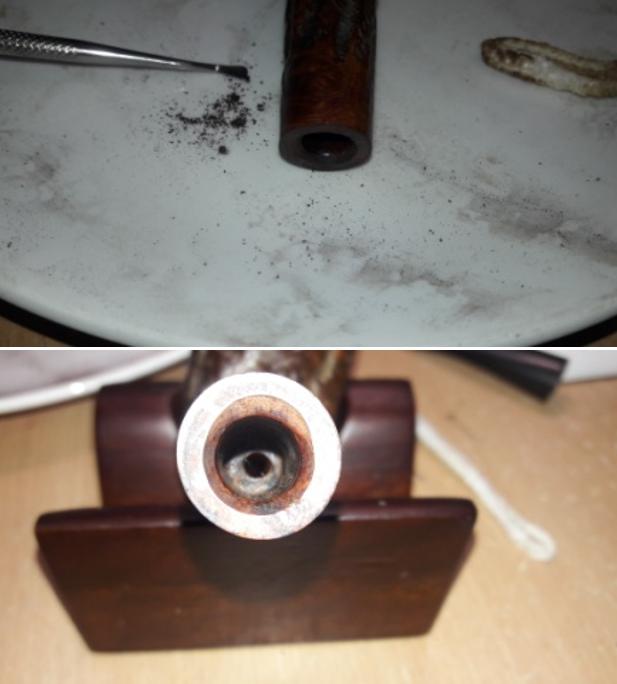
 After the stem was separated from the shank end, the sterling silver ferrule too fell out easily. I will have to fix it with superglue. A closer examination of the mortise confirmed that it is clogged with accumulation of oils, tars and gunk of yesteryear. The threads too are covered in the gunk and most probably the cause of the incorrect seating of the stem in the mortise.
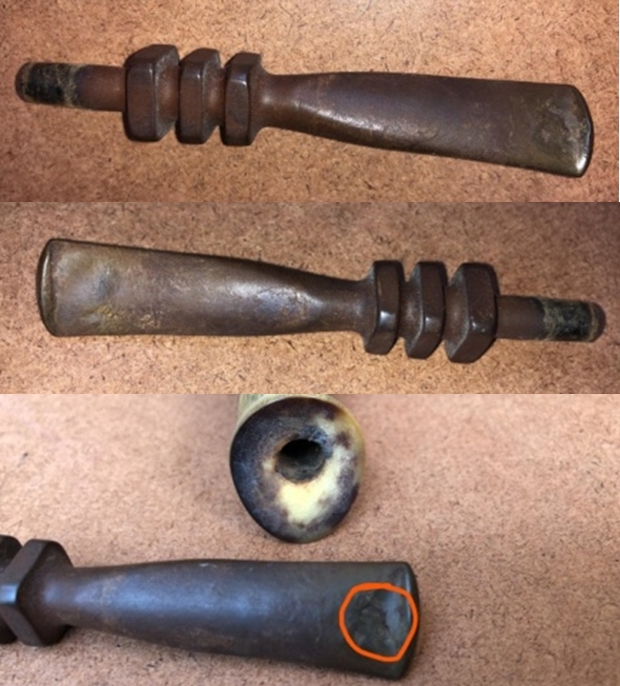
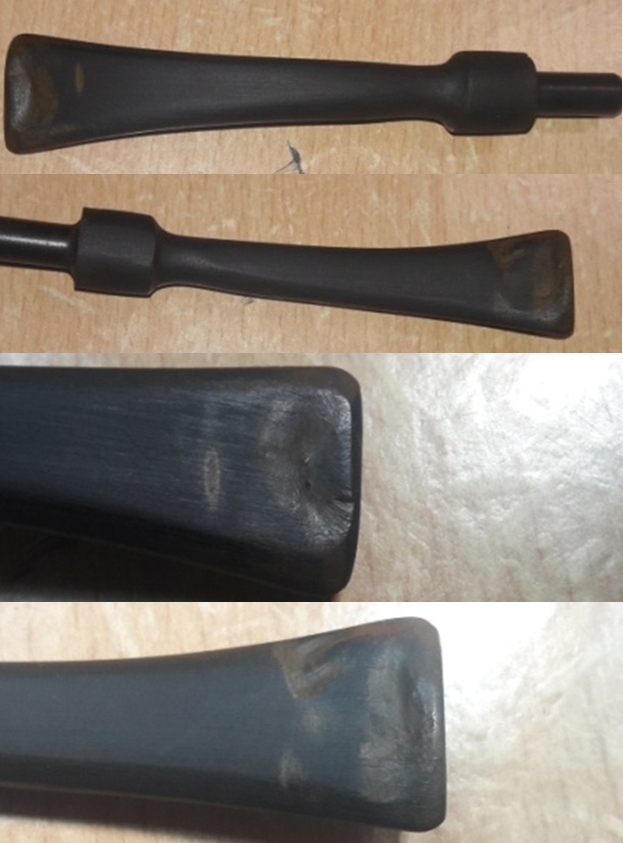
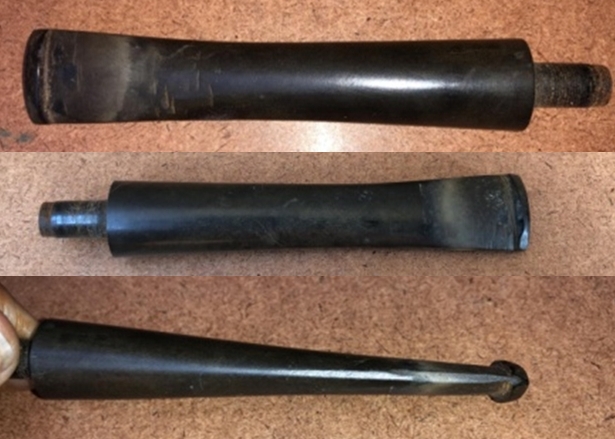
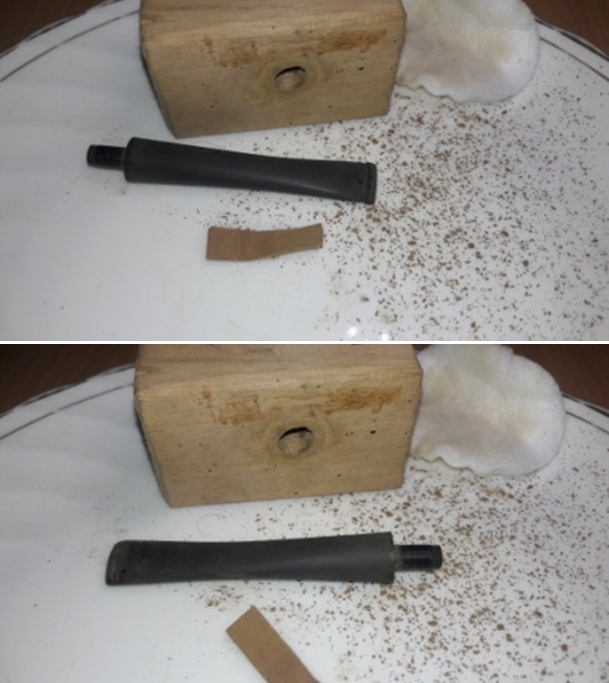
 The horn stem itself appears dull and lifeless and has tooth chatter on both the surfaces of the stem. The slot is perfectly round and correct for the time period of the pipe and shows accumulation of dried tars and dirt. The button edges, however, are sharp and sans any damage with a little dirt embedded at the bottom of the edges. I could make out one crack emanating from the right bottom edge of the diamond saddle and extending to more than half the length of the saddle panel. This crack is shown by a yellow arrow. The dark and light hues taken on by the stem over the years should polish out nicely and will add an additional touch of class to this classy pipe.
 THE PROCESS
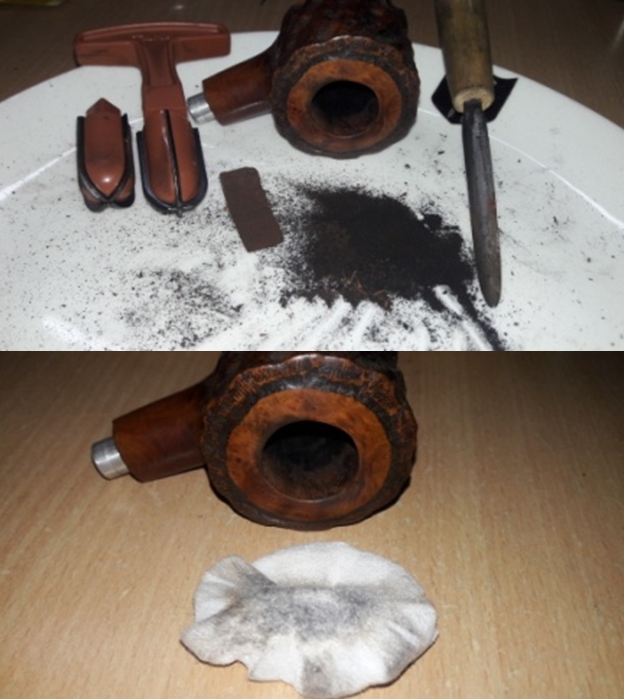
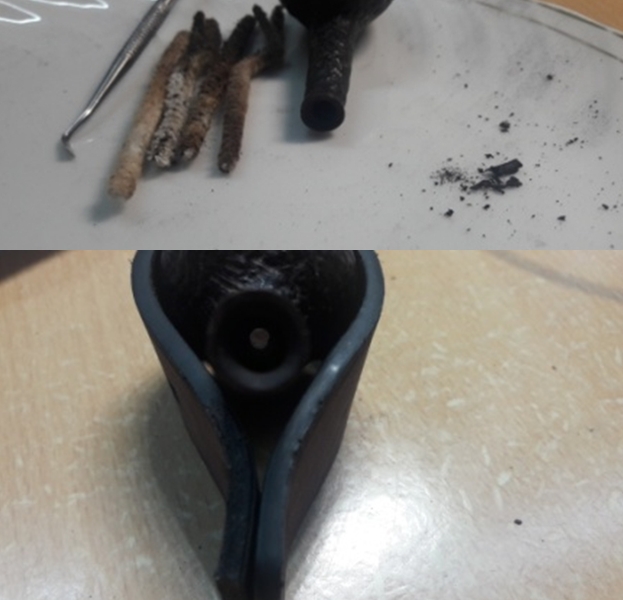
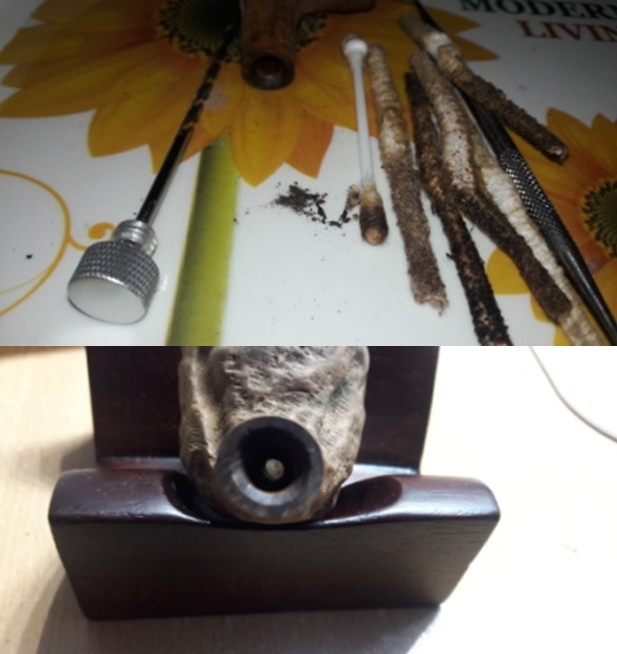
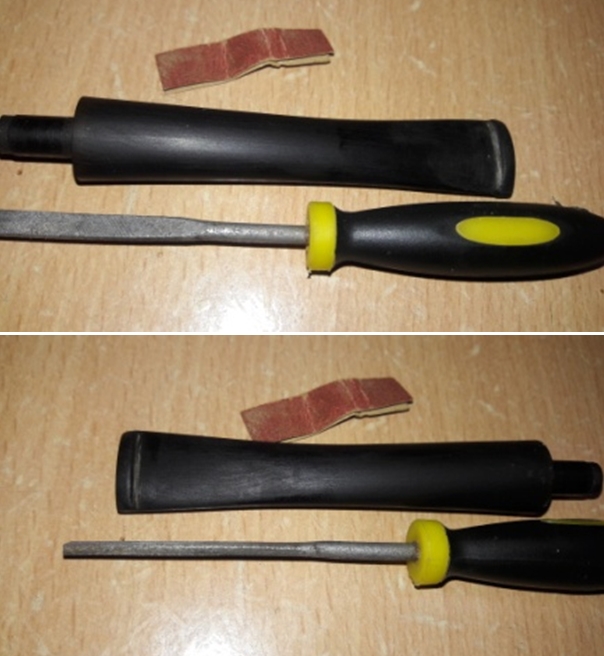
Pavni, my youngest daughter loves to help me in pipe restoration in her free time and her forte is getting the walls of the chamber as smooth as a baby’s bottom. With a folded piece of 220 grit sand paper she completely evened out the wall surface. Once she was through with her sanding regime, I cleaned out the internals of the shank and the mortise with a few hard and regular pipe cleaners dipped in isopropyl alcohol. I also cleaned out the threads in the shank end with cotton buds and alcohol. With a sharp knife, I gently scraped away the lava overflow from the rim top surface.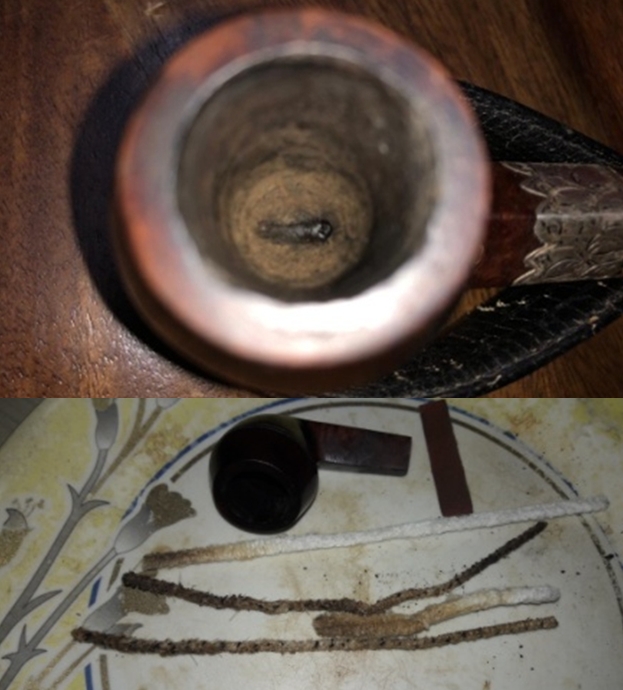
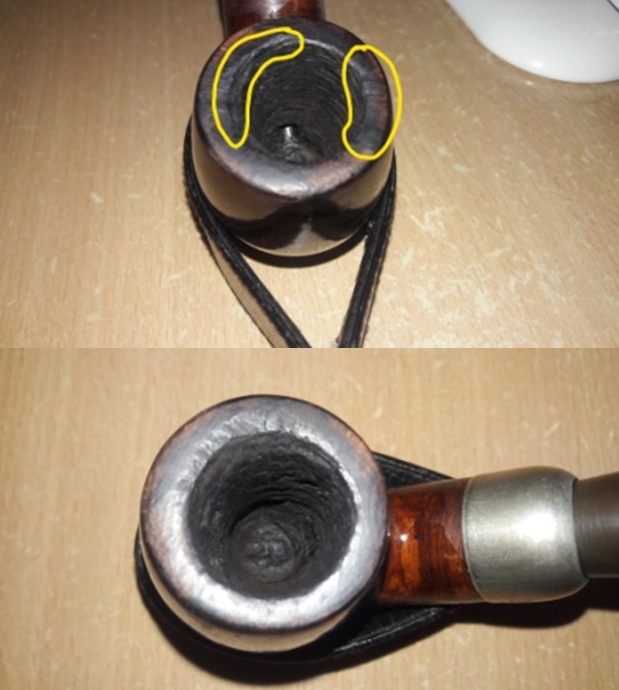
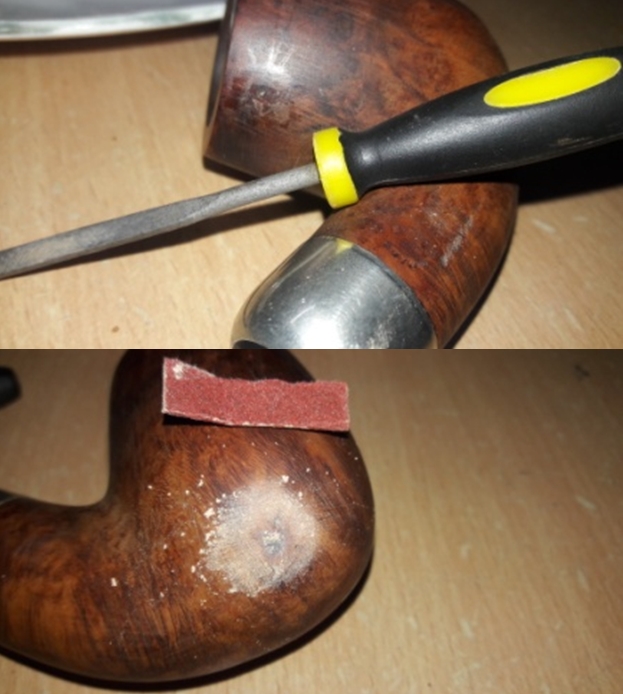
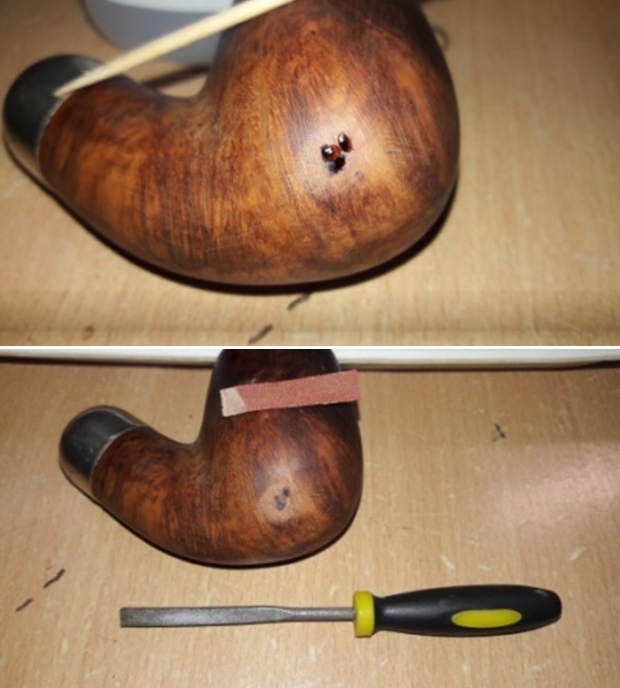
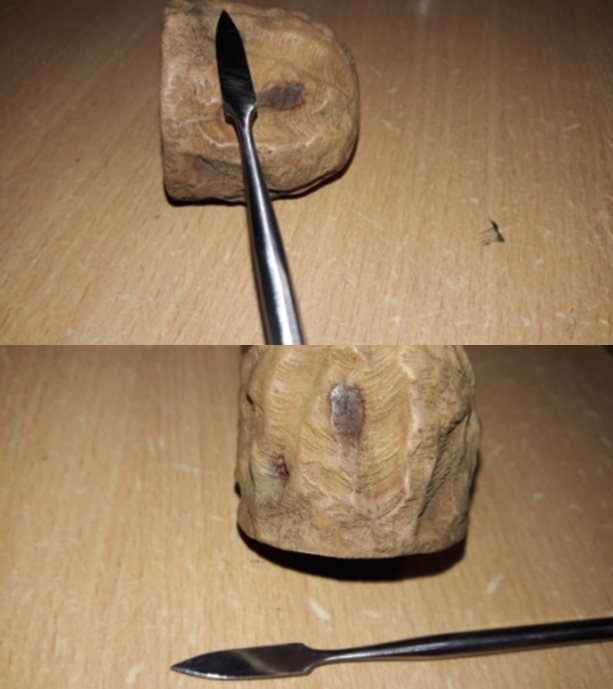
 I followed it up by cleaning the external surface of the stummel with hard bristled tooth brush and Murphy’s oil soap. I rinsed it under running tap water and dried it with paper towels and a soft cotton cloth. I diligently scrubbed the rim top surface with a scotch-brite pad and Murphy’s oil soap to remove the remaining lava overflow. With this step on this particular project, I achieved two results; firstly, the gold lettered stamping on the shank was consigned to past tense and secondly, a couple of fills were revealed (marked in yellow arrows) at the front of the bowl and in the bottom left panel of the diamond shank. Thankfully, there is no charring over the inner and outer edge or the rim surface.

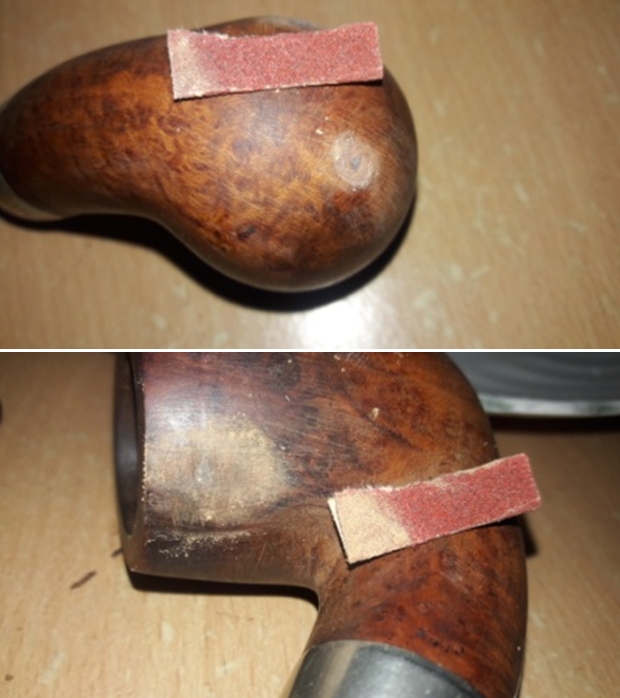
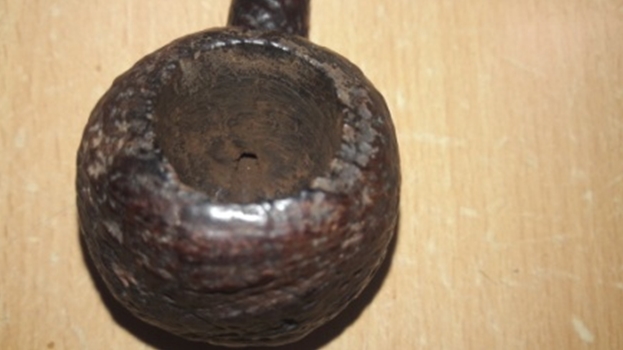
 I removed the old and loosened fills from the front of the bowl and one on the shank that was closer to the bowl. The old fill at the shank end; I let it be as it would be covered with superglue while attaching the silver ferrule. Next, I decided to address the issue of darkened rim top surface and uneven inner edge by topping the rim on a piece of 220 grit sand paper. The progress being made was frequently checked as I had no desire to lose any briar estate than absolutely necessary. Once satisfied with the result, I wiped the rim top surface with a moist cloth. The darkened rim top has been addressed completely, however, the inner rim edge is still uneven (though greatly reduced) with slight charred edges. I address these issues by simply running a piece of 220 grit sand paper along the inner rim edge without creating a bevel, but a nice rounded even surface.
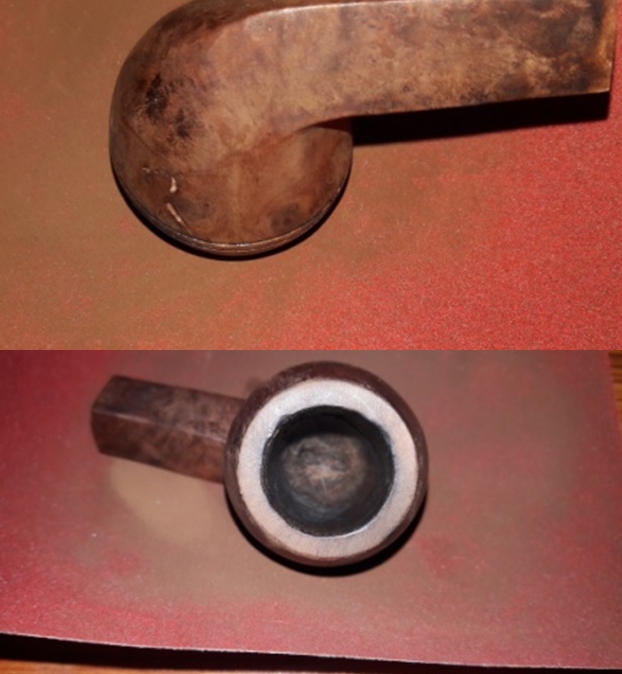 Next issue to be addressed was the fills. As mentioned above, I had cleaned out the old and loose fills using my sharp dental tool. I filled these with a mix of superglue and briar dust using the layering technique. Using a toothpick, I first spot fill superglue in to the surface of the intended fill and press briar dust over it. I repeat this process, if need be, till the fill is slightly above the rest of the surface. Once all the fills are covered, I set the stummel aside to cure. Once the fills are sufficiently hardened, which is quite rapid, I sand it with a flat head needle file to achieve a rough match with the rest of the stummel surface. I follow it up by sanding with a piece of 220, 600 and 800 grit sand papers to a perfect match. Discerning readers must have noted that I did not sand the entire stummel surface. This was because, as I had decided earlier that I would maintain the aged patina that the briar had taken on over the 119 years.
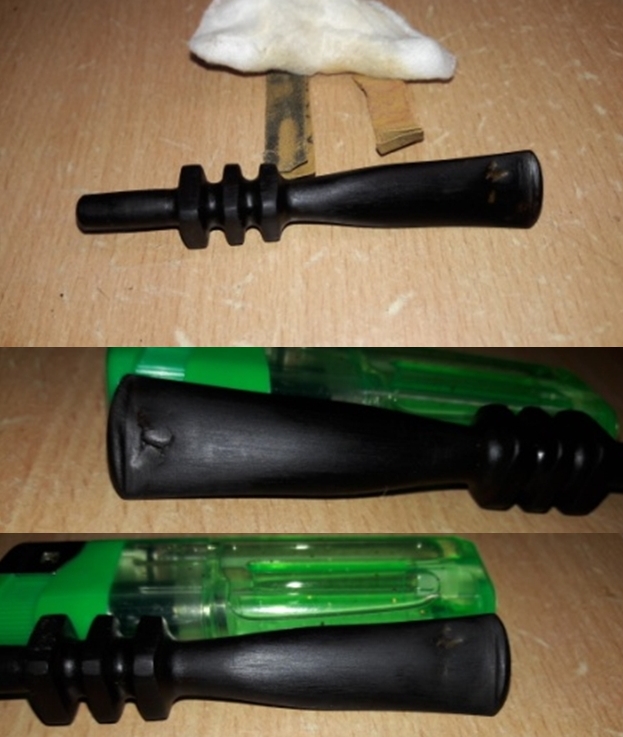
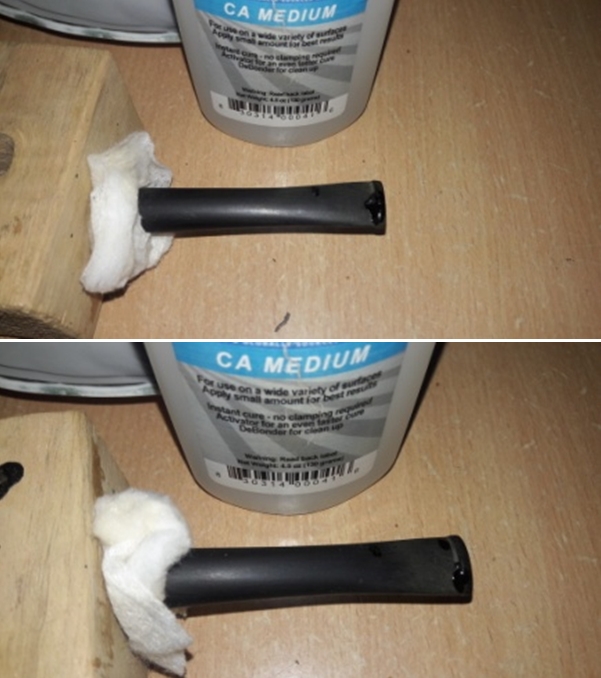
 At this stage, I decided that I would tackle the stem repairs as addressing the crack observed on the diamond saddle would require curing time and while the stem repair is curing, I could get back to the stummel, saving on time. I began by first cleaning the bone tenon and the stem surface with a cotton swab and alcohol to remove all the dirt and gunk from the surface. I was contemplating whether or not to drill a counter hole to prevent the crack from progressing further and after weighing the cons, I decided not to do so. The probability of the stem chipping or the crack developing further was reason enough for me to avoid this drilling. I filled this crack with plain superglue and set it aside to cure. The CA superglue would seep and spread inside and stabilize the crack.
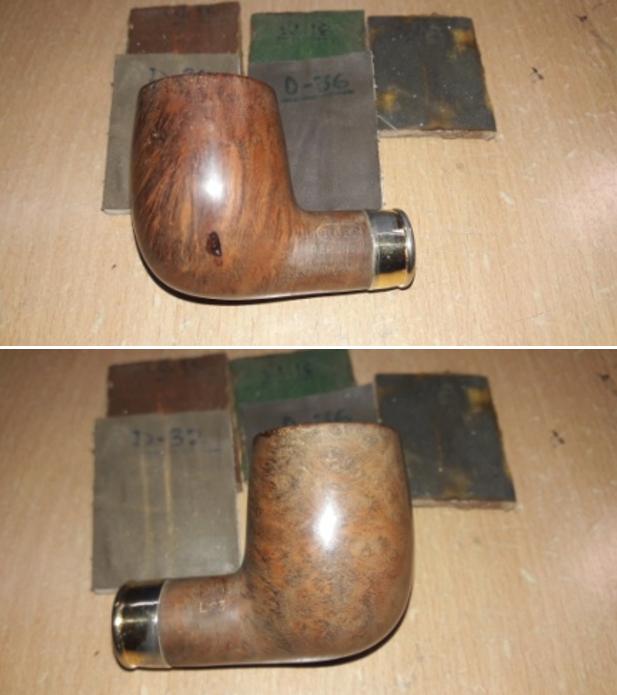
 During his visit, while discussing various aspects of pipe restorations, Steve had made a passing comment that in his experience the best way to preserve the patina on a briar if you need to sand it is to dry sand the stummel with 1500 to 12000 grit micromesh pads. I followed his advice and went ahead and dry sanded the entire stummel surface with 1500 to 12000 grit micromesh pads. The results are amazing. The stummel has now a deep and rich dark brown coloration and this will further deepen once I go through the polishing and wax application regimen.

 Most of the readers would have noticed that the double ring separating the cap from the rest of the stummel shows accumulation of briar dust and grime. Also the fills are darker than the rest of the stummel surface. I have noticed it too and will clean the rings at the end as the polish and wax would also be accumulating in these gaps subsequently. The issue of the fills was addressed by staining the fills and surrounding surface with a dark brown stain pen. I set the stummel aside overnight for the stain to set. The blend is near perfect and should blend further after application of balm and carnauba wax polish.
 The superglue applied over the crack was by now well cured and had seeped in to the crack as well. I sand the entire stem and the fill in particular, with a worn piece of 220 grit sand paper. This helped to address the tooth chatter seen in the bite zone as well as blend the fill with the rest of the stem surface. I followed it up with dry sanding the stem with 1500 to 12000 grit micromesh pads. I wiped the stem with a moist cloth after every three pads to remove the resulting bone dust. To finish, I applied a liberal coat of Extra Virgin Olive oil and set it aside to be absorbed by the porous bone. I am very pleased with the way the contrasting dark browns and lighter grains in the bone are now highlighted. Once polished further, this will further add a touch of class to an already chic looking Bulldog!! I applied petroleum jelly over the bone tenon and tried the fit of it in to the mortise after temporarily attaching the silver ferrule over the shank end. The alignment and seating of the two was spot on. I separated all the parts again and continued further.

 While the stem was being hydrated with olive oil, I went back to work the stummel. The stain had set well by this time. I applied a little “Before and After Restoration” balm with my fingers and rubbed it deep in to the stummel surface. This balm rejuvenates the briar and the transformation in the appearance of the stummel is almost immediate. The fills are now so well blended in to the briar that it is difficult to spot them.

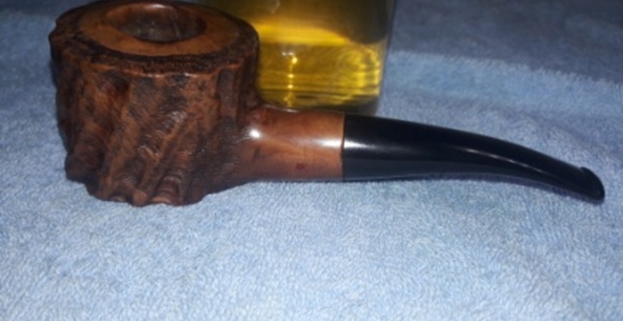
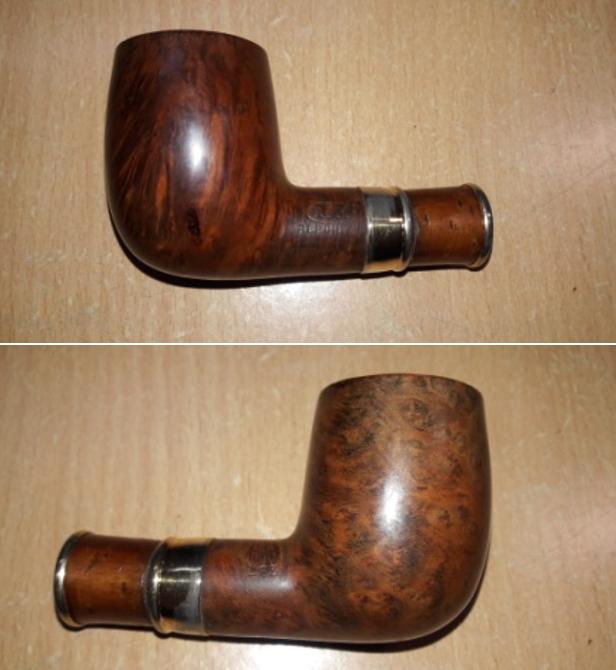
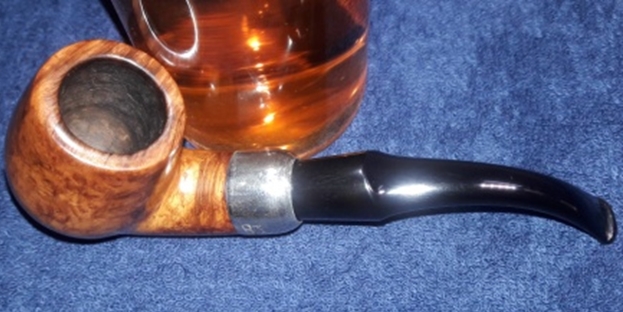
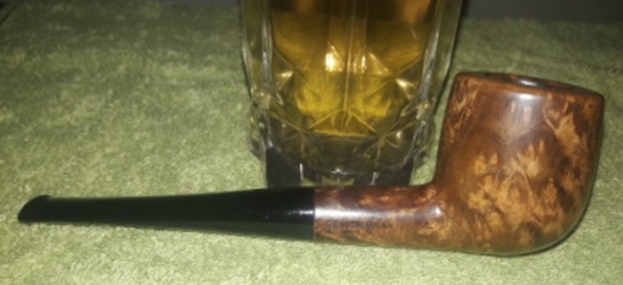
 The only part that needs TLC is the sterling silver ferrule. I polish the ferrule with a very soft powder specifically available locally, and widely used by jewelers, for polishing of silver. I align the ferrule stampings with the stummel stamping on the shank and fix it over the shank with a little superglue. The contrast that this shiny ferrule provides against the dark brown of the stummel looks fantastic.
 Next, I ran a thin and sharp knife through the double cap ring and cleaned it. To finish, I re-attach the stem with the stummel and mount a cotton cloth buffing wheel on to my rotary tool. I set the speed at about half of the full power and applied several coats of carnauba wax over the stummel and the stem of the pipe. I finished the restoration by giving the pipe a rigorous hand buff using a microfiber cloth to deepen the shine further. The completed pipe, with dark brown hues of the stummel contrasting with silver ferrule and the shiny dark browns and lighter grains in the bone stem makes for a visual treat. The pipe looks lovely, fresh and vibrant; the photographs speak for themselves. Thank you for your valuable time.


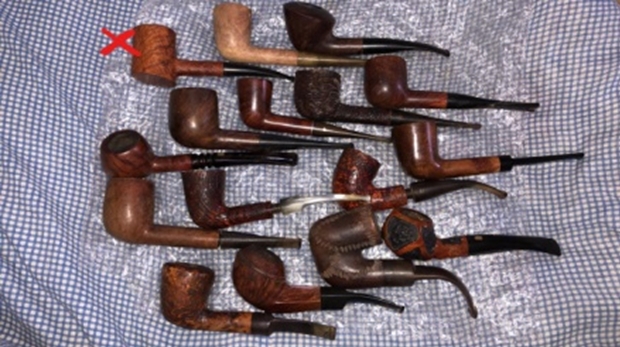
 P.S. This was the last pipe that I had restored during my leave from my work. The following write ups are now on pipes that I have already restored after returning to my work place. I shall sorely miss the help that Pavni, my 10 year youngest daughter and Abha, wifey dear, extend in my work. There are about 40 odd pipes that I have carried with me and which have been cleaned by Abha. So the next couple of months are going to be interesting. Keep following rebornpipes.com for some nice, unique and interesting pipes from here in India in the near future.
Oh, missed out on one aspect!! I tried to repaint the shank stamp with a gold glitter pen towards the end, but it would just not stay. Any suggestion would definitely help me mark this oldie as well as for future.

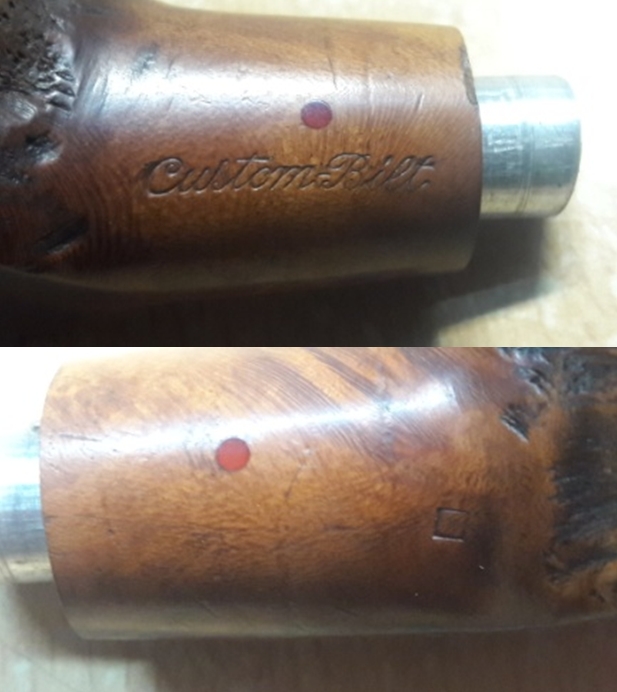
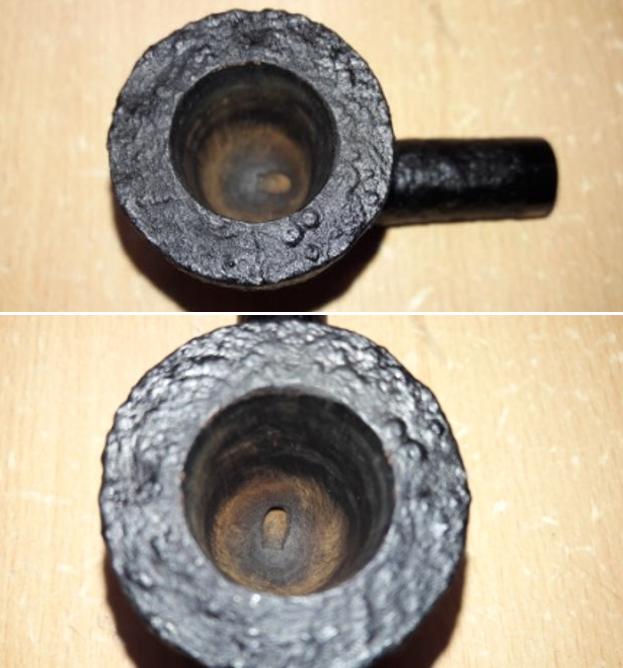
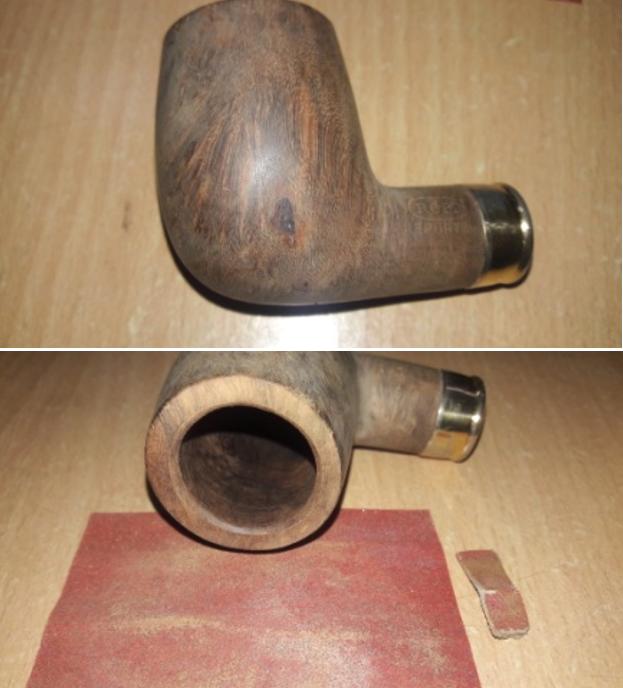
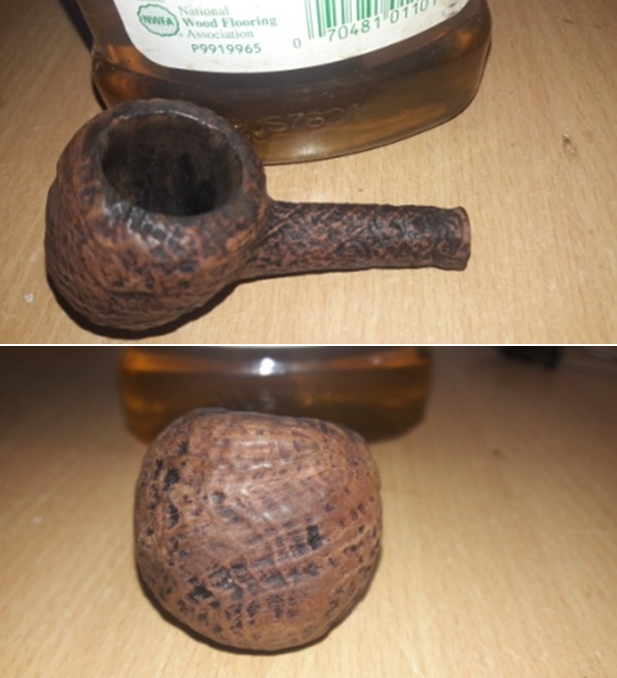
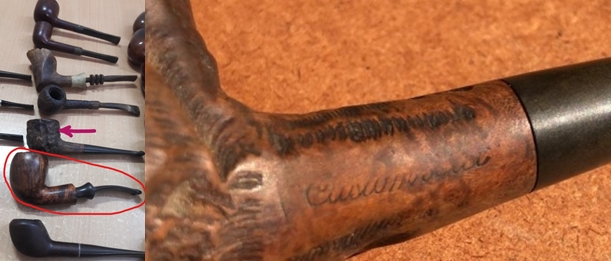
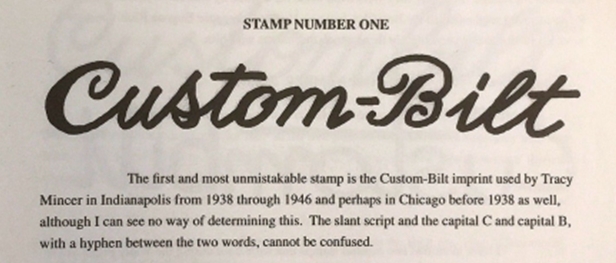
 It is stamped on the left side of the shank as “Custom-Bilt” with a hyphen between the two words, in cursive hand. The “IMPORTED BRIAR”, a commonly observed stamp on these pipes, is seen in the smooth surface towards the front on the foot of the stummel followed by the number “3038” in the next portion towards the shank end.
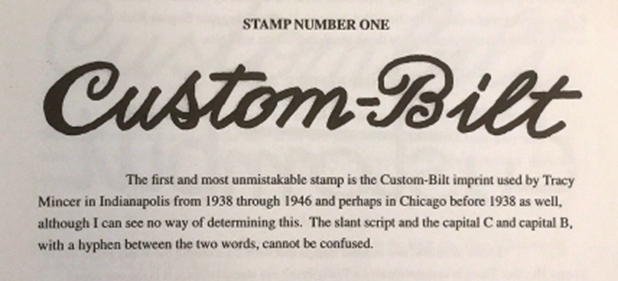
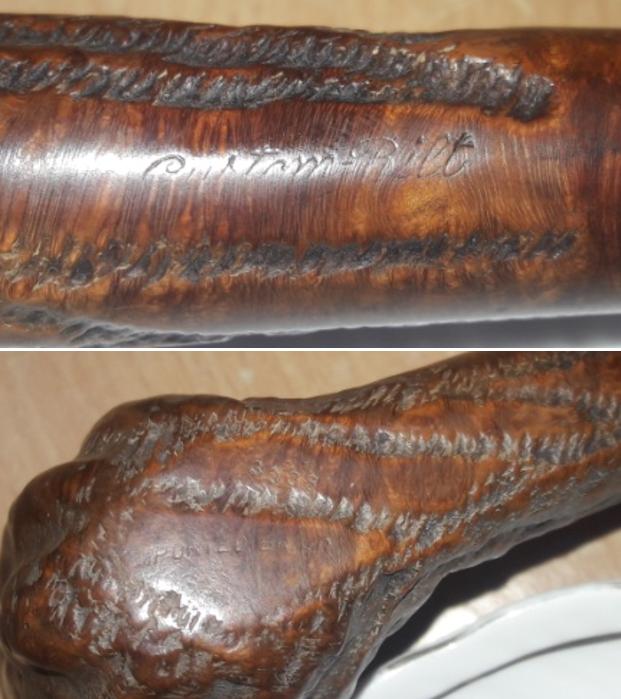 Having worked on a few Custom Bilt pipes in the past and researched this brand and based on the stampings seen on this pipe, I can say with an amount of certitude, that this pipe is from the period 1938-46. Here is the proof in determining the vintage based on stampings as researched by William E. Unger, Jr., PhD, which deals with the study of Custom-Bilt pipes.
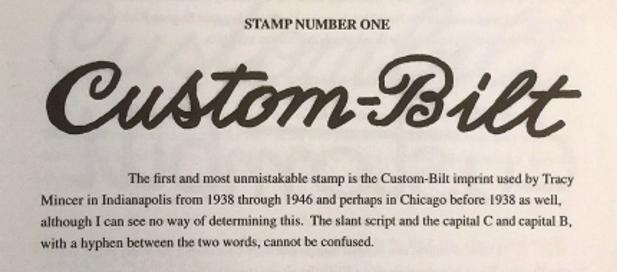 With this confirmation as regards to the vintage of this pipe, I move ahead with the initial visual inspection of this pipe.
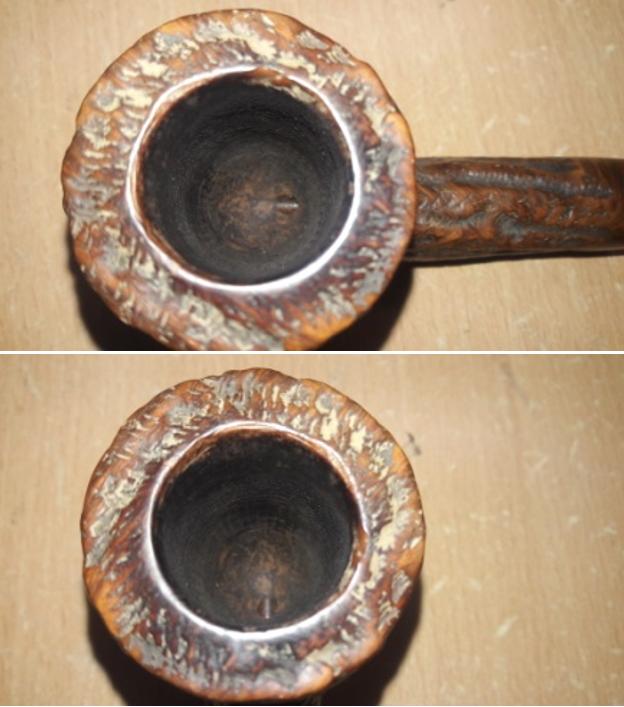
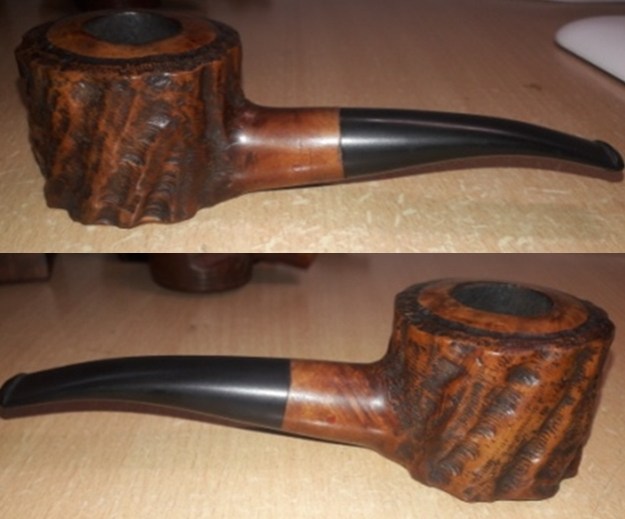
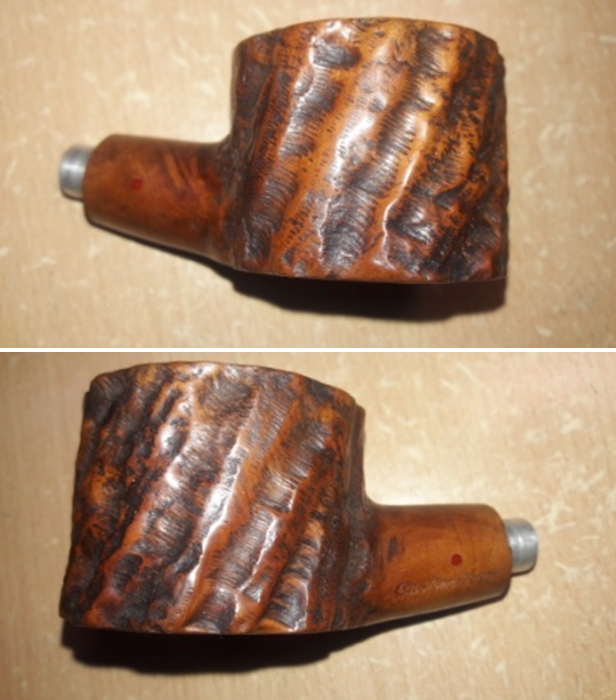
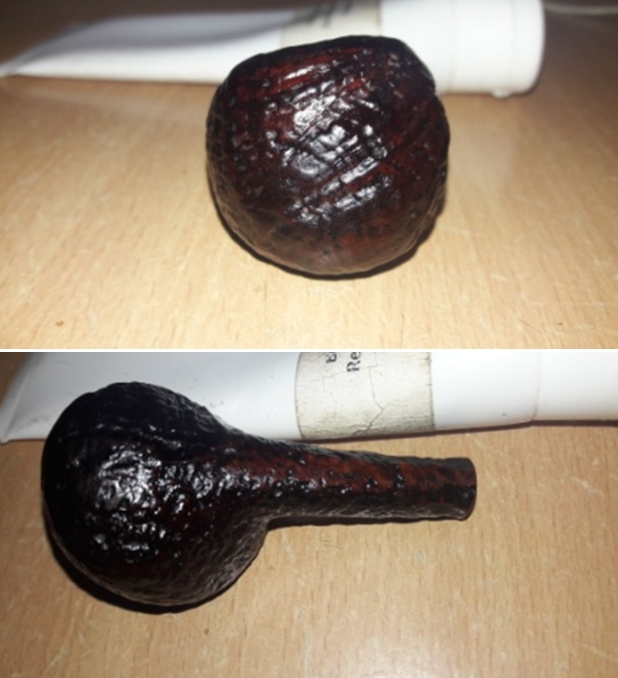
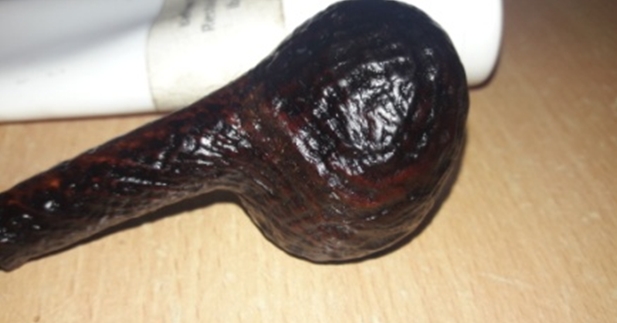
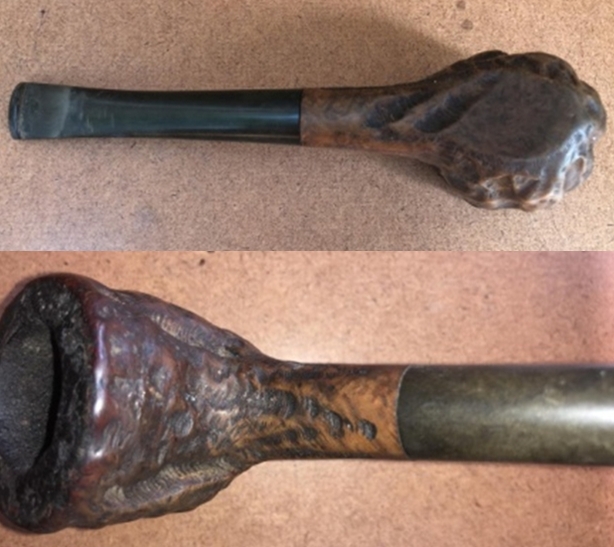
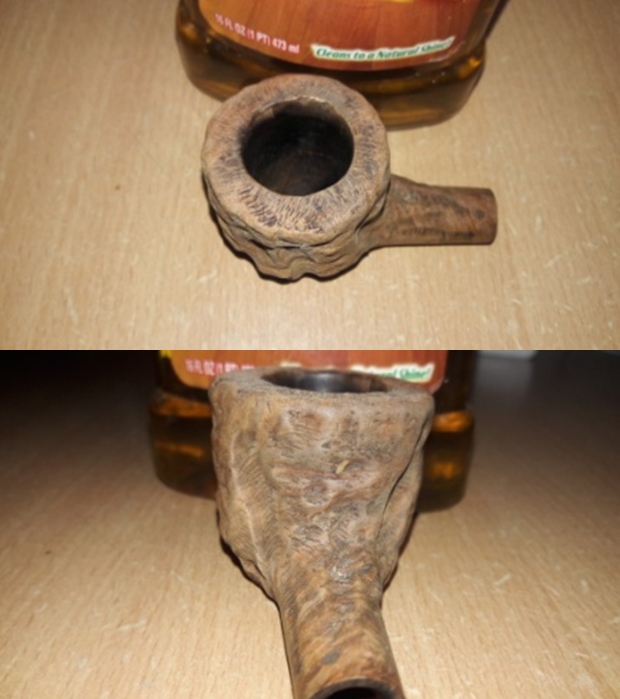
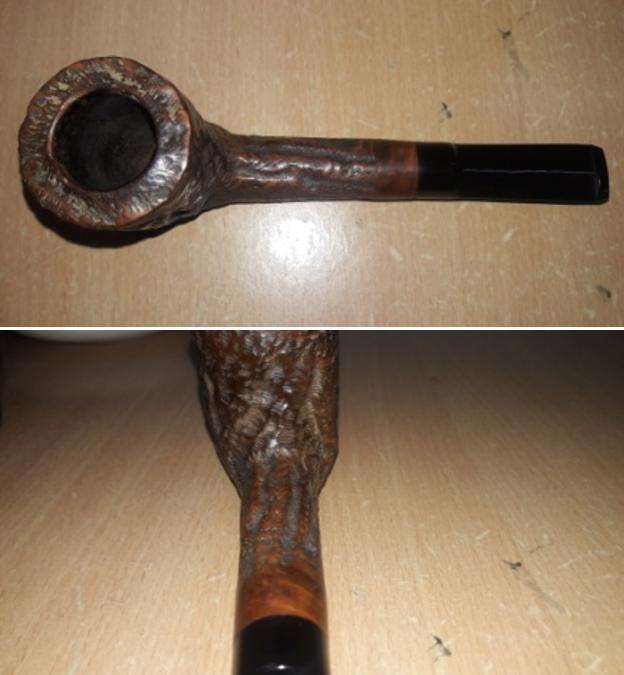
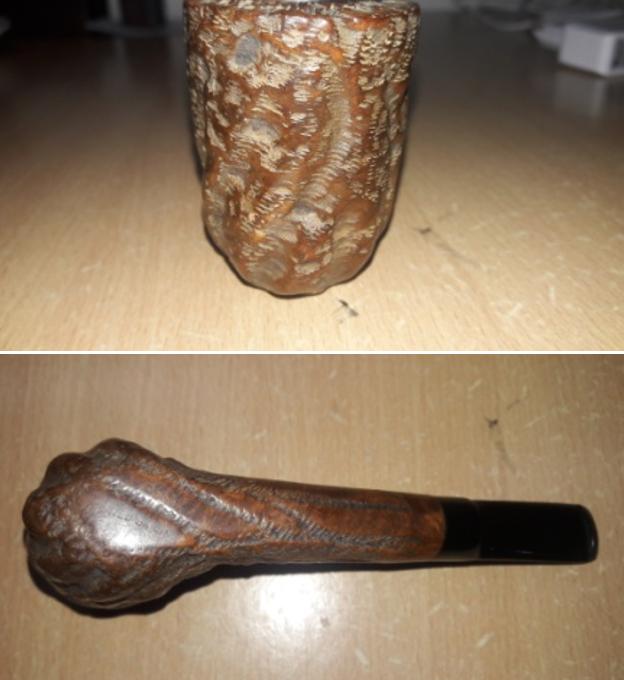
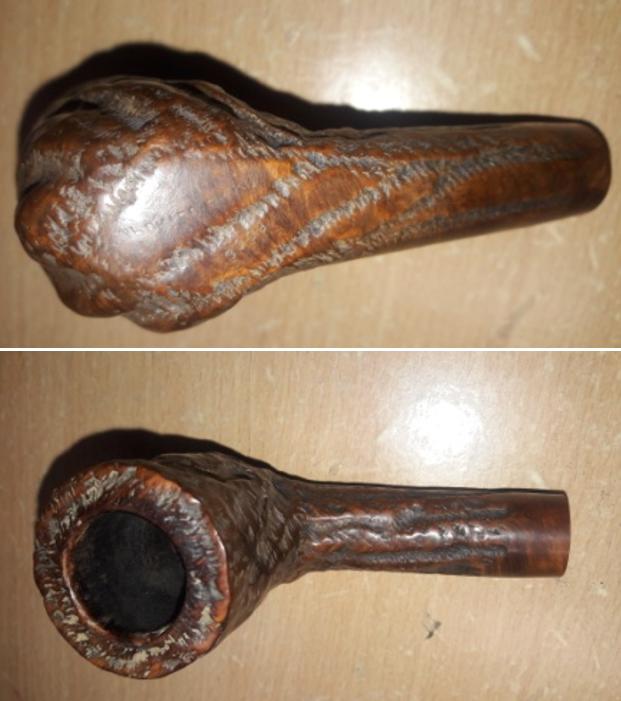
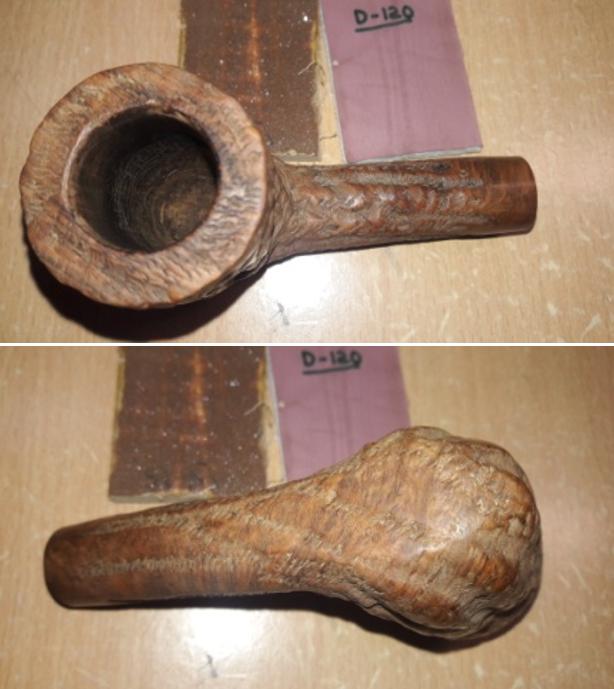
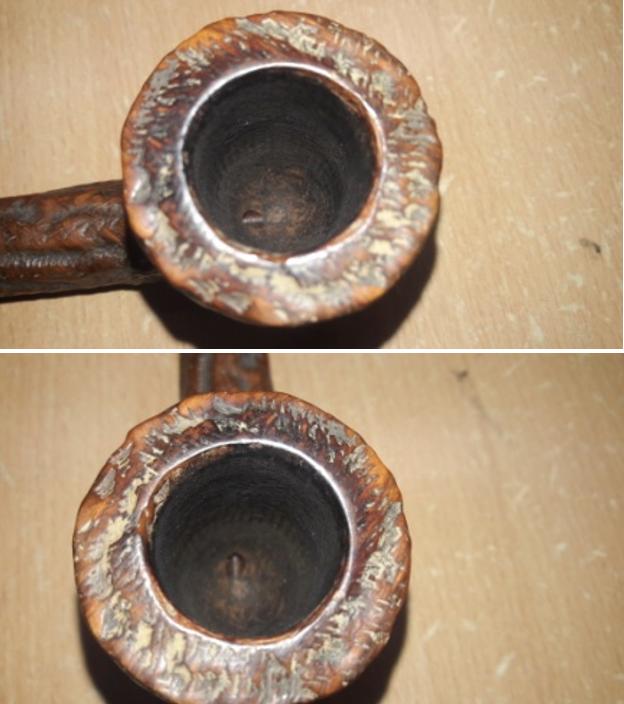 The craggy large vertical worm rustication with its horizontal thin line rustications within makes for a visual treat. The large vertical rustications are filled with dust and grime to such an extent that the horizontal lines lying within are barely visible. Same goes for the rim top. Though covered in dust and grime of all these years of storage, these should clean up nicely.

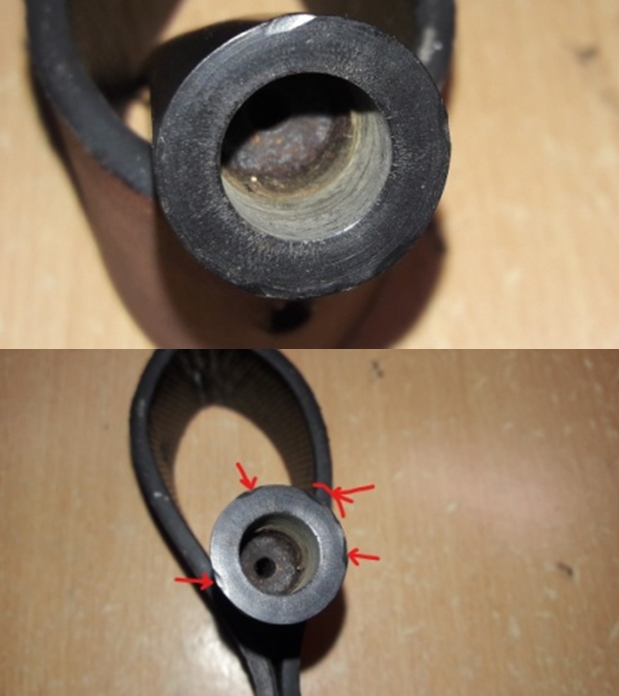
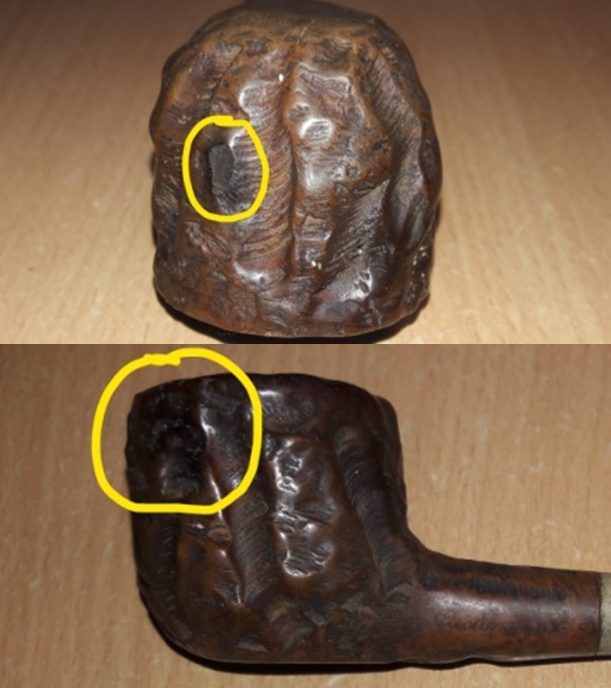
 I have seen an aluminum shank/ mortise extension fixed inside of the mortise on another very similarly sized and shaped Custom-Bilt from my Grandfather’s collection which I had restored about a year back!! This aluminum shank/ mortise extension (or should it be called a tenon?), was also seen on the previous Custom-Bilt Pot that I had restored just a couple of days back. However, this pipe has no such extension, just regular mortise and stem tenon construction. The mortise shows slight accumulation of oils and crud which has resulted in a slight gap between the stem and the shank end when seated. A thorough cleaning of the shank should address this issue.
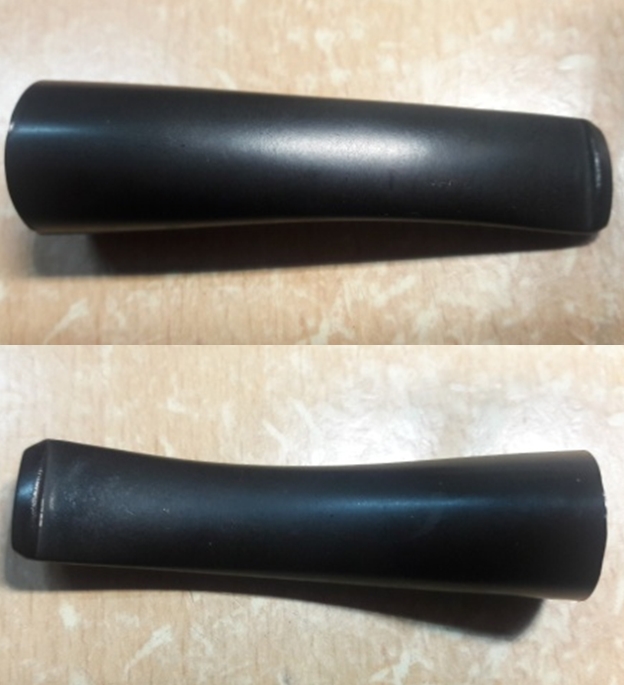
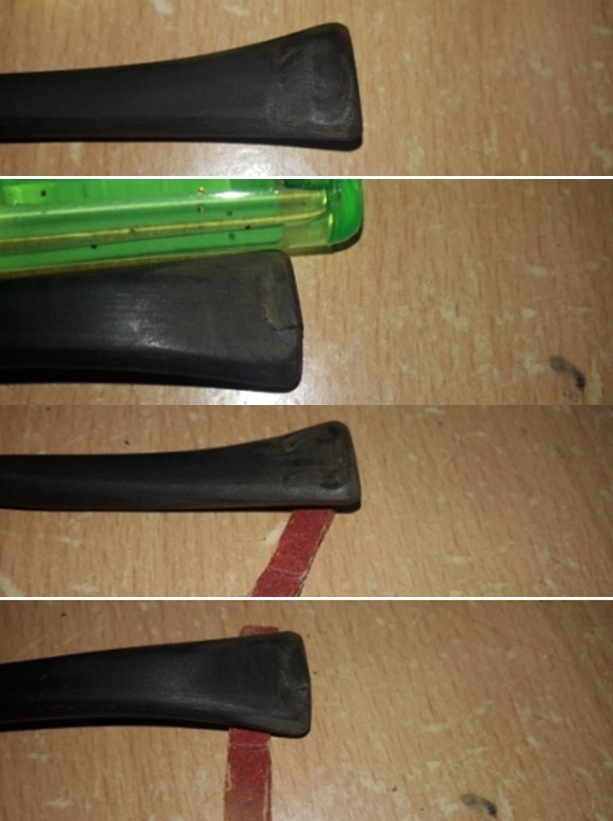
 The wide straight saddle vulcanite stem is in pristine condition and seats with a slight gap in to the mortise with all the right noises. The tenon and the slot are also very clean. A polish with Blue diamond and coat of carnauba wax should suffice to deepen the shine on the stem.
 THE PROCESS
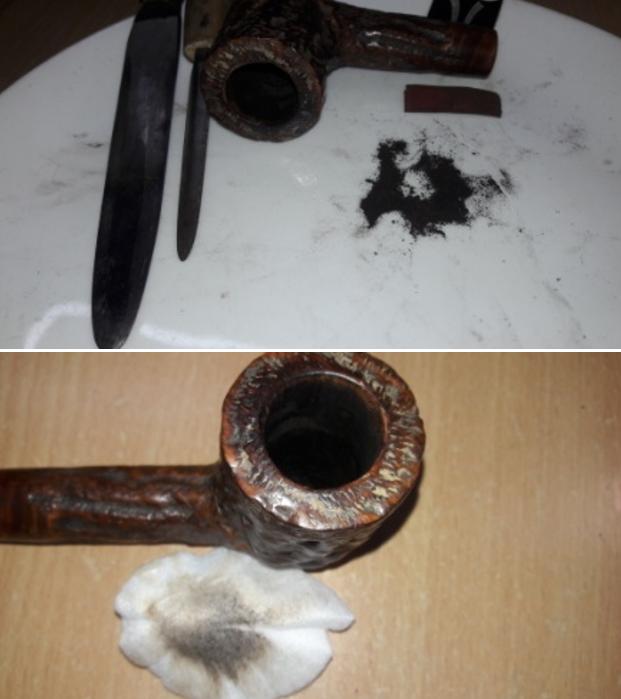
 I followed up the cleaning of the chamber with that of the shank internals. With a bent dental spatula, I scrapped out the dried gunk from the mortise. Using hard and regular pipe cleaners and alcohol, I cleaned the mortise and the shank internals. A number of attempts and pipe cleaners later, the shank internals are clean and the draw is nice, smooth and even. I tried the seating of the stem in to the mortise and was pleased to note that the fit is now perfect and without any gaps.
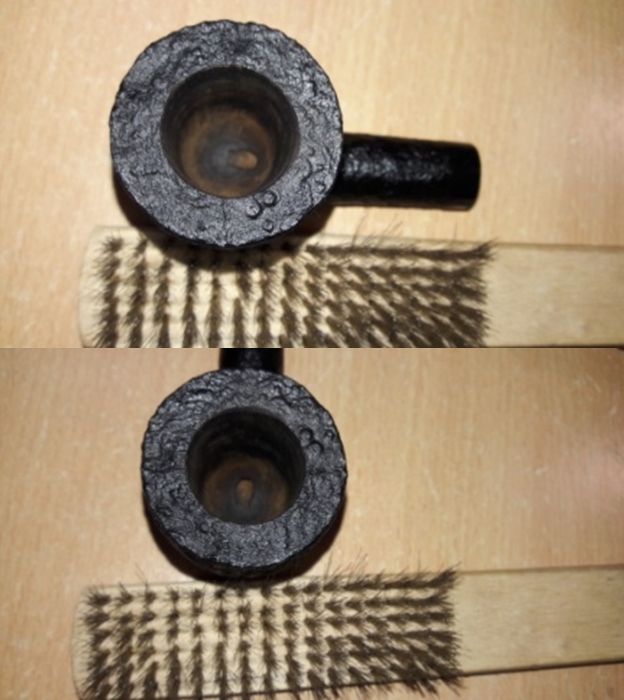
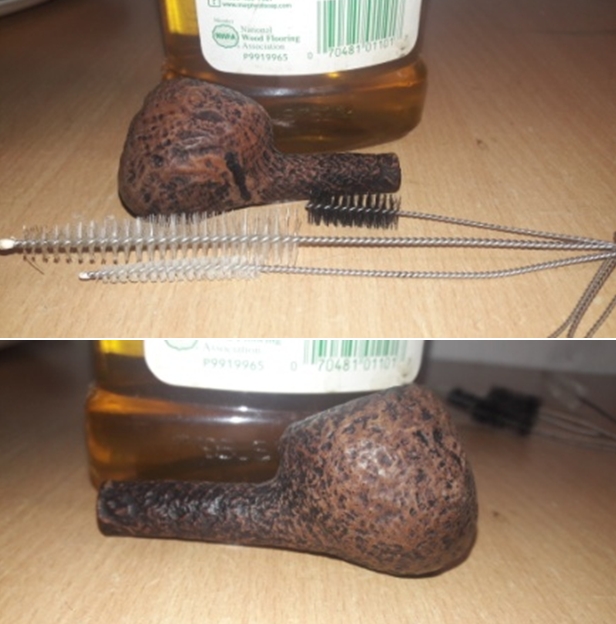
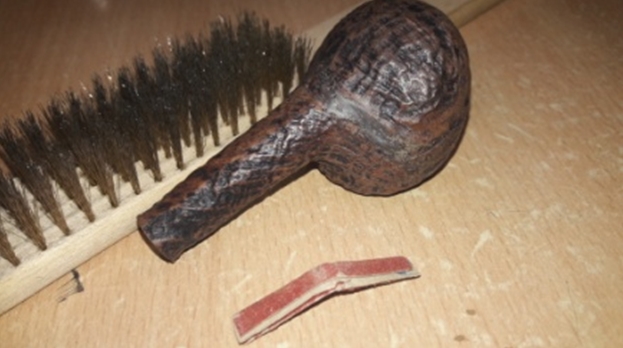
 The internal cleaning was followed by external cleaning of the stummel surface using Murphy’s Oil soap and a hard bristled tooth brush. I also used a brass wired brush to diligently clean out all the dirt and grime from within the worm rustications. With a shank brush and dish washing soap, I thoroughly cleaned the shank internals and the mortise. I dried the bowl with paper napkins and soft cotton cloth and set it aside to dry out completely.
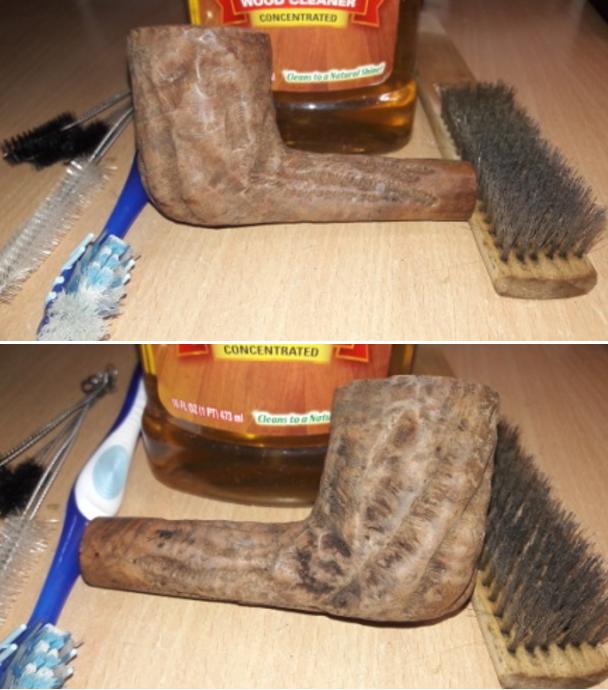

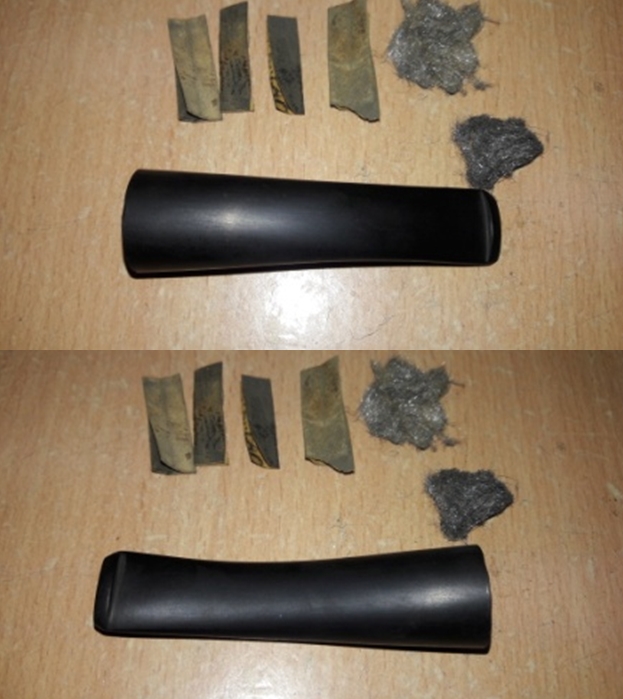
 With the stummel set aside to dry out naturally, it was time to move ahead with the stem restoration. I cleaned the stem internals with pipe cleaners and alcohol. With the bent flat end of a dental tool, I scrubbed the dried out oils and tars from the tenon of the stem and cleaned it with a cotton swab and alcohol. I wiped the stem with a small amount of Extra Virgin Olive oil and set it aside to be absorbed by the stem surface.
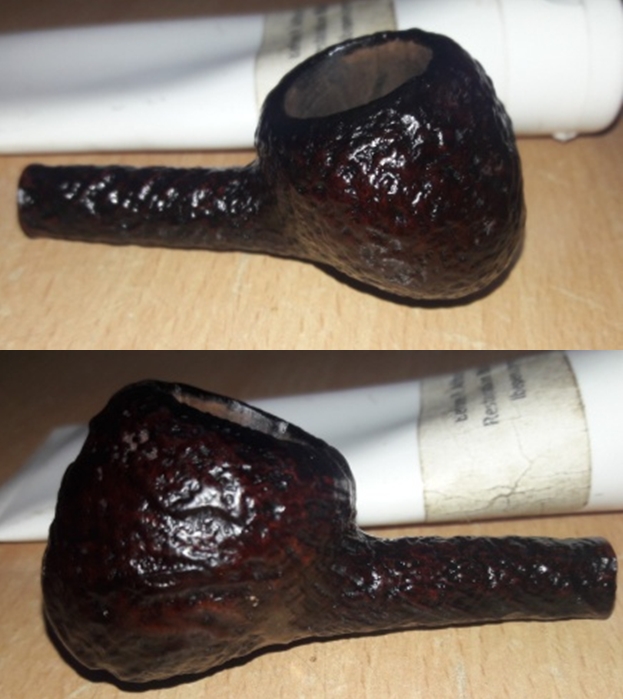
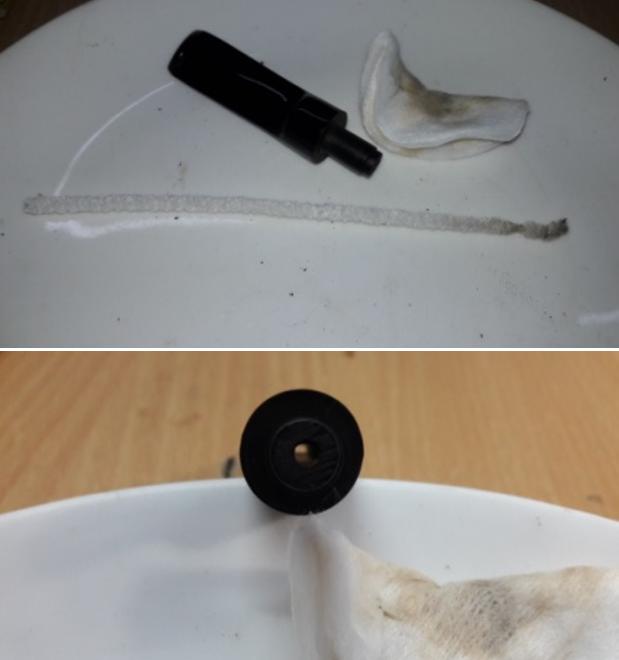 While the stem was set aside to hydrate, I worked the stummel, micromesh polishing of the smooth raised surfaces on the stummel. I polished the stummel by wet sanding with 1500 to 12000 micromesh pads. With a moist cotton swab, I carefully wiped off all the sanding dust from within the worm rustications. I am pretty happy with the results!!

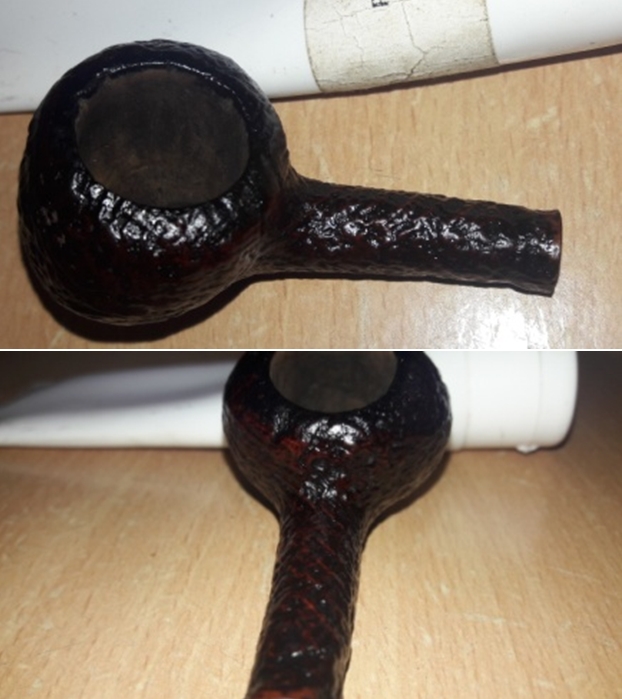
 Next, I rub a small quantity of “Before and After Restoration Balm” in to the briar with my finger tips and let it rest for a few minutes. The balm almost immediately works its magic and the briar now has a nice vibrant appearance with the beautiful worm rustication patterns on full display. I have been using this balm ever since I embarked on this journey and it is this part of restoration that I always look forward to. I further buff it with a horse hair shoe brush.
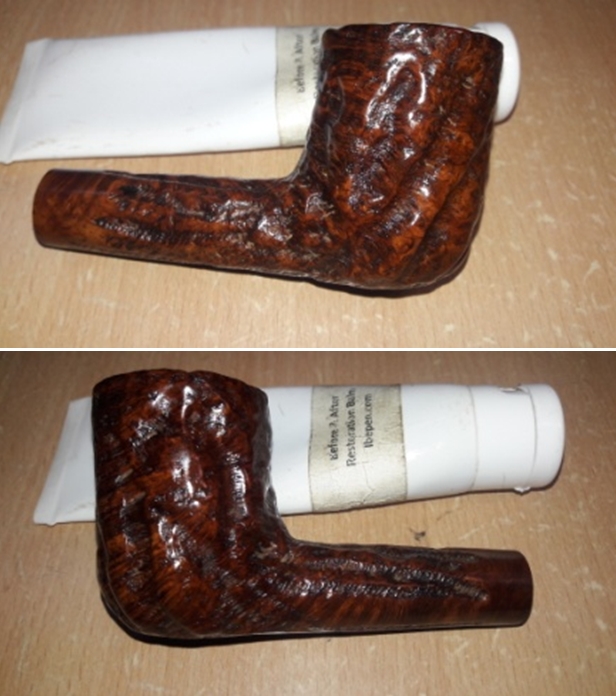

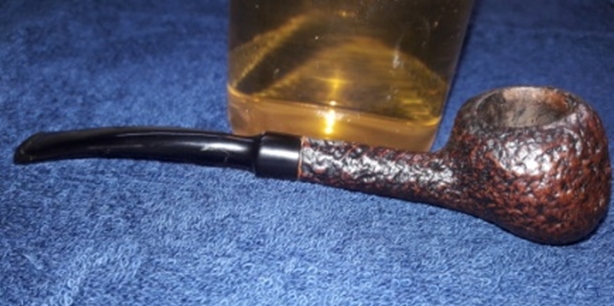
 On to the homestretch!! I mount a cotton cloth buffing wheel on to my hand held rotary tool and apply a coat of Blue Diamond to the stummel and the stem to polish out the minor scratches.
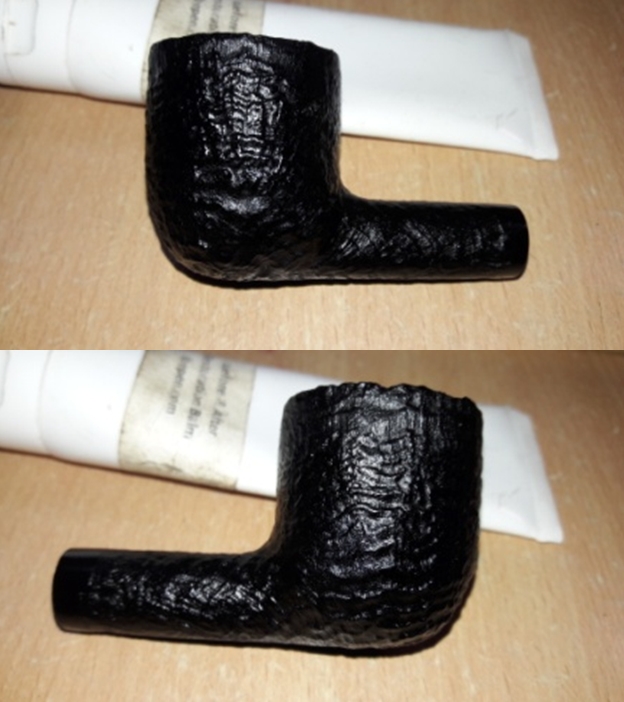
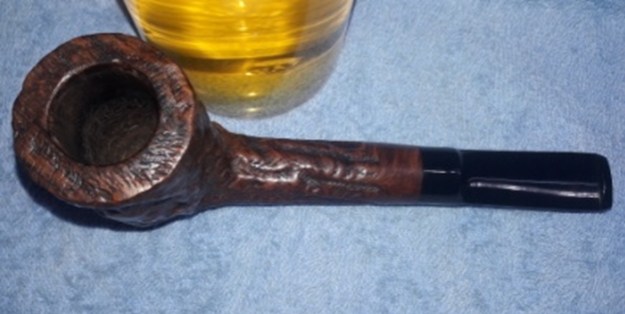
 With a cotton buffing wheel that I use for carnauba wax, I apply a coat of carnauba wax and continue to work on it till the complete coat of wax had been polished out. I mount a clean cotton cloth buffing wheel and give the entire pipe a once over buff. I finished the restoration by giving the entire pipe a rigorous hand buffing using a microfiber cloth to raise the shine further. The finished pipe looks amazingly beautiful and is now ready for its long second innings with me. I only wish it could share with me its life story of the past 70 plus years… Cheers!!


 P.S. These old Custom-Bilts may not be as elegant, delicate and quaint looking as most of the British pipes like say, Charatan’s, Barling’s, Comoy’s or an old Ben Wade, but there is a certain rustic charm about these pipes that appeals to me the most and of course, not to mention the size!! I am not sure if there are any serious Custom-Bilt collectors in our pipe world, but if any reader of rebornpipes.com is, I would definitely like to connect and share our common love for these magnificent pipes.