Dating Loewes by Periods – Martin Farrent


Blog by Martin Farrent

I read this awhile back on the web and wrote Martin for permission to post it on the blog. I find his work helpful in dating Loewe pipes and a pleasure to read. I received his permission last evening so here is his article.

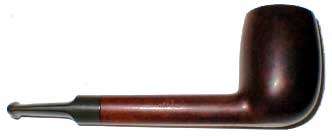
Loewe is one of the haunting old names of British pipe-making, characteristic of an almost vanished upper middle class” of the trade, which also incorporated makes such as BBB, Orlik, Comoy’s and GBD. Along with these brands, Loewe has long dwindled into pseudo-existence, becoming little more than a logo occasionally used by the Cadogan factory in Southend-on-Sea. But owners of older Loewes treasure them as superb, featherweight smokers, excellently crafted and with grain characteristics superior to those of many contemporary Dunhills.

The Frenchman Emil Loewe founded the company, both shop and workshop, in 1856 at the Haymarket 62, London. He is said to have been the first to make briar pipes in England. Richard Hacker maintains that theatre people from the West End were among the shop’s heyday aficionados. Loewe’s spigots are especially well regarded by lovers of elegance today – they were originally introduced for practical reasons, to facilitate the production of replacement stems for customers abroad.

Loewe pipes

The firm and its facilities were later taken over by Civic, well before becoming a fully integrated part of the Cadogan group sometime in the final quarter of the twentieth century. As with other brands belonging to this group, it is not easy to pinpoint a date marking the end of Loewe’s independence and singularity. This is partly due to Cadogan’s own development from a cooperative to a monolithic entity.

In 1979, a German paperback said that the Loewe brand had been discontinued two years previously, but that the pipes themselves were due to reappear as high-end GBDs. Interestingly, the year of publication coincided with the year in which the Loewe trademark became Cadogan’s, who by this time already owned GBD. From today’s point of view, the author appears to have been working on confused, but partly true information. If there were ever really plans to fully amalgamate the two lines, they were dropped. Also, a two-year break at this time seems impossible, since we have hallmark evidence of Loewes made in 1978 and 1979. However, there are firm indications that Loewe shapes were later marketed as Comoy’s (another Cadogan brand). There may also have been a phase of dissolution regarding location. The reported appearance of French Loewes in the early 1980s is a sign that Loewes were being produced in more than one place at some stage before the Cadogan-era proper.

From what I can gather, Cardogan’s various brands continued to be made in separate facilities throughout the1970s. It was the purchase of Orlik in 1980 that enabled the Cadogan group to consolidate all manufacturing in that company’s new factory in Southend-on-Sea. Whether or not this transferal was a gradual process and when it affected Loewe is unclear. We hear that, as a company, Loewe was not formally wound up by Cadogan (the successor to Civic) until the late 1980s. Of course, today’s ‘Loewes’ are definitely made in Southend – though, according to Cardogan, the trademark is no longer used very much.

Collectibility

As with most brands now owned by Cadogan, the collector’s emphasis is on finding pieces made before the consolidation of the group’s production in the Southend factory. It is generally agreed, for example, that the loss of a separate identity spelled the end of GBD’s excellence. Likewise, the once celebrated name Orlik means little to the buyer of new pipes today. But finding an ‘original’ on the estate market often involves blind trust in a vendor’s word — or in one’s own ability to assess a pipe’s quality from a couple of photos on Ebay.

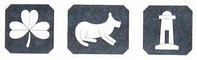
Mounted Loewes are thus the most valued, since the hallmarks on their silver bands offer an indication of age. Other pipes bearing the ‘L&Co’ logo are impossible to date as exactly as older Dunhills or even Charatans, where frequent changes to stamping patterns have been well documented. By contrast, the various owners of the Loewe trademark appear to have adhered to the original patterns rather consistently.

With help from members of the pipe-smokers’ newsgroups ASP and DAFT (Germany), I have looked into ways of rectifying this situation. We have come a little closer to dating Loewe pipes — or at least assigning them to a period, but there are gaps. One method is to correlate stamps with the hallmark information on pipes with bands, giving an idea of the exact stamp used in a given period. However, for a complete dating guide we would need to have examples from years clearly marking the beginning or end of a certain stamping policy — and also more insights into ownership and location issues.

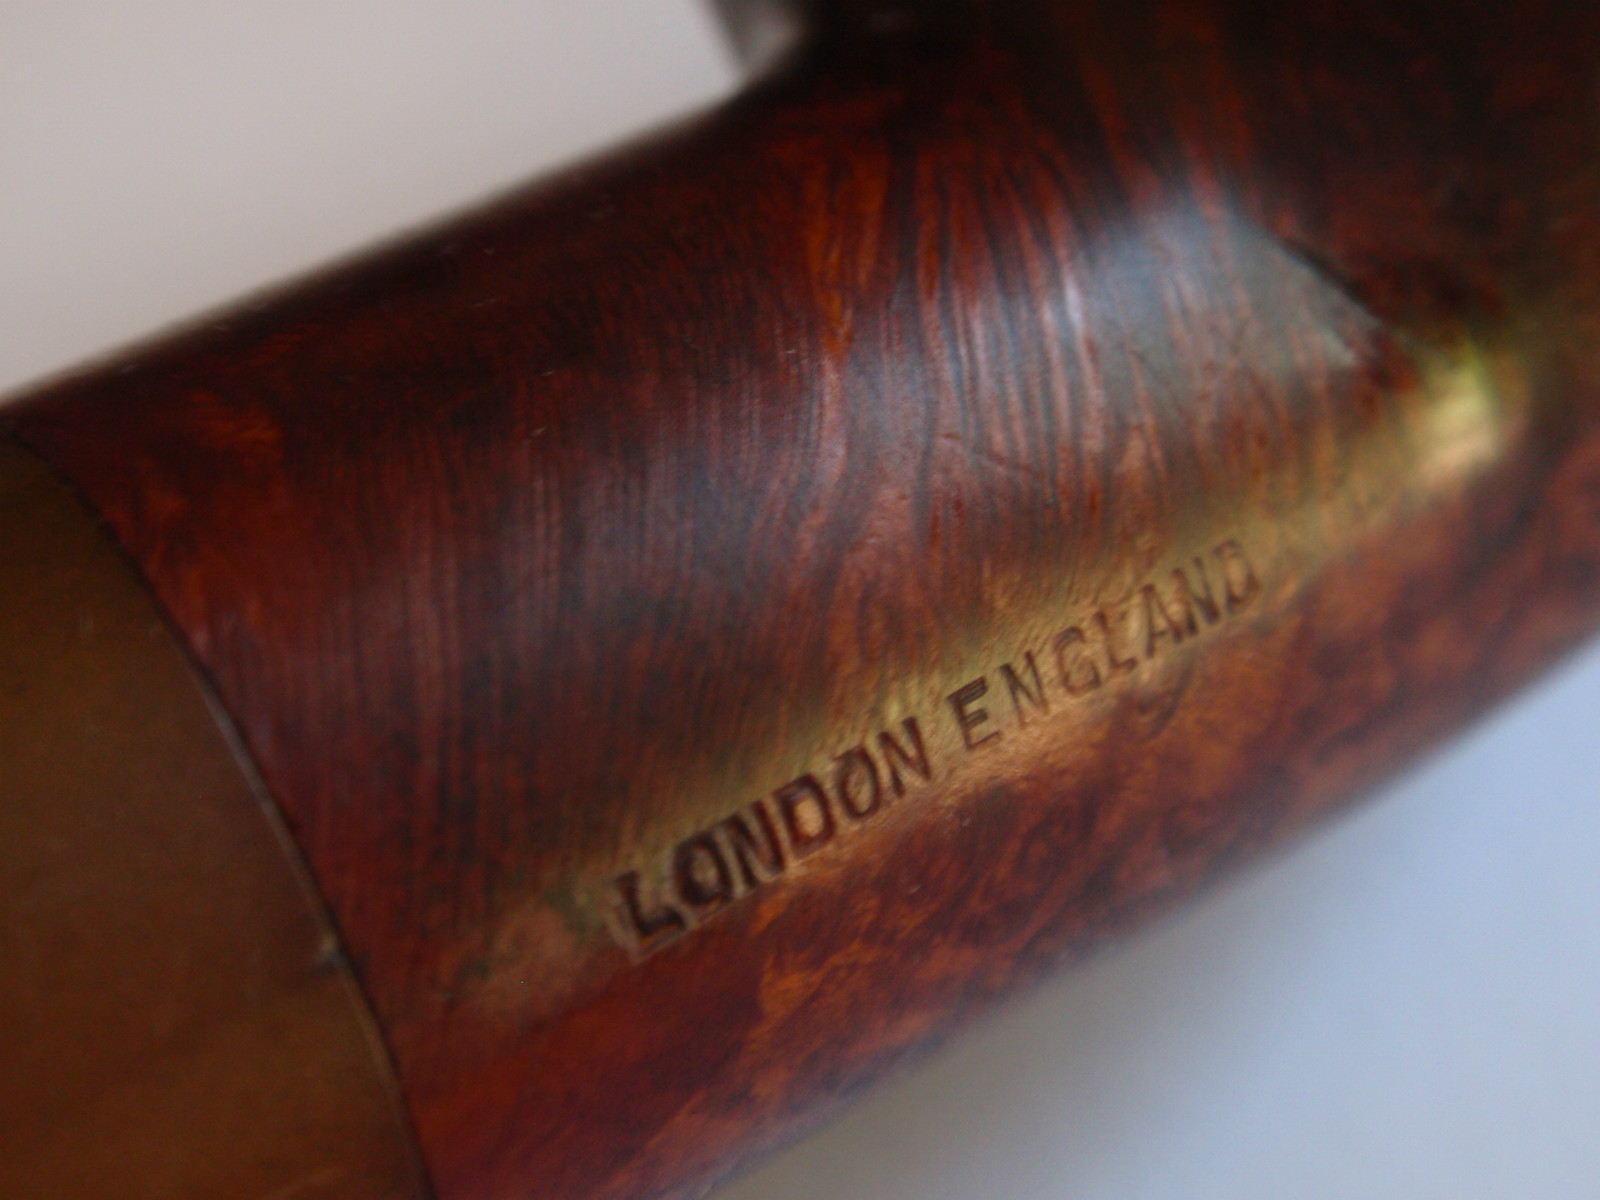
To an extent, Cadogan have been helpful with information, but they have not answered historical questions. Also, their stamping philosophy really adds to the confusion. For example, they still use a London stamp, though production has been on the Essex coast for well over a decade, possibly two. The results of our collected research are still not comprehensive and the hope remains that someone will provide the information necessary to fill in the blanks.

Aspects of Dating

The period of transitions — and therefore of interest, here — begins some time after 1960. Around that year, the pipes were still being made in the Haymarket building, though – of course – no longer by the late Emil himself. Civic was running the business, apparently having taken over from the founder or his successors under a mutual agreement many years previously. There is no indication that the pipes made under Civic ownership at this time were any less highly regarded than earlier Loewes.

Based on information rendered by owners of hallmarked Loewe pipes, the stamping from 1920
(or earlier) to 1967 (or slightly earlier) appears as follows:

Lowe2

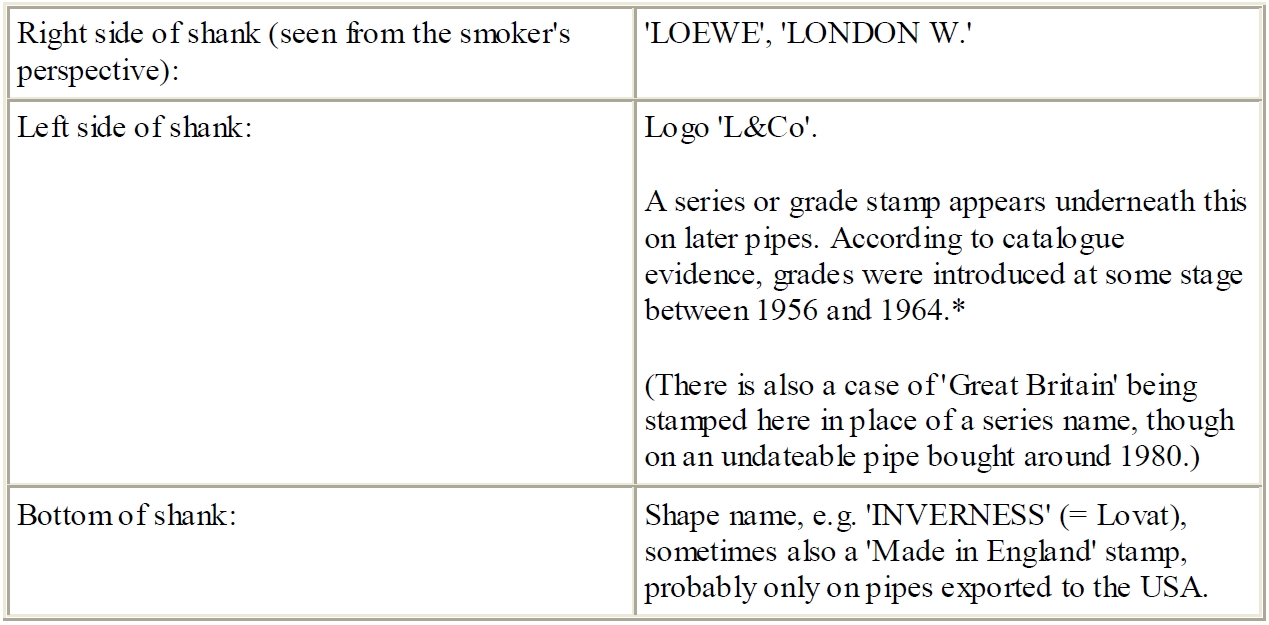
* The first series names to be used appear to be ‘CENTURION’ and ‘ORIGINAL’ and ‘OLD ENGLISH’. According to catalogues, they denote grades. Centurions were allegedly made of wood over 100 years old. Grading was not introduced until some time between 1956 and 1964, as one Danish owner of Loewe catalogues reports. Additional, probably later, grade stamps include ‘MOUNTED’, ‘SPIGOT’, ‘STANDARD’ and ‘STRAIGHT GRAIN’. There are certainly no grade stamps on pipes made up to 1920. There were also none on the sandblast pipes advertised as Ripple Grains in 1950. That year’s catalogue also lists a pipe called the “Process”, with a natural finish and a processed bowl requiring no breaking- in. Both the Process and the blasts were missing in 1956.

During the 1960s, still under the Civic regime, the original premises were lost to development schemes, and Loewe pipes were made in various, (possibly successive) locations all over London (Hammersmith appearing to be one of them).

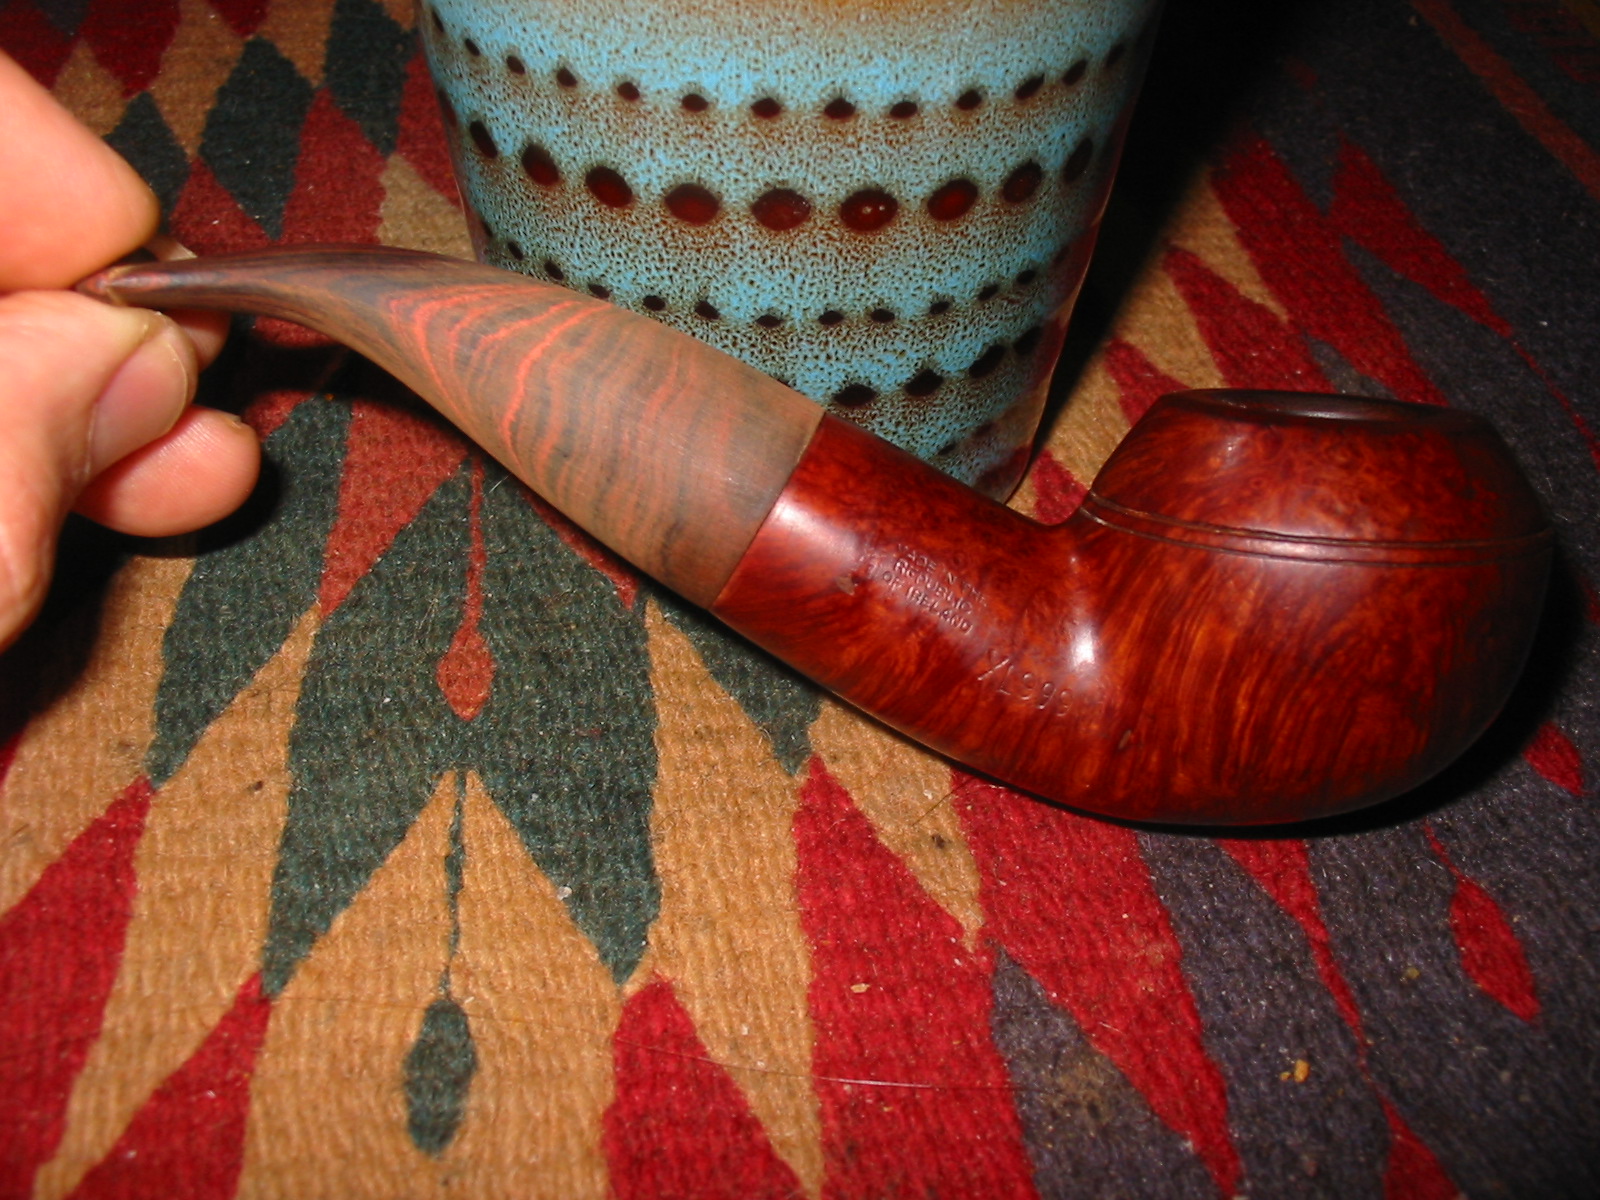
Also, at some stage before 1968, shape names were replaced by shape numbers, apparently all incorporating three digits and beginning with a 9. For example, a 910 was a billiard. We know that these numbers, stamped on the right side of the shank (under ‘LONDON W.’), were still used in 1983, though there is some confusion about this. We do not know exactly when the switch from names to numbers took place. It could have been as late as 1967, but may have occurred a few (not many) years earlier. A shape name appeared on a new pipe bought in the USA in 1967, yet a pipe bearing that year’s hallmark on its band already displays a number, rather than a name. It’s also worth noting the recollections of one Danish smoker, who remembers that W.O. Larsen only imported Loewes to Denmark until 1968.

Manfred W. Resag has a page on 9xx numbered pipes, with photos of pieces made from 1978 to 1982 (with one possible exception — an unbanded and therefore undateable pipe):
http://perso.wanadoo.fr/nautor/Loewe.htm

By studying the website of one UK dealer I was able to deduce that the present shape numbers (early 2003) mostly (probably all) differ from those used from 1967. For example, a Billiard is now a 28, a Lovat an 834, a Canadian a 296. Some shape numbers now have 4 digits. But even today, Cadogan will occasionally still stamp a pipe with a shape name instead of a number, though only on request.

It would appear that both older pipes with shape names and pipes using the 9xx numbers were made in London, before the move to Southend. My guess is that only the pipes made prior to the introduction of numbers were carved on the original Haymarket premises, with the graded shanks (series names) probably indicating pieces carved after 1956.

Murky issues

To go some way towards verifying this theory, we would need to know the exact year of the move from the Haymarket, but also more about the stamps on pipes made between 1960 and 1966/67. All those smokers who followed a call for information in ASP and DAFT and reported dateable (hallmarked) pipes owned pieces made before or after these years, which almost certainly encompassed the loss of the Haymarket workshop.

Cadogan has not answered questions concerning this or the later move to Southend. However, from the evidence contributed by readers of the first version of this article, I would say that the second event occurred by or in 1982, the year in which a Danish collector has reported buying a Canadian with the new 296 shape number.

This is notwithstanding the fact that several people own Loewes with the 9xx stamps — pipes I would attribute to the late London days — yet with hallmarks from 1982 or even 1983. There are several conceivable explanations for this. The most obvious is that there may have been a few months of overlapping production in two or more locations. One could even raise the question of whether the later London years saw any consolidated product ion at all — or whether some (or all) Loewes were being made to order by other firms. The Danish collector mentioned above has records of being offered both London-made and (cheaper) French Loewes in 1982.

Moreover, it is also reasonable to assume that some pipes began life in London and were stamped there, but only completed in Southend. In a few cases, it even seems clear that the lapse between conception and completion was several years. For instance, one German smoker owns a 908 with a 1983 hallmark. It was from a strange batch of spigots offered by a German dealer in the late 1990s, with shank bands hallmarked in the early 1980s and stems made a dozen or so years later. The dealer remembers that they were the last Loewes ever offered to him. Curiously, some of the Loewe shapes from the 1970s and early 1980s apparently reappeared as Comoys (now also made by Cadogan), later on. Indeed, Comoy spigots were among the new series introduced after Comoy’s full integration into Cadogan. This was in line with Cadogan’s branding hierarchy, which put Comoy’s at the top of the pyramid at some expense to the prestige of the other names. So an educated guess says that the bowls of the strange Loewes in question
were made in London, were among the inventory moved to Southend and fitted with stems years later, when someone remembered or discovered them. The stems were available, because they were still being produced for the new Comoy pipes.

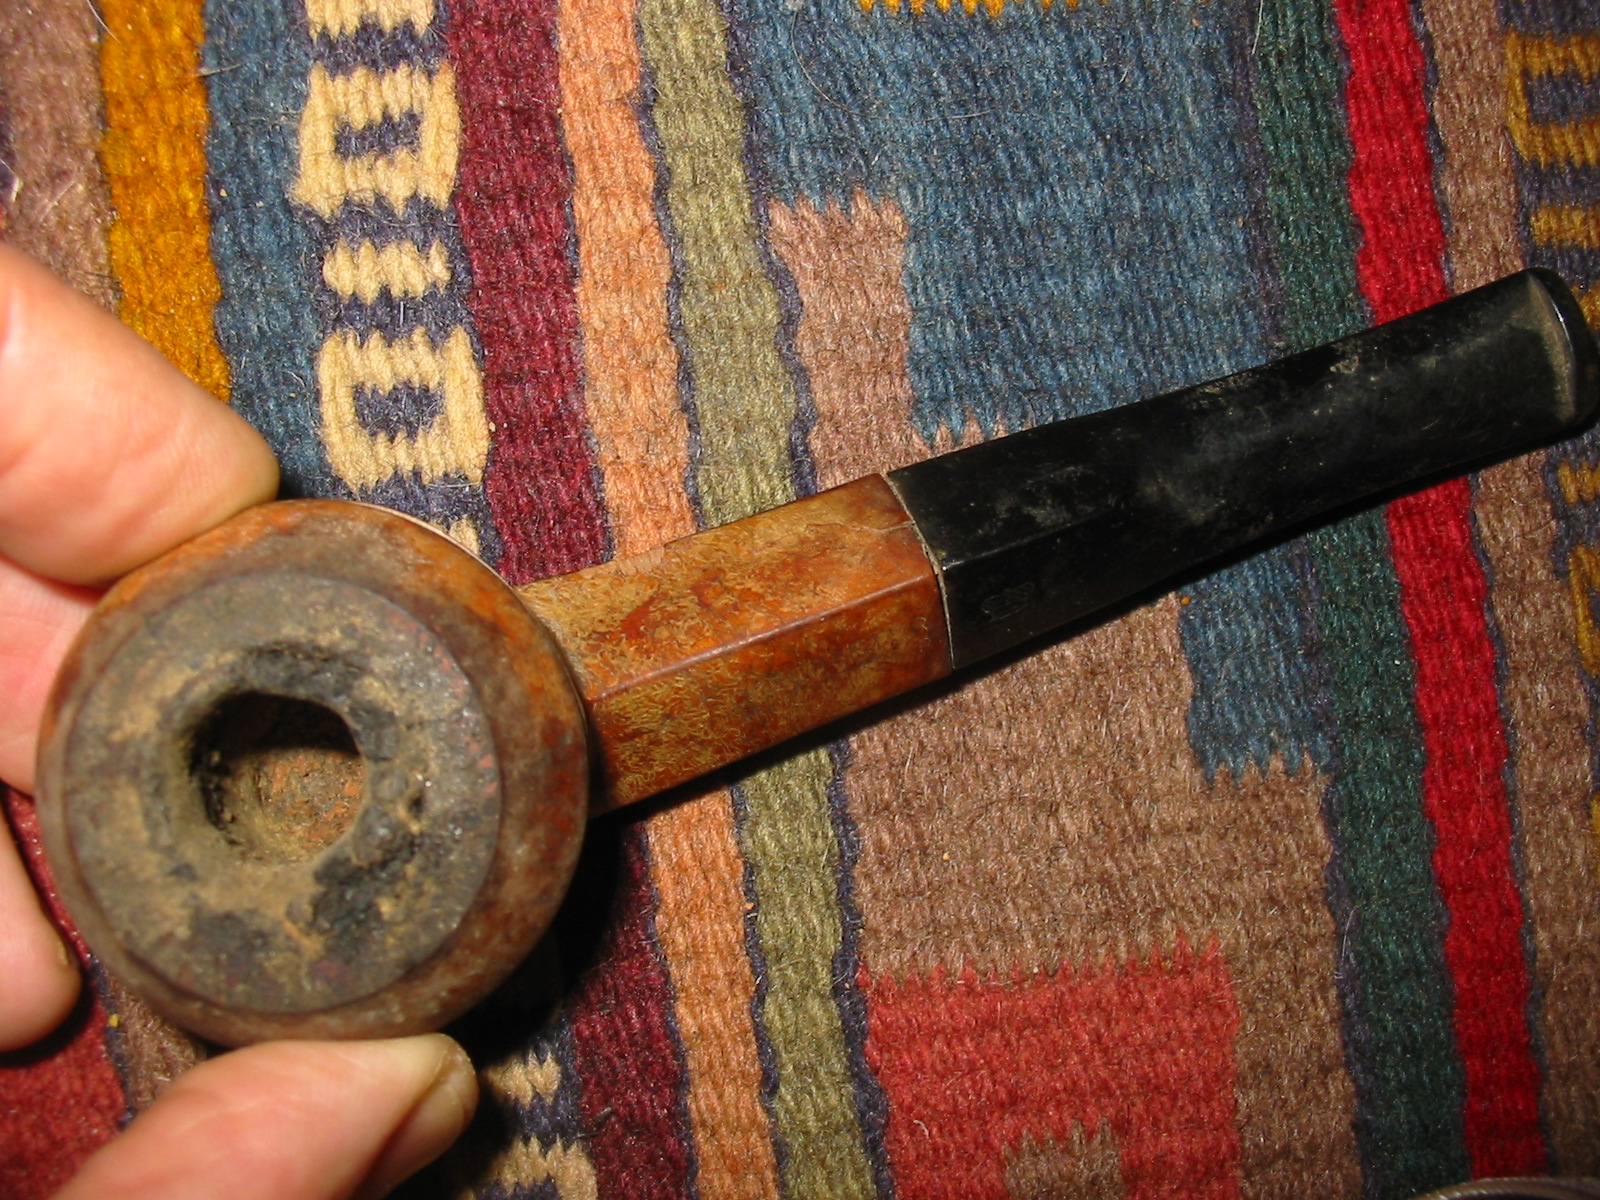
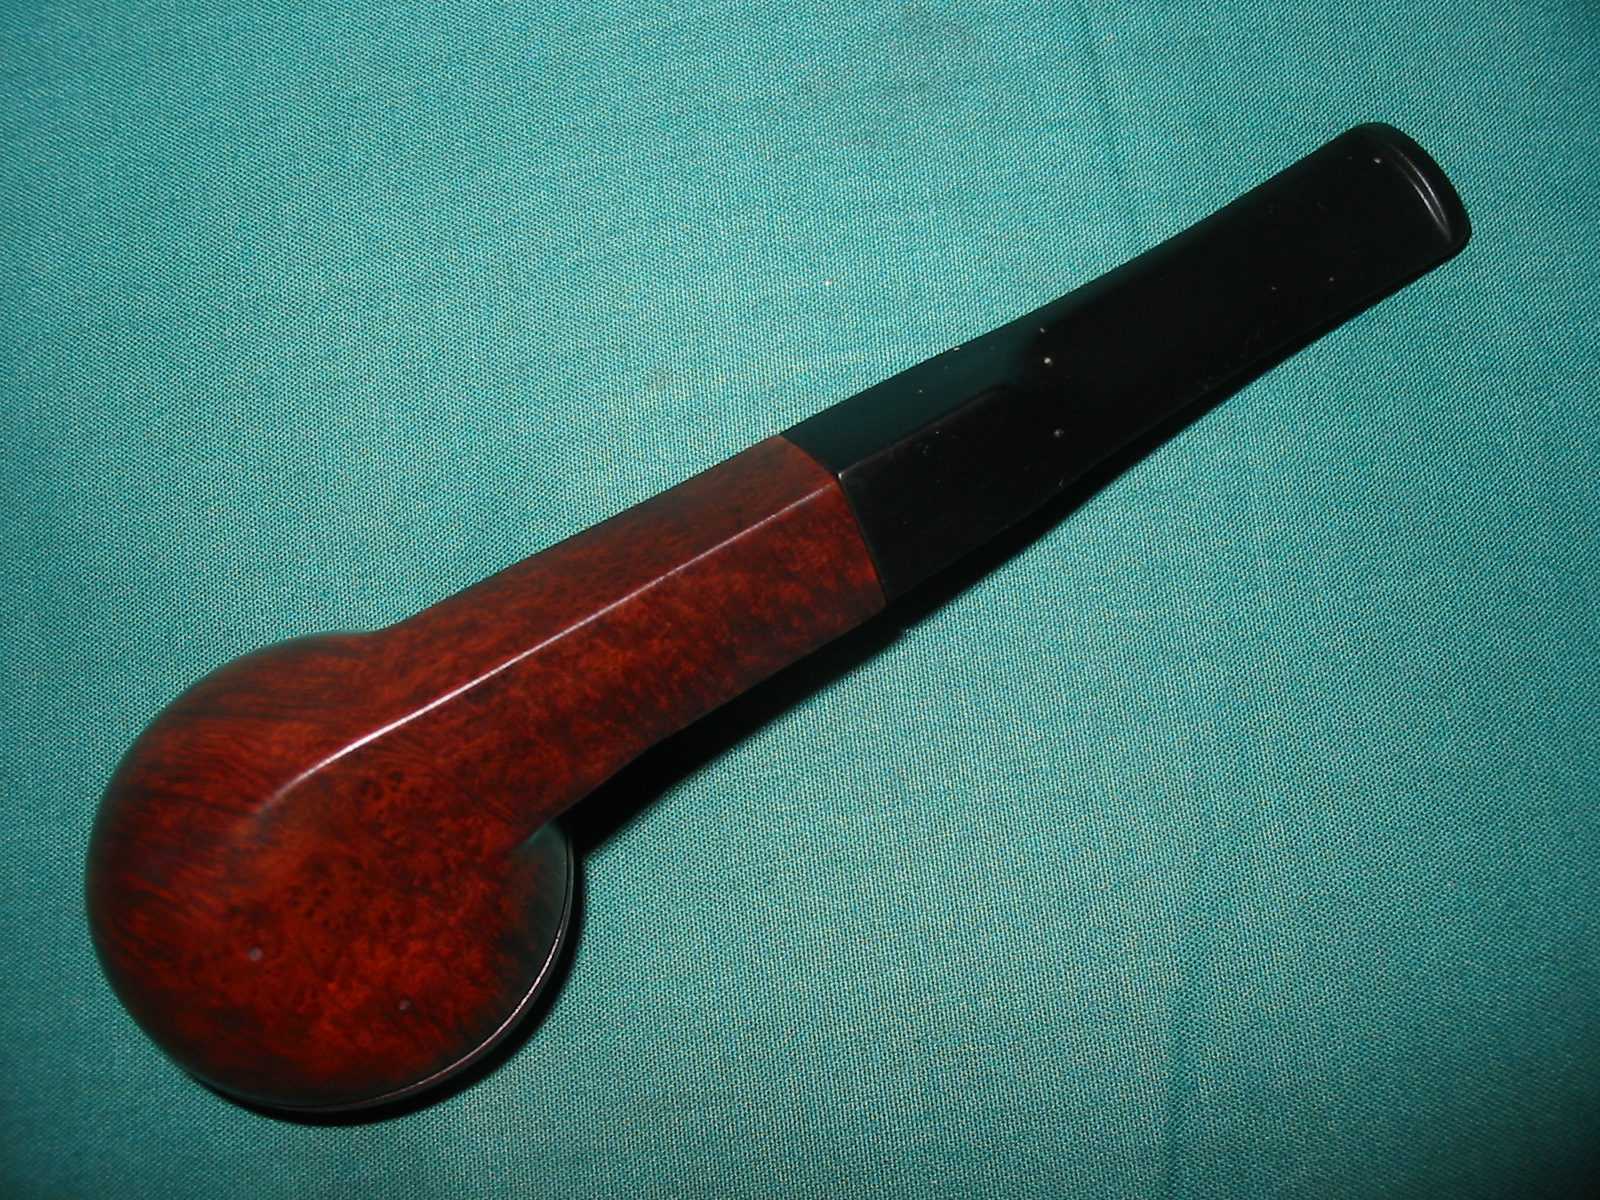
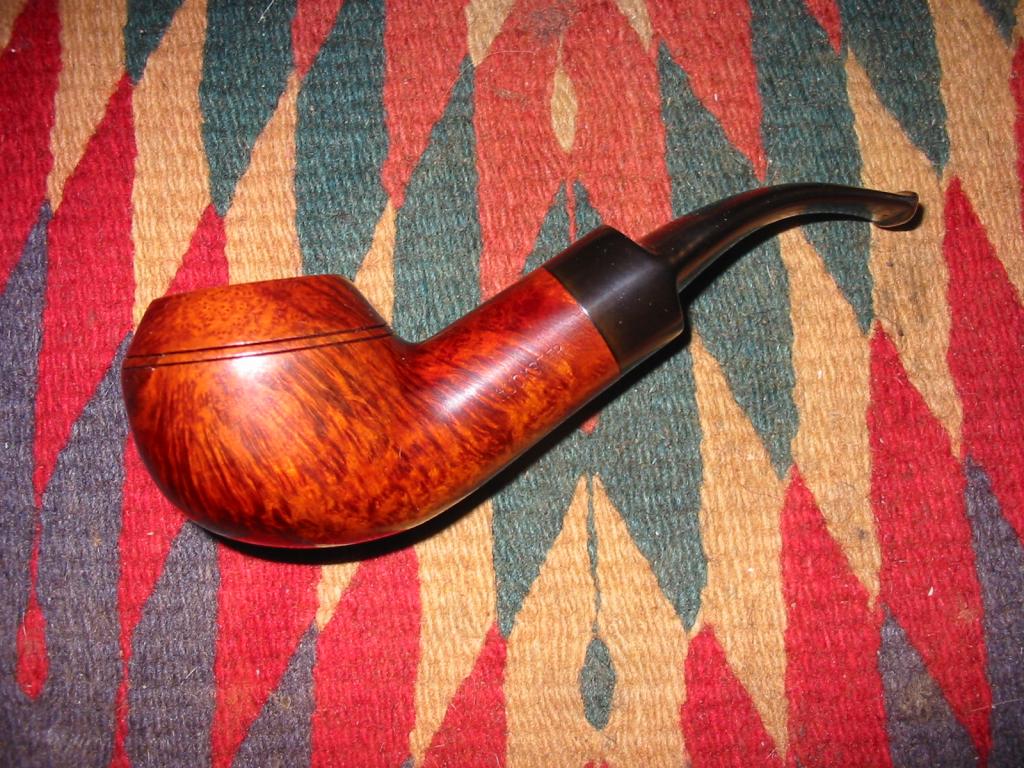
One final note on the transition period regards the desirability of Loewes made between the Haymarket days and the move to Southend. I have yet to hear a complaint from an owner of one of these pipes. I have a fine mounted Rhodesian myself with excellent, almost straight grain. It is a superlative smoker.

Prices

In 1926, the wholesale price for an unmounted Loewe was 11 shillings and three pence. 24 years later, it had doubled and such a pipe retailed for 50 shillings. At this time (1950) an ounce of pipe tobacco or a 4lb loaf of bread cost an average of a shilling in London. In 1982, one dealer was offering Loewes (London) for 19.50 pounds. A batch of 9xx Loewe spigots made in the early 1980s and sold towards the end of the century cost around 200 Euros each in Germany. In early 2003, one British website advertised Loewe-Kaywoodies for 18.50 to 65.00 pounds sterling (about 27 to 95 Euro/$). These were Cadogan pipes, of course. At the same time, some ‘antique’ pieces were fetching up to 175 Euro or US $.

Early Loewes were available with a variety of options, such as amber stems and solid silver or gold mounts at a surcharge. Interestingly, the 1926 catalogue prizes the pipes’ “natural finish”, but adds that an attractive dark tan was available at no extra charge (!).

Acknowledgements and note

This article grew in the making, following requests for information on Usenet and the publication of a first version, which almost immediately hastened new input from readers. My thanks to Asp’ers Kevyn Winkless, Stephen Bozle. Greg Pease, Chris Keene, Manfred Resag, Sonam Dasara, Jorgen Jensen and Jesper of Danpipes for contributing information and ideas to this article. Valuable details were also reported by DAFT (German newsgroup) members such as Klaus J. Pfeifer, Manfred Arenz, HaJo Oestermann, Jörg Eichelberger, Rainer Duesmann, Joachim Acker and Michael Karrengarn.

Finally, though I include my e-mail address here, it is not really intended for queries, since I lack the knowledge to answer them. I am simply an admirer, but no expert on Loewe pipes and have included every last scrap of evidence I have accumulated in this article. So ideally, the address is for those able to contribute additional information in order to make this text more satisfactory, some day.

Martin Farrent March 2003
martin@farrent.de

A Peterson Dating Guide; a Rule of Thumb – Mike Leverette


Blog by Mike Leverette

Many years ago now, Mike Leverette sent me a copy of this document. I have had it on the hard drive since sometime late in 2006. I am sure there are newer iterations of the material but I have found this little piece very helpful. I am looking forward with expectation to the book that is being worked on now by Mark Irwin and others. It will certainly be a definitive work on Peterson Pipes. Until then I use the Peterson forum and refer to this article by Mike.

A Peterson Dating Guide; a Rule of Thumb

This guide first appeared in pipelore.net on August 26, 2006 by: Mike Leverette

Introduction

The history of Ireland is an old and honorable one; steeped in warfare, family, racial and religious traditions. No other country can compete in comparison. However, the first couple of millennia of Irish history have no relevance to this dating guide. Should you wish to read more on the history of the Irish, I recommend “The Story of the Irish Race” by Seumas MacManus who gives a very vivid, and near as we can tell an accurate portrayal of their history.

History pertinent to our purposes began in the year 1865; the year Charles Peterson opened a small tobacco shop in Dublin. Later in 1875, Charles Peterson approached the Kapp brothers, Fredrich and Heinrich, with a new pipe design and with this, a very long-lived partnership was formed, Kapp & Peterson. This new pipe design is the now famous Peterson Patented System Smoking Pipe. By 1890, Kapp & Peterson was the most respected pipe and tobacco manufacturer in Ireland and rapidly gaining followers in England and America. In 1898 another of Peterson’s remarkable inventions became available, the Peterson-Lip (P-Lip) mouthpiece, also known as the Steck mouthpiece. So for the purpose of this dating guide, we will study Irish history, relevant to our pipe dating needs, from 1870s until now.
Before we start with this Peterson dating guide, an observation; the Kapp Brothers were making pipes as early as the 1850s and in many of the shapes we now associate with Peterson since the Kapp Brothers simply took their existing shapes and incorporated Charles Peterson’ s patented design into them. From their inception, Kapp & Peterson’s goal was to make a good smoking pipe that the ordinary, common working man could afford and we believe they have, very admirably, lived up to this.

Explanation of Title

The vagaries of Peterson’s processes do not allow for an accurate dating guide so this guide is a ‘rule-of-thumb’ guide only. For example; Peterson did not take up the old Country of Manufacture stamps as new ones were issued so depending on which one the various workers happen to pick up, the stamps can and do cross over the boundaries of the various Eras. Some of the pipes of the Sherlock Holmes Series of the 1980s have pre-Republic stamps, as well as other pipes produced in 2000. However, there will not be too many of these missed stamped pipes. For silver anomalies, see the section on silver marks.

Stamping of Bowls

During the years of Kapp and Peterson’s business operations, the country of Ireland has undergone several name changes and K&P’s stamping on their pipes reflects these changes. Knowing these changes, a Peterson pipe can be roughly dated and placed in “eras.”
• The Patent Era was between the years of K&P’s formation until the expiration of the patent; 1875 through approximately 1910. Though for our purposes we will list this era as 1875 through 1922. Peterson pipes made during the majority of this period had no “Country of Manufacture” (COM) stamped on them. However, later in this period, say around 1915/16, Peterson began stamping their pipes “Made in Ireland” in a block format.
• The Irish Free State was formed on 15 January 1922. So the Free State Era will be from 1922 through 1937. Peterson followed with a COM stamp of “Irish Free State” in either one or two lines, either parallel or perpendicular to the shanks axis and extremely close to the stem.
• Eire was formed on 29 December 1937. The Made in Eire Era will be from 1938 through roughly 1940? or 1941?. For dates with ?’s, see below. Peterson now stamped their pipes with “Made in Eire” in a circle format with “Made” and “Eire” in a circle with the “in” located in the center of the circle. This COM was used during the years of 1938 – 1940?/41?. Later they stamped their pipes with “Made in Ireland” in a circle format (1945?-1947?) and still later with “Made in Ireland” in a block format (1947?-1949). The “Made in Ireland” block format came in either one line or two lines.
• The Republic Era is from 1949 until the present. The Republic of Ireland was formed on 17 April 1949. From 1949 to present the stamp for this era is “Made in the Republic of Ireland” in a block format generally in three lines but two lines have been used with or without Republic being abbreviated.
•English made Peterson pipes actually spans between the pre-Republic and Republic eras. In 1895, Peterson opened a shop in London England that lasted until the late 1950s or early 1960s. So the English Era, for a simplified date, will be from 1895 through 1959. The stamps Peterson used in London and that we have seen are:
Made in England – block format
Made in England – circle format
Made in London
Made in London England
Simply, London England
Great Britain

Though there are a couple of more, the above will give one the general idea. We believe the earliest stamp of this era was the “Made in England” in a block format since Peterson was using the “Made in Ireland” block format at about the same time on their Irish production pipes. The “Made in England” circle format was used during the same time frame as the “Made in Eire” and “Made in Ireland” circle formats.

As one can see this is pretty straightforward but there have been inconsistencies within this method of stamping. Peterson was never very energetic in removing their old stamps from the work stations so the older stamps can and did cross-over into the newer Era’s.

The explanation for the question marks in the 1940’s dates is, during the Second World War briar was hard to come by for obvious reasons, so no one can say for sure what years Peterson produced briar pipes and how many briar pipes were produced in those years. Why the switch from “Made in Eire” to “Made in Ireland” is anyone’s guess since the country was still technically Eire until 1949. As a point of interest and due to the shortage of briar, Peterson did make clay and Bog Oak pipes during the war years though they had ceased clay pipe production in the Patent Era and Bog Oak production back in the early 1930s.

P1 The “Made in Ireland” block format (above) can be another headache in dating Peterson pipes since this stamp was used in the late Patent Era as well as the late 1940s. So for a guide we must take into consideration the style of lettering Peterson used on their pipes. From the start of the Patent Era until somewhere in the early 1930s, Peterson used the “Old Style” lettering that used a forked tail “P” in Peterson.

P2From then until now, Peterson used the more familiar script “P” (above) intermixed with a plain block letter “P.” Later in the 1970s, Peterson began production of “commemorative” pipes, often referred to as “replica” or “retro” pipes and these will also have the old style lettering but according to the pipes that we own and have seen, most of these will have a small difference in the original forked tail “P”. Again, there appears to be a cross-over with the old style forked tail and the later forked tail P’s(below). However, these commemorative pipes generally have a silver band with hallmarks so one can date these pipes by the hallmark.

P3Also, we must address the stamp “A Peterson Product.” During the last few years of the Pre-Republic era and throughout the Republic era, Peterson began stamping their other lines, such as Shamrocks and Killarneys, with “A Peterson Product” over the COM stamp. So a pipe stamped thusly will have been made say from 1948 to the present with the COM stamp identifying it as a pre-Republic or a Republic pipe.

Silver Band Dating

Silver hallmarks are placed on the silver after an assay office, in Peterson’s case, the Dublin Assay Office, has verified that the silver content is indeed sterling, in other words 925 parts of silver per 1000 parts of the metal. The silver hallmarks on Peterson pipes are a group of three marks, each in an escutcheon; the first is a seated Hibernia denoting Dublin Ireland, the second is a harp denoting the silver fineness, and the third is a letter denoting the year. The style of letter and the shape of the escutcheon the letter is in, will determine the year in which the assay office stamped the metal band and not necessarily the year the pipe was made. Peterson orders these bands by the thousands and sends them to the assay office for hallmarking. The assay office will stamp the date of the year in which they received the bands and it may be a year or two or three before Peterson’s employees happen to place one of these bands on a pipe though generally the bands are placed on a pipe in the year they were stamped. The Dublin hallmarks can be found in any book on silver markings or on one of several websites.

For the one year, 1987, the Dublin Assay Office added a fourth mark to commemorate the City of Dublin’s founding in 988. However, the Peterson pipes we have and have seen with silver dates of 1987 and 1988 generally do not have this fourth mark.

Here again, we must add a “maybe” to the above hallmarks. On 1 June 1976, certain countries attended an international conference on silver markings and decided to adopt an entirely different mark for sterling silver. This mark is an Arabian numeral, 925, located between the scales of a balance beam and in Peterson’s case may or may not have the Hibernia and Harp marks to either side. These particular pipes can only be said to date between 1976 and the present, and were stamped as such for shipment to the different countries involved in the conference. For pipes shipped to all other countries, Peterson still uses the old style hallmarks. Peterson pipes with a sterling silver band that does not have hallmarks could have been made for the United States market since the United States only requires sterling silver to be stamped “sterling silver” or “sterling.”

Before we close this section on silver hallmarks, we must address the marks that many people refer to as hallmarks. Peterson uses three marks on some of their pipes that are not silver hallmarks but are rather another Peterson logo (below). These marks are:
• A Shamrock for the many shamrocks found in Ireland
• A Prone Fox representing the famous fox hunts in Ireland’s history, and
• A Stone Tower for the many hundreds of stone towers spotted throughout Ireland
P4 Again these are not genuine silver hallmarks: Also many of the newer pipe smokers think that Kapp & Peterson’s official logo of “K&P,” each in a shield shaped escutcheon, are hallmarks but, of course, they are not. They are simply Kapp & Peterson’s initials.

Dating by Series

Dating by series or numbers is an area in which we are having a difficult time of establishing. For instance, the 300 series are all shapes used during the Patent Era and we believe Peterson started using this number system when the original patent expired. In the case of the 300 series and without looking at the COM stamp or silver hallmark, one can only say that they were made between 1910 and today. The 300 series was not in Peterson’s 1905 catalogue.

Though we are still trying to find the start dates of many series, here are some that we are pretty positive about:
• Centennial Edition – 1975 (for K&P’s Centennial)
• Great Explorers Series – 2002
• Harp Series – 2002
• Mark Twain Numbered Edition – 1979 (numbered 1 through 400)
• Mark Twain 2nd Numbered Edition – 1981 (numbered 1 through 1000) Mark Twain Un-numbered Edition – 1983 to c1989 (There must be a fourth production of Mark Twain pipes for there a couple of men who own Mark Twain pipes with a silver date of 1998; we are still trying to pin down the dates of this fourth production.)
• Emerald – c1985 to 2003
• Millennium Edition – 1988 (for the City of Dublin’s founding)
• Sherlock Holmes Series – 1987 to c1989
• Return of Sherlock Holmes Series – c1991
• Sherlock Holmes Meerschaums – 2006

Peterson Clay, Bog Oak and Cherry Wood Pipes
Peterson Clay, Bog Oak and Cherry Wood pipes were offered in the Patent Era with or without a formed case, as also offered with their briar and meerschaum pipes.

Peterson made clay pipes during the Patent Era with only two shapes being offered and depicted in their 1905 catalogue. During this period their clay pipes were stamped/molded “Peterson Patent” and could be purchased with either a silver or nickel band. How long and in what years Peterson made these clays is not known but as stated above two shapes were offered in their 1905 catalogue. Then during World War II, Peterson again made clay pipes due to the understandable shortage of briar. The clays of this period are stamped “Peterson System” and were only offered with nickel bands. This later production of clay pipes ended with the closing of Peterson’s London Shop in the late 1950s or early 1960s.

Also during World War II, Peterson again made bog oak pipes and again, this was due to the shortage of briar. They had previously ceased production of bog oak pipes in the 1930s during the Irish Free State Era. On the subject of bog oak pipes, Peterson’s bog oaks will always have a metal band with either amber (early production only) or vulcanite stems and will have the appropriate COM stamp. As with their clay pipes, Peterson offered a silver or nickel band on their early bog oak pipes of the Patent Era and just a nickel band on their WWII bog oak pipes.

Peterson made pipes of cherry wood during their Patent Era in both the smooth finish and the bark-left-on finish; and as with their clay pipes, Peterson used both amber and vulcanite stems and choice of silver or nickel bands. And like their clay pipes of the Patent Era, the introduction and termination dates are not known. Peterson Cherry Wood pipes were offered with or without a meerschaum lining.

Metal Ferrules of Military Mounted Pipes

As pipes get older, wear will, with all the handling, cleaning and polishing, take its toll on the nomenclature which will eventually disappear, thus, making it harder to determine the age of your Peterson. A good thorough cleaning of old hand oils, dirt and ash will sometimes bring out a faint outline of the nomenclature but sometimes the nomenclature has completely worn away and even this cleaning will not bring it back. So where do we go from here to determine the pipe’s age? The shape of the metal ferrule on Peterson pipes with the military mount will give you some hint though not a precise date.

During the Patent Era, the metal ferrules of Peterson military mounts will have a more ‘acorn-ish’ shape, that is, the bend will have a larger radius as it turns down to meet the stem. This larger radius gradually(?) changes to a smaller radius, more abrupt bend, during the Irish Free State Era and even more abruptly after World War Two when the bend takes on the modern day shape.

The metal ferrules on Peterson clay pipes during the Patent Era are angular while their clay pipes of World War Two will have the bend shape as do most of the Peterson pipes from then until now.

As with everything pertaining to the dating of Peterson pipes, this method can only give us a hint to the age of the pipe but it is better than nothing at all. The years of these changes in the metal ferrule shape are, we are sure, lost to the ages. However, someone with a larger number of Peterson pipes than we may be able to check the silver dates for more precise age boundaries. Well, this is a very short dating guide and we hope that you will be able to date more accurately your favorite Peterson with this information.

When Mike sent this to me it had the following addition at the bottom of the page:
This guide was first posted in Pipe Lore on August 26, 2006 by Mike Leverette. Should you have a correction or addition to any of the above, please do comment.

It appeared to be a hopeless case, but was it really?


Blog by Steve Laug

This pipe was posted on Smokers Forums as one that was in rough shape. http://www.smokersforums.co.uk/showthread.php?273-Whew! As soon as I saw it I thought it would be fun to take on as a challenge and see what could be made of it. It was truly in very rough shape. So I put in a low bid on EBay and it was mine. Only the wait remained before I would see what I got myself into.

Worchester Dog

When it arrived I opened the box and took it out to see what I had to deal with on it. The stem was stuck in the shank and it was off center. I made a guess that it was a screw in stem – metal tenon and some kind of condenser. The finish was absolutely ruined. There was an opaque film all over the bowl and shank of varnish that had gone bad. There were crackles in the finish. The shank was crack badly and the shank was no longer square – the crack had expanded away from the angles of the pipe. The rim was invisible and the bowl was caked with a thick cake but upon examination it was full of cracks and crevices rather than a hard cake of carbon. Looking at what I could see of the inner edge of the rim it seemed like it was not damaged – at least not by reaming! There were several burn spots on the outside of the bowl around the rim and left side of the bowl from laying the pipe in an ash tray with a cigarette. It would indeed be a challenge and one that I wondered seriously about for a few moments.

I immediately put it in the freezer for a half an hour to see if I could loosen the stem from the shank. Once I took it out I was able to twist off the stem and remove it from the shank. I took it to my work table and examined it to see what I had to work with. I was quite happy to see that the shank had a metal tube inside that was threaded to receive the tenon. The tube extended into the shank about an inch. This would make a repair on the crack quite simple and not require that I band the pipe. The stem was overturned and the tenon would need to be heated until it was loose and then realigned on the shank. The insert in the shank extended further than the end of the shank and kept the stem from seating correctly against the shank. I also noted that the stamping did not read Worchester as the seller had listed it but that it read Dorchester and underneath that Algerian Briar. There was also damage on the shank near the bowl on the right side where the edge was pretty chewed up by what looked like a pair of pliers used to try and remove the stem from the shank. The slot in the button was clogged with oils and tars so I was assuming that insides were the same way. The stem had white spots on it that at first appeared to be paint but were actually pits in the stem. It appeared to be made of something other than vulcanite. I was not sure what it was but it was not rubber. All of the issues with this pipe, and they were many, but it was very repairable.

IMG_1583

IMG_1584

IMG_1585

IMG_1586

I reamed the bowl with a PipNet reamer using the smallest cutting head first and gradually working up to the diameter of the bowl. I wanted to ream the pipe back to bare briar to give a fresh start and be able to see if there were any burn out issues in the bowl. There were none.

IMG_1588

IMG_1589

IMG_1590

With the bowl reamed and the cake gone it was time to clean the exterior of the bowl and rim. I wiped it down with acetone to remove the finish and break up the crackled varnish that is visible in the above photos. I also lightly topped the bowl with a sanding block to remove the crumbly build up on the rim. I was guessing from my examination that the rim itself was not damaged so a light topping to remove the buildup would be all I would need to do. The next series of photos show the process of wiping down the bowl, topping it and wiping it down a second time after topping. While most of the varnish finish was gone, not all of it would come off with the acetone wash. So in the last picture below you can see the crackly finish on the shank and at the bowl junction.

IMG_1591

IMG_1596

IMG_1595

IMG_1594

IMG_1593

IMG_1592

I decided to drop the bowl in my alcohol bath to soak while I worked on cleaning up the stem. I use an alcohol bath to soak the pipe bowl and get underneath the varnish coat. Once it comes out of the bath it is relatively simple to wipe off the remaining finish. While it soaked I scrubbed the stem with Everclear and a soft bristle tooth brush. I scrubbed off the surface grit and grim and also worked on the button and slot to loosen the grit. I scrubbed the condenser as well with the Everclear and also used 0000 steel wool to polish it. I cleaned out the inside of the stem with thick and bristle pipe cleaners. Once it was clean it was time to take the bowl out of the bath.

IMG_1600

IMG_1601

I removed the pipe from the bath and scrubbed it with the tooth brush. I worked on the grooves in the bowl and also at the shank bowl junction. I dried it off and prepared it for work on the cracked shank. The crackled finish was finally gone and the pipe was clean.

IMG_1602

IMG_1603

IMG_1604

I scrubbed the area around the crack in the shank and picked out dust and particles with a dental pick. I dripped clear superglue into the crack and packed in briar dust with a dental pick. I clamped the cracked area and set it aside to cure for about a half hour.

IMG_1613

Once I removed the clamp the crack was sealed and the shank was returned to its original shape. I sanded the shank area to remove the excess superglue and the briar dust that was on the surface. The photo below gives a clear picture of the end view of the repaired shank and how it was squared up.

IMG_1614

The next step in the repair process was correcting the overturned stem. I removed the stem and sanded the metal end of the mortise insert flush with the shank end. Then I heated the tenon over a heat gun and when it was warm screwed it on to the shank and turned it until it lined up well with the shank.

IMG_1615

IMG_1616

IMG_1617

With the stem and shank aligned I sanded the shank area to clean up the damage to the right side where the marks were from someone’s pliers. I also sanded the stem shank junction and the repaired crack with a sanding block until the sides were all smooth in their transition from stem to shank. I wiped it down with an acetone wet cotton pad to remove the sanding dust and prepare it for staining. I used a black permanent marker to cover the fills in the bowl. I have found that when I follow the grain pattern with the marker before restaining the stain works well to mask the fills.

IMG_1618

IMG_1619

IMG_1620

IMG_1621

I chose to do a contrasting stain on this pipe, a black understain and an oxblood/mahogany top stain. I heated the briar and then applied a black aniline stain to the pipe. I applied it with a cotton swab and flamed it with a lighter. I reapplied the stain and also flamed it again to set the stain in the briar.

IMG_1622

IMG_1623

IMG_1624

I wiped the bowl down with acetone to lighten the black stain and make the grain stand out on the pipe. I also sanded it with a fine grit sanding sponge.

IMG_1625

IMG_1626

IMG_1627

From the above photos you can see the coverage of the black stain and the way in which the black permanent marker blends into the grain of the pipe. I wiped the pipe down repeatedly until it was the colour I wanted before I put on the next coat of stain. For the top coat I chose to use an oxblood or mahogany coloured aniline paste stain. I rubbed it on with cotton swabs and wiped it off with a soft cloth.

IMG_1628

IMG_1629

IMG_1630

IMG_1631

IMG_1632

IMG_1634

At this point I wiped the bowl down a second time with acetone wetted cotton pads and lightened the reddish finish. The fills are slightly visible but once the pipe is buffed and polished they will be blended in better. I buffed the bowl with White Diamond to remove more of the excess stain and help the contrasting under stain to show. I sanded the stem with a fine grit sanding pad, and then with micromesh sanding pads from 1500-12,000 grit until it shined. I then gave it a rub down with Obsidian Oil and finally with multiple coats of carnauba wax. Here is the finished pipe. It is ready to smoke and will in all likelihood last longer than I will. The lightweight aged Algerian briar evidently made this a great smoking pipe for the previous owner and it will remain that I am sure for the owners to come.

IMG_1636

IMG_1637

IMG_1638

IMG_1639

Restemming the Peterson’s XL999 with a Cumberland Stem


Blog by Steve Laug

I put out a request for a stem for a Peterson’s XL999 stem on various web forums I am on. I was sent several that almost worked but either the diameter of the tenon was wrong or that of the stem itself was off just a bit. I turned a tenon on a stem blank that was sent to me and made a nice looking black stem that I posted pictures of earlier on the blog https://rebornpipes.wordpress.com/2013/07/26/making-a-new-stem-for-a-petersons-kildare-xl999/ but Todd Bannard, who is a pipe maker in Alberta, Canada offered to cut a rough one for me from some rod stock he had available. He did not have black vulcanite but did have some Brindle or Cumberland stock. I sent him the rough dimensions of the stem – I needed tenon material that I could turn to ½ inches and I needed a piece of stock that was 7/8 inches or more in diameter to work with to match the shank. I have shaped stems from straight rod stock in the past so I was not too worried about doing that. However, I got an email from Todd saying the rod stock was ready and he was going to send it off. He sent the following two photos to me to show me what was coming. He did a lion’s share of the shaping work for me. I was amazed at how much work he had done on it. I needed only to turn the tenon and refine the shape and the button once it arrived. The Cumberland is vertical and swirling rather than horizontal and lined. It was intriguing looking and I was excited to see what I could do with it.

IMG_2008

IMG_2009

When it arrived I set up my PIMO tenon turning tool on a cordless drill to cut a tenon that was slightly over ½ inch which was the extent of the tools adjustment. I cut a slight step in the tenon first to get a rough idea on the setting on the tool (Photo 1 below). It was correct so I tightened the adjustments and and cut the new tenon for the stem (Photos 2 and 3 below). Once I had it turned close to size I used a Dremel with a sanding drum and gave it a once around sanding and fit the stem to the shank (Photos 4 and 5 below).

IMG_1538

IMG_1539

IMG_1540

IMG_1541

IMG_1542

I used the Dremel with the sanding drum to also remove excess material from the stem at the shank stem junction. Afterward I sanded the stem with medium grit emery paper to remove the scratches and marks left by the Dremel. I followed up by sanding the stem with 220 grit sandpaper to further remove the scratches. The next series of four photos show the fit of the stem at this point in the process. The pattern of the Cumberland is also very visible. The pinkish swirls would polish into a reddish brown and the darker colour would be a dark brown fading into black throughout the length of the stem.

IMG_1543

IMG_1544

IMG_1545

IMG_1546

Once I had sanded the stem to the smoothness and fit pictured above I heated it to bend it to the finished shape. I set up the heat gun and held the stem over the tip until it was soft enough to bend. Cumberland like vulcanite bends quite easily. What made this one a bit harder was the thickness of the stem where I wanted to bend it. Once flexible I bent it over a rolling pipe and cooled it under running water to set the bend.

IMG_1547

IMG_1548

I continued to sand the stem with 220 grit sandpaper to get a better fit with the shank. I wanted the transition to be smooth between the two parts so it took a lot of hand sanding. I sanded it removed from the shank, checking often for the fit, until it was a smooth fit.

IMG_1549

IMG_1550

IMG_1551

IMG_1552

I sanded with a fine grit sanding sponge to smooth out the scratch marks more thoroughly and to also fine tune the fit. The next series of seven photos show that progress.

IMG_1553

IMG_1554

IMG_1555

IMG_1556

IMG_1557

IMG_1558

IMG_1559

I worked on the button and slot with needle files to thin down the button and to also open the slot. The first photo below shows the slot and button before I started reworking it and shaping it. The second photo, though blurry, shows the button and slot after I had been working on it with the files and sandpaper. The button is thinner and the slot is beginning to open up. Photos three and four show the finished button and slot before buffing and polishing. The button is rounded and shaped, thinner than it originally was and the slot is oval and wide open. I used folded sandpaper to polish the inside of the slot and smooth out the edges. The fifth photo shows the profile of the button when I had finished working on it.

IMG_1560

IMG_1582

IMG_1581

IMG_1563

IMG_1561

I sanded the stem with micromesh sanding pads from 1500-12,000 grit, with each successive grit giving the stem a more finished appearance and removing the scratches from the Cumberland. The next series of ten photos show the progressive shine developing. I included quite a few photos in this section to show the various sides of the stem and the developing clarity of the Cumberland patterns in the stem as it was sanded.

IMG_1564

IMG_1573

IMG_1572

IMG_1571

IMG_1570

IMG_1569

IMG_1568

IMG_1567

IMG_1566

IMG_1565

I took the pipe to the buffer and buffed the stem with White Diamond and Blue polish to further enhance the shine. I gave the entire pipe several coats of carnauba wax and buffed with a clean flannel buffing pad.

IMG_1574

IMG_1575

IMG_1576

IMG_1577

The photo below shows both of the stem that I turned and shaped for the pipe. The black vulcanite one is about ½ inch shorter than the Cumberland stem. Both look very good on the pipe and are comfortable in the mouth.

IMG_1580

After staring at the pipe and handling it yesterday I was not happy with the stem shank union. There were some problems there with a slight taper to the shank that broke the smooth line of the pipe. I took it back to the work bench last night and did some more work on it. I will post the update later today.

Addendum
I took the pipe to work with me today and held it off and on while working on things and ran my fingers over the joint of the shank and the stem. There was a slight hip, with the shank tapering down slightly at the joint and breaking the flow of the lines of the pipe. It bugged me so when I got home I put it back on the worktable. I would have to deal with it and smooth things out. I knew it would take some more sanding and then refinishing the pipe and stem but so be it. I sat down and read the responses to my post regarding this pipe on Smokers Forums and also read my private messages. I had received a private message from bbqncigars (Wayne). I include his message in the paragraph below.

Steve,
Your restorations have been breathtaking. That said, I have a quibble with this pipe. The last 1/16″ or so of the shank exhibits a taper that is out of place with the lines of the rest of the pipe. This could be from over-buffing/sanding pressure on the end of the shank (BTDT). To restore the continuous line from the shank to the tip would require block sanding (might jeopardize the stamping) or removing the taper by shortening the shank. It’s a beautiful pipe and bit, but the bit/shank junction would drive me nuttier until I fixed it.

Yeah, I can be really anal about things I make that other people will see.

Wayne

I laughed when I read his words because they confirmed my own feelings and put into words some of my reserve regarding the restemming of this pipe. I looked at the pipe again and then wrote him back as follows:

Wayne
I agree with you totally! It bugs me as well. It forms a slight hip between the stem and the shank that really bugs me. I know that I am not finished yet either! The stummel came to me with a slight taper that was only clearly seen when there is a stem in place. The black stem has the same problem due to the shank. I have been contemplating hunting down a silver band to do deal with the issue and clean up the lines but we shall see. I could indeed block sand and may do that instead, we shall see. Thank you for your pm. I appreciate it as it has been bugging me.

Thanks
Steve

So after dinner this evening I decided to tackle the repair and remedy the situation. I used a pair of sanding blocks, one coarse and one fine to block sand the shank on the top and the bottom and more carefully along the sides of the shank around the stamping on the pipe. I sanded the briar and the stem material until the lines were smooth from the bottom of the bowl to the end of the stem and the same for the top. I worked on the sides to achieve the same thing. After sanding it with the coarse sanding block I sanded it with the fine grit block to remove the scratches.

IMG_1605

IMG_1606

IMG_1607

I sanded the stem and shank with 1500-12,000 grit micromesh sanding pads to bring back a smooth finish to the stem and the shank. I heated the shank with a lighter to warm the briar, restained it with a dark brown aniline stain that I thinned with isopropyl alcohol – 1 part stain to 2 parts alcohol. I flamed the alcohol and continued to stain the shank until it matched the rest of the bowl on the pipe. I buffed it with White Diamond and then gave it several coats of carnauba wax and buffed it lightly with a soft flannel buff. Tomorrow morning I will give it a careful examination in the light of day and see where I go from there. Thanks Wayne for your help.

IMG_1608

IMG_1609

IMG_1611

IMG_1612

Why I Chose the last Ebay lot of bowls to restem and refurbish


I just finished restoring and restemming the last of the Ebay lot that is pictured below. I thought it might be helpful to reflect on what I look for when I pick a lot of pipes like this on Ebay. There are many lots that I pass over in my hunt for estate pipes but there are some commonalities to what draws me to them and why I bid and win most of the ones I choose.

bowls1

bowls2

When I came across this listing there was no information available as to brands, makers or stampings. I always look for certain shapes or designs that catch my eye and then save the photo and enlarge it to see if I can see clearly any issues with the pipes. I also enlarge the side views to see if I can read any of the stamping that may be present on the pipe. In this lot the stamping was unreadable in the photos so it made me wonder if I would be able to identify them once they arrived. The most I could do was to judge by experience what was present. The seller of this lot included several photos showing both sides and the top of the bowl. Upon examining them carefully in the enlarged pictures I can be relatively certain of the issues that I will find and minimize any unexpected ones.

In this lot there were several there that I thought I could identify, or at least reduce my guesses to two or three possibilities for that shape of pipe. Knowing what I had learned from my examination of the photos I entered a bid for the lot and won. I decided to write down my guesses as to what the pipes were in the photos. I don’t always do that but in this case I wanted to see how close I could come to identifying brand/make and/or country of origin. I looked at the shape, design and finished to make some “educated” guesses as to what they would be when I saw them in person upon their arrival here in Vancouver. The pipes are arranged in three columns in the side photos and each of the top view photos take a column and photograph the group. So I divided my guesses into the same three columns as to what the brands are and see how close I can come once they arrive. In the chart below the left column records my guesses as to the pipes.

ebay lot1

I have included the remainder of the photos that came with the EBay listing so that you can see the same things I saw as I decided to bid on this lot. For a little challenge, try to identify the maker of the pipe before you look at the next chart. I have been working on my ability to identify either country of origin or maker by the shape and finish of the pipe. I find it really helps when I am scanning through EBay to look over pipes there or also when I scan flea markets or rummage shops. It quickly sorts potential pipes I am considering purchasing. I have listed what actually came in the chart below. There were some great old pipes in the lot. All of them have been restemmed and refurbished. All of them have been written up on the blog.

ebaylot2

ebay lot 5

ebay lot 6

ebay lot 7

Banding and Restemming a Weber Blackthorne 485


I just finished refurbishing the last of the EBay lot, the second pipe down in the centre column of the photo below. It is stamped Blackthorne over Weber in an oval and Imported Briar 485 on the underside of the shank. The Weber was probably the easiest pipe of the lot to restem and clean up. The bowl was lightly caked and the rim had a light buildup of tars on it. The blast is quite nice on the bowl and when I first saw it thought it might be a GBD Prehistoric. The rim is crowned upward from the bowl and also sandblasted. The bowl is stained with a dark brown and black contrast stain which leaves much of the black stain in the crevices of the bowl and the brown on the higher portions. The shank had some darkening from the end toward the bowl for about a ½ inch – like it had had a band on it at one point. There were no cracks in the shank so the band must have been cosmetic in function. The shank was thick and gave the pipe a chubby look. I am not sure whether to call the shape a chubby billiard or a pot. The inside of the shank was not terribly dirty would take little to clean up the pipe and ready it for a smoke.

bowls1

Weber

I searched through my box of stem and found one of a suitable diameter to fit the pipe. I had the perfect match but it was a bent so I heated it with the heat gun and straightened it out. I used the PIMO tenon turning tool to clean up the tenon and make it straight. In the picture below the tenon appears to have a slight conical shape to it. After turning it the tenon was a cylinder that fit well in the shank.

IMG_1513

I took out a nickel band that would fit the shank and then used the Dremel to smooth out the portion of the shank that would have the band. I find that a band seats much better when the surface that it is pressed onto is smooth rather than blasted or rusticated. I slipped the band lightly on the end of the shank and heated it with the heat gun to expand the metal and make the band simpler to fit on the shank. I pressed it into place on a metal plate that I use for a flat surface to press bands.

IMG_1514

IMG_1515

IMG_1517

IMG_1518

IMG_1519

With the band in place on the shank the tenon needed a slight adjustment with sandpaper to fit well against the shank.

IMG_1520

IMG_1521

I reamed the pipe with a PipNet reamer and took the cake down to the briar. I scrubbed the top of the bowl with a cotton pad and Murphy’s Oil Soap to remove the buildup of tars. I gently wiped down the exterior of the bowl with the Oil Soap as well to remove the grime in the grooves and crevices of the finish.

IMG_1522

IMG_1523

IMG_1524

IMG_1525

I polished the bowl with Halcyon II wax and buffed it with a shoe brush. I cleaned out the shank and the bowl with pipe cleaners and Everclear and put the stem in place for the photo below. Once finished this will be a handsome pipe. I sanded the stem with micromesh sanding pads from 1500-12,000 grit to polish and remove any scratches left by the heating and straightening. I took the pipe to the buffer afterwards and buffed the stem with White Diamond and Blue polish to give it a shine.

IMG_1526

IMG_1527

IMG_1528

IMG_1529

I polished the nickel band with a silver tarnish polishing cloth and then waxed the stem with several coats of carnauba wax. I touched up the areas of the rim and the rim outer edge with a black permanent marker to cover some of the scratches in the finish of the bowl in those places. I buffed the pipe lightly on the buffer with White Diamond and gave the stem another coat of wax. The finished pipe is pictured below.

IMG_1534

IMG_1535

IMG_1536

IMG_1537

An Engagement Pipe (GBD 548 Seventy-Six)


My family had a pretty big life event here last week. My daughter came home from New Orleans for a week of vacation, with the boyfriend of two years in tow again. He had called us a few weeks prior to ask permission to marry her, the first of our daughters to get engaged. This young man is quite a gentleman, as you might have guessed (who knew guys still ask for permission?). He and I share a number of interests, including pipes. I enjoyed my week with him and we were able to spend some time in the shop where I shared with him some estate pipe restoration techniques. He left here with a few briars that he cleaned. I miss him and her already.

As they were getting ready to depart, I found this GBD Seventy-Six, shape 548, on Ebay. I later learned it was sold by our own Bob Landry. The pipe had some issues and I was a bit skeptical that a good outcome could result. I’m a fan of the Seventy-Six line and I liked the tall bulldog shape. The bowl top had some chips on it but the tall bowl looked like there was plenty of briar there to top it just a bit. The stem was in great shape, just oxidized and I rationalized that if it didn’t work out, at least I had a brass rondell for the parts box. The big concern was the two burn marks on the briar (photographed and described well by Bob). I knew it would require a restain. Here is the pipe as it was received.

GBD_584_76-Before

GBD_584_76-Before (1)

GBD_584_76-Before (2)

GBD_584_76-Before (3)

GBD_584_76-Before (4)

I reamed the bowl and found it to be in great shape. I used a sheet of 800 grit paper on my flat work bench to top the bowl and work past the damaged area. That fix came out great and the tall bowl definitely lent itself to that repair. Next up, I soaked the bowl in alcohol to remove the stain. This really exposed the burned areas. I tried to sand past them, but that was not possible and I was afraid of putting a flat spot on the bowl, particularly on that right side. This work exposed some other nicks on the bottom of the bowl. I was able to buff/sand out most of those.

GBD_548_76_Work (4)

GBD_548_76_Work (3)

GBD_548_76_Work

GBD_548_76_Work (2)

The GBD Seventy-Six line used a two stain process that I really like, much like Comoys used. I stained the bowl black but must have put it on too heavy, as I had a hard time getting the black off. The plan was to sand off the black, leaving it to highlight the grain and then apply a very light brown stain. I mulled over just leaving it black, but that didn’t set well with me either. I was a bit frustrated at this point and almost bagged the whole project and save the stem for a future project. I left it on the bench for the better part of a week, working on other projects. I decided to soak off the black stain and left it in an alcohol bath for several days. That finally did the trick and afterwards, I sanded the briar smooth with some 2000 grit paper and then 8000 grit micromesh.

GBD_548_76_Work (5)

GBD_548_76_Work (6)

GBD_548_76_Work (9)

GBD_548_76_Work (8)

GBD_548_76_Work (7)

I then applied a very light brown stain using Feiblings Medium Brown heavily diluted with alcohol (20:1 ratio or so?) The combination of the black and brown stain finally hid the burn marks rather well and I was pleased with the outcome. The bowl was then polished with White Diamond and then several coats of carnuba wax was applied.

With the bowl completed, I turned my attention to the stem, which didn’t require nearly as much work. Using a piece of plastic, cut into a round shape I inserted it as a shield between the stem and the briar for the sanding work. I sanded the stem with 800, 1500 and 2000 grit paper, all wet. I then moved to 8000 and 12000 grit micromesh sheets. The stem was then buffed with White Diamond and an automotive plastic polish.

This shows the plastic shield.

GBD_584_76_Work (10)

As I was finishing the pipe and thinking about my daughters marriage, it struck me that there were some similarities in this pipe project and a successful marriage. Like a marriage, at times things don’t always go the way you anticipated and being patient with your spouse or a project always pays off. I sent the pipe off to my future son-in-law with a note welcoming him to our family. I hoped when smoking the pipe, he would remember the week he spent here and his proposal to my daughter.

GBD_584_76-Finished (4)

GBD_584_76-Finished (3)

GBD_584_76-Finished (2)

GBD_584_76-Finished (1)

GBD_584_76-Finished

Restemming a Bruyere Krone Billiard


I am just about finished restemming the lot of pipe bowls I picked up on EBay. This is one of the last two pipes that I have left in the lot below. It is the fourth pipe down in the left column. It has an interesting rustication pattern that reminds of one that is done on Saseini pipes. It is striated around the bowl and then tapers up from the bottom to a striated pattern around the shank. It has a flat bottom on the shank that is smooth and stamped Bruyere in a crown with a large R in the centre of the band on the crown. Underneath the crown is an unfurled banner that is stamped K R O N E. I have no idea of who the maker is or when and where it was made. The stamping is faint so I may be missing a few letters but I think this is an accurate rendering of what is stamped. The finish was pretty dirty with grime in the grooves on the bowl and shank. The rim was caked with a tarry buildup and the grooving on the rim was not visible. There were also place on the finish where the stain was missing and the briar underneath exposed. The inside of the bowl had dust and cob webs and a pretty large cake buildup that would need to be removed. The bowl came without a stem and fitting one would take flattening of the stem on the underside to match the shank.

bowls1

sas

I went through my box of estate stems and found one that was a good fit to the shank. Once the cleanup of the stem was done and a flattening of the underside of the stem the pipe would look like it came with that stem. The stem had a calcified buildup around the button and some tooth marks as well. The oxidation was not too bad but was present.

IMG_1492

IMG_1493

IMG_1494

IMG_1495

IMG_1496

The clean angles of the button against the stem were gone so I recut them with needle files to clean up the edge. I reamed the bowl back to bare briar with a PipNet reamer starting with the smallest cutting head and progressing to the one that was the diameter of the bowl without the cake. Once it was cleaned out I scrubbed down the bowl with Murphy’s Oil Soap and a soft bristle tooth brush to remove the grime. I scrubbed the buildup on the rim with a soft bristle brass tire brush to remove the tars. Once I had scrubbed it I rinsed it with warm water to remove the soap and dried it off with a cotton towel. I wiped down the bowl with acetone on a cotton pad and prepared it to be stained. After heating it with a heat gun I stained it with a dark brown aniline stain. I used a permanent black marker to touch up the raw briar areas where it was scratched or damaged. I reapplied the stain and flamed it. The newly stained pipe is shown in photos 2 and 3 below.

IMG_1497

IMG_1498

IMG_1499

I sanded the stem with medium grit emery paper to remove the calcification around the button and also heated the tooth marks with a Bic lighter to lift them as much as possible. I “painted” the surface of the stem with the flame to burn off the sulfur of the oxidation that I had loosened by sanding. I repaired the tooth marks on both sides of the stem with black superglue and set it aside to dry overnight.

IMG_1500

The next morning I cleaned out the bowl and shank with pipe cleaners, cotton swabs and Everclear. I sanded the stem and the superglue patch with 220 grit sandpaper and then with a medium grit sanding sponge to clean up the scratches in the finish. I put it back on the bowl to get an idea of the overall look of the pipe and see if the diameters of the stem fit the shank. I needed to flatten the bottom of the stem some more to match the bottom of the shank and also removed some more of the material on the diameter of both sides to bring it into line with the shank. Once the stem was well fitted I moved on to sanding with micromesh sanding pads from 1500-12,000 grit.

IMG_1501

IMG_1502

IMG_1503

IMG_1504

IMG_1505

IMG_1506

IMG_1507

I buffed the stem with White Diamond and a Blue polish. I gave the bowl a light buff with White Diamond to bring up the shine. I gave the bowl a coat of Halcyon II wax and buffed it by hand with a shoe brush. I gave the stem multiple coats of carnauba and buffed it on the buffer with a clean flannel buff. I think the pipe came out well. Does anyone know anything about the brand?

IMG_1508

IMG_1509

IMG_1510

IMG_1511

Making a New Stem for a Peterson’s Kildare XL999


The Peterson’s Kildare is the second pipe down in the left column in the photo below. The second and third photos are of the pipe bowl apart from the lot. The externals were in pretty decent shape but the rim has a heavy buildup of tars and the cake in the bowl is quite thick and hard. To give an idea of the thickness of the cake I was unable to put my little finger in the bowl. The shank was quite large – the tenon is ½ inch in diameter for a snug fit in a clean tenon. The shank itself is 7/8 inches in diameter. It is a large mortise and airway. The pipe is stamped Peterson’s “Kildare” on the left side of the shank and Made in the Republic of Ireland XL999 on the right side of the shank. The finish is quite clean. The top will need to be topped to remove the buildup and dents. I also will need to chamfer the inner edge of the rim to repair the damage that is present on the surface of the rim.

bowls1

Pete999

Pete9992

I reamed the pipe with a PipNet Reamer beginning with the smallest cutting head on the T handle and working up to the diameter of the bowl. I carefully ream the cake so as not to damage the bowl roundness or the inner edge of the rim any more than it already is. I emptied the carbon out of the bowl repeatedly until it was clean and empty. I reamed the cake back to bare wood to begin to rebuild on a clean surface. I scoured the bowl and shank with Everclear and cotton swabs and pipe cleaners.

IMG_1379

IMG_1380

Once the inside was clean I decided to gently top the bowl. I used a medium grit sanding sponge flat on the table top and worked the rim against that to remove the buildup of tars. The first photo shows the set up and the second the result of the topping. Very little briar was removed from the rim, mostly tars. The finish however also was removed so the rim would need to be restained. The third photo shows how I used a folded piece of 220 grit sandpaper to bevel/chamfer the inner rim to repair the damage that had been done to the rim.

IMG_1381

IMG_1382

IMG_1383

I sent out several emails and private messages to folks on the online forums to see if I could find a Peterson stem with these dimensions. I received many answers and several possible stems that could work for this pipe. Thanks to those who sent them. For the most part they were either too long or the diameter of the stem was not large enough to fit the shank. Chuck (desertpipe on SF) sent me several that would work. I also have a piece of brindle rod coming that Todd (Sasquatch on SF) was willing to cut for me. So in the end I will have two different stems for the pipe. While awaiting the arrival of the Cumberland stock I decided to turn the tenon on a vulcanite stem blank from Chuck. I turned it with a PIMO tenon tool and fit it to the bowl. The end fit was a ½ tenon for the mortise so I did not need to remove much of the existing vulcanite on the cast stem to make it fit well. To fit the stem on the tool I drilled the airway so that it slid easily over the pin on the tool but did not have too much play. I held the stem and ran the drill over the tenon for a first pass (second photo below) I adjusted the cutting tip and spun it several more times until the fit in the mortise was close. I used the Dremel with a sanding drum to take off more of the material and fine tune the fit (third photo below). I spun it one last time to clean up the face of the stem where it sat against the shank. I want that surface to be smooth and seamless in its fit.

IMG_1427

IMG_1428

IMG_1429

After fitting the tenon to the mortise I used the Dremel with a sanding drum to remove the excess vulcanite on the diameter of the stem. I carefully sand with the Dremel and bring the stem as close to the diameter of the shank as possible without nicking the briar. I also sand down the sides of the stem to remove the casting overrun on the stem and button. The idea is to get as close as possible to the stem diameter and then sand the rest of the fit by hand with medium grit emery cloth and 220 grit sandpaper.

IMG_1438

IMG_1443

IMG_1444

I took the pipe back to my work table and removed the stem and sanded it until the fit was perfect and the marks left by the Dremel were gone. The hand sanding is probably the longest part of the process of fitting a new stem. I sanded it repeatedly with emery paper and 220 grit sandpaper until it was smooth enough to move to the next step in the process. At this point I am not looking for a smooth and perfect fit but one that is getting close. I then heat the stem with my heat gun in order to bend the stem to fit the flow of the pipe. I heated it until it was pliable and then bent it over the rolling pin and cardboard tube that I use for getting the curve of the stem smooth and correct.

IMG_1445

IMG_1446

IMG_1448

I took the pipe back to my table and showed it to my sidekick and helper, Spence for his approval. He gave it a sniff and looked it over. It passed his inspection so I continued to sand and shape the shank/stem union. Lots of pieces of sandpaper and emery paper later the stem is getting closer and closer to a good fit.

IMG_1449

IMG_1450

IMG_1451

The button was very tight and I was not able to push a pipe cleaner through the slot so I opened the slot with needle files and reshaped it into an oval that was open and flared back to the airway in the stem.

IMG_1453

I sanded the stem with a medium grit sanding sponge and a fine grit sanding sponge to remove the scratches left behind by the sandpaper. Each step of sanding brought both the fit and finish closer to the look I was aiming for with the finished stem.

IMG_1460

IMG_1461

IMG_1462

I wiped the bowl down with acetone on a cotton pad to remove the finish and prepare the bowl for a new coat of stain. I have found that if I do not remove the stain then it is very hard to match the rim to the colour of the bowl. With the finish gone the staining is very simple.

IMG_1463

IMG_1464

I thinned the stain, a dark brown aniline stain, with isopropyl alcohol – 1 part stain to two parts alcohol. I had picked a stain that matched the previous colour of the bowl and also matched another 999 Peterson that I have here. I heated the surface of the bowl with my heat gun to warm the briar and open the pores in the wood. Once it was warmed I applied the stain with a cotton swab and repeated until I had good coverage over the entire surface. I flamed the stain, repeated the application and flamed it a second time. Once it was dry I took it to the buffer and gave it a light buff with White Diamond to even out the stain coverage and remove the excess on the surface of the briar. I wiped down the inside of the bowl where the stain ran in with a cotton swab dipped in Everclear.

IMG_1465

IMG_1466

IMG_1467

IMG_1468

IMG_1469

IMG_1470

With the bowl finished and ready to buff it was time to finish the work on the stem. I sanded it with micromesh sanding pads. I wet sanded with 1500-2400 grit and dry sanded with 3200-12,000 grit. Each successive grit brought more of a shine to the stem and removed the scratches left behind by previous sanding.

IMG_1471

IMG_1472

IMG_1473

I worked on the slot with a folded piece of sandpaper to smooth out the surface of the inside. I also shaped it with the sandpaper until I had the look I wanted. The oval slot now easily took a pipe cleaner no matter how fluffy.

IMG_1474

After much sanding and fitting, the vulcanite stem is finished. The pipe is smokeable while I wait for the Cumberland/brindle rod stock to come from Todd. I like the look and feel of the pipe as it is very close in size and design to the GBD 9438 with a tapered stem. The finished pipe is pictured below after buffing with multiple coats of carnauba wax and with a clean flannel buff.

IMG_1488

IMG_1489

IMG_1490

IMG_1491

Reborn Huckster Pipe – Is It a GBD 9438?


When I hear the word Huckster I think of an aggressive salesperson or a promoter, a snake oil salesman or someone not to be trusted. The definition from the dictionary is one who uses aggressive, showy, and sometimes devious methods to promote or sell a product. The stamping on this pipe is HUCKSTER on the left side of the shank. On the right side of the shank it is stamped LONDON ENGLAND. The pipe is clearly either made by GBD or by someone doing an amazing copy of the GBD 9438 shape. The shape is perfect in comparison with my GBDs of this shape number. I have been researching on the internet to see if I can find out who the pipe was made by/for and develop some background on it but so far I have found nothing.

Hukster5

The five pictures below were included in the EBay sale by the seller of the pipe. While they are out of focus they gave me a clear enough picture to place the bid. I was one of a few bidders on this one so I picked it up for a very good price in comparison to that of GBD 9438s. When it arrived I was happy to see that the seller’s photos actually were poor in comparison to the pipe that I held in my hand. The grain is extremely nice – the left side and the bottom of the shank and bowl have some beautiful birdseye grain. The right side has great flame grain. The front of the bowl has a bald spot with a well hidden fill in the grain (In the photos it is just above the lighter spot on the front of the bowl. There were a few dents that would need to be steamed out of the finish but the stain and finish was impeccable. The rim was unblemished with no burn marks. There were a few small sand pits in the bowl above the double rings. The bowl had a slight cake in the bottom half but the shank is clean and spotless with some raw briar that has not been stained with smoking. If it weren’t for the slight cake in the bottom of the bowl it would appear to be unsmoked. The stem was badly oxidized and did have one slight tooth dent on the underside near the button. I think that the seller must have cleaned up the pipe before selling as there were also scratches from sanding on the stem – top and bottom sides.

Hukster1

Hukster3

Hukster4

Hukster6

When it arrived I took the next four photos to show what the pipe looked like before I worked on it. My description above formulated by and large from the photos online was accurate though in fact the pipe was very clean.

IMG_1416

IMG_1417

IMG_1418

IMG_1419

The bowl did not require any work other than a quick cleaning of the shank – more by habit than necessity. The stem on the other hand required a lot of work. I sanded it with a medium grit sanding sponge to break up the oxidation. I also used the flame of a Bic lighter to paint the surface of the stem. The flame from the lighter also raised the slight tooth indent next to the button. This combination of methods removed a large portion of the oxidation as can be seen in the next four photos below.

IMG_1421

IMG_1422

IMG_1423

IMG_1424

I then sanded the stem with micromesh sanding pads. I wet sanded with 1500, 1800 and 2400 grit sanding pads. I wet the pad by dipping it in a bowl of water and then sand the stem with it. Once I had wet sanded with those grits of micromesh I followed by dry sanding with 3200-12,000 grit micromesh pads. The next series of five photos show the progress of the sanding. I took it to the buffer after the wet sanding and buffed it with Tripoli to get an idea of where I stood with the oxidation. I also ran the flame over the hard to get angles on the saddle and against the button to further remove hard to get oxidation.

IMG_1425

IMG_1426

IMG_1430

IMG_1431

IMG_1432

After I was finished sanding with the final grit of micromesh I rubbed the stem down with Obsidian Oil and once it was dry buffed it with White Diamond. I then buffed a final time with a blue plastic polishing bar. I gave the bowl and stem multiple coats of carnauba wax and buffed it with a soft, clean flannel buff to raise the shine on the bowl and stem. The next four photos show the finished pipe.

IMG_1455

IMG_1457

IMG_1458

IMG_1459

Here are a few more shots with a different background
Huckster1

Huckster2

Huckster3

Huckster4