Early Van Roy Arista “Selected Briar” Adjustamatic Refurbish


Great information from Troy on alternative woods used in pipes in the US.

Troy W's avatarBaccy Pipes

I picked up this early Van Roy Arista off Ebay .
Van Roy pipes started around 1944-1945 .They were headquartered out of the Empire State building. They were the first pipe to use the Adjustamatic stem. HL&T (Dr.Grabow ) purchased the company around 1949 and used the Adjustamatic exclusively on the Dr. Grabow pipes. All Van Roy’s after that used a push stem ,so Van Roy Adjustamatics were only made for around 4- 5 years. I could not find out if  Van Roy had their own pipe manufacturing facility . Most likely they had production of the pipes made by different pipe makers like Mastercraft did.
This one i believe is a very early model made at the end of the war, because its a non imprted briar pipe.They must have started production before imported brair was again available to American pipe makers. I would guess my pipe is no…

View original post 849 more words

A Tale of an Ugly Duckling & His Virtually Invisible Swandom


Blog by Steve Laug

All of you are probably familiar with the tale of the ugly duckling. The poor bird hatched from a clutch of duck eggs that came out gangling and very unducklike. His appearance left much to be desired when he walked beside his siblings toward the pond following his “mom’. He was always laughed at and misunderstood. He sat with his head down in shame at how much he did not fit. Each day passed and the down of the ducklings was replaced by feathers. This went on until one day the duckling looked at his reflection in the pond and found that he was not a duck at all but a regal and majestic swan. He had always been a swan inside but the fact of his swandom was not visible to any who beheld him. Instead they saw what they wanted in the misfit duckling and wrote him off as ugly. They never once saw the swan inside until it came out in all of its glory. This tale really captures the pipe that I worked on next.

I have had a really rough older Canadian pipe sitting in the refurb box for a long time now. I have taken it out of the box and looked it over time and again but never took the step of cleaning it up. I have no idea who the maker of this old pipe is but it is a rough piece of wood. I say wood because it is clearly not briar. It is lighter and the grain pattern is quite different from briar. It has a Kaywoodie mortise insert and a Kaywoodie stem that has the stinger clipped off. I don’t know if it came that way or some creative soul made it happen. The wood was roughened and not sanded smooth. It looked as if it was rough shaped with a file or wood rasp and then just smoked. Somewhere along the way someone had put a coat of shiny urethane over the entire pipe. The shine hid none of the flaws but actually accentuated them. It had a significant fissure near the shank bowl joint on the left side that needed attention. The roughened finish had file marks going in every direction. The effect was a mess for a finish. The stem had some cardboard or thread pushed on to the threaded tenon that allowed the stem to line up correctly. I cut off the cardboard or thread washer and the stem was seriously overclocked. The bowl had a cake in it that was crumbly and uneven. The interior edge of the rim was not too badly out of round. The outer edges would need some work to smooth out before I could see if they were in round.Canada1

Canada2

Canada3

Canada4 I took some close-up photos of the bowl and the shank to give more of an idea of the kind of finish that the pipe had when I started. You can see the file marks and lines going in every which direction that were left behind in the initial shaping of the pipe. The overall look was very rustic and actually quite ugly. It was truly an ugly pipe. The beautiful Canadian that resided below the ugly exterior was virtually invisible. It would easily been put up there with “folk art” in terms of the rustic and rough finish to the pipe. Yet there was something about that seemed like raw charm that shone through the mess that sat on my table. This evening when I took it out I took more time to sit and look at it for a while before beginning to work on it. The more I looked at it the more I have to tell you that the second thoughts I was having almost caused me to put off working this old timer and just burying it in the box. I really was unsure whether I could do anything with it or that it would even be worth doing the work. I was not convinced that what I had when I was finished would be worth the time and energy that would go into reworking it.Canada5

Canada6

Canada7

Canada8

Canada9 I cleaned off the debris (cardboard or thread) that was on the tenon and then heated the tenon with a lighter to reclock the stem. I heated the metal carefully keeping the flame away from the vulcanite stem. It did not take long before the heat softened the glue that held the tenon in the stem and I was able to turn the stem back into the shank and twist it until it lined up correctly.Canada10

Canada11 I lightly sanded the bowl surface and then stopped to ream it with a PipNet reamer. I decided to take the cake completely out of the bowl so that I could check for cracks in the walls of the bowl.Canada12

Canada13 With the bowl reamed out I turned my attention to the finish on the exterior. I sanded the bowl and shank with emery paper and with 180 grit sandpaper to remove the roughness of the finish and to sand out the file marks. I wanted to sand the bowl and shank smooth to address the generally poor appearance of the pipe. It took quite a bit of sanding to even start to make a difference in the surface of the pipe. I also sanded it with a rough sanding block to smooth out more of the scratches. I filled the flaw at the union of the shank and bowl on the left side with clear super glue and briar dust. I sanded that repair smooth with 220 grit sandpaper to blend it into the surface of the pipe. There was a dark spot on the outer right edge of the rim that did not seem like a burn. I had the appearance of a stain. It was hard and did not affect the shape of the bowl edge so I left it. I lightly topped the bowl to clean up and flatten out the rim surface.

The more I sanded the grain began to come through the smoother finish of the pipe. It was clearly not briar. My guess is that it is Mountain Laurel or Manzanita. Once I get it sanded smooth and get a better look at the grain and colour I will be able to give a better assessment. The good thing was that a nicely shaped Canadian was emerging from the rough cut pipe that I started with. The shape was well executed and once I finished sanding and smoothing things out this alternative wood Canadian would look really good. My initial reticence gave way to curiosity to see what would emerge when the sanding was finished. You can see for yourself in the next set of photos below what is coming out as it is sanded.Canada14

Canada15

Canada16

Canada17 I continued sanding with 220 grit sandpaper and worked on the shank bowl junction. There were some deep cuts and file marks there that needed to be addressed. I sanded until the surface was smooth to touch. There were still a lot of scratches in the wood but the surface was getting smoother. I sanded it with a coarse and a medium grit sanding block to flatten out the shank and to smooth out the bowl sides, bottom and rim. I used a black permanent mark to cover the fill and line it up with the grain at that point. Once I sanded it more and blended it into the grain of the shank it would become less visible than it is in the photos below. I sanded more with the sanding blocks and then gave the pipe a light coat of olive oil to see what the grain would look like when I was finished. The wood had a red hue to it and some nice looking grain. There is a lot more sanding that needs to be done at this point but it is progressing.Canada18

Canada19

Canada20

Canada21 I have included a few more close-up photos to show the progress of the sanding on the surface of the bowl and shank. There is some nice looking grain coming through in the photos of the bowl sides and shank.Canada22

Canada23 At this point I sanded the bowl and shank with micromesh sanding pads and the oil to give me some traction while sanding. I find that the oil allows the micromesh to cut more deeply and work more effectively. I sanded with older 1500-2400 grit micromesh pads that I reserve for working with oil sanding. Unfortunately I got into the flow of things and did not take photos of this part of the process.

Once I had finished sanding the bowl to this point I worked on the stem. The same file marks went across and the length of the stem. There were gouges and marks and two deep tooth marks near the crease on both the top and bottom of the stem. The next two photos show the scratches and the tooth marks.Canada24

Canada25 I used an emery board to sand out the scratches and the tooth marks. I was able to remove most of the scratches and gouges with the board and then sanded the stem with 220 grit sandpaper to remove some of the deeper scratches and blend in the board marks. I also used the topping board to even out the end of the clipped stinger so that it was not rough.Canada26 The tooth mark on the top needed to be repaired. I cleaned up the sanded area and then filled the remaining tooth mark with clear super glue.Canada27 When the glue dried I used the emery board and the 220 grit sandpaper to blend in the repair with the surface of the stem.Canada28 Once the scratches and marks were gone and the patch smoothed into the surface I went on to wet sand the stem with 1500-2400 grit micromesh sanding pads. I rubbed the stem down with Obsidian Oil and then dry sanded with 3200-4000 grit pads before giving the stem another coat of oil. I finished with 6000-12000 grit pads and then a final coat of Obsidian Oil. I let it dry before taking the pipe to the buffer.Canada29

Canada30

Canada31 I sanded the bowl and shank down with all of the grits of micromesh sanding pads from 1500-12000 grit. By the time I was finished the scratches were virtually gone. The repair on the shank/bowl junction though showing is smooth to the touch. The ugly duckling had become a swan. The Canadian hidden beneath the file marks and rough finish gave way to the beauty of the alternative wood. The finished pipe was truly a thing of beauty.

I buffed the pipe and stem with Blue Diamond Polish on the wheel. I worked it until the remaining scratches disappeared. I gave the bowl and stem several coats of carnauba wax and then buffed the pipe with a soft flannel buff. I finished by hand buffing it with a microfibre cloth. The finished pipe is shown in the photos below. The change in appearance is significant and the feel in the hand is much better. I am still pretty convinced the pipe is Mountain Laurel but could be convinced otherwise if some of you know. Thanks for looking.Canada32

Canada33

Canada34

Canada35

Canada36

Canada37

A Peterson 301 System Pipe Reborn


Blog by Steve Laug

I have this pipe and one other left to clean up of the donated pipes for the benefit of Smokers Forums. This one is a Peterson’s System Standard Bent Pot. It is stamped Peterson’s System Standard on the left side and on the right side it is stamped Made in the Republic of Ireland over 301 which is the shape number. The finish was shot, worn and stained with most of the colour faded out. The nickel ferrule was oxidized and dull. The rim was dirty and nicked on the top surface but undamaged on the inner or outer edge. There were some deep scratches on the underside of the bowl that went across the surface of the briar. They were ragged and I knew that steaming them would not raise them. There was also some road rash on the right side of the bowl where it looked as if the bowl was dropped on concrete. The bowl had a thick cake that was soft and crumbly. The stem was oxidized and dirty with some tooth chatter on the top side and the underside near the p-lip. The interior was also dirty with grit. The inside of the shank/mortise was surprisingly clean with dust and tobacco residue but little tar and oil. The inside of the stem was also dirty. The hole in the end of the button was in great shape.Pete1

Pete2 I took a close up of the rim and bowl to show the thickness of the cake. I reamed the bowl with a PipNet reamer and took the soft cake back to bare briar so that a new hard cake could be developed by the new owner of the pipe.Pete3

Pete4 I sanded out the bowl to remove the ridge that appears in the photo below. You can also see the dents and nicks in the surface of the rim.Pete5 I lightly topped the bowl with a topping board to take out the damaged surface of the rim and clean up the top.Pete6 I wiped down the bowl with acetone on cotton pads to remove the finish and the grime in the grain of the briar.Pete7

Pete8 I filled the deep scratches in the bottom of the bowl with clear super glue and also filled the road rash nicks on the right side of the bowl. I sanded them smooth with 220 grit sandpaper and then sanded them with a medium and a fine grit sanding sponge. I also sanded them with 1500-2400 grit micromesh sanding pads to smooth out the scratches. I stained the bowl with a dark brown aniline stain that I thinned with 3 parts alcohol to 1 part stain. I flamed the stain to set it deep in the grain.Pete9 To make the stain more translucent I scrubbed down the surface with alcohol to lighten the stain and make it more transparent.Pete10 I put a light coat of wax on the bowl to protect it while I cleaned the inside of the pipe. I used pipe cleaners, cotton swabs and alcohol to clean out the shank and mortise area. I polished the nickel ferrule with a silver polishing cloth and was able to remove the oxidation.Pete11

Pete12

Pete13 I let the stem soak in Oxyclean for several hours while I worked on the bowl and then gave it a vigorous rubdown with coarse cloth to remove the loose oxidation. I then sanded it with 220 grit sandpaper and a medium and a fine grit sanding sponge to further remove the oxidation. Once it was gone I buffed it with red Tripoli and then moved on to sand it with the micromesh sanding pads – wet sanding with 1500-2400 grit pads, rubbing it down with Obsidian Oil and then dry sanding with 3200-4000 grit pads and giving it another rub down. I buffed it with White Diamond and then finished with 6000-12000 grit pads before giving it a final coat of oil and letting it absorb into the stem.Pete14

Pete15

Pete16 I finished by buffing the pipe with Blue Diamond on the wheel and then giving the bowl and stem multiple coats of carnauba wax. I buffed it with a clean flannel buff and then hand buffed with microfibre cloth. The finished pipe is shown below.Pete17

Pete18

Pete19

Pete20

Simple Clean Up And Preservation Of A Kaywoodie 5051 Push Stem Billiard


Kind of miss having Troy’s refurbs posted here so I reblog a few of them to keep them up front.

Troy W's avatarBaccy Pipes

I have been picking up a few older Kaywoodie’s four digits lately and thought i would share this one as the old push stems are pretty scarce.
I was scanning EBAY and saw this come up as a ‘Buy It Now” for a great price plus free shipping , so i purchased it right away.

It was lightly smoked and in excellent shape other than the bite marks and a dent on bottom of shank. I think the previous owner chewed it more than they smoked it.
This is my first shape 51 and i like it quite a bit. Its basically a 05 with a longer shank and shorter stem . I’m a big fan of the 07,05 and 11 shaped billiard’s but i think this might be my new favorite and will be on the lookout for some more.

It was in such great shape for its age…

View original post 306 more words

An Unexpected Gift – An Early Christmas Tale


Blog by Steve Laug

I started this short story last Christmas and never finished it. Over the past months I have taken the time to complete the story and continued to edit it. It has a few twists and turns and a predictable ending I suppose. I post it now as we move ahead toward Christmas.

Matt had tucked the children into bed after giving them each a cup of warm milk and reading them a good story. And now quiet had descended on the house as they were sound asleep. His wife had gone to bed as well after preparing for tomorrow’s Christmas meal. All things being equal that meant Matt had some quiet time to relax and reflect. He poured three fingers of Maker’s Mark neat into his mug and settled into his chair. He loved to sip the smooth bourbon from a mug rather than a glass – it just worked for him. On the side table next to his chair he had strategically placed one of his pipes (chosen for just this occasion), a tin of 2010 Christmas Cheer, a tamper and lighter. There was also a selection of books that he could spend time reading – everything from murder mysteries to autobiographies. There were plenty of options to meet whatever desire struck his fancy.

He took a sip of the Mark and then set it on the table so that he could pack his pipe. He loved the flavour of Christmas Cheer and he always packed it straight from the tin. He rubbed it together to form a ball and then stuffed it into the bowl. He put some of the broken pieces of tobacco on top of the bowl to use for tinder and took a draw on the pipe to make sure it was not too tight. He then let the flame of the lighter dance across the surface of the tobacco as he drew the flame into the bowl. It did not take long before the tobacco ignited. He tamped it lightly and relit. Soon he settled back to puff contentedly on the bowl. The flavours of the Virginia hung in his mouth on his lips and gums. He could taste the sugars. The air around his head was filled with smells of rich Virginia. And even though he had read that you could not smell your own pipe Matt was convinced that he could and savoured every smell.

With the pipe fully lit and smouldering he took another sip of the Mark and swirled it around in his mouth. Makers Mark went exceptionally well with a rich Virginia Flake. And Christmas Cheer was as rich as could be and the combination just worked. He sat quietly thinking about his family in bed in the rooms above his head. He looked at the Christmas tree and the gifts that were placed strategically around its base. He nodded his head and thought how much the kids would enjoy the magic of Christmas morning in just a few hours. He well remembered that they would be up at the crack of dawn and emptying the stockings that hung on the mantle of the fireplace – heavy with goodies and small gifts. He and his wife had devised the stockings as a strategy to give them a bit more time resting while the kids opened the stockings.

The smoke curled around his head and the peacefulness of the moment lent an air of contentment to his heart and mind. He reached for a book he was currently reading – a biography of CS Lewis one of his heroes. He had read all of Lewis’ books and had read the Chronicles of Narnia to his children for many years now. It was almost a yearly event that started every fall and ended about the time the flowers poked out from the ground in the spring. He found that at this particular moment he could not focus on the book at all so he set it aside. He tamped his pipe and slowly puffed on it. He sipped the Mark and leaned back in the chair. He put his feet up on the foot stool and disengaged from the world around him. That was the beauty of a pipe. The ritual of loading, packing, lighting and smoking a pipe had an uncanny way of making the cares of life slip away for the time spent with the pipe. It slowed down time and caused worries to dissipate even if only for a short moment. The respite seemed to make knots untangle and worries not matter as much.

Time seemed to just slip away and Matt was brought back to reality when he heard the grandfather clock strike 12:00. The tobacco had burned down to a light grey ash. The fire in the fireplace had grown cold. The Makers Mark in his mug was gone. He had been lost in the smoke of his pipe and the quiet reflection that seemed to reside in the midst of that smoke. He heard a rustle behind him and wondered what was going on. He thought he must have been hearing something but he stopped nonetheless. There was a rustle of fabric and a slight cough. He sat up straight and peered around the edge of the tree in whose shadow he sat to see who was there. And what to his wondering eye should appear? Who was behind the edge of the tree and his vision? Whose clothes were rustling and who coughed? It was his son Luke. Luke came into the room and climbed up on his dad’s lap. He snuggled in close and Matt laid his finished pipe on the table.

He sat with his young son on his lap in the dark with only the flickering Christmas lights lighting the room. His eyes grew heavy and very soon he was sound asleep with his son on his lap. He never heard the slight rustle in the chimney or the clunk as a pair of boots landed among the cold ashes of the fire. Nor did he move when the fellow quietly went across the room and laid down his sack and arranged his presents under the tree. Once finished the fellow looked at Matt and Luke sitting in the chair and chuckled quietly. His eye took in the pipe on the table next to Matt and the can of Christmas Cheer sitting open next to it. He walked to the table, picked up the tin and took a deep sniff of the tobacco. He took a pipe out of his pocket and loaded a bowl, tamped it with his finger and lit it with the lighter. He sipped the tobacco and as it burned slowly in the bowl he wrote a note for Matt. He set the note next to the tin and replaced the lid on the tin. As he did Luke stirred and his eyes grew large as he took in the fellow smoking a pipe standing in front of him. He wink at Luke and put a finger in front of his mouth. He put a finger next to his nose and in a wink he was gone.

Matt awoke to his son shaking him. His son said nothing but merely pointed to the note next to the tin of tobacco. Matt shook himself awake, picked up the folded paper and read what was written there. Here is what it said:

Hi Matt, I stopped by to leave a few things under your tree. I was so glad to see that you smoked some decent tobacco in your pipe. Christmas Cheer is my favourite blend. I hope you don’t mind but I helped myself to a bowl. You left the lid off so I put it back in place for you. You don’t want that tobacco drying out too much. Oh and just so you know I left a little something from me under the tree. I expect you will enjoy it. Maybe next year you will be awake and we can share a bowl. Merry Christmas! — Nick.

Matt sat stunned for a moment. Then he turned to his son and together they looked at the fireplace and the gifts under the tree. He went to the tree and picked up the small package with his name on it. He knew that it had not been there before. He turned it over in his hands and then opened the package. Inside was a nice tin of 2008 Christmas Cheer, two years older than the one that was on the table. There was a short note under the plastic lid that simply said:

I enjoyed some of your 2010 Cheer so I thought I would share some of mine. Enjoy! – Nick

Who would ever believe this simple tale? But they both knew it was true. Luke had seen the old soul and Matt had the letter and the closed tin of tobacco. They both knew that their guest had been there. Matt could also smell the Virginia smoke in the air. Ah well. They both should head to bed for a few hours of sleep before the rest of the family awoke and the festivities began. He unplugged the lights on the tree and picked up his son. The two of them climbed the stairs. He tucked his son into bed and kissed him good night. He took himself to bed and pulled back the covers. He was asleep as fast as his head hit the pillow. Santa2 October 6, 2015

Restemming a Brian Doran Nosewarmer Poker


Blog by Steve Laug

In the gift bag that I received while traveling was a poker made by Brian Doran. I did some reading on Brian’s Facebook page and cannot find out when the pipe was made. I know that this one was originally a nosewarmer poker. I had the pieces of the pipe as it had been dropped by my friend. The tenon broke off in the shank. The tenon would need to be pulled and a new tenon put in the stem or the pipe would need to be restemmed. The bowl was large and the rustication was very nice with a contrasting stain between the rim and bowl. The bowl was a dark brown/black with the smooth rim and bottom stained with a medium brown. The bowl was attractive and the drilling was spot on. There was a large silver band with two black rings around it on the end of the shank that added to the weight of the piece.Doran1 I put the stem up against the bowl to get an idea of how it originally looked before the break. The piece of briar was quite large and heavy and the small mouth piece that had been on it made gripping it a challenge. I could see why my friend had dropped it. The mouth piece itself was smaller in diameter than the shank of the pipe and did not look quite right to me. The button was rough – not sure if it happened during the drop or if it came that way. It had chips out of the edges, top and the face of the button and the inside of the slot was also roughly shaped. The shortness of the blade on the stem did not give much to work with.Doran2 I used a screw to pull the broken tenon out of the shank. I twist it in with a screwdriver until it catches and then wiggle the screw while pulling on it. It generally comes out very easily. I was thankful that this time it came out without a problem. I cleaned up the shank with pipe cleaners, cotton swabs and alcohol.Doran3 With the tenon pulled I needed to make a decision regarding the pipe. After spending some time with the mouth piece I decided that the damage to the button would take more work than I was willing to put into it. I personally did not like the short stem and found that it was uncomfortable in the mouth and the pipe was too heavy to make it practical. That meant that I needed to restem it. I looked at short stems of the same diameter – both saddle and tapered and just did not like the look. I went through my stems and found a saddle stem that was the same diameter as the shank but was not happy with the overall look. Then I found this smaller tapered stem. It was one I had scavenged from somewhere and the tenon was a perfect fit. It sat in the shank just like the little saddle stem had and showed the stained briar ring inside of the silver band. The appearance at the shank was almost the same. It was slightly bent and I would need to straighten it but I kind of liked the look. It would be worth working on. If I should decide otherwise later I can always restem it again. I set up the heat gun and straightened the stem leaving a very slight bend.Doran4 I took the next series of photos to show what the pipe looked like at this point in the process with the longer stem.Doran5

Doran6 I reamed the bowl to take back the uneven cake. I scrubbed the rusticated bowl and the tars on the rim with a tooth brush and Murphy’s Oil Soap. I rinsed the bowl with water and then dried it off with a soft cloth. I further worked on the darkening of the rim with a cotton pad and saliva until I had the majority of it removed. I also scrubbed the bottom of the bowl with the cotton pad and saliva as well.Doran7 I buffed the rustication with a shoe brush to give it a slight shine.Doran8 I gave the bowl a light wipe down with olive oil and hand buffed it with the shoe brush to raise the shine. The stem was in very good shape with no tooth chatter or oxidation so it needed only to be cleaned and polished. I buffed the rim and the base along with the stem with Red Tripoli, White Diamond and Blue Diamond. I then gave the rim, base and stem several coats of carnauba wax and buffed them with a soft flannel buff. I finished by hand buffing with a microfibre cloth. The finished pipe is shown below. I like the new look with the longer stem. The pipe now works as a sitter and balances on the desk with no issues. What do you think?Doran9

Doran10

Doran11

Doran12

Get Me to the Church on Time: Restoring a Longchamp Billiard


Blog by Anthony Cook

I was browsing through Reddit’s /r/PipeTobacco sub-forum when I saw a post from a member looking for someone who could restore an old, leather-wrapped Longchamp pipe. He wanted it in time for his wedding day, which was a couple of weeks away. I could see in the accompanying photos that the pipe had a chip out of the rim and a bite through on the stem, but otherwise it appeared to be in good condition and both the leather and stitching looked solid. So, I contacted him and offered to take care of it.
The pipe arrived at my door a while later. I was happy to see that there were no hidden “gotchas” and the condition of the pipe was pretty much as it had appeared in the photos.

Here are a few photos of the pipe on arrival:Bride1

Bride2

Bride3

Bride4 Notice in the image below that the stem has almost no tooth chatter despite the massive bite through. What’s up with that? Weird.Bride5 The next image shows some detail photos of the stamping and the rim damage on the pipe.Bride6 The pipe needed to be cleaned up before I tackled any of the damage. This is my “getting to know you” time with the pipes that I work on. I learn a lot about the pipe as I’m cleaning it and I often discover things that I hadn’t noticed previously.

I used a very lightly damp rag to remove the tar and soot from the rim. It came away easily. You can see some light spots on the rim in the photos above. I had been afraid that they were fills (that would be a nightmare), but they turned out to be… something else. Whatever it was, it came off with the rest of the grime and I could see that the rim was in good condition other than the noted chip.

Then, I cleaned out the interior of the stem and stummel with a few cotton swabs, pipe cleaners, a shank brush and some isopropyl alcohol. The pipe was already pretty clean. So, it didn’t take much work.Bride7 I then gave the pipe a retort just to be sure and another quick scrub to remove anything that the retort had left behind.Bride8 To prevent any lingering tobacco ghosts, I stuffed cotton balls into the chamber and used a dropper to drip in alcohol until they were saturated. I then sat the stummel aside overnight to let the cotton balls and alcohol do their job. The image below shows a photo of the bowl just after adding the alcohol, another taken about three hours later, and another at about twelve hours (just before I removed the cotton).

Meanwhile, the stem had been soaking in a bath of Oxyclean and warm water. I removed it from the bath and scrubbed it with cubes cut from a Magic Eraser until all of the yellow-brown oxidation was gone and the stem was restored to a satin-black finish.Bride9 Using needle files, I cleaned up the edges of the bite through hole to remove any loose material and scored the surrounding surface to prep for the patch. Then, I inserted a wedge of thin cardboard wrapped in clear tape through the slot making sure that it completely covered the bottom of the hole. I applied several thin layers of black CA glue over the hole. I allowed each layer to dry and lightly sanded with 220-grit paper between layers to give the next one a good surface to bite into. The patch was ready to be blended in when it was slightly higher than the surrounding surface. I used needle files to carve a sharp transition at the back of the button and sanded back the patch and much of the tooth chatter with 220-grit paper.Bride10 I followed that with 320-grit and 400-grit paper to further smooth the surface, and then I lightly sanded the entire stem (carefully avoiding the logo impression) with 600-grit paper.

I wanted to repaint the stem logo to give the pipe a more complete look. So, I used a silver leaf paint pen to paint over the logo and fill the impression with paint. Once it was dry, I carefully sanded the paint from the raised surfaces with 1200-grit paper leaving behind only what was left in the impression. Some of the impression had been worn away until it was nearly level with the surrounding surface. So, I had to try to shape those by hand using a printed photo reference of the logo.Bride11 I lightly sanded the rest of the stem with 1200-grit paper, and then polished with Micro-Mesh pads 1500-grit to 12000-grit. Somehow, I forgot to get a shot of the completed stem, but you can see it in the photos of the finished pipe.

The stem was finished. So, it was time to take care of the stummel. I filled the chip in the rim with briar dust and CA glue, let it dry, and then sanded the patch back with 220-grit paper. It’s just about impossible not to sand away some of the surface surrounding a patch. So, there was a very slight depression in the patched area. To even the rim out, I lightly topped the bowl, first with 220-grit, and then with 320-grit paper.Bride12 To bring the color back and blend the patch, I applied Fiebing’s dark brown dye to the rim with a cotton swab, flamed it, and sanded the rim with 400-grit and 600-grit paper. Then I stained with medium brown and sanded with 1200-grit. I polished the rim with Micro-Mesh pads 1500-grit through 2400-grit before giving the rim a final buckskin stain, and then polished with the remaining Micro-Mesh grits. Again, I forgot to get photos of any of this. Sometimes, you just get caught up in the work, you know?

All that was left to do to get this pipe ready for the wedding day was to spiffy up the leather a bit. I used a hairdryer set to high heat and low flow to heat the leather and raise the dents. I used my fingers to knead and stretch the leather around the deeper ones to help lift them. Then, I used Fiebing’s buckskin dye to restain the scratches and a small tear on the right side of the bowl. The tear itself was then patched with a bit of leather glue. Finally, I used Fiebing’s 4 Way Care to clean and condition the leather wrapping before burnishing the ends of the leather and edging the seams.Bride13 The pipe work as finished and it was ready to be sent back for the big day. Here are a few photos of the finished pipe:Bride14

Bride15

Bride16

Bride17 Thanks for looking and CONGRATULATIONS, NATE!!!

Rejuvenating a Peterson’s System Premier 307


Blog by Steve Laug

The next pipe that is on my desk came to me from a friend on Smokers Forums who wants me to clean and sell them for the support of the forums. It is a nice Peterson’s Premier System Pipe in the 307 shape. It is stamped on the underside of the shank Peterson’s System Premier 307. The silver ferrule is stamped as normal with Petersons of Dublin on one side. Underneath it is stamped Sterling Silver and there are hallmarks that give the date of the pipe. The stamping of the hallmarks was as follows: Hibernia, Lion (denoting that the silver is .925) and the letter “b” which denotes that the pipe was made in 1969. I have included the Peterson’s Hallmark chart below as it is a very helpful tool that I have used repeatedly to date my Peterson pipes.Peterson Hallmarks The pipe was dirty and the silver was oxidized enough that the stamping was hard to see. The rim was darkened by in pretty decent shape. The sandblast finish had a lot of grime in the grooves and there was some white paint of dried wax in the grooves. There was a light cake in the bowl that was thicker toward the middle of the bowl than it was at the top or the bottom. The stem had a rough finish from the oxidation and there were some small tooth marks on the top and the bottom edge of the stem near the P lip. The airway on the button was in excellent shape and the crease was still well defined.Pete1

Pete2

Pete3

Pete4 I took a close up of the bowl to show the cake that was in the bowl. There was a small nick on one side of the inner edge of the bowl on the right side but it looked like it would clean up very nicely.Pete5 I reamed the bowl with a PipNet reamer and took the cake back to the bare wood. I wanted a good even base so that the new owner could build a solid hard cake evenly in the bowl. I used a folded piece of sandpaper to smooth out the nick on the right side.Pete6

Pete7 I took the stem out of the shank and removed the Bakelite/wood extension that screws into the tenon on Peterson Premier pipes. The photo below shows the pipe taken apart.Pete8 I took the next series of photos to show the grime and white wax in the grooves of the sandblast.Pete9

Pete10

Pete11

Pete12

Pete13 I scrubbed the bowl with a tooth brush and Murphy’s Oil Soap to clean out the grooves of the blast. I worked on it until I was able to remove the grit. I followed up with a light scrub of the rim and the grooves with a brass bristle tire brush to finish the cleaning.Pete14 I rinsed the bowl under running water to remove the soap and the loosened dirt. I dried it off with a soft cloth and then took the next set of photos.Pete15

Pete16

Pete17

Pete18 I polished the sterling silver ferrule with a jeweler’s polishing cloth and was able to remove the tarnish. The silver began to shine and the stamping became very clear as I cleaned it.Pete19

Pete20

Pete21 I rubbed some microcrystalline Conservator’s Wax on to the bowl surface with my fingers and then buffed it with a shoe brush. The result was a warm shine on the bowl. I don’t like to use a buffer on deep blasts as it tends to flatten the blast and wear it down. Hand buffing it with a shoe brush preserves the blast.Pete22

Pete23 I cleaned the interior of the stem and shank with pipe cleaners, cotton swabs and alcohol. I was surprised at how clean the shank and the stem were. It took very few cleaners to clean up the interior of the pipe.Pete24 I soaked the stem in Oxyclean for about 30 minutes and then dried it off and sanded the oxidation with 220 grit sandpaper and also a medium and a fine grit sanding sponge to remove the loosened oxidation.Pete25 I wet sanded the stem with 1500-2400 grit micromesh sanding pads and then rubbed it down with Obsidian Oil. I dry sanded it with 3200-4000 grit micromesh and gave it another coat of oil. In each of these steps I did not let the oil absorb but rather used it to give traction to the micromesh pads. I buffed the stem with Red Tripoli and with White Diamond on the wheel to remove the stubborn oxidation that remained. I finished by sanding the stem with 6000-12000 grit sanding pads. I gave the stem a final coat of Obsidian Oil and let it absorb into the vulcanite.Pete26

Pete27

Pete28 I buffed the stem with Blue Diamond and gave it multiple coats of carnauba wax to protect and give it a shine. I then buffed it with a soft flannel buff and then by hand with a microfibre cloth. The finished pipe is shown in the photos below. It is a beautiful sandblast system pipe that will make someone a great addition to their rack. If you are interested in this pipe contact me via Facebook of comment on the blog. All proceeds will go toward supporting Smokers Forums.Pete29

Pete30

Pete31

Pete32

Pete33

Pete34

Pete35

A West German Mystery: Refurbishing a Merkur 2000 720


Blog by Anthony Cook

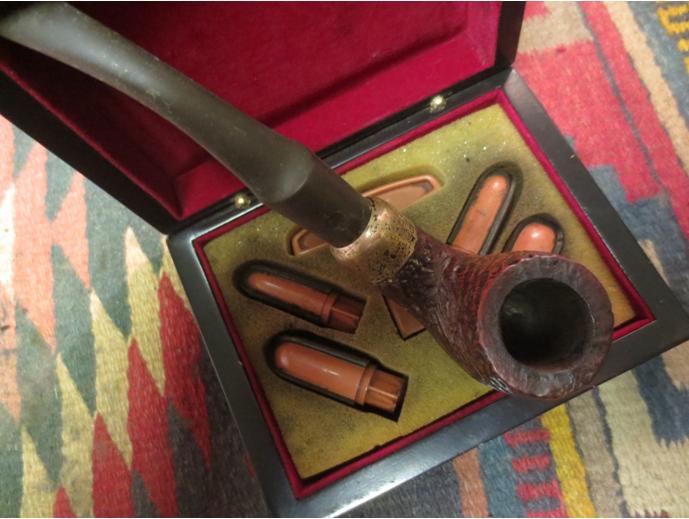
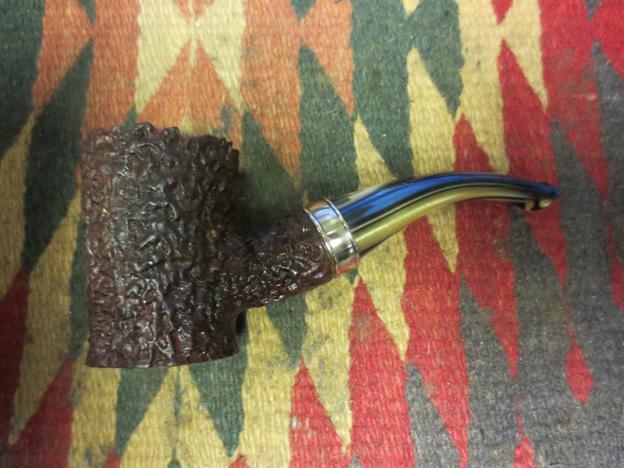
A friend from the Pipe Smoker Unlimited forums recently picked up a volcano-shaped Merkur 2000 pipe as a birthday gift to himself (we all know that those are the best gifts). He was drawn to the shape and the bit of nice grain that he could make out beneath the grime and dark stain. He mentioned in a comment that it was going to need a little cleaning up. So, I offered to take care of that for him and he accepted.

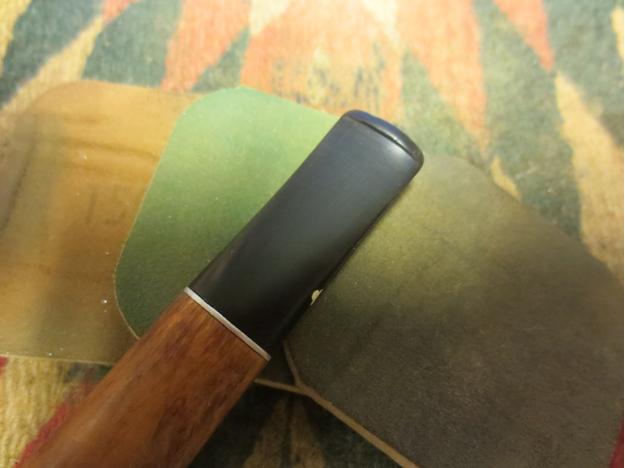
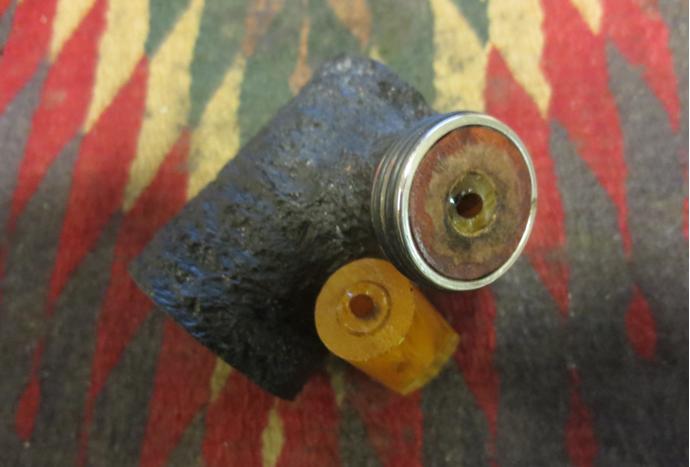
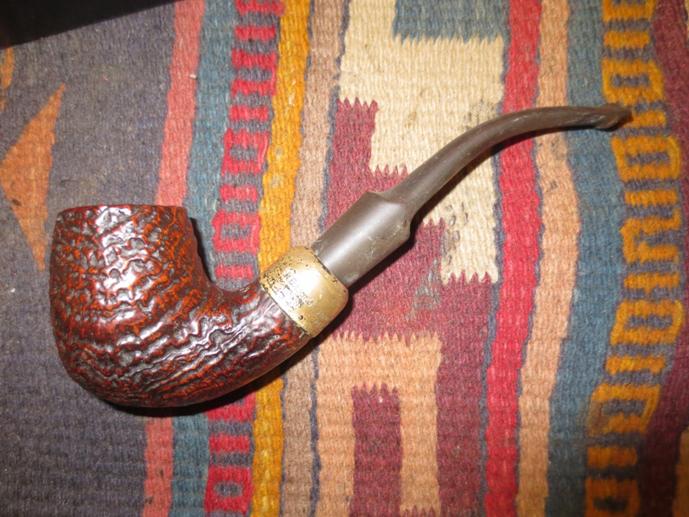
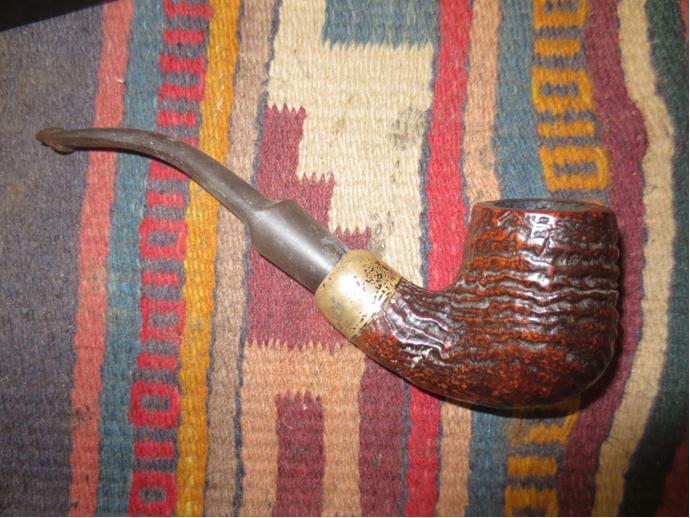
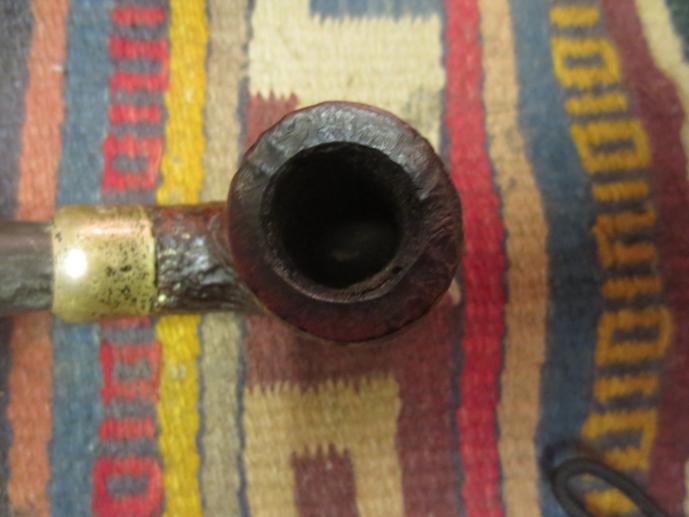
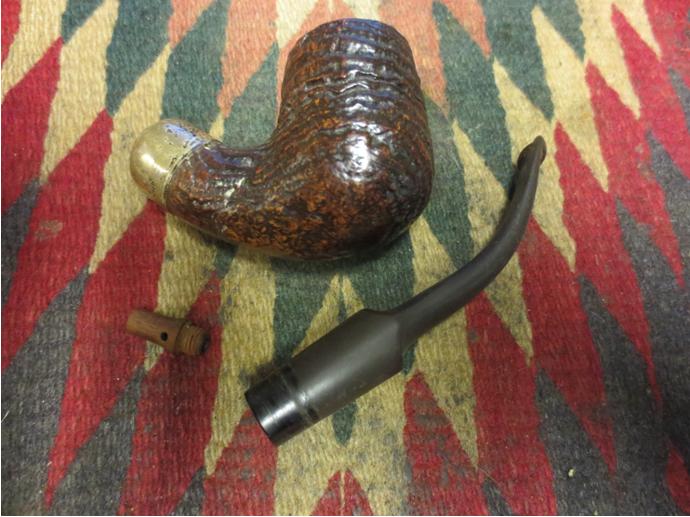
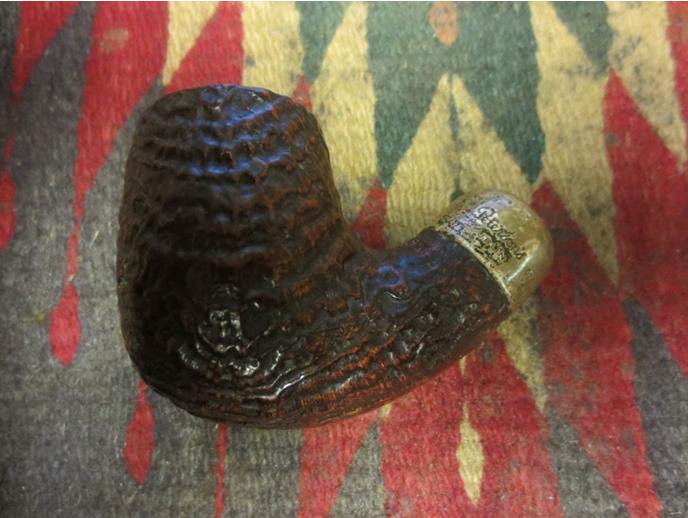
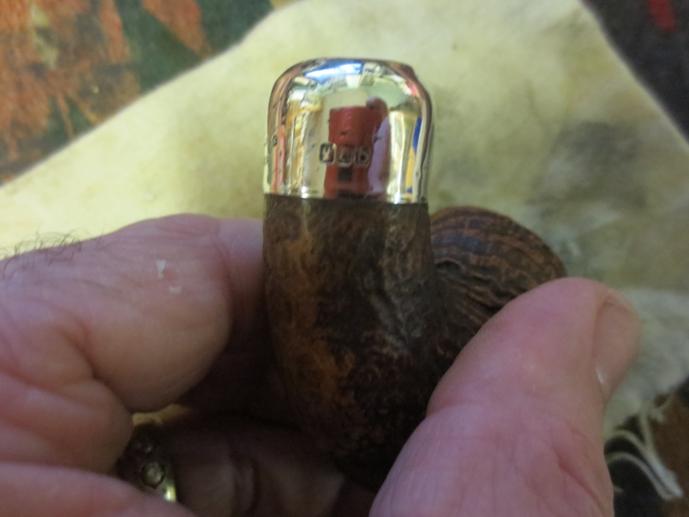
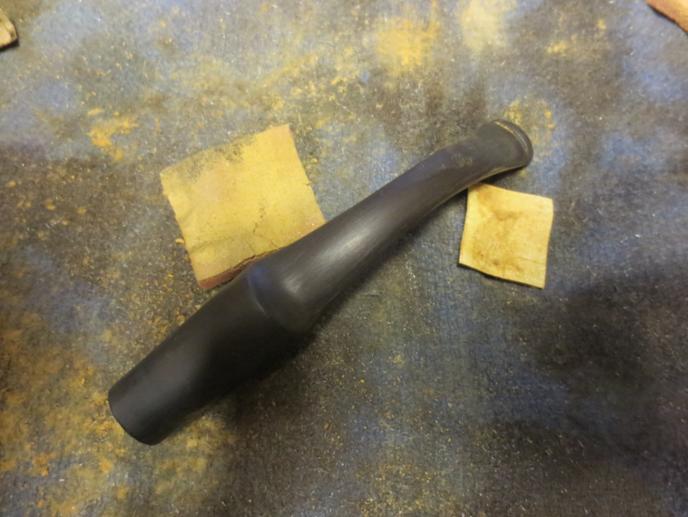
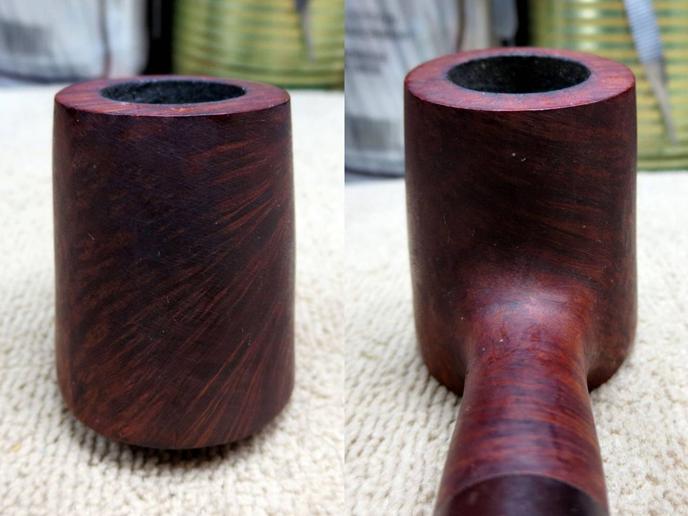
I gave the pipe a good look over when the pipe arrived some time later. I was immediately impressed by how light it was for its size. It appeared to be in good, clean condition too. The stem had barely any tooth chatter, but it had some reddish oxidation that almost matched the stummel stain and there were strange bands of raised vulcanite in some areas. My best guess is that something had lain across the stem for a very long time to cause the warping. The stummel appeared to have a few scratches, including one on the rim that was the most pronounced, but they were small and looked shallow. So, I was confident that they could be easily removed.
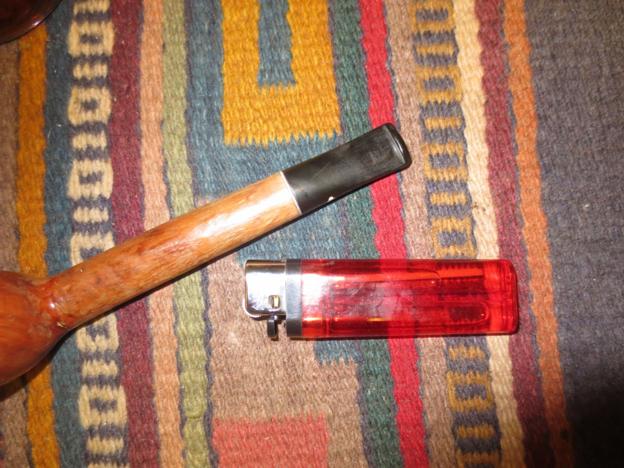
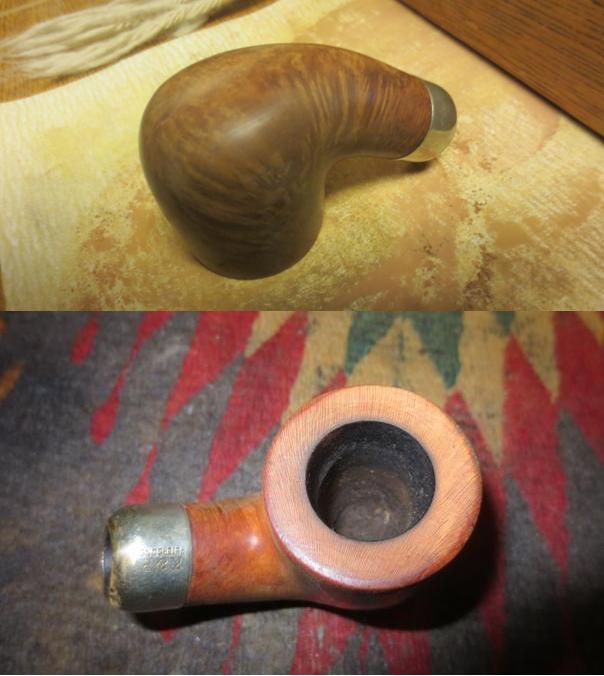
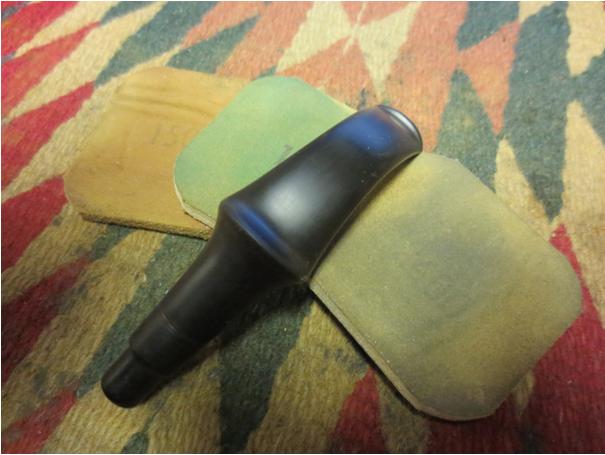
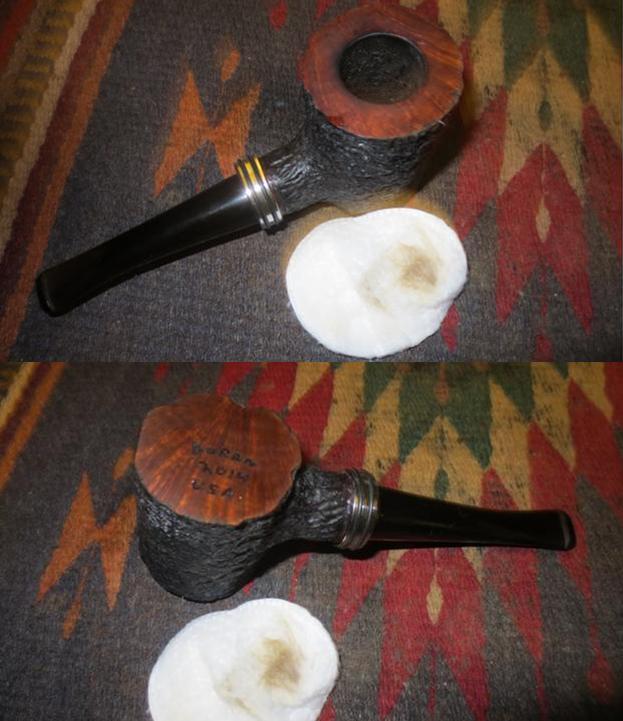
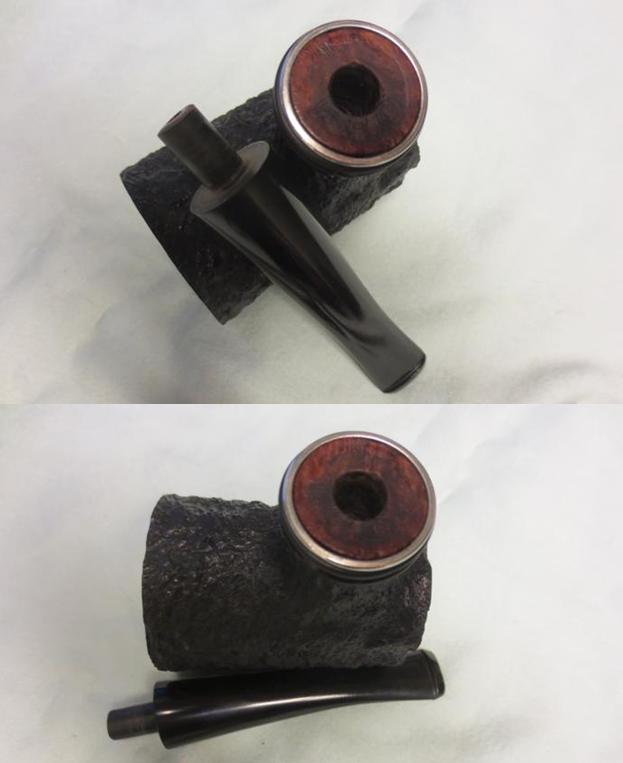
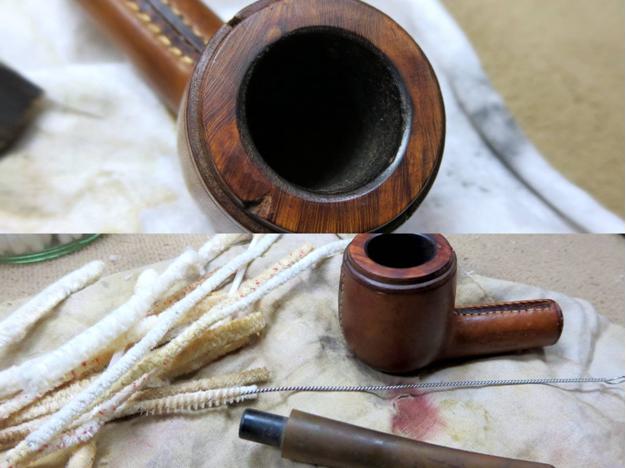
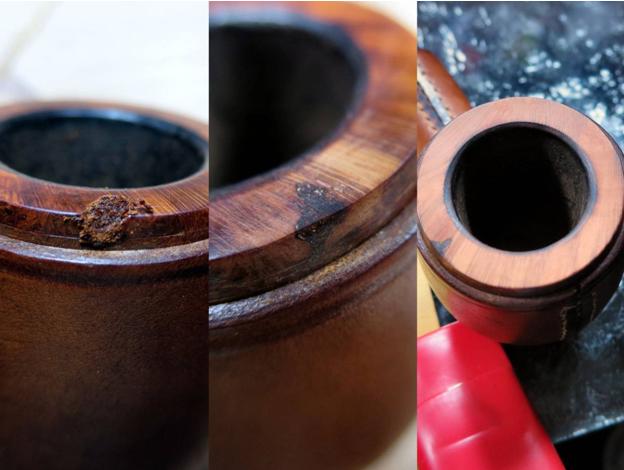
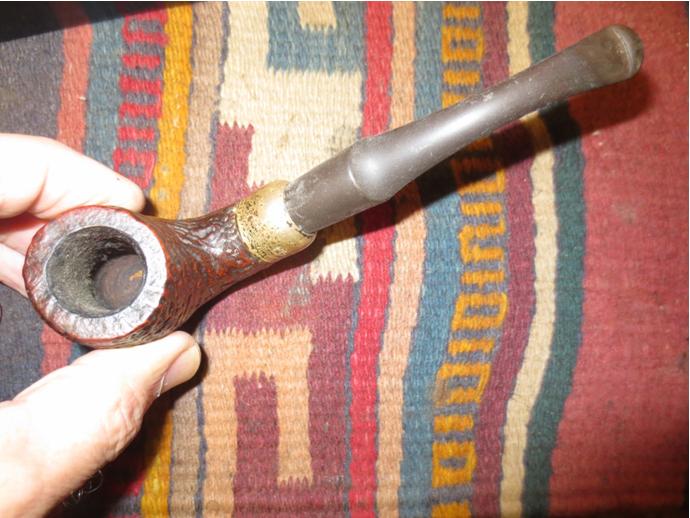
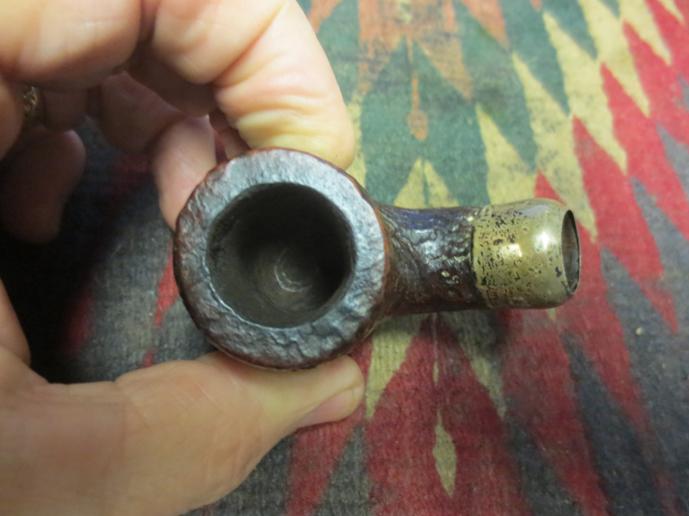
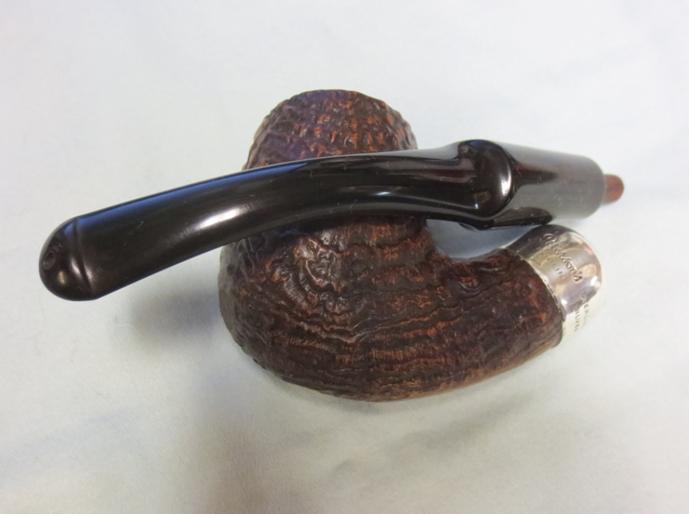
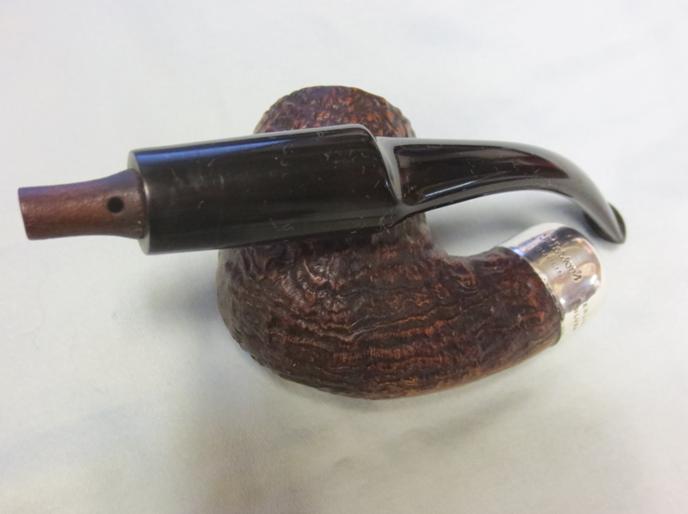
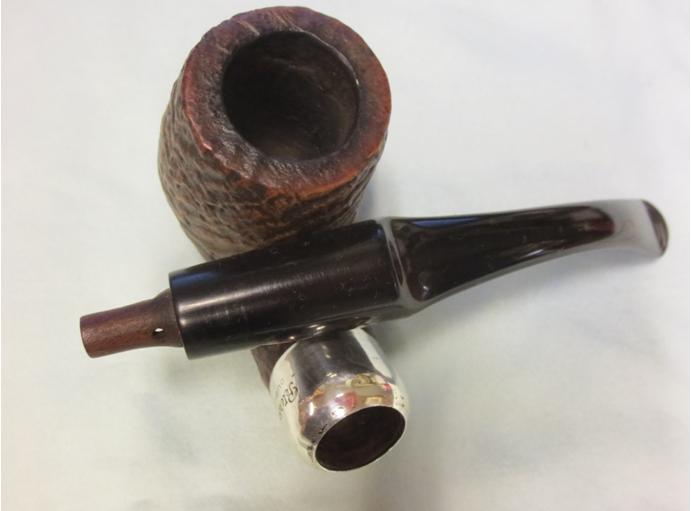
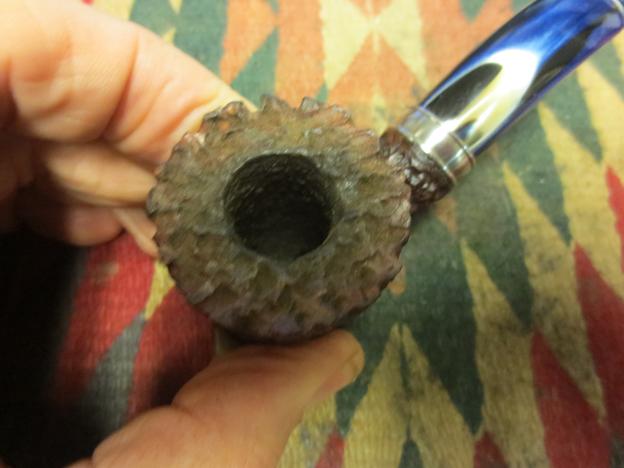
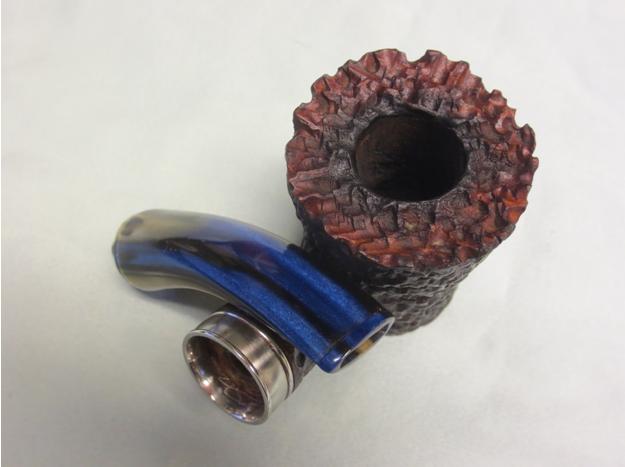
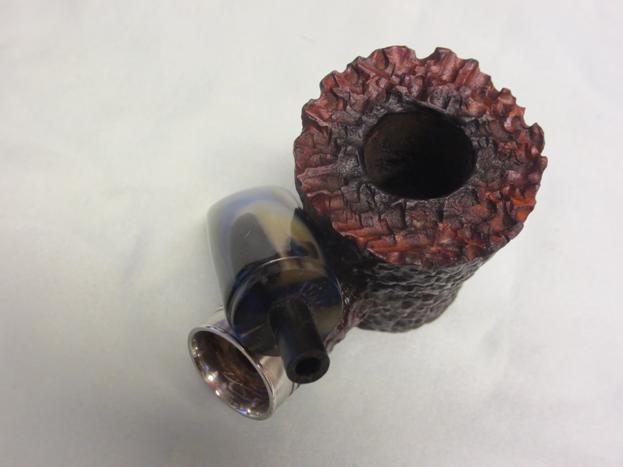
Here’s the pipe as it was on arrival:Merk1 In the photo below, I don’t know what that is in the chamber. It’s best not to think about it too much.Merk2

Merk3

Merk4 
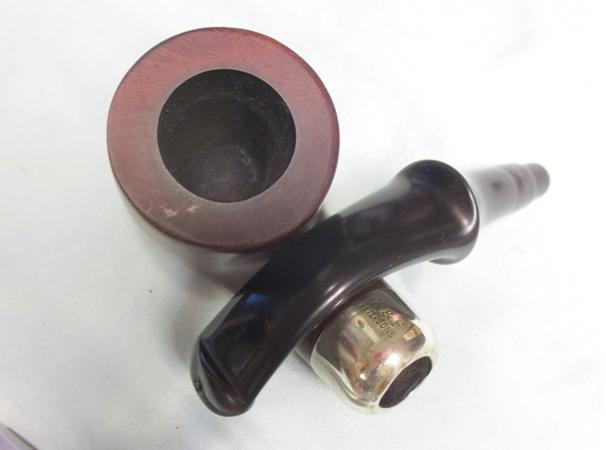
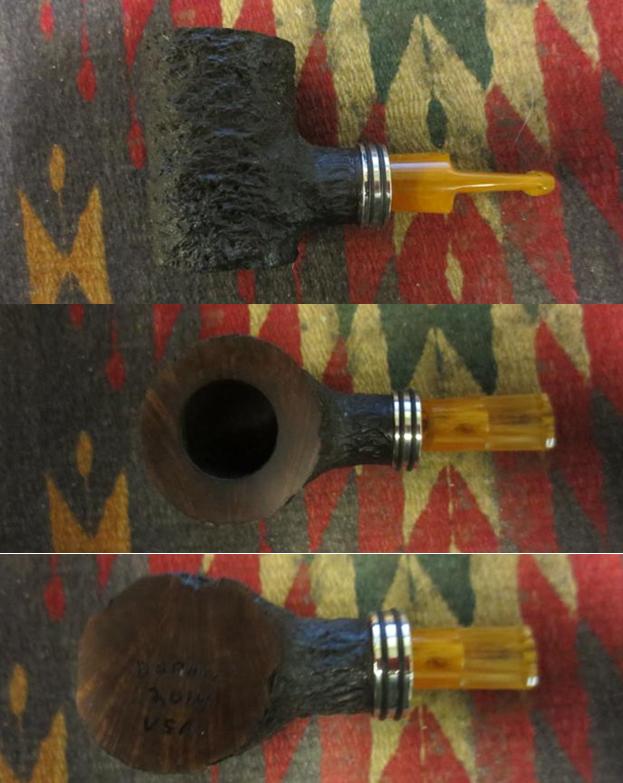
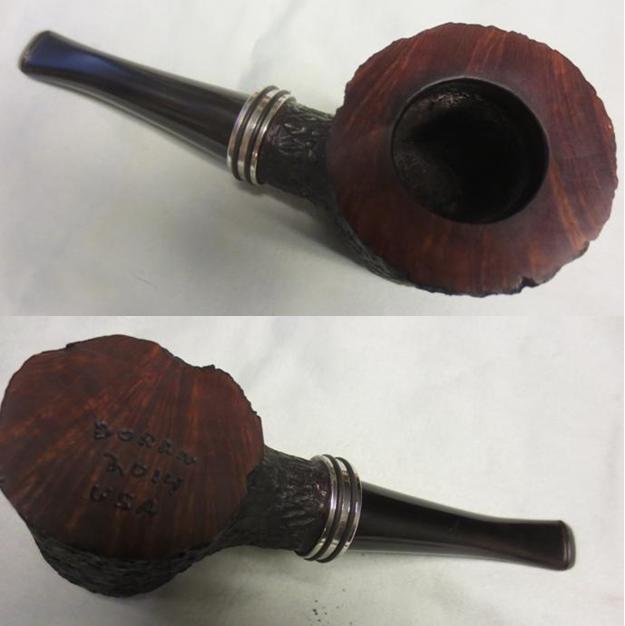
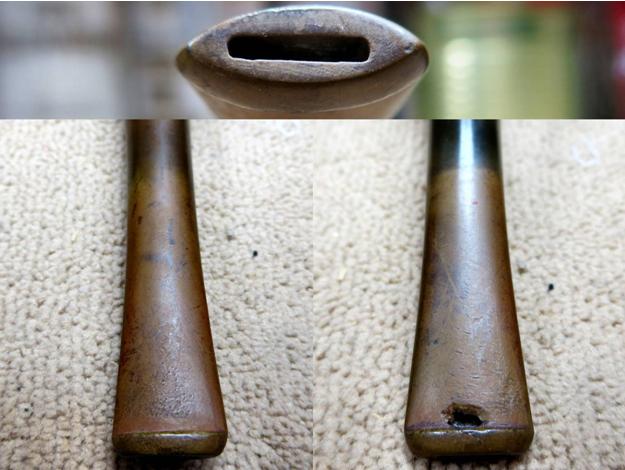
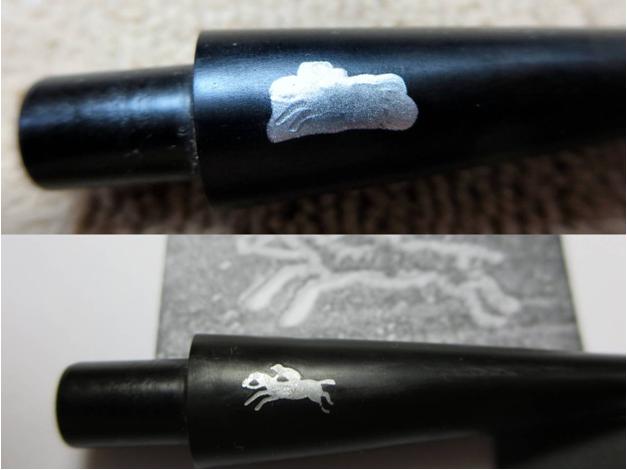
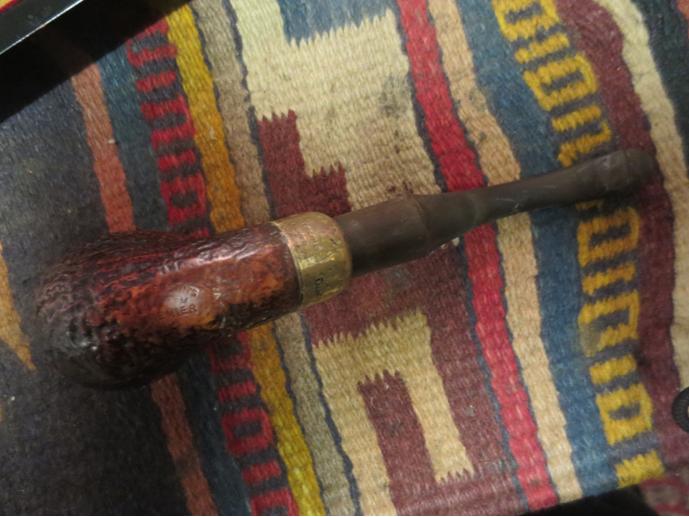
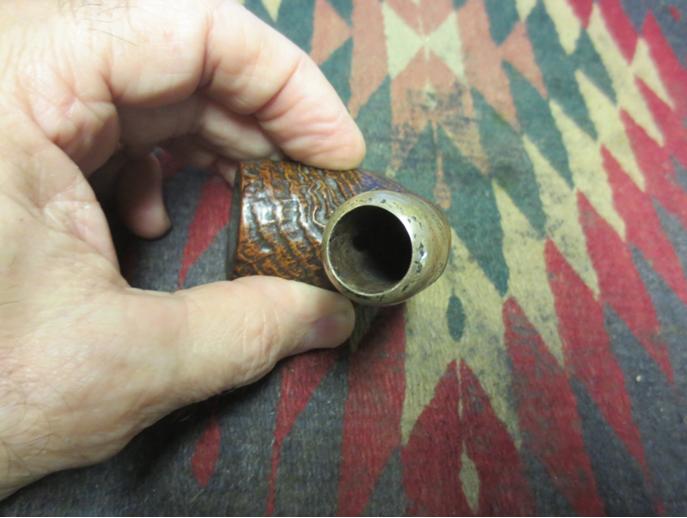
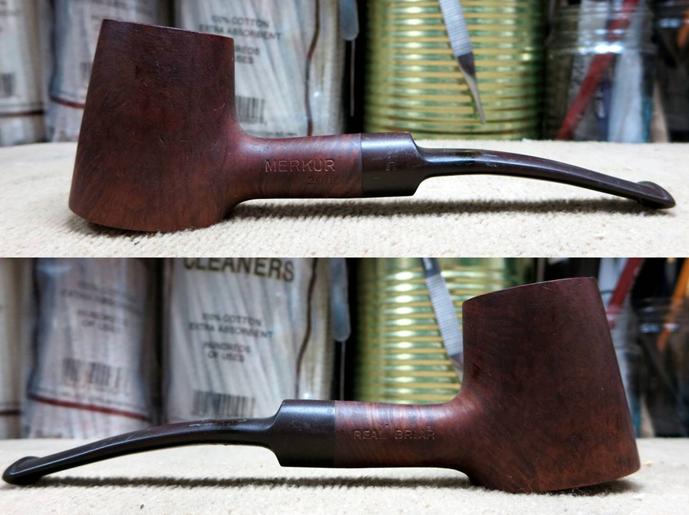
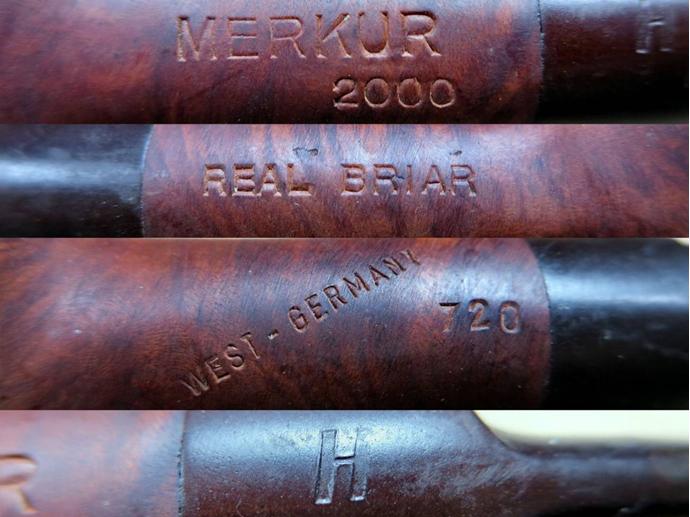
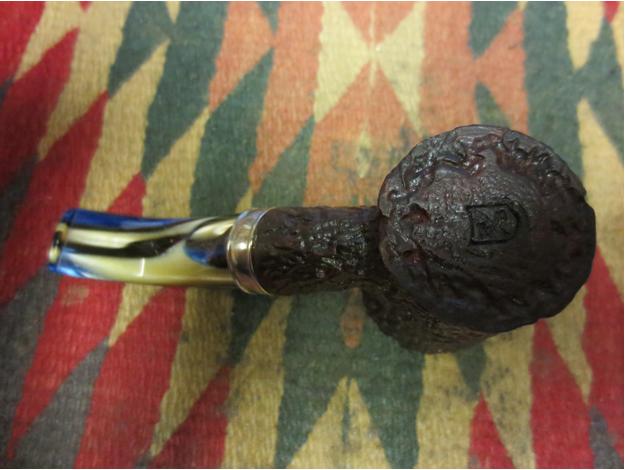
The actual manufacturer of this pipe is a bit of a mystery to me. It’s stamped “MERKUR 2000” along the left shank, “REAL BRIAR” along the right, “WEST-GERMANY” and “720” along the bottom, and there is a slanted “H” logo on the stem. Pipephil has a listing for a Blackwood pipe with a matching stem logo and “2000” in the same location and typeface. It’s my guess that neither Merkur nor Blackwood is a manufacturer brand name, but rather they are either model names or shop-branded names. Whatever the case may be, the “WEST-GERMANY” stamping is a clear indication of the country of origin and that the pipe was made sometime before the 1990 German reunification.

Here are a few detail photos of the stamping in question and also the Blackwoods pipe from pipephil:Merk5

Merk6 When I asked my friend what he wanted done with the pipe, he said that he would like me to lighten the color a bit and make the grain “pop.” So, to begin, I wiped the stummel down with acetone and cotton pads to remove the grime and lift some of the old stain.Merk7 
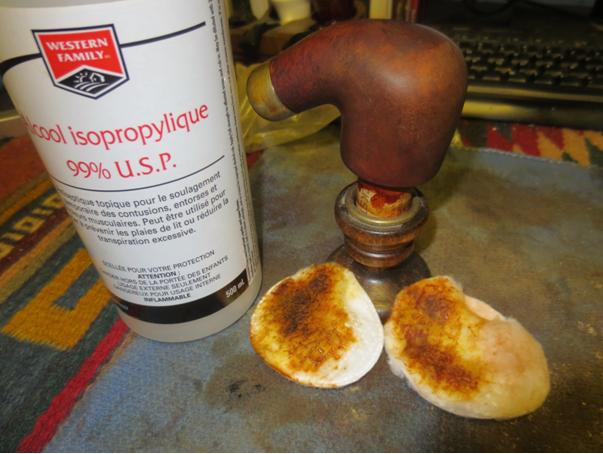
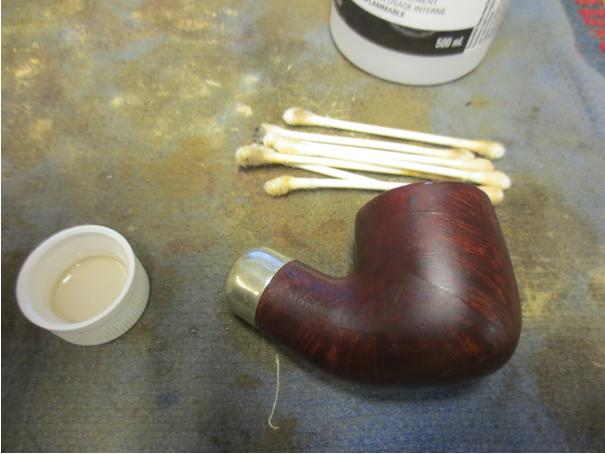
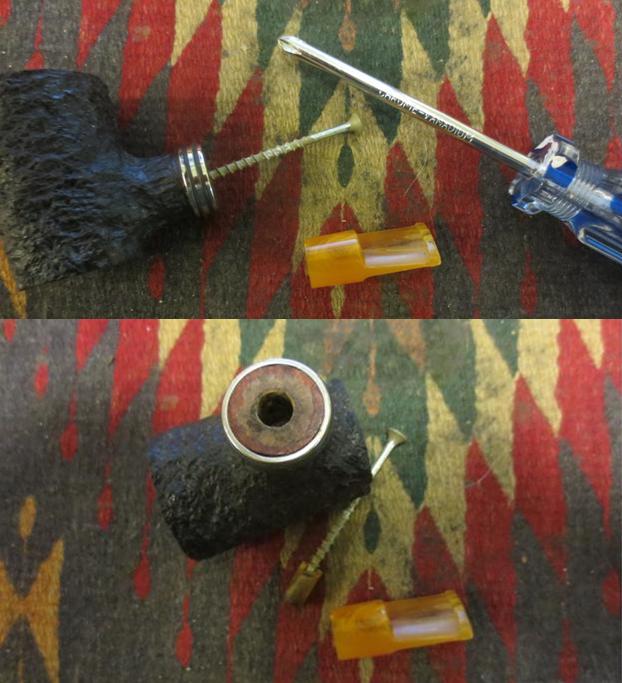
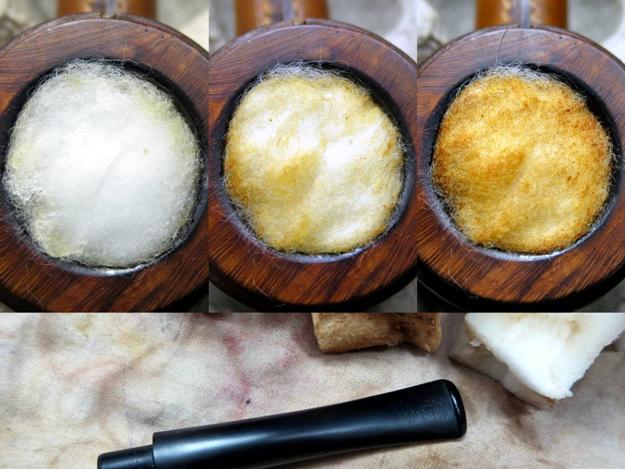
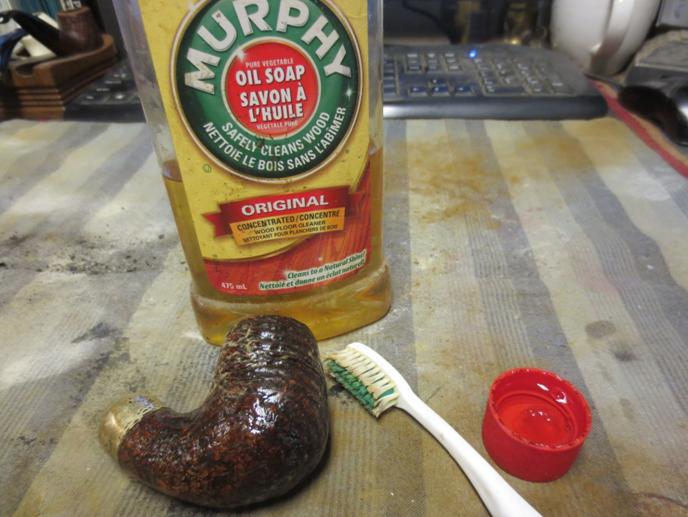
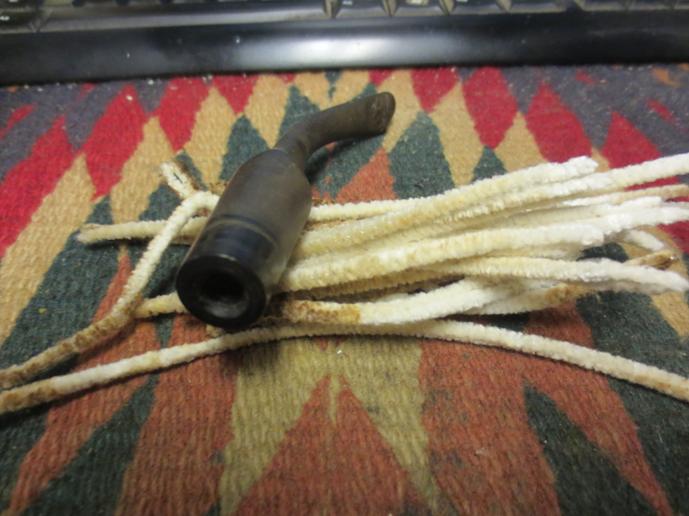
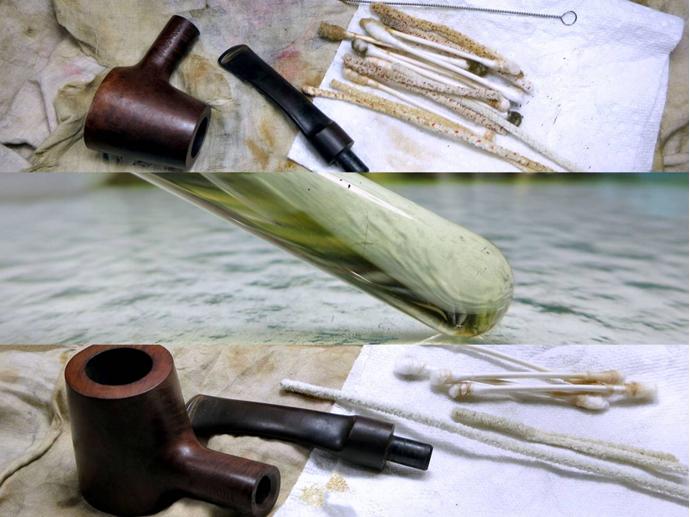
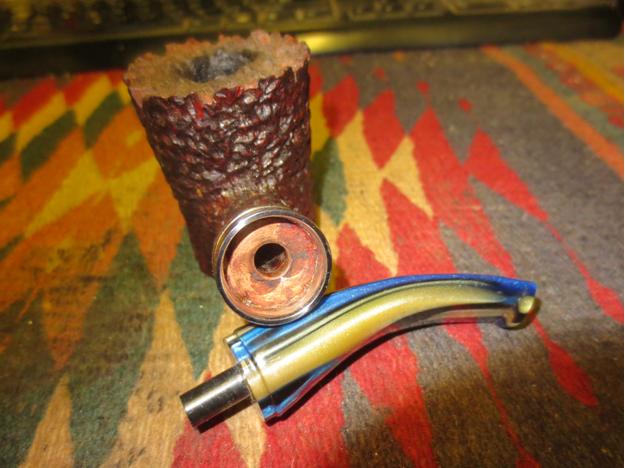
I think a good, internal cleaning is the foundation of any estate pipe work. So, I scrubbed out the stem and stummel with a few pipe cleaners, cotton swabs, and a shank brush. Next, I set up the retort for some deep cleaning (kind of like steam cleaning the carpet). I flushed the stem and shank 10-12 times with the boiling alcohol, let the pipe rest for about 10 minutes, and the flushed it 10-12 times again with fresh alcohol. After the second retort the alcohol in the vial was almost as clear as when it was fresh (the debris seen in the photo is bits of carbon build-up on the outside of vial from the candle flame). So, I gave the pipe a final scrub to remove anything left behind from the retort.Merk8 
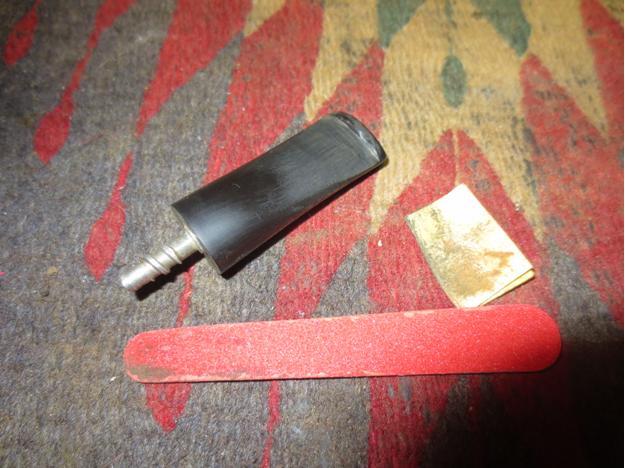
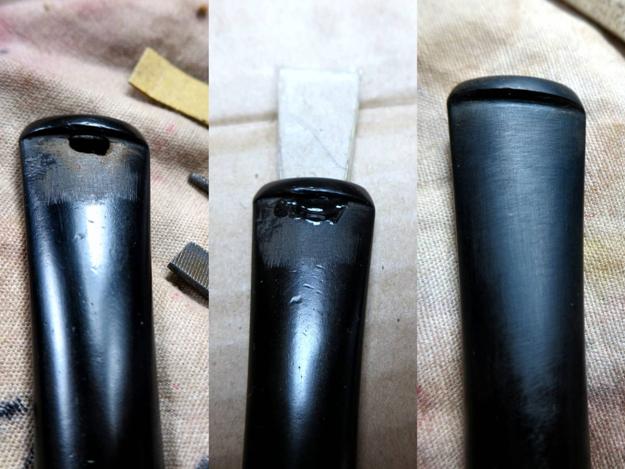
The stem was dropped into a bath of Oxyclean and warm water for about an hour, and then I removed the softened oxidation by scrubbing with cubes cut from a Magic Eraser pad. I sanded down the tooth chatter and warped bands on the stem with a progression of 220, 320, and 400-grit paper and the entire stem was lightly sanded with 600-grit paper to get rid of the pitting and smooth the surface.

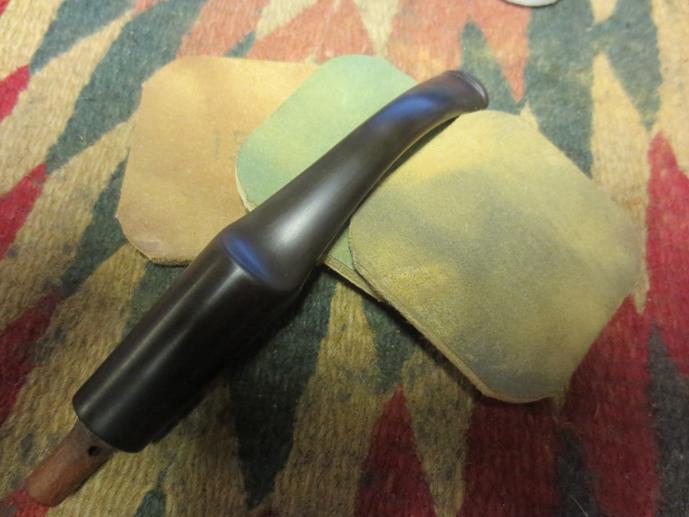
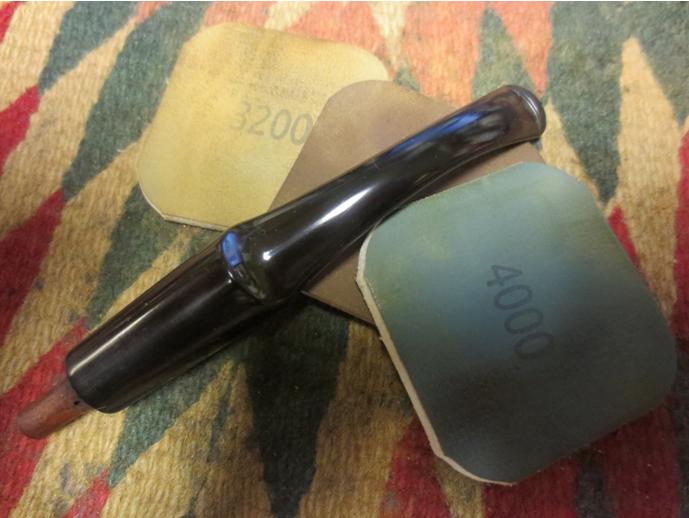
I already knew that I couldn’t completely restore the stem logo; the upper-right portion of the “H” was almost entirely worn away. I thought that it would look better with something there though. So, I painted over the logo with a grout pen, let the paint dry, and then very carefully sanded away the excess with 1200-grit paper to reveal the partially restored logo. Then, I sanded the rest of the stem with 1200-grit and polished with the full range of Micro-Mesh pads to wrap up the stem work.Merk9 The scratch on the rim didn’t seem too deep. I thought that I would be able to remove it with just a light topping. It didn’t take much sanding with 220-grit before I noticed that the “scratch” was widening and realized that it wasn’t a scratch at all, but a small pit. I thought that it might still be shallow enough that I could sand it out, but when the pit was still there after a bit more sanding I decided to cut my losses and patch it with a briar dust and CA glue patch. Then, I topped the bowl with 320-grit to even everything out.

Unfortunately, that pit wasn’t the last one that I encountered while working on this pipe. At least two more revealed themselves along the rim and a few more on the rest of the stummel.Merk10 Now, before I tell you about how I did the rest of the stummel I have to issue an apology. I failed to take any more photos before finishing up the pipe. I’ll lay the blame on the previously mentioned pits that kept cropping up, which caused me to backtrack at almost every stage and redo sections of the work. However, I’m sure that you can follow along with no problems. I won’t detail any of the pits, since they were all addressed in the same way as the one above.

In order to honor the request to make the grain “pop,” I heated the stummel with a heat gun to open the grain and applied a dark brown stain thinned to one part stain to three parts isopropyl alcohol. After flaming the stain to set it into the grain, I hand-buffed with a soft rag to remove the excess, and then sanded the stummel with 400-grit. This removed most of the light scratches as well as much of the surface stain, which gave the grain some nice contrast.

I heated the stummel again before applying a medium brown stain thinned the same as before. I flamed and hand-buffed again before lightly sanding with 600-grit and 1200-grit papers. I also began polishing with Micro-Mesh 1800-grit to 2400-grit.

Next, I applied a light brown stain, flamed, hand-buffed, and reattached the stem to give the stummel a Tripoli buff on the buffing wheel. I don’t buff the stem with Tripoli, but it’s good to have it in place to prevent the buffer from rounding the shoulders of the stem and shank faces. I use a rubber tourniquet tightly wrapped around the end of the stem to protect it from the wheel.

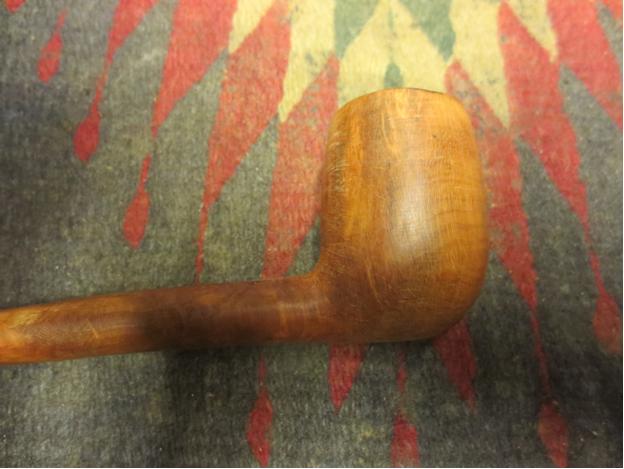
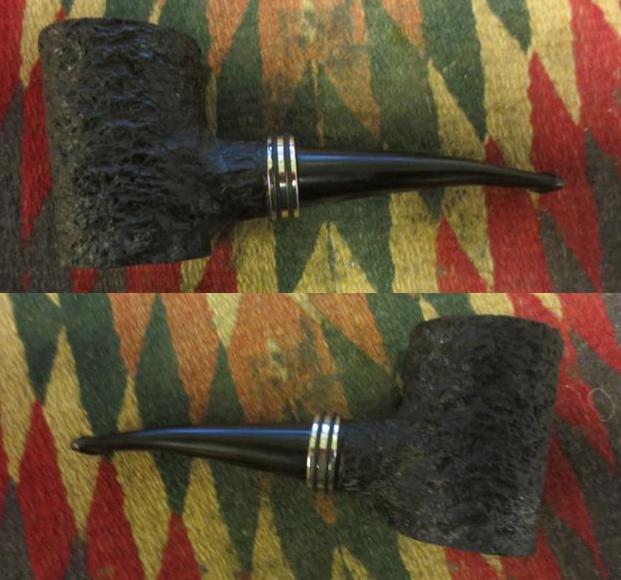
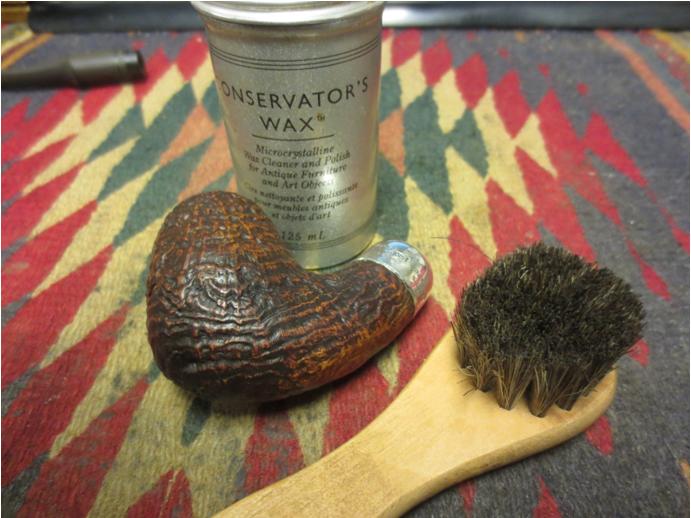
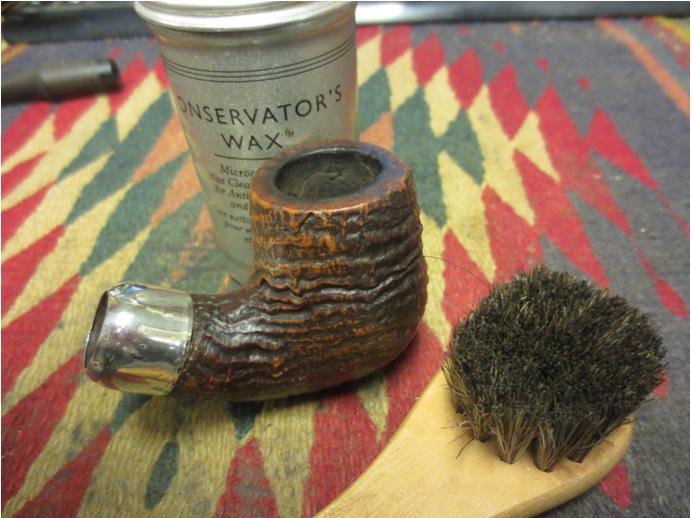
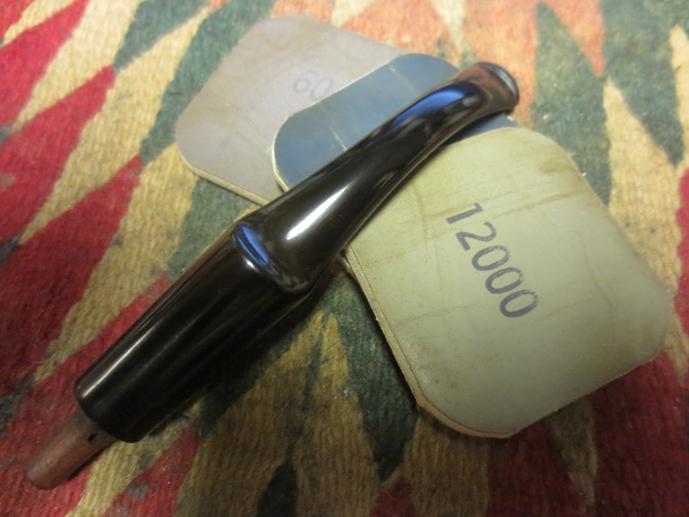
I polished the stummel with 3200-grit through 4000-grit paper before giving it one final stain of British tan thinned by eye until it was just weak wash. Then, I polished with the remaining Micro-Mesh grits before buffing the entire pipe with White Diamond and applying several coats of carnauba wax to finish up the pipe.

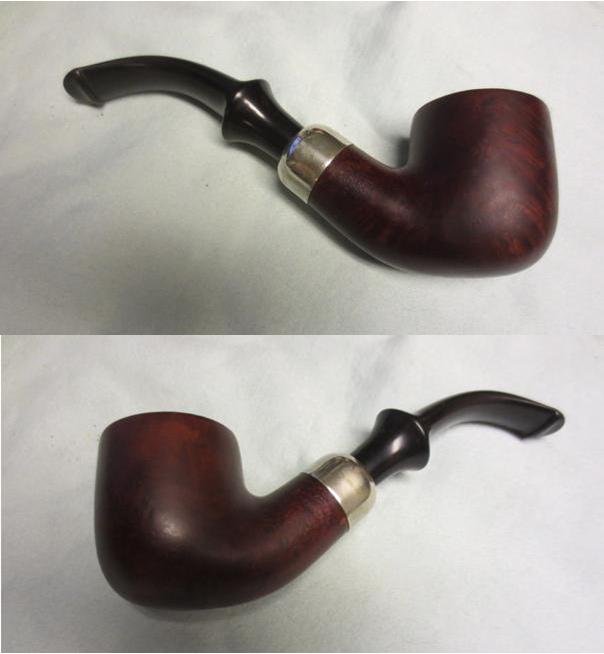
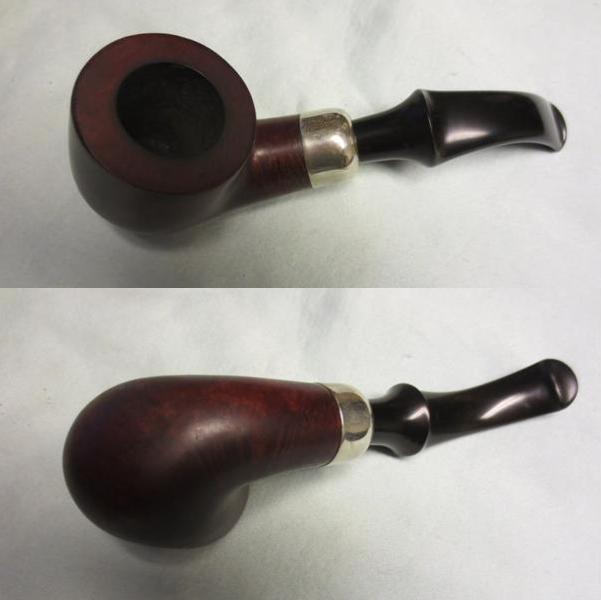
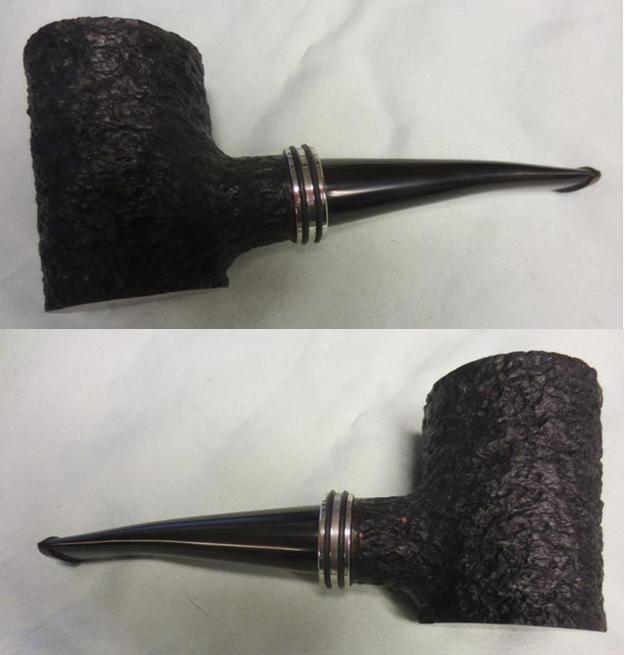
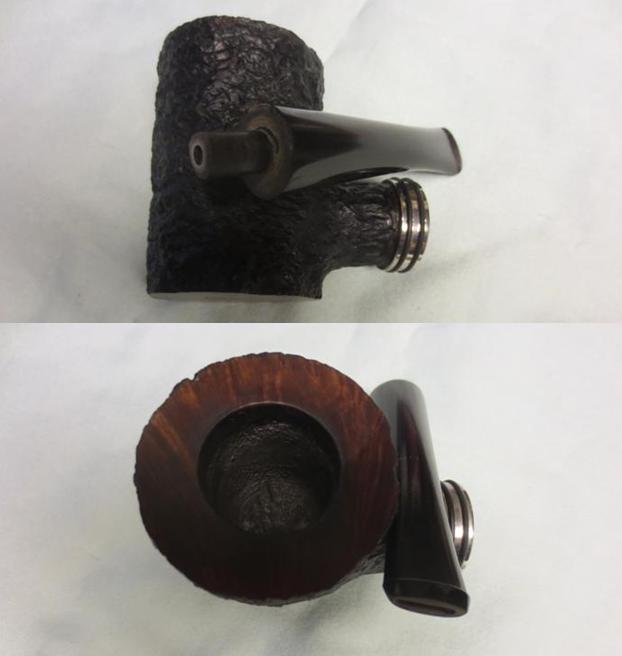
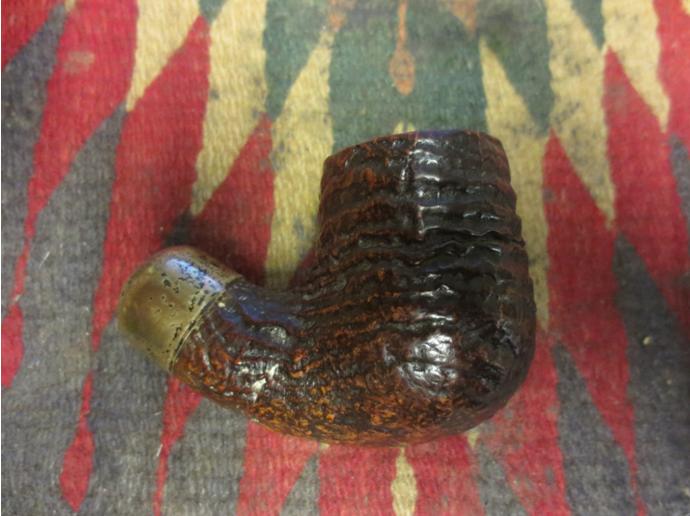
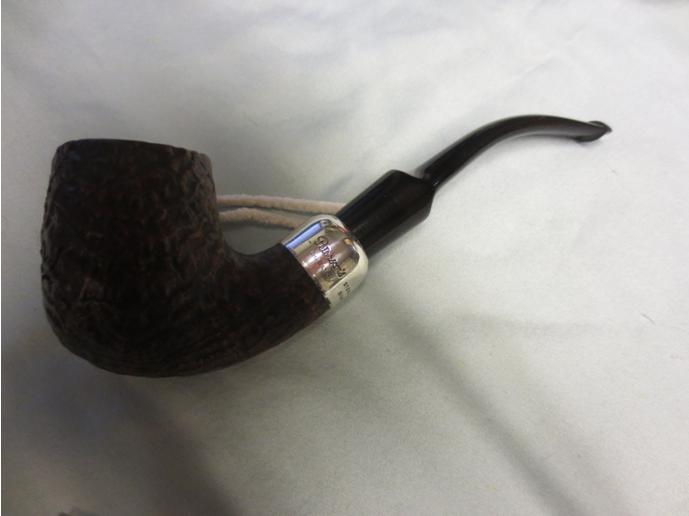
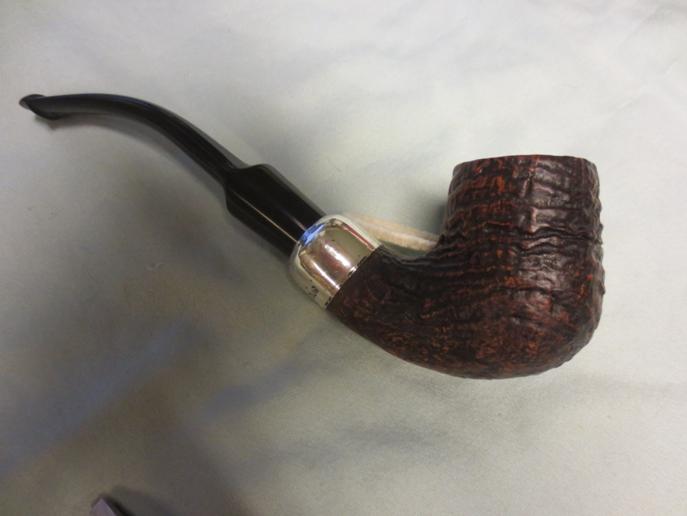
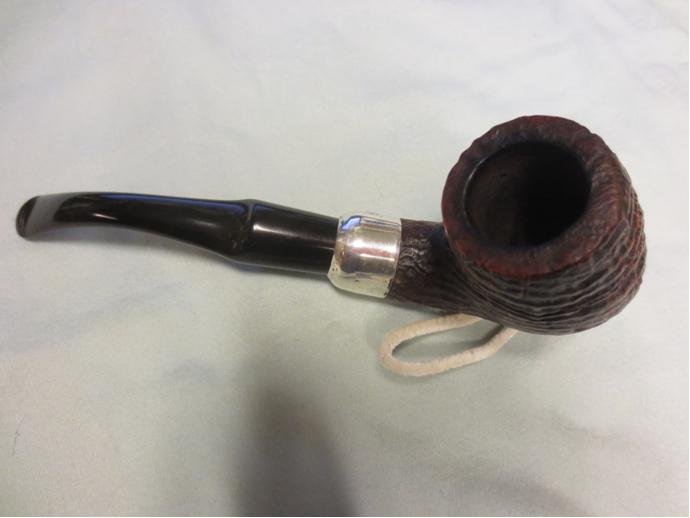
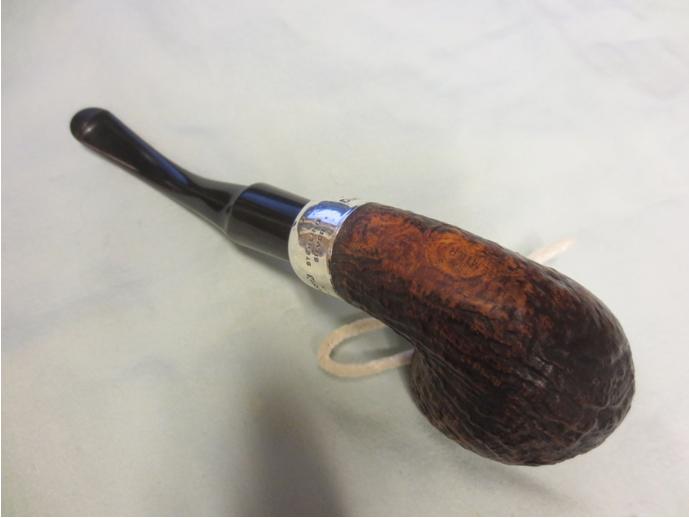
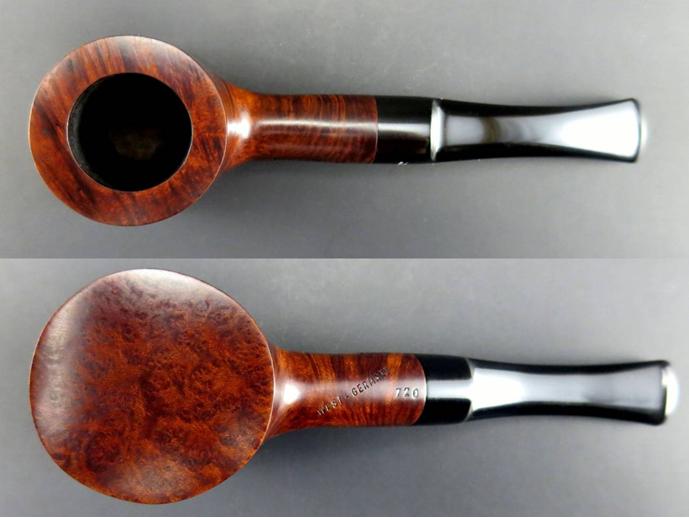
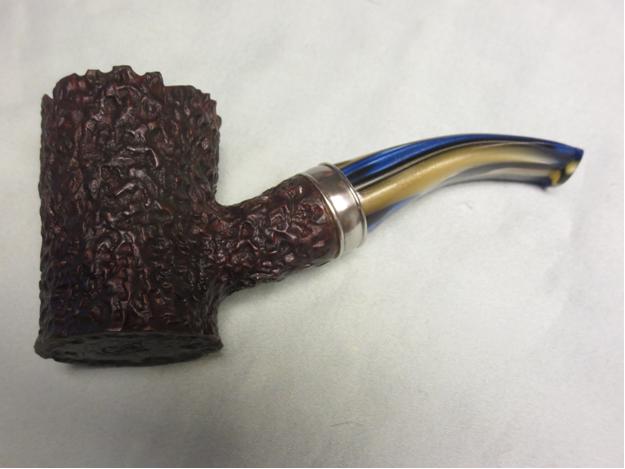
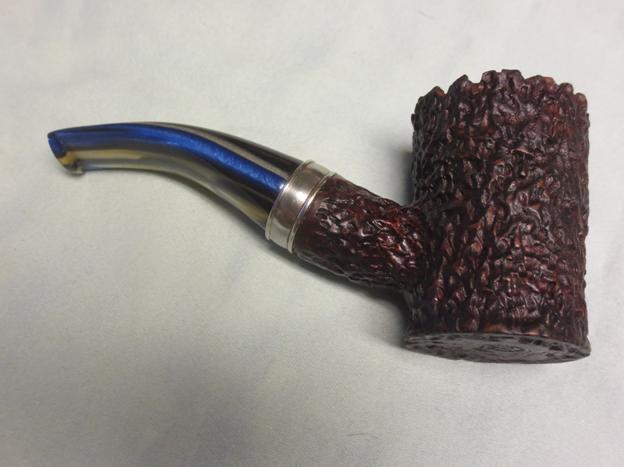
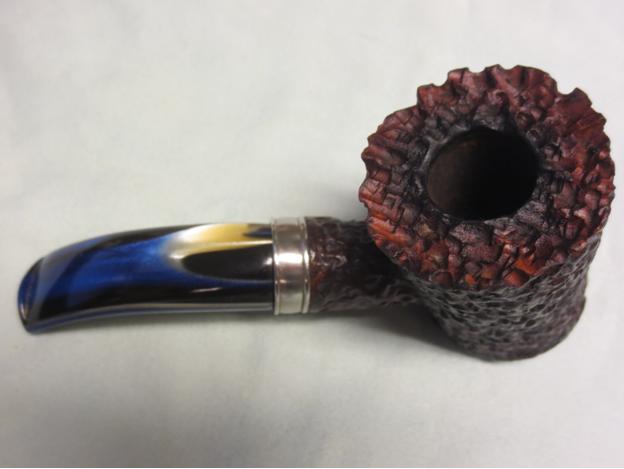
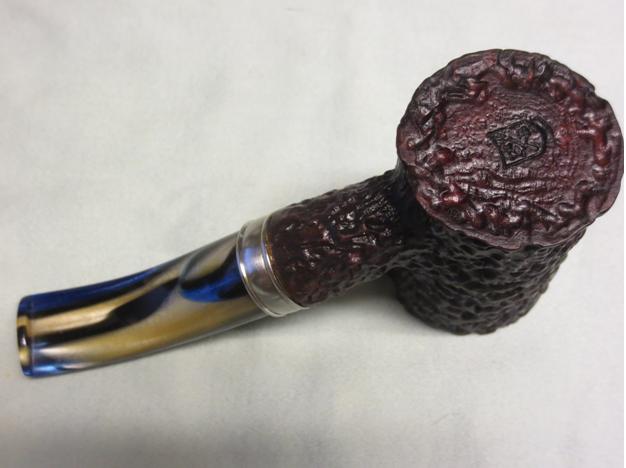
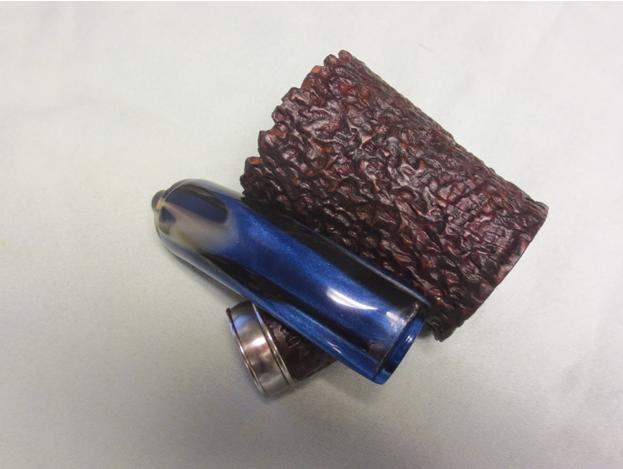
The final results are pictured below.Merk11

Merk12

Merk13

Merk14 I think the pipe will now be a proud addition to my friend’s collection and I’m sure that it will serve him well for many more birthdays to come. Thanks for looking.

Cleaning up a Briar Bird Bent Poker or Cherrywood


Blog by Steve Laug

cbe069ba4835007c4c7a330473170320 A friend of mine here in Vancouver dropped off a bag of pipe goodies for me while I was in Europe. When I got home and opened the bag there were four jars of tobacco, a Peterson ceramic three pipe stand, a two pipe travel bag, some pipe cleaners and three pipes – a pipe that I had sold him, a Briar Bird Bent Poker or Cherrywood with a blue/gold acrylic stem, a Poker with a broken tenon stuck in the shank. I decided to clean up the easy pipe – The Briar Bird Poker. I emailed the giver to express my thanks at his generosity and ask him some questions about the two pokers. He answered that the broken stem pipe was a pipe made by Brian Doren. He also told me that the Briar Bird pipe by J. Cochey was one of his early works.

At first glance it looked like it would clean up easily and I could add it to the rotation quickly. It had a rusticated finish that was too my liking, a wedding ring style band and a blue and gold stem. The bend was good in the stem and the pipe felt good in the hand. The button seemed like a good size. The slot was open and the airway clear. The inner dimension of the bowl was smaller than I normally use but it would work. The finish was dirty and the rim had some light build up in the rustication. The bowl would need to be reamed back to keep it from becoming even smaller in diameter than it was.BB1

BB2

BB3

BB4

BB5 When I removed the stem to have a look at the drilling and the fit against the shank the band fell off in my hands. It had been glued to a thin smooth band on the end of the shank and extended beyond the end of the shank. I acted as a tube that the stem sat in. Examining the stem I saw that the maker had also stepped down the end of the stem to accommodate the band as well. In essence the band sat suspended over the stem with a small fit on the shank. I cleaned up the shank end and reglued the band on the shank. Before I glued it I debated whether to properly seat it on the shank – removing some of the shank briar and seating the band further back. I decided against that. When I put the stem in place on the shank without the band, the tenon was too long to allow the stem to seat against the end of the shank. I could drill the mortise slightly deeper, shorten the tenon or just reglue and leave things alone. I obviously chose to just glue it and leave it alone.BB6 The slot in this stem was drilled beautifully and the oval opening flared back to the airway properly. The draw on the pipe was excellent.BB7 I reamed the bowl with the PipNet reamer and took the cake back to bare walls. With the narrow bowl I would keep this pipe very clean and develop the thinnest of cakes so as not to constrict the bowl.BB8

BB9 With the bowl cleaned the rim needed some attention. There was some oil and tar built up in the rustication.BB10 I used a brass bristle white wall tire brush to clean out the rustication. Once I had it cleaned out I rubbed the bowl down with some Halcyon II wax and then buffed it with a shoe brush to raise the shine. With a rough rusticated pipe like this I don’t buff it on the buffer as I want to keep the sharp edges of the rustication as they are without smoothing them out. I scrubbed out the shank and the stem with alcohol, cotton swabs and pipe cleaners until they came out clean. I polished the stem with Blue Diamond on the buffing wheel and polished the band with a jeweler’s cloth. The finished pipe is shown in the photos below. It is ready for its inaugural bowl since coming to my rack. If you are interested in seeing some of the newer work of Briar Bird Pipes I have included a link to the website. http://www.briarbirdpipes.com
BB11

BB12

BB13

BB14

BB15

BB16

BB17

BB18