A Tiny Apple Reborn – new stem and new finish


Blog by Steve Laug

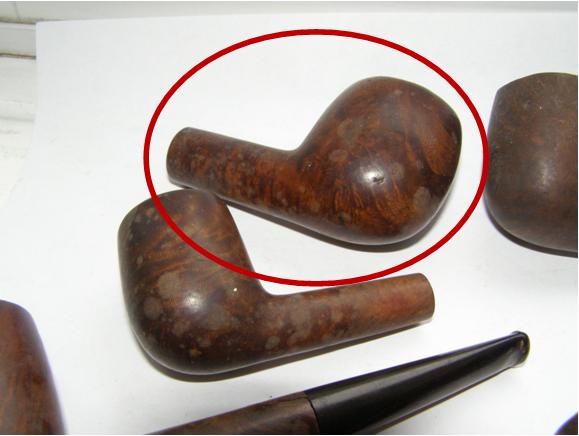
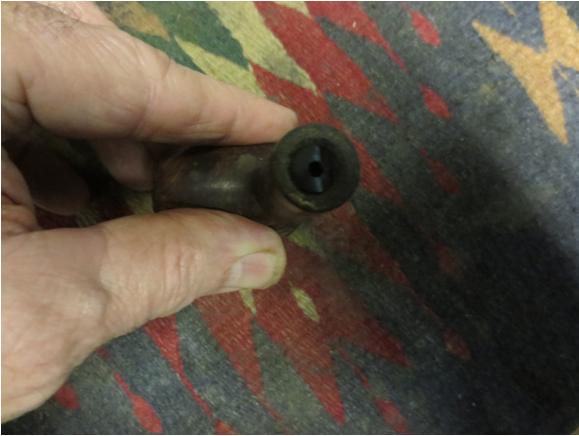
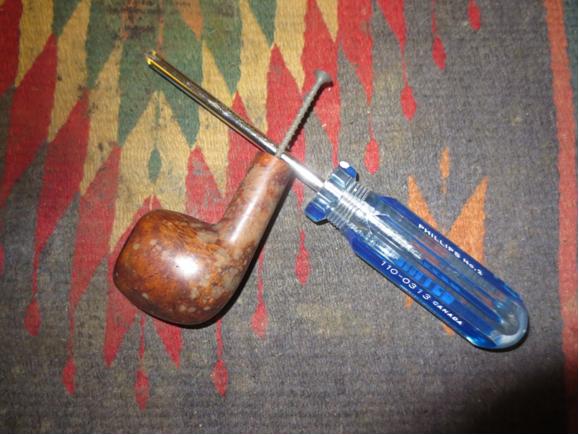
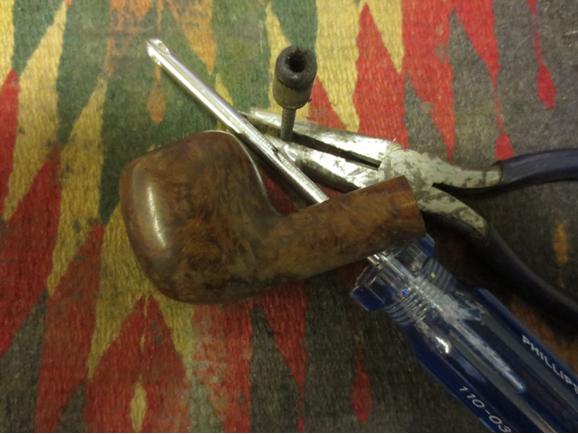
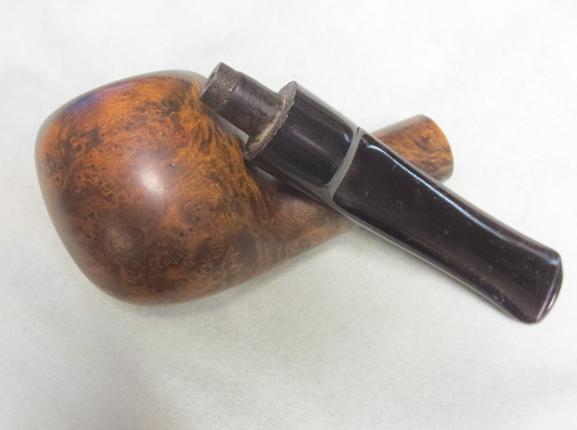
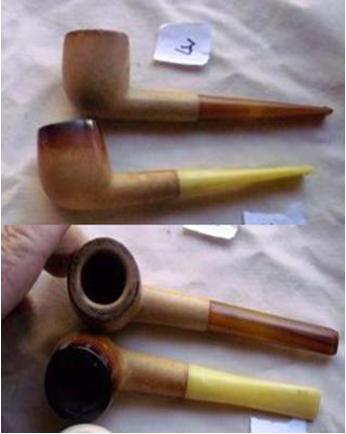
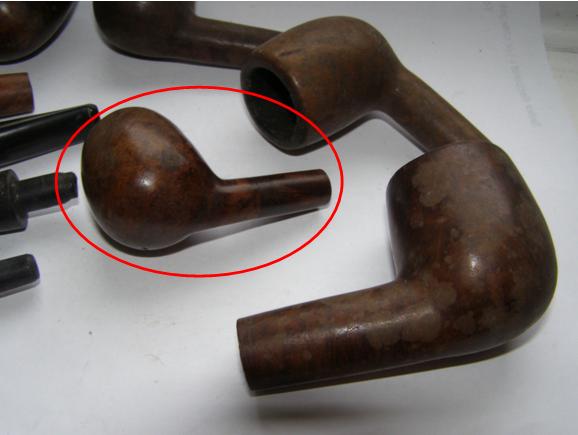
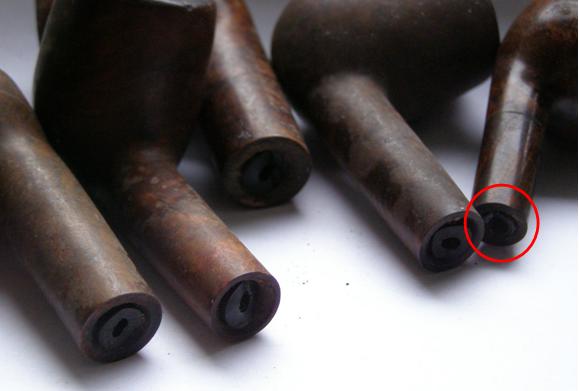
This morning I decided to work on an interesting little pipe that I picked up in an eBay batch from England. All of the bowls in that batch had broken tenons stuck in the shank. All were no name bowls or so worn that the name had long since worn off. This one was the smallest pipe in the batch. The bowl and shank are 2 ½ inches long and 1 ½ inches tall. The bowl is drilled at 5/8 inches and I can insert my little finger. The shank was spliced somewhere along the way and done quite well. It is a smooth splice. I wonder if it was a repair or if it came out that way when briar was scarce during the war. The finish was spotty – varnish was peeling from the bowl and shank. The tenon appears to have had a metal tube in the middle of the vulcanite and both had snapped off when they broke. I have circled this bowl in red in the next three photos. The first shows the batch of pipes that I picked up. The second is an enlargement of the bowl itself and the third photo shows the snapped tenon in the shank.Apple1
Apple2
Apple3 
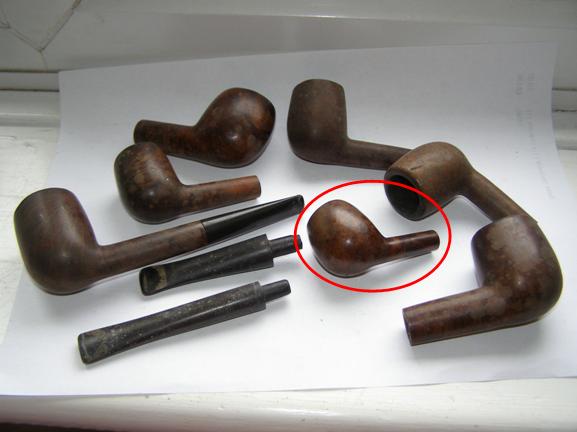
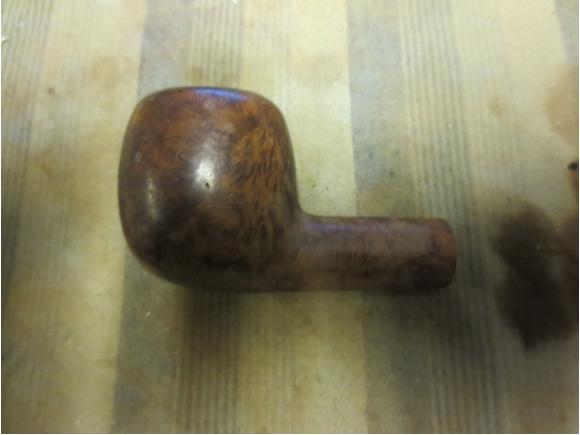
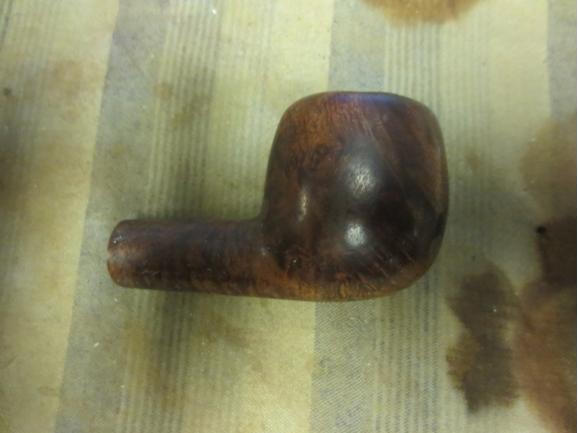
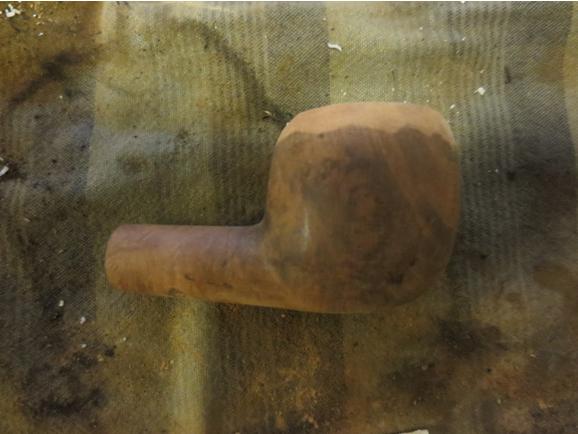
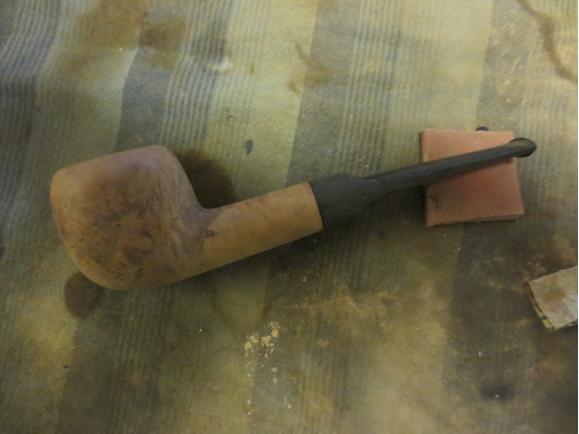
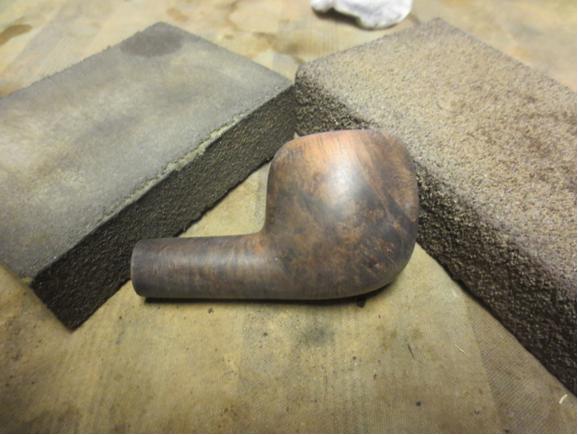
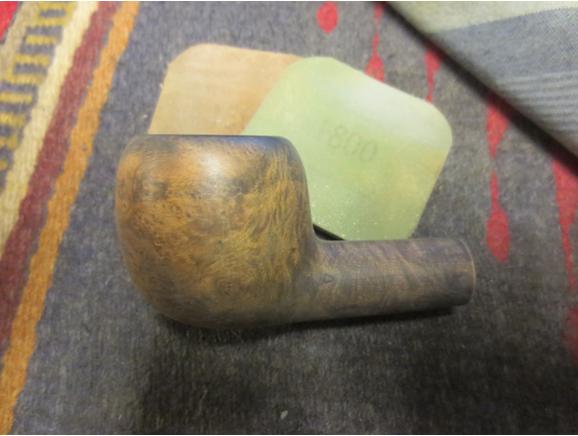
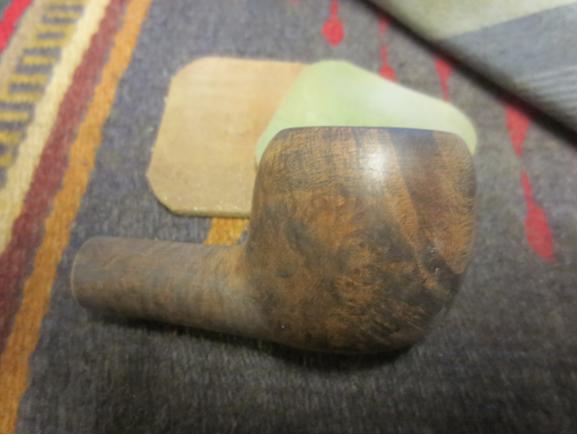
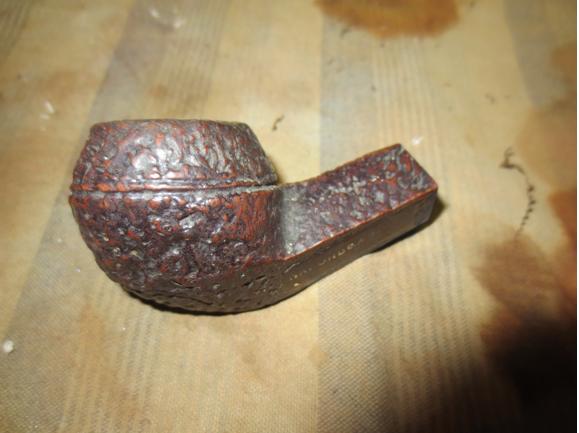
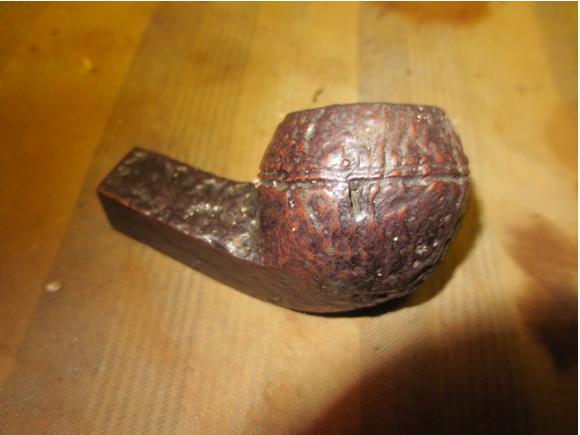
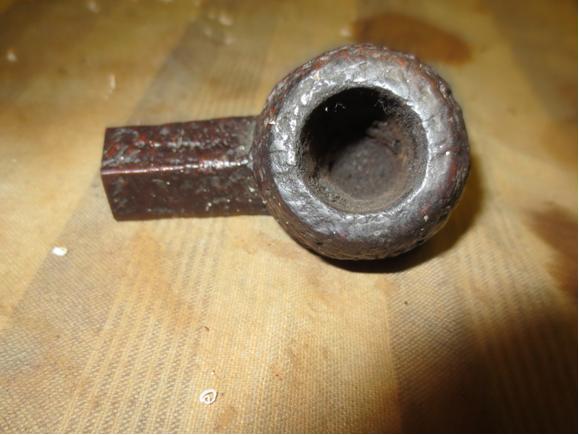
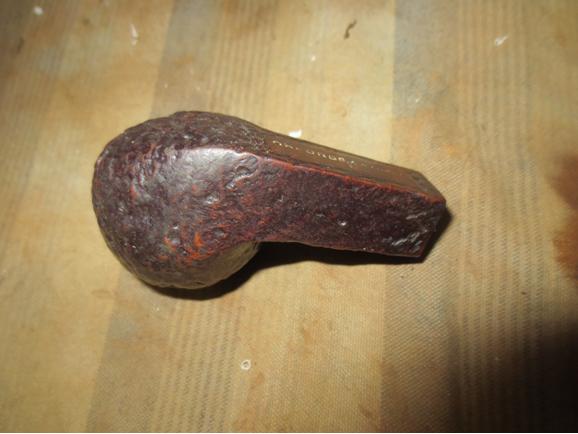
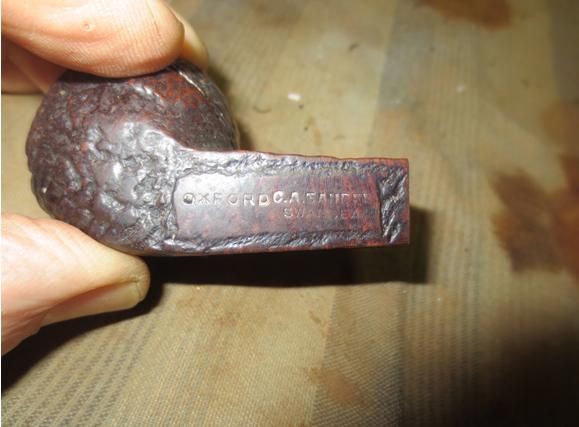
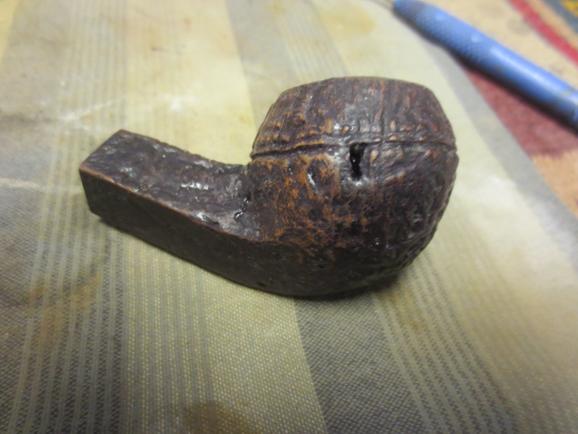
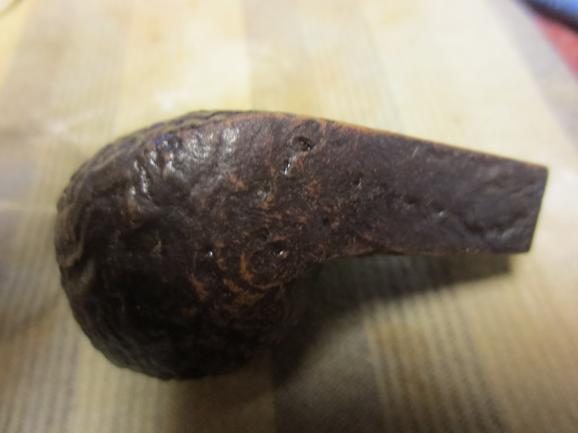
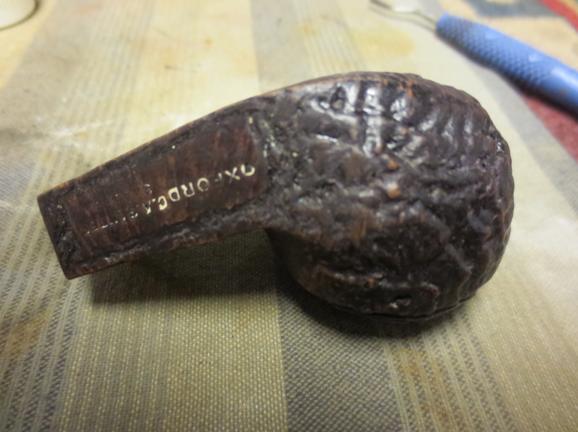
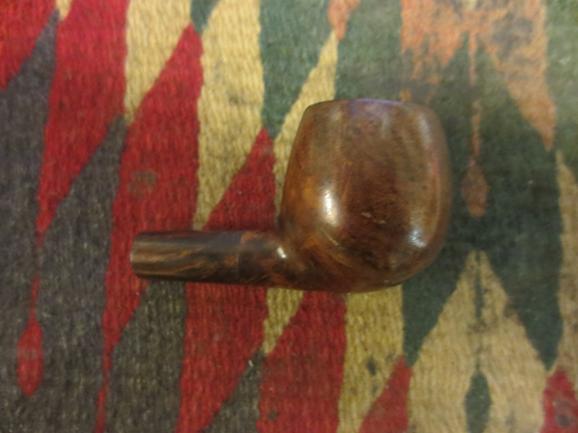
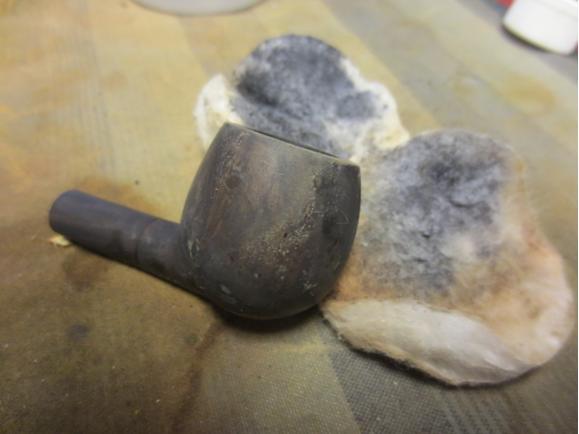
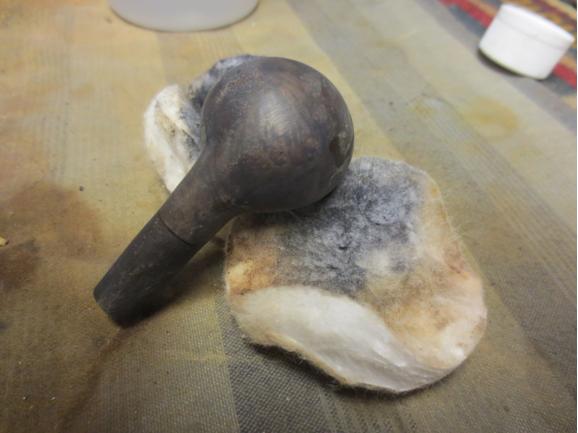
The photos above came from the seller. I took the next series of photos before I worked on the pipe this morning. The rough finish is visible in the photos as are the fills on both sides of the bowl. They were shrunken and hard so they would have to be repaired. You can also see the splice in the shank about 2/3 of the way up the shank to the bowl. The bowl had a thick cake that was crumbly and rough. The bowl still was half full of tobacco that had been stuffed into it evidently before the stem broke. The rim had lava overflow and some damage to the inside edge and the top of the rim.Apple4
Apple5
apple6
apple7 
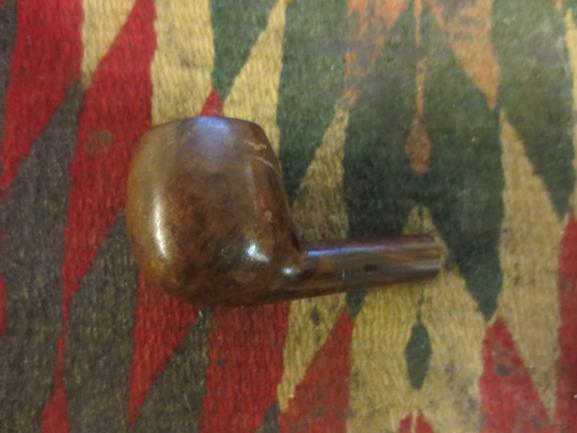
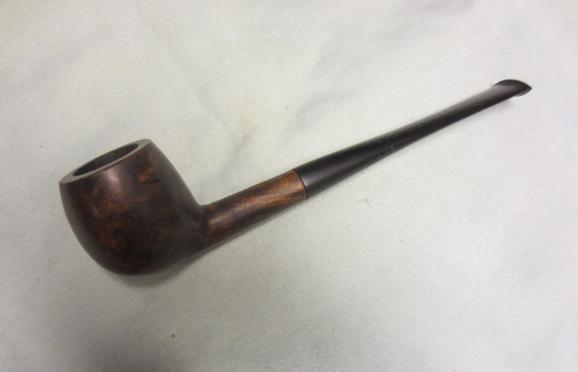
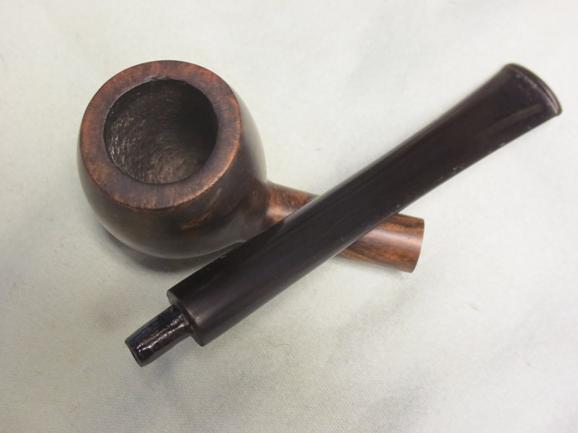
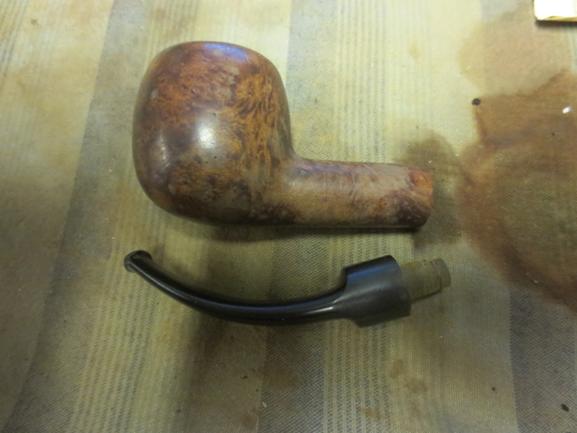
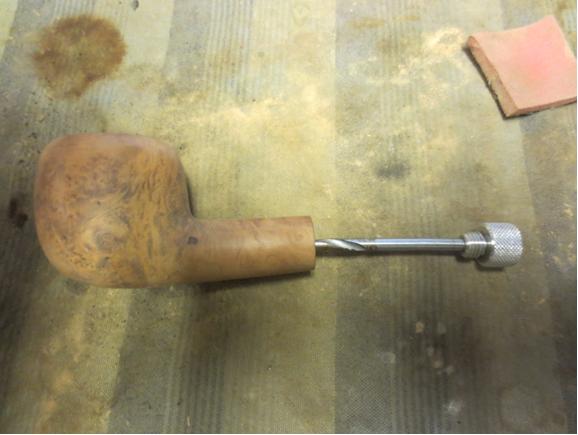
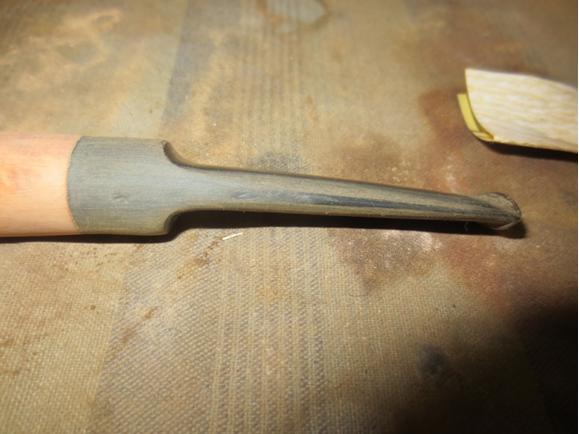
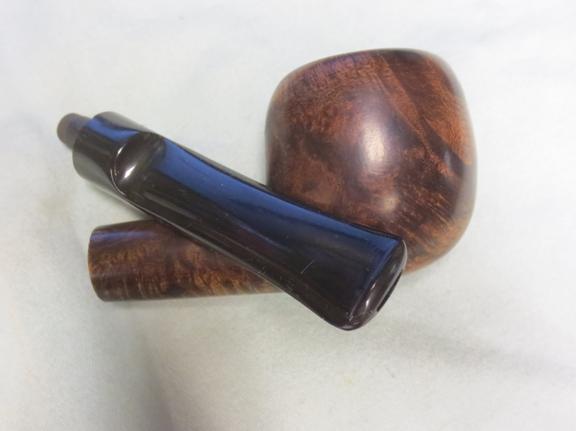
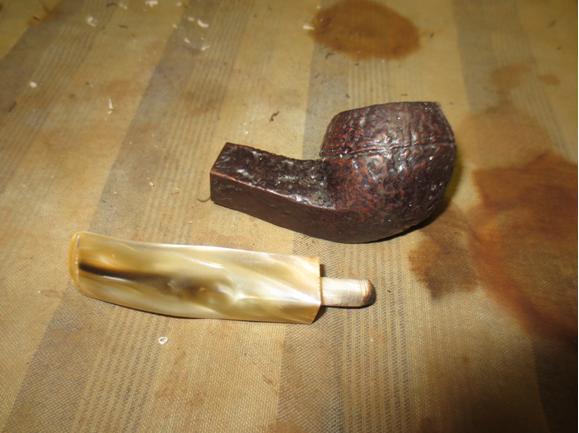
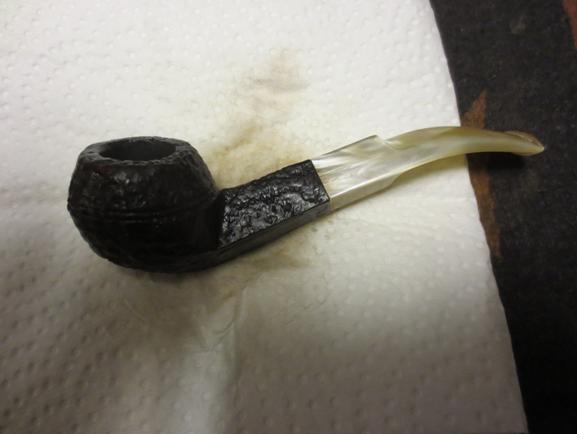
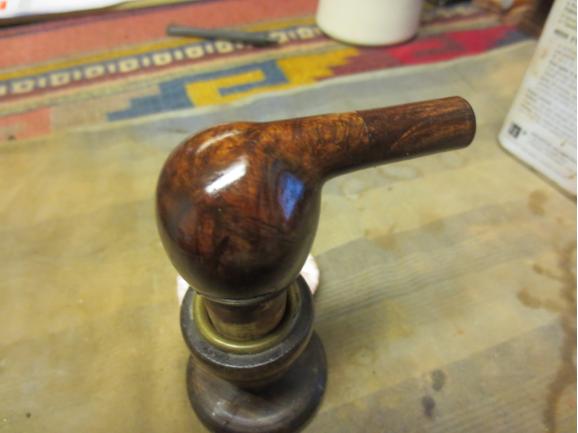
For a stem for this pipe I turned to my stem can and found a long narrow stem that needed a little adjustment to the tenon and the diameter of the stem at the shank before it would fit. I turned the tenon with a Dremel and sanding drum and finished by sanding it by hand.Apple8 
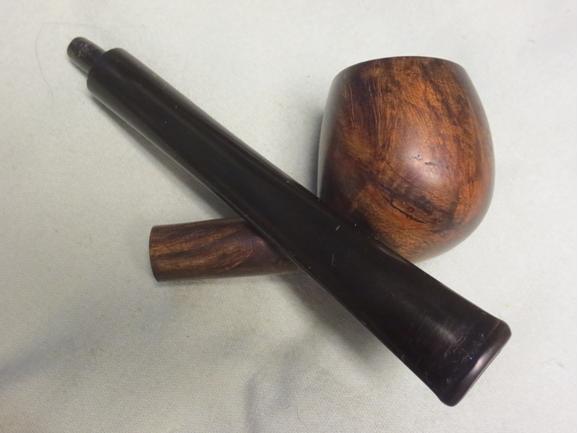
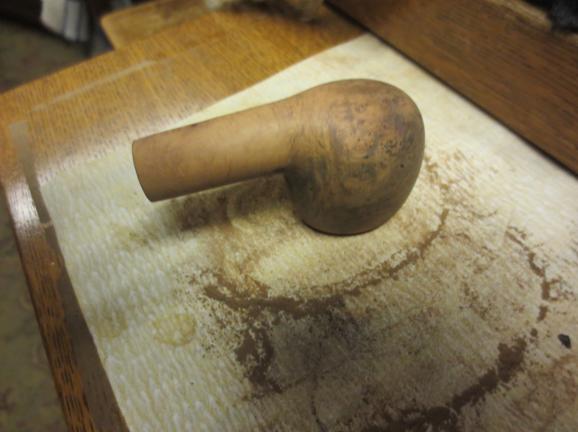
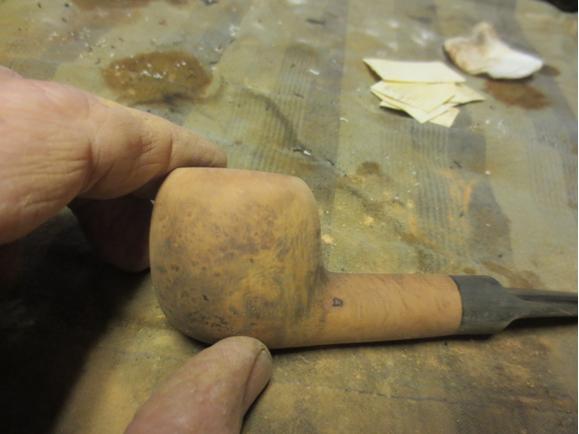
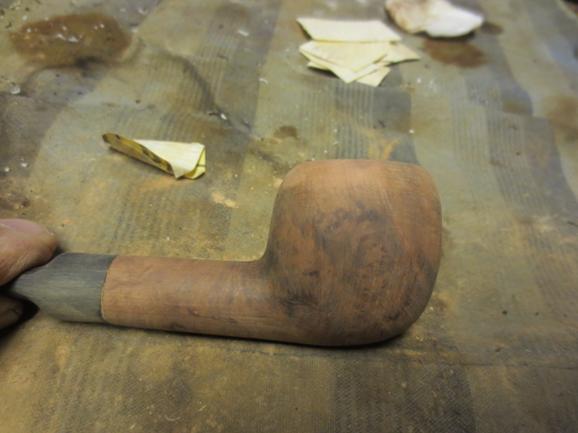
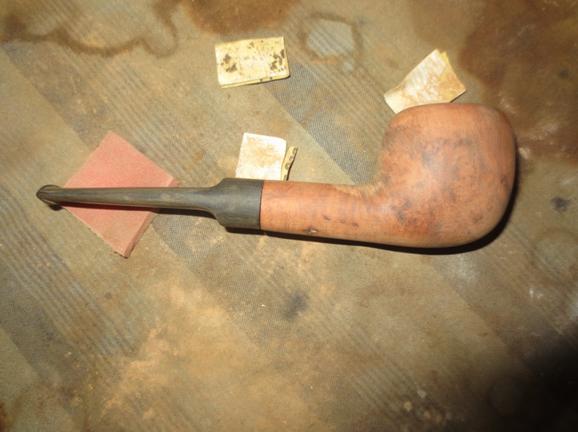
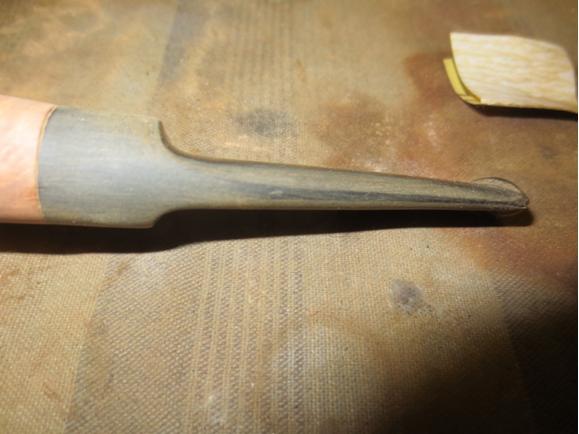
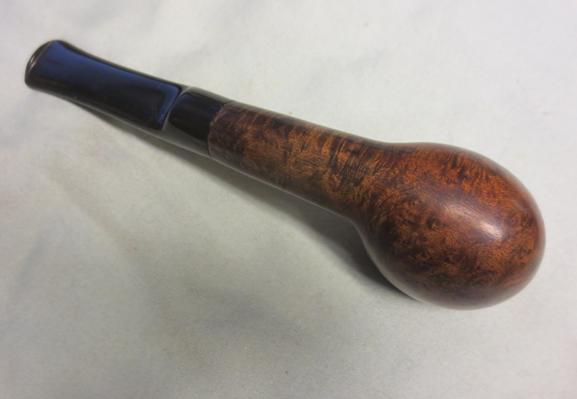
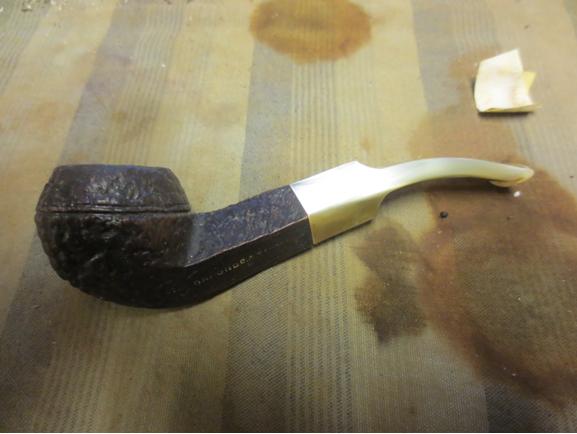
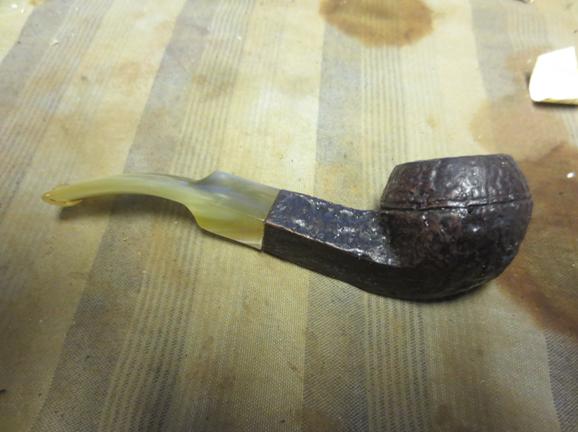
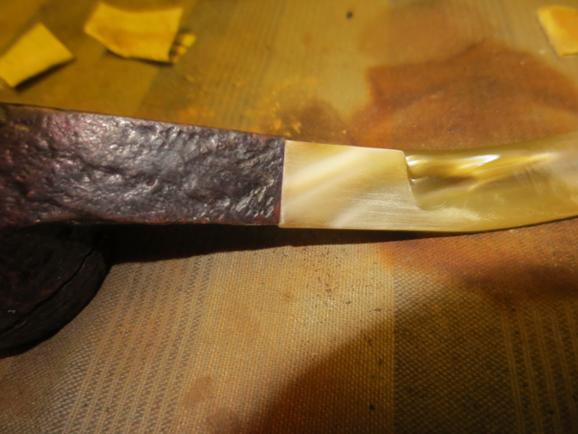
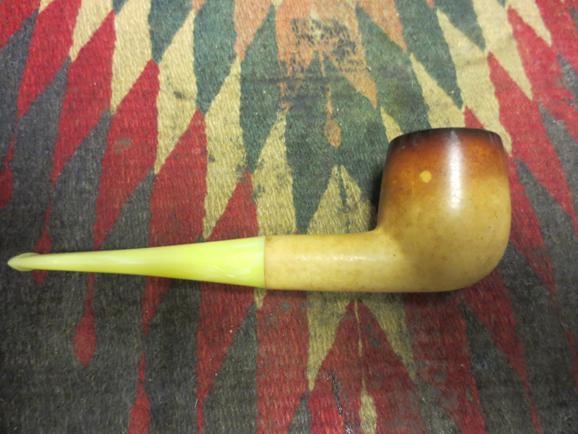
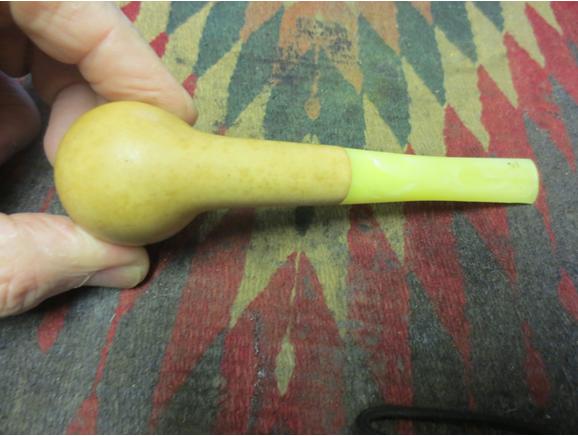
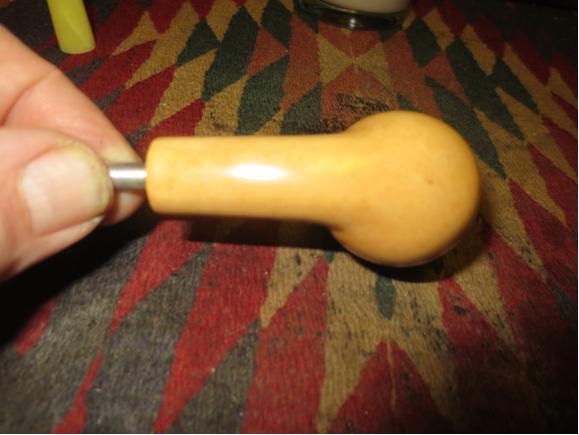
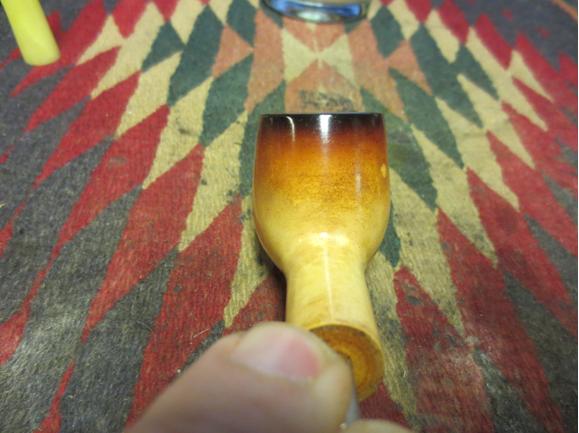
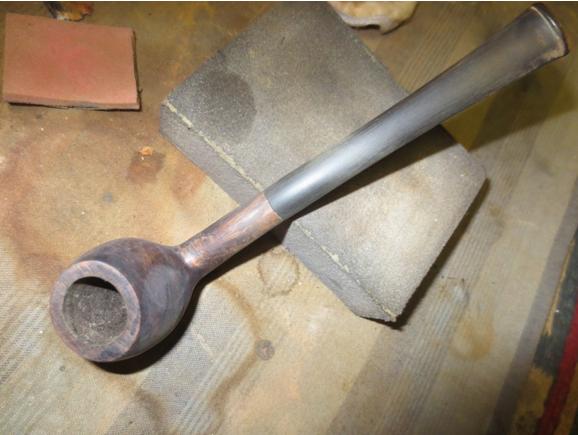
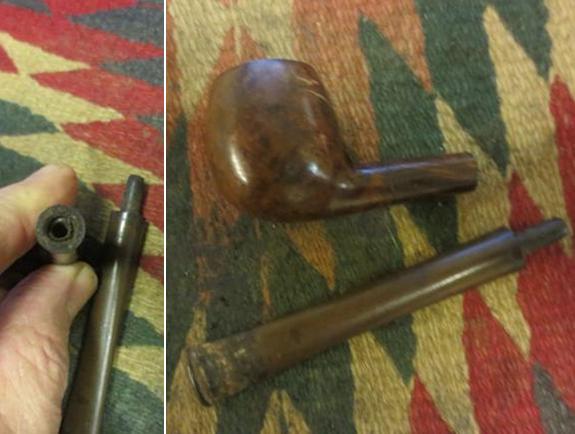
The photos below show the stem in the pipe. The diameter of the shank and the diameter of the stem do not match.Apple9 
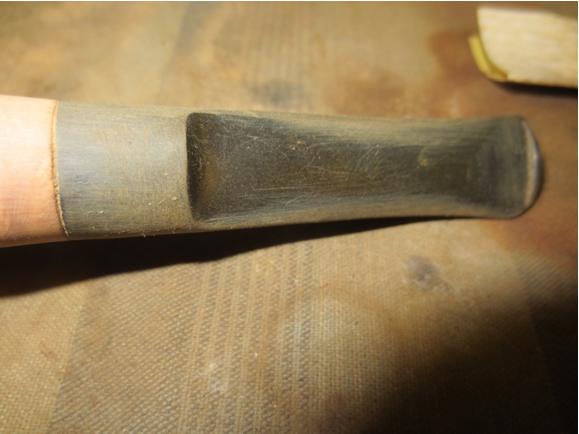
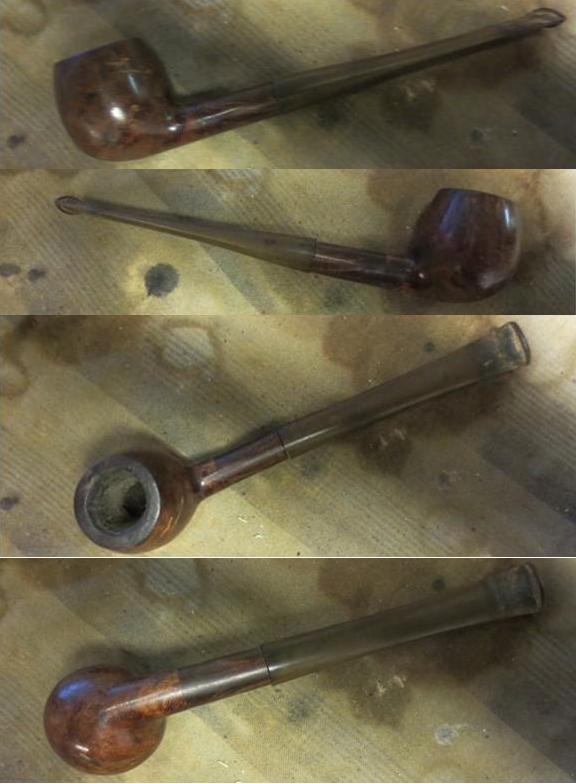
I used the Dremel and sanding drum to reduce the stem diameter to match the diameter of the shank. I always rough in the fit with the Dremel and then fine tune the fit by hand sanding.Apple10 
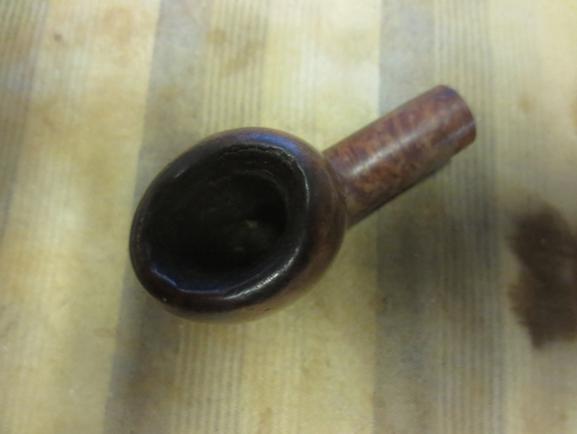
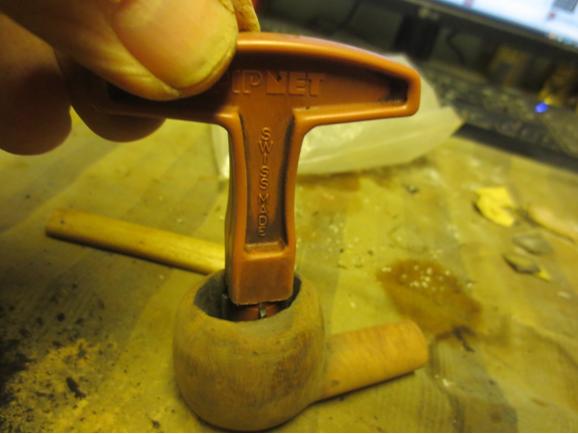
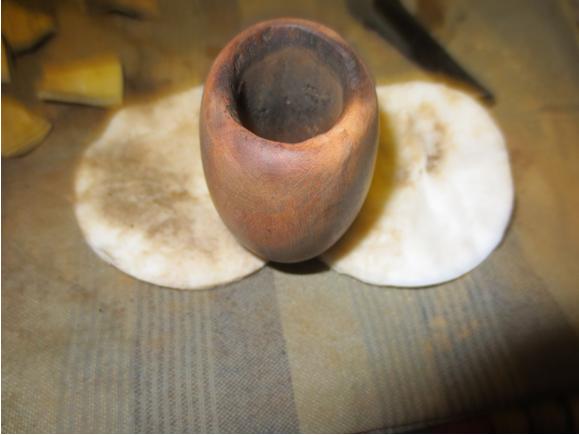
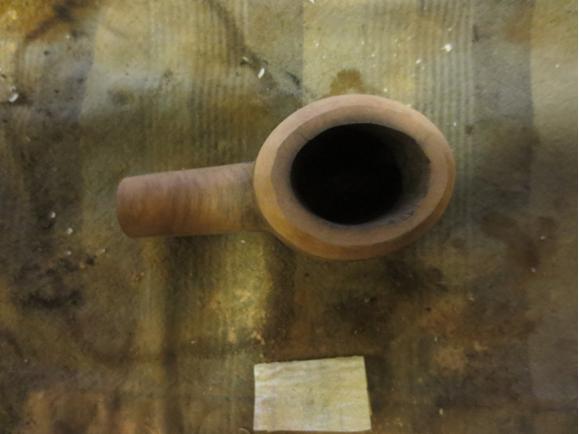
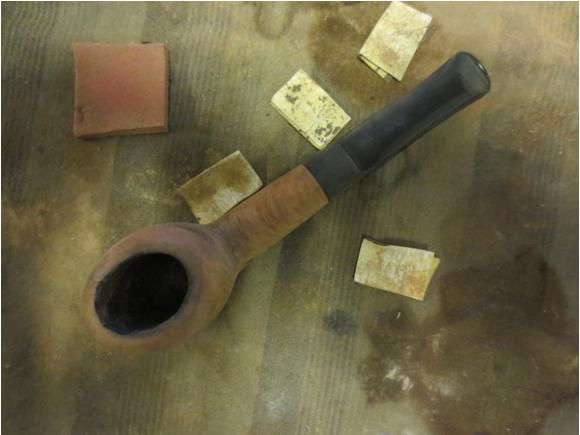
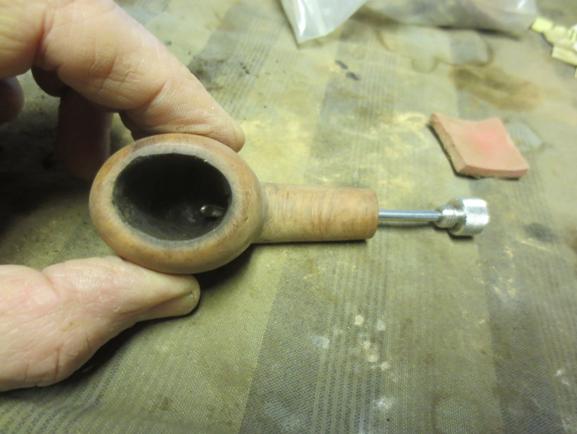
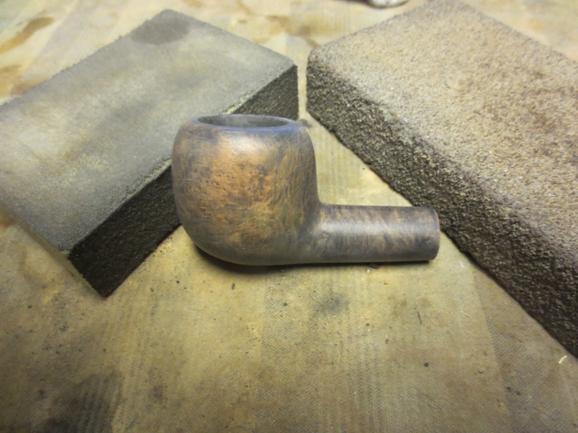
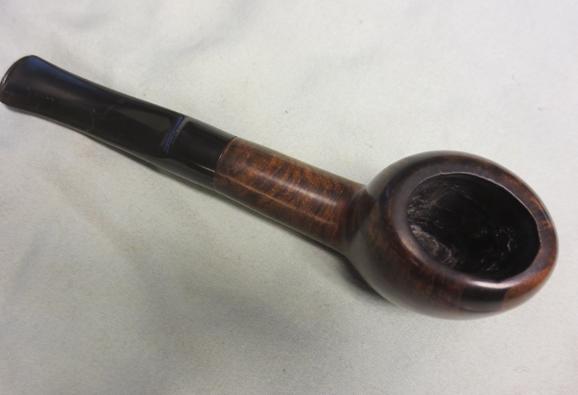
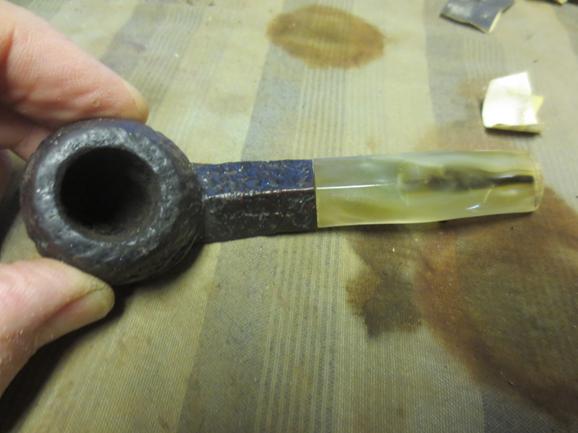
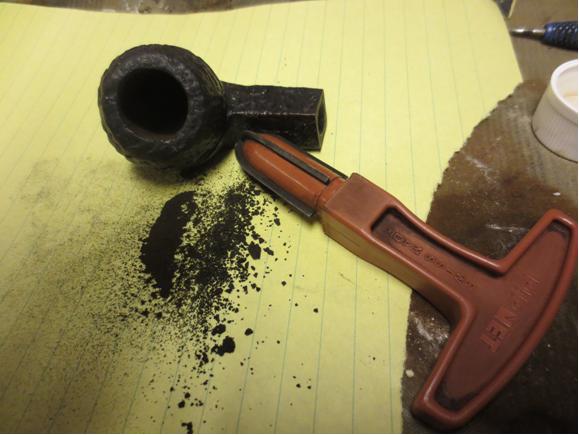
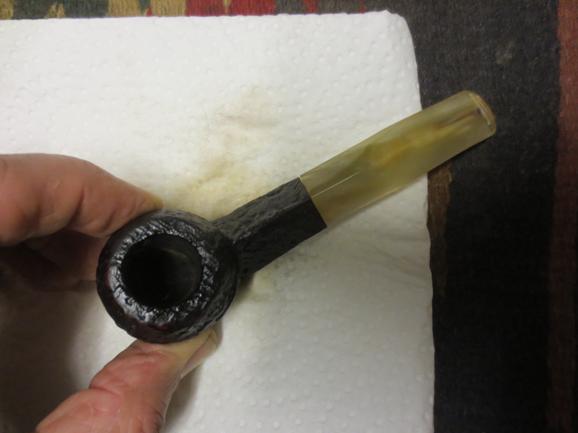
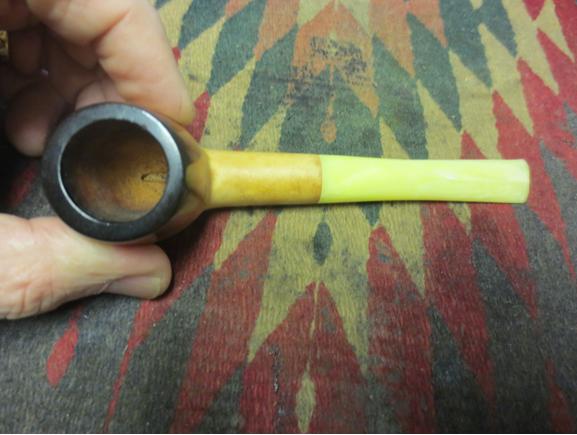
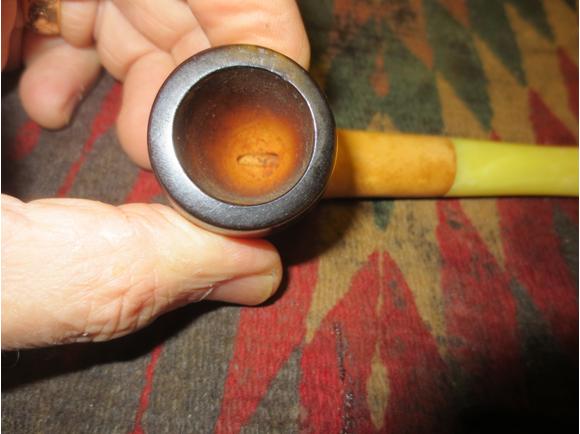
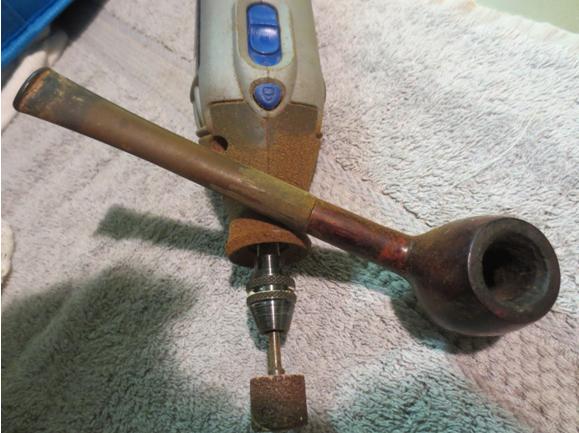
I reamed the bowl with a PipNet pipe reamer and took the cake back to bare wood. I wanted to look at the inside of the bowl and rim to see what needed to be done at those points.Apple11
Apple12 
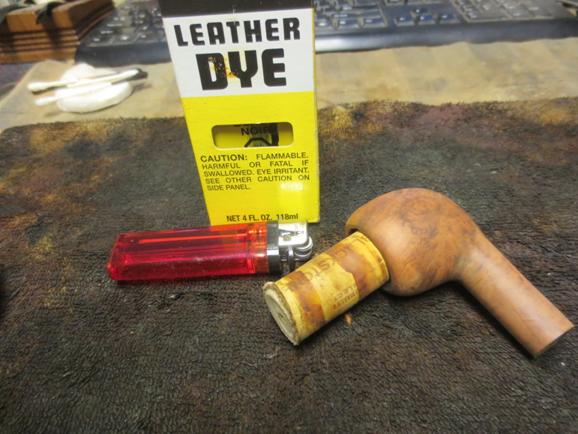
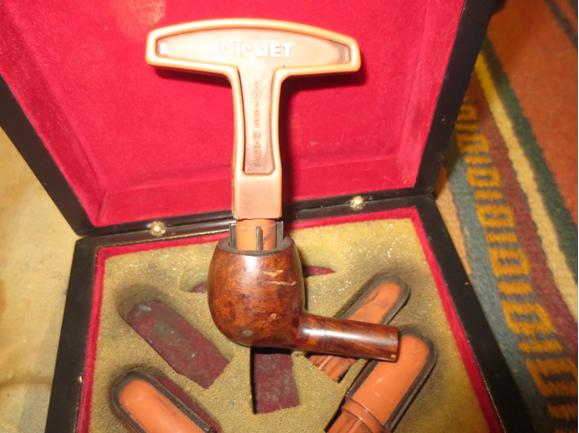
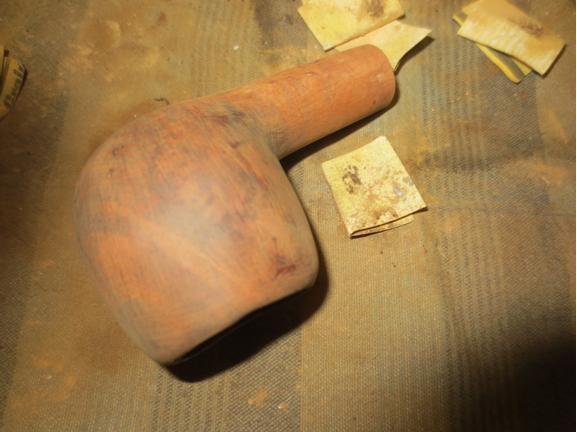
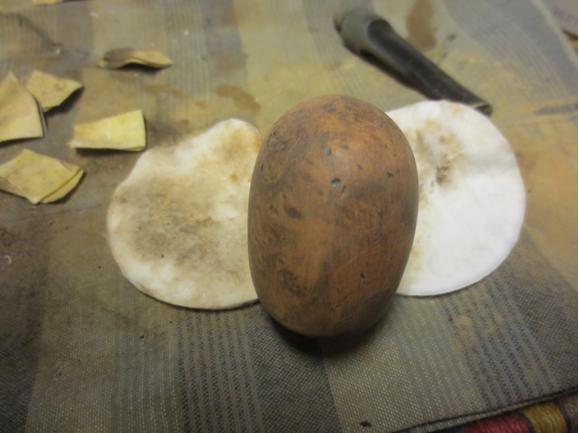
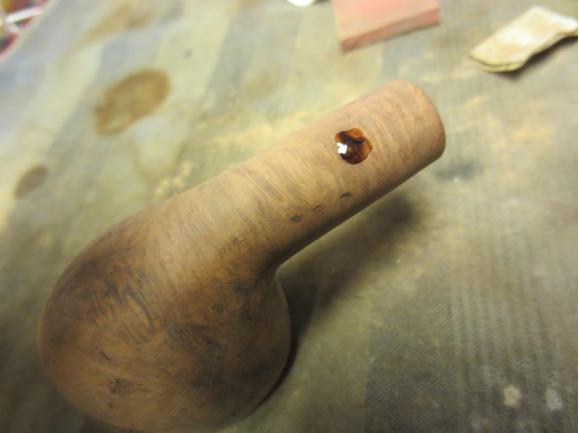
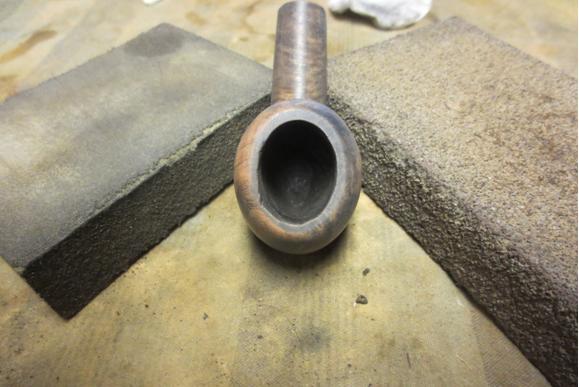
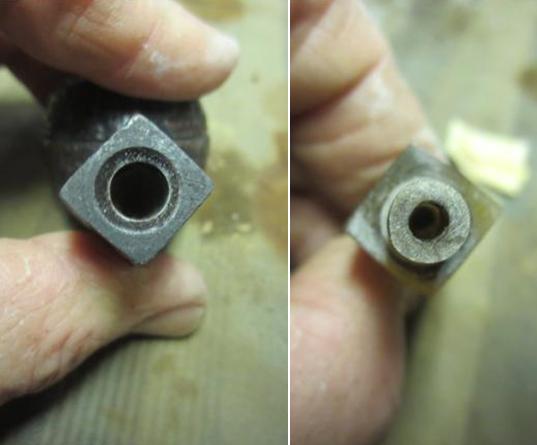
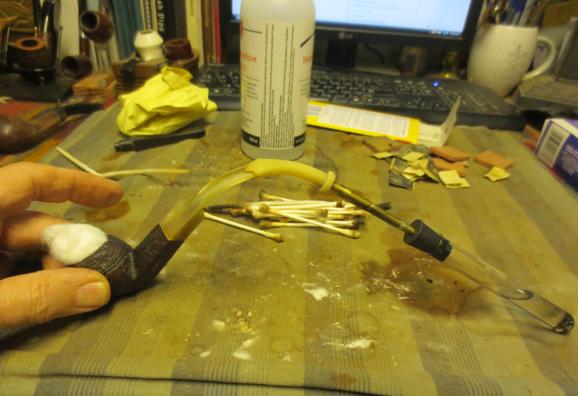
I stripped the finish off the bowl with acetone on cotton pads. With all of the fills and dents in the no name bowl it was another candidate for sanding and refinishing. Looking down the shank with a light it appears that the splice of shank was done with a metal tube in the shank. The bowl and the added shank also appear to be different wood.Apple13 
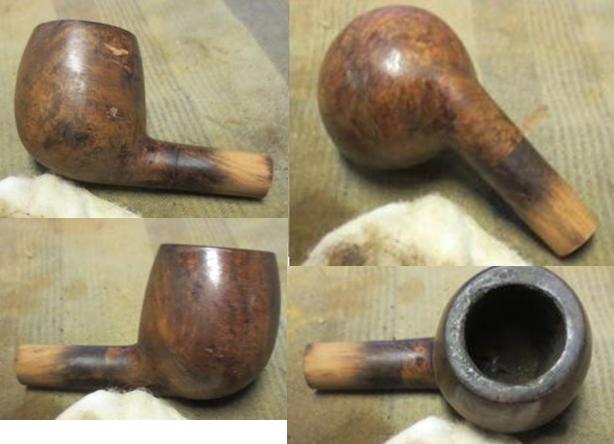
I topped the bowl to remove the rim damaged and to clean up the edges of the rim.Apple14 
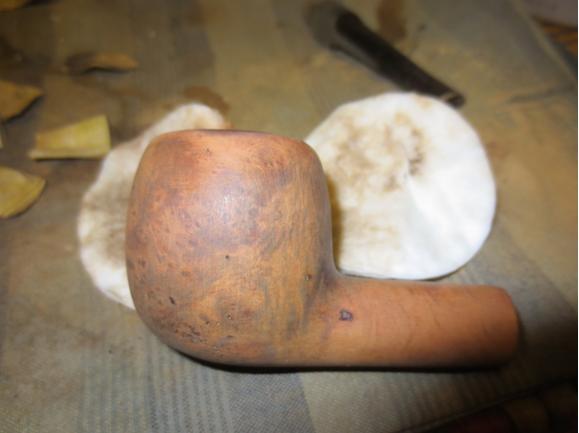
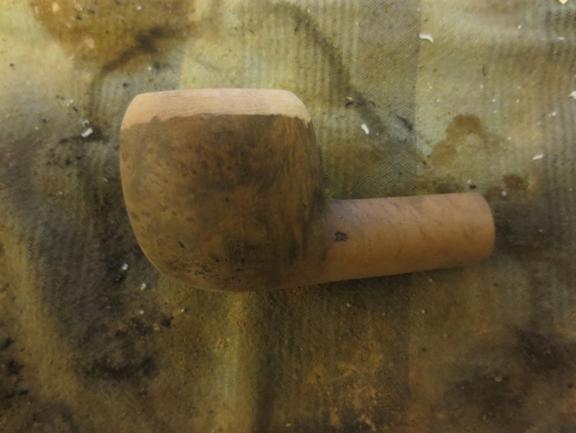
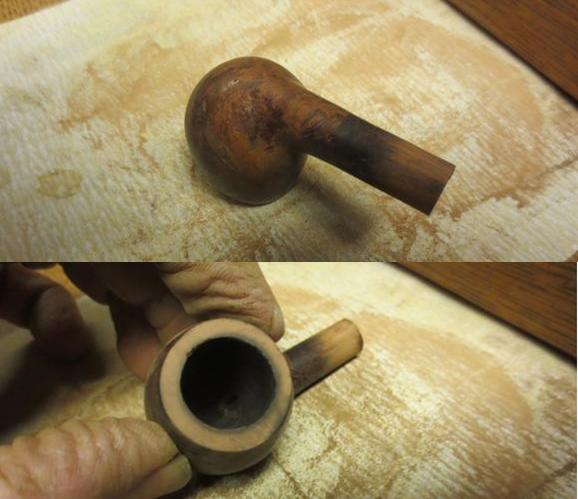
I tried to pick out the fills on the bowl but they were tight and were rock hard. I cleaned up around them and filled in the shrinkage with clear superglue.Apple15 
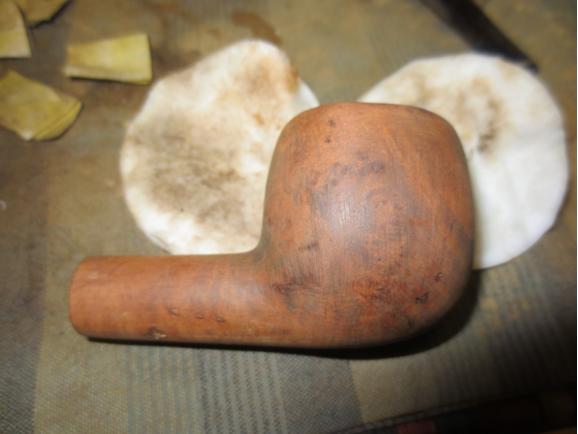
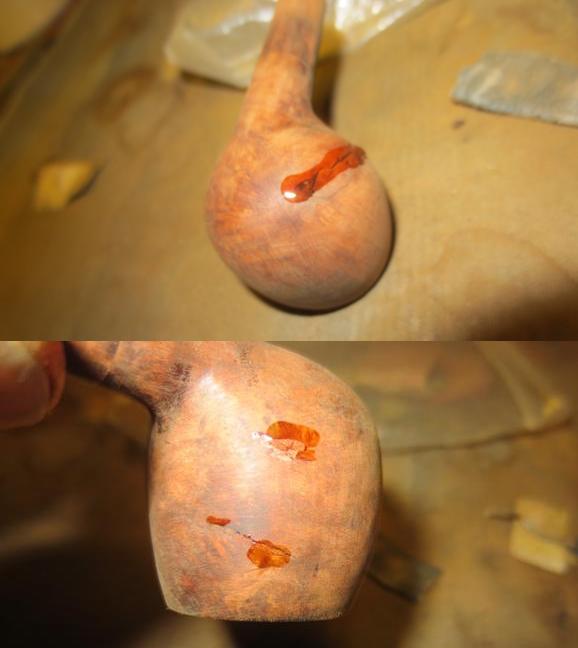
I sanded the repaired areas and the rest of the bowl and shank with 220 grit sandpaper. I sanded the repairs smooth and followed up by sanding with a fine grit sanding sponge.Apple16
Apple17 
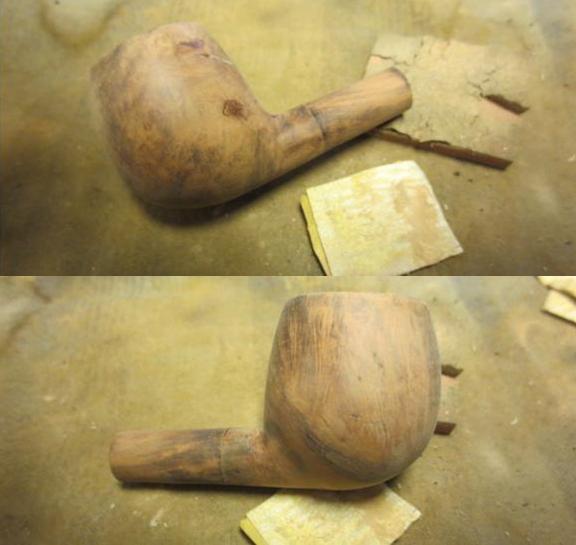
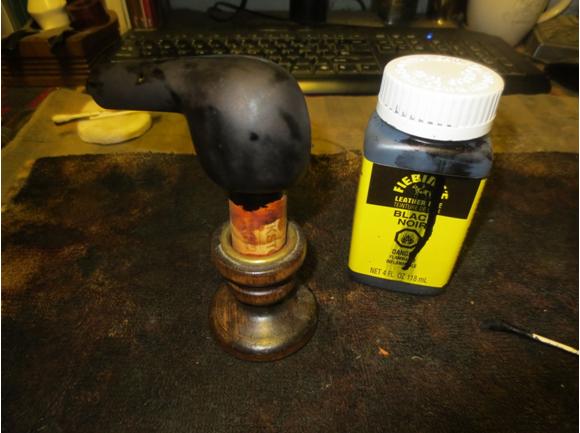
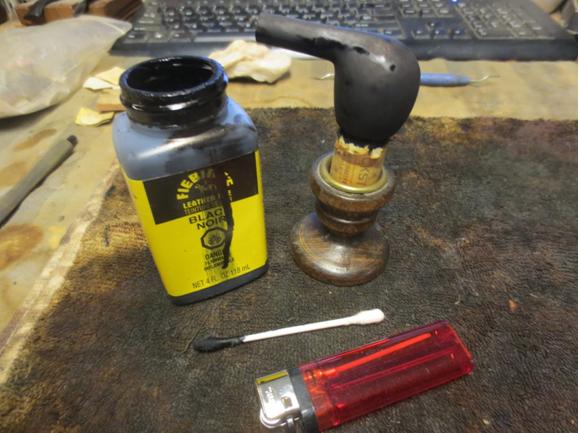
I gave the bowl a black under stain to help hide the fills and the splice. They would always show but the dark under stain would blend them into the finish better. I applied the stain and flamed the bowl and repeated the process to get good coverage.Apple18
Apple19 
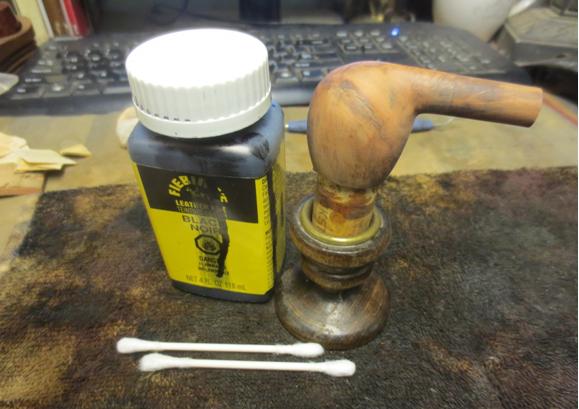
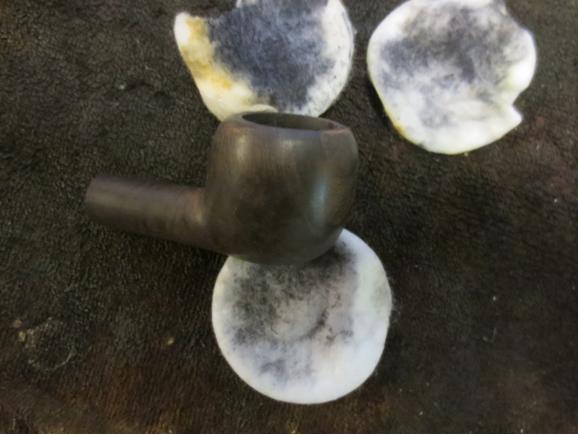
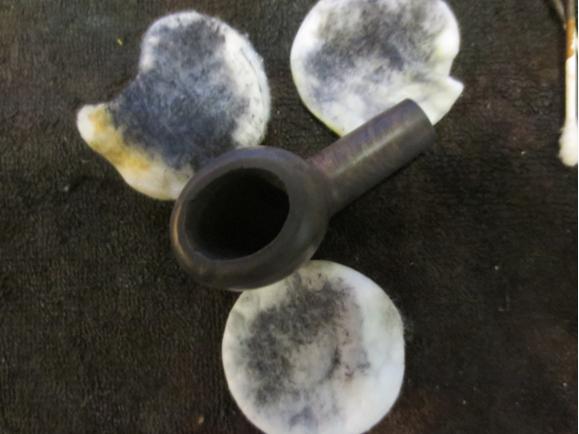
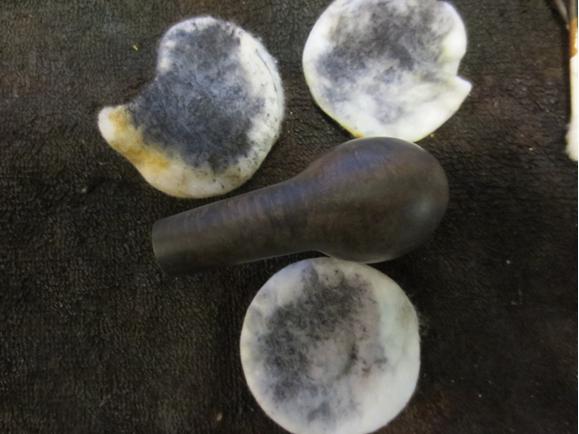
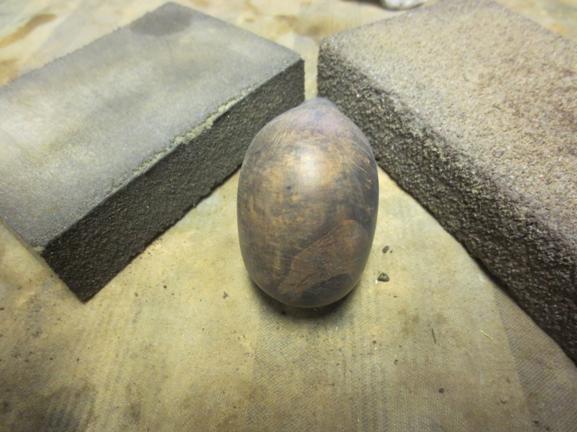
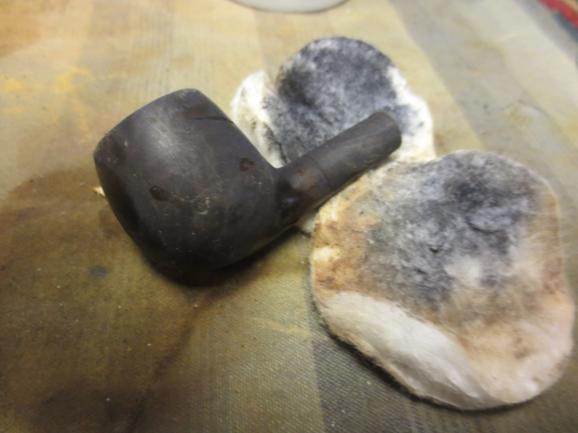
I wiped down the bowl with alcohol and cotton pads to remove the black from the surface of the briar and leave it in the grain patterns.Apple20
Apple21
Apple22
Apple23 
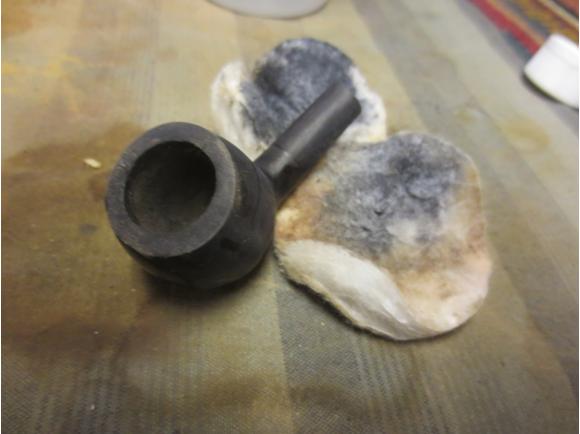
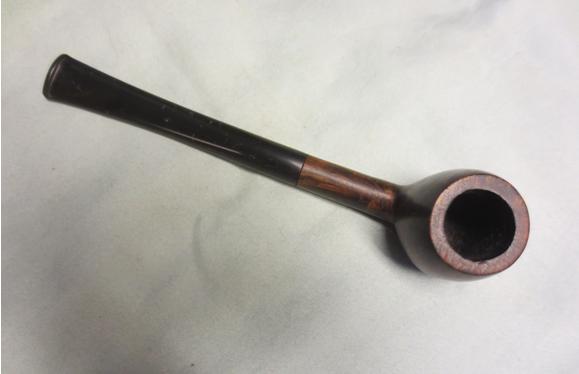
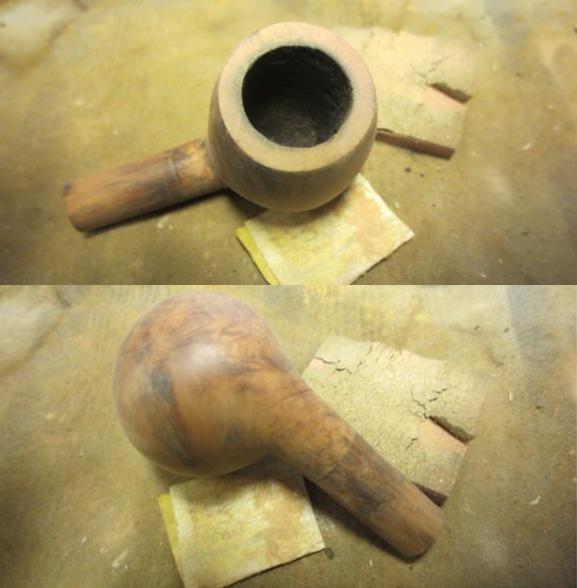
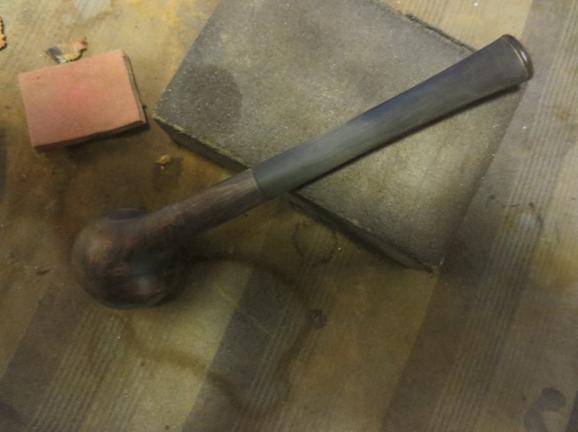
I sanded the bowl with a fine grit sanding block and the stem with the fine grit sanding sponge and fit it in the shank to get a feel for the new look. I took the next series of photos to see how the pipe was developing. I liked what I saw. The black stain had done a good job covering the fills and the splice. I used a black permanent marker to fill in some light spots and drew in some grain lines in the bald spots.Apple24
Apple25
Apple26
Apple27 
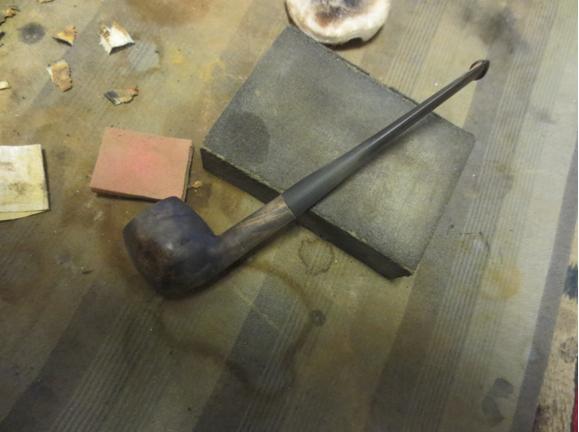
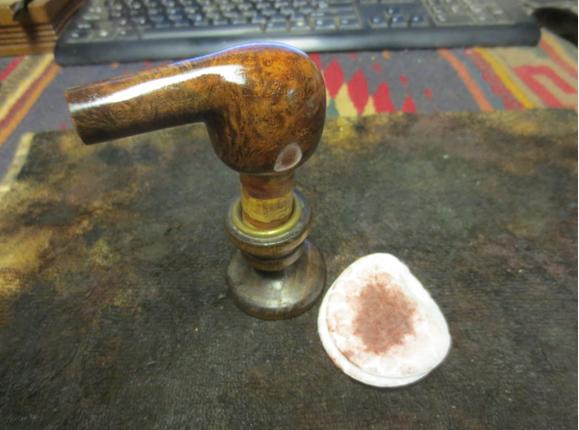
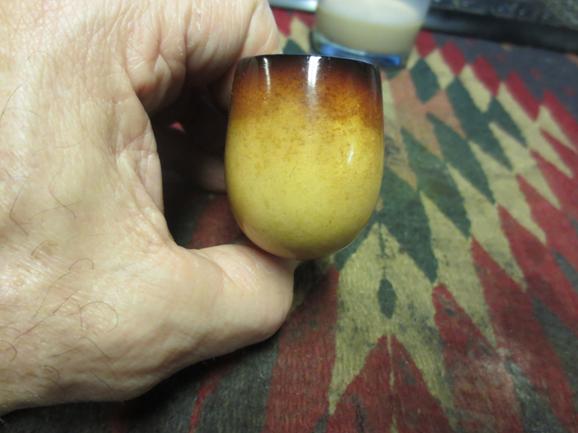
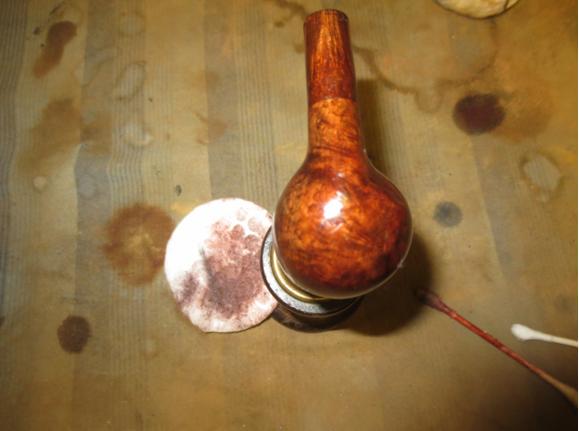
I gave the bowl a top coat of Danish Oil with Cherry stain and then again used the permanent marker to fill blank spots and darken the fills. I wiped the Cherry stain over the bowl several times until the coverage was good and then set the bowl aside to dry.Apple28
Apple29
Apple30 
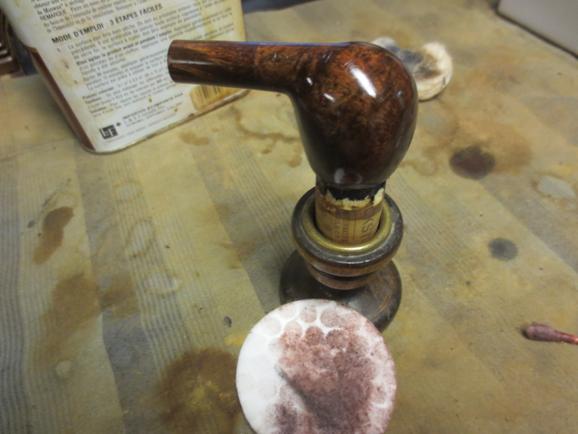
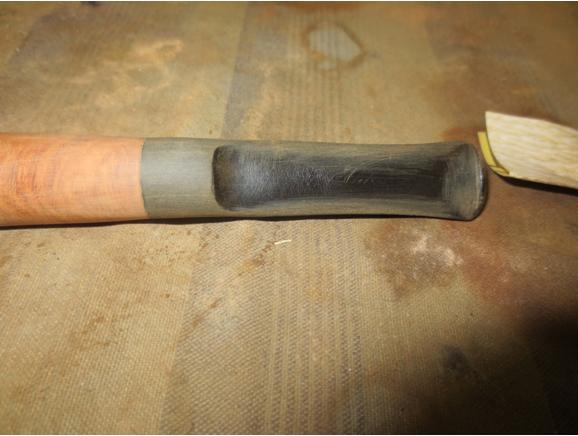
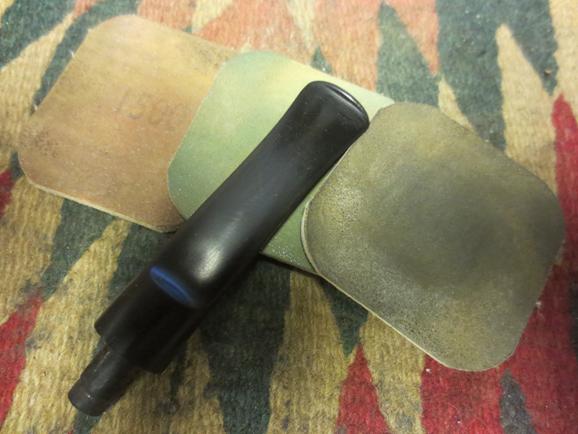
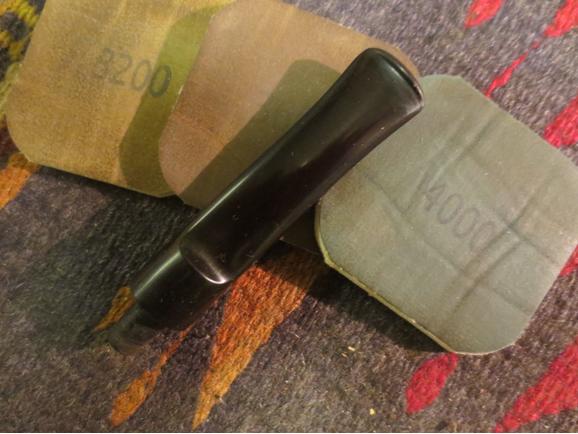
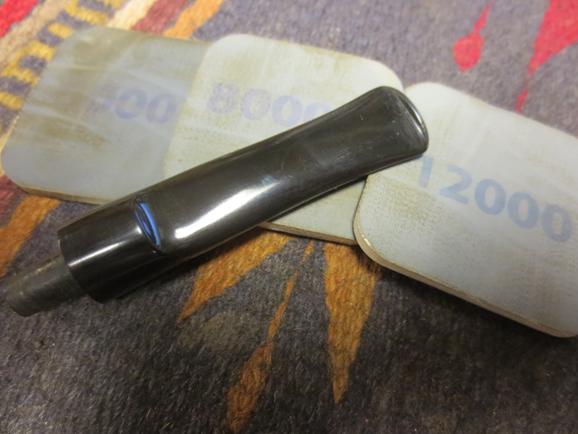
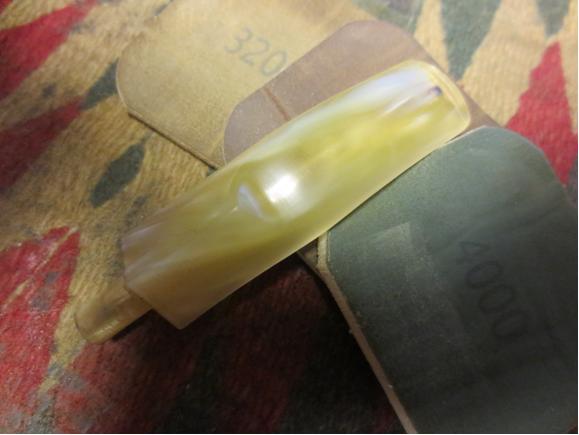
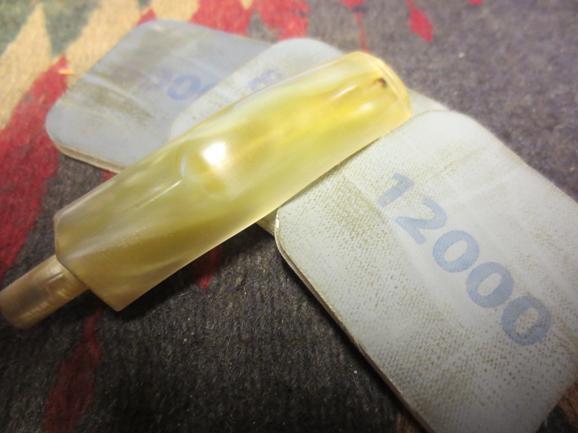
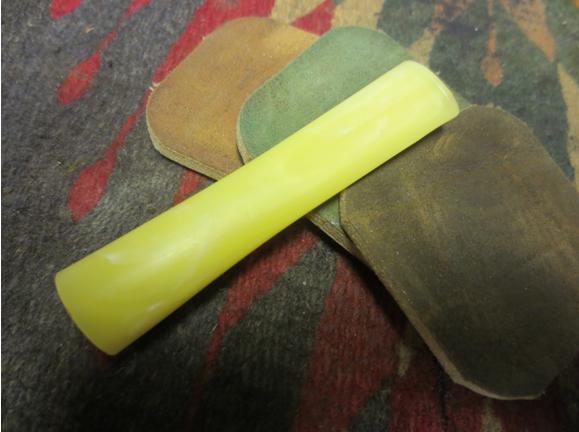
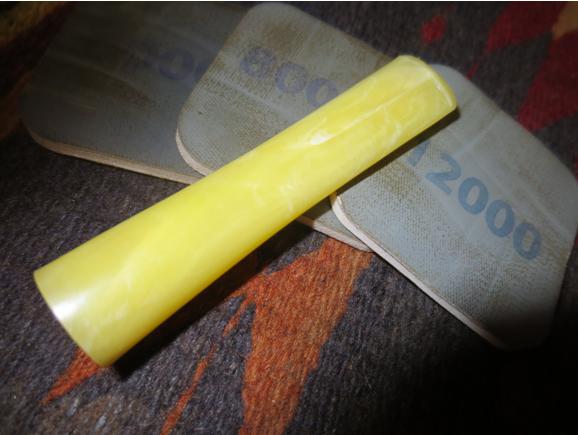
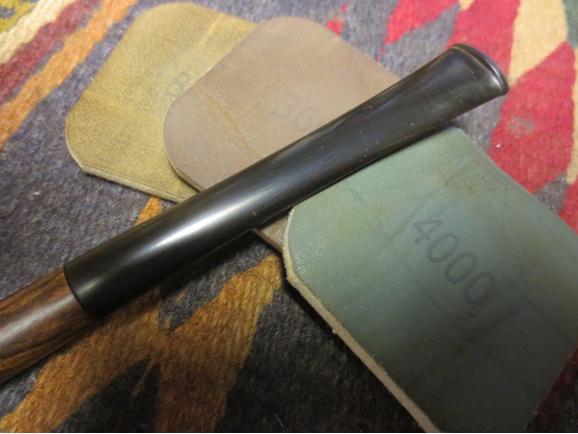
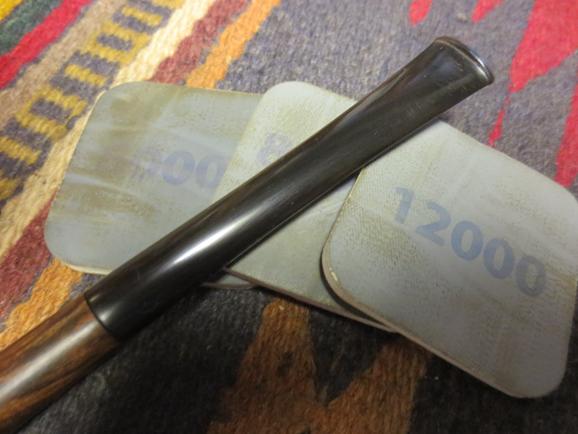
While it dried I worked on the stem with micromesh sanding pads. I wet sanded it with 1500-2400 grit pads and gave it a coat of Obsidian Oil. I dry sanded with 3200-4000 grit pads and gave it another coat of oil. I finished with 6000-12000 grit pads, gave it a final coat of Obsidian Oil and let it dry.Apple31
apple32
Apple33 
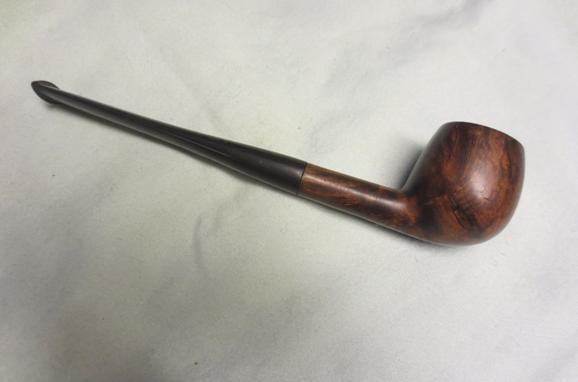
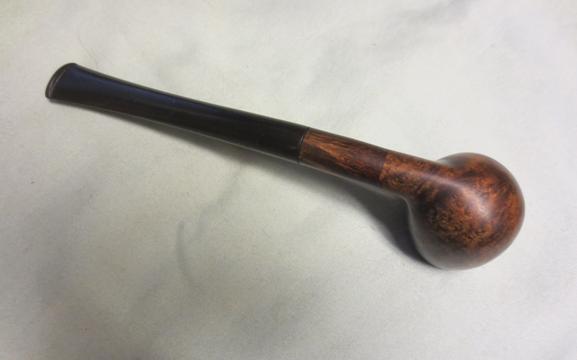
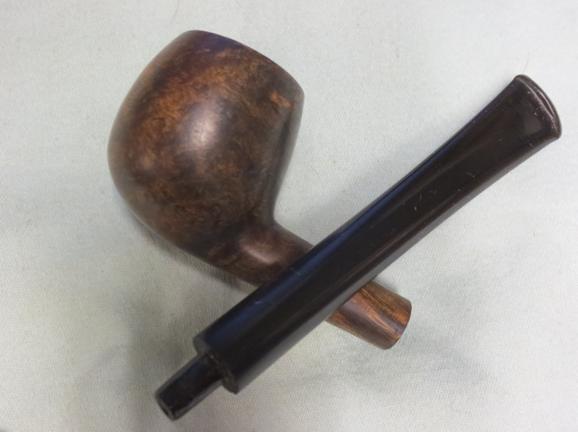
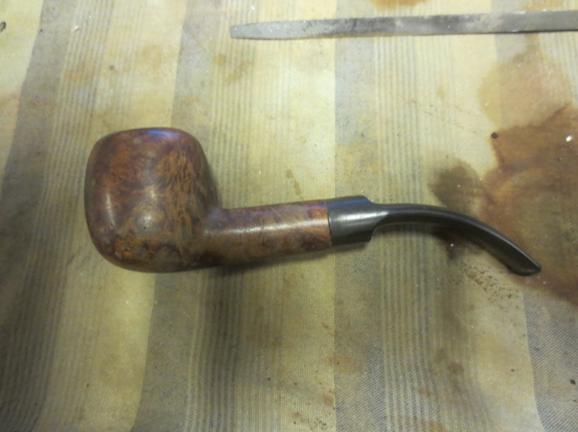
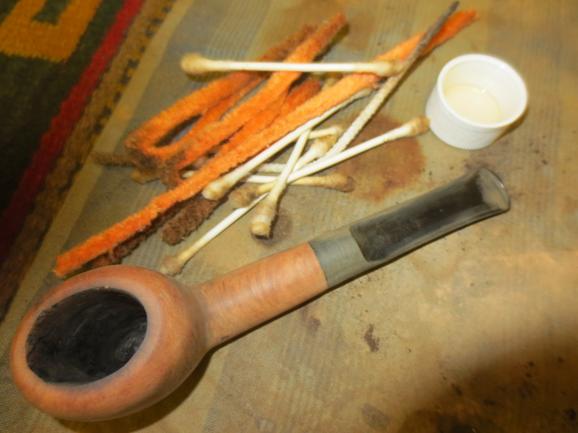
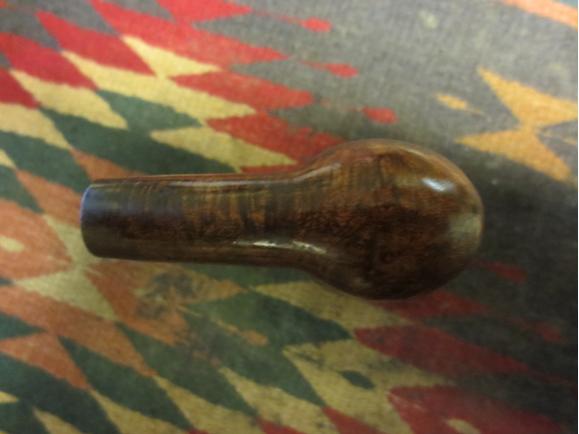
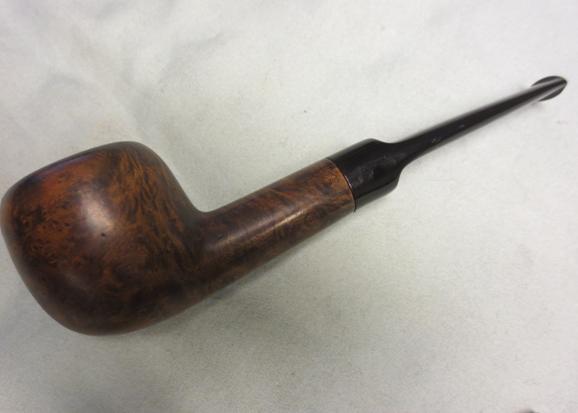
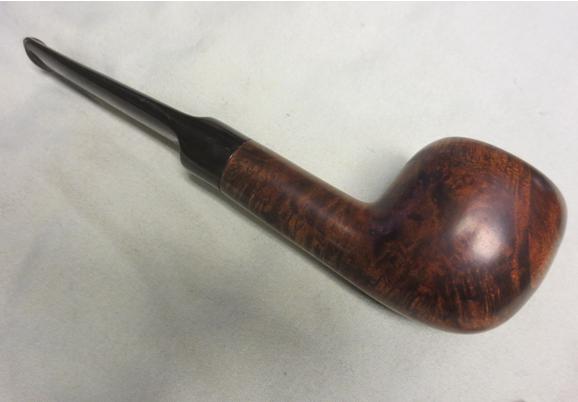
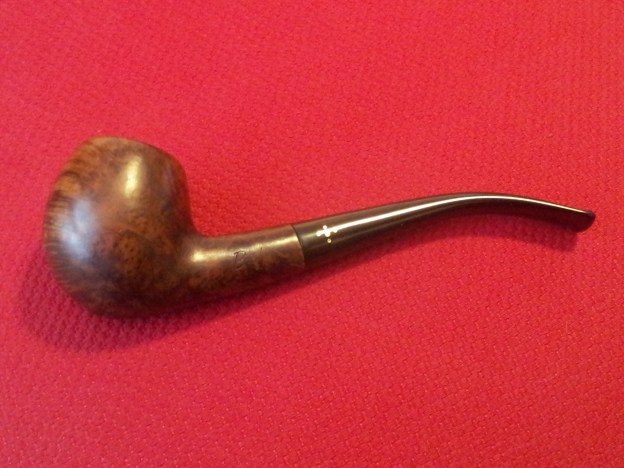
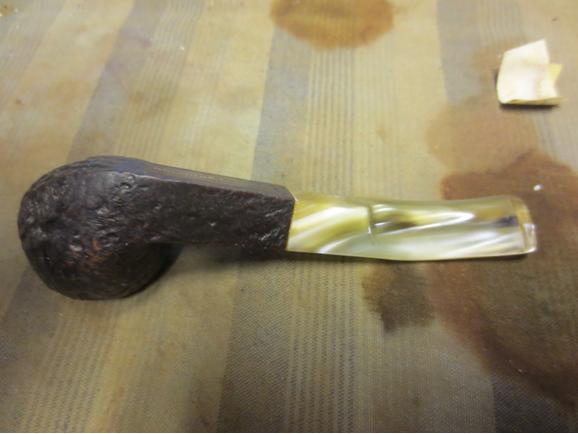
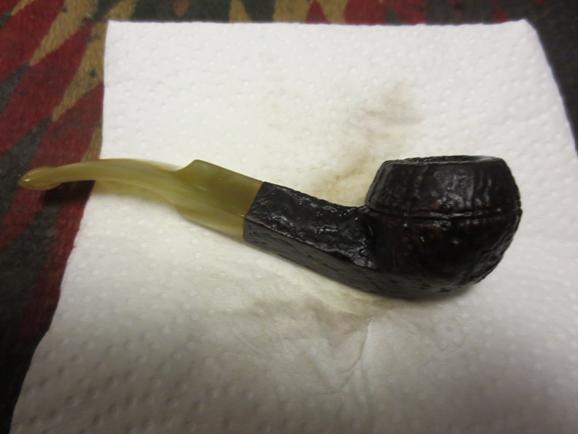
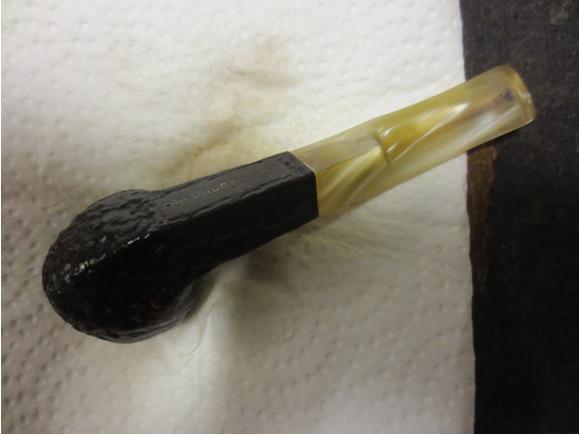
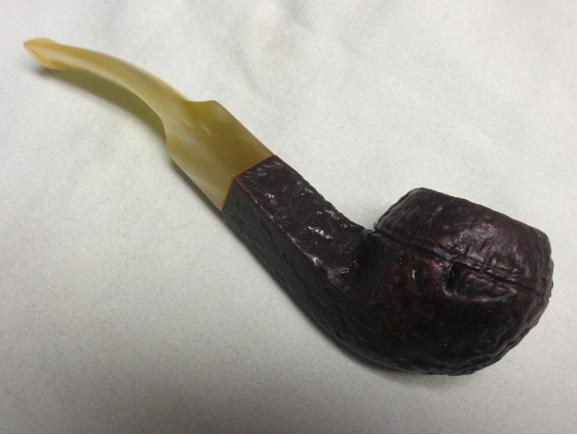
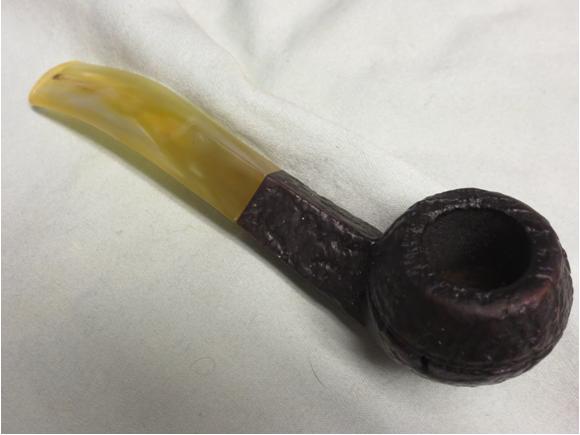
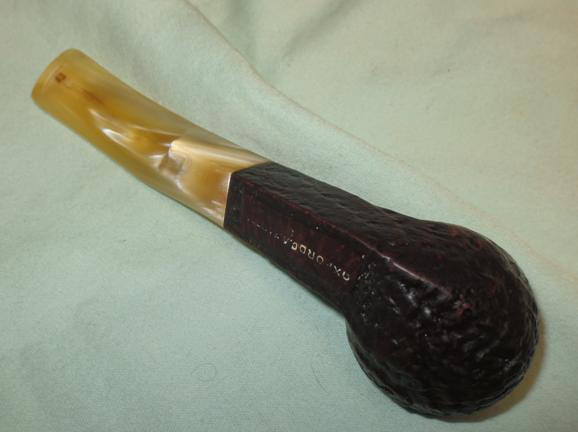
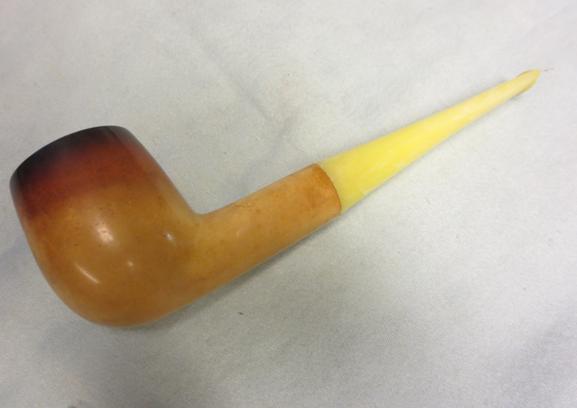
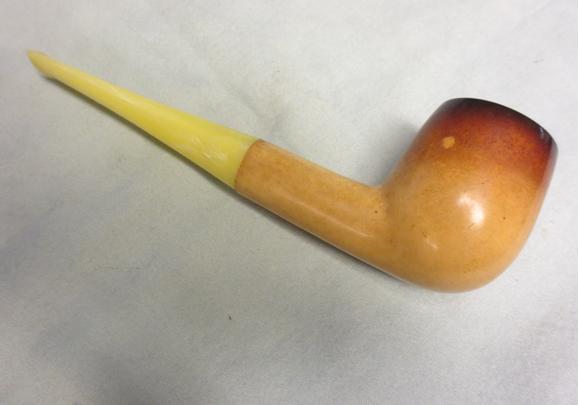
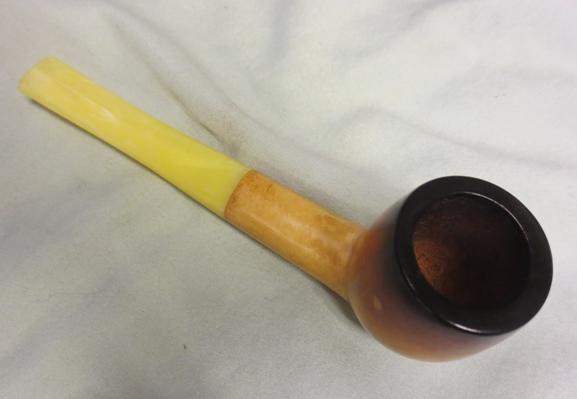
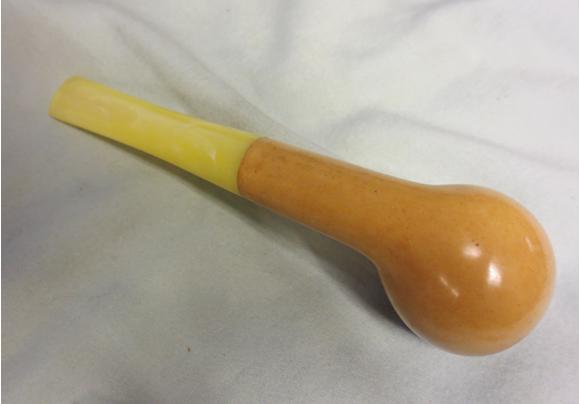
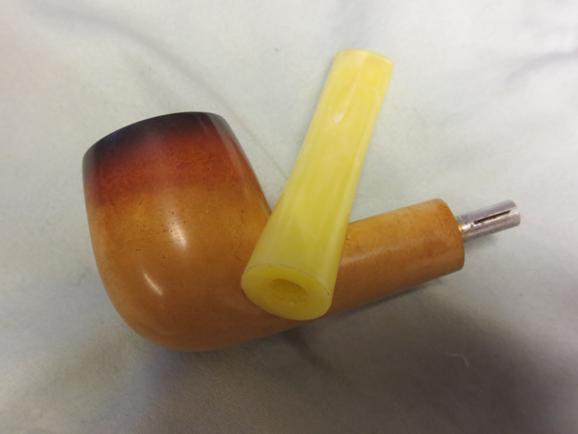
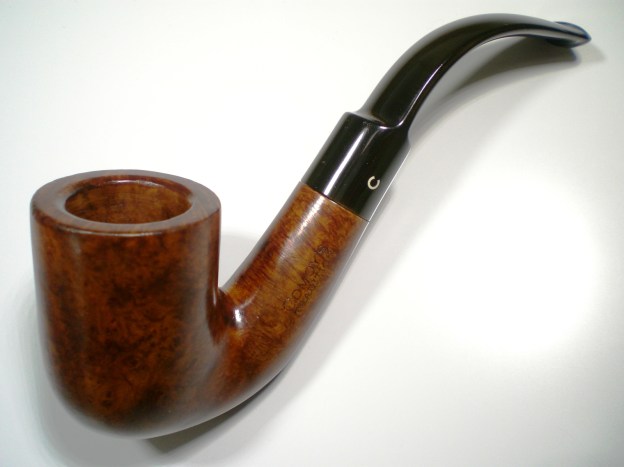
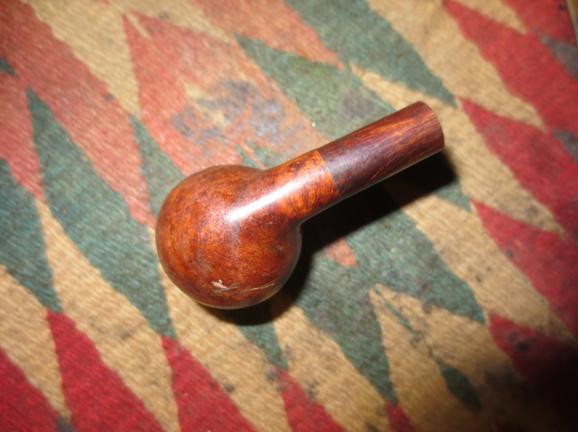
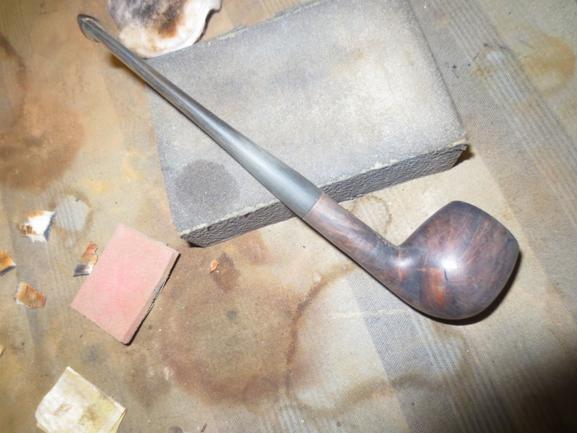
I buffed the pipe with Blue Diamond on the wheel and then gave it multiple coats of carnauba wax. I buffed it with a clean flannel buff and then by hand with a microfibre cloth to deepen the shine. The finished pipe is shown in the photos below. I like the looks of it with a long thin stem. It is a like a pencil shank Bing with an apple shaped bowl. Thanks for looking.Apple34
Apple35
Apple36
Apple37
Apple38
Apple39
Apple40

Reshaping and Restemming a no name Oval Opera Pipe


Blog by Steve Laug

I bought a group of pipe bowls on Ebay a while ago and one of them was an oval bowl Opera pipe. The stamping was non-existent, whether worn off by over buffing or never present it was no longer on the shank on either side. It is shown in the photo below marked with a red oval. It is an interesting shape and this one was a normal sized pipe. There was nothing of the typical small size of the pipes like this that I have worked on in the past. The stem was long gone and the broken tenon was stuck in the shank. The finish was rough and had deep dents and nicks all over the bowl. The cake in the bowl was thick and the rim was damaged on the inner edge and had burn marks on the front top and left side. There were two large fills on the bowl; one on the left side shank near the bowl junction and the other on the underside mid-shank.Op1 Op2 I pulled the broken tenon by my usual method. I use a drywall screw and insert it in the airway. I use a screwdriver to turn it into the airway just enough to be tight in the tenon. You need to be careful to not turn it in to far as it will expand the tenon and crack the shank. Once it is in place I use needle nose pliers to wiggle it free of the shank. It usually comes free with little effort. That was true in the case of this tenon.Op3
Op4 I took the next set of photos to show the state of the pipe when I started this project. Note the damaged rim top and inner edge.Op5
Op6
Op7
Op8 I went through my can of stems for a donor stem and found a bent saddle stem that I could straighten and fit to this pipe. I turned the tenon with the PIMO tenon turning tool to a close fit and hand sanded it to get a snug fit. The shank was slightly oval and the stem round so I would need to work on the shank to get a good fit.Op9
Op10 I used 220 grit sandpaper to clean up the finish on the bowl and shank. I did preliminary shaping of the rim to clean up the damage at the top. I used a PipNet reamer to ream the bowl. I use the smallest head and work it in the centre of the oval first and then move it to the front and back of the oval to ream those areas. I cleaned up the reamed bowl with a pen knife to get rid of the cake. I needed to take the cake back to bare briar so that I could reshape the inner edge.Op11 I sanded the bowl with 220 grit sandpaper to remove as much of the damage to sides of the bowl as possible. You can see from the photo below the dip in the top edge of the bowl about middle. That is where the burn damage is on that side.Op12 I wiped the bowl down with acetone on cotton pads to remove any remaining finish and to see where I stood in terms of removing damage to the bowl.Op13
Op14 The next photo shows the extent of the damage to the top and inner edge of the rim. You can see the rough cut marks on the inner edge from a previous owners attempt to ream the bowl. You can also see the burn marks on the left and right top and sides of the rim.Op15
Op16 To remove the dips where the burn marks were in the rim top and to remove the damaged briar I decided to top the bowl. I would need to reshape the rim to match the original but I would deal with that later.Op17 I used a Dremel and sanding drum to shape the outside edge of the rim and bowl.Op18
Op19 Op20 I put the stem in place in the shank, aligned it correctly and sanded the shank to clean up the fit. I wanted the shank to be more round and consistently shaped as it originally was not completely oval – it was only that shape on the left bottom side. The rest of the shank was round. I sanded until I had the shank rounded and matching the stem.Op21
Op22 I continued to shape and sand the rim and flow into the bowl. I worked on the slight bulge in the stem at the saddle to get the alignment and flow right. Since I had a clean slate to work with on this old briar I figured to get it as close as I could to a clean flowing look. I wanted it to look better than before not just cleaned up. It would take a lot of sanding and shaping before I was finished with it.Op23
Op24
Op25
Op26 The fill on the bottom of the shank was solid except for one small spot in the centre of the repair so I sanded it, wiped it clean and filled in the spot with clear super glue. Once it dried I sanded it smooth to match the rest of the shank. The small rough spot was gone and the fill was smooth and dark.Op27 I cleaned out the shank and airway with the KLEENREEM drill bit to remove the buildup in that area. The draw on the shank was constricted so this was necessary to open it and give an easy draw to the pipe.Op28
Op29 I cleaned out the shank and the airway in both the bowl and stem with alcohol, cotton swabs and pipe cleaners until it was clean.Op30 I sanded the edges of the stem and the scratches in the saddle portion with 220 grit sandpaper to shape and define the edge and fit of the stem. I left a slight bend downward in the stem when I had straightened it and like the look of it.Op31
Op32
Op33
Op34 I put a cork in the bowl of the pipe and prepared to stain it with the black undercoat. I wanted to highlight the interesting grain and the black would bring that out. It would also serve to mask the repair on the shank and the fill next to the bowl.Op35 I applied and flamed the black stain and repeated the process to get good coverage on the bowl.Op36 I wiped the bowl down with alcohol soaked cotton pads to remove the stain that did not settle into the grain.Op37
Op38
Op39
Op40 I sanded the bowl and shank with a medium and fine grit sanding block to further remove the black stain. The contrast is beginning to show and the grain stand out.Op41
Op42
Op43
Op44 I sanded the bowl and shank with 1500-1800 grit micromesh sanding pads to remove the scratches on the briar.Op45
Op46 I wiped it down with alcohol on a cotton pad and then set it up for the top coat of stain. I chose to use a Cherry Danish Oil on the top coat. I applied it with a cotton pad and set the bowl aside to dry.Op47
Op48 While the bowl dried I worked on the stem. I wet sanded with 1500-2400 micromesh sanding pads to further fine tune the shape of the stem. I worked to remove the remnants of scratching left behind by the initial shaping done with the lower grits of sand paper. I rubbed the stem down with Obsidian Oil and then dry sanded it with 3200-4000 grit pads. I gave it another coat of oil and finished sanding it with 6000-12000 grit pads. I gave it a final coat of Obsidian Oil and let it dry.Op49
Op50
Op51 The bowl was dry by the time I finished with the stem so I buffed the bowl and stem with Blue Diamond on the wheel and then gave both several coats of carnauba wax. I buffed the pipe with a clean flannel buffing pad and then hand buffed it with the microfibre cloth. The finished pipe is shown in the photos below. I really like the way the contrast stain came out and the way it hid the fills on the shank. The pipe really has some stunning and interesting grain all the way. Not one side looks the same. There is birdseye, cross grain and swirled grain. I think the finished pipe is a great improvement from when I started it. Thanks for looking.Op52
Op53
Op54
Op55
Op56
Op57

Opening the rebornpipes store.


I decided to create a store/sale page on the blog. I have so many pipes around here that are not getting the attention that they deserve so it is time to pass them on to some of you. The costs are listed and I think are quite reasonable. I have included an assortment of photos. Postage will be added to the price once I have the purchasers mailing address. Each week I hope to add a few more pipes so I can clear out some of my little used pipes. This first batch was given to me by a friend to clean and restore and sell. The proceeds will all go to a pipe forum that he supports for upkeep and maintenance costs. I am donating my restoration work so that all but postage will go to that forum.

Check it out. You can access it from the front page by clicking on the Welcome to the rebornpipes store or you can click on this link: https://rebornpipes.com/rebornpipes-store/

Thanks for your support.

Steve

Avatar2

Happy Birthday to Me – Restoring a Brigham 565


Love this unusual Brigham shape and the pins on the stem. Well done Charles.

Charles Lemon's avatar

My affection for vintage Brigham pipes is evident to anyone browsing this blog. Many of my restored Brighams have been showcased on the site, and I own more Brigham pipes than any other brand (currently 15 of the 55 or so pipes in my man-cave), ranging from run-of-the-mill 1-Dot Standards through to top-of-the-line Presidential Freehands. There is, however, a gap in my collection at the top end, specifically the 5 through 7-Dot range of what Brigham Pipes now calls the Classic pipes. My aim with this blog post is to narrow the gap slightly with the restoration of this Brigham 565, my first 5-Dot (500 Series) pipe.

I spotted this example of Brigham’s Special Grain line on eBay a few weeks ago, and was lucky enough to snag it just two days before my birthday, and three days before I took off with the family for a bit of vacation…

View original post 1,063 more words

My Second C.A. Sander of Swansea Bent Bulldog Restemmed and Restored


Blog by Steve Laug

When I was working on the previous C.A. Sander of Swansea straight bulldog that I restored (https://rebornpipes.com/2015/12/13/an-interesting-welsh-pipe-find-a-c-a-sanders-sandhurst-bent-bulldog/) I was looking for information on the brand. In my search on the internet I came upon this small bulldog bowl on eBay. I had found that there were at least two different names stamped on these pipes – both the ones I found were sandblast finishes. The earlier one was stamped Sandhurst and this one is stamped Oxford. Other than that the stamping on both is the same – the name then CA Sander over Swansea. I wrote the seller to see if he had any information on the brand and he replied that he did not. I put a bid on the pipe and ended up winning it. It arrived here on Tuesday this week. I have included the photos that the seller had posted on eBay below. It appeared to be in very good shape even though it did not have a stem.CA1

CA2

CA3

CA4

CA5 When the pipe arrived it was in excellent shape. The seller’s photos were absolutely correct. The bowl had a light cake in it and the rim was dirty with lava overflow and carbon. The shank was dirty and the finish had dust in the crevices of the blast. The stamping was exactly the same as the Sandhurst I restored other than the Oxford name that was present. I took the next series of photos to show the pipe on arrival before I started working on it.CA6

CA7

CA8

CA9

CA10 I went through my can of stems to find one that would work on this bowl. Diamond shanks are notoriously hard to match a stem to as each side and angle is very individual and hardly ever align with used or estate stems. I would have to find one that had a close fit and modify it to match the angles. With that in mind I found several stems that could have worked. In looking at the tapered stems I pulled all seemed too long to go with the petite size of this bowl. None quite aligned at the shank and modifying them was not an option as one or more of the sides did not have enough material to modify. I had several saddle stems that had the same issues. Then in the bottom of my can I remembered that I had a Lucite saddle stem that might very well work. I took it out and measured the sides of the diamond. I have to tell you I was very surprised – this stem was almost a perfect fit. I would need to shorten the tenon slightly and take a little material off to get a snug fit. Only the bottom right side was a little larger than the shank. Everything else matched. The stem is a pearlised cream coloured Lucite that actually would go well with the colour of the bowl once I had it cleaned up.CA11 I used the PIMO tenon turning tool to reduce the diameter of the tenon to get a close match and finished the fit by hand sanding. I shortened the length of the tenon with a Dremel and sanding drum to the same length as the mortise. In doing so I removed the damaged end of the tenon and the rounded right side. Once I had the work done I put the stem in place in the shank and took the photos below. You can see the great fit that the stem had in terms of the width of the sides of the diamond. I was fortunate in terms of the amount of work that would need to be done to fine tune this one. It would take very little work to make a good fit.CA12

CA13

CA14

CA15 I took a photo of the end of the shank and the end of the stem and put them side by side for comparison sake to show how close the two diamonds came to matching each other. This is a very rare occurrence in my experience.CA16 I sanded the bottom right side with 220 grit sandpaper to adjust the fit on that side. I needed to remove enough material to align the bottom of the diamond with the bottom of the diamond on the shank. All others point on the diamond aligned perfectly but this one. It did not take too much sanding before I had the alignment and the fit against the side of the shank perfect.CA17 I reamed the cake in the bowl with a PipNet reamer and took it back to bare briar.CA18 I scrubbed the bowl with Murphy’s Oil Soap and a tooth brush on the sides and bottom of the bowl and shank and with a brass tire brush on the rim.CA19

CA20

CA21

CA22

CA23

CA24 I put the stem on the bowl, put a cotton ball in the bowl and then set up the retort to clean out the internals of the pipe. I boiled alcohol through the pipe and after two tubes of alcohol the airways were clean. The retort also removed some of the staining in the stem airway. I removed the retort and scrubbed the internals of the bowl and shank with pipe cleaners and cotton swabs to remove the remaining alcohol and grime in the shank. In the end the shank and airway were clean and the pipe smelled fresh.CA24A I cleaned the stem with pipe cleaners and alcohol and also pipe cleaners dipped in Bar Keepers Friend powder to scrub out the tar stains in the airway. It took a lot of scrubbing but I got the majority of the stains out. I did not want to darken the stain on the bowl but wanted to highlight the contrasts in the finish. The combination of dark brown and medium brown on the high spots worked well for me. To keep that and add life to the bowl I wiped it down with a light coat of olive oil and rubbed it into the blast pattern. I took the following photos with the stem in place on the bowl. The pipe is taking shape.CA25

CA26

CA27

CA28 The stains at the button were stubborn and hard to remove. I found that there was a small lip where the slot in the button met the airway in the stem and it collected tars and oils. The pipe cleaners and scrubbing did not touch that as it did not reach into the small crevice there. I used a needle file to flatten out the lip at the junction. With that gone I was able to remove more of the stain from the stem. All that remain was a small spot on the top and the bottom that I could not get out no matter how hard I worked it.CA29 I sanded the stem with micromesh sanding pads to polish and remove the scratching. I wet sanded with 1500-2400 grit pads and dry sanded with 3200-12000 grit pads. As I sanded the stem with each successive micromesh pad it left a richer luster in the pearlised stem.CA30

CA31

CA32 I buffed the bowl and stem with Blue Diamond on the wheel (lightly on the sandblast bowl as I did not want to flatten the blast) and gave the stem several coats of carnauba wax. I hand waxed the bowl with Halcyon II wax and then buffed the bowl and stem with a shoe brush and a microfibre cloth to raise the shine. The finished pipe is shown in the photos below. It is a petite bulldog – only 5 inches long from bowl to button and 1 3/8 inches tall from rim to point on the bowl bottom. The drilling on the bowl is 5/8 inches. I like the contrast that the Lucite stem gives with the blast on the bowl. The colours work well for me. The stem length works on this bowl and the overall effect is a balanced small sandblast pipe that looks great. At least it does to me! Thanks for looking.CA33

CA34

CA35

CA36

Addendum: 06/06/18 I received an email from Andrew  in answer to a question I asked in my two blogs on CA Sander pipes. I quote in full his email because of the information that it includes.

Comment: You asked about C A Sander

C A Sander were tobacconists based in Wind Street Swansea. I don’t know exactly when the business started but it it passed to my Grandfather from his father (both were C A Sander) and by the 1920 was a successful and well established retail business with shops all over south wales. They were importers and blenders (if that is the term) of tobacco and the shops sold smoking paraphernalia. At my grandfathers retirement late 60’s to business went to my uncle again C A Sander but known generally as Jim. He developed a business supplying cigarette machines around South Wales and moved out of retail he eventually sold the business to Rothermans and went into other business ventures, I expect that was when the limited company you found was formed. Uncle Jim has now retired but still lives in the area.

Hope this helps with your research.

Andrew I received this followup email from someone who would like to get in touch with you. Here is her email

Hi there – I stumbled upon your website when looking for anything to do with C.A. Sander tobacco shop and I saw the pipe you restored – which is amazing! and then saw the comment below left by Andrew. Since that shop was owned by my grandfather, and Andrew’s grandfather – it would seem that we are cousins – but we have never met. I would love to get into contact with Andrew. Would you be able to assist in that? If possible, could you ask him to contact me at my email address pianokey88@hotmail.com?
Many thanks for your help! Georgina


2015 in review


The WordPress.com stats helper monkeys prepared a 2015 annual report for this blog.

Here’s an excerpt:

The Louvre Museum has 8.5 million visitors per year. This blog was viewed about 260,000 times in 2015. If it were an exhibit at the Louvre Museum, it would take about 11 days for that many people to see it.

Click here to see the complete report.

A Dr. Grabow Color Duke Billiard Renewed


Blog by Steve Laug

Most of the Dr. Grabow Color Duke pipes that have come across my worktable have been in rough shape. The paint has been chipped and the finish ruined. This is the second one lately that I have worked on. The first was the Cherry Apple Red Dr. Grabow Viscount that my brother found for me. This second one is a White Billiard with a saddle stem. It is one that was made for a paper filter rather than a stinger/spoon apparatus. The pipe is stamped Color Duke over Dr. Grabow on the left side of the shank and Imported Briar over Adjustomatic over Pat. 2461905. The Patent Number is for the Adjustomatic tenon.

The pipe came to me from a friend quite awhile ago and I just got around to working on it. It was in pretty decent shape other than being dirty. The finish has some dents in the bottom of the bowl on the right side. There was some staining on the right side of the shank at the stem/shank junction. The rim was dirty and had some darkening and a few spots where the finish was worn off. The bowl had a cake that would need to be removed. The screw in tenon was dirty but the stem aligned with the shank perfectly. The stem itself was dirty inside and out. There was tooth chatter on the top and underside of the stem near the button. On the underside was a deep tooth mark in the center about ½ inches from the button. The next photos show the pipe when I brought it to the work table.Duke1

Duke2

Duke3

Duke4 I took some close-up pictures of the rim and the dents on the bottom of the bowl to give a clear picture of the issues with this pipe.Duke5

Duke6 I reamed the bowl with a PipNet reamer and took the cake back to the bare briar. I used a pen knife to clean up remaining cake that the reamer left behind.Duke7

Duke8 I scrubbed the finish with cotton pads and Murphy’s Oil Soap as I did not want to use anything that potentially would damage the painted finish on the bowl. My intent was to get the grime off the finish and to remove as much of the rim darkening as possible without compromising the paint on the rim or edges.Duke9

Duke10 I rinsed the bowl with warm water and dried it off with a towel. Here are some photos of the cleaned bowl.Duke11

Duke12

Duke13

Duke14 I cleaned the inside of the shank and the stem with pipe cleaners, cotton swabs and alcohol until they came out clean.Duke15 With the bowl cleaned inside and out it was time to address the stem. I sanded the surface of the stem to clean off the dirt and tooth chatter. I wiped it down with a cotton swab and alcohol to remove the dust and to examine the dent on the underside.Duke16 After the deep dent was cleaned I filled it with a few drops of clear super glue.Duke17 Once the glue dried I sanded the repair to make it flush with the stem surface using 220 grit sandpaper.Duke18 I sanded the entire stem with medium and fine grit sanding sponges. The repair spot is beginning to blend in very well.Duke19

Duke20 I sanded the stem with micromesh sanding pads – wet sanding with 1500-2400 grit pads and then rubbing it down with Obsidian Oil. I dry sanded with 3200-4000 grit pads and gave it another coat of oil. I finished by dry sanding it with 6000-12000 grit pads. I gave it a final coat of Obsidian Oil and let it dry.Duke21

Duke22

Duke23 In the past buffing the painted bowls and the Grabow stems has caused me a lot of grief. I have found that these stems can take very little heat that the buffing pads generate so I hand buff them with Paragon Wax and a shoe buffer. I buff the bowls the same way using the shoe buffing brush and a microfibre cloth. The finished pipe is shown in the photos below. If you are interested in this pipe email or message me and make an offer. It could easily join your rack. Thanks for looking.Duke24

Duke25

Duke26

Duke27

Duke28

Duke29

The Love of “Old Briar”


Dutch Holland

I wrote and asked Dutch for an introductory Bio to give us a feel for who he is as a pipe smoker and also as a refurbisher. I posted an earlier piece he sent me on a stem repair on a Dunhill Rhodesian and thought it would be great to know more about him. He wrote back with this marvelous piece that shows that he not only does a great job in pipe refurbishing but writes well also. I have posted it on the contributors page but also wanted to put it here as it summarizes pretty much my life as a pipe man as well. Thanks Dutch and welcome to rebornpipes. – Steve@rebornpipes

I’ve smoked pipes since I was a teen, more years ago now than I care to admit to. For most of that time my collection consisted of a set of six Peretti house brand pipes and a basket Lovat, full of fills, I just loved. I had the good fortune to know Mr. Peretti and his brand of pipes were not fancy but they were always great smokers and after all, I had a pipe for each day of the week and thought myself to be “living large”. As the father of five the budget didn’t always have a surplus of disposable income and what there was of it wasn’t seen by the bride as resources to be squandered on fancy pipes. I can’t complain, she always made the money go a lot further than I ever could have. About ten years ago we became empty nesters but old ways die-hard and even now that I could, spending big money on pipes was something I couldn’t entertain. I did want to finally be able to expand my collection but just couldn’t justify spending a lot of money to accomplish it. That’s when I stumbled onto Ebay. Right in front of my eyes was the most wonderful selection of old classic shapes in need of some TLC. That would allow me to expand the collection at a modest cost if I could develop the skills to restore them. The quest was on.

My father did wood working and at an early age I was introduced to those skills but pipe restoration has its own special requirements so I set about mastering them. The internet is a wonderful thing; on it you can find like-minded people who are willing to exchange ideas and techniques. A few practice pipes and the right tools of the trade and I was hooked. Now time on Ebay can be something akin to being a kid in a candy store, I’ll have one of everything. My collection needed a focus and just about then I encountered the GBD 9438 Bent Rhodesian. It was love at first sight. I carefully restored that old Sauvage and when I finally put a match to the bowl I understood why I wanted to restore pipes. Rhodies and Dogs became my passion and with each restoration the skill set improves and the satisfaction increases. Now retired, my days are never without a project. When I have caught up with the seemingly endless “Honey Do” list, I retire to the bench, pick an interesting prospect and idle away a few hours or sometimes days bring it back to life. There are always a few pipes in the “Awaiting Action” box just so I never run out. I do on occasion treat myself to a new pipe. There are so many great artists making them today and every once in a while a pipe will just speak to me but something special happens when you light up a pipe that most thought had seen better days but you saw through the dirt and abuse and took the time and effort to return its beauty. It becomes a passion. All it requires is commitment, a few inexpensive special tools and the relentless desire to continuously improve your technique. A truly modest investment for such big rewards.

The collection now blossoms with Rhodies and Dogs of all types and makers. Most pipes others had passed on because they bore the scars of misuse. I acquired them at a cost far below their true value and with modest effort returned them to what they had once been. On occasion, when another package arrives on the doorstep, the wife will ask “do you really need another pipe”? No, I answer, but I do need the challenge. She smiles; glad I think that my passion isn’t golf.

An Easy Restoration – an Unsmoked Meerschaum Billiard


Blog by Steve Laug

Easy1I picked up two meerschaum pipes – neither bearing any stamping or markings that give a hint to the carver. The one I am working on now is the second one in the two photos to the left. It has a flumed bowl (darkening on the top and the top third of the bowl fading as it goes down the sides. The second third is a bit lighter and the bottom third is natural). It had a metal reverse tenon – the tenon was set in the shank of the pipe and the stem is pushed over that. In this case the stem is similar cheap nylon/plastic as the ones I replaced in the two previous blog articles noted below.

Prom Night – Dressing up a Cheap Meerschaum Apple

Another dressed for the Prom… maybe the Prom King – Cheap Meer Given a New Look

The similarity in tenon and stem setup leads me to believe that I was dealing with the same carver that I noted in the second article above. There I quote a fellow on the Dr. Grabow Collectors Forum who said “They were excellent pieces of meerschaum with bad stems. The bowls were carved by Robert Strambach in Vienna.” Looking at the stems that I kept from the pipes they are identical in look, feel and composition. All three have the casting marks on the sides of the stem and are thin at the button. The difference in this one is that the pipe was unsmoked so the stem had not tooth chatter or damage. It was merely dull and dirty from sitting in someone’s collection for years.

When I received this pipe it was unsmoked. The bowl had darkened from grime and dirt. The fumed rim had a few nicks on the top and inner edge of the rim where the pipe had been knocked about. The meerschaum itself was dirty and had ground in soil on the sides of the bowl and the top and bottom of the shank. There were also a few light spots on the side of the bowl where something had been dripped on the fumed portion and lightened it.Easy2Easy3Easy4Easy5 I took a close-up photo of the rim and the bowl to give an idea of the state of both. The bowl is darkened from sitting but has not been smoked. The rim has some of the nicks I spoke about on the inner edge and the top.Easy6I scrubbed the meerschaum with cotton pads and Murphy’s Oil Soap to clean off the grime. I rinsed the bowl with warm water to remove the soap. I dried it with a cotton cloth.Easy7I sanded the bowl with micromesh sanding pads – wet sanding with 1500-2400 grit pads to remove some of the scratching on the top of the shank and some of the ground in dirt on the sides of the bowl. I dry sanded with 3200-4000 grit pads. I buffed the bowl with Blue Diamond on the wheel and then gave it several coats of soft white beeswax and buff it with a soft flannel buff. The photos below show the cleaned and polished bowl. I was careful in how much of the patina I removed in the process of cleaning the bowl. I wanted it clean but it still needed to look its age.Easy8 Easy9 Easy10 Easy11 Easy12 Easy13To polish the dullness of the plastic stem I wet sanded it with 1500-2400 grit micromesh and dry sanded it with 3200-12000 grit pads. I gave it several coats of Paragon Wax and hand buffed it with a microfibre cloth.Easy14 Easy15 Easy16I put the stem on the bowl and buffed the bowl and stem by hand with the microfibre cloth to give it a shine. The finished pipe is shown in the photos below. This was a simple clean up which is greatly appreciated after the last few hard jobs. Thanks for looking.Easy17 Easy18 Easy19 Easy20 Easy21 Easy22

Comoy’s Tradition Shape 17 (Kruger S) Clean-Up


By Al Jones

I picked up this Tradition Shape 17 over the holiday weekend and finished the restoration this evening. I’m not an Oom-Paul fan but this one looked in too good shape to pass up.

I found very little references to this shape,save on the Comoys Shape chart. I did find that Steve had restored a Shape 17 second line detailed on this blog.

Royal Falcon Shape 17

The three piece, drilled “C” logo looked to be in terrific condition and the round Made in London/England stamping showed it was made between the early 1950’s to the merger year of 1981. Despite the bowl size, the pipe only weighs a svelte 34 grams.

Comoys_Tradition_17_Before (1)

Comoys_Tradition_17_Before (4)

The pipe had some tooth indentions and a few dents that I hoped would stem out. The button is really nice and fitment was very good. The bowl interior was also in great shape.

The bowl had a slight cake, which was reamed. My wife recently gave me a new Pipenet reamer set for Christmas, to replace my aging Castleford set. The bits on this shape are definitely of a better quality, something that I had been skeptical about in the past, having never held a Pipenet set.

20151228_173010

The small dents on the bowl top did steam out nicely. The faded finish rejuvenated nicely with some White Diamond rouge on the buffing wheel. The nomenclature is in excellent condition, so I was sure to stay away from that area. “Tradition” grade pipes always have a nice gleam to the briar. I polished the inner section of the bowl with some White Diamond on a small felt wheel mounted to my Dremel tool on the low speed setting. The bowl was then soaked with sea salt and alcohol. The Comoys beveled edge feature was in very good shape.

The teeth indentions near the button popped out nicely with heat from a lighter flame, leaving only the slightest ripple. As mentioned,the button is slim and finished very nicely. There was a little oxidation around the stem at the shank end that was removed with 1500 and 2000 grade wet paper, then micromesh (8000 and 12000) on the entire stem. The stem was then buffed with White Diamond and Meguiars Plastic Polish. The stem was completely clogged with residue, which took several bristle cleaners dipped in alcohol to remove.

As I was finishing the pipe, a pipe friend in India messaged me thru Facebook. I attached a picture of the pipe to our conversation and he ended up buying it, from across the world! The pipe community is a tight knit group!

Here’s the finished pipe, which will eventually be sent to my friend in India to enjoy.

Comoys_Tradition_17_Finish (1)

Comoys_Tradition_17_Finish (5)

Comoys_Tradition_17_Finish (2)

Comoys_Tradition_17_Finish (6)

Comoys_Tradition_17_Finish (7)

Comoys_Tradition_17_Finish (4)

Comoys_Tradition_17_Finish (3)

Comoys_Tradition_17_Finish (8)

Comoys_Tradition_17_Finish (9)

Comoys_Tradition_17_Finish (10)

Comoys_Tradition_17_Finish (11)

Comoys_Tradition_17_Finish (1)