Restoring an Old Bruyere Extra Floral Carved Bent Billiard


Blog by Steve Laug

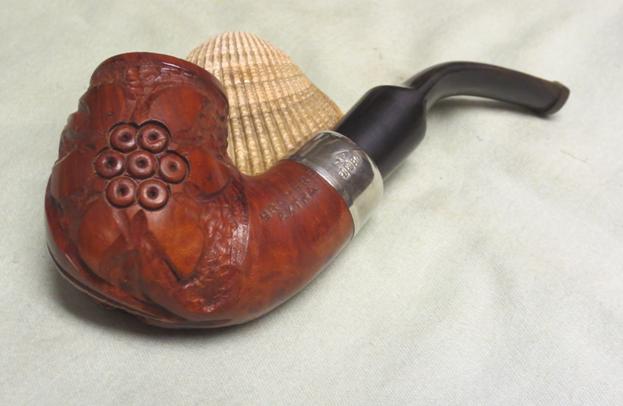
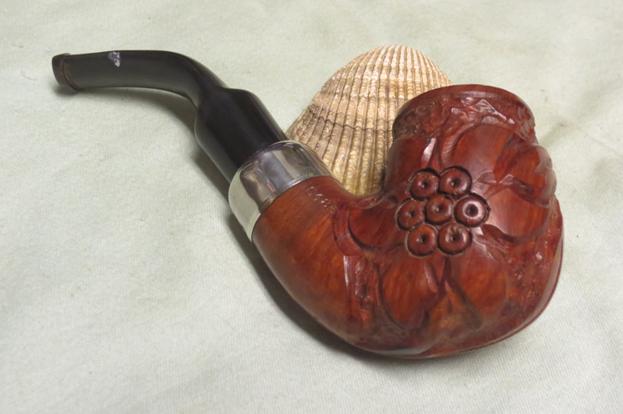
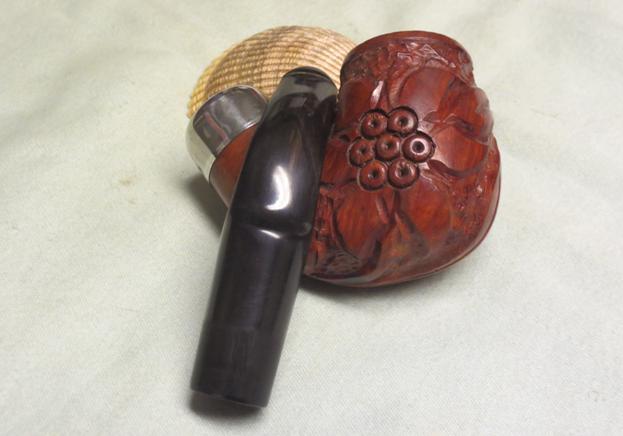
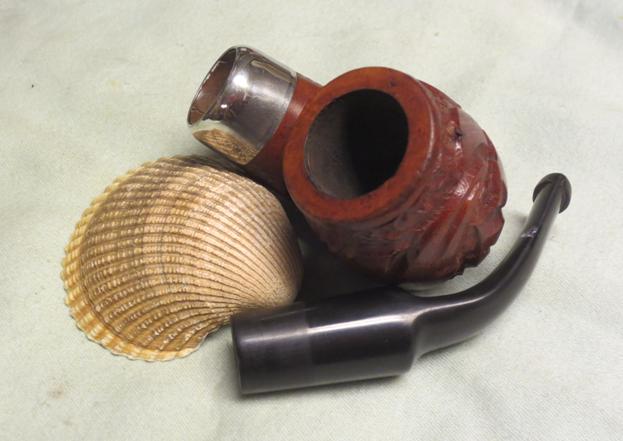
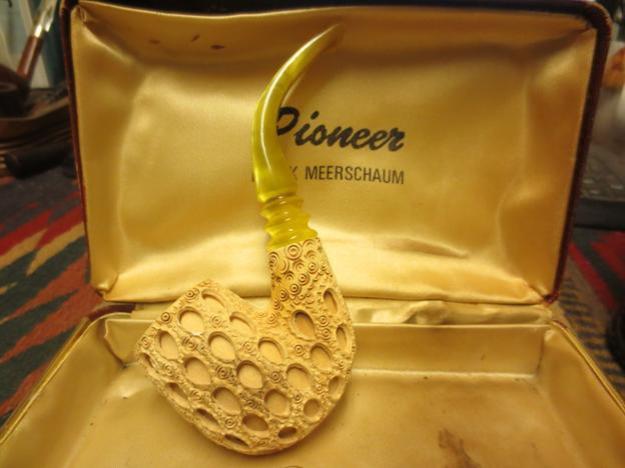
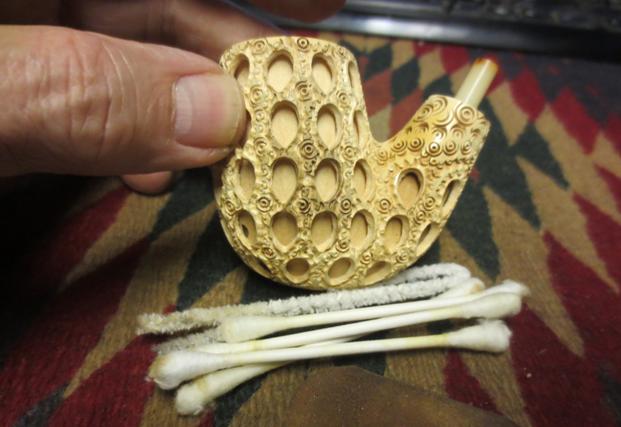
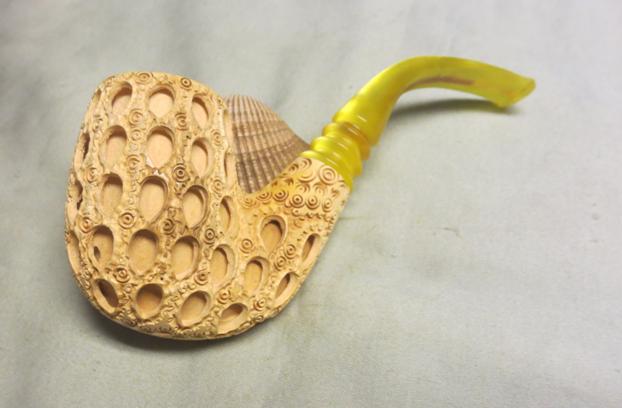
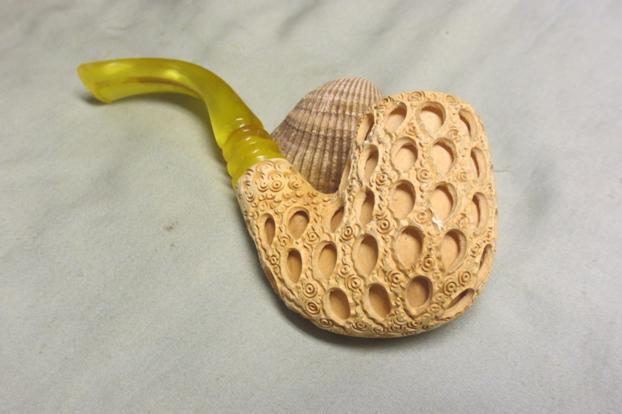
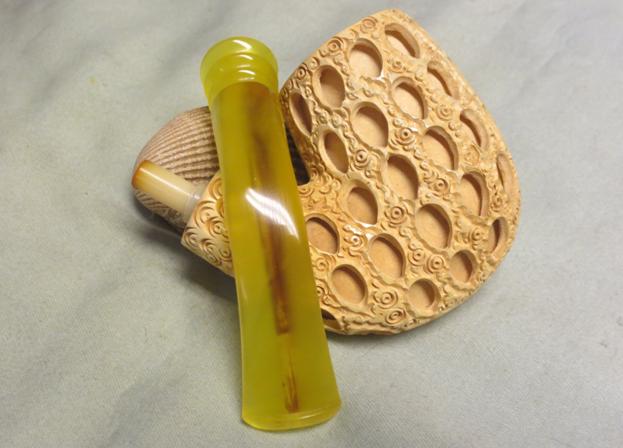
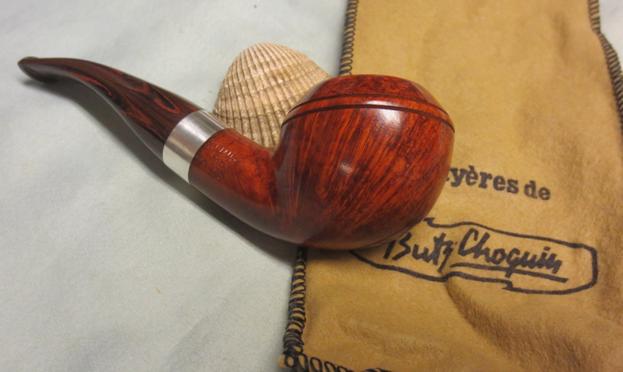
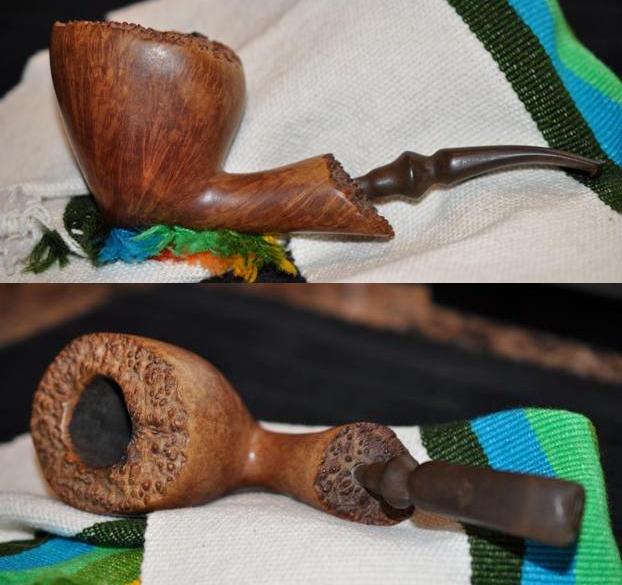
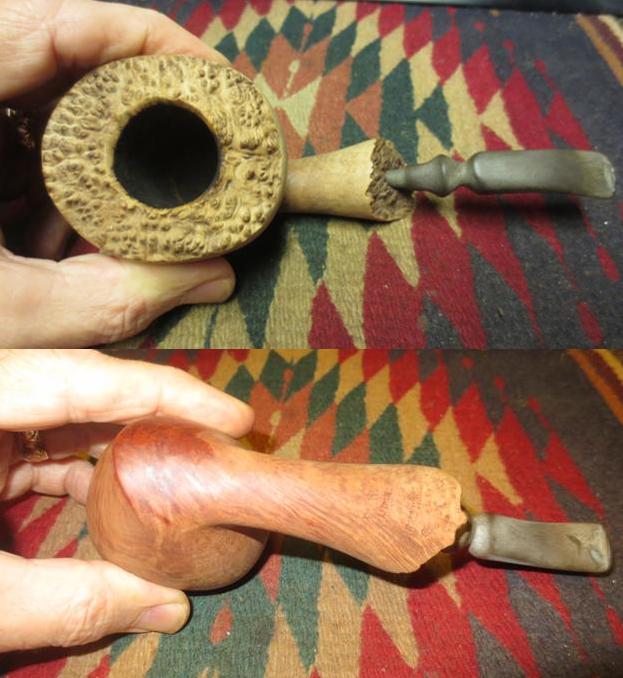
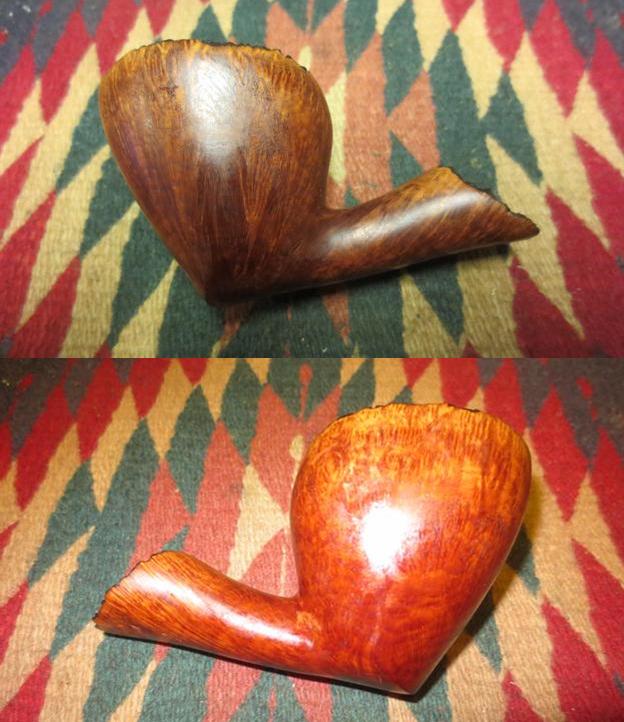
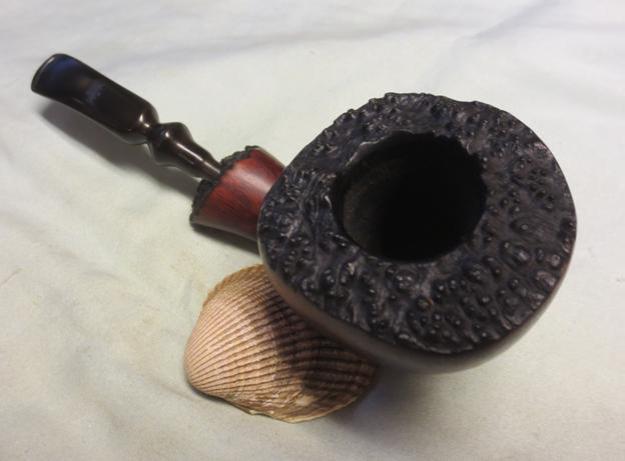
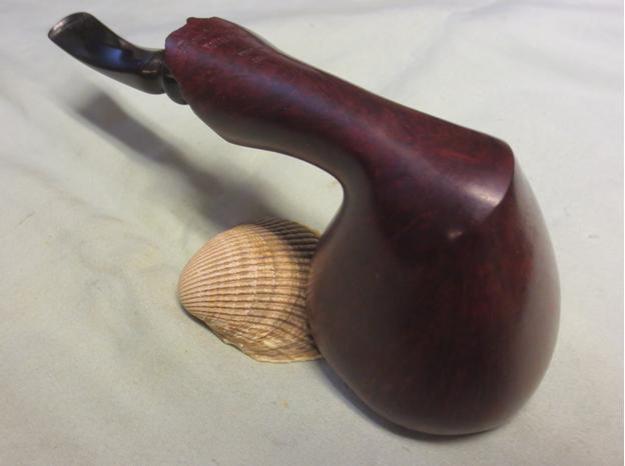
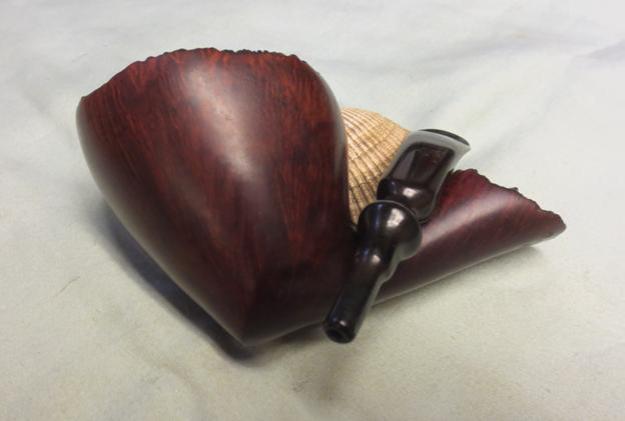
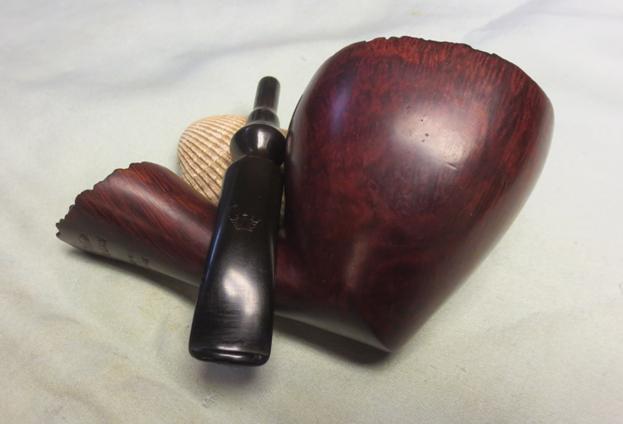
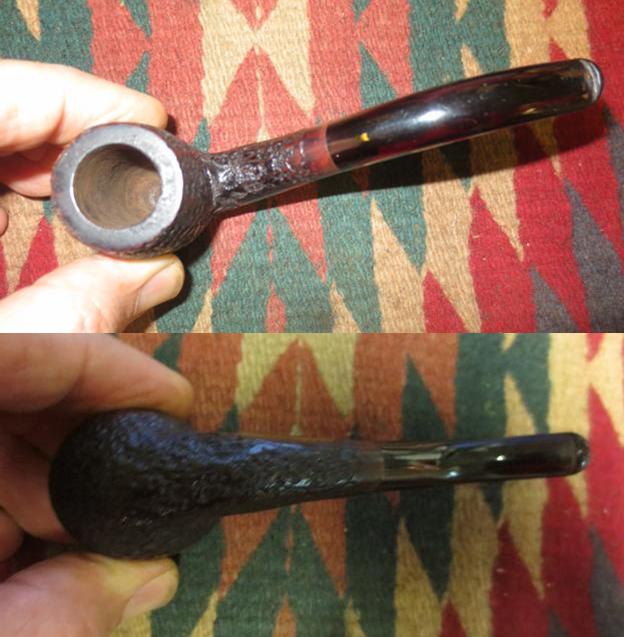
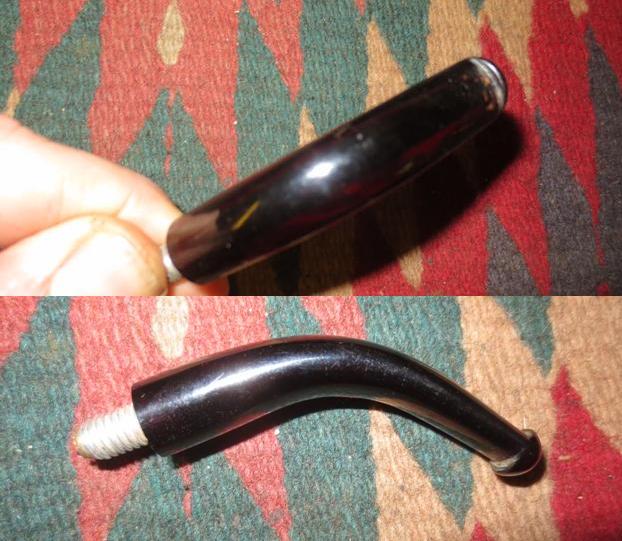
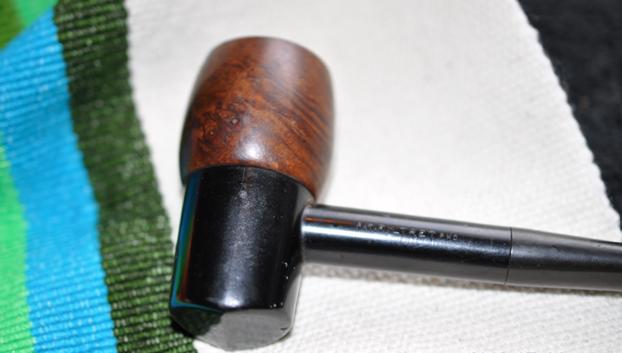
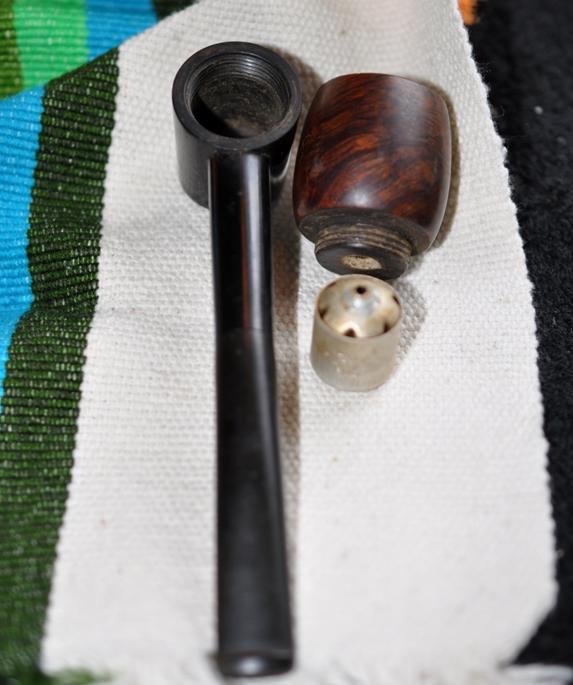
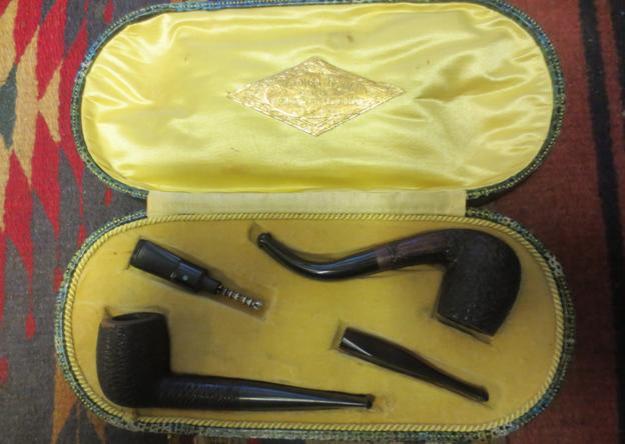
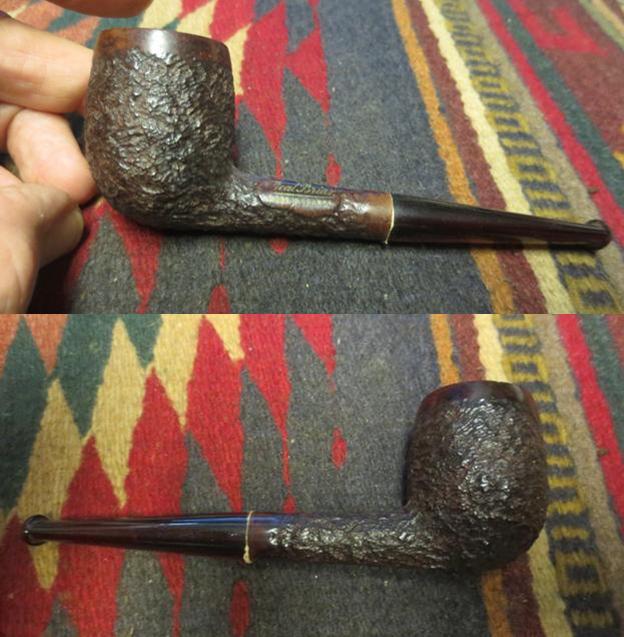
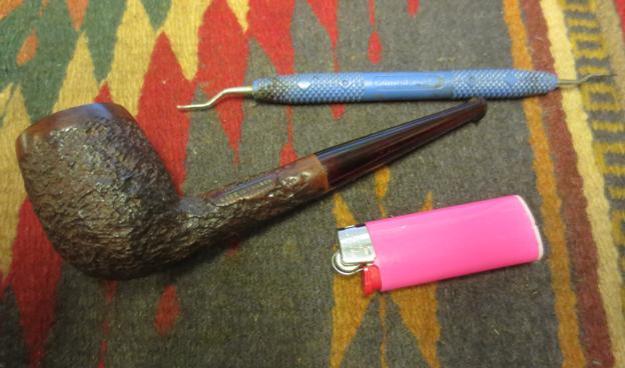
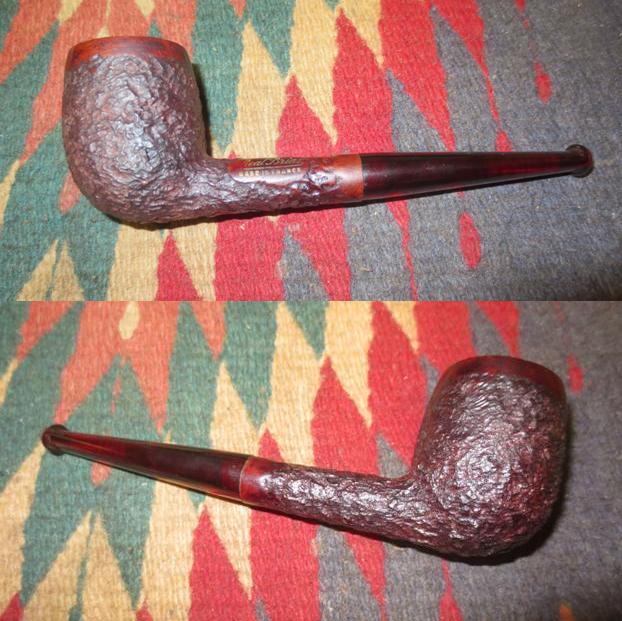
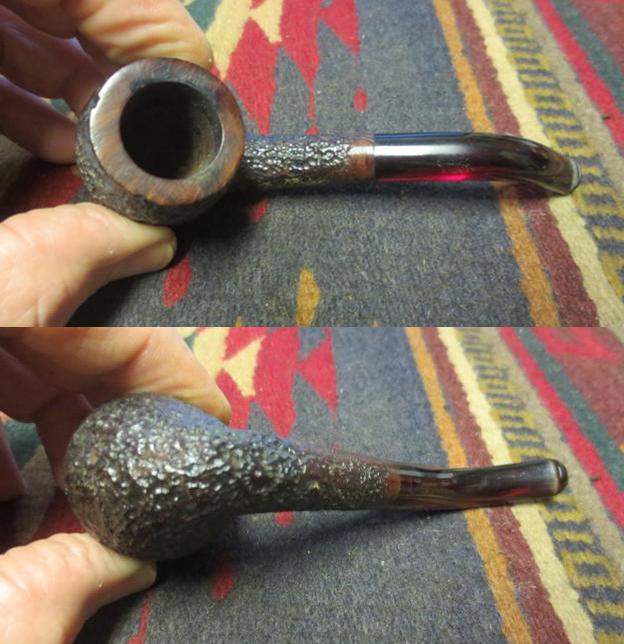
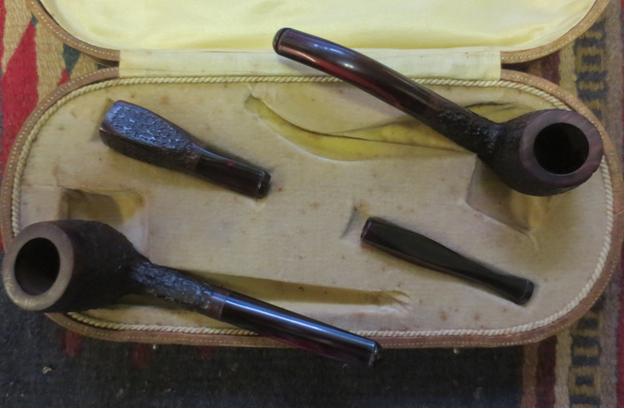
This interesting old pipe is unique in many ways. The first and most obvious is the floral pattern carved on the bowl sides and bottom. It is well carved and the petals and the leaves flow around the bowl. They sit against a rusticated finish in the gaps of the leaves and around the top of the bowl. There was one burn spot on the bottom of the shank where it looked as if the pipe had been set down in an ashtray and was burned. The second visible uniqueness is the horn stem with the orific button on the end. It had a little damage on the right edge of the stem but it was fixable. The third unique feature was not visible until I removed the stem. The stem had a large chamber in the saddle portion as did the shank. There were also two tubes at the end of the mortise and a collecting chamber or sump. The pipe was in pretty decent shape for its age. I can only hope that when I reach that age, if I am still around I will look as good.Bru1
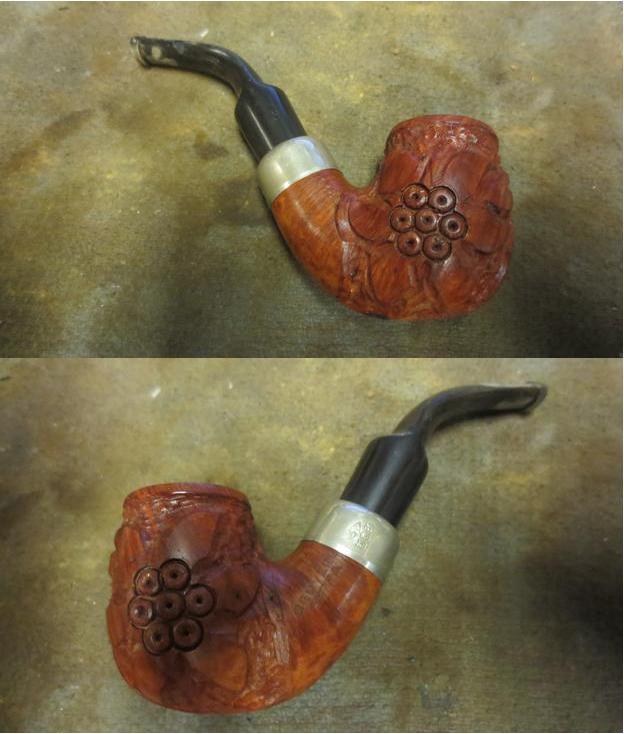
My brother Jeff had reamed the bowl and done the initial clean up. He had scrubbed the surface of the bowl and the shank. It is great that he is doing that part of the job for me as it speeds up the process that I do in the restoration. The rim had some hard cake built up on the surface. There was a burn spot on the bottom of the shank that is visible in the second photo below.Bru2
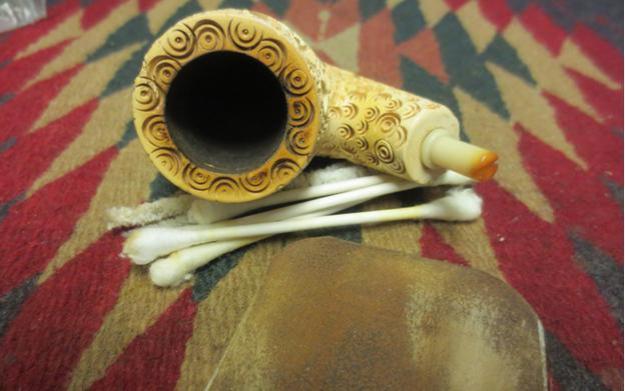
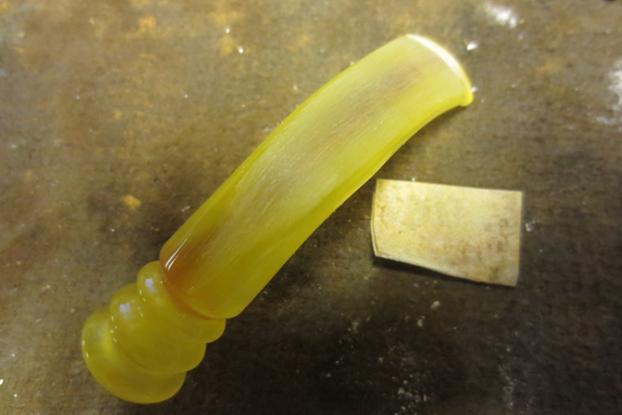
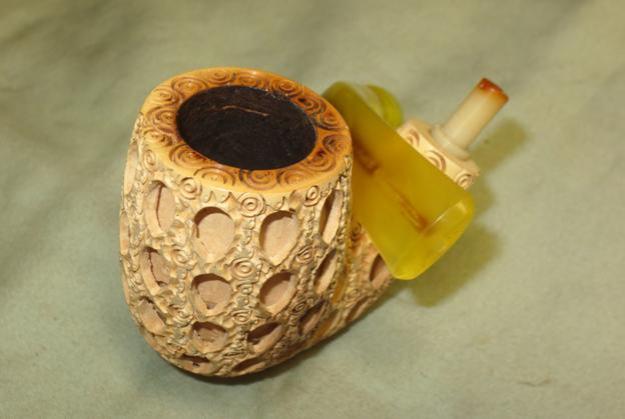
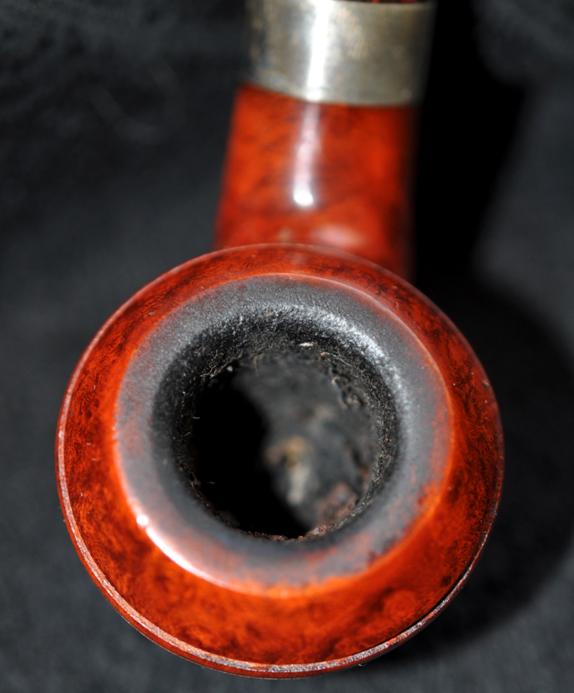
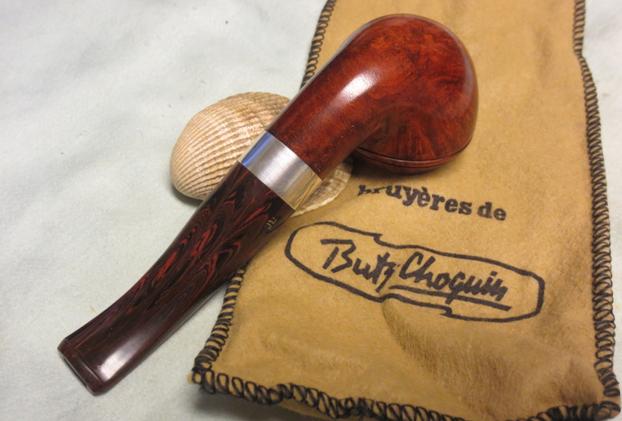
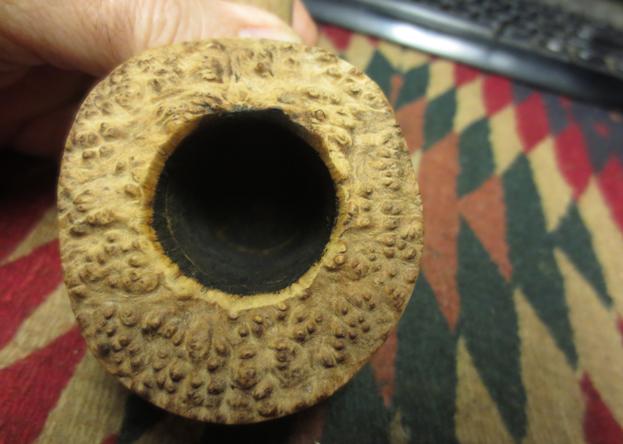
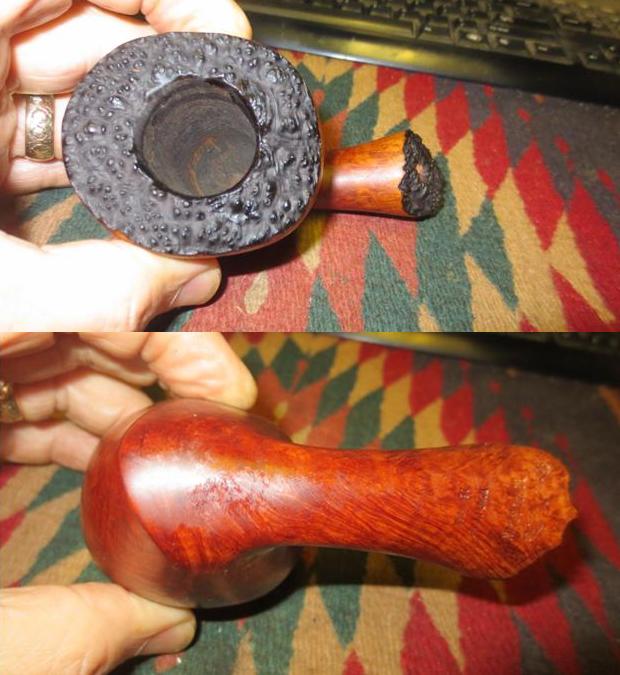
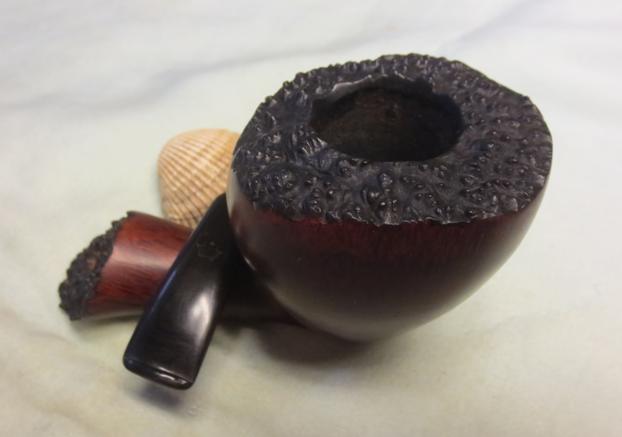
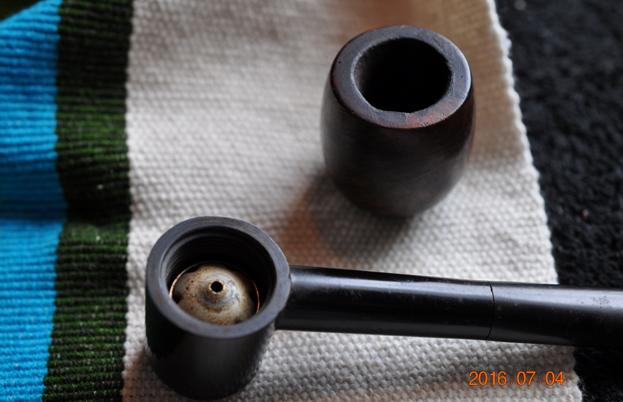
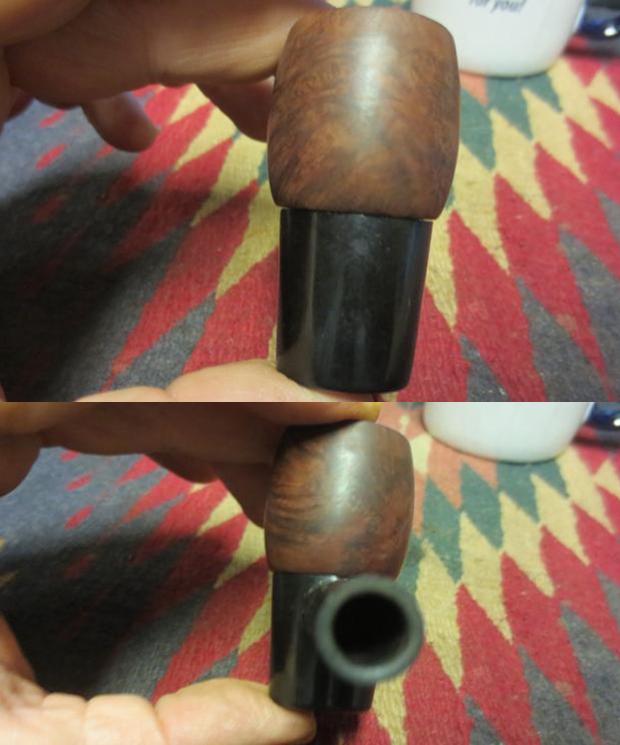
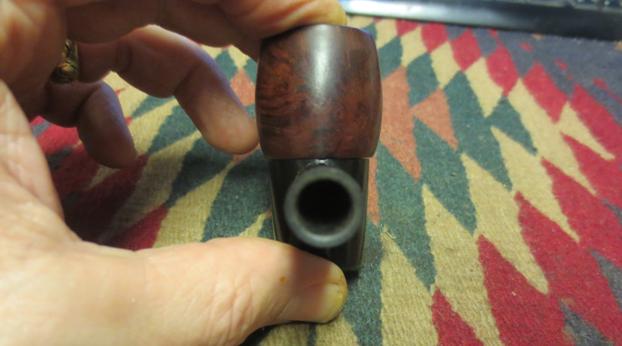
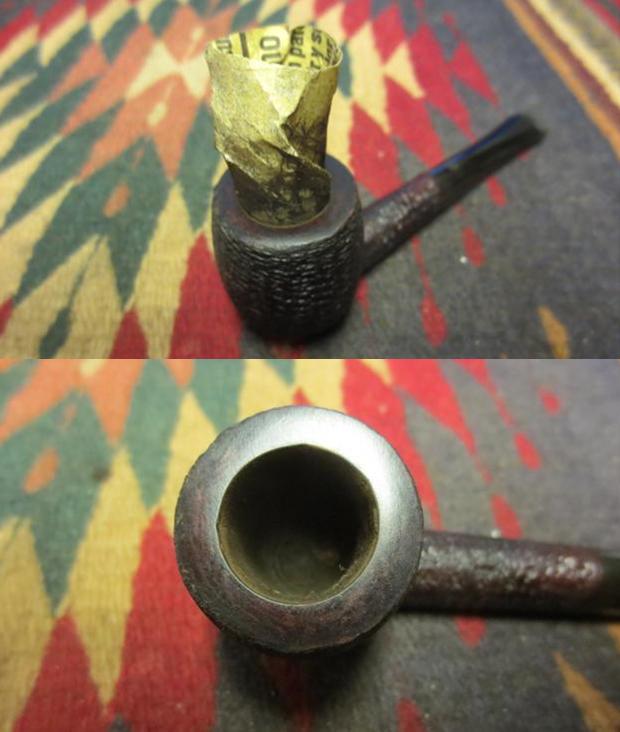
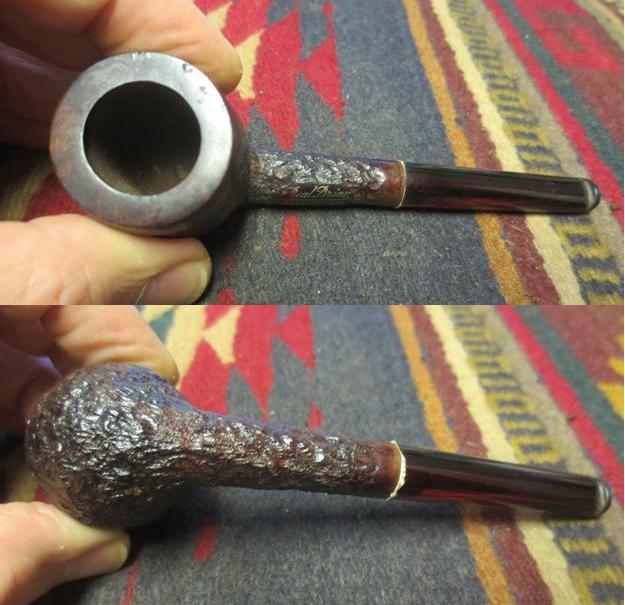
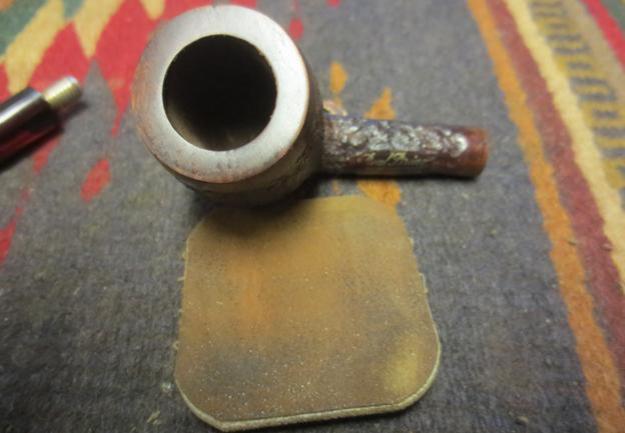
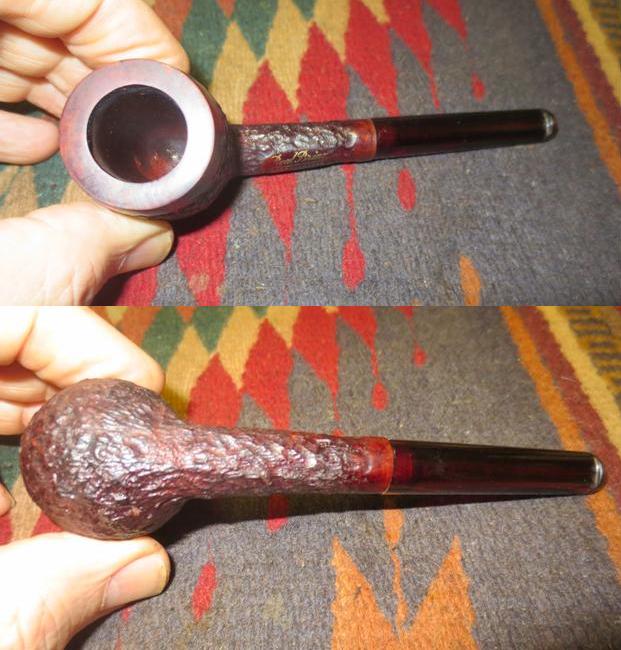
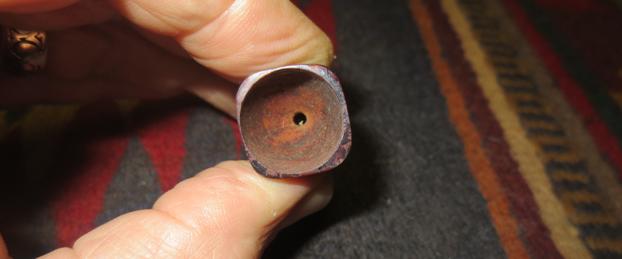
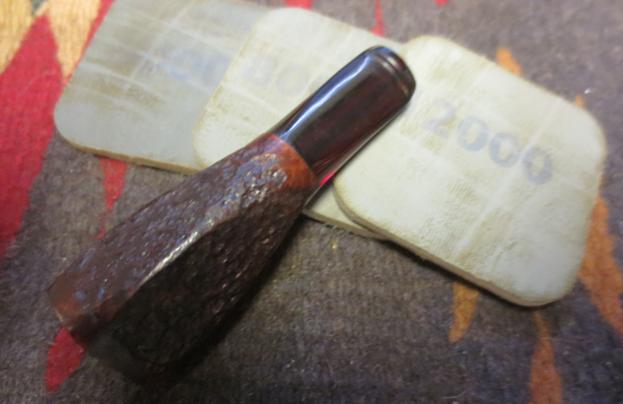
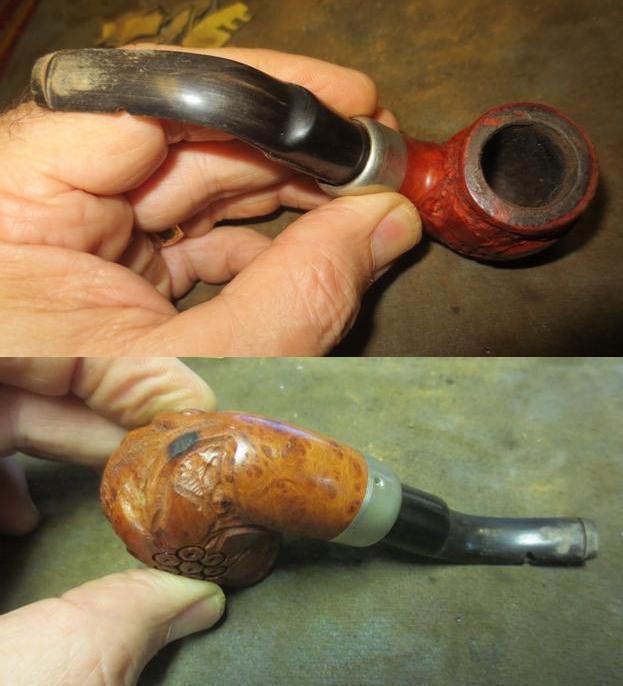
I took some close up photos of the areas that needed work. The first photo shows the burned spot. Fortunately the burn had not softened the wood too much. It was hard when I probed it with a dental pick. The second photo shows the hard cake on the rim. It is quite thick but the rim appears to be undamaged and the inner and out edges of the rim are in great shape. The third photo shows the damaged portion of the right edge of the stem. I have seen these often on horn stems and have always wondered if it was not damage done by a worm eating the horn.Bru3
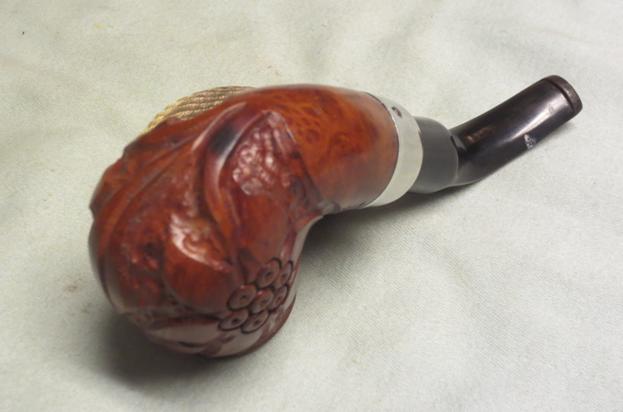
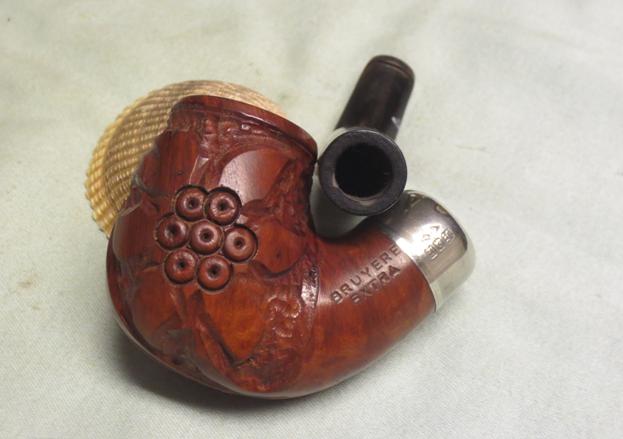
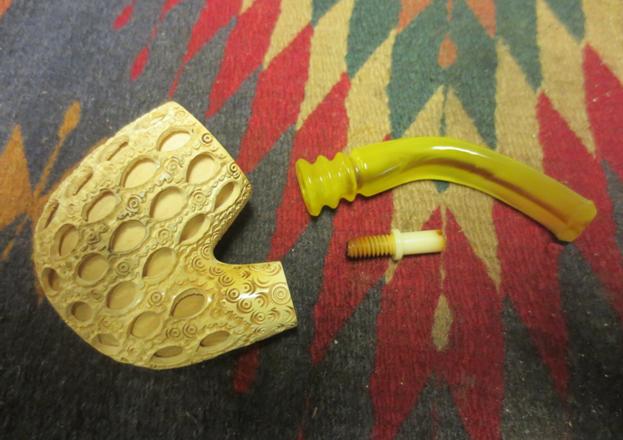
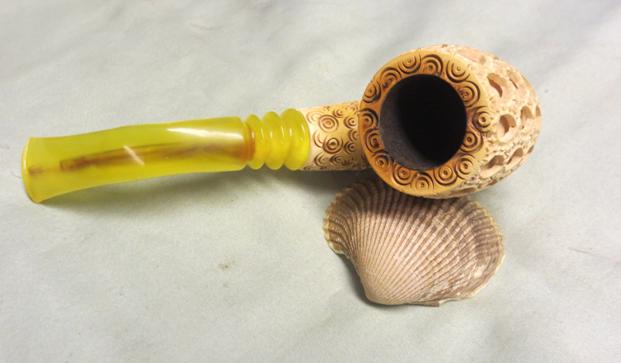
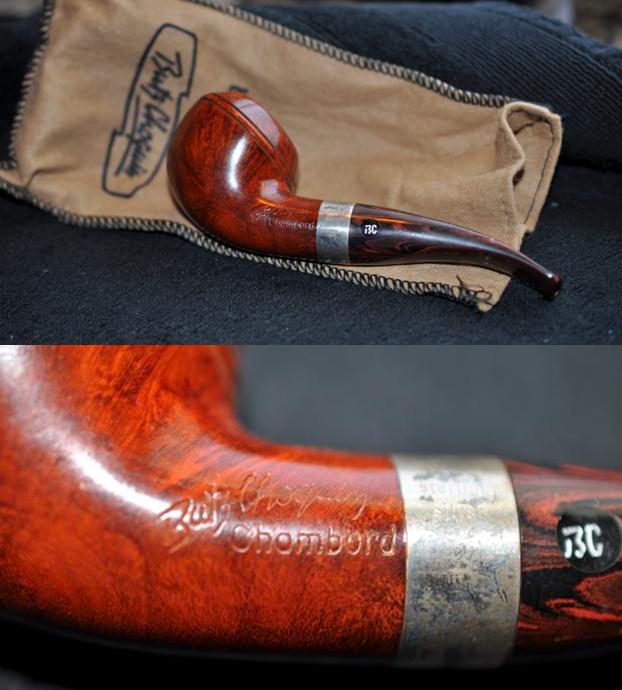
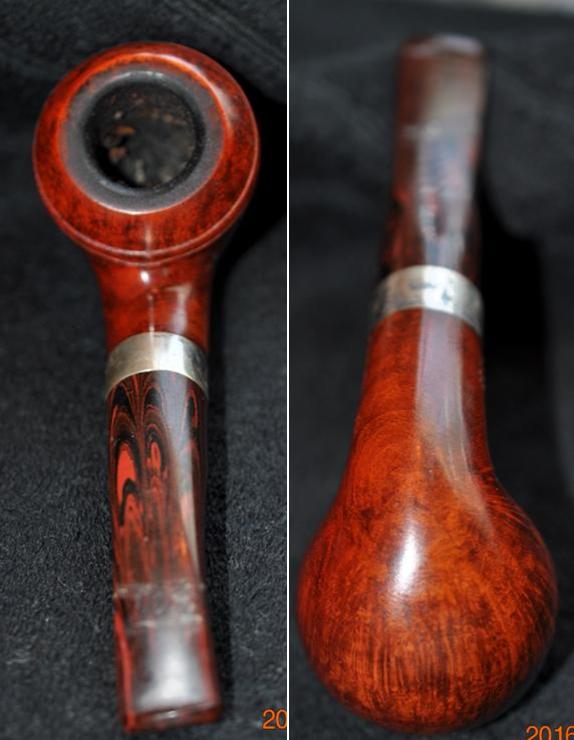
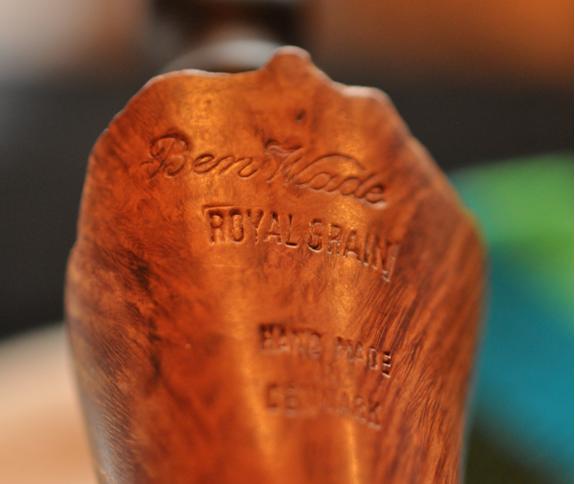
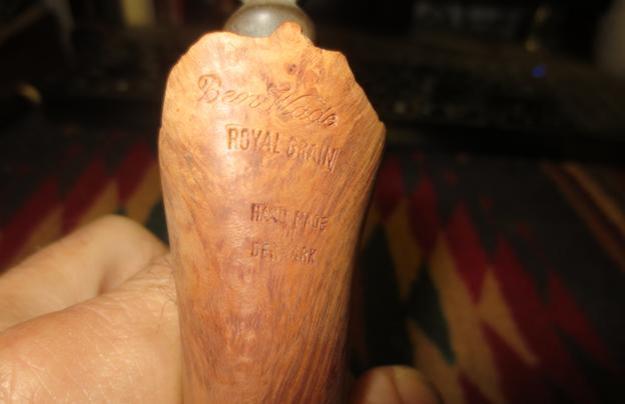
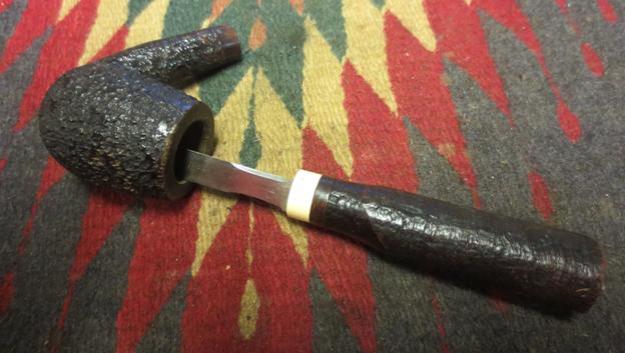
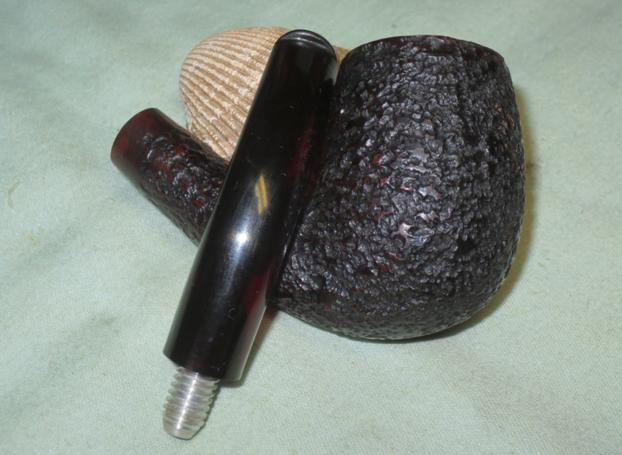
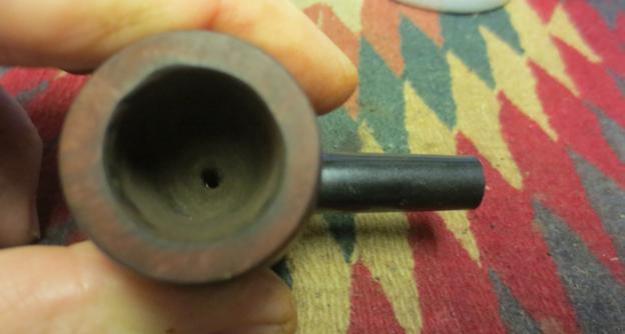
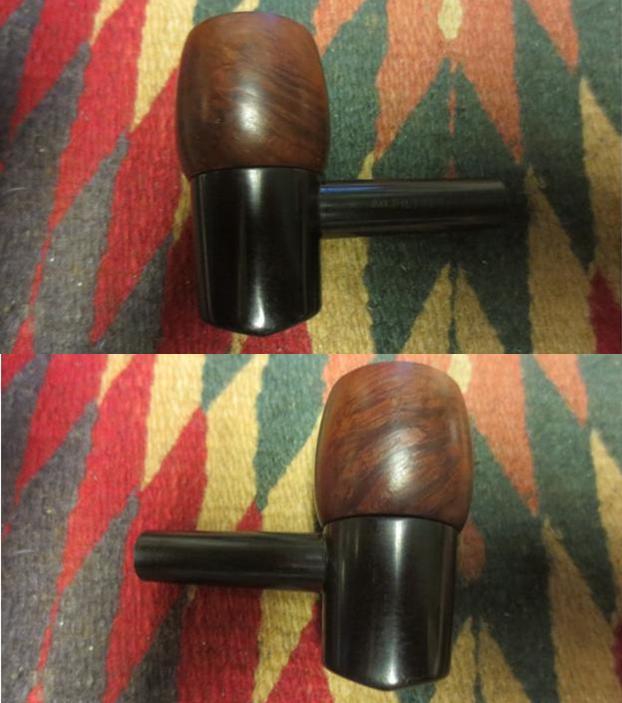
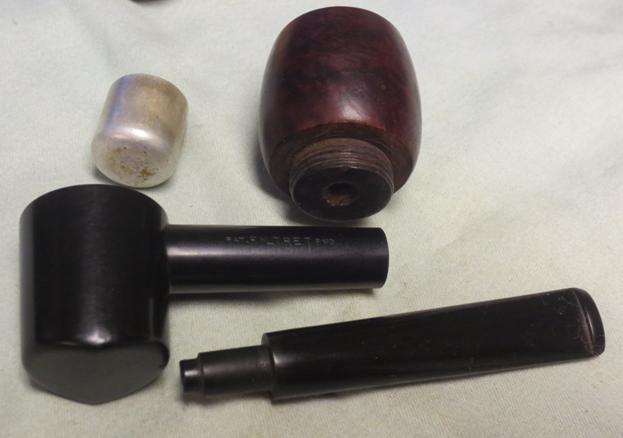
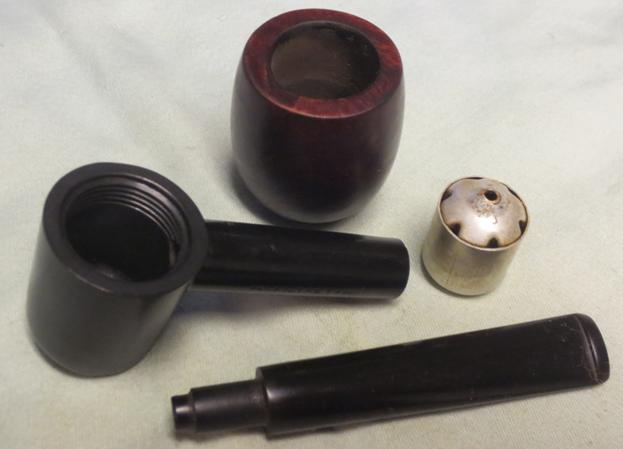
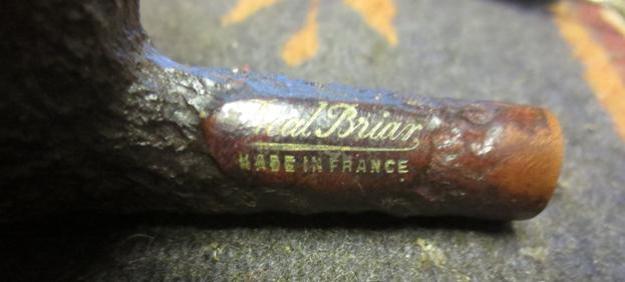
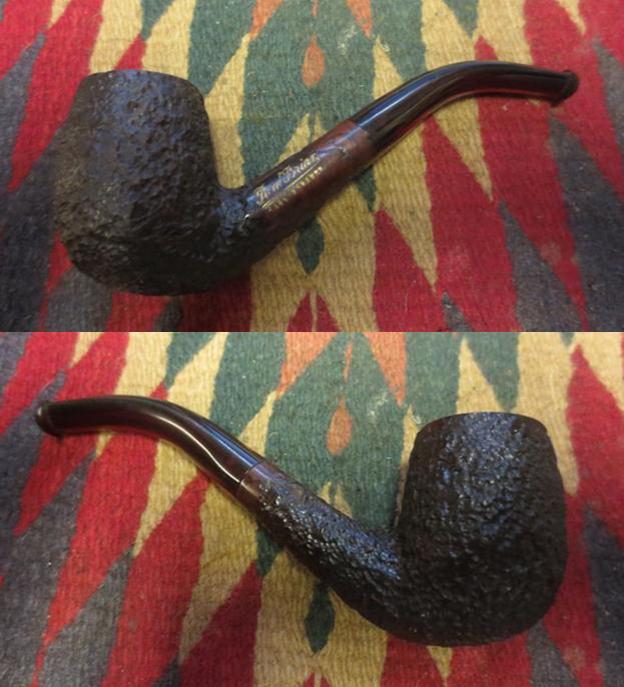
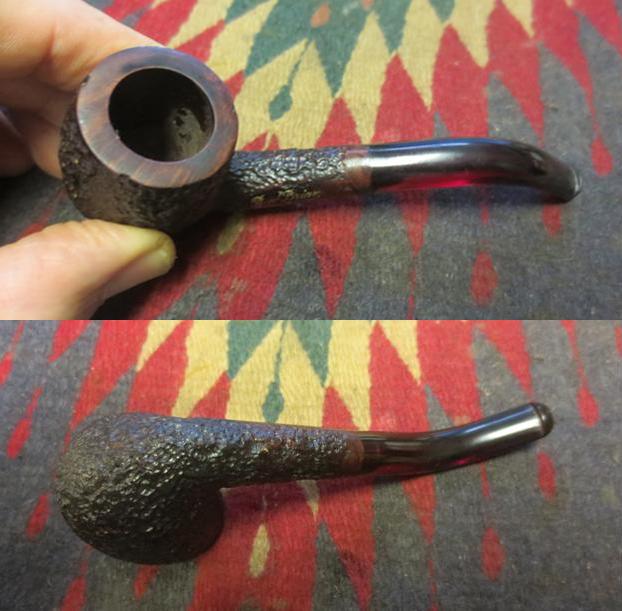
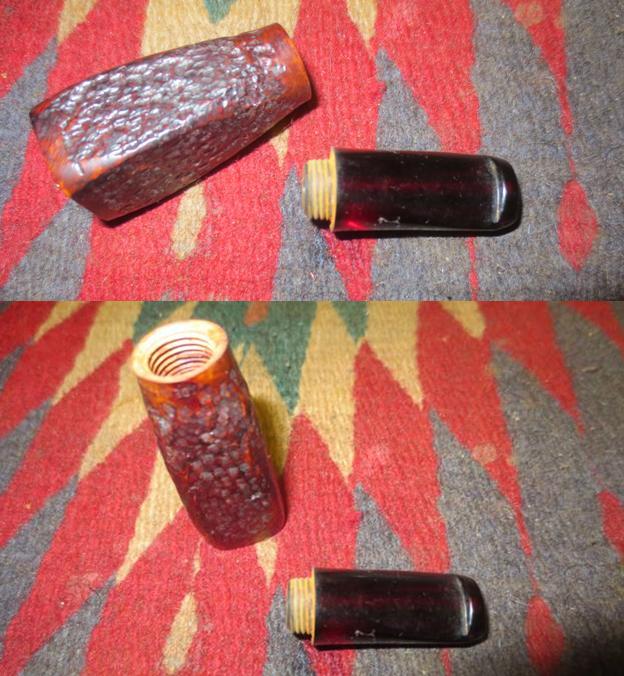
I took several more close up photos. The first photo shows the two inner tubes that enter the bowl in two spots at the bowl bottom. It is a twin bore airway. The second photo shows the stamping on the left side of the shank – it reads Bruyere Extra. The right side of the shank is stamped with the shape number 6185. The band has three hallmarks and EP in a diamond. The hallmarks are letters, each in a car-touche. My guess is that these signify the maker.B

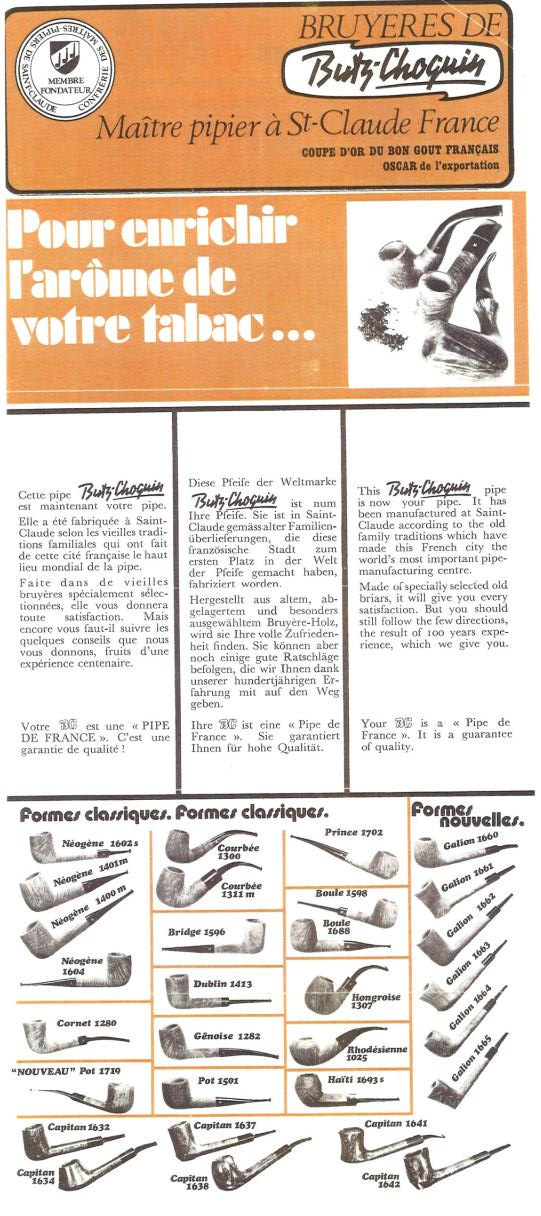
The letters are JBF and look like the ones I have pictured to the left.

Bru4
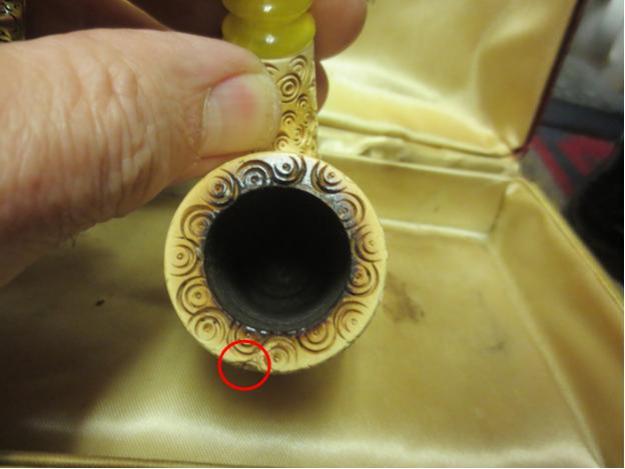
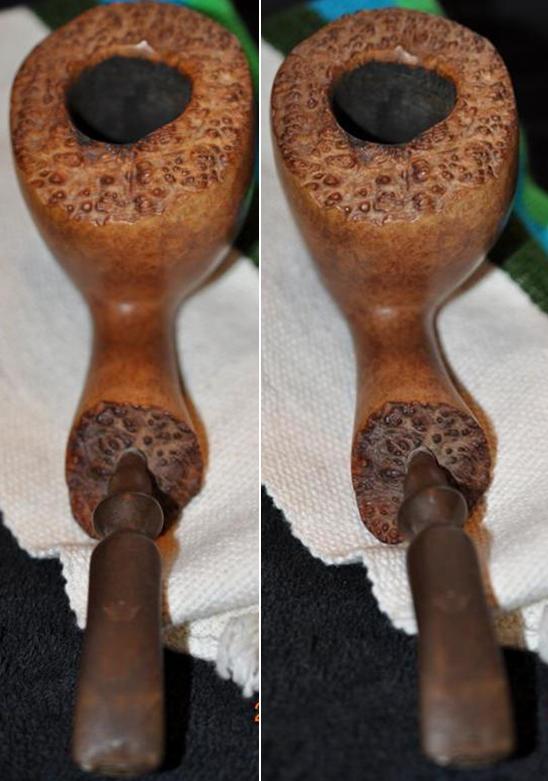
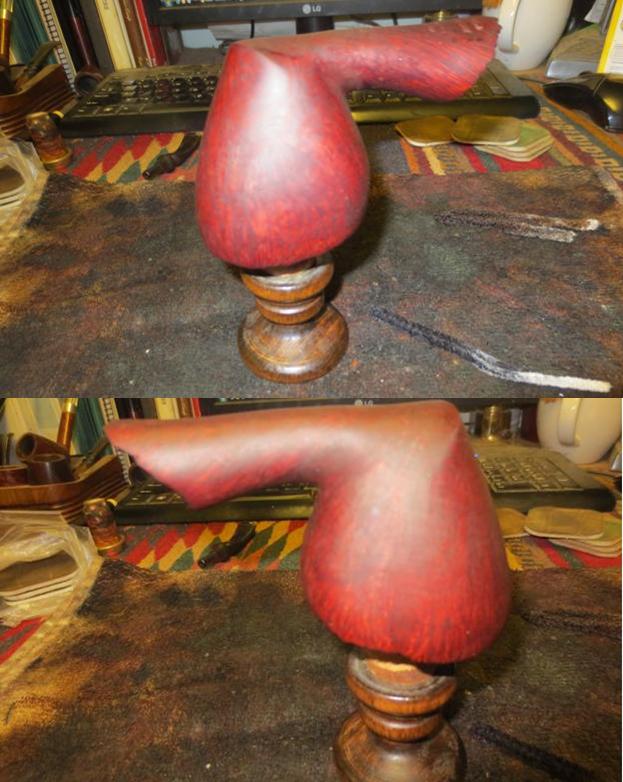
The inside edge of the briar was thin in several spots. The two that were the most problematic can be seen on the bottom edges of the shank on the right side of the photo below. I have circled the two spots in red. The top one was missing a wedge of briar and the bottom was a half circle of briar. Both were repairable with briar dust and wood glue.Bru5
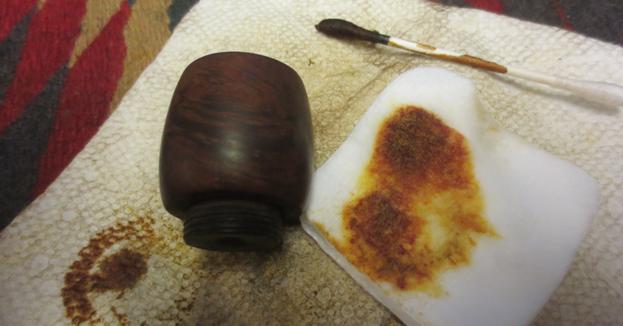
I decided to work on the stem repair first. I cleaned the area on the horn with alcohol and a cotton swab and then filled it in with clear super glue. For some reason this time around the repair turned white. That has never happened for me. Generally the glue dries clear and the underlying colour of the horn shines through. I set the stem aside to let the glue cure.Bru6
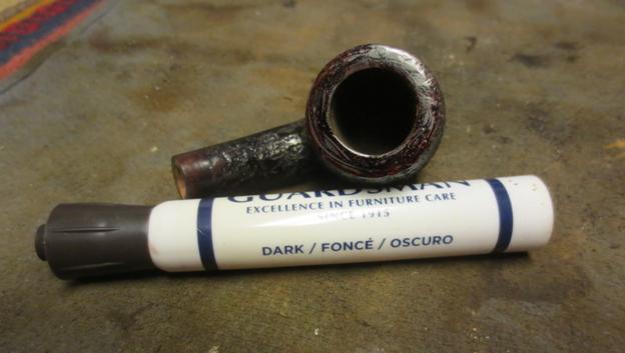
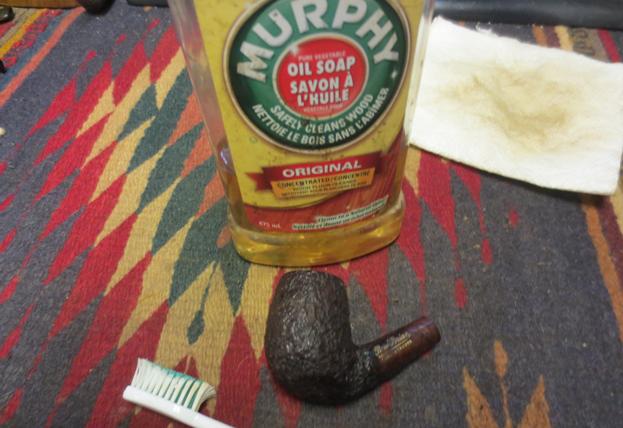
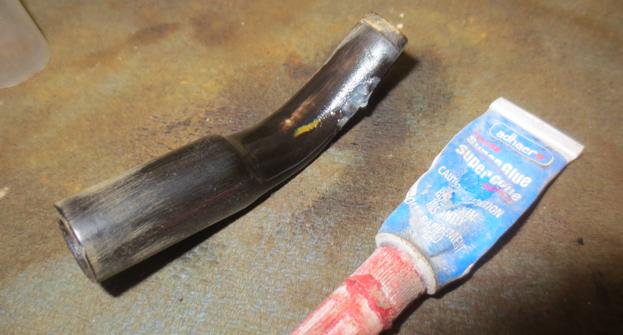
The tars and oils were almost petrified on the top of the rim. I had soaked the rim with alcohol to try to soften them with no success. I decided that the best option was to lightly top the bowl until the hard tars were gone. I used a topping board and 220 grit sandpaper to remove the buildup. I sanded the burned area on the bottom of the shank at the same time to remove the surface damage to the briar. I sanded it until the briar was darkened but solid.Bru7
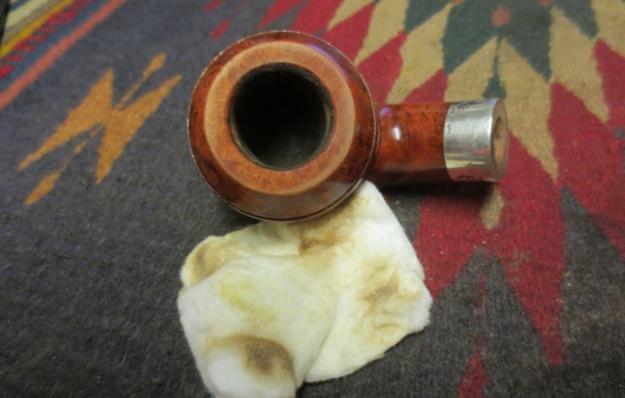
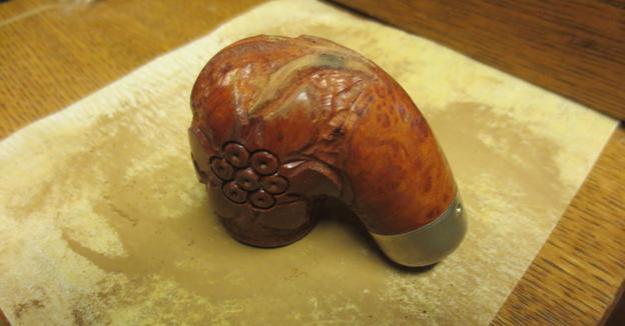
Once the rim was clean I sanded it with 1500-3200 grit micromesh sanding pads to smooth out the scratches left behind by the topping of the bowl. I scrubbed out the sump and the open mortise with cotton swabs and alcohol until it was clean. I cleaned out the twin bore tubes with pipe cleaners and alcohol. I used an all purpose wood glue and briar dust to build up the two spots on the inside of the shank and sanded them smooth. They are circled in red in the photo below.Bru8
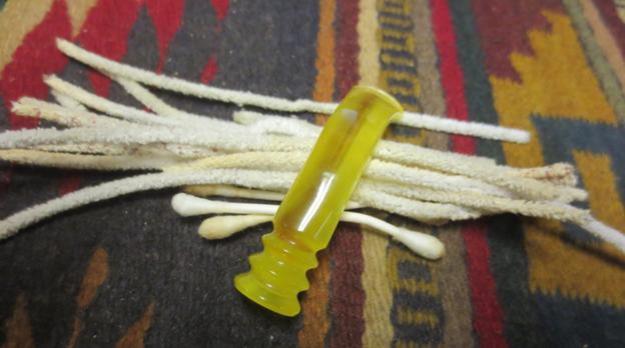
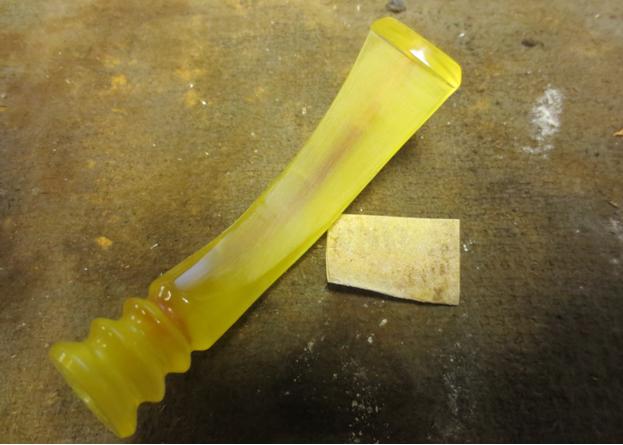
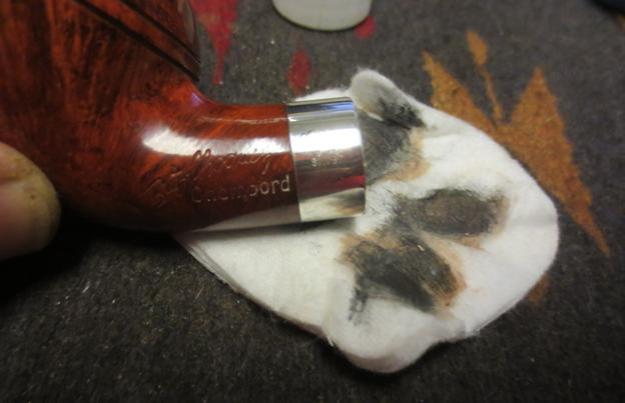
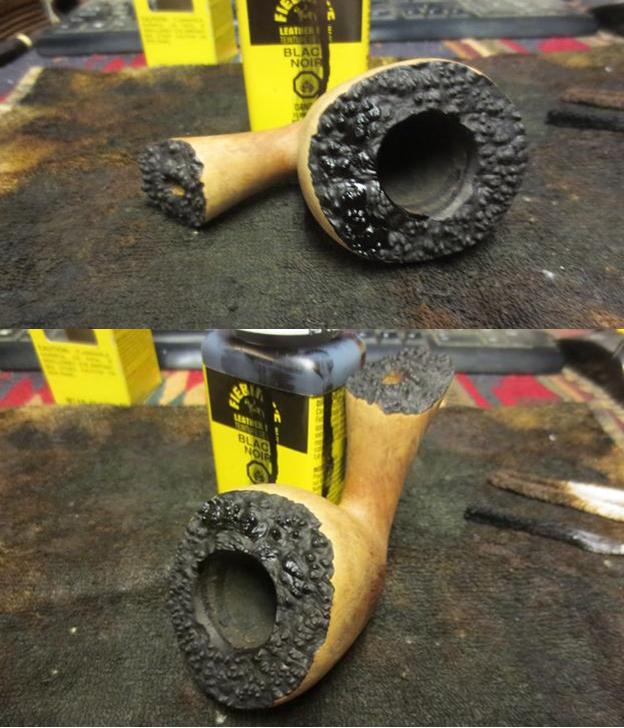
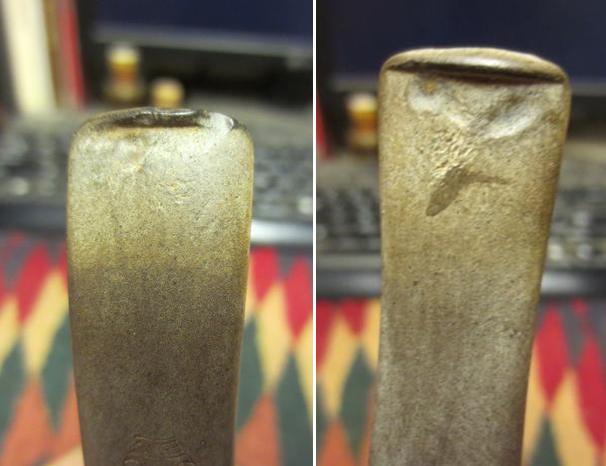
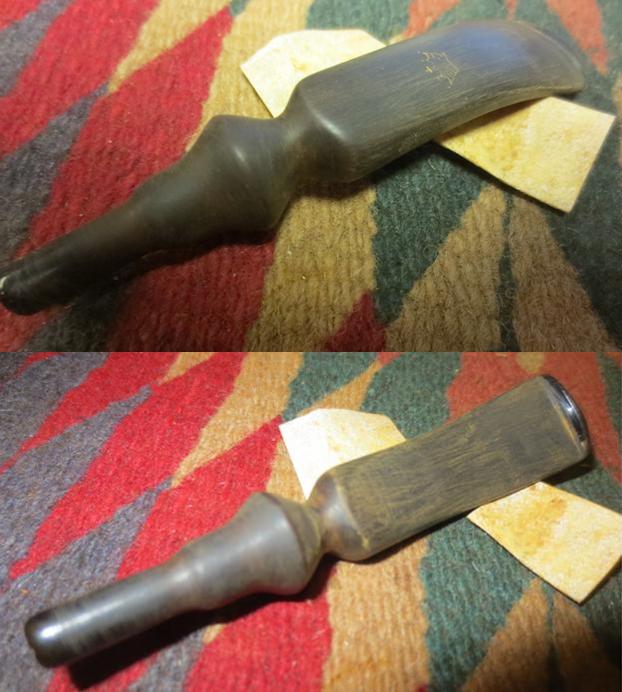
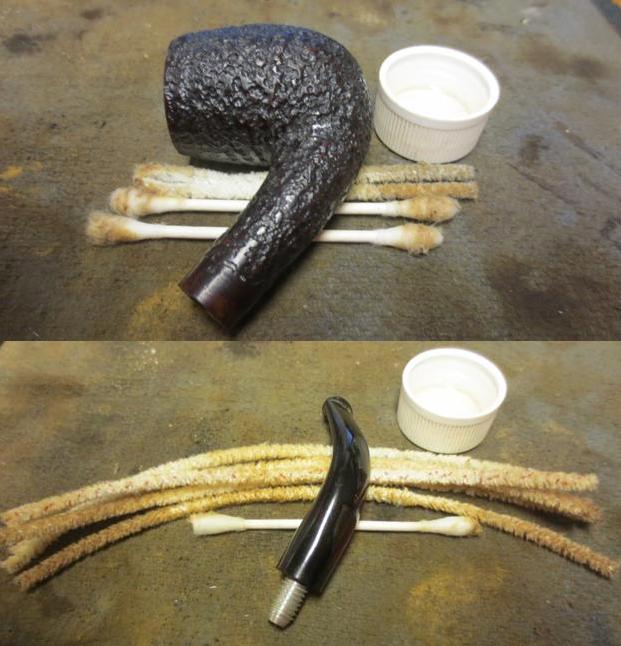
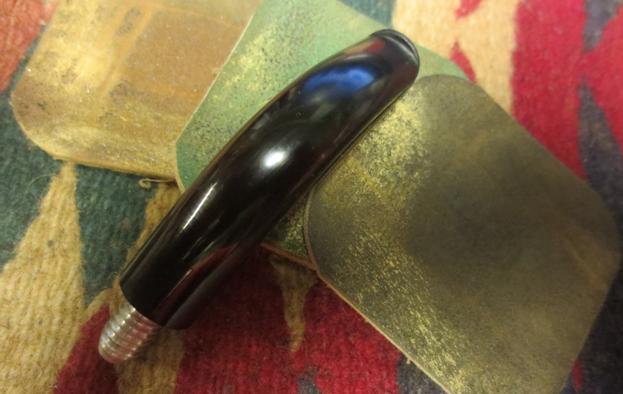
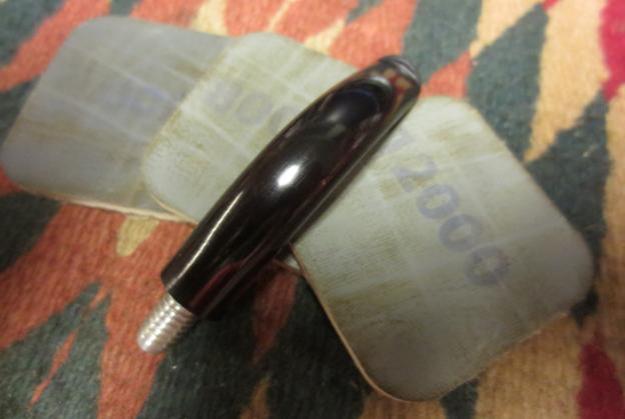
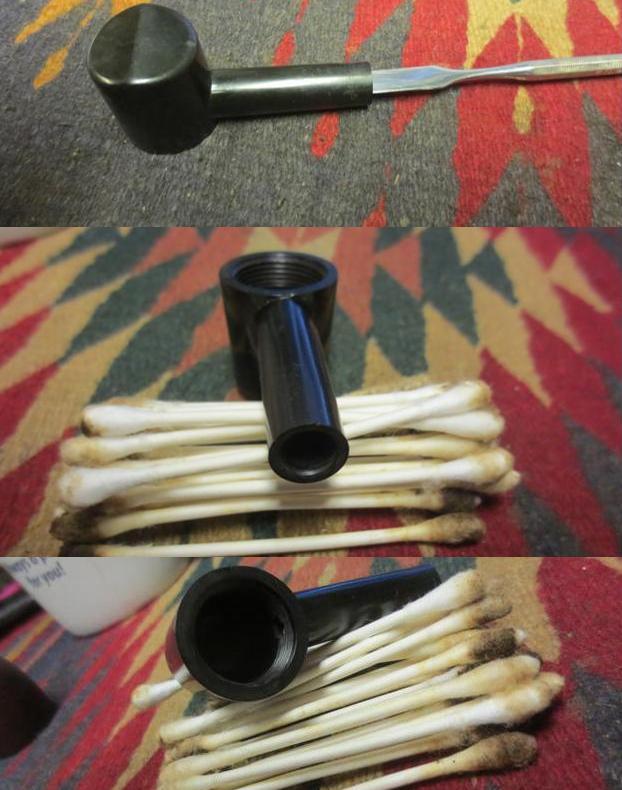
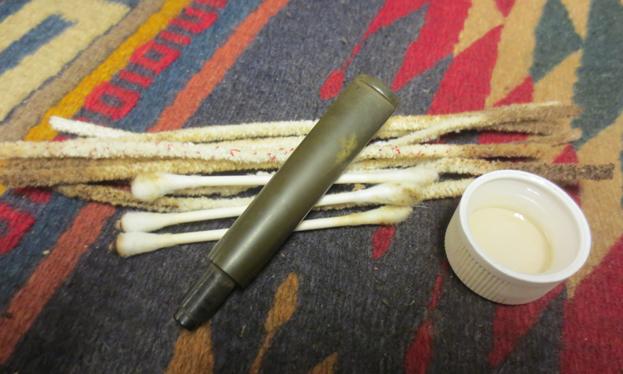
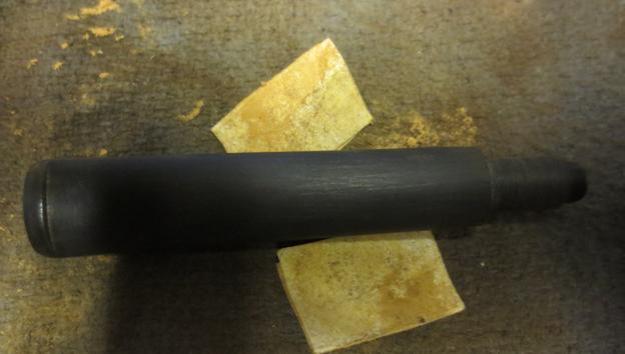
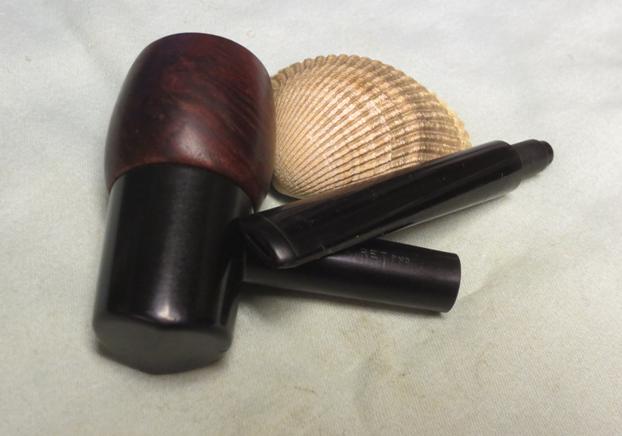
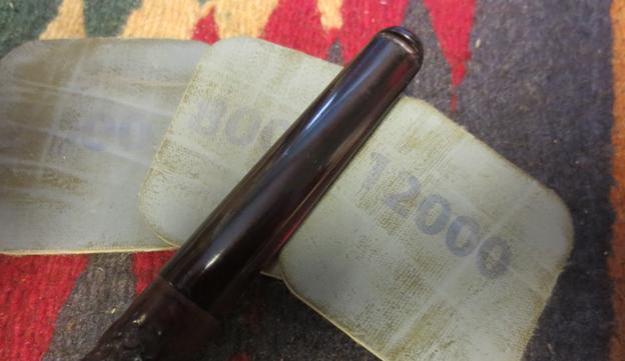
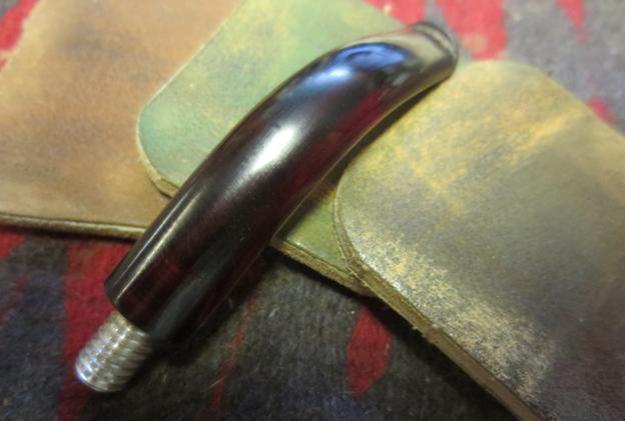
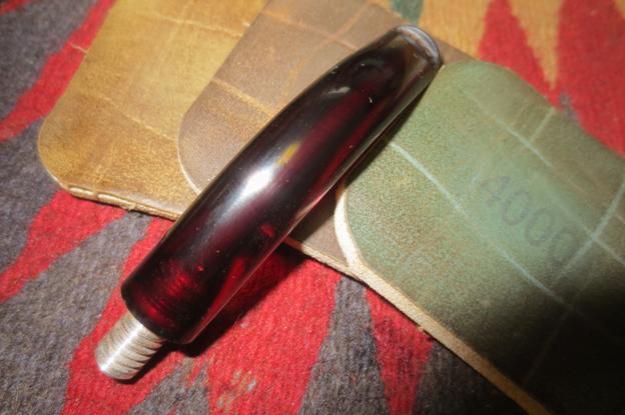
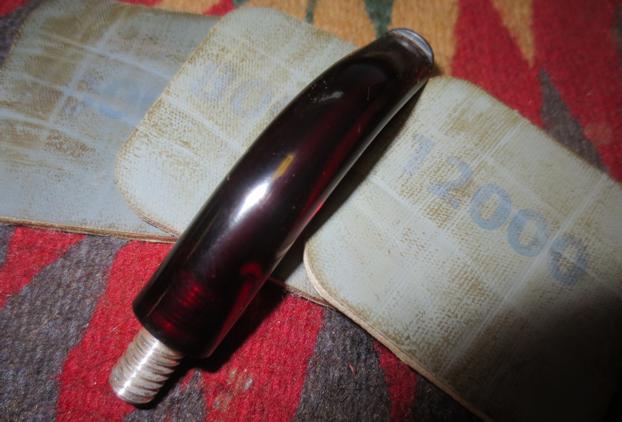
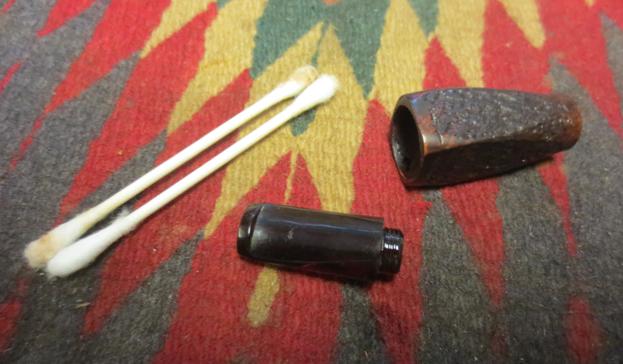
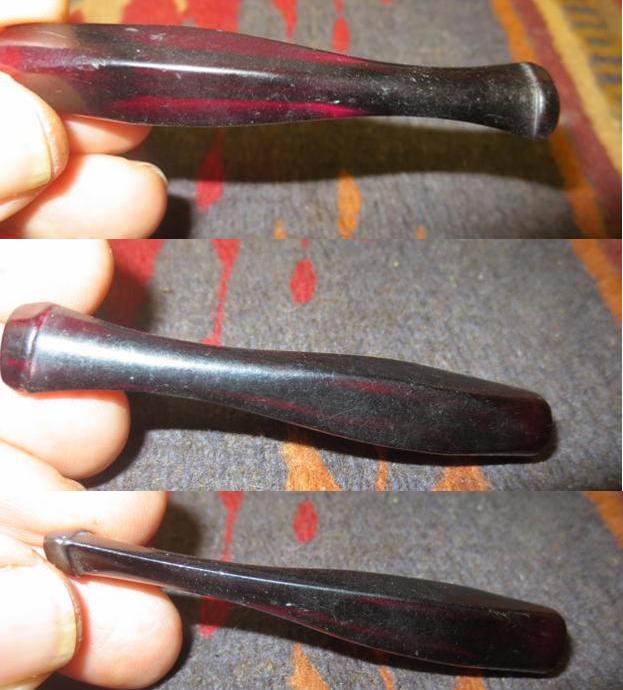
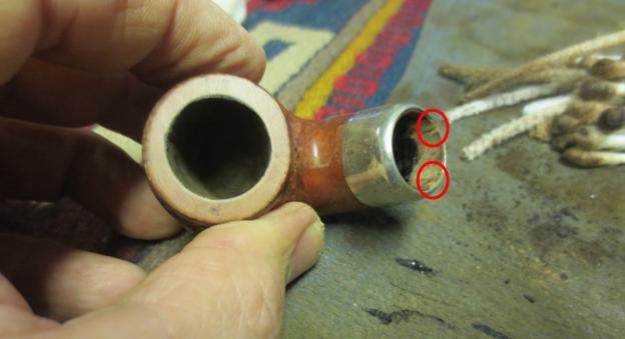
I sanded the repair to the horn with 220 grit sandpaper and sanded the tooth marks and chatter on the top and bottom of the stem until it was smooth. I cleaned out the chamber in the stem with pipe cleaners, cotton swabs and alcohol until it was clean. I had to do two full cleanings remove the tars in the chamber. The first photo below shows the stem after the first cleaning. The second photo shows the second cleaning. It took a lot of cotton swabs to clean out the chamber. I don’t like to boil hot alcohol through horn stems with the retort as I do not want to damage the stem.Bru9
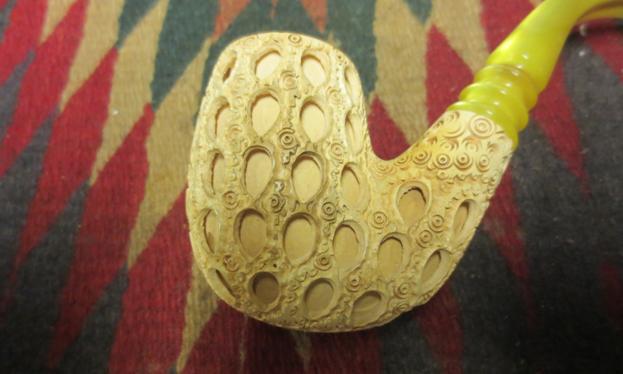
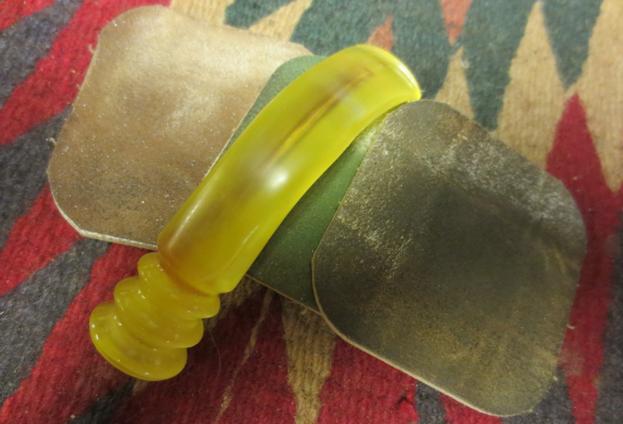
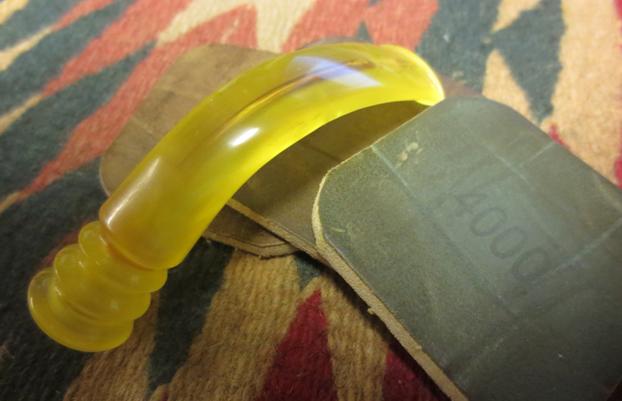
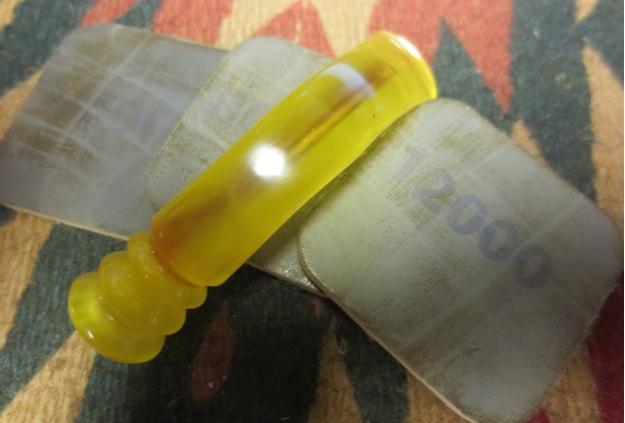
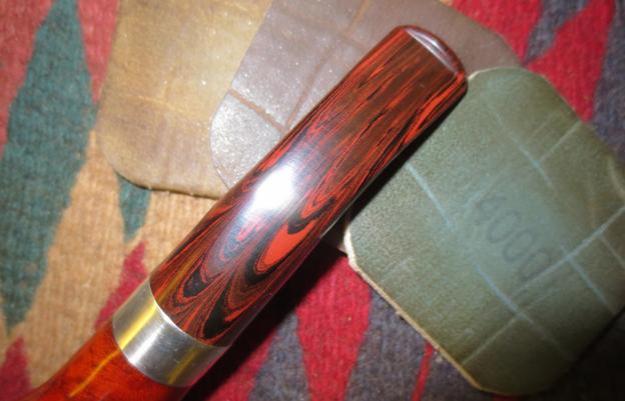
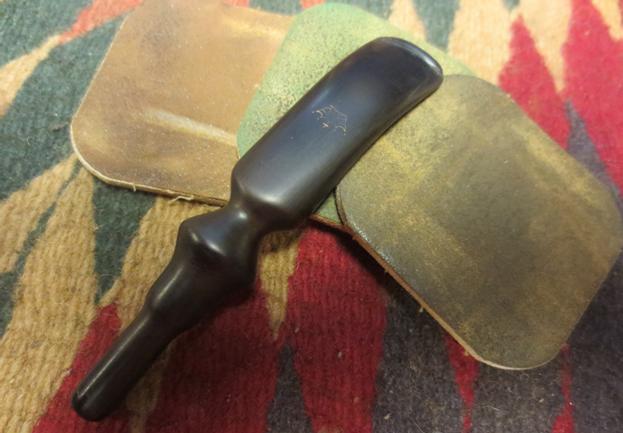
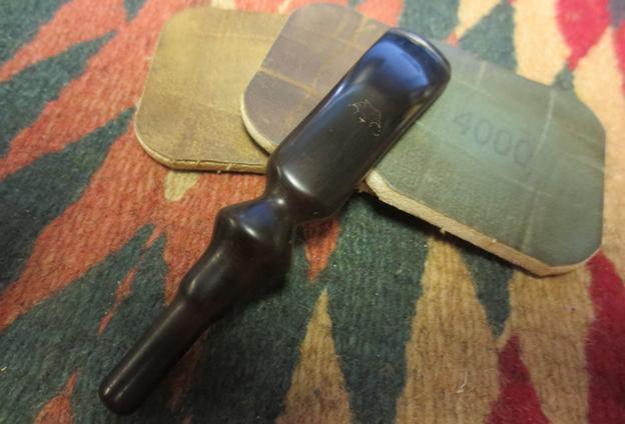
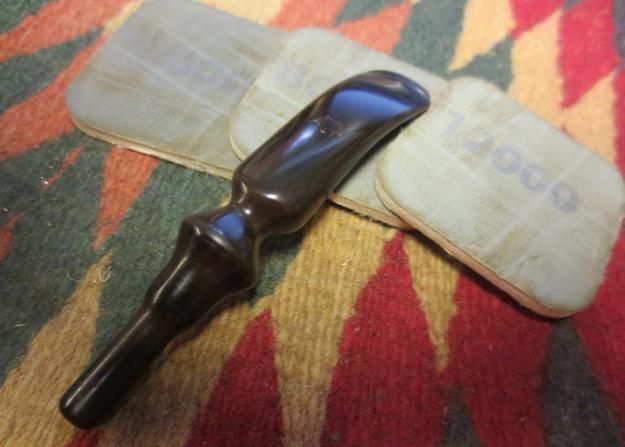
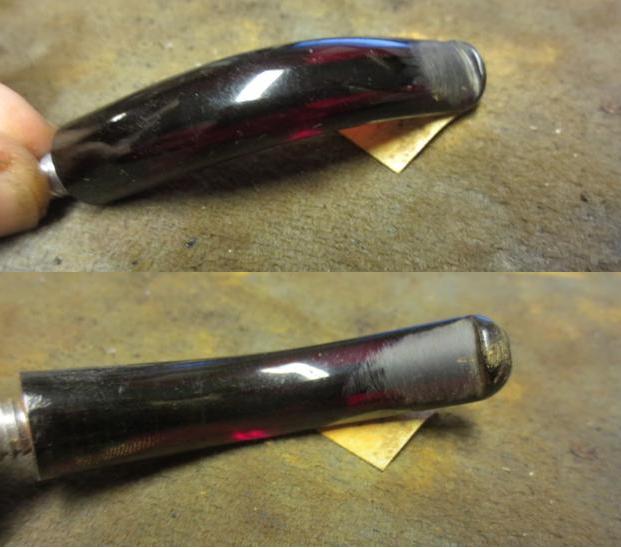
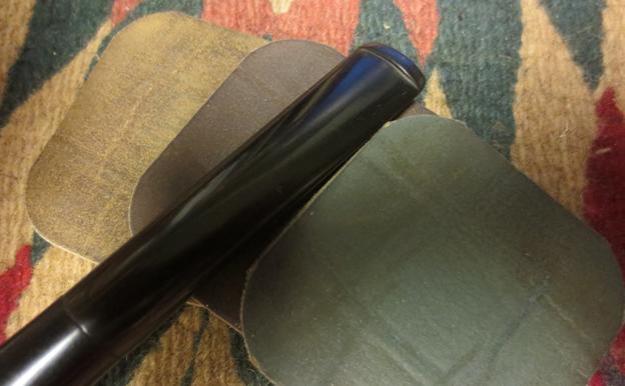
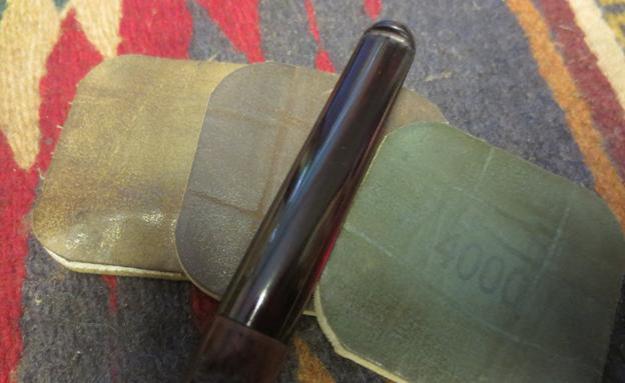
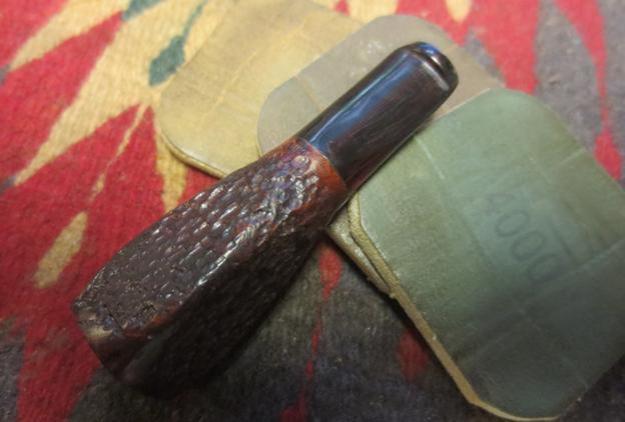
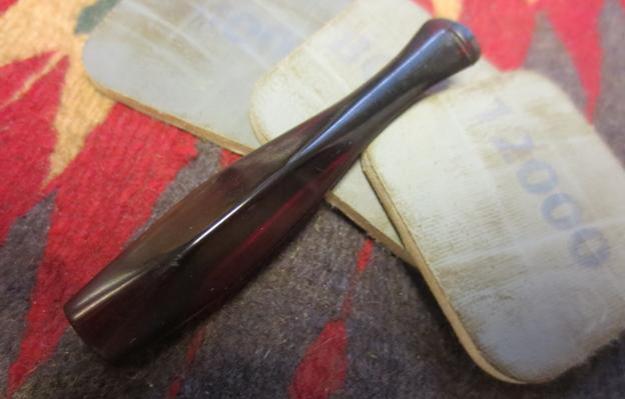
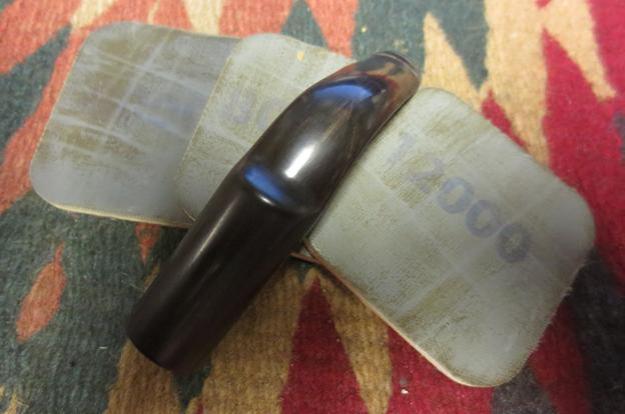
With the inside of the stem clean I sanded the exterior with micromesh sanding pads. I wet sanded it with 1500-2400 grit pads and rubbed it down with Obsidian Oil. I dry sanded it with 3200-4000 grit pads and gave it another coat of oil. I finished sanding it with 6000-12000 grit pads and gave it a final coat of Obsidian Oil.Bru10 Bru11 Bru12
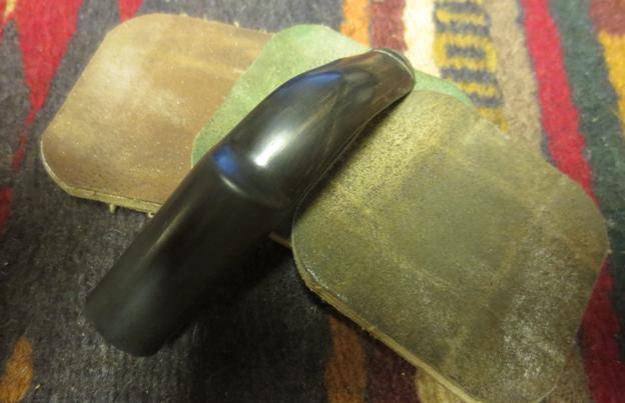
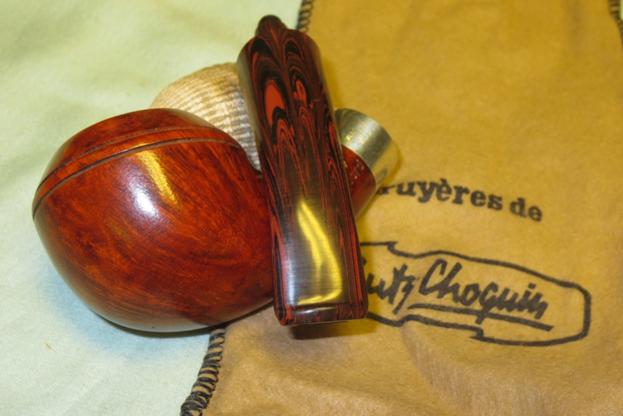
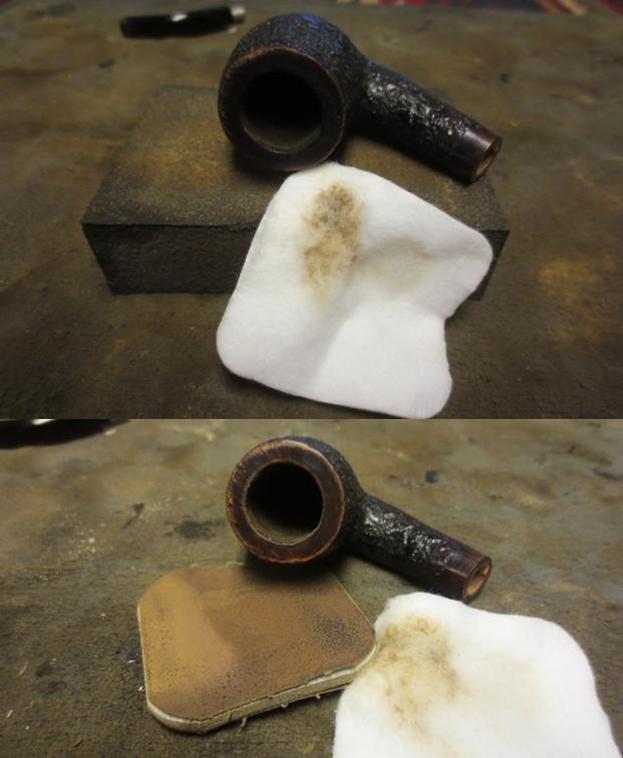
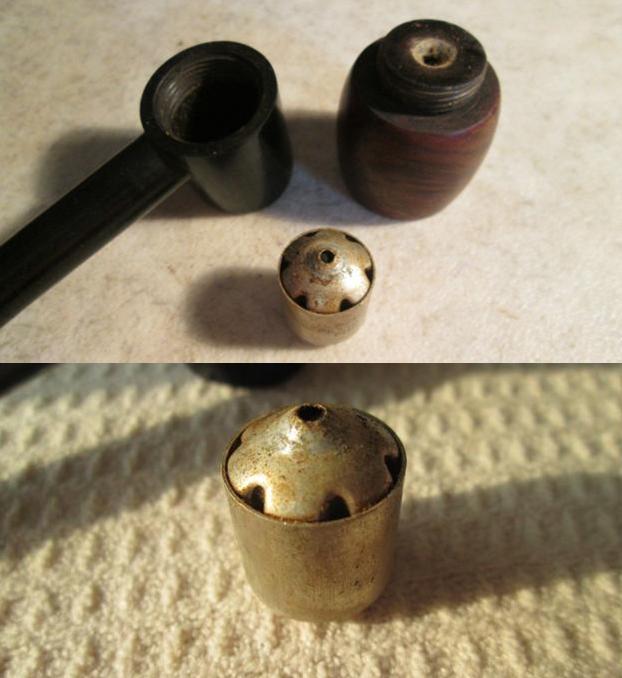
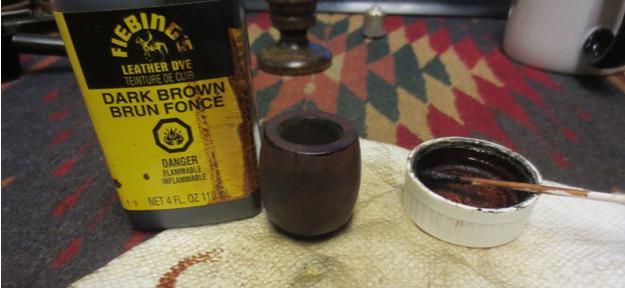
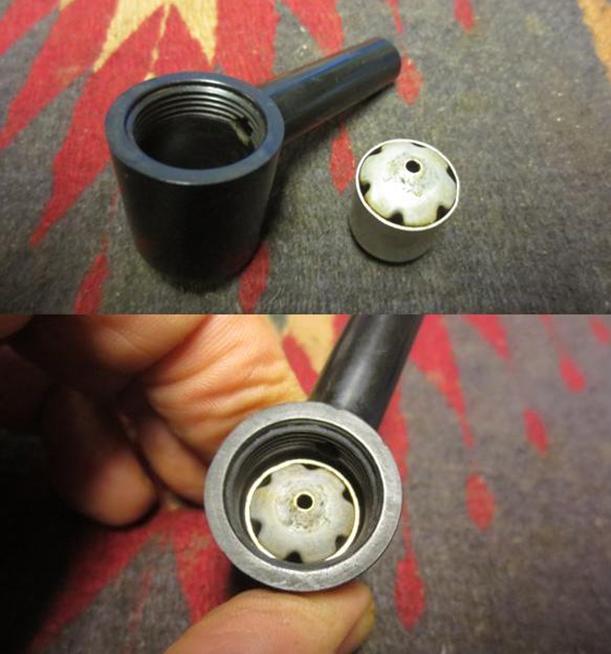
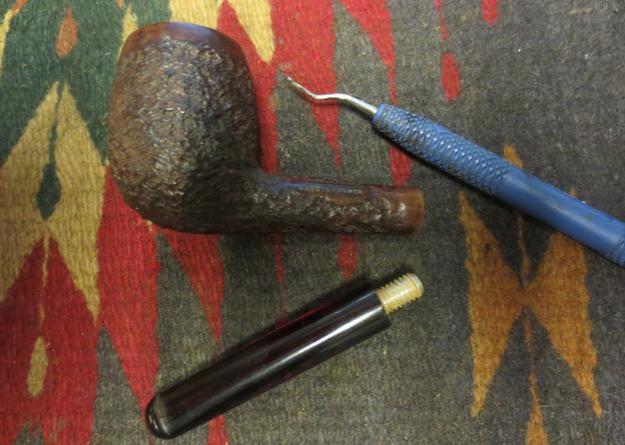
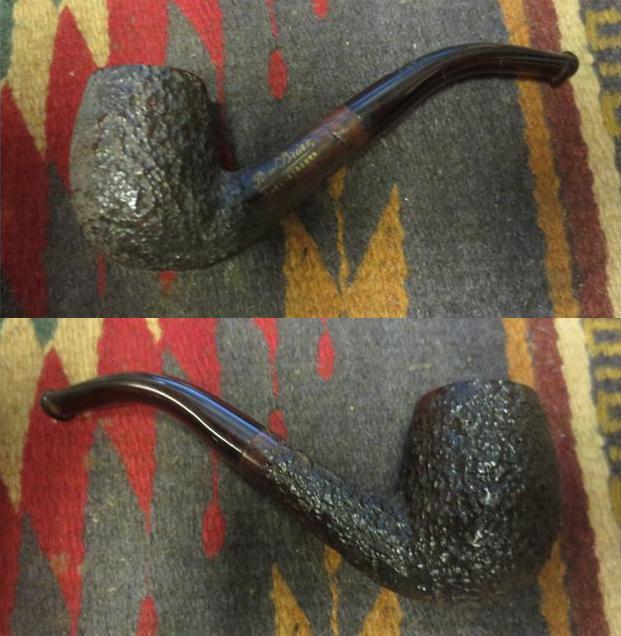
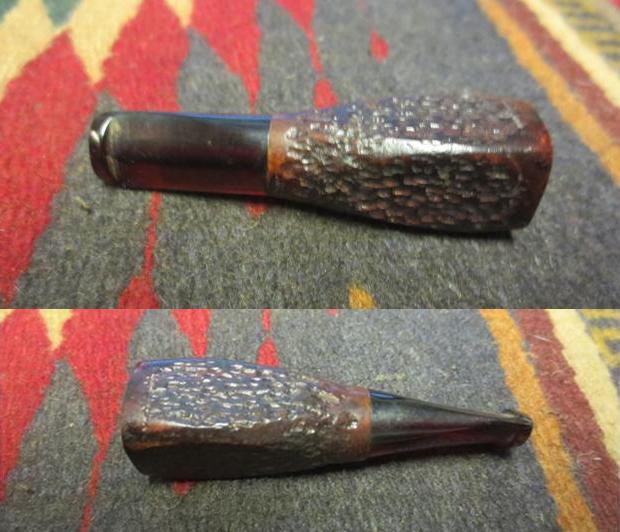
I polished the Electro-Plated silver end cap with silver polish to remove the tarnish and restore the shine. I stained the rim with a light brown stain touch up pen to match the colour of the rest of the bowl.Bru13
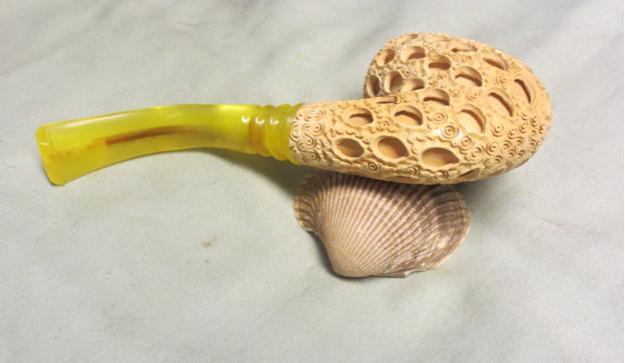
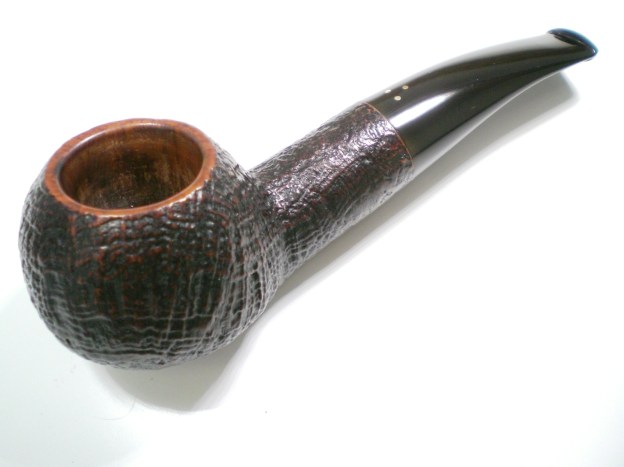
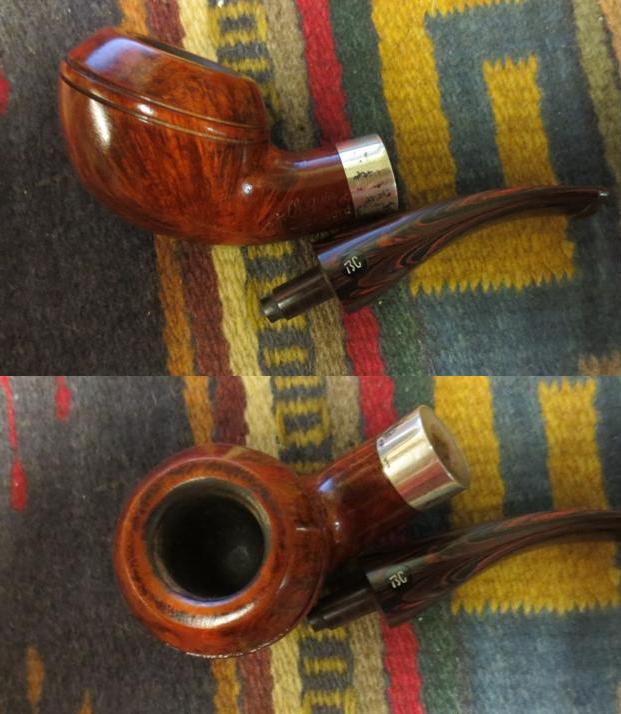
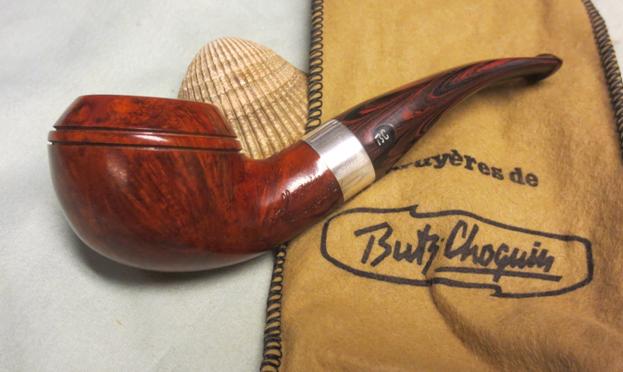
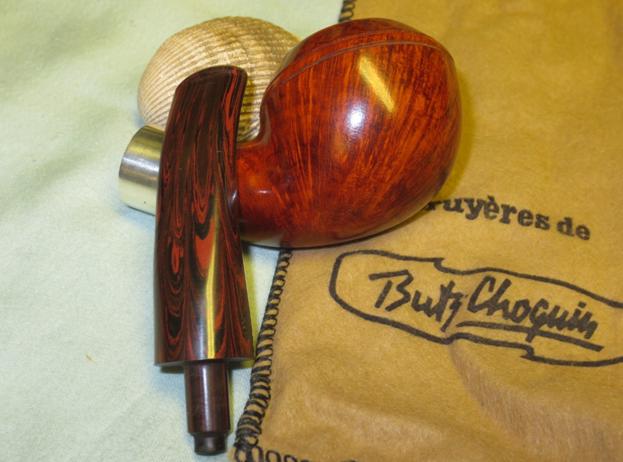
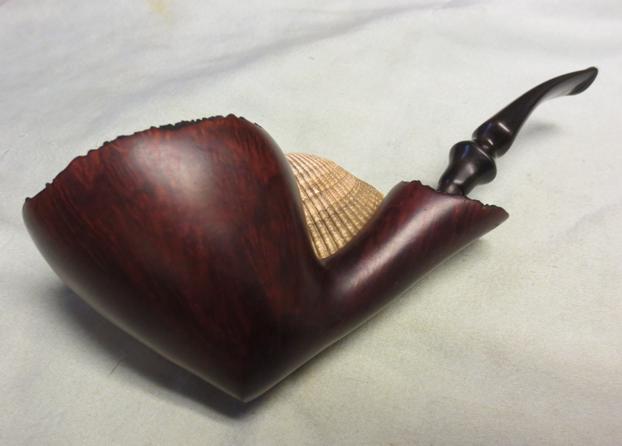
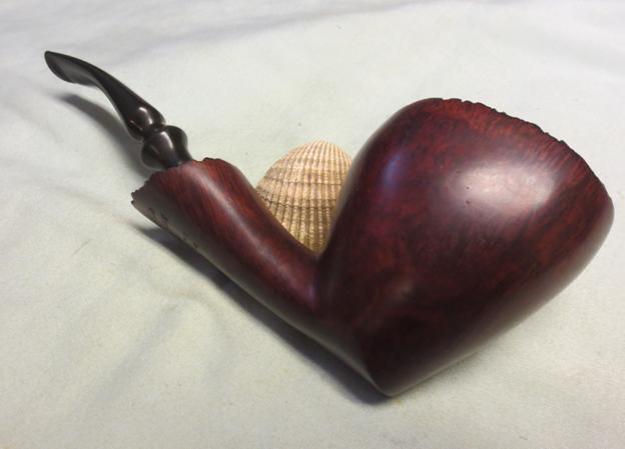
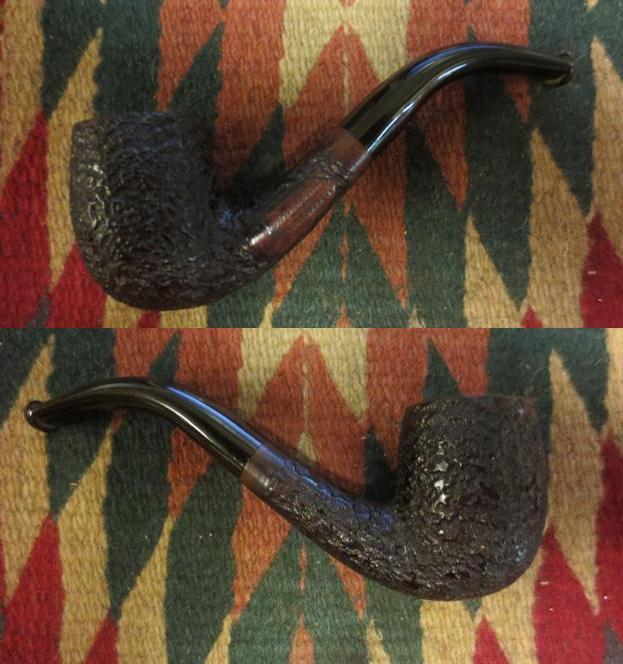
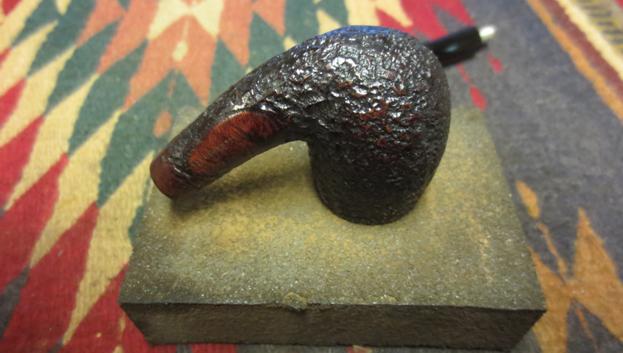
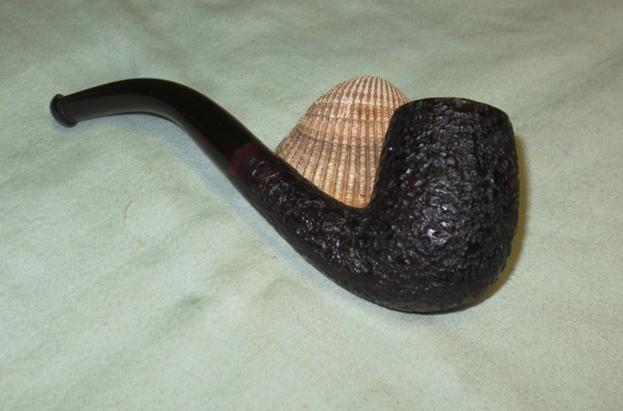
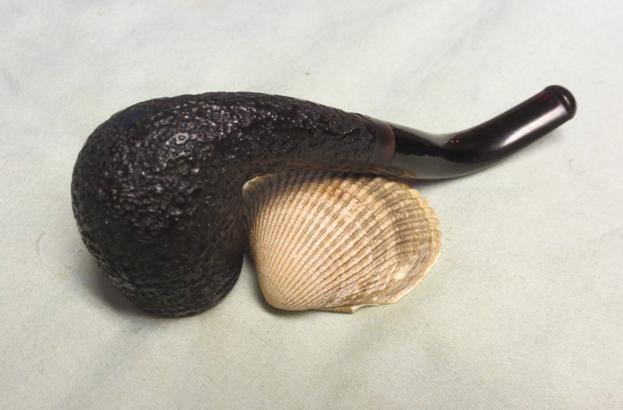
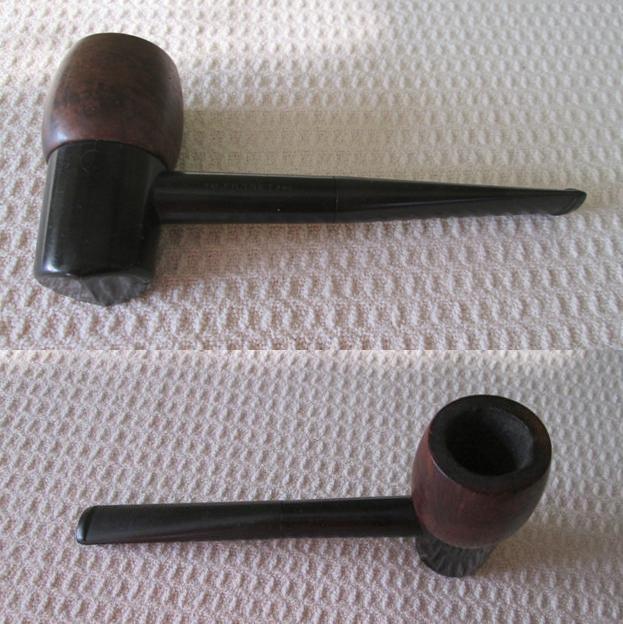
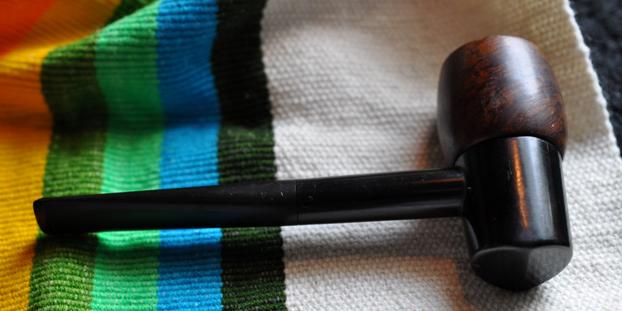
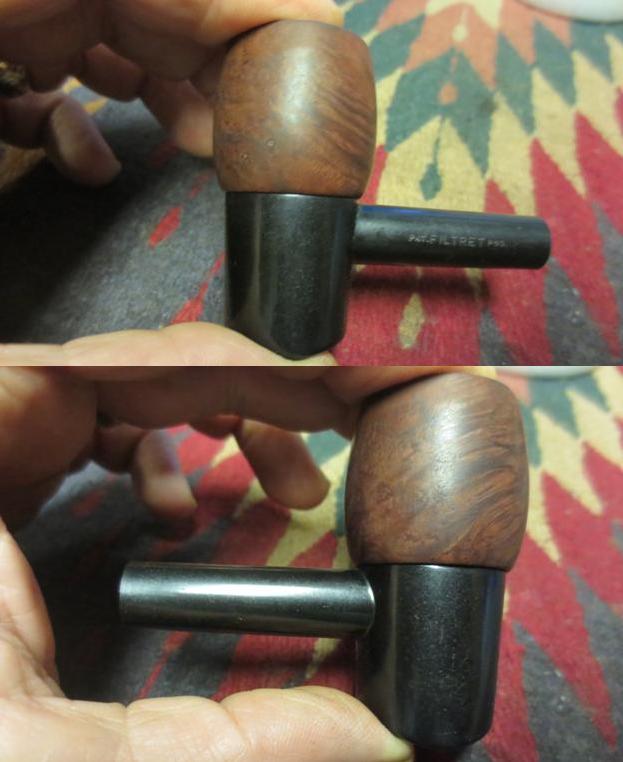
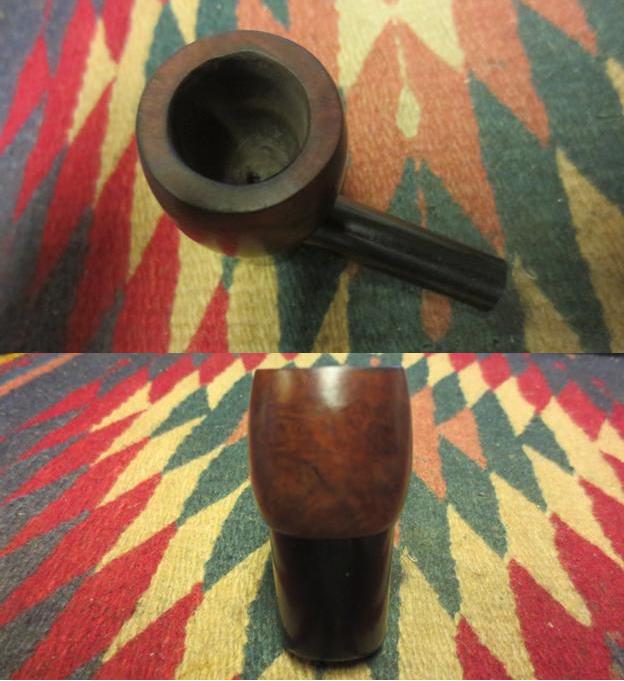
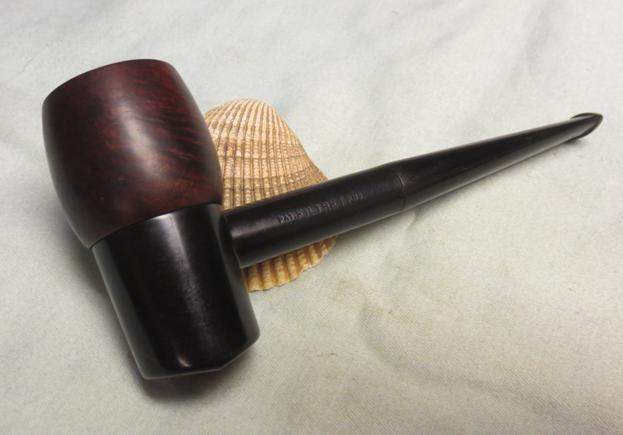
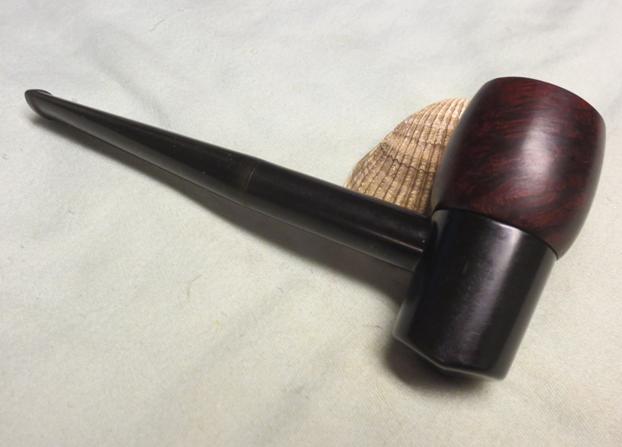
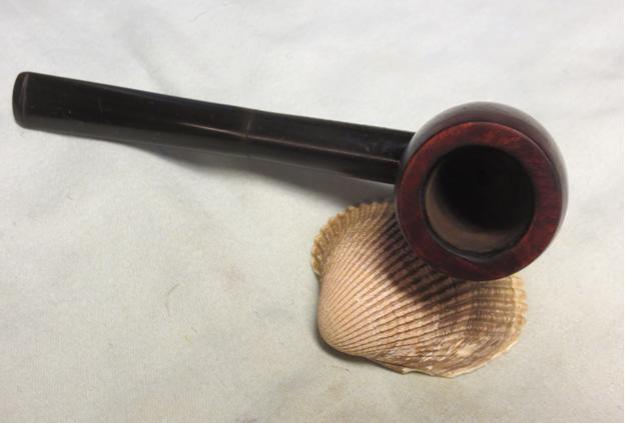
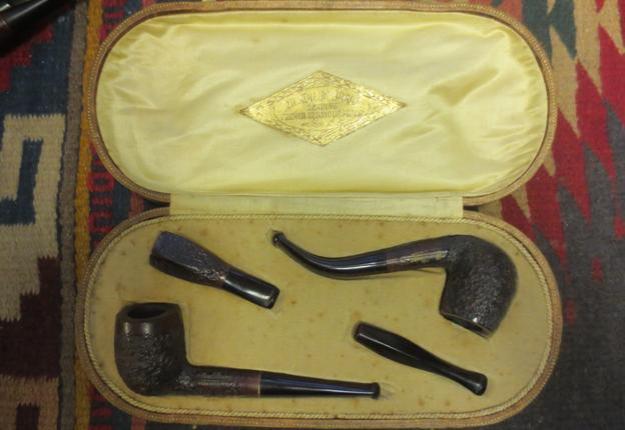
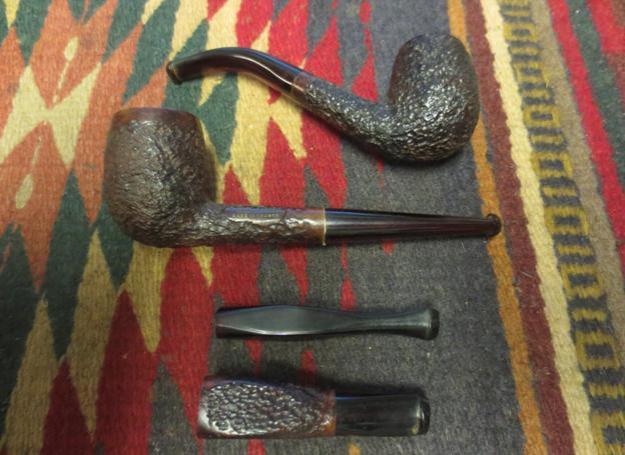
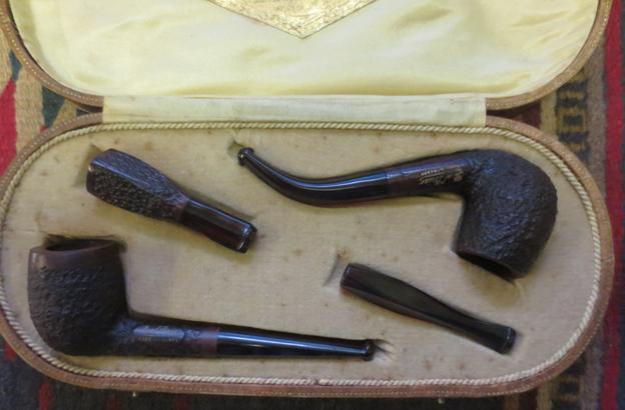
I gave the bowl several coats of Conservators Wax and hand buffed it with a shoe brush. I buffed the stem with Blue Diamond on the wheel and then gave the bowl and stem several coats of carnauba. I had a light touch on the bowl so it did not clog up the carvings. I buffed the pipe with a clean buffing pad to shine it and then hand buffed it with a microfibre cloth. The finished pipe is shown in the photos below. Have any of you seen a pipe with plumbing like this one? Do you recognize the hallmarks or the brand or shape number? Let me know as I am curious. Thanks for looking.Bru14 Bru15 Bru16 Bru17 Bru18 Bru19 Bru20 Bru21


Cleaning up a No Name Lattice Meerschaum Bent Billiard


Blog by Steve Laug

When my brother first showed me this bent lattice meerschaum pipe in a Pioneer box I was excited. I have never found a boxed Pioneer Meerschaum pipe before. I thought maybe, just maybe this was the first. I have learned never to assume that just because something is in a box it is necessarily that product. In this case at least we were talking the same material. When I brought it home with me and finally opened it up to work on it I was impressed by the beautiful lattice-work carving that left a series of tear drop shaped windows over an inner bowl. The yellow Lucite stem was also well made and looked good.meer1 meer2The rim on the pipe was darkened and dirty with a tar build up on the back side. There was a small chip (maybe it was made when the pipe was carved, I am not sure) on the front right side of the rim. I say maybe because the carving is also in the groove of the small chip. meer3The right side of the bowl had a dark soiled area where someone’s thumb had left a lot of dark grime. It was in the grooves around the tear drop but not inside the hole. There was some nice colouring happening all around the shank.meer4 meer5I took a close up photo of the rim to show the tar and the indented/chipped area. It can be seen in the centre of the red circle in the photo below.meer6The stem was loose so when I took it apart I was a bit surprised to find that it had the Jobey Link system in the shank and stem. I wonder if that is original or if someone restemmed the pipe and decided to use the Link and stem from a Jobey pipe. I probably will never know for sure but I would hazard a guess that this is what happened on this pipe. They did a great job in fitting the connector in the shank and aligning the stem and shank.meer7The stem is an interesting mix of yellows and brown swirls that is hard to capture in the photos. There was also some tobacco staining in the airway of the stem and the button. Differentiating between the stain and the colour was an interesting problem. I figured that the straight airway from button to shank was stained and the other parts were part of the swirled pattern. I worked on the airway with alcohol and soft scrub cleanser and pipe cleaners until I removed as much of the stain in the airway as possible. I also worked on the area where the end of the Jobey Link sat in the stem using cotton swabs and alcohol. The stain did not come out all the way but it is clean. The brown swirl in the stem runs alongside of the airway which makes the stain interesting. The cleaned stem is shown in the photo below.meer8I took the Jobey Link out of the shank and cleaned out the airway with pipe cleaners, cotton swabs and alcohol. I scrubbed the rim and the soiled spot on the left of the bowl with alcohol and cotton swabs and was able to remove much of the dirt. I sanded the rim top with 1500-2400 grit micromesh sanding pads to further remove the buildup. The cleaned rim and left side of the bowl can be seen in the photos below.meer9 meer10I put the stem in place and took the following photo to show how good the soiled area on the left side of the bowl came out after cleaning.meer11The stem was rippled and wavy to touch. It felt as if someone had overdone the buffing and left behind the waves of too much pressure against the buffing wheel. I sanded the top and bottom surfaces of the stem with 220 grit sandpaper to remove the waves and ripples. I sanded both sides until the surface was smooth to touch.meer12 meer13I wet sanded the stem with 1500-2400 grit micromesh sanding pads and dry sanded it with 3200-12000 grit pads to polish out the scratches left behind by the sandpaper. Each successive grit of micromesh left the stem more shiny and smooth.meer14 meer15 meer16I buffed the stem with Blue Diamond and lightly buffed the bowl as well. I gave the stem several coats of carnauba wax and then buffed the pipe and stem with a clean buffing pad to polish it. I wish I could have gotten more of the stain out of the stem but it is what it is.  The finished pipe is shown in the photos below. It is quite nice but I am still not sure whether it is a Pioneer Meerschaum or not and I am not sure that I will ever know. It is a beauty. If you are interested in adding it to your collection let me know in the response below or via messenger or email. We can make a deal. meer17 meer18 meer19 meer20 meer21 meer22 meer23

Savinelli Guibileo d’Oro 320KS Fiamatta Restoration


By Al Jones

The Savinelli 320 shape has been on my “Holy Grail” list for a few years, but I wanted the pipe to be in the Guibileo d’Oro grade and have a vulcanite stem. After a while, it seemed hopeless to actually find one. In fact, I had dropped it from my eBay search list last year. Only because of the eagle eye of my friend, Dave J, was I able to acquire one. Dave gave me the heads up on this pipe when it was listed. I put in a last second bid and lost by one dollar. I figured it was not to be. A few weeks later, the seller messaged me that the winning bidder had never made payment and it was mine for my final bid, how fortunate!

After making the purchase, it only occurred to me that this one has the additional “Fiamatta Straight Grain” stamp. I knew that only one in a thousand Savinelli’s make the Guibileo d’Oro grade but I had no idea on how many of those had the “Fiamatta” stamp. This pipe has a Vulcanite stem, with no filter, which means it was made before 1982 when the factory switched to acrylic/filter stems.

The pipe was in very good shape, with a mild cake, some oxidation on the stem and a few minor bite marks. The stem fitment was excellent.

Savinelli_GBD320KS_Before (1)
Savinelli_GBD320KS_Before (2)
Savinelli_GBD320KS_Before (3)

I used a wet cloth to remove the thin layer of buildup on the polished rim. It was undamaged underneath. I removed the cake with my Castleford reamer set. The bowl is quite wide, conical and in excellent condition. The briar was then soaked with alcohol and sea salt. Here’s a shot as it was soaking, after the rim was cleaned, polished with White Diamond and some Carnuba wax.

?

?

I put some grease on the gold stem dots and soaked it in a mild Oxy-Clean solution. While it was soaking, I removed the salt from the bowl and cleaned it with a bristle brush and alcohol. I was able to raise the teeth marks with some heat from a lighter flame. The stem was then mounted to the bowl and I used 800, 1000 and 2000 grades of sandpaper to remove the oxidation and polish the stem. 8,000 grade micromesh was then used. The stem was buffed with White Diamond and Meguiars plastic polish.

The KS designation is for an oversized pipe and this one is a hefty 70 grams, which is slightly larger than a GBD 9438. Here is the finished pipe.

If anyone has information on the “Fiamatta” stamp, please comment.

Savinelli_GBD320KS_Finish (1)

Savinelli_GBD320KS_Finish (2)

Savinelli_GBD320KS_Finish (3)

Savinelli_GBD320KS_Finish (4)

Savinelli_GBD320KS_Finish (5)

Savinelli_GBD320KS_Finish (6)

Savinelli_GBD320KS_Finish (7)

?

?

Savinelli_GBD320KS_Finish (1)

Butz-Choquin Pamphlet


WIth the recent Butz-Choquin Chombord pipe that I refurbished there was a great pamphlet in the box with it. I thought it would be good to post that here as well for all of you to enjoy. I particularly found the write up on “The Minor Art of Pipe-Smoking” fun to read. The language is clearly translated by one whose first language is not English so it make it more enjoyable to read. Enjoy.

BC Brochure2

BC Brochure1

Cleaning up a Butz-Choquin Chombord Rhodesian


Blog by Steve Laug

The Rhodesian is one of my favourite shapes and recently I stumbled on the BC 1025 that really captures the Rhodesian shape well. It is right up there with the GBD 9438 and the Peterson 999. So when my brother and I saw this one on Ebay we of course were smitten with PAD. I wanted that pipe. The Cumberland stem is definitely a plus because I like that as well and to have the two combined in one pipe was bonus. This one is stamped on the left side of the shank Butz-Choquin over Chombord. On the right side it is stamped St Claude in an arch over France over the shape number 1025. The silver band is stamped Sterling Silver. It was dirty – the rim had a tarry top coat and there was a cake in the bowl. The silver was tarnished and the Cumberland stem was oxidized. It also bore some calcification on the stem where it looked as if the stem had borne a softee bit. The good thing about the softee bit is it often prevents tooth marks or in some cases hides them. The stem bore the BC logo encased in clear resin and set in the left side. This pipe came with the box, the original pipe sock and a BC brochure. BC1 BC2 BC3 BC4When the pipe arrived in Vancouver it came in its original box and sock. I couldn’t wait to open it up and check it out.BC5Inside the lid was the brochure that gave the variety of BC pipe shapes along with a simple guide on pipe care called “The Minor Art of Pipe-Smoking”.BC6I took the pipe sock out of the box and took the pipe out to see it. Once again my brother did an incredible job cleaning and reaming this one. It came to me in really great shape. The finish was actually pristine on the bowl after the clean up. The stem was clean and lightly oxidized. The silver was tarnished. All of these were minor clean up issues. The rim had a very light coat of tar that had not come off in the scrubbing.BC7 BC8The next two photos are close up pics. The first is of the bowl and stem separated and shows the tarnish on the silver. The second photo shows what is left on the rim top. Neither issue would actually take a lot of work.BC9I used 1500 grit micromesh sanding pads and also a cotton pad and alcohol to remove the remaining tars.BC10I cleaned off the tarnish with some silver tarnish remover and a cotton pad. I scrubbed it until the silver shone.BC11I wet sanded the Cumberland stem with 1500-2400 grit micromesh sanding pads and rubbed it down with Obsidian Oil. I dry sanded it with 3200-4000 grit sanding pads and gave it another coat of oil. I finished sanding the stem with 6000-12000 grit sanding pads, gave it a final coat of oil and set it aside to dry.BC12 BC13 BC14I buffed the bowl and stem with Blue Diamond on the buffing wheel and gave it multiple coats of carnauba wax. I buffed the pipe with a clean buffing pad and by hand with a microfibre cloth. The finished pipe is shown in the photos below. The finished pipe is shown in the photos below. Thanks for looking.BC15 BC16 BC17 BC18 BC19 BC20 BC21

A Large Ben Wade Royal Grain Freehand brought back to life


Blog by Steve Laug

One of the recent acquisitions that my brother sent me is a beautiful freehand briar pipe. The briar is a piece of plateau with mixed flame and straight grain. The plateau is on the top of the bowl and also the end of the shank. The plateau was faded with most of the dark stain washed out. The smooth portions of the bowl were also faded and washed out. The stem was oxidized and had deep teeth marks on the top and the bottom of the stem near the stem. There were some scratches on the bowls sides but none of them were deep. The bowl was large – 1 inch in diameter. The inside of the bowl was also quite clean. The photos below show what the pipe looked like when my brother received it.Ben1 Ben2The pipe is stamped Ben Wade over Royal Grain over Hand Made in Denmark. The stamping is clear and readable.Ben3The next photo shows some of the scratches in the bowl. They are not deep but they are visible.Ben4My brother scrubbed the briar with Murphy’s Oil Soap and a soft tooth brush. He rinsed it under running water and cleaned out the interior with pipe cleaners, cotton swabs and alcohol.Ben5 Ben6I took a close up photo of the plateau rim. It is clean and undamaged. I took a close up photo of the stamping on the shank as well. The grain and the stamping are in great shape.Ben7 Ben8I stained the plateau on the rim and the shank with black aniline stain and flamed it to set it in the grain. I used a pipe cleaner to apply the stain because the fuzz on it went into the grain and high spots. I find that it works amazingly well to apply the stain.Ben10I wiped down the bowl with a little bit of olive oil to see what the grain looked like and also so I could sand the bowl with micromesh sanding pads. I sanded it with 1500-4000 grit sanding pads until it was smooth.Ben11 Ben12Once I had sanded the scratches out of the grain I stained it with a mixture of dark brown stain and alcohol – 50/50 mixture. I flamed it and repeated the process until the coverage was good. I kept the brown stain off of the plateau areas of the bowl and shank.Ben13My brother washed the stem with Murphy’s Oil Soap and rinsed it off. The oxidized stem has deep tooth marks on the top of the stem that crossed the top of the stem and the button on the left side. The underside had three deep grooves in it that did not penetrate into the airway. The fact that they did not break through into the airway was the only real blessing in the mess.Ben14I sanded the stem to smooth out the oxidation and to remove the debris around the tooth marks. I wanted the stem area clean so that I could patch it. I used black super glue and let it dry for one hour and then sprayed it with an accelerator to harden it.Ben15I used a needle file to recut the button edges and clean up shape of the button. I sanded it with 220 grit sand paper to remove the excess black super glue patch and blend it into the surface of the stem. The Ben Wade Crown stamp was faint but still slightly visible. I planned on maintaining it as much as possible.Ben16I wet sanded the stem with 1500-2400 grit micromesh sanding pads and rubbed it down with Obsidian Oil. I dry sanded the stem with 3200-4000 grit pads and gave it another coat of oil. I finished sanding it with 6000-12000 grit pads, gave it a final coat of Obsidian Oil and set it aside to dry.Ben17 Ben18 Ben19I buffed the bowl and stem with Blue Diamond on the buffing wheel and then gave the bowl and the stem multiple coats of carnauba wax. I buffed it with a clean buffing pad to raise the shine. I finished by hand buffing it with a microfibre cloth to deepen the shine. The finished pipe is shown in the photos below. It is a large pipe. The dimensions are: length – 7 inches, height – 2 ½ inches, inside diameter of the bowl – 1 inch, outside diameter of the bowl – 2 ½ inches. If this beauty is of interest to you send me a message or leave a response below. It could easily be added to your rack and provide years of service. If it is anything like my Ben Wade Freehand this is likely to be great smoking pipe. Thanks for looking.Ben20 Ben21 Ben22 Ben23 Ben24 Ben25 Ben26

A Picadilly Brand Genuine French Rustique Briar Pipe


Blog by Steve Laug

The second box that was labeled Picadilly Brand Genuine French Rustique Briar Price $15 had one lonely pipe left in it after I had combined the pieces in the first boxed set and cleaned up the Berkeley Club billiard. This one was the only one that actually belonged in the set. It is marked as the others had been on the left side of the shank. It reads Real Briar in script over Made in France stamped in a smooth part of the shank. This one had been smoked, though lightly. The bowl had a light cake and the rim top was covered in tar and oils with a slight build up. The stem had tooth chatter on the Redmonal/Bakelite top and bottom sides near the button. The alignment was perfect on this one. Real1I took some photos of the pipe before I cleaned it up to show the condition it was in when I started. It was a really clean pipe compared to many of the ones that I work on. It would be an easy cleanup.Real2 Real3I took a close up photo of the rim top to show the cake and the build up on the rim. I also took some close up photos of the stem to show the tooth chatter and the metal tenon on this pipe.Real4 Real5I scraped out the light cake with a Savinelli Pipe Knife.Real6Rather than top the bowl and start over with the finish I used a medium grit sanding block to remove the tarry build up on the rim top. I scrubbed it down with a cotton pad and alcohol and then followed that by sanding the top with a 1500 grit micromesh sanding pad.Real7 Real8I touched up the stain on the rim with a dark brown stain pen.Real9I cleaned out the mortise and the airway in the shank and the stem with a cotton swabs, pipe cleaners and alcohol.Real10I sanded the stem with 220 grit sandpaper to remove the tooth chatter and marks on the top and the bottom sides. I wet sanded it with 1500-2400 grit micromesh sanding pads to begin polishing them I gave it a coat of Obsidian Oil. I dry sanded it with 3200-4000 grit pads. I gave it another coat of oil. I finished sanding it with 6000-12000 grit pads, gave it a final coat of oil and set it aside to dry.Real11 Real12 Real13 Real14I gave the bowl and stem several coats of Conservator’s Wax and buffed it with a shoe brush. I lightly buffed the bowl and stem with a clean buffing pad. I hand buffed it with a microfibre cloth. I put the pipe back in its case while I continue to look for the rest of the set to complete a second boxed set. The finished pipe is shown in the photos below. It is a beauty. Thanks for looking.Real15 Real16 Real17 Real18 Real19 Real20

Another for the strange but true hunt for a Cooler/Drier Smoker Collection


Blog by Steve Laug

My brother sent me the links to this sale on EBay and I was hooked. It is probably the oddest pipe contraption I have seen in the many pipes that formed the pipeman’s dream of a cooler, drier smoke. There have been many over the years that vied for the oddest looking contraption but to date this one takes the prize. I have a few in my own oddity collection that would give this one a fair run for its money but I think this one is still by far the strangest. The T shaped look of the pipe is one thing but once it taken apart it is even odder. The only normal part of the pipe is the vulcanite stem. The Bakelite shank ends in a dropped down base that is part of the shank. It is as big as the briar bowl on the top.Filt1Inside the base is a metal canister contraption that has six wedge shaped holes around the edges and a single hole in the crowned centre. The crowned centre meets the hole in the bottom of the threaded briar bowl which is indented to hold the contraption in place.Filt2The Bakelite shank on the pipe is the only part of the pipe that bears any identification marking. It reads Filtre T with PAT. to the left of the name and PND. to the right. Thus the stamping is Filtre T Patent Pending. The Bakelite base is quite thick with threads extending into it to hold the bowl in place. The diameter of the opening is ¾ inches and the exterior 1 inch. The length of the base and stem is 5 1/8 inches. With the bowl in place the height is 2 ½ inches tall. The hang down base is 1 ¼ inches. The bowl itself is 1 ¼ inches. The filter canister is stamped with the same stampings as the shank PAT. over FILTRET over PND. and is made of aluminum.Filt3I did some hunting for a Patent on the US Patent site and found a written patent. The pipe seems to have been made by FILTRET Inc. of Seattle, Washington and the patent filed by George E. Baldwin, President on May 5, 1930. I cannot find the attached specimens mentioned in the document but this at least identifies the name and gives me a base date.

Filt43

When the pipe arrived in Idaho my brother took some photos of it. The stem was slightly oxidized and it was stuck in the shank. It was underturned to the left and could not be straightened out. The rim was dirty with a tar build up and there was a cake in the bowl. The bowl itself was slightly out of round. The briar had a few small fills in it and the finish was dirty.Filt4 Filt5 Filt6When my brother Jeff took the bowl off the base the interior of the base was very dirty with tars and oils. The metal basket was also covered with debris of tars, oils and saliva. It looked to me that the way the pipe worked was that the air was drawn through the single hole in the top of the canister and then it came out through the wedges and into the airway in the shank.Filt7 Filt8 Filt9This pipe was a pleasure to work on because Jeff did the lion’s share of work on it. He reamed and cleaned the bowl. He cleaned out the stem with pipe cleaners and alcohol and the base with cotton swabs and alcohol. He flushed out the canister with alcohol and then water. He flushed it until it was clean. He scrubbed the bowl with Murphy’s Oil Soap and removed the finish and the debris from the surface of the bowl. He was able to remove much of the tar and oil on top of the bowl. The next set of four photos show the way the pipe looked when I unpacked it this afternoon. Thanks Jeff this was an easy clean up.Filt10 Filt11I took a close up photo of the rim top to show the damage to the inner edge of the rim. It is darkened and also has some burned areas on the top and inner edge.Filt12I also took a close up photo of the stem – it was stuck tight in the shank and it was underturned to the left. I tried to heat it with hot water to try to loosen it. It would not move. After taking this photo I put it in the hot water to soak and see if it would loosen the tars and oils in the shank that were holding it tight.Filt13I turned my attention to the bowl and the base while the stem soaked. I cleaned out the airway in the bottom of the bowl with a cotton swab and alcohol to remove the “gunk” that was clogging the airway and reducing the air flow.Filt14I topped the bowl on a topping board with 220 grit sandpaper. I topped it until I had removed the damaged areas on the rim surface.Filt15I rolled a piece of 220 grit sandpaper to sand the bowl and the inner edge to clean up the damaged inner edge and bring it back to round.Filt16I sanded the bowl and rim with a medium and a fine grit sanding block to remove the scratches in the briar. Once it was clean of scratches I stained it with a dark brown stain thinned by half with alcohol. I flamed it and repeated the process.Filt17I wiped the bowl down with cotton pads and alcohol to make the stain more transparent and to make the grain show through.filt18I took the stem and base out of the hot water and wiggled it until the stem turned. I removed the stem so that I could clean the inside of the shank and base.Filt19I used a dental spatula inside the tube of the shank to scrape away some of the thick build up on the walls of the shank. I then scrubbed it down with alcohol, cotton swabs and pipe cleaners until they finally came out clean. I also scrubbed down the inside of the base with them to remove the grime in the base.Filt20I used the micromesh sanding pads to polish the Bakelite base and the shank. I sanded it with 1500-12000 grit pads and then wiped it down with some Obsidian Oil.Filt21I scrubbed out the canister one more time and found that it was very clean. I dropped it in place in the base.Filt22With the canister in place I screwed the bowl onto the base and took some photos.Filt23 Filt24 Filt25It was ready to buff with Blue Diamond so I took it to the wheel and buffed the bowl and the base. I gave bowl several coats of carnauba wax and then buffed it with a clean buffing pad to raise the shine. Once I finish the stem I will give it several more coats of wax.Filt26 Filt27 Filt28I cleaned out the airway in the stem with alcohol, cotton swabs and pipe cleaners. After heating it with the hot water to loosen the stem a lot of grime came loose in the shank and ran down the stem.Filt29The stem had some tooth chatter along with the oxidation that I brought out with the hot water bath. I sanded it with 220 grit sandpaper to remove both the chatter and the oxidation. I wiped it down with Obsidian Oil.Filt30I wet sanded the stem with 1500-2400 grit micromesh sanding pads and rubbed it down with Obsidian Oil. I dry sanded it with 3200-4000 and gave it another coat of oil. I finished sanding it with 6000-12000 grit pads and gave it another coat of oil. I buffed it on the buffer with Blue Diamond polish and gave it a final coat of Obsidian Oil and set it aside to dry.Filt31 Filt32 Filt33I put the pipe back together and gave it a final buff with Blue Diamond and then gave it multiple coats of carnauba wax. I buffed it with a clean buffing pad and then by hand with a microfibre cloth to deepen the shine. The finished pipe is shown in the photos below. It is a true oddity but the more I worked on it the more I am intrigued with it. I wonder how the contraption works in real-time. Well, I may have to give it a try one day soon. Thanks for looking.Filt34 Filt35 Filt36 Filt37 Filt38 Filt39 Filt40 Filt41 Filt42

A Berkeley Club 7118 Billiard that turns out to be Sasieni Made


Blog by Steve Laug

Inside the first boxed set of Picadilly Brand Genuine French Rustique Briar pipes that my brother picked up was a straight billiard that did not bear the markings that were on the bent billiard or on the other complete set of Picadilly pipes. This one had a familiar finish to me but I could not put my finger on it and identify it. It was stamped on the underside of the shank with the following: 7118 over Berkeley Club over London Made. The bowl end of the smooth bottom of the shank it was stamped England in an arch. The finish on the bowl sides was very clean. The rim was a bit beaten. The front edge of bowl had been knocked out on a hard surface repeatedly and left a rash. The entire top of the rim was also beaten up and pitted. It was the only part of the bowl that was in rough shape. The stem had some tooth chatter and some light tooth marks on the top and bottom sides near the button. There was some oxidation and a faded stamp with what looked like a B partially circled by a C.Berk2 Berk3I took a close up photo of the bowl and rim to show the cake on the bowl and the damage to the rim surface. I also took a close up photo of the stamping on the underside of the shank.Berk4I went online to Pipephil’s site Logos and Stampings (http://www.pipephil.eu/logos/en/logo-b4.html) and found the brand and the reminder that had niggled at the back of mind. The Berkeley Club with this stamping was made by Sasieni. The photo below came from that website and shows the same finish and the same stamping on both the shank and the stem.Berk1With that in mind I took the pipe apart to have a look at it. I was expecting the pipe to have an inner tube in the tenon. I looked in the bowl and the point extended into the bowl showing a glint of metal. However when I took the pipe apart there was no inner tube. I shined a light down the mortise and airway in the shank and sure enough the tube had broken off in the airway leaving the mortise unobstructed. I looked at the stem and saw the same – broken off slightly inside the tenon leaving it also unobstructed.

I decided to work on the rim top damage by topping the bowl with 220 grit sandpaper on a topping board. It took some work to remove the damaged portion of the rim. The second photo shows the initial sanding and the third photo shows the finished topping. You can also see the chips in the cake at 12 o’clock in the third photo.Berk5I used the Savinelli Pipe Knife to clean out the cake in the bowl and work on the inside edge of the rim. I was able to remove all of the cake and smooth out the rim edge while keeping it in round in the process.Berk6With that completed I decided to drill out the broken inner tube in the shank of the pipe. I used a drill bit almost the same size as the airway in the inner tube. I increased the size of the bit until it was the same size as the airway and drilled out the broken tube. I never use a power drill when I am doing this – rather I use a cordless drill sans battery (I don’t want to inadvertently hit the trigger and regret it). I turned the shank onto the drill bit until it grabbed onto the tube and I was able to pull it out on the end of the bit. While I was pulling I also used the end of the Savinelli Pipe Knife to push on the end of the inner tube in the bowl. It takes patience but the result leaves behind no damage to the airway or the bowl.Berk7I scrubbed the rustication on the bowl with a tooth brush and Murphy’s Oil Soap until it was clean. I rinsed it under running water to remove the soap and the debris. I dried it off with a soft cotton towel.Berk8I took some photos of the cleaned and dried pipe to get an idea of what I needed to do with the finish on the bowl and shank. The pipe looks really good other than the top of the rim that I will need to restain and polish.Berk9 Berk10I cleaned out the mortise in the shank and the airway in the shank and the stem. The airway was quite clean thanks to the broken inner tube. The mortise had some tars and oils that took a few cotton swabs, pipe cleaners and alcohol to remove. The stem was dirty on the inside and took considerably more pipe cleaners than the shank. I used pipe cleaners and alcohol to clean out the stem airway.Berk11To match the stain on the bowl sides I used a black Sharpie Marker and a dark brown stain pen to restain the rim top and the outer edges of the bowl.Berk12I cleaned up the inner edge of the bowl with a piece of sandpaper wrapped around my finger to smooth out the rough edges of the inner rim. It took a few passes to smooth out the edge but when it was done it looked much better.Berk13I gave the bowl a coat of Conservator’s Wax and buffed the bowl with a shoe brush to bring up the shine.Berk14I used the same method that I spelled out above – a stationary drill and drill bits to remove the broken tube in the tenon. I drilled until the bit caught a hold of the tube and then pulled the tube out of the tenon.Berk15I used some European Gold Rub ‘n Buff to fill in the logo on the stem. I applied it with a cotton swab and then rubbed off the excess. The finished logo is shown in the photo below.Berk16I wet sanded the stem with 1500-2400 grit micromesh sanding pads. I rubbed it down with Obsidian Oil. I dry sanded it with 3200-4000 grit pads and gave it another coat of oil. I finished sanding with 6000-12000 grit pads. I gave it a final coat of Obsidian Oil and set it aside to dry.Berk17 Berk18 Berk19I buffed the stem with Blue Diamond polish on the buffing wheel and then gave it multiple coats of carnauba wax. I buffed the bowl and the stem with a clean buffing pad to raise the shine and polish the wax. I buffed it again by hand with a microfibre cloth. The finished pipe is shown in the photos below. It came out looking really good. This one will eventually be listed for sale on the store. You can send me an email or a message any time if you would like to add it to your collection. Thanks for looking.Berk20 Berk21 Berk22 Berk23 Berk24 Berk25 Berk26

NOS Picadilly Brand Genuine French Rustique Briar


Blog by Steve Laug

My brother bid on a boxed set of pipes that was in a box covered with a green alligator pattern material. Inside the box was a yellow linen lining with a diamond logo on the inside of the lid that read Picadilly Brand Genuine French Rustique Briar Price $15.Pic1When he received it in the mail and opened it the set of pipes inside was not quite what he had expected. There was Redmanol or red Bakelite cigarette holder, a bent billiard with a Remanol or Bakelite stem with an orific button. The shank was stamped Real Briar over Made in France. The stamping was set with gold. The second pipe in the box was a billiard with a vulcanite stem that was notably newer in age than the bent billiard. It was stamped on the underside of the shank with 7118 Berkley Club over London Made. At the bowl end of the shank the word England was stamped in an arc. The fourth indentation which should have had a cigar holder held a Lovat stem from a screw mount shank. It obviously did not go with this set. Thus looking at the set we could see that the cigar holder and the straight billiard were missing.Pic2Not long after receiving the set in the mail he was scanning eBay and found another boxed set that bore the same gold filigree diamond on the lid. It was in a brown vinyl box with a linen coloured lining. The exterior and the interior of the box were in great shape. This one had both the straight and bent billiard and the cigar holder but was missing the cigarette holder. We talked about it and decided to bid on it. He won it and soon it was on his desk next to the other one.Pic3 Pic4He put the cigarette holder from the first case in the second one. He compared the bent billiards and kept the one that came with the second case. The entire set was new old stock. It had not been smoked and it was in great shape. The only issues were that both Bakelite stems were overturned and the surface of each bowl that faced upward was dusty in the grooves and crevices. The bowls were pristine. The cigar holder also was unsmoked though it had obviously been held between someone’s teeth as there were some tooth marks in the top and bottom side near the button. The cigarette holder from the first set was also unused. Putting the four pieces together in the second box gave a full unsmoked new old stock collection. We were excited.Pic5I took the pipes out of the case and lined them up on the work table. The rustication on both billiard pipes was dusty on the exposed side. The rims on both were clean but had some sticky substance on the surface. The Redmanol/Bakelite stems were both oxidized and dull. The stamping on both pipes was gold. The Bakelite stem on both pipes had been overturned. The straight billiard had a paper washer between the shank and the stem to try to compensate for the overturned stem. The surface of the pipe stems and the cigarette holder were all free of tooth marks or dents. The cigar holder was also dusty on the exposed side and the Redmanol/Bakelite stem had some tooth dents on both sides near the button even though the holder was unsmoked. The stem was also overturned on the cigar holder.Pic6I decided to work on the straight billiard first. I took photos of the pipe before I started working on it. You can see the paper washer between the stem and the shank. You can see the sticky substance on the top of the bowl rim.Pic7 Pic8I took a photo of the gold leaf stamping on the shank. The Made in France stamping is double stamped on the Made In portion. France was single stamped.Pic9The tenon was metal and it had glue or something that had been added to the threads to try to align the stem and shank. I removed the paper washer and threw it away. I picked out the glue in the threads with a dental pick. The mortise was threaded directly into the briar.Pic10I used a 1500 grit micromesh sanding pad to remove the sticky substance on the rim top. It was hard and tacky so the micromesh worked well to remove it. The rim surface was clean and undamaged when I was finished.Pic11With the pipe and tenon cleaned up I used a Bic lighter to heat the metal tenon. Once the glue in the stem softened I screwed the stem back in place and aligned the stem and the shank.Pic12I scrubbed the rustication of the bowl and shank with Murphy’s Oil Soap and a tooth brush. I rinsed it under running water to remove the soap and debris.Pic13I wet sanded the stem with 1500-2400 grit micromesh sanding pads and wiped the stem down with Obsidian Oil. I dry sanded it with 3200-4000 grit pads and rubbed it down with another coat of oil. I finished sanding it with 6000-12000 grit pads, gave it a final coat of Obsidian Oil and set the stem aside to dry.Pic14 Pic15 Pic16I lightly buffed the stem with Blue Diamond and gave it several coats of carnauba wax. I gave the bowl a coat of Conservator’s Wax and hand buff it with a shoe brush. I hand buffed the whole pipe with a microfibre cloth to raise a shine. I took a few photos of the finished pipe before moving on to the second one.Pic17 Pic18I worked on the bent billiard next. It had not been smoked and was clean. The stem was overturned. The gold leaf stamping was in great shape and was single stamped. The stem had an orific button and was made out of Redmanol/Bakelite. It was oxidized but in good shape with no tooth marks or chatter. The bowl was in great shape and still pristine new briar. The rim had some sticky material on the top the same as the other billiard. The rustication was in good shape but it was dusty on the exposed side.Pic19Pic20I sanded the rim with a 1500 grit microfibre sanding pad to remove the hardened sticky substance on the top of the rim. I scrubbed the bowl with a tooth brush and Murphy’s Oil Soap to remove the dust from the rustication. I rinsed it under running water to remove the soap and debris and dried it off.Pic21I used the Bic lighter to heat the metal tenon until the glue in the stem was warm and then screwed the stem onto the shank to realign it. Once it was aligned I let it cool. I wet sanded the stem with 1500-2400 grit micromesh sanding pads and gave it a coat of Obsidian Oil. I dry sanded it with 3200-4000 grit pads and gave it another coat of oil. I finished sanding it with 6000-12000 grit pads, gave it a final coat of oil and set it aside to dry.Pic22 Pic23 Pic24I gave the bowl a coat of Conservator’s Wax and hand buffed it with a shoe brush. I buffed the stem with Blue Diamond and gave it multiple coats of wax. I buffed it with a clean buffing pad and then hand buffed the pipe with a microfibre cloth. I took the following photos to show the finished pipe.Pic25 Pic26I turned next to the cigar holder. It was in decent shape though it too had dust on the exposed side. The stem was overturned and there were some tooth marks in the surface of the Bakelite/Redmanol stem next to the button on the top and bottom sides.Pic27The inside of the holder was pristine and had not been smoked.Pic28I unscrewed the mouthpiece from the holder and cleaned up the threads with a dental pick and a tooth brush.Pic29I cleaned out the inside to remove the dust with cotton swabs and alcohol. I gave the threads a coating of clear fingernail polish. I wanted to build up the thread slightly so that the mouth piece would align correctly.Pic30I sanded out the tooth marks with 220 grit sandpaper. I wet sanded the stem with 1500-2400 grit micromesh sanding pads and gave the stem a coat of Obsidian Oil. I dry sanded it with 3200-4000 grit pads and gave it another coat of oil. I finished sanding with 6000-12000 grit pads, gave it a final coat of oil and set it aside to dry.Pic31 Pic32 Pic33 Pic34I gave the briar part of the holder a coat of Conservator’s Wax and hand buffed it with a shoe brush. I buffed the stem with Blue Diamond and gave it several coats of carnauba wax. I lightly buffed the holder with a clean buffing pad and then again by hand with a microfibre cloth. I set the cigar holder aside until I had finished the rest of the set.

I had one more item to clean up. The cigarette holder from the other box was oxidized and dull. There were no tooth marks or bite marks in the Redmanol/Bakelite. There were a lot of scratches in the surface of the holder that needed to be polished out to remove them.Pic35I wet sanded the holder with 1500-2400 grit micromesh sanding pads and gave the holder a coat of Obsidian Oil. I dry sanded it with 3200-4000 grit pads and gave it another coat of oil. I finished sanding it with 6000-12000 grit sanding pads, gave it a final coat of oil and set the holder aside to dry.Pic36 Pic37 Pic38I buffed the holder with Blue Diamond on the wheel and then gave it multiple coats of carnauba wax. I buffed it with a clean buffing pad and then by hand with a microfibre cloth. I set the finished cigarette holder in the case.

I put the pipes and holders back in the case and took some photos of the finished pipes in place in the case. It is a great looking set of pipes and holders and shows some age on it. I wish I could figure out who made it but so far I have not been able to find any information in my usual spots on the web. Thanks for walking with me through this refurb. Thanks for looking. If any of you have any information on the set let me know in the comment box below.Pic39

TtPic40Pic41