Blog by Steve Laug
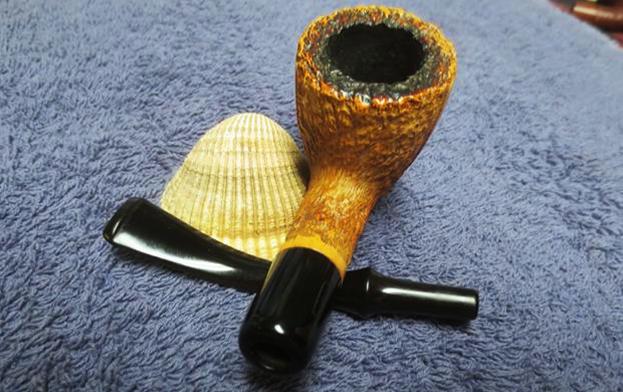
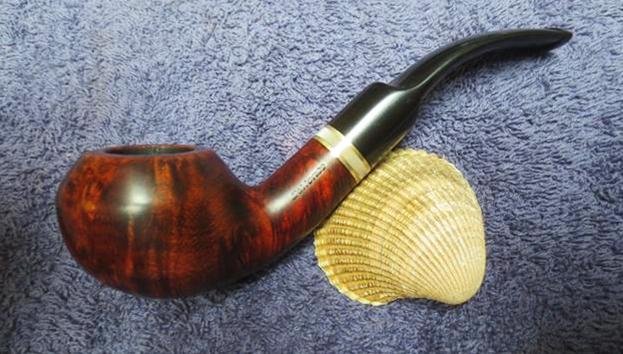
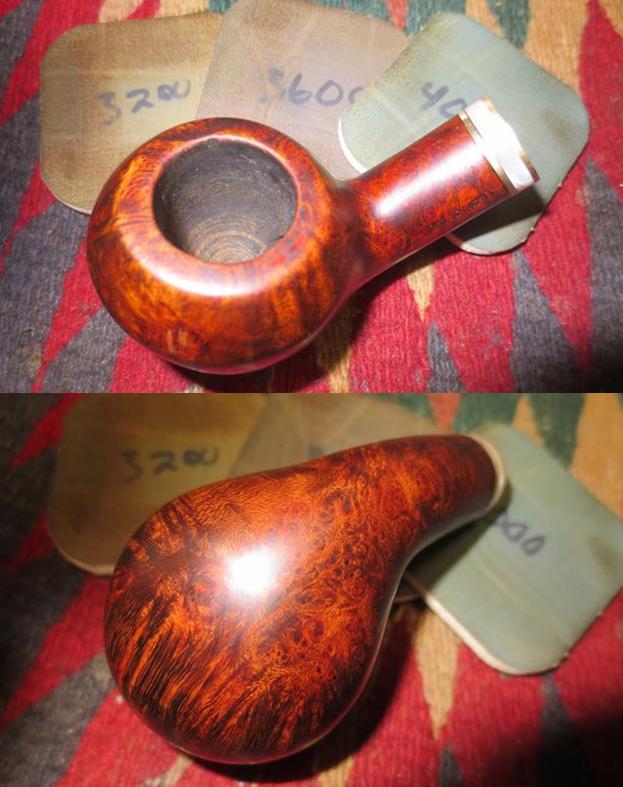
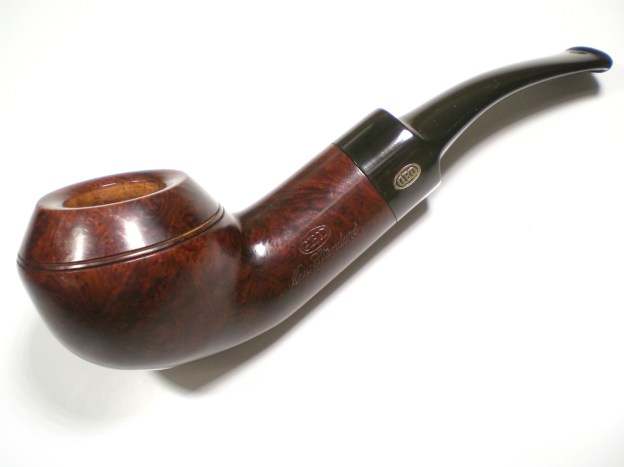
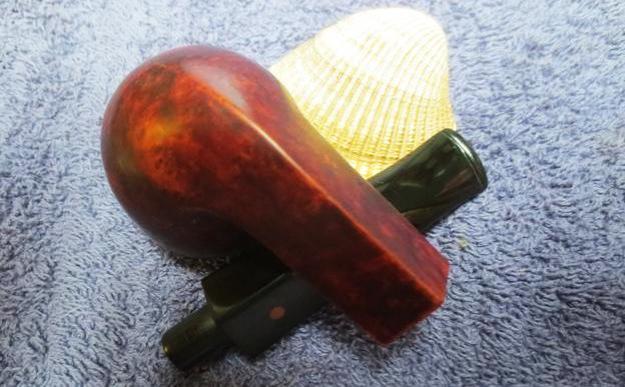
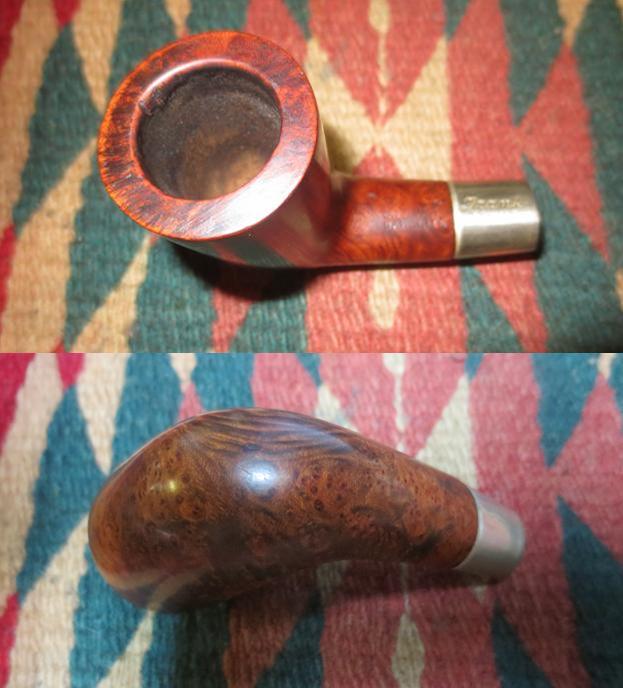
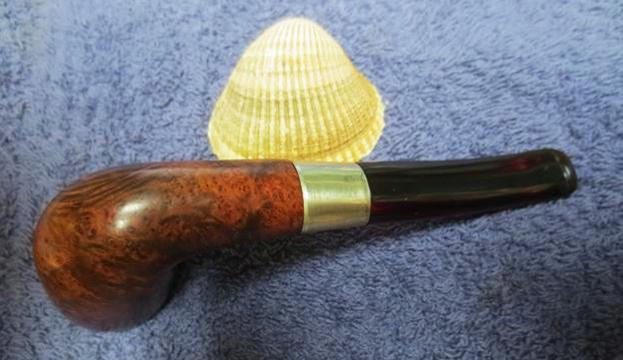
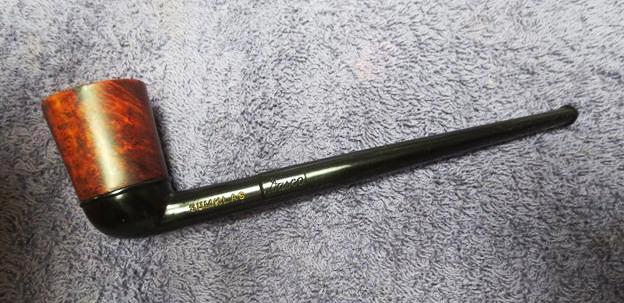
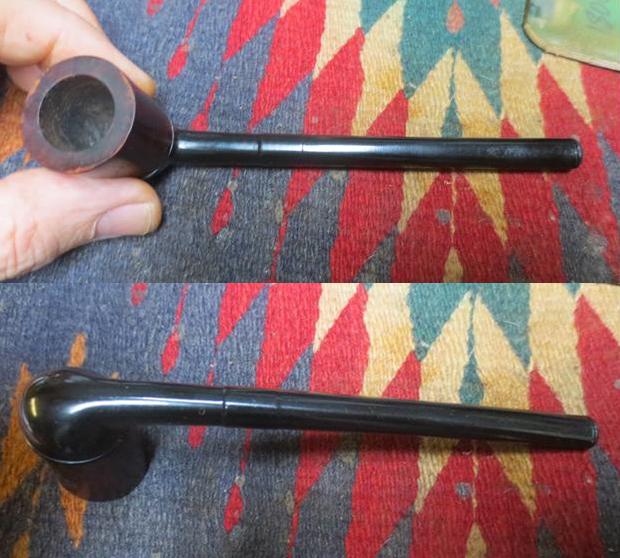
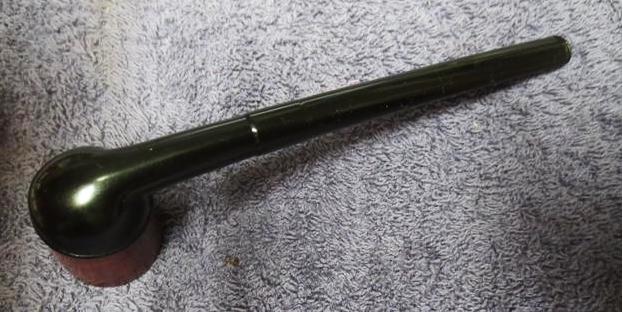
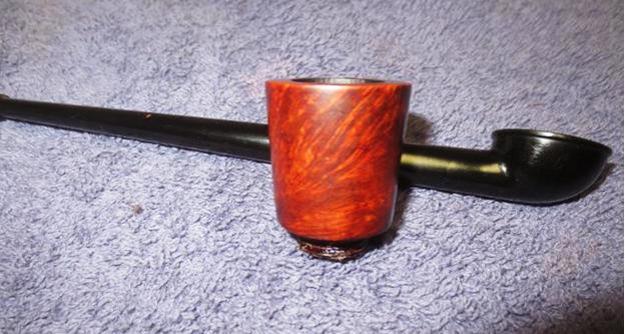
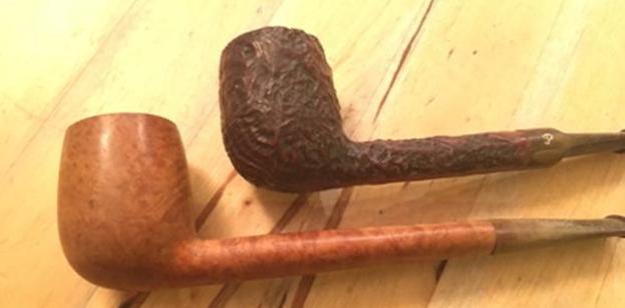
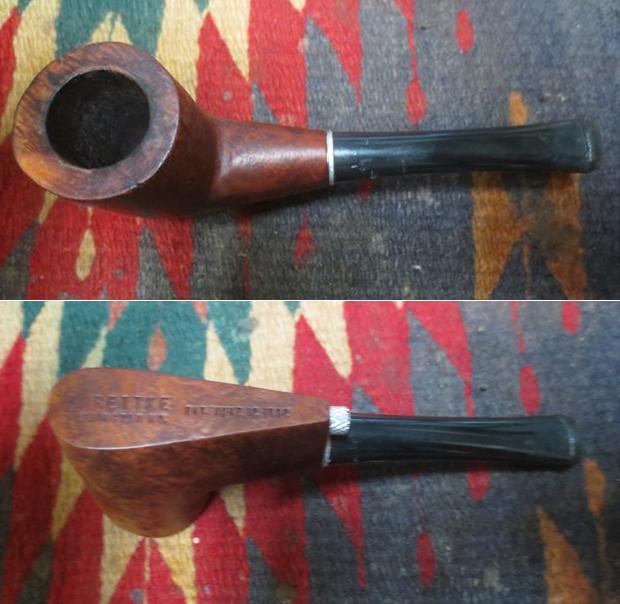
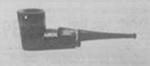
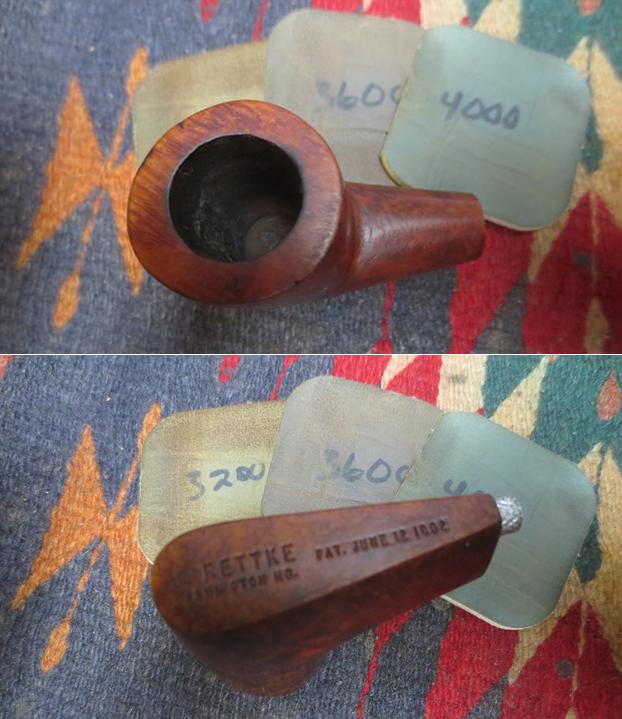
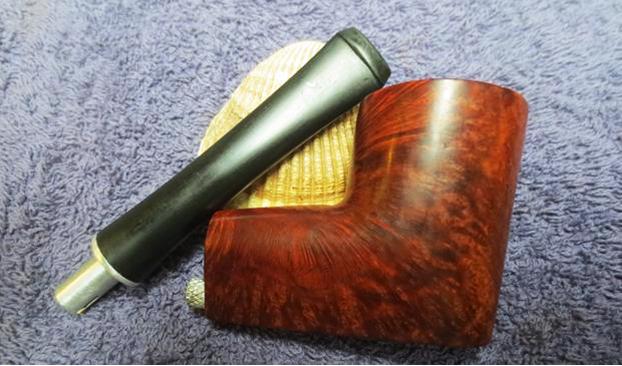
This strange looking pipe came from Josh (misterzippo), a reader of the blog earlier this year. He sent me an email and photos some pipes that he thought I might want. As usual when you have incurable PAD there is always something that catches my eye. We fired some emails back and forth about the pipes and it did not take long to make a deal. I bought a Malaga Bulldog, a pair of Wally Frank Sandblast Filter pipes, a little Jost’s and this bizarre looking Rettke. There were a couple of things about the Rettke that fascinated me in terms of the history. The stamping of Washington, MO. made me think of Missouri Meerschaum Corn cob pipes which are also from there. I wondered about a connection. The stem is identical to a Medico/Grabow style stem and was made for a Medico paper filter. That also made me wonder if there was a connection to Medico. I will need to do a bit of research to see if I can unearth the connections. 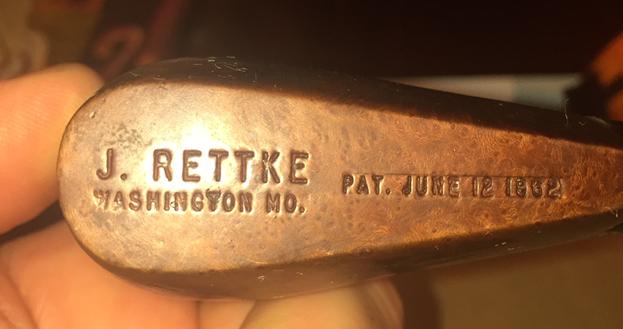 I have an unstamped Rettke and find it a fascinating piece of pipe history so I decided to pick up on from Josh. He sent along a photo of the underside of the bowl and shank to show the stamping on the pipe so I would know it was a true Rettke unlike my other pipe. I asked him for photos of the pipes that he had in hand so I could make a decision on which one that I was interested in. He sent along the photo below showing the four pipes that he had available for sale. I wanted something different from the unmarked one that I have which is rusticated. It is a lot like the third pipe in the photo below so I wanted a smooth Rettke. I looked over the pipes and asked him to choose one of the top two smooth pipes in the photo below and include with the other pipes I purchased from him. He chose well and when it got here I was thrilled with his chose. The one he sent was the first pipe in the photo. It has some really nice grain on it.
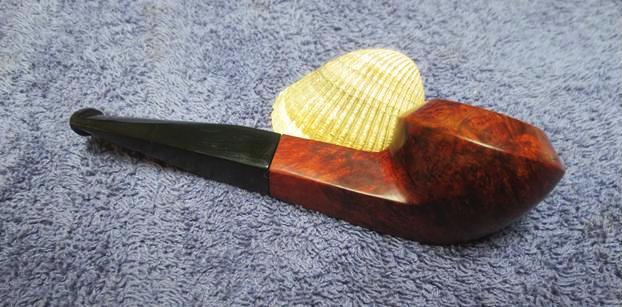
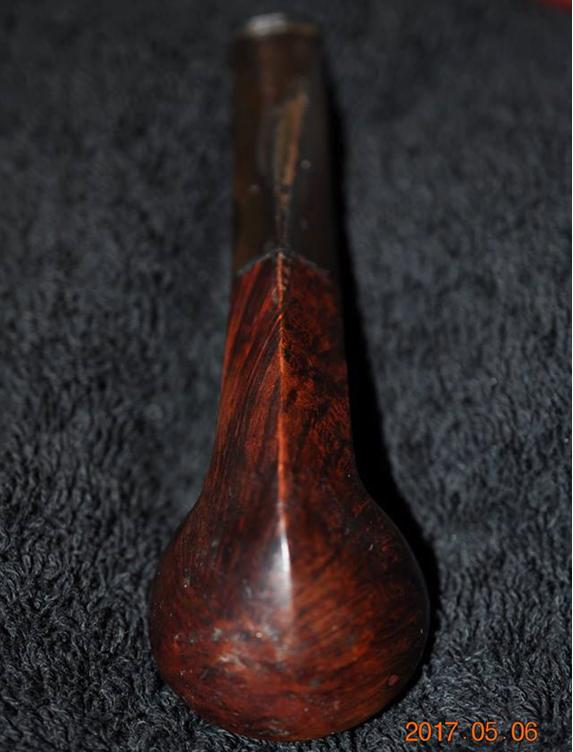
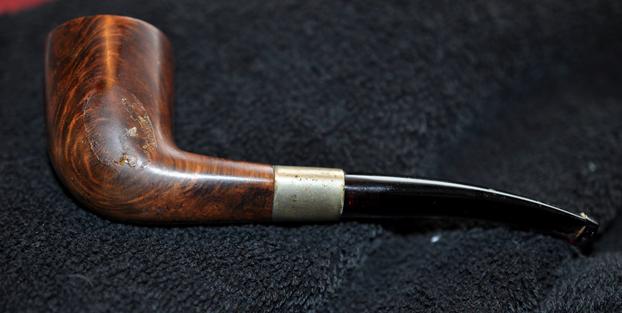
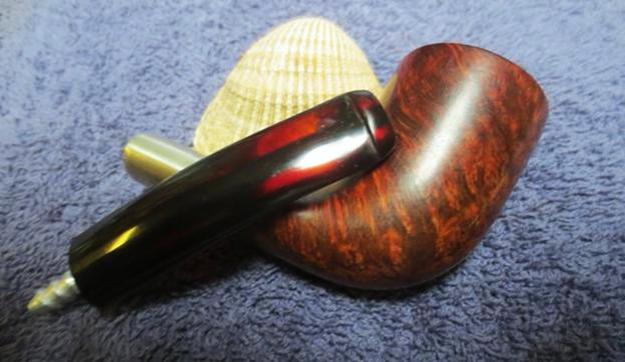
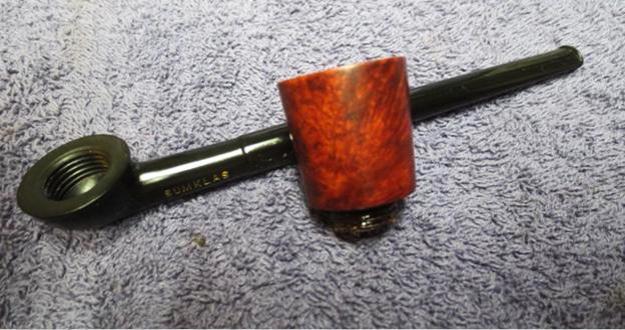
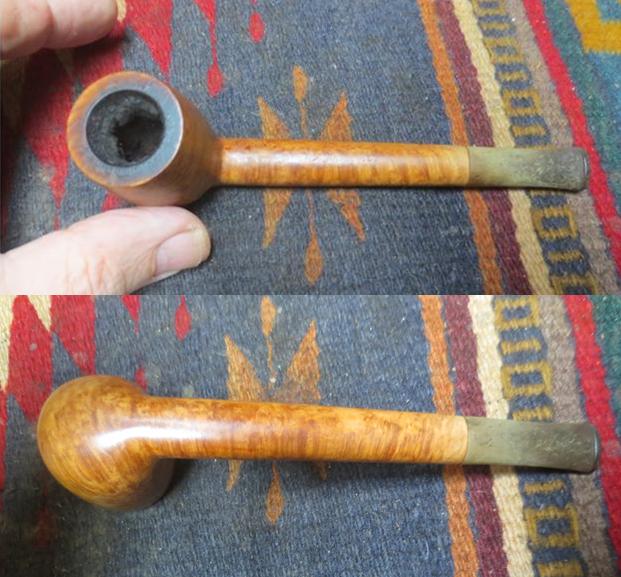
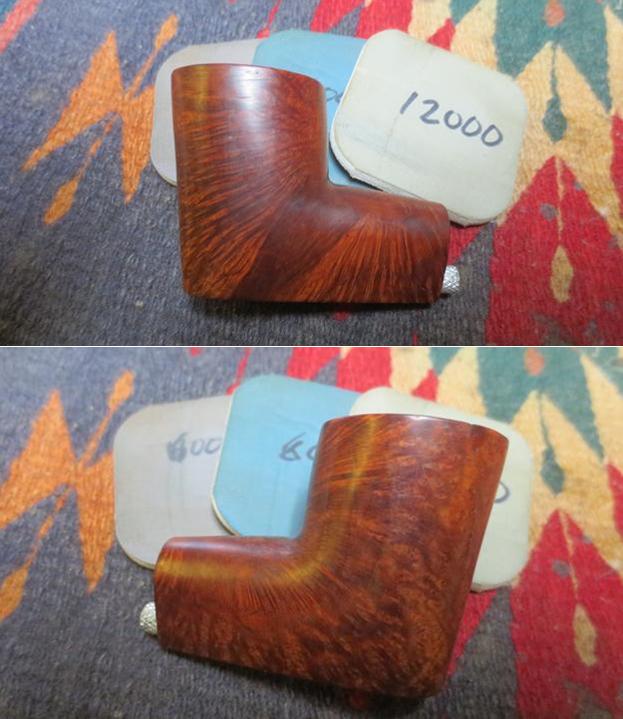
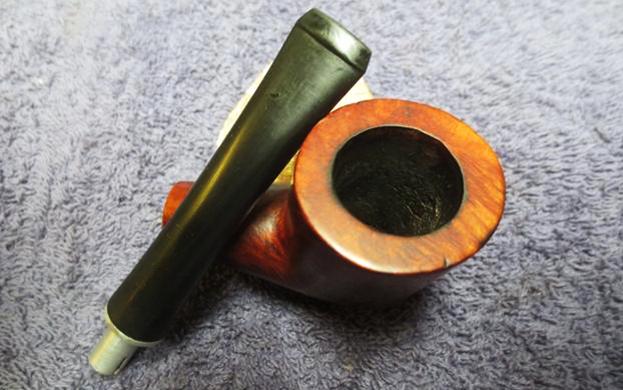
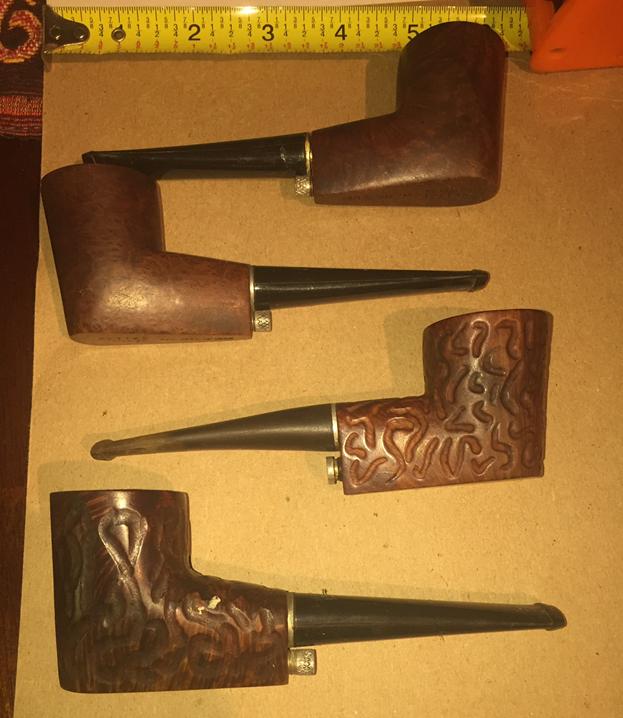 From the photos I could see that the pipe was dirty but that is never really a problem. The tape measure in the photo shows that the Rettke is about 5 inches long with a taper stem. When the pipe arrived in Idaho, my brother took photos of it so that we would know the condition of the pipe before he started working on it. The finish on the briar looked good underneath the grime of the years. There was a cake in the bowl and a buildup of lava on the top of the rim. It was not possible to see what it looked like under the cake so after cleaning we would know if there was rim damage. The stem was made out of nylon and it had a lot of tooth marks and scratches in the surface and they were deep. It was going to take some work to fill them in and sand them out. Polishing the nylon stem is not a pleasant exercise. It takes a lot of work to get it smoothed out and blended together. The metal spacer was an integral part of the stem. It was rough was in good shape with light oxidation and some tooth marks on both sides near the button.
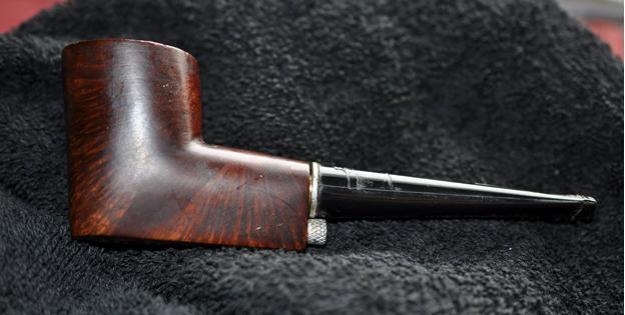
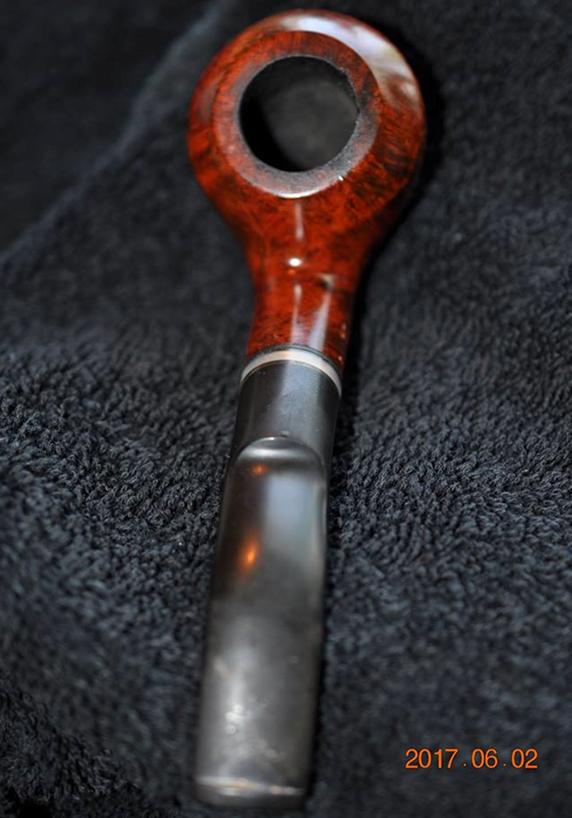
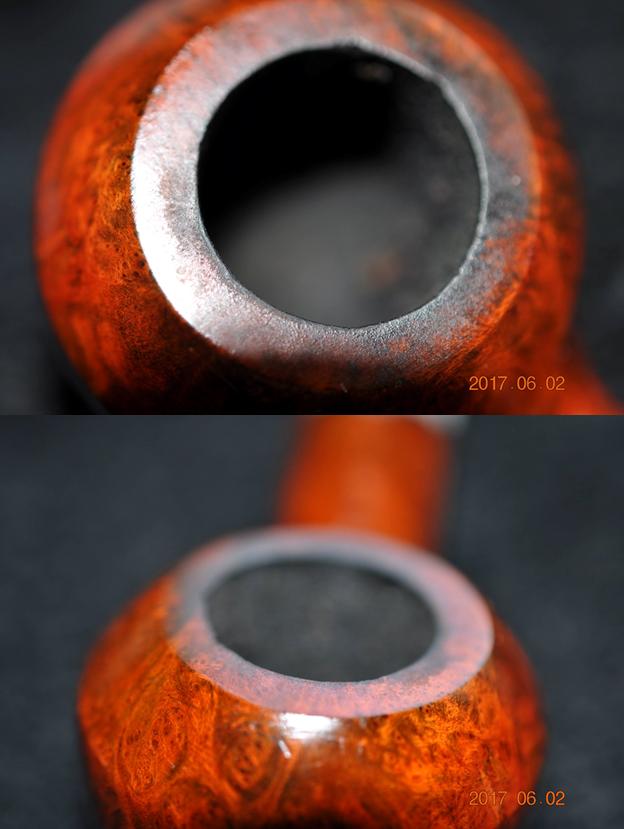
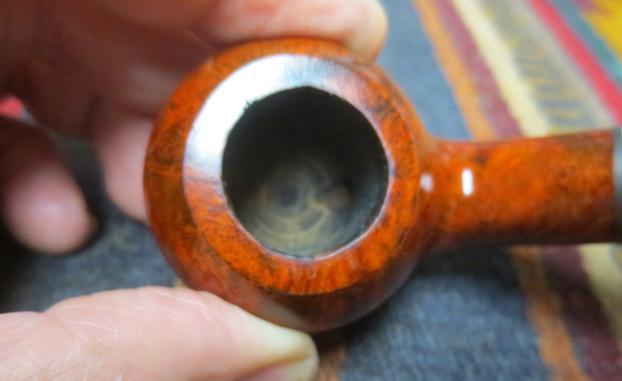
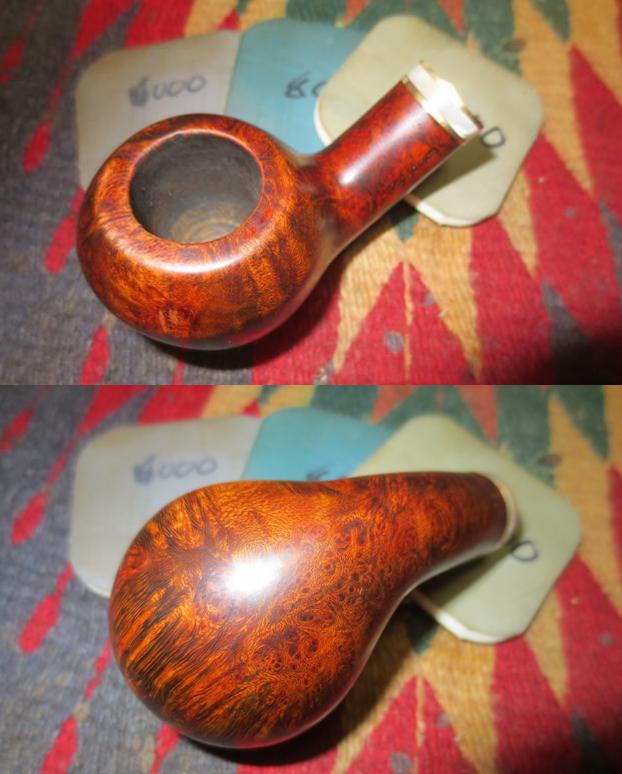
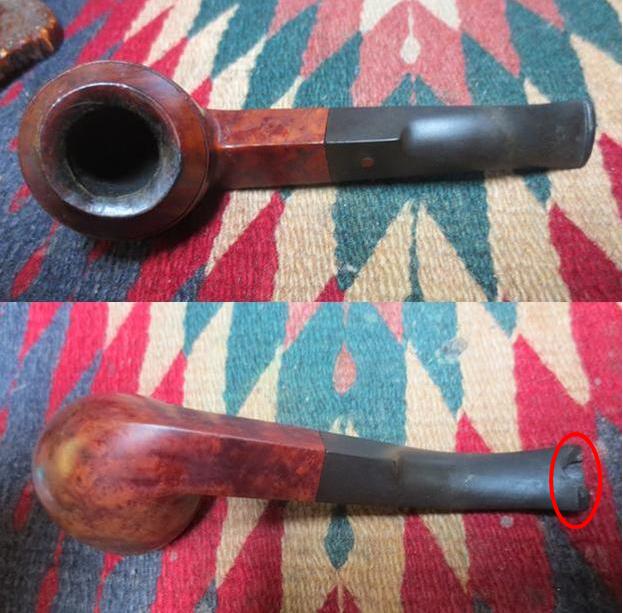
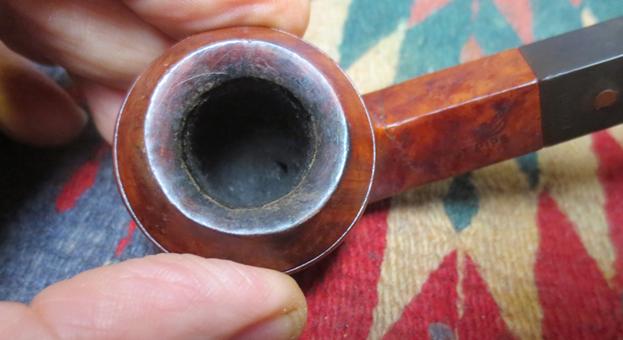
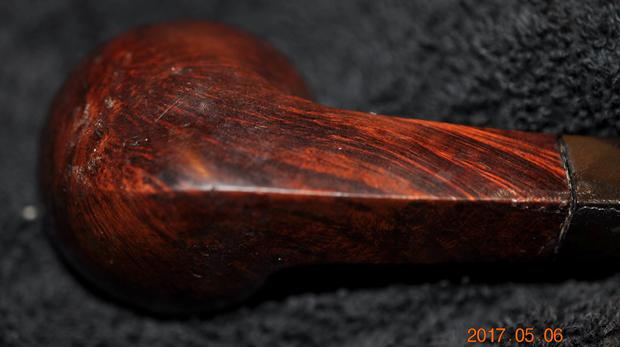
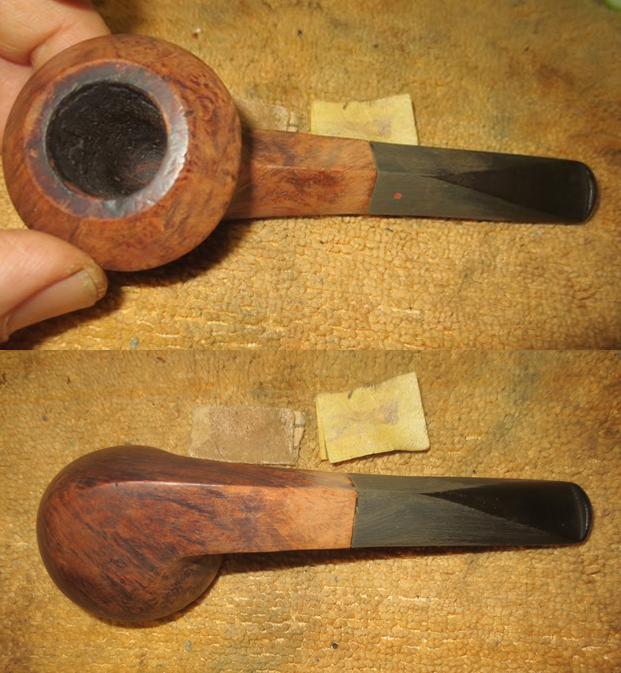
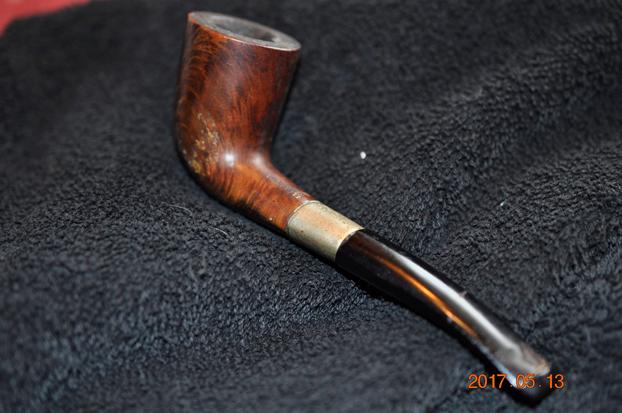
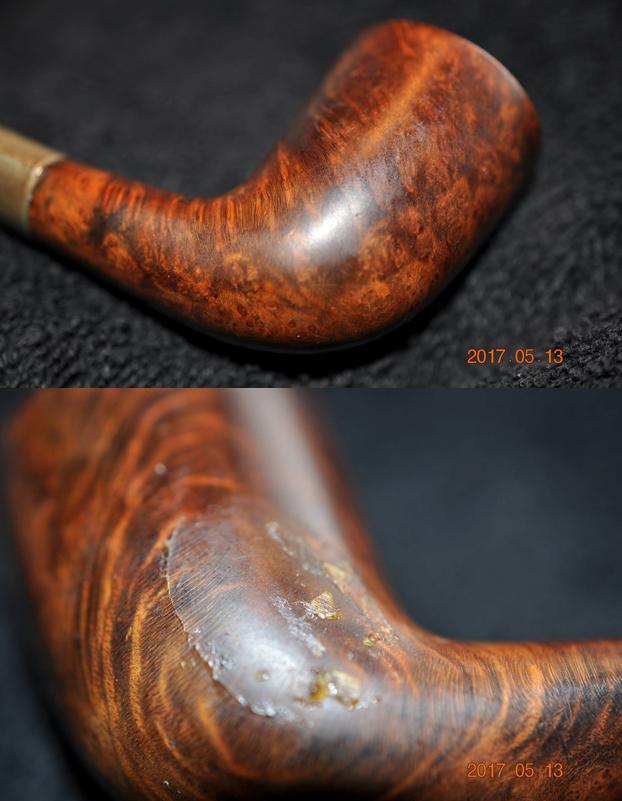
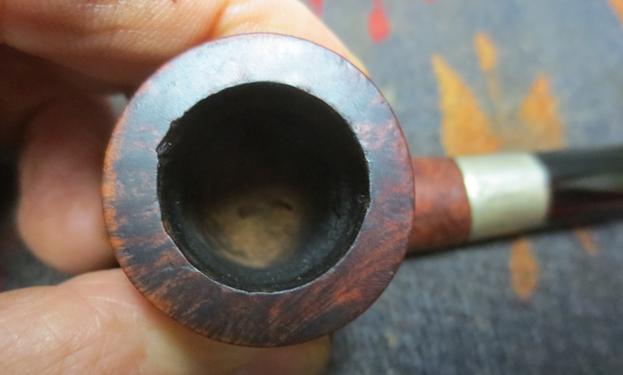
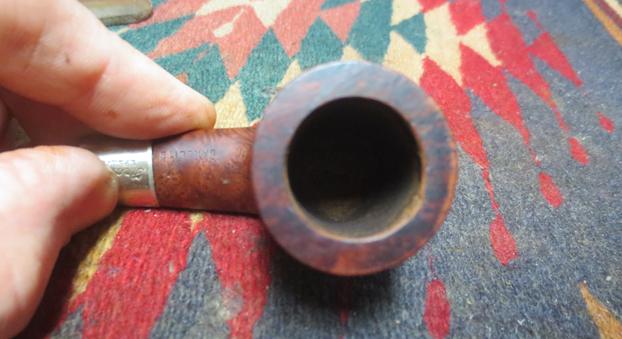
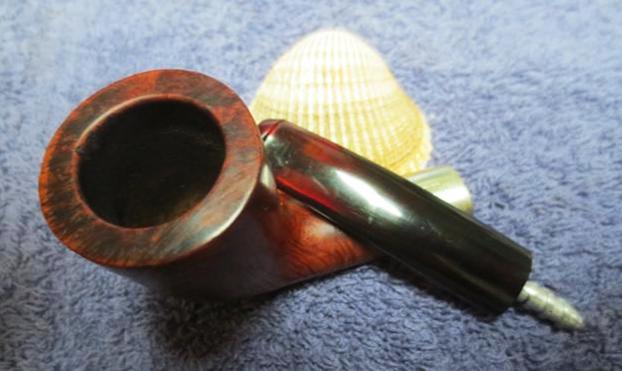
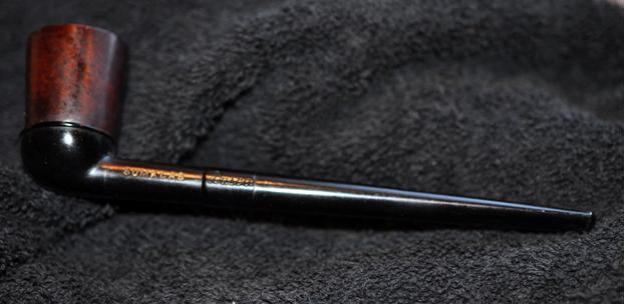
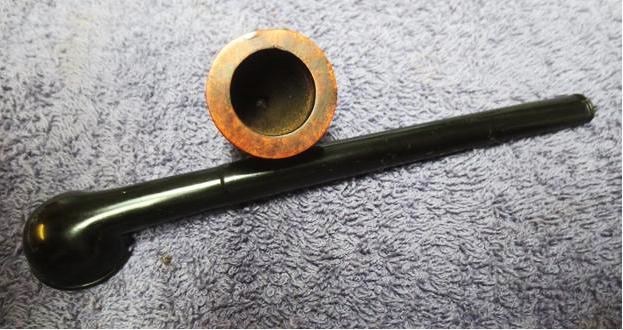
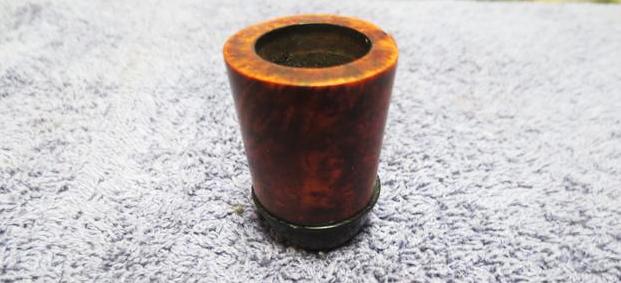
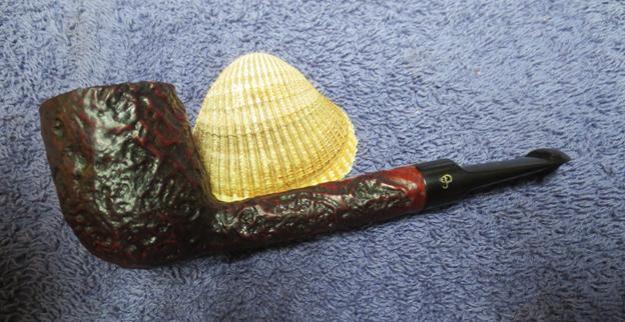
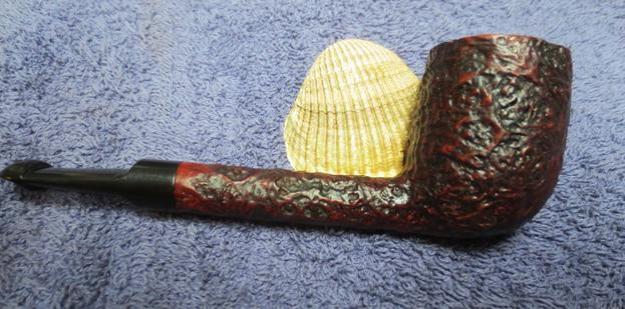
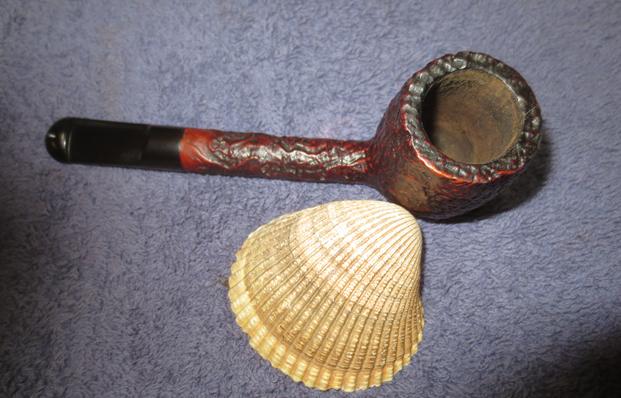
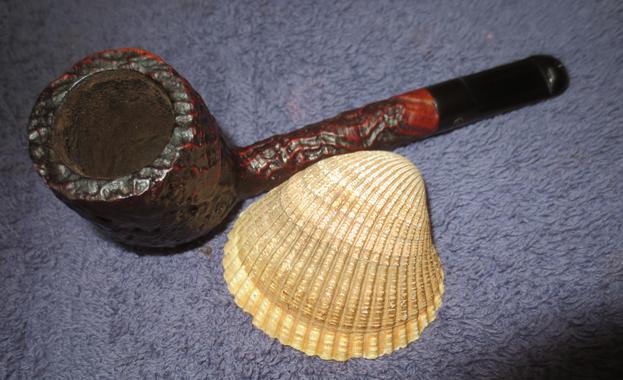
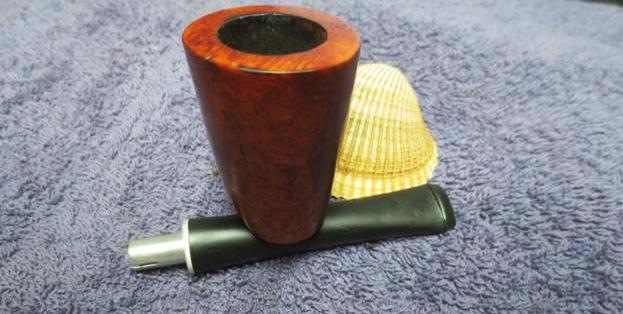
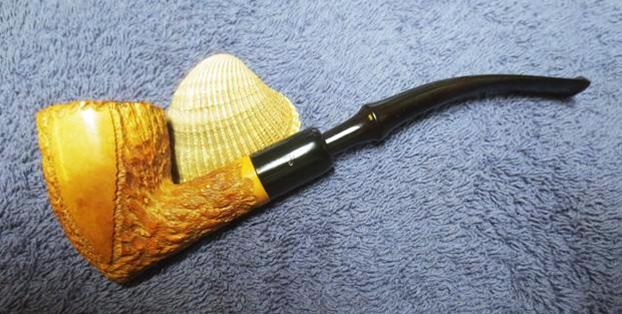
 Jeff took a close up photo of the rim and bowl and you can see the general condition of the pipe from that photo. This must have been someone’s favorite pipe and it must have smoked very well to have this kind of cake and tar build up. I was looking forward to seeing what was underneath all of that debris on the rim and in the bowl.
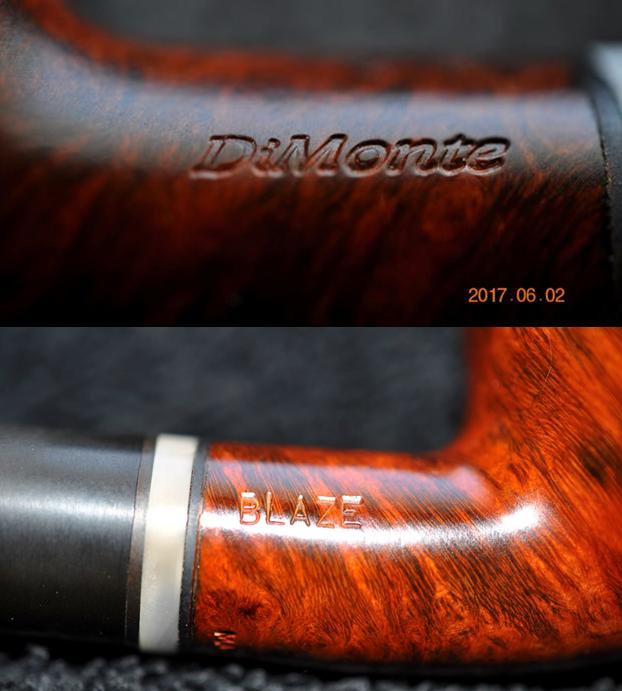
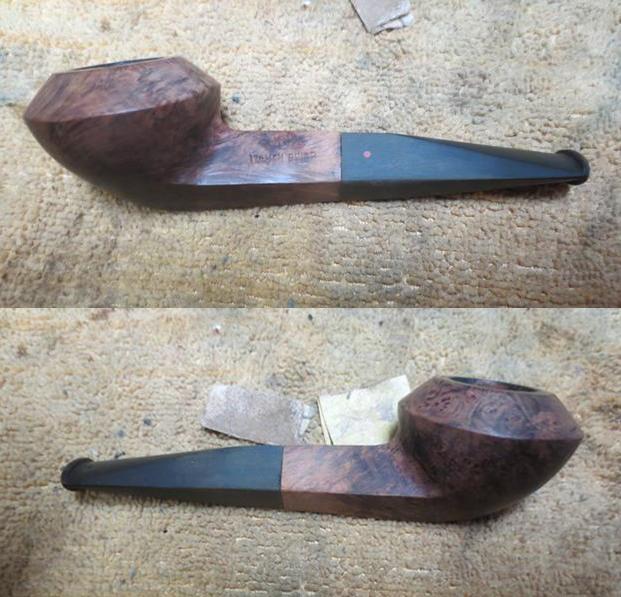
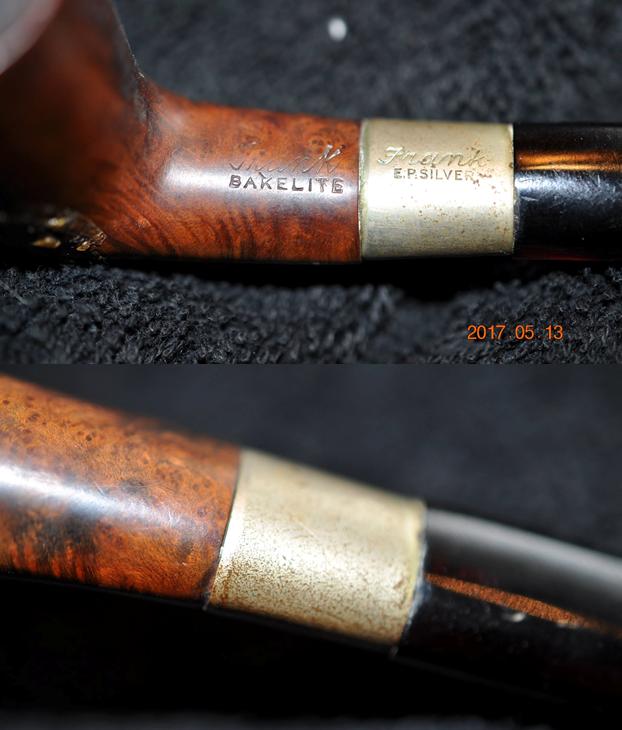
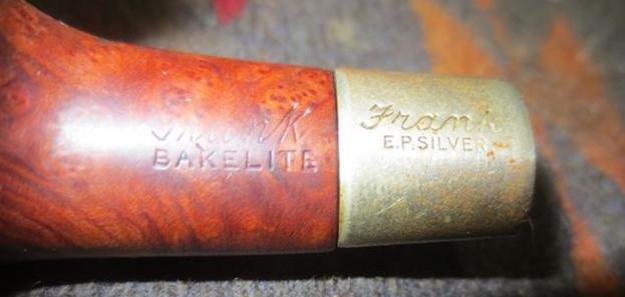
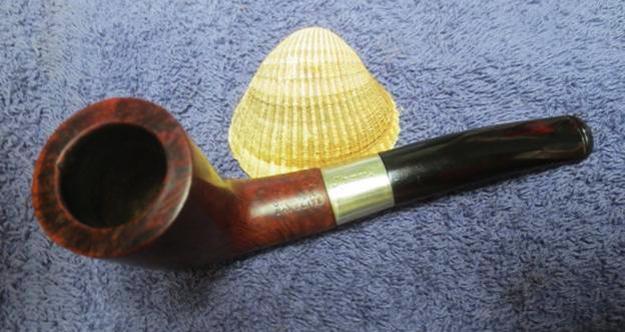
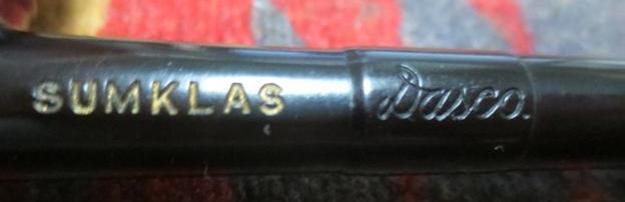
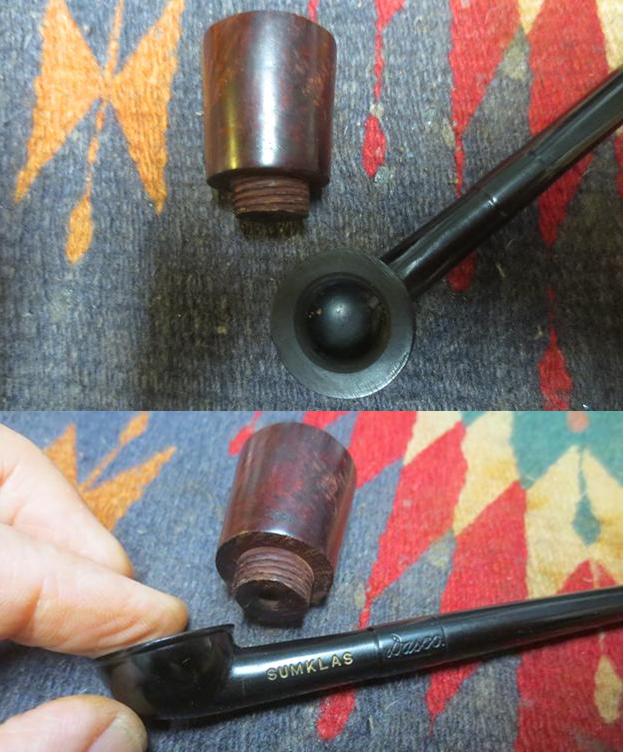
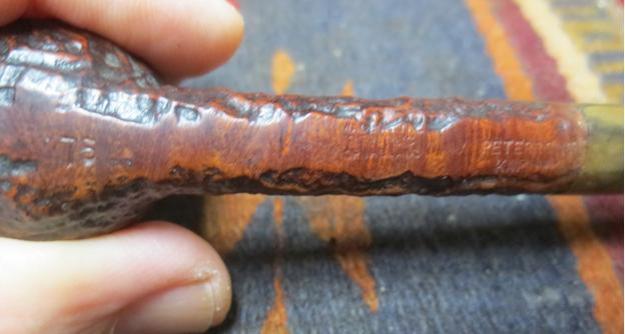
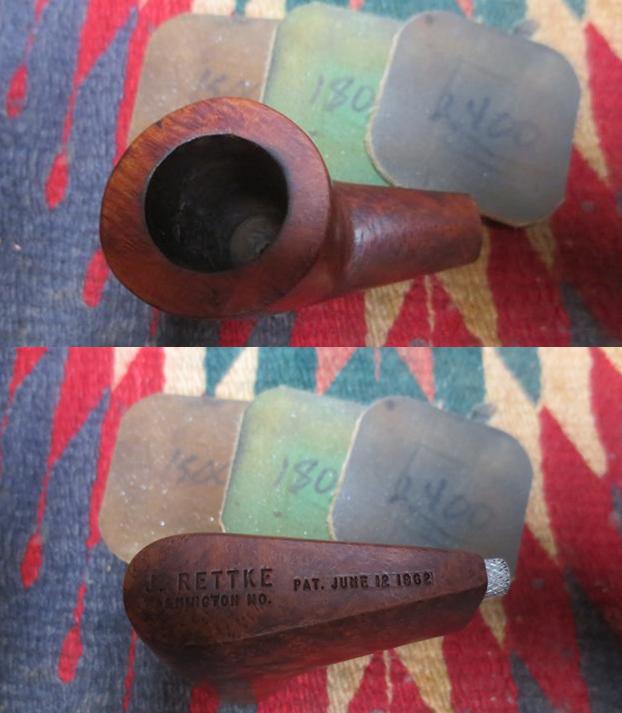
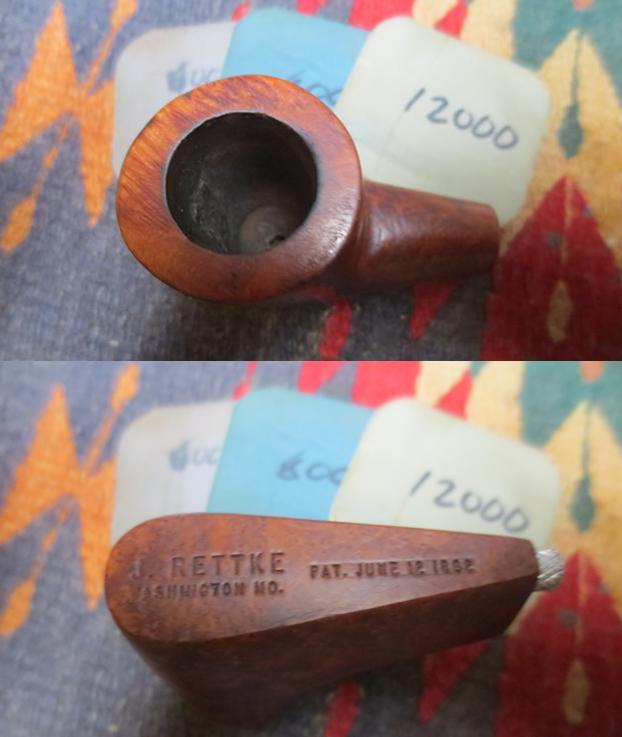
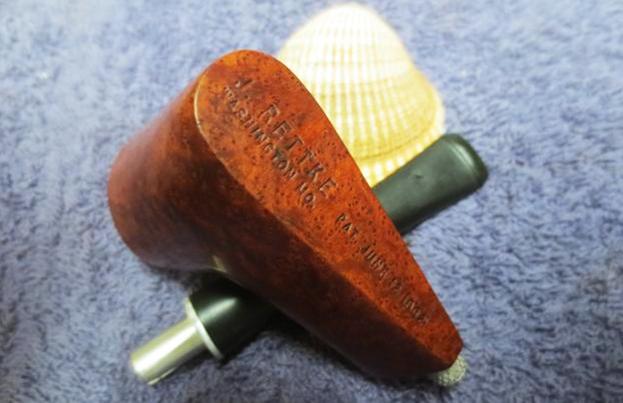
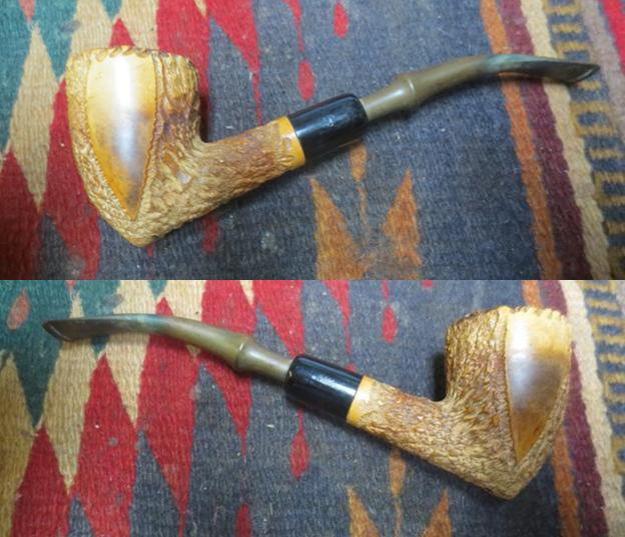
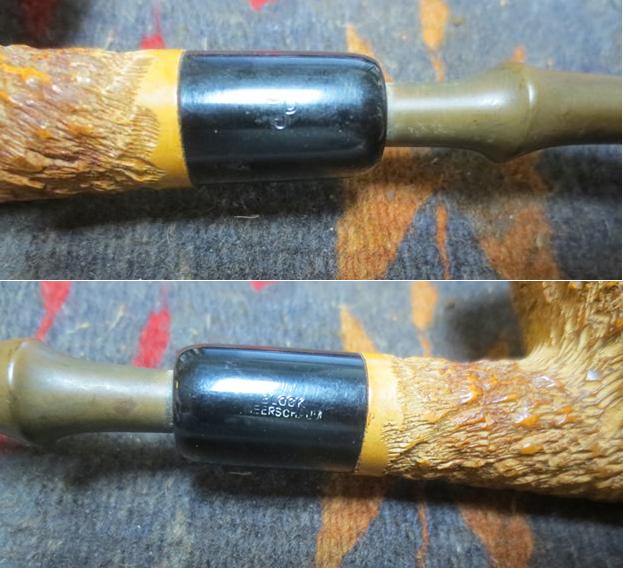
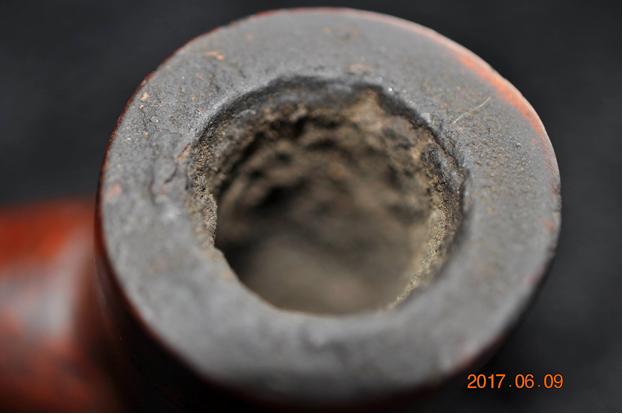 The next two photos show the stamping on the bottom of the bowl. They are fascinating in that they not only identify the maker but they tell about his method of stamping the pipe. The second photo shows the date stamp and you can see that the patent date is on a bar and the bar was pressed into the briar leaving a faint imprint behind the date stamp. The stamping reads J. Rettke over Washington, MO. and next to that it reads Pat. June 12, 1962.
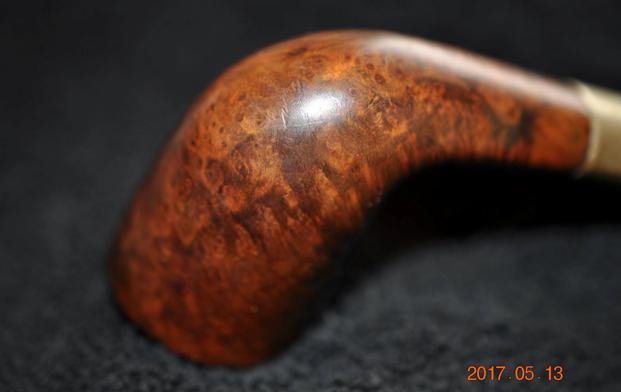
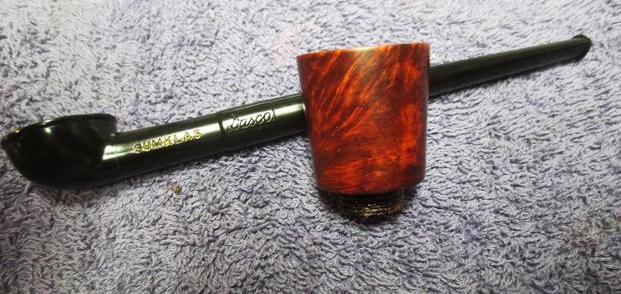
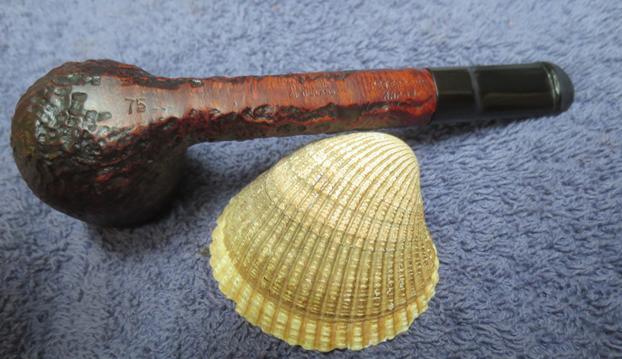
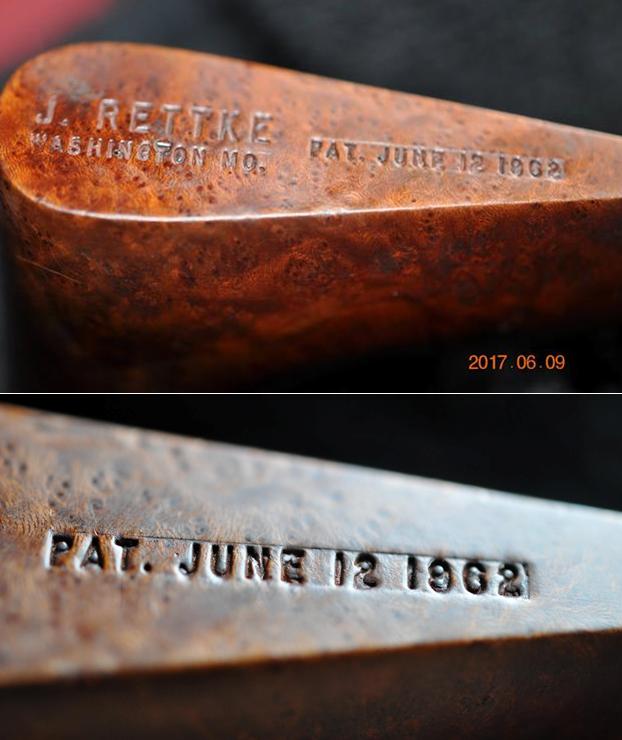 There is some pretty grain on the piece of briar underneath the detritus of time. I was looking forward to making that shine.
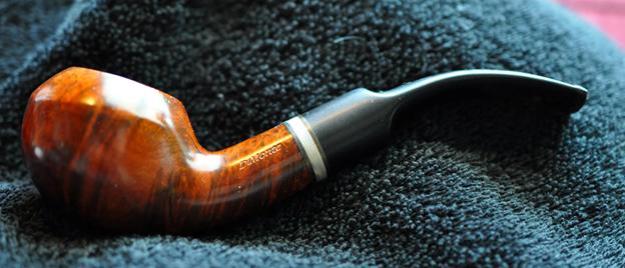
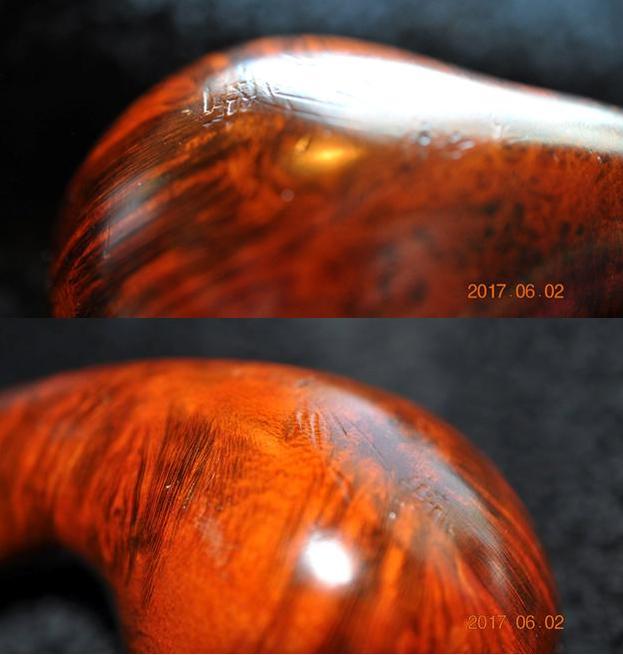
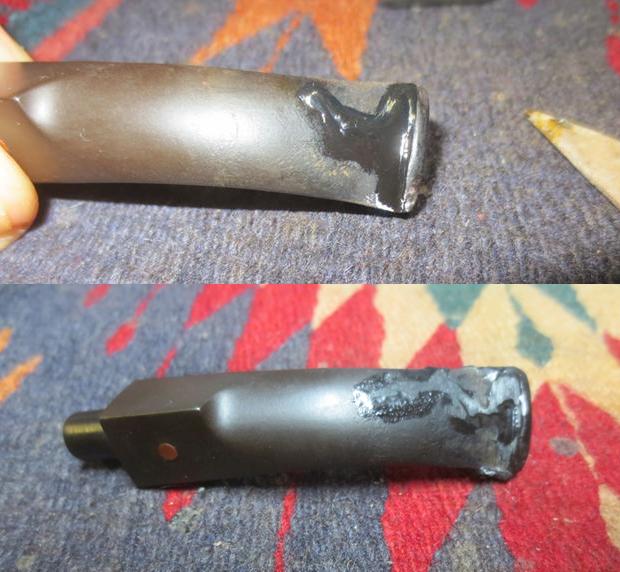
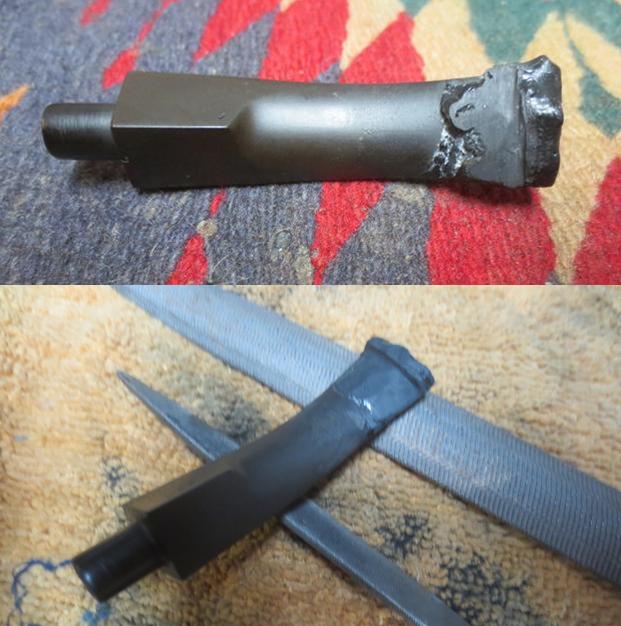
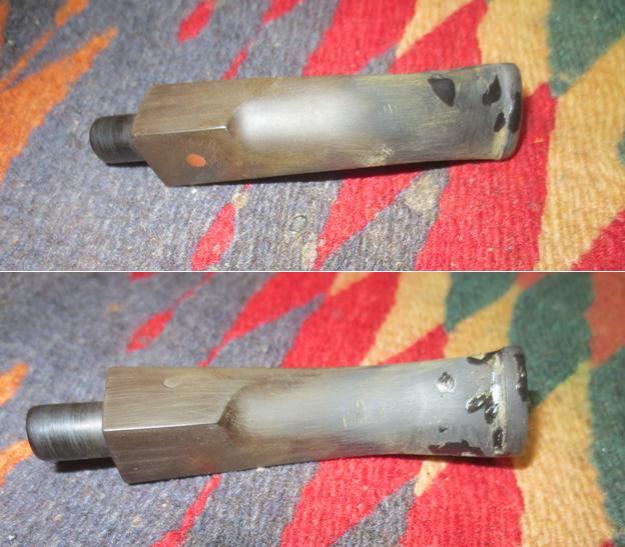
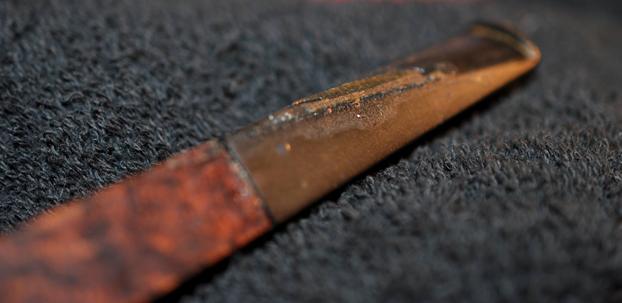
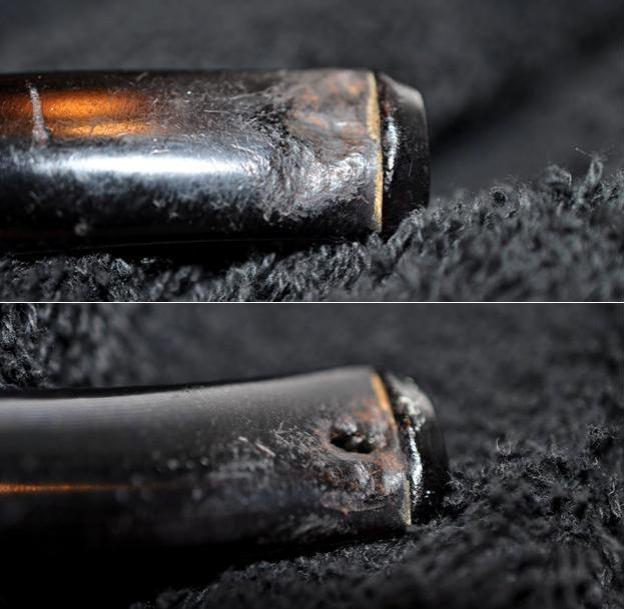
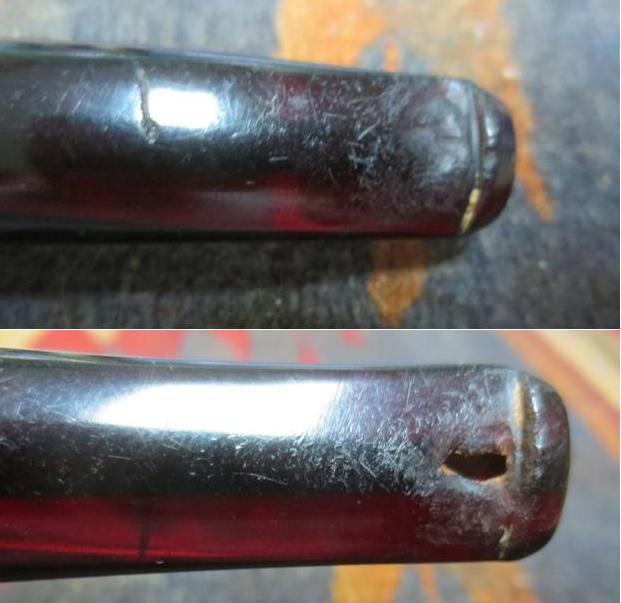
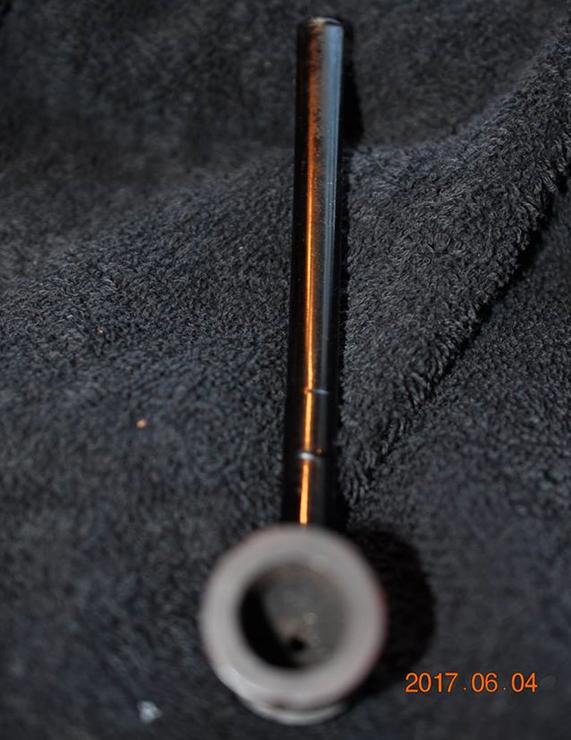
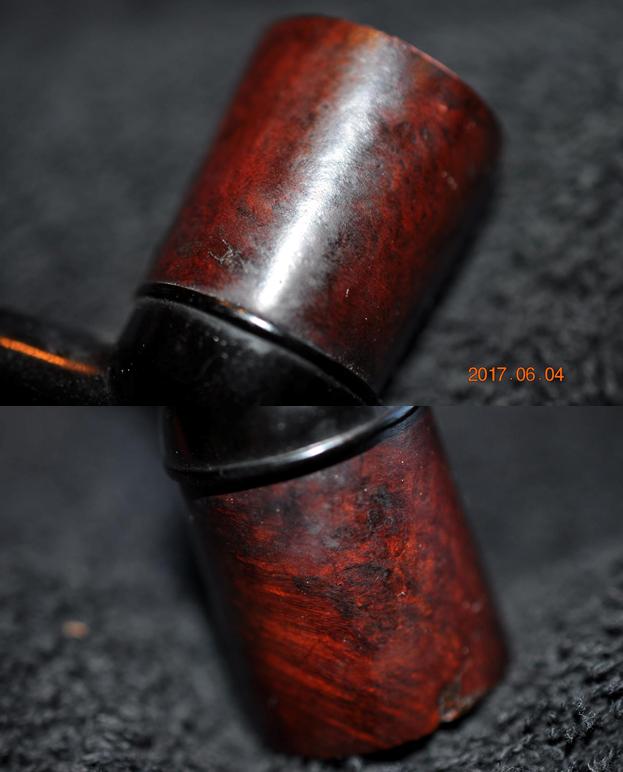
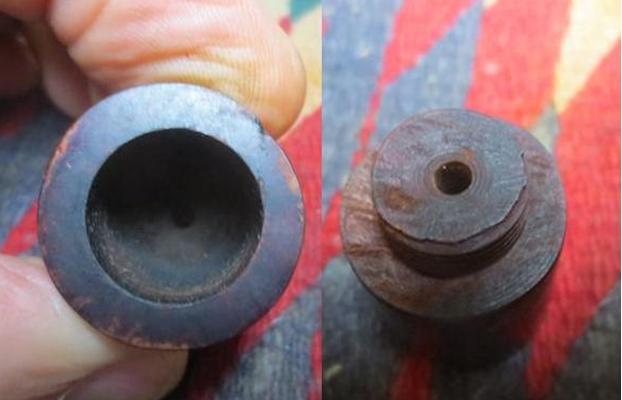
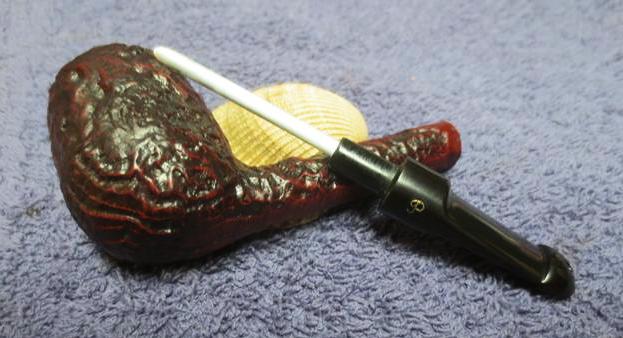
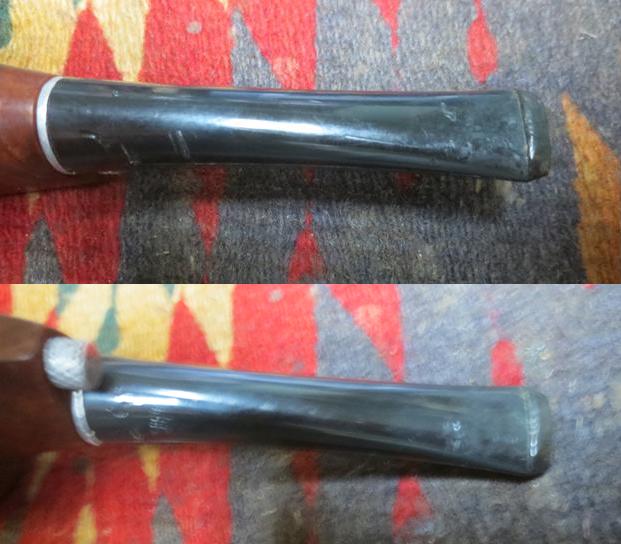
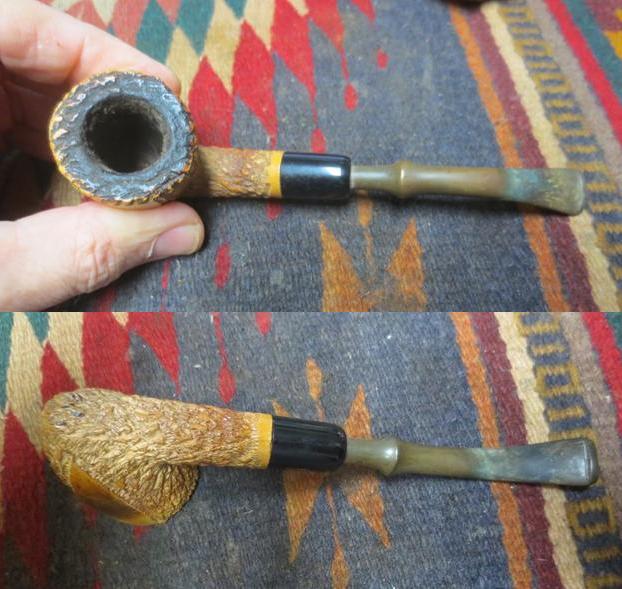
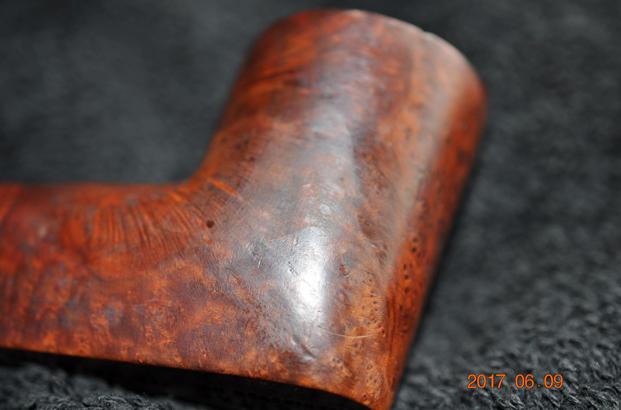 The next photos show the pipe from various close-up angles so that you can see the damage to the stem and the junction to the shank and stem.
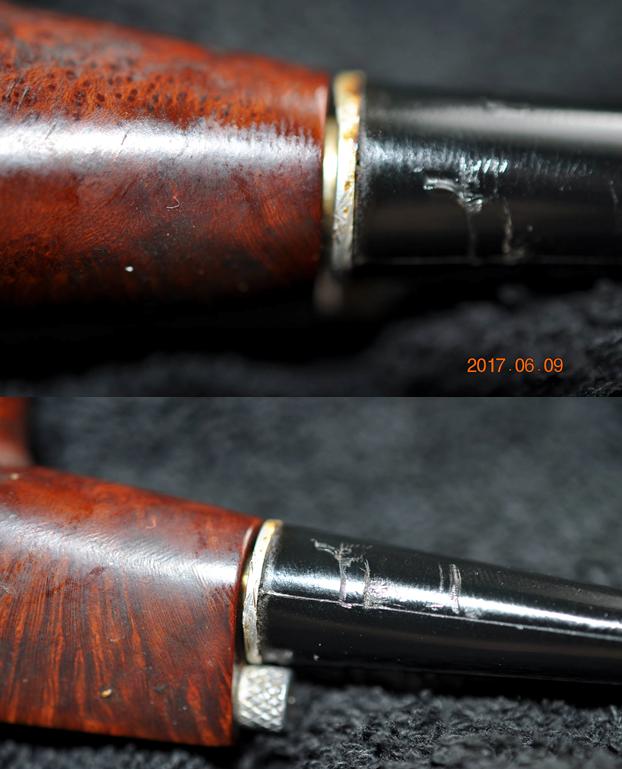
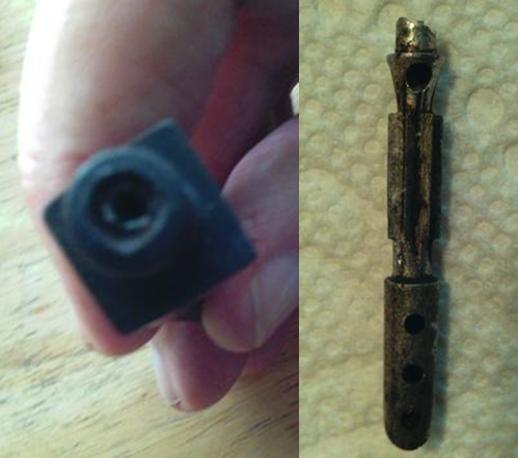
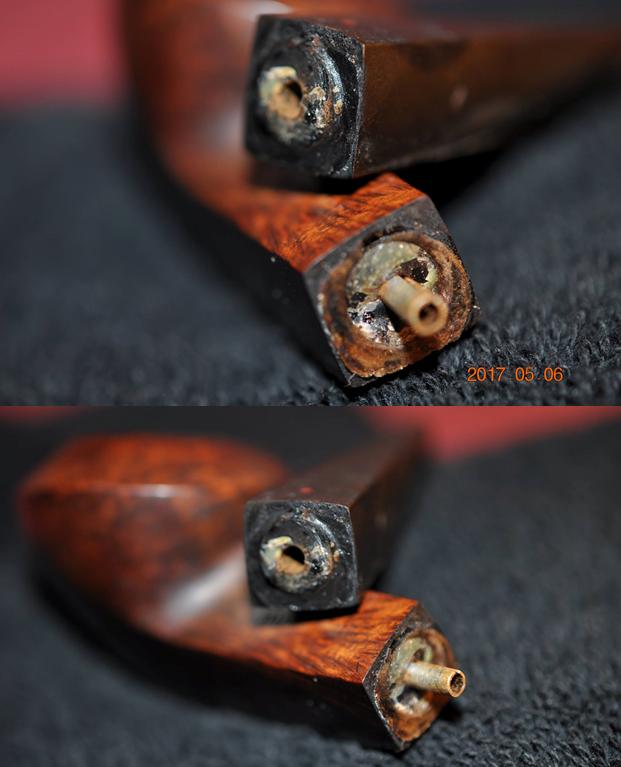
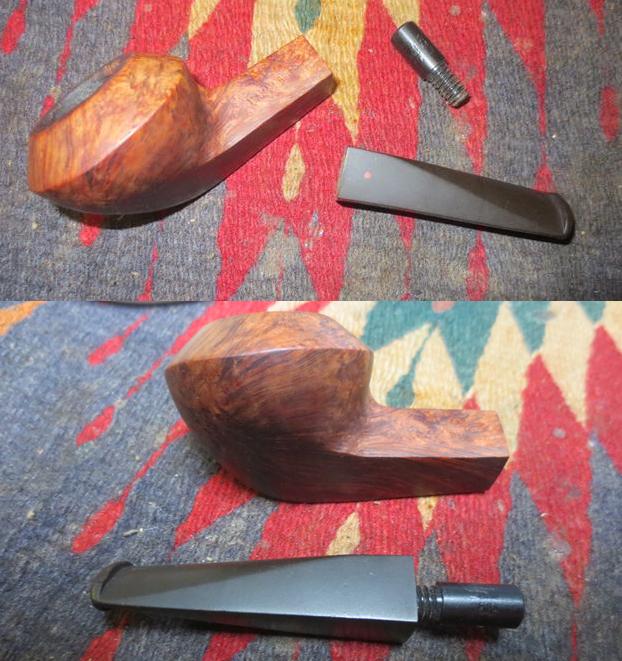
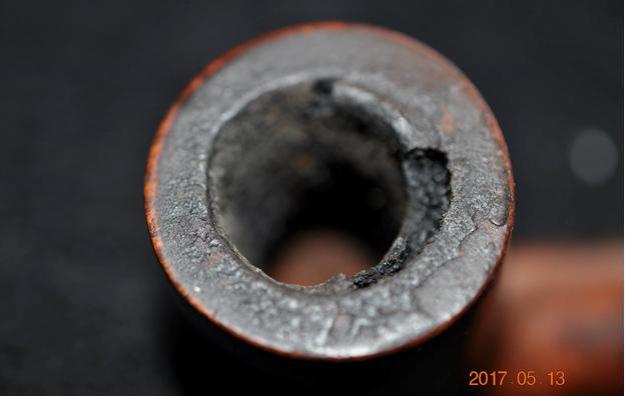
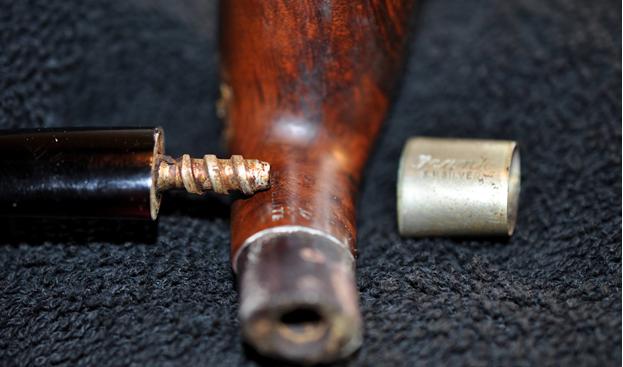
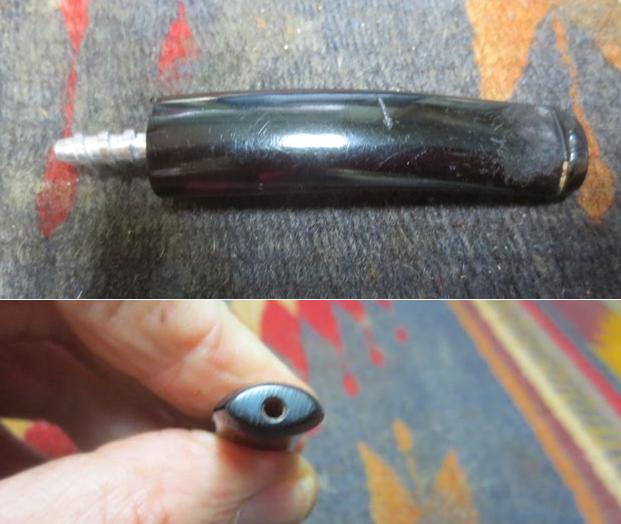
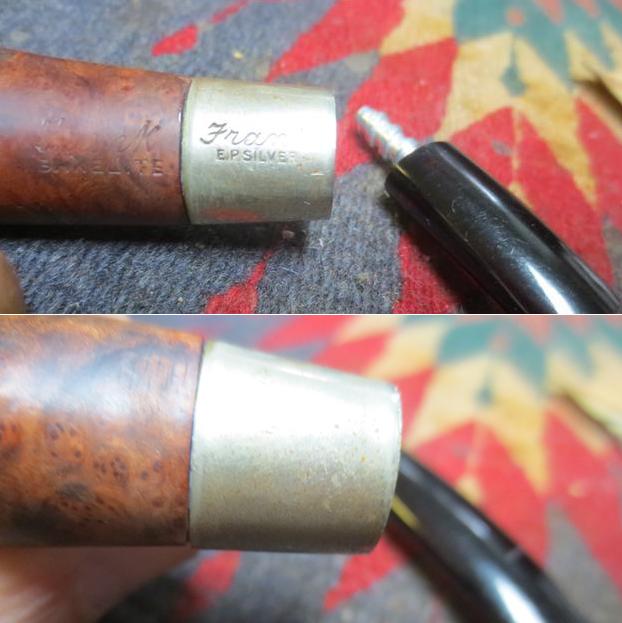
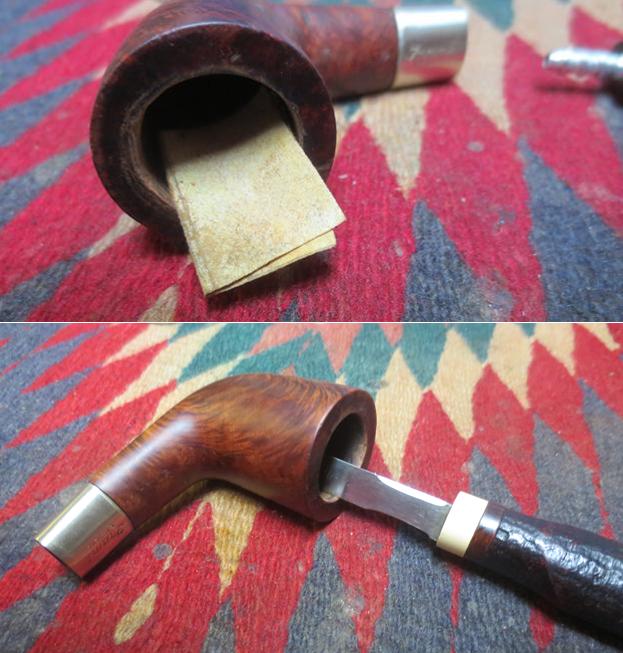
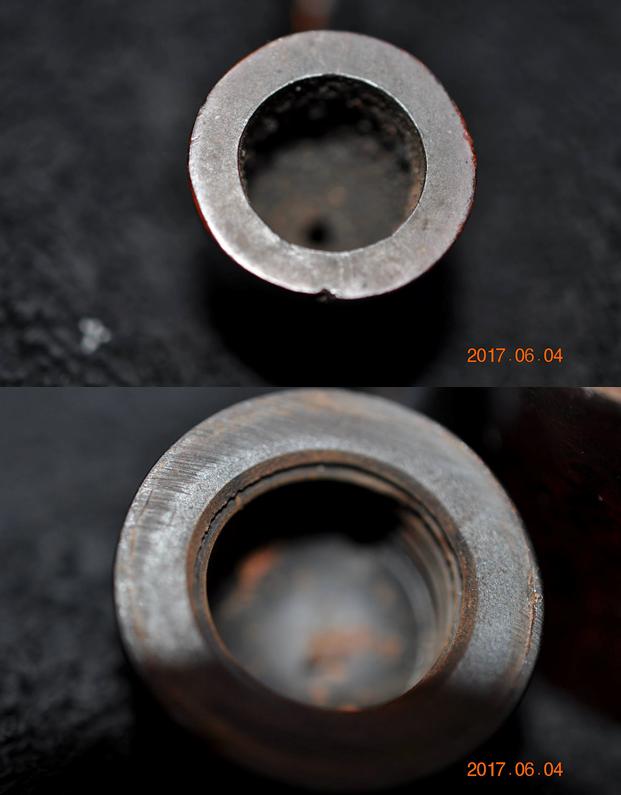
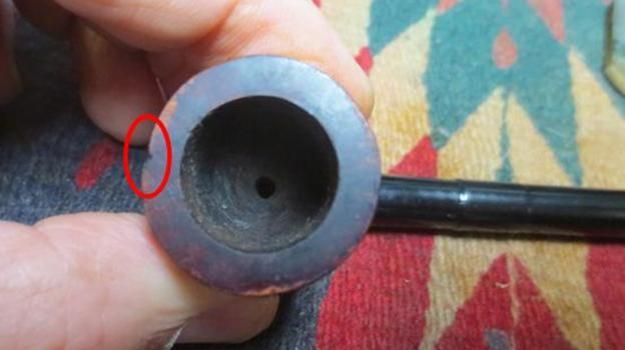
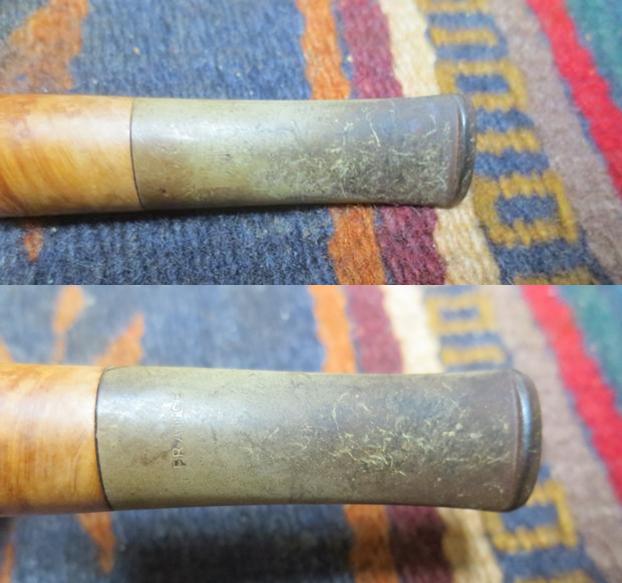
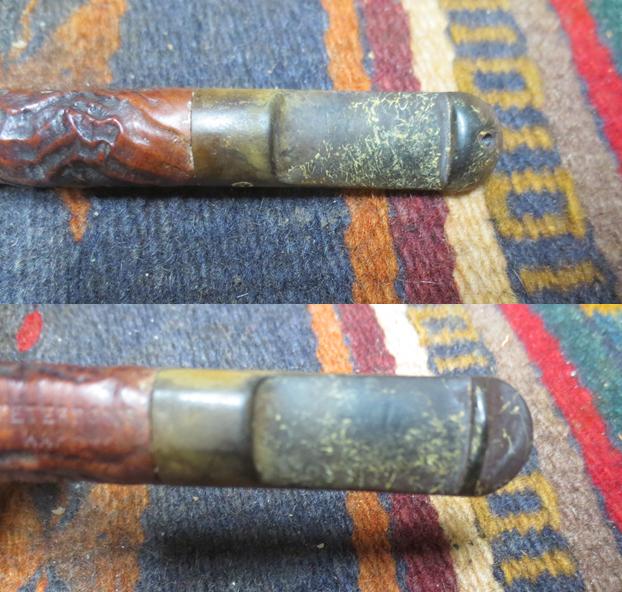
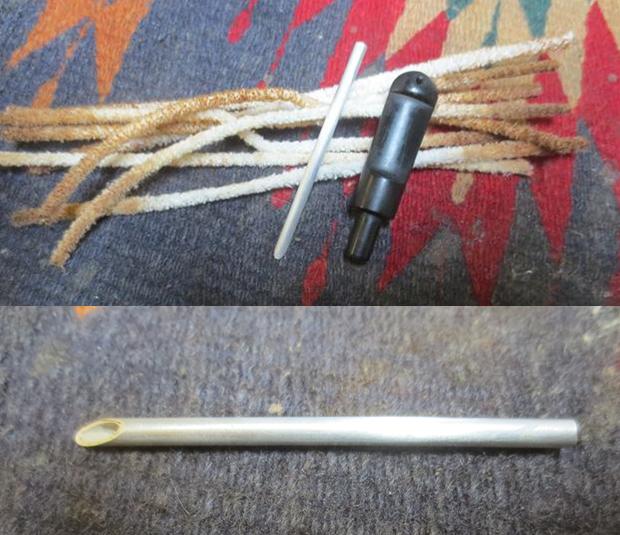
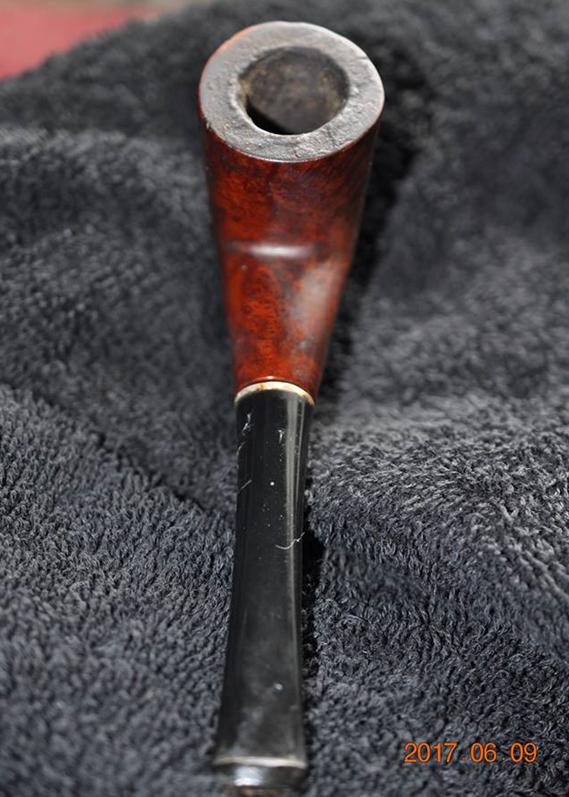
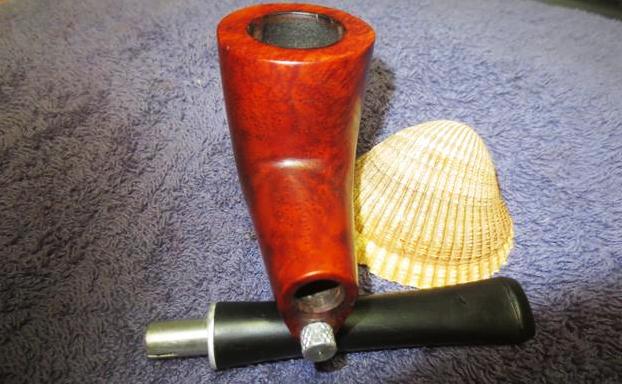
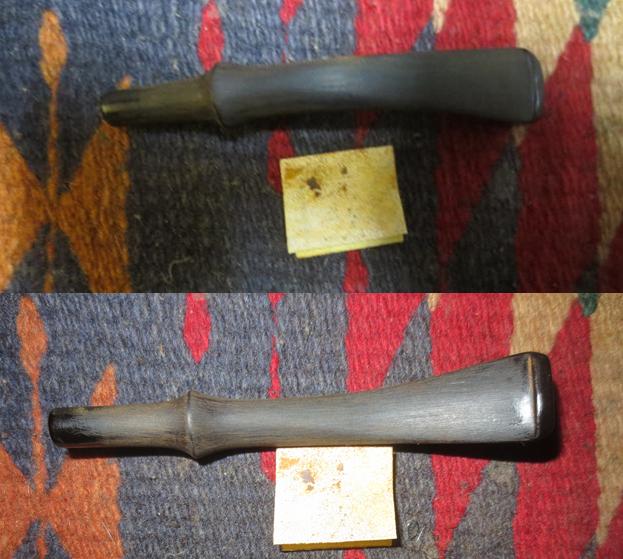
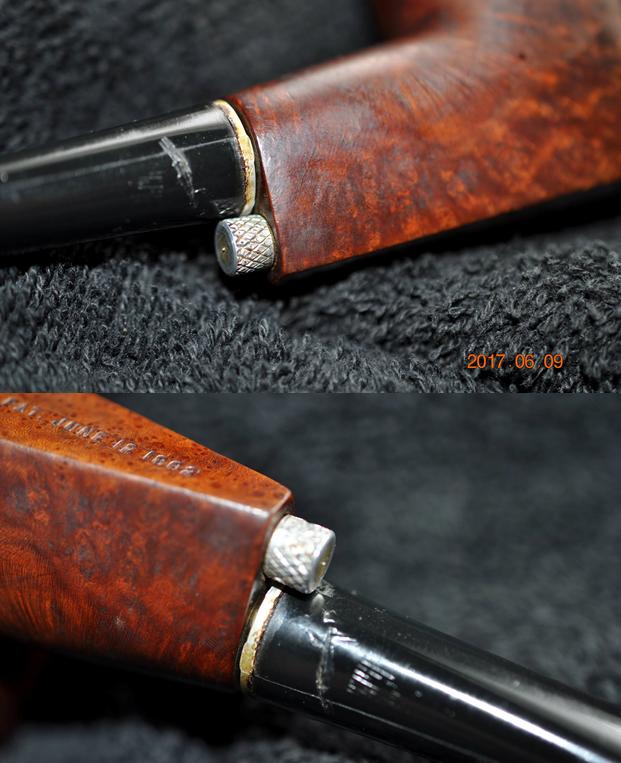 Jeff removed the stem from the shank and unscrewed the knurled silver coloured cap below the stem and took photos. It looked to me that the pipe was missing a stinger apparatus that attached to the knurled cap.
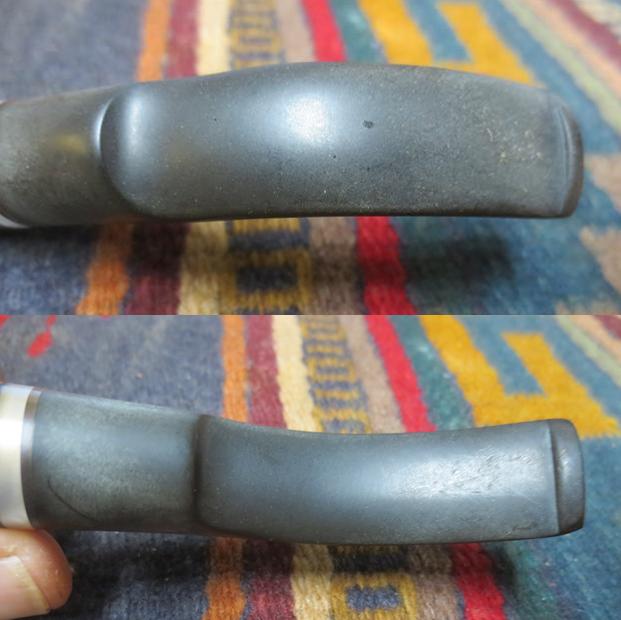
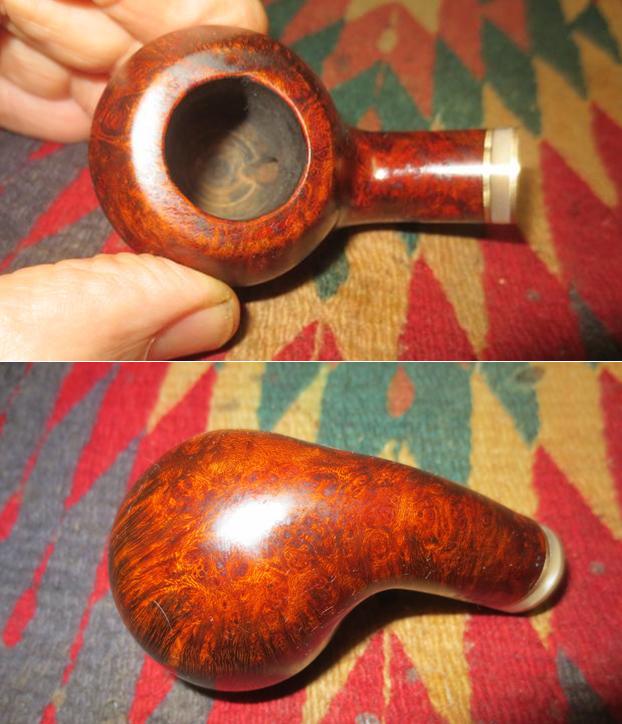
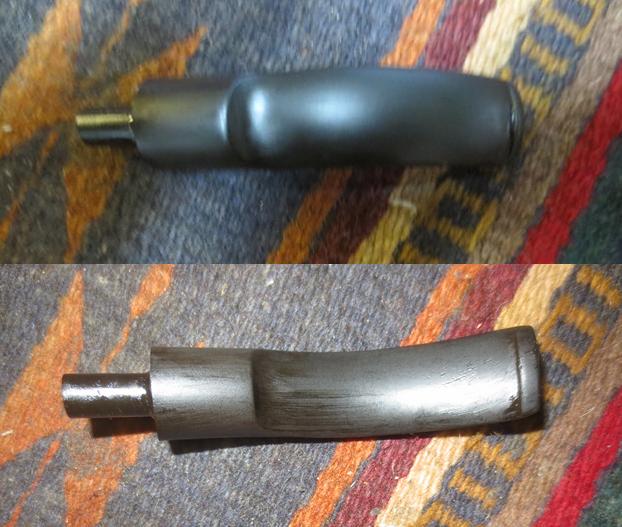
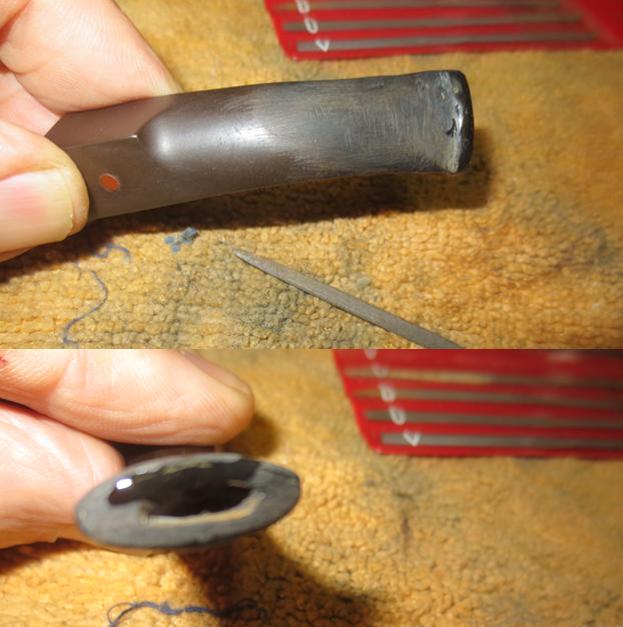
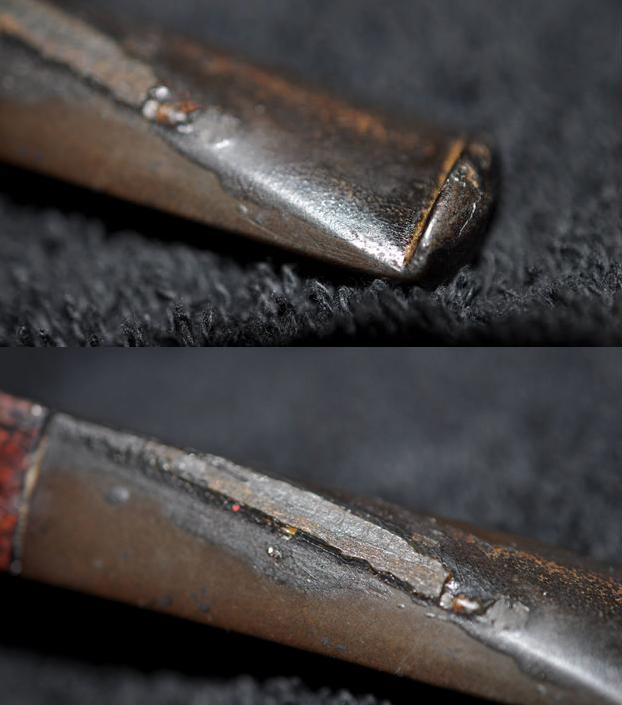
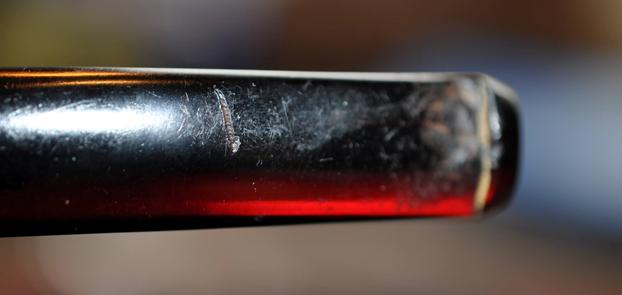
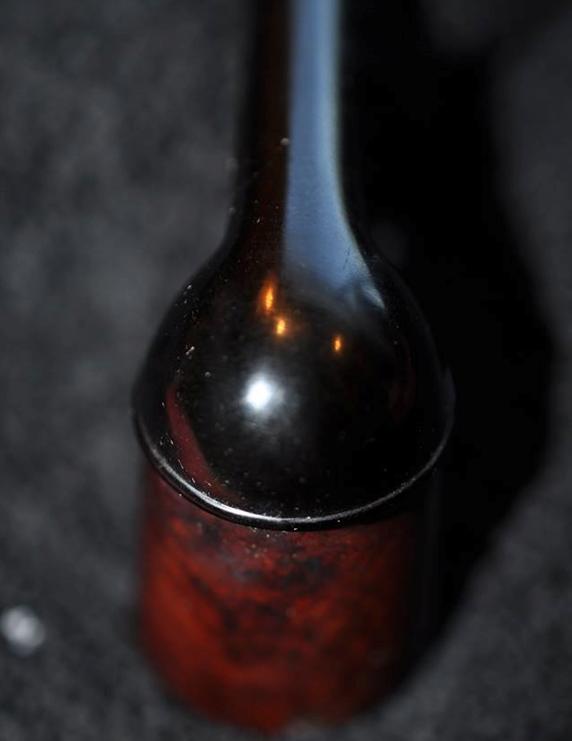
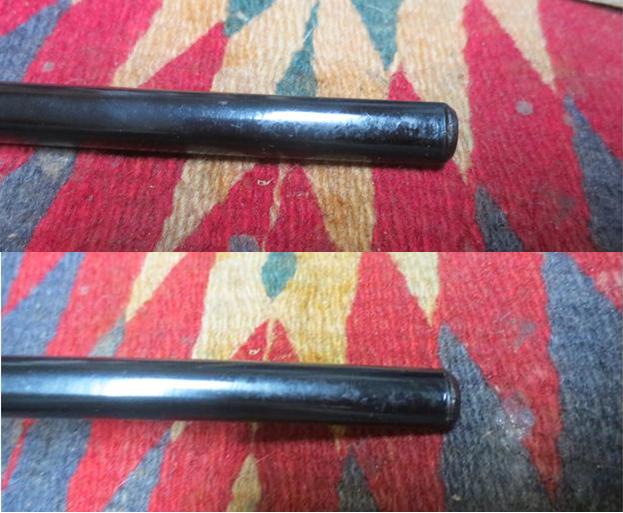
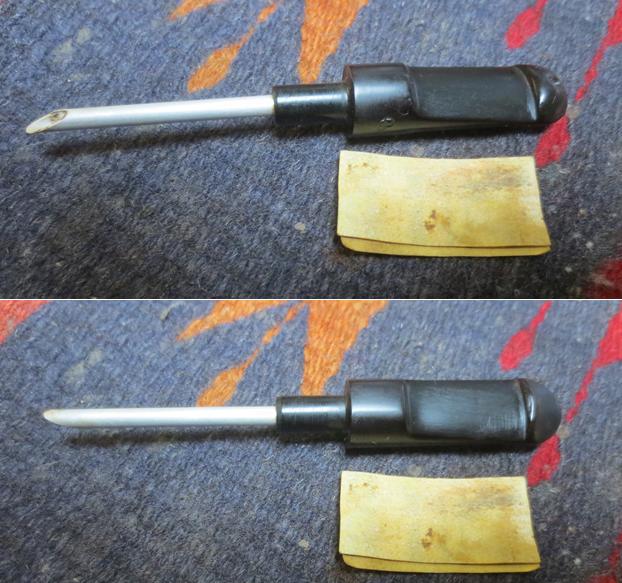
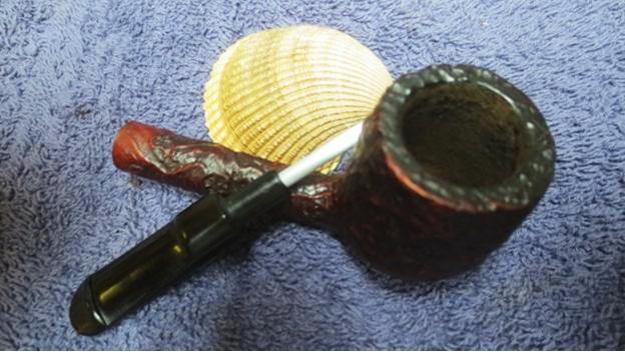
 The last two photos that Jeff included show the top and underside of the stem at the button. There were quite a few tooth marks and lots of chatter on both sides of the stem. When I saw that it was a bit of a pain because cleaning up these nylon style stems is difficult and time consuming.
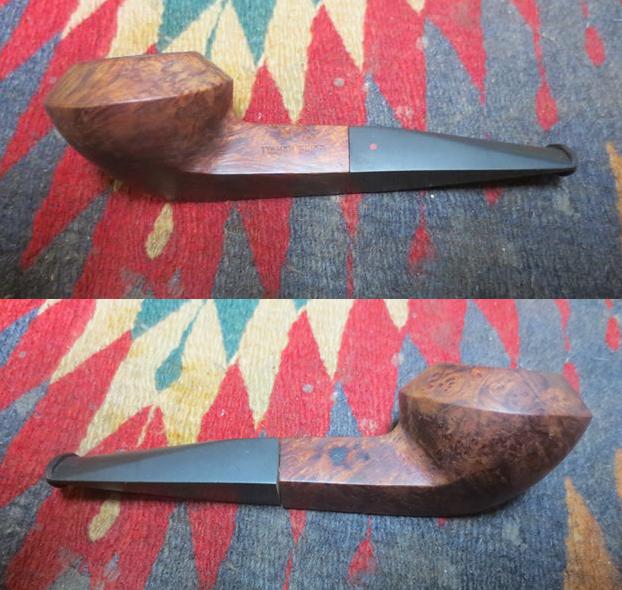
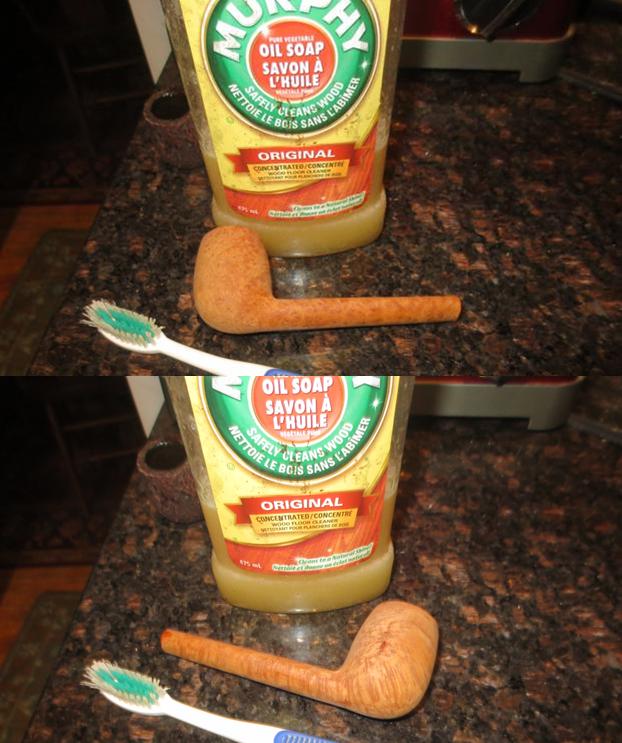
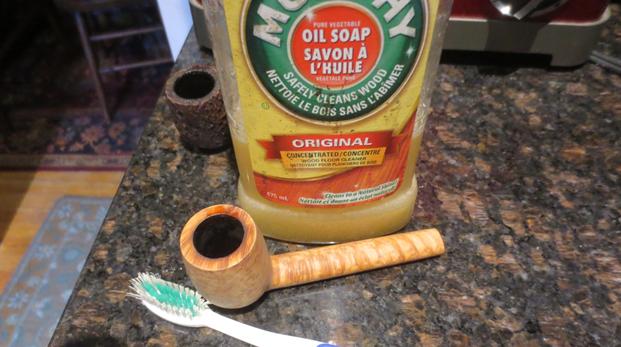
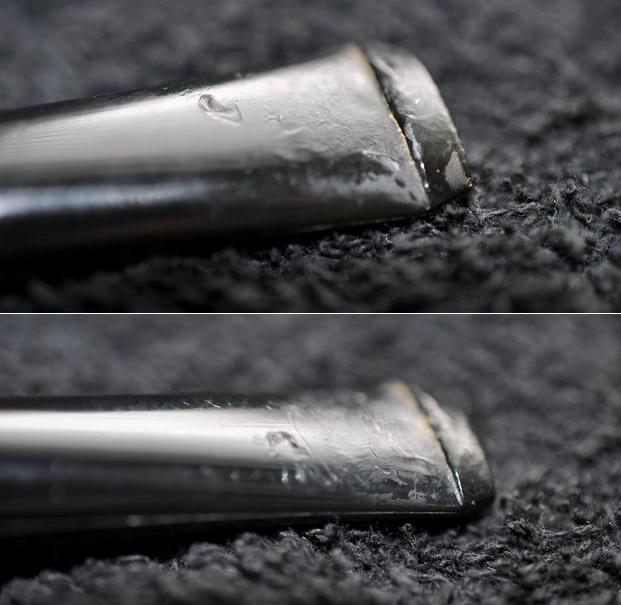 Jeff did his usual thorough cleanup of the pipe. I am coming to expect nothing less when he sends me pipes that have gone through his cleaning process. He reamed the bowl with a PipNet reamer, scraped the bowl and the rim top with a Savinelli Fitsall Pipe Knife to clear off the lava build up. He cleaned out the internals in the airway in the shank and the condensation chamber with alcohol, cotton swabs and pipe cleaners. He cleaned out the metal tenon and the airway in the stem with alcohol, cotton swabs and pipe cleaners. He scrubbed the exterior of the briar and the stem with Murphy’s Oil Soap and a tooth brush to remove all of the grime on the briar and the stem. He rinsed the parts under running water and dried it with a soft cloth. He soaked the stem in OxyClean to clean off the grime on the surface. When the pipe arrived in Vancouver it looked different than it did in the above photos.
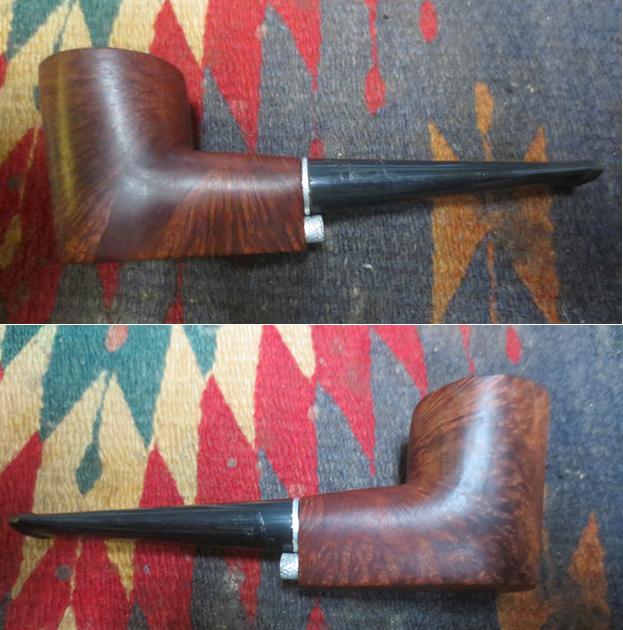
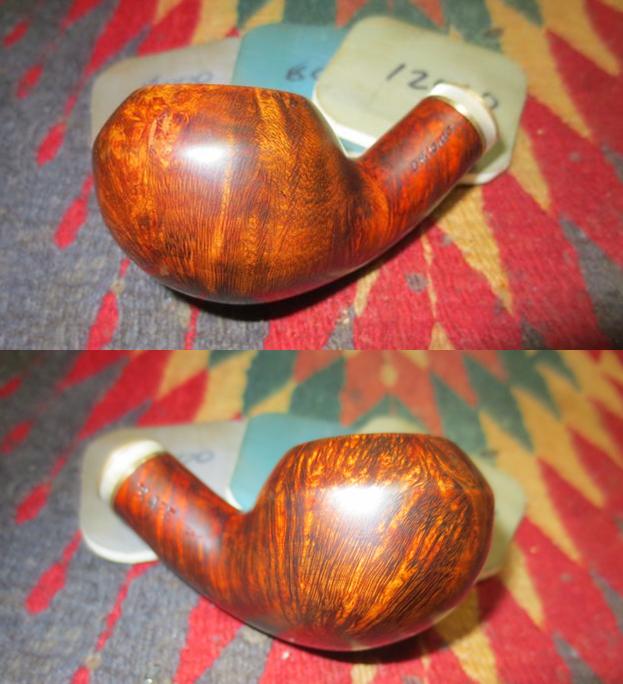
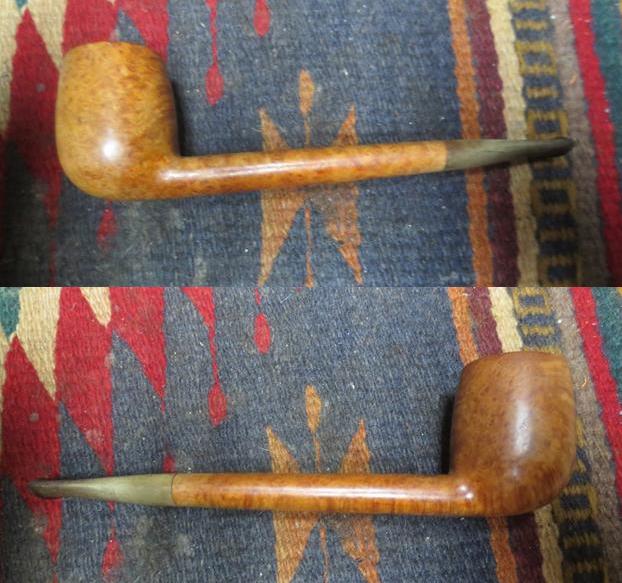
 The rim top and bowl looked really good. The damage was minimal and very visible. The condition of the stem was much as I had expected.
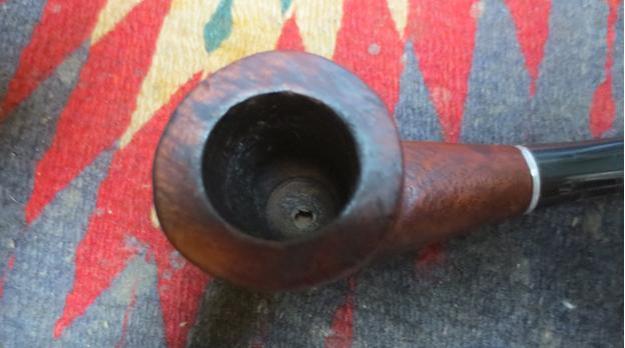
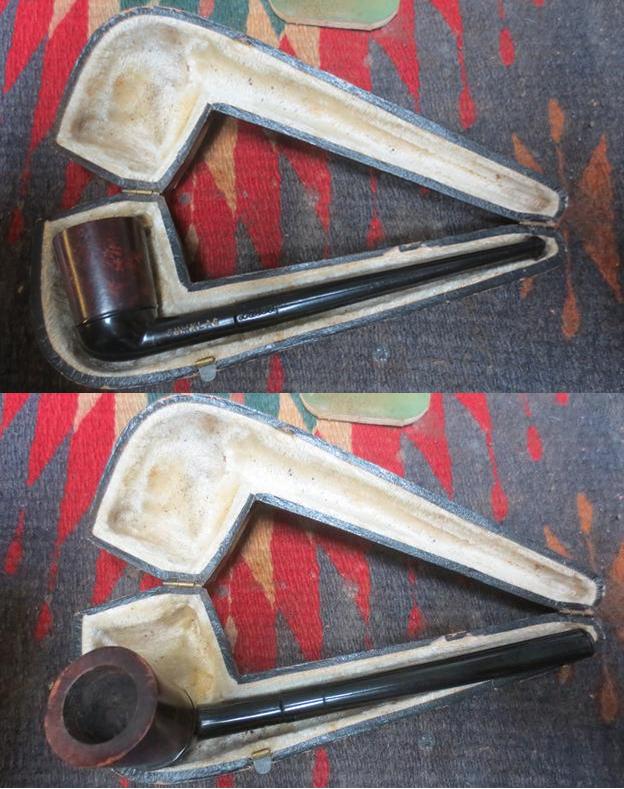
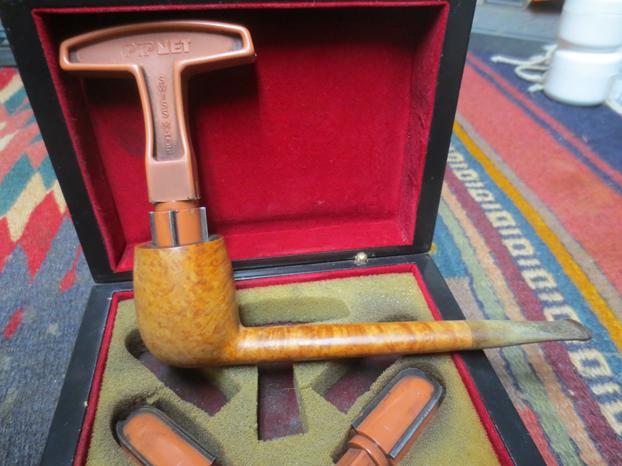
 Before I started my restoration work on the pipe I decided to do a little research on the brand. I first turned to Pipedia where I found a short entry. I include that here as it confirmed that I was missing the 2 3/8 inch corkscrew device. I quote it in full with the link to Pipedia.
J. Rettke, Washington MO, PAT. June 12 1962. The silver colored thumbscrew below the stem unscrews and is a 2⅜” corkscrew like device. The company is now gone having been purchased by Missouri Meerschaum. This odd looking pipe is made of briar and has a lower chamber with a metal condenser and an upper chamber that contains a filter. The smoke leaves the bowl thru the lower chamber then into the upper and out the stem. It smokes dry and cool. It has a large bowl. https://pipedia.org/wiki/Rettke
The pipe was not included in my other usual sources so I dug a bit further to see if I could find more information on the brand and the maker. I wanted to know the links to Missouri Meerschaum or Dr. Grabow/Medico. I found an article in the Washington Citizen Newspaper from Washington, Missouri dated December 13, 1964. Here is the link. I included a photo of the news clipping below as well as a transcript of the article that I did using a magnifying glass. I also copied the photos for ease of reference. I have included them in the article transcript with the captions http://digital.shsmo.org/cdm/compoundobject/collection/WashCitz/id/21937/rec/1.
Julius Rettke Makes and Sells 3,000 Briar Pipes in Two Years
Julius Rettke spent 43 years making pipes. Two years ago he retired. What happened?
“I just couldn’t sit still. I had to do something.”
He went back to making pipes. He calls it a hobby and that’s what it is for him. He could sell his patent and there is no doubt that it could be made into a lucrative business. But Julius is interested in it only as a hobby. He is 74 years old.
He doesn’t advertise his pipes but has made and sold about 3,000 of them in the past two years. Each sells for $4.00. He has been told he could sell them for $8 to $12.
“I would rather sell them for $4. You know there are a lot of people that can’t pay more than that for a pipe.”
Hasn’t Promoted Pipes
His advertising has been only by word of mouth. He does burn his name and Washington, Mo., on the pipes. Most of his pipes have been sold in this immediate area, but he has had orders from all over the country. Many people give them as gifts. Several companies with chain retail outlets would like to handle his pipes.
Julius made his first pipe about nine years ago. It was made of pecan wood. He gave it to James L. Miller of The Missourian-Citizen to try out. The newspaper publisher at that time was a steady pipe smoker. He liked the pipe.
“That made me feel like others would be interested,” he said. But he was too busy with his job as a machinist at Missouri Meerschaum, where he spent 43 years helping to make corn cob pipes. After he retired he made several pipes out of cherry wood. But he soon found most pipe smokers preferred a briar pipe. Carl Otto, his former-boss, supplied him with briar roots and he made his first briar pipe.
“I took the first pipes to the Bryan boys (Harvey and Tom) and they like them. Before long people asked me to make pipes for them. That’s how I got started.
Does Work in His Basement
The work is done in Mr. Rettke’s basement of his home at Third and Market streets. He doesn’t work at it every day only when he feels like it. He likes to fish and that comes before his pipes in the summer.
What is the reason for the rather wide acceptance of his pipe?
“They claim it is a dry smoking pipe with no nicotine. It has protection against nicotine,”
Mr. Rettke received his patent on his pipe in 1962. What makes his pipe different from others on the market is the path the smoke takes from the bowl, and the passage of smoke through a twisted piece of aluminum, or a “whirler.” The smoke also travels through a standard filter in a standard hard-rubber stem. The “whirler” has a rubber tip that shows on the outside of the pipe under the stem. The “whirler” also can be used as a pipe cleaning tool. It pulls out easily for cleaning purposes.
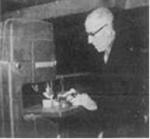
Mr. Rettke: makes only one style of pipe. He buys his briar roots from a New York importing company. The briar roots are grown chiefly in Mediterranean countries. Most of the briar now conies from Greece and is several hundred years old. The briar itself is a shrub-like plant. The briar burl is cut into specific sizes and shapes and it is in an almost square form when Mr. Rettke receives it.
The manufacturing process in Mr. Rettke’s basement is illustrated in the accompanying photos.
No Production Schedule!
When he works at it, he can make about 10 or 12 pipes a day, he has no production schedule to meet! Things tend to get a little hurried around Christmas time since many people buy pipes for gifts.
When he received his patent, Mr. Rettke gave one of it to John Fowler, who is a career man in the Air Force, and to Wilson Schroeder of Washington, his two sons-in-law. Mr. Rettke’s son, Arthur Rettke lives in Clover Station. He is a carpenter and does some farming.
Mr. Rettke was born and raised in Warren County near Martinsville. He spent some time as a carpenter before going to work for Missouri Meerschaum.
Mr. Rettke was never a heavy smoker and never did smoke a pipe. He did smoke cigars for a period, but he gave that up long ago.
“It’s just a hobby with me. I never expected it to be anything else, but somebody should take it over after I’m gone,” he confided.
-
-
The evolution of a pipe is shown here on a work table in Julius Rettke’s basement. The briar root is at the right and this is the way a pipe looks as it progresses through the various steps.
-

-
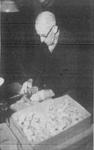
This is the way the briar roots look when Mr. Rettke receives them. They are different sizes but are almost square at the end where the bowl is made.
-
-
The briar blocks are squared by use of a band saw.
-

-
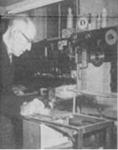
The bowl is shaped by use of this drill press.
-
-
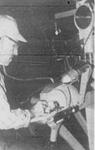
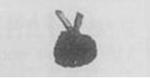
A drill is used to bore holes for the stem, “whirler” and bowl. In all, four holes are bored.
-
-
The pipe is shaped on both sides by this circle saw.
-
-
The bowl is rounded to a fine finish. It is buffed after it is stained to give the pipe added luster.
-
-
For gifts, Mr. Rettke puts pipes in these plastic cases. His patent hangs on the wall in the background. Note the pipes displayed at the top.
-
-
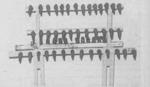
After the pipes are stained by dipping them in a solution, they are dried in this fashion. This rack holds over 50 pipes.
-
-
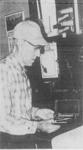
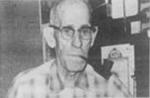
Julius Rettke doesn’t smoke but he “models” one of his products.
-
-
This is the way a briar root appears before it is cut into a rough block.
-
-
The Rettke Pipe
To me this is a fascinating article. It answered at least some of my questions. Julius Rettke had indeed worked for Missouri Meerschaum as a bowl turner in their factory. On his retirement he started making the pipes. He only made one style of pipe and never varied from the basic shape. He purchased briar from a company in New York. I wonder if he did not purchase it from S.M. Frank along with the premade Medico style stems and filters. I suppose I won’t ever know but it does fit the general information above.
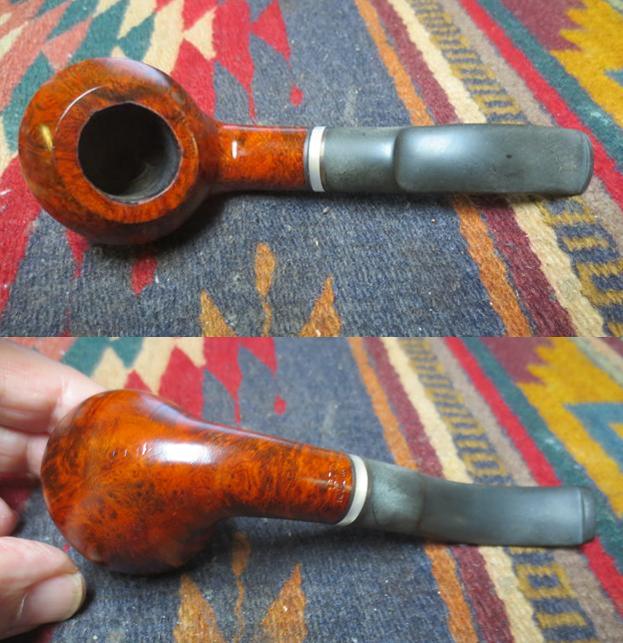
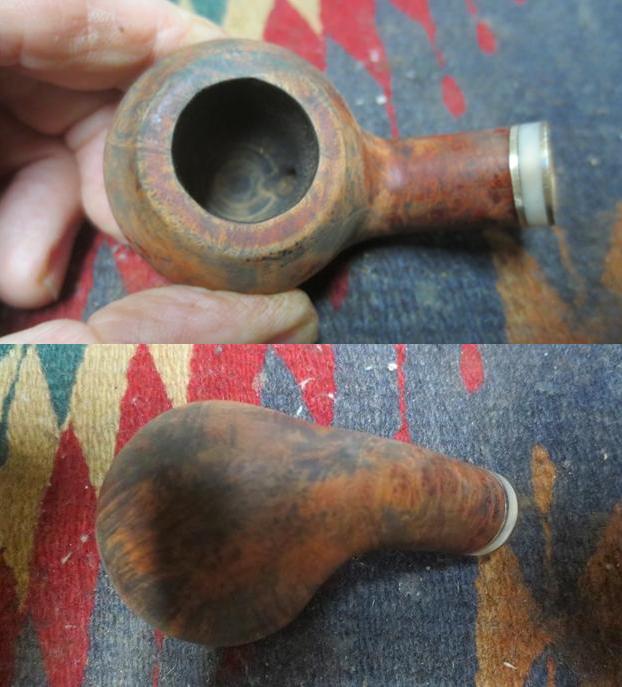
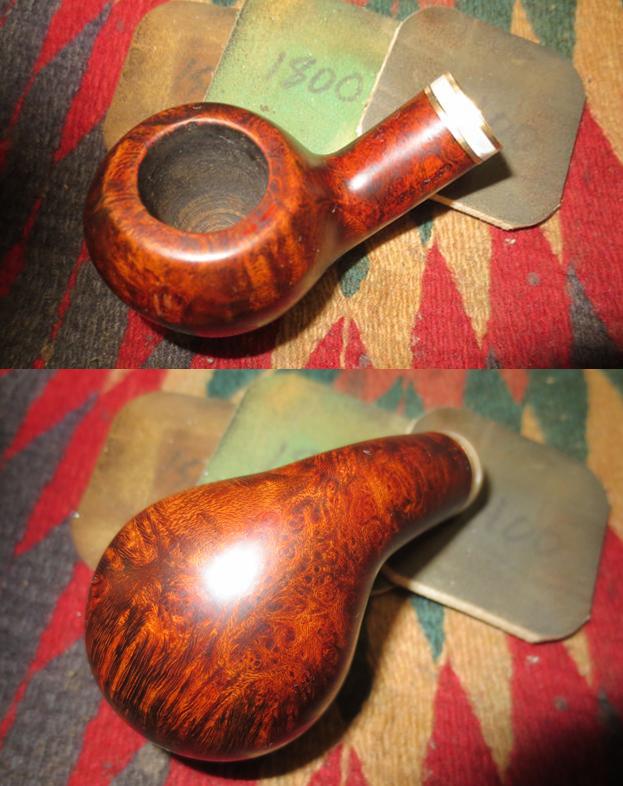
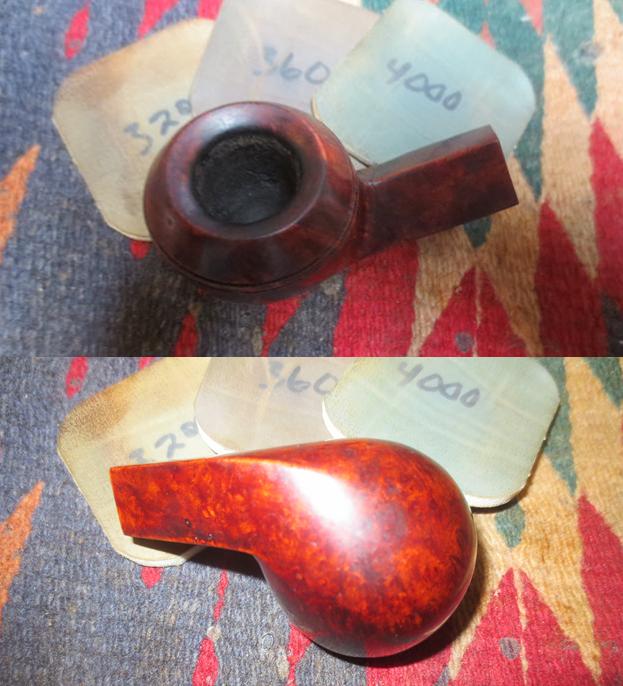
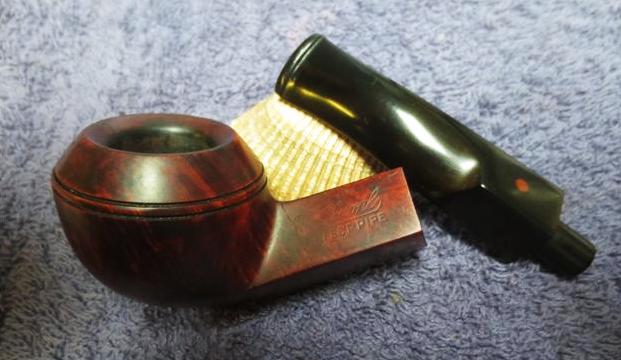
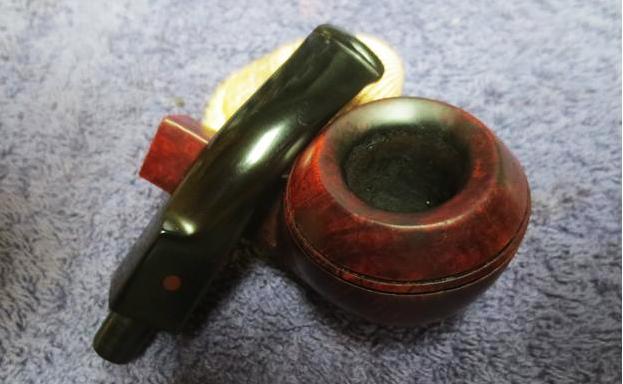
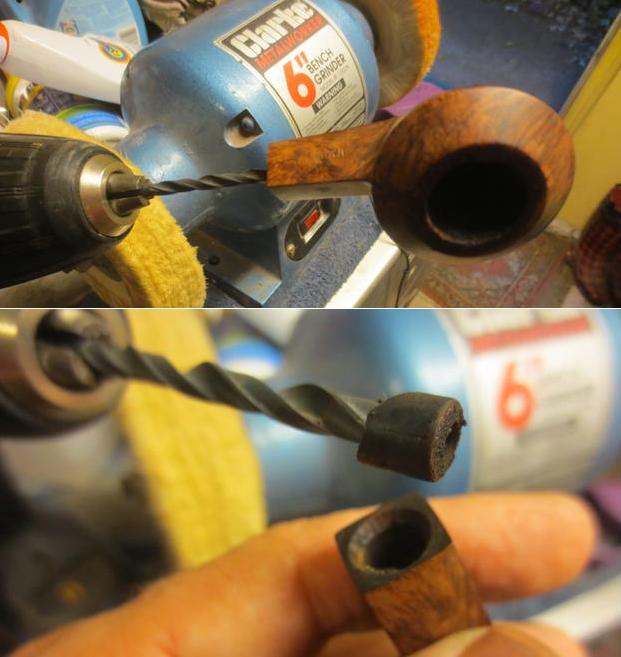
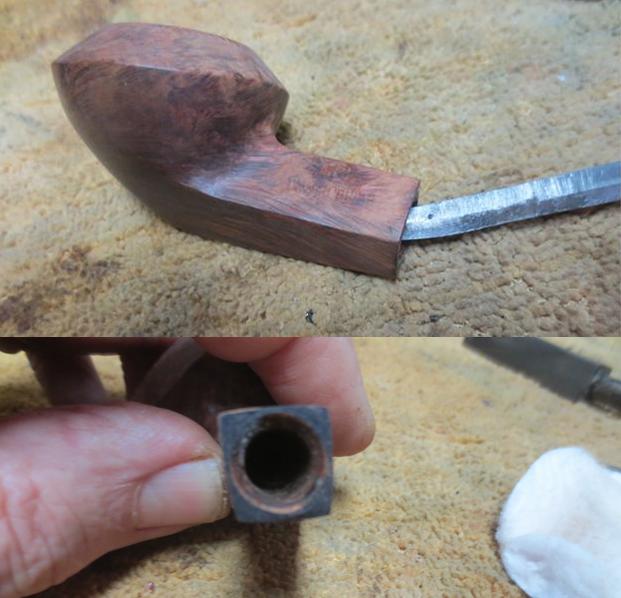
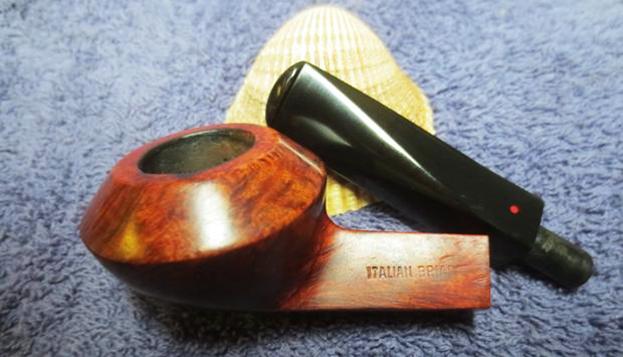
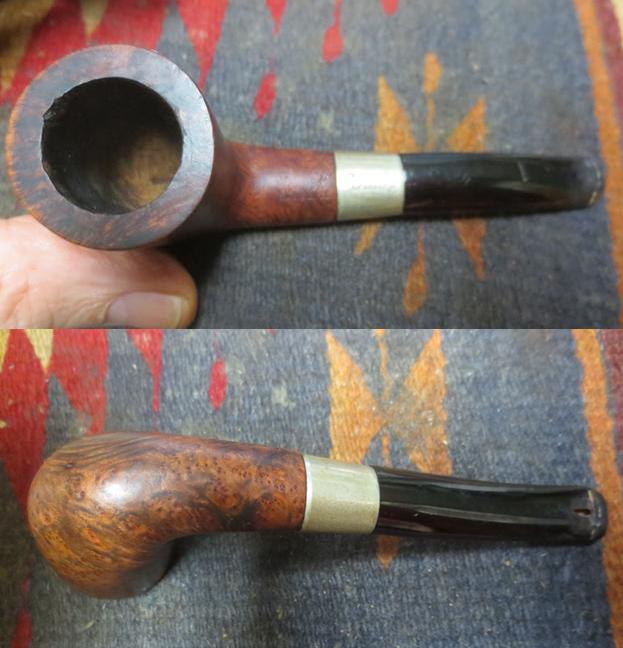
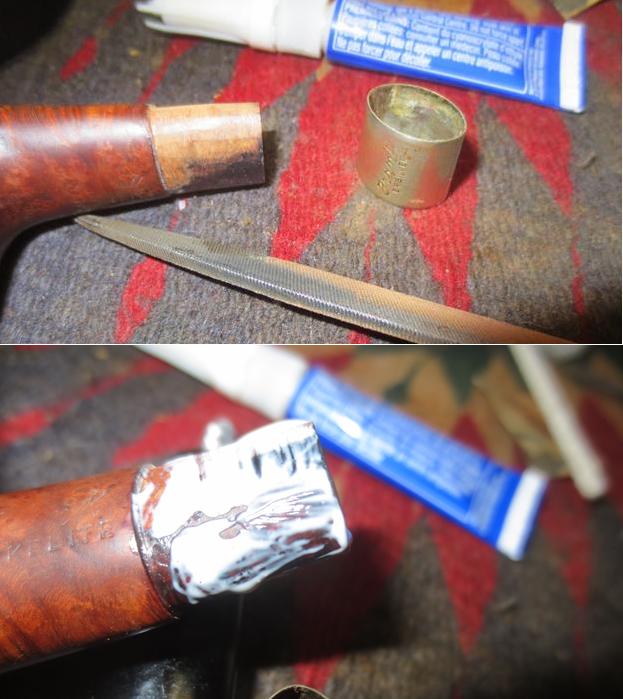
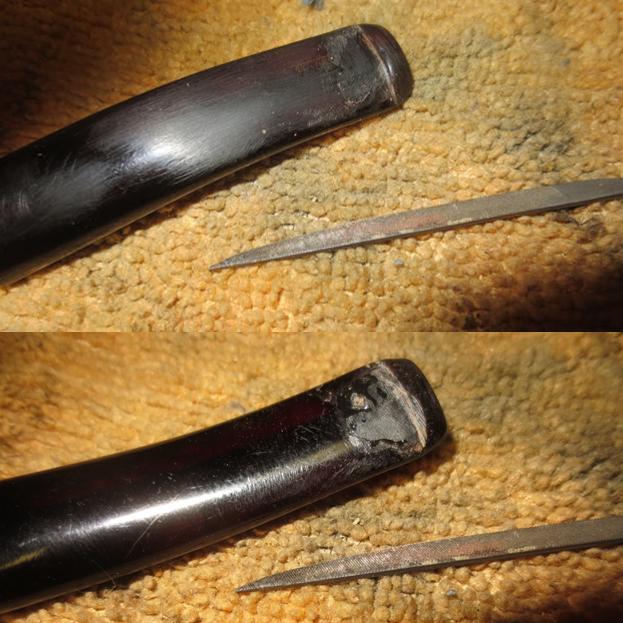
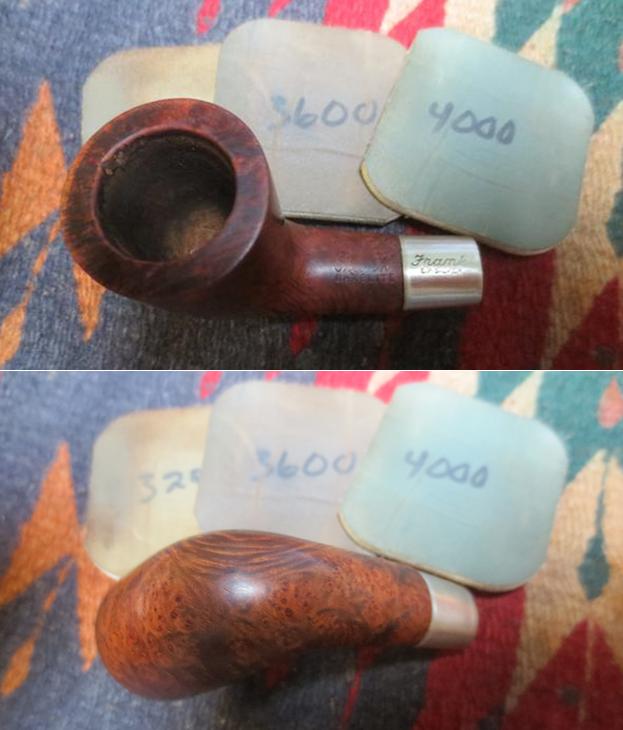
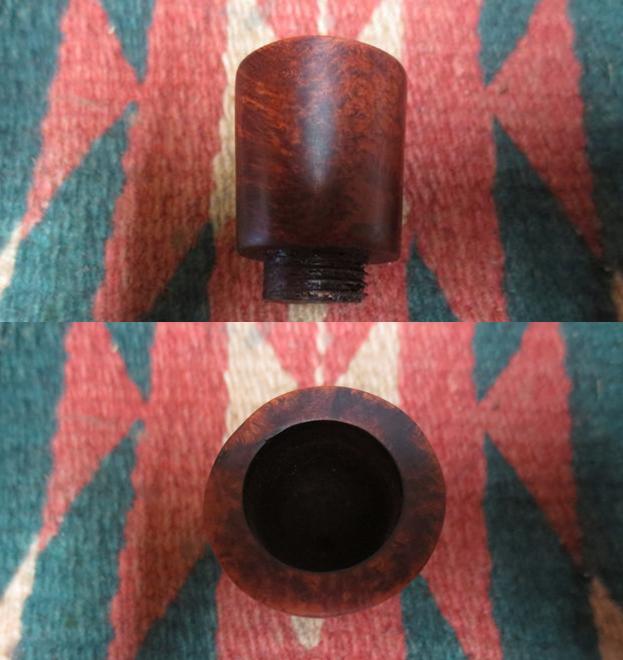
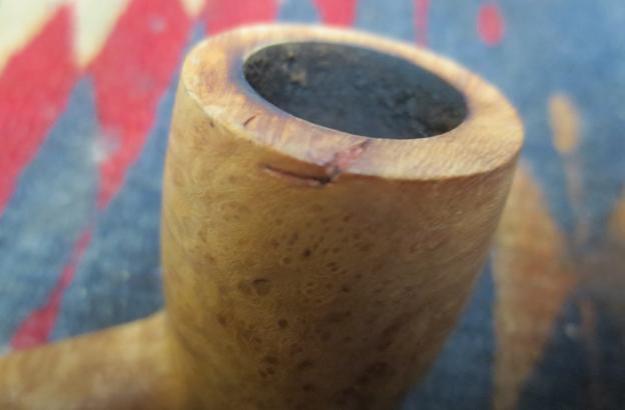
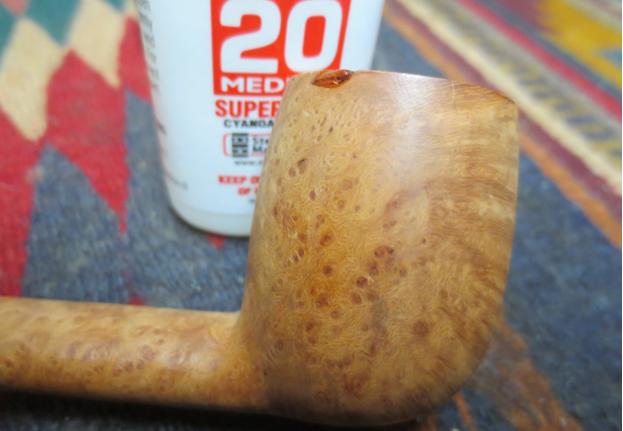
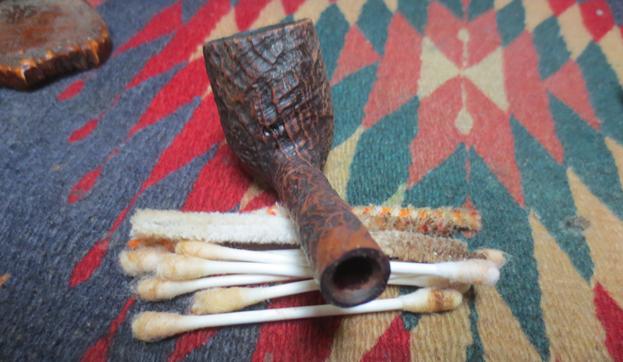
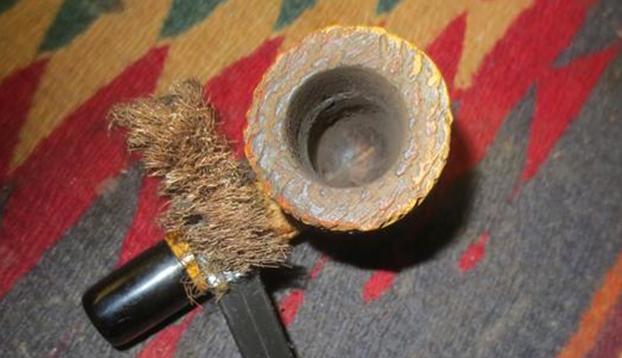
Now better armed with information I turned my attention to the restoration of the pipe. I took it apart and took a photo. I was missing the “twirler” as Julius called the spiral condenser that sat in the condensation chamber below the bowl. Everything else looked good. He had chosen a beautiful piece of briar and laid out the pipe to fit the grain pattern really well. This would be a pretty looking pipe once it was polished. The nicks and scratches on the rim top and edges were deep enough that a light topping was warranted. I topped it on a piece of 220 grit sandpaper on the topping board. I did not have to top it too much as continuous checking showed me when the surface of the rim was smooth.
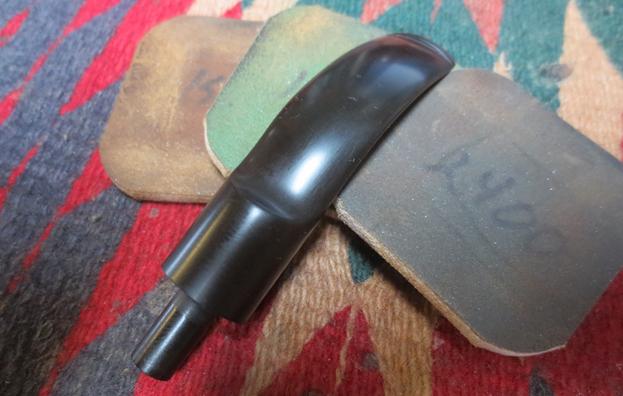
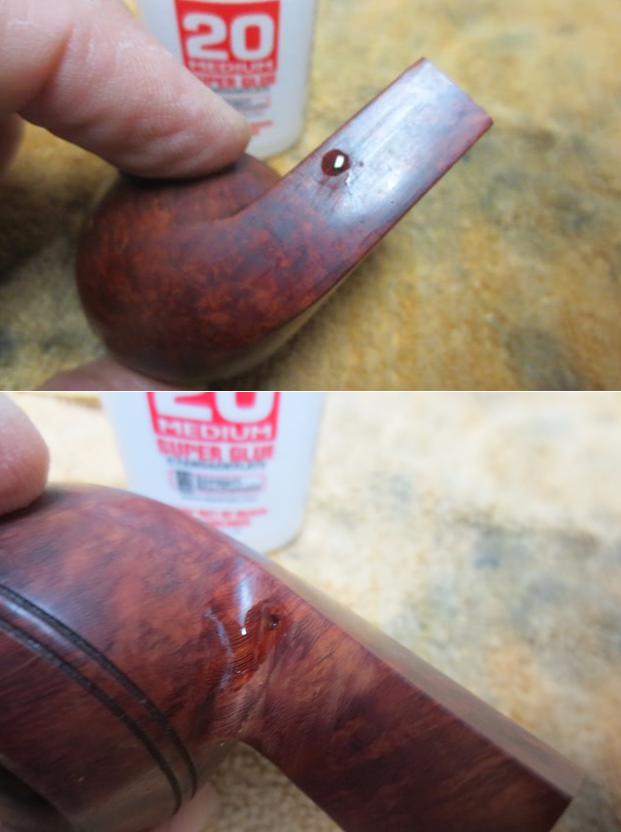
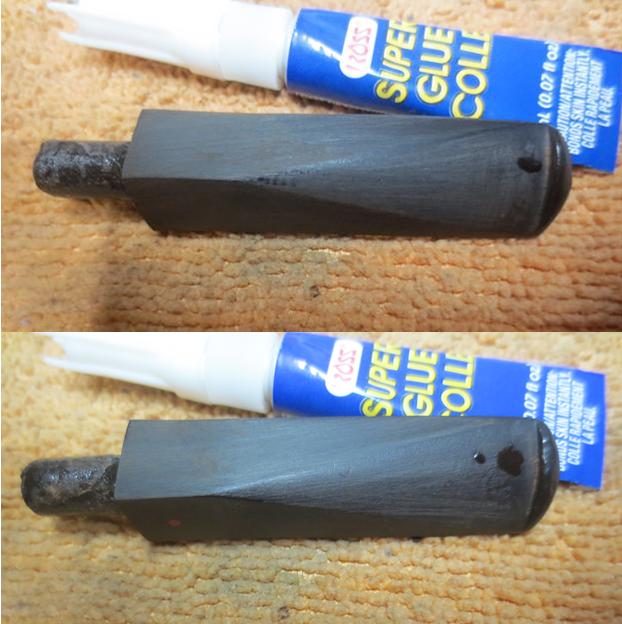
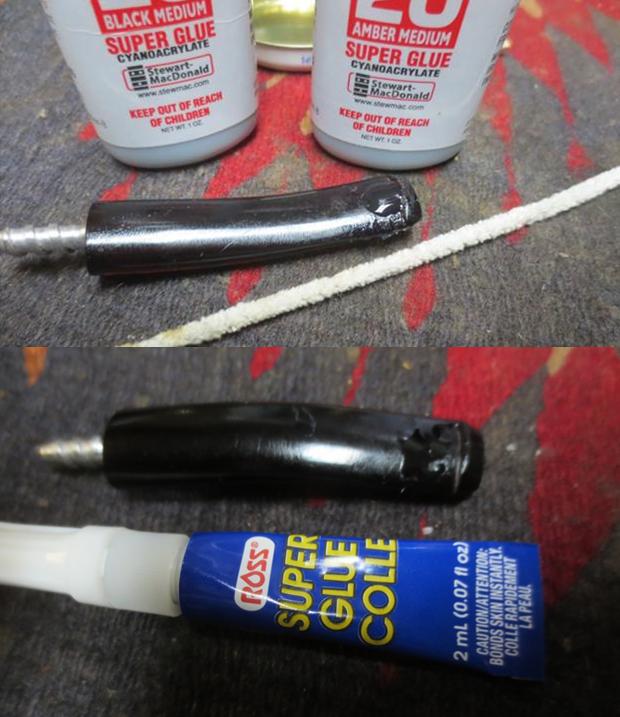
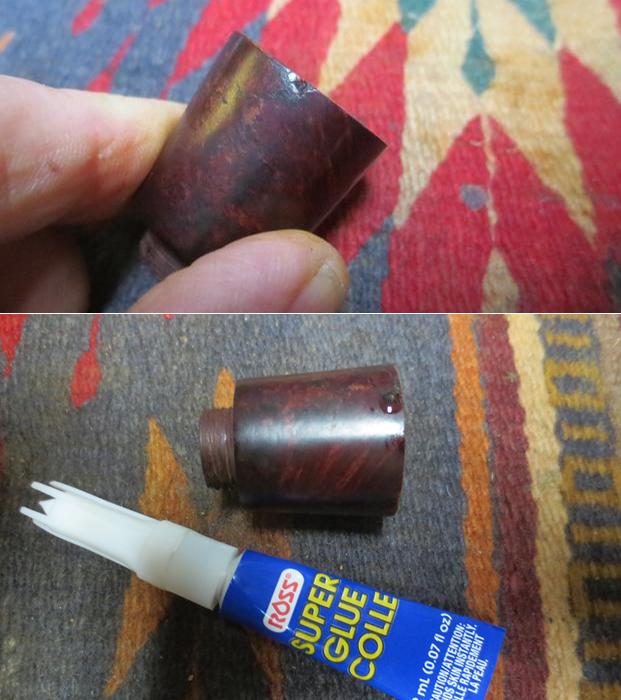
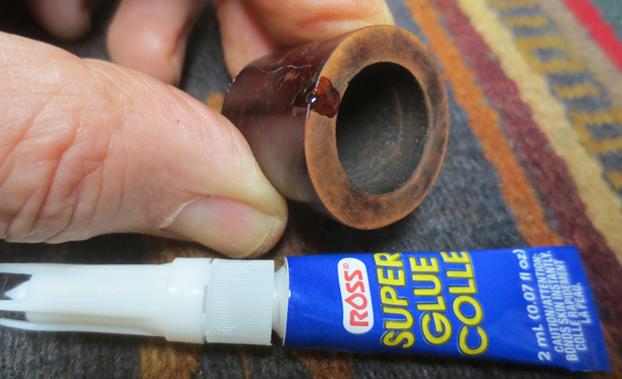
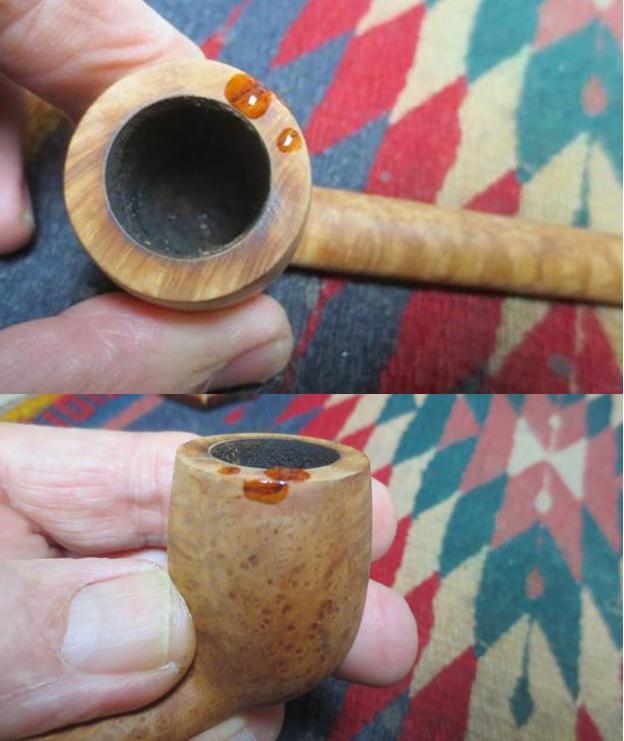
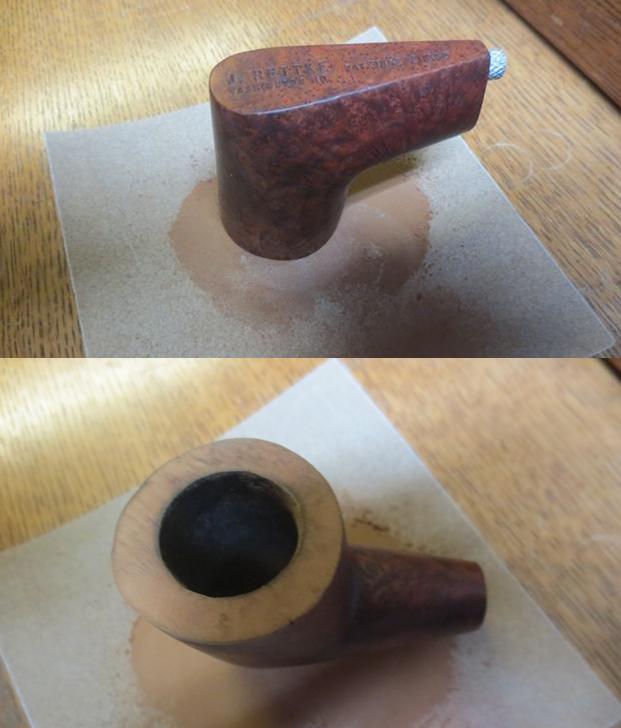 The stem was a mess so I decided to clean it and do some repairs to all the damaged spots with black super glue. It would take time for the glue to harden, so I applied it and gave it a quick shot of accelerator. The accelerator dried and turned to a white powder on the rest of the stem as seen in the photos below. I set the stem aside to dry and called it a night.
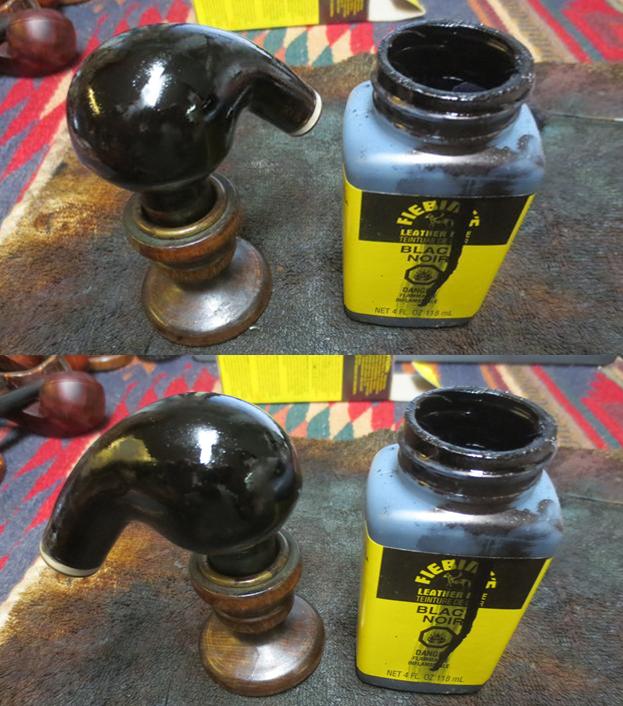
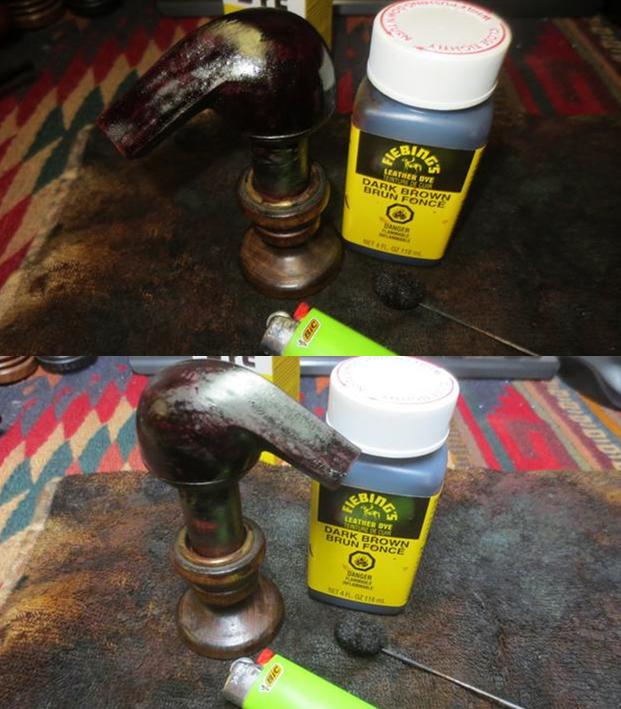
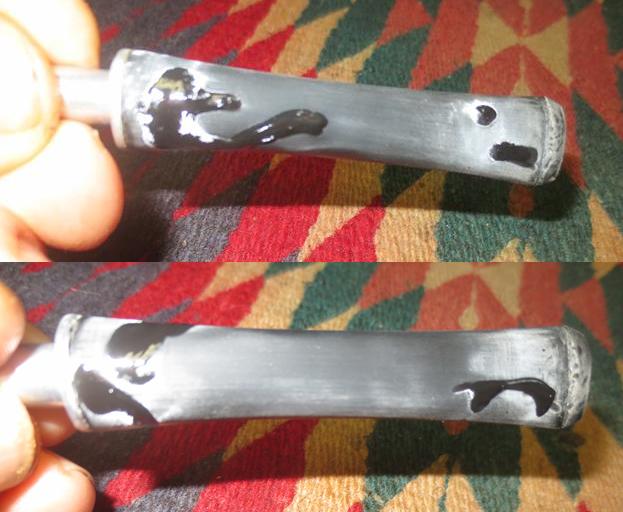
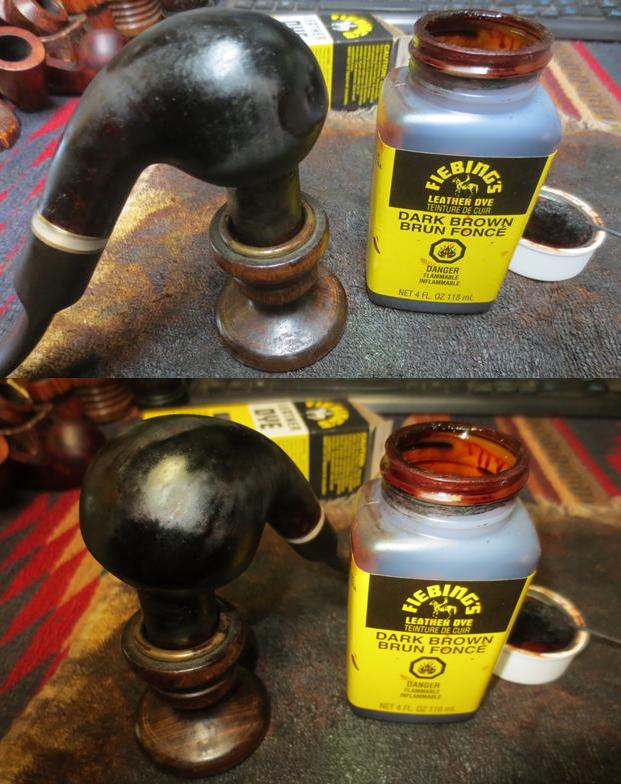
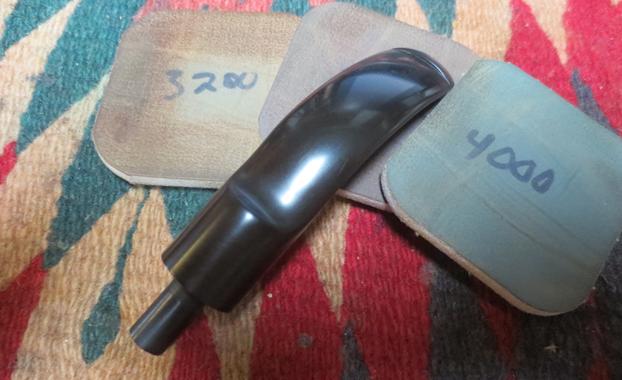
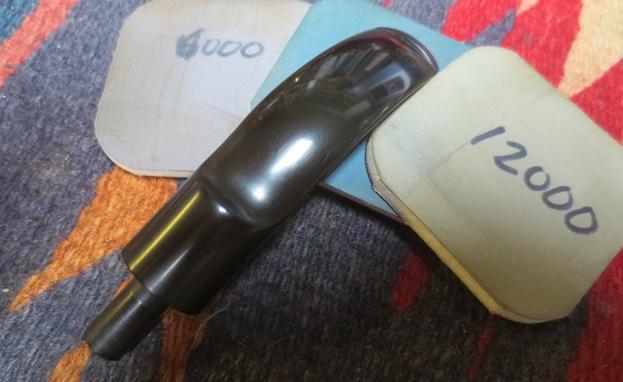
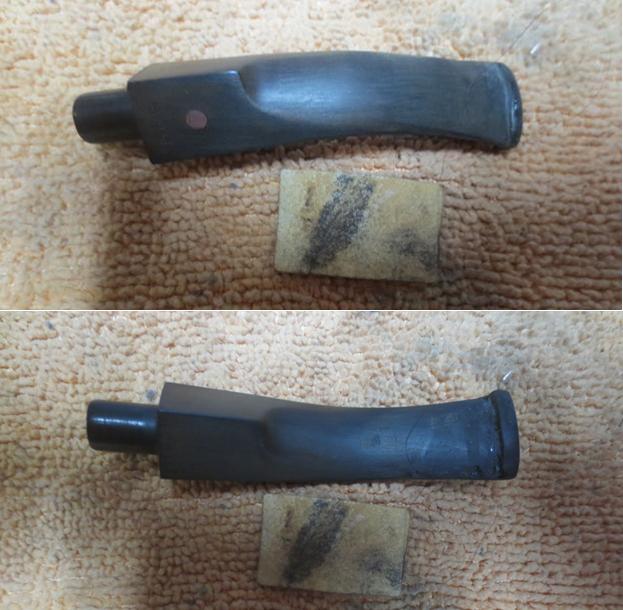
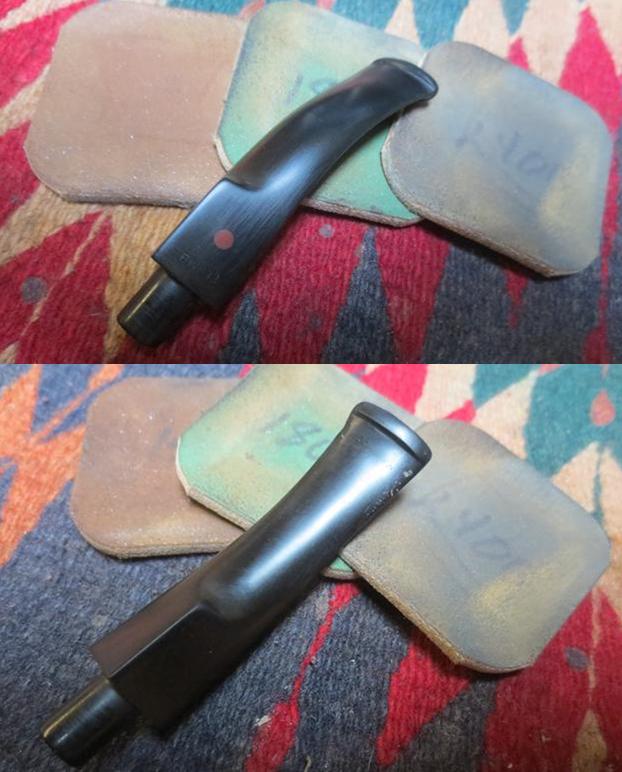
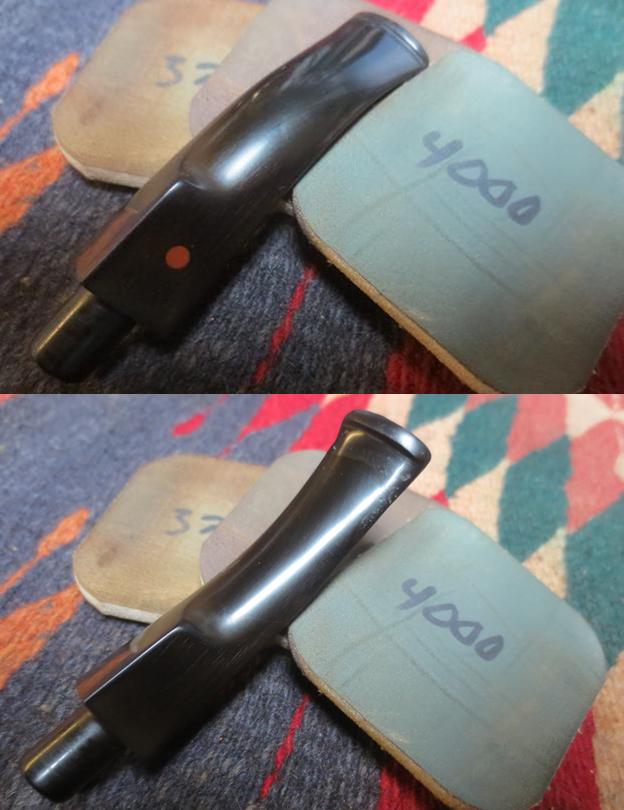
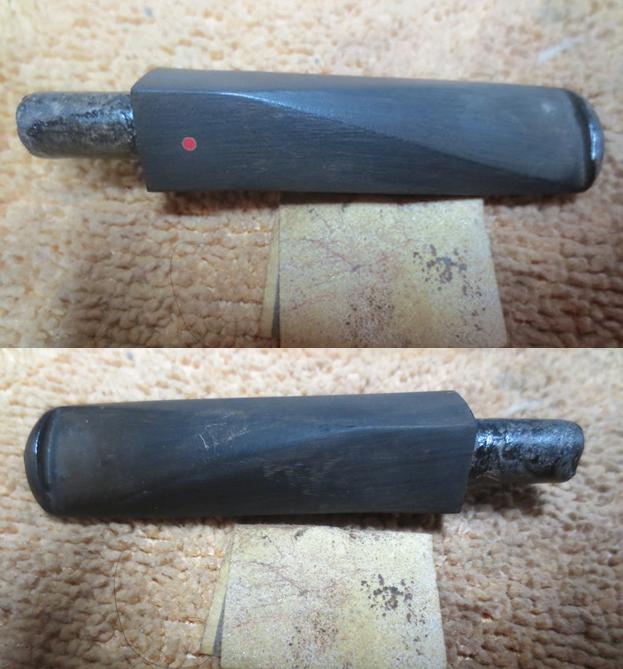
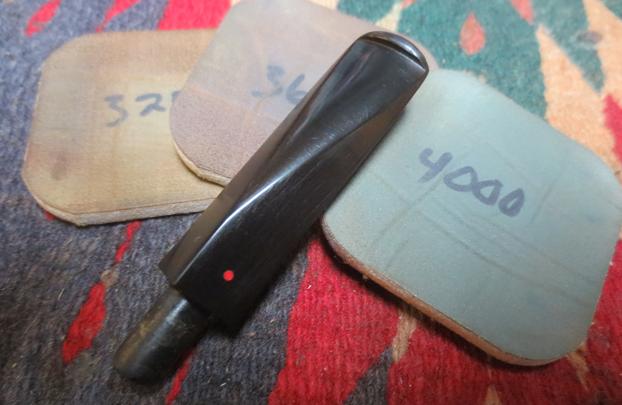
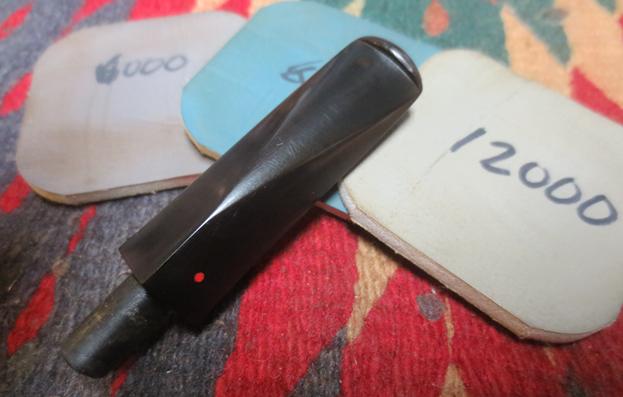
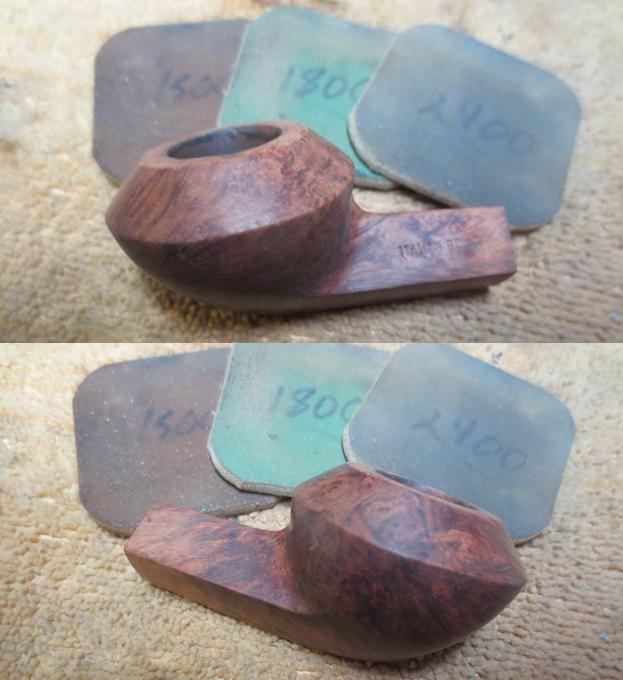
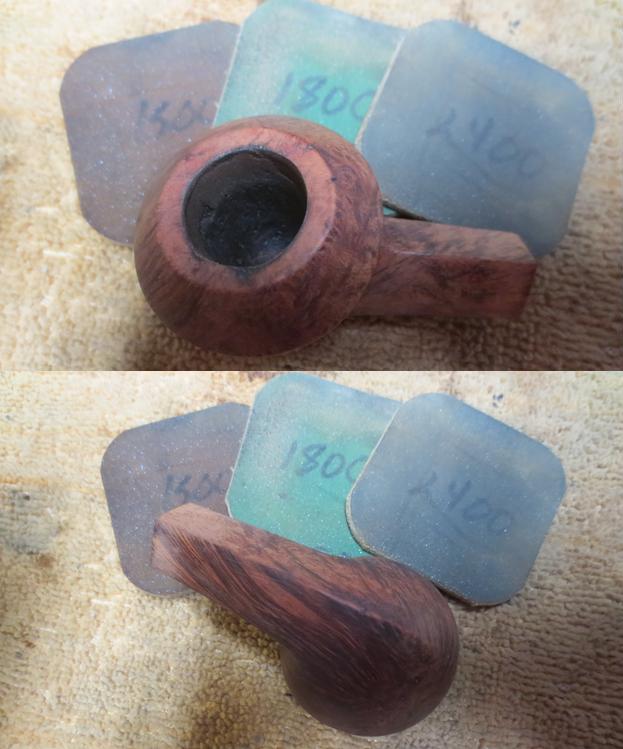
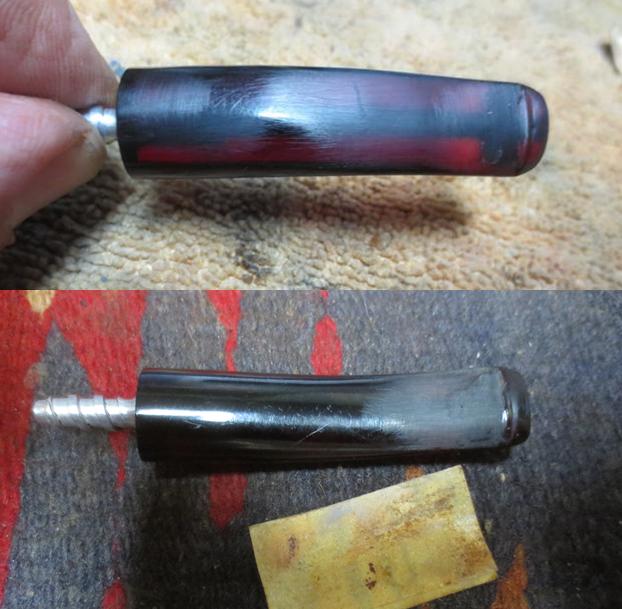
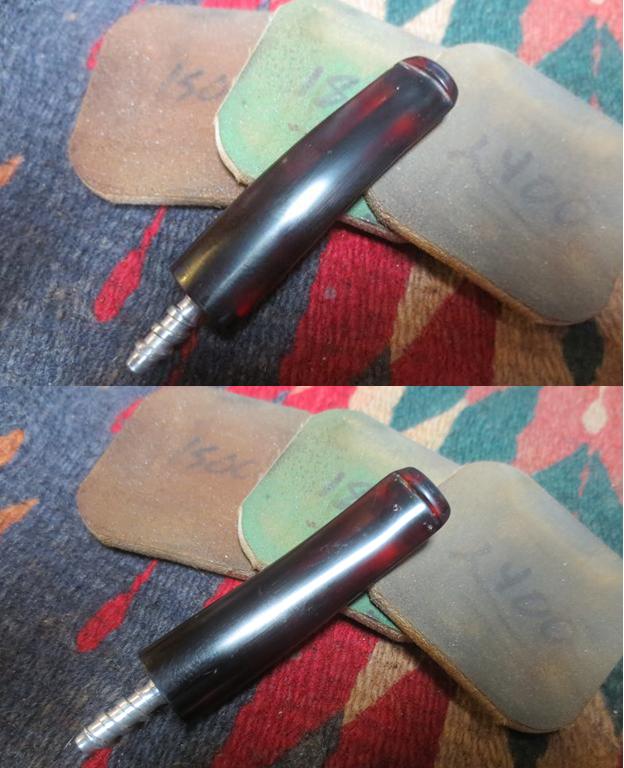
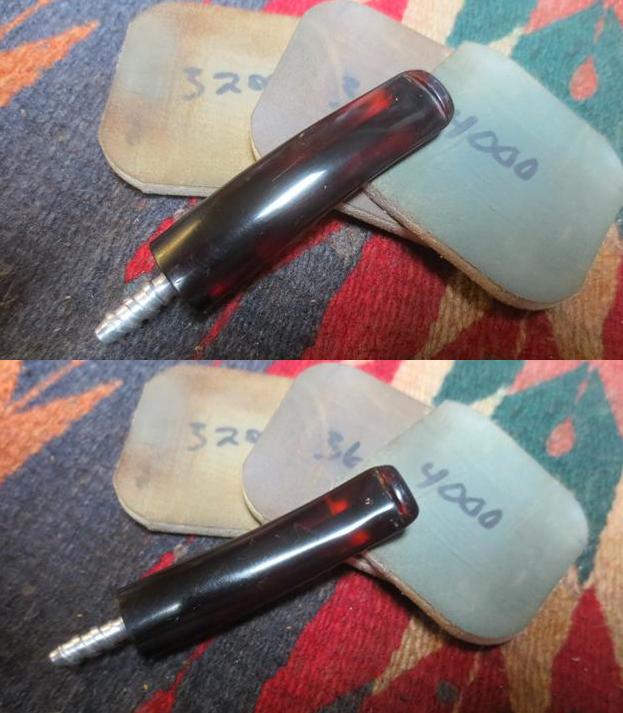
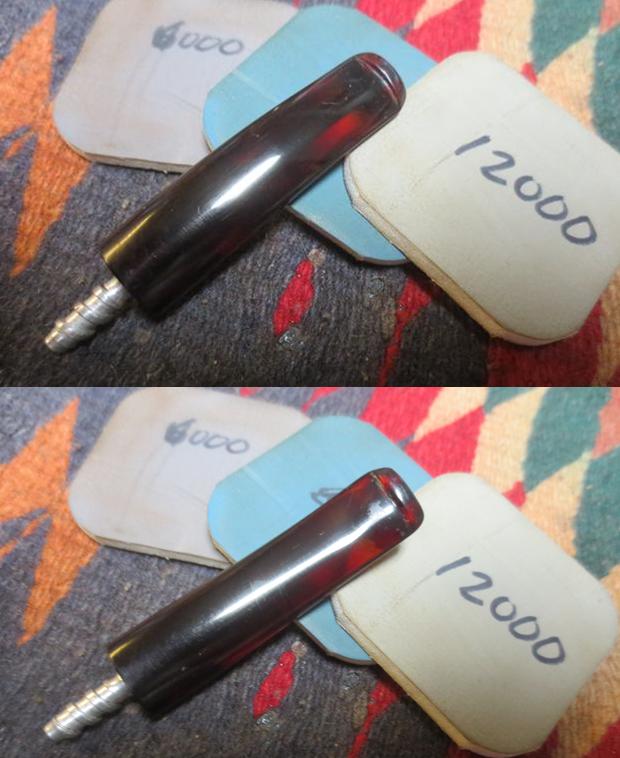
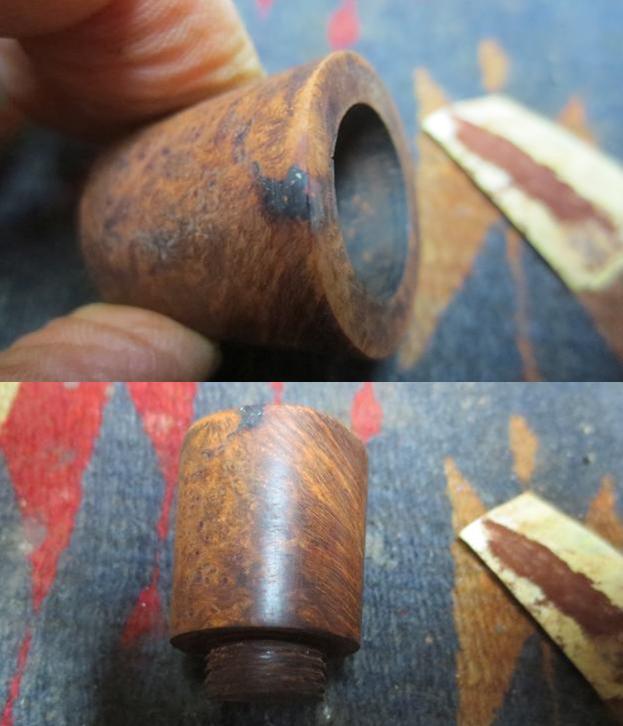
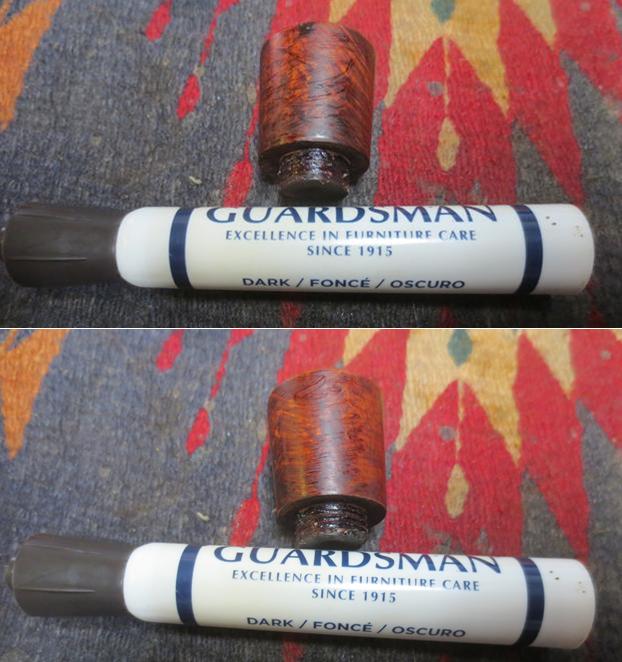
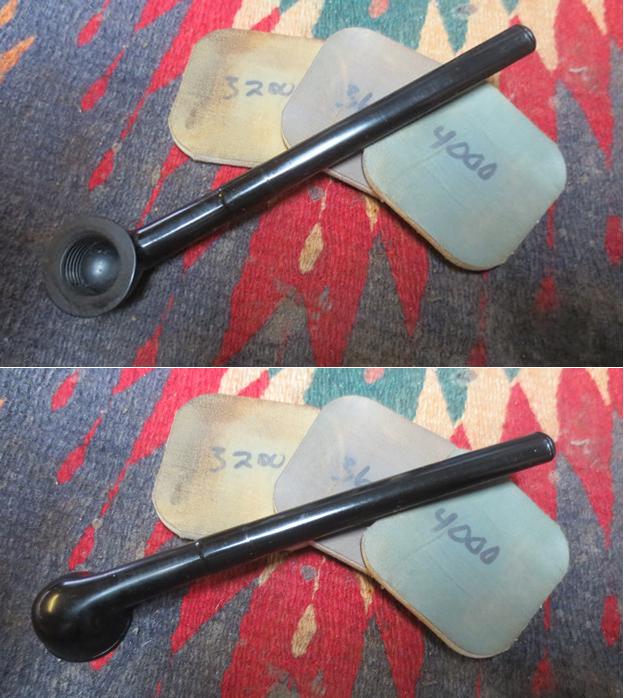
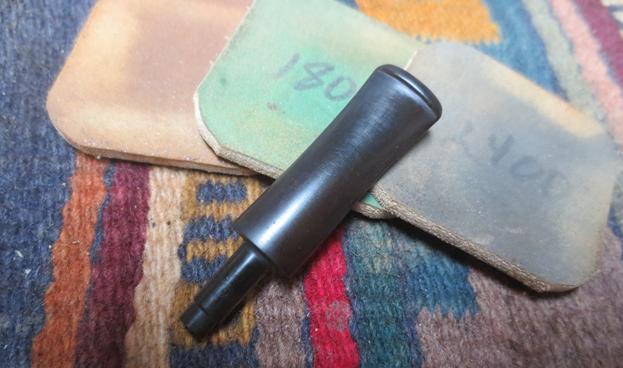
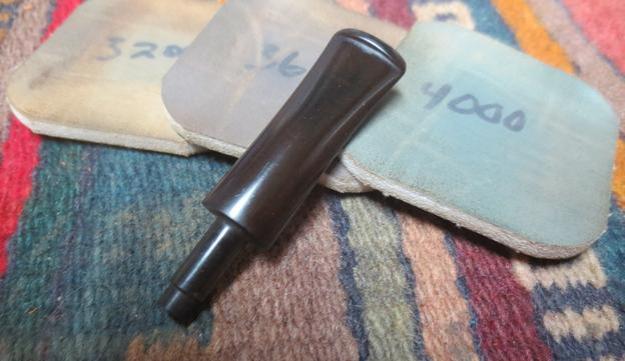
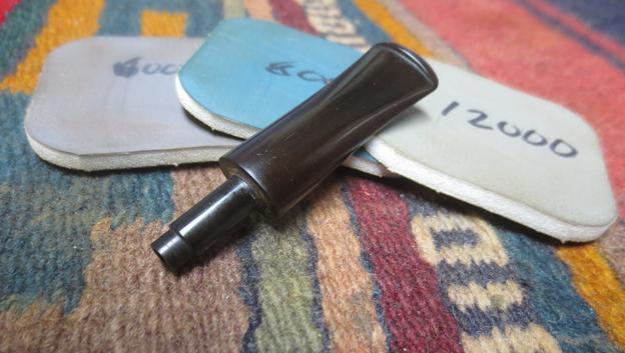
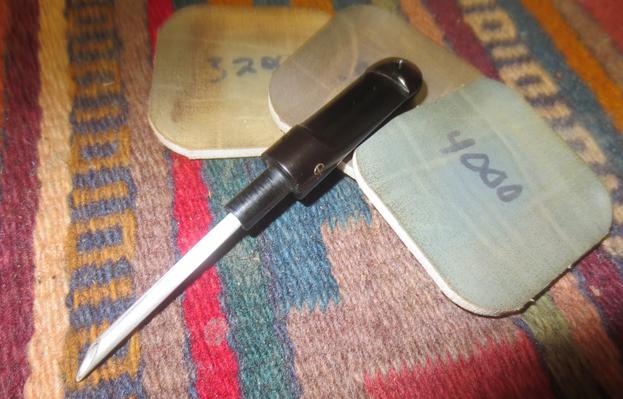
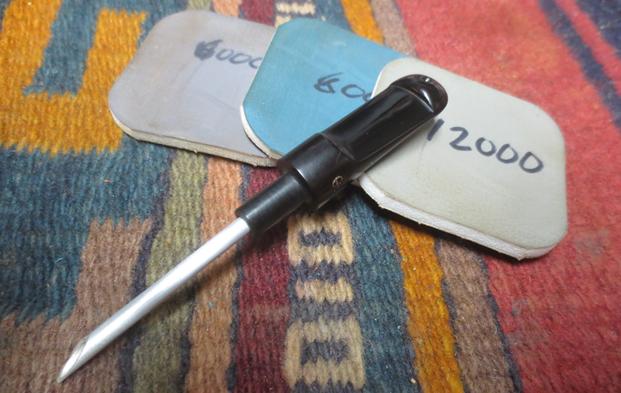
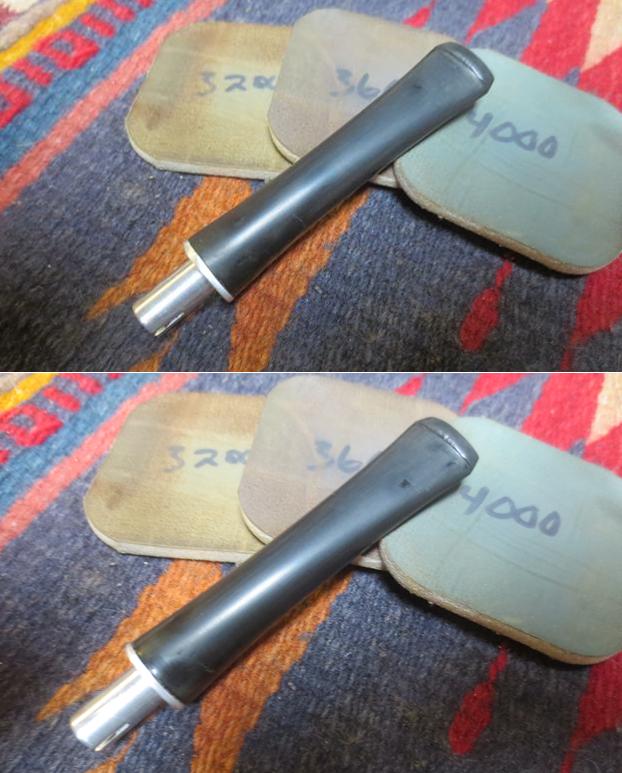
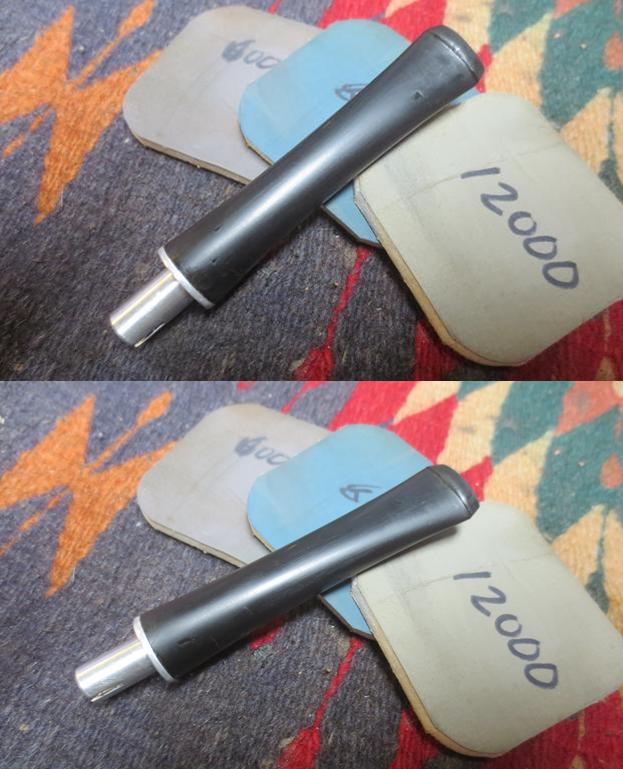
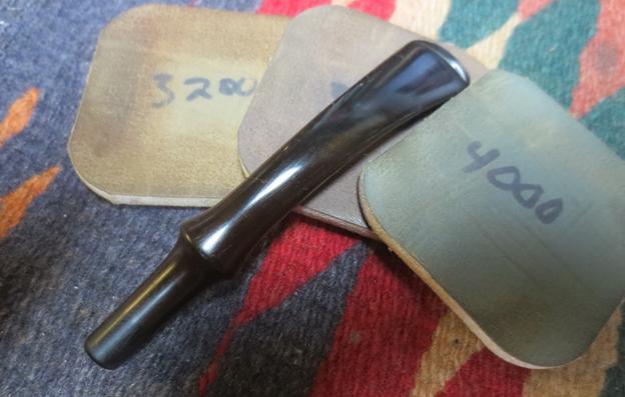
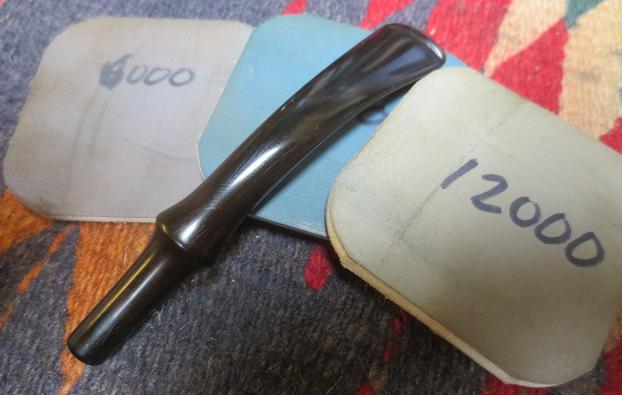
 I have to tell you; my strong dislike of nylon pipe stems is even more confirmed. They are hard to repair as dents are virtually permanent. Patching with black or clear super glue works but leaves shiny spots that are hard to blend into the rest of the material. Polishing to get a shine needs to be done by hand as a buffer, even with a light touch, melts the material and sends you back to the beginning. They are a pain. I polished the stem with micromesh sanding pads – wet sanding with 1500-2400 grit pads and rubbing it down with Obsidian Oil after each pad – not so much to give shine as to give more bite to the micromesh. I dry sanded the stem with 3200-12000 grit pads and repeated the oil after each pad. The stem is slowly but surely getting a shine. (The shiny spots in the photos are not dents but super glue repairs.)
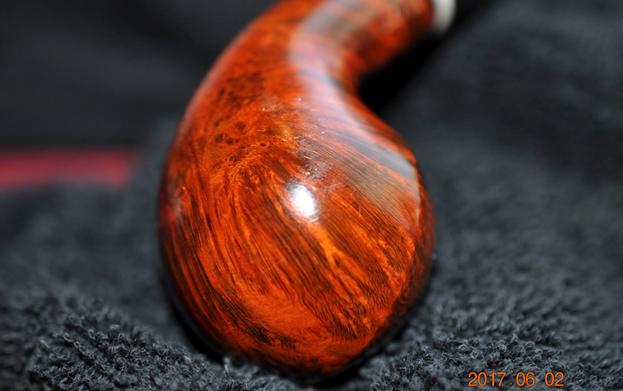
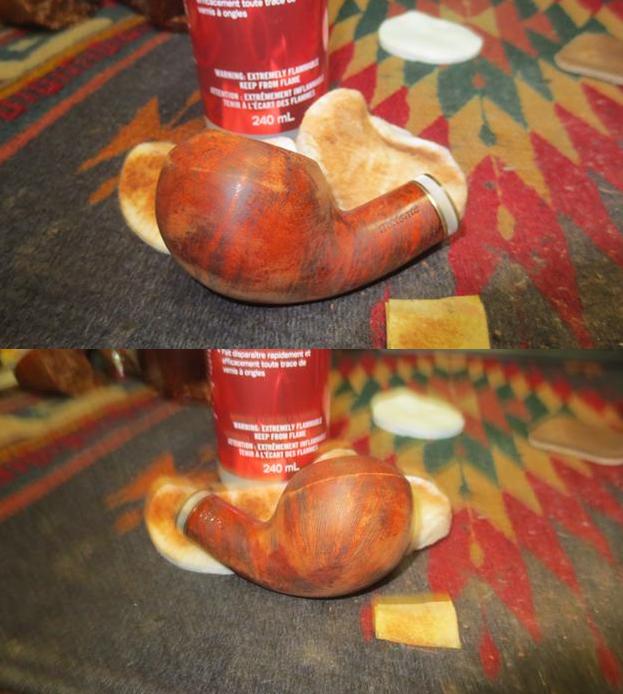
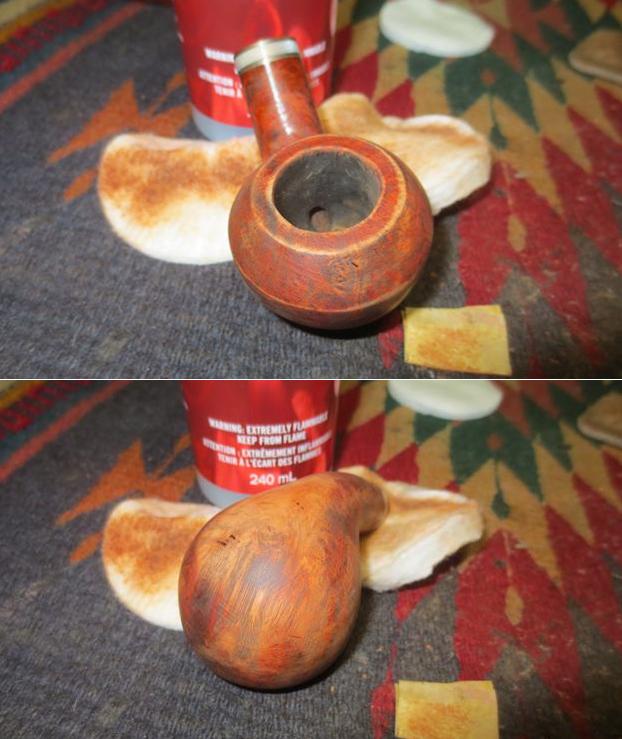
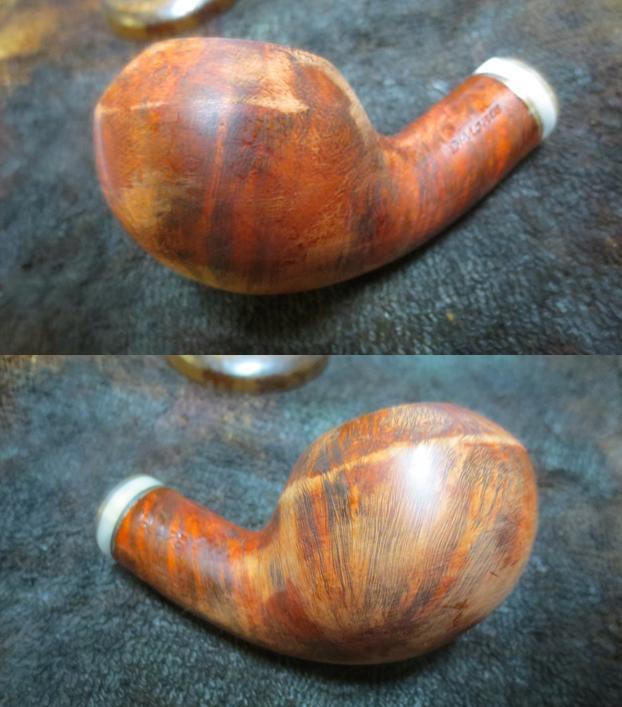
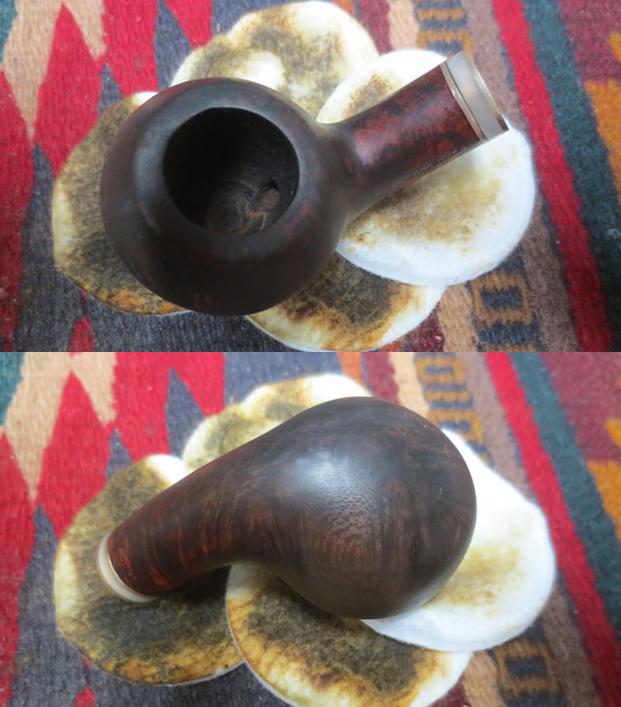
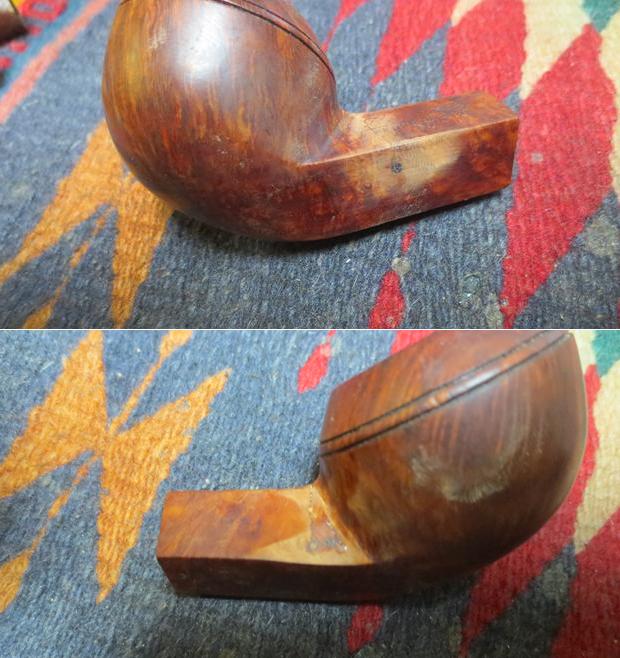
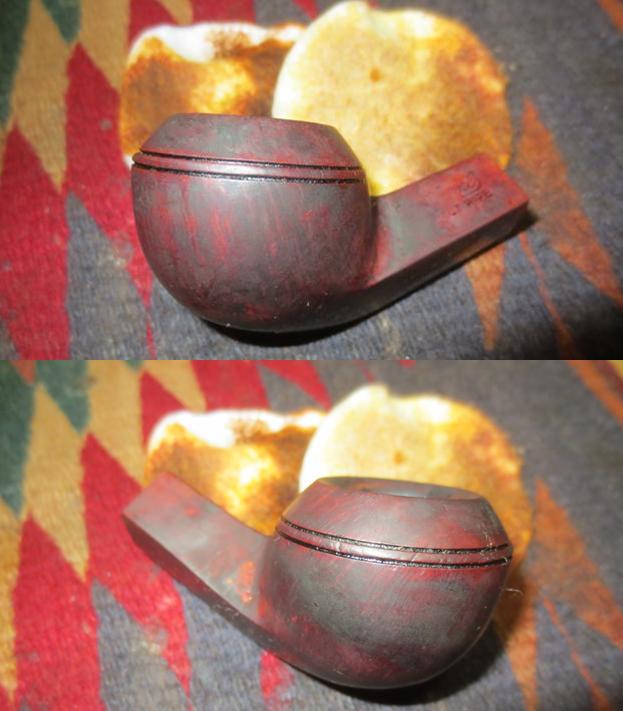
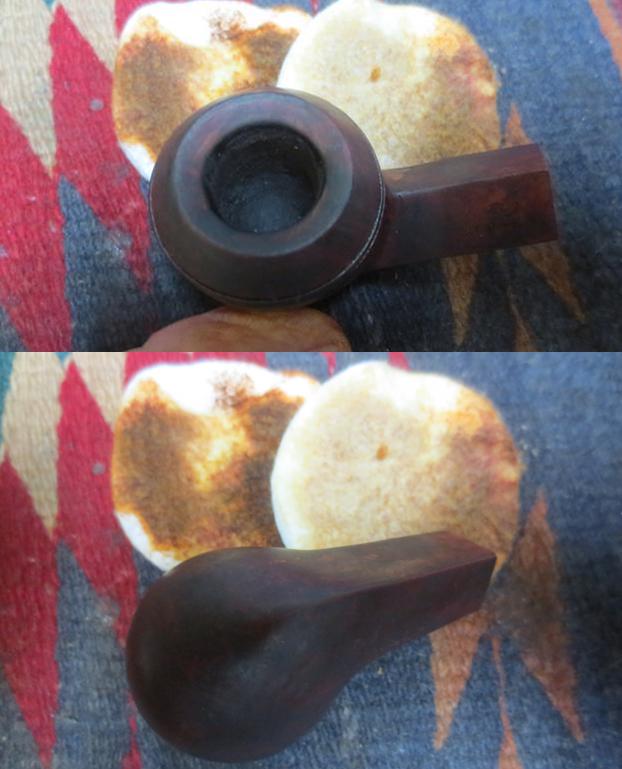
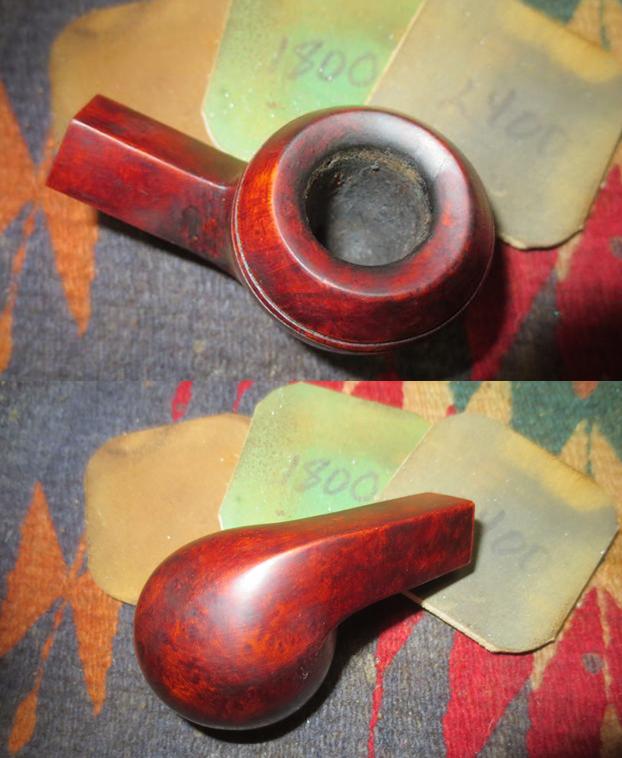
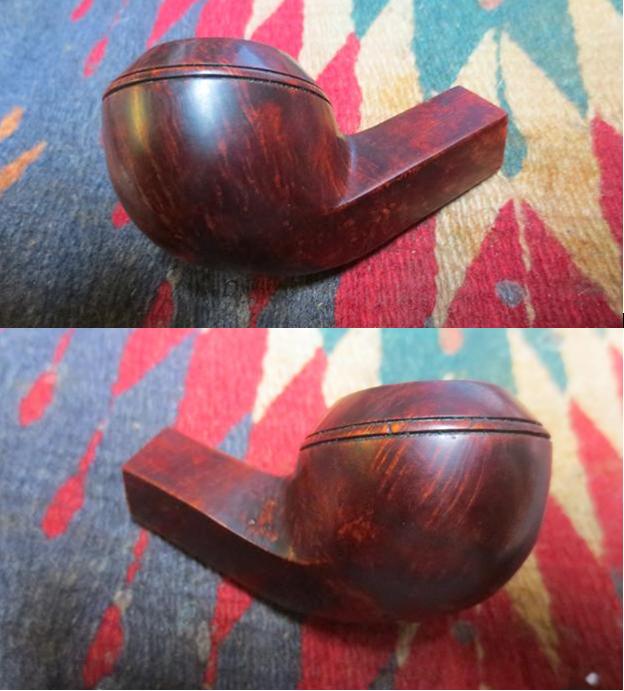
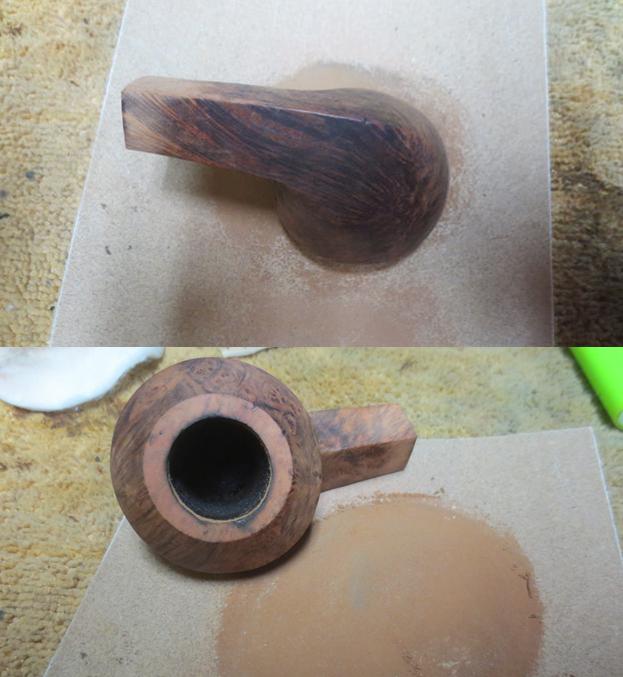
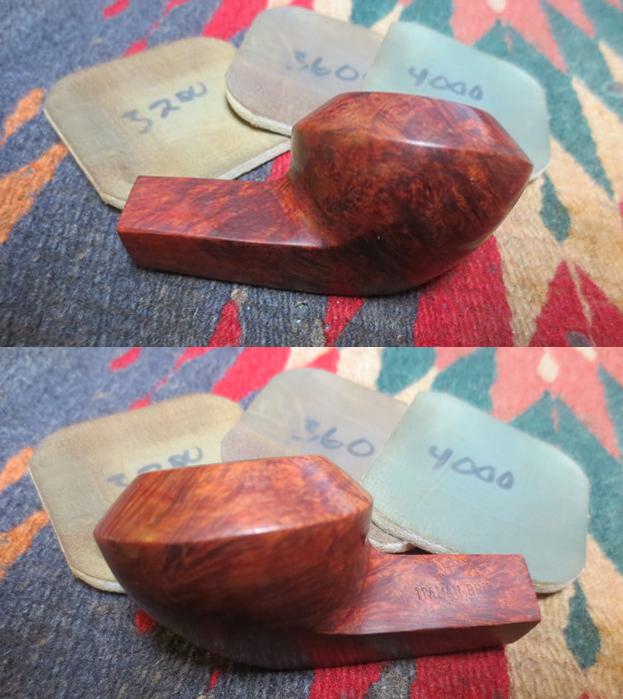
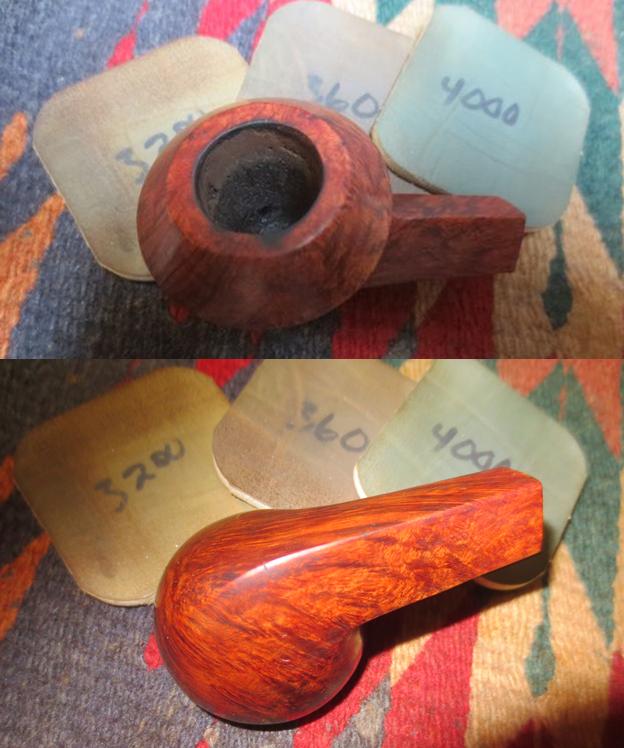
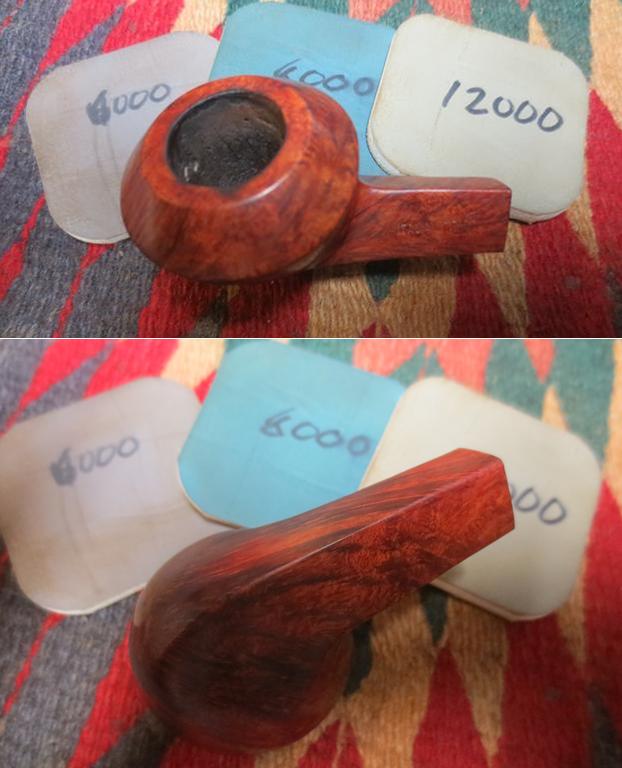
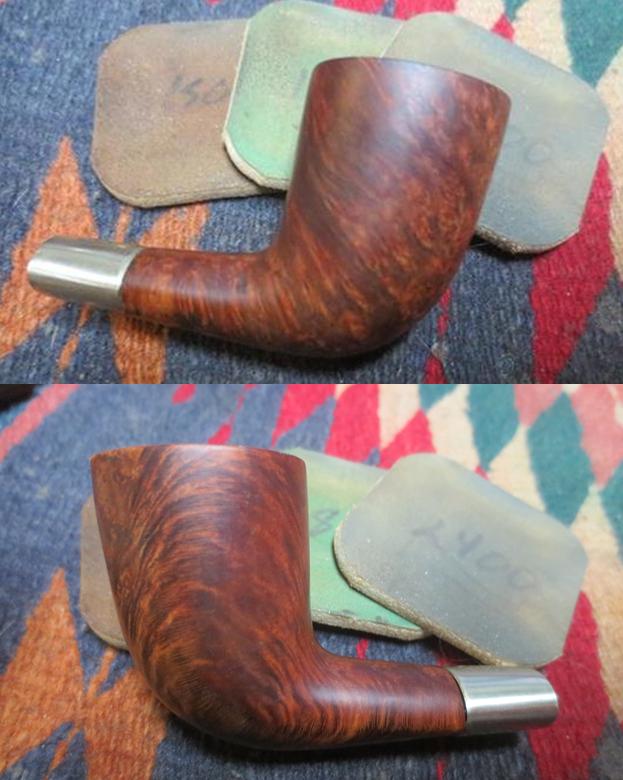
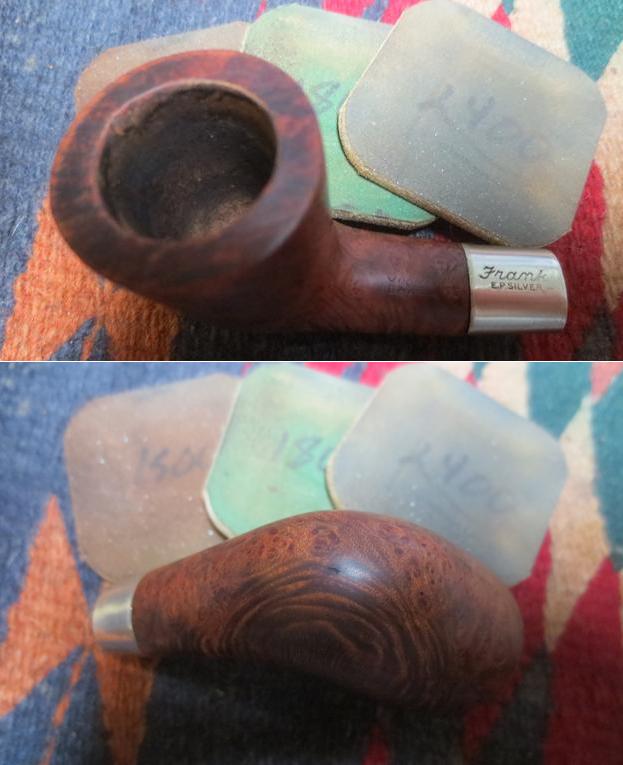
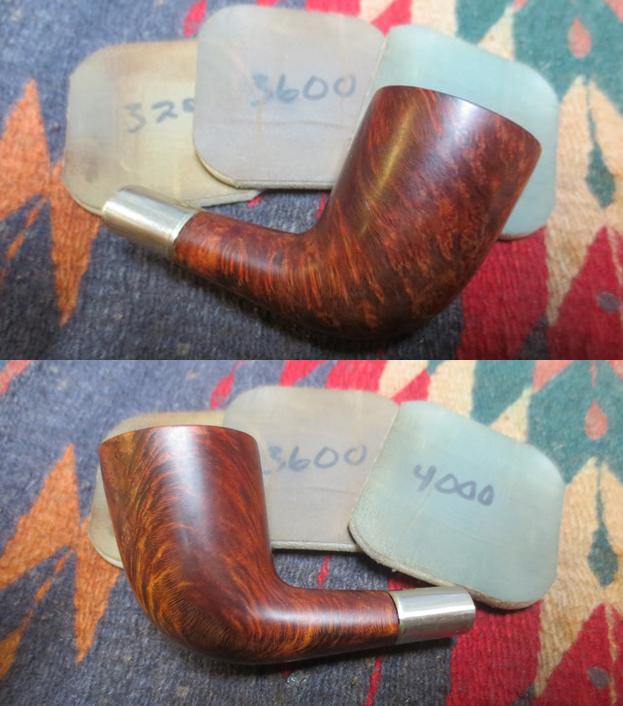
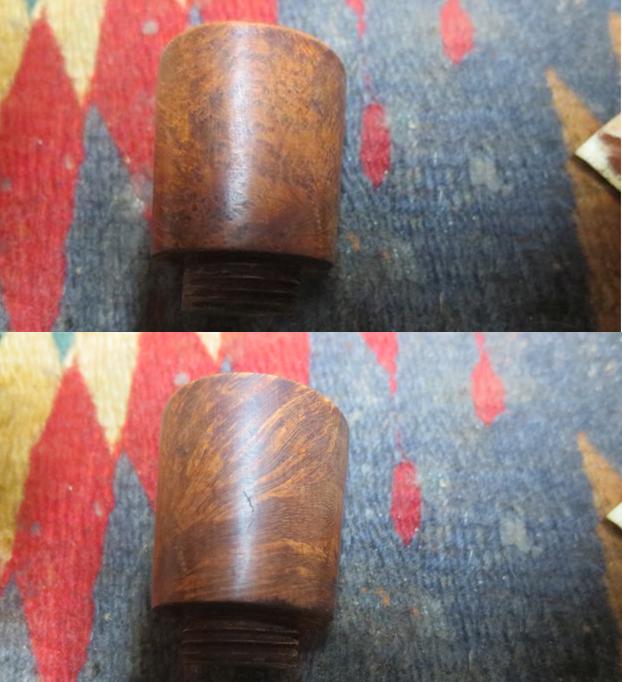
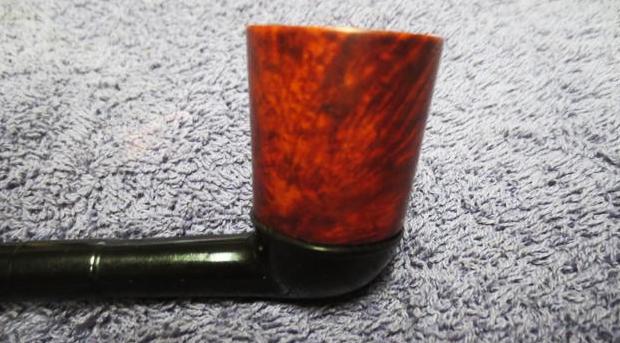
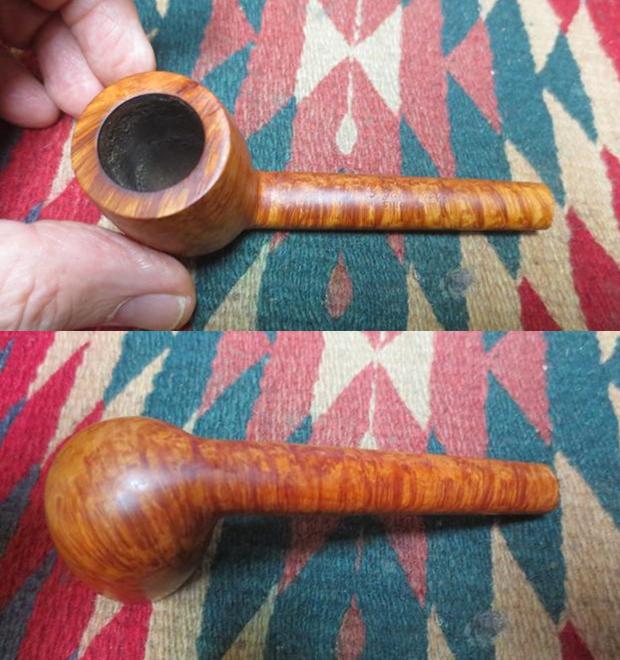
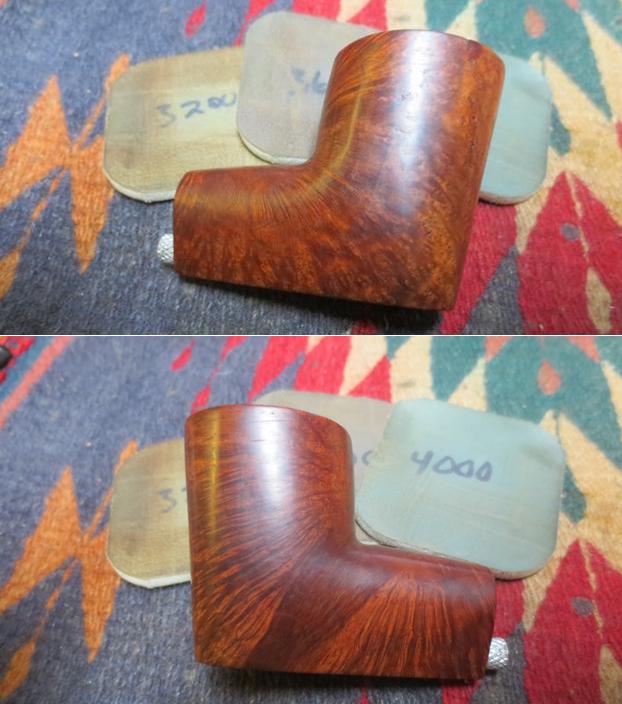
 I polished the briar with micromesh sanding pads – wet sanding with 1500-2400 grit pads. I wiped the bowl down with a wet cloth to wipe off the sanding dust after each pad. The further I went with the micromesh the deeper the shine became. This is really a pretty piece of briar. I dry sanded with 3200-12000 and once more wiped the bowl down with a damp cloth.
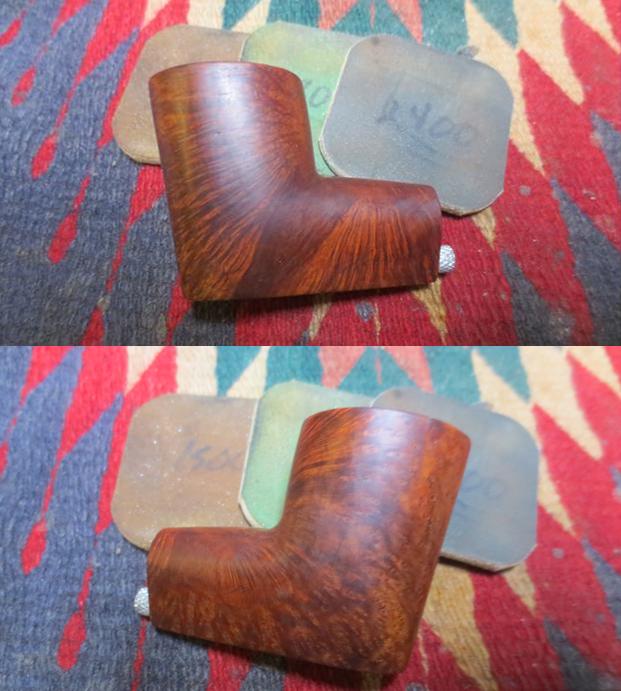
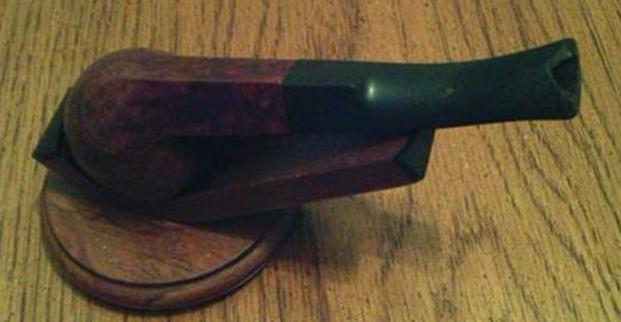
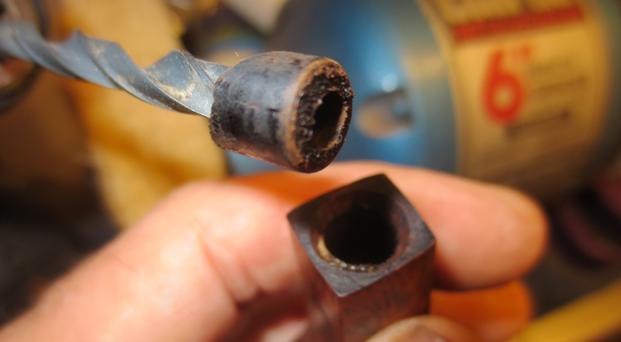
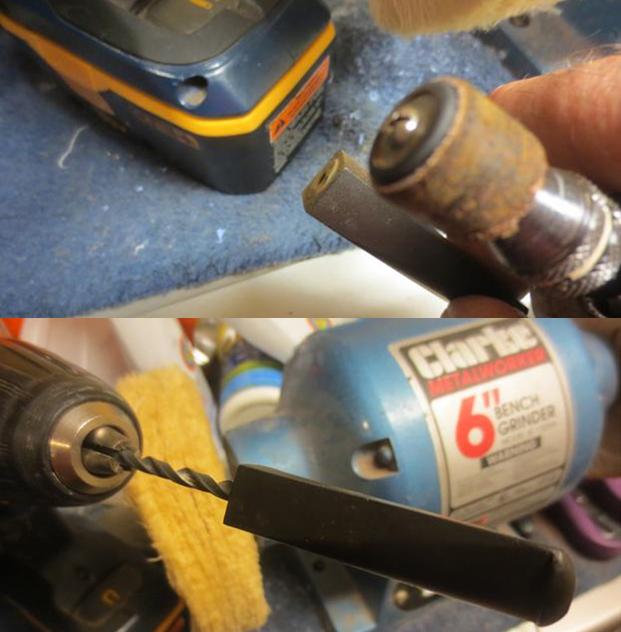
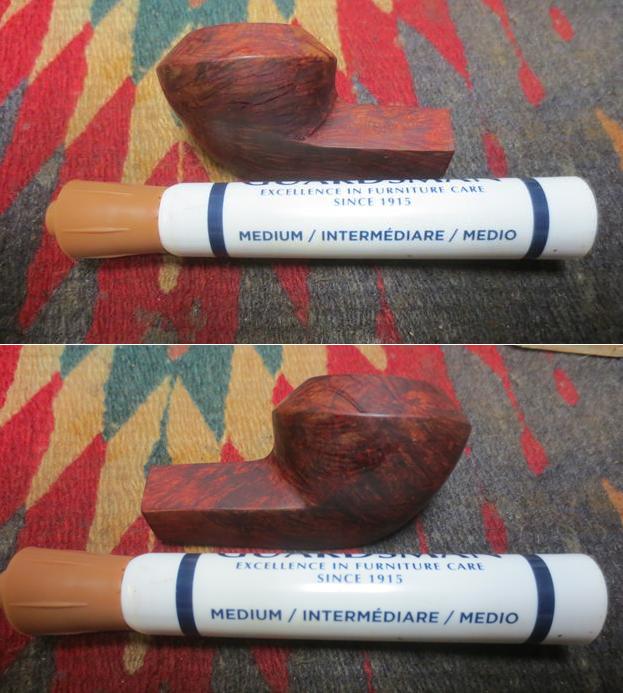
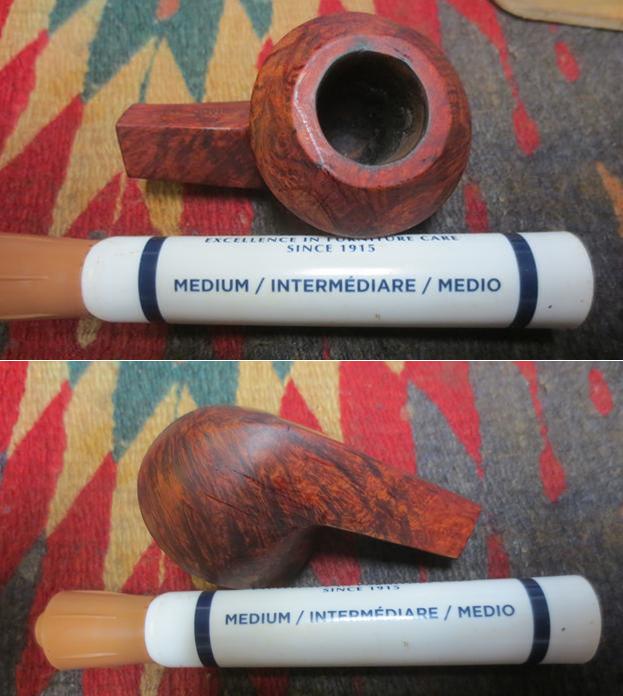
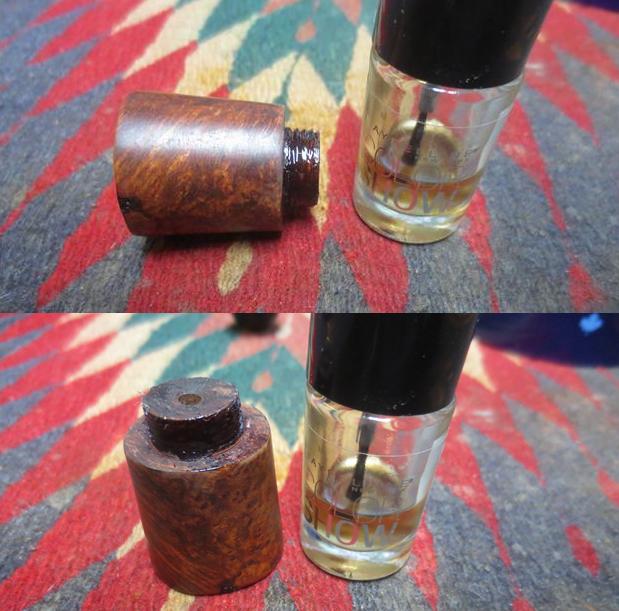
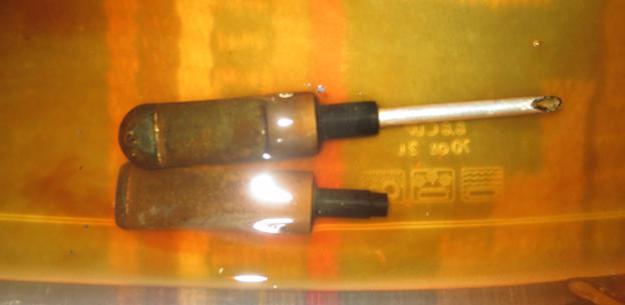
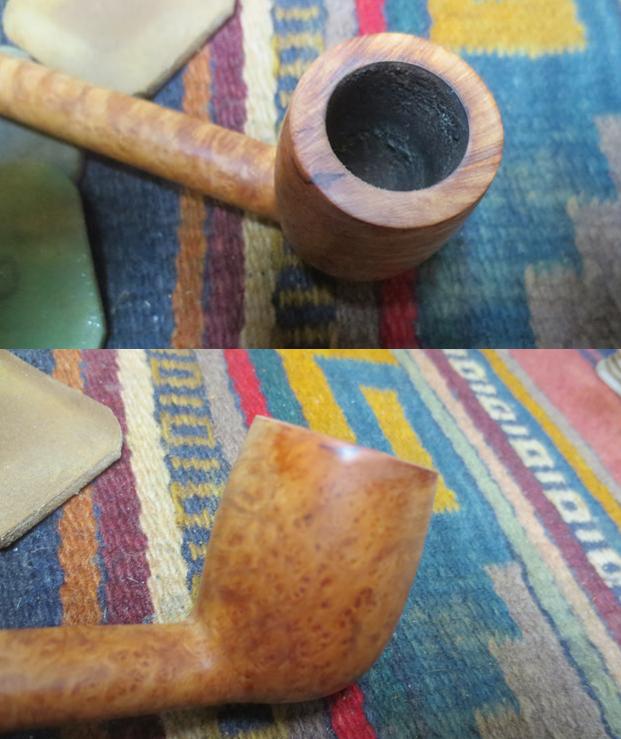
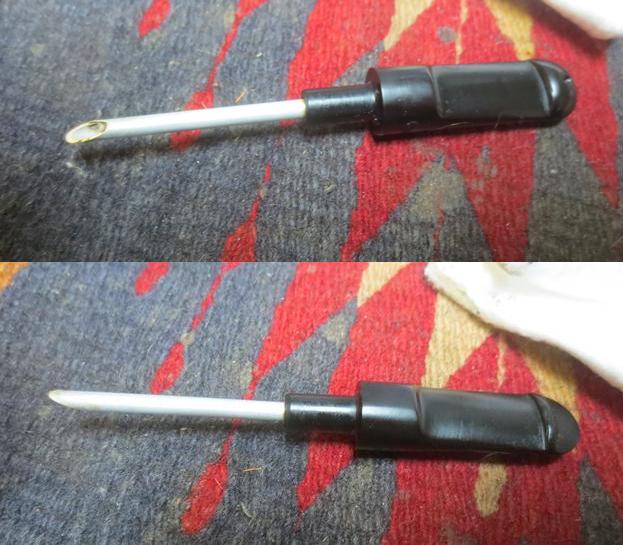
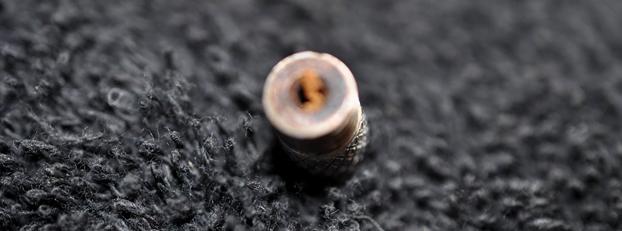
 I took apart the other unstamped Rettke style pipe and removed the “whirler” from that one. I inserted it in the knurled cap that sat under the stem and took the following photo.
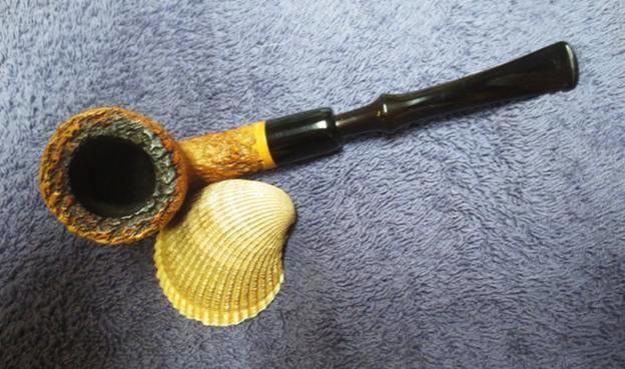
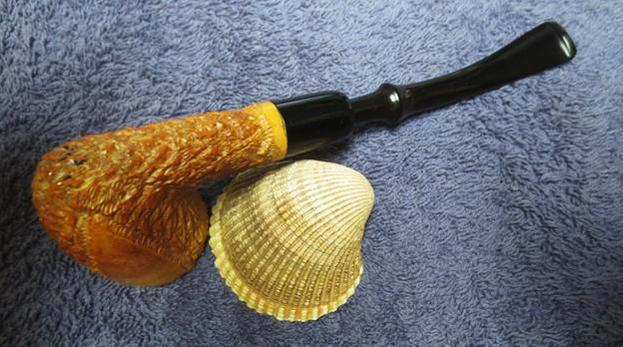
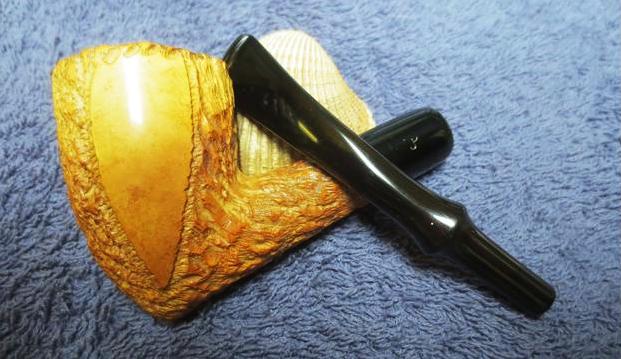
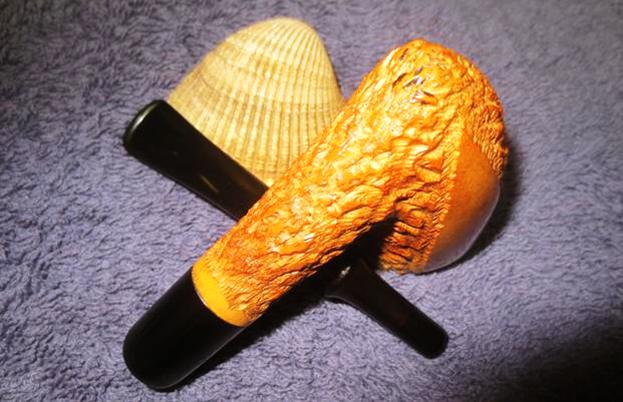
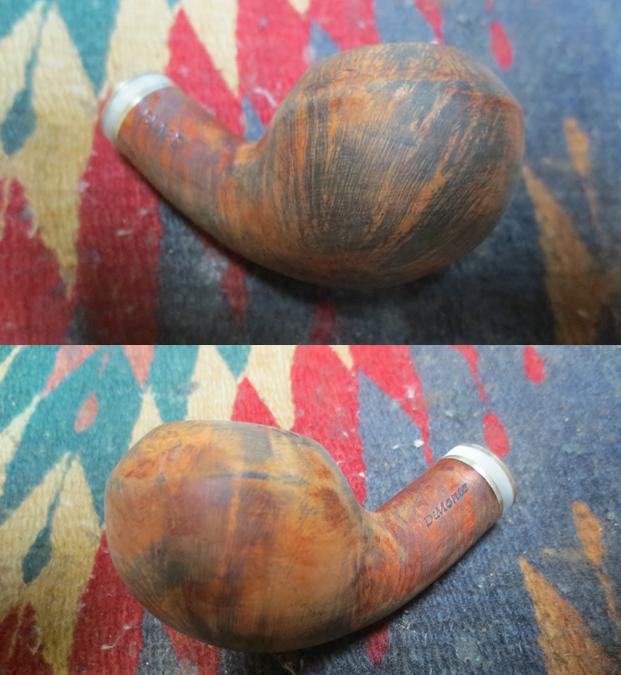
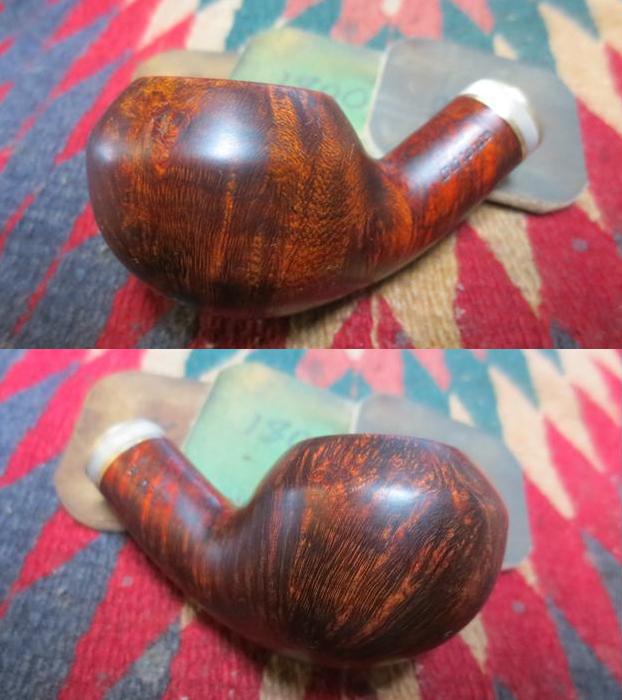
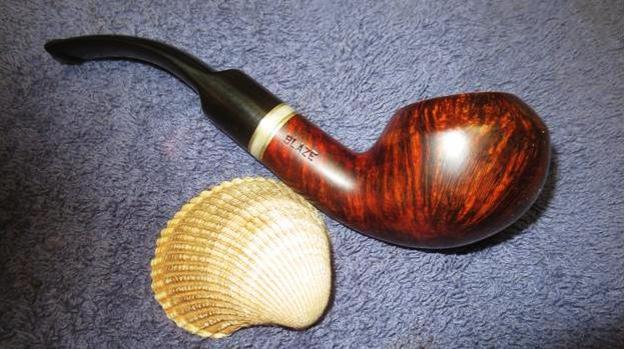
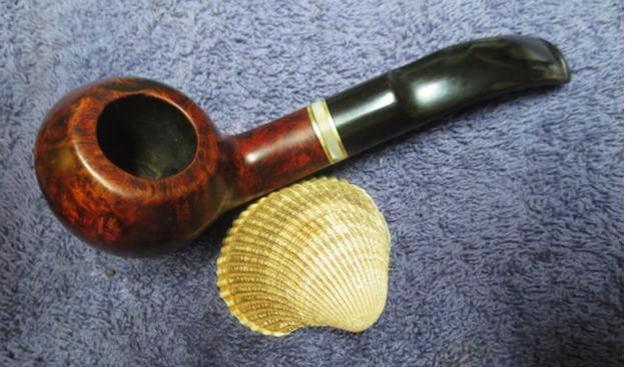
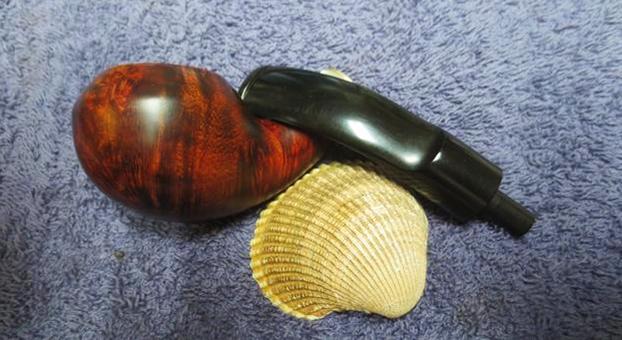
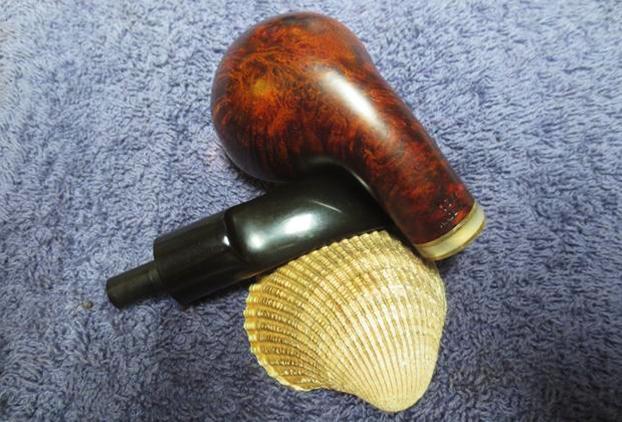
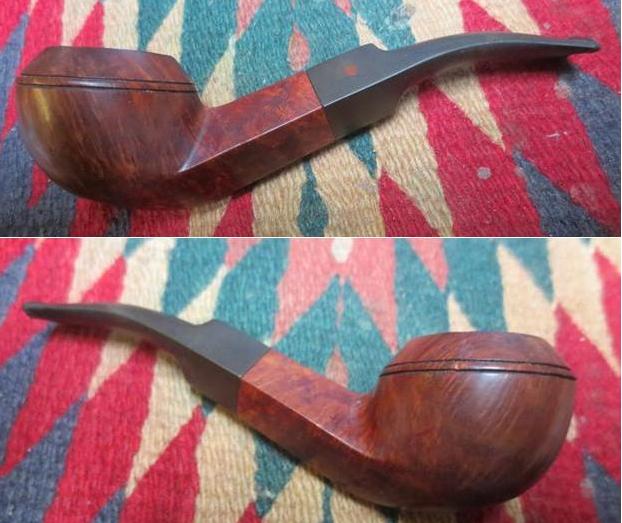
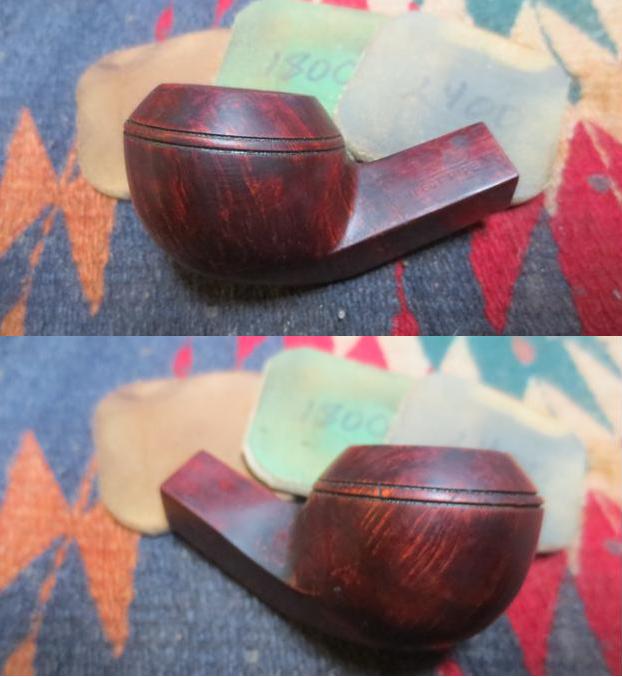
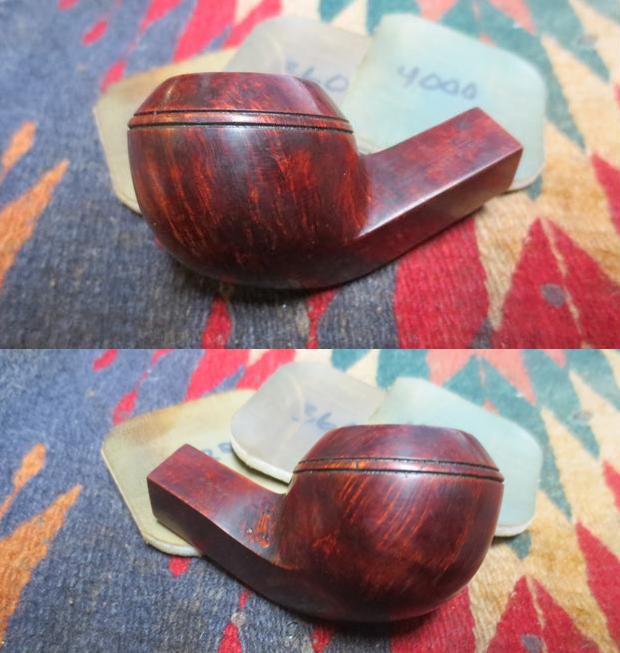
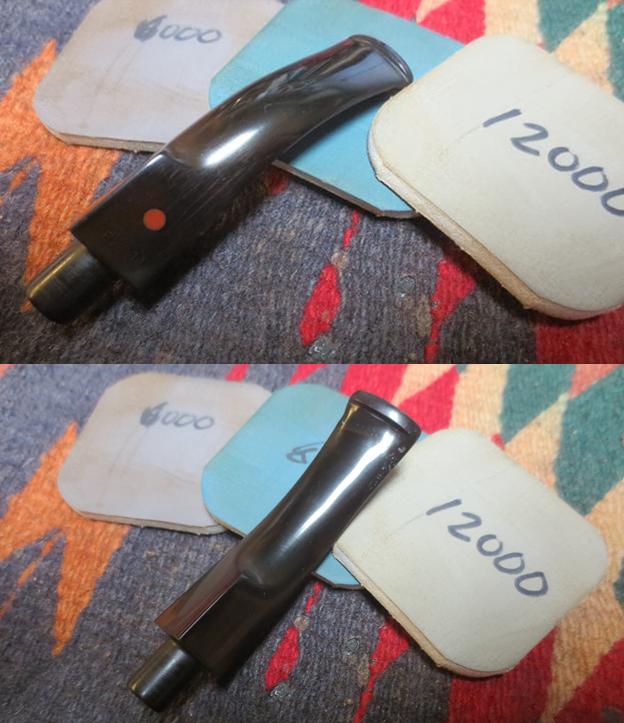
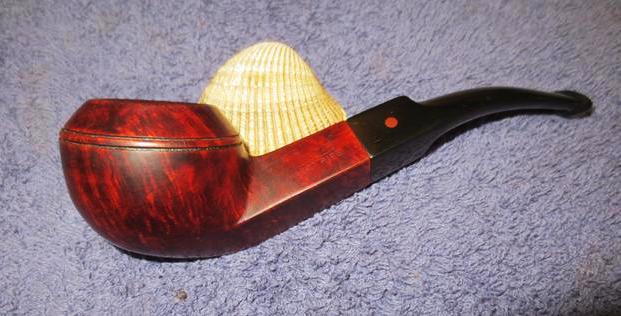
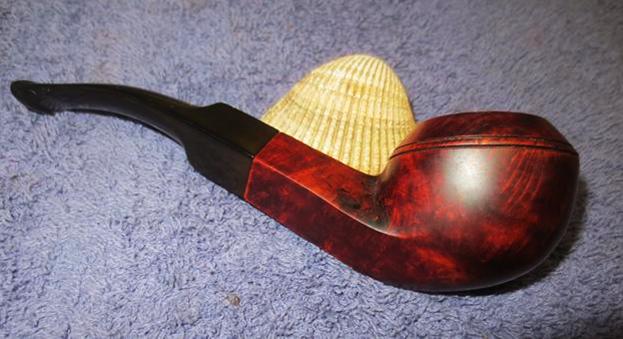
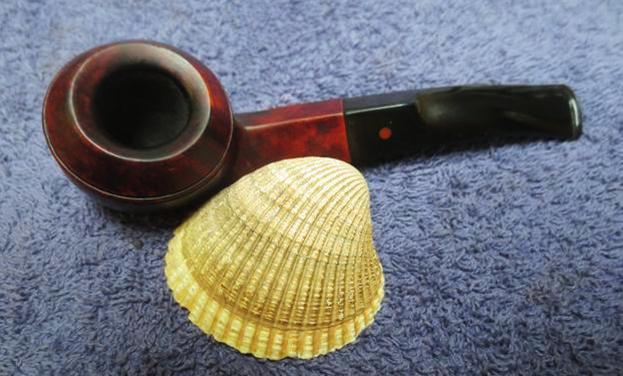
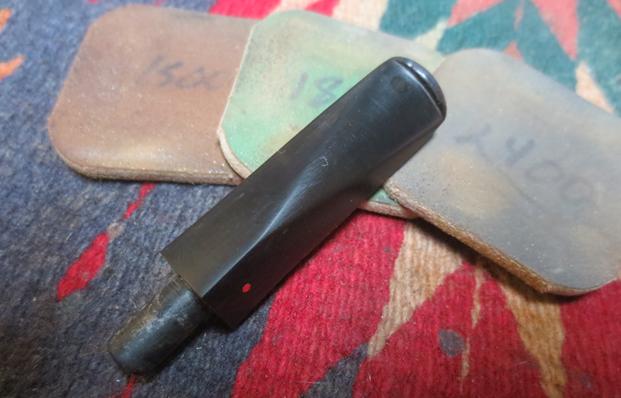
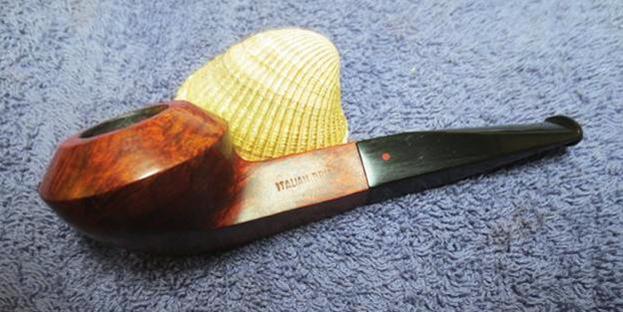
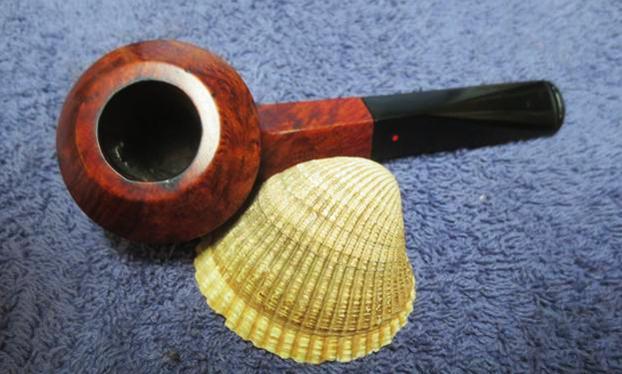
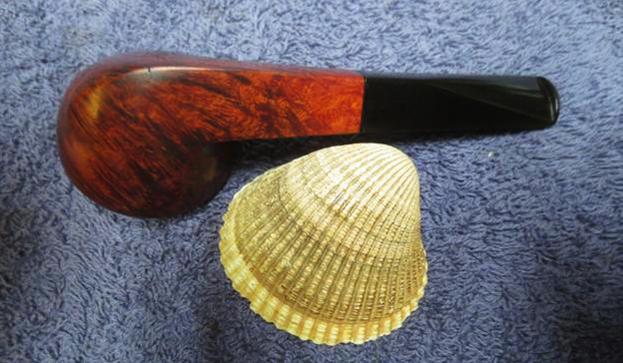
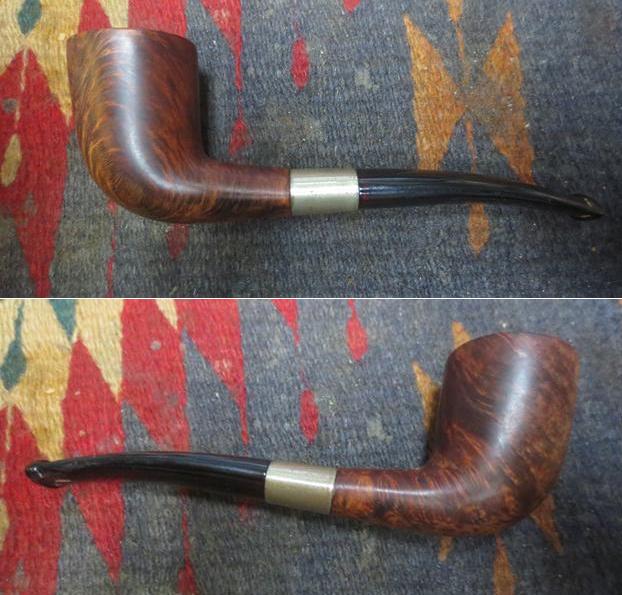
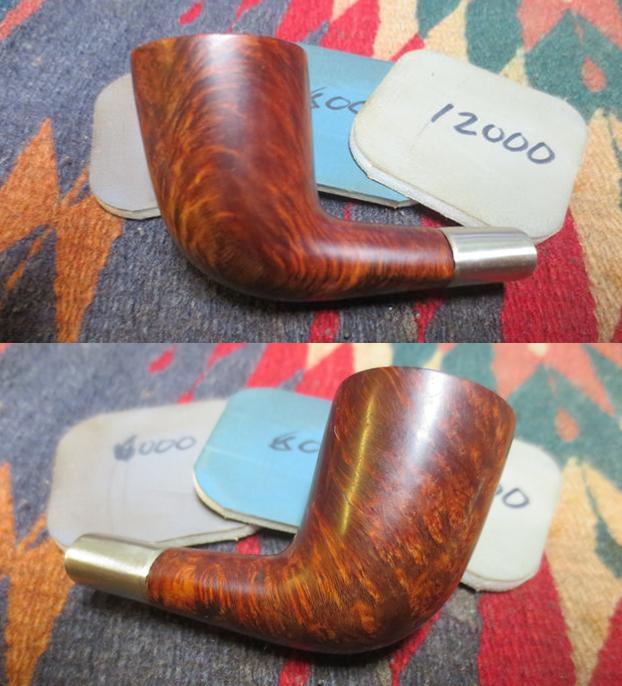
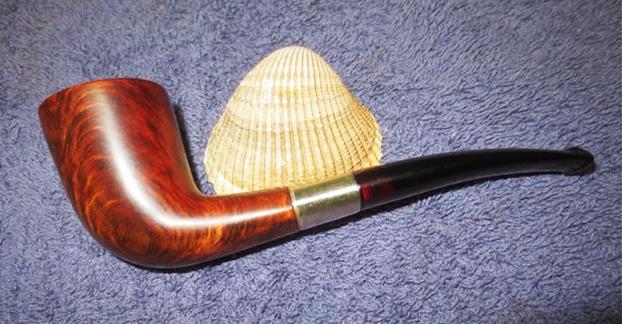
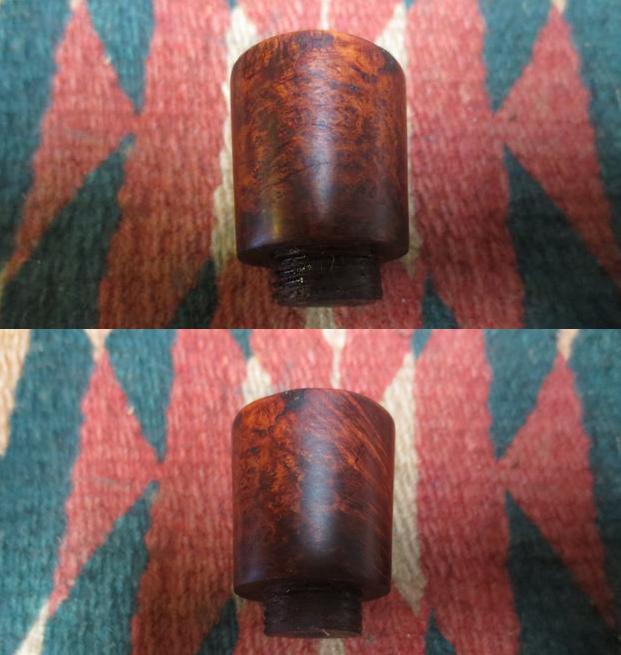
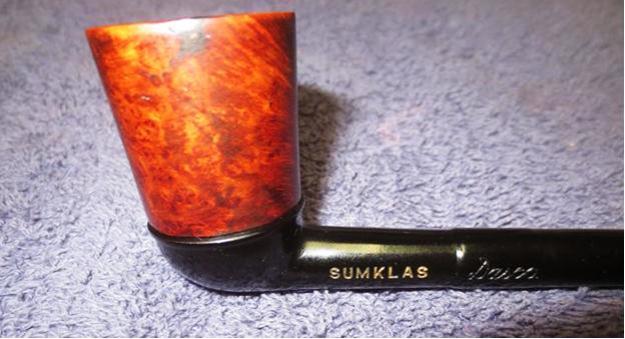
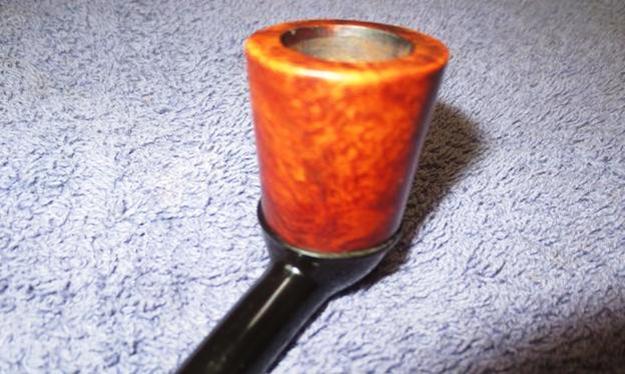
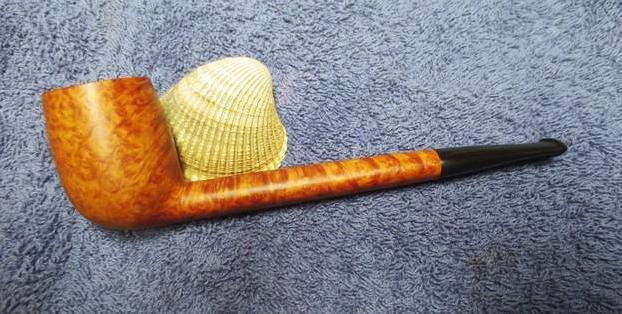
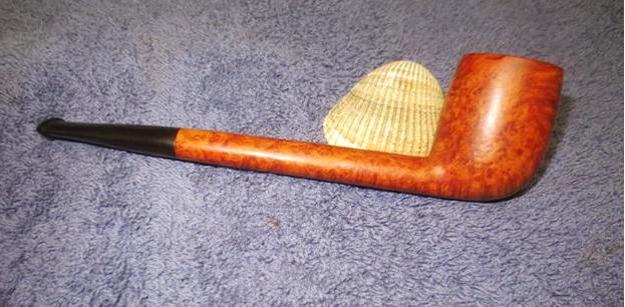
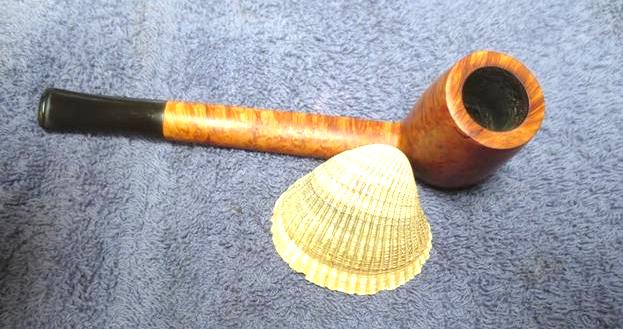
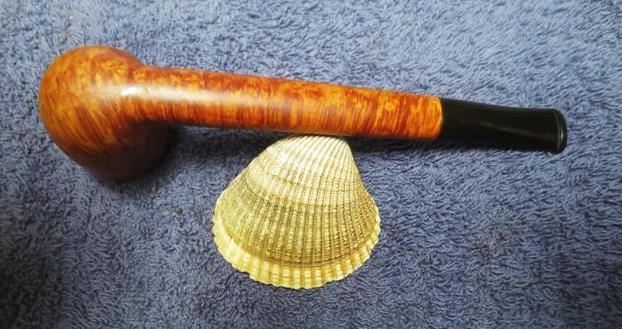
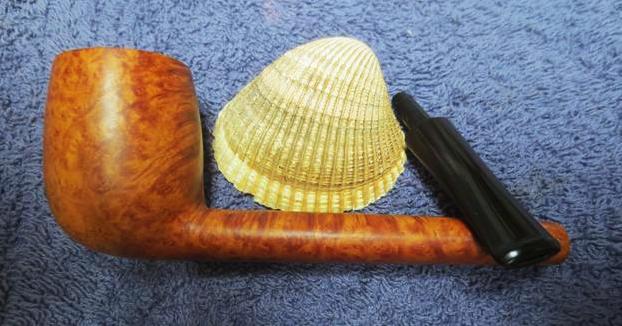
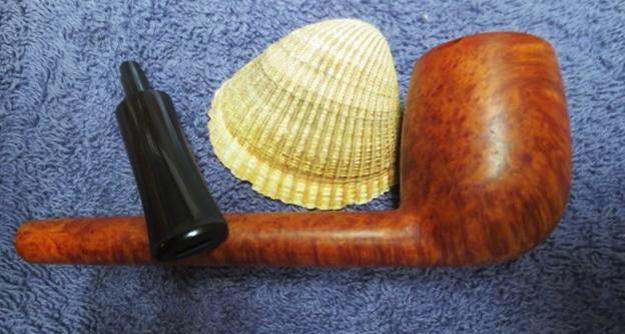
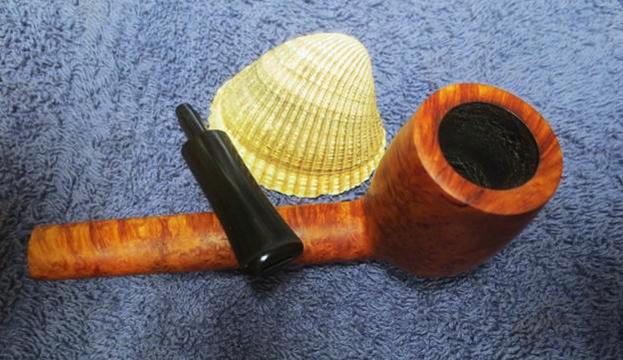
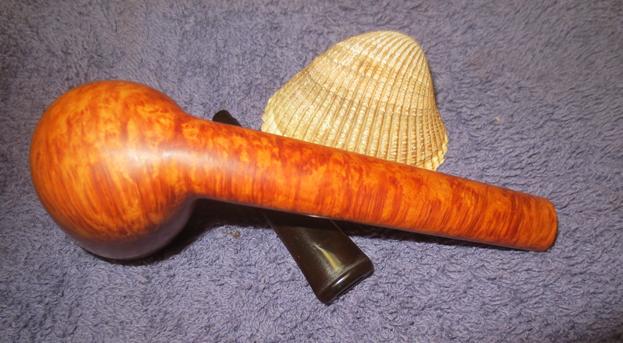
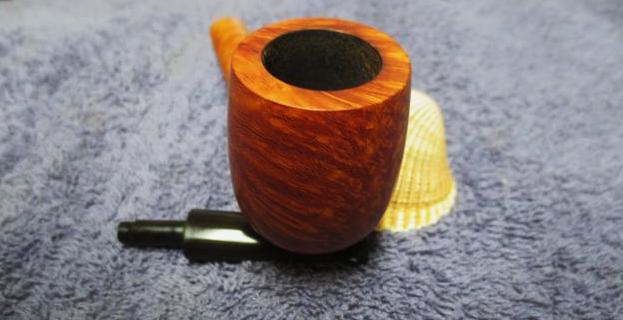
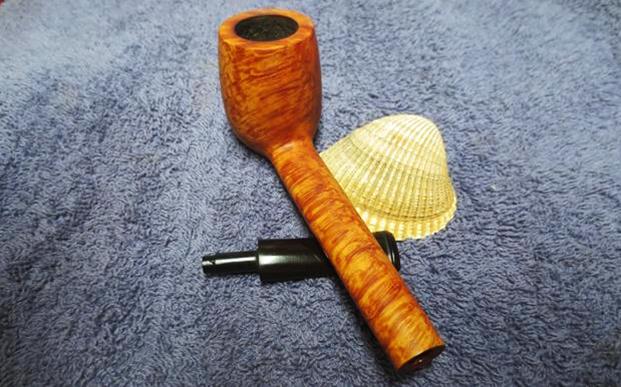
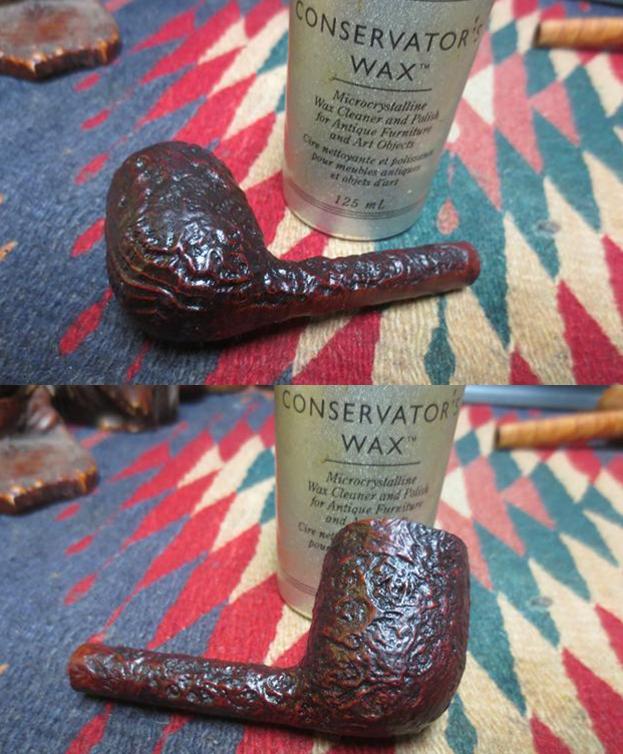
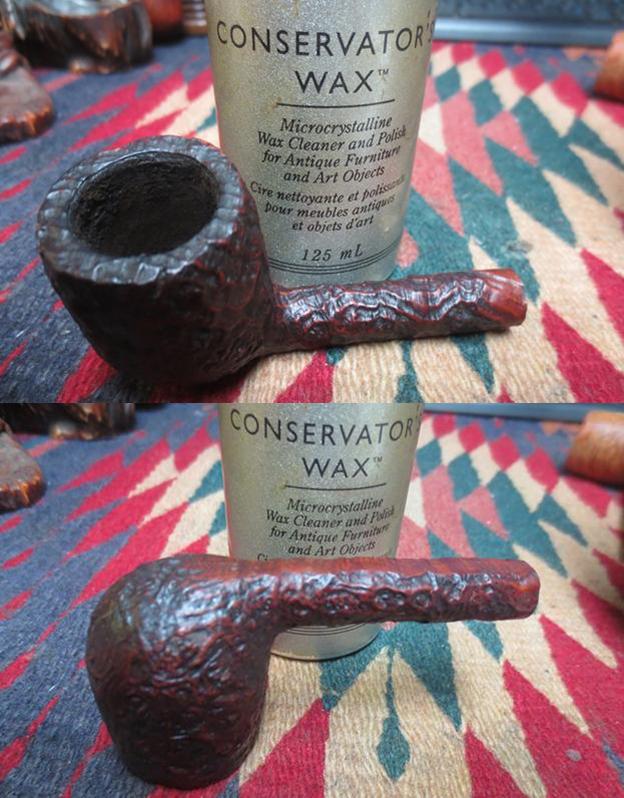
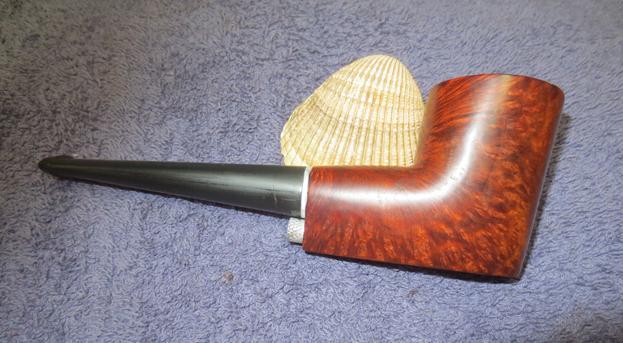
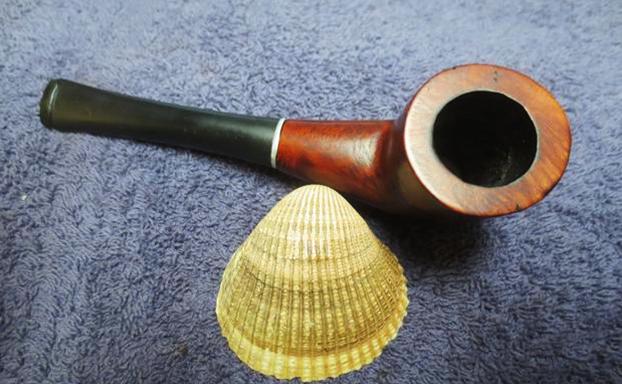
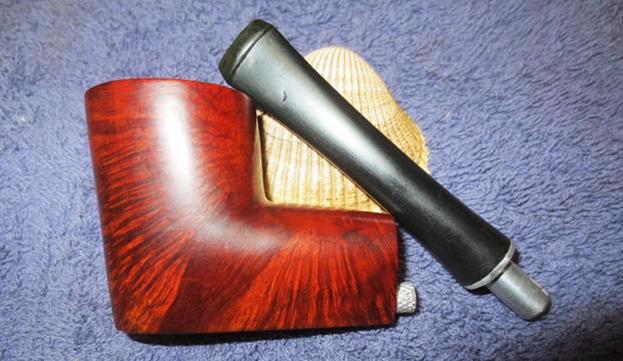
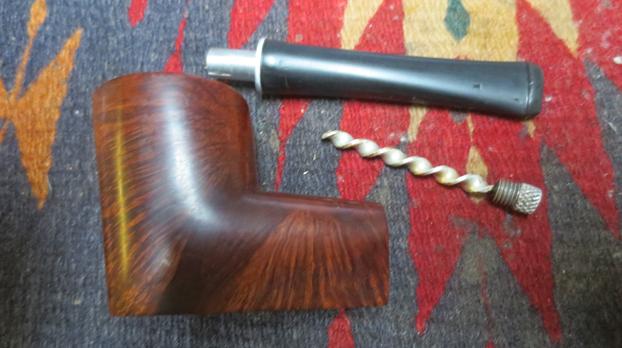 I worked on the stem for several hours. I was able to smooth out the damaged areas but they show up in the pictures. They look like black dents or dips in the stem surface but they are actually the super glue repairs. The nylon is very hard to polish for me. Buffing on the machine is next to impossible without melting it. I polished it with polishing compound by hand and I gave the stem multiple coats of Conservator’s Wax. I hand buffed it with a microfiber cloth to give it some life. Once that was finished I called it done. I buffed the bowl with multiple coats of carnauba wax and buffed the bowl with a clean buffing pad to raise the shine. I put the stem back on the bowl and gave it a final hand buff. The finished pipe is shown in the photos below. It is a beautifully grained piece of briar and is lightweight and interesting to look at. Thanks for journeying with me through the history and the restoration.
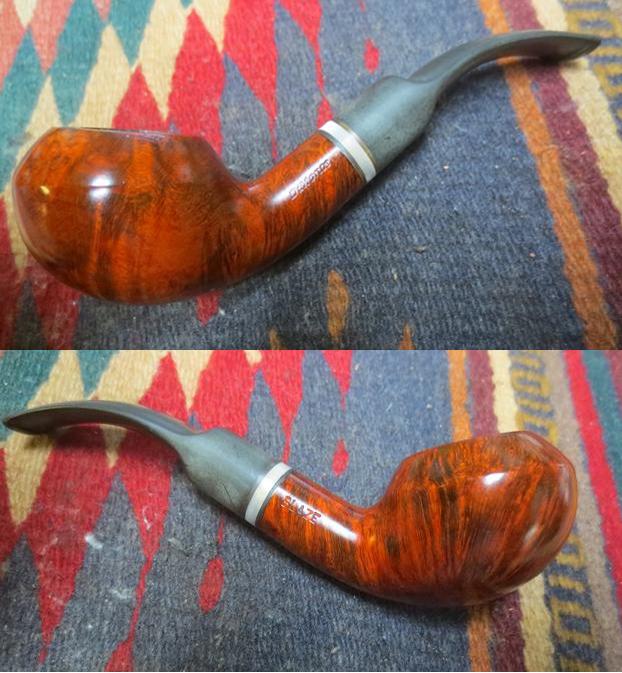
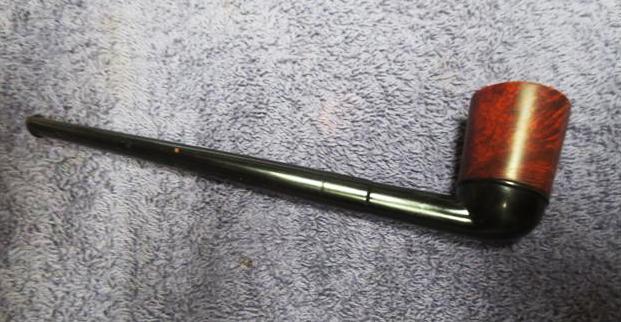
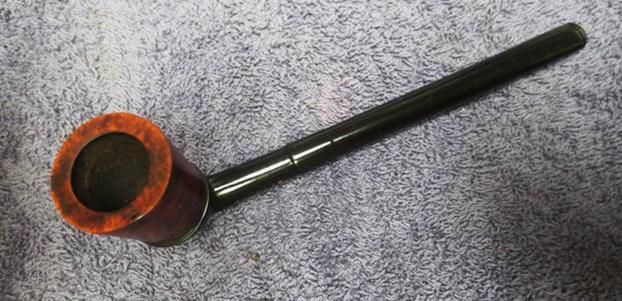
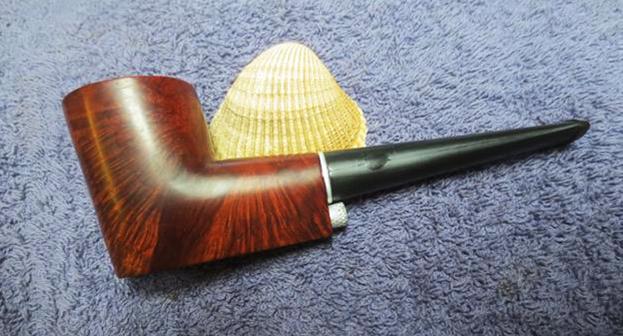

 I wanted to refresh my memory about Pioneer Block Meerschaum pipes so I did a quick Google search and found a catalogue for Pioneer on Chris’ Pipe Pages. Have a look. I have included the back and front cover of the catalogue. The inside can be read on the link below. http://pipepages.com/1pioneer2.html
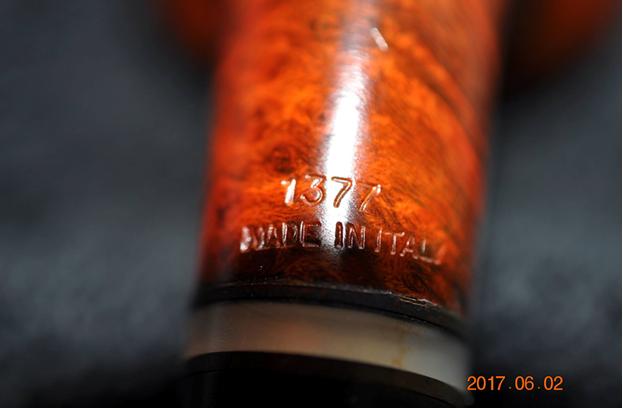
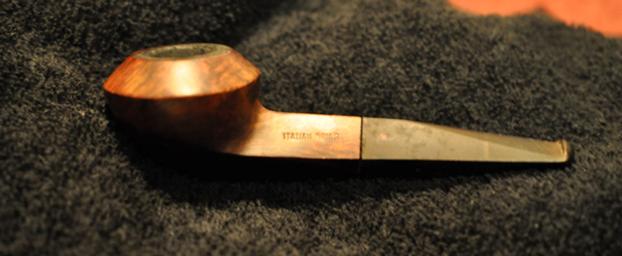
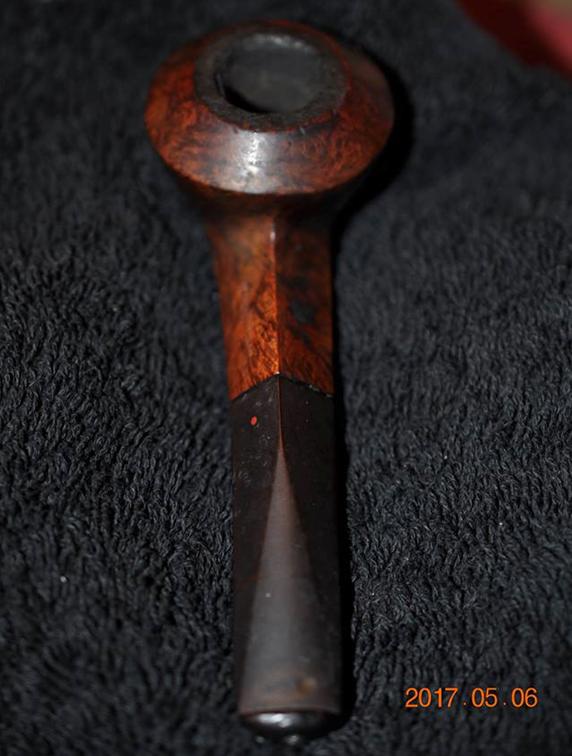
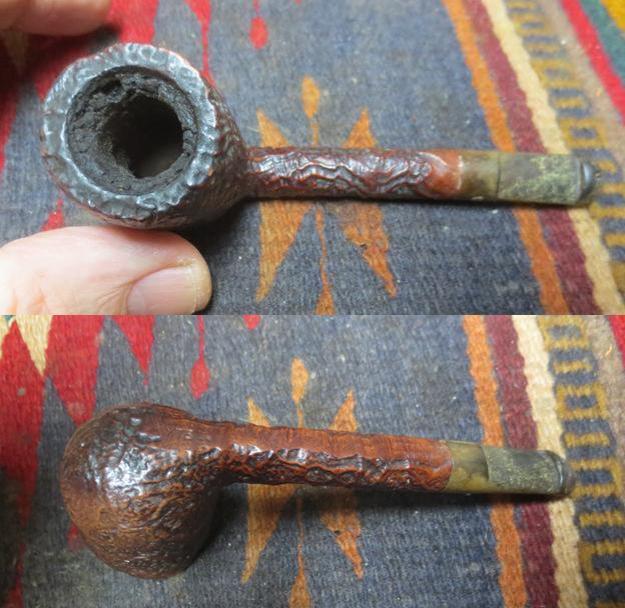
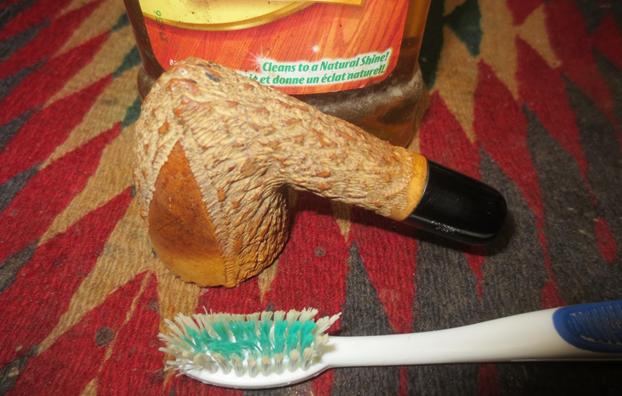
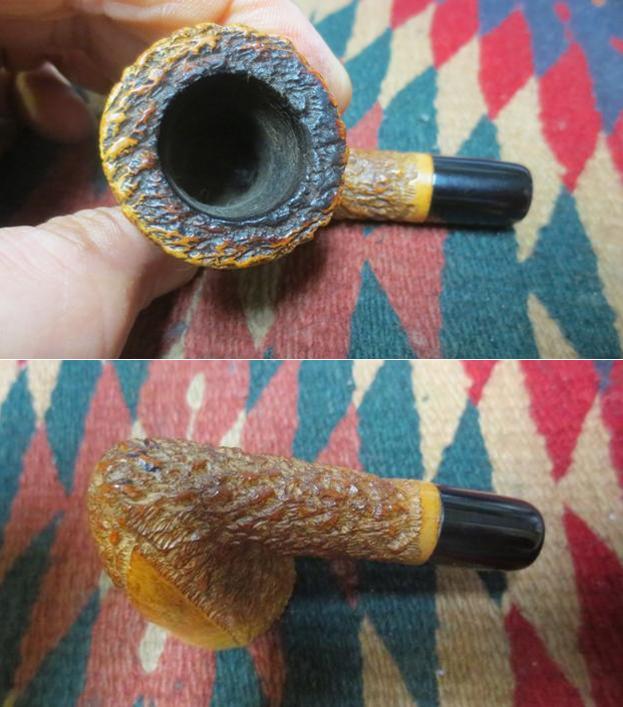
 I took a close up photo of the bowl and rim top to show the condition of the rim and the bowl. The cake and the lava were very thick. The finish was dirty. I took photos of the shank extension to try to capture the stamping in the acrylic.
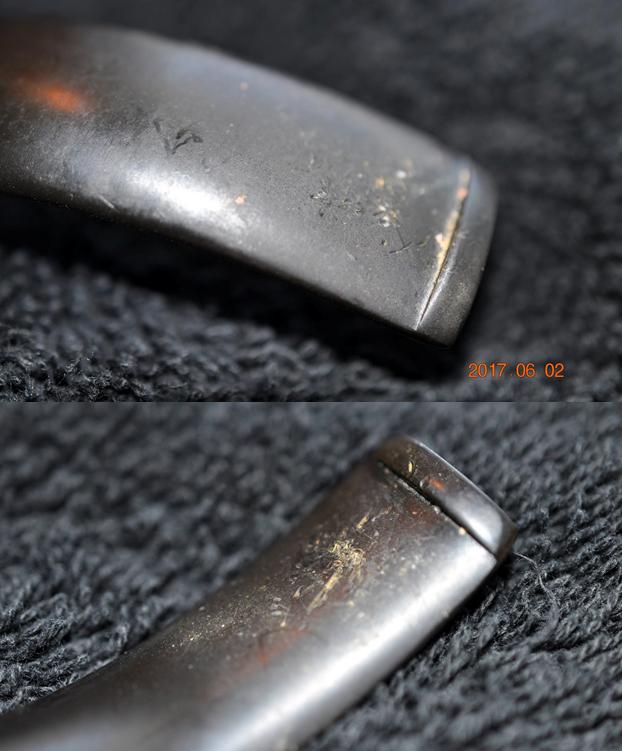
 The next two photos show the oxidation and tooth chatter on both sides of the stem. It was almost green and there were some oxidation mid stem that looked like oxidized copper. It was almost blue green in colour.
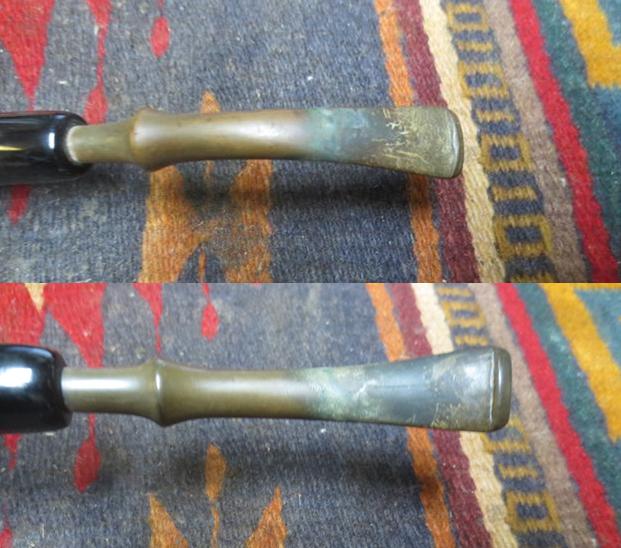 I am working on five of Steve’s pipes right now so I put the stems in the Before & After Pipe Stem Deoxidizer and left them to soak while I worked on the bowl.
 I reamed the bowl with a PipNet pipe reamer starting with the smallest cutting head and working my way up to the third cutting head. I followed that by cleaning back the remaining cake with a Savinelli Fitsall Pipe Knife. I cut the cake back to the meerschaum walls of the bowl. I used a brass bristle wire brush to dry brush the surface of the rim. It cleans off the buildup of lava and gives me a clean surface to scrub with the rest of the bowl.
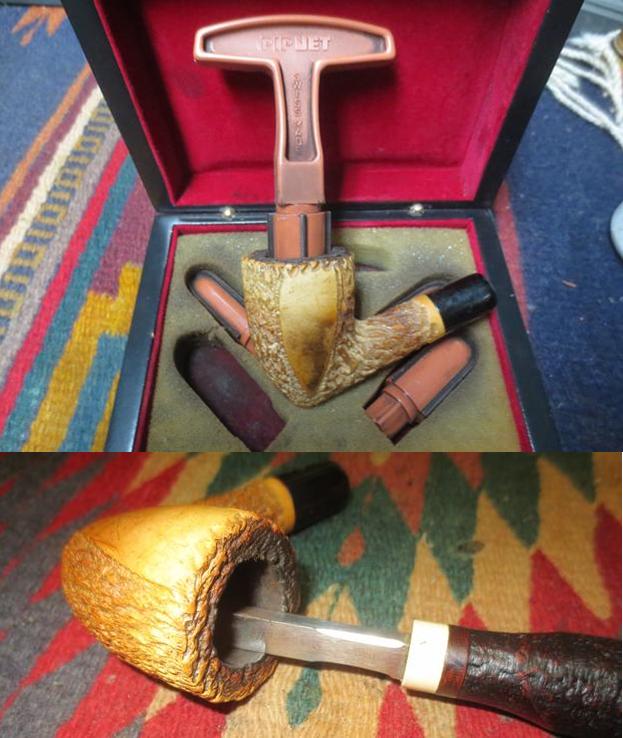
 I scrubbed the exterior of the bowl with a tooth brush and Murphy’s Oil Soap. I scrubbed until all of the grime was loose and rinsed it under running water. I continue to scrub it in the running water until I was happy with the way it looked.
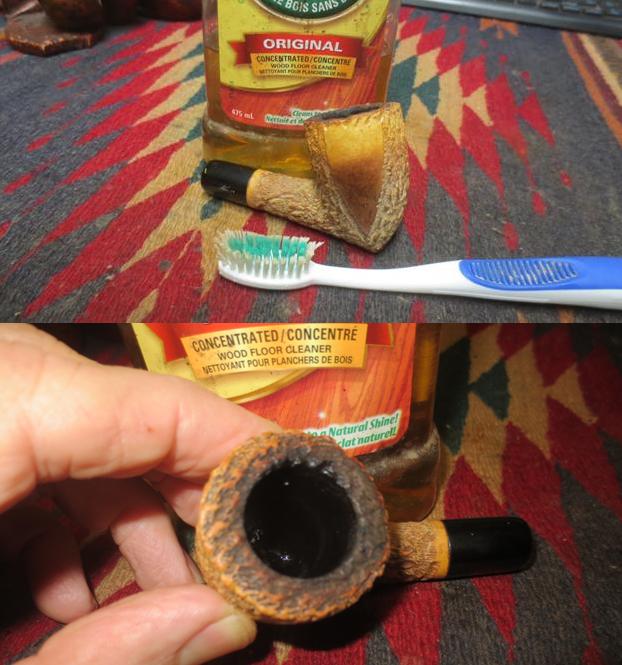
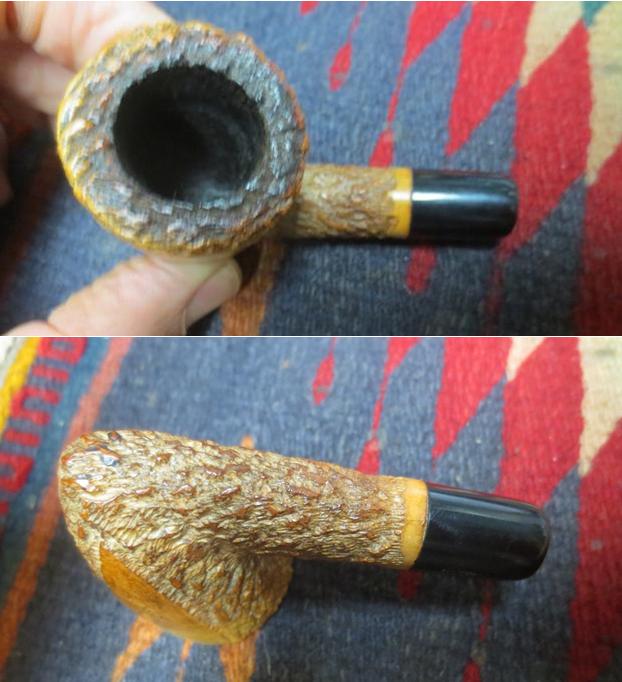
 I dried off the bowl and took some pictures of what it looked like at this point in the process.
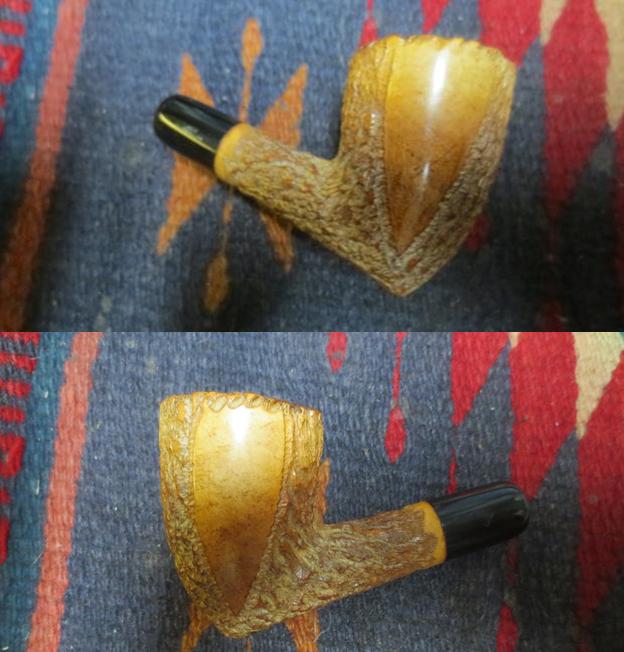
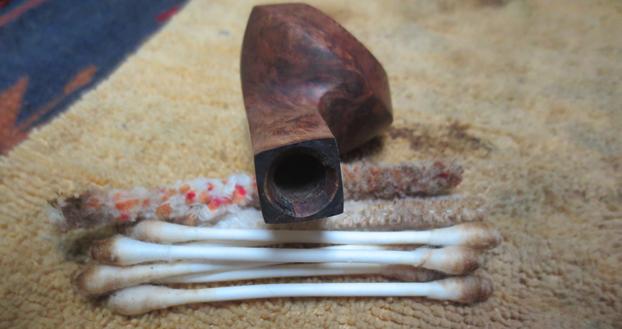
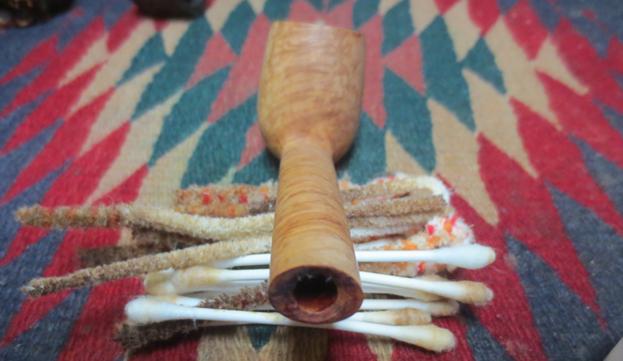
 I cleaned out the mortise and the airway in the shank with pipe cleaners, cotton swabs and alcohol. It took a bit of work as the airway in the shank was really narrow from all of the built up tars and oils. I was able to remove all of the debris.
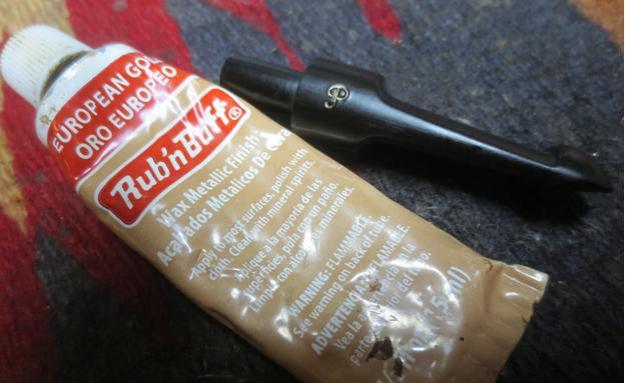
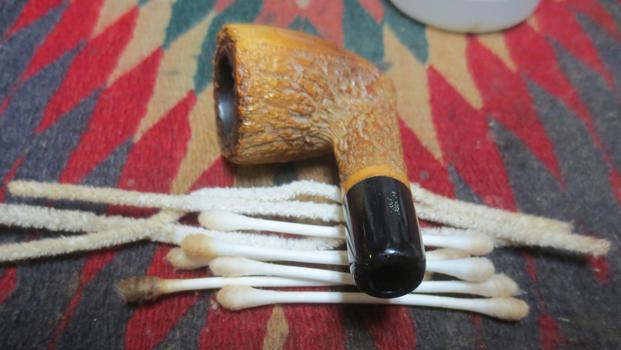 I polished the acrylic shank extension with Obsidian Oil and dried it off. Once it had dried completely I used the Rub’n Buff European Gold to touch up the stamping on the extension.
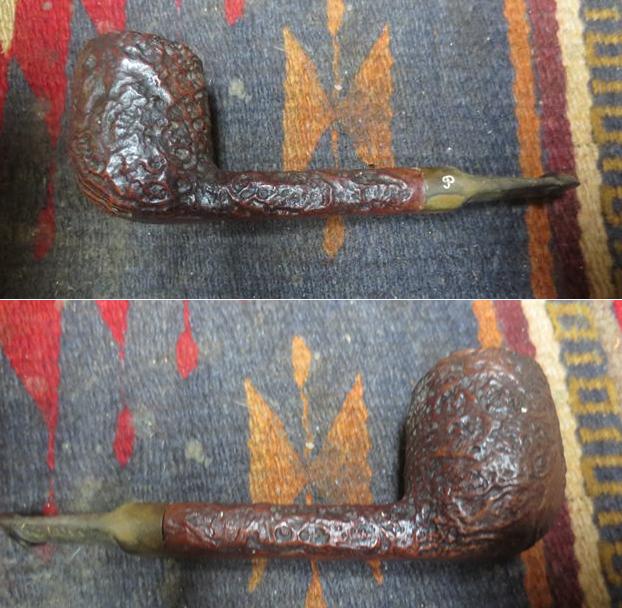
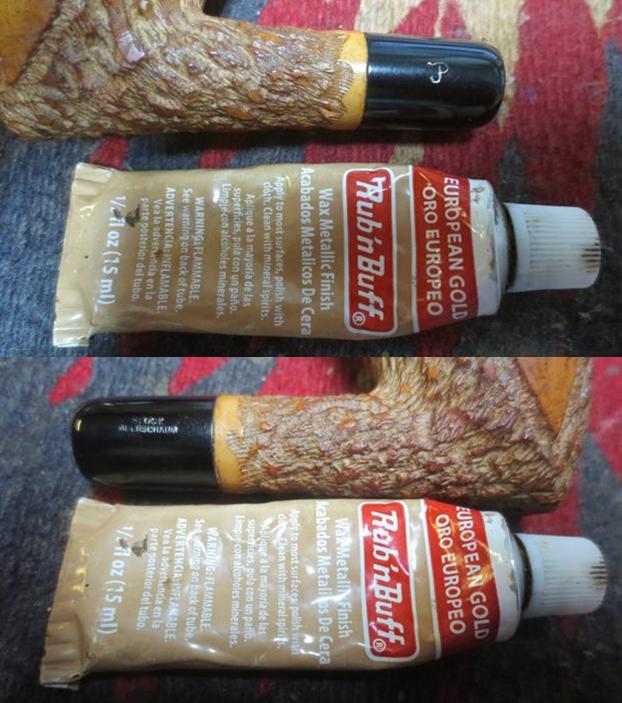 I rubbed several coats of Clapham’s Beeswax into the rusticated finish. I buffed it with a shoe brush between each coat. After the last coat of the wax I buffed it with a clean buffing pad. I hand buffed it with a microfiber cloth.
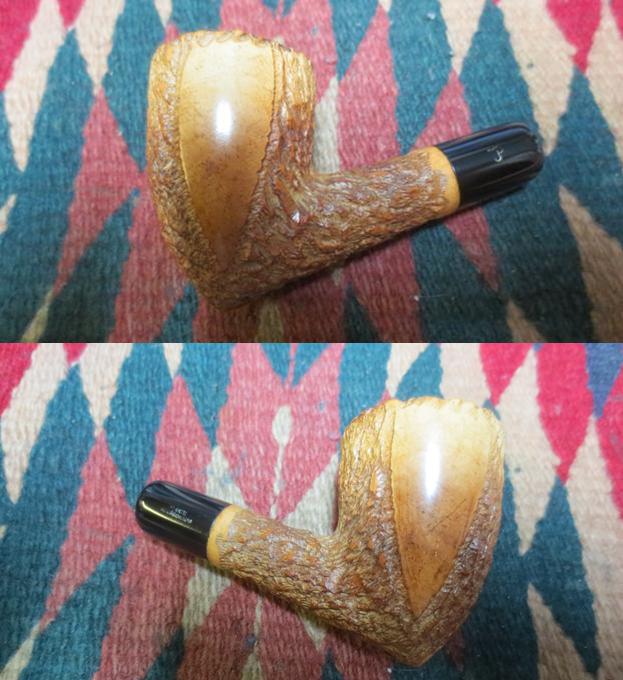
 I took the stem out of the Before & After Pipe Stem Deoxidizer bath and wiped it off with a clean towel. The first two photos below show the stem after the 24 hour soak. The majority of the oxidation is gone off the stem. There was some deep oxidation mid stem on both sides where the green area was on the original stem photos. I sanded the stem with 220 grit sandpaper to remove the tooth marks and chatter on both sides of the stem and the oxidation mid stem.
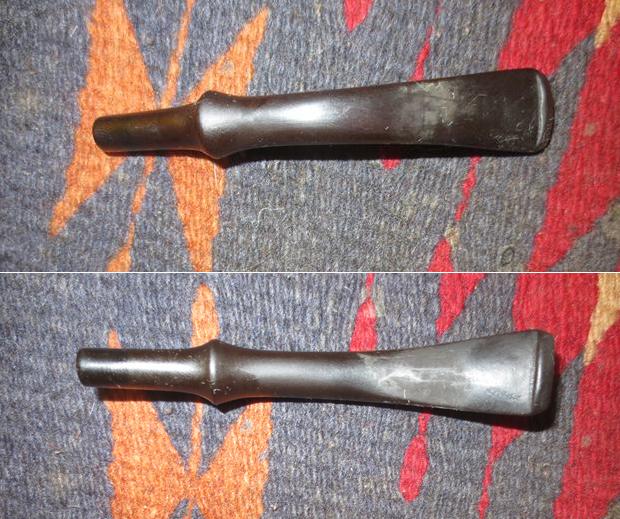
 I rubbed down the stem with Obsidian Oil to remove the dust. I cleaned out the inside of the stem with alcohol and pipe cleaners to remove any debris and the remaining Before & After Pipe Stem Deoxidizer that had gone inside during the bath.
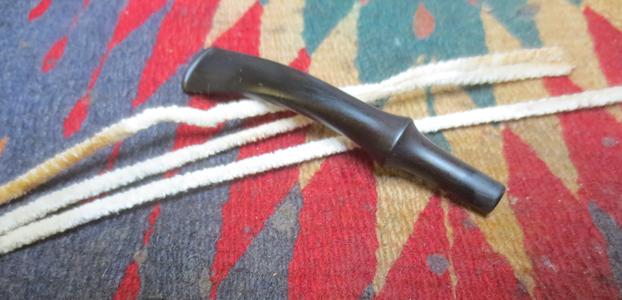 I polished the stem with micromesh sanding pads – wet sanding it with 1500-2400 grit pads and dry sanding it with 3200-12000 grit pads. I wiped the stem down after each sanding pad with Obsidian Oil. After the final 12000 grit pad I gave it a last coat of oil and set it aside to dry.
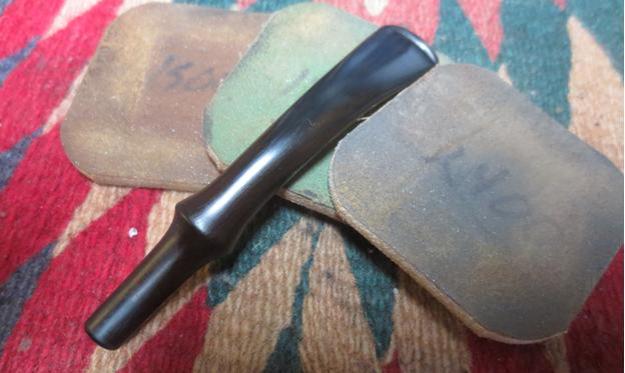
 I buffed the stem with Red Tripoli and worked over the parts of the stem that still showed some of the oxidation. I buffed until the stem was clean working over the middle and the tenon end. I buffed again with Blue Diamond polish on the wheel to polish up the vulcanite. I gave the stem multiple coats of carnauba wax and buffed it with a clean buffing wheel. I buffed the bowl with the clean buffing wheel as well to give the bowl a shine. I hand buffed the stem and bowl with a microfiber cloth to deepen the shine. The finished pipe is shown in the photos below. It is a nice older Pioneer. It is light weight and comfortable in the hand and the mouth. I think my friend Steve in Dawson Creek is going to love this one. Steve,if you are reading this I hope you enjoy this beauty. It will be on its way to you very soon. Thanks for looking.