Blog by Dal Stanton
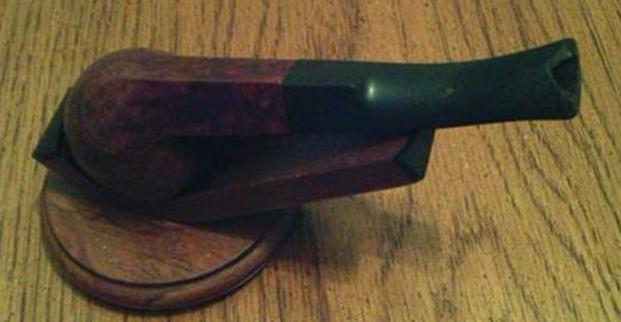
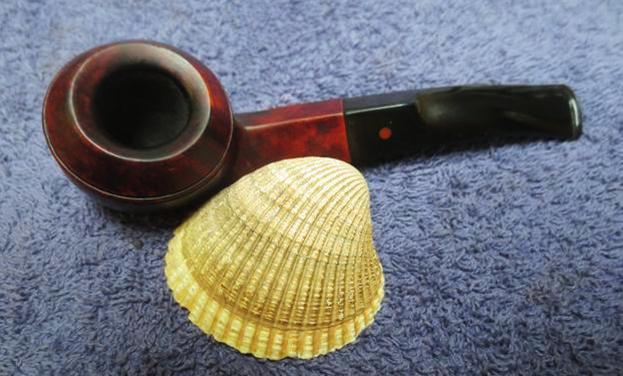
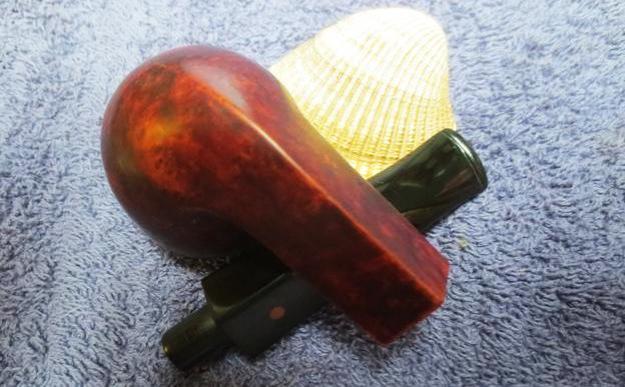
I acquired this Gefapip 500 26 S Bent Bulldog in the acquisition of what I call the ‘St. Louis Lot of 26’. My son, Josiah, found the Lot for sale in an antique shop in St. Louis where he was doing his Masters work on a counseling degree. He texted to me in Bulgaria the details with the proposal that we split the cost of the purchase – that I would choose one of the pipes as a gift from him and the remainder would go into the For “Pipe Dreamers” Only! online collection for pipe men and women to commission to benefit the Daughters of Bulgaria – our work here in Bulgaria with women and girls who have been trafficked and sexually exploited. It was a win/win proposition and the HUGE Champion Churchwarden in the center became my gift from Josiah. I made out like a bandit! Several of these pipes have already found their way to new stewards and another is on deck for restoration. Seth saw the St. Claude produced Bent Bulldog (arrow in picture above) and sent me this note:
Hi Dal, first of all, I just want to say that I’ve been checking your website pretty frequently since you spoke at our church’s (Faith PCA in Cumberland, MD) mission conference a year or two ago. Since hearing about the work you and Beth do through the Daughters of Bulgaria, I knew I wanted to donate in some way and have been waiting to find the right pipe to get.
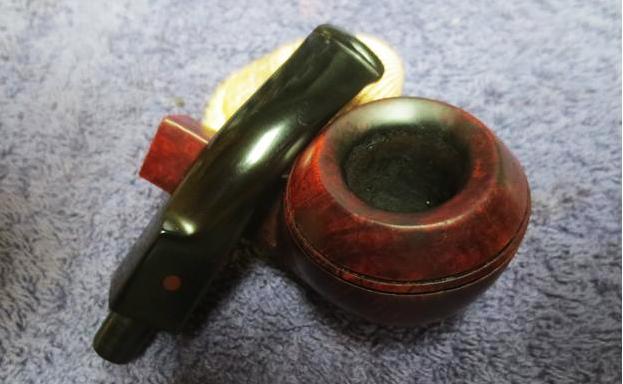
My wife and I visit many churches in the US when we’re there talking about our life and work in Bulgaria. Seth was at one of these conferences and I love getting notes like this. One of the pipes he had in mind was the Bulldog. Later, Seth added another commission project to the GEFAPIP Bulldog, by asking me to fashion a new Churchwarden from a Sculpted Bull’s Head – I’m looking forward to this one! His biggest challenge is the missing horns which I will need to fashion! I’m grateful for Seth’s patience in waiting for his commissions to reach the worktable. Here are pictures of the Bent Bulldog.
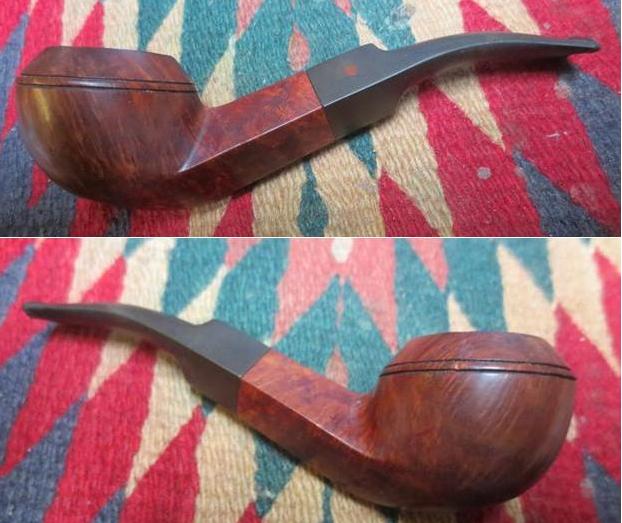
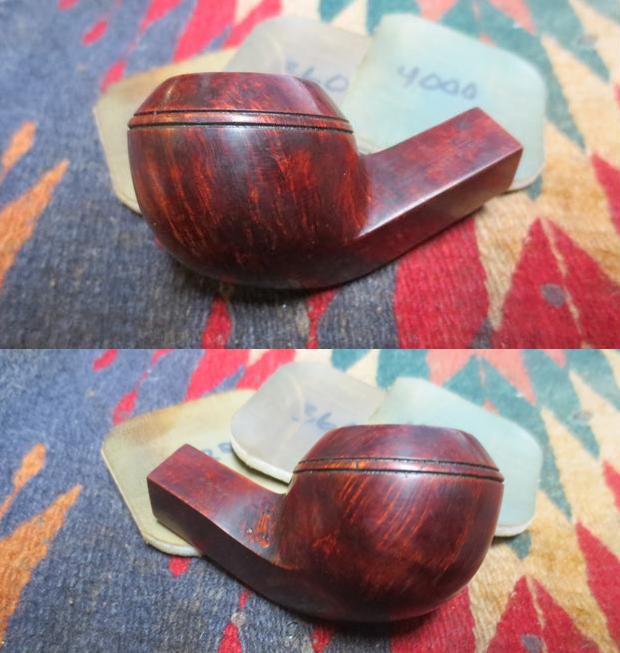
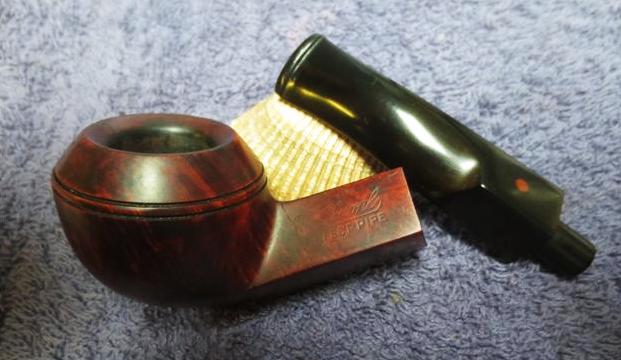
 The provenance of the pipe is found on the lower left panel of the diamond shaped shank. The nomenclature is GEFAPIP [over] 500 [over] FRANCE. Running parallel to the shank facing to the right is what I’m assuming is a shape number: ’26 S’. The ‘500’ and ‘FRANCE’ stampings are very thin, so I need to be careful to safeguard these.
 A quick look in Pipedia reveals pertinent information about the French origins of this GEFAPIP. The information is brief but helpful.
Gefapip was a French brand from the St Claude region. Their products appeared in the 1979 Tinderbox catalog, with prices ranging from $17.50 to $62.50.
The following catalog page (1979 Catalog page, courtesy Doug Valitchka) was included with the text and it added helpful information that the GEFAPIP name was started by a group of master carvers in the St. Claude region. The production line pictured in the catalog page are examples of shapes smoked in the Saint Claude region in the 1890s according to the caption. A visit to Pipephil.eu did not produce new information but gave some additional examples of GEFAPIP pipes. The stem stamping of a ‘modernistic’ pipe shape shown in the panel unfortunately is not visible on the Bent Bulldog’s stem. I don’t know if it was ever there or was worn away over the years.
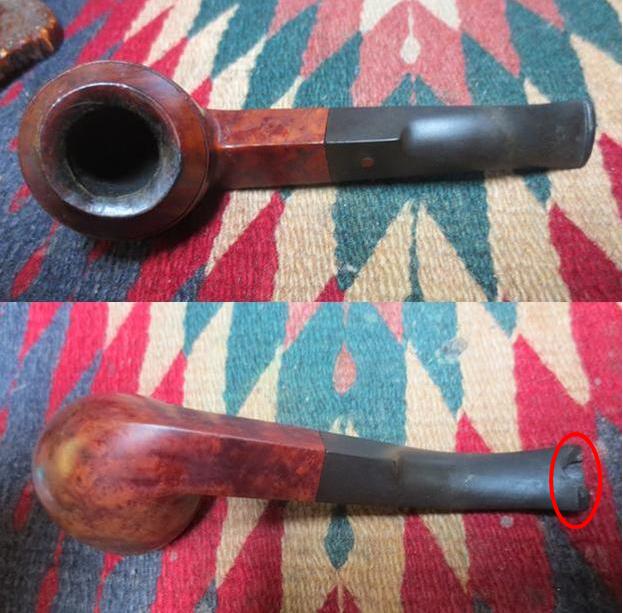
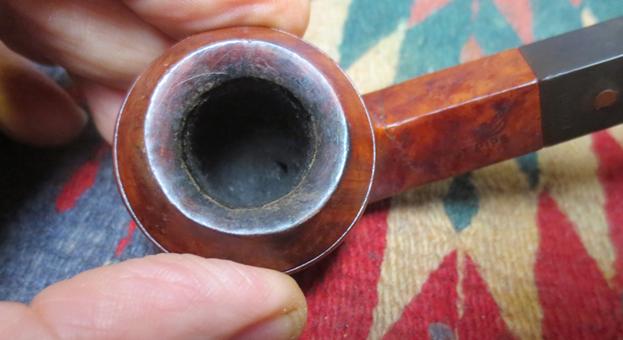
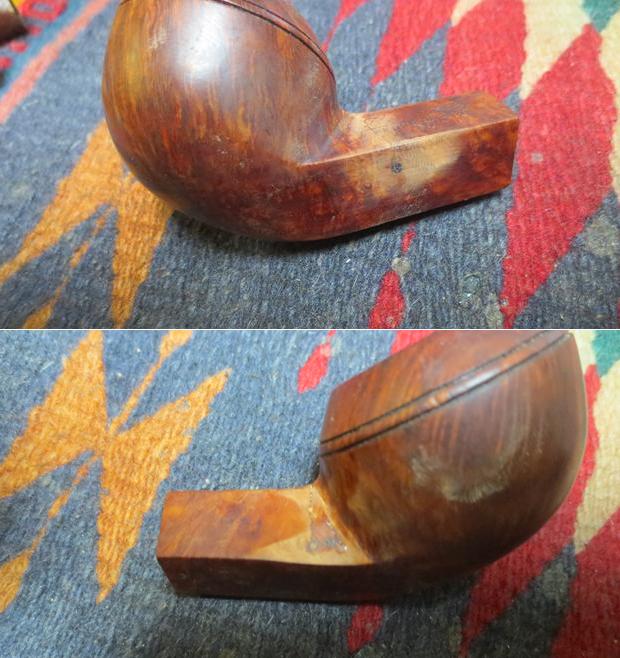
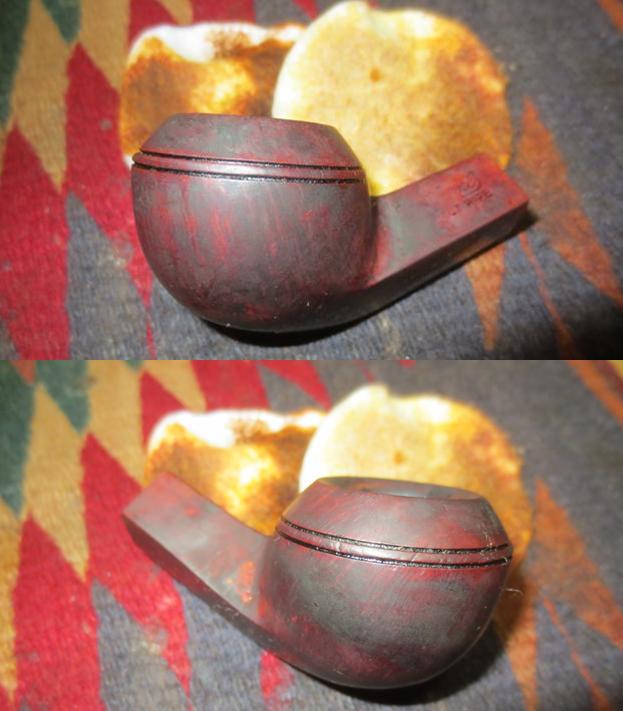
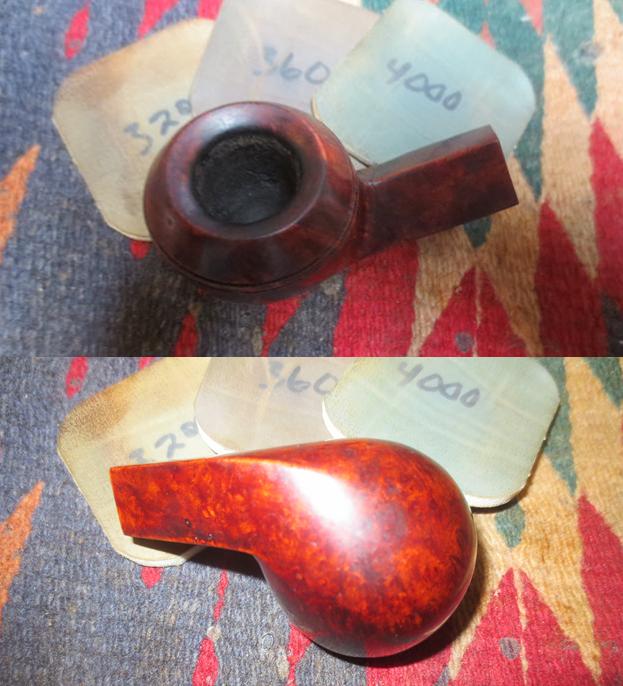
 Looking more closely at the Bulldog itself, reveals that it has been smoked hard and put out to pasture. The rim has lava flow along with a thick carbon cake buildup in the chamber. The briar surface is covered with a darkened film of grime and oils that need cleaning.
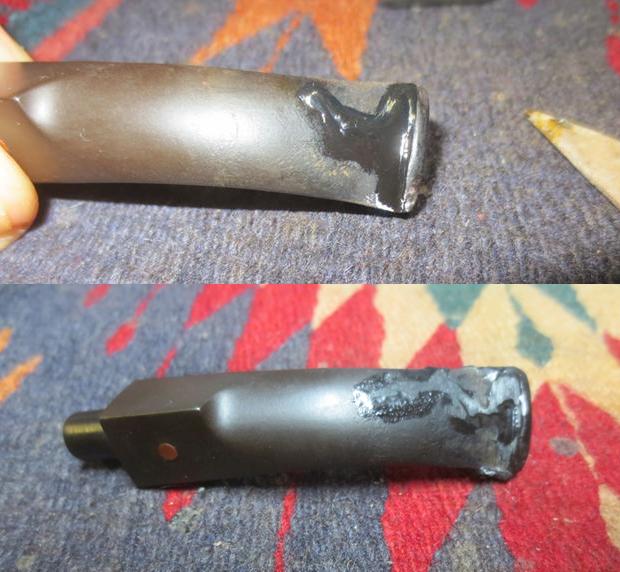
 The stem is deeply oxidized to the point of what I believe is calcium buildup on the surface concentrated in the bit area. The bit has been chewed severely with the upper button bite caving in on the slot.
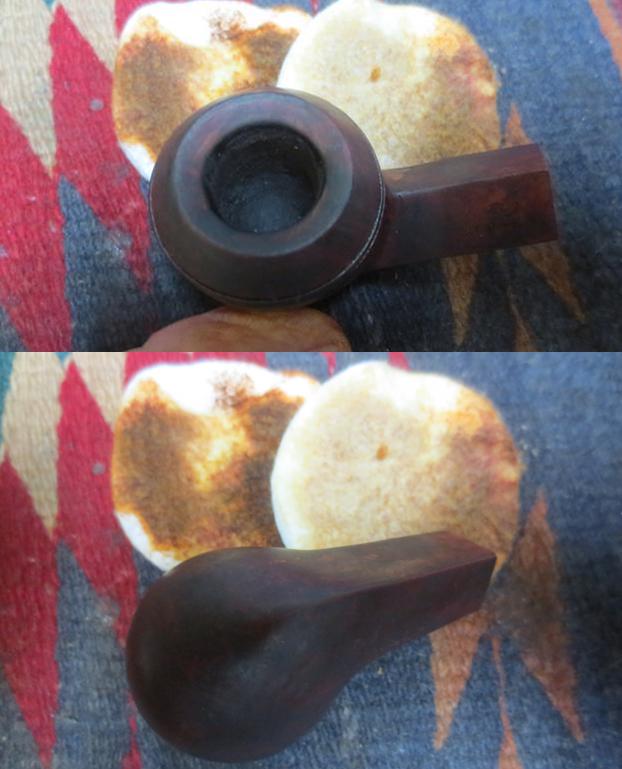
 The underside also has a severe tooth hole almost puncturing through to the airway. The entire button will need rebuilding to address these issues.
 The shank junction seems to be in good shape at first glance, but I see that former sanding and wear has created some shouldering on the corners of the stem facing.
 The restoration of the French GEFAPIP Bent Bulldog begins with the needy stem to address the deep oxidation. I first clean the airway with pipe cleaners dipped in isopropyl 95%.
 Trying to get a jump on breaking up the oxidation in the vulcanite, I apply a 00-grade steel wool to the surface before putting the stem in a soak of Before & After Deoxidizer. This seems to help.
 I’ve purchased a new batch of the Deoxidizer from Mark Hoover (lbepens1@gmail.com), but I wanted to give the current batch one more use before tossing it! Generally, I like the Before & After Deoxidizer’s performance except when deep oxidation is present. Consistently, I find that it doesn’t remove this deep oxidation but perhaps masks it and generally I find that following the Before & After Treatment sanding to remove the oxidation is needed. The stem of the GEFAPIP Bulldog joins other pipes in the queue (Longchamp, Danish Freehand, Kaywoodie Standard, Italian Billiard and Brewster) for a soak in the Deoxidizer.
 I give the soak several hours, though I don’t believe the additional time adds more cleaning, and after fishing out the Bulldog’s stem and draining off the excess liquid, I run another pipe cleaner wetted with isopropyl 95% through the airway to clean away the Deoxidizer. I also rigorously wipe off additional oxidation raised through the soak process using cotton pads wetted with isopropyl 95%.
 After this, to help revitalize the vulcanite stem, I wipe paraffin oil on the stem. Paraffin oil is a mineral oil I can find easily here in Bulgaria.
 With the help of the setting of the camera on my iPhone X, the remnant of deep oxidation remaining in the vulcanite is visible. I will need to fully sand the stem to clean it thoroughly.
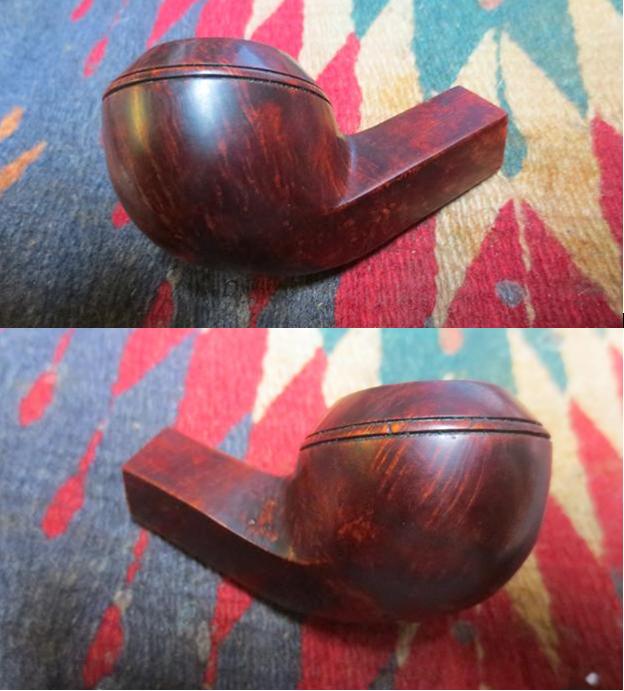
 Putting the stem aside for the time, I take a closer look at the stummel with a fresh picture of the chamber. The picture below is difficult to discern the canonical shape of the chamber as the cake thickens toward the floor of the chamber.
 I also do a quick inventory of the briar surface in need of cleaning. The dark spots of oils and grime hide the beautiful grain peeking in from underneath.

 After laying out paper towel to minimize cleanup, to clean out the carbon cake buildup in the chamber I use the Pipnet Reaming Kit to get down to the fresh briar. I use two of the four blade heads available in the kit. Then, switching to using the Savinelli Fitsall tool, scraping the chamber walls continue. Finally, after wrapping a Sharpie Pen with 240 grade paper, the chamber is sanded to finish the reaming process. After cleaning the chamber of carbon dust with a cotton pad wetted with isopropyl 95%, inspection of the chamber shows some minor heating veins, but healthy briar now has a fresh start. I move on.
 Transitioning now to the external cleaning, undiluted Murphy’s Oil Soap is used with a cotton pad to scrub the briar surface. A dental probe is helpful in cleaning the pair of parallel dome grooves separating the upper and lower Bulldog bowl. A brass bristled brush helps to clean the lava flow on the rim as well. Brass bristles are used because they are gentler on the briar surface yet provide some abrasive cleaning action.
  From the cleaning on the worktable, the bowl is transferred to the kitchen sink and rinsed with hot water. Using long shank brushes, the internal cleaning starts by using anti-oil liquid dish soap. After a thorough rinsing, back on the worktable the results of the cleaning are examined.
 The surface cleaned up very well. The dark spots that were especially evident at the shank/bowl junction were cleaned away very nicely.
 The rim shows continued darkening, but this will be addressed with some sanding to clean the briar.
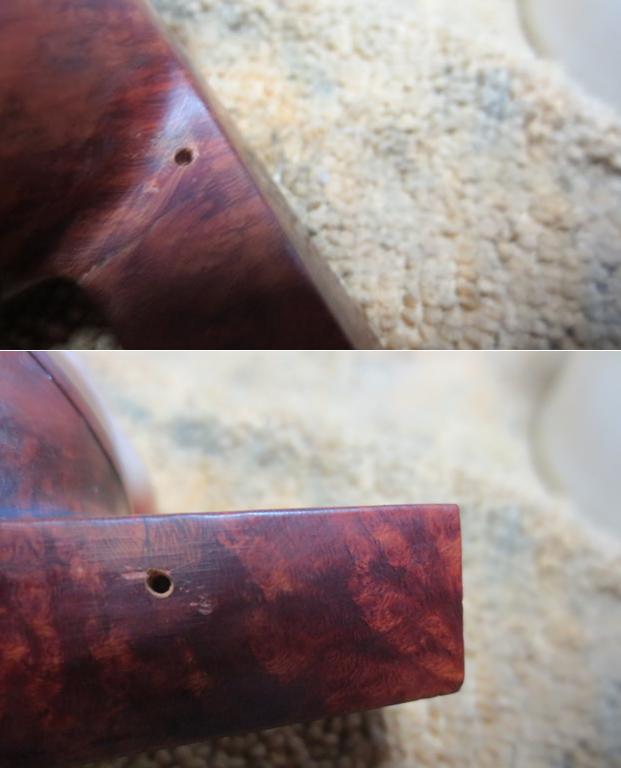
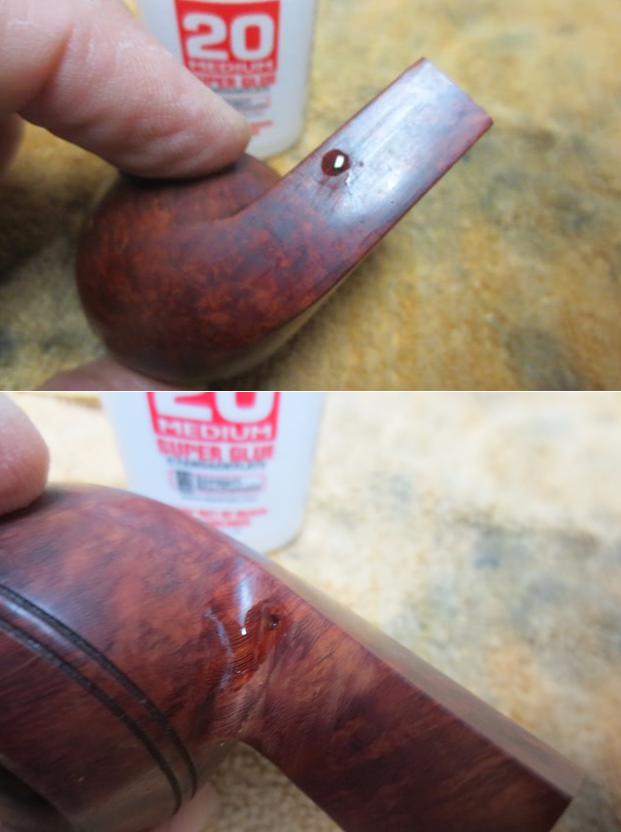
 The nice quality of this block of briar is evidenced by the emerging grain and that I found only one, very small fill on the right upper shank panel. There’s a slight ridge where the fill has shrunk after being wet, a normal phenomenon. I may touch it up with some clear CA glue.
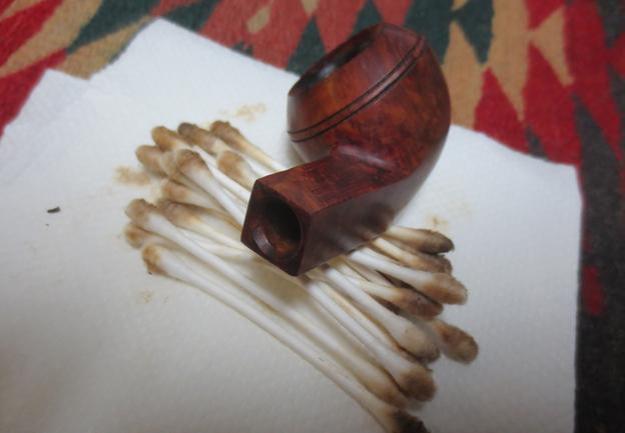
 Switching now to the internal cleaning proper, cotton buds and pipe cleaners are employed after wetted with isopropyl 95%. The internals are grungy. Using a smaller pointed dental spoon, I excavate huge amounts of tars and oils scraped off the mortise walls. My first effort at pushing a pipe cleaner through the draft hole is frustrated by a blockage. With the help of a stiff piece of wire, the blockage is pushed through – a hunk of gunk! With a lot of effort expended, the buds and pipe cleaners start emerging in a lighter state until I call it a truce! I’ll continue the internal cleaning later with a kosher salt/alcohol soak. The pictures show the first assault.

 I decide to move straight away to the kosher salt and alcohol soak. I first twist a cotton ball by pulling and twisting it to form a ‘wick’ that is inserted into the mortise with the help of the stiff wire. Then, after filling the bowl with kosher salt which leaves no aftertaste and placing the stummel in an egg carton for stability, using a large eye dropper, the chamber is filled with isopropyl 95% until it surfaces over the salt. After a few minutes, the alcohol is absorbed into the pipe and I top it off again and set the stummel aside for several hours allowing the soak to do the work.
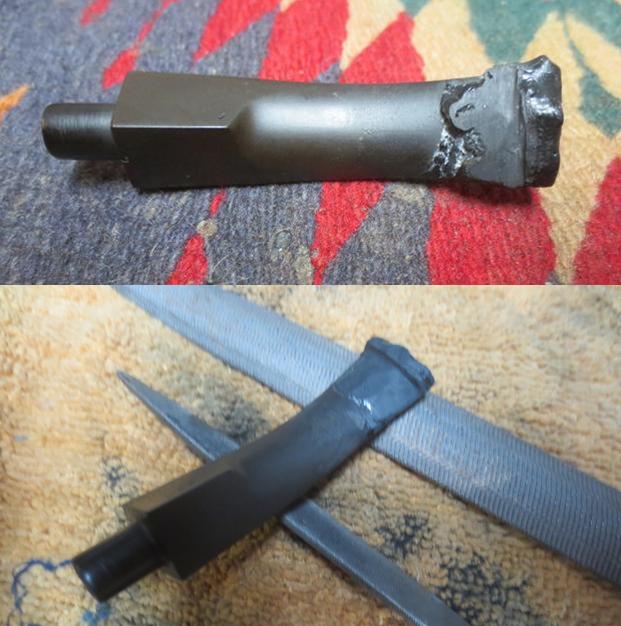
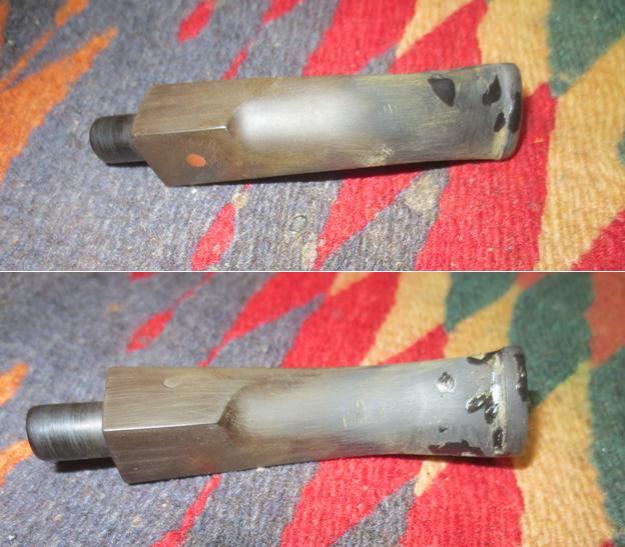
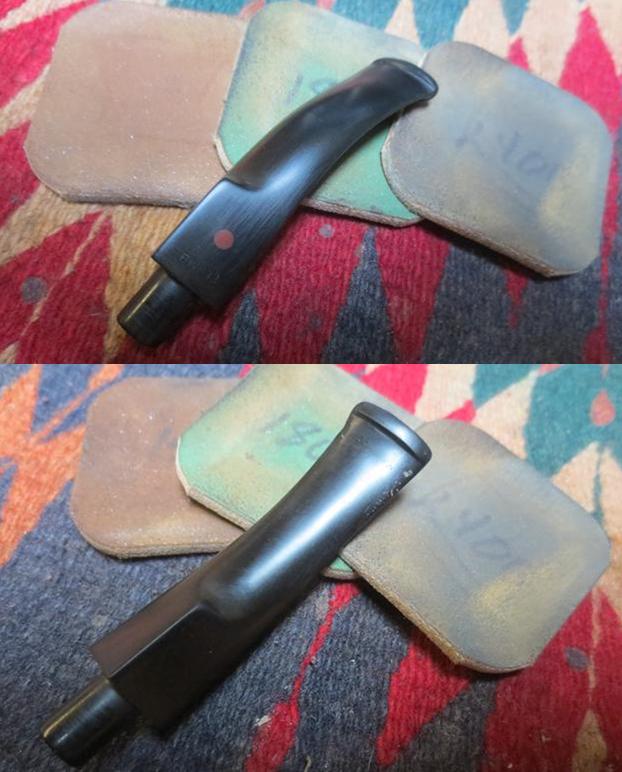
 Switching focus now to the stem, I take a few pictures to take a closer look. With the residual oxidation remaining in the stem, it is a given that the stem will be fully sanded to address this. The upper bit has compressions including damage to the button lip. In the picture, after inserting a pipe cleaner, the split in the button becomes more visible.
  The lower bit is so damaged that no amount of sanding will resolve these issues. With the upper bit, I’ll first use the heating method to expand the vulcanite to lessen the amount of sanding needed.
 I note that the button doesn’t have a slot but simply an airway hole.
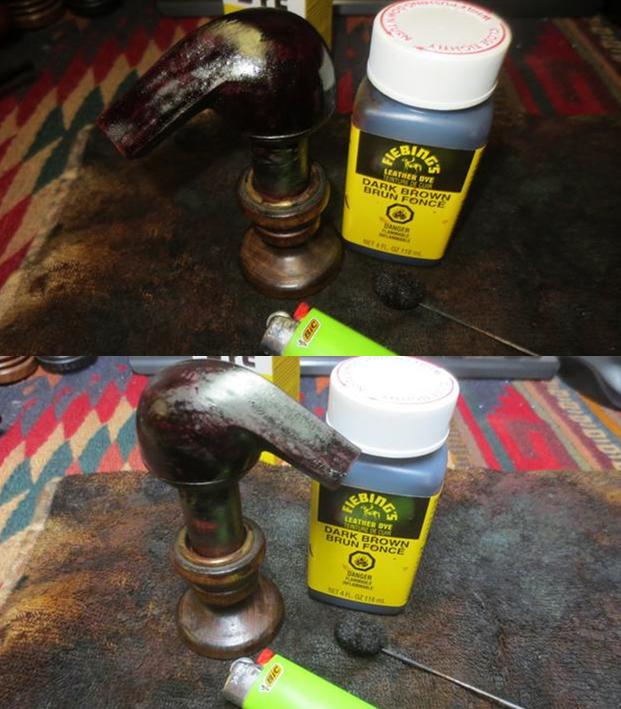
  To begin, I use a Bic lighter to paint the upper bit to lessen the severity of the compressions before rebuilding the button. I take a picture to mark the start and another picture to show the progress. The second picture does reveal that the vulcanite expanded some and this is good.
 Next, the entire button needs to be rebuilt using a mixture of activated charcoal and Extra Thick CA glue. To begin, I wrap a piece of Scotch tape around the end of a pipe cleaner then rub Petroleum Jelly over the tape. I then insert the pipe cleaner into the airway and position the tape so that it straddles the air hole in the button. This is to guard the integrity of the airway so that the patch material doesn’t seal it.
 I then clean the upper- and lower-bit area with alcohol.
 With a plastic disk serving as a mixing pallet, scotch tape is used to help in the cleanup. I mix on a non-porous surface to provide consistency in the way the CA glue mixes with the activated charcoal. That is, I do not mix on card stock or something like this because it absorbs moisture out of the glue and causes the glue to behave less consistently while mixing.
  I use an activated Charcoal Capsule to provide the charcoal – it is pure and is not lumpy.
 After removing the charcoal from the capsule, I add a small puddle of the Extra Thick Maxi-Cure CA glue produced by BSI. It works well for me.
 I use a toothpick to mix the CA glue and charcoal by drawing the charcoal into the glue as I mix. When it thickens enough so that it’s not running off the toothpick, I then trowel the mixture onto the button – upper and lower. The patch mounds should be more than what is needed so that sanding brings the newly fashioned button down to the right size and shaping.
 After the patch material sets, just like it should work, the petroleum jelly coated pipe cleaner was removed with a few small tugs.
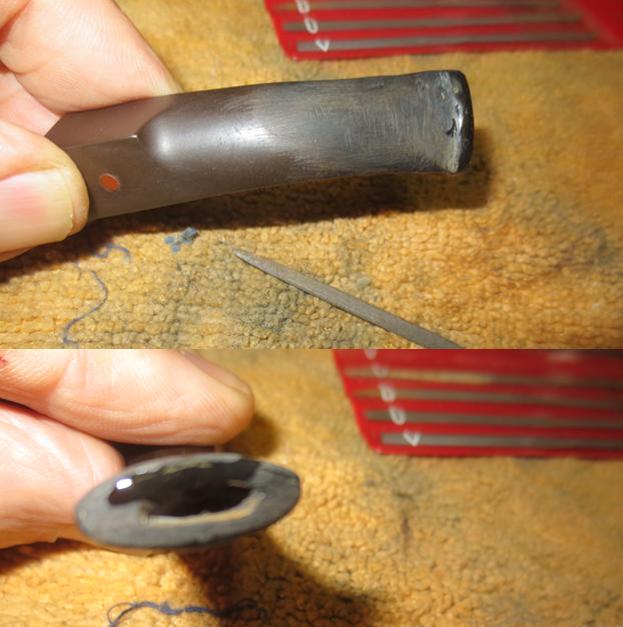
 After several hours the patch material is fully cured. The long patient process of filing and shaping the button begins with a flat needle file. The following pictures show the gradual progression on the upper button lip.
  Next, transitioning to the lower button lip and the patch to bit.
 The filing phase is completed as the pictures show the upper and lower bit and views of the airhole – upper and lower orientation.

 Transitioning to 240 grade paper I begin sanding which continues the smoothing and shaping of the button but also expands the sanding to the entire stem to address the deep oxidation. I employ a plastic disk to sand against to avoid shouldering the stem facing. It is no surprise to see the emergence of air pocket pits in the patch material as the sanding continues. I would like to figure out how to minimize this! The upper and lower stem is shown.

 The sanding with 240 paper is completed and I wipe the button off with a cotton pad wetted with isopropyl 95% to get a closer look at the patch pitting in the rebuild button.
 To address this and to fill the pits, I use regular clear CA glue. I put a small amount of CA glue on the lip of the button and then spread it over the lip to create a thin layering of glue over the surface. This layering of CA glue fills the pits. I spray the glue with an accelerator to hold it in place and to quicken the curing time.
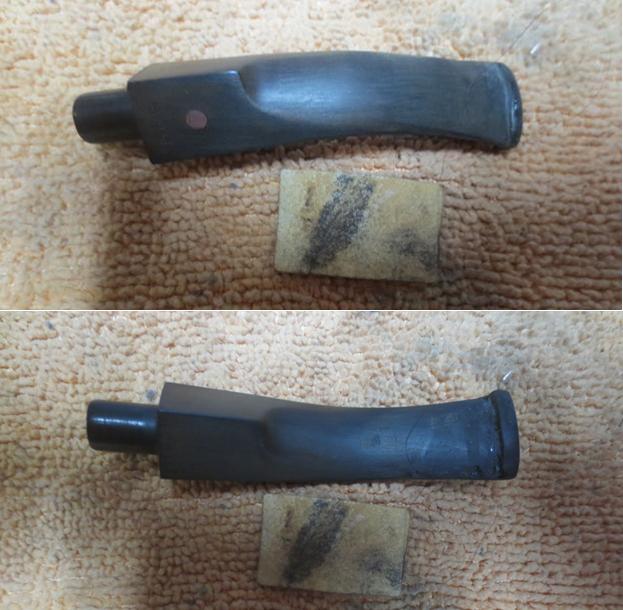
 Next, after taking the stem to the kitchen sink, the whole stem is wet sanded with 600 grade paper and after the sanding, 000 is applied to the entire surface of the stem to smooth it further – including the newly rebuilt button with the CA glue painting of the button. The results are looking good for the upper and lower stem.
 I put the stem to the side for now and turn again to the stummel which has been undergoing a kosher salt/alcohol soak for several hours to continue cleaning and refreshing the internals. The salt and mortise ‘wick’ are soiled revealing the passive activity of drawing out the tars and oils from the internal mortise walls. After tossing the expended salt into the waste, I wipe the bowl with paper towel and blow through the mortise to remove salt crystals.
 To make sure all is fully cleaned, I use one pipe cleaner and cotton bud to confirm this. I also take a whiff of the chamber and it is smelling sweet and ready for its new steward! Moving on!
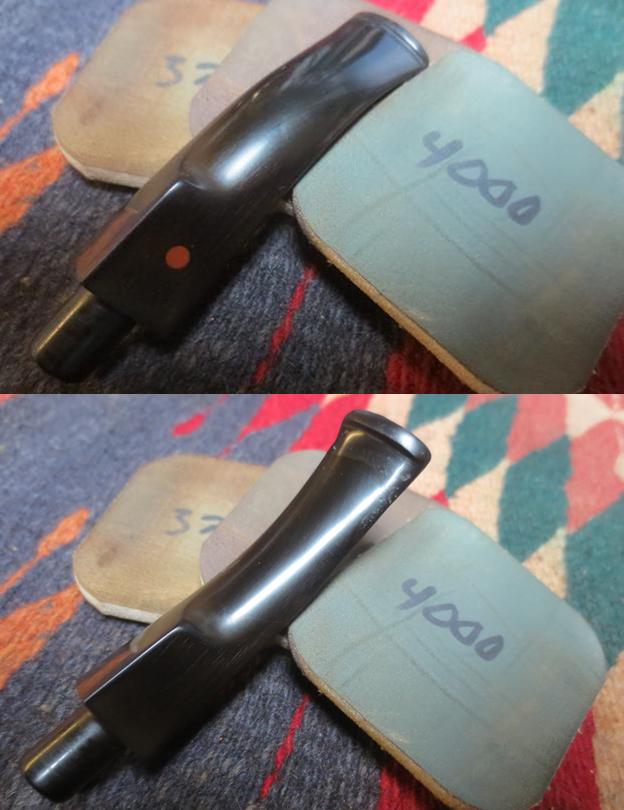
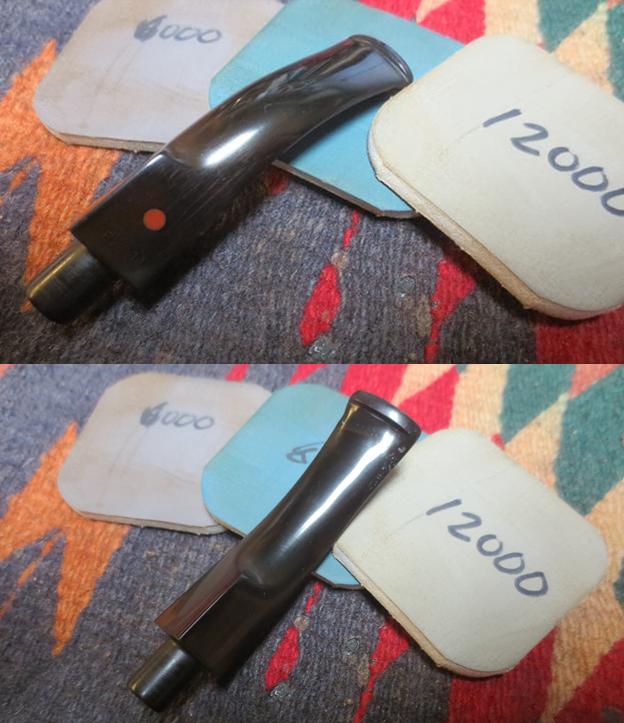
 I continue with the stem applying the full regimen of micromesh pads. First, with pads 1500 to 2400 wet sanding is followed by dry sanding with pads 3200 to 4000 and 6000 to 12000. Between each set of 3 pads, Obsidian Oil is applied to rejuvenate the vulcanite stem and to retard future oxidation development. The stem looks great and the button rebuild does as well.
 Continuing to help in the revitalization of the vulcanite stem, I apply Before & After Fine Polish and then Extra Fine Polish in that order. After each application by working the polish into the vulcanite with my fingers, afterwards wipe the excess with paper towel. The stem looks good.
 After completing this phase of the stem restoration, to get a look at the overall progress, I reunite the stem and GEFAPIP Bent Bulldog stummel. Two issues emerge after reuniting the stem and stummel. First, the tenon/mortise fitting has loosened as a result of the cleaning processes. This often is the case. The seating of the tenon needs tightening. The second issue is that the shank/stem alignment is off slightly creating a gap between the stem and shank on the left side – right side of the second picture below. This gapping is enhanced somewhat by the rounded corners of the stem facing that I identified earlier.
 Before addressing the gap, to tighten the tenon’s fit in the mortise, I find a drill bit one size larger than what will fit into the airway.
  Then, using a Bic lighter to heat the tenon until the vulcanite softens; the drill bit is forced into the airway gradually. After inserting the very beginning of the bit, I re-heat the tenon with the Bic lighter to again soften the vulcanite. I then force the bit into the airway further. With each advance of the slightly larger drill bit into the airway, the vulcanite is expanded thus increasing the diameter of the overall tenon resulting in a tighter fit in the shank.
 After the bit has reached the end of its journey expanding the tenon, I take the stem to the kitchen sink and cool the tenon with the drill bit remaining inserted. This cools the vulcanite and it hardens resulting in holding the expanded tenon diameter. Back at the worktable, to remove the bit, which is now stuck, I grip the end of the drill bit with plyers and while holding the bit stationary, I rotate the attached stem so that gradually the bit is released from the tenon’s grip.
 The procedure works very well so that the tenon is now too large to fit after a test fitting. Using 240 grade paper wrapped around the now expanded tenon, while holding the sanding paper stationary, I rotate the entire stem so that the sanding on the tenon moves toward a custom fit and is sanded uniformly.
 After some sanding, another test shows progress, BUT the tenon is never forced into the mortise which increases the dreaded shank cracking noise to be heard!
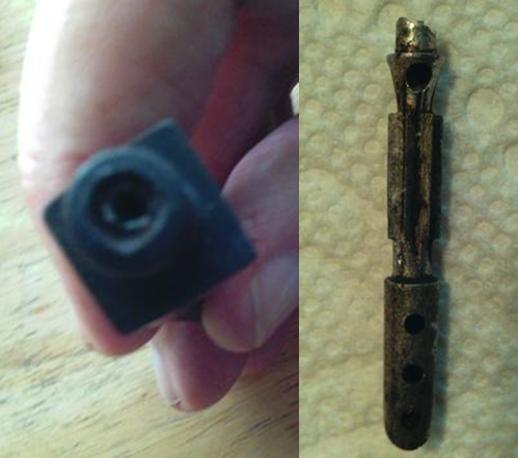
 Finally, the tenon is seated into the mortise and I examine the fit. The truth is that the stem fitting is not good, and it appears that this was a factory issue or is it a replacement stem? I don’t think so, but it looks like the drilling was off some so that the stem and shank facing are not perfectly flush. The resulting gaps are easily seen in the pictures below.
 To address this issue, since the gapping is in the lower quadrant of the stem/shank facings, I fold a piece of 240 sanding paper and insert the now two-sided edge of the paper in the upper quadrant sandwiched between the stem and shank. Sanding the folded paper like a hand saw – back and forth – has the effect of removing the material equally on both sides which has the hoped result of closing the gaps in the lower quadrant.
 This takes some time – ‘hand saw’ sanding and testing – to see very gradual progress. Re-fitting a catawampus stem/tenon/shank junction is not easy in general, but when one is dealing with a diamond or squared shank, it’s much more difficult. Why? A rounded junction is much easier to blend the opposites coming together. With the corners and edges of a diamond shank, it is much easier to see problems stand out. The following pictures show progress, but perfection is not found in this life!
 The other thing that is troublesome with this junction is that the corners have been rounded or shouldered. I noted this before and this picture brings attention to this. The next two pictures show this as well as a lingering gap that my OCD tendencies will not ignore!
 To help remove the shouldering and hopefully provide more movement toward a better fitting, I bring out the stem topping board. With a hole drilled in the board, I place 240 paper over the hole and force the tenon through the paper into the hole. With the tenon inserted into the hole, I then rotate the stem carefully to sand down the stem facing – thus, removing the shouldered edge and creating a sharper facing – hopefully!
 After the topping, I cover some of the stem with masking tape and sand the junction with 240 then 600 grade paper to bring things into a tighter alignment removing the edges I can feel as I rub my finger over the junction. I’m avoiding the lower left panel which holds the nomenclature.
 This sanding and the topping have worked very well. Not perfection, but a much better union is evident.
 I continue sanding the junction with the addition of 000 grade steel wool avoiding the nomenclature panel altogether. Satisfied, I move on!
 After putting the stem to the side, I turn to the stummel and take a closer look at the Bulldog’s scratched and nicked rim. It’s not in terrible shape but shows signs of normal wear and tear. I take it to the topping board for a light topping to refresh the Bulldog rim.
  I first turn the inverted stummel several rotations on 240 sanding paper placed on top of a chopping board. This does well as a portable topping board.
 The topping progression is shown in the next few pictures as the scratches are removed and the rim lines re-established. The first picture concludes the 240 topping and the second after changing to 600 grade paper.
 Moving now to the stummel surface, as with the rim, it shows scratches and nicks from general usage.
 To address these minor issues, using sanding sponges cleans the surface but are not too invasive. I first use a coarse grade followed by medium and light grades. The transformation is stark as the grain begins to emerge and I like what I see!
 From the sanding sponges, I transition to applying micromesh pads to the stummel. Using pads 1500 to 2400, I wet sand followed by dry sanding with pads 3200 to 4000 and 6000 to 12000. The grain is very nicely teased out through the process.
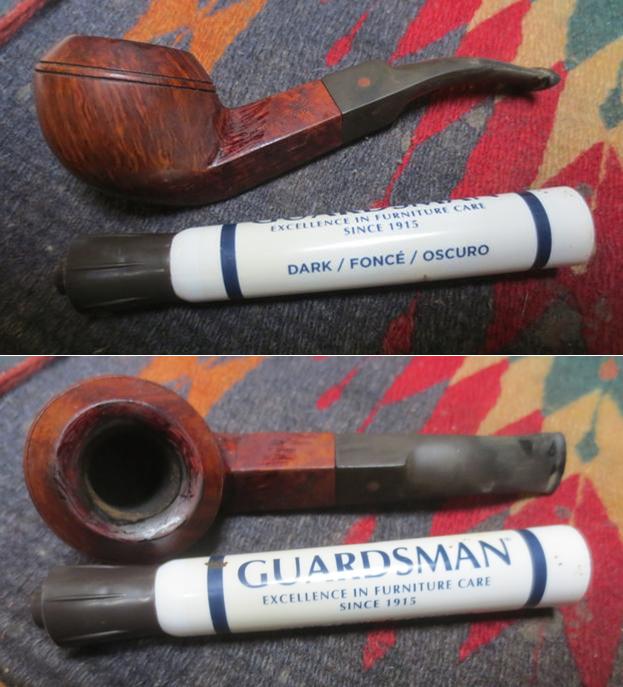
 Detour – After the first set of 3 pads which wetted the stummel. I took a closer look at a fill on the upper right shank panel. This is the most noticeable fill I’ve detected, and the fill has remained solid, but is lightened in contrast to the surrounding briar. Before moving to the next set of micromesh pads, I darken the fill using a mahogany dye stick. This does a good job of darkening the fill. The continued sanding helps to blend the fill.
 Before moving on to the finishing phase, the dome grooves receive a cleaning using a sharp dental probe to remove packed briar dust and such.
 With the grooves cleaned of debris, I next apply Mark Hoover’s (www.ibpen.com) Restoration Balm to the stummel. I like this product because it brings out the subtleties of the natural briar grain. After putting some of the Balm on my finger, I apply it to the stummel surface and work it into the briar. I then set it aside for 20 minutes or so allowing the Balm to do its magic. I use a cloth dedicated to removing the excess Balm after it has set. I then buff the stummel with a microfiber cloth. Nice! The picture shows the Balm on the surface doing its thing.
 The home stretch – after mounting a cotton cloth buffing wheel to the Dremel, setting the speed at about 40% full power, Blue Diamond compound is applied to the entire pipe – stem and stummel. Following this, a felt cloth is used to buff removing compound dust from the surface in preparation for applying wax. I run a dental probe around each of the dome grooves to remove caked compound.
  After changing to another cotton cloth buffing wheel, carnauba wax is applied to the stem and stummel at the same speed as the compound.
  Finishing the restoration, a microfiber cloth works well to give a rigorous hand buffing to disperse any wax build up and to raise the shine.
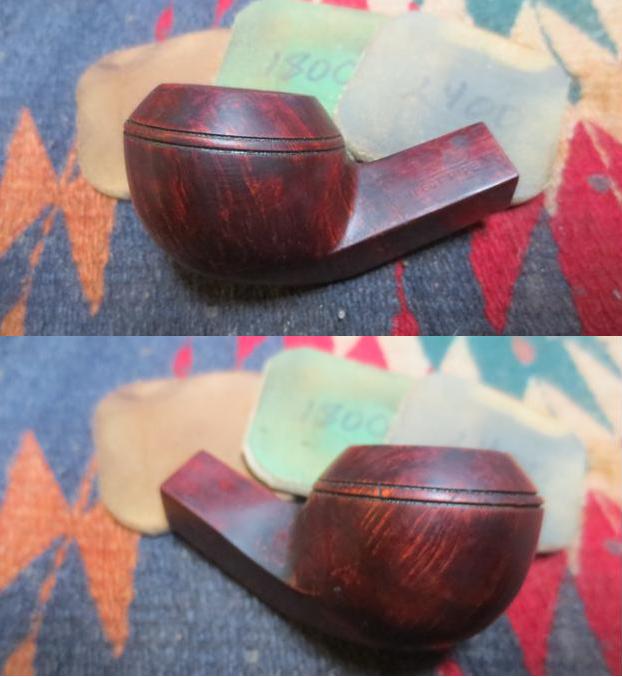
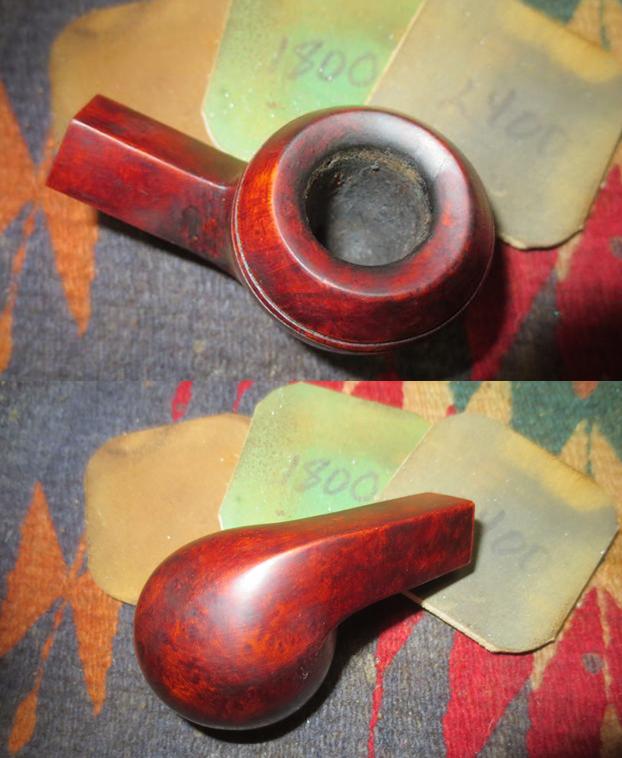
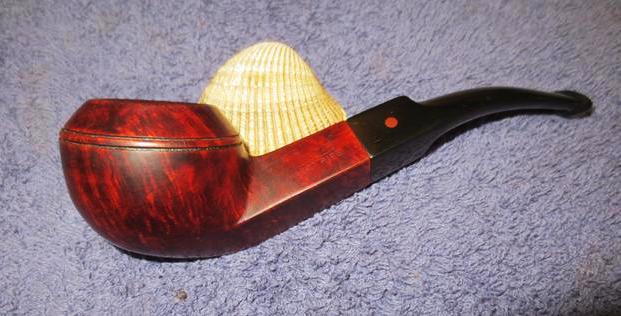
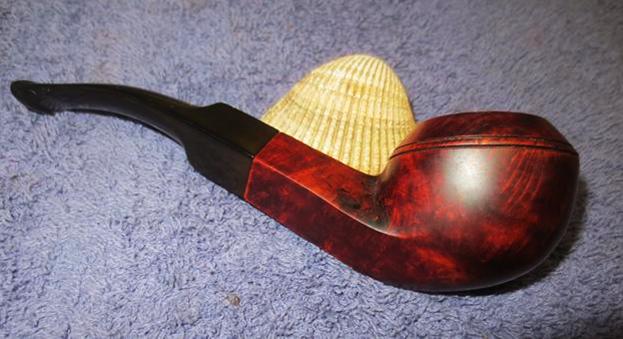
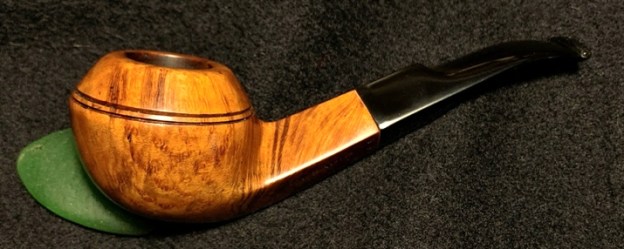
The most daunting challenges in bringing this GEFAPIP 500 S Bent Bulldog back into service was the stem work – rebuilding the button and helping the tenon/mortise fitting. The oxidation was stubborn as well. In the end, it was worth the effort. The classic Bulldog shape is to me a pipe with attitude. This Bulldog, a product of St. Claude, France, is no exception. The vertical grain encompassing most of the dome resolves on the underside of the bowl in bird’s eye grain and swirls very pleasing to the eye. The stem’s quarter bend is nice for resting in the palm in a relaxed way for reflecting on life and family. Seth, from Maryland, will have the first opportunity to claim this Bulldog from ThePipeSteward Store which benefits the Daughters of Bulgaria. Thanks for joining me!