Discovering the Vintage of a Paul Viou ‘Feather’ with the Help of Sebastien Beaud of Genod Pipes of St. Claude


Blog by Dal Stanton

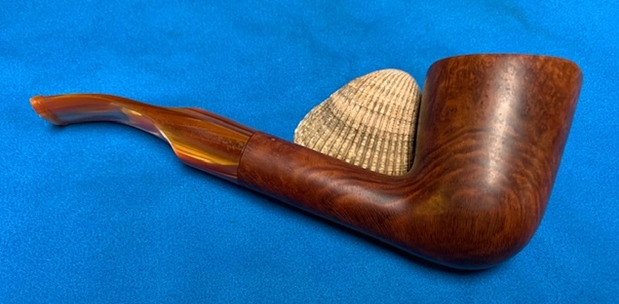
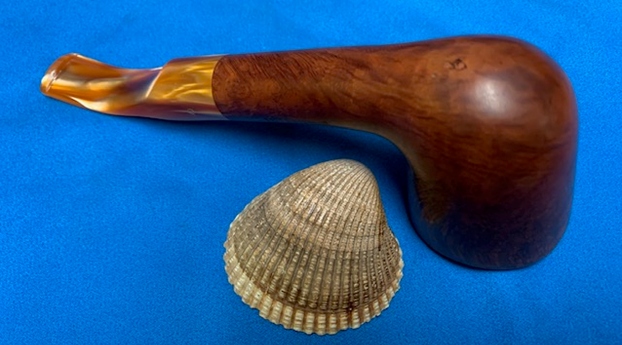
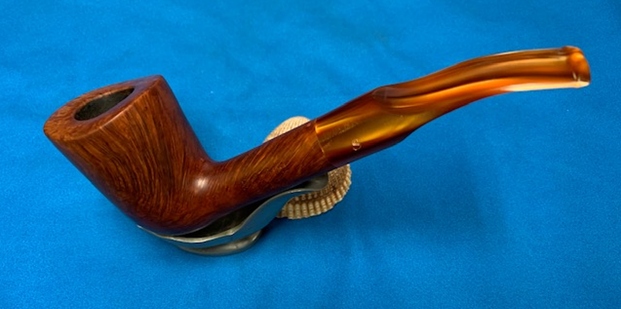
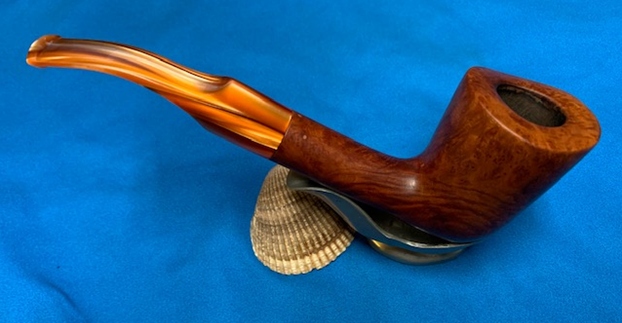
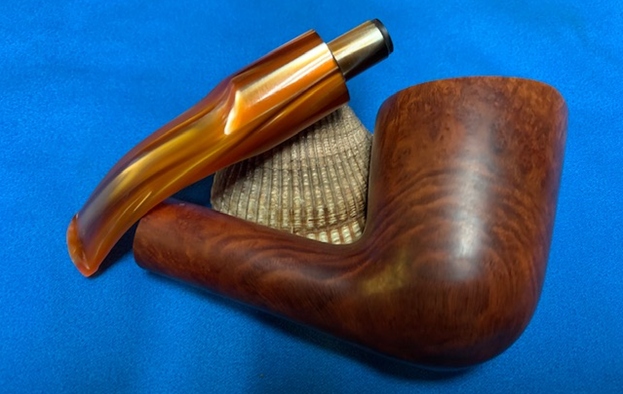
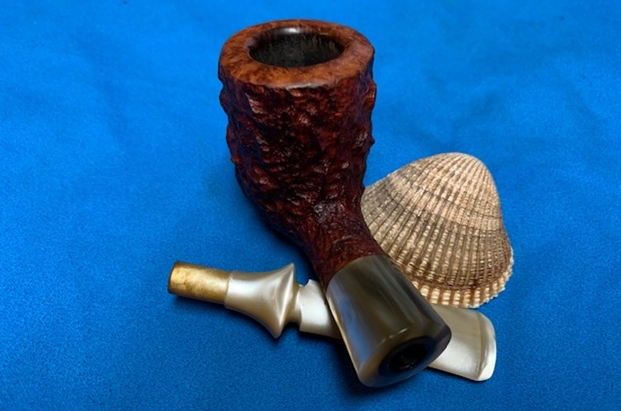
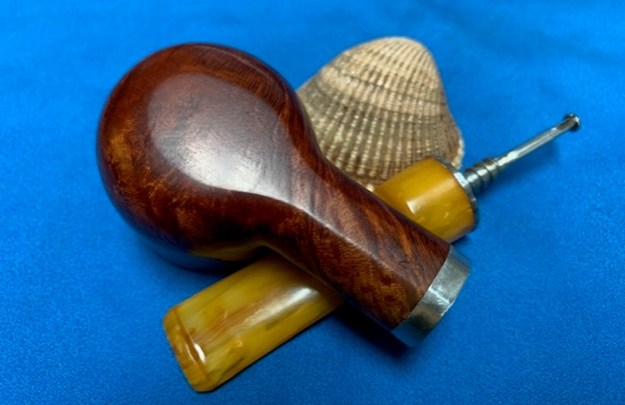
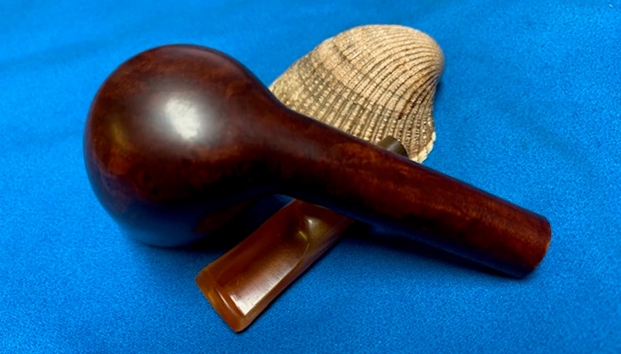
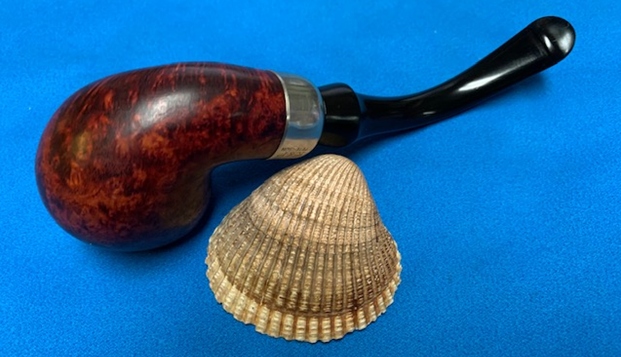
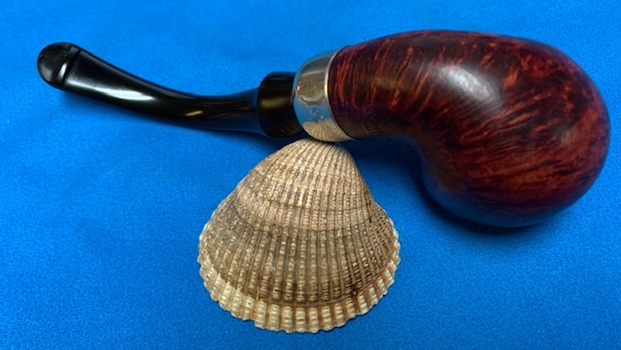
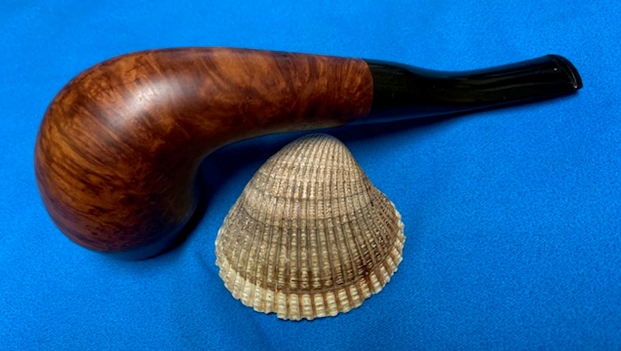
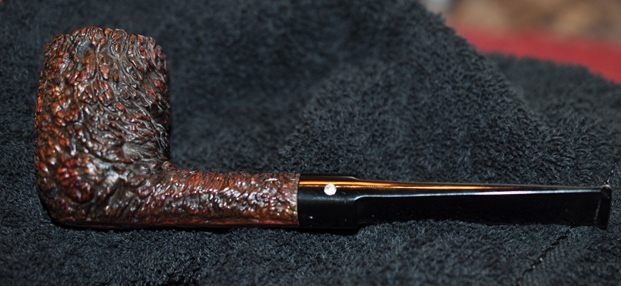
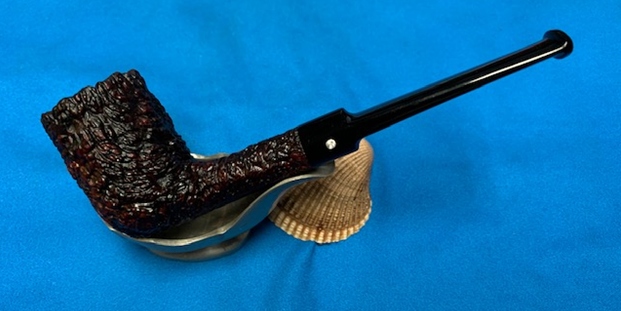
When I first laid eyes on this unique ‘Feather’ or ‘Plume’ shaped pipe, I debated adding it to my own personal collection and not posting it in the For “Pipe Dreamers” Only! collection, making it available for pipe men and women to commission.  Well, the Feather did find a place in the ‘Dreamers’ collection and Daniel eventually added the P. Viou Feather to his trove of commissioned pipes totaling 7(!) benefiting the Daughters of Bulgaria.  I acquired the P. Viou Feather from the French eBay auction block in 2018.  This ‘French Lot of 50’, which is what I have affectionately called it, has offered up several treasures – one restoration that became my first publication adding to Pipedia’s wealth of information (See: Discovering the History with the Reclamation of this Petite EPC Majestic Bent Horn Stem Billiard and for Pipedia contribution see: A. Pandevant & Roy Co.).  The picture of the Lot provided by the Parisian seller only created the urge to know what was hidden within the tangle of stems and stummels.  That I could see so many interesting shapes and horn stems supplied the impetus to acquire the Lot.  The P. Viou Feather is mostly hidden in the picture (arrow below left) and it wasn’t until later after the package arrived in Sofia and I gleefully sorted and grouped the pipes that I came to realize the treasure trove of pipes in this Lot.  The Feather grouping is pictured below.Looking more closely at the P. Viou Feather, I take some additional pictures. 
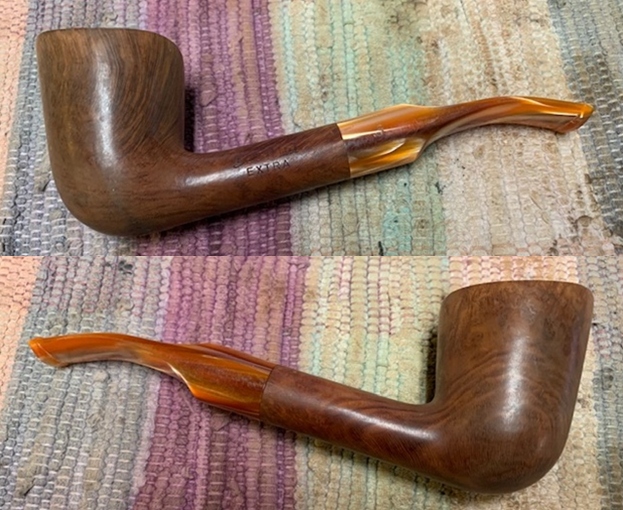
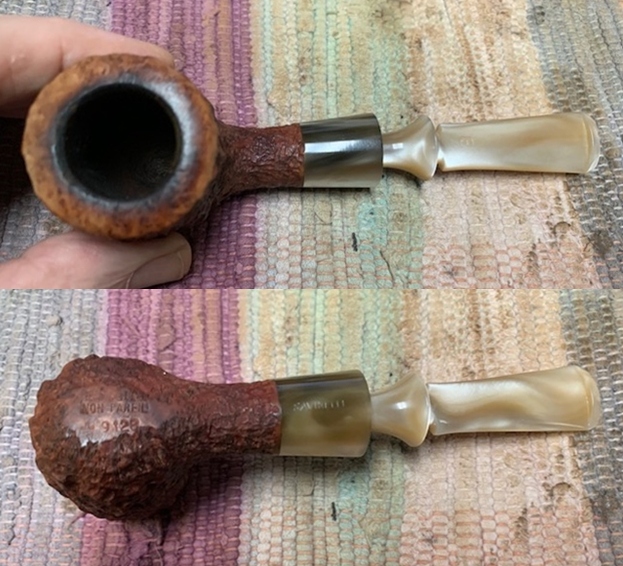
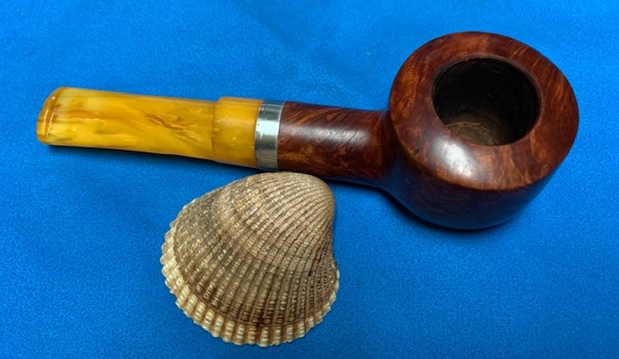
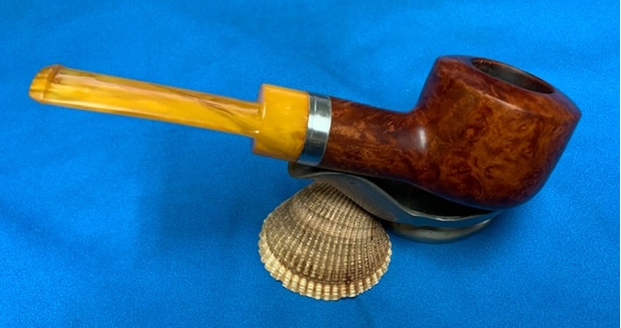
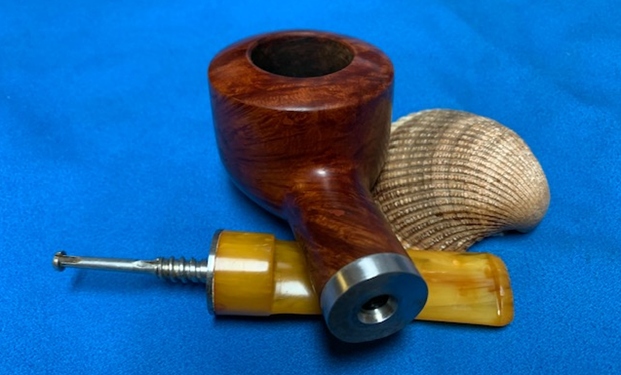
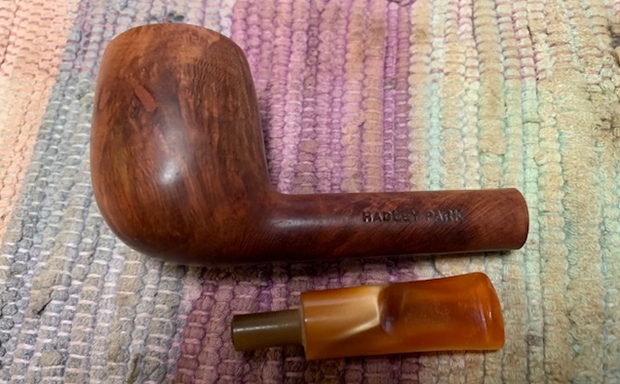
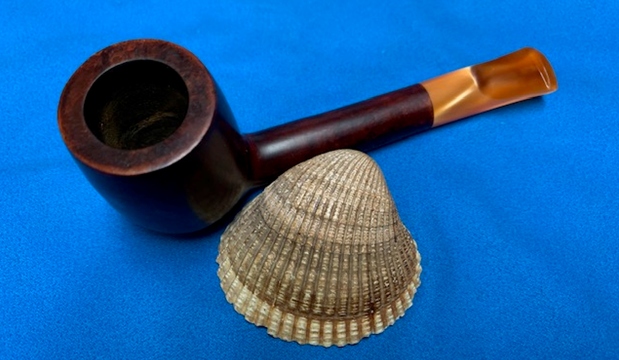
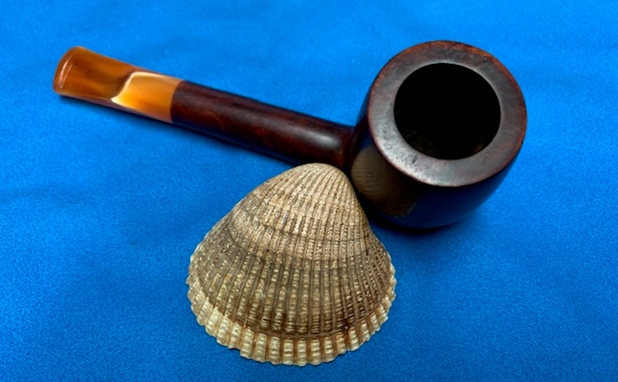
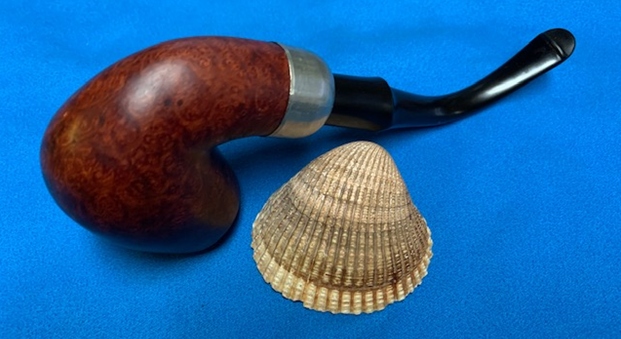
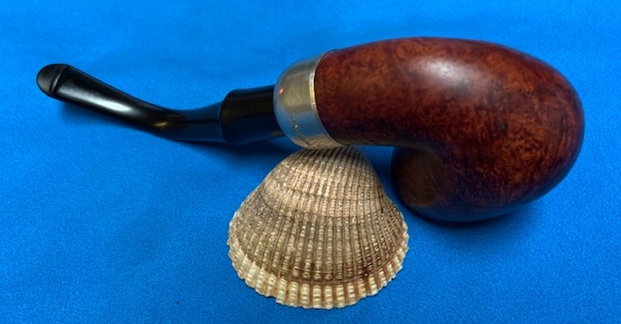
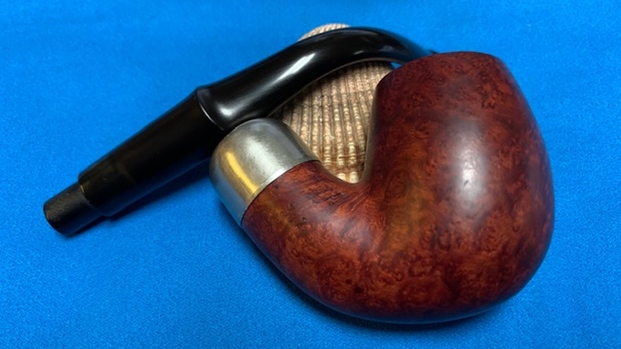
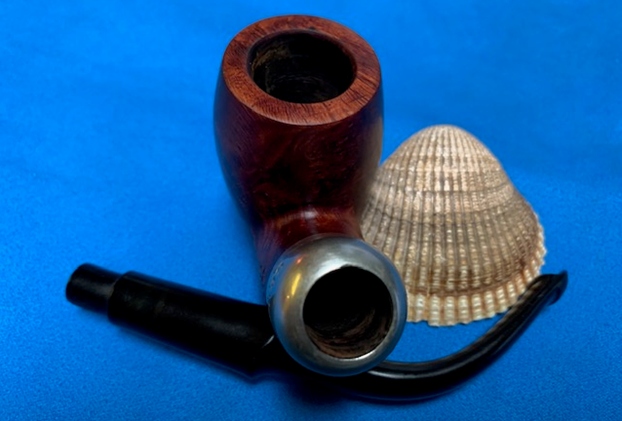
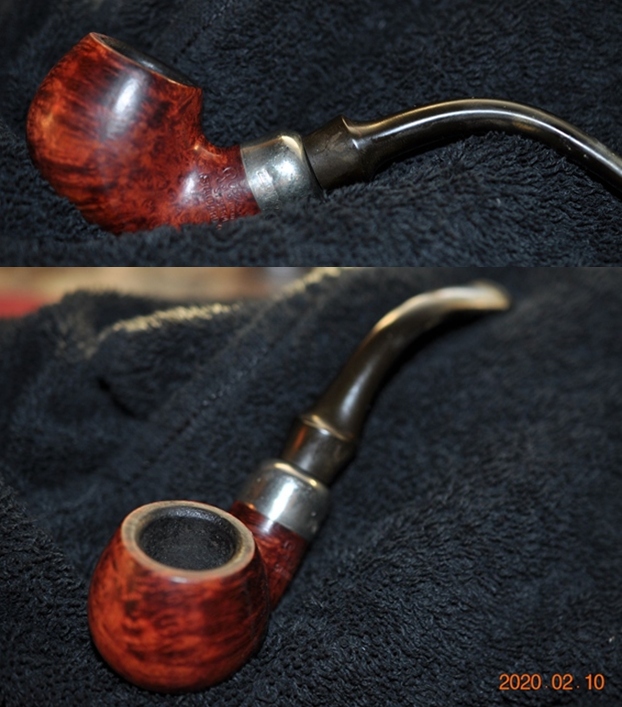
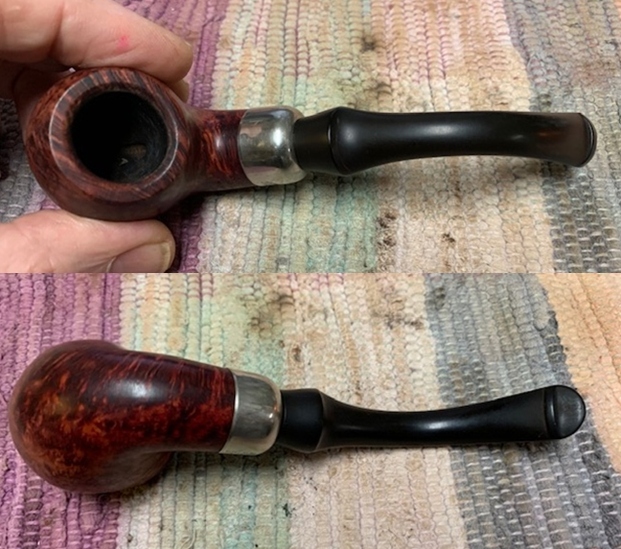
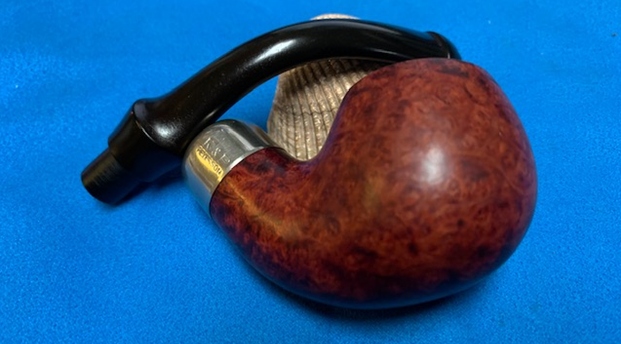
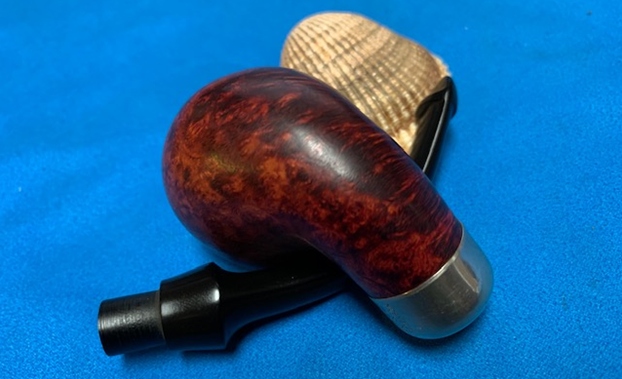
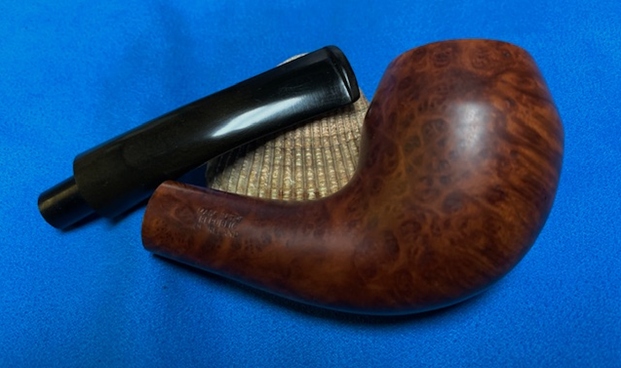
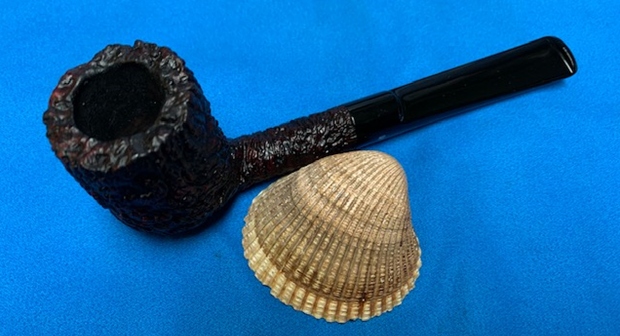
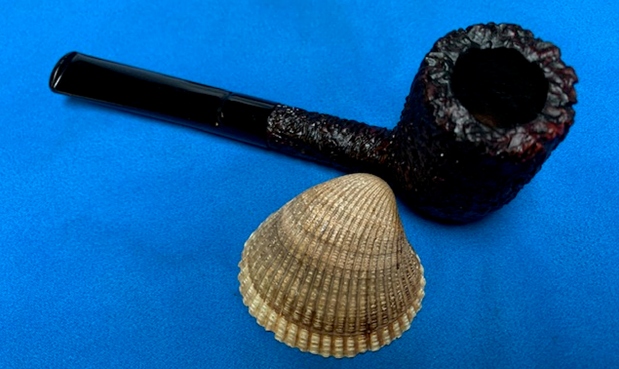
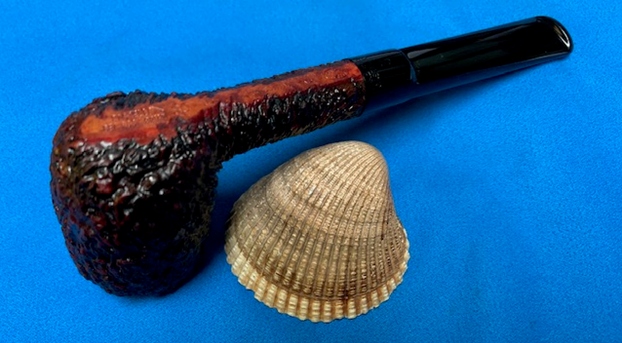
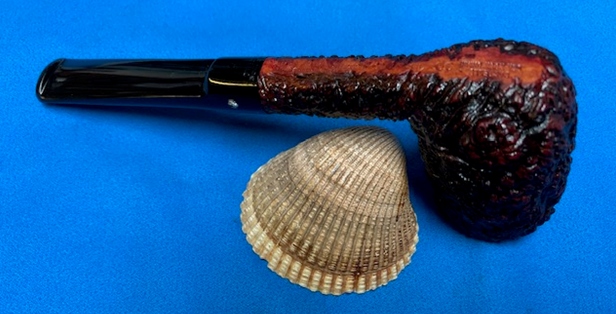
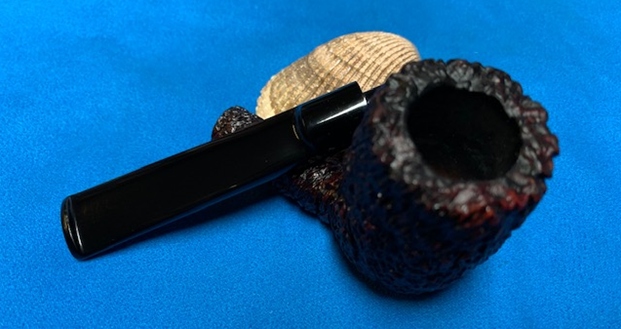
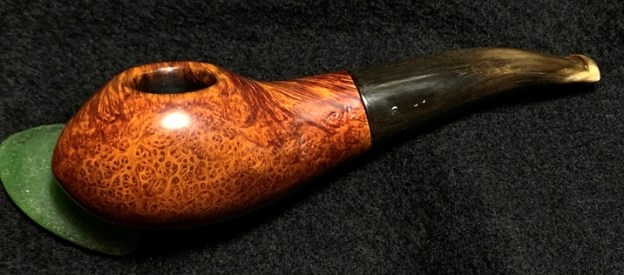
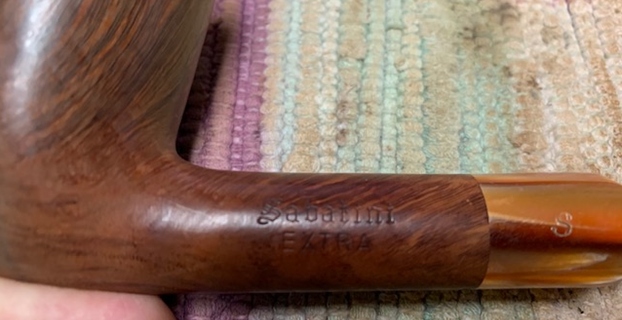
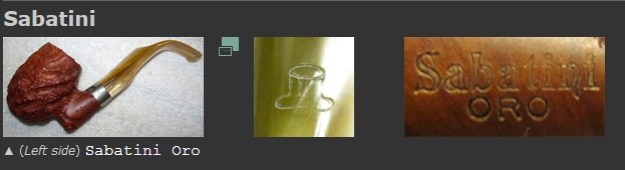
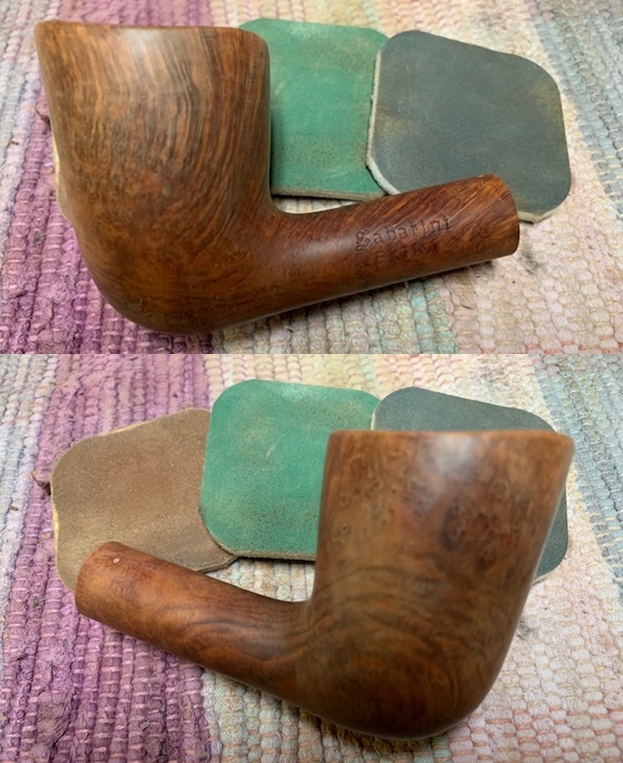
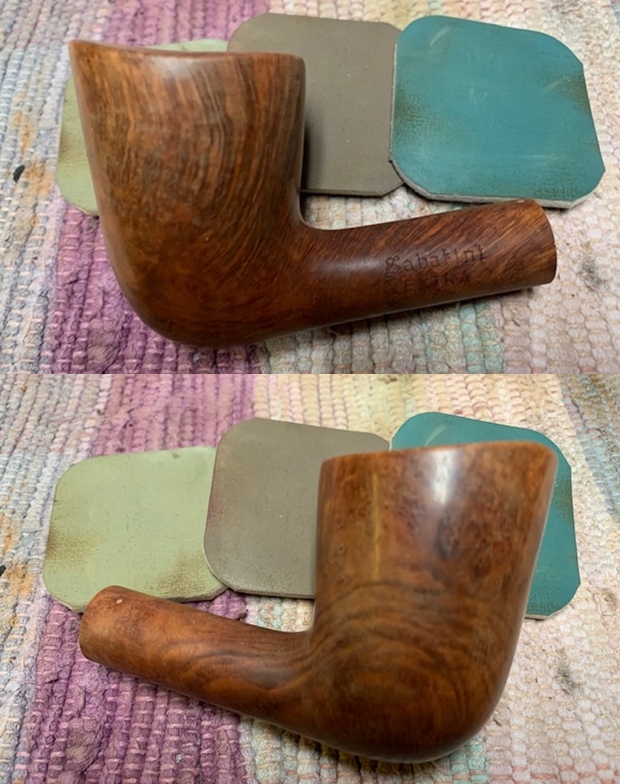
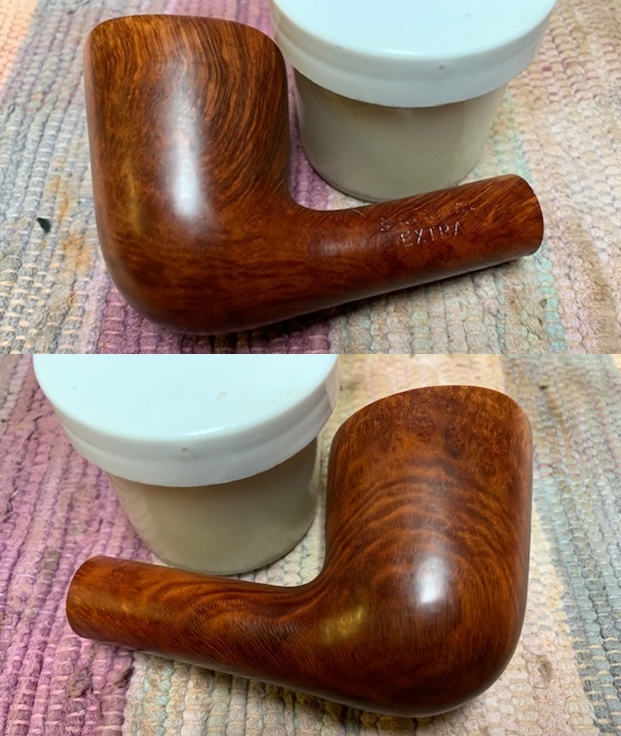
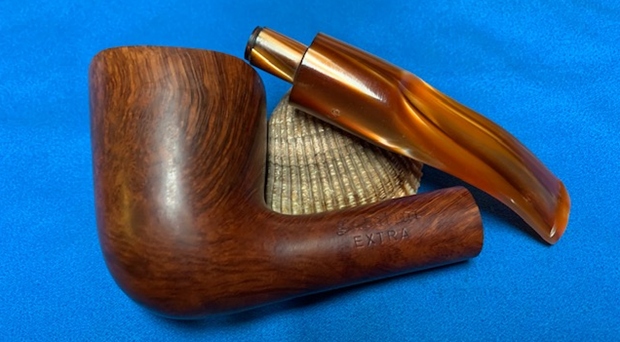
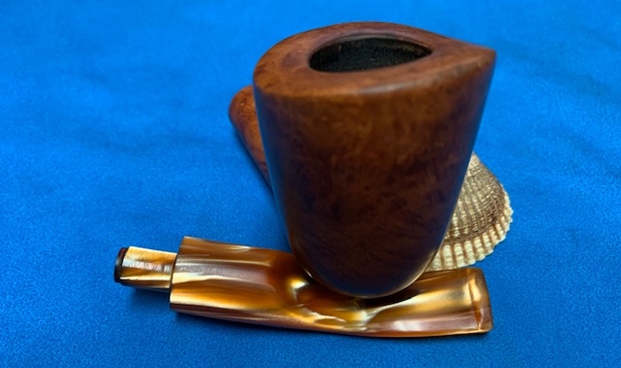
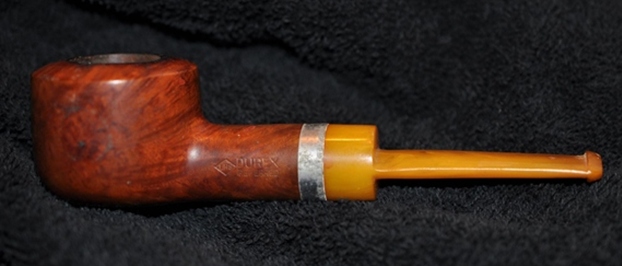
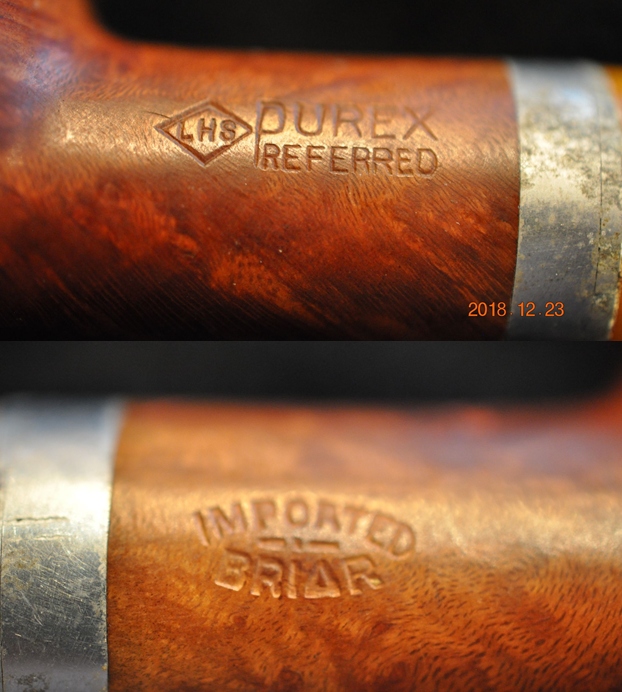
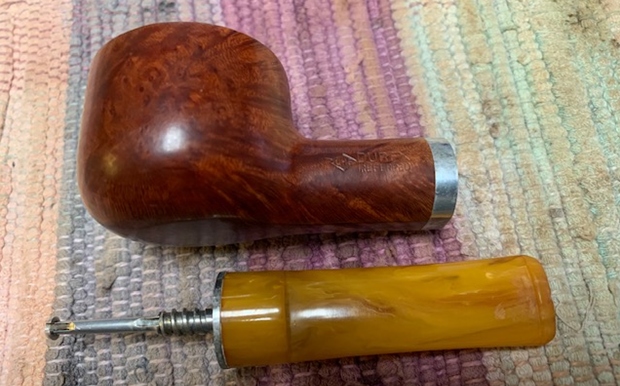
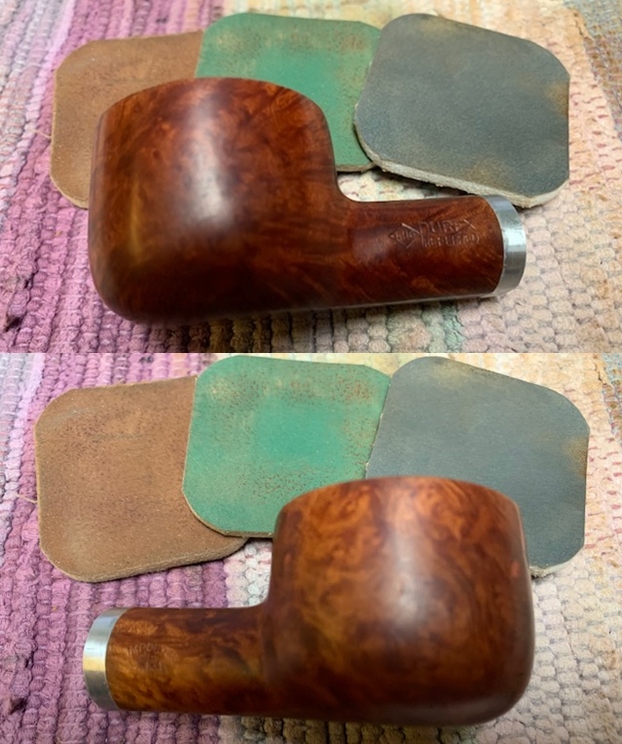
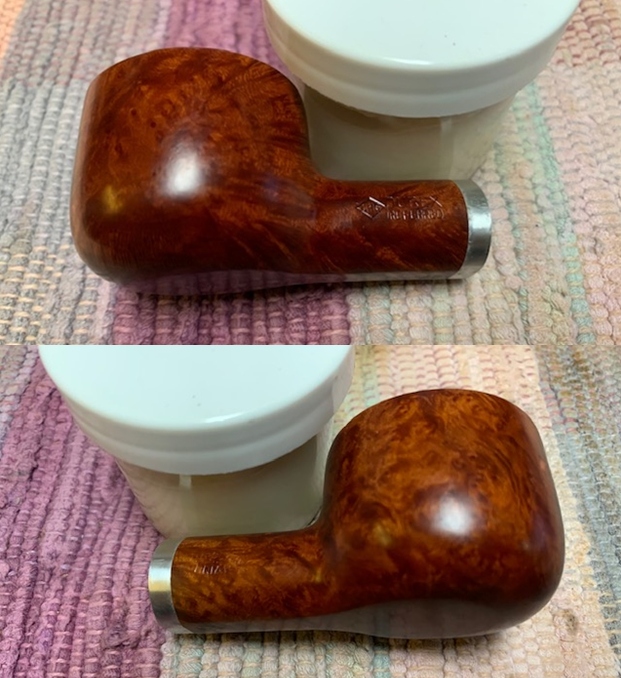
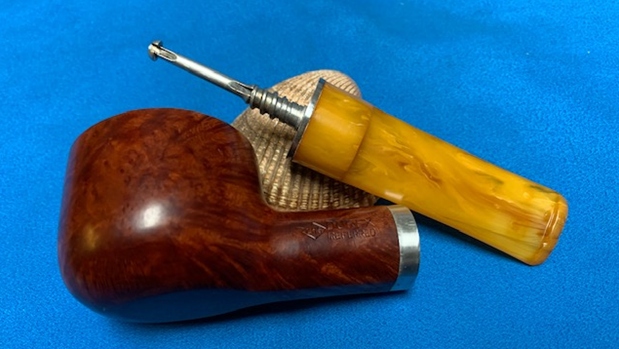
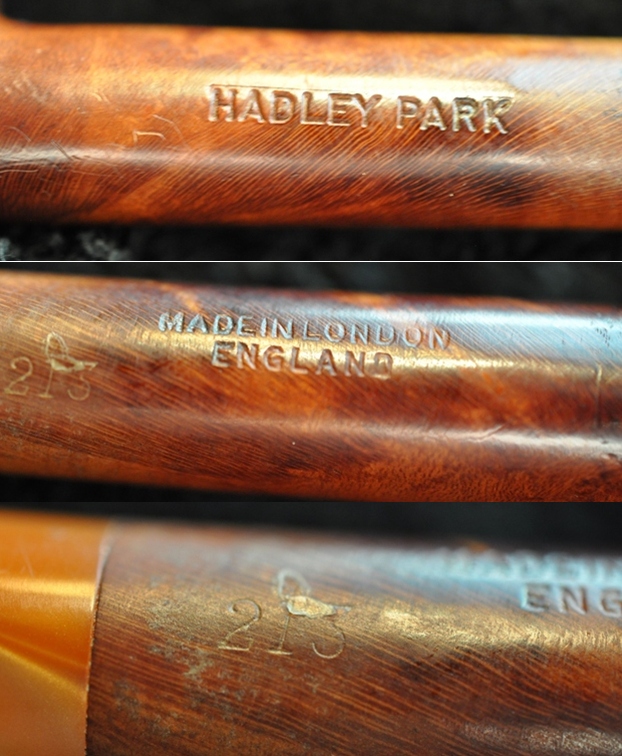
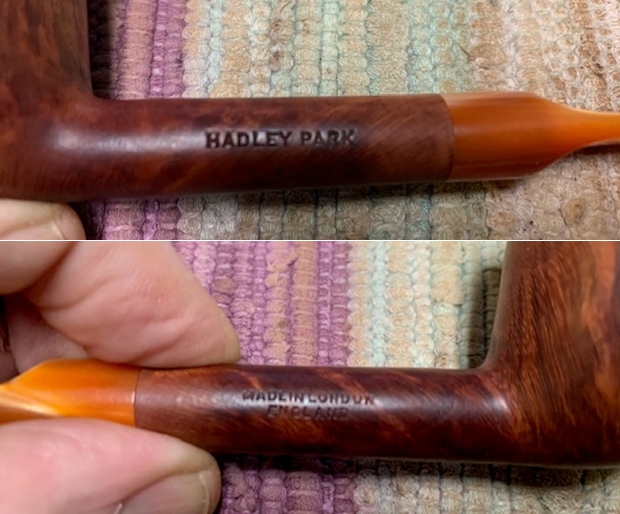
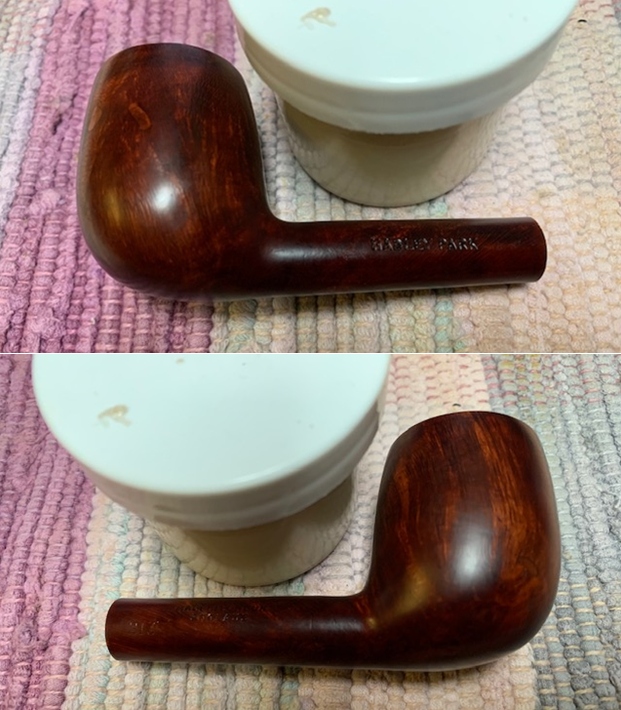
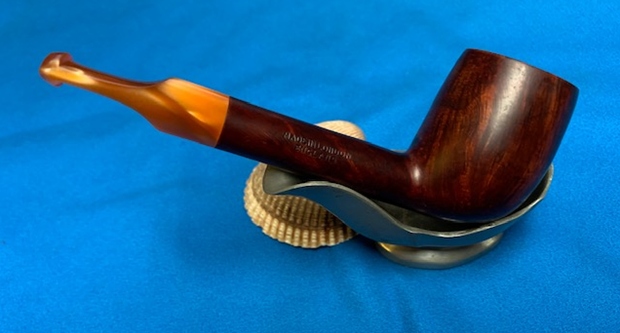
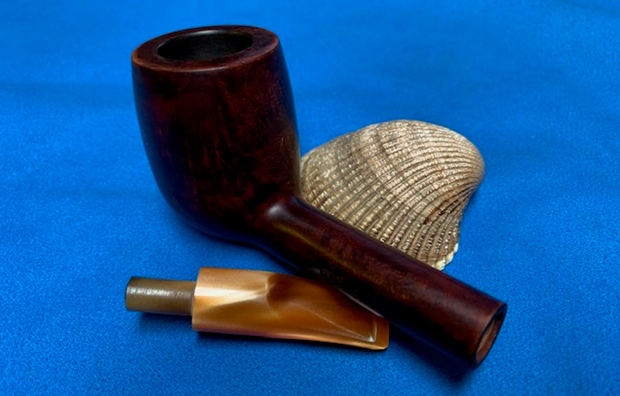
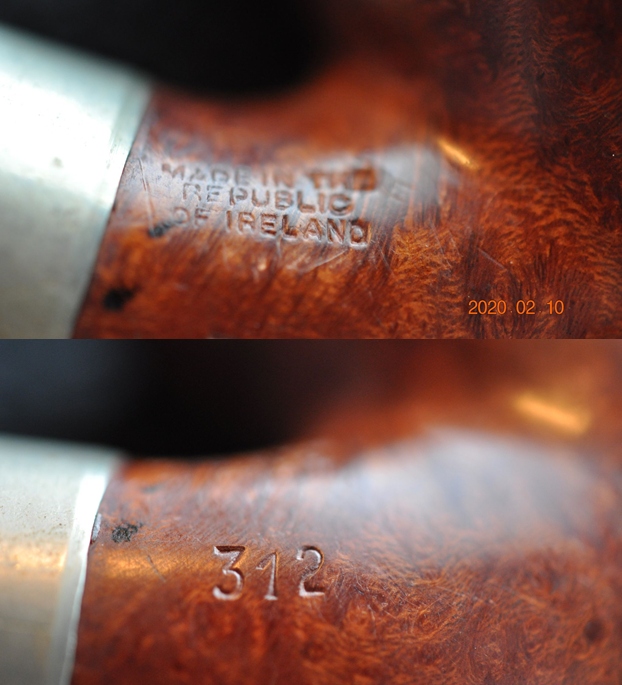
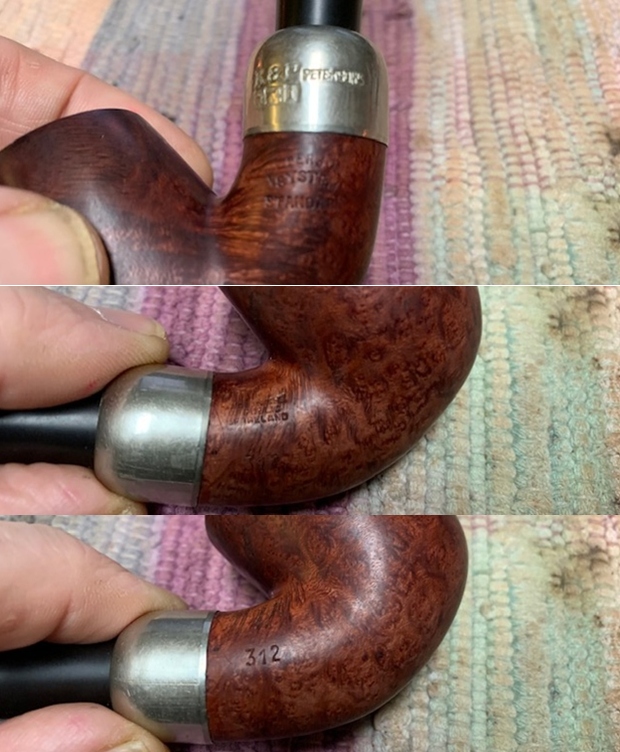
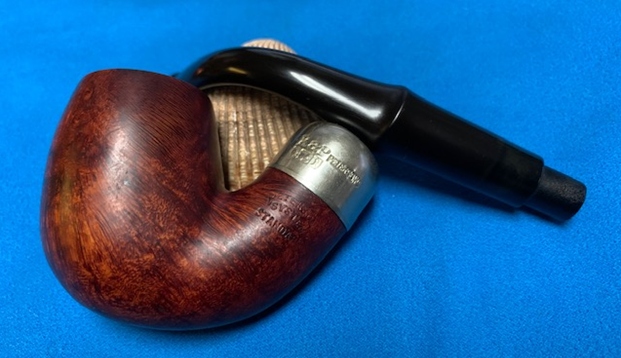
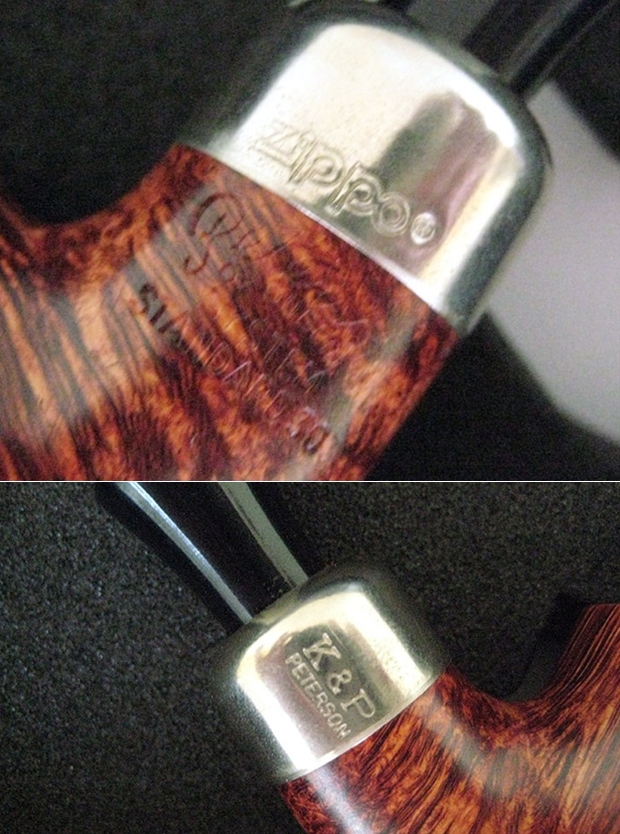
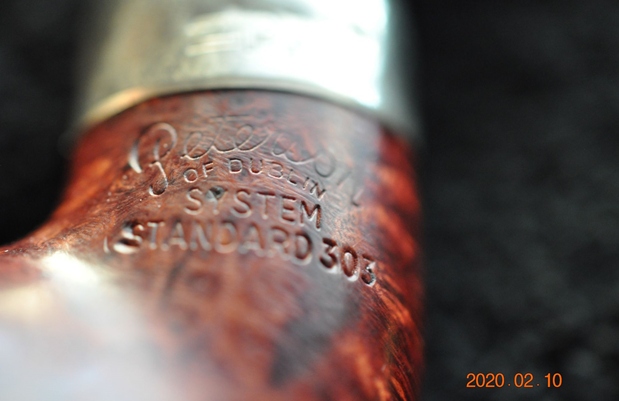
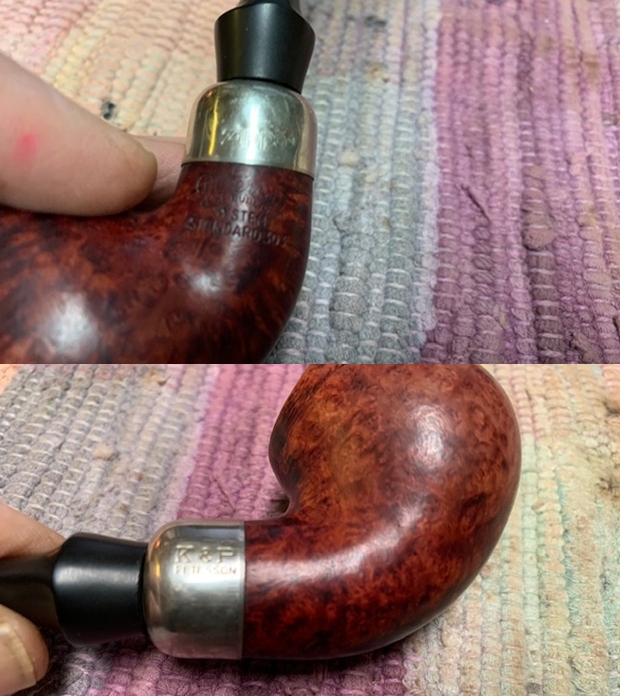
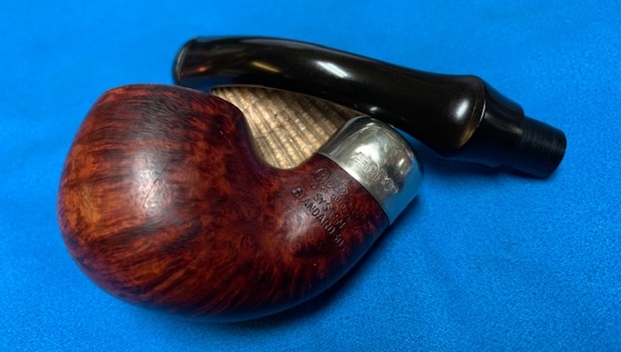
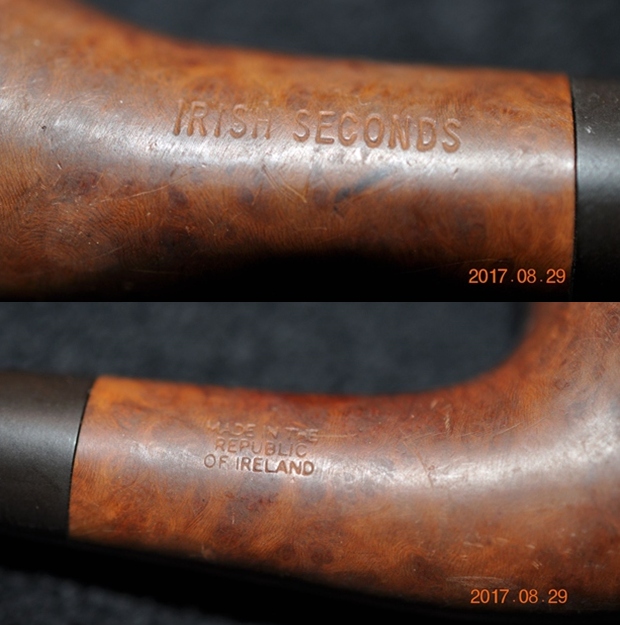
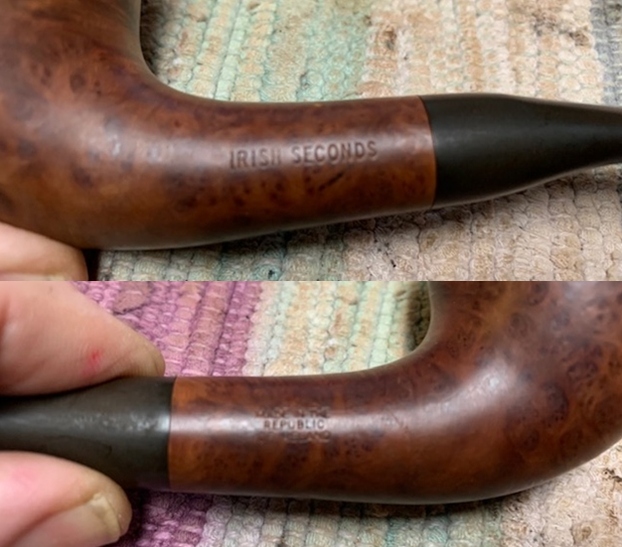
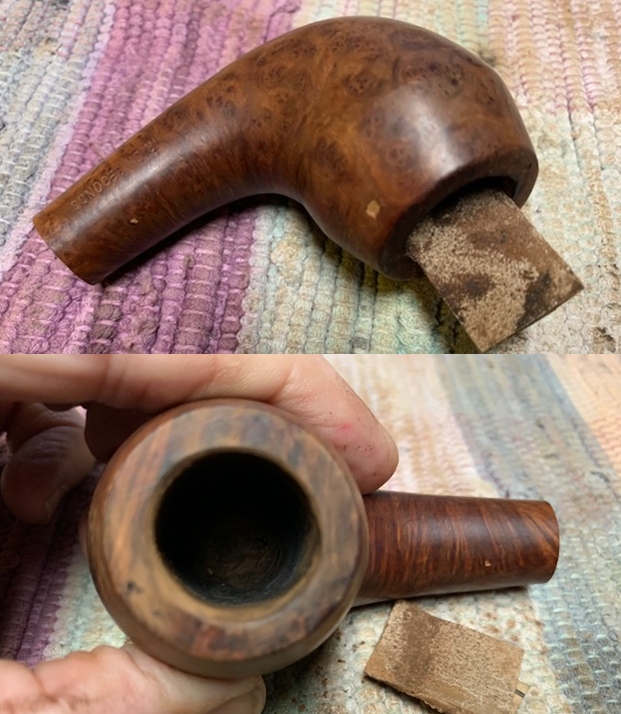
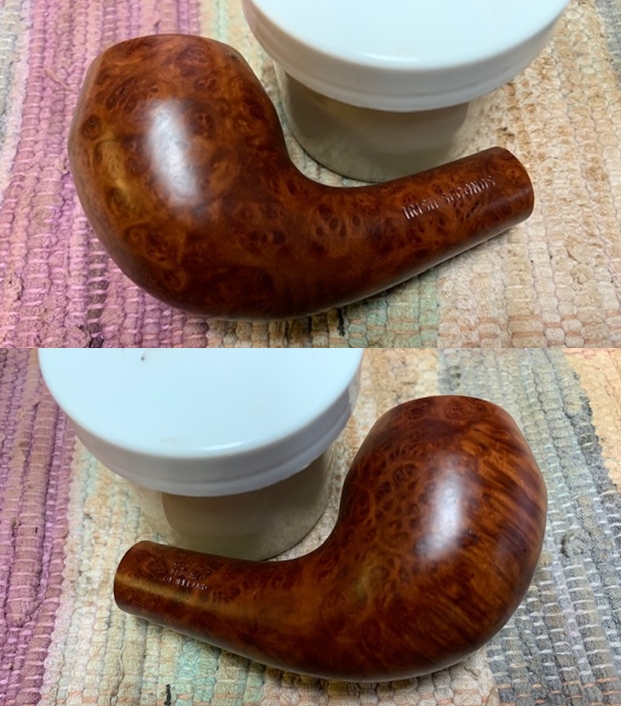
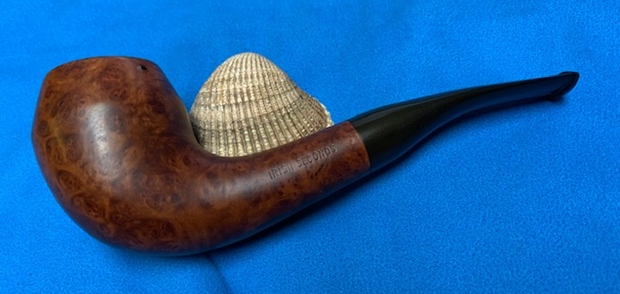
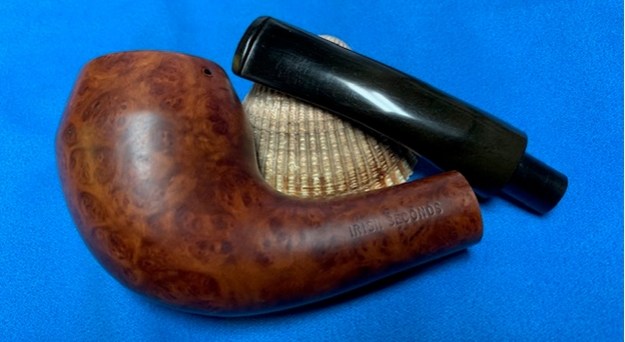
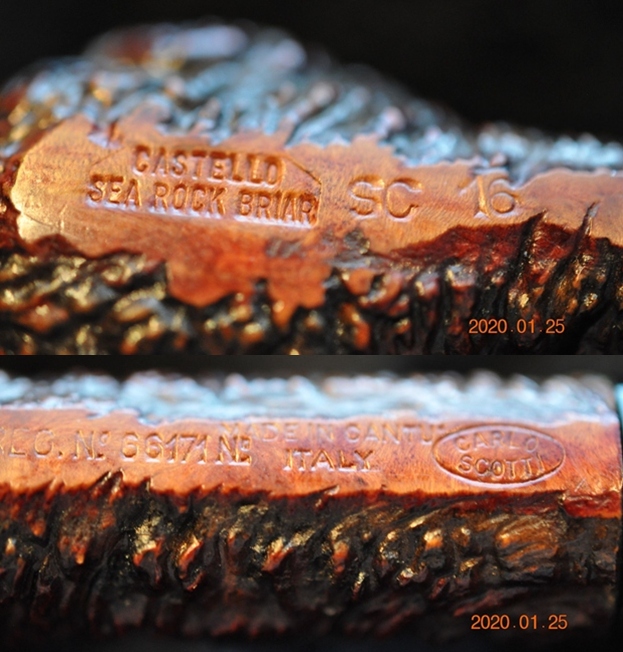
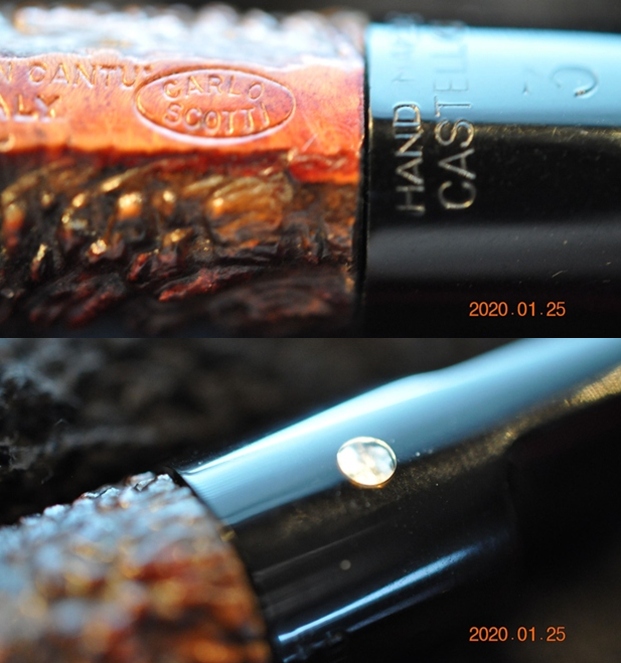
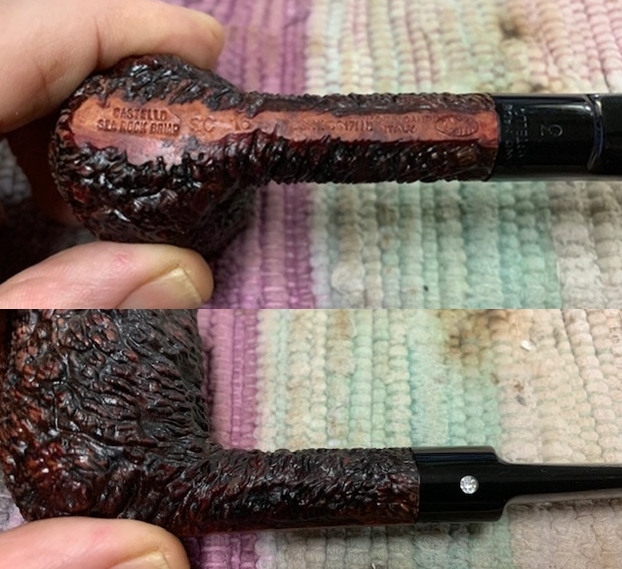
The nomenclature is worn and thin at points but generally recognizable.  On the left flank is stamped in fancy cursive ‘P’ [underscored] followed by ‘Viou’ which is punctuated with a flared underline.  The COM stamped on the right flank of the Feather stummel reads: St CLAUDE [over] FRANCE.  St. Claude is the pipe center of France and the birthplace of the production of briar pipes.  The horn stem is also stamped, P. VIOU.  This stamp is also thin, but I’m hopeful to refresh it later.     I had the opportunity of restoring another Paul Viou from the French Lot of 50 – a Churchwarden (See: Recommissioning a Vintage French Paul Viou Churchwarden of St. Claude).   There is scant information about the Paul Viou name on the internet that I could find.  Pipedia’s article of Paul Viou is brief:

From Pipes, Artisans and Trademarks, by José Manuel Lopes’

Paul Viou was the brand and name of a French artisan who sold his pipes by correspondence and then he was a pipe supplier for military institutions. He also made sculpted pipes and sometime used horn stems.

The brand is currently sold by Jacques Craen and made by Genod in Saint-Claude, after having also belonged to Paul Guilland and Vuillard. They are stamped P. Viou and made primarily for export.

This information is confirmed by Pipephil.eu with the addition of the date of 2006 when the Paul Viou name transferred to Sebastien Beaud of Genod.As I broaden my online research, I discover that Sebastien Beaud is an interesting story.  He currently is the owner of the Genod house of pipes in St. Claude and is a younger entrepreneur.  In trying to find out further information about Paul Viou, Genod information is prevalent in the research.  The Pipedia article dedicated to Genod of St. Claude is also interesting (See: Genod).  The Genod story began in 1865 when Comoy founded pipe production in St. Claude.  In 1923 the production is taken over by Georges Vincent and in 1939, son in law John Craen joined Vincent.  John Craen’s son, Jacques, joined the business in 1959 and took over the business in 1977 where he expanded the Genod name and opened the shop in St. Claude to visitors to observe the pipe production.

From the same Pipedia article: In 2006 the young pipemaker Sebastien Beaud started his work in Jacky’s factory. As Craen himself he took over the brand Viou to start with. In future he will take over the business in its entire and continue this sympathetic workshop in its traditional way.

In the excerpt above, the Paul Viou line is mentioned as continuing under Genod during the Craen period, then Sebastien Beaud took over the Viou line.  Unfortunately, this article nor the article in Pipedia dedicated to Paul Viou, provide much in the way of specific dating of the Paul Viou branding.

I’ve searched several forums for answers to questions regarding when the historical Paul Viou began production using this name?  The Paul Viou Feather, or Plume (French translation) appears to have some age.  The horn stem would suggest a dating in the 1940s during the rubber shortages of WW2.  Horn became a ‘go to’ material in place of rubber compound stems.  Yet, a question arises regarding this older dating when I discovered in Genod’s current offerings of pipes on its website an almost identical ‘Plume’ yet, not with a horn stem but an ebonite or vulcanite stem (See: Link). Also missing is the P. Viou nomenclature. Furthermore, more than many pipe manufacturers today, Genod’s quality offerings include many horn stemmed options.  I like this(!) but it brings into question the necessity of an older dating for the P. Viou on my worktable.With the foundational question being, when did the P. Viou name begin?  Was it before or during the Craen era of Genod?  Was the P. Viou stamp on this Feather an indicator of a pre-Genod production?  My experience with tracking down and nailing down French pipe production details has never been easy but always interesting!

Potentially to find answers about the dating of the Paul Viou name, I sent an email via the ‘Contact’ form provided on the Genod website.  I have been surprised in the past to receive responses from ‘Hail Mary’ requests to pipe houses in Europe and America.  We’ll see what happens.

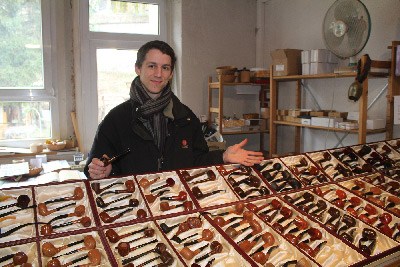
Well, I am continually amazed at ‘names’ in the pipe world being accessible to folks like me!  The next day I received a reply from Sebastien Beaud, currently at the helm of Genod.  I include my original message with the replies that followed:

DAL:   Greetings,  Thank you in advance for your time! I restore vintage pipes and publish the restoration process and research online at www.ThePipeSteward.com. I have restored some Paul Viou pipes and have researched a lot and enjoy the connection of Paul Viou and Genod. However, there is very little information that I can find on the internet regarding Paul Viou, historically. Can you please provide any information about Paul Viou’s origins, when he lived, when the P. Viou name started being placed on pipes? My current restoration is a P. Viou Plume with a horn stem. I see that you still produce these shapes on your website but with Ebionite stems. I’m trying to determine the potential dating of this pipe but cannot find much information about when Paul Viou came onto the pipe scene. Thanks so much for your help in advance if you are able!

———–

Dear Dal,

Congratulations for your work and your website! All I know about Paul Viou is that as a former officer in the French army, he used to advertise his pipes in the army magazines.  So he used to sell a lot to the soldiers during the Algerian war, back in the 50’s / 60’s. He ran the business together with his wife Odette.  Their workshop was located right next to ours, and when they got old, Jacques Craen, started making pipes for them.  At the same time, Jacques Craen created the “Genod” brand to start selling directly to the smokers instead of selling to whole sellers. Genod is a tribute to his grandfather Georges Vincent-Genod (on his mother’s side) with whom he had learned and from whom he inherited the workshop. In the early 90’s, Jacques bought the Paul Viou brand and customers’ addresses file. I myself took over when Jacques retired, and kept Paul Viou’s name for a while, but it is the exact same product as a Genod pipe, so now I stamp all the pipes “Genod”.  I hope this helps.

Best regards,
Sebastien BEAUD
www.maitrepipier.fr
SARL GENOD VIOU
13 Faubourg Marcel – BP 145
39205 SAINT CLAUDE Cedex FRANCE
Tél. (+33) (0)3 84 45 00 47

———

DAL: Sebastien,  Thank you so much for responding to my inquiries! This information needs to be added to Pipedia. If I could ask one follow up question regarding the pipe on my worktable. The nomenclature is the cursive ‘P. Viou’ and COM: St. Claude, France. The horn stem is stamped, ‘P. Viou’. Can you venture a guess as to what period this ‘Plume’ was manufactured with this nomenclature and horn stem?   Before the Jacques Craen period (50/60s?) or when Jacques Craen was making them for Paul Viou (60/70s) or during the Genod period starting in the 70s but still using the ‘P. Viou’ stamp? I hope you can understand this! I’m simply trying to place this pipe in a time period. I’ve attached a few pictures if this is a help.  Again, much thanks.

———

Dear Dal,

I think this pipe has been made by Jacques Craen back in the 80’s (even though it could also be the 90’s or late 70’s).

Best regards,

Sebastien BEAUD

With deep appreciation to Sebastien Beaud for his time and for the information he supplied, I have a much better understanding of the Paul Viou name and a small piece of the man himself.  Valuable information added was regarding Paul Viou, the man.  He was formerly an officer in the French army – a military man but also a pipe man/entrepreneur.  Apparently after his time with the military and residing in St. Claude, he was undoubtedly very much a part of the ‘pipe world’ milieu and at one point added his hand to the pipe making industry.  With his connections in the military, he advertised his pipes in the military magazines of the time and in military institutions.

It is noteworthy that Sebastien pinpoints this activity during the Algerian War.  A quick search on the internet renders a Wikipedia article describing the war that was from 1954 to 1962 that found France engaged in a ‘decolonization’ war with the Algerian National Liberation Front and facing turbulent times at home with a war that garnered international attention.  The war gradually resulted in an independent Algeria – much resembling the turmoil of the Viet Nam conflict of the United States.  Paul Viou had developed his business selling pipes and during this difficult time, with French servicemen abroad, Paul Viou, along with the support of his wife, Odette, provided pipes for the troops via army magazine adds.  The personal relationship between Jacques Craen and Viou family is interesting – their shops were next door to each other and the aging of the senior Viou created a transition from Paul Viou’s actively working in the shop to his work being done by Jacques.  During this transition period, undoubtedly steps were taken to sign over the Viou name to Craen and the Vincent-Genod legacy.  Another transition alluded to by Sebastien’s words – the brand created by Jacques, “Genod”, was a tribute to his grandfather.  The Viou brand joined the Genod brand and again, this legacy was passed on to Sebastien Beaud.  The Viou name is no longer used to mark pipes, but the quality of the Viou pipe was brought under Genod craftsmanship.

One last question I brought to Sebastien was the dating of the P. Viou Feather on my worktable.  His qualified answer is somehow in sync with French pipe dating in general!  Most likely the P. Viou Feather is from the hands of Jacques in the 80s, but the late 70s or the 90s could be possibilities as well!  Much thanks to Sebastien Beaud for his help in this project!

One very interesting piece of information related to horn stems I discovered on the Genod site written by Sebastien Beaud in March of 2020 regarding Genod’s current use of horn stems (See tab: All About Pipes).  More than most pipe houses, Genod continues to fit their pipes with horn stems which I find interesting.  His article was excellent and apropos since a horn stem from the Genod house is now on the worktable!  I include his article which taught me a good bit!

Close up on the horn!

March 16, 2020in All about the pipe by Sébastien Beaud

Most of the pipes fitted to briar pipes are made of ebonite because this material combines flexibility and resistance to wear by the teeth. But other materials are interesting for the production of pipes. There is one that is dear to us, because it is comfortable, beautiful, and presents various shades of colors, it is the horn.

 Which horn for pipe stems?

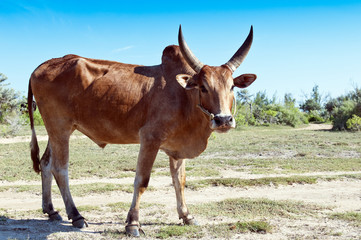
The horn is made of hairs bonded with keratin, the material from which our nails are made. This hair-armed keratin protects and strengthens the bone that grows on each side of the head of cattle. The horn we use to make the pipe stems is that of the zebu. It can reach 1 meter in length. As we have seen, a horn is hollow because it contains a bone. Therefore, only the end (the tip) is suitable for turning work. A cow’s horn is therefore not long enough to be used in turning.

Zebus also have a brown, white or marbled coat, their horn presents a magnificent variety of shades, ranging from sometimes very dark brown to blond, the association of the two colors being called “marbled”.

 Filming on horn.

The zebu is bred for its meat in Brazil, Argentina and Madagascar. The horns, instead of being lost like the other inedible parts, are exported for use in the manufacture of combs, knife handles, beads, and of course, for turning pipe stems.

Once arrived in the workshops of the Jura, the horns are possibly softened by heating in a bath or steam, in order to straighten them by pressing.  Then comes cutting, turning, shaping, then drilling. Now here is a straight pipe stem.
If necessary, it can be bent in a “form” press dipped in a hot oil bath, and there it is, ready to be adjusted to the heather.

 How to maintain the horn?

An organic material, the horn offers a soft contact, and quickly takes the mark of the teeth. And what a pleasure to combine plants and animals in a beautiful object!  The maintenance of horn pipes is very simple: just avoid exposure to heat sources, and if you want to prevent the shine of the pipe fading over time, you can rub it regularly with a simple cloth, as a polish.  Choose now the pipe with horn stem that suits you, fill it with your favorite mixture, natural or aromatic, and… good tasting!

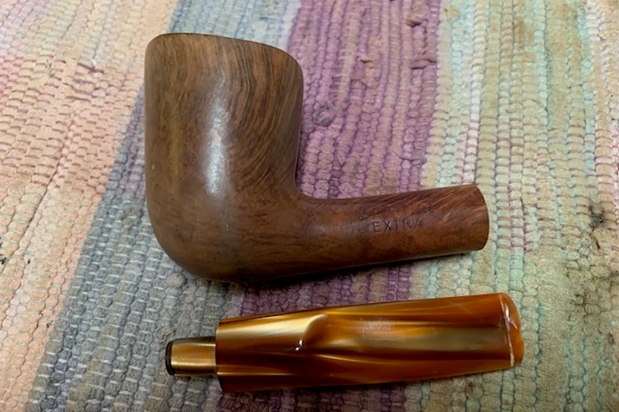
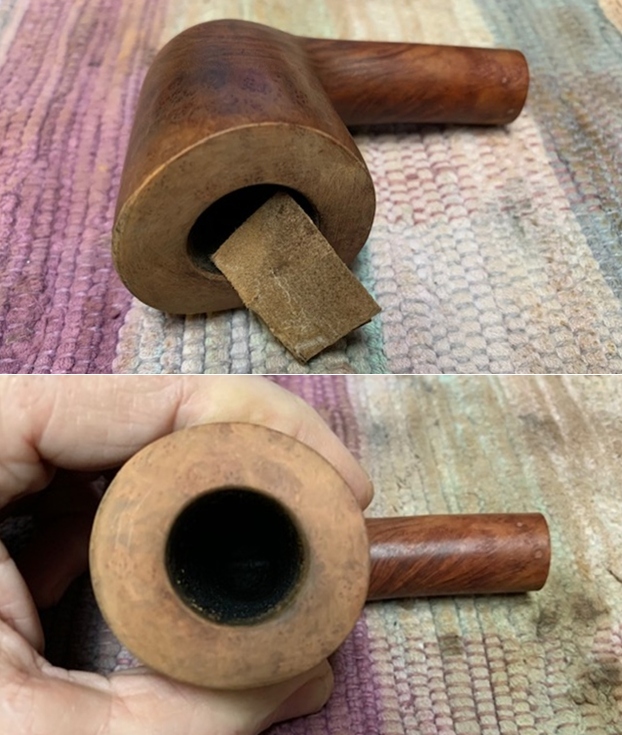
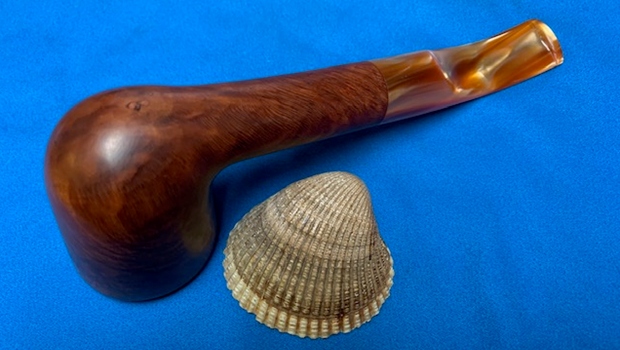
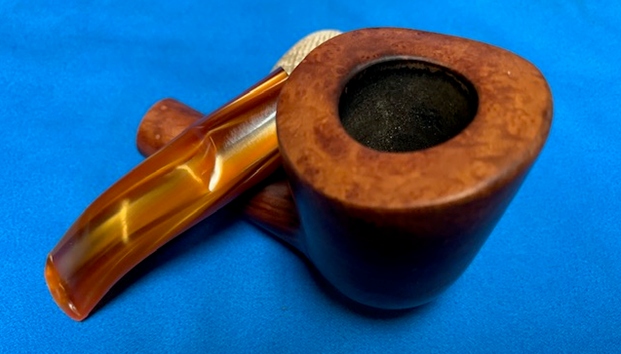
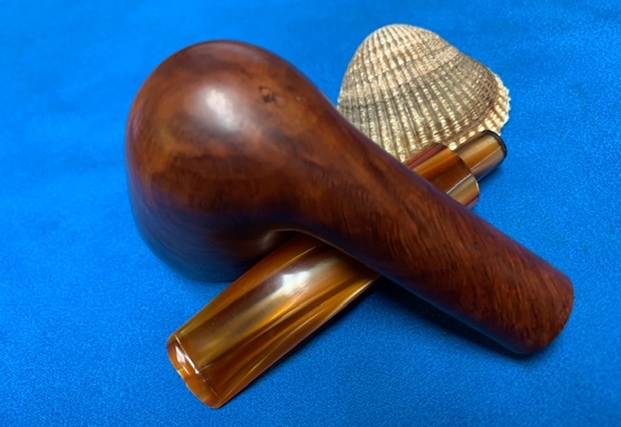
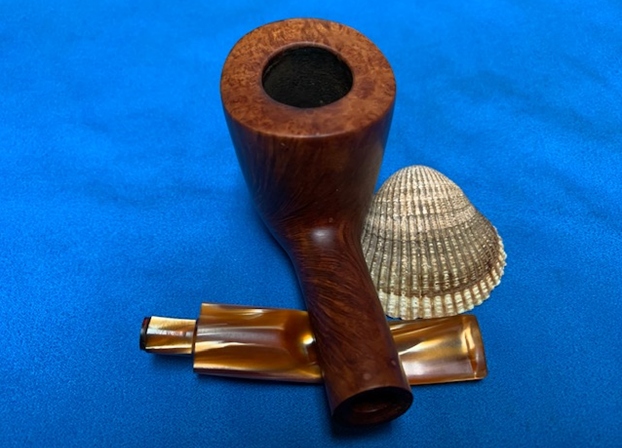
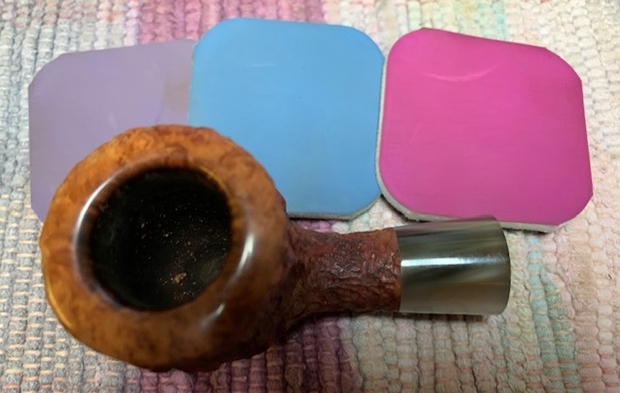
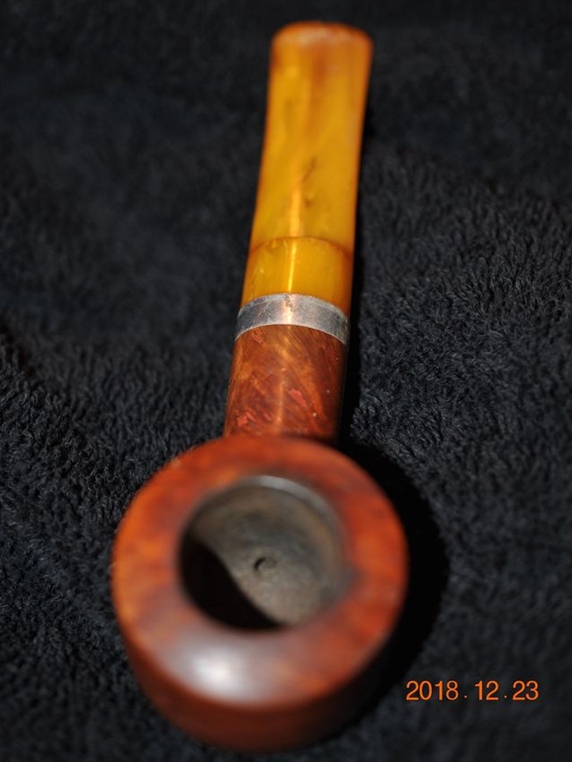
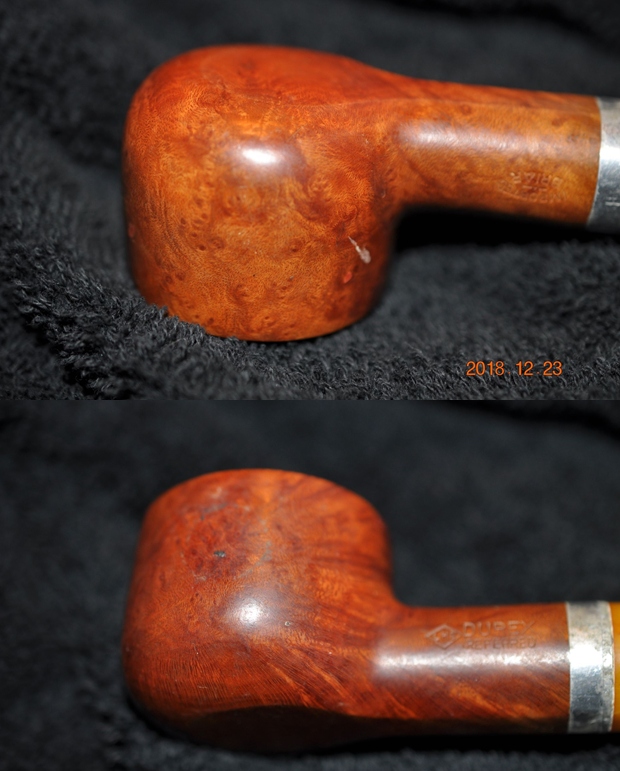
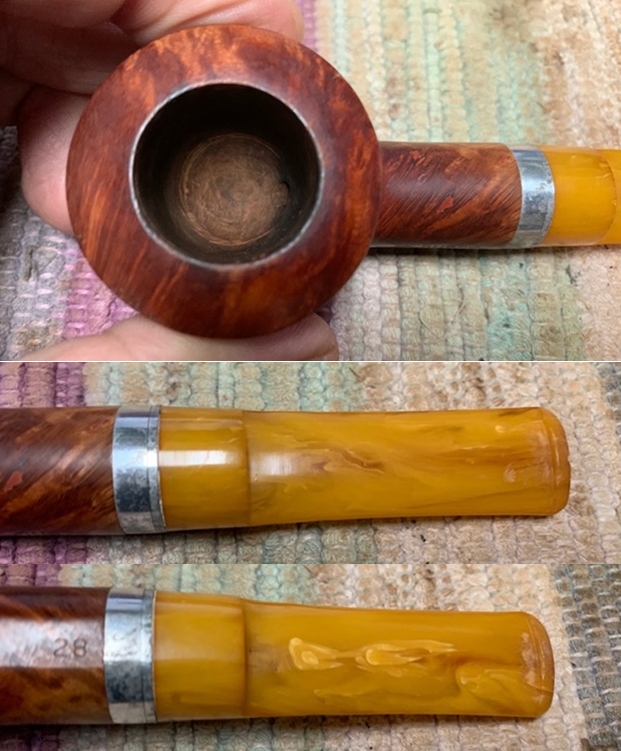
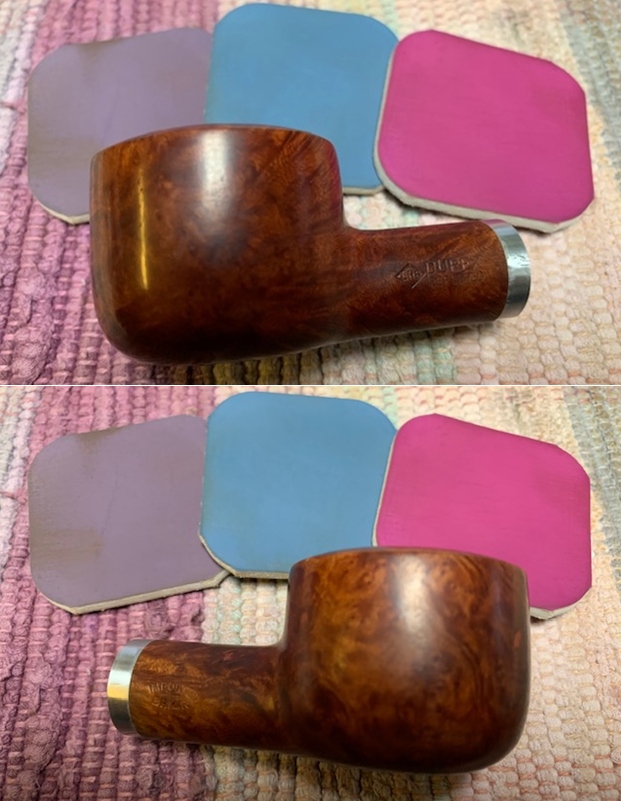
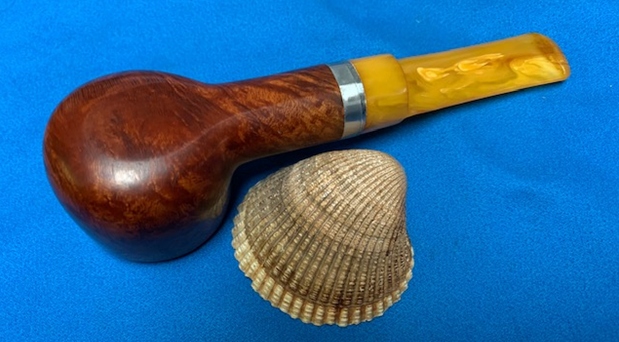
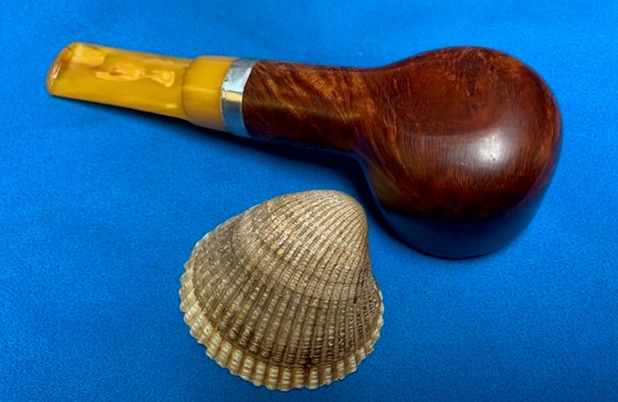
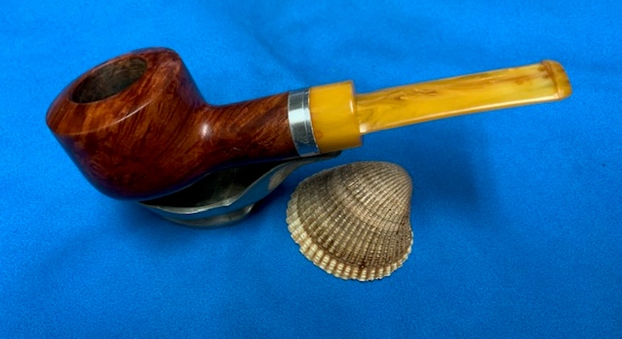
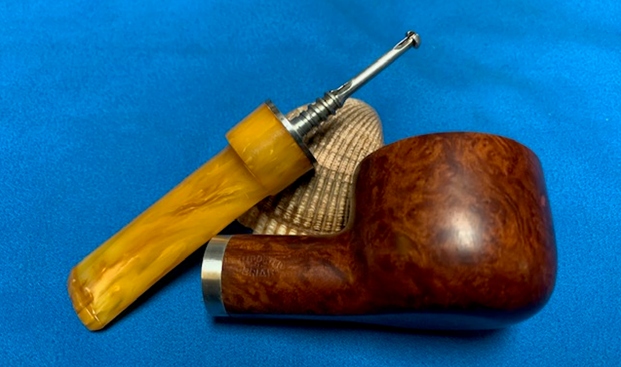
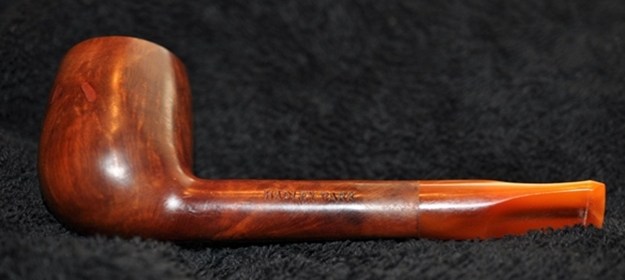
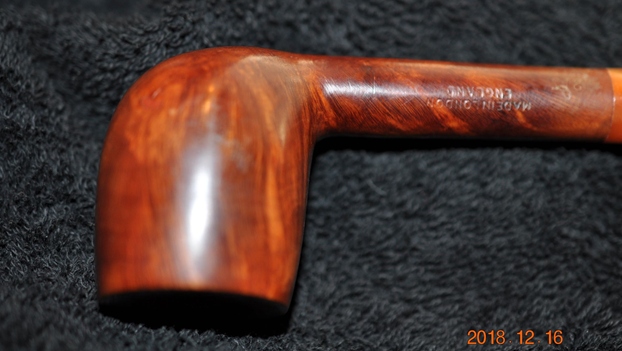
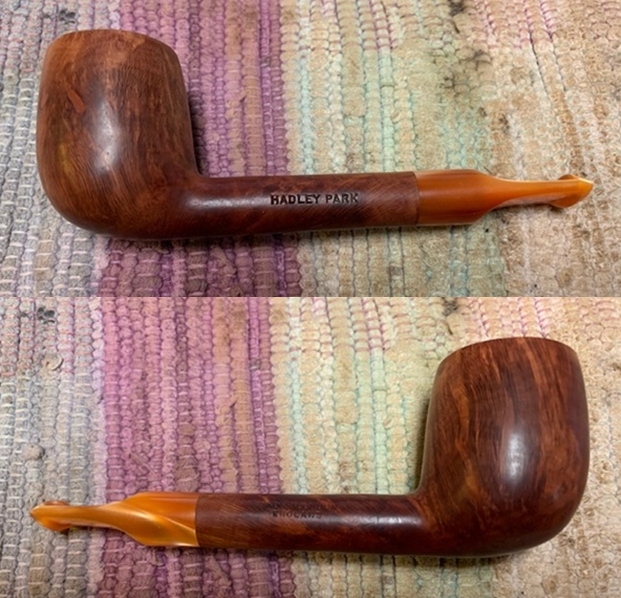
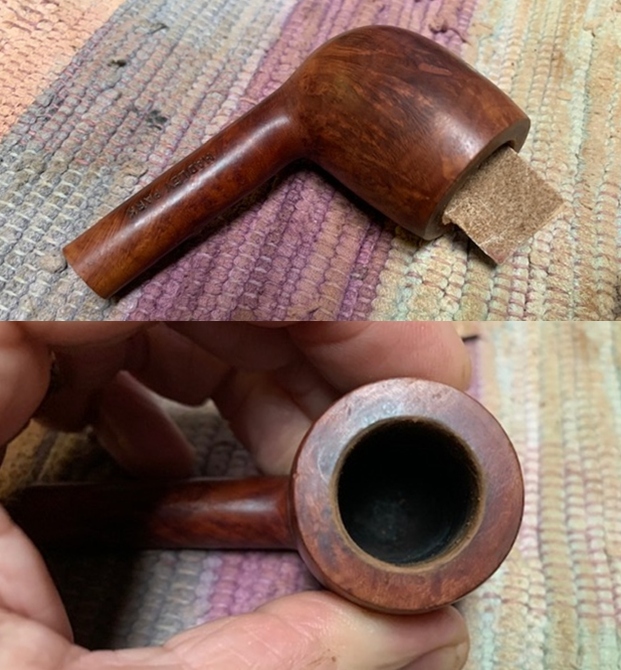
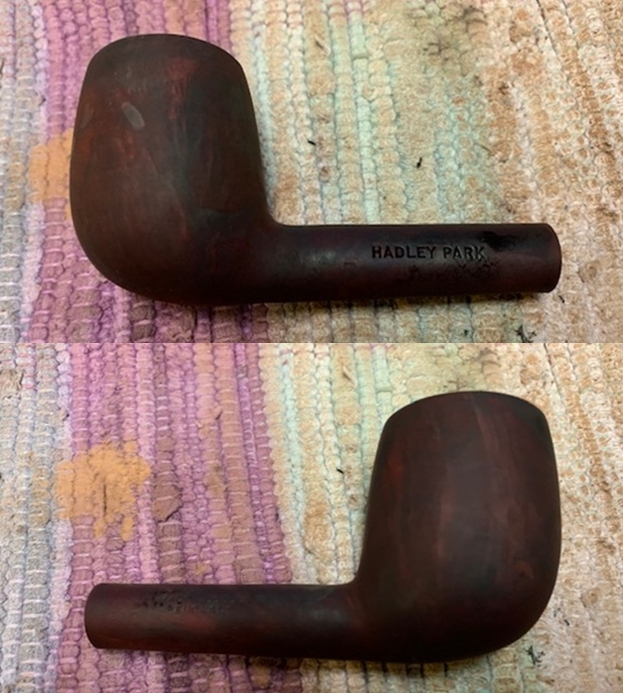
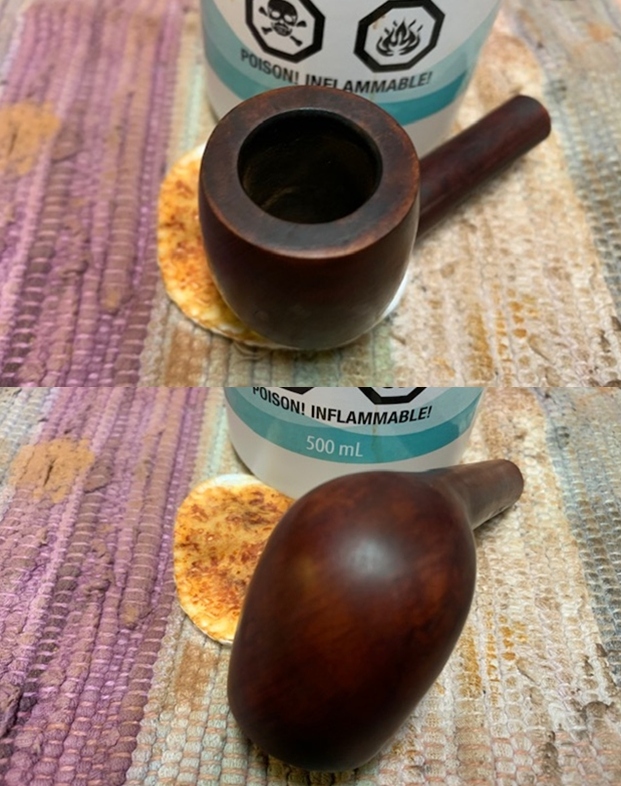
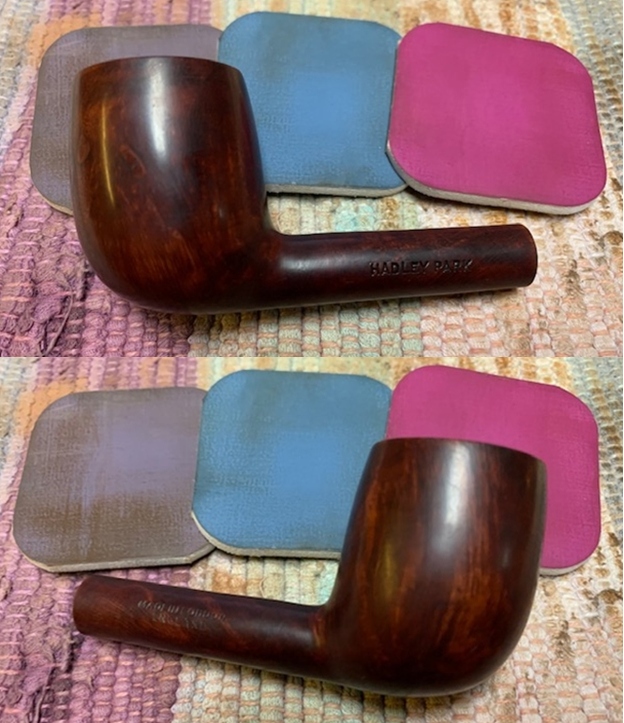
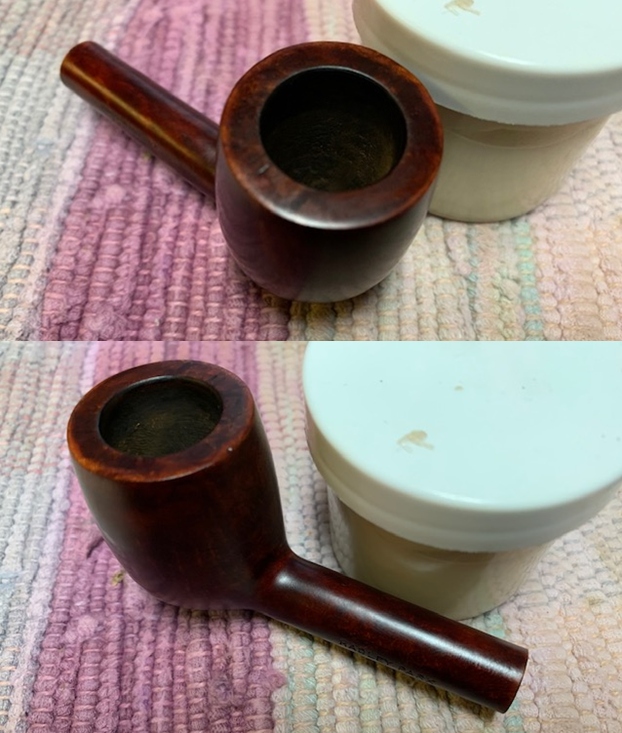
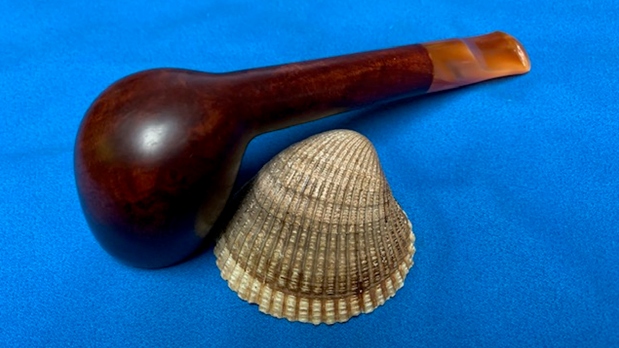
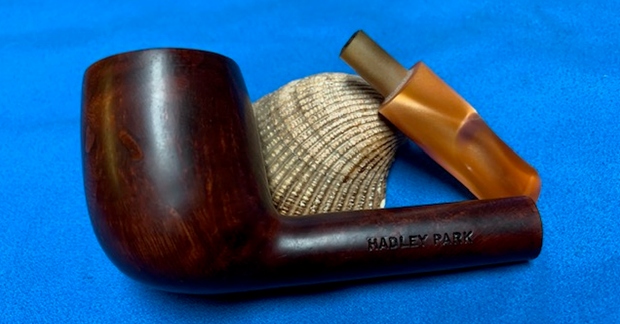
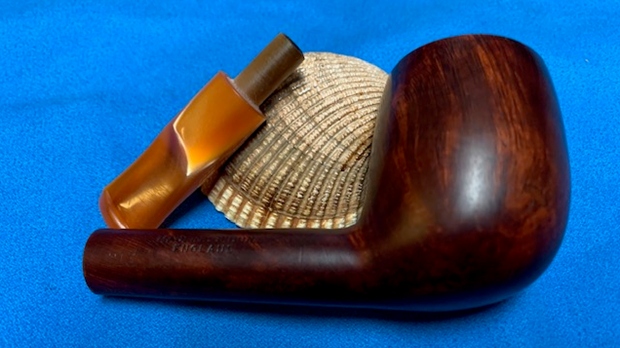
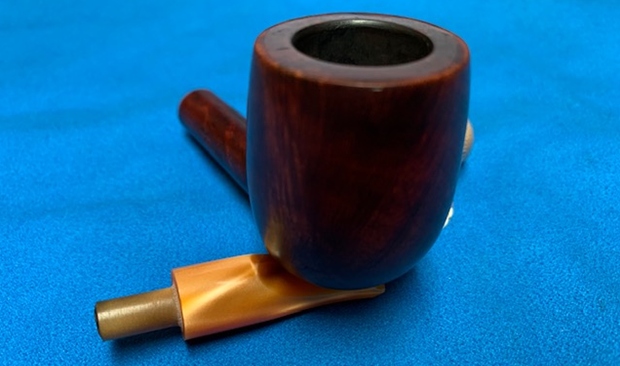
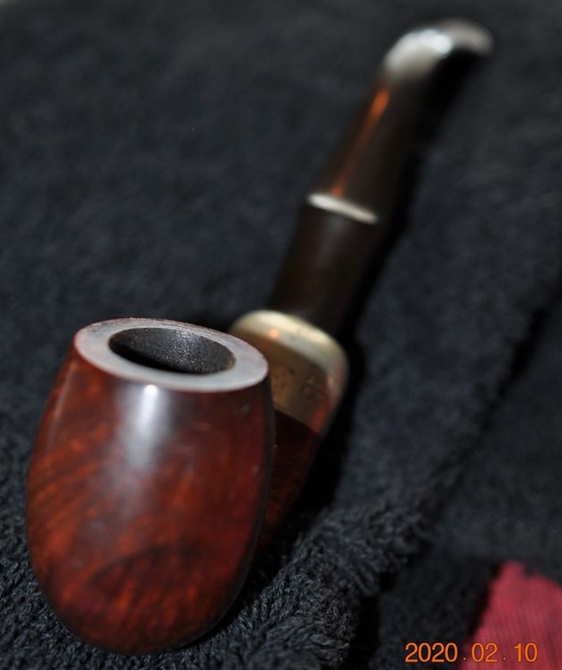
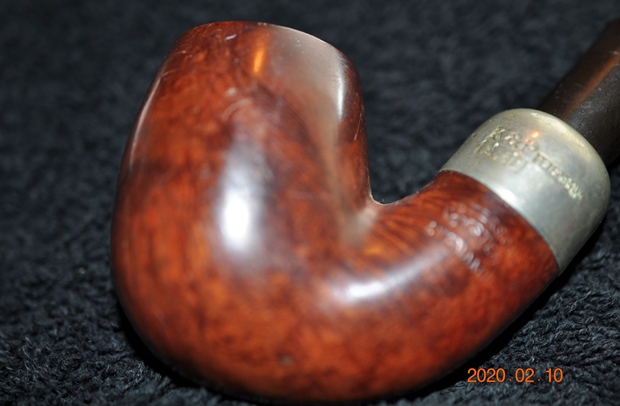
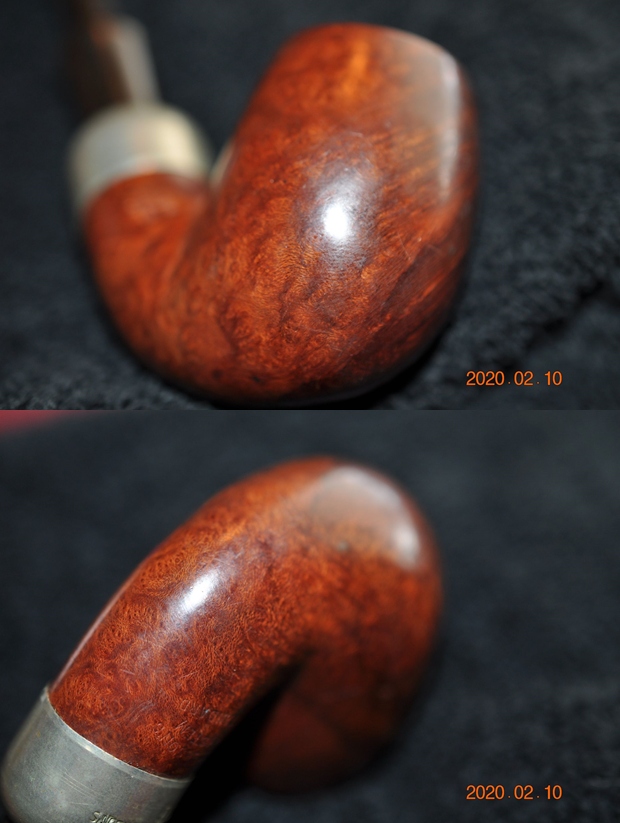
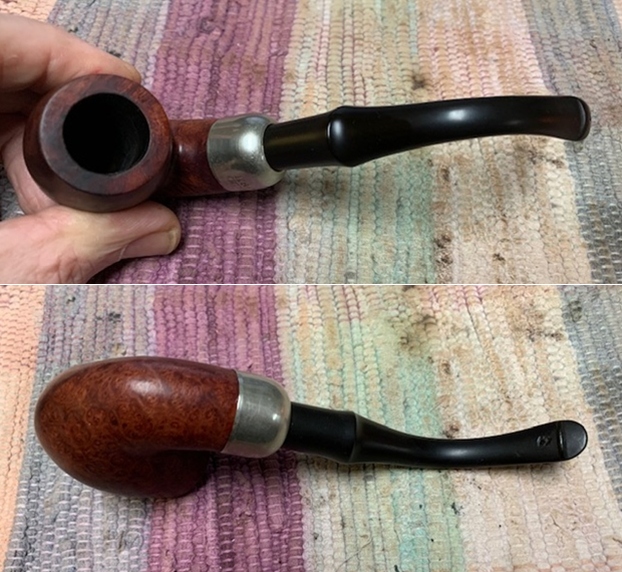
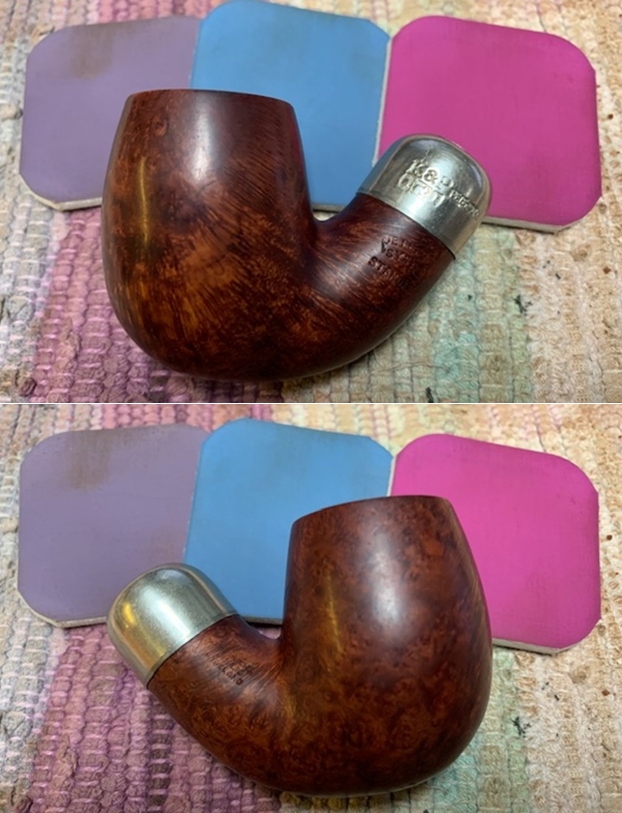
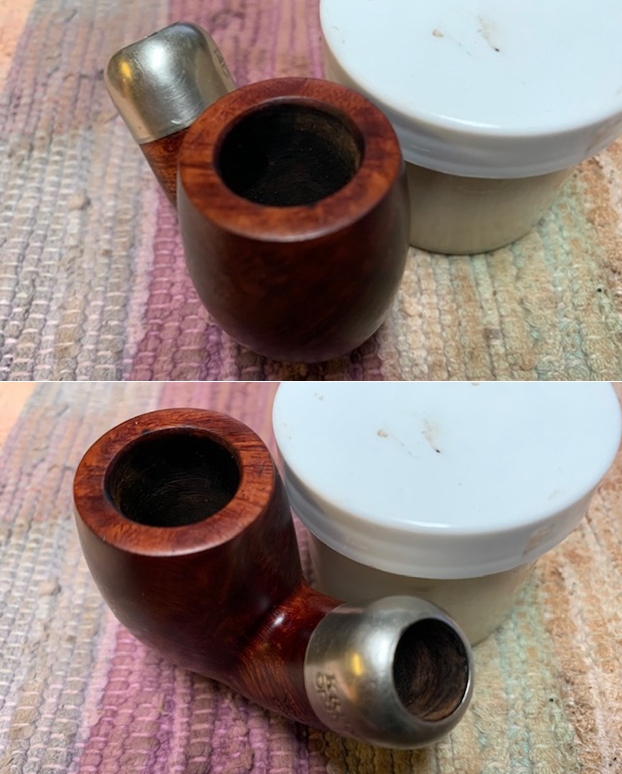
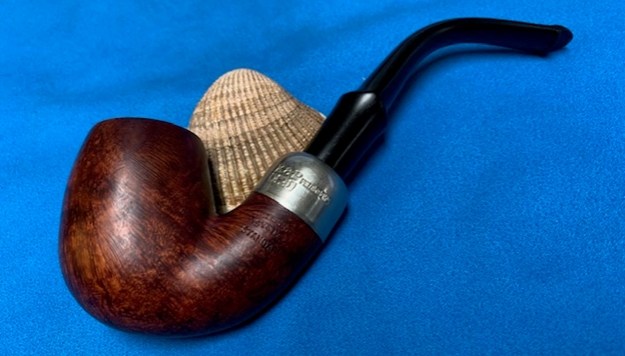
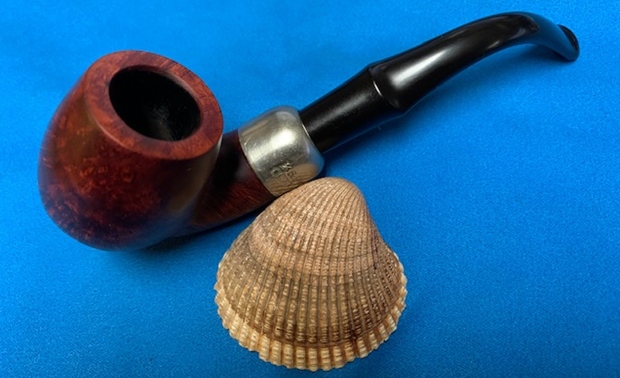
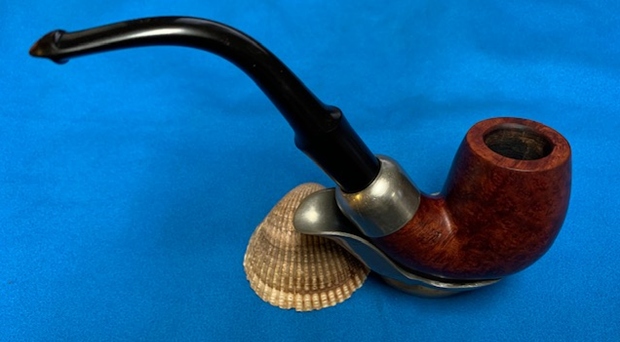
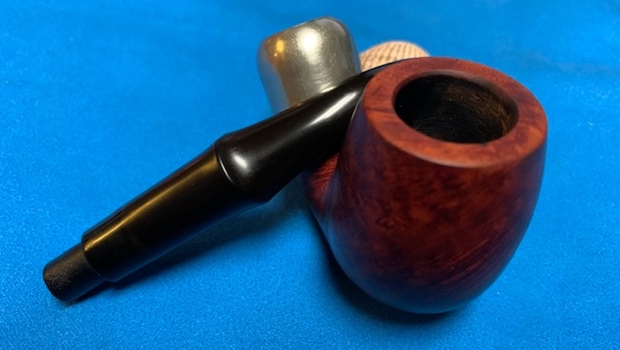
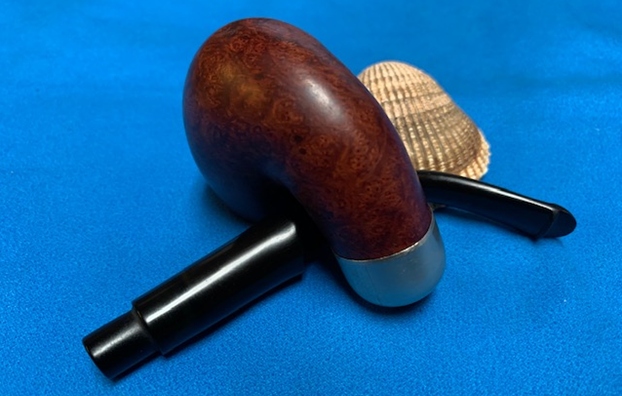
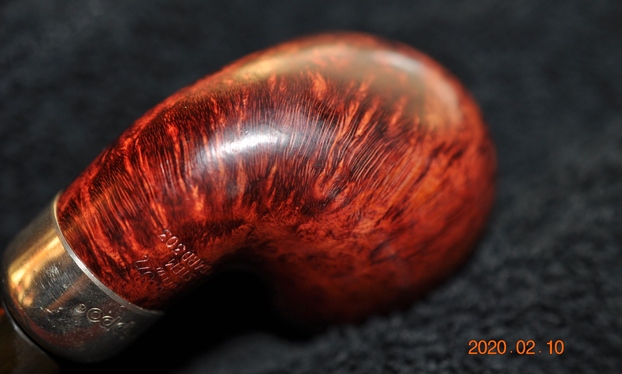
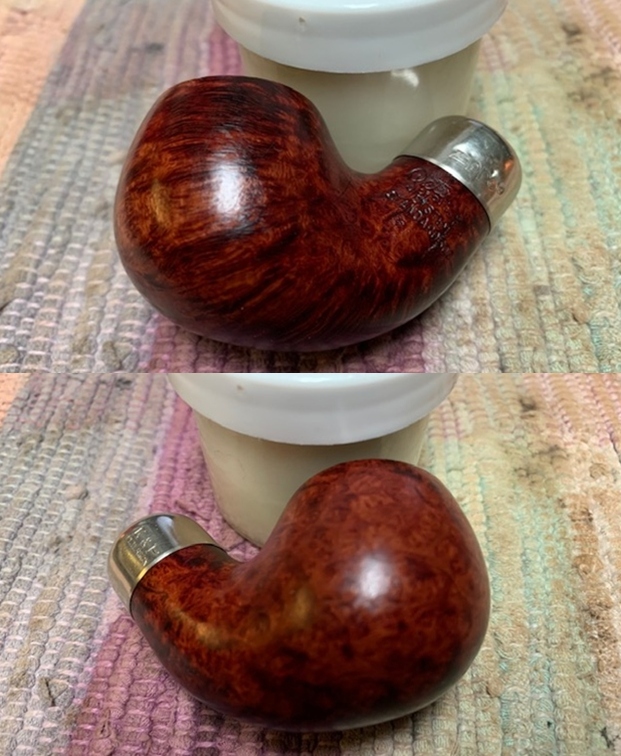
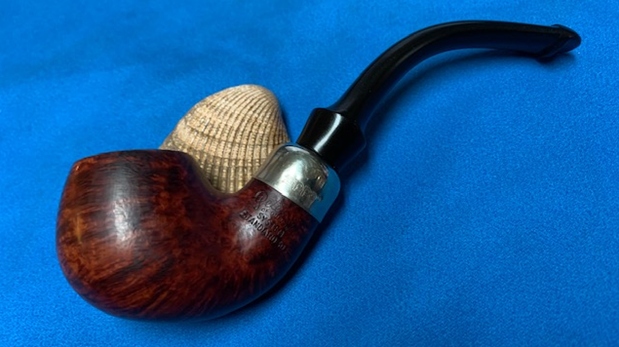
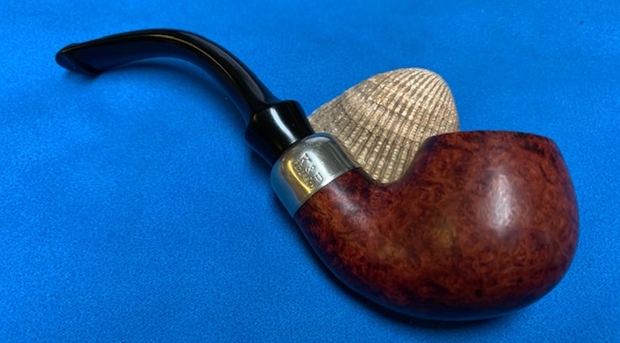
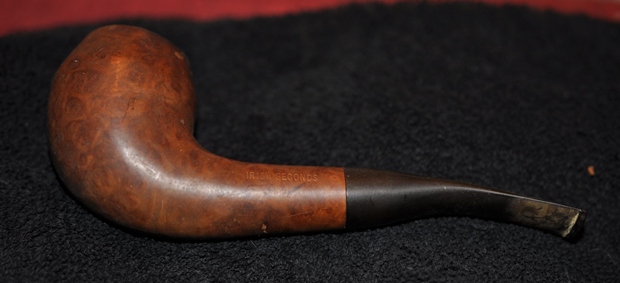
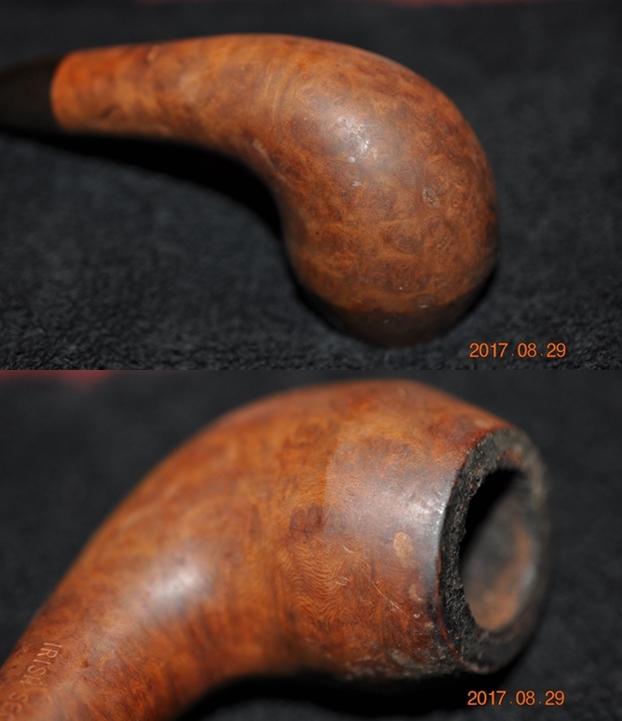
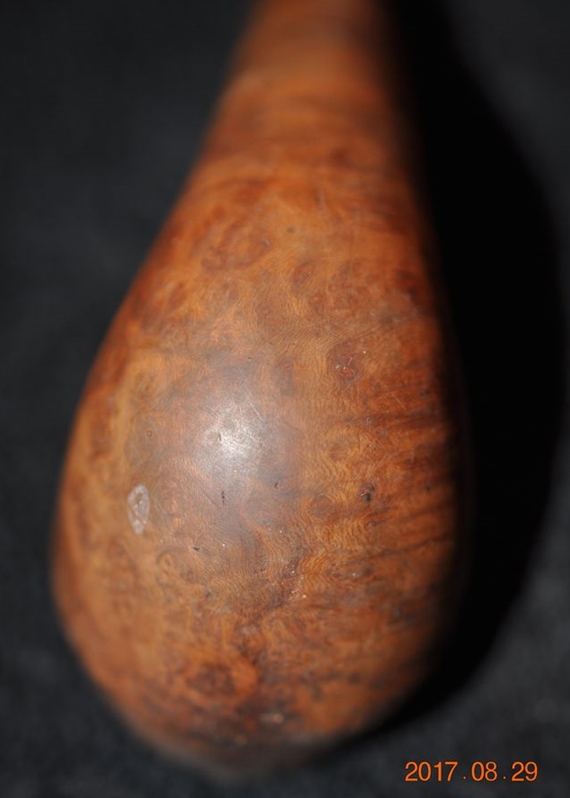
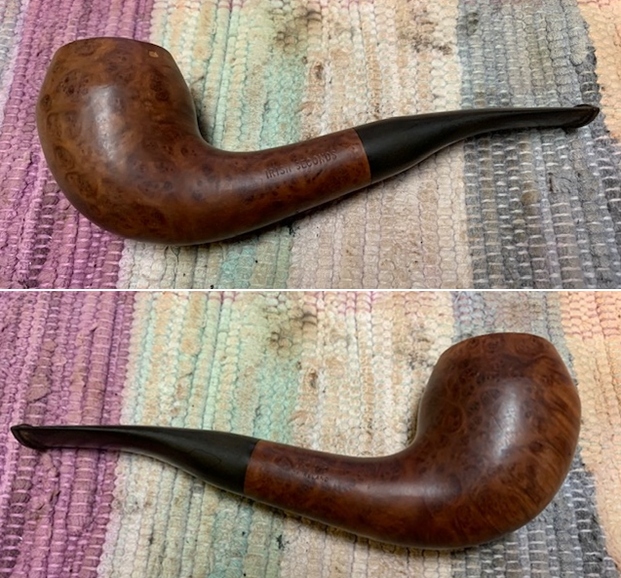
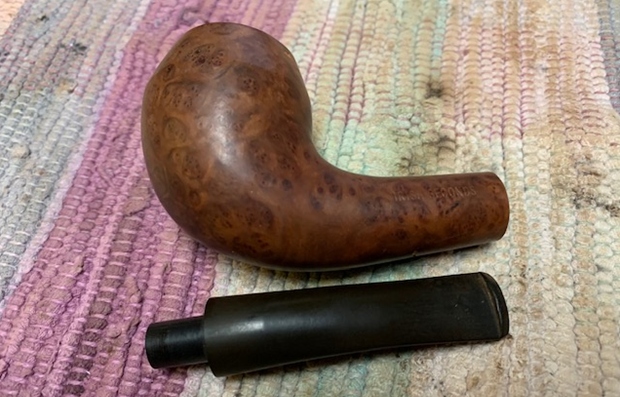
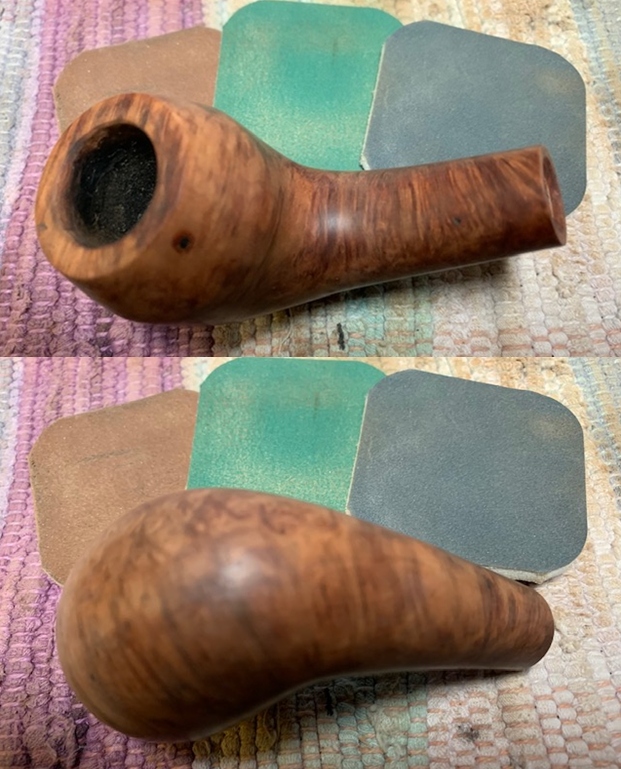
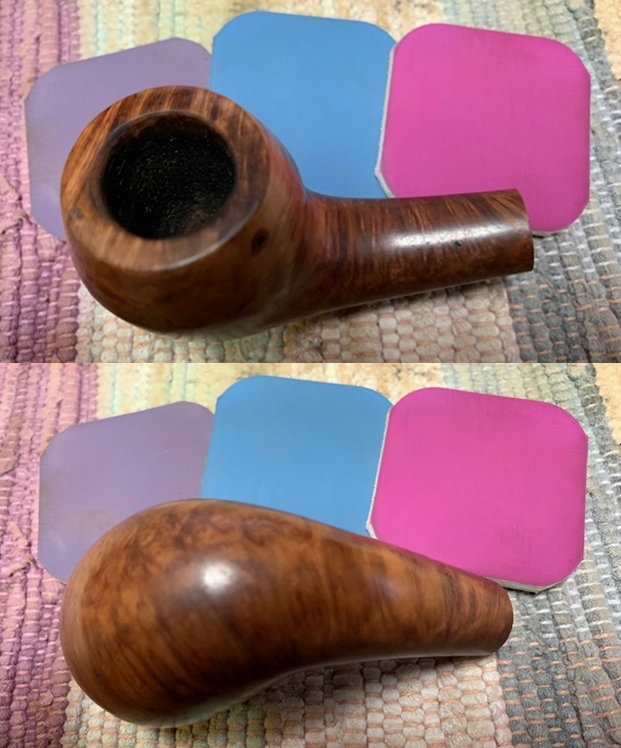
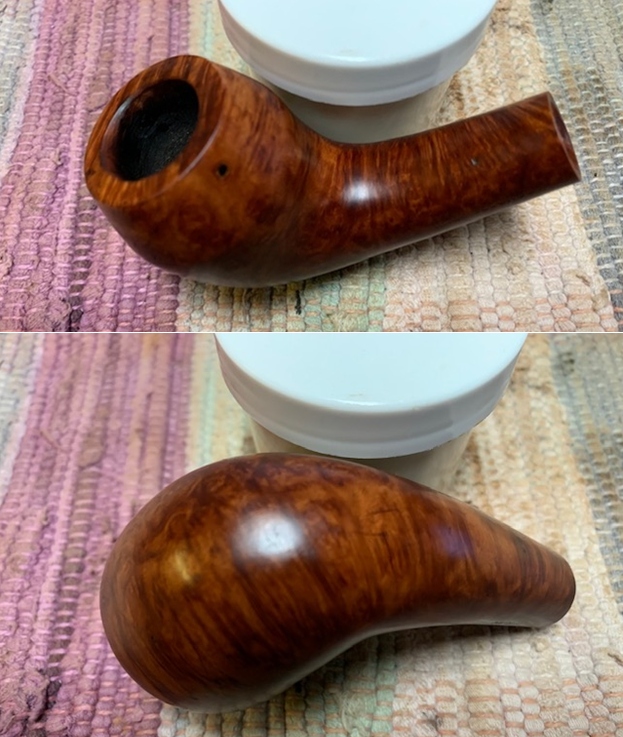
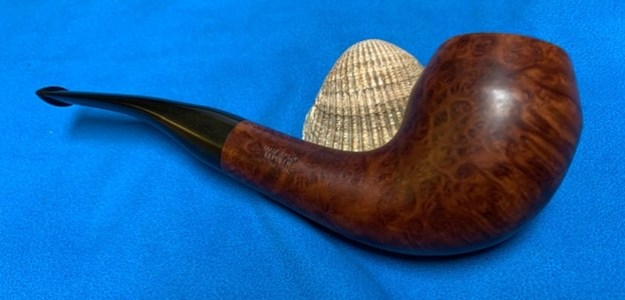
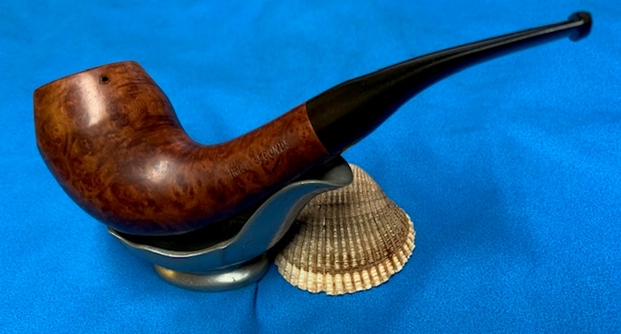
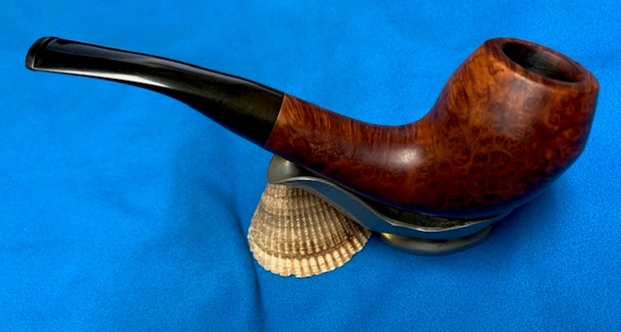
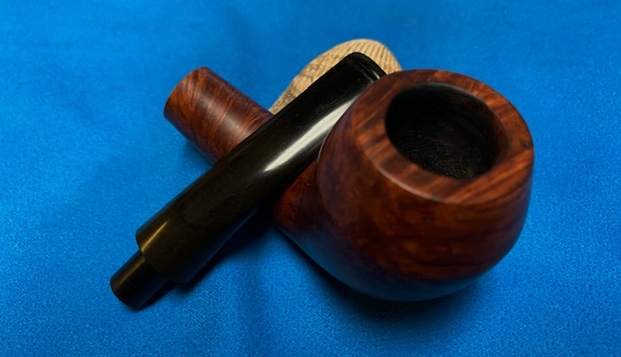
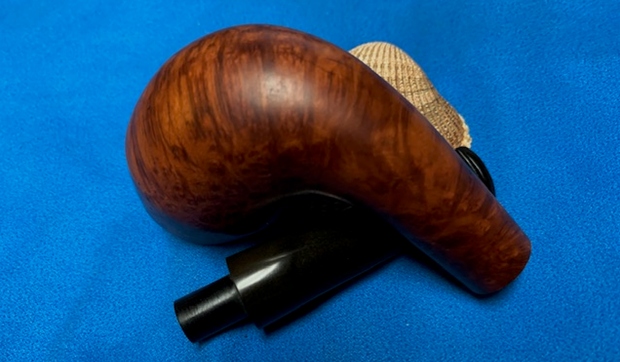
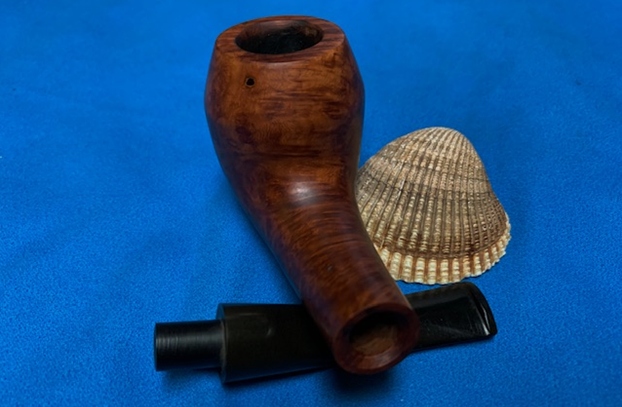
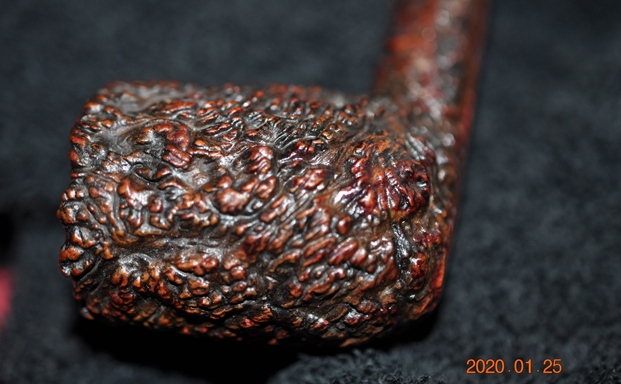
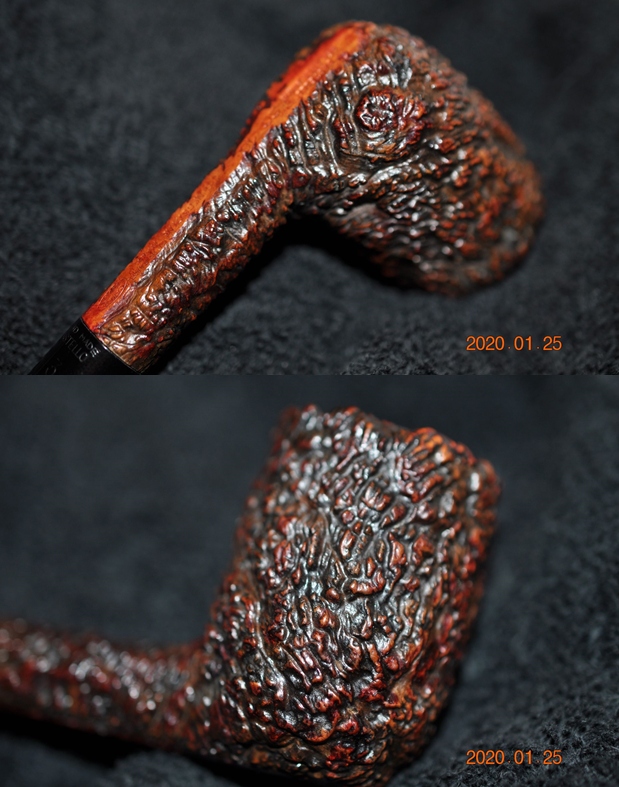
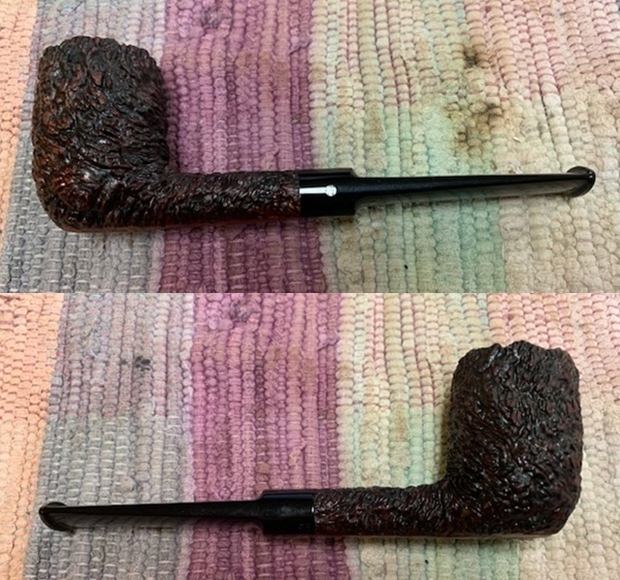
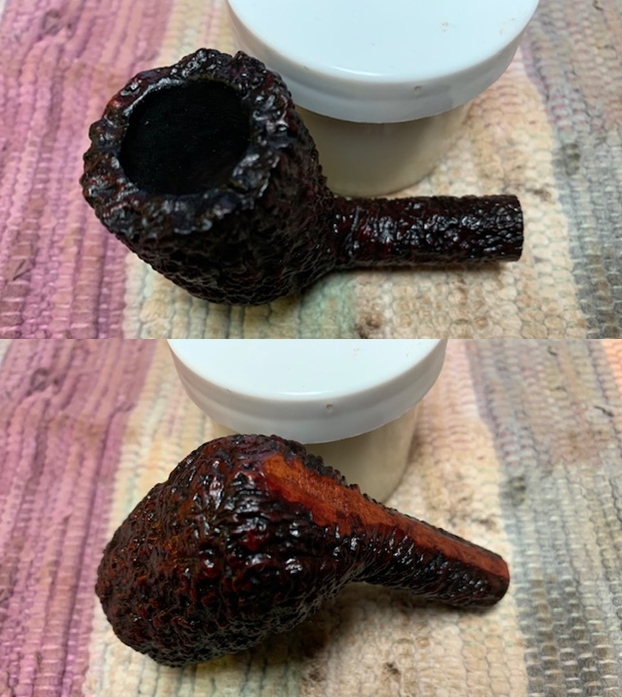
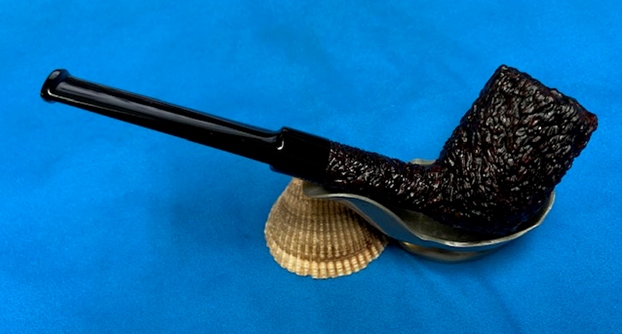
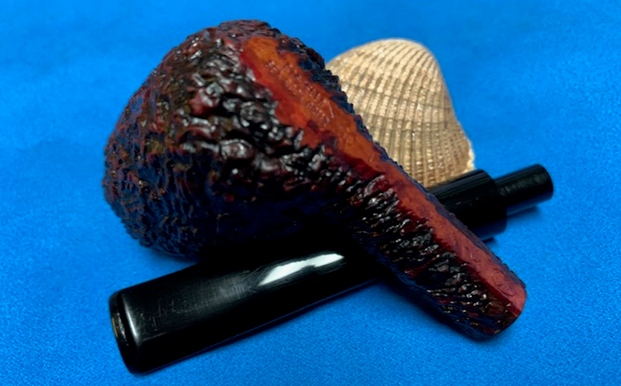
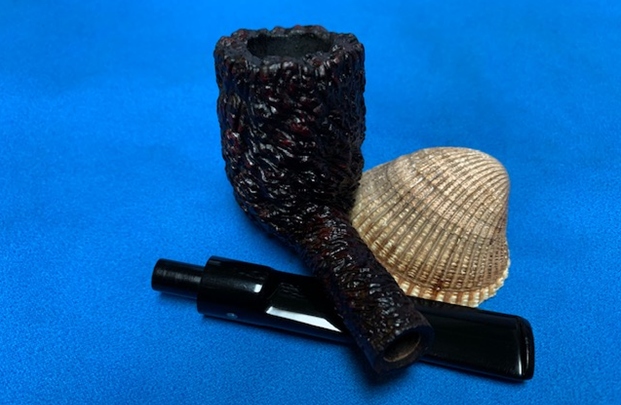
With a better understanding of the Paul Viou name and man who originally have his name to the pipes, I take a critical look at the Feather or Plume shape now on the worktable.  The grain on the stocky Feather stummel is attractive.  The briar block was cut allowing very intricate Bird’s Eye grain to emerge on both sides.  Looking at the stummel straight on – at the nose of the ‘torpedo’, the cross grain is visible connecting the sides creating the cross grain perspective.The finish on the briar is dark and in need of cleaning.  The surface shows dents and scrapes on the heel of the stummel as well as on the upper side.  The diminutive size of the Feather allows it to be the perfect ‘pocket pipe’ but in the pocket are keys and change to compete with!  
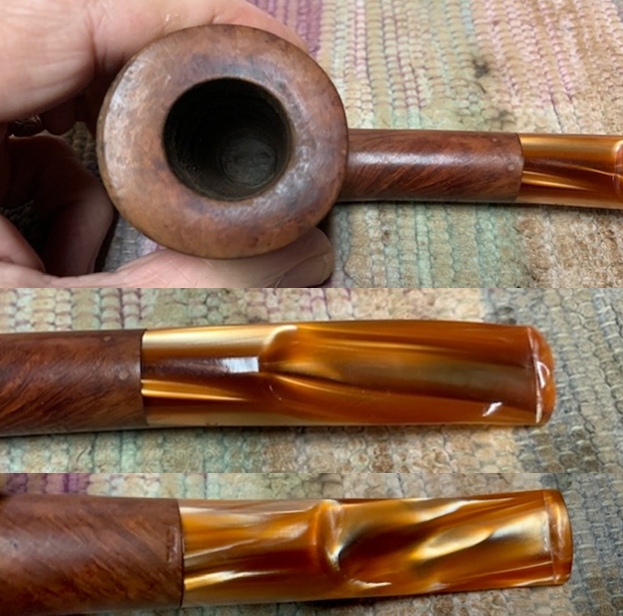
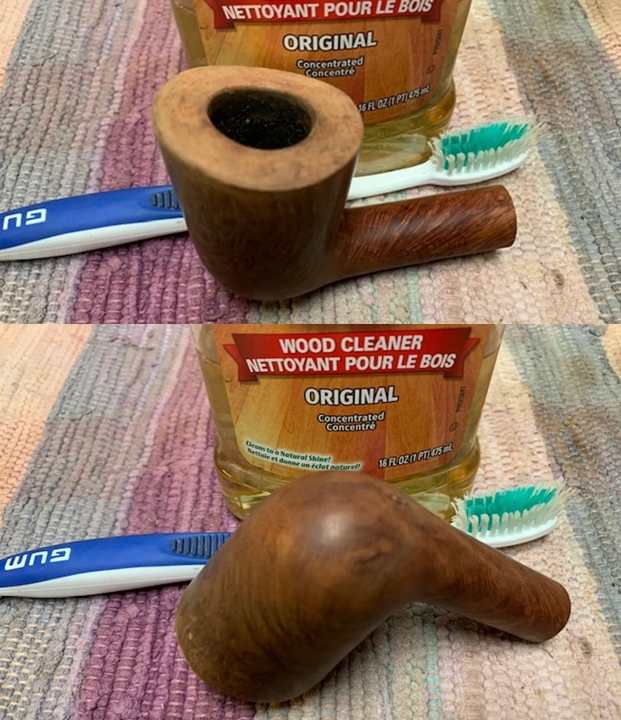
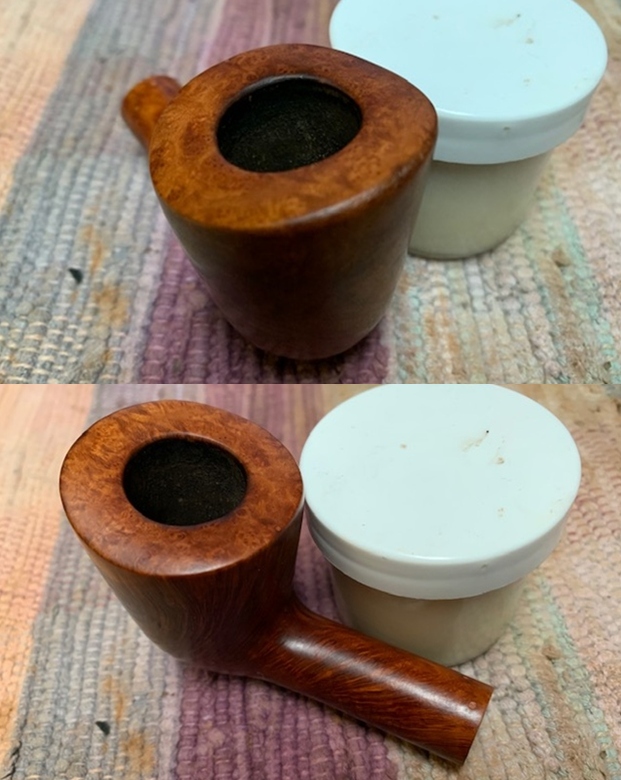
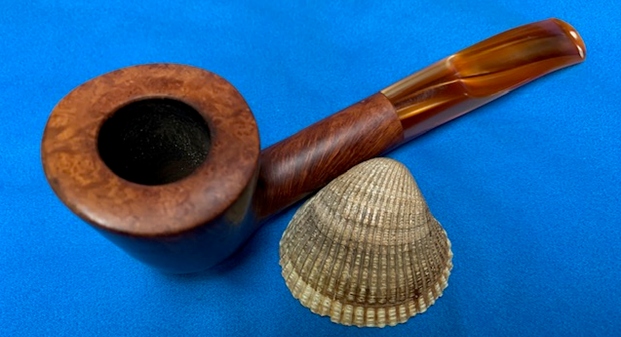
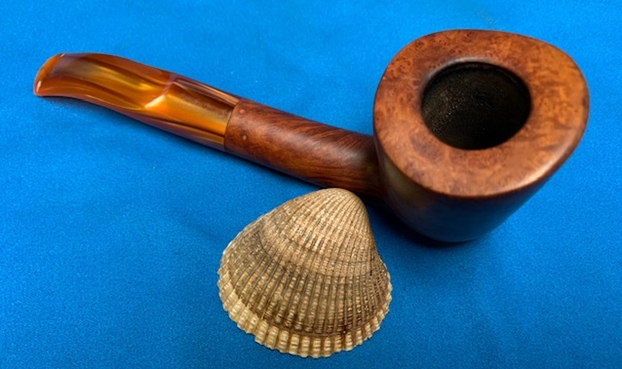
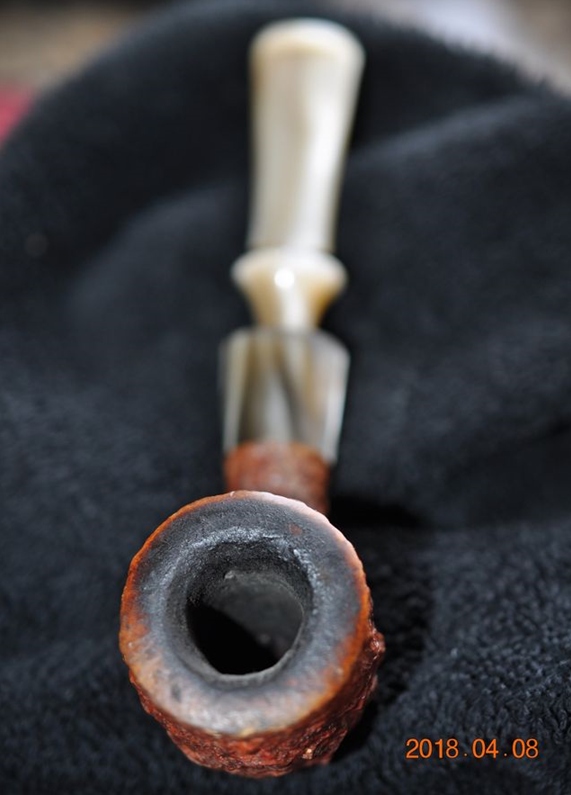
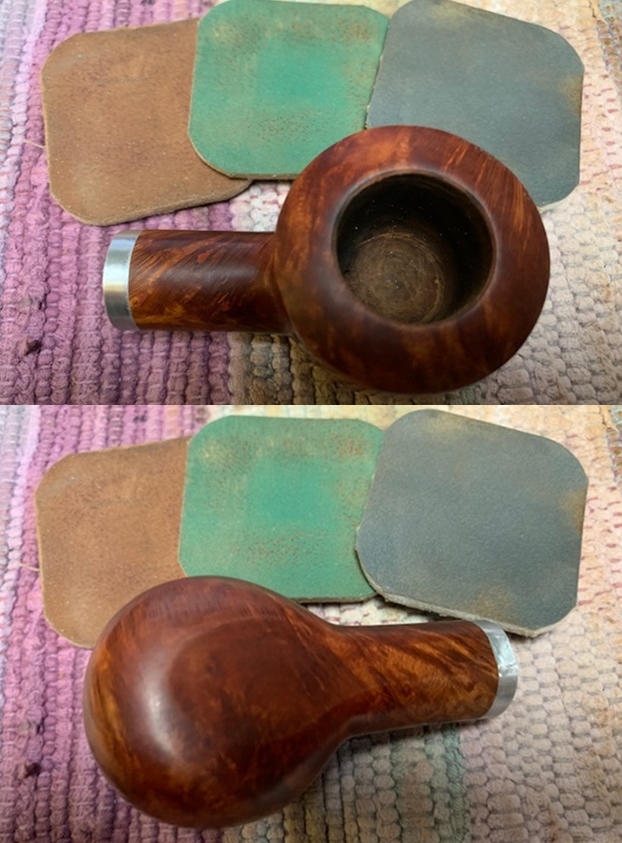
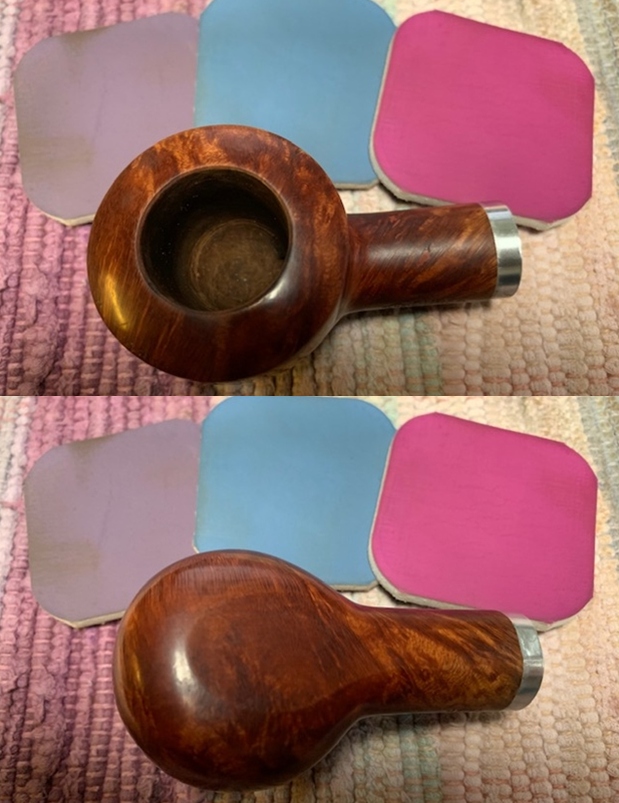
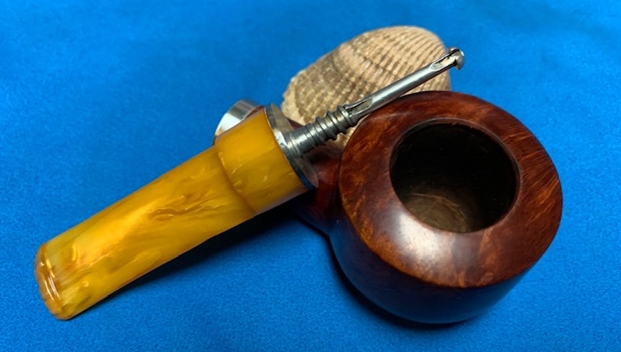
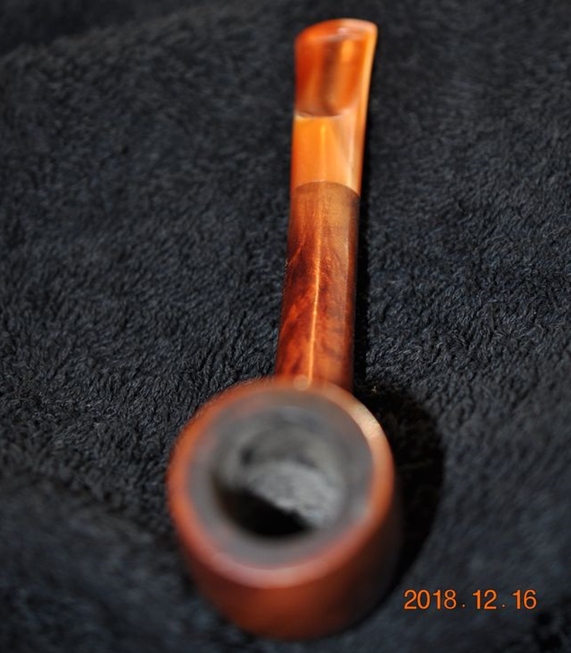
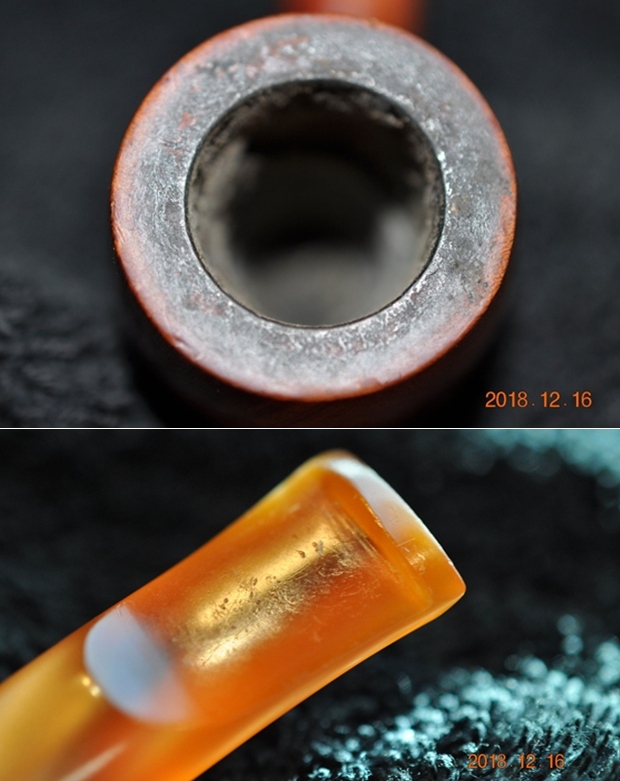
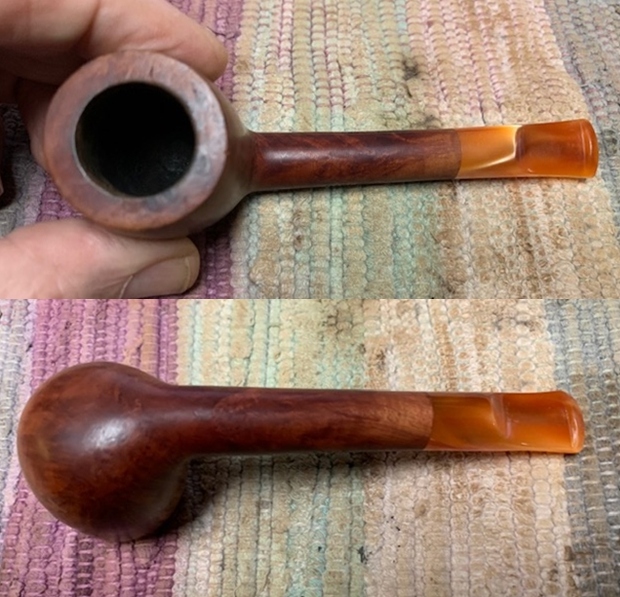
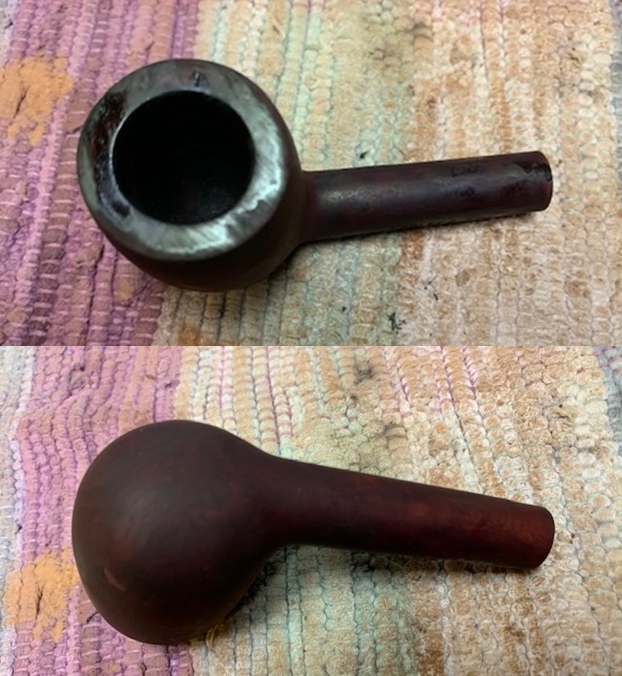
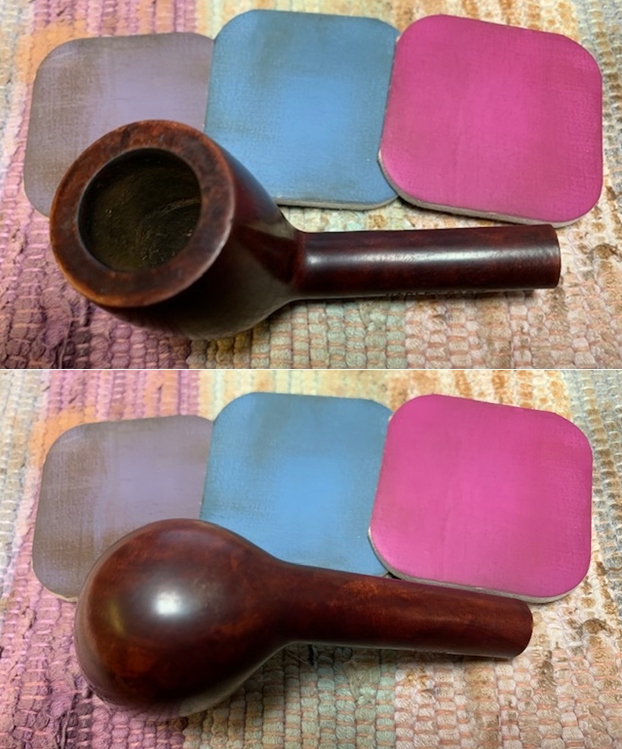
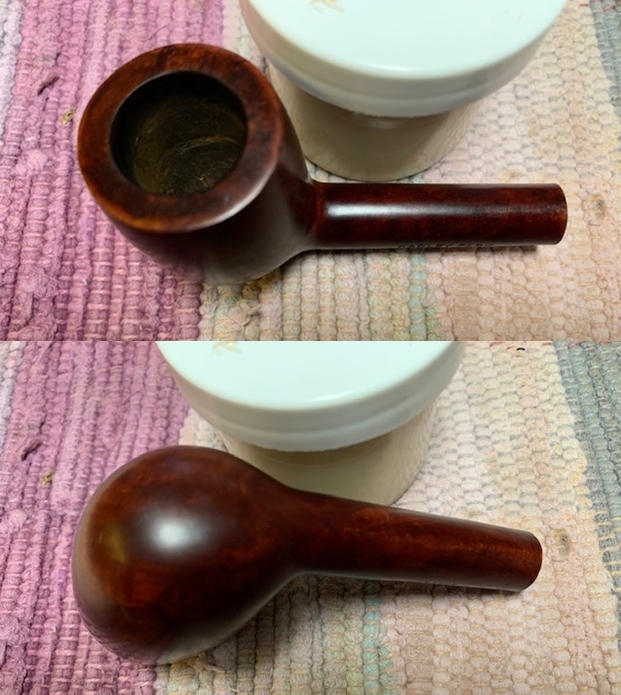
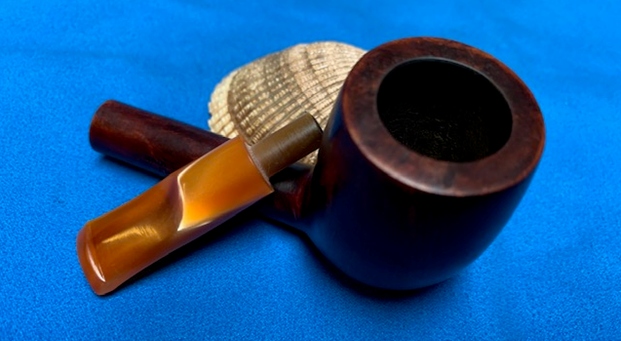
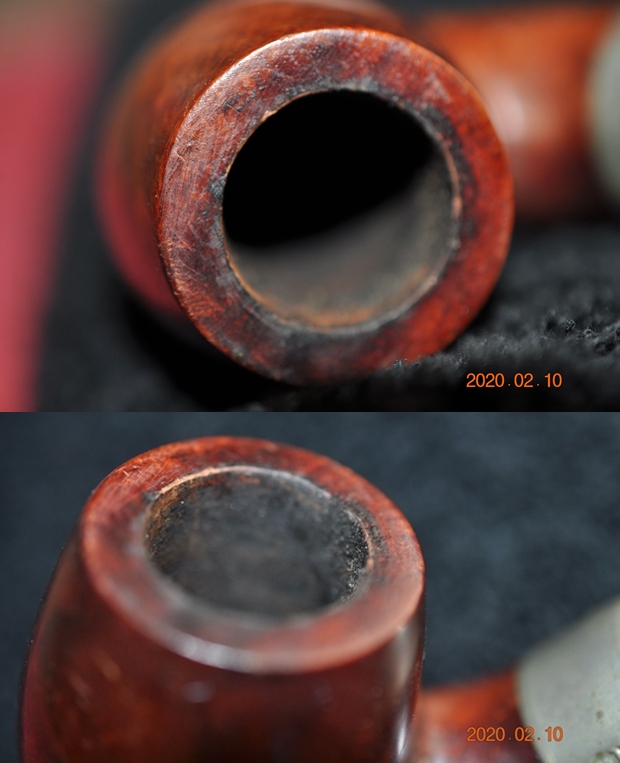
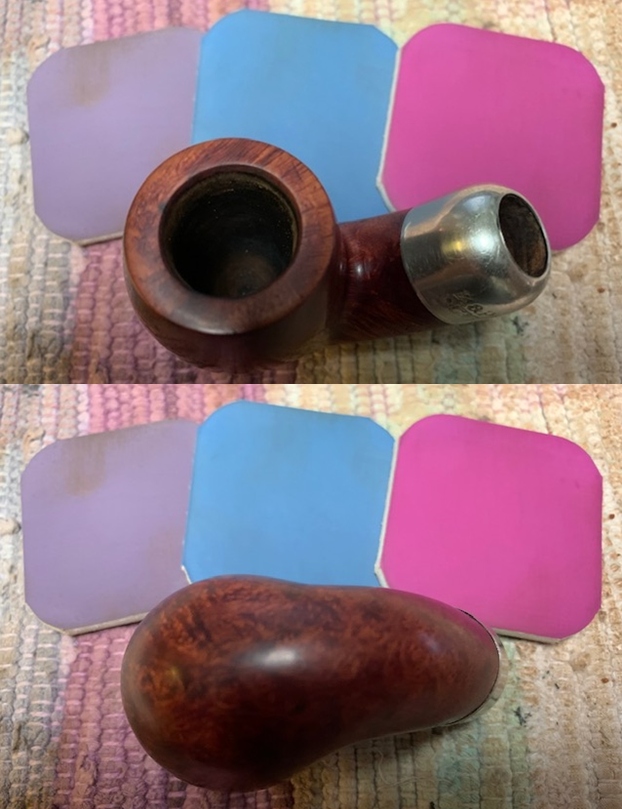
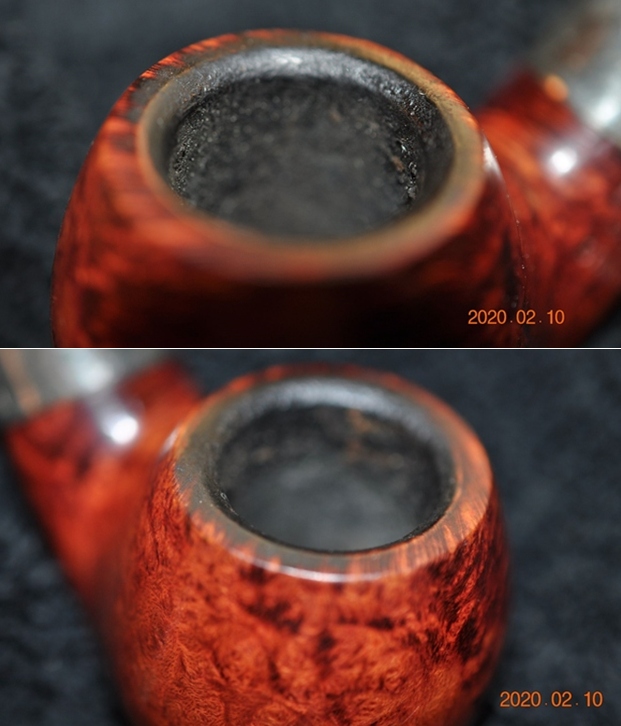
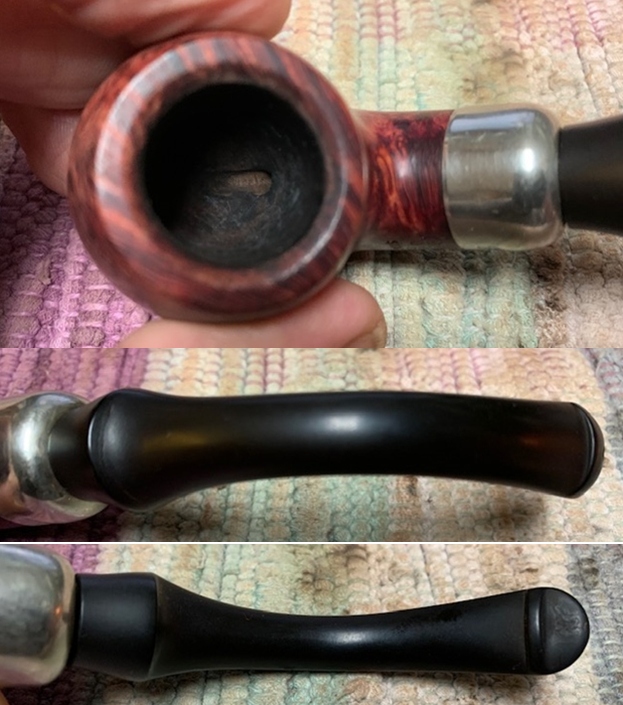
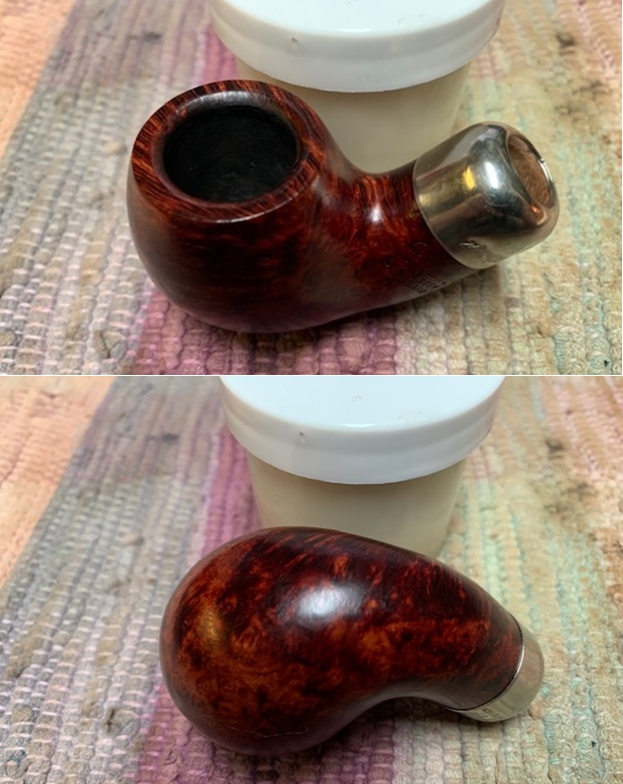
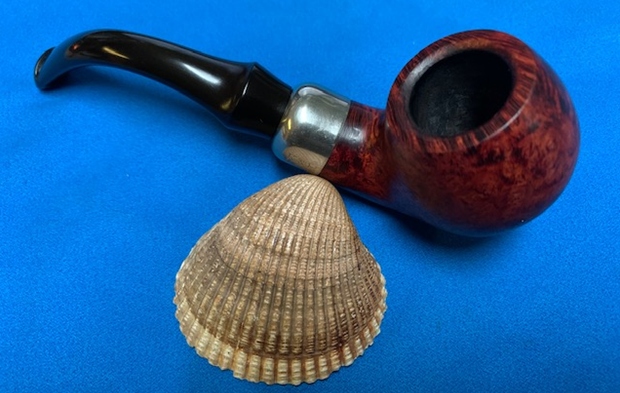
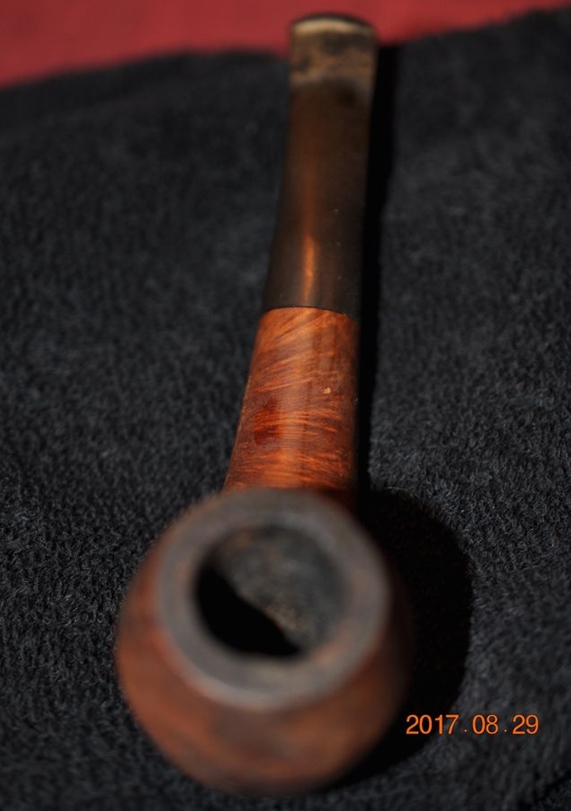
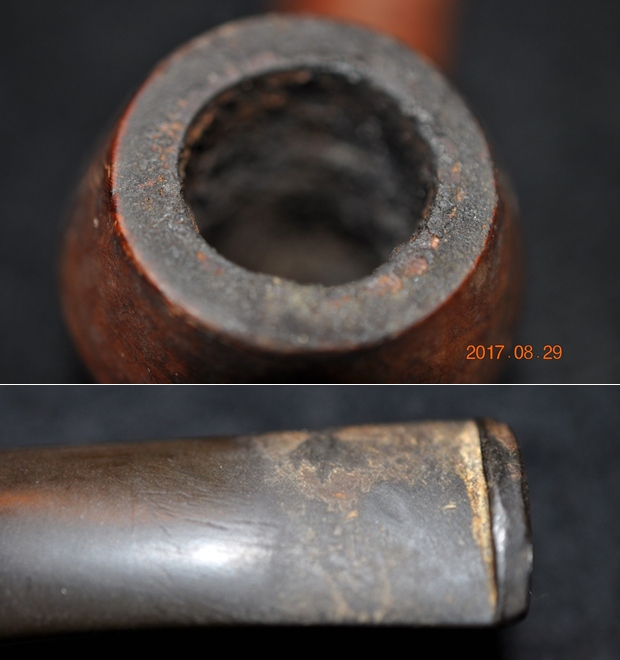
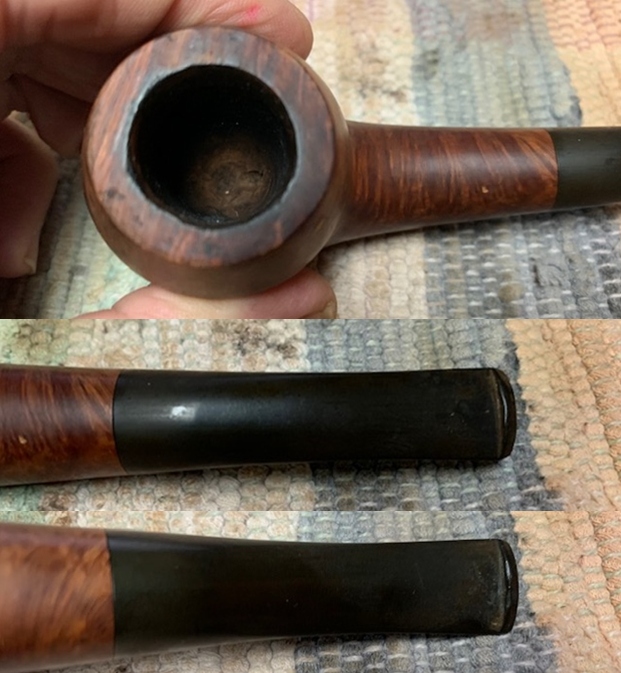
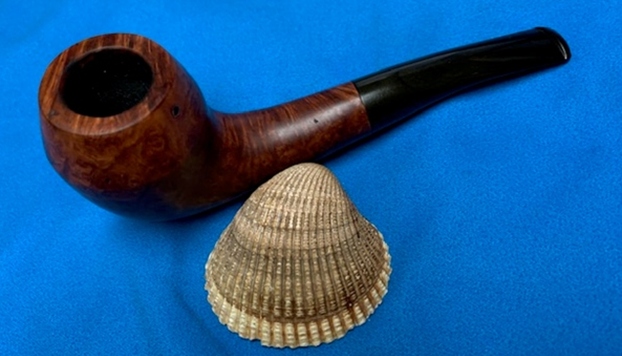
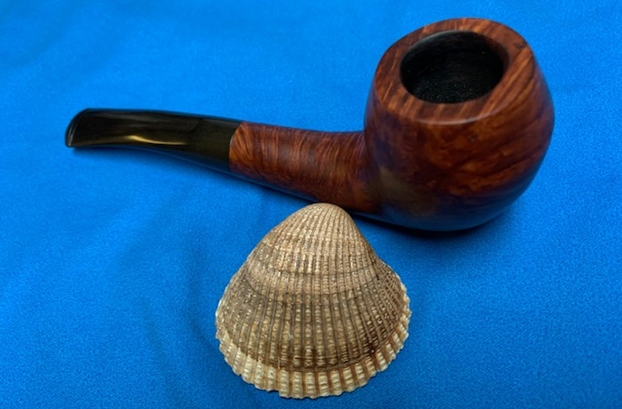
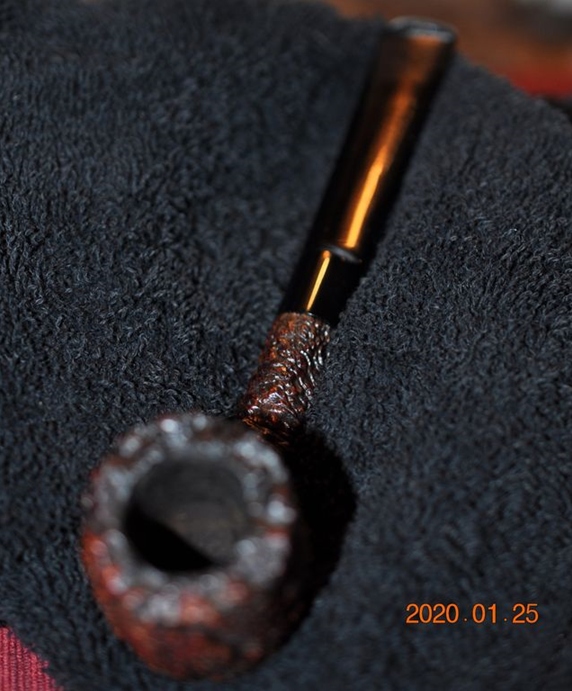
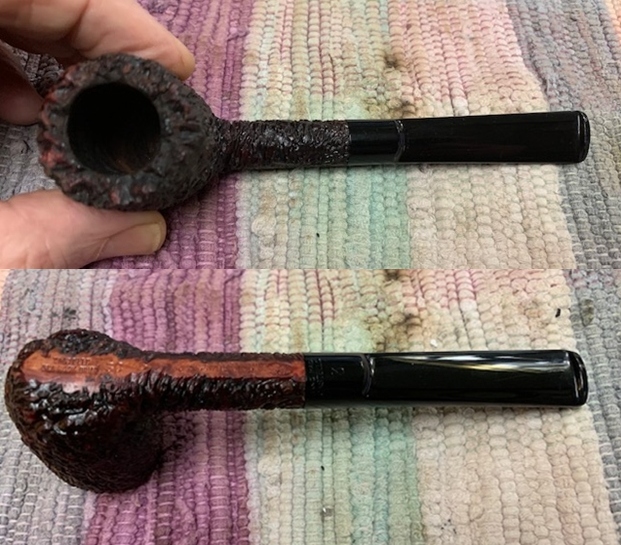
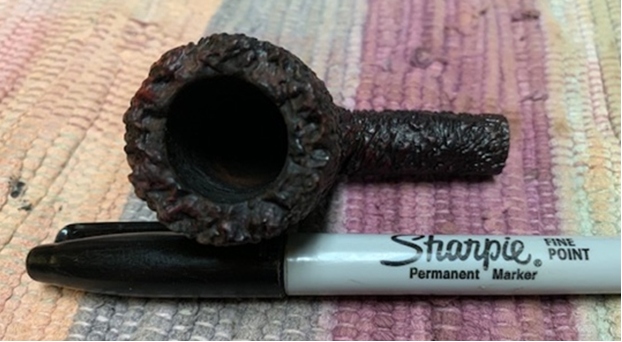
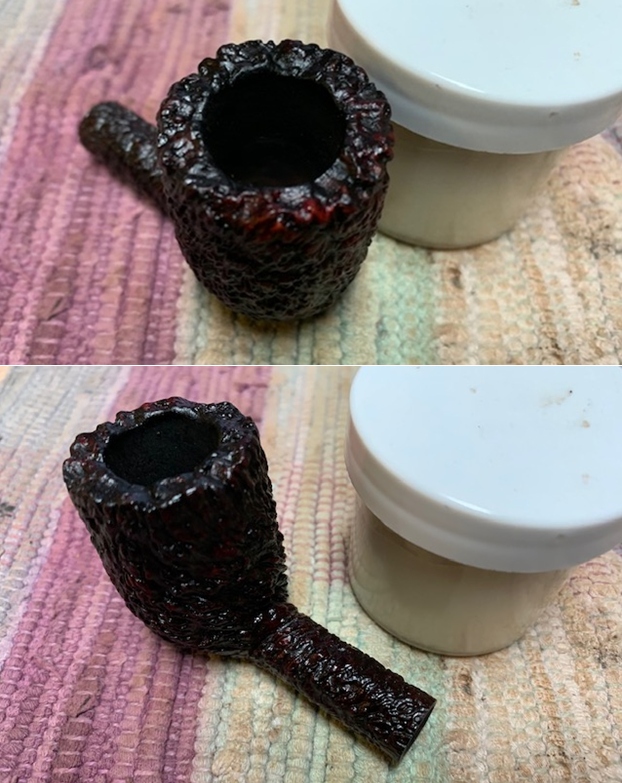
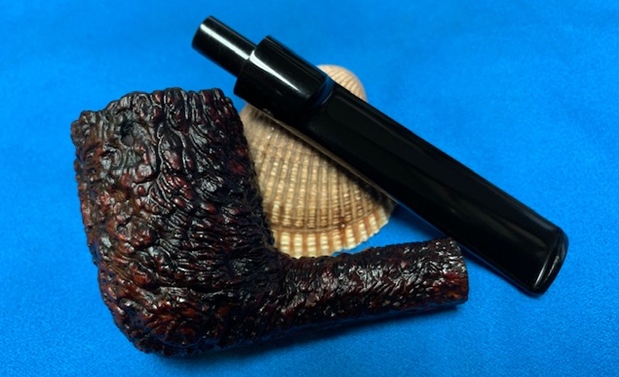
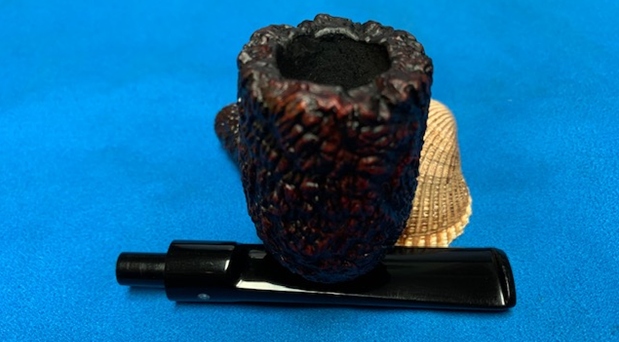
The chamber has light cake buildup and will be removed to allow a fresh start for the briar.  The rim also shows caking which needs removing so that the condition of the rim can be seen more clearly and to rediscover the rim’s grain.  There are nicks and dents around the rise to the rim.  
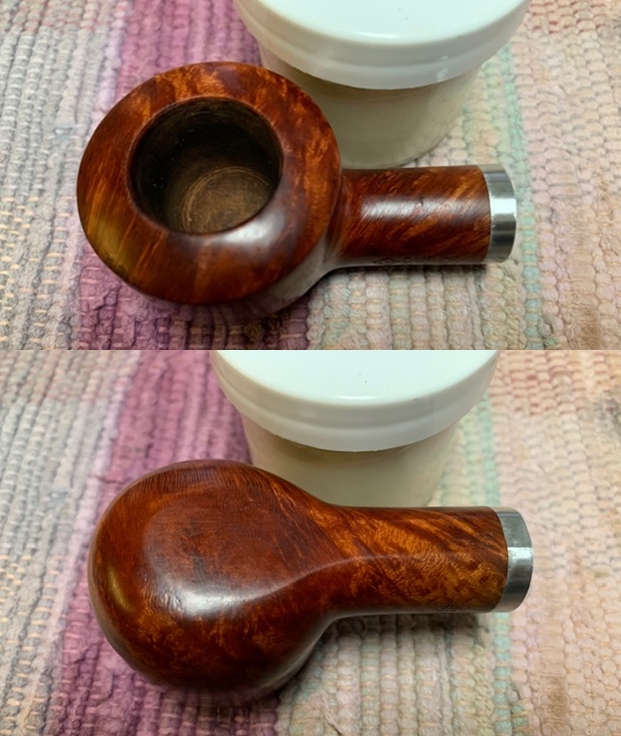
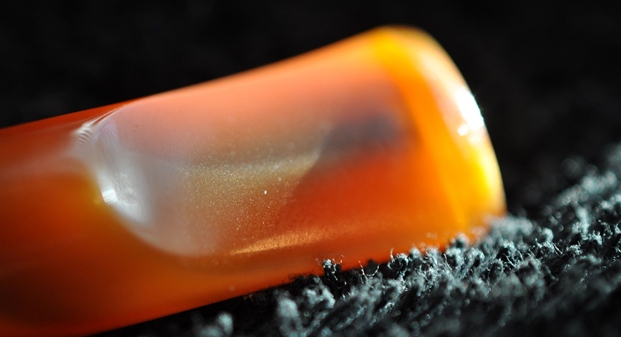
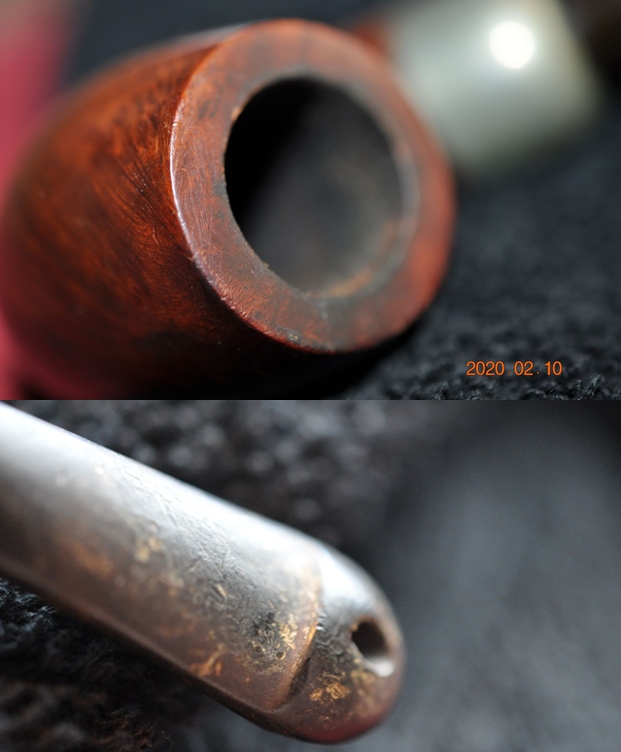
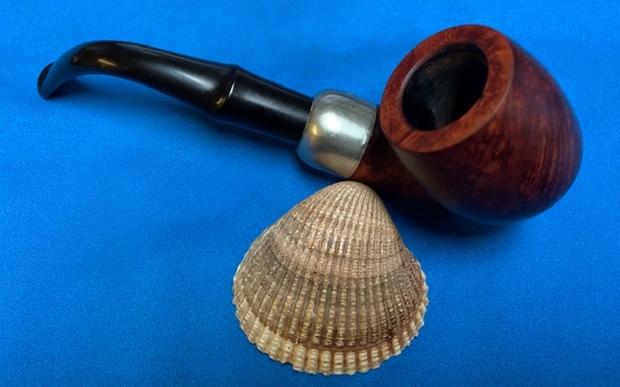
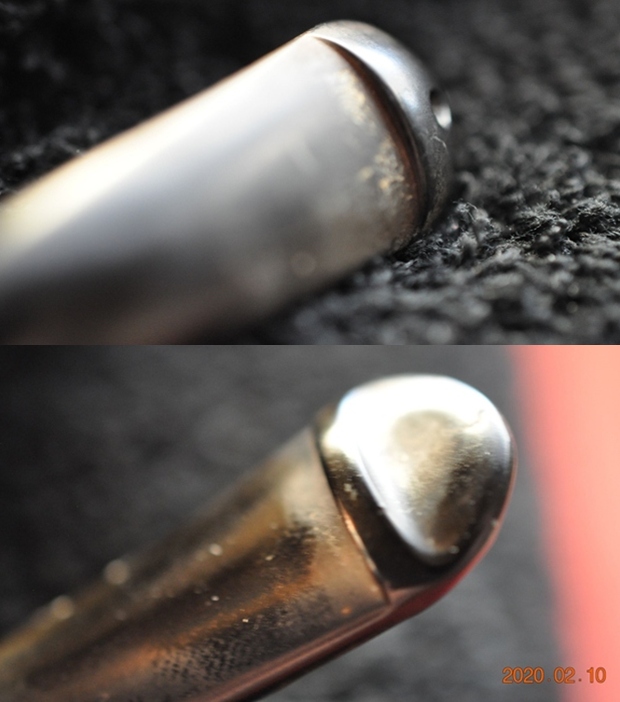
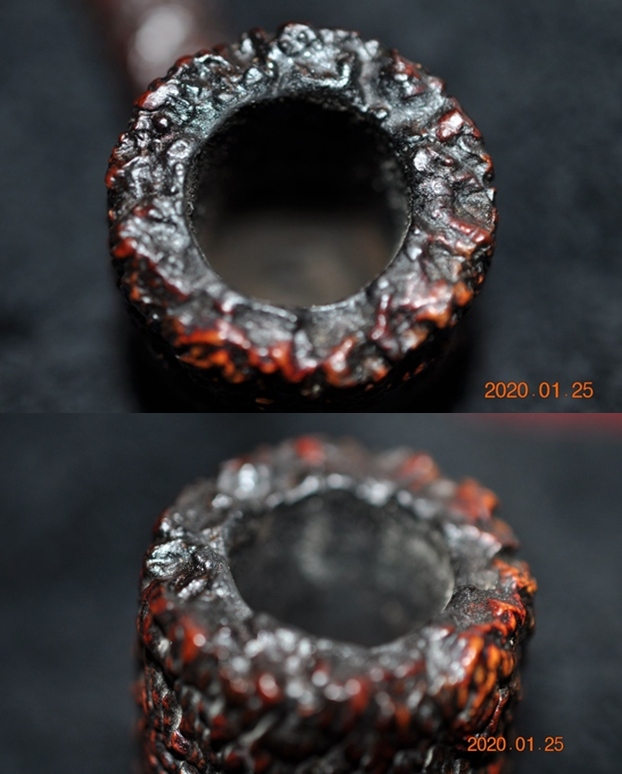
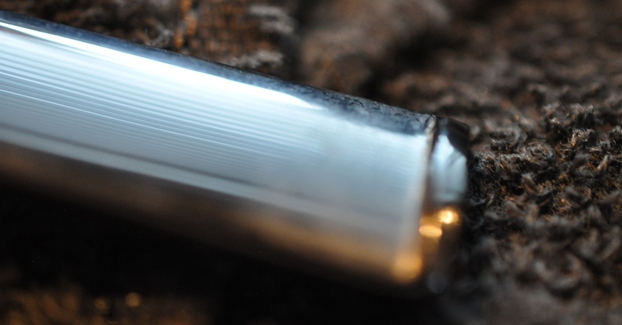
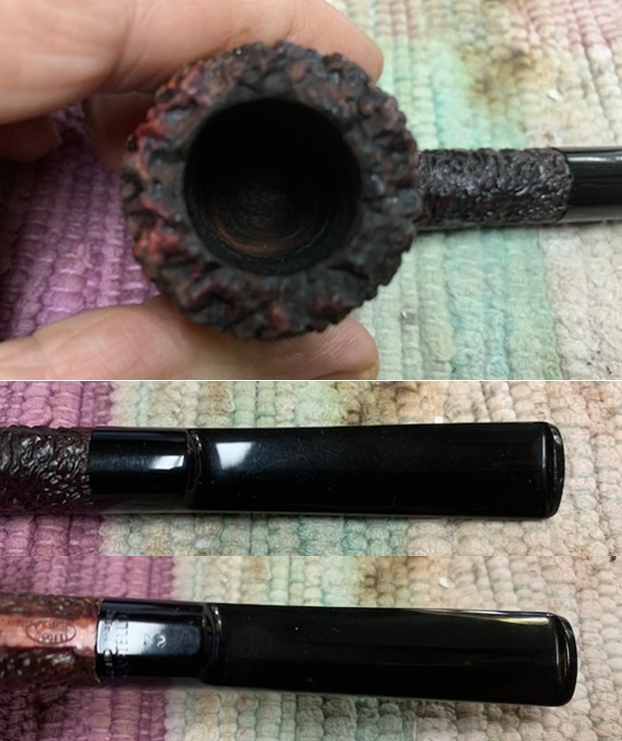
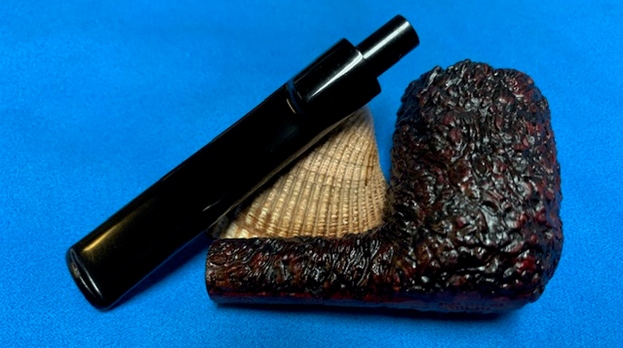
The horn stem is predominantly a dark hue except for near the bit area where it lightens.  The horn is rough but should clean up very nicely.
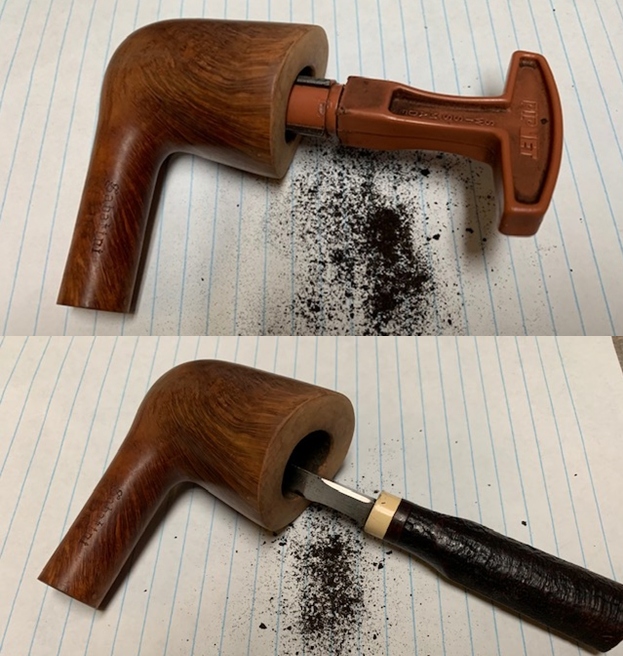
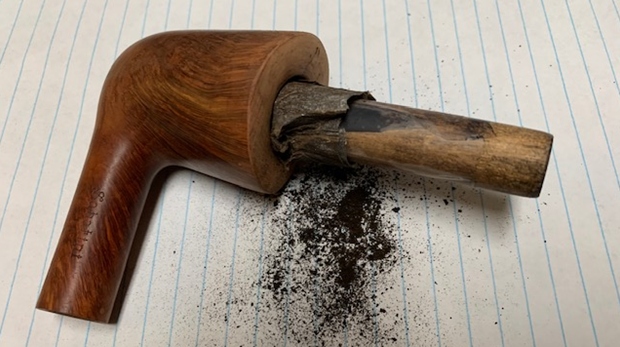
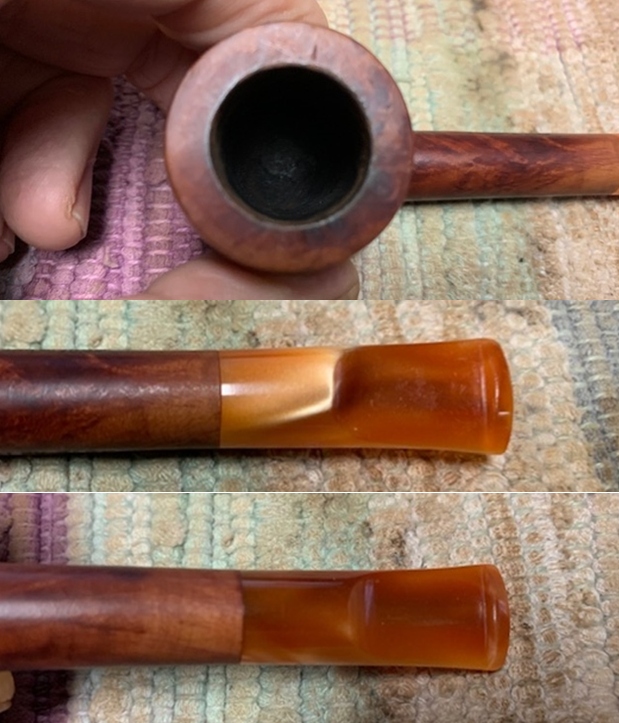
I start the restoration of the P. Viou Feather by addressing the cake in the chamber. Only the smallest blade head is accommodated by the 3/4-inch diameter chamber.  The process of clearing the carbon cake transitions quickly to employing the Savinelli Fitsall Tool to scrape the chamber walls.  The rim is carefully scraped as well with my Winchester pocketknife then the chamber is sanded with 240 grade sanding paper wrapped around a Sharpie Pen.  The progress looks good.  
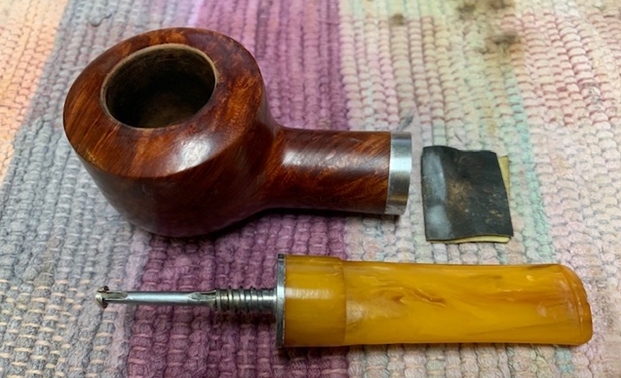
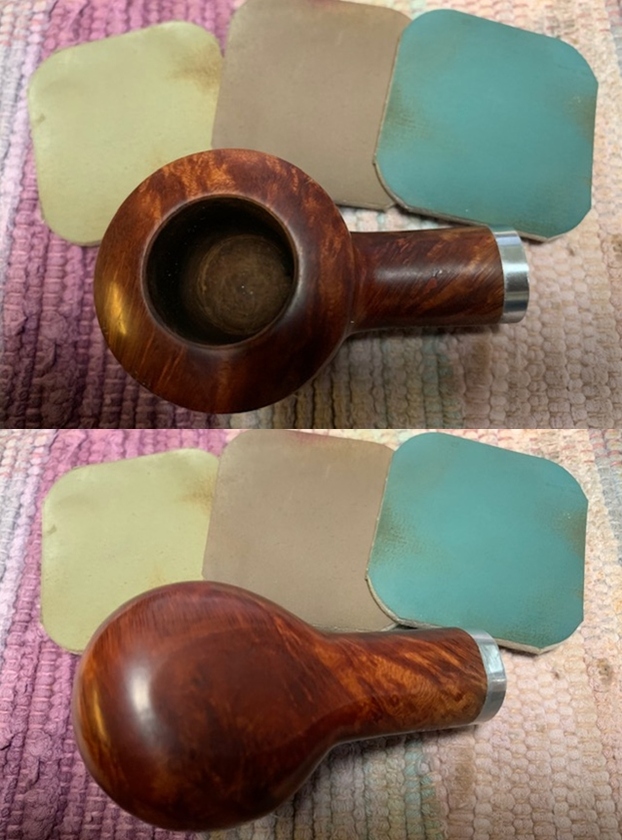
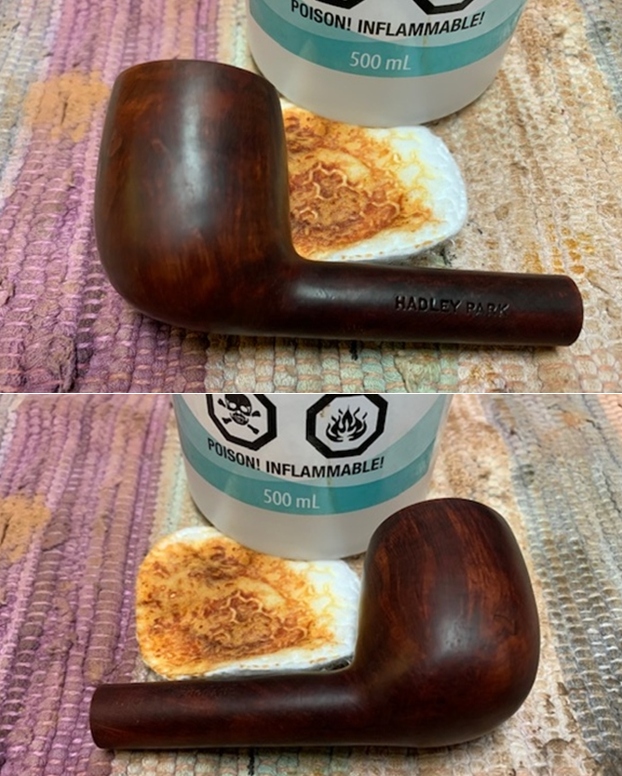
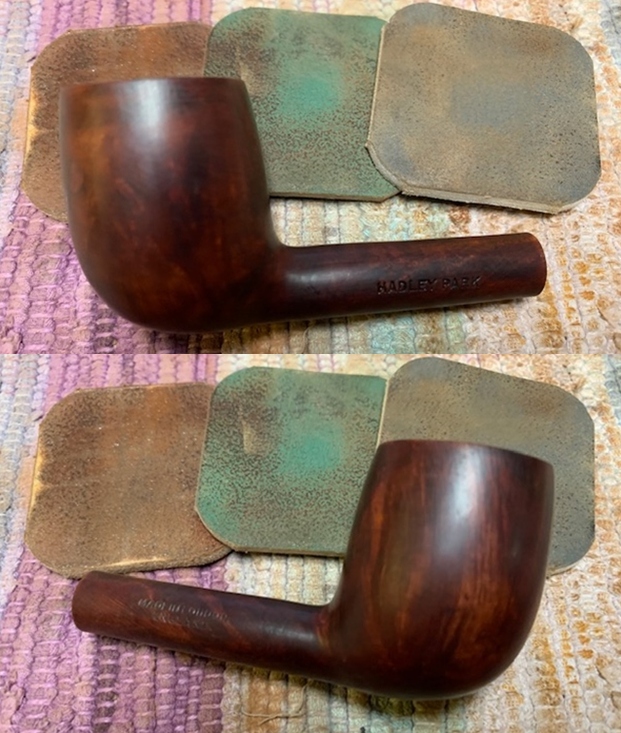
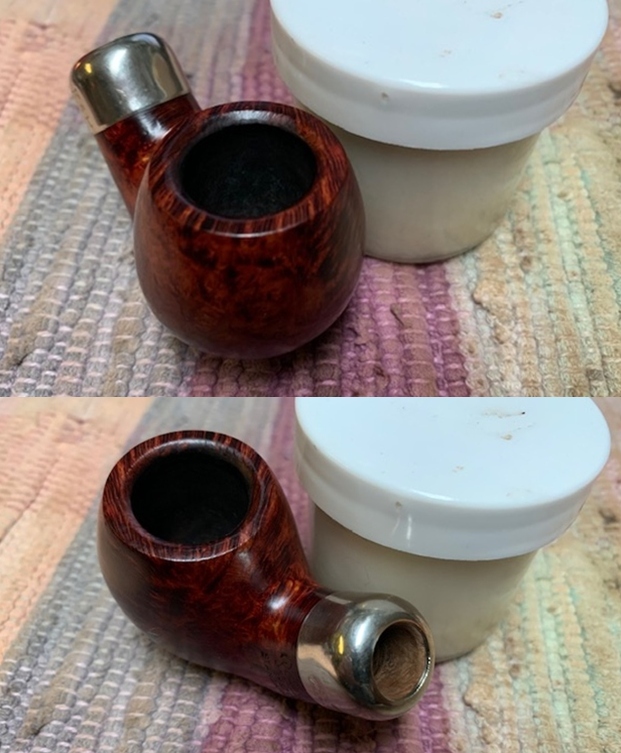
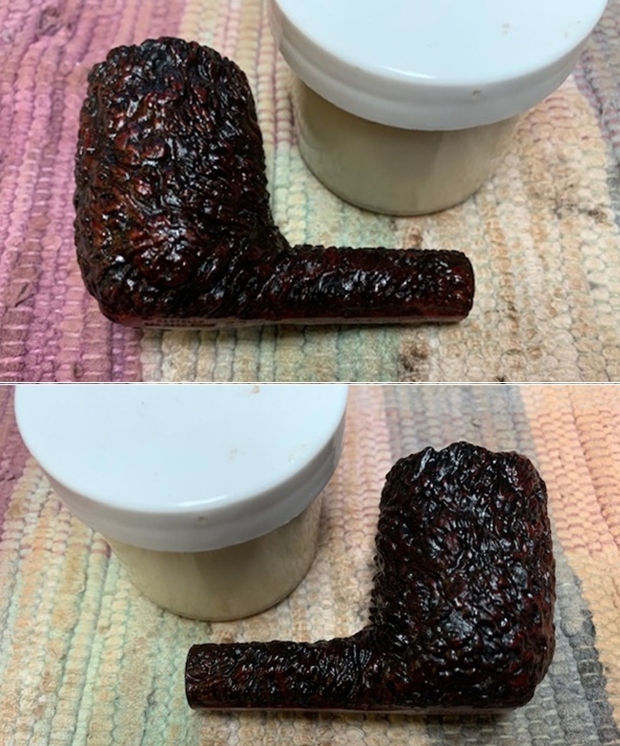
With the chamber cleared of the cake buildup, After taking a starting picture, I clean the external briar surface using undiluted Murphy’s Oil Soap.  The stummel is scrubbed with a cotton pad as well as utilizing a brass bristled brush to work on the darkened rim. The brass brush will not negatively impact the briar as it scrubs the rim.
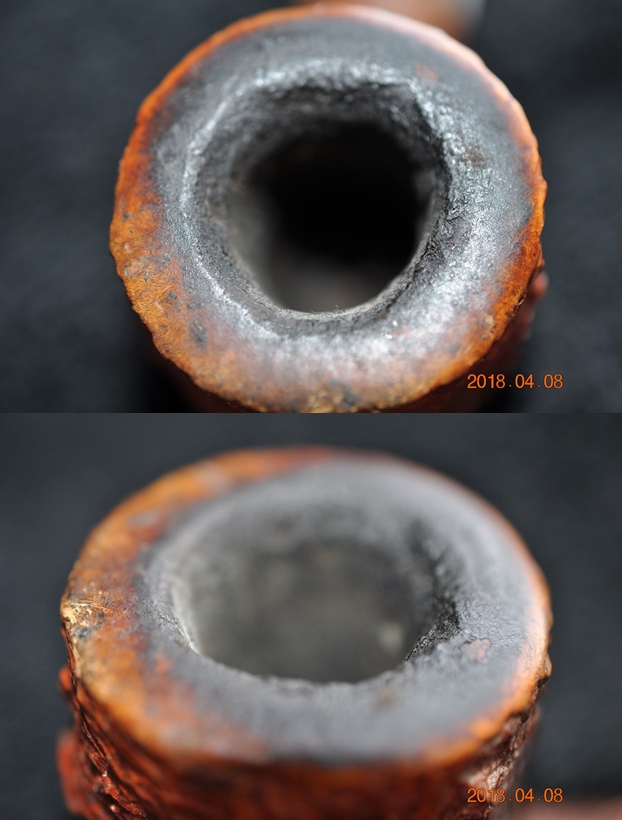
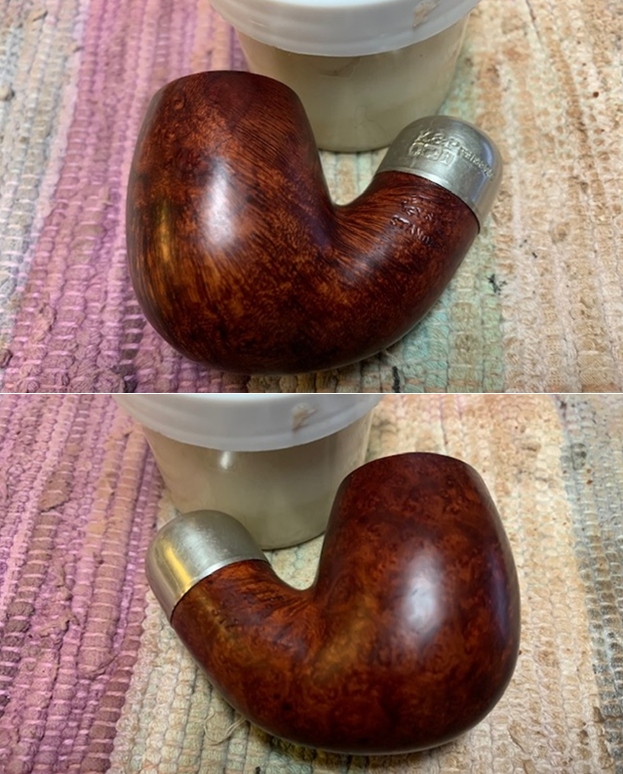
To further the cleaning the stummel is transitioned to the sink.  Using warm water, shank brushes are employed with anti-oil liquid dish washing soap to clean the internal mortise chamber.  The brass bristled brush is used a bit more on the rim.  Back at the worktable I take another picture to show the cleaning progress.  The cleaning did a great job revealing very nice looking briar. The rim is much improved as well.  
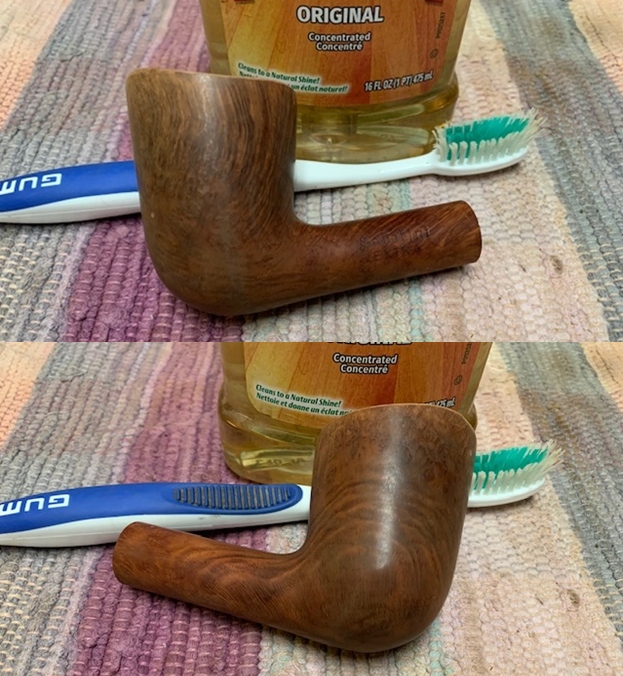
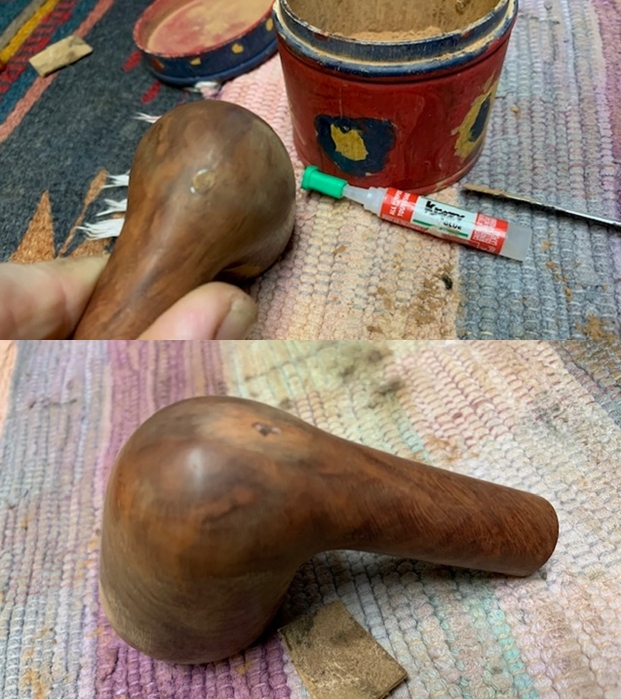
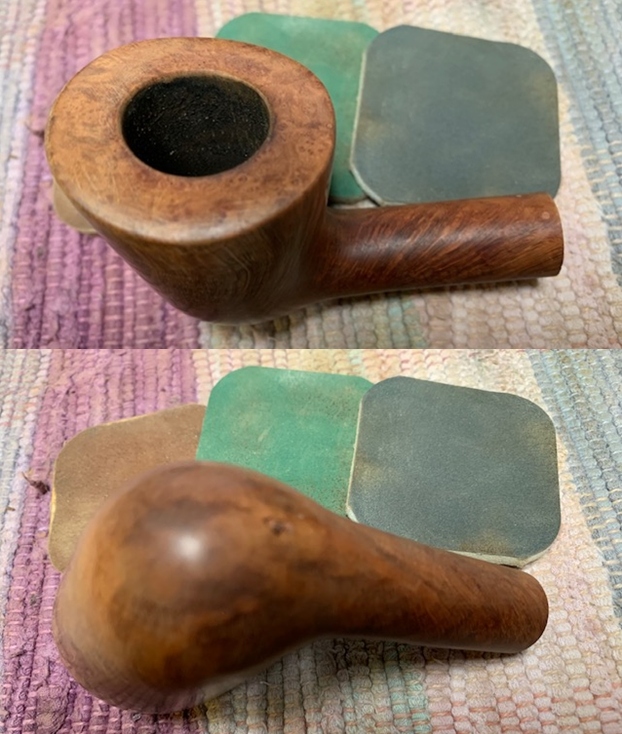
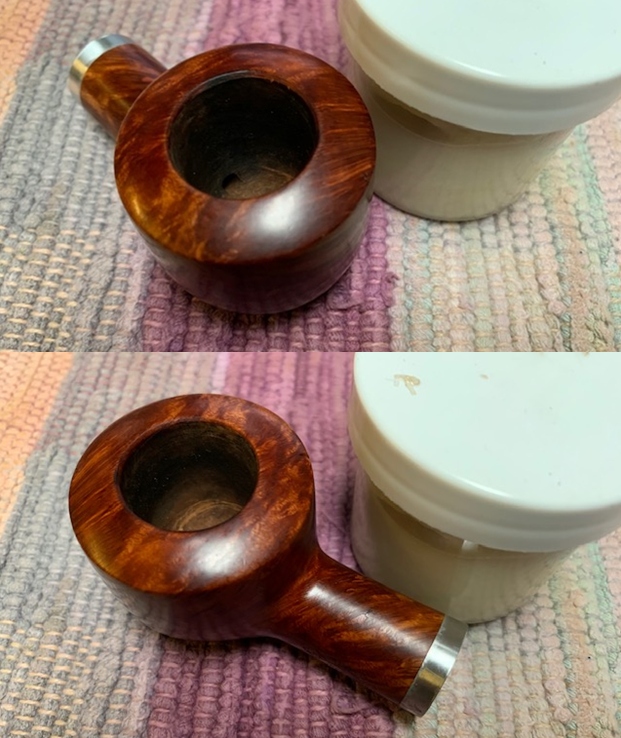
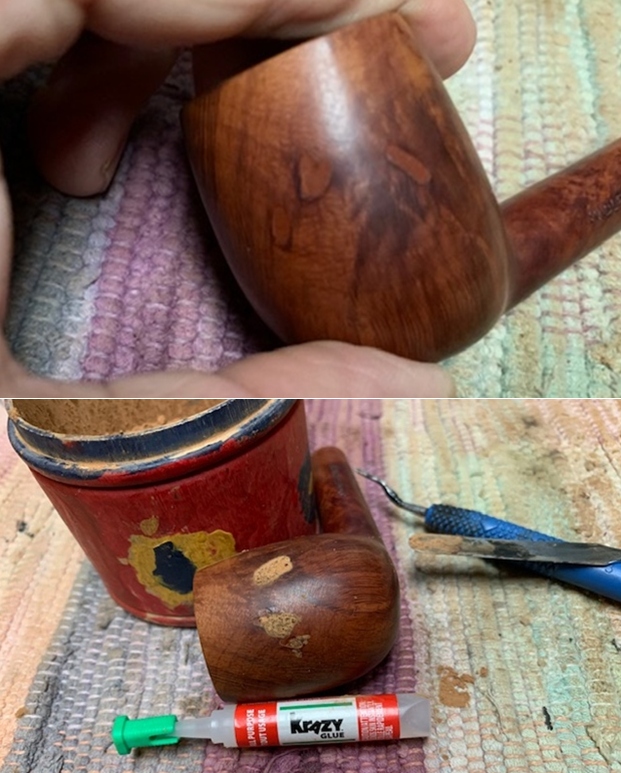
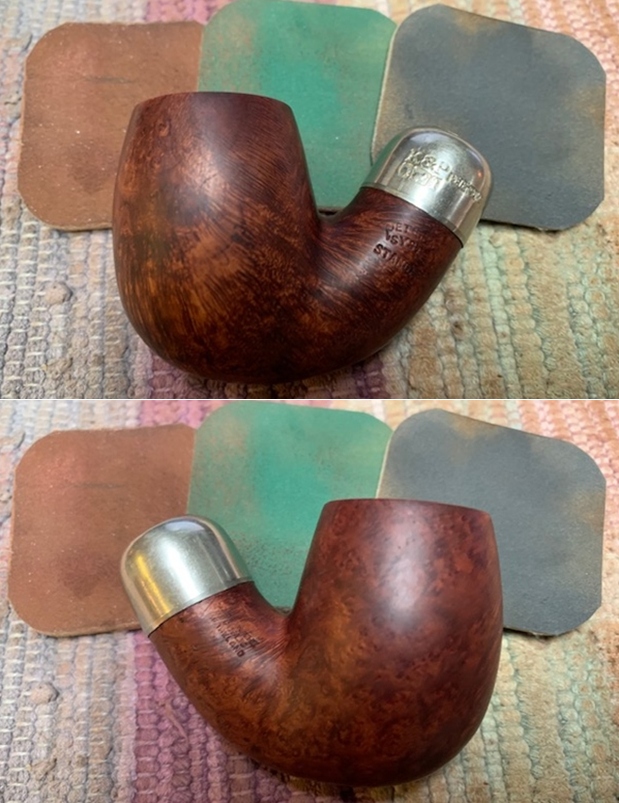
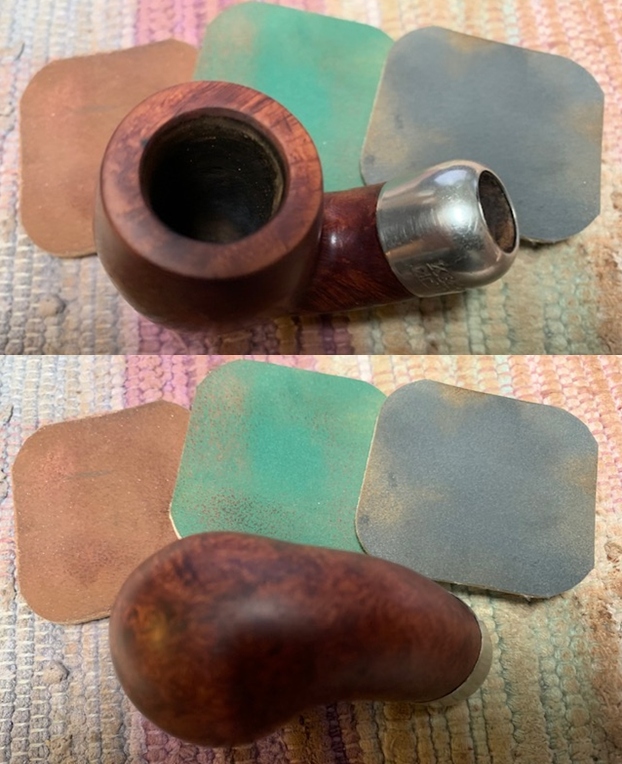
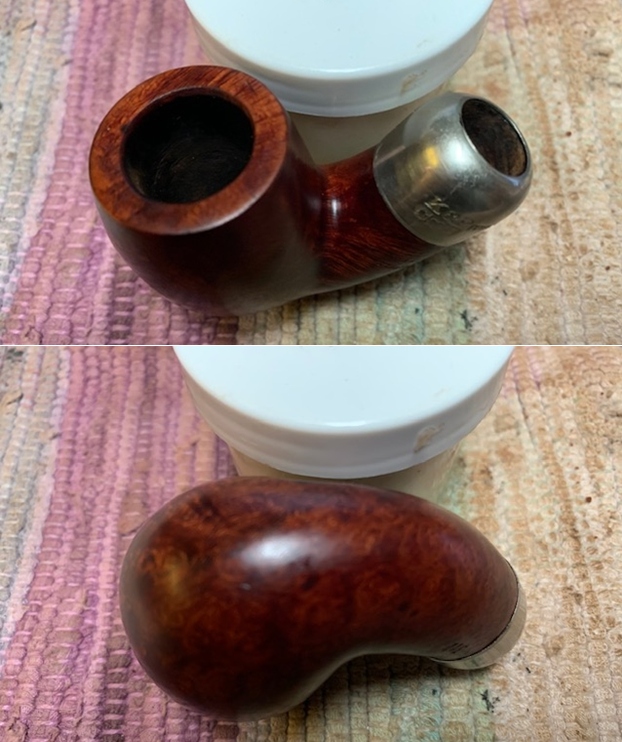
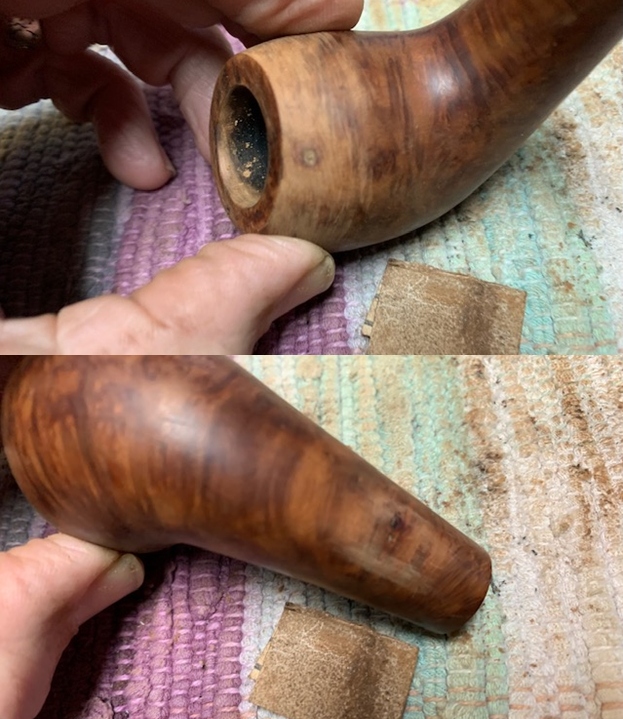
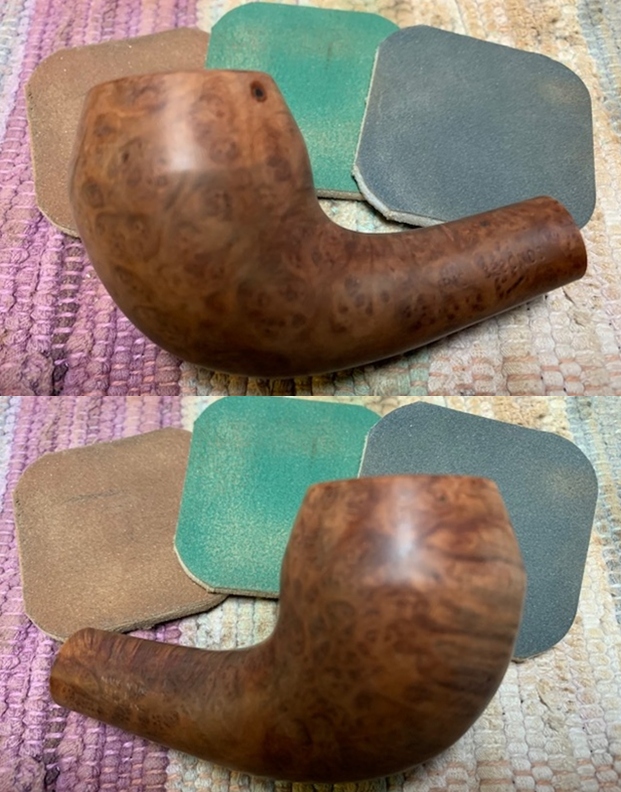
With a clean stummel before me, I take a closer look at the dents and pits primarily on the underside of the stummel I observed earlier.  The rough surface is from normal wear placing the Feather stummel down on the table or other harder surfaces.  The pictures show the comparison of ‘before and after’ to see how much progress is made with the repair.The approach I take capitalizes on the fact that wood is a very porous substance – spongelike in its composition.  Using a hot iron (with my wife’s permission!), I place a wetted cloth between a hot iron and the dents and press.  The heat generated by the iron heats the water in the cloth turning it into steam which permeates the briar surface with water.  The hot steamed water is absorbed and softens the wood allowing it to regain all or some of its pre-damaged condition. A comparison after several steaming sessions shows that the main heel damaged has lessened in its severity as the briar has expanded.  The side dent is now almost invisible.  
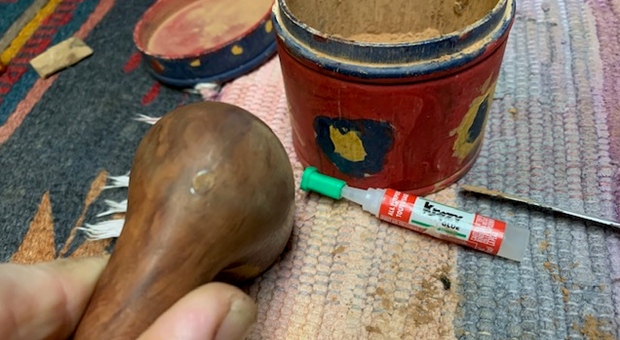
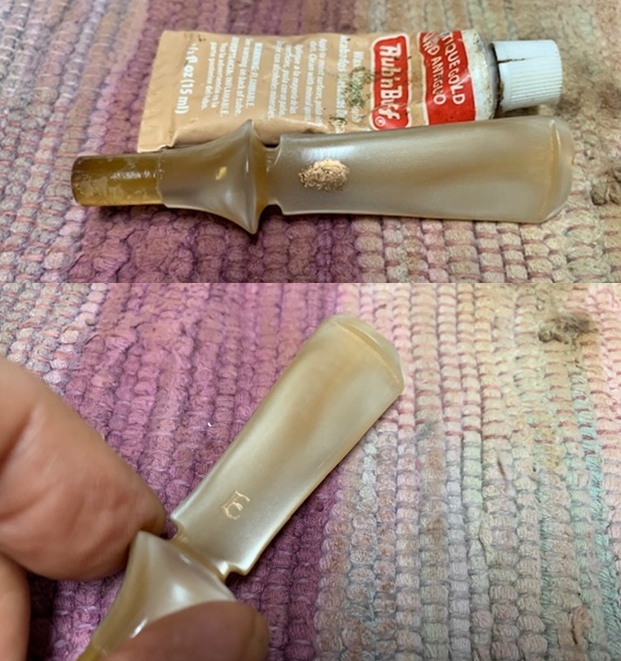
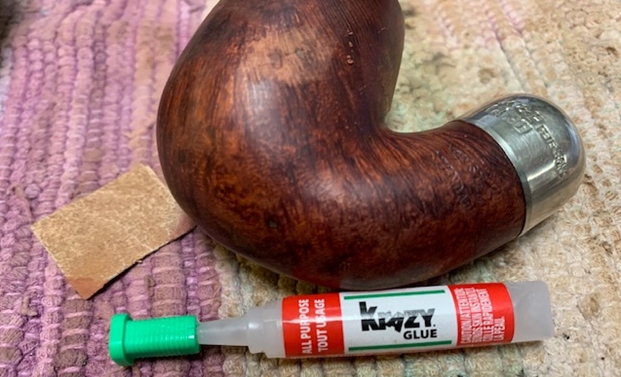
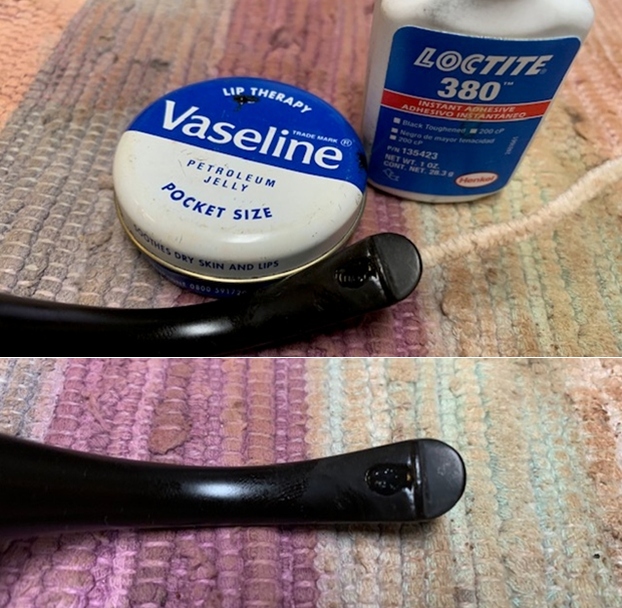
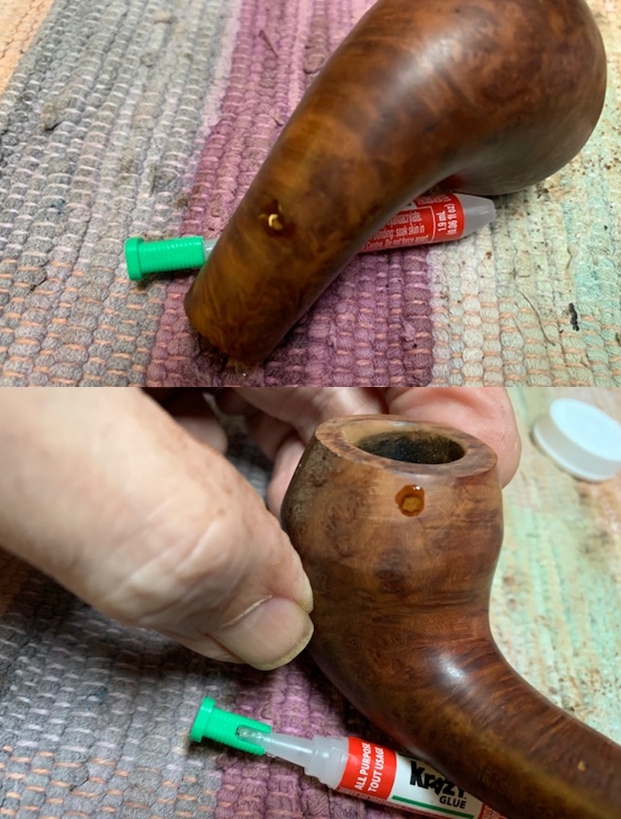
To repair the residual pitting, using a toothpick as a guide, clear CA glue is spot dropped to fill the pits.  I put the stummel aside to allow the CA to cure.
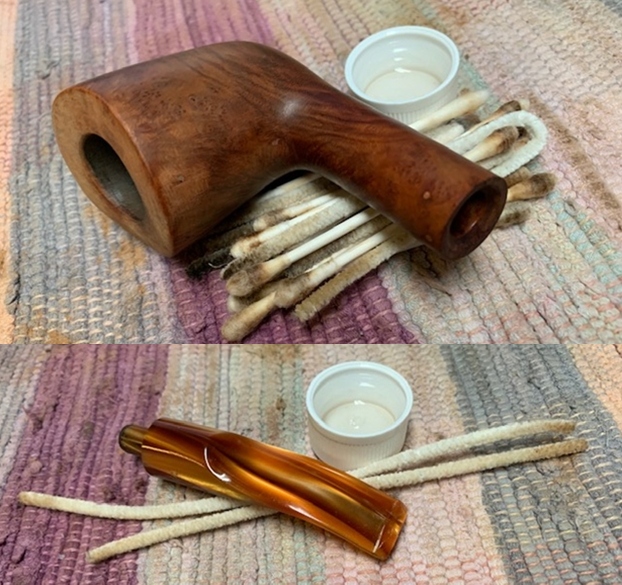
Turning now to the horn stem, pipe cleaners wetted with isopropyl 99% are used to clean the airway.  Along with smooth and bristled pipe cleaners wetted with isopropyl 99%, shank brushes are used to clean the airway.  A dental probe is used to scrape inside the slot as well as inside the nickel tenon.  Eventually, the pipe cleaners begin to emerge lighter and I move on.
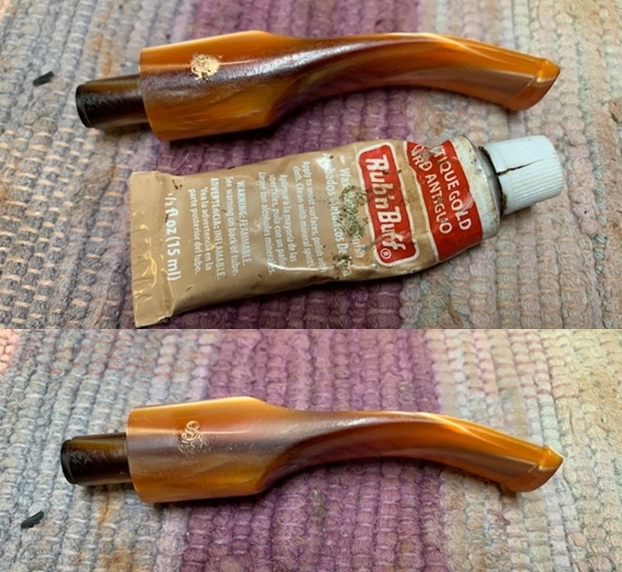
Before continuing working on restoring the horn stem surface, I place a piece of painter’s tape over the thin P. Viou stem stamping to protect it. In no way do I desire to contribute to its demise!
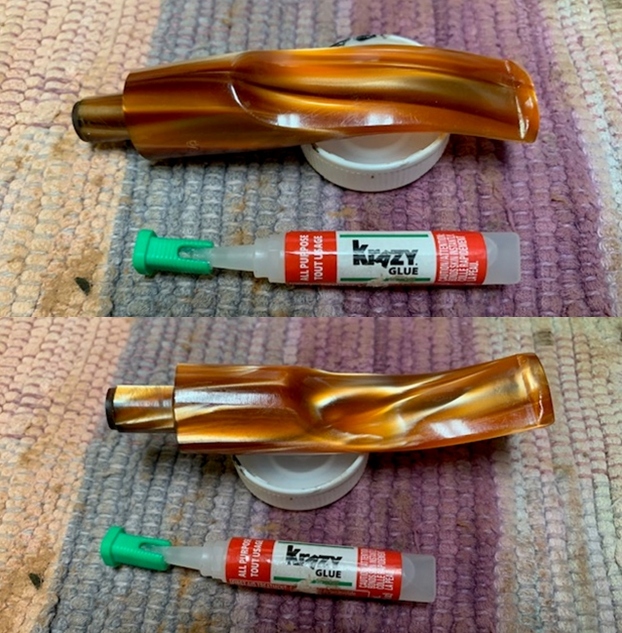
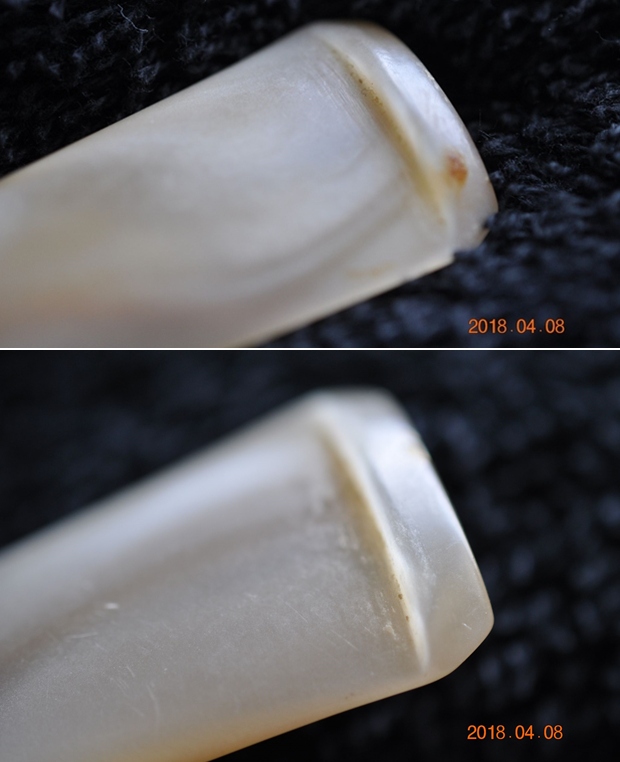
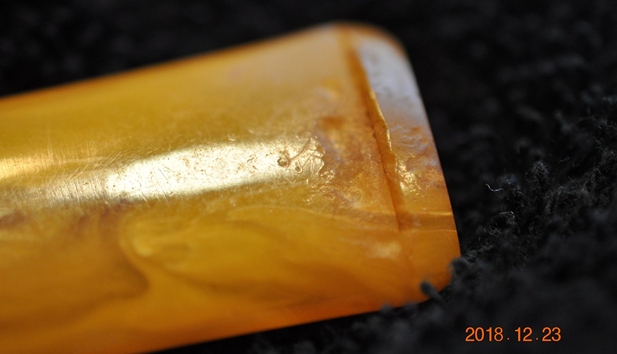
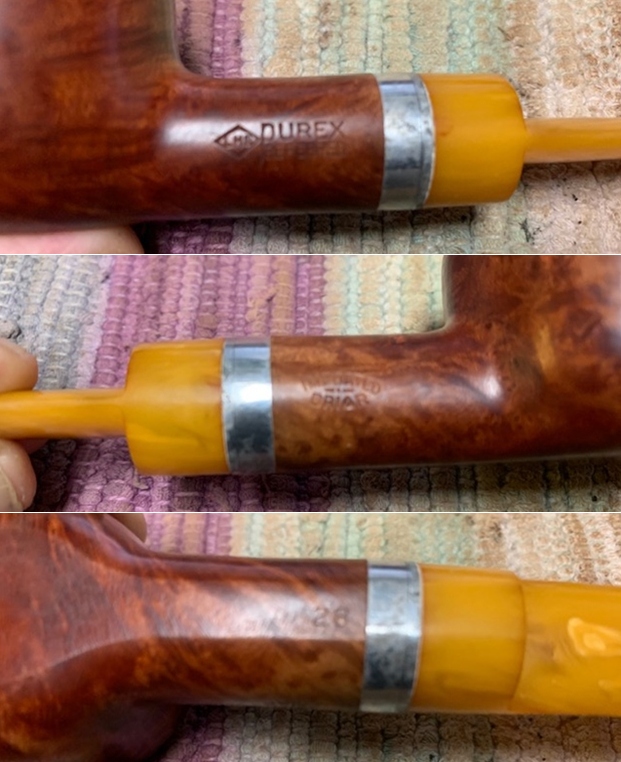
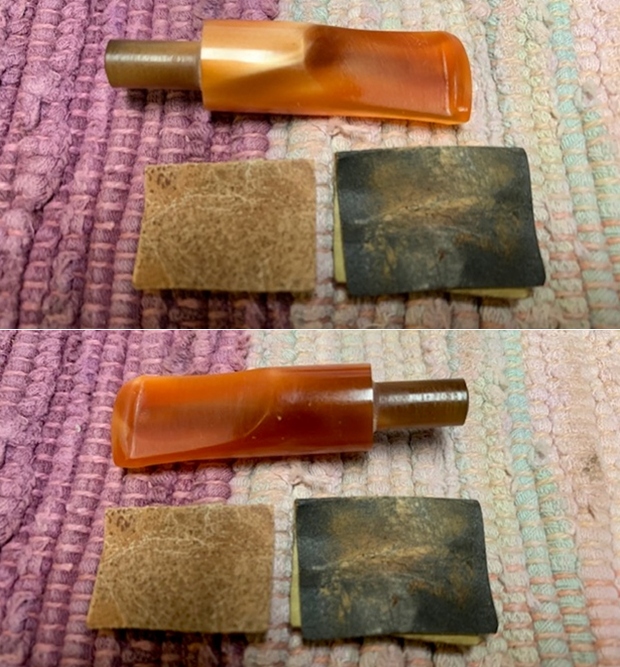
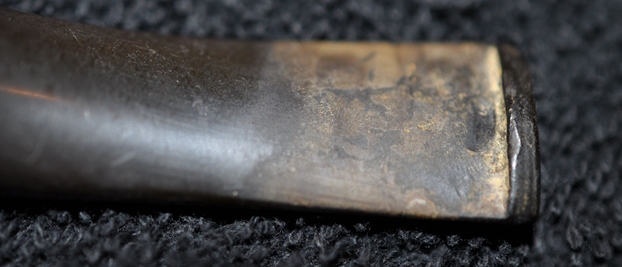
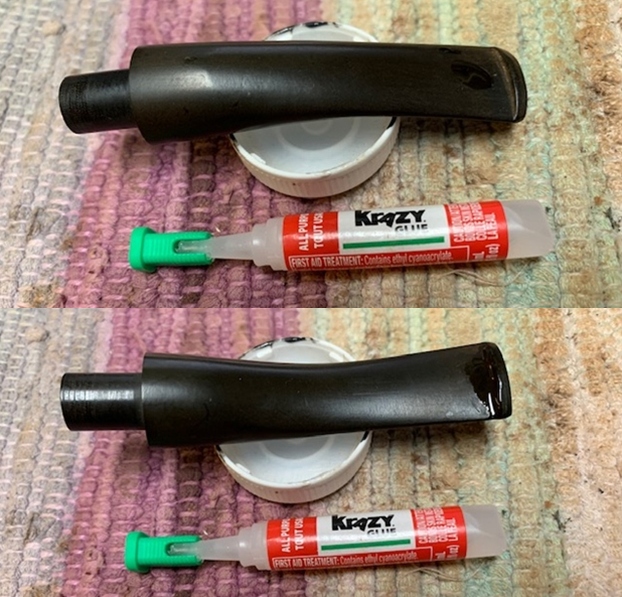
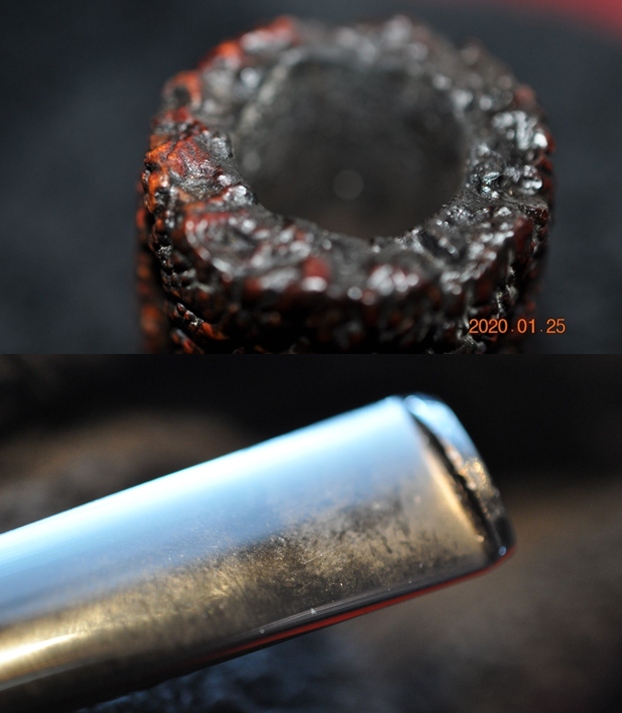
I approach working on horn stem much like on vulcanite stems.  I take a few more pictures looking at the current condition of the horn material – upper and lower.  I like the solid blackish hue of the horn’s midsection contrasting with the gradual lightening of the bit.
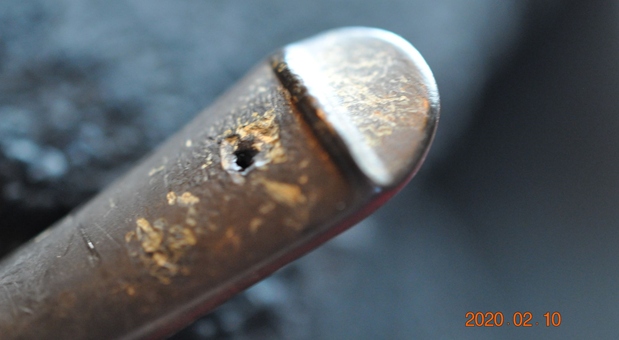
The condition of the stem is good except for one small tooth compression on the lower bit.  I fill it with a drop of CA glue and allow it to cure before sanding. 
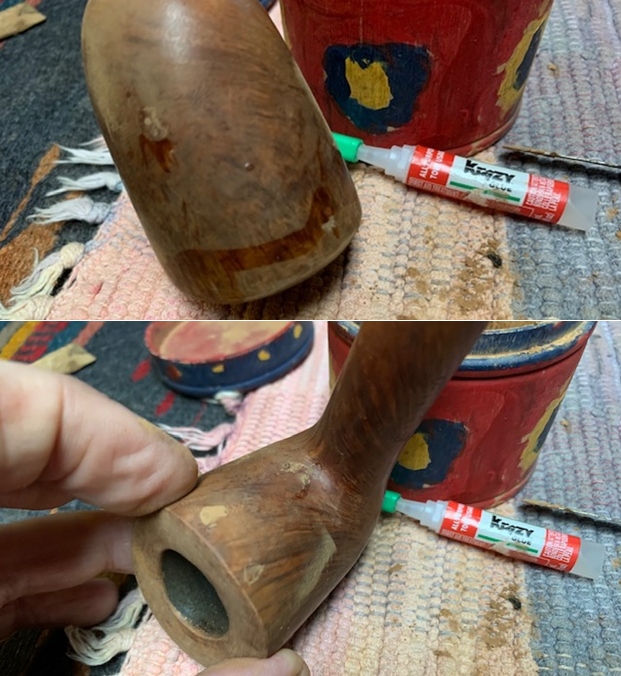
The CA patches on the stummel heel have cured.  A flat needle file is used to file the glue mounds down to the briar surface. 
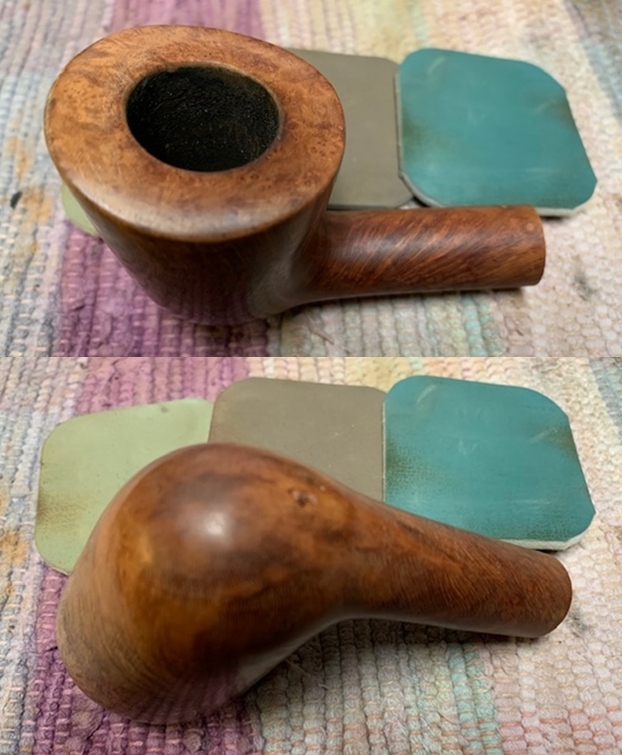
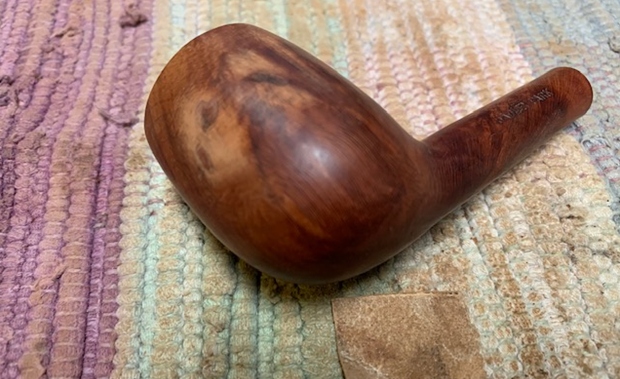
Transitioning to 240 grade paper, the patches are sanded further followed by 600 grade paper. I’m pleased with the results.  There is almost no visible reminder remaining of the rough area.  The repair blends nicely. 
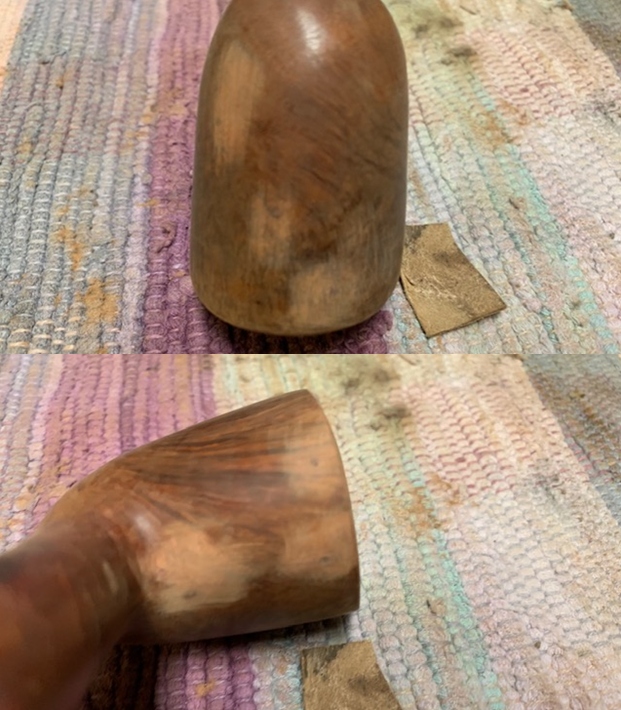
The rim continues with darkened, scorched areas.  There are nicks as well on the right side of the rim (top of the picture below).  Using a hard backing behind a piece of 240 sanding paper, the slightly canted bevel is sanded and refreshed.  Following the 240 paper, the same is done with 600 grade paper.  I’m pleased with the refreshed rim.   
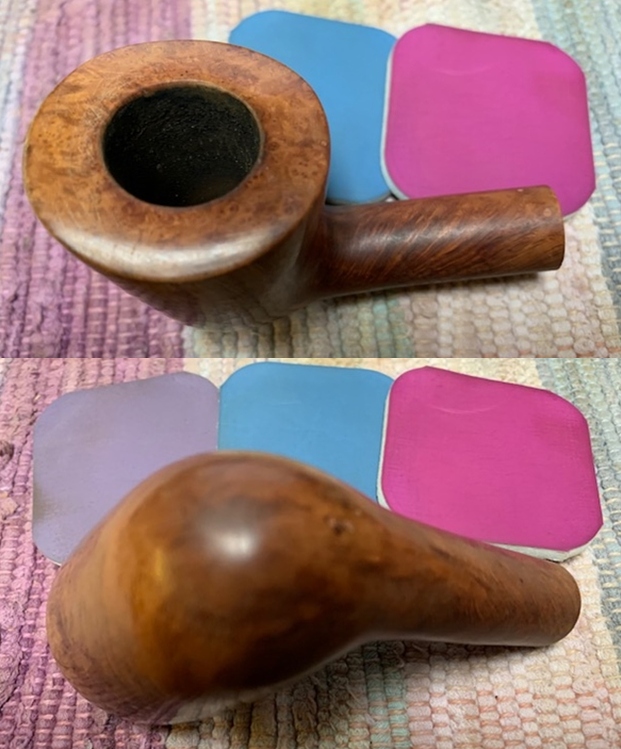
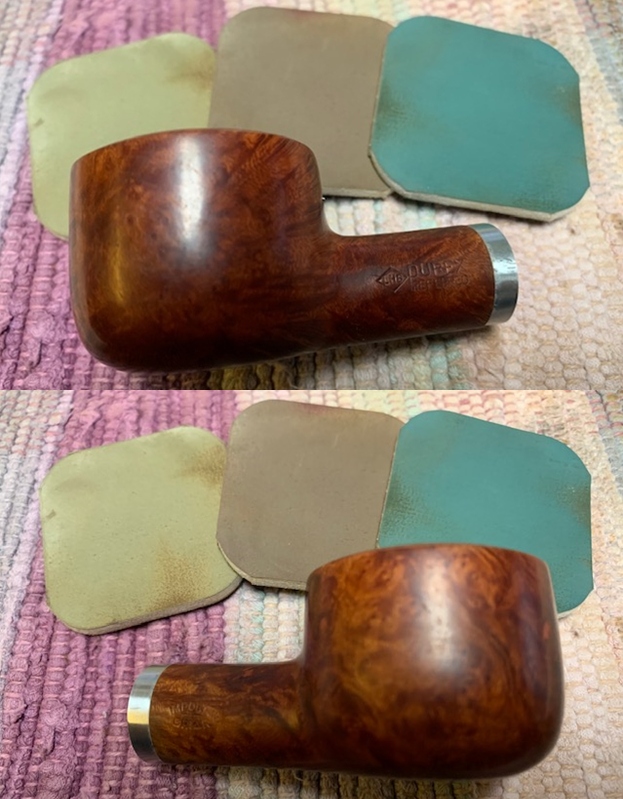
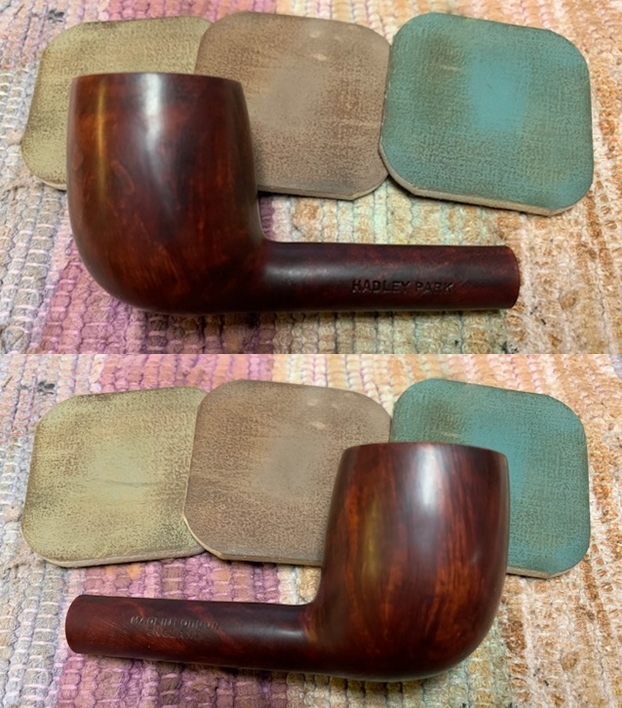
Next, utilizing the full regimen of micromesh pads, the stummel is sanded.  Before sanding, painters’ tape is used to cover the P. Viou and COM on the sides of the stummel.  Using pads 1500 to 2400 the stummel is wet sanded.  Following this, the stummel is dry sanded with pads 3200 to 4000 and 6000 to 12000.  The protective tape was removed for the last 3 pads to even out the briar tone.  The beauty of the briar grain emerges through the micromesh process – I’m liking what I see!   
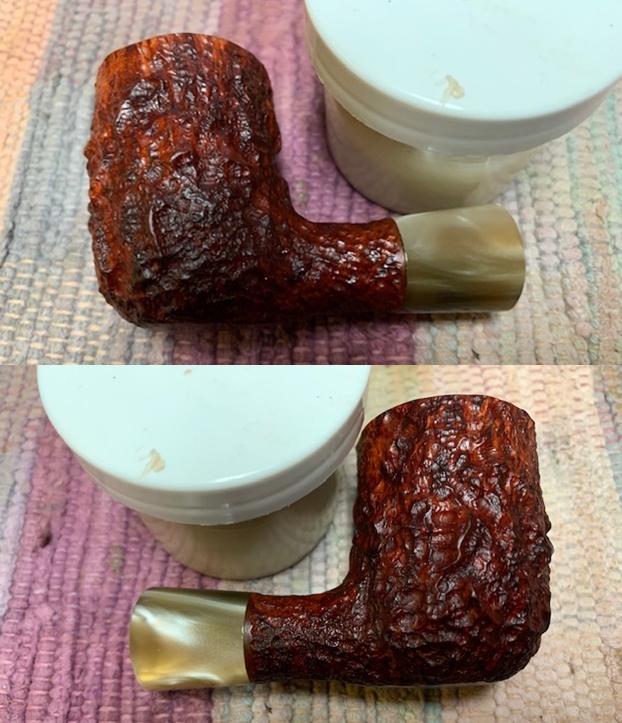
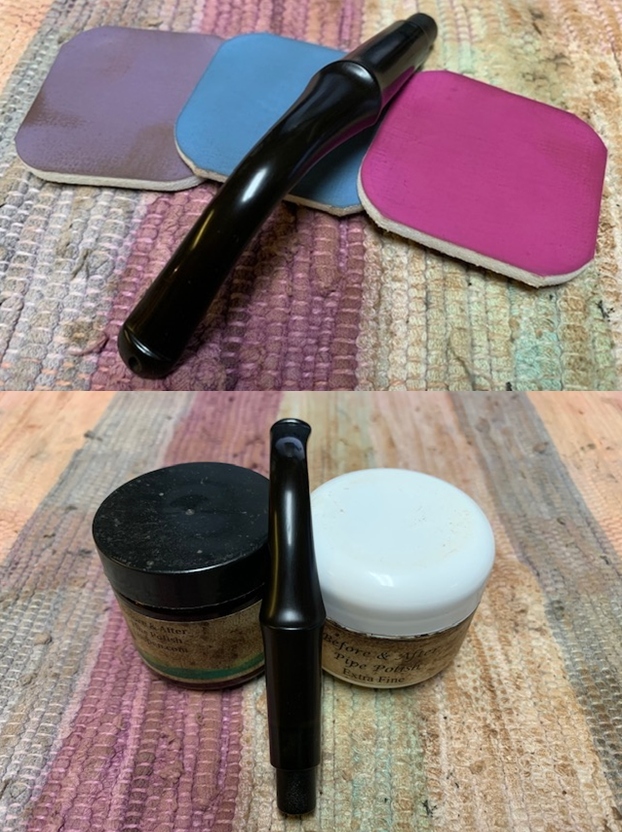
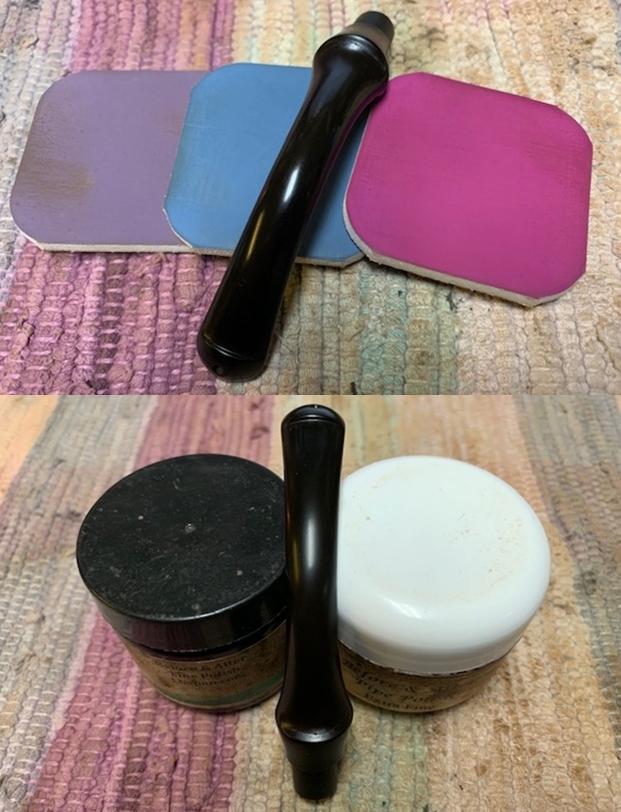
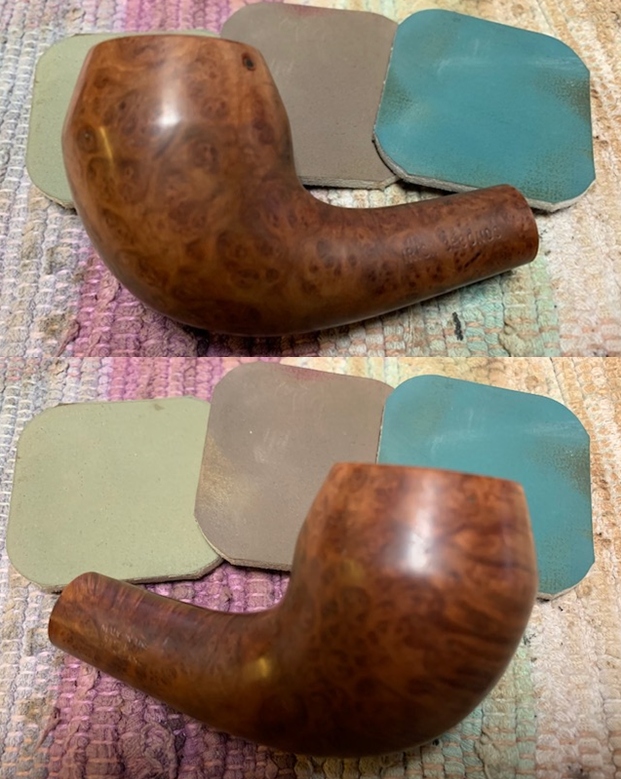
Before returning to the stem, I’m looking forward to applying Mark Hoover’s ‘Before and After Restoration Balm’ to the stummel.  I apply some of the Balm to my fingers and rub it into the briar surface.  At first it has a cream-like consistency but as it works into the briar it transforms into a waxy consistency.  After applying the Balm, the stummel is set aside for 20 minutes or so for the Balm to enrich the briar.  After 20 minutes I use a microfiber cloth to wipe off excess Balm and then hand buff the stummel to raise the shine.  I like the way the Restoration Balm enhances the natural hues of the briar.
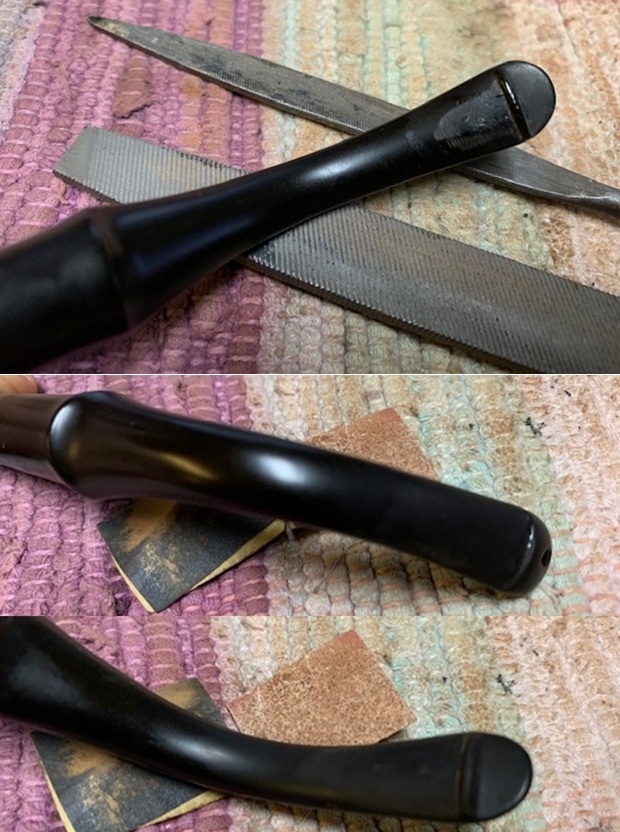
Returning now to the horn stem, the sanding process is much like that of vulcanite stems.  After the CA patch has cured filling a tooth compression, using the flat needle file, the lower bit patch is filed until level with the stem surface.  The file also helps to refresh the lower button lip. 
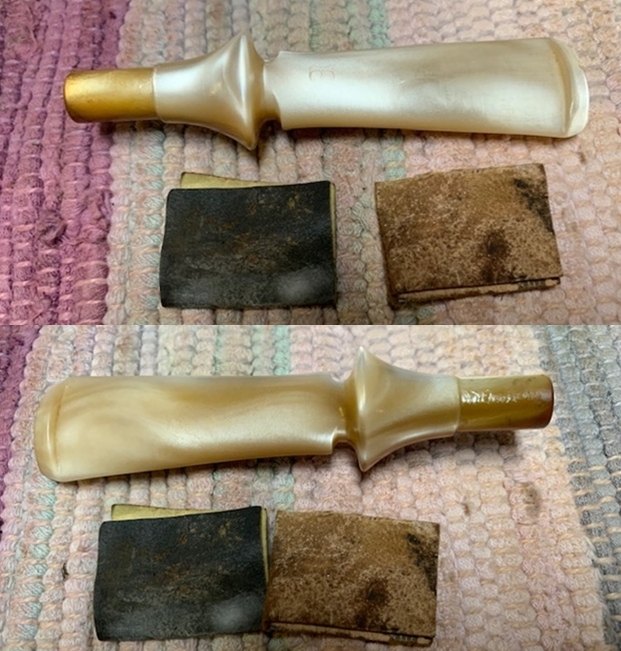
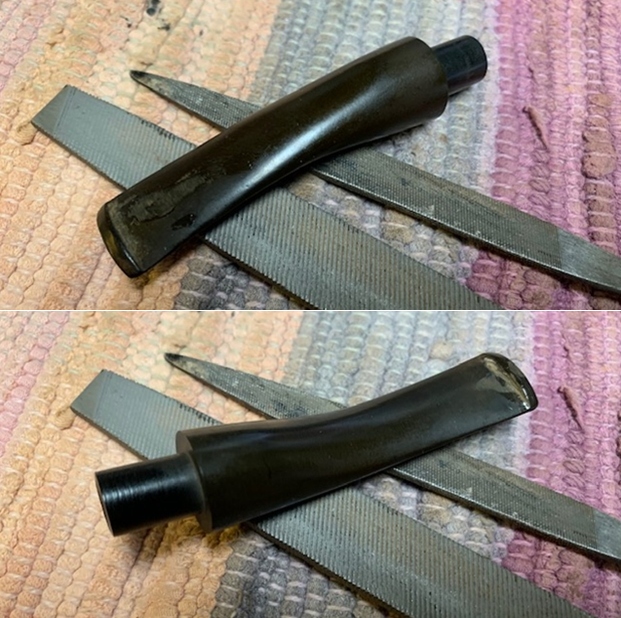
Next, I transition to 240 sanding paper and smooth further the lower bit blending the patch more.  Flipping the stem over, the upper bit is sanded to smooth and tighten the horn surface from normal wear.   Next, the entire stem is wet sanded using 600 grade paper.
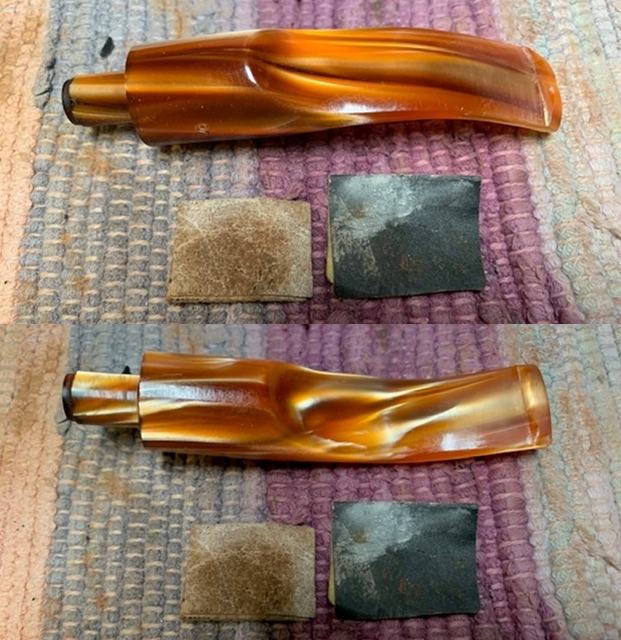
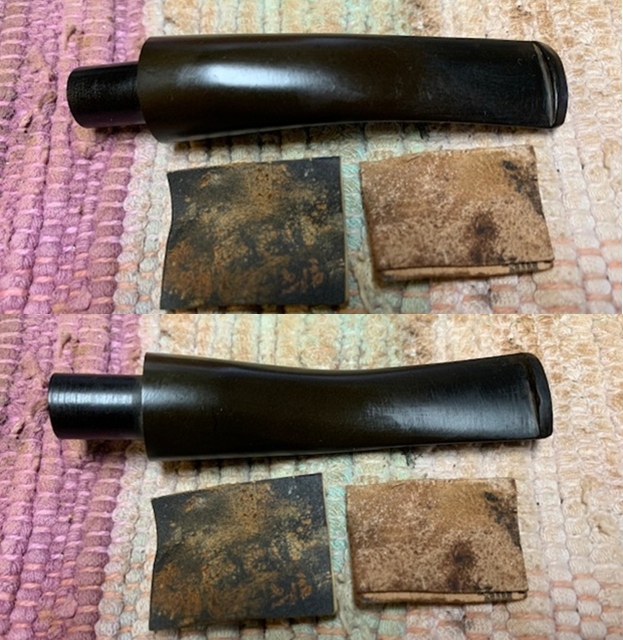
As with vulcanite stems, next I apply 0000 steel wool to the entire stem to smooth and shine further. While using steel wool, I also apply it to the nickel tenon which shines it up very nicely.  
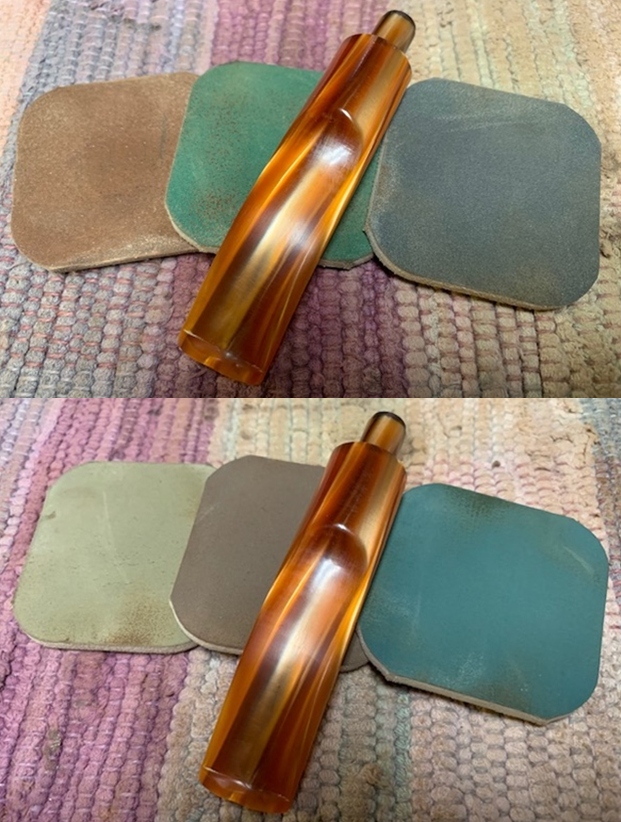
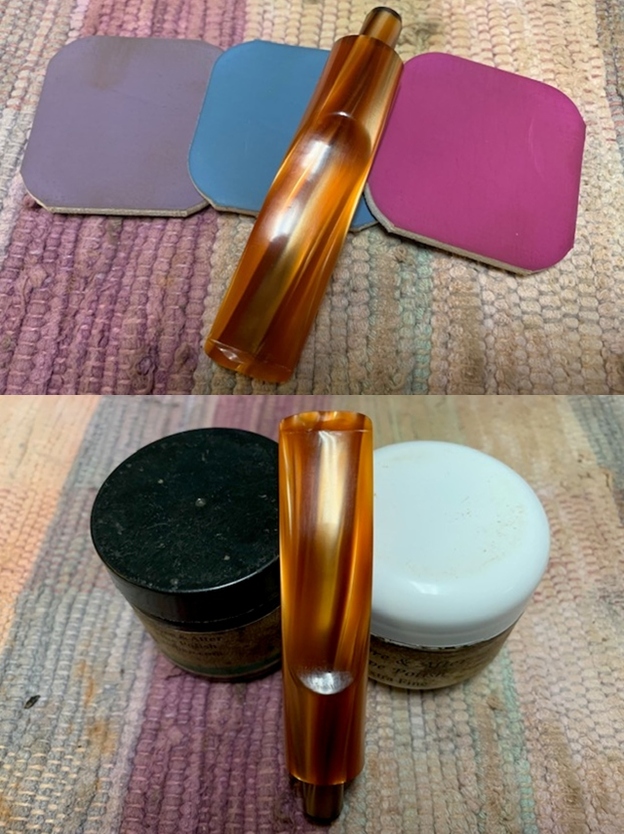
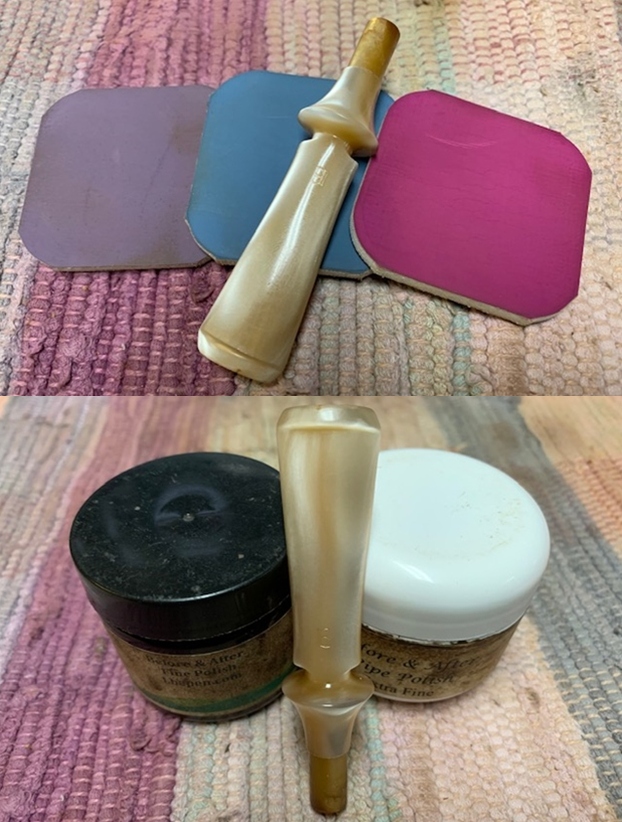
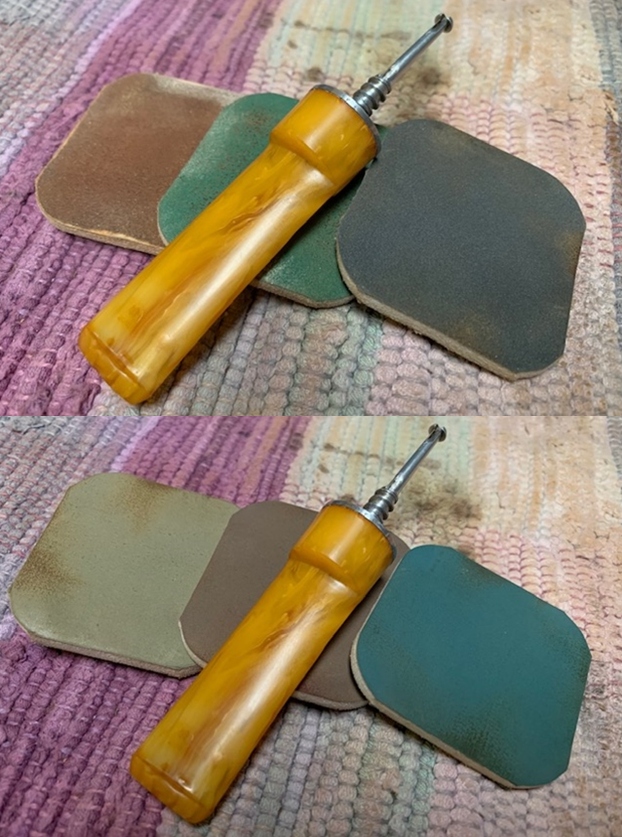
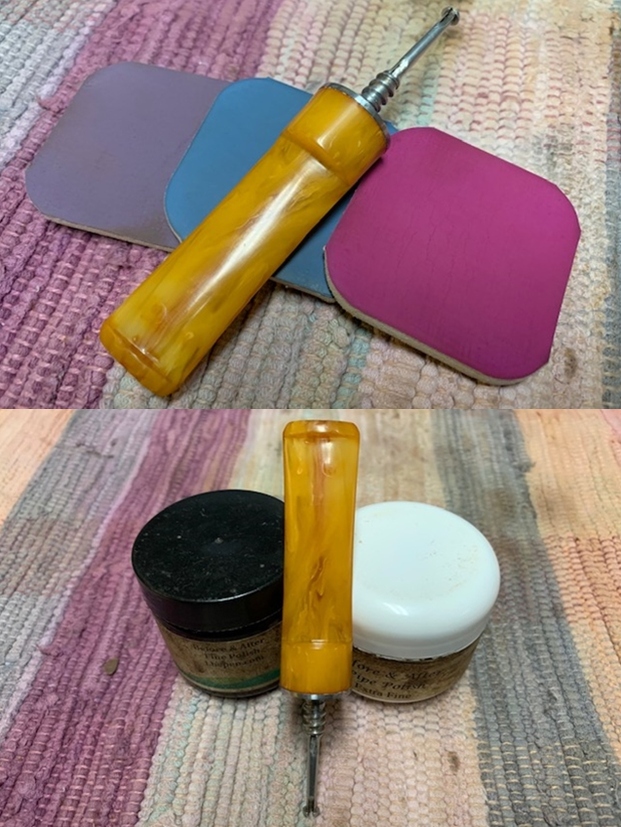
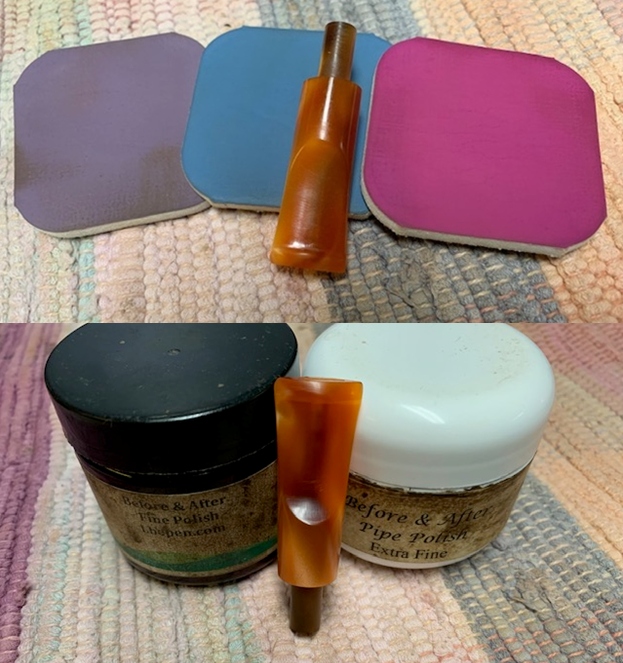
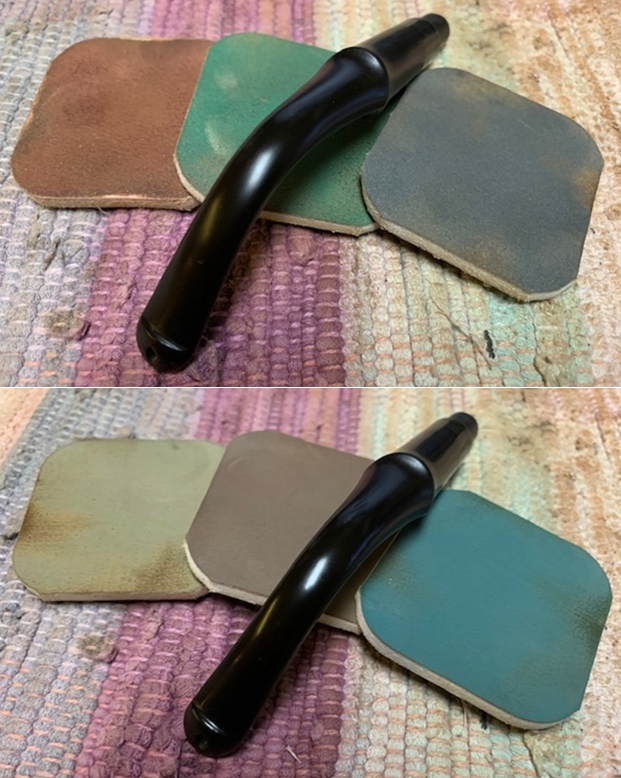
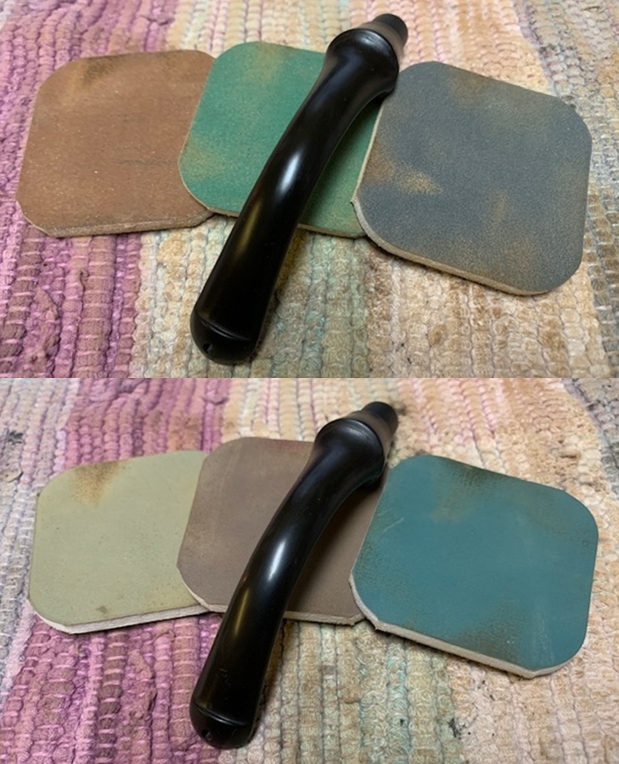
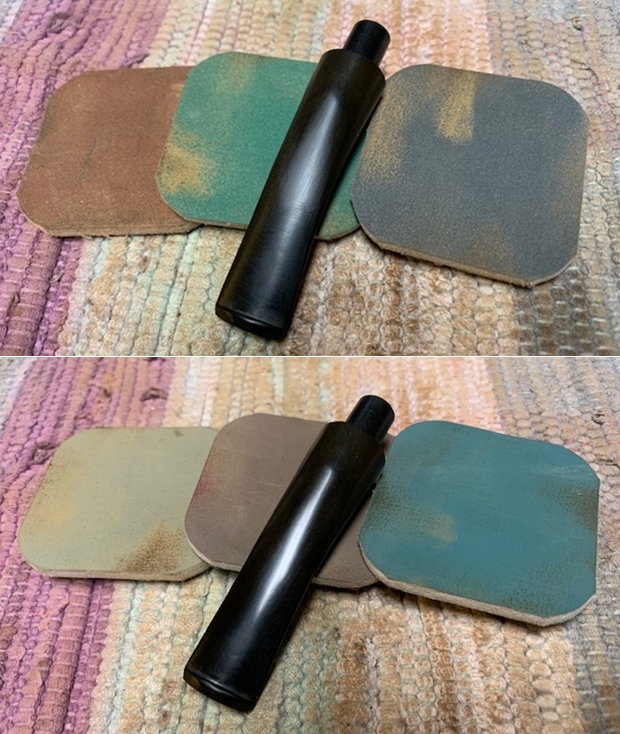
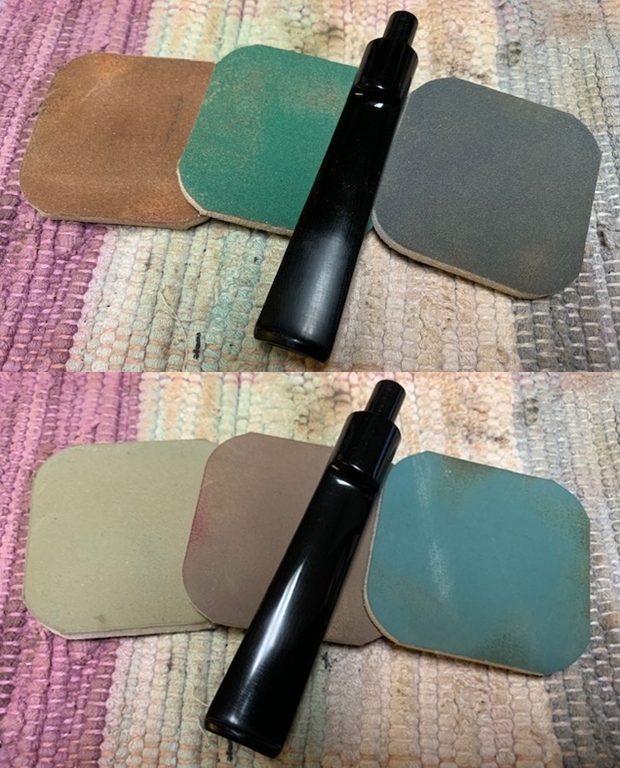
Next, with the P. Viou stem stamping still covered with painters’ tape, the stem is the recipient of the full regimen of micromesh pads.  Starting with pads 1500 to 2400, the horn is wet sanded.  Following the wet sanding, I dry sand with pads 3200 to 4000 and 6000 to 12000.  I remove the tape for the last two pads to sand more closely to blend the area.  Obsidian Oil is applied and worked into the horn between each set of 3 pads.  The horn almost ‘drinks up’ the oil. 
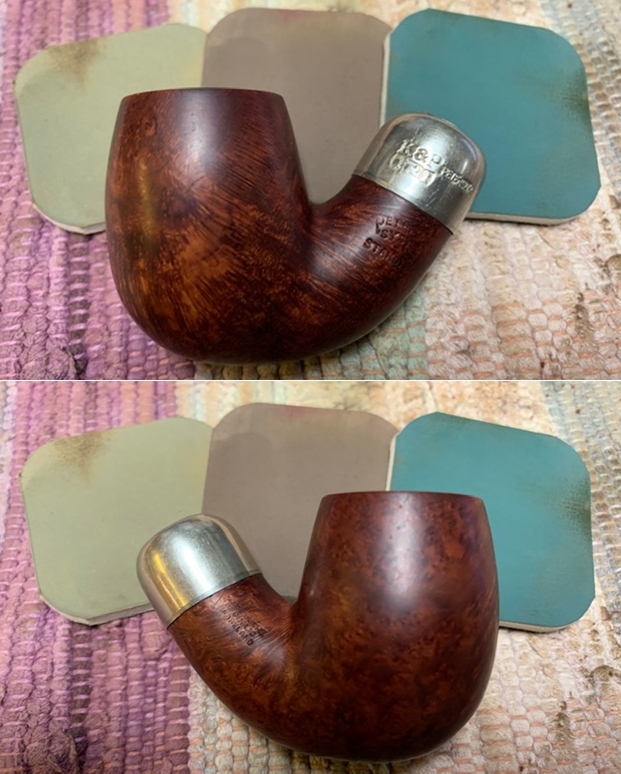
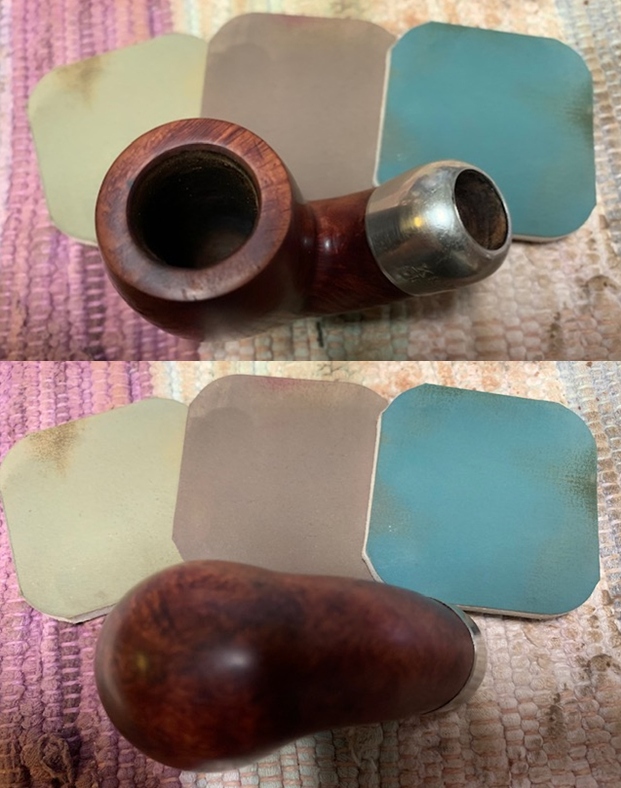
To get a look at the progress, the stummel and horn stem are reunited.  Two issues surface after I do this. The seating of the stem into the mortise is off.  The next picture shows this with a gap of sunlight on the upper side of the connection point.  To remedy this, I fold a piece of 240 sanding paper and insert it between the lower halves of the stem and stummel and sand in a sawing motion.  This hopefully will even out the high point to bring the two faces back together flush – or as close as possible.   The result is good. There is still some daylight, but I’m satisfied at this point.  Sanding to remedy an unseated stem can be a bit finicky and sometimes ‘less’ is ‘more’ – I don’t want to complicate things!The other issue that emerged was that through the cleaning process the internal mortise cavity expanded somewhat so that the nickel tenon is not as snug as it should be.  The ways to fix this are limited.  If this were a vulcanite stem and tenon, the approach would be to expand the width of the tenon by heating it and forcing expansion by wedging the end of a drill bit in the softened tenon airway.  A nickel tenon, however, does not expand.  The remedy is to paint the external surface of the metal tenon with an acrylic nail polish or with CA glue.  The results are the same.  The hardening of the acrylic creates a hardened layer around the metal tenon, thus expanding its diameter and creating a snugger fit seated into the mortise.  I use a small bottle of acrylic nail polish and apply the acrylic polish with the small brush that comes along with the bottle. After each coating, I wait until the acrylic is cured before applying another layer.  After each cycle, the tenon is carefully fitted into the mortise to determine if another layer is needed.  To help it to dry evenly after each application, I ‘post’ the stem vertically on the end of a chop stick.  After several coats of clear acrylic nail polish, the fit of the stem was much snugger.  Mission accomplished.   Next, I attempt to refresh the P. Viou stem stamping, but am not successful.  The vestiges of the stamping were not deep enough to allow the white acrylic paint to grab the stamp channels.  After several attempts, I settle for what is. 
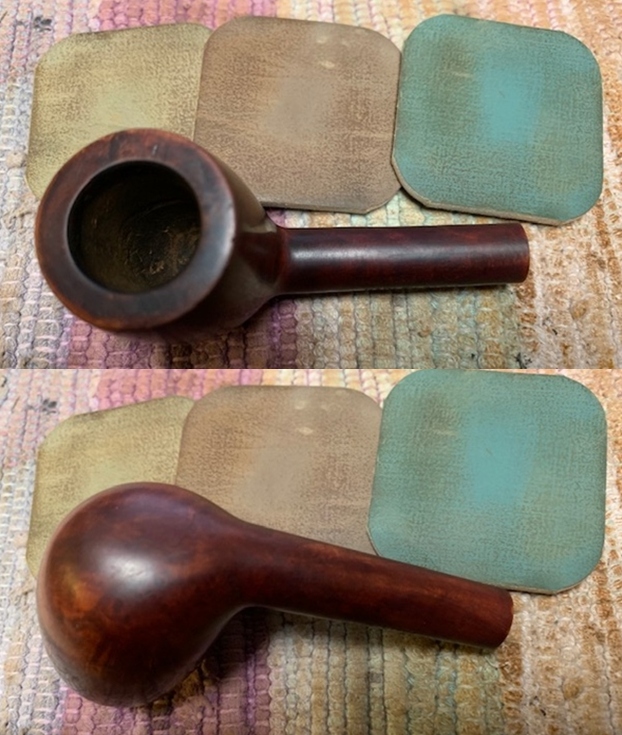
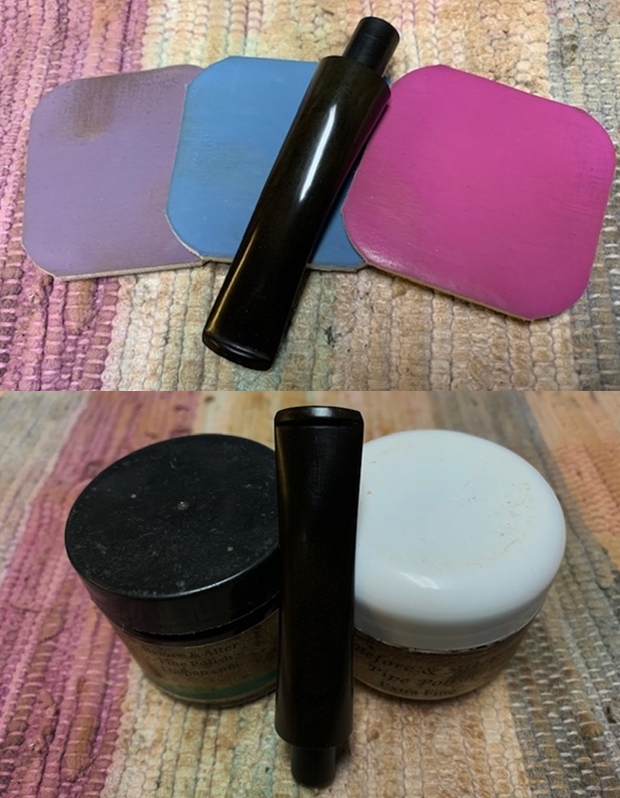
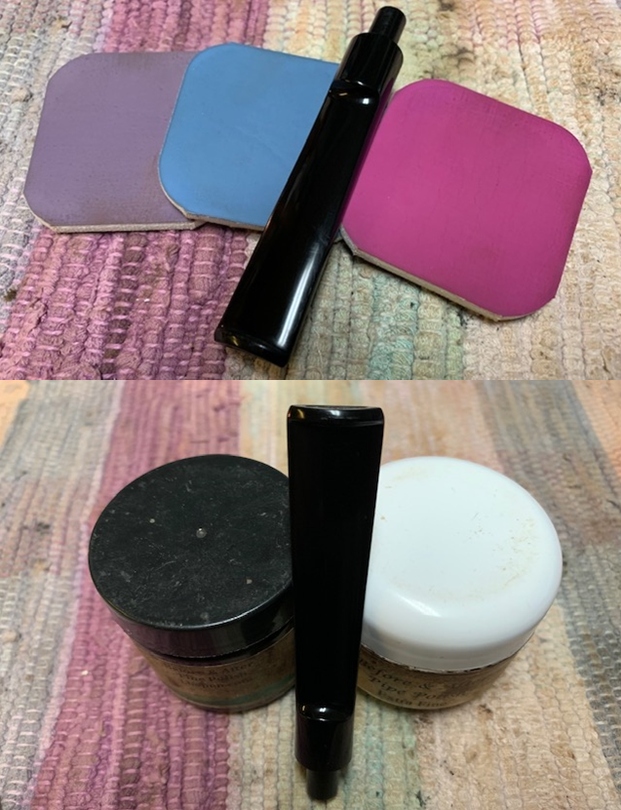
Now on the homestretch.  After mounting a cotton cloth buffing wheel to the Dremel, speed set at about 40% full power, I apply Blue Diamond compound to horn stem and stummel.  After completing this, a felt cloth is used to buff the pipe to clear the compound dust before applying the wax.
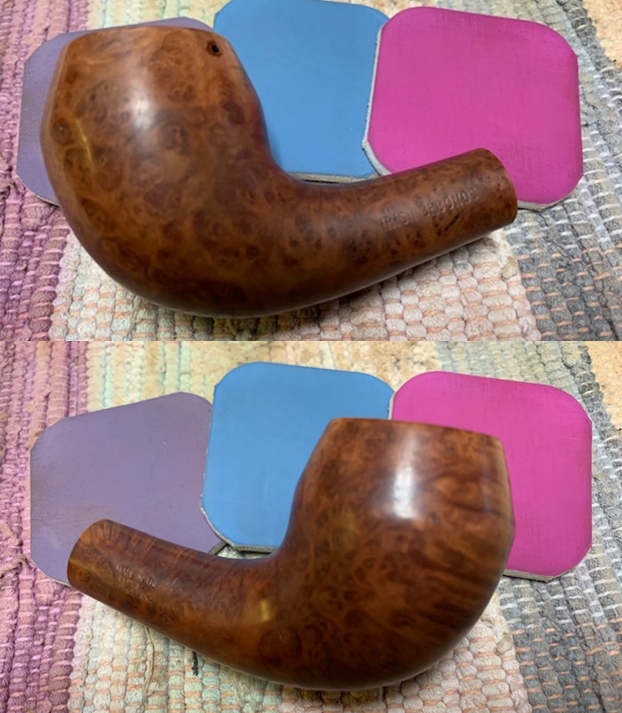
To apply carnauba wax, the cotton cloth wheel is changed to a wheel dedicated to carnauba.  With the speed on the Dremel maintaining 40% power, wax is applied to the entire pipe.  The first coat applies the wax thoroughly over the surfaces.  Following this, the pipe is buffed up using the Dremel to make sure all the wax is dispersed and absorbed.  Finally, the pipe is given a rigorous hand buffing with a microfiber cloth to raise the shine further.
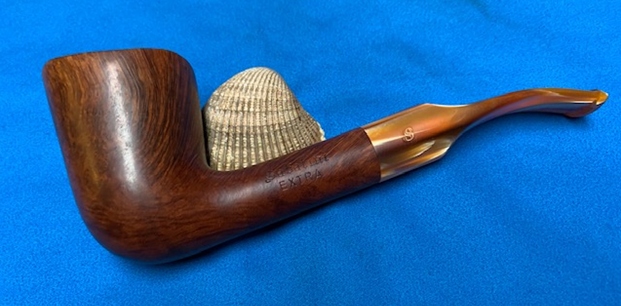
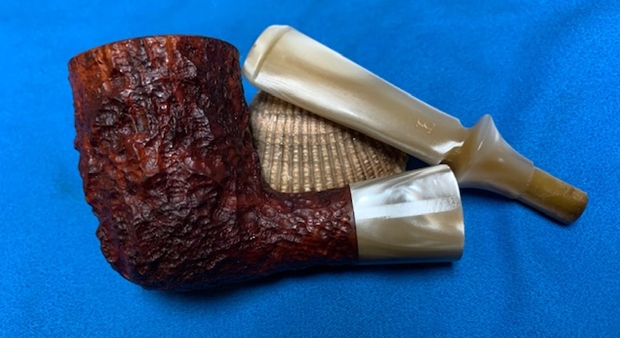
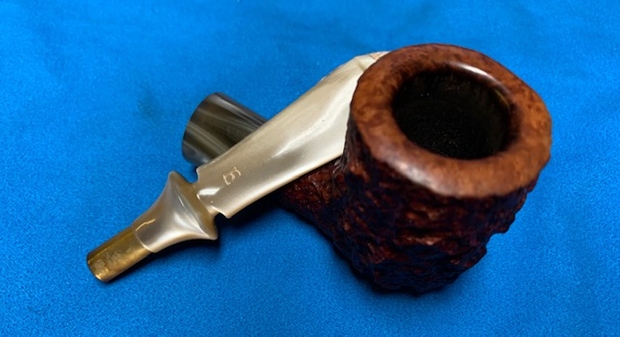
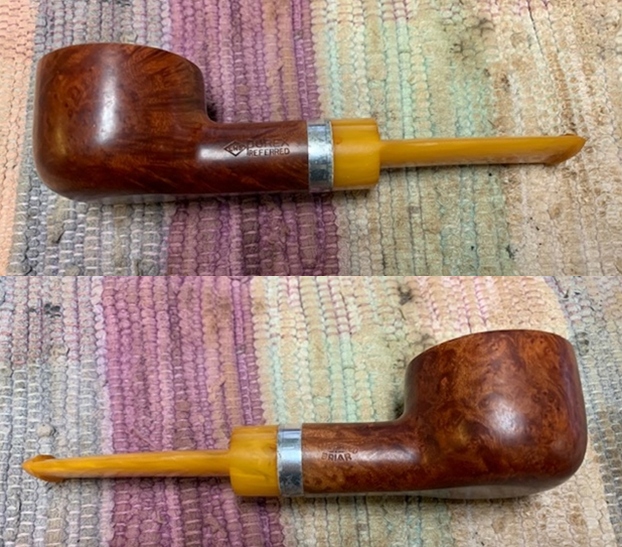
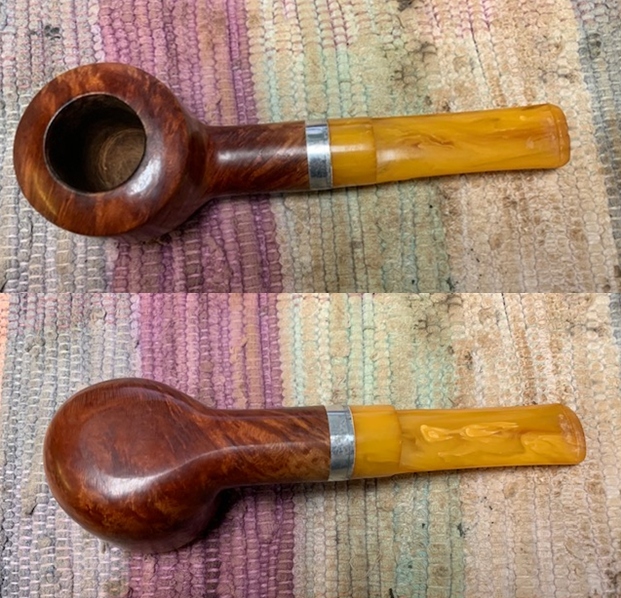
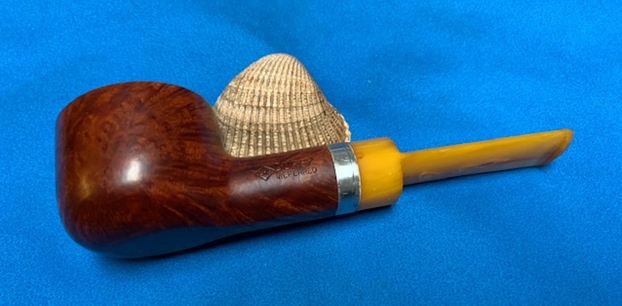
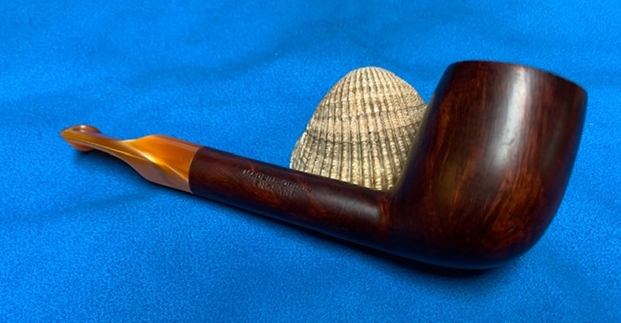
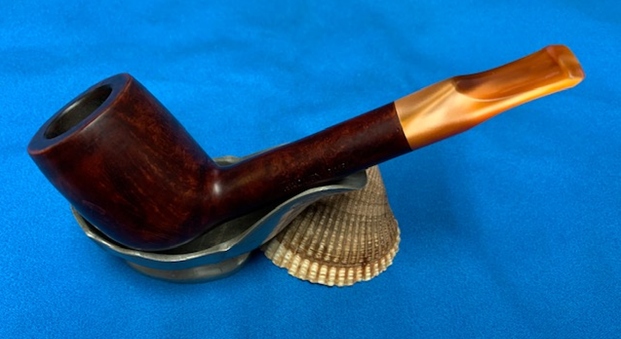
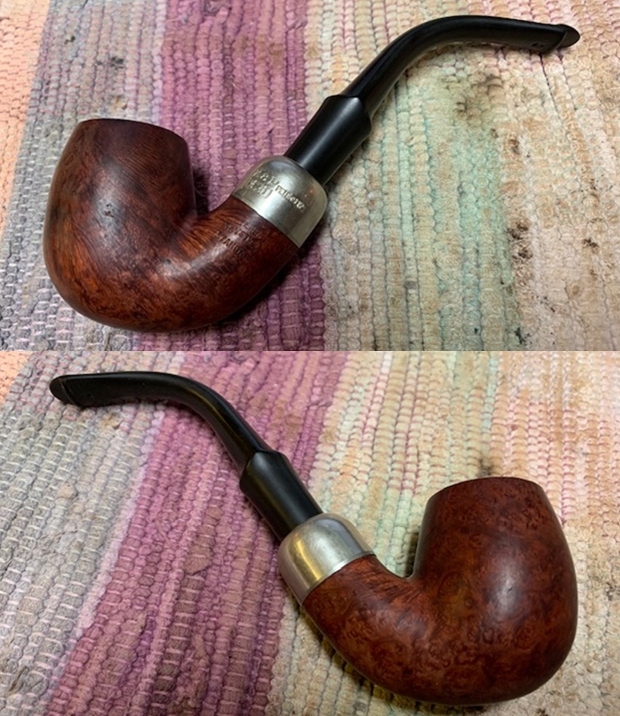
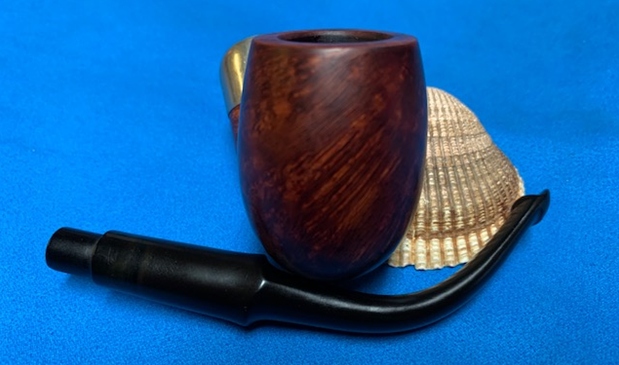
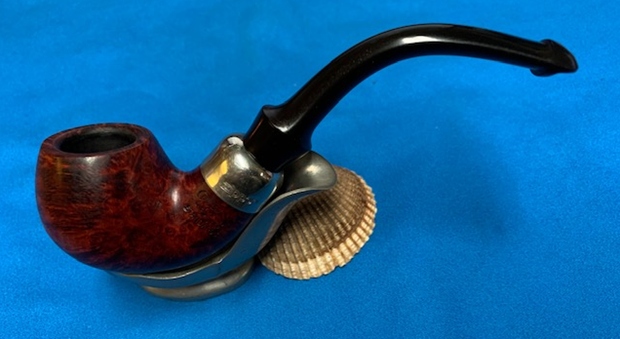
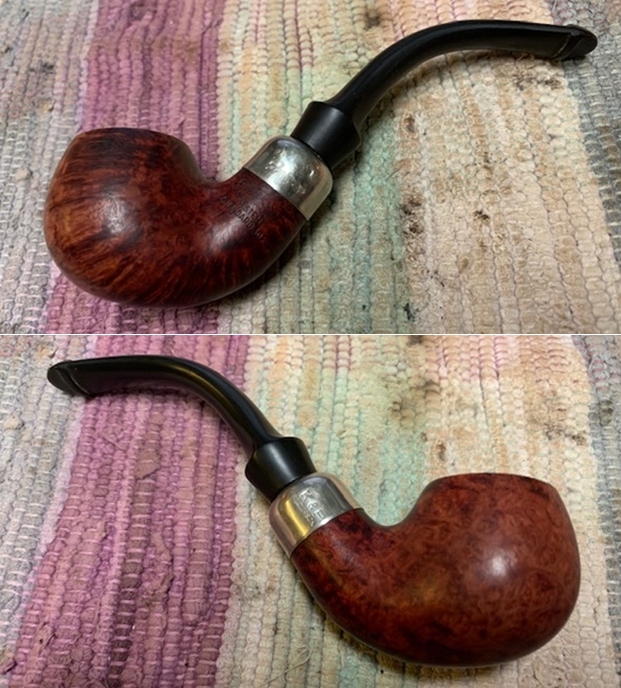
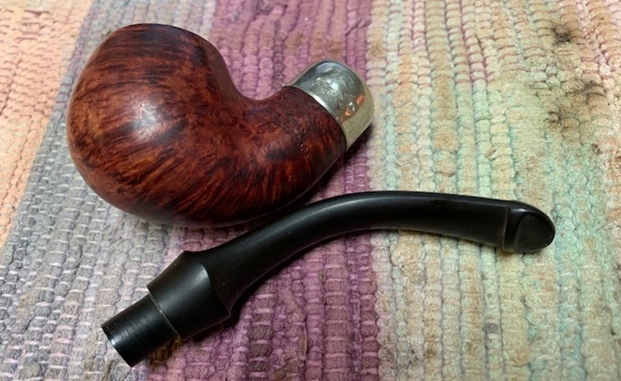
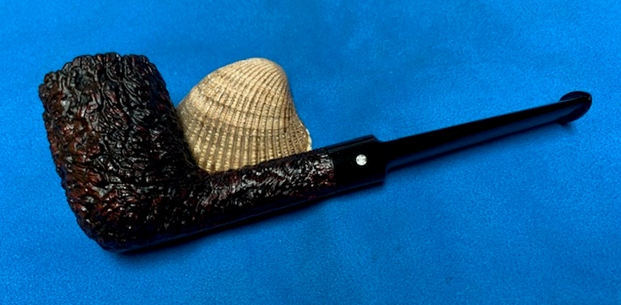
I’m pleased with how this product of Jacques Craen in St. Claude has turned out.  With Sebastien Beaud’s generous assistance, we can date this pipe after Jacques received the P. Viou name from the aging Paul Viou and his wife, Odette, who provided pipes to French military servicemen.  This ‘Plume’ is a beautiful example of French pipe making with its subtle intricacies, flow, and lines.  The grain, especially the exceptionally tight Bird’s Eye, is pleasing to behold! The horn stem with its gentle natural bend, has unique coloring.  The glassy shine of finely polished horn is pleasing to the eye and its rustic character will make it a pleasure to enjoy tobacco fellowship.  Last but not least, the unique Plume or Feather diminutive shape allows it to cradle very nicely in the palm.  This is the second of Daniel’s commissioned pipes and he will have the first opportunity to claim the P. Viou Feather from The Pipe Steward Store benefiting the Daughters of Bulgaria – women and girls who have been trafficked and sexually exploited.  Thanks for joining me!

Restoring a Sabatini Extra Quarter Bent Dublin


Blog by Steve Laug

The next pipe I have chosen is one that neither Jeff nor I remember picking up. It could have come to us through a trade for work on a pipe or it could have come from one of an earlier pipe hunts that either Jeff or I did. Either way, the long and short of it is that we have no idea how this one came into our hands. It is a Sabatini in a shape I would call a ¼ bent Dublin. It had a smooth finish on the bowl and a slightly scooped rim top with a variegated Lucite stem. Under grime on the finish it appears that pipe may have had a light brown or tan stain to highlight the grain around the bowl. There were small sand pit fills around the bowl on the front, back and underside. It was stamped on the left side of the shank. The stamping was readable. It read Sabatini [over] Extra. Next to the shank/stem junction on the underside it was stamped Italy. There was also a stylized upper case S on the left side of the saddle stem. It was in decent condition when I brought it to the table. The finish was dirty with grime ground into the briar sides and rim. There was a moderate cake in the bowl and light damage to the rim top and the inner edge of the bowl. The stem was dirty but otherwise in good condition. There were tooth marks and chatter on the top and underside on and near the button and on the button surface itself. I took photos of the pipe before my cleanup work. They tell the story and give a glimpse of the promise that I see in this pipe.  I took a photo of the rim top to show the interior the bowl and the rim top and inner edge. It is moderately caked with some damage to the rim top and edges and some darkening on the back top of the rim. The Lucite stem is in decent condition with tooth marks on the top and underside near the button.   I took a photo of the left side of the shank to show the stamping. The stamping is readable in the photos below and is as noted above. The stem has a stylize upper case S on the left side. I took the stem off the bowl and took a picture of the parts of the pipe to give a sense of size.I turned to Pipephil’s site to see if I could find out any information on the brand (http://www.pipephil.eu/logos/en/logo-s2.html). There was little there to go on however it appears that the Italian crafted pipes were distributed by the US distributor Wenhall Pipes LTD. I did a screen capture of the information that was there.I checked on Pipedia and came up empty handed on the Sabatini brand but then turned to the article on Wenhall Pipes Ltd (https://pipedia.org/wiki/Wenhall). I found that Wenhall Pipes Ltd. was a distribution company out of New York City and distributed some well-known pipes. I quote the article below

Wenhall (USA)

By the end of the 1970’s Wenhall approached Michael Kabik and Glen Hedelson, at that time operating from a farm house in Glen Rock, Maryland to create a line of freehands called Wenhall. The situation was favorable, because Kabik & Hedelson had ended their cooperation with Mel Baker of Tobak Ltd. to produce the famed Sven-Lar freehands shortly before.

Upon Wenhall’s offer the partners got a bank loan and set up a studio of 2000 square feet in a fairly new industrial park in Bel Air, Maryland and took on the name Vajra Briar Works. Wenhall initially wanted 500 pipes a week! But Kabik & Hedelson doubted that they could move that much product and told them they would produce 250 pipes per week. Happily, some of the old crew from Sven-Lar joined them at Vajra Briar Works, and thus they rather quickly met the production demands.

Furthermore during this time, Wenhall requested to create a line of pipes consisting of 12 different shapes. The line was called The Presidential and, while they repeated the same 12 shapes for this series, each one was freehand cut. Although they came up with interesting designs, mainly developed by Hedelson, especially Kabik was never really happy with the line or the concept, but, by this time, they had nine people on full-time payroll.

The stint with Wenhall lasted a couple of years, at which time they asked them to join Wenhall in a move to Miami, Florida. But by this time Kabik and Hedelson felt very uncomfortable with the owners of Wenhall and decided that they’d rather close the shop than make the move. Time proved that decision very wise, as Wenhall folded shortly after the move. All the same they had to close Vajra, but scaled down to the two of them and moved the operation to the farm house Glen was currently living in…

The next lines of the article are the ones that got my attention. When I first saw the pipe in the repair box I immediately thought it reminded me of a Barontini and sure enough there is a possible link noted below.

Wenhall also distributed pipes from Italy. By unconfirmed information Gigi and Cesare Barontini were mentioned as suppliers.

Armed with that information I decided to begin my work on the pipe by addressing the damage to the rim top and edges. I used a folded piece of 220 grit sandpaper to clean off the rim top and the inner edge of bowl. It took some time but I was able to bring it back to a pretty clean condition.  I reamed the pipe with a PipNet reamer and cut back the cake back to the bare briar. I cleaned up the walls with a Savinelli Fitsall Pipe Knife. I sanded the walls as a final touch with 220 grit sandpaper wrapped around a dowel. The interior walls of the pipe looked free of burn or heat damage. To me that is always a relief.  I scrubbed the exterior of the bowl with a tooth brush and undiluted Murphy’s Oil Soap. I find that the soap cuts the grime and grease on the briar and leaves the surface clean and easier to work with. I rinsed it off with warm water and dried it with a cotton towel.  I filled in all of the putty filled flaws around the bowl with briar dust and clear super glue. Once it cured I sanded them smooth with 220 grit sandpaper.  I cleaned out the shank and airway in the shank and stem with pipe cleaners, cotton swabs and alcohol. I was surprised that I also was removing some brown stain from the end of the shank.I polished the bowl and rim top with micromesh sanding pads – dry sanding it with 1500-12000 grit pads. After each pad I wiped the briar down with a damp cloth. This served a dual purpose of both removing the sanding debris and the dust that had accumulated in the rustication patterns around the bowl and shank.   I worked some Before & After Restoration Balm into the surface of the briar with my fingertips and a horsehair shoe brush to clean, enliven and protect the briar. I let the balm sit for 15 minutes and then buffed with a cotton cloth to raise the shine. The photos show the bowl at this point in the restoration process. It looks quite nice at this point.   With that done the bowl was finished other than the final buffing. I set it aside and turned my attention to the stem. I filled in the tooth marks and rebuilt the button with clear super glue and set it aside to cure. Once the repairs cured I used a piece of 220 grit sandpaper to clean them up and blend them into the surface of the acrylic. I started the polishing with 400 grit wet dry sandpaper. I used some Rub’n Buff Antique Gold to touch up the S logo on the stem. I rubbed it on and pressed the product into the stamp. I rubbed it off with a cotton pad.I polished the stem with micromesh sanding pads – wet sanding with 1500-12000 grit sanding pads. I wiped it down after each sanding pad with Obsidian Oil. I polished it with Before & After Pipe Stem Polish – both Fine and Extra Fine.   I am excited to finish this Sabatini Extra Bent Dublin. I put the pipe back together and buffed it with Blue Diamond on the buffing wheel. I gave the bowl and the stem multiple coats of carnauba wax. I hand buffed the pipe with a clean buffing pad to raise the shine. It is fun to see what the polished bowl looks like with the grain popping through on the bowls sides and rim top. Added to that the polished variegated orange Lucite stem was beautiful. This smooth finished Dublin turned out to be a nice looking pipe that feels great in my hand. It is light and well balanced. Have a look at it with the photos below. The dimensions are Length: 6 ½ inches, Height: 2 ¼ inches, Outside diameter of the bowl: 1 ¾ inches, Chamber diameter: ¾ of an inch. The weight of the pipe is 67grams/2.36oz. It is a beautiful pipe and one that will be on the rebornpipes store in the Italian Pipe Makers section soon. If you are interested in adding it to your collection let me know. Thanks for walking through the restoration with me as I worked over this pipe. Thanks to each of you who are reading this blog. Remember we are not pipe owners; we are pipemen and women who hold our pipes in trust until they pass on into the trust of the next pipeman or woman. 


Bringing a Savinelli Estella Non Pareil  9128 Billiard Back to Life


Blog by Steve Laug

The next pipe on my work table is a Savinelli made Estella that my brother purchased 2 years ago at an antique shop in Pocatello, Idaho, USA. It is stamped on the heel of the bowl on a smooth patch – Estella over Non Pareil over 9128 with the Savinelli S shield next to that and Italy to the left of that very faintly stamped. There was also an upper case E on the top of the stem. The rugged rustication on the bowl and shank looked to be dirty or at least had darkening where the hand of the previous owner had wrapped around the bowl. The thick cake in the bowl had overflowed on to the rim top and left behind a thick black mess. It was hard to know what the inner edge of the bowl looked like because of the thickness of the cake and lava. The outer edge of the bowl looked very good. The Lucite shank extension and the matching Lucite stem in grey, brown and ivory tones looked really good – from the side view. The stem had light tooth chatter on both the top and underside near the button. Jeff took photos of the pipe before he started his cleanup work. The close up photos of the rim top and bowl show the condition of the pipe. You can see the thick cake in the bowl and the thick lava on the rim top. The stem is in decent condition with light tooth marks and chatter on both sides and the button surface. The next photo shows the stamping on the bottom of the bowl and the shank extension. Other than the S shield logo pointing to a link between Estella and Savinelli the stamping on the Lucite shank extension certified the connection.  There was also an uppercase E on the top of the stem. My brother did his usual thorough clean up on the pipe. He reamed the bowl and scrubbed the externals with Murphy’s Oil Soap and a soft tooth brush. He was able to remove all of the buildup on the rim top. It looked better but there was some burn damage on the inner edge of the rim all the way around the bowl as well as some darkening on the top of the rim. He cleaned the internals of the mortise and the airway in the shank and the stem with pipe cleaners and alcohol. He wiped down the stem so that when the pipe came to me it was ready to restore. The next four photos show the pipe when I brought it to my work table. I took a close up photo of the rim top to show the damage on the inner edge of the bowl and the rim top. I took close up photos of the stem. It was in decent condition with light marks on both sides.   I took a photo of the stamping on the heel of the bowl and the underside of the shank extension. They were readable as noted above.I removed the stem from the pipe and took a photo of the parts to show the overall look of the pipe before I started my work on it.I started my work on the bowl by addressing the issues with the rim top and inner edge of the bowl. I reshaped the inner edge and cleaned up the rim top with a folded piece of 220 grit sandpaper. I was able to minimize the damage to the edge by giving it a slight bevel and the top by smoothing it out and removing the burn marks.   Once the top and edge were clean I polished them with micromesh sanding pads – wet sanding with 1500-12000 grit pads. I wiped the rim down after each pad to remove the debris. By the last sanding pad the rim top looked very good.  I rubbed the bowl and shank down with Before & After Restoration Balm. I worked it into the surface of the bowl sides and shank with my fingertips and a horsehair shoe brush to get into the rusticated grooves and channels. The product works well to clean, enliven and protect the briar. I let the balm sit for 15 minutes and then buffed with a cotton cloth to raise the shine.  I set aside the bowl and turned my attention to the stem. I sanded out the tooth marks and chatter on both sides with 220 grit sandpaper and started the polishing with 400 grit wet dry sandpaper. You will note some darkening on the tenon end that would not come off with scrubbing and sanding would reduce the diameter of the tenon and affect the fit in the shank. I touched up the stamp on the top of the stem with Rub’n Buff Antique Gold. I rubbed it on the stem surface and worked it into the stamp with a tooth pick. I buffed it off with a cotton pad. It looked better when it was finished.    I polished the stem with micromesh sanding pads – wet sanding it with 1500-12000 grit pads. After each set of three pads I wiped the stem down with the damp cotton pad to check the progress. I had been able to blend in the tooth marks on both sides.  This Savinelli Estella Non Pareil Rusticated 9128 Billiard with a variegated brown, grey and ivory Lucite stem is a great looking pipe now that it has been restored. There is some great grain on the rim top that really shines and the Caminetto Style rustication is exceptionally well done. I gave the bowl a coat of Conservator’s Wax and buffed it with a shoe brush. I buffed the stem with Blue Diamond on the wheel to see if I could further smooth and blend the repairs. I buffed the entire pipe with a clean buffing pad and then once again by hand with a microfibre cloth. The finished pipe is shown in the photos below. The bowl and rim look really good and the finish is clean and as good as new. The stem and shank extension have a rich glow and they look amazing. The dimensions of the pipe are Length: 5 ¾ inches, Height: 2 inches, Outside diameter of the bowl: 1 ½ inches, Chamber diameter: ¾ of an inch. The weight of the pipe is 51gr/1.80oz. If you are interested in adding this pipe to your collection send me a message or an email. Thanks for reading this blog and my reflections on the pipe while I worked on it. There are many more to come!

Restoring an LHS Purex Preferred 28 Chunky Pot


Blog by Steve Laug

The next pipe on the work table came to us from an antique store on the Oregon Coast, USA. This morning as I was going through my box of what I have to work on this is the second one that caught my eye. Not surprising it is another amber/butterscotch coloured Redmanol stem. It is a nicely grained small Chunky Pot. Once again the stem reminds me of butterscotch candies that I used to have as a kid. The pipe is stamped on the left side of the shank and has the LHS Diamond followed by a large P that is the lead letter for Purex and for Preferred. On the right side it is stamped Imported arched over Briar. There is also a shape number 28 on the underside of the shank next to the aluminum fitment.The finish had a lot of grime ground into the bowl and some darkening around the sides. The bowl was lightly caked and there was a light lava coat on the rim top and inner edge. The edges looked okay but we would know more after the cleanup. The silver coloured band on the shank and matching one on the stem were both oxidized. They were the fitments for the screw in stinger/tenon. The stem was dirty and had tooth chatter and marks on the top and underside near the button. There were not markings or a logo on the saddle stem. The pipe showed promise but it was very dirty. Jeff took photos of the pipe before he started his cleanup work.      He took a photo of the rim top and bowl to give a clear picture of the thickness of the cake and the condition of the rim top and edges. He also took photos of the top and underside of the stem to show the chatter and tooth marks.   Jeff took photos of the sides and heel of the bowl to give a picture of what the briar around the pipe looked like. There is some great grain under the grime.      He took photos of the stamping on the shank. It reads as noted above and is clear and readable.   I turned to Pipephil’s site to see if the Purex Preferred line was shown there. It was not listed though there were other Purex pipes listed. I have included a screen capture of the summary of the history of the brand from the site below (http://www.pipephil.eu/logos/en/logo-lhs.html).I turned to Pipedia (https://pipedia.org/wiki/LHS). There was no listing for the Purex Preferred that I was working on but the article is very well done. Thanks to Dave Gossett for the information and the pictures of his collection. Give the article a read.

Now it was time to work on this interesting old pipe with the Redmanol man made amber stem.

Jeff had cleaned up the pipe with his usual penchant for thoroughness. He reamed the pipe with a PipNet Pipe Reamer and cleaned up the remnants with a Savinelli Fitsall Pipe Knife.  He scrubbed the bowl with undiluted Murphy’s Oil Soap with a tooth brush. He rinsed it under running warm water to remove the soap and grime. He cleaned out the inside of the shank and the airway in the stem with alcohol, cotton swabs and pipe cleaners. He scrubbed the stem with Soft Scrub liquid cleanser to remove the grime on the surface and rinsed it off with warm water. I took photos of the pipe once I received it.   The rim top looked very good  and inner edge of the rim showed some light damage. The stem surface looked good with some remaining oxidation on the aluminum parts and tooth marks and chatter on both sides near the button.     I took a photo of the stamping on the shank. It is clear and readable as noted above.     I removed the stem and took a photo of the pipe to give a sense of the whole. The stem is a compact Redmanol saddle. I decided to start my work on the pipe by cleaning up the damaged inner edge of the bowl. I reworked the edge with a folded piece of 220 grit sand paper. Once I finished the rim and edge looked much better. I moved next to polishing the aluminum fitments on the shank and on the stem. I polished both with 400 grit wet dry sandpaper to remove the scratches and marks on both. They took on a nice silver glow. I polished it with micromesh sanding pads – wet sanding with 1500-12000 grit pads and wiping it down after each pad with a damp cloth. I rubbed the bowl and shank down with Before & After Restoration Balm. I worked it into the surface of the bowl sides and shank with my fingertips to clean, enliven and protect the briar. I let the balm sit for 15 minutes and then buffed with a cotton cloth to raise the shine.  I set the bowl aside and turned to work on the stem. I filled in the deep tooth marks on the surface of the Redmanol with clear super glue. I let the repairs cure.        I polished the repairs on the Redmanol stem with micromesh sanding pads – 1500-12000 grit pads. I wiped it down with a damp cloth after each sanding pad. I used Before & After Pipe Polish – both Fine and Extra Fine to further polish the stem.     This LHS (LH Stern) Purex Preferred Chunky Pot with an amber coloured Redmanol stem is a great looking pipe now that it has been restored. There is some great grain around the bowl and shank. I put the stem back on the bowl and carefully buffed the pipe with Blue Diamond on the buffing wheel using a light touch on the briar. I gave the bowl and the stem multiple coats of carnauba wax on the buffing wheel and followed that by buffing the entire pipe with a clean buffing pad. I hand buffed the pipe with a microfiber cloth to deepen the shine. The finished LHS Purex Pot is chunky and fits nicely in the hand and feels great. Give the finished pipe a look in the photos below. The dimensions of the pipe are Length: 5 ½ inches, Height: 1 ½ inches, Outside diameter of the bowl: 1 ¾ inches, Chamber diameter: 7/8 of an inch. The weight of the pipe is 61gr/2.19oz. If you are interested in adding this pipe to your collection send me a message or an email. Thanks for reading this blog and my reflections on the pipe while I worked on it. There are many more to come!

Restoring an English Made Hadley Park 213 Lovat


Blog by Steve Laug

The next pipe on the work table came to us from one of Jeff’s pipe hunts a few years ago and to be honest we don’t remember where we got it. This morning as I was going through my box of what I have to work on this one caught my eye. It is a nicely grained small Lovat with an acrylic stem that is almost butterscotch coloured. The stem reminds me of butterscotch candies that I used to have as a kid. The pipe is stamped on the left side of the shank and reads Hadley Park. On the right side it is stamped Made in London England and to the left of that, near the stem is the shape number 213. The finish had a lot of grime ground into the smooth finish on the bowl and some darkening around the sides of the bowl. The bowl was heavily caked and there was a lava coat and darkening on the rim top and inner edge. The edges looked okay but we would know more after the cleanup. There were a few fills that had shrunken around the sides of the bowl. The stem was dirty and had tooth chatter and marks on the top and underside near the button. There were not markings or a logo on the saddle stem. The pipe showed promise but it was very dirty. Jeff took photos of the pipe before he started his cleanup work. He took a photo of the rim top and bowl to give a clear picture of the thickness of the cake and the condition of the rim top and edges. He also took photos of the top and underside of the stem to show the chatter and tooth marks.    Jeff took a photo of the side and heel of the bowl to give a picture of what the briar around the pipe looked like. There is some great grain under the grime.     He took photos of the stamping on the shank. It reads as noted above and is clear and readable.   I could not find any information on the brand. I thought the shape number might point the way but it did not give the clues I was hoping. The Made in London England stamp is similar to those used by a variety of English pipemakers so that is not definitive either. So I am left not knowing who made the pipe. Now it was time to work on this pipe.

Jeff had cleaned up the pipe with his usual penchant for thoroughness. He reamed the pipe with a PipNet Pipe Reamer and cleaned up the remnants with a Savinelli Fitsall Pipe Knife.  He scrubbed the bowl with undiluted Murphy’s Oil Soap with a tooth brush. He rinsed it under running warm water to remove the soap and grime. He cleaned out the inside of the shank and the airway in the stem with alcohol, cotton swabs and pipe cleaners. He soaked the stem in Before & After Deoxidizer and rinsed it off with warm water. I took photos of the pipe once I received it. The rim top and inner edge of the rim showed some damage. The inner edge of the bowl was roughened and showed some darkening. The rim top also showed some damage. The stem surface looked good with some remaining oxidation and tooth marks and chatter on both sides near the button.    I took a photo of the stamping on the shank. It is clear and readable as noted above. I removed the stem and took a photo of the pipe to give a sense of the whole. The stem is a short acrylic saddle.   I decided to start my work on the pipe by cleaning up the damaged inner edge of the bowl. I reworked the edge with a folded piece of 220 grit sand paper. Once I finished the rim and edge looked much better.    I moved next to repairing the damaged fills on the front left of the bowl. I filled them in with clear super glue and briar dust. Once it cured I sanded them smooth and blended them into the surrounding briar.   With the repaired fills being lighter than the surrounding briar I decided to restain the bowl with a light brown aniline stain. I applied the stain and flamed it with a lighter to set it in the grain. I repeated the process until I was happy with the coverage on the bowl. Once the stain had cured I removed it from the cork and took photos of the new look before I buffed or polished it at all.  I buffed the bowl with red Tripoli and then wiped it down with a cotton pad and isopropyl alcohol to make the stain a bit more transparent and show the grain around the bowl sides. I polished it with micromesh sanding pads – wet sanding with 1500-12000 grit pads and wiping it down after each pad with a damp cloth.      I rubbed the bowl and shank down with Before & After Restoration Balm. I worked it into the surface of the bowl sides and shank with my fingertips to clean, enliven and protect the briar. I let the balm sit for 15 minutes and then buffed with a cotton cloth to raise the shine.  I set the bowl aside and turned to work on the stem. I sanded out the tooth chatter and marks with 220 grit sandpaper and started polishing the stem with 400 grit wet dry sandpaper.I polished the acrylic stem with micromesh sanding pads – 1500-12000 grit pads. I wiped it down with a damp cloth after each sanding pad. I used Before & After Pipe Polish – both Fine and Extra Fine to further polish the stem.    This Hadley Park 213 Lovat with an orange/butterscotch acrylic stem is a great looking pipe now that it has been restored. There is some great grain around the bowl and shank. I put the stem back on the bowl and carefully buffed the pipe with Blue Diamond on the buffing wheel using a light touch on the briar. I gave the bowl and the stem multiple coats of carnauba wax on the buffing wheel and followed that by buffing the entire pipe with a clean buffing pad. I hand buffed the pipe with a microfiber cloth to deepen the shine. The finished Hadley Park Lovat is petite but fits nicely in the hand and feels great. Give the finished pipe a look in the photos below. The dimensions of the pipe are Length: 5 inches, Height: 1 ¾ inches, Outside diameter of the bowl: 1 ¼ inches, Chamber diameter: ¾ of an inch. The weight of the pipe is 34gr/1.23oz. If you are interested in adding this pipe to your collection send me a message or an email. Thanks for reading this blog and my reflections on the pipe while I worked on it. There are many more to come!

Restoring a Peterson’s Republic Era System Standard 312 Bent Billiard


Blog by Steve Laug

The next pipe on the work table came to us from an online auction from Front Royal, Virginia, USA. It is a smooth Peterson’s System pipe with a saddle vulcanite stem. The pipe is stamped on the left side of the shank and reads Peterson’s [over] System [over] Standard. On the right side it is stamped Made in the Republic of Ireland and underneath that is the shape number 312. The nickel ferrule is stamped K & P Peterson with three hallmarks underneath. The finish had a lot of grime ground into it and it was very dirty. The bowl was moderately caked and there was a light lava coat on the flat rim top and the inner edge of the rim. The inner edge had some nicks and damage and the rim top had a lot of scratches that looked like the rim top had been scraped with a knife. The stem was oxidized, calcified and had tooth chatter and marks on the top and underside near the P-lip style button. It also had a bite through on the underside of the stem just ahead of the button. The pipe showed promise but it was very dirty. Jeff took photos of the pipe before he started his cleanup work.   He took photos of the rim top and bowl to give a clear picture of the thickness of the cake and the condition of the rim top and edges. He also took photos of the top and underside of the stem to show the oxidation, calcification and chatter and tooth marks. The photo of the underside of the stem you can see the bite through that is present.  Jeff took a photo of the side and heel of the bowl to give a picture of what the briar around the pipe looked like.     He took photos of the stamping on the shank and the nickel ferrule. It reads as noted above and is clear and readable.   I am including the information from Pipedia’s article on Peterson pipes. It is a great read in terms of the history of the brand (https://pipedia.org/wiki/Peterson). I have included a bit of the pertinent history here.

1950 – 1989 The Republic Era – From 1950 to the present time, the stamp for this era is “Made in the Republic of Ireland” in a block format generally in three lines but two lines have been used with or without Republic being abbreviated.

I knew that I was dealing with a Republic Era pipe made between 1950-1989. It was a smooth Peterson’s System Standard 312 Billiard with nice grain. The finish was stained with a combination of brown stains. Now it was time to work on the pipe.

Jeff had cleaned up the pipe with his usual penchant for thoroughness. He reamed the pipe with a PipNet Pipe Reamer and cleaned up the remnants with a Savinelli Fitsall Pipe Knife.  He scrubbed the bowl with undiluted Murphy’s Oil Soap with a tooth brush. He rinsed it under running warm water to remove the soap and grime. He cleaned out the inside of the shank and the airway in the stem with alcohol, cotton swabs and pipe cleaners. He soaked the stem in Before & After Deoxidizer and rinsed it off with warm water. I took photos of the pipe once I received it. The rim top and inner edge of the rim looked very good with a bit of damage on the inner edge and on the rim surface. The stem surface looked very good with some tooth marks and chatter on both sides near the button.  The bite through on the underside of the stem is not huge but it is very present.  I took a photo of the stamping on the shank. It is clear and readable as noted above.    I removed the stem and took a photo of the pipe to give a sense of the whole. The stem is a typical Peterson’s System stem.I started my work on the pipe by working over the rim top and the inner edge of the bowl to clean up the damage. Once finished the rim top and edge looked much better.  I repaired the deep gouges on the left side of the bowl by filling them in with clear super glue. Once it cured I sanded it smooth to blend it into the surrounding briar.I polished the briar with micomesh sanding pads – wet sanding with 1500-12000 grit pads. I wiped the bowl down after each pad with a damp cloth. I rubbed the bowl down with Before & After Restoration Balm. I worked it into the surface of the bowl sides and shank with my fingertips. The product works to clean, enliven and protect the briar. I let the balm sit for a little while and then buffed with a cotton cloth to raise the shine. I set the bowl aside and turned to work on the stem. I coated a pipe cleaner with Vaseline and inserted it in the airway in the stem. I filled in the bite through with black Loctite 380 CA Glue. I set it aside to let the repair cure then smooth it out with a file and rasp. I smoothed out the file marks with 220 grit sandpaper and started polishing it with 400 grit wet dry sandpaper.   I polished the vulcanite stem with micromesh sanding pads – 1500-12000 grit pads. I wiped it down with a damp cloth after each sanding pad. I used Before & After Pipe Polish – both Fine and Extra Fine to further polish the stem.    This Peterson’s System Standard 312 Bent Billiard with a vulcanite stem is a great looking pipe now that it has been restored. The beautiful grain that shines through the polished finish is stunning. As the pipe is smoked the patina should develop and look even better. I put the stem back on the bowl and carefully buffed the pipe with Blue Diamond on the buffing wheel. I gave the bowl and the stem multiple coats of carnauba wax on the buffing wheel and followed that by buffing the entire pipe with a clean buffing pad. I hand buffed the pipe with a microfiber cloth to deepen the shine. The finished Peterson’s System Standard 312 fits nicely in the hand and feels great. Give the finished pipe a look in the photos below. The dimensions of the pipe are Length: 6 inches, Height: 2 inches, Outside diameter of the bowl: 1 ¼ inches, Chamber diameter: ¾ of an inch. The weight of the pipe is 50gr/1.76oz. If you are interested in adding this pipe to your collection send me a message or an email. Thanks for reading this blog and my reflections on the pipe while I worked on it. There are many more to come!

Restoring a Peterson’s of Dublin System Standard 303 from a Zippo gift set.


Blog by Steve Laug

The next pipe on the work table came to us from an antique store on one of Jeff’s pipe hunts in Utah, USA. It is a smooth Peterson’s Apple shaped System pipe with a saddle vulcanite stem. The pipe is stamped on the left side of the shank and reads Peterson’s [over] of Dublin [over] System [over] Standard followed by the shape number 303. The nickel ferrule is stamped on the left side and reads ZIPPO and on the right side it reads K & P Peterson. That was interesting information so I did a bit of hunting on the web and found photos of a gift set that was issued by Peterson and Zippo together. I wrote them and asked about when it was first issued. In the mean time I also found a link on Pipesmagazine.com where the gift set was discussed and some photos shared of the original (https://pipesmagazine.com/forums/threads/peterson-zippo-combo.1499/). I have included the photos below as they provide a context for the pipe I am working on. I only wish I had the Zippo lighter that it came with originally! It appears from the photos that the set sold for at least $99.00US.

The pipe on the desk before me now was similar to the one in the above photos. It had different grain but the shape and stamping was identical. The finish had a lot of grime ground into it and it was very dirty. The bowl was moderately caked and there was a lava coat on the flat rim top and the beveled inner edge of the rim. The edges looked okay but we would know more after the cleanup.. The nickel ferrule was undamaged and did not have dents of nicks in the surface. It was oxidized a bit but would clean up very well. It is stamped K&P [over] Peterson on the right side of the ferrule and had the ZIPPO logo on the left side of the ferrule. The stem was oxidized, calcified and had tooth chatter and marks on the top and underside near the P-lip style button. It also had a unique style stem in terms of fitting to the ferrule. The pipe seems petite to me but I do not have another 303 to compare it to so it is only a feeling. The pipe showed promise but it was very dirty. Jeff took photos of the pipe before he started his cleanup work.   He took photos of the rim top and bowl to give a clear picture of the thickness of the cake and the condition of the rim top and edges. He also took photos of the top and underside of the stem to show the oxidation, calcification and chatter and tooth marks.    Jeff took a photo of the side and heel of the bowl to give a picture of what the briar around the pipe looked like.   He took photos of the stamping on the shank and the nickel ferrule. It reads as noted above and is clear and readable.   Jeff had cleaned up the pipe with his usual penchant for thoroughness. He reamed the pipe with a PipNet Pipe Reamer and cleaned up the remnants with a Savinelli Fitsall Pipe Knife.  He scrubbed the bowl with undiluted Murphy’s Oil Soap with a tooth brush. He rinsed it under running warm water to remove the soap and grime. He cleaned out the inside of the shank and the airway in the stem with alcohol, cotton swabs and pipe cleaners. He soaked the stem in Before & After Deoxidizer and rinsed it off with warm water. I took photos of the pipe once I received it. The rim top and inner edge of the rim looked very good with a bit of damage on the inner bevel of the rim surface. The stem surface looked very good with some tooth marks and chatter on both sides near the button. I took a photo of the stamping on the shank. It is clear and readable as noted above.    I removed the stem and took a photo of the pipe to give a sense of the whole. The stem is a fancy saddle version. The pipe was in such good condition that I started by rubbing it down with Before & After Restoration Balm. I worked it into the surface of the bowl sides and shank with my fingertips. The product works to clean, enliven and protect the briar. I let the balm sit for a little while and then buffed with a cotton cloth to raise the shine.     I set the bowl aside and turned to work on the stem. I sanded the tooth chatter and marks with 220 grit sandpaper to smooth them out and blend them into the surface. I started polishing the stem with 400 grit wet dry sandpaper.   I polished the vulcanite stem with micromesh sanding pads – 1500-12000 grit pads. I wiped it down with a damp cloth after each sanding pad. I used Before & After Pipe Polish – both Fine and Extra Fine to further polish the stem.    This Peterson’s of Dublin System Standard 303 Bent Apple originally made in partnership with Zippo with a vulcanite saddle stem is a great looking pipe now that it has been restored. The beautiful grain that shines through the polished finish is stunning. As the pipe is smoked the patina should develop and look even better. I put the stem back on the bowl and carefully buffed the pipe with Blue Diamond on the buffing wheel. I gave the bowl and the stem multiple coats of carnauba wax on the buffing wheel and followed that by buffing the entire pipe with a clean buffing pad. I hand buffed the pipe with a microfiber cloth to deepen the shine. The finished Peterson’s System Standard 303 fits nicely in the hand and feels great. Give the finished pipe a look in the photos below. The dimensions of the pipe are Length: 5 ½ inches, Height: 1 ½ inches, Outside diameter of the bowl: 1 ¼ inches, Chamber diameter: ¾ of an inch. The weight of the pipe is 47gr/1.66oz. If you are interested in adding this pipe to your collection send me a message or an email. Thanks for reading this blog and my reflections on the pipe while I worked on it. There are many more to come!

Starting Again from Golden, Colorado – A GBD Meerschaum Lined 9437 Blasted Pot


Blog by Dal Stanton

Leaving life in Sofia, Bulgaria, and setting up a new life in Golden, Colorado, has not been without its challenges.  After living in Europe for over a quarter of a century, adjusting to life in the US has been every bit as difficult as when my wife and I left for Ukraine many years ago with 5 children in tow.  All those children are now married and have added 6 grandchildren for us to dote on!  When I packed up The Pipe Steward worktable in May and shipped it along with all our earthly belongings to Colorado USA, in an ocean-going and railroading 40’ container, I would not have guessed it would be November before I restored my next pipe.  The container arrived the end of August and the unpacking and reestablishing of a new home-base began.  I am thankful to God that through all our travels – airplanes and airports, we have remained well during uncertain times with pandemic on everyone’s minds.  My first ‘for USA’ pipe purchase came from Steve’s rebornpipes worktable.  A beautiful Butz Choquin Maitre-Pipier Deluxe that Steve had restored caught my eye and from Vancouver and it was waiting in Golden when we arrived from Bulgaria to begin our 14-day quarantine in June.  I enjoyed good fellowship with this classy BC during those initial days in Golden – Thanks Steve! After our container arrived, it has taken some time to unpack and settle – we’re still unpacking and organizing!  It was also a bit of a challenge to set up the worktable area. In Sofia, in our compact 10th floor flat, everything was arranged so the work process flowed.  The challenge was to recapture the ‘magic’ of that workspace here in Golden.  Even though I could theoretically have expanded my workspace adding larger, more powerful tools, I’m used to the Dremel being my main tool for polishing and buffing because of the former smaller workspace in Sofia.  So, staying with the familiar compact space works for me!  I decided to take a picture of my Golden workspace and include my first project, the GBD Meer Lined, that is on the same Bulgarian design work cloth which will continue to provide the background for The Pipe Steward restorations 😊.When pipe men and women commission pipes from my online For “Pipe Dreamers” Only! collection, I ask them to be patient in waiting for their chosen pipes to work through the queue to reach the worktable.  Daniel has been more than patient!  He had commissioned 7 pipes (!) when we were still in Bulgaria and they reached the top of the queue when it was time for me to pack up in May.  Daniel shared with me that he’s from the Green Bay area of Wisconsin and follows rebornpipes.com and the Pipe Restorers Facebook group.  After finally getting setup in Golden and ready to pull the trigger, I emailed Daniel to make sure he was still a “go” with the pipes he had commissioned.  His response came quickly, and he was still good to go!  Here are his 7 – a nice selection of pipes all benefitting the work we continue to support in Bulgaria, the Daughters of Bulgaria – helping women and girls who have been trafficked and sexually exploited. Looking more closely at the GBD, I took more pictures of the first of Daniel’s commissions:  The nomenclature is stamped on the underside panel.  On the left side is the GBD incased in an oval [over] MEERSCHAUM LINED.  To the right of this is stamped, LONDON ENGLAND [over] 9437, the shape number which points to the designation of a Pot shape (Jerry Hanna’s GBD Shapes list on Pipedia).  The straight stamping of the COM, LONDON ENGLAND points to a pre-Cadogan era GBD which would be pipes made up to 1981.  This dating is also confirmed by the brass inlaid rondel which were discontinued after 1981 after the Comoy’s merger.  GBD’s history is involved and I enjoy a refresher with Jerry Hanna’s, “A Brief History of GBD” reprinted on Pipedia:

The company was founded in Paris France in the 19th century by Ganeval, Boundier and Donninger who were no longer associated with the company by the turn of the century. By the time they left the GBD name was well established and thus retained. In 1903 an additional factory was built in England and ran by Oppenheimer. The Paris factory moved to Saint-Claude in 1952. Since 1981 the majority of GBD pipes come from the English factory. At about that same time GBD merged with Comoys, since then all production for both GBD and Comoy comes from a single factory.  (I wasn’t kidding when I said it was brief! )

The GBD Meerschaum Lined Pot is an attractive pipe.  The only real issues that I see are addressed in cleaning at this point.  The blasted finish is in great shape and is set off very nicely with the Perspex – acrylic stem.  GBD used an early patented acrylic called Perspex before the merger in 1982 which is attractive except for the stained airway.  The sad reality of Perspex is that it is a bear and a half to clean the stain that builds up in the stem’s airway.  I learned from Steve’s tutelage some time ago that if one uses alcohol to clean this early GBD acrylic, it can result in small cracking or crazing.  I did a quick search on google to show an example of crazing.The alternative to cleaning Perspex and is a safer approach is to use lemon juice or a soft scrub product.  This will be the approach.  The other challenging part of this GBD restoration is to refresh the Meer lining which is totally covered with a thick cake which needs careful removal.

To begin this first restoration from my new worktable in Golden, Colorado, I focus on the Perspex stem which will take some patience to clean.  To take a conservative approach, I pour lemon juice into a plastic container and put the entire stem in for a long soak.  I’m hopeful that the natural acidic of lemon will begin the process of breaking down the staining in the airway without crazing.   With the stem soaking, I turn to cleaning the stummel.  I take a few pictures to show the Meer lined chamber. Using the Savinelli Fitsall Tool, I gently scrape the chamber removing the rough clusters of carbon buildup on the chamber surface.  I also – again, gently, scrape the canted Meer rim. Using 240 grade sanding paper, I sand the Meer rim further to clear the blackened carbon buildup.  Using a Sharpie Pen wrapped with 240 paper, the chamber is also lightly sanded to remove the carbon.  The aim of sanding the Meerschaum is not to remove the Meerschaum, but to cosmetically clean the surface. Next, using cotton buds and pipe cleaners dipped in isopropyl 99%, the internals of the stummel are cleaned.  A dental spoon is also used to scrape the mortise walls. Switching now to the externals, using Murphy’s Oil Soap at full strength with a cotton pad, cleans up the blasted surface.  After scrubbing well, the stummel is rinsed with tap water.  I’m careful to keep the water out of the chamber and the mortise, keeping the Meerschaum dry.To condition the stummel, I apply Mark Hoover’s, Before & After Restoration Balm, to the blasted surface.  I like this product which teases out the deeper tones of the briar.  After squeezing a bit on my fingers, I rub the Balm into the surface thoroughly.  It begins with a cream-like consistency then thickens into a waxy substance.  After applying the Balm over the stummel, I put the stummel aside for 15 or so minutes for the Balm to do its thing. Then, using a microfiber cloth, the excess Balm is removed, and the surface is buffed up with the cloth.Turning again to the GBD clear Perspex stem, the process of cleaning the airway took a lot of effort.  I began the process by soaking the stem in 100% lemon juice.  To use alcohol on Perspex can result in crazing – fine spider web-like cracking running the length of the stem.  Using lemon juice employs natural acids which helps in the cleaning.  After soaking overnight, bristled pipe cleaners were employed.  I wasn’t satisfied with the results.  Next, I drop the stem in a soak of vinegar – another natural acidic which is not pictured.  Again, overnight in the vinegar bath.The vinegar soak made some headway, but real progress waited for the next step.  Using Soft Scrub with some bleach additive did the trick, but not without much scrubbing with bristled and smooth pipe cleaners.  I believe the lemon and vinegar soaks helped breakdown the residue.  The Soft Scrub finished the work.I’m pleased with the results of a giant labor-intensive cleaning process!  Before and after pictures show the transformation. There is still some residual staining in the tenon’s airway, but overall, I’m pleased.  The bit has no tooth chatter that I can see.  I forego sanding with 240 sanding paper and jump to wet sanding the stem with 600 grade paper to smooth the acrylic and bring it back to a pristine state.  Following the 600 grade sanding paper, 0000 grade steel wool continues the cleaning and smoothing.  This also shines the brass rondel nicely.Next, the full regimen of 9 micromesh pads are used: starting with wet sanding with pads 1500 to 2400 followed by dry sanding with pads 3200 to 4000 and 6000 to 12000. Between each set of three pads, Obsidian was applied to the Perspex to condition it.  After reuniting the GBD stem and stummel, I take a picture to see the progress.  My oh my!  I’m liking what I see, and I think Daniel will as well.  Now on the home stretch, a cotton cloth buffing wheel is mounted on the Dremel and Blue Diamond compound is applied to stem and stummel at about 40% power.  After applying the Blue Diamond compound using a felt cloth, I buff the pipe to remove the compound dust before the application of the wax.After mounting another cotton cloth buffing wheel and increasing the Dremel speed to about 60% power, a light application of carnauba wax is applied to stem and stummel.  I increase the speed on the Dremel to aid the carnauba wax to heat and to be absorbed into the blasted briar surface.  Wax can collect on the rough blasted surface if this is not done.After application of the wax, a microfiber cloth is used to give the pipe a rigorous hand buffing to remove excess wax and to raise the shine.

I’m pleased to inaugurate my first restoration in Golden, Colorado, benefiting the Daughters of Bulgaria – women and girls who have been trafficked and sexually exploited.  The GBD blasted stummel is a rich burgundy and the clear, glass-like Perspex stem is a classy touch to this Meerschaum lined Pot.  As the commissioner of the GBD Meerschaum Lined, Daniel has the first opportunity to claim the pipe from The Pipe Steward Store.  Thanks for joining me!

Cleaning up a Peterson’s Made Republic Era Irish Second Rhodesian


Blog by Steve Laug

The next pipe on the work table came to us from Ebay 2017 and it has been sitting here for a long time. It is a nicely grained Irish Second Rhodesian with a tapered vulcanite stem. The pipe is stamped on the left side of the shank and reads IRISH SECONDS. On the right side it is stamped Made in the Republic of Ireland. Irish Seconds were a Peterson’s second line that usually did not make the grade because of flaws in the briar or sandpits. This is another nicer piece of briar than I have seen on some of the firsts I have worked on. The finish had a lot of grime ground into the smooth finish on the bowl and some darkening around the sides of the bowl. The bowl was heavily caked in the lower half of the bowl and thinner toward the top. There was a light lava coat and darkening on the inner edge of the rim. The edges looked okay but we would know more after the cleanup. There were a few sandpits and nicks around the sides of the bowl. The stem was oxidized, calcified and had tooth chatter and marks on the top and underside near the button. There were not markings or a logo on the taper stem. The pipe showed promise but it was very dirty. Jeff took photos of the pipe before he started his cleanup work. He took photos of the rim top and bowl to give a clear picture of the thickness of the cake and the condition of the rim top and edges. He also took photos of the top and underside of the stem to show the oxidation, calcification and chatter and tooth marks. Jeff took photos of the sides and heel of the bowl to give a picture of what the briar around the pipe looked like. There is some great grain under the grime. He took photos of the stamping on the shank. It reads as noted above and is clear and readable. I am including the information from Pipedia’s article on Peterson pipes. It is a great read in terms of the history of the brand (https://pipedia.org/wiki/Peterson). I have included a bit of the pertinent history here.

1950 – 1989 The Republic Era – From 1950 to the present time, the stamp for this era is “Made in the Republic of Ireland” in a block format generally in three lines but two lines have been used with or without Republic being abbreviated.

I knew that I was dealing with a Republic Era pipe made between 1950-1989. It was a smooth bent Rhodesian with nice grain. The finish was stained with a combination of brown stains. Now it was time to work on the pipe.

Jeff had cleaned up the pipe with his usual penchant for thoroughness. He reamed the pipe with a PipNet Pipe Reamer and cleaned up the remnants with a Savinelli Fitsall Pipe Knife.  He scrubbed the bowl with undiluted Murphy’s Oil Soap with a tooth brush. He rinsed it under running warm water to remove the soap and grime. He cleaned out the inside of the shank and the airway in the stem with alcohol, cotton swabs and pipe cleaners. He soaked the stem in Before & After Deoxidizer and rinsed it off with warm water. I took photos of the pipe once I received it. The rim top and inner edge of the rim showed some damage. The inner edge of the bowl was roughened and showed some darkening. The rim top also showed some damage. The stem surface looked good with some remaining oxidation and tooth marks and chatter on both sides near the button.     I took a photo of the stamping on the shank. It is clear and readable as noted above.    I removed the stem and took a photo of the pipe to give a sense of the whole. The stem is short and tapered. I decided to start my work on the pipe by cleaning up the damaged rim top and inner edge. I reworked the edge and top with a folded piece of 220 grit sand paper. Once I finished the rim and edges looked much better.I moved next to repairing the damaged fills on the underside of the shank and the back side of the rim cap. I filled them in with clear super glue and briar dust. Once it cured I sanded them smooth and blended them into the surrounding briar.    I polished the bowl and the rim top, sides and shank with micromesh sanding pads – wet sanding with 1500-12000 grit pads and wiping it down after each pad with a damp cloth.  I rubbed the bowl and shank down with Before & After Restoration Balm. I worked it into the surface of the bowl sides and shank with my fingertips to clean, enliven and protect the briar. I let the balm sit for a little while and then buffed with a cotton cloth to raise the shine.    I set the bowl aside and turned to work on the stem. I filled in tooth marks in the stem surface with clear super glue. Once the repairs cured I used a rasp and a file to recut the button edge and flatten out the repairs. I sanded out the file marks and smoothed out the rest of the repair with 220 grit sandpaper and started polishing the stem with 400 grit wet dry sandpaper.     I polished the vulcanite stem with micromesh sanding pads – 1500-12000 grit pads. I wiped it down with a damp cloth after each sanding pad. I used Before & After Pipe Polish – both Fine and Extra Fine to further polish the stem.  This Peterson’s made Irish Second Rhodesian with a vulcanite taper stem is a great looking pipe now that it has been restored. There is some great grain around the bowl and shank. I put the stem back on the bowl and carefully buffed the pipe with Blue Diamond on the buffing wheel using a light touch on the briar. I gave the bowl and the stem multiple coats of carnauba wax on the buffing wheel and followed that by buffing the entire pipe with a clean buffing pad. I hand buffed the pipe with a microfiber cloth to deepen the shine. The finished Irish Second Rhodesian fits nicely in the hand and feels great. Give the finished pipe a look in the photos below. The dimensions of the pipe are Length: 5 ¾ inches, Height: 2 inches, Outside diameter of the bowl: 1 ¾ inches, Chamber diameter: ¾ of an inch. The weight of the pipe is 56gr/1.94oz. If you are interested in adding this pipe to your collection send me a message or an email. Thanks for reading this blog and my reflections on the pipe while I worked on it. There are many more to come!

Breathing Life into a Carlo Scotti Castello Sea Rock Briar SC16 Billiard


Blog by Steve Laug

It is a rainy fall day in Vancouver and one that just invites me to stay home and cozy. It is a great day to work on pipes. This next pipe on the table came to us in a group of pipes that we purchased at the end of 2019 from a fellow in Los Angeles, California, USA.  It is a Castello Sea Rock Briar and it is a Billiard shape to – both pluses in my book. It is stamped on the smooth heel of the bowl and the shank bottom and reads Castello [over] Sea Rock Briar followed by SC 16. That is followed by Reg. No. 66171 No. Next to that is stamped Made in Cantu [over] Italy followed by an oval containing the name Carlo Scotti next to the stem shank union. The Castello “diamond” inset is on the left side of the tapered stem letting me know this was a pipe made for US import. On the underside of the stem it is stamped Hand Made [over] Castello [over] 3. It was pretty dirty with dust and grime when we got it but still showed promise. He took the following photos of the pipe before he worked his magic on them. The pipe must have been a terrific smoker because the bowl was heavily caked with lava flowing over the rim top. In its condition it was going to take some work to clean out that bowl and be able to see what the rim looked like underneath the layer of lava. The acrylic/Lucite stem was in good condition. It was dirty and had light tooth chatter and marks in the top and underside of the stem just ahead of the button. The rest of the bowl looked dirty but the photos give an idea of what Jeff saw before his cleanup revealed the condition of the pipe. The next photos try to capture the stamping on the flat panel on the underside of the shank. It read as I have noted above. The stem also bears a Hand Made Castello 3 stamp on the underside.    Jeff cleaned the pipe with his usual penchant for thoroughness – reaming the bowl with a PipNet pipe reamer and cleaning up the remnants with a Savinelli Fitsall Pipe Knife. He scrubbed the internals of the bowl, shank and stem with alcohol, cotton swabs and pipe cleaners. He scrubbed the exterior with Murphy’s Oil Soap to clean off the dust and grime on the rusticated Sea Rock finish. The rusticated rim top looked very good under the thick lava coat. The inside of the bowl itself looked great. The stem was in great shape other than the tooth marks on both sides. I took photos of the pipe when it arrived here.   I took some close up photos of the rim top, bowl and stem to show what they looked like after Jeff’s cleanup. It is a startling difference. The rim top looks very good. The stem also looks very good.     I took a photo of the stamping on the underside of the shank and the stem. It is clear and readable as noted above. I also have included a photo of the “diamond” inset on the left side of the saddle stem.  I removed the stem from the shank and took a photo of the pipe to show the proportions of the bowl/shank and the stem length.I cannot seem to retain the details on Castello pipes in my head for long for some reason. The stamping on them – Castello and the Reg. No. and the Carlo Scotti stamp left me with some questions that I need to answer before I began to work on the pipe. I turned first to the Pipephil site (http://www.pipephil.eu/logos/en/logo-castello.html) because of the general quick summary of information I get there. I quote:

Castello PIPA CASTELLO di Carlo Scotti & C. was founded in 1947 by Carlo Scotti († 1988). Franco Coppo (AKA “Kino”) who married Carlo Scotti’s daughter Savina, manages (2012) the corporate since 1985.

The site also gave a good summary of the grading and sizes of the pipes. I quote that in full.

Sizes (ascending):

1K to 4K, G (Giant) and GG (Extra large)

Rusticated grading: SEA ROCK, OLD SEA ROCK, NATURAL VIRGIN,

Sandblasted grading: ANTIQUARI, OLD ANTIQUARI

Smooth grading (ascending): TRADEMARK, CASTELLO, COLLECTION

Other stampings: Great Line (Non-standard or freestyle) Fiammata (Straight grain)

Production (2012): ~4000 pipes / year

I also found a note on the page that the Rhinestone logo was originally on pipes for the US market. It is occasionally used now.

I turned then to Pipedia for more information on the brand (https://pipedia.org/wiki/Castello). The majority of the information was what was already quoted above in abbreviated form. However there was a link to an article by Bob Hamlin that gave some interesting bits of information that I found helpful (http://www.pipes.org/BURST/FORMATTED/196.016.html). I quote in part from that article.

SEA ROCK [Carved Black or dark brown]:  This is the lowest grade of the Castello line and is the most common in the USA.  Sea Rocks are produced by taking a smooth bowl that has not been “final finished” and surface carving the finish with tools. This “carved” finish is then evened out using a steel wire brush, stained and then waxed. The Natural Vergin carved finish is left unstained and unwaxed as a rule, although we have seen waxed and partially waxed “Vergins”.

All carved Castello pipes are graded by the number of K’s that are stamped on each piece and are K-graded by SIZE.  1K is the smallest and fairly rare, 2K is small to medium, with 3K or 4K being the most common and ranges from medium to medium large. Large pieces are stamped “G” for giant and extra large pieces are stamped “GG” for double giant.  In addition to the number of K’s on a carved Sea Rock piece the shape number is almost always added.  As a rule a Sea Rock Castello is stained Black, although recently there have been quite a few coming in stained deep brown and still stamped “Sea Rock”.  American Logo’d Sea Rocks are all priced the same to the consumer, although most are 2 or 3 K’ed models.  G/GG models are charged at a higher price on American pieces and are basically the same as their European counterparts.

The Castello Sea Rock briar I was working on did not have the K stamping. It definitely was made for the American Market with the Rhinestone in the stem. It had the dark brown finish. The shape number still needed to be determined.

Pipedia also gave a link to Mike’s Briar Blues site for help in dating and determining shapes (http://www.briarblues.com/castello.htm). I quote a piece on the Reg. No. that I found helpful.

1947 – Carlo Scotti begins the company.  In the beginning (1947 – 1949, maybe 1950) the pipes were stamped Mi Reserva (my reserve ).  Later the Reg No was added.  This Reg No has nothing to do with shape numbers, but is merely the Castello company trademark

Shape numbers. Shape numbers are all 2 digits. A 2 in front indicates a “fancy” interpretation, a 3 in front means that the carving is somehow unique. I don’t know when the change was made, but currently, a π symbol is used instead of the 3xx. I’ve only seen this on Sea Rocks, but that doesn’t mean anything…

Pre K grading.  Late 1950’s to mid-1960’s the pipe carried stamps which indicated sizes. These were as follows; SA, SB, SC, and SS.  SA being the smallest and SS the largest.

Now I had more information to work with. The Castello Sea Rock in my hands was pre K graded. That told me that it came out in the late 1950s to mid-1960s. The SC stamp makes it a mid-sized pipe from that time period. The number 16 makes it a straight shank billiard.

I started the minimal work I had on the bowl by using a black Sharpie Pen to darken the light spots on the rim top. My purpose was to blend the rim top into the rest of the stain on the bowl and shank. It worked very well.I worked some Before & After Restoration Balm into the rusticated Sea Rock finish on the bowl and the rim top. I worked it into the surface of the briar with my fingertips and a horsehair shoe brush to clean, enliven and protect the wood. Once the bowl was covered with the balm I let it sit for about 20 minutes and buffed it off with a soft cotton cloth and the shoe brush. I polished it with a microfiber cloth. I took photos of the pipe at this point in the process to show what the bowl looked like at this point. I set the bowl aside and worked on the stem. It was in great shape so I polished the stem with 1500-12000 grit pads. I dry sanded it with the pads and wiped it down with a damp cloth after each sanding pad. I finished polishing the stem with Before & After Pipe Polish – both Fine and Extra Fine polishes. I wiped the stem down with a damp cotton pad afterwards and buffed it with a soft microfiber cloth.   I put the bowl and stem back together on this beautiful Castello Sea Rock Briar 16SC Billiard. I polished the stem with Blue Diamond to polish out the scratches in the Lucite. I gave the bowl multiple coats of Conservator’s Wax and the stem multiple coats of carnauba wax. I buffed the pipe with a clean buffing pad to raise the shine. I hand buffed it with a microfiber cloth to deepen the shine. The pipe polished up pretty nicely. The contrast of the blacks and dark browns of the briar with the polished black acrylic/Lucite is quite stunning. The dark and coral like rustication around the bowl and shank is quite remarkable and gives the pipe an incredible tactile presence that only improve as it heated from a smoke. The finished pipe is shown in the photos below. The dimensions of the pipe are Length: 5 ½ inches, Height: 2 inches, Outside diameter of the bowl: 1 ¼ inches, Chamber diameter: ¾ of an inch. The pipe weighs 39grams/1.38oz.Thanks for walking through the restoration with me. I always enjoy working on Castello pipes. Cheers.