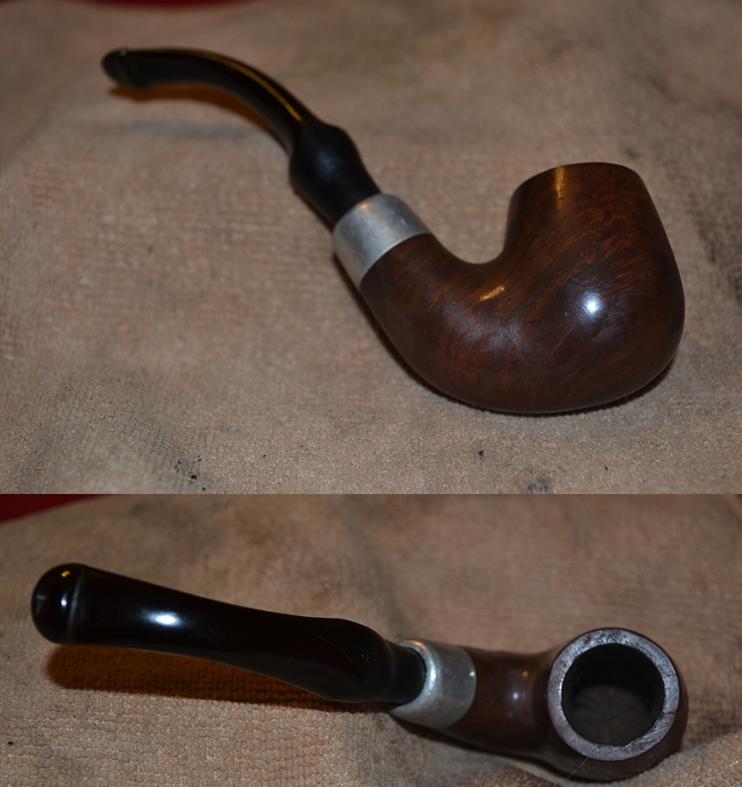
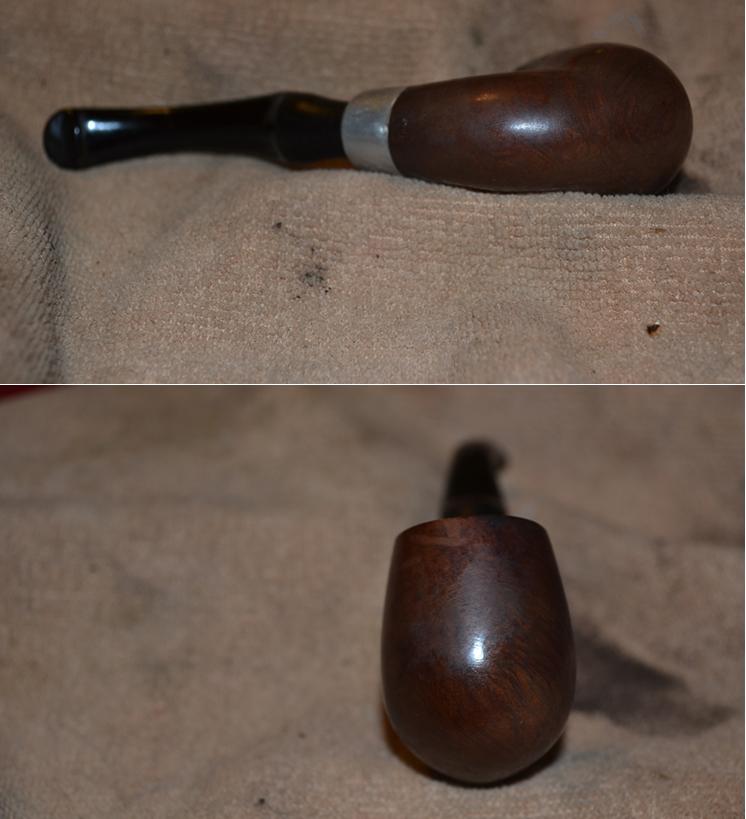
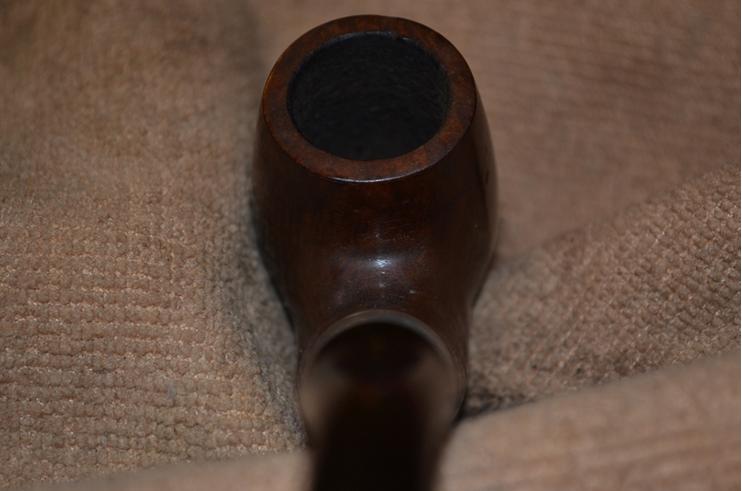
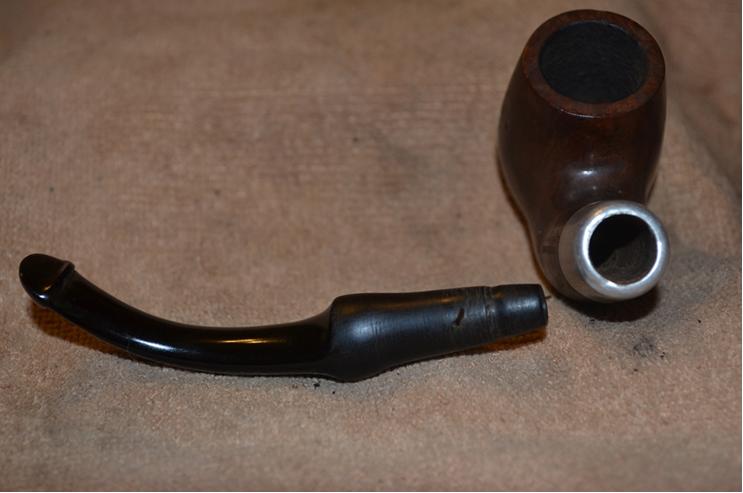
Category Archives: Pipe Refurbishing Essays

Essays and pictorial essays on the art of refurbishing

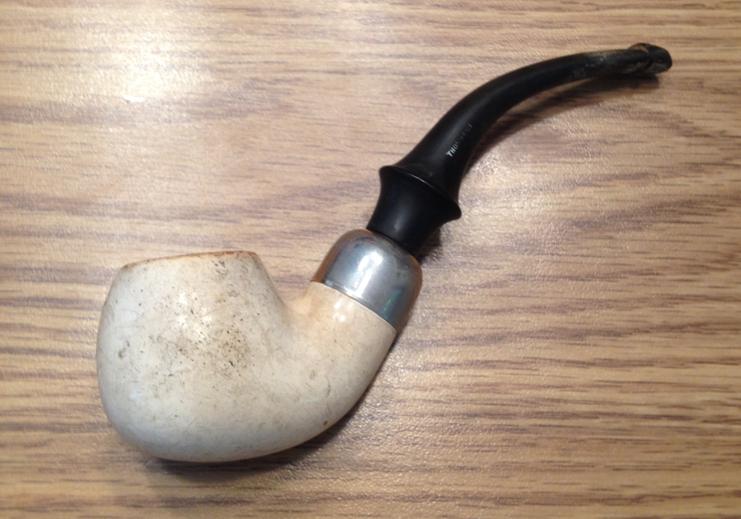
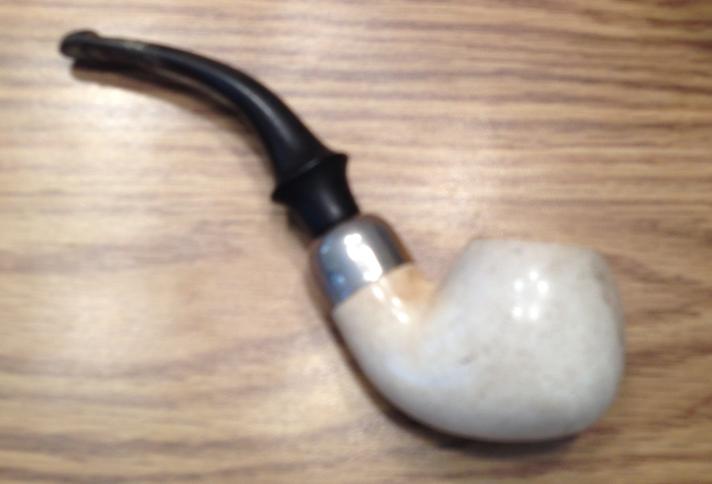
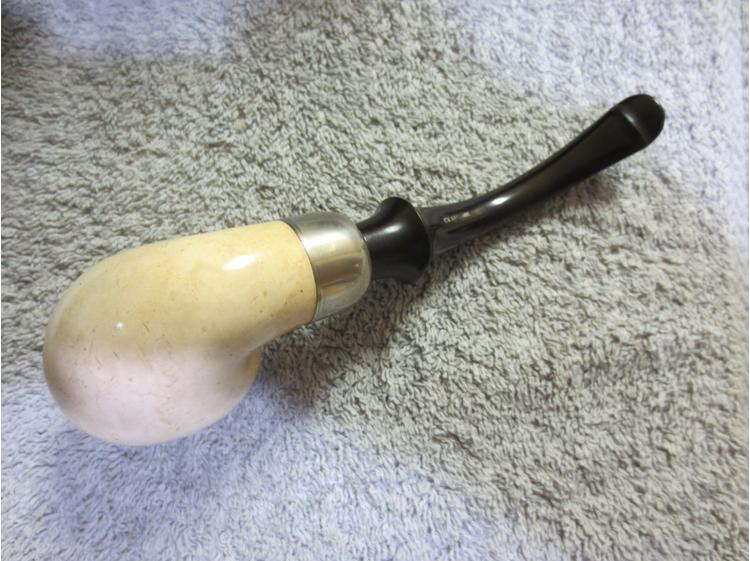
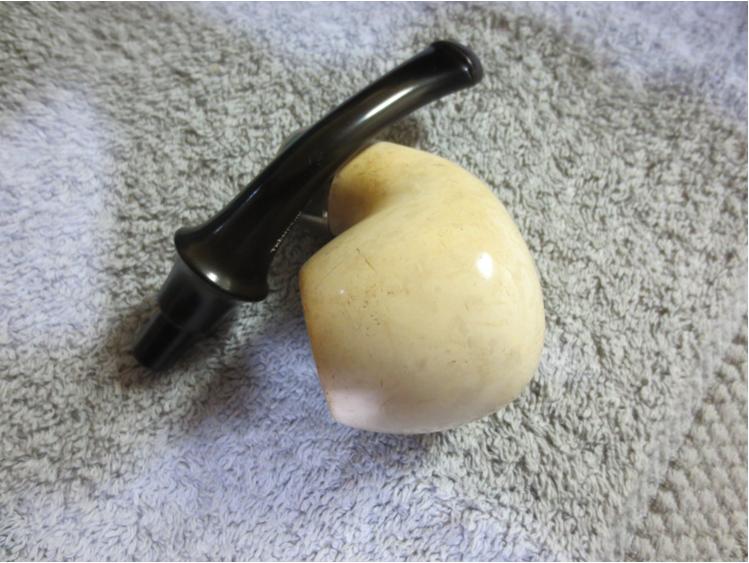
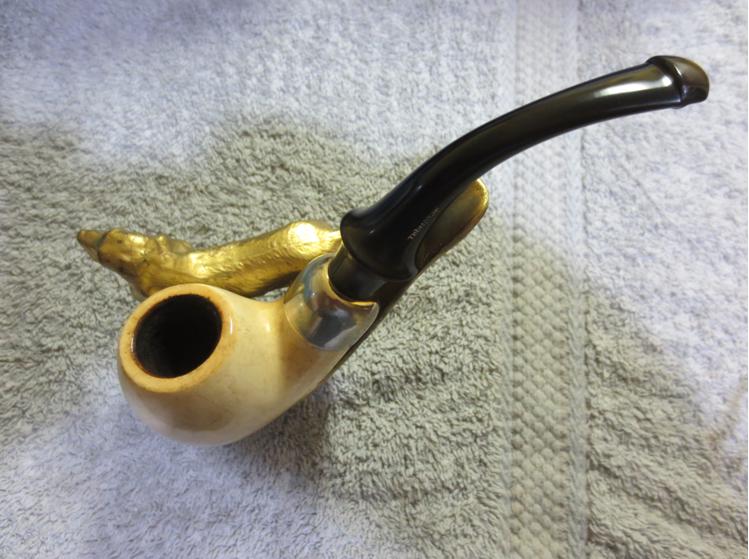
Thompson Bent Meerschaum System Pipe – Peterson Shape 303


Blog by Steve Laug

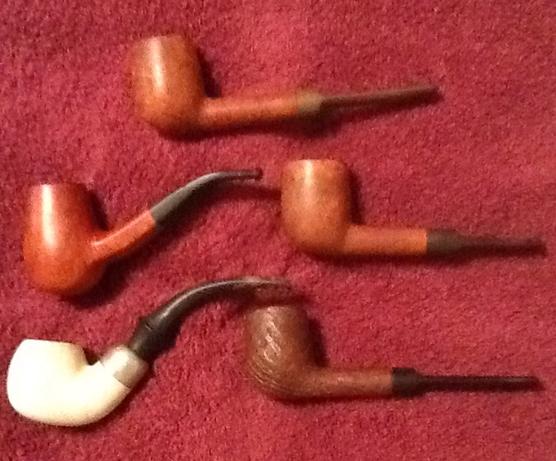
Last week I was down in the US visiting my parents and had some time to visit a few of my old haunts for estate pipes. One of the locations was a gold mine of old pipes. Below are two poor quality picture of the lot that I found there. It included two old English made pipes with saddle stems that were tired but in decent shape, an older Danish Made egg, an older Jobey English made push stem sandblast billiard and a meerschaum system pipe that looked like a Peterson 303 shape to me.Thompson a

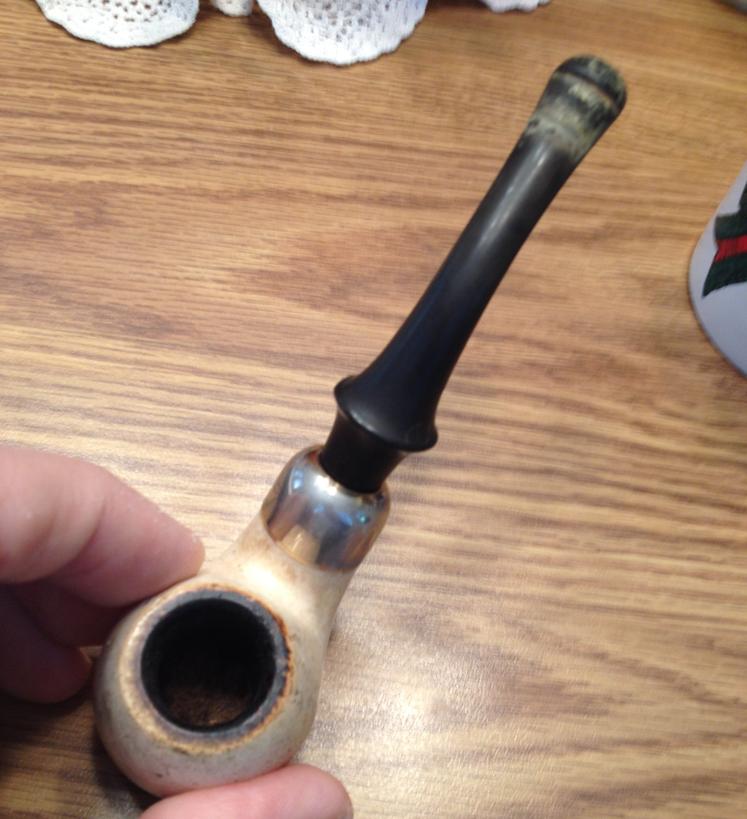
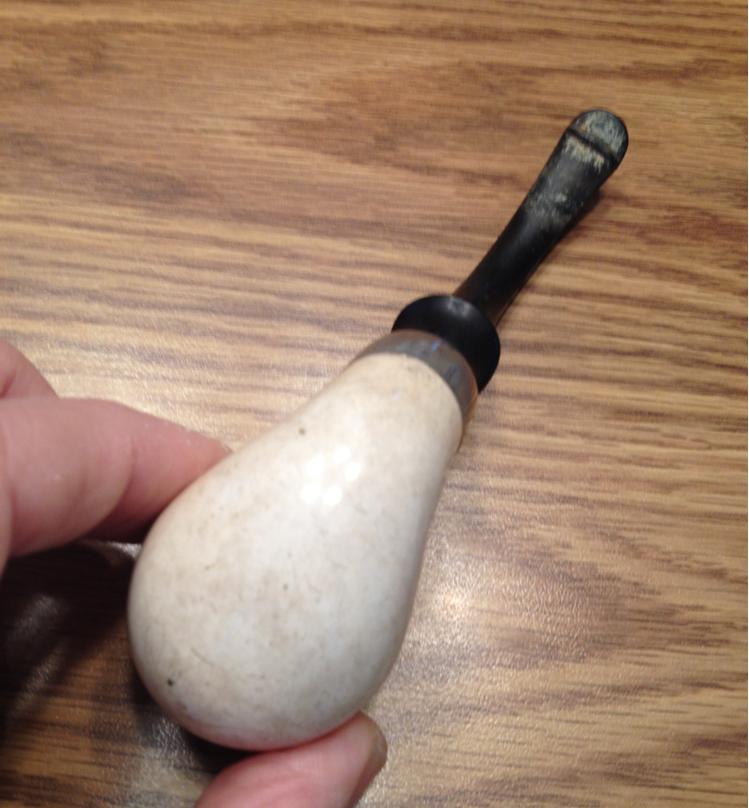
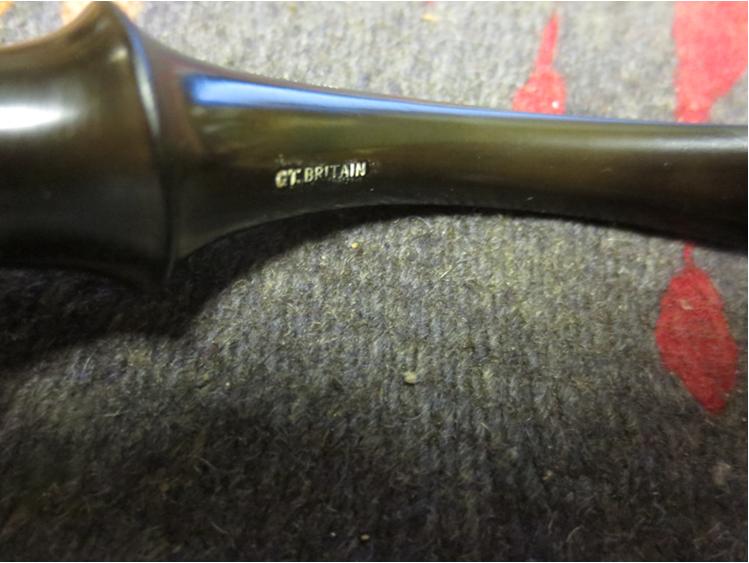
Thompson b It was scratched and dirty with oxidation and bite marks on the stem. The stem looked like a P-Lip but it is not – it has the airway in the end of the button rather on the top of it. The saddle flare is also different from a Peterson stem but the shape of the pipe certainly screams Peterson. It bears stamping on the stem that reads Thompson on the left side and Gt. Britain on the underside. The stamping is etched into the vulcanite. The nickel cap was oxidized and worn. The rim of the bowl was dirty and had tarry build up. The inside of the bowl was caked and dirty. The sump in the shank was filled with tars and oils that had crystallized and hardened. It was in need of some TLC.Thompson1

Thompson2 I reamed the bowl with a sharp knife to remove the cake back to the meerschaum. I carefully scraped it away so that I would not damage the inner edge of the rim.Thompson3

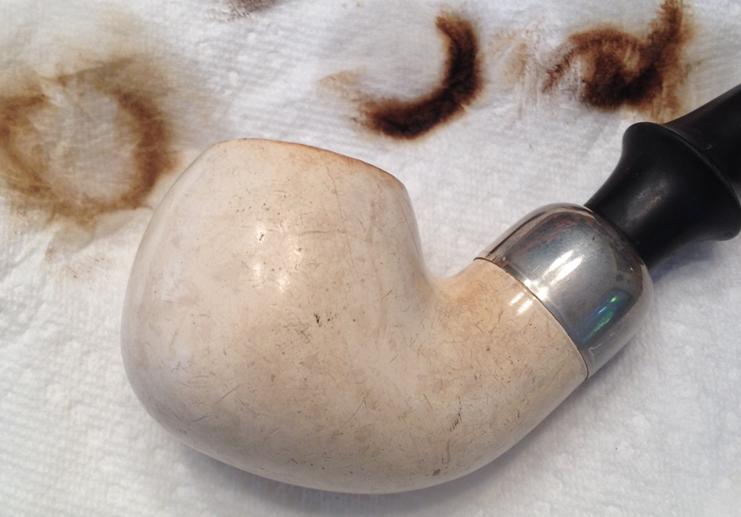
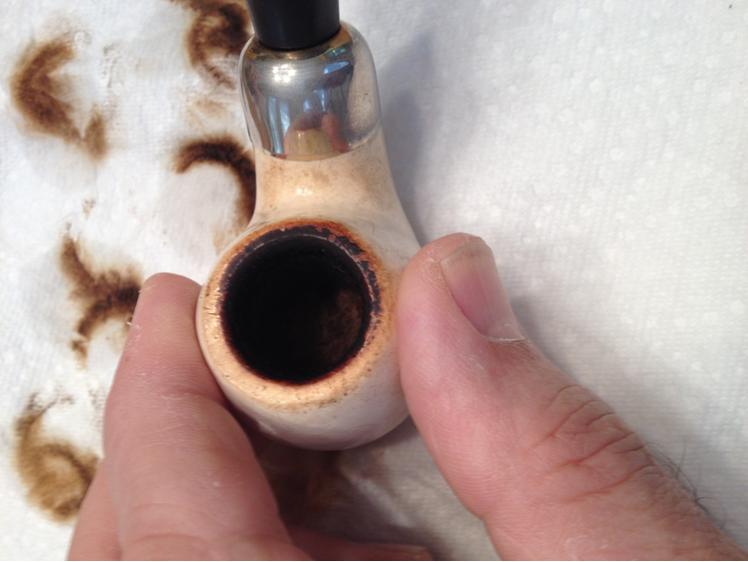
Thompson4 When I returned to my parent’s house I set up some newspapers and turned the kitchen table into a work table. I chose to work on this old warhorse first. I scrubbed the rim with a damp paper towel to remove the tars. I scrubbed it with saliva as well to break down the tars. I also scrubbed the bowl with the damp towel as well to remove the dirt and grime on the sides. The first bit of scrubbing took off the grime on the bowl sides and most of the buildup on the top of the rim. The second photo below shows the rim after the first bit of scrubbing.Thompson5

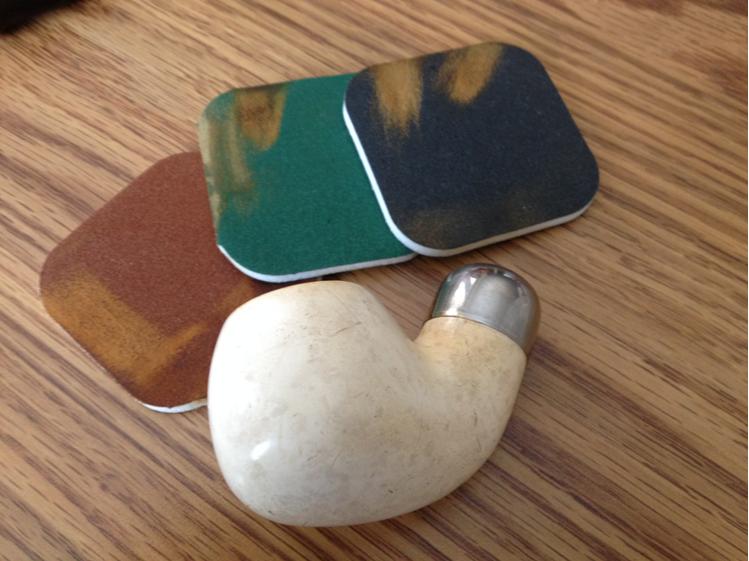
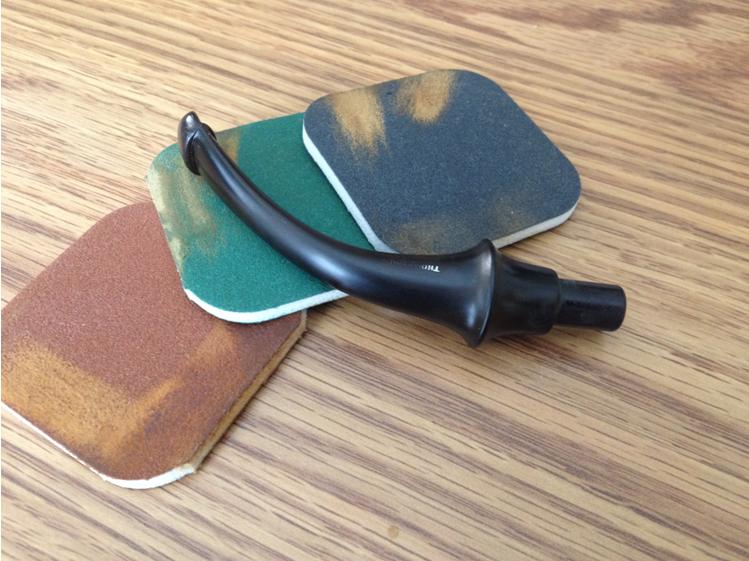
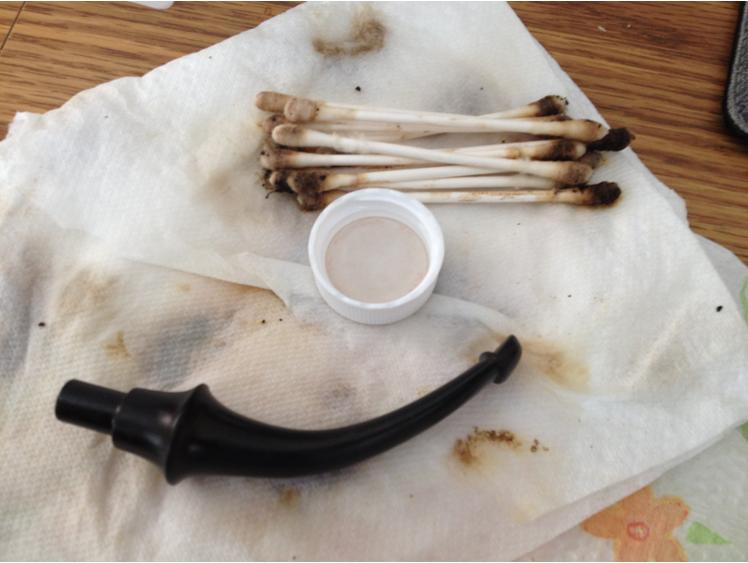
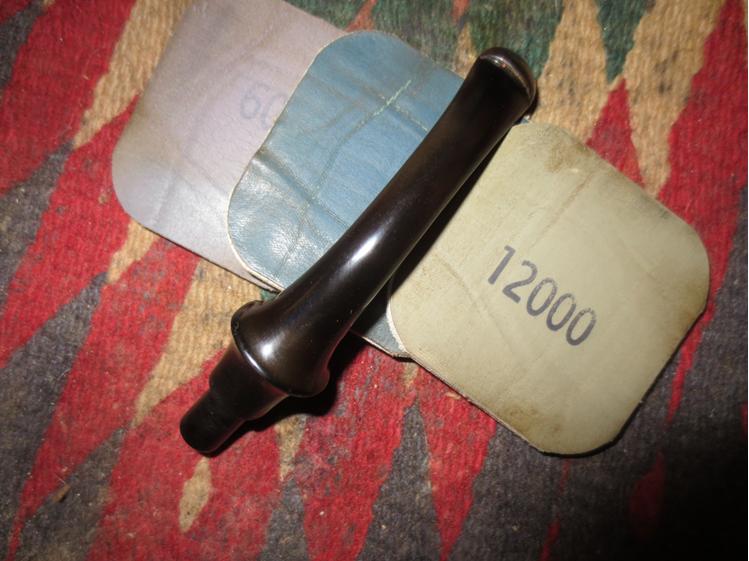
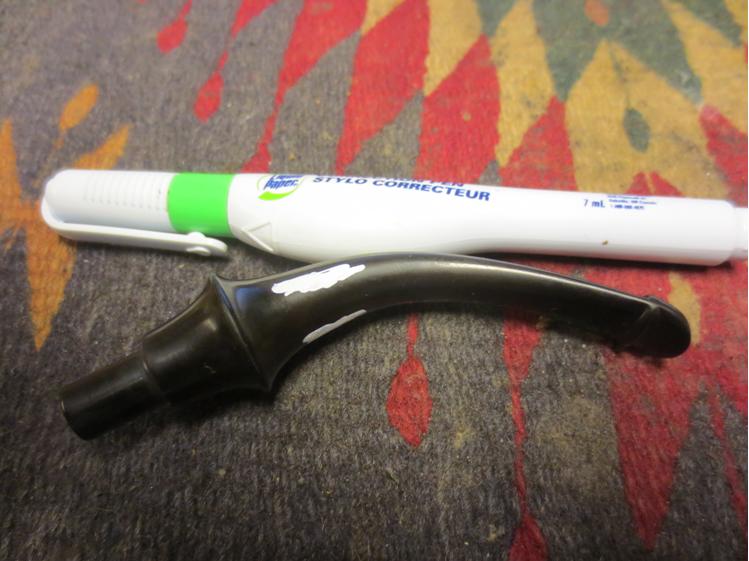
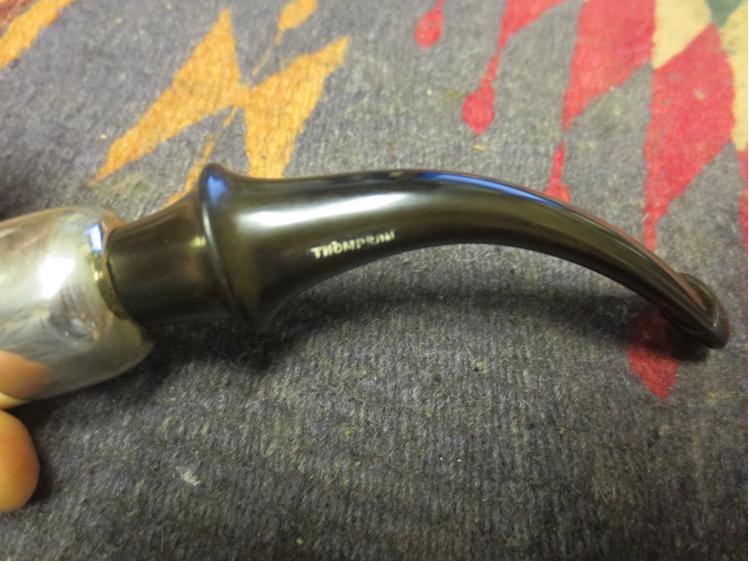
Thompson6 I sanded the bowl and rim with micromesh sanding pads. I started with 1500 grit and worked through 2400 grit sanding pads. It minimized the scratches on the sides of the bowl and also removed the rest of the tars on the rim.Thompson7 I wet sanded the stem with 1500-2400 grit micromesh and then rubbed it down with a light coat of mineral oil (thanks Troy) and sanded it with 3200-4000 grit pads. I carefully sanded around the etched/stamped letters on the stem side and bottom. I was able to remove the oxidation and calcification that was built up around the button.Thompson8 I scrubbed out the tenon end of the stem and the shank/mortise of the meerschaum bowl with alcohol and cotton swabs. I scrubbed out the bowl with cotton swabs and alcohol to remove the dust from the reaming. I then followed that by scrubbing the shank and bowl with pipe cleaners and alcohol.Thompson9 I set aside the pipe until I returned to Vancouver and then buffed the stem and bowl with White Diamond to polish both the stem and the bowl. I then sanded them both with 6000-12000 grit micromesh pads and then buffed both with Blue Diamond on the buffing wheel. I gave the bowl a coat of carnauba wax to polish it.Thompson10 I used a liquid paper pen to fill in the stamping on the stem and let it dry.Thompson11 I scraped off the excess dried liquid with my fingernail and then buffed the stem with Blue Diamond to finish cleaning up the area around the stamping. The next two photos show the stamping on the stem.Thompson12

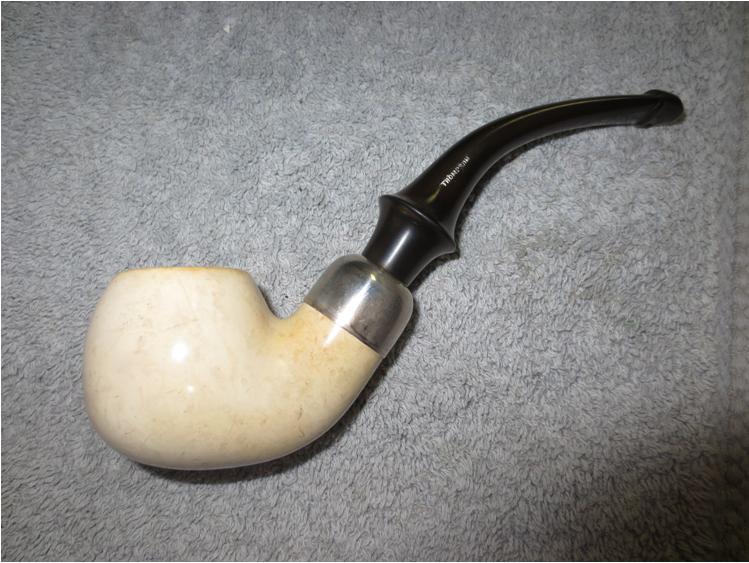
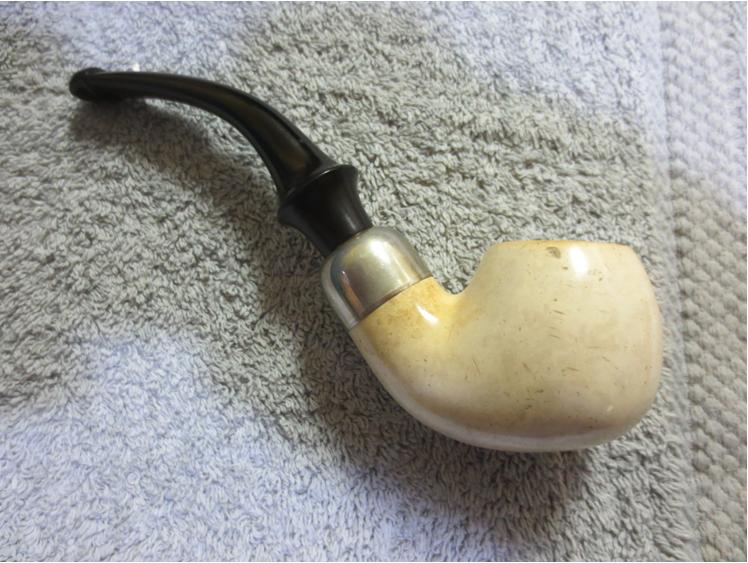
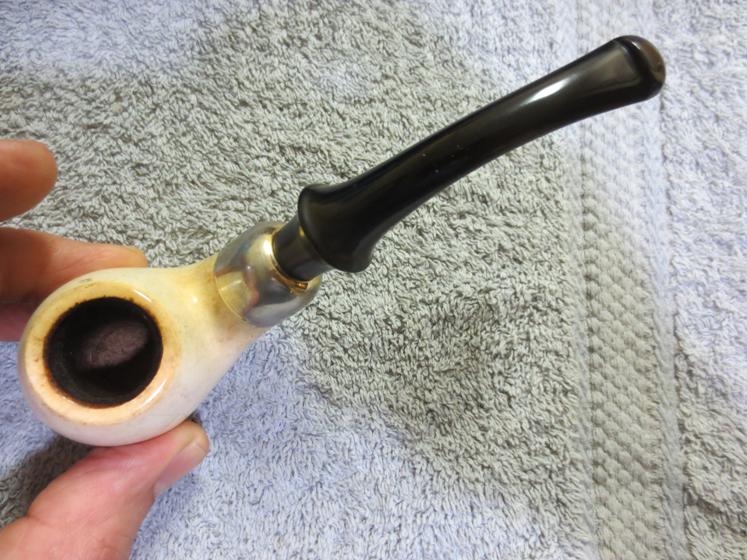
Thompson13 Once I had finished I buffed the bowl and stem with carnauba wax and buffed it finally with a clean flannel buff to raise the shine. The finished pipe is shown in the next series of photos. It turned out to be a beautiful pipe. I would love to figure out who made the pipe and wonder if there is not a Peterson connection based on the drilling and the shape. Does anyone have any information on the brand? Thanks for looking.Thompson14

Thompson15

Thompson16

Thompson17

Thompson18

Thompson19

Thompson20

Bullets, Sawdust, and Rhododendrons: The Story of the D&P Spartan


Blog by Anthony Cook

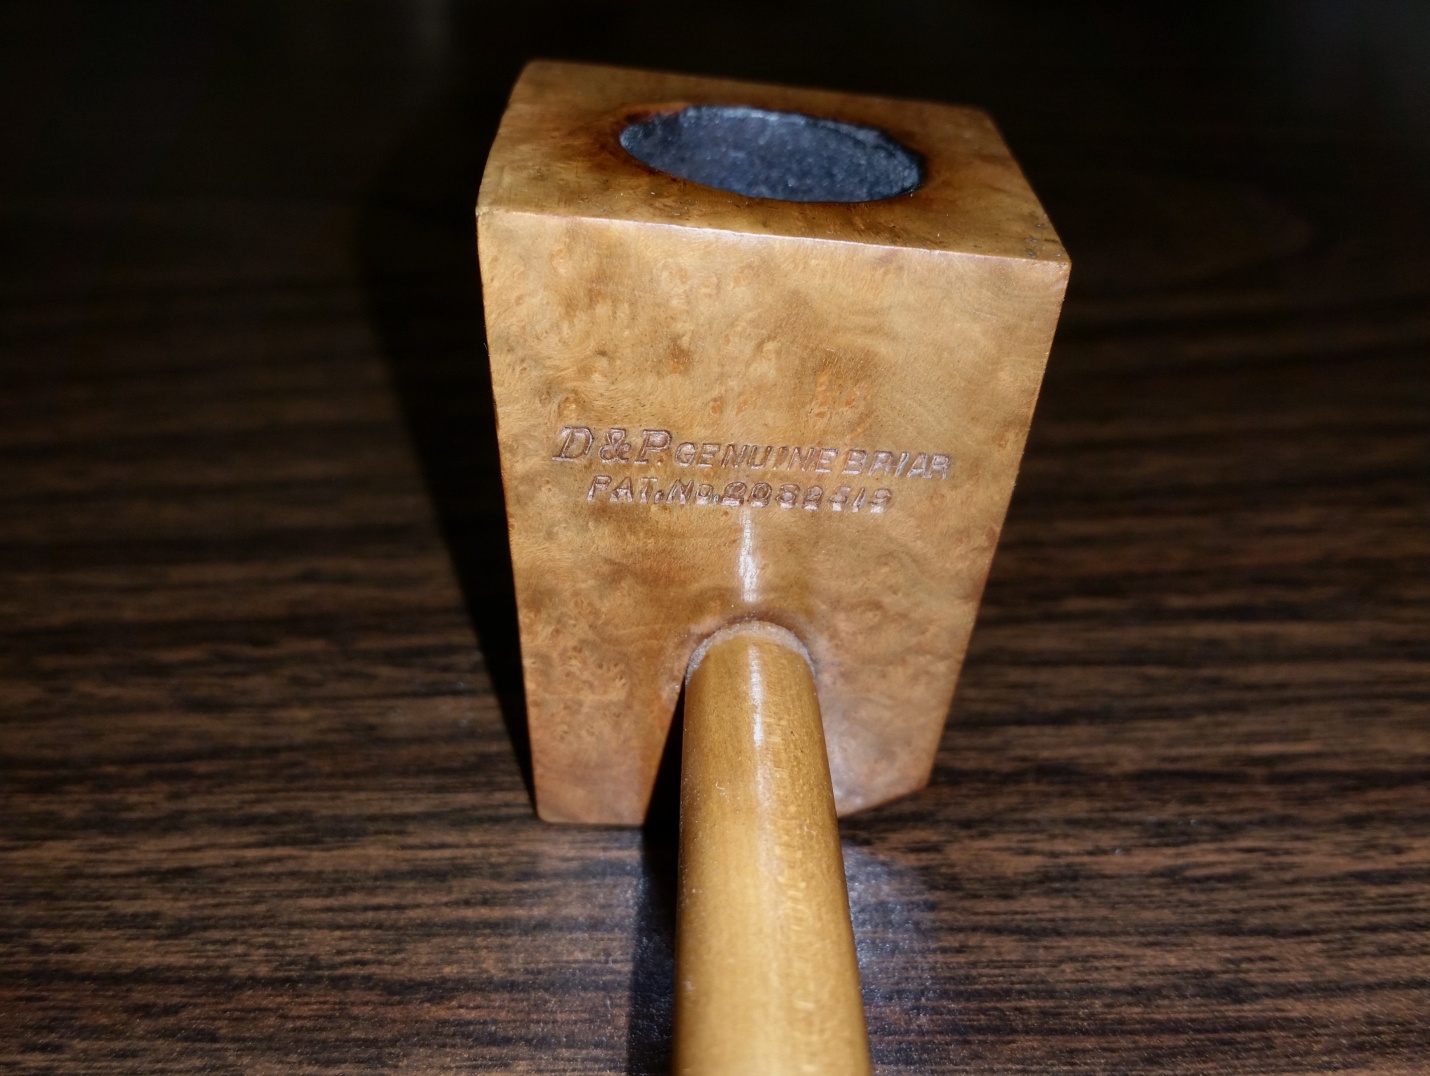
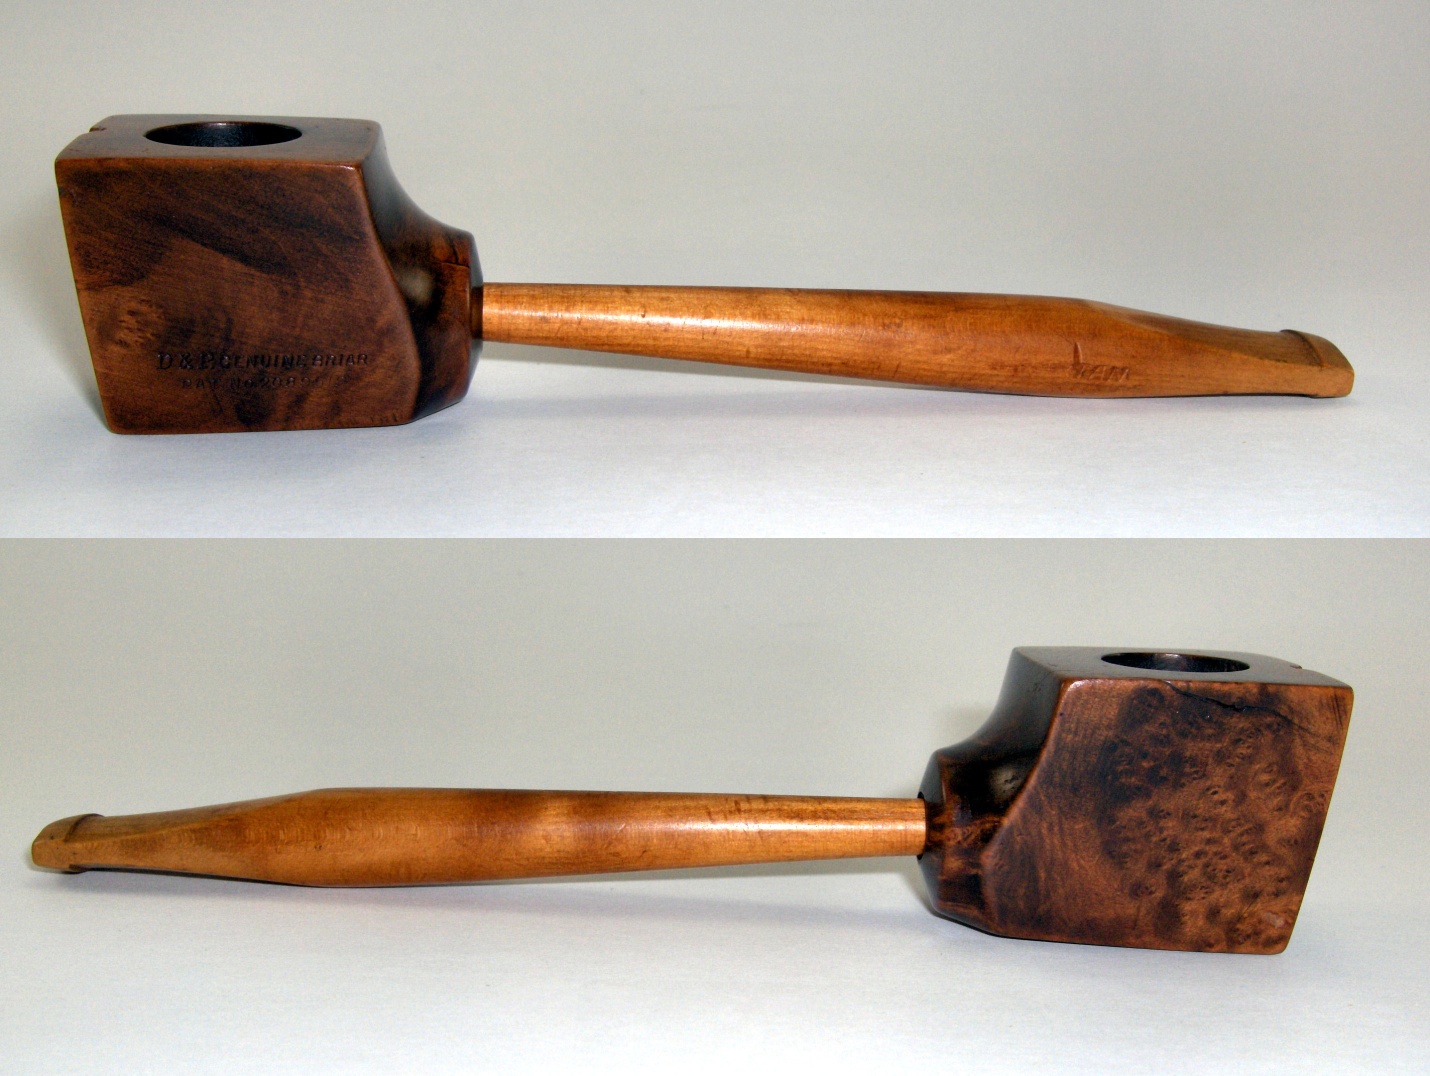
I love old pipes with stories to tell and I recently acquired a couple of very unique, American-made pipes that appear to fit that bill nicely. For those of you unfamiliar with the brand and the pipes (and I’m betting that’s the most of you), let me make the introduction. Meet the D&P Spartan… Spartan1 Spartans were made from 1942 until at least 1945. The majority of them were produced for distribution to U.S. troops overseas during WWII, but some were available domestically as well. The pipe pictured above is one that I acquired and it was probably made in mid-to-late ’43. The stem is made from maple, and although the bowl is stamped “GENUINE BRIAR”, that’s not really true. It’s most likely mountain laurel and possibly even rhododendron (they made do with what they had on hand when briar was tough to get during the war). The stamped patent number (2089519) on the side of the bowl refers to a method of curing wood with boric acid for better heat resistance.

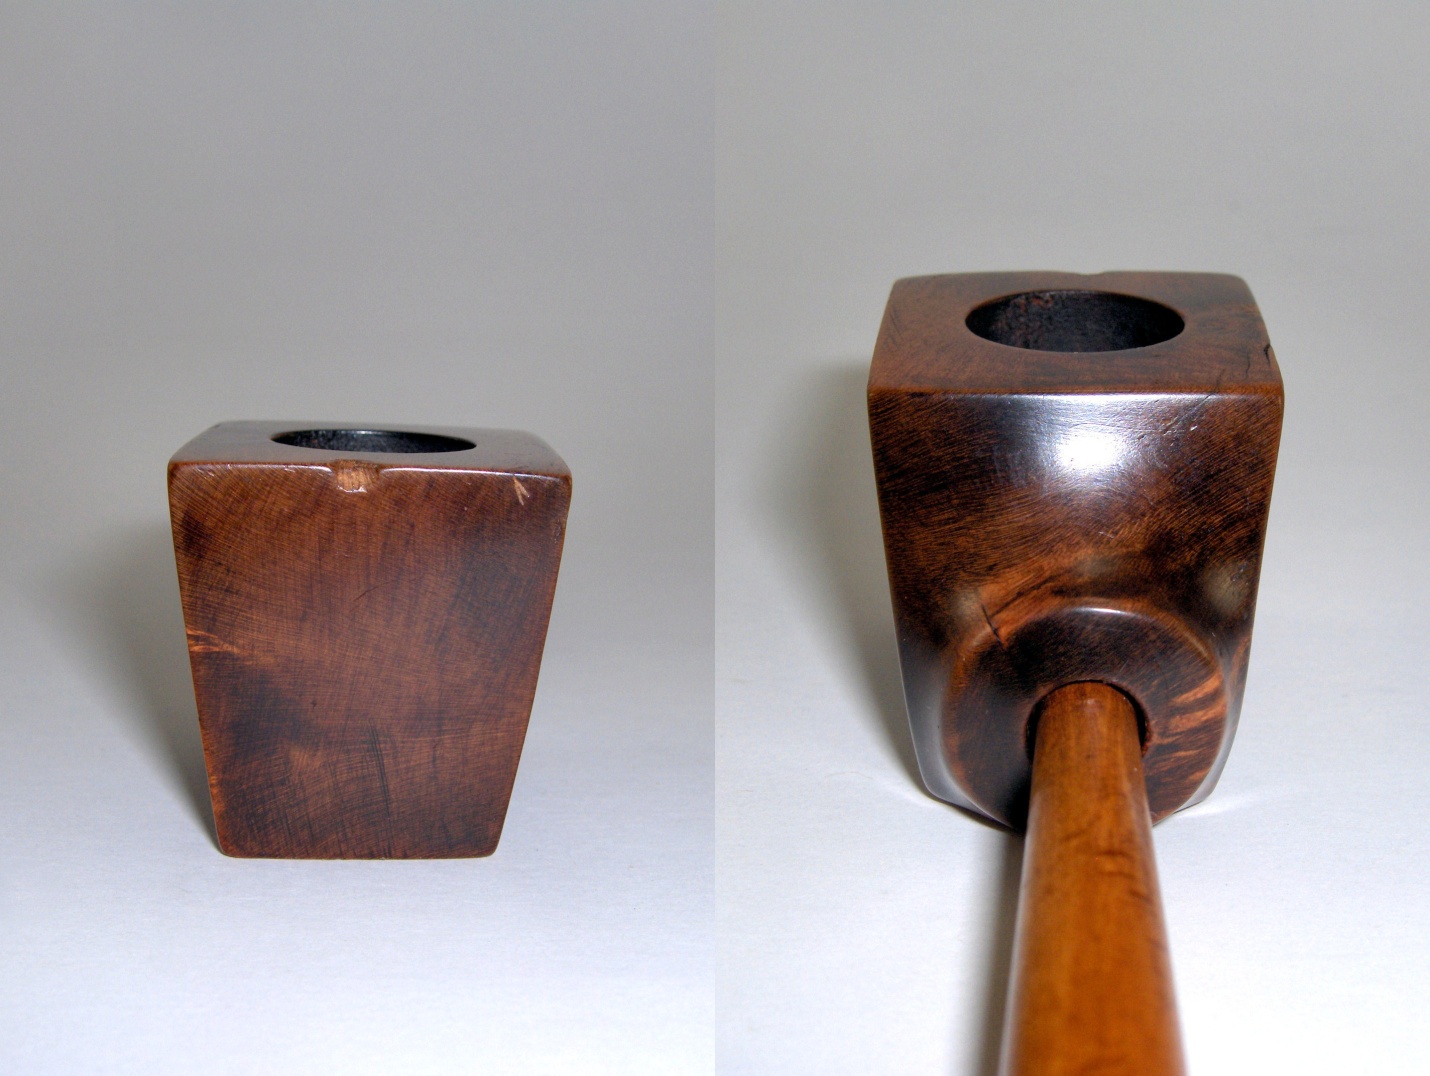
The shape of the Spartans evolved during the course of production. The earliest were simply a wood block with a hole drilled for the tobacco chamber and another on the backside that the stem fit into. It’s very similar to the design of a cob pipe. Those were made from 1942 to mid-1943. I don’t have one of this design on hand, but Tim (oldredbeard) from the Dr. Grabow Collector’s Forum, graciously sent me a couple of photos of one that is in his collection.Spartan2

Spartan3 Notice that Tim’s pipe has the same patent stamp on the bowl as the one pictured above it. The patent was issued in March of 1943. So, this pipe is probably from one of the last production runs for this design.

Sometime around mid-1943 the design of the Spartan was changed. The new version was slightly less utilitarian and added a few aesthetic curves to the back of the bowl. It also grew a nub of a shank and utilized a patented (1888462) pressure fit for the stem. My mid-to-late ’43 Spartan is an example of this design.Spartan4

Spartan5

Spartan6 The design was again changed near the end of the war. I suppose the idea was to give it more appeal as D&P began to rely more on the domestic market. The new look was more traditional, but still rather roughly shaped. The paneled bowl received a few more angles, the shank was further extended, and the maple stem was replaced with one of vulcanite. The second Spartan that I picked up is an example of this design. It would have probably been made somewhere around late-’44 to ’45. I’m not aware of any further changes to the design, and in fact, I don’t believe that D&P continued to produce Spartans for very long after the end of the war.Spartan7

Spartan8

Spartan9

Spartan10 D&P was created in 1942 by David and Paul Lavietes. They were, respectively, the brother and father of Henry Lavietes who was part owner of the better known HLT located in Ozone Park, New York (Henry was the “H”). David Lavietes was also the inventor of the “Ajustomatic” stem fitting.

From the December, 1945 issue of Popular Mechanics

From the December, 1945 issue of Popular Mechanics

Originally, D&P was a sawmill and basically a supplier for HLT. They were located in Boone, North Carolina and purchased mountain laurel locally, which they then cut into blocks to be shipped to Ozone Park to be made into HLT pipes. I’m not sure, but I don’t believe that the D&P stamped pipes were ever sent to HLT. I think that they were carved in North Carolina. In 1944, D&P relocated the sawmill to Sparta, North Carolina and HLT relocated there soon after. In the early ‘50s, D&P became known as the Briarshop. They continued to carve blocks for HLT, although they were located in a different building and still regarded as a separate company. I’ve found no evidence that they ever again marketed pipes under the either the D&P or Briarshop names.

In 1953, HLT acquired the name and assets of the Dr. Grabow Pipe Company. The Briarshop ceased to be a separate company somewhere within the same timeframe and was rolled into HLT. The operation still produced stummels, but now they were doing it for both the HLT and Dr. Grabow brands. HLT has since ceased to exist, but Dr. Grabow pipes are still being made to this day in Sparta, North Carolina.

So, there you go. A couple of old pipes with stories worth telling. To me it doesn’t get much better than that.

I’d like to give special thanks to Dave Whitney and Tom Douglas for helping me put all of these pieces together. Sometimes, things get a little muddy out there in Sparta. Also, thanks to Tim for providing me with photos of a 1st-gen Spartan. You know where to reach me when you’re ready to let it go, Tim.

Late Breaking News Update!

Okay, not so late breaking, since the news is more than 70 years old, but here it is anyway…

Tom contacted me shortly after the write up was posted and told me that Appalachian State University has a yearbook titled, aptly enough, “The Rhododendron.” The 1942 and 1945 editions have D&P advertisements in them. Both of the yearbooks are available for viewing online here: http://bit.ly/asuyearbooks . I’ve cropped out the D&P ads and you can see them here:

1942: https://lh3.googleusercontent.com/-VqKwuNNXRjo/VZ7dMvMyeVI/AAAAAAAABic/386oDL1_swE/s800-Ic42/asuyb1942-p133.jpg

1945: https://lh3.googleusercontent.com/-7PyicjIL6nQ/VZ7dMzP2UqI/AAAAAAAABig/bM3Xw9a0poM/s800-Ic42/asuyb1945-p101.jpg

You’ll notice that the ’42 and ’45 ads refer to both Boone and Sparta. This leads me to believe that the Sparta location was part of the D&P operation from the beginning. When D&P relocated in ’44 it must have been a headquarters move only. The Boone location appears to have remained in operation after the move, but I have no idea for how long. I’m going to do some more digging around Boone and see what turns up.

WDC Wellington Bent System – Restoring a Mainstay Pipe of the Celebrated Maker


Guest Blog by Robert M. Boughton
Member, North American Society of Pipe Collectors
http://www.naspc.org
http://www.roadrunnerpipes.com
http://about.me/boughtonrobert
Photos © the Author

Bruno Antony: Each fellow does the other fellow’s murder. Then there is nothing to connect them. The one who had the motive isn’t there. Each fellow murders a total stranger. Like you do my murder and I do yours…For example, your wife, my father. Criss-cross.
― from “Strangers on a Train” (1951), directed by Alfred Hitchcock, screenplay by Raymond Chandler and Czenzi Ormonde, starring Farley Granger and Robert Walker [Bruno]

INTRODUCTION
The movie was one of Hitchcock’s greatest and a favorite of mine. How could it not be, with the legendary detective novelist Raymond Chandler as the top word-man? But this is not a blog about swapping murders. It does concern the swapping of a bit, however, or to be more accurate, the removal of one from a basic Peterson’s System Standard in my collection of pipes awaiting more extreme repair, and which won’t be missed before it can be mended, to use for the William Demuth Co. Wellington System Billiard.

But first, let’s play Find the Pipe in the Lot.Robert1 No doubt you have spotted it without trouble, or will soon deduce the answer from following photos.

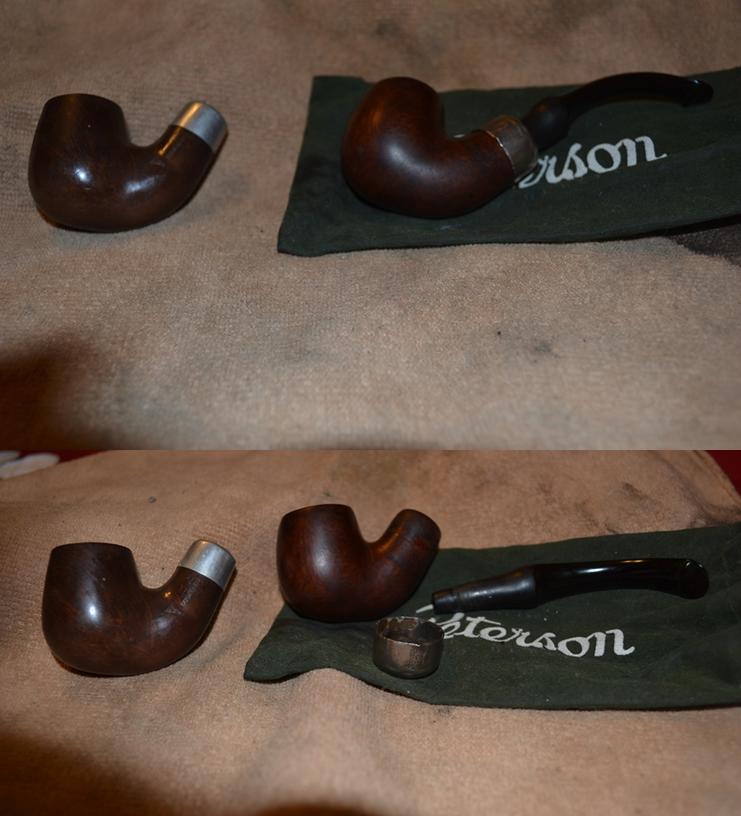
Now for the criss-cross: watch as the bit, at first loose but in place in the shank of the Peterson’s Standard System to the right in photo one, without warning falling to the trademark green sleeve along with the battered band in photo two. Look long enough, and I guarantee you’ll see the moment of selfless sacrifice for the blighted, bit-less predicament of the once proud, near-twin WDC close by. And then, in photo three – the miraculous transplant to the WDC after the donated organ has embraced its new host body, at least tentatively.Robert2

Robert3 A few words concerning the William Demuth Co. are in order, for those not familiar with its illustrious history. Demuth (1835-1911) entered the U.S. as an emigrant from Germany with no money when he was 16 and worked a number of odd jobs. His break came when he attained the position of clerk for a tobacco products trade company. Demuth founded his own company in Brooklyn, New York in 1862, two years into the Civil War, when he was only 27.

Success was rapid, leading to friendships with such prominent figures as James A. Garfield. [Garfield was inaugurated as the twentieth U.S. president in 1881 after winning by the narrowest popular vote margin in history, a mere 9,464 ballots, but with an extra 59 Electoral College votes. He served only four months before he was gunned down by a single shot aimed by Charles Julius Guiteau, an American lawyer denied an ambassadorship to France(evidently for good cause, as shooting the president on July 2, four months into his term, was not very diplomatic). Although Garfield lingered for about two and a half months, the assassin’s bullet caused the blood poisoning to which he succumbed. Guiteau was hanged several days short of a year after the ultimate assassination.]

At the Presidential Inauguration, Demuth presented Garfield with two meerschaum pipes, one in Garfield’s image and the other in the new First Lady’s. The friendship of the two men led to Demuth’s commissioning of a partial presidential line of pipes. But the linchpin WDC pipe was the Wellington, which lasted beyond the company’s own lifetime. Having become a subsidiary of S.M. Frank & Co. in 1937, WDC continued until the final day of 1972. The Wellington, however, was still offered in Frank’s catalog until 1976 and even had a brief reprise in the mid-1980s by way of consumer-direct sales.

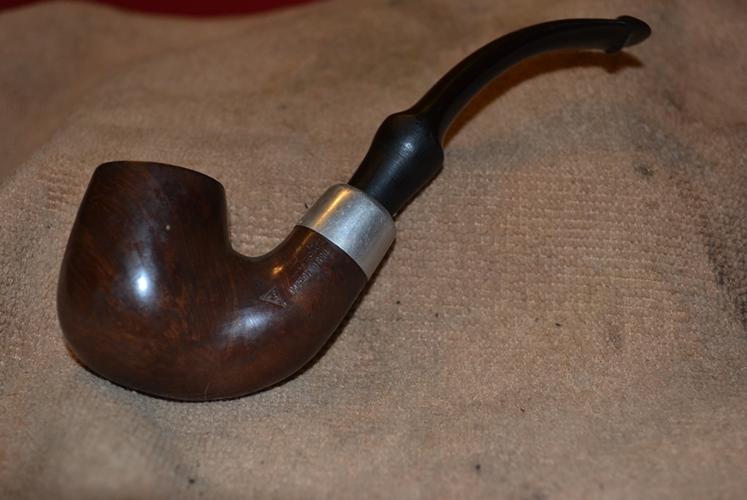
Here are two other Wellington’s, the first courtesy of pipephil.eu and the second from pipedia.org.Robert4 RESTORATION Robert5

Robert6

Robert7

Robert8 In a sentence, this restoration was more about the stem than anything else. I had decided to go with a perfect replacement from a Peterson’s Standard System pipe in my personal collection. Then, when I donned my Dollar Store 3.75X glasses for a “final” close inspection, I cringed at the sight of the faint black outline of the Peterson’s P, shown below, now filled in with a white china marker.Robert9 Note the correct shape of this bit from lip to tenon. My next brainstorm was to sand off the P, and in fact set out to do so when I came to my senses. What can I say? Sometimes I have the stupidest ideas. And so I opted to let the buck stop here and repair the bit I took off of the Peterson’s System Standard shown in the criss-cross photos of the Introduction. That System Standard needs serious work, also; not only a new, genuine bit but a replacement matching band. I will tackle that one when I have the new bit and band and am up to speed on the process of banding.

With a happy glow of contentment in the pit of my belly, I replaced the above bit, with the P filled in at last, on its rightful pipe in the stand-up, two sided bookshelf with doors where I store most of my collection, and opted to proceed with this restoration by doing the long, tedious work of applying layers of black Super Glue to build up the thinner, bottom section of the bit that lacks a tenon. As a result, while the rest of the Wellington has been finished for about ten days, the old bit, mangled by some wannabe pipe fixer, took days of patient layering, sanding and micro-meshing each phase, then polishing on the buffers, and was only completed moments ago.

I started the bit on its way, which I knew would take some days, by filing it to a uniform tapering roundness and sanding with 150- and 320-grit paper before micro-meshing from 1500-4000.Robert10

Robert11 After that I gave the entire surface of the bit below the bulge the first of four thick coats of black Super Glue. Aware of the risk, I then stripped the old finish with as short as possible of an Everclear soak.Robert12

Robert13

Robert14

Robert15

Robert16

Robert17 Leaving the bowl and shank for about 10 minutes in the alcohol and time enough to dry, I reamed and sanded the chamber to the smoothness of a chamois cloth and retorted the pipe using the bit from my own Peterson’s System Standard. Starting with super fine 0000 steel wool, then micromesh every step from 1500-4000, the wood and steel band had a nice natural sheen.Robert18

Robert19

Robert20

Robert21

Robert22

Robert23 Without stain, using the natural rich color of the briar, I prepared the bowl and shank for the coming test to see if the bit worked out, the likelihood of which I had doubts, by buffing it with white Tripoli, White Diamond and two coats of carnauba, using the plain cloth buffer between each, of course.

The following days seemed to drag with each successive layer of black Super Glue and the long drying time followed by sanding with 200-grit paper and micro-meshing up the scale each time. But in the end, the result was worth the time and effort, considerable and somewhat unnerving as they were.Robert24

Robert25

Robert26

Robert27

Robert28

Robert29

Robert30

Robert31 CONCLUSION
Again, this battle was far more about trying to recover an available bit, so that it would fit and lock in the shank, rather than any problems I faced with the bowl and shank. As the bit was when I received the Pete System Standard with which it came, well, the bit was the tip of the iceberg with that future project. In fact, my friend and mentor, Chuck, recommended that I send it to someone he knows in Denver – not so much because the task was beyond my skills but that it was what he would do if he needed a new Peterson’s bent system pipe stem with the right measurements as well as a replacement band of the appropriate type. I was fortunate with the WDC in that it called for a bit designed after the Pete System variety.

Of course I would have preferred to place a perfect, like-new bit in this great WDC Wellington, but the personal reward came in finding out that I could take what I had and make it work.

I think I’ll do the same with the estate Peterson’s Standard System that gave its bit for this pipe, after I’ve received the new parts in the mail.

Restoring a No-Name Bent Rhodesian


Blog by Aaron Henson

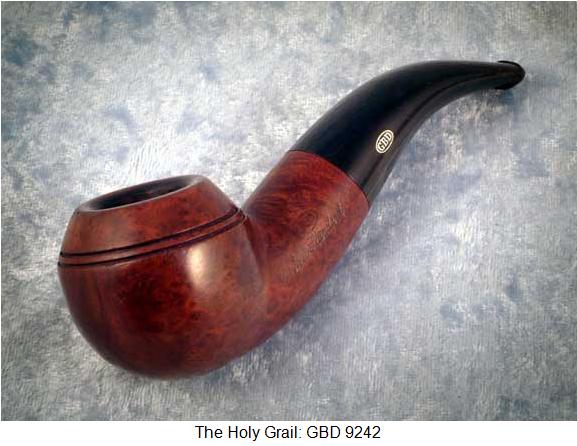
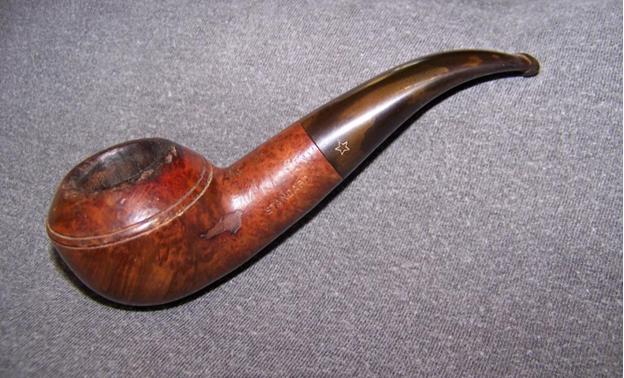
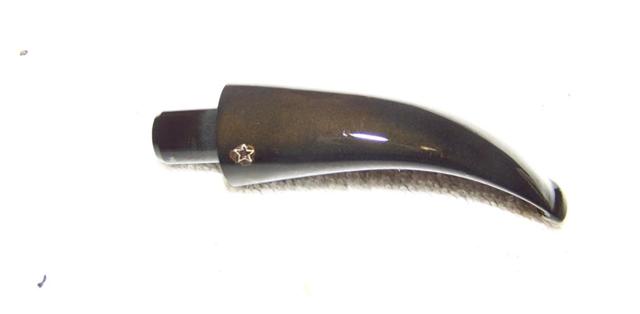
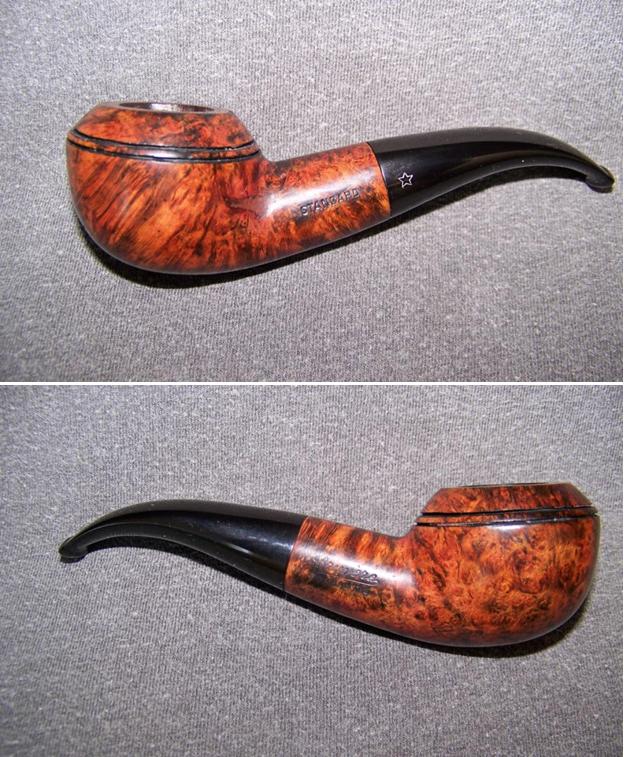
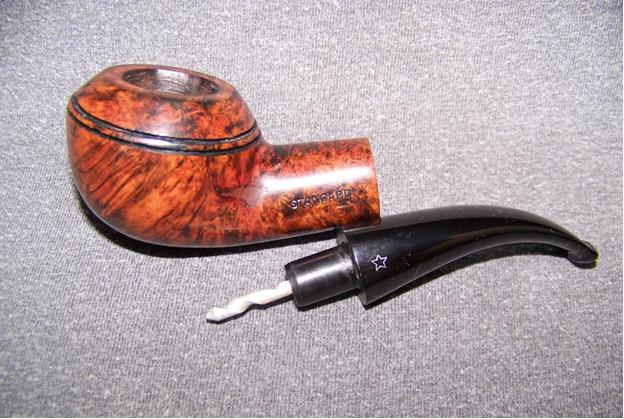
Still being relatively new to the pipe collecting/restoration hobby I have been a bit selective when it comes to the pipe I purchase. I typically look for shapes that have visual or tactile appeal and pay little attention to the name on the stem. And in that line of thought, ever since seeing the GBD 4292 for the first time I have wanted a pipe of this shape. So when I came across this no-name bent Rhodesian on eBay, I quickly placed a bid.Aaron1 It’s not that there were no markings on this pipe. The left side was stamped with STANDARD on the shank and a white 5-point star on the stem. The right side of the shank was stamped with Bruyère in script over Garantie.

A week later the package arrived in the mail and happily, the pipe was just as described and there were no surprise chips or cracks that the seller forgot to mention in the advertisement.Aaron2

Aaron3

Aaron4

Aaron5 Stummel Inspection
The grain was very nice with some birds eye on the right side and a kind of flame grain on the left. There was some minor denting on the heel but the only real wood flaw was a large fill on the left side The color of the fill did not blend well with the grain and it detracted from look of the pipe. Around the rim there was some chipping and charring; damage not uncommon in a used pipe. The only other major issue that I found was the that the twin groves around the bowl were not very deep and had been worn completely away on the right side.

Stem Inspection
The stem was in very good shape. There were some tooth marks on the bottom side of the stem with moderate oxidation overall. The singer was removable and had a modest build up of tar. The biggest issue with the stem was the loose fit to the stummel – which didn’t become apparent until after the shank was cleaned.

During the inspection I decided to change the stain and finish of the pipe in order to highlight the grain and camouflage the large patch. So I began by setting the stummel to soak in 95% isopropyl alcohol to remove finish and loosen the tars and cake. I set the stem to soak in the same solution in a different container for the same reasons.Aaron6 After an overnight soak, I began cleaning the stem with pipe cleaners, running them through until they came out clean. To address the oxidation, I placed a small dab of petroleum jelly over the star and set the stem to soak in a solution of 50/50 chlorine bleach and water. After 20 minutes – when the bubbles had subsided – I rolled the stem over in the solution and let it go another 20 minutes. Then I removed from the bath, rinsed with fresh water and set the stem aside to dry.Aaron7 I didn’t get back to the work bench right away, so after a 36 hour soak, I removed the stummel from its alcohol bath and wiped it dry. I then reamed the bowl with 40 grit sand paper wrapped around a ½” diameter dowel (although this method works well, I did finally order a Castelford pipe reamer from Amazon). Once the cake was removed and the chamber cleaned, I went to work on the shank. Pipe cleaners and cotton swabs removed the remaining gunk inside the shank.

The chips and charring around the rim could only be cleaned up by topping the bowl. I use a sheet of 220 grit sandpaper laid on a flat surface and worked the stummel around in the circular motion. Even pressure and constant checking ensured that the rim was flat and level. I didn’t get the deepest chips because I was concerned that anymore material off the top would change the look of the pipe. Looking back now, I could have filled these chips with a briar dust patch. Maybe I will go back and do that this fall.

I sanded the remainder of the bowl with 320 – particularly around the large filled area and decided that the fill was in good shape and not worth removing. The fill proved to be of a darker color and that went along with my finishing plans.

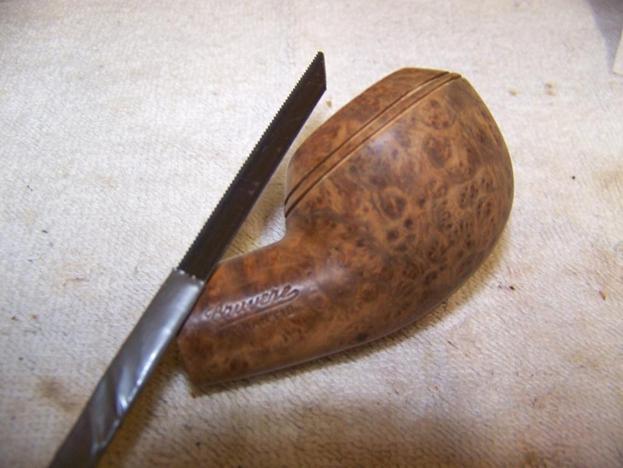
The parallel grooves around the bowl were next on the list. On the right side they had worn away until they were barely visible. I went to my local hardware store and searched through the saw blades until I found what I was after: a thin fine toothed mini-hacksaw blade that just fit the width of the existing grooves. I trimmed the end of the blade with shears so I would have more clearance around the shank. Using the existing groves as a guide, I carefully worked my way around the bowl deepening and redefining the grooves. As usual, I found that not rushing yielded the bet results.Aaron8

Aaron9 Returning to the stem, I tried applying heat to raise the tooth mark but that did not answer. So I roughened the tooth marks with 320 grit paper and fill of the divot with black superglue in multiple thin layers, letting the glue dry completely (12 hours) between layers. Once the final layer of superglue was dry, I feathered out the patch with 320 grit paper. Then I began the sanding/polishing process by wet sanding with 400 – 4000 grit paper stopping every few grits to dry the stem and apply a light coat of mineral oil. I didn’t touch the star on the stem until I got to the 2000 grit paper not wanting to damage the logo. Once I finished polishing the stem with 6000 – 12000 grit paper I oiled the stem and set it aside.

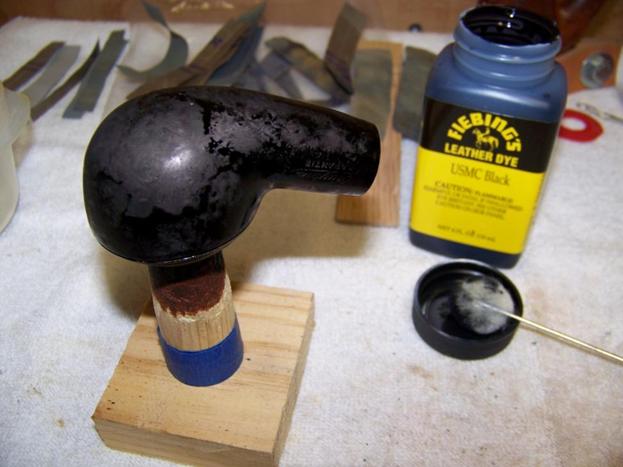
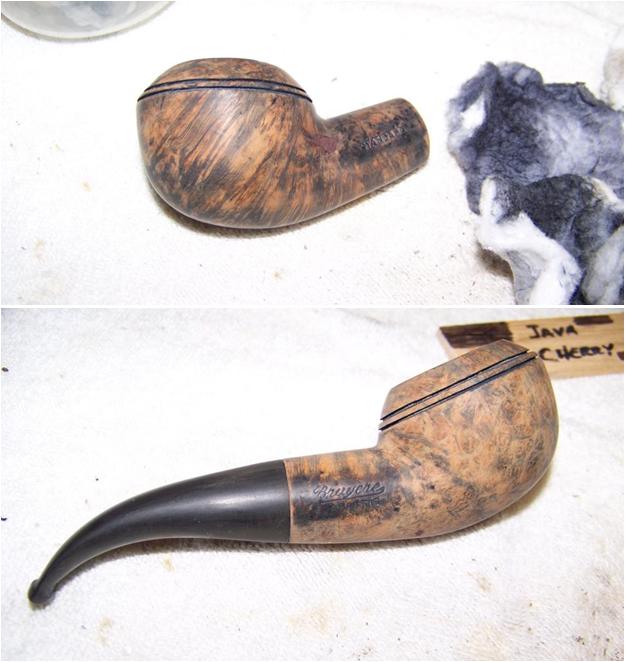
I wanted to provide some contract to the grain of the pipe and to make the grooves really stand out. The original grooves did not have a contrasting color. I began with a coat of Black Fiebing’s leather dye. In retrospect, I should have thinned it down some.Aaron10 After the stain dried, I had a difficult time removing it. Acetone wipes and eventually light sanding removed most of the dye but left enough to highlighting the grain.Aaron11 I wanted a little more color so I applied a 3:1 diluted coat of Fiebing’s Ox Blood dye. This had the result of giving the pipe a pink hue that had me more than a little concerned. Happily, it all came together with multiple thin coats of olive oil. I left the oil on the stummel until it soaked in and then applied the second and third coats. The third coat did not soak in, so I wiped in clean and set it aside to rest for a couple of days.Aaron12 Before taking the pipe to the buffing wheel and thought I would address the loose stem. I tried bee’s wax, which has worked in the past, but the stem remained too loose. After a little research I heated the tenon over the heat gun and then inserted a nail set into the air hole and let the tenon cool. This technique only enlarges the end of the tenon rather than the full length of the tenon, which is a better repair. I went through the heating/cooling process several times until I got a snug but not tight fit. Another thing to be aware of when heating the tenon is that the softened tenon may ‘sag’ a little. If this happens, then you may be left with a little gap between the stem and shank.

From here, I assembled the pipe and took it to the buffing wheel. I use an inexpensive Sears buffing system that fits into the chuck of my drill press. I found on previous projects that gearing down the drill speed to 1200 rpms was important to maintain control and not overheat the pipe. I finished with three coats of carnauba wax and buffed to a shine.Aaron13

Aaron14

Aaron15

The Perfect Birthday Present for a Mother Who Never Smoked and Has Everything


Guest Blog by Robert M. Boughton
Member, North American Society of Pipe Collectors
http://www.naspc.org
http://www.roadrunnerpipes.com
http://about.me/boughtonrobert
Photos © the Author

Mr. McGuire: I just want to say one word to you. Just one word.
Benjamin: Yes, sir.
Mr. McGuire: Are you listening?
Benjamin: Yes, I am.
Mr. McGuire: Plastics.
Benjamin: Exactly how do you mean?
― From “The Graduate” (1967), directed by Mike Nichols; with Anne Bancroft, Dustin Hoffman, Katharine Ross, many others…and Walter Brooke as Mr. McGuire

INTRODUCTION
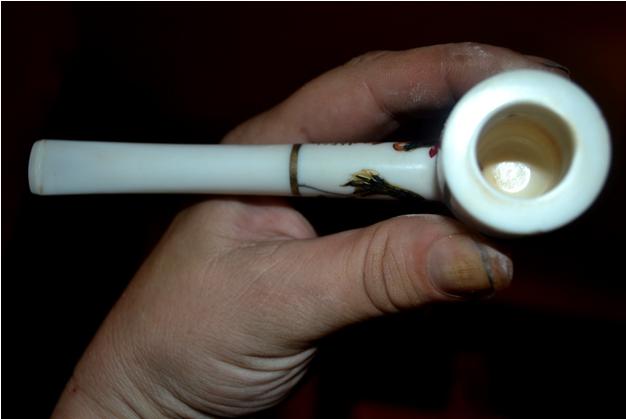
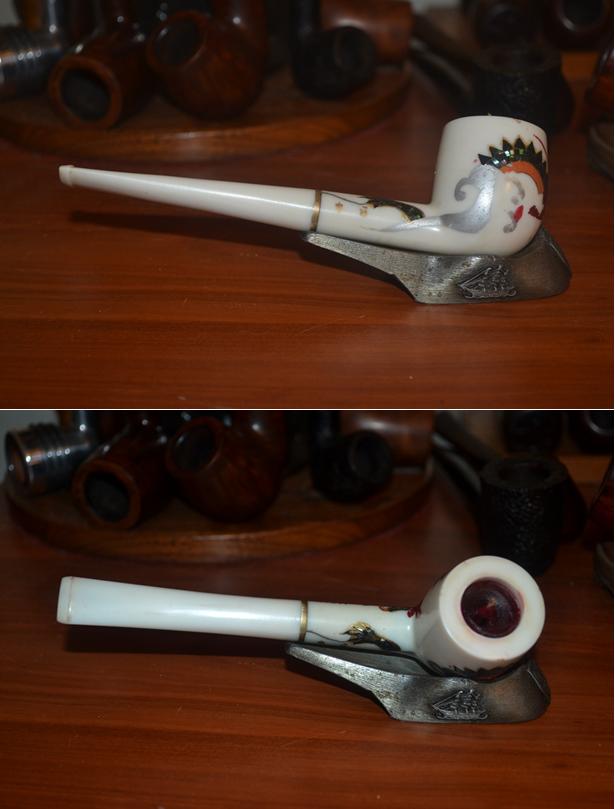
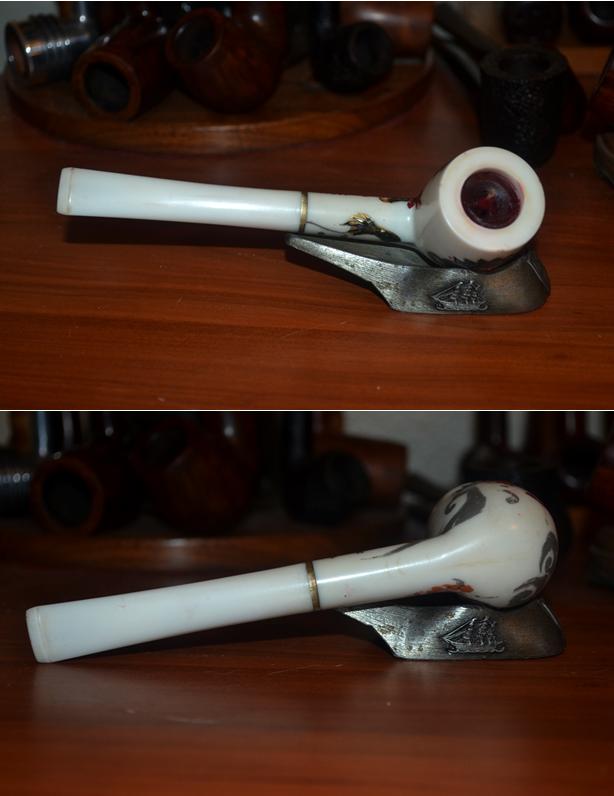
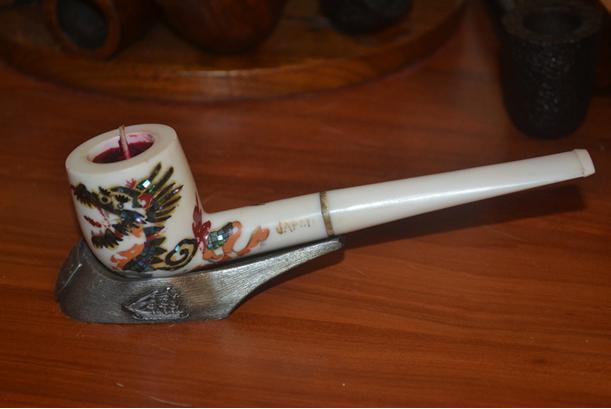
My mother’s birthday was last Saturday, June 27. I won’t go into the kind of details most women prefer to avoid, even though my mother is by no means most women. She would be the first person to tell you her age, and that is as it should be. But I will tell you about the Japanese hand-painted and otherwise adorned white billiard I bought as part of a pipe lot, thinking it was ceramic, even when it arrived, because of its heft and the thickness of the bowl. I will describe and illustrate this pipe and the work I did to restore it because of my decision to make something unusual and special of the otherwise novelty or gift store item as a late present to my mother for a landmark birthday (I’ll go that far and not a word more).

I only learned of the true composition of the Japanese beauty after I stopped by my Post Office Box to pick it up, along with the regular briars that came with the lot, on the way to my pipe club’s monthly meeting on the third Thursday of a forgotten month last year. And it really is a pretty thing, with its hand painting and what looks to be intricate application of green, red, purple, blue, black and other colored stones of whatever types arranged in the shape of a dragon.

As I recall, I arrived at the meeting a little late and showed it first, as my supposed jewel of the lot, to my mentor, Chuck. He took it in his rough but surprisingly kindly hands and turned it every which way, frowning.

“What the hell have you got here?” I believe were his exact first words. Anyone who knows Chuck understands how he likes to beat around the bush.

“Ummm, a ceramic pipe from Japan?” I tried, feeling my gut sink, rightfully as it turned out.

“I don’t think so,” he said and headed across the room to a table where two professional pipe-makers, Victor Rimkus and Don Warren, sat talking.

I like to think the idea that discretion is the better part of valor stayed me from joining them. Instead I watched and listened from my seat at a safe distance. At least they all seemed genuine in their curiosity and perplexity about the material used to fashion this odd Japanese billiard. At last, Victor whipped out his trusty cellphone to use the flashlight app, but not as I expected. Here is a poor shot I later took replicating his action.Rob1 I gave it a moment’s thought as I vaguely heard them chortling, and the truth hit me like the bright Christmas ornament Victor had made of my beautiful new pipe: it was plastic!

Chuck walked back to me with one of his big grins and the pipe outstretched in a hand, and as I took it, he asked, “Do you know what you have here?”

“Yes, I figured it out,” I replied, snatching it from him with a bit of motherly protection.

“That’s how you learn,” he said, managing not to laugh outright.

And so I had a marvelous Japanese plastic pipe that I knew right off I could never imagine offering it for sale, even if there might be someone somewhere on the planet who would want to buy it. Yes, I did smoke a bowl in it later that night, for the experience if nothing else, and it wasn’t all that bad; maybe a tad toxic, but not bad at all.

RESTORATION
Rob2

Rob3

Rob4

Rob5 Doesn’t it look like the dragon broke its hind quarters with the bit fully closed at an exact half-turn off? I set the dratted thing away with my broken pipes, all of the others of which had one thing in common, even the cheapest Medicos – they were real pipes, not plastic and Made in Japan, if the fatally flawed tobacco pipe was not in fact made in one of the Koreas.

At any rate, the week before my mother’s birthday, I found myself in line at my Post Office with a card I found there (the USPS is hilarious when it comes to greeting cards), and the idea to send my dear mother the pretty plastic pipe that might have come all the way from Japan first occurred to me. I dismissed the notion out-of-hand as some sort of mental attack of ghastly tackiness.

But as the week passed, somewhere in the echoes of my mind as Glen Campbell sings “Wichita Lineman,” I continued to cogitate on how I might somehow make the perhaps proudest pipe poseur into a worthwhile gift my mother might just love. After all, she has become quite interested in the myriad types of pipes and ways they can go wrong following my blogs on this site, despite the fact that she has never smoked anything – at least not to speak of.

Well, first I had to align the bit, which several of the above photos reveal is half off its screw, in more ways than one. Besides, this was a new lesson I received from Chuck regarding a genuine example of fine pipe-making, a 1930s L&H Stern Park Lane De Luxe Billiard that was about an eighth of a turn off. And so I gathered together my pump pliers, a small cloth and a Bic, and set myself to the task of heating the tenon until it was black. Then I draped the cloth over the tiny screw sticking out of the shank and clamped my pliers over the cloth until the jaws settled and closed shut. With all of my might, I turned the tenon as far as it would go, which turned out to be about halfway, and repeated the process. The stem was in perfect alignment.Rob6 By the way, not only is the direction to turn the tenon counterintuitive, as Chuck warned me obliquely, but the entire concept of heating metal (which thereby expands it) takes some pondering to get a handle on. But if nothing else, my mind does thrive on theories that seem to defy logic. Consider this: the turning of the tenon, in the direction it is off-set, is made possible by the very expansion of the metal stretching that which surrounds it. The trick is not heating it to the point of cracking the outer substance.

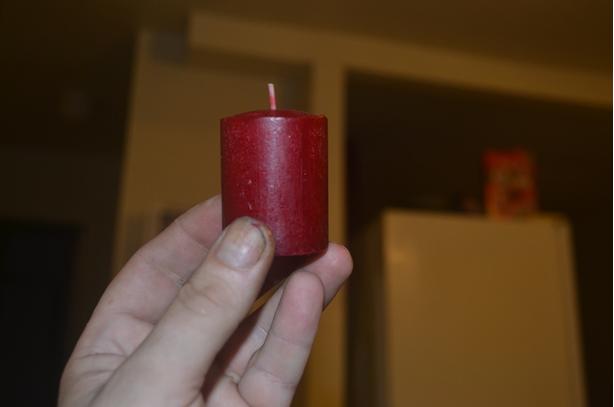
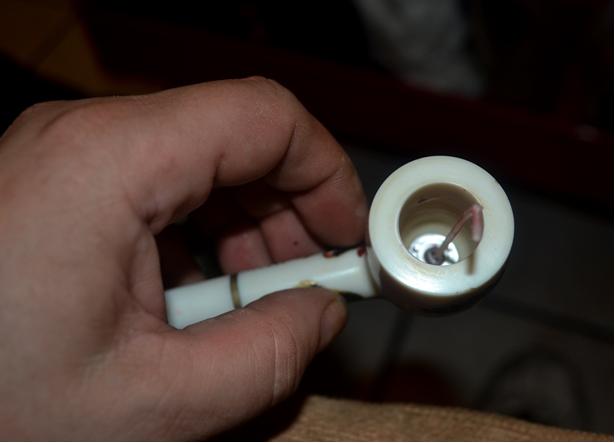
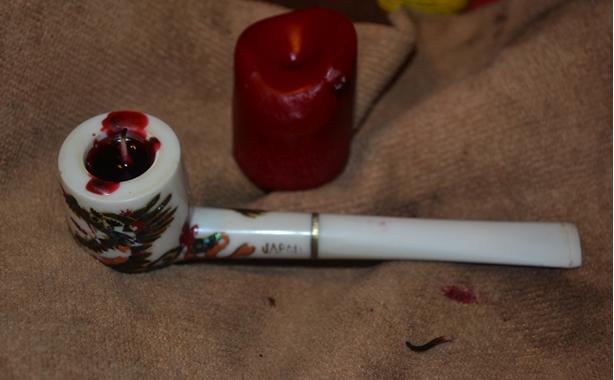
I considered skipping the next step for reasons that will become apparent, but the thought was abhorrent to me, and so I cleaned some stains, light and dark brown, from the chamber using a small cotton cloth square with a little Everclear. There was still a light brown area around the bottom of the chamber.Rob7 While I was at it, I used the super fine steel wool #0000 on the bit and turned it from a creamy color to bright white. I finished the bit with 4000 micromesh.Rob8 I happened to have a dark red votive candle that was perfect for my plan.Rob9 Peeling away the paper label from the bottom of it, I removed the wick and its aluminum base and inserted it in the direct center of the chamber.Rob10 By now I’m sure it’s clear where I’m headed with this. If not, there is something wrong with the reader’s sense of foreshadowing. At any rate, I bent the top of the wick to a side and melted the rim of the candle into the chamber until it was almost full. I set it aside to harden again and clipped the excess wick.Rob11 The waxed that dripped onto the pipe’s rim came off easily, and since no buffing on a wheel was necessary or even possible, I was finished.Rob12

Rob13

Rob14

Rob15 CONCLUSION
For the most part, I have no problem with special kinds of plastic being used to make tobacco pipes. I have even said that no real pipe collection is complete without at least one of The Pipe versions, made of pyrolytic graphite/phenolic resin, a high heat and pressure plastic the components of which were created more often for use in liquid rocket fuels. This liberal attitude toward pipe material, in a rarefied and more than a little opinionated sub-culture of human society in general, does not go over well with many pipe enjoyers. But The Pipe models, started in 1963 by the Super-Temp Corporation contracting with Venturi Inc. for marketing, lasted until 1975. They were supposed to be fun, and, after a brief time of distribution of only the pure black “dress pipe” variety, were offered in multiple colors such as yellow and red and were often mixed in wild combinations representative of the good old Hippie Generation that inspired them. The Pipes made no pretense of being anything but a fancy kind of plastic that may have been used in the construction of the Japanese billiard, which was likely bought by or for a collector who discarded it after learning of its material. Here are two The Pipes I own, one of which I will restore for sale on my site and the other that I will keep.Rob16 I guess all I have left to say at this point is: Happy Birthday, Mom! I hope you enjoy your new, very special Japanese plastic tobacco pipe candle for many years. And remember, you can burn it as often as you like, and I’ll always refill it for you.

The B(ew)itchin‘ Pipe – A Lost Episode of ‘The Twilight Zone’


Guest Blog by Robert M. Boughton
Member, North American Society of Pipe Collectors
http://www.naspc.org
http://www.roadrunnerpipes.com
http://about.me/boughtonrobert
Photos © the Author

“Every writer is a frustrated actor who recites his lines in the hidden auditorium of his skull.”
― Rodman Edward “Rod” Serling (1924-1975), U.S. TV/film writer, narrator, anti-war and –racism activist, in “Vogue” magazine [April 1957]

INTRODUCTION
Good evening. Imagine, if you will, a rather large college town in the heart of the American Southwest, population estimated at a little more than half a million. This sprawling urban area does not appear on any globe of the Earth, nor do its lights draw the attention of a satellite passing far overhead at night in the vacuum of outer space. Nevertheless, due to the proximity of two of the country’s three top nuclear weapons developers to this liberal college and arts metropolis, it is likely the target of hundreds if not thousands of such warheads from other, potentially hostile nations or terrorists, foreign and domestic.

In today’s episode, we are about to meet a 53-year-old man named Robert Boughton, who as a matter of record resides in this sprawling burg. Mr. Boughton knows the twin peaks that are, atop the one, success and hope, and the other, defeat and futility. At the moment, he is at the very zenith of the heap of that more and more common social malaise that people glibly call the harried man. He is finding his way through one of the more interesting times of his life, in the sense of the ancient Chinese curse. Honest, hard-working and trustworthy, he has had more jobs than he could ever recall to put down on a government security clearance application, from maintenance man to assistant manager in hotels; neighborhood delivery boy to photojournalist for newspapers, and, most recently, both caregiver and pipe restorer – tobacco pipes, he always adds to prospective new customers he doesn’t know as he offers them his card.

During the past seven years, Mr. Boughton has postponed his lifelong pursuit of a literary career to dedicate almost every waking hour as caregiver to a mentally unstable roommate with a slightly shorter list of physical disorders, one of them fatal; a shrewish man a few years over the hill who carries his misfortunes the way some brag about drug abuse or petty thievery, but in his case molded into the very form and execution of his tragic worldview by the madness of living day-to-day knowing he is deteriorating from the core of marrow of his brittle bones to the disappearing sheath around every nerve fiber and the corresponding loss of sight and voluntary movement, and finally to the thin skin of his failing frame.

Mr. Boughton’s roommate has no idea how close he has come to being granted his repeated if insincere request to be put out of his misery; to a drive far out onto a back road of the desert for a very long stay. He has pushed Mr. Boughton to the limits of his self-control – to the end of his wits and the edge of his sanity. But the downward spiral is about to change, as you will soon understand. For not long ago, Mr. Boughton caught sight of a pinhole of light in the abyss; a hobby that helped him survive the slings and arrows that another writer once called outrageous fortune.

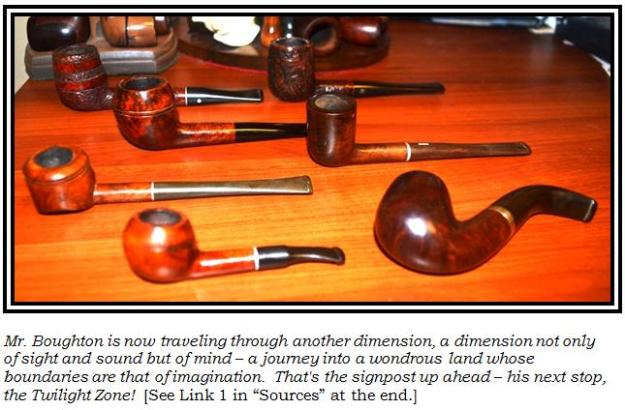
And now all of Mr. Boughton’s troubles are about to change for the better from the simple purchase of an estate lot of seven tobacco pipes in time to write off as an expense on last year’s business income taxes. All of them would have been finds for more than the $25 he paid for the lot – but at a glance, the real gem, in the eye of the restorer at any rate, first went unnoticed. See if you can spot it in the following picture from our gallery, which we call “Lot #7: Tobacco Pipes.” Robert1 If you correctly identified the L&H Stern Straight Billiard, on the right in the middle, as the object of Mr. Boughton’s growing obsession, shall we say, then you either have what is commonly referred to as the Sixth Sense or you are an astute collector of fine pipes.
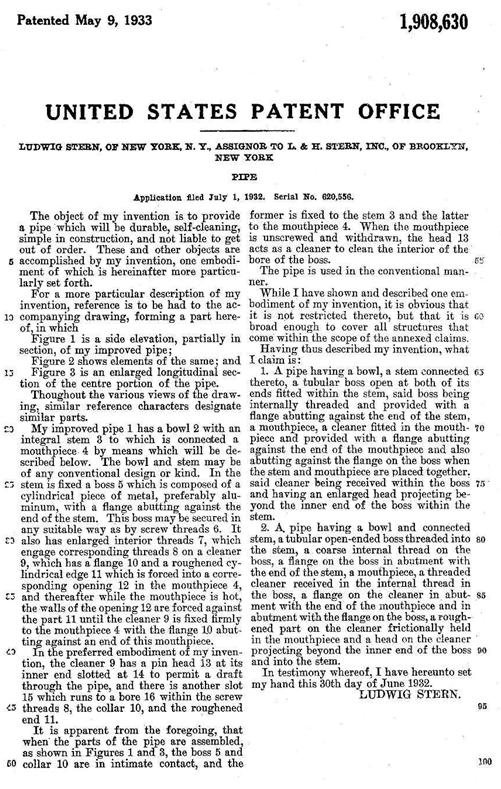
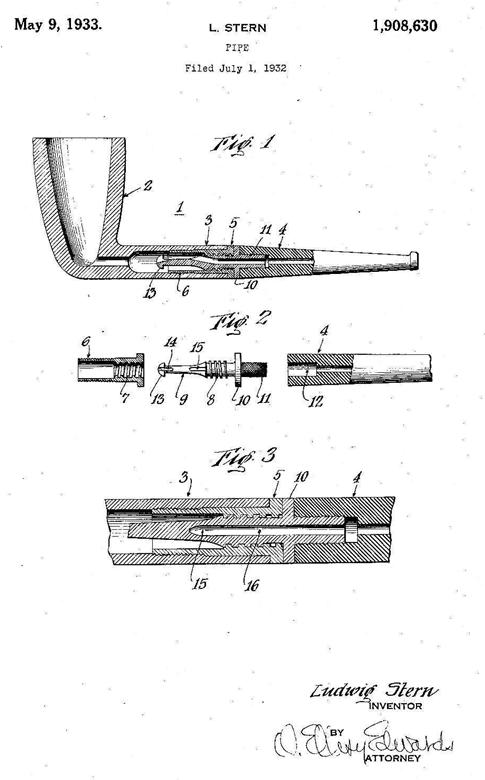
The Park Lane, an invention of the company’s primary founder, is stamped with U.S. Patent № 1908630, issued May 9, 1933. Mr. Boughton has always appreciated the elegant – in expressions of poetry, law, logic and art, to name a few – and as for Patents, he considers this one, being only two pages including the obligatory illustration of parts, to be as brief and comprehensive as they come.Robert2
Robert3 L&H Stern Inc. was officially organized in 1911 by one Ludwig Stern (the L in the initials, which in the early days were fashioned L. & H. S.), with his older brother, Hugo (the H). Ludwig emigrated from Germany as a young man, after his brother, who was five years older.

(And now, if the audience will permit a brief side-bar, a point of interest: Ludwig worked for the largest supplier of tobacco products to the entire state of New York – somehow providing an estimated 90% of cigarettes, cigars, pipe tobacco and other related items to manufacturers and retailers in the area – as early as 1899, the year the behemoth tobacco supplier was spawned. Called the Metropolitan Tobacco Company, a corporation born of a cartel of others in the same business known to everyone who was anyone within the industry as the “Tobacco Trust,” became the object of a drawn-out restraint of trade civil complaint. The original trial and both appeals of said cause were decided, not surprisingly, in favor of the tobacco industry defendants. The small shops, banded together as plaintiffs, now collectively relegated to historical obscurity by a single last name and “et al.,” were forced to close. I submit for your consideration one question: could the wheels of justice have been greased in this case by the main product of the second of the Seven Deadly Sins? This is offered as food for thought – only available at your local diner in the Twilight Zone.) [See Link 2.)

The brothers moved the re-formed business in 1920 to Brooklyn. The new location, in a seven-story building, was – for the then-ubiquitous craft – in a convenient part of town now known by its acronym, D.U.M.B.O. (Down under the Manhattan Bridge Overpass). It remained there until closing in the mid-1960s. [See Link 3.] LHS was already so well respected in the business at the time that the company reorganization and move were news in those bygone days. [See Link 4.]

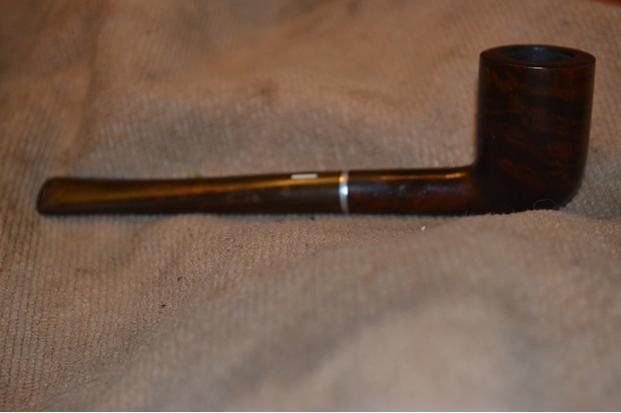
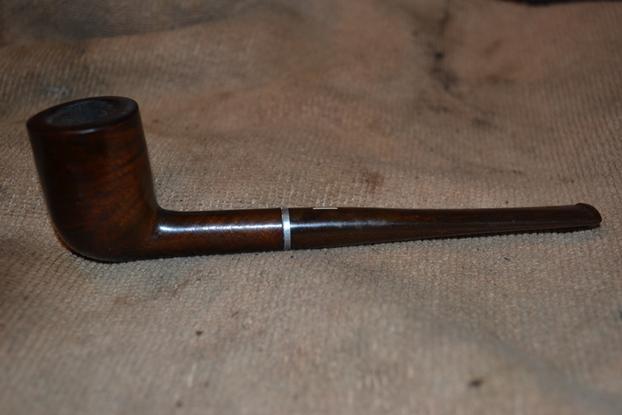
The LHS Park Lane Billiard included a brown and orange swirled Cumberland bit, handmade from Ebonite and fashioned in this case to look like wood. Mr. Boughton considered the task of restoring this pipe to be distinctly good fortune and a pleasure of restoring, in particular because of a certain aspect of the repair that was new to him. The line was made only in the 1930s. [See Link 5.]

At the present moment, Mr. Boughton is busy at work attempting to restore the WDC Park Lane to its original state. As noble as the endeavor may be, the only problem, with this peculiar specimen, is the invisible transformation the pipe has undergone during years of smoking by a single prior owner who had the good grace to love it. As Mr. William Shakespeare so aptly put it in “A Midsummer Night’s Dream”: “Love looks not with the eyes, but with the mind,/And therefore is wingèd Cupid painted blind.” Now, meet Mr. Boughton in his favorite activity – restoring tobacco pipes with every ounce of his love.

RESTORATION
Robert4

Robert5

Robert6

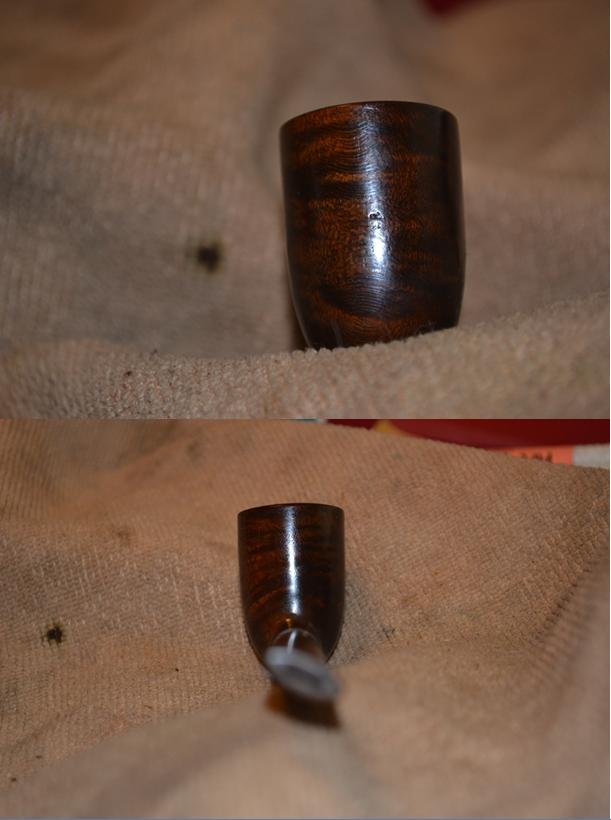
Robert7 The last shot of the Park Lane prior to restoration, above, makes the most serious problem I encountered apparent. The bit was off by about an eighth of a turn, which may seem negligible to one who has never enjoyed the ruminating quality of a fine pipe, but is in fact a microcosmic chasm along the lines of the Grand Canyon to the general viewer.

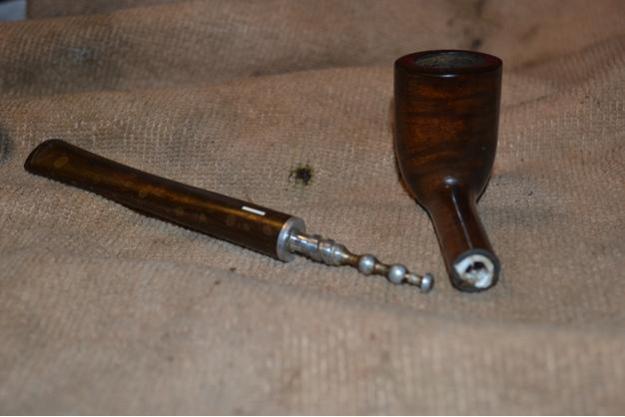
The flaw was masked by the seller of these estate pipes, who, with no small amount of duplicity, placed a piece of paper around the metal tenon screw built into the opening of the shank.Robert8
Robert9 The wily culpability of this particular ilk of seller is obvious from the freshness of the paper. Hence the conspicuous starting point for my restoration.

At this point of experience restoring pipes, I consider myself a journeyman in the craft. Although familiar with various ways to tighten Vulcanite, Ebonite, Lucite and other tenon materials, I was unable to locate any useful information on the Internet – the modern day Library of Alexandria, which was dedicated to the Muses, or nine gods and goddesses of the Arts – concerning the re-alignment of metal tenons fixed either to the bit or shank.

Nevertheless, finding myself without a clue how to proceed, I sent an email to Steve Laug, who soon replied with the suggestion that I read his recent online blog on the restoration of an LHS Purex Bulldog. This amused me, as the many notices of comments on the blog in question were forwarded to me, I wondered what all the hoopla was about and had intended to check it out.

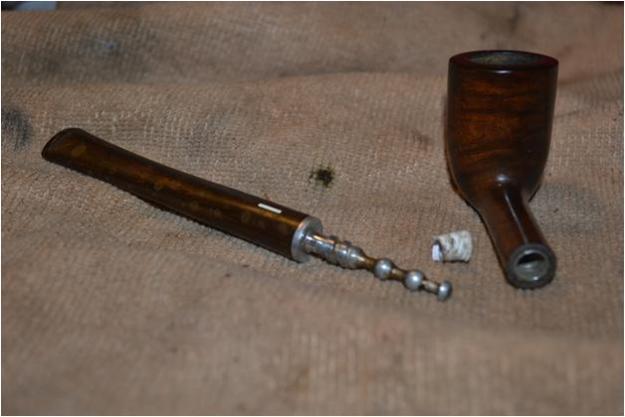
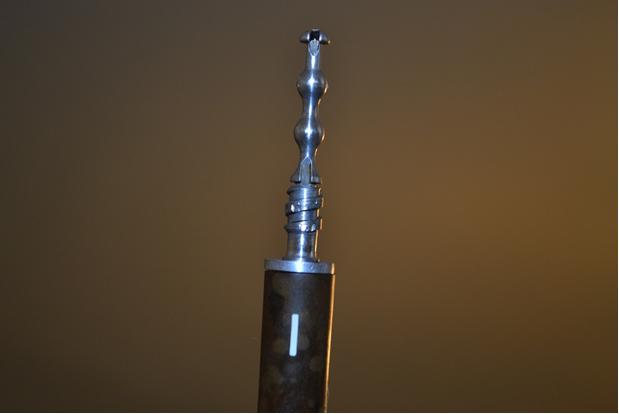
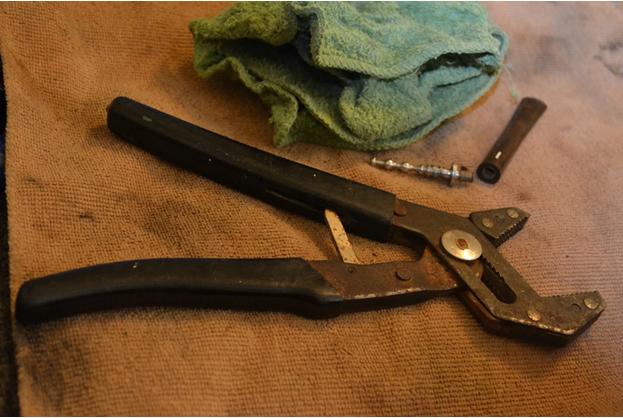
However, awaiting Steve’s reply did not hinder me from proceeding with certain steps I knew, such as the fact that the stinger extension of the tenon should come off. Thinking of that, I tried heating the entire aluminum tenon with the flame of a Bic, careful not to touch the shank opening beyond the part of the tenon Ludwig Stern referred to as the flange [see p. 1, Fig. 2, part 10 of the Patent]. Unfortunately, the tenon still would not budge. Even the stinger [illustrated as a whole as part 9, with parts 13, 14 and 15 forming its length and pushing into part 8] seemed to form a single piece. I was aware this would be odd, if not unprecedented, but after four attempts, I swear it would not come off.Robert10 One lesson I did manage to learn from my dad in his countless frustrated endeavors to teach me about mechanics was that if a part of a mechanism or machine would not come free using reasonable pressure, don’t force it. But, always believing that not all of his maxims were absolute, I suspected he meant it as a guideline that was not immutable under controlled conditions I might someday, by some miracle, learn to recognize. Therefore, I found a small wash rag and a pump plier that I feared might be overkill, but it was all I owned that had not been stolen by previous apartment owners. I also possess a wicked sense of adventure at moments like these. Adjusting the rivet to match the job, I then wrapped the small towel around the base of the tenon/stinger by the flange and loosely clamped the end of the plier over the tenon. As I applied pressure, I could feel the two sides of the mouth turn and clamp firmly down on the rag-covered metal. Gripping the bit in one hand, I turned the plier with my other and immediately felt it begin to move. Slowly, it came free and undamaged.Robert11 In the meantime, Steve replied with the suggestion that I read his recent online blog on the restoration of an LHS Purex Bulldog. This amused me, in a good way. As the many notices of comments on the blog in question were forwarded to me, I wondered what all the hoopla was about and had intended to check it out.
Reading through to the first mention of the difficulty encountered by Steve, my heartbeat quickened. Confident I was on the verge of making the discovery that would enlighten me, I continued, on the edge of my seat on the couch in my living room, as though I were reading a real page-turner of a book or watching an Alfred Hitchcock thriller or perhaps “The Twilight Zone.” Indeed, in my mind I envisioned the Canadian master at work in his studio, so vivid were the words and photographs flashing across his computer screen.

Nearing the expected moment of revelation, I was consumed with anticipation – only to come to a single photograph of Steve’s LHS shank that dashed my hopes in a nanosecond, as is the popular if peculiarly à propos phrase these days; for the illustration revealed the exact reverse of my predicament, one that could not be repaired in the same fashion.

Delayed but not daunted, I set out to do that which I knew I should have attempted in the first place: taking the Park Lane to my own friend and mentor, Chuck Richards, I humbly sought his advice.

Before doing that, I continued where I had left off, cleaning the tenon and stinger inside and out, including the corroded threads that screwed into the bit, using a small square piece of cotton cloth soaked with Everclear and bristly cleaners that passed through the airways. To be done with it, I also ran a pipe cleaner with alcohol through the air hole of the bit, and when it came out filthy, recalled Steve’s words in his blog that this sort of pipe often needs considerable cleaning of the shank and bit. Quite a few cleaners later, I had the mess under control for the time. Known to my dad for having “a mind like a steel trap” and to my friends as being on the stubborn – or, as I prefer to think, confident side – I was by whatever label loathe to surrender to any challenge.Robert12

Robert13 When I arrived at the pipe shop and we exchanged pleasantries, I presented my distressed pipe. Chuck, pipe of the day in mouth, put on his eyeglasses and examined the LHS closely. Within a blurring handful of seconds, my older, more experienced mentor made his diagnosis, telling me with his typical certitude to heat the tenon before tightening it into the bit. A man who prefers to let people learn as much as they can on their own, Chuck then offered the rare treat of extra advice: “It will be counter-intuitive.”

Intrigued, I took a seat in the pipe shop and, starting a fresh bowl full of tobacco in a new pipe, mulled over the problem in my mind. In a flash, I thought of a comparison, and unfortunately blurted it to the complete perplexity of all of the cigar smokers present.

“Like turning into the skid on ice!”

Chuck, caught unawares by the outburst and not at first grasping the metaphor, at last smiled and said, “Yes, something like that.”

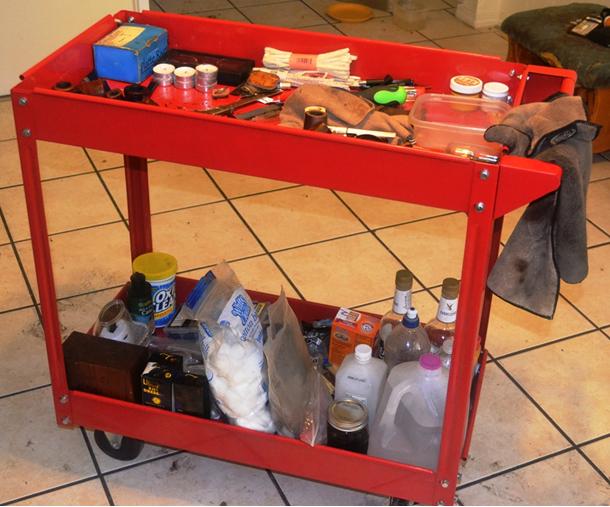
At home later, the first chance I had, I sat down with my movable feast of standard implements of construction, including quite a few that were improvised, to make my first attempt at the genuine repair of a loose bit.Robert14 Following Chuck’s advice, and keeping the counter-intuitive dog treat in mind, I was set to apply heat to the tenon stinger when the idea struck me to try removing the stinger again. Of course, then it came out with a simple turn of my fingers, apparently loosened by the work I did earlier and the passage of time.
And so I flicked my Bic and held it under the small tenon with even more care not to burn the precious Cumberland bit. (A Cumberland, by the way, is made from a special sort of Ebonite that can be colored with limits, which in turn is a particular variation of Vulcanite. This subject, I understand from research, is a matter of some hot debate.) With the tenon blackened, I quickly tossed a small rag over it and grabbed my pump pliers, clamping them firmly and remembering not to turn the small metal insert opposite from the direction the bit was off but toward it – as one would, if one hoped to avoid losing control of a vehicle and crashing or rolling, turn into the skid on black ice. Thus one particularly memorable experience on a bridge late one night in Colorado Springs, when my training and reflexes saved me, proved useful in this new endeavor. Each of several increasingly difficult rounds of this process brought the bit closer until it was aligned snugly.

Reaming the chamber and sanding it with 150-grit paper before 200 and then 320 was an easy task, as was using super fine 0000 steel wool to remove the rim char and excess dark stain that was popular when the pipe was made somewhere around three-quarters of a century ago. The rim and bowl then only needed a progression of micromesh from 1500-4000.

At this late stage of the restore, I retorted the pipe, again, unfortunately, with the tenon in place. I at least left the stinger aside for that process, which required about five Pyrex tubes of Everclear boiled through the pipe’s innards to clear out decades of crud and juices soaked into the briar from considerable use by someone who loved this pipe.

I stained the briar with Lincoln Brown boot stain, as opposed to Medium Brown which appears lighter, and flamed it before removing the thin layer of char with gentle rubbing using 3600 micromesh.Robert15

Robert16

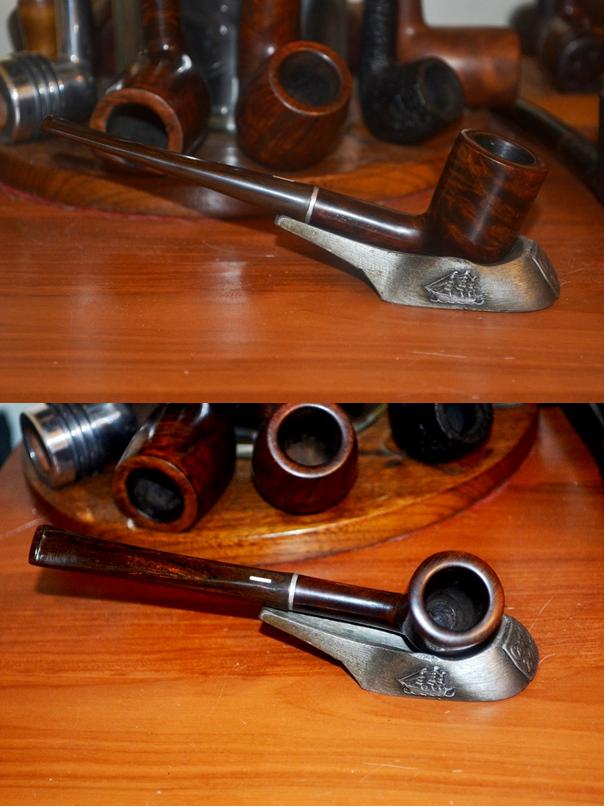
Robert17 At last I am at the end of this rather strange, I admit, blog. I buffed the stem with white and red Tripoli and White Diamond, using a soft cotton cloth and a clean wheel between each. Then I used white Tripoli, White Diamond and carnauba on the wood, with the same steps between each.Robert18
Robert19

Robert20

Robert21 CONCLUSION
Mr. Boughton had intended to offer this fine LHS pipe for sale at his online store. But following an odd impulse he could neither resist nor explain, he found himself loading a bowl of one of his best tobacco blends and, before he knew it, striking a match and placing the flame to the firm top layer.

The magical qualities of the pipe immediately became apparent. Where he had been tense to the point of explosive results, he was consumed with a sense that all was right in the world. Continuing to puff the mysterious pipe that had somehow found its way to him, he pondered the possible reasons behind the overwhelming sense of attraction to the diminutive pipe. Nothing he could imagine provided a satisfactory explanation, and Mr. Boughton also found he no longer cared.

Mr. Shakespeare also wrote, on the same subject and in the same play: “And yet, to say the truth, reason and love keep little company together nowadays.” Truer words may never have been written.

For at that very moment, although Mr. Boughton thought he was sitting on his sofa in his suddenly less dreary little apartment in the heart of the American Southwest, he was, in fact, still on the outskirts of the Twilight Zone.

SOURCES
1. “The Twilight Zone,” Introduction, Season 2, with thanks. http://www.imdb.com/title/tt0052520/quotes

2. Locker et al. v. American Tobacco Co. et al, NY Sup. Ct. (1907), pp. 115-124. https://books.google.com/books?id=34g7AAAAIAAJ&pg=PA117&lpg=PA117&dq=metropolitan+tobacco+company+brooklyn&source=bl&ots=hQ6aVa_tY8&sig=1uaY2AesgKT4mCKepaOyan9gB9I&hl=en&sa=X&ei=MIiQVZGuHYizoQSxsouAAg&ved=0CCgQ6AEwAg#v=onepage&q=metropolitan%20tobacco%20company%20brooklyn&f=false

3. L&H Stern background, including D.U.M.B.O.
Featured Fade – L & H Stern – Smoking Pipes & Holders – DUMBO – Fred King

4. Magazine story on L&H Stern 1920 move.
https://books.google.com/books?id=rpc7AQAAMAAJ&pg=RA1-PA22&lpg=RA1-PA22&dq=l%26h+stern+inc&source=bl&ots=cDWCX4gIom&sig=eLu9PUkd8JzfNPCZDb7df71R4Ic&hl=en&sa=X&ei=M5-MVbi1FM7IogThw5ToDg&ved=0CCsQ6AEwAg#v=onepage&q=l%26h%20stern%20inc&f=false

5. LHS Park Lane dating confirmation.
http://www.smokingpipes.com/pipes/estate/united-states/moreinfo.cfm? Product_ID=100458

Bringing New Life to a Weber Blackthorne 370 Poker


Blog by Troy Wilburn

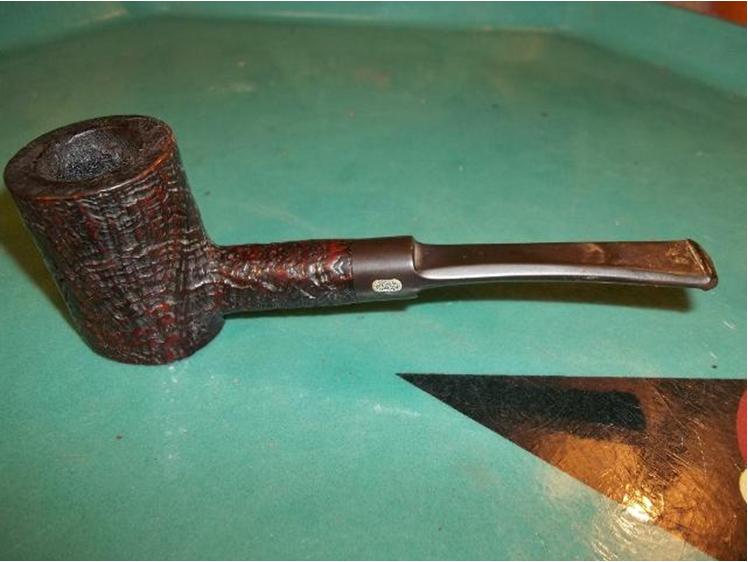
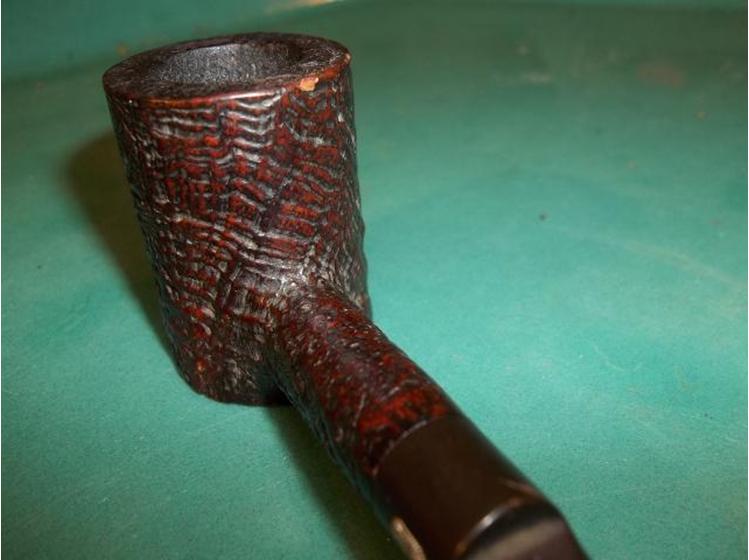
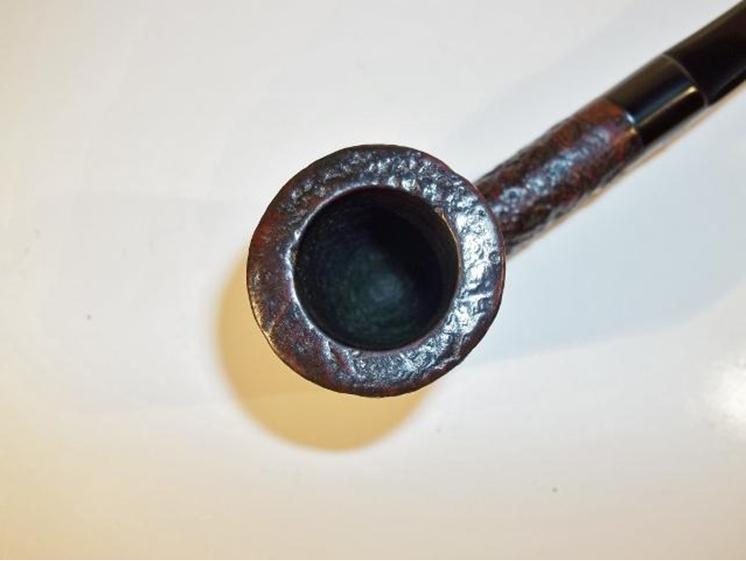
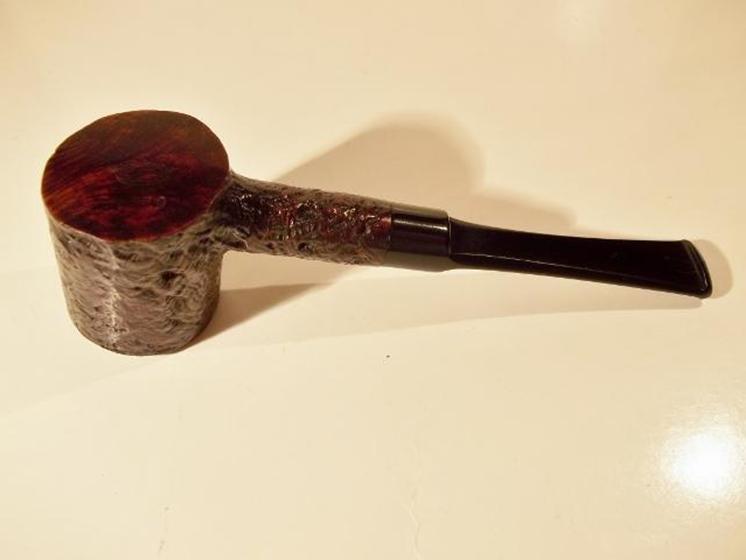
I acquired this Weber Poker off Ebay with a “Best Offer” bid. Although I got other pokers made by Weber (Webco, Jobey, Wally Frank) I did not have one stamped Weber, so I added this to my American Poker Collection.Frank1

Frank2

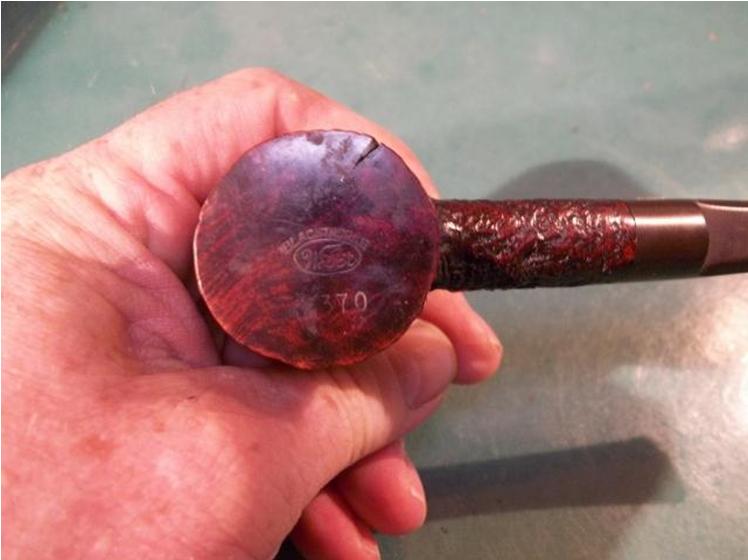
Frank3 It had a crack on the bottom which in my “Best Offer” bid I noted my concern over it and got the pipe for much less than the amount they wanted.Frank4

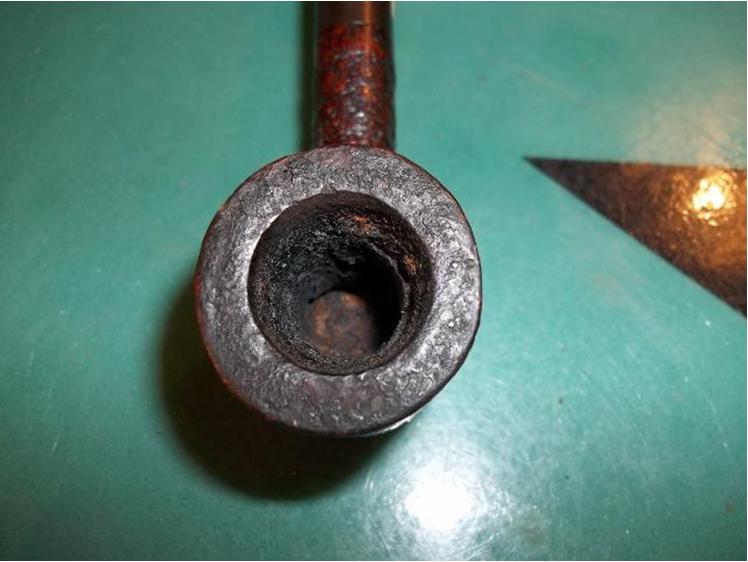
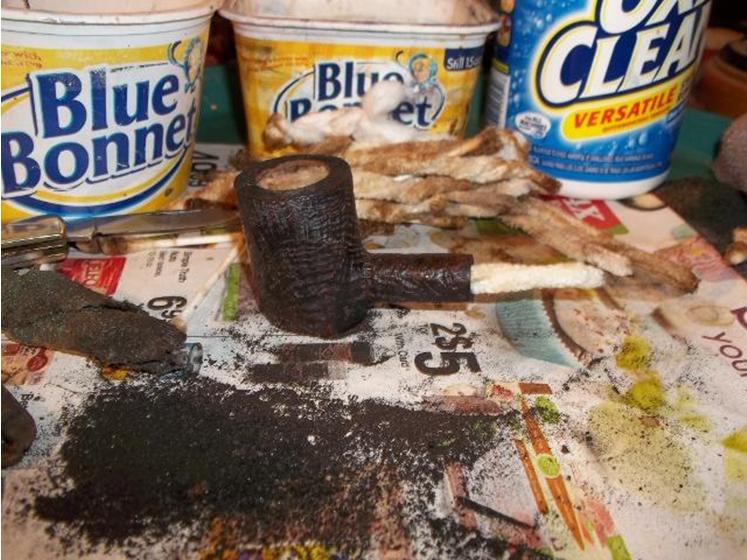
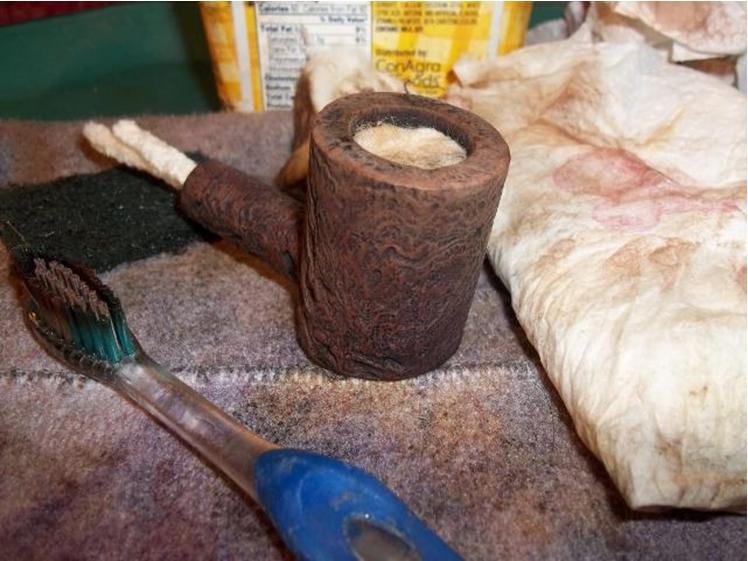
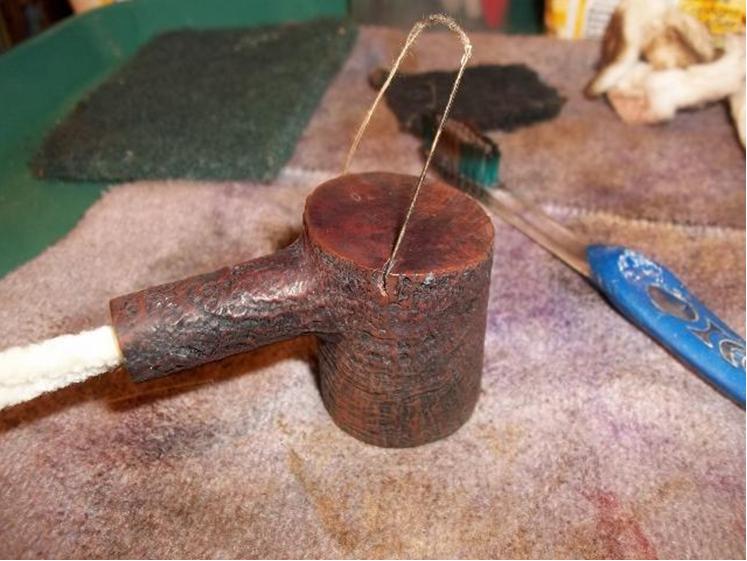
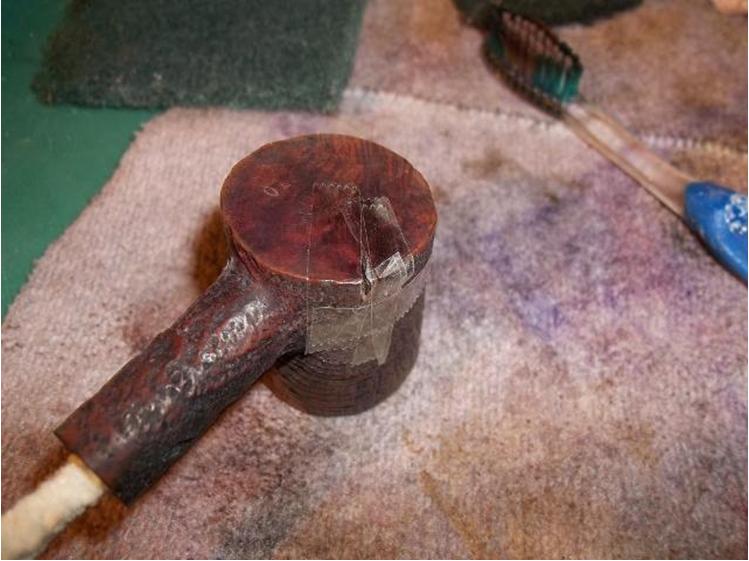
Frank5 The pipe was pretty dirty and the cake was set like concrete.Frank6 After getting cake out and shank cleaned I stripped off the old wax and grime.Frank7 I dug out all the trash from the crack with a sewing needle. I was thinking this damage was from abuse from a smoker. I dug out old filler so I think it may have come from factory with it.Frank8 After cleaning out crack I taped it up with some packing tape.Frank9 I then filled it with glue and briar dust and hit it with a file when dried.Frank10

Frank11 I mixed up a thin color match to the factory color and applied a couple of coats.Frank12 After a soak in Oxy Clean I worked on stem. The owner had teeth like a house cat. All were small round and deep. What a pain they were. I haven’t done a Cherrywood Poker in a while and I had forgotten what a chore it was doing these thin little saddle bits.Frank13 I colored in the Weber emblem with black sharpie to be taken off when I buffed it.Frank14 After the dye dried I scuffed it with a Scotch Brite pad and mineral oil to highlight the blast.Frank15 Here is the finished pipe, buffed and waxed.Frank16

Frank17

Frank18

Frank19

Frank20

Frank21

Frank22

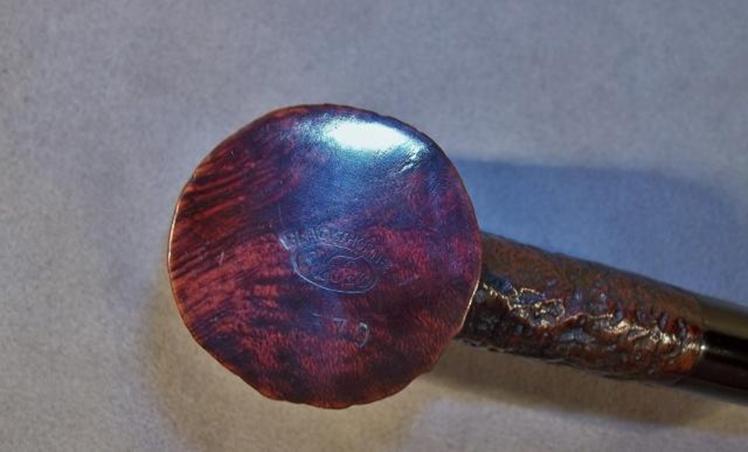
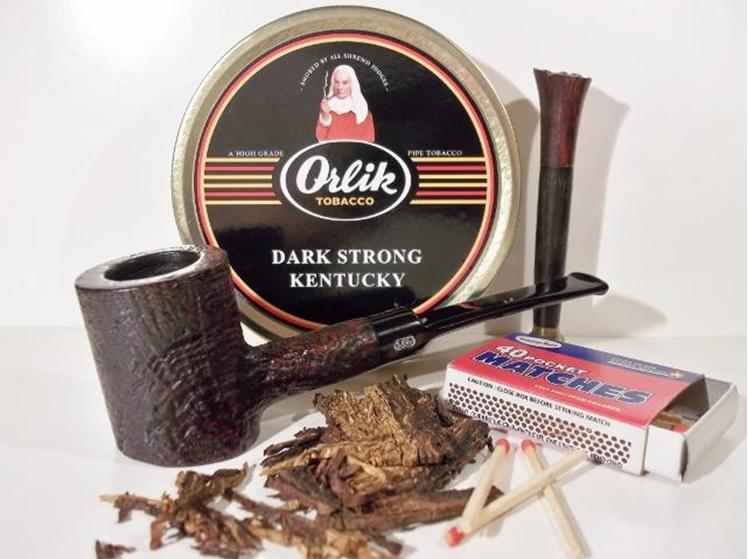
Frank23 I had a hard time getting a picture of stamping and repair on bottom of bowl with the glare. This was best out of several attempts.Frank24 Now it’s time to try this ol gal out with some Dark Strong Kentucky:). Frank25

Restoring an LHS Certified Purex Bullmoose Rhodesian


Blog by Dave Gossett
Dave1 LHS Certified Purex shape #99.

This pipe was in better shape than most estates I start with. It had some dents and dings and some tooth chatter, but overall it was a solid pipe.Dave2

Dave3

Dave4

Dave5 I started off this restoration with the usual internal cleaning, giving the stem, mortise, and airway an alcohol scrub with pipe cleaners and a shank brush. Next up was the bowl chamber. After removing what little cake build up that was in the bowl, I sanded the bowl chamber smooth with 400 grit.

Next, I tackled the dents and dings – first with steam followed by 2000 grit. Heating the flat side of a butter knife and pressing it firmly to the dented areas with a damp rag between the two will generate steam, lifting the dents from the briar. Don’t try this around any stampings, as it will lift the stampings just as it does with dents. This may need to be done more than once or twice for stubborn dents.

After I had worked the dents, I gave the briar a very light scrub with alcohol and 0000 steel wool to remove the stain and even out the finish where I had steamed and sanded.

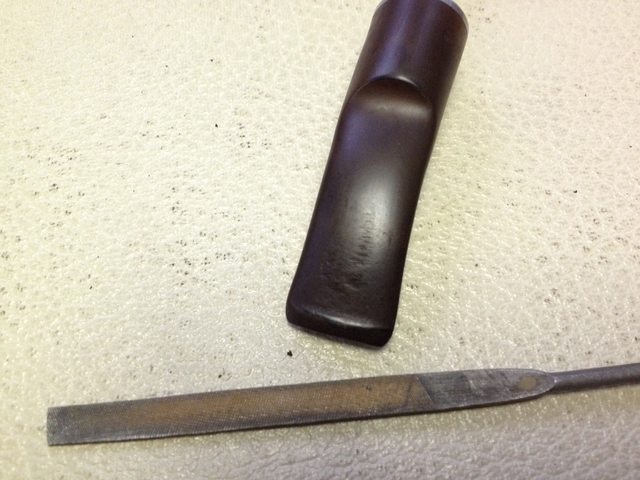
After prepping the briar, I started on the stem. The button was a little worn down but not bad enough to reform, so I left it as is. I used a needle file to remove the tooth chatter. Feathering out and away from the button past the damaged area will prevent the stem from having a warped look or divot around the repaired area.Dave6

Dave7 The next step after removing the tooth chatter was wet sanding the stem to remove the oxidation and file marks. The way this particular stem was made with a metal inserted logo and metal ring and stinger attached, made this clean up much easier than most others. No worrying about working around a fragile stem stamping or rounding the crisp edge of the stem/shank connection, I was able to just mow through the whole stem while wet sanding until I unearthed fresh black vulcanite.

Now that the grunt work is over, it’s almost time for the fun stuff…Dave8

Dave9 Oh, one more thing. Let’s try our hand in some metal alchemy by making the aluminum look more like sterling silver.
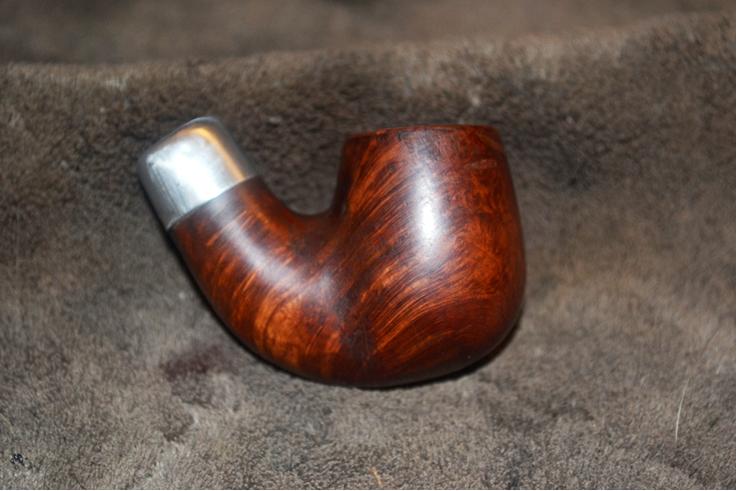
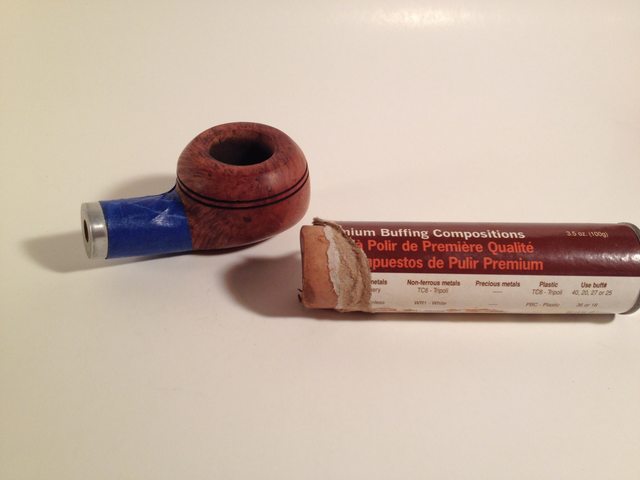
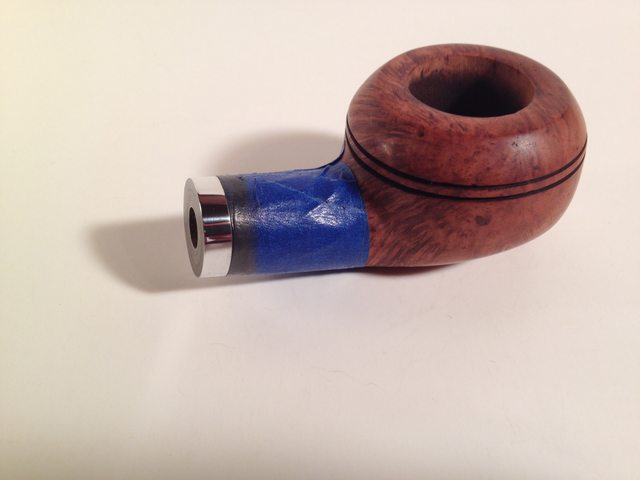
I prepped the briar with tape for two reasons. First, the compound will raise the grain if you run it on a buffing wheel and secondly, the tarnish/compound mix on the buffer wheel with stain the briar black.Dave10 Notice how dark the tape is afterwards.Dave11 The natural briar looked pretty nice and I thought about leaving it in a natural finish, but I decided to put it back to its original color, or as close as I could get. I blended a color close to the LHS burgundy by mixing two full droppers of alcohol, one full dropper of oxblood, and one half dropper of dark brown.

Pay no mind to the workbench of disarray. Sometimes I lose the pipe I’m working on in all the clutter.Dave12

Dave13 After the stain had dried, I lightly sanded the briar with a worn piece of 2000 grit to highlight the grain a bit, and then proceeded with laying on the carnauba wax. Two coats followed by a hand buff with a microfiber rag.Dave14

Dave15

Dave16

Dave17 I forgot to wipe out the buffer fuzz before taking photos.Dave18 Last but least, I finished up the pipe by adding a fresh carbon bowl coating. This is a simple and effective way to give a tired looking bowl chamber a great new look. I’ve seen many crazy recipes for a homemade bowl coating but after trial and error, I have found this to be the most effective and easiest way to do it. Once the bowl chamber is clean and smooth, apply a thin coat of maple syrup to the chamber. Next fill the entire bowl to the top with activated charcoal. Leave it for one hour, then dump it out and blow through the shank to remove excess. Don’t touch it for five days. After the five day curing process, it is as tough as a Savinelli factory coating and looks just as nice.Dave19

Midterm Exam #4: Re-Refurbishing an Unknown Bulldog


Blog by Anthony Cook

It’s time for the fourth and final midterm exam! This one is an “unknown” bent bulldog that I picked up from eBay. I snagged it because I liked the shape and it was cheap. What I didn’t know at the time, but became immediately apparent when the pipe arrived, was that the end of the shank had been shattered into at least three pieces and glued back together. There was no stamping on the pipe, but I don’t think that was always the case. It was likely sacrificed during the shank repair. The repair is fairly obvious in my photos below, but I assure you that it was not nearly so in the seller’s. The right combination of lighting and angles can cover up a multitude of sins, folks. Caveat emptor.

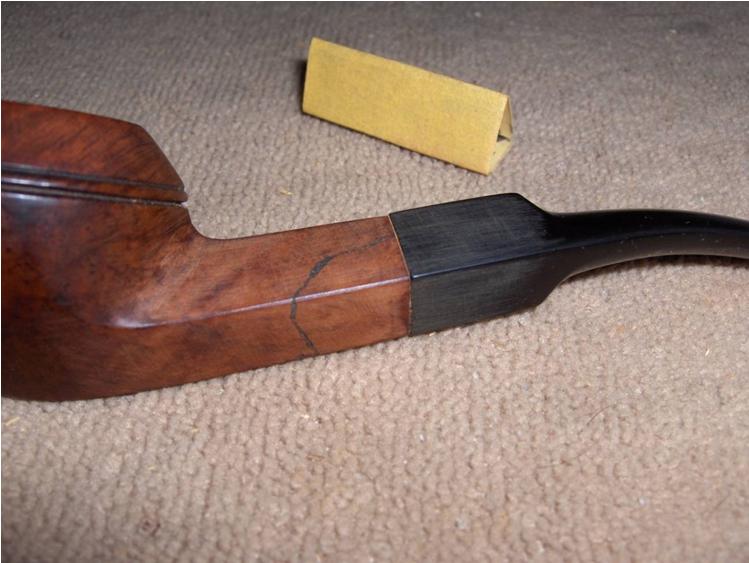
The exposed cracks weren’t the worst part of the story though. The repair did as much damage to the pipe as the crack did. An alarming amount of material had been taken off while sanding out the excess glue. It’s difficult to see in the photos, because from any one angle everything looked correct. However, if you held the pipe in hand and rolled it around you would notice that no two faces on the shank were equal. The shank was no longer a diamond shape; it was a trapezium. The repairman hadn’t paid much attention to keeping the surfaces level either. So, there was a subtle undulation to the line of the shank as it went from thick to thin and back again several times along its length. There was also very little effort made to blend the repaired area into the rest of the pipe, and several shallow “steps” were visible where the two surfaces met. There was at least an attempt to match up the stem to the shank, but that only gave the stem the same odd angles and even they didn’t quite match up to the ones on the shank. All in all, it was a bit of a travesty. Here are a few photos taken just after it arrived.Anthony1

Anthony2

Anthony3 That was all far more than my tender, noobie hands could handle at the time. So, I cleaned the internals of the pipe and put it away for later, but not before adding a bit of bend to the stem that it seemed to have lost over time.
I’ve finished up work on all the rest of the pipes in that first batch. So, this week it was time to put a collar on that dog and turn in my final midterm.

I started (or restarted I should say) by dropping the stummel into an alcohol bath for a couple of hours to soften any coating that might be on the pipe. I had quite a surprise when I removed it later on. It looked fine when it was fresh from the bath, but a hazy, white glaze began to form on the surface as it dried. I hadn’t seen anything like this before and I’ll admit to a brief moment of panic. I assumed that this was probably the result of some type of coating reacting to the alcohol. So, I wiped the stummel down with acetone taking extra care around the shank repair, since acetone will break down superglue. That did the trick and the stummel cleaned up nicely.Anthony4 I set up the retort to see if I could remove any more tar buildup from the pipe. I flushed the shank about 10 times with boiling alcohol before allowing the pipe to cool. I noticed that the vial appeared to be losing a lot of liquid during the retort. The cotton wasn’t discolored. So, it wasn’t gassing out through the bowl. It really had me scratching my head until I saw a spot of moisture on the shank when I was removing the retort. For some reason, it wasn’t sealing well at the mortise and I’d need to look into that before I went much further.Anthony5 I gave the pipe a post-retort scrub of the stem and shank, and then inspected the crack repair for gaps. The surface of the glue joints looked airtight, but I noticed that the glue hadn’t penetrated very deep. The joints left shallow fissures inside the mortise and along the shank face. I used a small pushpin to place a little super-thin CA glue directly into the fissures, and then used a toothpick to apply a thin layer of the CA around the end of the mortise to create a seal inside as well as out.

When the glue was dry, I sanded out the interior patches with sanding needles and a piece of 400-grit sandpaper wrapped around a small dowel. I refaced the shank on my topping surface in a manner similar to how I would top a bowl (pressing lightly into the paper and using a circular motion). The following pictures show the patches when fresh and after they had been sanded out. You can also get some idea of the irregularities in the shank by comparing the differences in the face angles and wall thickness around the mortise.Anthony6 After that, I reattached the stem and ran a retort through it again to test for leaks. The outside of the stem and shank stayed dry as a bone through the whole process. So, I began addressing the pipe’s cosmetic issues.

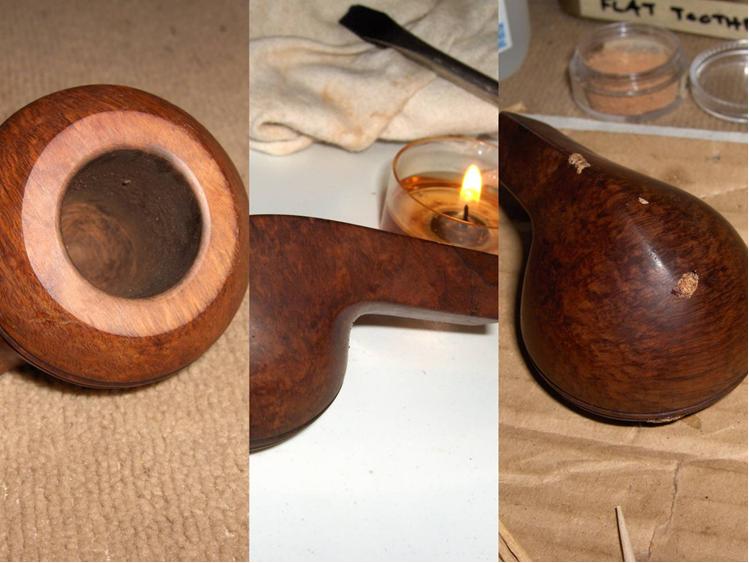
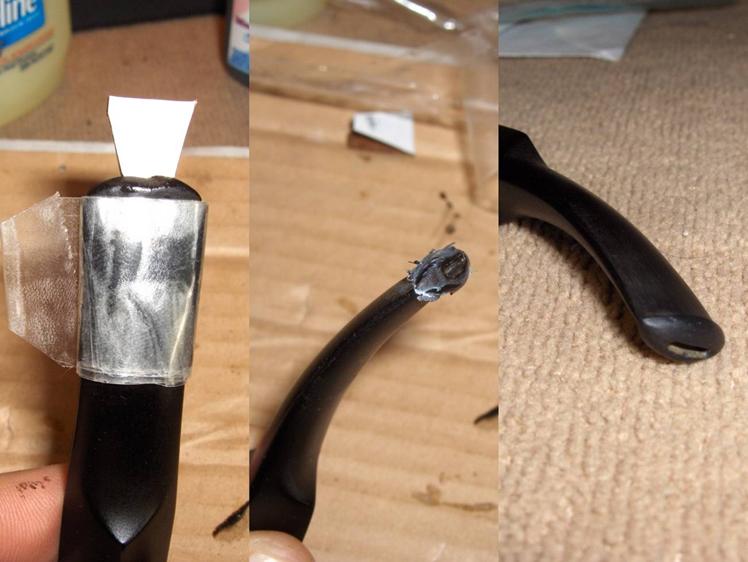
I lightly topped the bowl and chamfered the inner rim to remove the scratches and dings. Then, I steamed a few dents out of the finish by pressing a screwdriver that had been heated over a tea candle into a wet cloth placed over the dents. Finally, I used CA glue and briar dust to patch a few, small gouges and missing fills and sanded them out with 220-grit and 320-grit sandpaper.Anthony7 While I worked on the stummel, the stem had been soaking in an Oxyclean bath. I removed it and scrubbed it down with a Magic Eraser to remove any oxidation. I used black CA glue to fill the tooth dents on the top and bottom of the stem. Once that had dried I sanded it down with 220-grit paper.Anthony8 The stem button needed to be rebuilt since it was worn and dented. I wrapped several layers of clear tape around the stem just below the button to create a form to make a crisp edge and also inserted a Vaseline smeared wedge of cardboard into the slot to seal it. Then, I applied thick, black CA glue in several layers to the end of the stem to begin building the new button. It wasn’t a pretty thing to look at when I removed the tape, but the edge was sharp and there was enough material to work with. I trimmed away the glue artifacts created by the tape molding with an X-Acto blade and rough-shaped the new button with 220-grit paper.Anthony9 Once the button started taking shape, it was time to do something about the other end of the stem and also the deformity of the shank. This was the part of the exam that I had not been looking forward to. Up to this point, everything had been the equivalent to multiple-choice or fill-in-the-blank questions. There were a couple of challenges, but nothing too rough. The next part was more like the essay section.

After a lot of thought, I finally decided that there just wasn’t enough material left around the stem to square everything back up. So, I thought I’d try some trickery of my own. If I couldn’t make everything right, maybe I could use a little more finesse and subtlety than the original repairman did to make it at least look “righter”. If ya can’t beat ‘em, join ‘em.

I used 220-grit sandpaper to start carefully nudging the edges of the shank and stem saddle this way and that to give them an appearance of alignment. All the while I paid special attention to keep the faces as level and even as I could. There was very little technical skill involved. I was basically just freehanding. Once I had corrected the lines as much as I could, I began blending the reworked areas into the rest of the pipe with 320-grit. The photo below shows the progress somewhere early in the reshaping phase. Honestly, I was at this for a while and kind of lost myself in the middle of it. So, I didn’t get many photos.Anthony10 When I was as satisfied as I was likely to be with the shape of the shank and saddle, I went back to work on the rest of the stem to finish it up. I continued shaping the button with 320-grit and 400-grit paper. Then, I smoothed the entire surface by lightly sanding with 600-grit and 1200-grit paper. Finally, I polished the stem with micro-mesh pads 1500-12000.Anthony11 The stem work was wrapped up. So, it was time to do the same for the stummel. The off-kilter shape of the shank made it difficult to find a band that would fit well. It took three attempts before I found one that would work. I used a method for shaping a round band for the diamond shank similar to what Steve has previously written about here, but it took quite a bit of reworking to get it to conform to the now strange dimensions of the shank. I’m still not quite happy with how it fits, but I’m not sure what I could have done differently.Anthony12 There was nothing left to do at that point but to address the finish of the stummel. I wanted the final color to be close to the original but a little darker to help hide the bit of crack repair that was still visible. I heated the stummel over the heat gun to open the grain and then applied Fiebing’s black dye to the stummel. I then sanded down the surface with 400-grit paper to remove the remaining scratches and most of the black stain, except for what had set in the grain and recesses of the rings. Next, I applied a mahogany stain before sanding with 600-grit and 1200-grit paper. I took the stummel to the buffer and gave it a quick Tripoli buff, and then applied a final stain of British Tan.
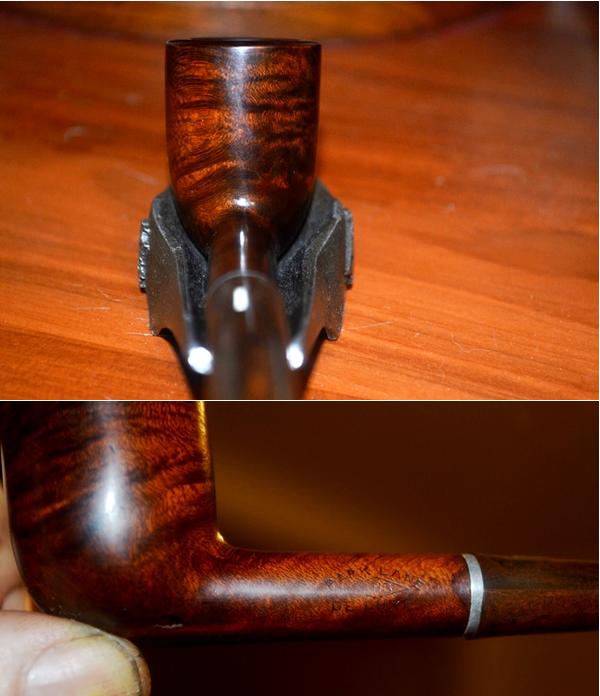
The stummel was polished with micro-mesh pads starting with 3600-grit and working through to 12000-grit. I then buffed the entire pipe with white diamond compound and gave it several coats of carnauba wax to finish it up.

I leaned back in my chair and checked the clock on the wall. There were only minutes to go and most of the other seats were already empty. I had to admit that this was really as good as it was going to get. So, with a sigh, I stood up from my chair, gathered my exam materials, and delivered them to the desk at the front of the room…Anthony13

Anthony14

Anthony15

Anthony16

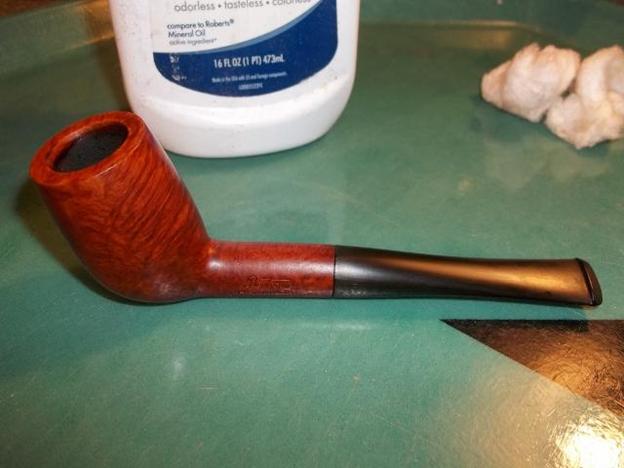
A Bertram Grade # 50 Cutty


Blog by Troy Wilburn

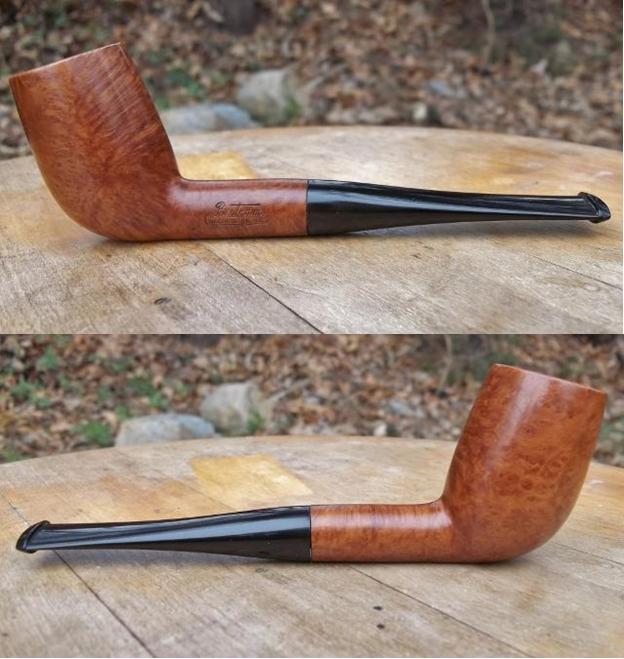
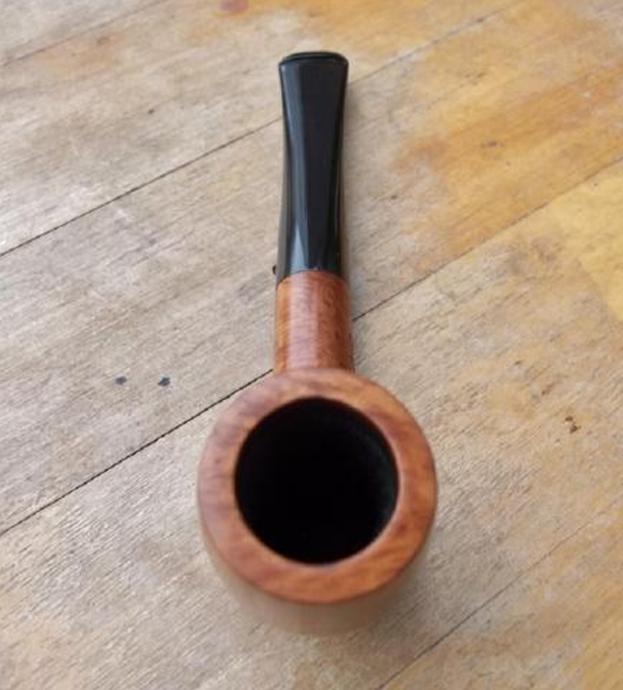
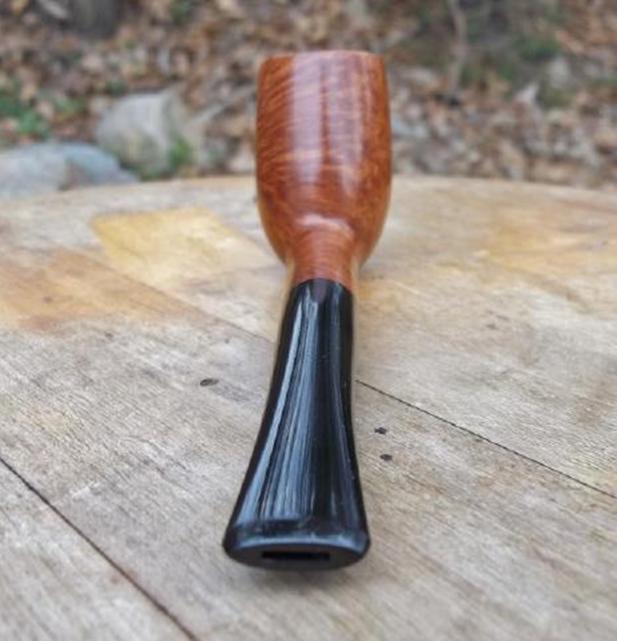
This is the other Bertam I have in my collection that I refurbished last fall. It was my first refurbish of a higher end type pipe. I figured I would show it off since I got such a nice positive response on my latest Bertram poker I posted recently. When I acquired this pipe I had been looking and wanting a nice Bertram but most out of my price range, but luckily I found this one with just enough work to get it cheaper than most. I had also wanted a Cutty shaped pipe and this one really caught my eye.

The pipe was in wonderful shape and didn’t need much work. By the scorching on rim you think it would have been smoked more but wasn’t. There was barely any cake built up at all under inspection. I didn’t even have to clean out shank and stem but did so very lightly with 91% alcohol and a couple of pipe cleaners.

Pipe as it arrived from Ebay seller.Bertram1

Bertram2

Bertram3

Bertram4 There were some scratches in bowl.Bertram5 I sanded out scratches with nothing more than 2500 grit paper and mineral oil.Bertram6 The drilling was perfect.Bertram7 After soaking the stem in Oxy Clean I gave it a very light wet sanding with 800 grit sandpaper and then worked my way up to 2500 grit.

Stem and bowl back together for some time on the buffer.Bertram8 After buffing and waxing I took the pipe outside for some pics to really show off the grain and color.Bertram9

Bertram10

Bertram11

Bertram12

Bertram13

Bertram14

Bertram15

Bertram16

Bertram17 It’s an excellent smoker and really shines with VA/Per blends. I don’t smoke it often but when I do it brings great pleasure.Bertram18