Category Archives: Metal Pipes

In this section all of the various metal pipes that have been refurbished and written about have been collected.

Reworking a Unique Nylon “Vikingish” Pipe


Blog by Steve Laug

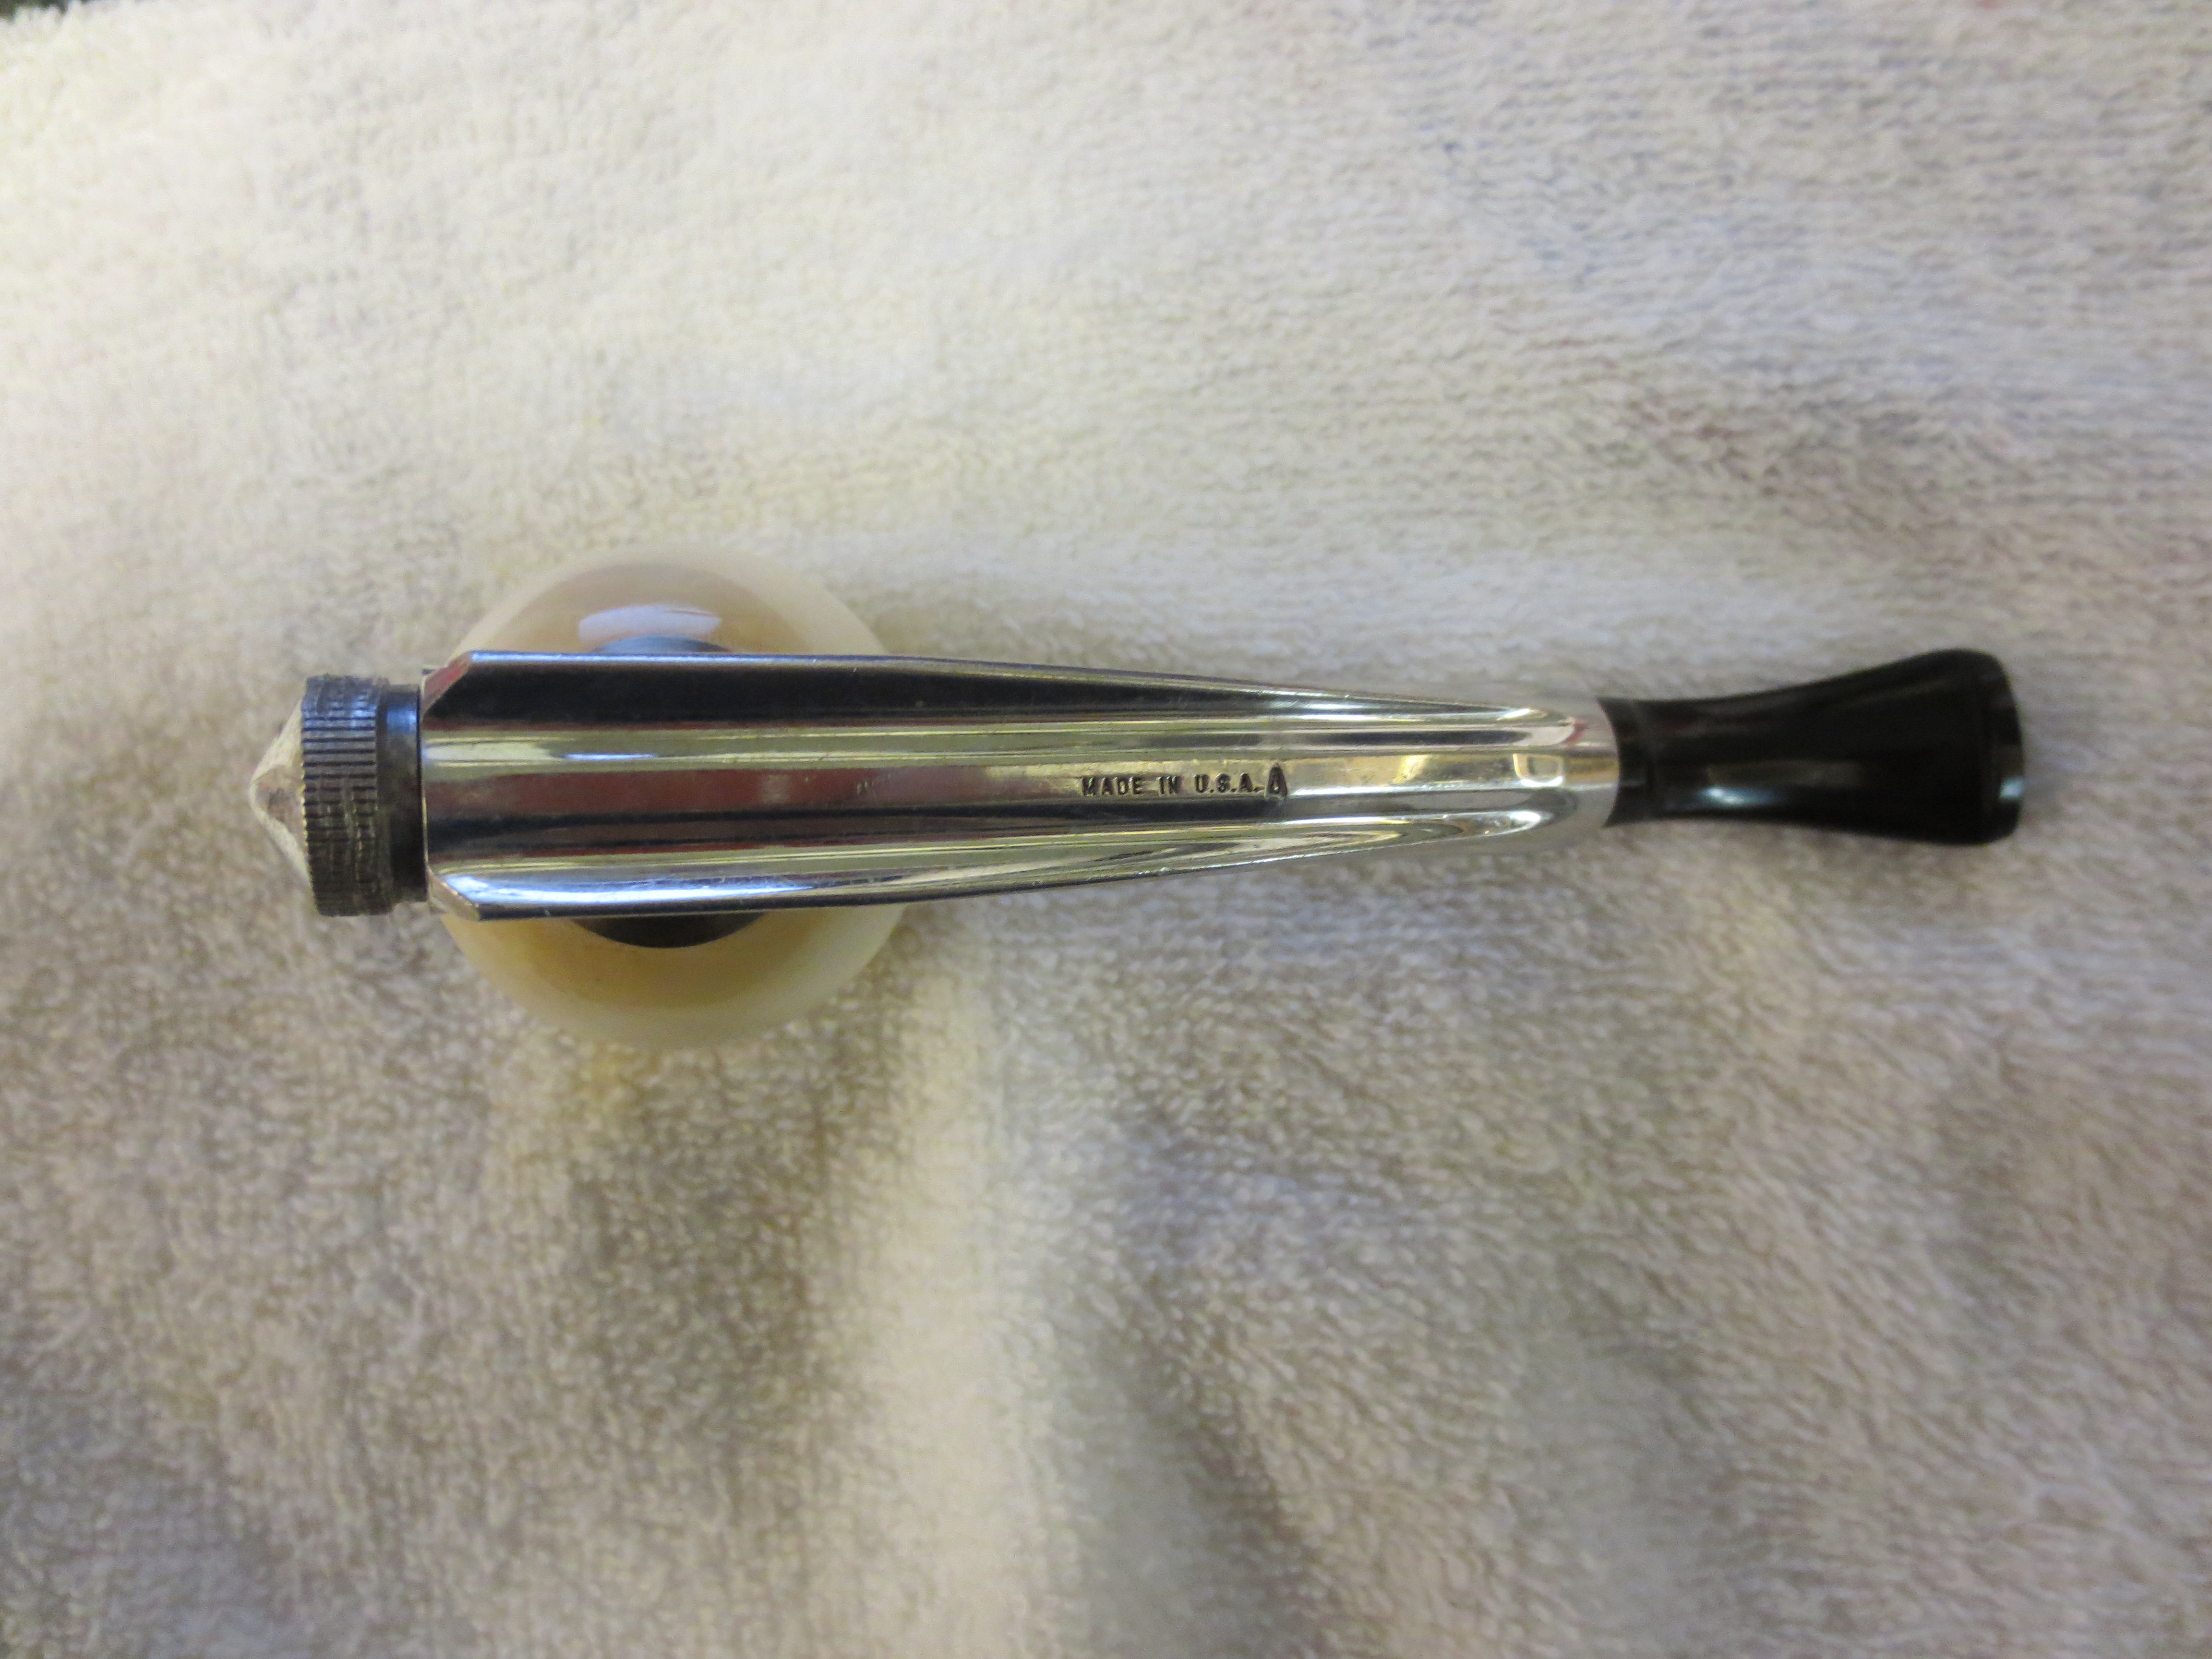
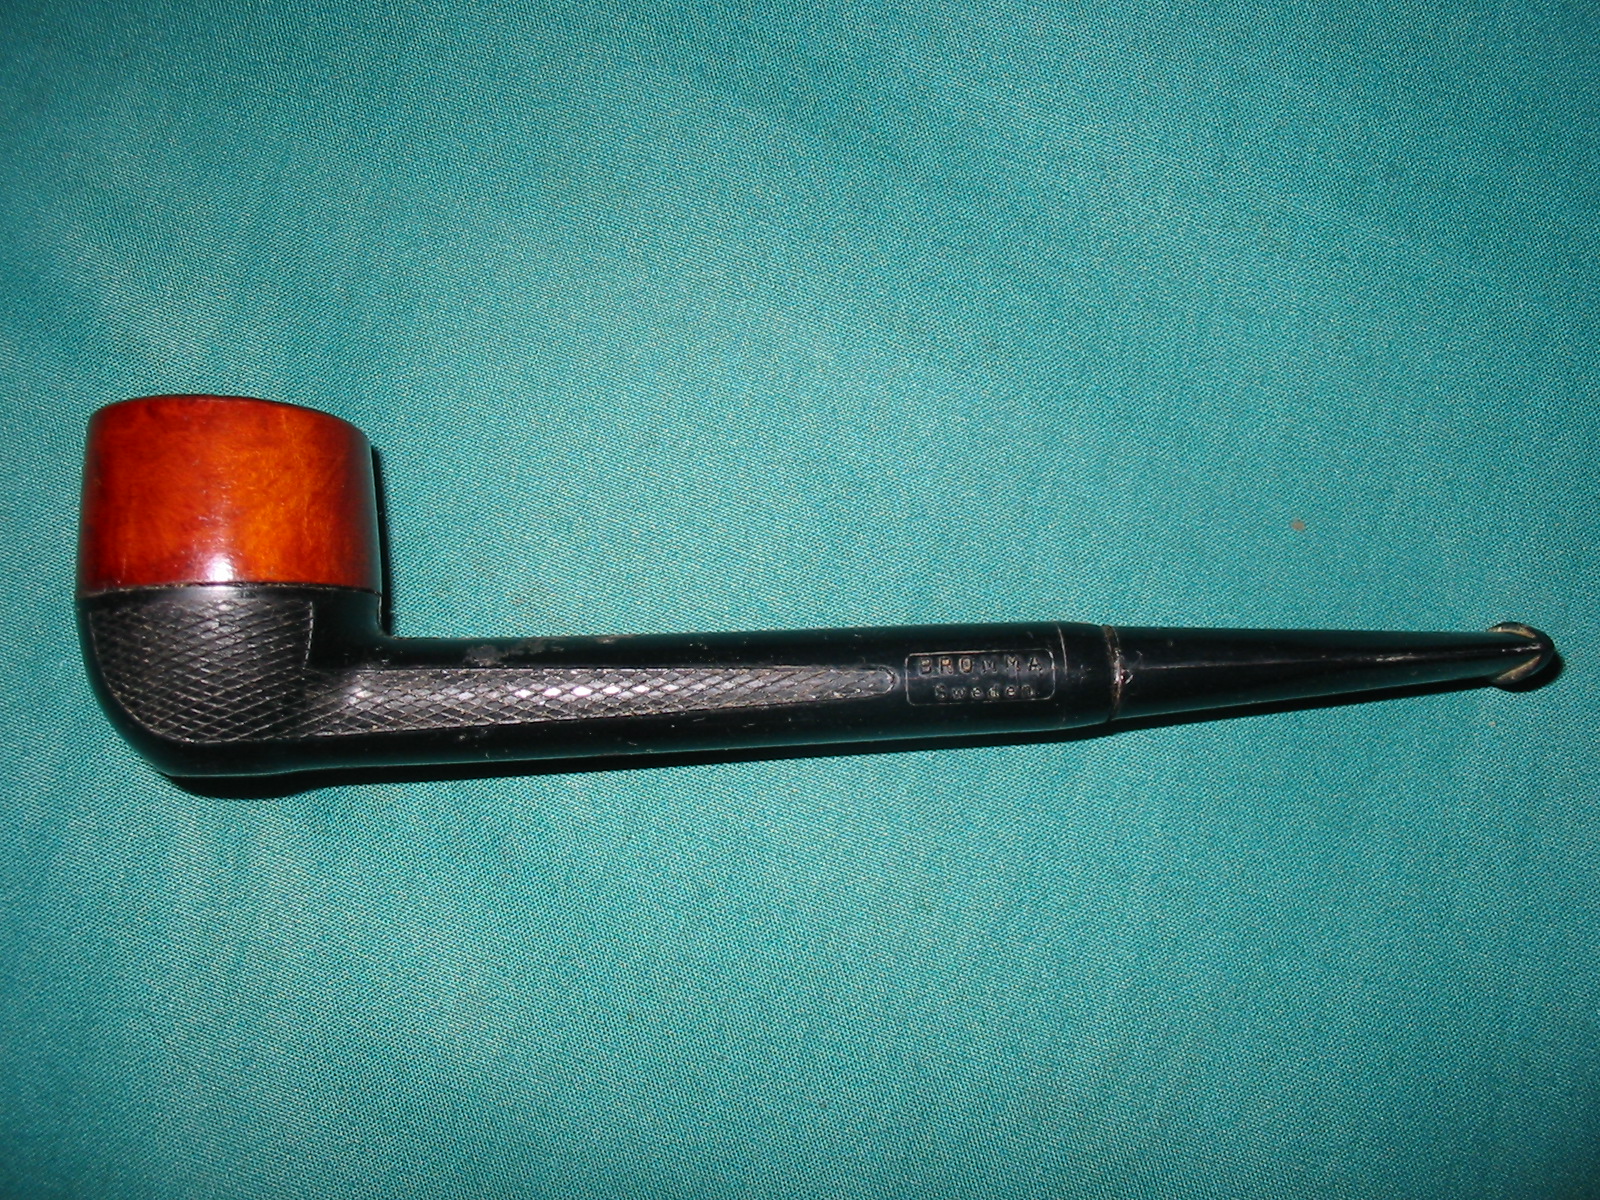
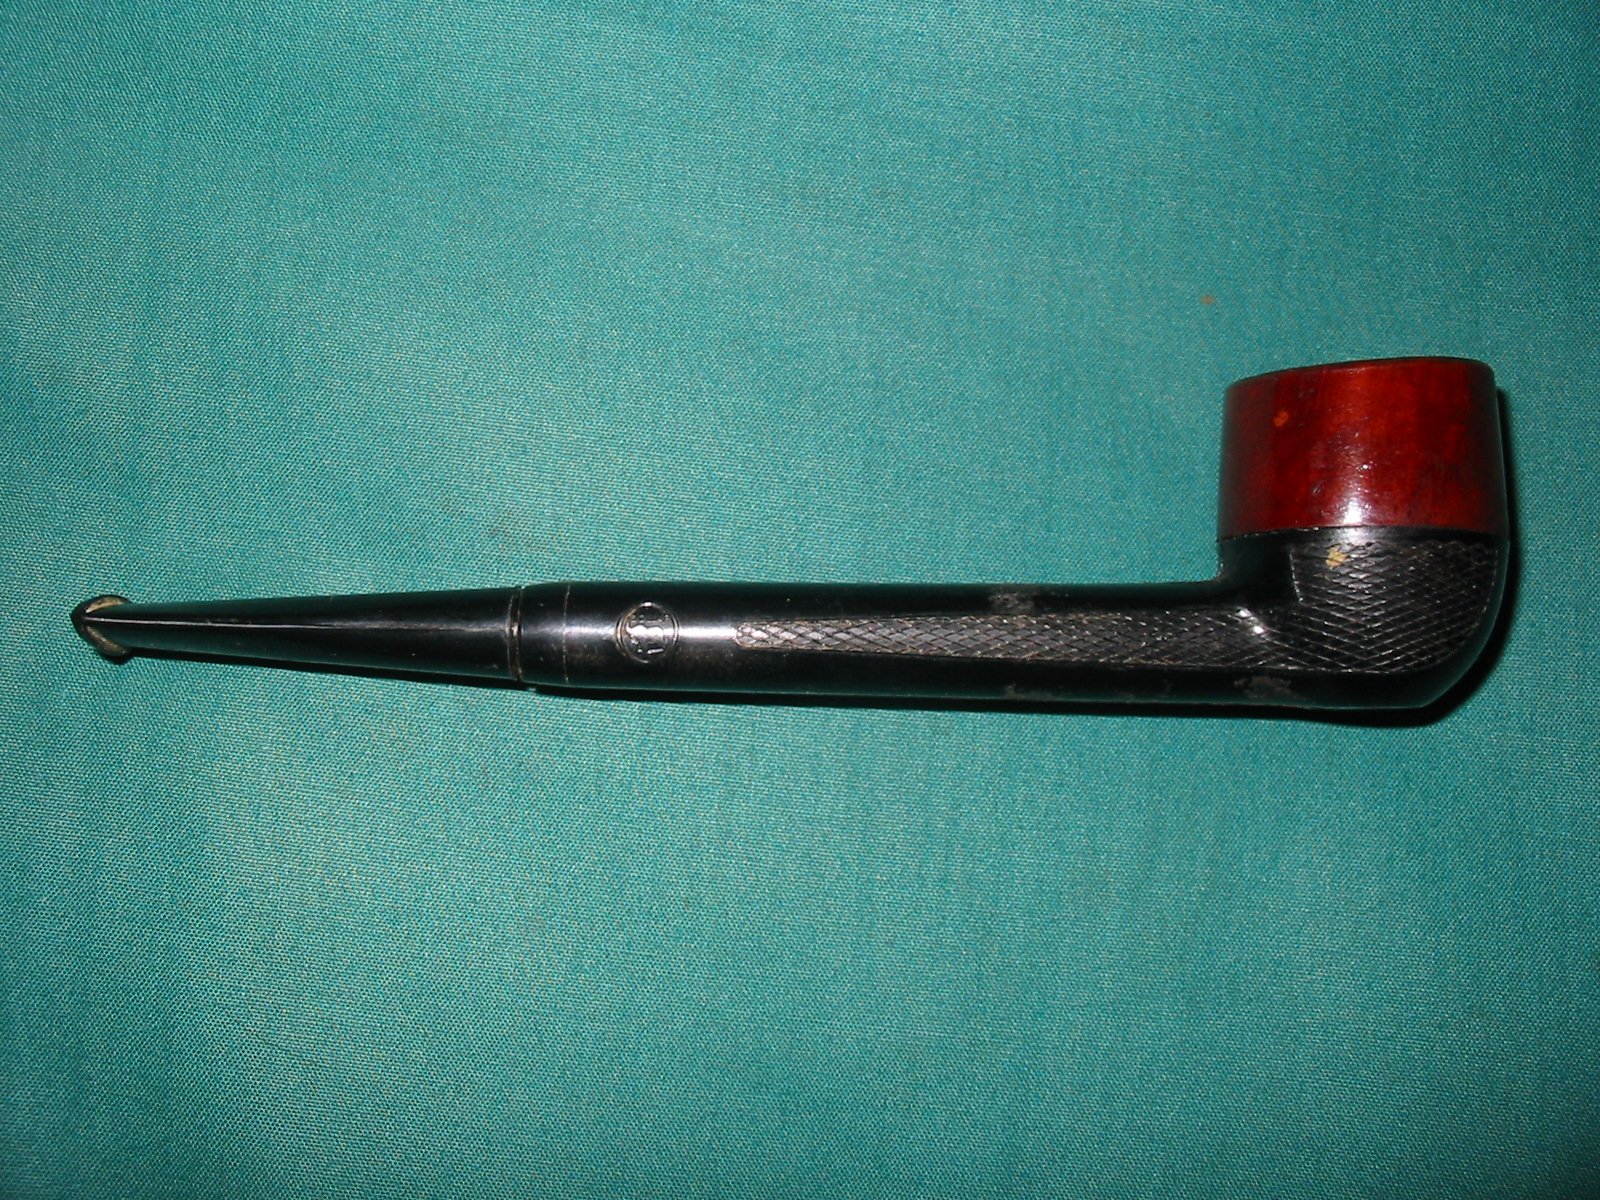
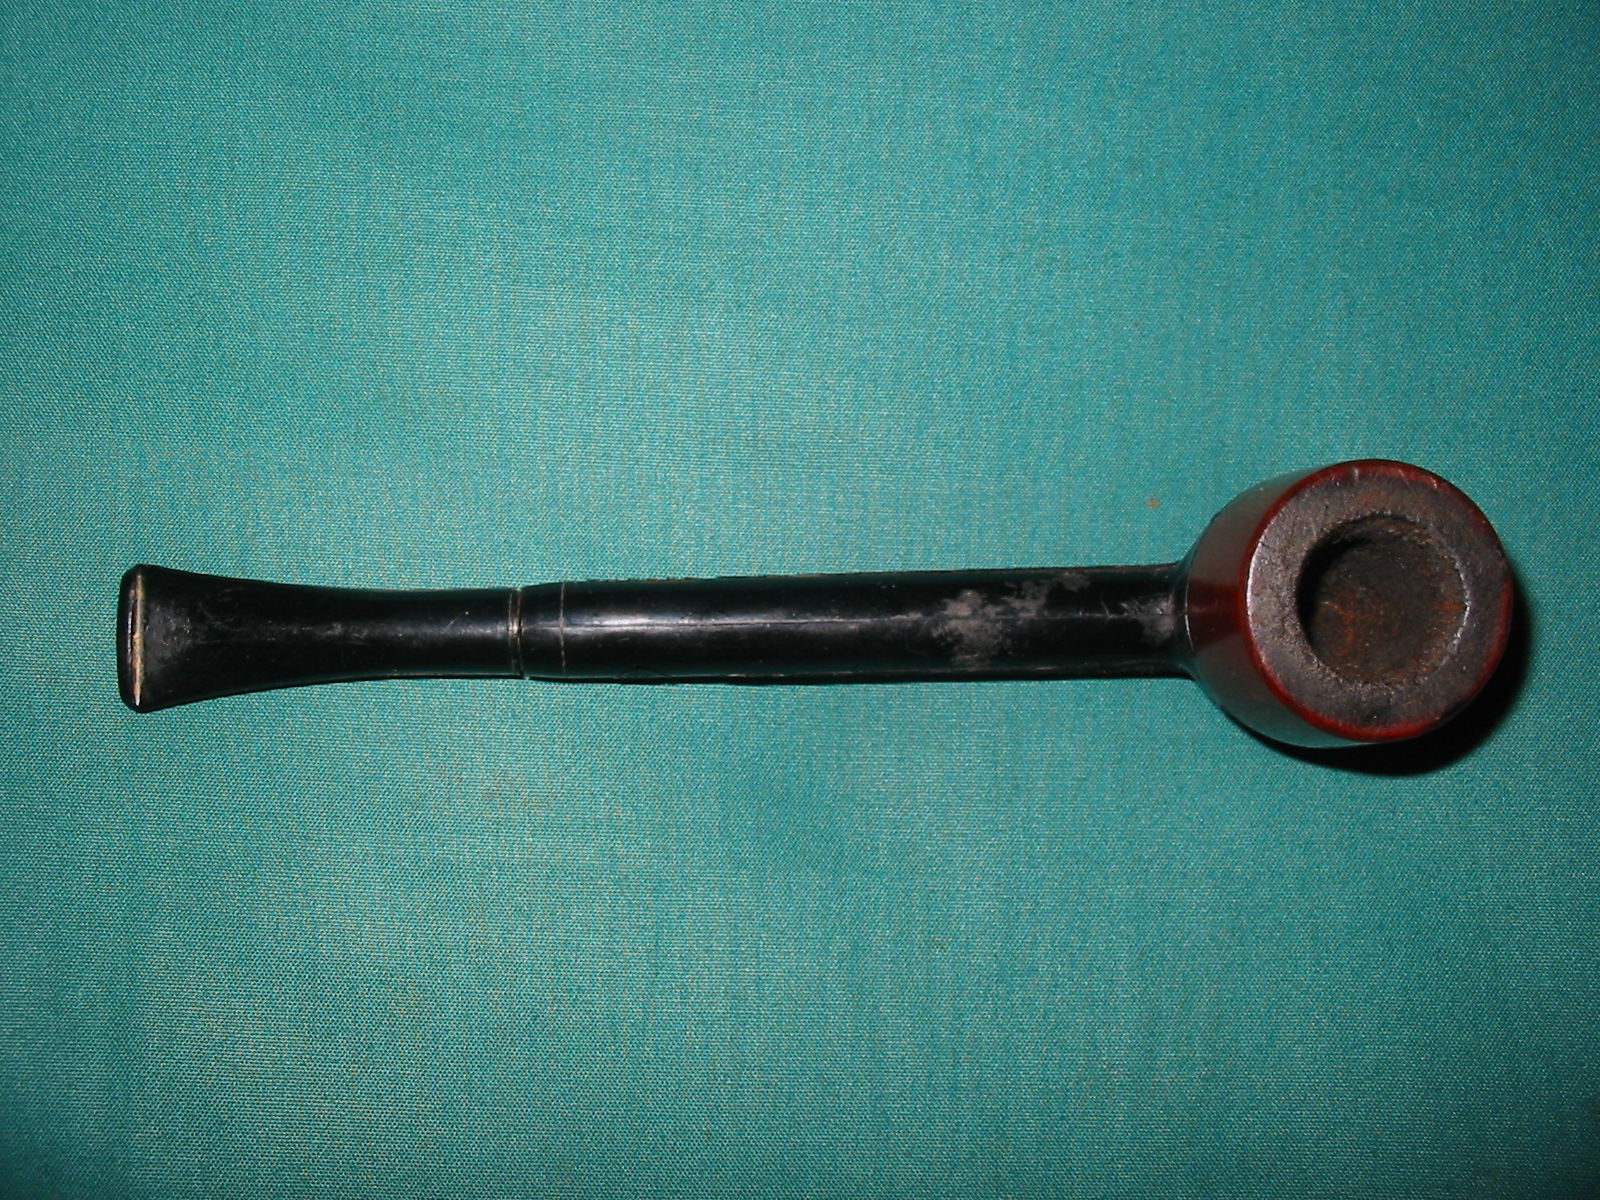
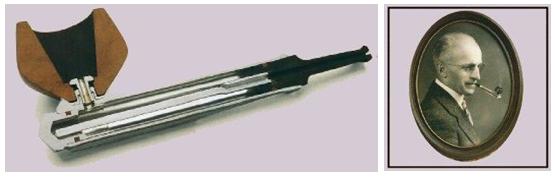
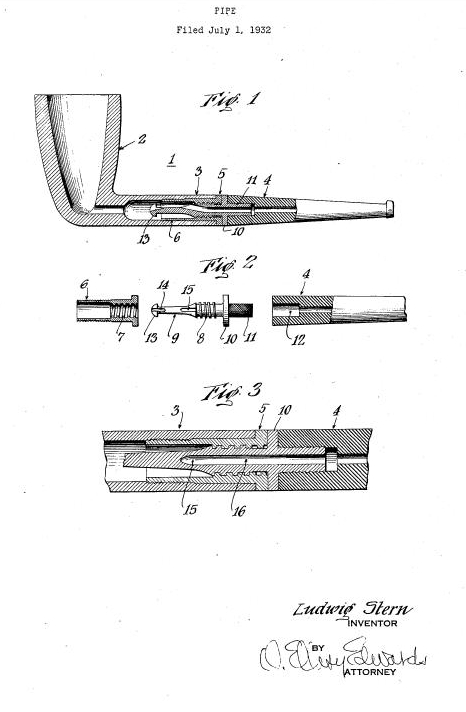
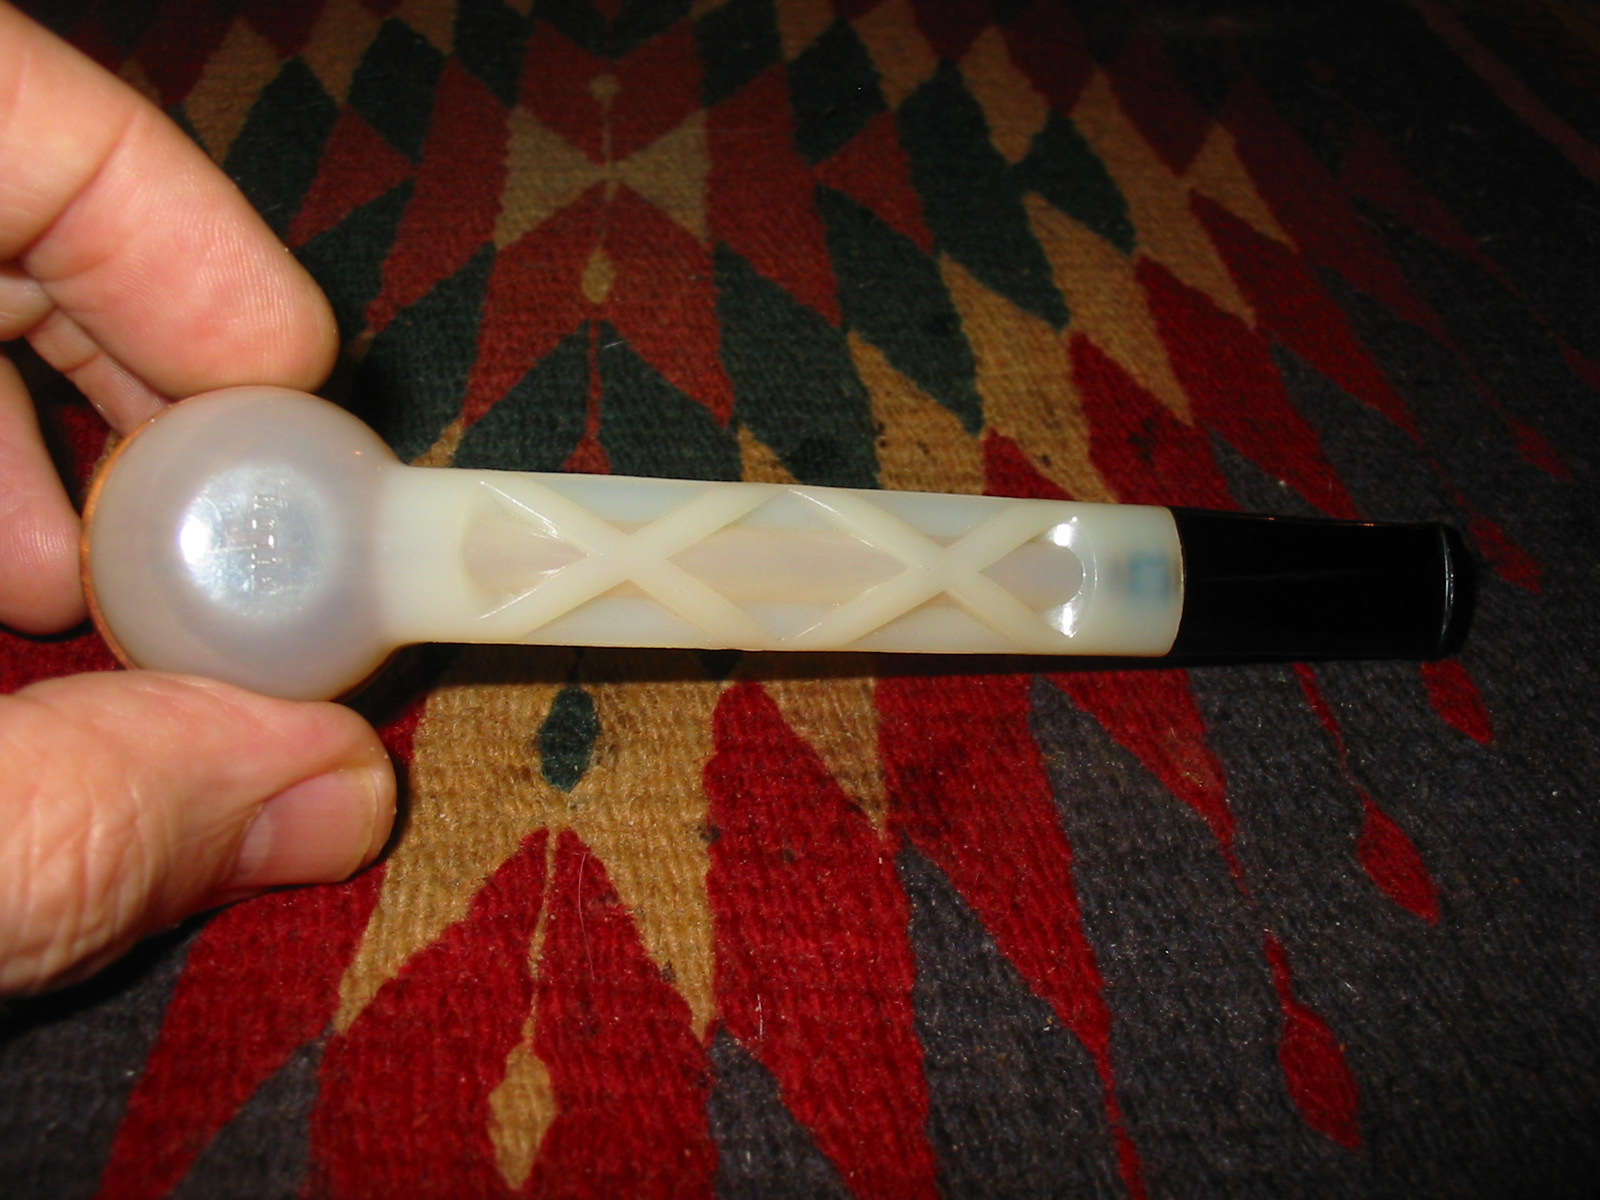
When I saw this old pipe in the rack at the antique mall I wanted it because of its uniqueness. The price was also good – $9.95. I figured at that price it was like buying a corn cob pipe and certainly would function in the same capacity for me. This one had a nylon base and stem with a briar bowl that screwed into the base. Dr. Grabow bowls fit this pipe base perfectly but Falcon bowls do not fit. The only stamping on the pipe is on the bottom of the base where it reads Nylon. In researching this pipe on the net I was unable to find any pertinent information. When I posted it on Pipe Smoker Unlimited Forums I got a suggestion and a link to the Smoking Metals site. Low and behold the link took me to the exact pipe base as the one I had found. Here is the link: http://www.smokingmetal.co.uk/pipe.php?page=60 The pipe pictured has a far better bowl than the one that I found. What I found interesting was the information that was on the site regarding this pipe. I am copying it verbatim:

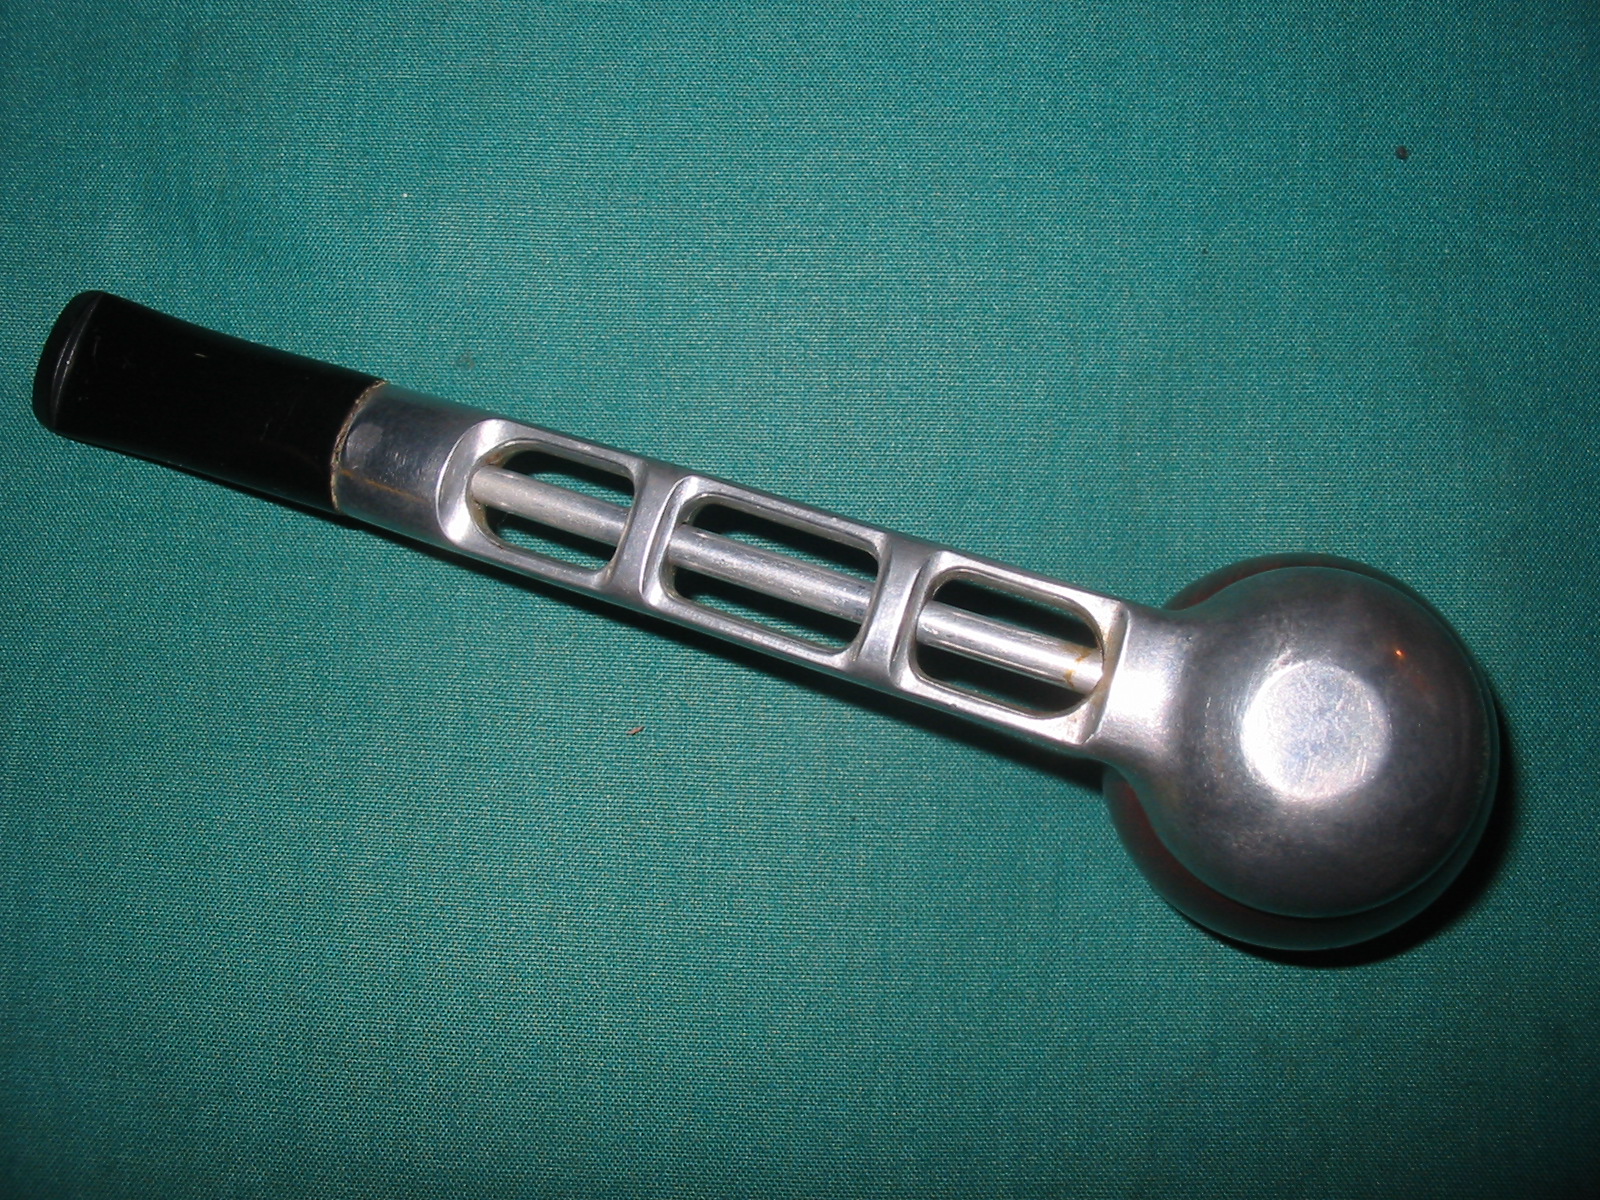
“No makers name, simply the word ‘NYLON’ on the base of the stem under the bowl. The briar bowl is Viking style, accepting all Dr Grabow Viking and Koolsmoke bowls. The bit can be varying colours and not always vulcanite so often severely damaged. The stems can be silvered or in gilt, or even painted, but it is not known if this is how they left the manufacturer. Among names sold under is Forecaster Superline. US Patent# 179,373 Inventor Berenson would seem to apply.”

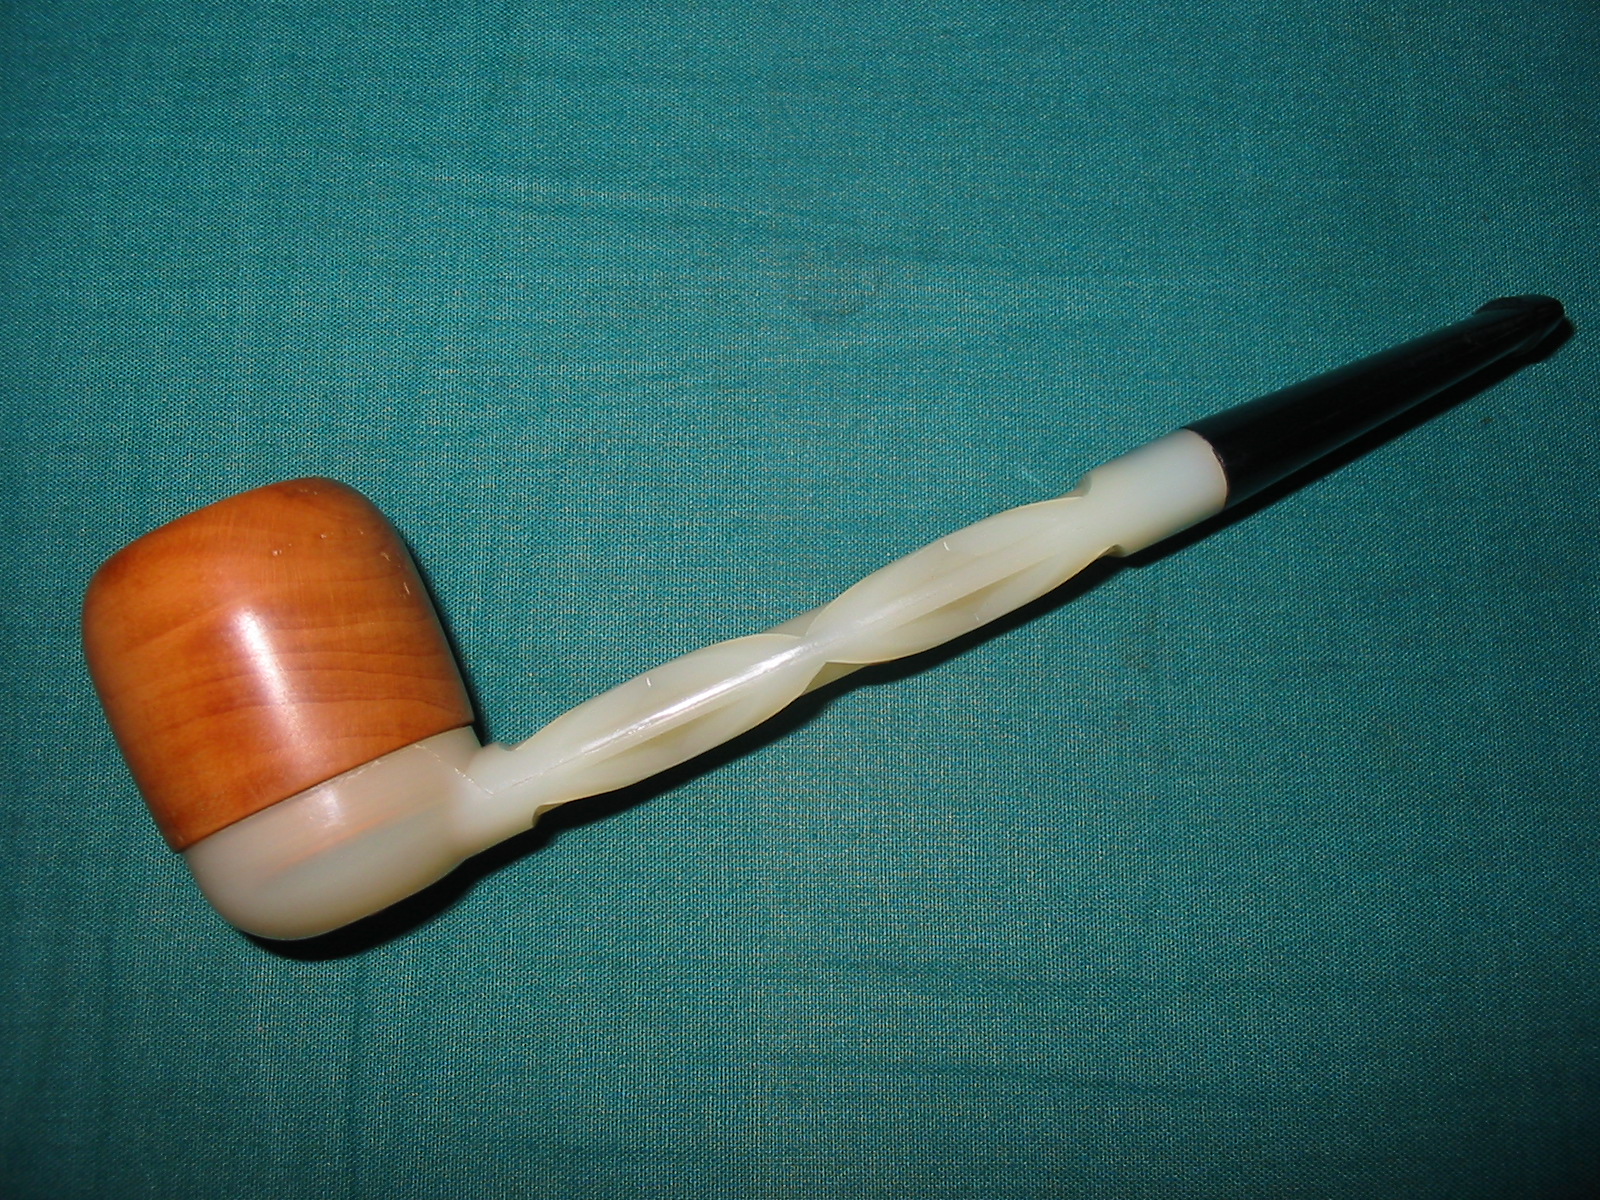
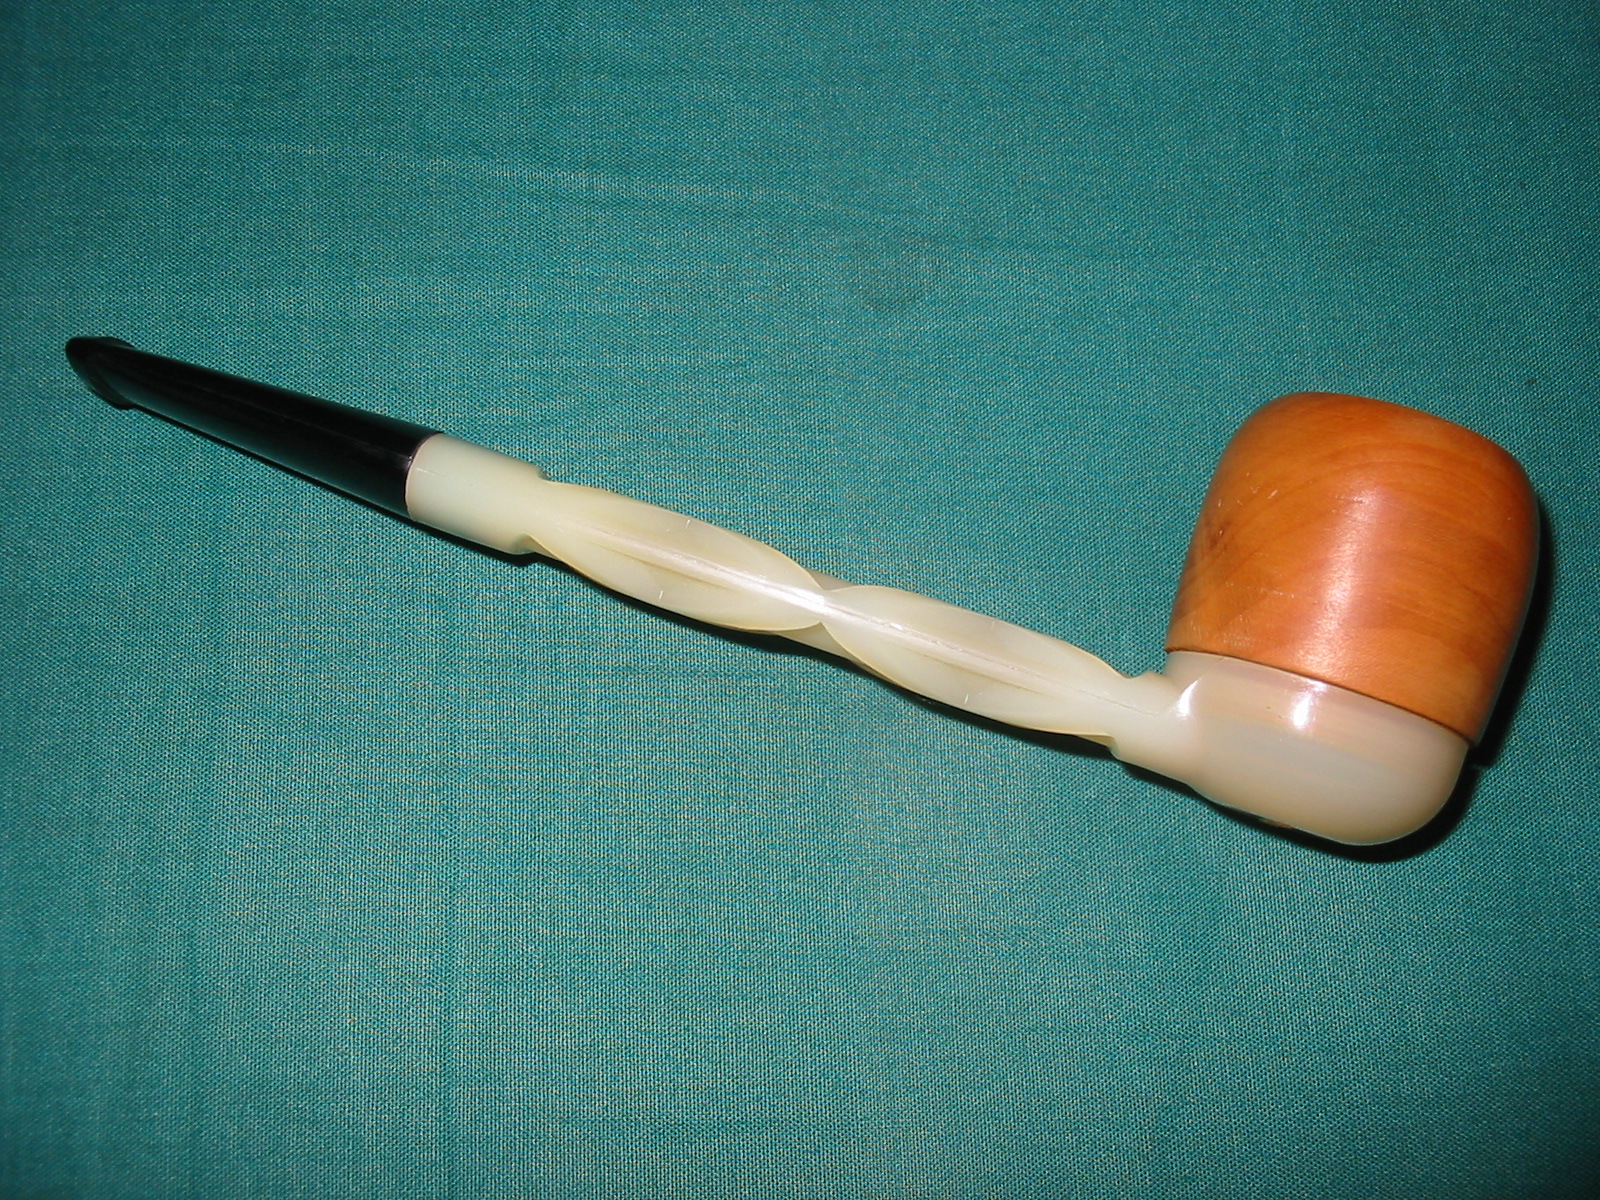
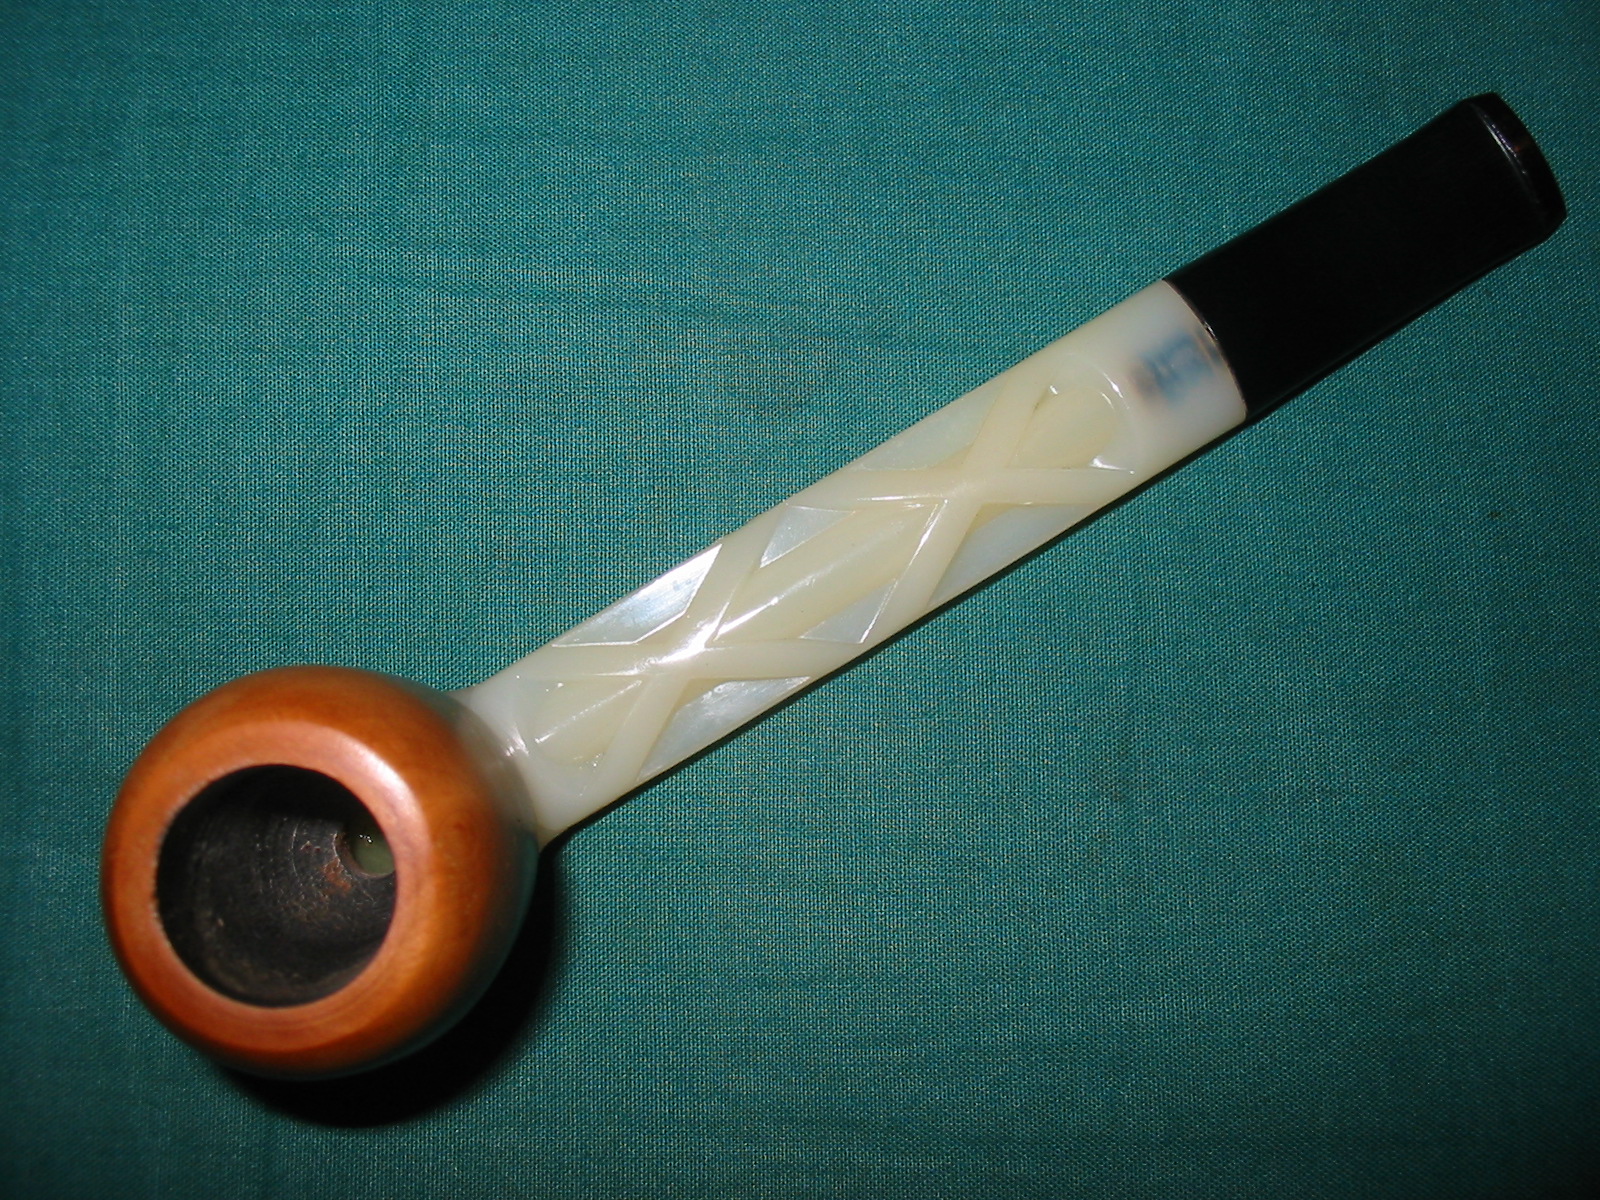
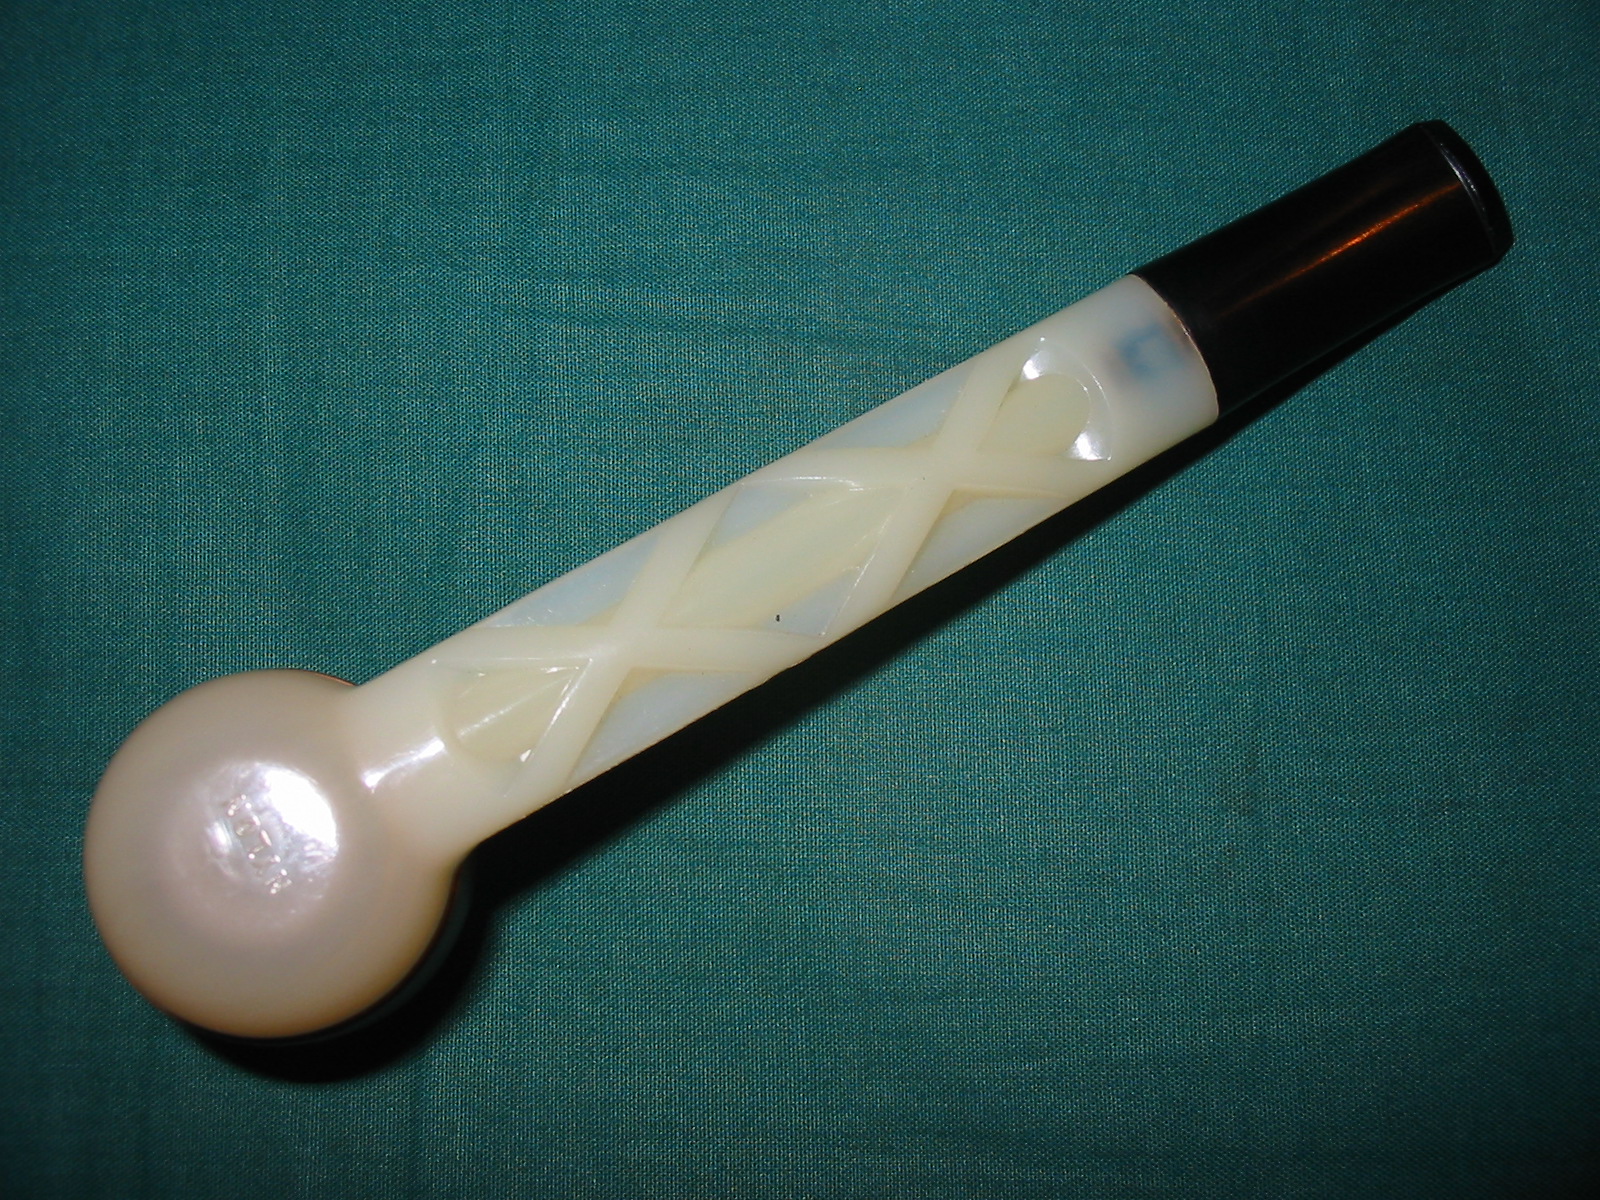
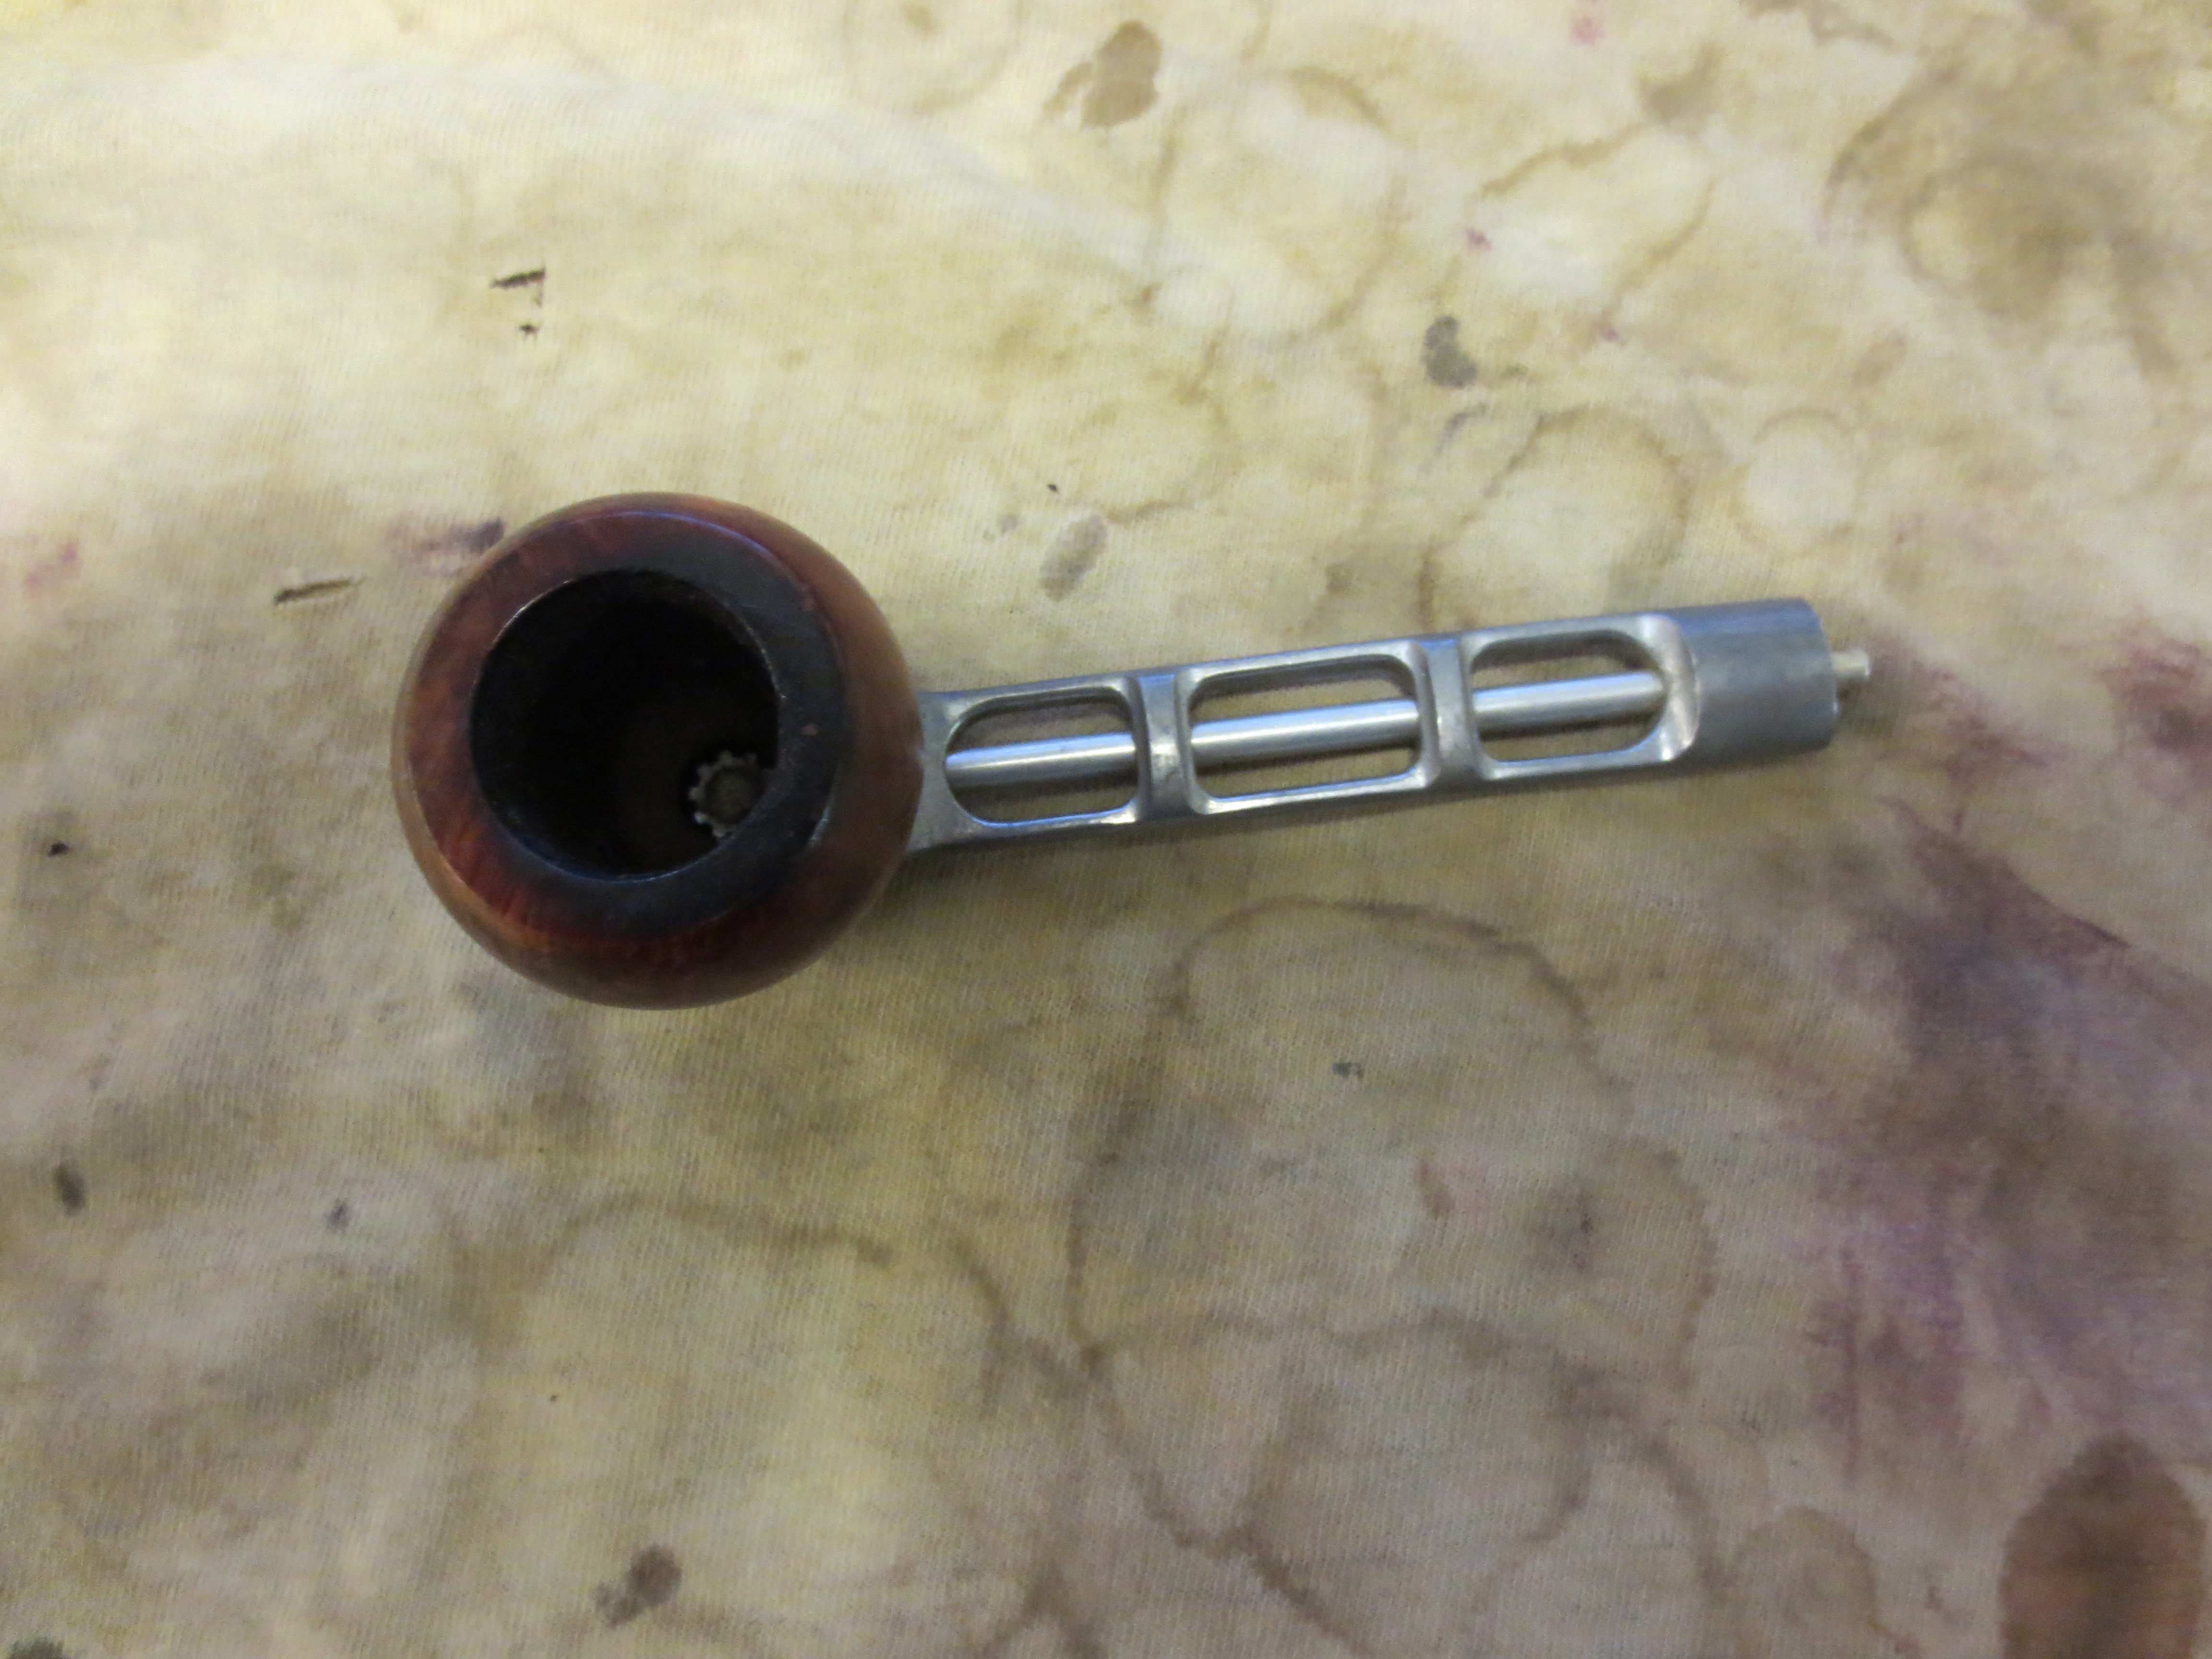
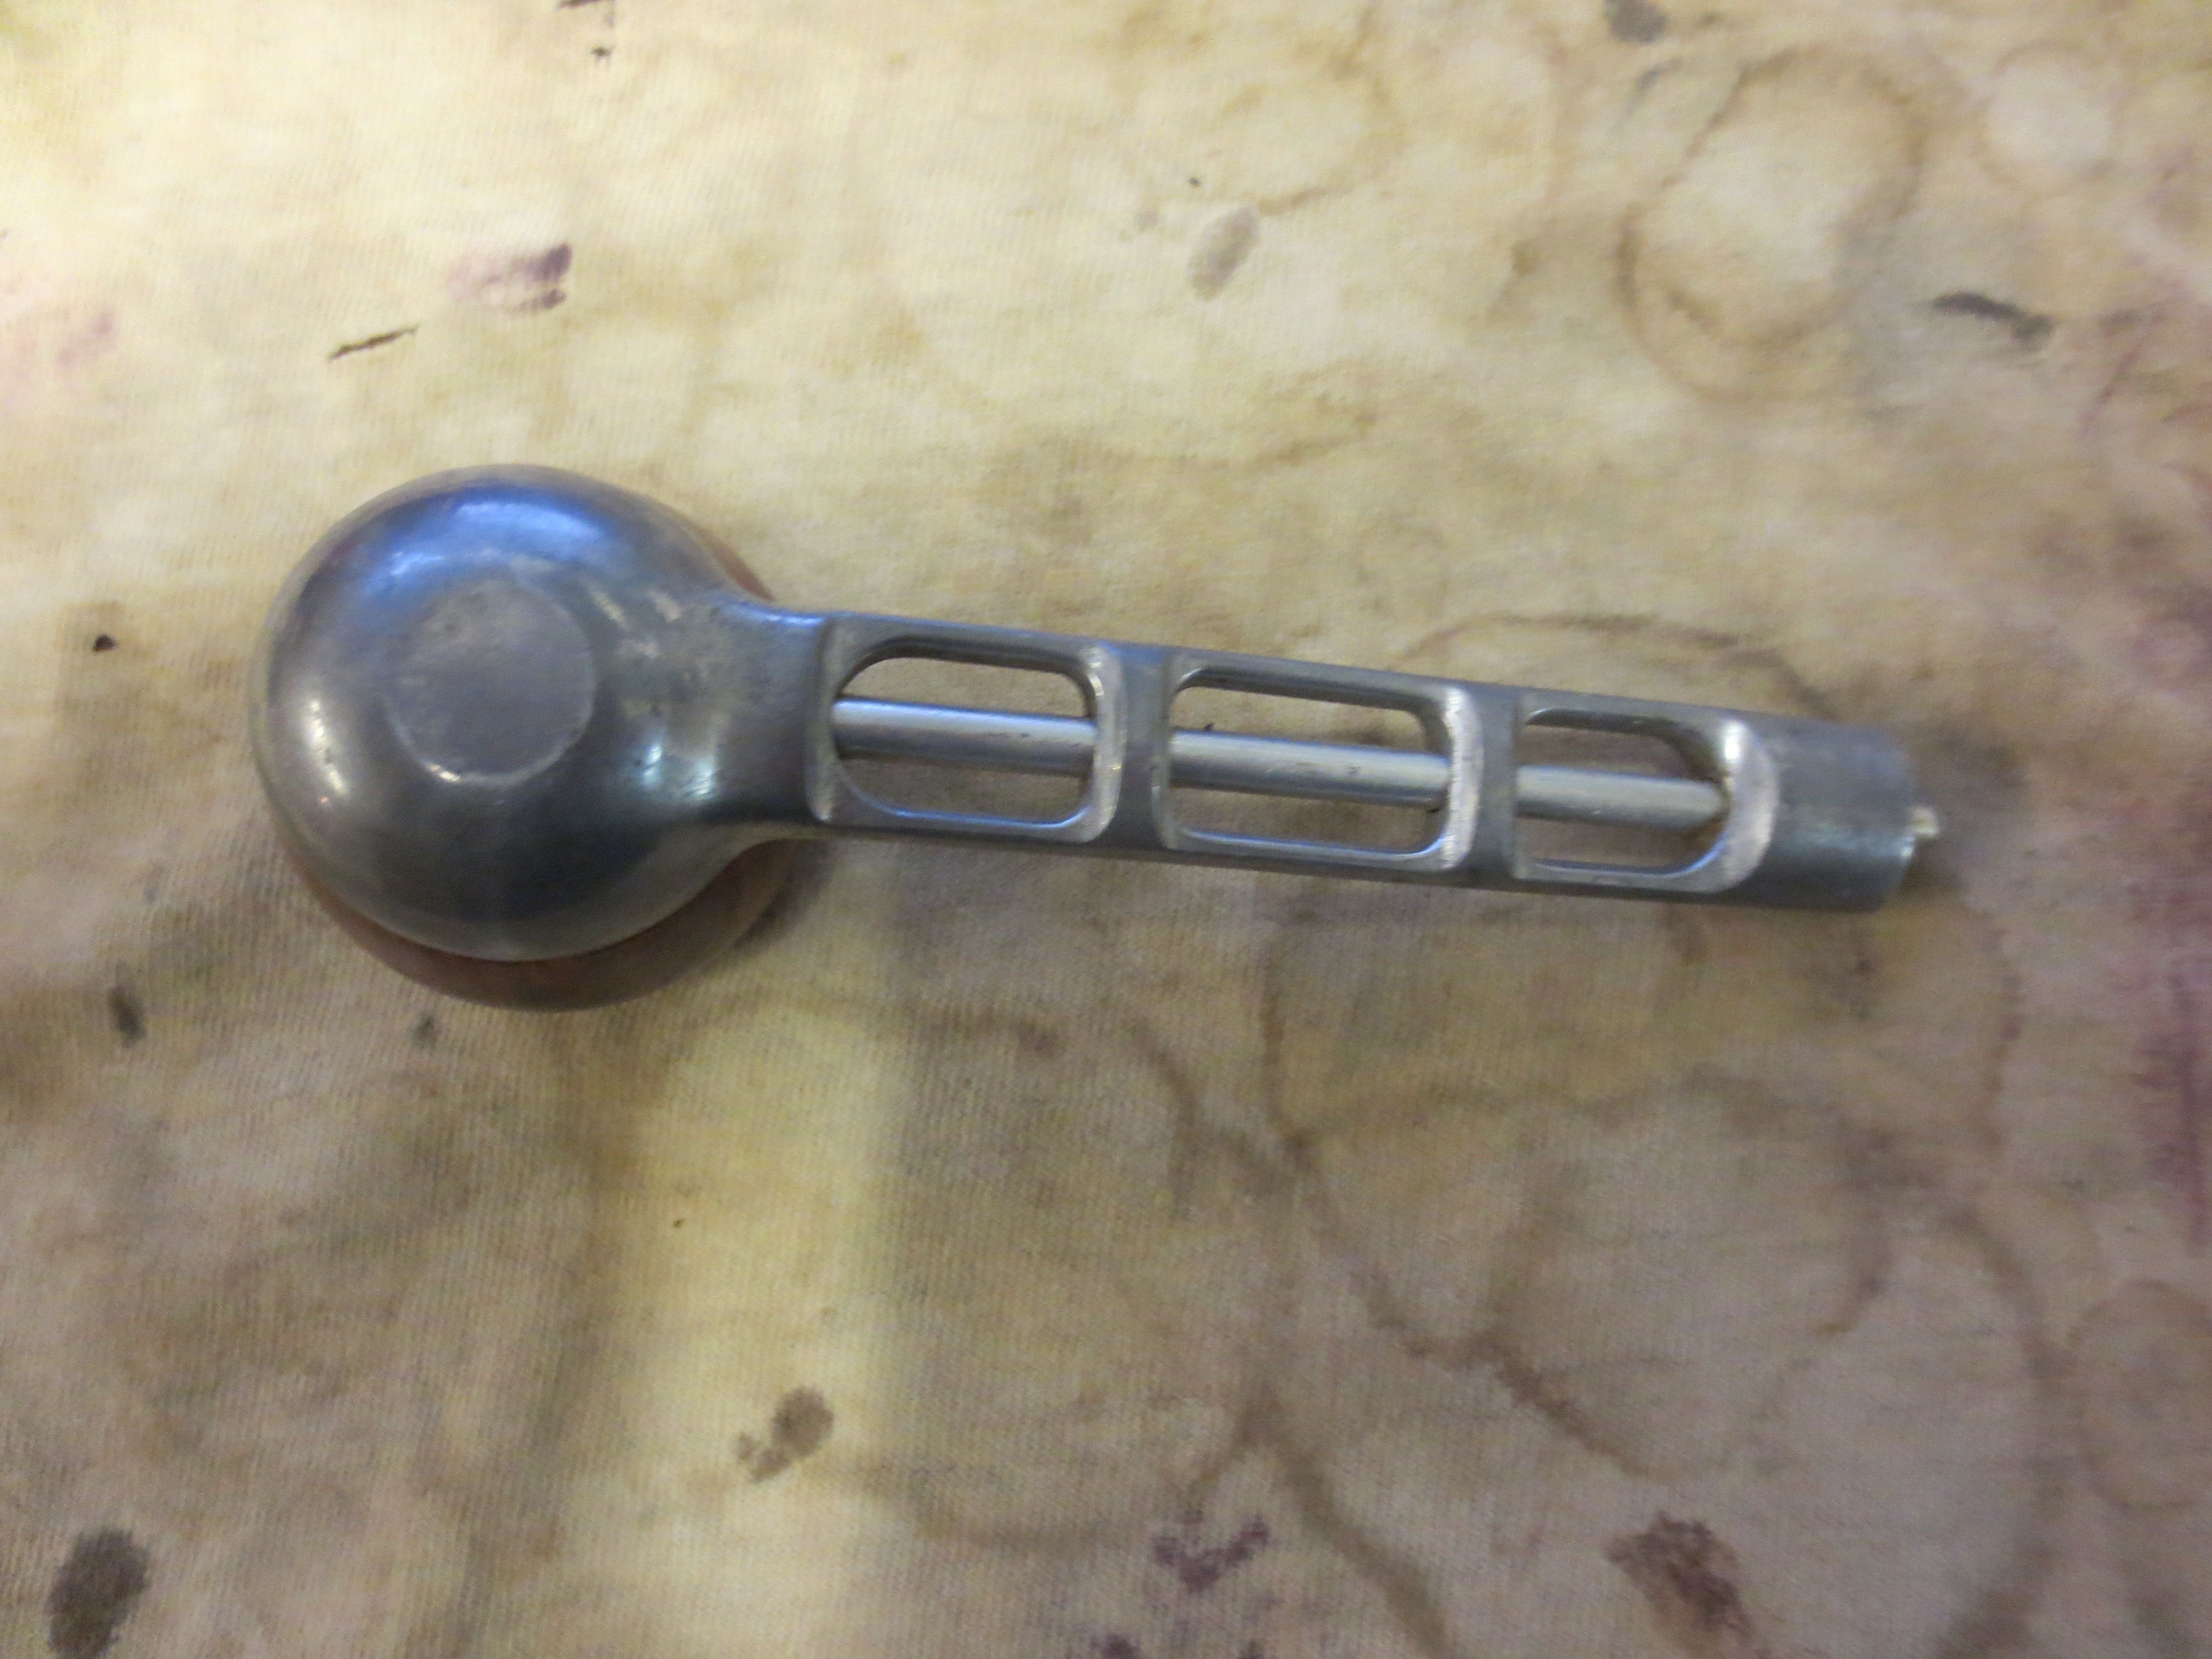
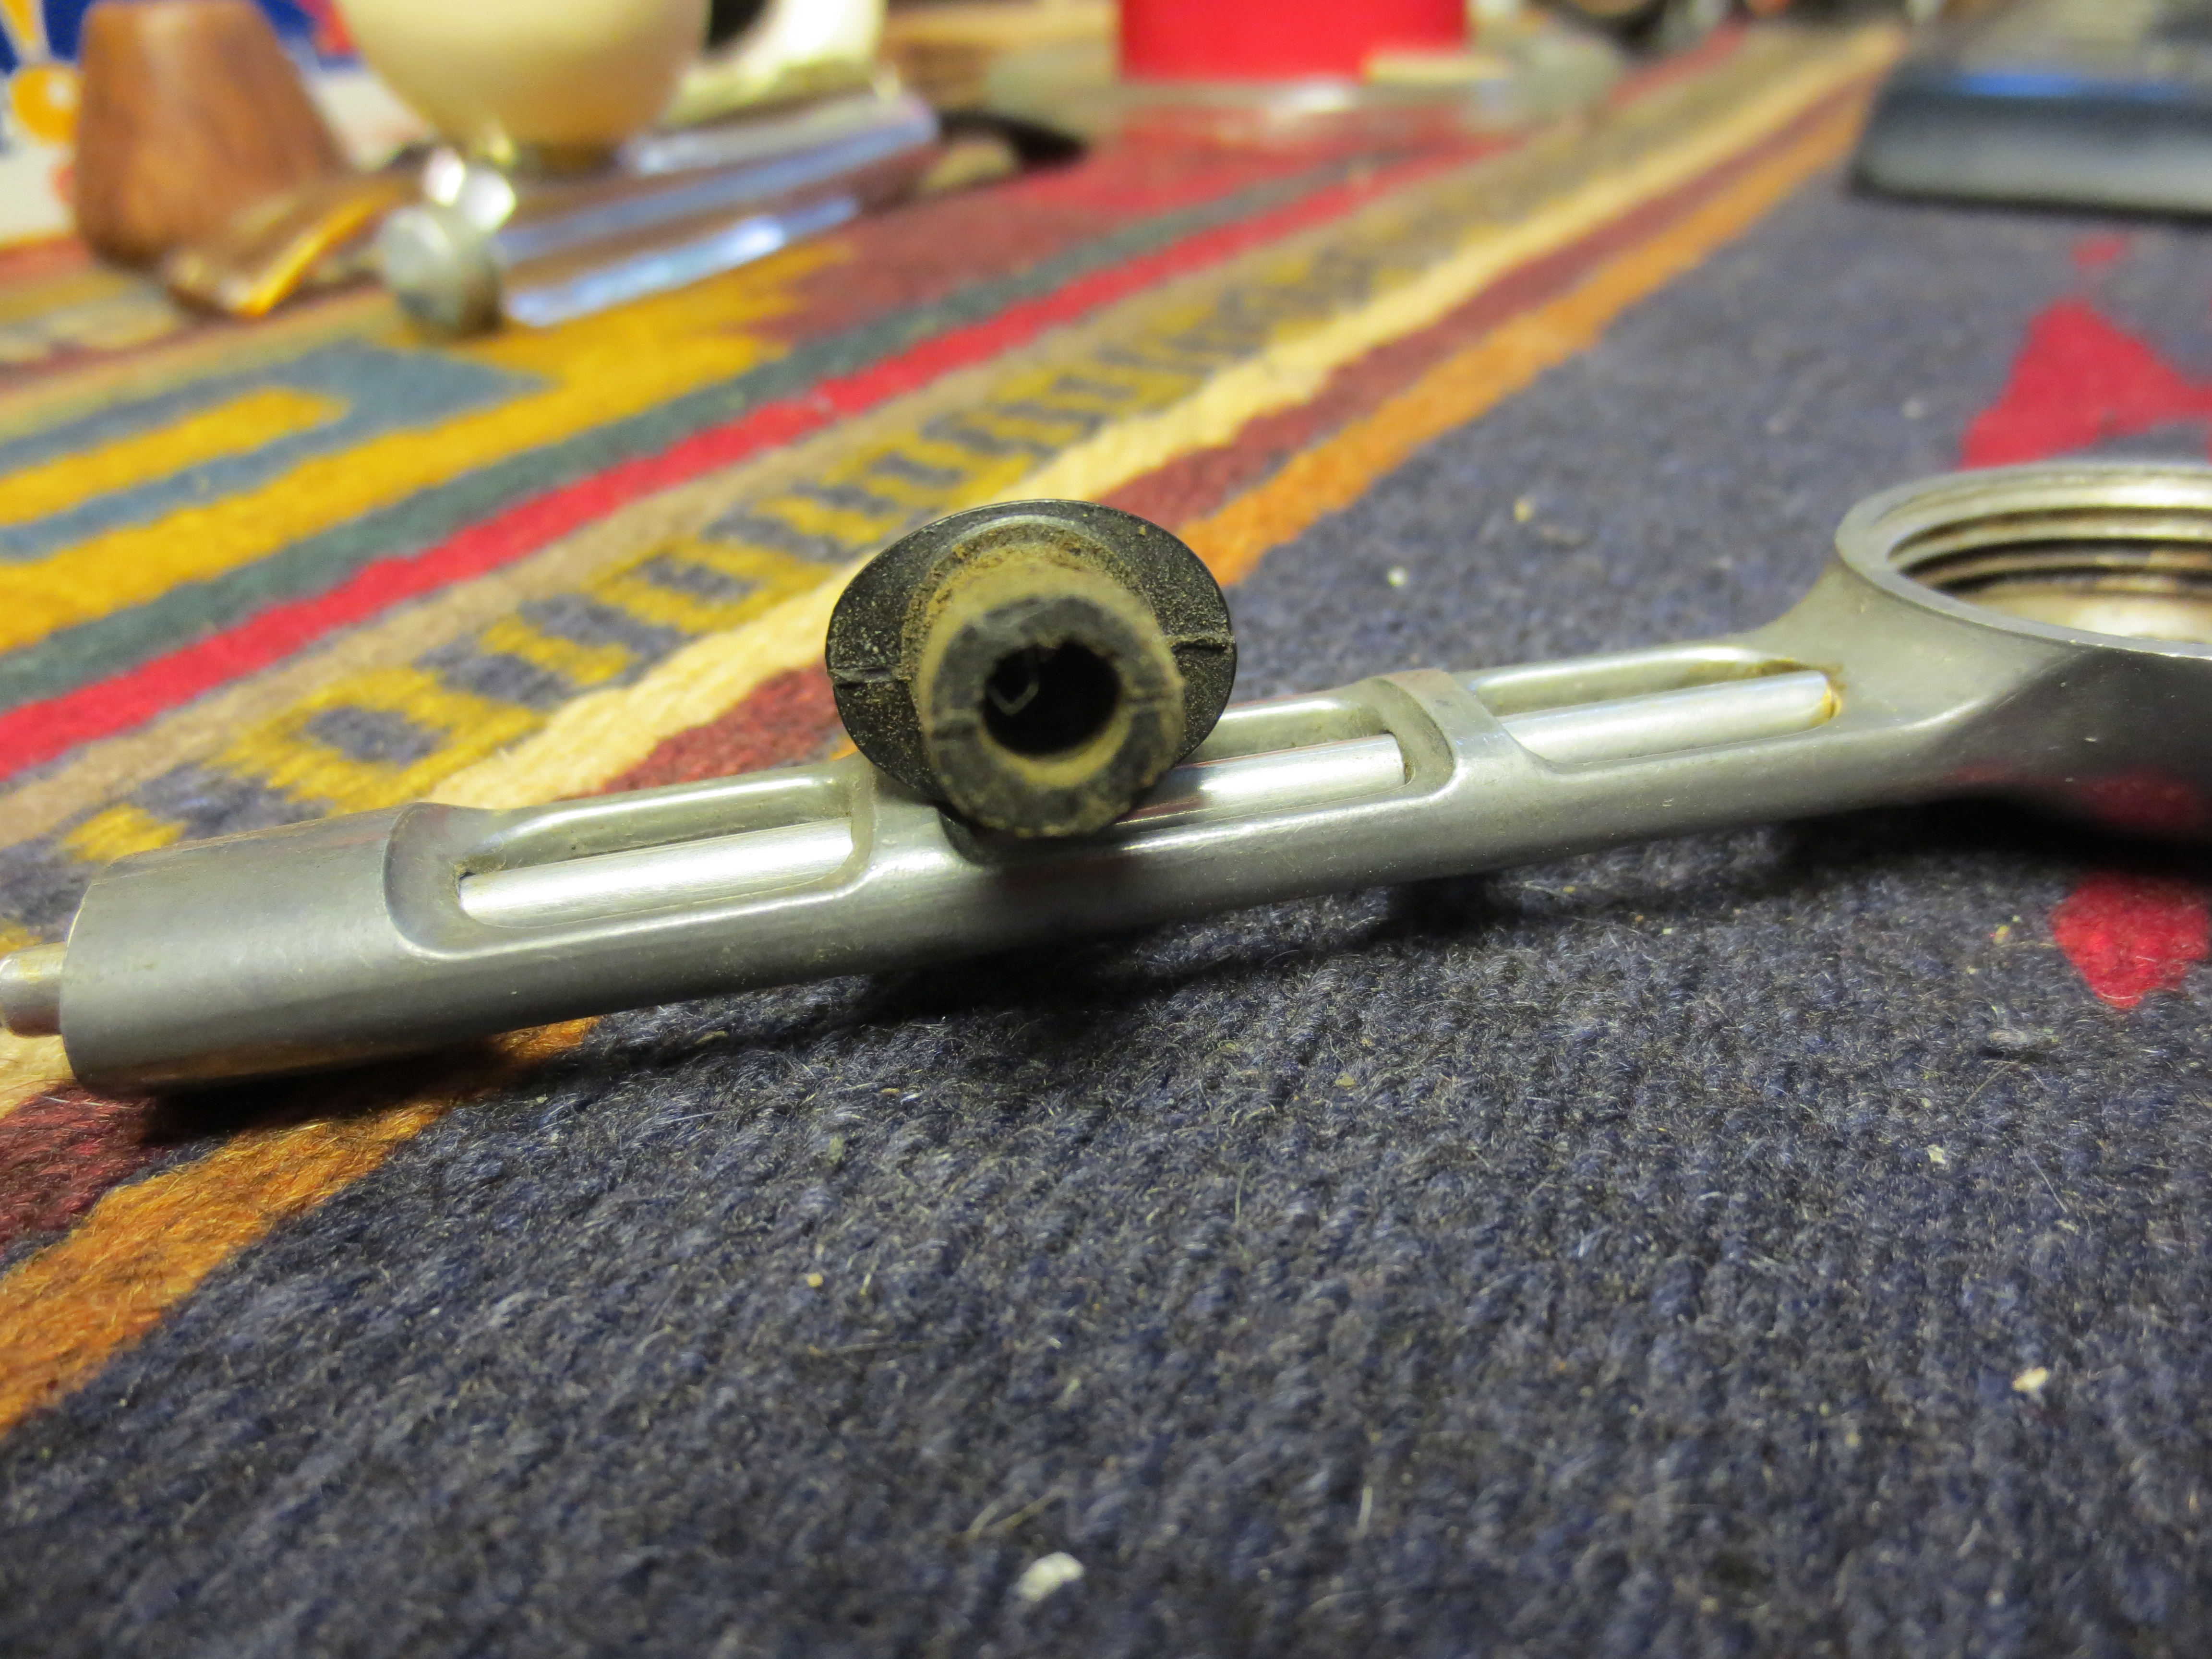
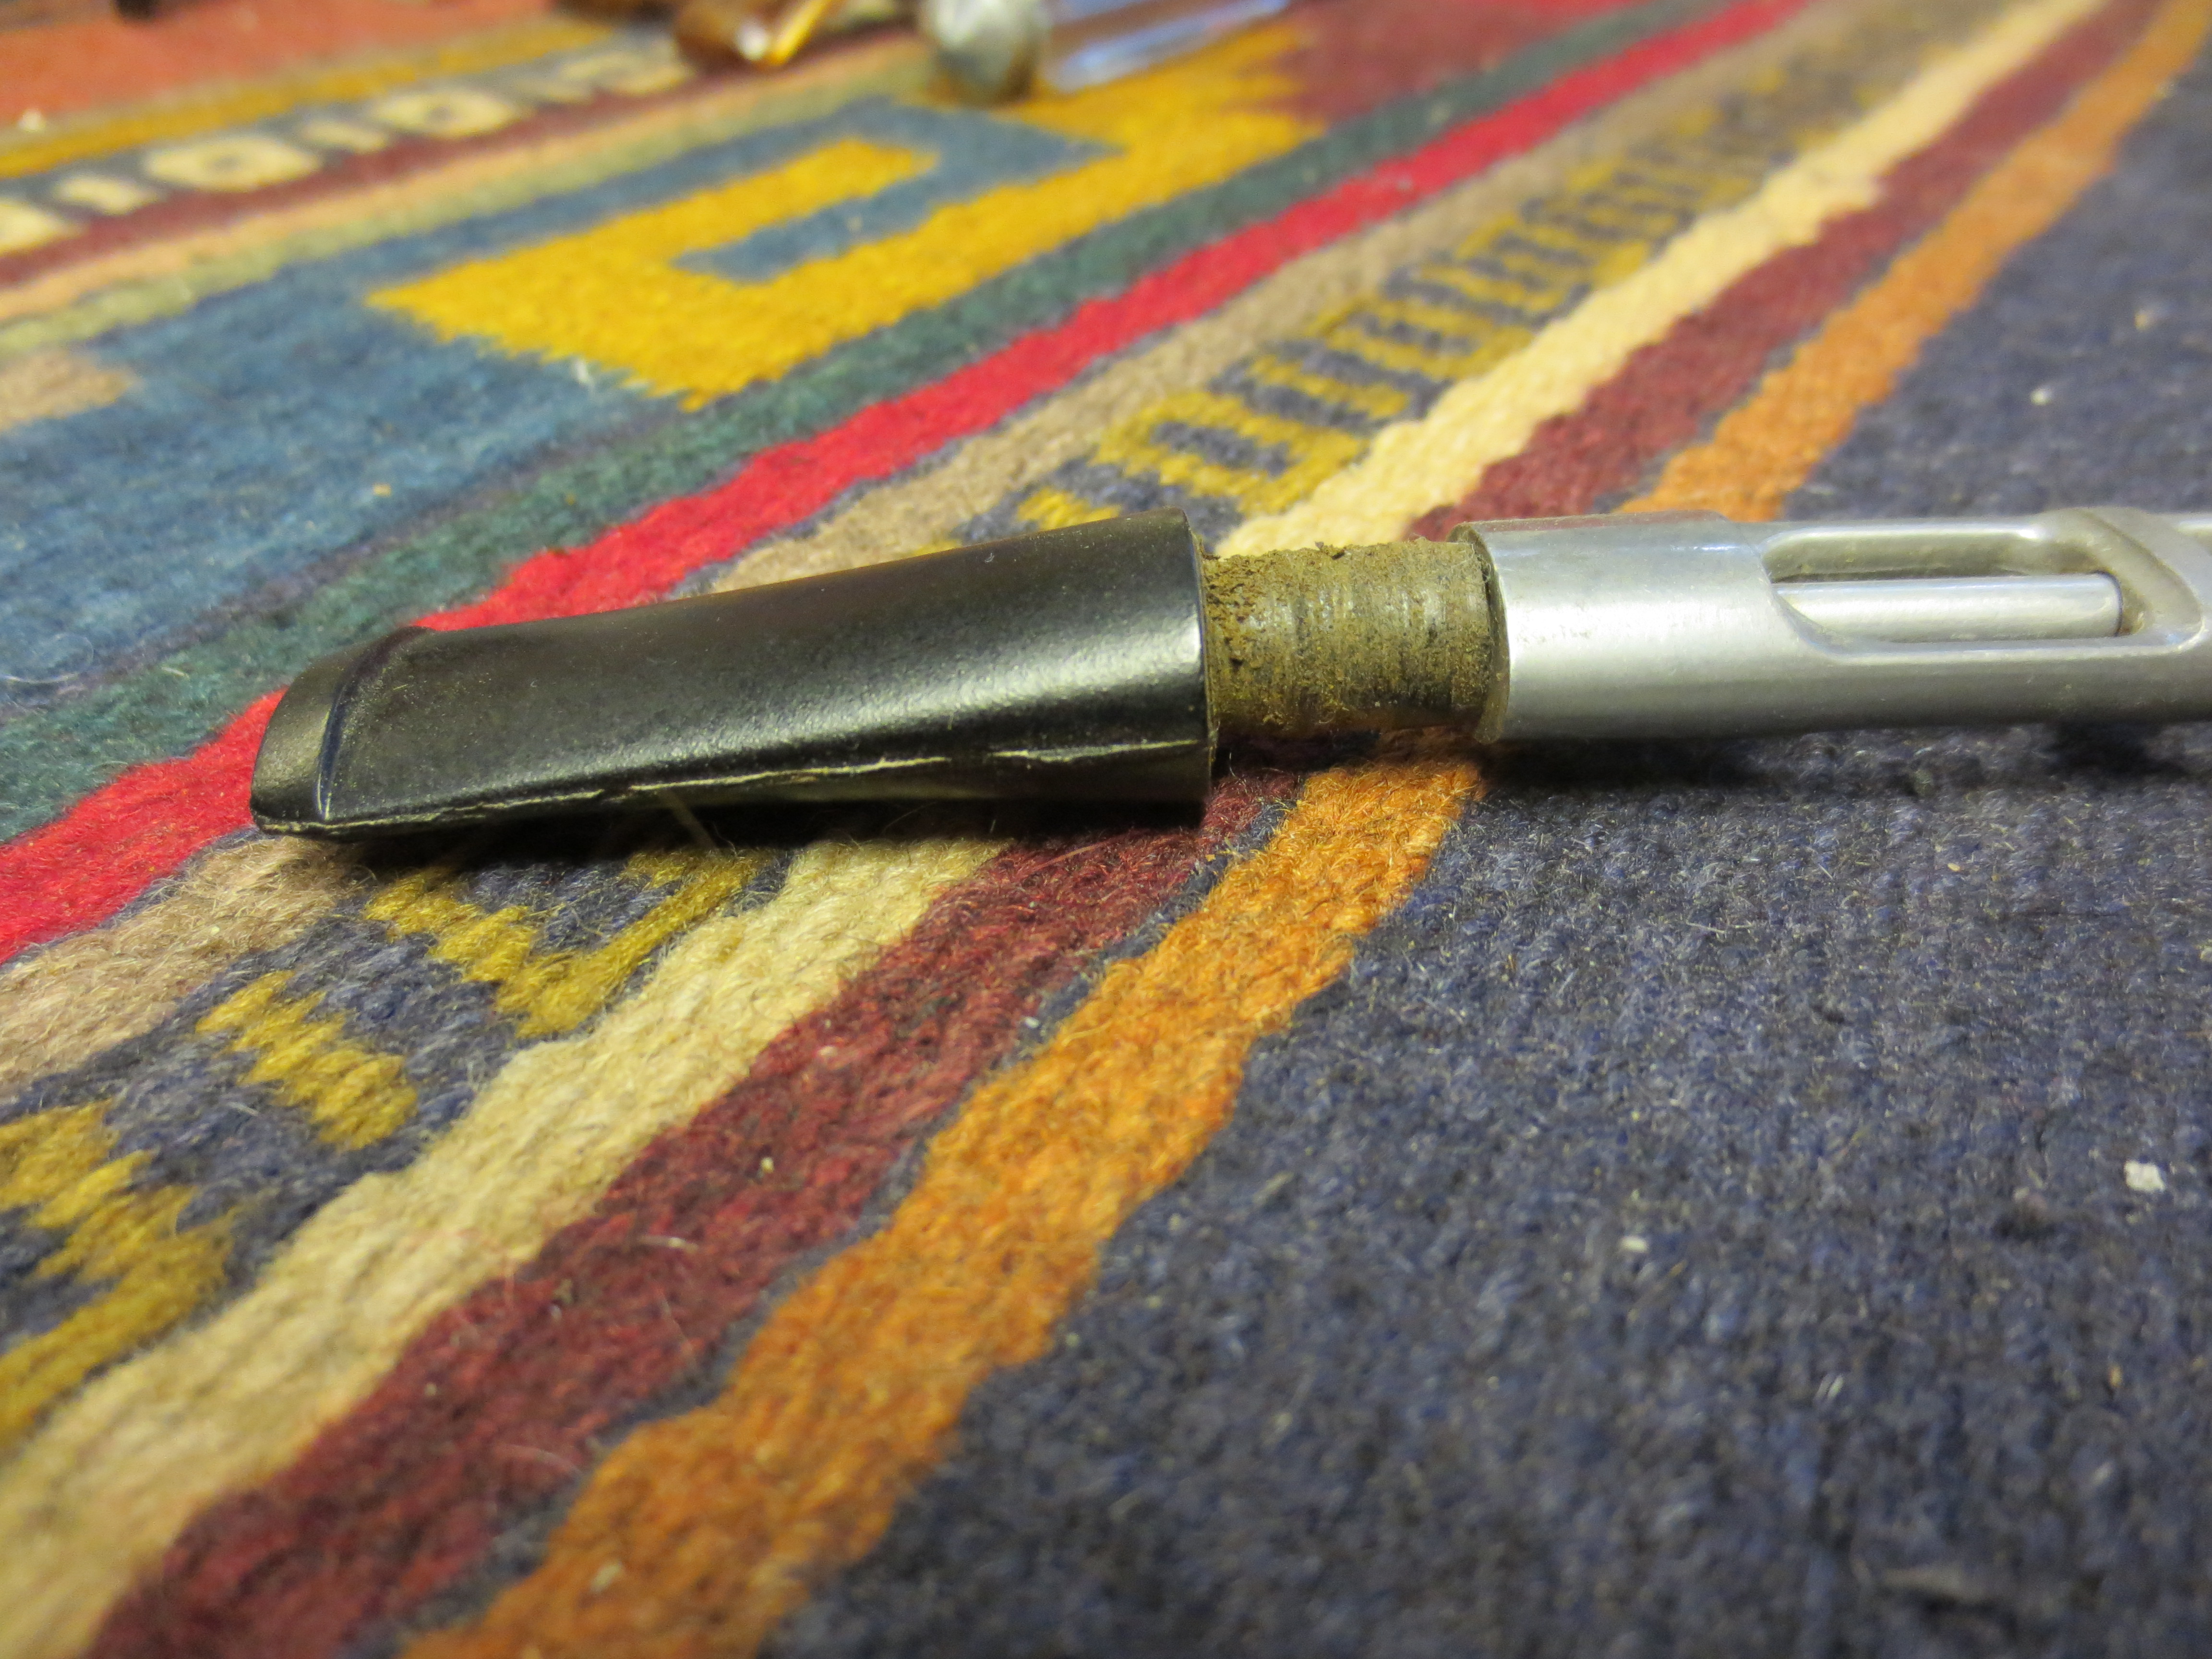
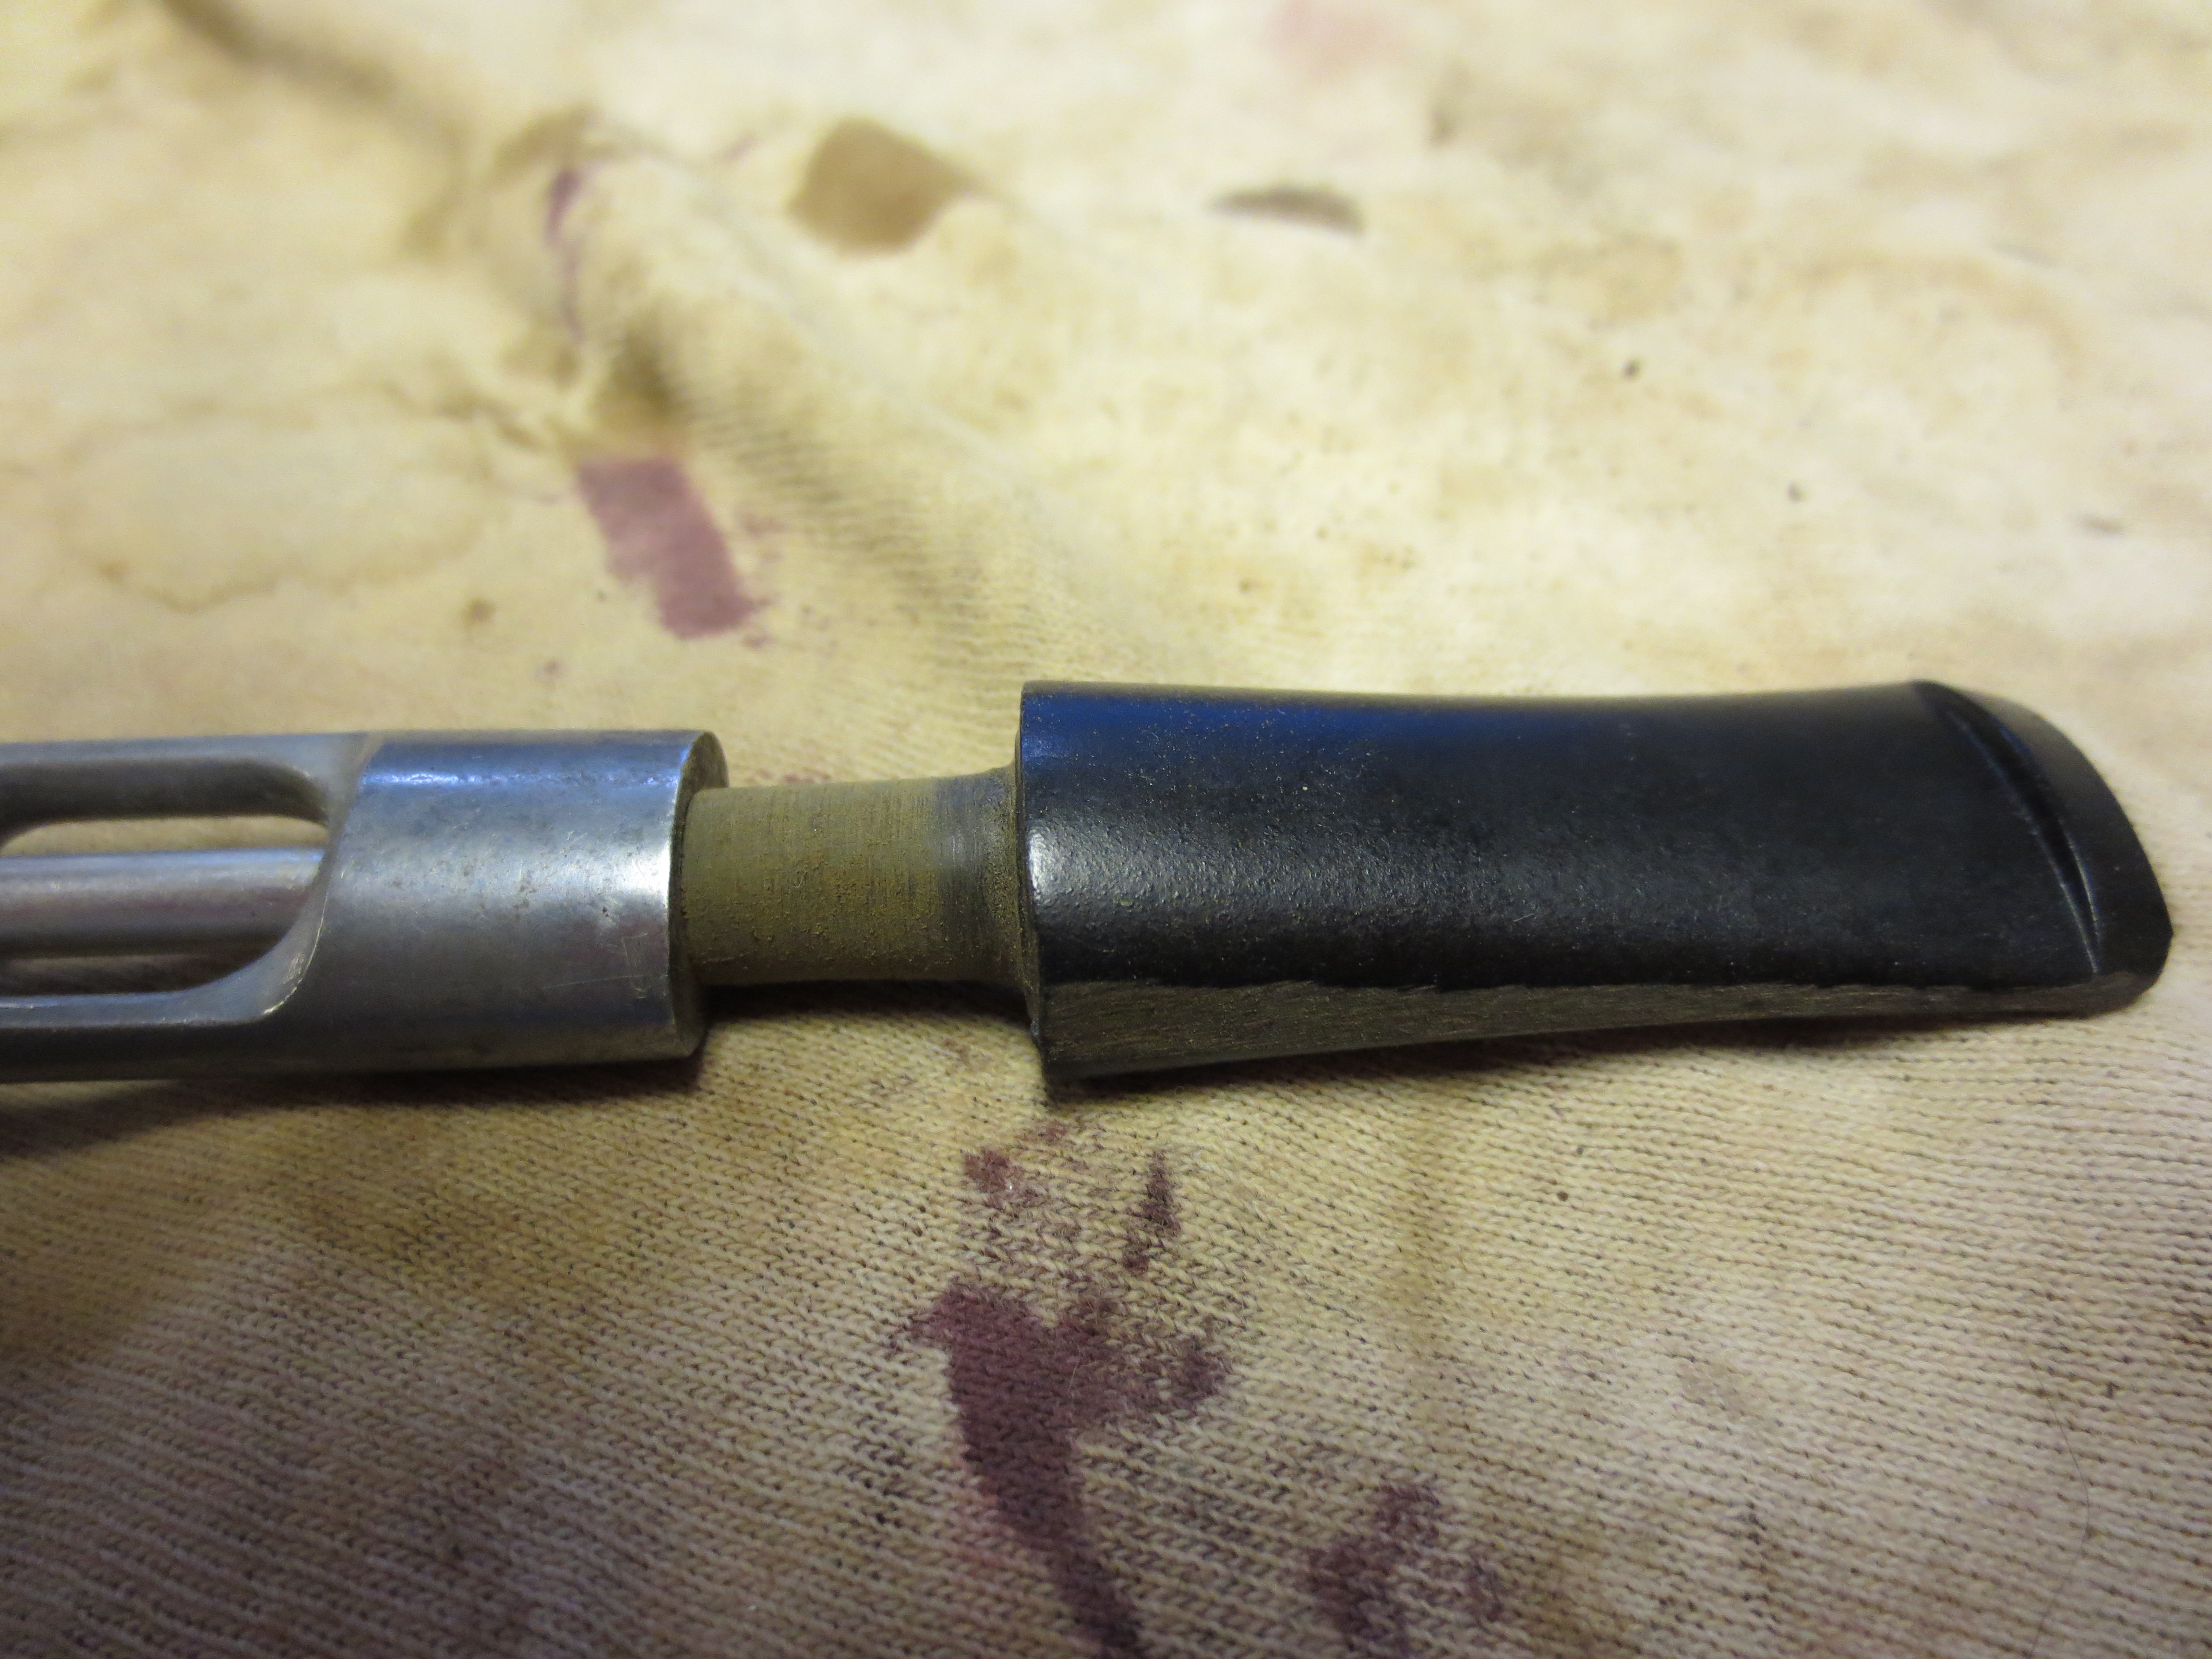
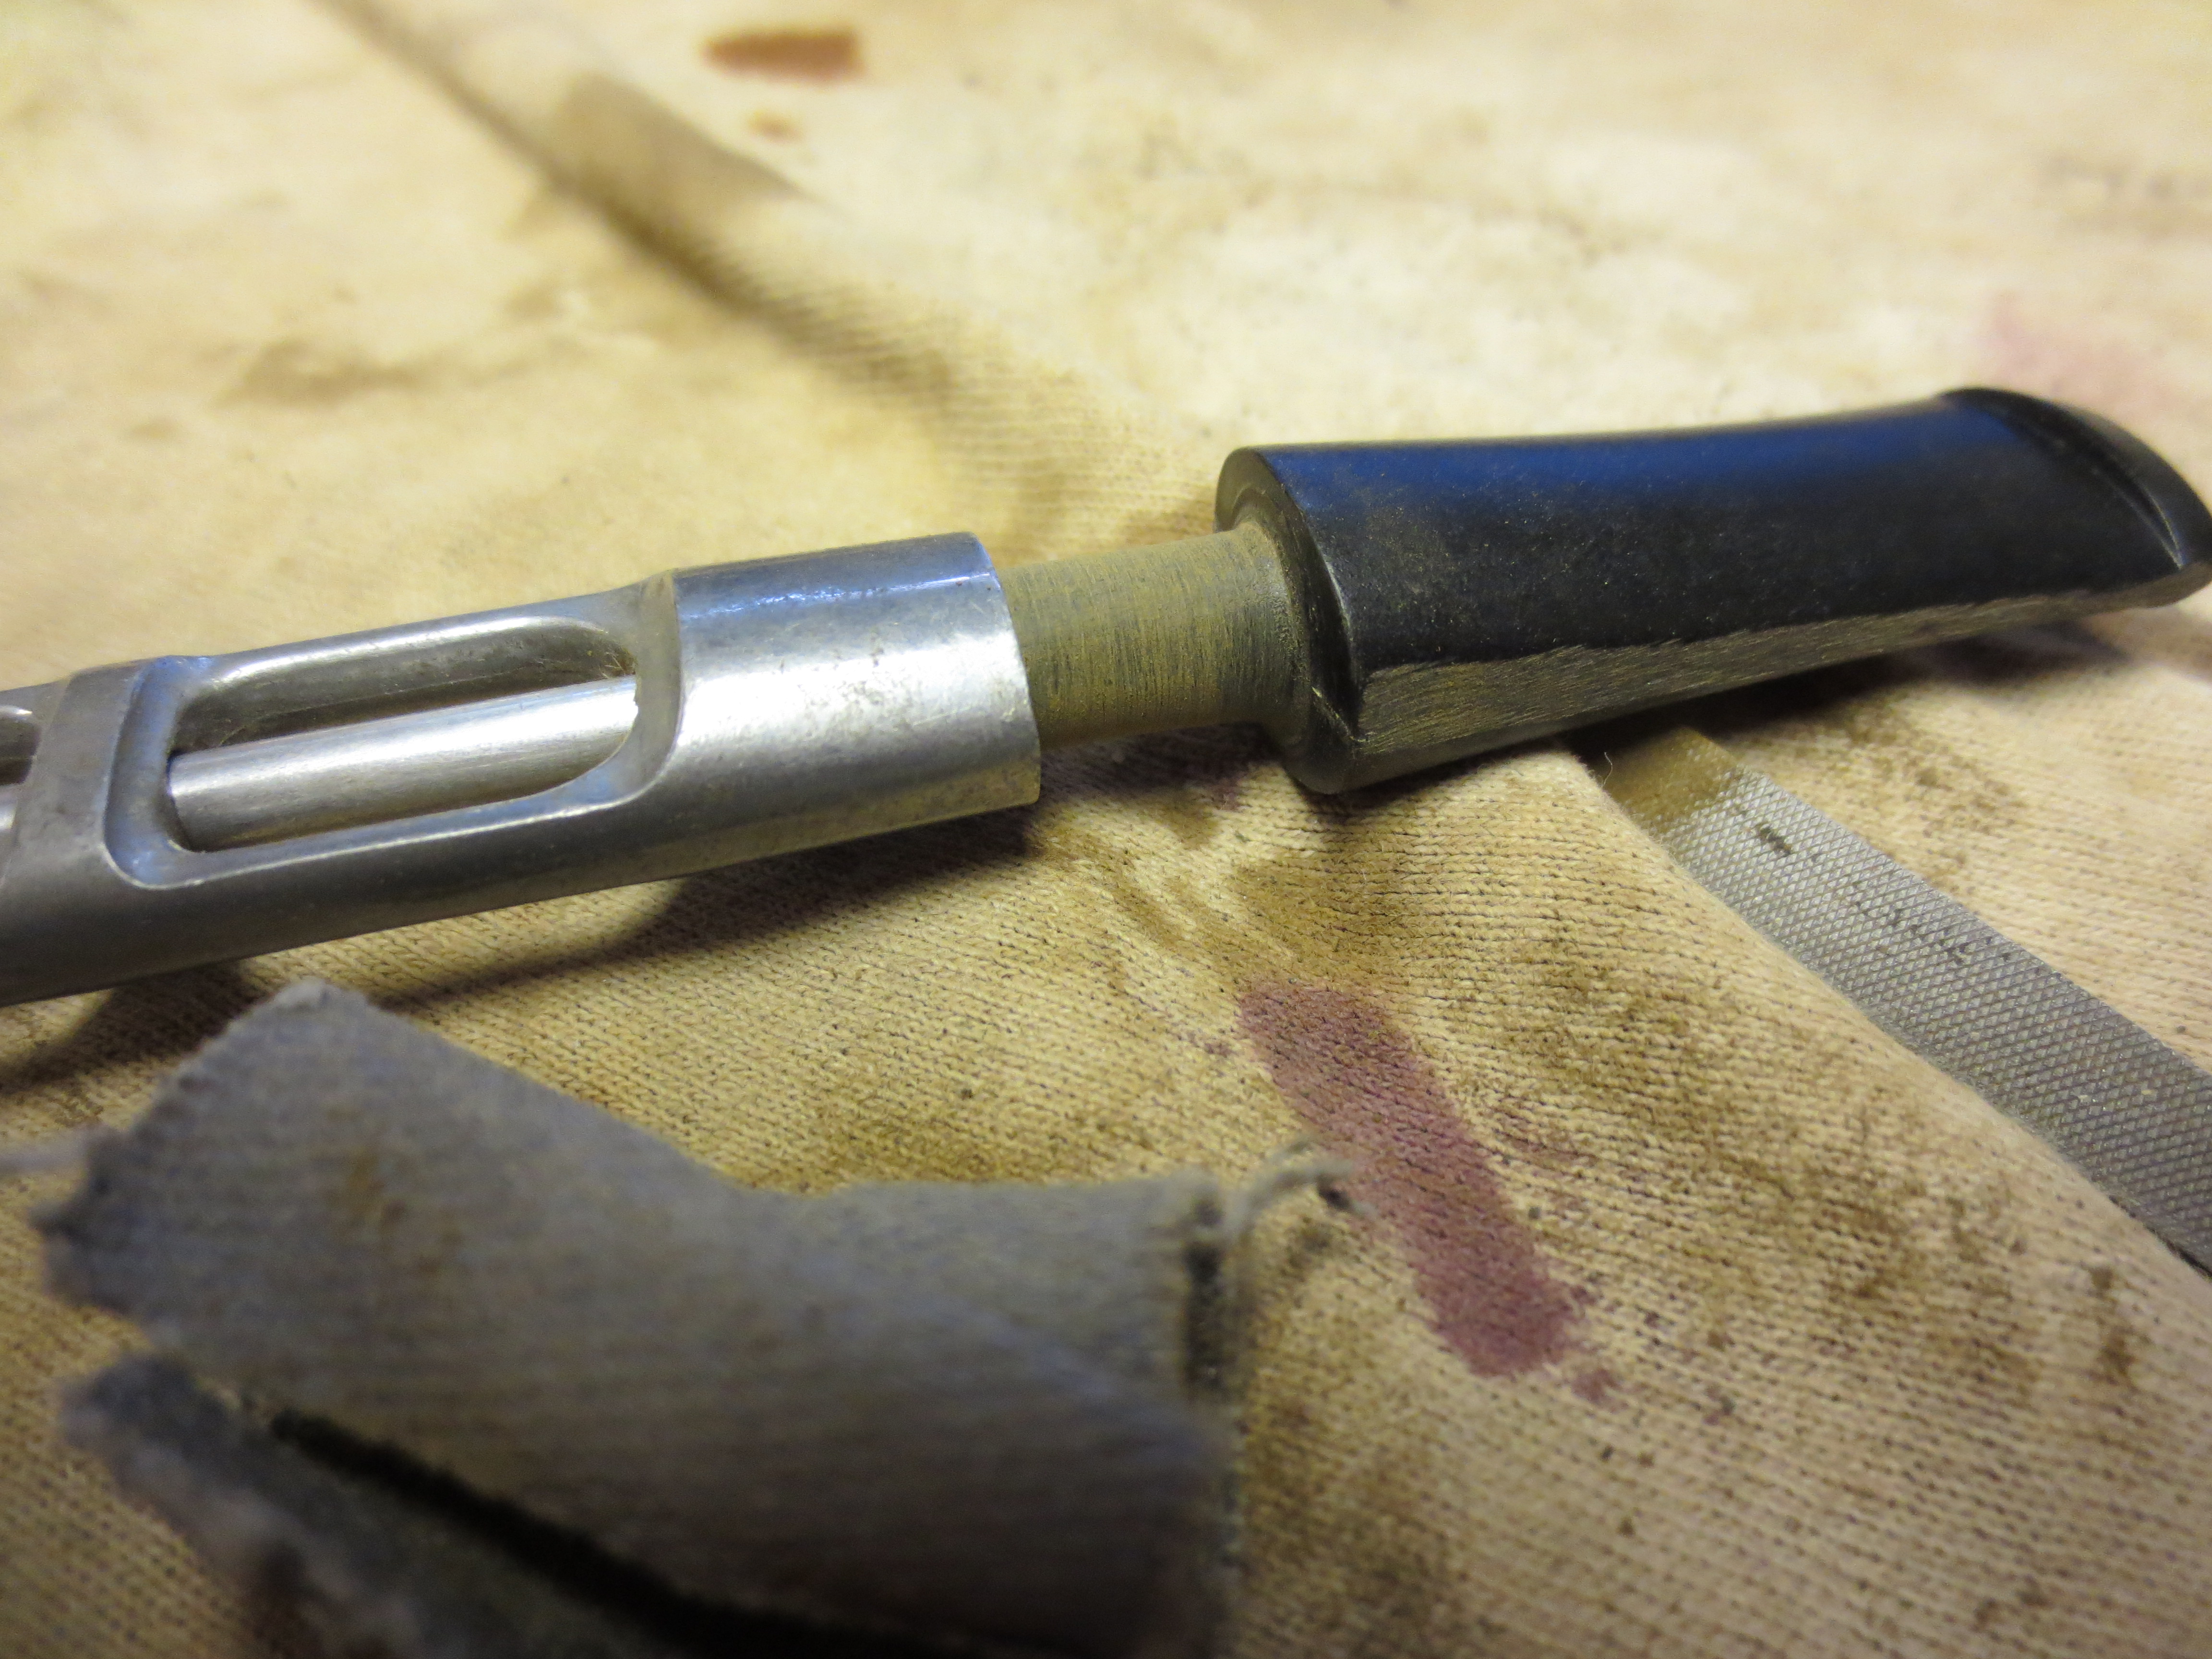
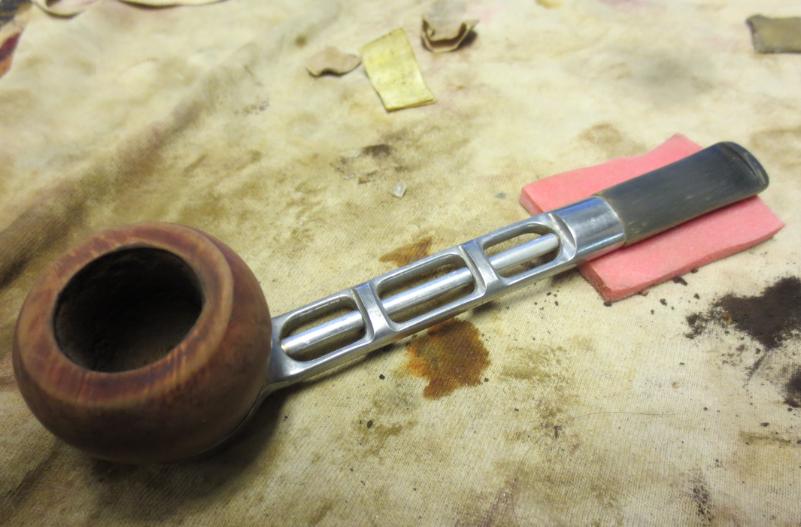
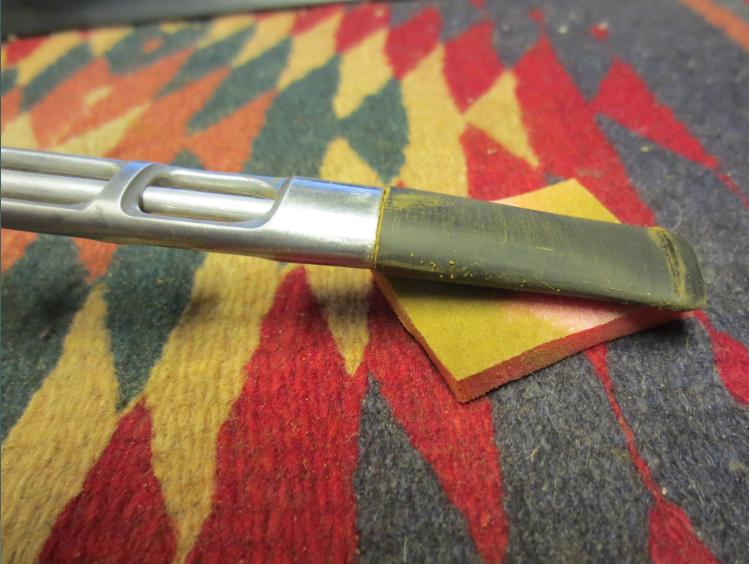
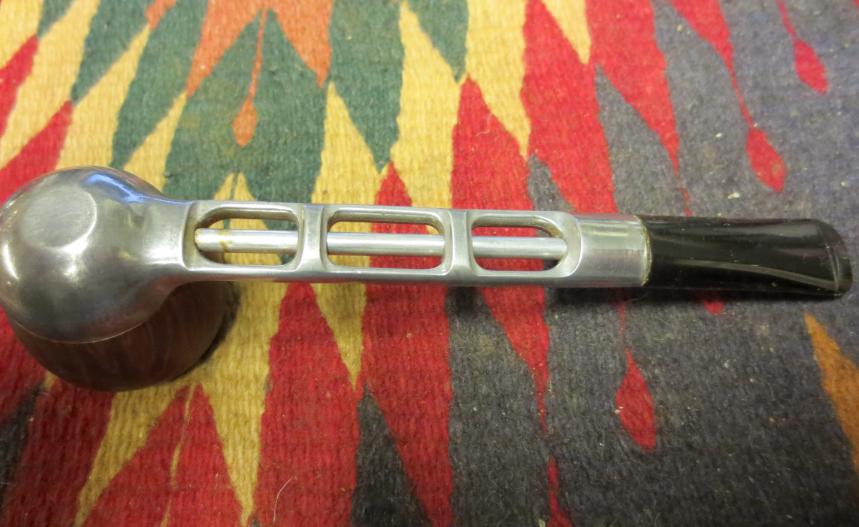
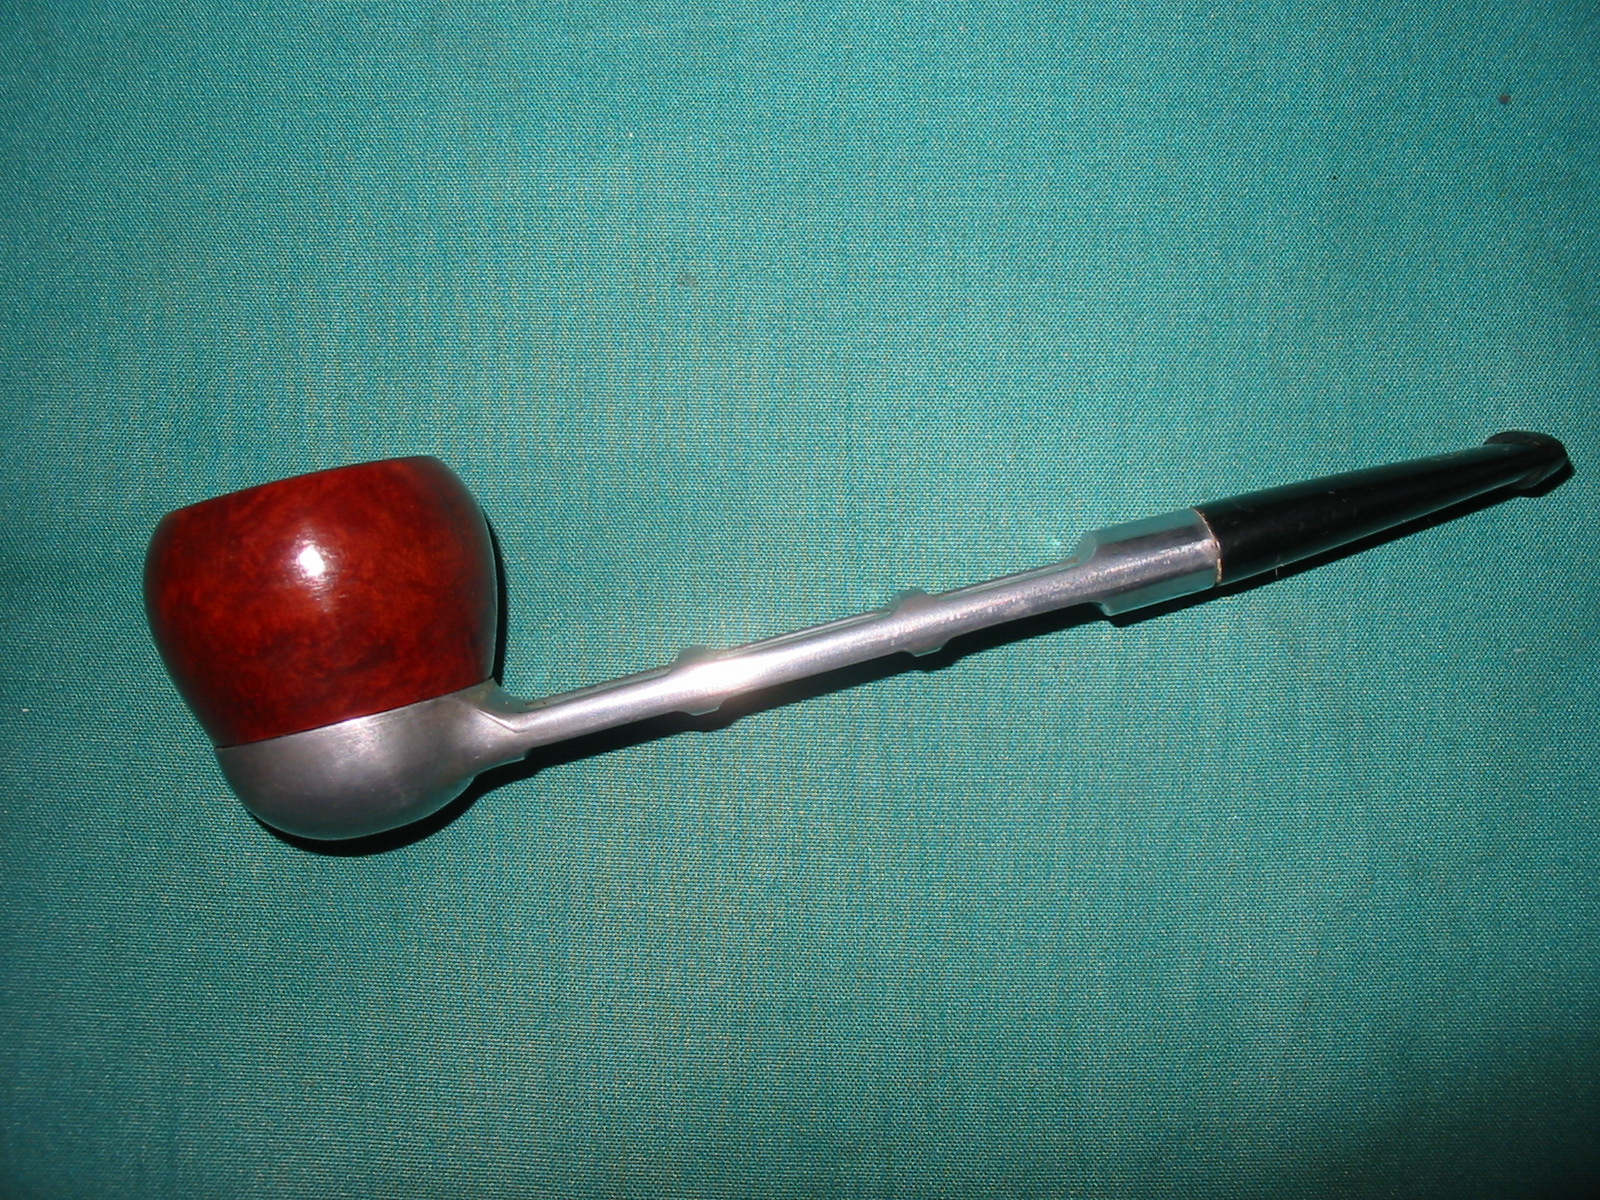
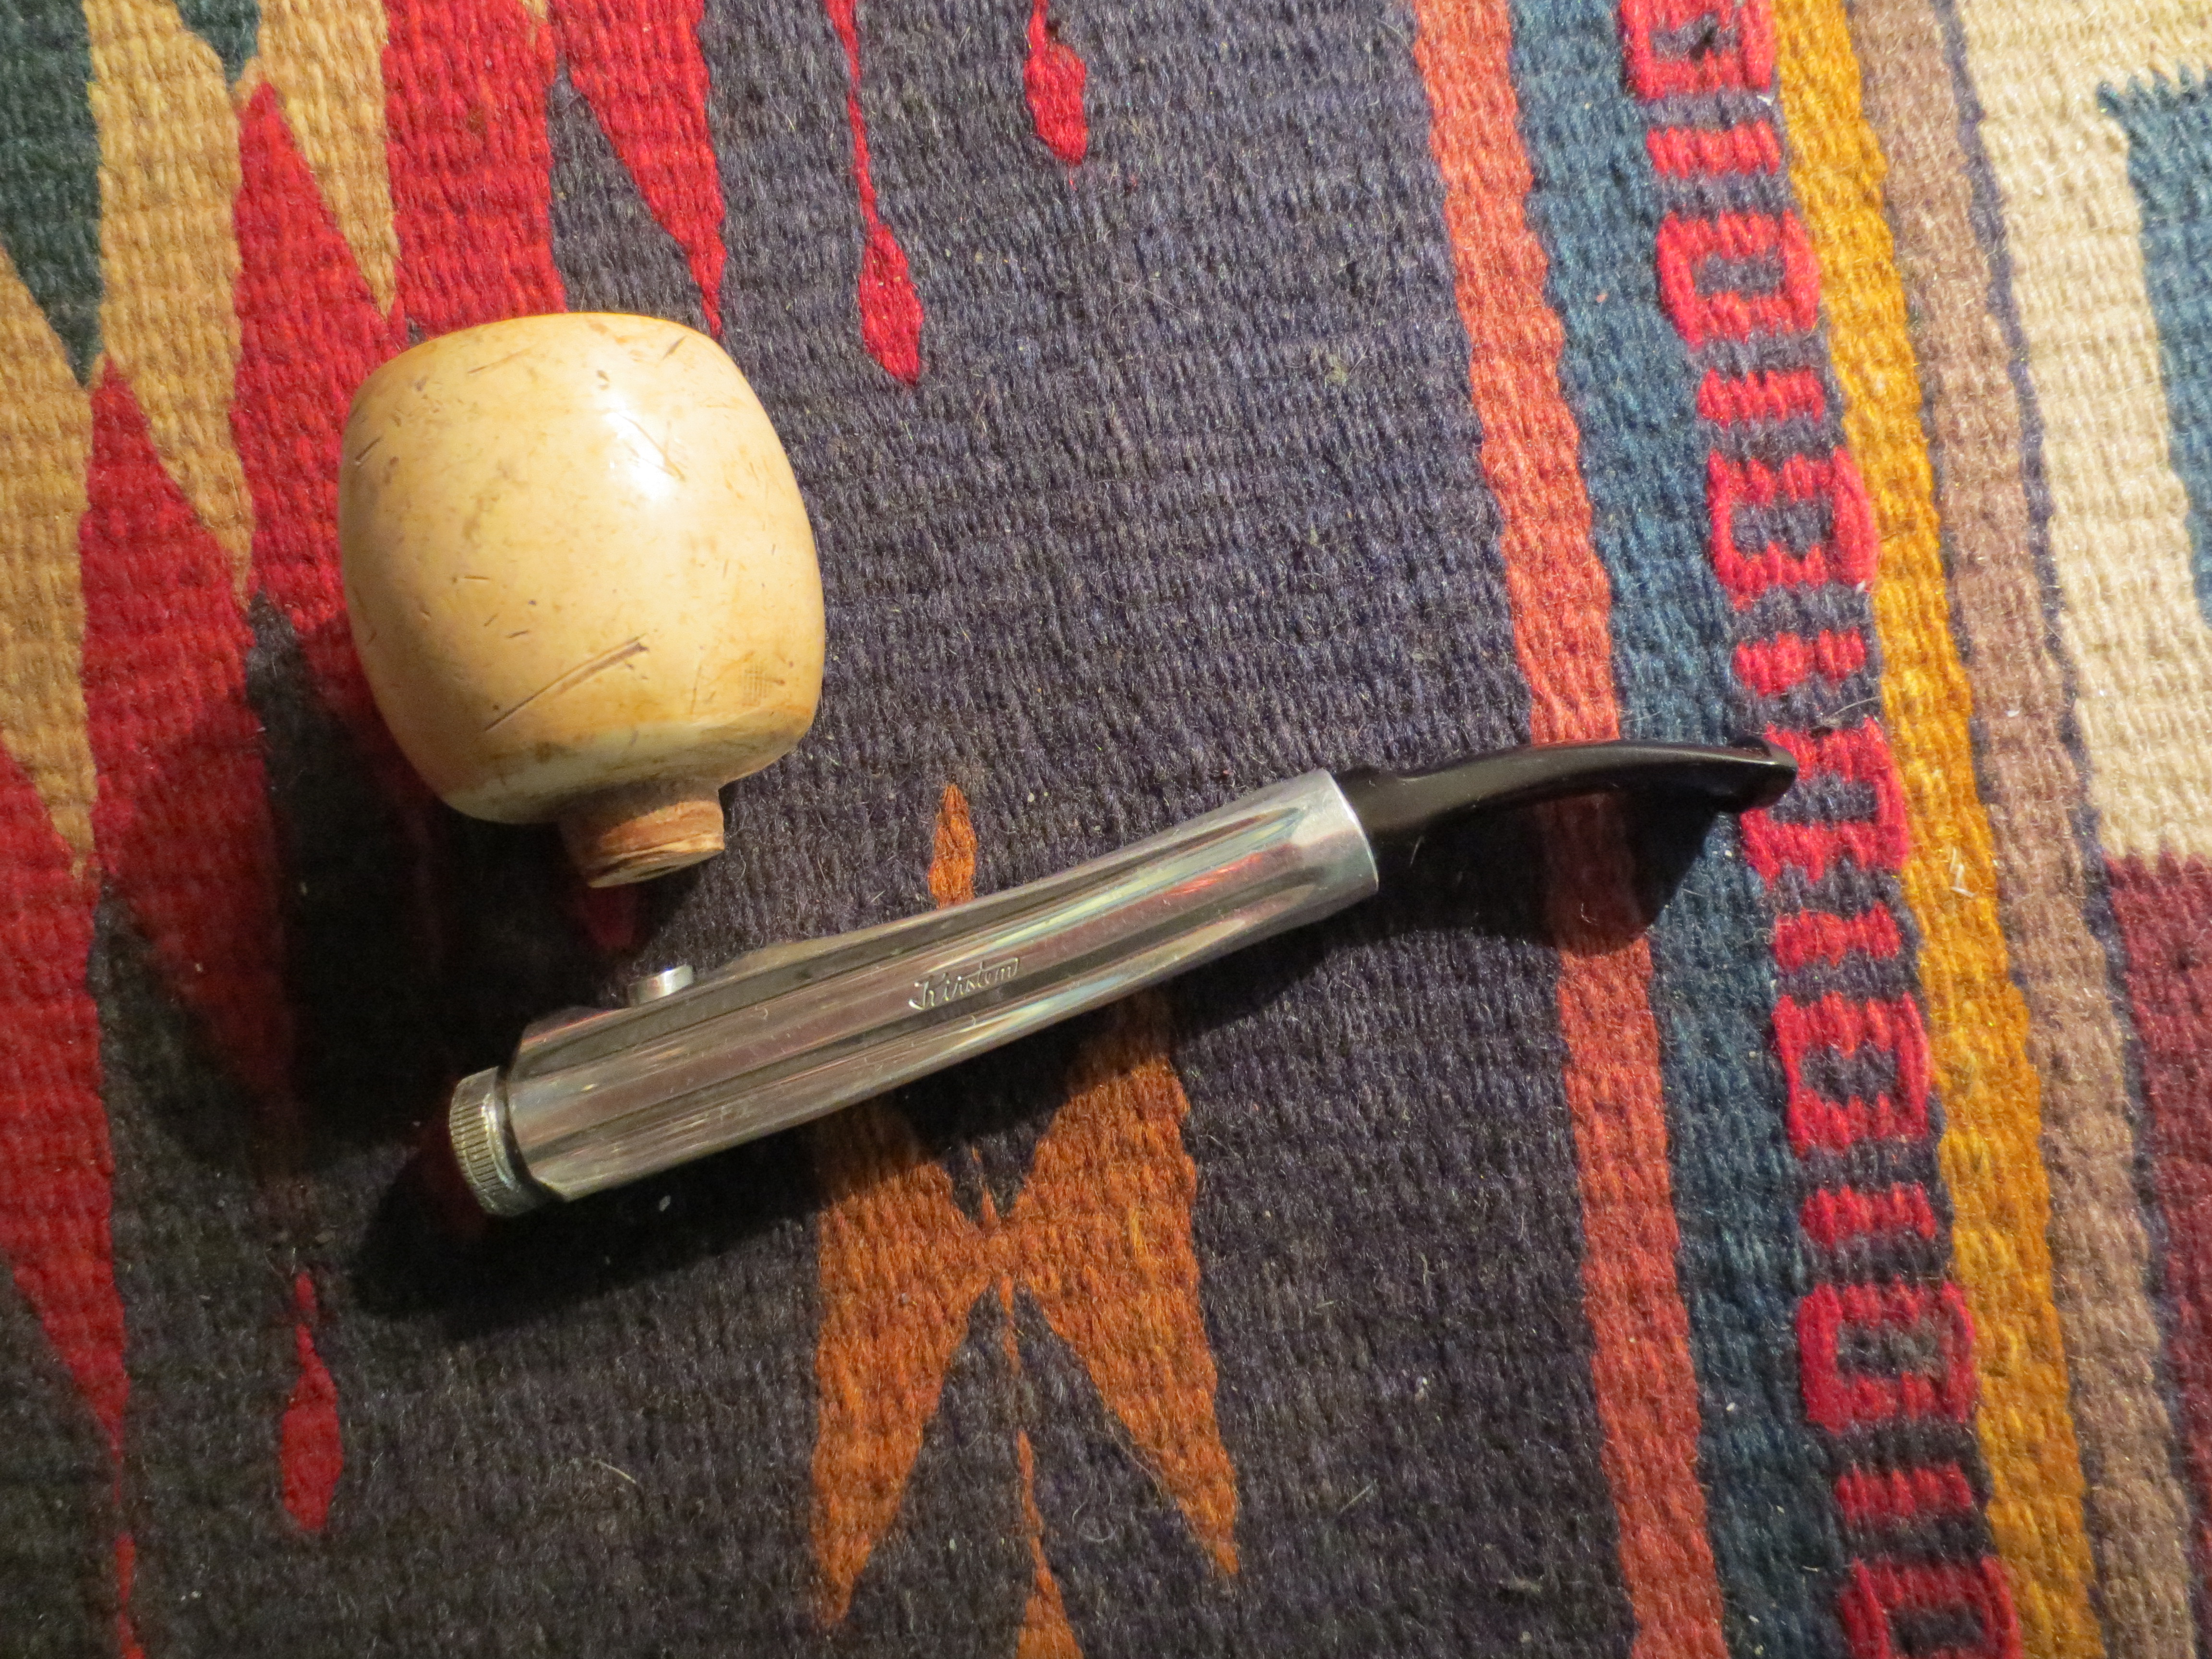
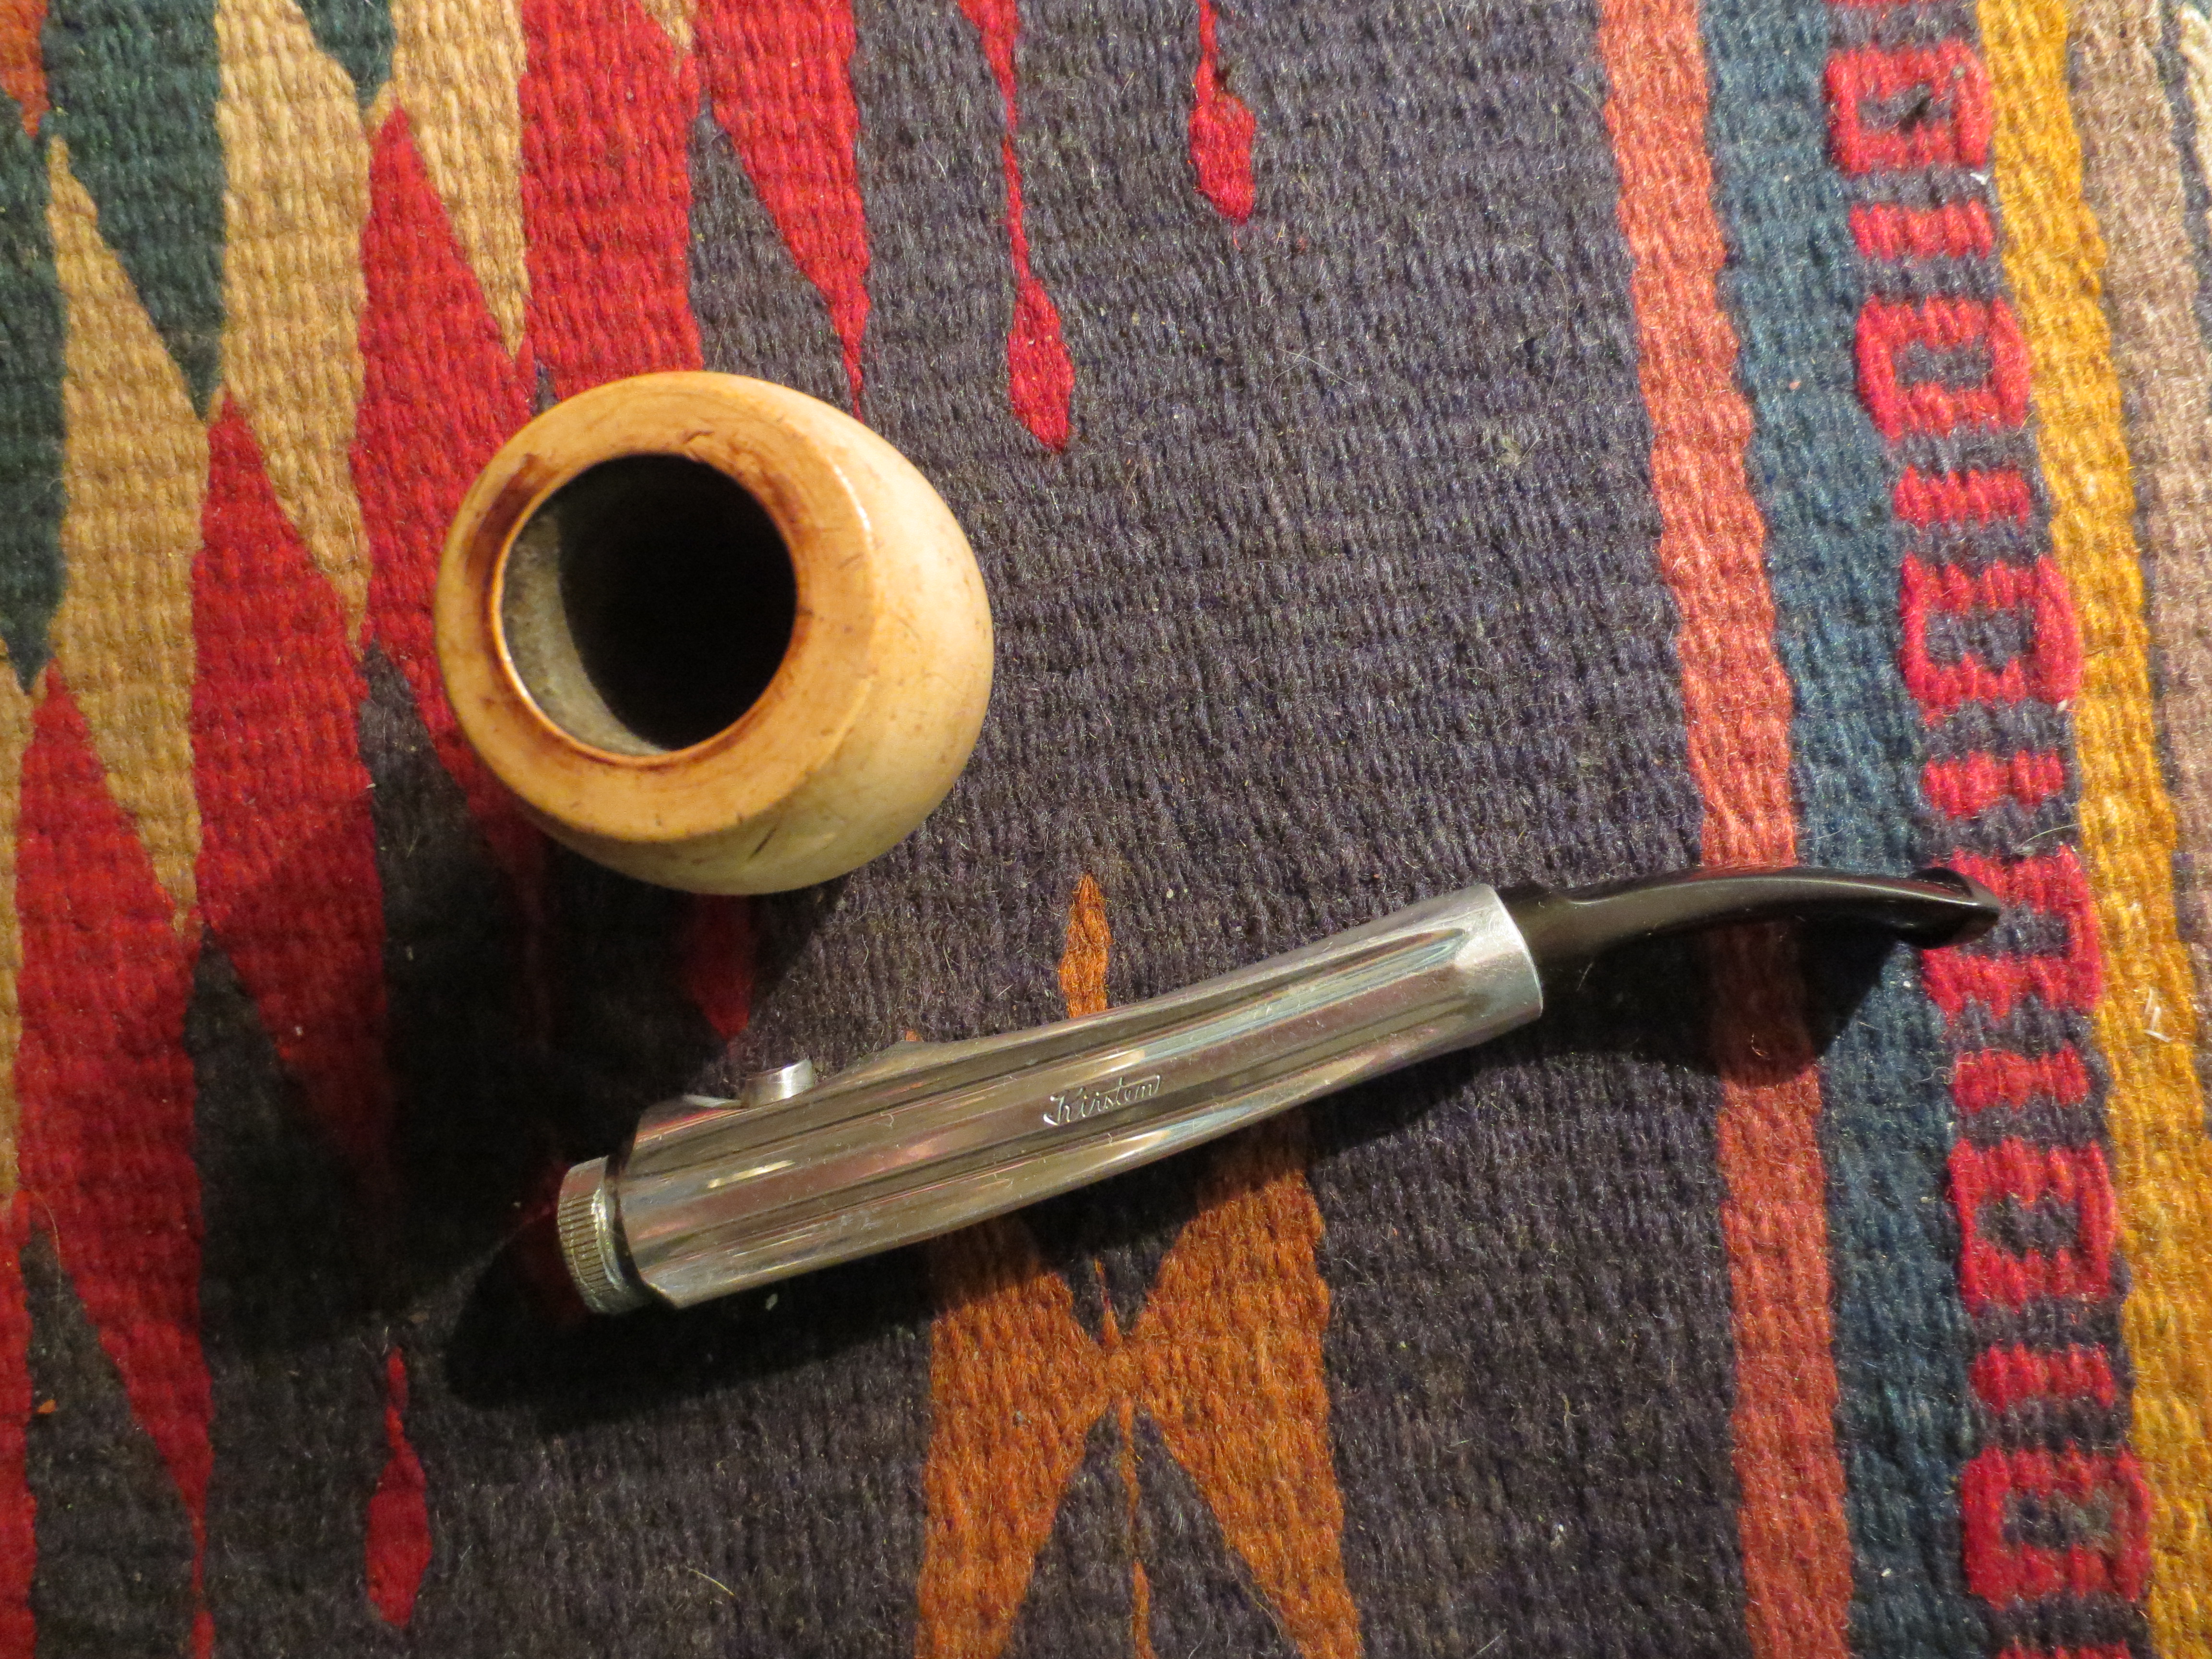
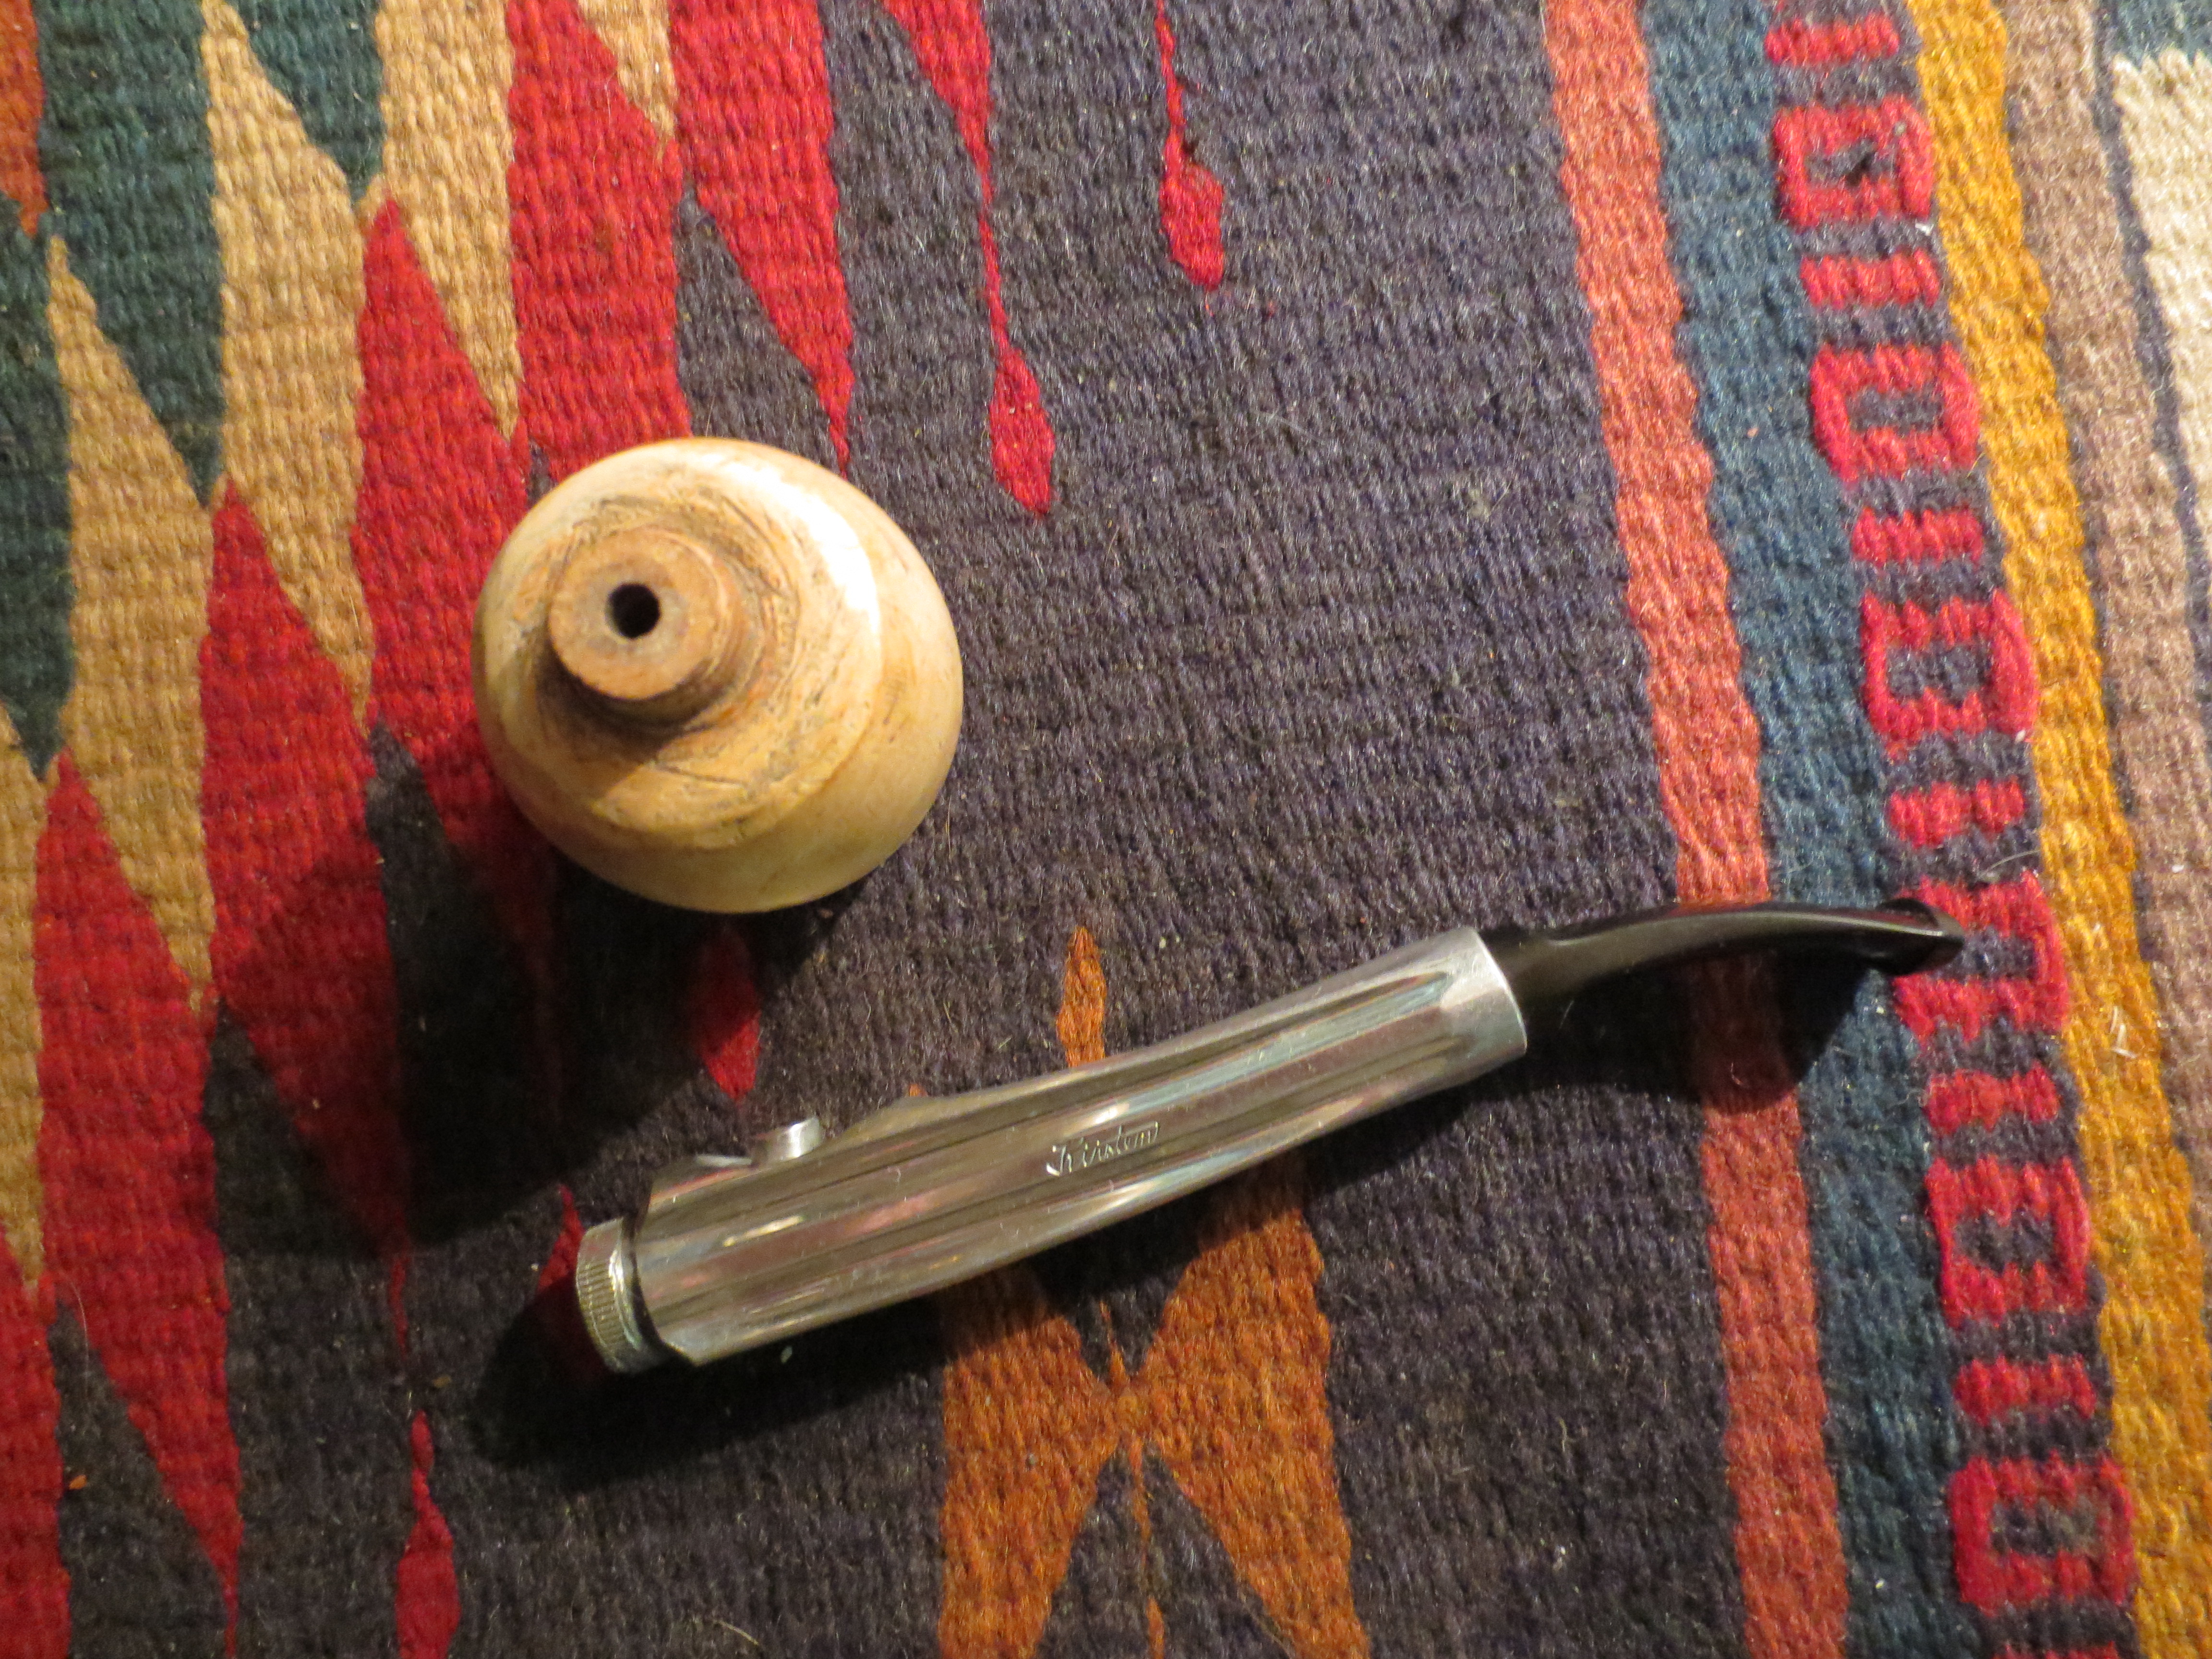
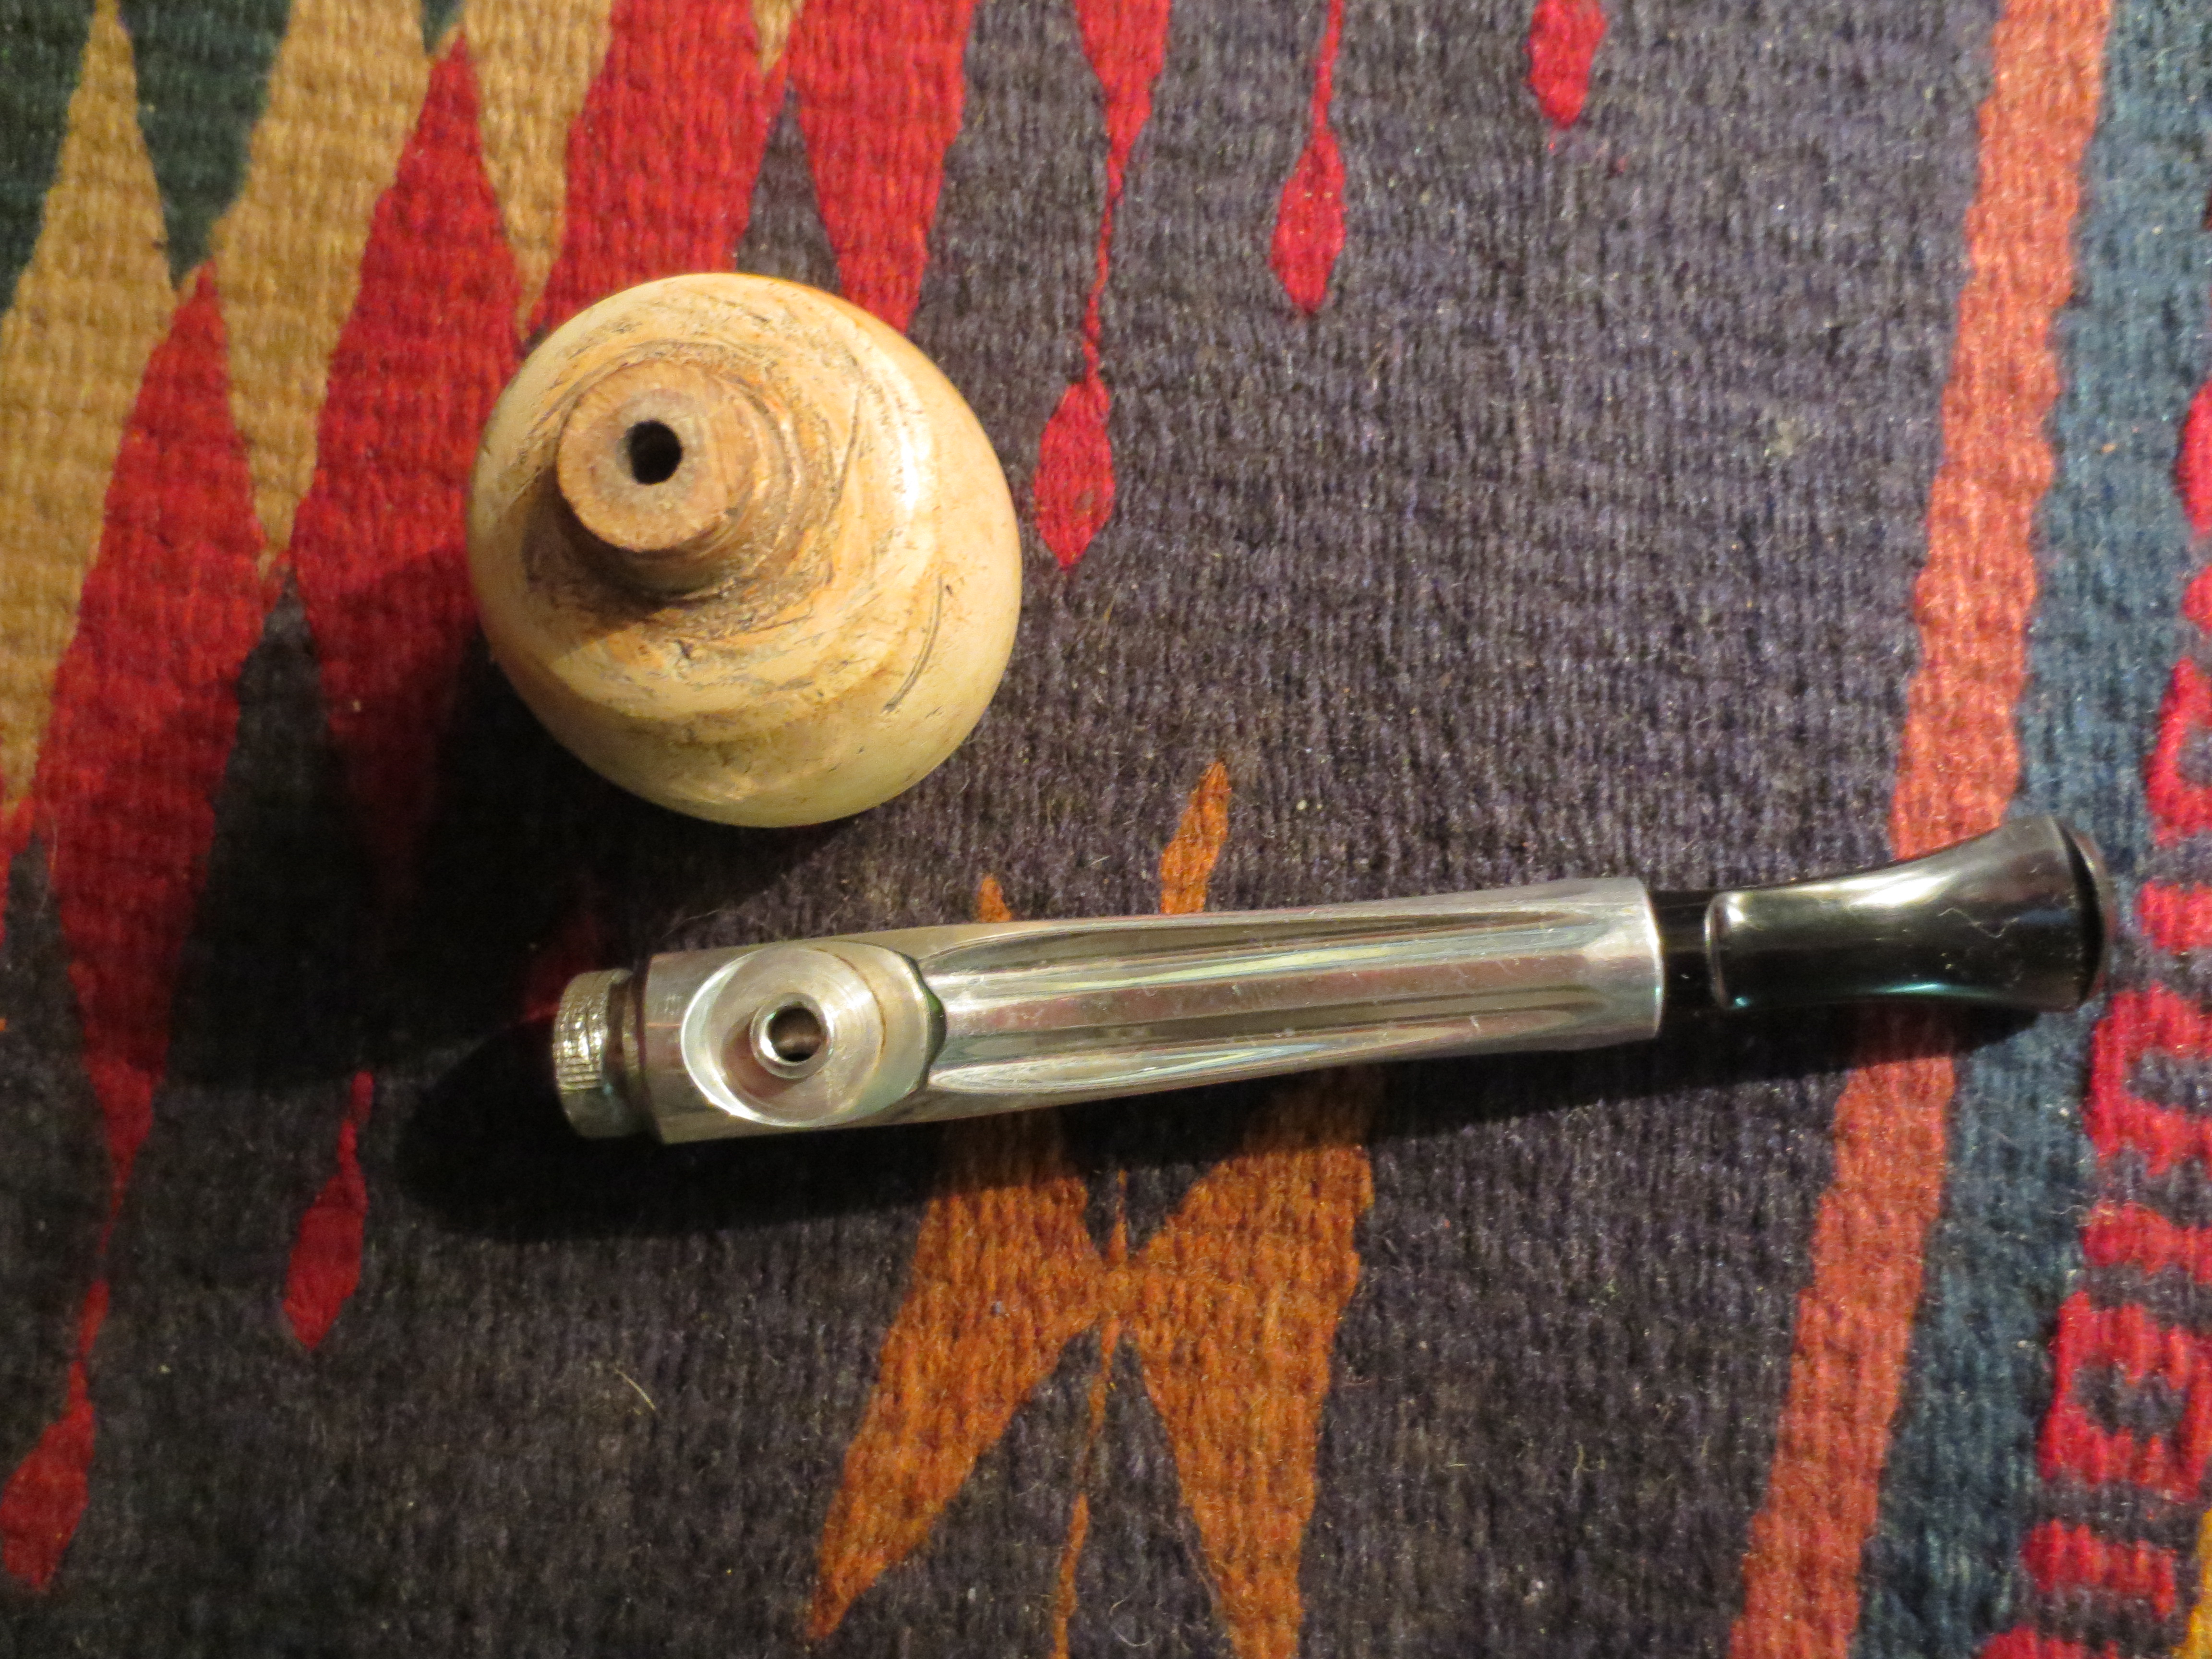
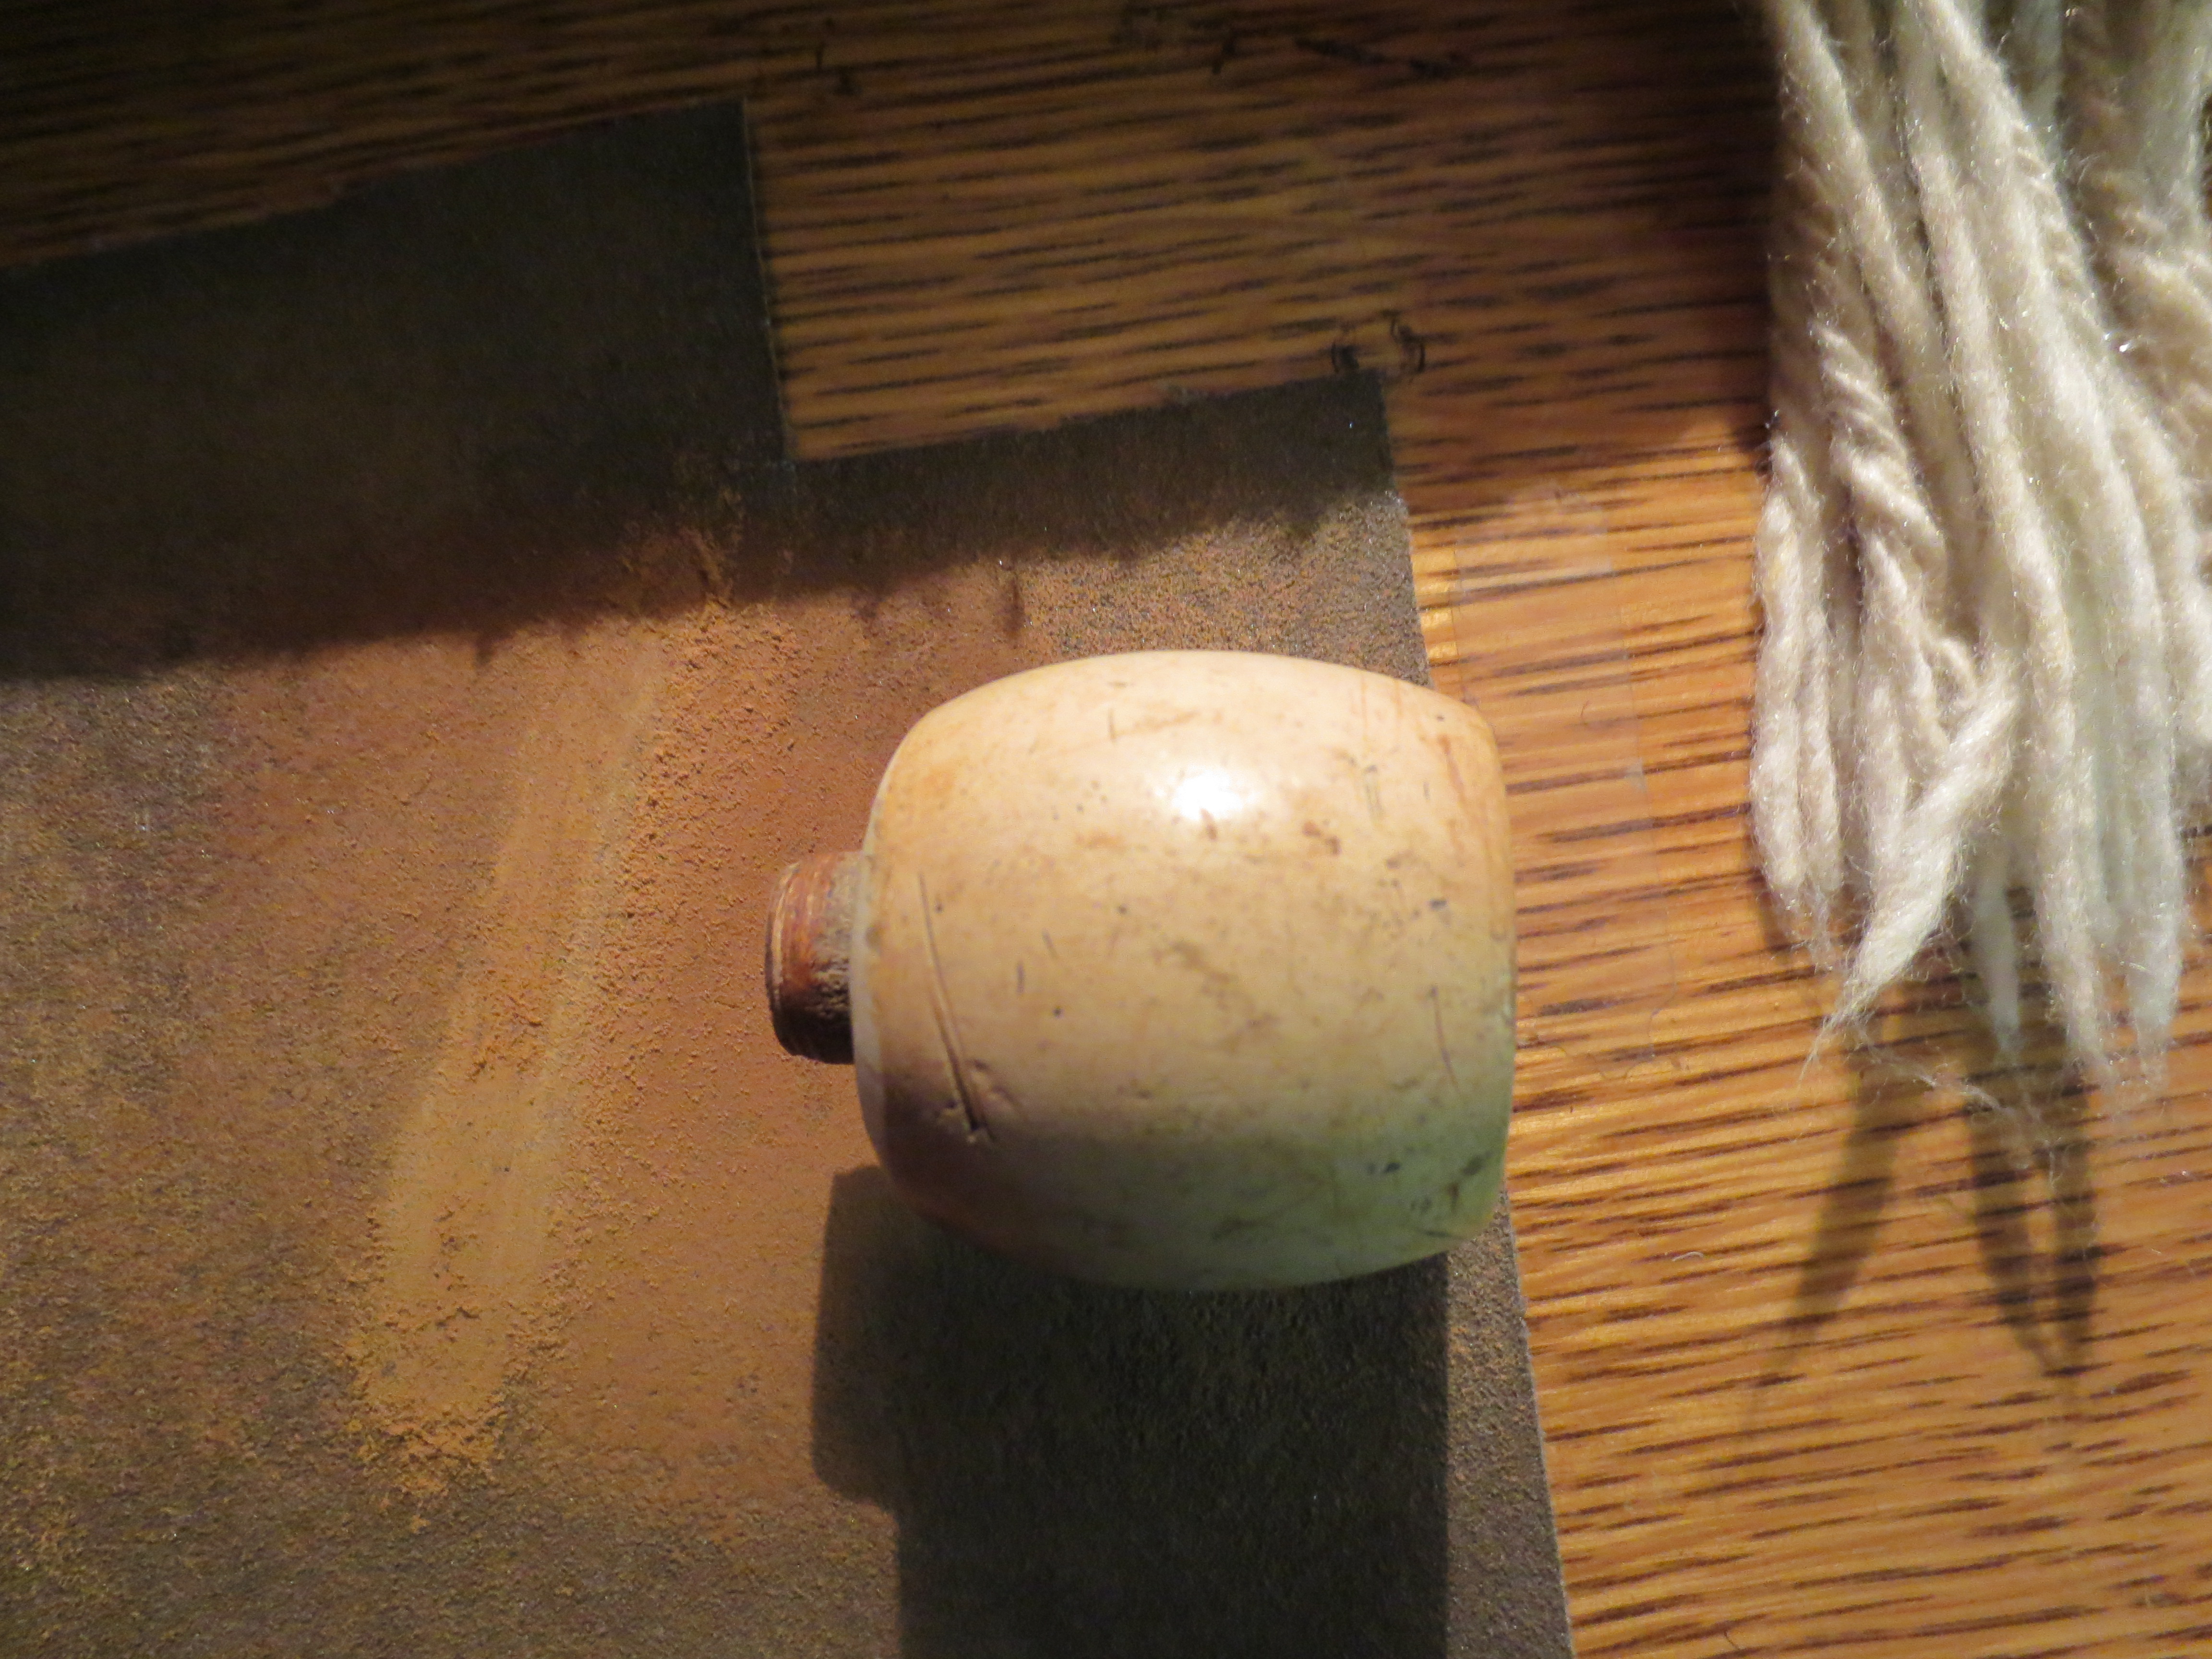
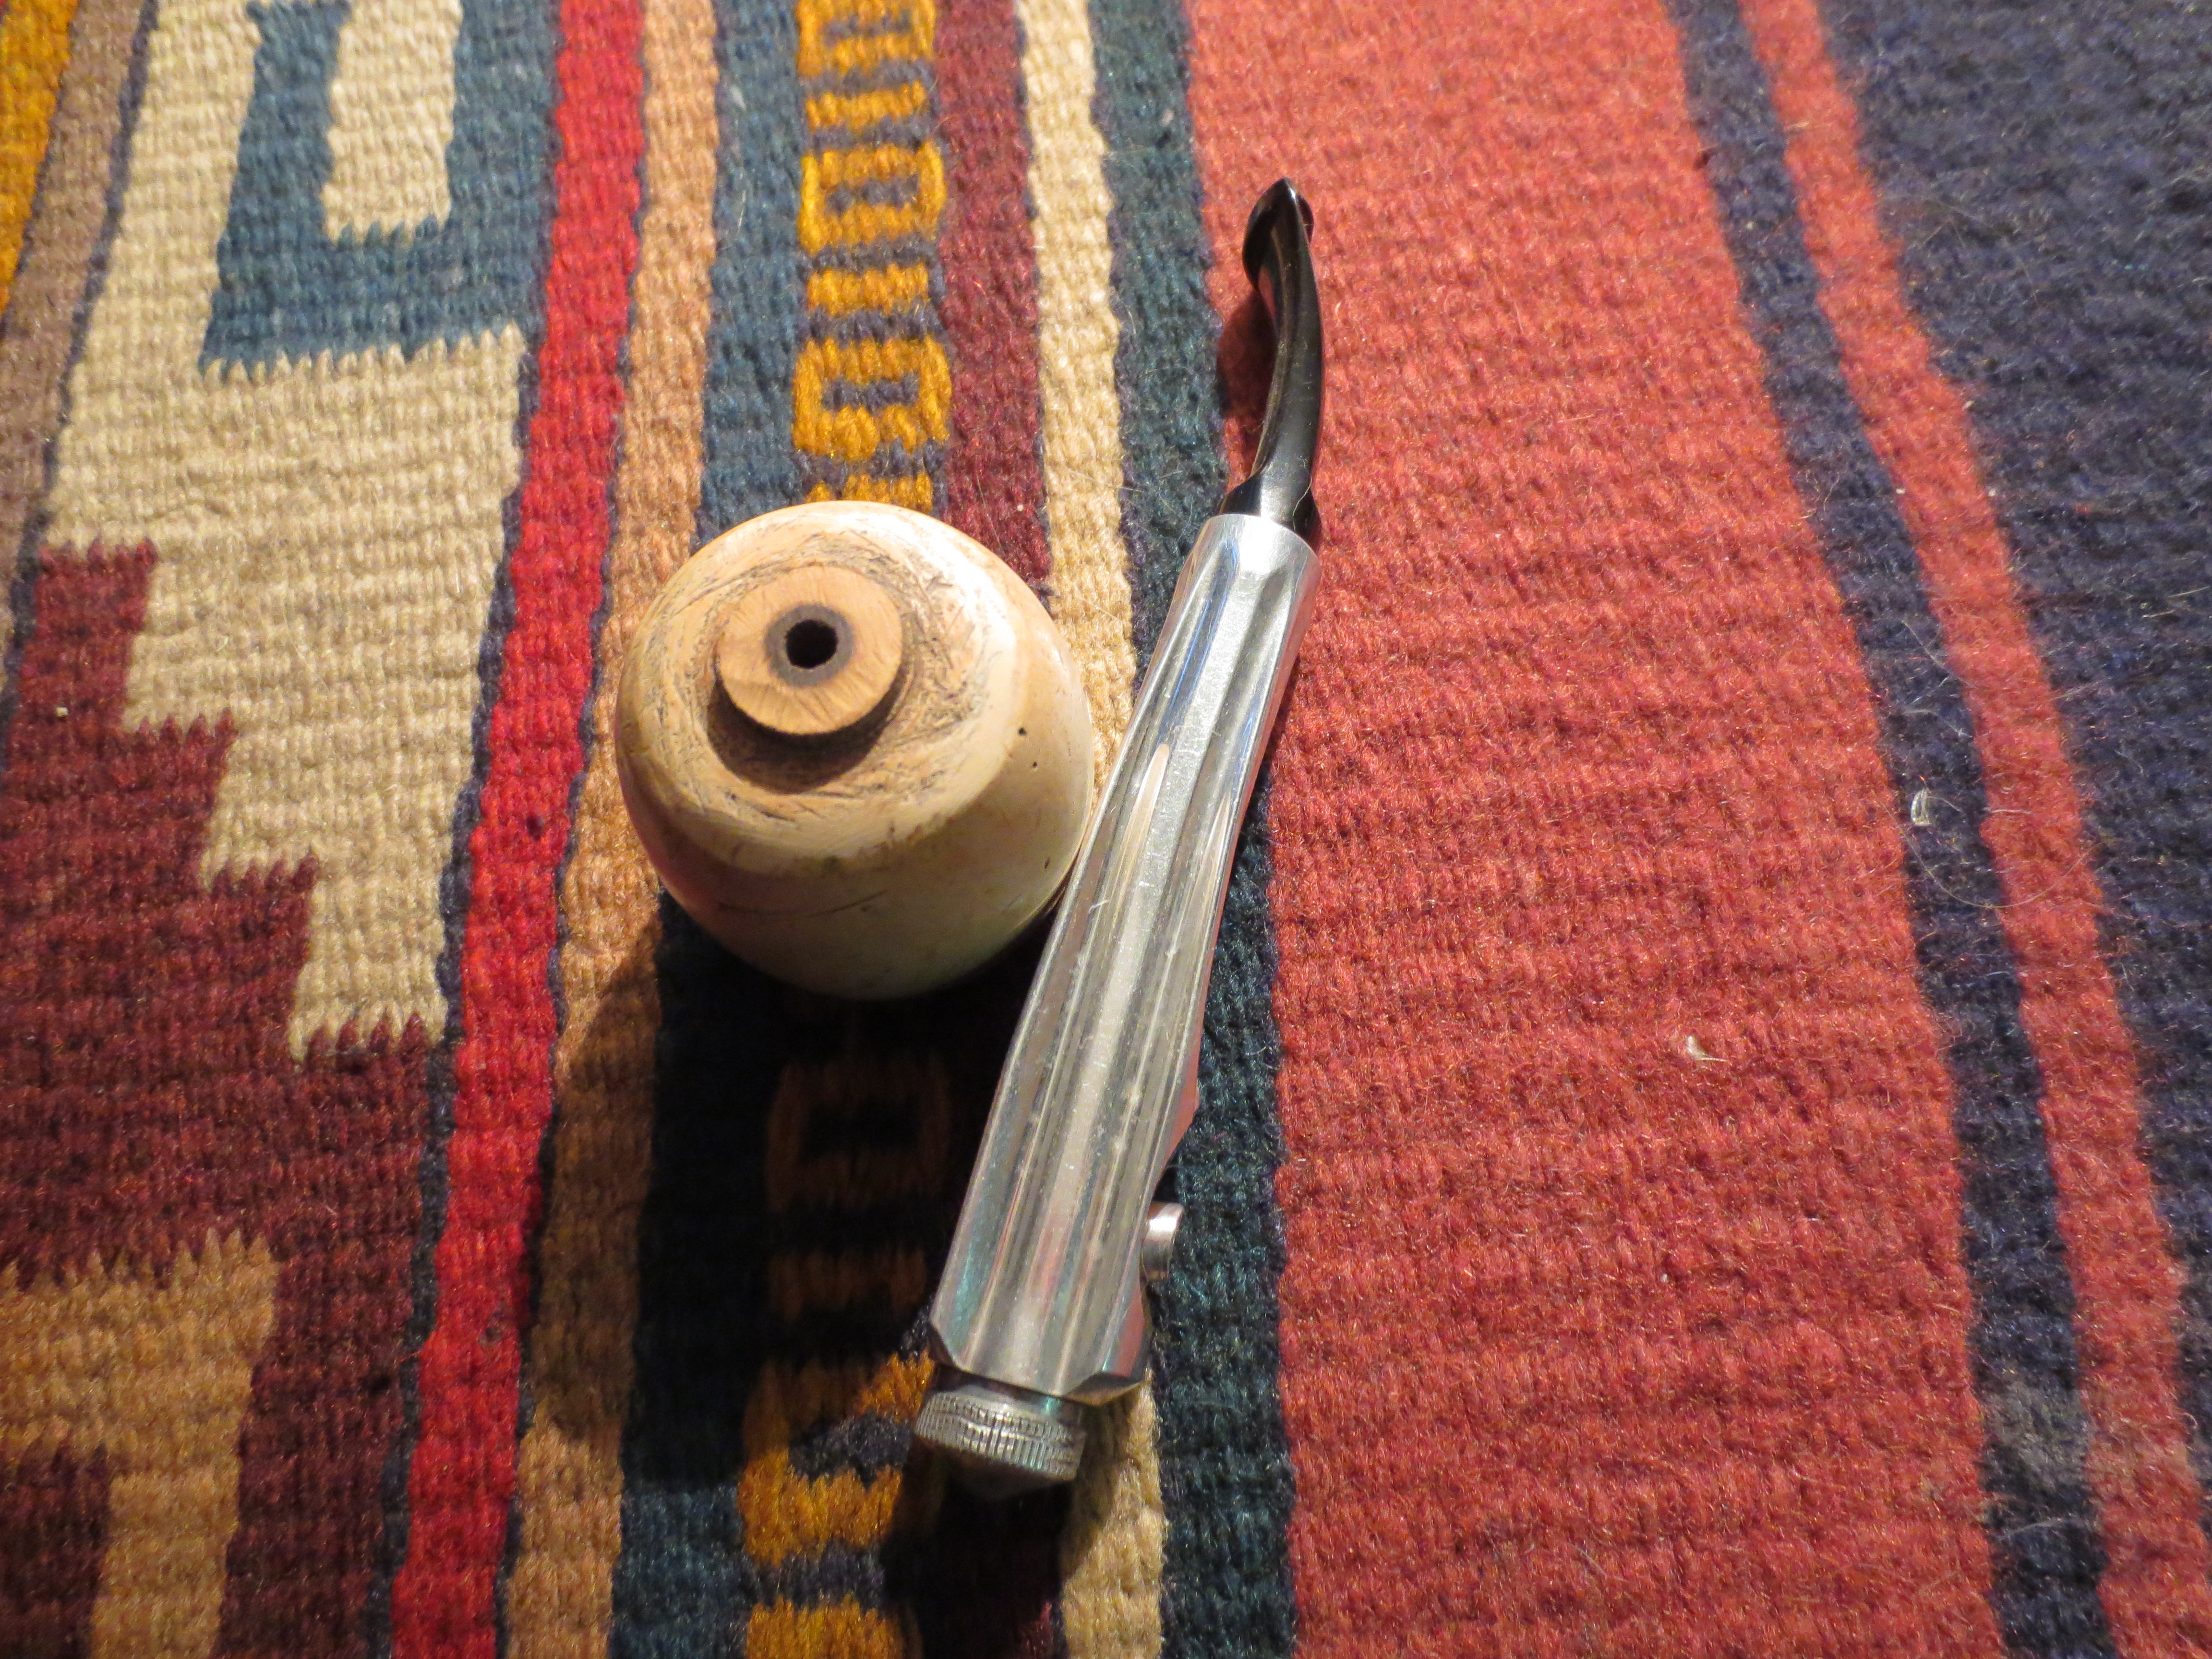
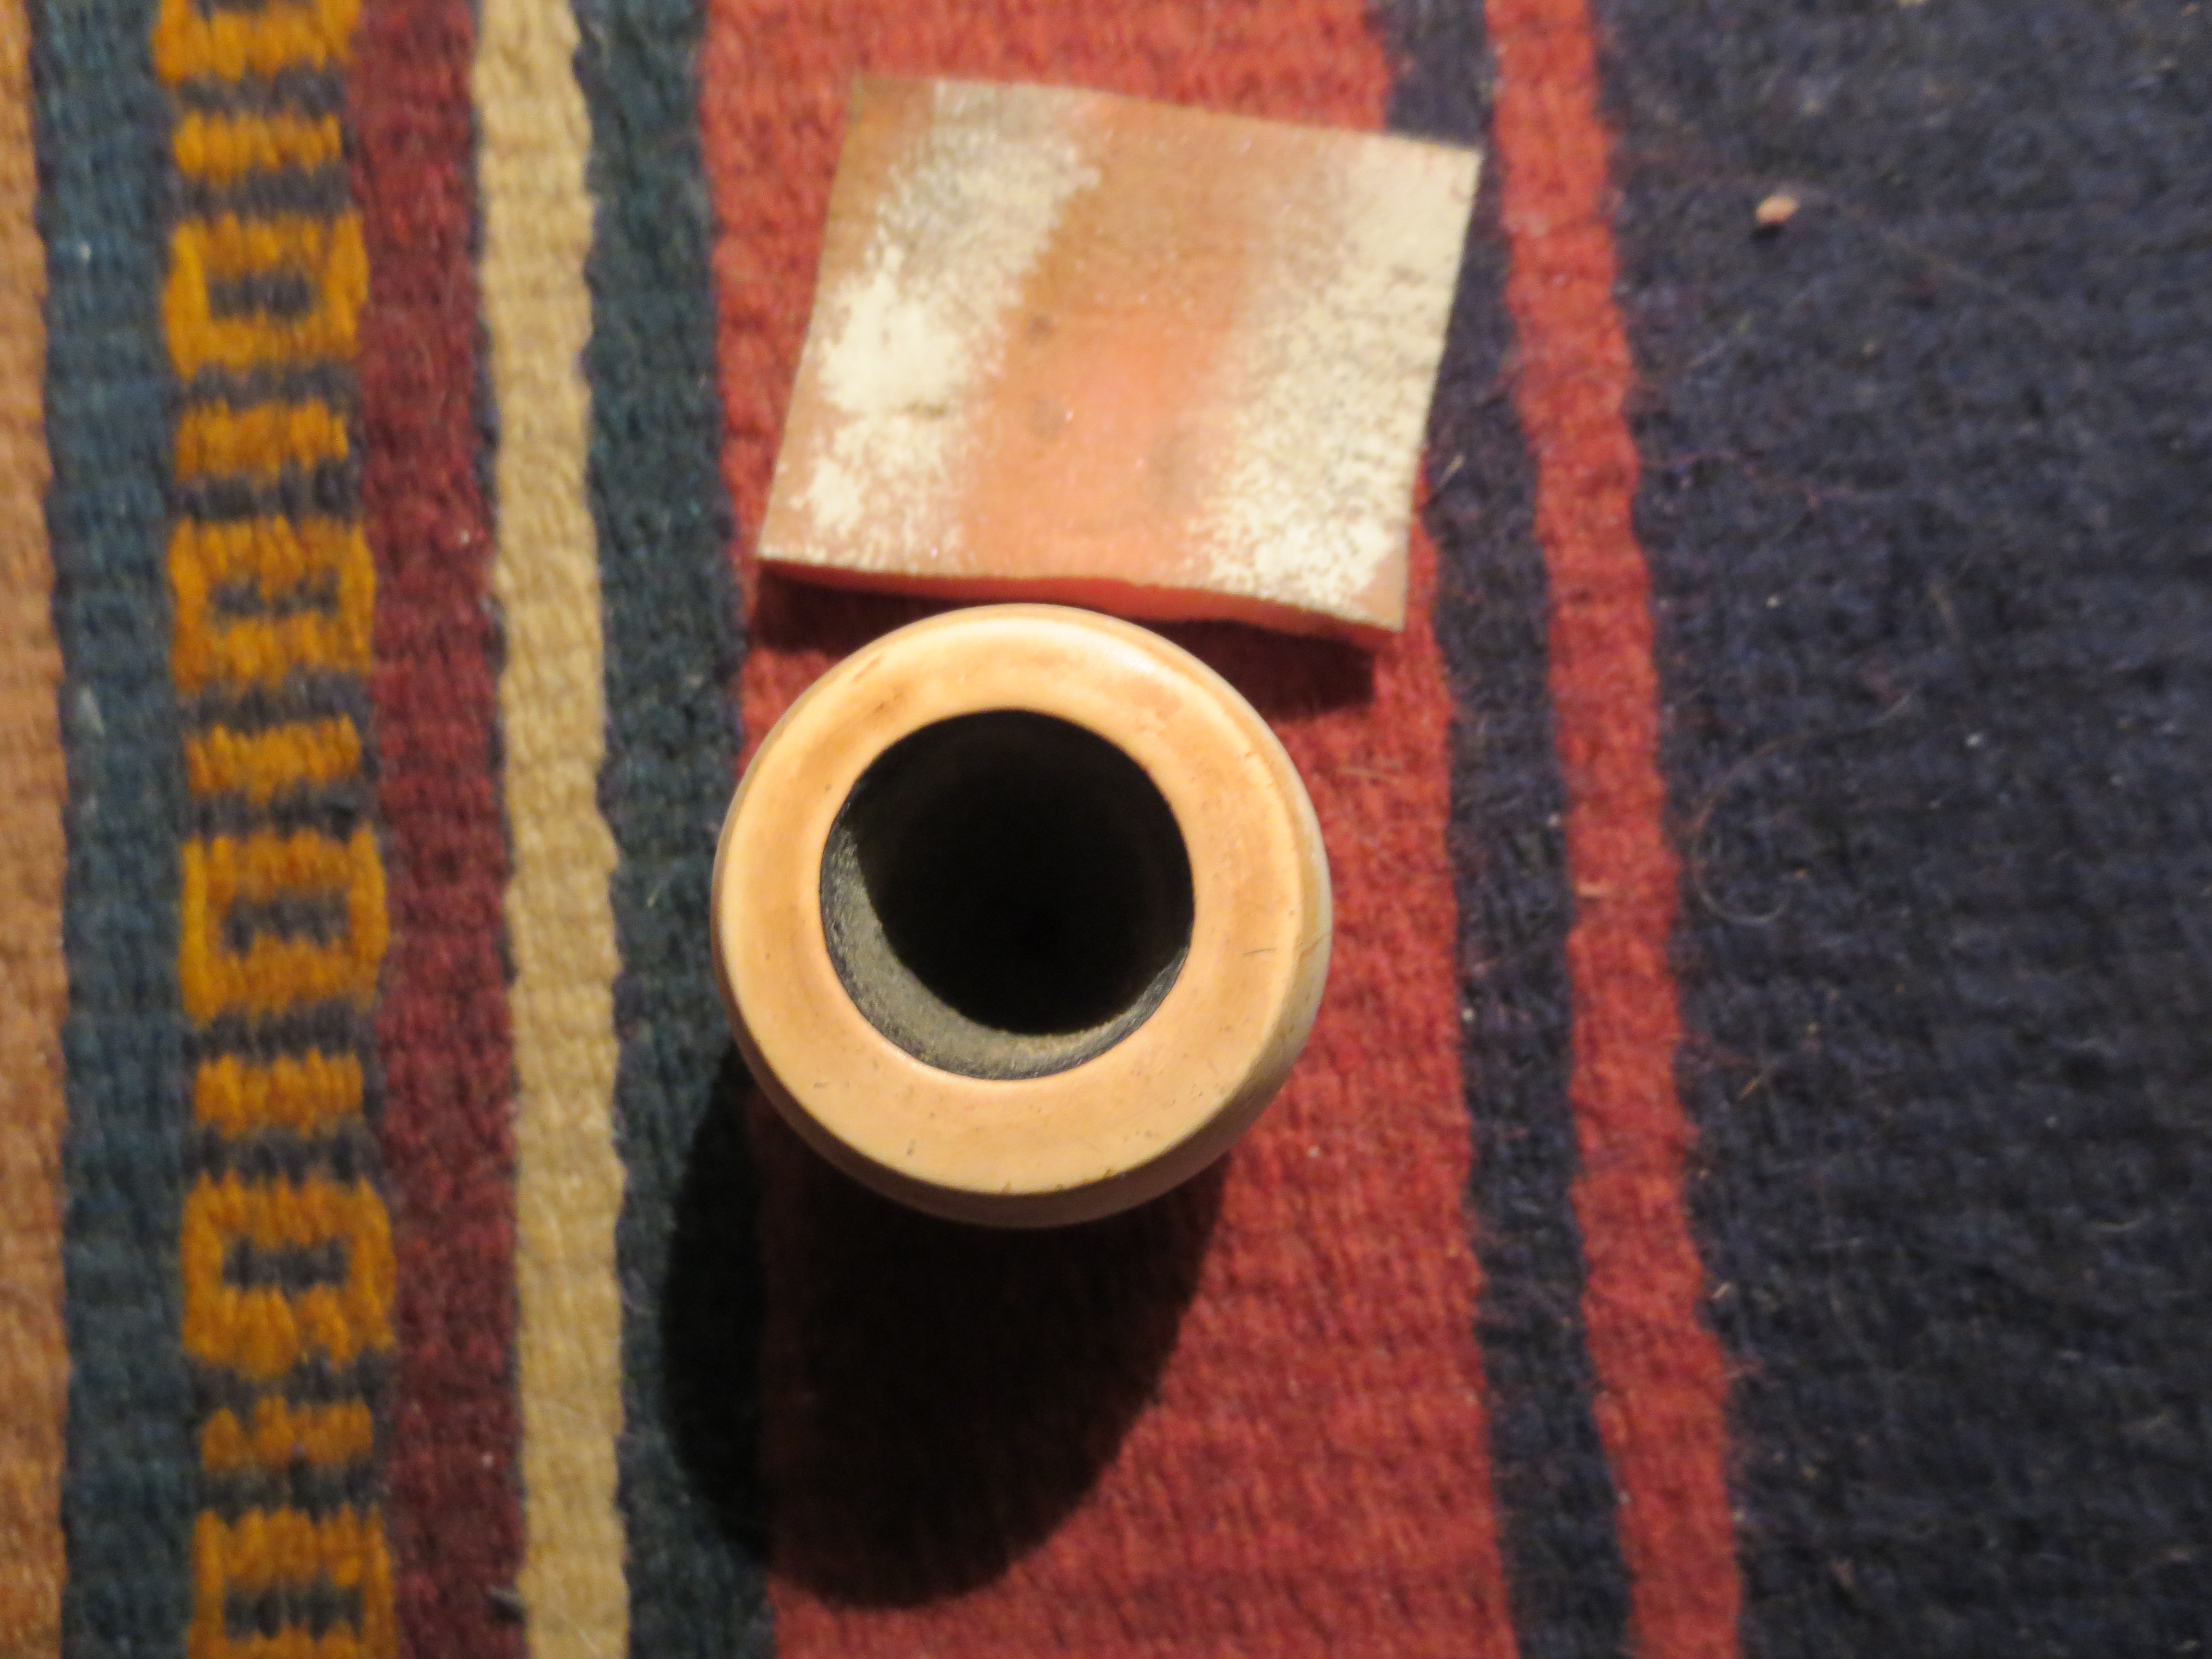
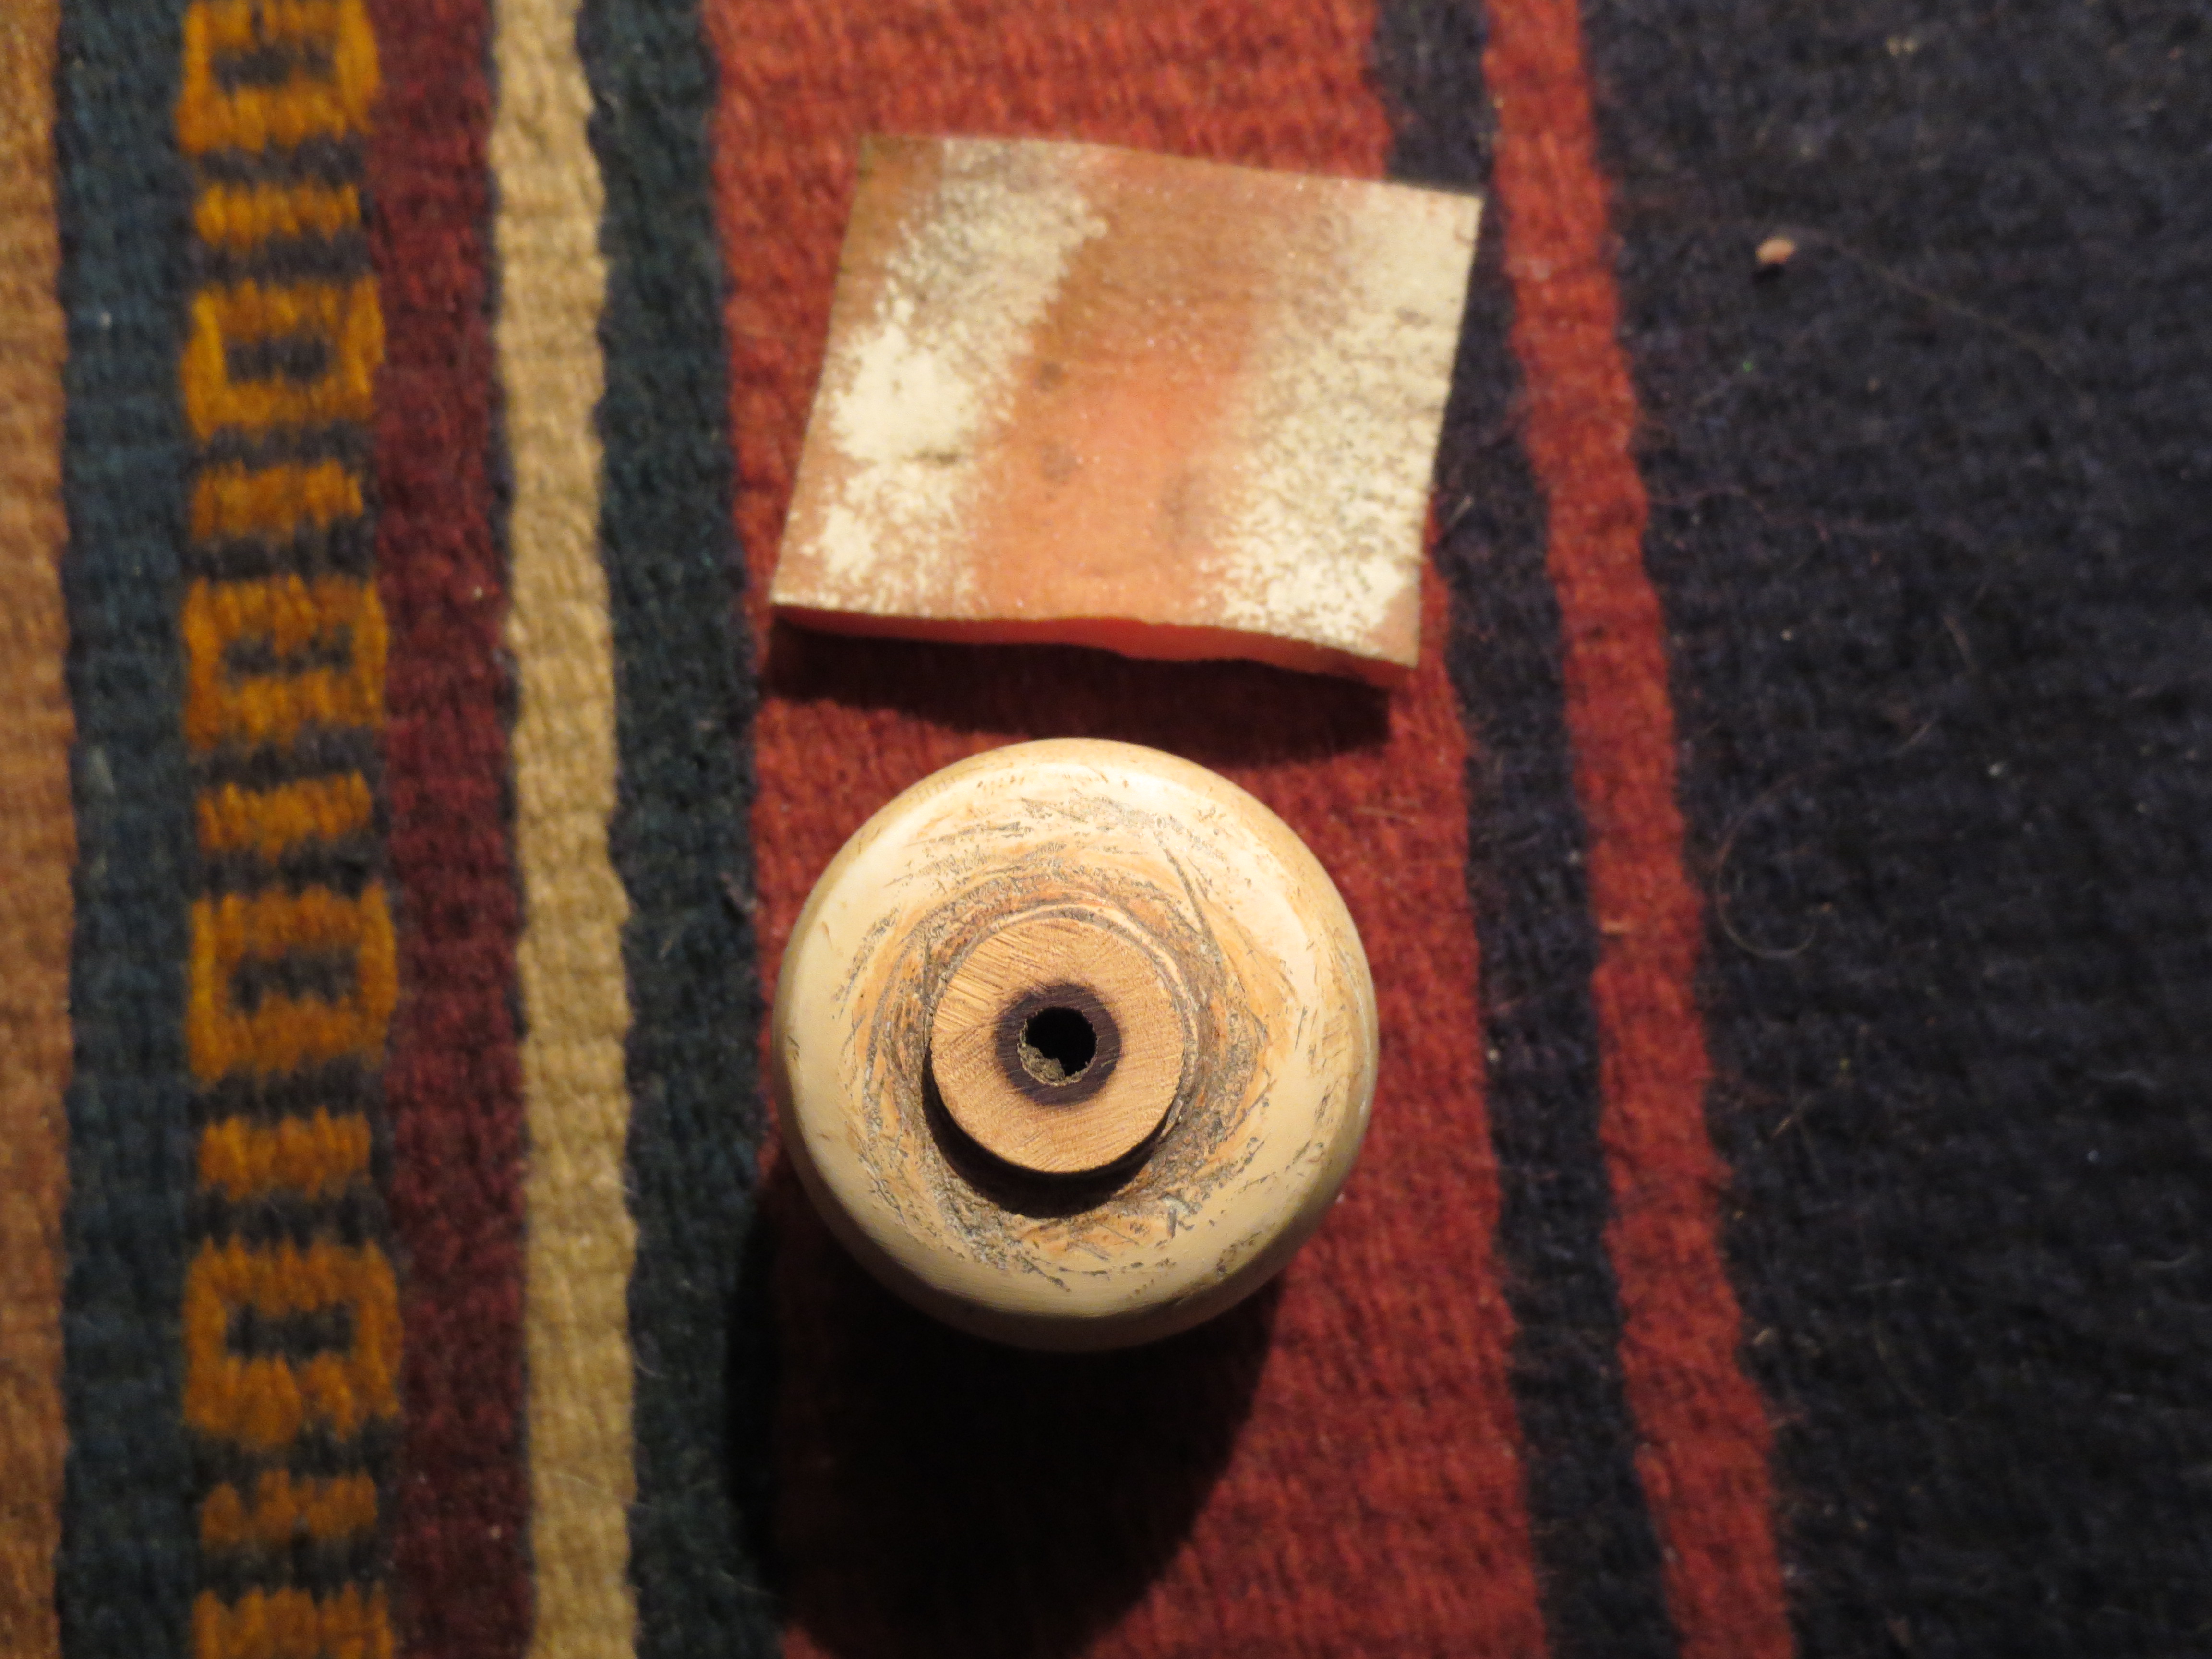
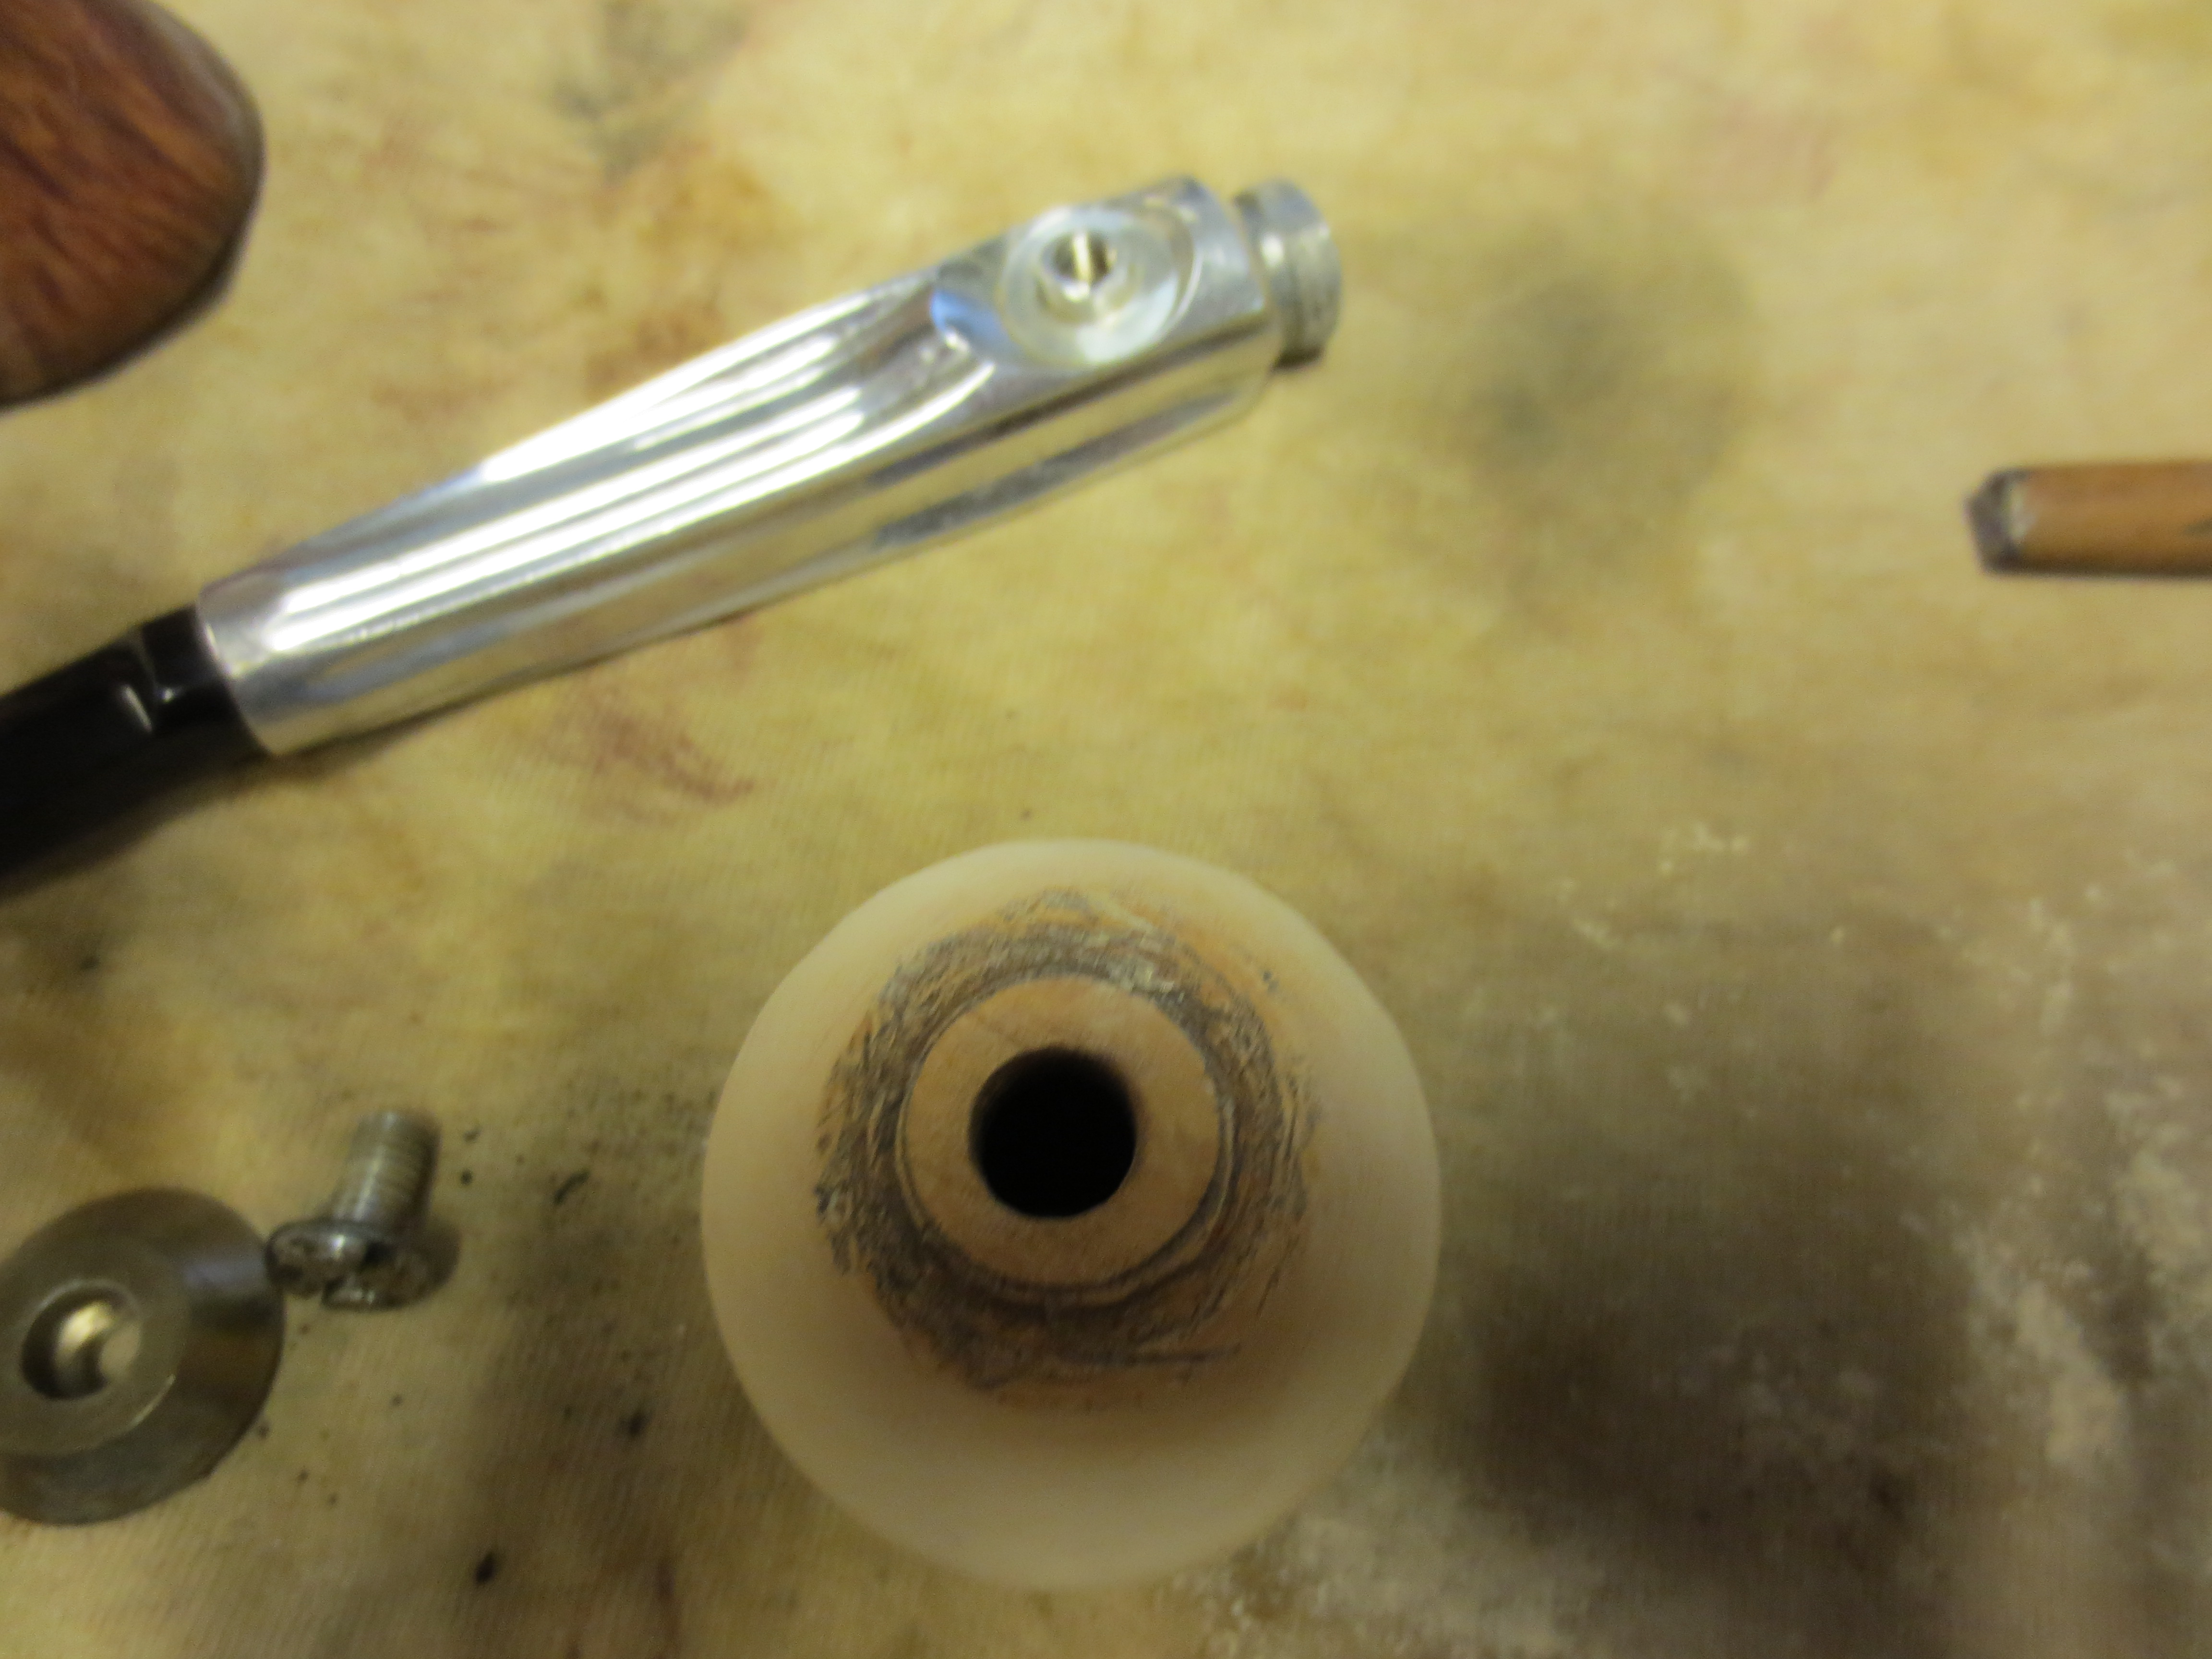
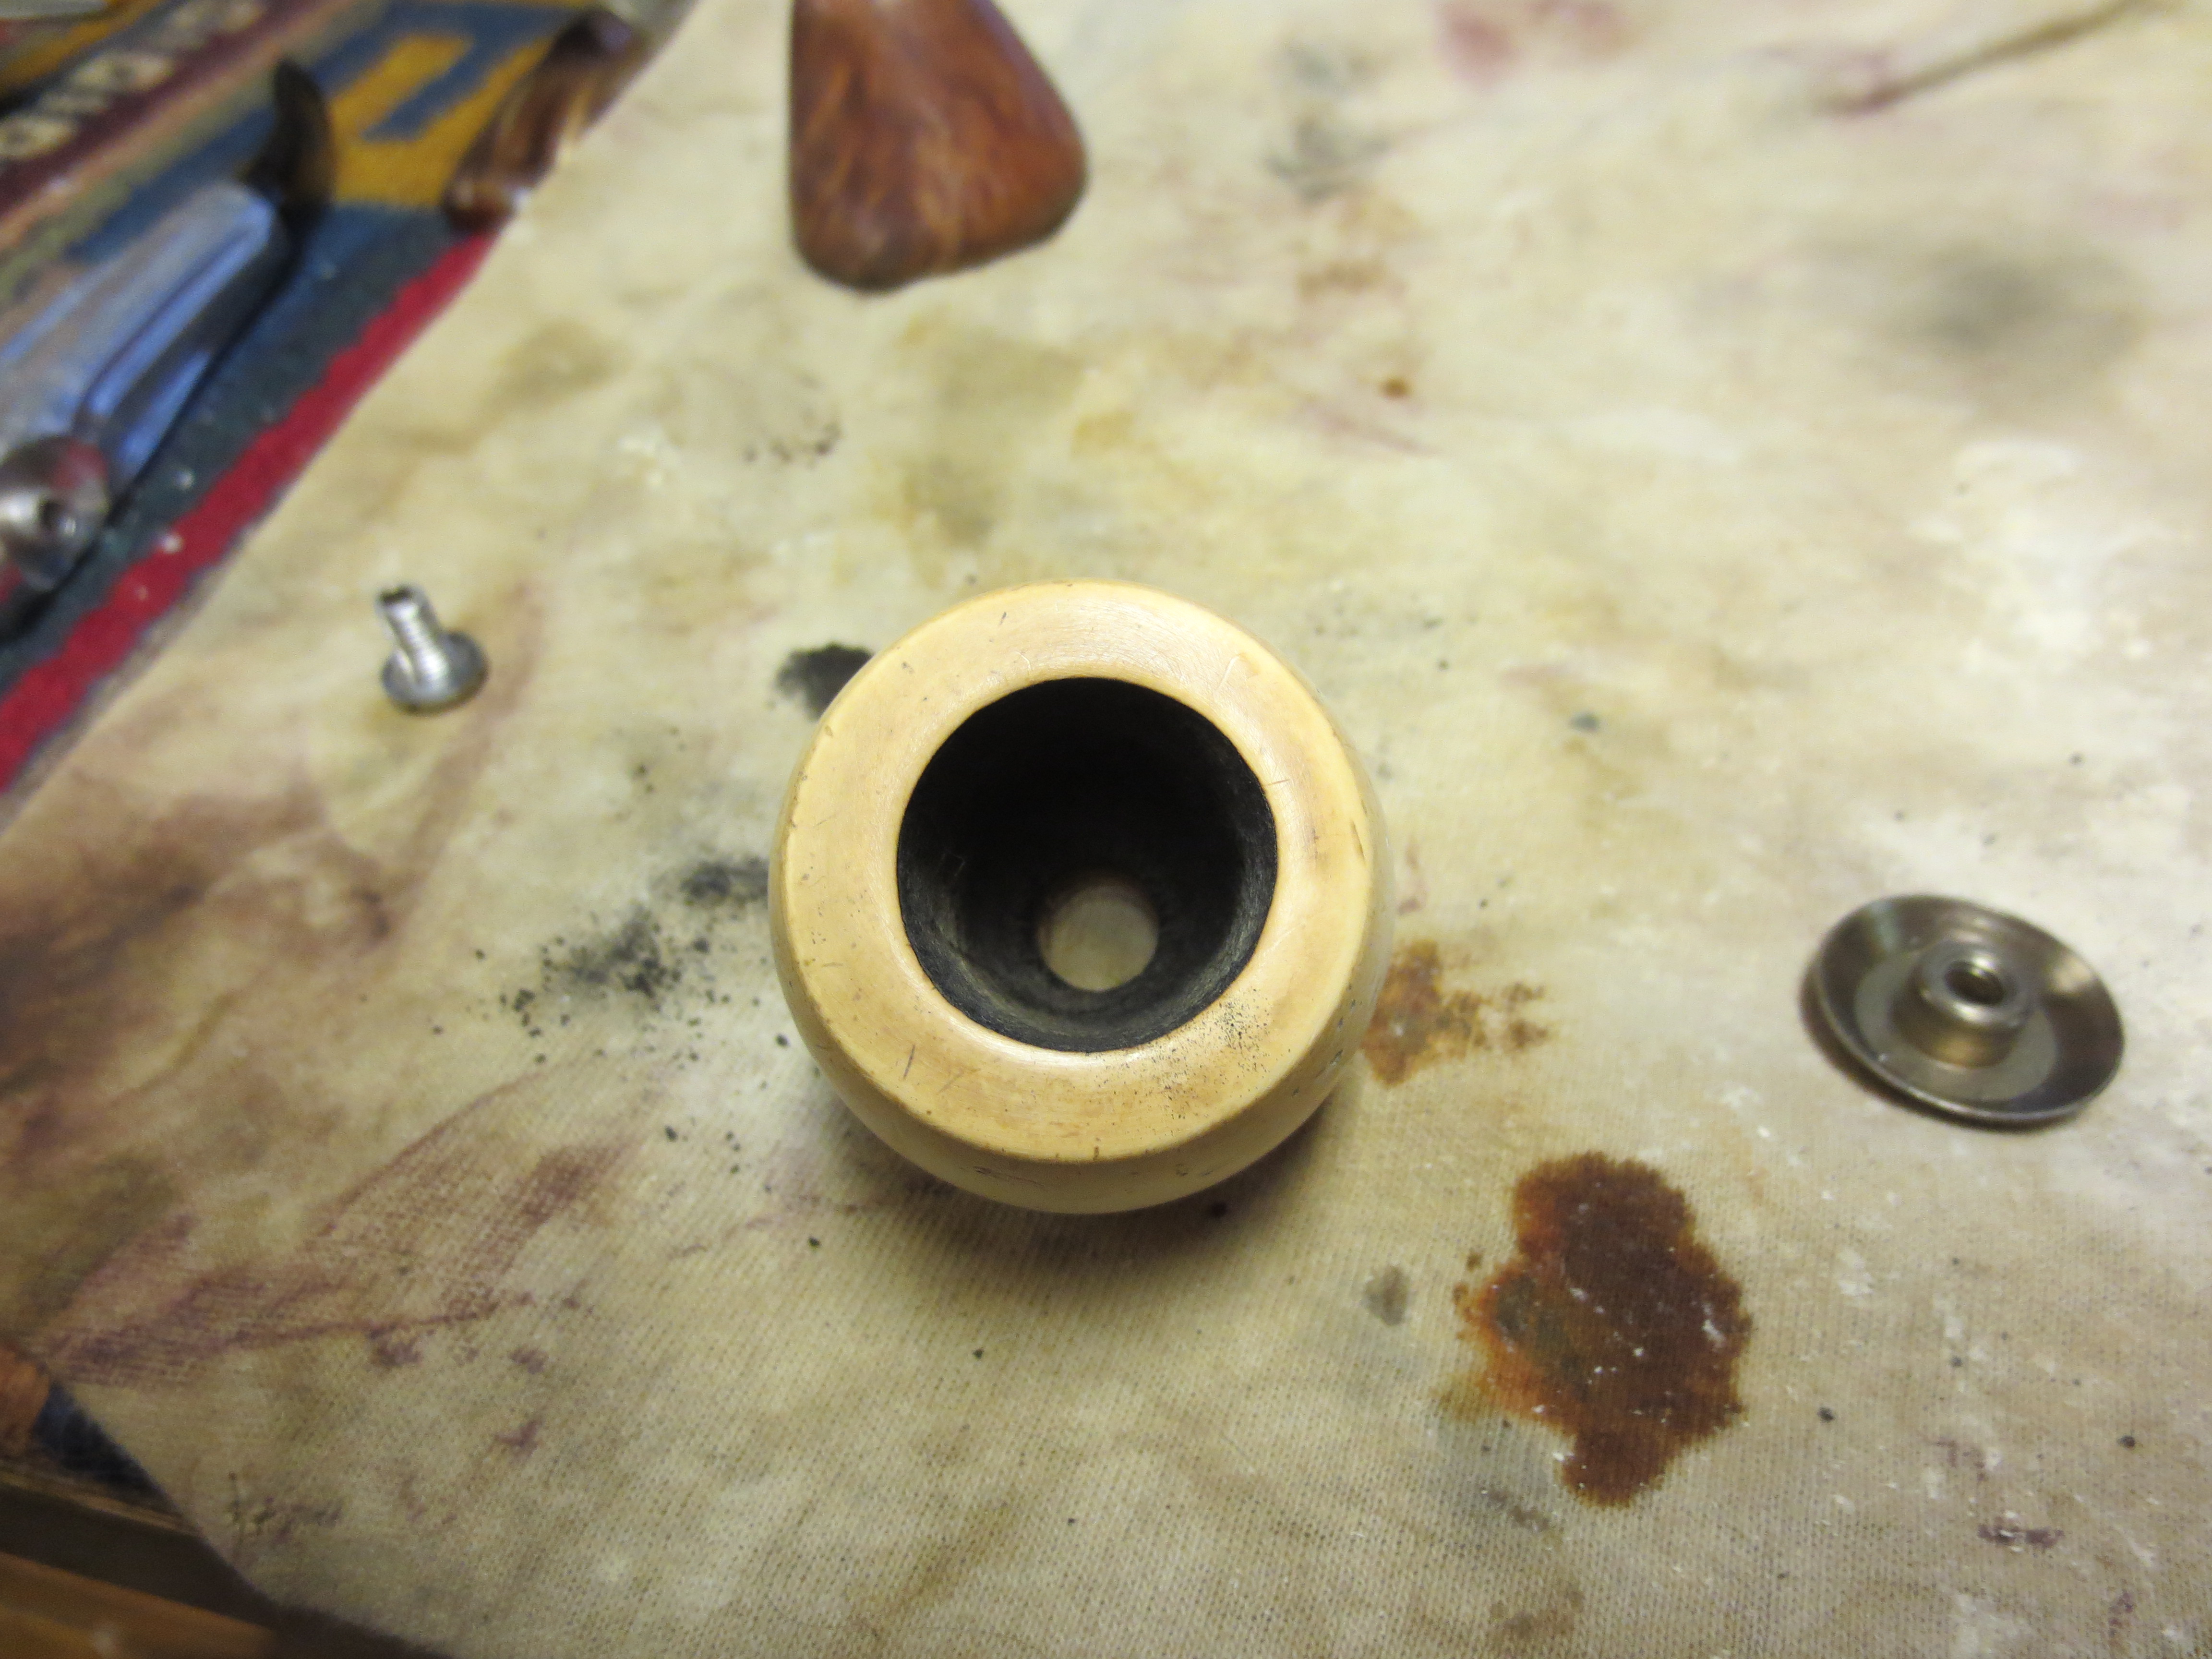
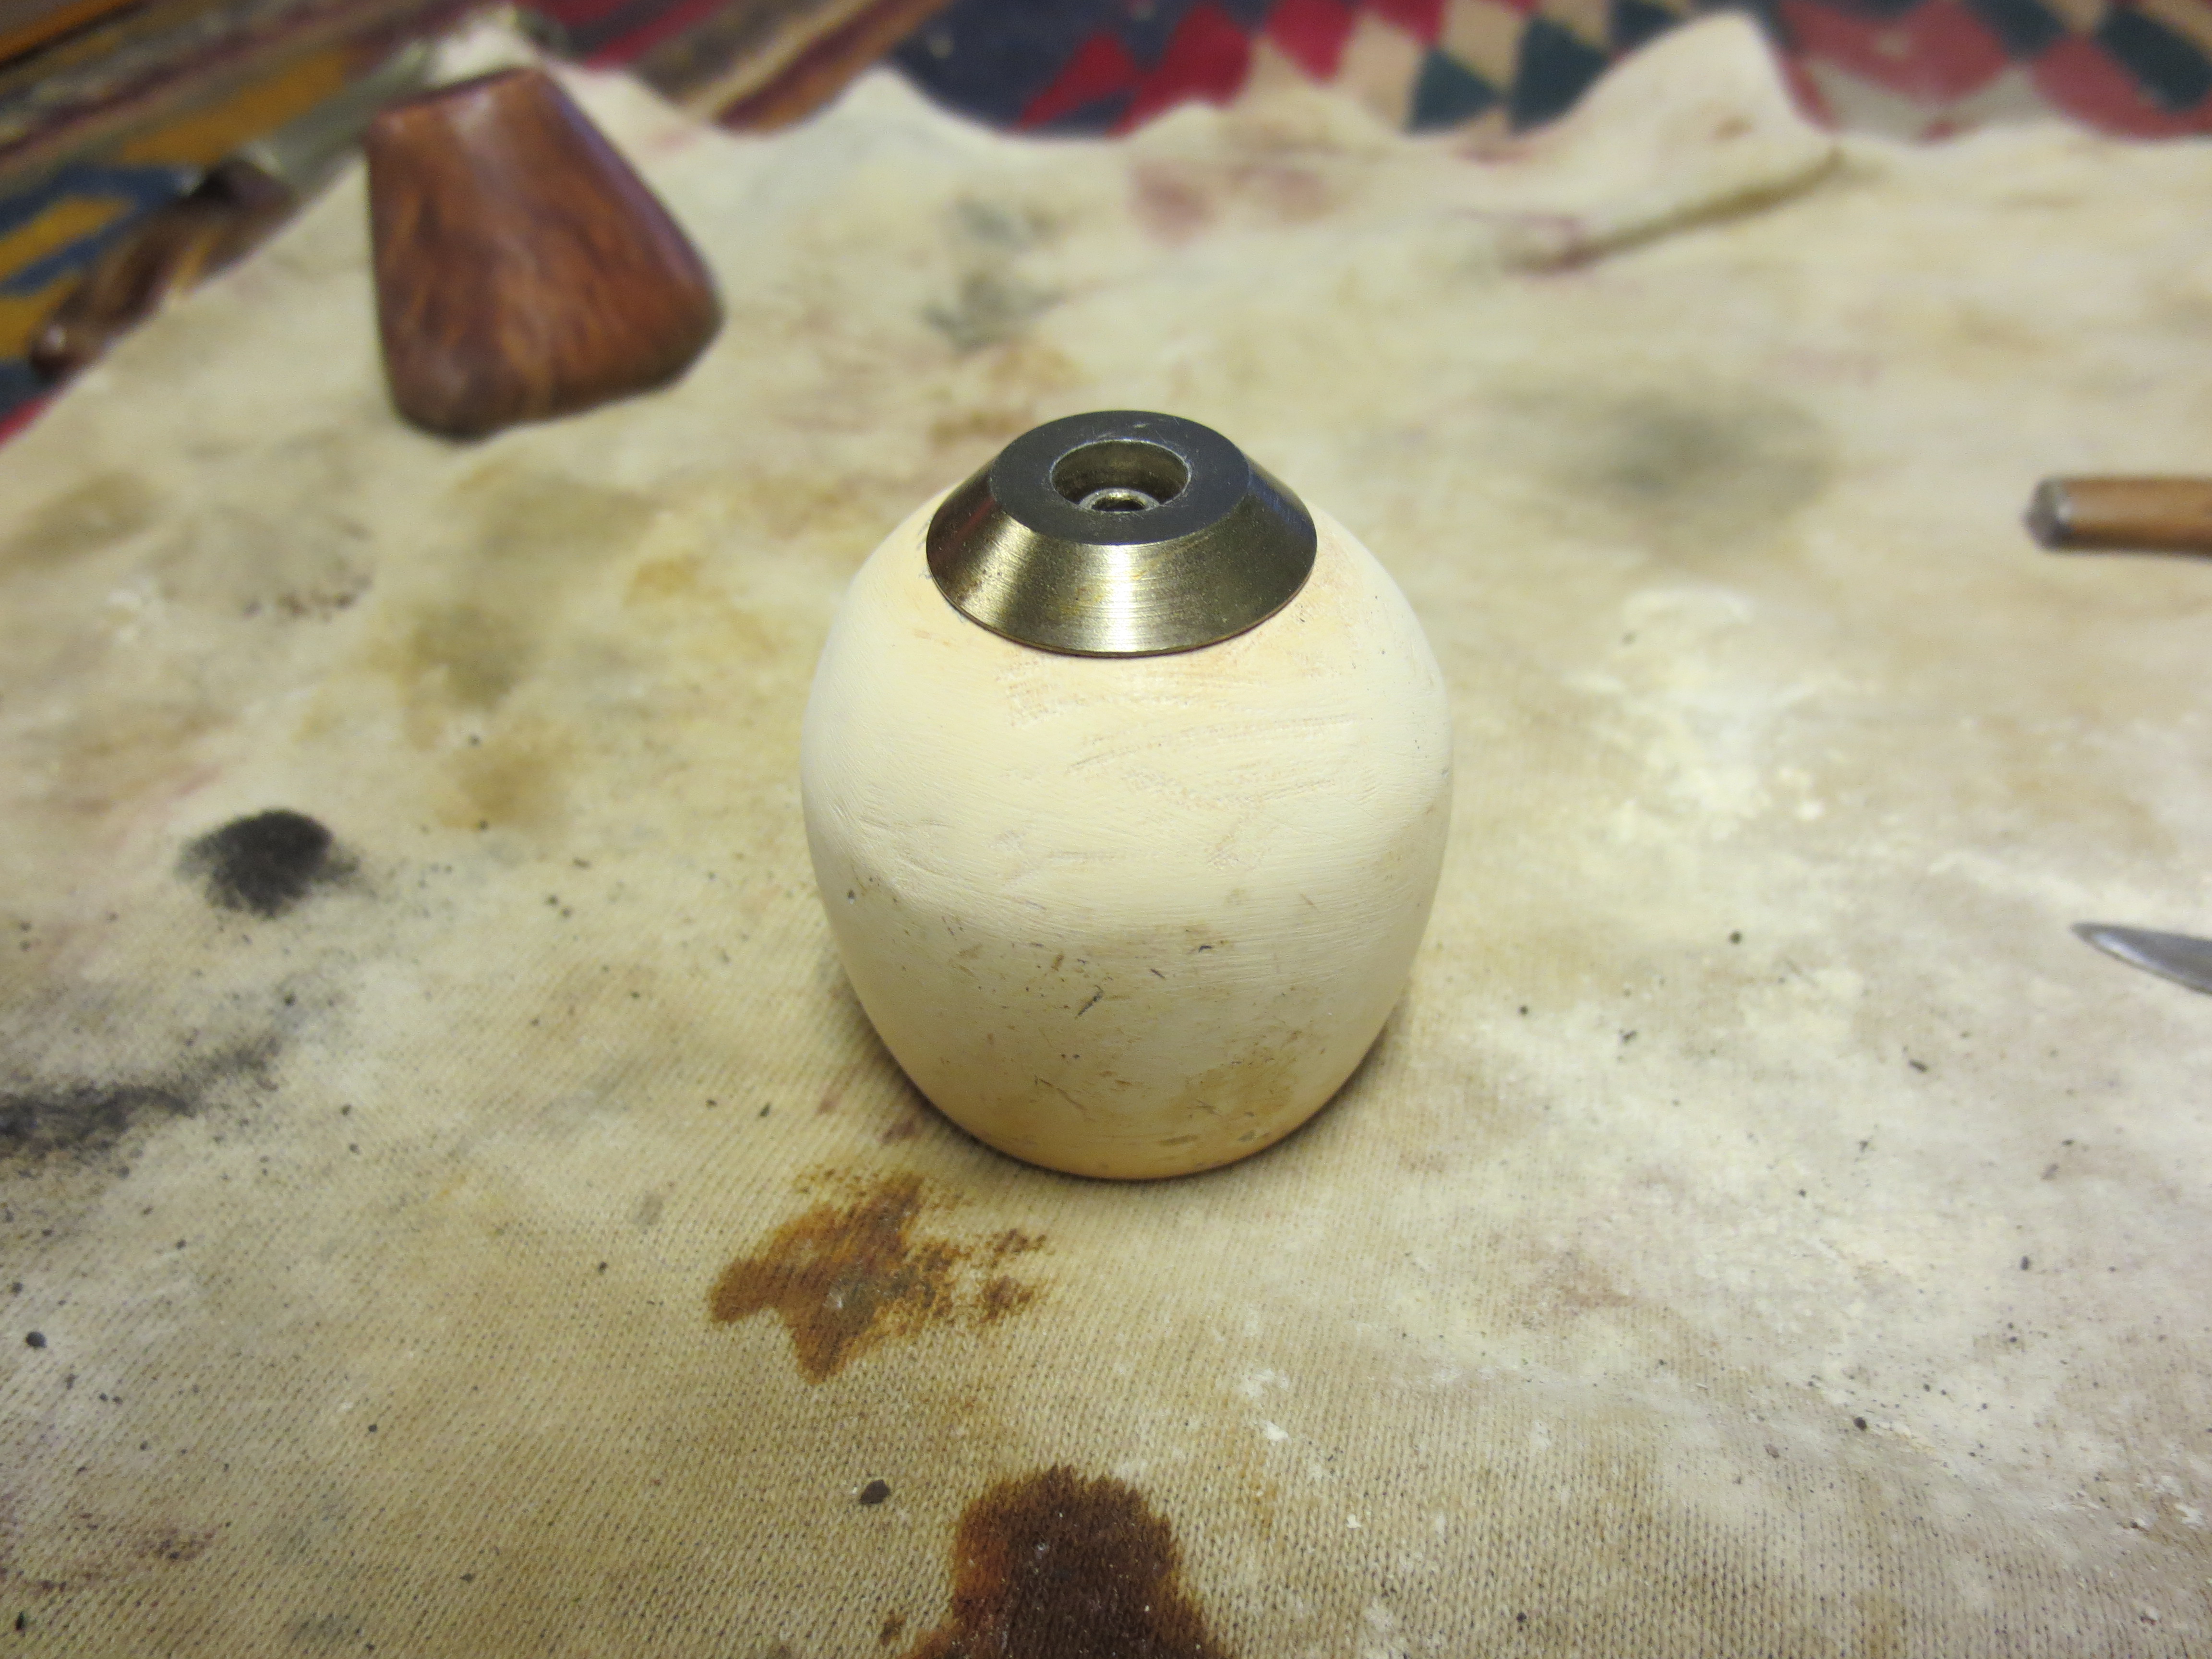
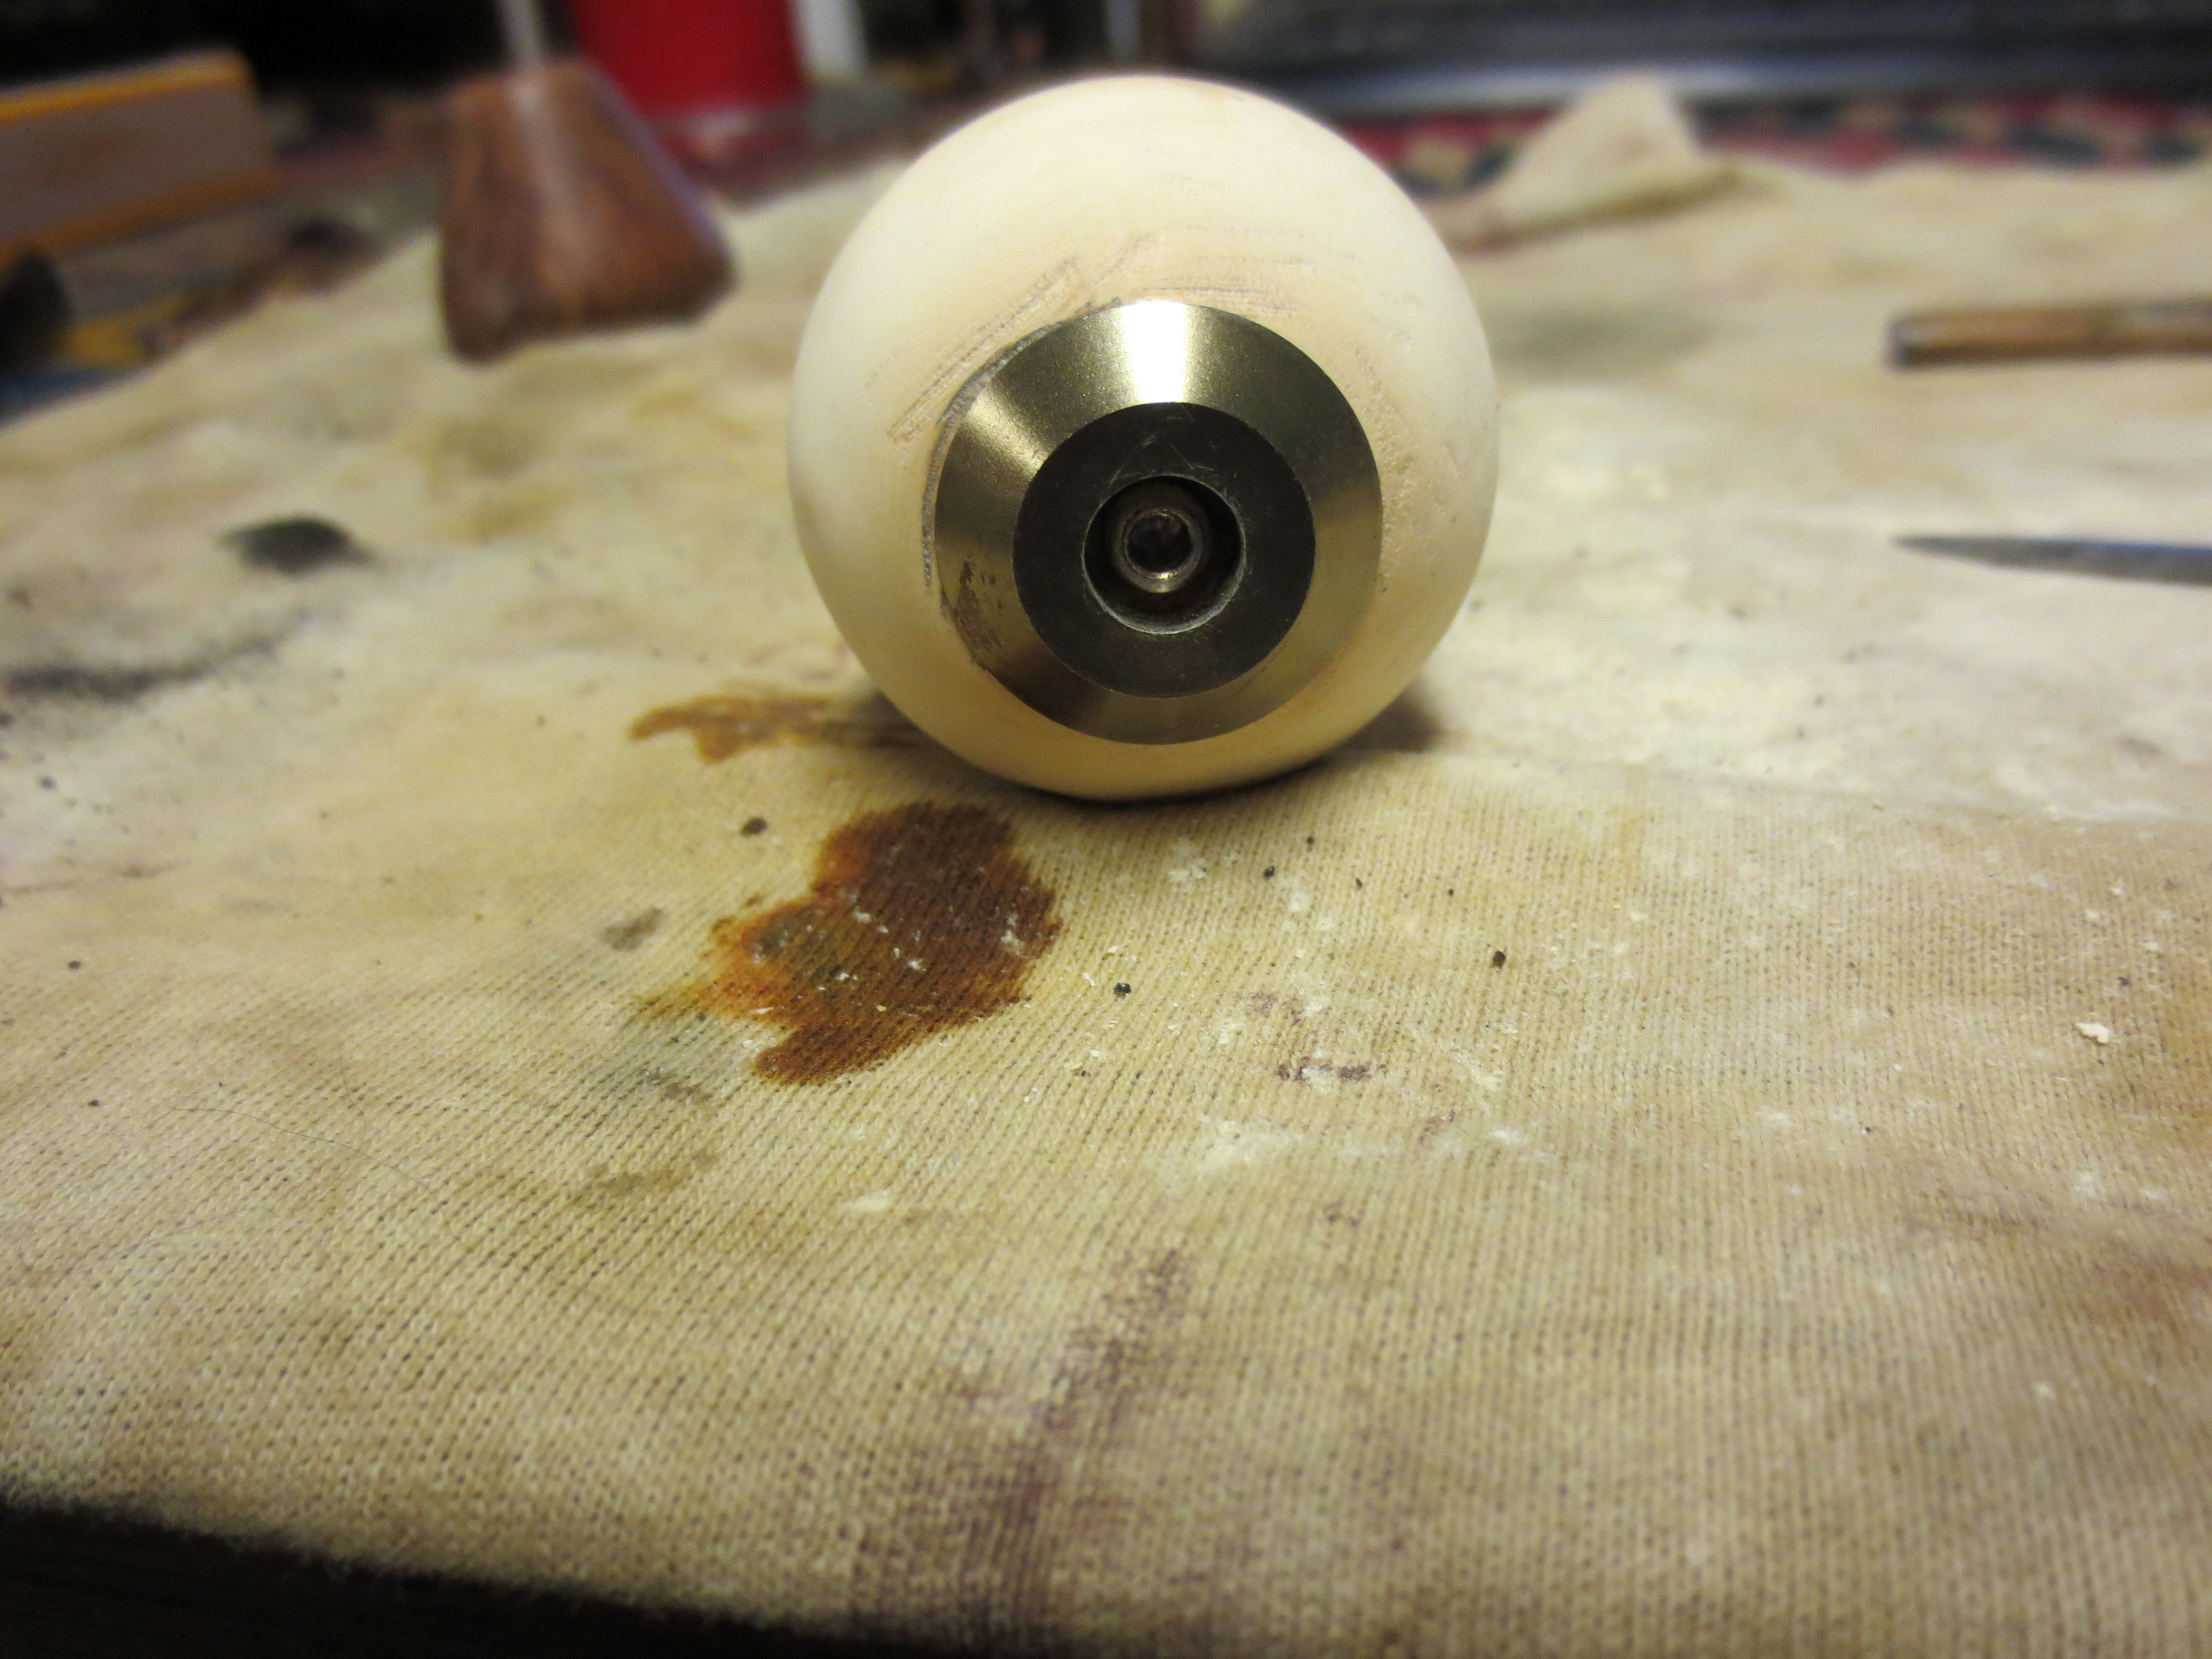
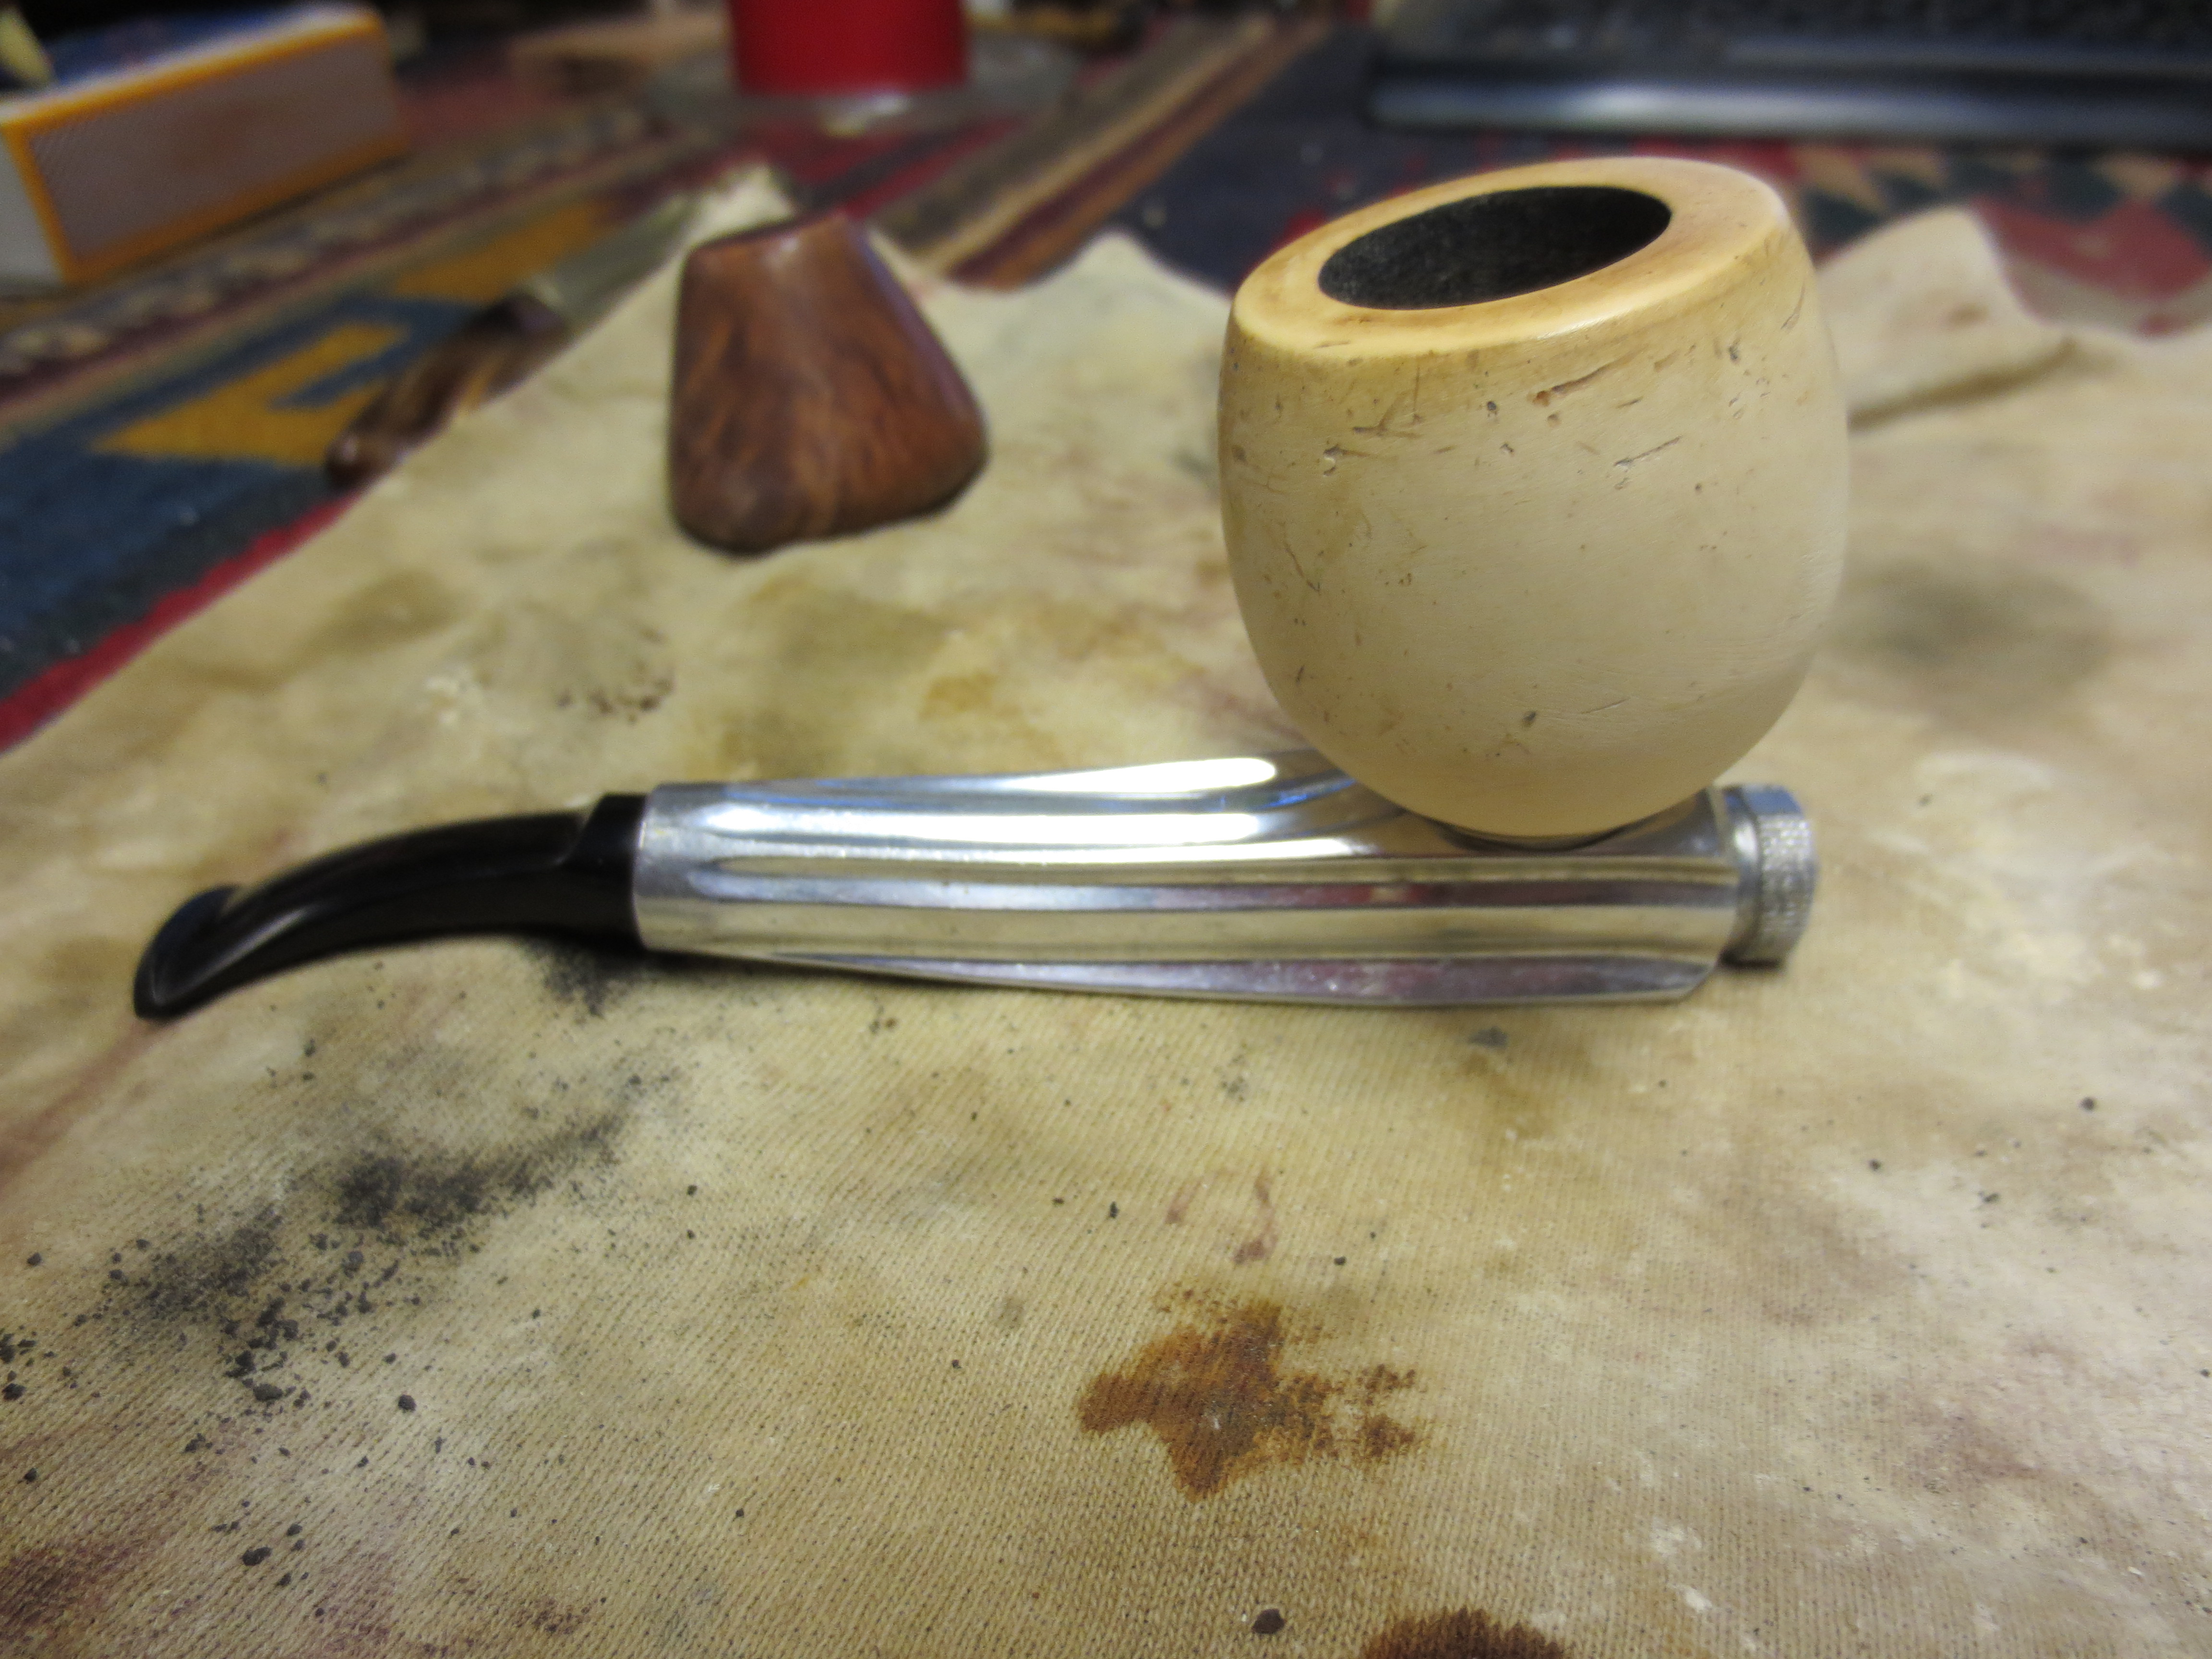
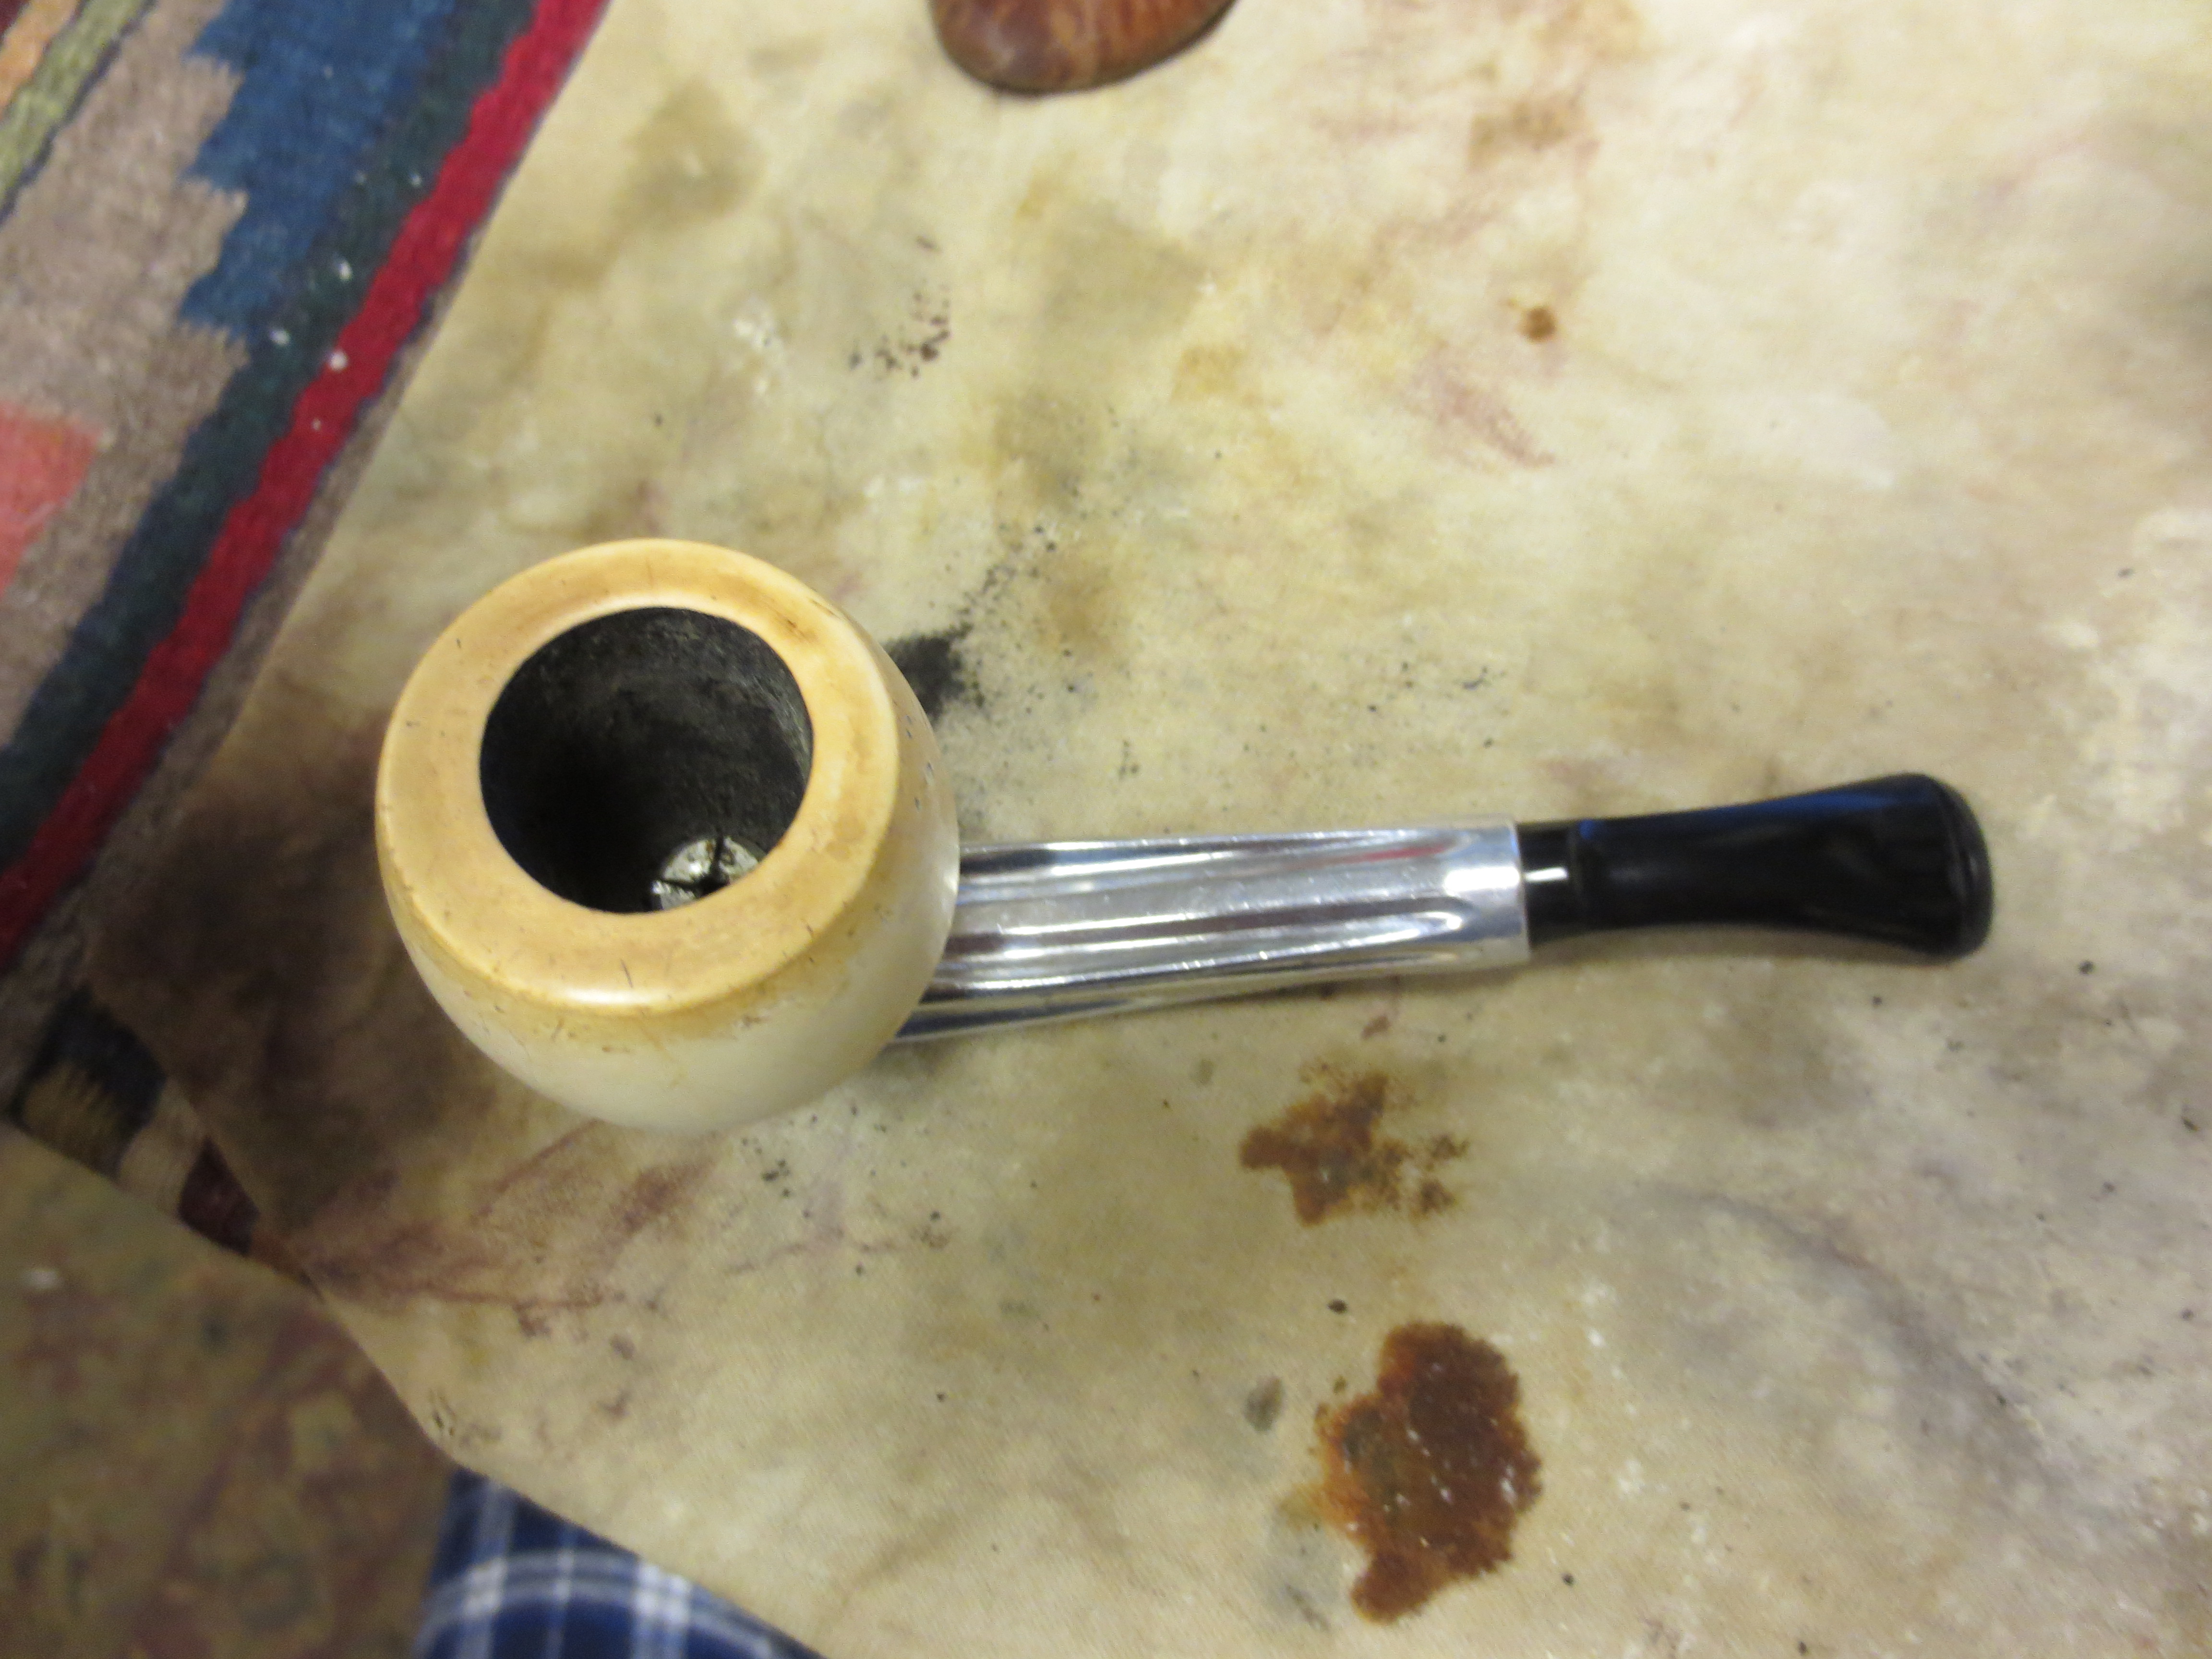
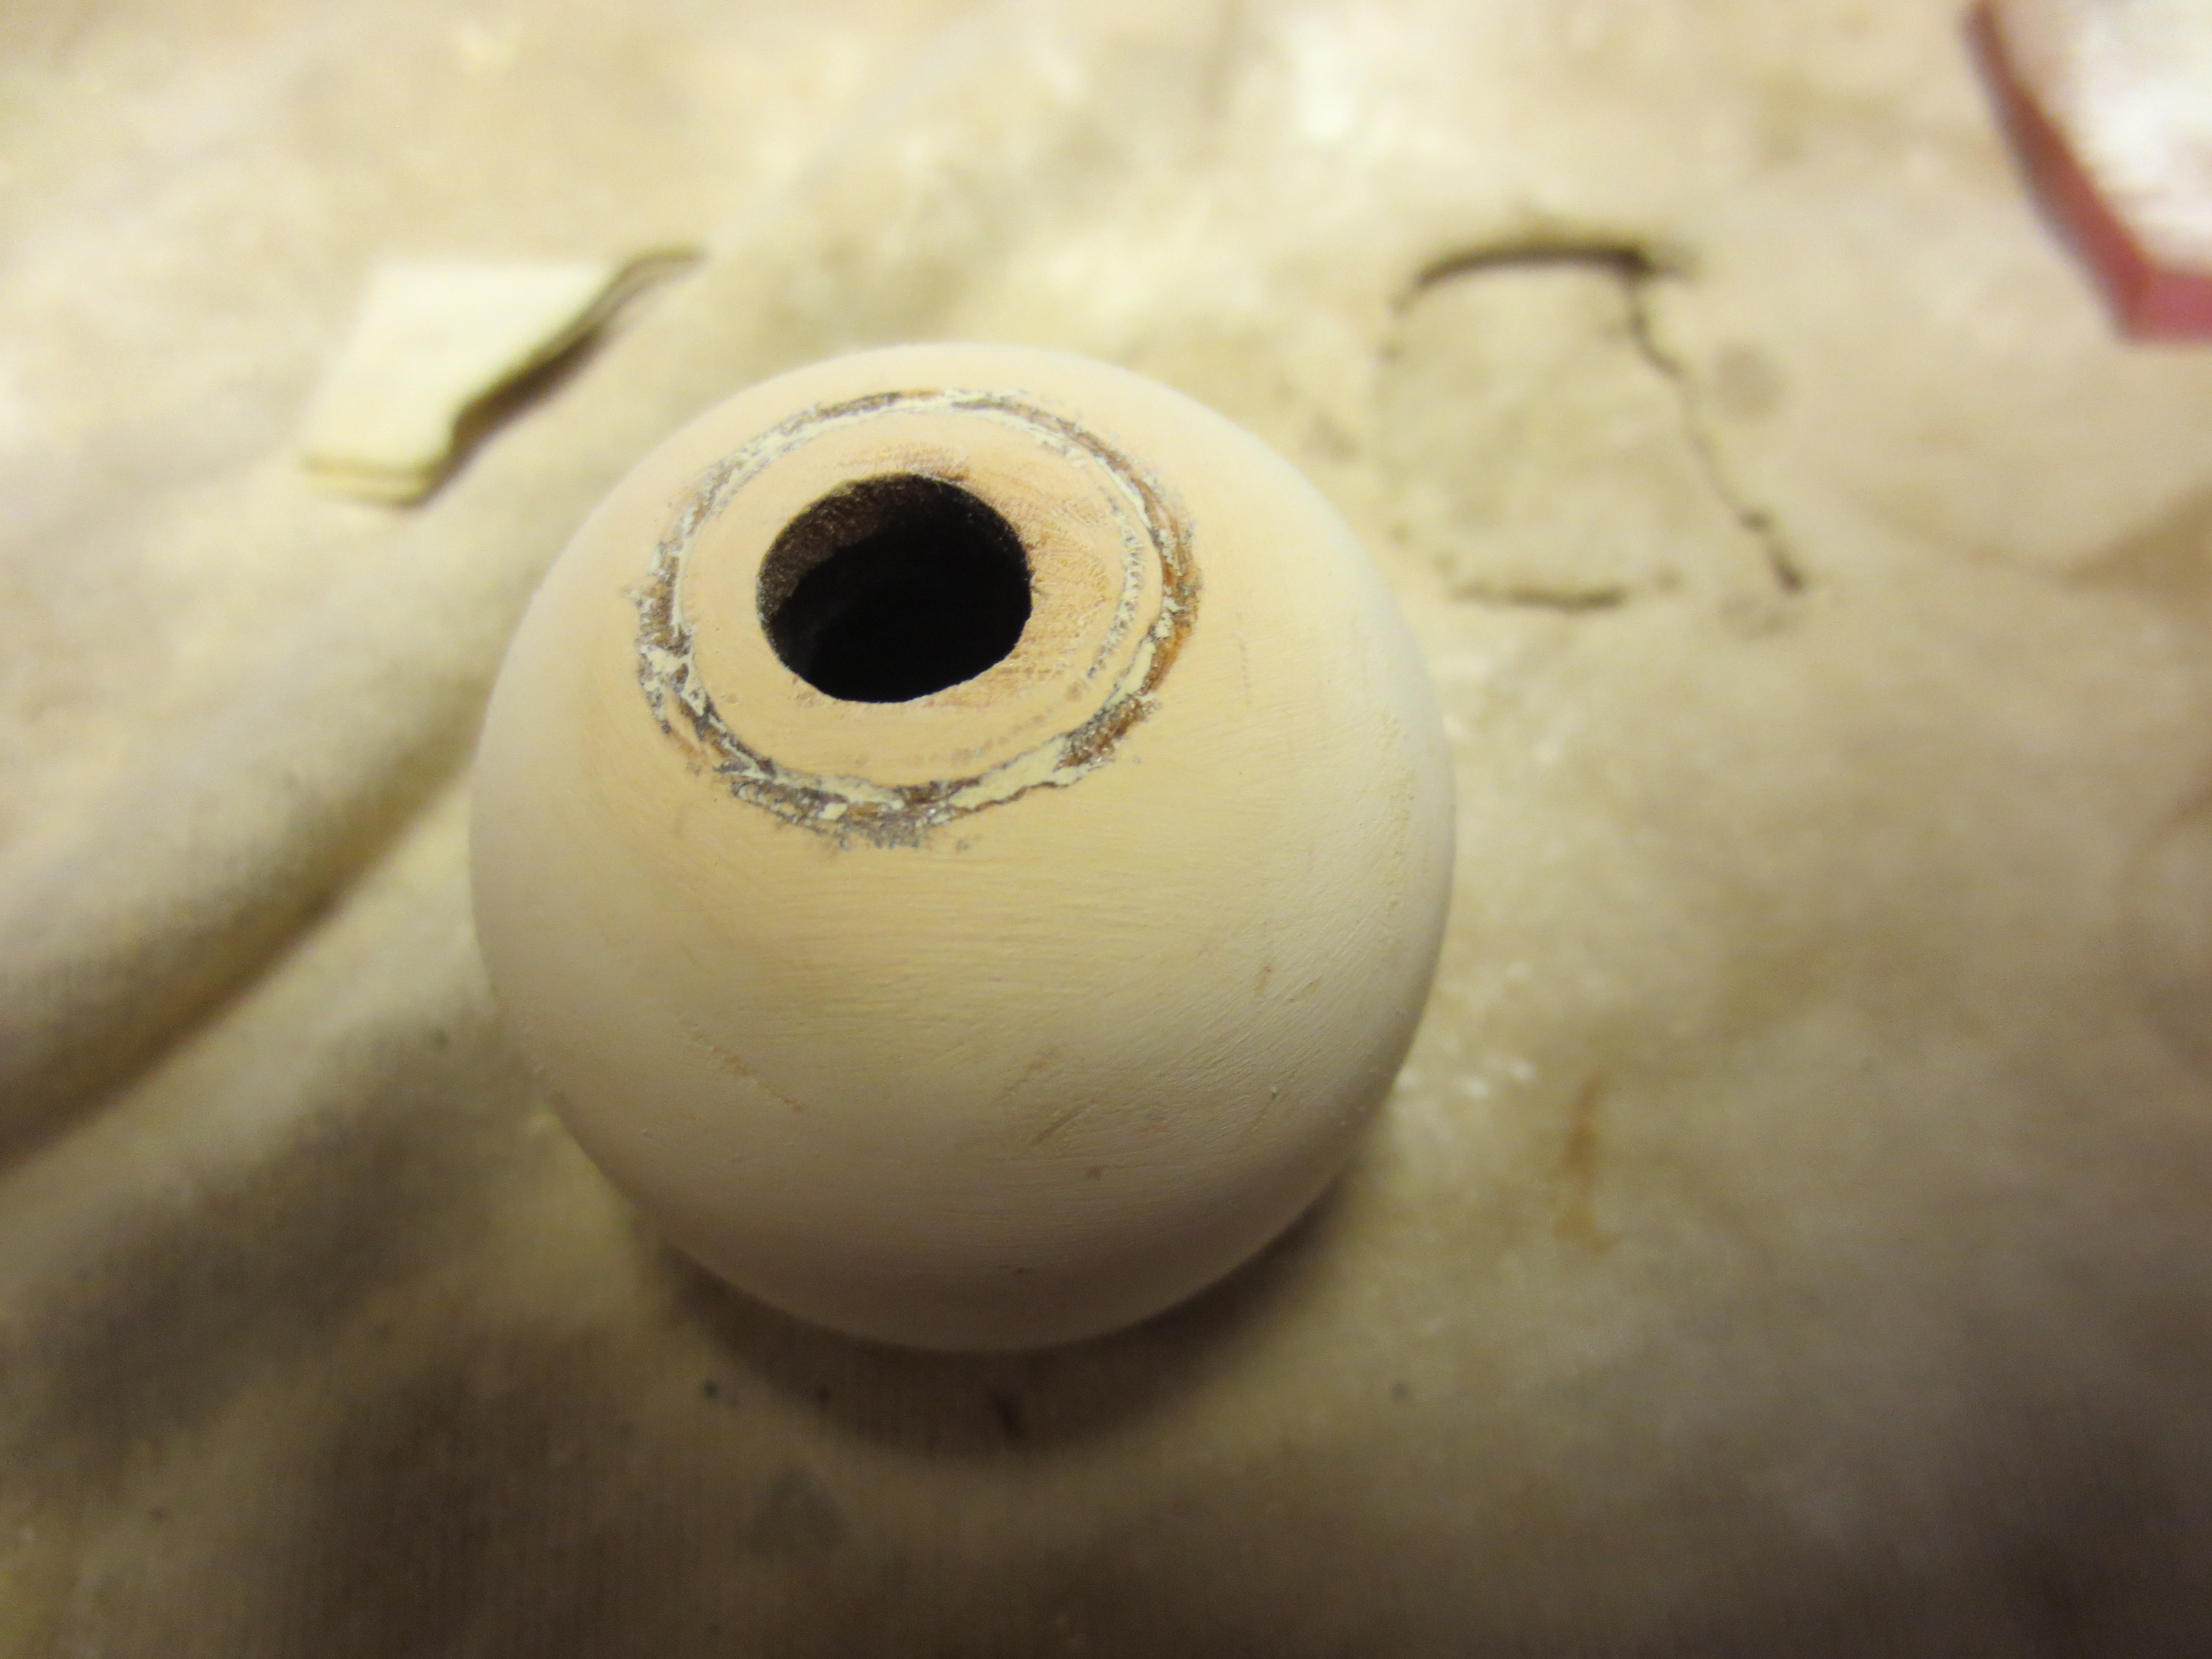
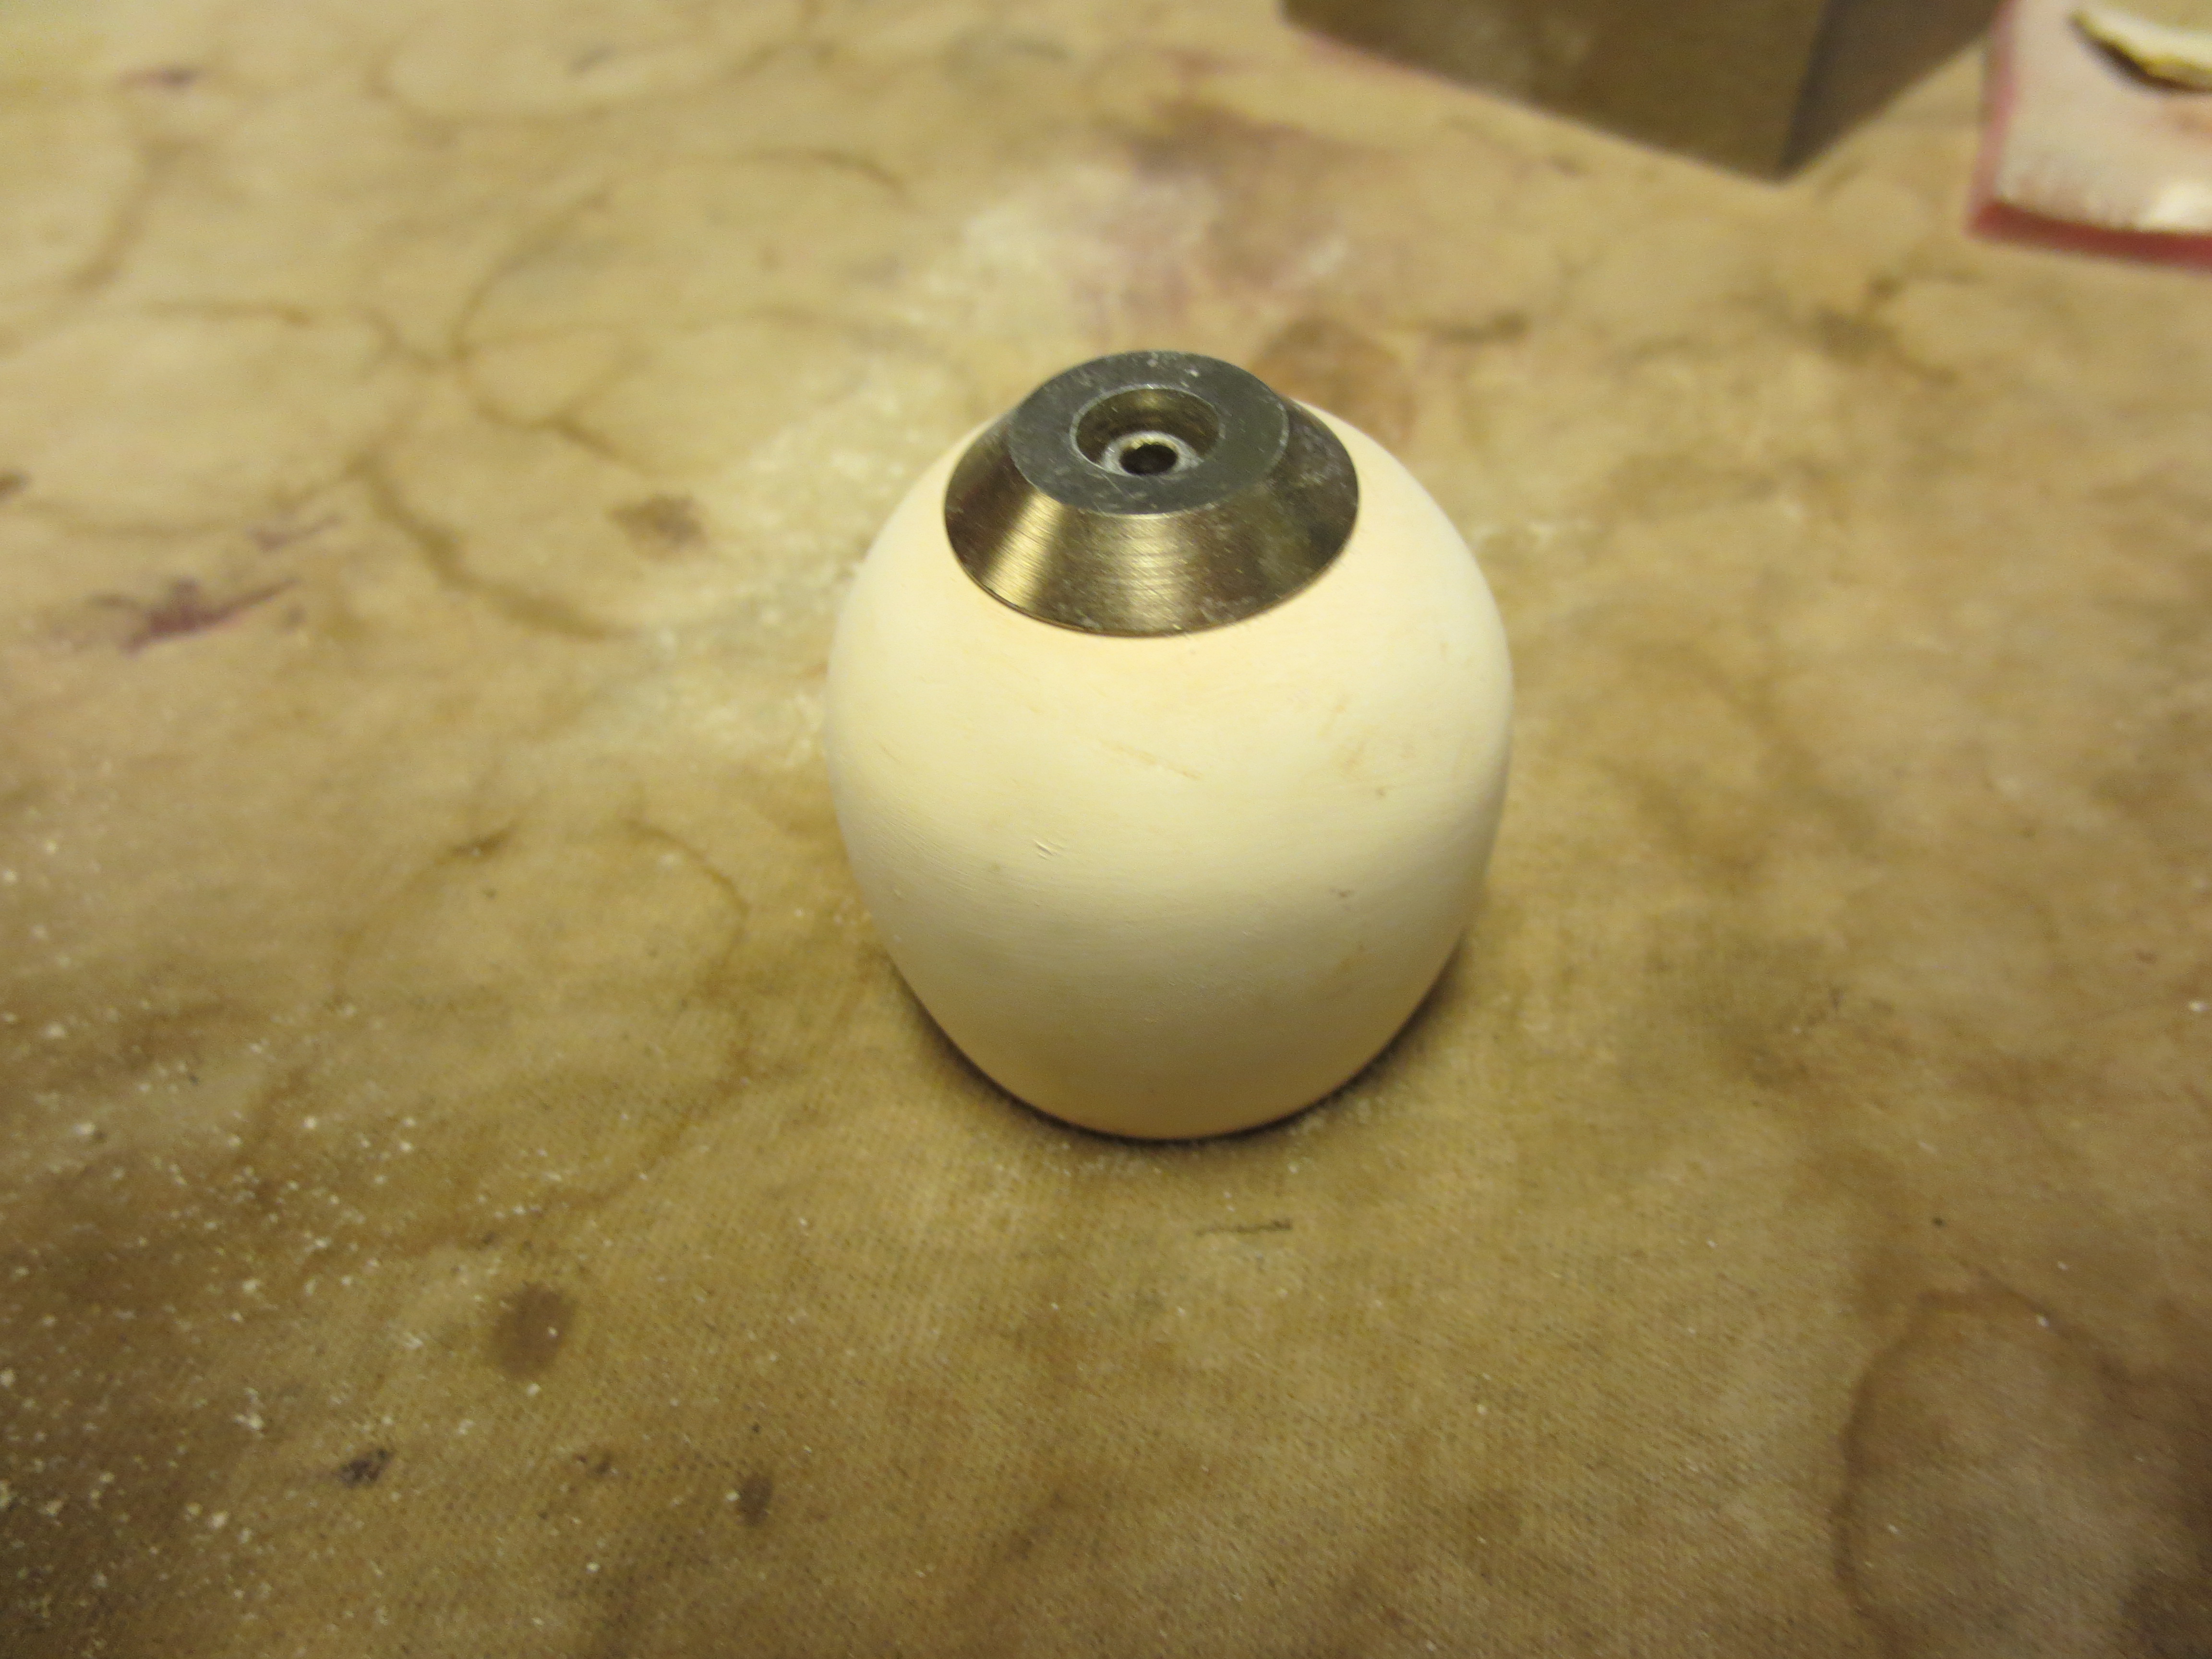
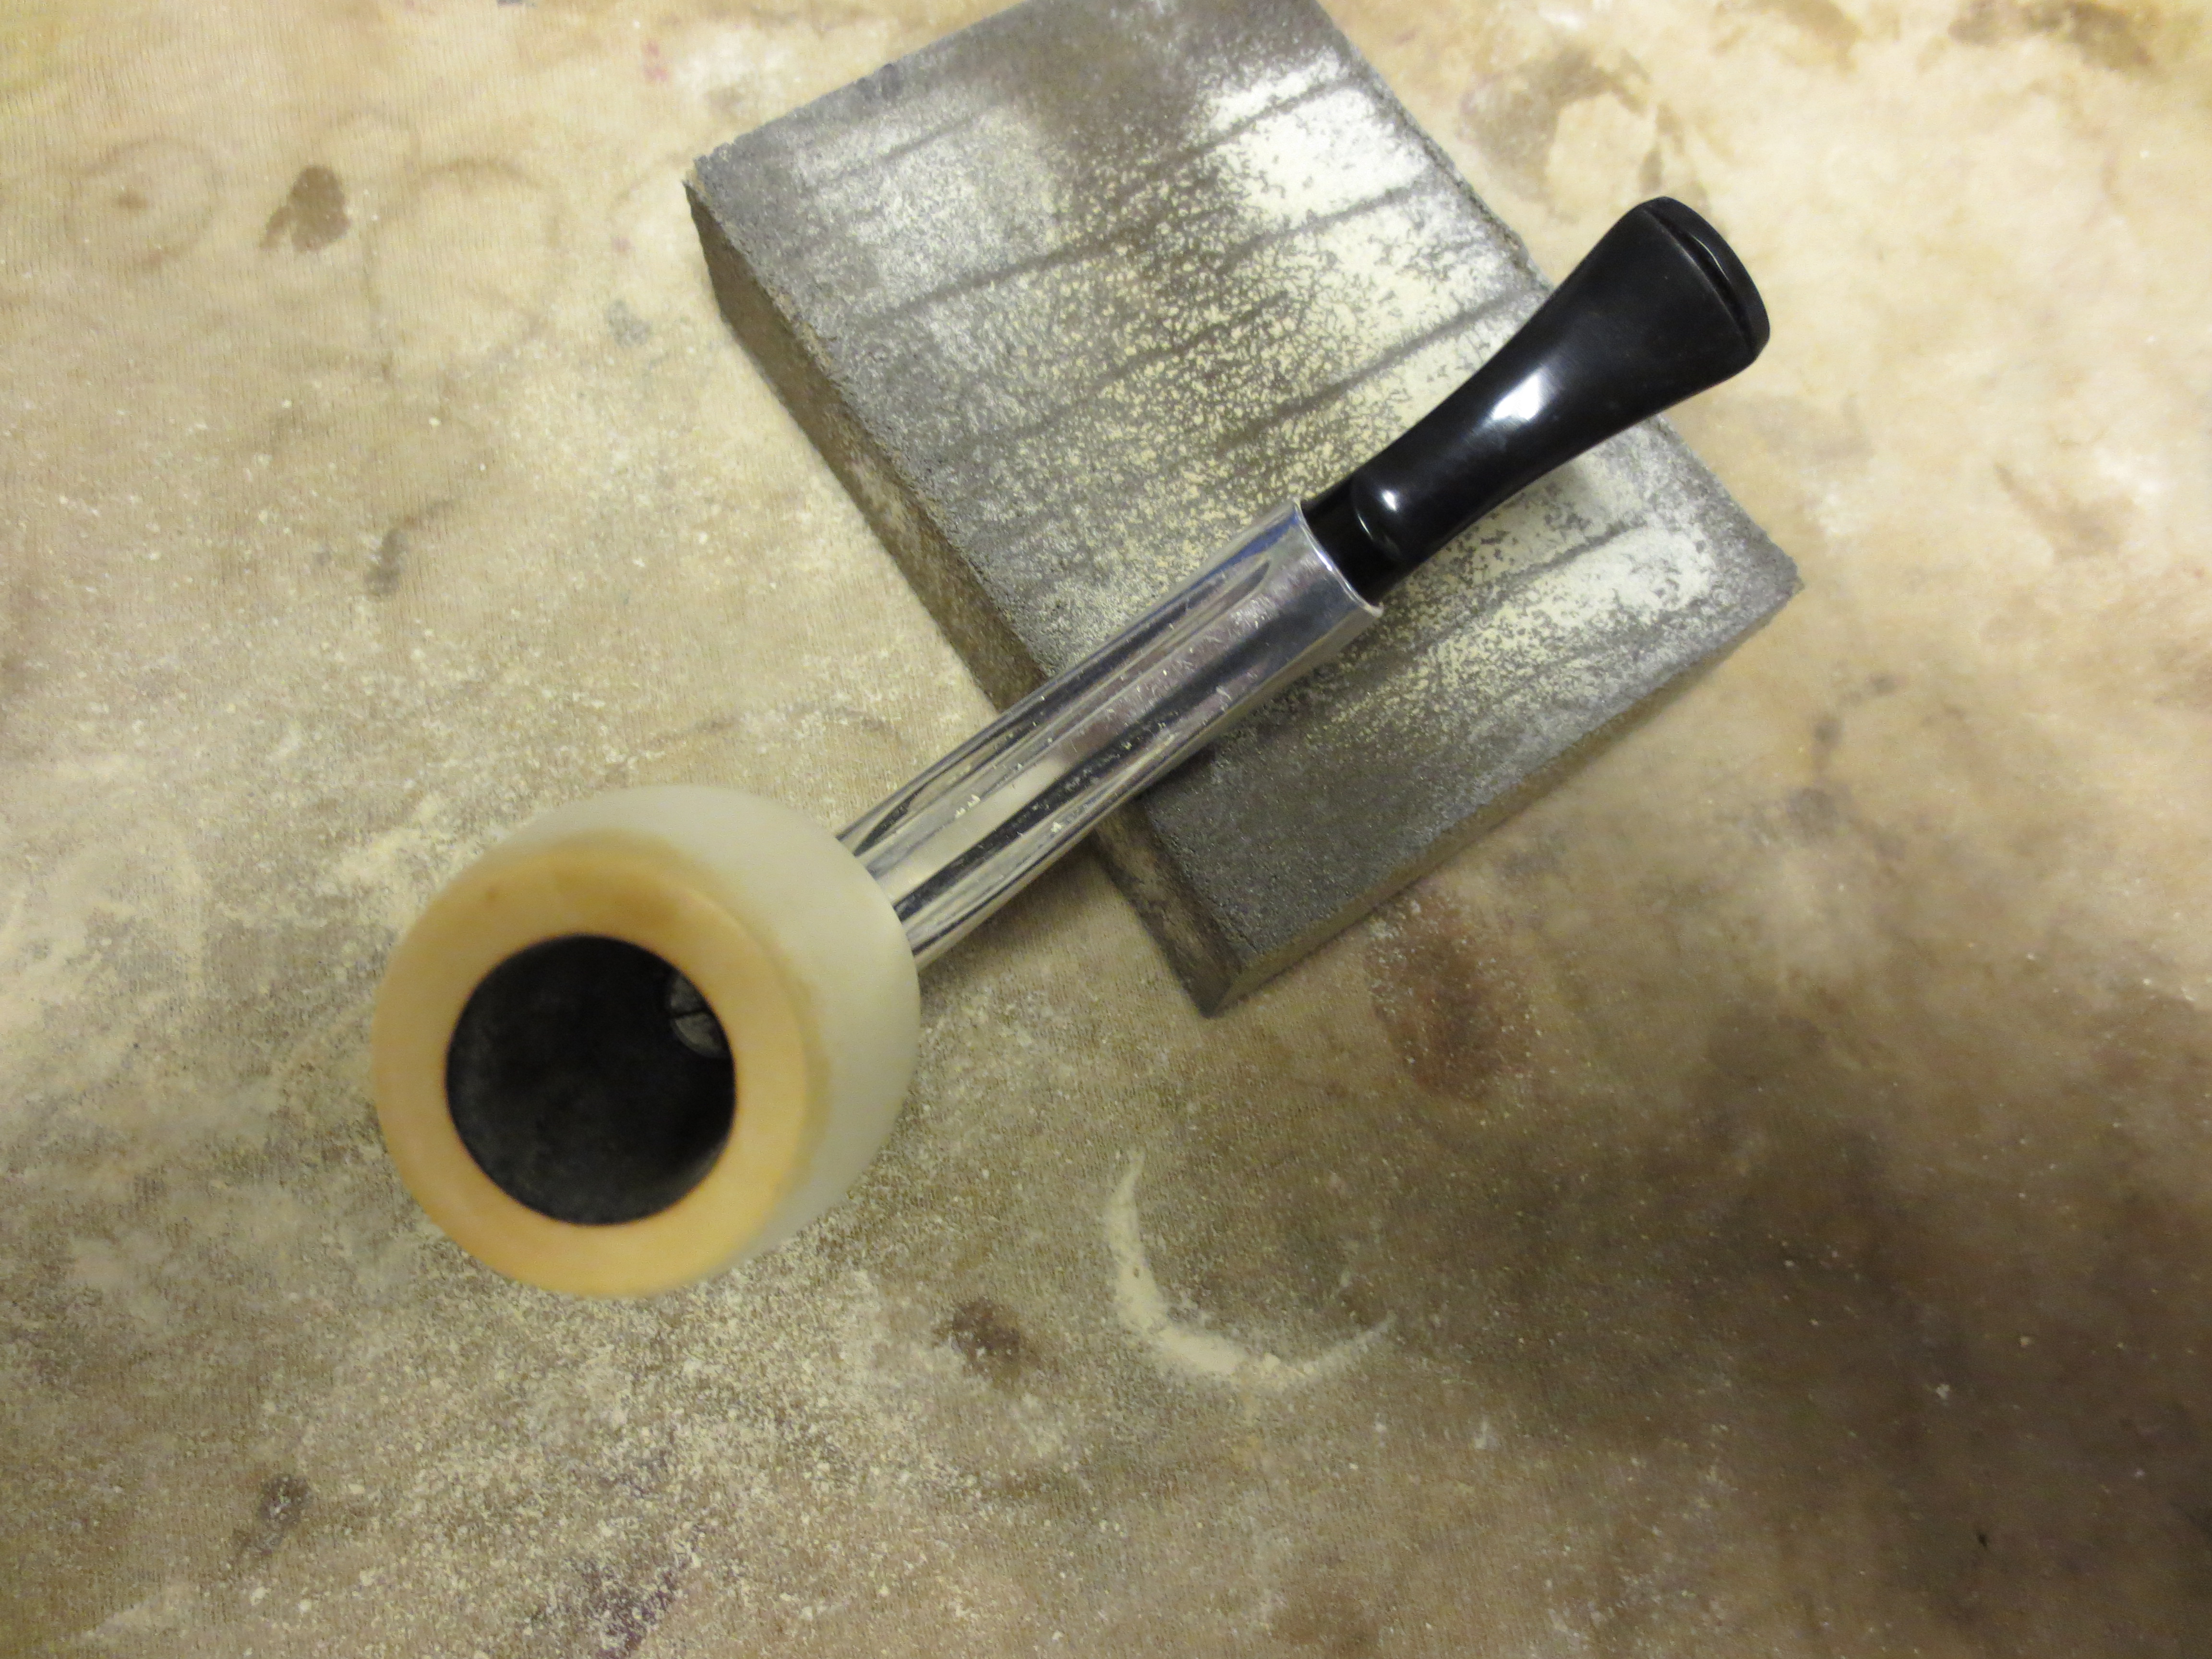
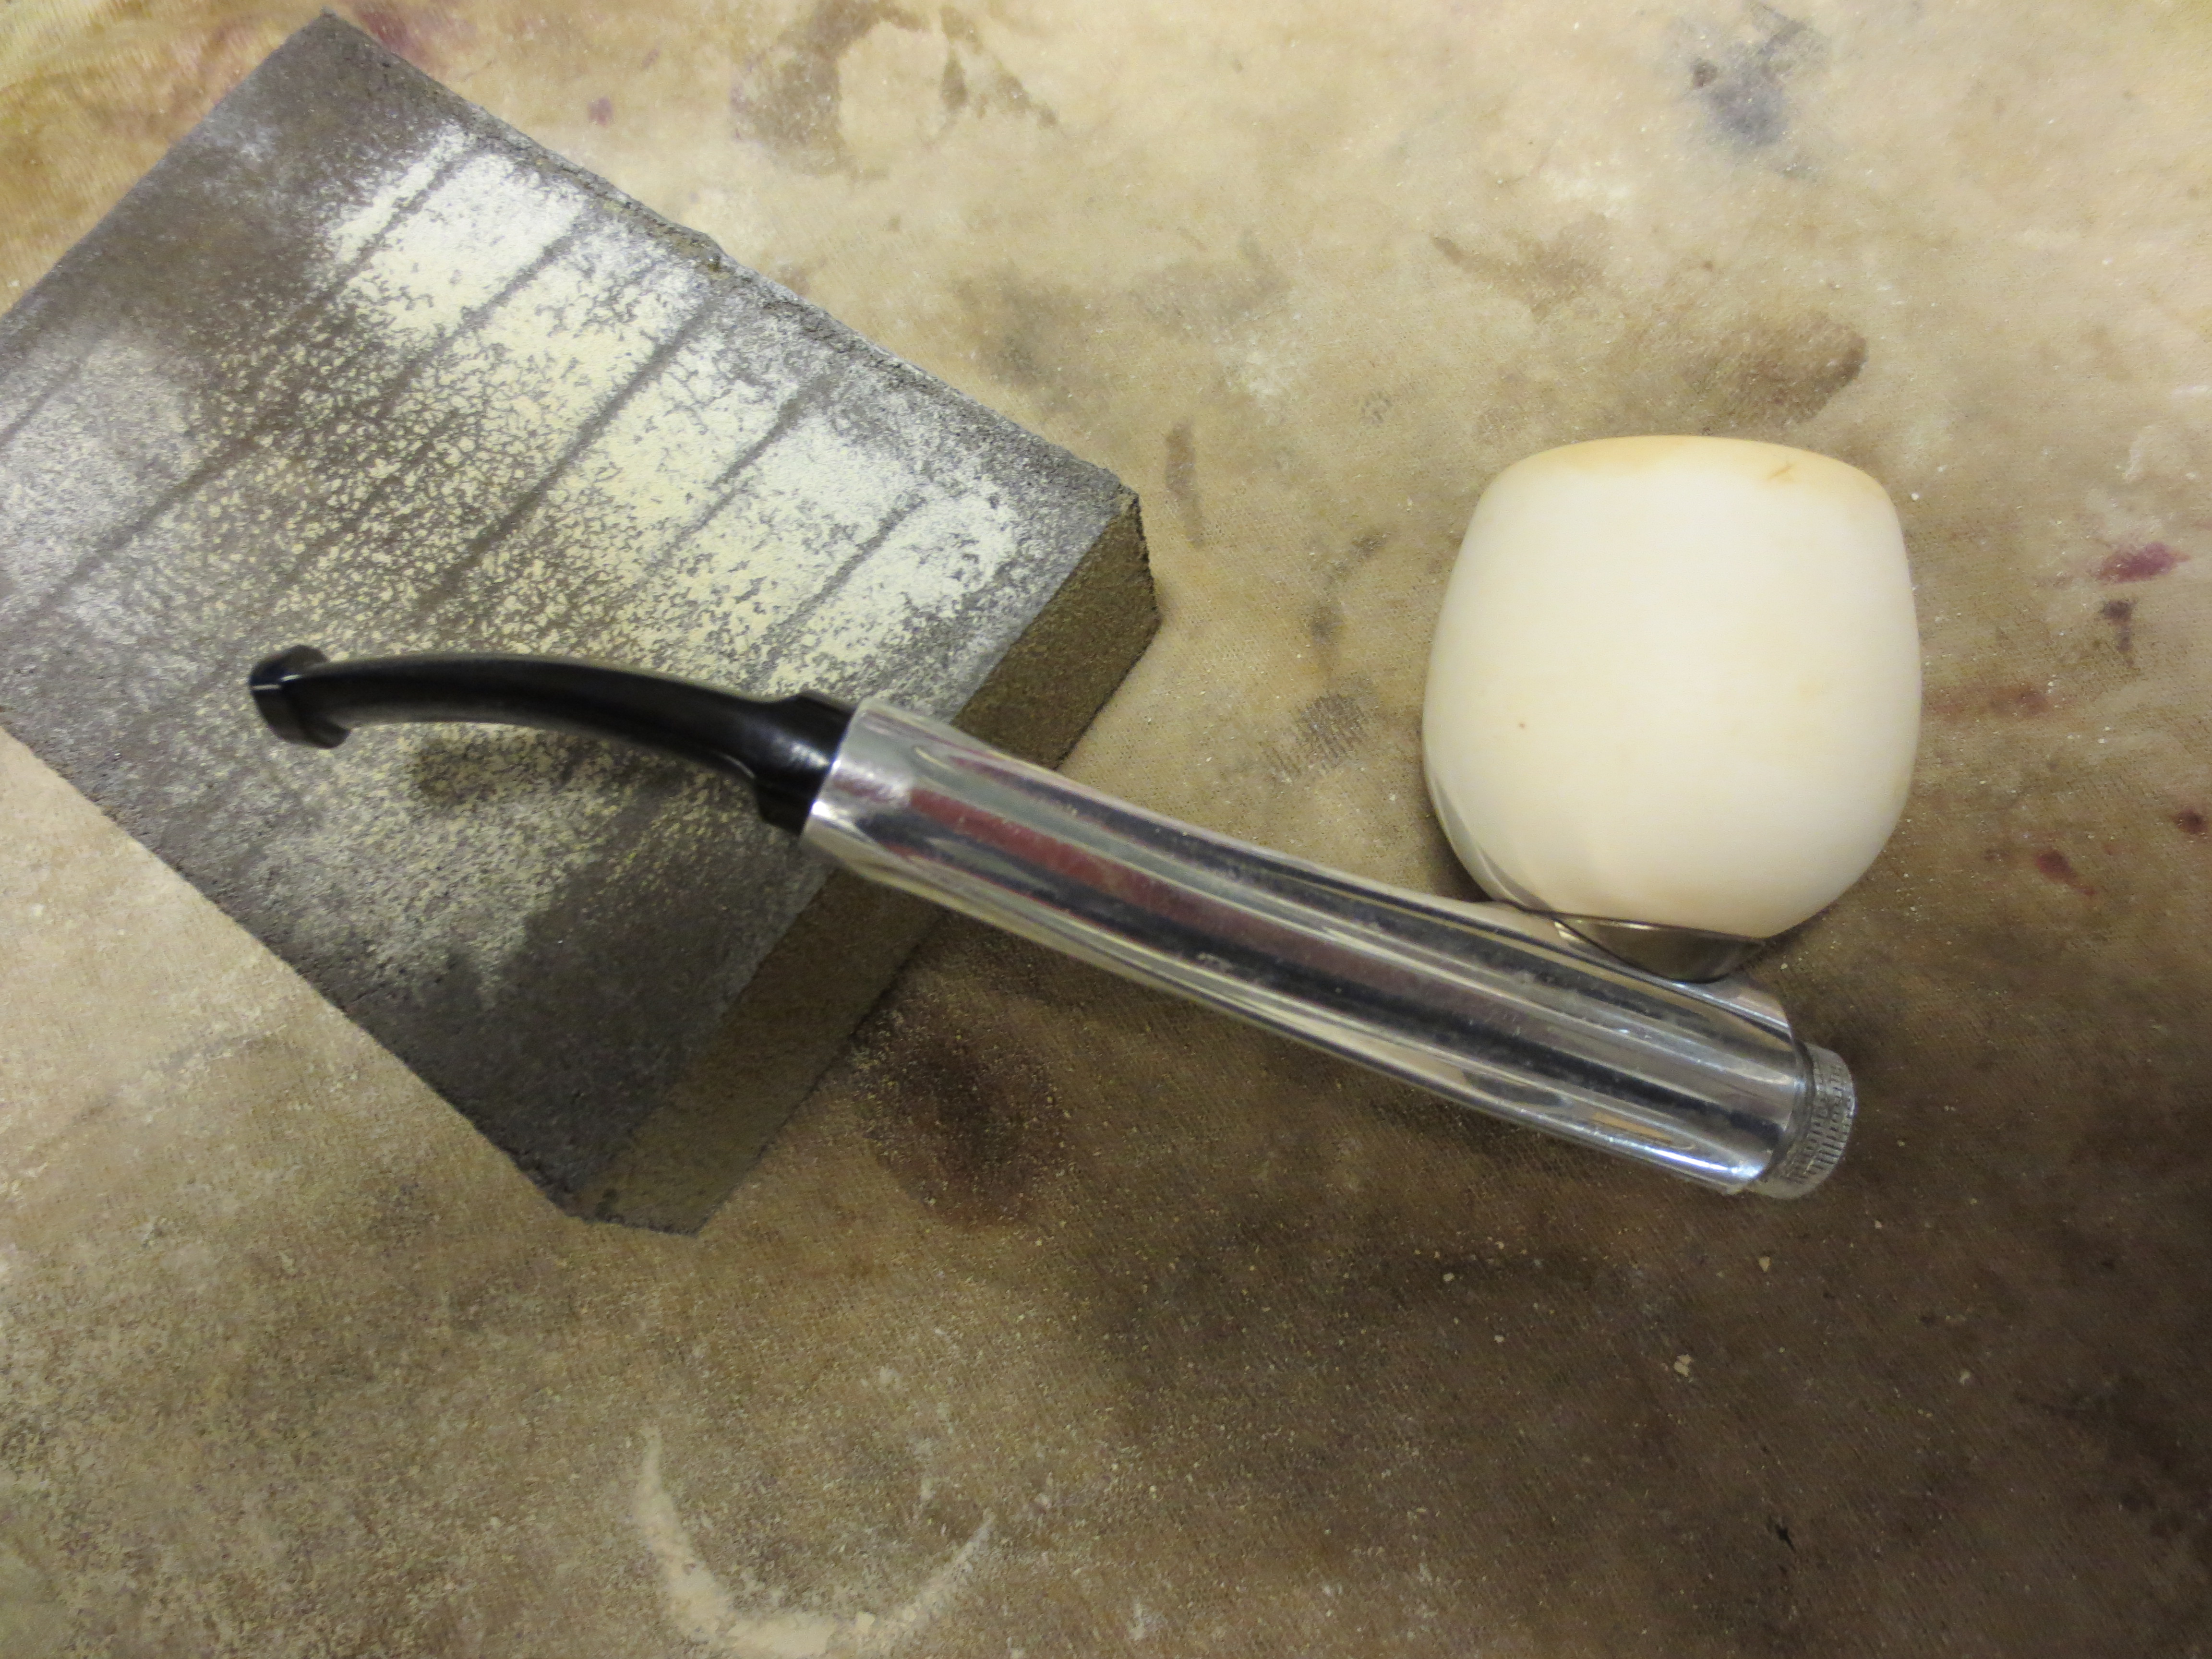
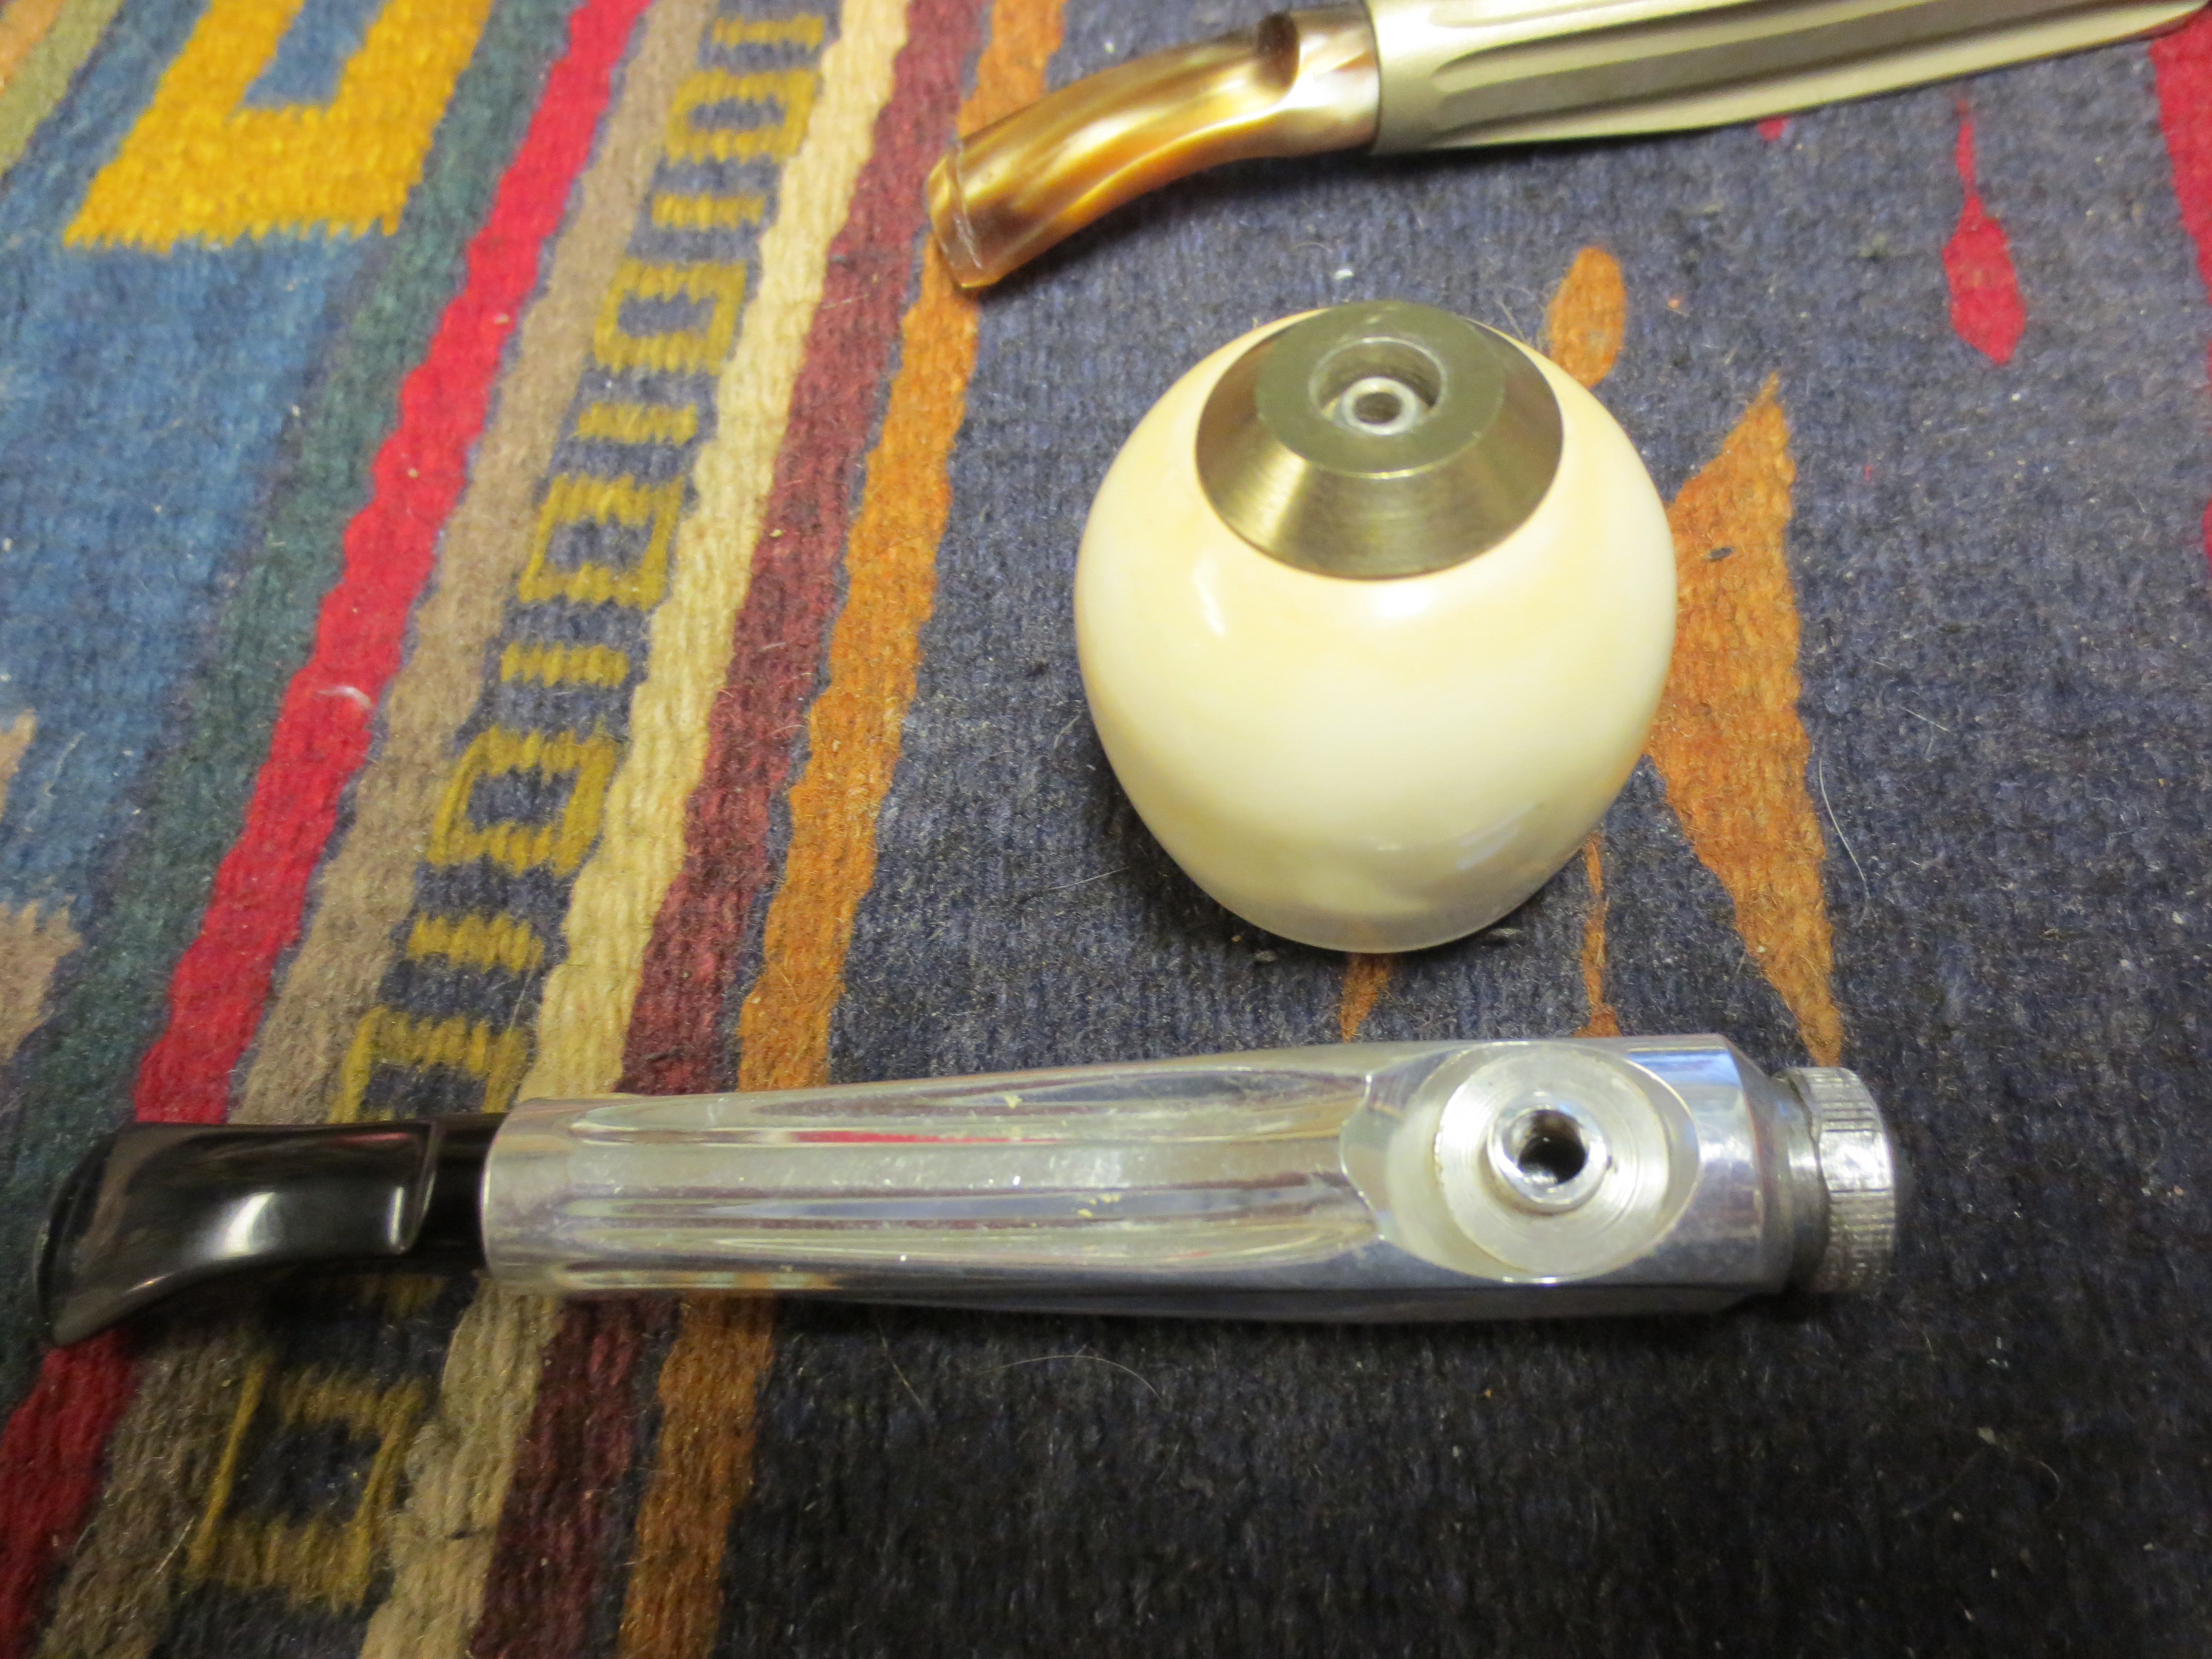
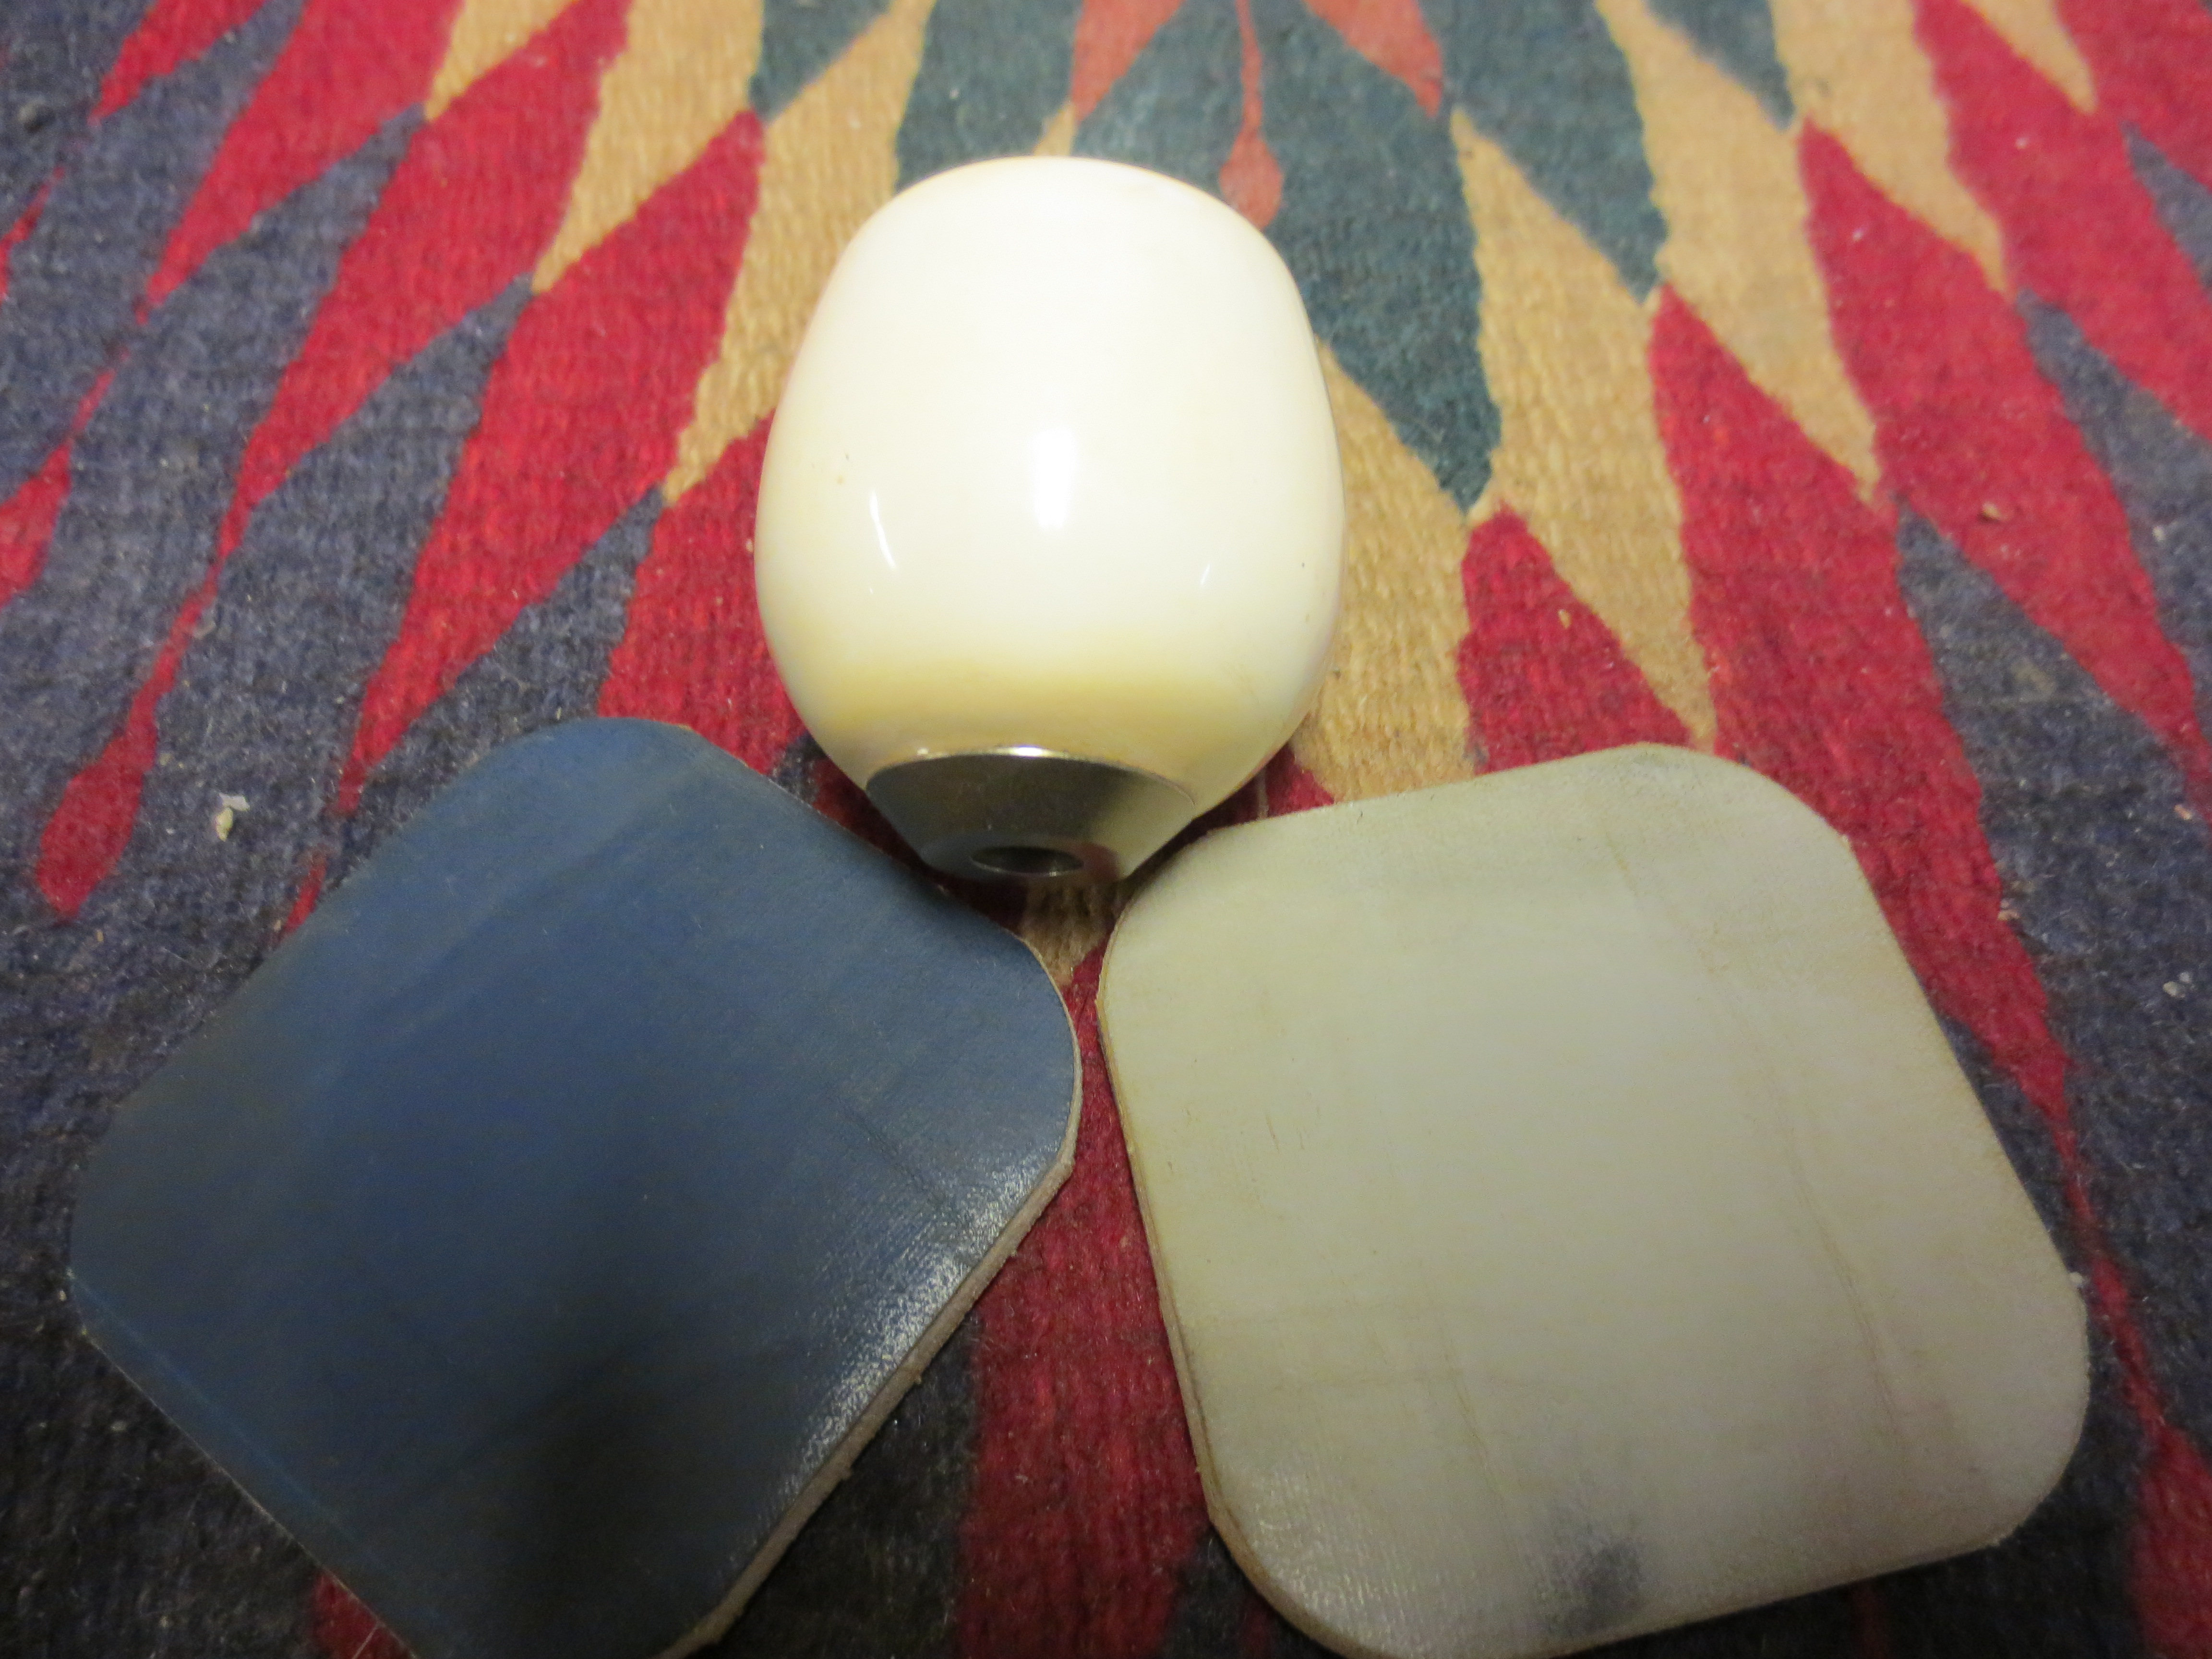
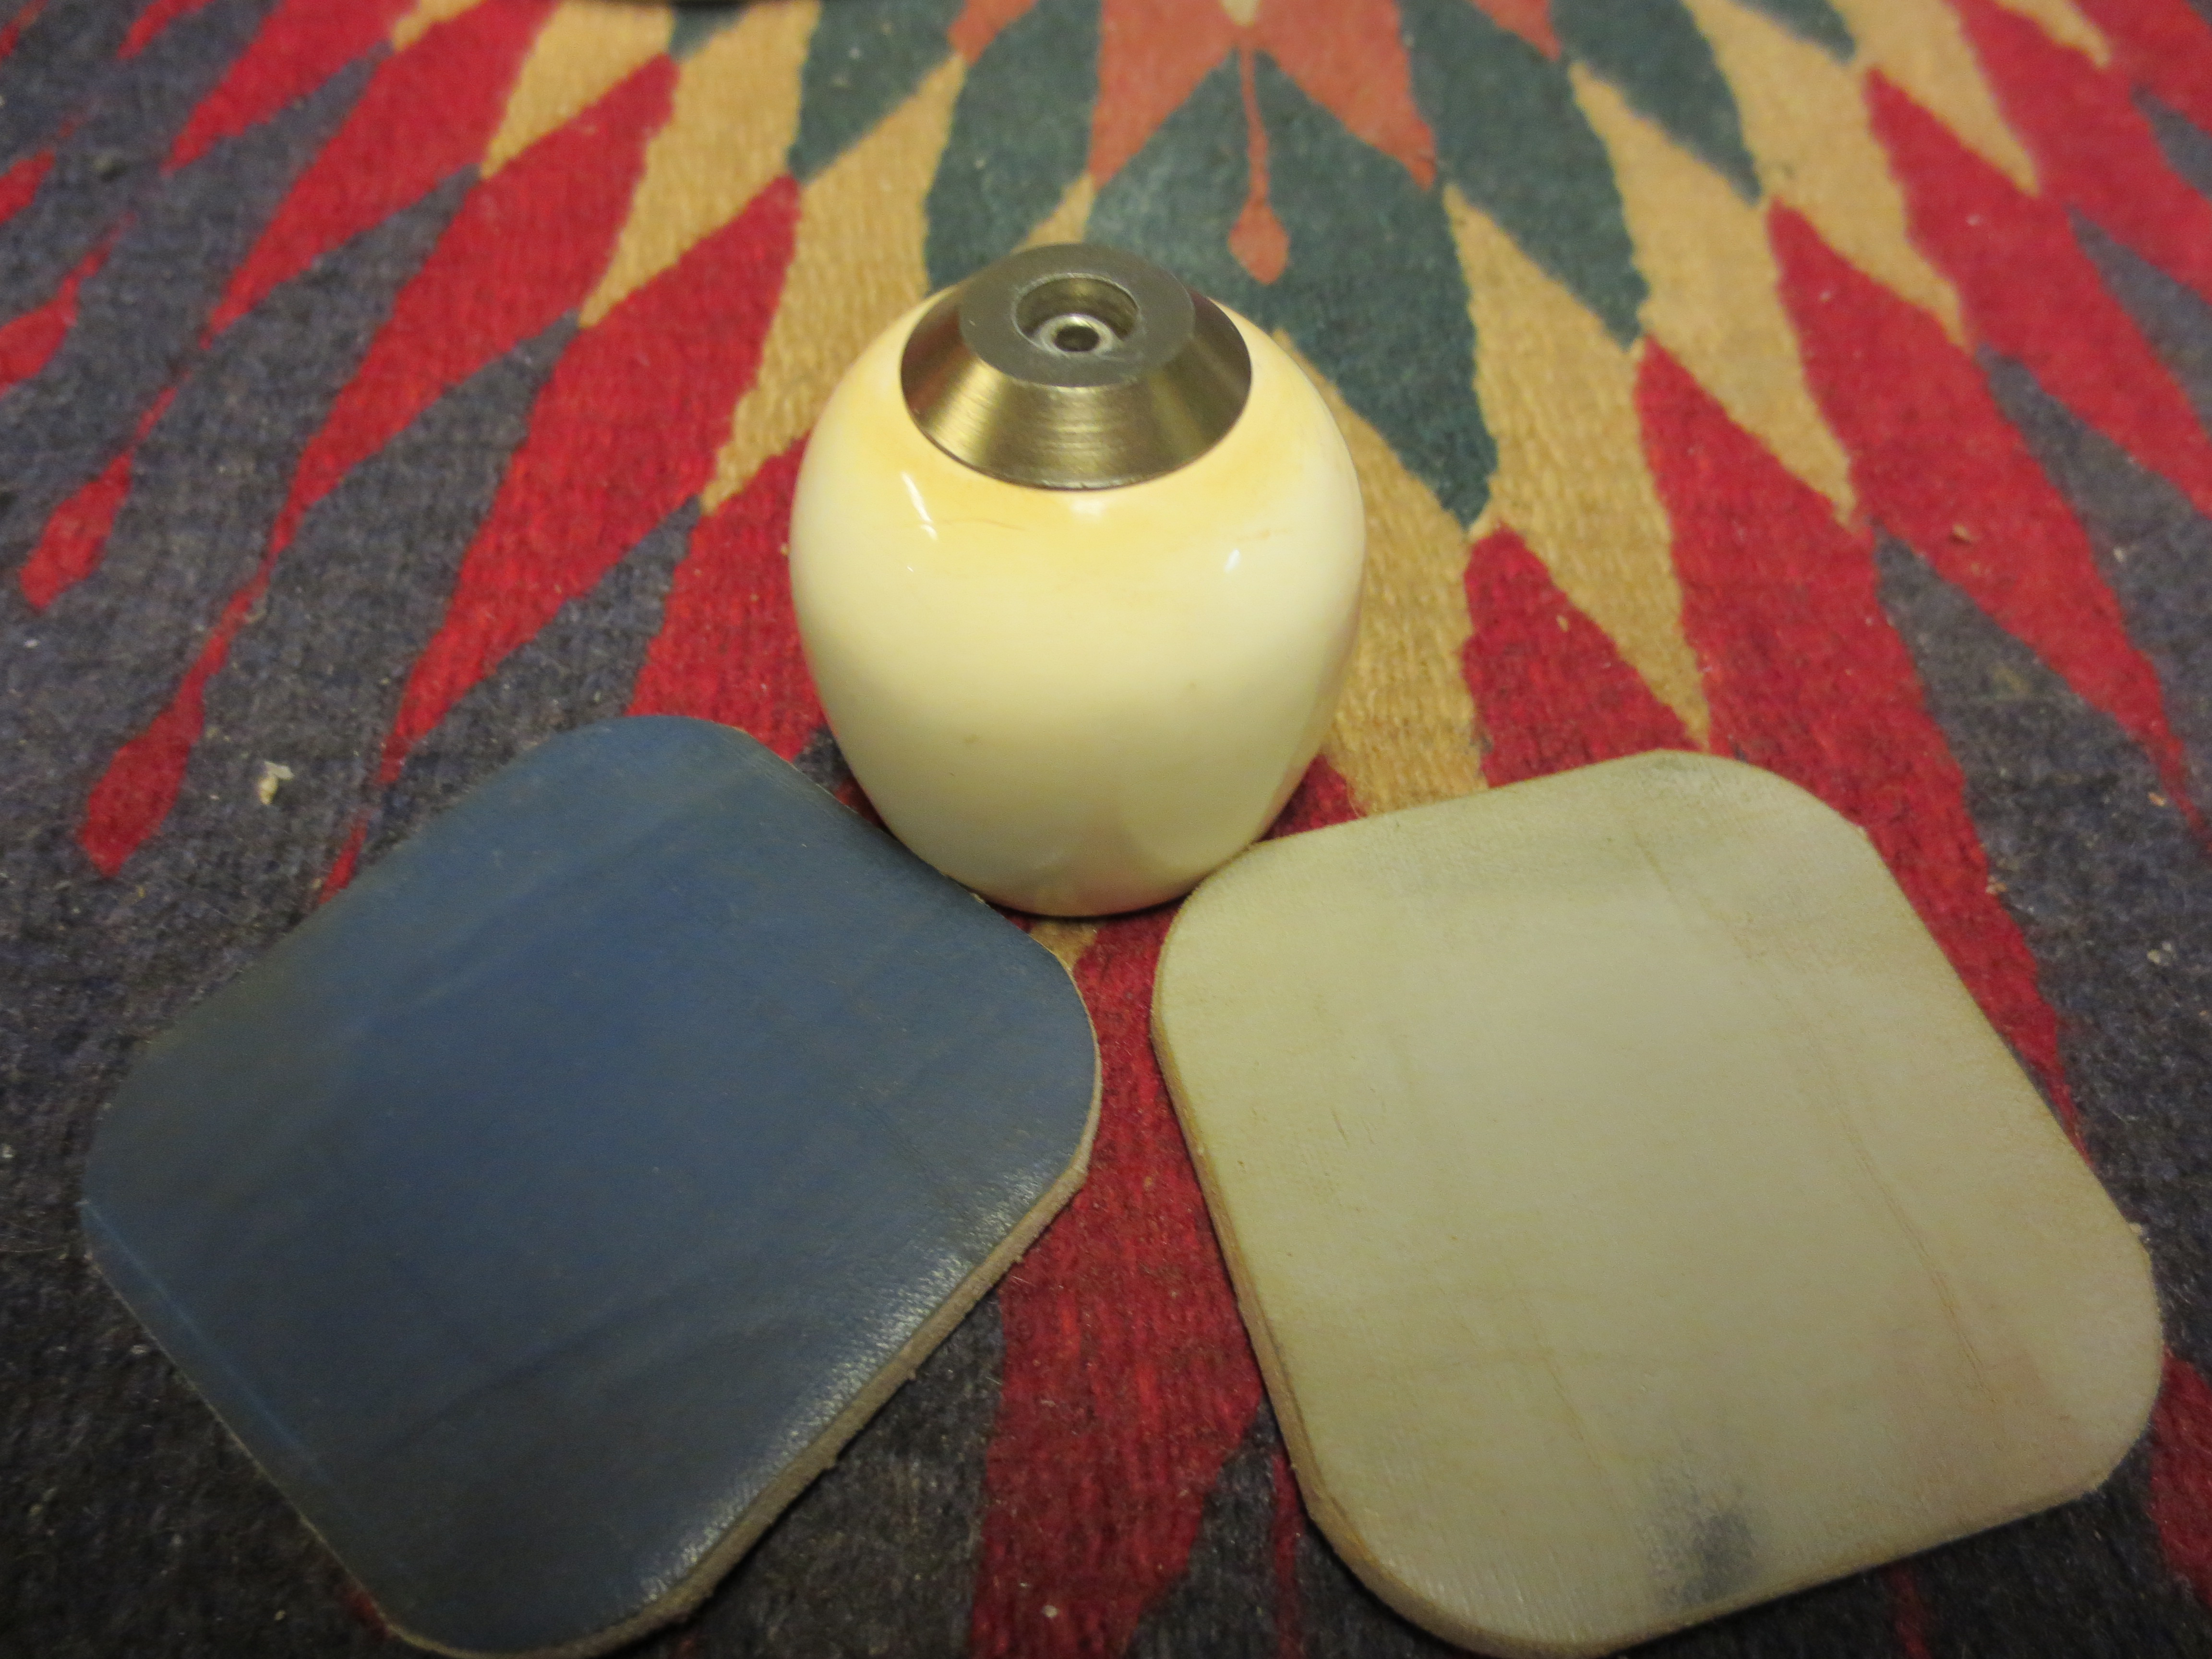
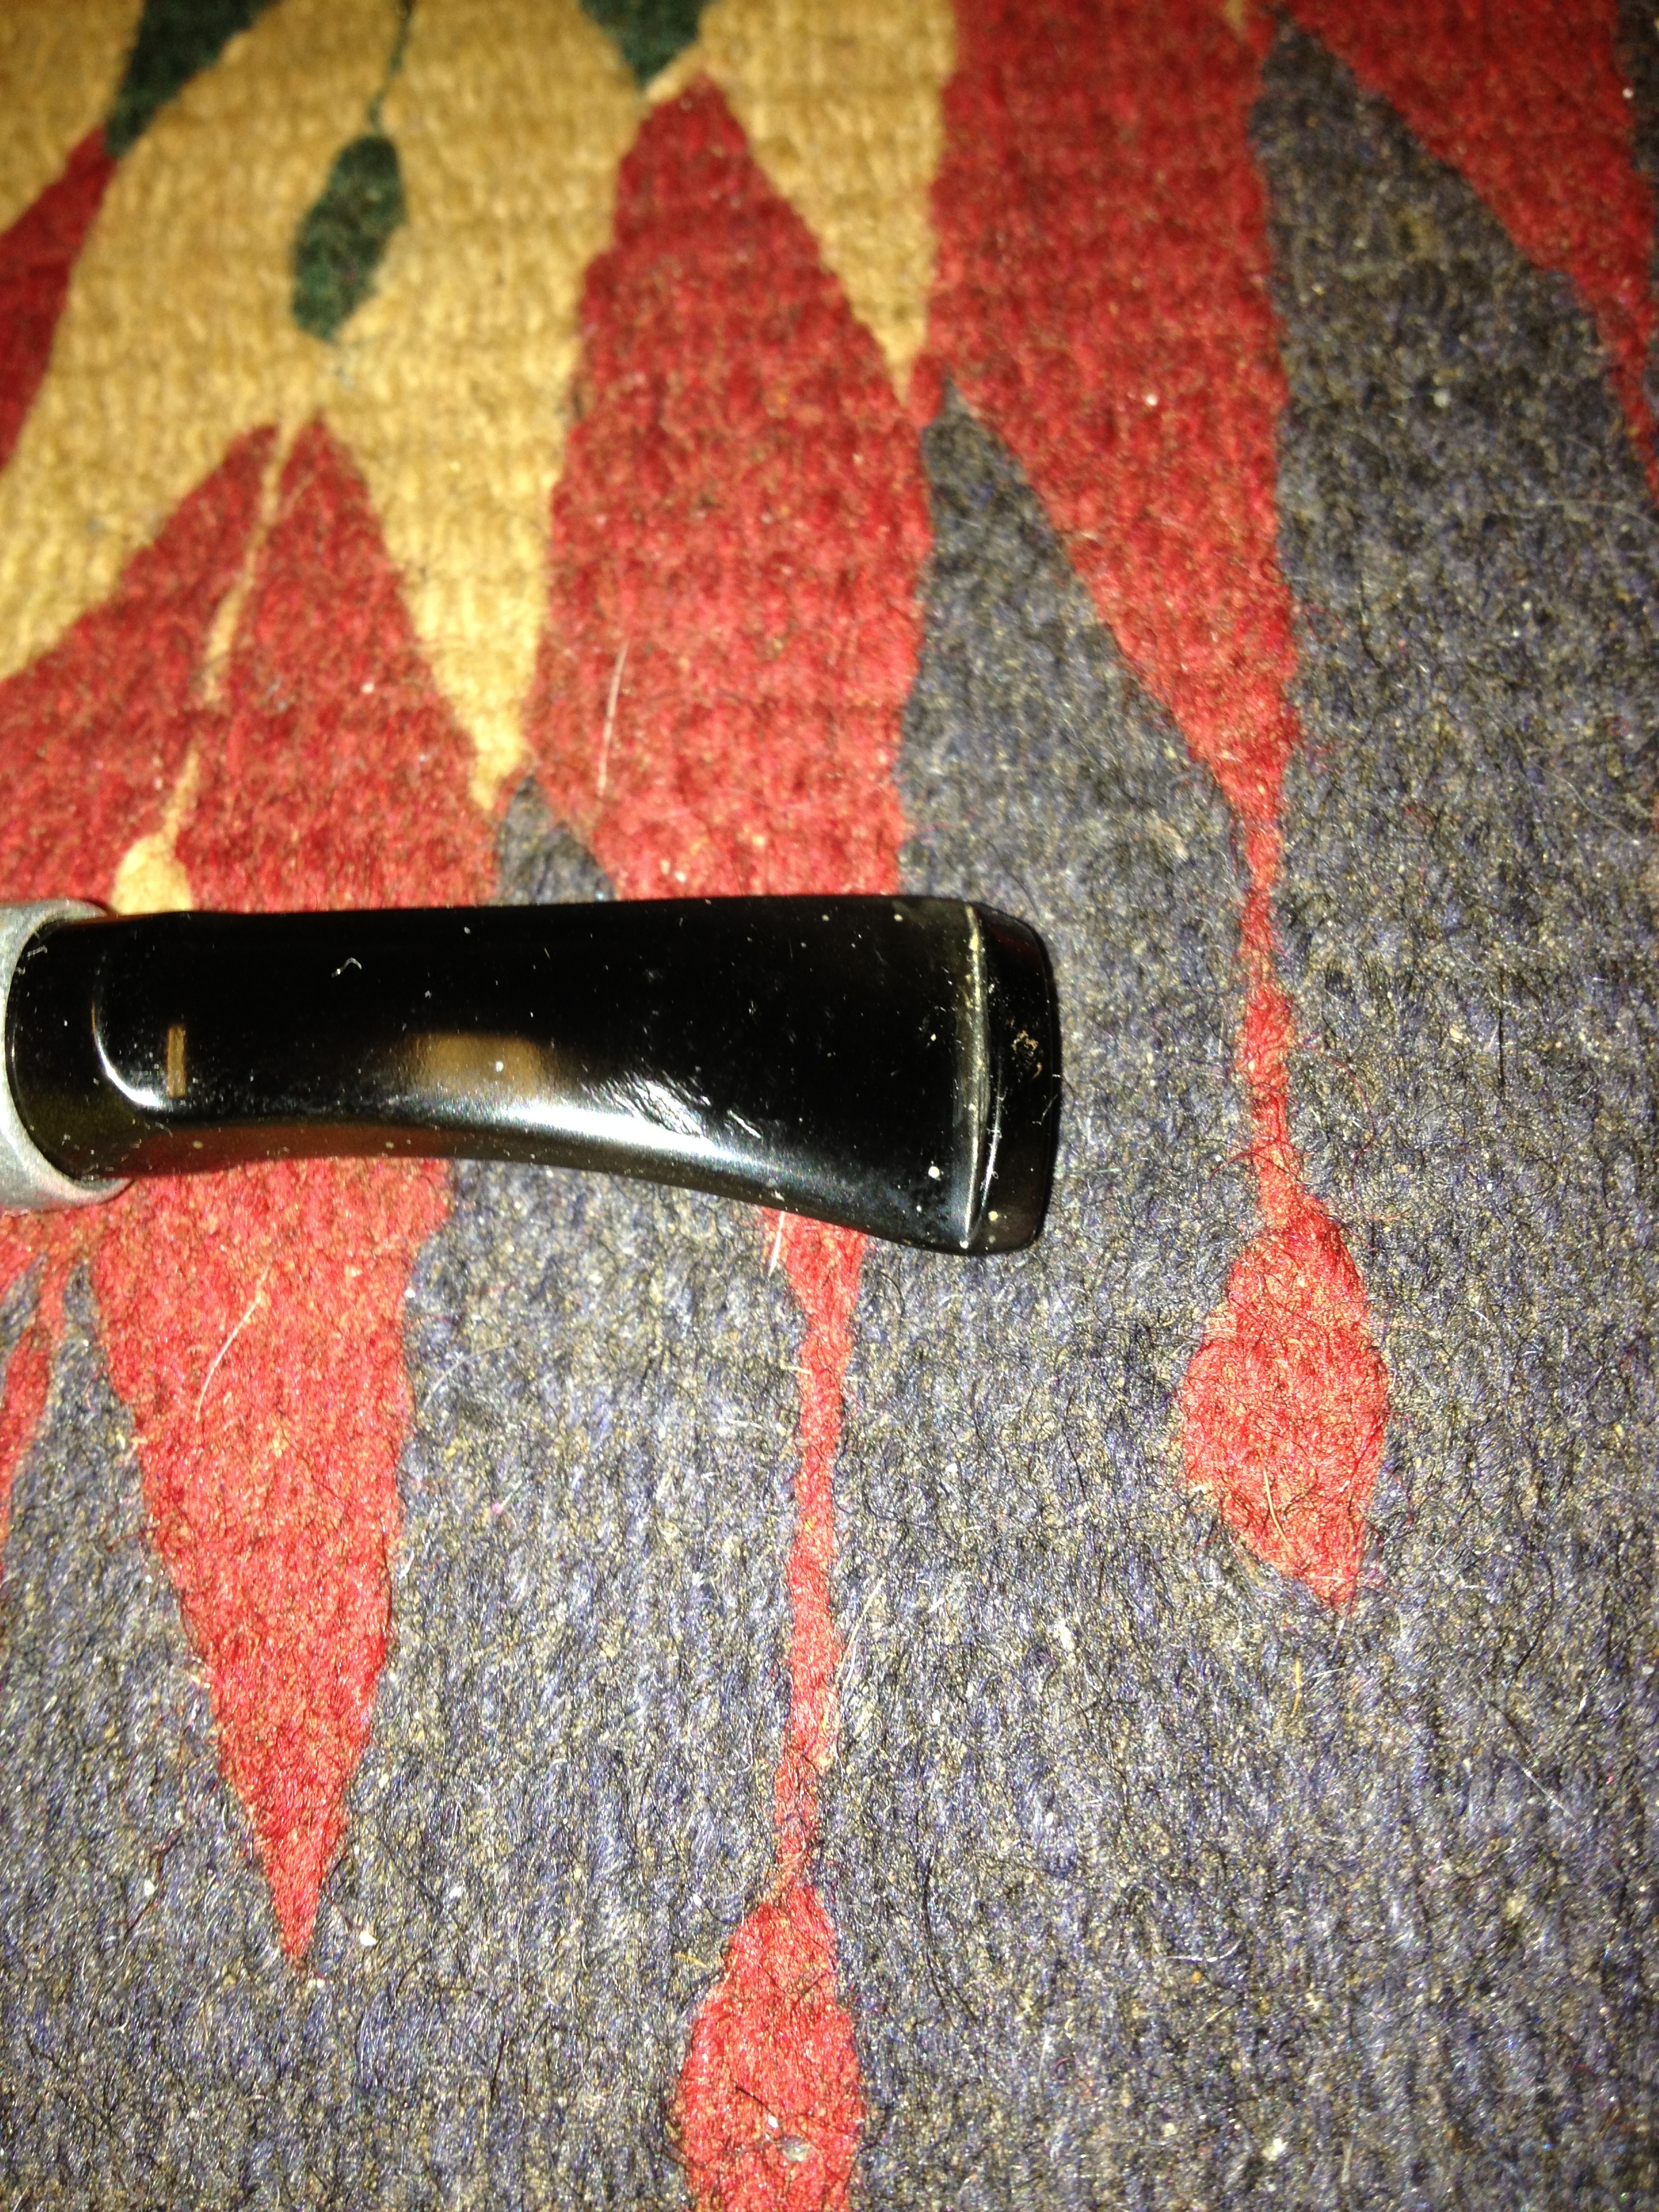
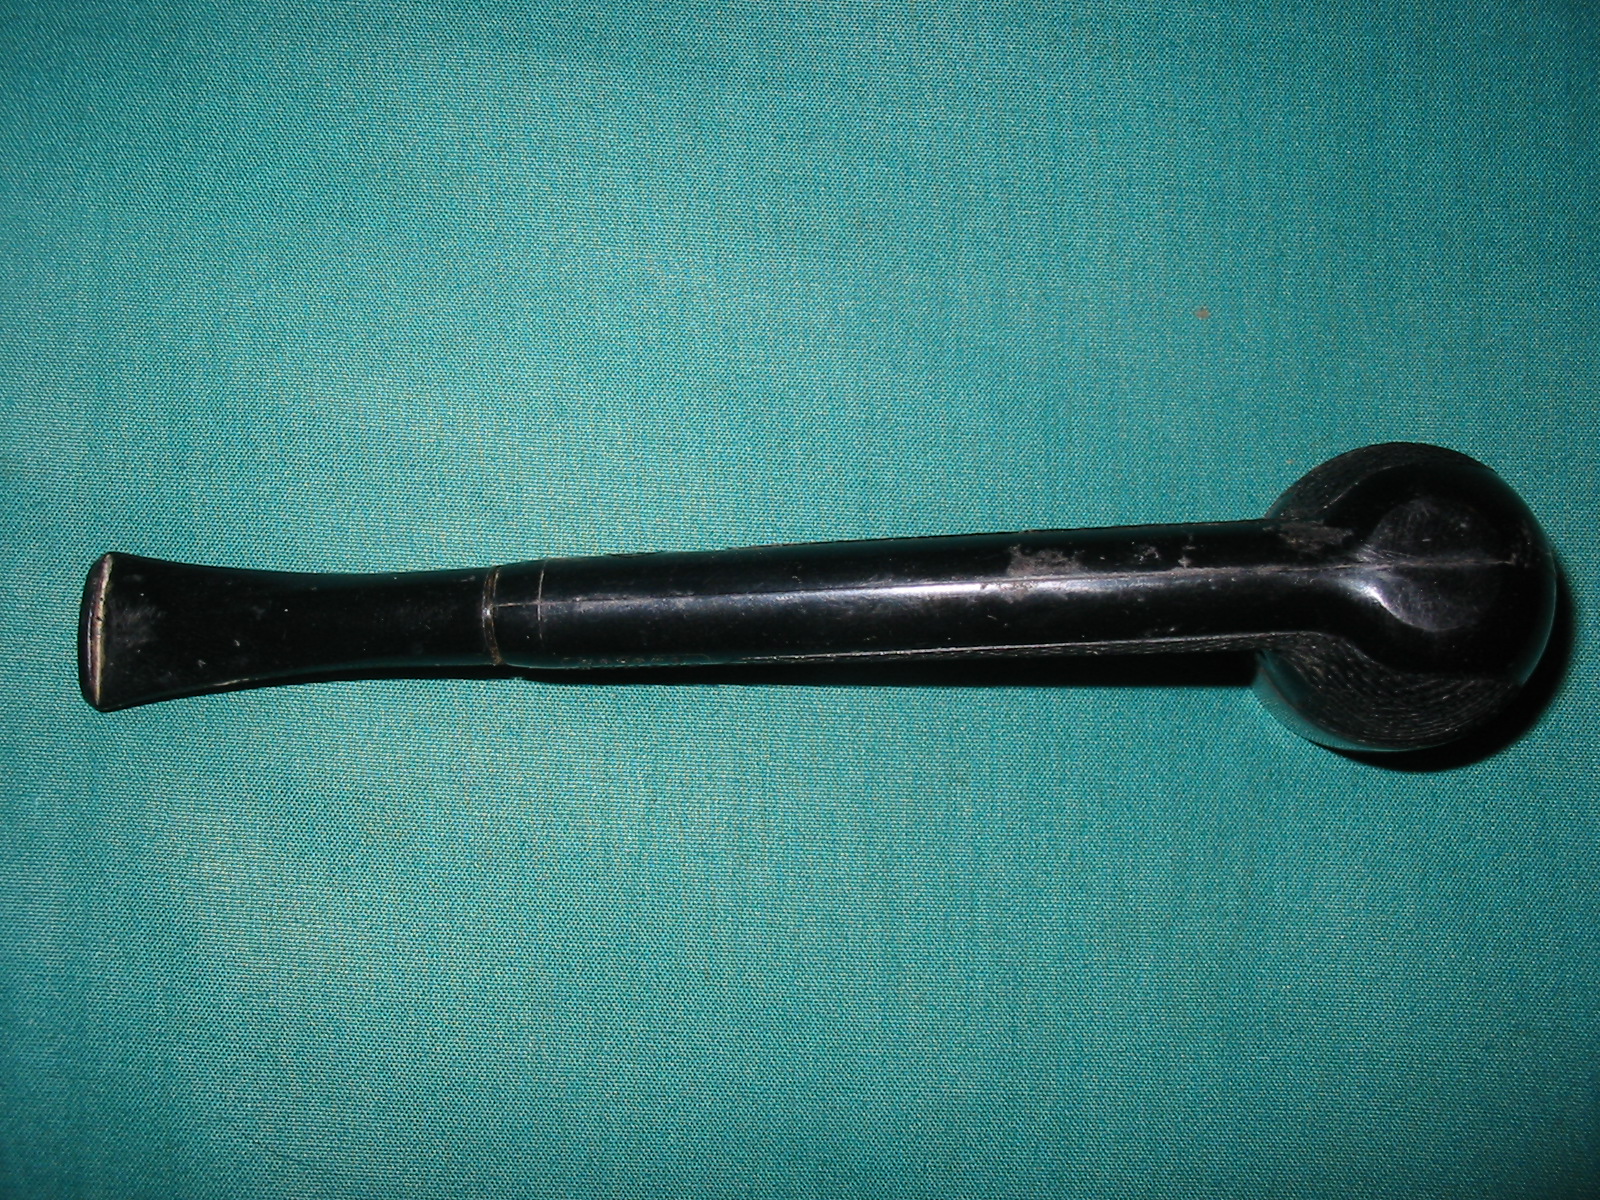
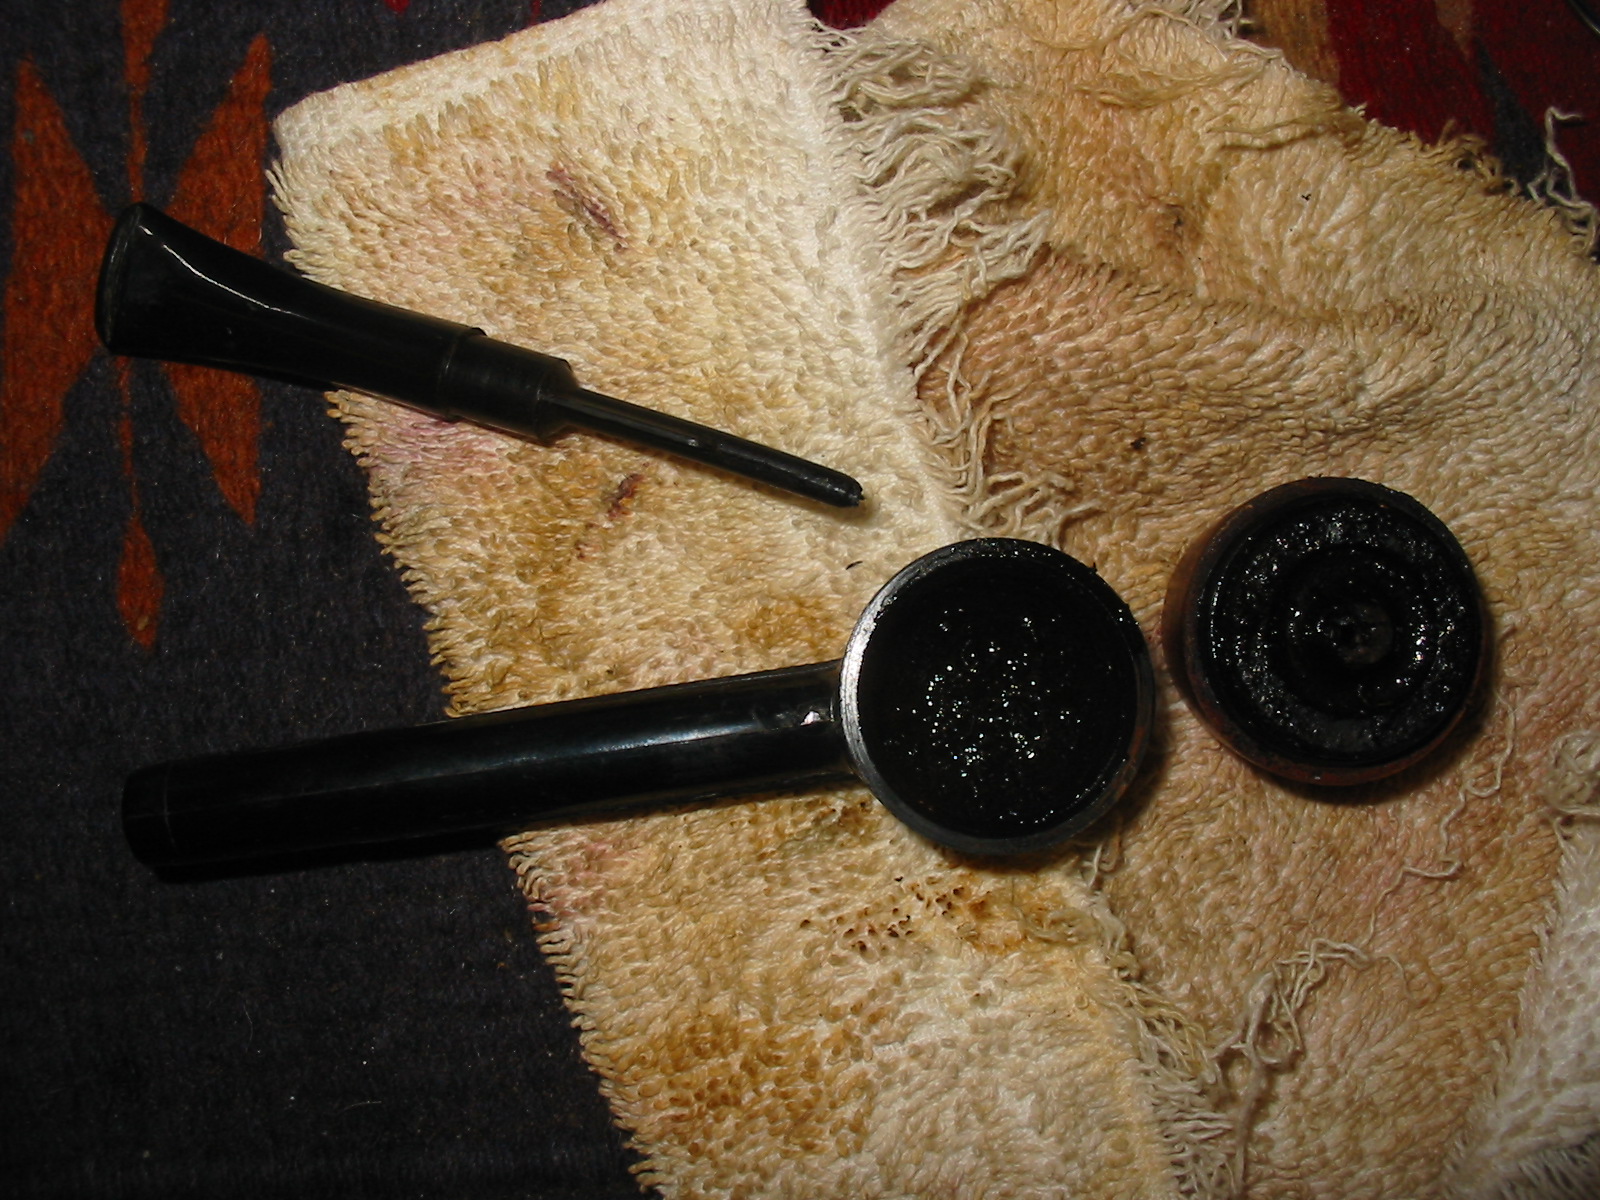
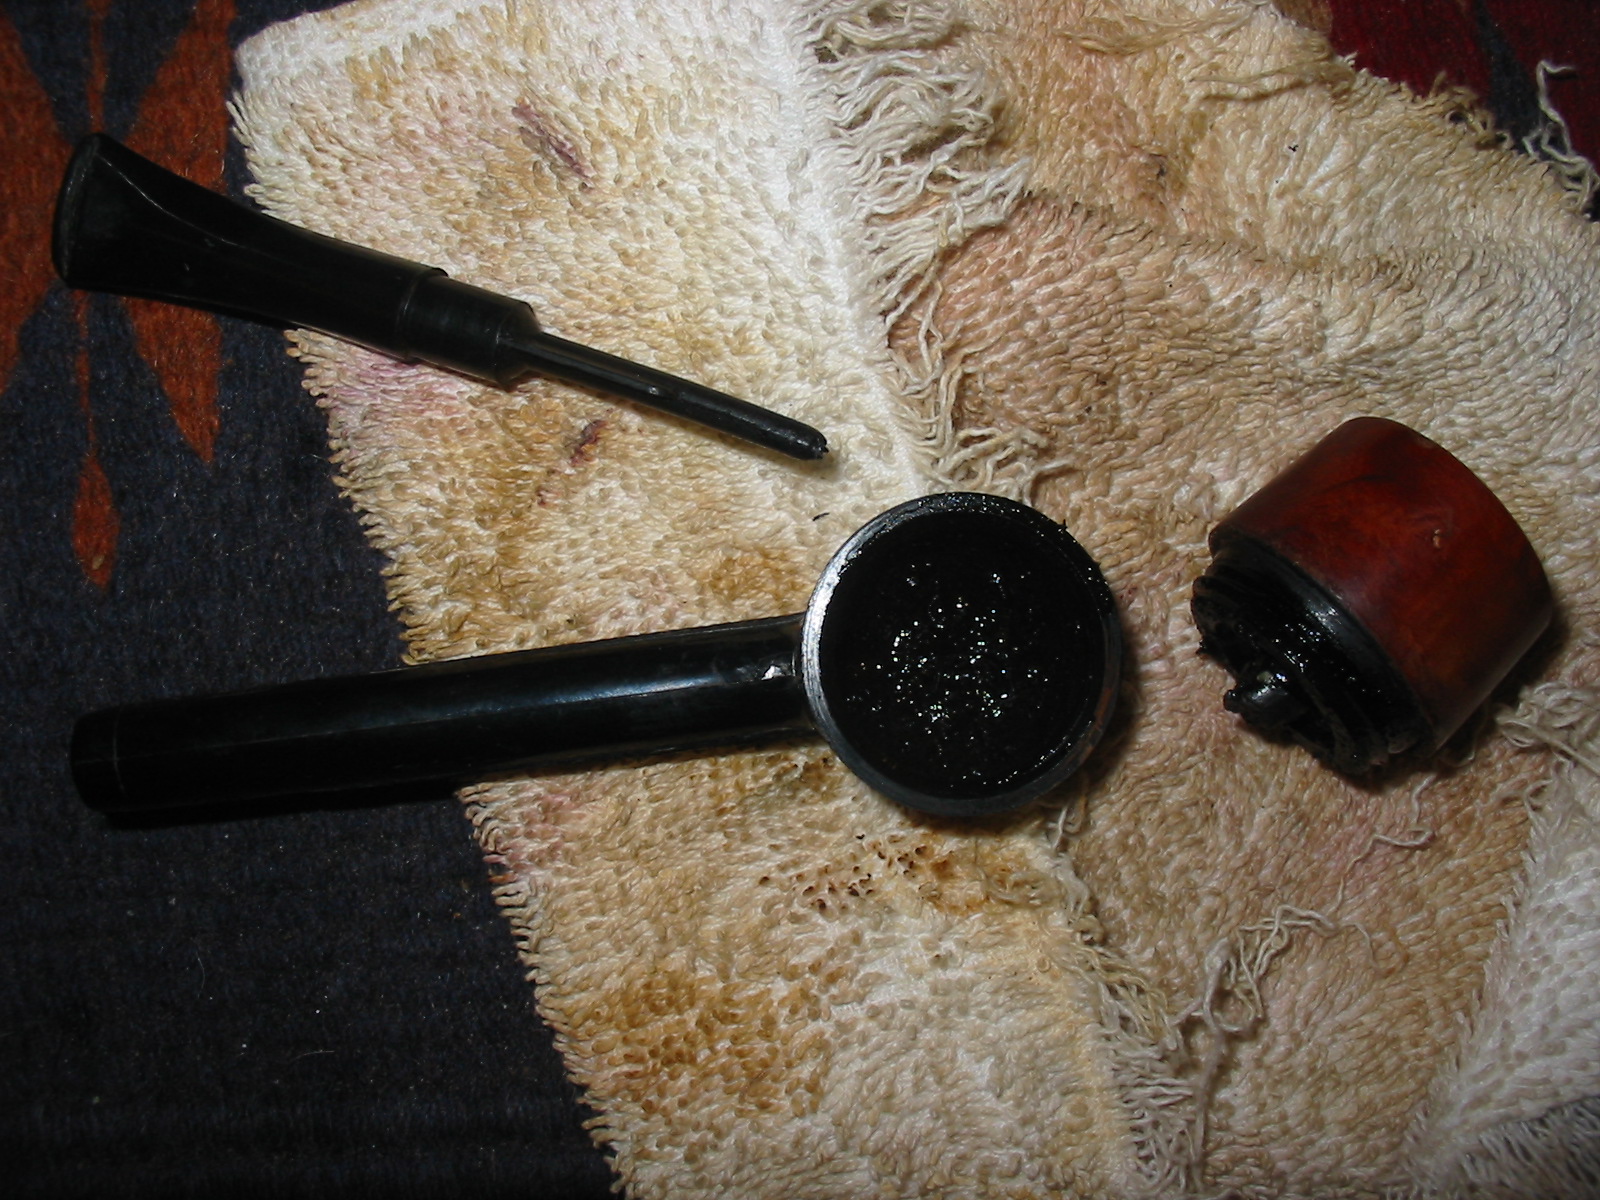
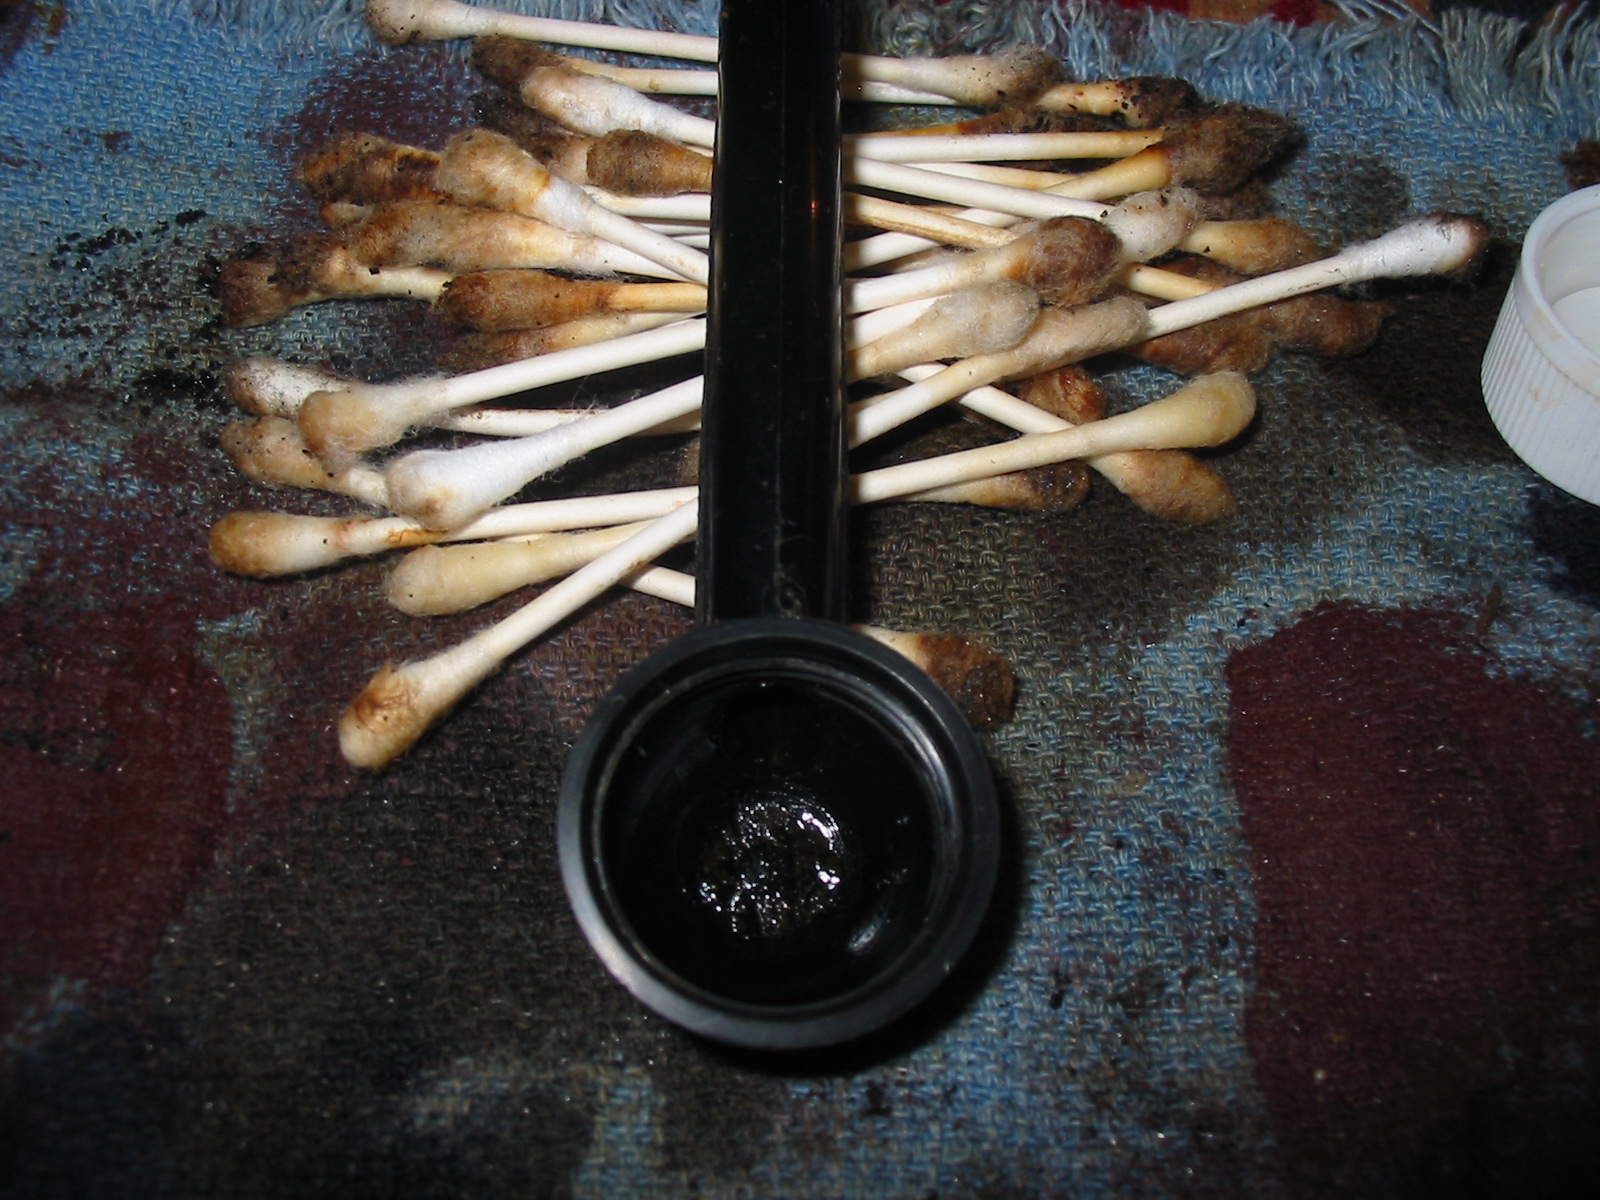
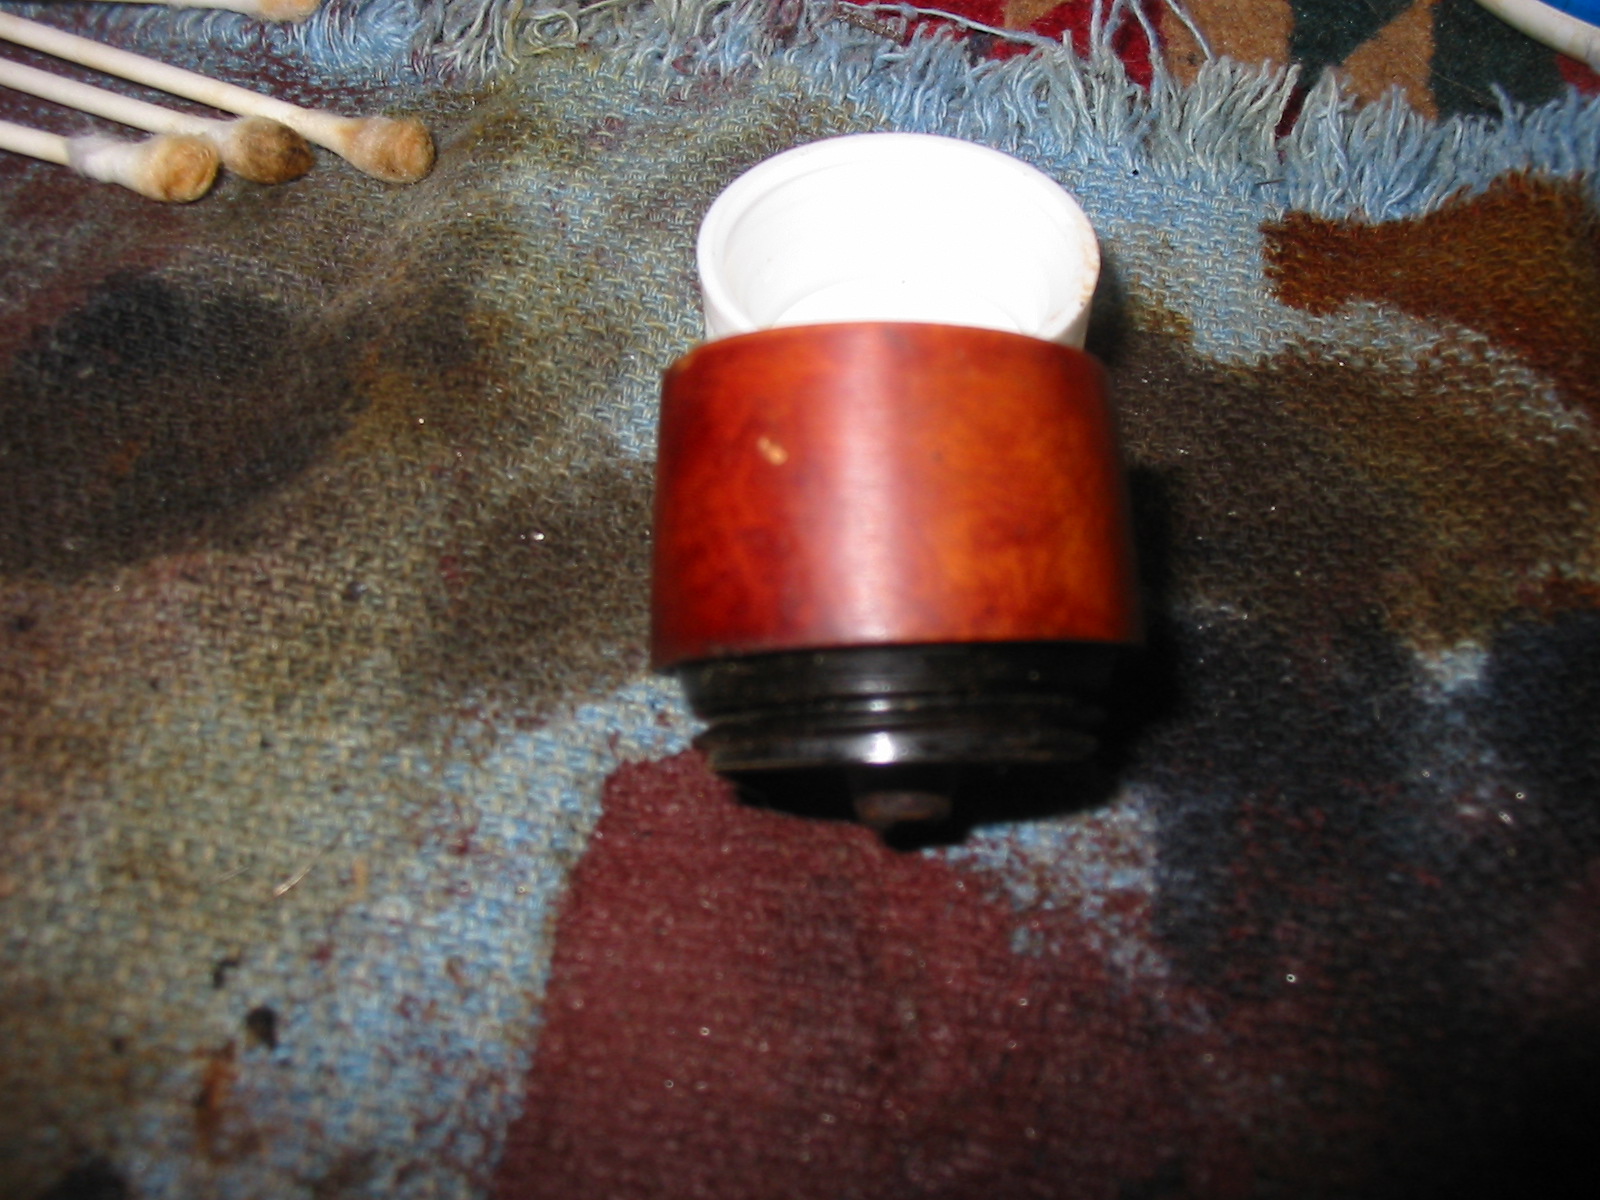
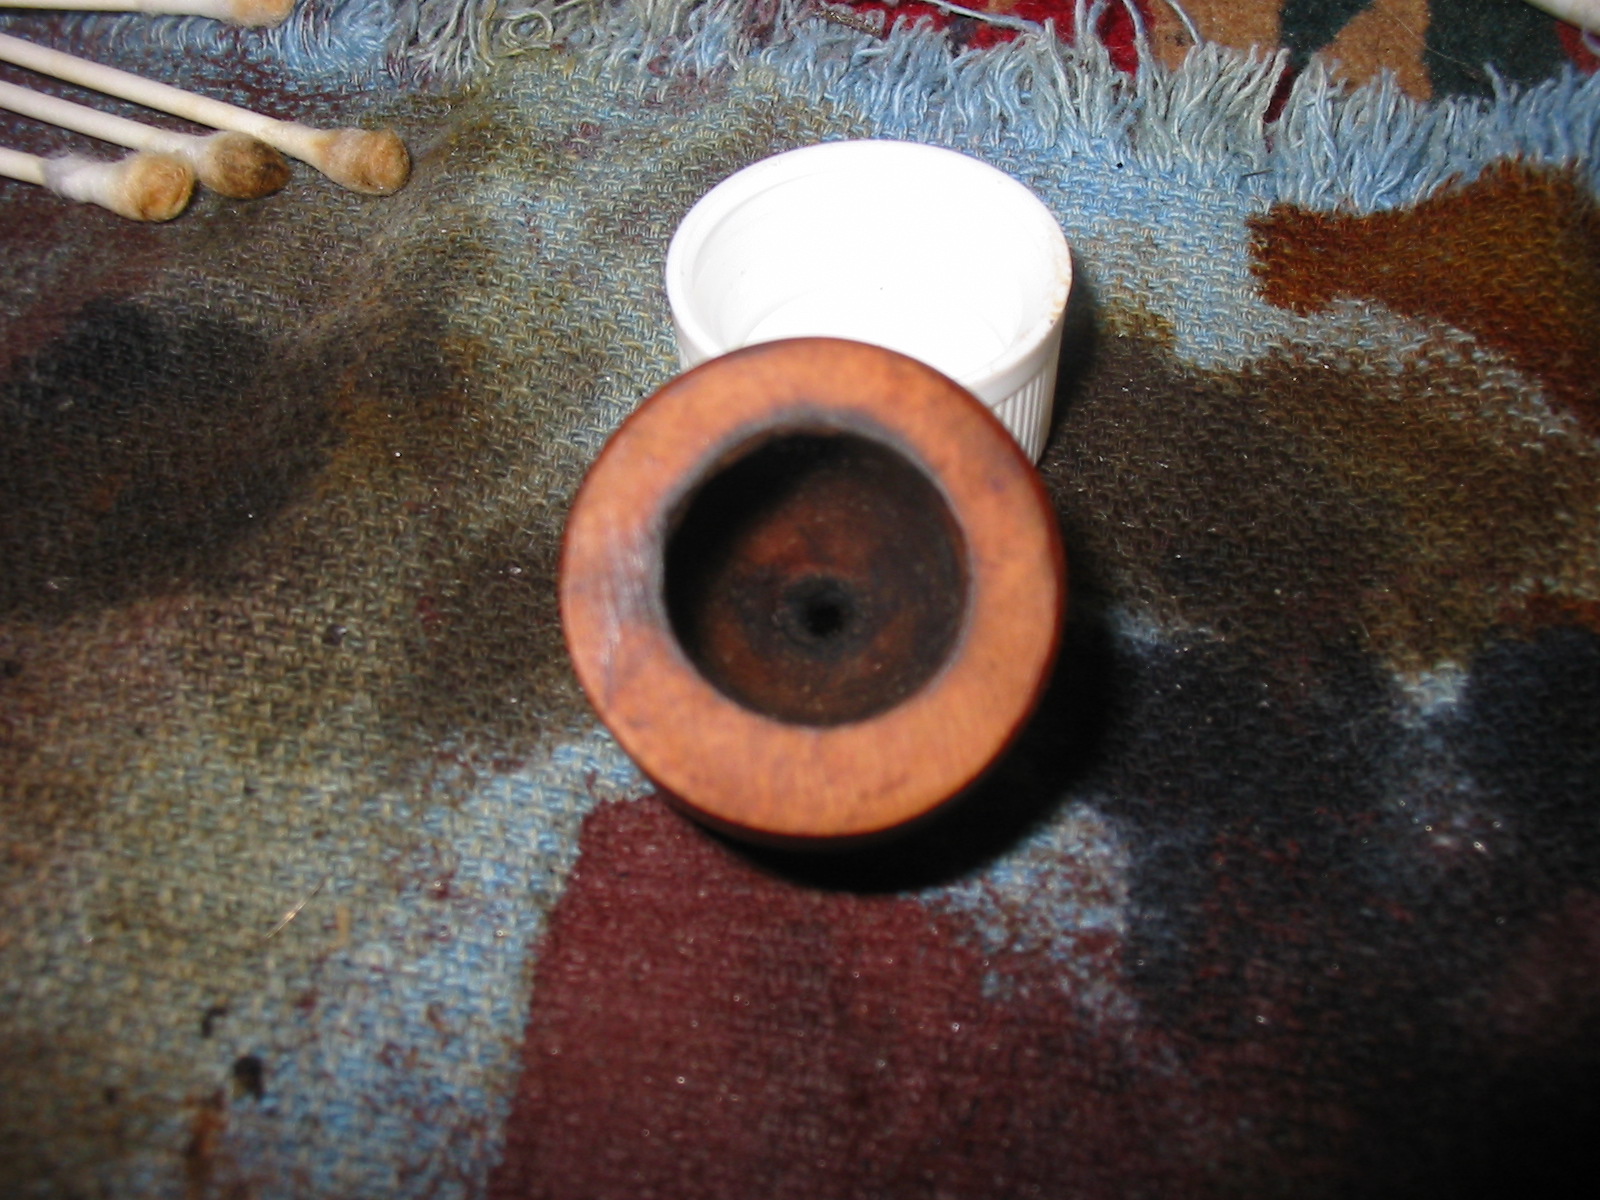
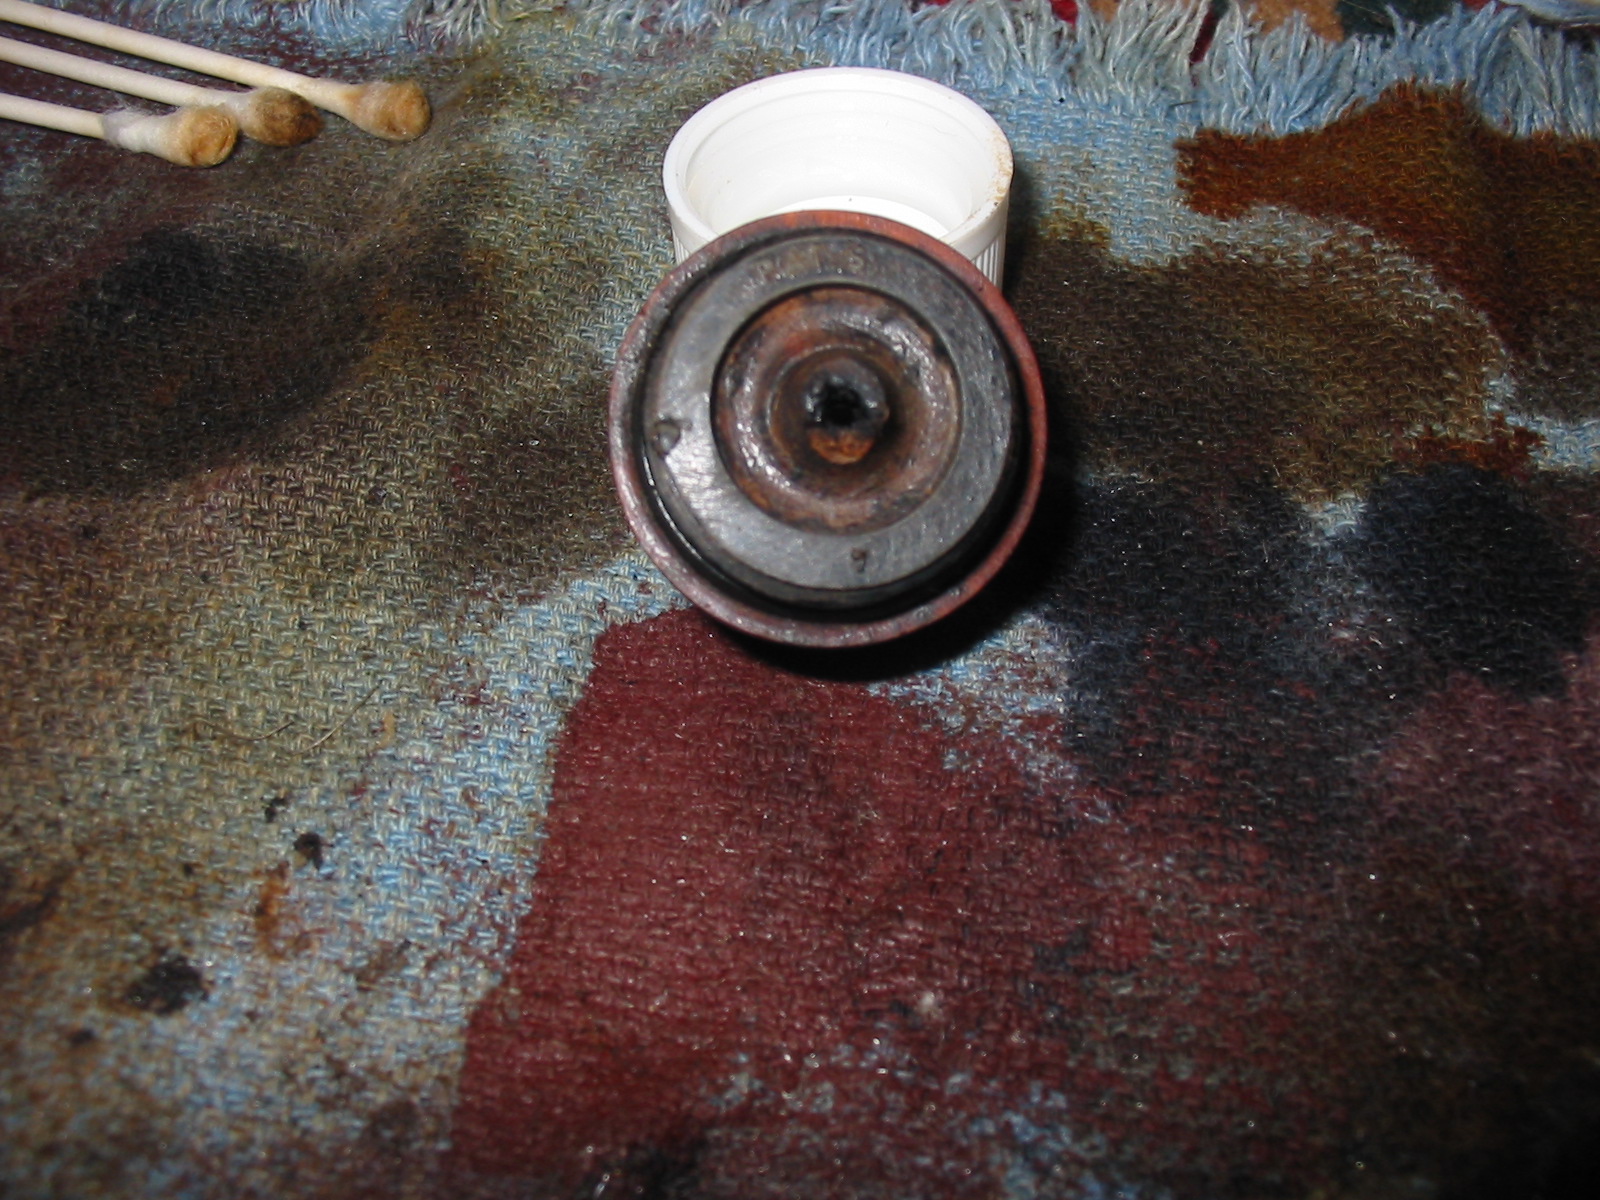
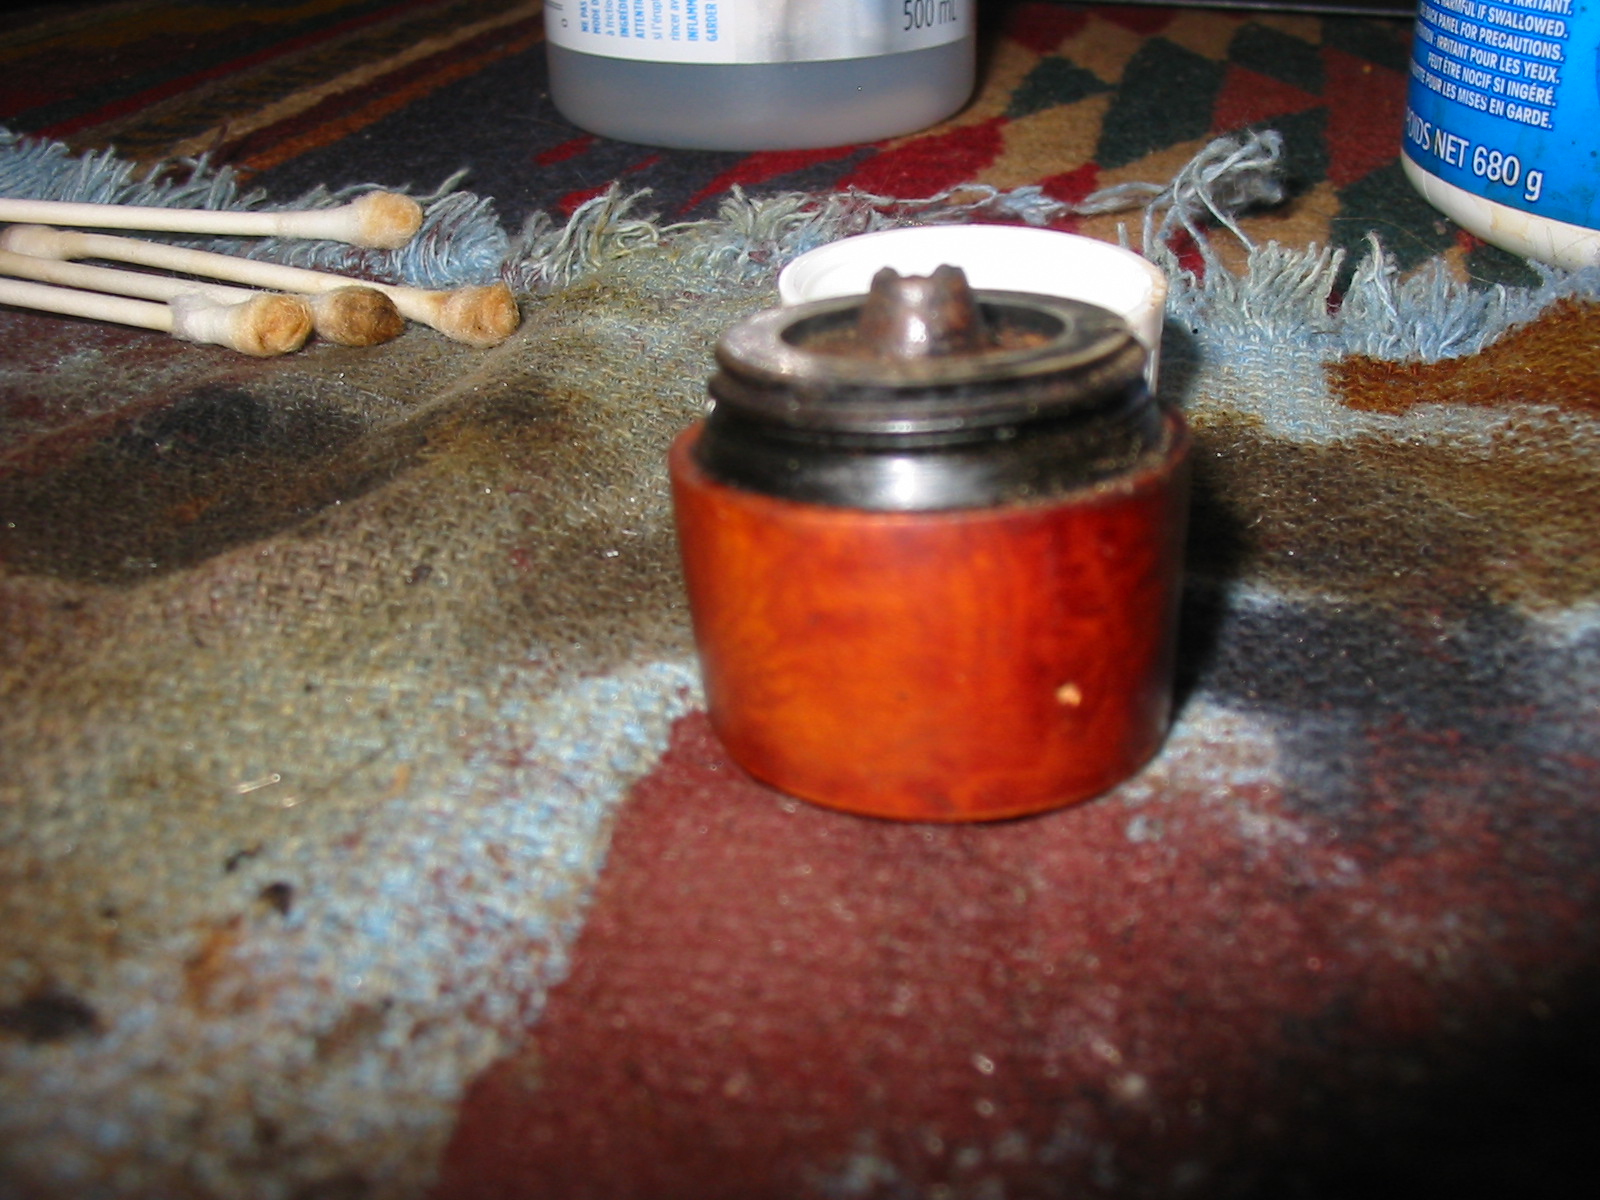
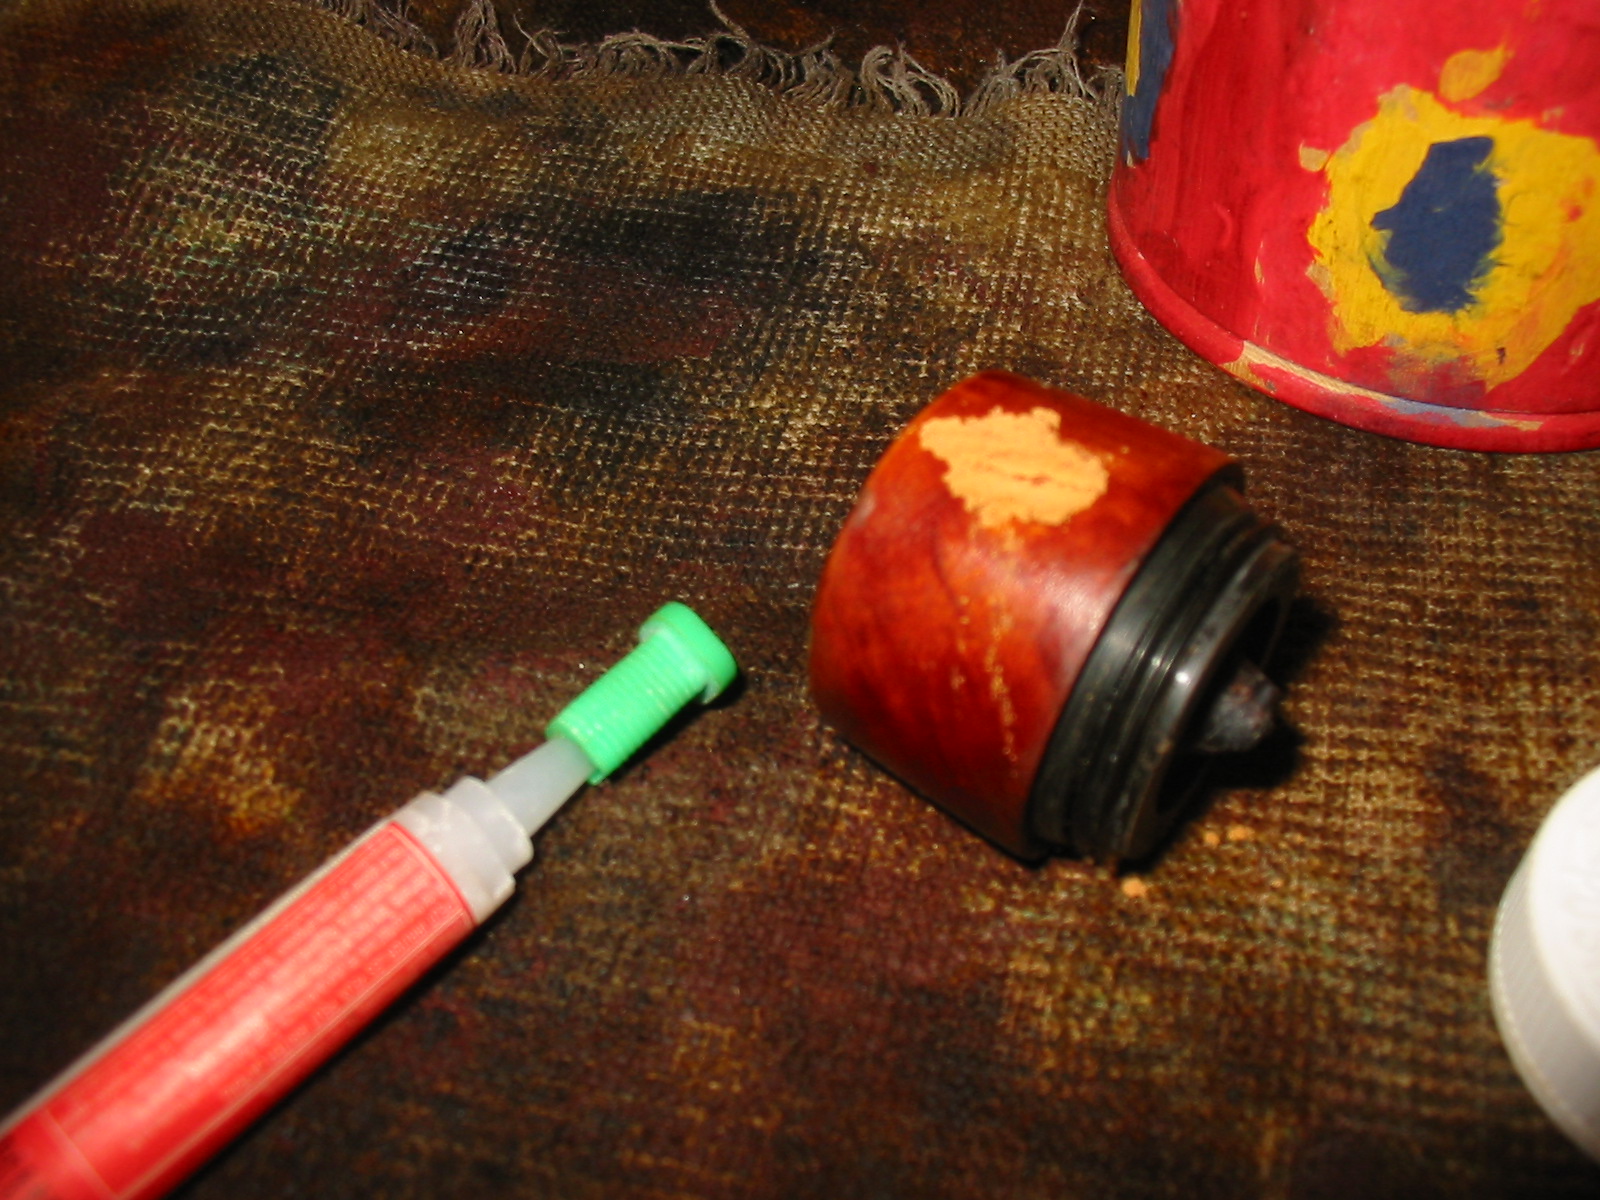
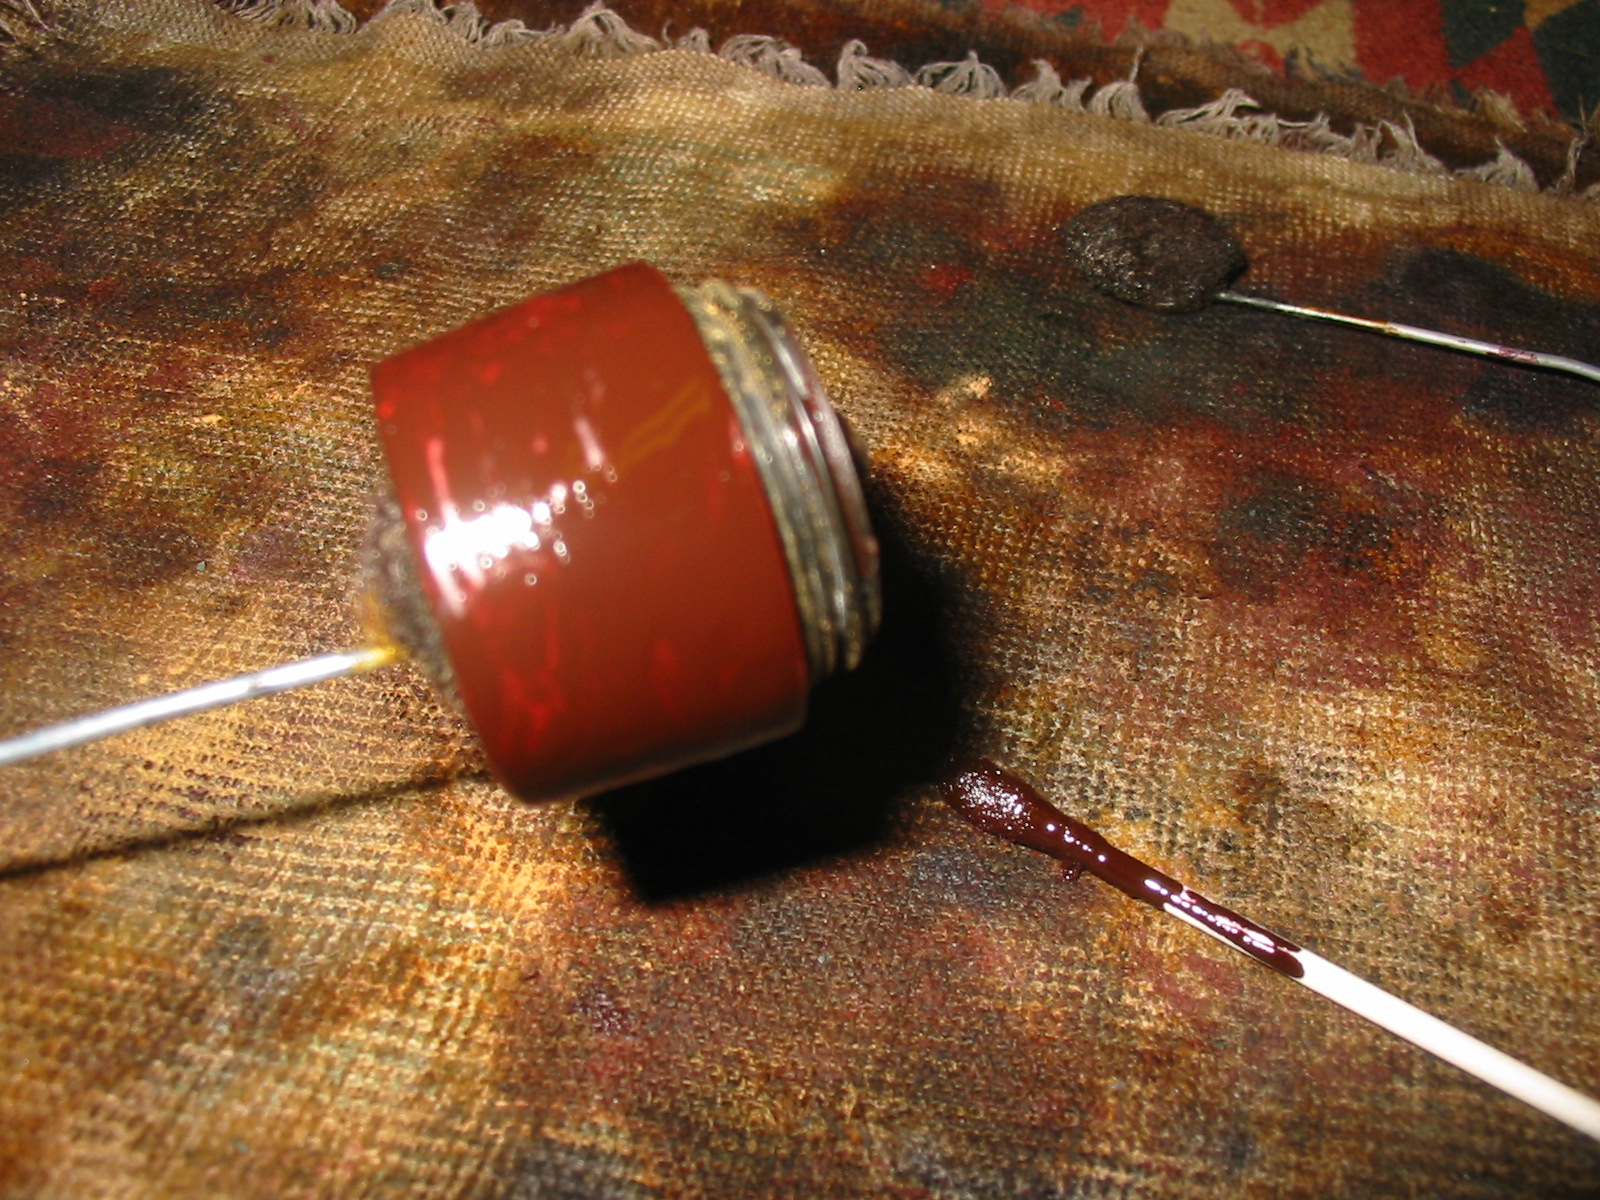
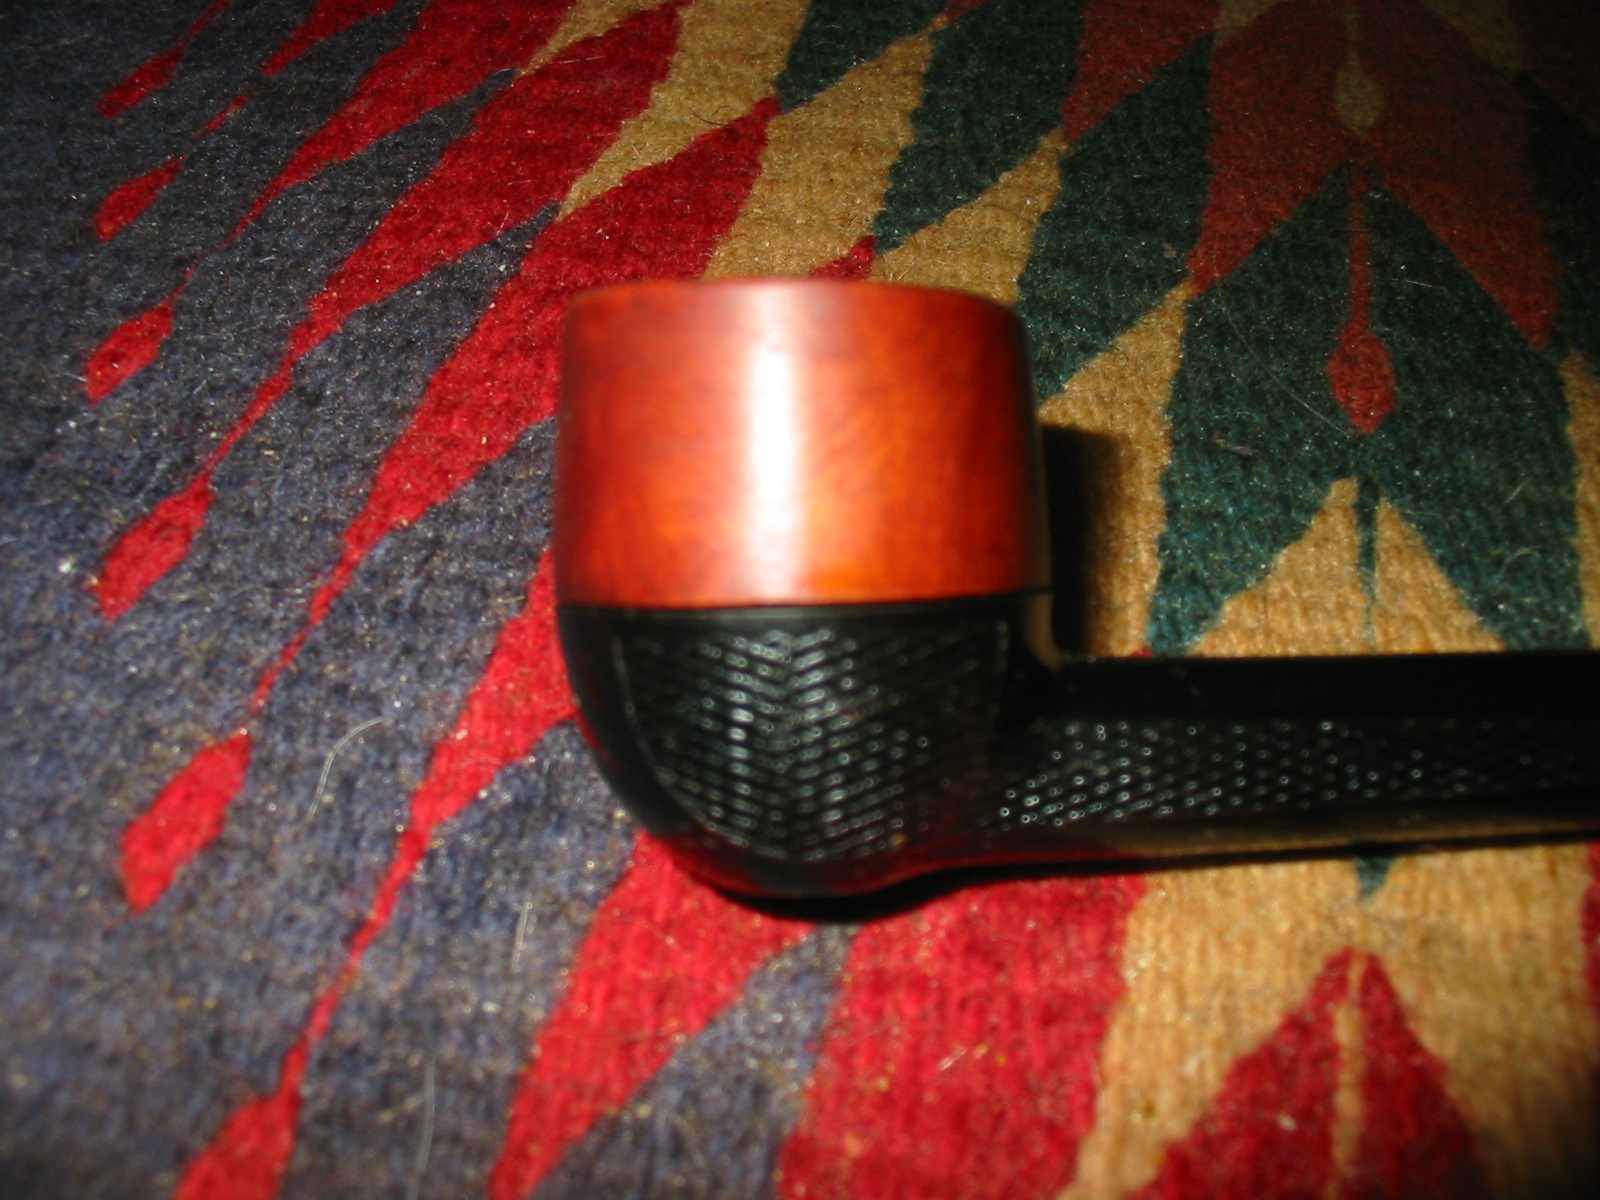
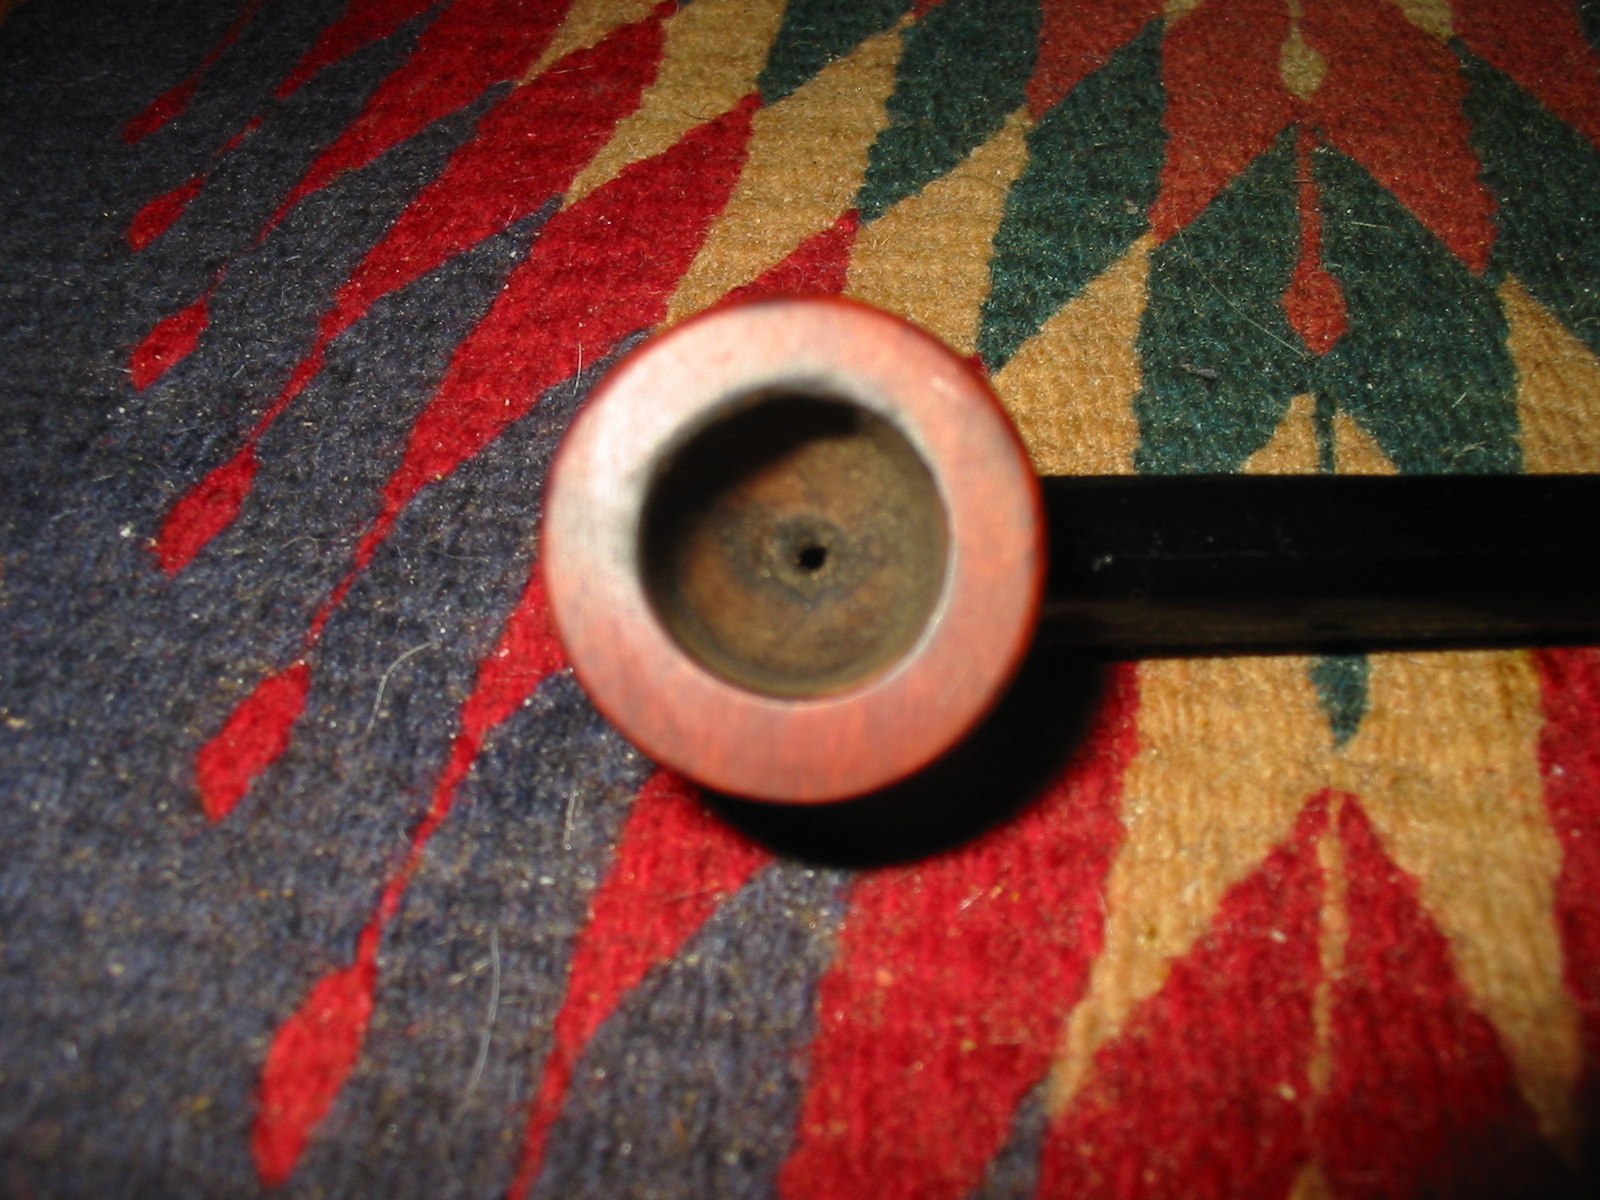
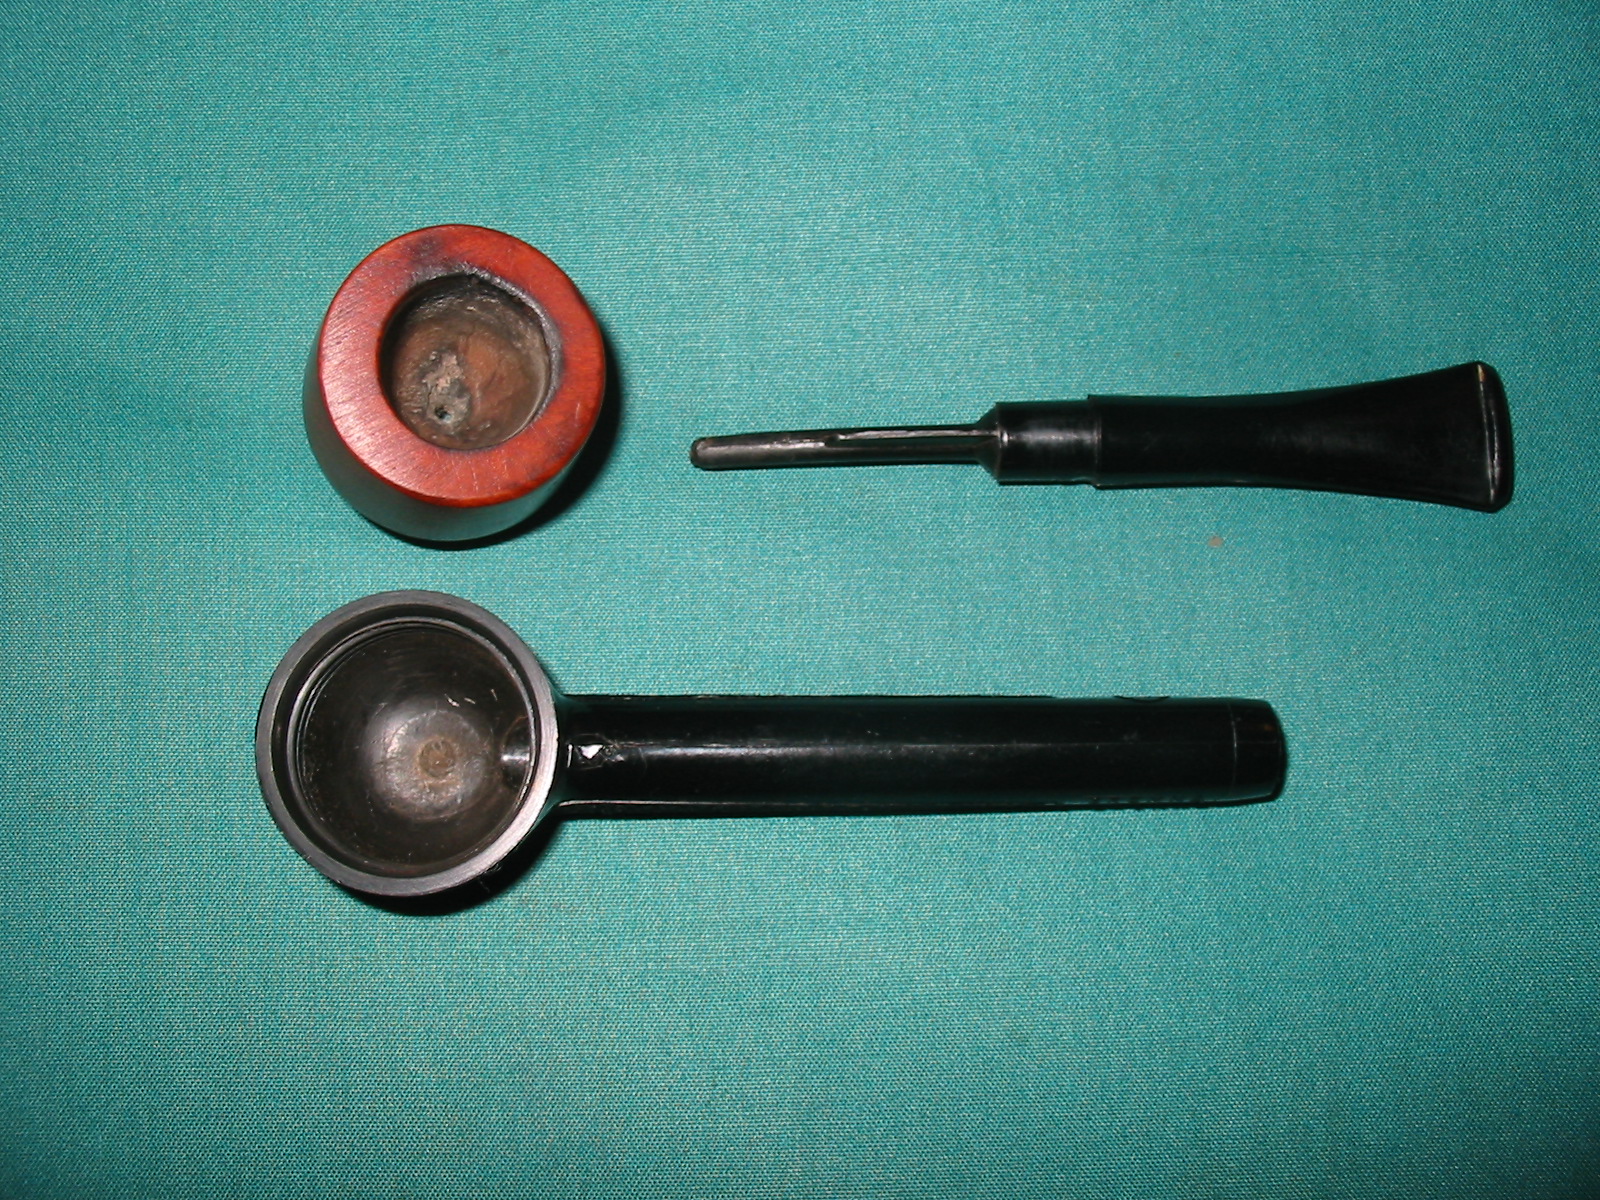
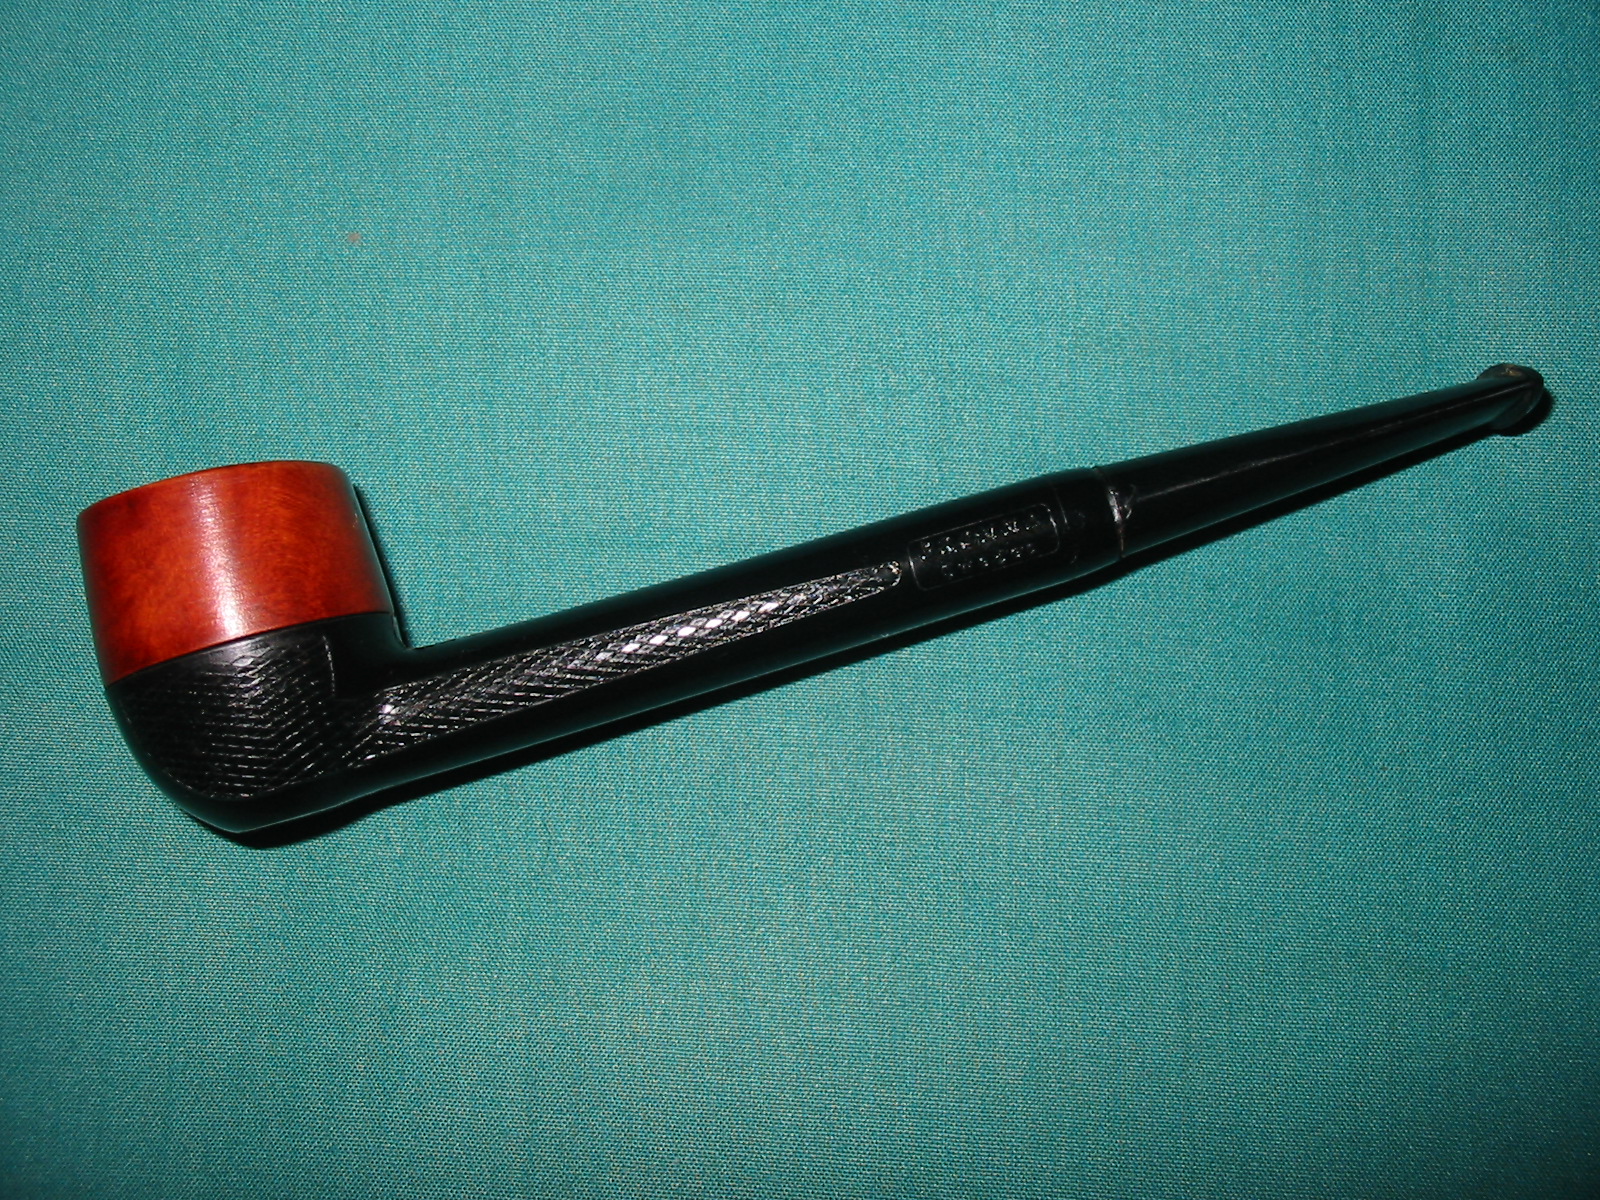
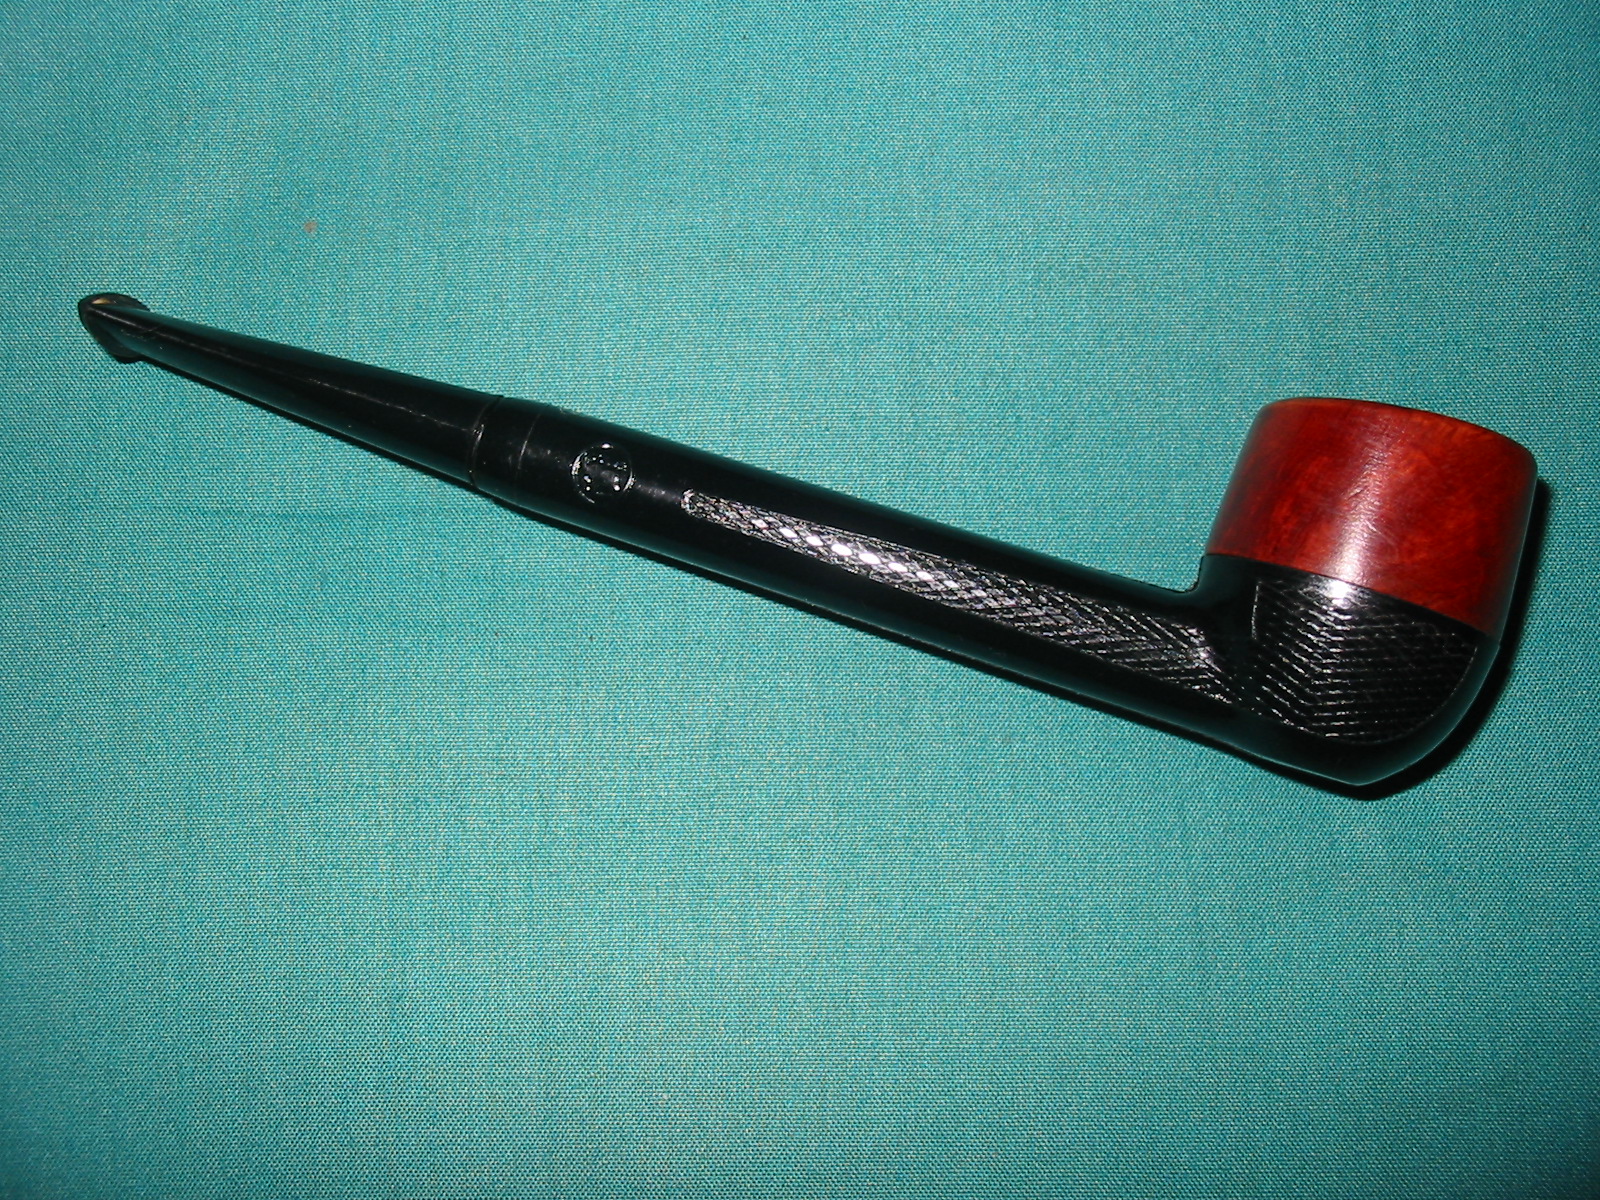
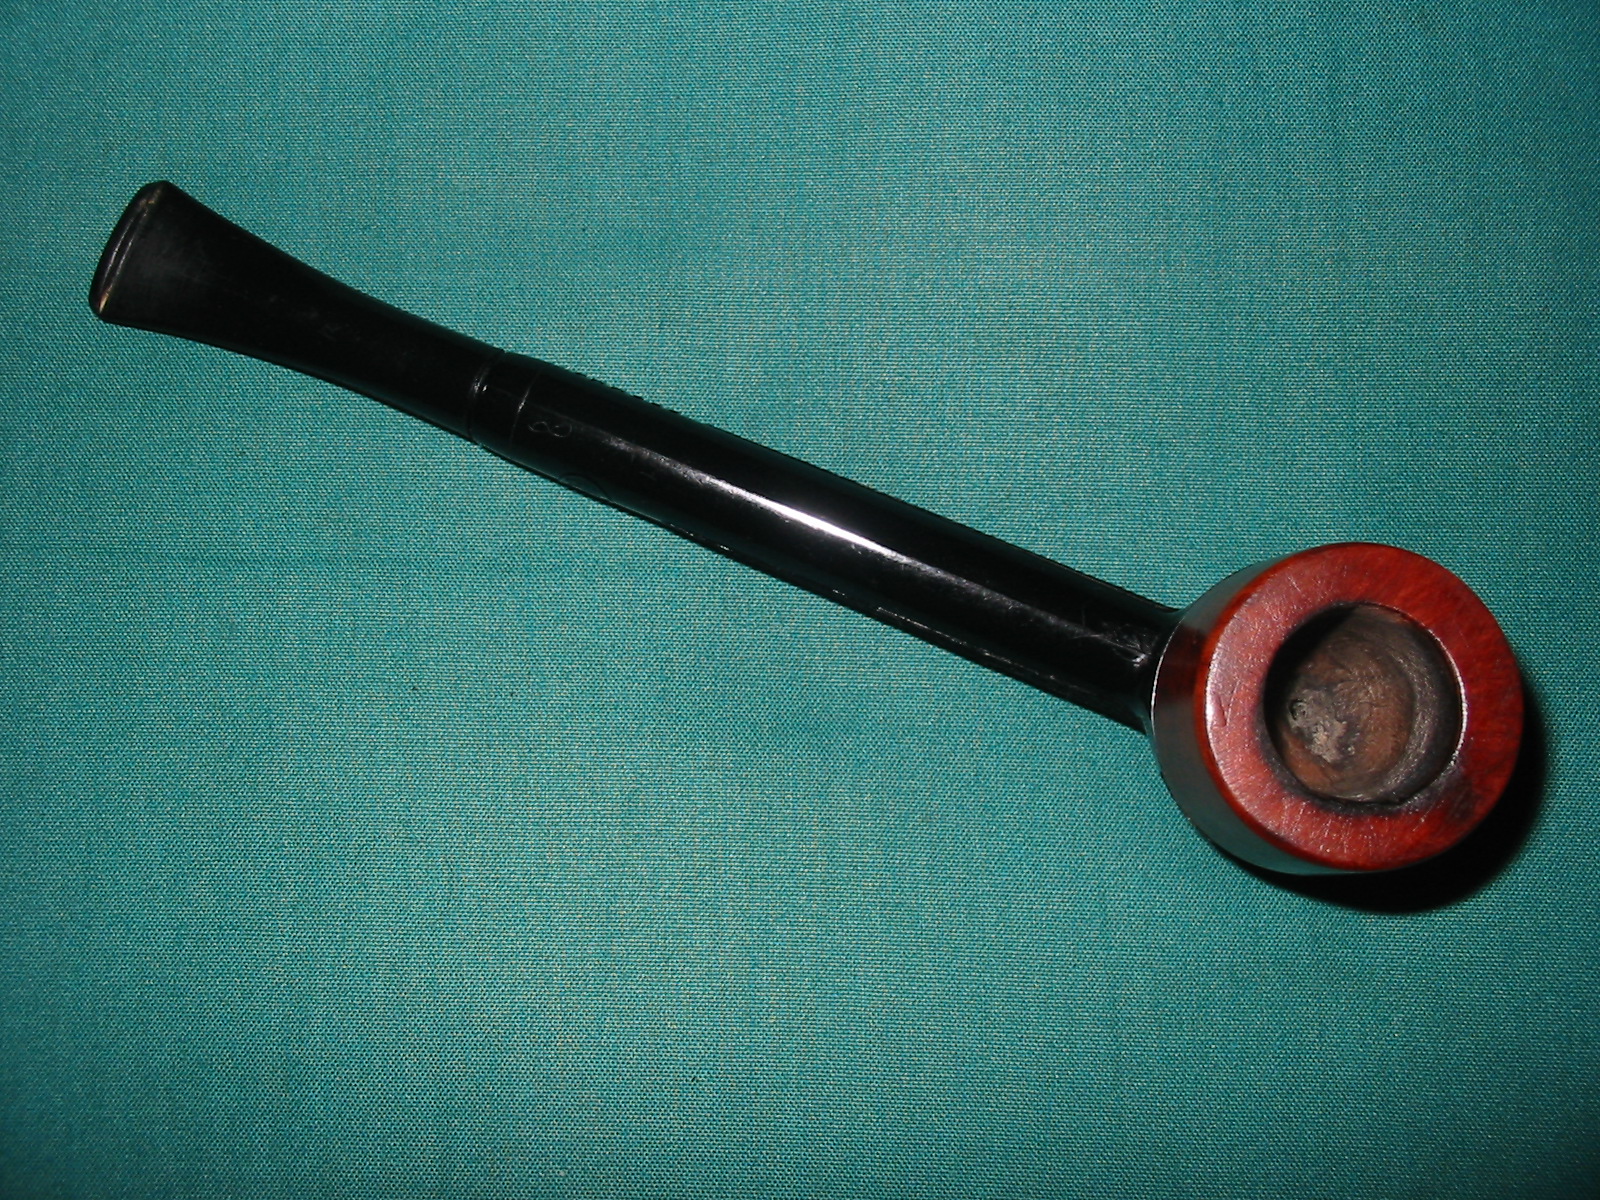
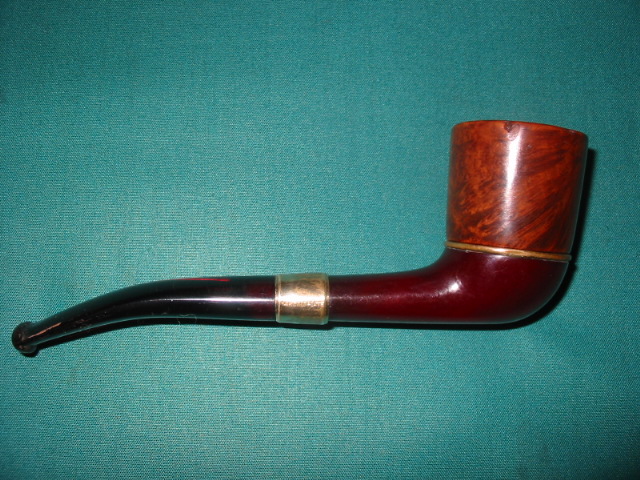
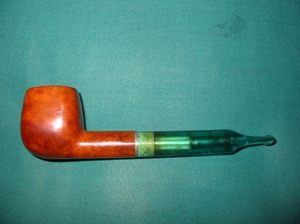
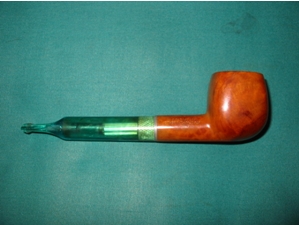
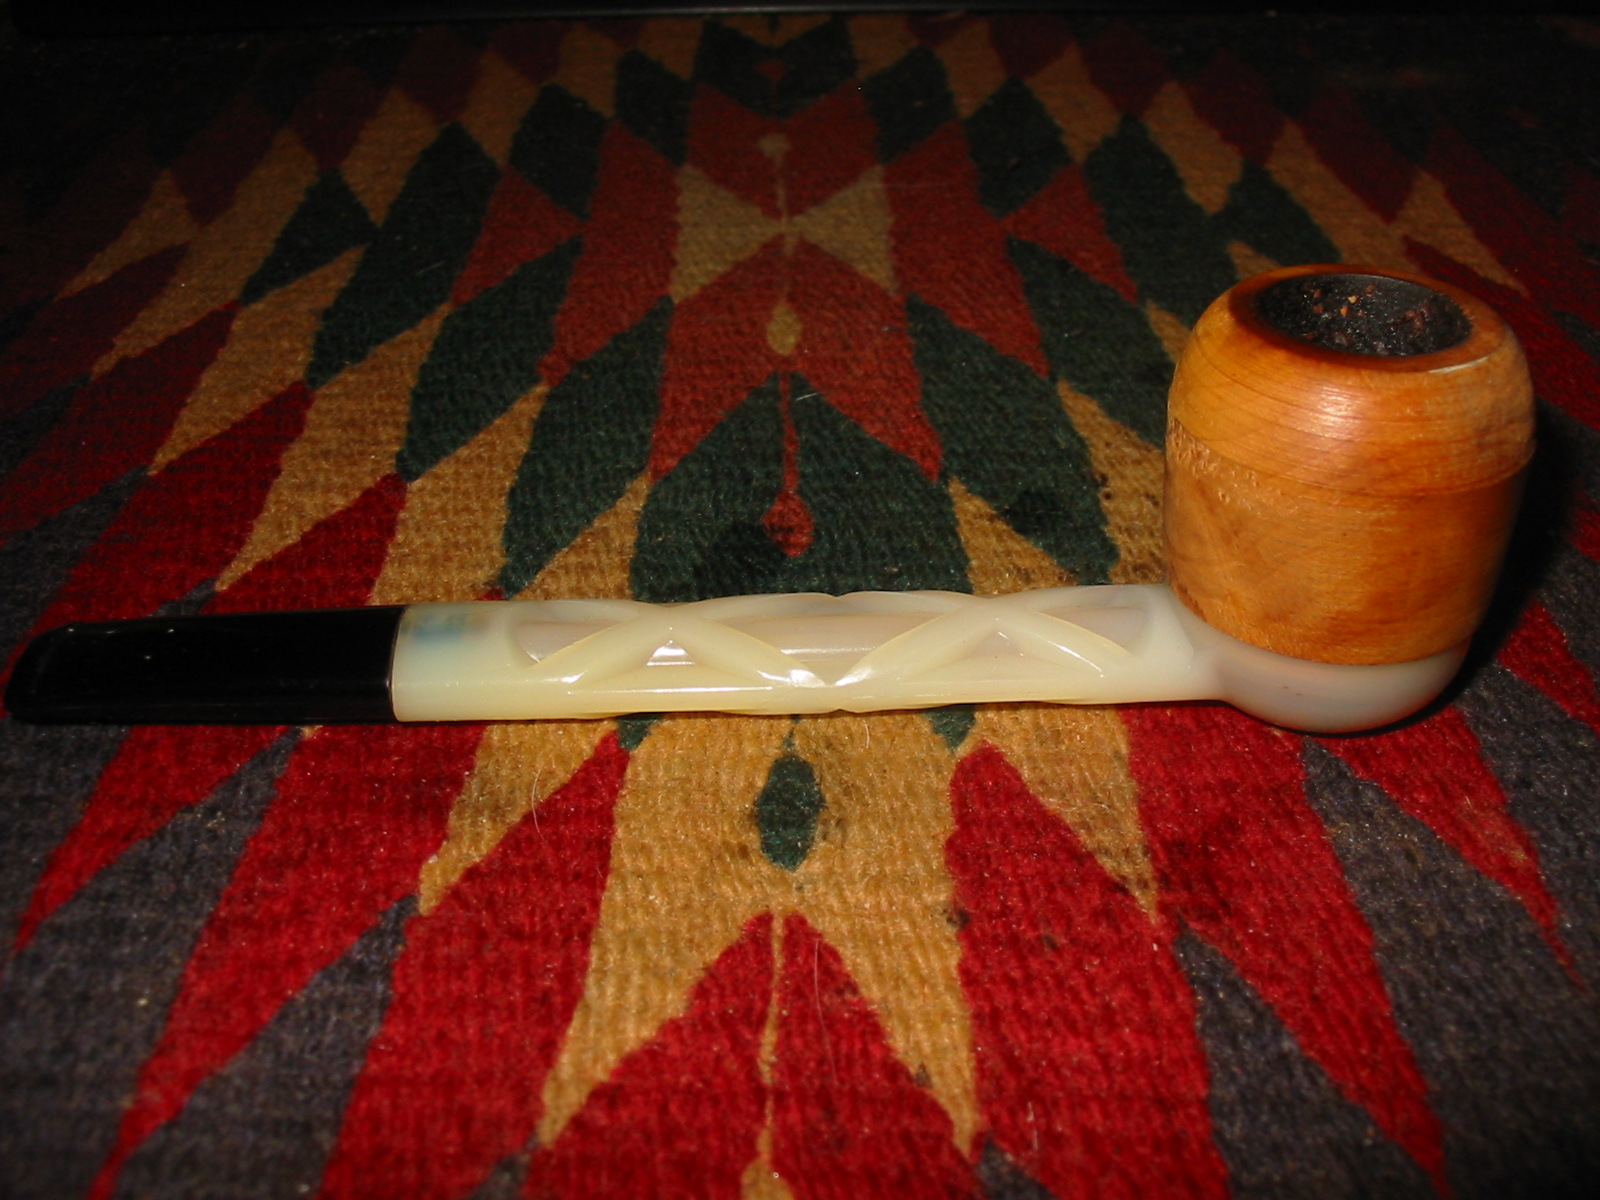
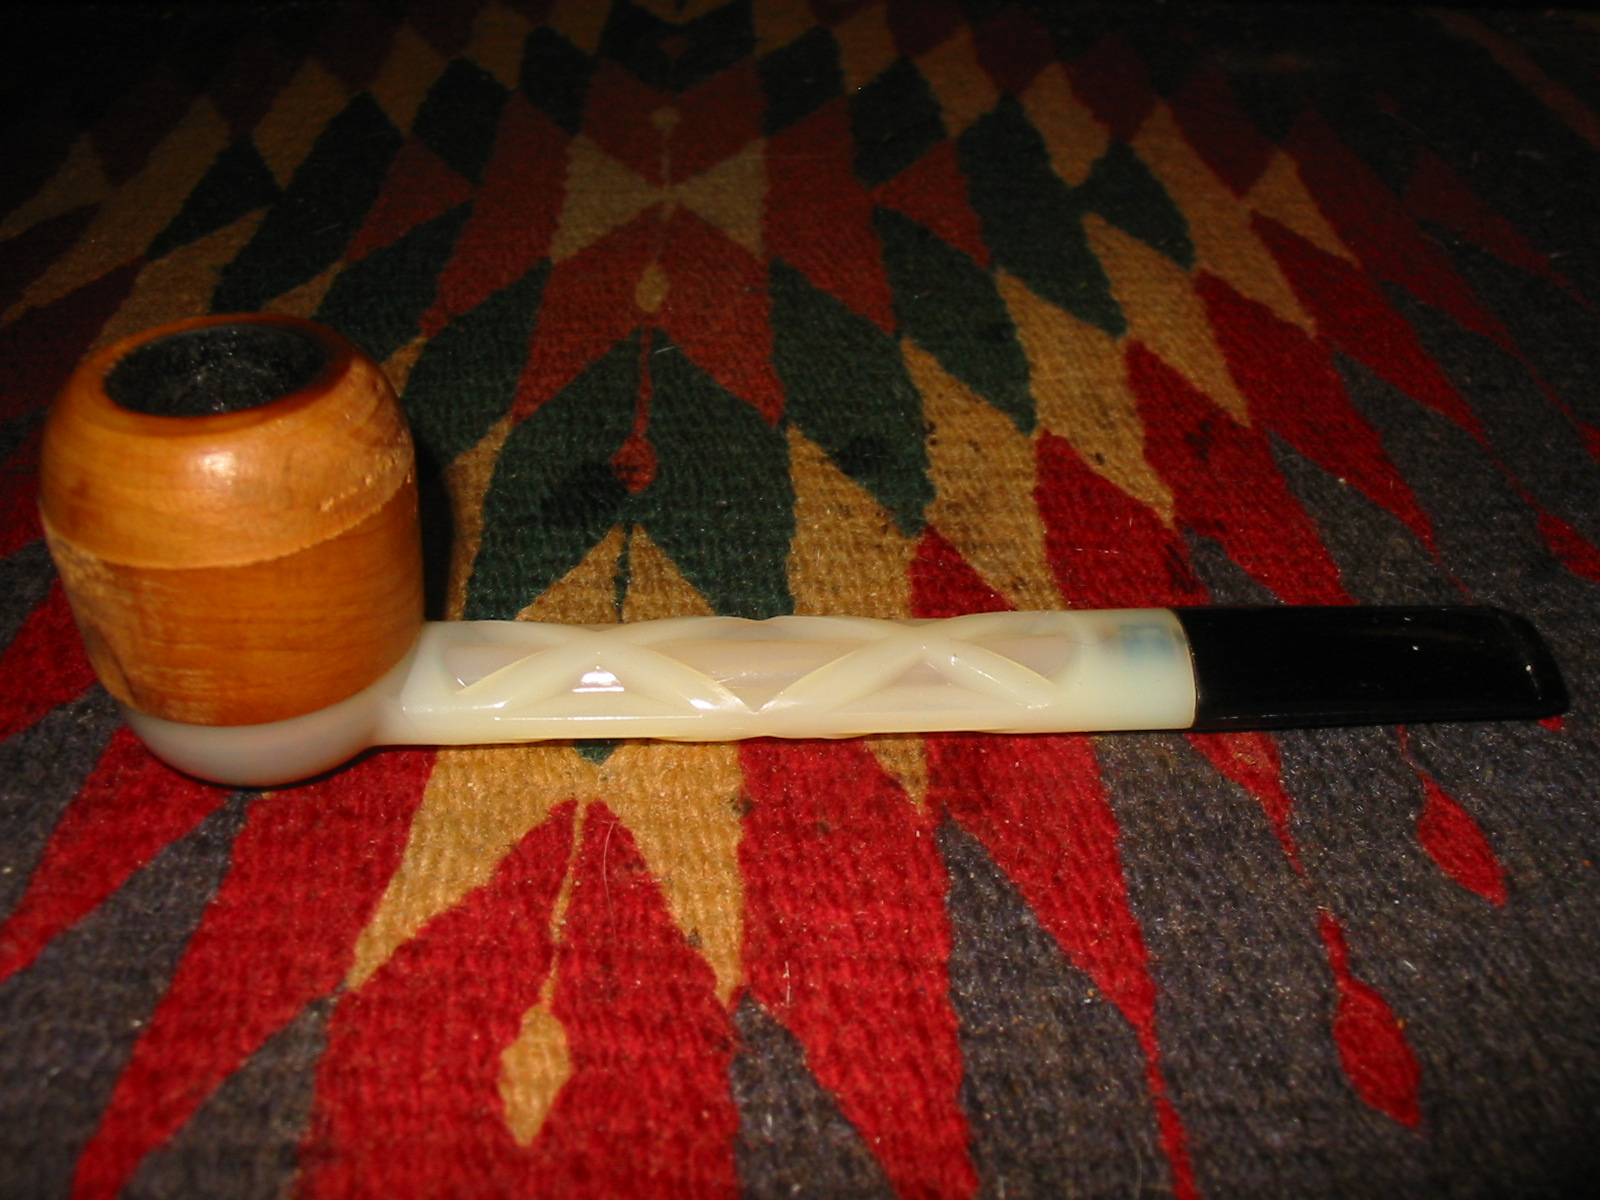
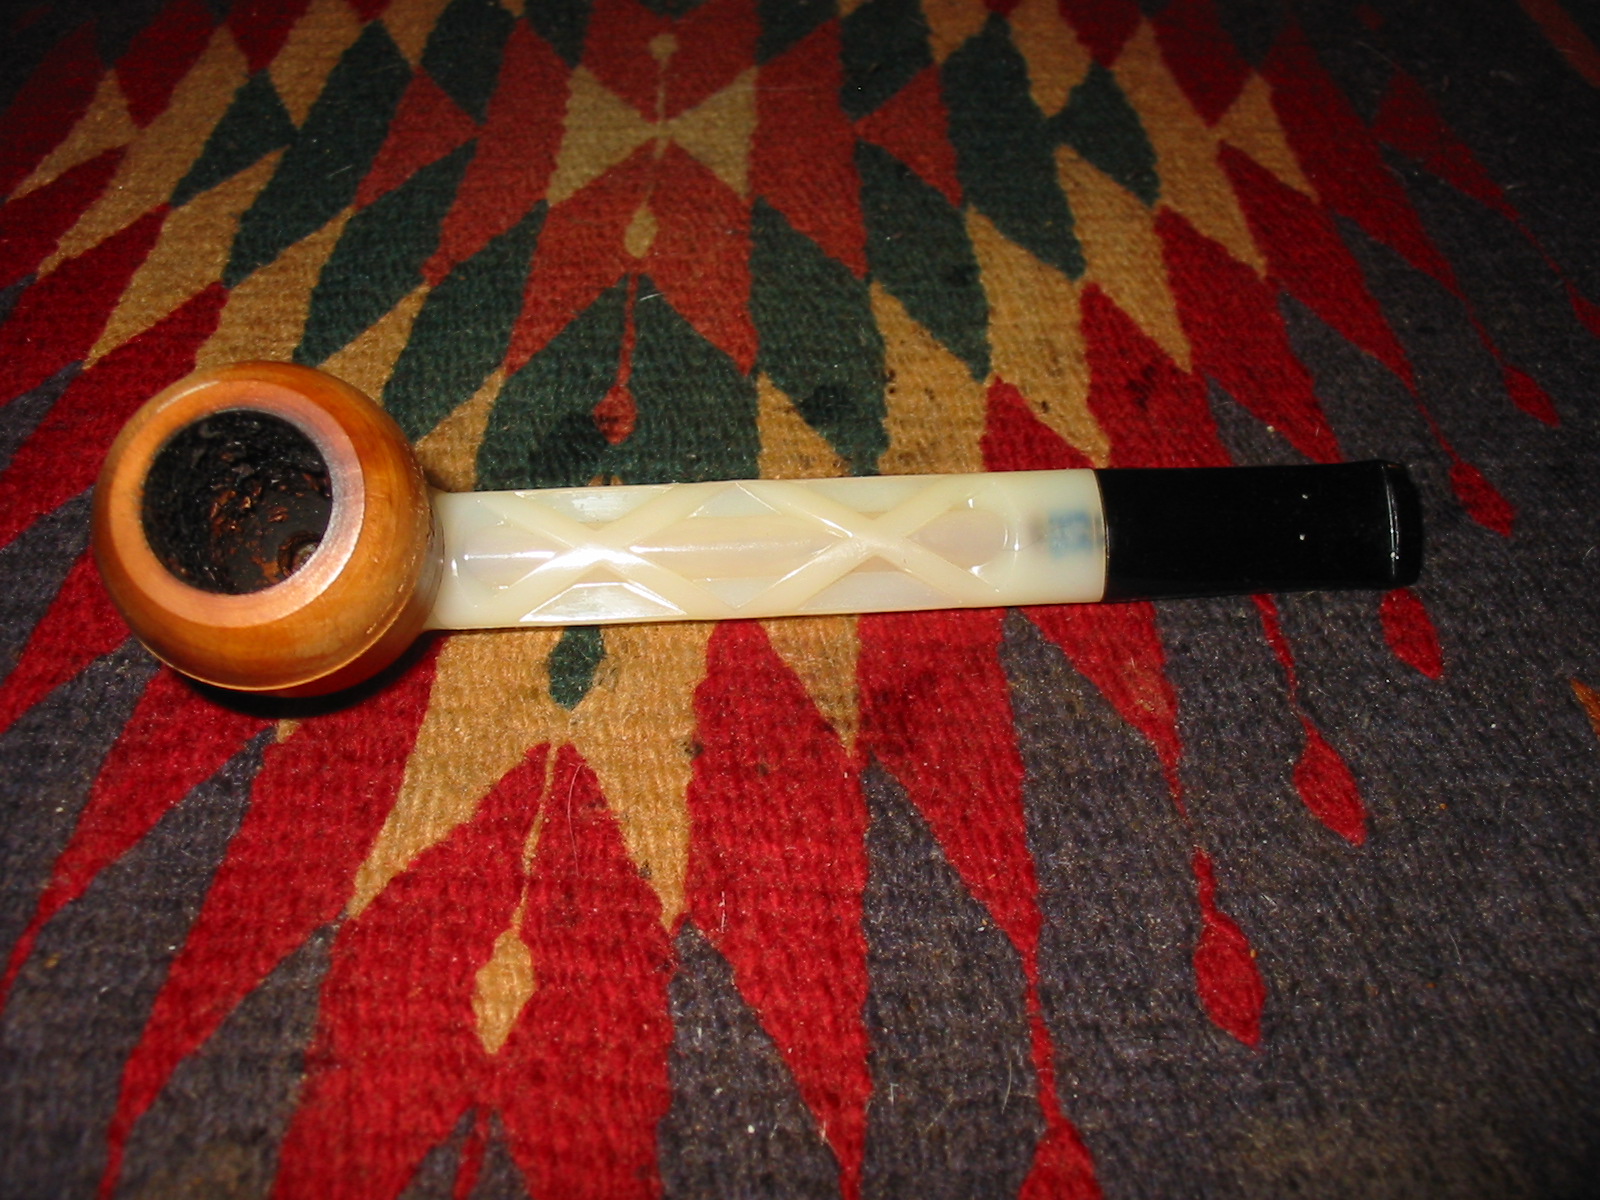
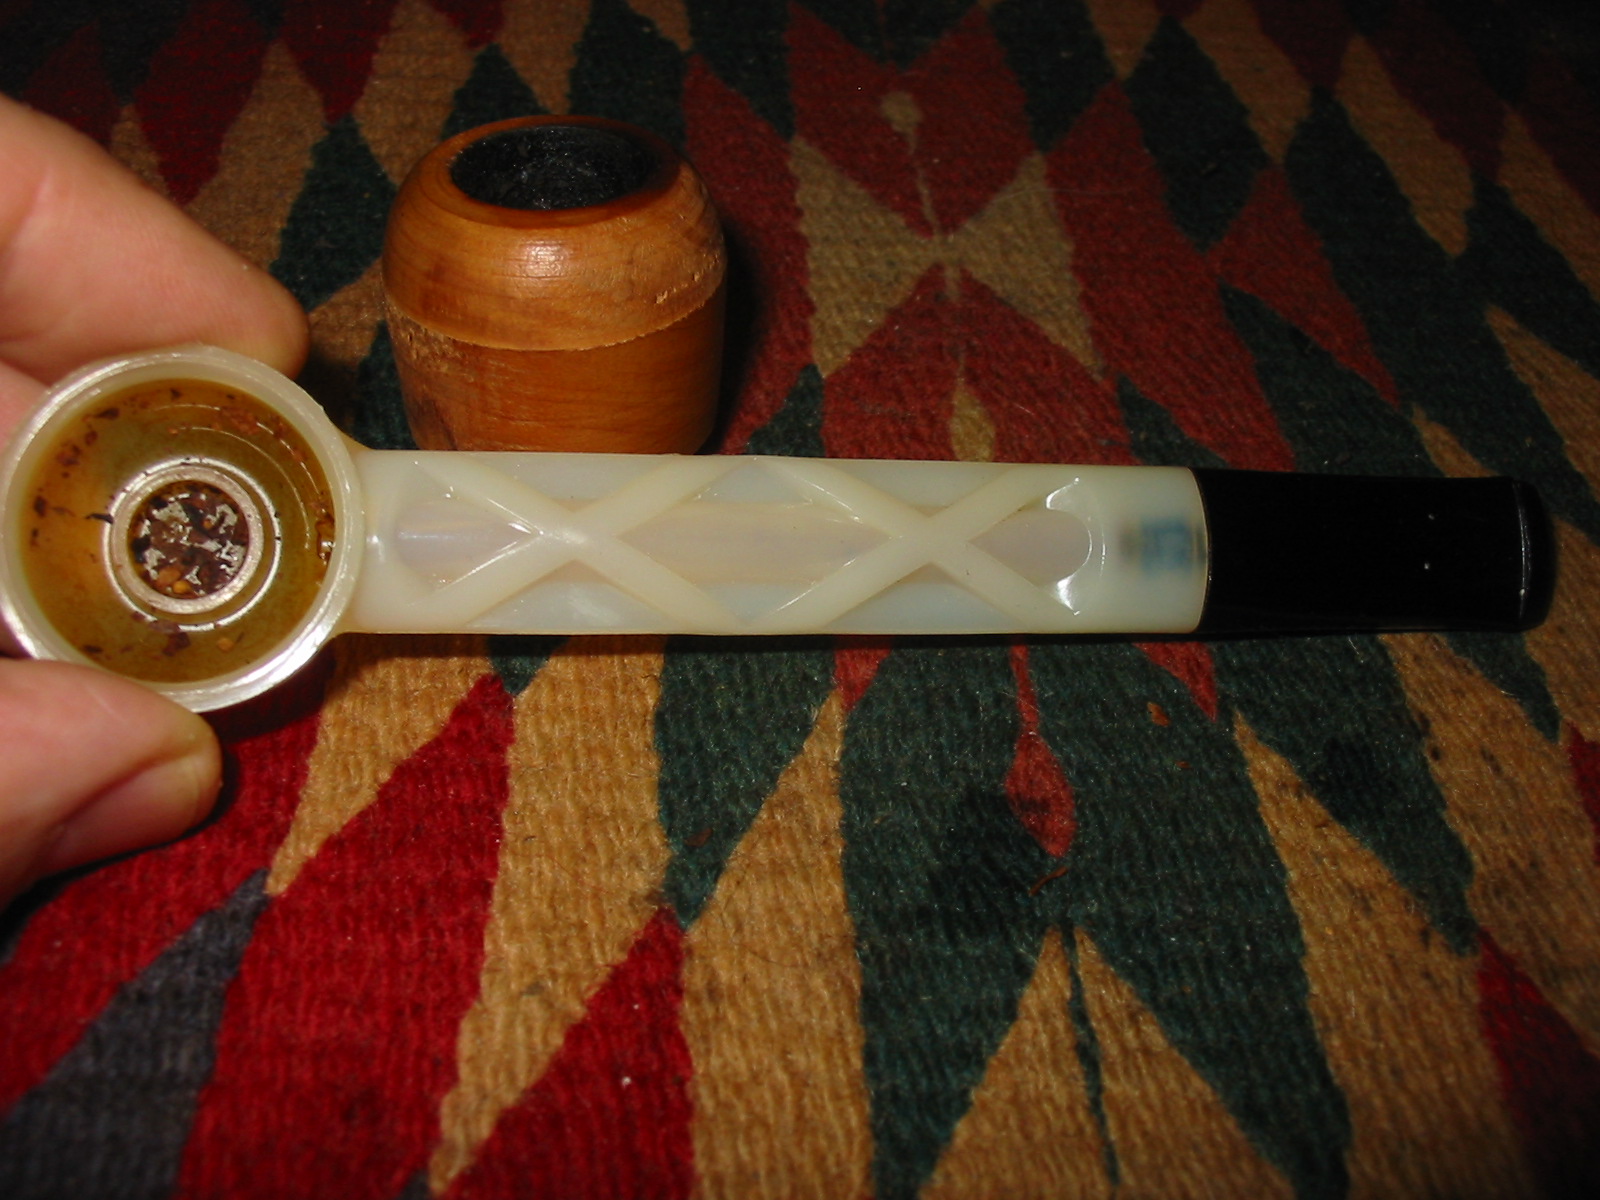
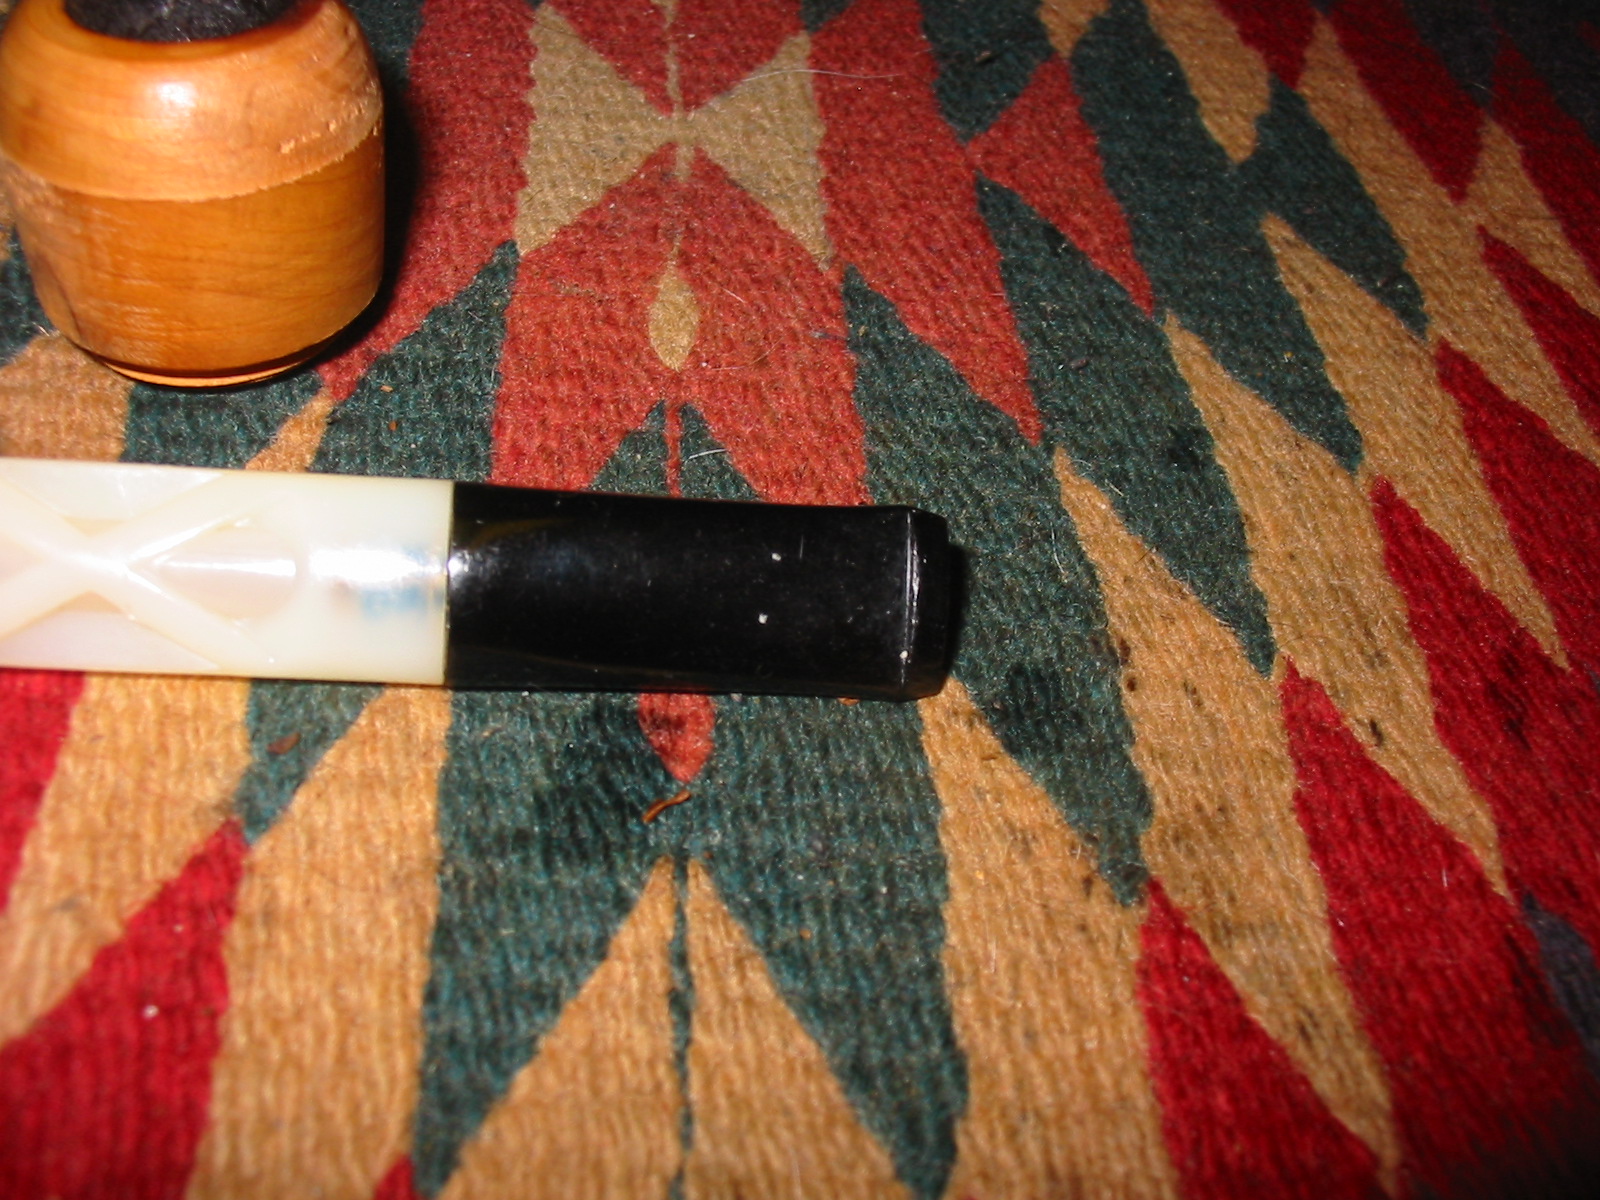
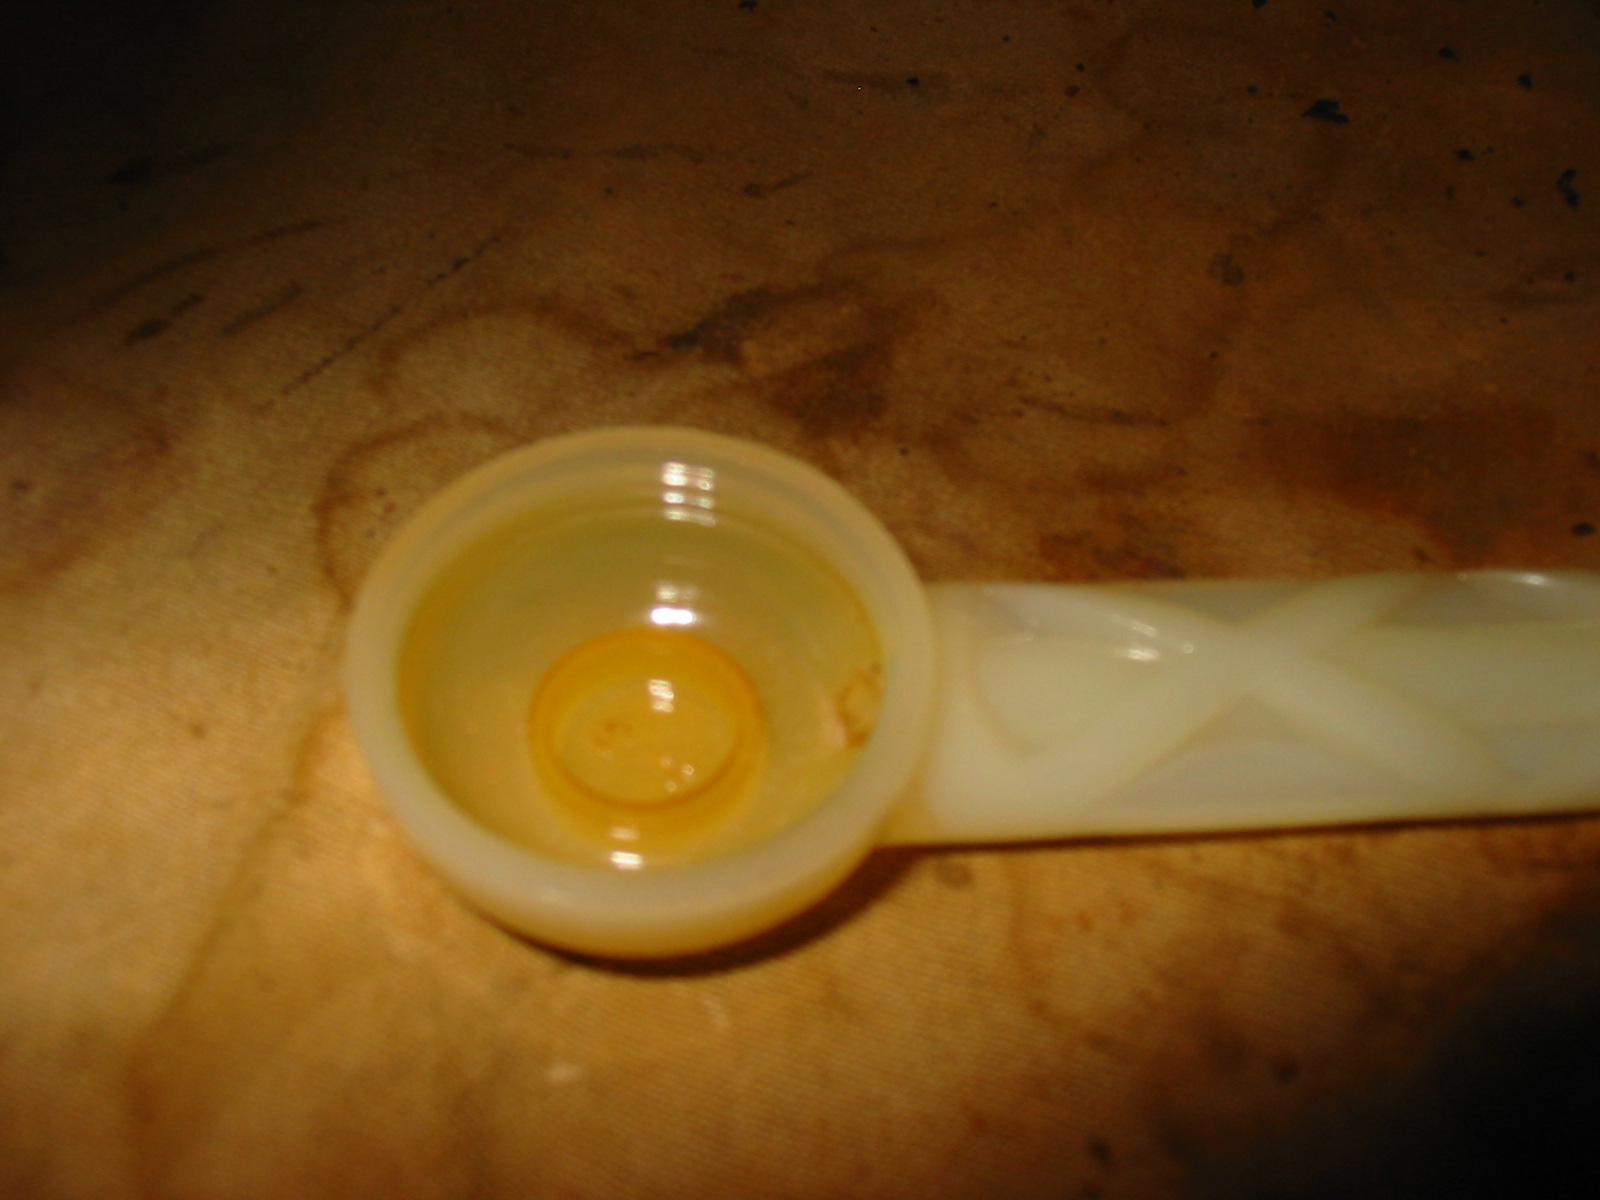
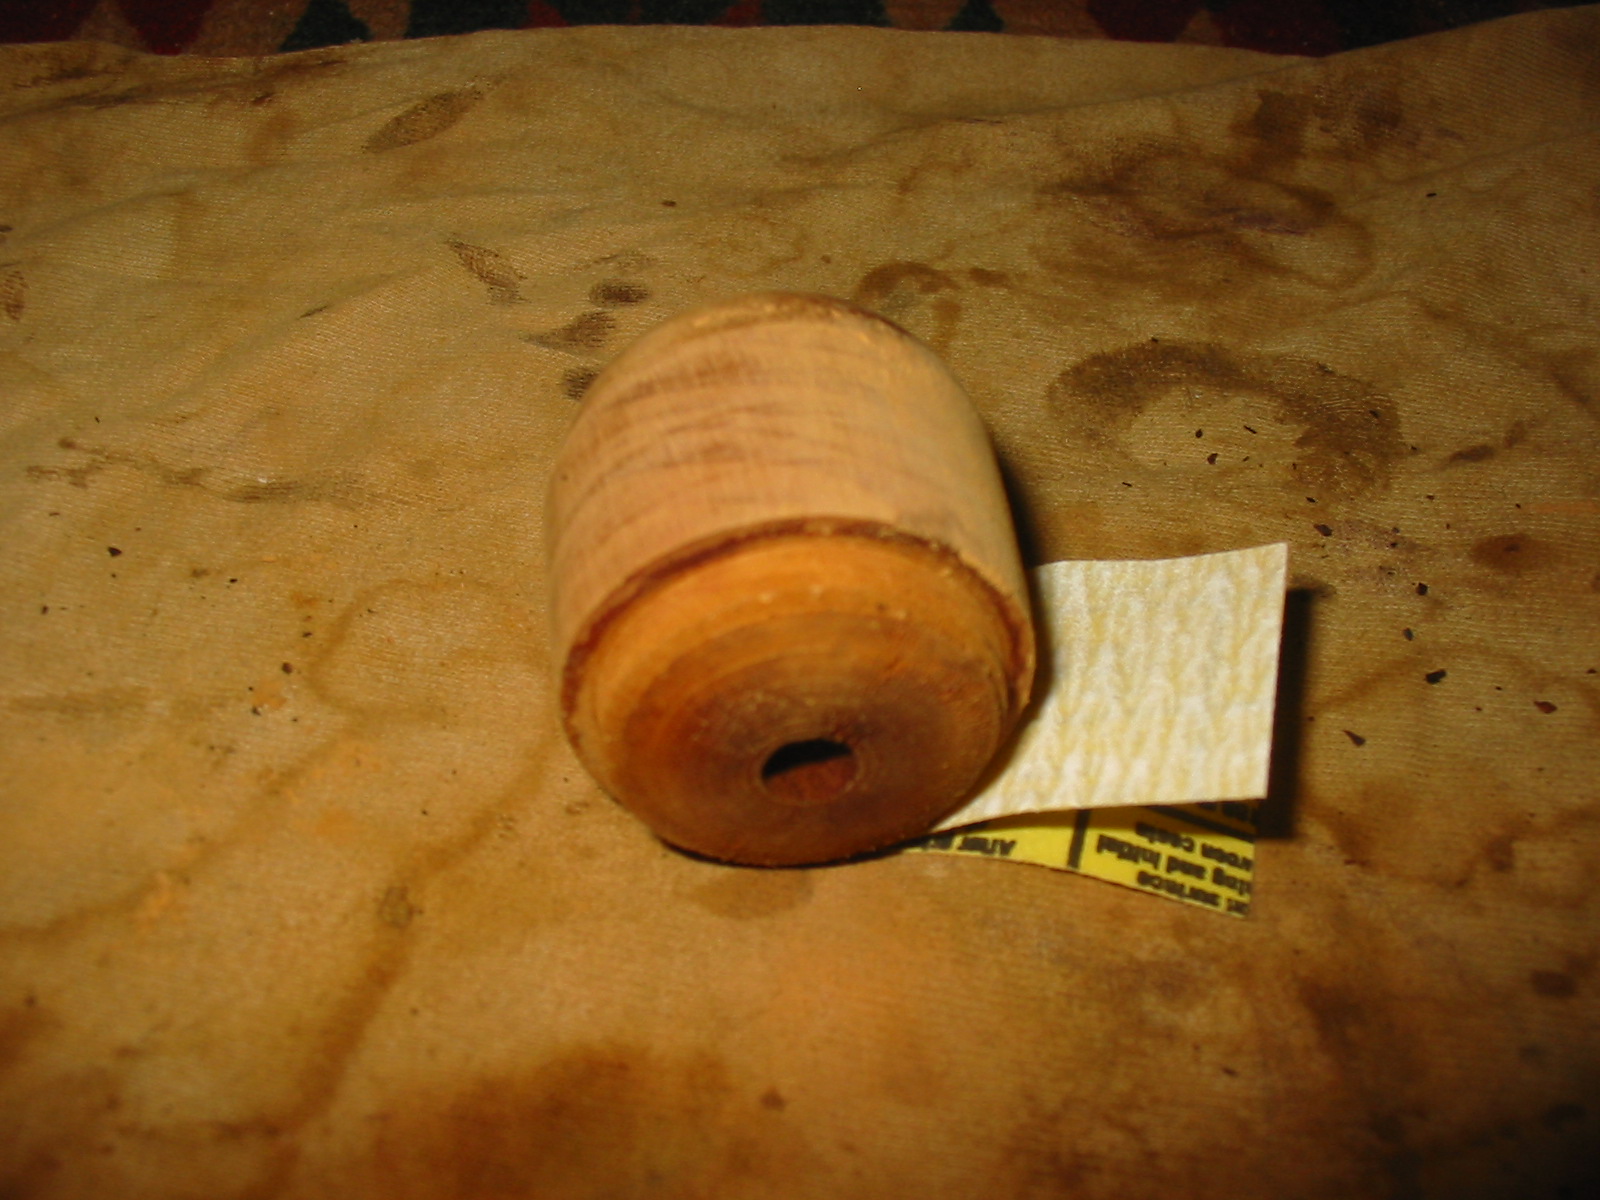
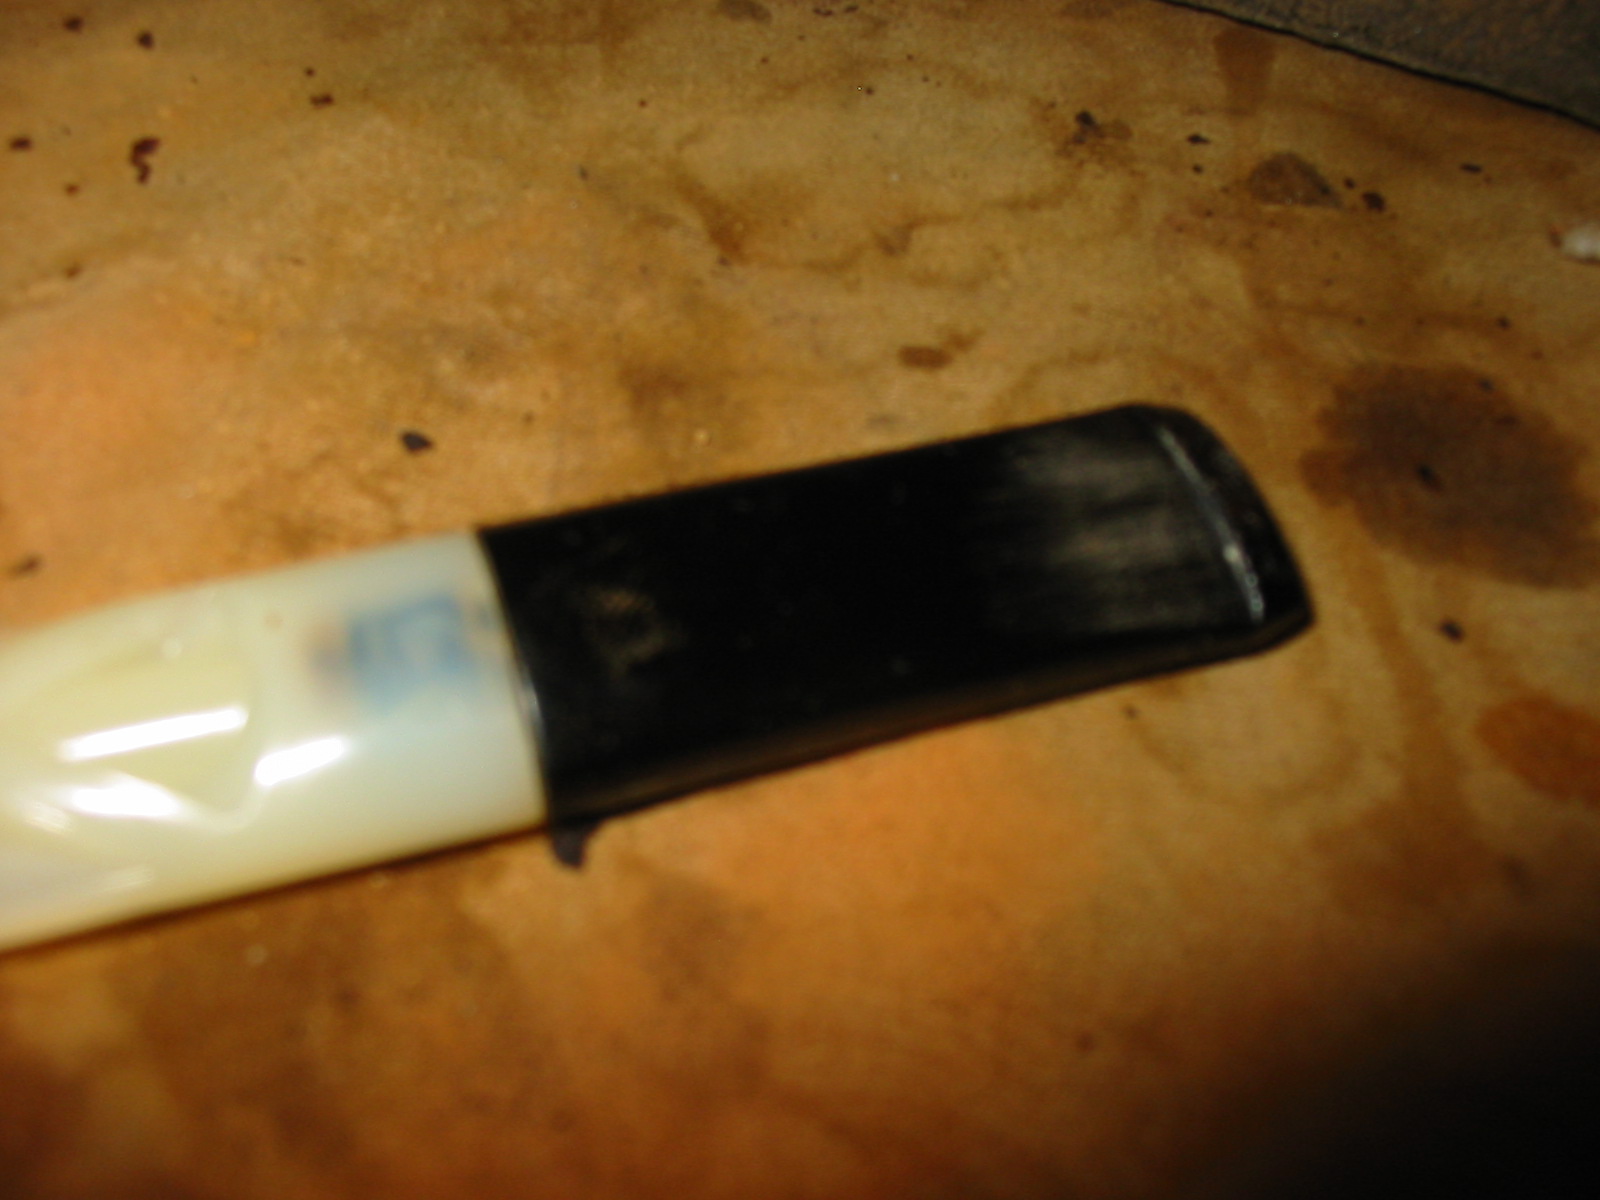
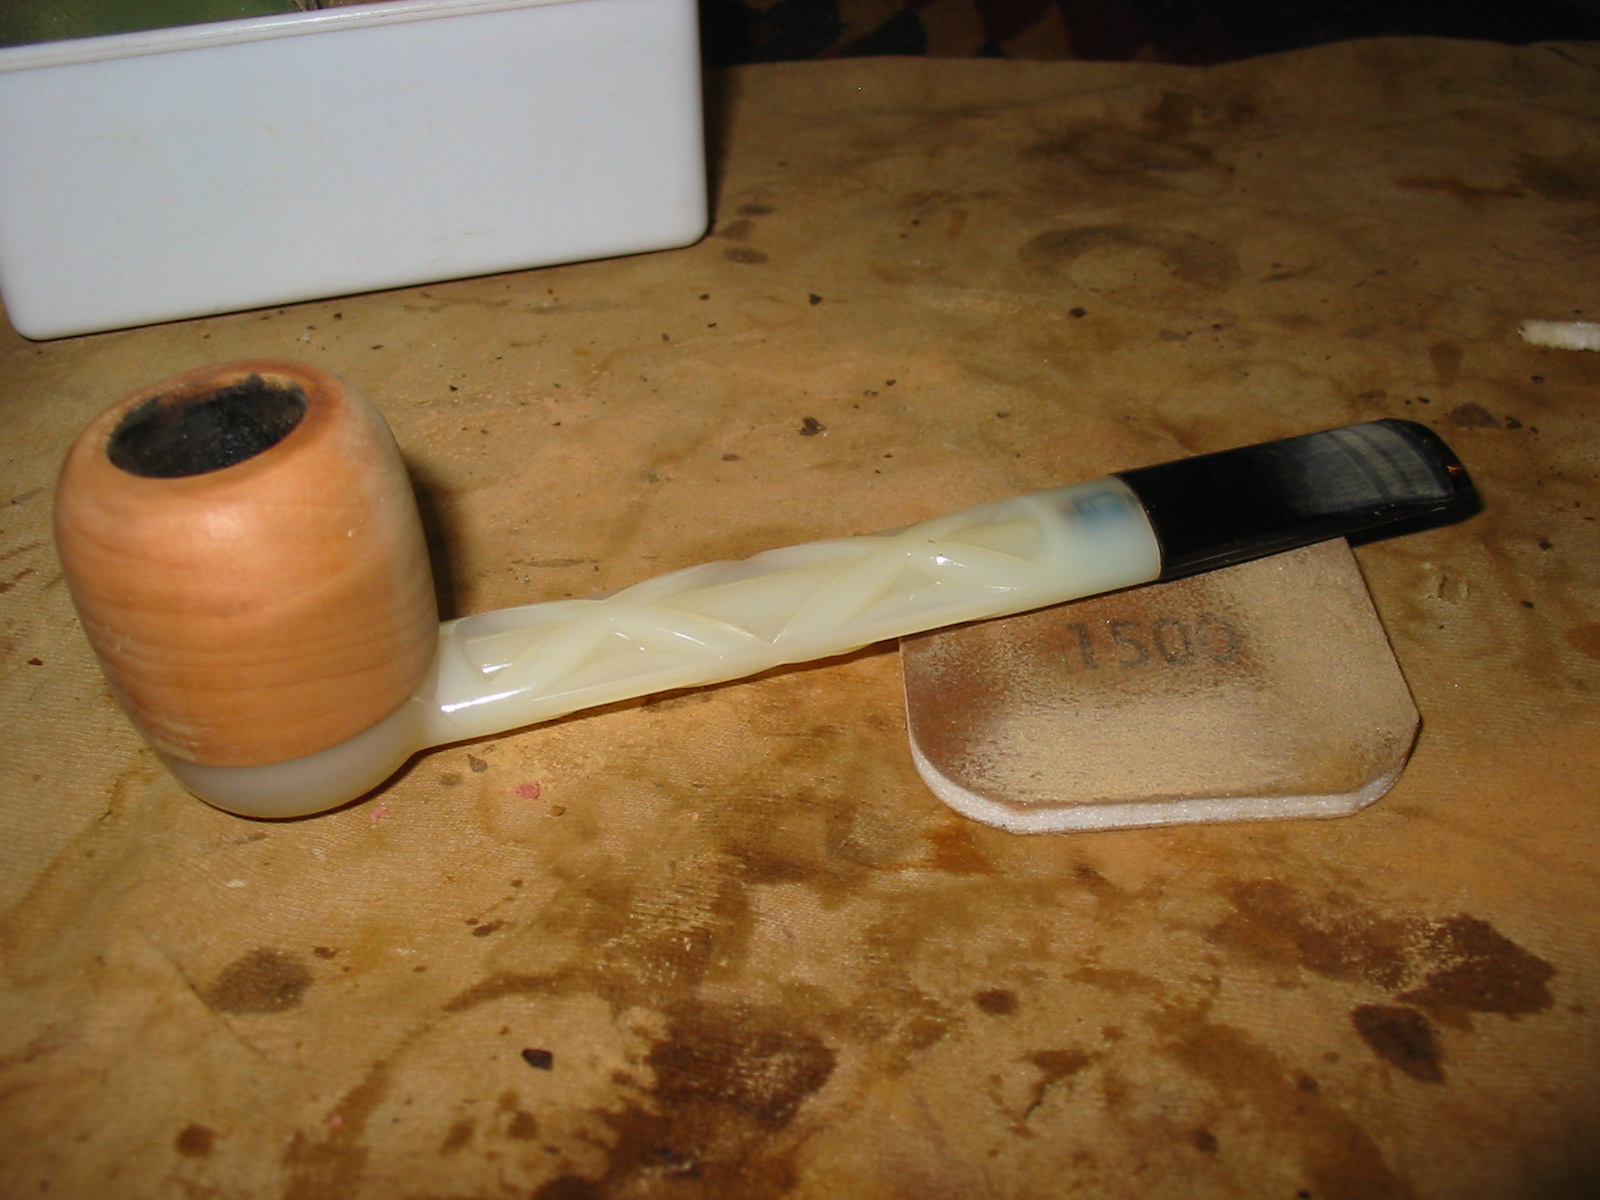
This pipe was in good shape. The stem is attached and not removable. It had some tooth chatter but no tooth marks or bites. It was made of nylon and not vulcanite even though it is black. The base itself is an opalescent white colour and showed tobacco stains in the base and the shank. The bowl was unfinished and showed tooling marks from the turning on the lathe. There was a slight uneven ridge on one side where the top of the bowl curved upward. There were rough spots all around the bowl and the finish was unsanded. The wood is not briar and seems more like the maple or hickory bowls that come from Missouri Meerschaum. The inside of the bowl has a slight uneven carbon build up in the top of the bowl and dried and hardened pieces of dottle stuck to the sides in the bottom half of the bowl. The reservoir in the base also had a buildup of tars and shreds of tobacco stuck to the base. The first photo below was taken the day I found the pipe. Photos two through five show the bowl when I began working on it at my work table.
IMG_0490

IMG_2195

IMG_2196

IMG_2197

IMG_2198

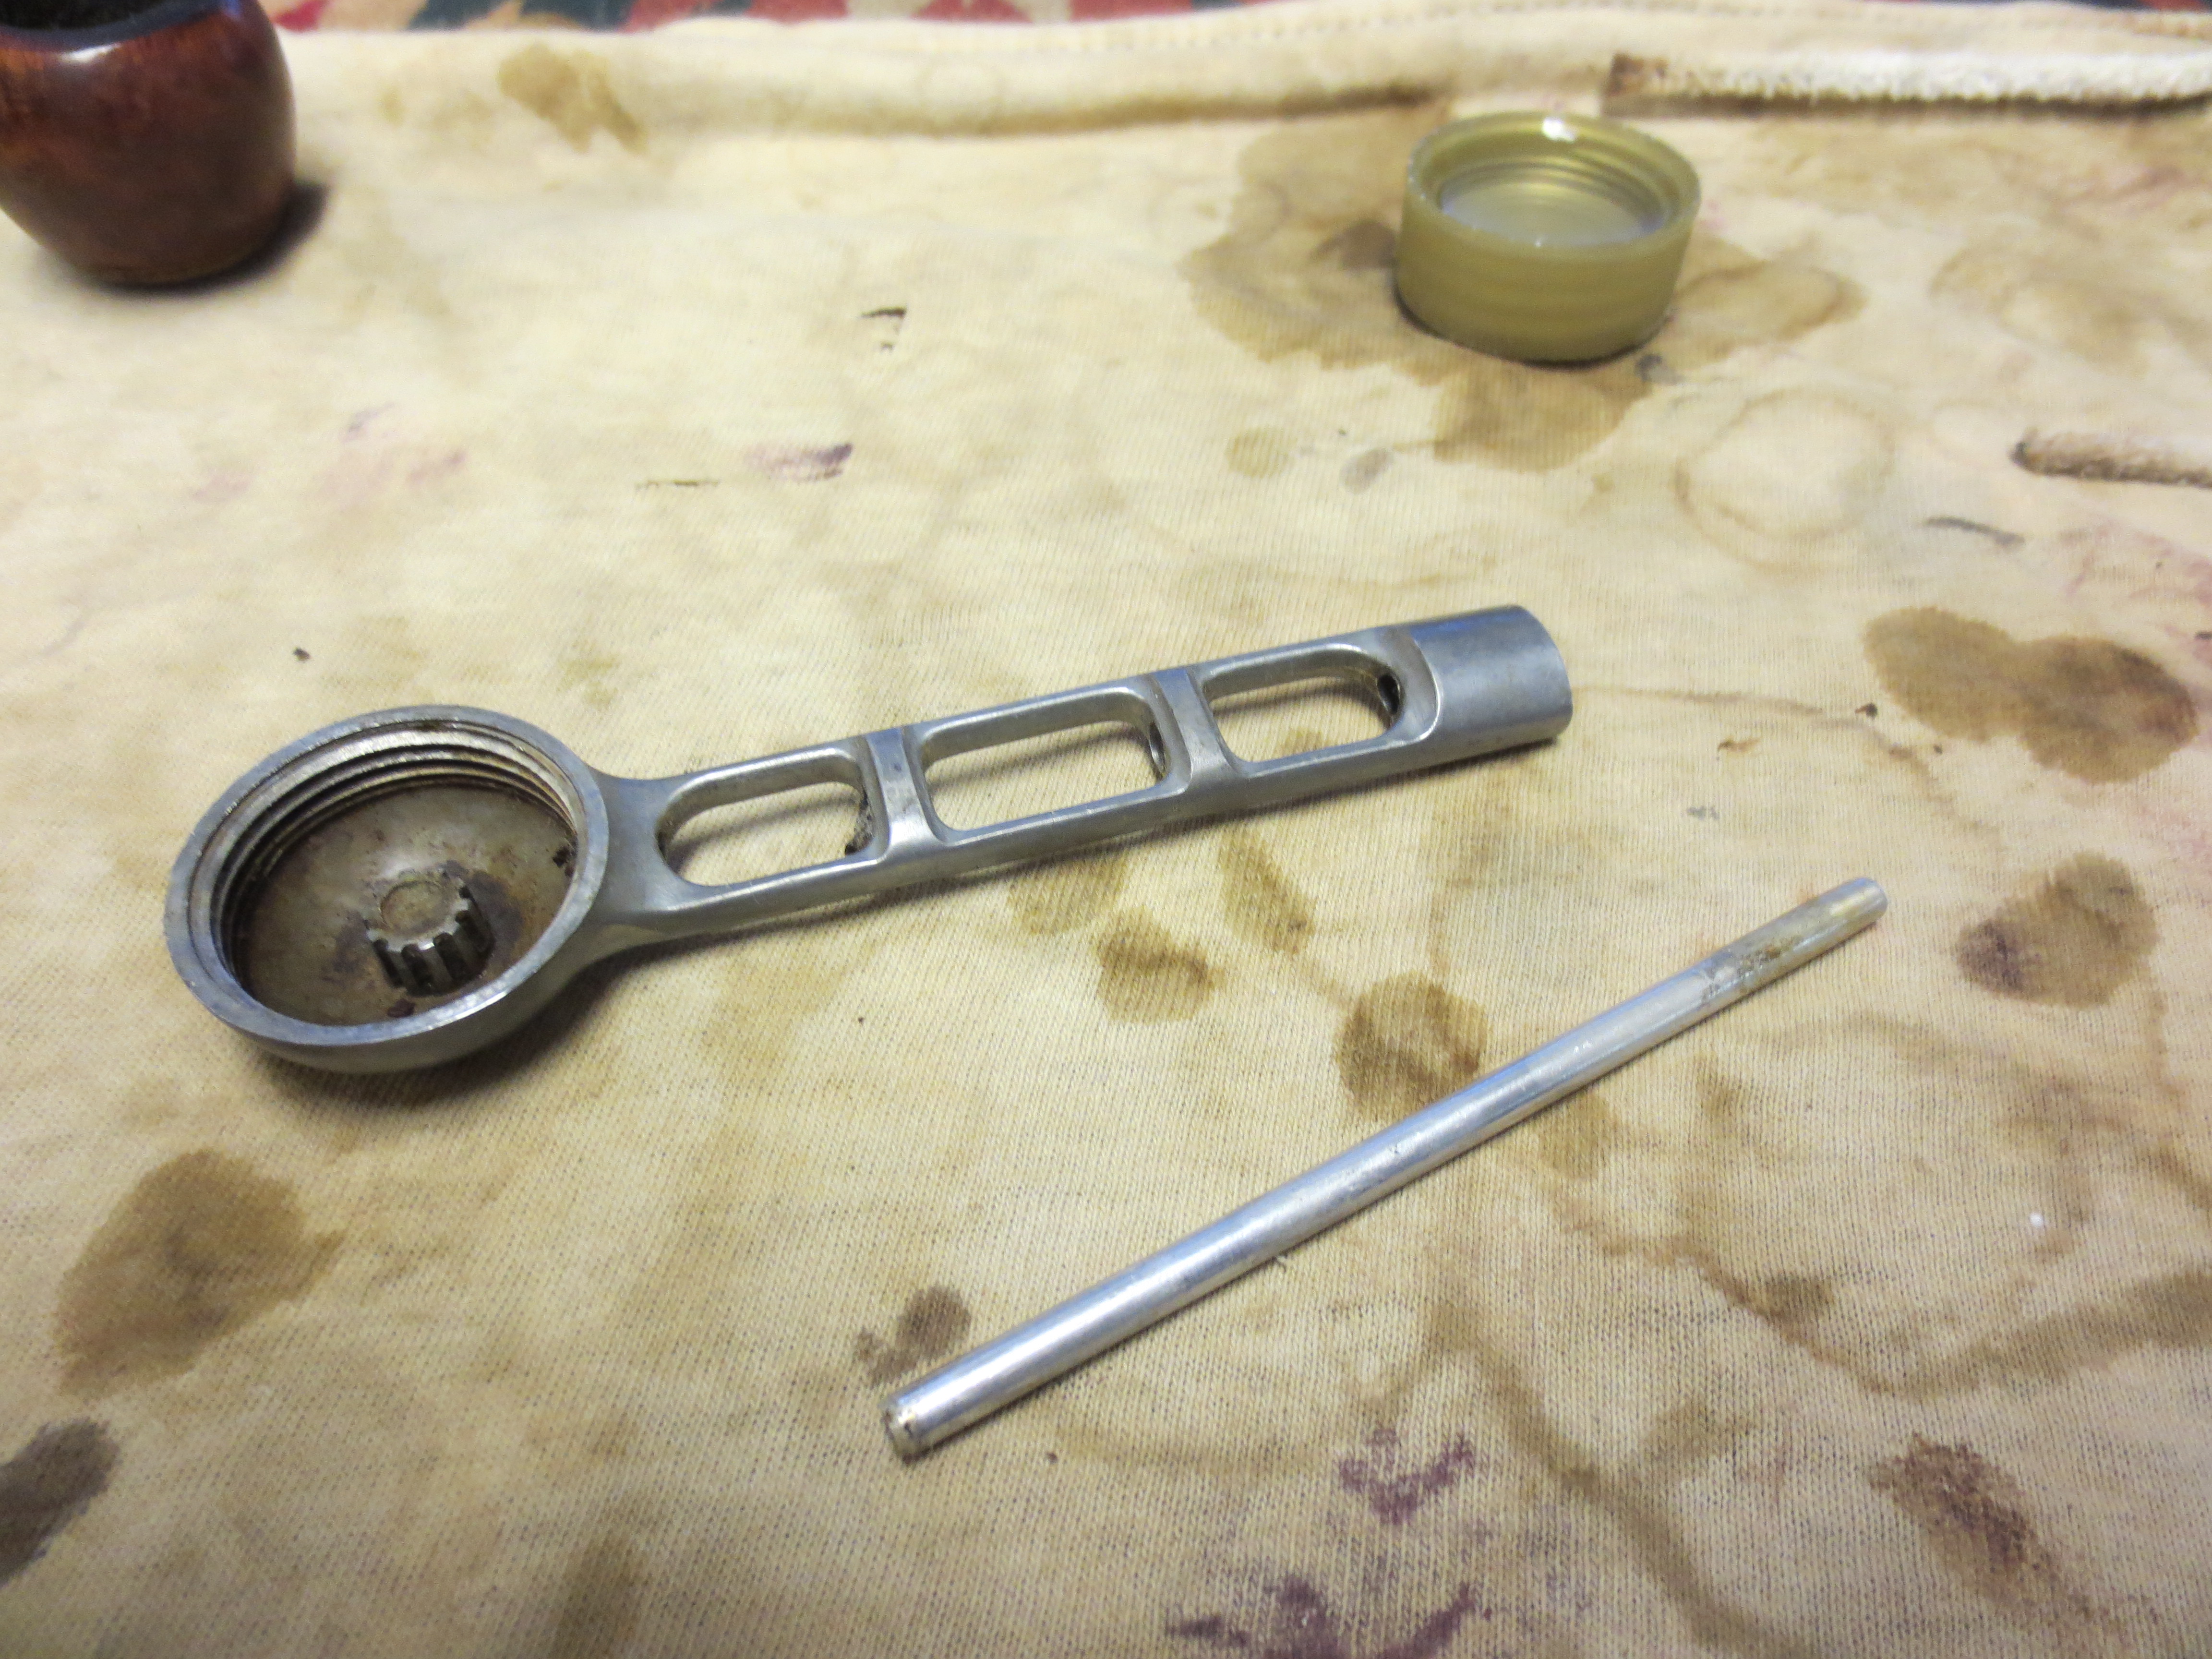
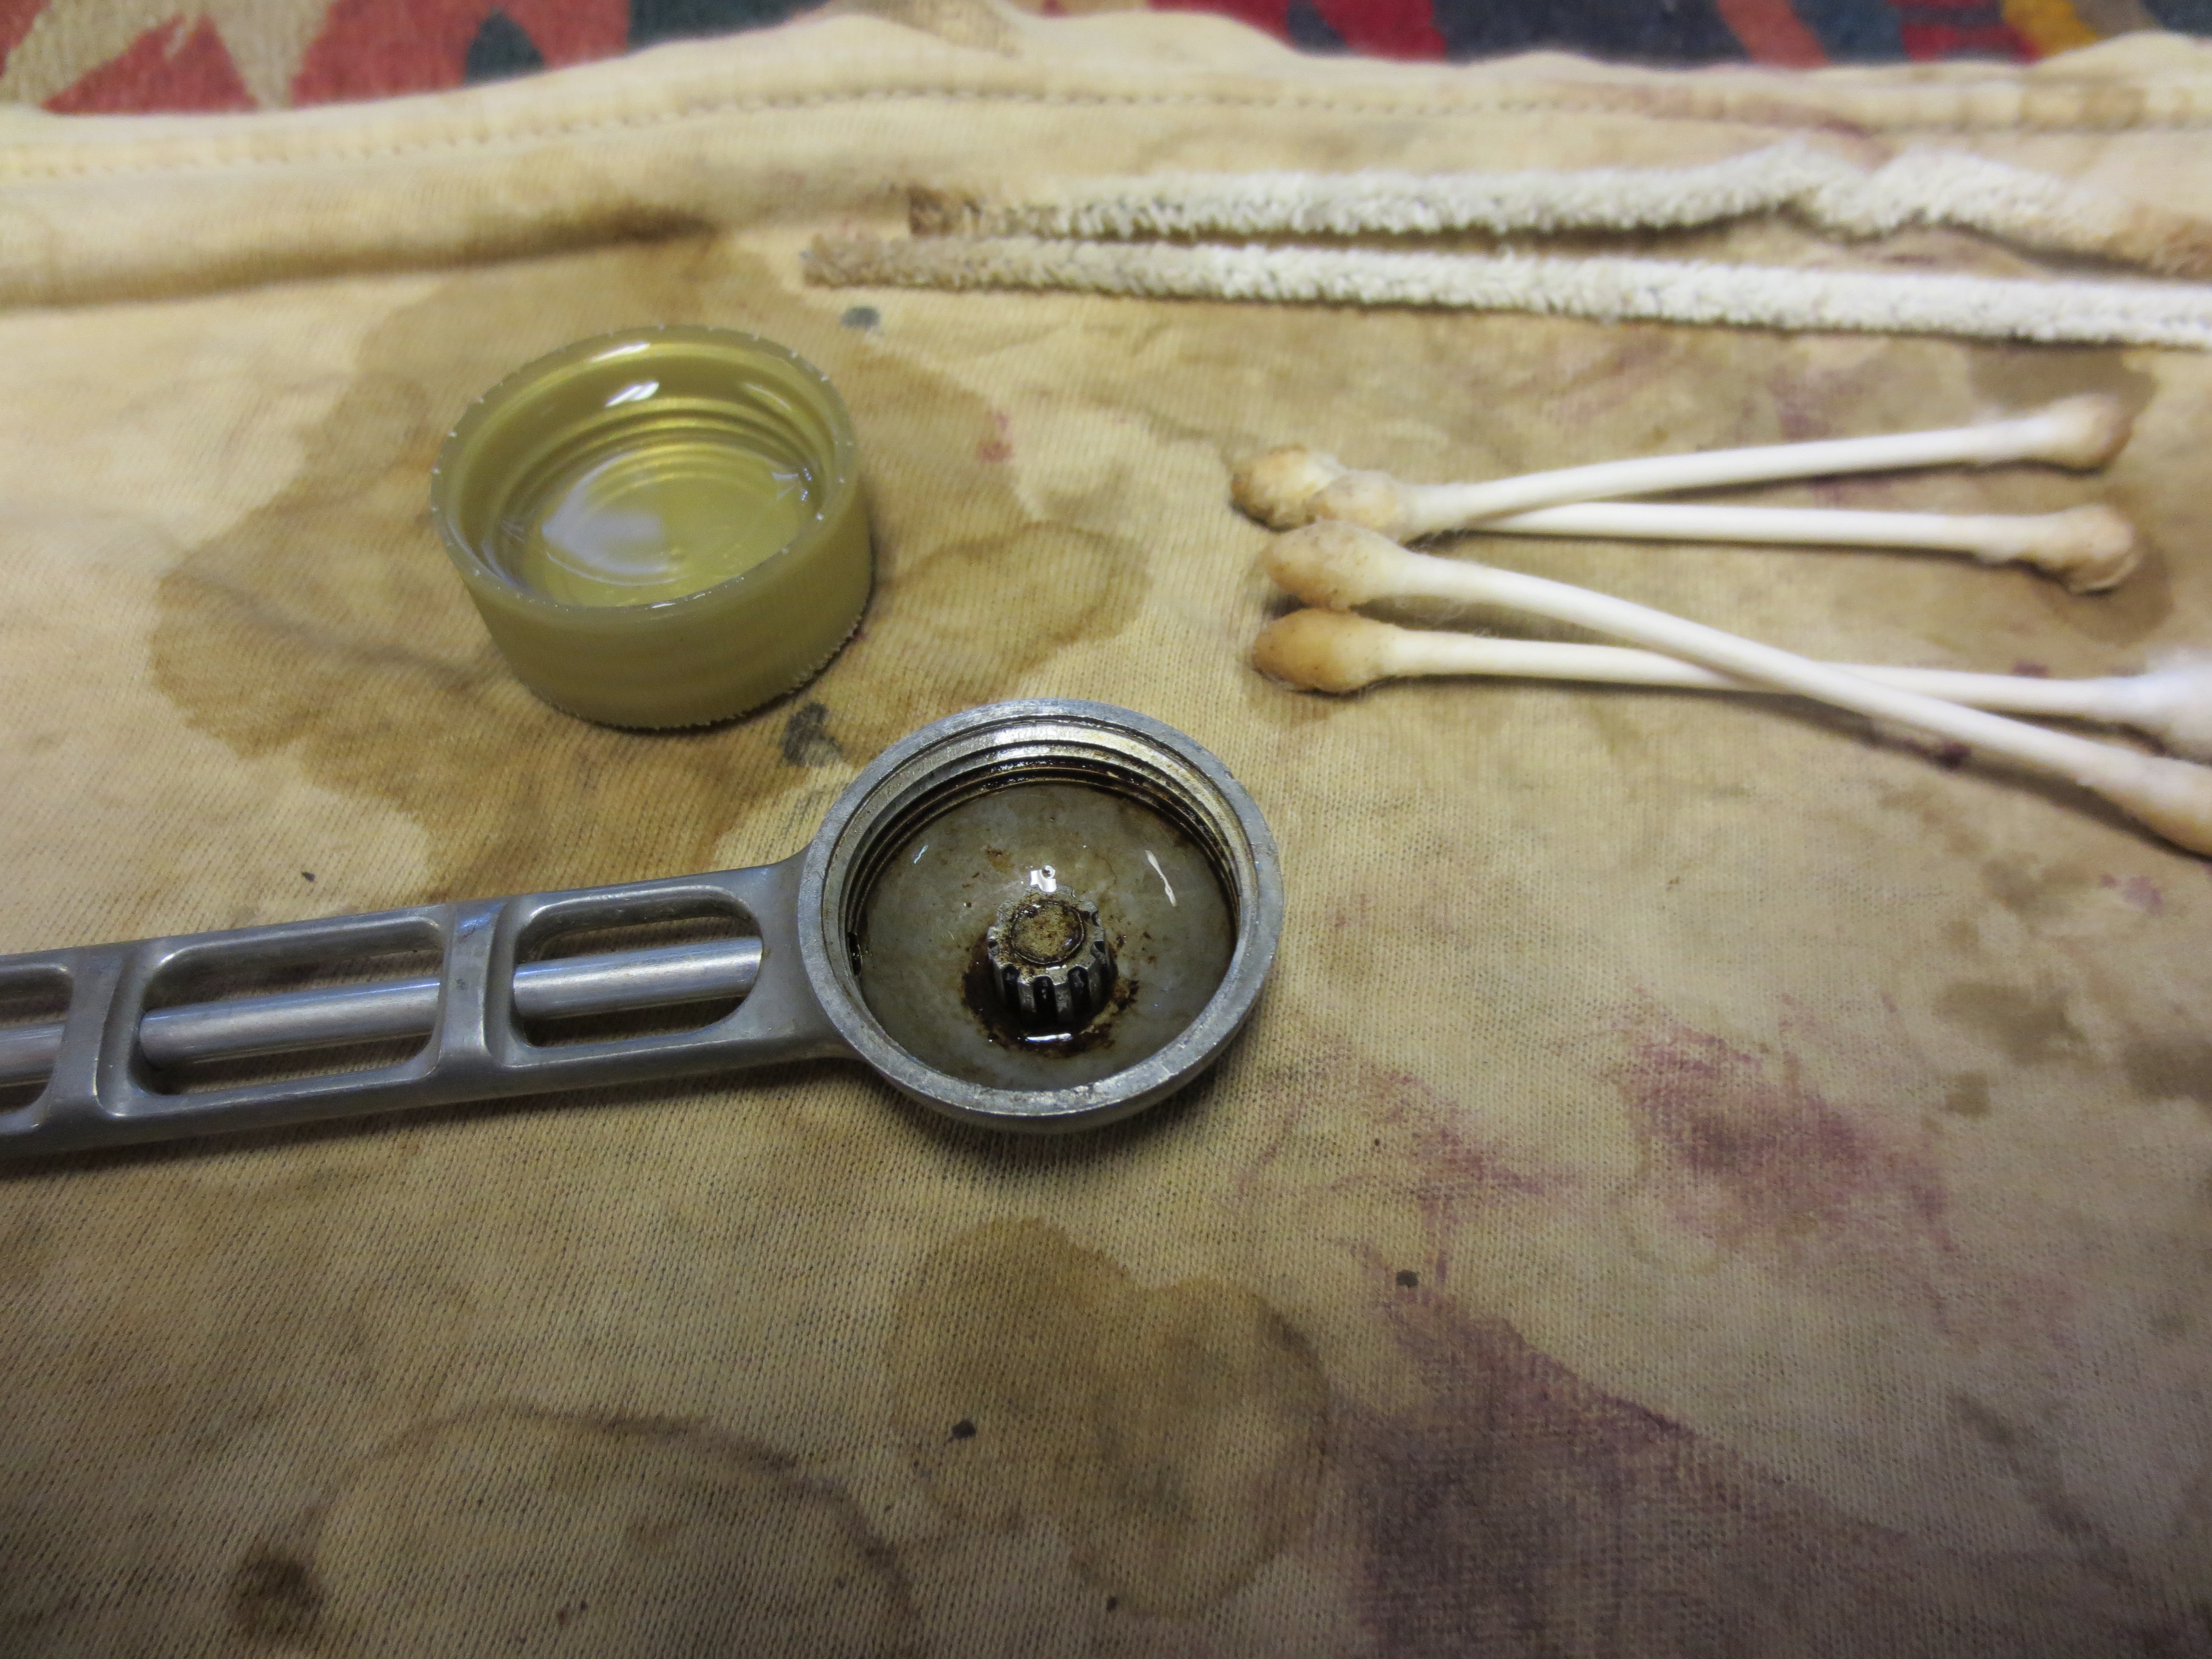
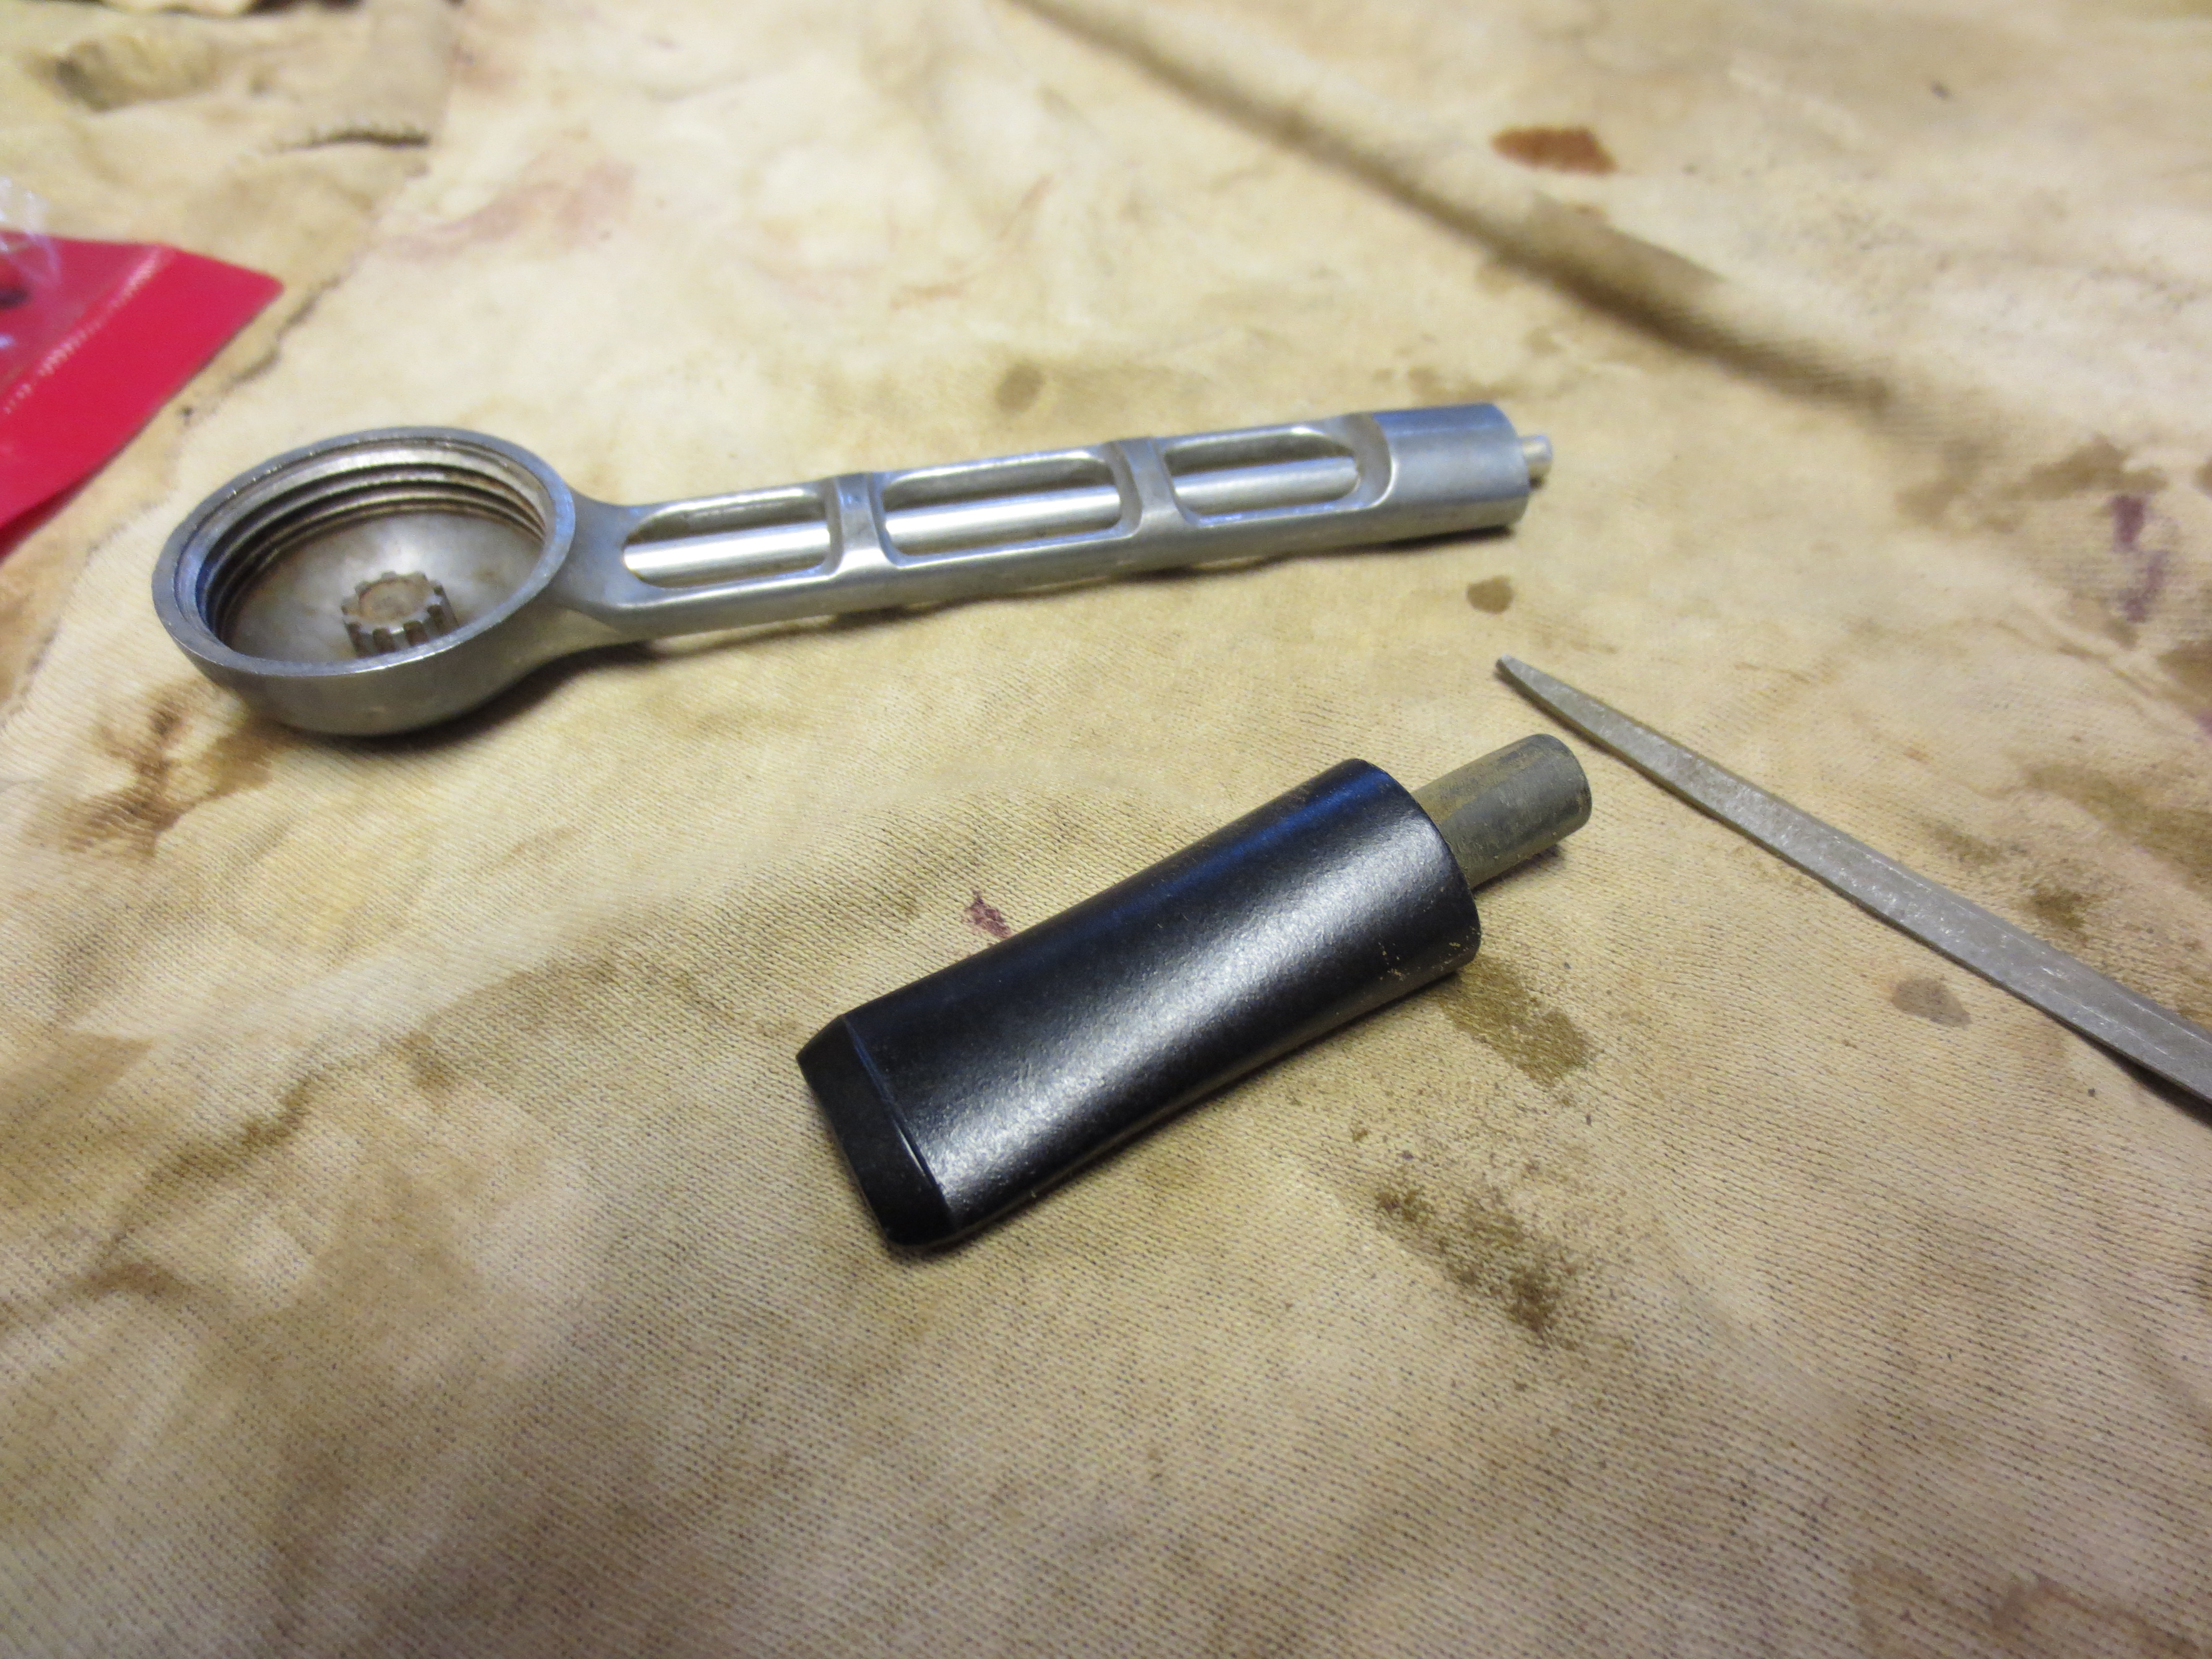
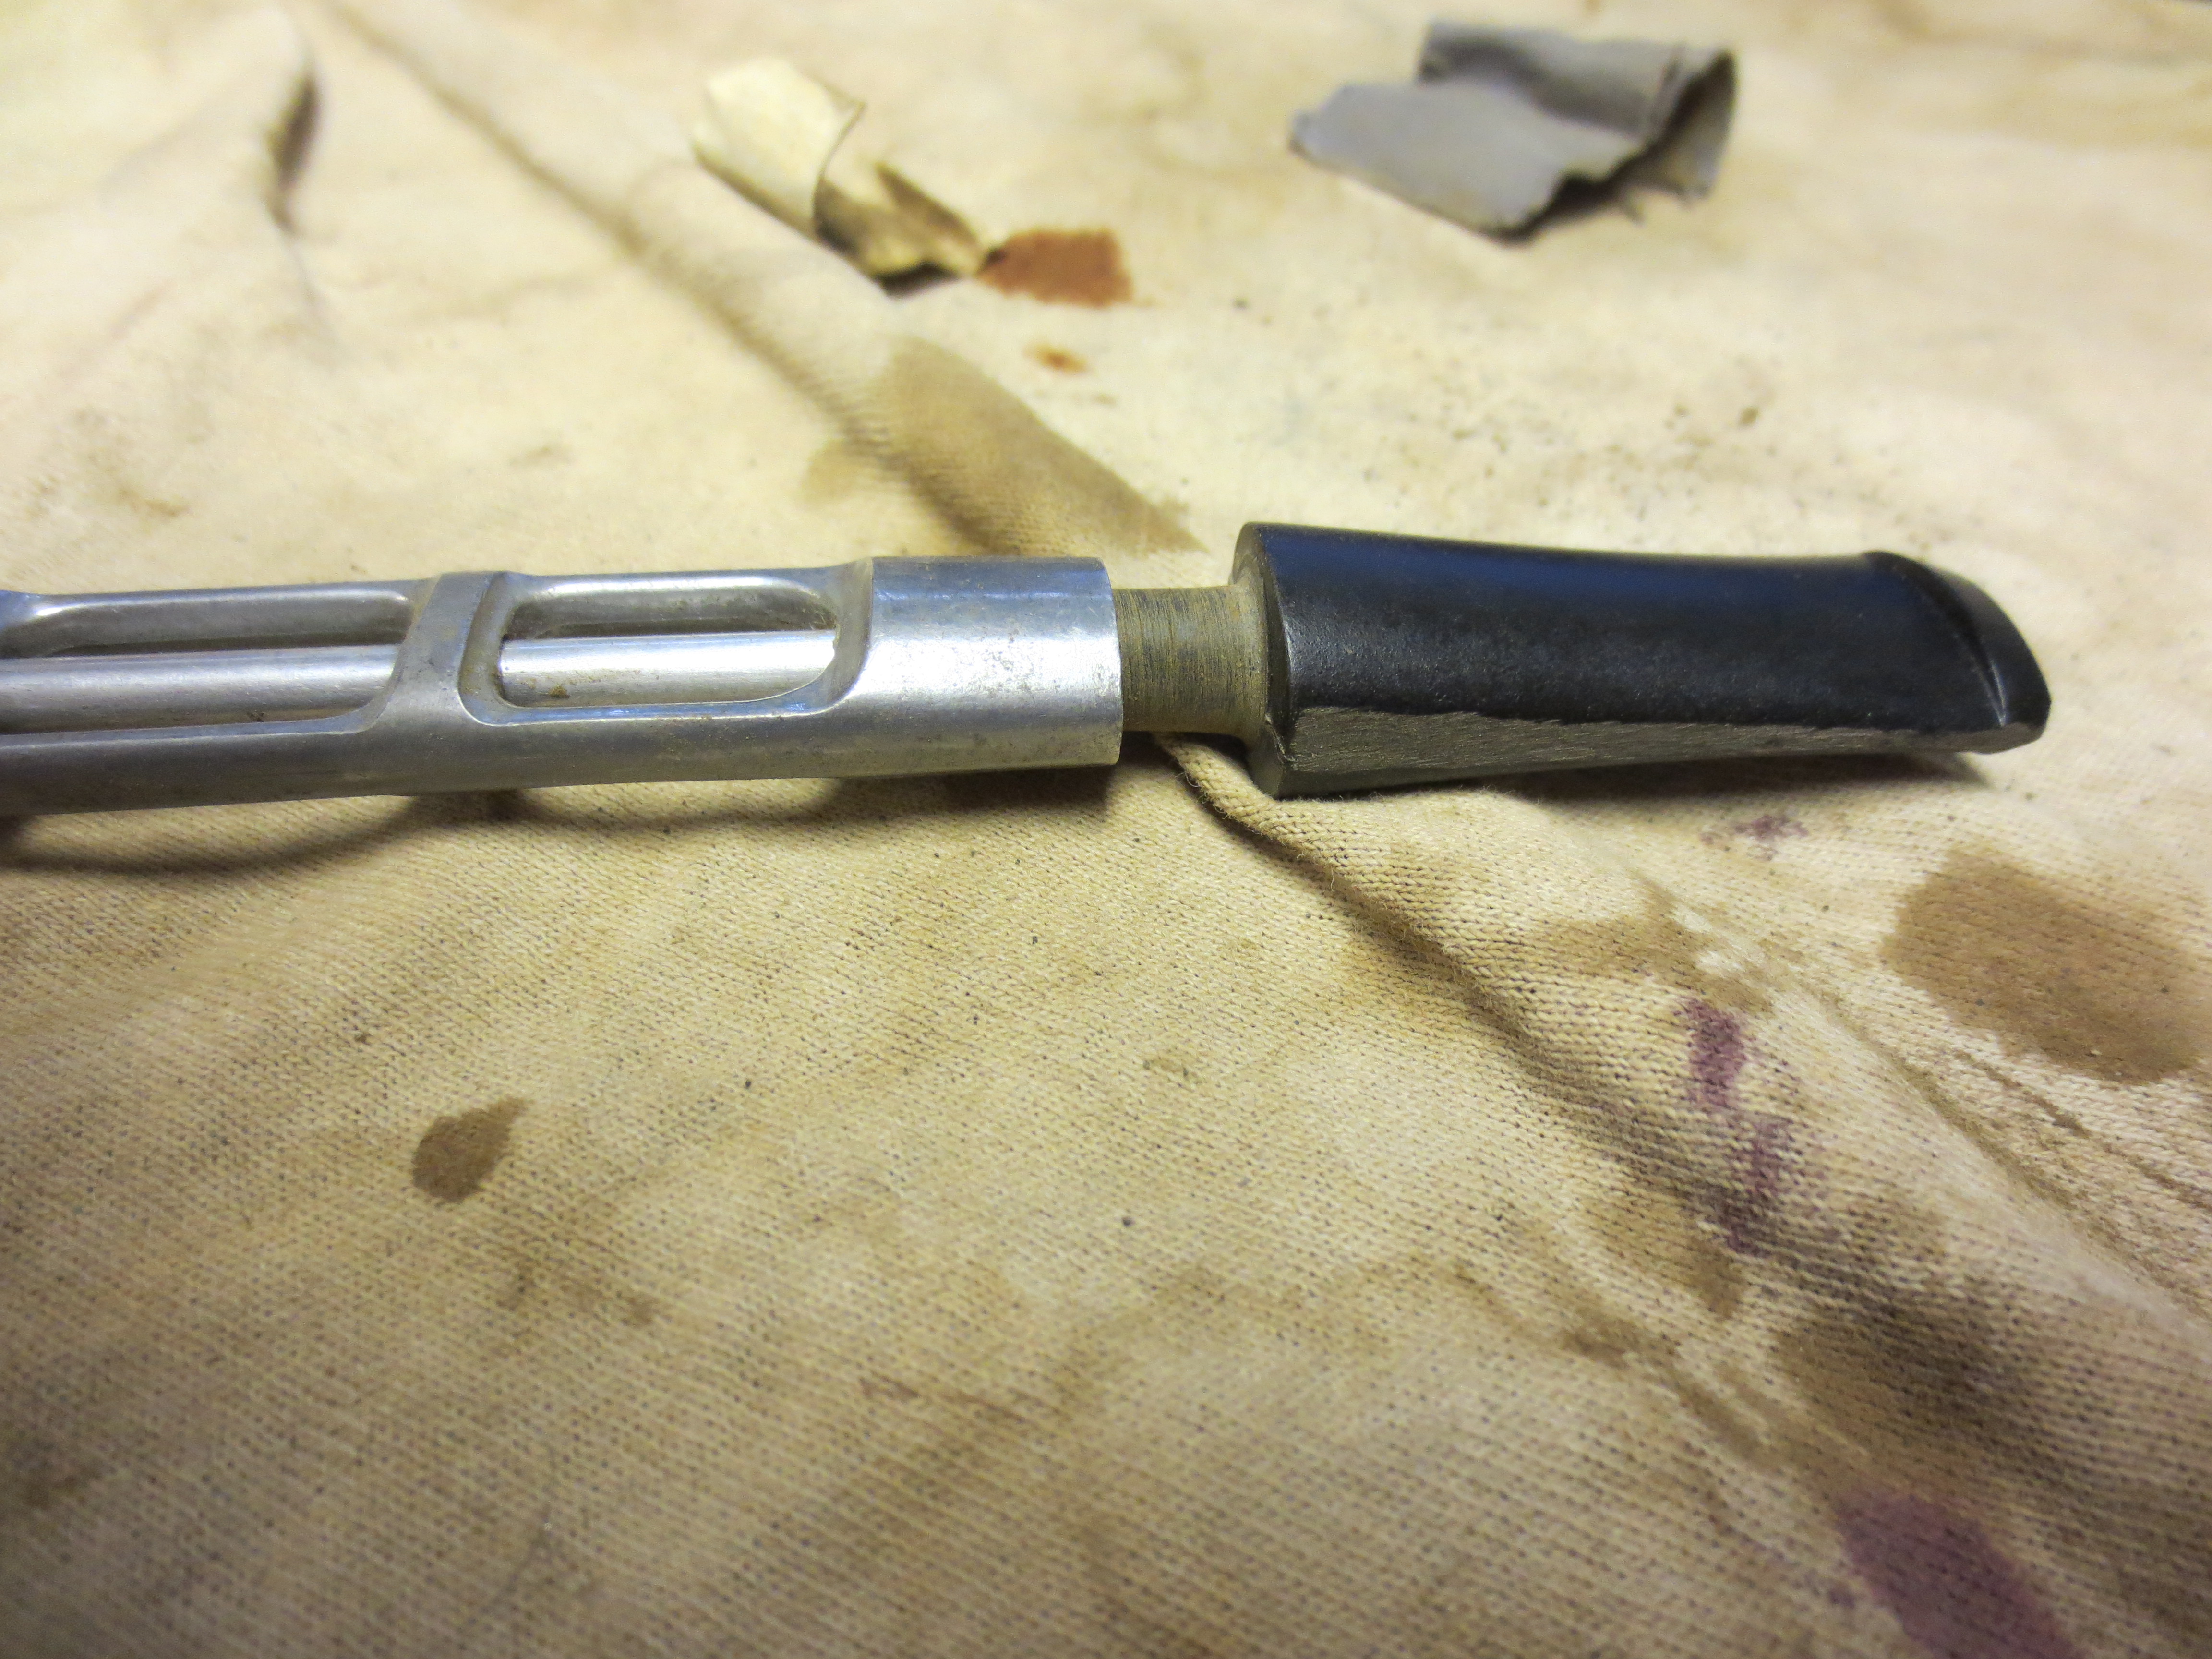
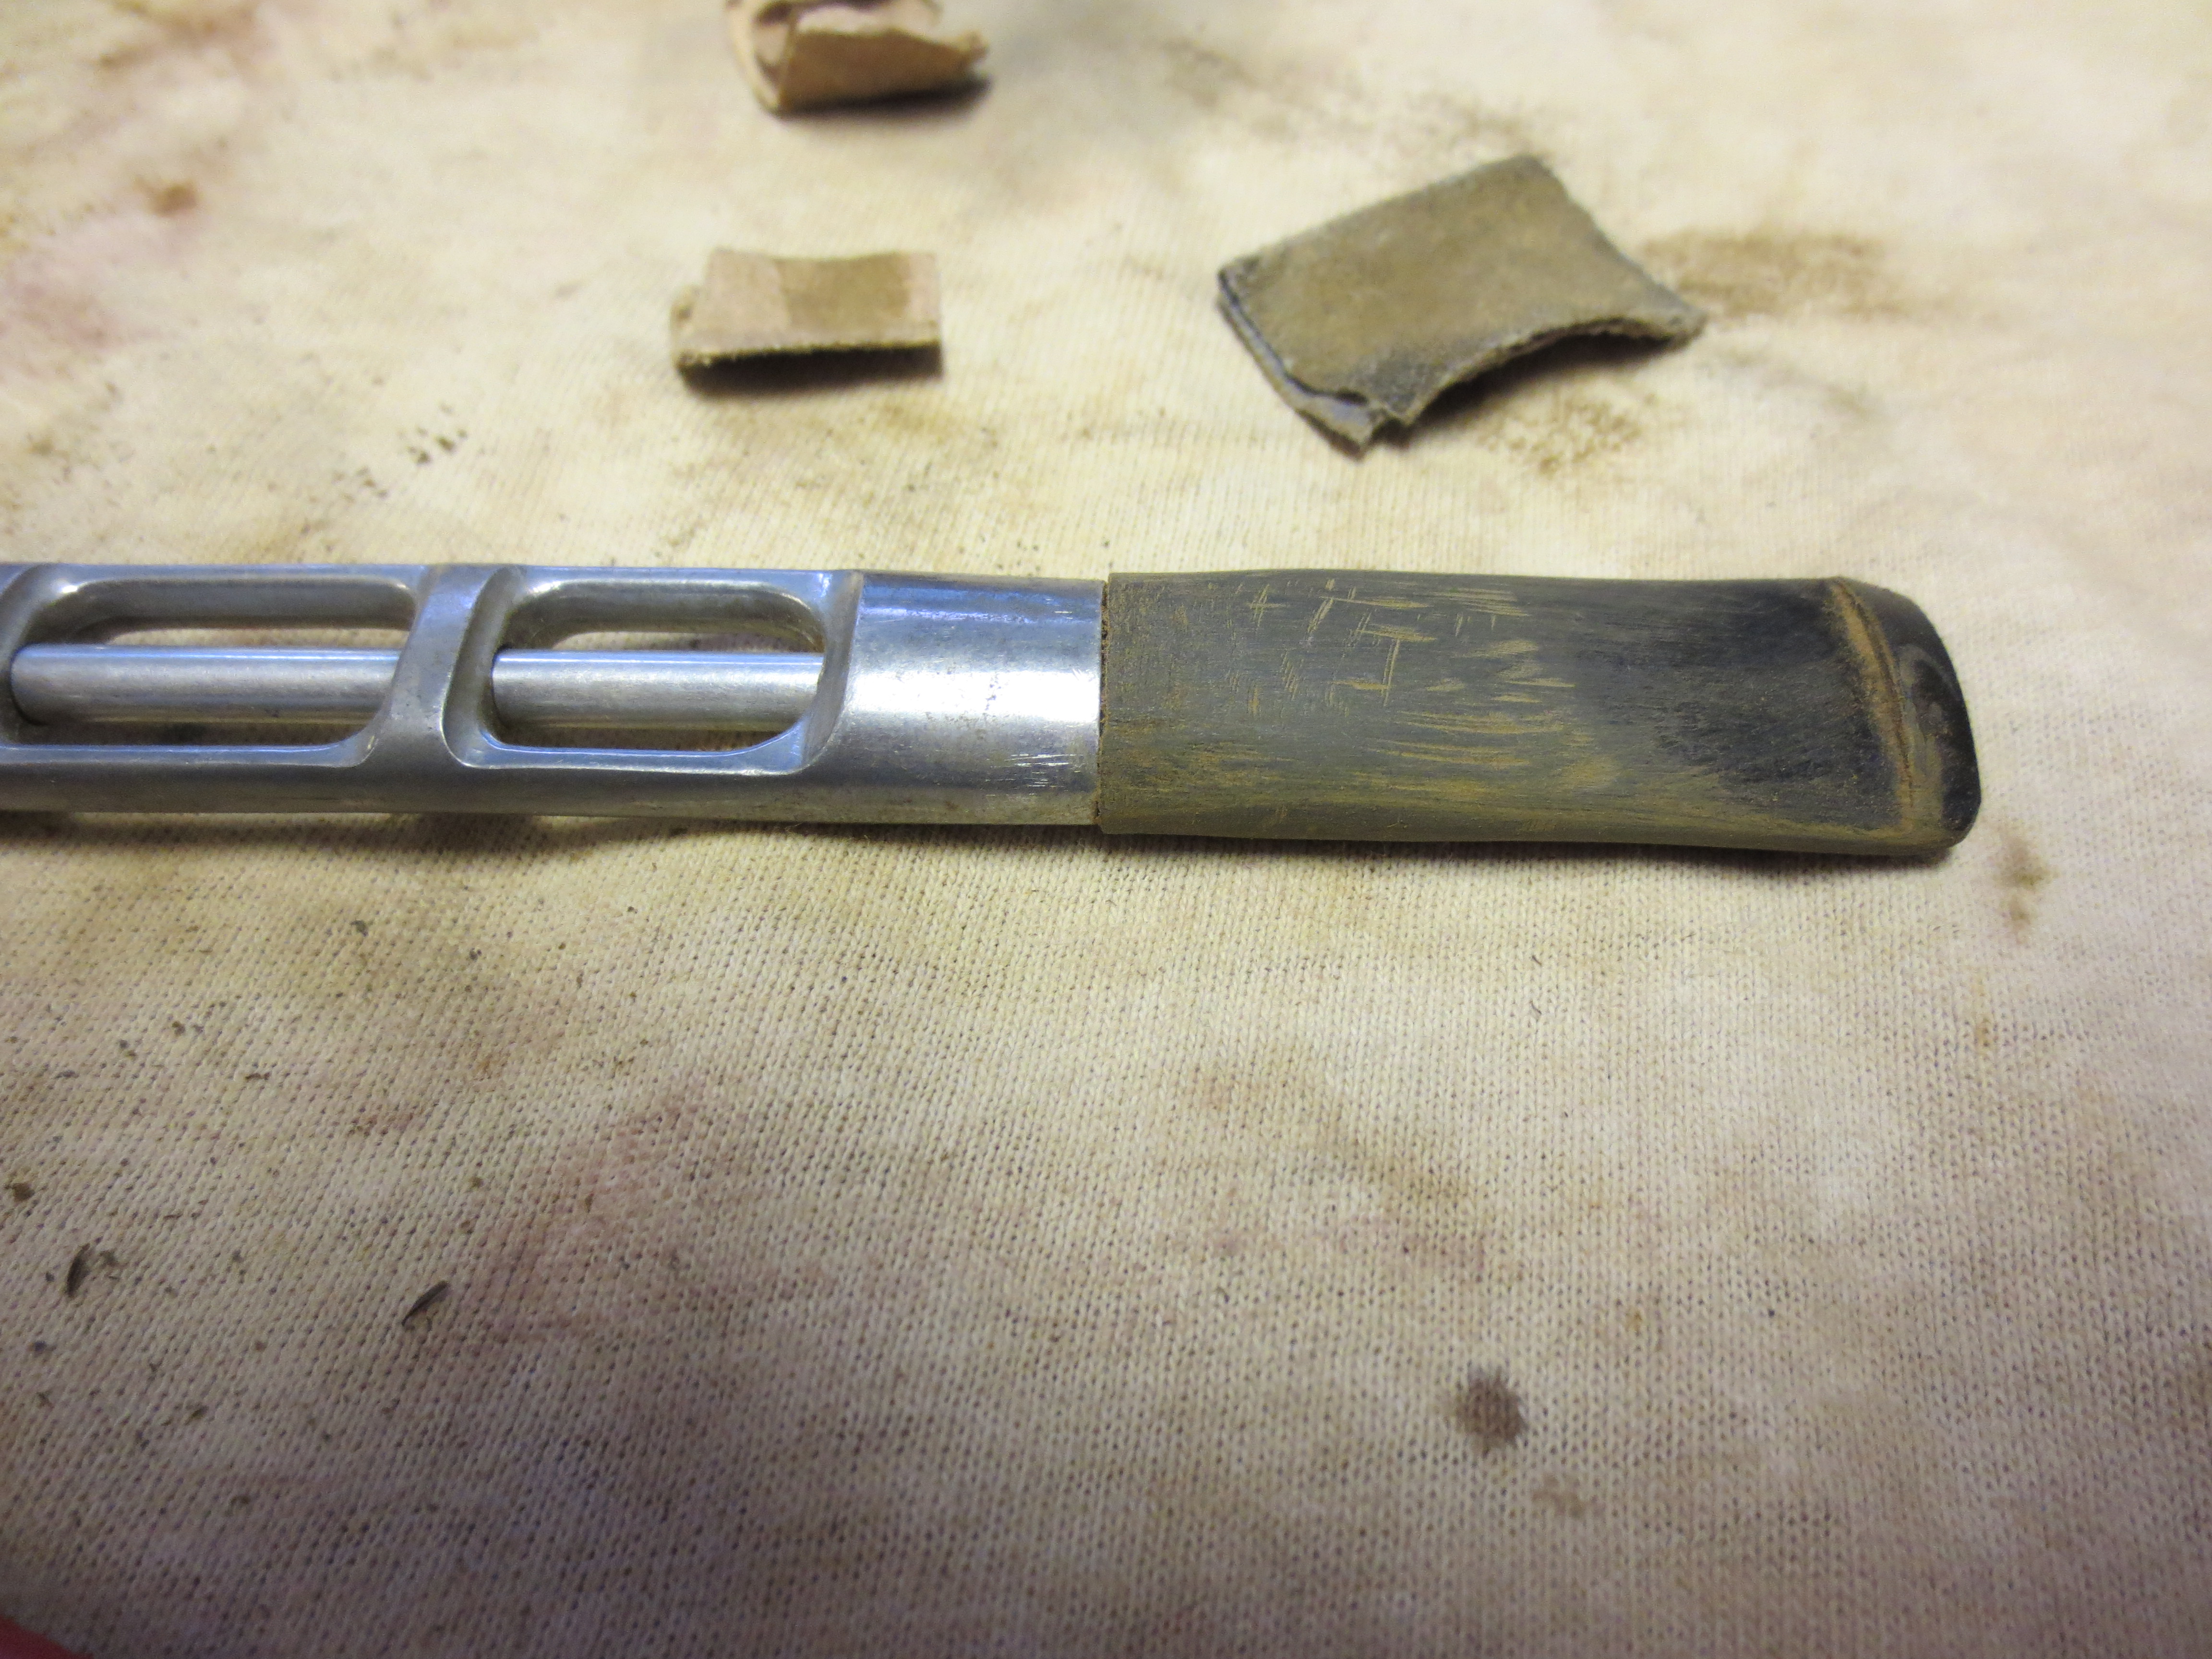
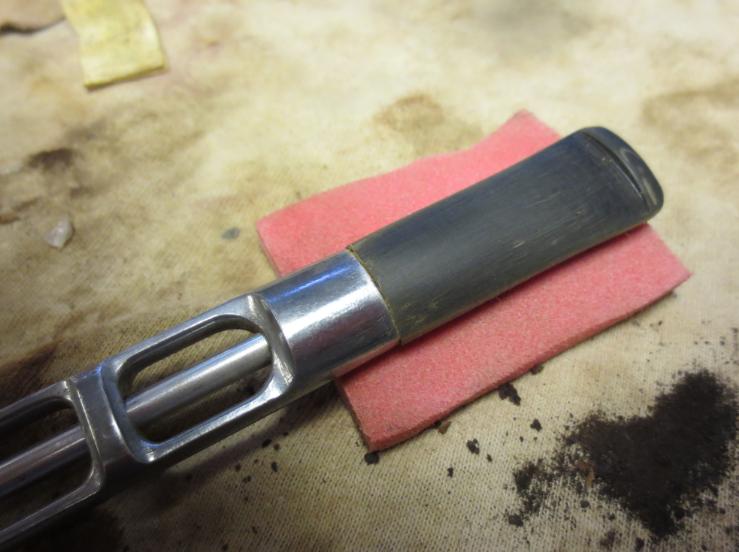
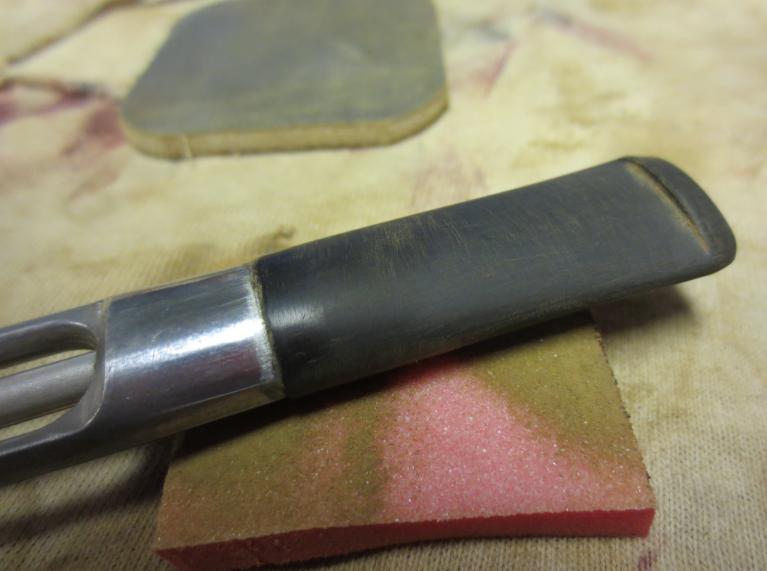
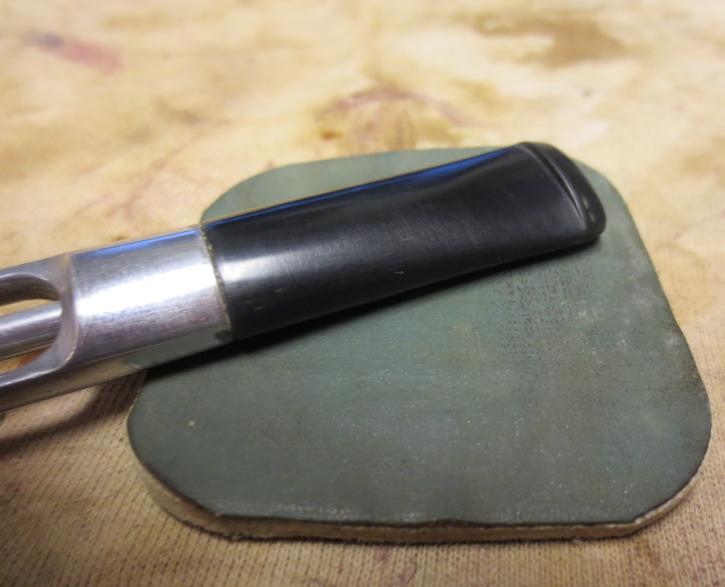
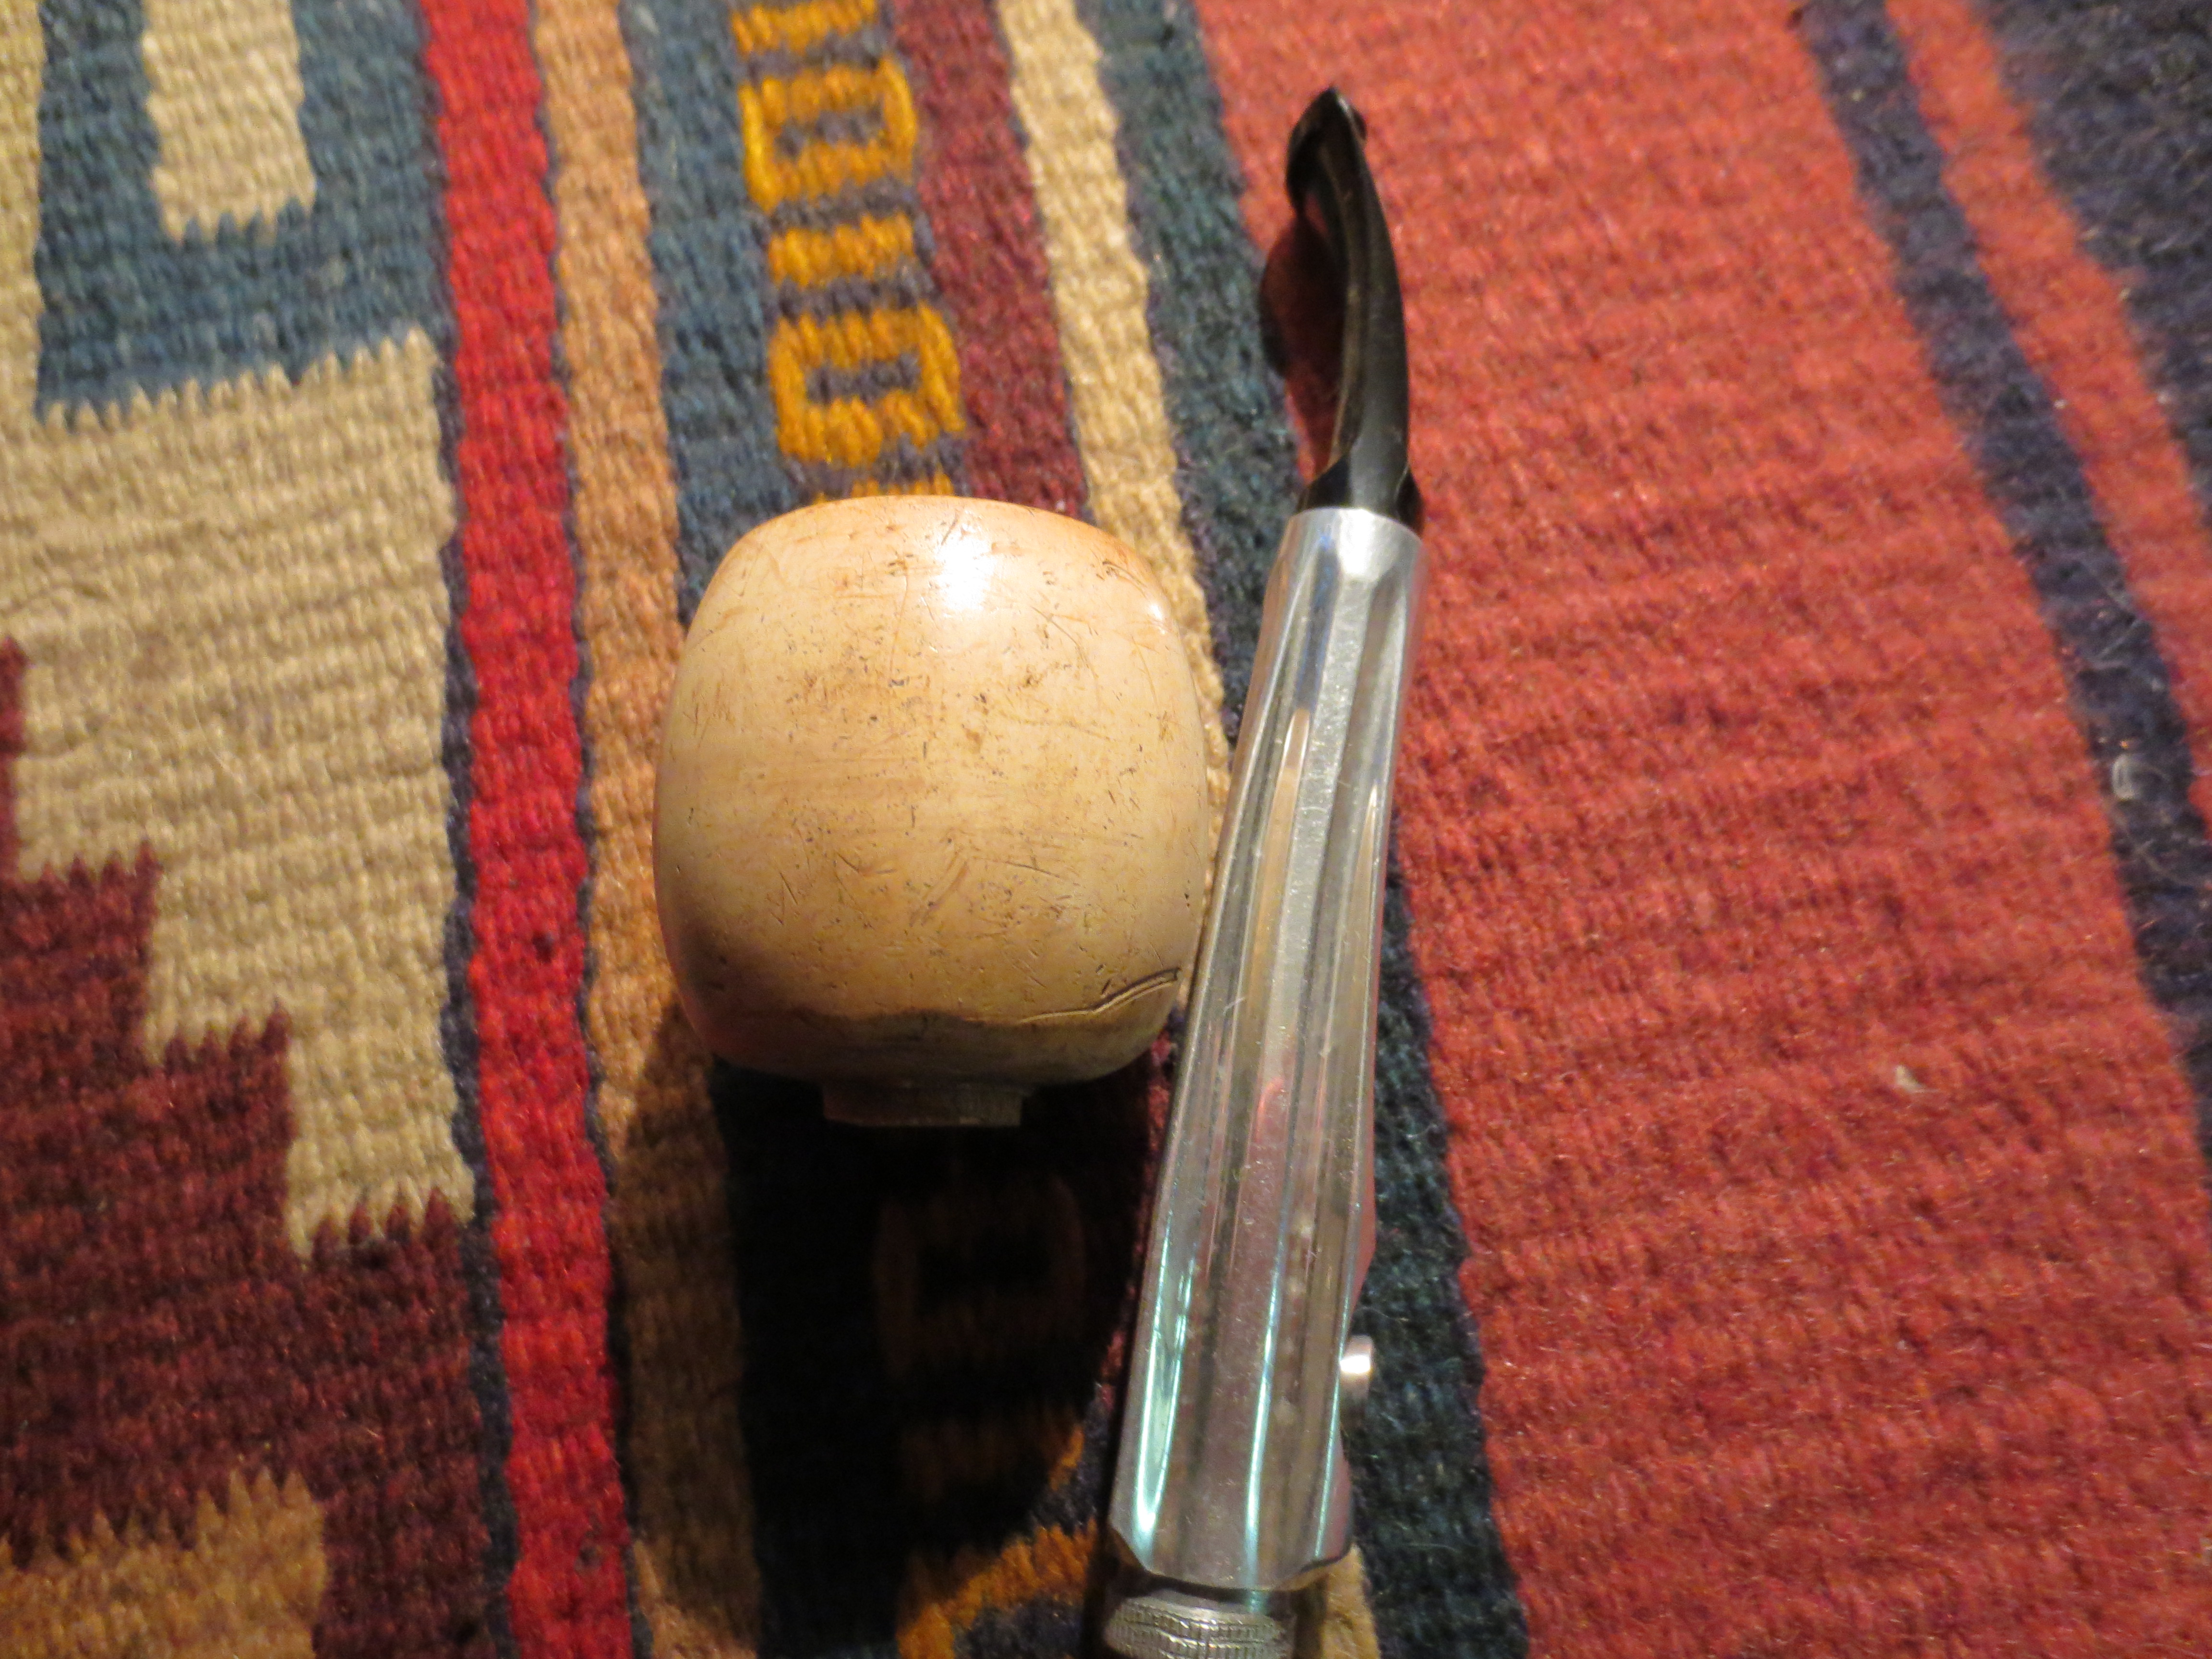
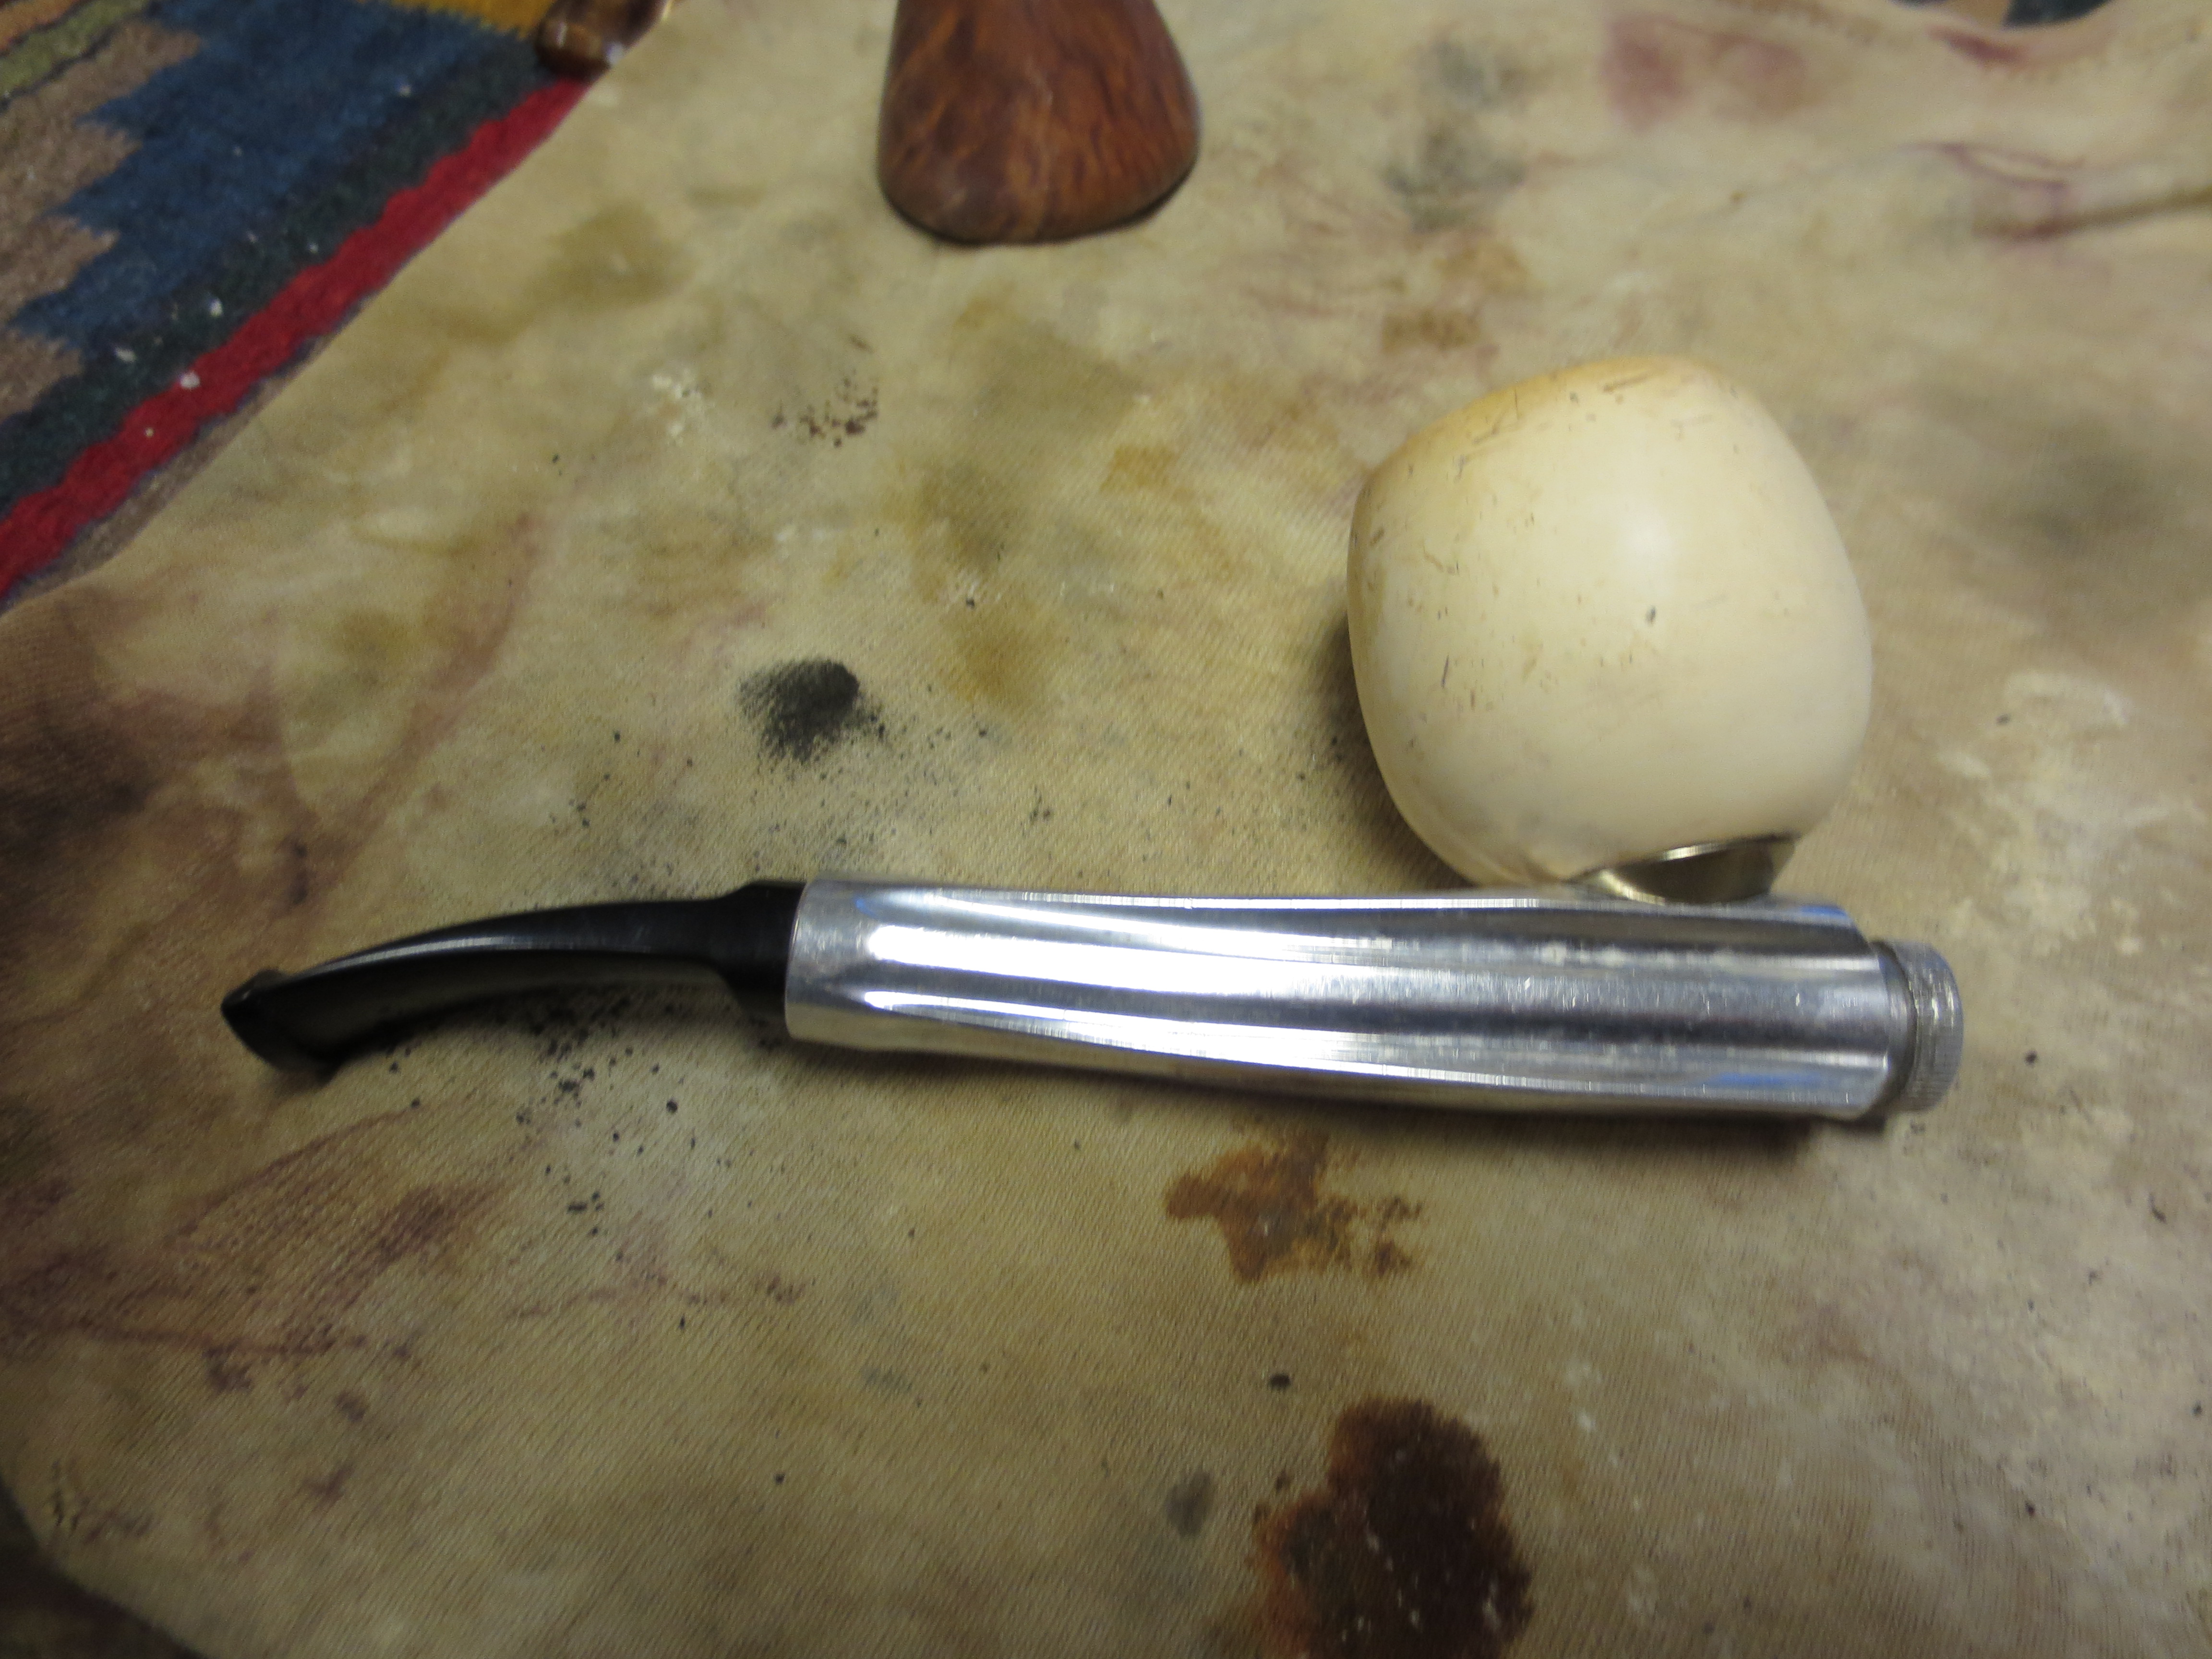
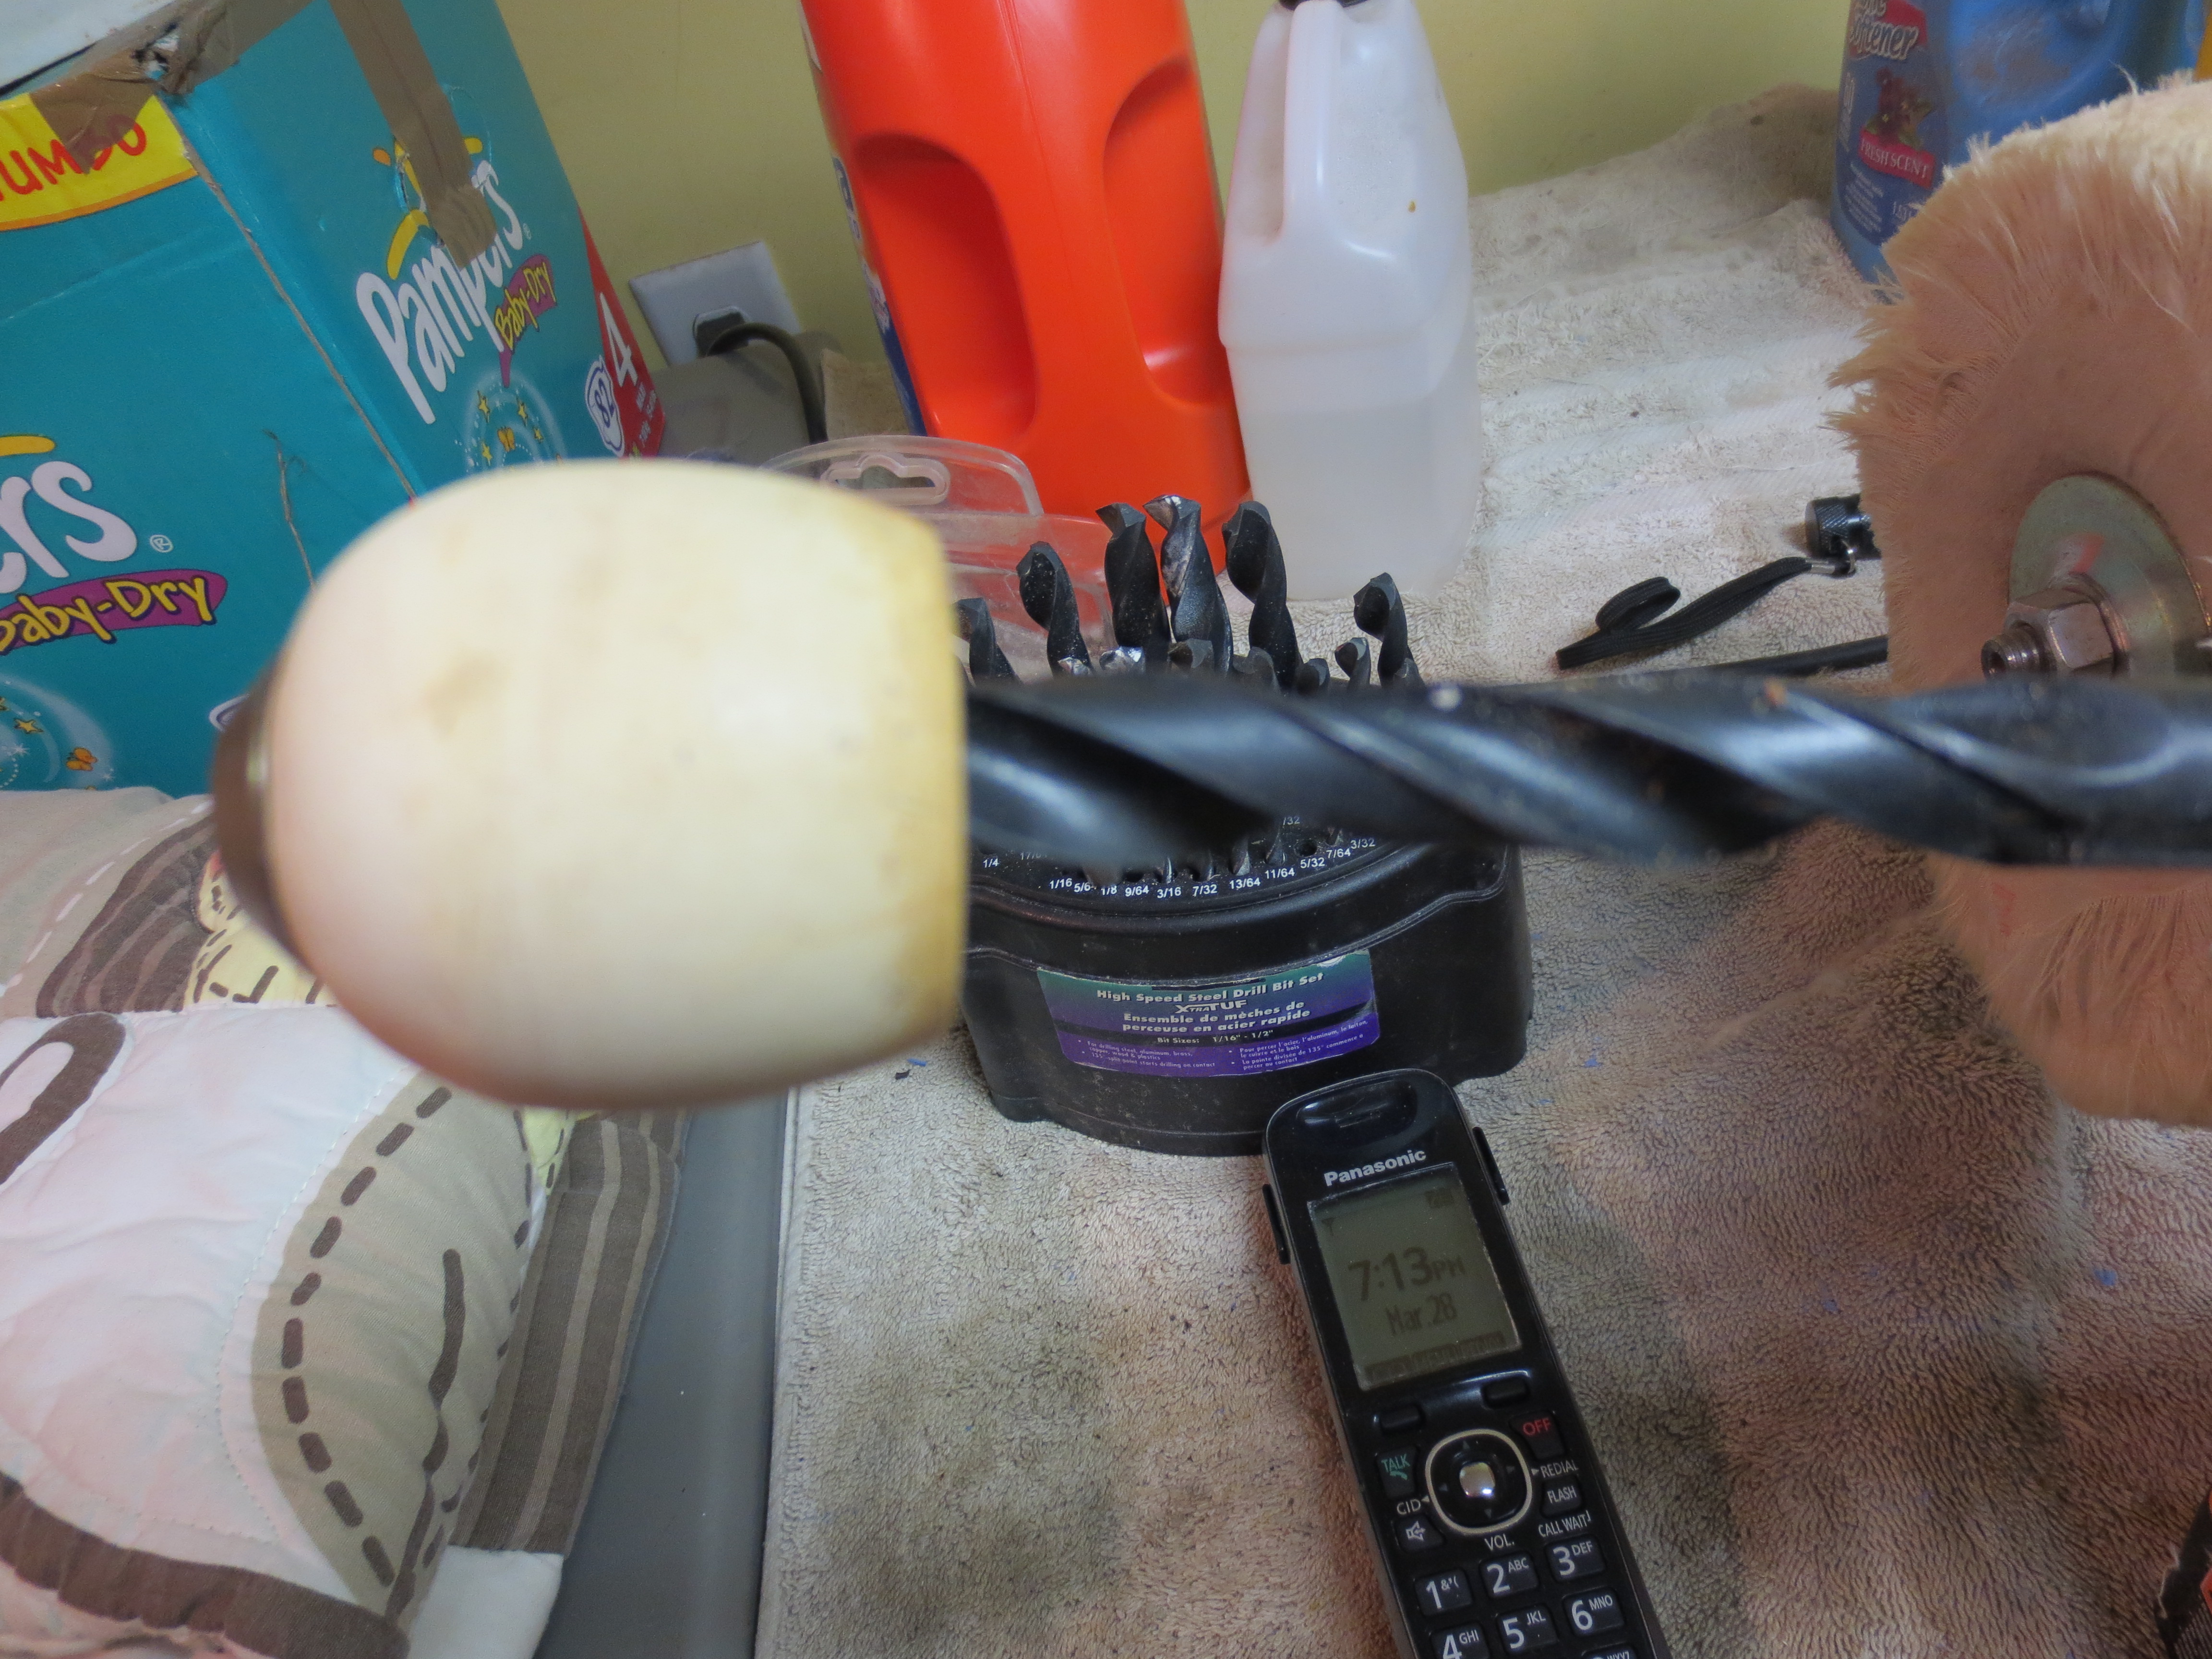
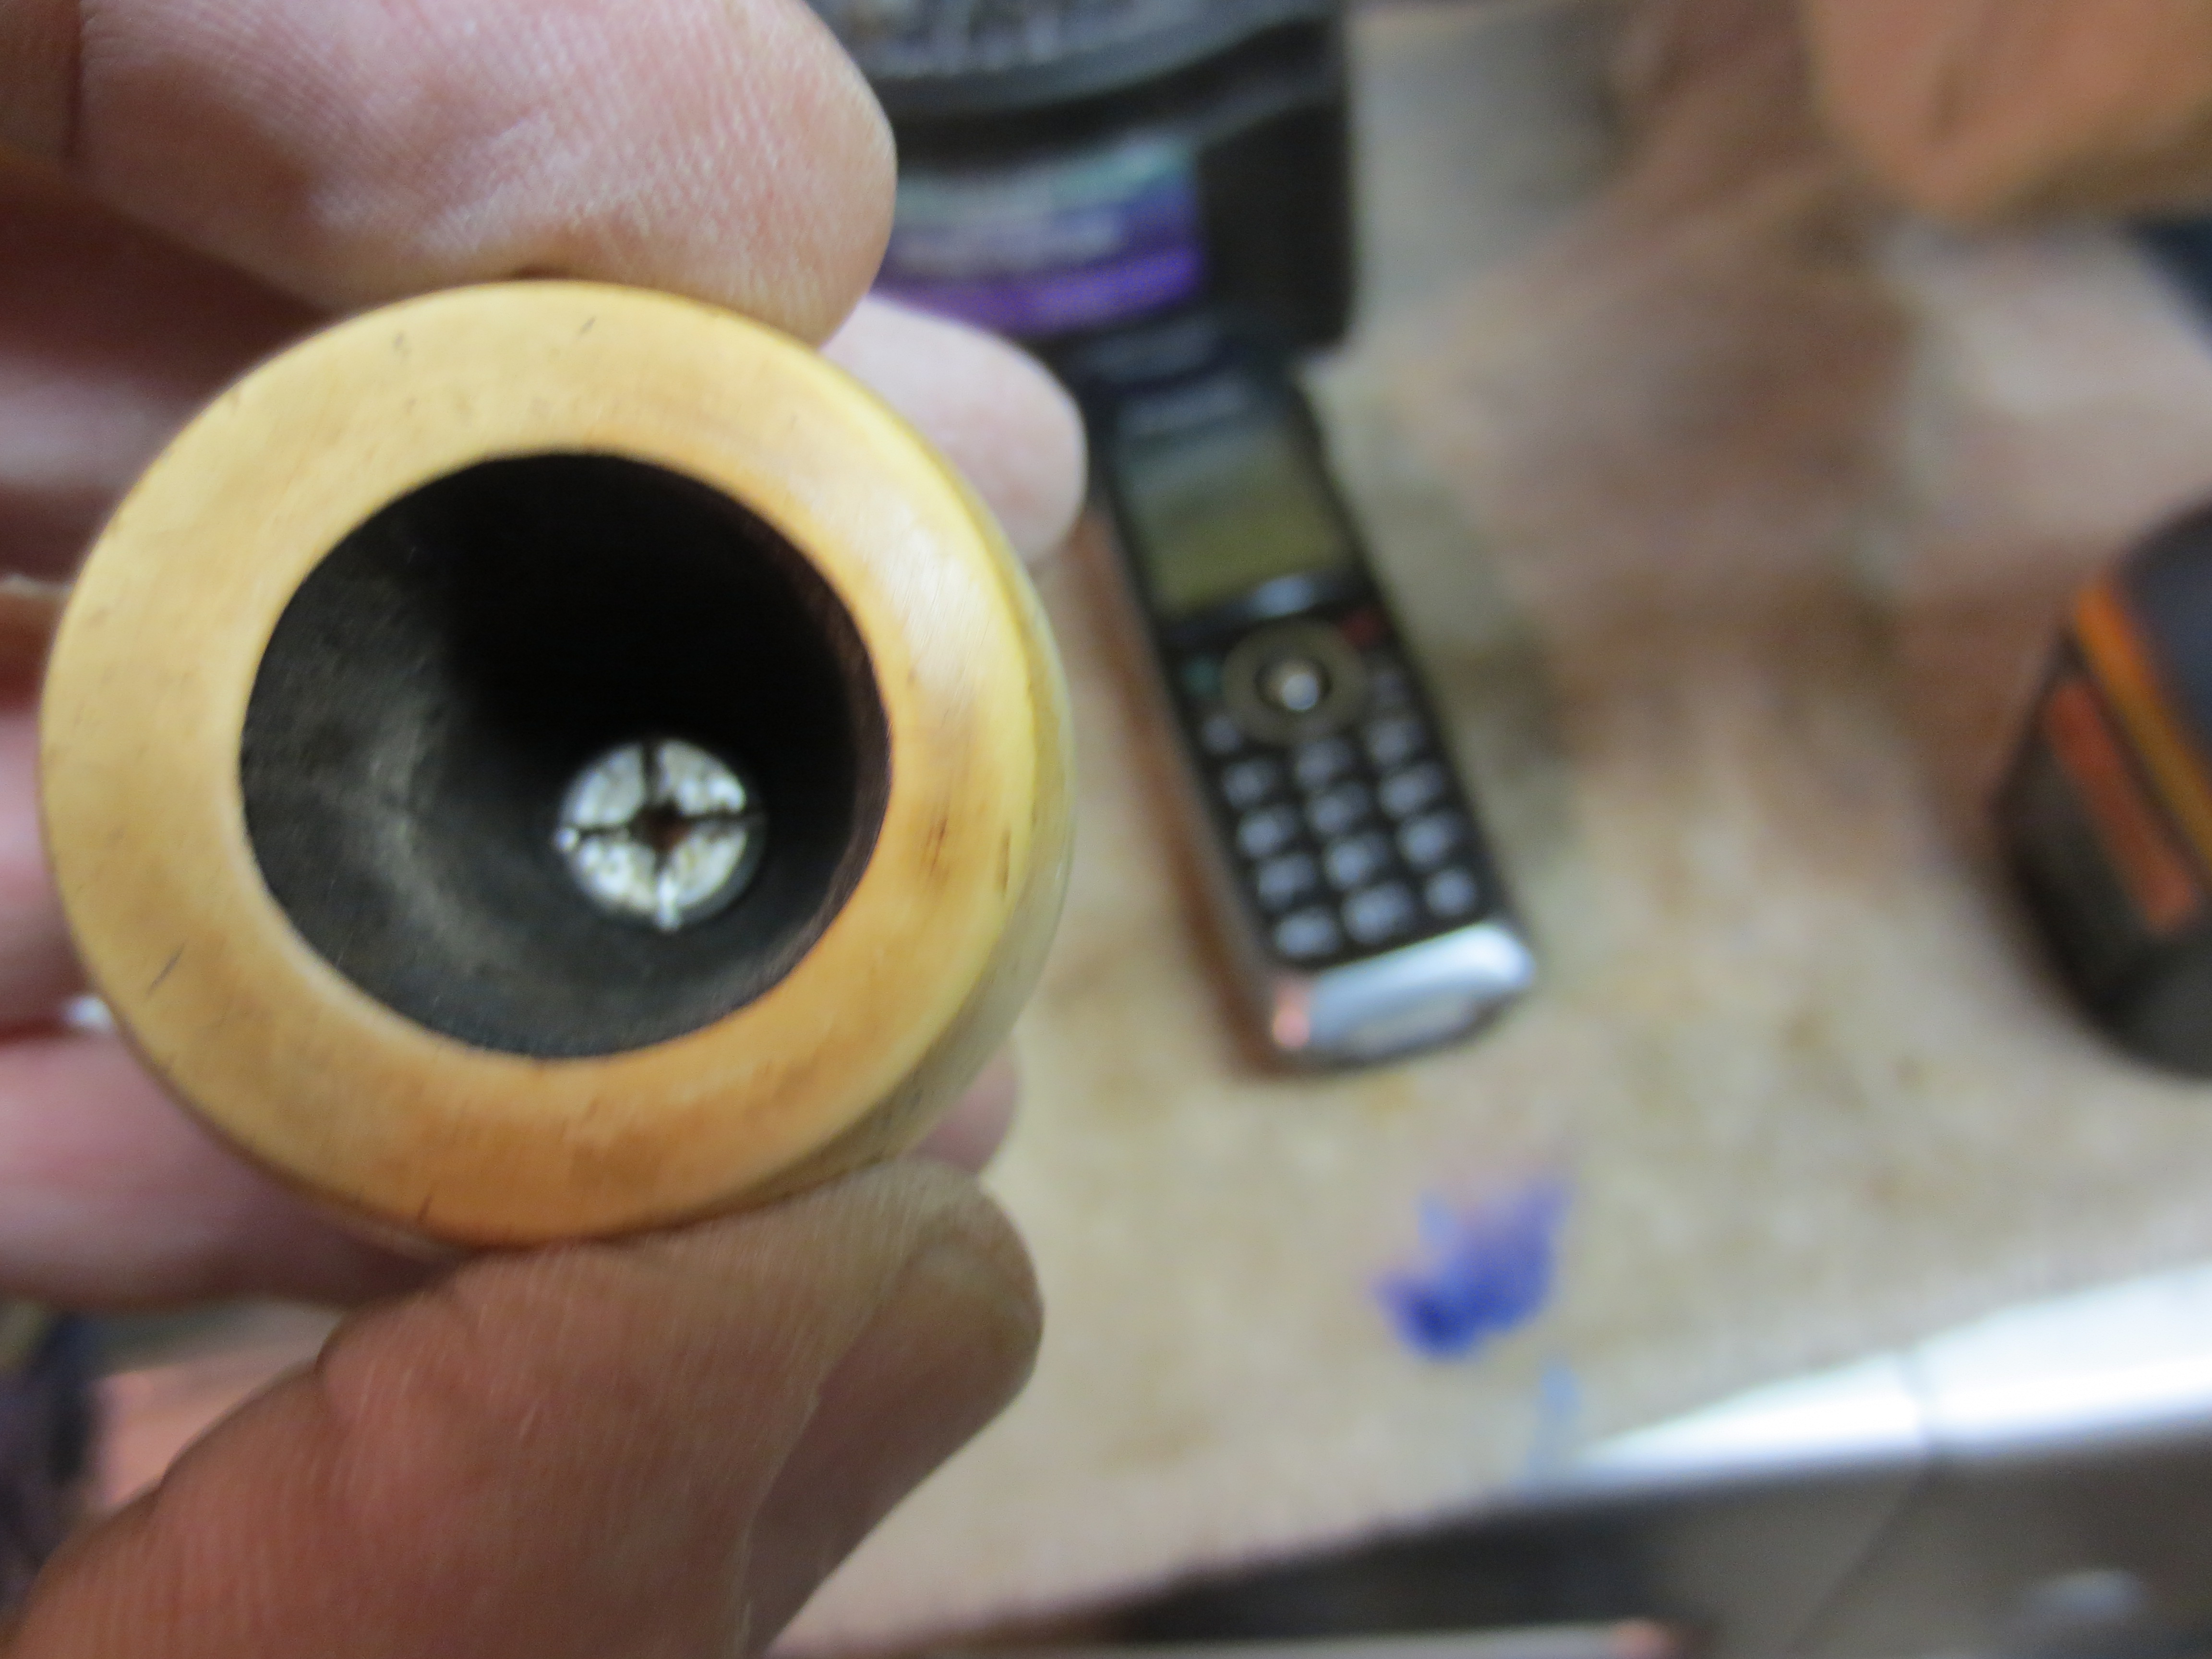
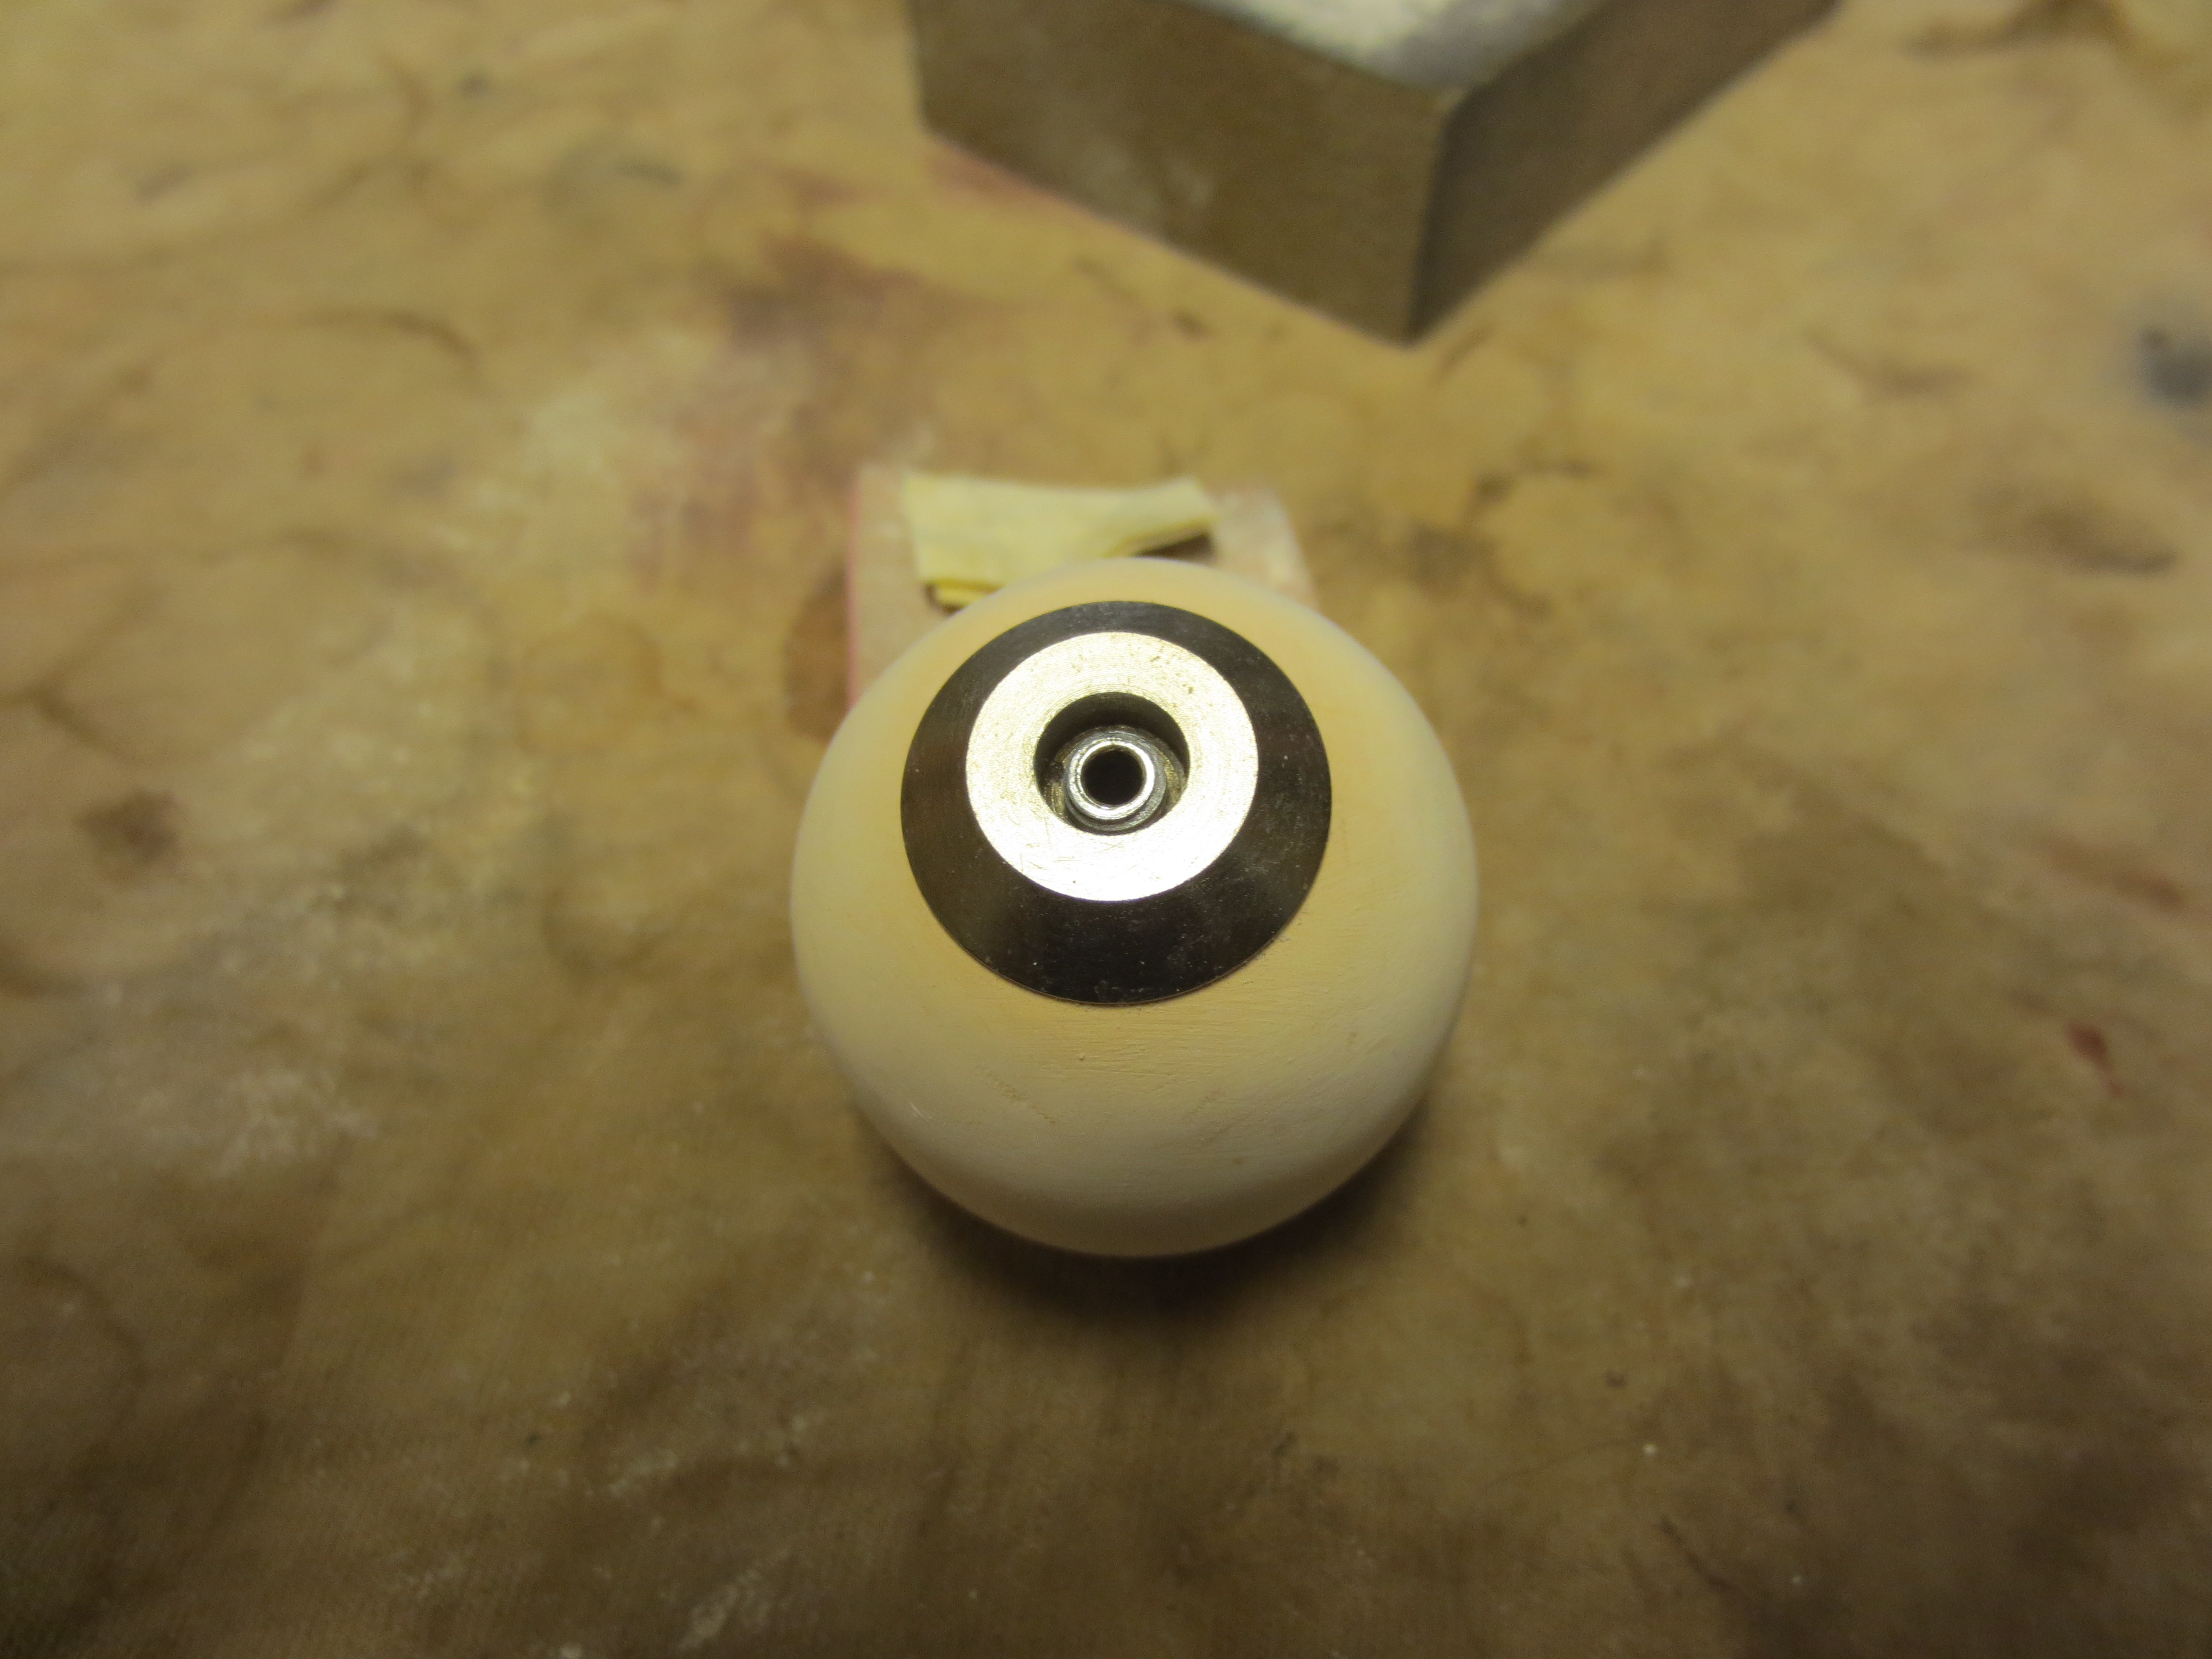
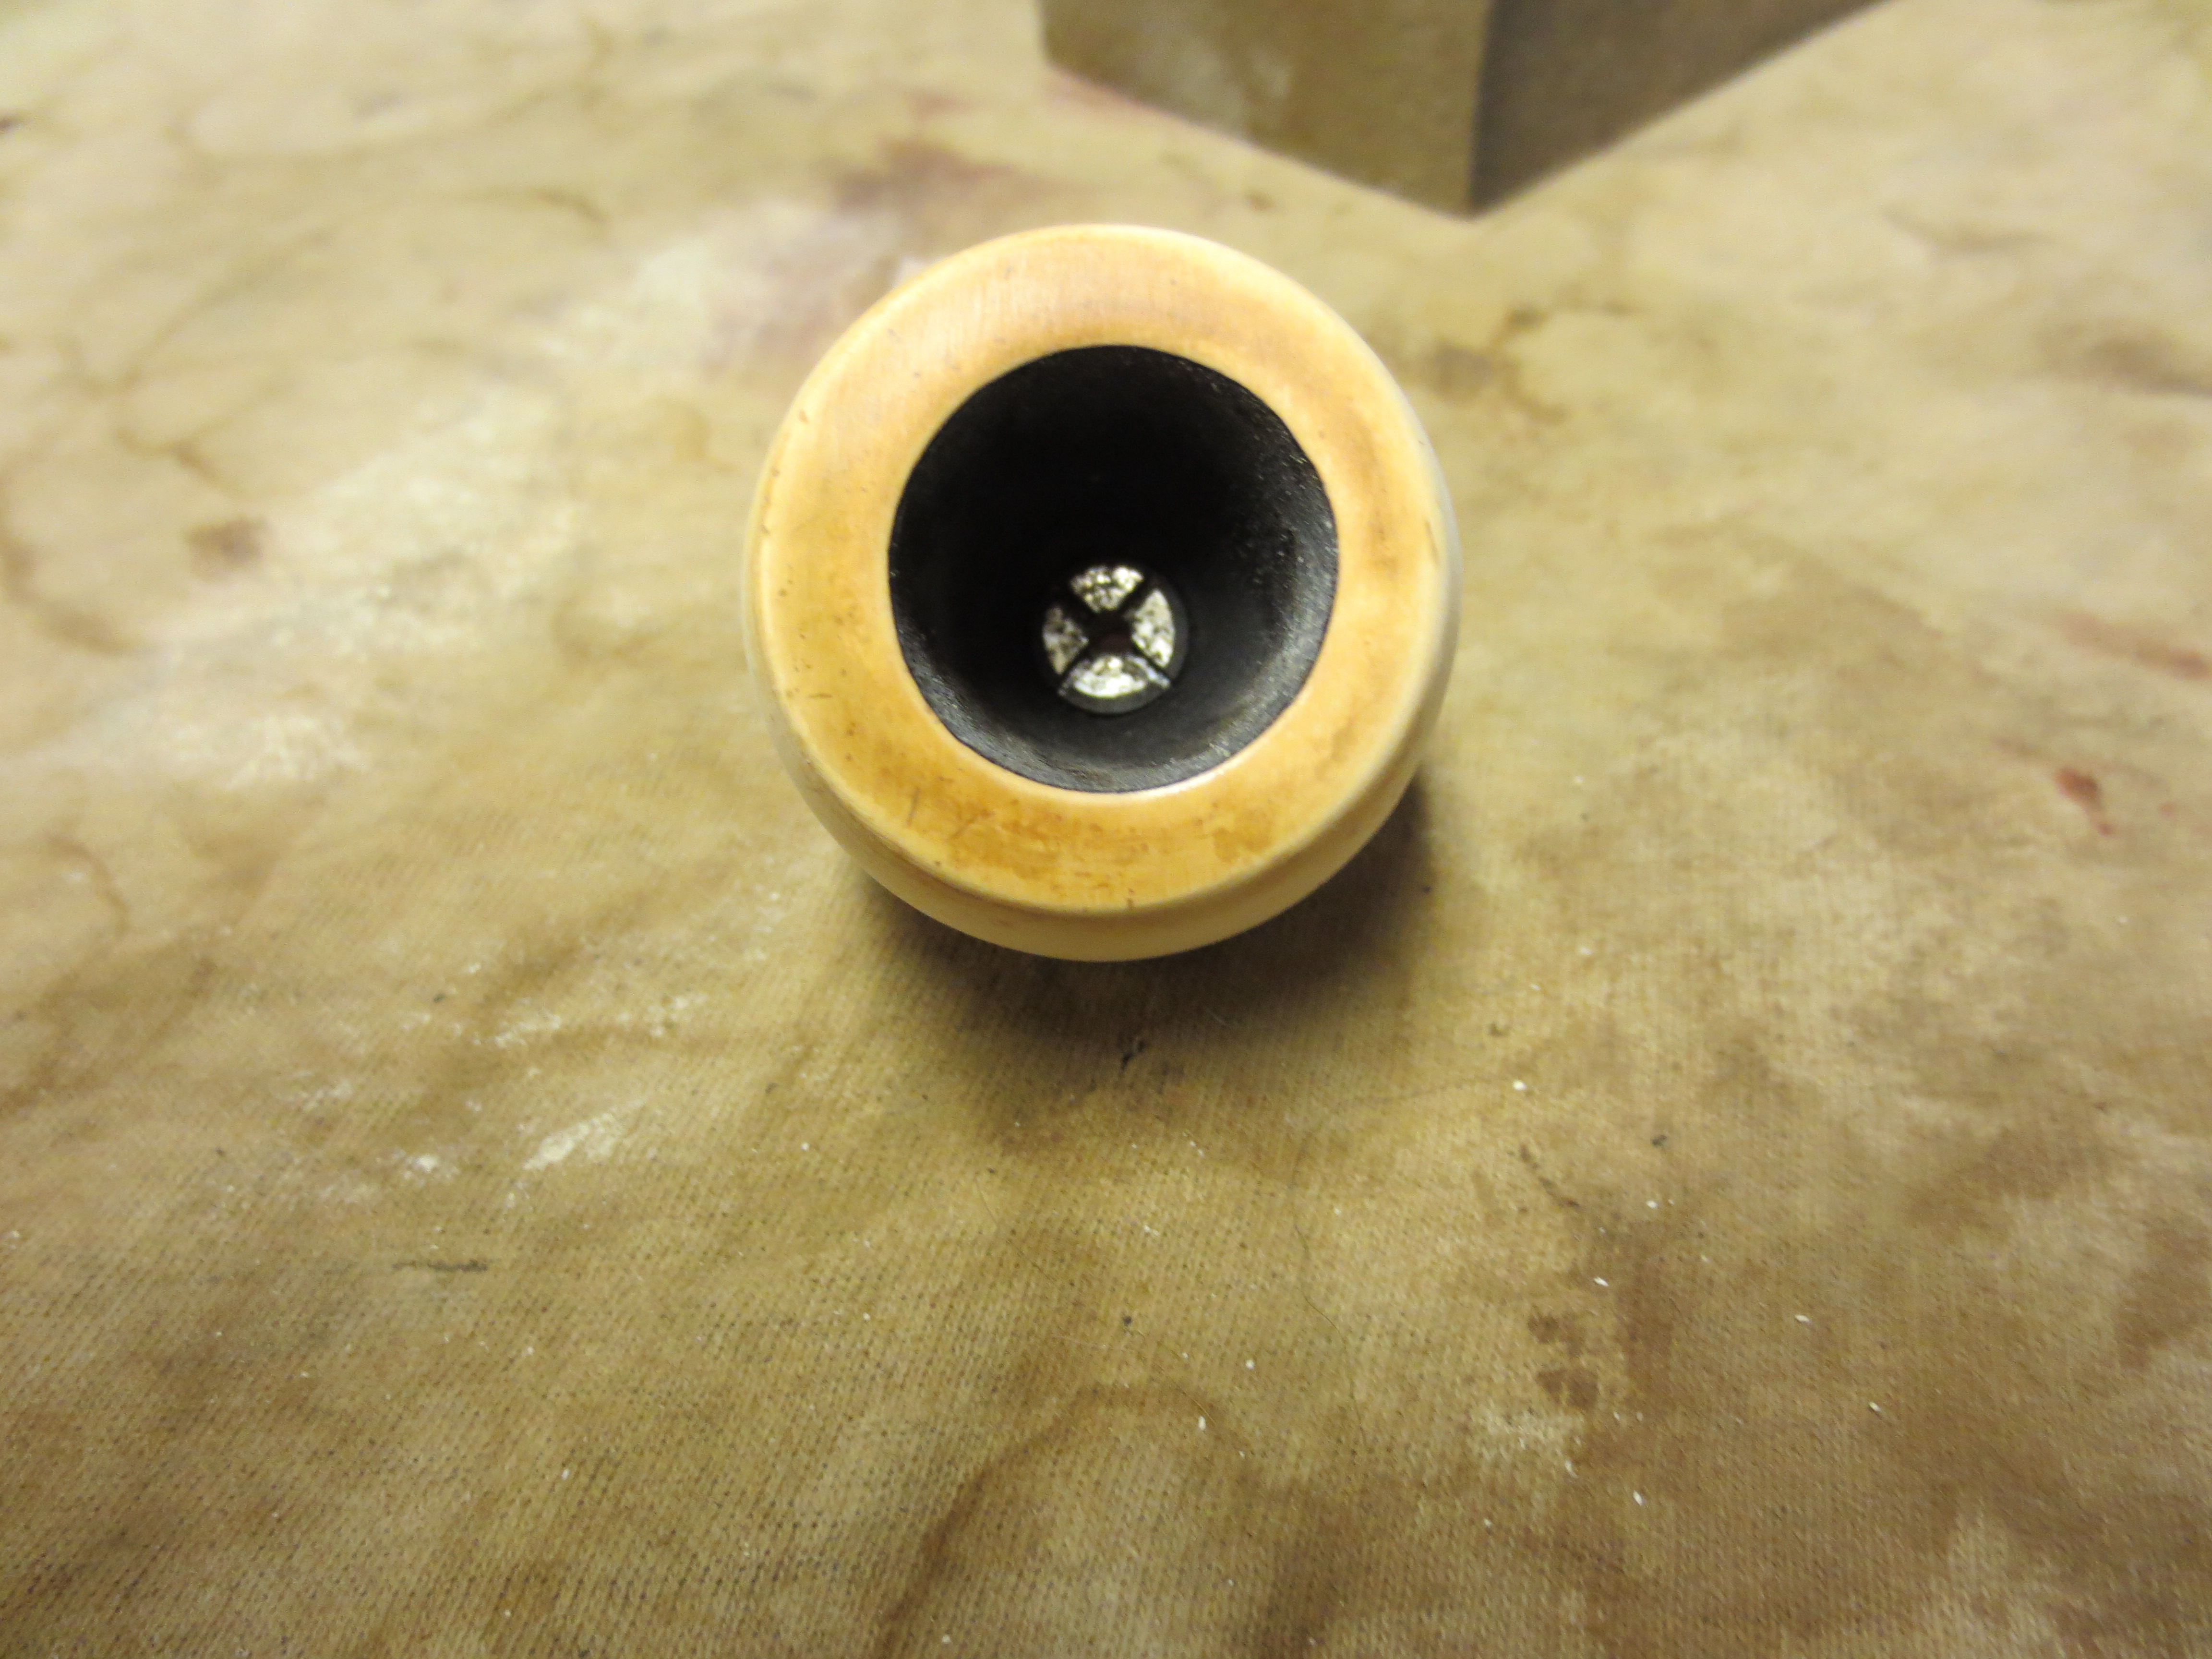
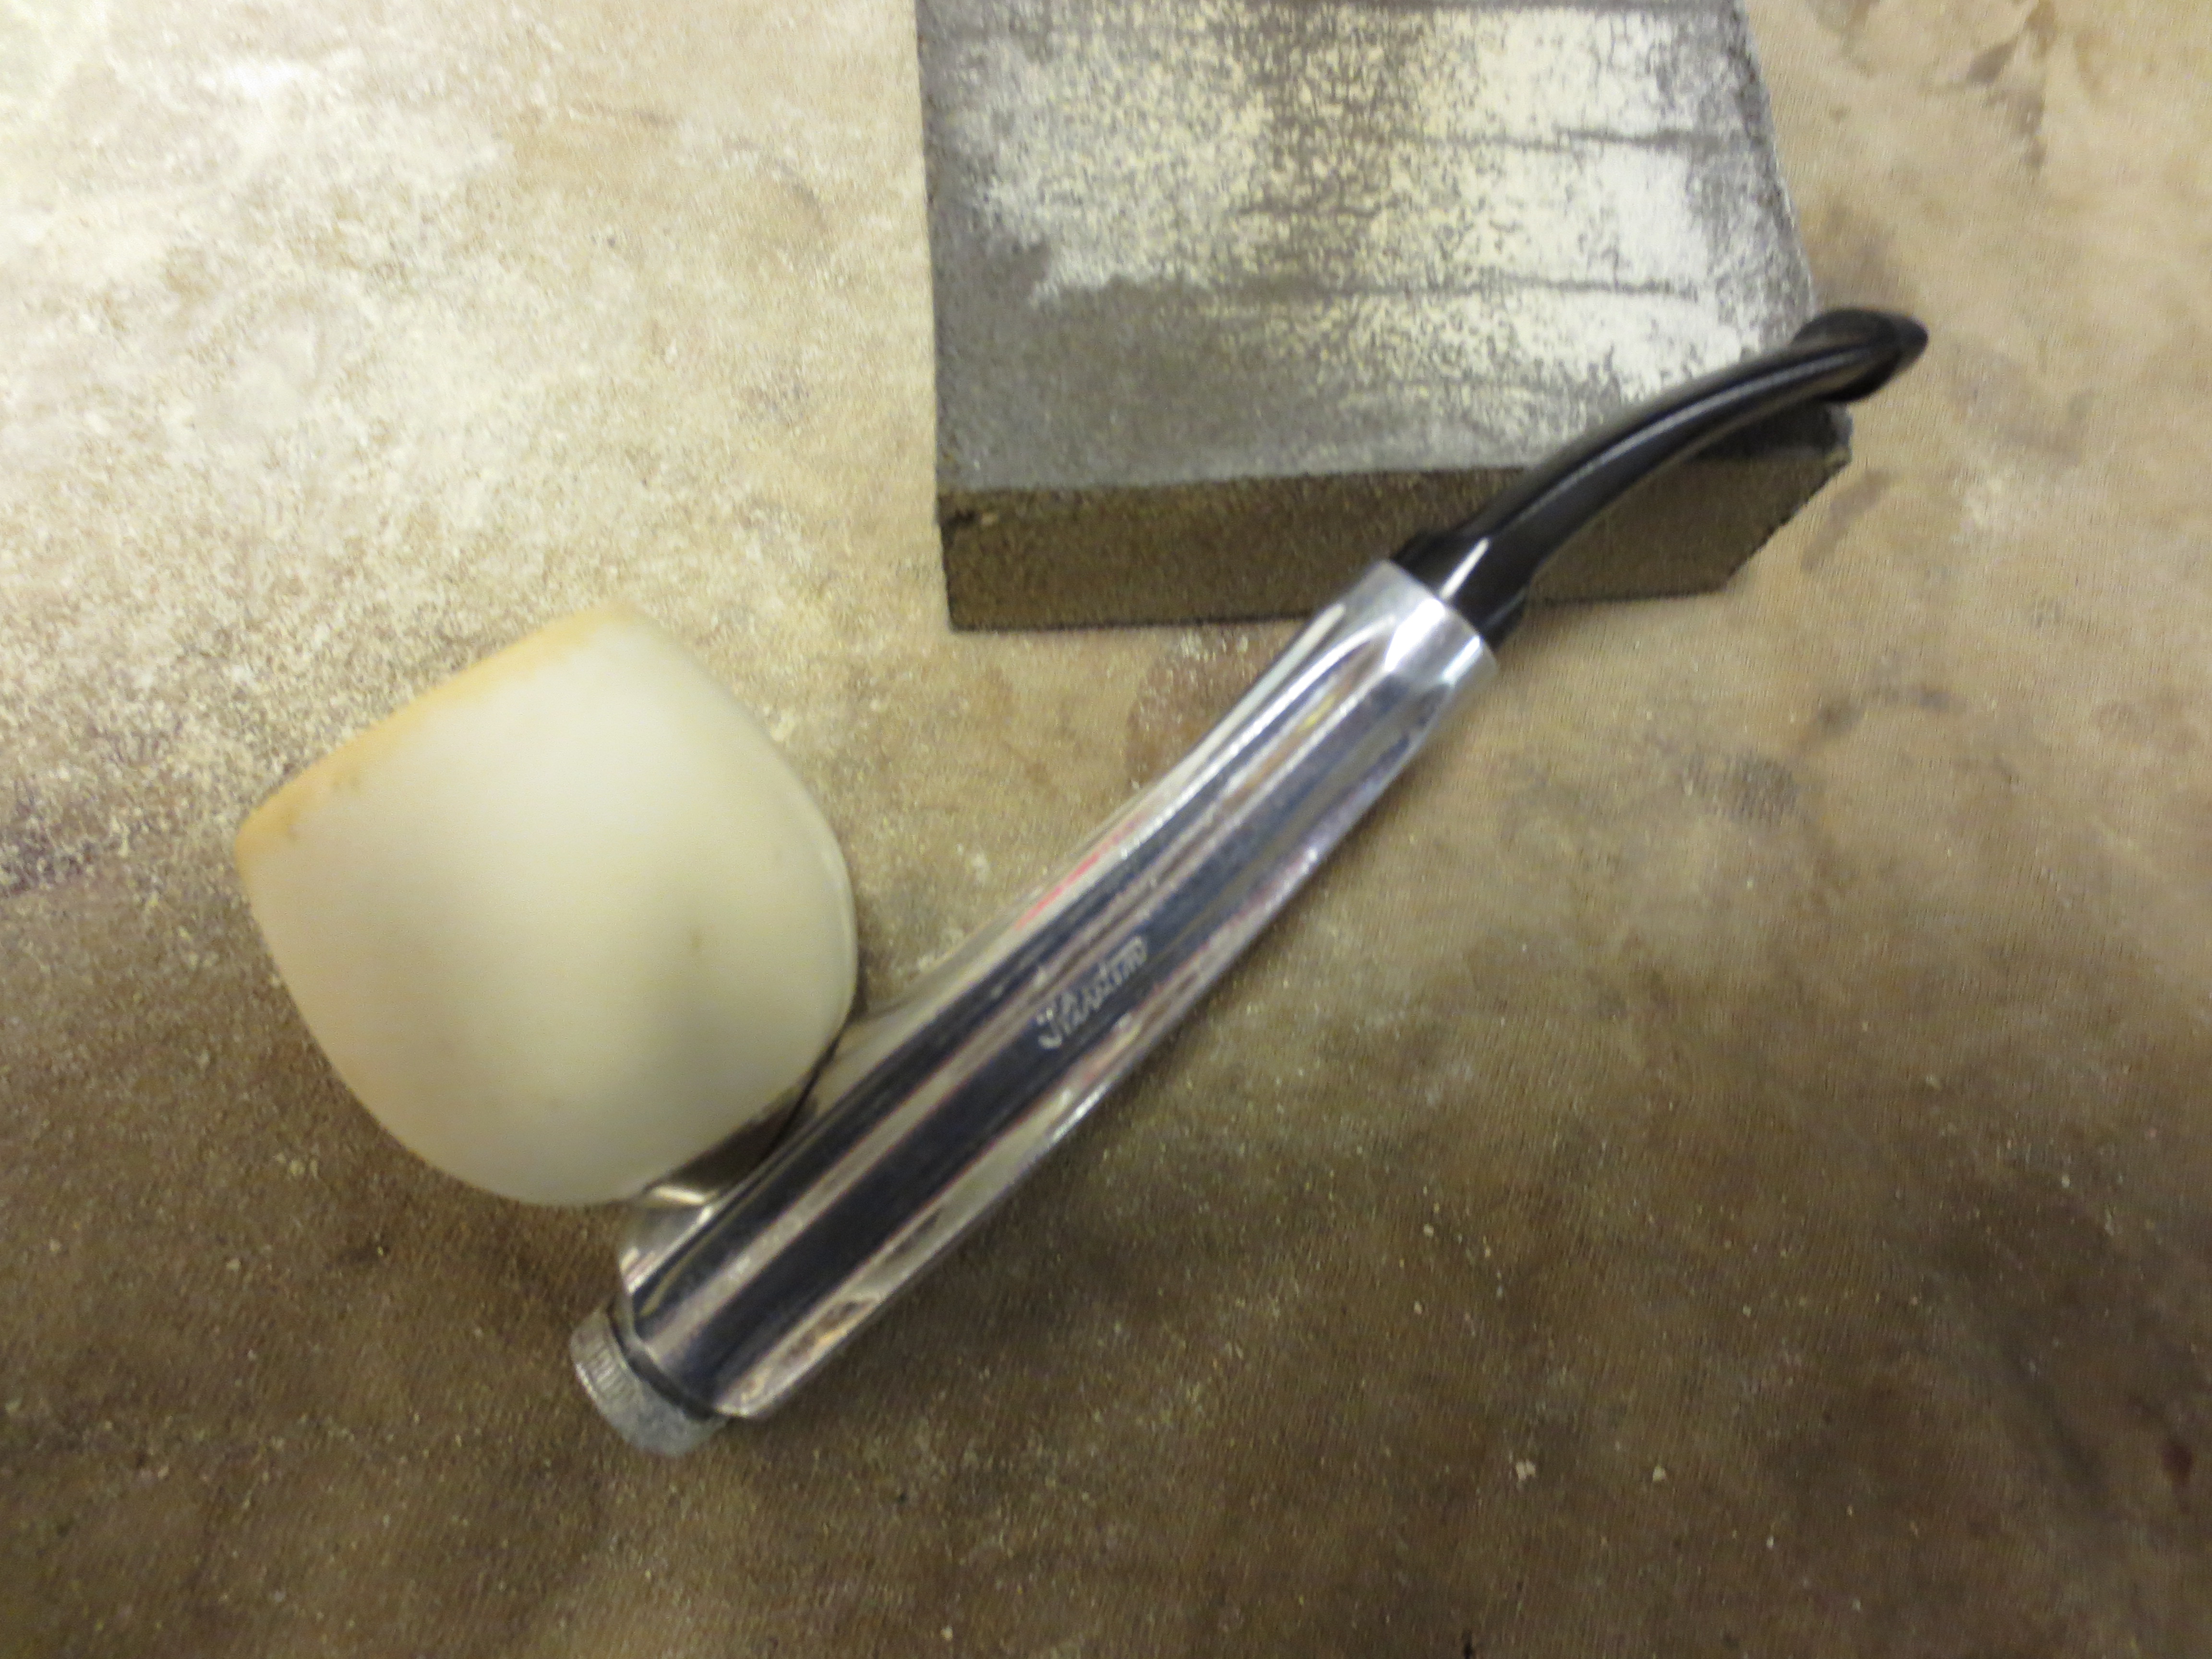
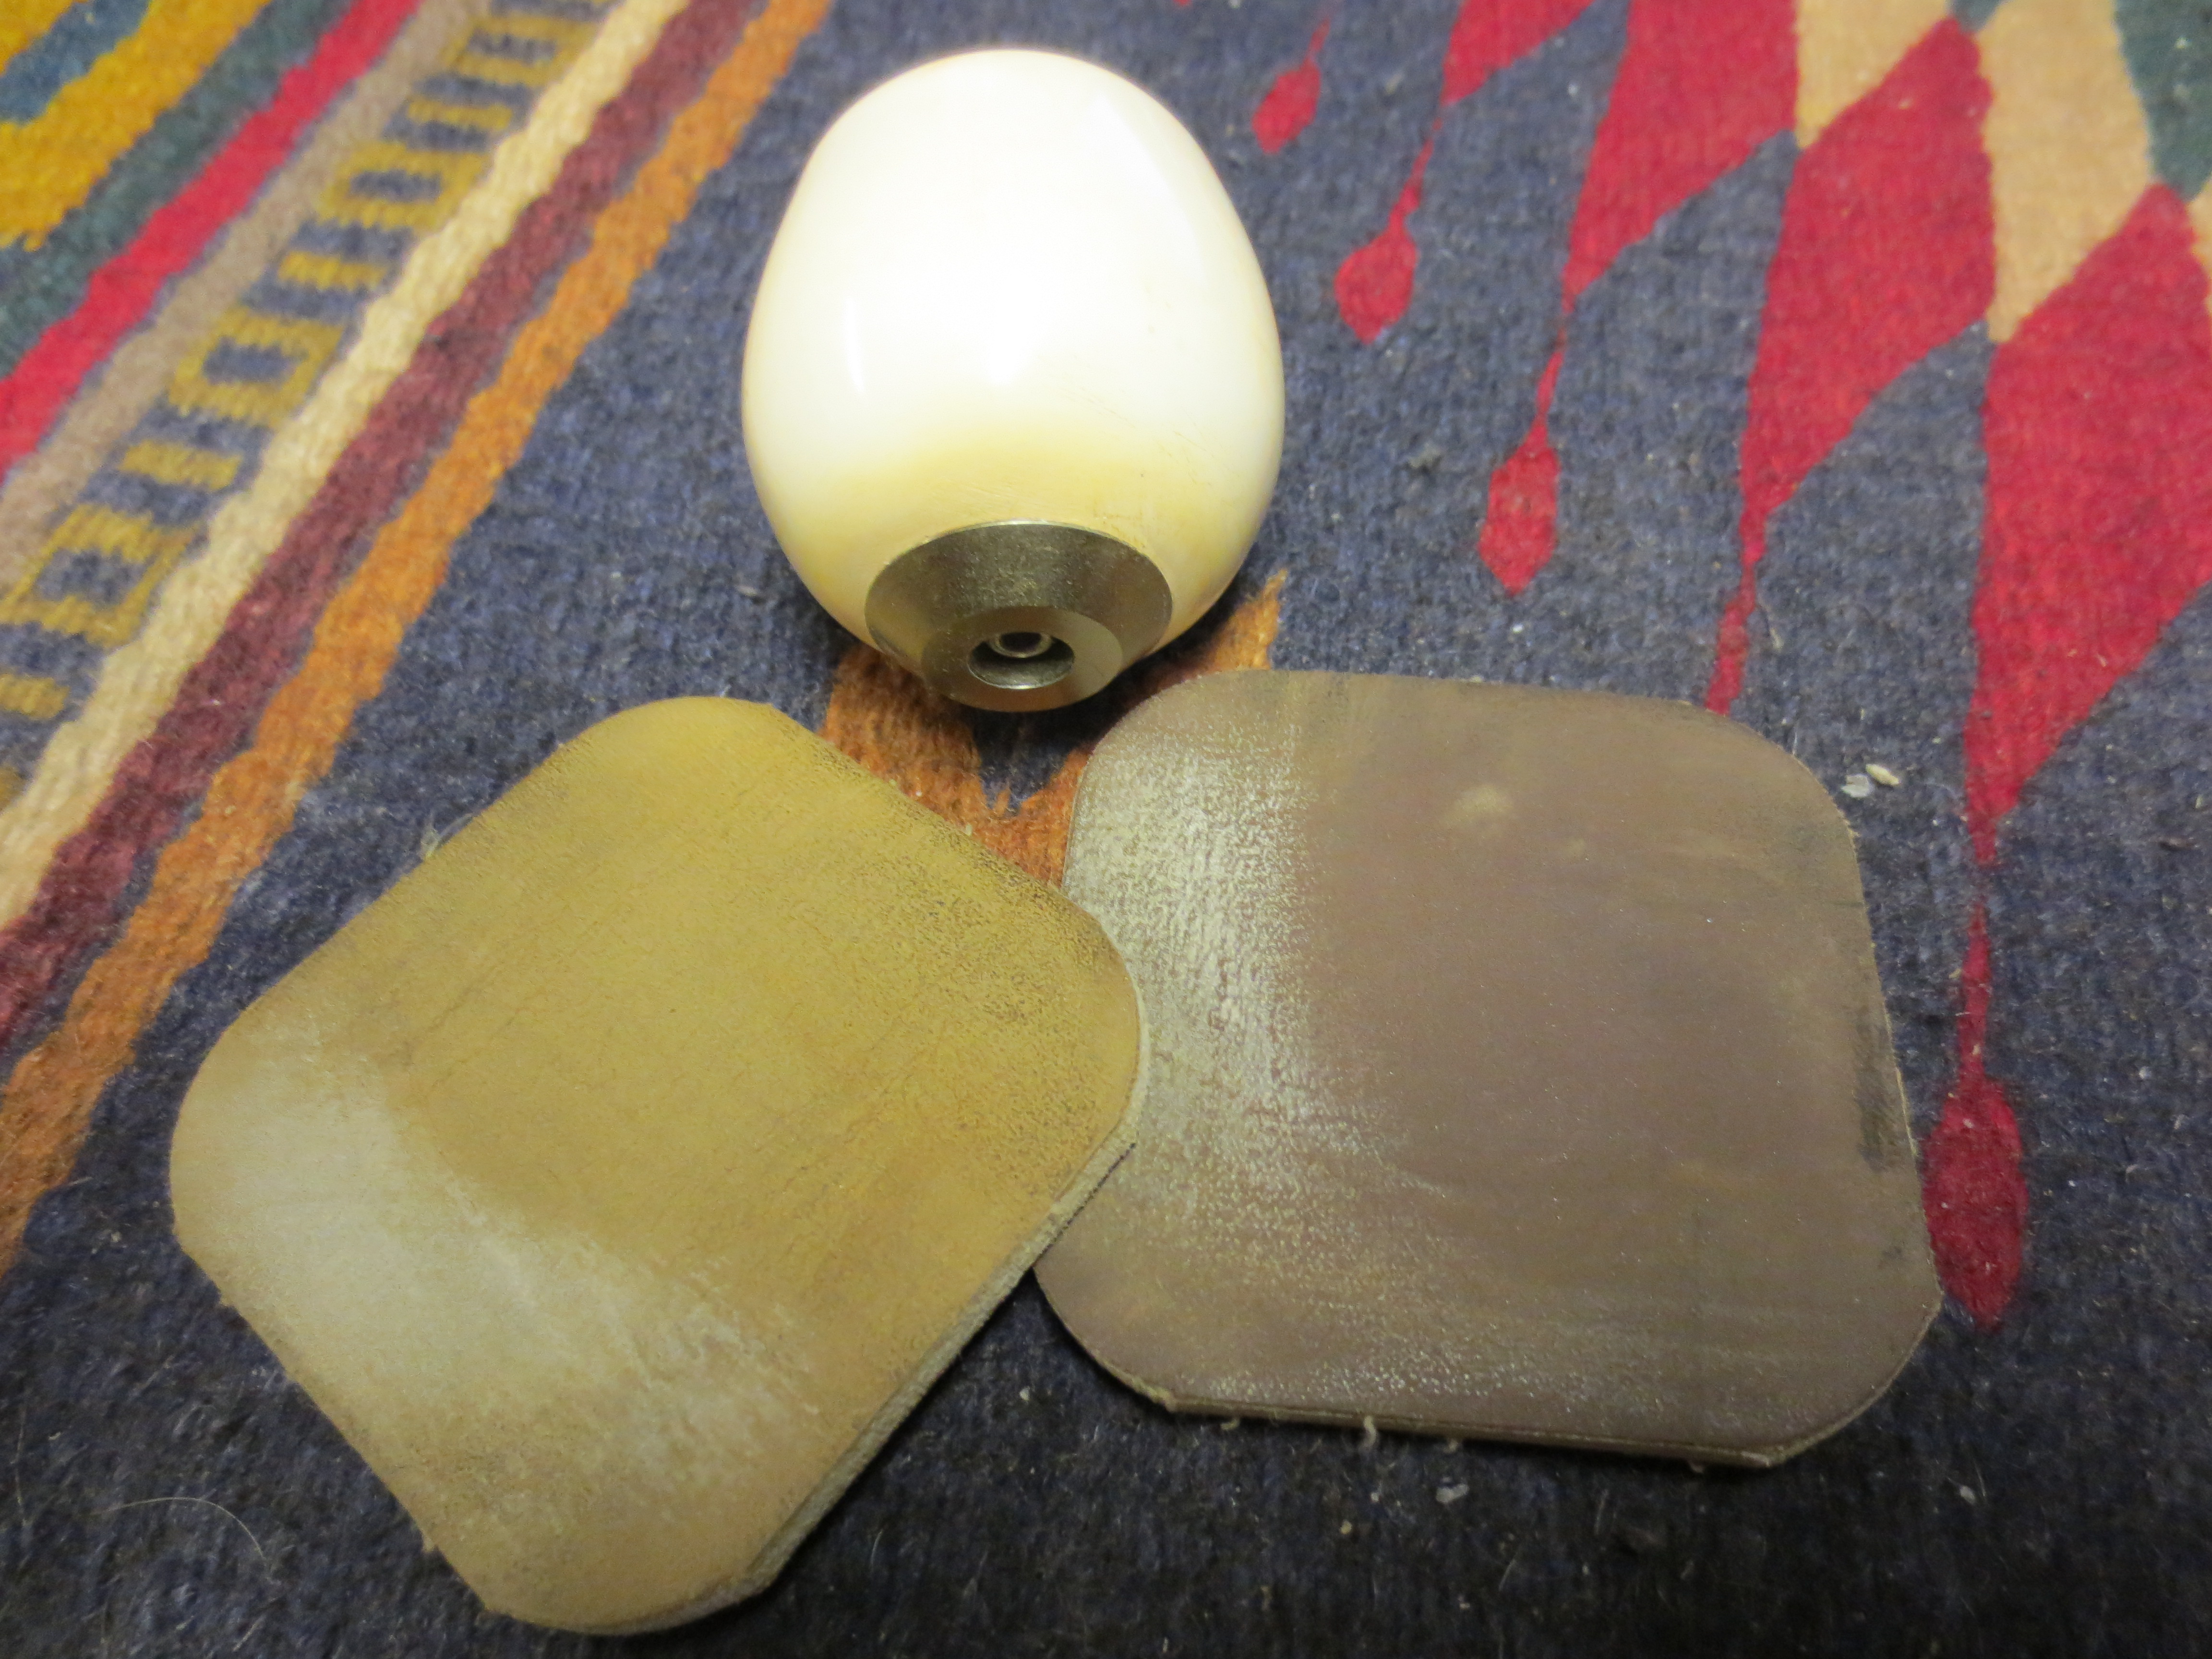
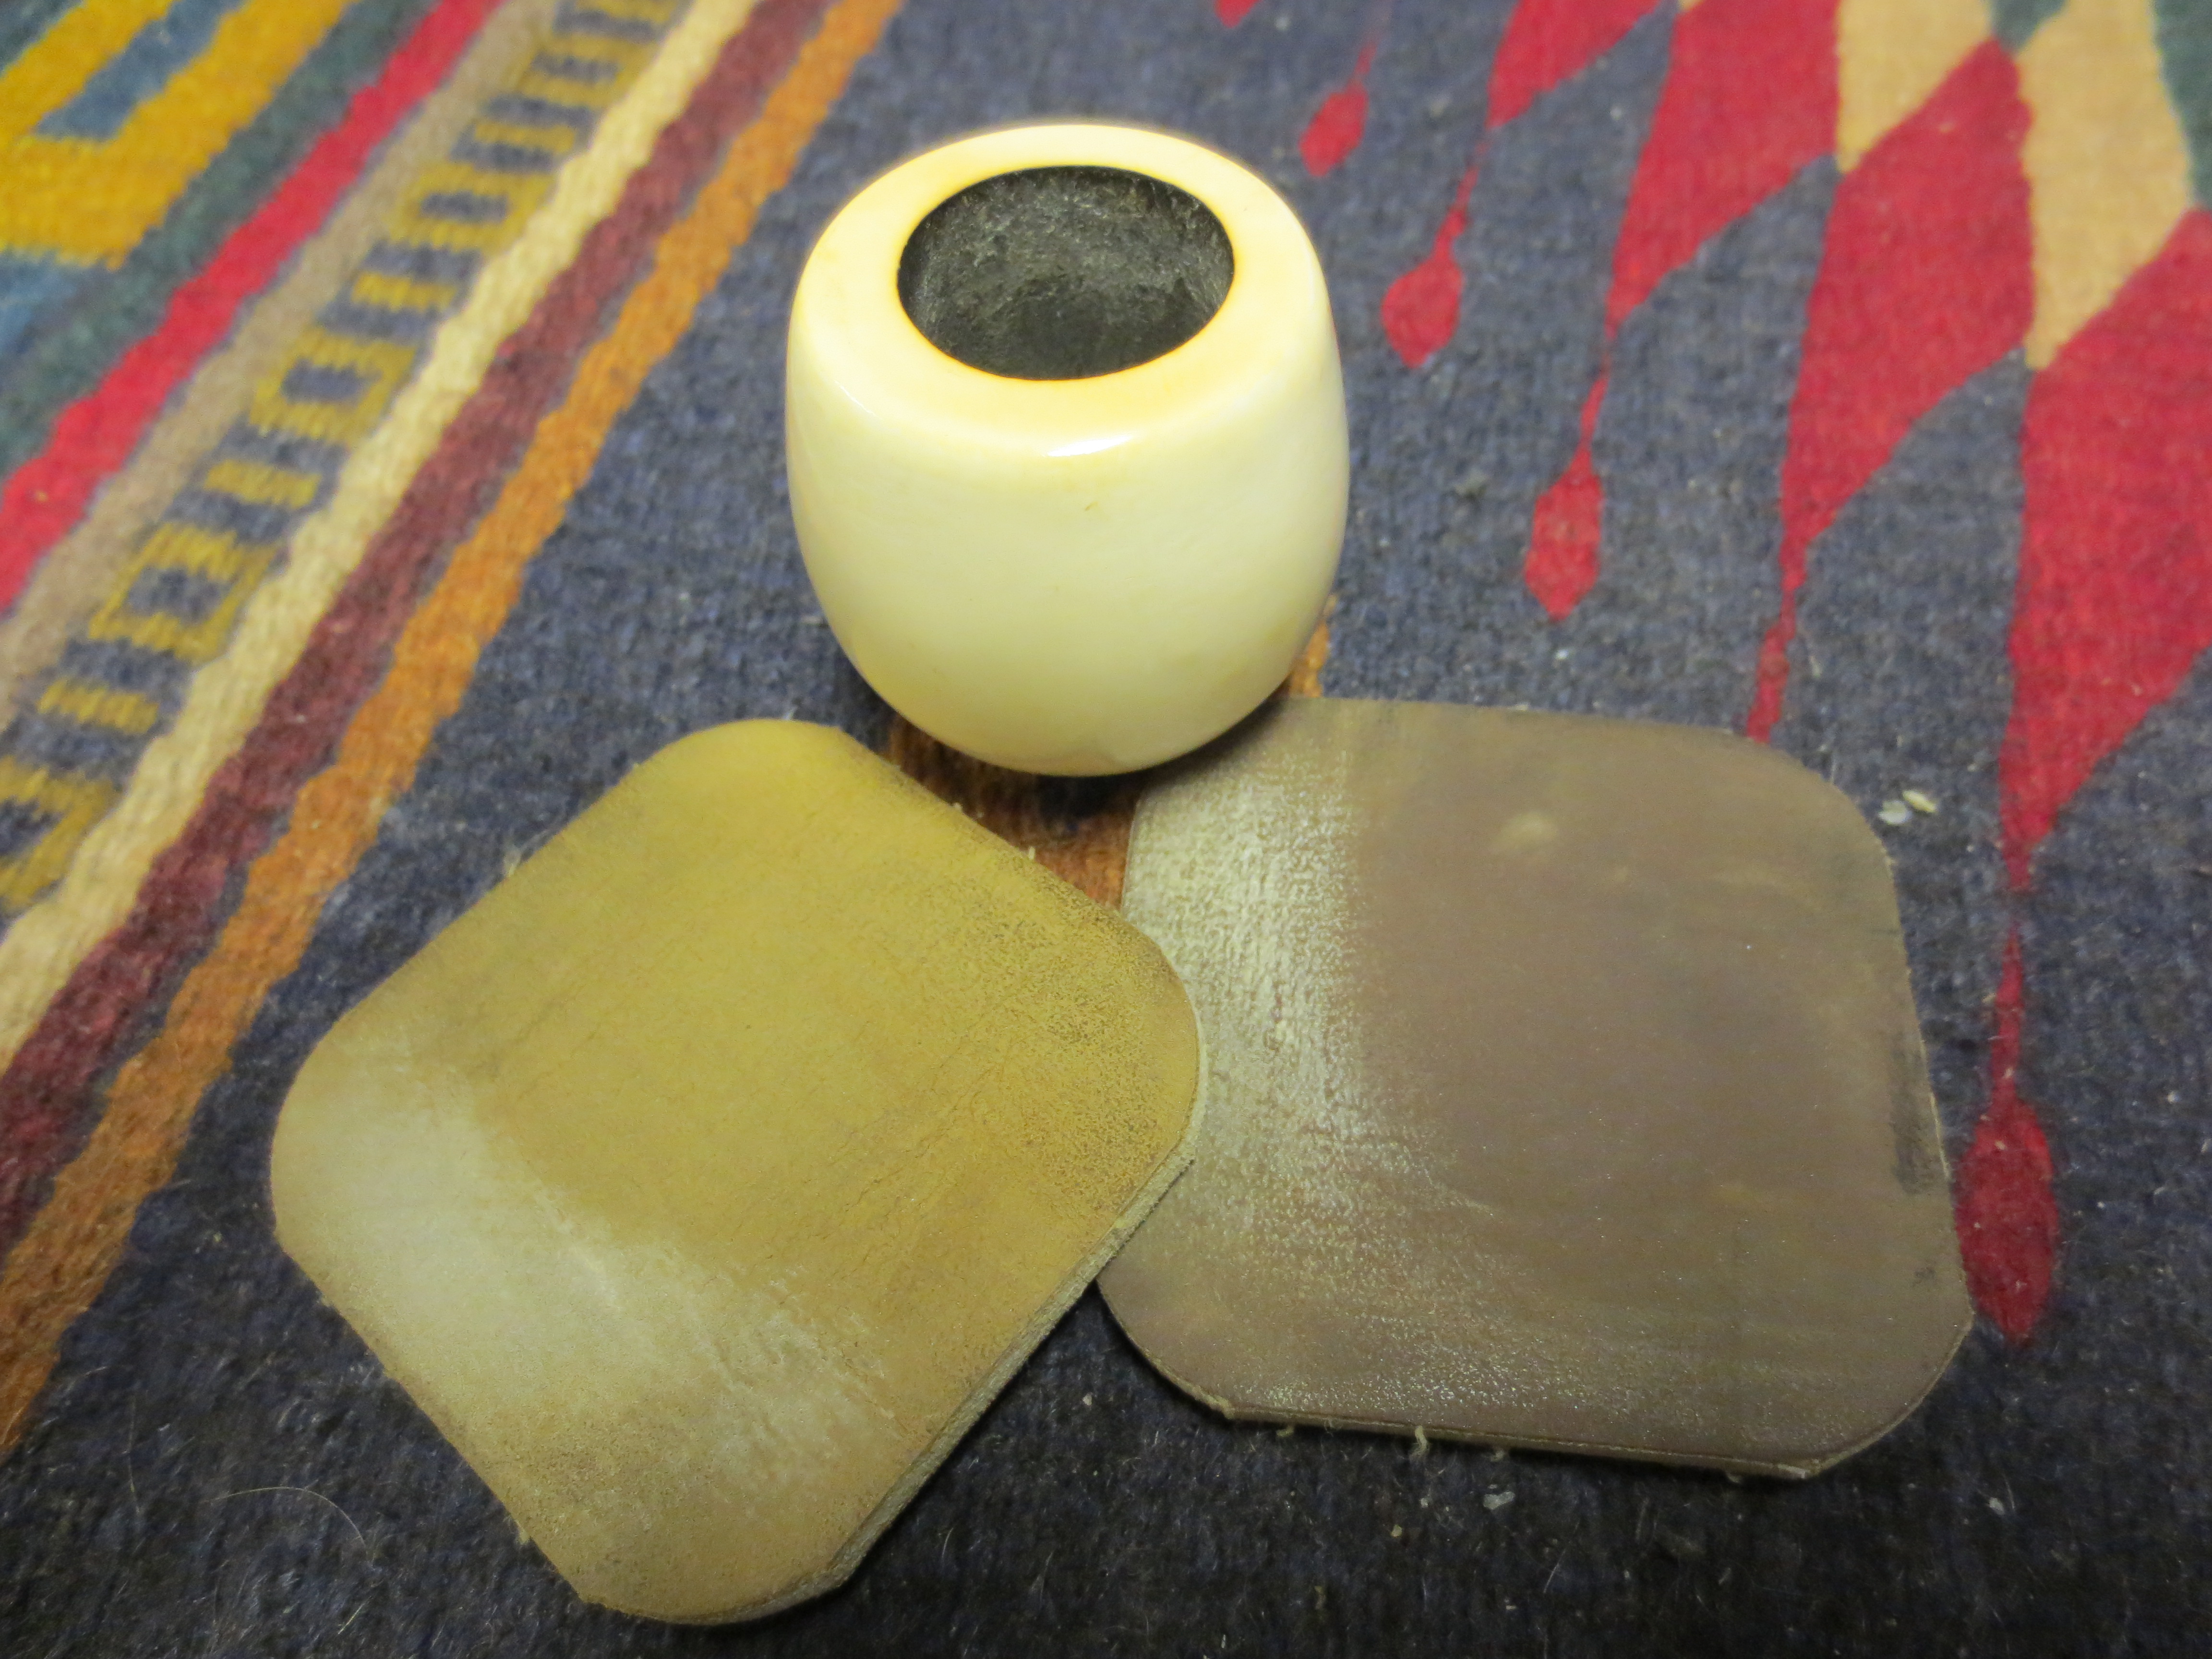
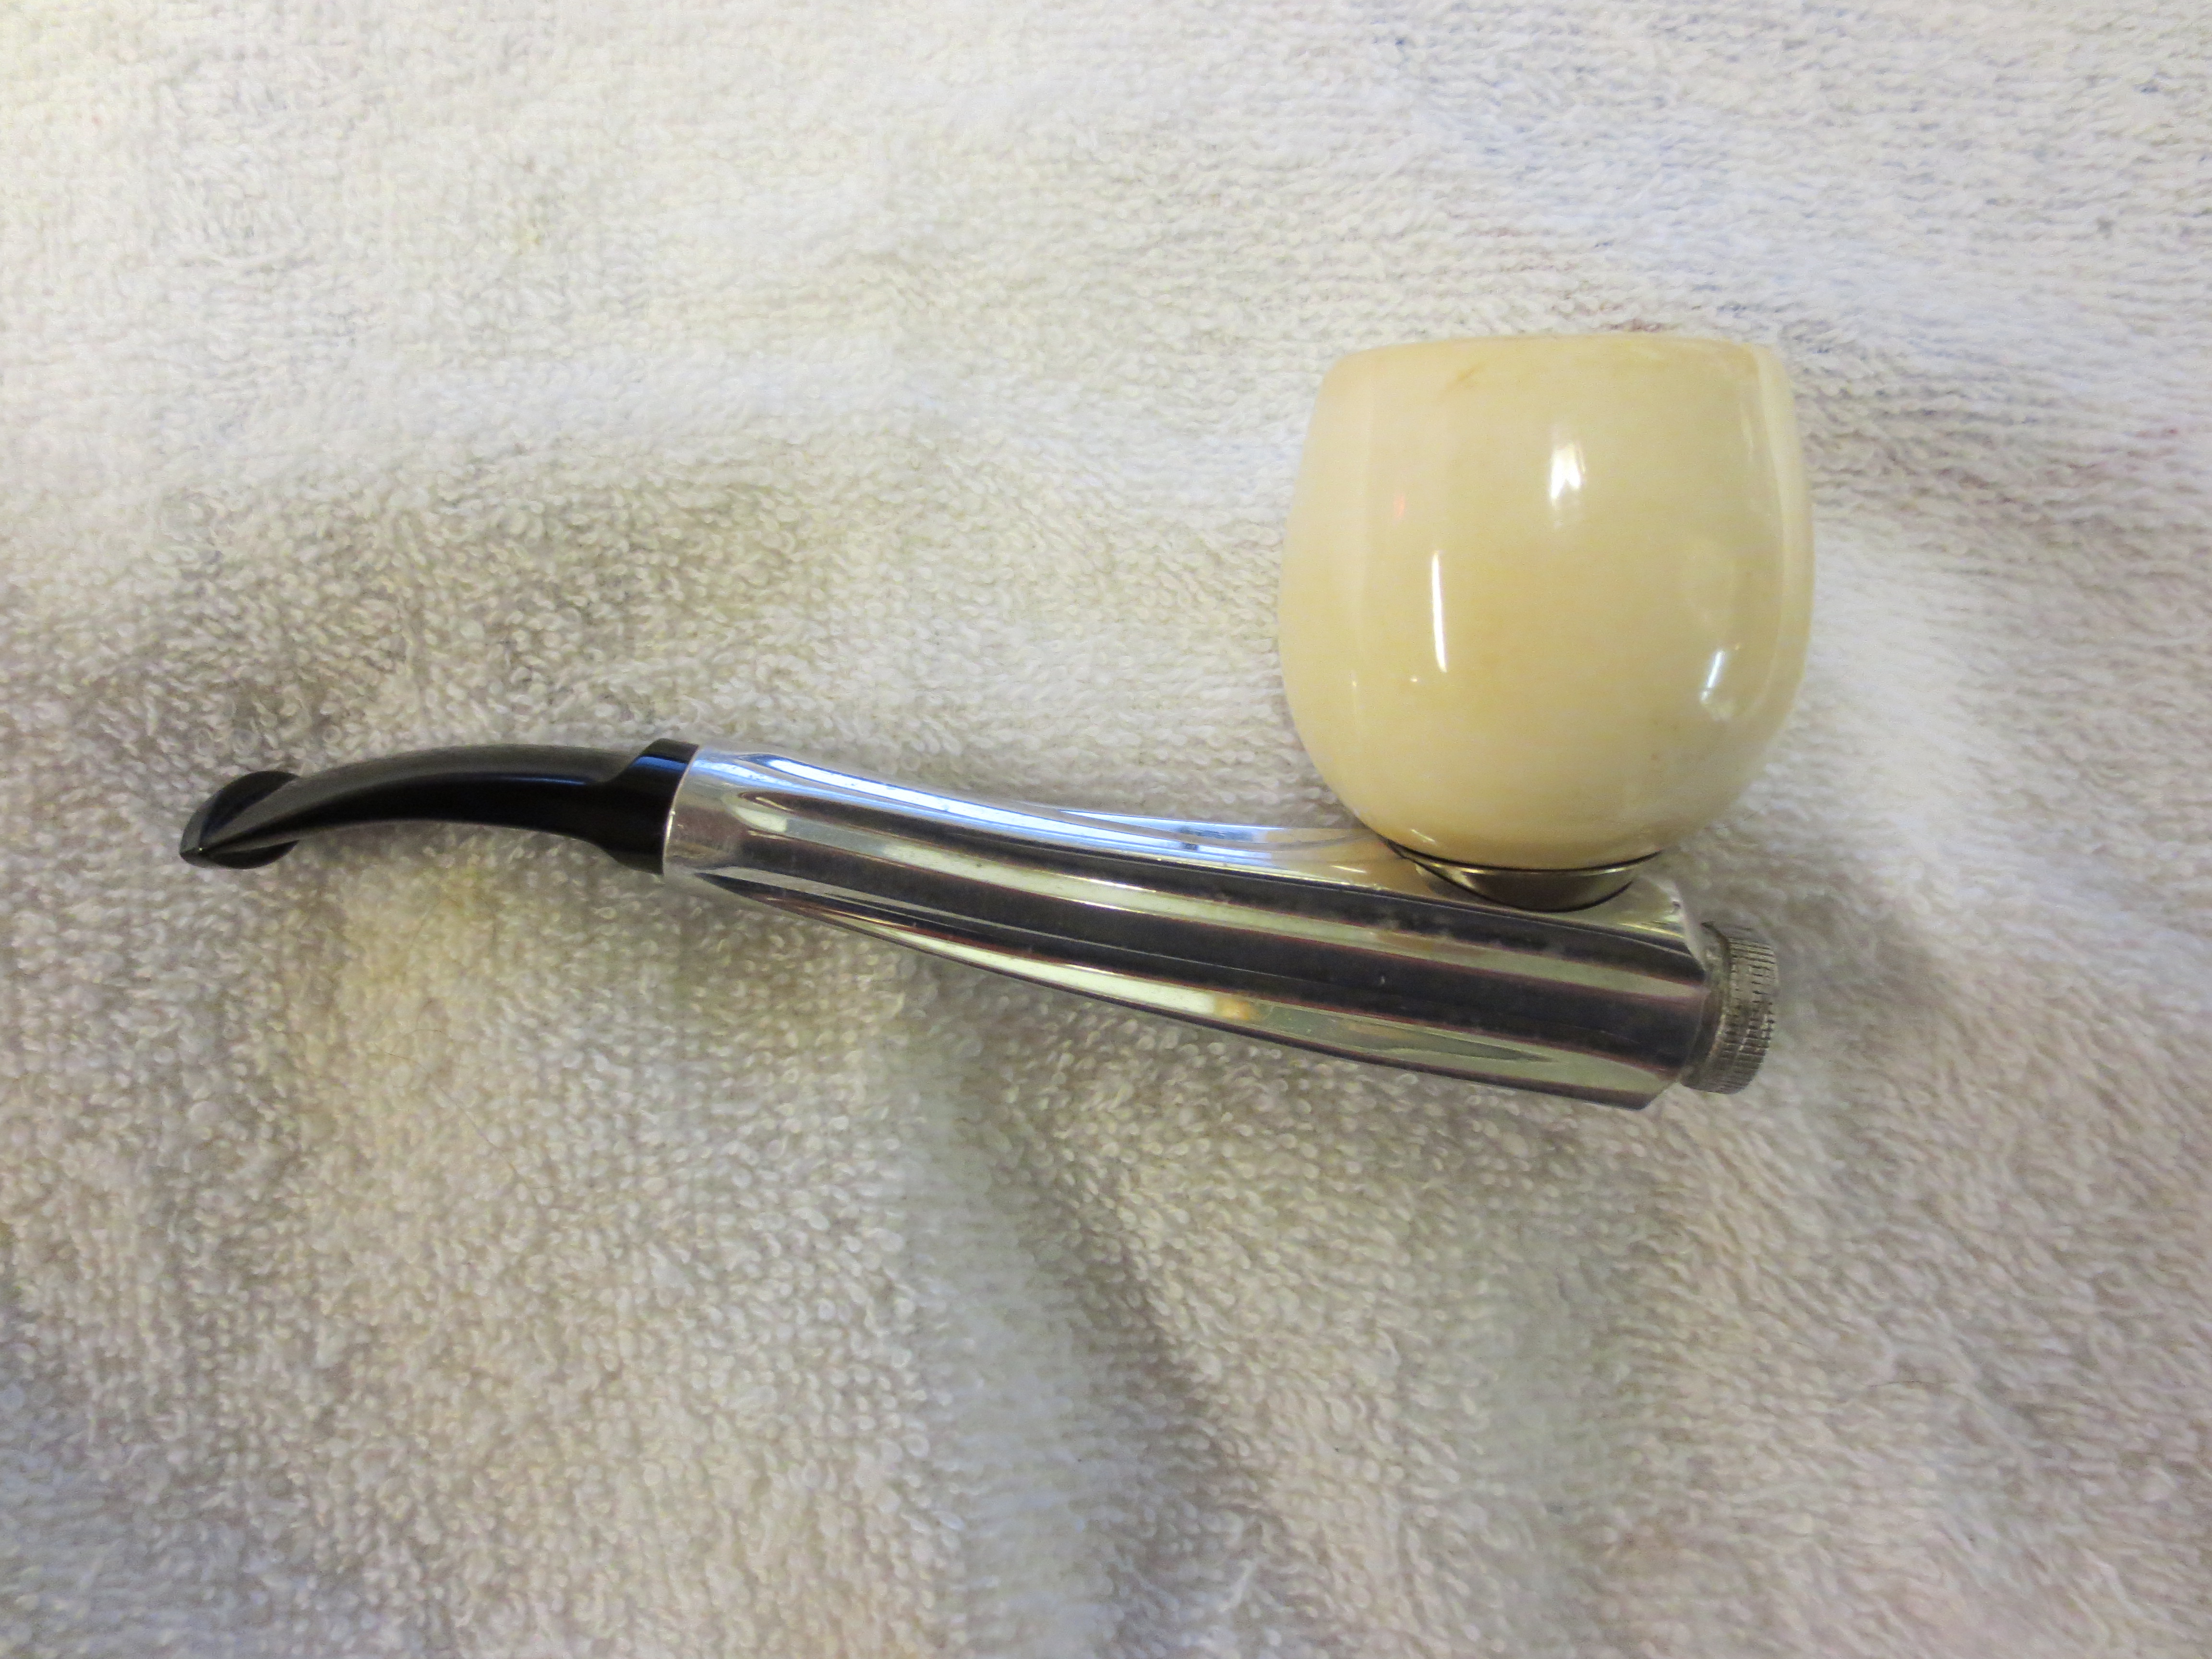
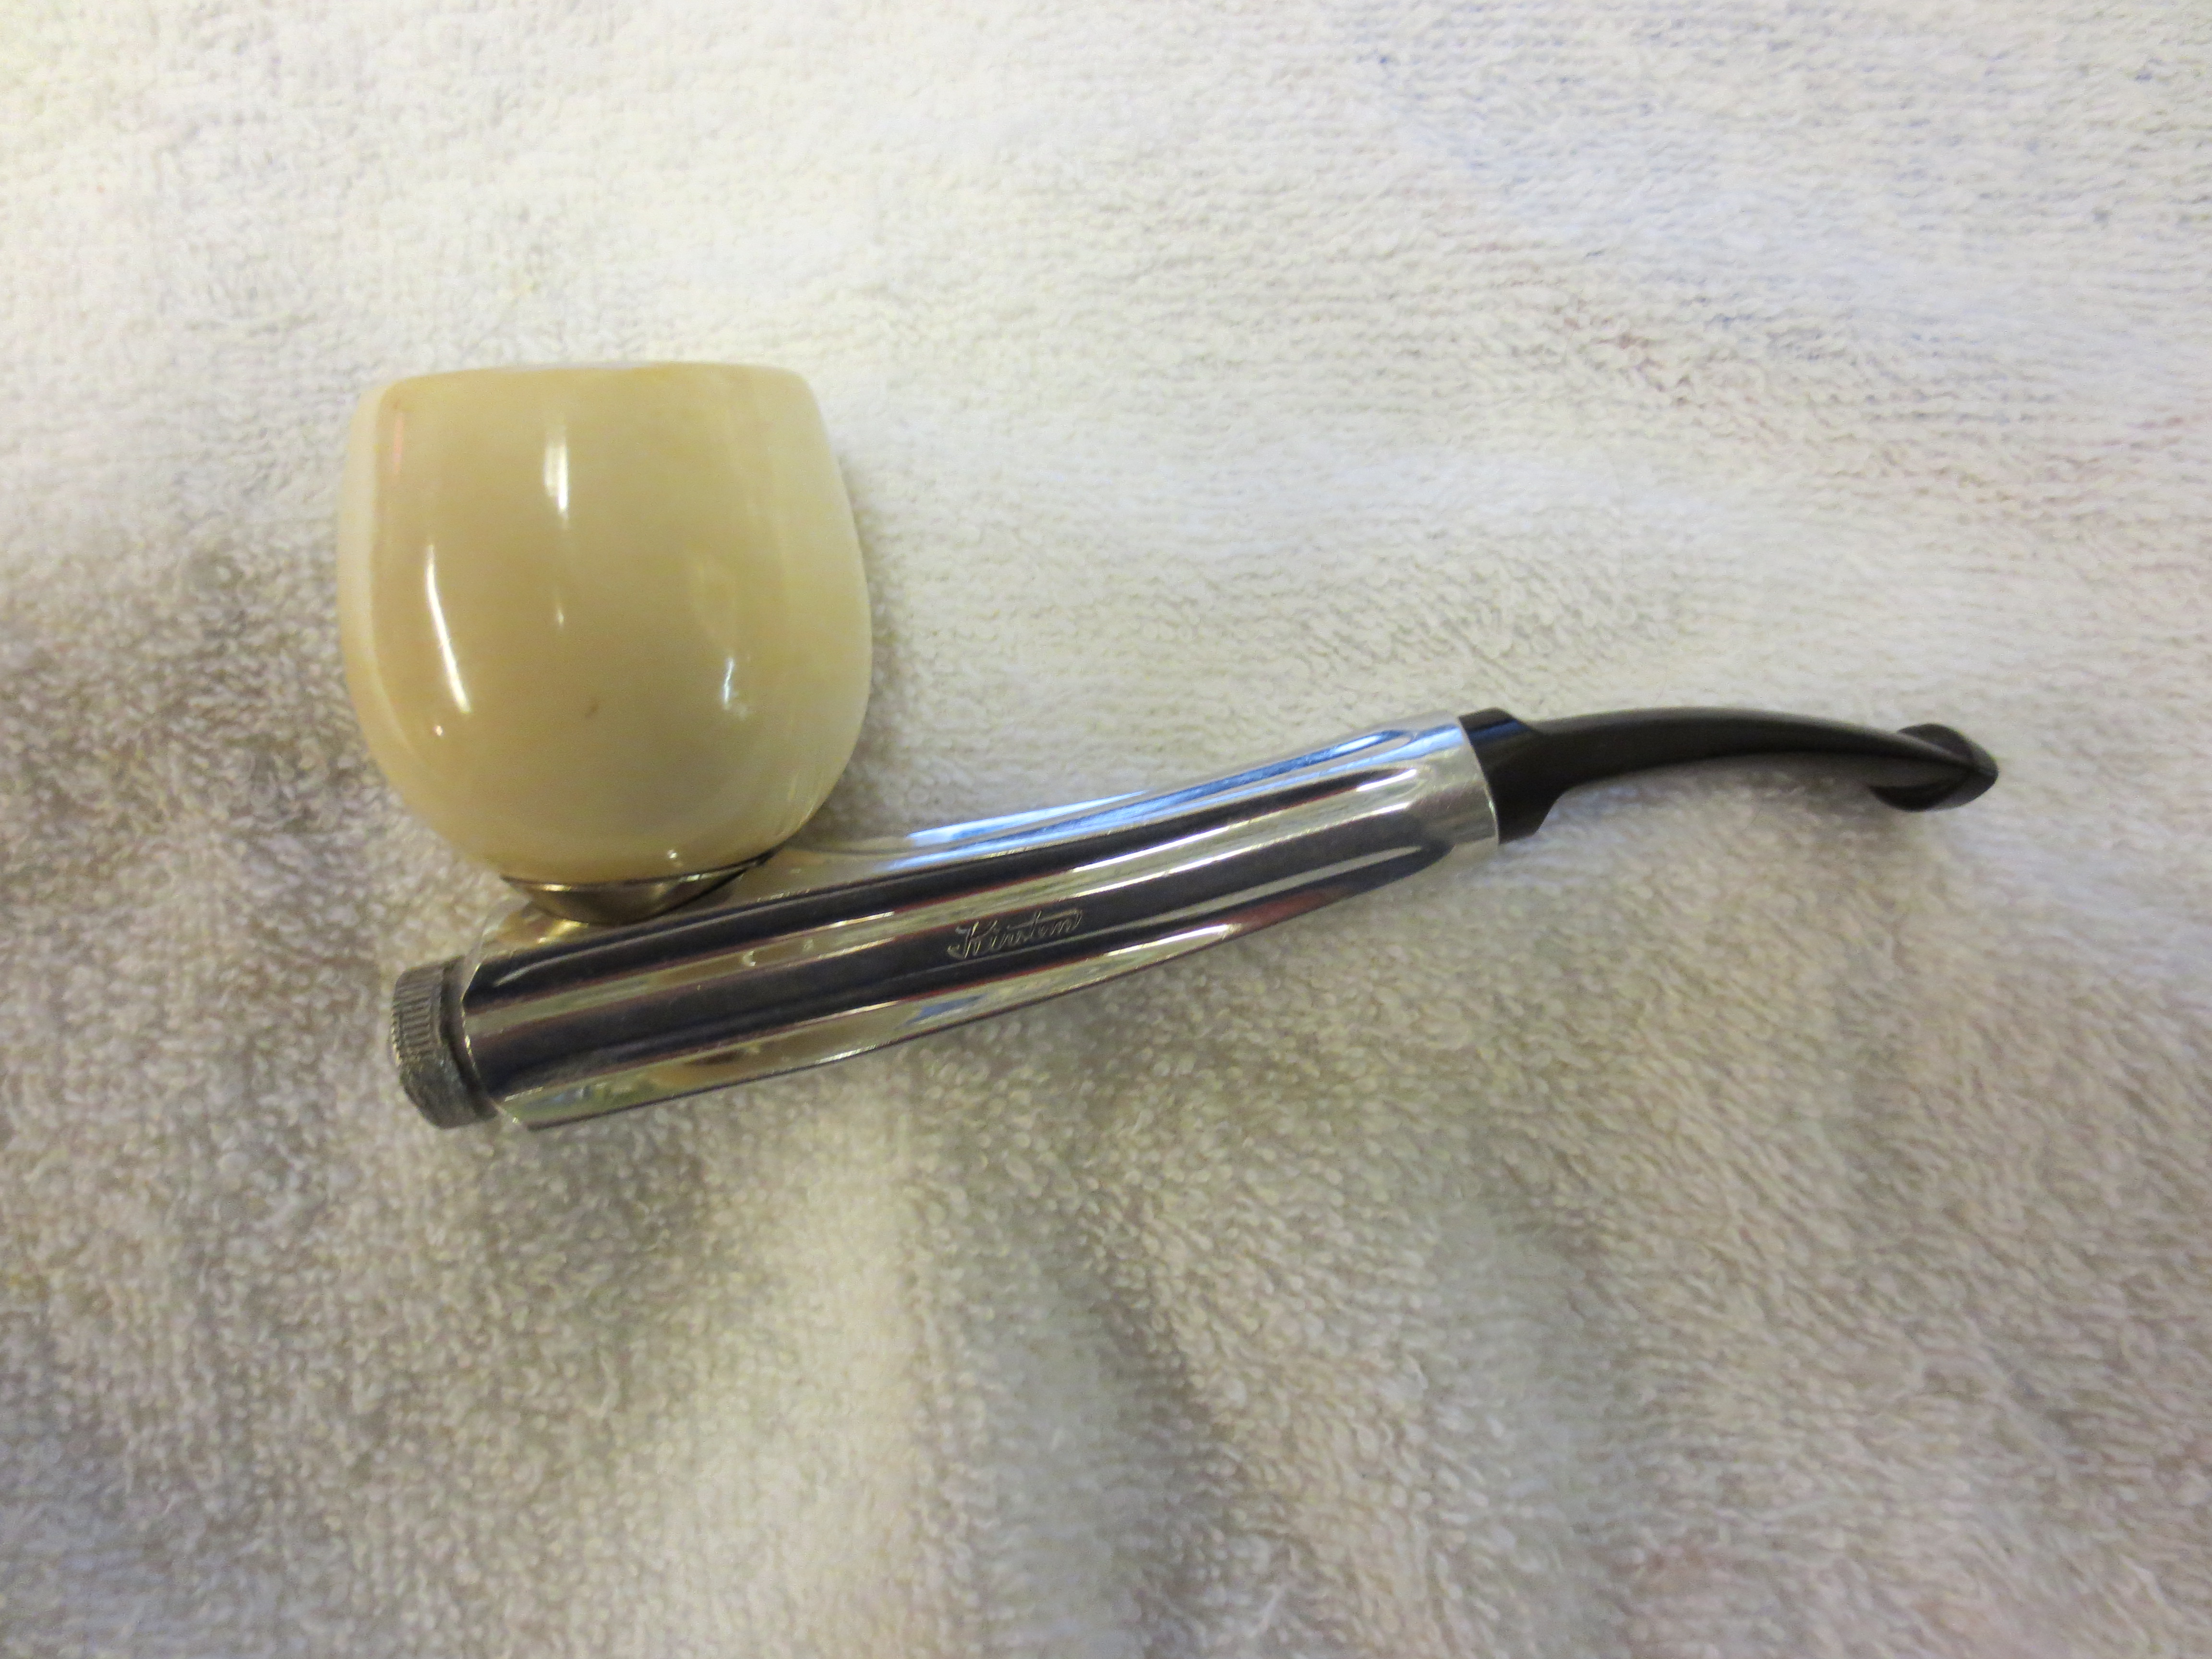
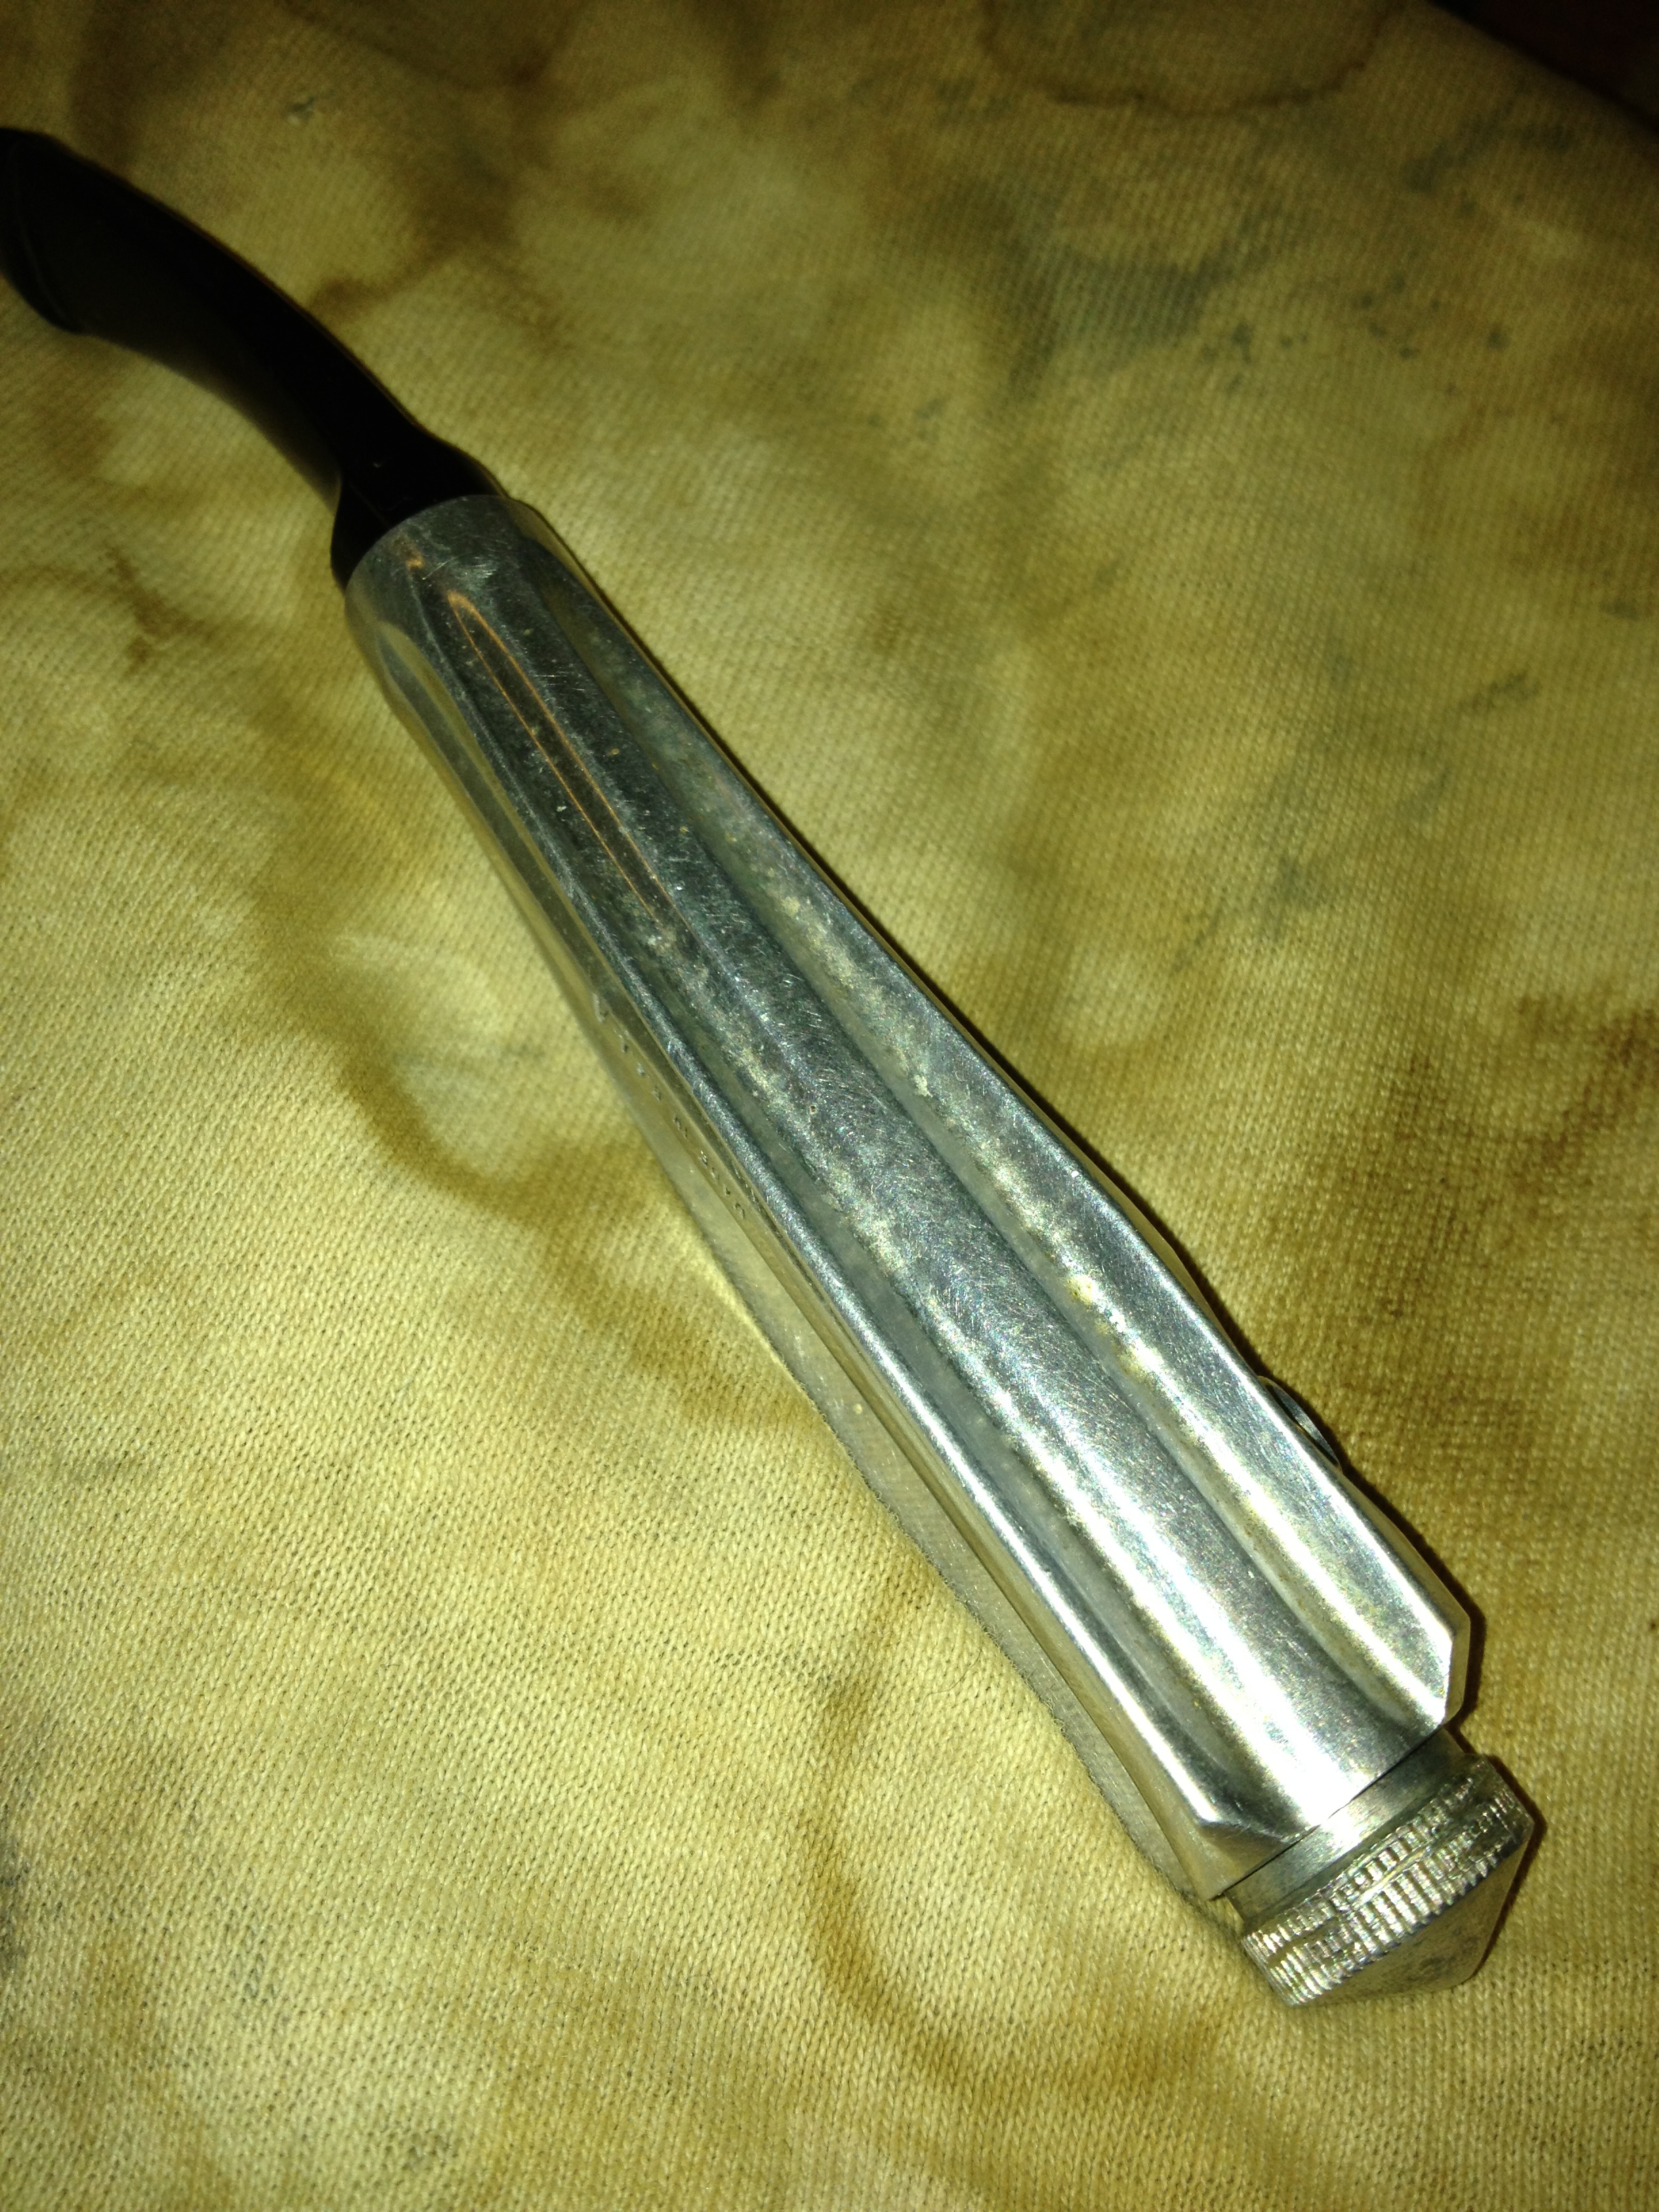
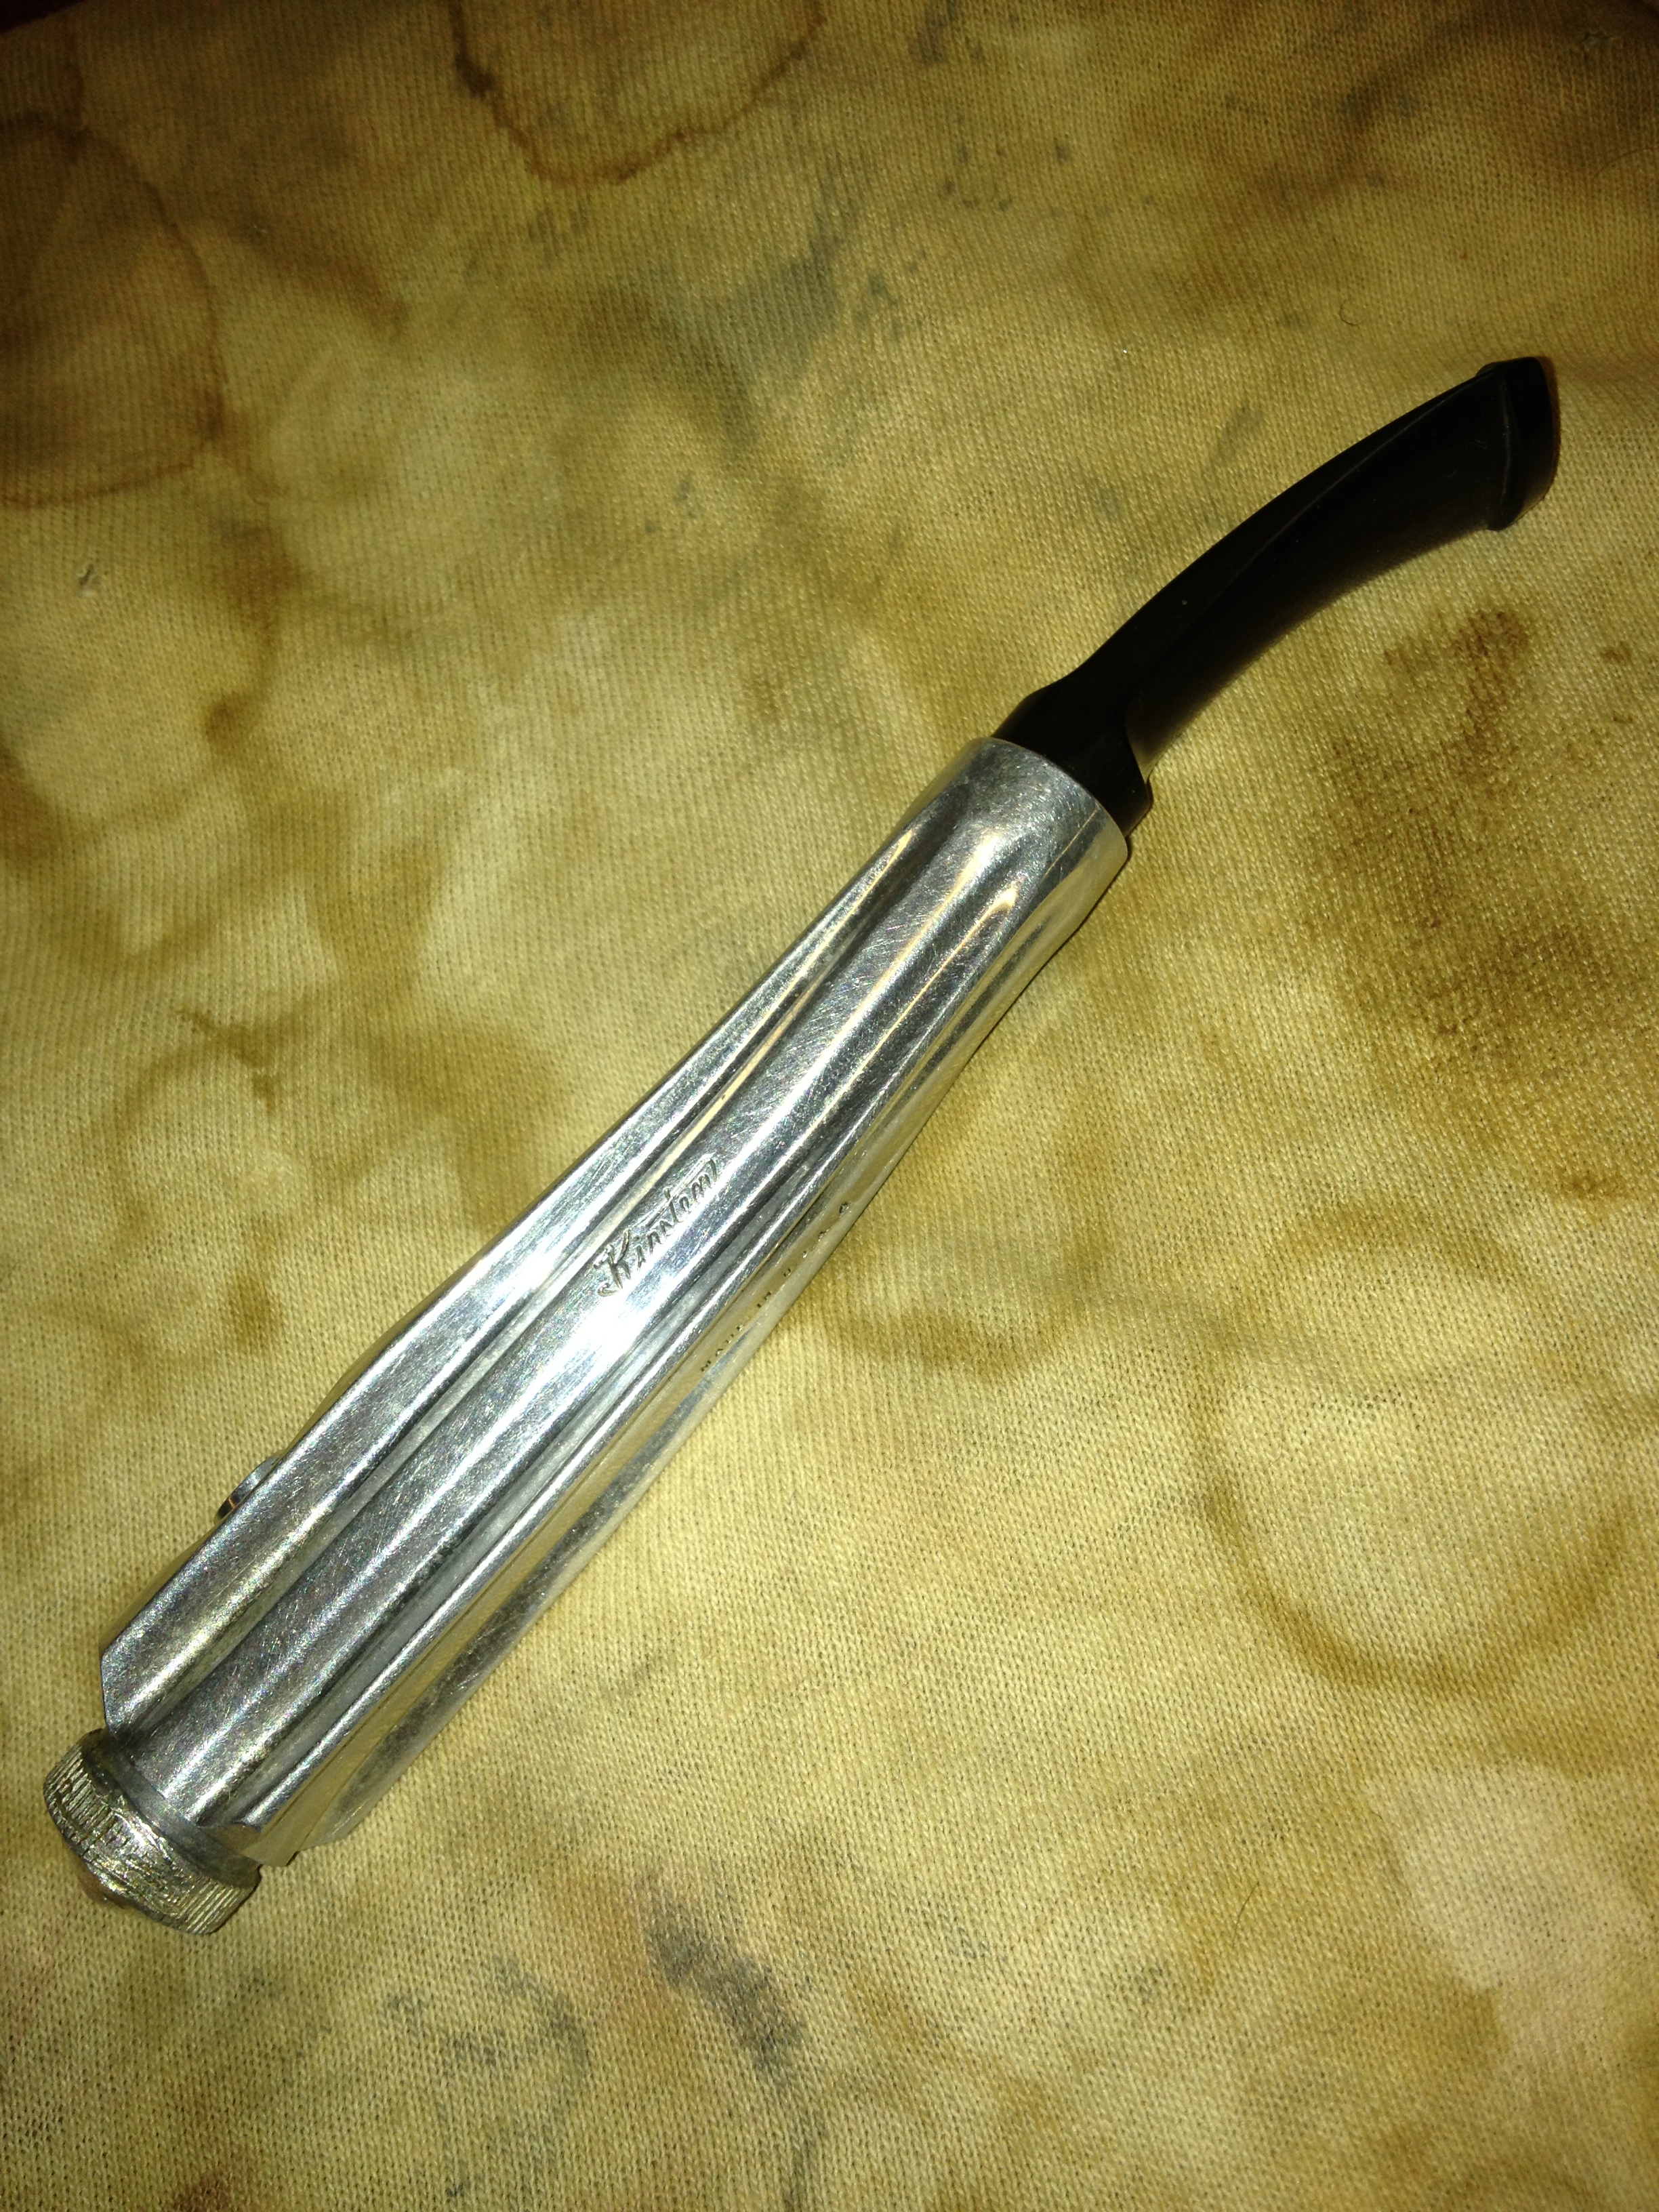
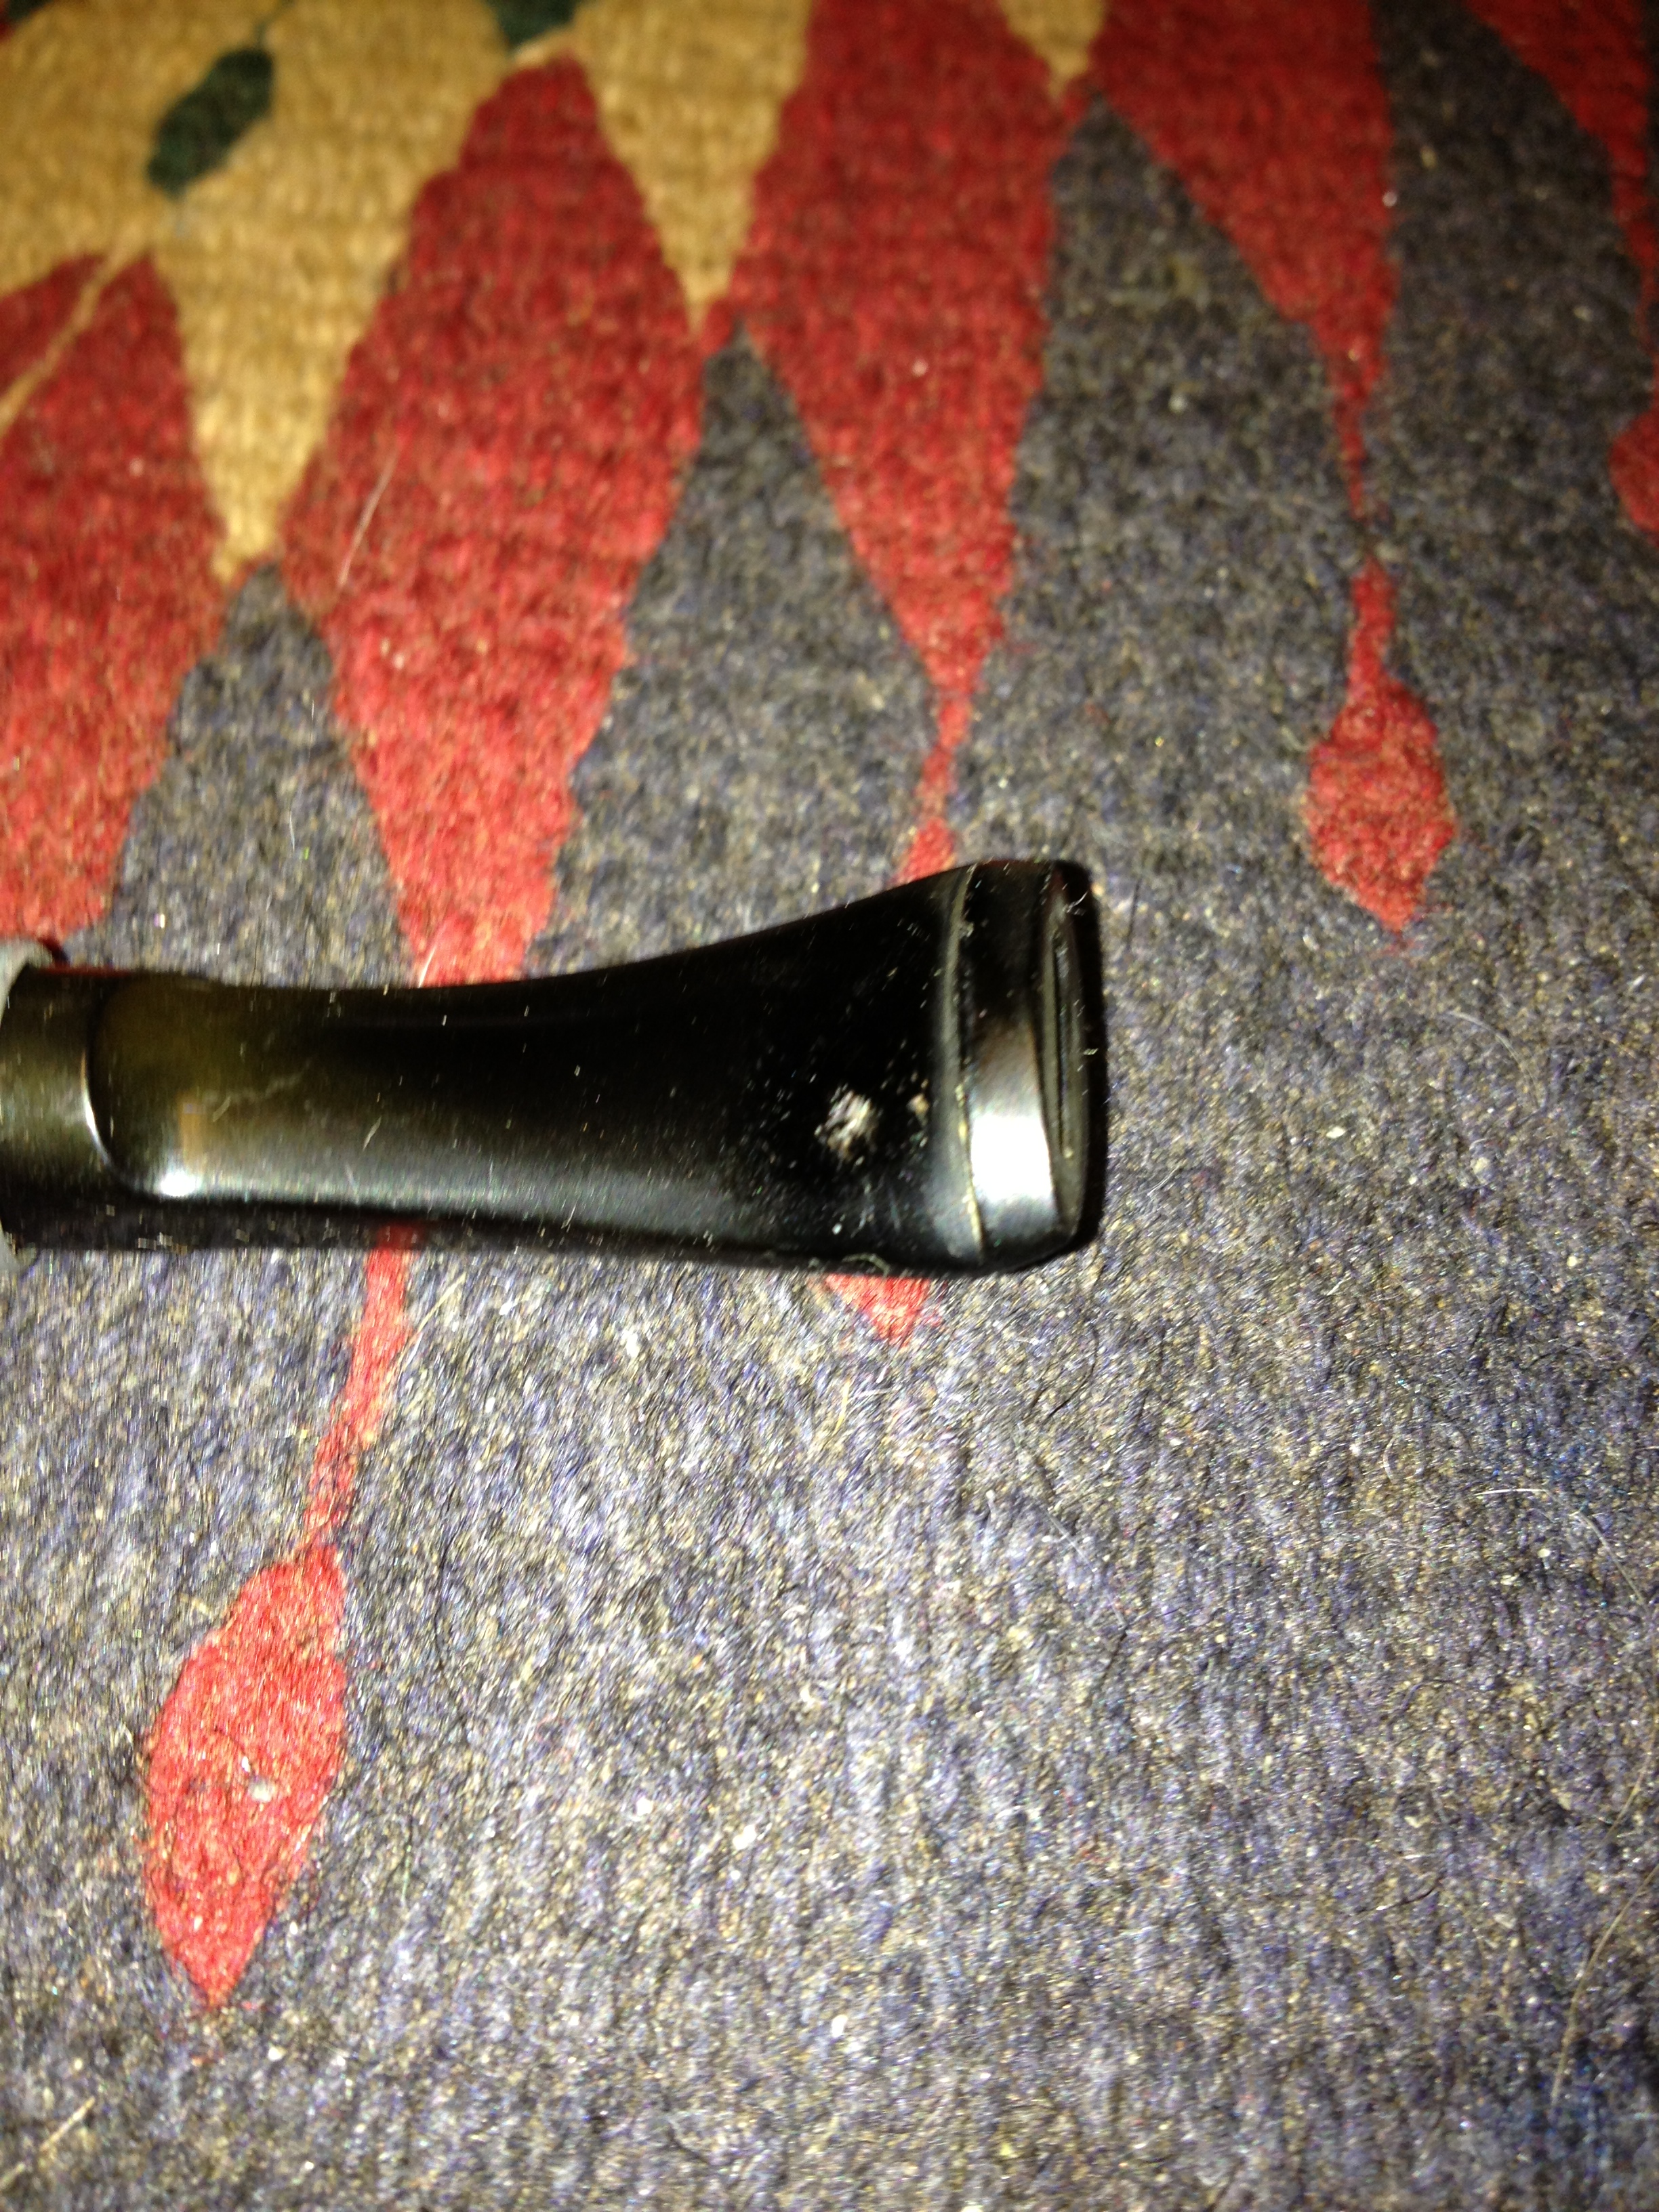
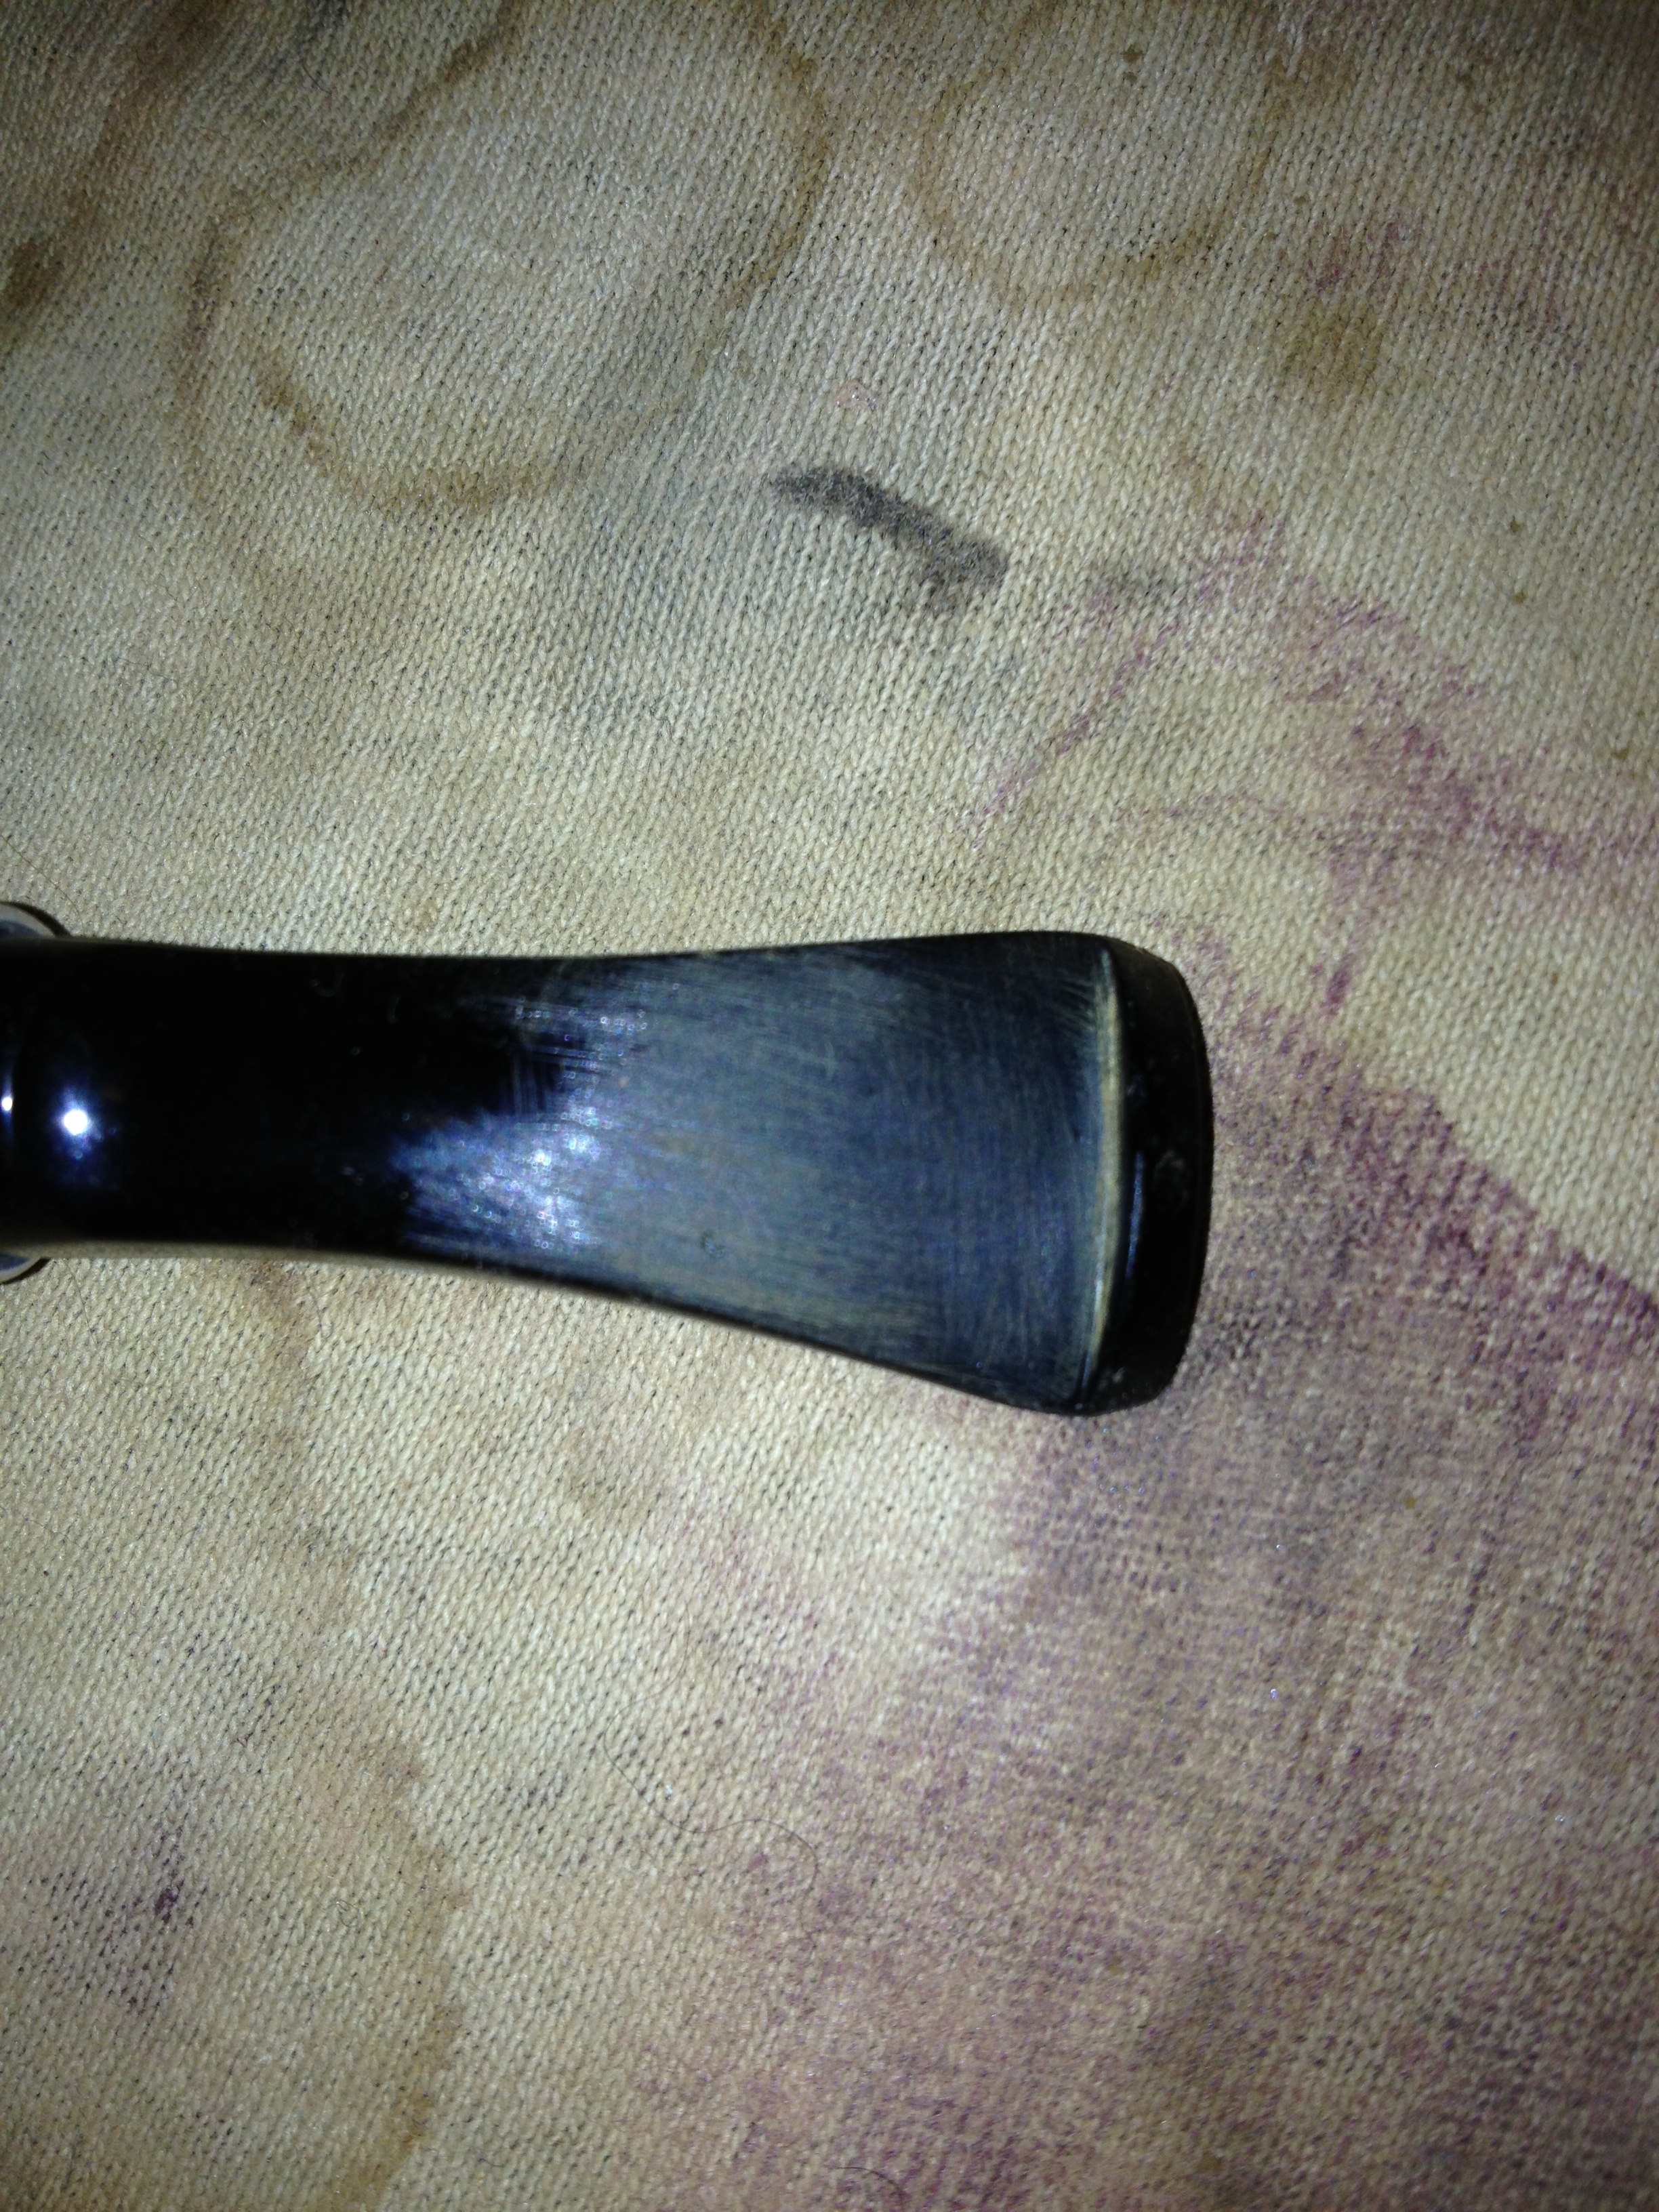
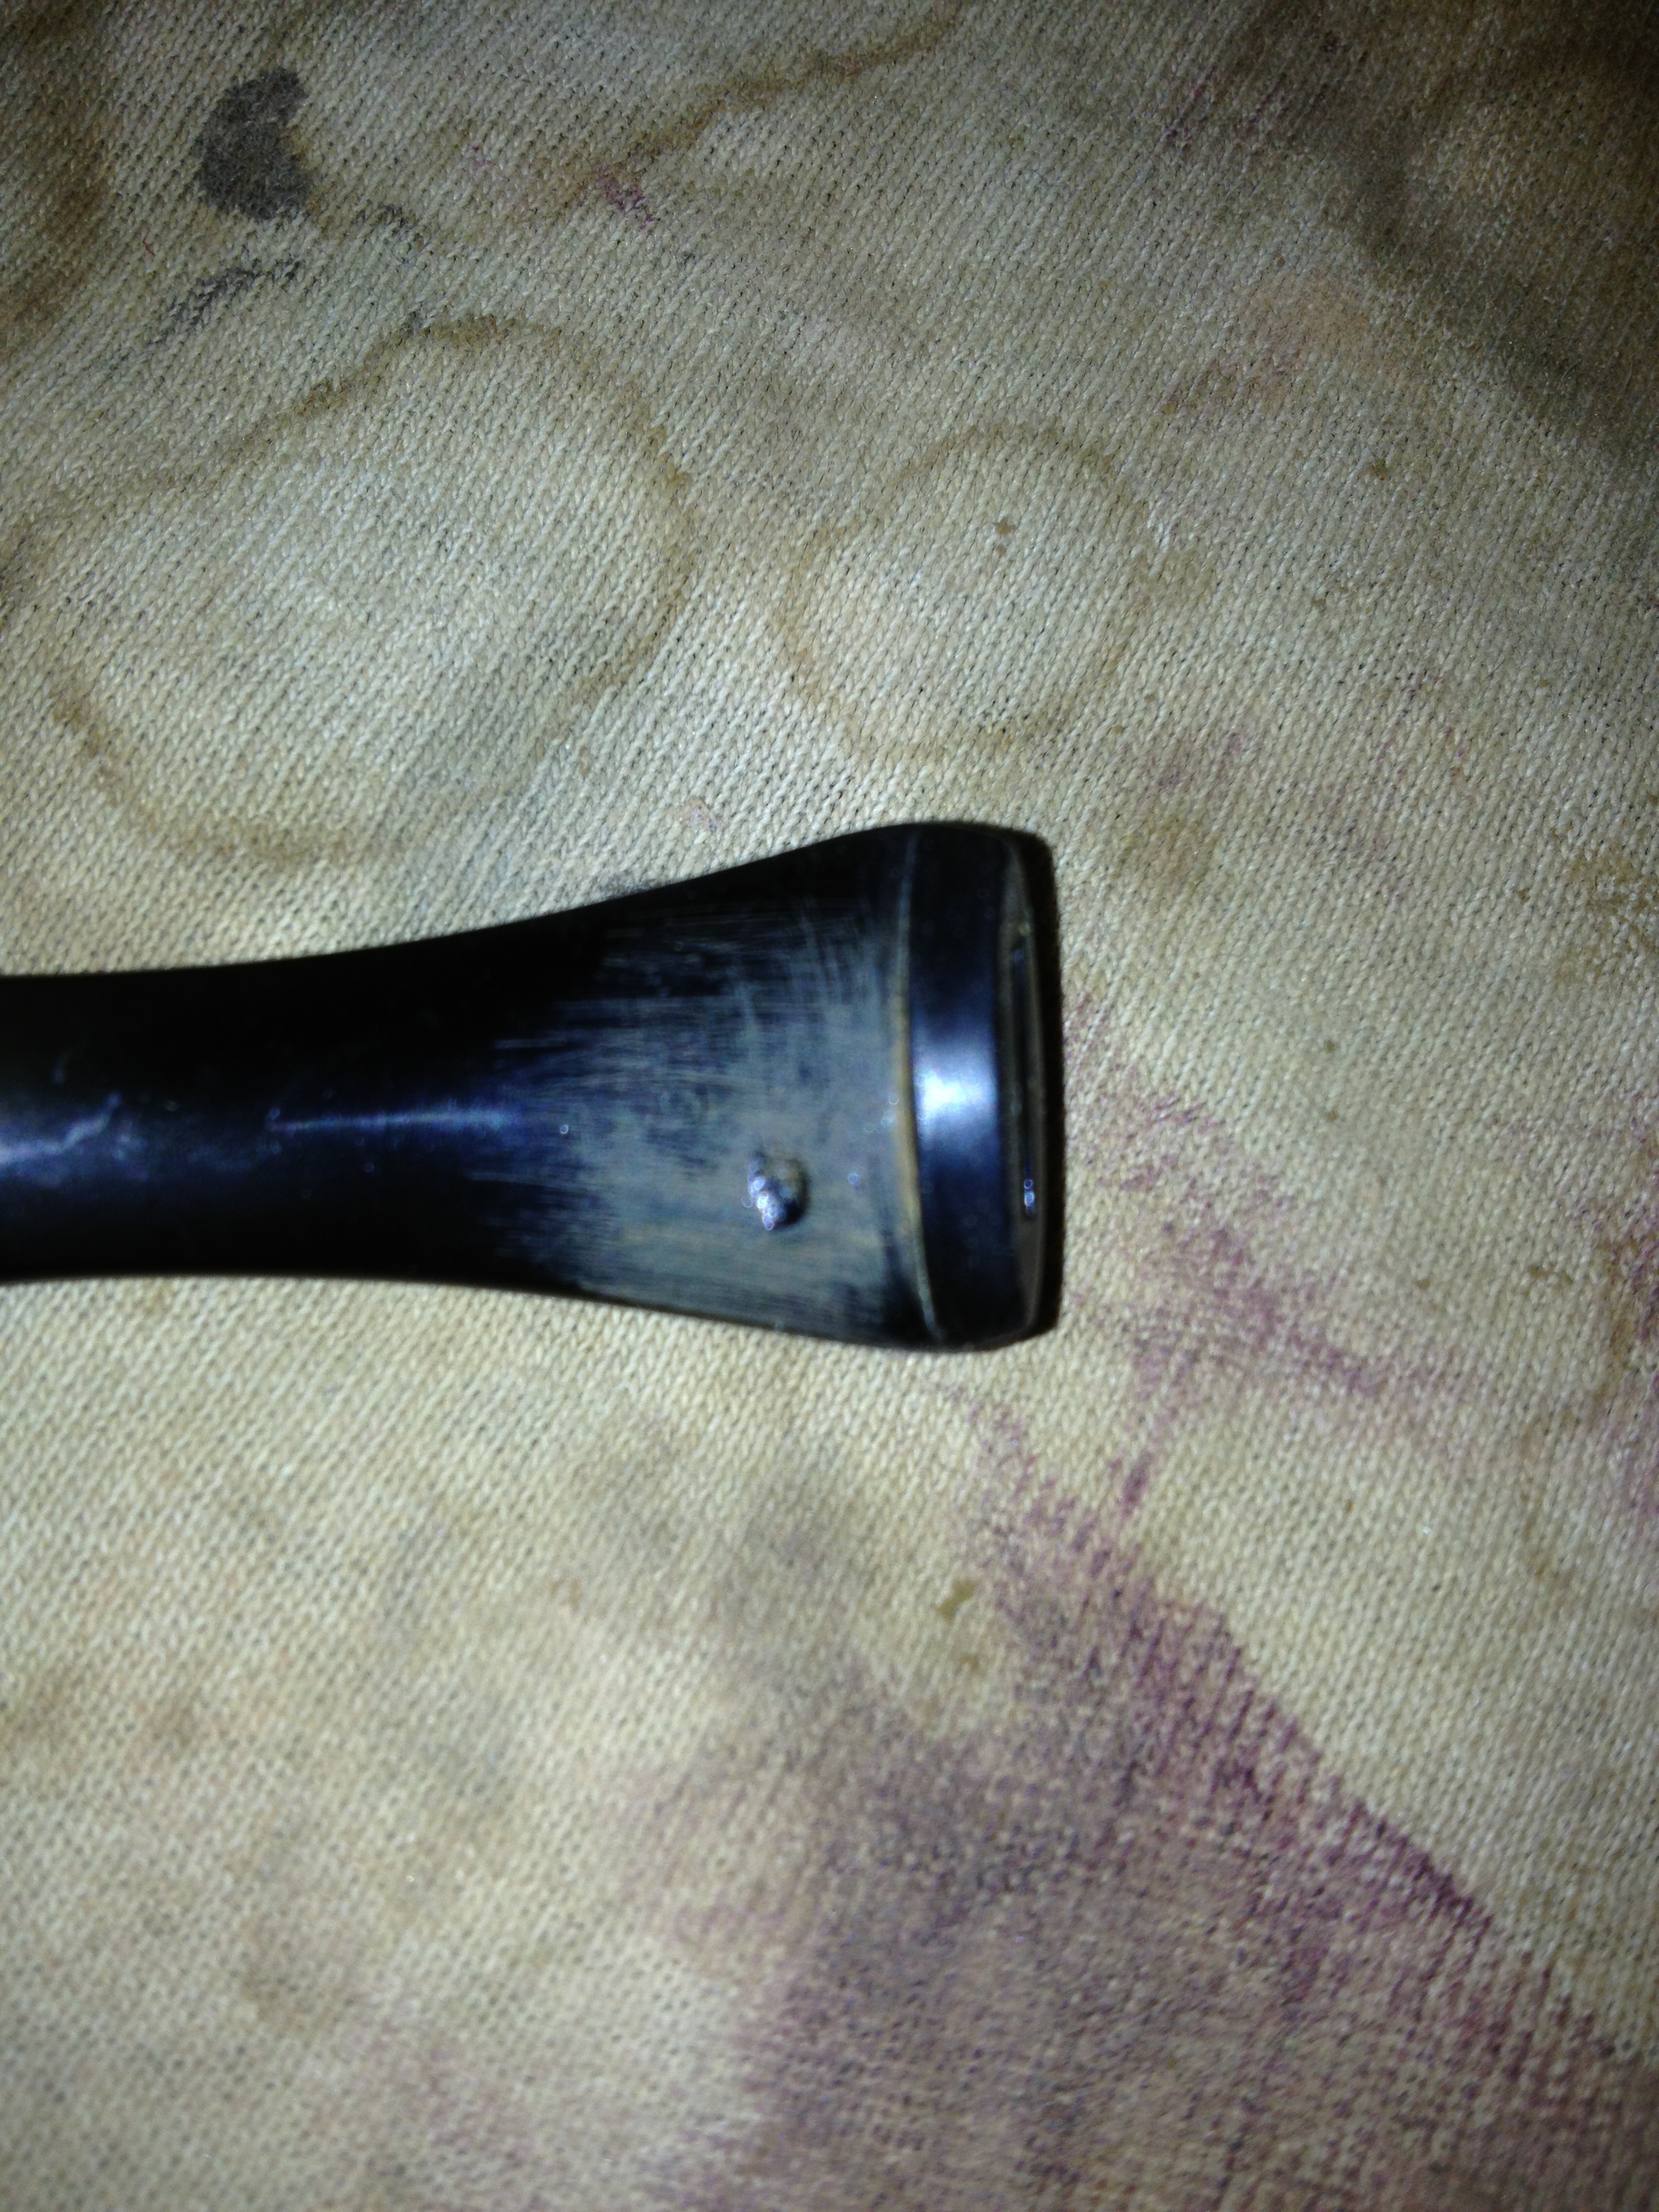
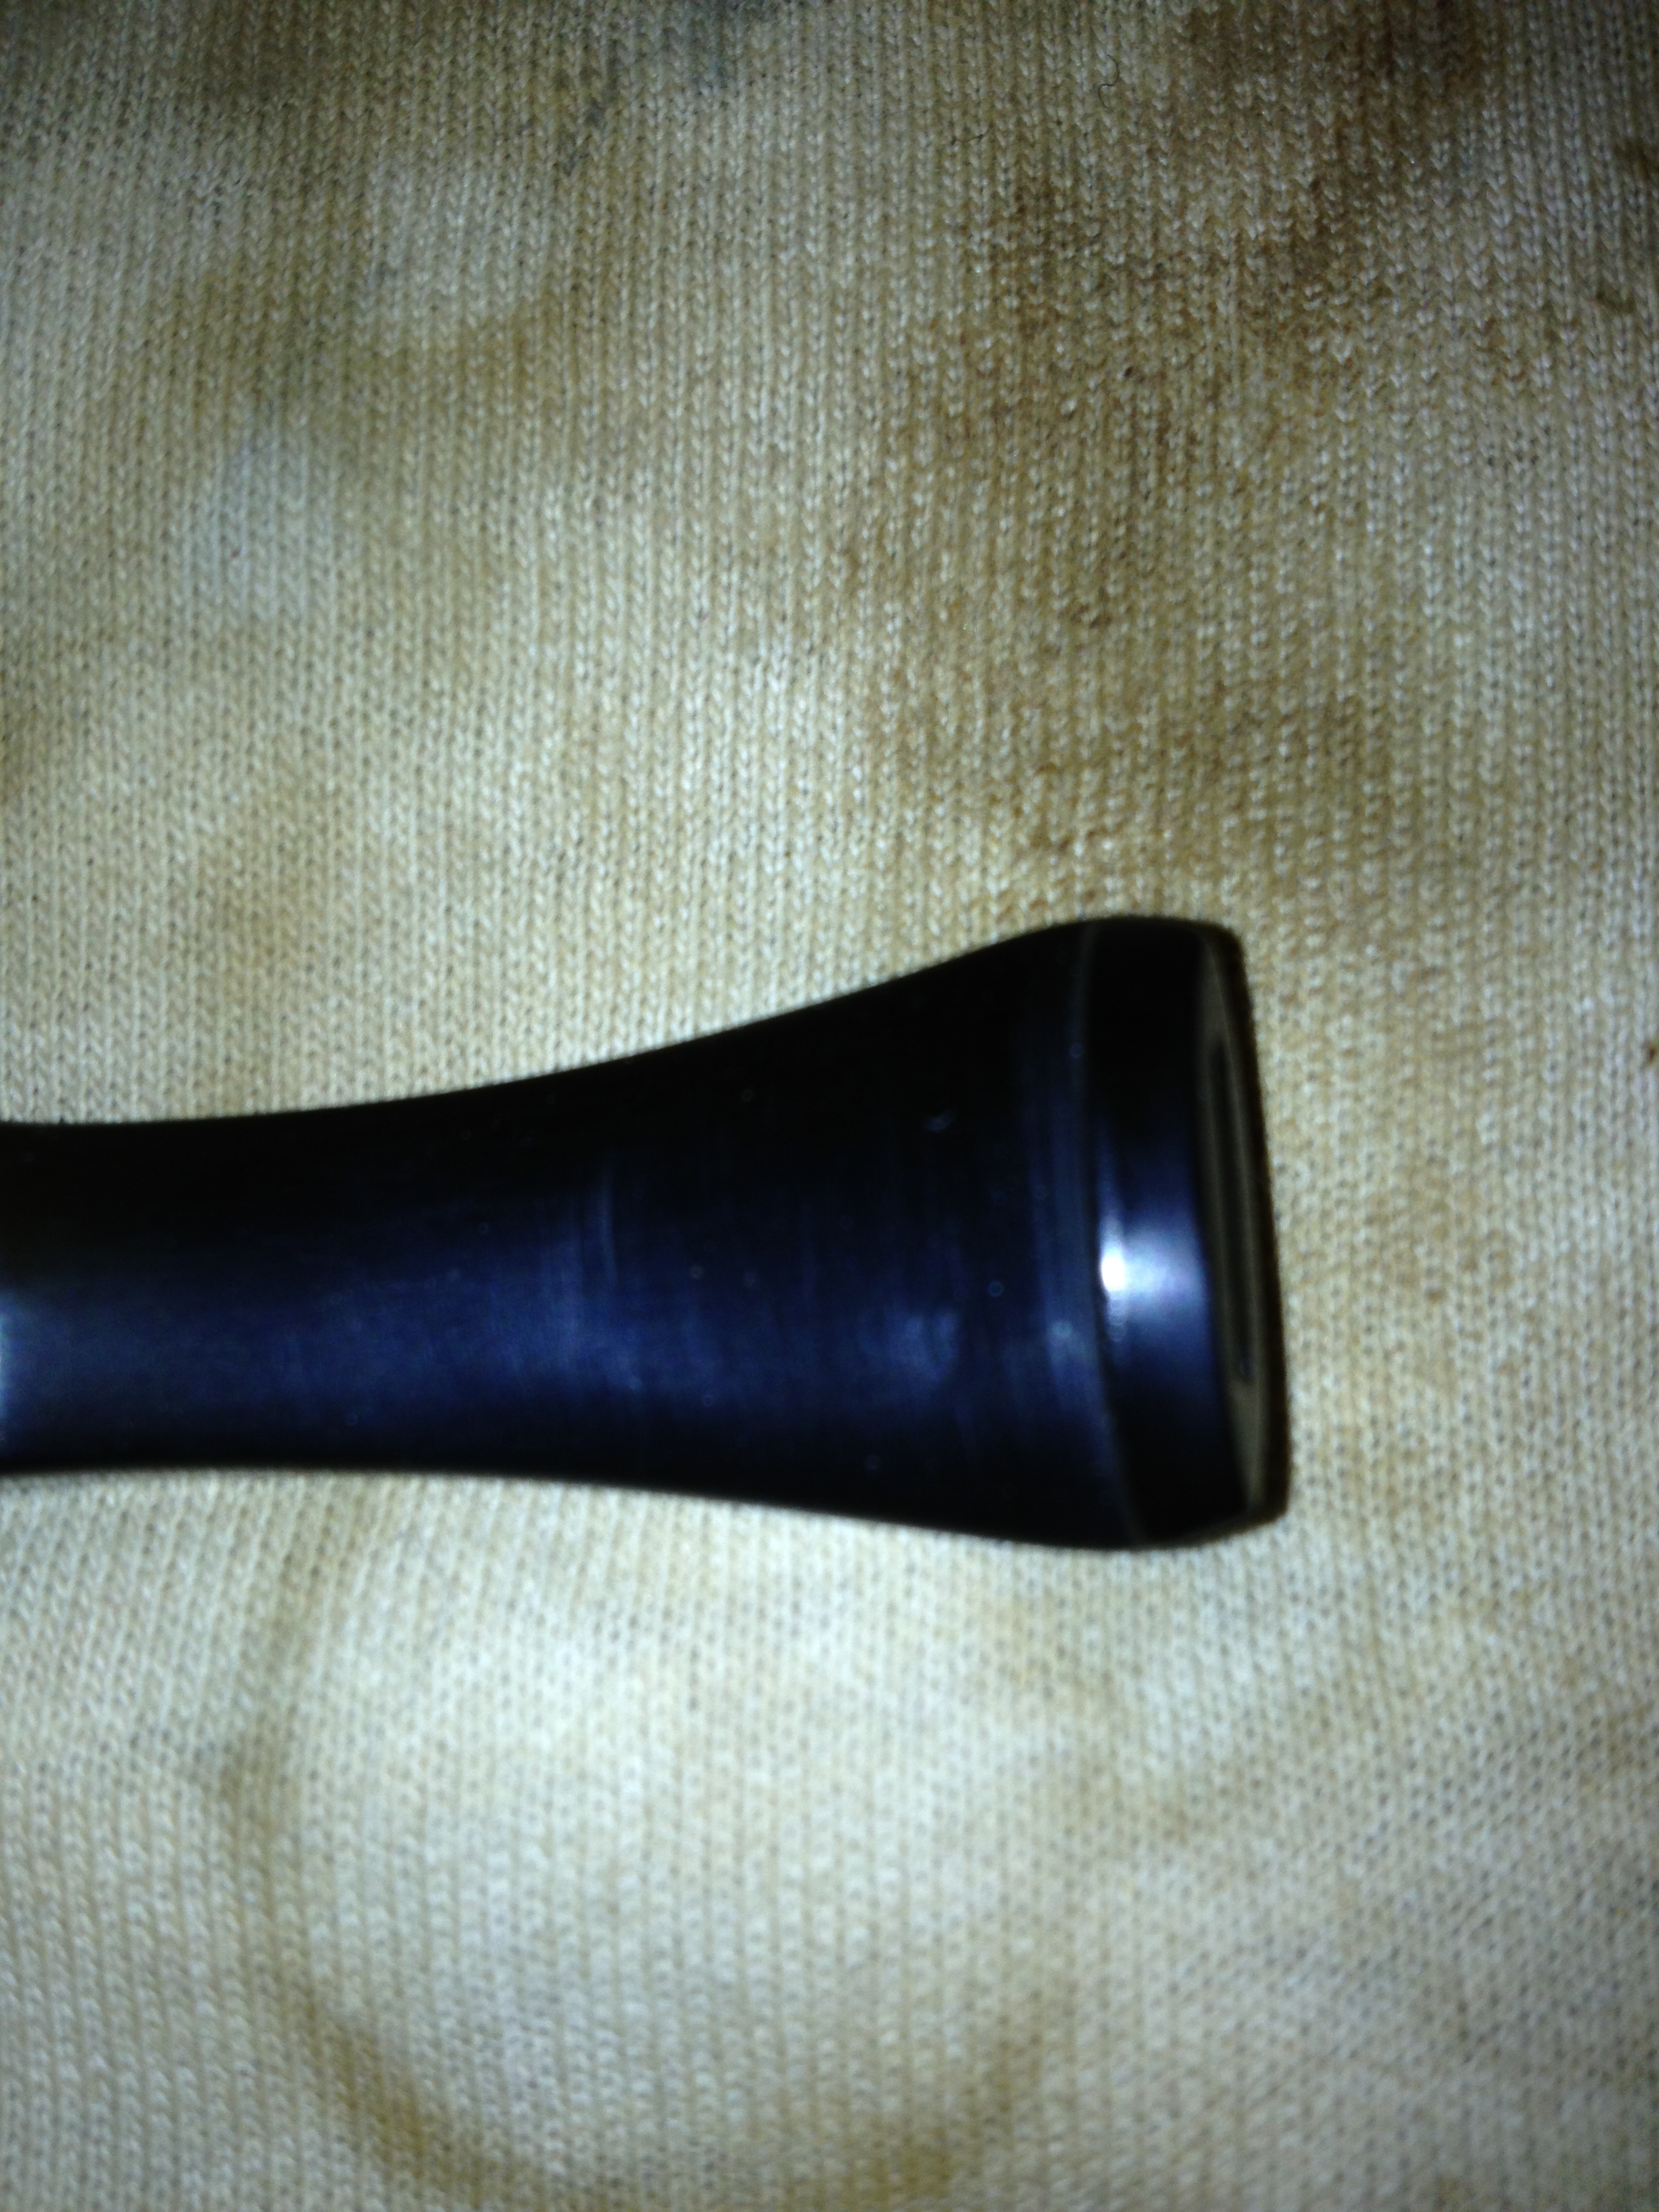
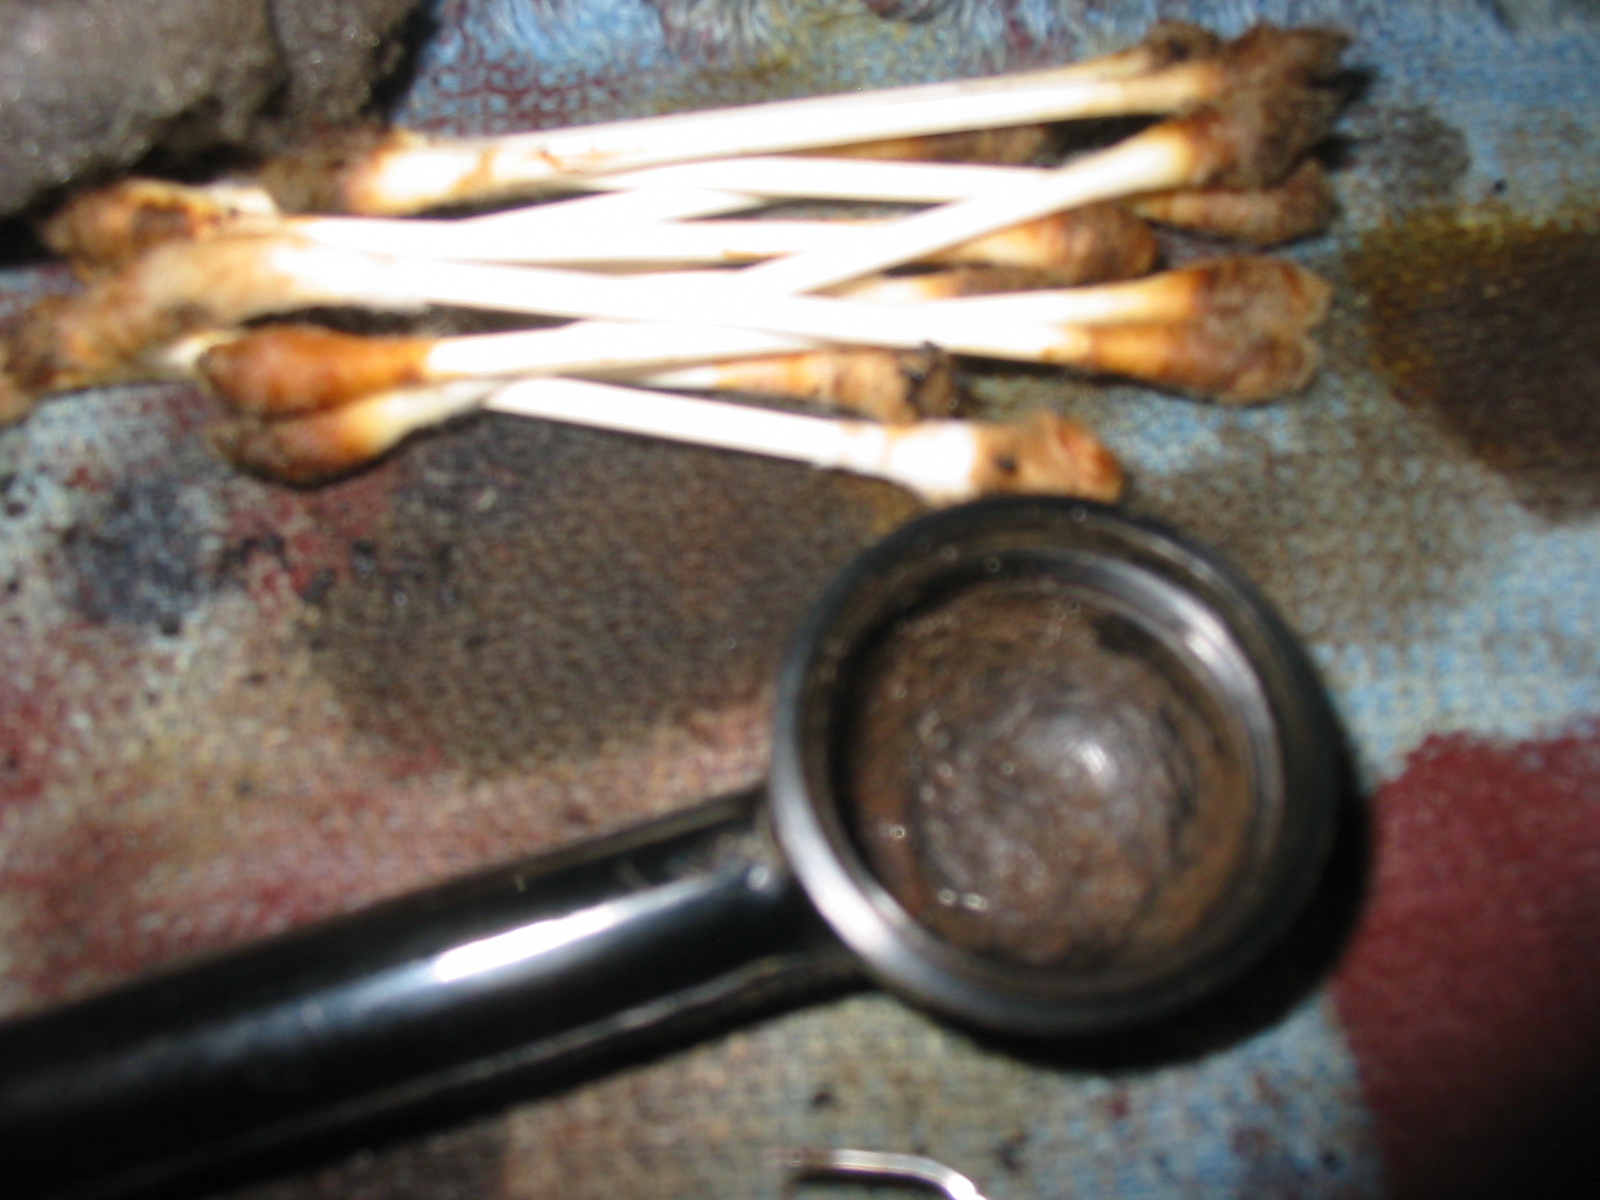
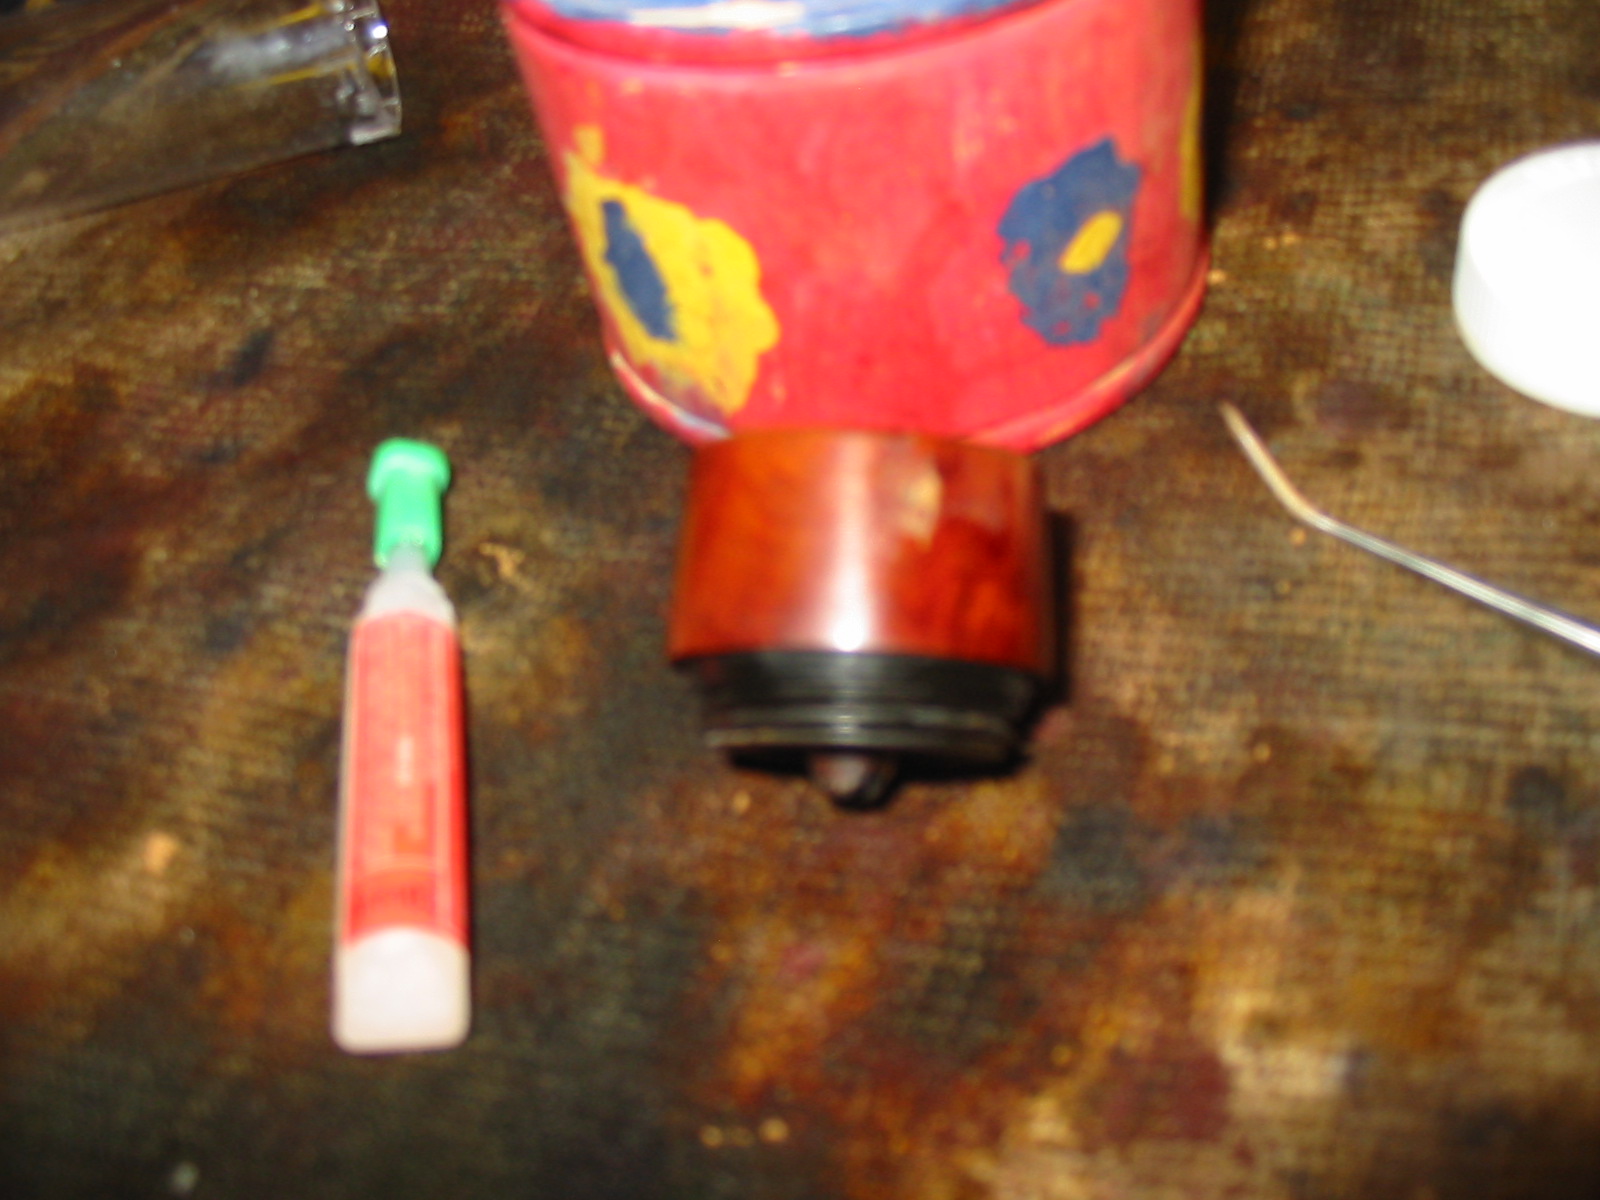
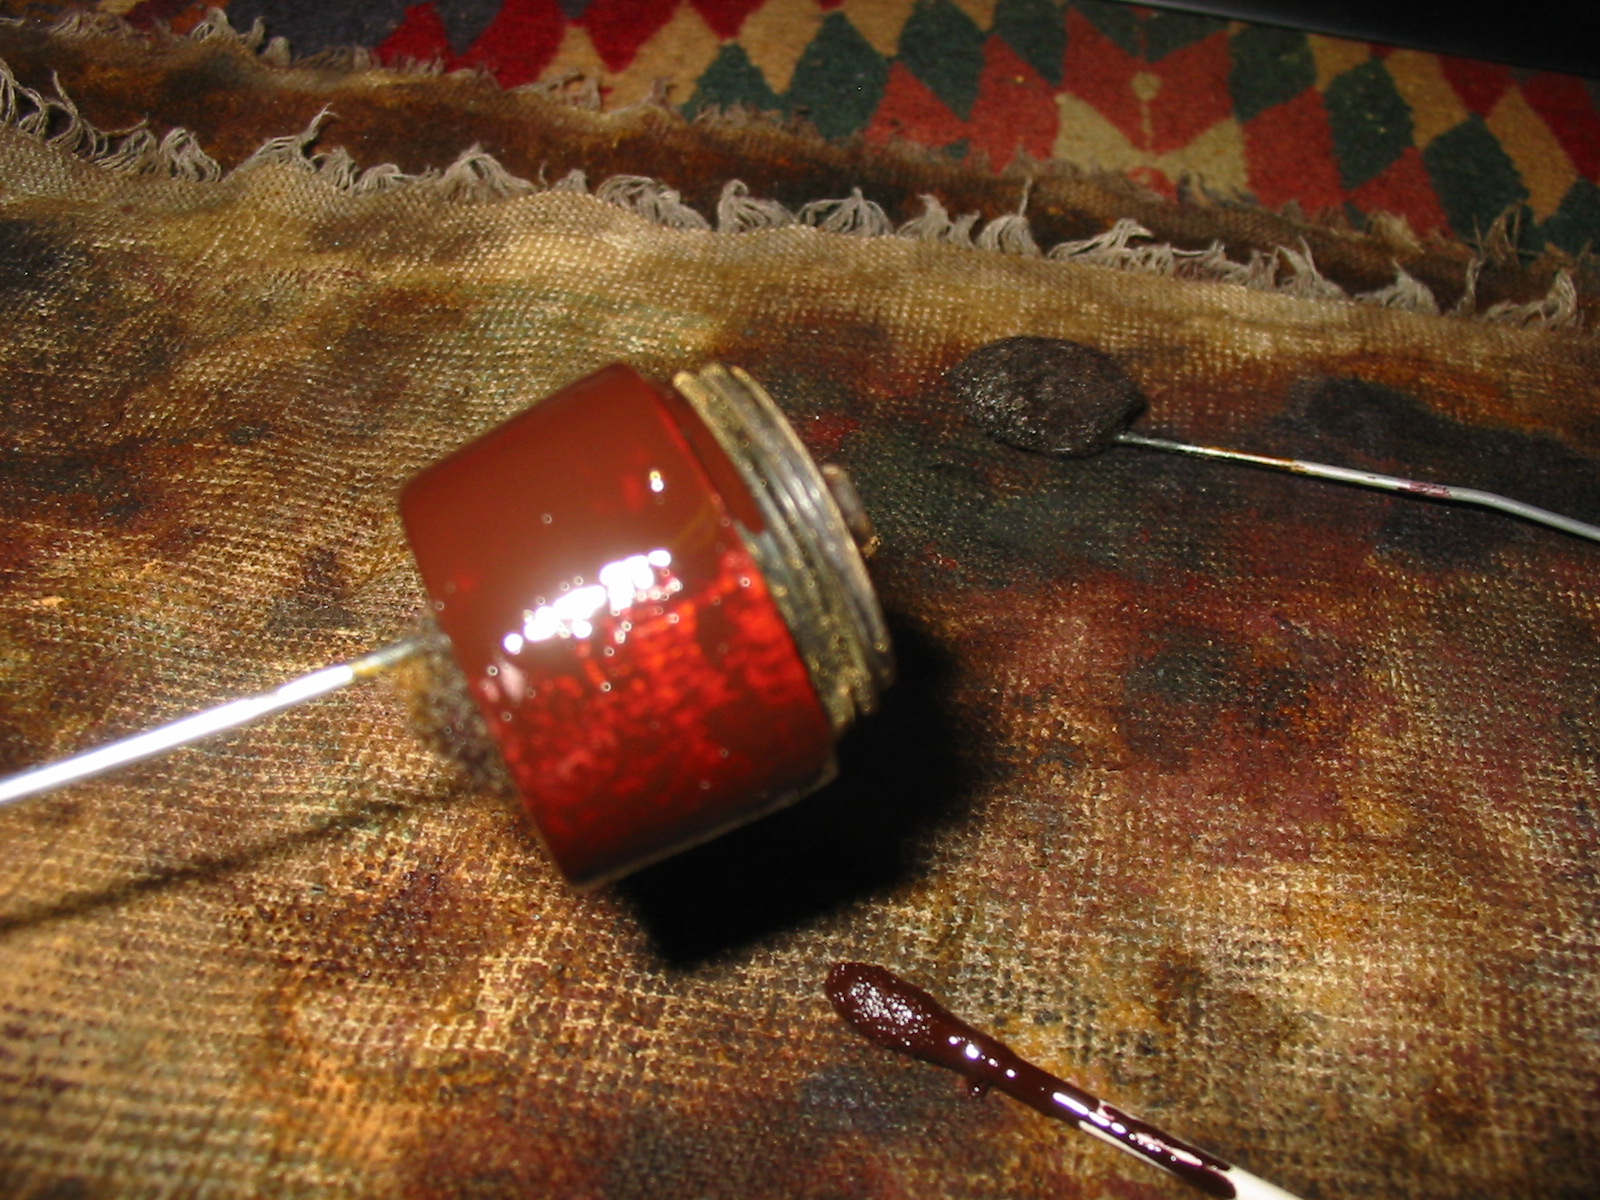
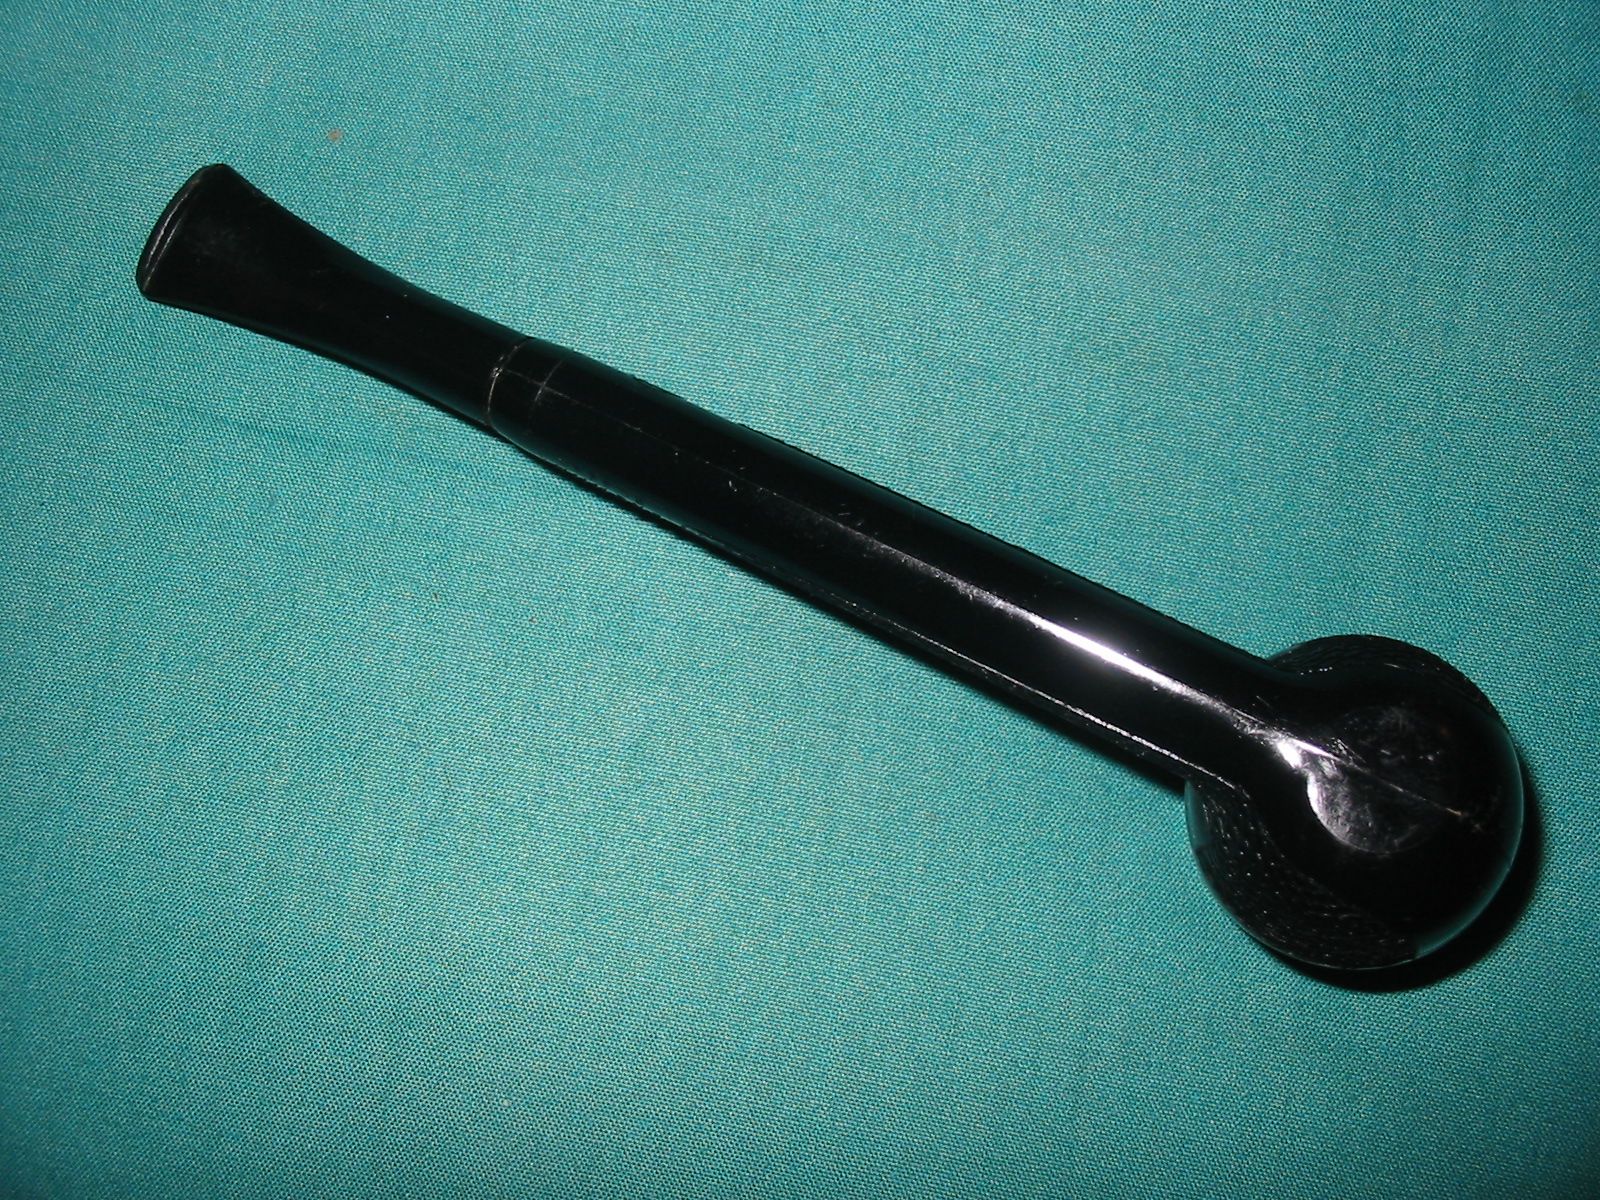
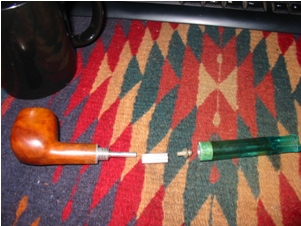
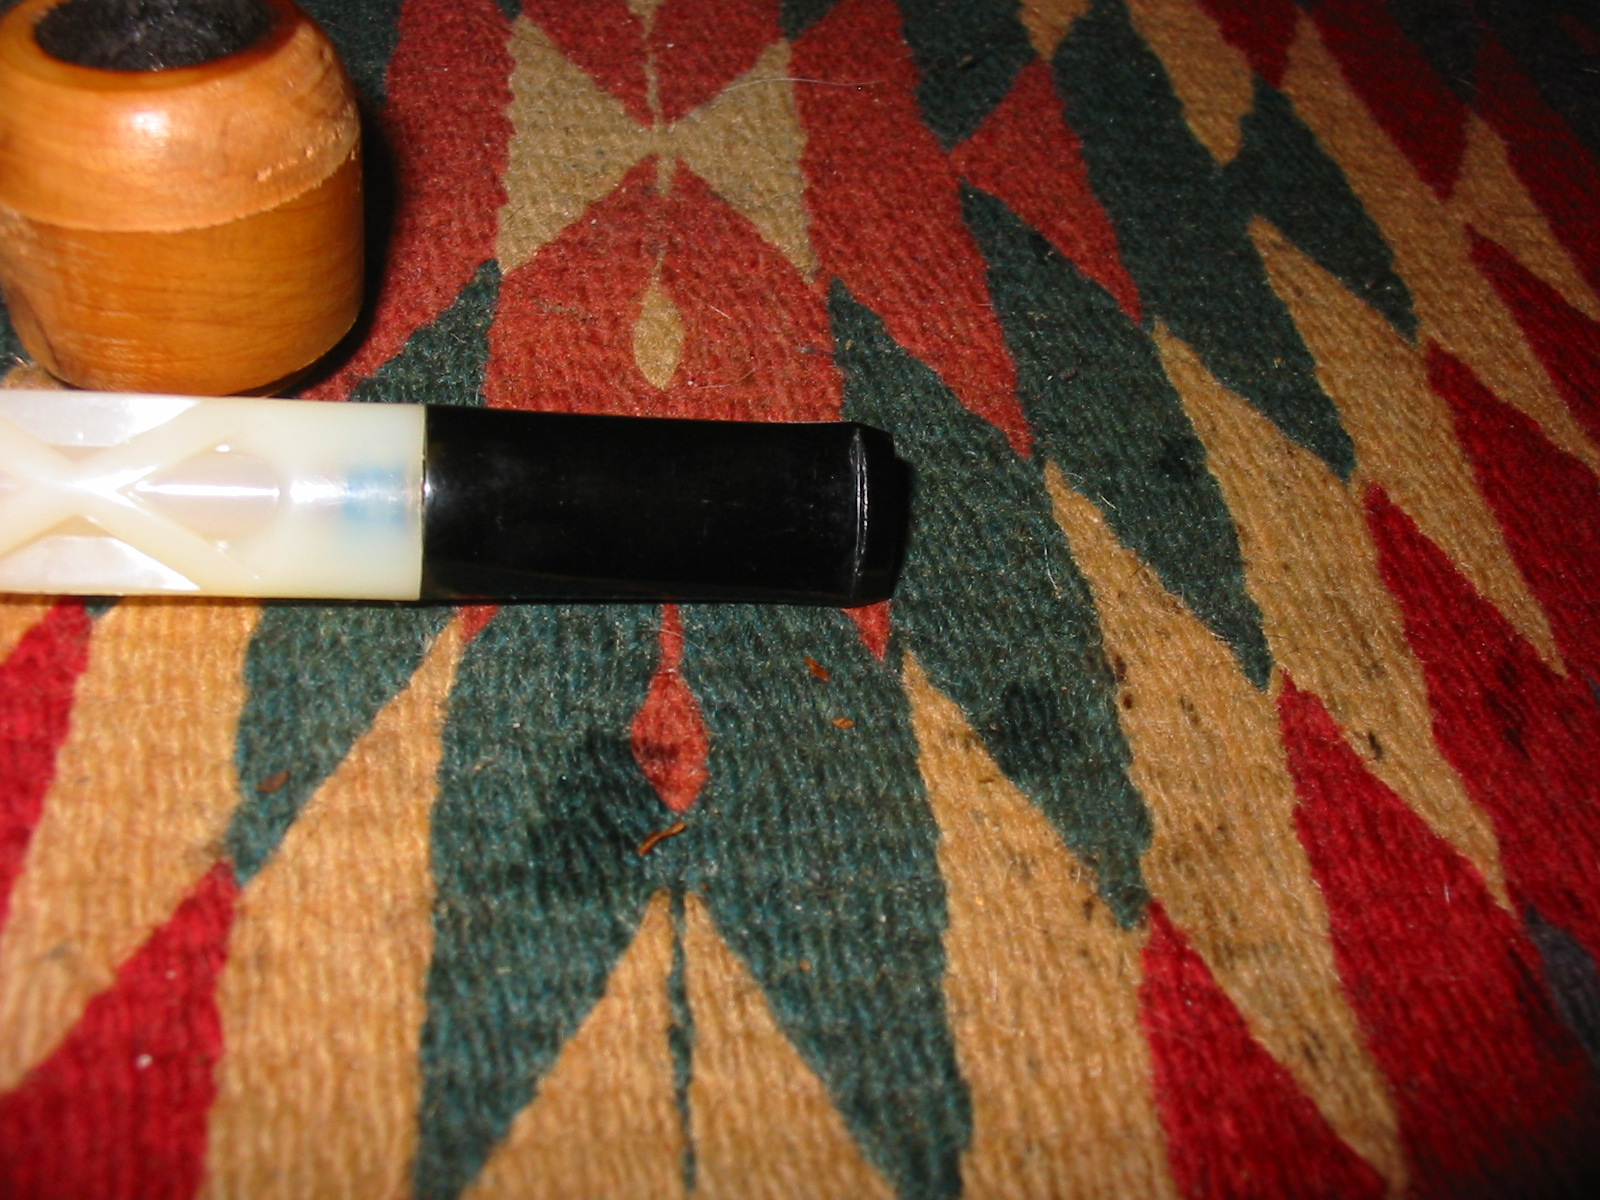
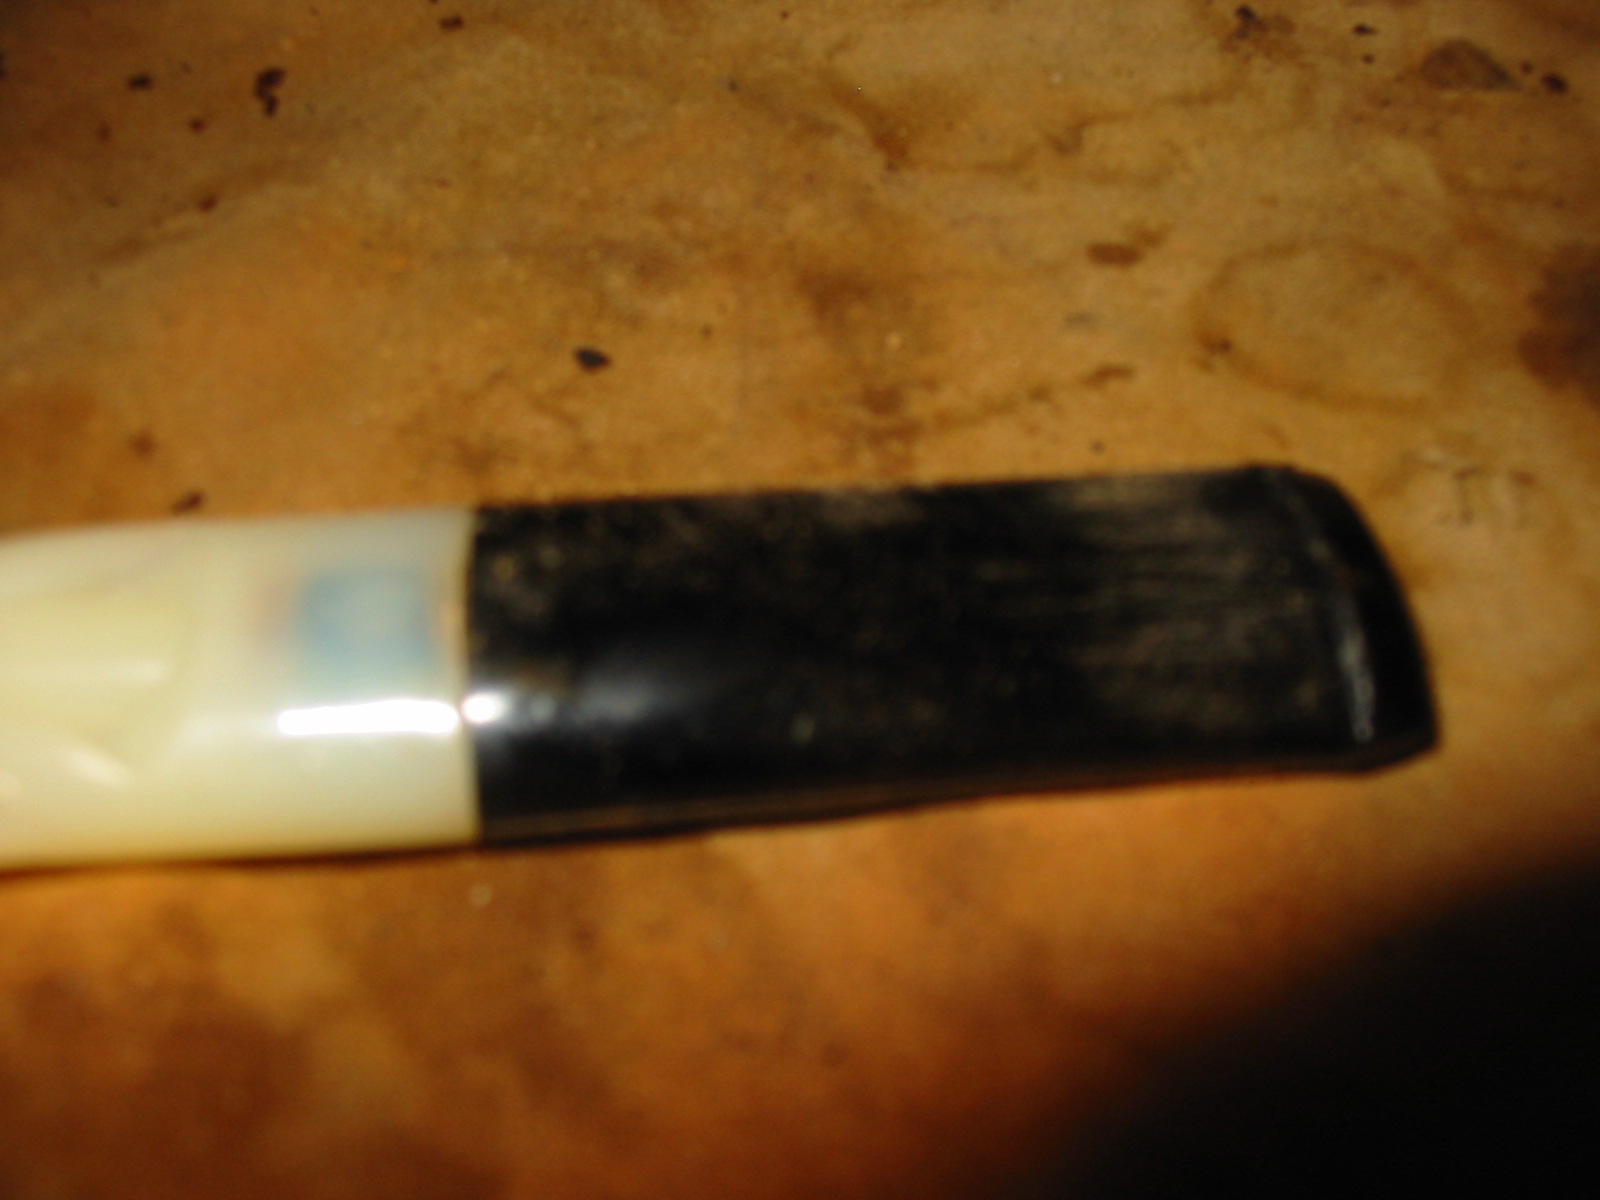
I unscrewed the bowl from the base and set it aside while I worked on the base to begin with. I cleaned out the stained reservoir with cotton swabs dipped in Everclear and used bristle and fluffy pipe cleaners on the inside of the stem and the shank. The dried tobacco shreds were stuck to the base so it took some scrubbing to remove the dried materials. The next three photos give an idea of the state of the reservoir and the slight tooth chatter on the stem. The fourth photo shows the cleaned but stained base of nylon.

IMG_2199

IMG_2200

IMG_2201

IMG_2204

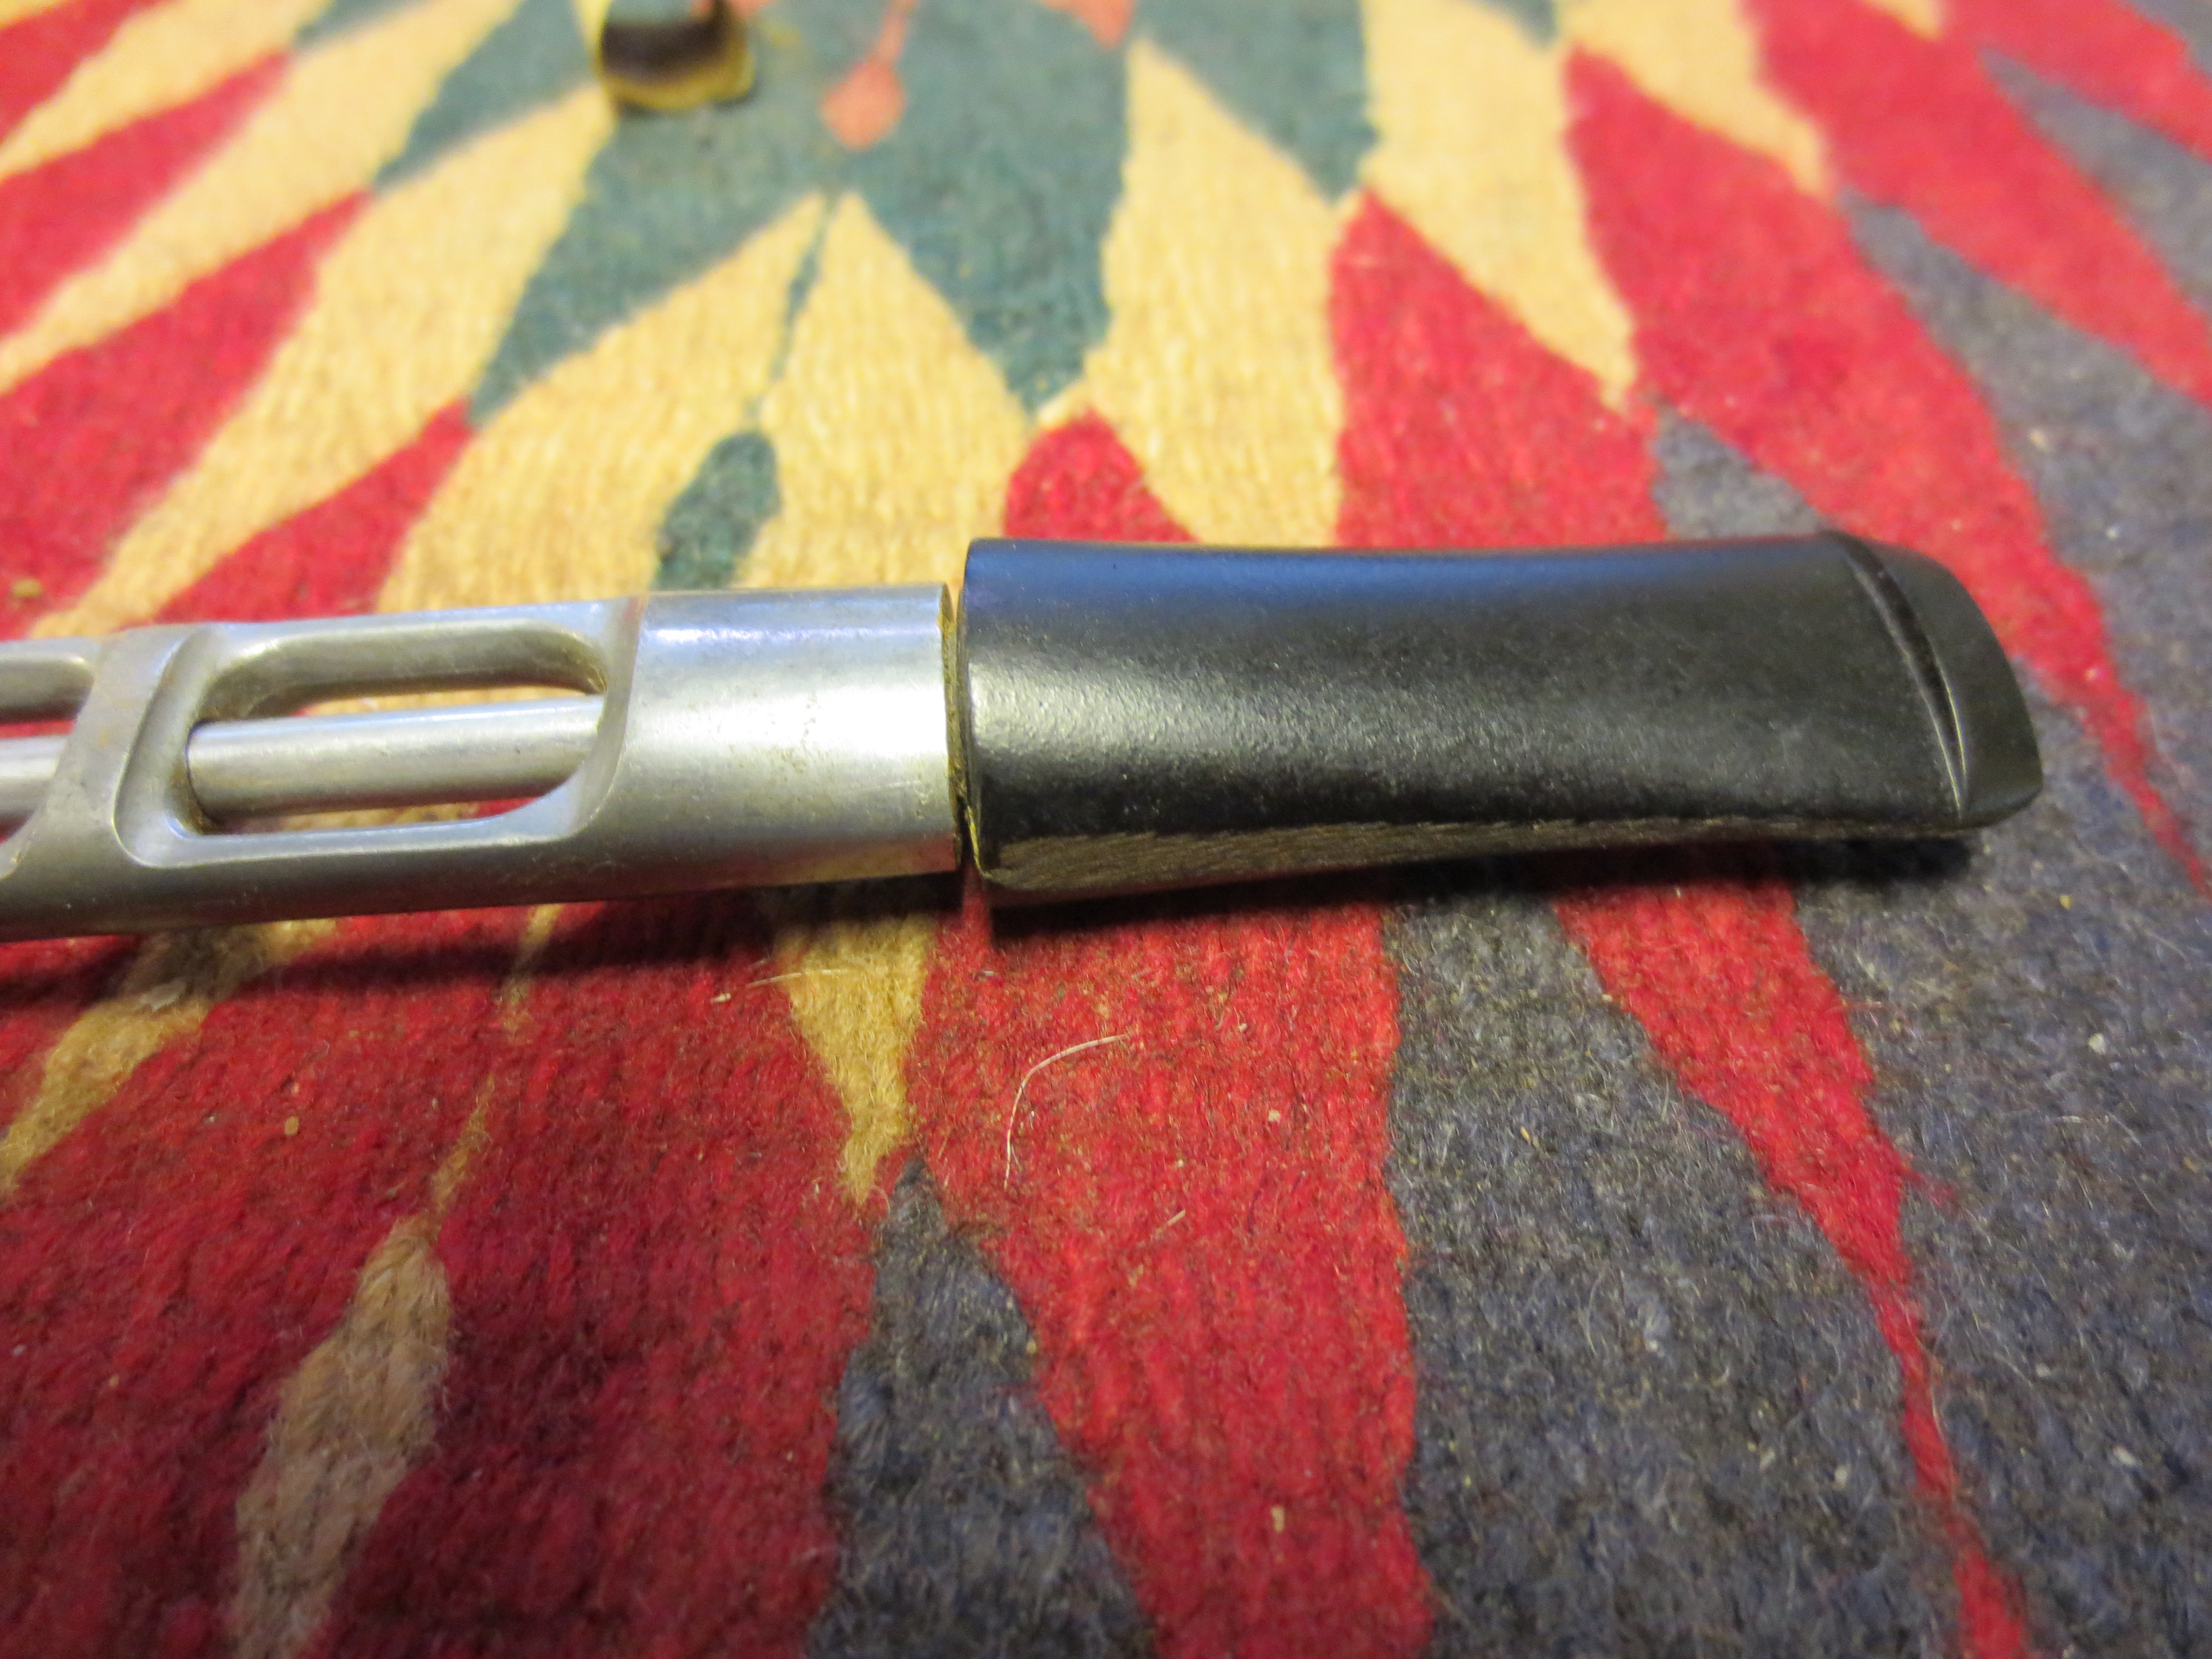
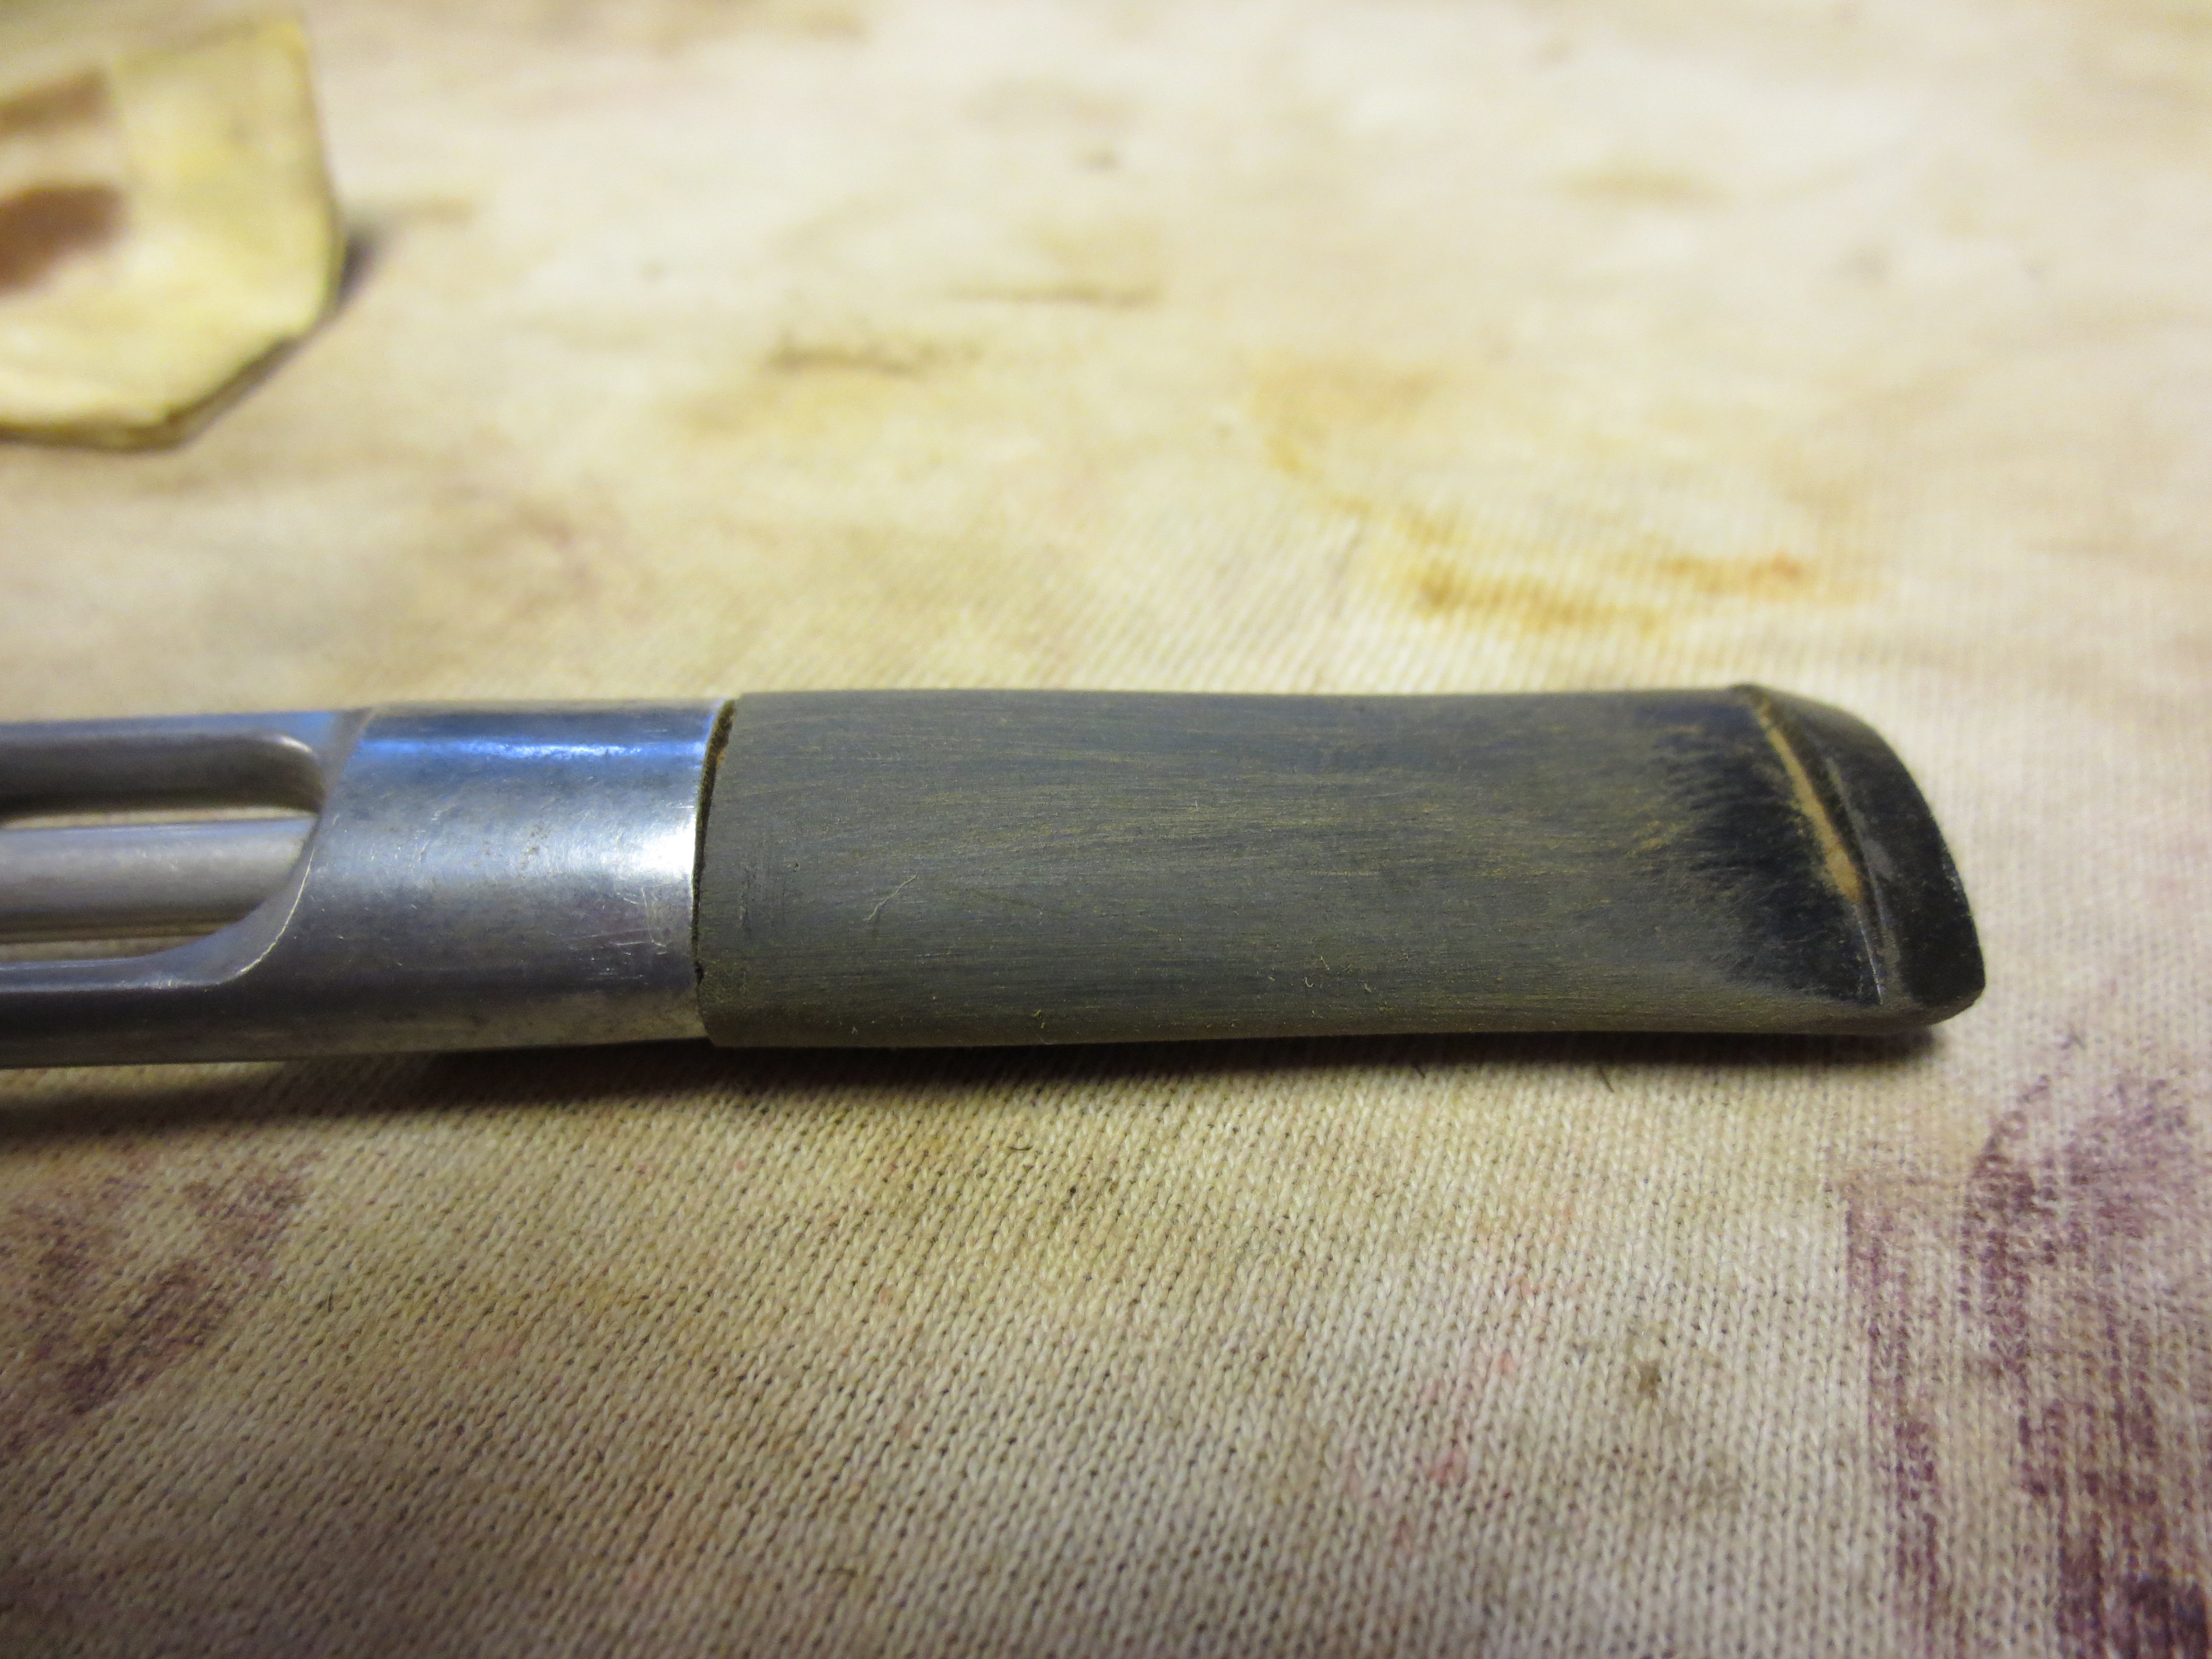
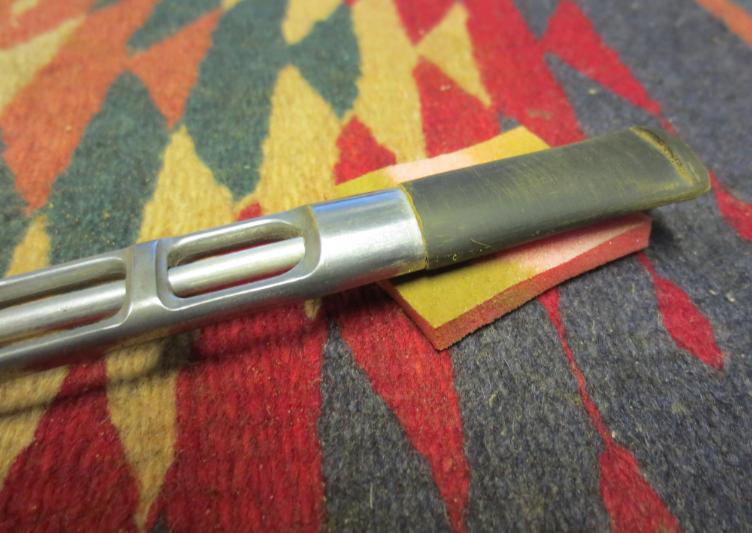
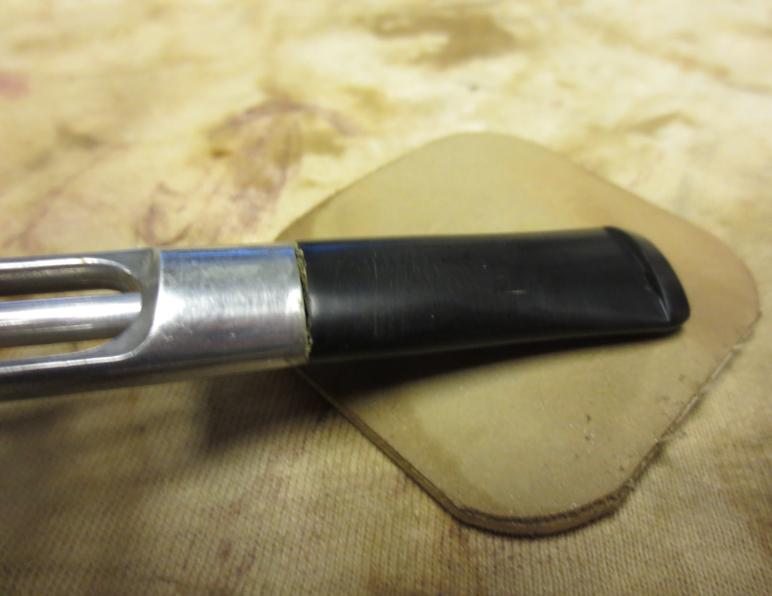
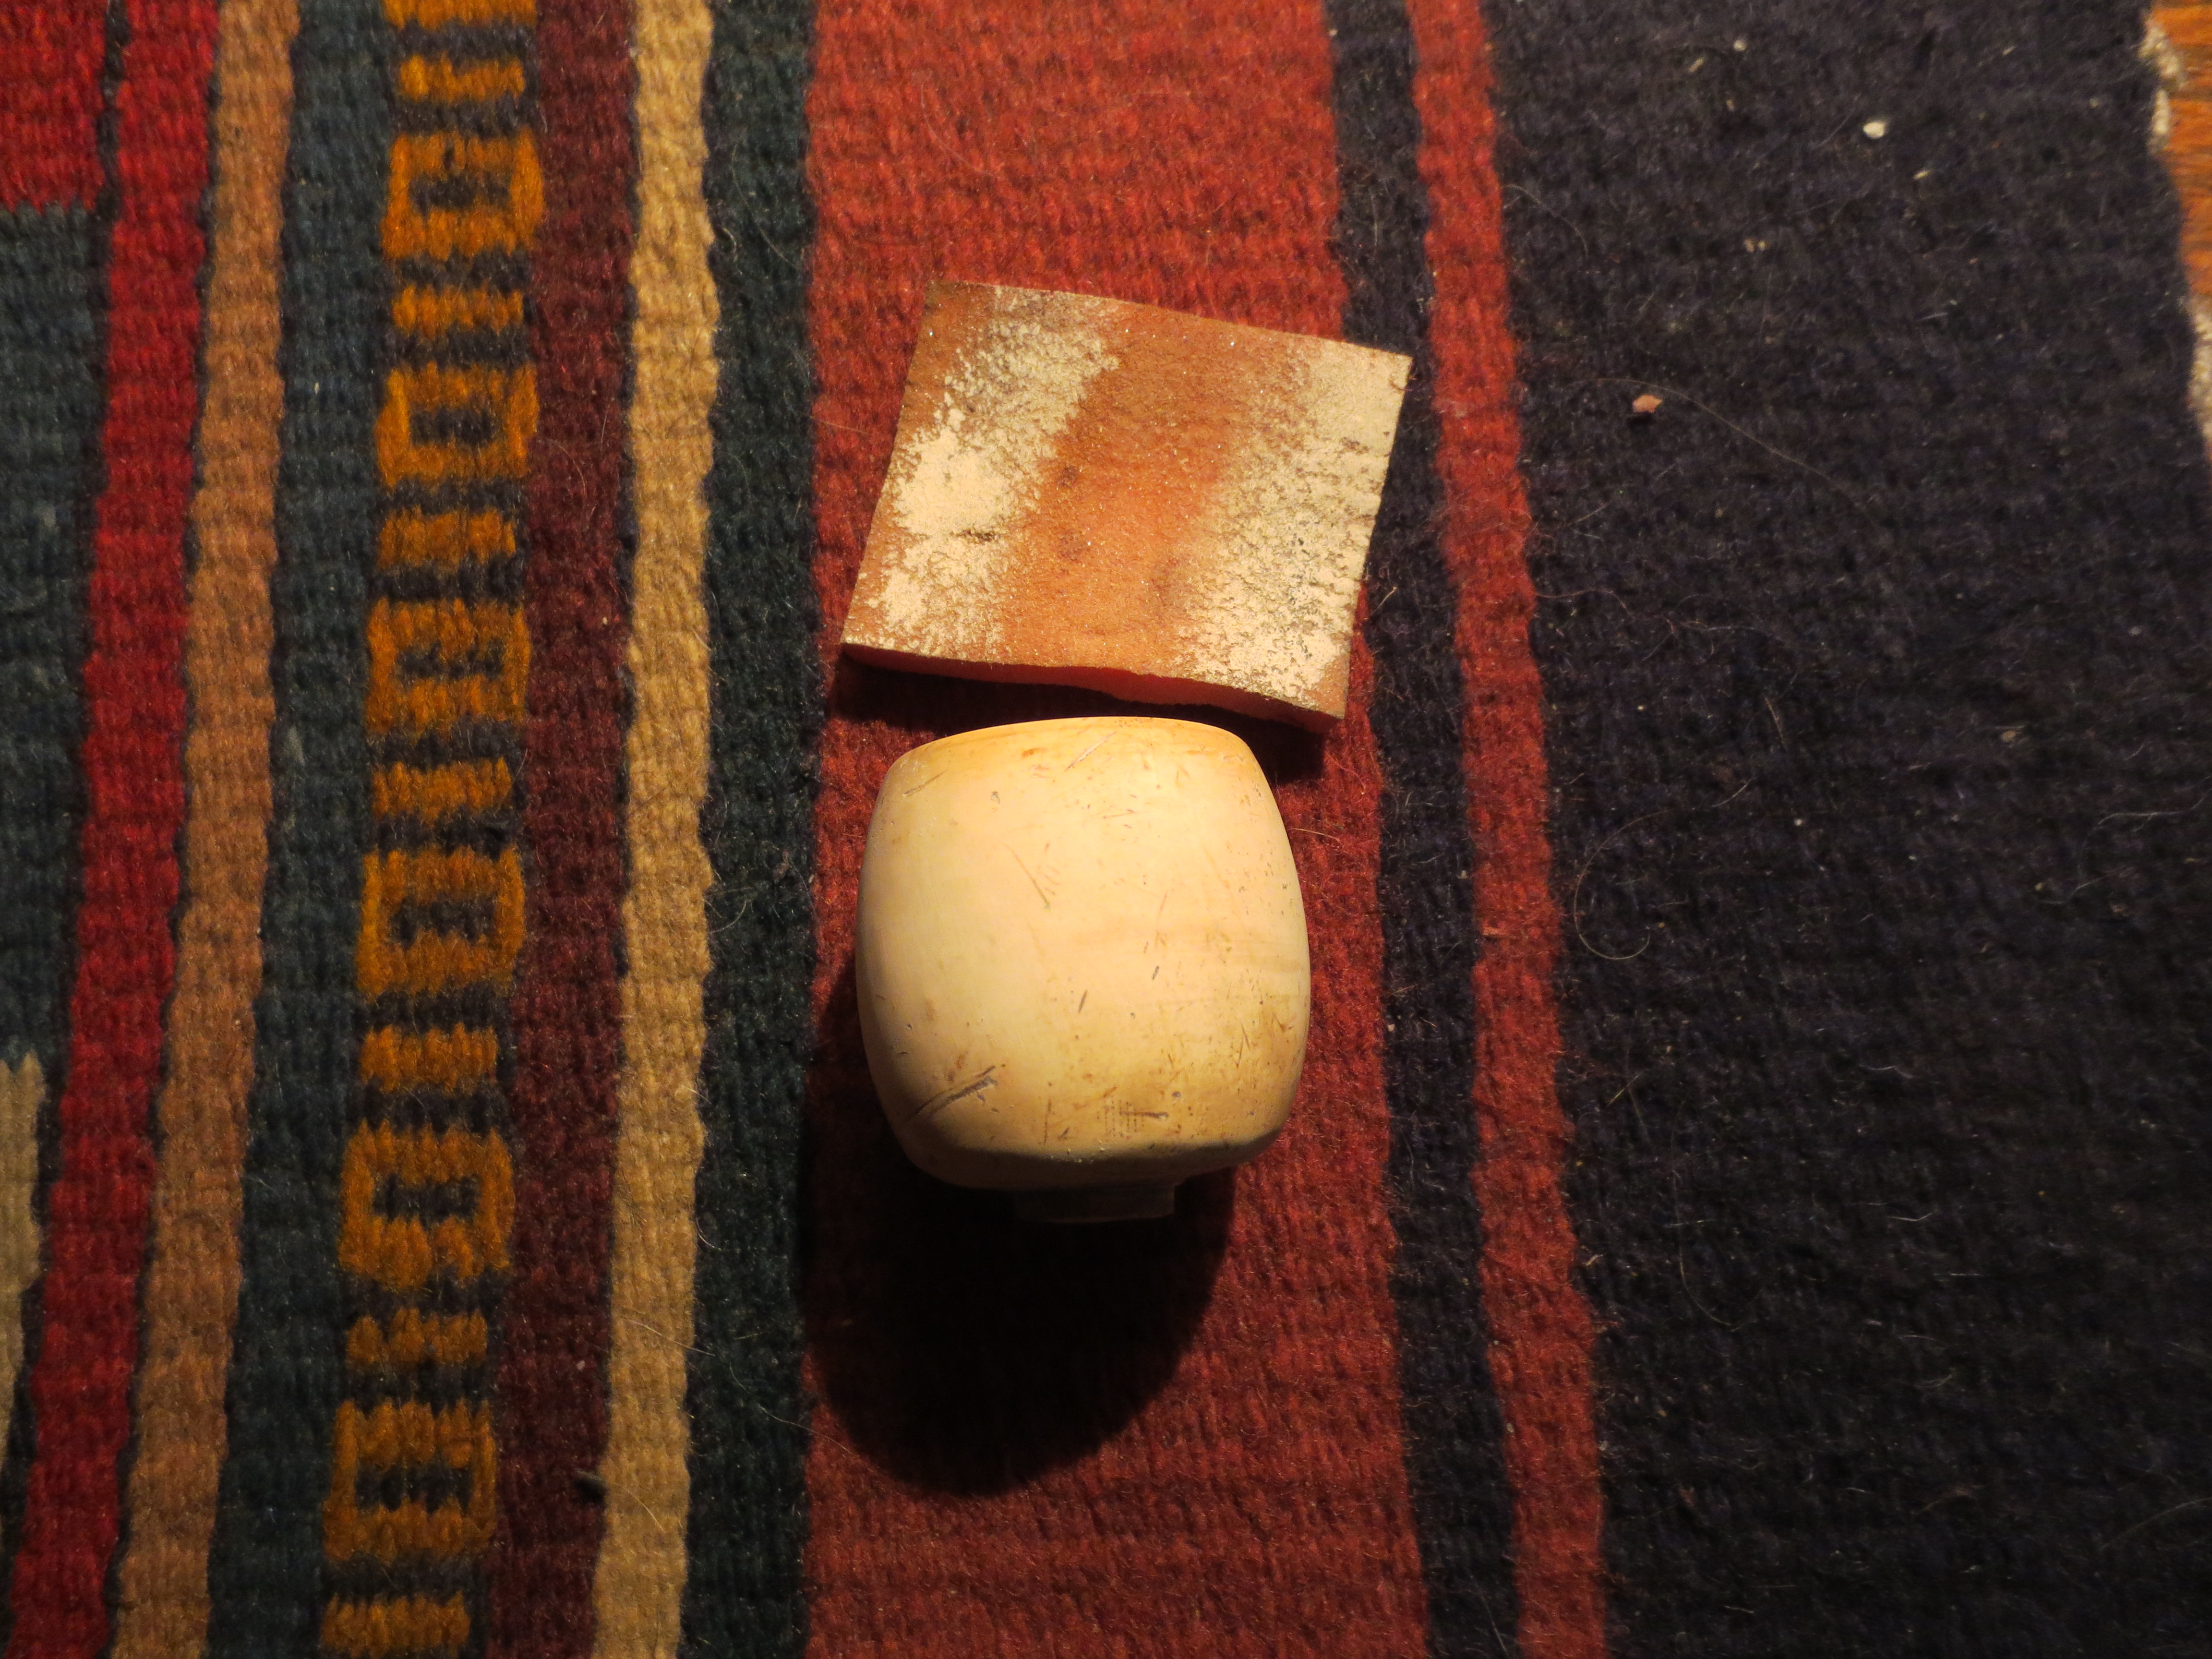
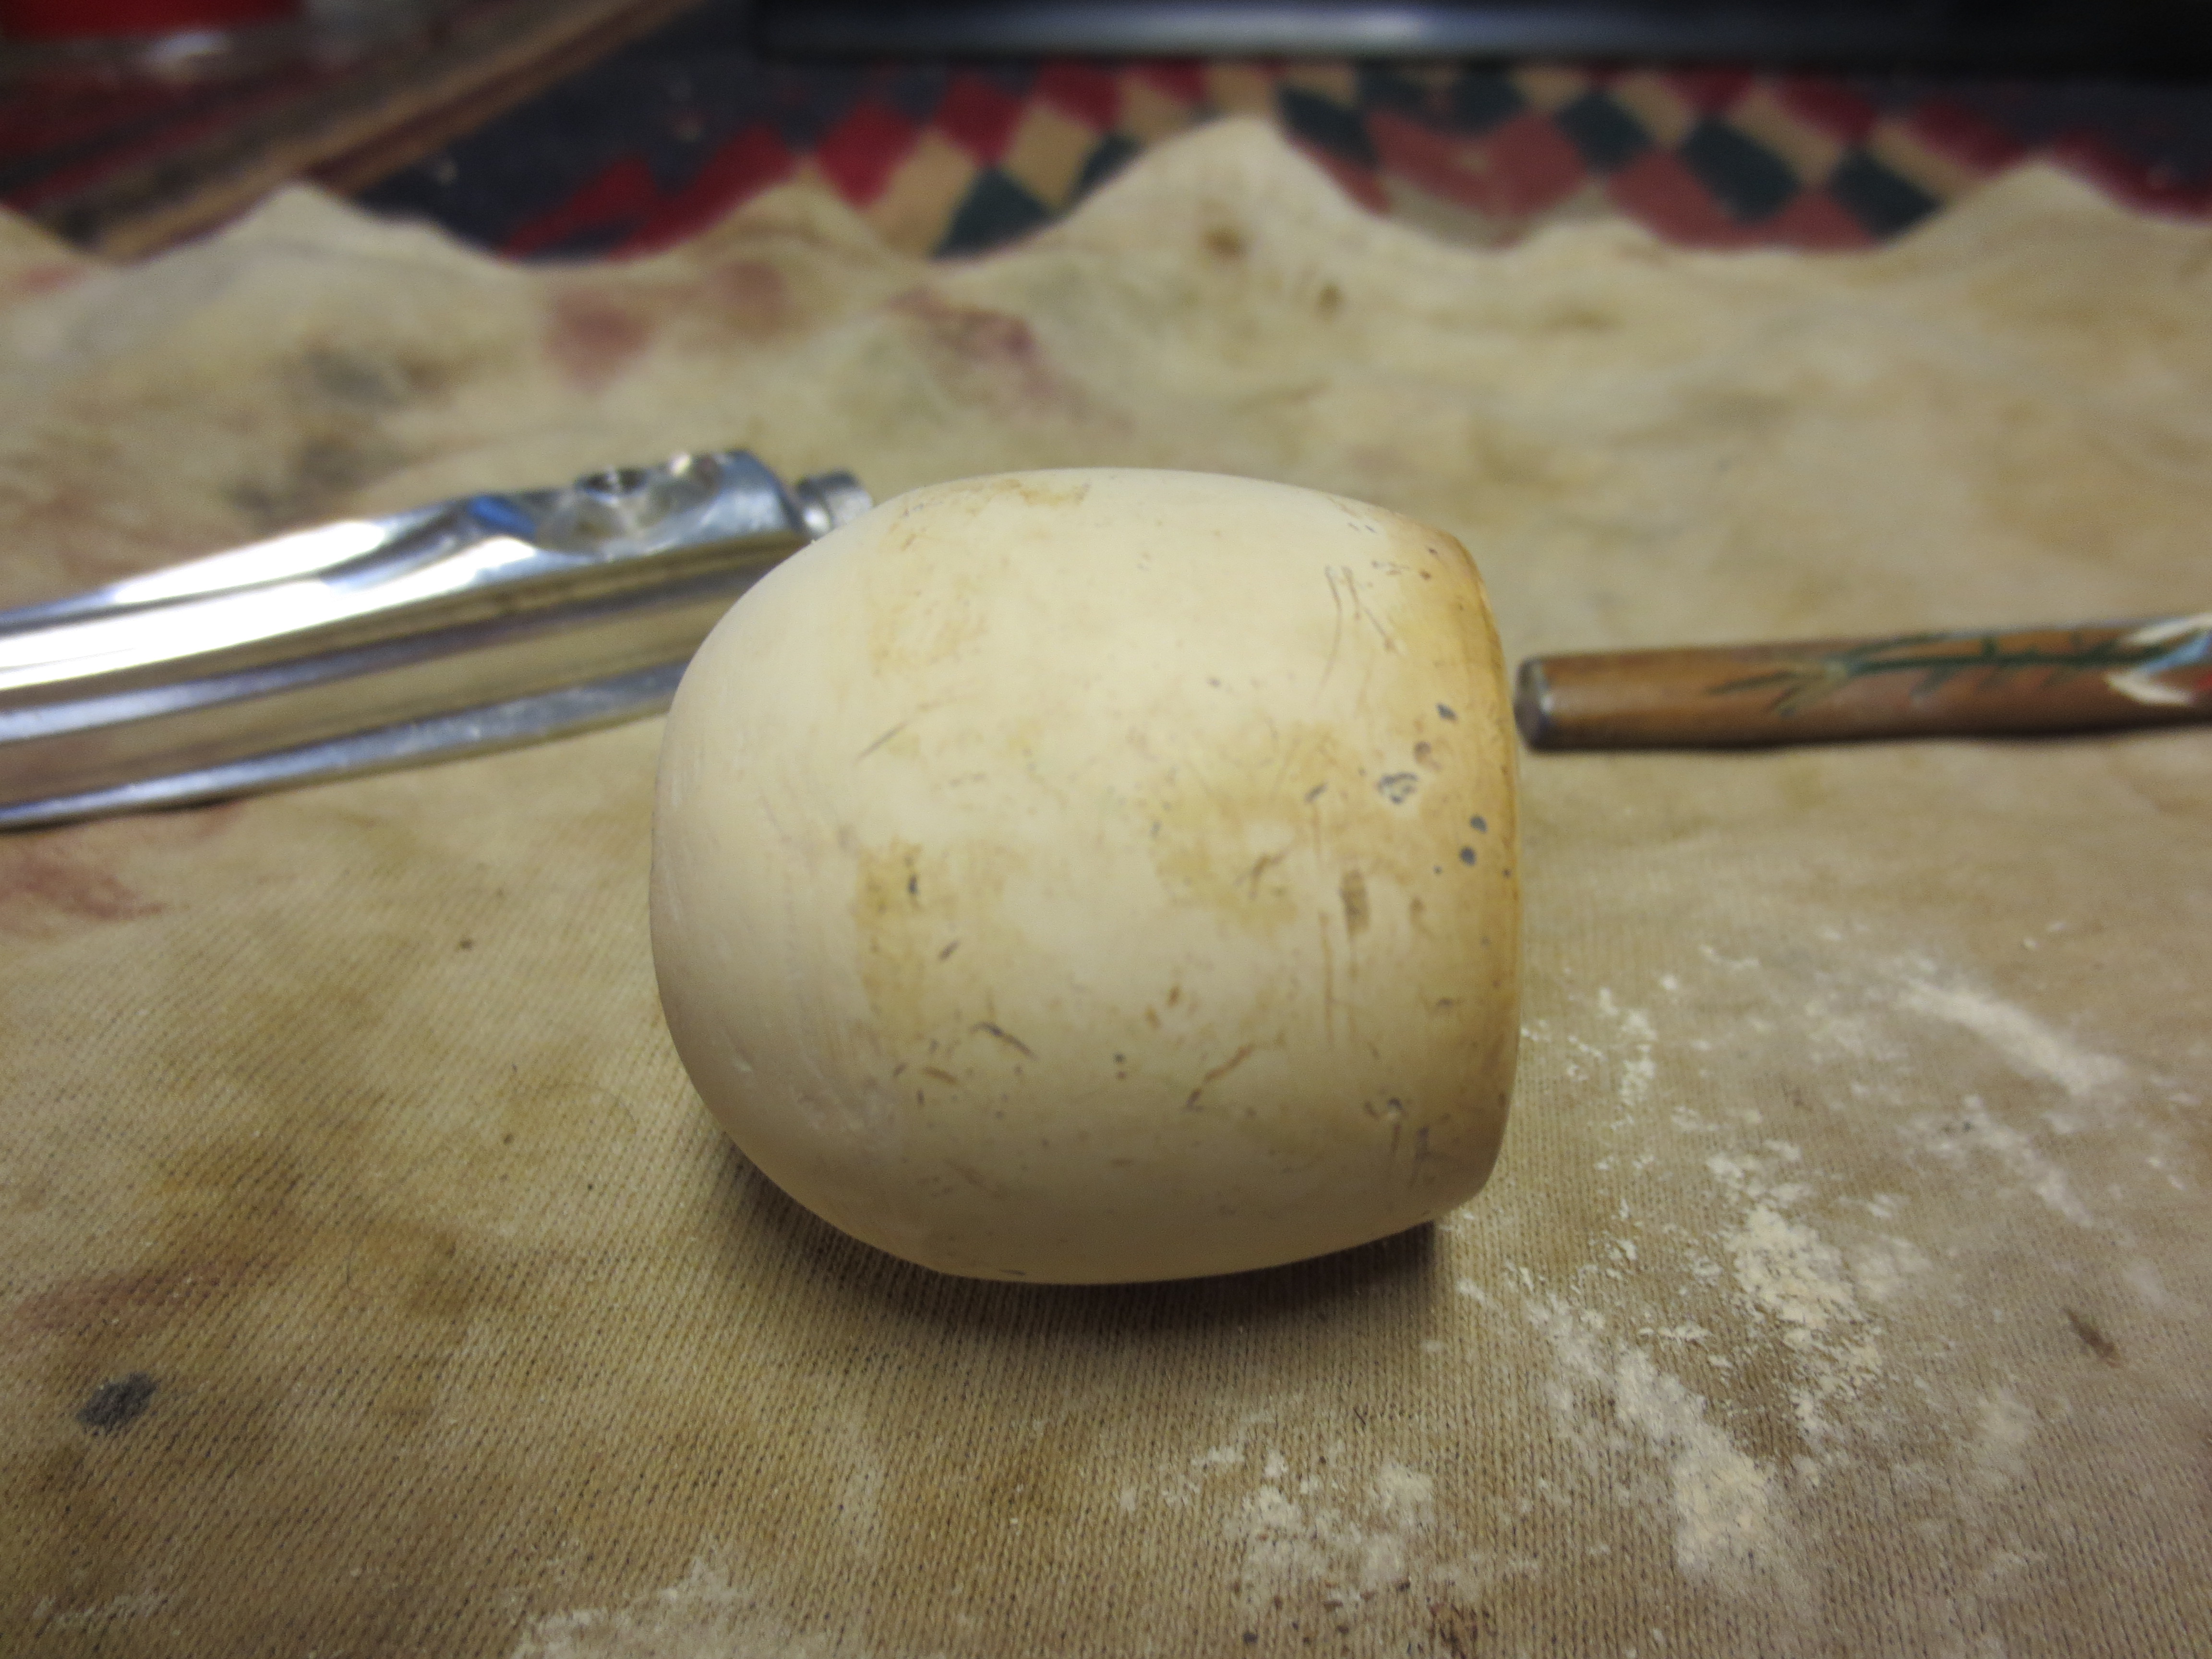
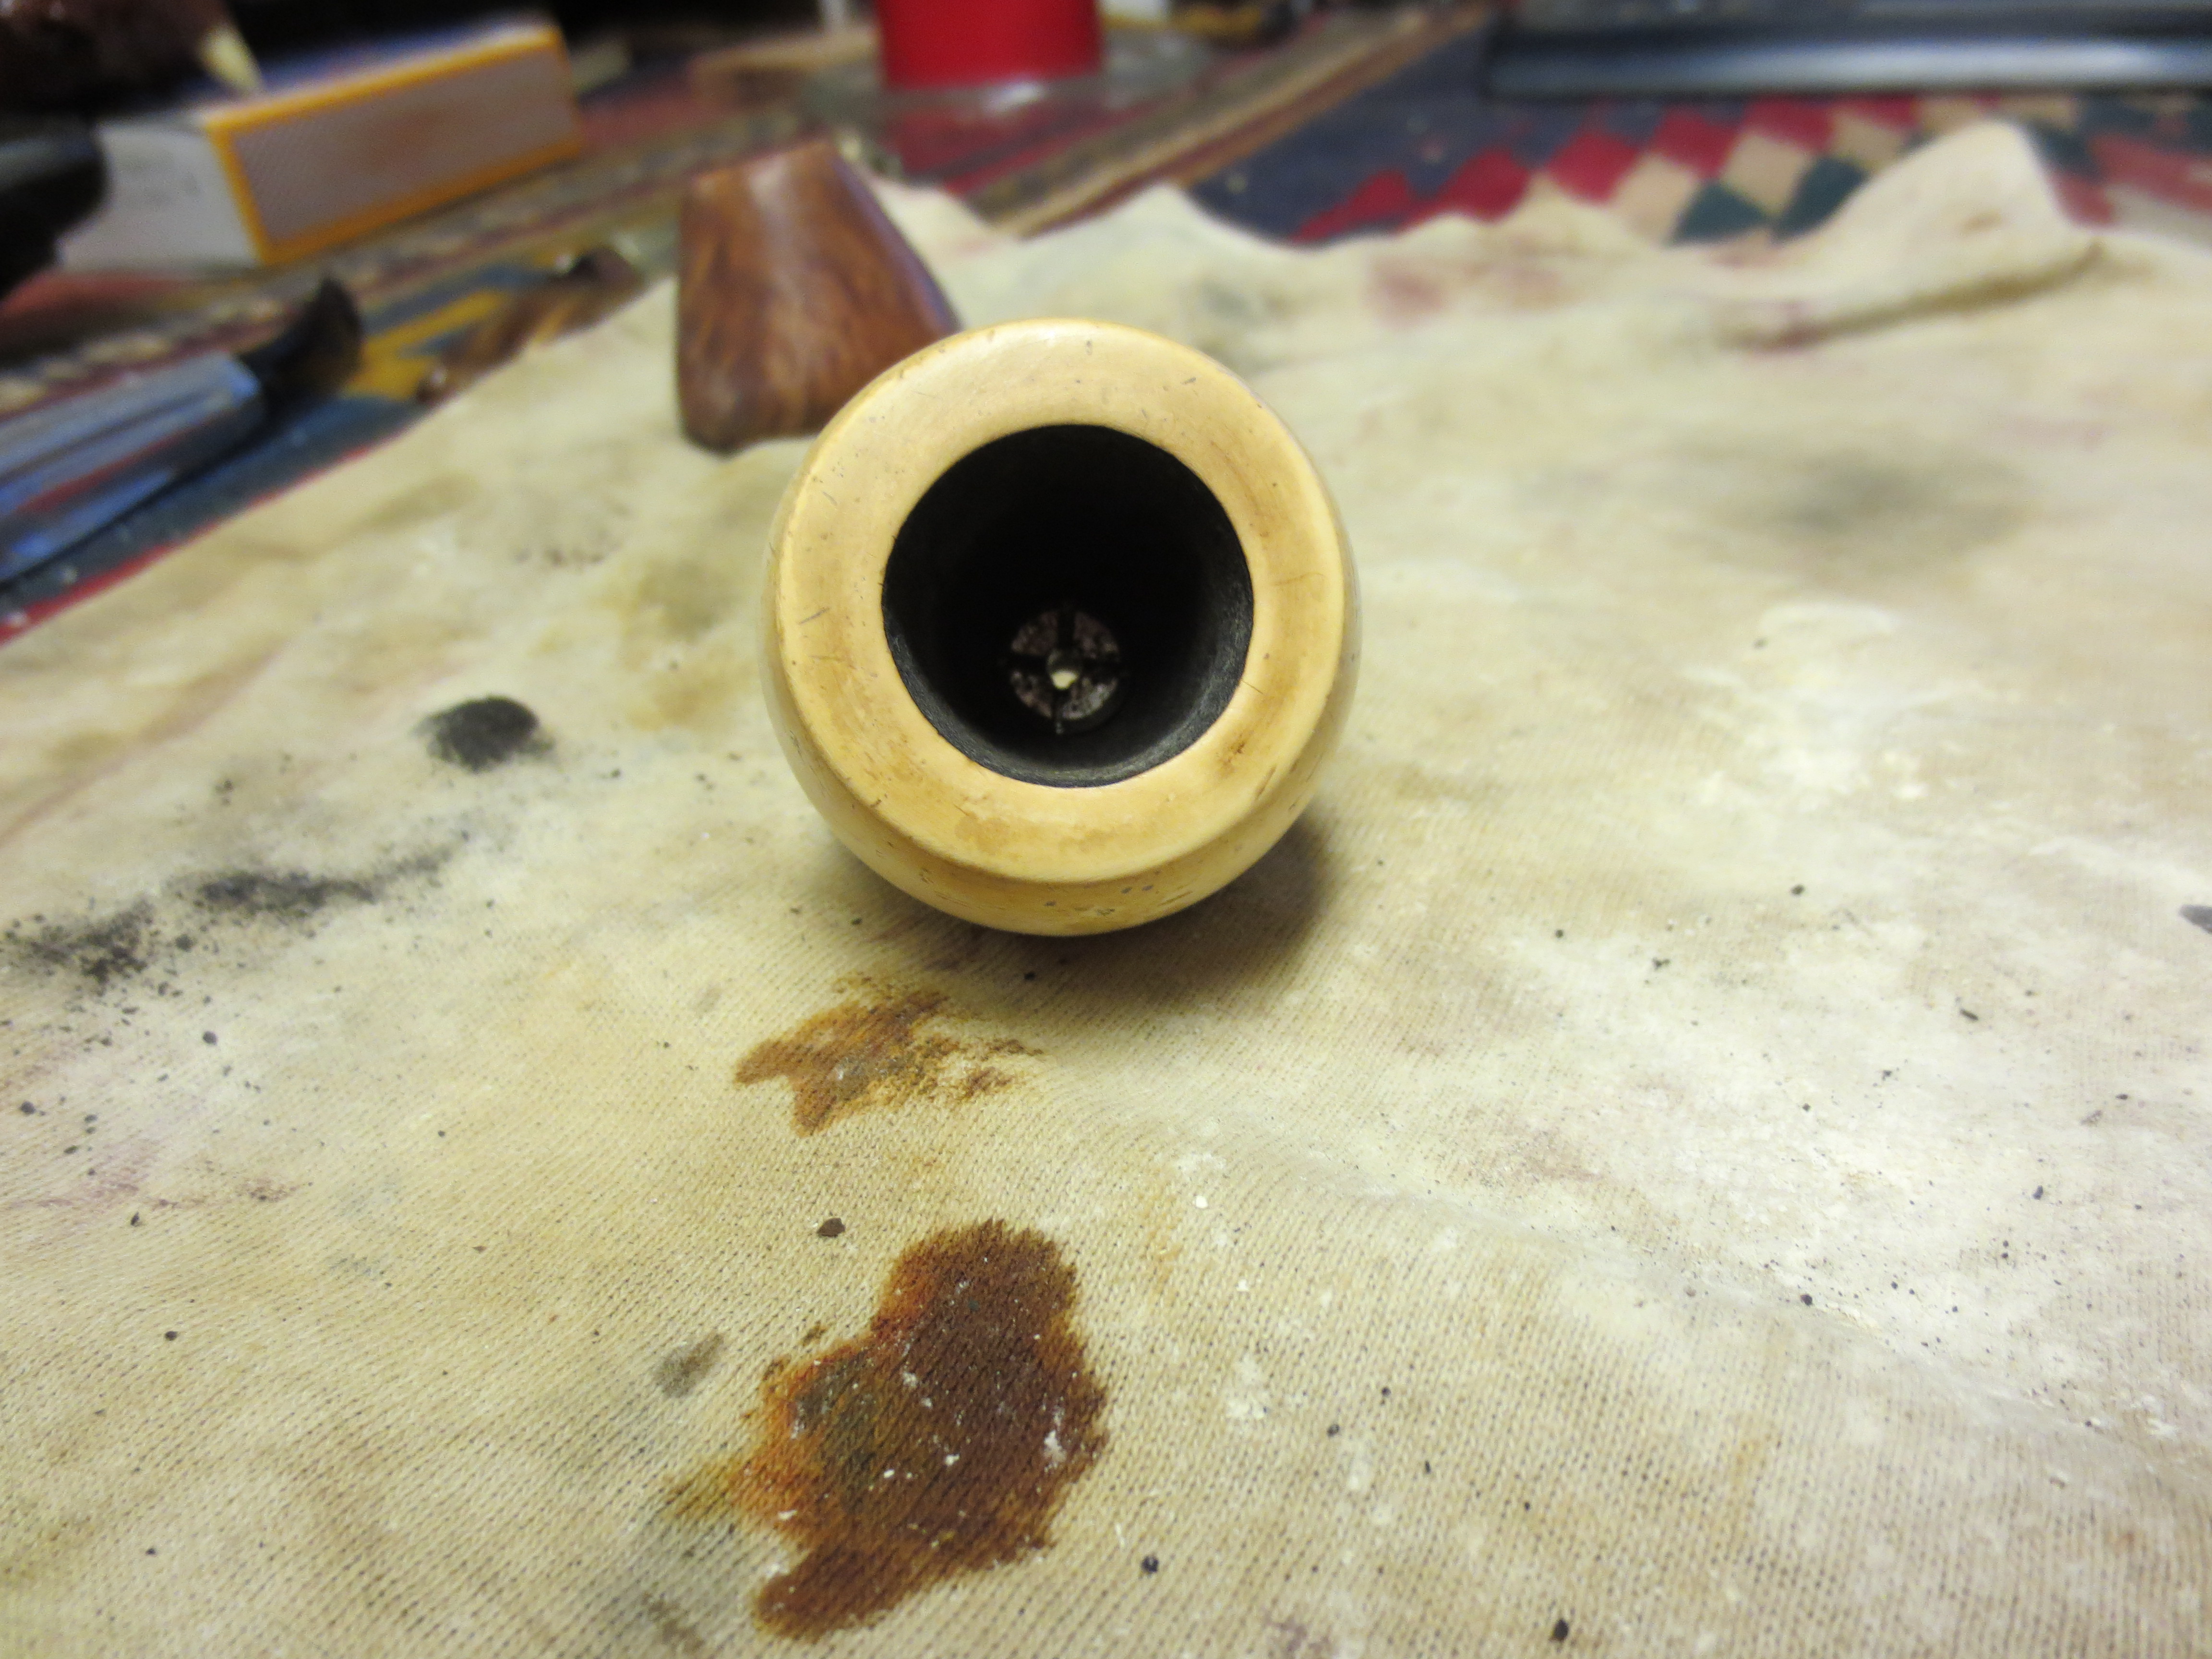
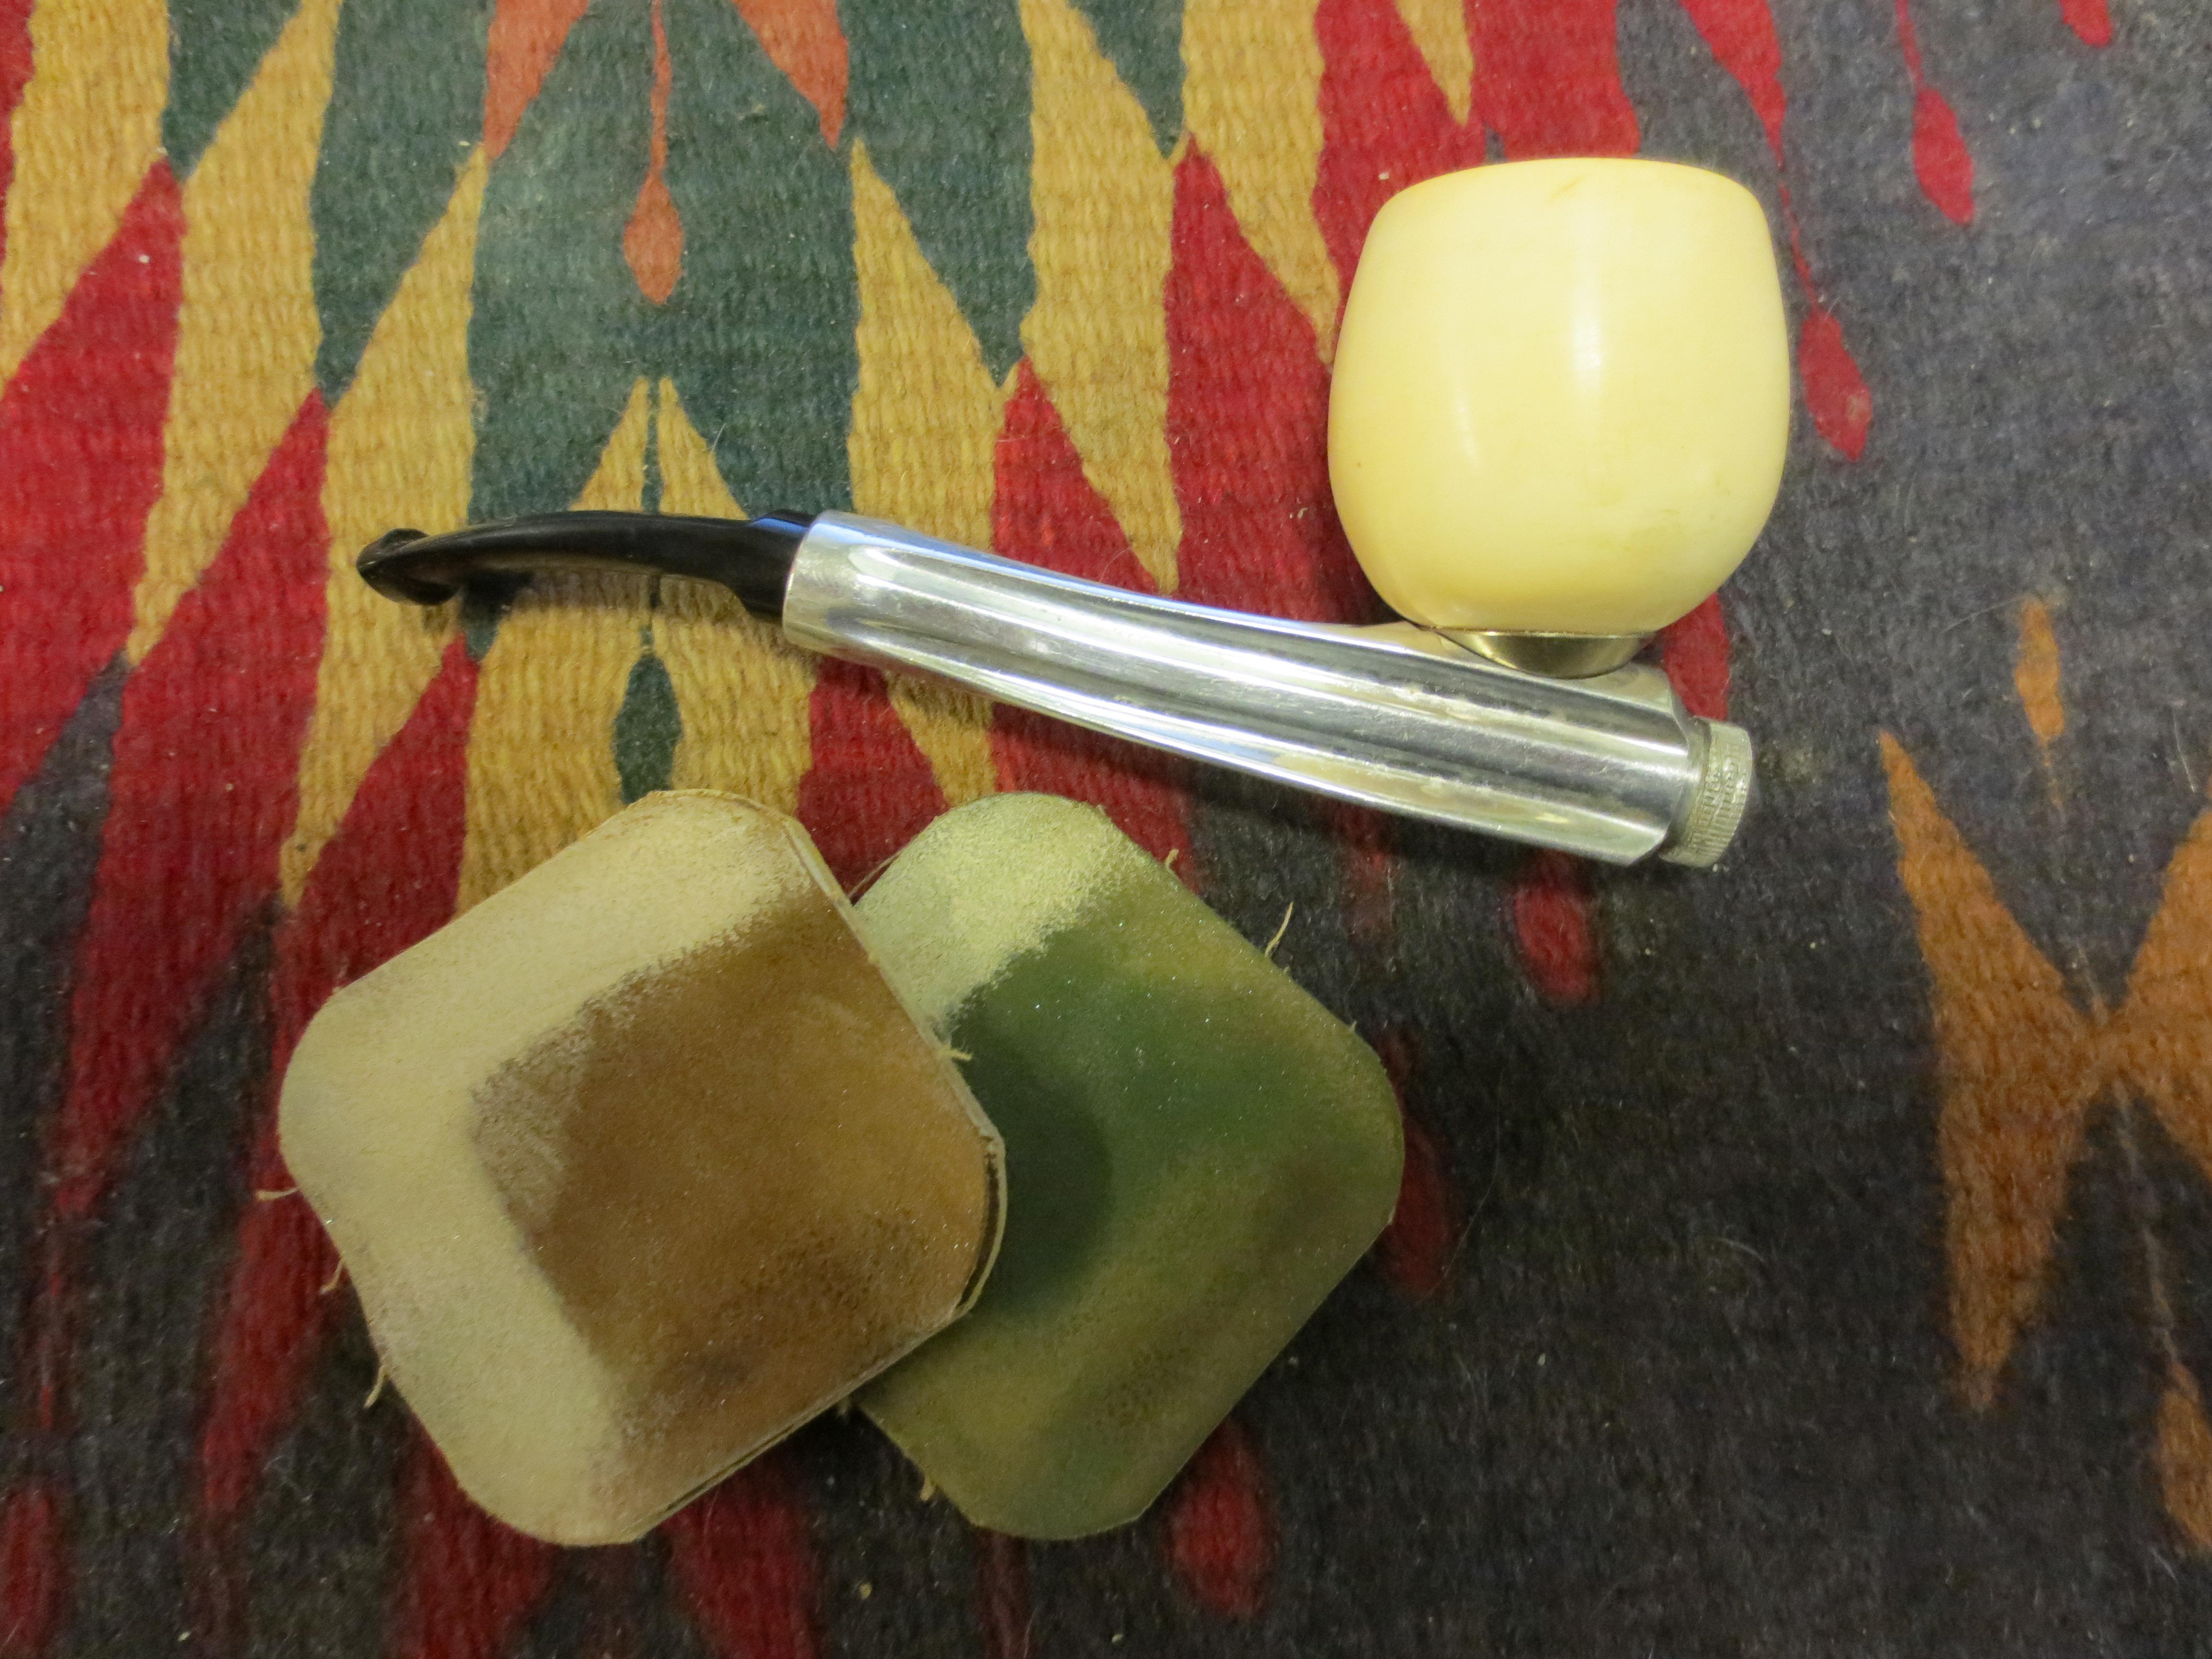
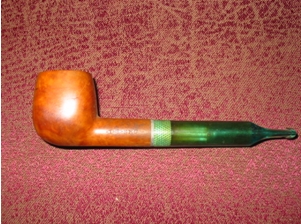
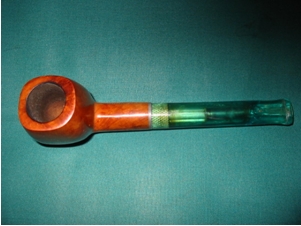
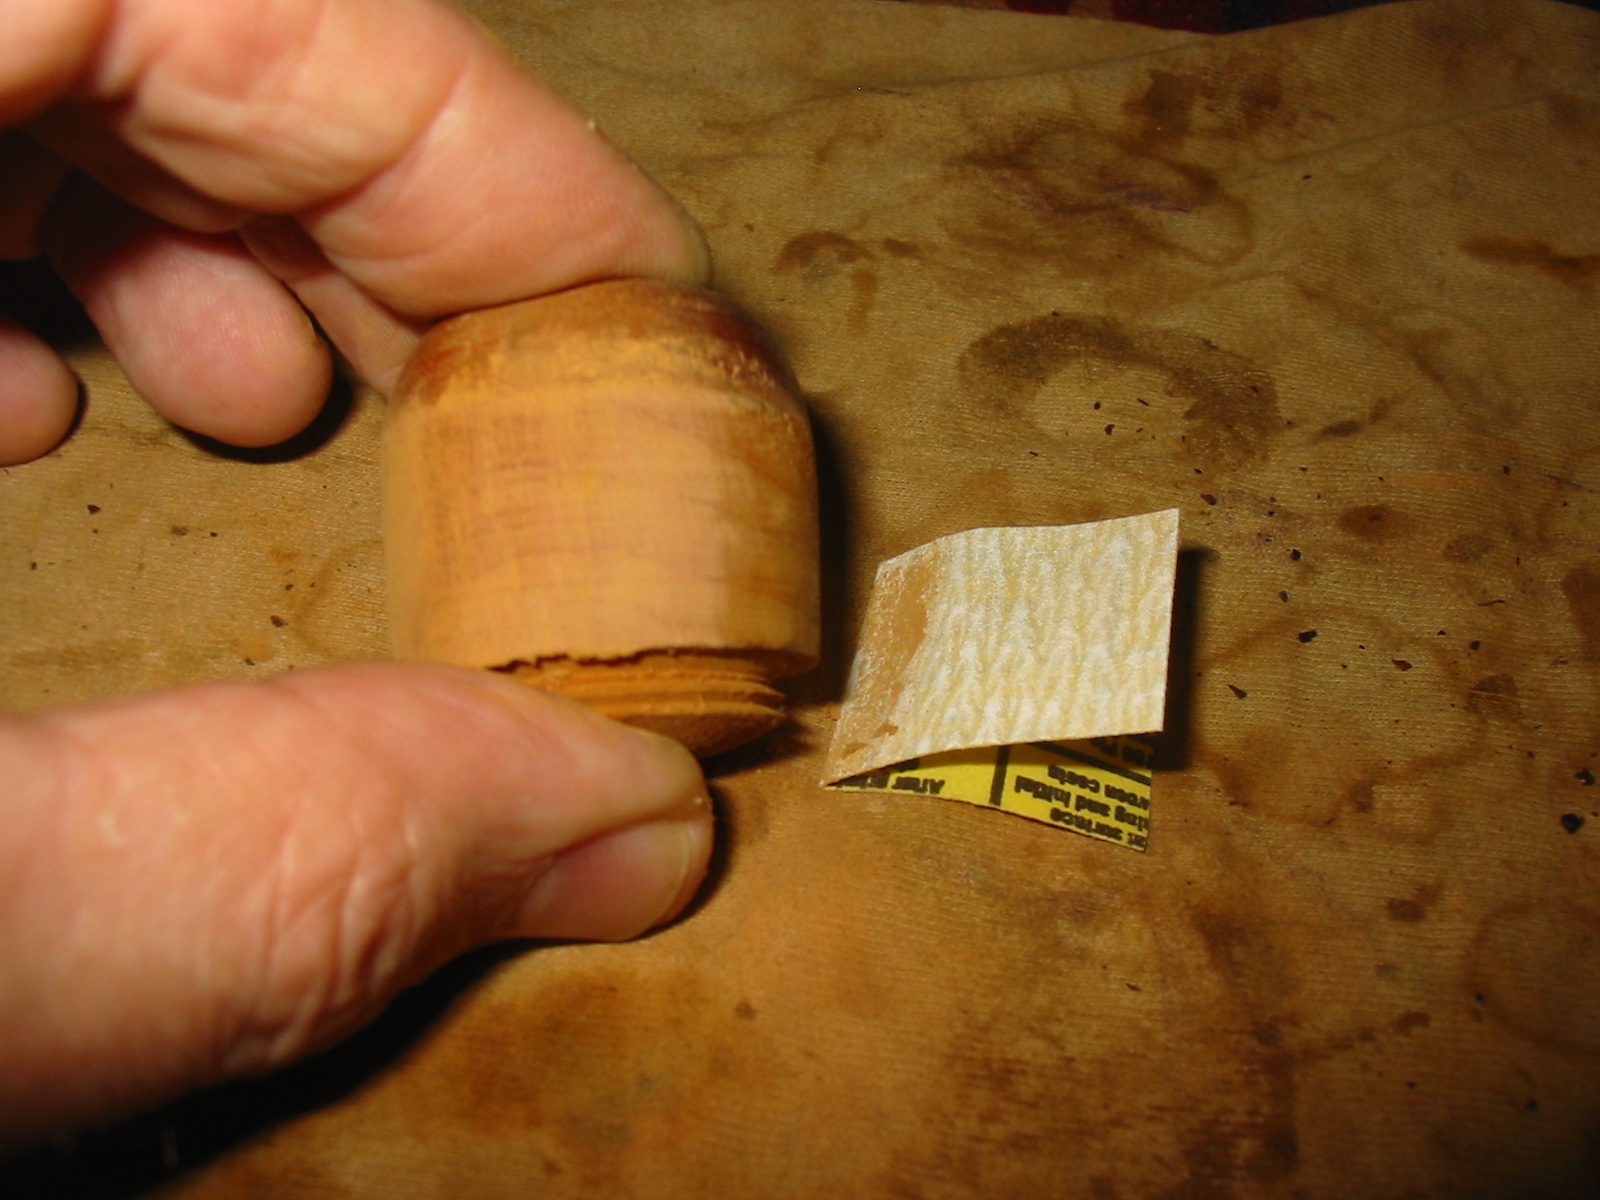
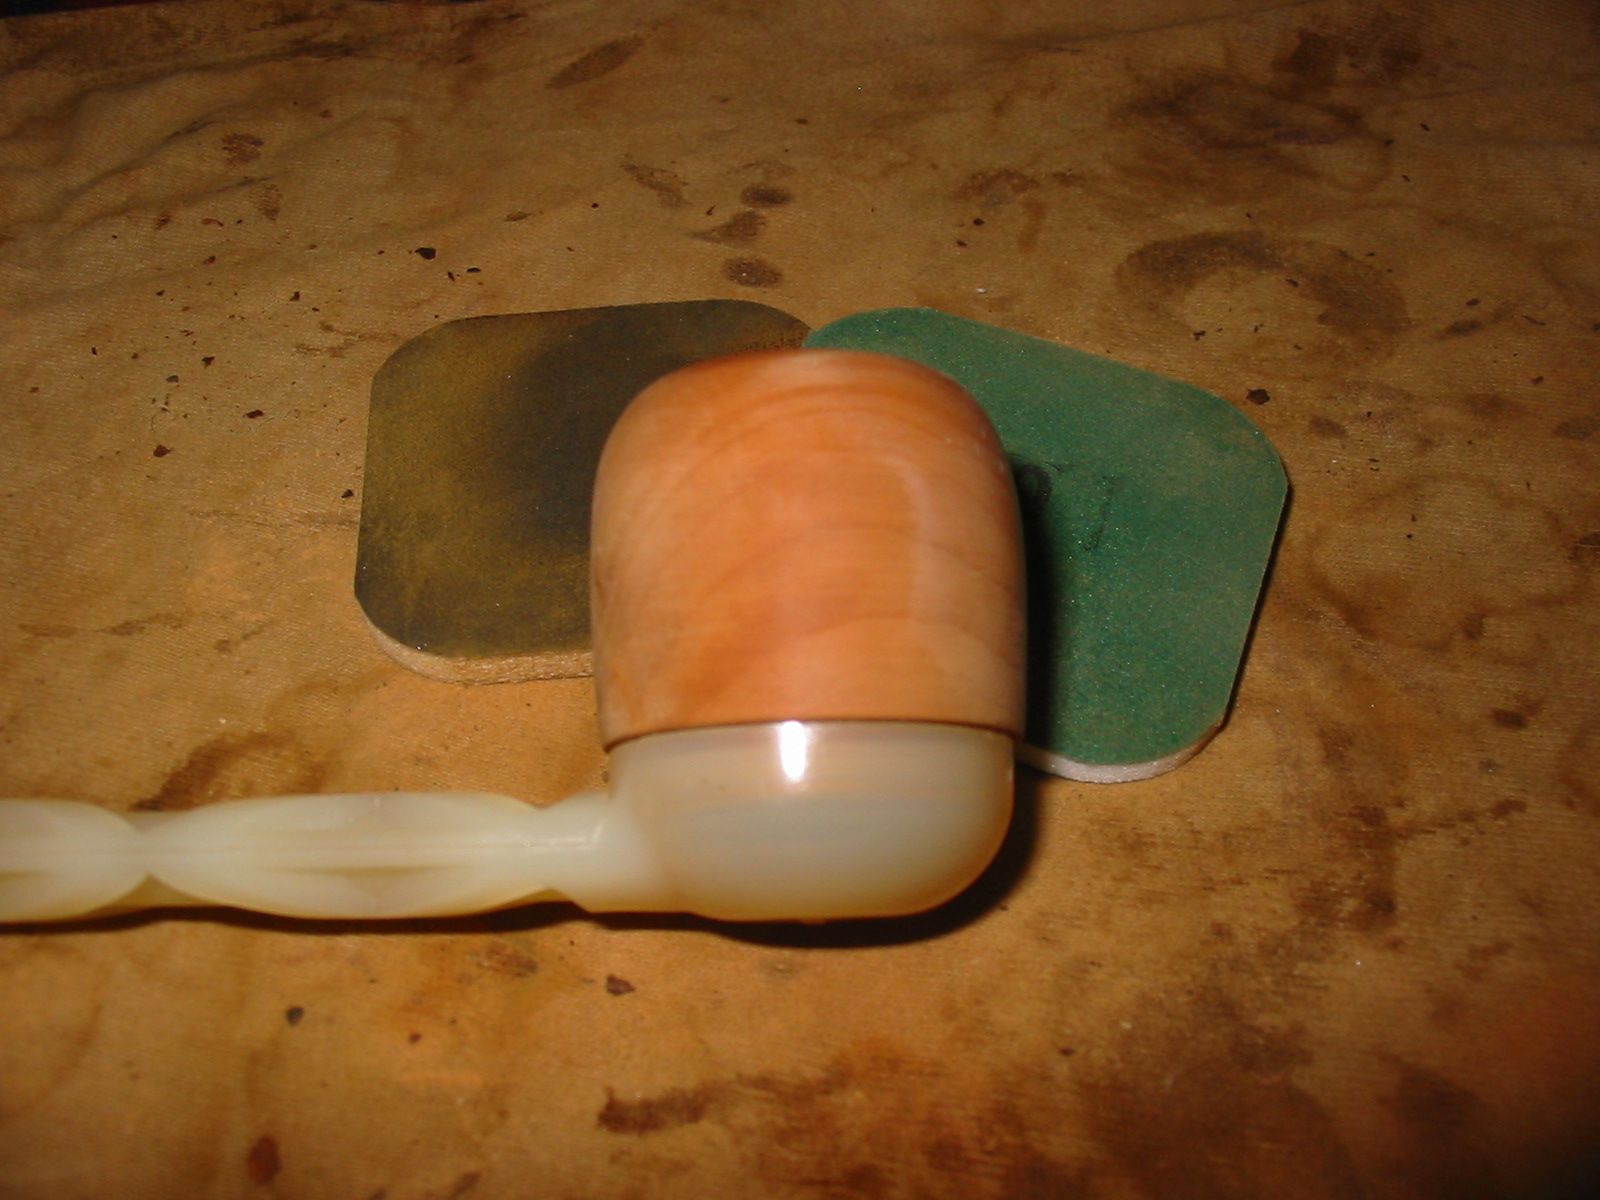
Once the base was clean and the tars and buildup removed I worked on the finish of the bowl. I sanded it with 220 grit sandpaper to remove the marks from the lathe and the rough spots. I wanted to remove as much of the marking on the bowl as possible without changing the shape. As I sanded it I was impressed by the grain on the particular piece. I sanded the stem at the same time with the 220 grit sandpaper to remove the tooth chatter. Interestingly the nylon stem sanded out greyish white. The sanding dust was light grey in colour.
IMG_2202

IMG_2203

IMG_2205

IMG_2206

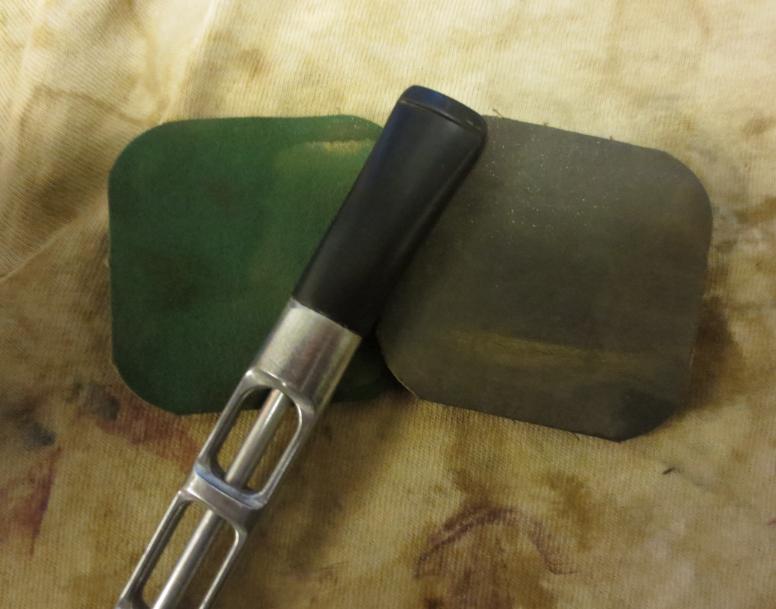
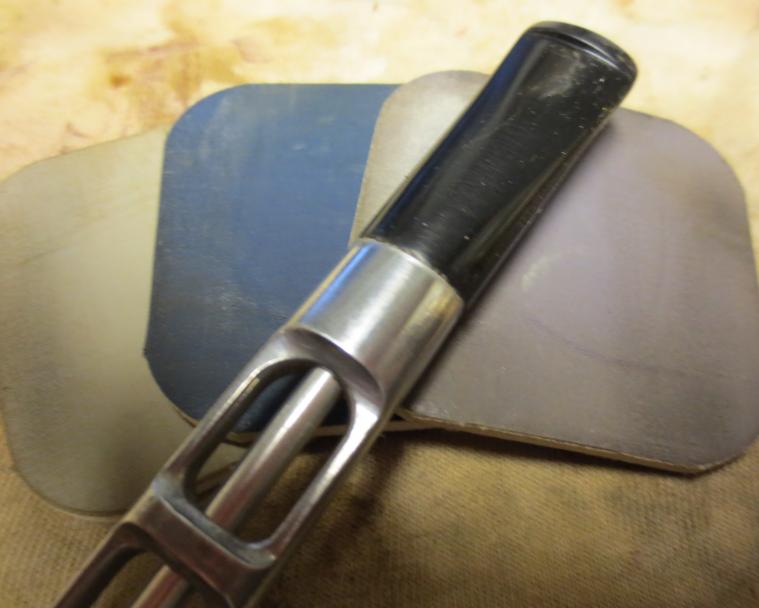
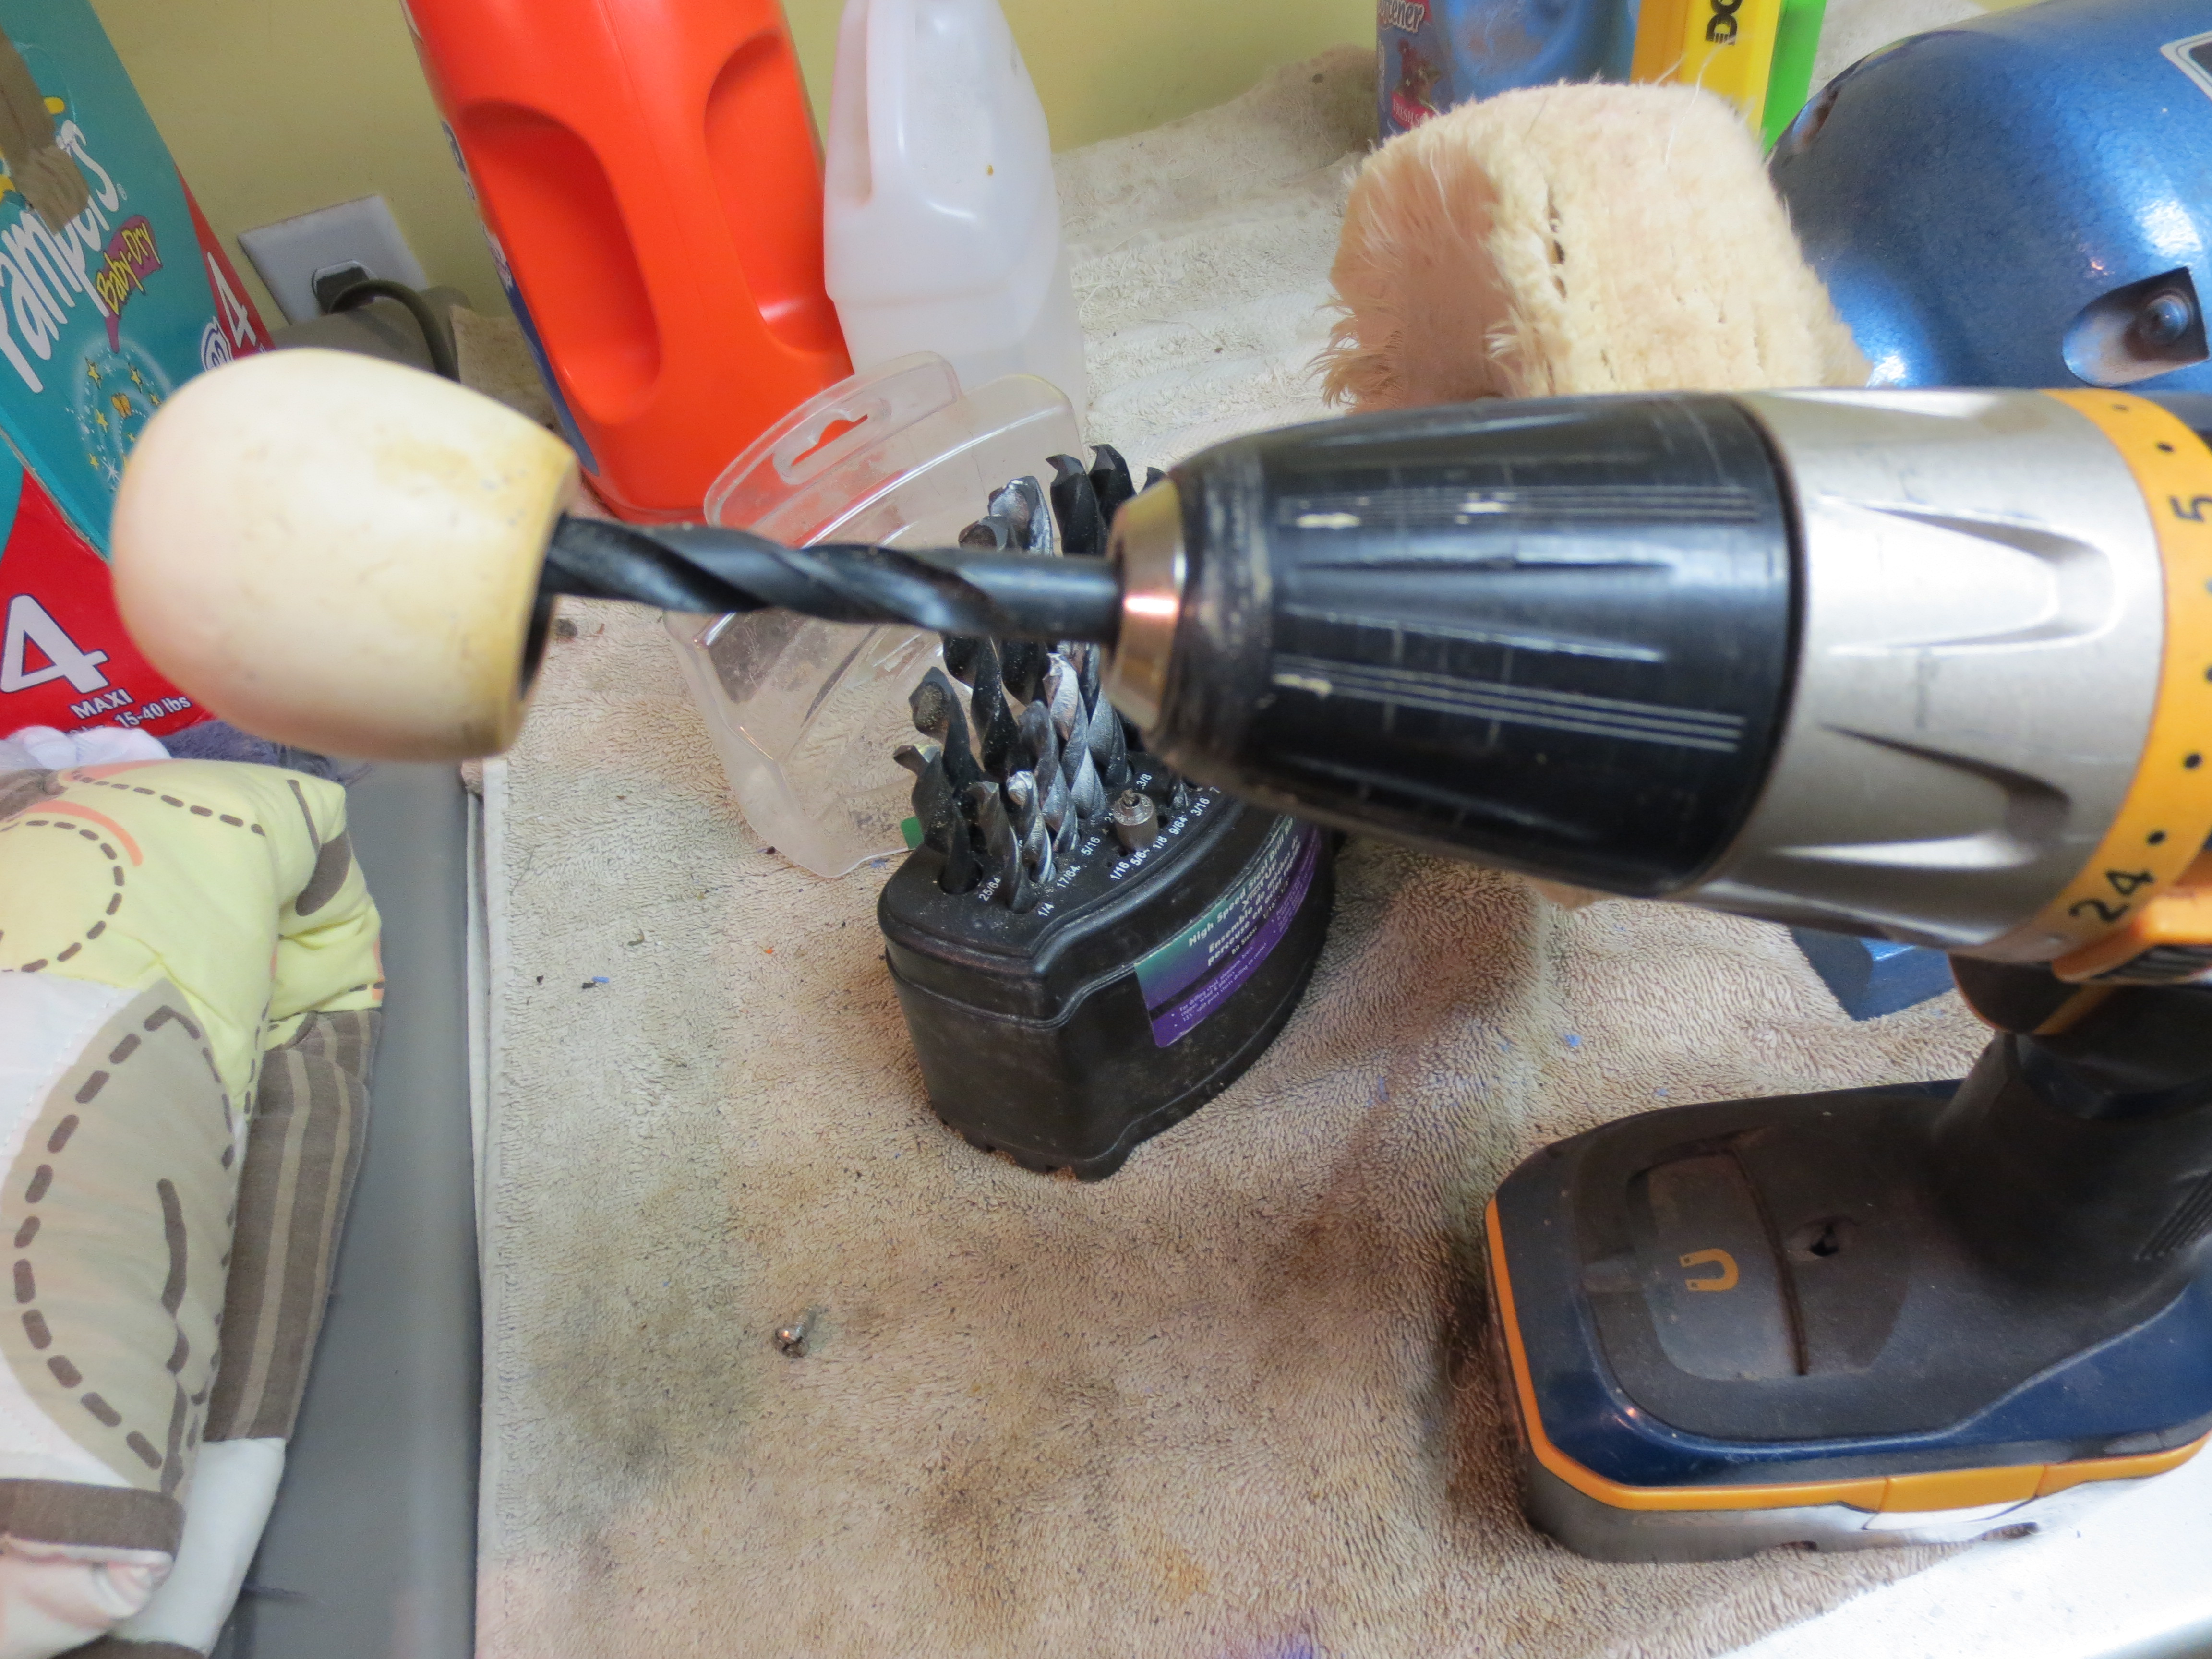
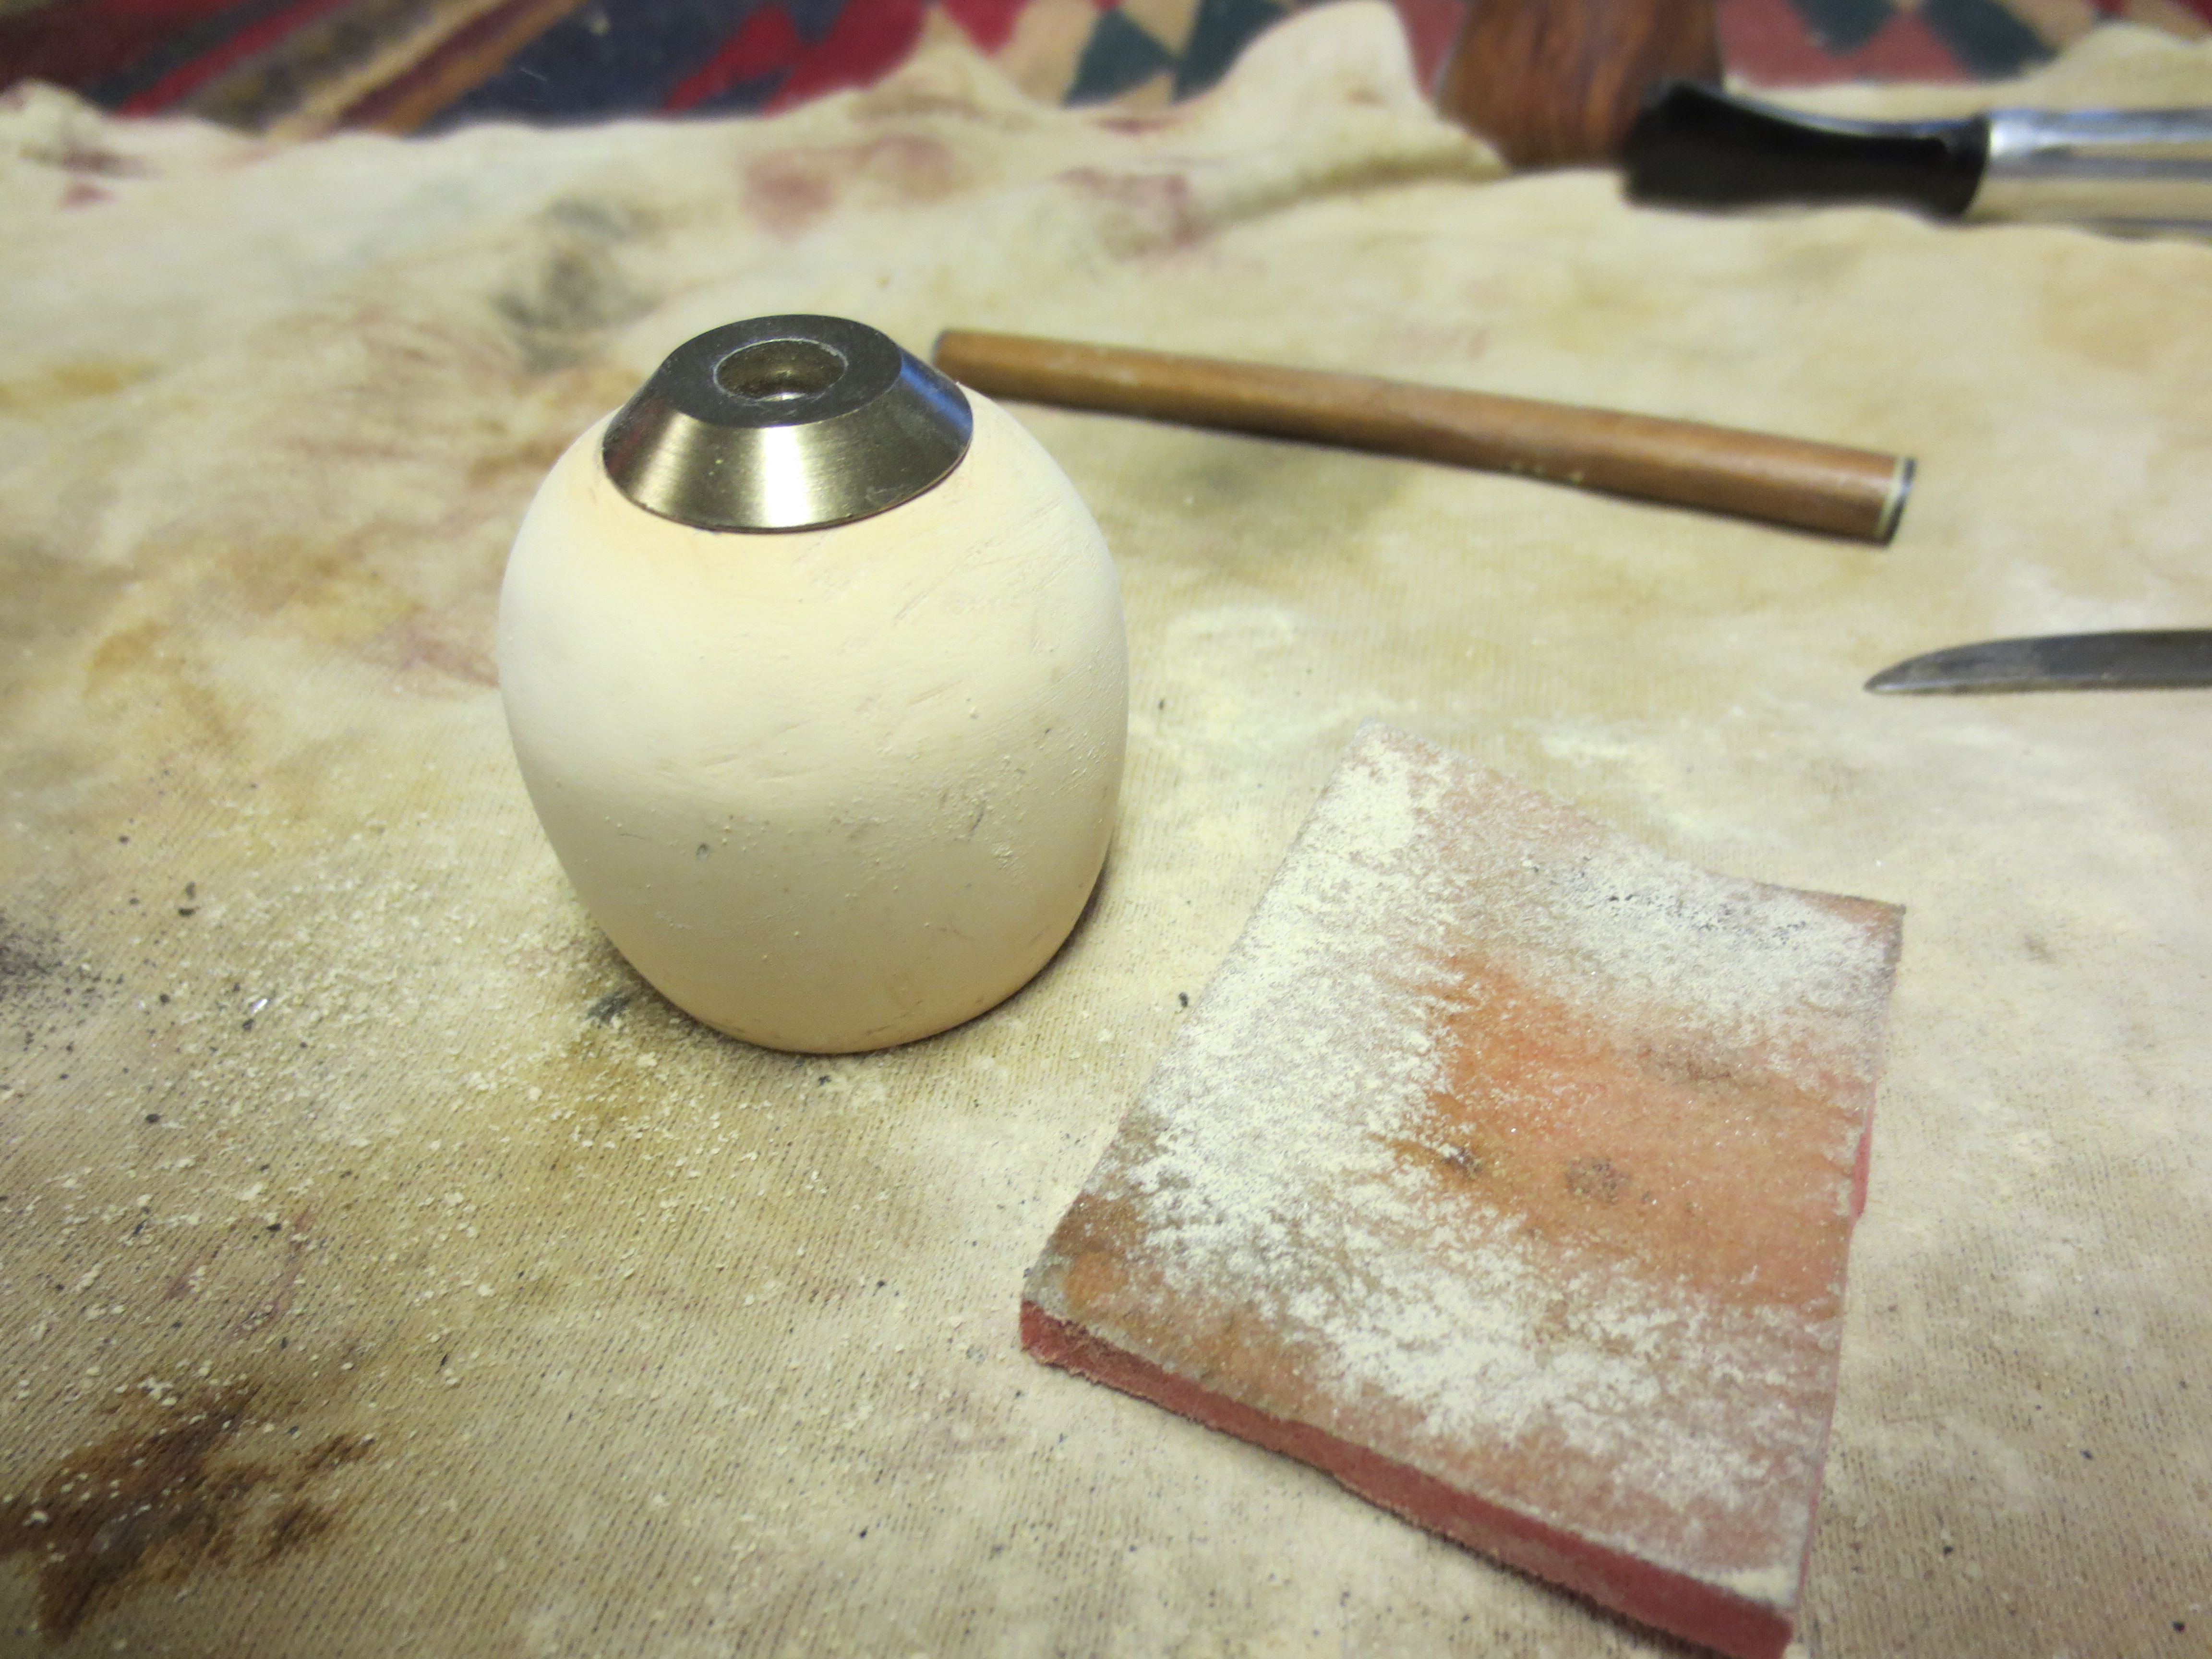
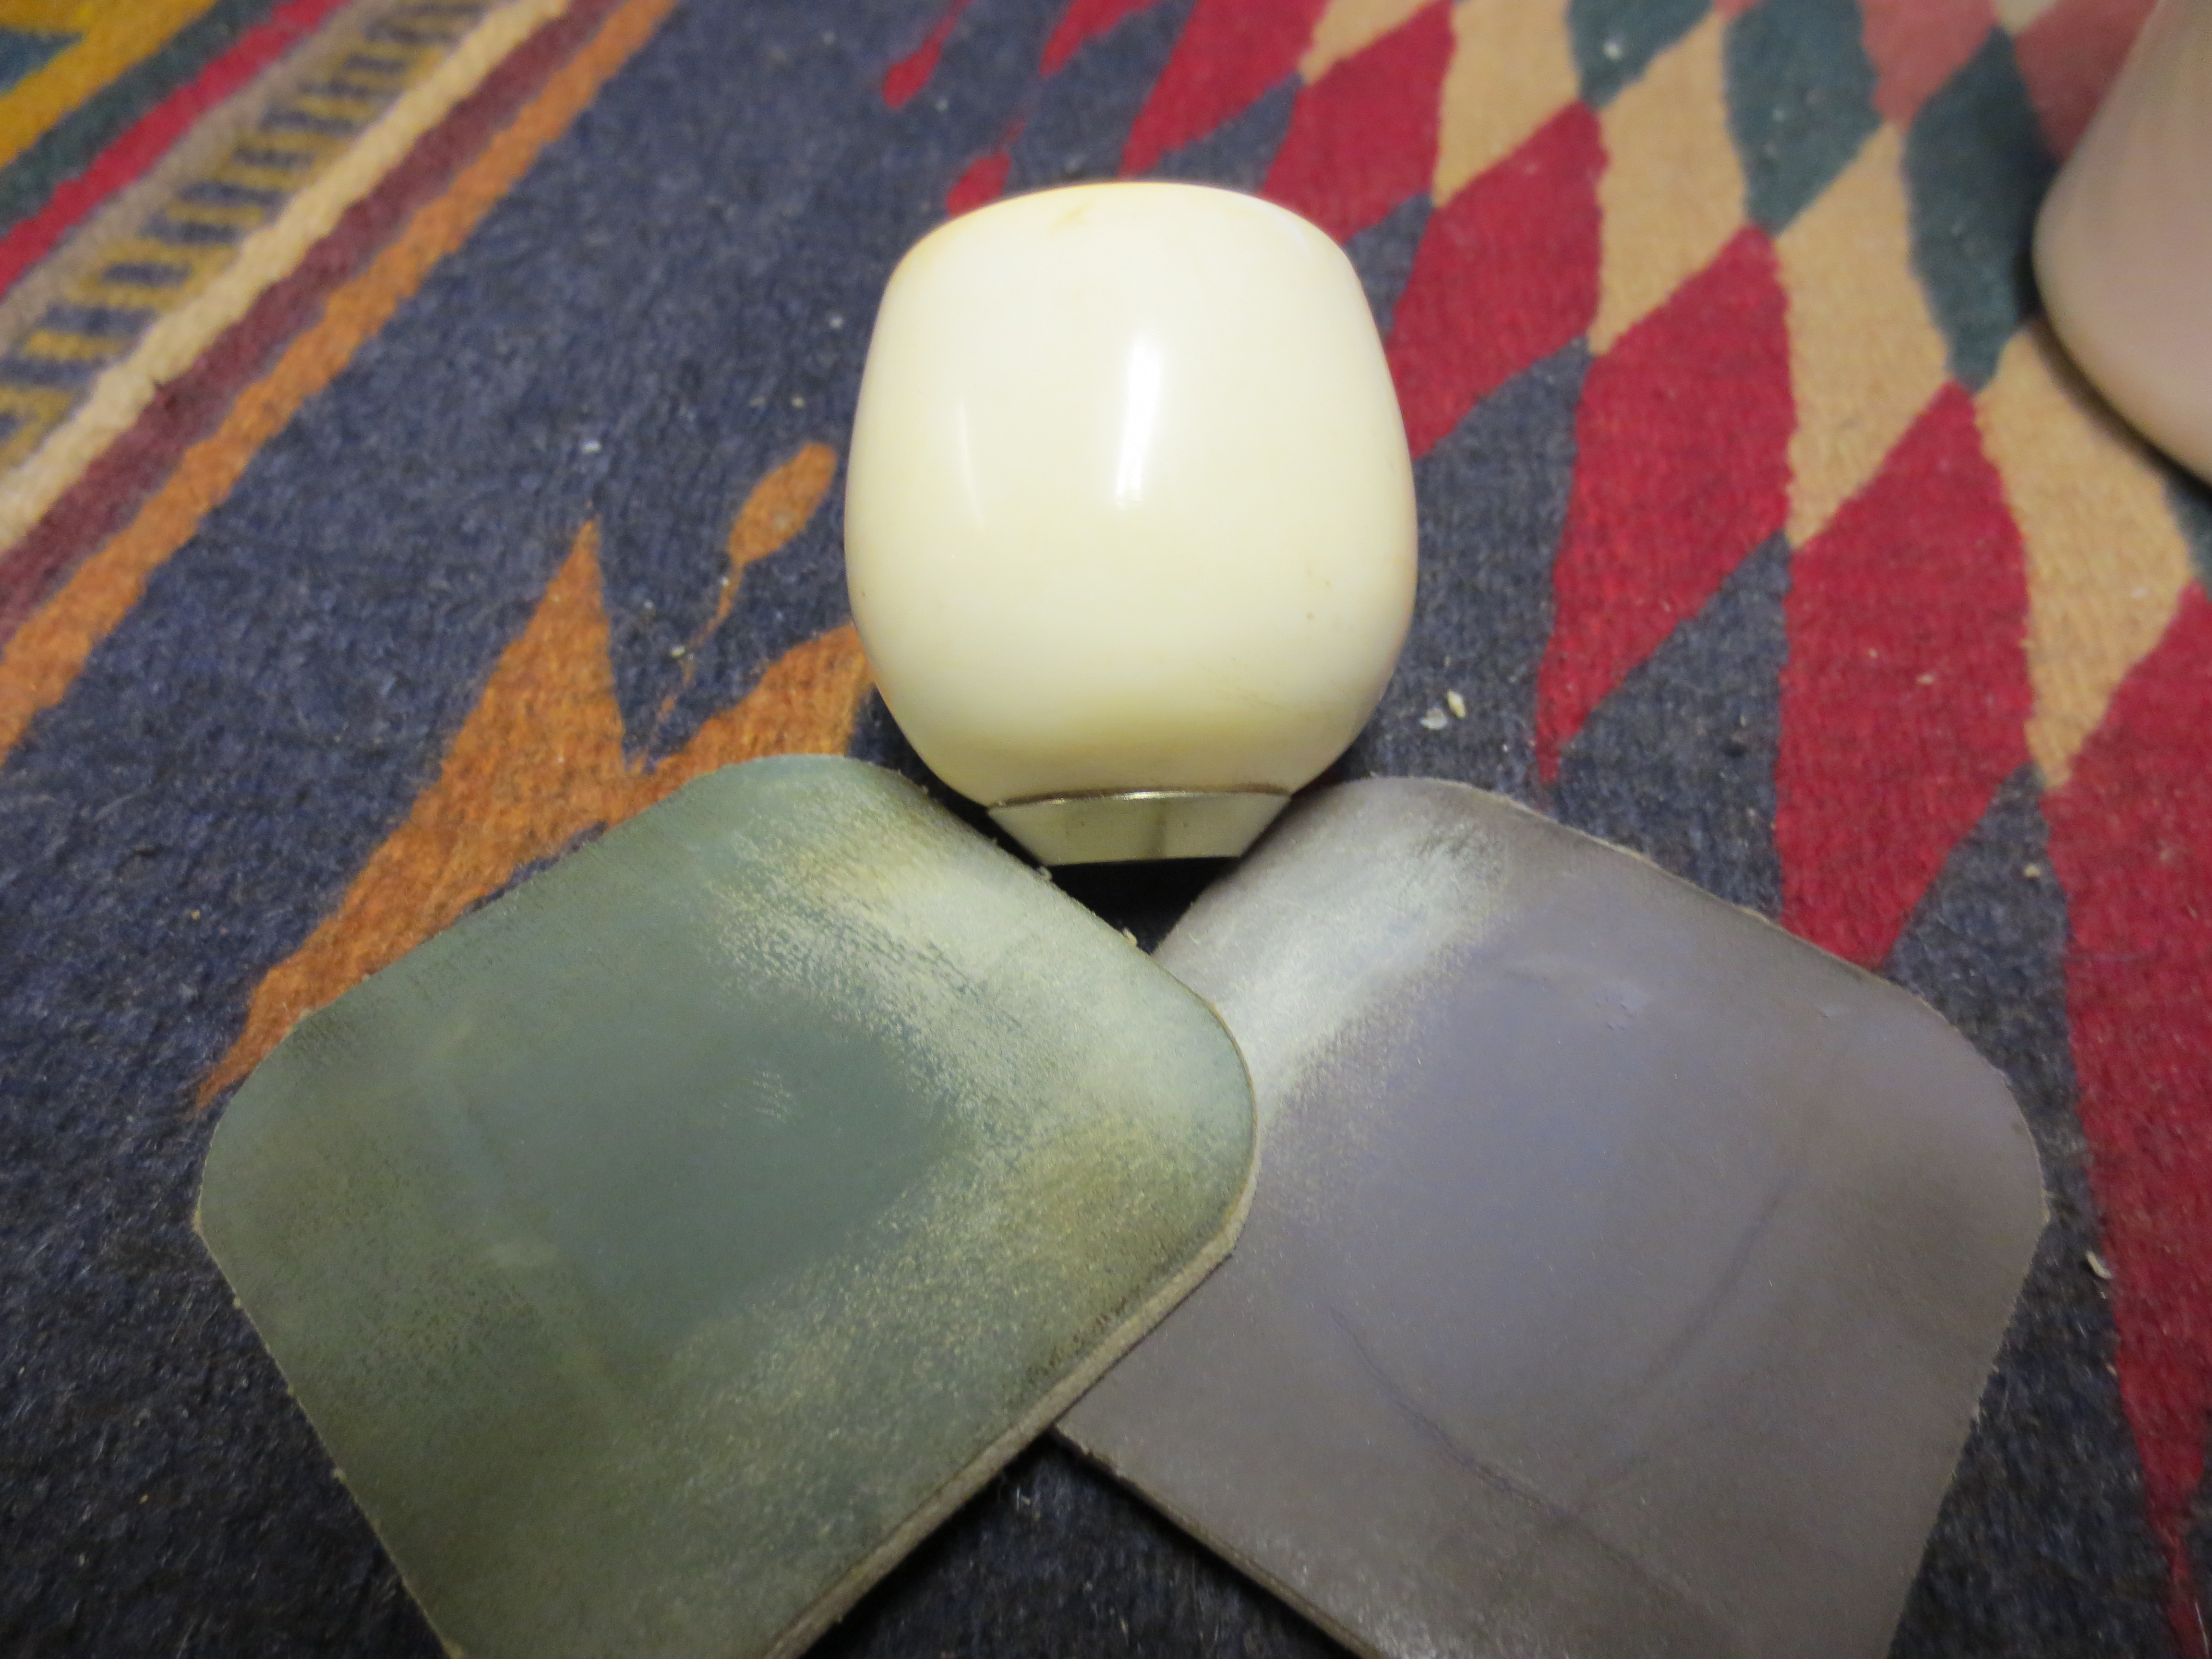
The next step in the sanding process was to use a medium grit sanding sponge and also with a fine grit sanding block to remove the marks and scratches left behind by the 220 grit sandpaper on both the bowl and the stem. I followed that by wet sanding the bowl and the stem with 1500, 1800 and 2400 grit micromesh sanding pads.
IMG_2207

IMG_2208

IMG_2209

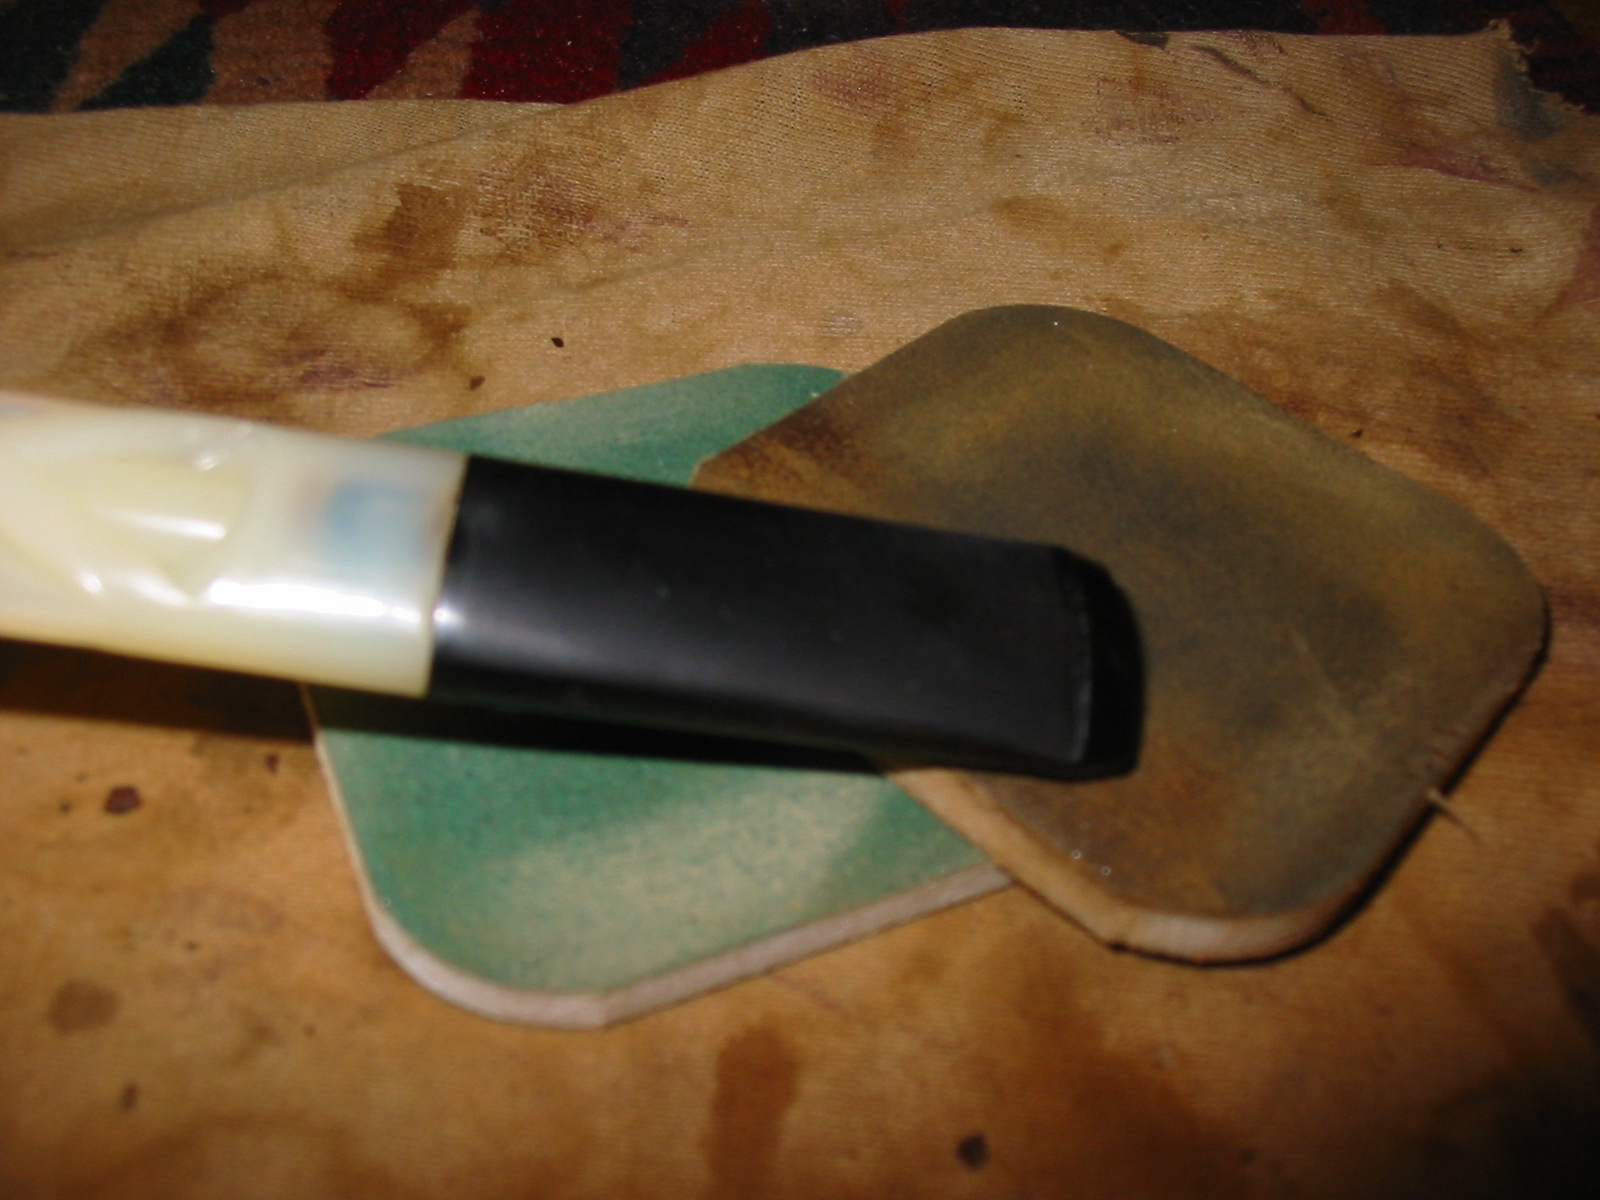
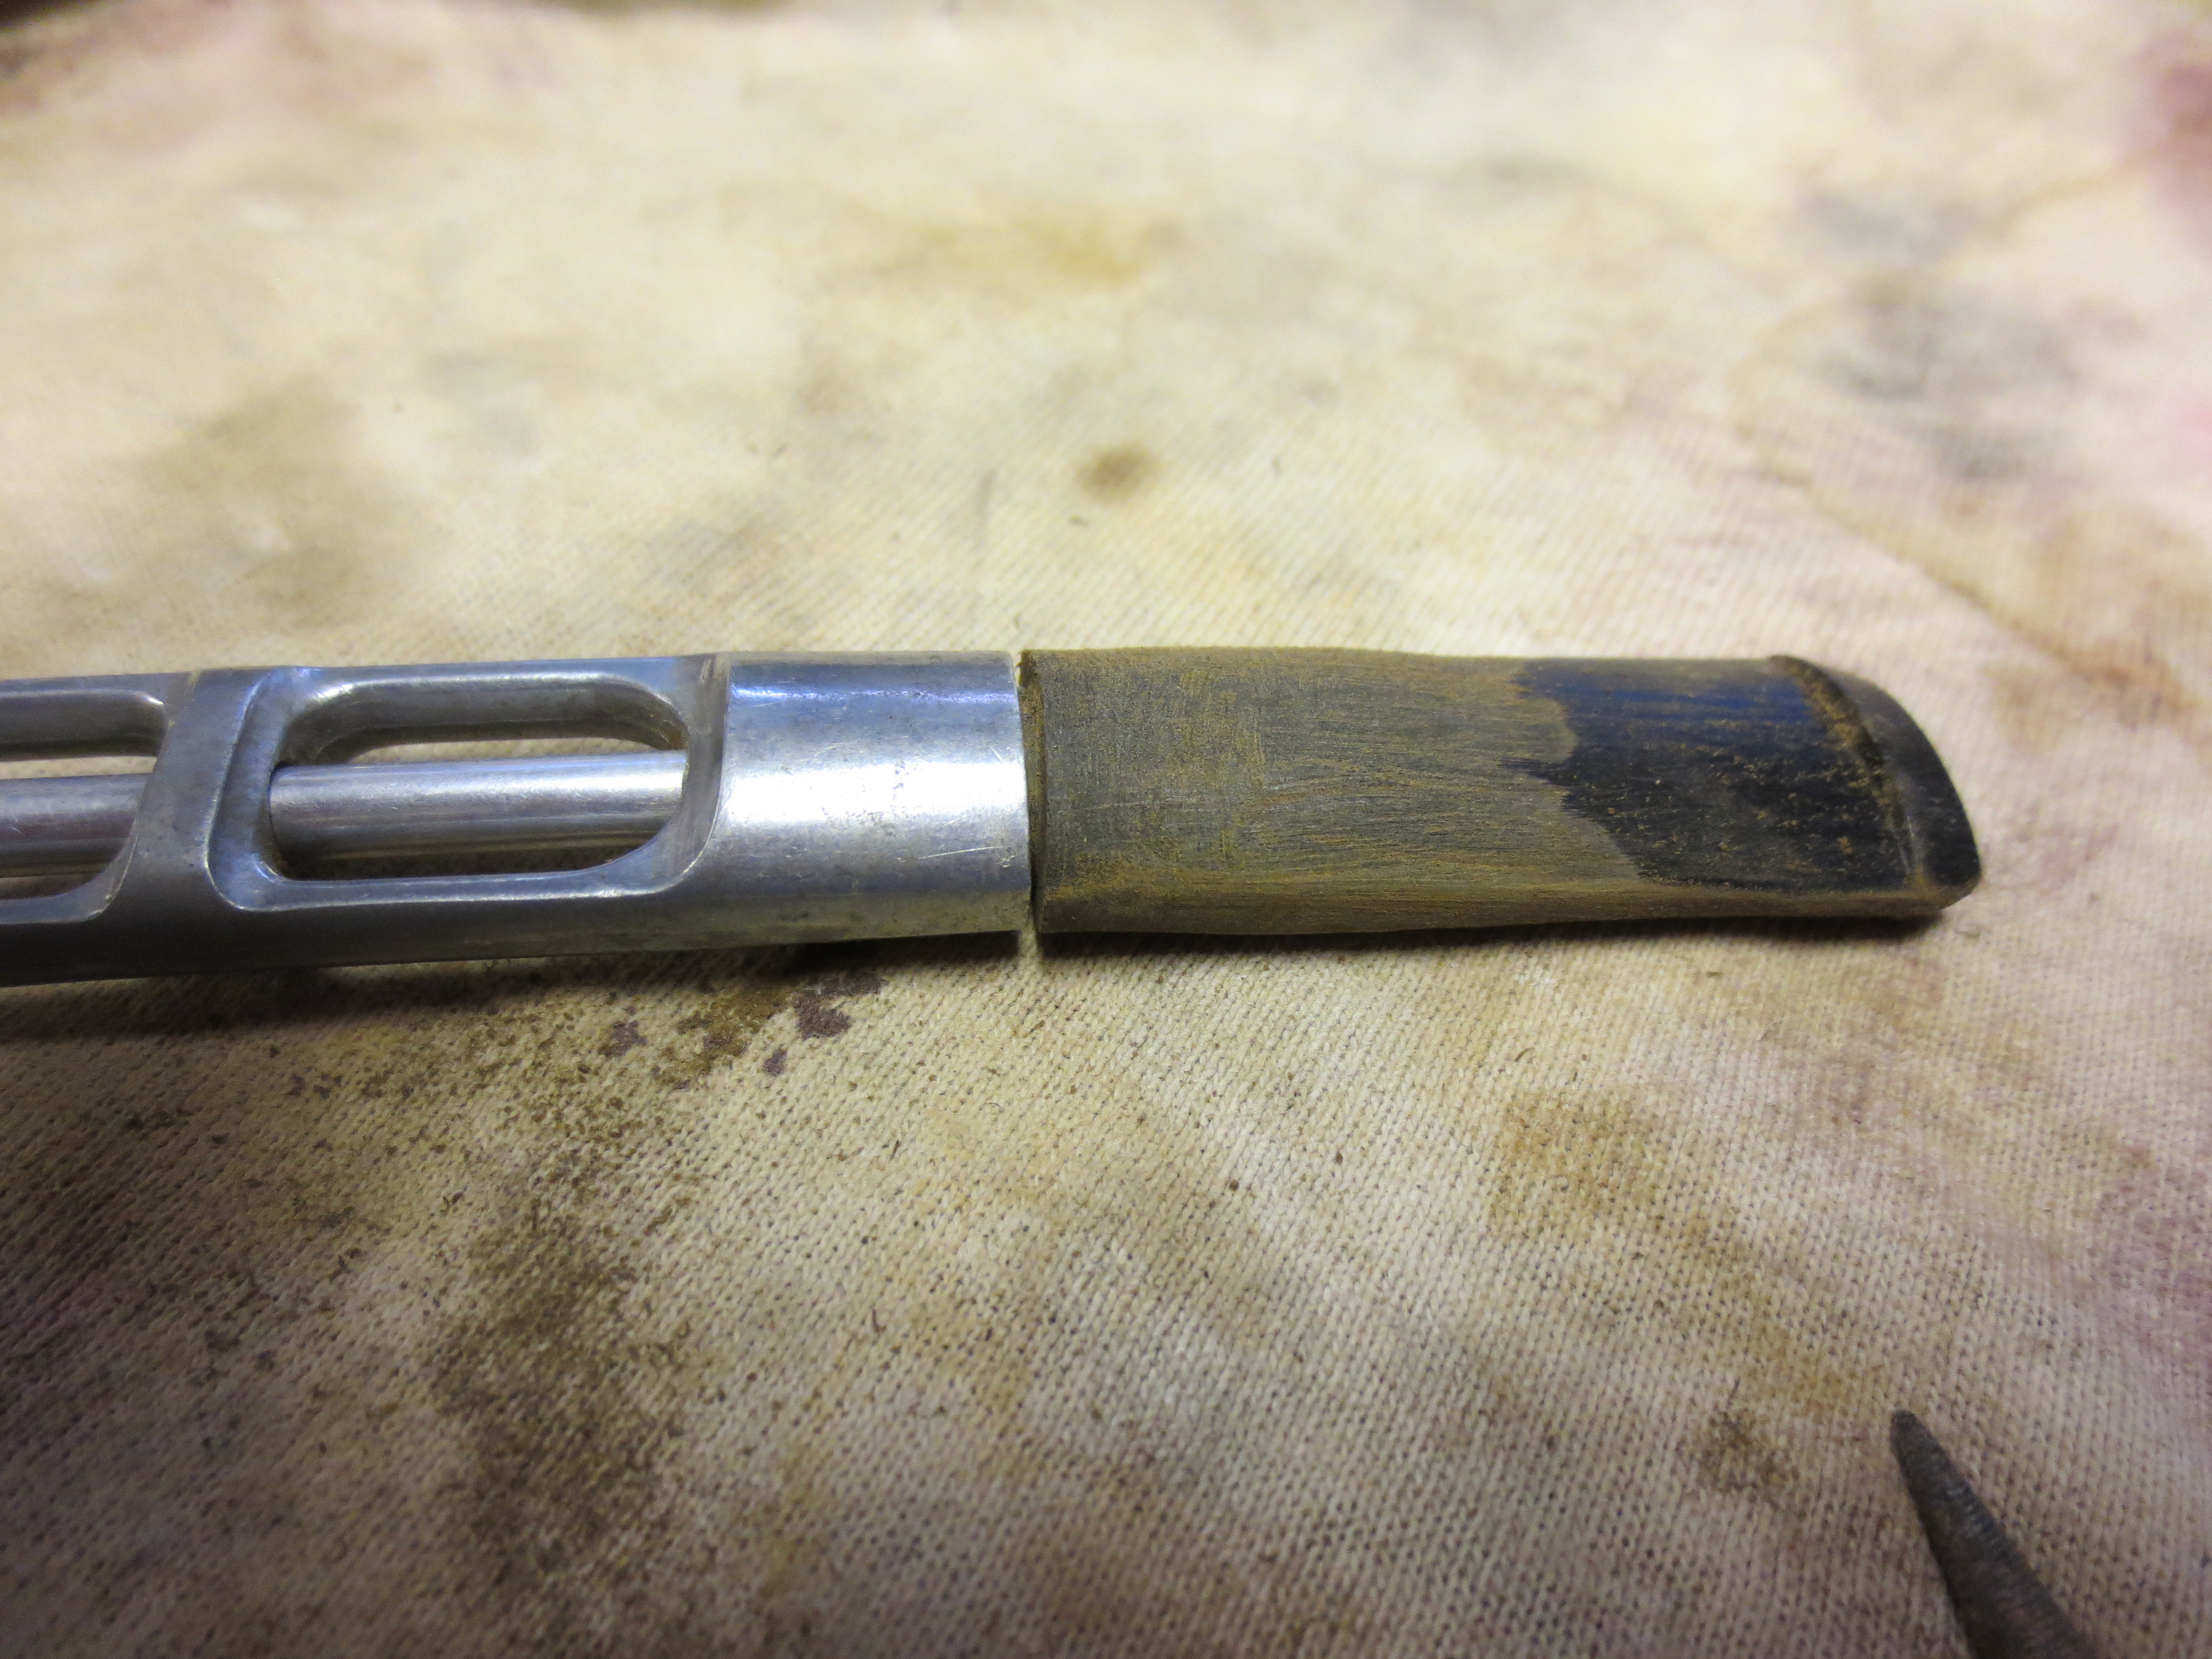
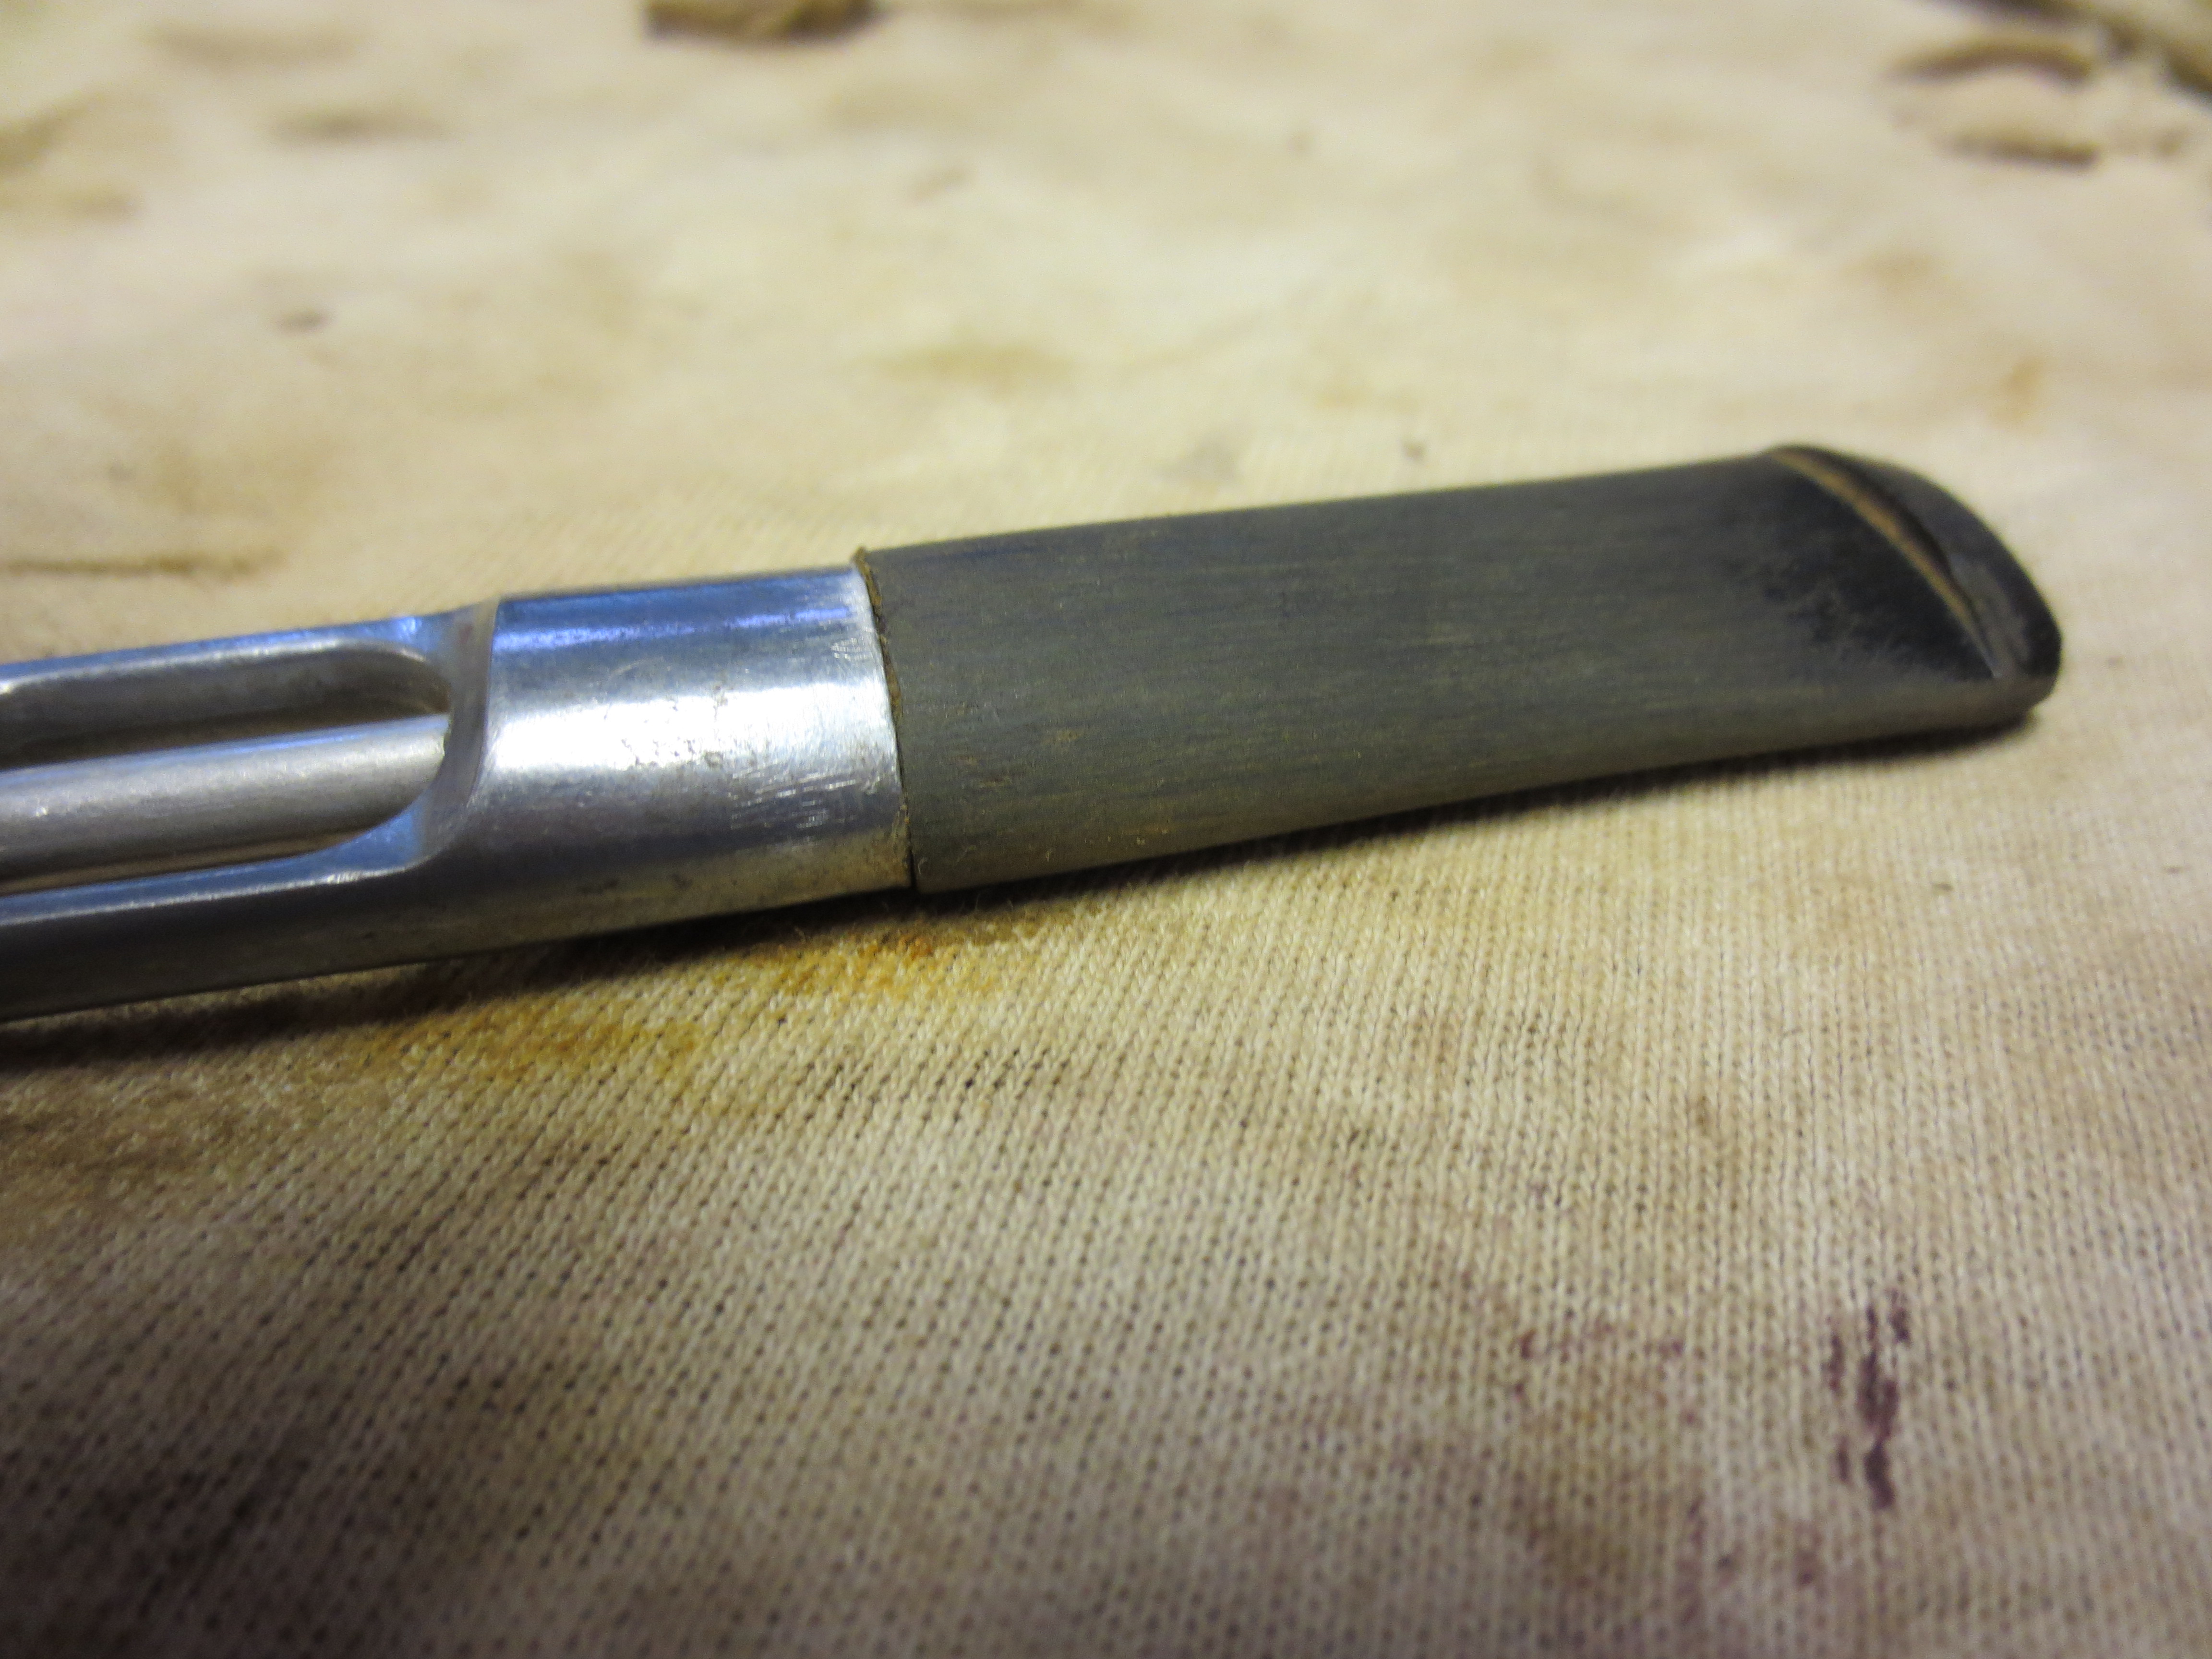
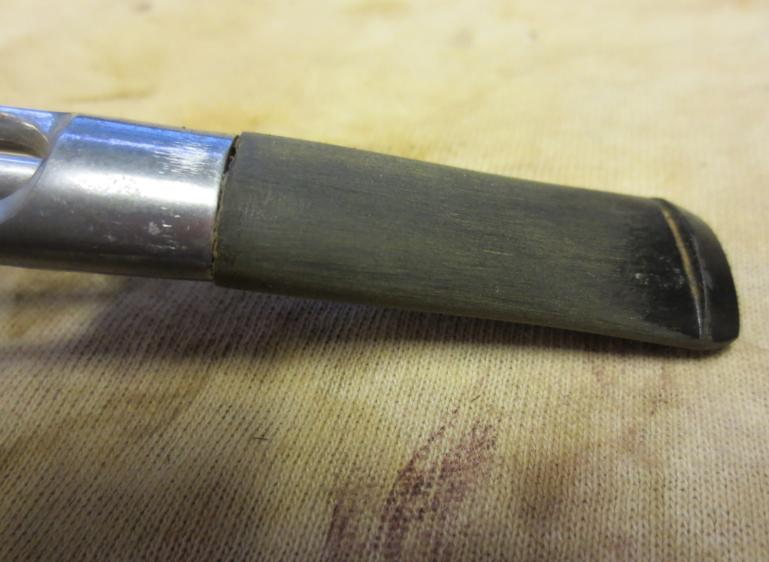
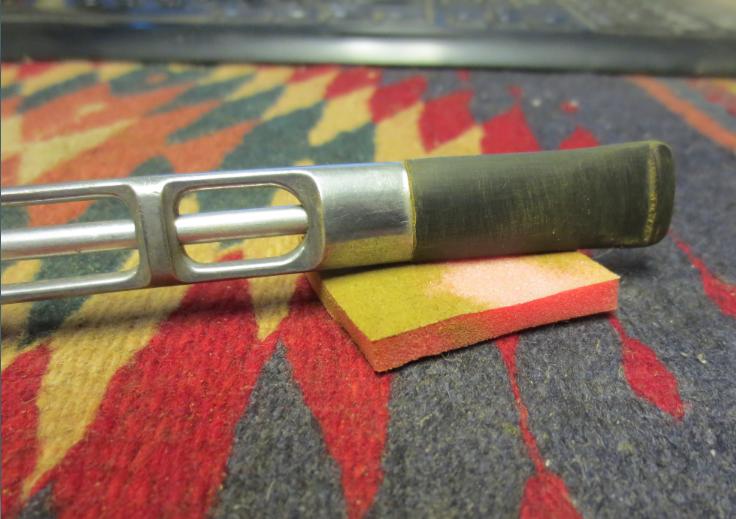
I then dry sanded with the remaining grits of micromesh sanding pads from 3200-12,000 grit. I used the micromesh pads on both the bowl and the stem. I did not include pictures of all of the sanding process but chose the one below as representative.
IMG_2211

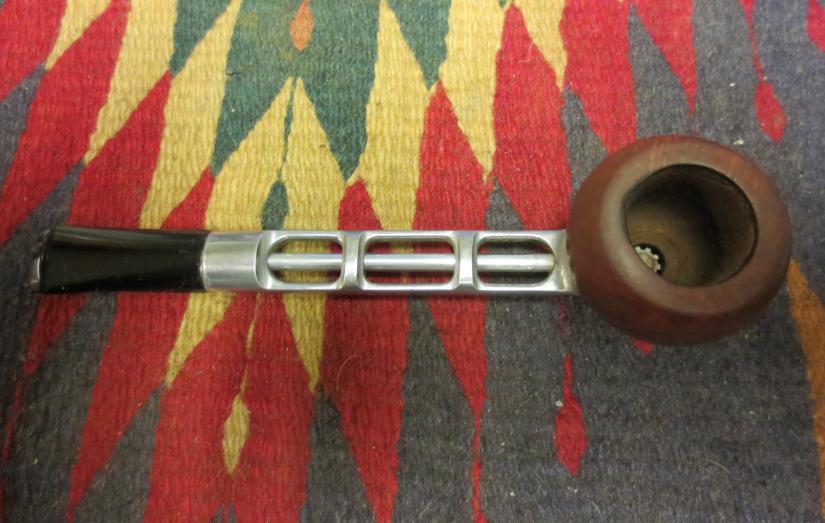
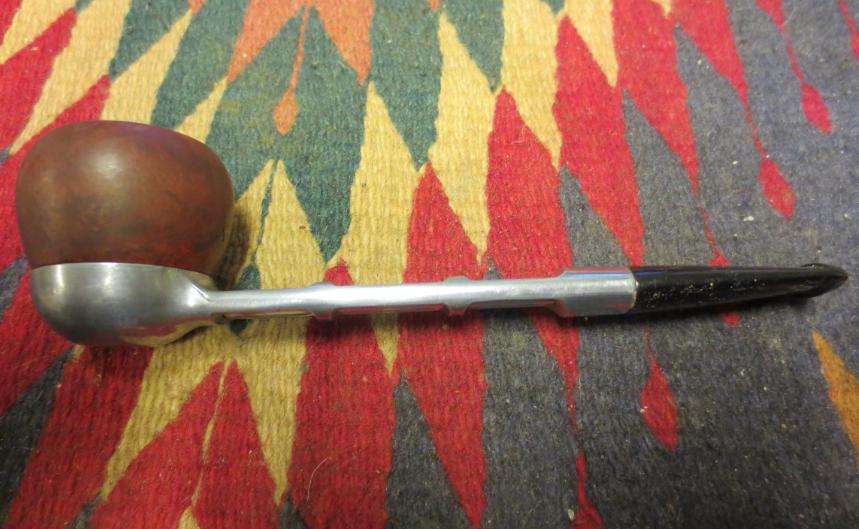
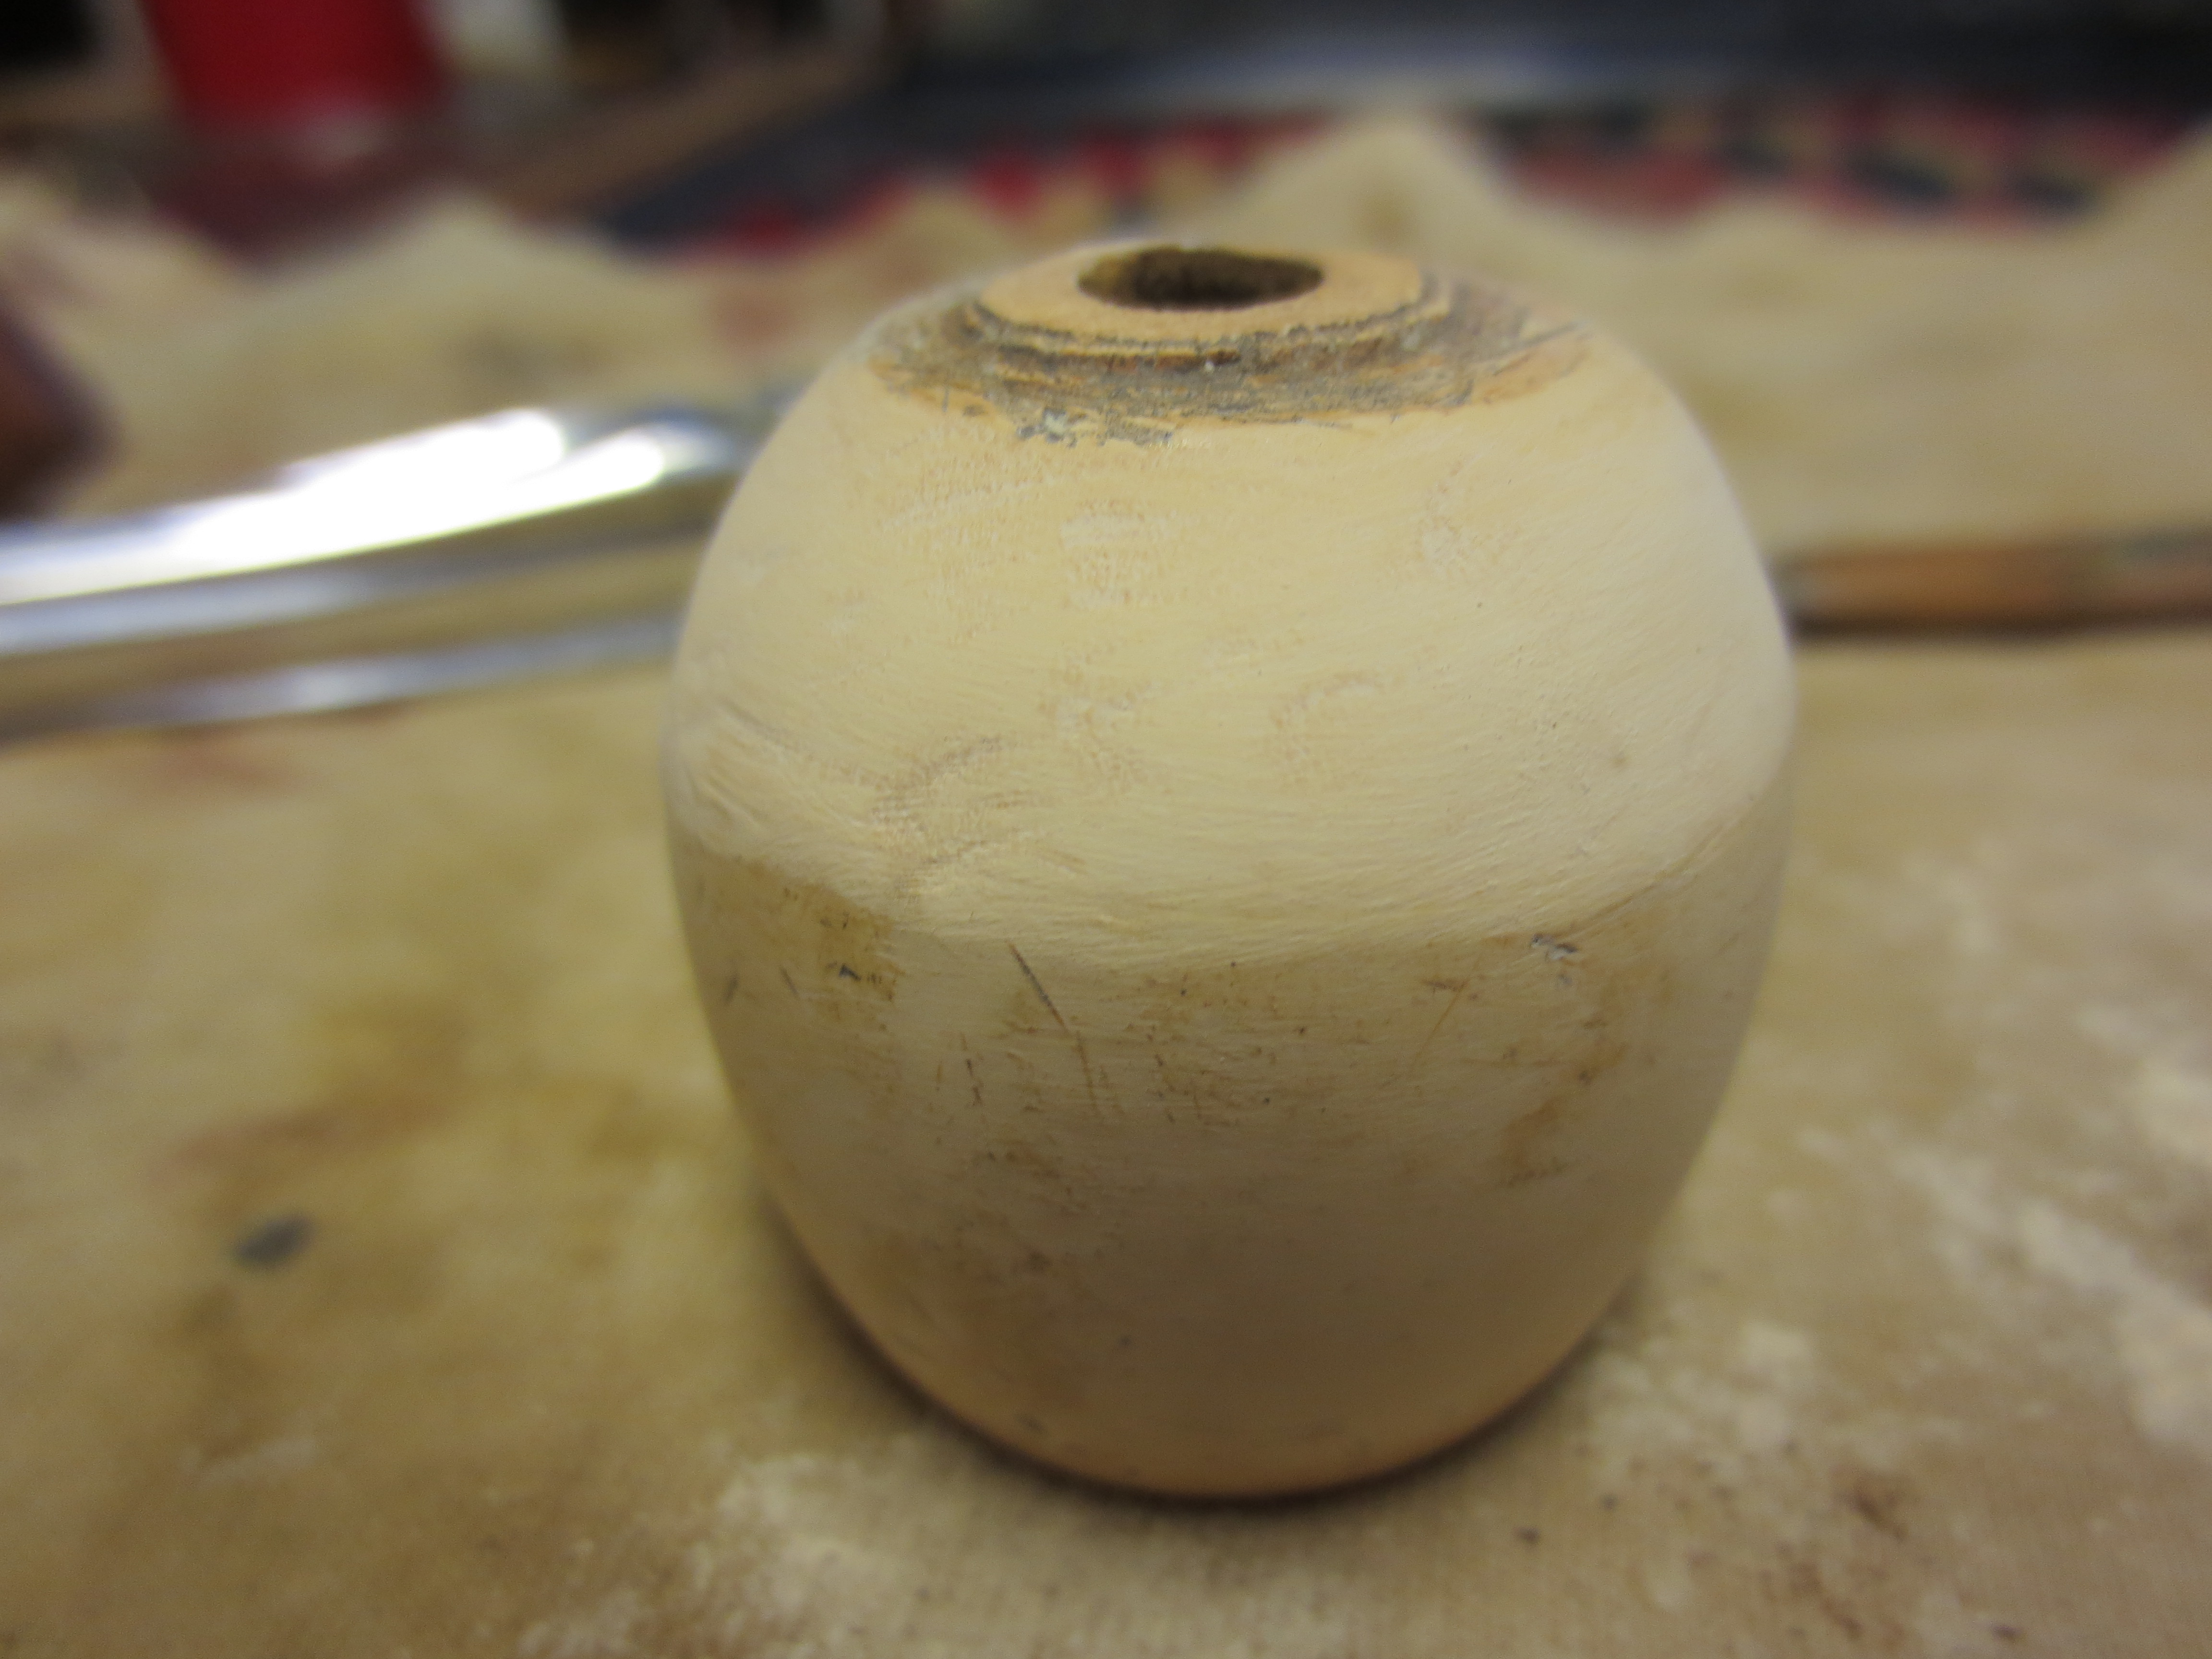
When I had finished sanding the stem and the bowl I buffed them lightly with White Diamond and then gave both a coat of carnauba wax. I chose for this bowl to not stain it but leave it natural as I like the look of the grain in the wood. The photos below show the finished pipe. Any ideas on what the wood might be?
IMG_2213

IMG_2214

IMG_2215

IMG_2216

Dr. Grabow Viking Restemmed and Refurbished


Blog by Steve Laug

In my recent EBay purchase of pipe bowls there was a Dr. Grabow Viking metal base minus the stem. I have had several of the Grabow Vikings over the years and cleaned them up and sold them. I have one that is in my regular rotation and it is a great little pipe. This one came with a Dublin shaped bowl and the shank was not bent or damaged. For a long time now I have wanted to try restemming one of these metal pipes and do a write up on the process. This would be the opportunity to do both. The metal bowl base was coated inside with the tobacco lacquer that is often found in old Vikings or Falcons that have been sitting for a long time unused. The aluminum shank was oxidized and dull but would shine up well with a little elbow grease. The finish on the outside of the bowl was not damaged and would be easy to restore. There was a rough broken cake in the bowl and the rim was tarred and caked. As I inspected the bowl I noted that there was also a burned area on the inner rim at the back of the bowl. The first three photos that follow show the condition of the pipe when it arrived on my work table.

ImageImageImage

My procedure for cleaning an estate pipe is generally the same. I may vary the steps a bit but always cover the same ground in pretty much the same order. On this one I began by working on the bowl. In this case it meant removing the bowl from the pipe. The Viking has screw on bowls that are interchangeable with other Viking bowls (but not with Falcon bowls which have a different thread size and count). I reamed and cleaned the bowl of the old broken cake and picked out the buildup around the hole in the bottom of the bowl using a dental pick. I took apart the base and the inner tube. The tube slipped out easily as it is normally held in place by the stem. I cleaned the tube with pipe cleaners and Everclear and then cleaned out the entrance of the tube into the bowl base. After cleaning that I put the tube back in place. I wanted to plug the hole with it so that I could fill the base with Everclear to soften the lacquer buildup. I soaked it with Everclear and then scrubbed it with cotton swabs once it had softened. The next two photos show the process of cleaning the bowl base and tube.

ImageImage

I sorted through my stem box and found a precast stem for a Canadian. It was a small sized taper that would give me room to work with the diameter and the length that I needed for the right dimensions. I drilled the tenon on the stem blank so that the airway would be large enough to go over the tube at the end of the shank. I turned the tenon with my PIMO tenon turner set to the smallest setting so that I would have little left to remove for a good fit into the hole in the end of the metal shank. The fit involved the tube fitting inside the airway of the tenon and then the tenon itself fitting into the opening on the end of the shank. I used my needle files and emery paper to sand the tenon after I had turned it on the turner. I needed to take it down further for the fit so I used my Dremel with a sanding drum. The next series of seven photos show the process of fitting the stem to the metal shank.

ImageImageImageImageImageImageImage

After I had the basic fit as pictured above I decided to work on the out dimensions of the stem to get a smooth flow between the metal shank and the vulcanite stem. I used my Dremel to take down the majority of the excess material that needed to be removed. The next two photos show the stem after I had used the Dremel. It was ready to hand sand at this point in the process.

ImageImage

I sanded the stem with medium grit emery paper to remove the marks from the Dremel and smooth out the angle of the stem from the shank to the button. I also shortened the tenon to get a tight fit on the stem to the shank. It was just a little too long to fit the depth of the hole in the shank. The next series of five photos show the fit to the shank and the first stage of sanding to remove the scratches.

ImageImageImageImageGrabow under

I took the stem back to the Pimo tenon turner and set it a bit deeper to smooth out the portion that goes against the shank. Then I took it back for more sanding to make it fit more tightly against the shank. I moved on to sand with medium grit sanding sponges to continue to make the stem sit correctly on the shank and to remove the scratches remaining on the stem. The next seven photos show the progress on the stem. It is getting close to a good fit and the scratches are less visible. I also wiped down the bowl with acetone and sanded the top of the bowl and the inside edge of the bowl to deal with the burn mark on the back side of the rim.

Grabow1 Grabow2 Grabow3 Grabow4 Grabow5 Grabow6 Grabow7

At this point you can see some of the minor scratches on the aluminum of the shank. These will come out when I use the micromesh sanding pads after the stem is ready. The next series of two photos show the progress of smoothing out the stem with the micromesh sanding pads. I wet sanded with 1500, 1800 and 2400 grit sanding pads. Each successive grit gave a deeper shine and polish to the stem surface.

Grabow8 Grabow9I also wet sanded with 3200 grit micromesh sanding pads. The next two photos show the change in the stem as the shine deepens.

Grabow10 Grabow11

I went on to dry sand with 3600 – 12,000 grit micromesh sanding pads. The next series of photos show the progress in polishing of the stem. To me the final three grits – 6000, 8000 and 12,000 grit – show the most change. The next two photos are selected to show the progress. The first one below is of the stem after sanding with the 4000 grit micromesh. The second photo shows the stem after sanding with the final three grits of micromesh.

Grabow12 Grabow13Once the stem was polished I used some clear superglue to glue the stem to the shank. I also went on to stain the bowl with an oxblood stain. I applied it and then flamed it and restained and reflamed it. The next four photos show the pipe after staining and before taking it to the buffer. I also used the micromesh to polish the stem and shank.

Grabow14Grabow15 Grabow16 Grabow18

The final four photos show the finished pipe. I buffed it on the buffer with White Diamond and then gave the bowl and stem multiple coats of carnauba wax and buffed with a soft flannel buffing pad to give it a shine.

IMG_0476 IMG_0477 IMG_0478 IMG_0479

Modifying an Old Meerschaum Bowl to Fit a Kirsten Pipe Barrel


In a lot I picked up off EBay was a nice older meerschaum pipe bowl. I think it was originally made either for the WDC base that came in the lot or for a different metal or Bakelite pipe. The threads on the pedestal base were stripped out. As I was looking at it I thought, “Why not see if I can modify it to fit the Kirsten stem and barrel that I have waiting for a bowl”. In the first photo below is the lot of bowls I picked up on EBay. The Meerschaum bowl is in the bottom right corner. The base or nipple is visible in this photo.

Image

The next series of four photos show the bowl before I began work on it I wanted to line it up and see if it would possibly work on the Kirsten. I wanted to see if it was awkward looking or would look feasible. I took photos of the bowl and pipe from different angles to get a feel for the look of the bowl on the pipe.

ImageImageImageImage

I decided to try the same process I use in topping a bowl to remove the nipple or base. I set up my sandpaper on a flat board and sanded the nipple to flatten it out. It seemed like it was going to take a long time to remove it so I took it to my Dremel and quickly removed most of it and then came back to the sanding board to finish it up. The next three photos show the process of removing the meer nipple.

ImageImageImage

Now the bowl needed to be cleaned up and shaped to fit the barrel of the Kirsten. I sanded the bowl with a medium grit sanding sponge to remove the tar and finish of the bowl. Since I was going to reshape the bowl bottom I wanted to remove the old patina and dents as much as possible to make matching the bowl bottom simpler. The next three photos show the sanding of the bowl.

ImageImageImage

After sanding the bowl surface I used my Dremel to remove the material from the bottom of the bowl and to reshape the bowl to fit the Kirsten. It was a slow and repetitive process as one thing I have learned it you can always remove more material but you cannot put it back. I wanted to shape the bowl with a more rounded bottom on it and give the overall look of a brandy shape. The next three photos show the new shape of the bowl after the Dremel had done its work.

ImageImageImage

The next step in the process was to open up the hole in the bottom of the bowl in order to receive the bottom plate on the outside and the hollow screw on the inside. Kirsten bowls have a brass or vulcanite bottom plate that is inserted into the bottom of the bowl. This adapter or plate is cupped so I matched the bowl bottom to the cup on the plate. I had to drill slowly with increasingly larger drill bits until I had opened the airway enough for the plate to fit. Then I needed to open the bowl bottom enough to take the screw head. This particular bowl was a bit tapered so I needed to drill it so that the bottom was more flat on the inside so that the screw head would rest evenly on the bottom of the bowl. The outside drilling was ¼ inch when finished. The inside drilling was a ½ inch to let the screw sit evenly. The next three photos give an idea of the drilling and the end product. In the last of the three photos I placed the plate/adapter and the screw in the photo so that you can see where I was going with my drilling.

ImageImageImage

After drilling the bowl to fit the pieces I put it together to see if it all worked. The first three photos below show the bottom plate and the screw attached. I tried to photograph the bowl from a variety of angles in order to show the fit and feel of the bottom plate. The top down photo shows the placement of the screw. The other two photos show the fitted bottom plate. The last photo of the three shows the view from the bottom of the bowl with the screw centered in the bottom plate and the bowl ready to place on the shank.

ImageImageImage

At this point in my work I wanted to see how the bowl fit the barrel and stem. I wanted to determine if I needed to remove more of the meerschaum to ensure a good fit with the barrel. The next four photos give you a look at the pipe bowl fit at this point. There was still much work to do in making the fit perfect but I was getting there and the finished pipe had potential that it would look very good.

ImageImageImageImage

The internal screw was still not sitting flat and deep enough in the bowl to ensure a good tight fit to the barrel. I rode too high in the bowl bottom to really be able to tighten the bowl snugly against the barrel. So I took it back to the drill and inserted a larger bit in the drill and carefully drilled the internal bowl bottom to let the screw seat more deeply. This process took care as I did not want to go too deep into the bottom as that would weaken the bottom of the bowl. I went slowly and checked the seating often until it was the correct fit. The next series of two photos show how I did the drilling and the finished fit of the screw in the bowl bottom.

ImageImage

Once the fit of the bottom plate was correct it was time to sand the meerschaum bowl. This was a very messy proposition with the dust being similar to sanding Gyprock or drywall board after it has been taped and mudded. I had no idea that the sanding would be such a messy work. The dust was very fine and permeated everything, my hands and arms were covered with the fine white powder. Even my eye sockets were filled with the dust. I used 320 grit sandpaper to begin the process and sanded out the deeper scratches left by the Dremel and also the deeper gouges in the bowl from its previous history. I then used a medium grit sanding sponge to further remove those scratches and the finer ones left by the sandpaper. The next six photos show the sanding process and the increasingly smooth surface of the reshaped bowl.

ImageImageImageImageImageImage

I stopped sanding at this point and put the bowl back on the barrel to make sure that the edges and bottom of the bowl sat correctly against the top of the barrel. While it was on the barrel I sanded it further with a fine grit sanding sponge. The next three photos show the look of the bowl on the barrel after sanding. The shape and finish is beginning to appear in the process.

ImageImageImage

Once the fit and feel were correct it was time to work on the finish of the meerschaum bowl. Meer is pretty unforgiving in that it shows scratches in detail and as the bowl is smoked and heated any hidden ones suddenly will appear. I figured I would have to deal with that when it happened but in the mean time I would work to minimize that effect. I sanded the bowl with micromesh sanding pads. I used 1500-12,000 grit. The eight photos below show the progressive shine that developed in the bowl after each successive grit of micromesh was used. It was fascinating to me that as I sanded and polished the bowl more of the patina seemed to come to the surface and what was almost white in the newly sanded bowl began to yellow and darken around the top and bottom edges with the polishing.

ImageImageImageImageImageImageImageImage

The final series of four photos show the finished bowl on the barrel and ready to use. I am very pleased with the look of this old meerschaum bowl on the newer Kirsten metal barrel. The marriage of old and new is actually quite pleasant to look at. The feel in the hand is also very nice and the bowl has a natural shine to it from sanding with the micromesh. I gave it a coat of white beeswax after the sanding and hand polished it. I will continue to give it coats of beeswax as I use it.

One thing I have learned in the process of working this meerschaum bowl to fit the barrel is that there is always a use for what appears to be a throw away bowl. I will think long and hard before I discard a pipe bowl as junk because who knows what beauty lies just beneath the surface and what a pleasant new life can be resurrected from the old pipe.

ImageImageImageImage

Repairing a Bite Mark on a Kirsten Stem


In one of my EBay bargain basket purchases I picked up a Kirsten Barrel and stem. It is complete minus the bowl. I have a bowl coming from a friend so it was time to do some work on the stem and barrel. The valve on the end of the stem was stuck shut so removed the stem and needle valve system from the barrel and filled the barrel with alcohol up to the top of the valve on the end. This worked through the buildup on the valve and I was able to remove it. The barrel was fairly easy to clean up with alcohol and cotton swabs. The stem valve also cleaned up nicely but the stem was another matter altogether.

ImageImage

On the underside of the stem was a deep bite mark. It was rough around the edges and the vulcanite was compromised. On the top side of the stem were some smaller and less deep bite marks that were more like dents. There was also a wrinkle in the topside of the stem that was strange. The first two photos below show the stem when I began to work on it.

ImageImage

I decided to use my heat gun and set it on the lowest setting and held the stem over the gun to lift the tooth marks as much as possible. The ones on the top side of the stem lifted very easily with the heat. The wrinkle also smoothed out easily with the heat. The bite mark on the underside lifted slightly but it was not going to come out smoothly. I then sanded it with 240 grit sandpaper to remove the remnants of the bite marks and remaining tooth chatter. The top of the stem came out very nicely and I would need to work out the scratches with higher grits of sandpaper and micromesh. The underside was another matter. I sanded out the roughness around the edges of the crater in the stem. I sanded out the remnants of tooth chatter to see what I would have to do to reclaim the stem. The next two photos show the stem after the sanding with the 240 and 320 grit sandpaper. The topside is nice, but the bottom crater remains – smaller but visible.

ImageImage

I sanded the stem with 400 and 600 grit wet dry sandpaper to remove the majority of the scratches pictured above. The top side I then sanded with 1500-2400 grit micromesh sanding pads. The first photo below shows the top of the stem and the bite marks and tooth chatter is gone. The stem from the top looks clean and new – ready for the bowl when it gets here. The second photo shows the underside of the stem. For the crater in the underside I cleaned out the hole with a cotton swab and alcohol. I picked away any debris that had collected in the hole with a dental pick. I then filled the hole with black superglue. I made a superglue bubble over the hole to make sure that when it dried it would be able to be full enough. I set it aside for the night. In the morning I sanded it with 320 grit sandpaper and took the bubble down to the surface of the stem. I then sanded with 400 and 600 wet dry to smooth it out more. Finally I sanded it with the 1500-2400 micromesh sanding pads to get it to the point shown in the second photo below.

ImageImage

At this point the stem is repaired and all that remains is to do some final sanding with the higher grits of micromesh sanding pads. I worked on it with 3200 and 3600 grit micromesh and then polished it Maguiar’s. After that I sanded it with 4000-12,000 grit micromesh and then gave it a coat of Obsidian Oil. The finished stem was buffed with White Diamond and then more carnauba wax. I also hand polished the barrel with carnauba wax.

ImageImage


Cleaning up a Swedish Bromma Dollar System Pipe


Blog by Steve Laug

I picked up this old Swedish Pipe in a little town in Northern Alberta, Canada. It was an antique mall, the only one in town and I was able to pick up this one for about $10 so I did not feel too bad about it. I had not seen one of these pipes before. It is stamped BROMMA over Sweden on one side of the shank. On the other there is an Elephant logo in a circle and inside the circle is the word DOLLAR. The bowl is briar and the rest of the pipe seems to be either plastic or Bakelite. It is interesting. I was able to take the stem out when I picked it up but the bowl would not budge. It was definitely a screw on bowl as it was on crooked and at somewhat of an angle. The stem had tooth chatter on the top and bottom but no tooth dents. I sprayed some solvent on the bowl stem connection to try to loosen it. I twisted it carefully but it would not budge so I set it in my box of pipes for repair.

ImageImageImageImage

Today was my day to work on it. I took it out of the box and gave the bowl a twist and it would not budge. I used the sanding board to top the bowl and once it was smooth and clean I wiped the entire bowl with acetone. I was careful not to get any on the shank or bottom of the part. I then used Isopropyl and a cotton swab to swab alcohol around the bowl and the bottom portion of the pipe – the keeper for lack of a better word. I repeated this several times and tried to carefully twist the bowl off the keeper. I repeated the swab and alcohol until finally I was able to twist it off the keeper. The next two photos below show what I found inside the keeper portion of the pipe. This is amazingly like the stem portion of the Falcon pipes. The difference is the material it is made of. It is incredibly lightweight and resilient. The base was absolutely full of hardened tars and sludge. My guess is that it had never been taken apart after the initial purchase and after the bowl was put on and misaligned. This would take some work to be sure. The stuff was as hard as rock and would not budge with a pipe cleaner.

ImageImage

I decided to drop the bowl into the alcohol bath and let it soak away while I worked on the stem and base portion. I used my dental pick and Isopropyl alcohol to work at the rocklike tar in the base. I soaked the tarry stuff with alcohol and picked at it with the dental pick. Once I had some of it loose I would use the cotton swabs to daub out the gunk and alcohol and then repeat the process. The next series of three photos show the process of picking away the tar and the results after wiping it clean with the swabs. I probably used about 60 or more swabs and removed a lot of the gunk from the bottom of the base. I soaked it and kept at it. I used 0000 steel wool to scrub the tars once I had the majority of the material picked free. Then I took it to the sink and used a microfiber cloth to scrub the base with hot water and degreaser.

ImageImageImage

The next two photos show the inside of the base after it has been thoroughly cleaned. The shank itself was almost like a Kirsten barrel and need lots of soft tissue and cloth run through it until it was clean and shiny on the inside. The photos are slightly out of focus but the cleanness of the base is very visible.

ImageImage

I then removed the bowl from the alcohol bath and went to work on it. I picked out the two putty fills with my dental pick. I also followed the threads with the dental pick to remove the grime and grit that filled the threads and did not allow the bowl to be threaded on correctly. I also used a bristle tooth brush and alcohol to scrub the bottom of the bowl from the threads down to the nipple like structure on the bottom. The next four photos show the bottom of the bowl and the threads after cleaning them. There is an inset portion of the bowl bottom that is like a moat around an island that has the moutainlike nipple in the centre. This took quite a few cotton swabs to clean the grime out of the channel. Once it was clean there is a patent stamp on it. It reads Pat. S. I am guessing it is a Swedish Patent mark. The portion of the bowl that is threaded seems like it is made of the same kind of material as the base of the pipe. The mountain in the middle is briar. It is an interesting and unique design. I am looking forward to firing it up and giving it a smoke once it is finished.

ImageImageImageImage

Once the bowl was clean I decided to replace the fills with briar dust and super glue. The next series of photos show that process. I had already picked out the putty fill. I used a dental pick to tamp briar dust into the pits on the bowl. The first picture shows the briar dust before I wiped it smooth and added a few drops of super glue to the mix. The second and third photo are a bit out of focus but show the repaired fills after I sanded them down with sandpaper to smooth the surface to match the surface of the bowl.

ImageImageImage

The bowl was now ready to be stained with an oxblood coloured aniline stain. I applied the stain with a cotton swab and then flamed it and buffed it off. The first two photos below show the stain applied and ready to be flamed with a match. I held the bowl with a dauber so that I could manipulate it to apply the stain.

ImageImage

The next two photos show the bowl after a buff with Tripoli. I had not polished them at all at this point I merely buffed off the stain to get an even coat on the bowl sides and rim. The great thing with the briar and super glue fill is that it takes the stain and darkens with the finish coat. It is far more attractive to me than the pink putty fills that were originally present.

ImageImage

The next two photos show the pipe taken apart. There is the bowl base and long shank that is made of the plastic or Bakelite material, the bowl itself. It has a small burn mark on the top of the rim but I left it rather than take it down any deeper into the surface. The third portion is the stem unit with a four finned stinger apparatus. The airflow is straight through from the bottom of the bowl to the slot in the button. The stinger with cooling fins is designed to cool the smoke and trap the tar and oils along the fins. This portion and the inside of the stem took work to clean. It is open enough to take a pipe cleaner through it with no problem.

ImageImage

The final four photos are of the complete pipe reassembled and ready to smoke. I coated the bowl base and stem with Obsidian Oil and then hand waxed it with Halcyon II wax and buffed it to a shine by hand as I did not want to risk it on the buffer. I have had this kind of material melt when buffed so I am shy to try it on this pipe. The stem was sanded with micromesh sanding pads from 1500-12,000 grit and then polished with Maguiar’s Plastic polish as I have been doing on all of the pipes lately. I put some carnauba wax on the threads of the bowl to lubricate make the threads as I screwed on the bowl.

ImageImageImageImage

Kirsten Generation 1, 1.5, 2, 3


Blog by Dave Whitney and Steve Laug

I wrote Dave Whitney for permission to use his material in this post. He wrote back granting that permission and asked that I credit it as coming from OLD BRIAR by Dave Whitney. Thanks Dave for allowing this information to be posted here. What follows is taken from correspondence with Dave that later became the article in his book.

Over the years I have had several Kirsten pipes of different ages and different composition. I have always found it difficult to tell the difference between the various pipes in terms of their age. I have ordered replacement parts from Kirsten in Seattle and I have also cannibalized older ones that I have here that are not useable. From these I have traded and bought others. One of the early ones I had stumped me in terms of the markings and stampings on the barrel and the bowl. I wrote to a fellow on one of the online pipe forums (I now know that it was Dave Whitney as I have since found an article by him on Kirsten pipes that I have read and have written to him. I kept the information he gave me and finally got around to editing it and putting it on the blog.) My questions to him revolved around how to tell age of Kirsten I had in my hands.

He replied with the below information. I found it very helpful and have not found other places to get this info so I thought I would post it here for all to use. (Since writing this I have found that Dave has developed the material in his book Old Briar – it should be consulted for more information).

“Kirsten’s are fun to try and figure out, especially when trying to buy then on eBay. Years ago, when I first started, I finally got a hold of a fellow who “Restored” Kirsten’s for quite a long time. He taught me about the Generation system, and it immediately made life easier. I could ask the seller to take the pipe apart and tell me about the O-rings. I could even call the company and refer to the Generation parts I wanted, and at that time they knew exactly what I was asking for…the last time I called was three years ago, so who knows now. This is all from memory……”

All Kirsten pipes are made up of five basic components – mouthpiece, radiator body or barrel, valve, bowl and bowl screw (a sixth component, the bowl ring, is found in many Kirstens. They were originally designed in 1936 by Professor Frederick Kirsten – the man who invented Boeing’s first wind tunnel – after he has been advised by his physician to stop smoking. Kirsten was looking for a way to trap the tars and moisture from tobacco and the Kirsten pipe was his solution.

Kirsten2

Generation 1 – 1936-1958
The wooden bowl on this generation connects directly to the metal barrel and there is no metal cup spacer. It is a pretty flush fit that goes flat against the barrel. On the underside of the metal barrel it is stamped with one or more of the following “Pat. Appl. For” (1936-38) and “Pats. & Pats. Pending” (1938-1958) over “Made in USA” – S” (or applicable size – S, M, L). There are no O-rings on the bit or metal shank insert. They came in the following models:

Straights

Companion First edition in rough finish.

S Standard 1st generation with full-length cooling fins

M Medium

L Large

A Aristocrat Extra large 1st generation

Generation 1.5 – transitional period – mid to late 50’s
This was an experimental stage. Kirsten realized that the bit and insert were prone to seizure as the condensate dried. This model always has O-rings on the metal insert, and later models can have O-rings on both. Same markings, as I remember it. There is no metal cup spacer under the bowl. This generation has O rings either on the valve or mouthpiece but no O rings on the other end. This transitional period is stamped “Pat. Pending” and “Pats. & Pats. Pending” some with “Made in U.S.A.  It seems like the company was using surplus parts to combine into this series of pipes. They came in the following models:

Straights

K Companion

M Medium

L Large

They came in a polished finish and later white Heritage finish. There were a few other Transition Models:

Thrifty – a nice early model with black offset valve that works in reverse. There is an O ring on valve but none on the stem

No Letter/No Name – This one is an unmarked short pipe with a different valve and O ring. There is not an O ring on stem

Generation 2 – 1958-1985
Markings on underside of metal shank “Made in USA XL” (or app. size) and “Pat. & Pats. Pending”. The presence of O rings on both the valve and the mouthpiece and the metal cup spacer under bowl are the biggest thing that separates the Generation 1 from the Generation 2 pipes. These O rings help provide a tighter seal when the stem and apparatus are inserted into the radiator stem. Instead of “O” rings, the machining of the Generation 1 pipes was so precise the fit was exact. This generation came in the following models:
Straights

K Companion

G Gem

S Sportsman

SX Sportsman Brass

M Mariner

MB Mariner Black

L Lancer

Quarter-Bents

A Aladdin

V Vagabond

CX Cavalier Brass

T Tyrolean

Full bents

W Westerner

B Beau Geste

P Premier

F Firesider

Generation 3 – 1985 to the present                                                                         

All current models stamped “Made in U.S.A.” and all have O rings on both the valve and stem. They come in the following models:

Straights

JX Jewel Brass

M Mariner

L Lancer

Quarter-Bents

RX Regent Brass

H Horizon

Full bents

EX Esquire Brass

DX Designer Brass

FOOTNOTE ON VARIATIONS IN LETTER DESIGNATIONS:  Generally speaking, the X added to a model letter like “S” stands for brass tone finish, i.e., “SX.” There is one exception to this: In the 1960s Kirsten made a brass tone model with an “Eternalum” finish that gave the brass tone an antiqued look. They were marked with a “X” designation following the model letter. The B added to a model letter like “M” stands for black finish, i.e., “MB.”

He ended his answer to the questions with this great note: “Now the fun part….this is how they came from the factory. What people did to them after they got them is what makes it an inexact science. Parts for the different sizes are not interchangeable, except for the bowls. I have a Gen 1 – M and -S…nothing interchanges but the bowls. If you get a Gen 1 that has been badly abused, you can end up losing either the bit or metal insert, or both, no matter what you do or how long you try.”

References used:

Whitney, Dave (2009) Old Briar – Pipe smoking on a budget. pipesbywhitney

http://www.kirstenpipe.com/

Refurb on an old WDC “Falcon” style pipe


Blog by Steve Laug

I refurbished this old WDC pipe a while ago now and thought I would post it for its historical value. I have called it a Falcon style pipe in that the bowl is removable and thus interchangeable with other WDC bowls. The stem and bowl bottom are Bakelite and the bowl itself is threaded briar bowl with an airway on the bottom. This one needed a bit of work as can be seen from the first two pictures below. The bowl was badly caked so I reamed it, sanded it and cleaned it. Then I had to top it as the rim seemed to have been used as a “hammer” and was seriously dented and chewed along the out edges of the bowl. Once the bowl was topped I decided to strip the finish from the bowl and restain and polish the bowl as a whole. I wanted to keep with the older style reddish brown stains that I had seen on other WDC pipes that I have so I used an oxblood understain and the overstained it with Medium Brown aniline. I buffed the finished bowl with Tripoli and White Diamond while holding it with a finger inserted in the bowl and holding on to the bowl with the other hand. I did not want the buffer to snatch it out of my hand while I was buffing it. I finished by giving the bowl a polish with carnauba wax and a soft cotton flannel buff.

The bowl seats in the Bakelite bottom on top of a brass ring that seems to act as both decoration and gasket to the bowl connection. It needed some cleaning and polishing as it too had dents and scratches in the surface.

The Bakelite receptacle bottom that the briar bowl screwed into was very dirty and I cleaned it out with cotton swabs and alcohol and then polished the inside with a soft cloth. The stem was rough with deep scratches and gouges in it. I sanded it with 400 and 600 wet dry sandpaper and a bit of water to give the grit a bite. Then I finished with micromesh pads in 1500, 1800, 2400, 3200, 4000 and 6000 grits. Upon completion of the sanding I buffed the stem with Tripoli and White Diamond.

Here are pictures of the pipe after I reamed it with a Pipnet Reamer (T-handle with interchangeable heads).

ImageImage

Here are pictures of the pipe after it has been finished:

ImageImageImage

I also thought some of you might be interested in seeing a picture of the pipe taken apart. I have included a picture of the cleaned version for you to get an idea of what the pipe looks like when taken apart.

Image

Refurb LHS SEC system pipe – strange one


Blog by Steve Laug

In my ongoing quest to collect pipes that are unique and give a picture of the history of interesting inventions and modifications to the simple smoking pipe I wanted to post this refurb that I finished. It is a LH Stern (LHS) SEC pipe. It is a system pipe as can be seen from the blown out pictures and the diagrams from the patent office. It is an interesting piece of history. The apparatus inside is quite elaborate. The stem is green perspex that serves as a collection chamber for sediments before the smoke goes to your mouth. I cleaned and reamed the bowl and polished it with carnauba wax. The stem had some tooth marks and cuts. I lifted the majority of them with my heat gun and finished by sanding them  and buffing them smooth.

Here are pictures of the pipe when it arrived:

ImageImage

Here are pictures of the pipe after I cleaned it and polished it:

ImageImageImage

Here is the pipe taken apart – it has an amazing assortment of parts. I have also included a copy of the patent information for those interested in the background of this pipe.

ImageImageImage