Blog by Steve Laug
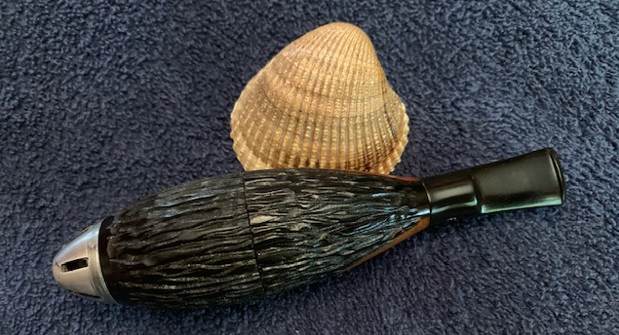
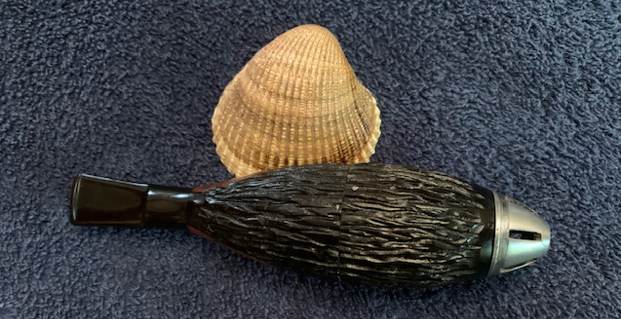
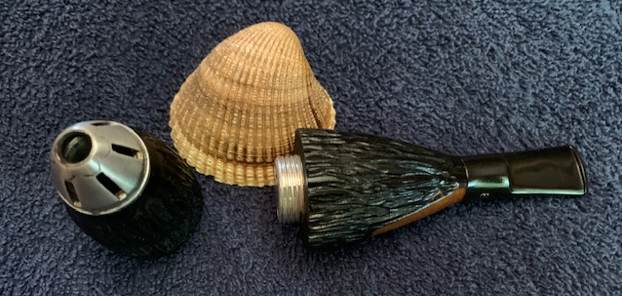
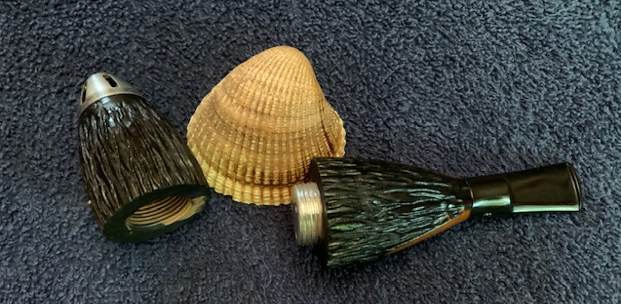
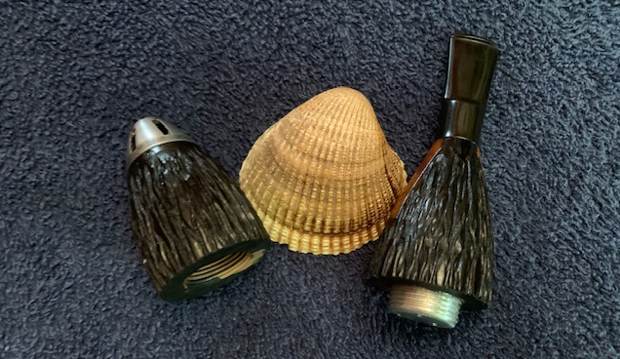
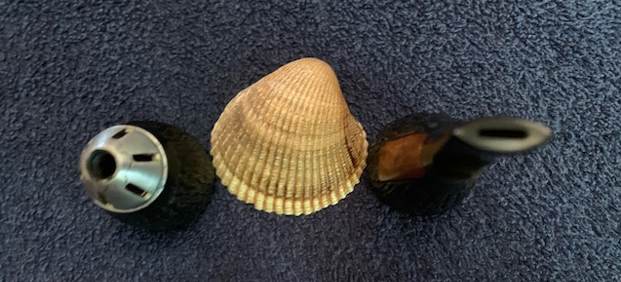
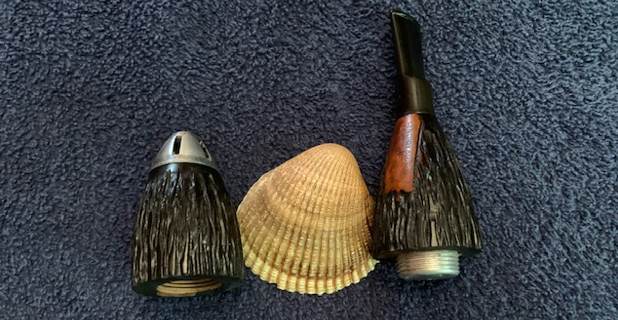
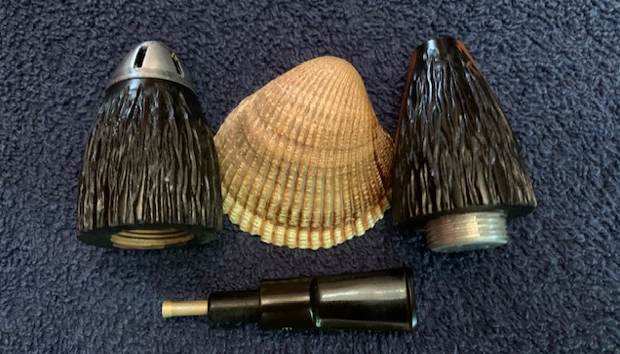
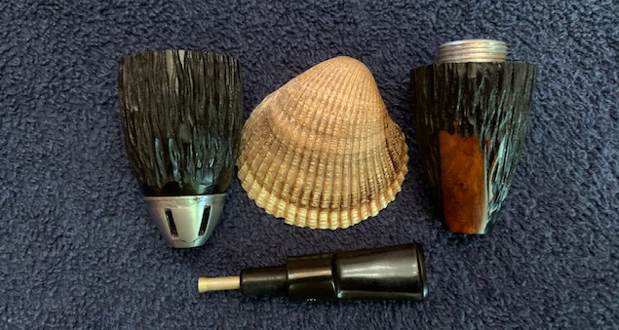
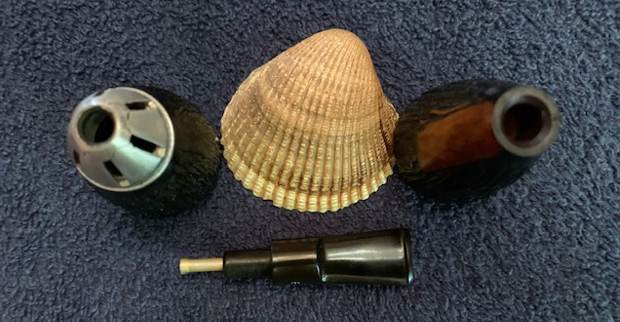
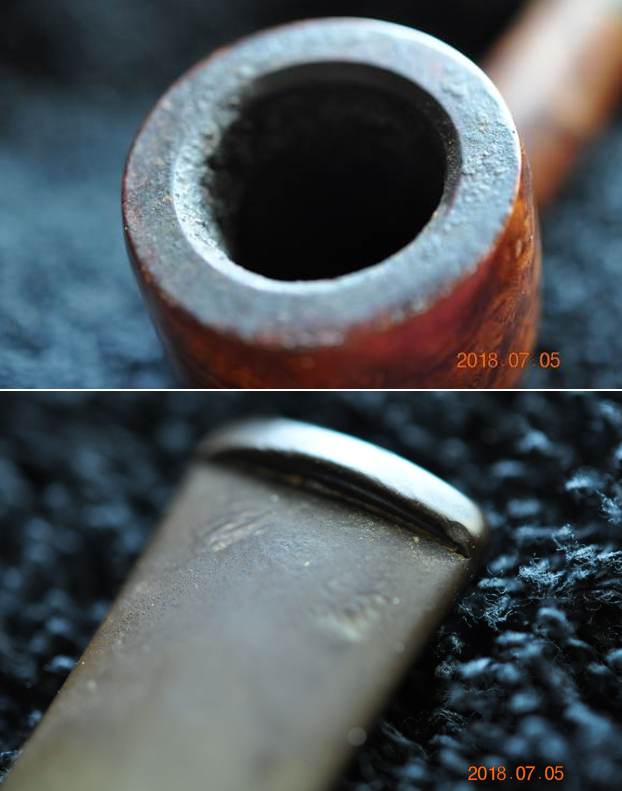
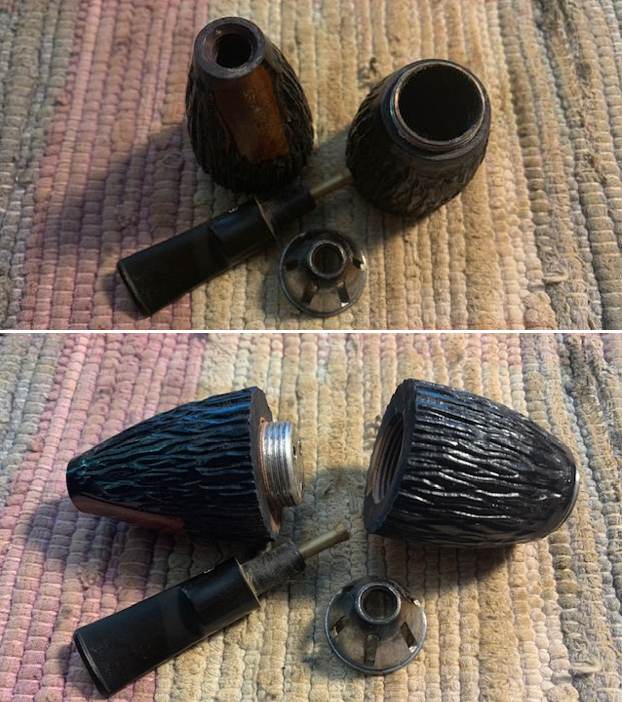
I went through my boxes of pipes and pulled out another rusticated Cigar Pipe that Jeff I had picked up somewhere on our journey. I think we must have thought it was unsmoked but when I took it apart I would have to change that assessment to lightly smoked. The pipe is stamped on both sides. On the left side it reads CIGAR-PIPE [over] SPARKLESS. On the right side it reads CENTURY OLD [over] BRIAR – Italy. Around the end below the metal nose cone it is stamped REG. No MU 3840 on one side and on the other PERFECTED. The finish was quite clean with no dust or debris in the rustication. There was a varnish coat on the finish that looked very good. The bowl is split in half and held together by a threaded metal apparatus in the stem end of the pipe. The other end is threaded in the briar and screws onto the apparatus. There is an aluminum nose cone on the front end of the pipe and it was tarnished. The inside was clean but there was some tar in the nose cone and on the aluminum joint. There was a inner tube in the tenon that was discoloured with tars. There was some carbon in the top half of the bowl below the nose cone. The stem is vulcanite and has some light tooth chatter and marks on both sides ahead of the button. There was a Mastercraft “M” logo on the left side of the saddle stem. I took photos of the pipe before I started my clean up. 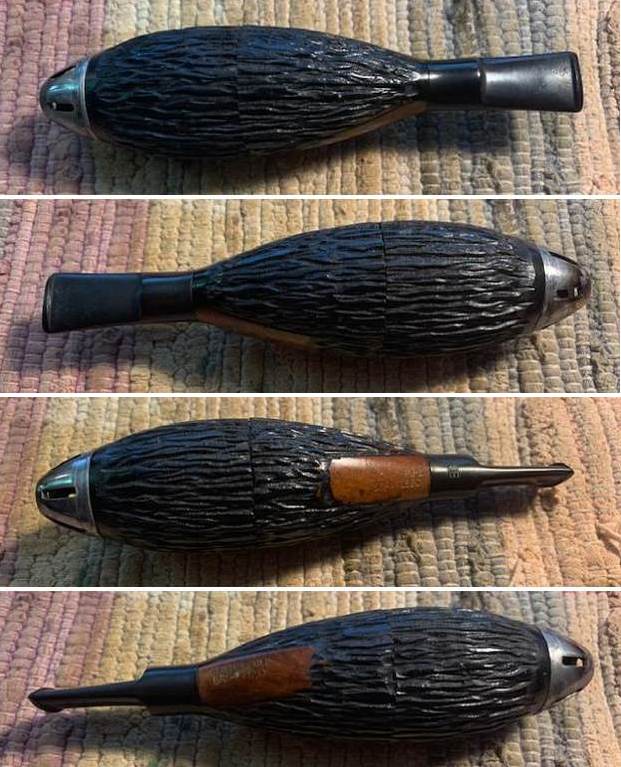 I took the pipe apart and took photos of the pieces from various angles. You can see the darkening on the aluminum threaded inside of the pipe, the tarnish on the nose cone and the inner tube in the stem. It was not filthy but it was indeed dirty.
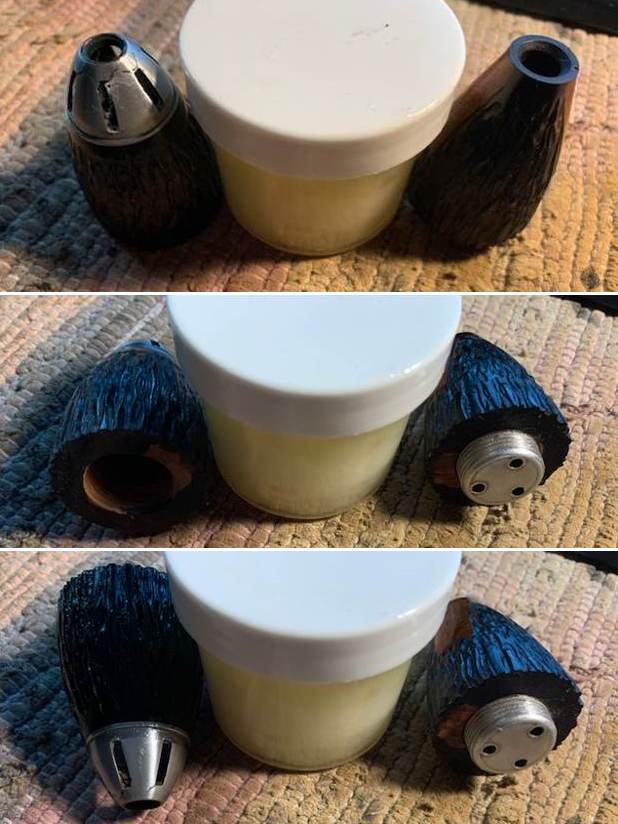
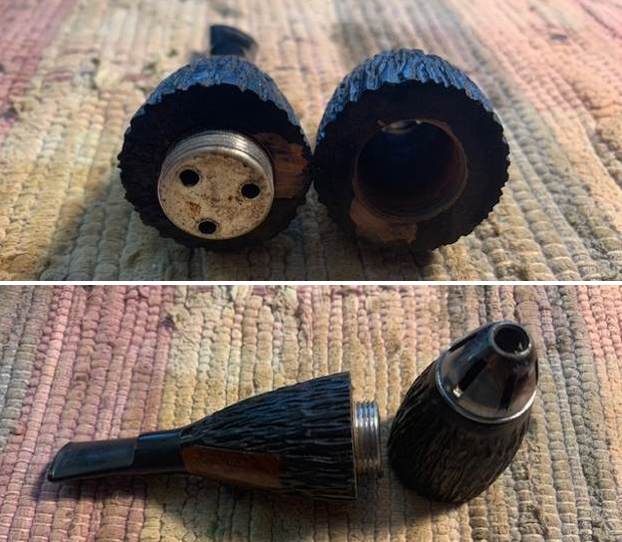
 I captured the stamping on both sides of the cigar pipe. It is clear and readable as noted above. He also captured the logo on the left side of the saddle stem.
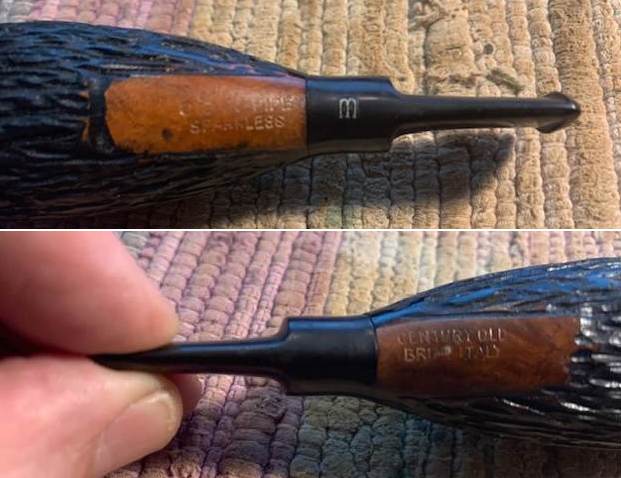 I worked on a pair of Mastercraft Sparkless Cigar Pipes back in 2016 so I turned and reread the blog I wrote on the work. Here is the link: https://rebornpipes.com/2016/09/12/back-in-flight-a-pair-of-mastercraft-sparkless-cigar-pipe-zeppelins/. I quote from the research below:
I have seen a lot of these pipes for sale in shops and on eBay but I had never had one in my hand so I had never done any research into them or what “sparked” their invention. So now that I had two of them I figure it was time to look up some information. I looked on the pipephil website and found that they were made by Mastercraft and that there were some further articles in the odd pipes section of the site. Here is the link to that part of the site. http://www.pipephil.eu/oddpipes/pipcig/sparkless2.html. The trouble is that the articles were in French. I used Google Translator to translate them into English and then did some serious editing to the translations. I am including both articles in full here. The first one is written about the smooth briar versions and the second is about the rusticated versions.
Overseas manufacturers of pipes are not deprived of market of cigar pipes based on the mythical model of the 1920s. The best-known is called Sparkless [1] and comes from the Mastercraft House which was issued in several finishes. Two of them will allow you to judge fully of these strange pipes (The article included two photos of two different smooth finishes on the pipes – a stained and an unstained version).
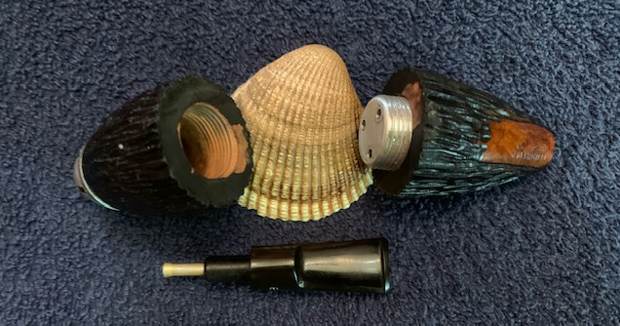
It should be noted on at the outset that it is stockier than its Germanic Zeppelin cousin. When the pipe is disassembled we note that the two wooden parts screw into another – one side is threaded wood on the interior of the piece and the other side has a metal threaded end that turns into the wooden threads. There may be some doubts about how well this type of connection will hold up under use. There is no place for a filter in the Sparkless pipes unlike the Zeppelin. This pipe is adapted to the tastes of American smokers.
You should know that Mastercraft had a long standing near-monopoly of imports of European briar and particularly Italian briar. This explains the stamping ITALY on the side of the pipe.
The stamping is as follows:
On one side it is stamped Cigar Pipe, Sparkless and on the other side it is stamped Century Old, Briar Italy. On the nose of the pipe it is stamped Perfected on one side and Reg. No. M.U. 3840 on the other side.
The measurements of the pipe are as follows: The length is 13.9 cm and the height is 3.2 cm….
…The complete disassembly of the pipe shows that the stem in ebonite has a condensation system reduced to its simplest expression here: a small aluminum tube. It should be noted that these systems don’t bring great benefits for smoking and on the contrary can add moisture and condensation. They are often the origin of disturbances in the draw of the pipe and cause of particularly unpleasant gurgle. But it should not hurt.
The details of the stamping nomenclature reflects that the origin of the pipes is Italian and are potentially made by Lorenzo…
Armed with the interesting information I went to work on the Mastercraft Rusticated Cigar-Pipe. I cleaned up the internals of the bowl parts and the shank with pipe cleaners, cotton pads and isopropyl alcohol. I scraped out the carbon inside the cone and the top half of the bowl with a Savinelli Fitsall Pipe Knife. I wiped both down with a cotton pad and alcohol. I polished the aluminum nose cone, the connector for the halves and the inner tube in the tenon with a folded piece of 220 grit sandpaper and then polished it with a 1500 grit micromesh pad. It looked much better.
 I worked some Before & After Restoration Balm into the surface of the briar with my fingertips and a horsehair shoe brush. The product works to clean, renew and preserve briar. I let it sit on the briar for 15 minutes then buffed it off with a soft cotton cloth. The aluminum nose cone and the briar look very good at this point in the process.
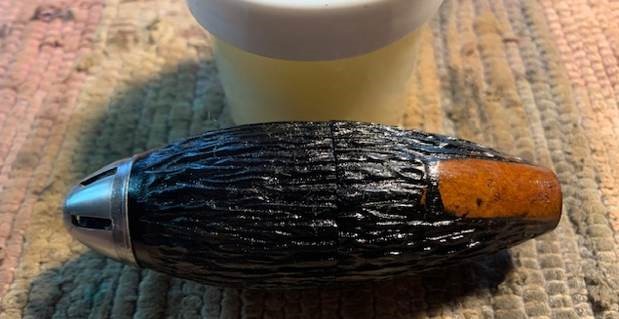
 I sanded out the tooth marks on the top and underside of the stem with 220 grit sandpaper. I started the polishing of the stem with 400 grit wet dry sandpaper. I wiped the stem down with Obsidian Oil.
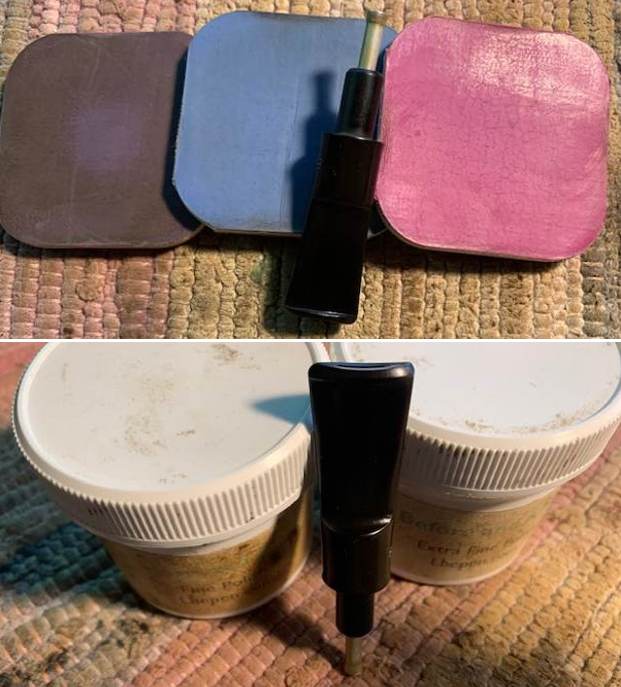
  I polished the stem with micromesh sanding pads – dry sanding with 1500-12000 grit pads and wiping it down after each pad with some Obsidian Oil. I polished it further with Before & After Stem Polish – both Fine and Extra Fine. I gave it a final coat of Obsidian Oil and laid it aside to dry.
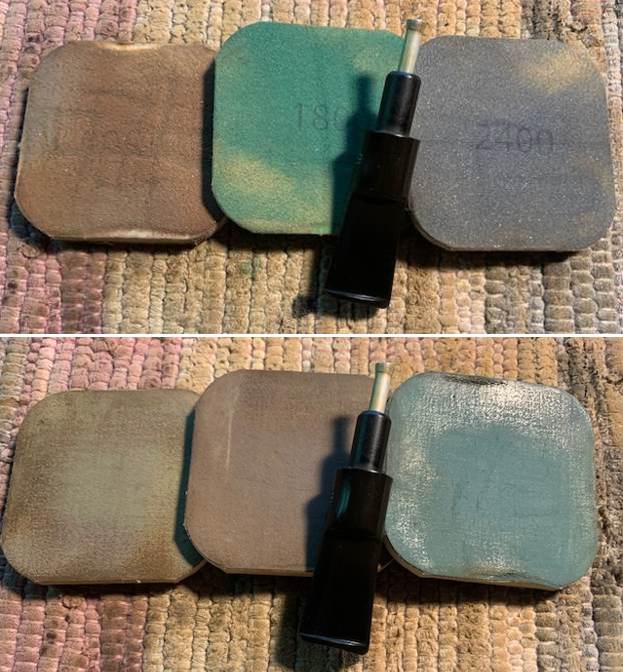
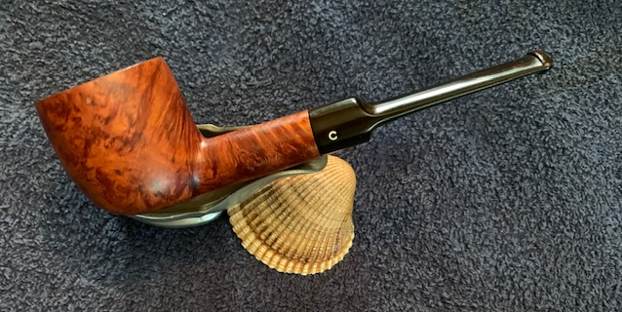
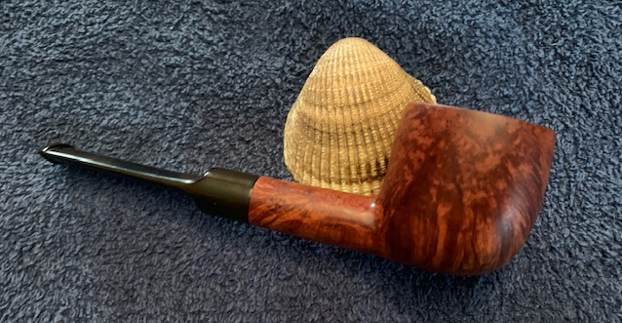
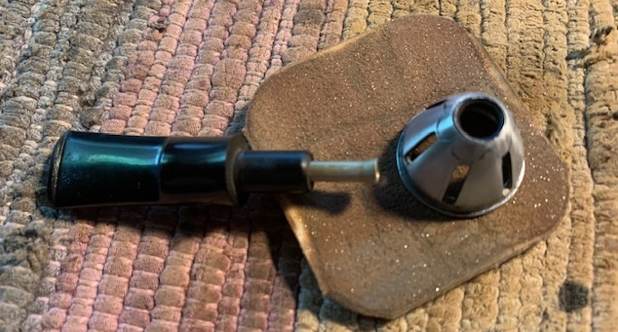
 As always I am excited to finish a pipe that I am working on. I put the rusticated MasterCraft Patented Sparkless Cigar Pipe back together and buffed it with Blue Diamond on the buffing wheel. I gave the bowl and the stem multiple coats of carnauba wax. I buffed the pipe with a clean buffing pad and hand buffed it to raise the shine. It is fun to see what the polished bowl looks like with the colours shining through the various carving in the rustication along with the vulcanite saddle stem. It is beautiful, light and unique pipe. Have a look at it with the photos below. The dimensions are Length: 5 inches, Height: 1 inch, Outside diameter of the bowl: 1 1/8 inches, Chamber diameter: ¾ of an inch. The weight of the pipe is 37 grams/1.31 ounces. It is a beautiful pipe and one that will be on the rebornpipes store in the American Pipe Makers section. If you are interested in adding it to your collection let me know. Thanks for walking through the restoration with me as I worked over this pipe. Thanks to each of you who are reading this blog. I want to keep reminding us of the fact that we are not pipe owners; we are pipemen and women who hold our pipes in trust until they pass on into the trust of the next pipeman or woman.