Blog by Steve Laug
 It seems like just a few weeks ago I was contacted by an older gentleman about purchasing his pipe collection. He sent me the photos and I was amazed at what I saw. He had Dunhill pipes, BBB pipes, Orlik pipes, Barclay Rex Pipes, a couple of Meerschaums and a whole lot of other pipes. All I could say as I looked at the pipes was what a collection it was. We negotiated a deal and I think we both walked away quite happy with the exchange.
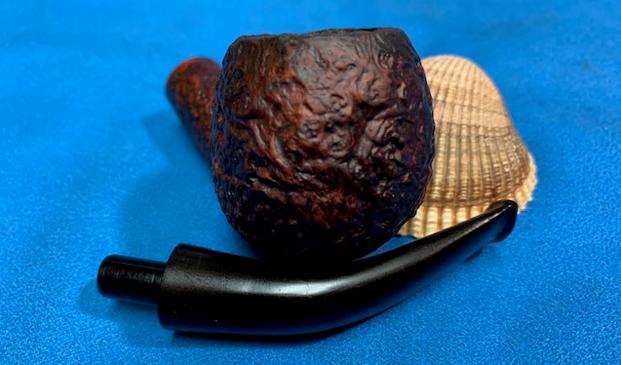
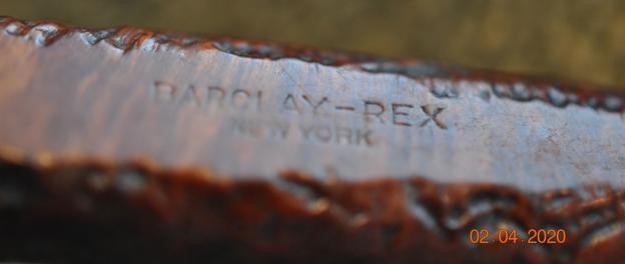
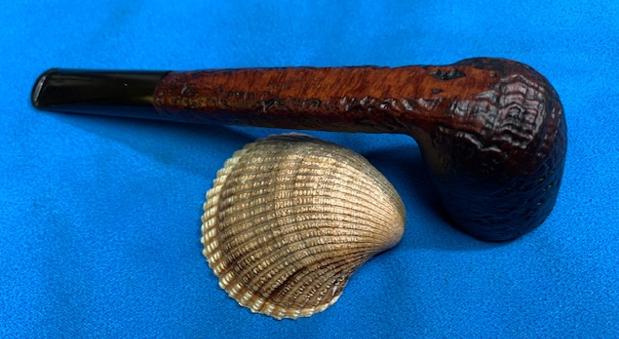
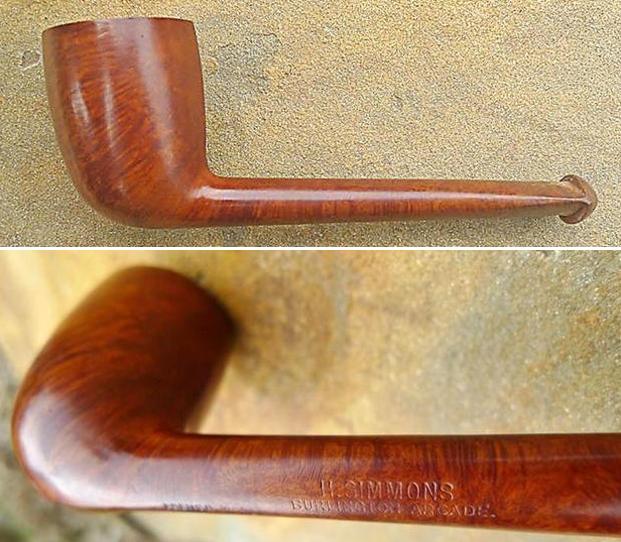
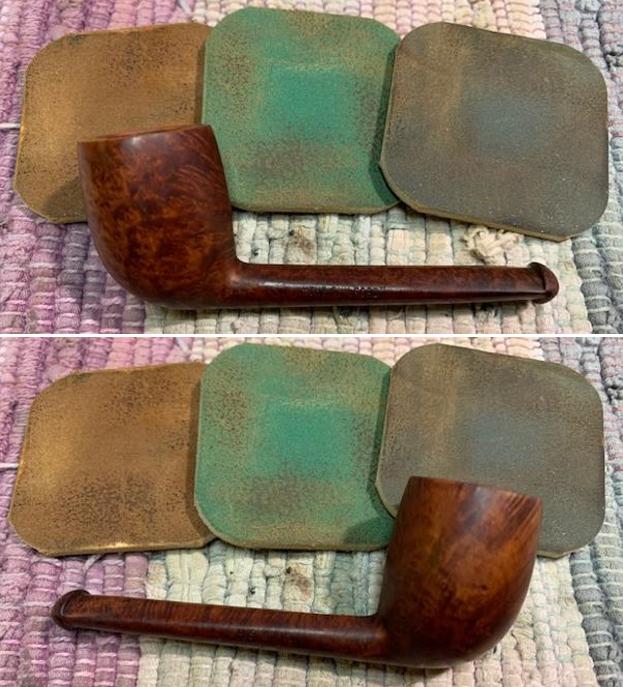
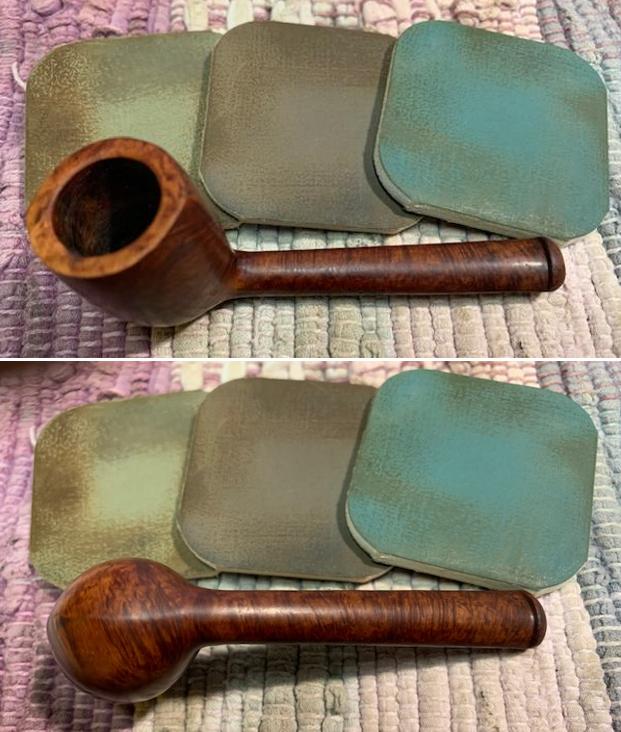
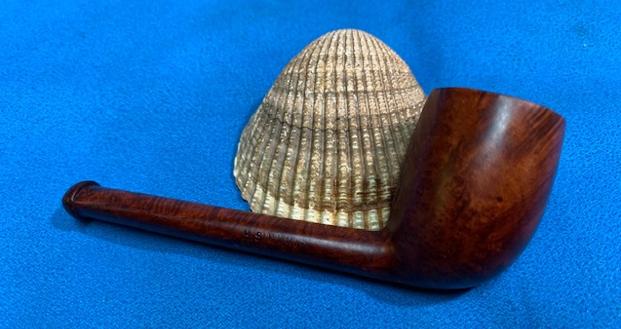
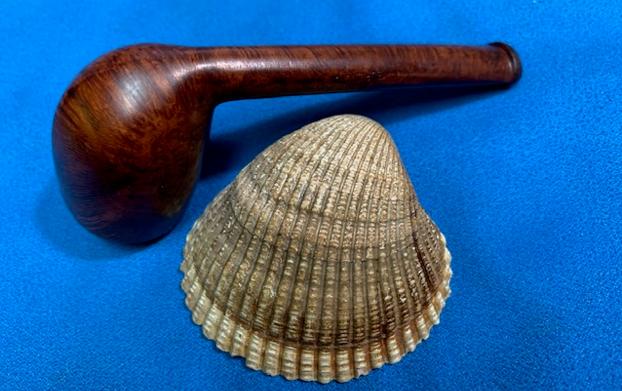
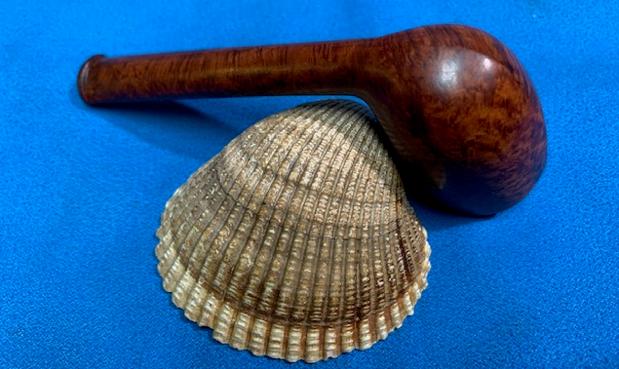
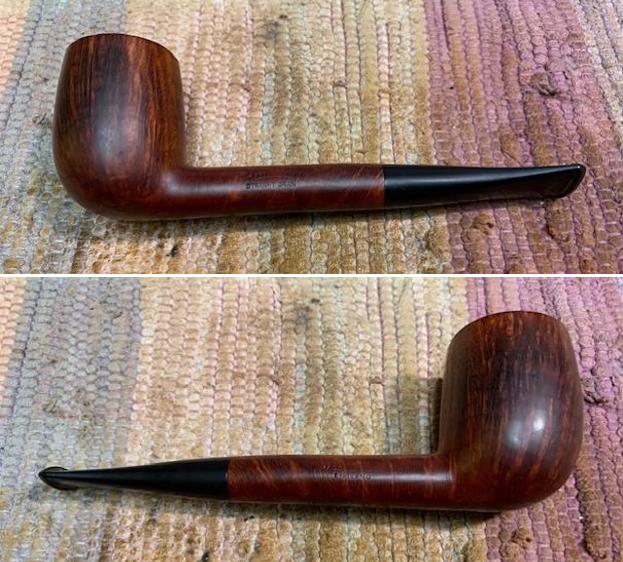
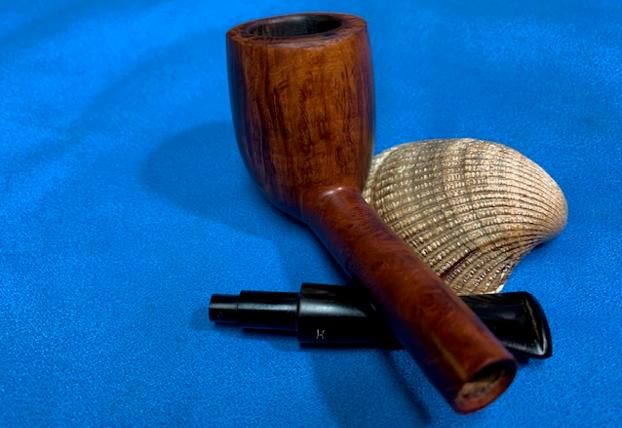
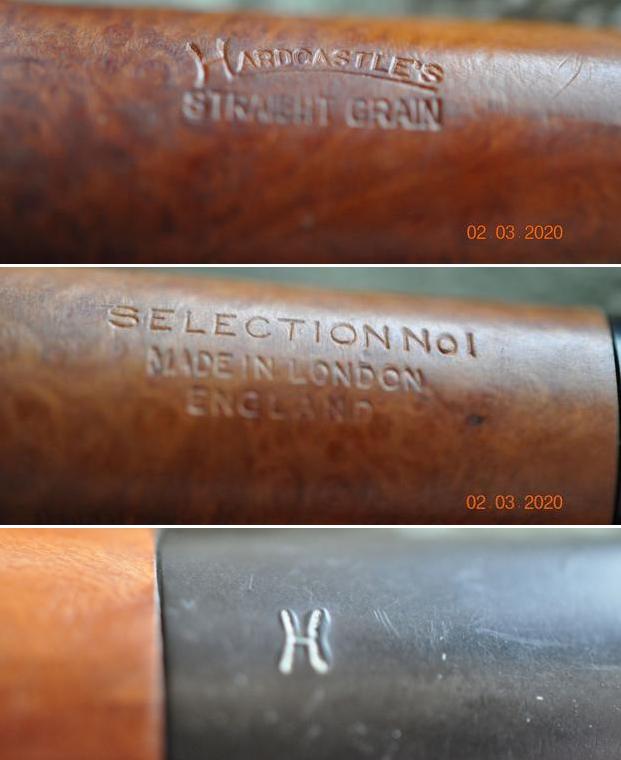
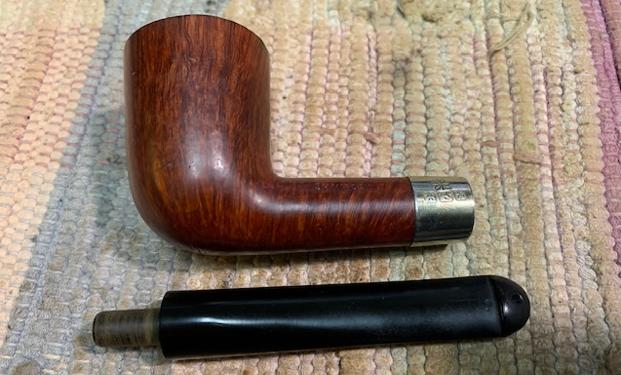
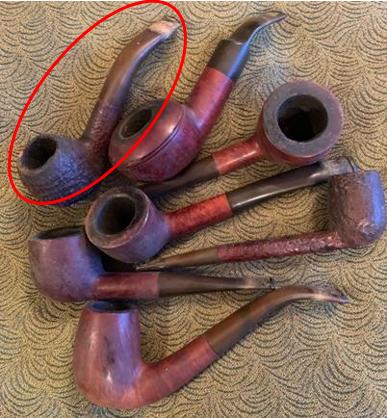
You have seen the work we have done on the Dunhills, Hardcastles, H. Simmons all briar billiard and BBB pipes from the lot but there are still more. The above photo shows all of the Barclay-Rex pipes that were purchased from the New York City shop by the fellow we bought the collection from. It is one of two sandblast pipes that he had and it is a Canadian shaped pipe.
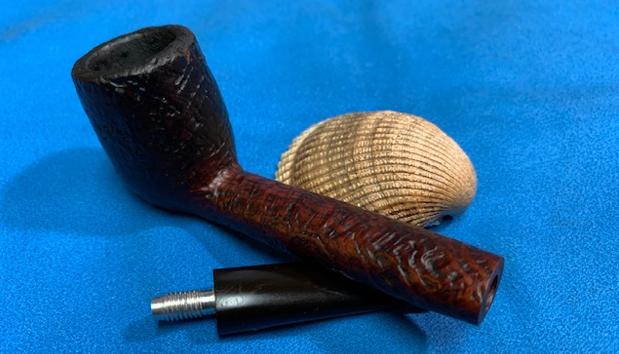
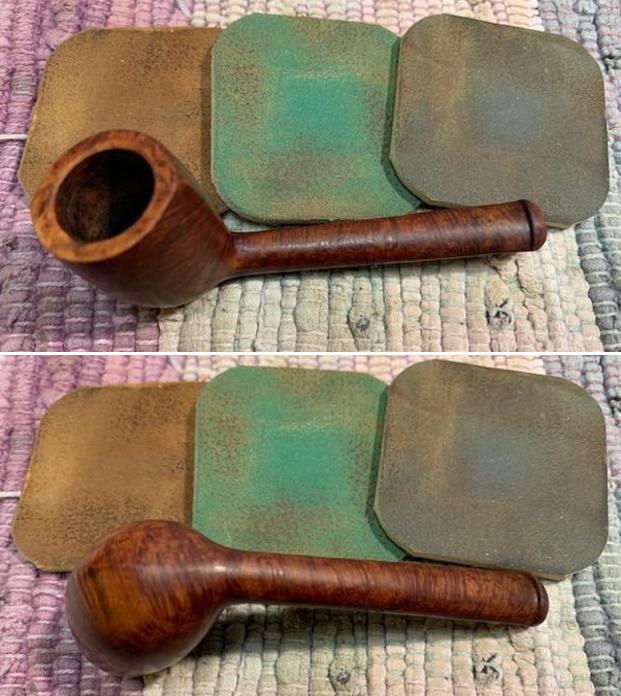
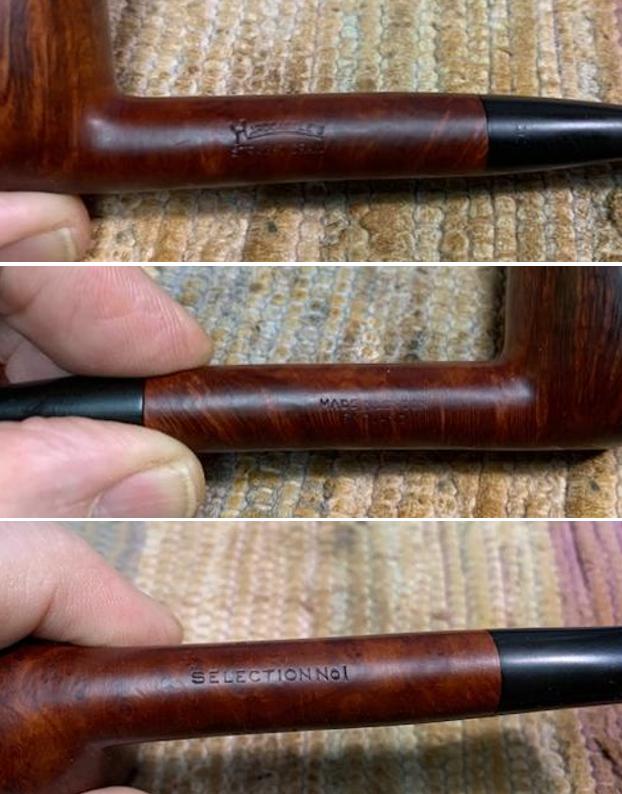
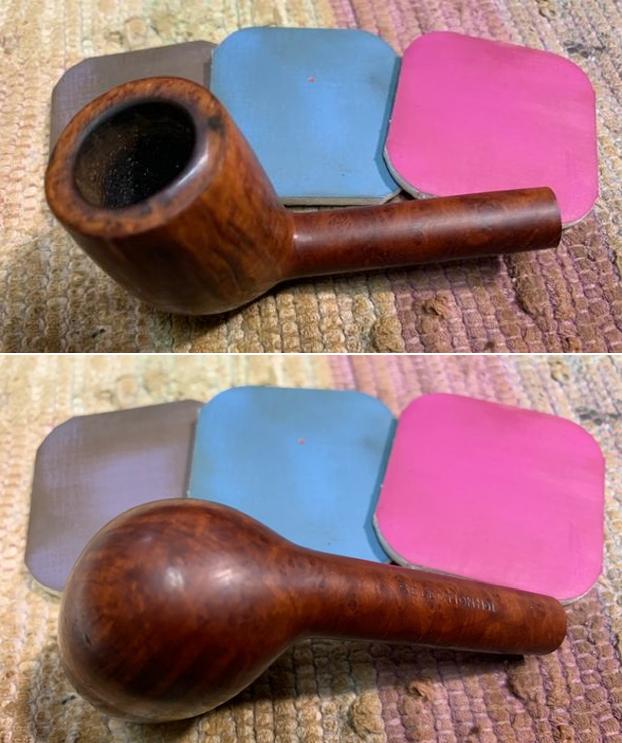
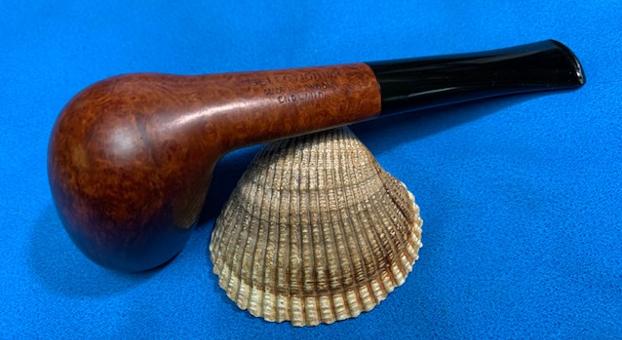
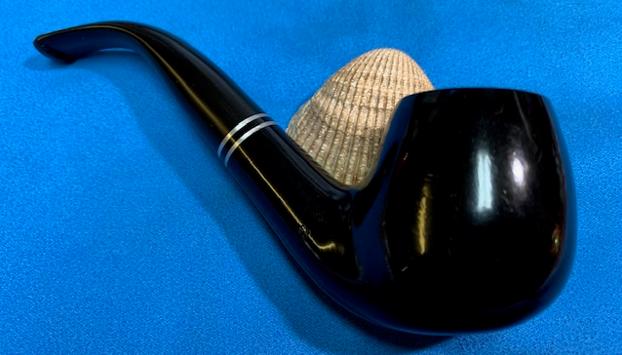
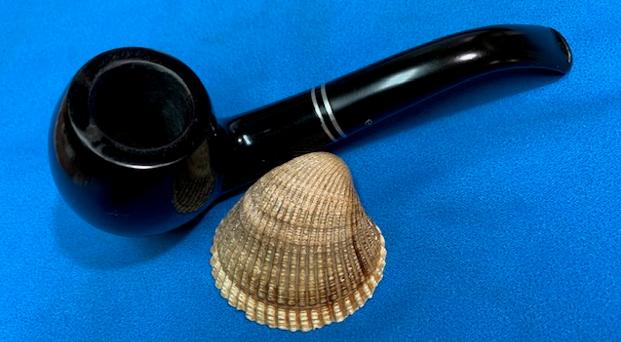
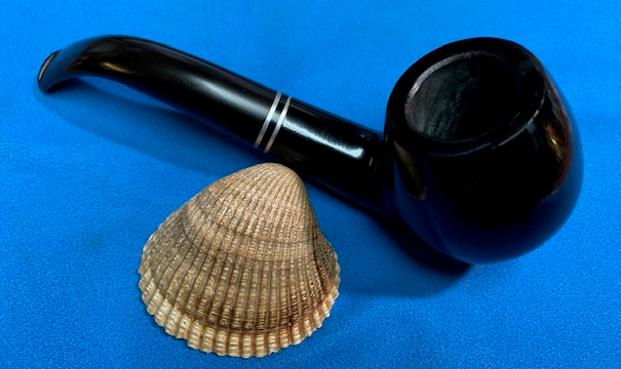
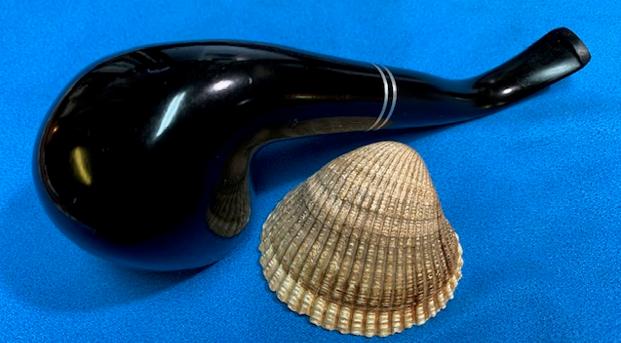
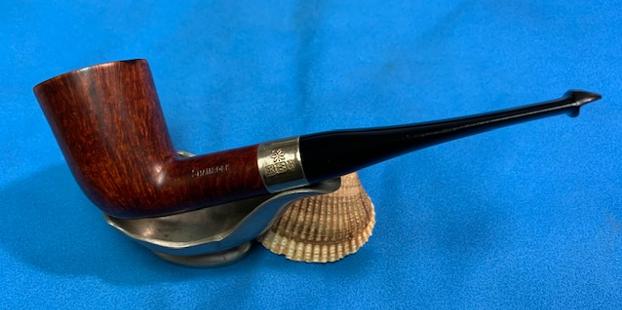
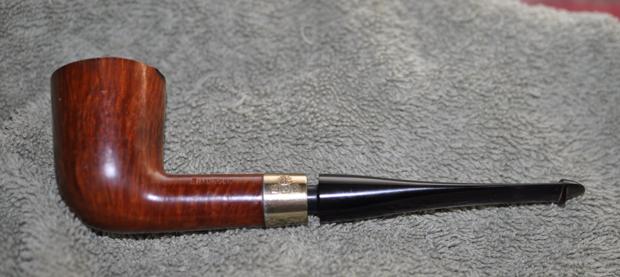
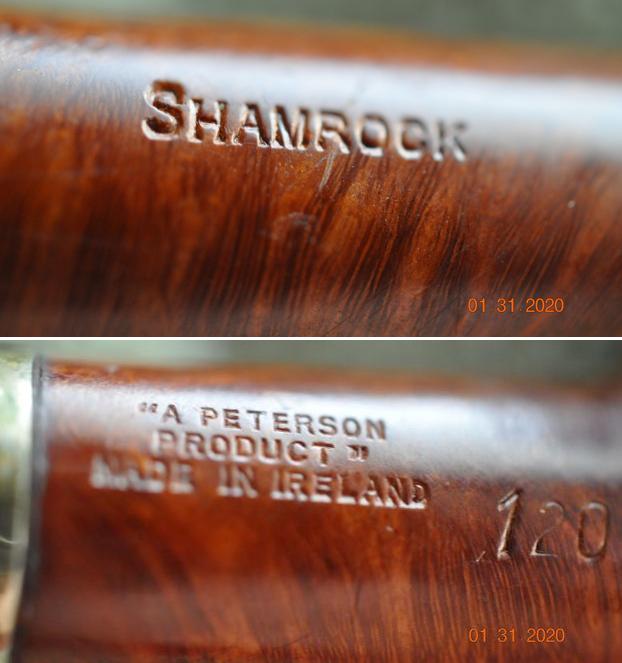
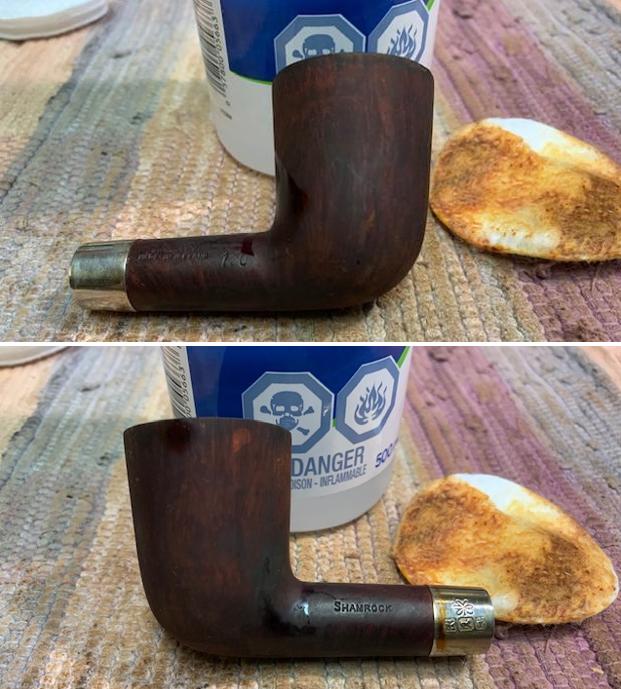
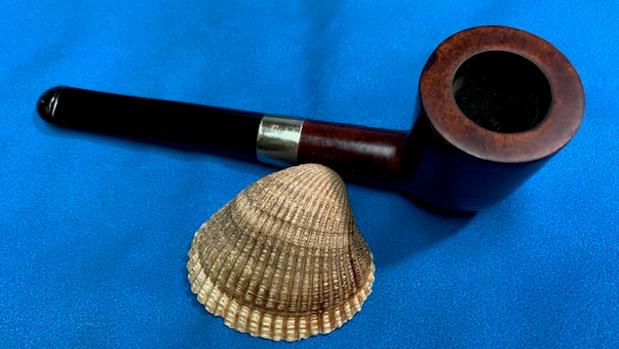
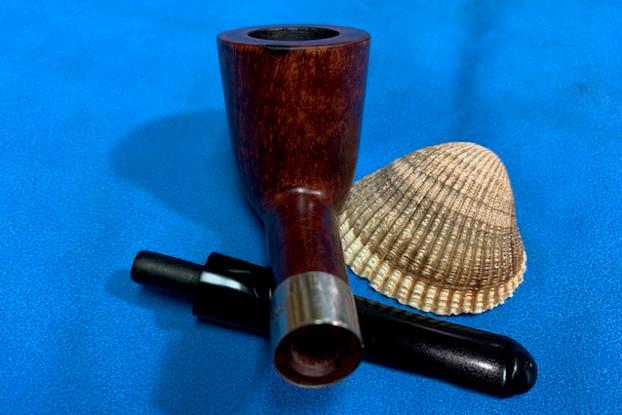
I have worked on several Barclay-Rex pipes in the past but this one was unique in many ways that will become evident in the photos below. When I looked at the various Barclay-Rex Pipes I decided to work on this apple. You can imagine the surprise that I had when I took it out of the box and look at the stamping expecting to see BARCLAY-REX New York and saw something totally different. This pipe is stamped on a smooth panel on the underside of the shank and reads Barling’s [arched over] Make [over] “Ye Olde Wood” [over]406 on the heel of the bowl. To the right of that it is stamped EXEL [over] Fossil. That is followed by Made in England (two lines) followed by T.V.F. (The Very Finest). The stamping is clear and readable and I was utterly surprised. The stem is stamped with remnants of the Barling Cross on the top of the taper stem.
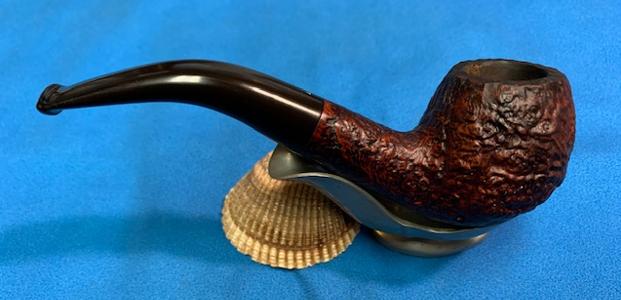
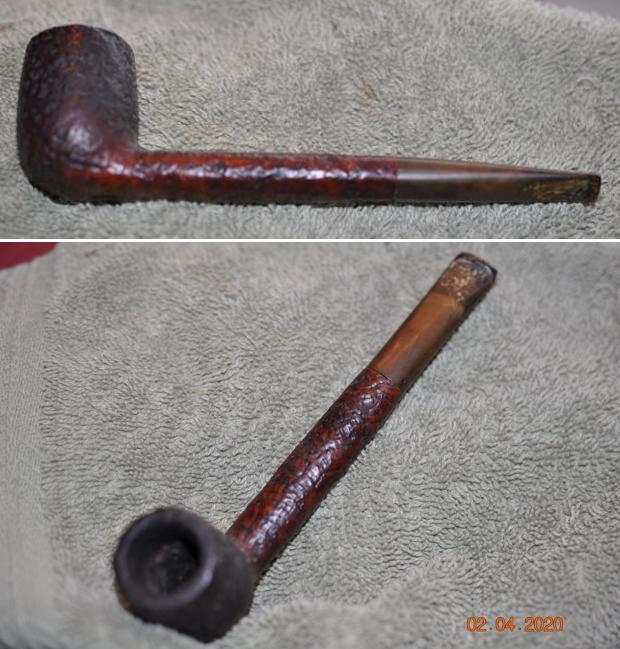
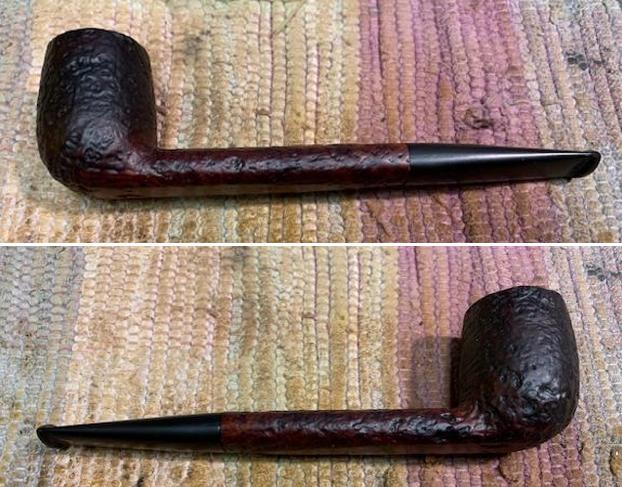
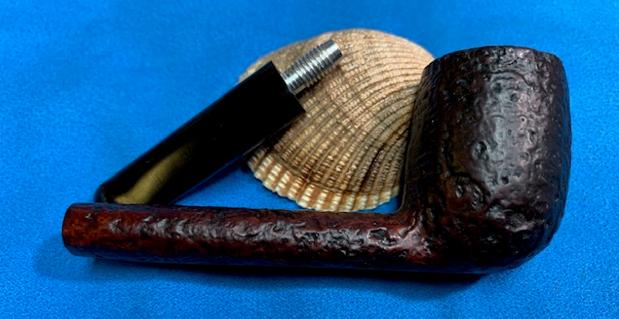
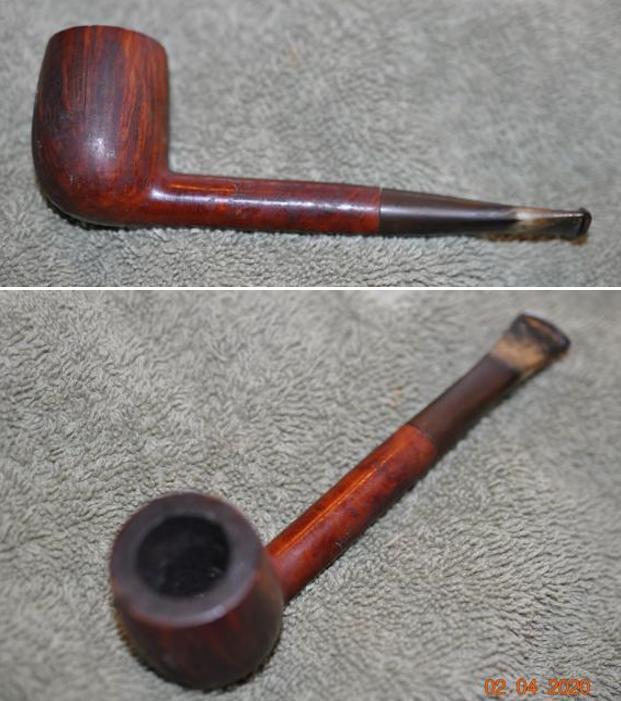
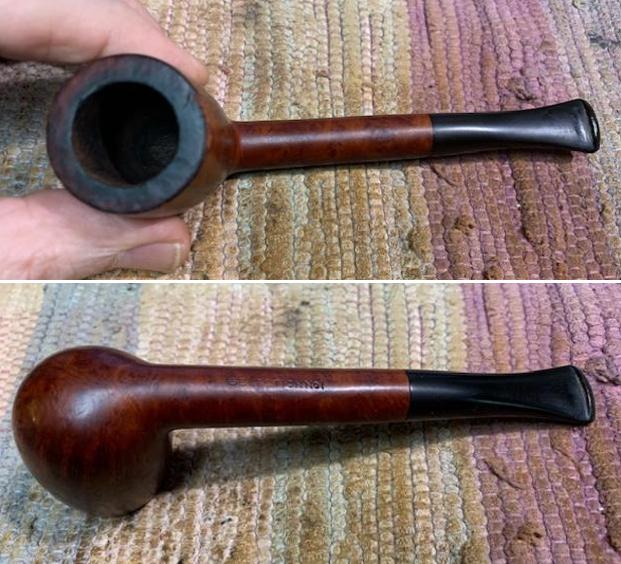
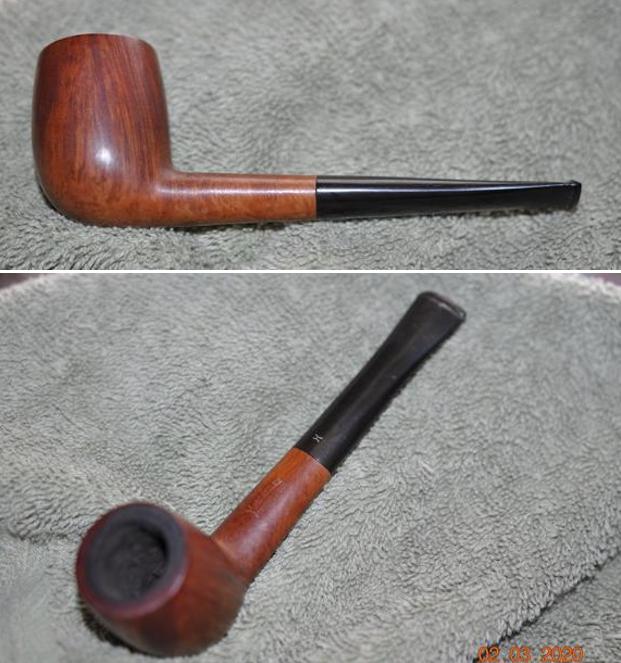
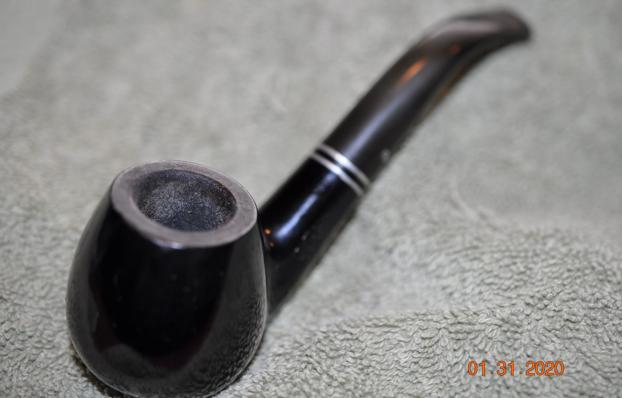
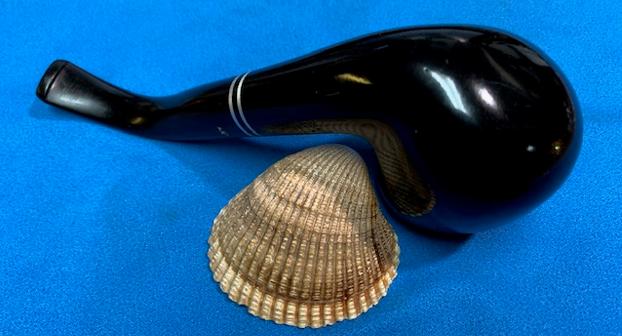
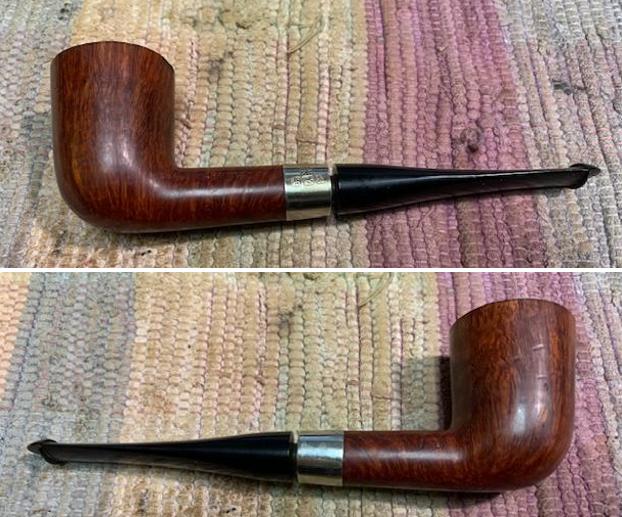
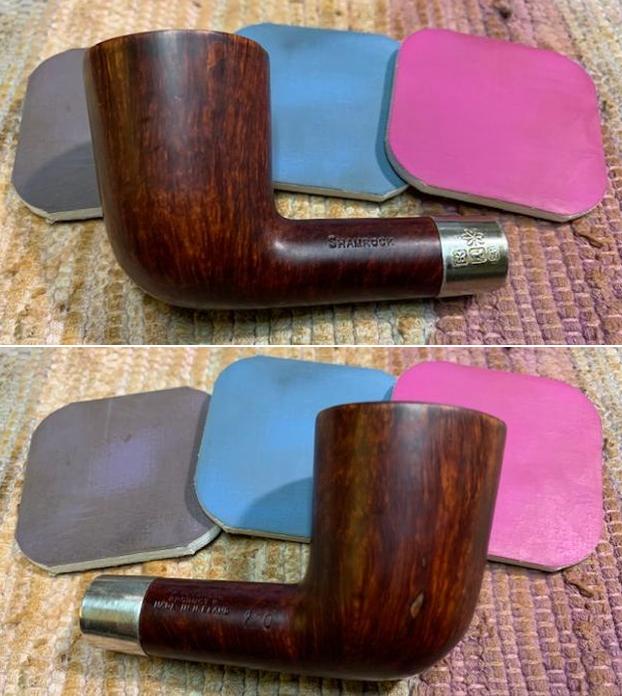
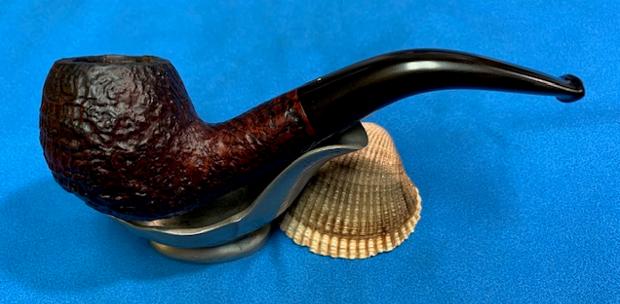
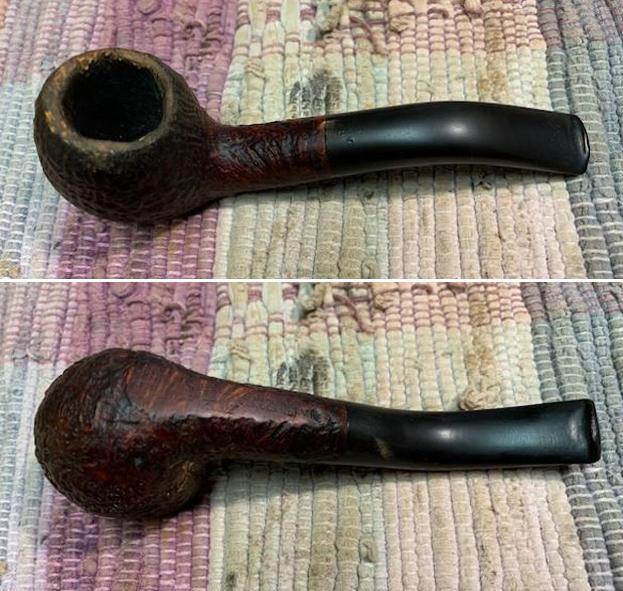
Jeff took some photos of the Barling’s Make Ye Olde Wood Fossil EXEL 406 before he worked his magic in cleaning up the pipe. It is a an interesting pipe with a lot of potential and what appears to be a great sandblast under the grime and debris of the years.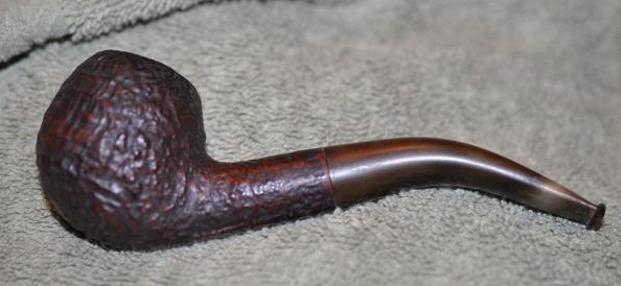
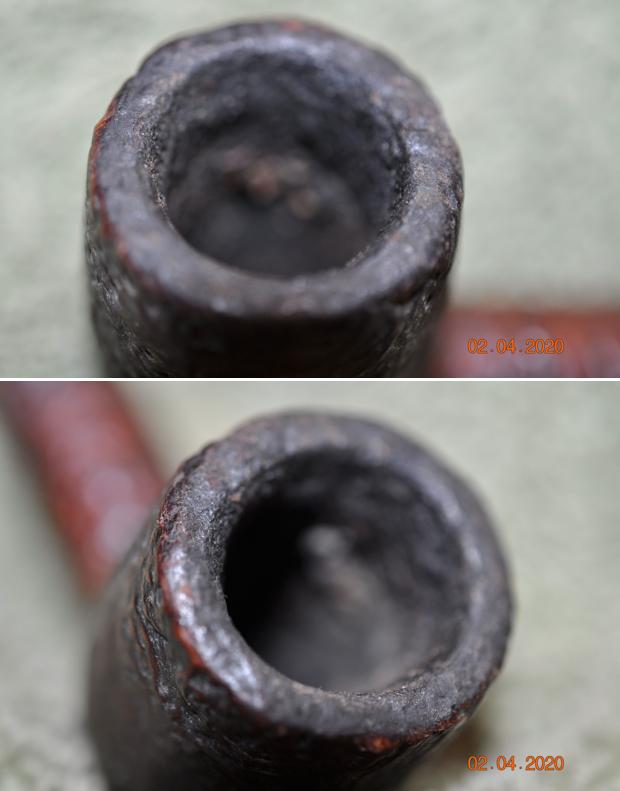
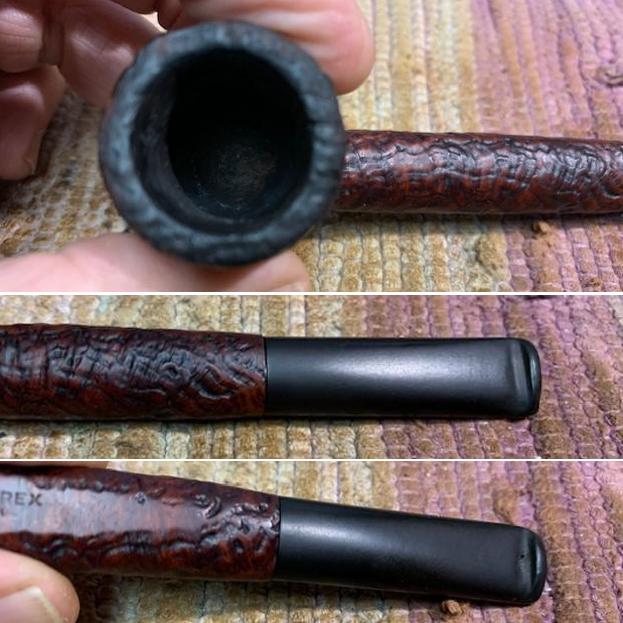
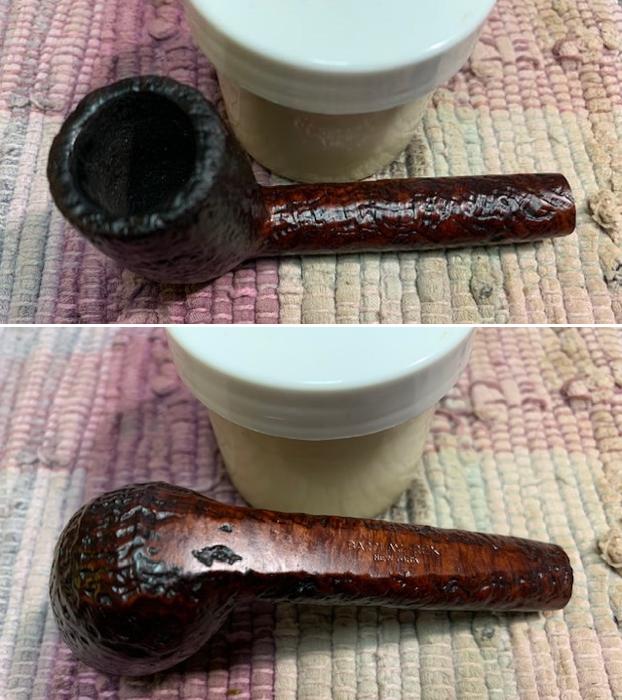
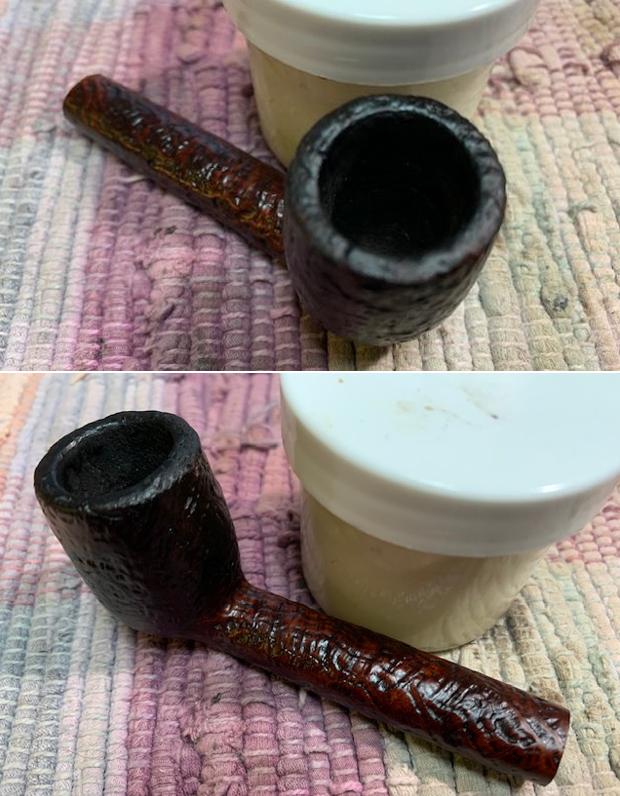
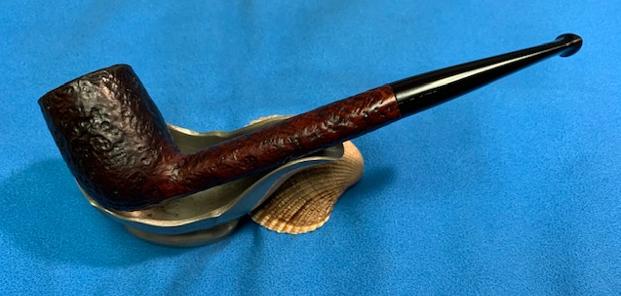
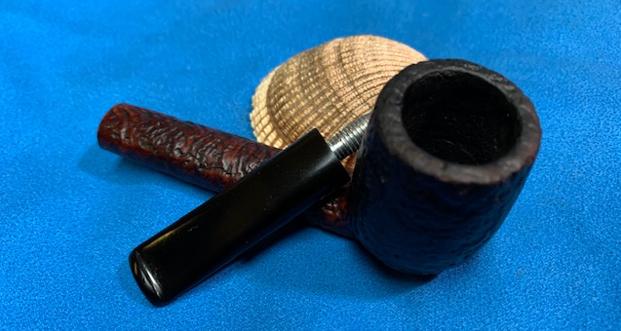
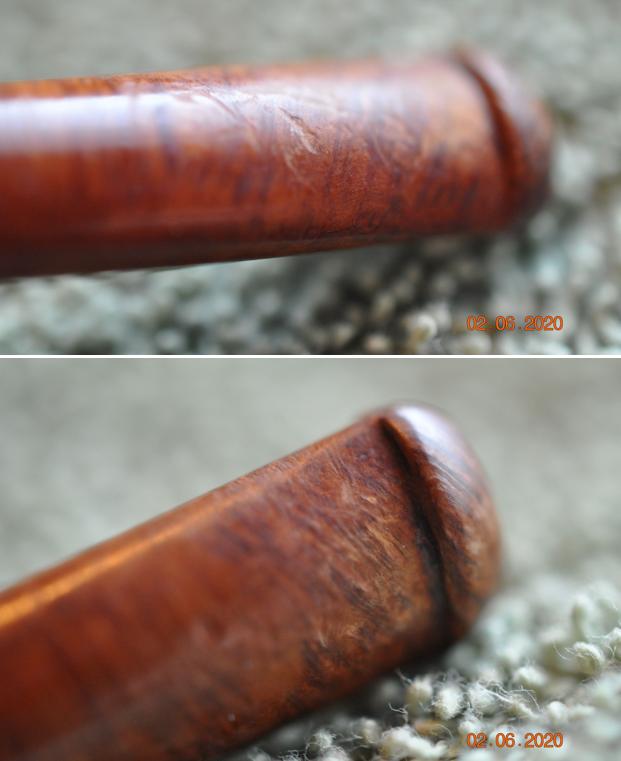
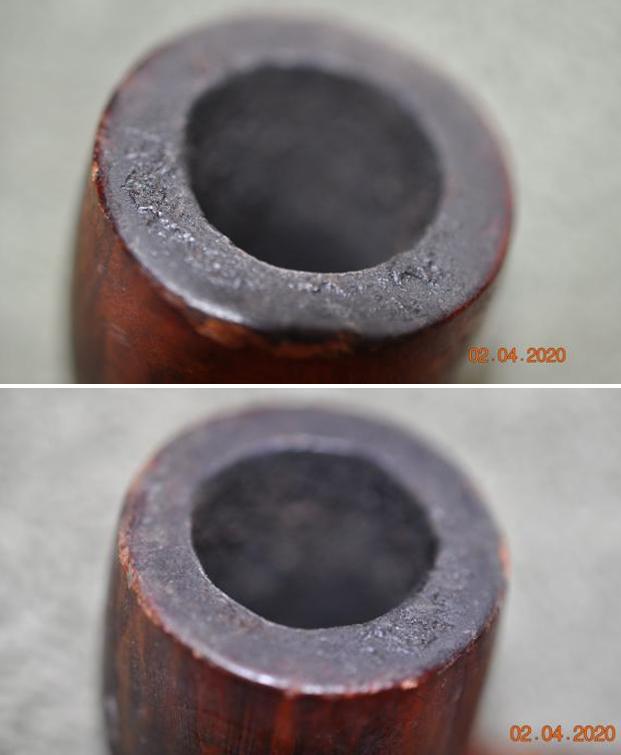
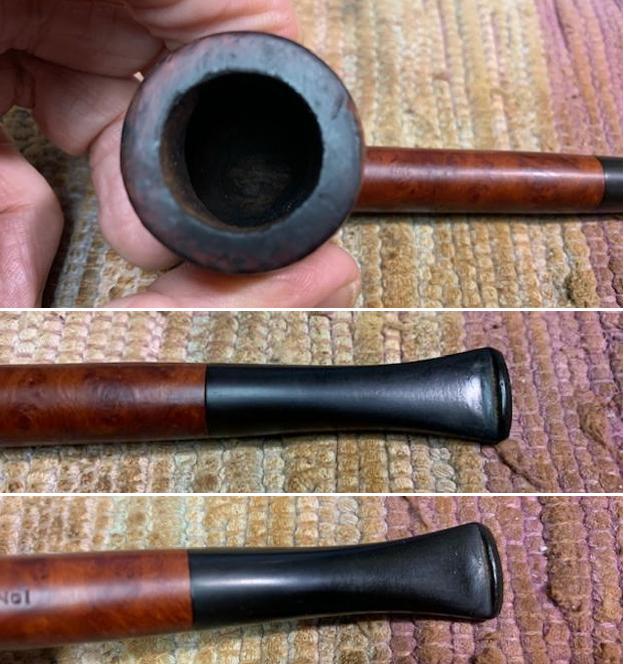
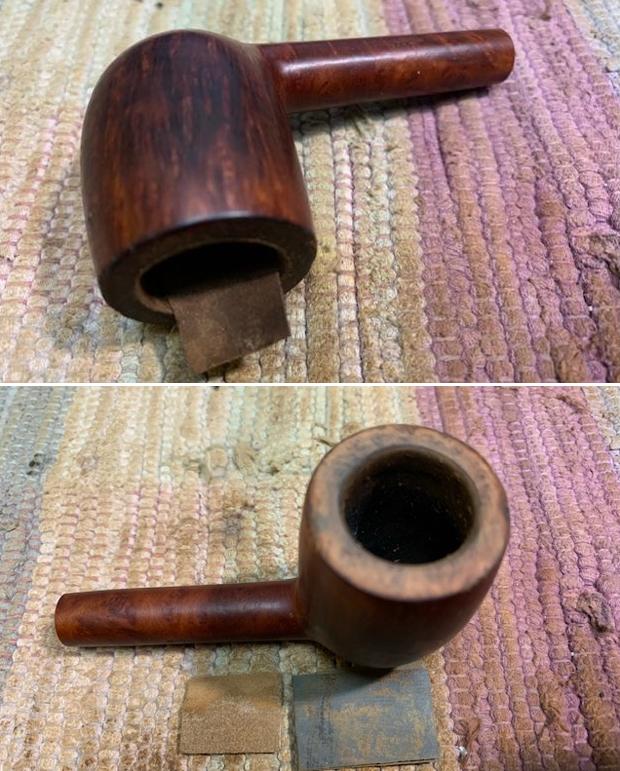
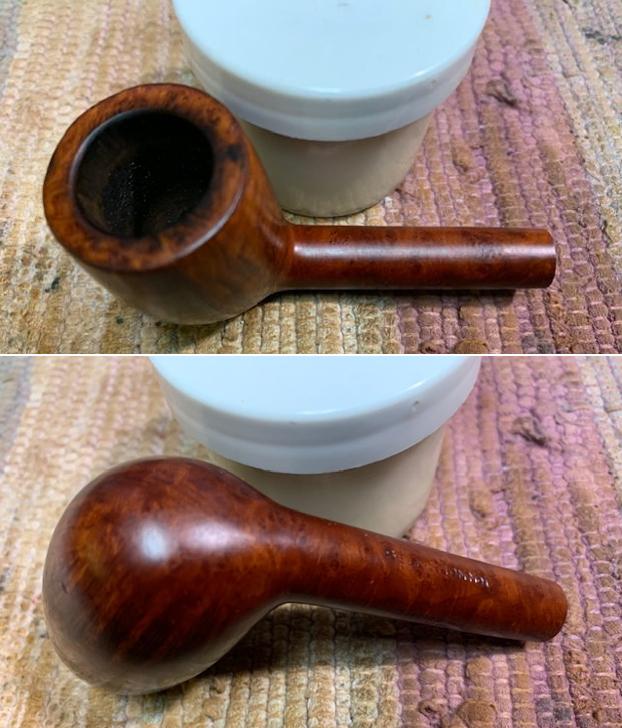
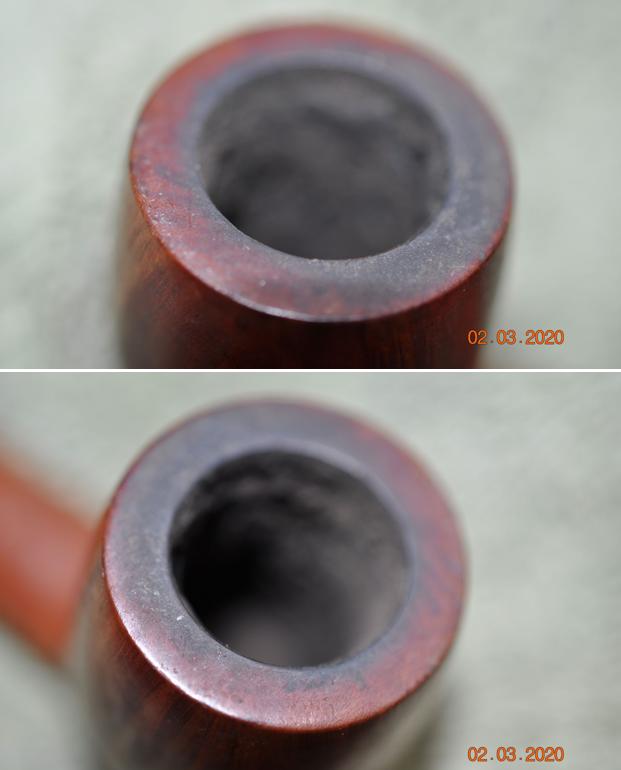
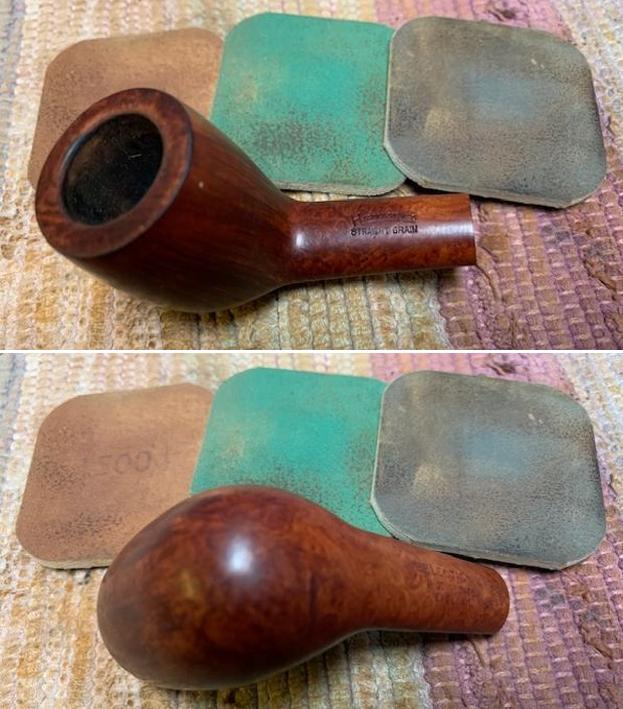
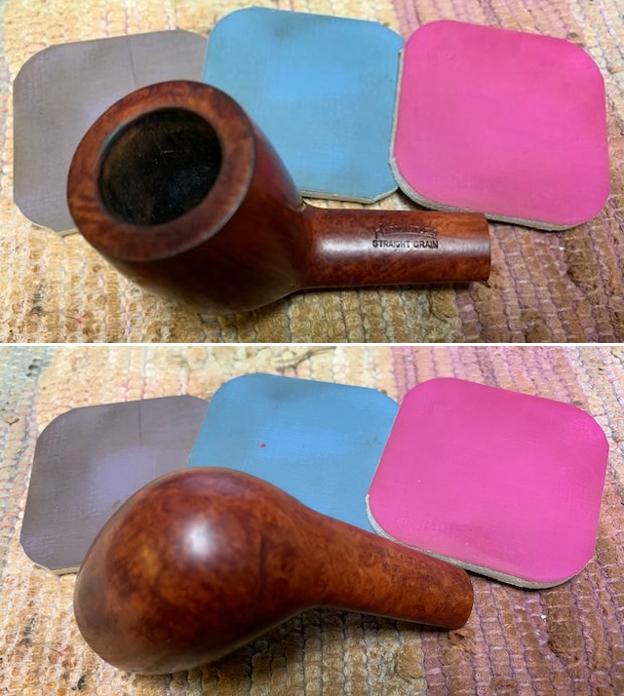
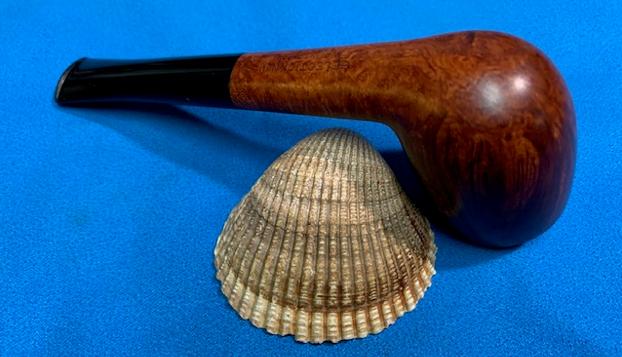
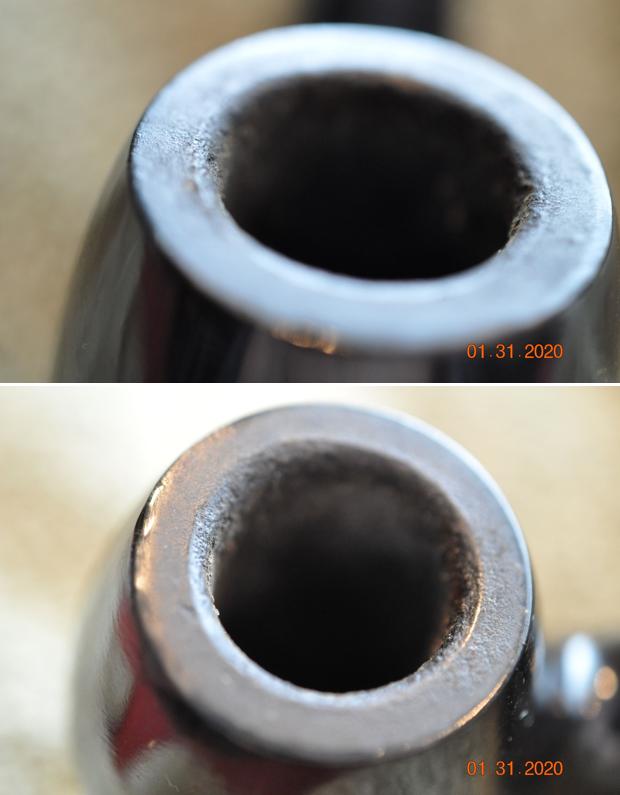
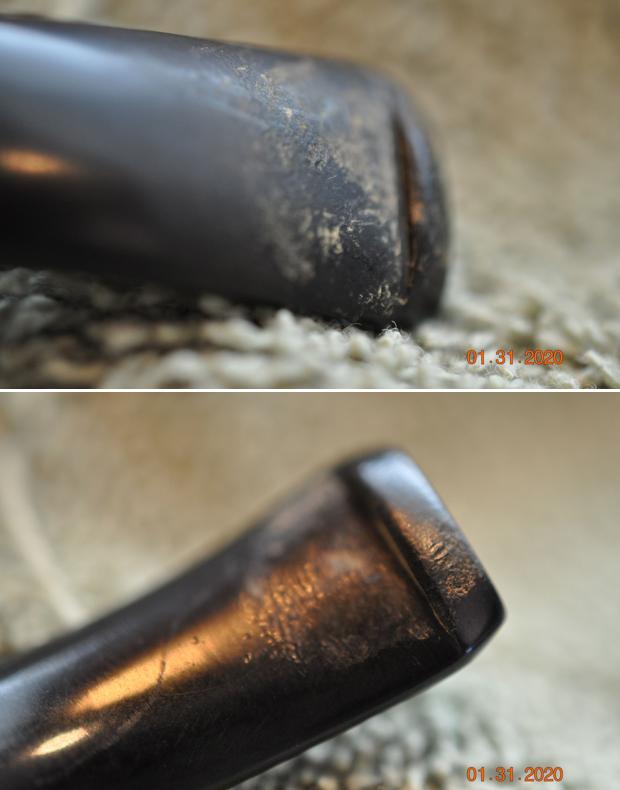
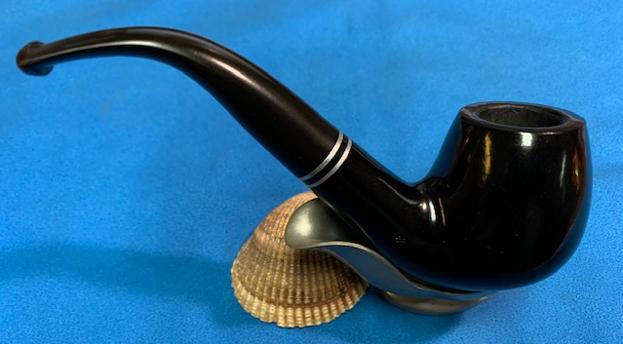
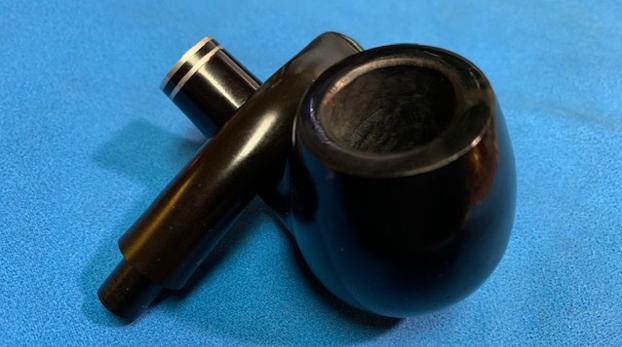
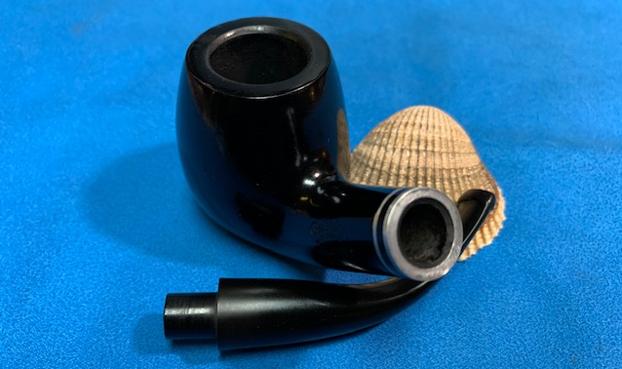
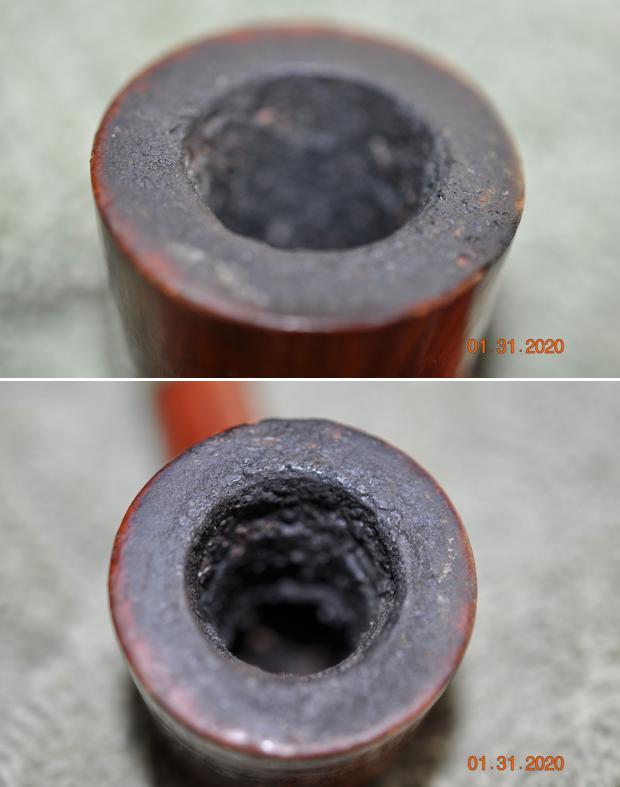
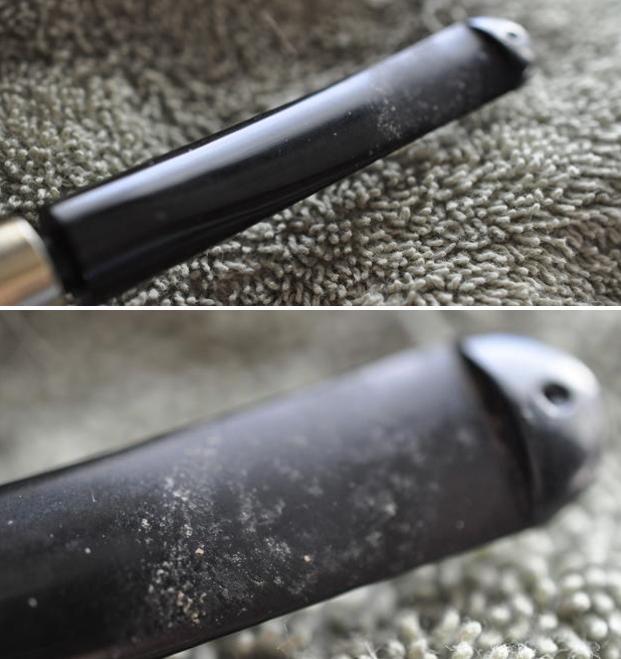
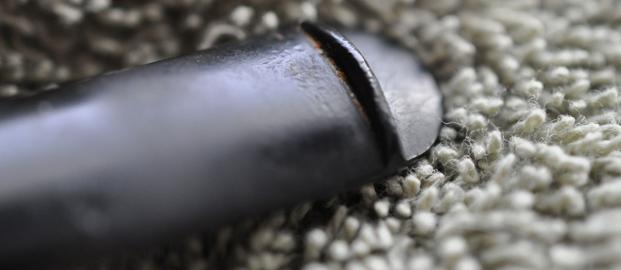
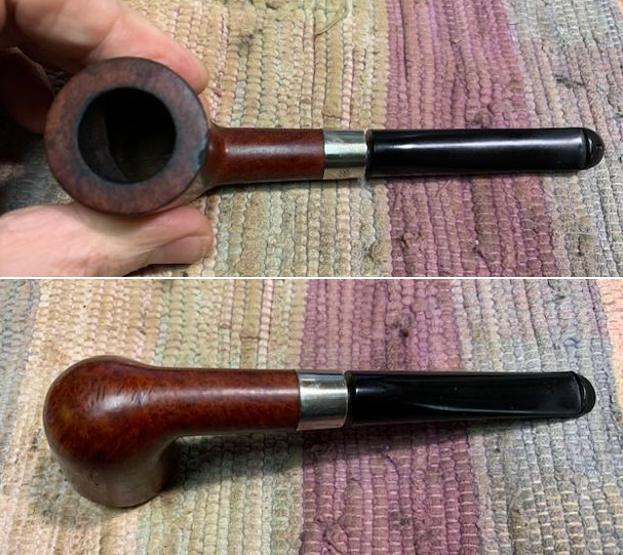
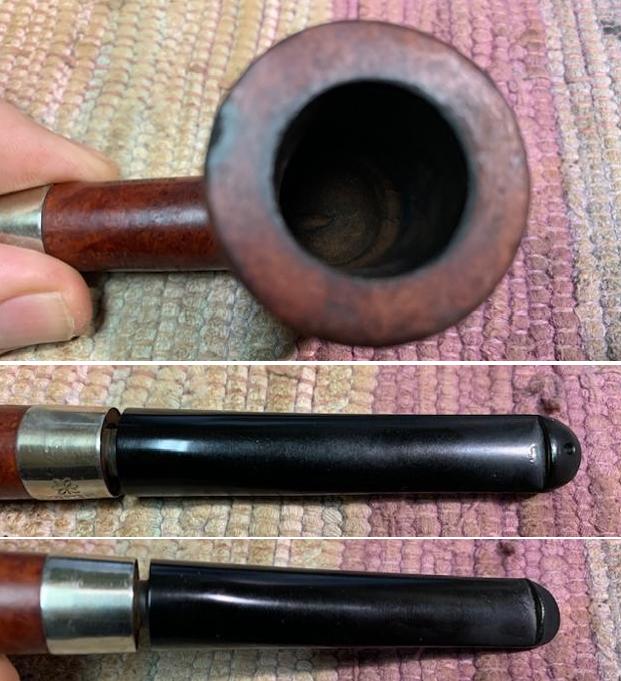
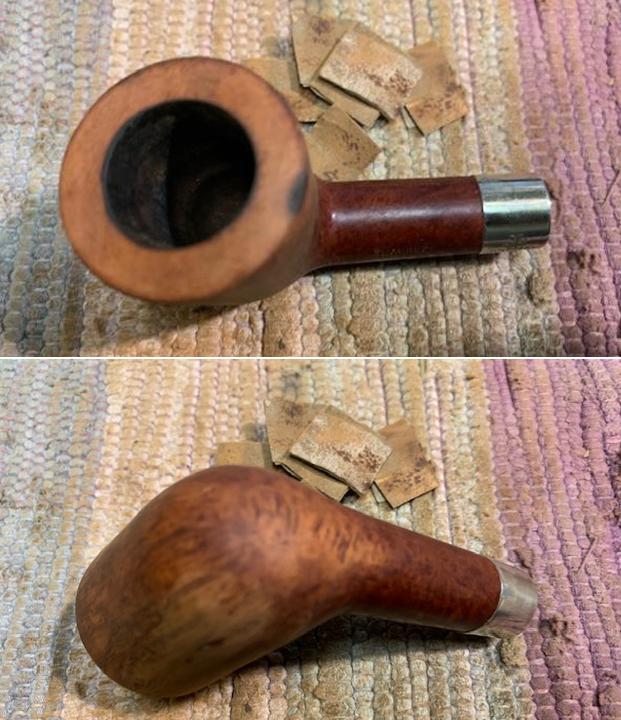
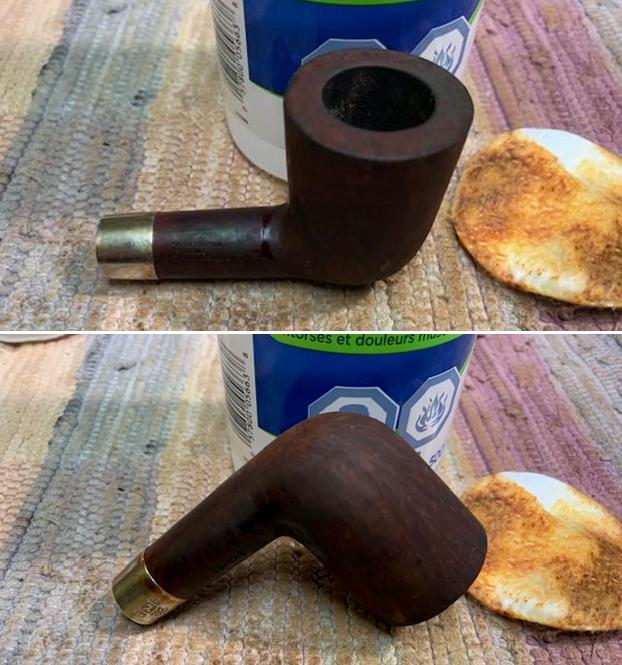
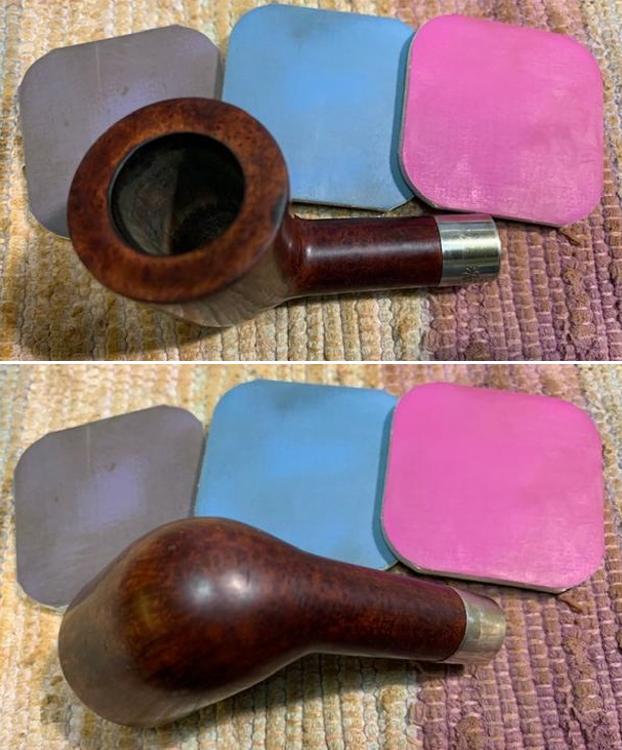
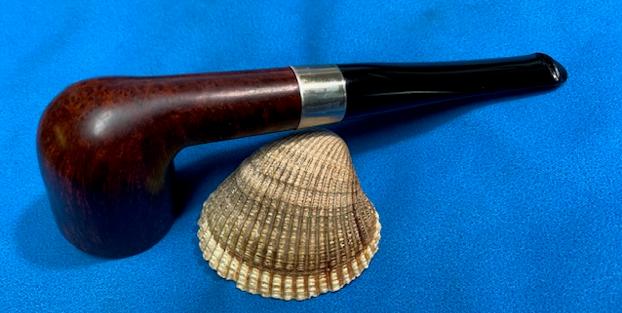
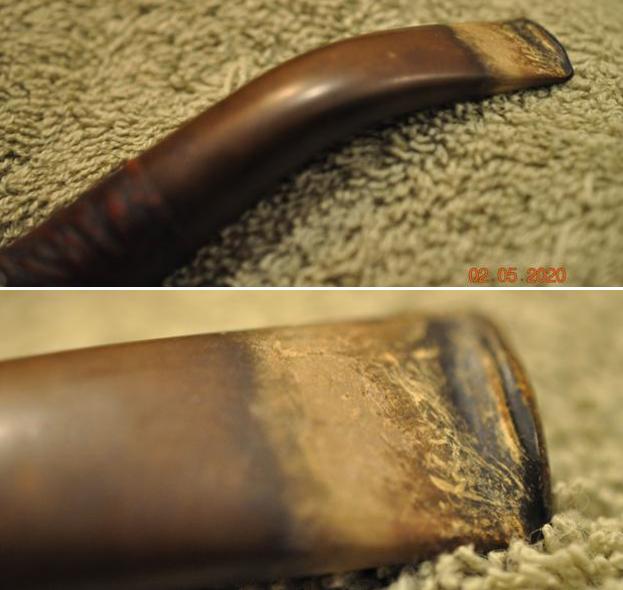
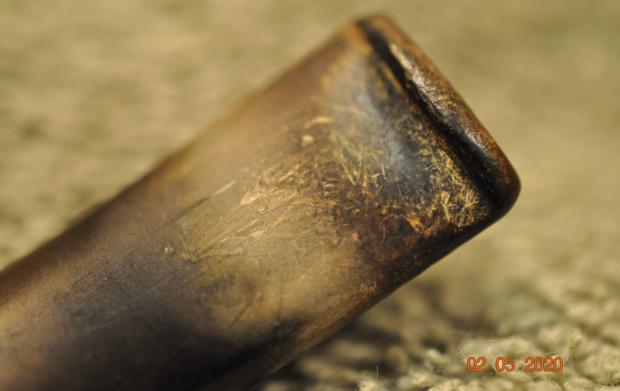
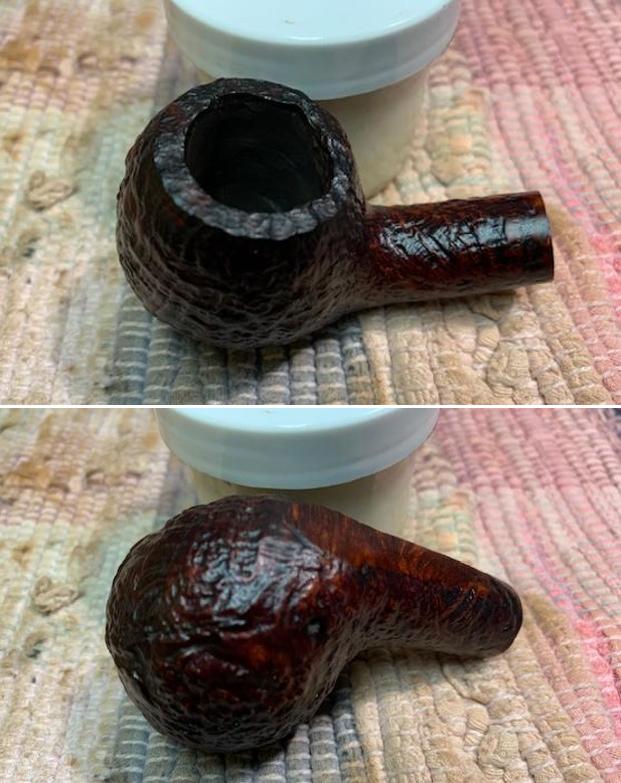
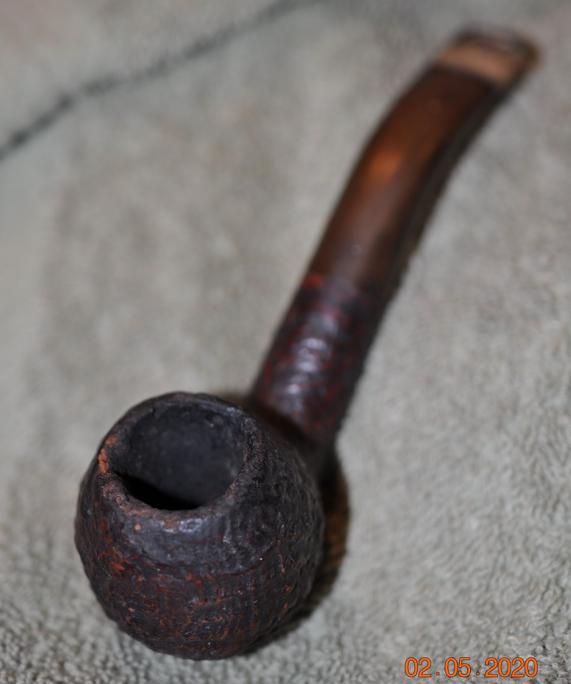 Jeff took photos of the bowl and rim top to show the thickness of the cake in the bowl and the thick lava on the rim top. The rim looks to be heavily damaged under the lava on the top and the inner and outer edges. It really is a mess. He took photos of the top and underside of the vulcanite stem showing the tooth marks, chatter and wear on the stem and button.
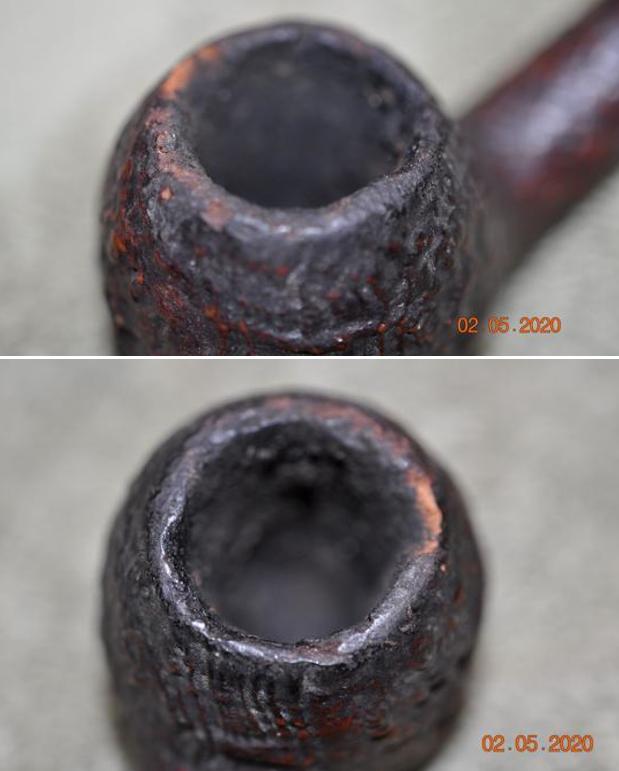
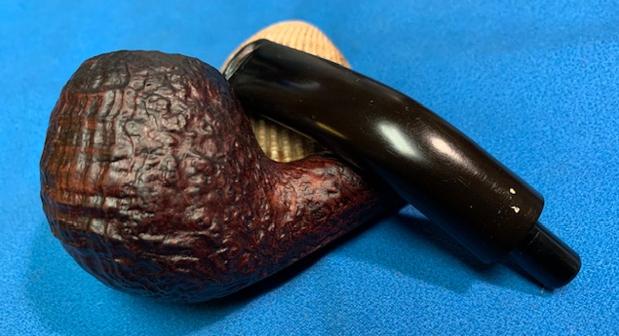
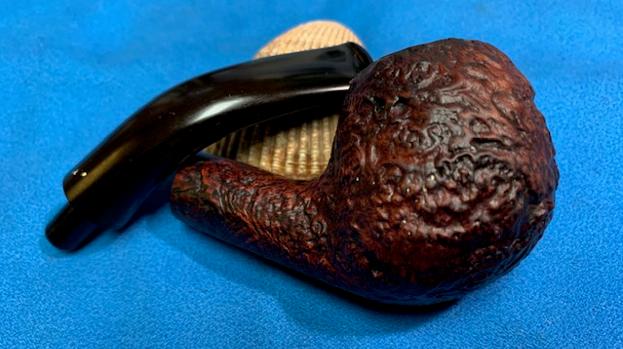
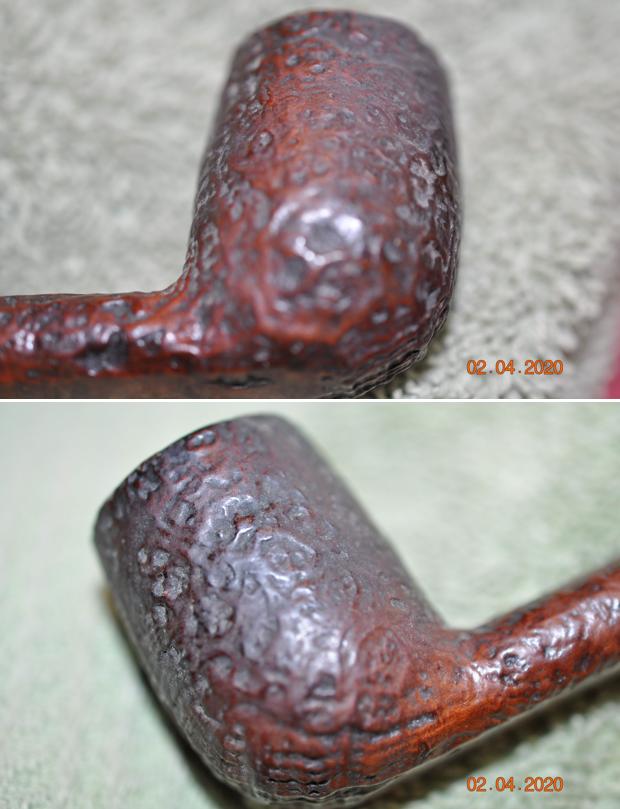
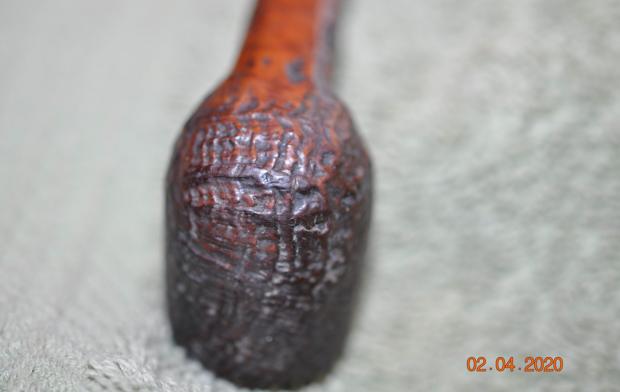
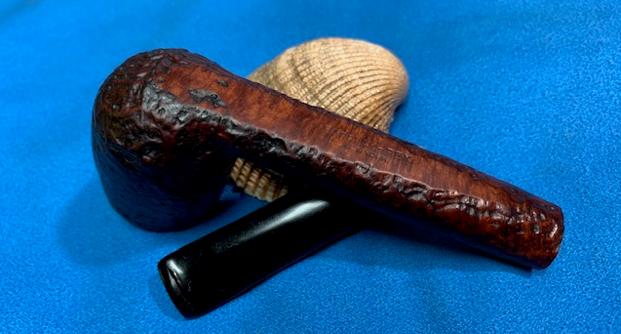
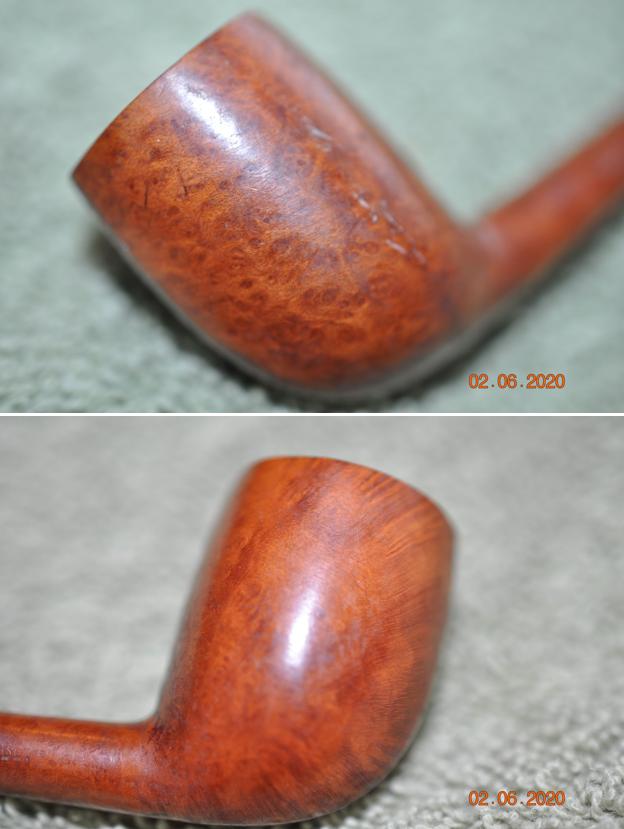
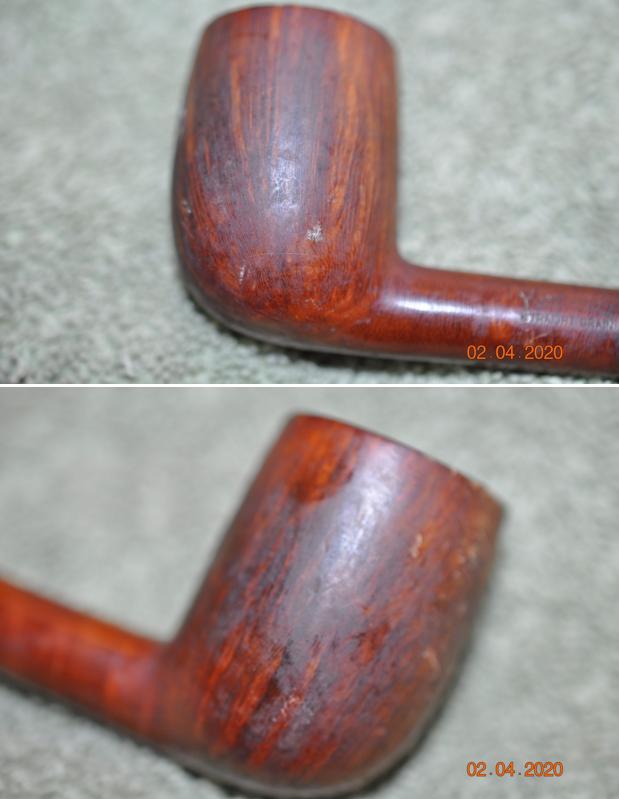
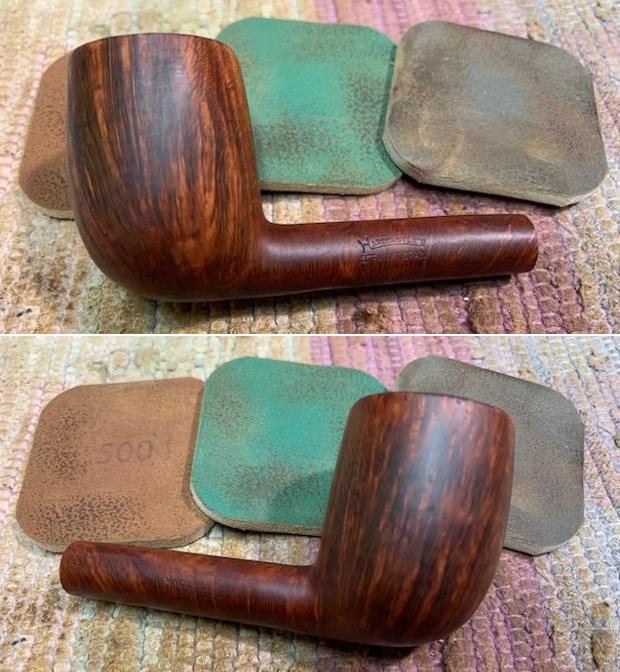
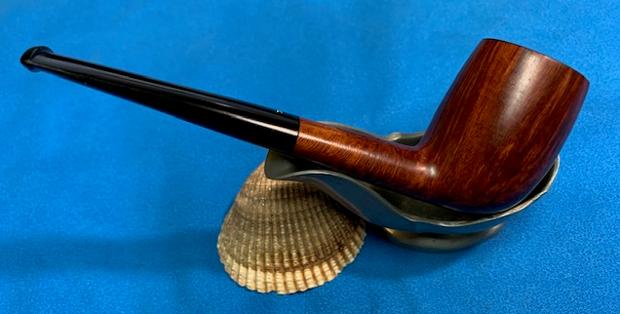
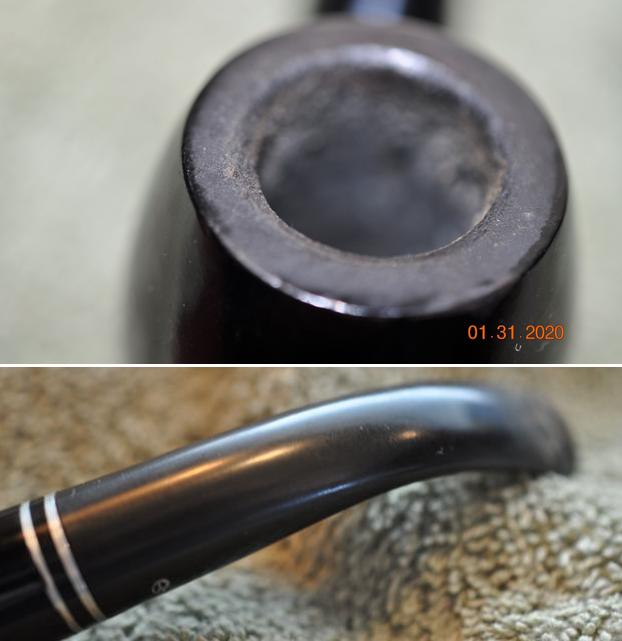
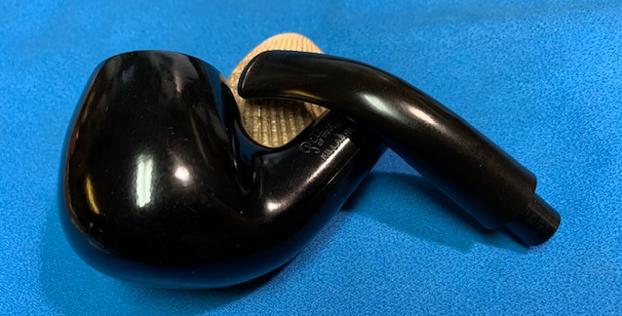
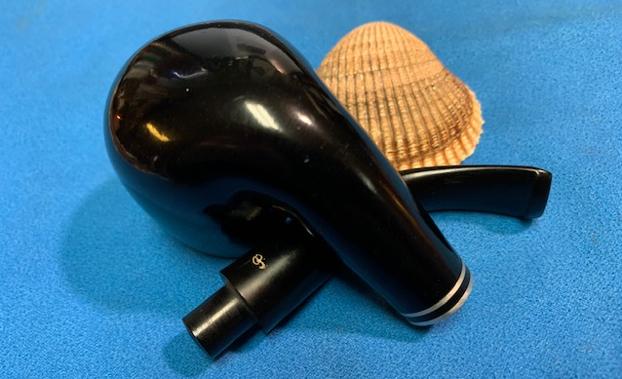
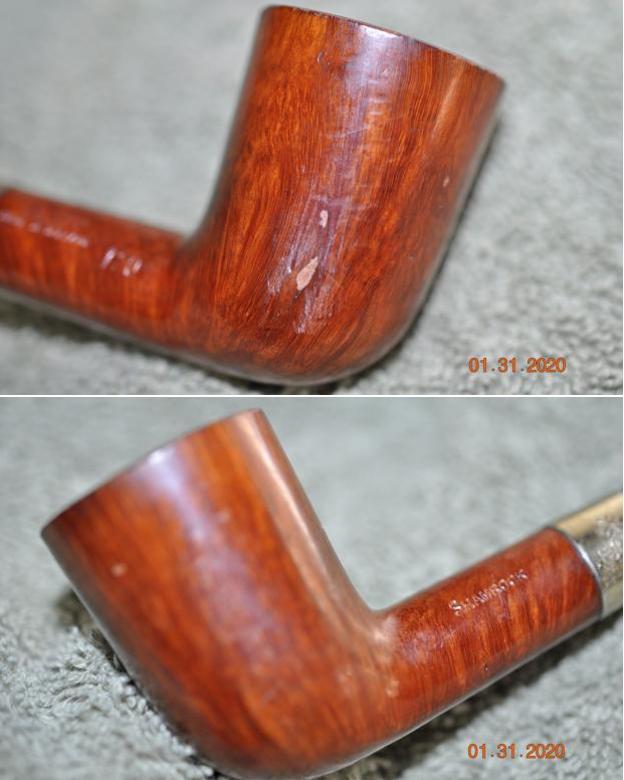
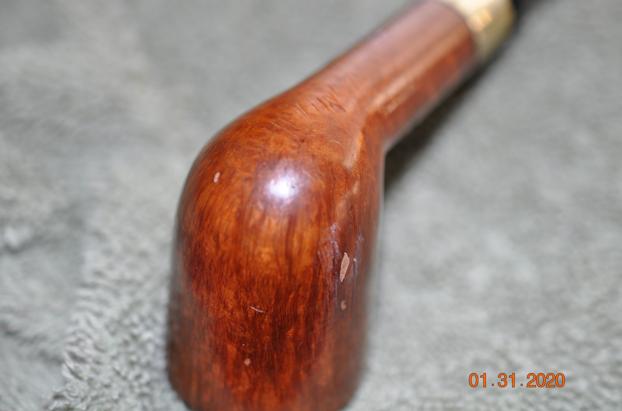
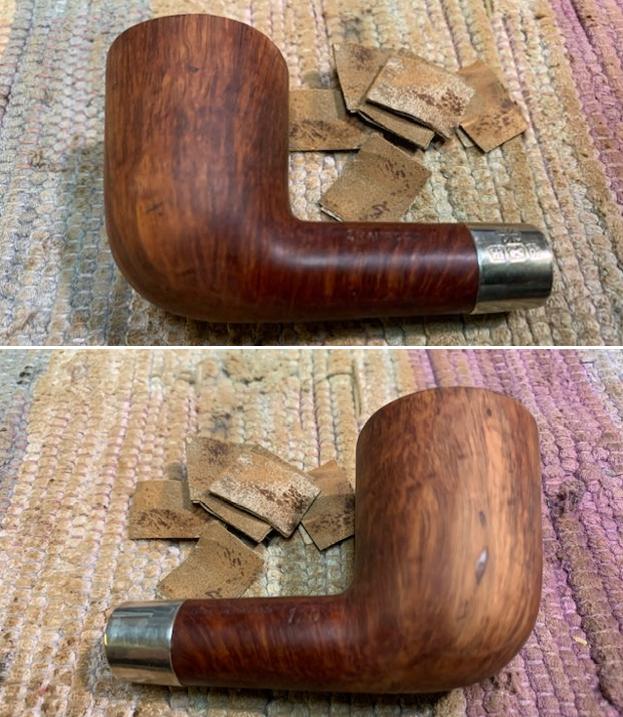
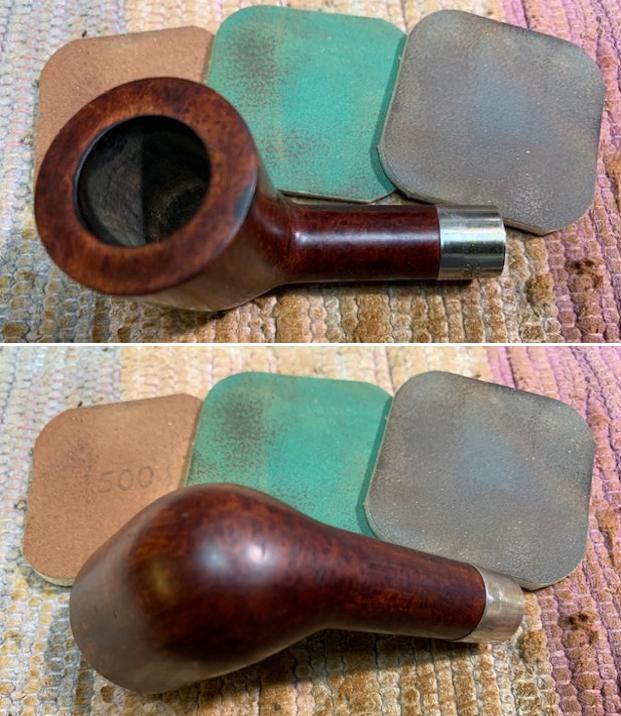
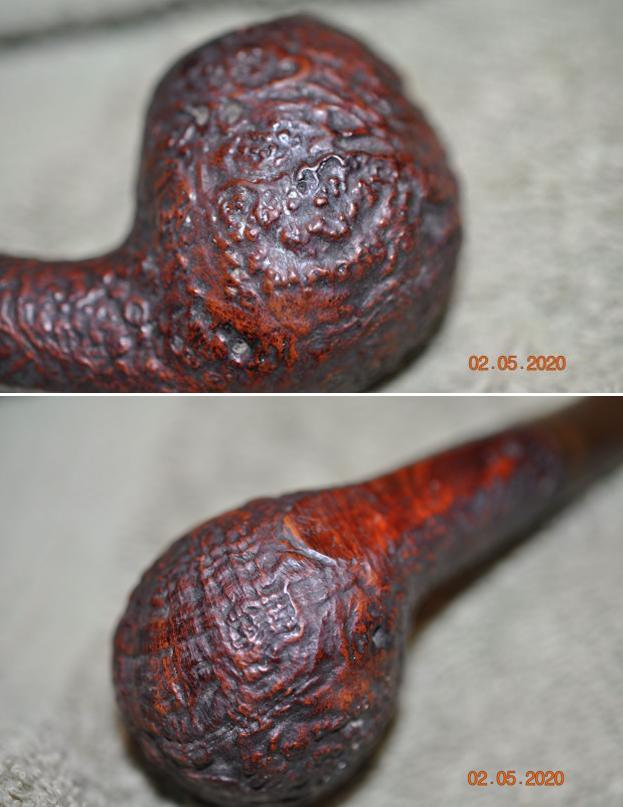
 Jeff took photos of the sides and heel of the bowl to show the condition of the briar. You can see the beautiful shape and the sandblast grain on the bowl even through the dirt and debris of many years.
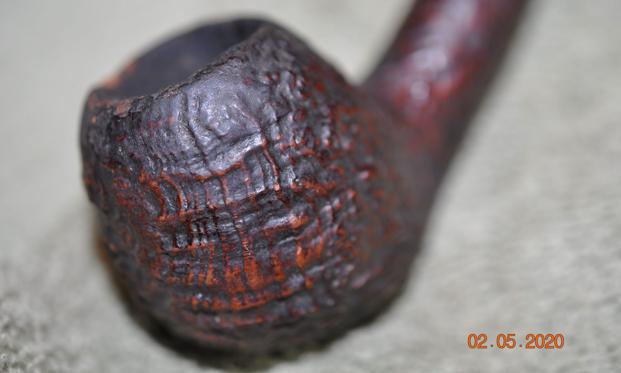
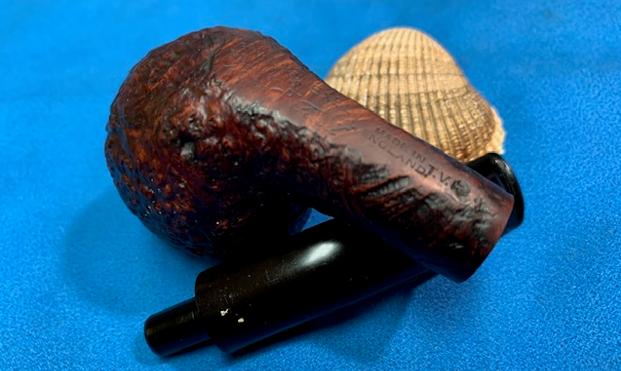
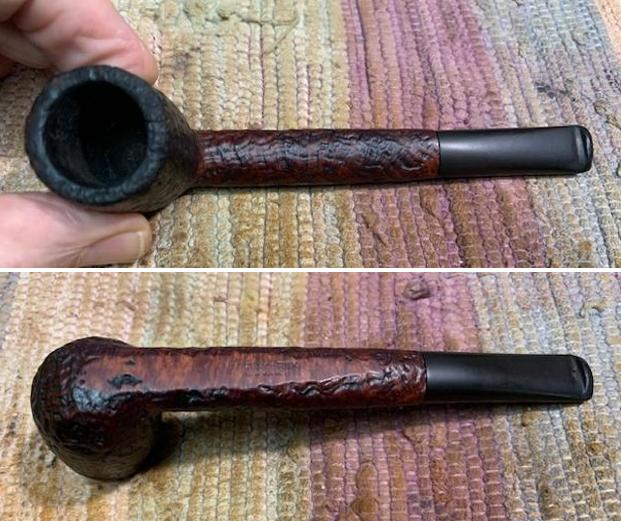
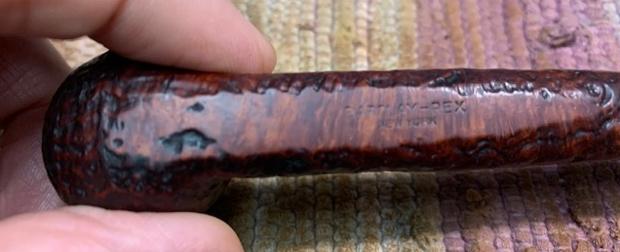
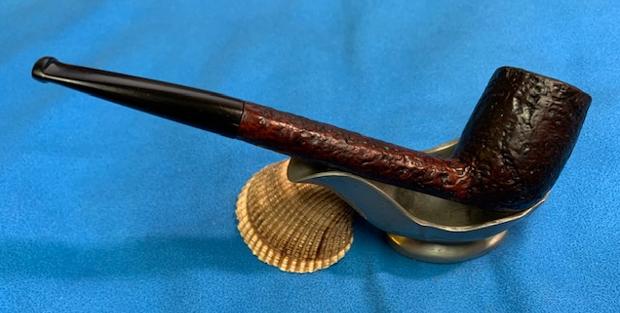
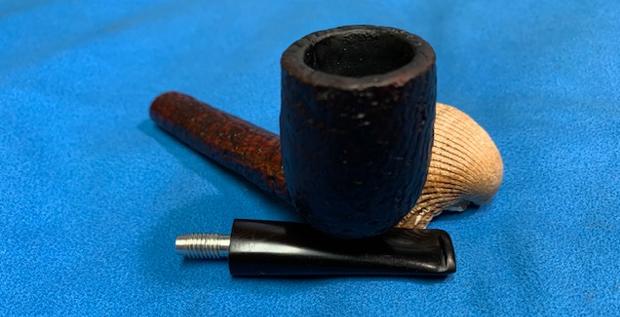
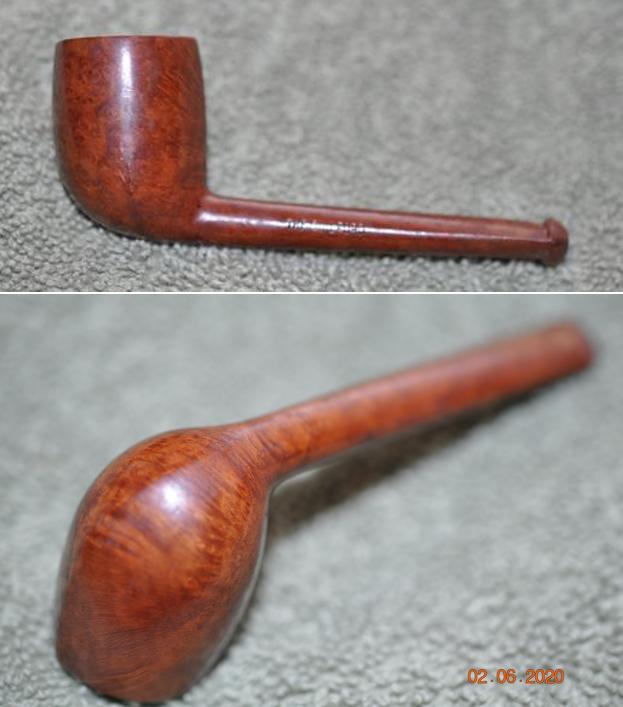
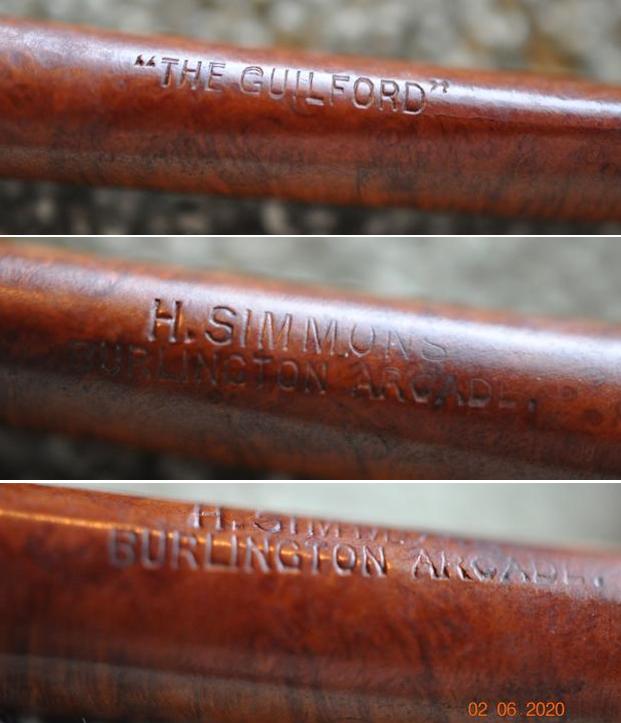
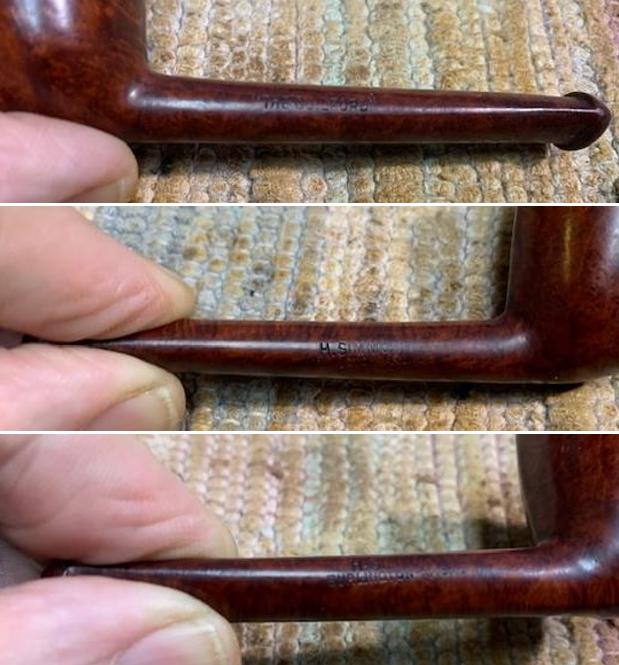
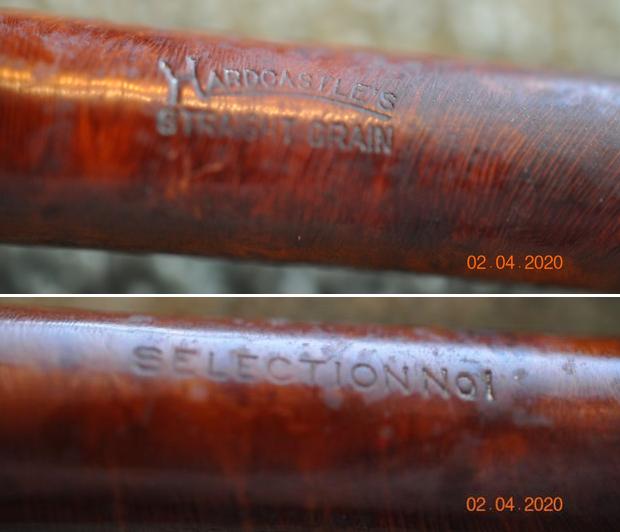
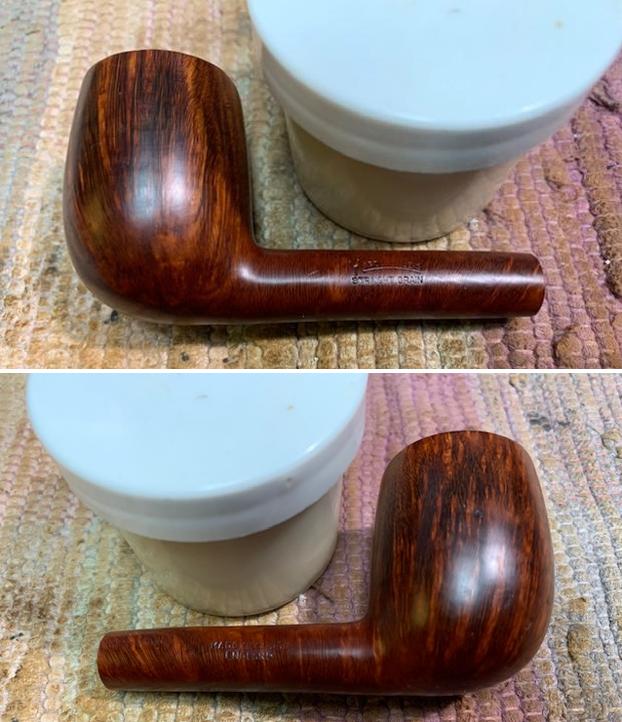
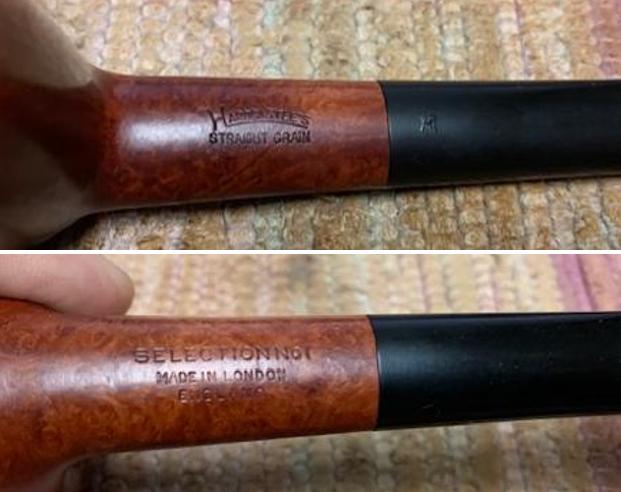
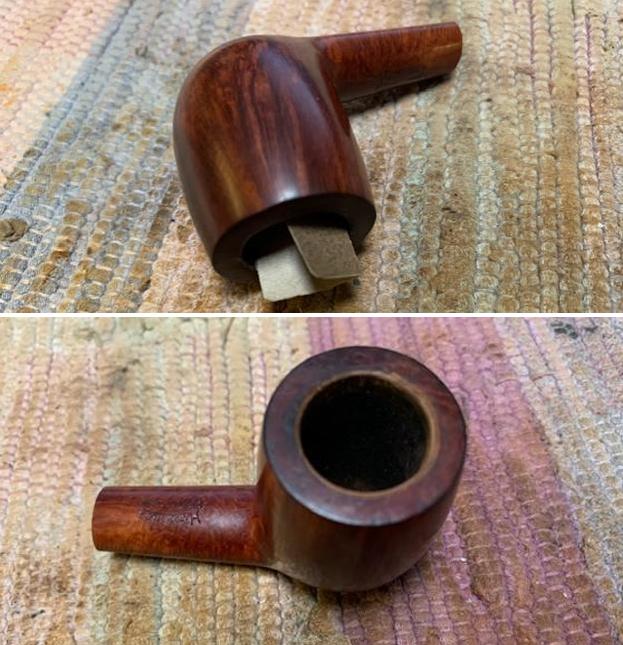
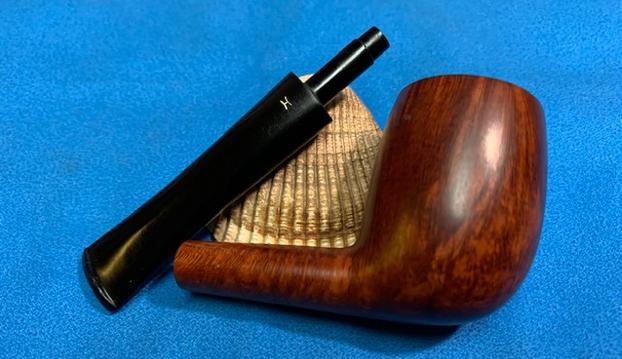
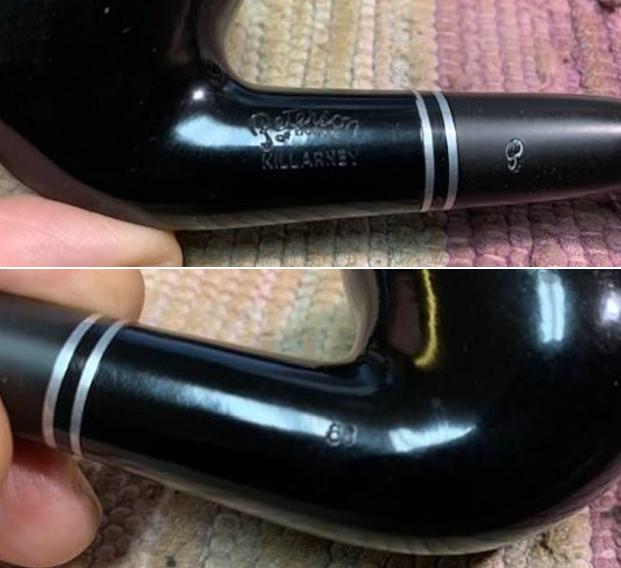
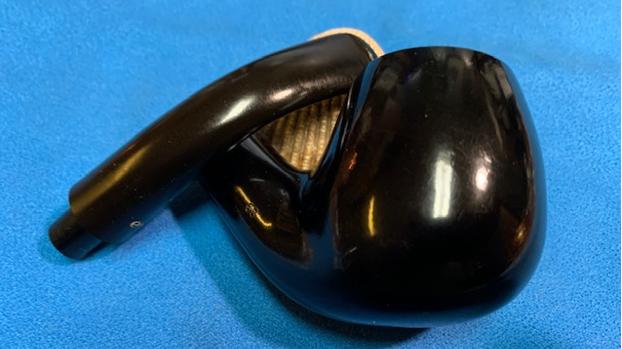
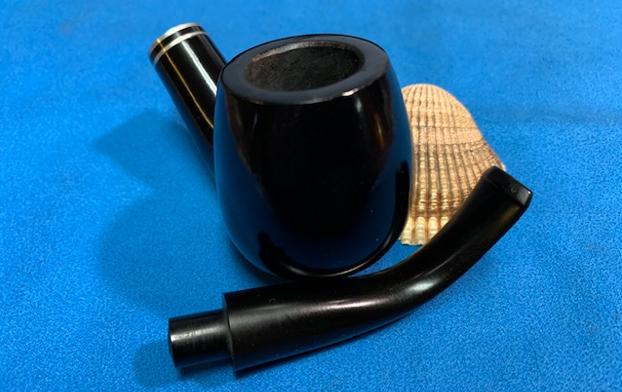
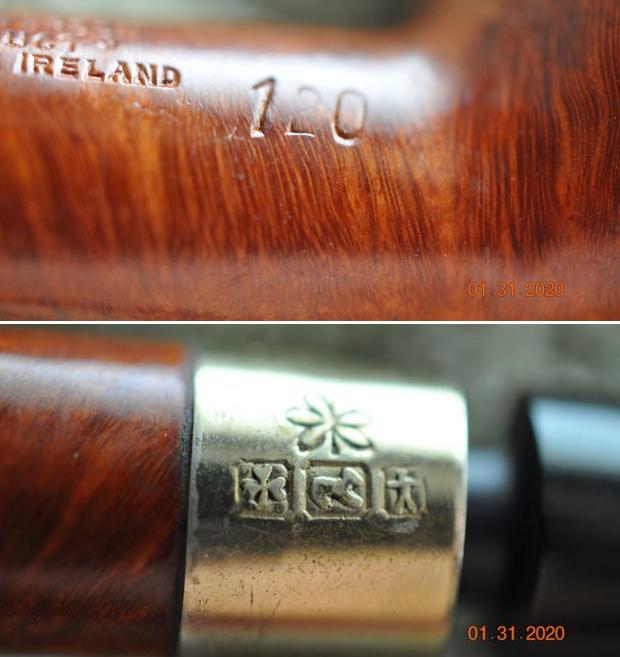
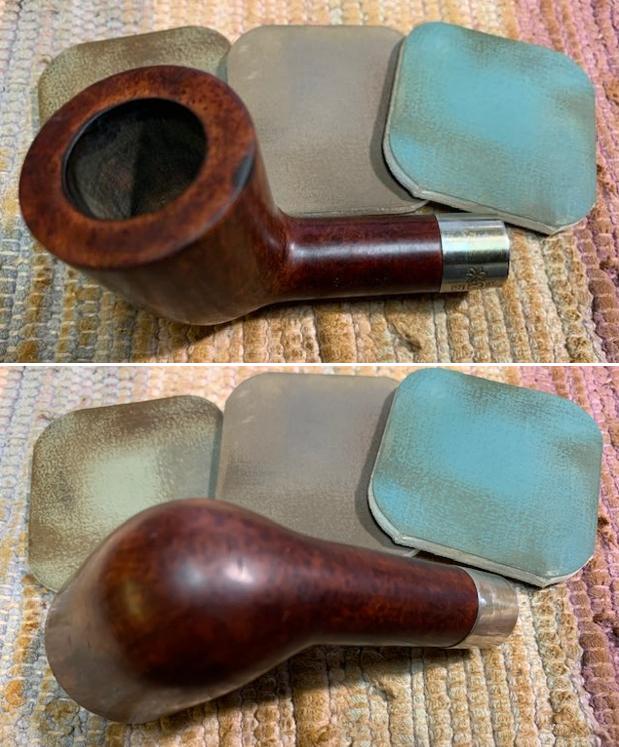
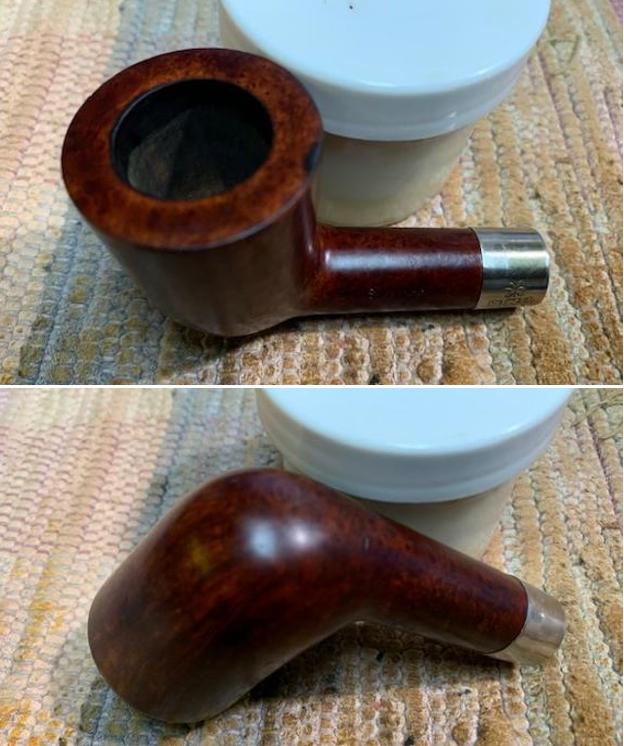
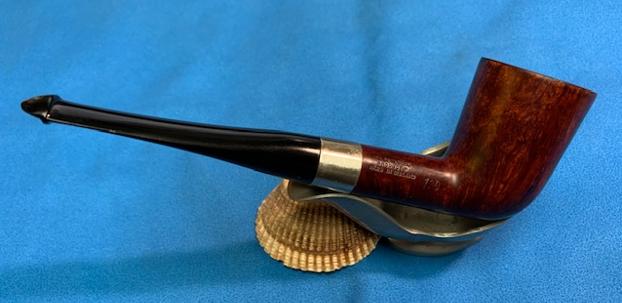
 Jeff took a photo of the stamping on the underside of the shank. You can see that it is clear and readable as noted above.
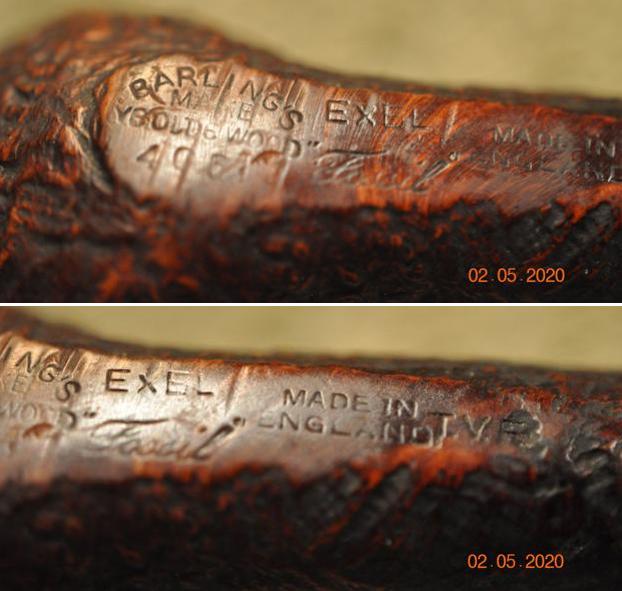 I turned to Pipedia to try and place this pipe in the timeline of the brand and was able find some helpful information which I have included below (https://pipedia.org/wiki/Barling). I believe that the pipe is a Family Era pipe so I read the article with interest and gleaned some information on the stamping on the pipe.
The first section I quote below is with regard to the nomenclature on the pipe. The one I am working on bears the stamping “Ye Olde Wood” and T.V.F. and the style name Fossil. I have highlighted the pertinent section in red.
Family Era Nomenclature:
Before discussing the nomenclature of the Family Era pipes it is important to note that there are no absolutes. Barling pipes from this period show a remarkable degree of variation when it comes to nomenclature. The following information can be applied in a general fashion.
According to Tad Gage, Pre-1946 stampings are minimal. Pre WW2 pipes rarely have size, shape or grading. But pipes have surfaced, hallmarked as early as 1925 with size marks, and as early as 1926 with model numbers. There may be earlier examples, and when we see them we will revise the dates.
Examples with silver hallmarks illustrate that a distinct change in nomenclature occurred around 1938-40, although clearly the war and London bombings impacted production of silver-mounted and of all English pipes. A George Yale catalog from 1941 features the familiar stampings such as “YE OLDE WOOD”, “TVF”, and style names like “Fossil”, and these were not generally found on pre-1940 pipes, although “YE OLDE WOOD” did inconsistently appear on some earlier examples. (Gage)…
The next section I am quoting is with regard to the Logo nomenclature. The Barling’s Make stamp is explained below. Following that I have included some information ont eh “Ye Olde Wood” stamp and the Barling Cross stem logo.
Logo Nomenclature:
…The “BARLING’S MAKE” has the word “BARLING’S” arched over the word “MAKE” in capital block letters. Barling used this block letter logo until late 1962…
During the 1930’s and early 1940’s the BARLING’S MAKE logo appeared in a small version with a simpler letter style. Following the War, the small “BARLING’S MAKE” logo was discontinued and a larger logo was used. The larger logo would continue to be in use until 1962, when the 1930’s style logo was reintroduced along with the new numbering system…
Ye Olde Wood Stamp:
Sometime around 1913, the “Ye Olde Wood” stamp made its appearance on selected pipes. An example exists stamped on a 1913 date hallmarked pipe.
This logo will continue to be used in the decades to come. Initially it was used to designate a higher grade than the average, much as the “Special” grade would after the Second World War. Price lists show the “Ye Olde Wood” pipes as a separate grade from the basic BARLING’S MAKE pipe. Eventually, “Ye Olde Wood” came to represent the company to the world. The use of “YE OLD WOOD” as a stamp prior to 1940 was haphazard, at best, although the company used the slogan in advertising materials from the early teens onward. (Gage)
Crossed Barling Stem Logo:
It is not known when the crossed Barling stem logo first appeared, but an example exists on a pipe with a 1923 date hallmark. And several of the mid 1920’s pipes added in this update also feature the crossed Barling stem logo.
Lastly, I have included information on the shape number and the size stamping on this pipe all of which help to date it.
Model Numbers:
Model numbers were occasionally stamped below the logo as early as the late 1920’s.
Nichols Numbers:
Pipes intended for the US Market have a 3 digit model number. However, Family Era Barlings may have two numbers, not just three, and they may also have a letter following the model numbers. For example, the letter “M” following a model number would indicate that the bowl is meerschaum lined.
Stamping model numbers on the pipes became much more common after WW2, though like all Barling nomenclature their appearance is a bit haphazard…
Other Nomenclature:
The “MADE IN ENGLAND.” stamp was in use in the 1930’s thru 1962. As with all things related to Barling nomenclature there are variations. Sometimes there is no “MADE IN ENGLAND.” stamp. Examples exist with a “MADE IN LONDON” over “ENGLAND” stamp. And, there are examples with “MADE IN ENGLAND” with no period after the word “ENGLAND”.
Size Stampings:
Up to 1926 and possibly beyond, Barling used specific, completely unrelated, model numbers to designate the various sizes of a specific shape. They produced pipes in three sizes, small, medium, and large.
Barling’s published price lists show that they continued to offer pipes in only three sizes, small, medium, and large until 1941. That’s it, small, medium, and large. So when someone claims that they have a 1930’s EL, EXEL, or other size, they are mistaken.
In 1941 the published range of sizes expanded. Going from the smallest to the largest, they are SS, S, S-M, L, EL, EXEL, and EXEXEL. There is no “G” for giant. Giant pipes, or magnums, which are oversized standard billiards, were not stamped “G” but are commonly identified by collectors as such because they are obviously large relative to even EXEXEL pipes, and carried no size stampings (Gage)…
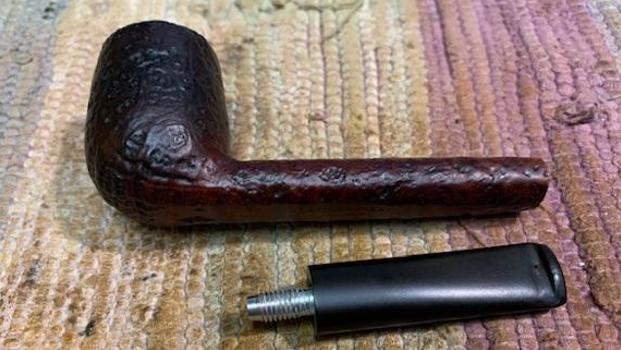
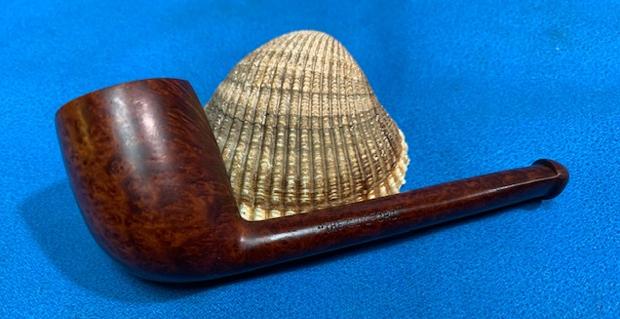
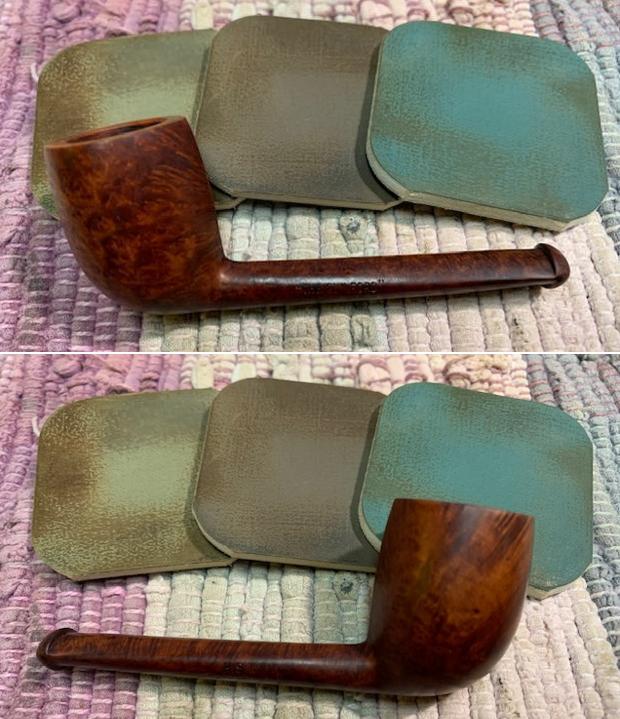
With the information from Pipedia I knew that I was working a Barling’s Make “Ye Olde Wood” Fossil from the time period between 1941 and 1962. It is a beautifully sandblasted pipe that has some great grain. Now it was time to work on the pipe.
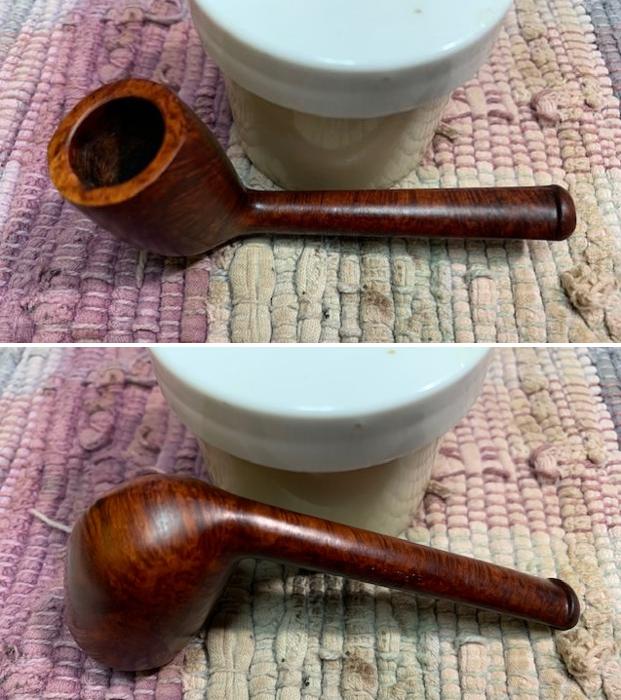
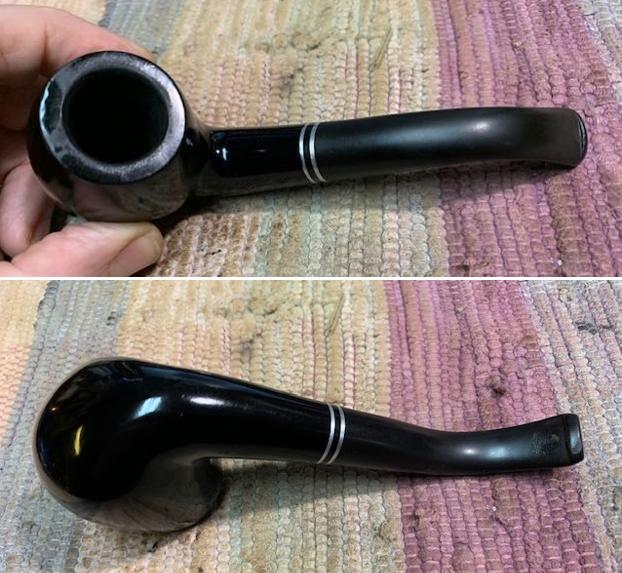
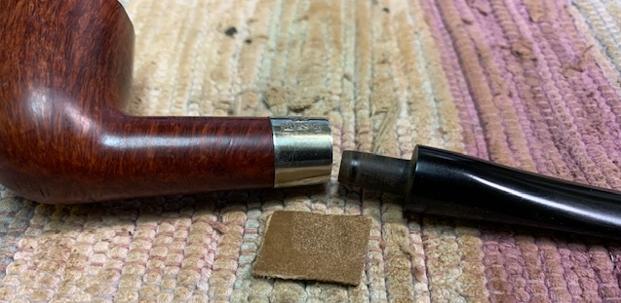
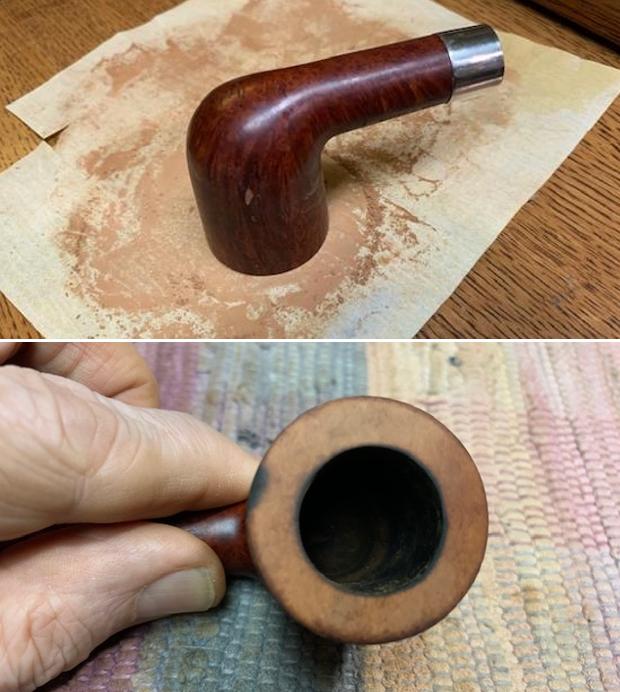
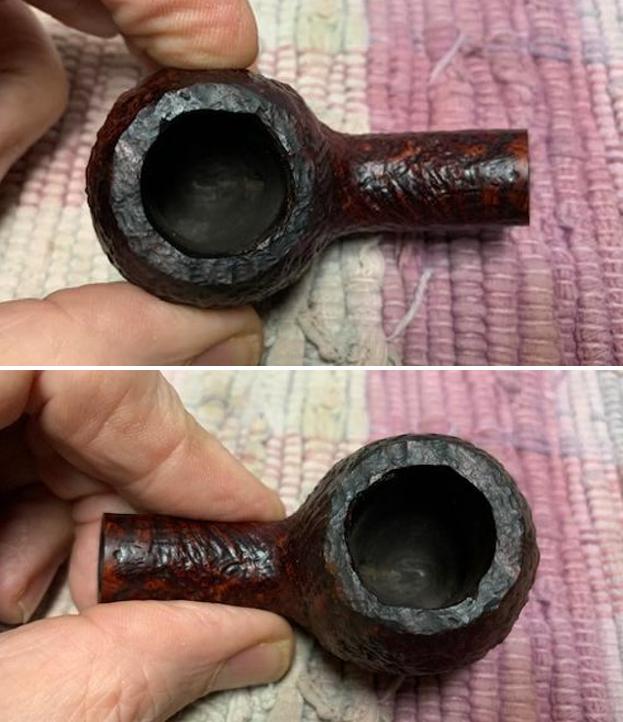
Jeff carefully cleaned the pipe. He reamed it with a PipNet pipe reamer and then cleaned up the reaming with a Savinelli Fitsall Pipe Knife. He scrubbed out the internals of the shank, stem and shank extension with alcohol, pipe cleaners and cotton swabs until the pipe was clean. He scrubbed the exterior of the bowl with Murphy’s Oil Soap and a tooth brush to remove the grime and grit on the briar and lava on the rim top. The finish looks much better and has a deep sandblast that is quite beautiful. The rim top is in rough condition with chips out of the top and inner edge of the bowl making it out of round.. When the pipe arrived here in Vancouver I was amazed it looked so good. Here are some photos of what I saw. 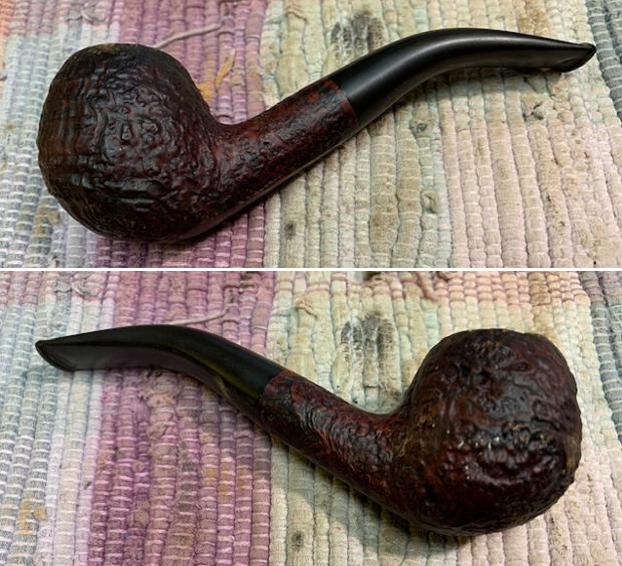
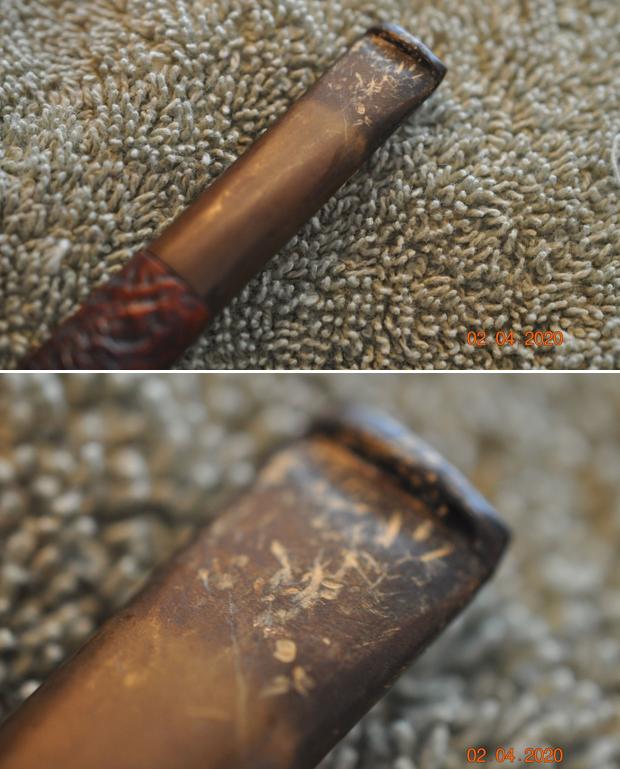
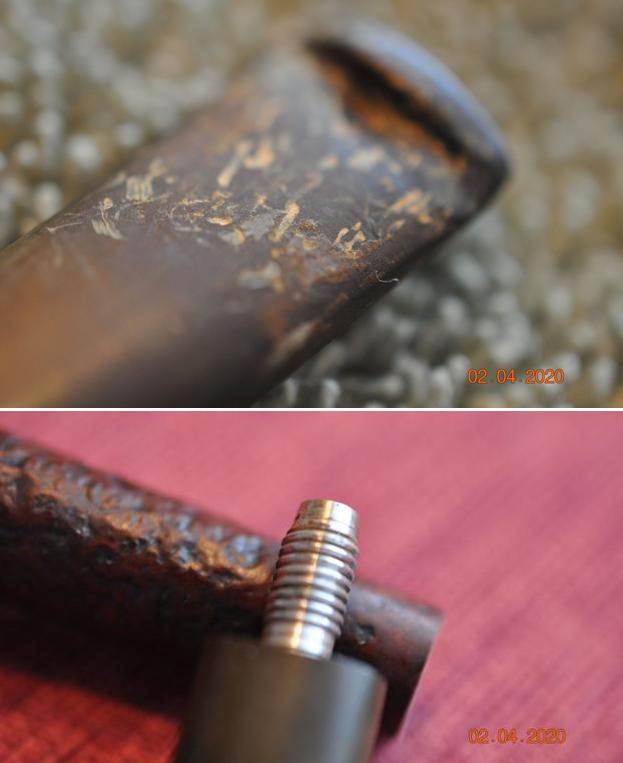
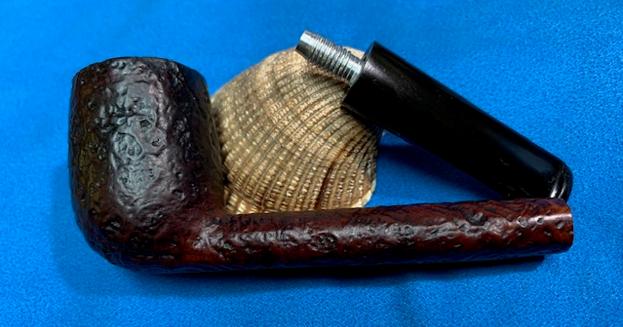
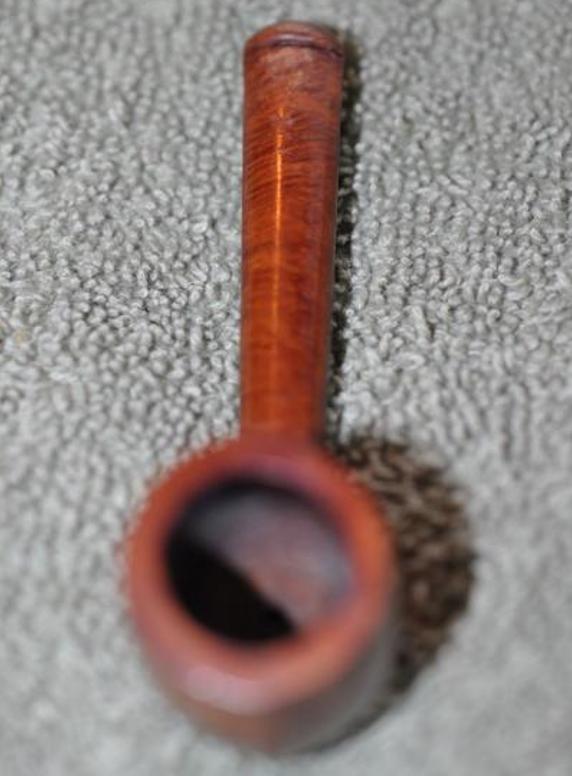
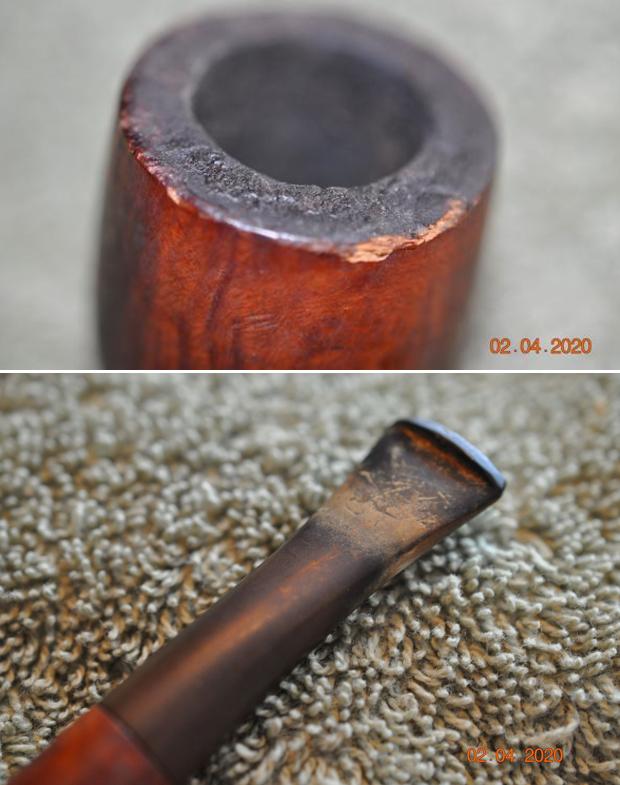
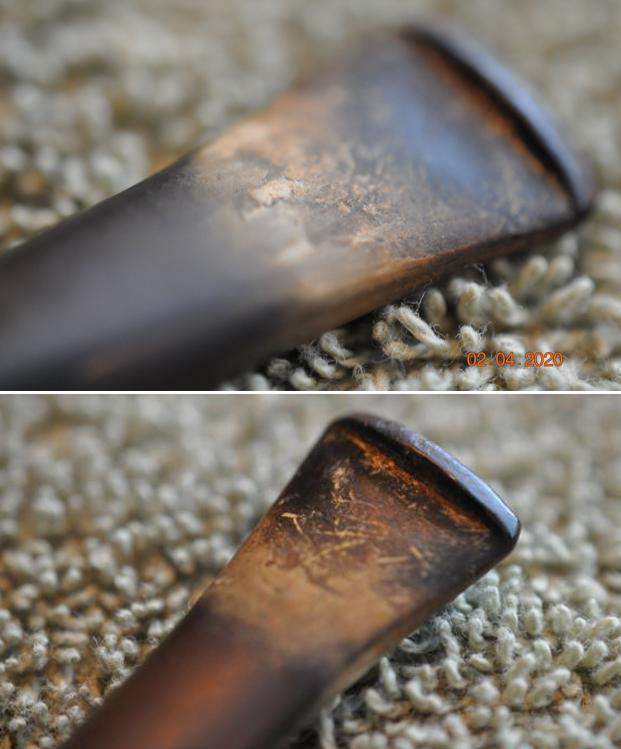
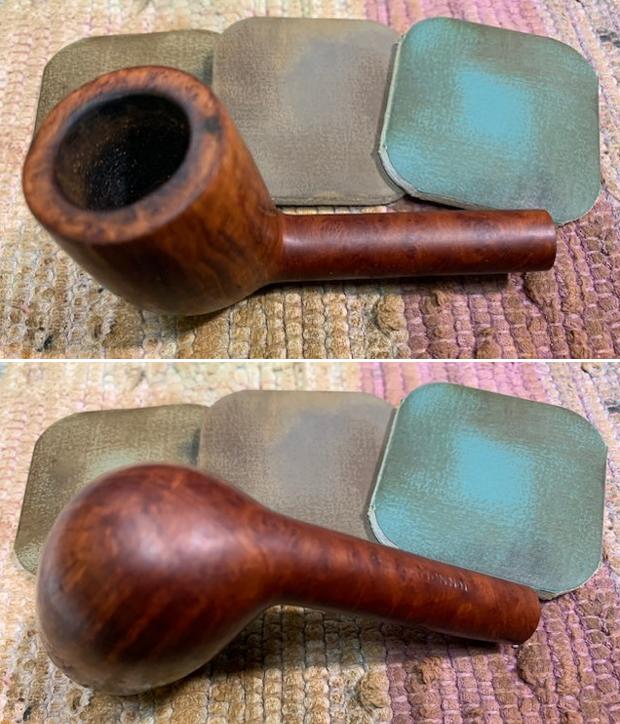
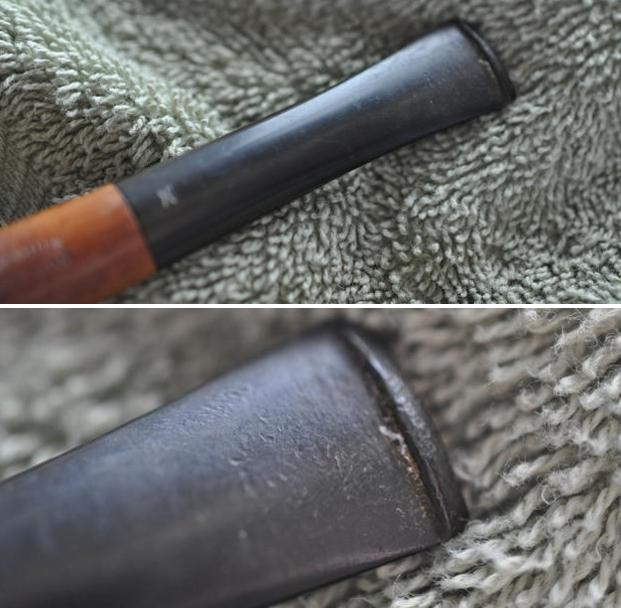
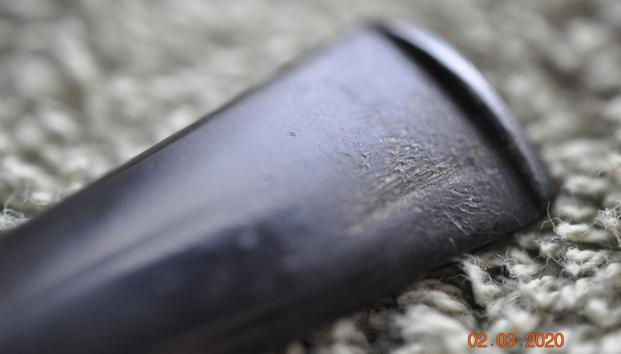
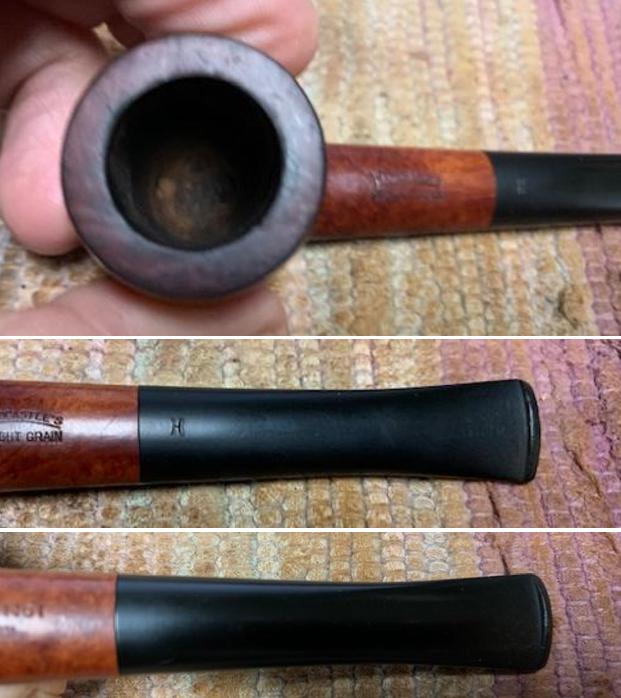
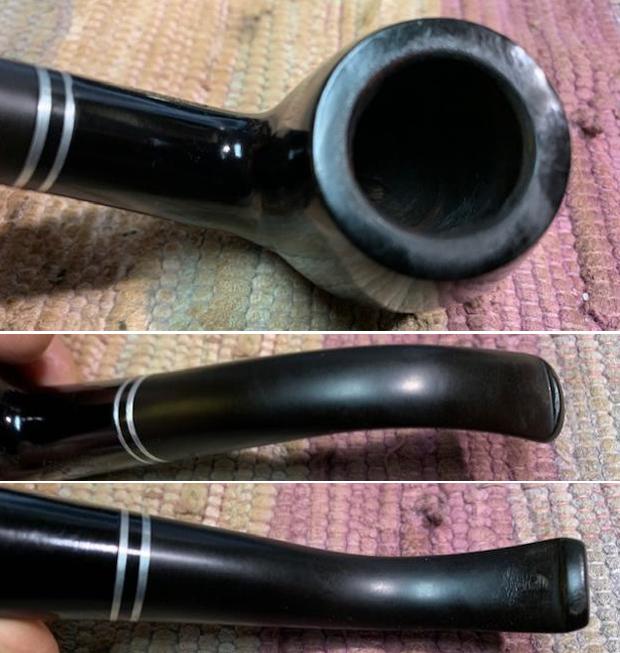
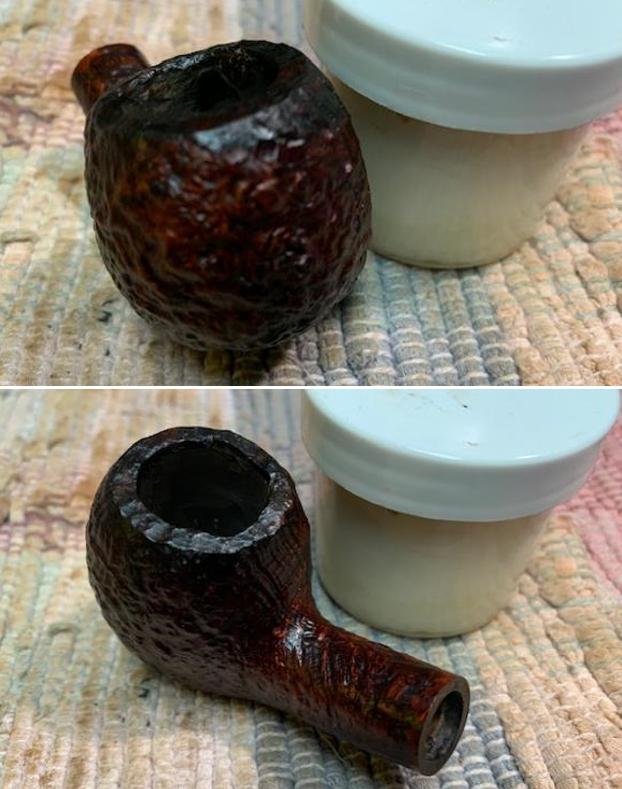
 I took some close up photos of the rim top and the stem surface. The inner edge of the rim was in rough condition with chips and nicks in the sandblast of the rim top and the inner edge of the bowl out of round. I would take some work to straighten out the issues. I took close up photos of the stem end of the pipe to show the condition of the surface and button.
  I took a picture of the stamping on the underside of the shank and it was faint but readable as noted above.
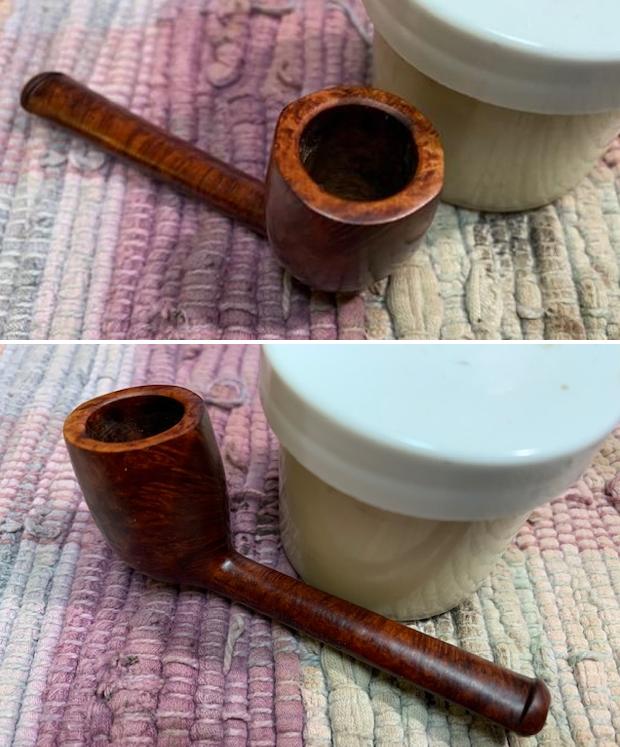
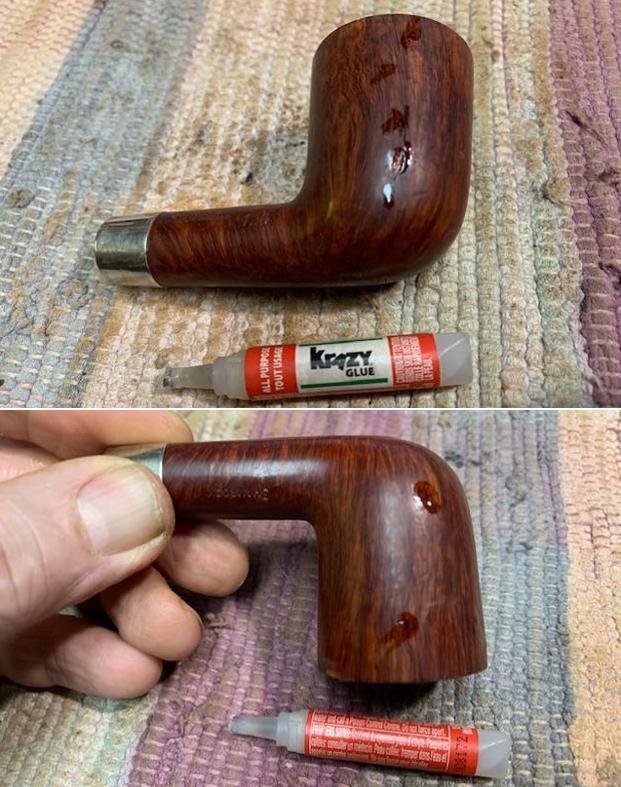
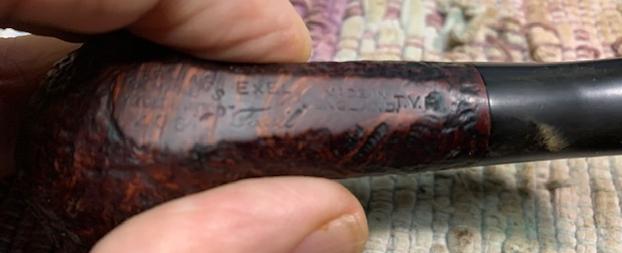 I started my work on the pipe by addressing the damage on the rim top and the inner edges of the bowl. The first photo shows the condition of the rim after I had lightly topped it and what the edge looked like before I started. I decided to rebuild the chipped areas on the rim top and edges with briar dust and CA glue.
 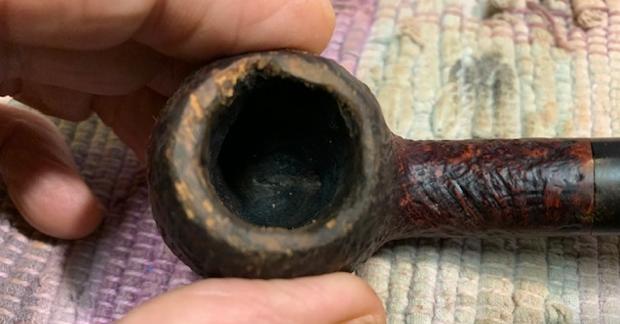 I layered the CA glue on the edge and top and used a dental spatula to press briar dust on top of it. It took multiple layers on the rear and back edge and rim top before I was happy with it.
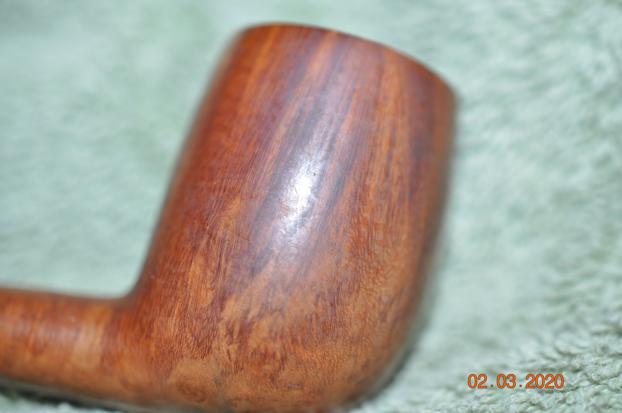
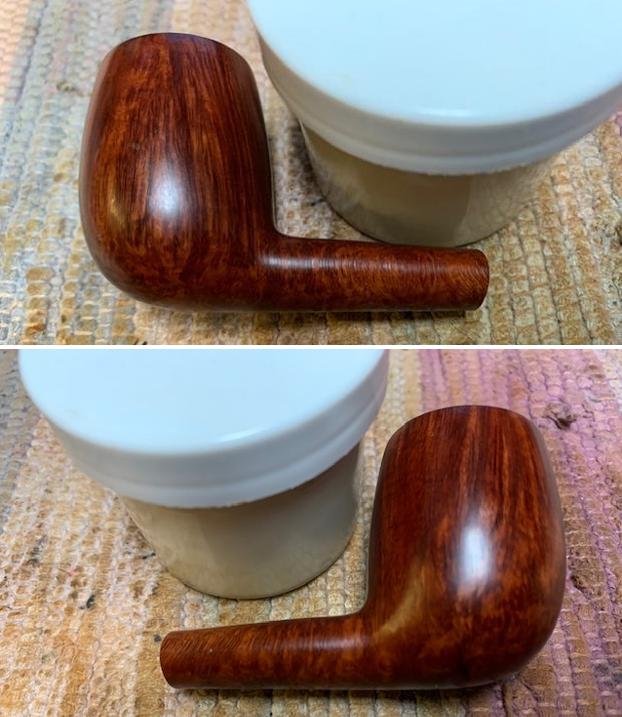
 When I finished the repairs I used a Dremel and burrs to reproduce the sandblast finish on the rim top to match the bowl sides. I stained the rim top and edges with a combination of Black, Walnut and Cherry stain pens to match the colour of the rest of the bowl. I took pictures of the finished rim top to give an idea of the completed look of the repair.
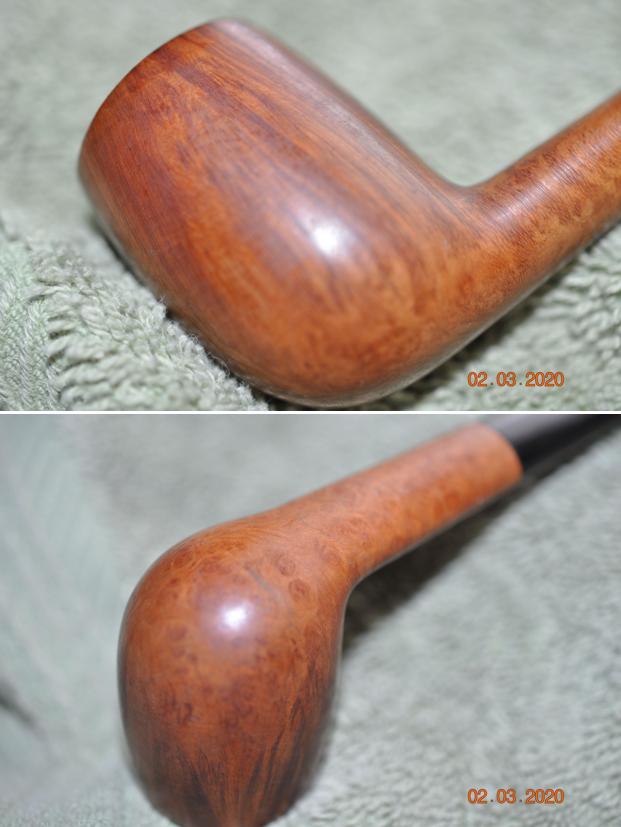
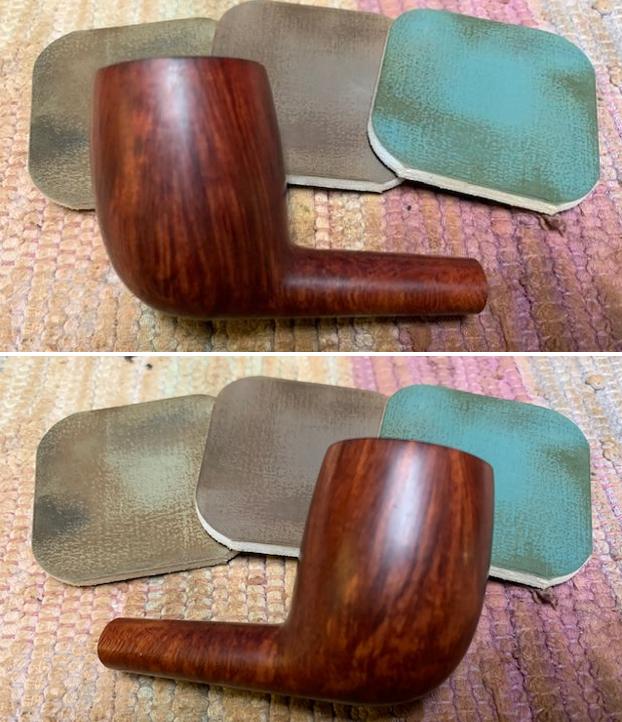
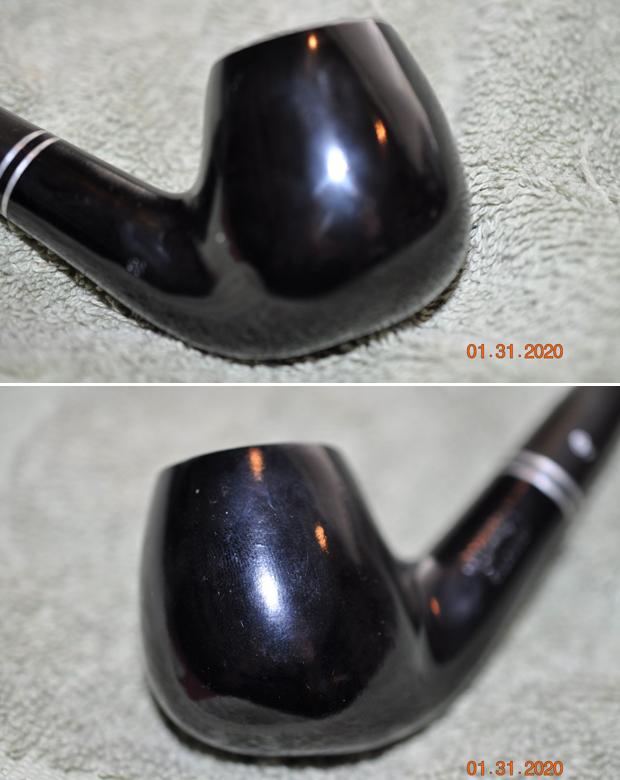
 With the rim repair completed I worked some Before & After Restoration Balm into the surface of the bowl and shank with my fingertips and a horse hair shoe brush to clean, enliven and protect the briar. I let the balm sit for 15 minutes and then buffed with a cotton cloth to raise the shine. The photos show the bowl at this point in the restoration process.
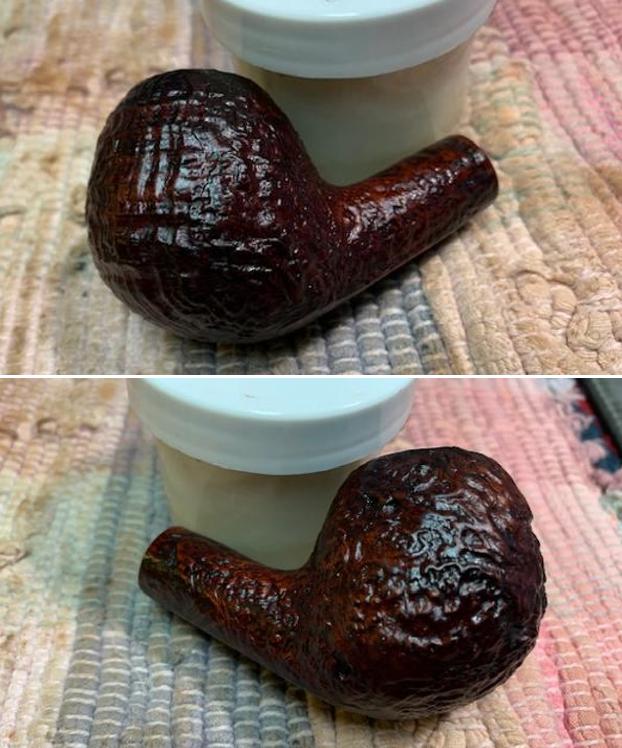
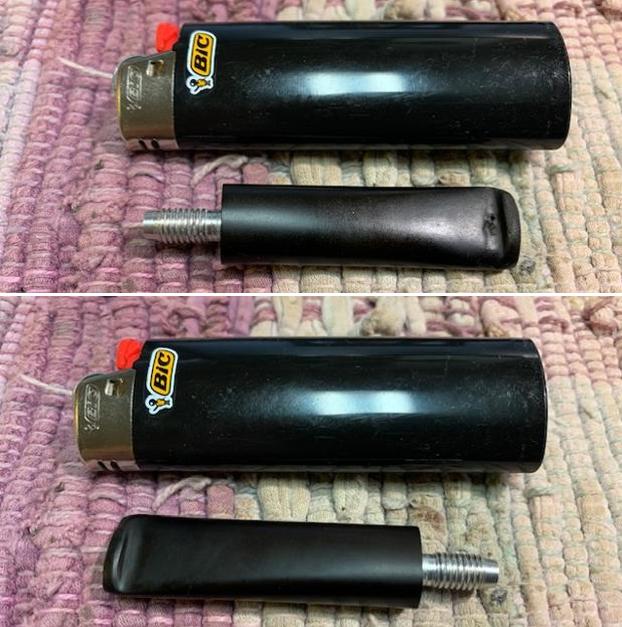
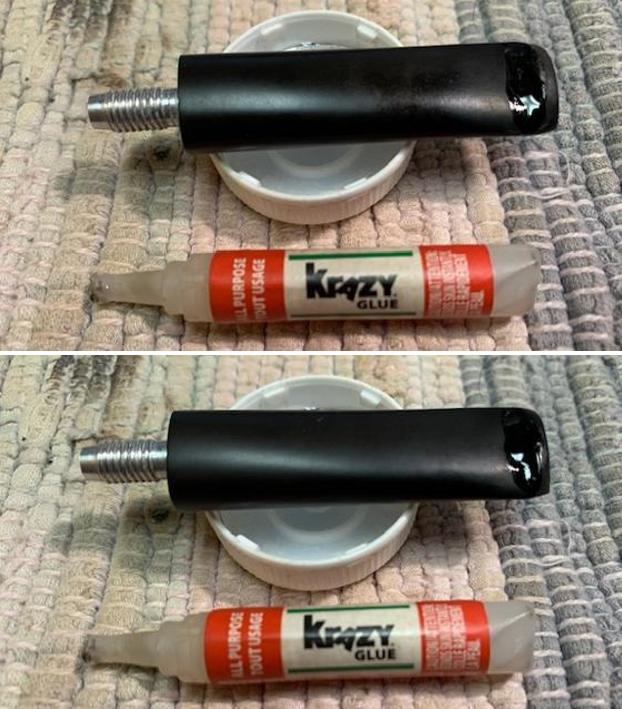
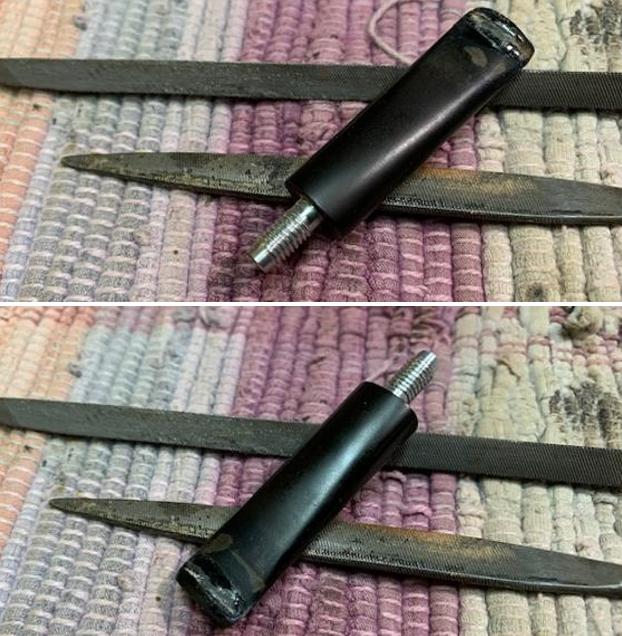
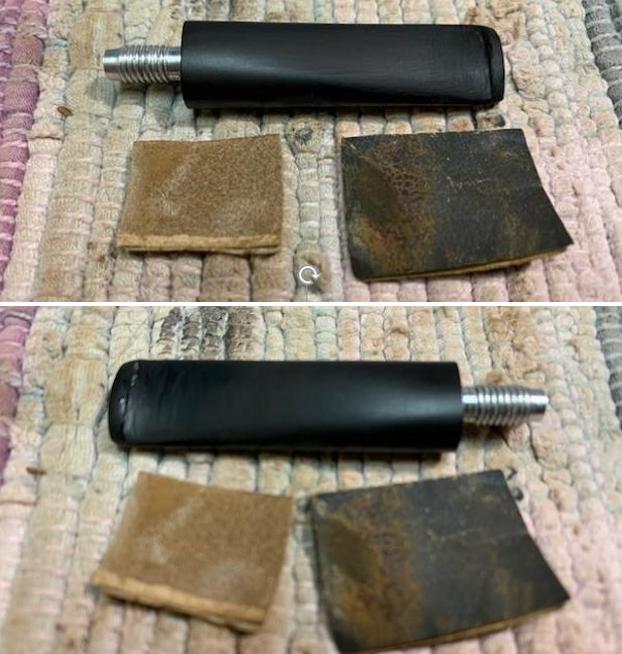
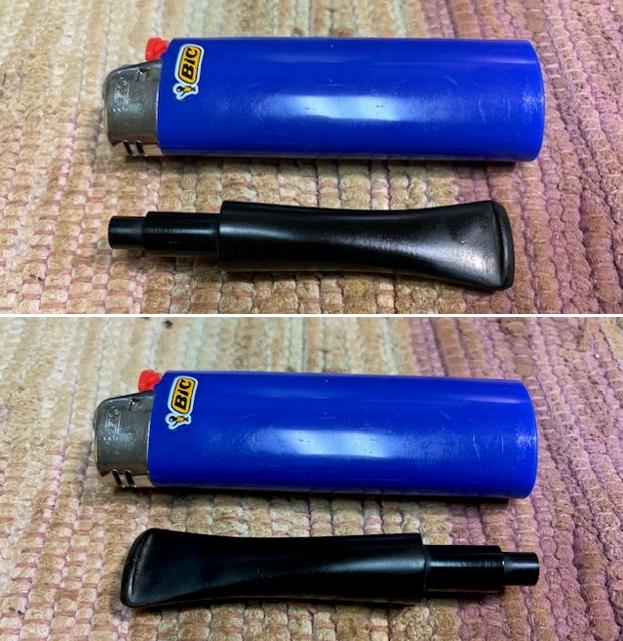
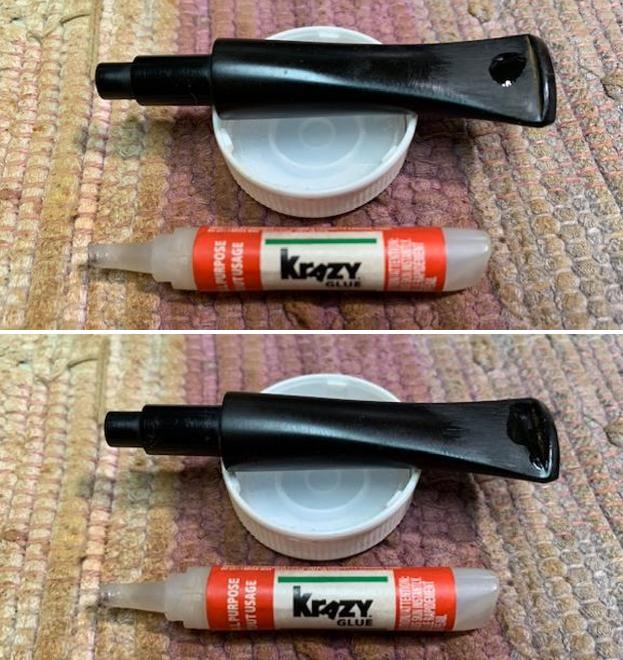
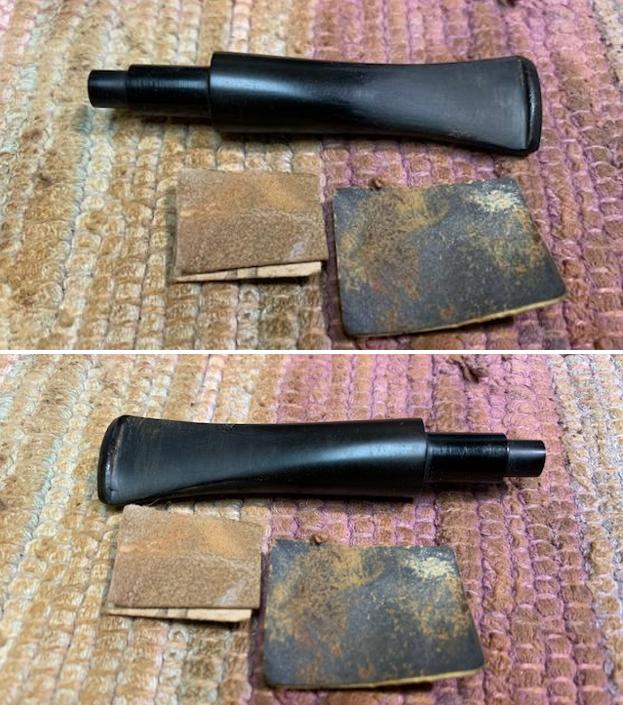
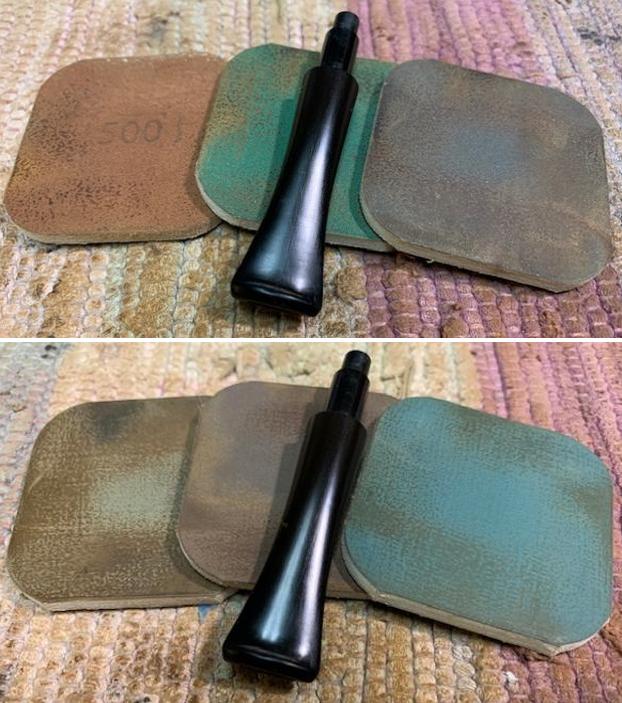
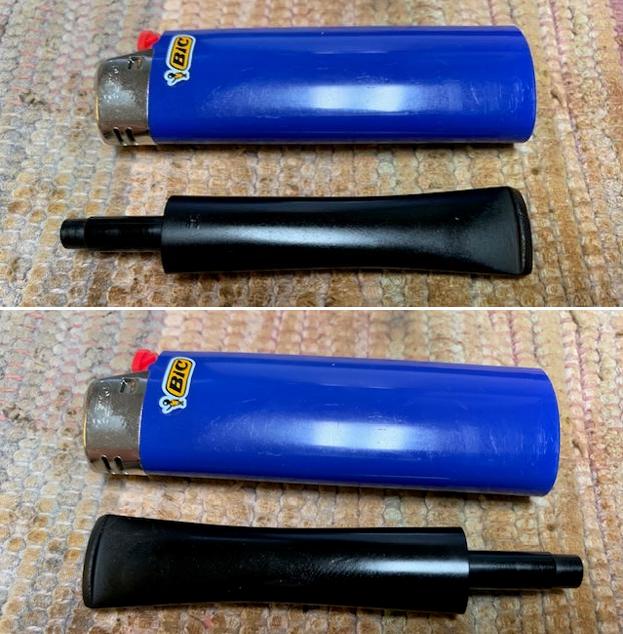
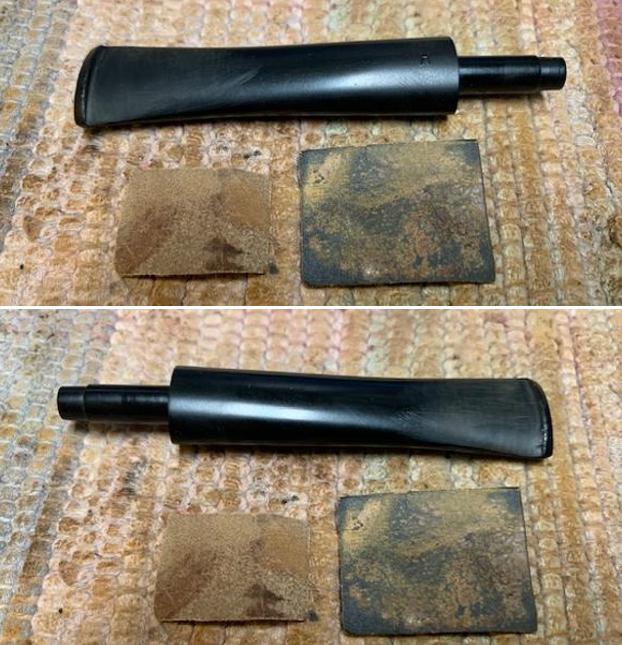
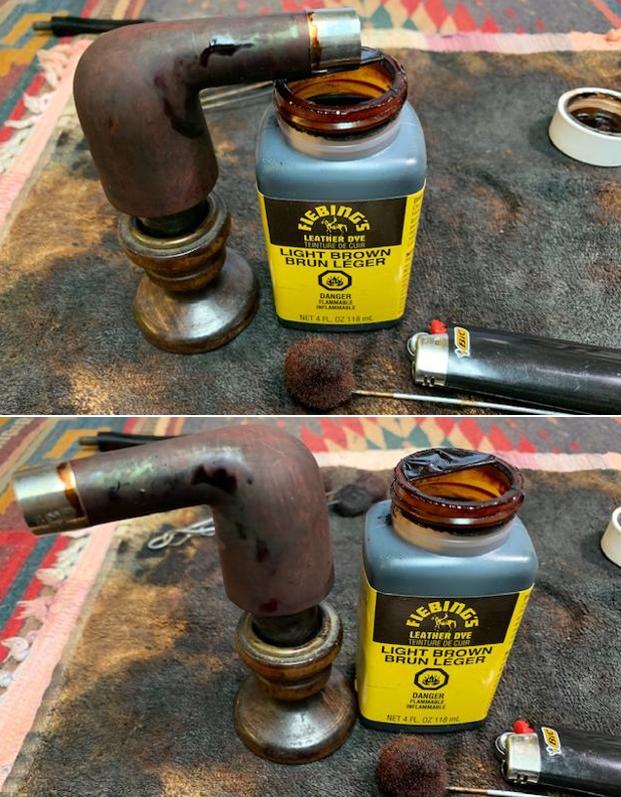
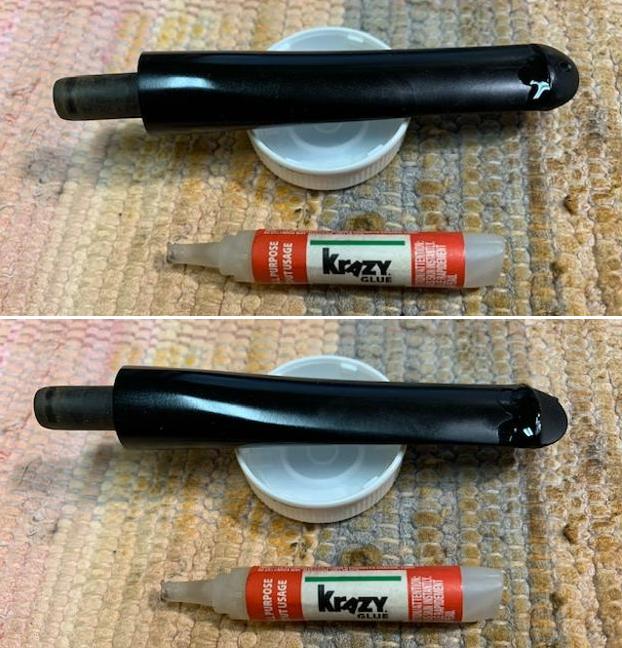
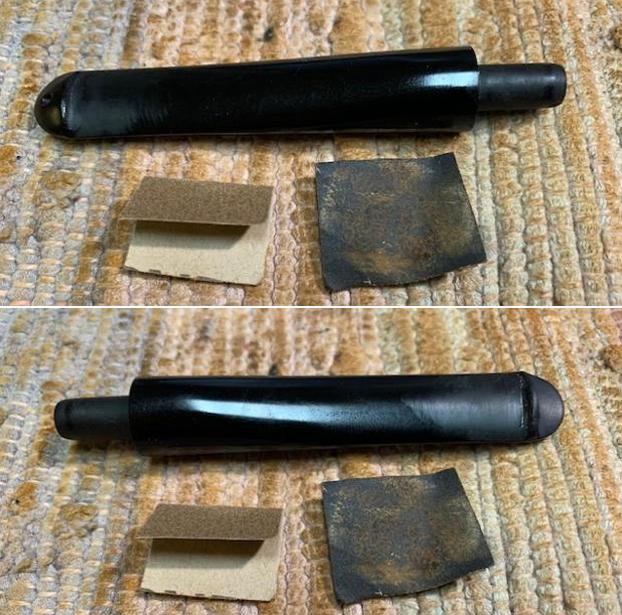
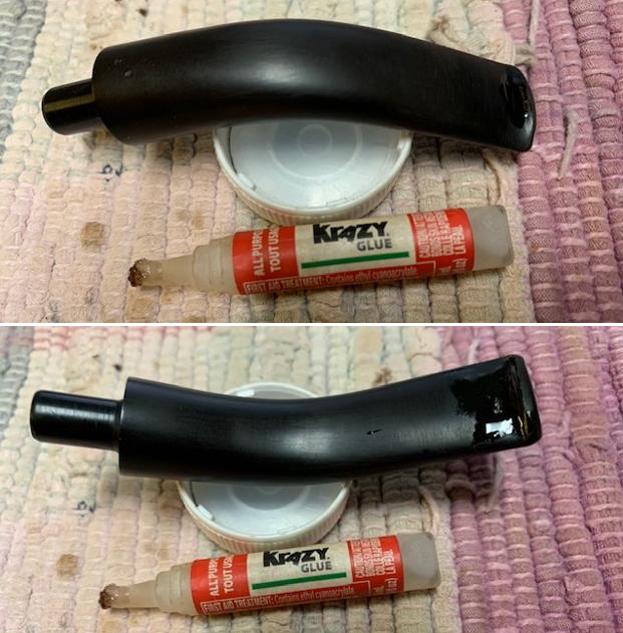
 I set the bowl aside and turned my attention to the stem. I “painted” it with the flame of a Bic lighter to lift the tooth dents in the surface of the vulcanite. I was able to lift the majority of them and interestingly the small pin hole on the topside sealed off. I filled in the remaining marks with clear CA glue. Once the repairs cured I used two files to flatten out the repairs and recut the sharp edge of the button. I sanded them smooth with a folded piece of 220 grit sandpaper to blend them in the rest of the stem surface. I started polishing the stem with 400 grit wet dry sandpaper.
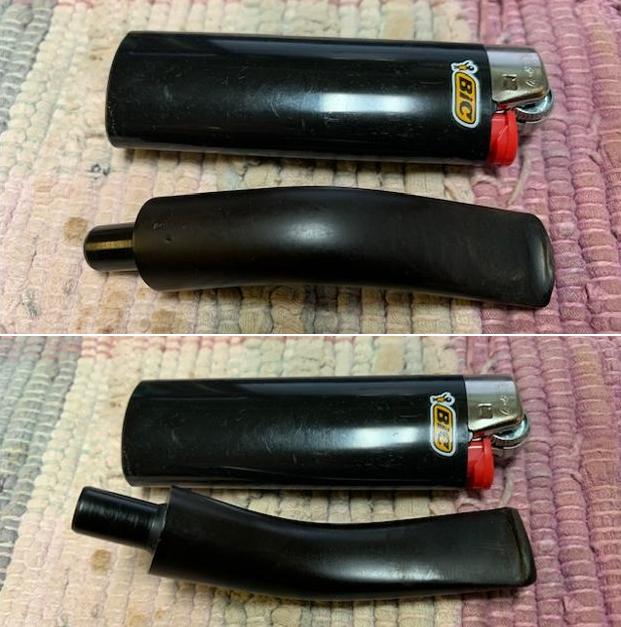
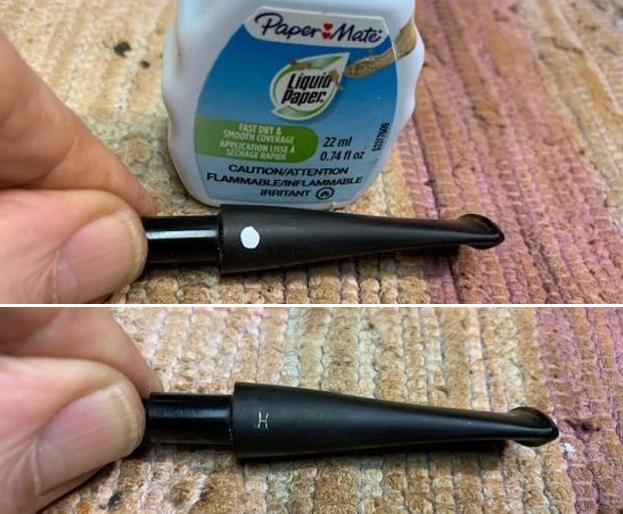
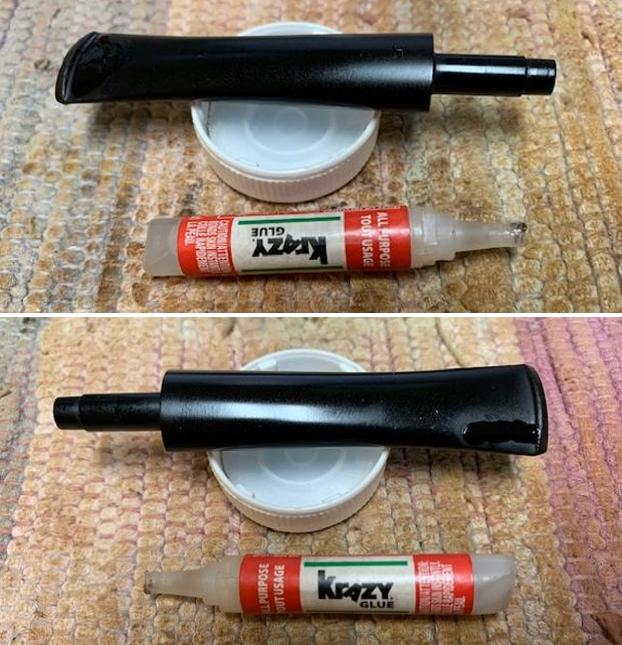
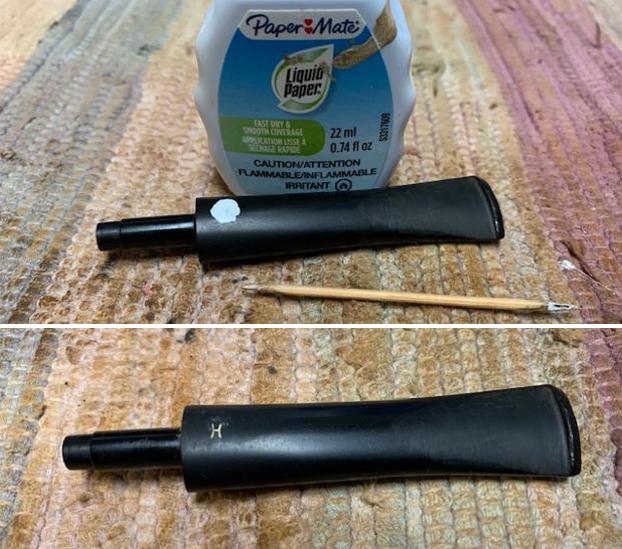
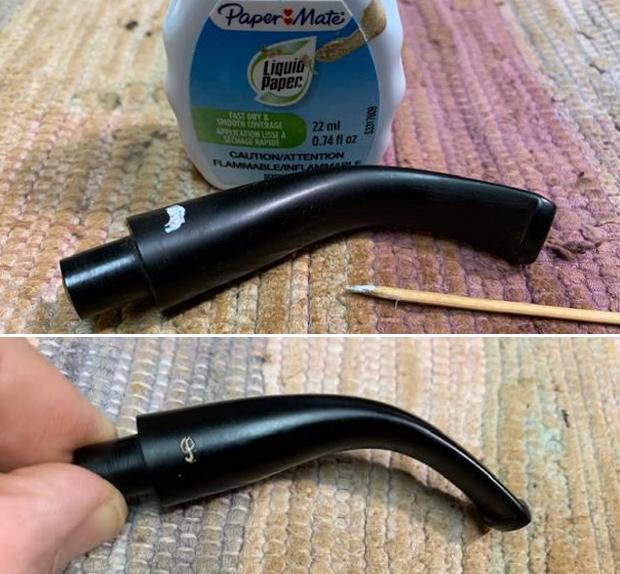
 I touched up the faint stamping on the top of the stem with PaperMate Liquid Paper White. I worked it into the surface of the stamping with a tooth pick. When it cured I scraped off the excess with a tooth pick and a sanding pad. The stamping was faint on in the middle but more readable on the edges.
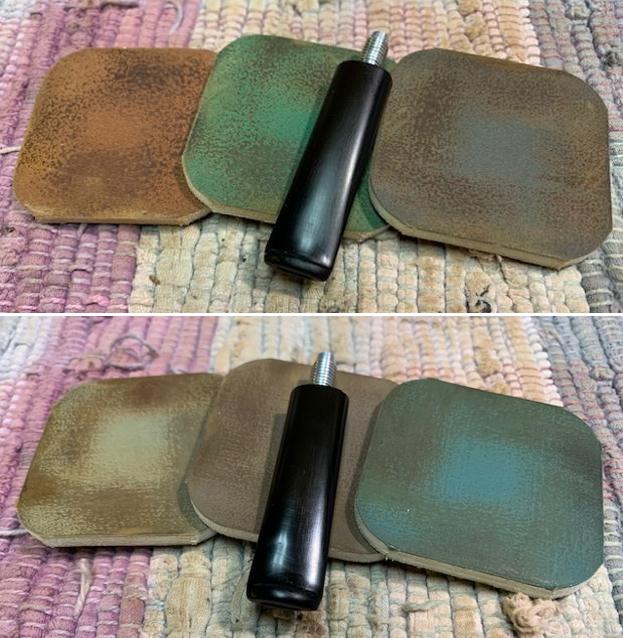
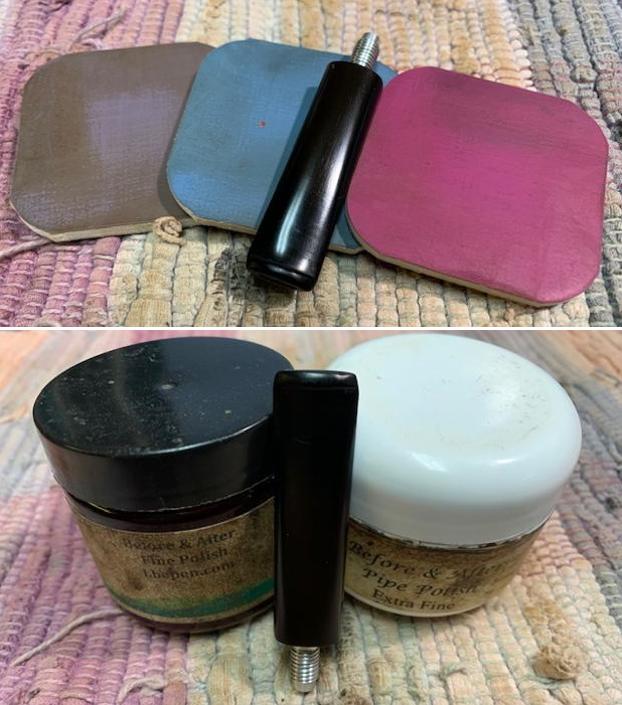
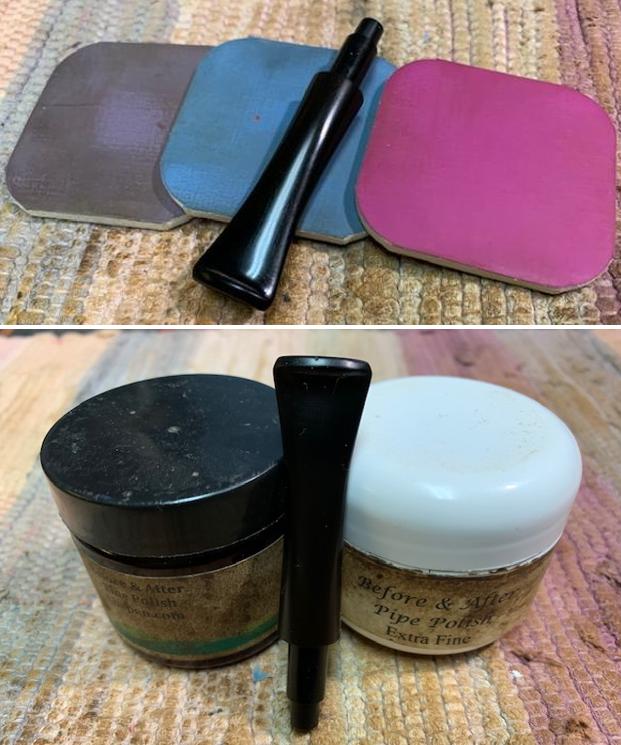
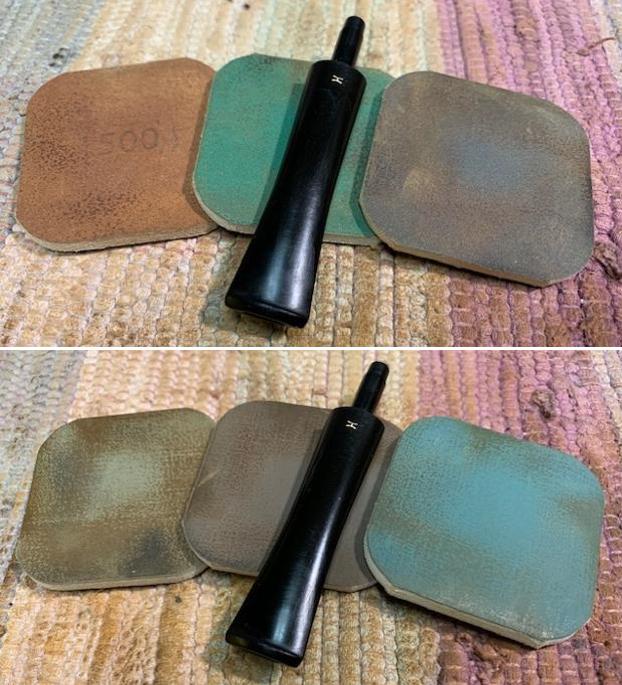
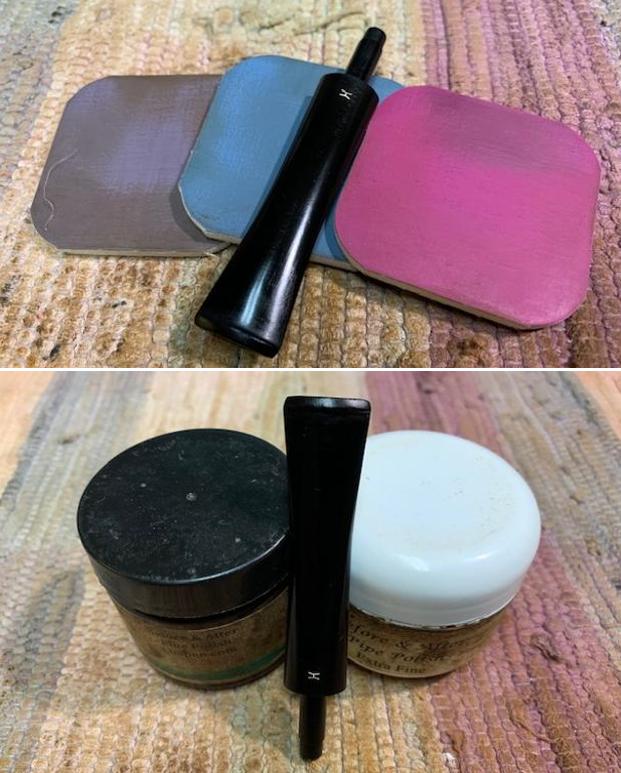
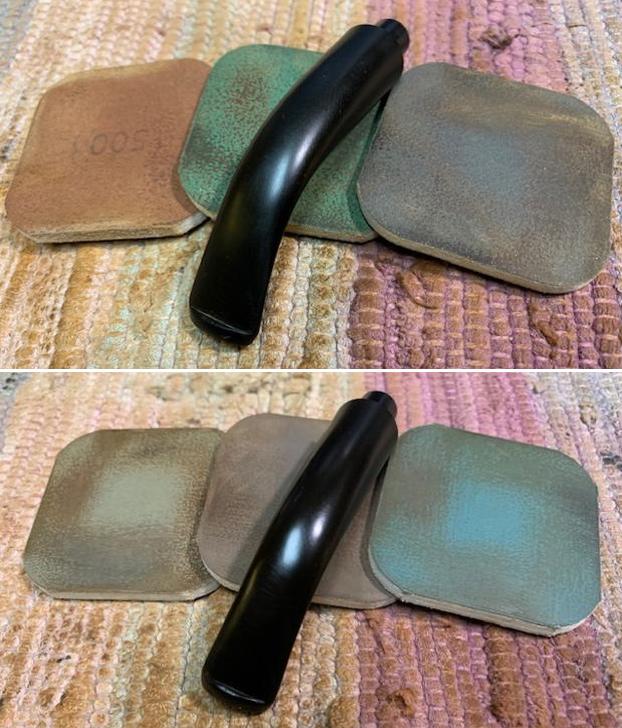
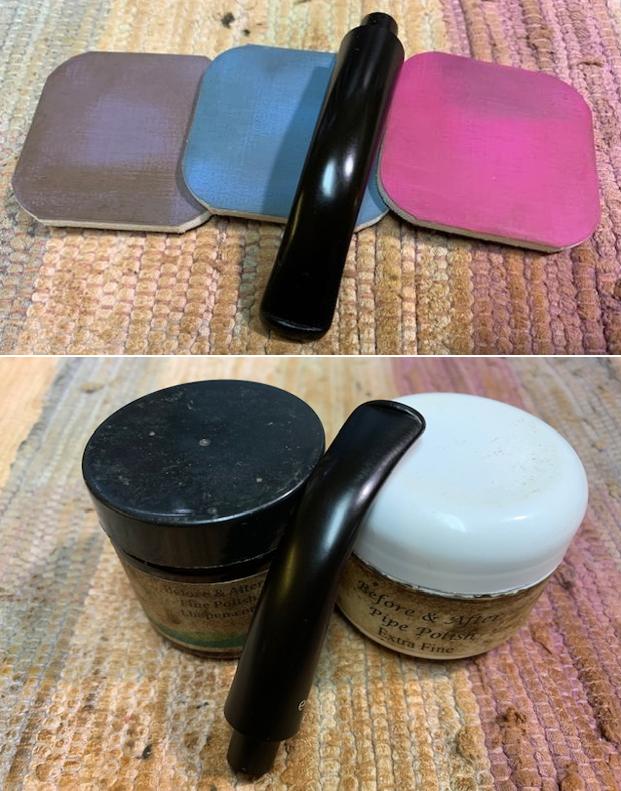
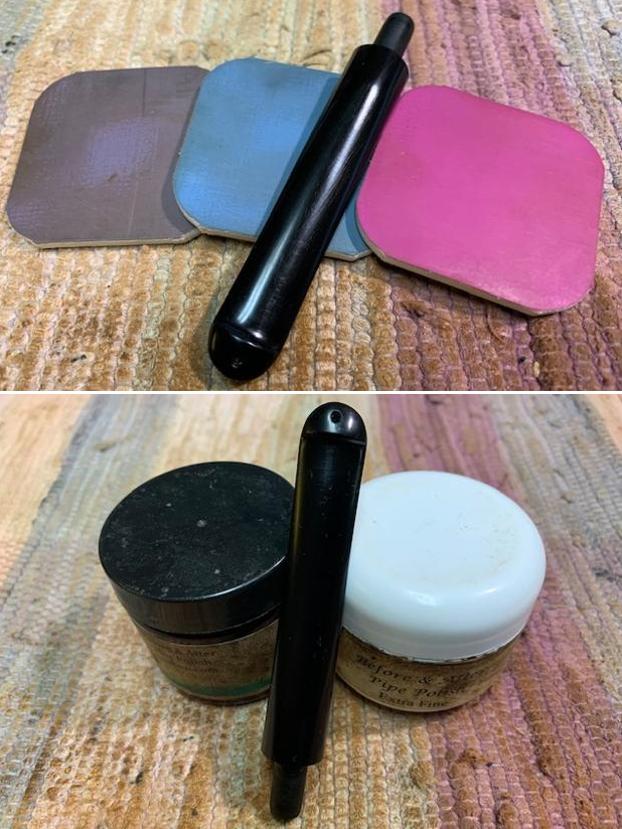
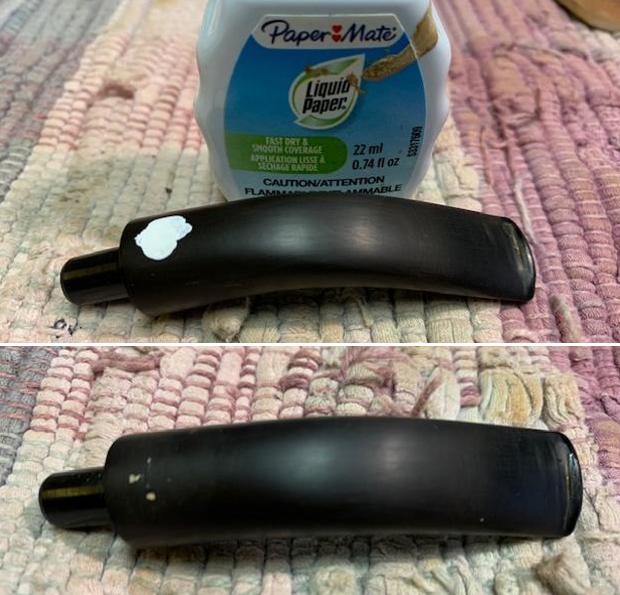 I polished the stem with micromesh sanding pads – dry sanding with 1500-12000 grit sanding pads. I wiped it down after each sanding pad with Obsidian Oil. I polished it with Before & After Pipe Stem Polish – both Fine and Extra Fine. I gave it a final coat of Obsidian Oil.
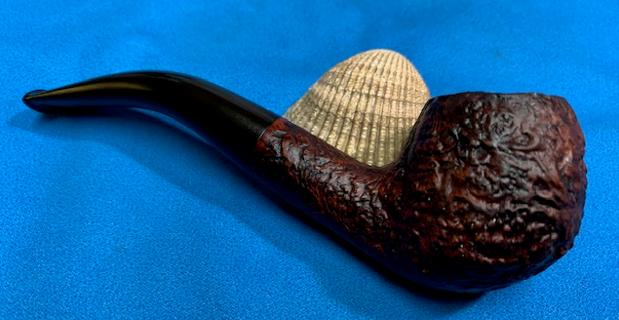
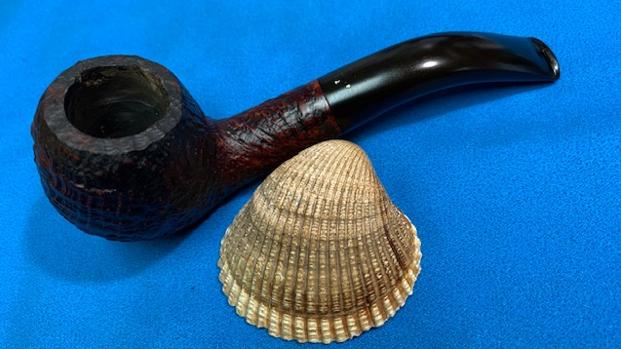
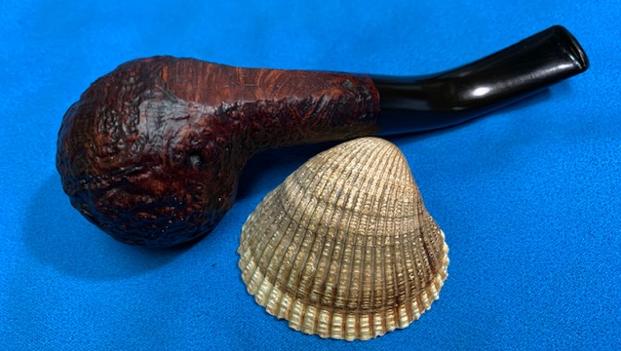
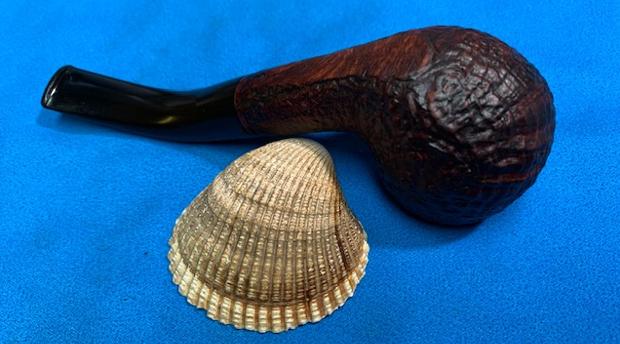
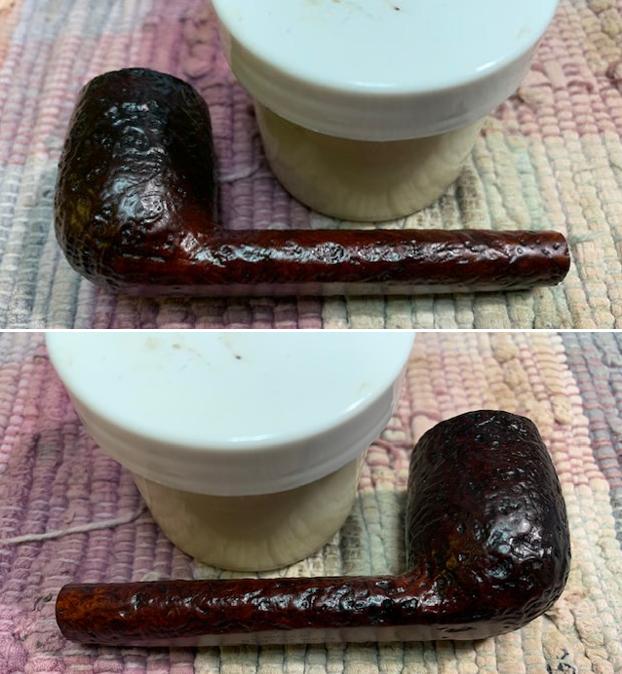
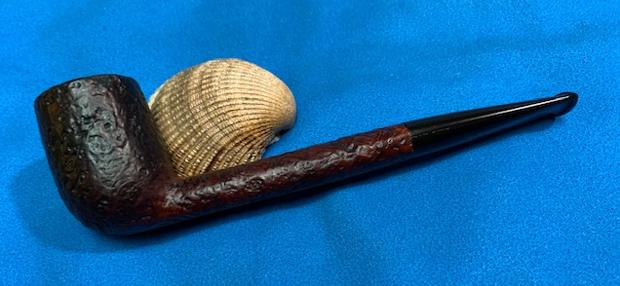
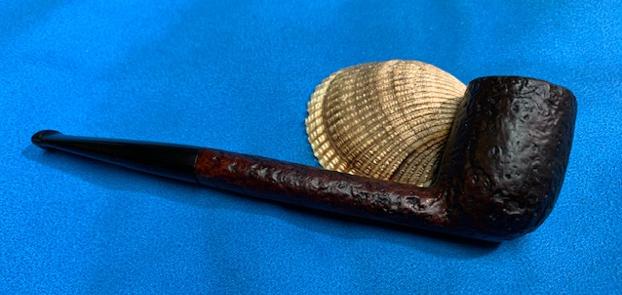
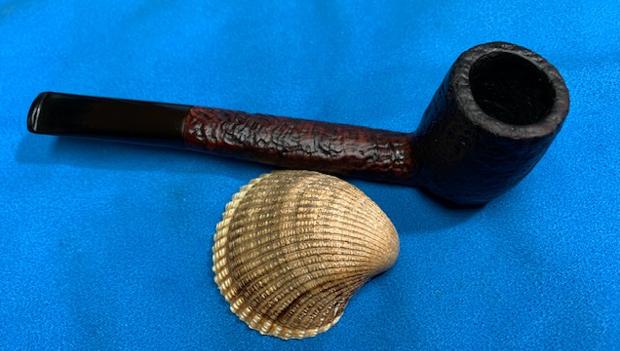
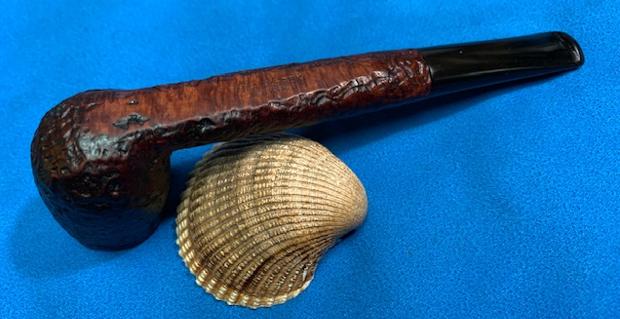
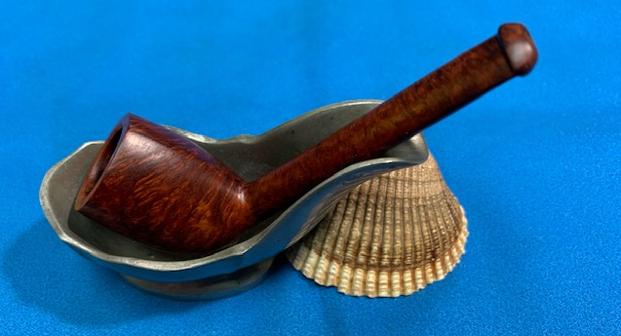
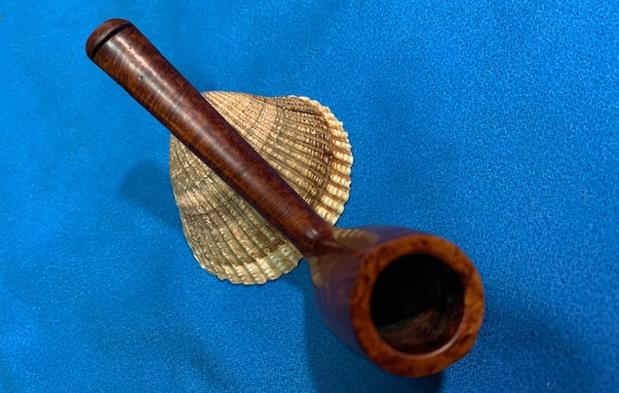
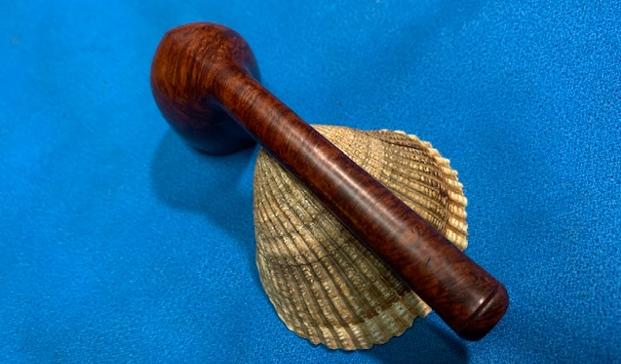
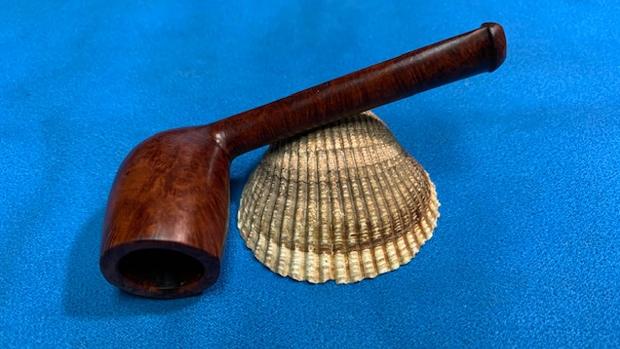
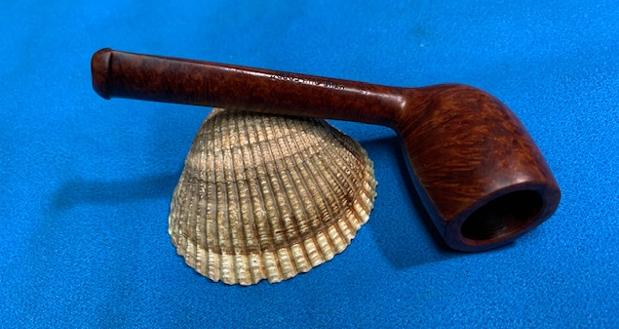
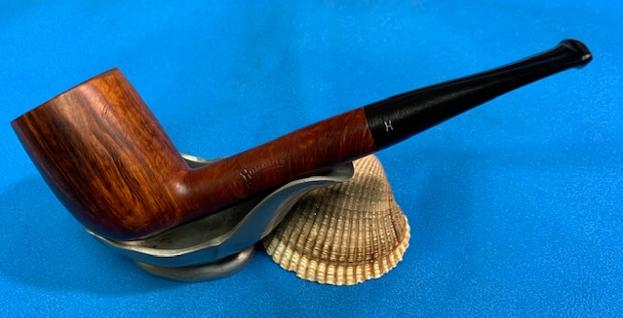
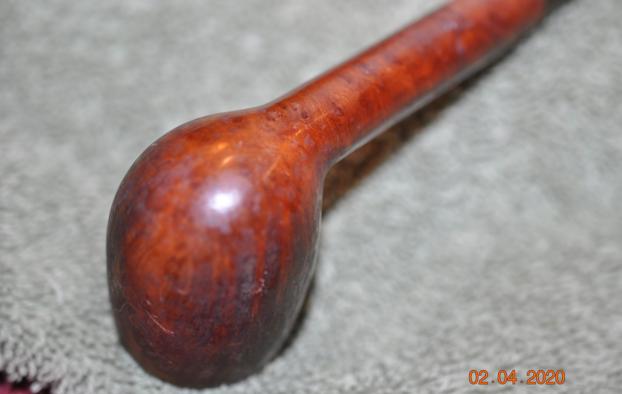
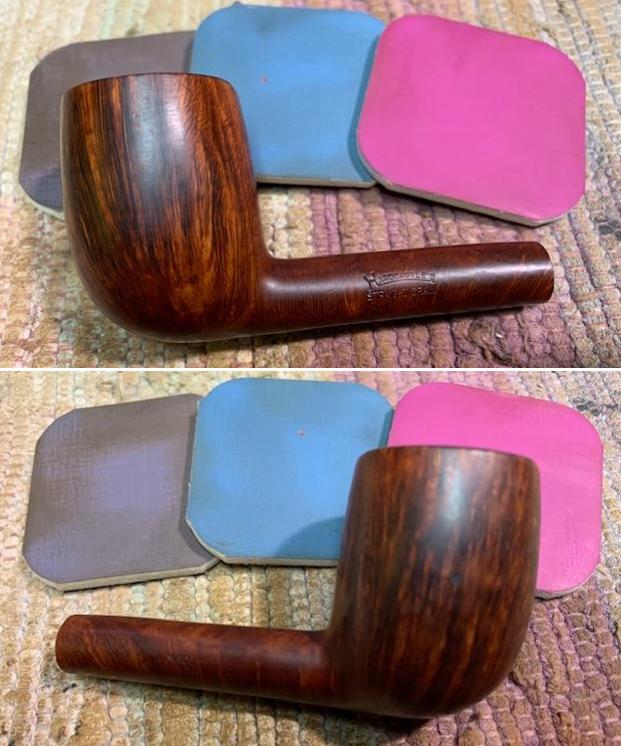
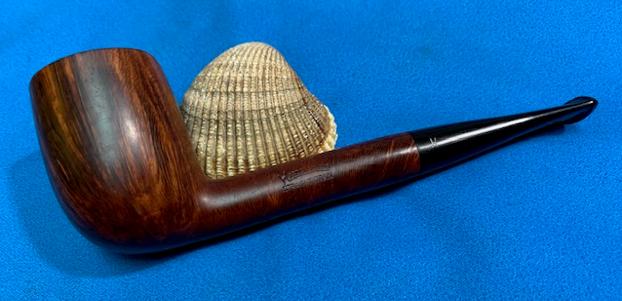
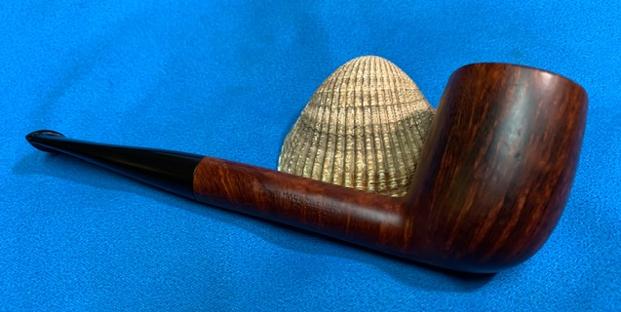
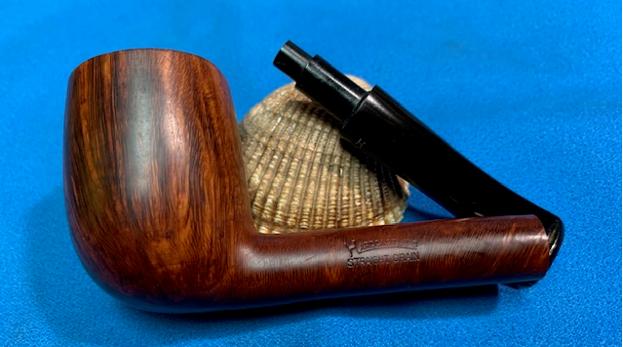
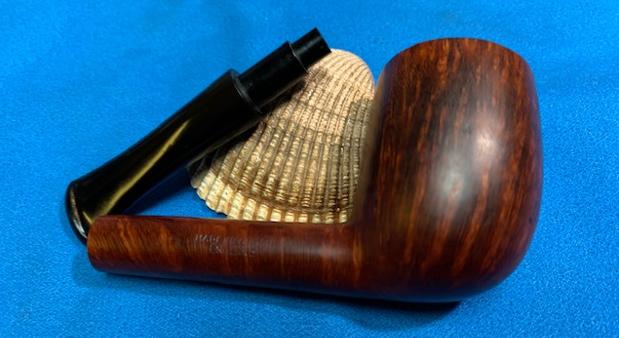
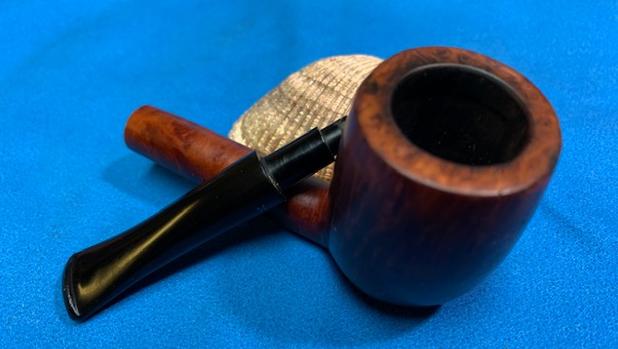
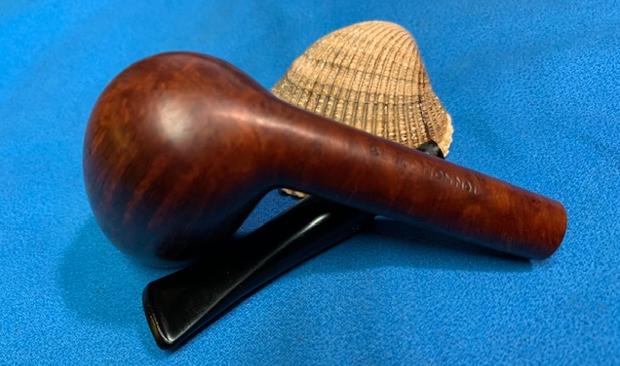
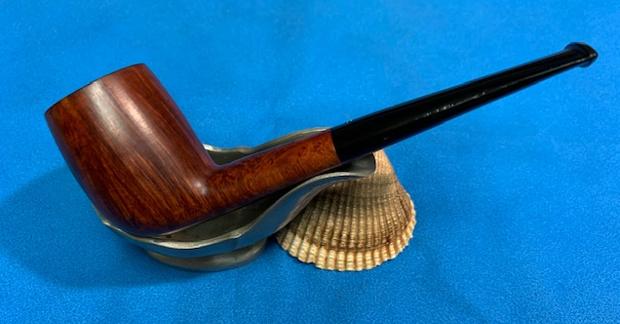
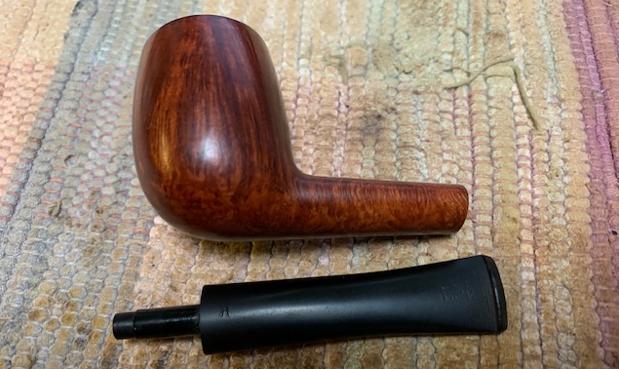
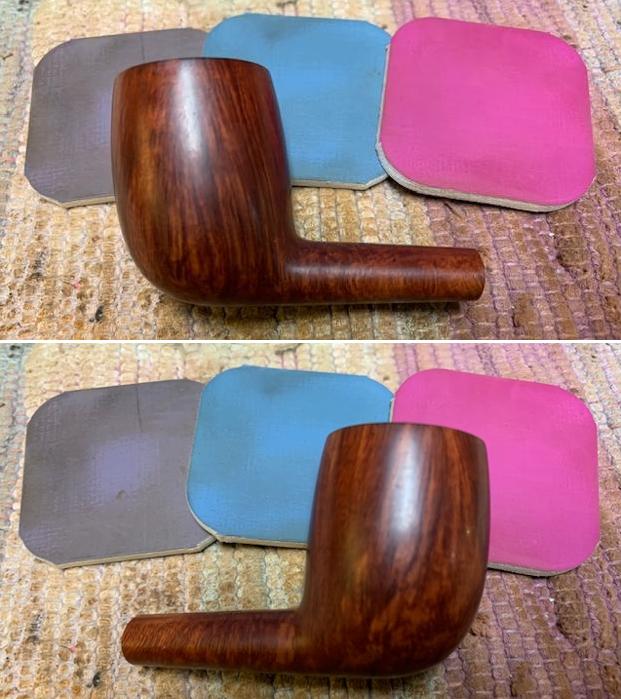
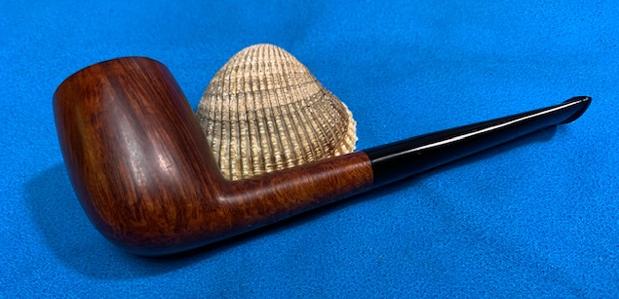
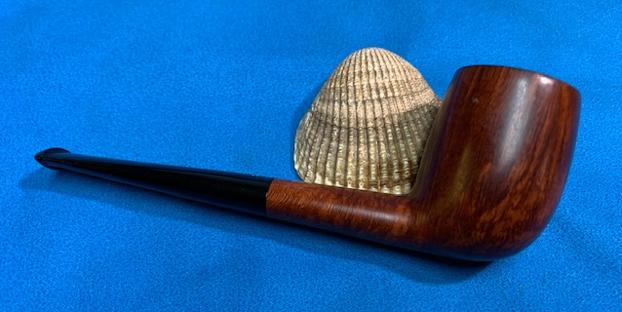
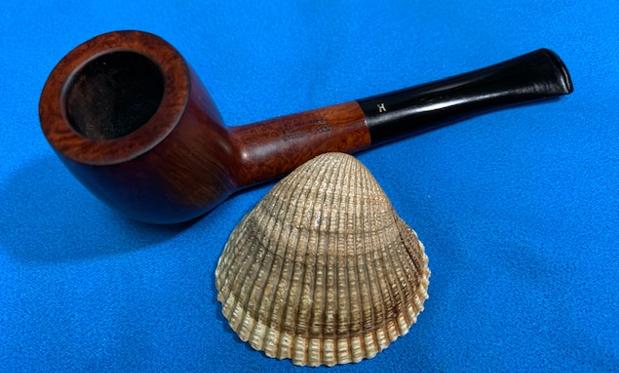
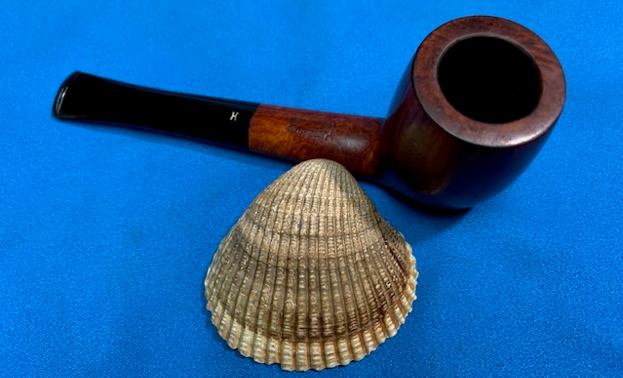
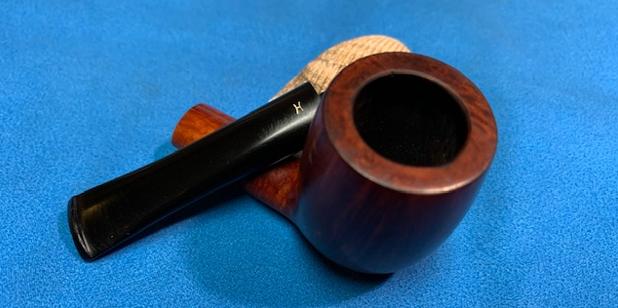
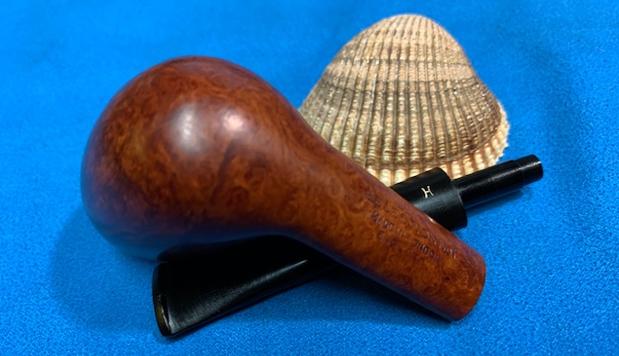
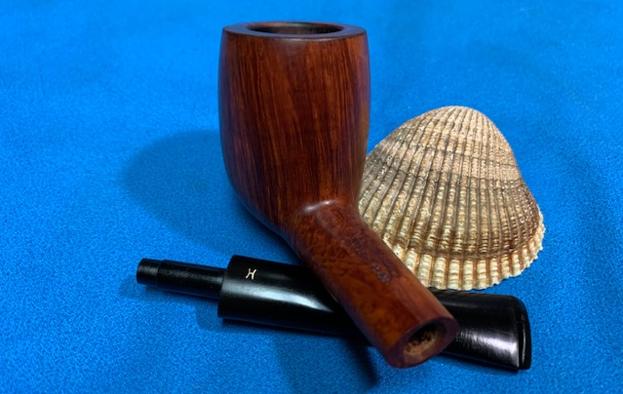
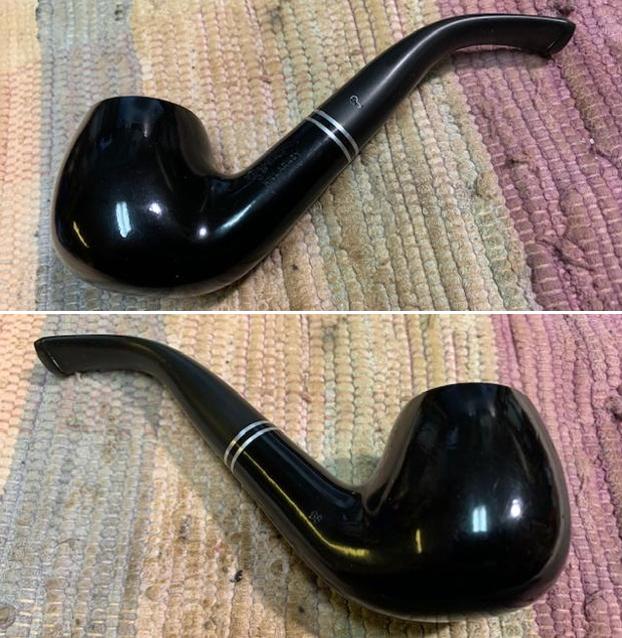
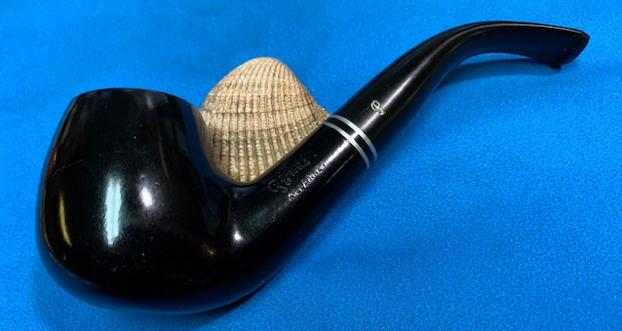
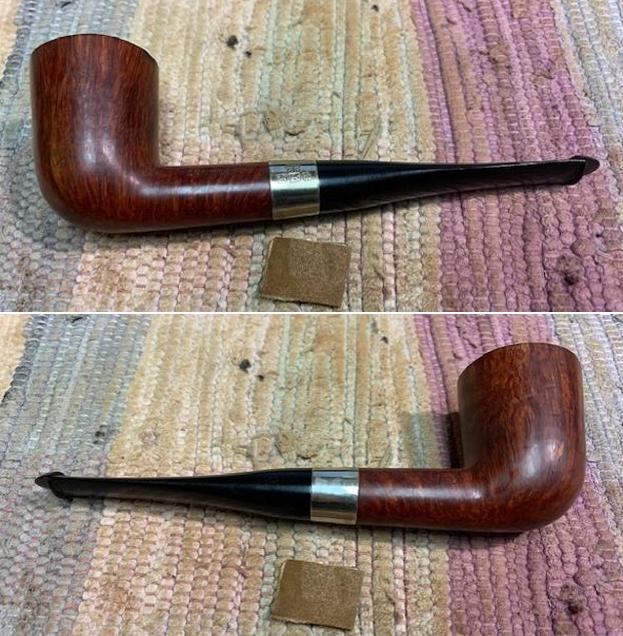
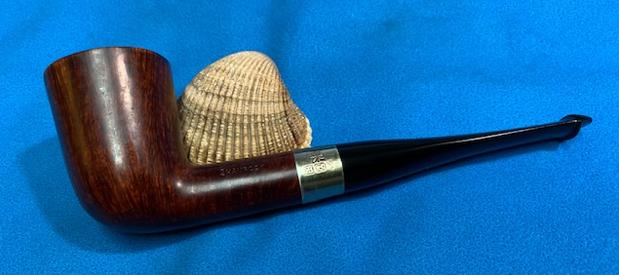
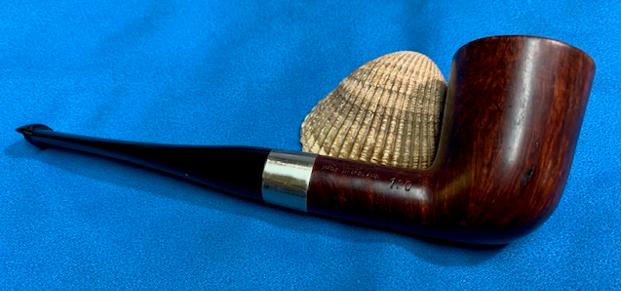
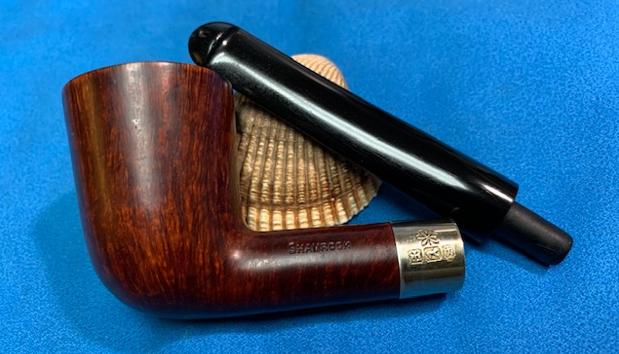
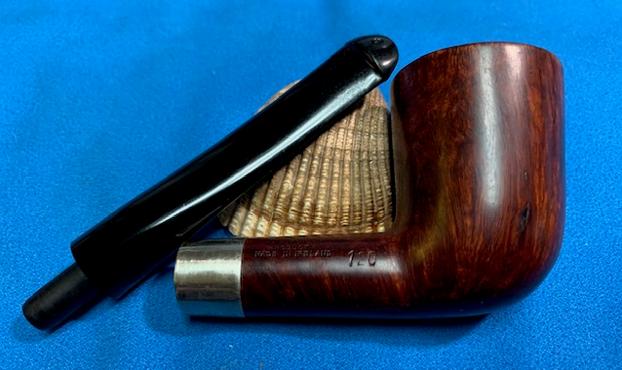
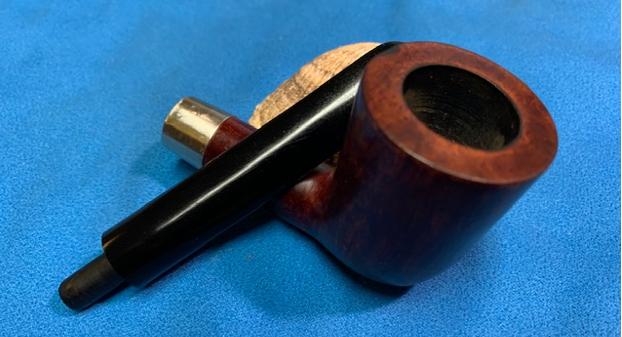
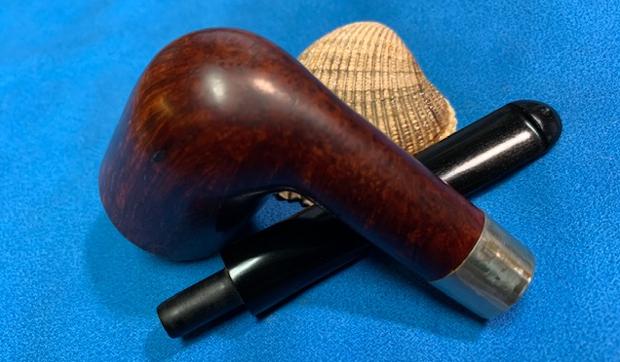
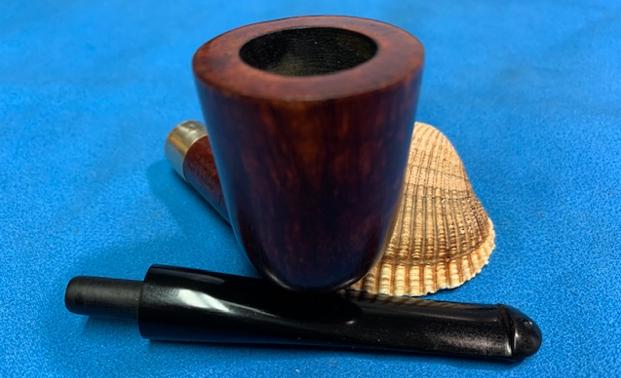
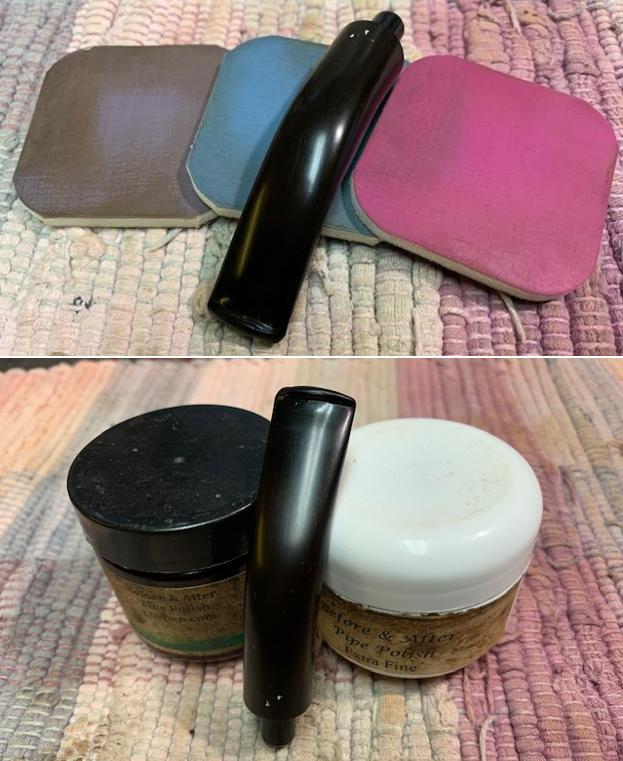 With the bowl and the stem finished I put the beautiful Sandblast Barling’s Make Fossil 406 EXEL Bent Apple back together and buffed it on the wheel using Blue Diamond to give it a shine. I gave the bowl multiple coats of Conservator’s Wax and the stem multiple coats of carnauba wax on the wheel. I buffed it with a clean buffing pad to raise the shine. I hand buffed it with a microfiber cloth to deepen the shine. It really is a great looking sandblast. The dimensions of the pipe are – Length: 5 ½ inches, Height: 1 ½ inches, Outside diameter of the bowl: 1 ¼ inches, Chamber diameter: ¾ of an inch. The weight of this large pipe is 1.55ounces /44grams. This Barling’s Make Fossil Bent Apple is another great find in this collection. It is a shape that touches all of my buttons. It is one that I am still trying to figure out what to do with. This is another pipe that has the possibility of transporting the pipe man or woman back to a slower paced time in history where you can enjoy a respite. Thanks for walking through the restoration with me.