Blog by Steve Laug
I am working on another pipe from Bob Kerr’s estate, another one of his Petersons. It is beautiful bent billiard with a taper stem. It is a large pipe that has some amazing grain on the briar. I have restored nine of his Peterson pipes and two of these were Peterson’s pipes made specifically for import into the Canadian market – one was a Kapruf 54 sandblast bent billiard (https://rebornpipes.com/2019/08/09/back-to-bob-kerrs-estate-another-canadian-import-petersons-kapruf-a-54/) and the other was a Kapruf 9BC 56 (https://rebornpipes.com/2019/08/09/back-to-bob-kerrs-estate-linking-petersons-kapruf-9bc-with-the-56-shape-number/). These were interesting that they had a unique numbering system designed for Petersons pipes that were specifically brought to Canada by the Canadian importer, Genin, Trudeau & Co. of Montreal, Quebec. I have included the links on that company below. (https://rebornpipes.com/2016/09/13/petersons-pipes-brochure-from-genin-trudeau-co-montreal-quebec/). I restored an English Made Peterson’s System ‘0’ 1307 bent billiard a (https://rebornpipes.com/2019/08/17/an-english-made-petersons-system-0-1307-bent-billiard-from-bob-kerrs-estate/) and a Republic Era Peterson’s Flame Grain Bent billiard with a fishtail stem (https://rebornpipes.com/2019/08/16/a-petersons-flame-grain-x220s-bent-billiard-from-bob-kerrs-estate/).
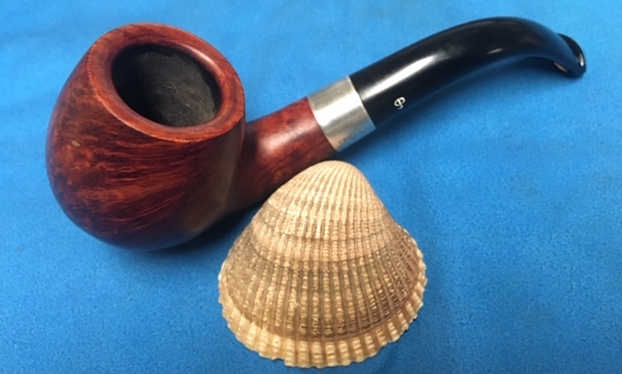
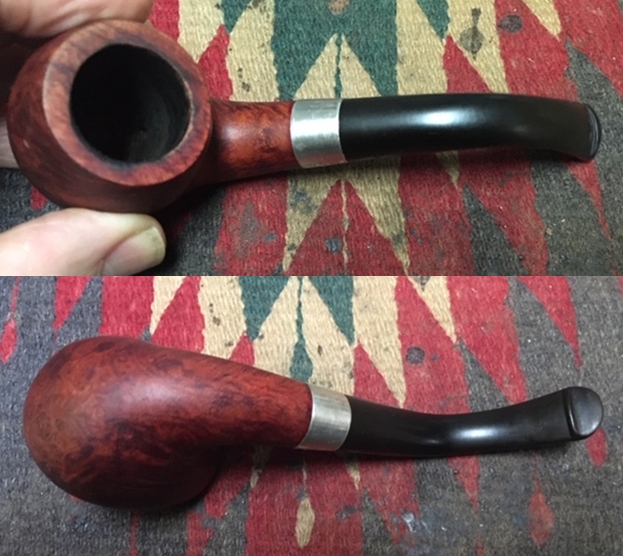
I have been enjoying working on these Petersons particularly because Jeff has done such a thorough cleanup of them before I receive them. When I took it out of the box of the pipes that Jeff had cleaned up and sent back to me, I could see that it was stamped Peterson’s “Sterling Silver” on the left side of the shank next to the band. The right side of the shank was stamped Made in the Republic of Ireland over the shape number 68. It has some stunning grain around the bowl and shank under the thick grime. There was a thick cake in the bowl with remnants of tobacco stuck on the walls. There was a fair lava overflow on the rim. The top and edges of the rim looked good under the grime. It appears that there may be some damage on the inner edge on the left front. I think that there was a beautiful pipe underneath all of the buildup of years of use. The band is stamped Peterson’s over Dublin followed by Sterling Silver on the left side. On the underside are three hallmarks – The Hibernia stamp, the Crowned Harp stamp and finally the letter “O”. The stem was oxidized and calcified toward the end with some tooth chatter but surprisingly it did not have the deep tooth marks that I have come to expect from Bob’s pipes but the button edges were worn. Jeff took photos of the pipe before he started his cleanup work on it.  Jeff took photos of the bowl and rim top to show the thick, hard cake in the bowl and the lava build up on the top of the rim and the edges of the bowl. The rim top, with the inner bevel appeared to be in good condition with a potential burn marks on the left front. The outer edges of the rim also appeared to be in good condition.
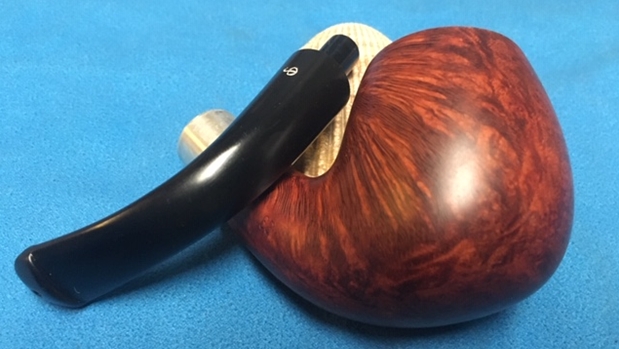
  Jeff took photos of the sides and heel of the bowl to show the condition of the finish. You can see the beautiful birdseye grain on the front and the heal. The flame and mixed grain on the back and sides of the bowl and shank. Even under the dirt and debris of the years it looked very good.
  Jeff took photos of the stamping on both sides of the bowl and shank. The vertical stamping on the left side was readable as you can see from the photos. It read Peterson’s “Sterling Silver”. The stamp on the right side read Made in the Republic of Ireland with the shape number 68 underneath and toward the bowl.
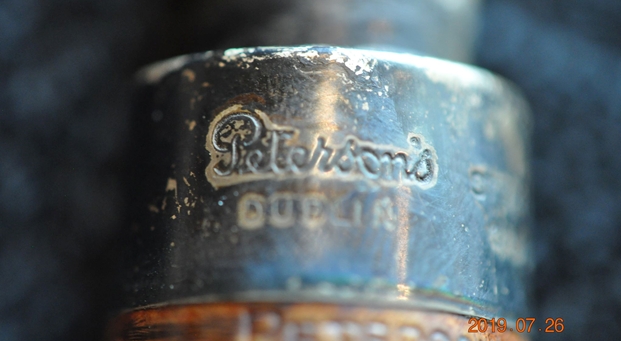
 The band was also stamped in the silver. Jeff took photos of the stamping. On the left side of the band/ferrule it is stamped Peterson’s Dublin. As the pipe is turned it reads Sterling Silver. Finally on the underside it is stamped with three hallmarks -1. Hibernia, 2. Crowned Harp and 3. The letter “O”. I will need to look that up during the restoration.
 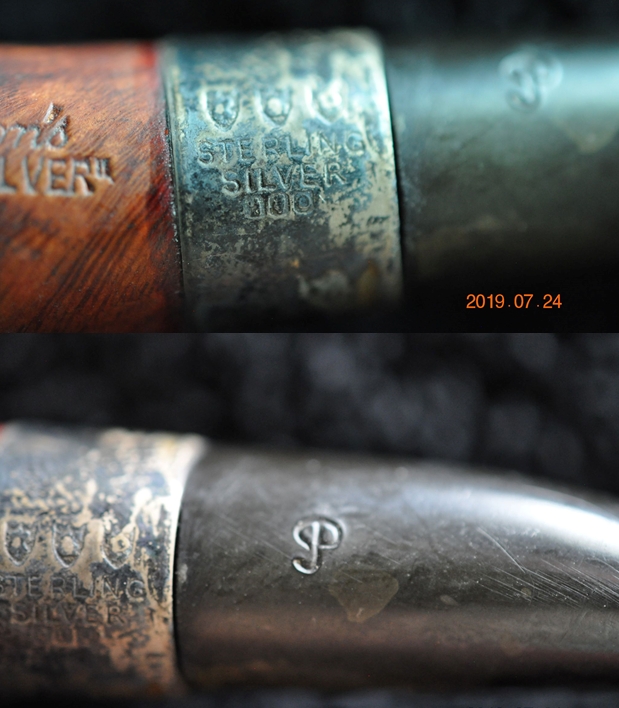 Jeff took photos of the top and underside of the stem showing the tooth chatter, scratching and oxidation on the stem surface and wear on the edges of the button.
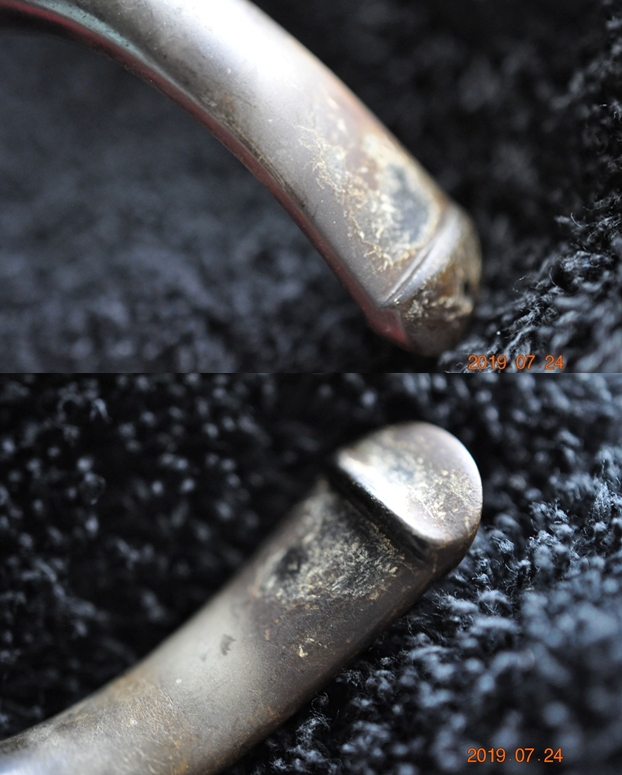 I turned to a Peterson Catalogue that I have on rebornpipes and looked up the Classic Range Sterling Silver pipes (https://rebornpipes.com/tag/peterson-hallmark-chart/). I have put a red box around the shape 68 pipe shown in the catalogue page shown below.
 I turned first to Pipephil’s site to reacquaint myself with the Sterling Silver. Unfortunately there was no information to be found on this specific line. I then turned to Pipedia’s article on Peterson pipes to see what I could garner from that information. It is a great read in terms of the history of the brand (https://pipedia.org/wiki/Peterson). I have included a bit of the pertinent history here.
1950 – 1989 The Republic Era – From 1950 to the present time, the stamp for this era is “Made in the Republic of Ireland” in a block format generally in three lines but two lines have been used with or without Republic being abbreviated.
During the 1950’s and 60’s the Kapp & Peterson company was still in the ownership of the Kapp family. However 1964 saw the retiral of the company Managing Director Frederick Henry(Harry) Kapp.
In the 1960’s Peterson hallmarked all gold mounted pipes but apparently they used their own marks on silver. This practice stopped at the end of that decade when they started to have all silver bands hallmarked.
- With that information in hand I knew what I was dealing with in terms of the stamping on the pipe. It is a 1980 Republic Period pipe. I also wanted to be able to interpret the hallmarks on the silver band. I have captured a portion of the chart that include below that helps to clarify the meaning of each of the three hallmarks. I like the Hallmark feature on the higher end Peterson pipes with Sterling silver bands. It helps to pin down the date even further.
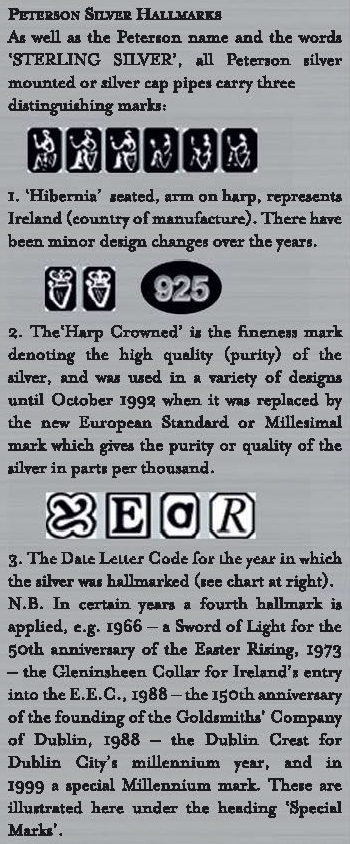
- “Hibernia” seated, arm on harp represents Ireland (country of manufacture). There have been minor design changes over the years.
- The “Harp Crowned” is the fineness mark denoting the high quality (purity) of the silver, and was used in a variety of designs until October 1992 when it was replaced by the new European Standard or Millesimal mark which gives the purity or quality of the silver in parts per thousand.
- The Date Letter Code for the year in which the silver was hallmarked (see the chart below). In certain years a fourth hallmark is applied – for example 1966 – a Sword of Light for the 50th anniversary of the Easter Rising 1973. There were also other marks used for the fourth hallmark.
The pipe on my table had the Hibernia seated mark (Ireland) followed by the Harp Crowned signifying Sterling Silver percentage and finally in this case a lower case “o”. Each of the hallmarks was in an octagonal cartouche. The chart below helps me identify the date mark to 1980. I have highlighted the 1980 mark with a red arrow in the chart below.
I have included the entire Hallmark chart for ease of reference show any of you be looking to date the pipes that you are working on at present. I took photos of the pipe with the right stem. With over 125 pipes to clean from Bob’s estate I am very glad for Jeff’s help cleaning them. He remembers this pipe as one of the really dirty ones in Bob’s estate. He cleaned this filthy pipe with his usual penchant for thoroughness that I really appreciate. This one was a real mess and I did not know what to expect when I unwrapped it from his box. He reamed it with a PipNet pipe reamer and cleaned up the reaming with a Savinelli Fitsall Pipe Knife. He scrubbed out the internals with alcohol, pipe cleaners and cotton swabs until the pipe was clean. He scrubbed the exterior of the bowl with Murphy’s Oil Soap and a tooth brush to remove the grime and grit on the briar and the lava on the rim top. The finish looks very good with great looking grain around the bowl and shank. Jeff soaked the stem in Before & After Deoxidizer to remove the oxidation on the rubber. When the pipe arrived here in Vancouver for the second stop of its restoration tour I was amazed it looked so good.
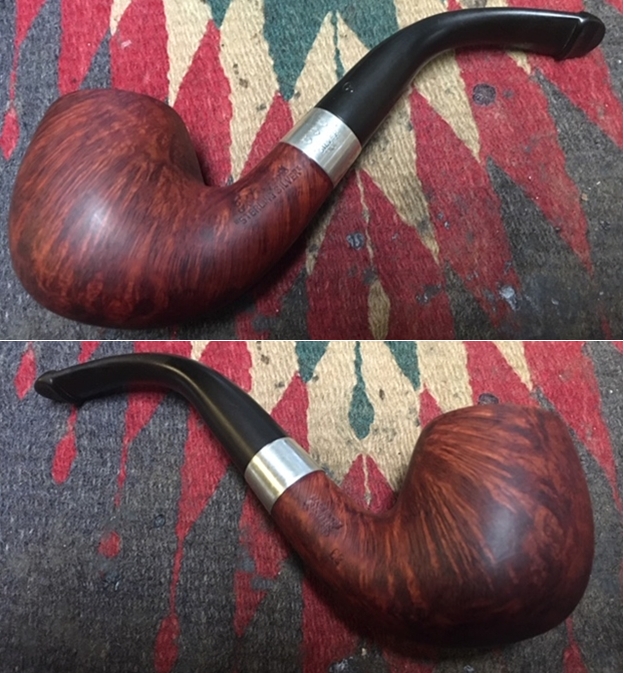
 I took some close up photos of the rim top and also of the stem surface. I wanted to show what an amazing job Jeff did in the cleanup of the rim top. The rim top was burned and darkened on the left front inner edge. I also took close up photos of the stem to show the lack of tooth marks and chatter on the stem surface. It was very clean.
  One of the things I appreciate about Jeff’s cleanup is that he works to protect and preserve the nomenclature on the shank of the pipes that he works on. The stamping on this one was very faint to start with so I was worried that it would disappear altogether with the cleanup. He was not only able to preserve it but it is clearer than shown in the earlier photos. I took some photos to show the clarity of the stamping. I have noticed that many restorers are not careful to protect the stamping in their cleaning process and often by the end of the restoration the nomenclature is almost destroyed. I would like to encourage all of us to be careful in our work to preserve this as it is a critical piece of pipe restoration! I also have included a photo of the cleaned up hallmarks that were noted above.
 Since this is another pipe Bob’s estate I am sure that some of you have read at least some of the other restoration work that has been done on the previous pipes. You have also read what I have included about Bob Kerr, the pipeman who held these pipes in trust before I came to work on them (see photo to the left). Also, if you have followed the blog for long you will already know that I like to include background information on the pipeman whose pipes I am restoring. For me, when I am working on an estate I really like to have a sense of the person who held the pipes in trust before I worked on them. It gives me another dimension of the restoration work. I asked Brian if he or his wife would like to write a brief biographical tribute to her father, Bob. His daughter worked on it and I received the following short write up on him and some pictures to go along with the words including one of Bob’s carvings. Once again I thank you Brian and tell your wife thank you as well.
I am delighted to pass on these beloved pipes of my father’s. I hope each user gets many hours of contemplative pleasure as he did. I remember the aroma of tobacco in the rec room, as he put up his feet on his lazy boy. He’d be first at the paper then, no one could touch it before him. Maybe there would be a movie on with an actor smoking a pipe. He would have very definite opinions on whether the performer was a ‘real’ smoker or not, a distinction which I could never see but it would be very clear to him. He worked by day as a sales manager of a paper products company, a job he hated. What he longed for was the life of an artist, so on the weekends and sometimes mid-week evenings he would journey to his workshop and come out with wood sculptures, all of which he declared as crap but every one of them treasured by my sister and myself. Enjoy the pipes, and maybe a little of his creative spirit will enter you!
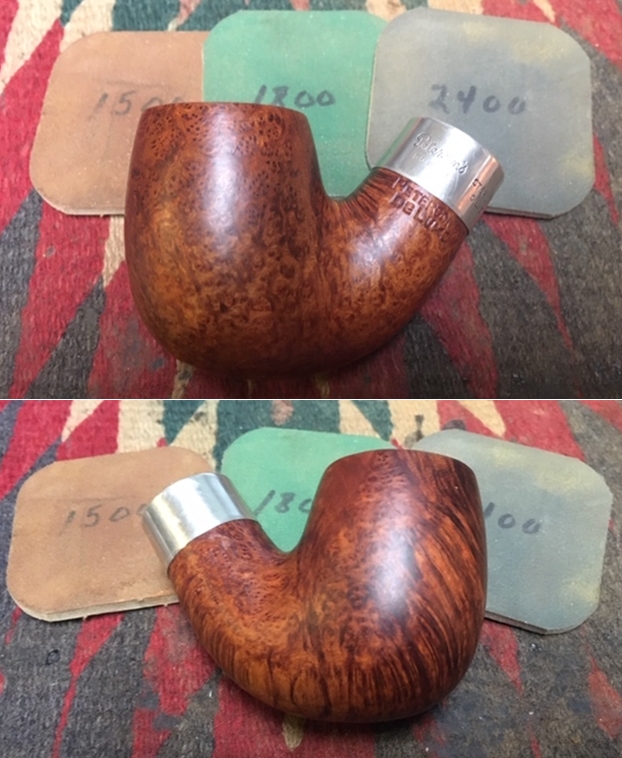
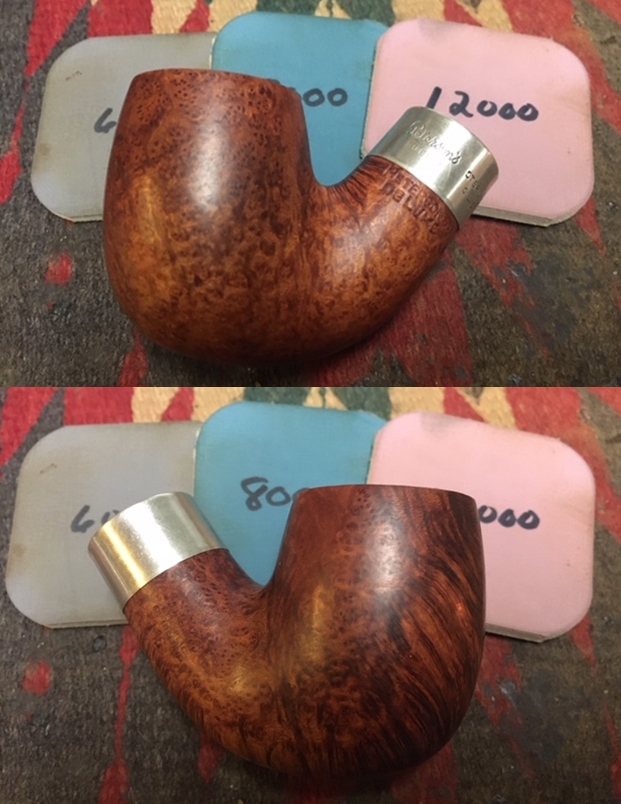
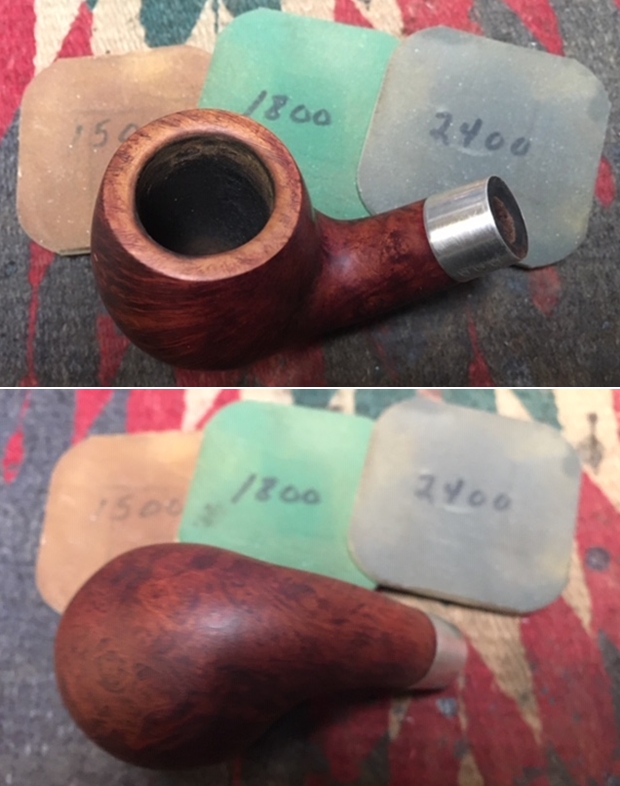
Now with all of the background on the line and the background on Bob Kerr it was time to get on with the restoration of this beautifully grained Peterson’s “Sterling Silver” 68 Bent Billiard. I am really coming to appreciate the hard cleanup work that Jeff did on these pipes. They were a real mess when I sent them to Jeff and I have to tell you it was great that I did not need to clean this pipe. I decided to start the process by cleaning up the left front inner edge of the rim top. I used a folded piece of 220 grit sandpaper to smooth out the edge and give it a bevel. I polished the briar with micromesh sanding pads – wet sanding it with 1500-12000 grit pads and I wiped the bowl down after each sanding pad with a damp cloth. The bowl began to take on a finished shine.


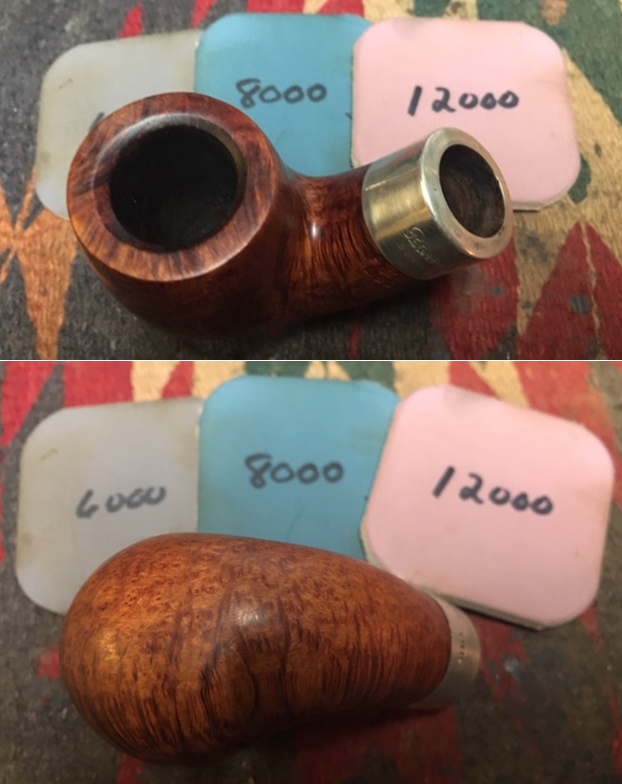
 I used Mahagony and Cherry stain pens to restain the rim top. The combination blends with the stain on the body of the bowl.
 I rubbed the bowl and rim down with Before & After Restoration Balm. I worked it into the surface of the briar with my fingertips to clean, enliven and protect it. I let the balm sit for a little while and then buffed with a cotton cloth to raise the shine. I really like watching the Balm do its magic and bring the briar alive.
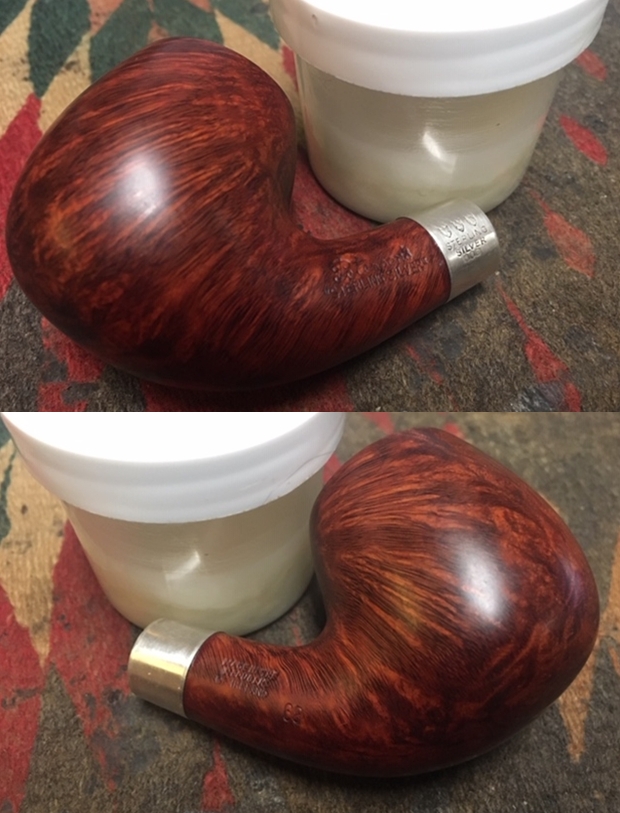

 The stem was in such good condition that I could skip working on it with sandpaper and went directly to polishing it with micromesh sanding pads – wet sanding with 1500-12000 grit pads. I wiped the stem down after each sanding pad with Obsidian Oil. I polished it with Before & After Pipe Stem Polish – both Fine and Extra Fine. Once I had finished the polishing I gave it a coat of a new product I am experimenting with from Briarville Pipe Repair. It is called “No Oxy Oil” and it is made to protect the stem from oxidizing. I set it aside to dry.
 I used some liquid paper to touch up the P on the left side of the stem. I applied it and let it dry and cure. Once it had cured I scraped the excess off with a tooth pick. The P looks very good.
 I polished it with Before & After Pipe Stem Polish – both Fine and Extra Fine. Once I had finished the polishing I gave it a coat of a new product I am experimenting with from Briarville Pipe Repair. It is called “No Oxy Oil” and it is made to protect the stem from oxidizing. I set it aside to dry.
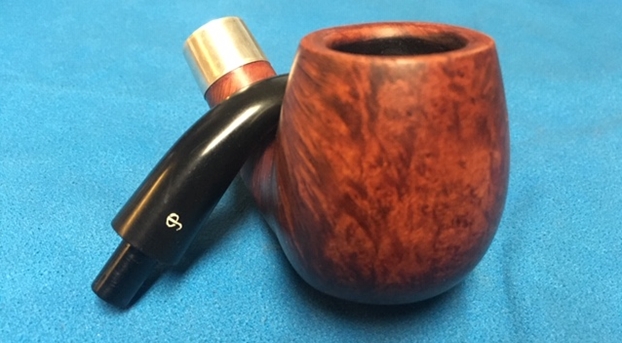
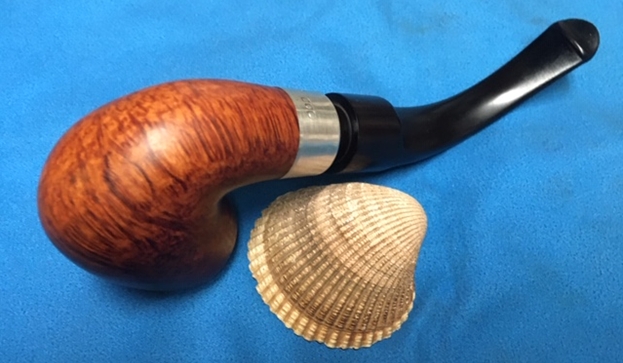
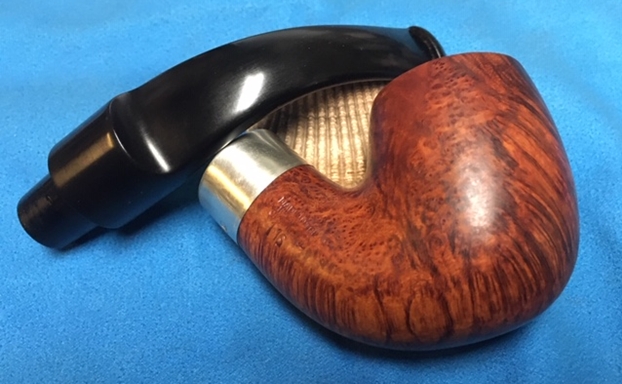
  As usual at this point in the restoration process I am excited to be on the homestretch. I look forward to the final look when it is put back together, polished and waxed. I put the bowl and stem back together. I polished the bowl and stem with Blue Diamond to polish out the scratches in the briar and the vulcanite. I gave the bowl and the stem multiple coats of carnauba wax. I buffed the pipe with a clean buffing pad to raise the shine. I hand buffed it with a microfiber cloth to deepen the shine. The pipe polished up pretty nicely. The grain really pops with the wax and polish. The shiny black vulcanite stem is a beautiful contrast to the browns of the bowl and thick shank. This Peterson’s “Sterling Silver” 68 Bent Billiard was another fun pipe to work on thanks to Jeff’s cleanup work. The pipe almost looks unsmoked. The “Sterling Silver” has a silver Band/Ferrule that is hallmarked and works as a contrast between the stem and the briar and binds it all together. It really is another stunning piece of briar whose shape follows the flow of the briar. The pipe is comfortable pipe to hold in the hand. The finished pipe is shown in the photos below. The dimensions of the pipe are Length: 6 inches, Height: 2 inches, Outside diameter of the bowl: 1 ¼ inches, Chamber diameter: ¾ of an inch. This beautiful pipe will be going on the rebornpipes store if you would like to add it to your collection and carry on Bob’s legacy. If not, I have a lot more of Bob’s estate to work on of various brands. Perhaps one of those will catch your attention. Thanks for reading this blog and my reflections on the pipe while I worked on it. This is an interesting estate to bring back to life.