Blog  by Robert M. Boughton
Copyright © Reborn Pipes and the Author except as cited
https://www.facebook.com/roadrunnerpipes/
“Ah,” she cried, “you look so cool.”
— Daisy to Gatsby in The Great Gatsby (1925), Ch. 7, by F. Scott Fitzgerald
INTRODUCTION
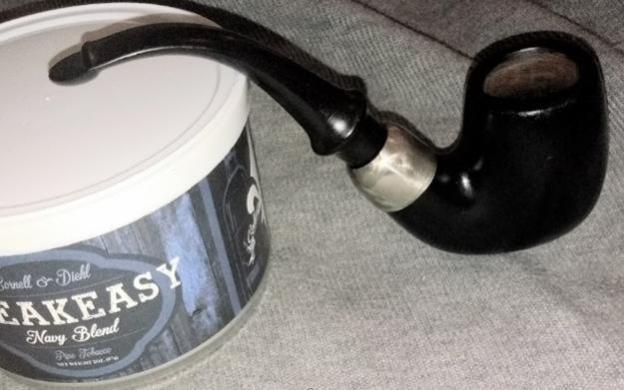
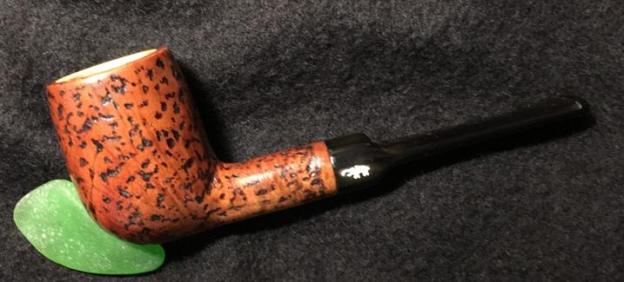
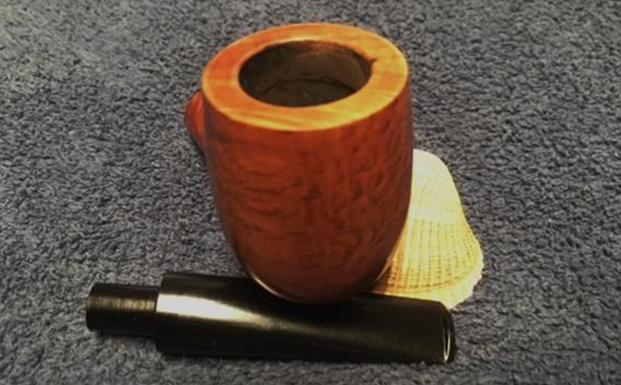
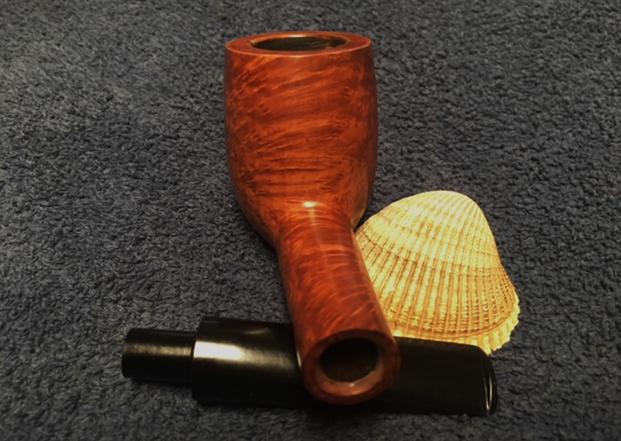
The whole unlikely adventure started when one of my two housemates, Mike, who rents a room from the owner as I do, somehow got it in his head that he wanted me to make the perfectly nice Trident full bent billiard I sold him for next to nothing into a dress pipe. As Mike is a complete novice when it comes to pipes, I didn’t even want to guess how he heard of the term many far more experienced smokers don’t know. The Trident is fashioned in the classic style of a Peterson system pipe.

Trident original before

Trident original after

Gaboon ebony *
Dress pipes have also been called by other appropriate adjectives including dinner, evening and cocktail, and now are more often referred to as ebony. That may be the worst name for this style, which renders the pipe with a jet black and shiny finish, as it refers to one of the rarest and most expensive (and now almost extinct) hardwoods from the tree of the same name. Ebony heartwood tends toward dark black, but the extreme density – 3,080 lbf compared to 2,090 for briar on the Janka Scale – eats up cutting equipment like hors-d’oeuvres at a redneck bachelor party. For that and other reasons, it is a poor choice for pipes. But one thing is certain: a black dress pipe does look so cool.
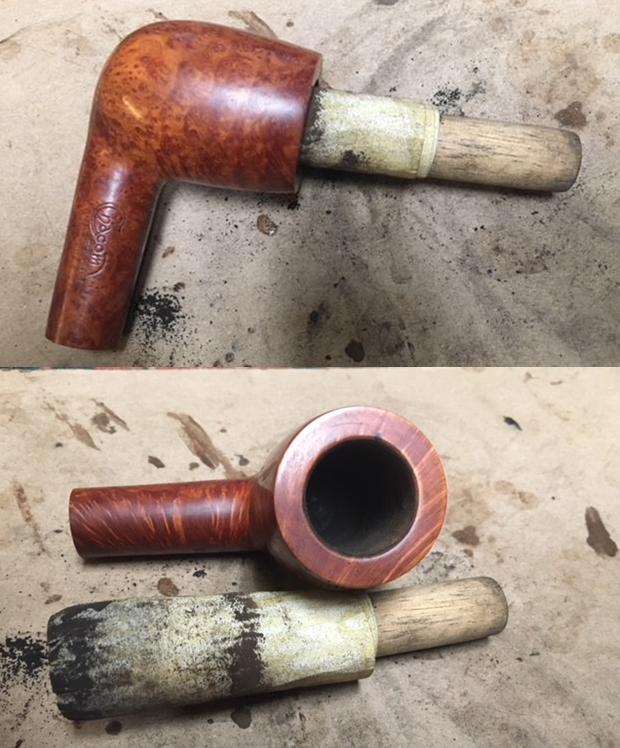
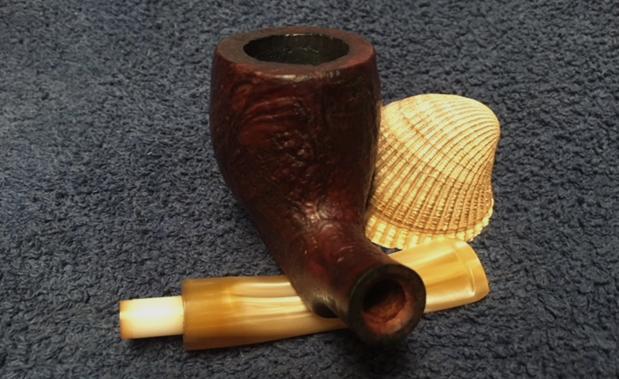
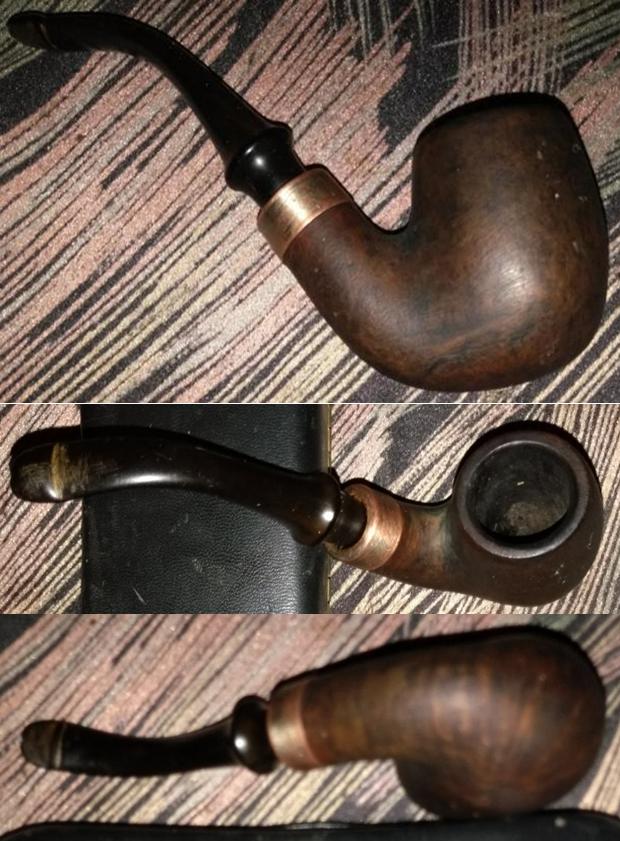
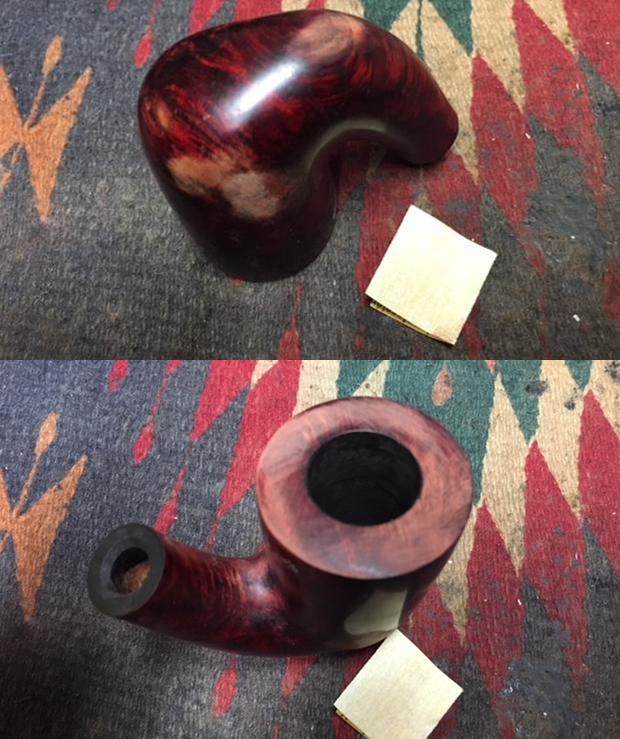
Assuring Mike that I would look into the process and necessary supplies, soon afterward I told him I had a tentative list, and it wouldn’t be expensive. That’s when he dropped the indefensible bombshell on me about how he had thrown the Trident away because “it didn’t work out” and bought a corncob. Then he said he didn’t think I was serious about dressing up the Trident. Is that not the perfect example of waffling or am I missing something? By an amazing stroke of luck, the trash collectors had not come, and at my rather frantic suggestion Mike retrieved the pipe from the garbage. Here’s what it looked like after maybe a month of use by him. The velocity of the Trident’s trip from being restored to like-new condition to worse than when I first received it has to be some kind of record. Needless to say, given the garbage incident and the horrendous wear and tear in such a short time, I was reluctant to turn it into a high maintenance item. When Mike said I could have it, that ended that dilemma. He later regretted the decision – but there’s the only preview of Part 2 of this series I’ll give here.
HISTORY AND THEORY OF THE DRESS PIPE
Dating a pipe, even to an approximation as close as a decade, can be impossible. Determining the origins of names for some shapes, such as the Oom Paul, might be easier but is still murky. [Stephanus Johannes Paulus Kruger, president of the South African Republic, the Transvaal, and a fierce military leader against the British in the Second Boer War (1899-1902), is said to have chain-smoked a pipe of an uncommon shape. His nickname among the Afrikaans inhabitants was Oom, for uncle, Paul – hence, the Oom Paul, although the name is debated, as is most everything pipe-related.] Of course, coming up with a theory for the beginning of a special style of pipe, such as the dress as a finishing method, is by the nature of the guesswork involved much easier.
Dunhill 61032 Dress 1983 courtesy Paronelli Pipe
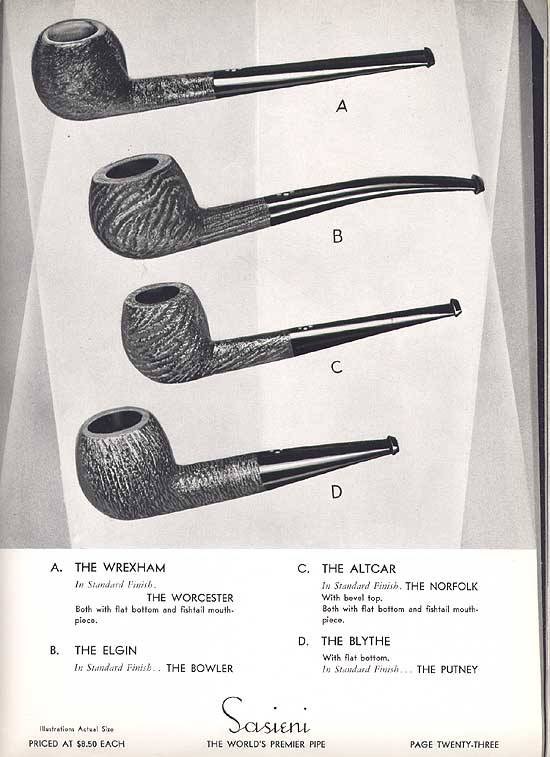
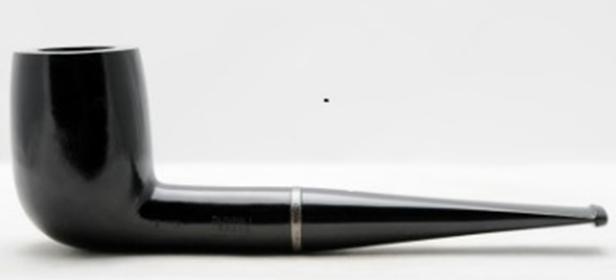
The basic premise of a dress pipe (or in the alternative again, evening, cocktail or ebony) is something that stands out and dazzles from across a room, and further, one that should only be used on special occasions because of its appearance and greater susceptibility to damage. Andrew Wike wrote a thoughtful 2014 essay, in the Pipe Line section of Smokingpipes.com, titled “Dressed for the Occasion.” In a space that could have amounted to no more than a single page from a word processor, Mr. Wike employs elegant concision pondering the important question of which one of his pipes he should take to a friend’s wedding – and he even provides illustrations, descriptions and the basic qualities of a handful he recommends for such formal situations.
Starting his personal debate process with a smooth, jet-black Dunhill billiard derived from the collection Mr. Wike writes started the term “dress pipe” (and similar to the one shown here), he notes the classic elegance of Dunhill’s line, including the traditional sterling silver band, and compares the beautiful work to a tuxedo.
Mr. Wike moves on to Castello’s wonderful Perla Nera line and observes that these pipes vary from having no band or various ferules, as well as this Perla Nera Horn with a silver bamboo band below.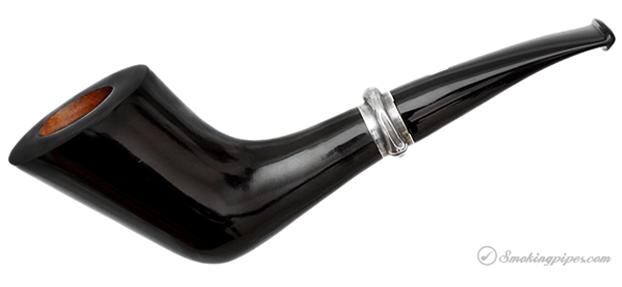 Then Mr. Wike asks the perfect question, one that had been nagging me: “Who says your dress pipes have to be smooth finished?” One excellent illustration is an unusual sandblasted Peterson Cara that SmokingPipes.com calls a bell style Dublin/Calabash hybrid.
 Skipping to the end of Mr. Wike’s list, I have to include his stunning example of a Tsuge dress pipe gone wild, the Urushi Sakura with its hand-painted floral design on the otherwise shimmering lacquer-coated black bowl, a black bamboo extension and brass fittings.
 Here’s my theory. While the actual date of introduction of the black dress pipe is elusive, the likelihood of that flashy style of finish being conceived at all before the 20th century, much less as fashionable, is hard to imagine.
What better period of time and place for such a style than the Roaring ’20s in the U.S.? Although I have not yet found an example from quite that far back, I can’t help the mental image that pops to mind of some of the wealthy revelers of that era, as recorded in The Great Gatsby and summed up with the simple quote opening this blog, trailing wisps of smoke from just such elegant, shiny black pipes with the ballroom lights in West Egg glinting off them.
Dunhill made its formal introduction of the Evening Dress Pipe in 1973, as shown below.

Dunhill Evening Dress Pipe courtesy Pipedia

Nomenclature left side
Nomenclature right side
However, several examples of Dunhill pipes associated with the word cocktail trace to the 1930s. As well as the traditional black model shown below, green and red versions of Dunhill’s Lady’s Cocktail Pipe were made in 1934.

Dunhill Lady’s Cocktail Pipe, courtesy Pipephil
The following magazine ad from March of the same year is a hoot. I couldn’t help letting out a healthy guffaw that startled one of my other housemates, the owner, when I took in the cloying sexism of a bygone era – in particular the idea of protecting the fingers of our precious little homemakers from being yellowed.

Courtesy Pipephil, from Modern Mechanix
If I didn’t know of too many occasions when Dunhill took credit for methods of making pipes that had already been used by different brands, I might have no doubt this was the first dress pipe. But 1934 is too close to the 1920s for my comfort. For now, it remains the earliest I can trace.
PREP WORK
Go a head and chalk it up to coincidence, if you like, but at the very next monthly meeting of my pipe club after I set my mind to dressing up my abused but still savable Trident, I tuned into an interesting conversation next to me. Don Gillmore, a respected artisan whose business is known as Don Warren Pipes (dwpipes) in Albuquerque, was talking to another restorer about the use of shellac on many of his pipes. I was shocked for several reasons, chief of which was that I’ve seen quite a few examples of Don’s masterful creations over the years and never had a clue that shellac might have been involved. I also knew that shellac, like varnish and certain other finishes, can, in excess at any rate, affect a pipe’s ability to breathe and lead to damages. Until that moment, I had only associated it with awful, cheap Chinese pipe abominations, with the one exception being dress pipes for which I deemed the substance a necessary evil. Unable to join the conversation, I resolved to email Don for more information on the subject, in particular how I might go about dressing a pipe in black.
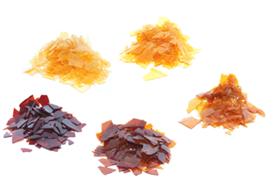
Flake shellac courtesy Wikipedia
First, I looked up shellac online. I was surprised to learn that it is natural and converts to flake form from a resin secreted by the female lac bug on trees in India and Thailand. Really, I’m not a bad raconteur, but I don’t have the gift of gab needed to spin that good of a yarn! The finish has been in use for millennia and in various forms with artwork and wood finishing in general and furniture in particular for centuries, but not until the 1800s did it become preferred to oils and waxes for woods.
The following is a condensed version of the ensuing email exchange between Don and me. Rather than the usual lacquer that seems to be the most common final coat used by the big pipe brands, Don repeated that he uses a thin coat of orange flake shellac on some of his pipes. I asked if black shellac might be as good or better, and his answer was a firm but polite no. He assured me the orange shellac would be clear by the time I reached that point.
To reveal how clueless I was at the outset of my decision to try dressing up a pipe, I read numerous online references to the need for black aniline dye and even consulted the definition of aniline, which in every standard English dictionary published omits the most pertinent aspect. Only after at least an hour of obsessive searching did I find a mind-numbing technical treatise on the subject that mentioned, somewhere in the blur of multiple-digit chemistry terms, the simple word alcohol. Realizing my default leather stain was in fact an aniline dye, I was both relieved by the discovery and angered by the waste of time to which I was subjected. Even when I posted a thread on an online smokers’ forum asking for help, everyone replied that black aniline dye was what I wanted! But a few deep breaths later, I was back to my usual self again.
Don provided links to the site where he buys his orange flake shellac, a chart that shows the various mixtures of the flakes (aka buttons) with, ideally, 190-proof denatured alcohol dependent upon the desired thickness, and even detailed instructions for applying the shellac once it is rendered to pure liquid form. All of this information can be found at obvious links in my sources, but you know I’ll describe the whole process soon enough.
LIQUEFYING FLAKE SHELLAC FOR IDIOTS
The Pound Cut Chart says it all – in fact, maybe more than you need to know for use with pipes – but the order is a bit whacked. The main issue I have with it is how simple the process is compared to the way it’s described. I had to consult Don for more than a few clarifications, which he was happy and gracious to supply. That’s why I’m going to lay it out in this EZ synopsis.
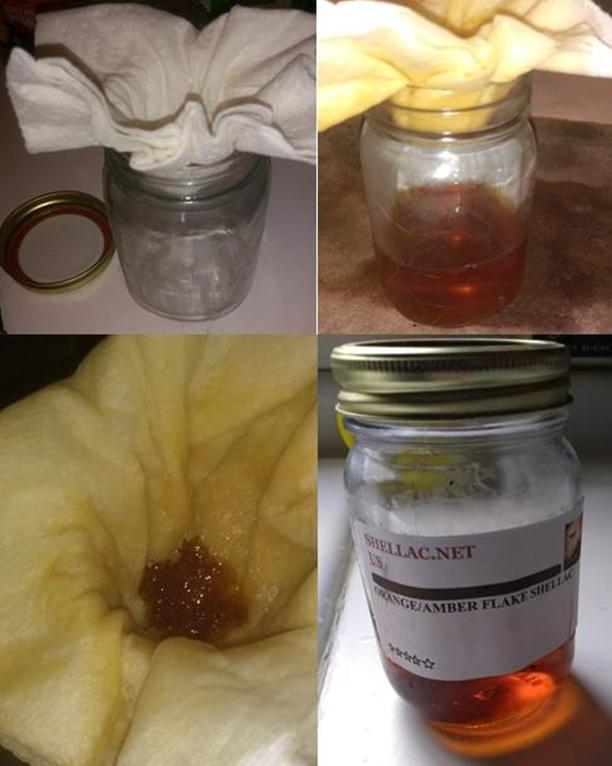
To be sure, the official instructions are spot-on about three points: 190-proof denatured alcohol as the ideal agent for liquefication, the need to crush the flakes to as fine a degree as possible and the mix of alcohol and ground flake for the thickness and amount desired as shown in the chart. Whatever size mix is made should last three months (its effective shelf life), and Behlen Behkol Solvent is specifically mentioned, although I used Everclear. For my first batch of liquid shellac, I did not crush the flakes quite as small as they should have been. It worked out but took longer to dissolve. Here’s how to do it.
-
- From the Pound Cut Chart, decide how much liquid shellac you want and the thickness. Unless you’re going to use it all the time, a little goes a long way. Don recommended one cup of shellac at the one-pound cut (minimum thickness). His reasoning was that it’s easier to apply a second coat if needed than to remove one. Note: I ended up needing to do two coats, so I later made more at the two-pound cut.
- Crush the flakes, again, as fine as possible. I suspect a mortar and pestle would be perfect, but this is Albuquerque where such things other than very small types proved impossible to locate except online. Instead, I improvised with a chopping block and the flat bottom of a ceramic plate. Getting the hang of that method wasn’t easy because the ornery flakes liked to shoot all over the place until I used mind over matter to develop my own style. I highly recommend investing in a mortar and pestle! If you’re thinking you might try grinding the flakes in a blender, remember they’re derived from resin and think again.

- Use a glass or plastic – not metal – container larger than the liquid amount you want. For purposes of this first installment for which I used the one-pound cut, I poured one ounce (eight fluid ounces) of Everclear into a large glass baking pan and then slowly stirred in one ounce of flake with a rubber batter mixer. The official instructions suggest a little every 15-30 minutes and stirring or shaking, as the container allows, as well as “occasional agitation.” I added more flakes at 15-minute intervals but found frequent scraping of the flakes was vital to fight the constant sticking to the bottom of the glass pan.
- The photo above shows the mix about an hour and a half after I finished stirring in the last of the flakes and continued frequent scraping and stirring. As you might notice, my flakes weren’t as fine as they should have been, and some bits are still at the bottom. Then again, maybe that’s just what happens.
- Strain the shellac into a glass or plastic container that has a lid in order to remove any sediment or organic particles. The official instructions give various methods and even combinations, but for the love of all that’s holy, it isn’t rocket science! True, cheesecloth, a thin white cotton cloth or a paint strainer would have been just grand if I had any of them on-hand and going whole hog by “straining through a paint strainer first then through T-shirt or multiple layers of cheese-cloth” might have left me ecstatic. But I used a few pieces of paper towels, and despite losing a little of the finished shellac to soaking all the way into the paper, I was overjoyed with the nice clear result. I still have way more of it left than I can possibly use before it expires.
RESTORATION
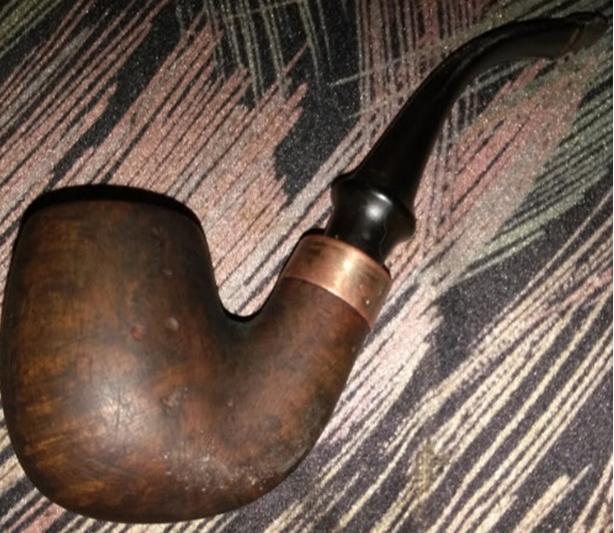
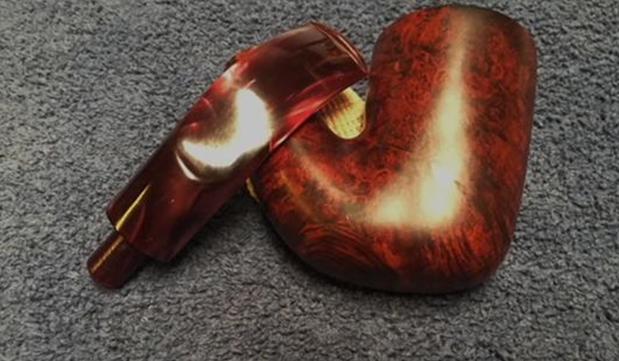
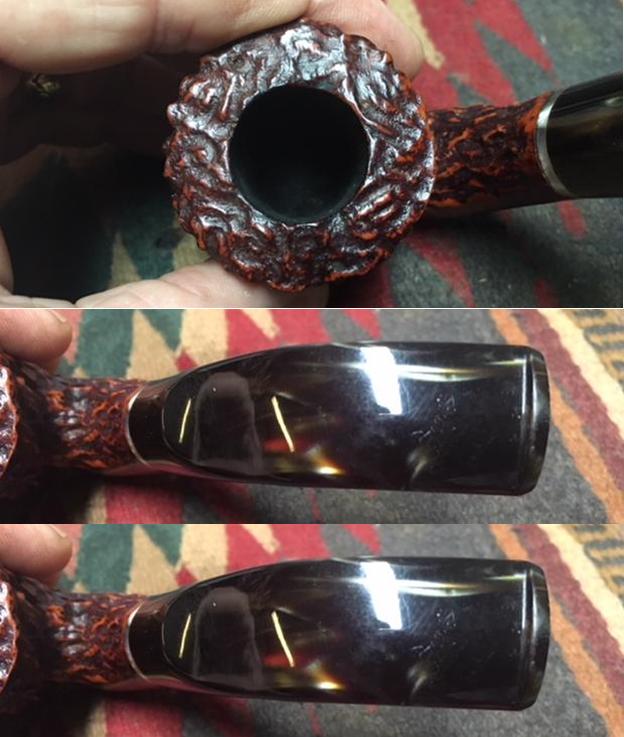
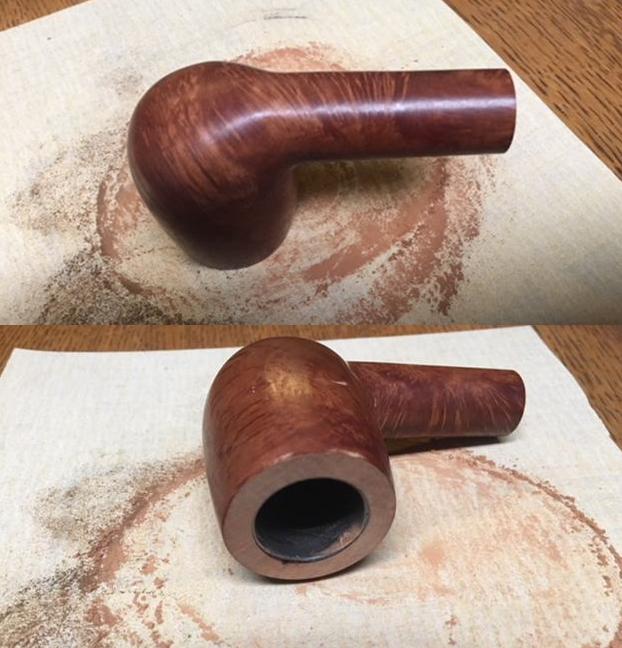
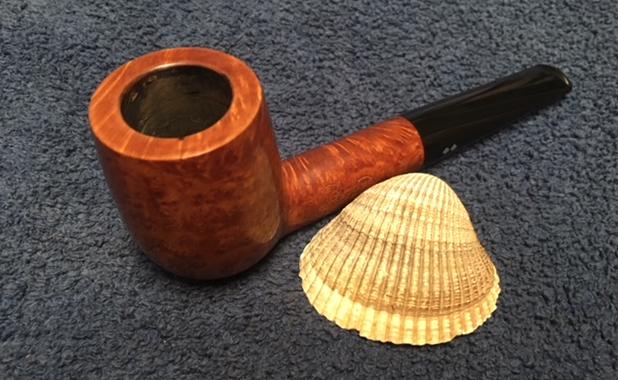
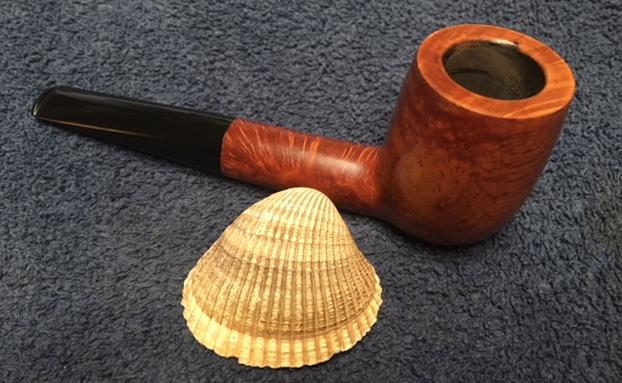
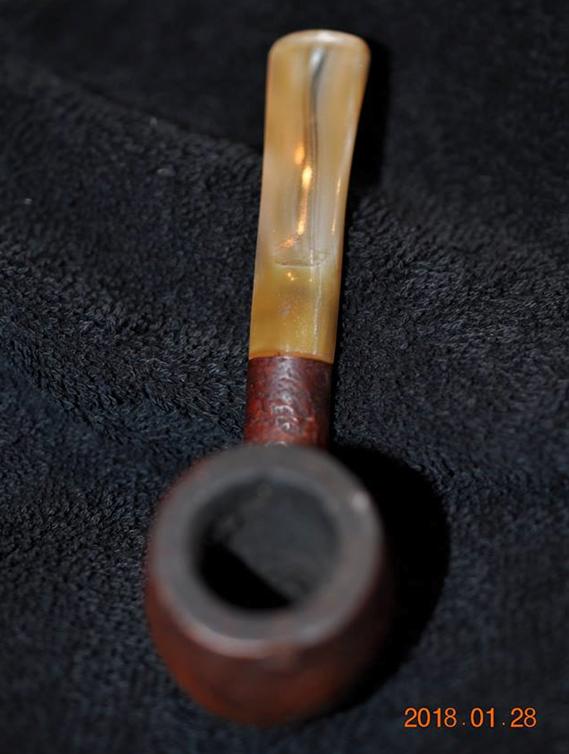
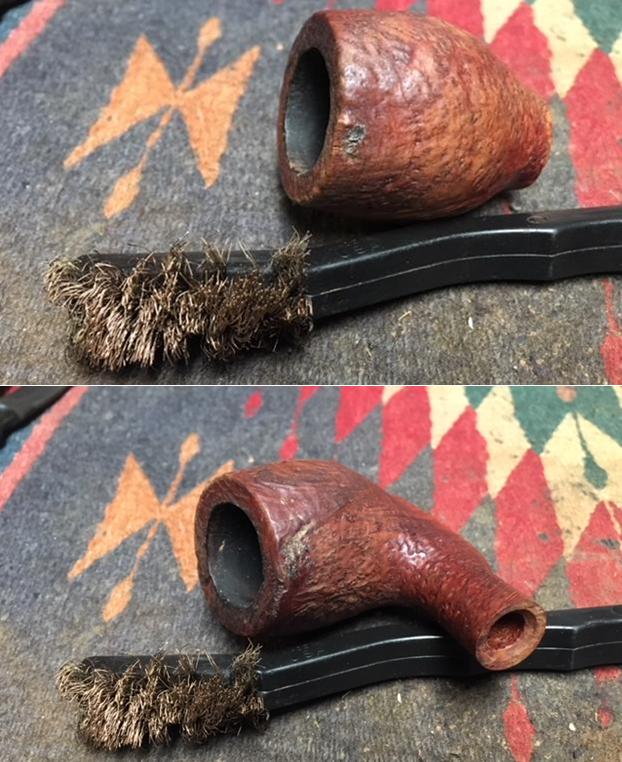
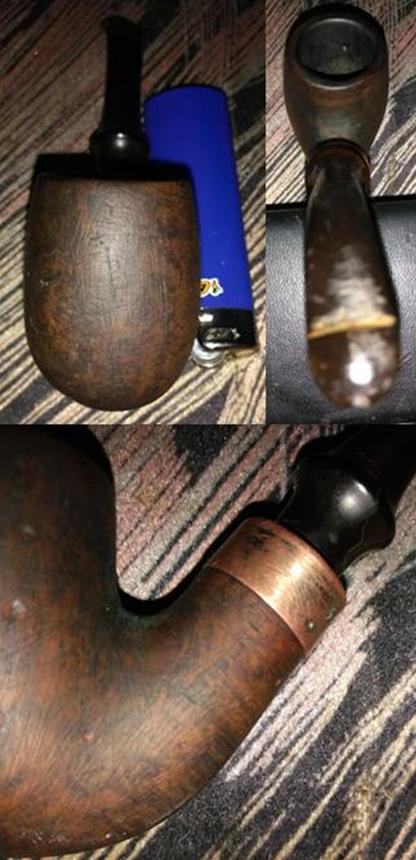 I’ll state for the record that the most egregious sign of the Trident’s abuse is the ghostly remnant of the name on the left shank shown up-close above. Due to the necessary smoothing of the entire stummel, even the least abrasive measure obliterated it.
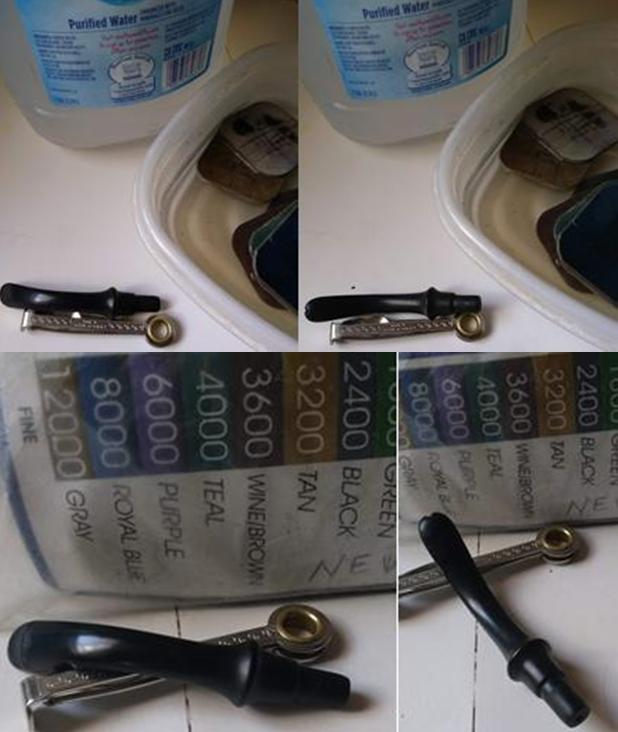
If ever an alcohol strip were called for, this was it. I immersed the stummel in Everclear and let it sit for a couple of hours. One positive result was the complete cleaning of the carbon and gunk buildup. 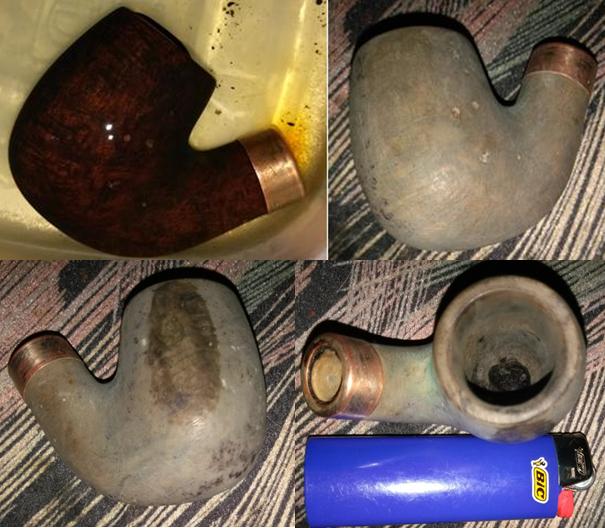
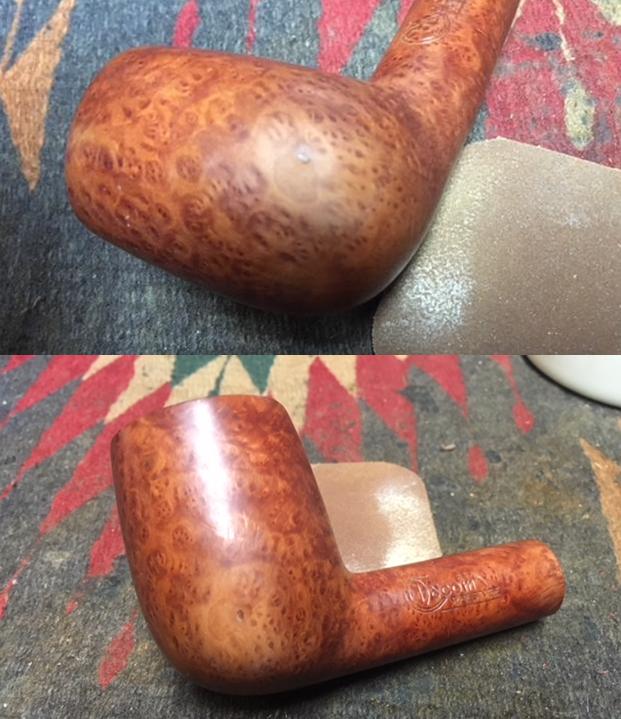
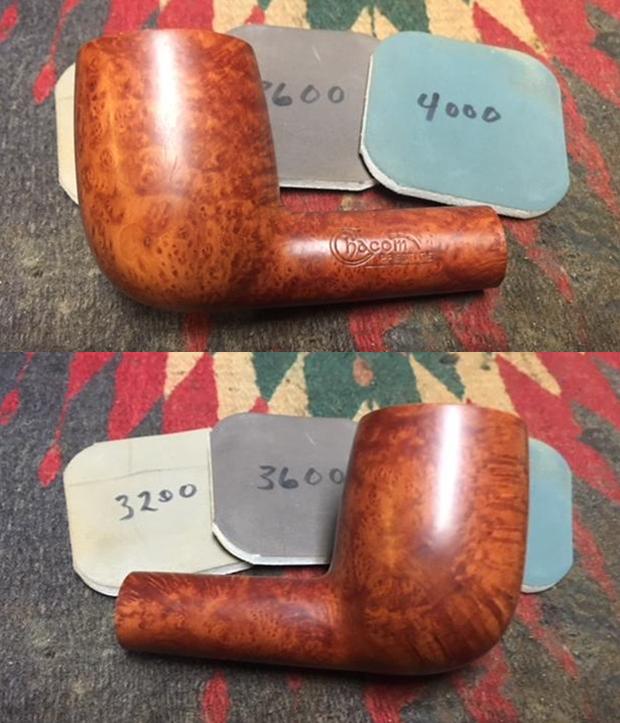
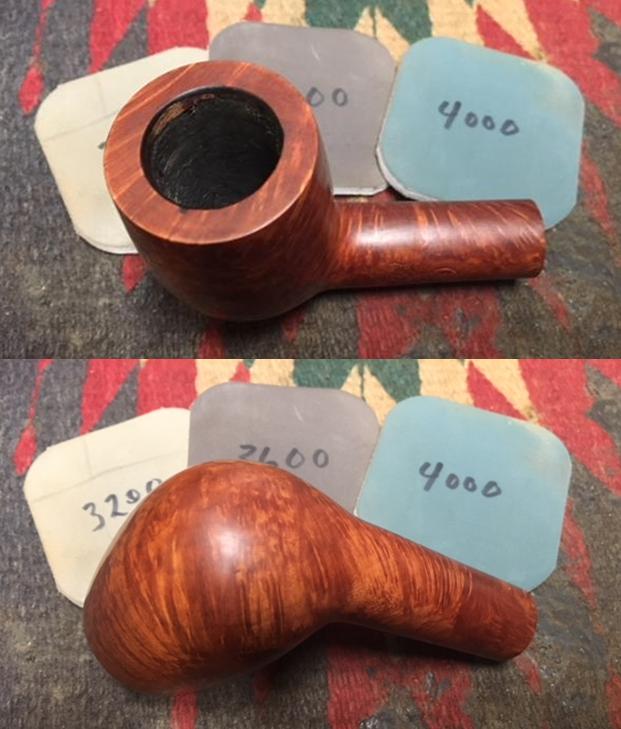
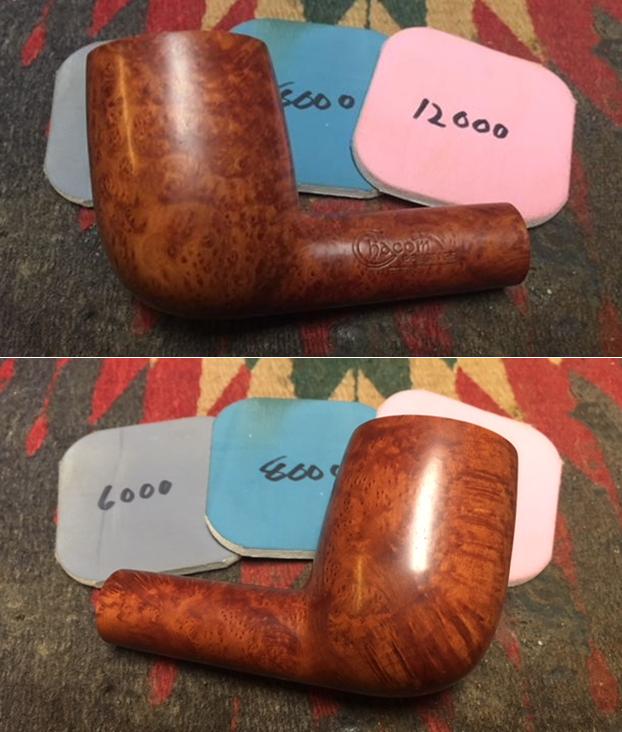
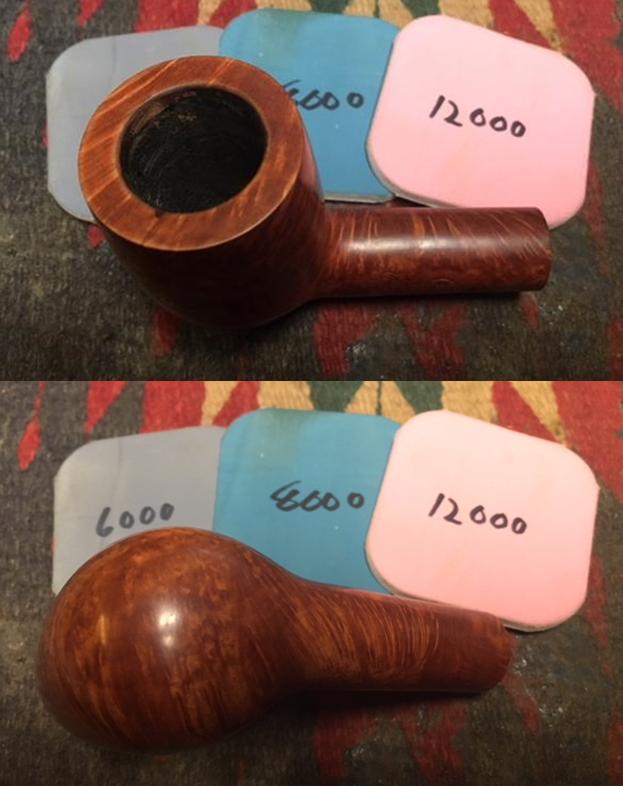
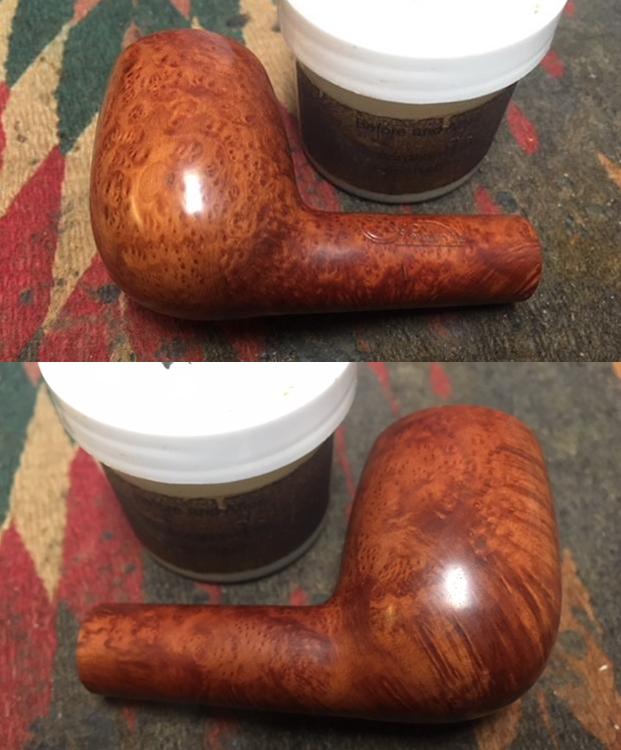
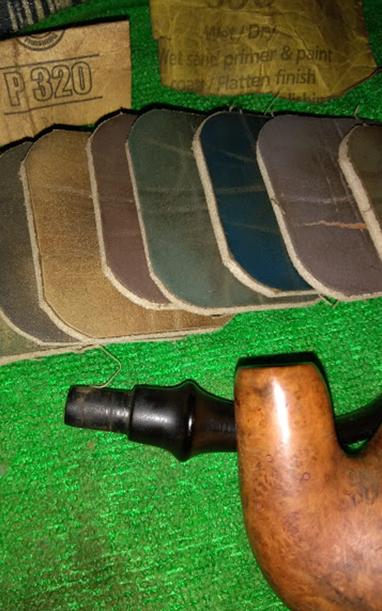
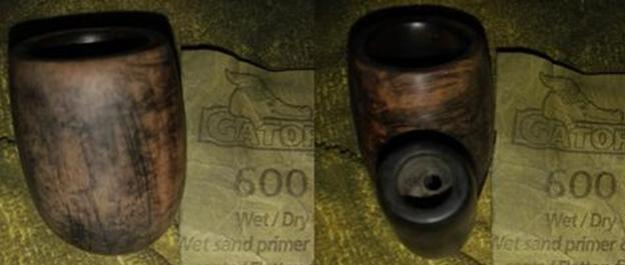
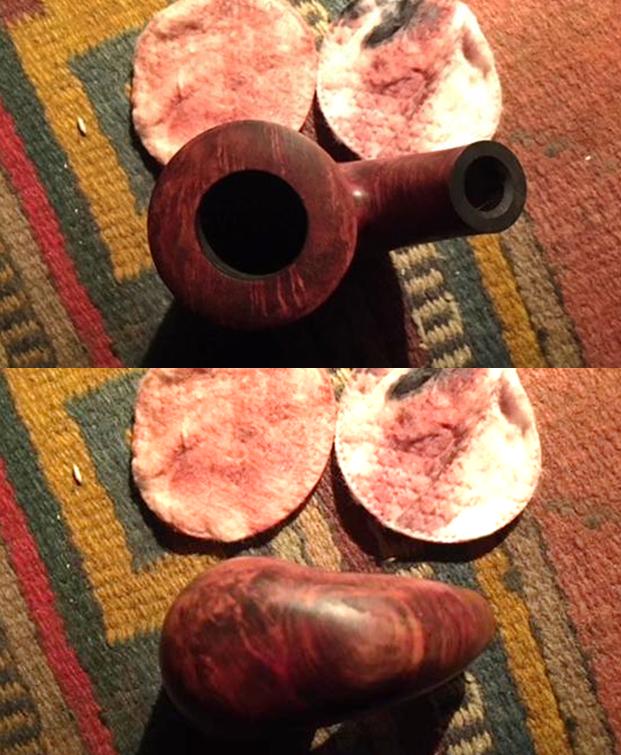
To clarify one point, the plethora of pits and other blemishes apparent in the above shots were not from fills that came out with the soak. They were inflicted by Mike. To remove them, I started with a double 150- and 180-sided sanding pad and 150-grit paper for the pernicious dings. As a heads-up, it was a mistake. Of course, that was then, and this is now. I could have saved considerable time and trouble with the subsequent sanding progression, but as I like to say, shoulda-coulda-woulda.  Now, for the beginning of what turned out to be a long, arduous smoothing process, starting with 220-, 320-, 400- and 600-grits followed by super fine “0000” steel wool, that even with the later fine-tuning was never altogether successful.
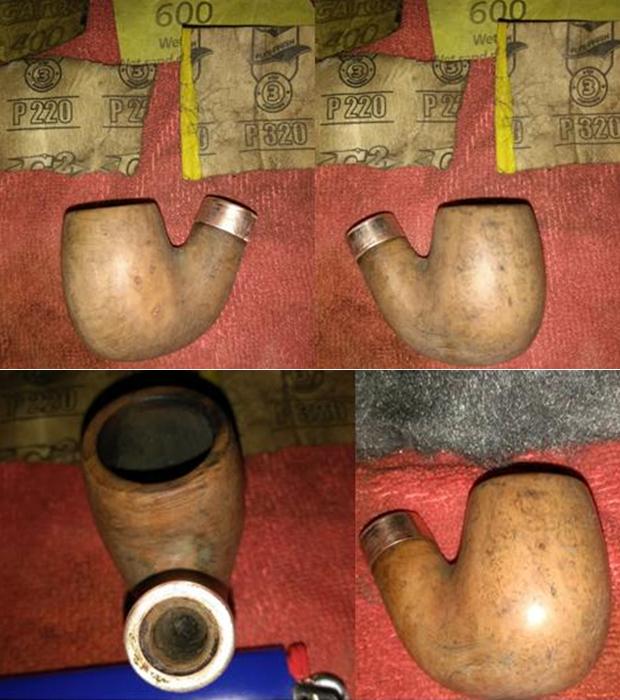
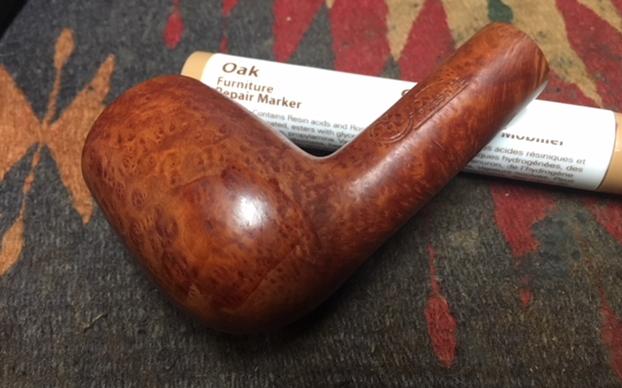
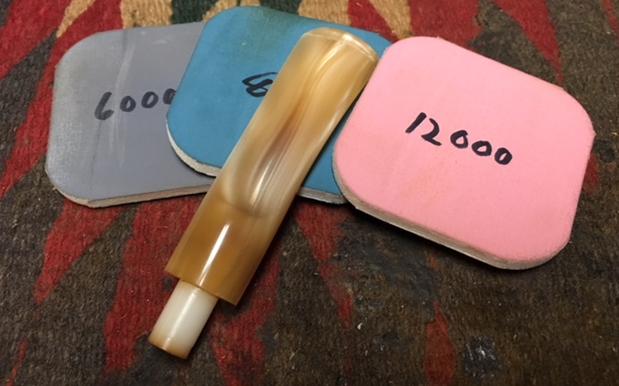
 The result so far is no doubt a great improvement from where it started and looks pretty good, but you know what they say about looks. This project was the beginning of a learning process, after all, if I may be permitted a lame excuse. Anyway, I followed up with a full micro mesh from 1500-12000. The shine was beautiful, but there are still some small scratches, and that is not good with any restoration but in particular when dressing a pipe in black.
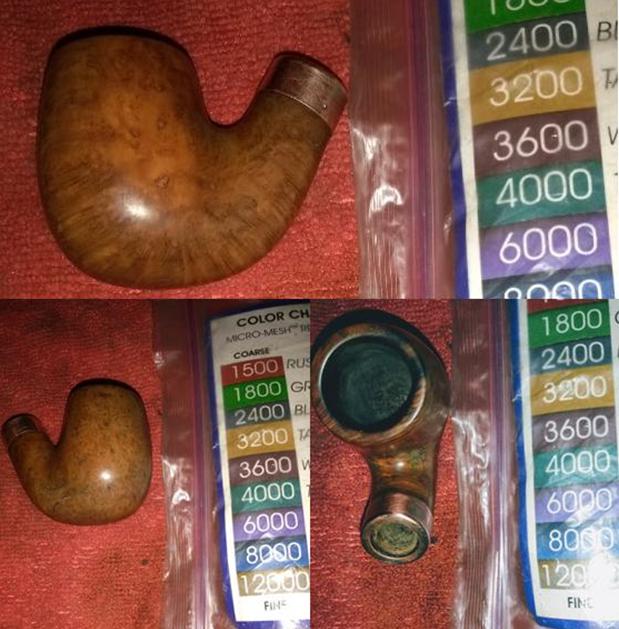
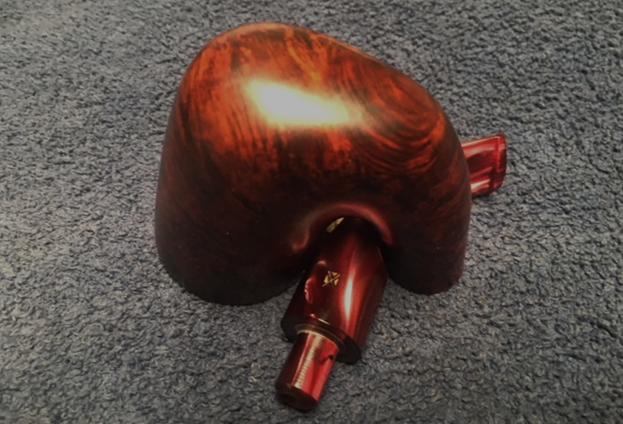
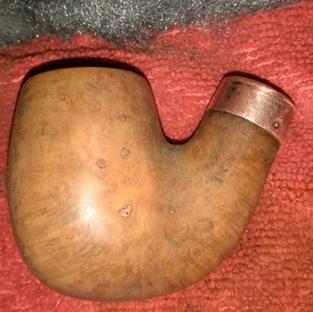
 Thanks to someone I had added as a Friend on Facebook’s Gentlemen’s Pipe Smoking Society forums just because he knew a couple hundred other people I do, I have a baggie of old bands, ferules and whatnot. In the mix, I found a cool Peterson-style endcap I decided was more appropriate than the thin band on the pipe. The third pic below is a tentative view of how it would look when I removed the old-worn-to-copper nickel band. The biggest benefit of the endcap was that the stem, which was loose at first with the band, was able to stay in place well.
 The actual task of prying off that old band proved difficult, but as I’ve noted before, I’m tenacious. I was quite aware of the dangers of damage including cracking the shank and with great and very slow care, I succeeded with a tiny pen knife. I attacked the band somewhat like removing a flat tire, where my dad taught me to loosen the lug nuts a little at a time but not in order. In plainer words, I went at one side of the band, then the opposite, and then the other two, before gently working the tip of the blade in between the four corners. Again, I did this with no rush, and so it took about an hour before the narrow rim popped off.
 I cleared away the muck where the band had been with 220-, 320- and 600-grit paper, steel wool and all nine micro mesh pads, but the end cap still didn’t fit.
 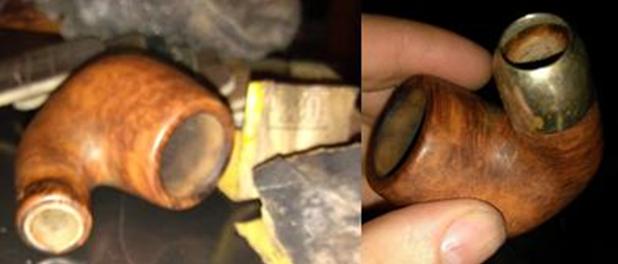 A small piece of 150-grit paper and patient work to be sure I didn’t overdo it did the trick. The open end of the shank was just narrow enough to place the end cap over it and push down slightly with a cotton cloth set on a table to make it snug. Removing it again, I micro meshed after 320-grit paper.
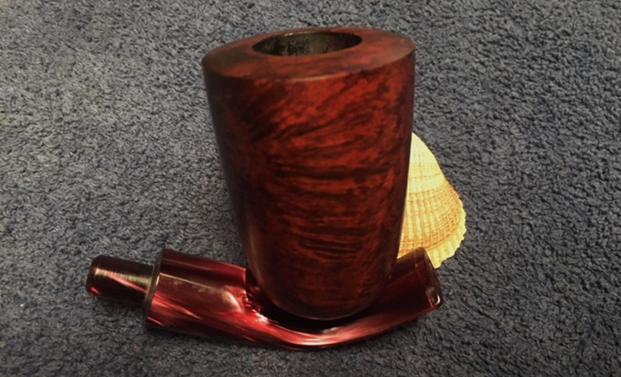
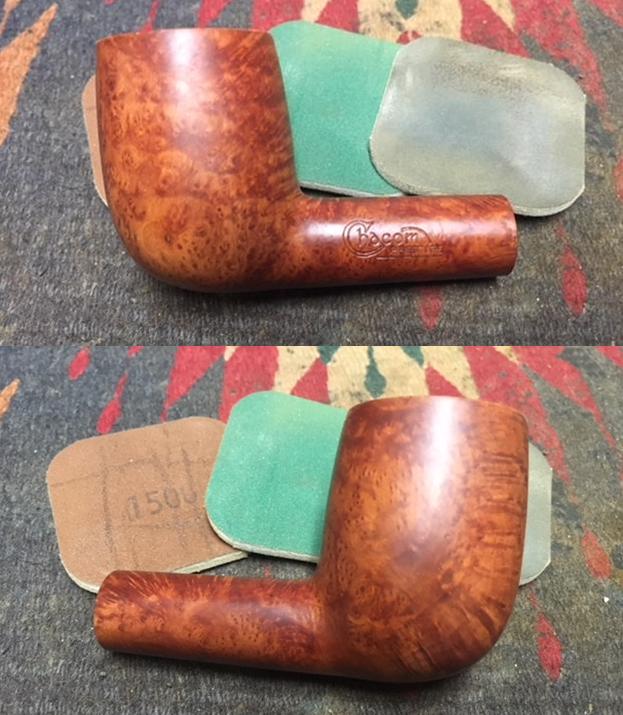
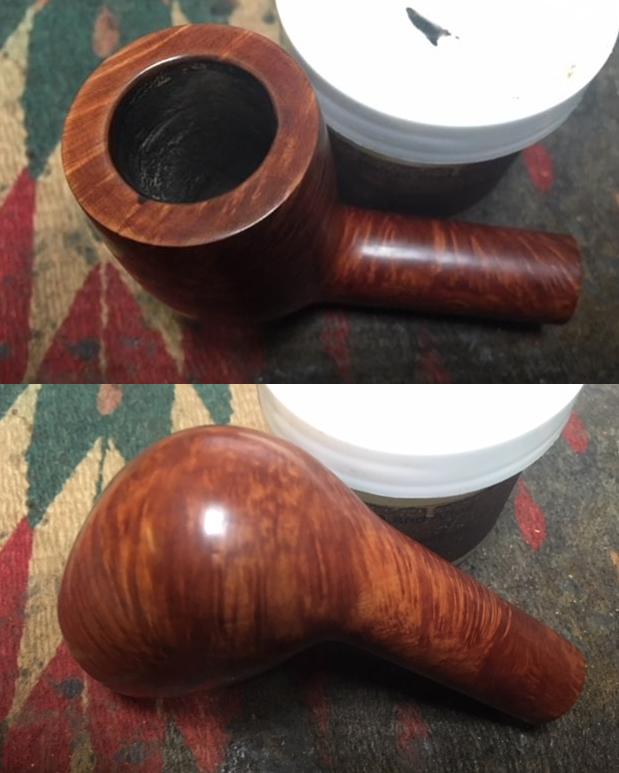
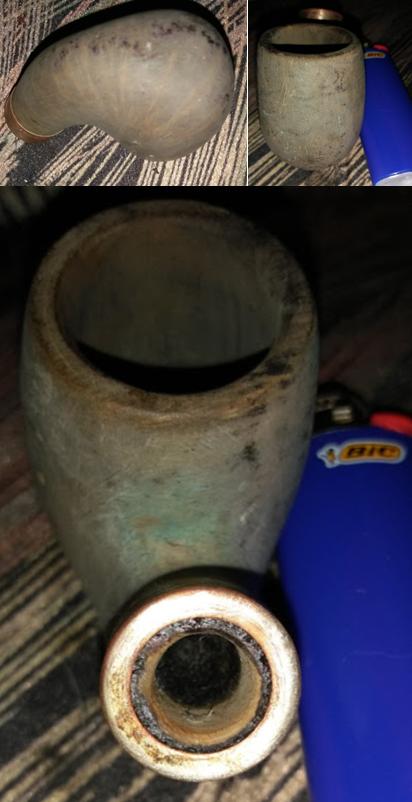
 The big moment of staining and flaming the stummel had arrived, and I admit I was nervous. The wood needs to be, for all intents and purposes, as smooth as a pipe maker would have it at this point of creation, and I am no pipe maker. Restorations in general do not need to be as exacting. Don had indicated 1000-grit paper is advisable, but I only had 600 and micro mesh.
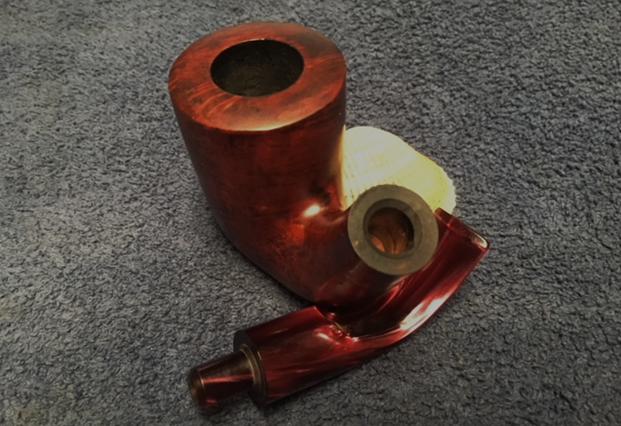
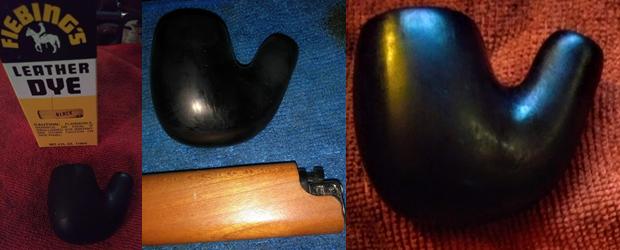 This was how it looked after hand-buffing without shellac. As far as I’m concerned, the above results were unacceptable to proceed with the full dressing, but I figured I might as well get the chamber cleaning and smoothing out of the way with 150-, 320- and 400-grit papers.
 And then, for me, it was like the line from the traditional nursery rhyme: “Poor old Michael Finnegan, begin again.” Back into an Everclear soak went the stummel, but this time only long enough to take the stain off to a point where I could smooth it more with 600-grit paper and micro mesh and try the stain again. I’m missing the pics of the micro mesh work, but the next photos show the marked improvement.
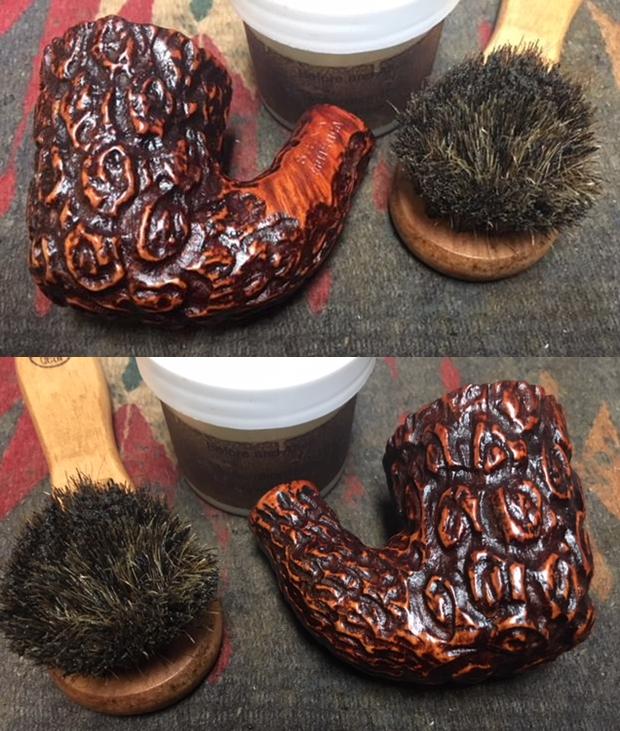
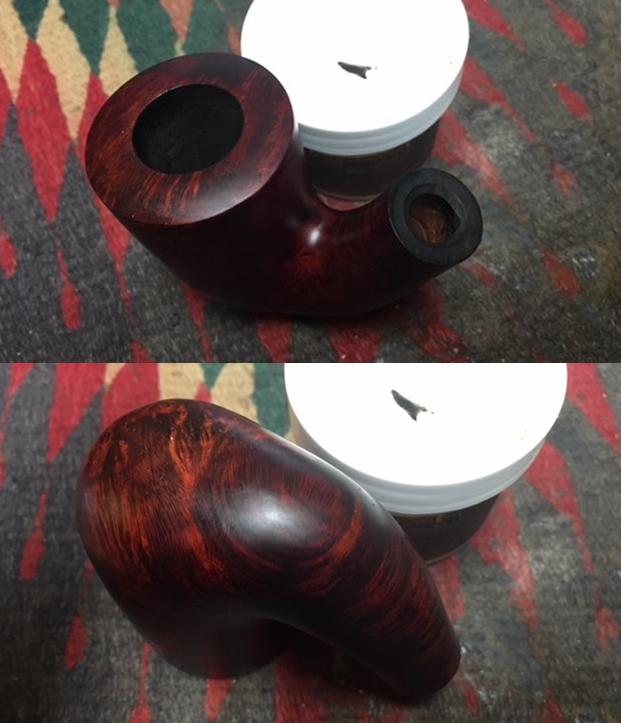
 Once again, I stained and flamed it.
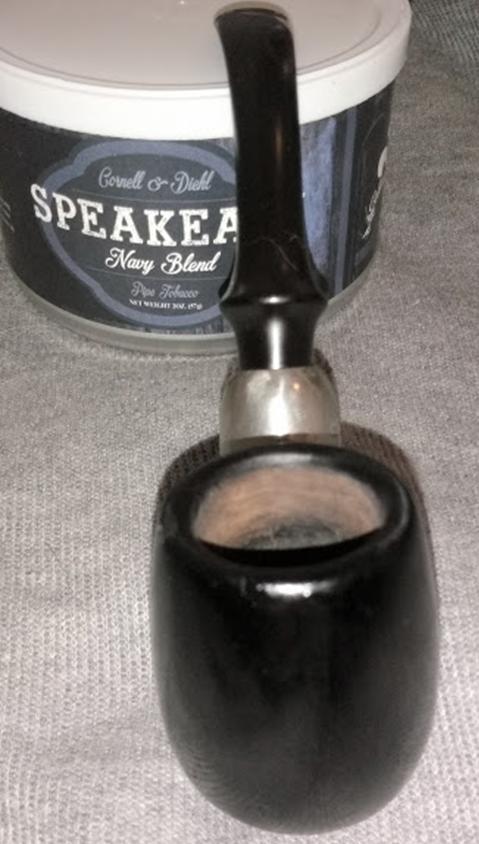
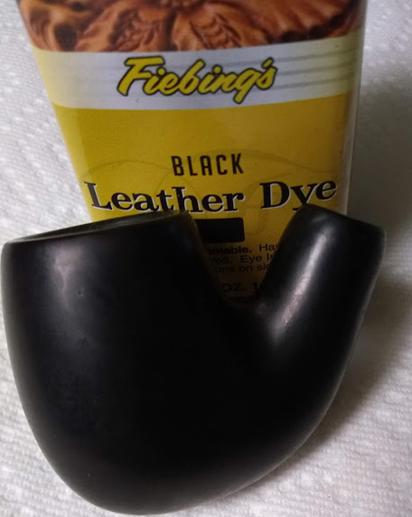 Even before hand buffing with a special cloth for wood, the single shot above shows it was ready to shellac. I used the small, soft brush for that part, taking care to move the brush in slow, even strokes from top to bottom around the stummel, including the shank. I did the rim as closely as possible without overlapping to the sides. After letting it dry for about six hours, I decided to repeat the shellac process and dry it again. The shellac step, needless to say, was impossible to photograph
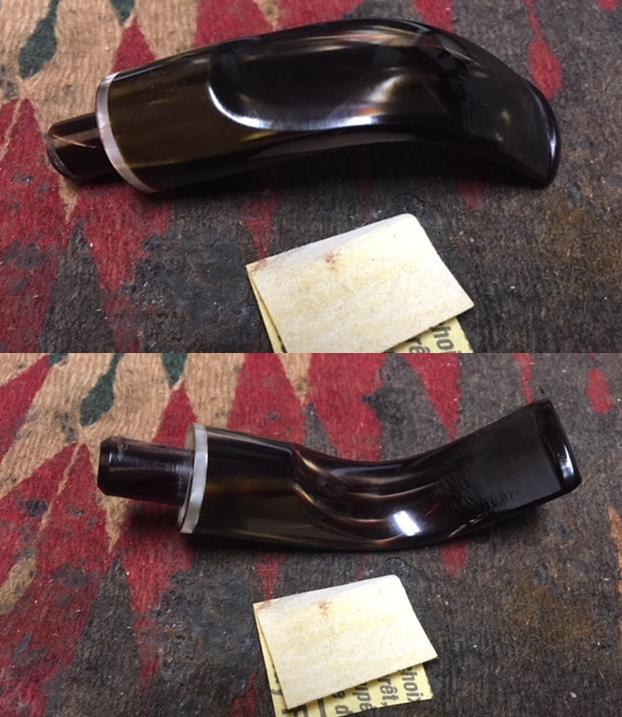
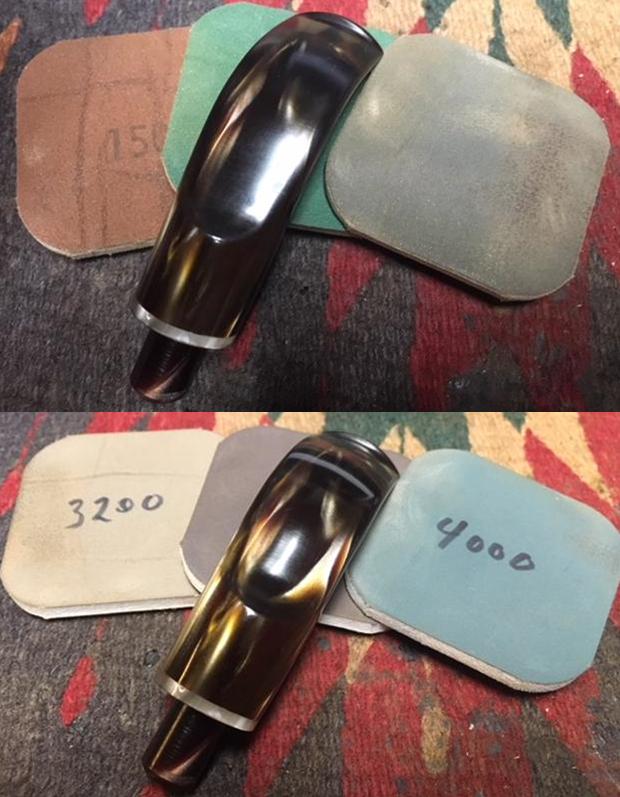
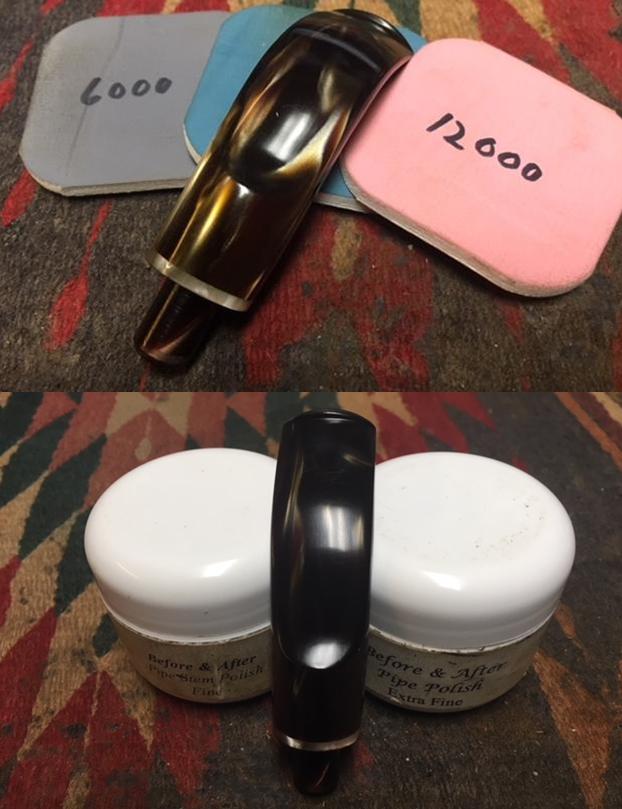
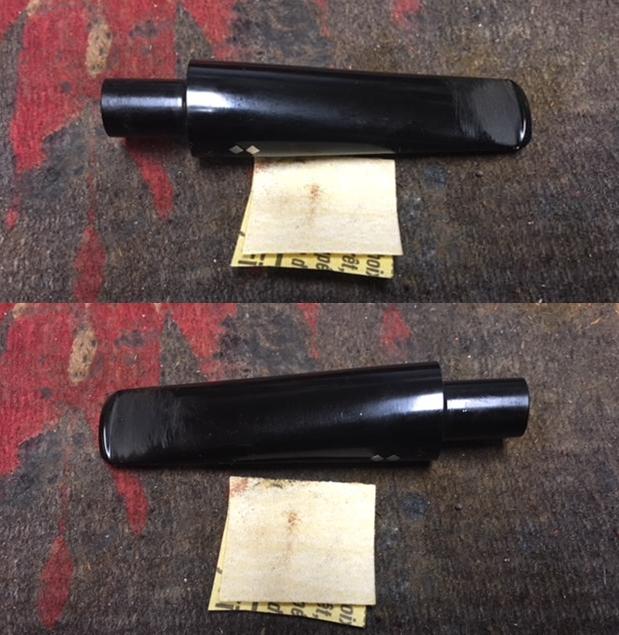
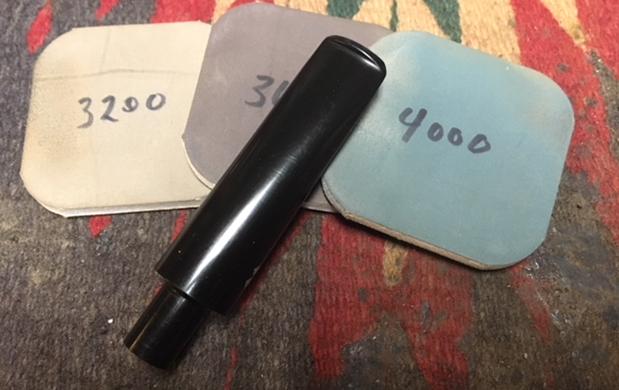
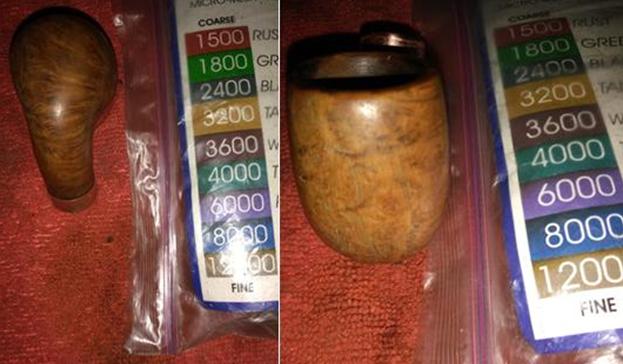
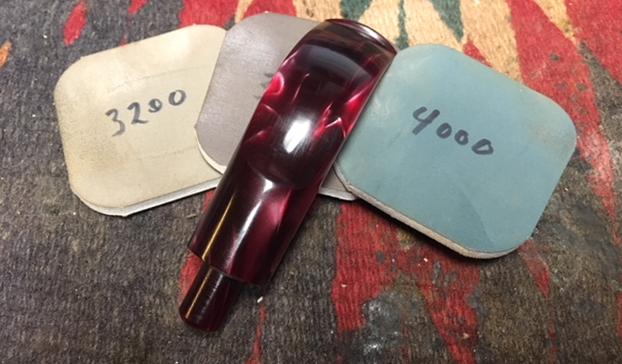
Now, for the stem, which was easy. All I did was two full micro meshes, first with wet pads and then dry.
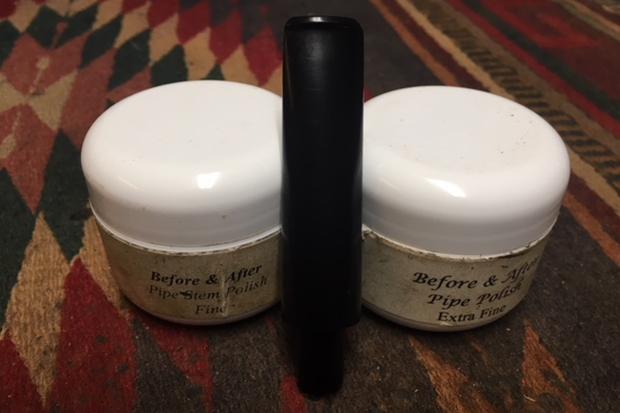
 I also buffed with red and white rouge and carnauba. The endcap was snug as I mentioned before, but I added a couple dabs of Super Glue for good measure after a little polishing.
One more comment before the finished pipe pics. Don had told me to “lightly buff” with the machine using white rouge between applications of shellac, but my electric buffer is a one-speed – fast – and I had severe doubts I could pull it off without removing patches of the shellac and stain. In some of the installments of this series that follow, I gave it a shot, and with practice learned to hold the wood such that it almost didn’t even come in contact with the wheel buffer.


 CONCLUSION
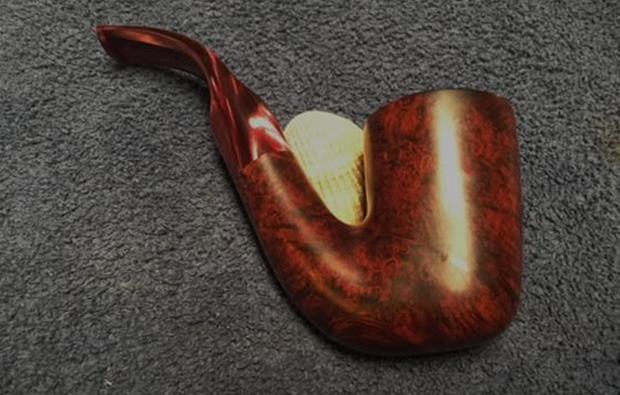
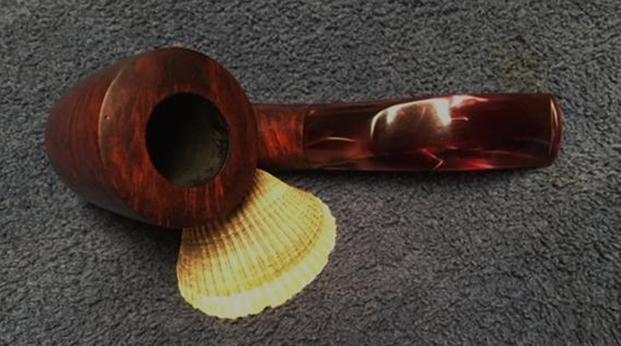
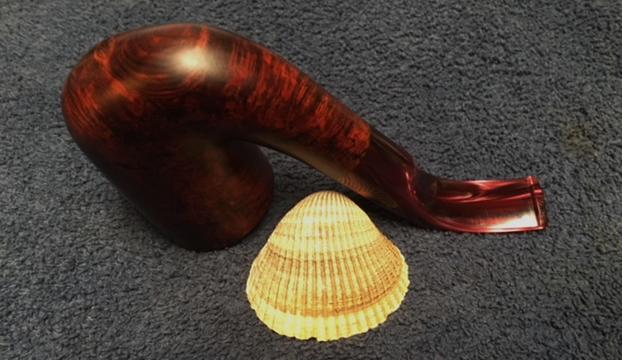
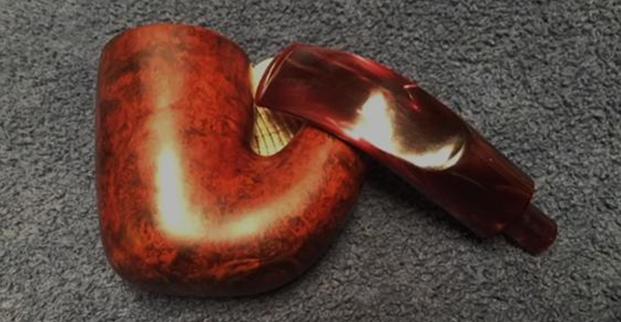
The flaws can be seen in the photos above but allowing it was my first try at dressing a pipe, I was happy. Besides, I was keeping the Trident for myself, and I’m glad I did because it’s a great little smoker.
SOURCES
* Gaboon ebony photo courtesy Wood Database below
https://www.merriam-webster.com/dictionary/ebony
http://www.wood-database.com/gaboon-ebony/
http://oompaul.com/musings/2014/5/29/the-odyssey-of-the-oom-paul-a-hungarian-really-by-ben-rapaport
https://www.smokingpipes.com/smokingpipesblog/single.cfm/post/dressed-for-the-occasion
https://en.wikipedia.org/wiki/Shellac#History
http://www.pipephil.eu/logos/en/dunhill/others1.html#41
http://www.pipephil.eu/logos/en/dunhill/others2.html
http://www.pipephil.eu/logos/en/infos/dunhill-lady2.html
https://pipedia.org/wiki/Dunhill#Dress
https://www.alpascia.com/moments/en/detail/57/dunhill-pipes
https://www.shellac.net/Shellac_ordering_list.html
https://www.shellac.net/PoundCutChart.html
https://www.woodworkingshop.com/product/b6502816/
https://www.walmart.com/ip/Home-Basics-Mortar-and-Pestle-Bamboo/36699397
https://www.dwpipes.com/html/briar_pipes.html

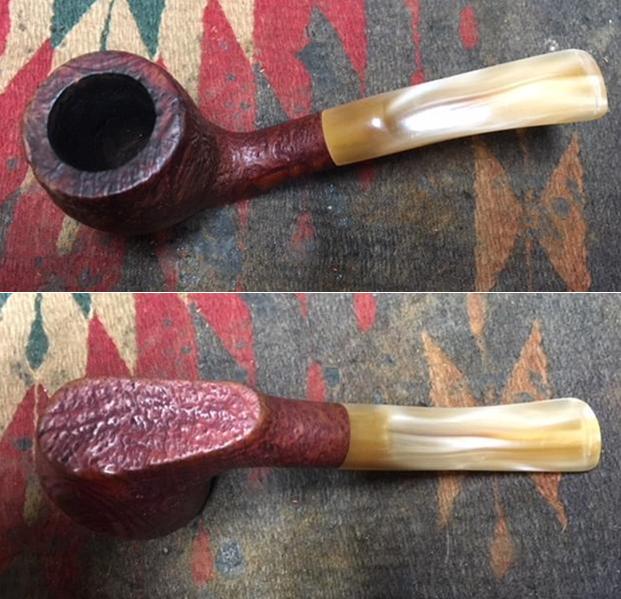
 The second pipe is shown on the right side of the photo above. It is also a full bent Oom Paul but it has a smooth finish. The finish was in rough condition and was a Cordovan colour. There were a lot of nicks and damaged fills on the sides of the pipe. It has some great grain that shows through the grime on the bowl sides. Once it is cleaned and repaired that grain should show through nicely. The pipe is stamped on the left side of the shank Prince of Wales over Hand Made. There is no other stamping on the shank or bowl. The rim top was dirty and there were nicks and dents in the crowned surface. Fortunately there was no damage on the inner and outer edges of the bowl. The bowl had a light cake in it that would be easy to deal with. The stem was acrylic and variegated red. It had some tooth chatter and scratching on both sides near the button. Jeff took photos of the pipe before he started his cleanup up work.
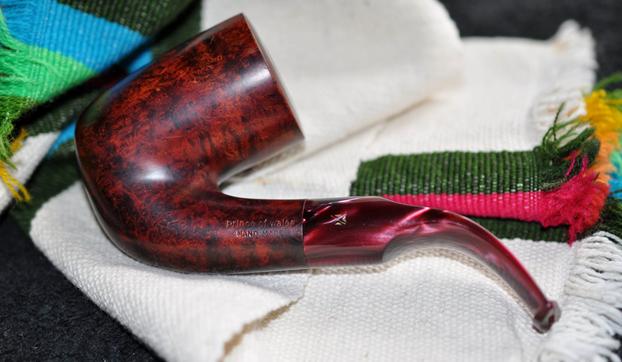
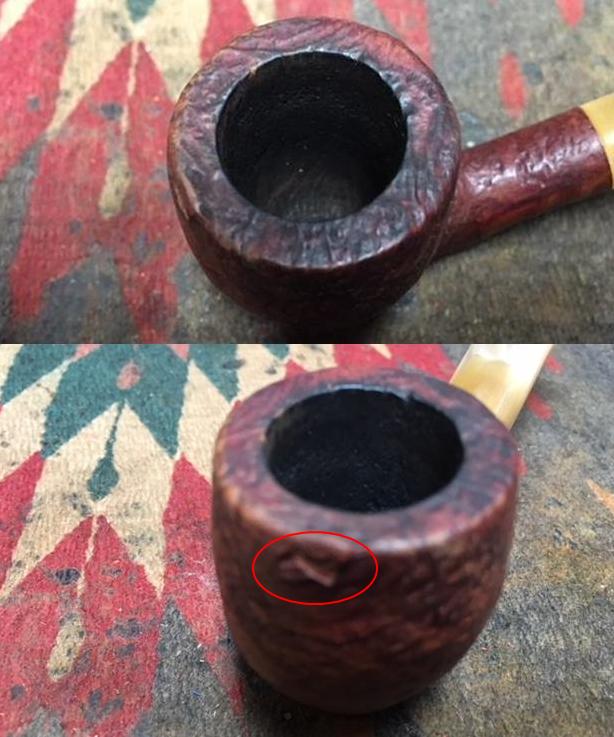
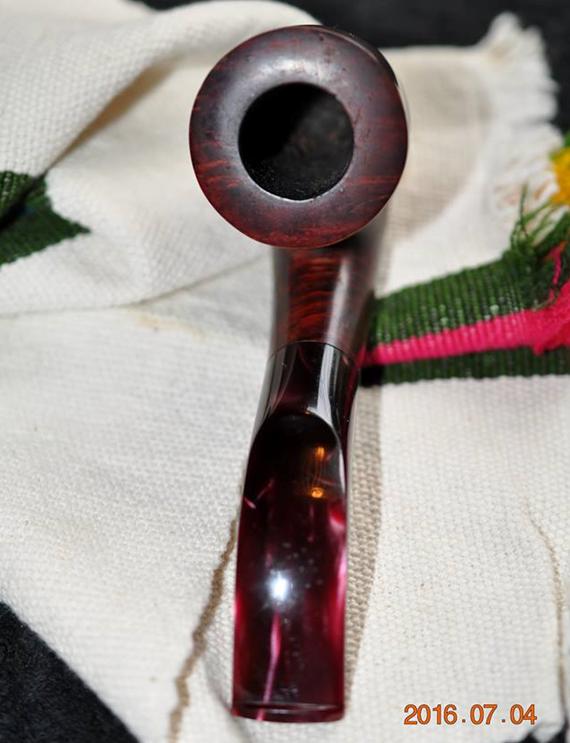 He took a closeup photo of the rim top showing that it was quite clean. The crowned surface was nicked and scratched. The edges of the bowl look very good. There is a light cake in the bowl. The stem was in good condition. There was some tooth chatter and scratches on the top and underside near the button.
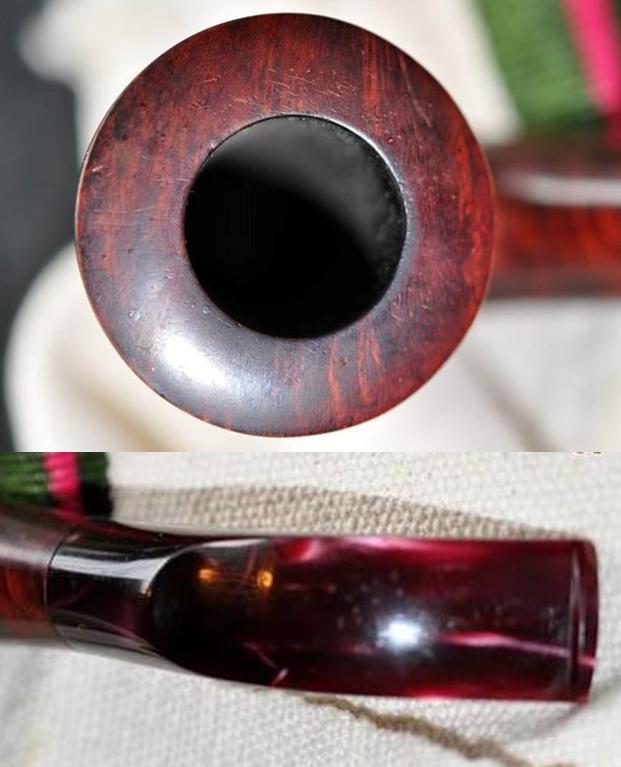 He took several photos of the finish to show the largest damaged fill on the right side of the bowl. The first photo gives an overview of the right side of the bowl and shank. You can see the wear and tear on the finish and the nicks and scratches. There is also a damaged fill mid bowl. The second photo shows the damaged fill clearly.
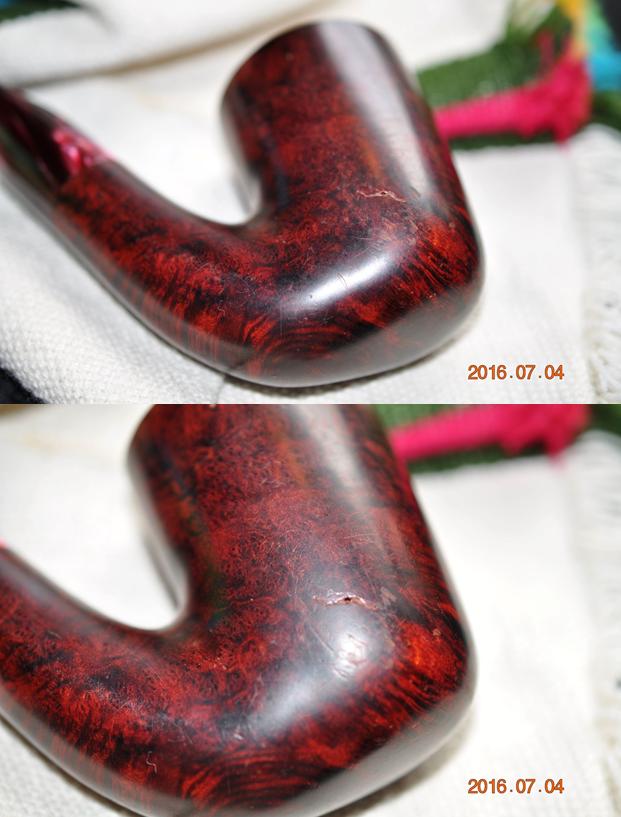 The next photo shows the stamping on the shank and on the Scottish flag logo on the left side of the stem.
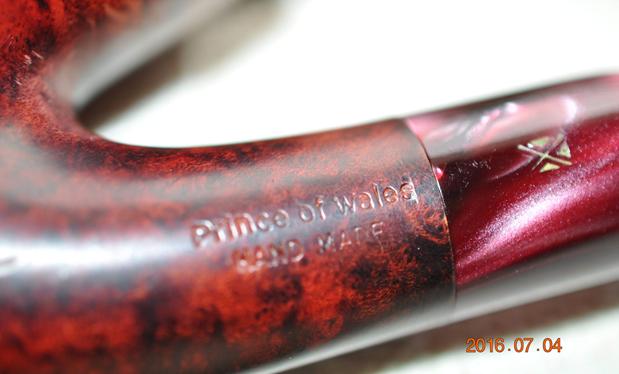 I turned to the two websites that I regularly check for background on pipe brands. The first was Pipedia. I found the brand listed and the short description on the wiki that linked the brand to GBD pipes. It stated that it is a GBD sub-brand (https://pipedia.org/wiki/Prince_Of_Wales). It also included a link to the second site that I check, Pipephil. There it said that the brand was made in England. It bears the Scottish flag (X-shaped cross representing the cross of the Christian martyr Saint Andrew, the patron saint of Scotland) as logo. I did a screen capture of the stamping on the shank and stem that was included on the site. I include that below (http://www.pipephil.eu/logos/en/logo-p5.html).
  The stamping on shank read Prince of Wales over Hand Made like the screen capture above. It is very readable and clean. Jeff had scrubbed the exterior of the bowl with Murphy’s Oil soap and removed the dust and grime that had accumulated there. The finish was damaged but was worn and needed some repairs once it had been scrubbed. He reamed the bowl with a PipNet Pipe reamer and cleaned up the remnants of cake with a Savinelli Fitsall Pipe Knife. He cleaned the interior of the mortise and the airway in the shank and the stem with alcohol, cotton swabs and pipe cleaners. The pipe came to me clean and ready to do the restoration. I took some photos of the pipe to show the condition at this point in the process.
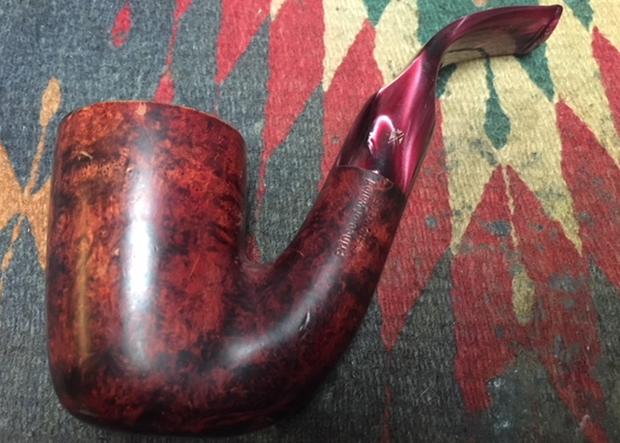
 I took a photo of the rim top and to show the condition of the surface of the rim. There is some darkening on the inner edge of the bowl and a lot of nicks and surface damage. I also took close up photos of the stem to show its condition. There is some light tooth chatter and tooth marks on both sides near the button but otherwise it is in good condition.
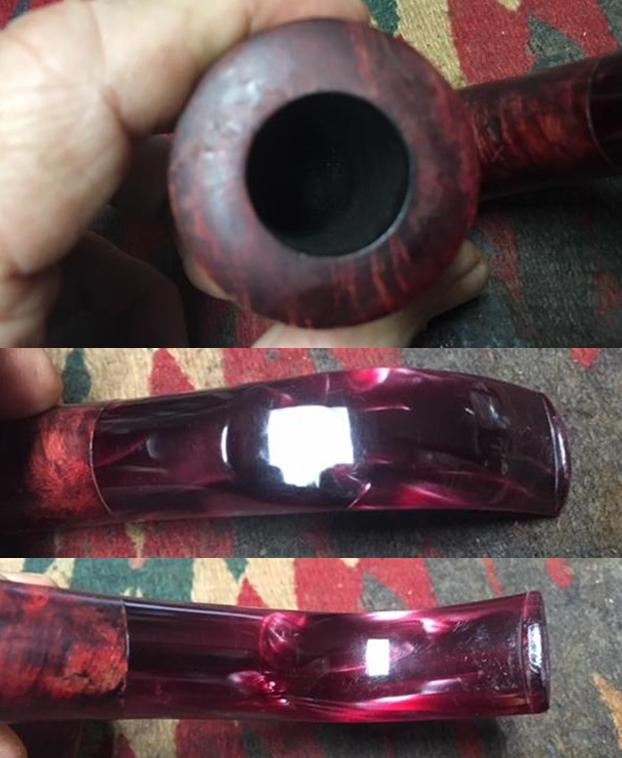 I took some photos of the bowl sides to show the dents, nicks and faulty fills that would need to be addressed in the restoration.
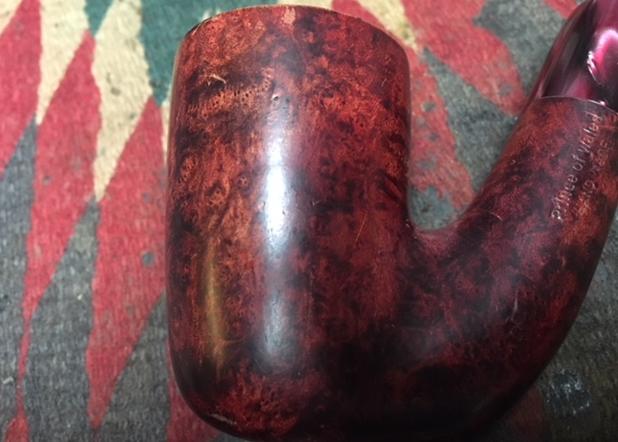
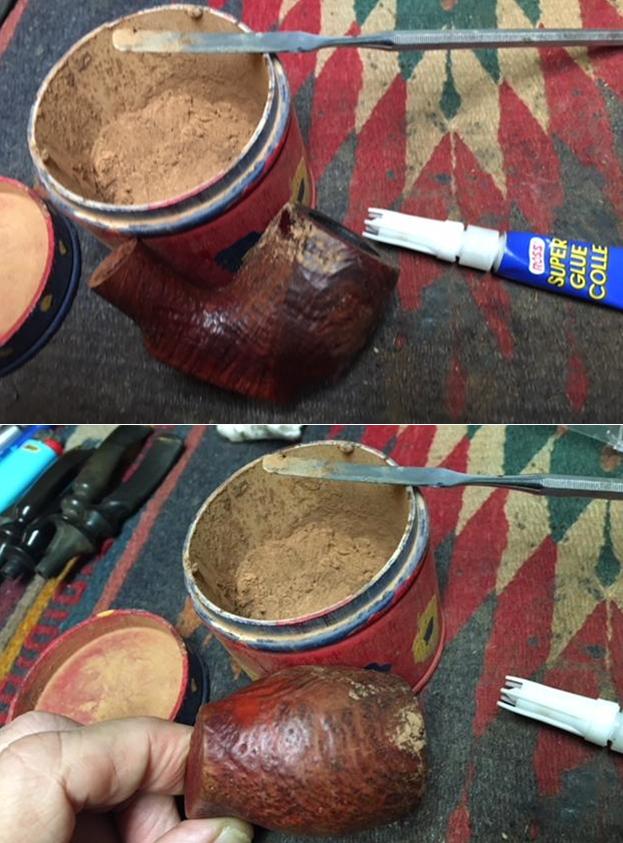
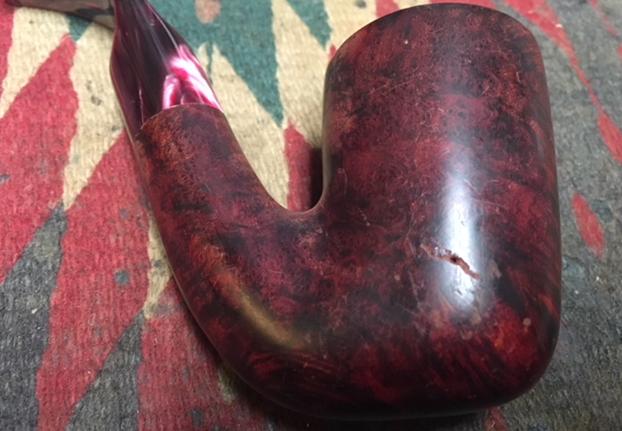 I repaired the damaged areas on the bowl sides with clear super glue to smooth out the damage. Once they cured I would sand them smooth to blend them into the bowl. Because there were so many damaged areas it would require restaining the bowl.
 It did not take too long for the repairs to cure. I sanded the repaired areas smooth with 220 grit sandpaper. I took photos of the bowl after the sanding to show the spotted, leprous look of the bowl after sanding.
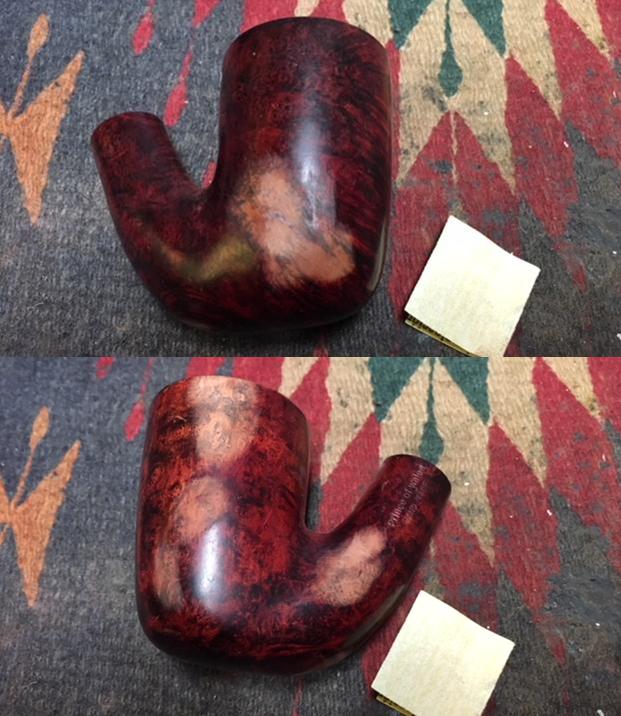
 To further blend the repairs into the bowl surface I would need to stain it again. In preparation for restaining I wiped the bowl down with isopropyl alcohol to remove much of the previous stain.
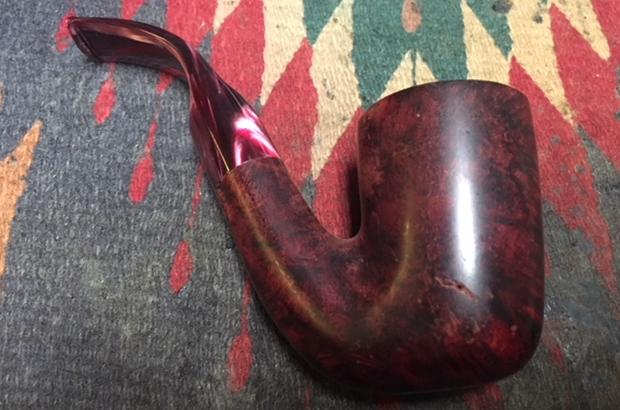
 I restained the pipe with my Fiebing’s Tan stain – remember it is mislabeled and is actually a cordovan stain. I applied it and flamed it with a lighter to set it in the briar. I repeated the stain/flame process until the coverage around the bowl was even.
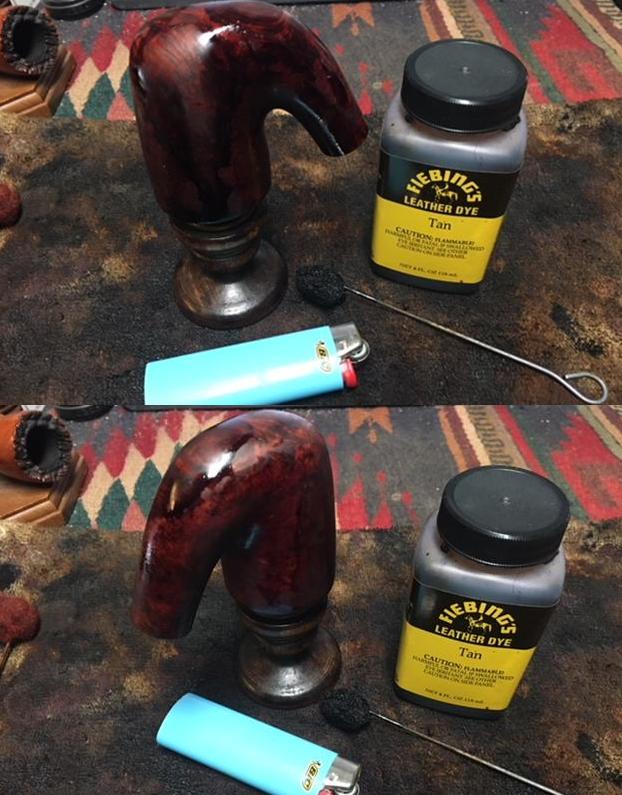 I let the stain set over night and in the morning wiped the bowl down with isopropyl on cotton pads to unveil the newly stained pipe. The pipe looked better. The fills were visible if you looked for them but they looked far better than when I had started.
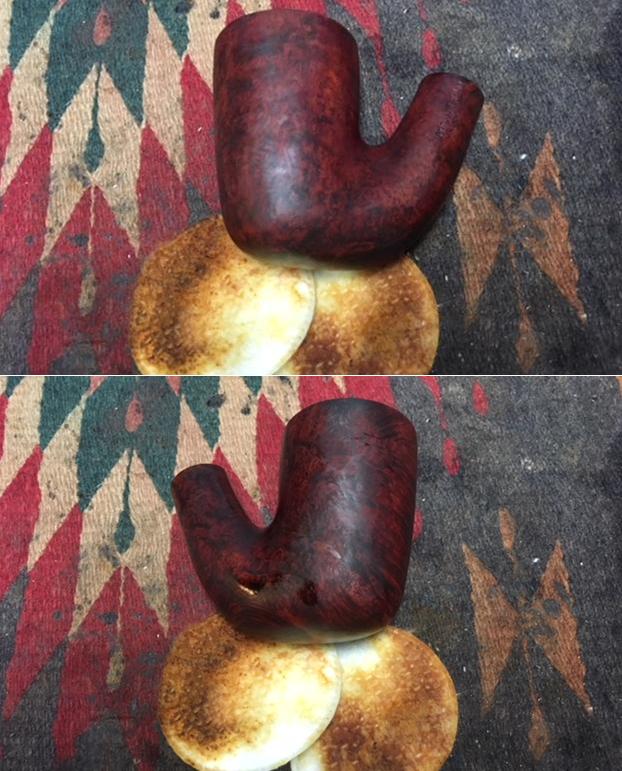
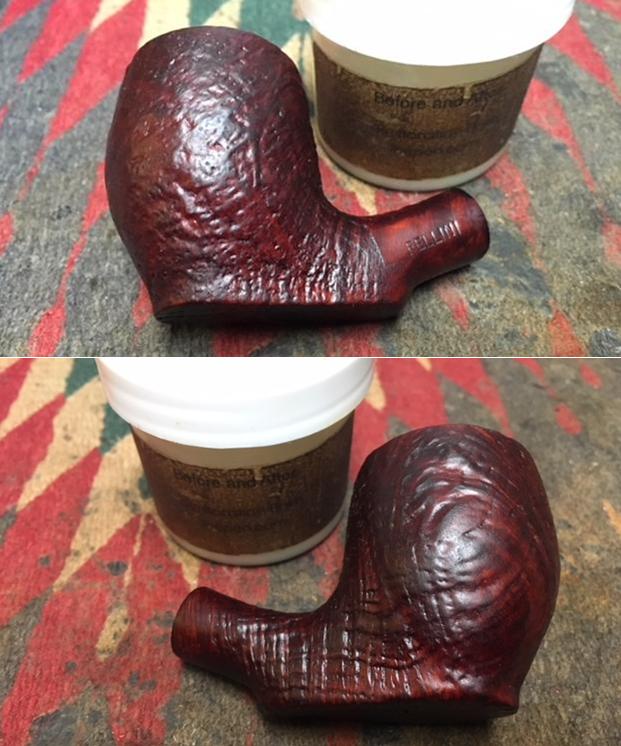
 I rubbed the bowl down with Before & After Restoration Balm to deep clean the briar bowl and the rim top as well as the briar shank. I also have found that it really helps to blend a restain on briar. The product works to clean, enliven and protect the briar. I hand rubbed it with my fingers, working it into the exterior of the pipe. After it had been sitting for a little while, I buffed it with a soft cloth to polish it. The pipe really began to have a rich shine. I took some photos of the bowl at this point to mark the progress in the restoration.
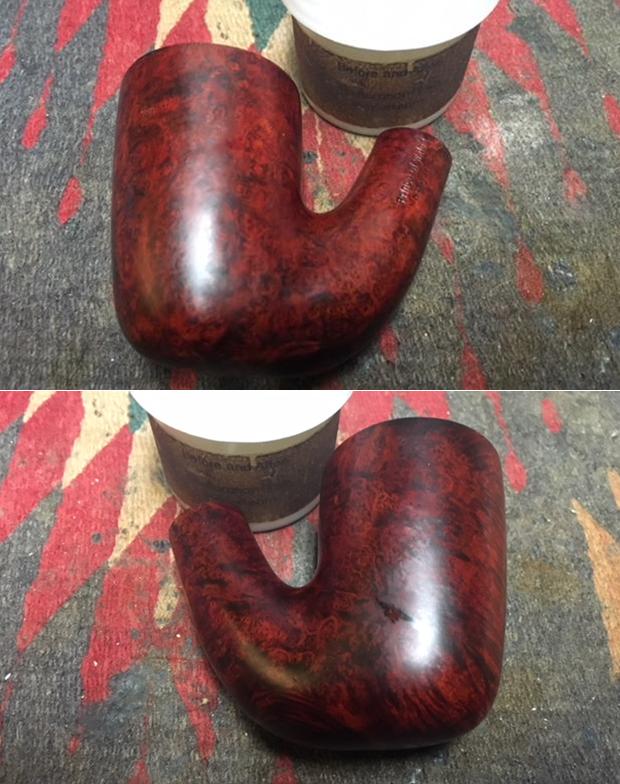
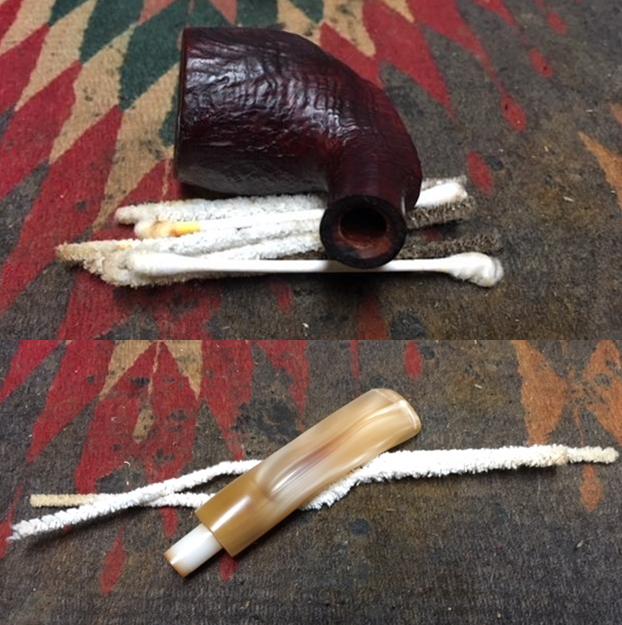
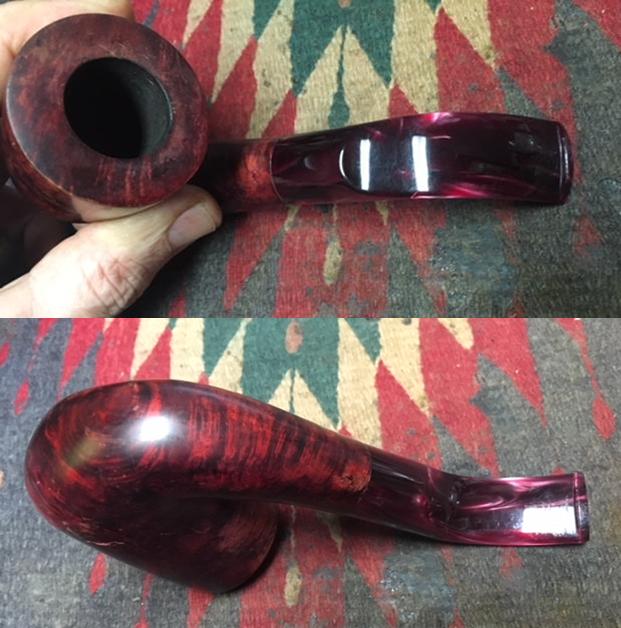
 I set the bowl aside and turned my attention to the stem. I used a folded piece of 220 grit sandpaper to sand out the tooth chatter and marks on both sides of the stem just ahead of the button. They were not deep so it did not take too much to remove them.
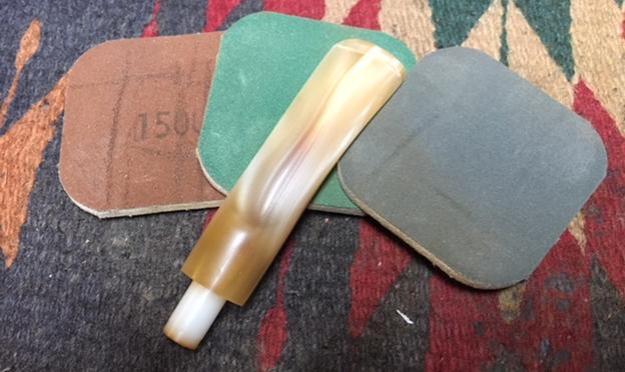
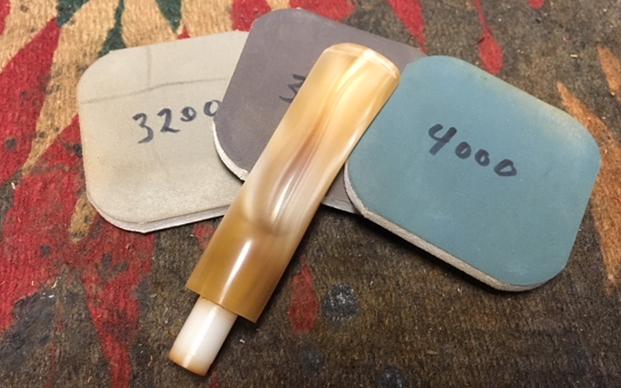
 I polished the stem with micromesh sanding pads – wet sanding with 1500-2400 grit pads and dry sanding with 3200-12000 grit pads. I wiped the stem down after each pad with a damp cloth to remove the sanding dust on the vulcanite. When I finished polishing and wiping it down I set it aside to dry.
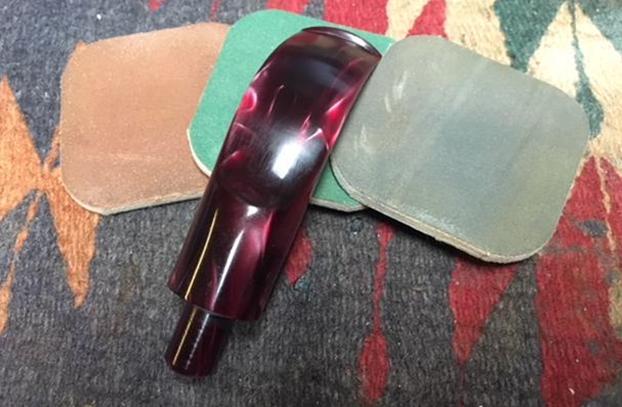
 I polished stem and bowl with Blue Diamond to polish out the remaining small scratches. I gave the bowl and the stem multiple coats of carnauba wax. I buffed the pipe with a clean buffing pad to raise the shine. I hand buffed it with a microfiber cloth to deepen the shine. The pipe polished up pretty nicely. The dark undercoat and the cordovan combine to give the briar depth and a rich look. The polished variegated red and burgundy acrylic stem work together with the stained briar to give the pipe a rich look. The finished pipe is shown in the photos below. This is a beautiful smooth finish Oom Paul made by GBD. The pipe has already found a new home. The shape, finish and flow of the pipe and stem are very well done. The dimensions are Length: 6 inches, Height: 2 3/4 inches, Outside diameter of the bowl: 1 3/4 inches, Chamber diameter: 3/4 inches. This one will join the rusticated Oom Paul and soon be on its way to the southern US. Its new trustee is looking forward to firing up both of these pipes. Thanks for walking through the restoration with me as I worked over this unique Oom Paul.