Blog by Steve Laug
Over the years I have gained a soft spot for Pipe by Lee pipes. I have found them in antique and junk shops around Canada and the US. They seemed to have had quite a following. Most of the pipes I have found have been 2 or 3 star pipes – designated by the number of gold stars on the stem. I have had a variety of shapes from Billiards, Bulldogs, Bull Moose, and Rhodesians. All have been well cut shapes and fairly decent pieces of briar. Some of the 2 star pipes have had small fills but generally they are well blended into the rest of the briar with the stain. Many have obviously been favourite pipes judging by the thick cake in the bowl and the wear and tear on the stems. They are workhorses and when cleaned up there is always a lot of life left in the pipe.
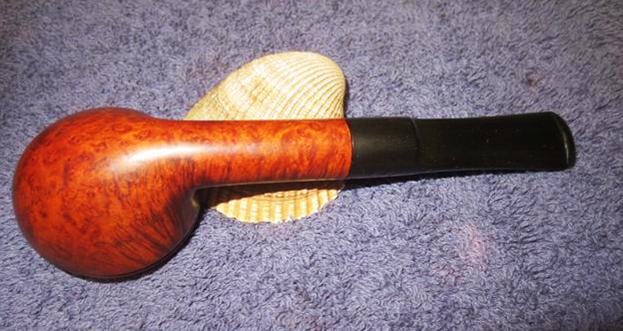
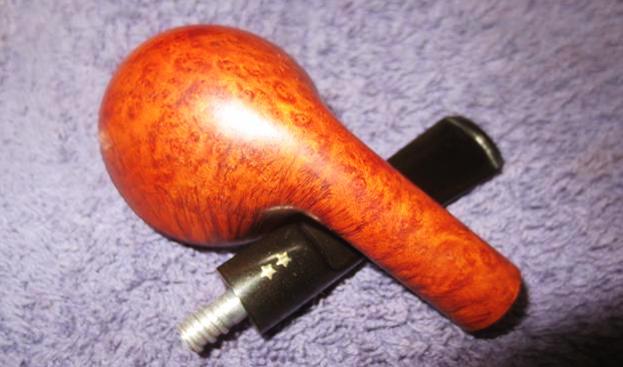
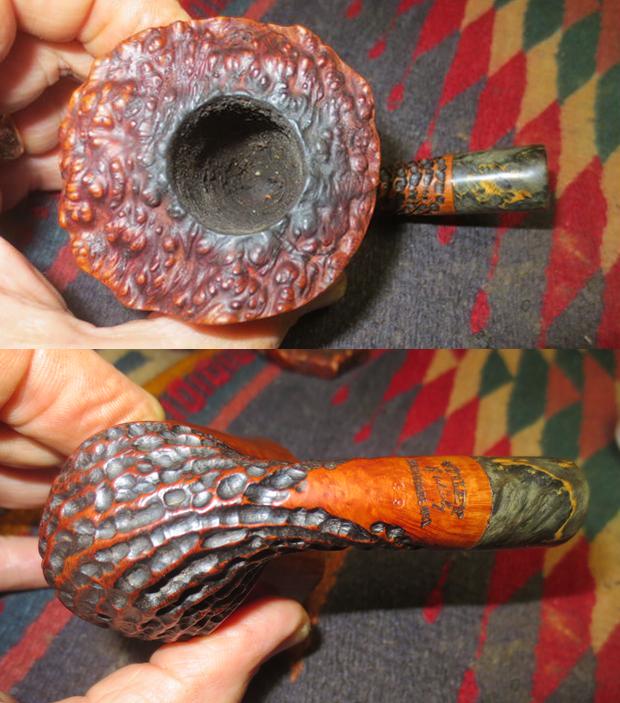
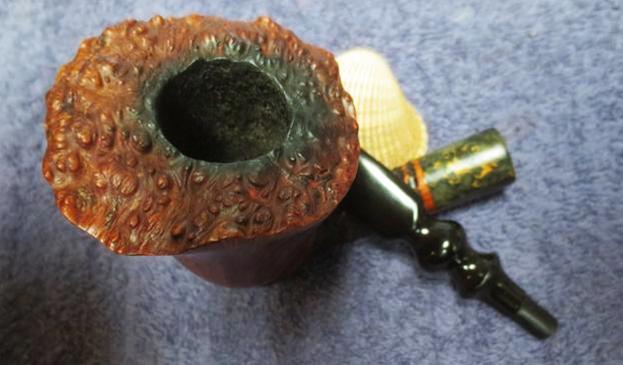
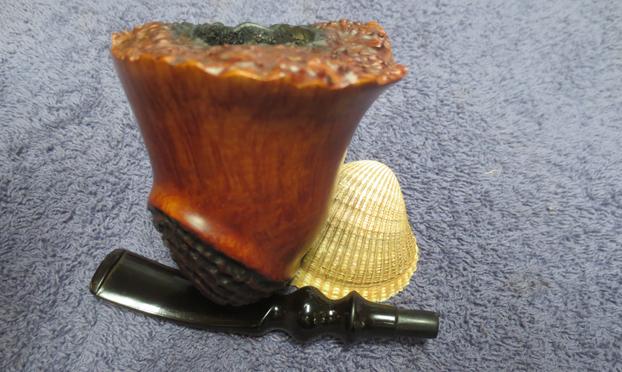
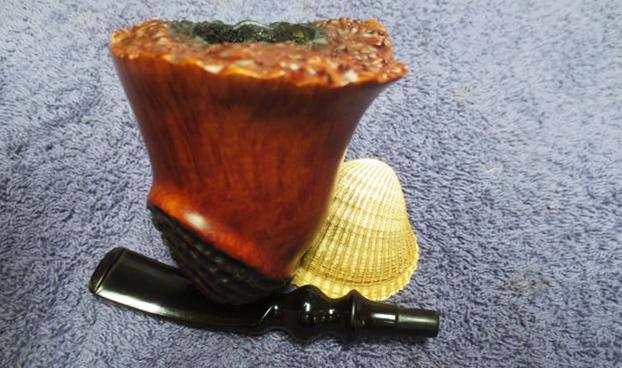
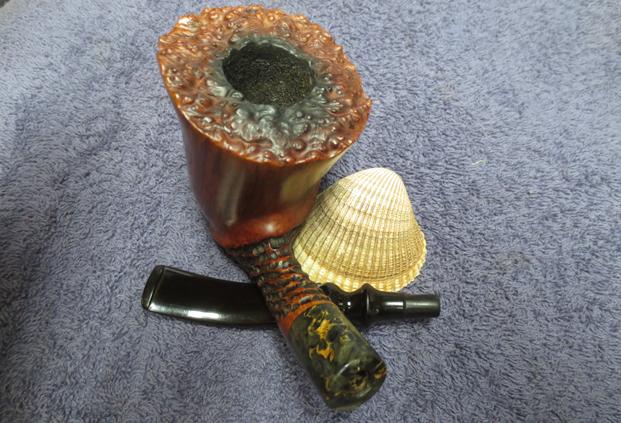
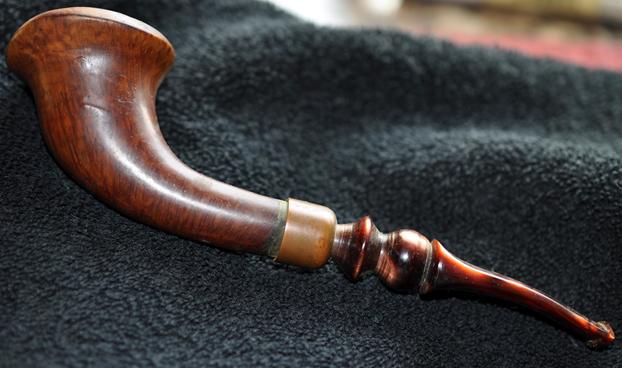
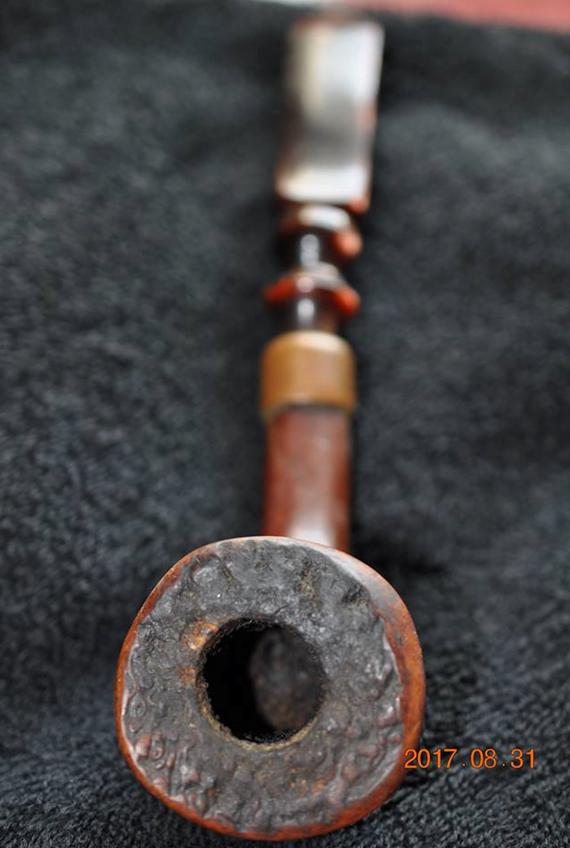
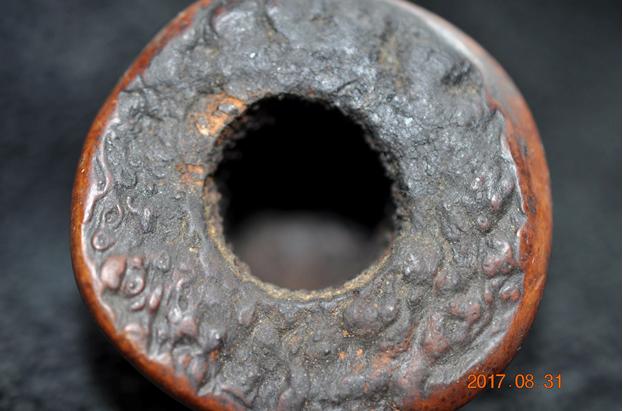
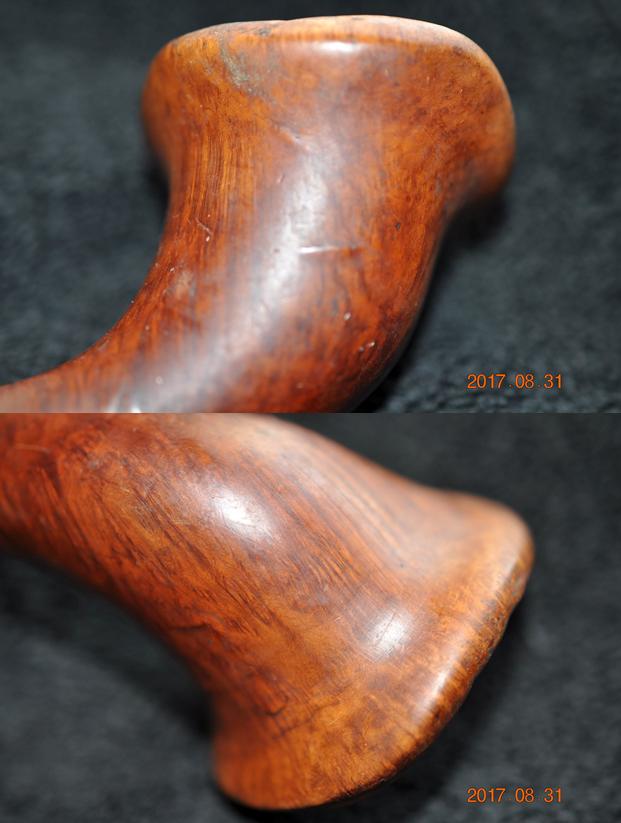
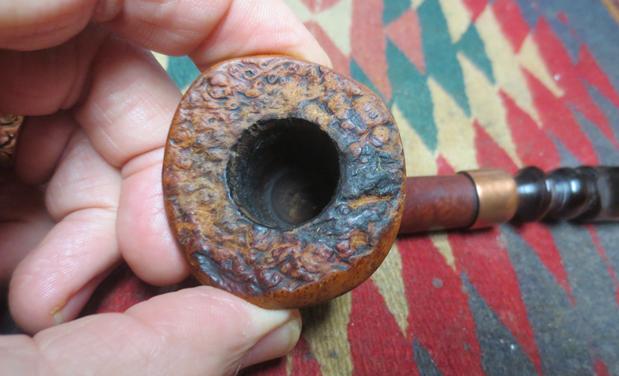
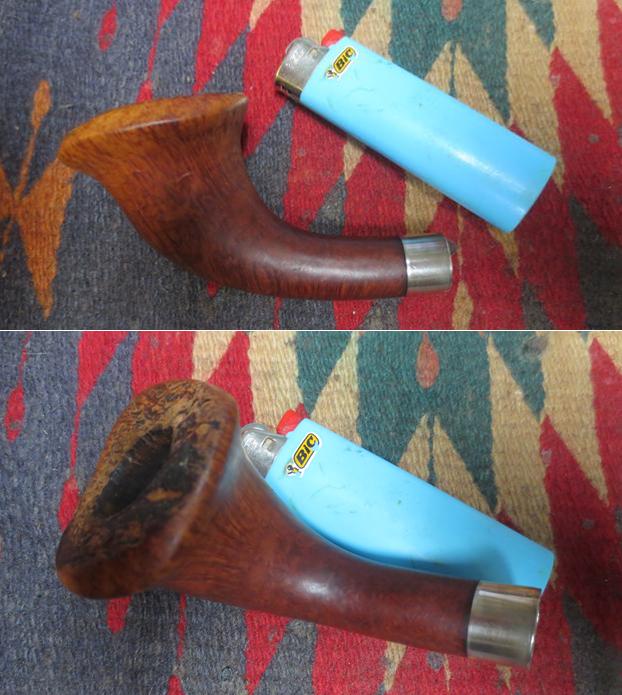
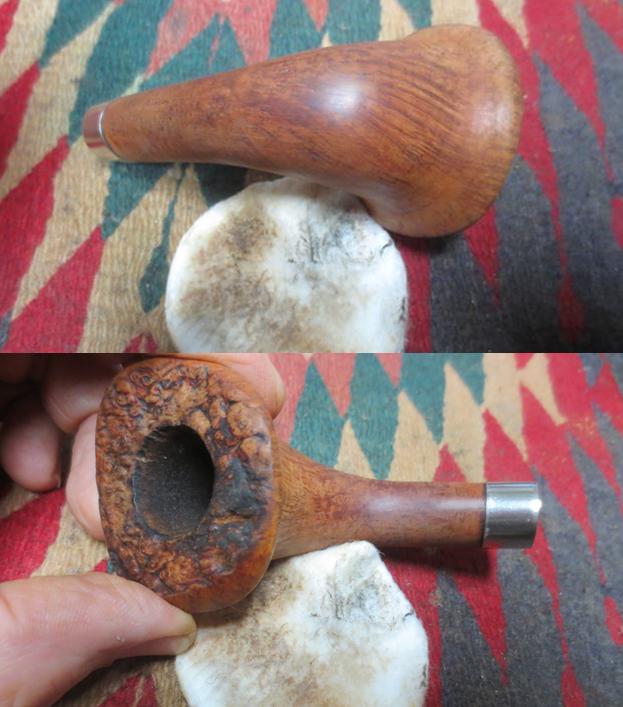
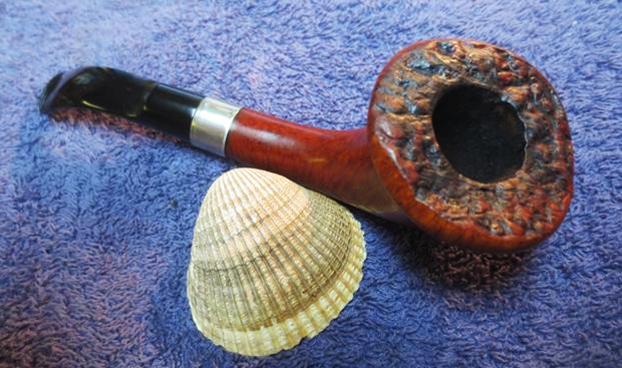
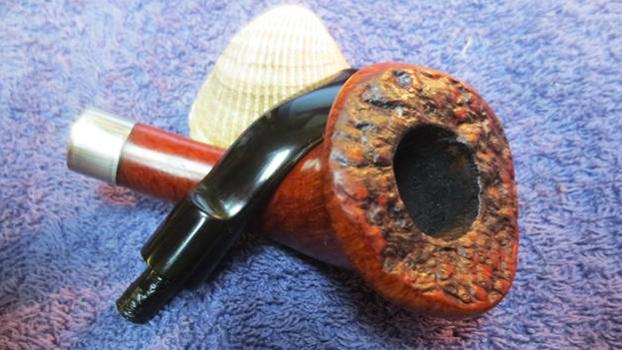
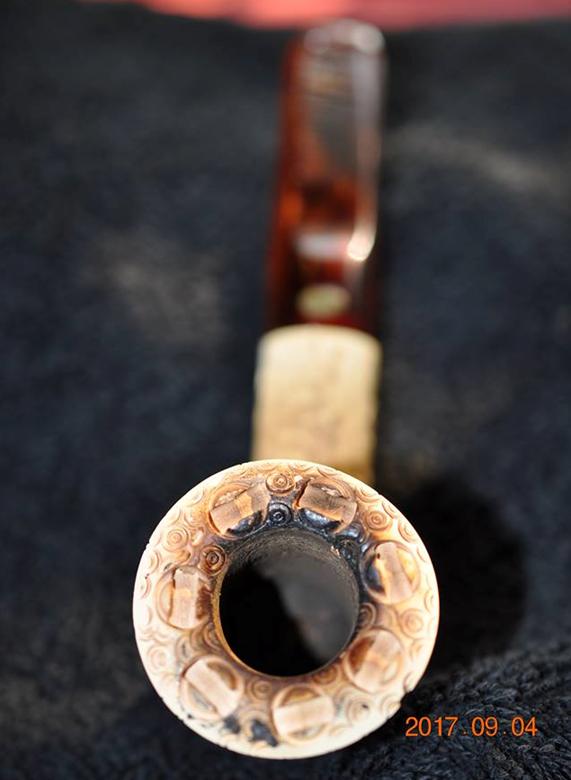
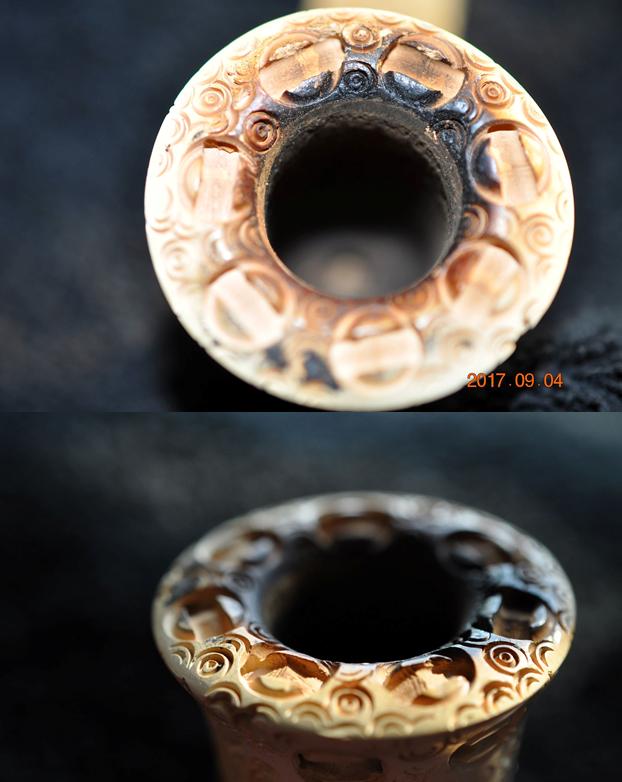
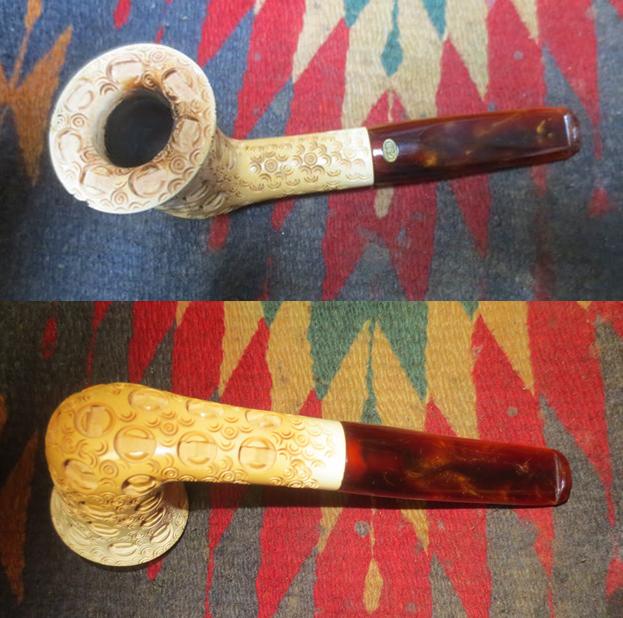
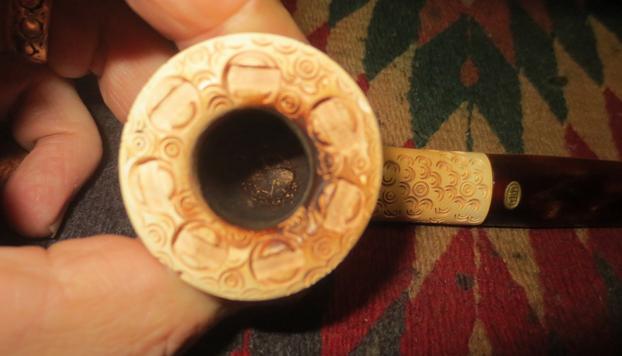
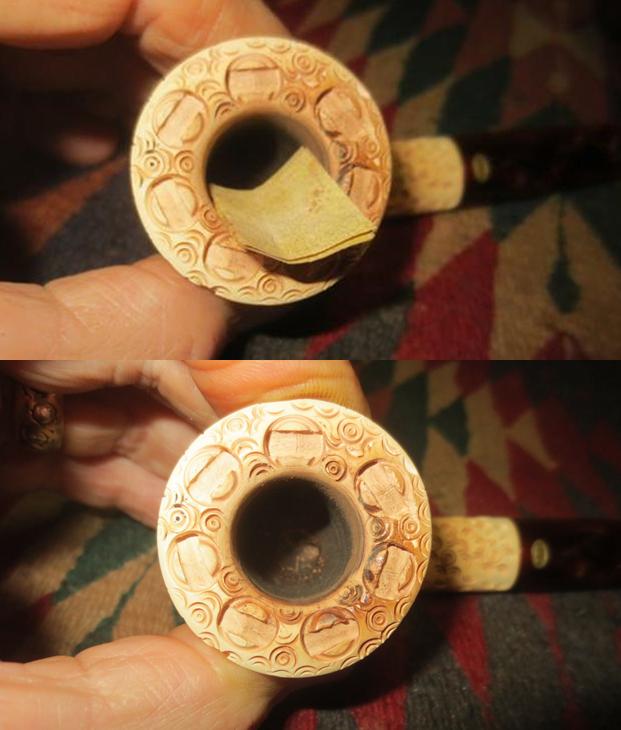
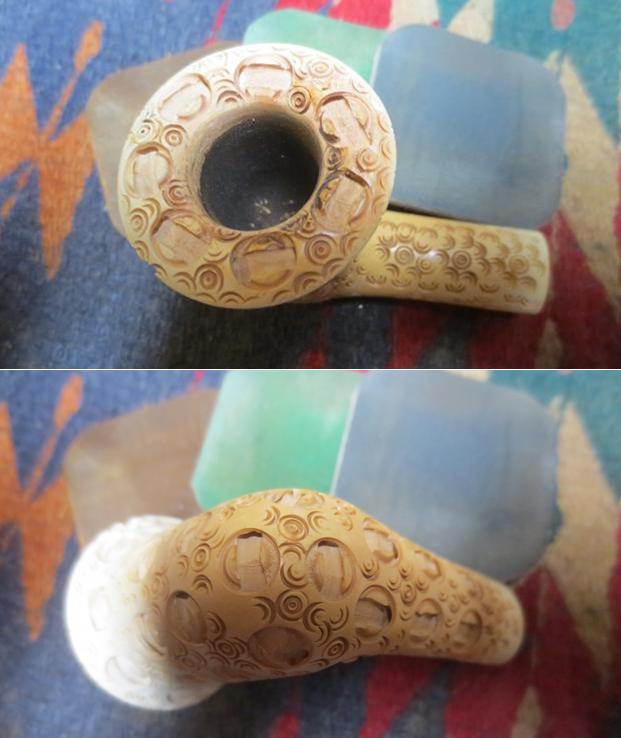
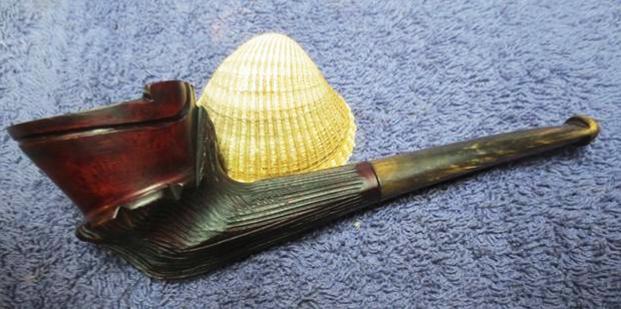
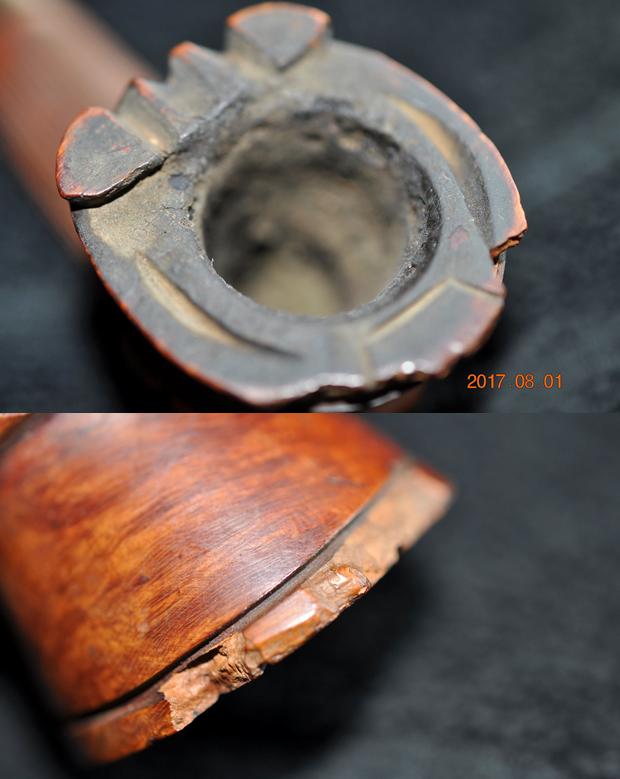
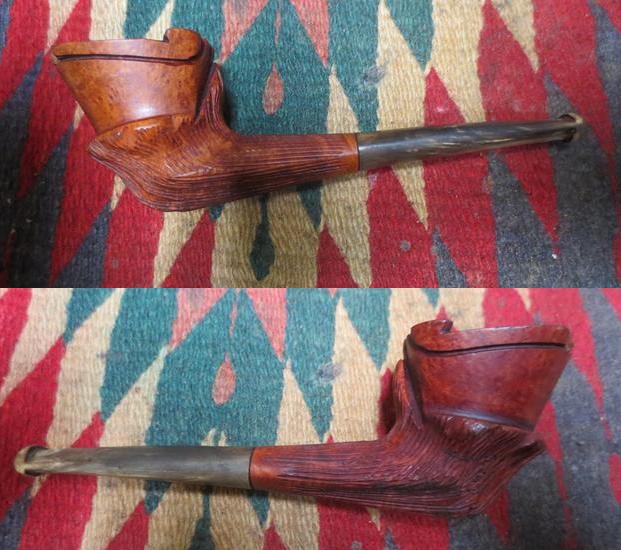
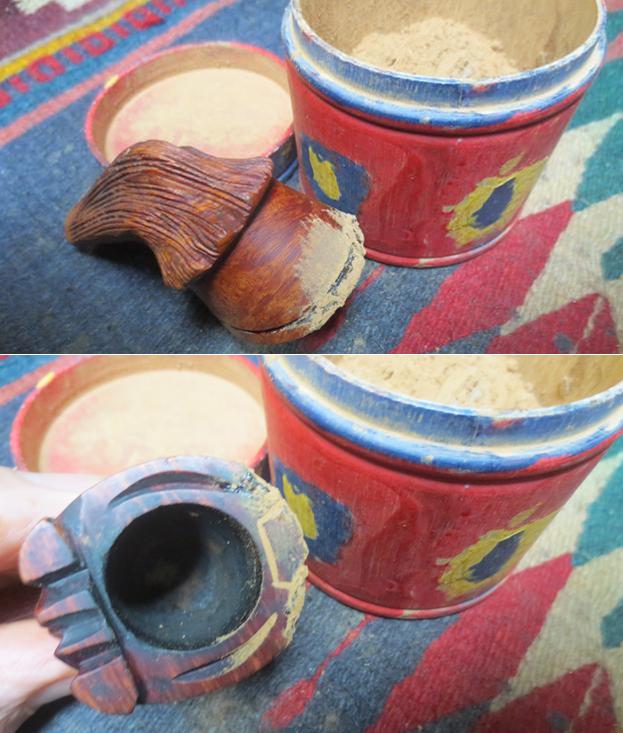
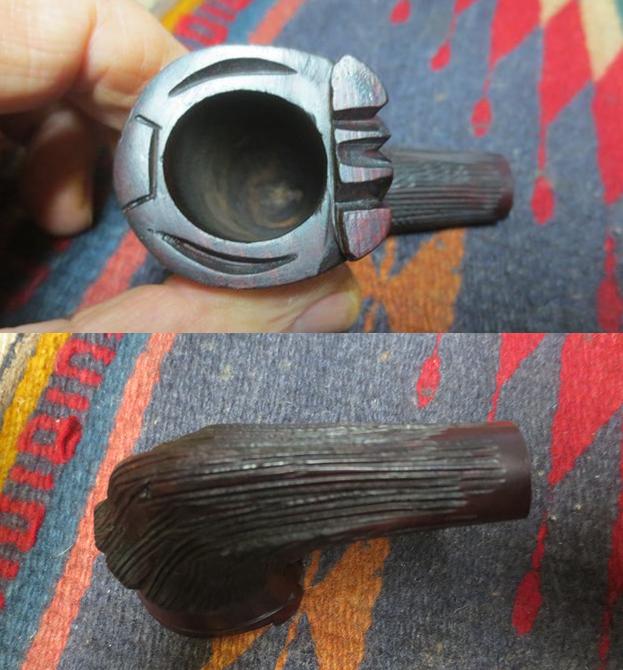
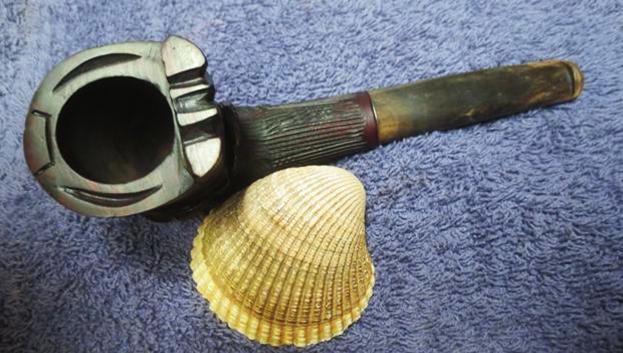
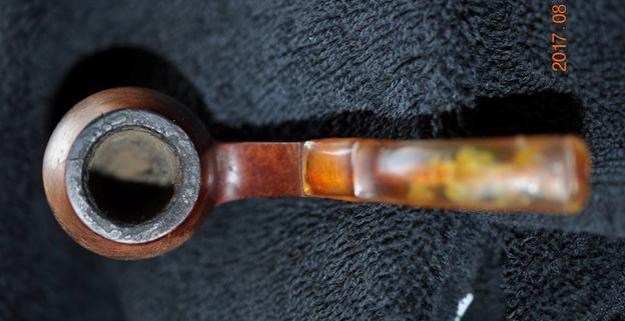
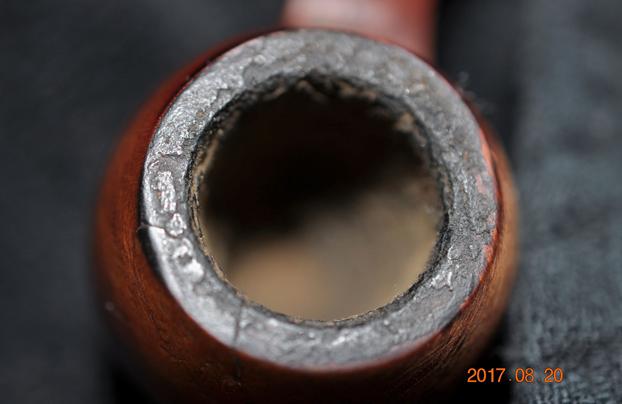
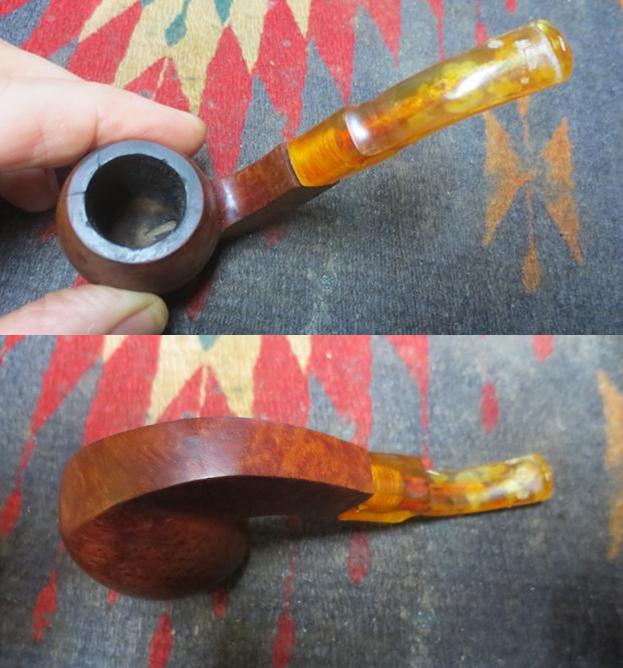
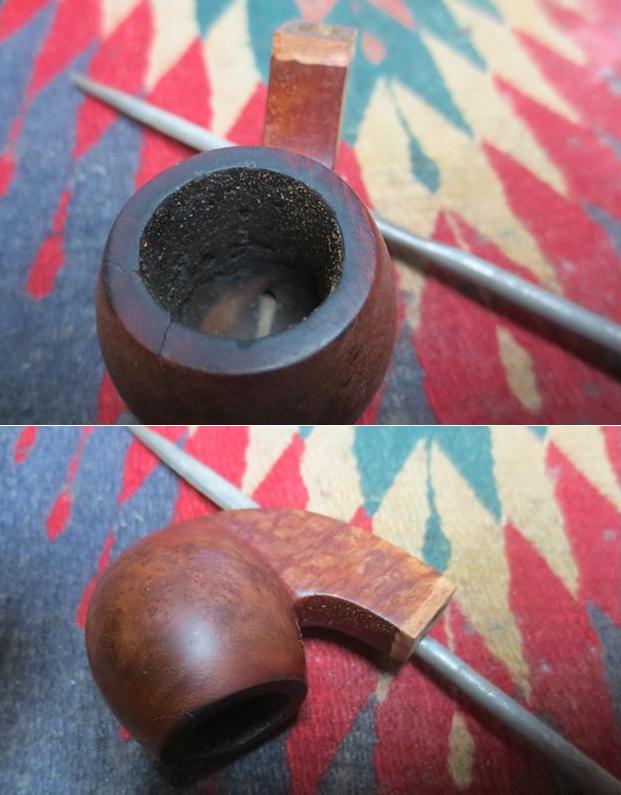
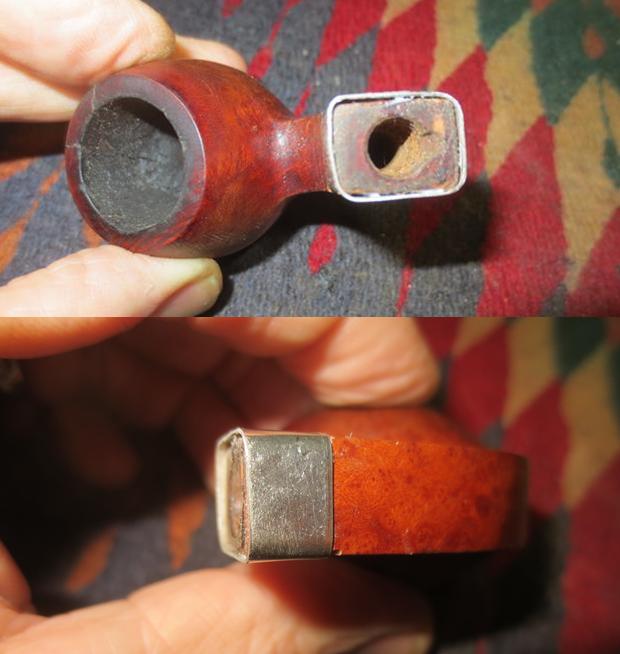
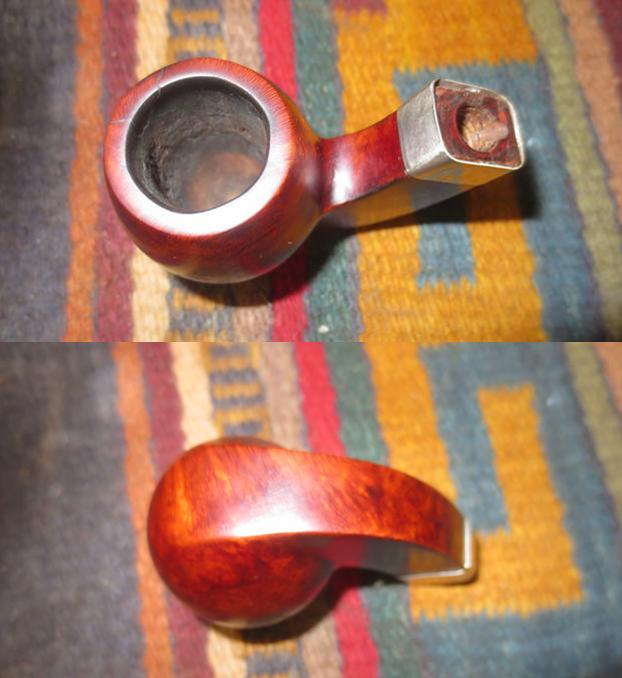
My brother Jeff picked up a Pipe by Lee Rhodesian that is on the delicate side – far different from the chunky ones that I have cleaned and restored. This one is a low profile Rhodesian with a round shank and a saddle stem. It has a dark stain on the briar, which is also different from other Lee pipes I have worked on. Jeff took some photos of the pipe before he started to work on it.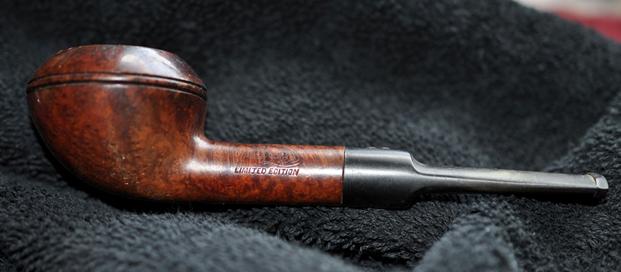 The next two photos show the condition of the bowl. You can see from the photos that the bowl is thickly caked and there is a heavy lava overflow on the rim top and the inner edge of the bowl. It covers the beveled rim top to where it almost looks flat. There appears to be some nicks and damage on the front outer edge of the bowl but I won’t know until it has been reamed and cleaned.
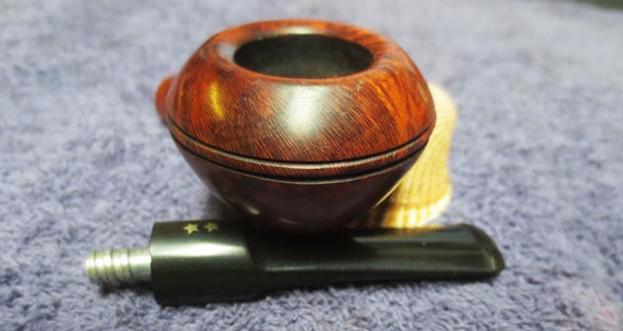
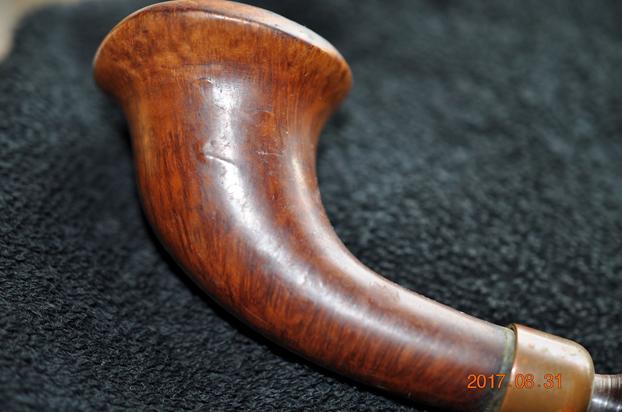
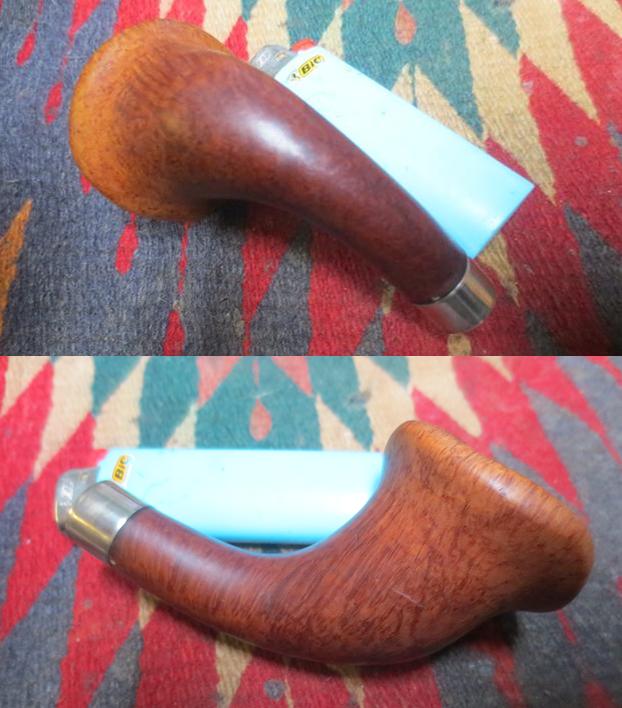
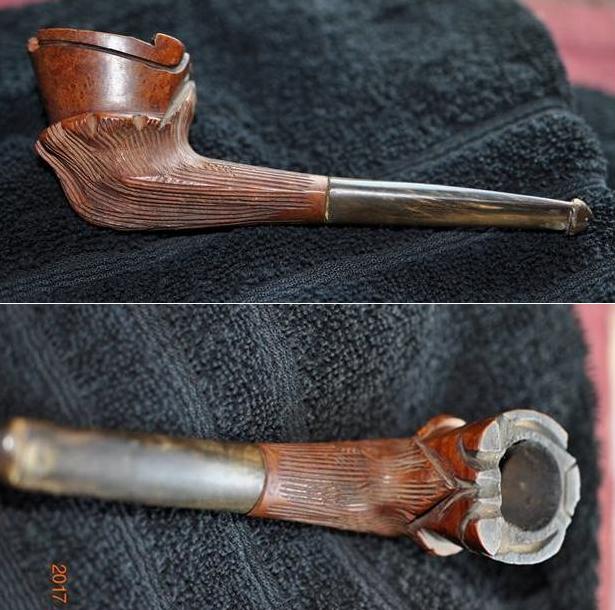
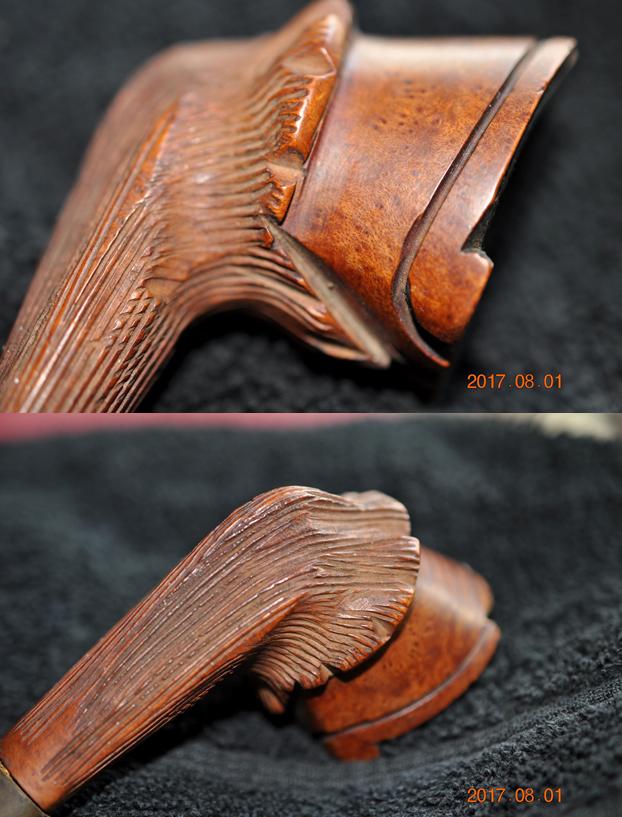
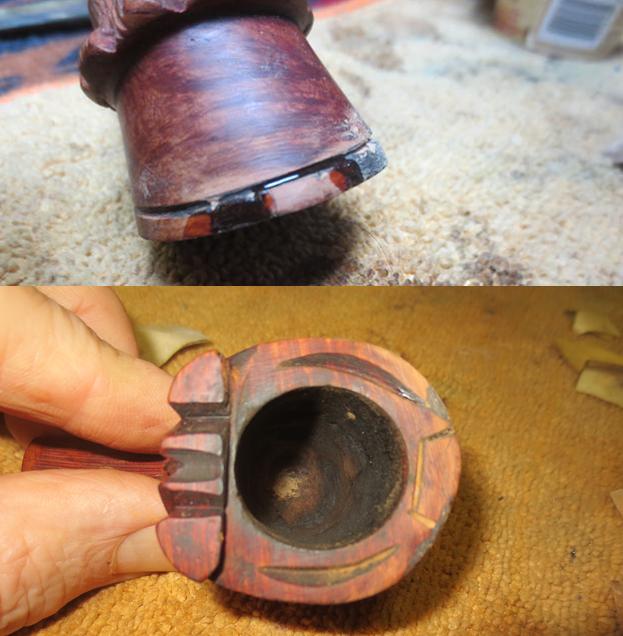
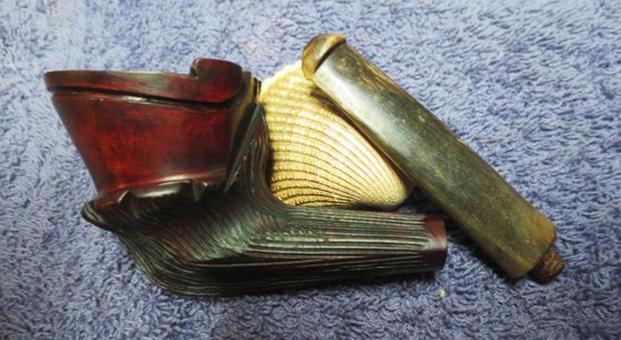
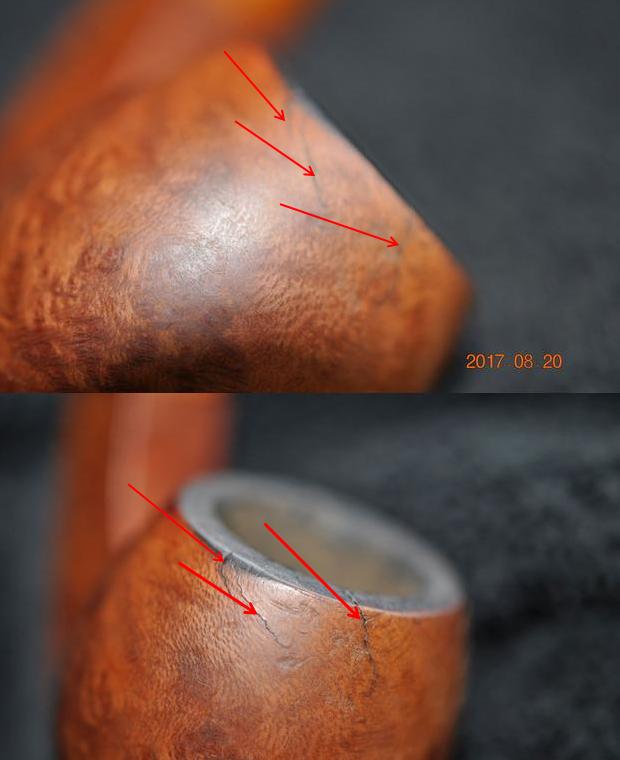
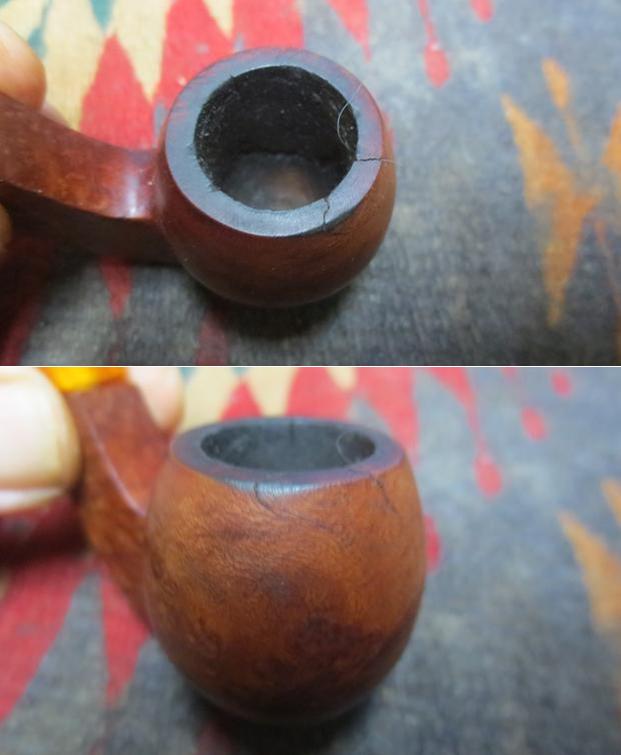
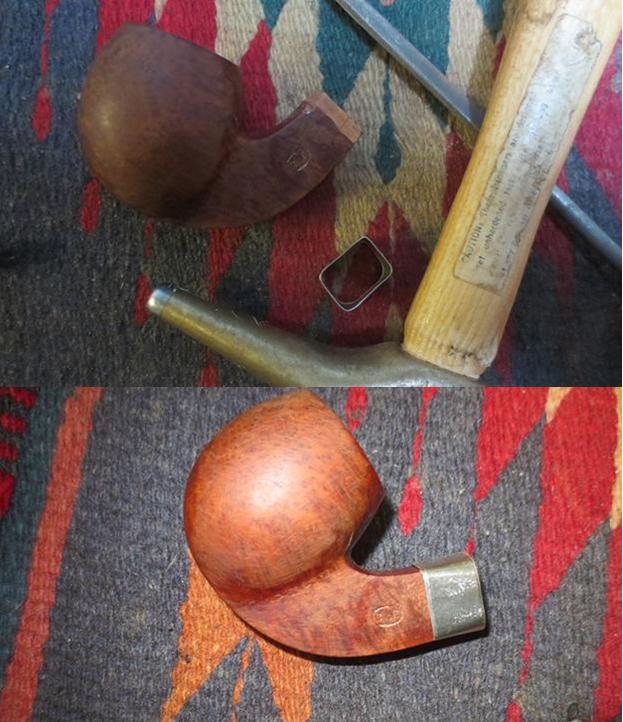
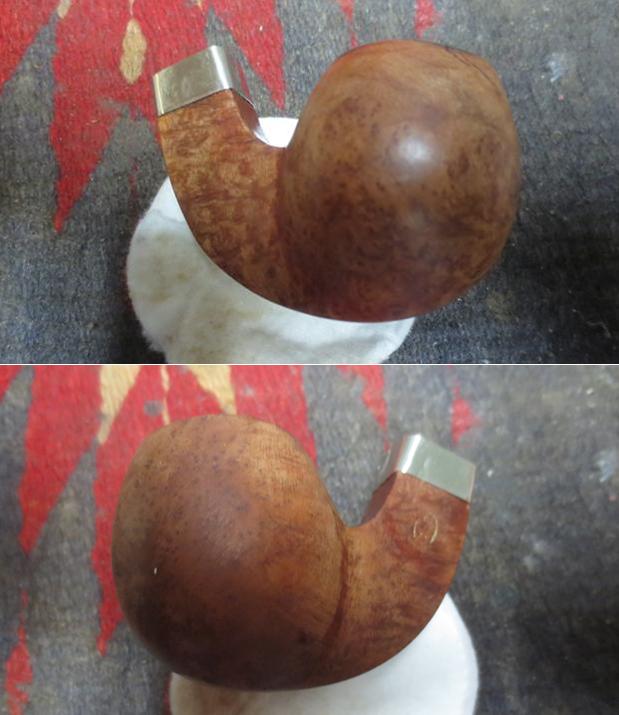
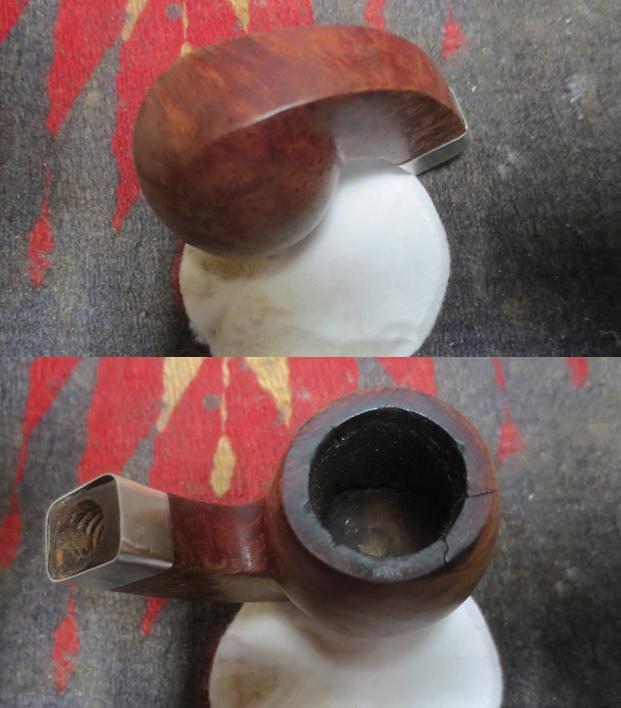
 The finish on the bowl was dirty and had a lot of nicks and scratches in the surface of the briar. The double rings around the rim cap are in excellent condition with no damaged areas.
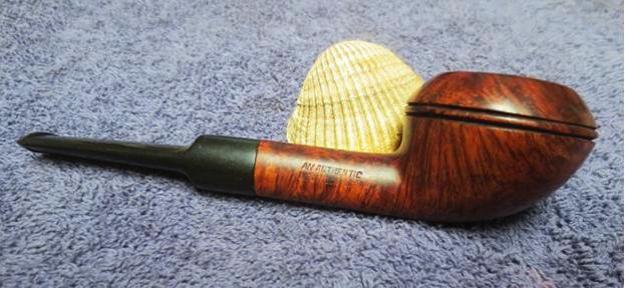
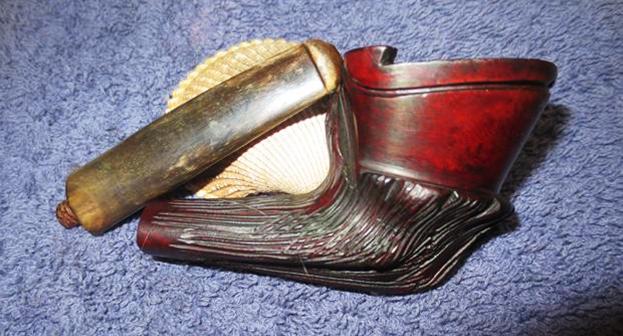
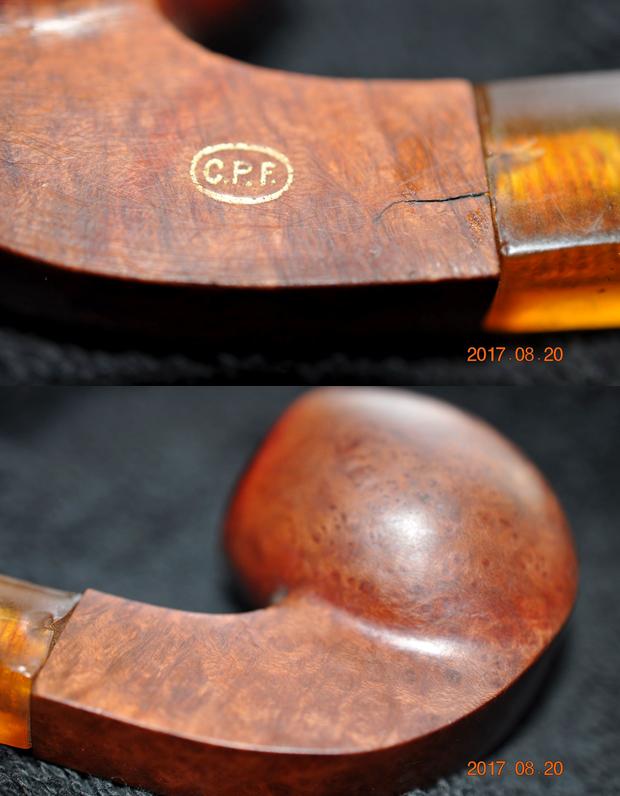
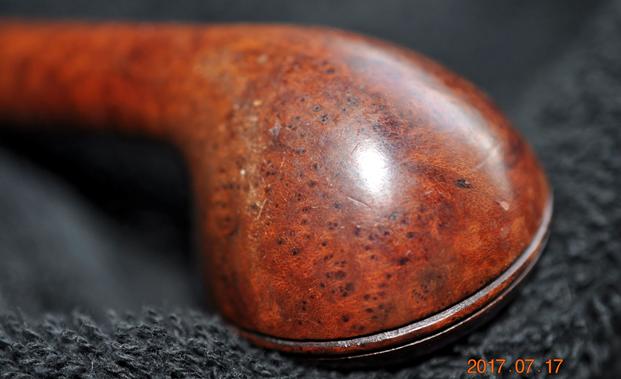 Jeff took some photos of the shank sides to show the stamping on the pipe. It is stamped Pipe by Lee on the left side of shank over Limited Edition. On the right side it is stamped An Authentic over Imported Briar.
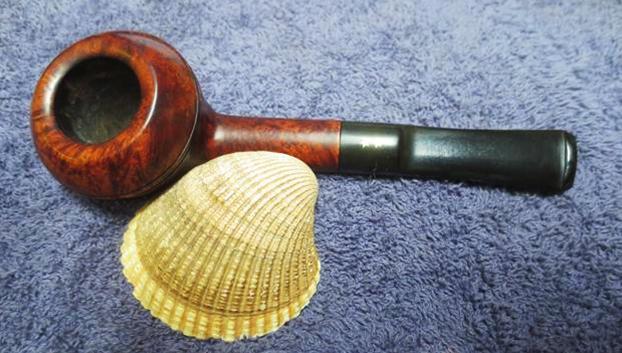
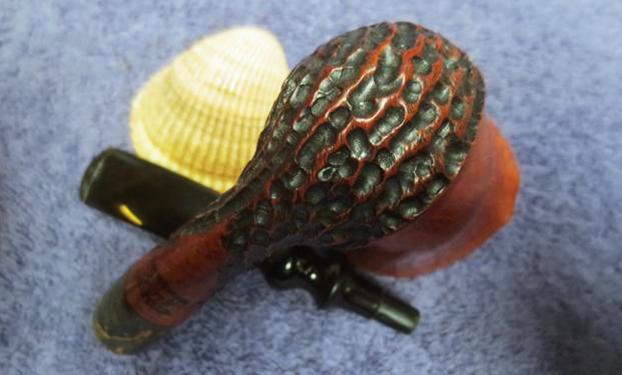
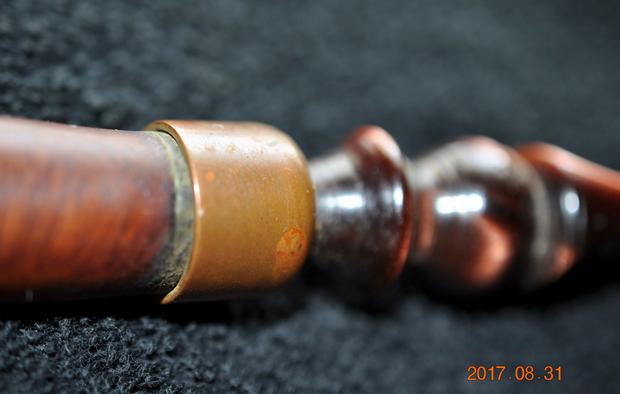
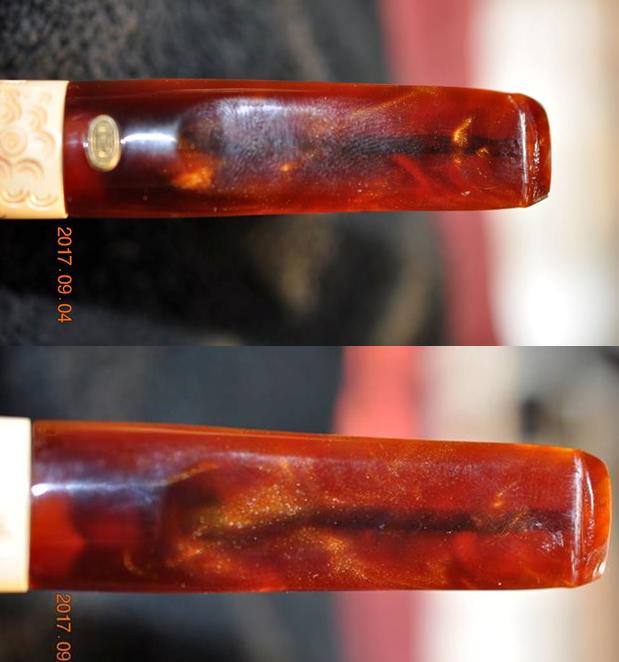
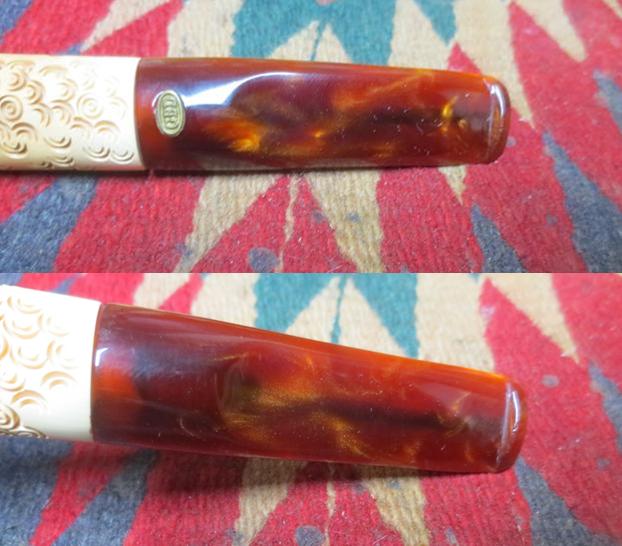
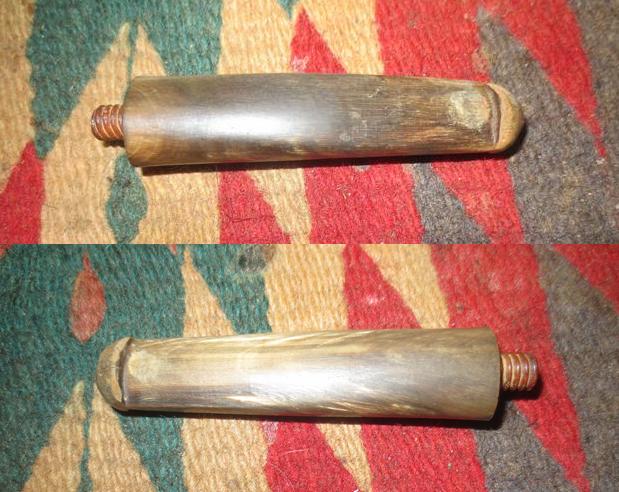
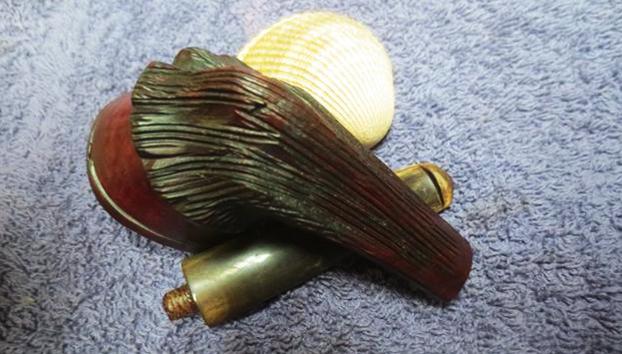
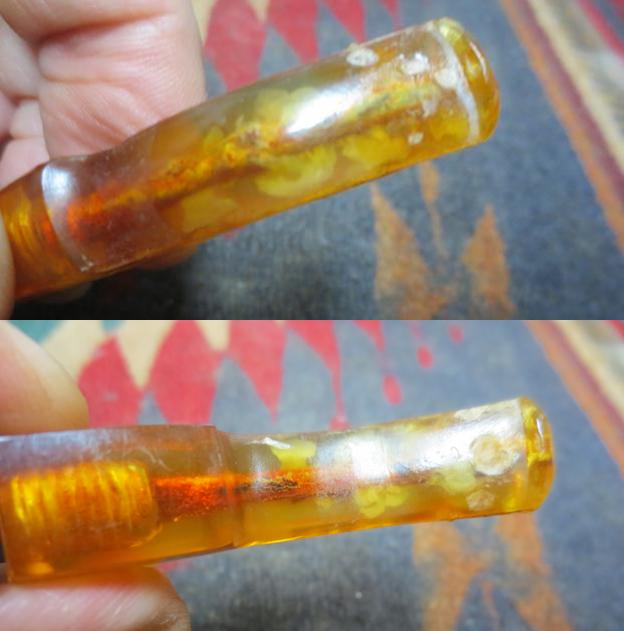
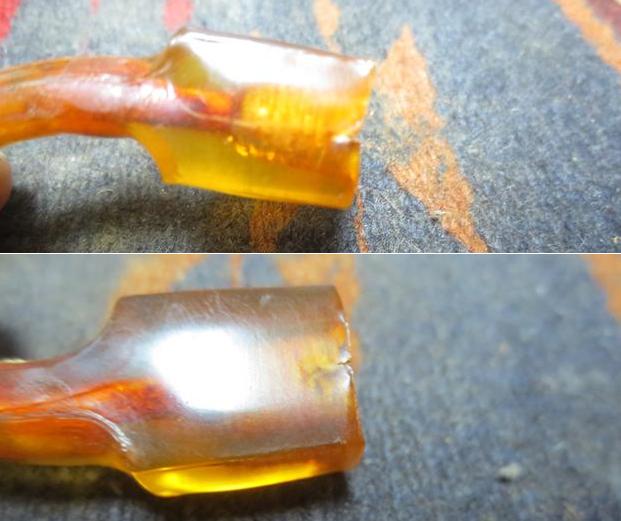
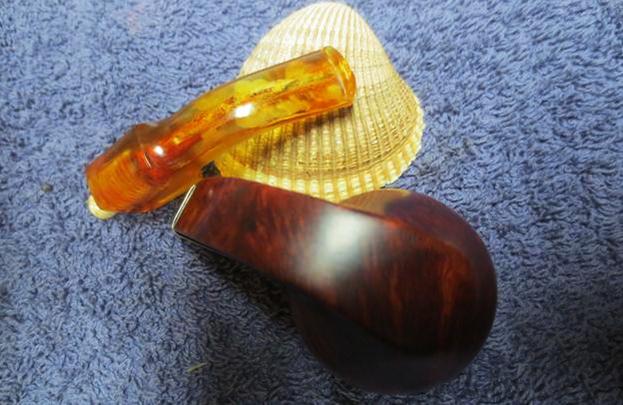
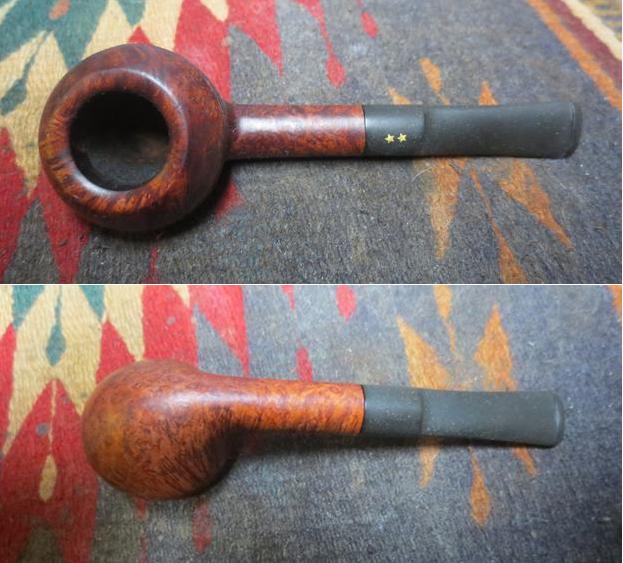
 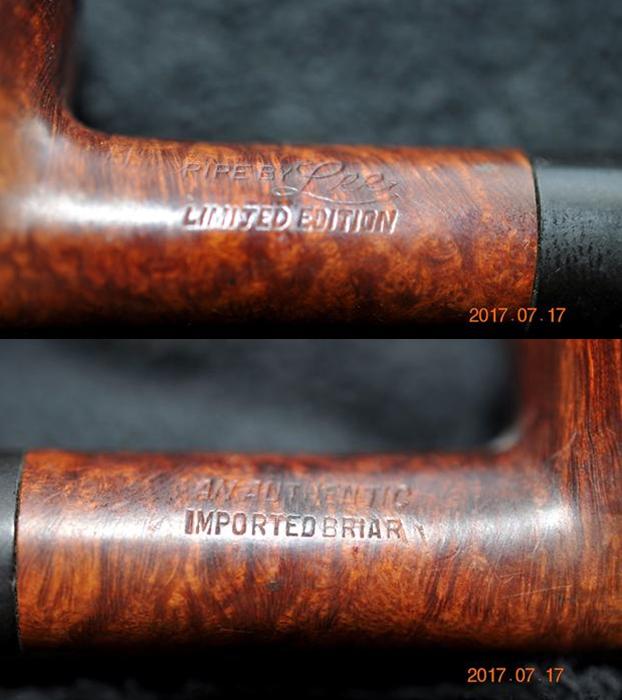 The saddle stem had two gold stars inset in the top portion of the saddle equidistant from the front and back of the saddle. The stem was dirty, sticky and lightly oxidized. There were light tooth marks on the top and underside at the button and on the sharp edge of the button.
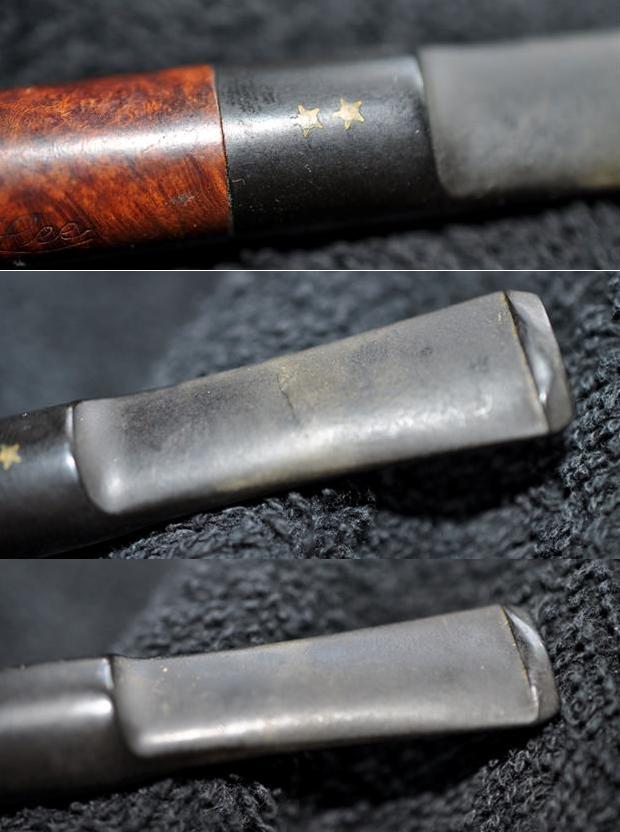
 I decided to refresh my memory regarding the Pipe by Lee brand. I checked on my usual sites to learn what I could. I went to Pipedia and looked up the brand. Here is the link https://pipedia.org/wiki/Lee
I quote the entirety of the listing as it is brief and pointed regarding the history of the brand.
This brand was distributed by Stewart-Allen Co. Inc., NY. The Grading (ascending): 1 to 5 stars. Early pipes have seven pointed stars, middle run have five points and later pipes are stamped with coloured gold stars.
The site also quoted a section from the pipephil website regarding the brand. Lee seconds: Briar Lee, Gold Coast (preceding content from “Pipes: Logos & Markings” website http://www.pipephil.eu/logos/en/logo-l3.html#lee)
I quote the next section of the article because it pertains to the pipe I am working on.
I have seen one pipe. “Pipe By Lee” stamped on left side of shank over “LIMITED EDITION”. Right side of shank stamped “AN AUTHENTIC” over “IMPORTED BRIAR”. Logo on top of the stem is three gold seven pointed stars in a row. Additional information on time frame of operation or quality of the pipes would be helpful. — Dgillmor 21:51, 10 May 2012 (CDT)
 I went directly to the pipephil site to look at the stamping and logo markings that are included there. There was a photo of a similar pipe though it had a tapered stem rather than the saddle stem on the one that I am working on. The shape is a Rhodesian as well. Below that there was a photo of the stamping on that pipe that matches the stamping that is on the pipe have. http://www.pipephil.eu/logos/en/logo-l3.html#lee
I decided to do some more searching and look for sites other than Pipedia or Pipephil. I wanted to find a good summary of the history of the brand from someone who collects the pipe. I found a great link to a conversation on the Shotgun World BBS. The link is as follows http://www.shotgunworld.com/bbs/viewtopic.php?f=75&t=269843 I am including portions of that conversation from a member there, going by the screen name SuperXOne. He obviously collects pipes from Pipe by Lee. If you are interested in reading the entire interchange you can go to the site. For my purposes I only wanted the one side.
For any of you pipe smokers, I want to share something I’ve discovered about “estate” pipes. You may come on a pipe at a garage sale, flea market, or eBay that is marked “Pipes by Lee”. This pipe will be, if not completely abused beyond salvation…a goodun!!!
Evidently, there was somebody named Lee who made pipes in New York City from just after WW2 on up until sometime in the 1970’s. Lee’s pipes were not ever cheapies. He sold them mail order and wholesale, and Lee met Kaywoodie grade for grade back when Kaywoodie was winding down from making their best pipes into a slow, declining mediocrity.
Lee Pipes came marked with stars to determine quality. As of 1950, a one star pipe was $3.50, Two stars were $5, and Three stars were $10. Four star pipes were $15 and Five star pipes were $25. $3.50, $5, and $10 were the exact prices in the first three grades of Kaywoodies, the Drinkless, Super Grain, and Flame Grain. Later prices went up gradually for both brands, but somewhere along the line Lee lost the race and yet you can still buy a brand new pipe that says Kaywoodie Flame Grain in 2011…but it’s only a decent, basic pipe that wouldn’t have even made the lowest cut for a $3.50 Drinkless or One Star in 1950.
The overwhelming majority of Lee Pipes that I own and I’ve seen were three stars. There are two periods of quality, and no Lee Pipe is ever junk. The earlier, better Lee Pipes had actual gold inlaid stars into the rubber stem. The later, still good but not as nicely polished Lee pipes, had the stars cast into the stem but have no gold inlaid in the stars. Every so often, I’ll see a two star Lee and it will always have nice grain, but a few “fills” here and there. A three star Lee will have no noticeable “fills” and will always have excellent grain structure, but not quite on a level with a Pre War Kaywoodie Super Grain or Flame Grain. Evidently, Lee saved his best wood for his four star and five star pipes…but I’ve never seen one and never seen one advertised for sale. Likewise, for some odd reason, I’ve never seen a “one star” Lee pipe. Perhaps because the one stars all got used up and smoked out and thrown away within a few years of purchase.
What you’ll likely find is a “Three Star” Lee in a conventional shape such as an Author, Billiard, Apple, or Bulldog. They pretty well matched Kaywoodie in their shapes offered. Do not pretend that a Lee Pipe is the equal of a Pre War Kaywoodie “four hole” Super Grain or Flame Grain. But they are probably better than the Pre War “four hole” Kaywoodie Drinkless…at least the three star Lees are…and a Pre War “four hole” Kaywoodie Drinkless is a truly fine pipe. I’ve found the Lees to be better quality than the later “three hole” Kaywoodies, as well…even the higher grades of Kaywoodie. I’ve never seen a trace of varnish on a Lee pipe of any grade, and the workmanship is wonderful. Remember too that all that incredibly fine briar that Kaywoodie used before the war to make all those wonderful “four hole” Kaywoodies was already more or less gone by the time that Lee starts making his pipes after the war. Lee pipes more than hold their own against Kaywoodies of the same year of manufacture.
Prices on Lee pipes are cheap. A brand new one in the box is often less than fifty bucks. Well-used ones are giveaway cheap at flea markets and yard sales. A fair price for a good condition, lightly smoked three star Lee is probably twenty five dollars. For that you’ll get a pipe that you’d have to pay several hundred for if it was made brand new today…if you could even find one as good.;)
Here’s a web page that shows the Lee 1950 dealer’s catalog. Drool away!: http://pipepages.com/pblpage
But while Lee might have equaled Kaywoodie pipes, Kaywoodie had Lee beat hands down in catalogs. If you smoke a pipe you just have to see this 1947 Kaywoodie catalog: http://pipepages.com/47kaycat2.htm
All links are to Pipe Pages. A fine place to while away the time looking at old pipes.;)
And here’s a link to the existing Kaywoodie Company. Sad to compare them with the 1947 Kaywoodie, but at least they are still kicking and still in the USA: http://www.smfrankcoinc.com/
Too further illustrate just how high quality the Lees and the Kaywoodies were in the 1940’s, here is the 1949 price list of Alfred Dunhill. You could get your choice of Dunhill pipe in the USA in 1949 for $15 retail. In those days that would have included tariffs, and of course transportation to the USA from England. Dunhills are, of course, still being made to the exact same standards as they were in the late 1940’s. Today any Dunhill is over five hundred dollars…at the very least,,,,even the sandblasted ones. Back in the 40’s Lee and Kaywoodie hardly sold any sandblasted pipes at all, because their customers demanded for ten dollars a completely perfect, flame grained, smoothly polished, outrageously high quality pipe, and they would have only sand blasted a pipe that somehow didn’t make the grade. For fifteen dollars an American expected a Lee or Kaywoodie to be out of this world wonderful, and I can’t even imagine those $25 grade Kaywoodies and Lees…but we know that some were made. We Americans don’t think about us making the finest of anything, but we did back in the 1940’s when it came to making smoking pipes. Our pipes were the absolute best in the world, using the very best briar. http://pipepages.com/49rtda13.htm
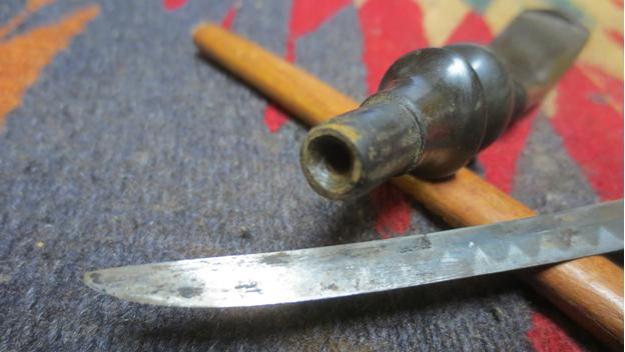
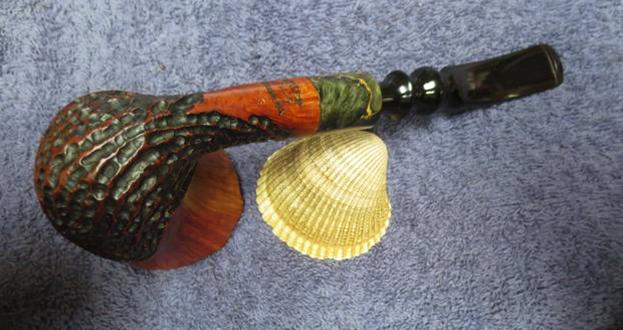
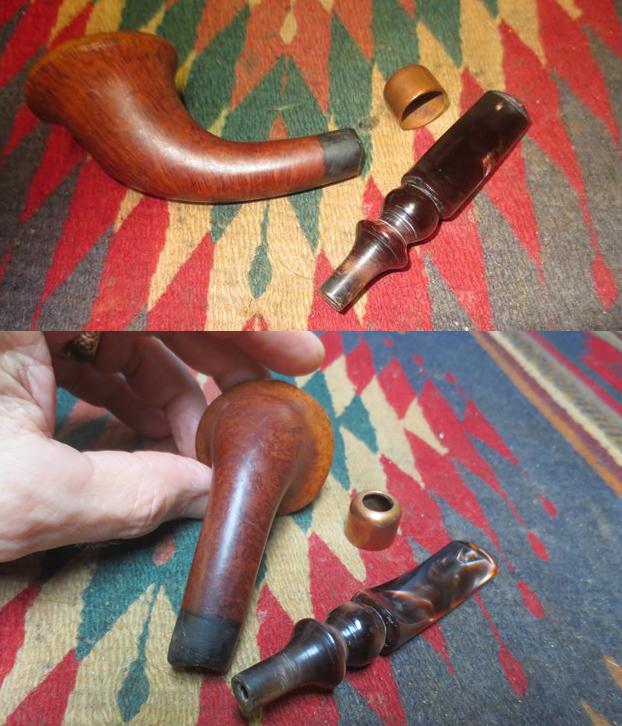
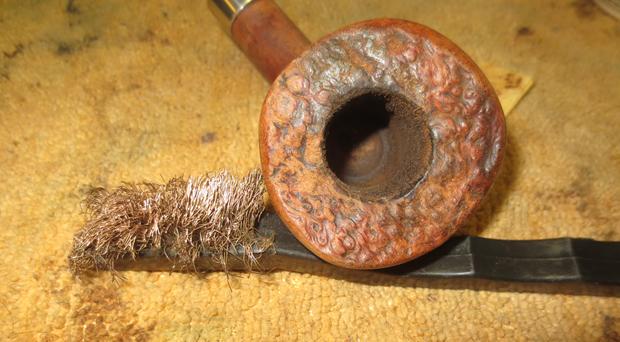
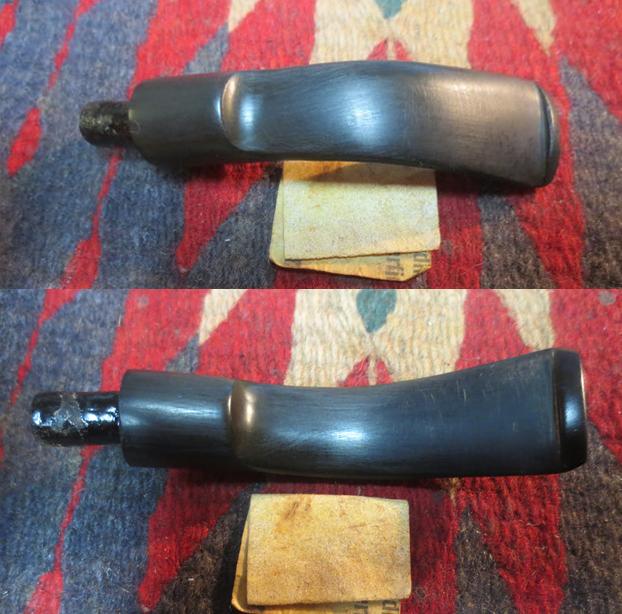
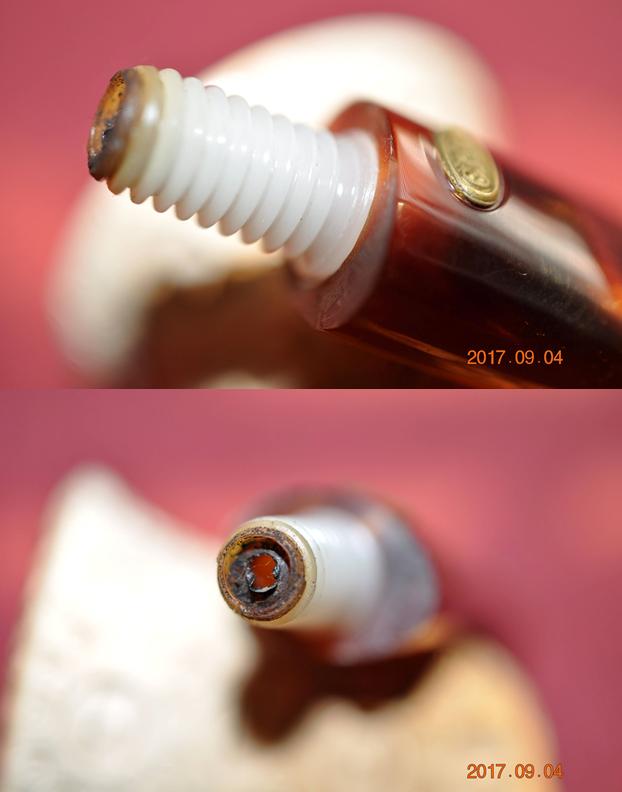
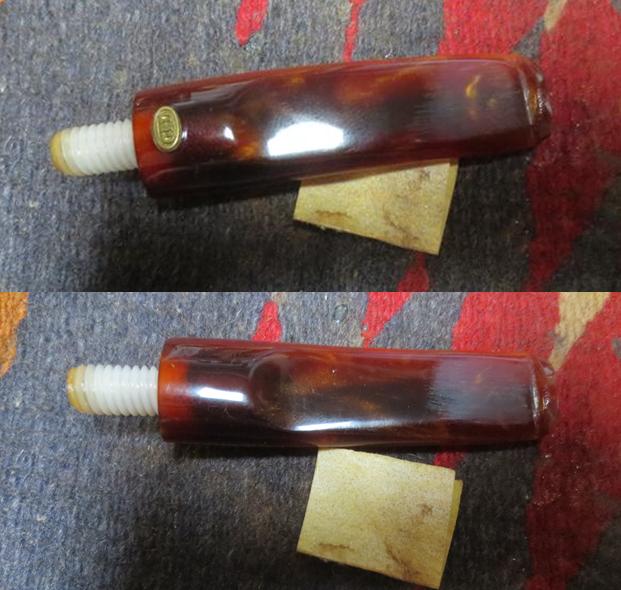
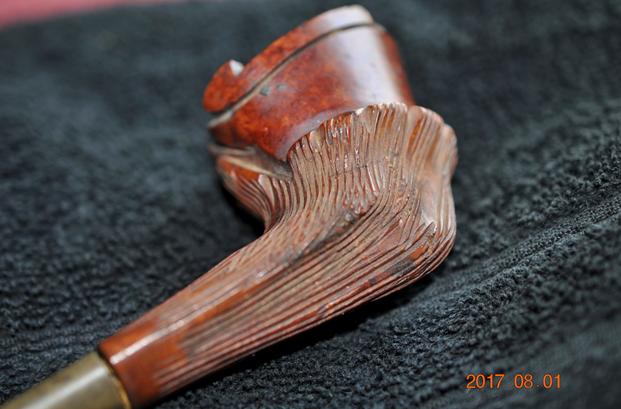
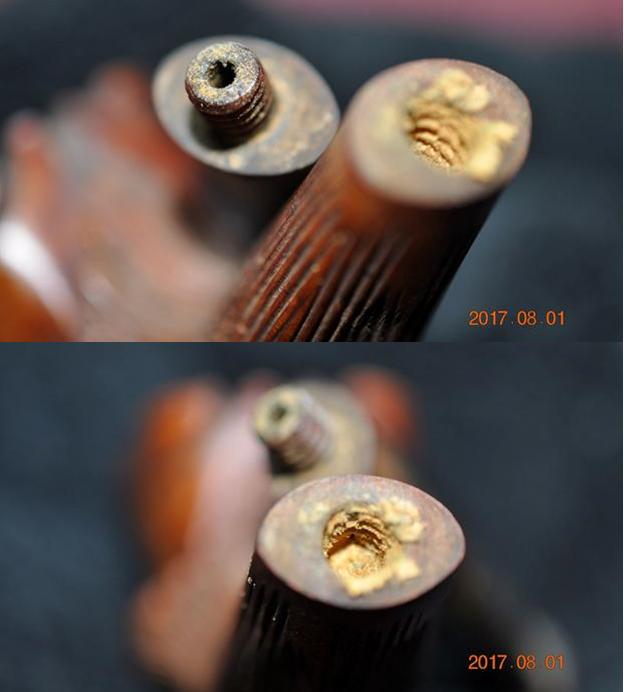
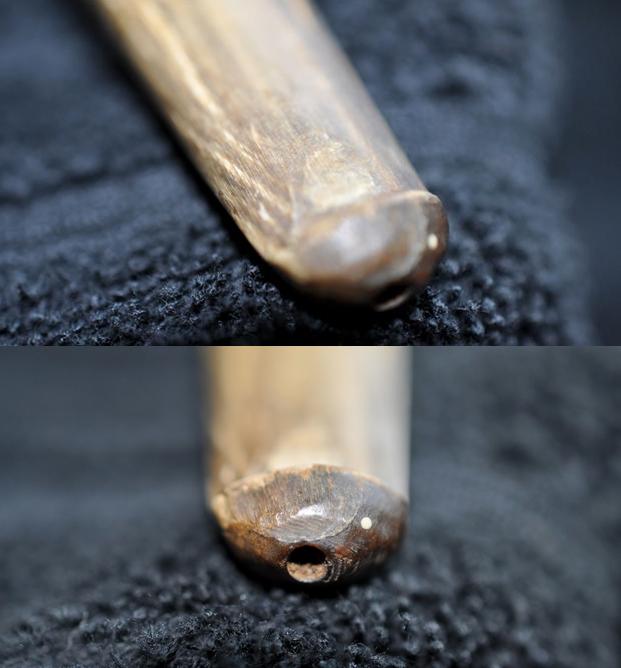
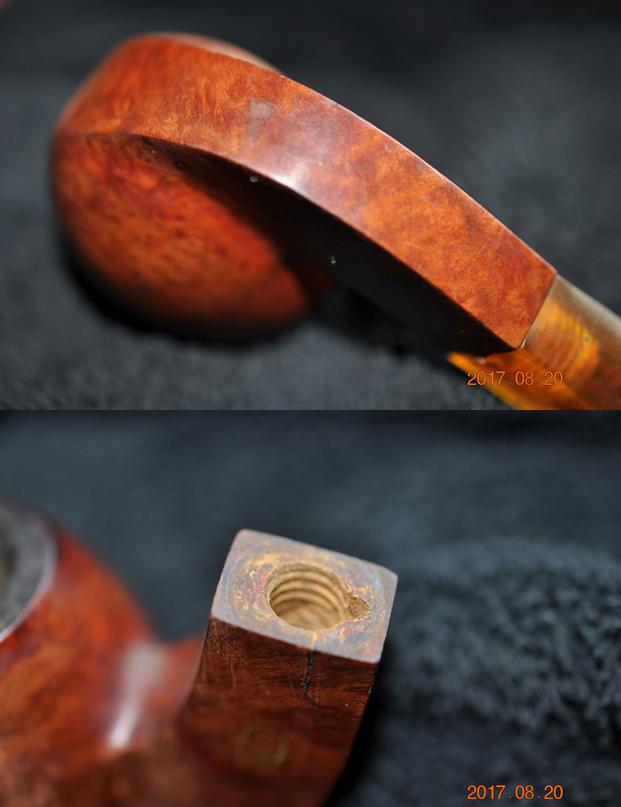
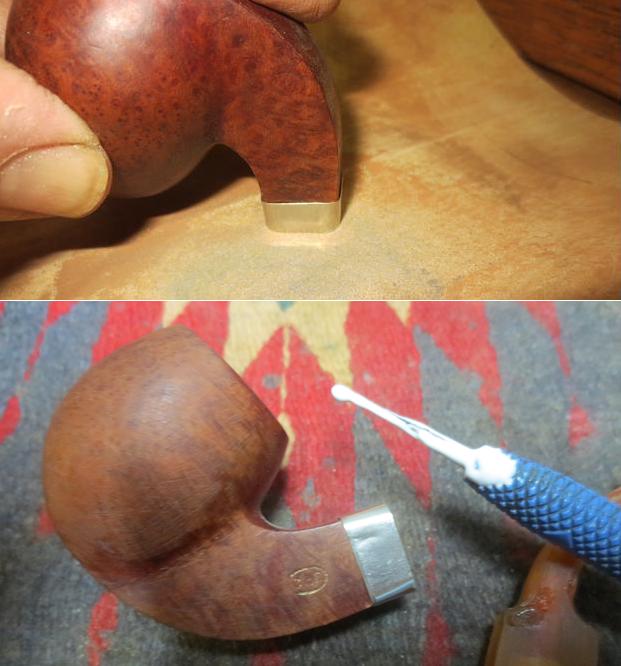
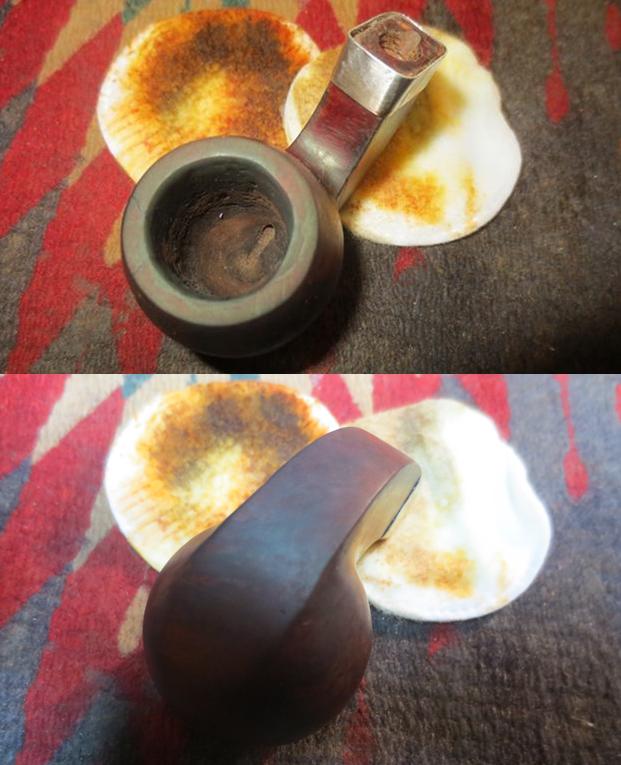
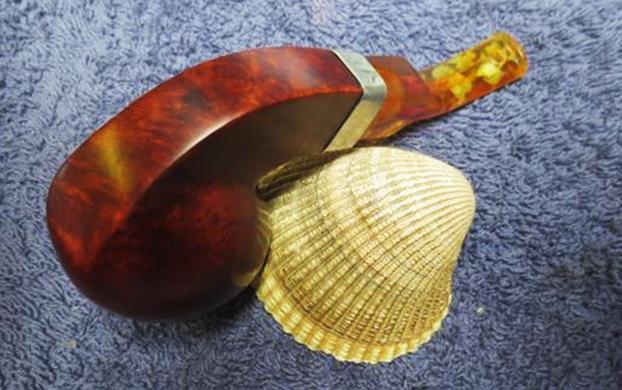
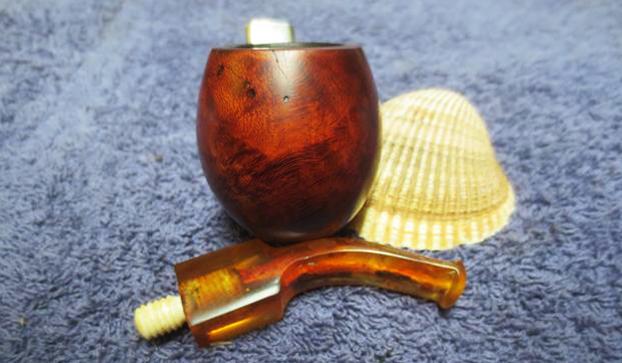
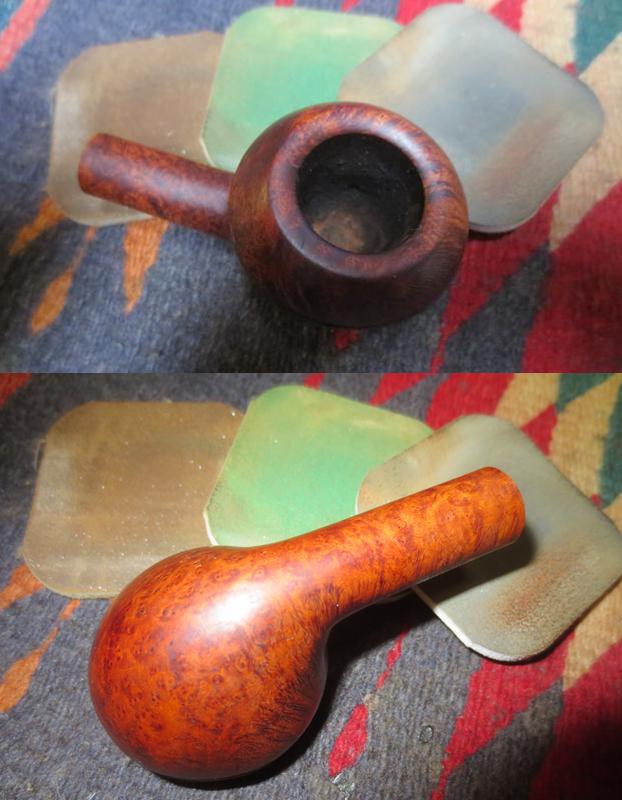
Armed with the renewed information it was time to work on the pipe. Jeff did his usual thorough clean-up work. He reamed it with a PipNet reamer and cleaned up the remnants with a Savinelli Fitsall pipe knife. He scrubbed out the mortise and the airway in the shank and the stem with alcohol, cotton swabs and pipe cleaners. He scrubbed the exterior of the bowl, rim cap and shank with a tooth brush and Murphy’s Oil Soap and rinsed it under running water. It took a lot of scrubbing to get it free of the tars. He dried it off with a soft cloth. Once the grime was removed the finish was in excellent condition with a mix of straight and birdseye grain around the bowl and shank. He cleaned up the vulcanite stem and metal threaded tenon with the oil soap as well and was able to remove much of the debris. There were some light tooth marks on both sides of the stem.I took photos of the pipe to show its condition before I started my work on it. 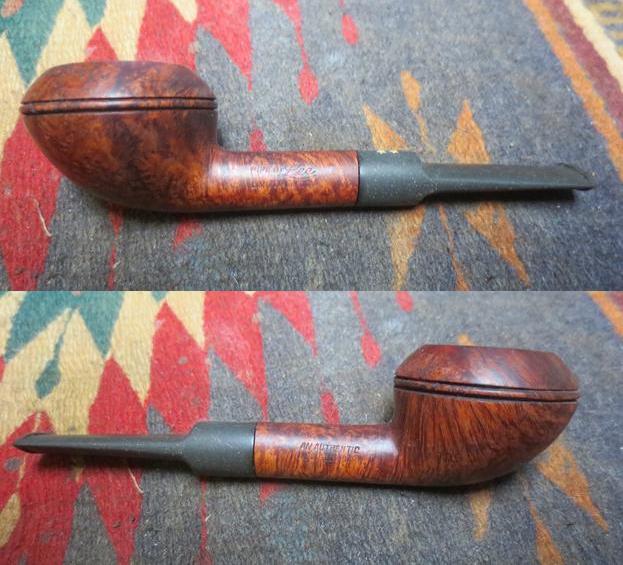
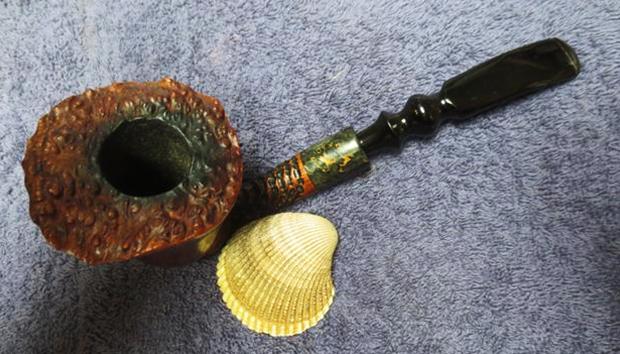
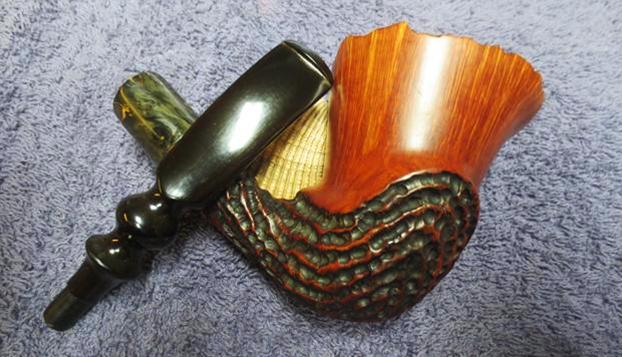
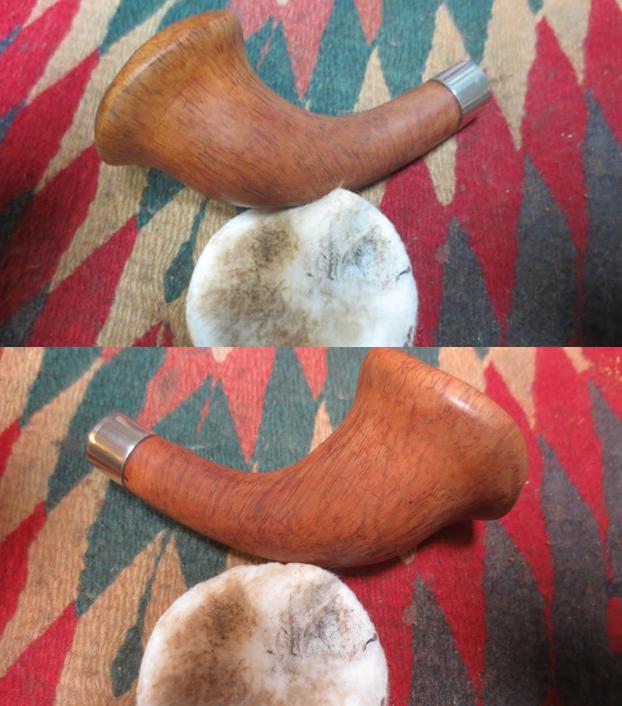
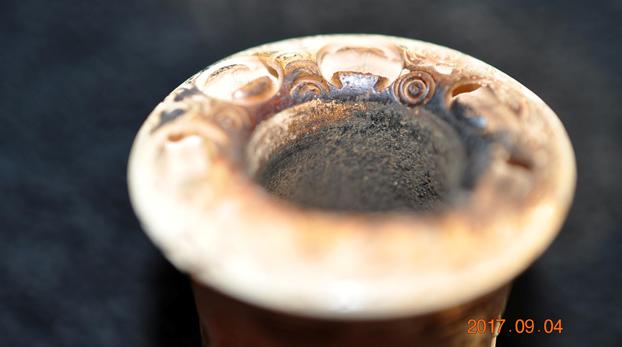
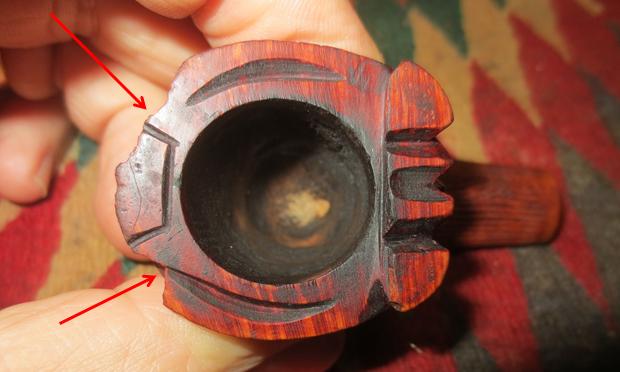
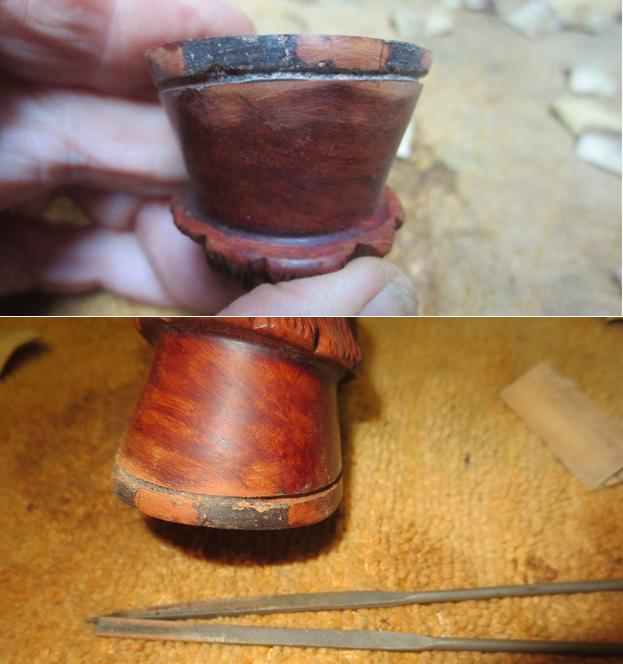
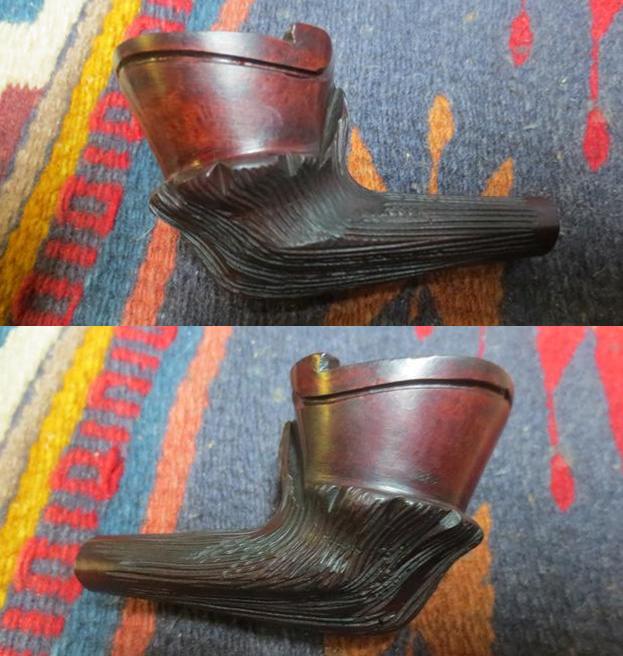
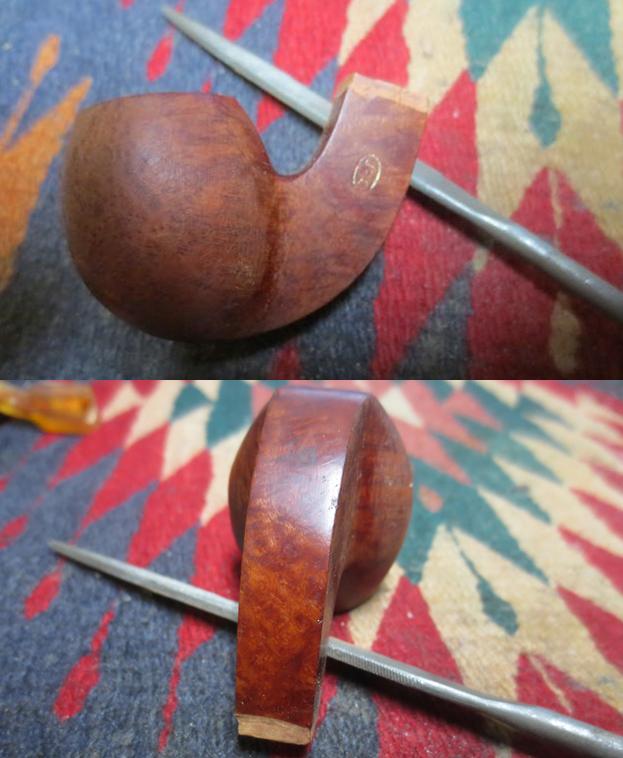
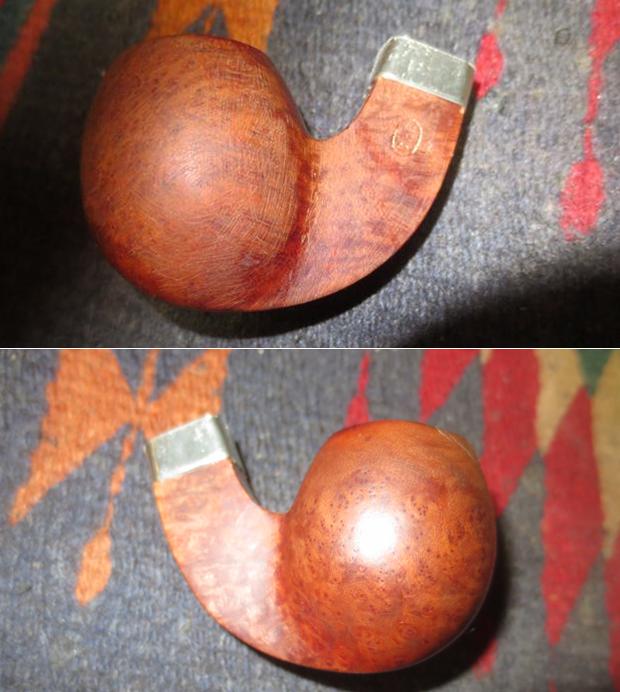
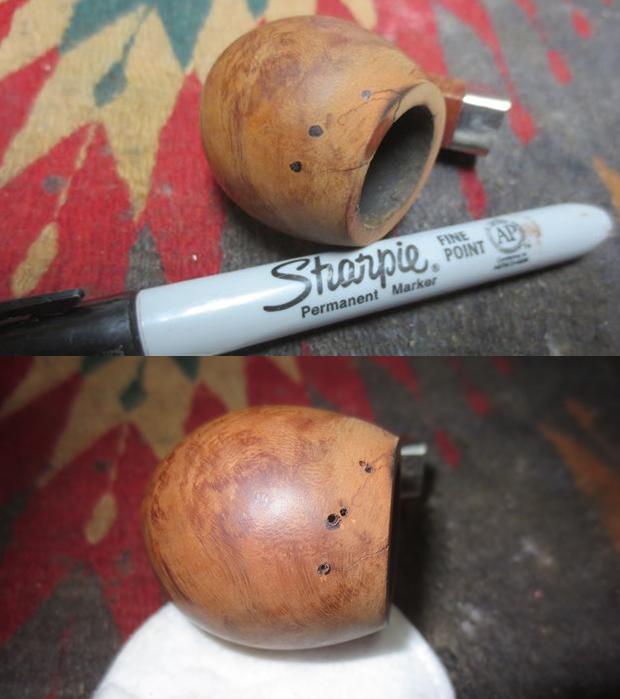
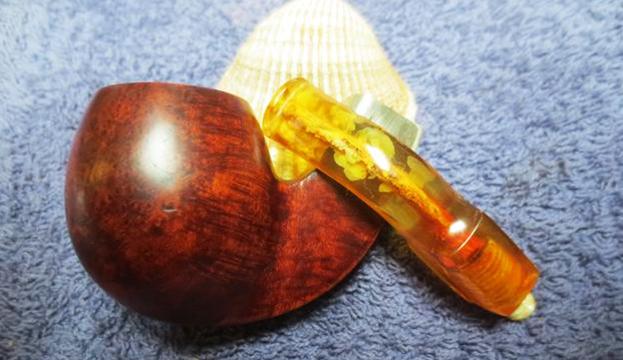
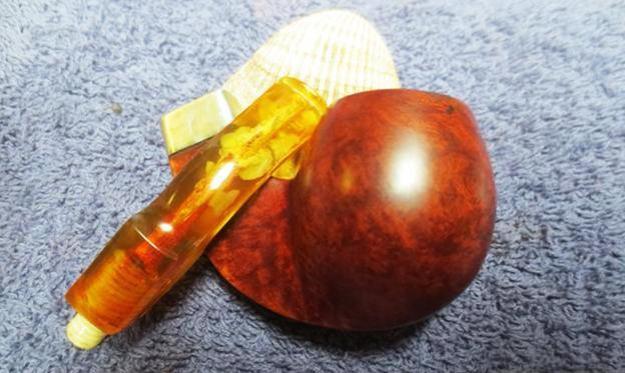
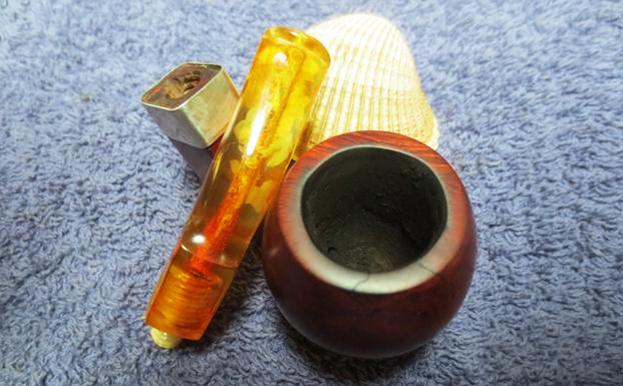
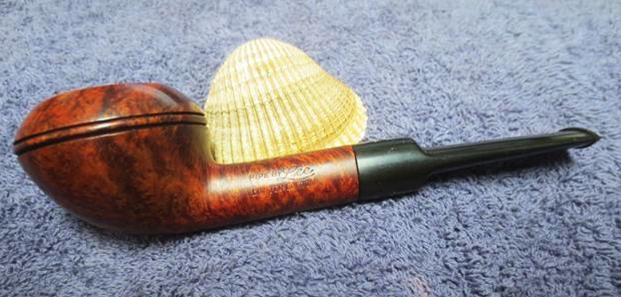
 Jeff did an excellent job removing the cake from the bowl and scrubbing the rim cap. The bevel came out absolutely clean and looked great. The rounded outer edge of bowl looked good as well. There were a few light scratches that could be lifted from the right front of the rim top.
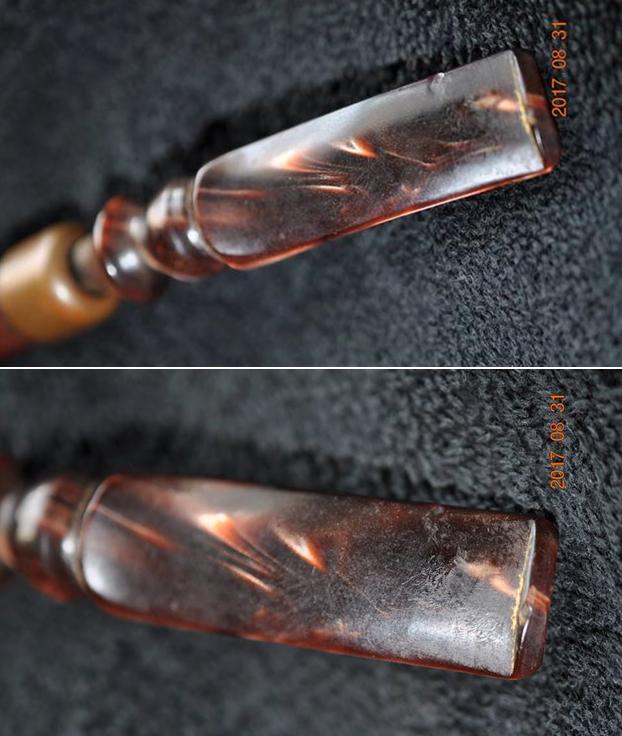
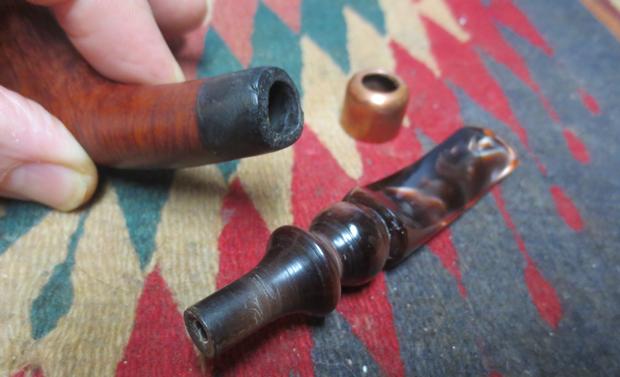
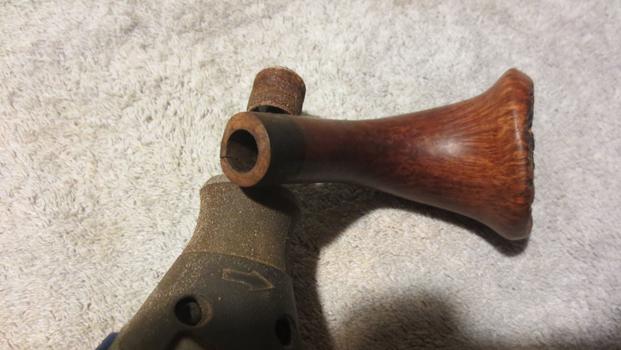
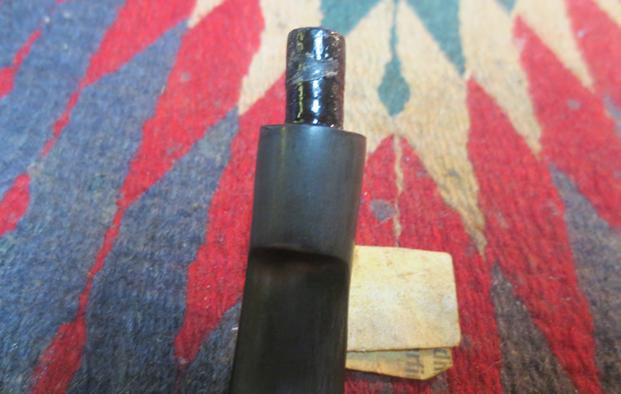
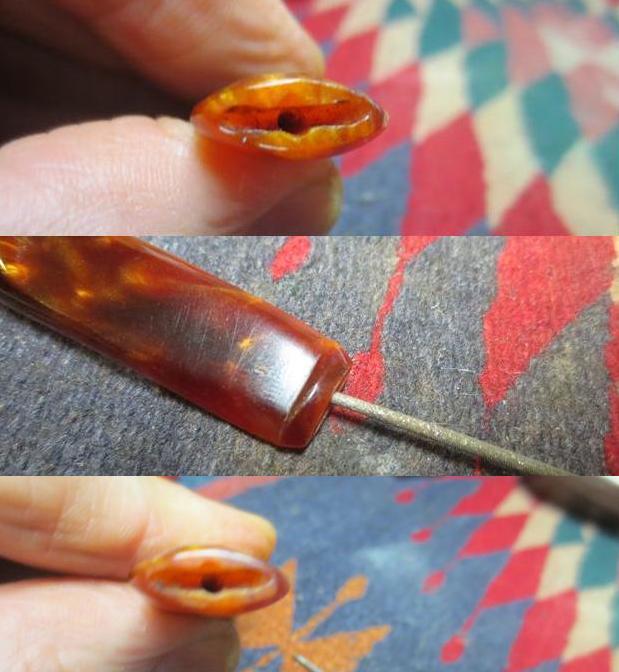
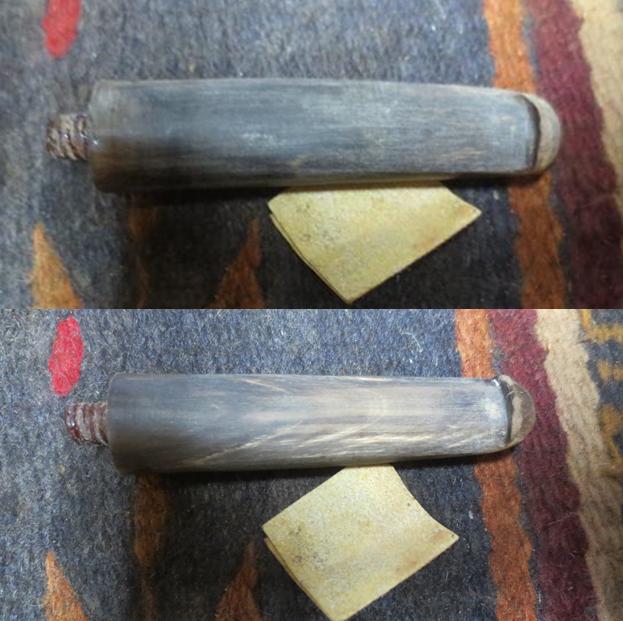
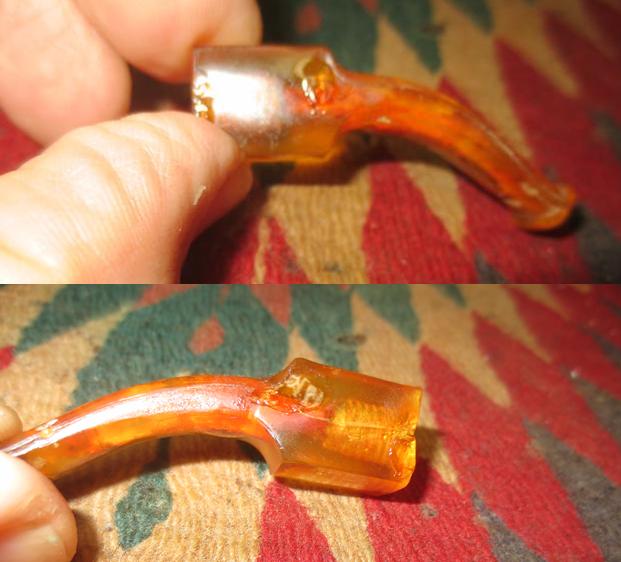
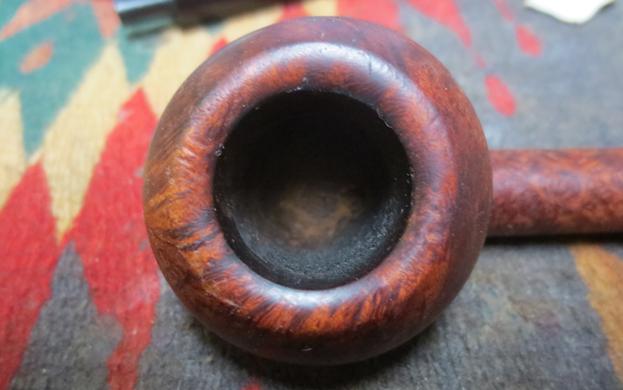 The stem looked very clean. The vulcanite was pitted but did not show much oxidation on the surface. The wear on the sharp edge of the button on both sides was clear. The tooth mark on the top of the stem near the button was deeper than the chatter on the underside.
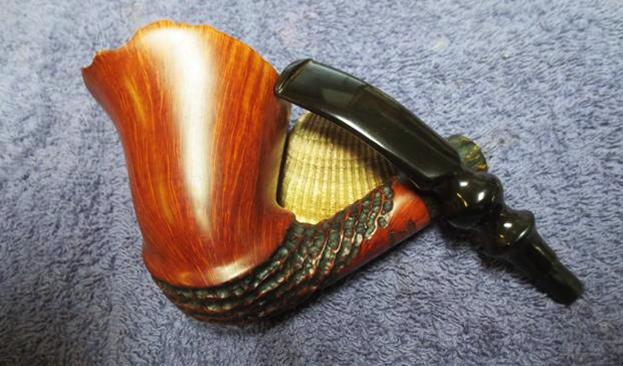
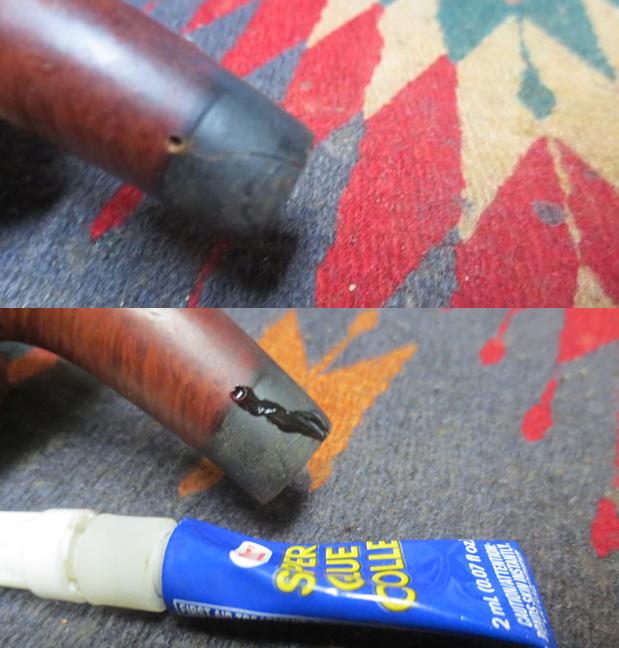
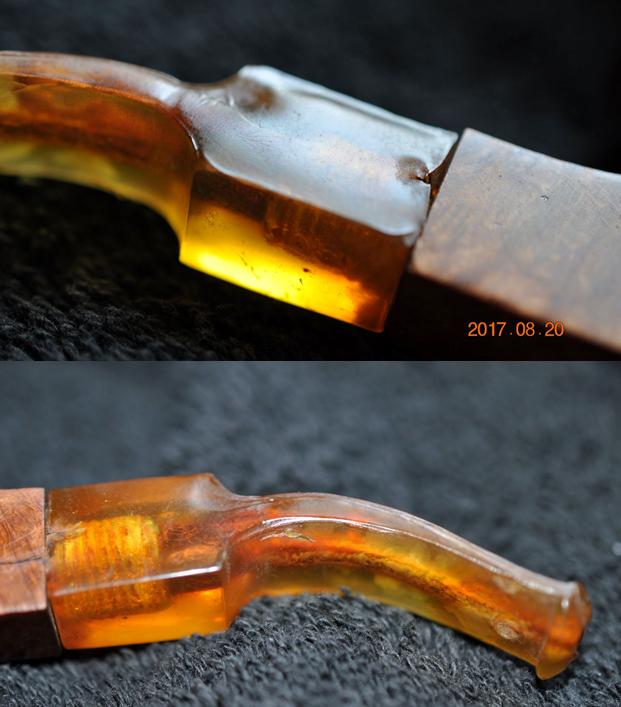
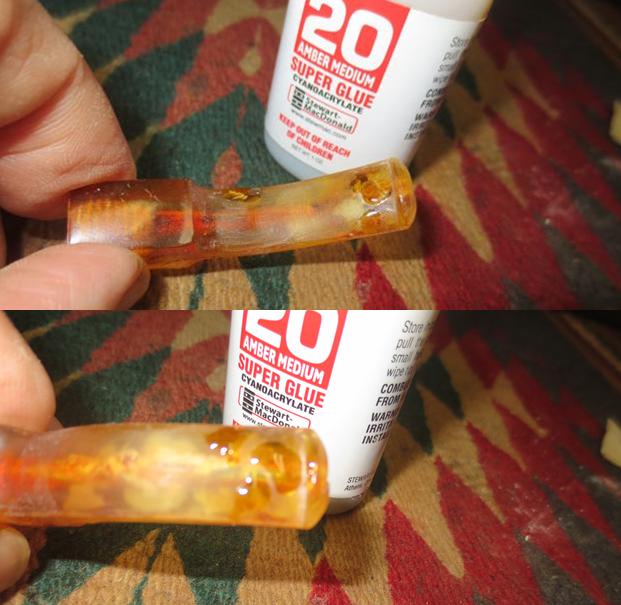
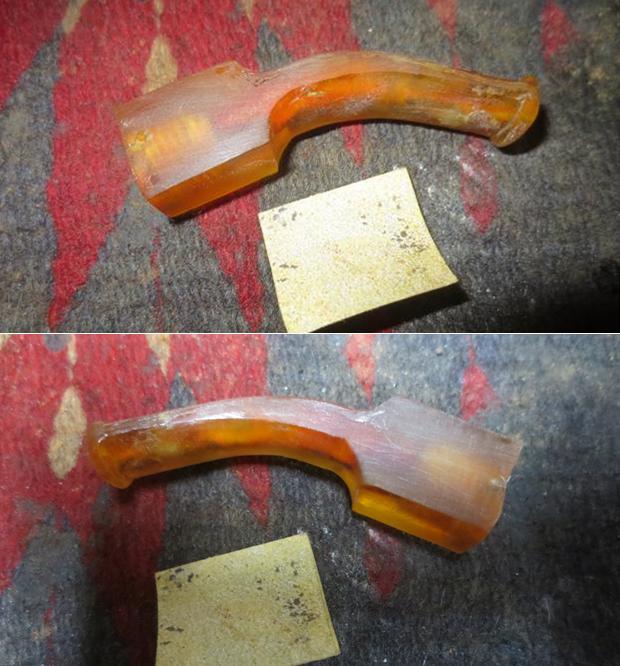
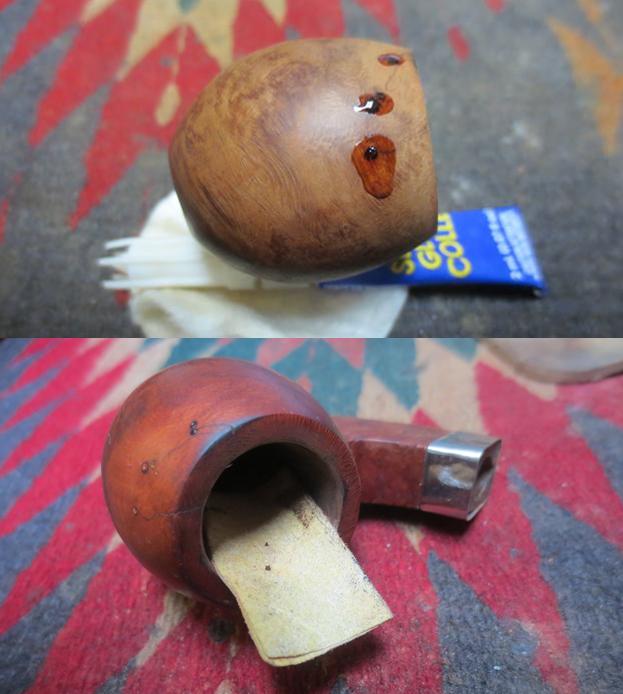
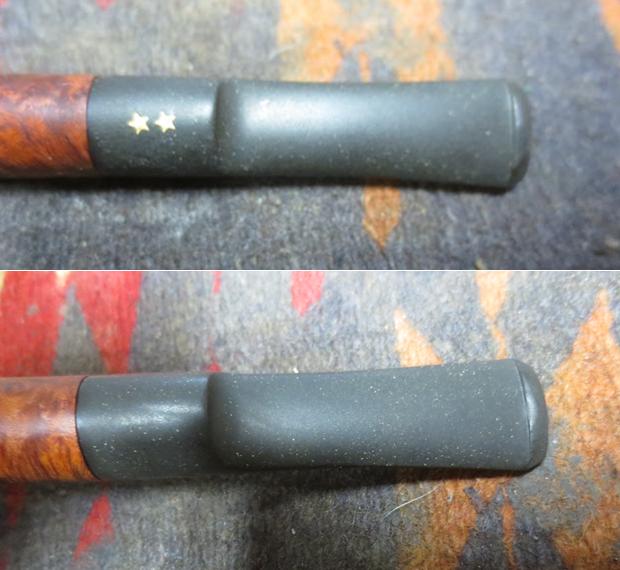 I repaired the worn sharp edge on the top and underside of the button with clear super glue and used a needle file to clean up the edges. I sanded the tooth mark out with a folded piece of 220 grit sandpaper.
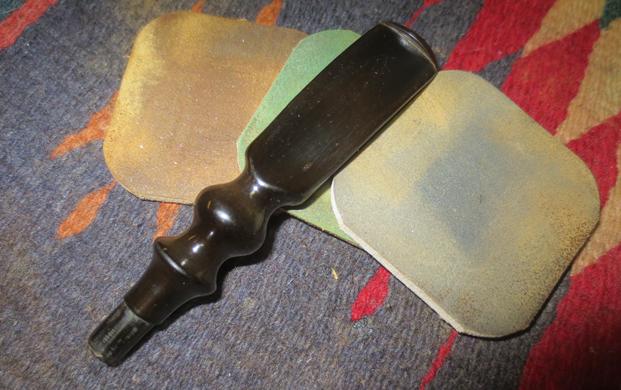
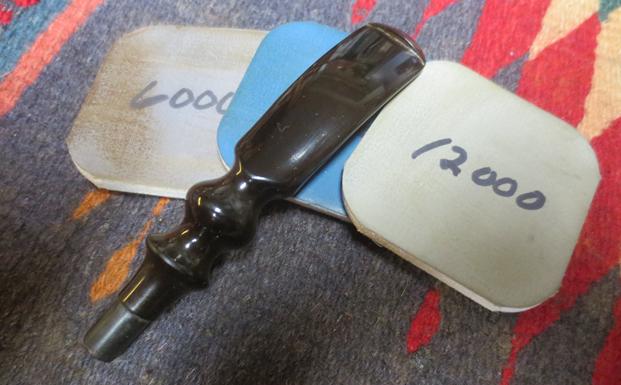
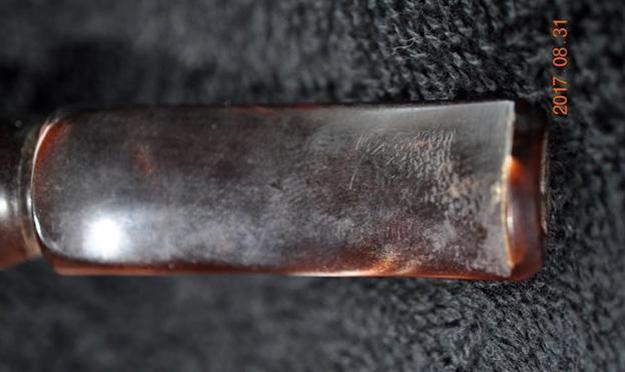
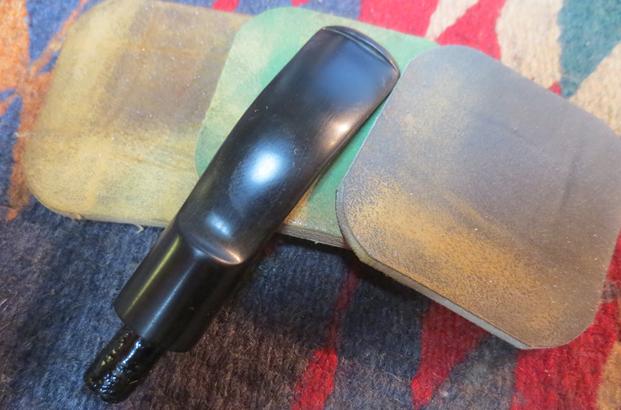
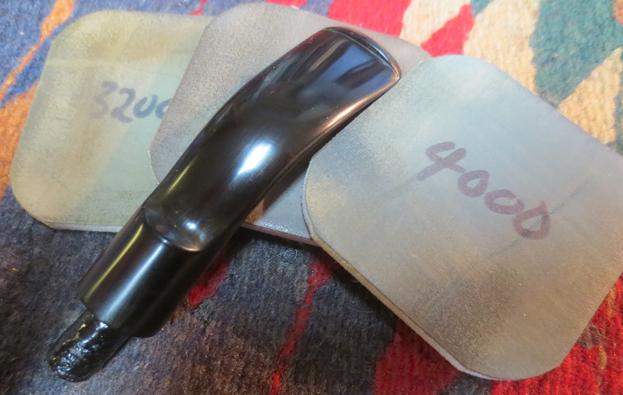
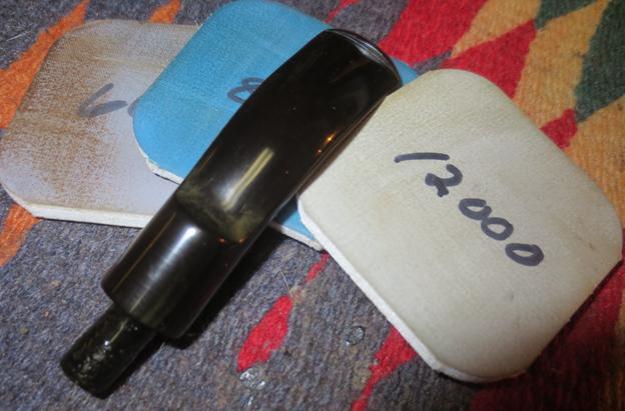
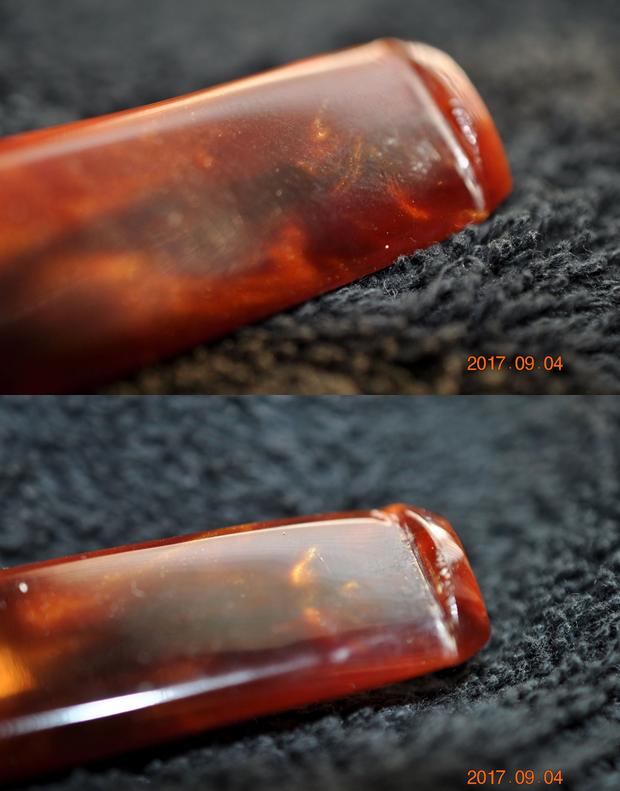
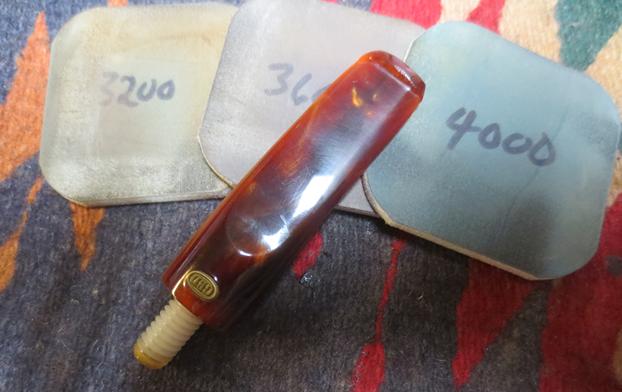
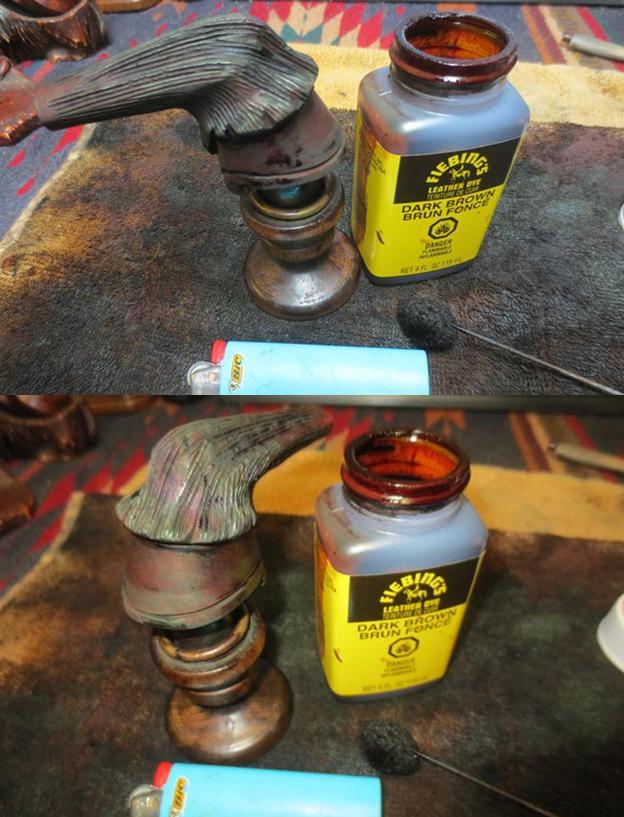
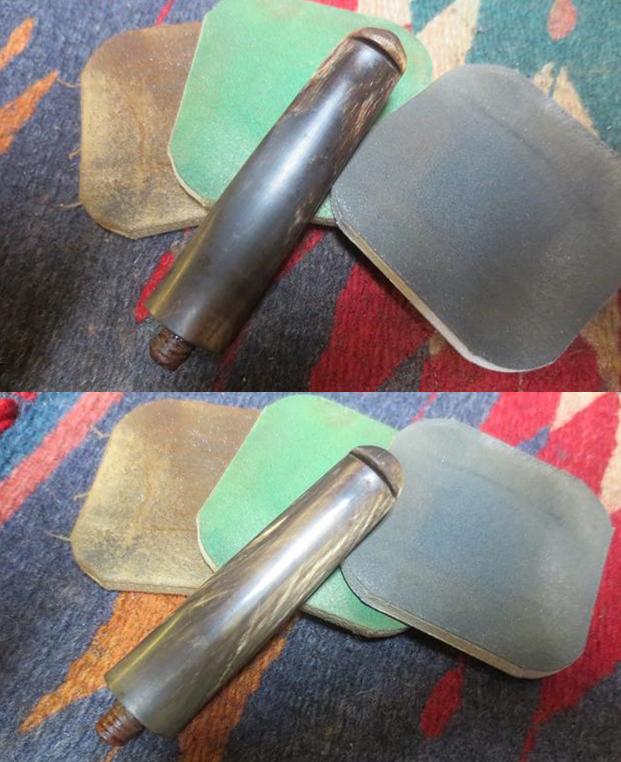
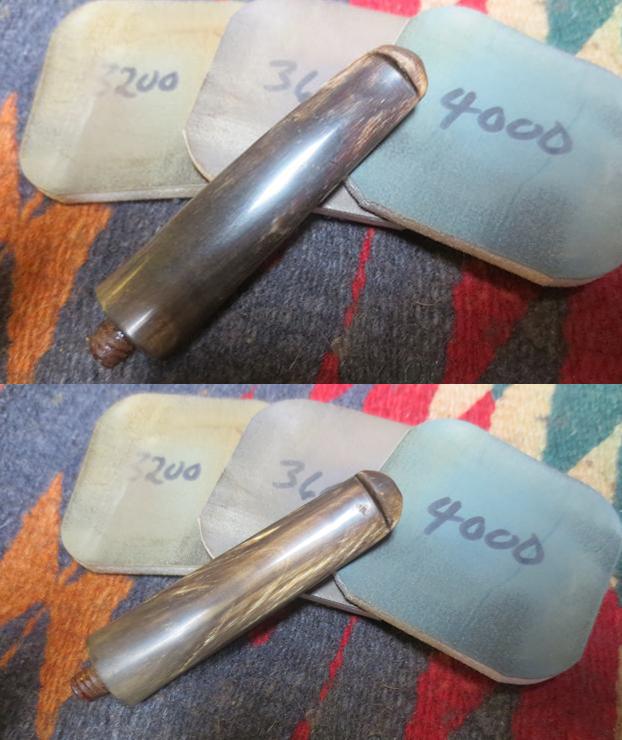
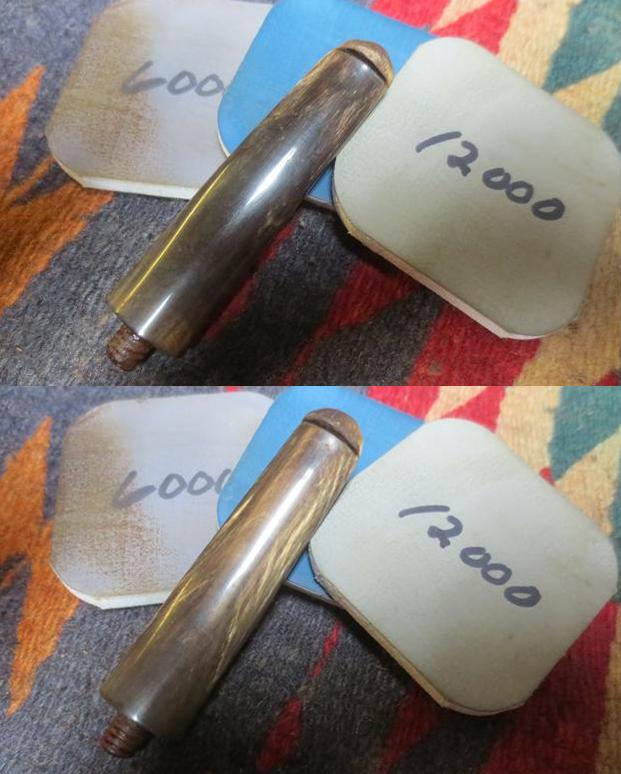
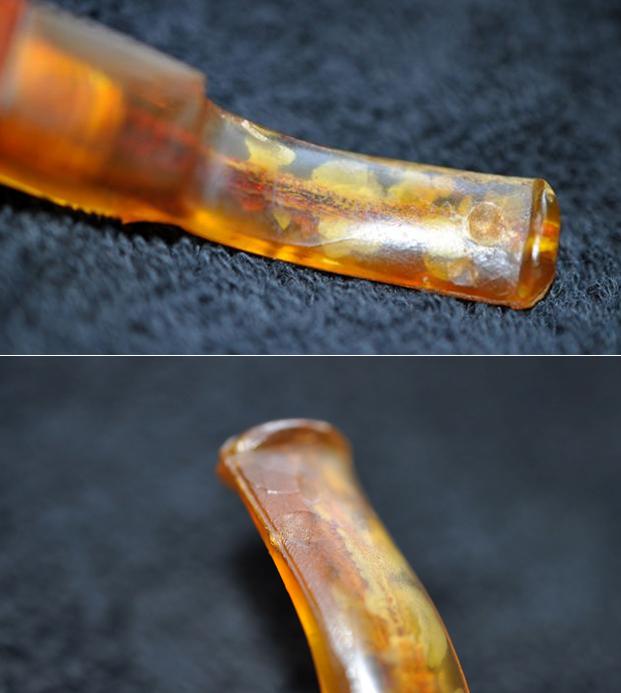
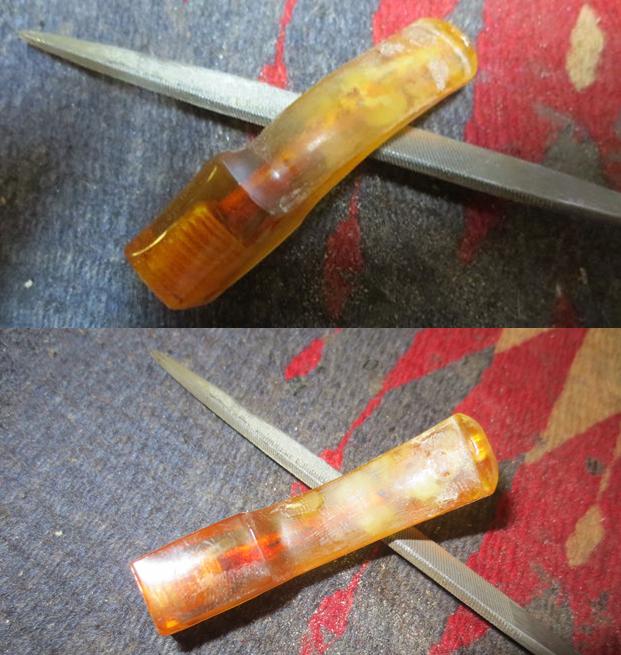
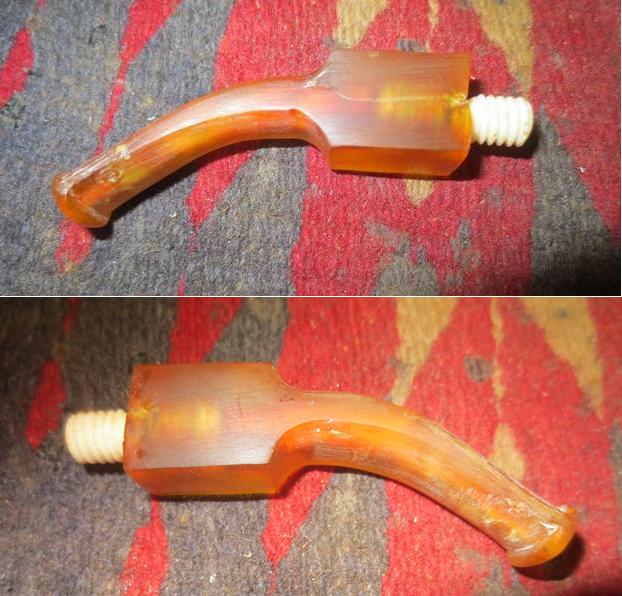
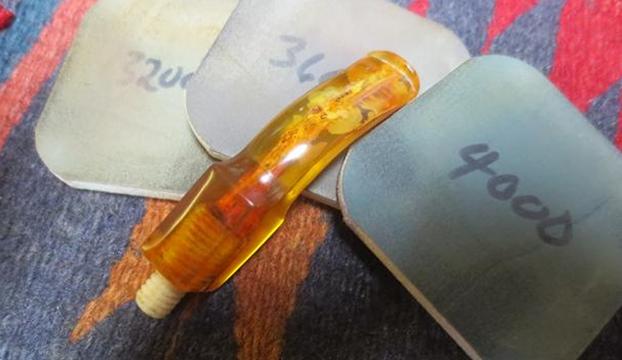
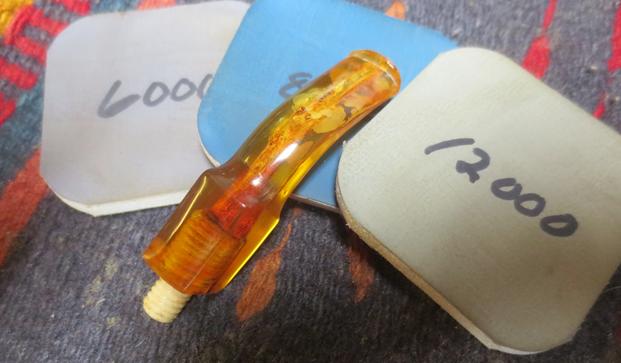
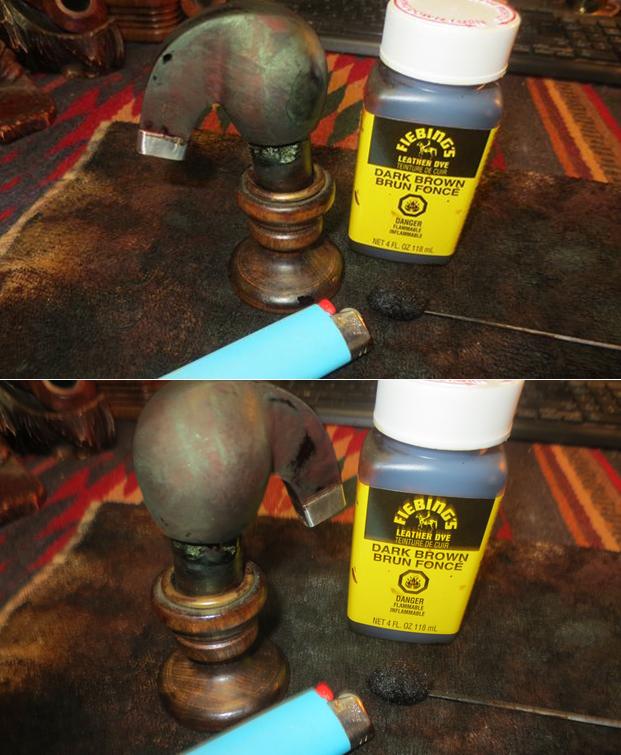
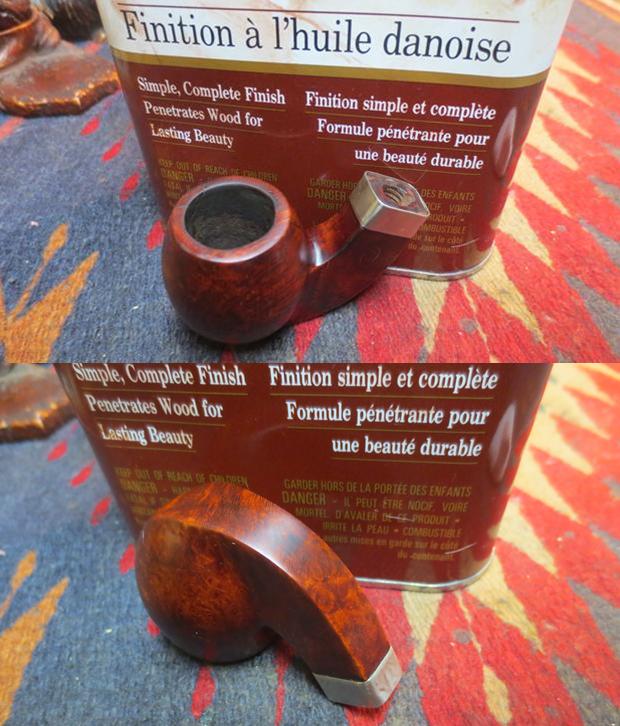
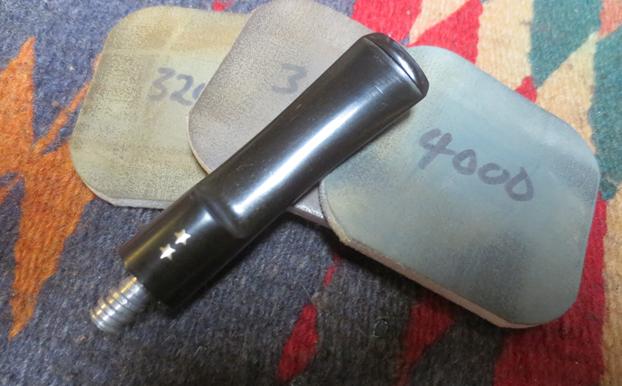
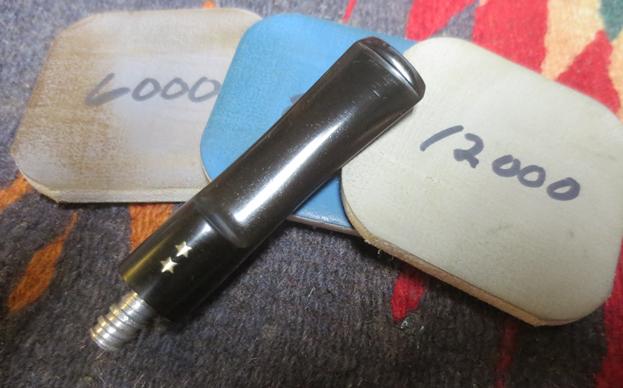
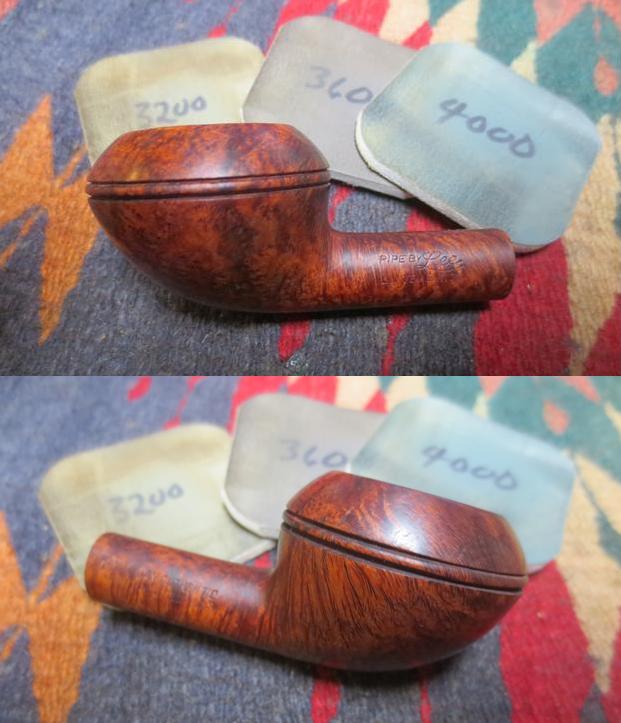
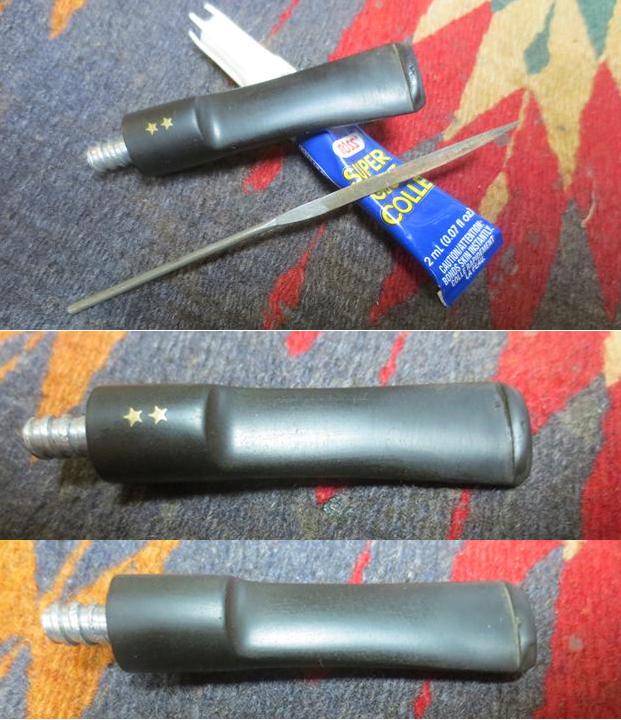 I sanded the stem surfaces with 220 grit sandpaper to remove the light oxidation and the button. I polished the stem with micromesh sanding pads – wet sanding it with 1500-2400 grit pads and buffed it with red Tripoli to remove the oxidation that showed up in the first photo below. I dry sanded it with 3200-12000 grit pads. I rubbed the stem down with Obsidian Oil after each pad to give traction to the next pad and also bring a little life to the vulcanite stem. After the final pad I gave it a last coat of the oil and set it aside to dry. The next series of photos show the development of the shine on the rubber stem.
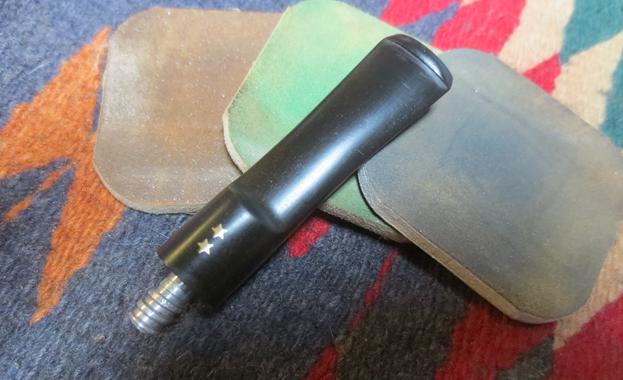
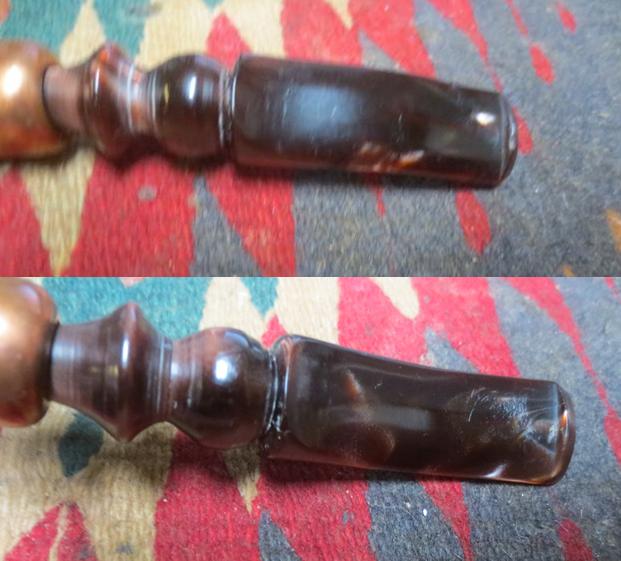
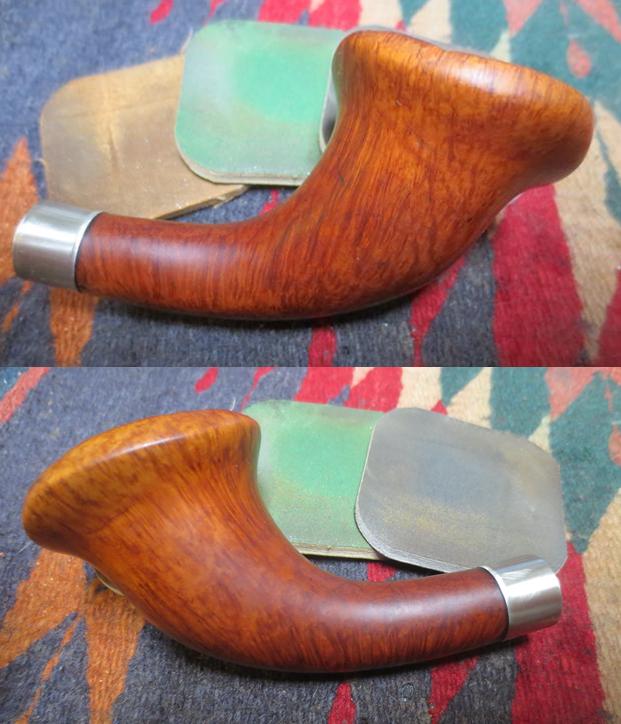
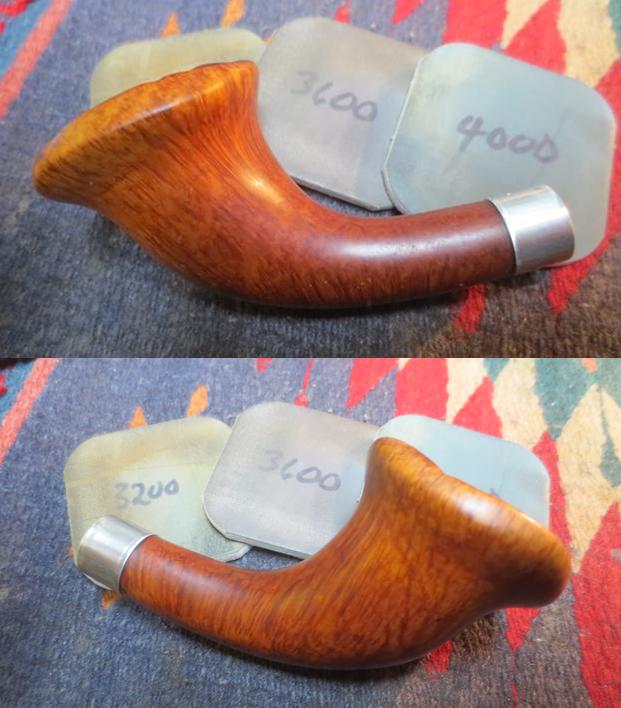
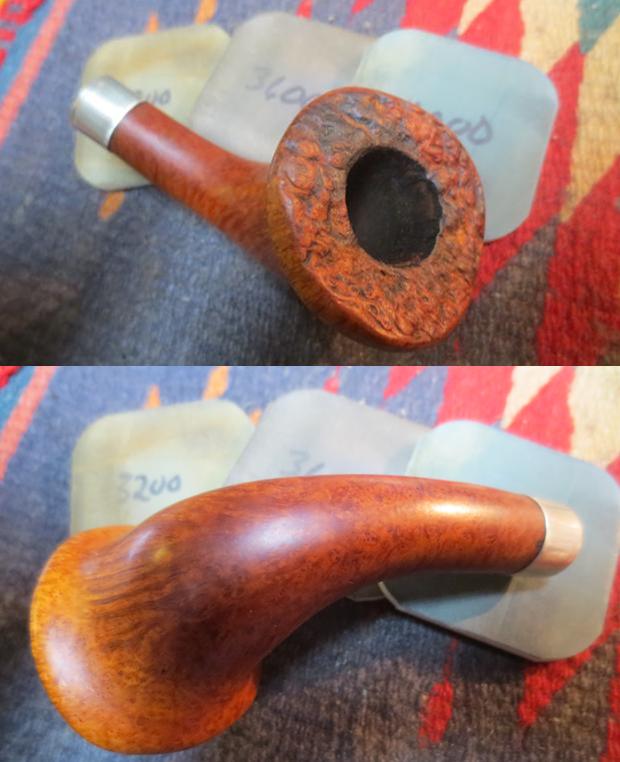
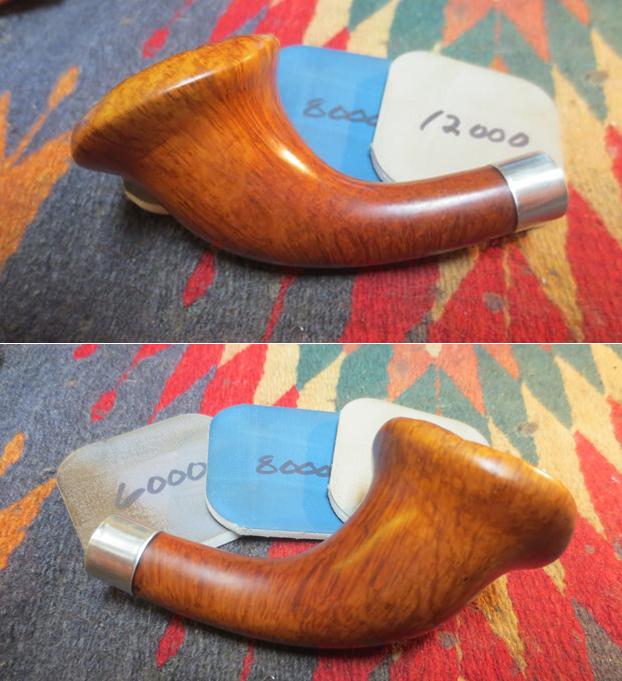
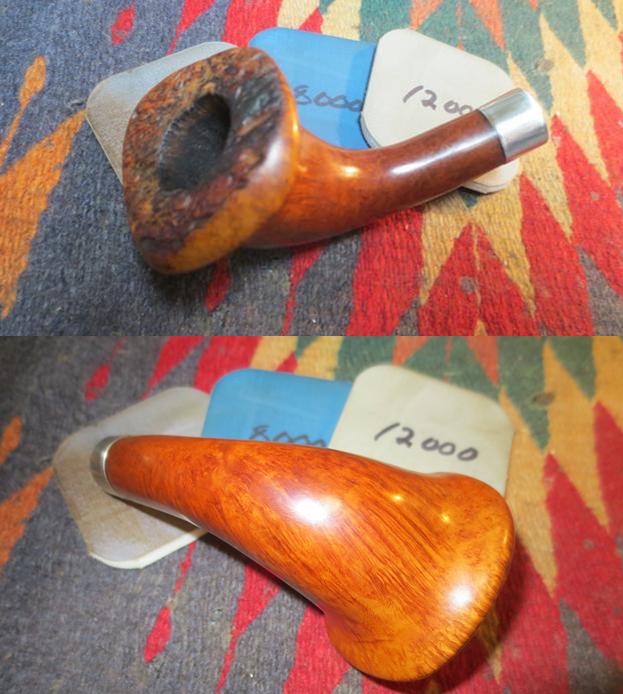
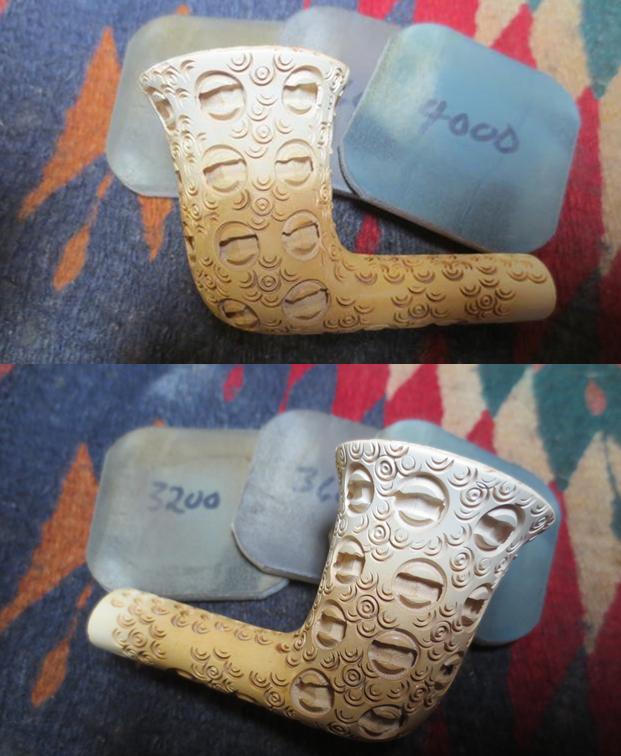
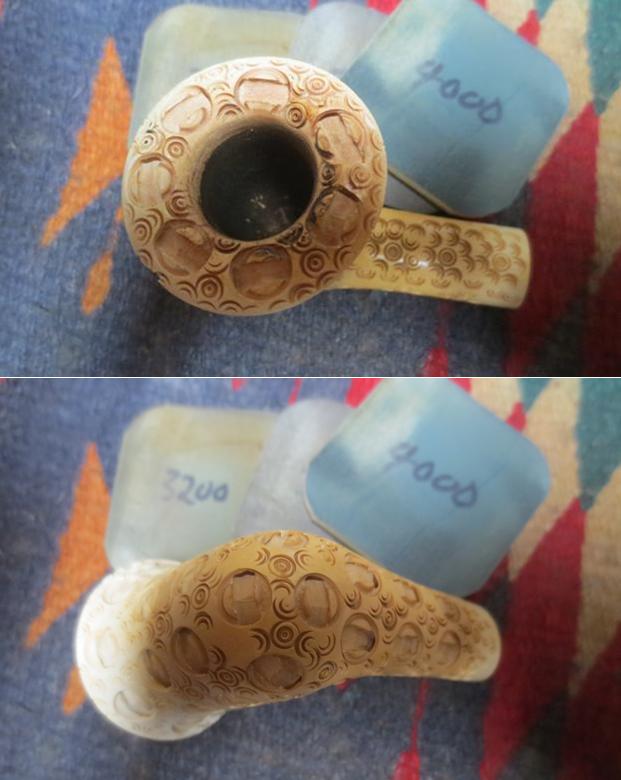
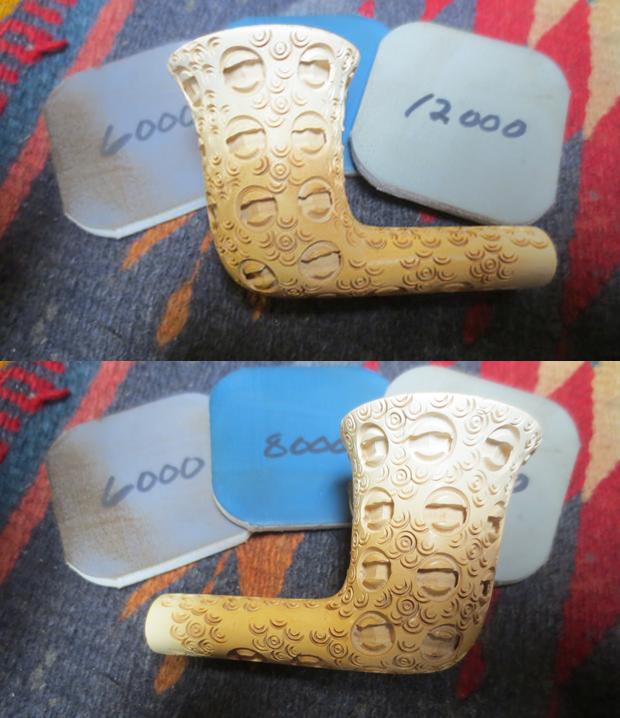
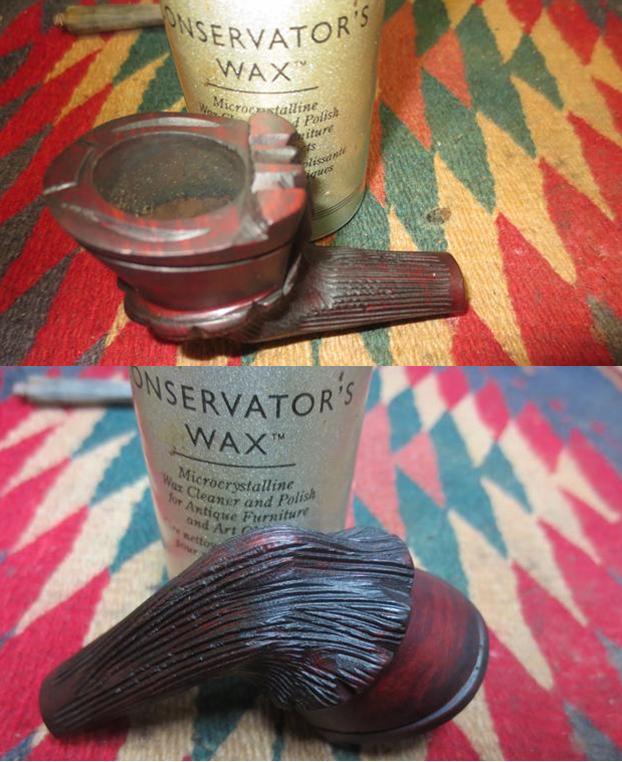
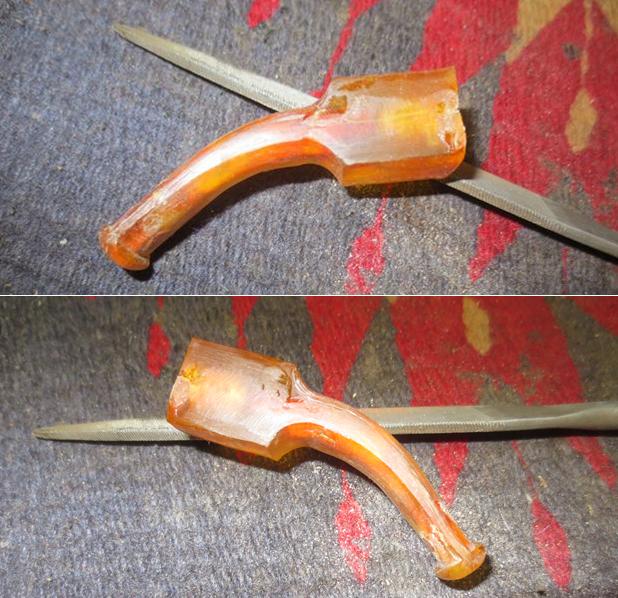
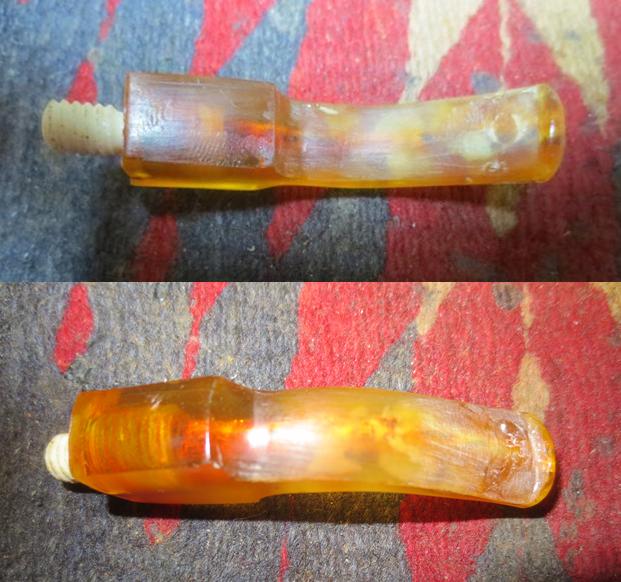
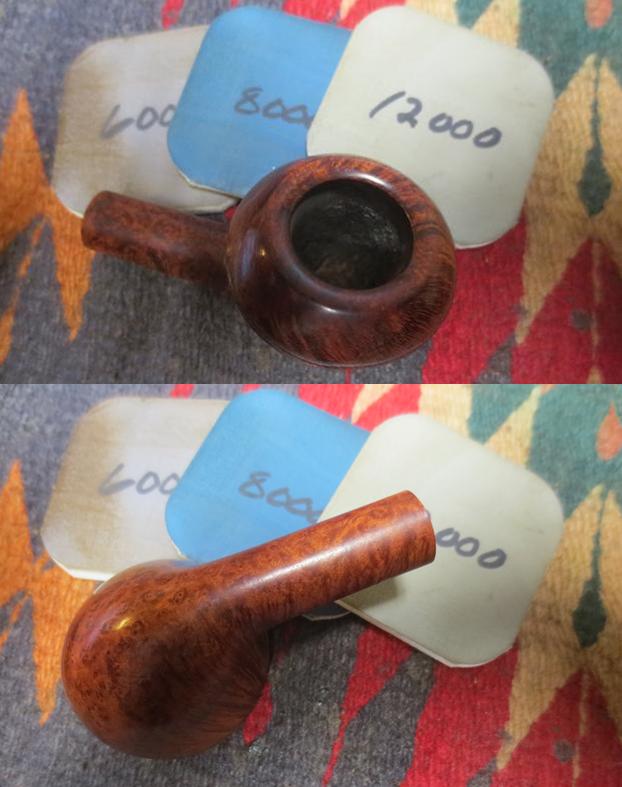
 I buffed the bowl with Blue Diamond to polish it a bit and see where I needed to do some work before the final buff. I hand polished the briar with micromesh sanding pads – wet sanding with 1500-2400 grit pads and dry sanding with 3200-12000 grit pads. I wiped the bowl down with a damp cloth after each buffing pad. I hand buffed it with a microfibre cloth after the 12000 grit pad. The pictures below show the progress of the polishing on the briar.
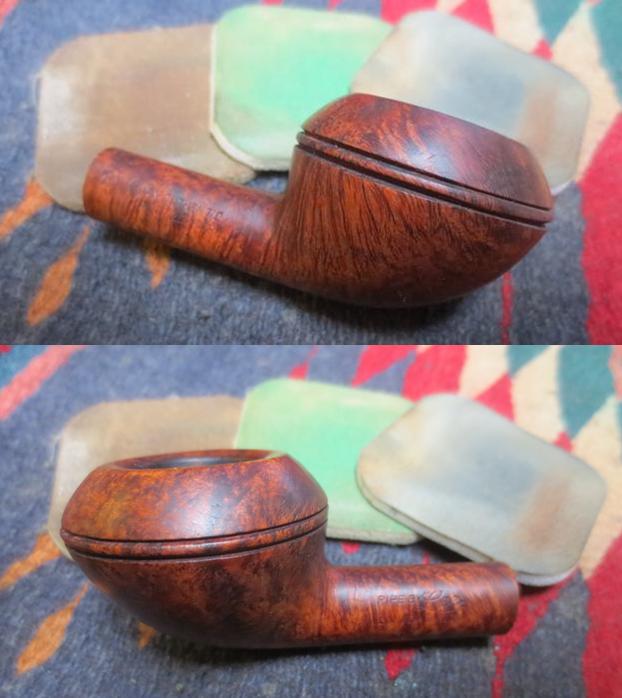


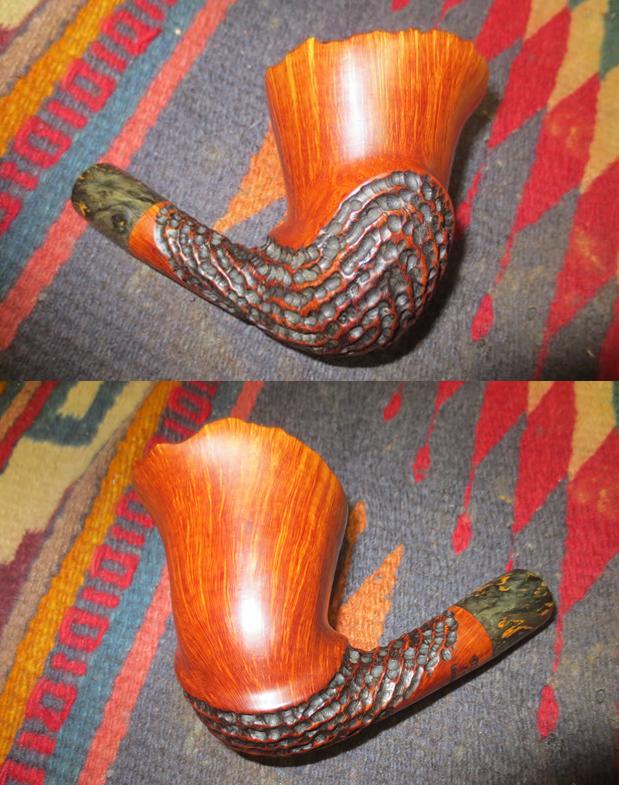
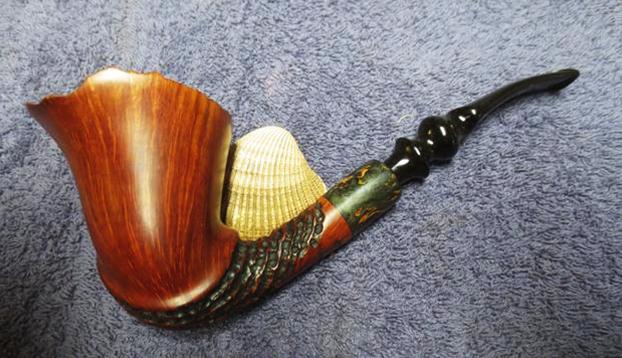
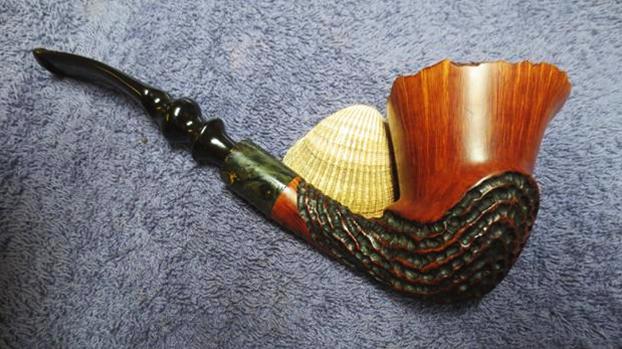
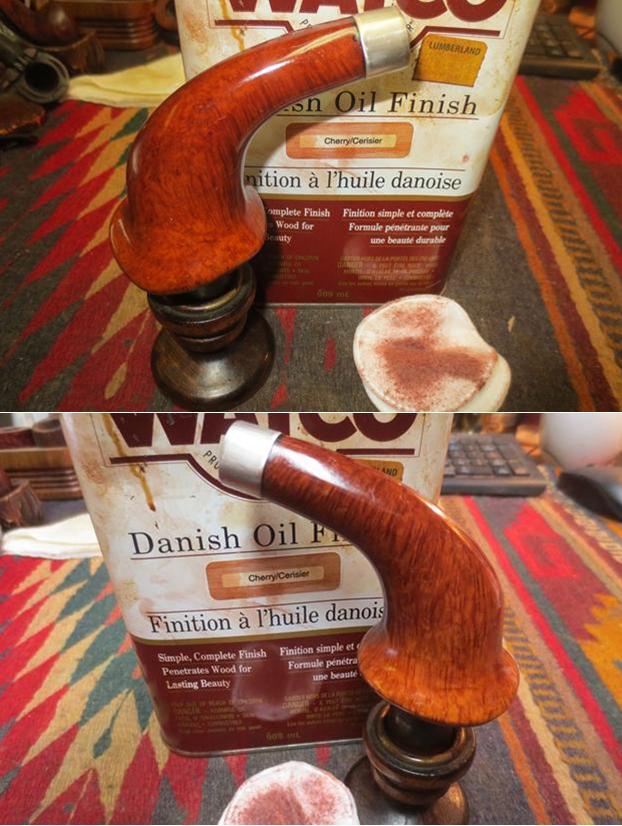
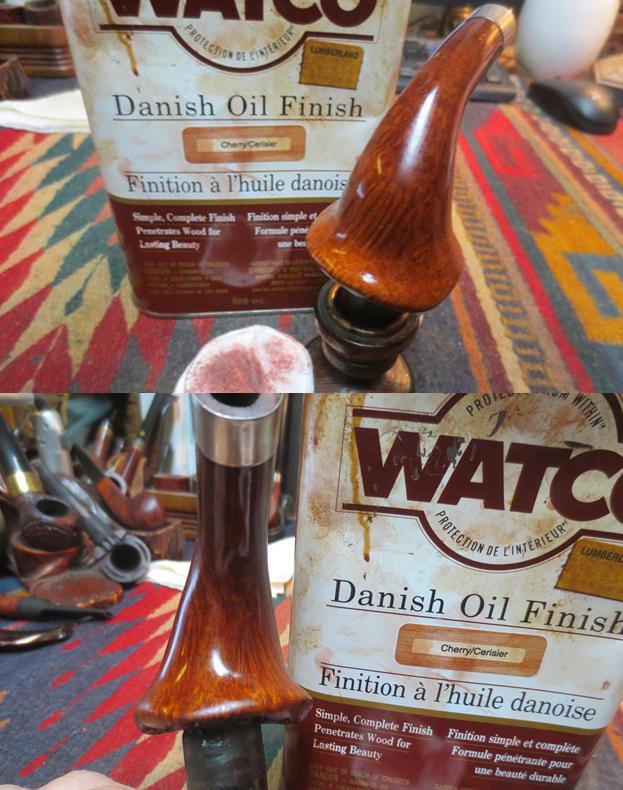
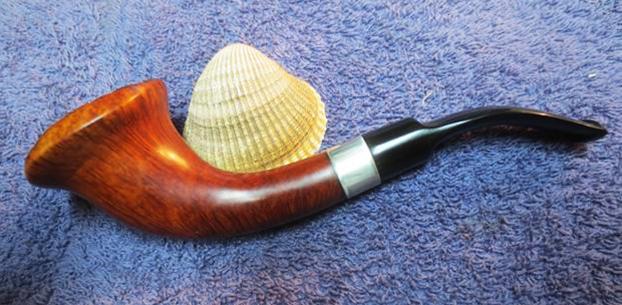
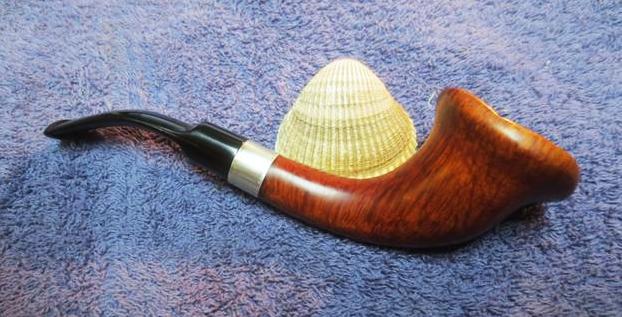
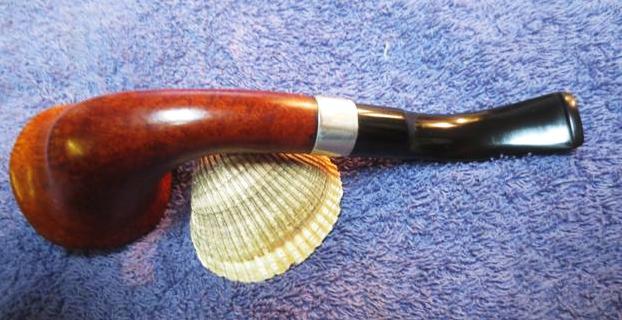
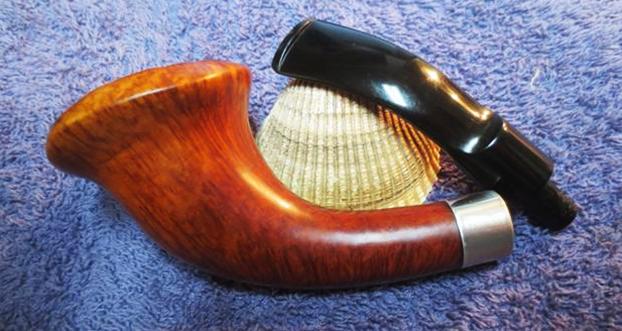
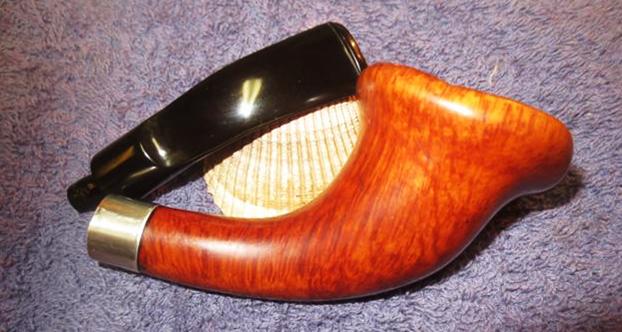
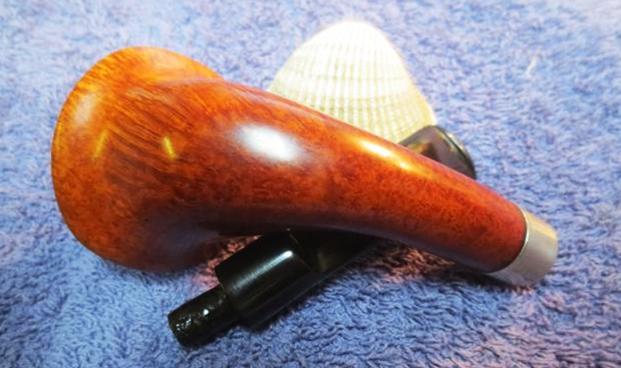
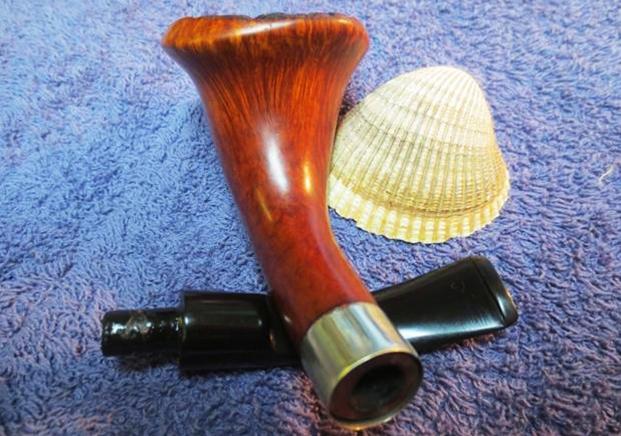
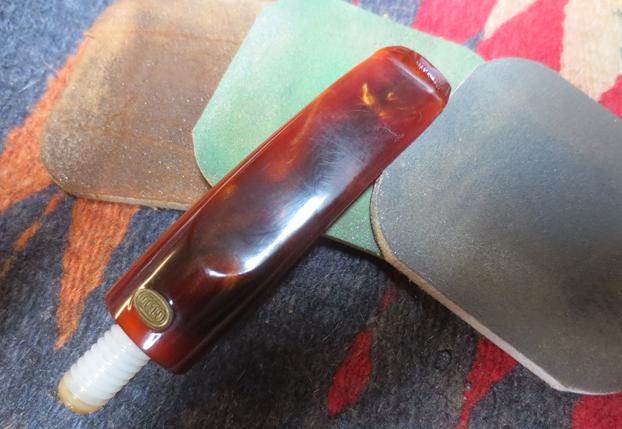
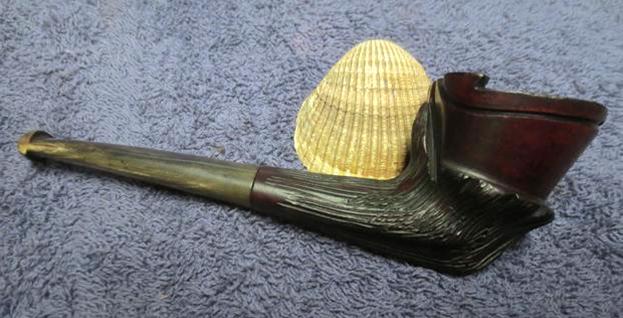
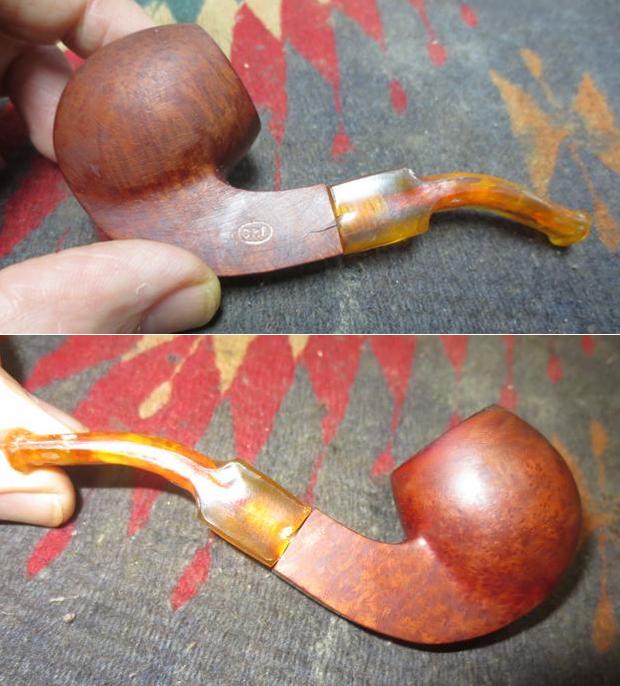
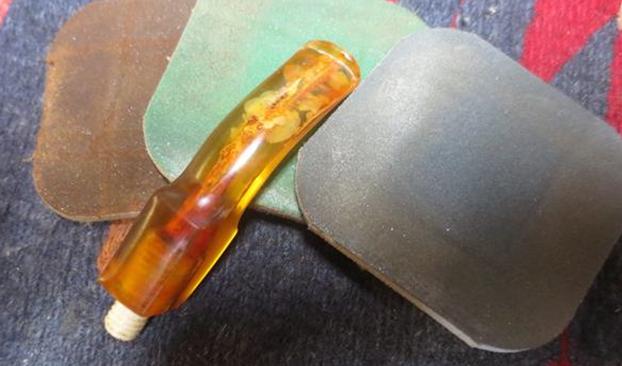
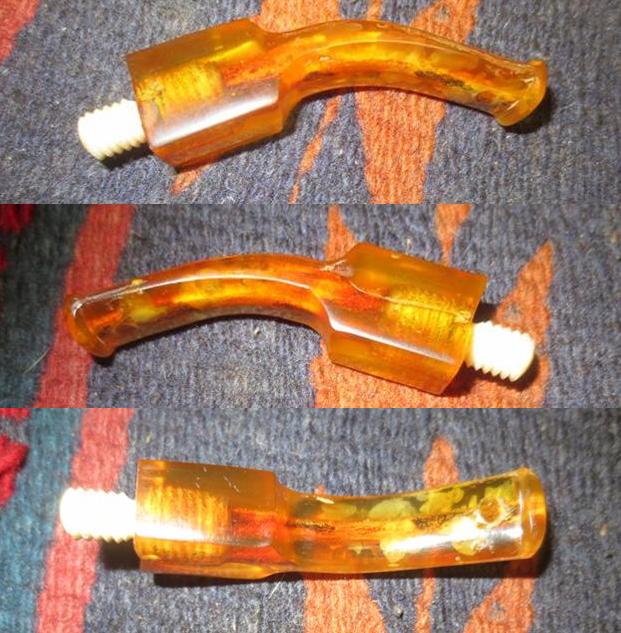
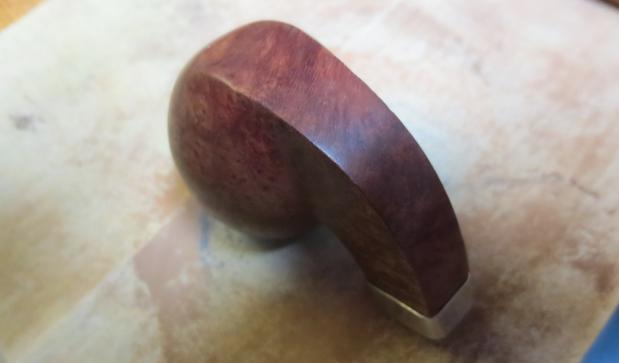
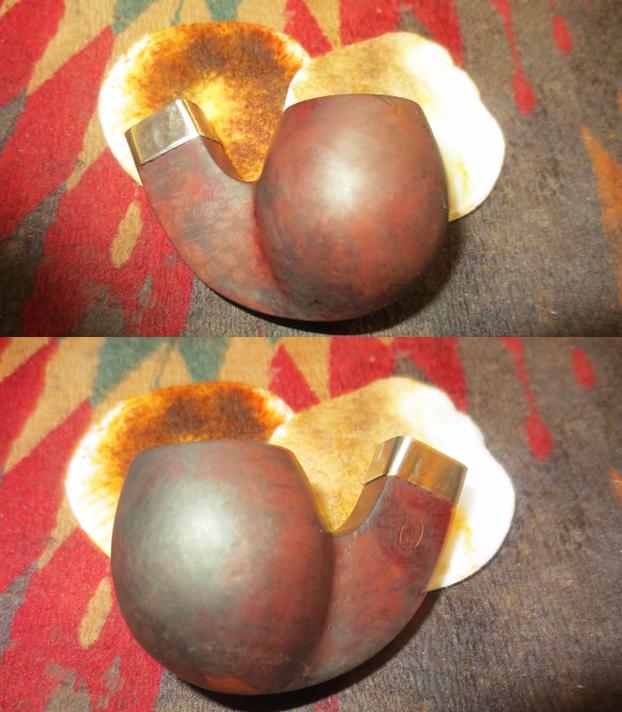
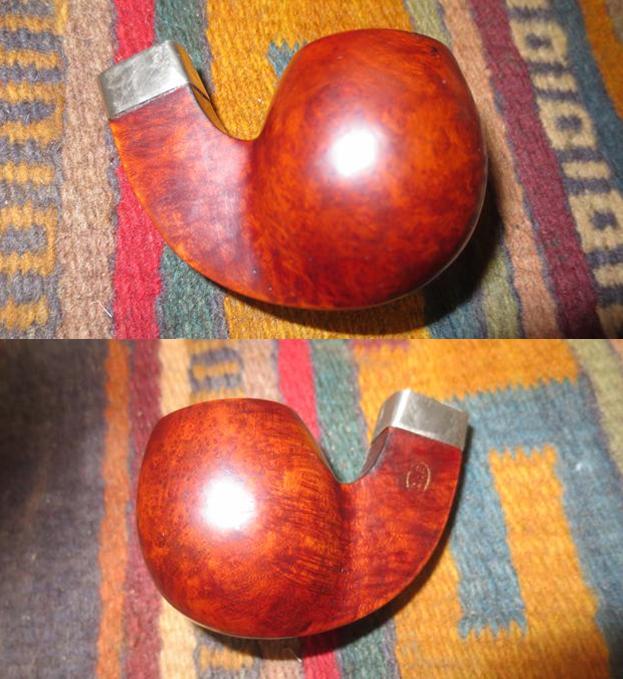
 I put the stem back on the bowl and buffed it with Blue Diamond on the buffing wheel to polish the briar. I gave the pipe multiple coats of carnauba wax and buffed it with a clean buffing pad to raise a shine. I hand buffed it with a microfiber cloth to deepen the shine. The black stem of polished vulcanite and the polished dark stained briar work well together to present a beautiful pipe. The pipe looks fresh and new. The finished pipe is shown in the photos below. Thanks for looking.