I have put many of the catalogues I was given on the blog for you to enjoy over the recent months. Last evening I was going through the remaining pieces in the envelope and found that there was also this 1977 IRC booklet from Iwan Ries & Co. of Chicago, Illinois. It was really fun to read through last evening so today i scanned it so I could share it with all of you. I find it an enjoyable read to go through the pipes and tobaccos that are listed from the time when I was in university. Sometimes I wish there was a way to go back and pick up some of these amazing pipes and tobaccos.
Monthly Archives: October 2016
A Surprising Collaboration between Sasieni and Tinderbox – an Ivory London Made by Sasieni 107 Freehand
n SanBlog by Steve Laug
My brother sent me this pipe that was stamped on the left side of the shank Ivory over London Made over by Sasieni and on the right side of the shank was the rugby ball shaped stamping Made In England and the shape number 107. When I saw the photos that my brother sent I have to admit, I thought it was an ugly, strangely shaped deformed pipe. I was not sure what to make of it but I ‘knew’ I did not like it. I thought. The shape did not do anything for me and the blandness of the grain that I saw in the left side photo did not help. Too me there was not much redeeming about the look of the pipe. (The next photos are the ones my brother sent me.)
I had not heard of the Ivory made by Sasieni pipe stamping before. It was a new one to me. So I did a little searching. On one of the online forums I found a clue that the Ivory was mentioned in the 1979 Tinderbox catalogue at pipepages. I went to pipepages and found the link to the catalogue: http://pipepages.com/tinderbox.htm. There was a 1979 Tinderbox Catalogue there that had the following quotation regarding the Ivory. “Made to our specifications by Albert Sasieni of London. The Sasieni Ivory is a Tinder Box exclusive.” The mention of the name Albert Sasieni I believe is an error as the company was run by Alfred Sasieni.
I knew from the link that the pipe was made for Tinderbox in 1979, the end of the family era. The collaboration between Tinderbox and Sasieni was established in that catalogue. In a way the Ivory made by Sasienin was like the Unique made by Charatan’s. Both were special orders by Tinderbox from those pipe companies. I have included a copy of the page in the 1979 catalogue from the pipepages site.
I also found a Sasieni Shape Chart online and copied the page that had the 107 shape listed. It is circled in red in the photo below. The 107 is called a Waterloo and has a xs* notation in the catalogue. The note on the top of the page says that the xs* means that the pipe is a premium priced pipe in the 4 dot grades only.
I also looked on pipephil’s logos and stampings site and found the Sasieni Ivory there as well. There was a
great photo of the stamping on the shank and the stem. The stamping on the one I have is identical in all but the shape number. Mine is a 107 shape. The S on the stem is also exactly the same and in the same position on the saddle.
My brother also took some close up photos of the stamping on the sides of the shank and the rim to show me the damage to the rim top and the cake in the bowl.
He also took a photo of the top side of the stem to show the tooth marks on that surface. There was a matched set on the underside of the stem. Combined with the surrounding tooth chatter the stem was a bit of a mess.
My brother did his usual stellar job of cleaning up the pipe. He scrubbed the exterior of the bowl with a tooth brush and Murphy’s Oil Soap and rinsed it under running water. He was able to remove the wax and oils on the surface of the bowl and leave the briar pretty bare. The rim was better but the burn marks would need more work. He cleaned out the mortise and airway in the shank and stem with pipe cleaners, cotton swabs and alcohol. I took the next photos of the pipe before I started working on it.
I took close up photos of the rim and the stem to show what I had to work with on this pipe. My brother was able to get the majority of the stuff off the rim. There was still some remaining buildup and tars on the rim. There were also some burn marks on the rim. The stem closeup photos reveal the dents and tooth marks on both sides of the stem and the damage to the edge of the button.
I sanded the rim with 220 grit sandpaper to remove the rim damage. I also sanded the inside edge of rim. I was able to remove the damage to the rim and edge. It is a nice looking piece of briar from the top down.
I sanded the bowl with microfibre sanding pads to polish the briar. I sanded with 1500-12000 grit sanding pads.
With the bowl finished I turned my attention to the stem. I heated the dents in the stem to raise them. I was able to raise them a bit and then sanded the stem with 220 grit sandpaper to smooth them out. I wet sanded the stem with 1500-2400 grit micromesh sanding pads. I was able to remove much of the oxidation. I left the area around the S stamp on the left side of the saddle. The stem looks far better at this point in the process than when I started.
I scrubbed the stem with the Before & After Pipe Stem Deoxidizer to work on the oxidation around the S stamp. I was able to remove the majority of the oxidation without damaging the stamping. I scrubbed it with multiple applications of the deoxidizer until the oxidation was gone. I polished it with the Before & After Pipe Stem Polish Fine and Extra Fine.
I sanded the stem with 3200-4000 grit micromesh sanding pads to further polish it. I rubbed it down with Obsidian Oil. I sanded it with 6000-12000 grit pads and gave it another coat of Obsidian Oil. I set it aside to dry.
I decided not to stain the pipe but leave it with a natural finish. I buffed the pipe and stem with Blue Diamond and gave it several coats of Carnauba wax. I buffed it with a clean buffing pad to raise the shine. I received an email from Wikus, a reader in the South Africa asking if I could show some photos of the pipe after the final machine buff and before the hand buffing to show the difference in results of the two techniques. The photos below show the pipe at this point in the process.
I took it back to the worktable and hand buffed with a microfibre cloth. The remaining photos were taken after the hand buffing. It removed some of the surface shine on the bowl and added more depth. To me the hand buffing has always improved the quality of the shine and adds another dimension. Overall the restoration on this pipe moved it from a thing of ugliness in my eyes to one that actually had beauty and felt good in the hand. Even the rather bald grain on the left side of the pipe shined up well and reflects the briar nicely. The finished pipe is shown in the photos below. Thanks for looking.

In Praise of International Cooperation – Cleaning Up a Large Harcourt Grade D Freehand by Preben Holm for Dunhill
I thought I would share this pipe that Charles just refurbished. The connection of Preben Holm with Harcourt is fascinating and one that I read with interest.
By all accounts, the Danish Fancy pipe boom of the lat
e 1960s and 1970s caught the great English pipe house of Dunhill unprepared. Dunhill was unable to produce the new Freehand shapes in-house, so if the firm was to capitalize on the surging demand for Danish pipes, it would have to look elsewhere. The answer came in the form of a contract with the Preben Holm factory for the production of what became the Harcourt brand of pipes, destined for distribution through Dunhill’s network of principal pipe dealers.
The Harcourt on my worktable arrived in excellent estate condition. It is easily one of the largest pipes I’ve worked on – its overall length is just 5.75 inches, but the stummel is a real fistful of briar measuring 2.5 inches tall by 1.6 inches wide with a copious tobacco chamber of nearly one inch in diameter and 2.25 inches deep! Despite its size, the…
View original post 554 more words
My Dremel Polishing Techniques with a No-Name pipe from Sozopol Bulgaria
Blog by Dal Stanton
My reaction to Steve’s request that I write a step by step procedure of how I use a Dremel in my restorations was, “Who, me? Uh….” When he said that I was the only one that he knew of that uses a Dremel for the entire buffing/polishing process and that my results were up there with high powered buffers, these results piqued his curiosity. When he also said that others too might be interested in my approach, I agreed to write this essay because I’ve benefit a great deal from reading others and discovering both methodologies of the art and the camaraderie that exists among pipe men (and women!) and those who restore tired pipes. So, I proceed with this caveat: Since I’ve never used a normal sized powered buffing wheel I can’t compare these with my use of a Dremel. My use of a Dremel is due to my setting – my wife and I live in a former Soviet apartment ‘block’ on the 10th floor in Sofia, Bulgaria. By necessity my approach when I started this hobby last June with my first restoration (Link) was to keep things compact and contained because of our living space limitations. Hence, the acquisition of a Dremel (In fact, I have a Skil brand high speed tool, but like the universal branding of Xerox, I call it a Dremel!) and its use of miniature buffing wheels. To set the table, I’ll do a short-hand on the front end of the restoration and then get into more detail when I get to the polishing phase with my use of the Dremel, wheels, compounds and wax. I told Steve that I’m flying by the seat of my pants! Consider yourself forewarned!
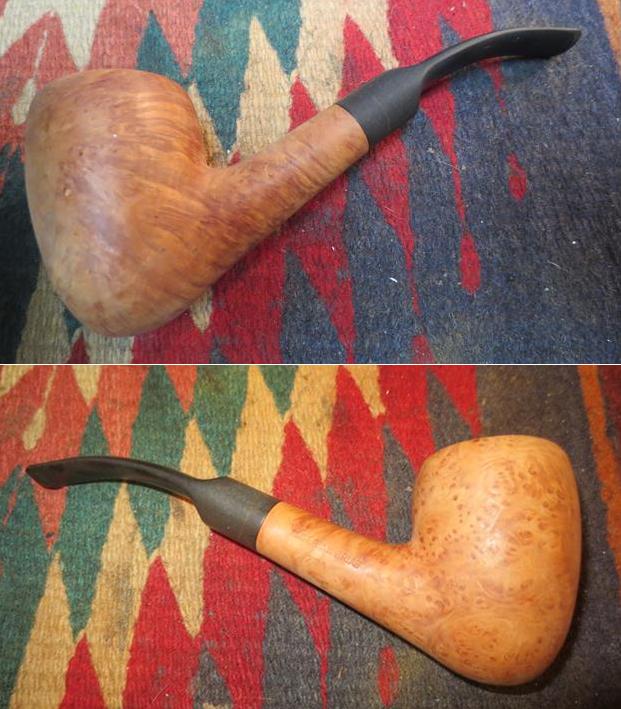
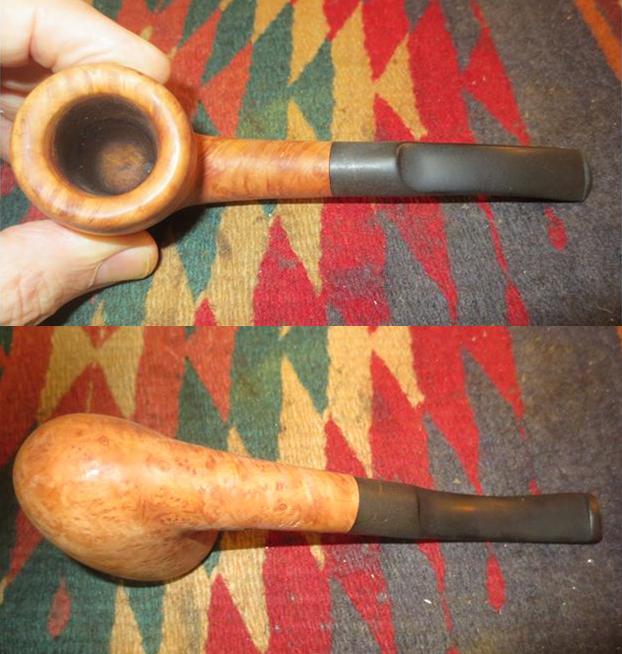
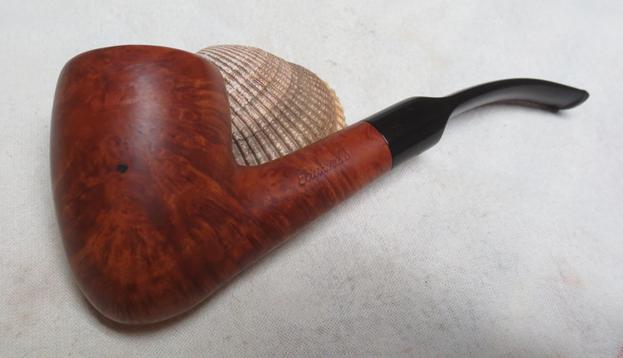
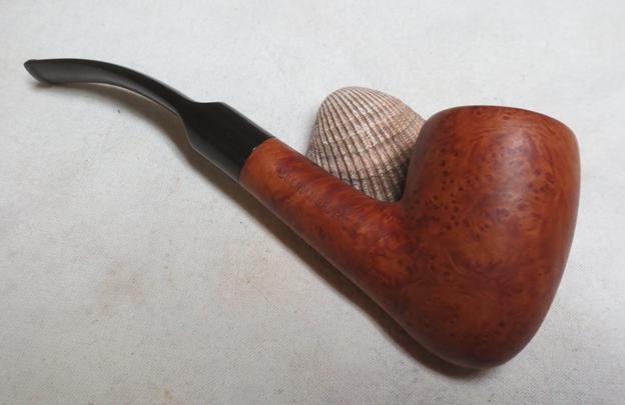
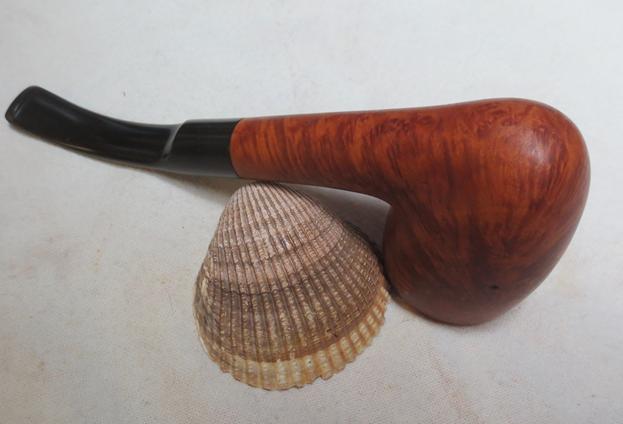
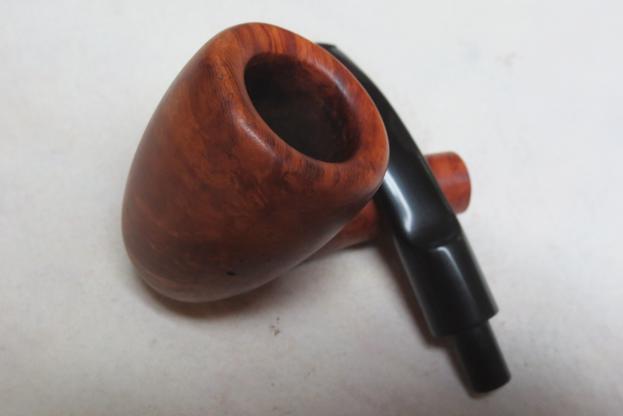
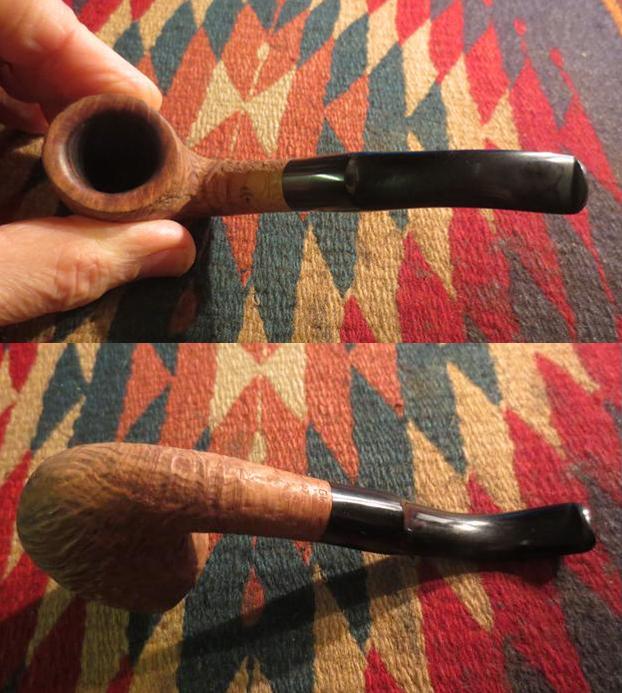
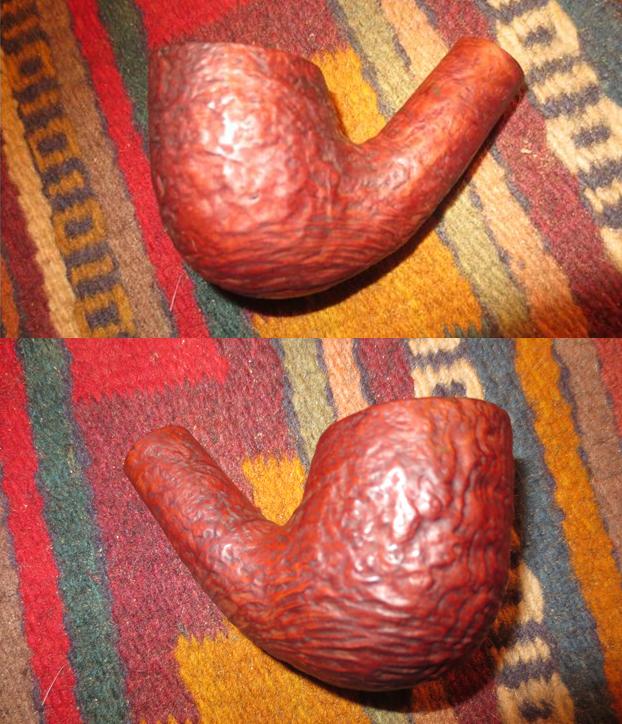
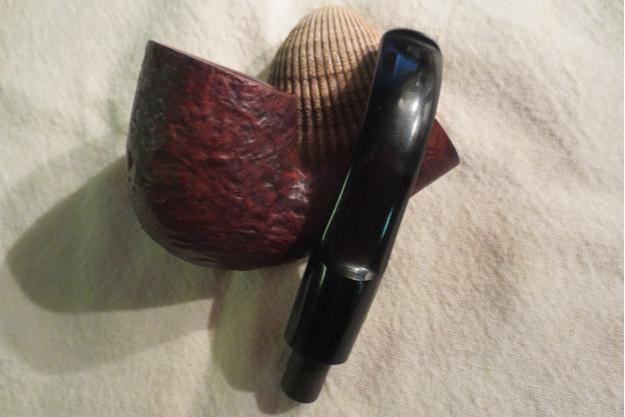
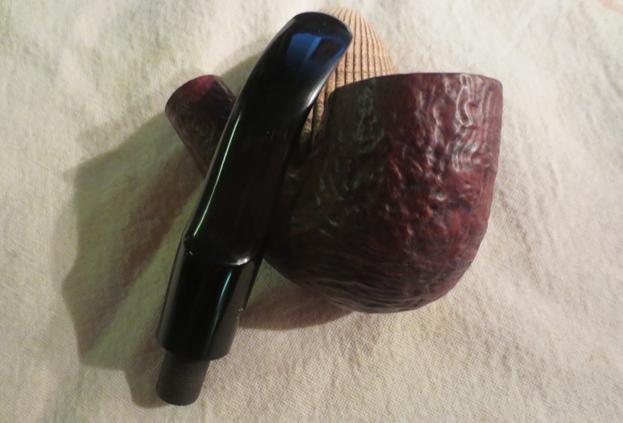
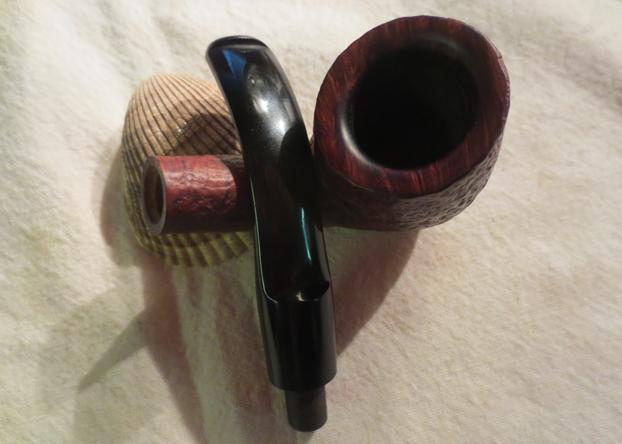
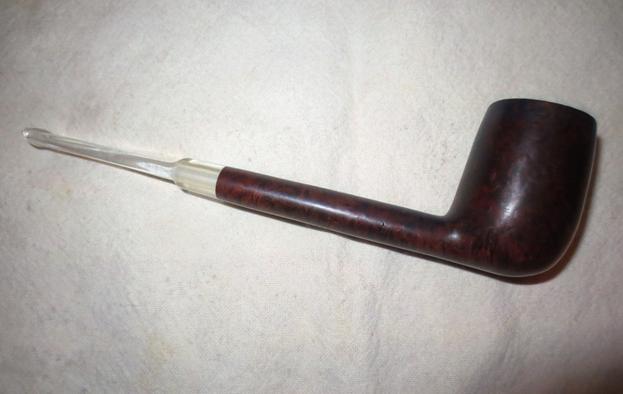
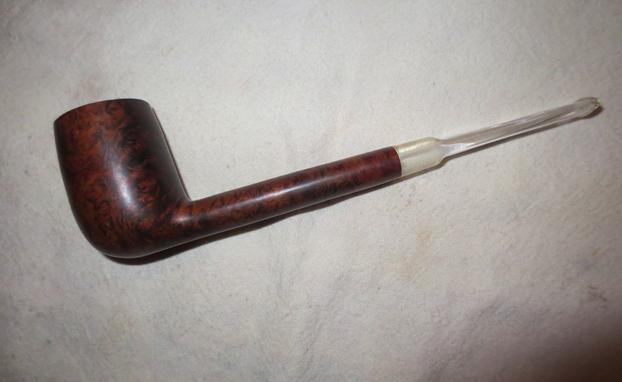
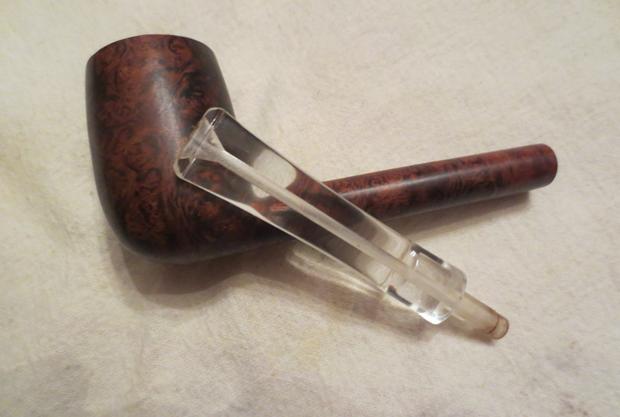
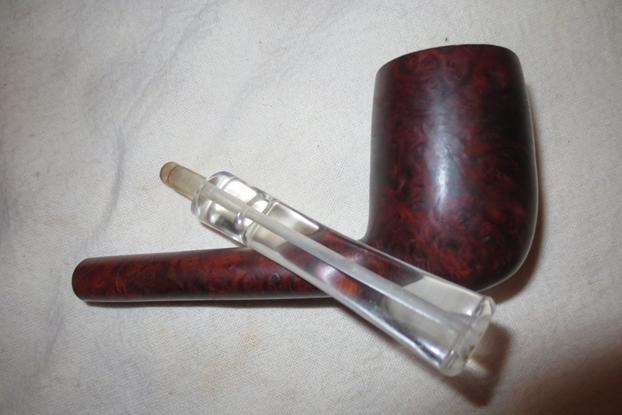
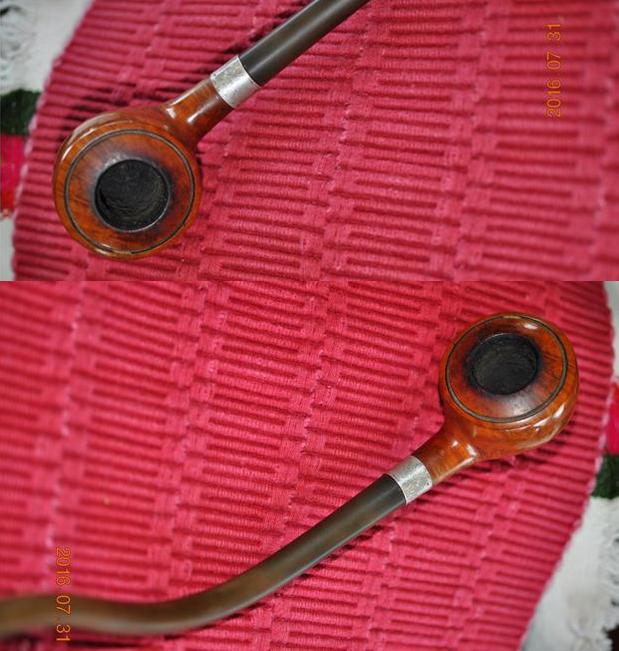
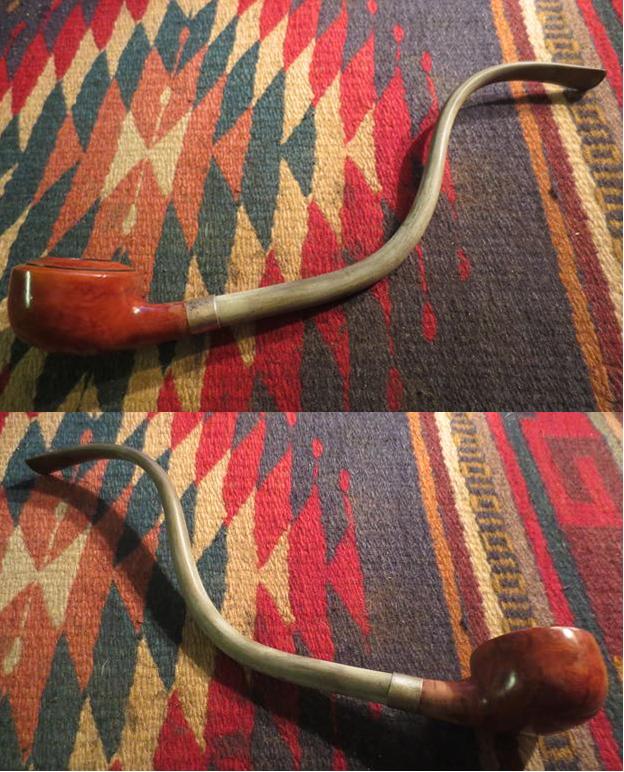
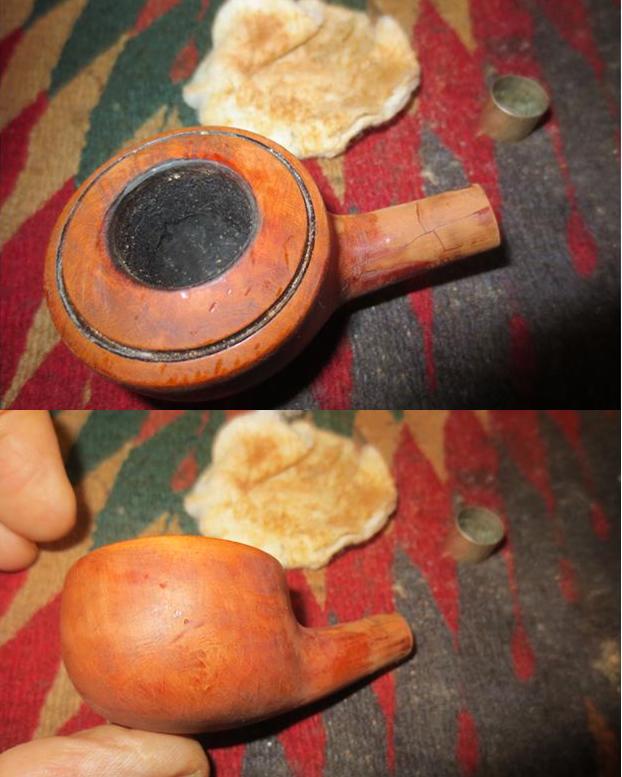
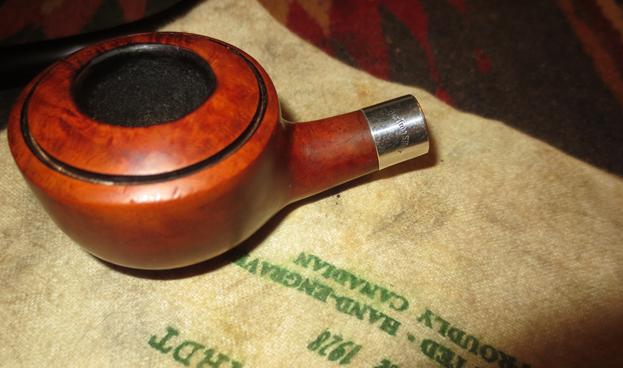
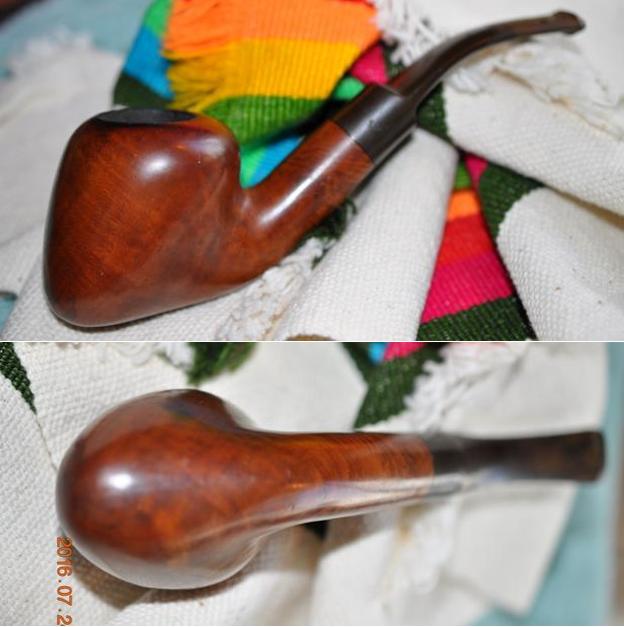
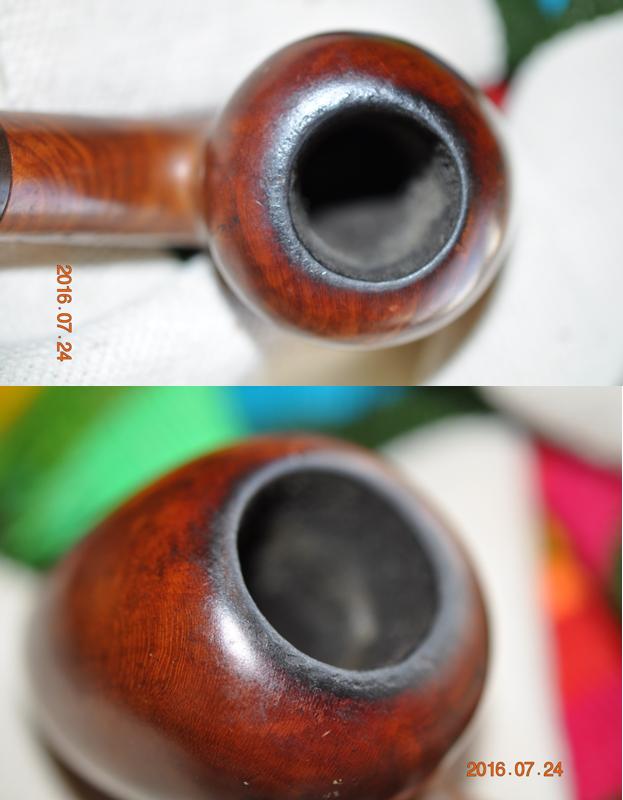
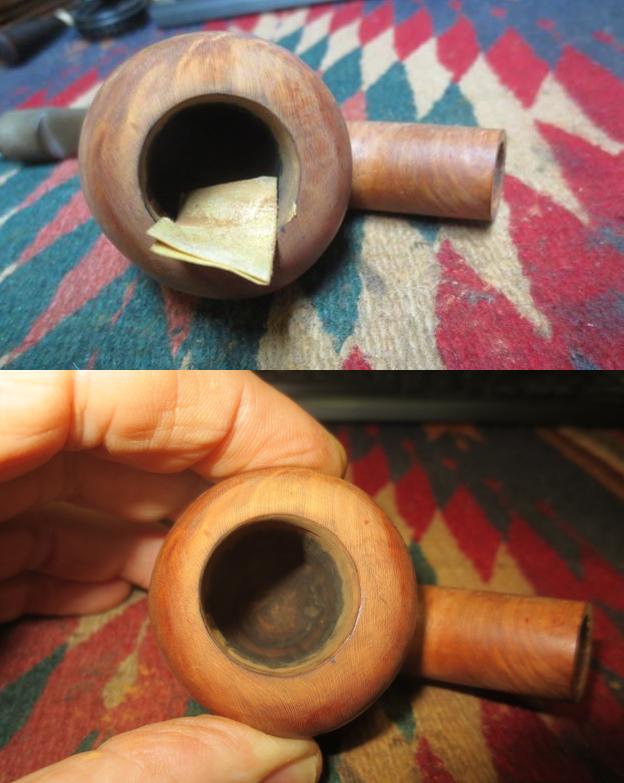
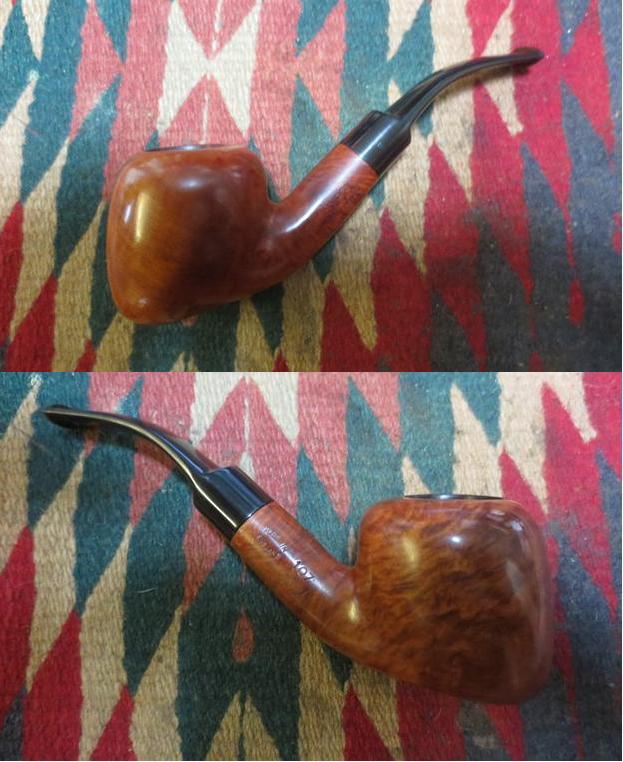
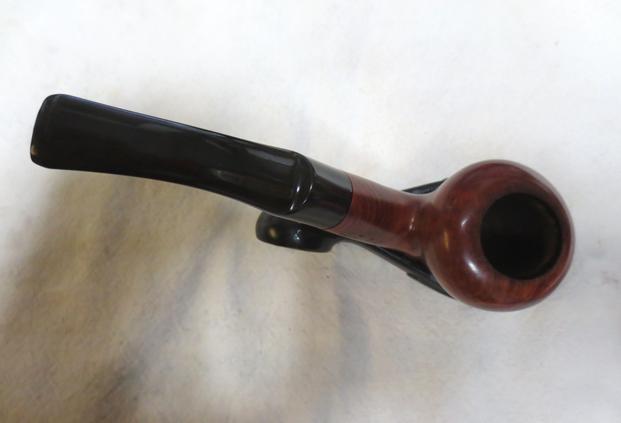
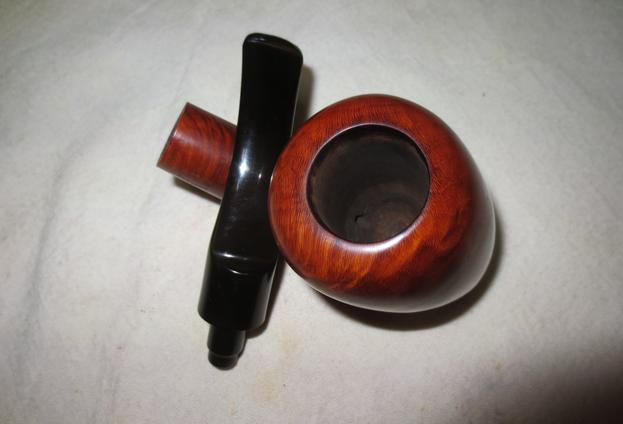
The no-name bent billiard before me now I found in the lazy little fishing town of Sozopol, Bulgaria, (Wikipedia) on the Black Sea coast during summer travels with our visiting daughter and son-in-law. As we were strolling down the cobblestone street, an older lady had several pipes in a coffee tin situated on a window ledge looking over her impromptu display table with all kinds of old nick knacks and Soviet memorabilia. I almost missed the tin can because my eyes were scanning the stuff on the table for a lonely pipe in need of a fresh start on life. When I started drawing the small selection of pipes out of the can and studied them, what drew my attention immediately to this pipe was the unique grain in the briar. After striking the deal, I took these pictures of the Sozopol find:
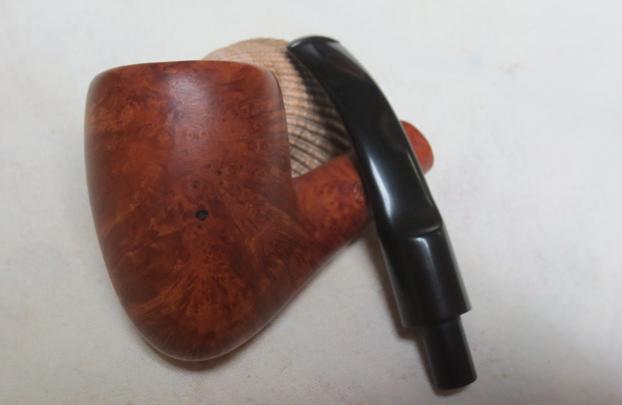
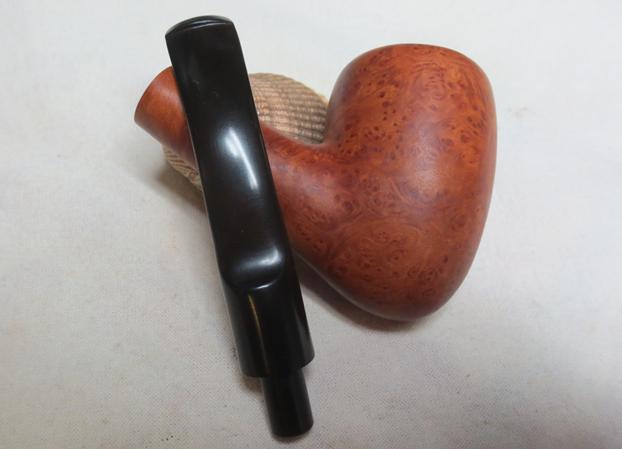
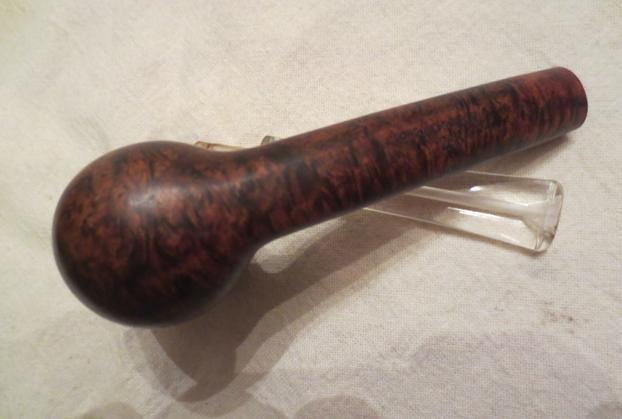
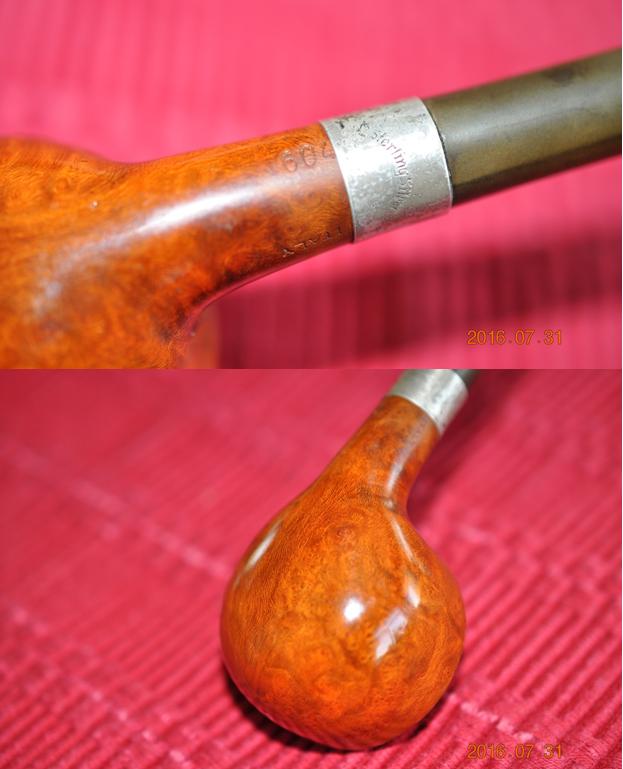
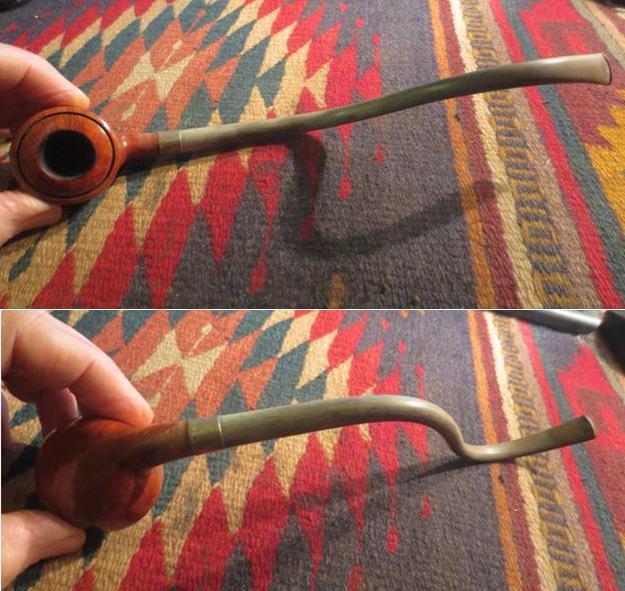
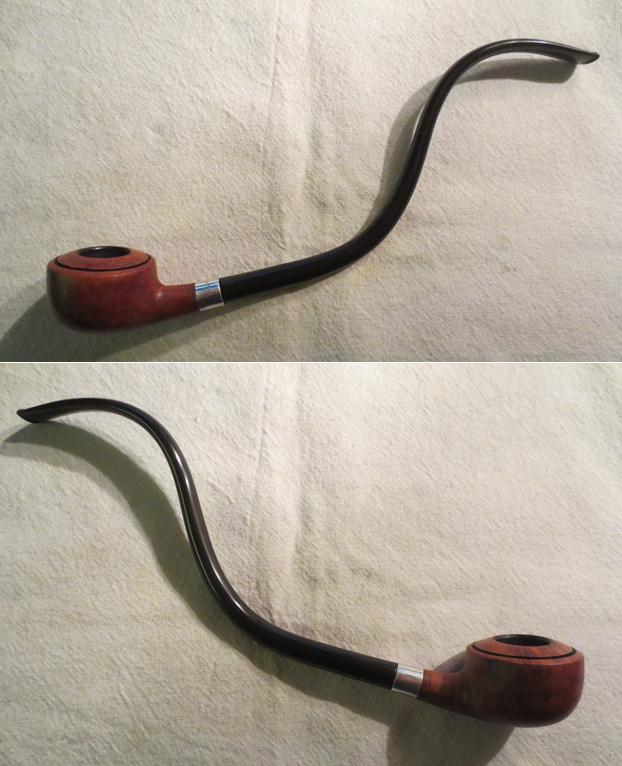
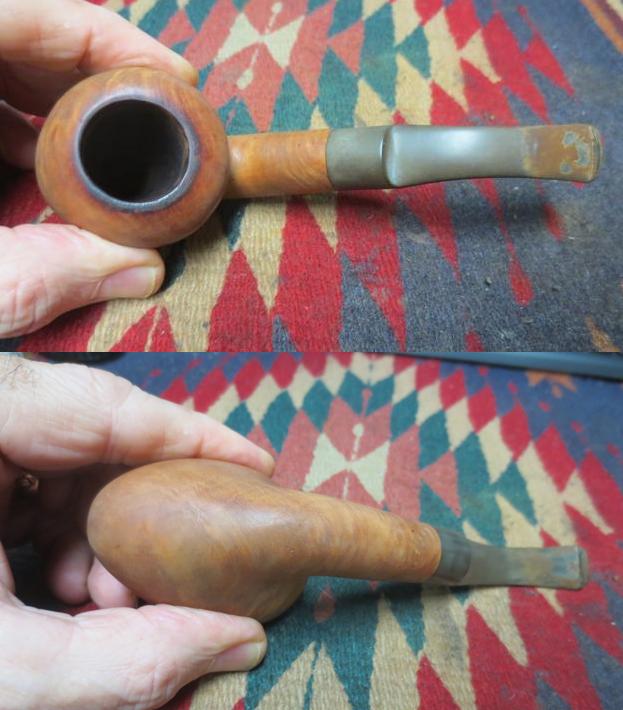
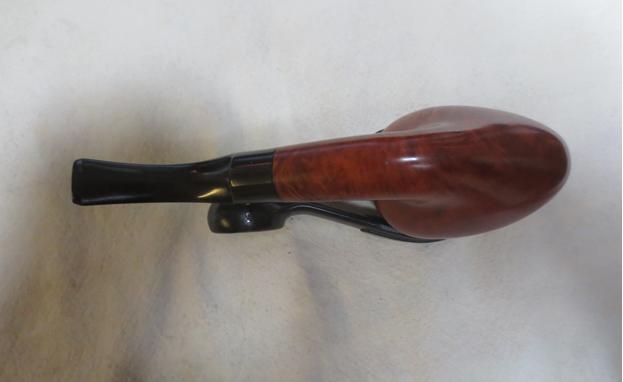
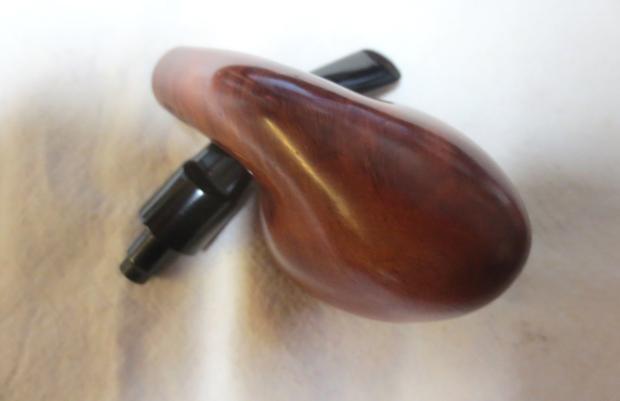
Today, after receiving Steve’s request for the essay, I took the Sozopol pipe out of the ‘Help me!’ basket, and again examine the briar with fresh eyes. I’m thinking that this pipe will be perfect for the Dremel essay. I am drawn to the briar as it is now and am anxious to coax it out even more. I take a few more pictures on my work desk to fill in some gaps.

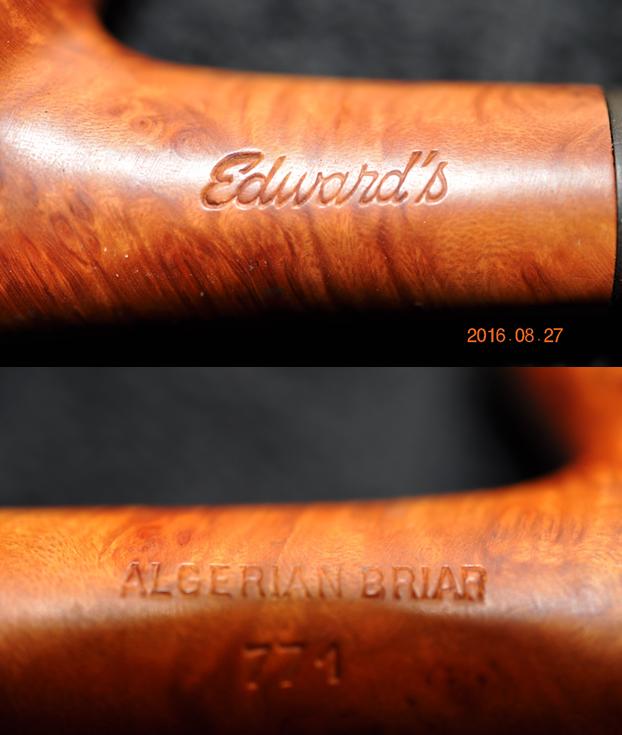
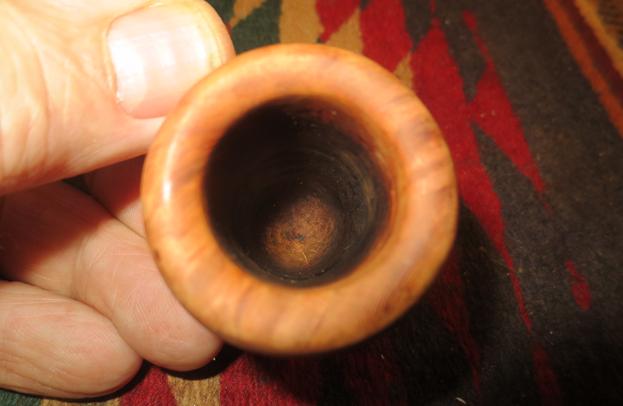
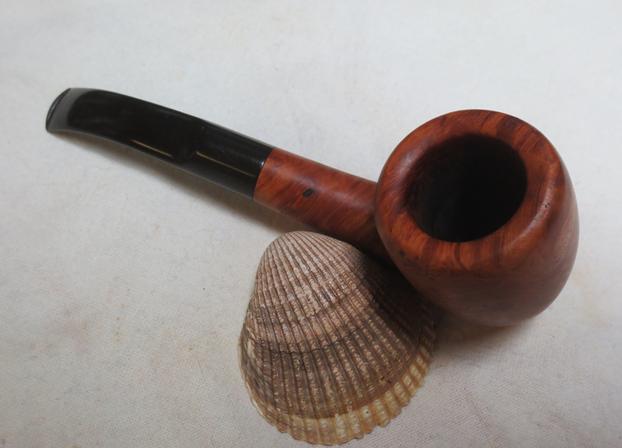
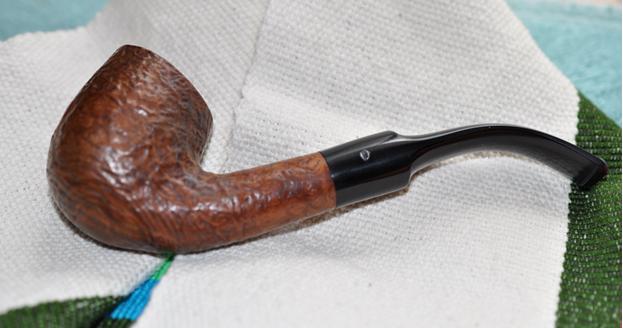
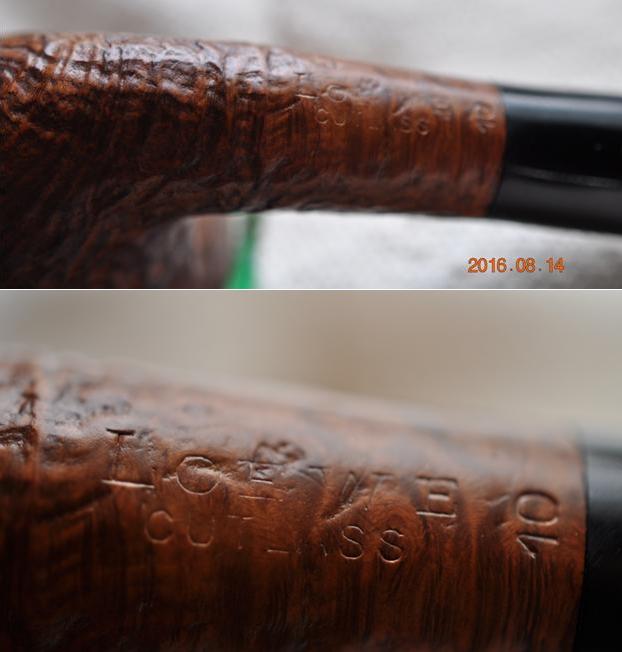
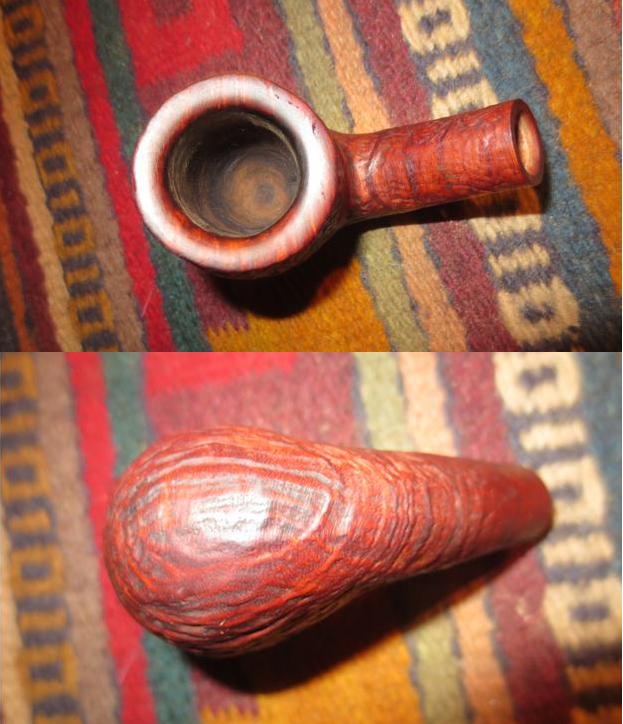
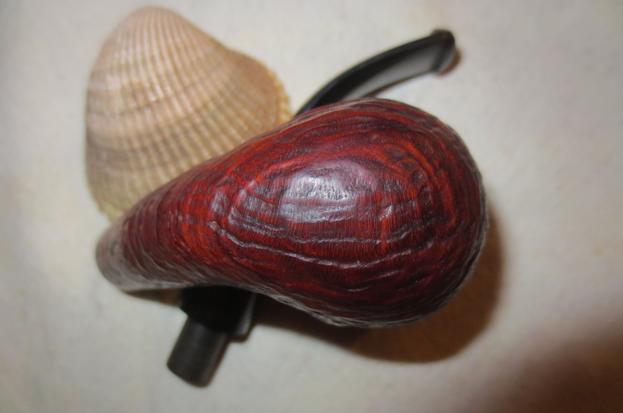
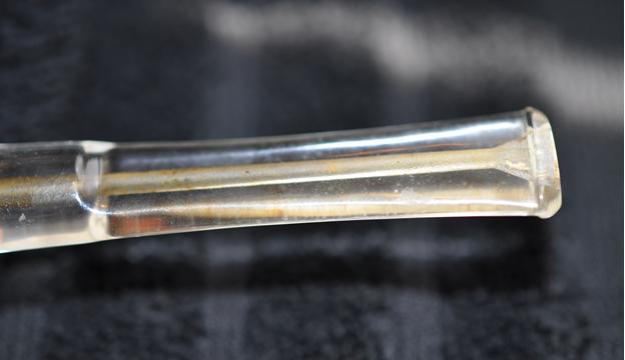
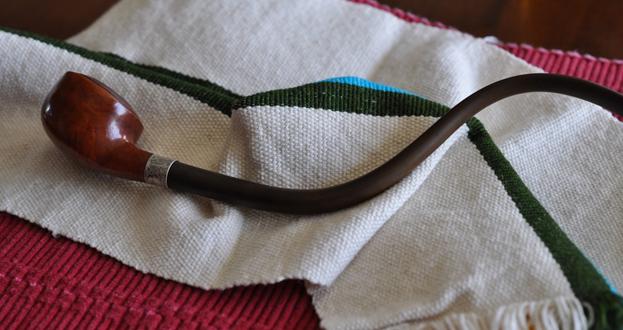
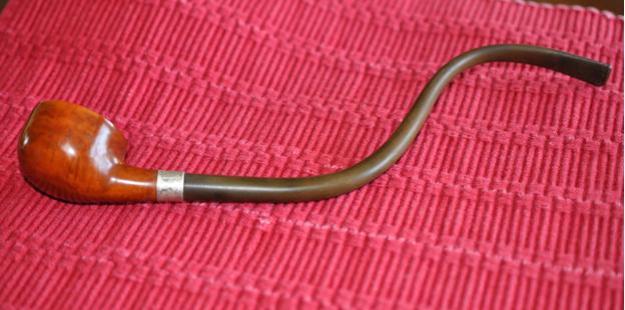
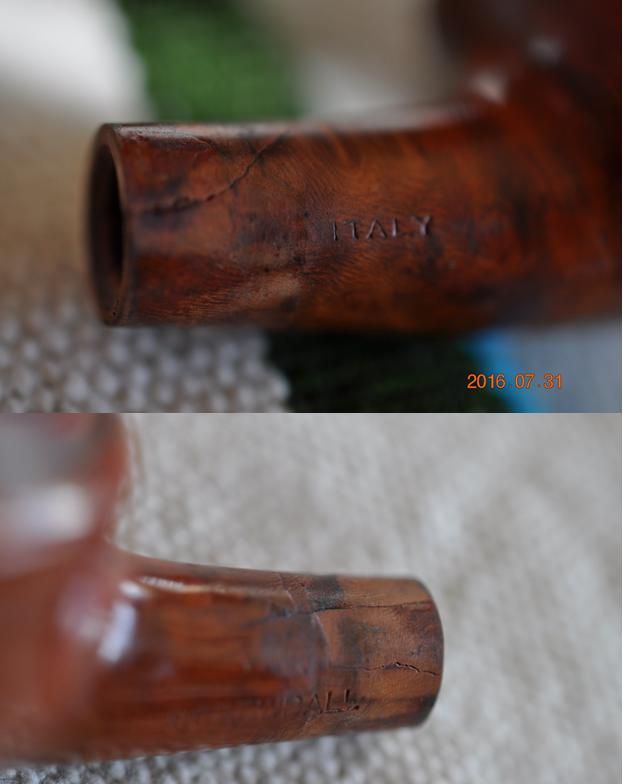
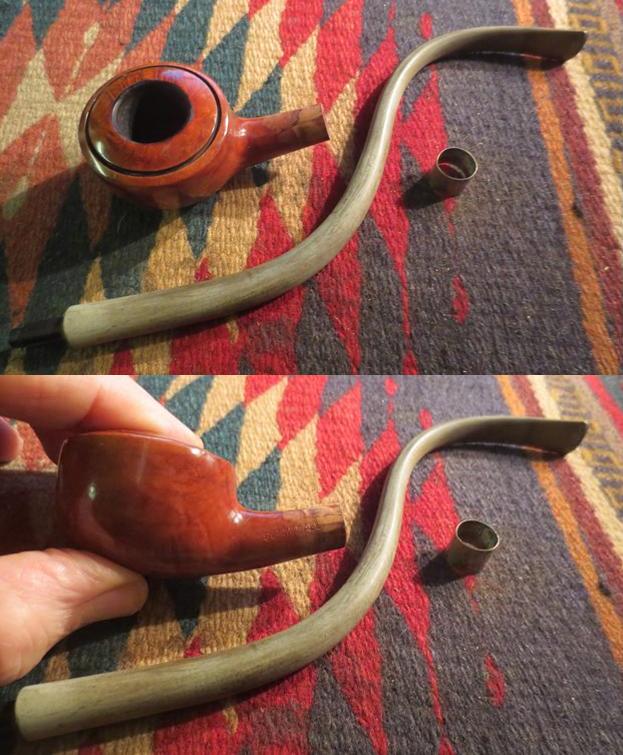
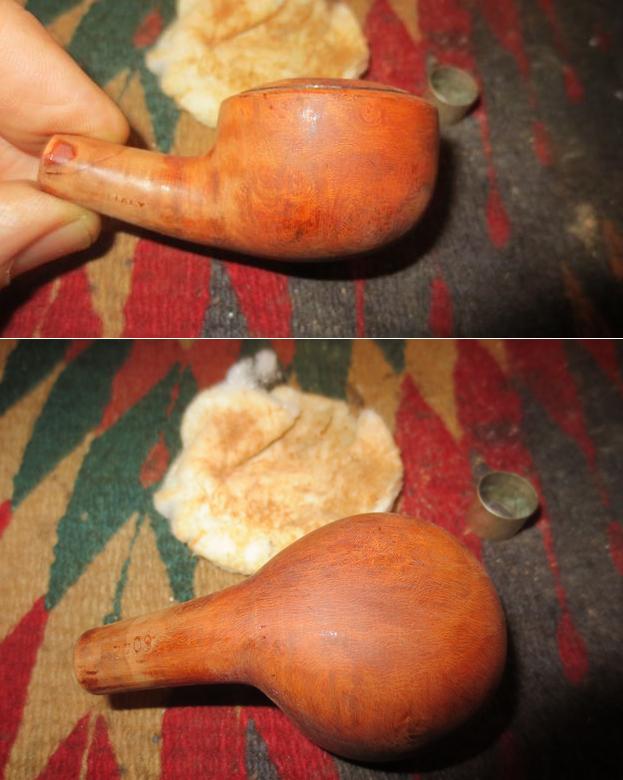
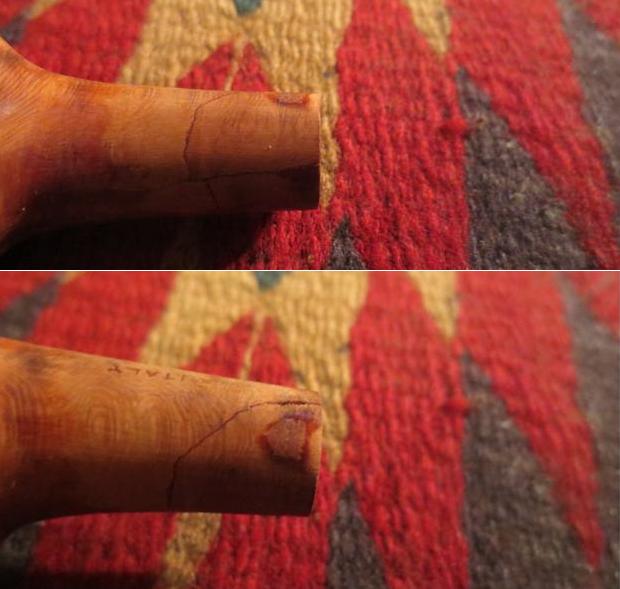
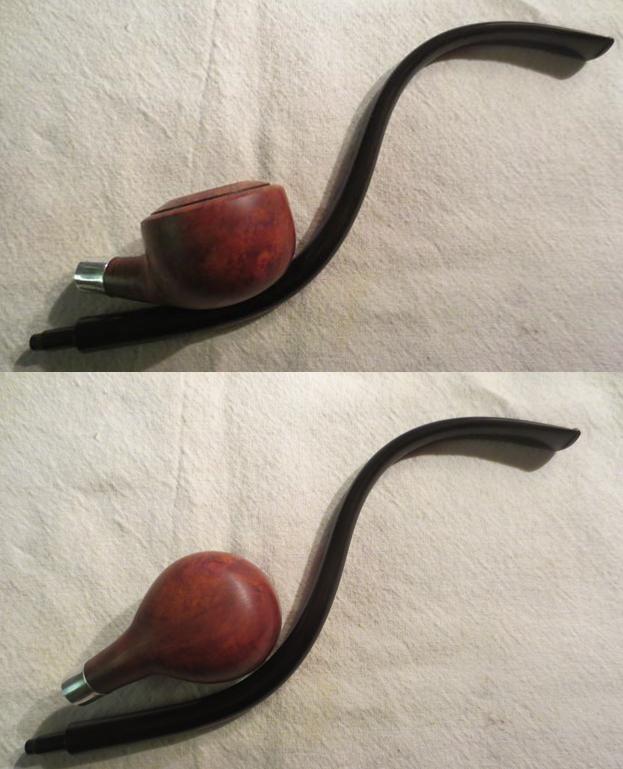
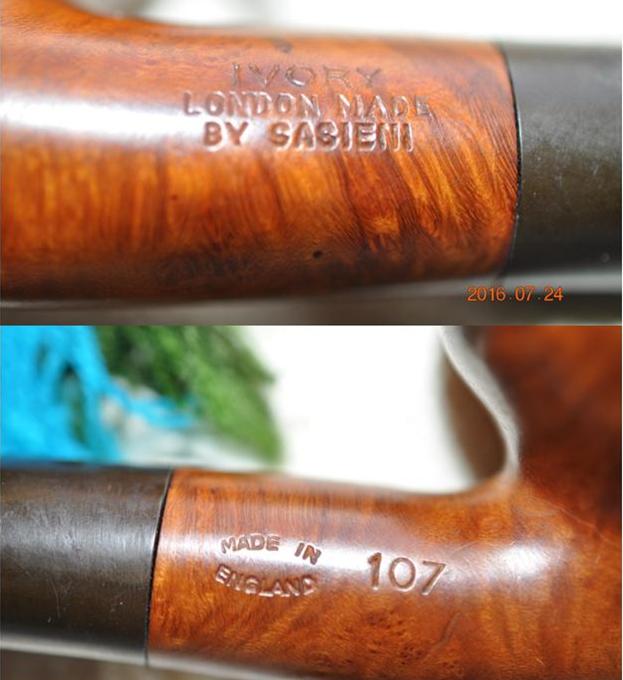
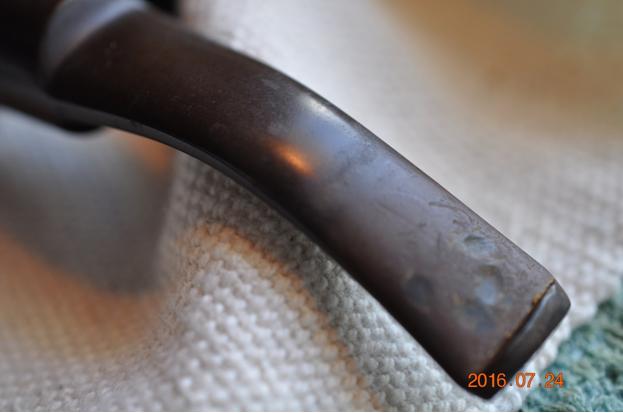
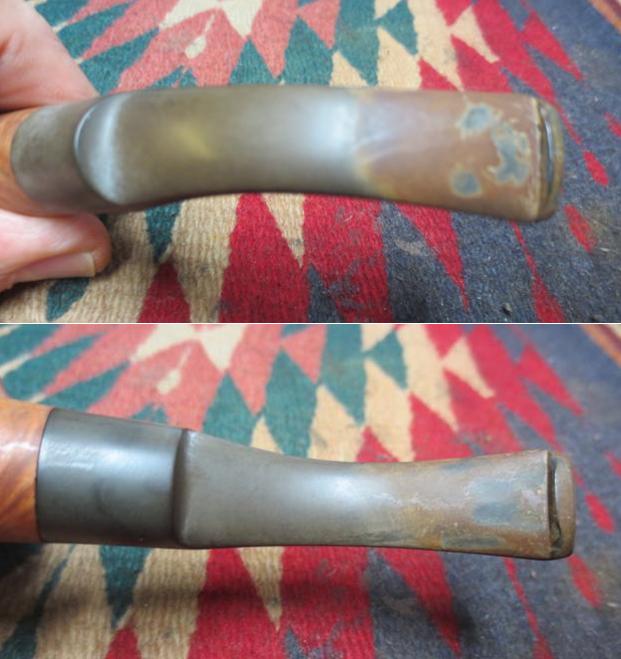
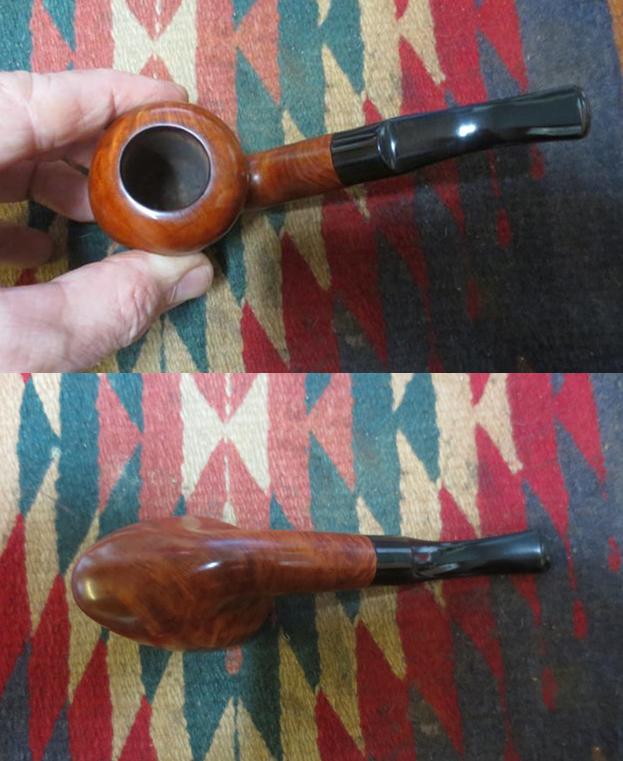
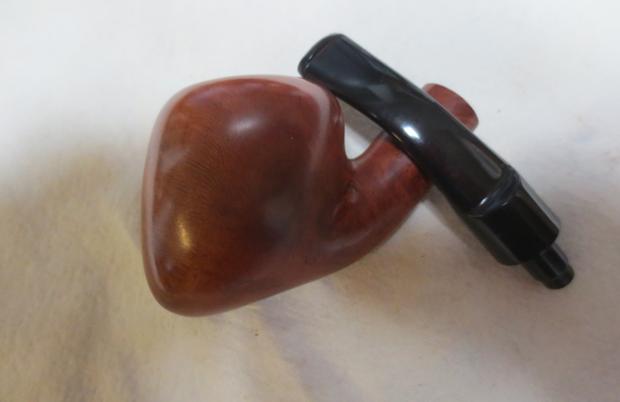
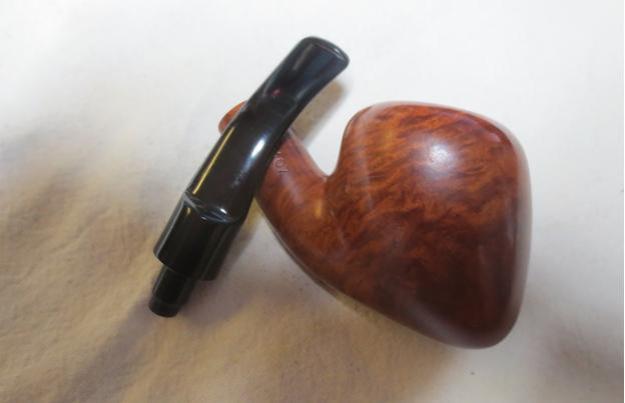
With no name stamped on the shank and only what I assume is a shape number (362) stamped on the right side of the shank, the only indicator to the origins of this pipe is the stem imprint (above) which appears to be an ‘A’ with either an oval circle forming the cross bar or possibly the cross bar forms the shape of a pipe with the bowl to the right – at least it seems that way to me. I looked at www.Pipephil.eu to find a match and I found none. I always appreciate discovering something of the history of a pipe which enriches the restoration process for me – I’m connecting with its past as I contribute to its ongoing life through its restoration. I’ll spruce up this stem logo with white acrylic paint later.
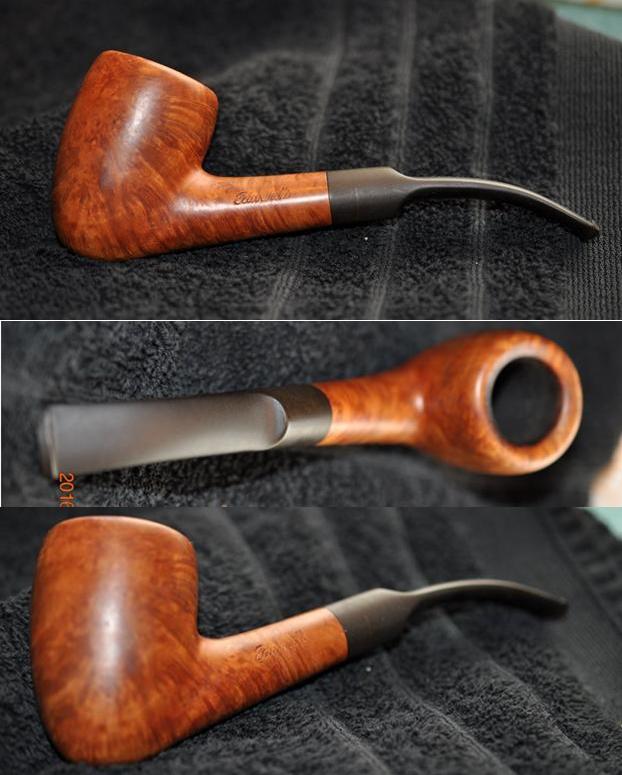
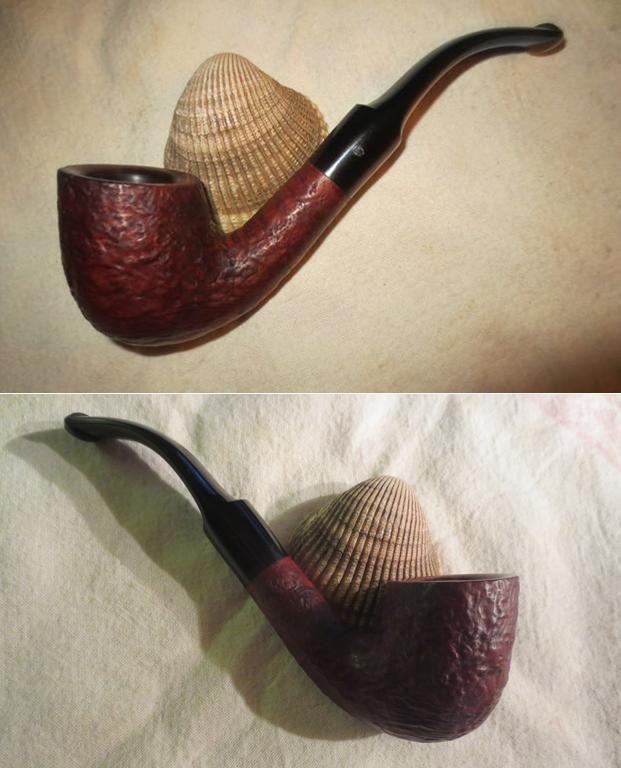
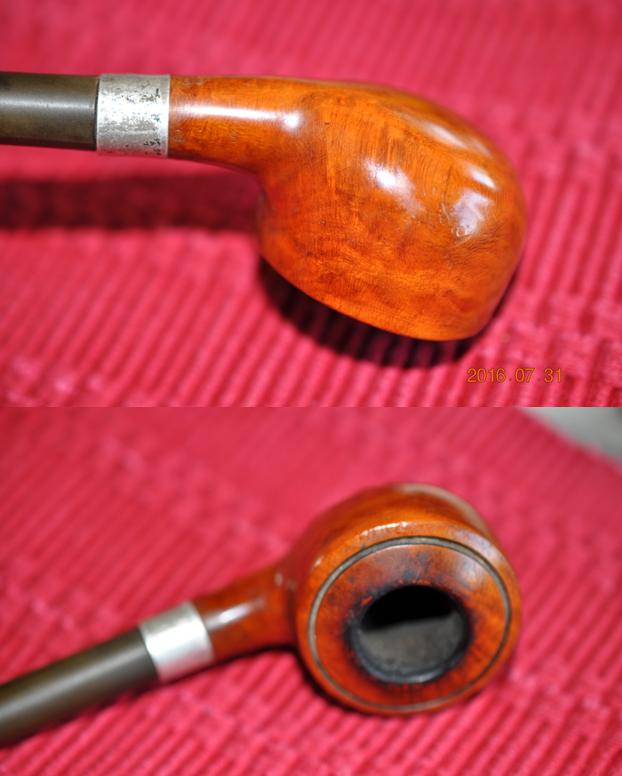
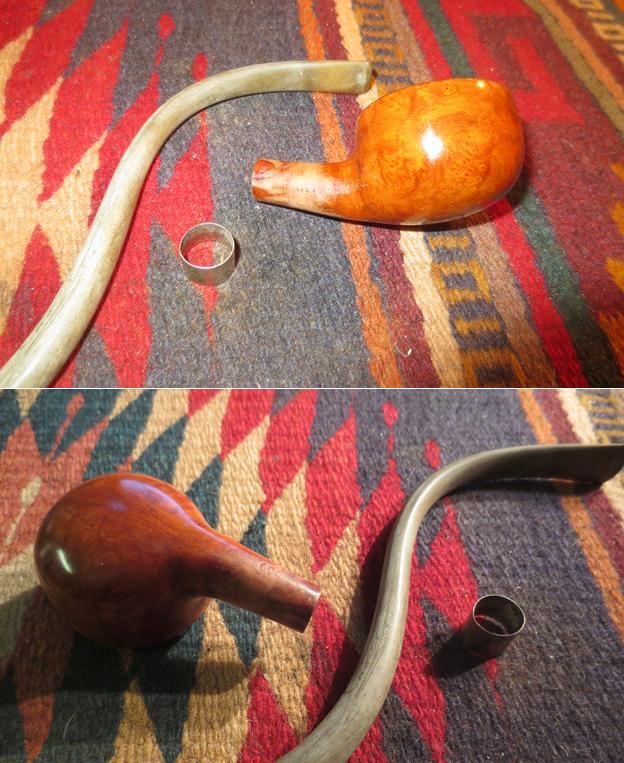
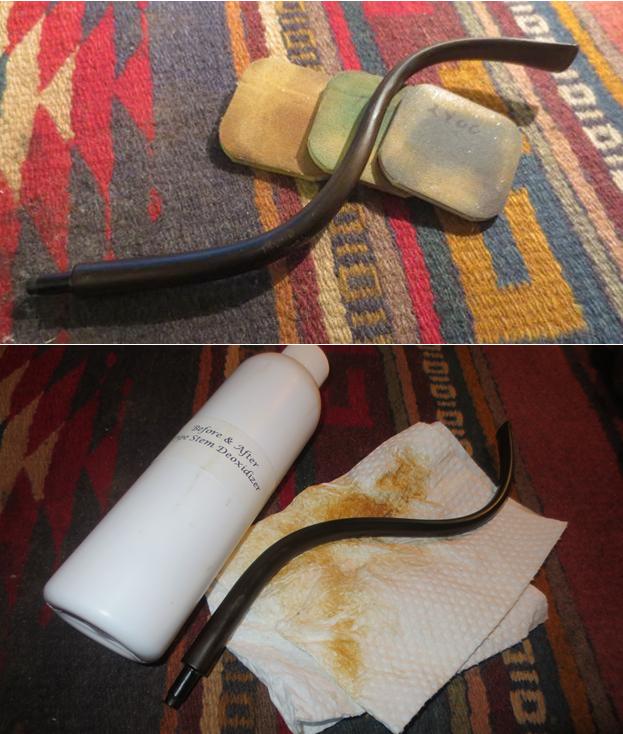
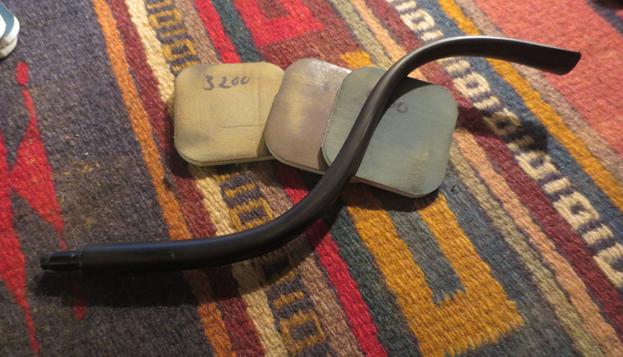
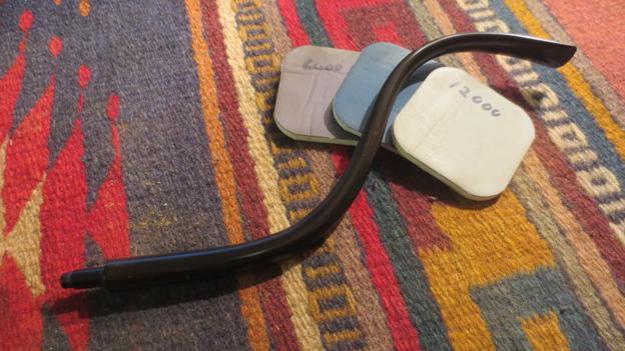
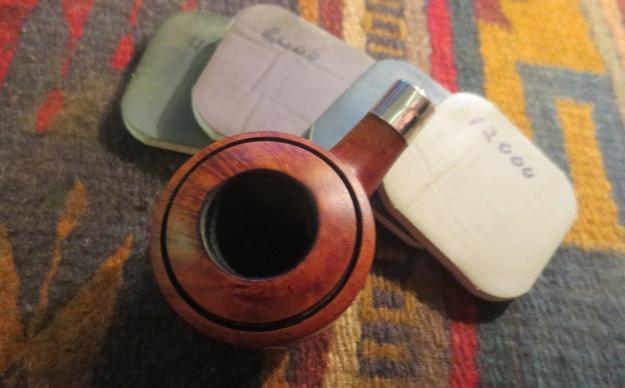
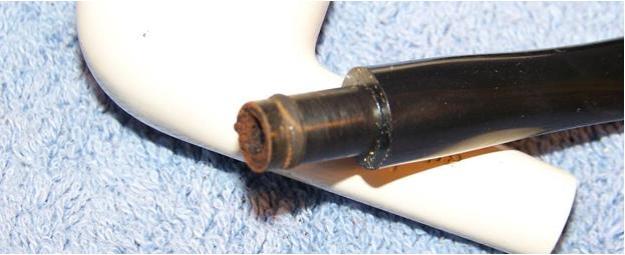
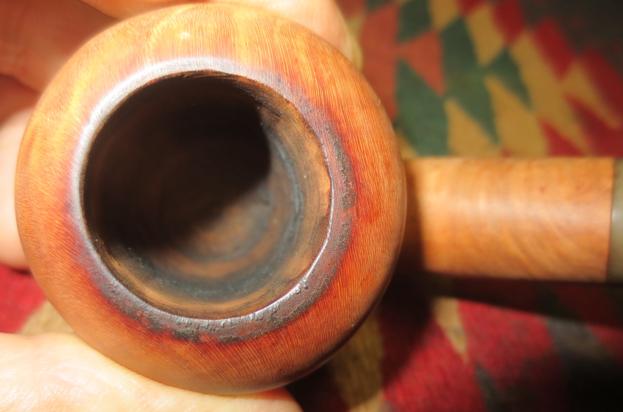
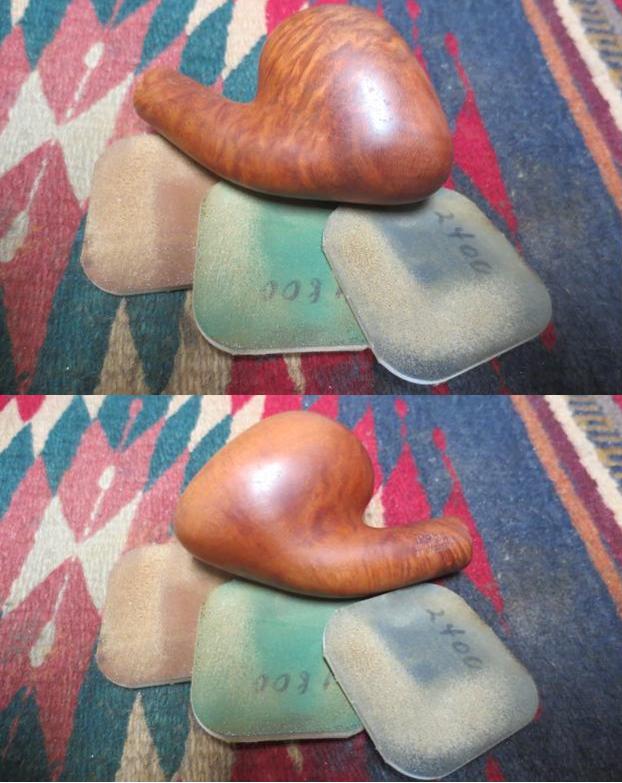
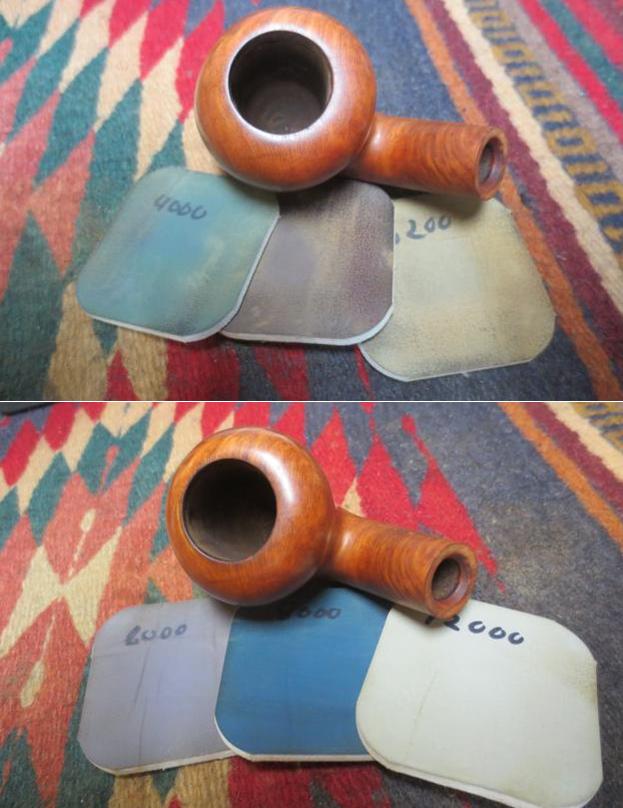
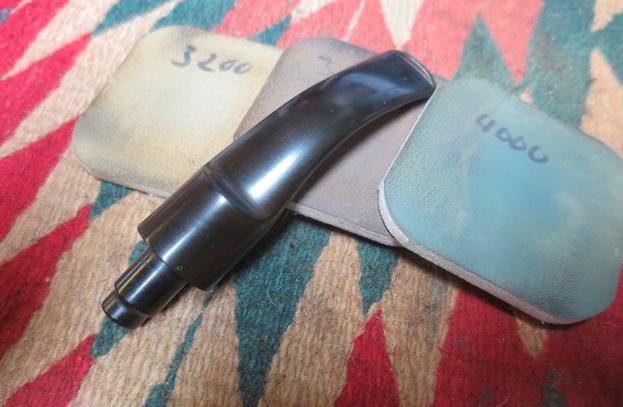
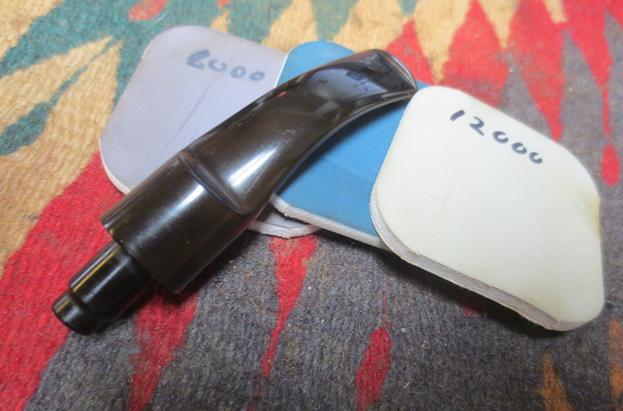
Since this blog is devoted to my use of the Dremel in the latter stages of the restoration, after reaming, cleaning of the internals of stem and stummel, removal of oxidation and micromesh the stem, cleaning the stummel with Murphy Oil Soap, and preparing the stummel for the sanding and buffing processes, I arrive at this point, completion of use of medium and light sanding sponge and the full micromesh process (1500-12000 grit pads). I show these pictures because I understand that the end polishing results will never be better than your sanding prep leading up to the application of compounds and waxes. For this reason, I’m very patient with the micromesh cycles – I enjoy seeing the grain pop out during this stage and polish will not remove missed scratches and pits in the briar. The pictures also show the progress.
Overview of Set-up
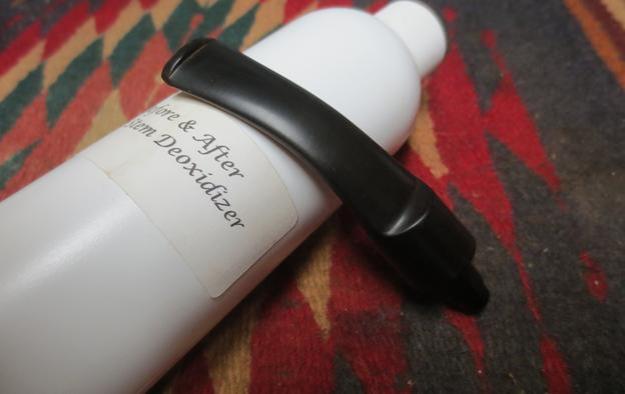
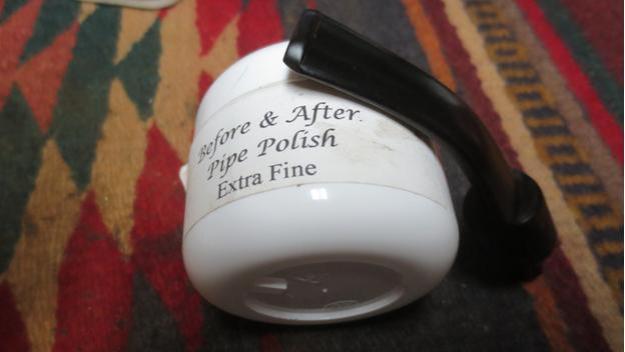
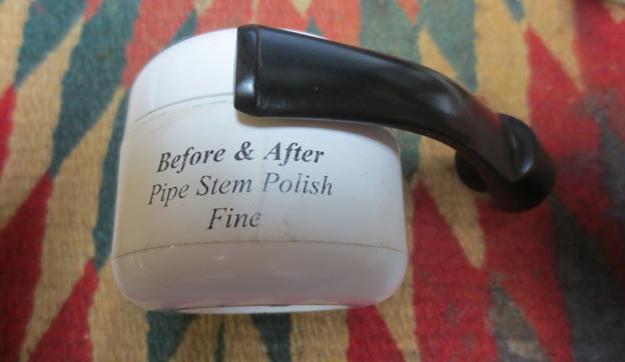
One of the first places I went to get a handle on buffing techniques when I was starting was to Steve’s Reborn essay about using a buffing wheel (Link). Even though the essay is for high powered buffing wheels there was very useful information about dos and don’ts, wheel maintenance and techniques of buffing. Even though my buffing wheels are miniscule in comparison, they also can launch the stummel or stem quite ably from what you thought was a secure grip. Safety is also a consideration! He also provides additional links which are useful. My Dremel (Skil) has a hand-held flexible shaft that is very useful in allowing me to get up close and personal with the buffing. I use it all the time. The wheels I use are about 1 inch in diameter and I utilize both felt and cotton cloth wheels for different applications. I bought them bulk on eBay at a very reasonable price! Each wheel is dedicated to a specific stage of the process and is labeled so that compounds and wax are not mixed. The wrench that comes with the Dremel for loosening and tightening wheels also serves to clean the wheels. Before each use (or after) I engage the wheel and carefully run the blunt end of the wrench tool along the end of the wheel. This removes old compound and keeps the wheels fresher and supple. Pictures show my setup!
Compounds and Wax
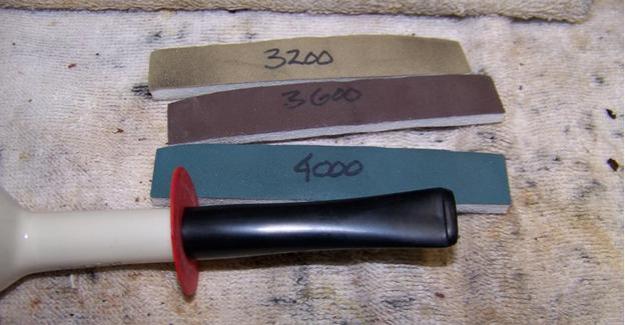
From a newbie’s perspective, I wasn’t sure what compounds were and what they did (true confession!). From 9th grade shop class I had a grasp of the basic principles of sanding and moving from more abrasive to less abrasives to remove impurities and smooth things up. When I started reading Rebornpipes.com, I started seeing words like Tripoli, Blue Diamond, White Diamond, carnauba…, I didn’t know what these did or what part they played in the process – abrasives, polishes? I also was not familiar with color coding – blue, brown, white – I also saw green on Amazon when I was trying to figure out what to buy in concert with my newly purchased and anxious Dremel. So, after poking on the internet I found this very helpful site (Enkay Polishing Instructions) that described what the different compounds were and what uses they had and how. Very helpful too, was a chart that lined up all the compounds from coarse to fine (with colors!) and what kinds of materials they are used on for sanding/polishing (see below).
The 3 lines on the bottom, sum up well my pipe universe: Hard Rubber/Horn/Wood. It was because of this chart that I decided not to use White Diamond because of its next-door status to Brown Tripoli and because the dots for these materials tick Tripoli and Blue All Purpose. I know that in restorations both White and Blue Diamond are used effectively and one could jump to White Diamond in lieu of Tripoli. So, my methodology, which seems to be working well for me, is after the micromesh phase is complete, I employ Brown Tripoli (coarsest) and then jump to Blue Diamond (fine), followed by carnauba wax. Each application has its own wheel. I start with Tripoli after the micromesh cycles (or after staining which I place between the micromesh cycles and Tripoli), because technically, Tripoli and the diamonds are a continuation and conclusion of the abrasive/sanding process. With carnauba wax the restoration transitions to the polishing and protective phase – at least this is how I now view it.
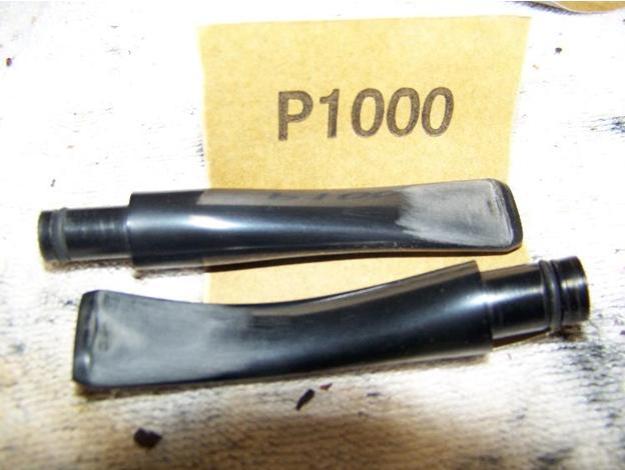
Felt Wheel vs. Cotton Cloth Wheel?
I use felt wheels for the Tripoli and Blue Diamond applications and then switch to a cotton cloth wheel for applying the carnauba wax and then a final clean buffing. Somewhere I read (I’m sorry I don’t have a specific link for the source!) that caution should be used when utilizing a felt wheel because they tend to be more abrasive than cotton cloth and hence, they potentially can generate too much heat on the briar or vulcanite surface – melting or scorching would not be a good result at this stage! Yet, with words of caution in mind, I have found that applying the Tripoli and Blue Diamond at the lowest Dremel setting (slowest RPMs – It would be interesting to compare the technical data for RPMs for the Dremel with a high-powered polishing wheel). With the carnauba wax and the final clean buff, I use cotton cloth wheels which is a smoother material and therefore cooler relatively speaking. I tweak the RPM speed up one number on the Dremel when I apply the carnauba. I played around with the speeds and this is what seems to work for me.
Applying Compounds and Wax
Through simple observation and experimentation, I developed my approach for applying the compounds and wax. Both compounds and carnauba wax need friction and heat to accomplish the job for which they are intended. What I discovered as I applied both compounds and wax was that each has its own characteristic behavior when they meet the briar or the vulcanite on the stem. Since Tripoli and Blue Diamond are abrasives, they remain powdery and dry when they are applied with the felt wheel. When they make contact, there is a distinctive initial cloudy patch which disappears into deeper gloss through the polishing process. Compared to the compounds, carnauba wax liquefies into notable ripples during the application and can be strategically spread around in a uniform way. The way I achieve this perspective is with the felt and cotton cloth wheels being so small, with my bright light overhead, I can angle my field of view to observe the ‘action’ the wheel is generating revealed in the sheen of the reflection on the briar or vulcanite surface. With the compounds, it can be likened to pushing a broom across the dry floor. With the carnauba, it can be likened to a wet mop and pushing the wax over the surface.
Charging the wheels is straight forward based upon Steve’s essay and everything I’ve read: Less is more! For both the compounds, I lightly ‘pause tap’ the wheel on the block of Tripoli or Blue Diamond. Just enough to pick up some product on the wheel. With carnauba, there is more of a pause, pause on the block as the wax is collected onto the wheel – not too much though. When I bring the wheel to the surface, I divide the stummel into about 8 areas and I methodically (I do it the same way each time so I don’t forget a ‘patch’) work the compound or wax into those sectors with overlap between them so I’m sure to not miss anything. As I watch the ‘action’ in the sheen of the surface, I can move the product around and tell when I’m in need of recharging and moving on by the gloss produced in the ‘patch’. With carnauba, especially, I watch the ripples created by the liquefied wax and I ‘push it around’ the surface as it is assimilated into the briar or vulcanite and gloss is produced. I keep the wheel moving in a circular rotation over the surface, never pressing too hard, allowing the product, RPMs and wheels to do the work. The gloss that increasingly emerges with each application has a 3-dimensional depth to it – this helps me know when I’m achieving maximum shine and I can move on.
The Practice (Thank you to my wife for pictures while my hands were full!)
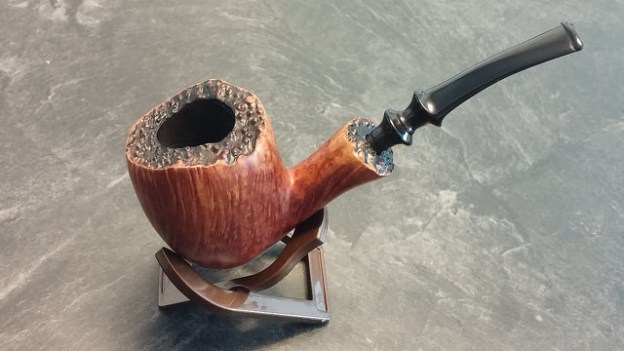
With my Sozopol no-name, I decide to apply a stain using Fiebing’s Dark Brown Leather Dye with a few drops of Oxblood. I cut the mixture by adding about one half part alcohol. I amply apply the stain mix twice, each time flaming the surface of the stummel setting dye in the grain. I take my Dremel with a felt wheel (after cleaning with wrench) set at the slowest RPM and I apply Tripoli compound to the surface.
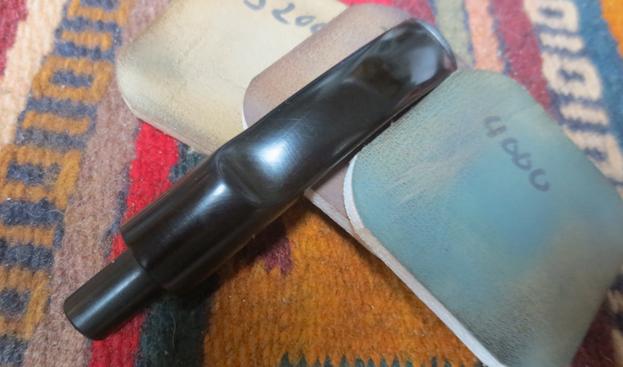
Application of Tripoli
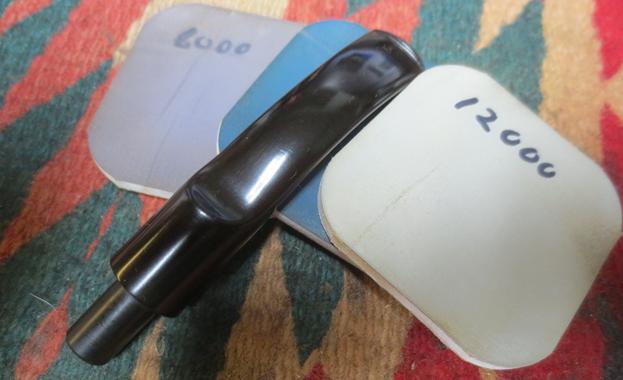
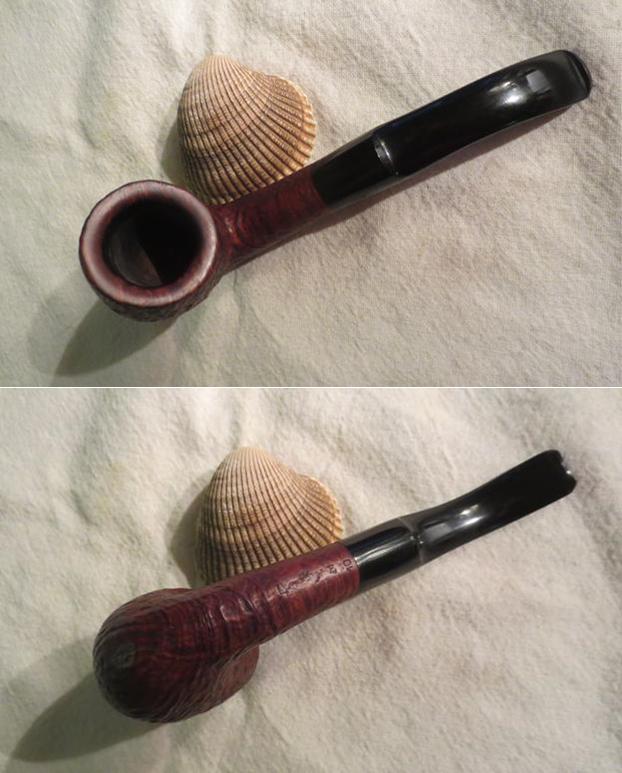
Application of Blue Diamond followed by micromesh cloth wipe to remove residue compound before applying carnauba wax.
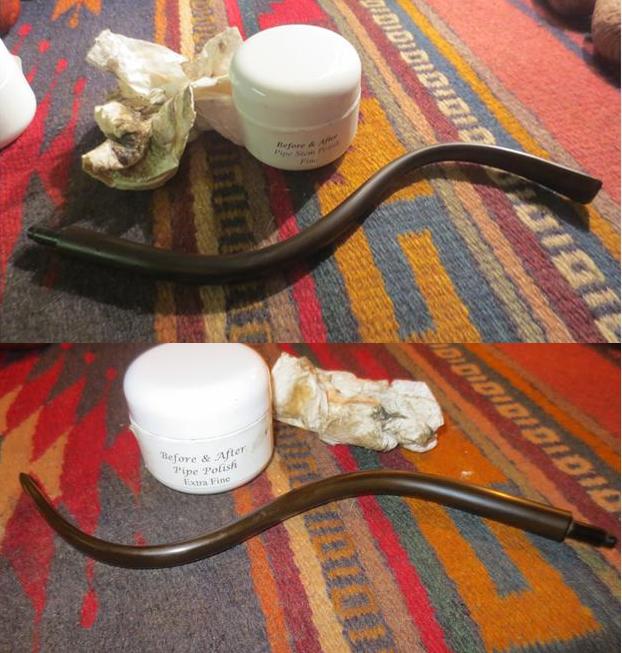
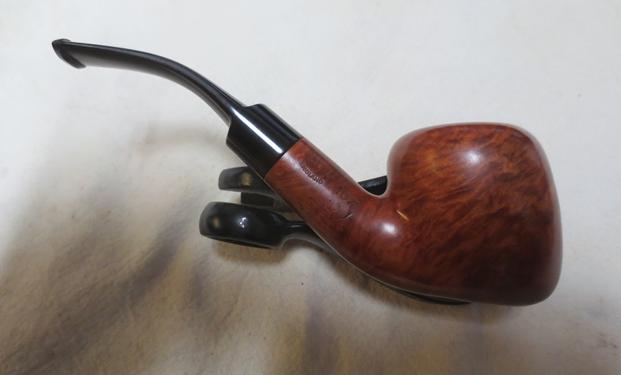
Application of carnauba wax to stem and stummel finishing with a clean cotton wheel buff and then micromesh cloth buff.
I hope this essay has been helpful. Has anyone seen this stem mark? If you would like to adopt this pipe, let me know! Leave a response below or send an email to slaug@uniserve.com. Thanks for joining me!

My Latest Refurb, an Edwards Algerian Briar 771 is not a shape I’ve seen before
Blog by Steve Laug.
Over the years I have had many Edwards pipes cross my work table. I have kept a few and sold many. I have also repaired many of them. The available shapes that the pipes came out it spoke of a very fluid design philosophy. Pipedia says that “Edward’s Design Philosophy is hard to pin down, think of their style as the “American Charatan” with unique & clever twists all their own.” Across the board they were all Algerian Briar and all were unstained waxed or oiled briar. I remember reading that actually oil curing was a feature of their pipes. I did a quick look on Pipedia https://pipedia.org/wiki/Edward’s and found that I was correct. I quote: “All of Edward’s pipes are Algerian Briar – a fact very few pipe companies can claim, and all are oil-cured utilizing natural finishes – no strange concoctions are used to interfere in your tastebud’s dance with the briar. Algerian, Calabrian, Sardinian, Corsican – take your pick, but Algerian Briar is generally considered the finest smoking briar ever used. When combined with oil-curing, Algerian takes on a magical quality that even Alfred Dunhill recognized as far back as 1918 as the choice for both his Bruyere and Shell.”
The pipe is stamped Edwards on the left side of the shank and Algerian Briar over shape number 771 on the right side of the shank. The pipe is a large group 5 sized bowl. The stem was lightly oxidized but does not have any tooth or chatter marks. Push in tenon fits tight. The dimensions are: length 6 inches, height 2 1/4 inches, chamber width 13/16, chamber depth 2 inches. The following photos were taken by my brother before he cleaned the pipe. It is obvious it is in pretty decent shape. The rim has a little tar and darkening on the rounded back edge but the rest is pretty clean. The finish is quite nice and has some rubbed in grime that will come off with scrubbing. The photos tell the story on this pipe.
My brother took some close up photos of the rim, the bottom of the bowl and the stampng on the sides of the shank. You can see from the photos that the pipe is in great shape except for the slight buildup on the back edge of the rim. There is a light cake in the bowl and the bottom third of the bowl appears to be raw briar that has not been darkened by smoking. I would call the pipe lightly smoked.
My brother scrubbed the pipe with his usual mix of a tooth brush and Murphy’s Oil Soap. He rinsed it with water. The scrubbing removed all of the grime and oils on the bowl and removed the build up on the rim as well. The stem was lightly oxidized and there were some scratches around the circumference of the saddle portion of the stem. My brother also cleaned the interior of the airways in the stem and shank and the mortise area. I took some photos of the pipe when it arrived here.
I took a close up photo of the rim to show how well it cleaned up after Jeff had scrubbed it. There is a shine to the rim that is unblemished by scratches or dents. I also took some photos of the stem to show the light oxidation and the absence of tooth marks or chatter. The stem is stamped on the underside horizontally across the saddle with the word France.
I worked over the stem with micromesh sanding pads – wet sanding it with 1500-2400 grit pads and dry sanding with 3200-12000 grit pads. I rubbed the stem down with Obsidian Oil between each set of three pads. After the final micromesh pad I gave it a last coat of Obsidian Oil and set it aside to dry.
I rubbed the bowl down with a light coat of olive oil to bring the grain to the surface. It also brought life to the briar. I buffed the pipe with Blue Diamond on the wheel and then gave it several coats of carnauba wax. I buffed it with a clean buffing pad. The finished pipe is shown in the photos below. It is a beautiful piece of briar, lightweight and well grained.

Getting Lazy – A Simple Restore on a Loewe Cutlass 10
Blog by Steve Laug
The last three or four pipes I have taken out of the refurbishing box have been very simple restorations. My brother sent me this Loewe’s pipe that is stamped Loewe over Cutlass on the underside of the shank with the shape number 10 at the shank stem union. In the photos he sent me it appeared to be in pretty decent shape. The finish looked dirty and murky but otherwise good. The rim had some tars and overflow from the cake in the bowl but not too bad. There were some nicks and dings in the rim but none too deep. The stem was virtually flawless with no tooth chatter or tooth marks. The boxed L logo on the stem was worn and almost illegible but with a lens it is clear.
While I have heard of and enjoyed quite a few older Loewe’s pipes the shape of this one and the name were not familiar to me. Even the shape number was not recognizable. I looked on the pipephil site to see if I could find any information on this particular iteration of the brand and found what I was looking for. There on his site (http://www.pipephil.eu/logos/en/logo-l5.html) I found a pipe with the same stamping but a different number. The one in my hands does not have a COM stamp
so I do not know where it was made. I have included the photo of the stamping and the stem logo to the left from that site as it is parallel to the one I have. I have also included some information from the listing there.
The brand was founded 1856 by Emil Loewe and was first bought out by Civic. Eventually the brand became part of Cadogan Group along with BBB, Civic, Comoy, GBD, Loewe and Orlik in about 1979. Judging from the age and the stamping on this pipe I would surmise that it was made after that merger and is a Cadogan pipe.
I also did some reading on the history of the brand on Pipedia and include a short excerpt here that is pertinent to the age and stamping on this pipe: https://pipedia.org/wiki/Loewe_%26_Co.#Bottom_of_shank: “By studying the website of one UK dealer I was able to deduce that the present shape numbers (early 2003) mostly (probably all) differ from those used from 1967. For example, a Billiard is now a 28, a Lovat an 834, a Canadian a 296. Some shape numbers now have 4 digits. But even today, Cadogan will occasionally still stamp a pipe with a shape name instead of a number, though only on request.”
It looks to me that I am dealing with a pipe made around 2003 jusding from the change in shape numbers to a two digit numbering system at some level. Though there is a lot of uncertainty regarding the dating of Loewe pipes after the Cadogan buy out.
My brother took the first and the following photos of the pipe before he did the cleanup. What follows are a series of close up photos of the stamping, the rim and bowl and the sandblast look on the bottom of the bowl. In the bowl bottom photo you can see the dust and debris in the grooves of the blast.
My brother cleaned out the internals – the mortise and the airways in the shank and stem with pipe cleaners and alcohol. He scrubbed the externals with a tooth brush and Murphy’s Oil Soap and was able to not only remove the grime from the finish but most of the finish also. When it arrived in Vancouver the pipe looked like virgin briar. The stem is acrylic so there was no oxidation on it. The next photos show the pipe when I brought it to my work table. The blast on the briar is quite shallow and shows mixed grain.
I took some close up photos of the rim and the stem to show their condition. My brother was able to remove the tars on the rim. There was some slight rim darkening on the inner edge but other than that it was clean. The scratches and dings were also raised. The photos of the stem show how clean it was as well when it arrived.
I sanded the inner edge of the rim with 220 grit sandpaper to smooth it out and remove the darkening and light burn marks. I also sanded it with 1500-2400 grit micromesh sanding pads to remove the scratch marks left behind from my sanding.
I wiped the bowl down with acetone on a cotton pad to remove any remnants of the previous finish and the dust from sanding. I stained the bowl with a dark brown aniline stain cut 50/50 with isopropyl alcohol. I flamed it and repeated the process until the coverage on the bowl was even.
I hand buffed the bowl and took the photos below to show what it looked like at this point in the process.
I gave the bowl and stem several coats of Conservator’s Wax and buffed it with a clean buffing pad to raise the shine. I hand buffed it with a microfibre cloth to deepen the shine. The finished pipe is shown in the photos below. This one will also soon be on the rebornpipes store. If you are interested in adding it to your rack let me know through email at slaug@uniserve.com or by message on Facebook or a comment here. Thanks for looking.

Another Easy Restoration – a GBD Seventy Six 255 Canadian
Blog by Steve Laug
When I opened the box of pipes from my brother there was a long shanked clear stem pipe that stood out to me. The stem was in perfect condition, with no tooth chatter or marks and was very clean. In fact, the stem was probably a replacement made of Lucite. Looking at the classic shape and the grain on it I was pretty sure it was a GBD but had not even looked at it. When I got around to examining the pipe I saw that it was stamped on the top of the shank with GBD in the oval logo over Seventy Six in script. On the underside of the shank it is stamped Made in England over the shape number 255 which when I looked it up was a GBD number for a Canadian with an oval taper stem. Finding out that pretty well sealed the fact that the stem is a replacement. It is an oval shaped saddle stem.
I remembered reading about the Seventy Six line before but had to look it up again. From what I found with a simple search I could see that the pipe was introduced by GBD in1976 in honor of the American Bi-Centennial. According to what I read the pipe was released as a polished dark brown “take off” finish. The best I can understand is that the dark brown was removed leaving it in the dark grain and birdseye of the pipe.
So my memory was nudged and I remembered that Al Jones (Upshallfan) had written about his repair of a classic GBD Seventy Six and given information on the brand in this link: https://rebornpipes.com/2013/06/17/gbd-oval-shank-pot-seventy-six-restoration/ I quote: “In 1976 GBD introduced a series called the “Seventy-Six” to commemorate the United States Bicentennial. I was a Sophomore in high school during 1976 and the year-long celebration had a big impact on me. The Seventy-Six model remained in the GBD catalog until 1981.”
He also quotes from the 1976 Catalogue: “The GBD “Seventy-Six” is our contribution to the Bicentennial celebrations. We have really pushed out the boats for “the colonies” in launching this new series that will be remembered by its proud owner long after the celebrations are forgotten.”
My brother took the above photos and the close up photos that follow before he did any clean up on the pipe. The first photos shows the condition of the bowl and the rim. There was a cake in the bowl and an overflow of lava on the rim. I did not know until the pipe arrived that the rim was beveled inward to the bowl. There appeared to be a lot of damage on the rim. The second and third photo show the stamping on the top and underside of the stem. It is clear and readable. The last photo shows the condition of the stem. There were no bite marks on the top and underside near the button. There was some light tars in the airway in the stem.
My brother scrubbed the exterior of the pipe with Murphy’s Oil Soap to remove the wax and the buildup on the rim. It removed the oils and wax and left the pipe clean and natural briar. He cleaned out the airway in the shank and stem. He also cleaned out the mortise with alcohol, cotton swabs, pipe cleaners and alcohol. The photos below show the pipe when I received it. When I saw the rim it was then that I knew that it was beveled inward. The briar on this pipe was truly stunning. There were no sandpits or flaws in the briar.
He was able to remove most of the lava on the rim and what had appeared to be burned areas was merely dirty. It would not take much to clean it up and make it shine.
There was still some inner edge darkening and some damage on the inner edge. I used a folded piece of 220 grit sandpaper to clean up the darkening and the damage. The third photo shows the process of sanding the inside of the bowl with a piece of 220 grit sandpaper wrapped around the end of a Sharpie pen to smooth out the inside of the bowl. The fourth and final photo shows the interior of the bowl after it was sanded.
I decided not to stain the pipe but to leave it natural. I rubbed it down with a light coat of olive oil to bring life back to the briar. I liked the look of the pipe with the natural oil finish. I buffed the bowl with Blue Diamond on the buffing wheel to raise the shine. I gave the bowl and the stem several coats of carnauba wax and buffed it with a clean buffing pad to raise a shine. I hand buffed the pipe with a microfiber cloth to deepen the shine. The finished pipe is shown in the photos below.

Restoring a Cracked Chacom 296 Canadian
I have a GBD panel that Charles used the same method to repair the cracked bowl. Mine had a lot of cracks and splits around the bowl and he pinned them/stitched them with the brass pins. I have been using for a long time now and there is no flex in the cracks.
I came across this Chacom 296 Canadian pipe at a local antique market, and though it was in rough shape, it had a few things going for it in my mind. First was the unique leather pipe case it came in that featured a snap closure just like Grandma’s change purse. The case is unmarked, so I don’t know if it is original to the pipe or was simply purchased to use with it. At any rate, its novelty caught my attention.
Releasing the pipe from its case, I could see that the pipe was a Canadian, one of my favourite pipe shapes. It had been a constant, though poorly maintained, companion to its previous owner. The rim was hidden under a thick crust of lava, the bowl was nearly choked off with cake, and the stem looked like it had been chewed on by a puppy instead of a…
View original post 1,553 more words
“Chinrester” Pipe stamped Screwball would be an interesting restoration project
Blog by Steve Laug
Over the years I have seen photos of the strangely shaped pipes with the long almost tortuously bent stems but I had never seen one close up. Then my brother sent me photos of one that he had picked up for me to restore. It was stamped Screwball on the left side of the shank and 6044 over Italy on the right side. It had a tarnished silver coloured band on the shank that covered what appeared to be a cracked shank. The finish had been sanded free of the area that was banded but the rest of the bowl was still covered with a shiny plastic coat finish that seemed impermeable. The stem was intact which was interesting as many of the ones I have seen were either twisted or bent or broken. The bowl was a unique shape as well. At a side glance it was a combination of a prince and pot but there was a ring around the top of the rim that divided the rim into two enclosed circles. It is a large pipe – 11 inches long, 1 ¼ tall, 1 ¾ inches diameter and a ¾ inch chamber diameter.
The stem was oxidized and slightly brown. The silver band was tarnished but the pipe still had a glossy shine in the photos he sent me.
The rim showed darkening and some lava over flow on the top of the bowl. There was a light cake in the bowl. The ring around the top was filled with grit and grime.
My brother took some close up photos of the pipe. The first of these shows the rim top and the cake and overflow on the rim. The second shows the stamping. The name of the pipe as it appears in the photo is SCREW. Underneath the band is the second half of the name BALL.
The next two photos show the stamping on the shank and the imprint of Sterling Silver on the band. They also show the grain peeking out of the shiny topcoat on the underside of the bowl.
Here are a couple more shots of the bowl – you can see that the shiny coat has some scrapes in the surface and the almost painted on look that makes me wonder if it is not a later coat of varathane.
When my brother received the pipe the band was loose so he slid it off the shank and revealed not only the complete stamping on the pipe but a large cracked area that had been repaired. The cracked area looks like a large chunk of briar had broken free. It had been glued in place and then a band slid over the repair. The glue had dried and long since let the band fall loose.
My brother did the clean up and took off the rim burn on the top and scrubbed the exterior with Murphy’s Oil Soap and the interior with pipe cleaners, cotton swabs and alcohol. When I received the oxidation on the stem was on the surface and the pipe was ready to restore. I have to be honest with you all it was not a restoration that I was looking forward to. The long and curved stem just spelled trouble to me. Trying to run pipe cleaners through it and also polishing and cleaning the oxidation seemed a daunting task. But finally I brought it to the table. Here are some photos of the pipe before I started.
I took the pipe apart and took photos of the parts. With the band removed you can see where the repair person had sanded the shank and done the crack repair before banding the shank.
Trying to scrub off the shiny topcoat with acetone was next to useless. The only place it came off was in the area that had already been sanded. I lightly sanded the bowl with 220 grit sandpaper to break up the surface of the shiny coat. Once that was done I was able to scrub it off with acetone quite easily. In the next photos you can see the repaired crack. It was quite large.
I took photos of the repaired crack to show the extent of it. The band fortunately covered the entire cracked area so it provided stability to the glued crack. Unfortunately it also covered up half of the stamping on the left side of the shank.
I used some Weldbond white all-purpose glue to glue the band in place on the shank. I applied it with the tip of the bottle and spread it around with my finger tip to get good coverage. I pressed the band in place on the shank.
While the band repair was drying I worked on the stem. I broke up the oxidation on the surface by wet sanding with 1500-2400 grit micromesh sanding pads. I wiped the stem down with a damp cloth. I scrubbed the stem with Before & After Pipe Stem Deoxidizer and was able to remove more of the oxidation. This was a labour intensive effort and took a lot of scrubbing with the solution and paper towels. When there was no more brown coming off the stem I scrubbed it with Before & After Pipe Polish – both Fine and Extra Fine to further address the oxidation.
You can see from the above photos that much of the oxidation had been removed but under a bright light such as the camera flash the oxidation still showed. At this point I had a decision to make – either scrub the stem with more of the deoxidizer or use my tried and true method of micromesh sanding pads. I chose to use the pads. I wet sanded it again with 1500-2400 grit pads and rubbed it down with Obsidian Oil. I dry sanded it with 3200-12000 grit pads and gave it a coat of Obsidian Oil after each set of three pads. After the final set and another coat of oil I set the stem aside to dry.
While the stem dried I sanded the bowl with the micromesh sanding pads to polish the briar. I had decided not to stain the bowl but leave it natural with a light oil finish and a good buffing. I cleaned off the tarnish on the band with a jeweler’s cloth and polished it to a shine.
With the bowl and stem both hand polished I took the pipe to the buffer and buffed it with Blue Diamond on the wheel. I was able to raise more of a shine with the buffing on both the bowl and stem. Buffing the stem was a real interesting challenge – lots of twisting and turning to get the entire stem buffed. At one point I removed it from the bowl to make it easier to maneuver on the wheel. I gave the bowl and stem several coats of carnauba wax to protect it and buffed it with a clean buffing pad. I finished by hand buffing it with a microfibre cloth. It turned out pretty decent considering where it started. I don’t know if I would call it a chinrester or a shoulder rester as it is a big pipe. I do know that the original design to make it easier on the teeth of the pipeman may not apply here. In the original design the stem rested against the chin of the smoker. In this design unless the smoker has a jutting jaw there is no way that it can rest against the chin. Anyway, the finished pipe is shown in the photos below. Thanks for looking.

Space Age Technology for a Better Smoke?
Blog by Aaron Henson
There is a small antique store located along highway 195 in Eastern Washington that I have driven past many times on my way to job sites or family functions but never had the opportunity to stop. This past week I had little spare time on my way home and took the opportunity to stop in. Sitting on a table by the door were the only two pipes in the shop: a matching pair of white billiards – one bent and one straight – both in good exterior condition. Both pipes, and the stand they were on, came as a set and the price was such that I could not pass them up – I would have paid list price for just the stand. I knew nothing about the name stamped on the shank– the pipe – but I thought I would take the chance…. What could go wrong?
Once home, I was able to do a more thorough review of their condition. Both pipes were in about the same condition, the rims were covered with a heavy crust of lava and the bowls had a nice thick cake built up on the sides. And they both had a strong smell of aromatic tobacco. The outside of the both bowls were in very good condition considering the painted finish; no worn spots, dents or discolorations. The straight billiard has a very small chip in the rim and had two pin-point sized flaws in the paint but the paint on the bent was flawless.
The stems are nylon and had some tooth dents around the button. The dents were deep but not to the point of needing filled. Both airways were clear, but were restricted with a thick layer of tar. Removing the stem revealed an o-ring set in a groove in the tenon. Looking into the shank I saw no briar only plastic.
Even more intrigued now, I searched for the pipe on-line and I found the following on Pipedia:
In 1963, Super-Temp Corporation began making plastic pipes with pyrolytic graphite bowl liners. They were called the pipe. In 1965, Super-Temp contracted to market their unique pipes through Venturi, Inc., the company which sold Tar Gard cigarette filters. Colors and stripes began to be offered circa 1967. About 1970, THE SMOKE pipes were added to the line – they were non-traditional shapes with a less expensive bowl liner. Venturi pipes were added around 1972 – they had no liner in the bowls at all. The pipes were out of production by 1975.
Plastic pipes? Pyrolytic graphite bowl liners? Granted, I missed out on the 1960’s, but I did get to live through the aftermath and I remember the cultural fascination with space-age materials as they tried to find a place in our daily lives… but I had no idea they made space-age pipes. An ad in the December 1967 issue of Esquire, captures this fascination.
I felt that I needed to do a little more research and found that the pipe has a small following of dedicated fans. I eventually came across a web site authored by Billie W. Taylor II, PhD that is dedicated to the history and novelty of these pipes. He has amassed what could easily be called the definitive work on the pipe: http://www.thepipe.info/sitemap.html
While there is no way I could (or would) share all the information in Dr. Taylor’s website, there are a couple of things I think worth sharing. The first is the pipe’s unique anatomy. The body is made of compression molded Bakelite stummel with a graphite bowl insert. There is an insulating air gap between the bowl insert and the bowl body.
Pyrolytic graphite has been manufactured since the 1950s and is used as heat shields in rockets and reactors, it being an excellent conductor of heat. As the story goes, in 1963, a machinist at Super-Temp was machining graphite rods into cups to be used in the nuclear power industry. Being an avid pipe smoker and seeing the cups were about the size of his pipe, he made one that fit into the bowl of his pipe. Finding that is smoked well, he took the idea to his management and the pipe was born.
Early stems for the pipe were made of nylon while many stems made after the first year were made of Bakelite – addressing complaints that the nylon was too soft. The tenon has an o-ring set in a groove to ensure a seal between stem and stummel.
Although it was originally offered only in black, in 1967 the pipe came in nine different shapes and offered in standard red, green, blue and white. The pre 1970’s pipes were coated with a two-part epoxy paint while those after 1970 used an acrylic paint. Additional colors and color schemes were offered throughout the life of the brand but some of the ‘unique’ colors were the result of fading of the acrylic paint.
Other than stem material, I did not have much to go on to date these two pipes. But because both stems are nylon I will estimate that they were early runs and date to the mid-1960’s.
After what I read, I assumed that the typical briar pipe restoration techniques would apply. I was worried about damaging the graphite liner and not sure what chemicals might do to it. I also assumed that the bowls should not be scraped or sanded. Since both of the pipes I had bought had nylon stems, using alcohol on them was out. I kept researching and found a 1969 magazine ad that gave me an idea:
Putting the pipes in my wife’s dishwasher was out of the question… I didn’t even ask! Additional reading through thepipe.info website I found a cleaning guide that began with a soak in warm water with a small amount of mild dish soap. This began to loosen the hardened tars and lava.
I used the paper stick of a cotton swab, cut at an angle, to remove much of the buildup in the corners of the mortise and the airway. The remainder of the buildup required half a dozen soaks in soapy water and a lot of cotton swabs and pipe cleaners. I finally got the internals cleaned and in the end I didn’t use anything more abrasive than a paper towel.
The shank still had the ghosts of the old tobacco. So I went back with an alcohol soaked cotton swab and wiped down the inside of the shank again. Surprise, surprise, it came out dirty. Nothing seems to cut though the old tobacco oils and residue like alcohol.
I also soaked the stems in warm soapy water. Using a small nylon bottle brush I was able to soak and scrub repeatedly until the bulk of the crud was removed. I continued on with bristled pipe cleaners but even after the pipe cleaners came out clean I could still smell the old tobacco smell. I could not figure out where it was coming from until I removed the o-rings. I didn’t think about this at right away, but of course there was a lot of build-up in the grooves.
To raise the tooth dents, I placed the stems in some near boiling water. I have tried to use direct flame or a heat gun in the past but have found them to be too hot and they melt the nylon. The hot water did raise the dents some but it also straightened the stem of the bent pipe. Another dip in hot water and molding the stem over a large diameter dowel restored the stem’s shape. No pictures of this…. I am afraid that both hands were busy.
To completely remove the tooth marks I needed to sand them with 220 grit paper. I removed the deeper scratches of the 220 grit with 500 grit and 1000 grit paper. I finished up the stems by wet sanding with 1500 – 2400 micro mesh pads. The nylon is soft and the scratches hard to remove. Several times I had to drop back to a courser pad to remove a stubborn scratch. I finished polishing with the 3200 – 12000 pads and a light amount of mineral oil.
I took the pipes to the buffing station and used red diamond on the stems only, – I didn’t want to risk damaging the paint with even a light abrasive. Dr. Taylor’s website suggested auto wax as a finish but I opted for the more traditional three coats of carnauba wax over all.
The end of the pipe of occurred in about 1975 with complications of corporate business plans and a lack of following. Estimates say that approximately three million units were sold during the ten year life of the pipe. My own inexpert opinion, nothing will ever truly compete with briar for a good smoke.
This is the best pictures I got of the graphite bowl liners.


