Daily Archives: November 21, 2015

Peterson 999 Deluxe Restoration


By Al Jones

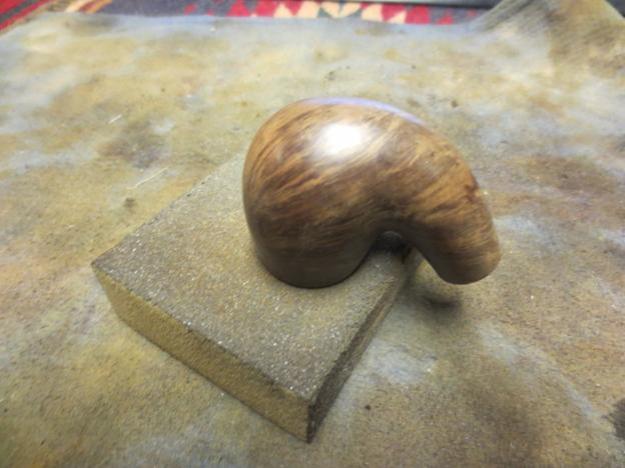
The Peterson 999 is an iconic Rhodesian shape and one of my favorites. I prefer the chubbier, pre-Republic versions of that shape and have a pre-Republic “Sterling” 999 in my collection. This pipe was found on eBay and appeared to in great condition.

I enjoy reading Mark Irwins “The Peterson Pipe Connoisseur & Collector” blog. The entry linked below, reviews nomenclature on pre-Republic pipes makes it easy to get a date range on a particular piece. Because Peterson used older stamps throughout various eras, only silver hallmarked pipes can be dated to a specific year. This pipe has the stacked “Made In Ireland” which was used between 1922 and 1938.

Mark Irwins Pre-Republic Blog Entry

Prior to 1920 it was rare for a country of origin to be stamped on the pipe, just Peterson’s Dublin on the band. After 1921/22,If it is stamped “MADE IN IRELAND” and the “Made in” is stacked over “Ireland” or “MADE IN EIRE” or several other forms, it was made between 1922 and 1938.

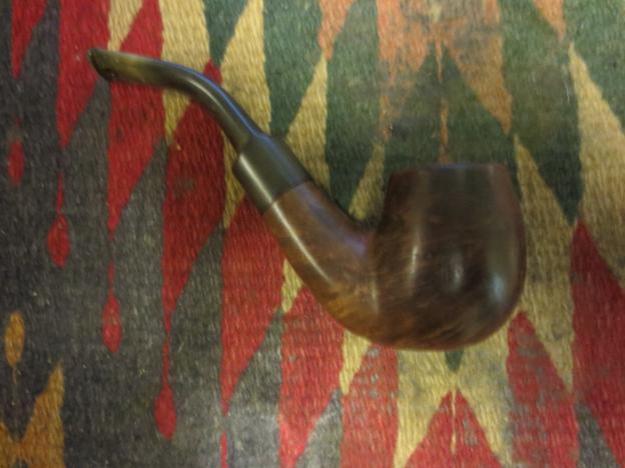
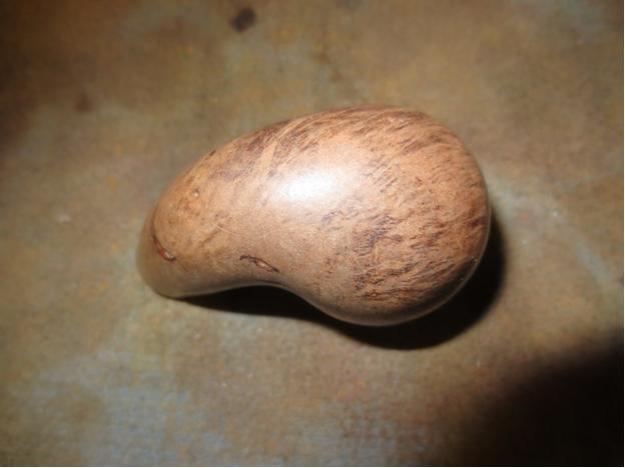
The Deluxe grade was the highest grade Peterson for that era and this one has some nice grain.

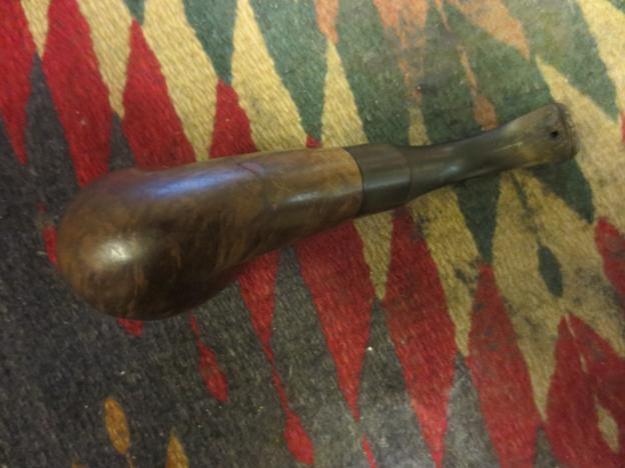
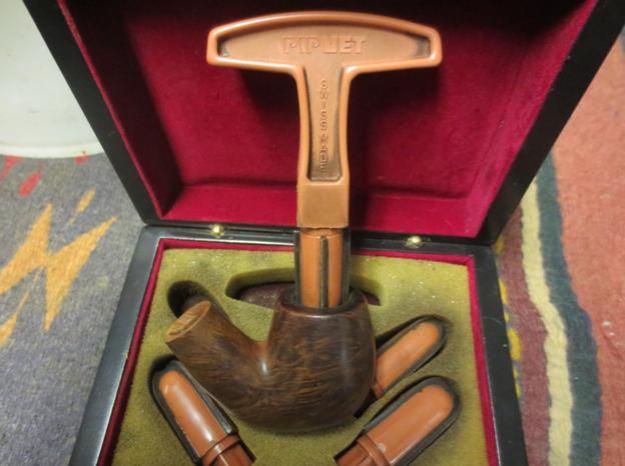
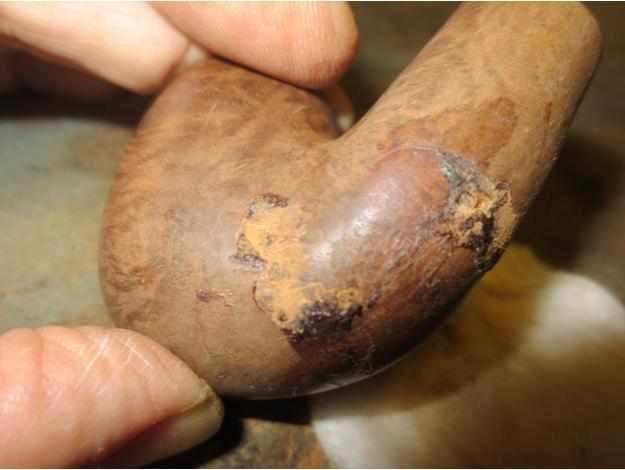
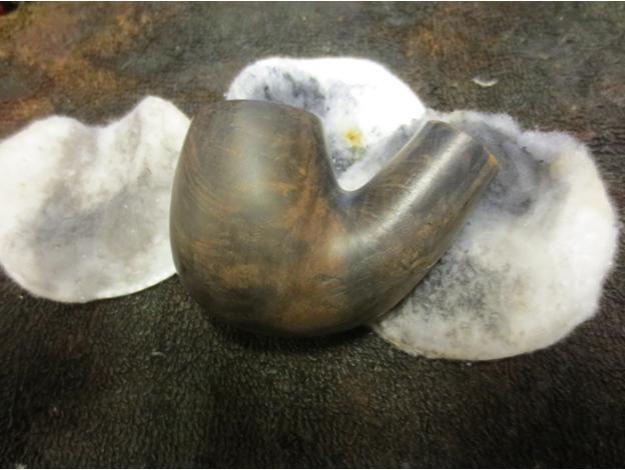
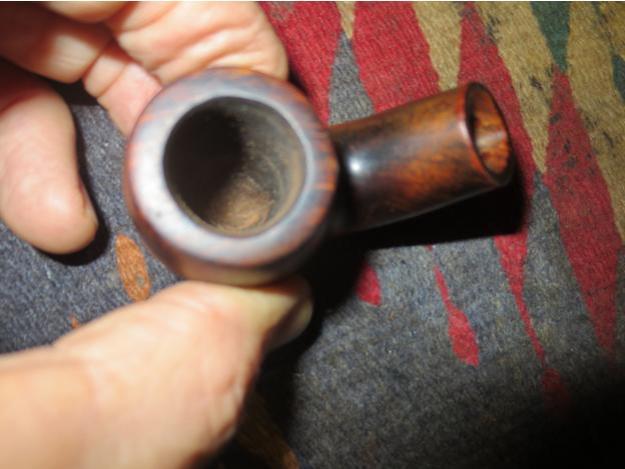
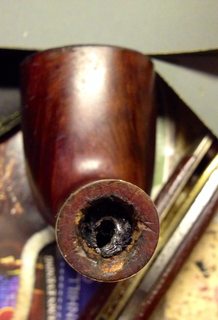
The photos from the seller were very good and I didn’t bother to take any “before” pictures of my own. The stem had some oxidation, but appeared to be free of any teeth marks. The gold “P stem logo looked perfect. The bowl had a few nicks and some circular marks on the bowl top that I hoped could be removed. The nomenclature was in great condition. Below is the pipe as advertised.

Peterson_999_Deluxe_eBay

Peterson_999_Deluxe_3eBay

Peterson_999_Deluxe_4eBay

Peterson_999_Deluxe_6eBay

There was a small amount of cake, which was reamed and then the bowl was soaked with alcohol and sea salt. I used some 2000 grit paper to remove the marks on the bowl top, which lightened the stain. I applied some diluted Fieblings Medium Brown to the bowl top, just above the top ring. The stain blended in nicely with the factory finish.

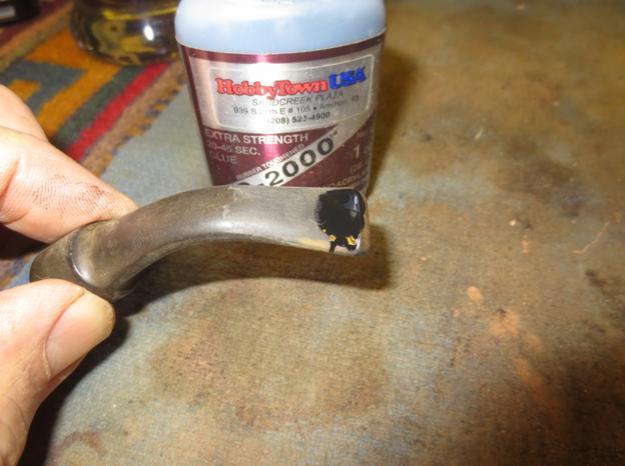
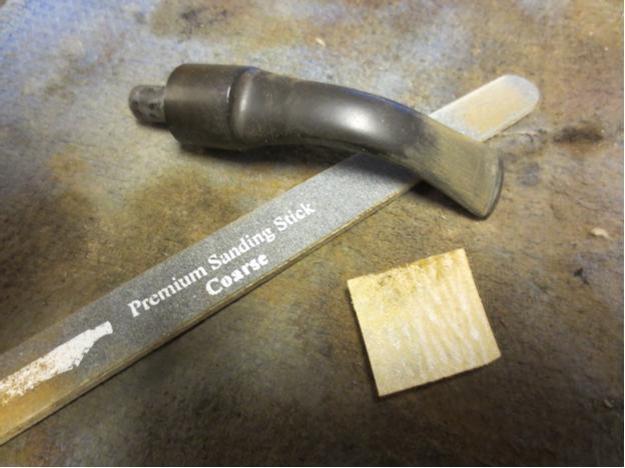
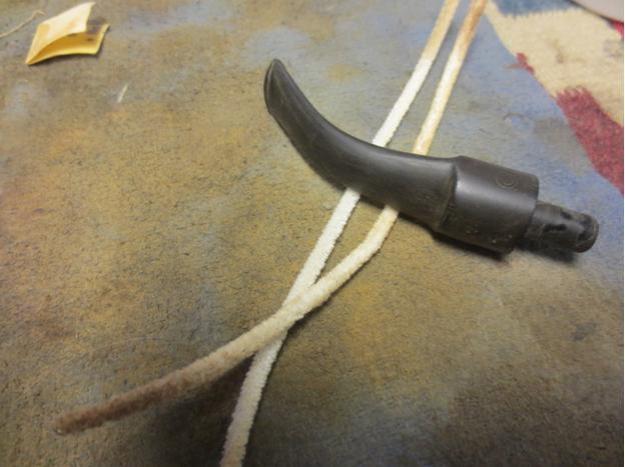
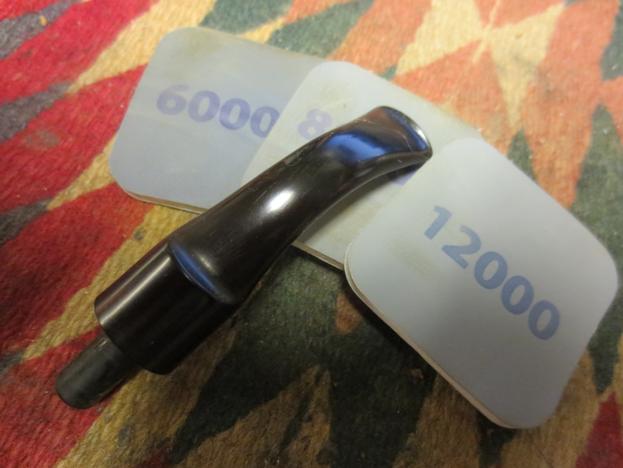
The oxidation on the stem was heavier than it appeared. I started with 800 grit wet paper and then moved down thru 1500 and 2000 grades. 8000 and 12000 grade micromesh was used next. The stem was buffed lightly with White Diamond and then Meguiars Plastic polish. I was careful around the gold “P” logo and didn’t want to damage it. That made it tricky to remove the oxidation in that area and I wasn’t able to get all of it. I may go back later and revisit that section of the stem. The stem is threaded for the “chimney” but it is missing.

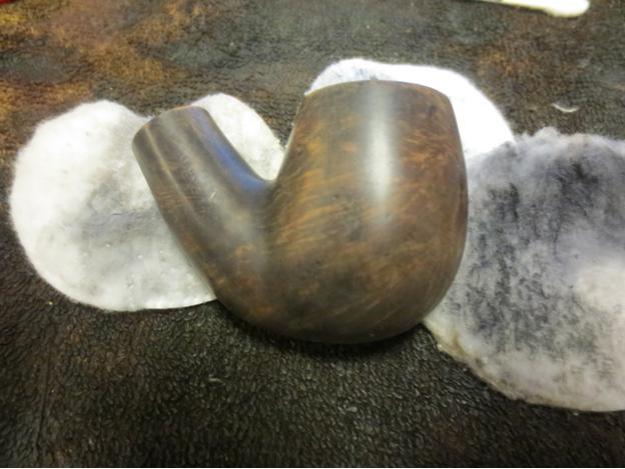
The bowl was buffed with White Diamond (staying away from the nomenclature areas) and then several coats of Carnuba wax.

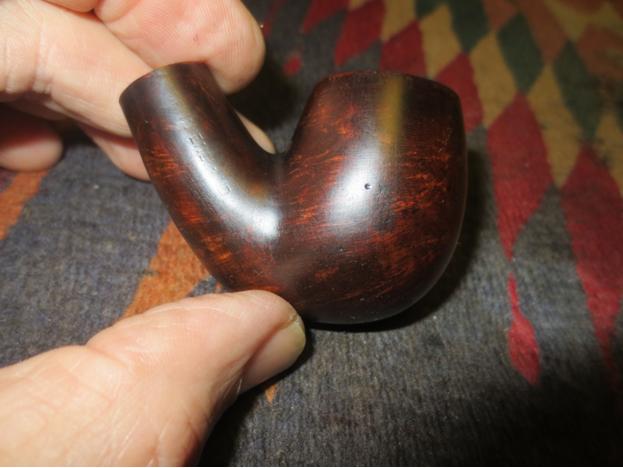
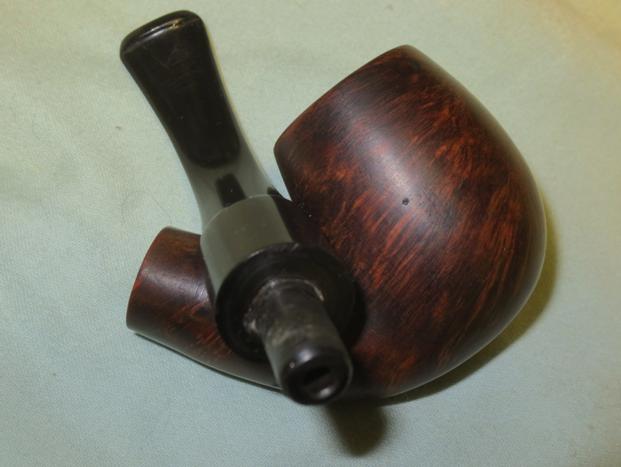
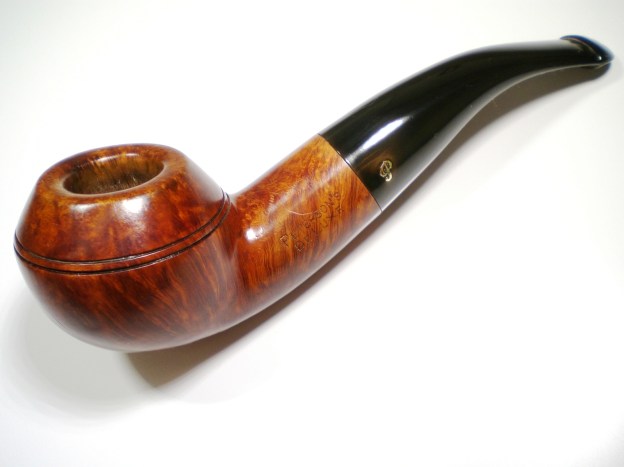
Below is the finished pipe.

Peterson_999_Deluxe_Gallery

Peterson_999_Deluxe_Final (4)

Peterson_999_Deluxe_Final (6)

Peterson_999_Deluxe_Final (5)

Peterson_999_Deluxe_Final (3)

Peterson_999_Deluxe_Final (8)

Peterson_999_Deluxe_Final (9)

Peterson_999_Deluxe_Final (7)

?

?

?

?

Peterson_999_Deluxe_Gallery

A Mysterious Little Bent Billiard Brought to Life


Blog by Steve Laug
This is another pipe I picked up at the antique mall in Idaho Falls. It is a bit of a mystery pipe in that the stamping is faint on the left side of the shank. On the right side it is stamped Made in England. On the right side it is missing some of the first letters but is stamped _ ANTE_ over London. Searching through Who Made That Pipe the best option I found for that combination of letters was a CANTERBURY. The brand was made by Comoy’s. There is a very faint C in a Circle on the stem that also matches the CANTERBURY stamping so I think that may well be the stamping on this mystery pipe. The pipe was in pretty rough shape. The previous owner was in the antique mall when I bought it and he walked me through its deficiencies as he saw them. He had wrapped a piece of Teflon tape around the tenon to hold it in the shank. The stem itself had deep bite marks on the top and a large bit through on the underside near the button. The bowl had some fills on the left side and the underside that were quite large. The finish was shot and was dirty with lots of dents and dings. The rim was smooth but had tars and lava overflow. The bowl was heavily caked and the cake was as hard as rock. The inner edge of the rim was slightly damaged and out of round. The outer edge was clean with a small fill on the front of the bowl near the rim.Cant1

Cant2

Cant3

Cant4 I took the next photos to give a clear picture of the bite through on the underside of the stem and a close up of the thick cake in the bowl.Cant5

Cant6 I tried to ream the bowl with a PipNet reamer and barely made a dent in it. It was very hard. I decided to let it soak in an alcohol bath to soften the cake. I left it in the bath overnight.Cant7

Cant8

Cant9 When I took it out of the bath the finish was clean. The briar looked pretty good. The grain was quite nice. The fills softened and were white putty that would need to be removed and refilled.Cant10

Cant11

Cant12

Cant13 The softened cake came out easily with the PipNet reamer and then I scraped it further with a pen knife. The next photo shows the cleaned out bowl. I wiped down the rim with a soft cloth to remove the tars.Cant14 I lightly topped the bowl with a medium and fine grit sanding block to clean up the rim surface. The cleaned up rim looked very good.Cant15

Cant16 I cleaned out the bowl and shank with alcohol, cotton swabs and pipe cleaners.Cant17 I picked out the putty fills with a dental pick. I filled in the holes with briar dust and then covered that with super glue. I added more briar dust to smooth out the repairs.Cant18

Cant19 I sanded the bowl repairs with 220 grit sandpaper and then with a medium and a fine grit sanding sponge. I forgot to take photos after sanding the bowl.

I set the bowl aside and worked on the stem. I cleaned out the bite marks on the top of the stem and the underside with a dental pick, alcohol and cotton swabs. Once they were clean I put some charcoal powder and black superglue on the bite marks on the top of the stem and leveled the repair with the edge of the dental pick. I set it aside to dry.Cant20 Once the topside repair was cured I put Vaseline on the point of an old nail file that I use to repair bite throughs. I inserted it in the slot on the button. I mixed some black super glue and charcoal powder and filled the hole in the stem with the mixture. I spread it and leveled it with a dental pick. When the repair was finished I set the stem aside to cure once again.Cant21

Cant22 The next morning I sanded the repairs on the top and bottom of the stem with 220 grit sandpaper and with a series of sanding sticks to smooth out the surface. The sanding sticks allowed me to get a good angle on the sharp edge of the button. I started with the coarse stick and worked my way up to the fine stick.Cant23

Cant24 I cleaned out the inside of the stem to remove the Vaseline and the dust from sanding using alcohol, pipe cleaners and cotton swabs. I heated the tenon with a lighter and inserted an ice pick in the airway in the tenon to expand the tenon enough to get a good solid fit in the shank.Cant25 With the stem repair complete and the pipe clean inside and out I decided to do some contrast stain work on the bowl. I stained it with a black aniline dye for the first coat. I wanted to blend in the fills a bit and also highlight the grain. I was aiming for a darker colour in the finished product so this was the first step.Cant26 I applied the stain and then flamed it. I wiped it off with alcohol on cotton pads to lighten the surface coat while leaving the black in the grain and the fills.Cant27

Cant28 I sanded the bowl with micromesh sanding pads to remove more of the finish and then gave it a top coat of a medium brown stain. I applied it and flamed it before hand buffing it.Cant29

Cant30 The colour of the pipe was still too dark to really make the grain pop so I sanded it with a medium and a fine grit sanding sponge to further remove some of the dark colour and to also minimize the scratches in the briar. I wiped it down with acetone to lighten it further.Cant31

Cant32

Cant33

Cant34 With the finish on the bowl complete I sanded the stem with micromesh sanding pads. I wet sanded with 1500-2400 grit pads and dry sanded with 3200-12000 grit pads. Between each set of three pads I rubbed the stem down with Obsidian oil. On the last rub down I let it sit until it was absorbed.Cant35

Cant36

Cant37 I buffed the pipe with Red Tripoli and White Diamond to further lighten the top coat of stain and to polish the stem. I then buffed the pipe with Blue Diamond and gave it multiple coats of carnauba wax. The finished pipe is shown below.Cant38

Cant39

Cant40

Cant41

Cant42

Cant43

Cant44

Revival of a Globetrotter: LHS Sterncrest 14K


Blog by Dave Gossett
Dave1

Dave2 A great pipe is reborn, the ad should read. This old LHS has been an extensive traveler throughout its long life. Plucked from the Mediterranean soil and carved in Brooklyn New York, traveling to the west coast, back to the east coast once more. From there it made its way to British Columbia, then again back to the east coast of America where it currently resides.

I received this pipe in an estate lot from California with the tenon and stinger broken off in the mortise. Someone had crudely tried to remove the broken tenon without success. I thought the pipe was a lost cause, but with little hope for a remedy I put out the bat signal for help. Steve Laug himself from Reborn Pipes answered the call. Off to British Columbia it went to undergo surgery from the master repairman.Dave3

Dave4 Here is the link to Steve’s great repair/rescue and stem replacement on this pipe.

Removing a Broken Metal Tenon from a LHS Sterncrest 14K

Back from surgery, Steve had sent me a fully functioning usable pipe.Dave5

Dave6 I started in on the usual ream and clean. Next I lightly topped the bowl and began working out the dents and scratches.Dave7

Dave8

Dave9

Dave10 Once I had a smooth clean stummel, I mixed up some Fiebings and tried to match the original finish.Dave11

Dave12 Sanding with 2500 grit I lightened the stain until I was close to the shade I wanted. I used a rag dampened with alcohol around the stampings to lighten those areas and blend in with the rest of the stummel.Dave13

Dave14

Dave15

Dave16