Tag Archives: waxing a stem

Restemming a Bruyere Krone Billiard


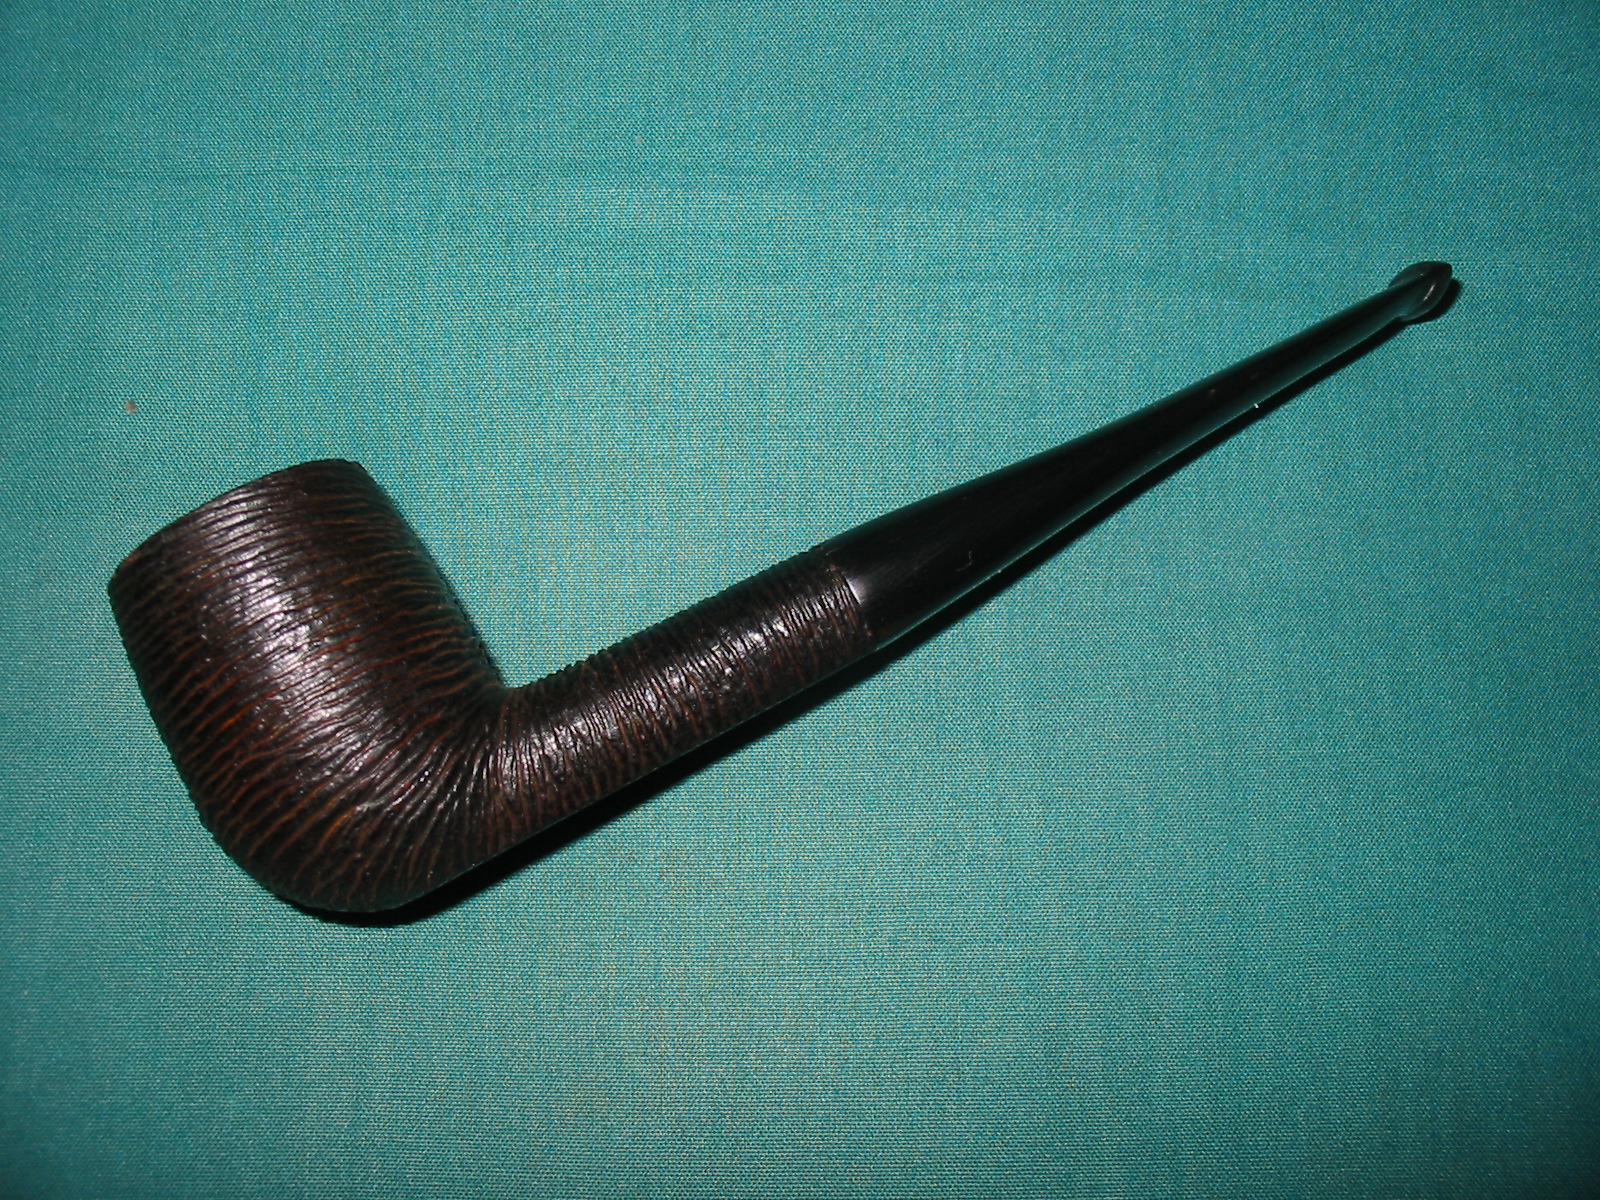
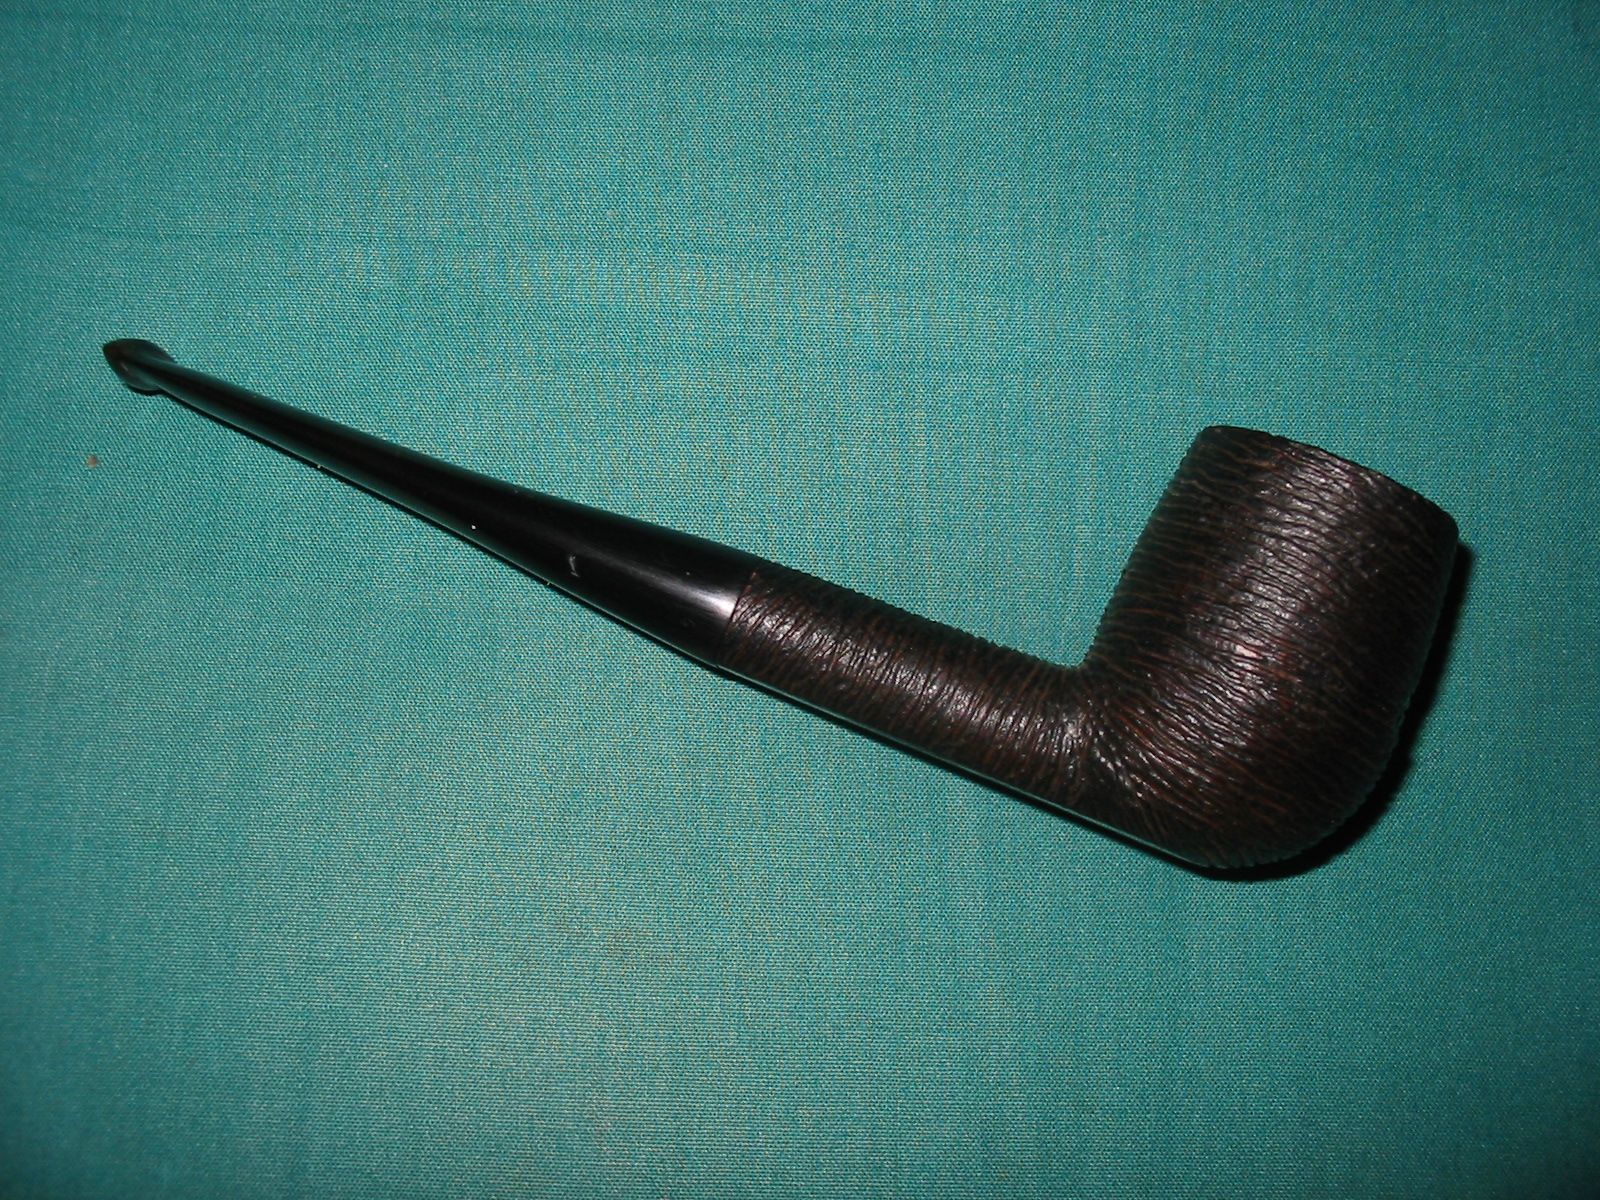
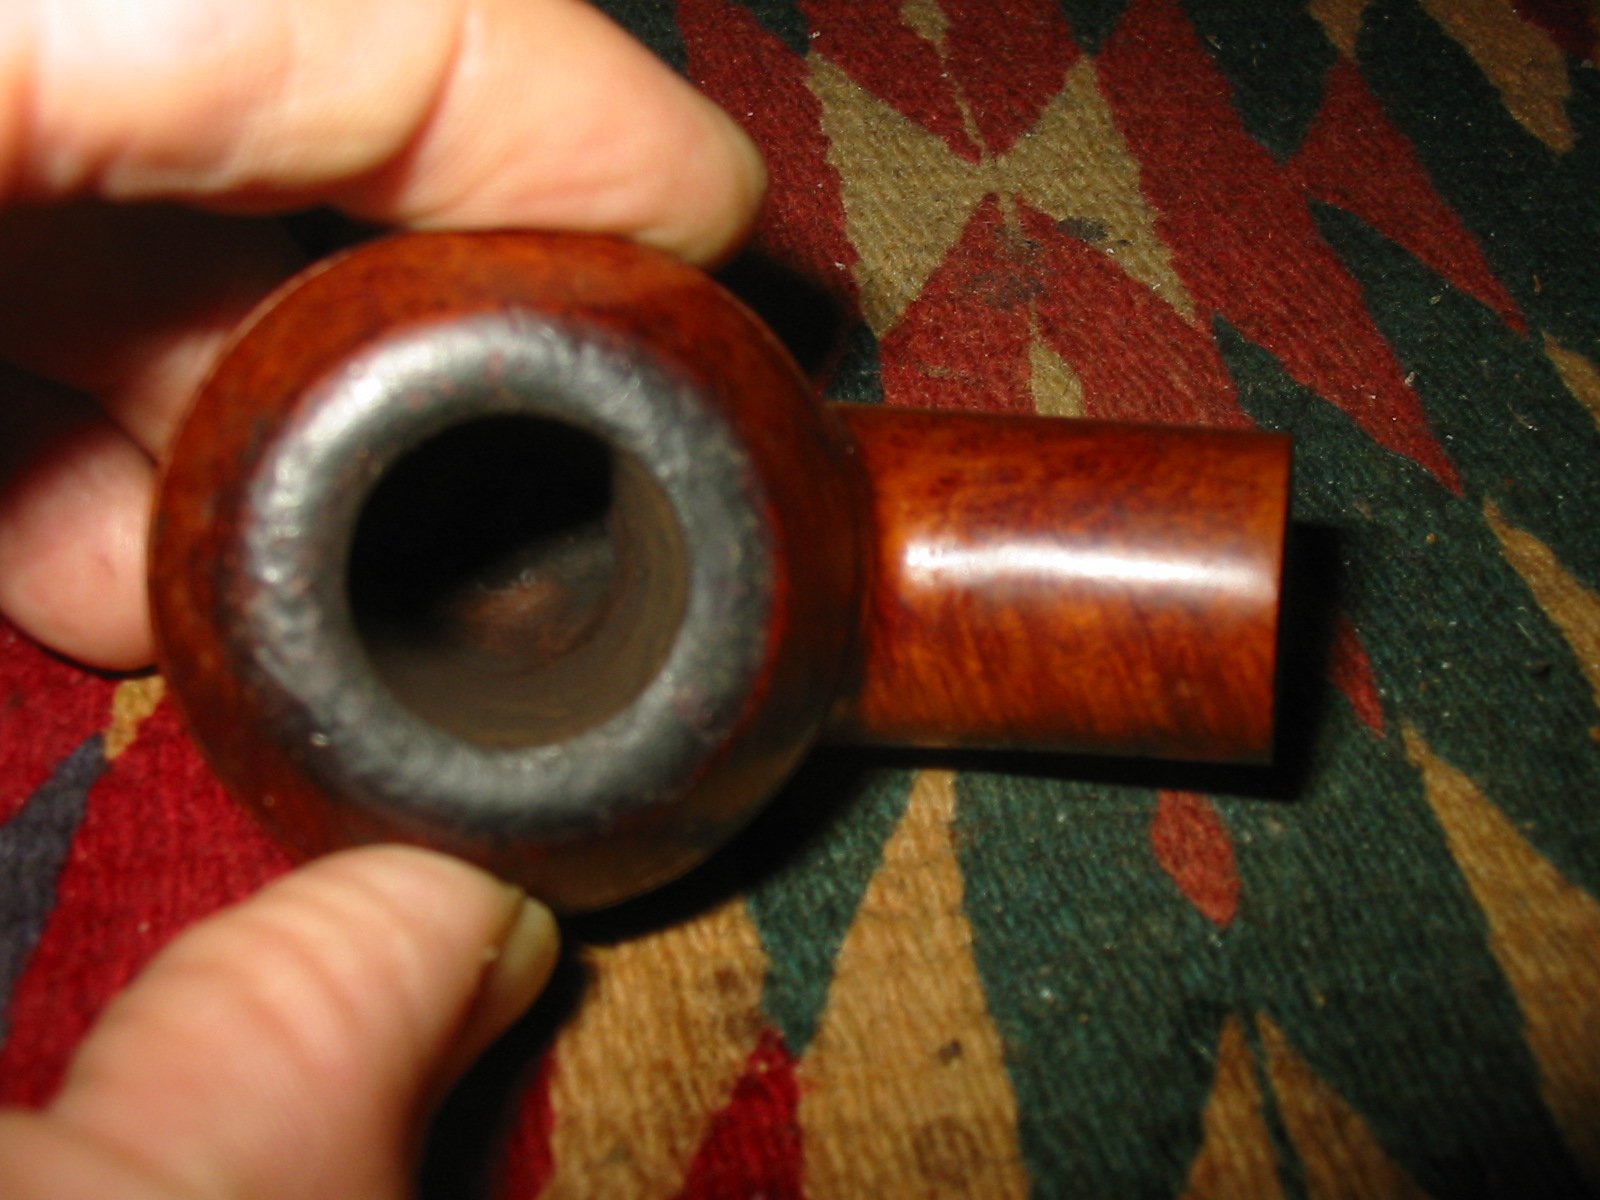
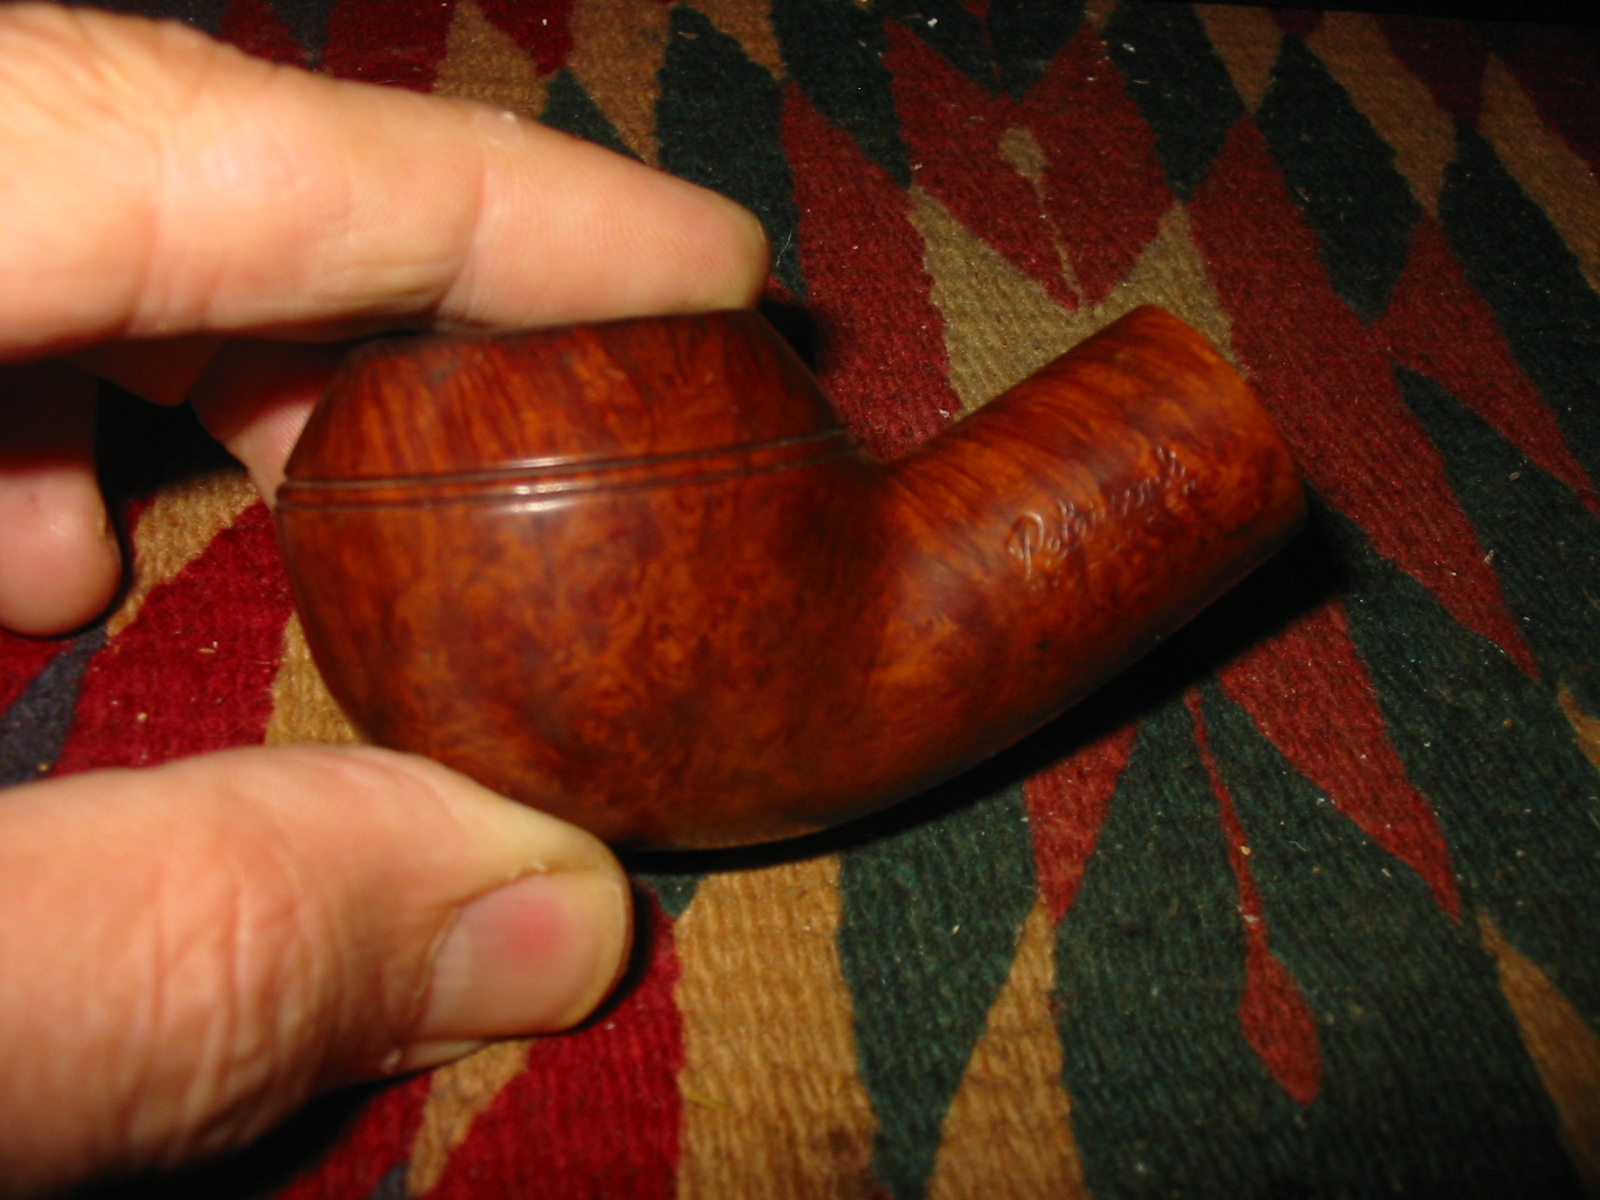
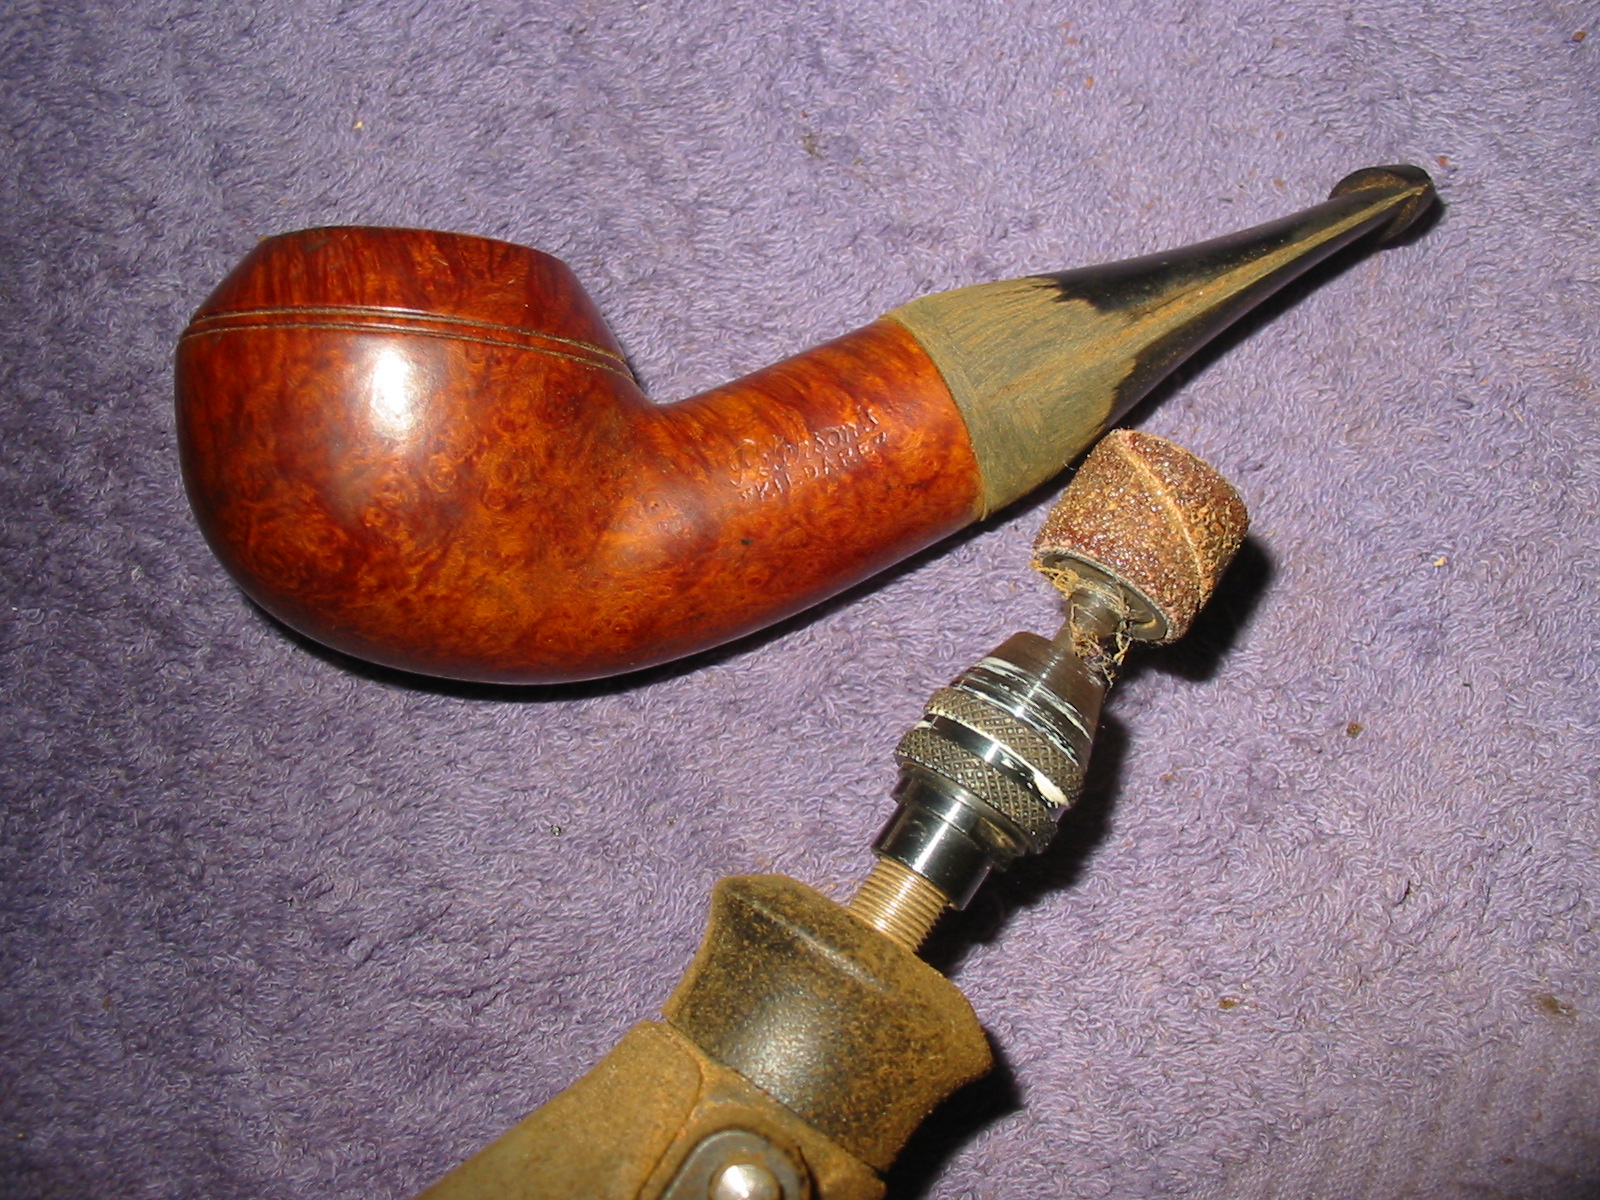
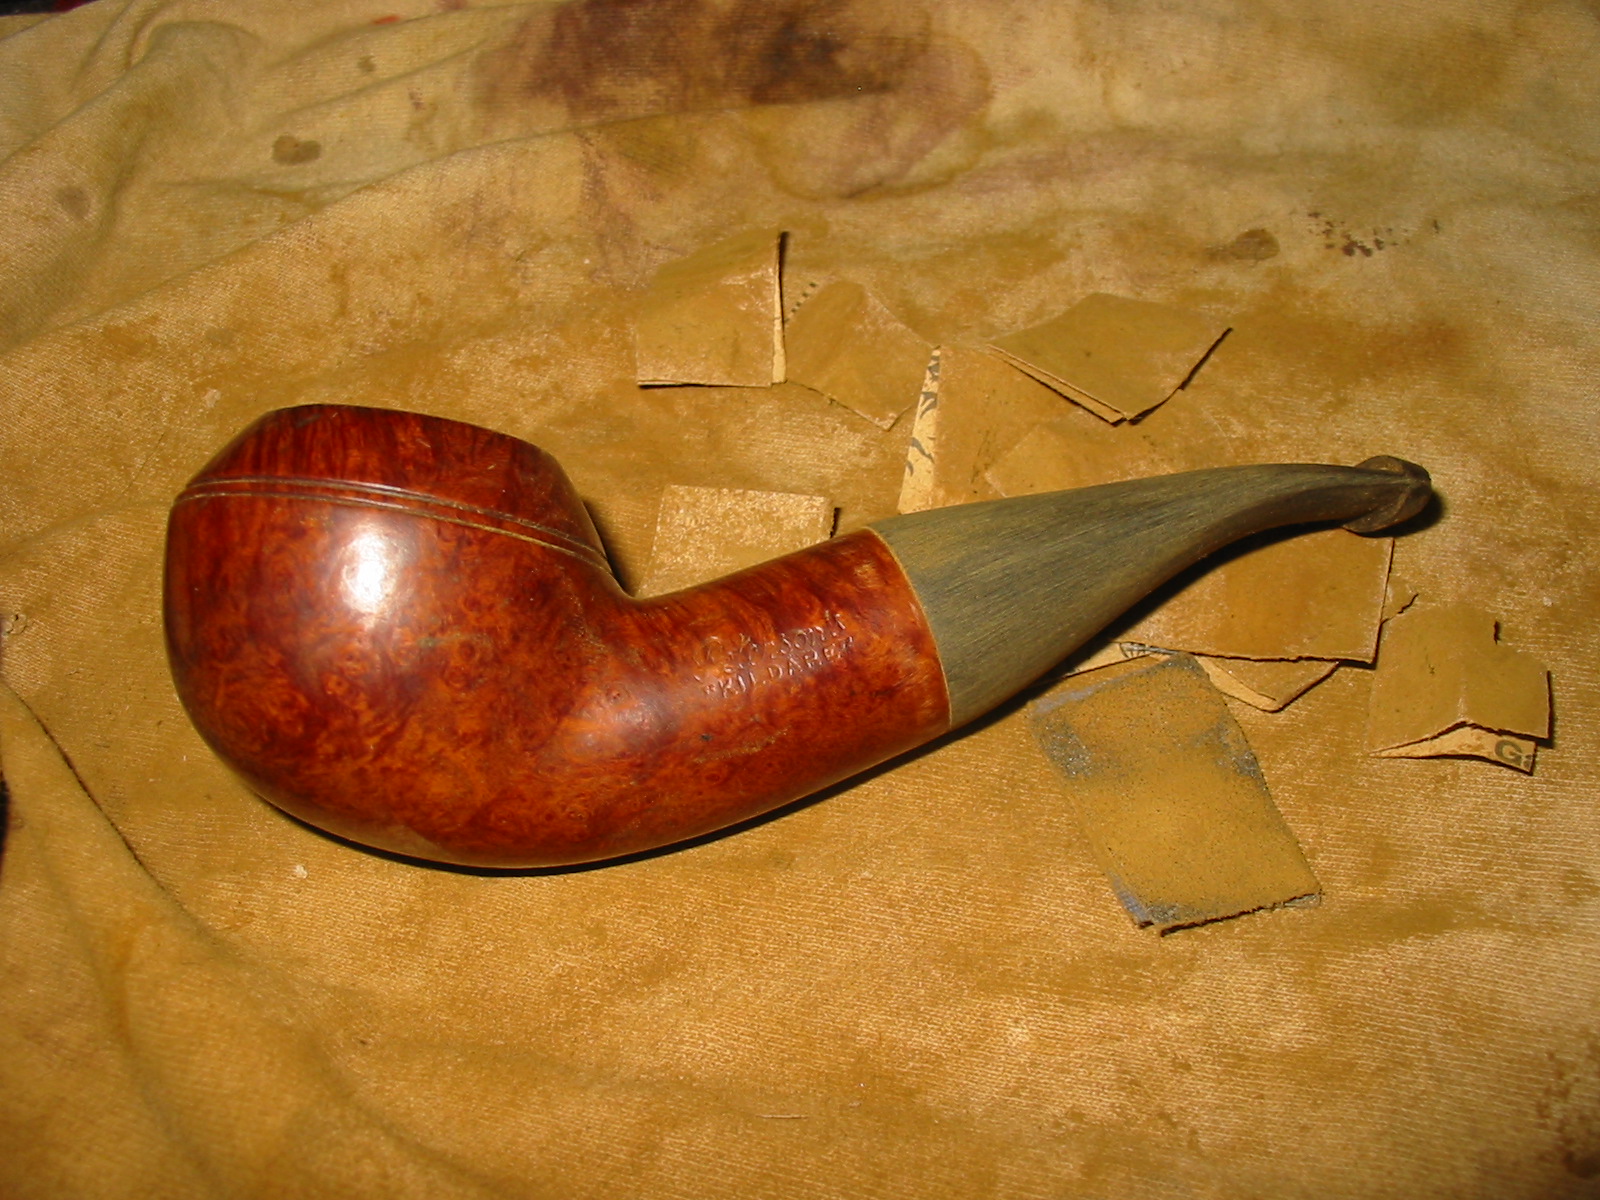
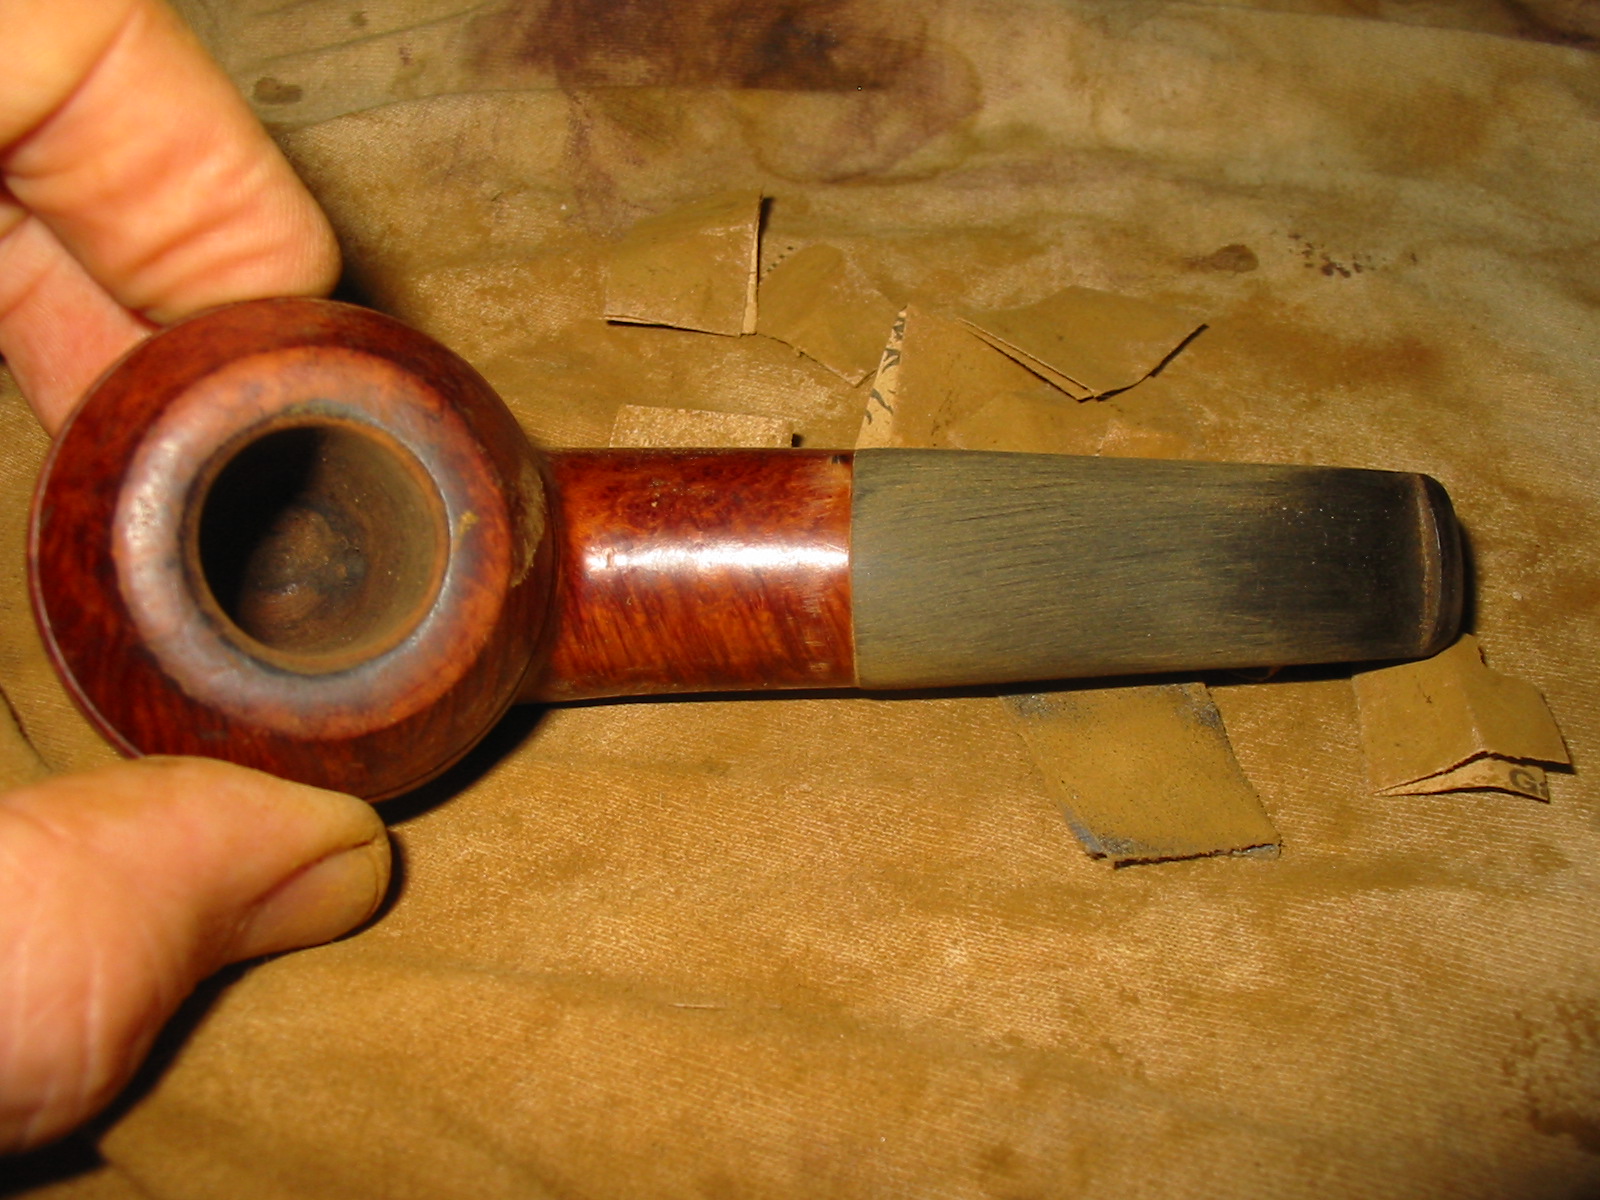
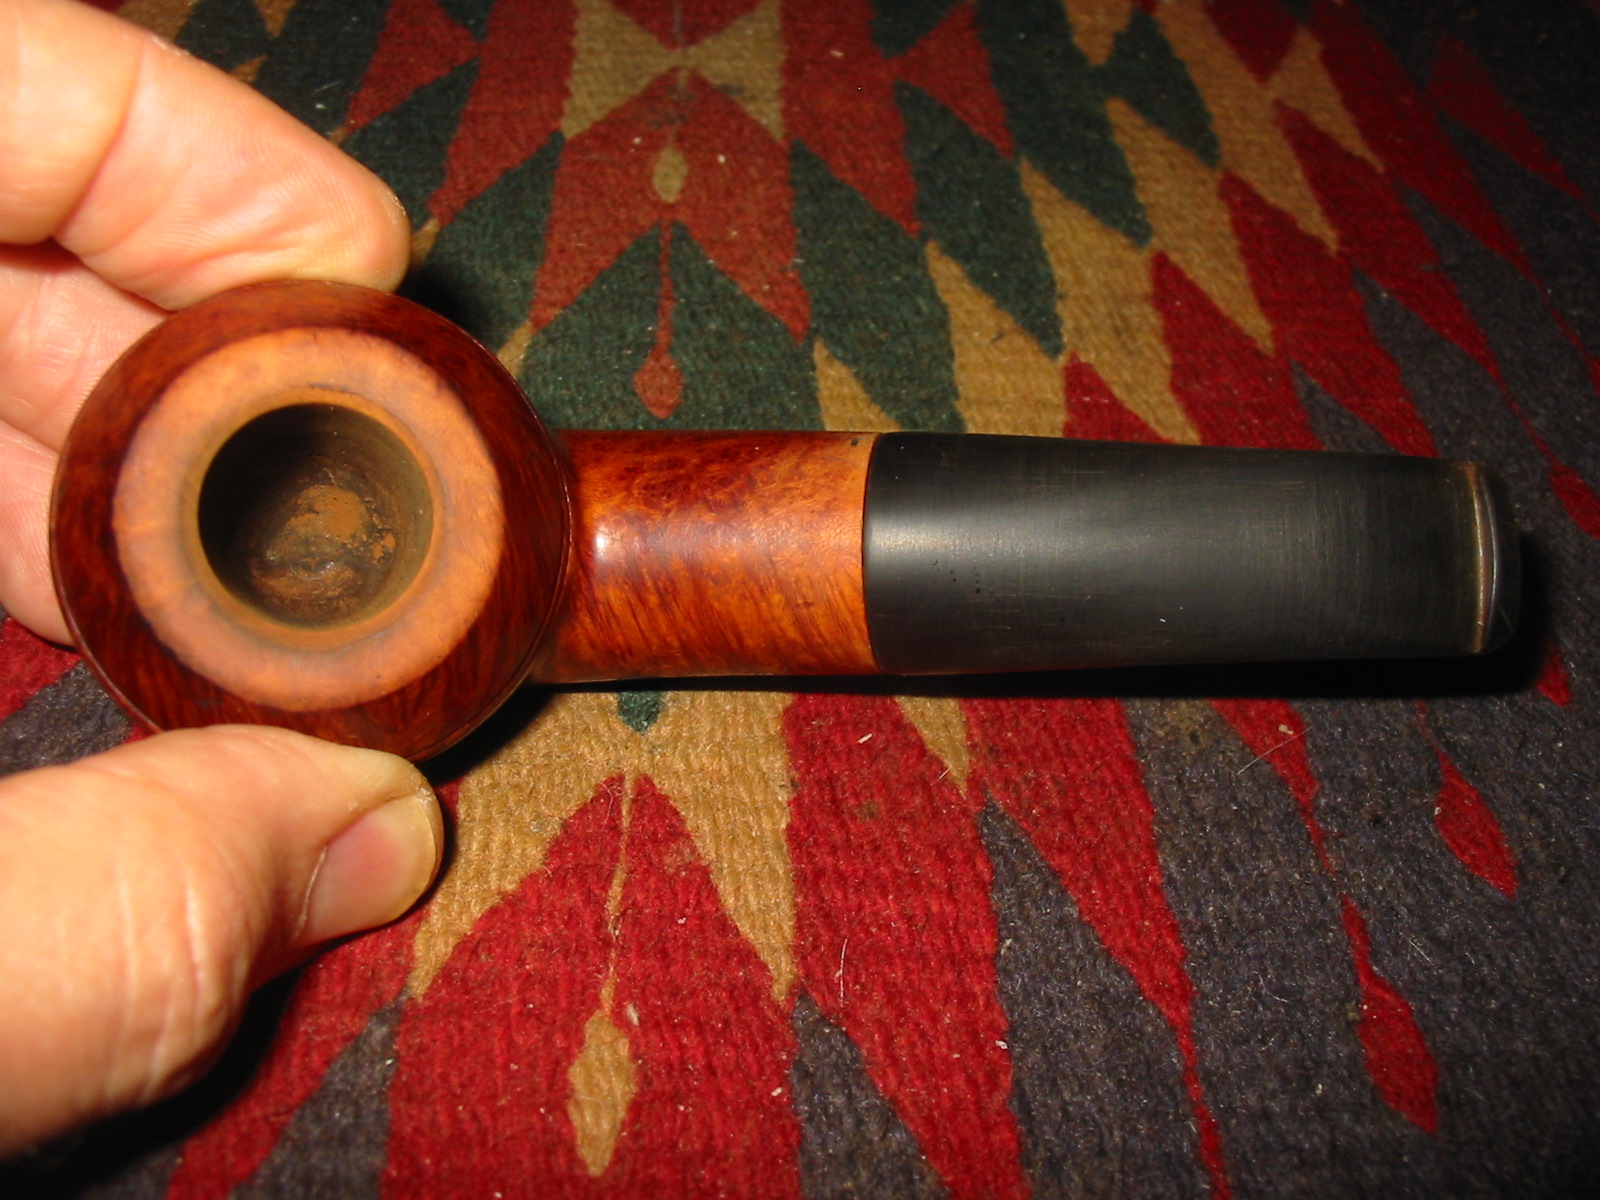
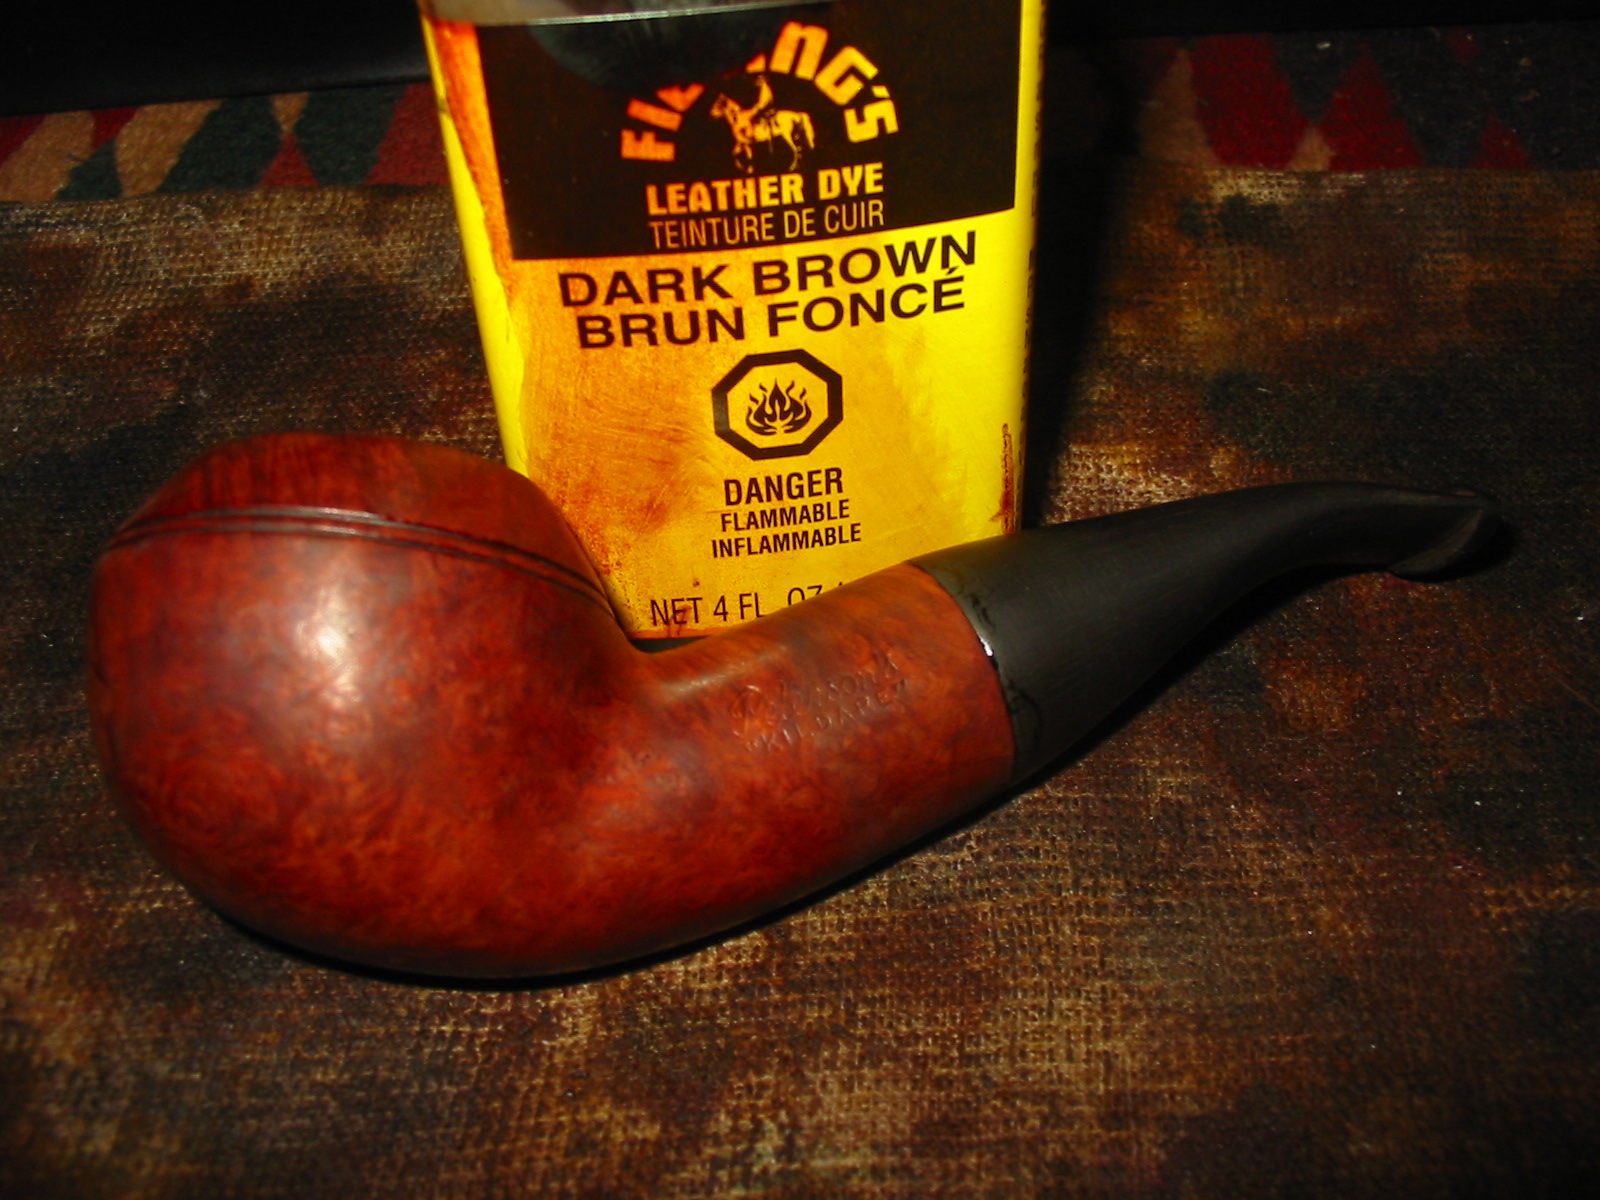
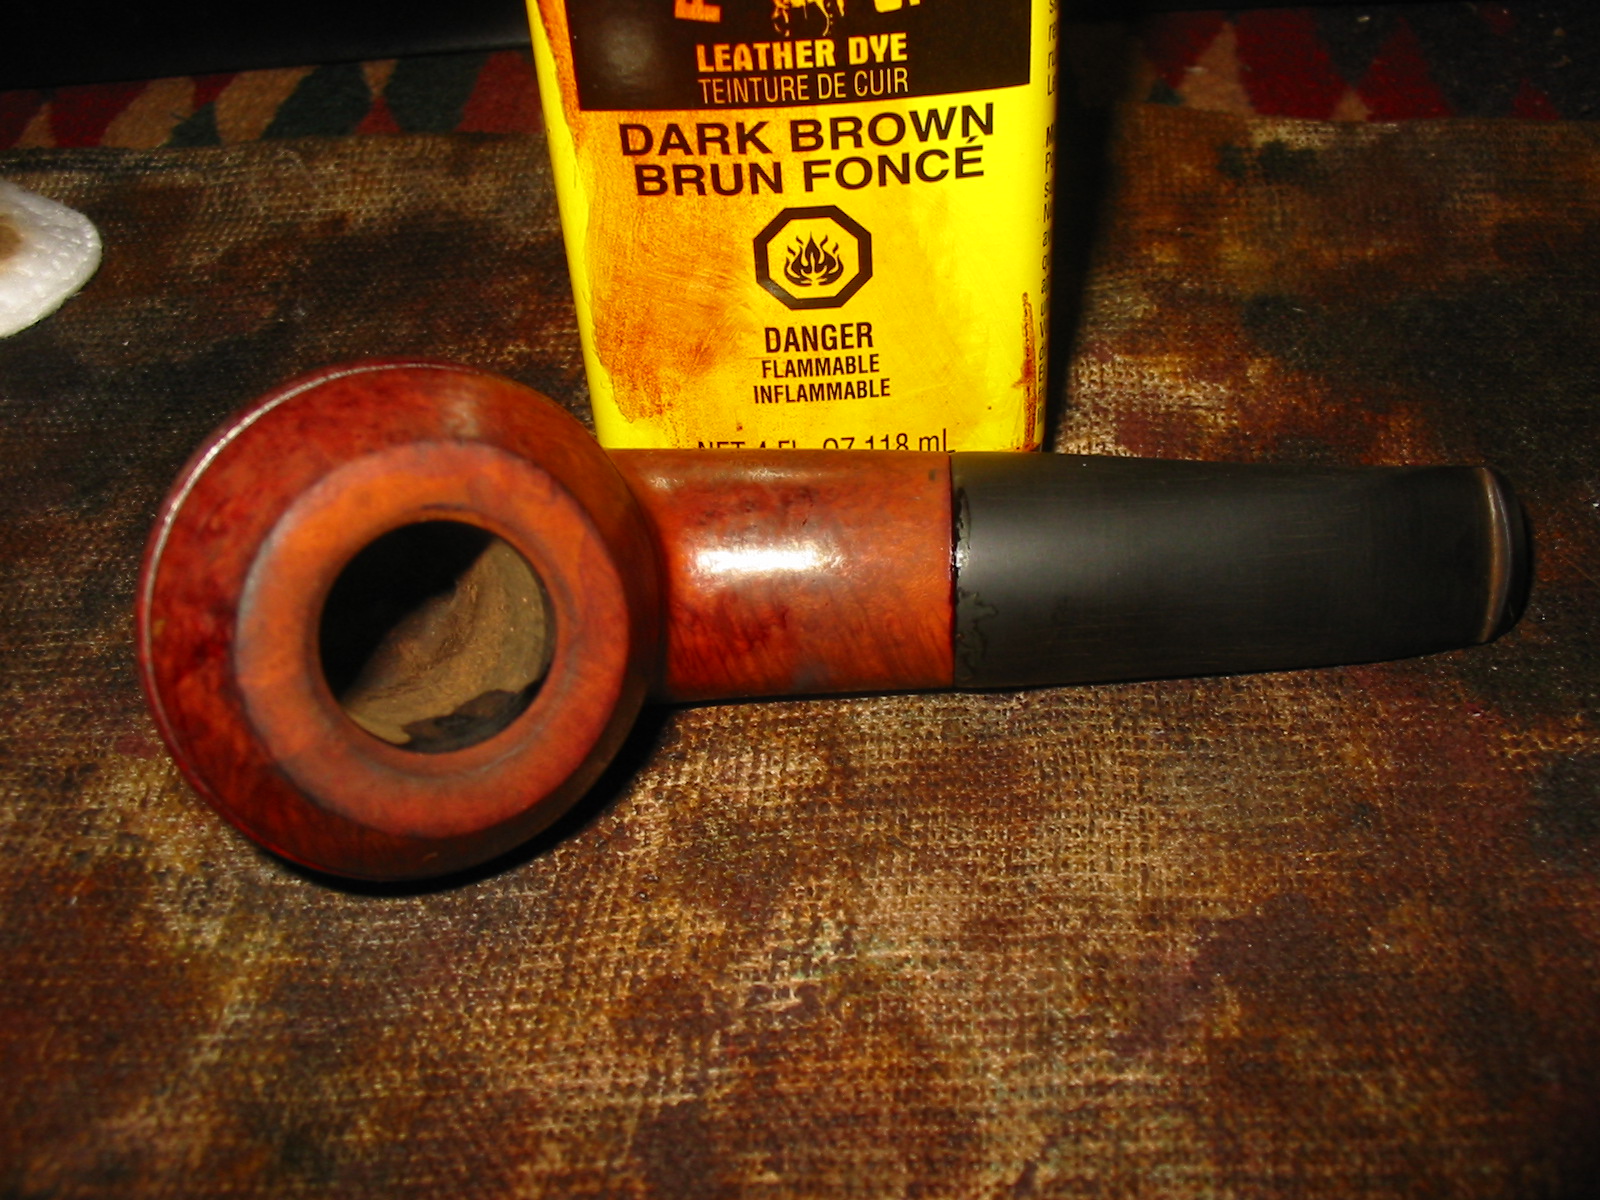
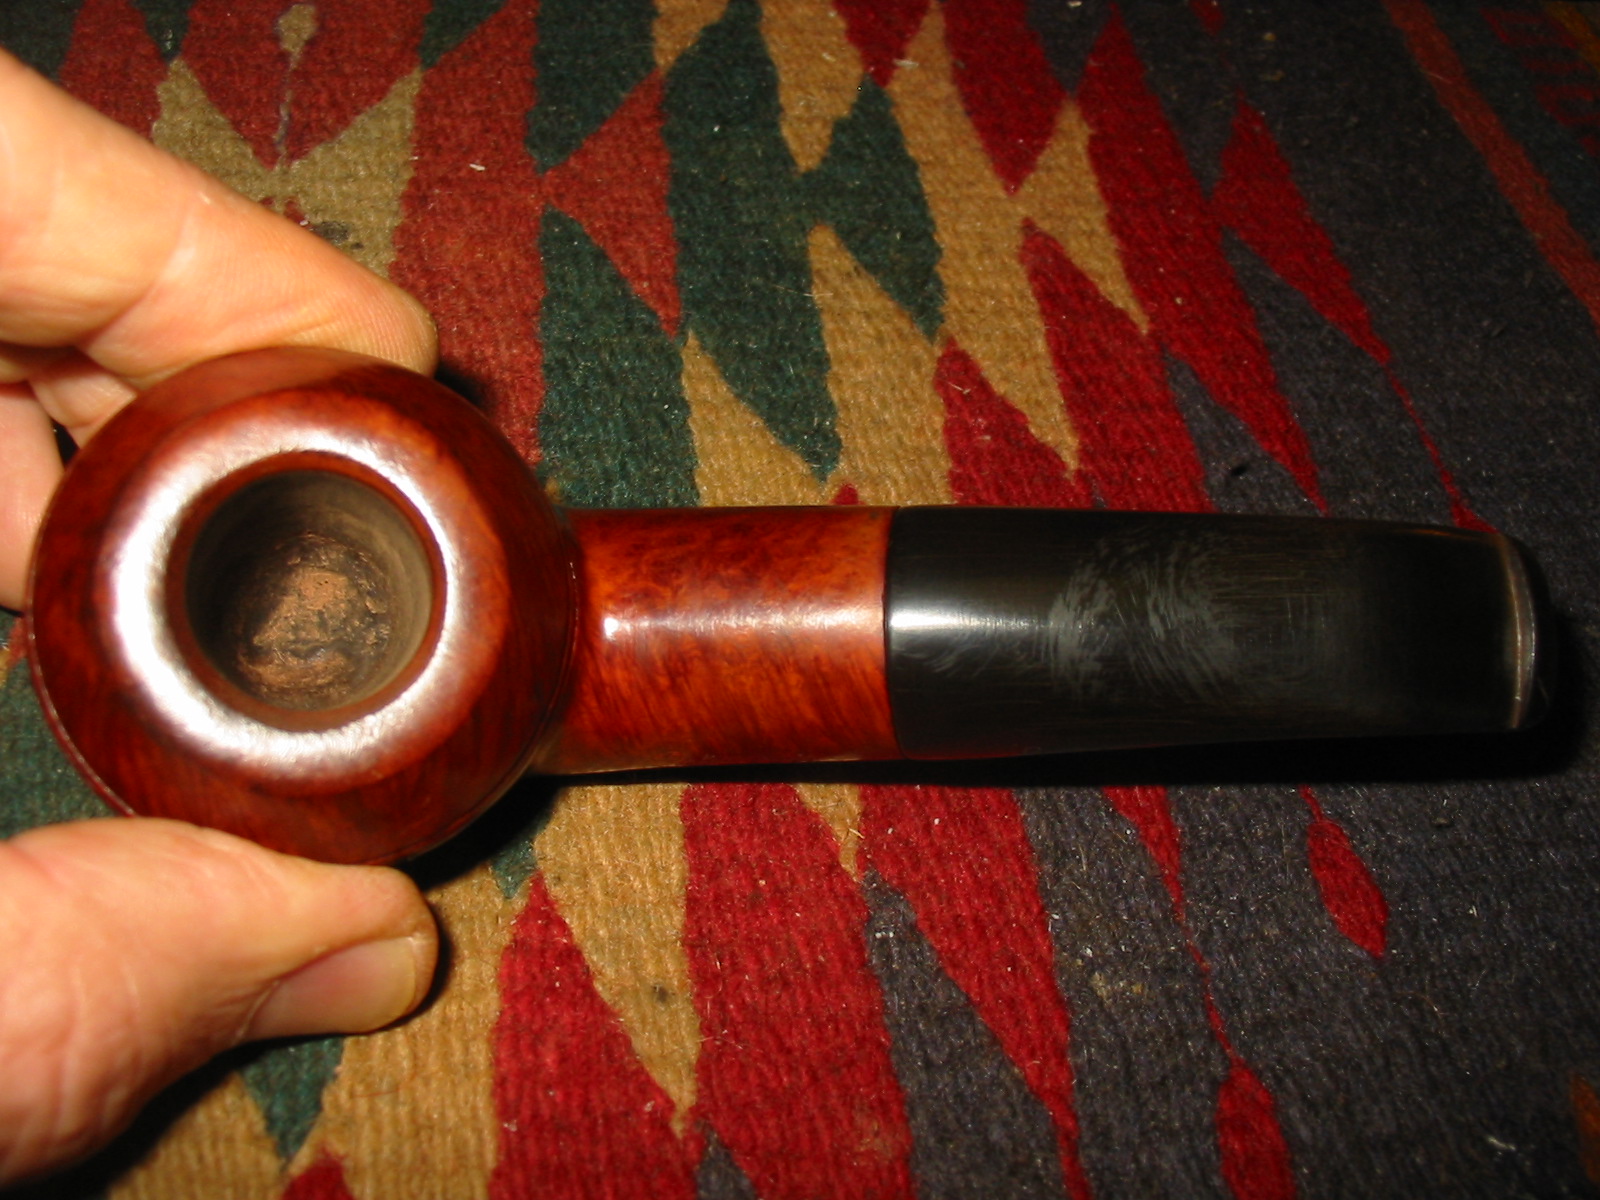
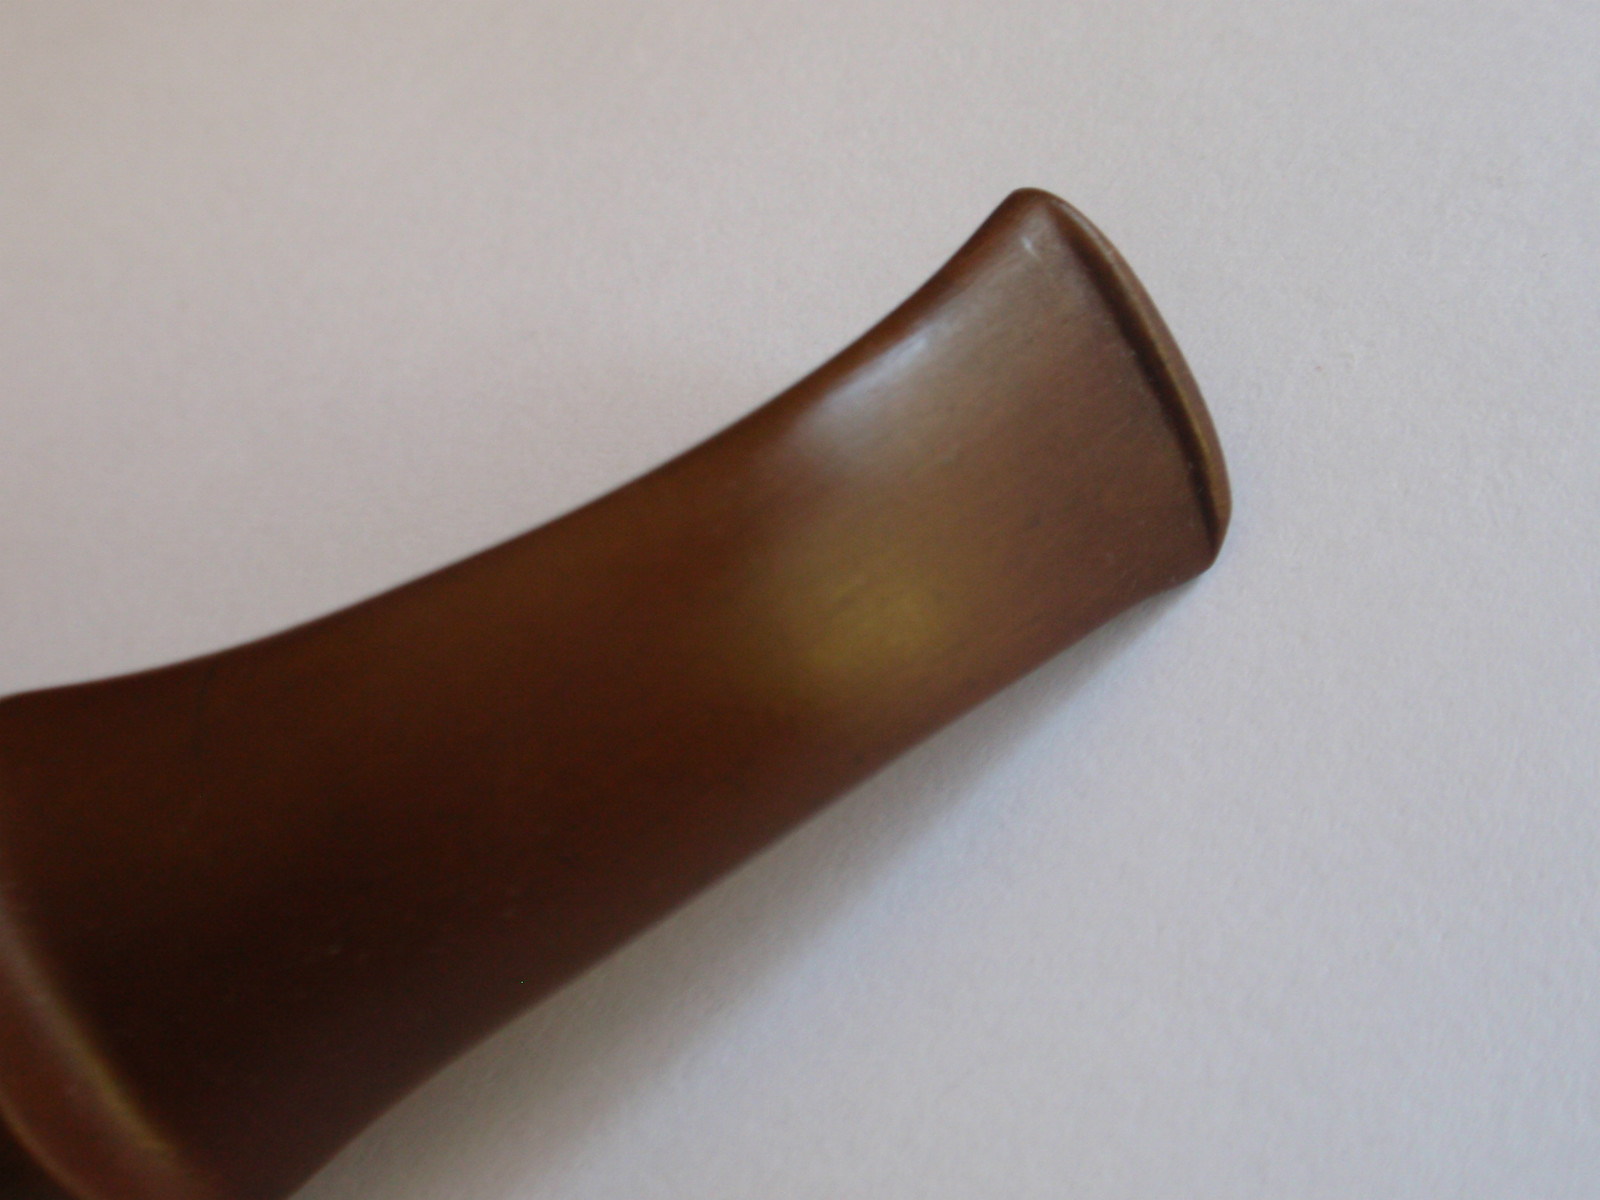
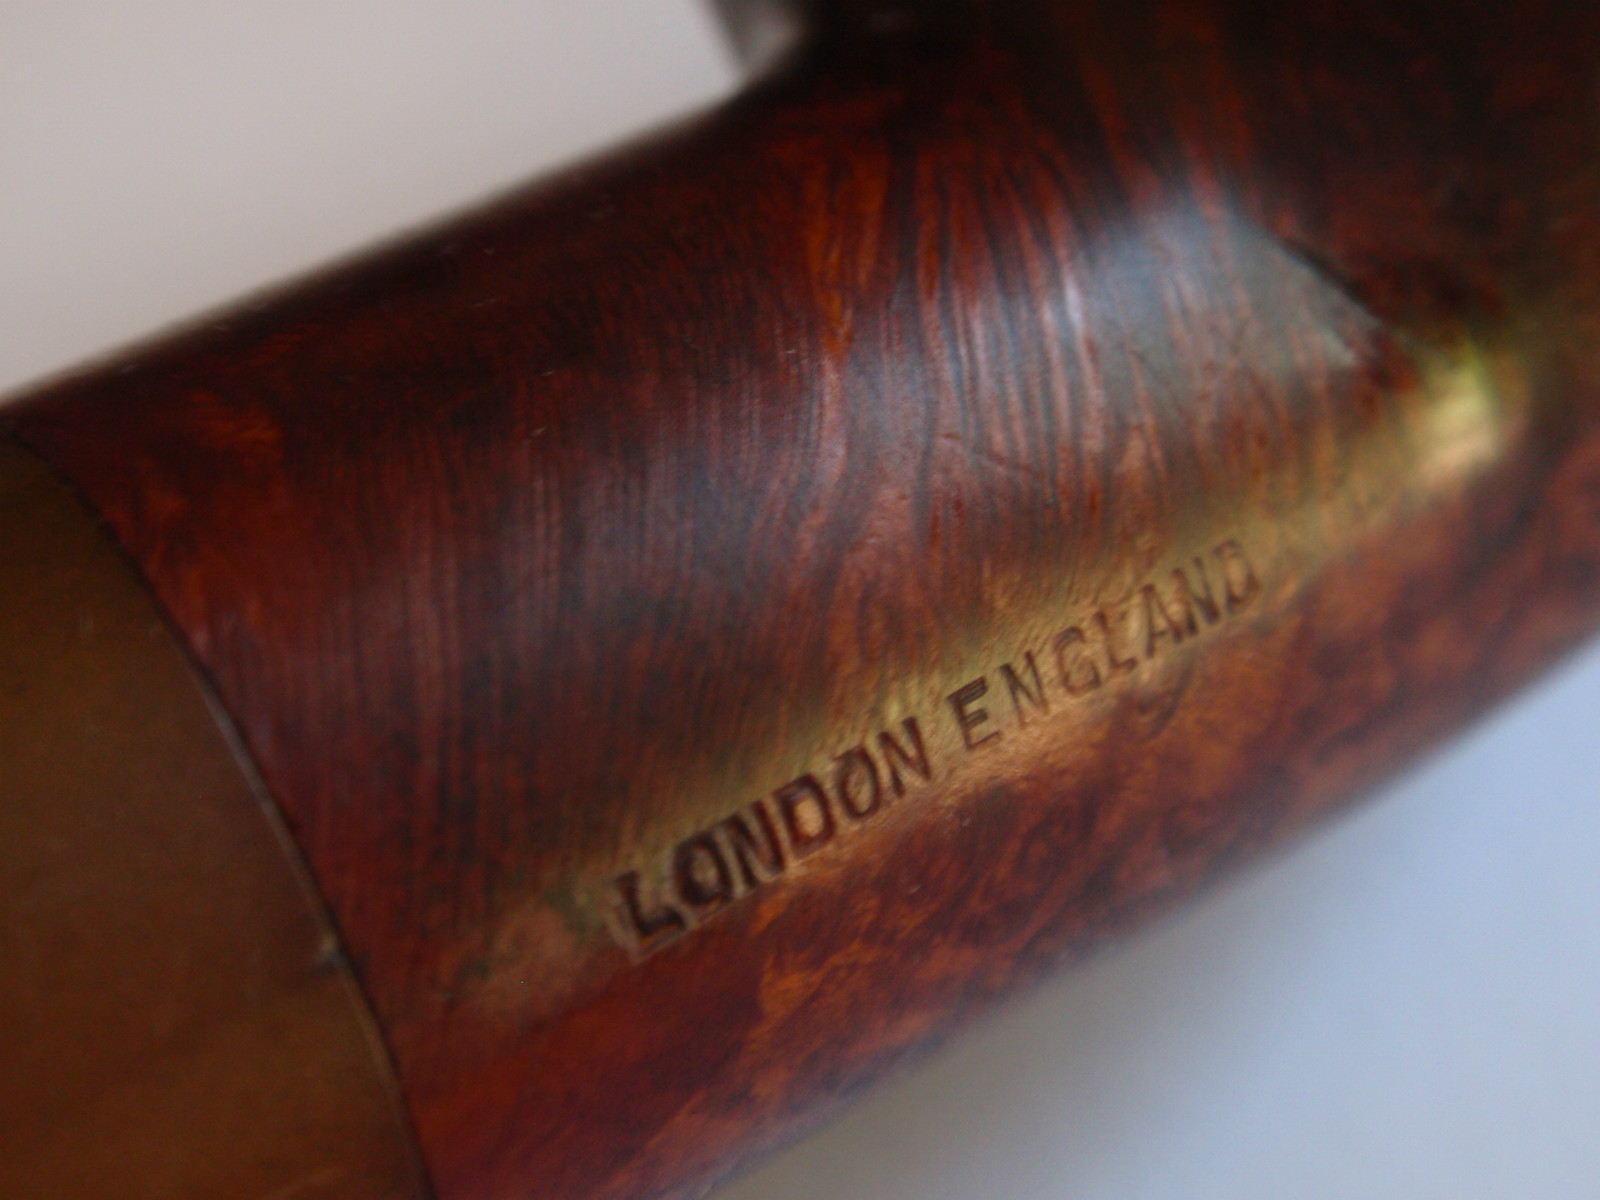
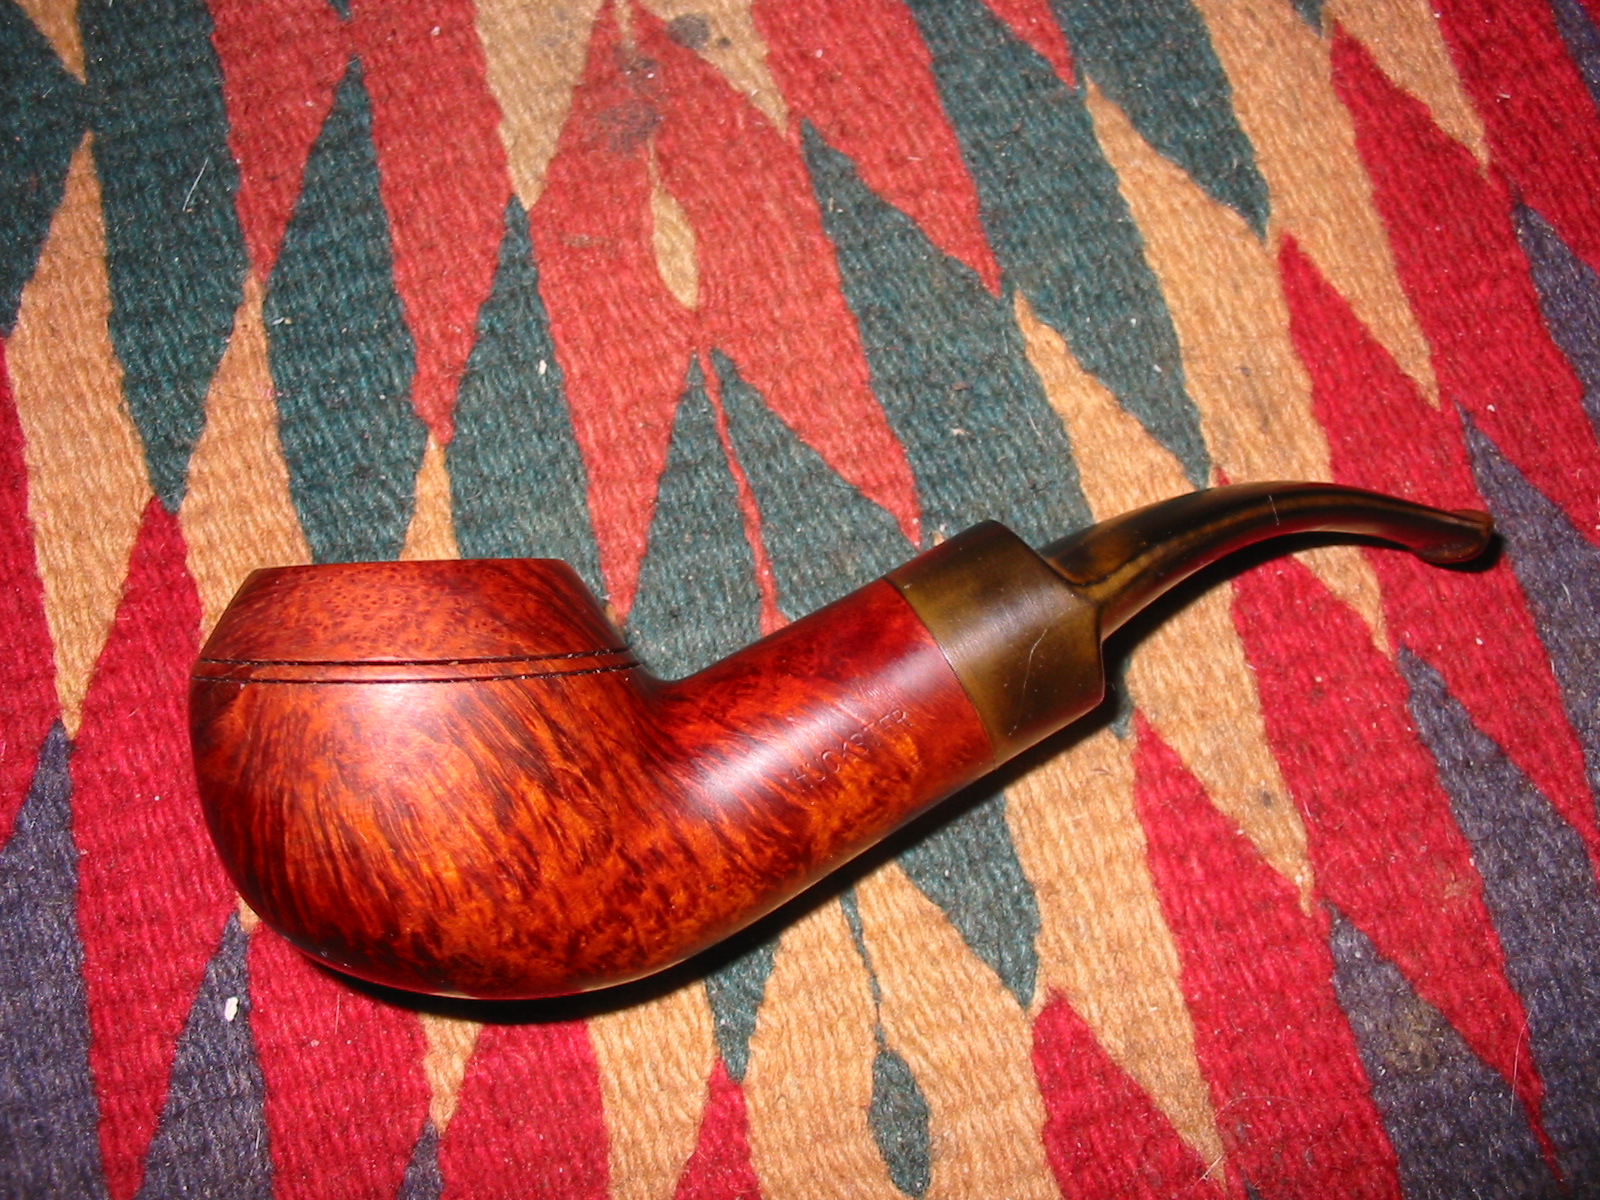
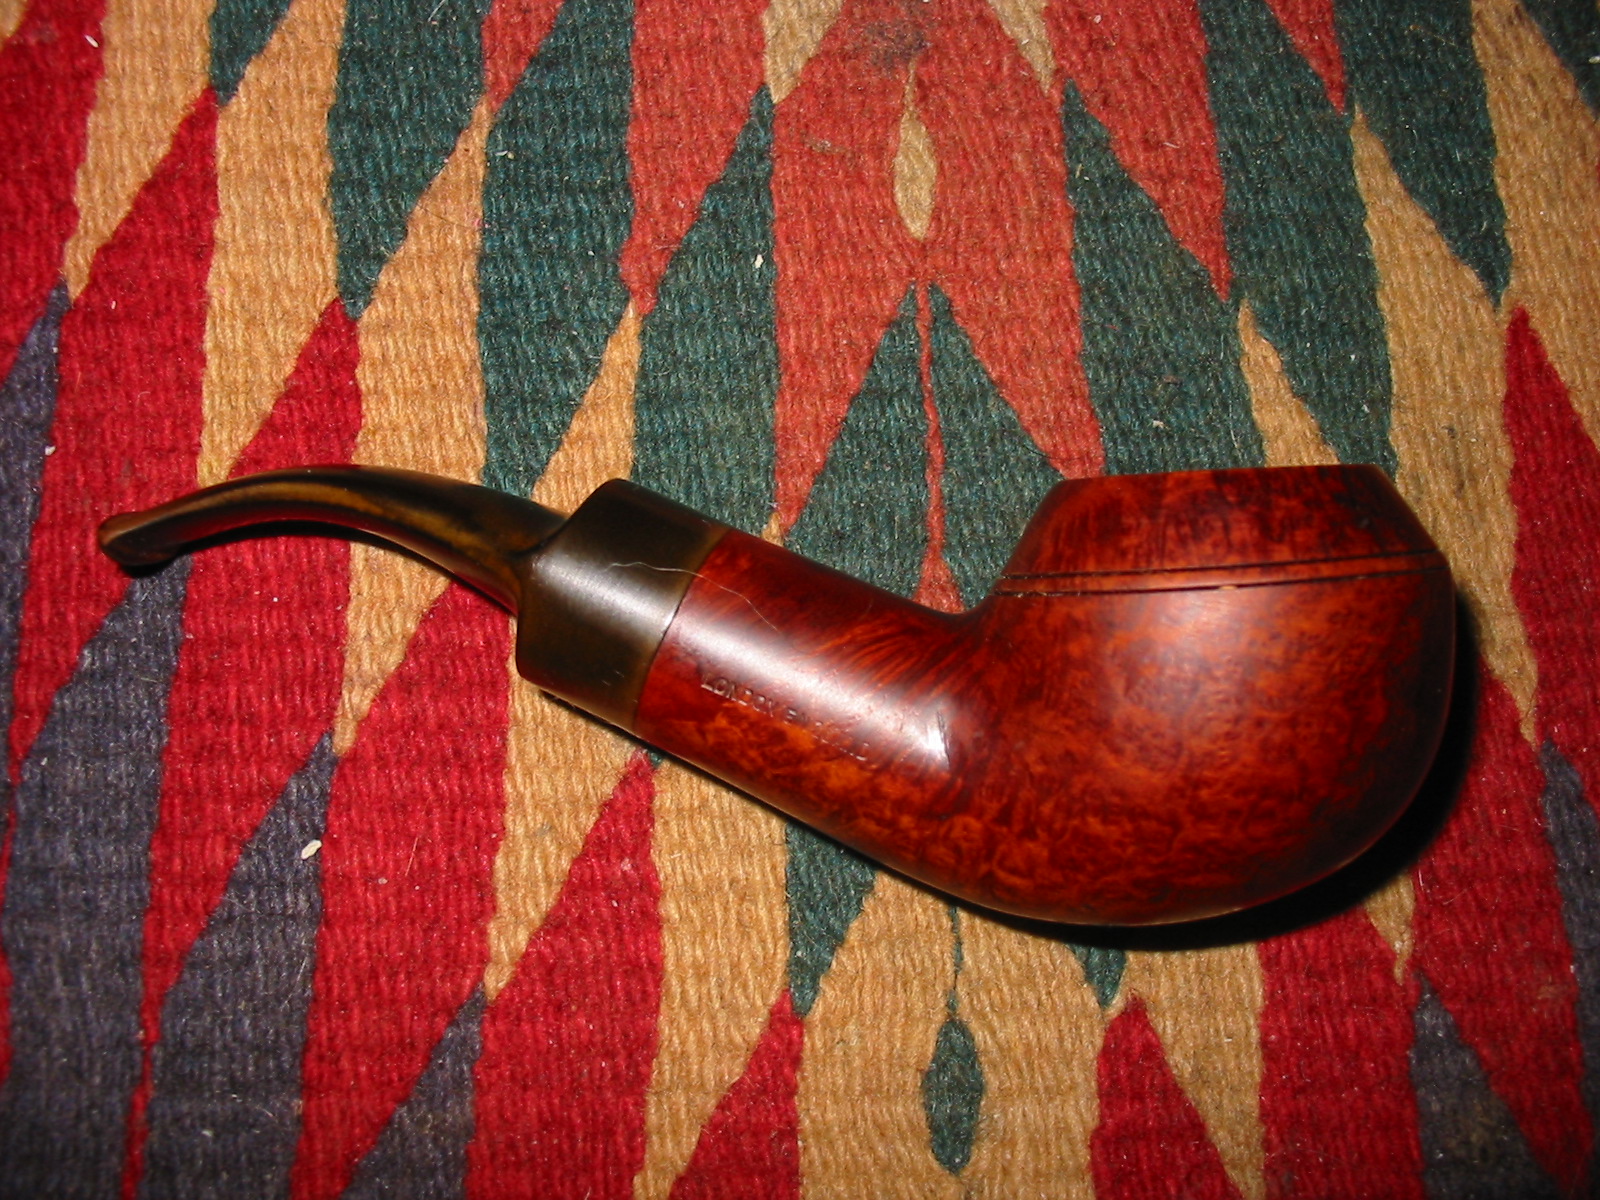
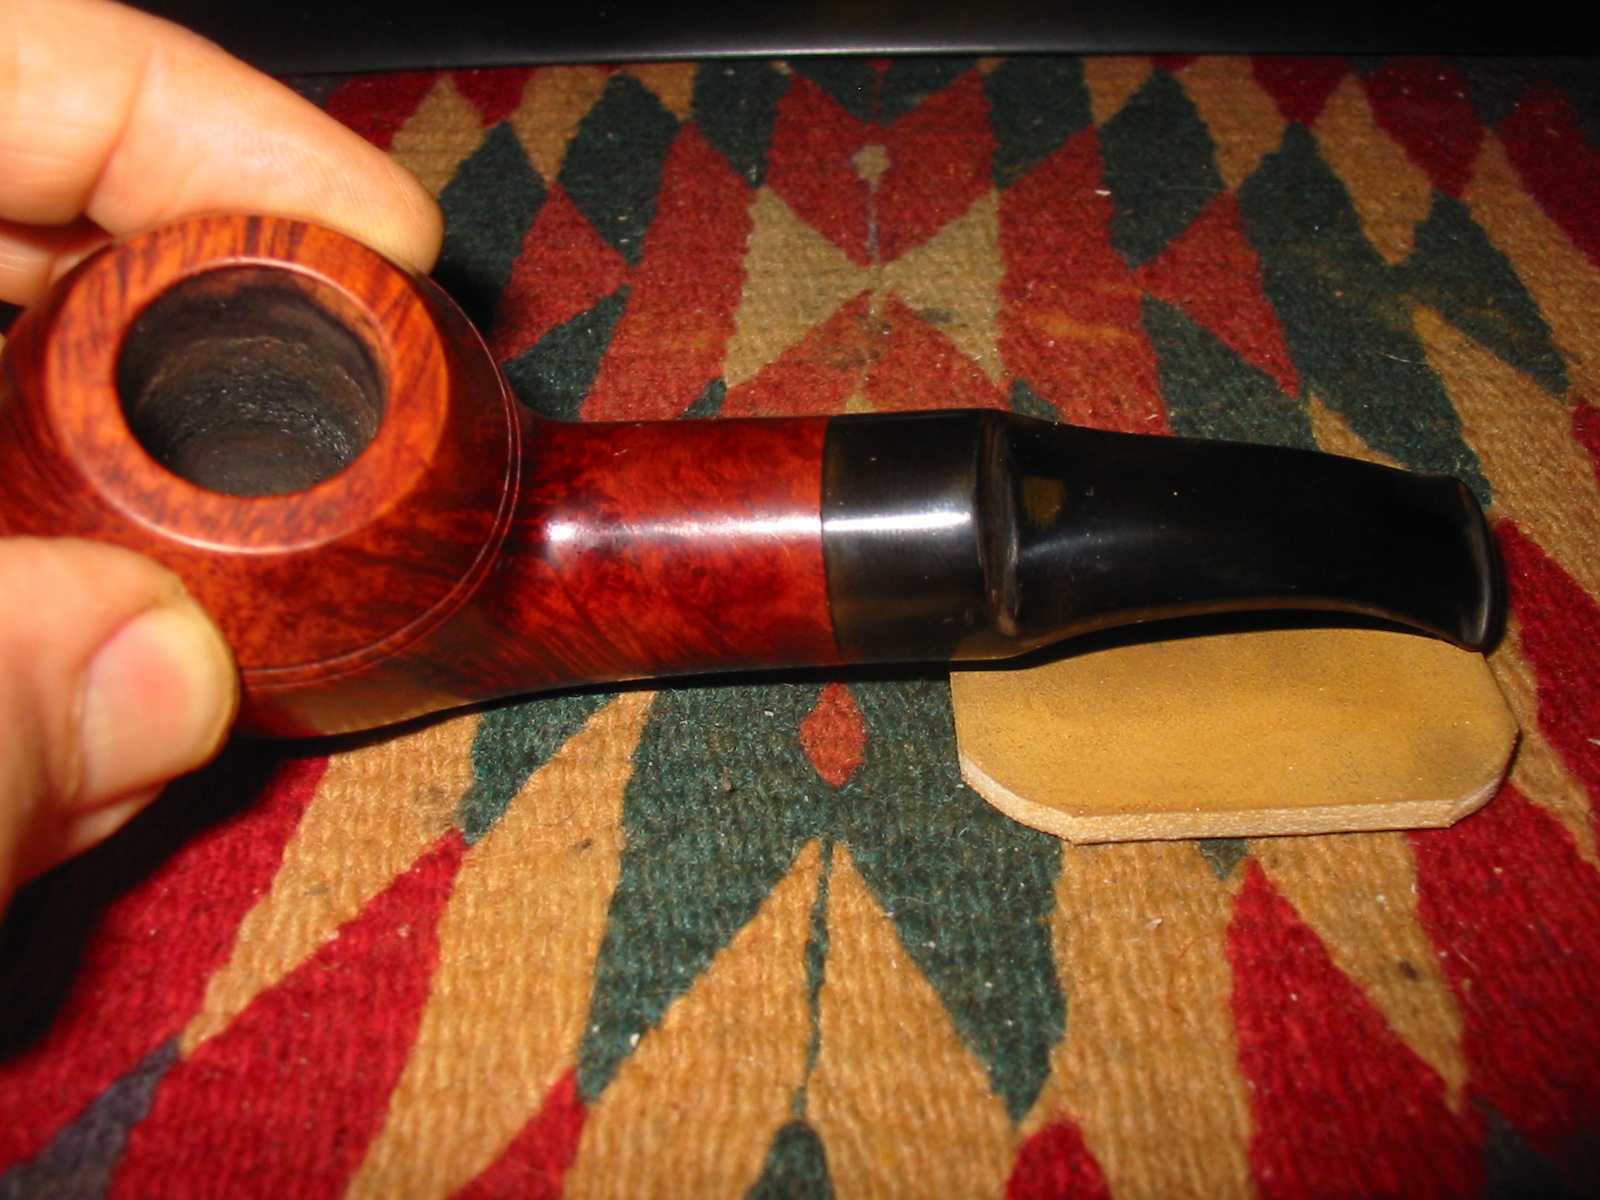
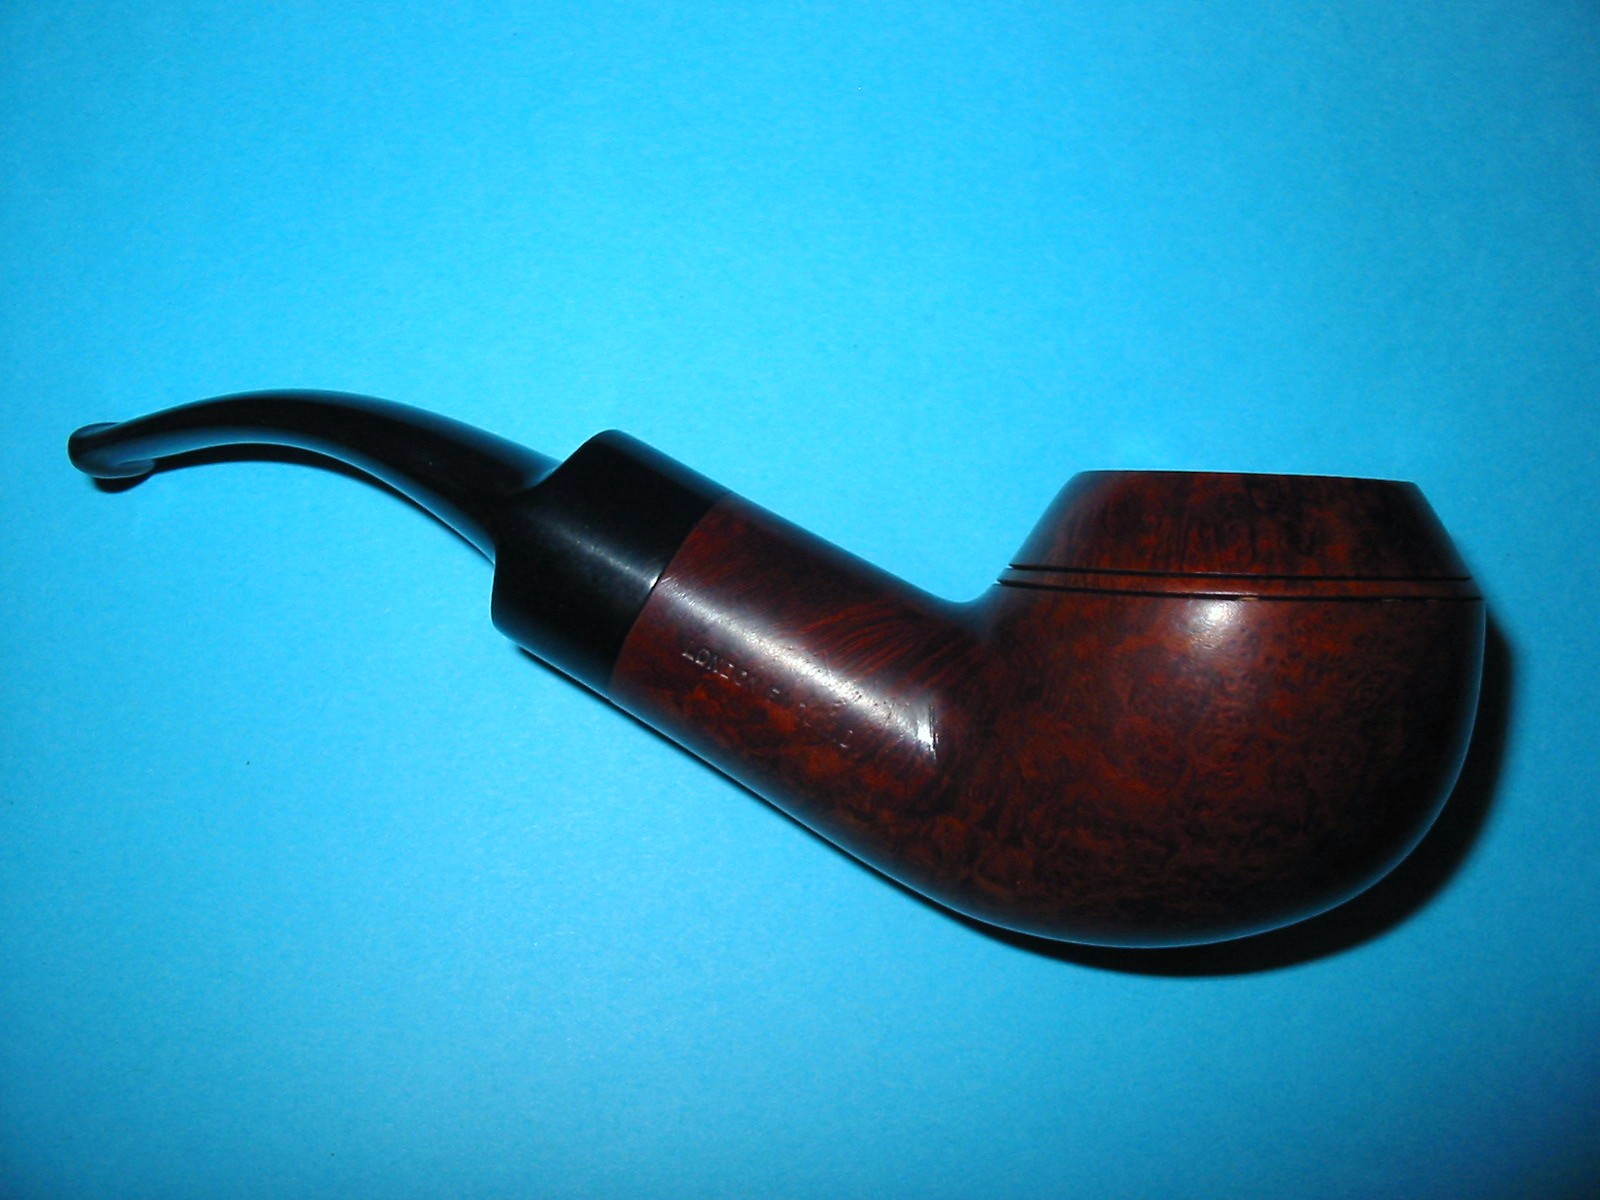
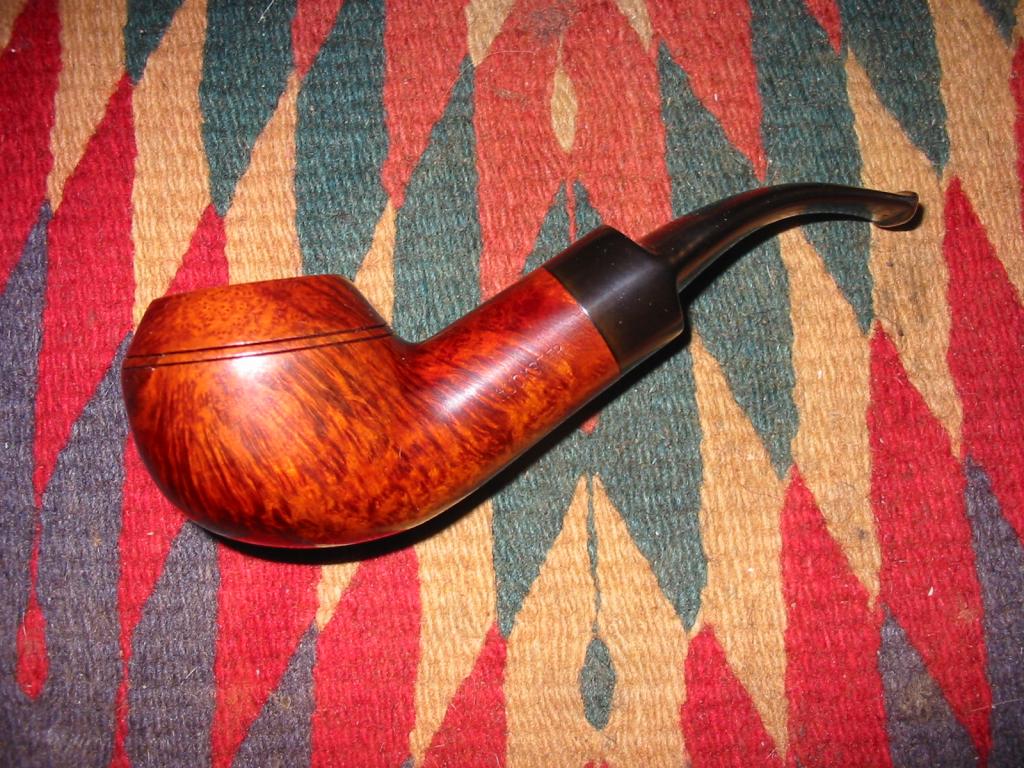
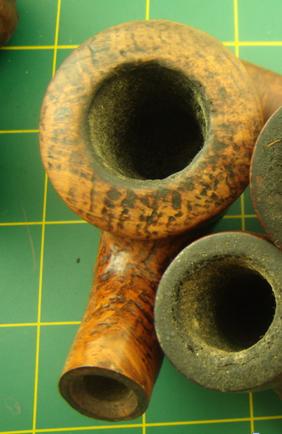
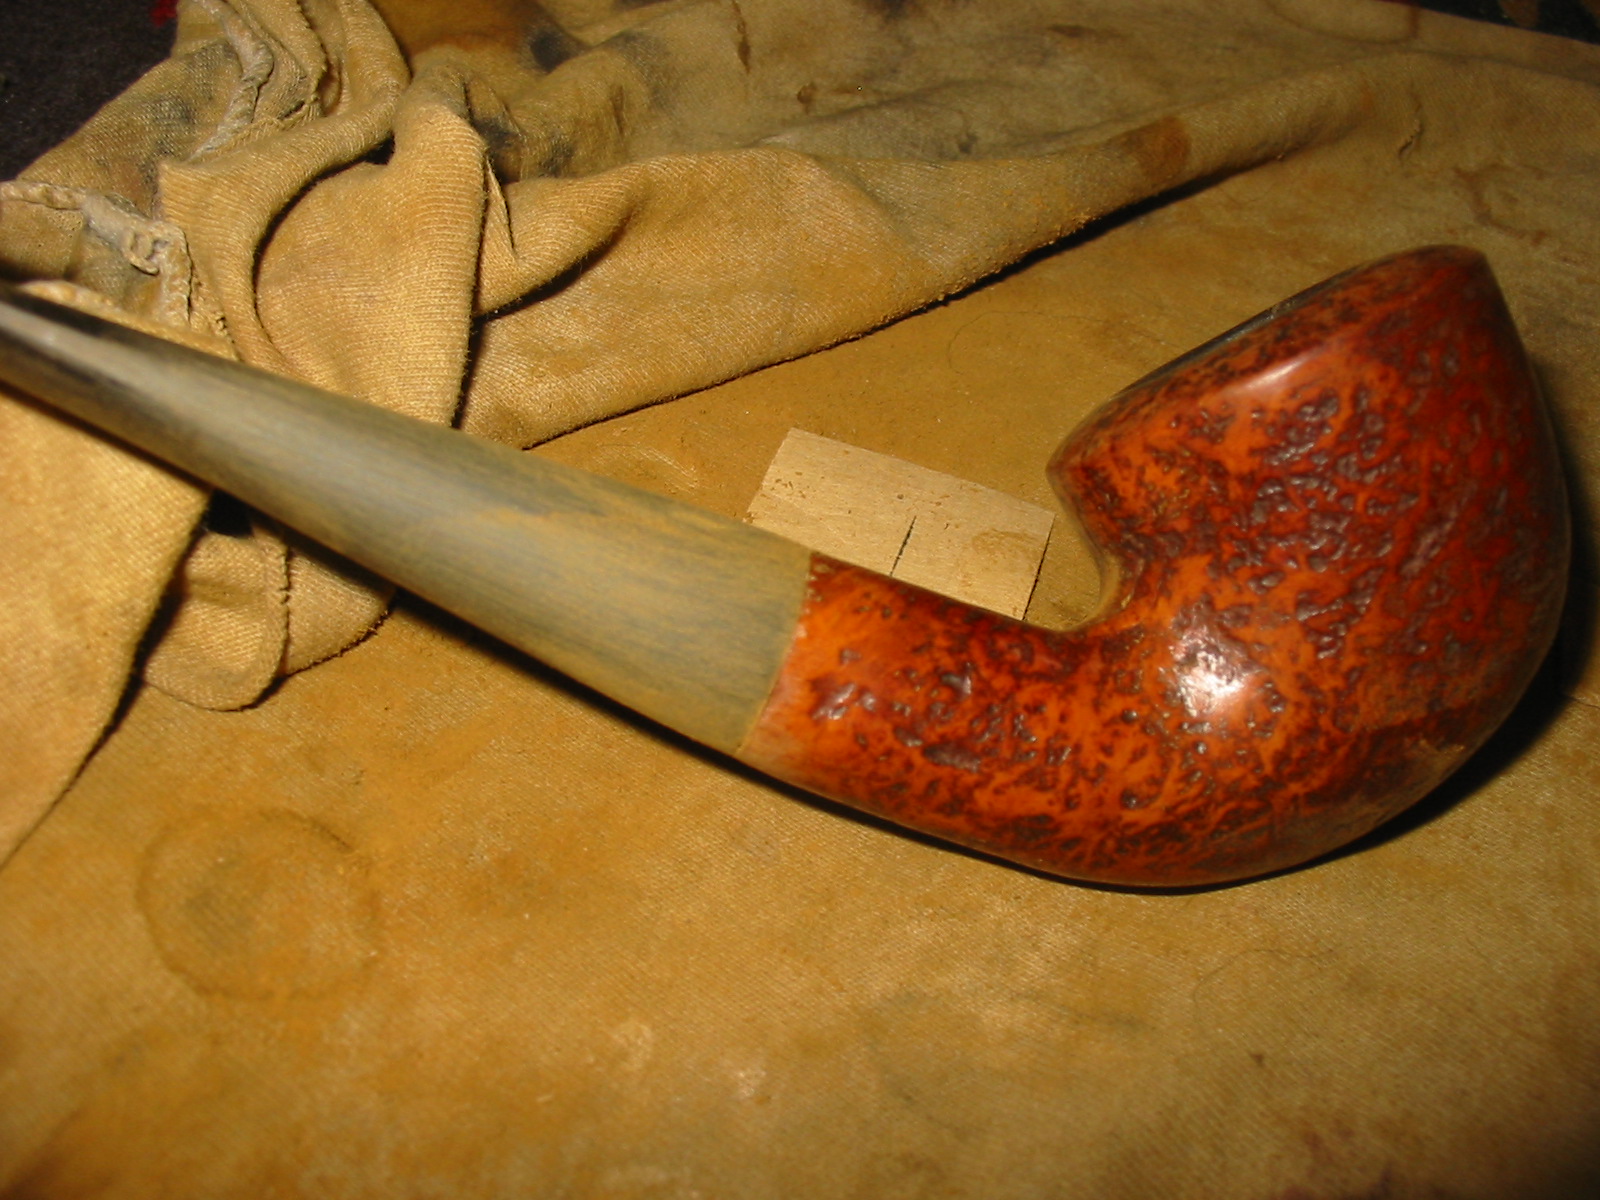
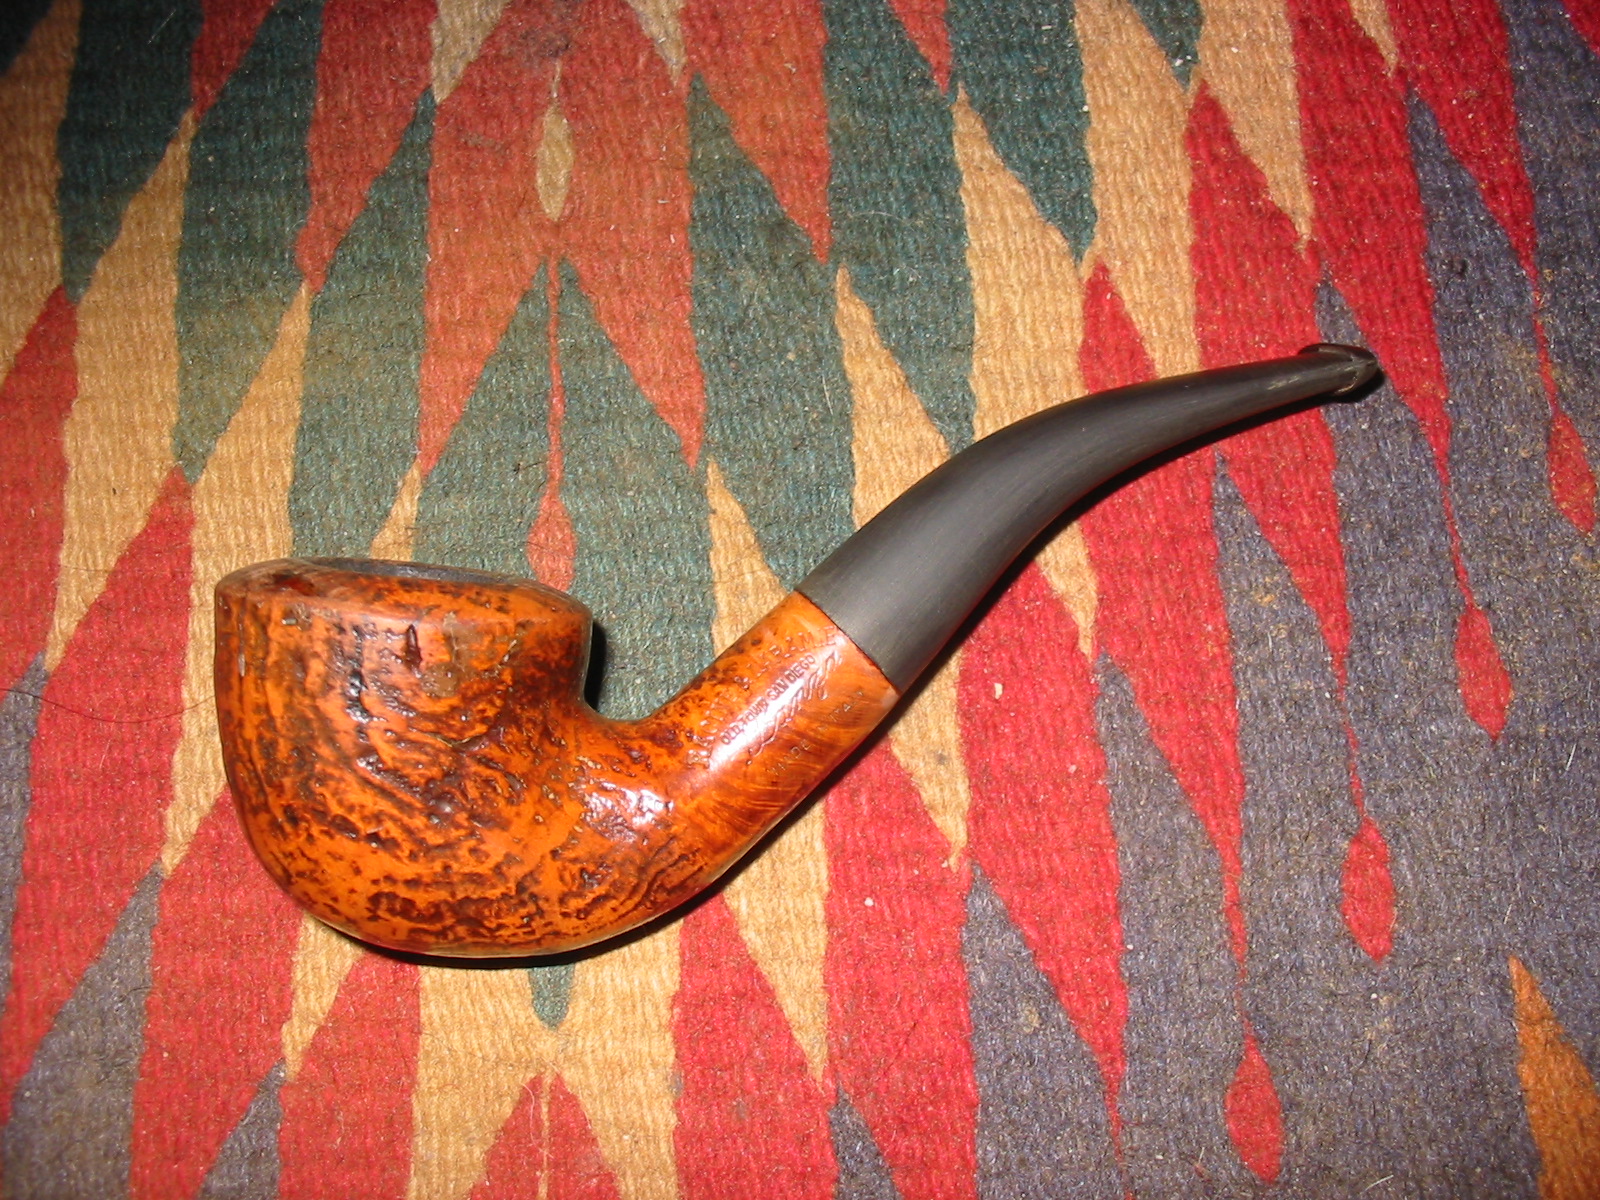
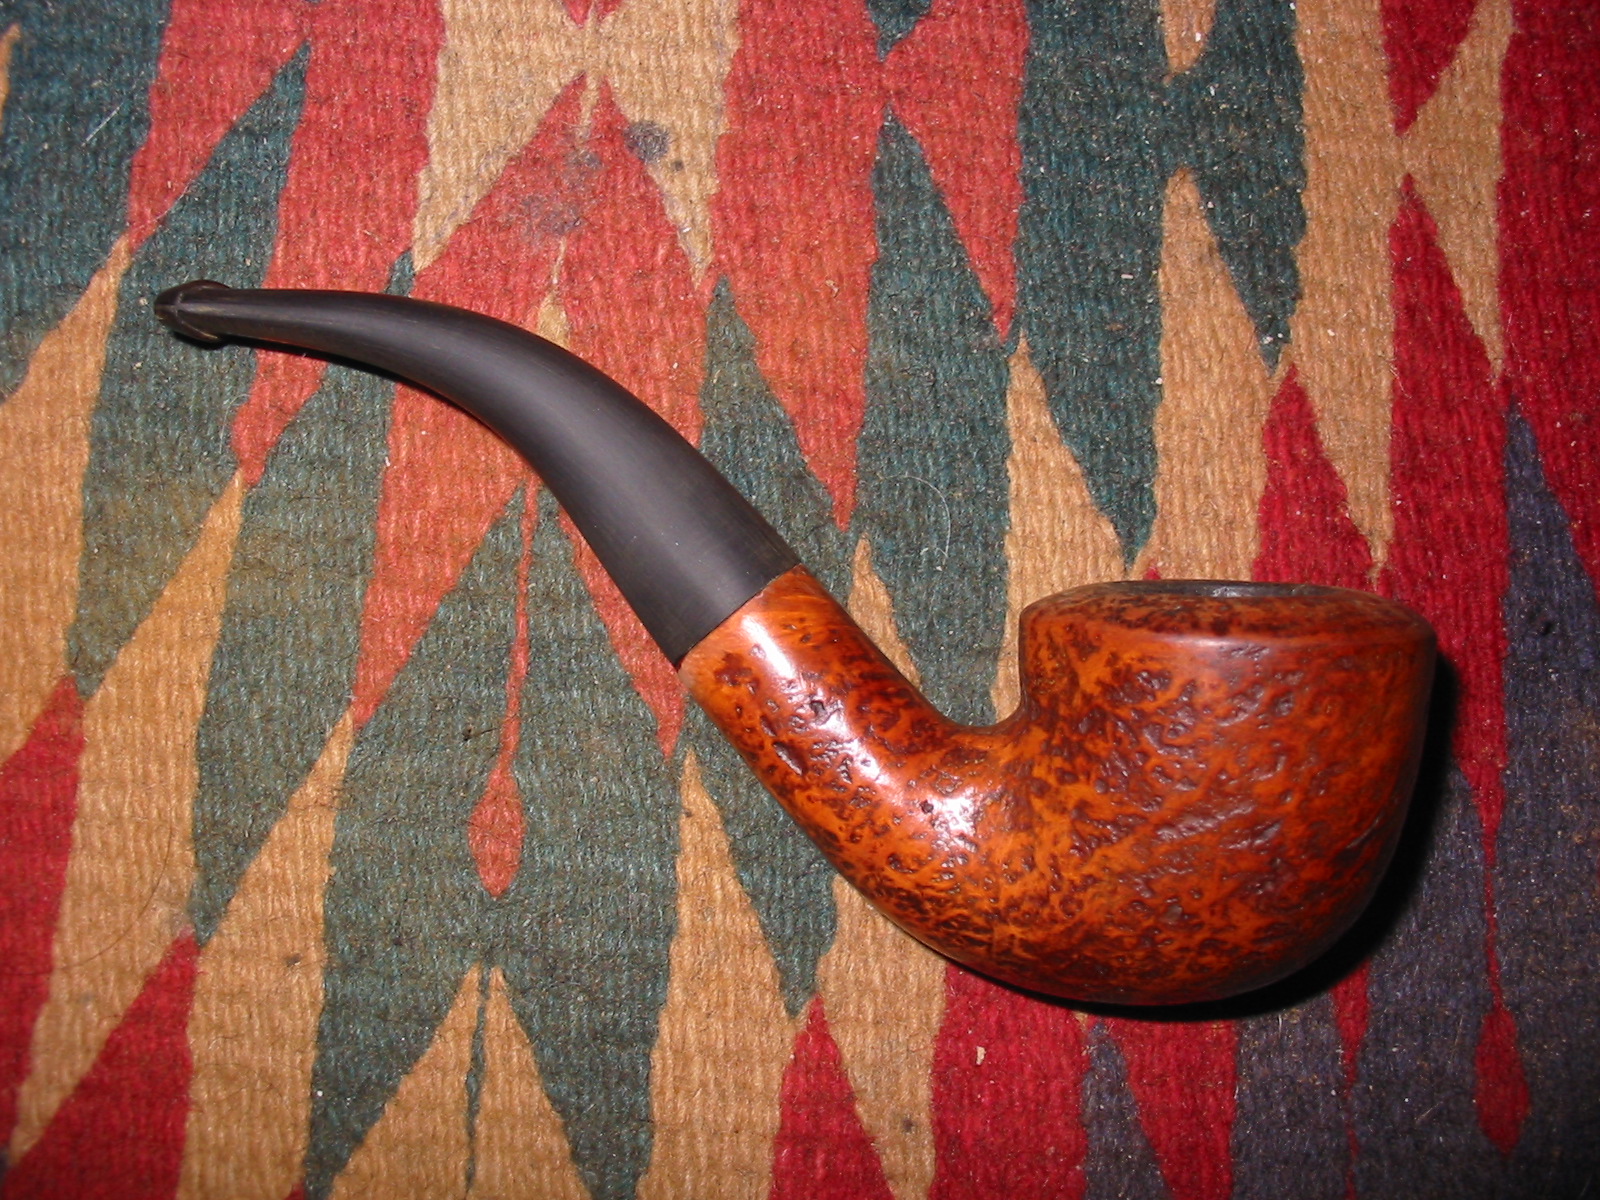
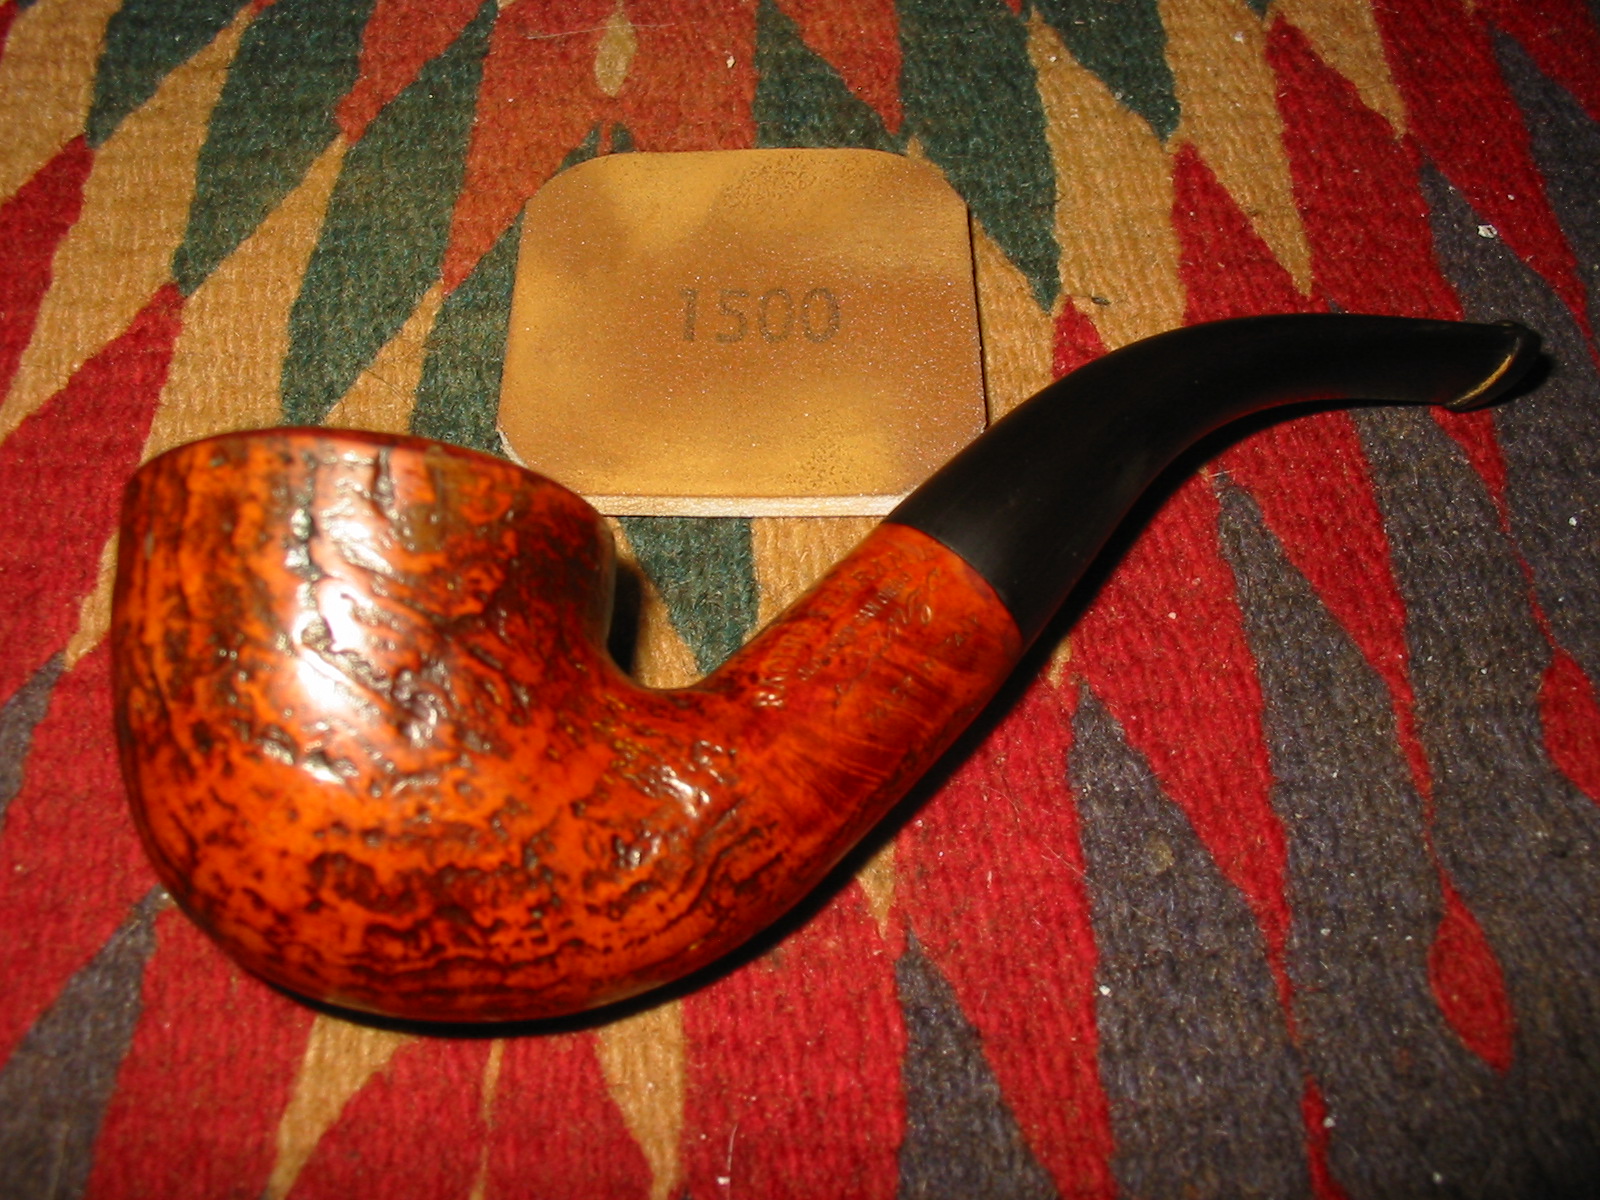
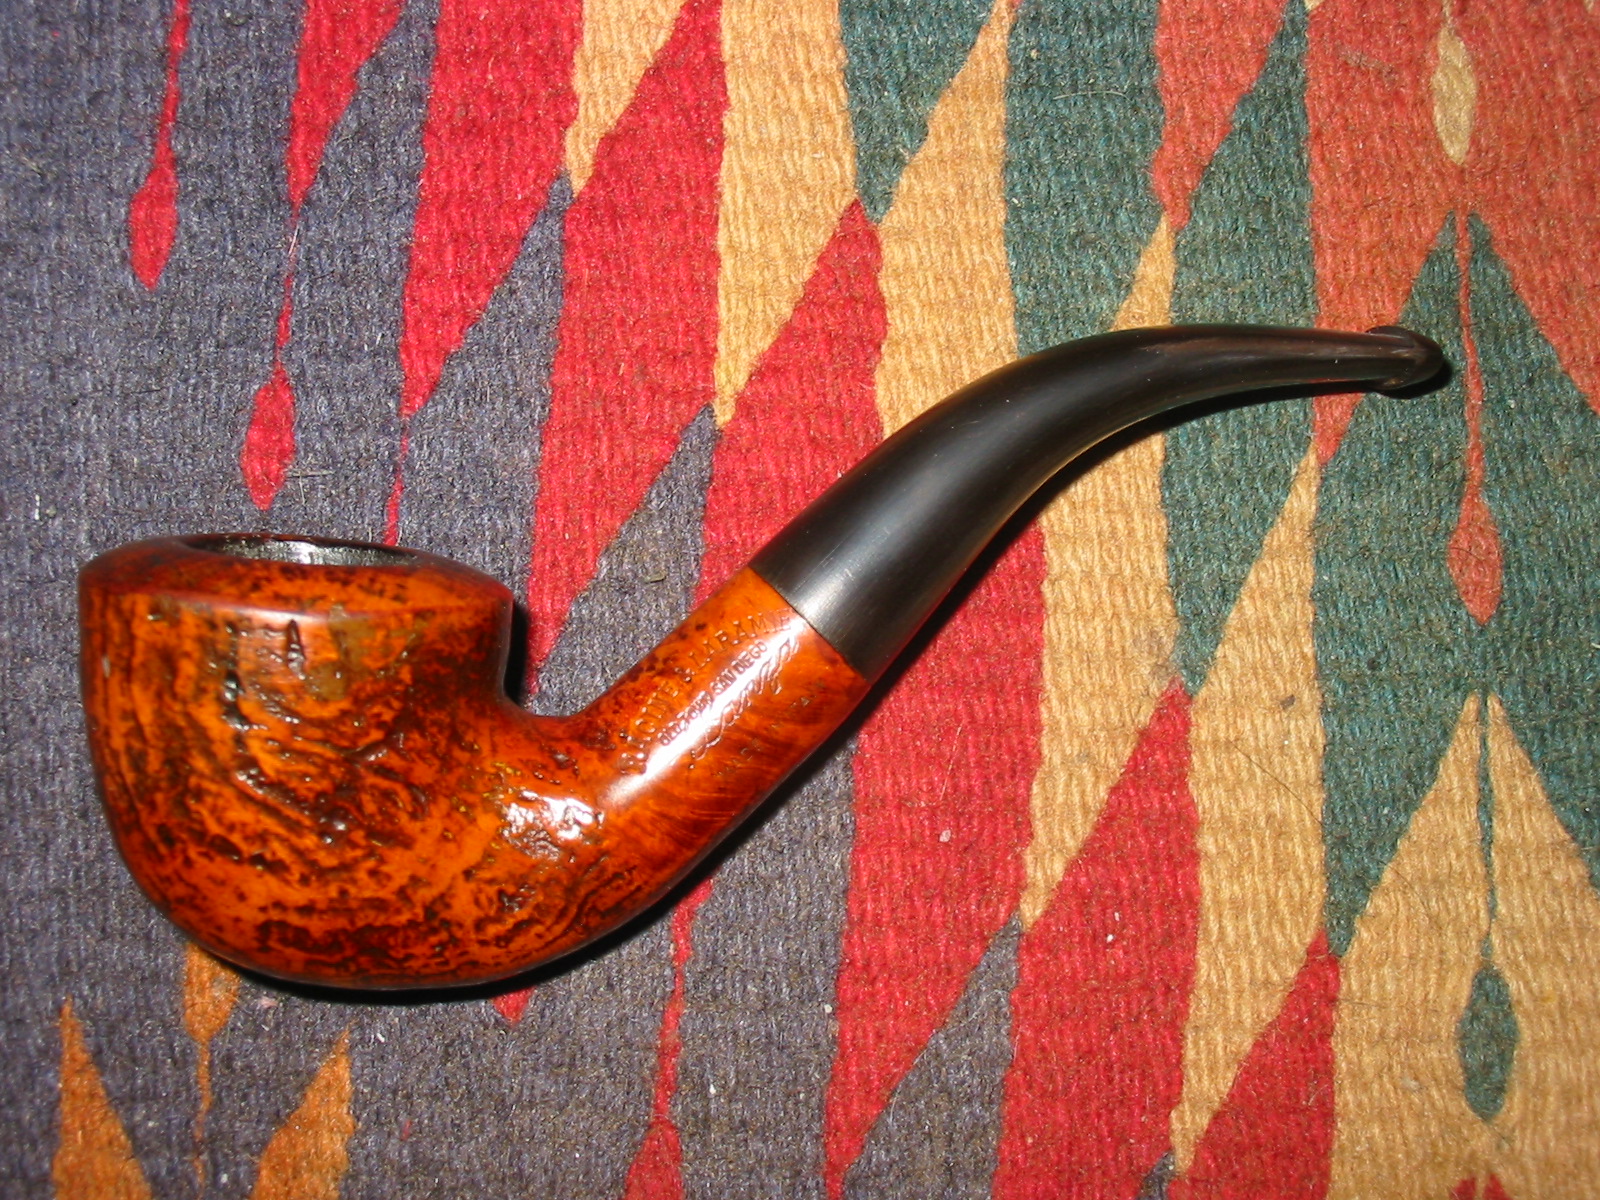
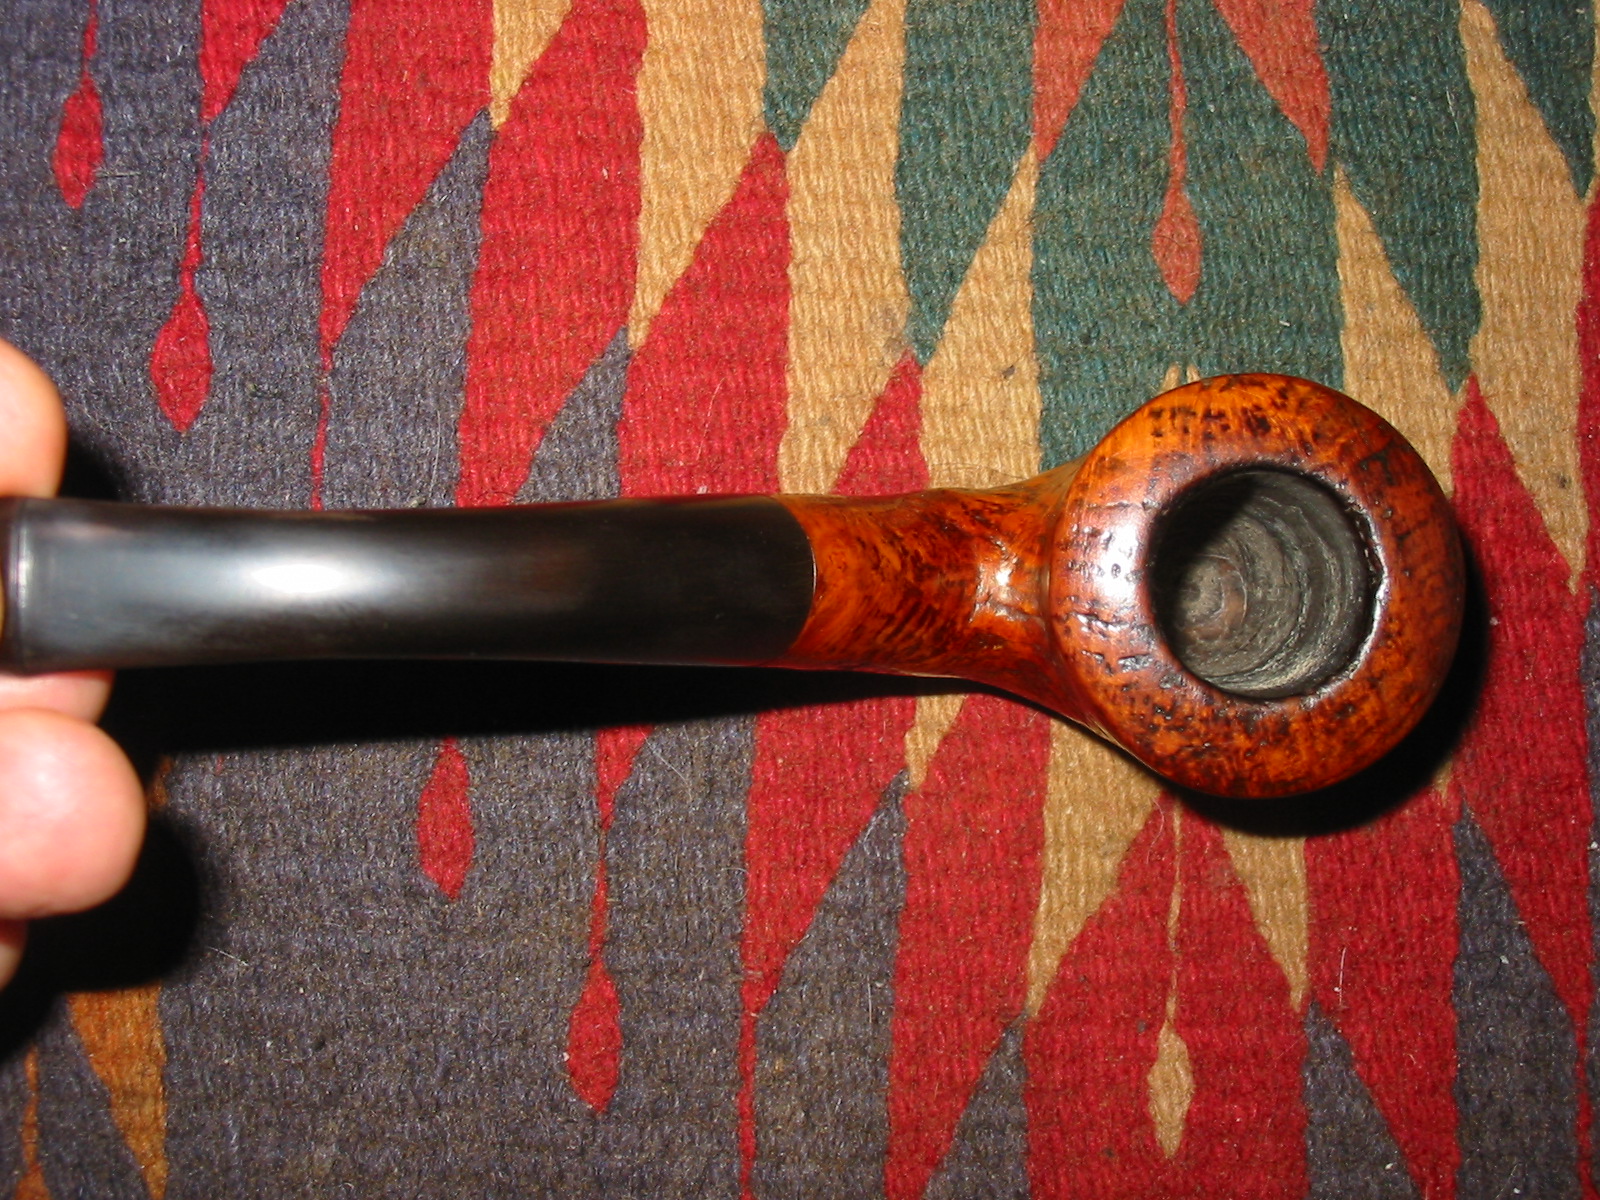
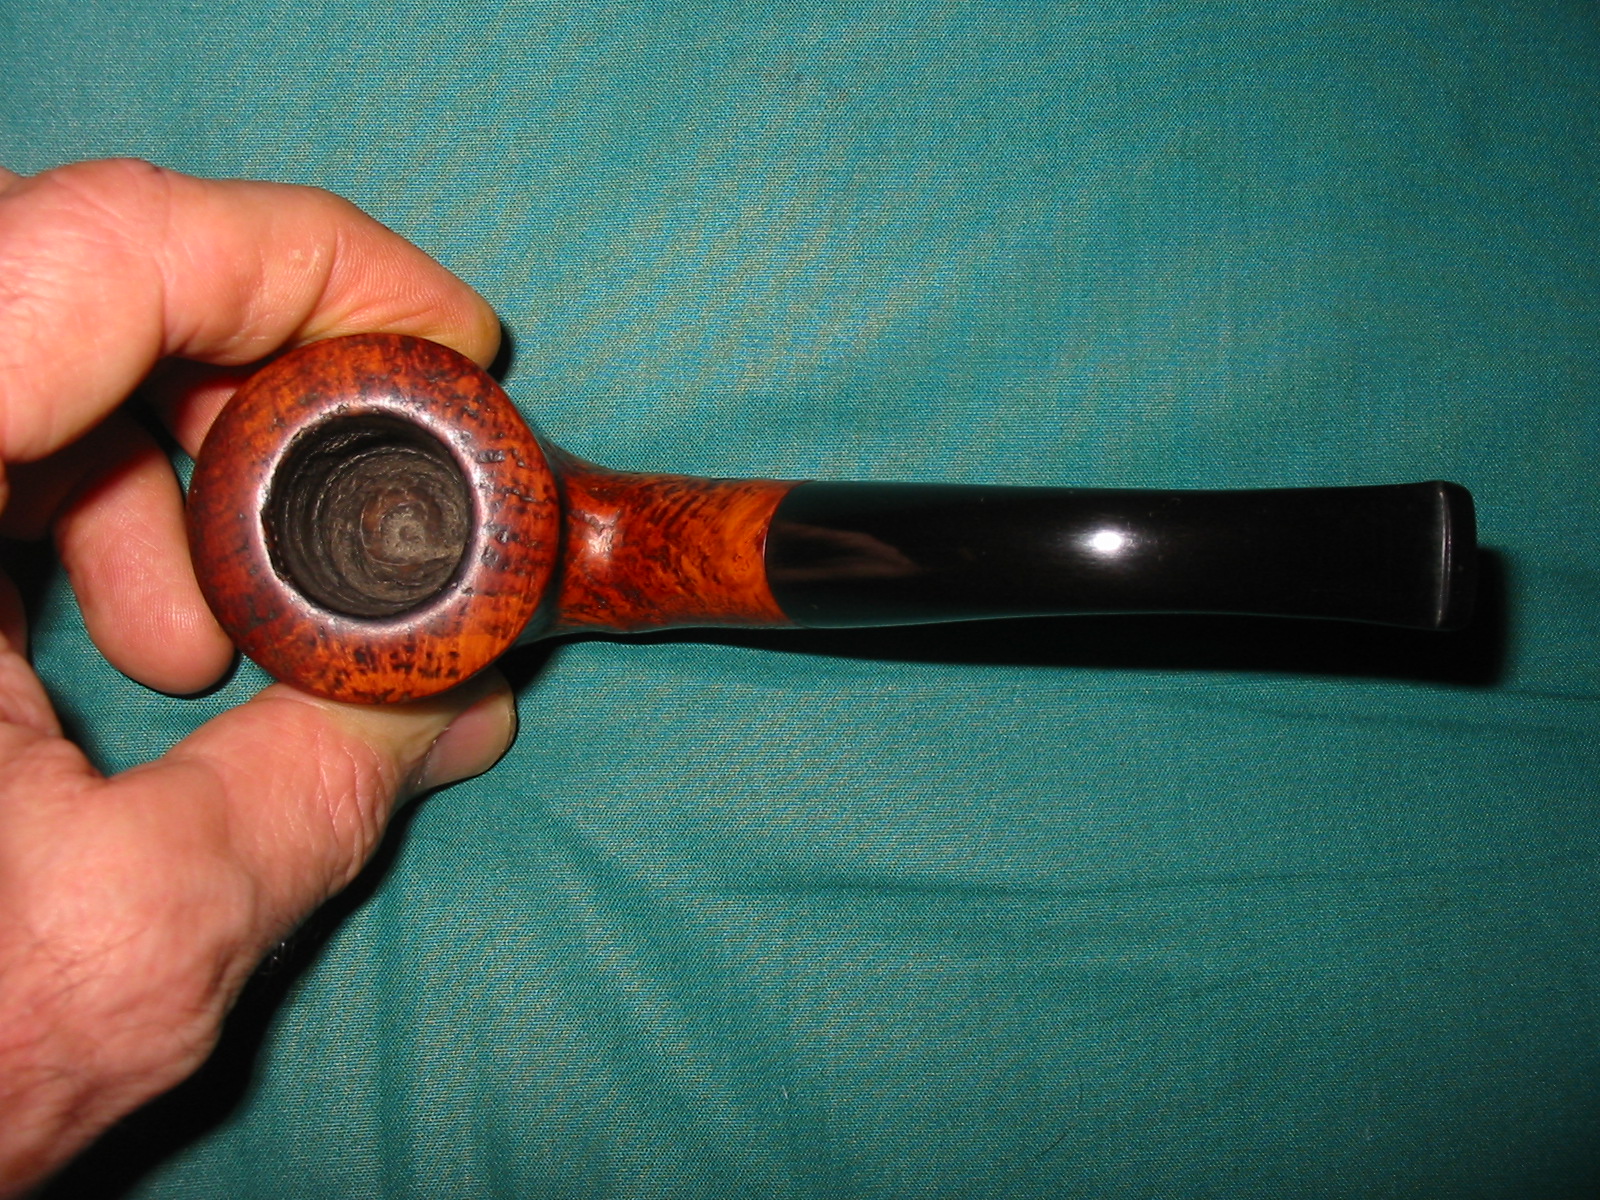
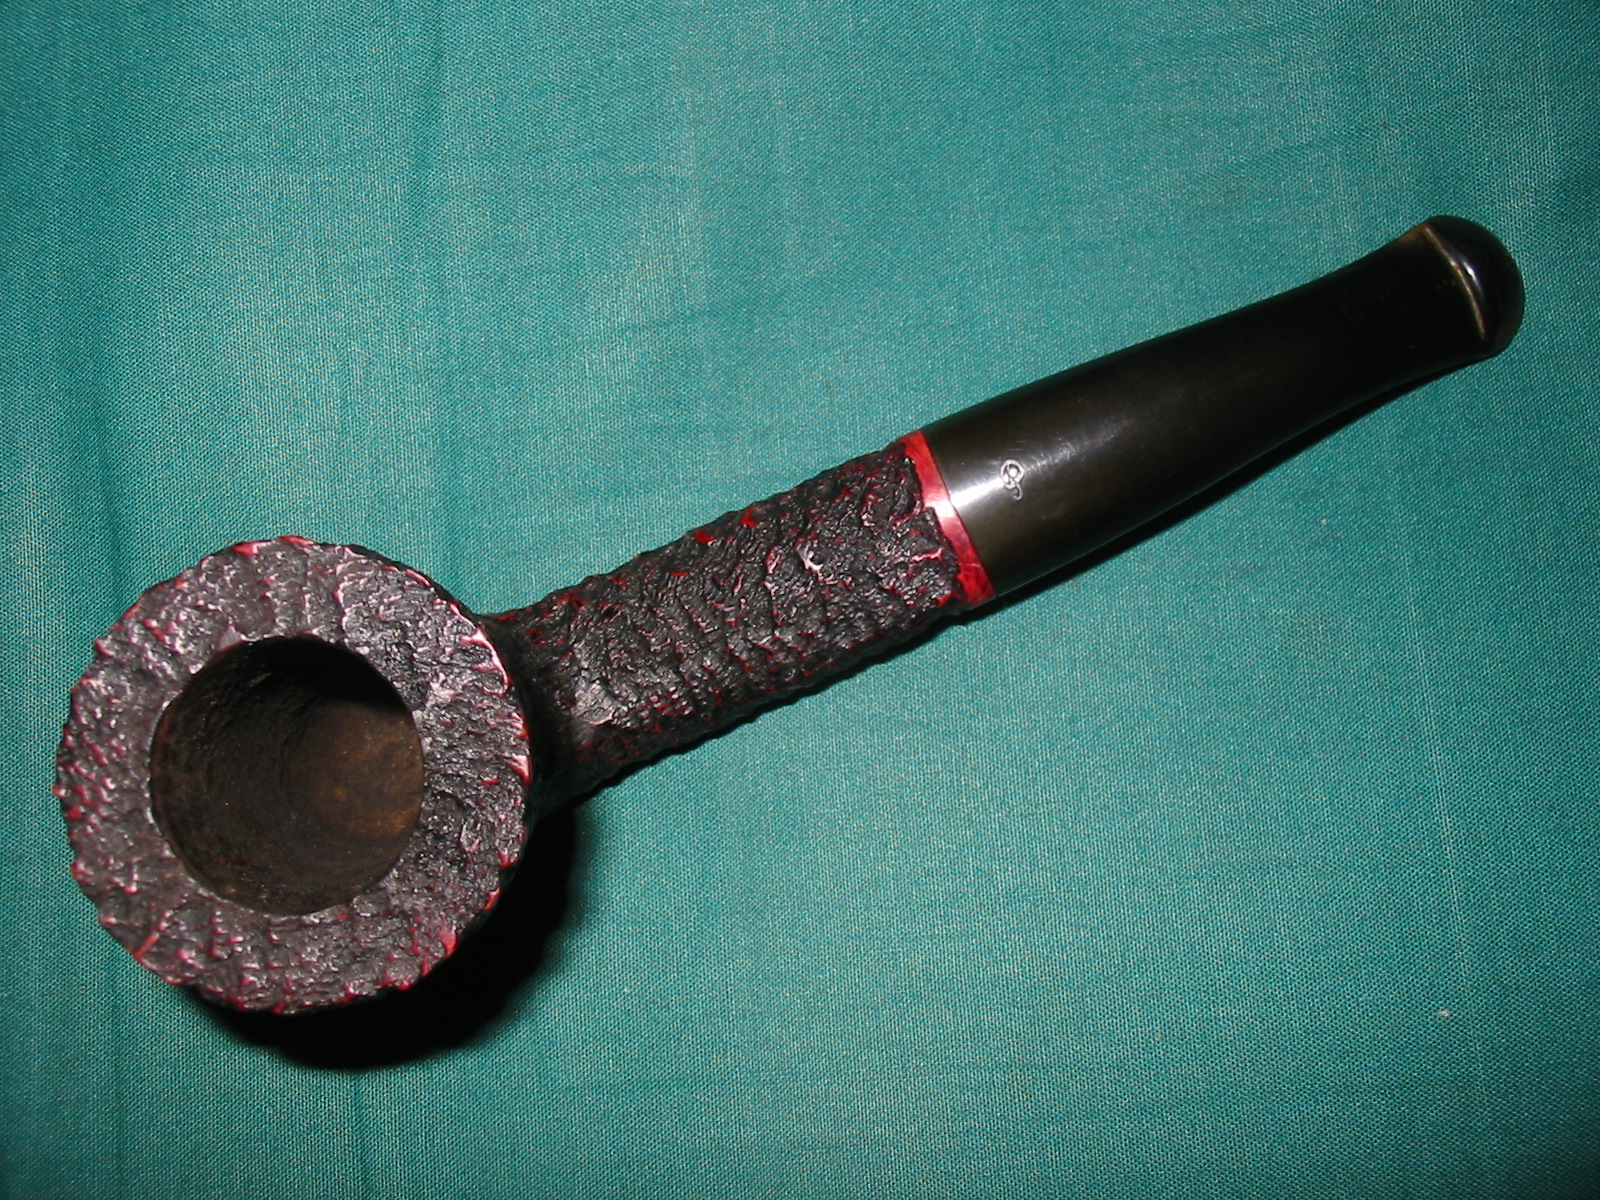
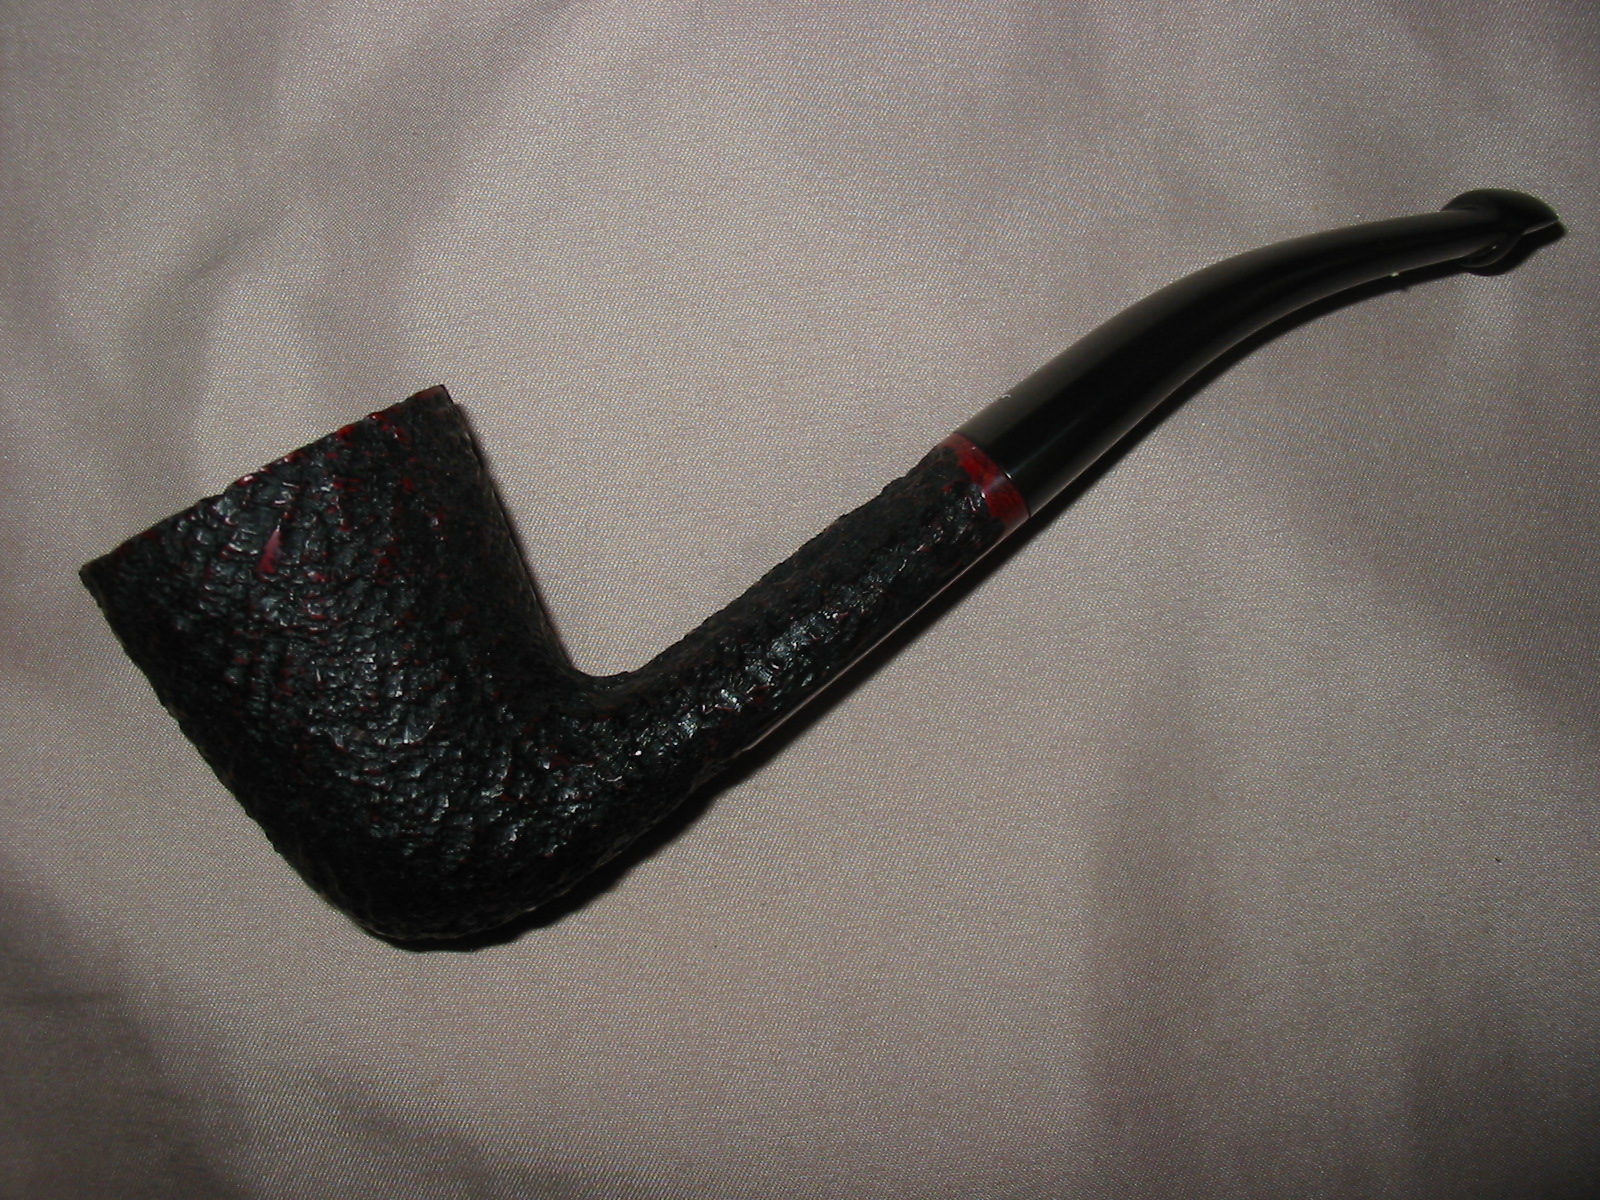
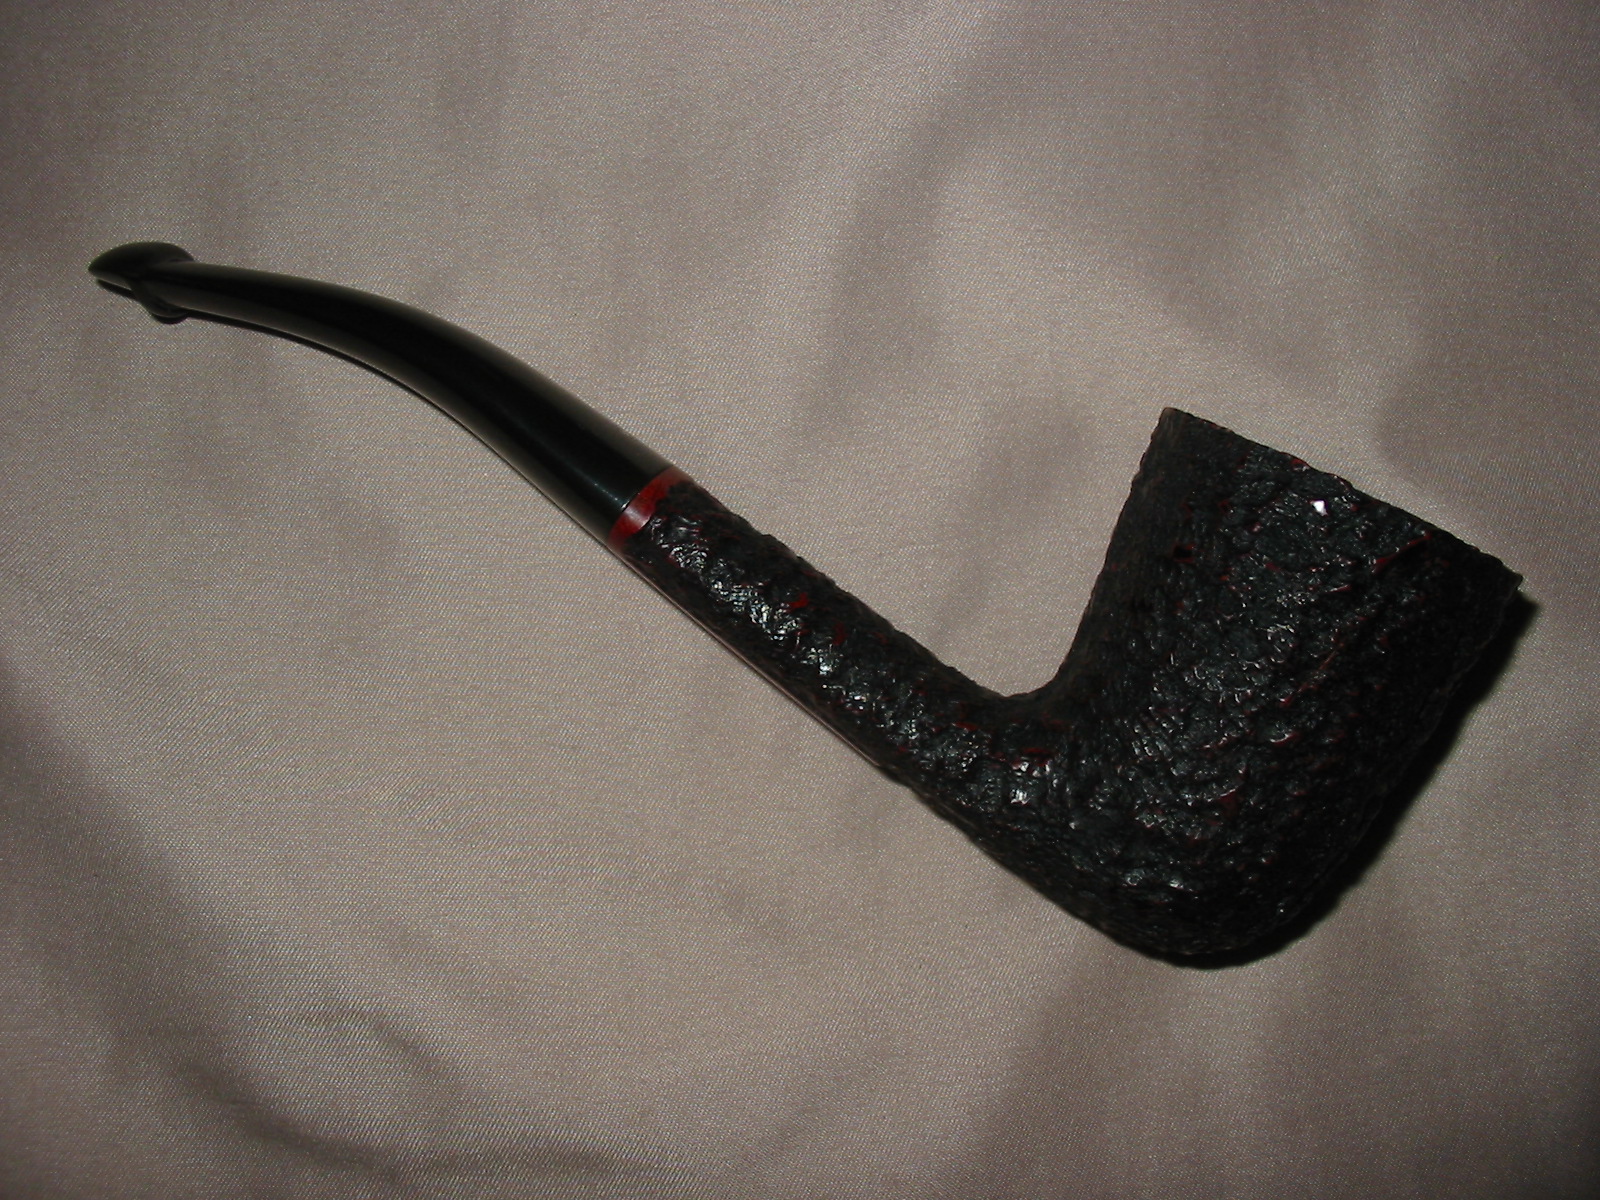
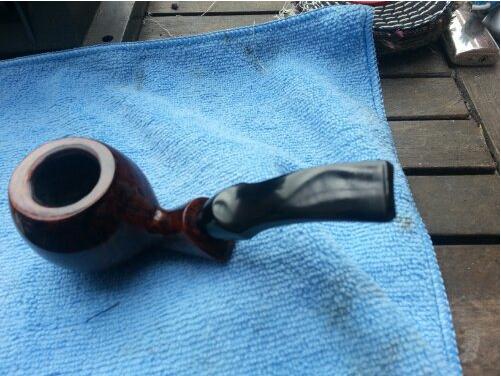
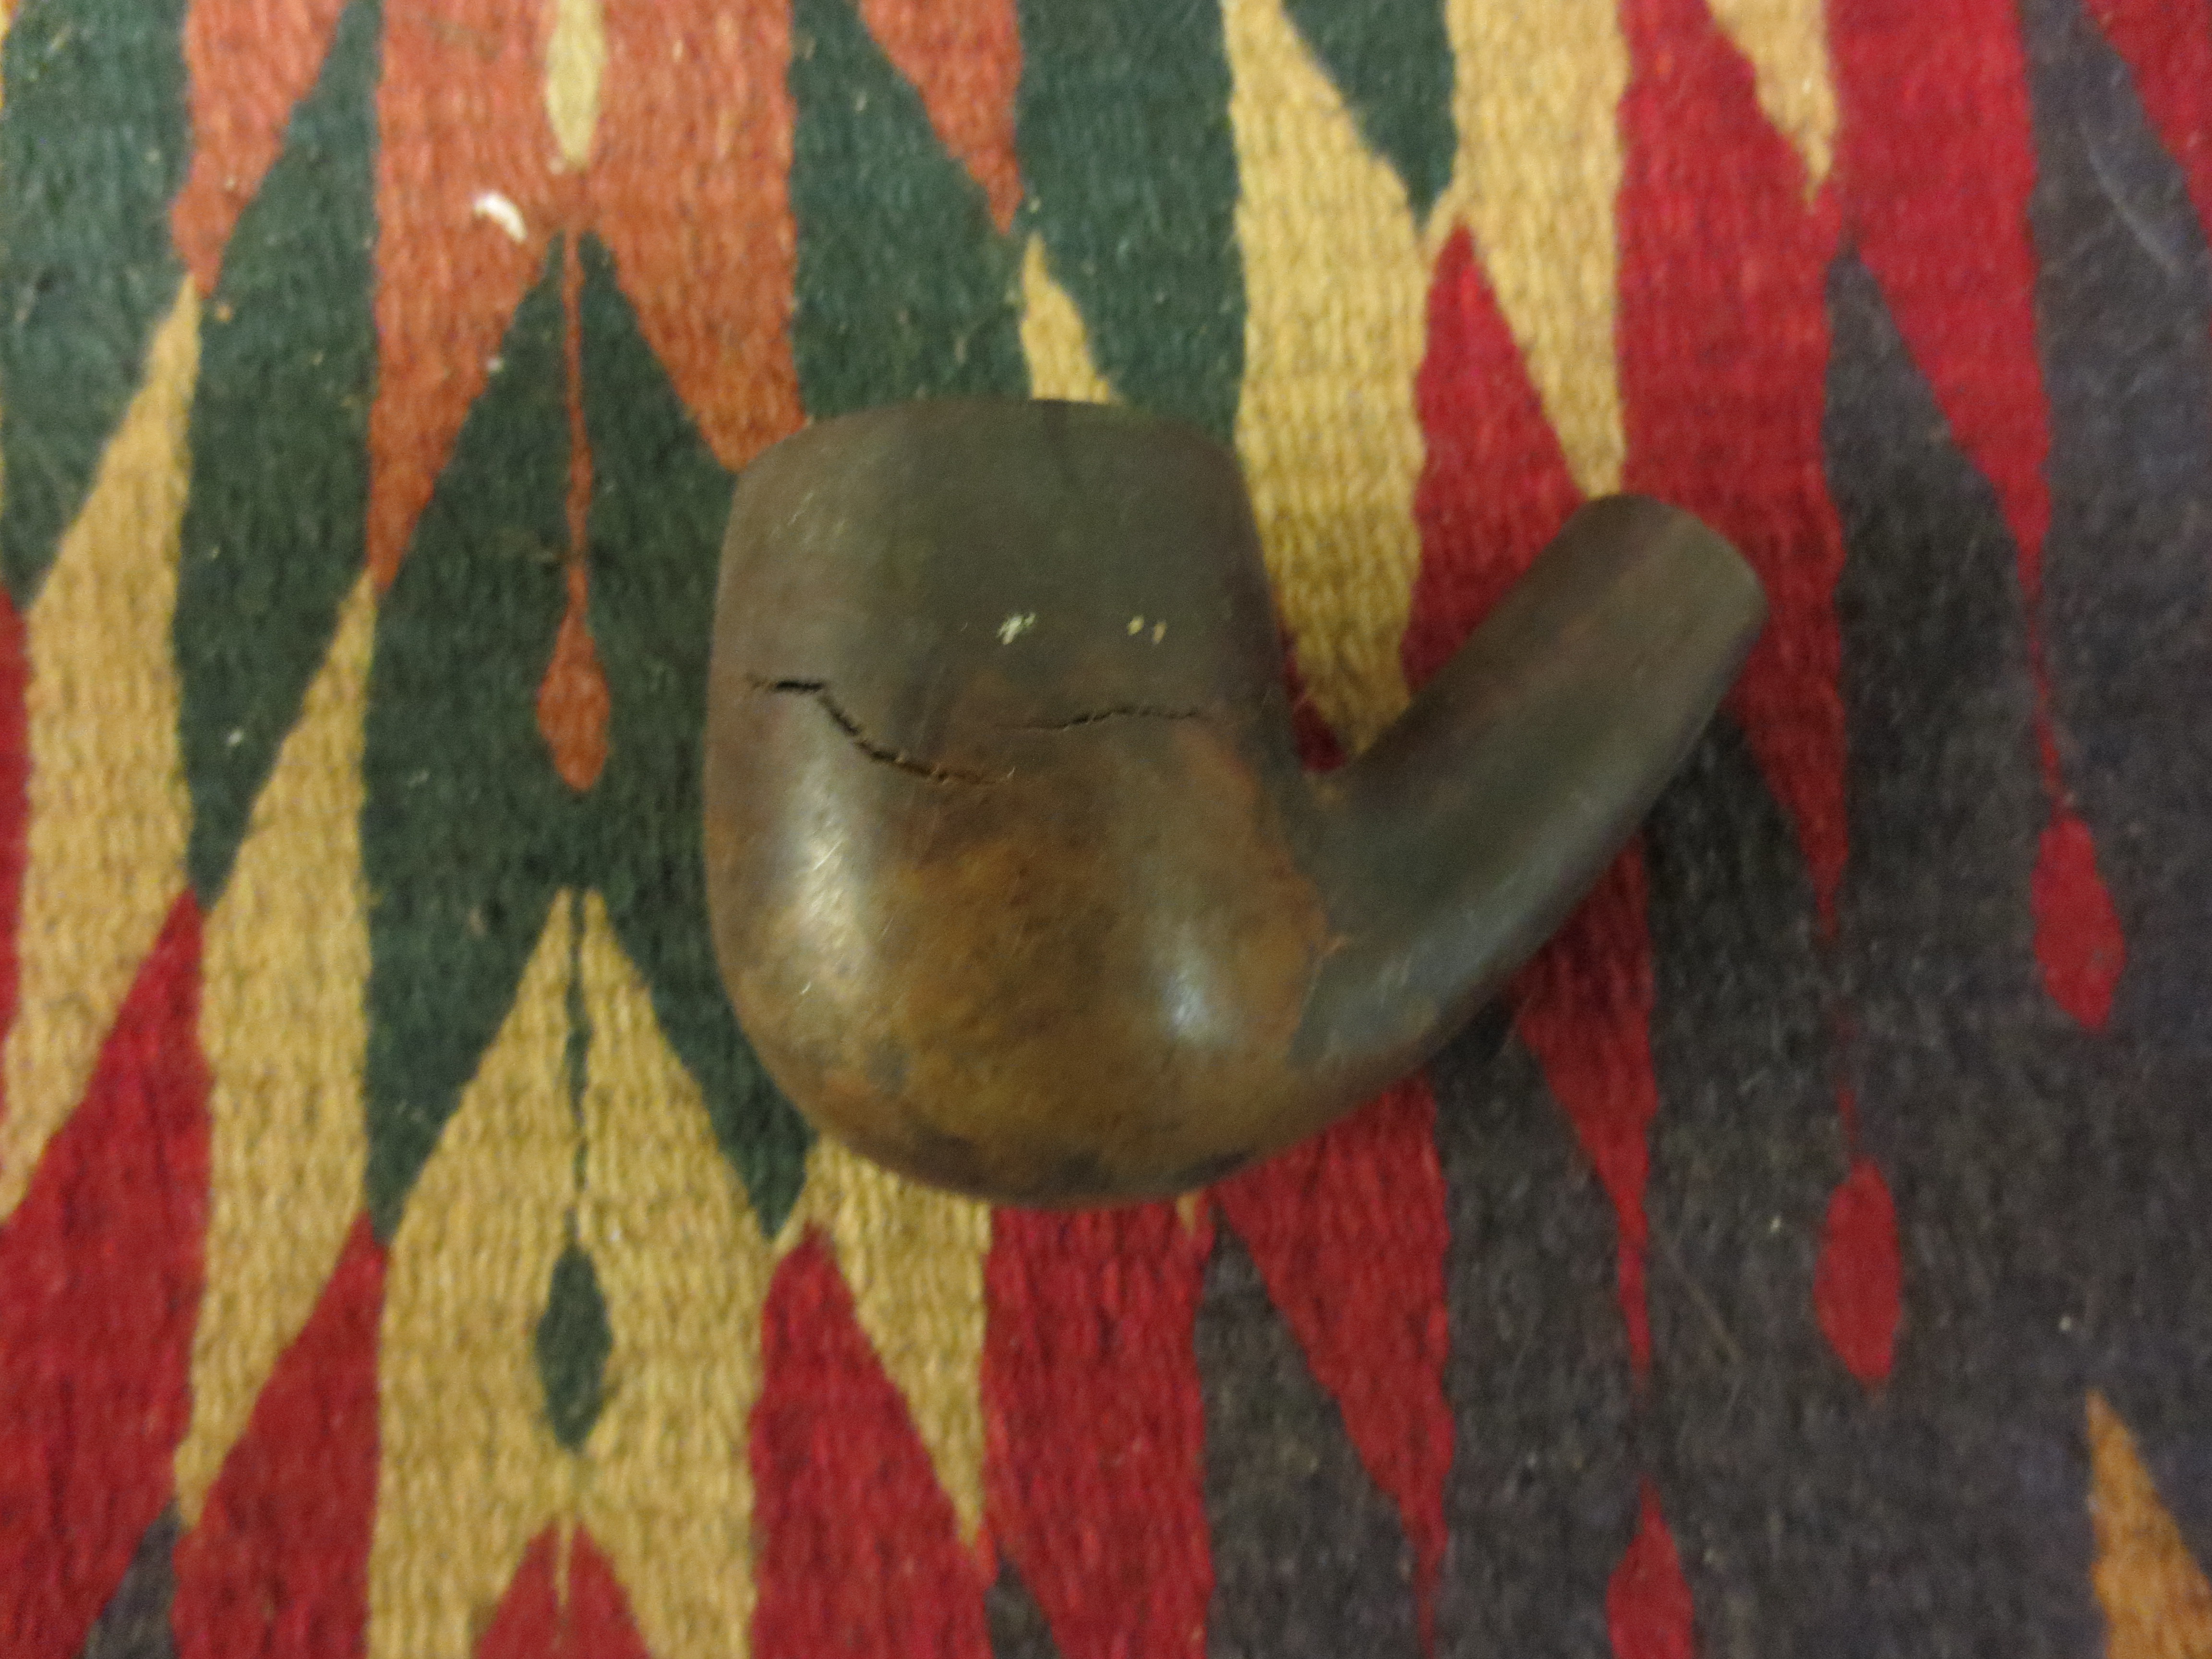
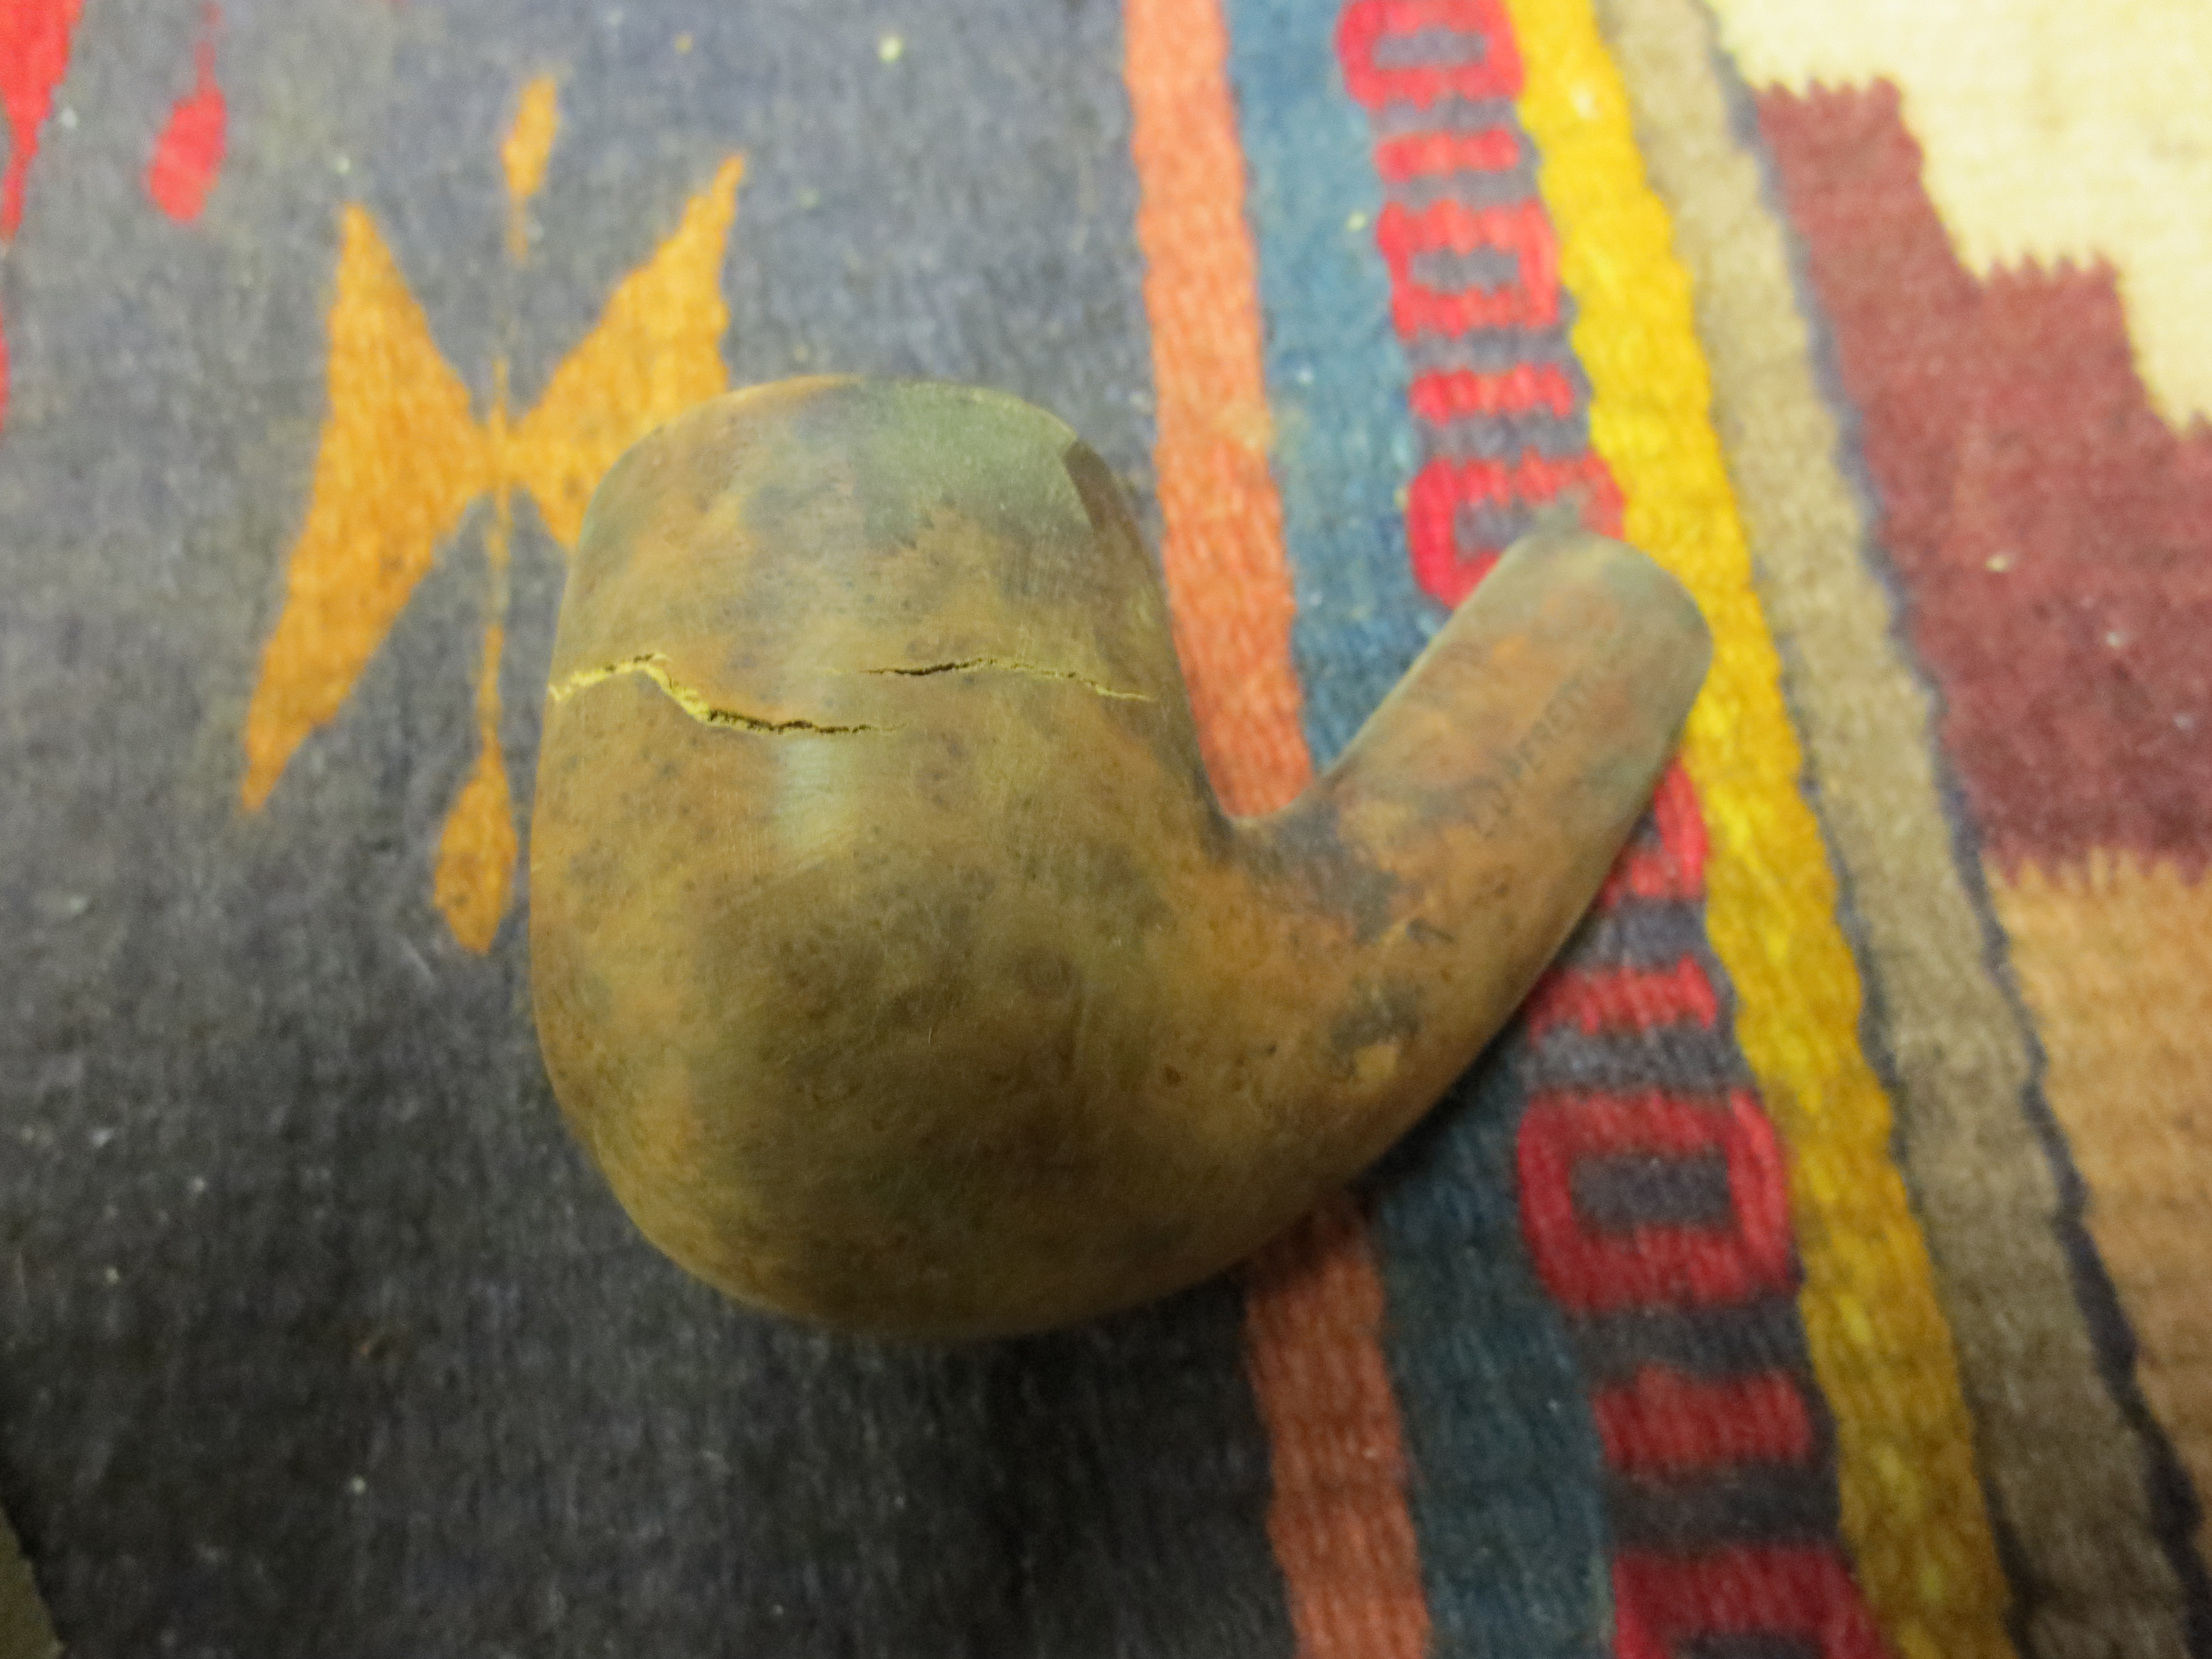
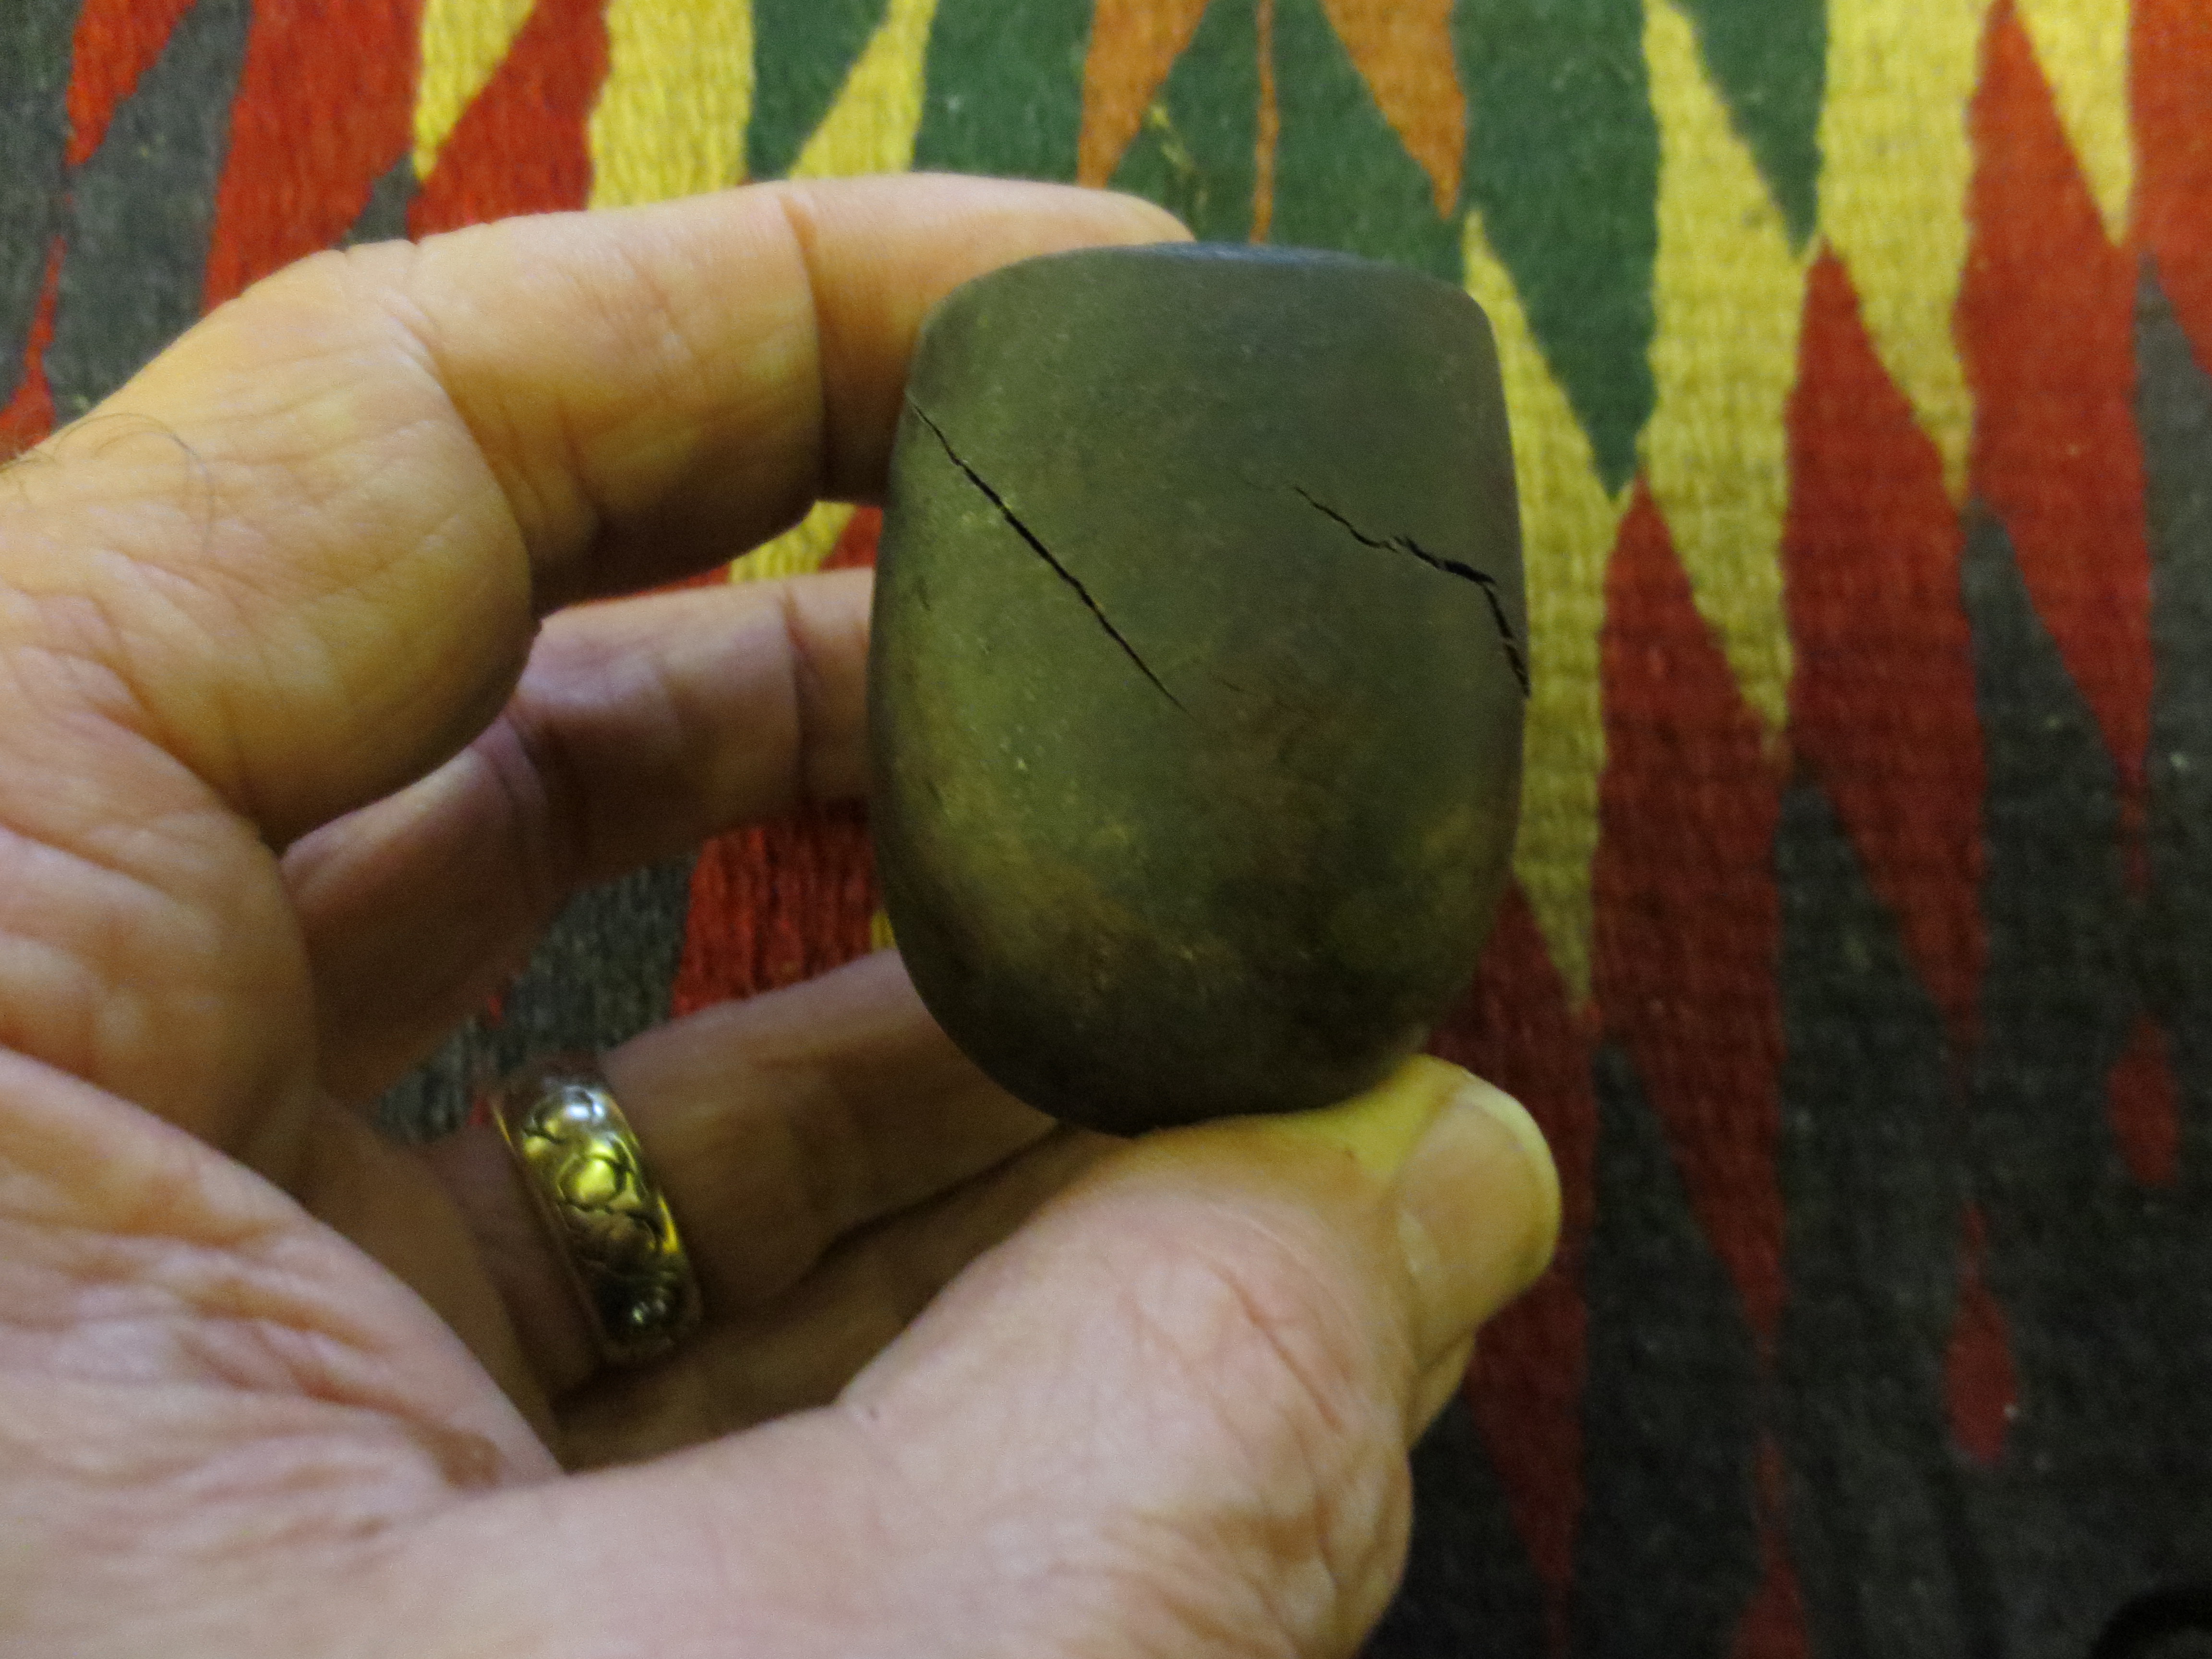
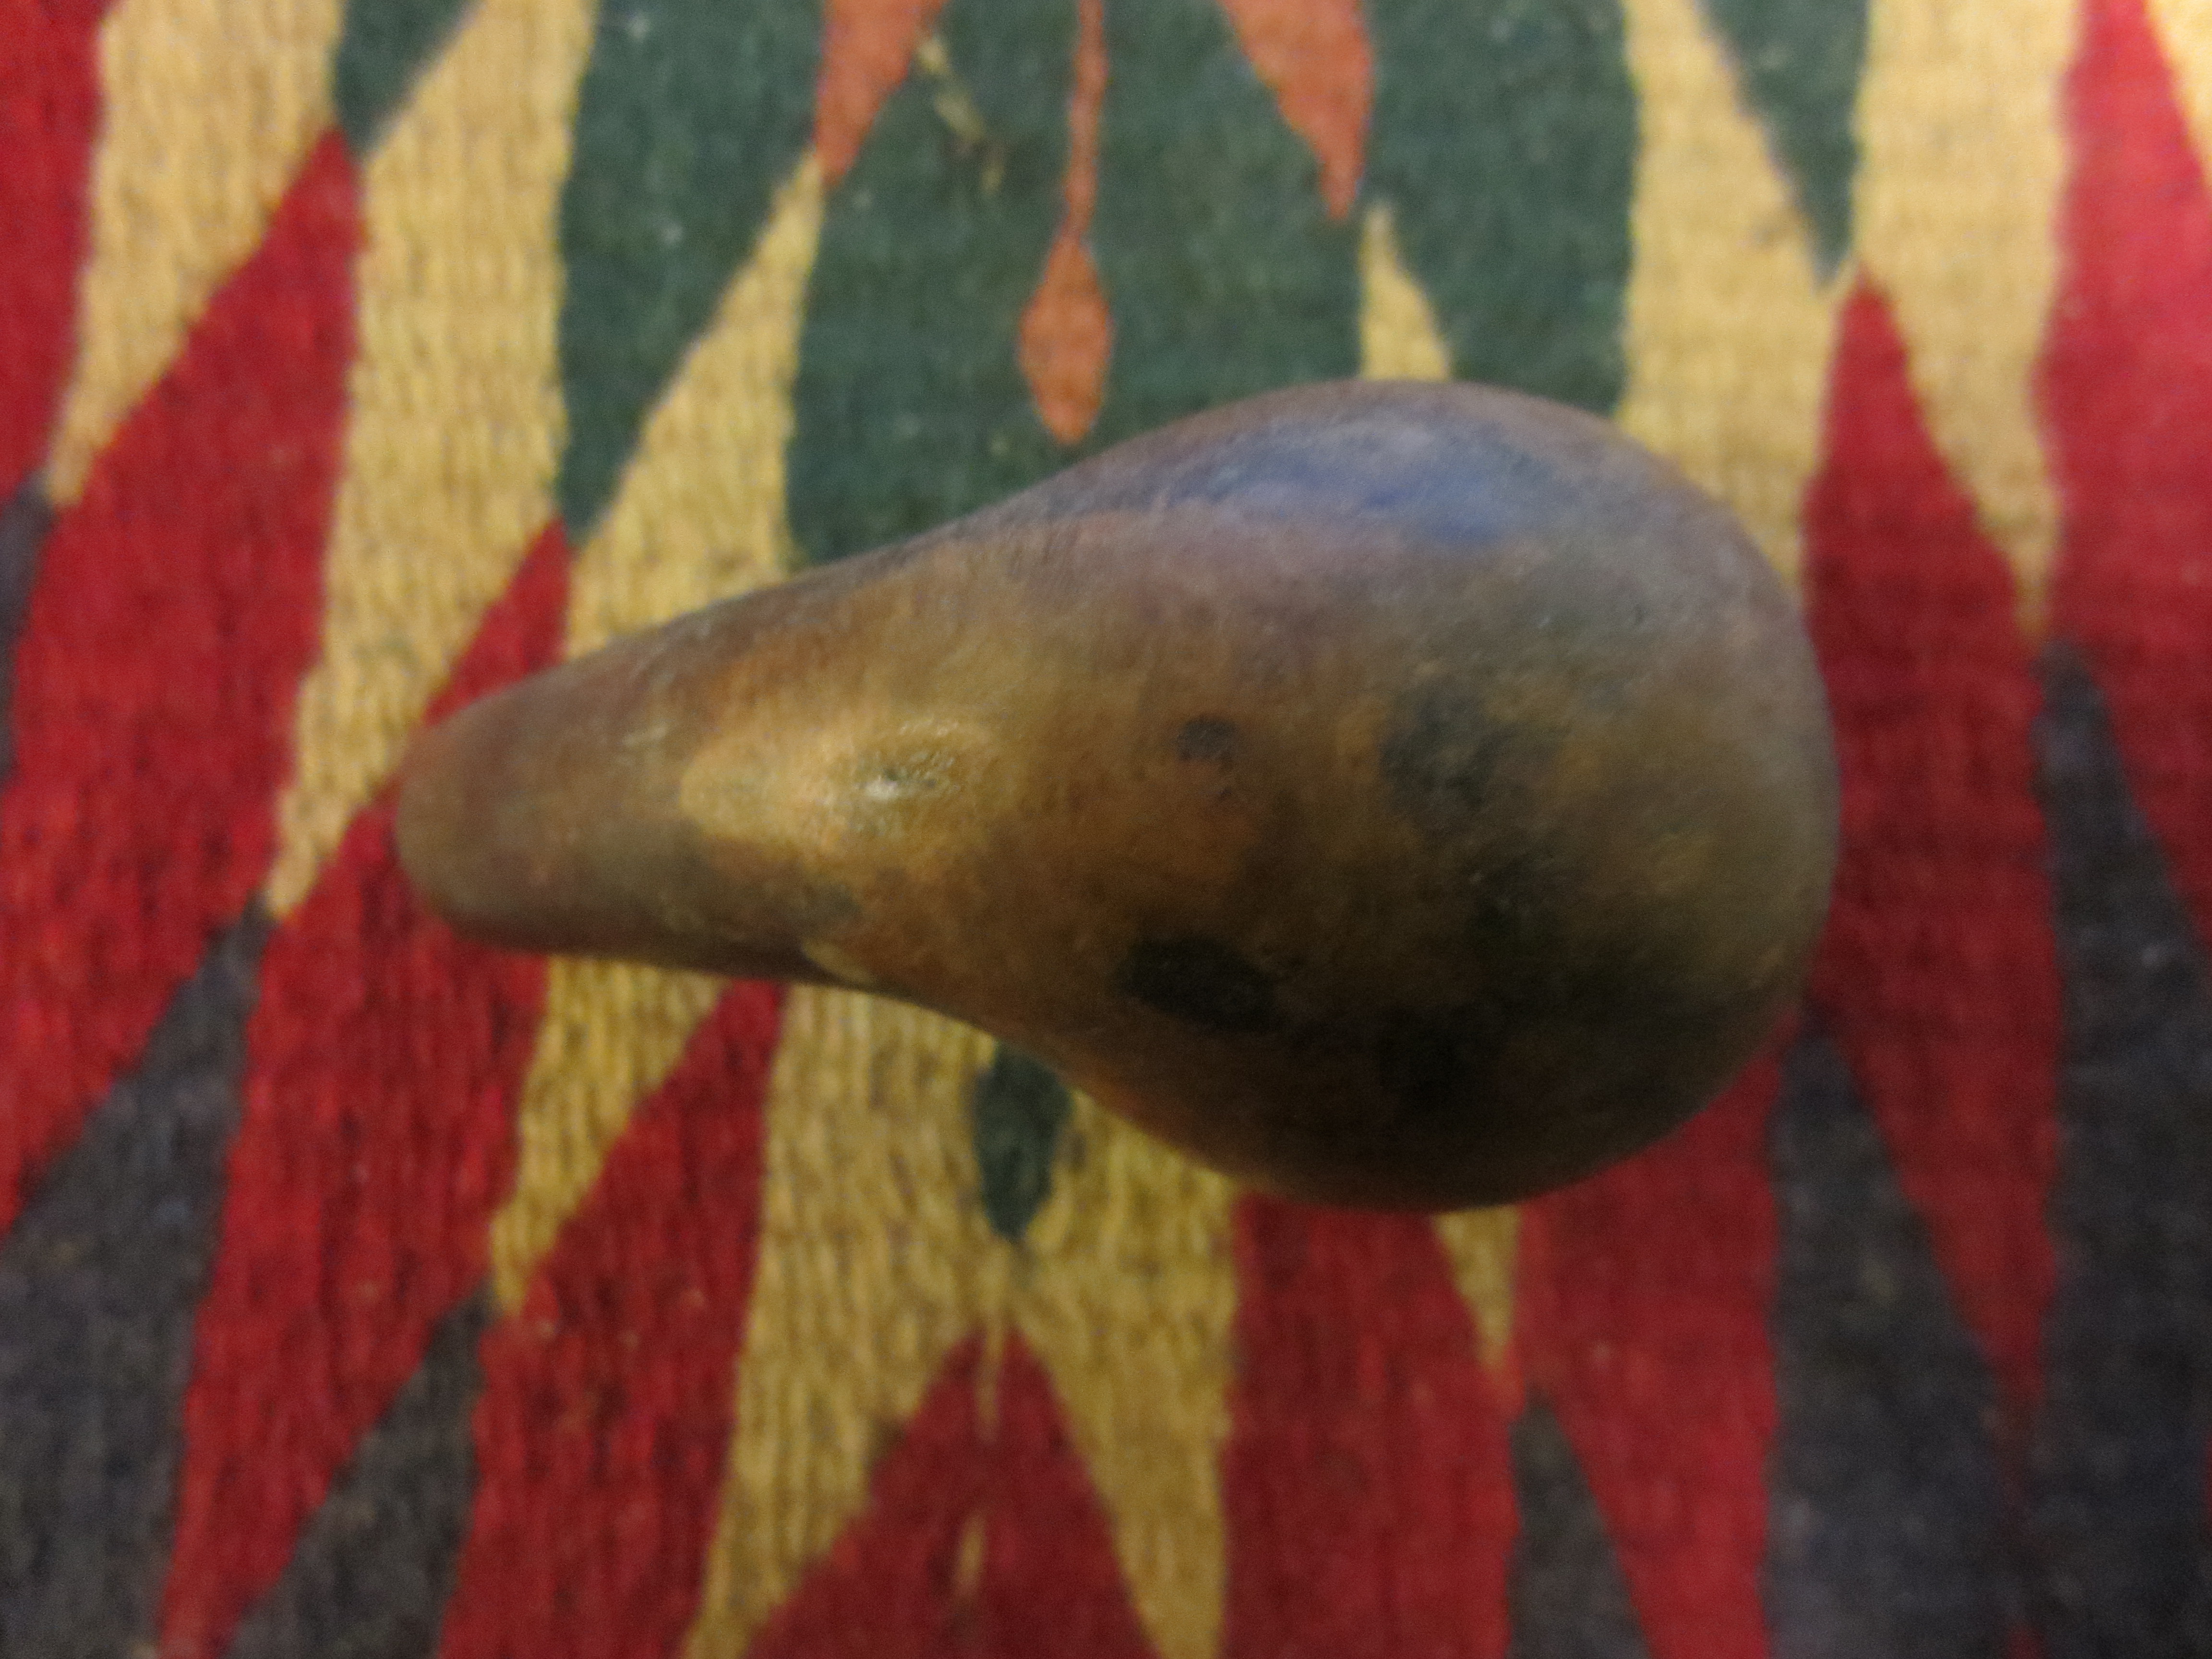
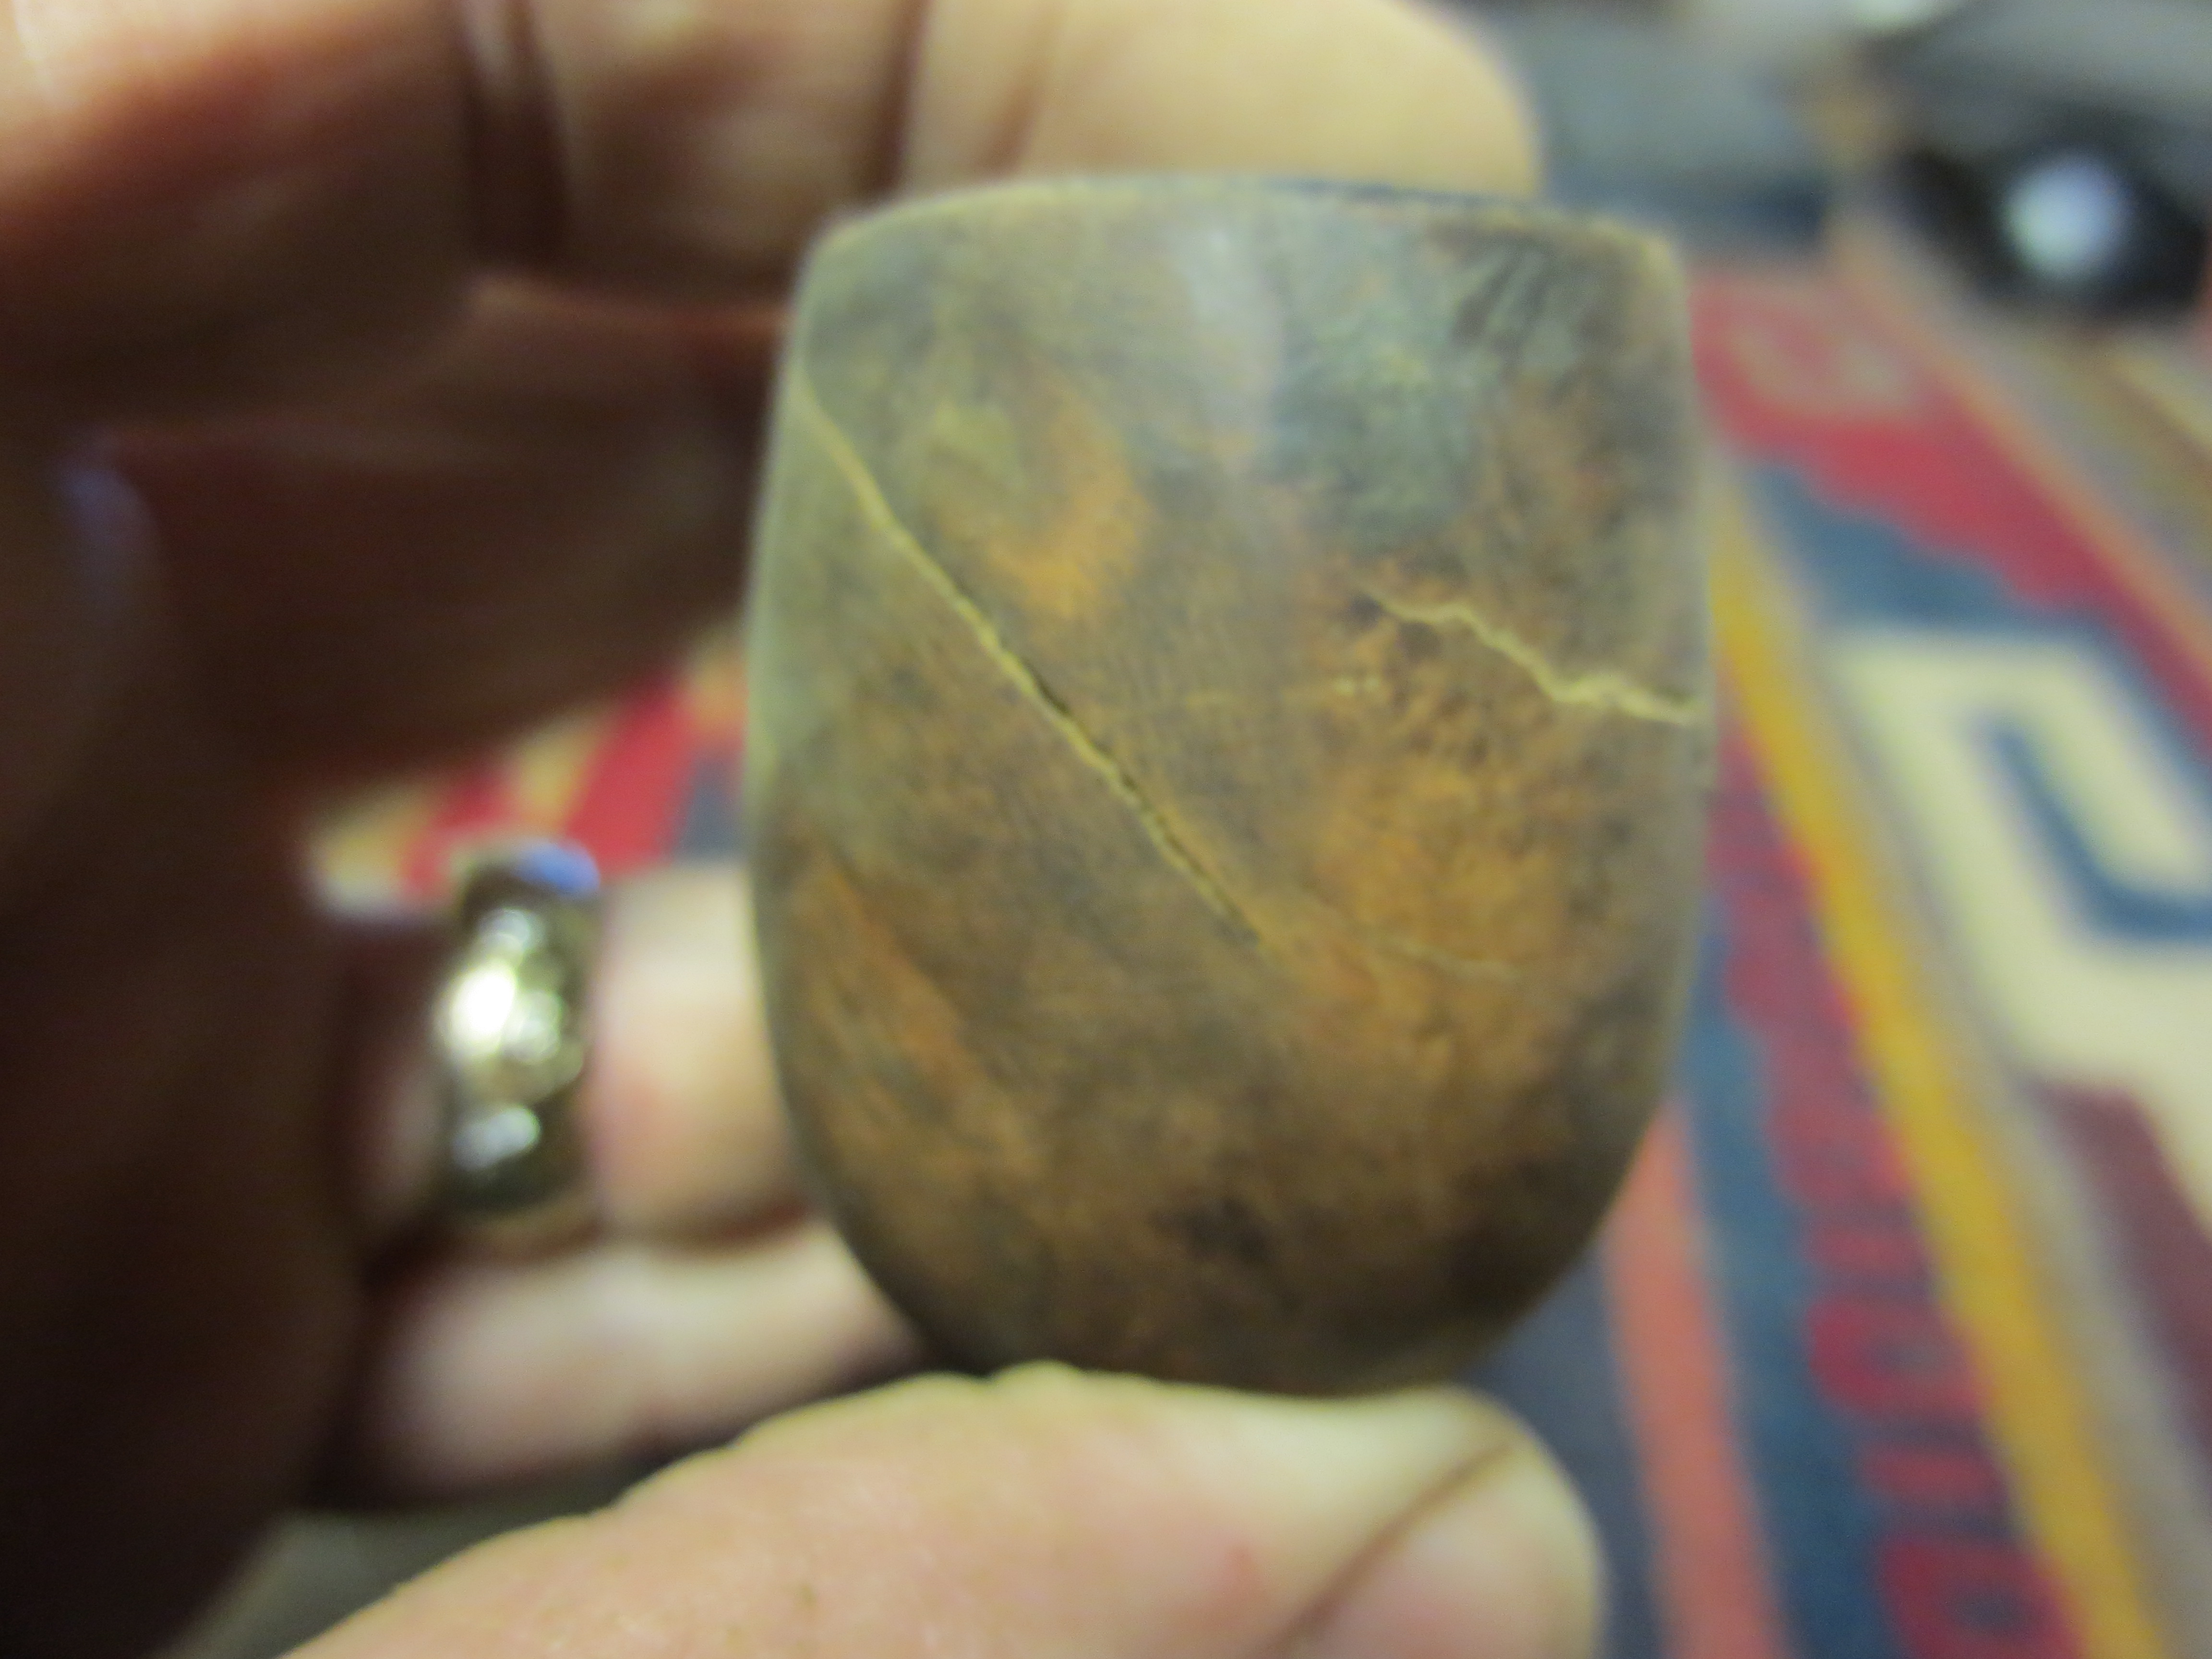
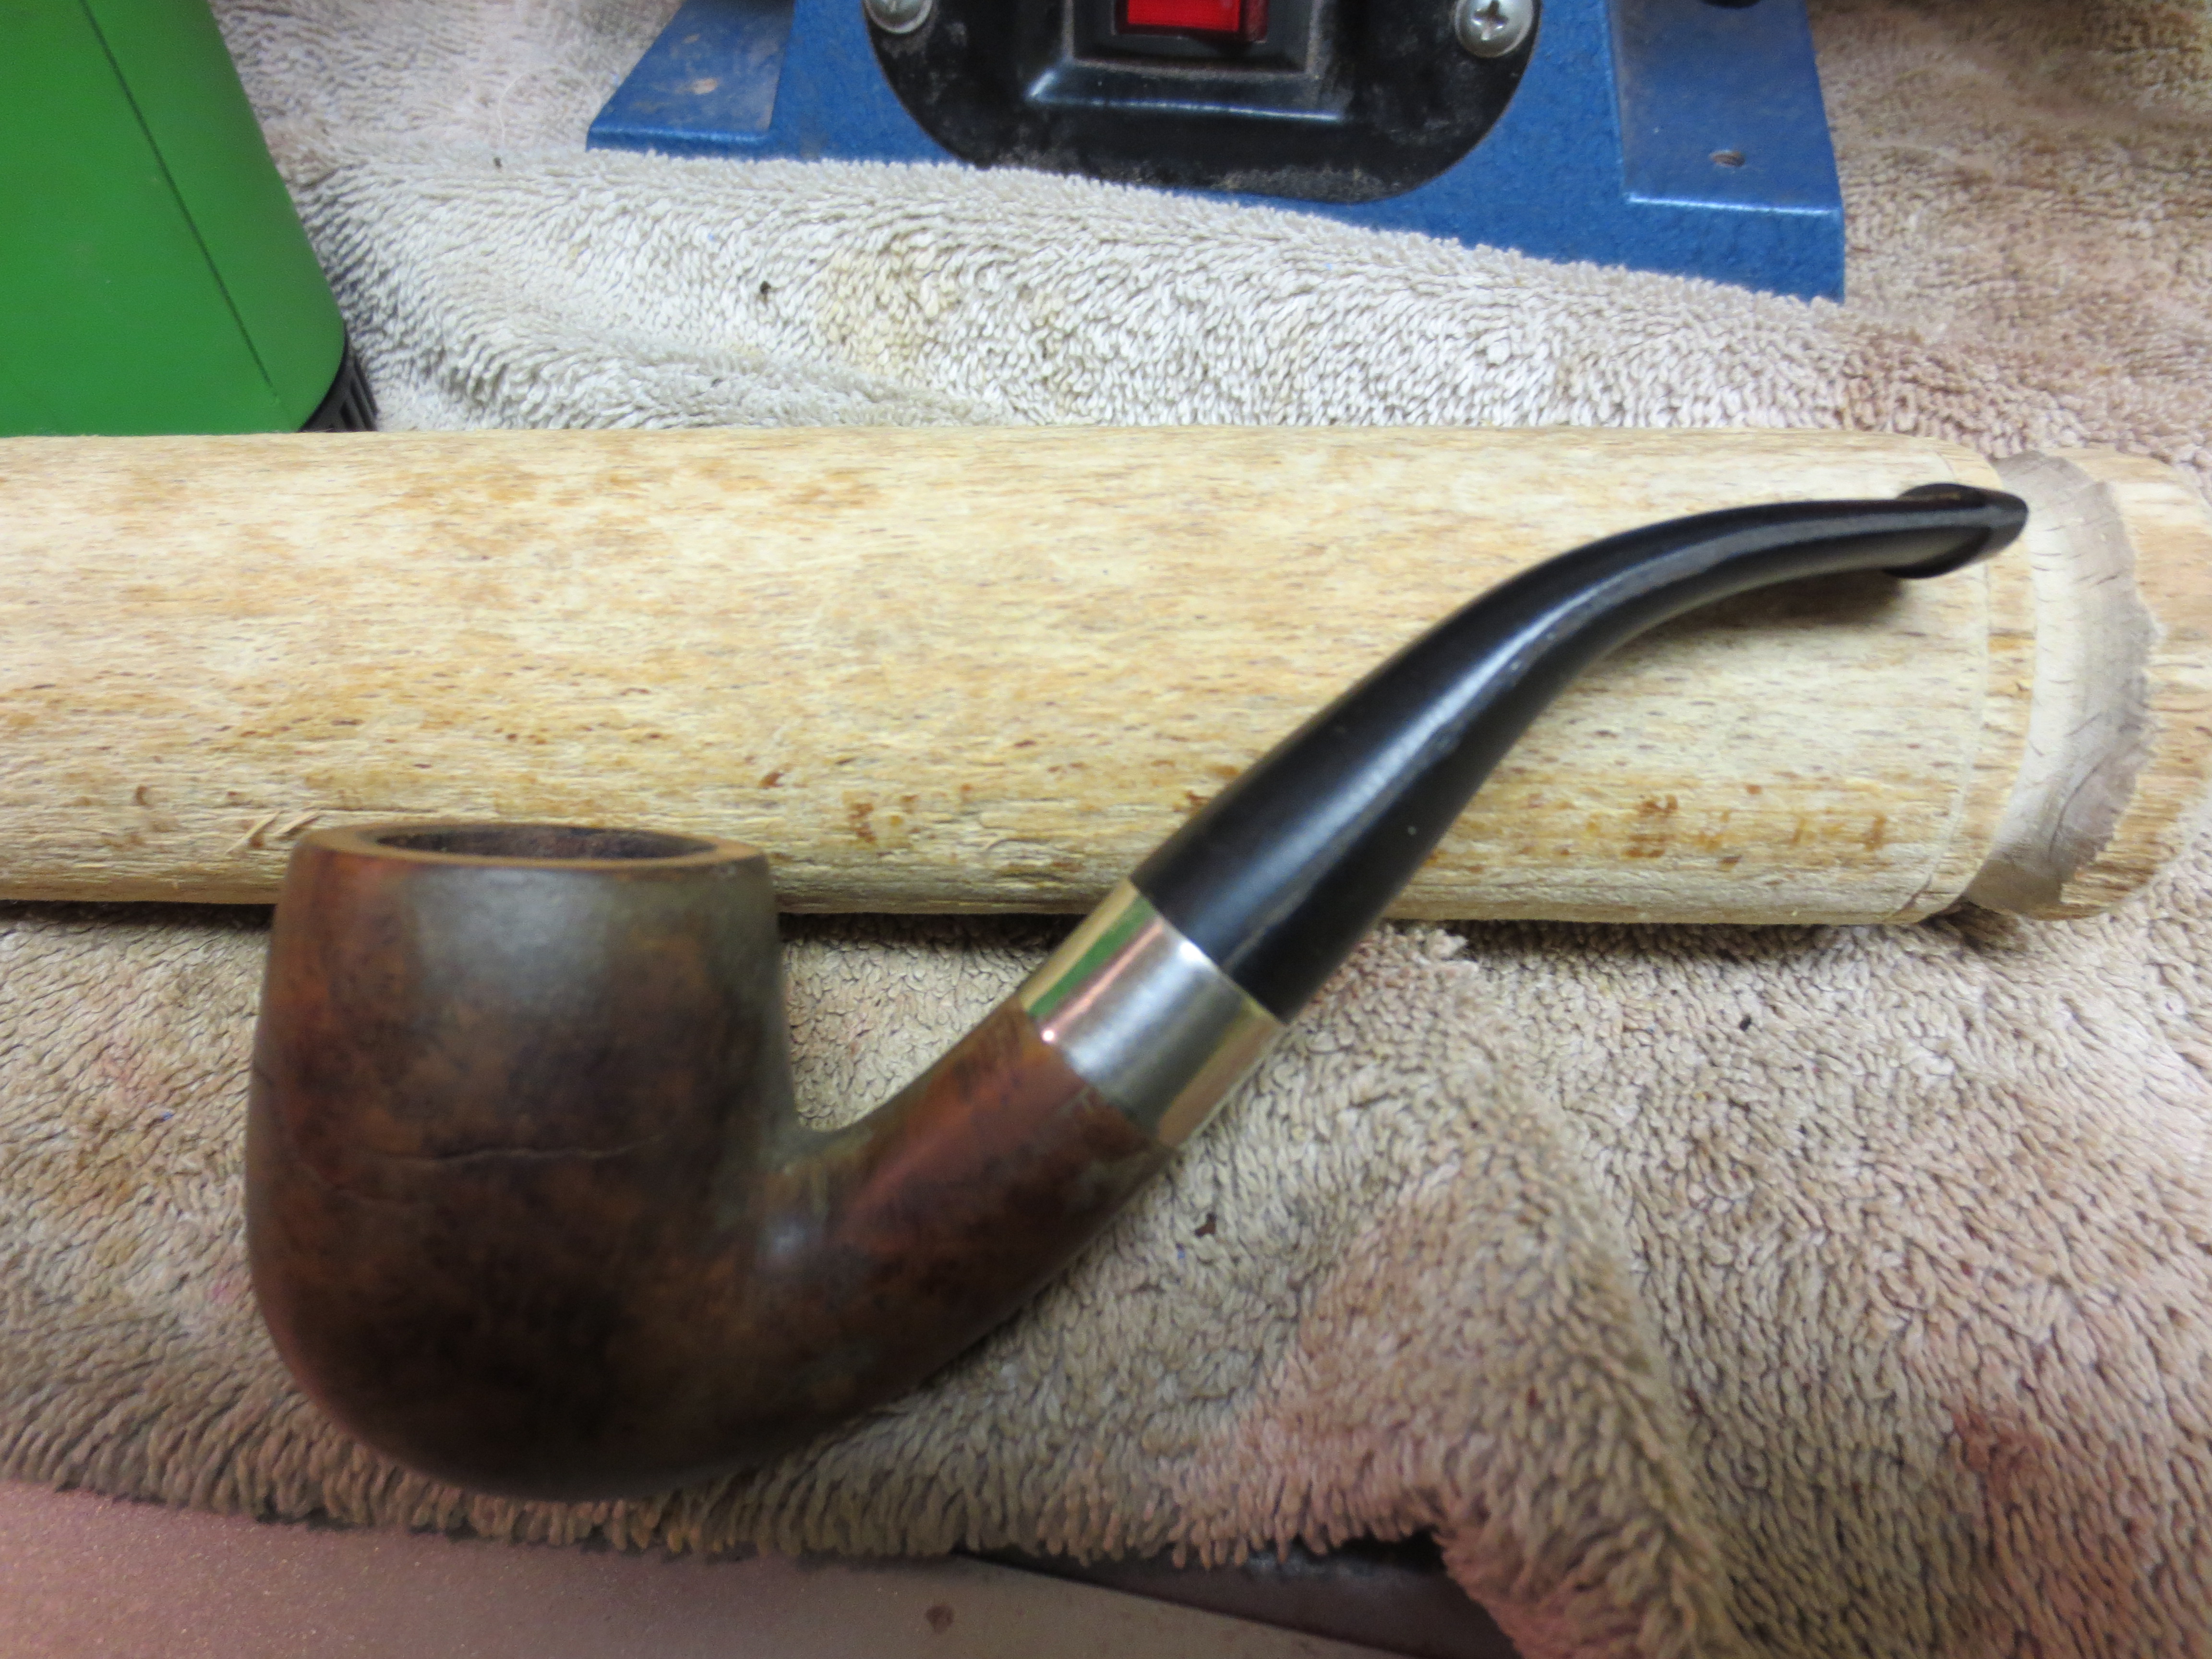
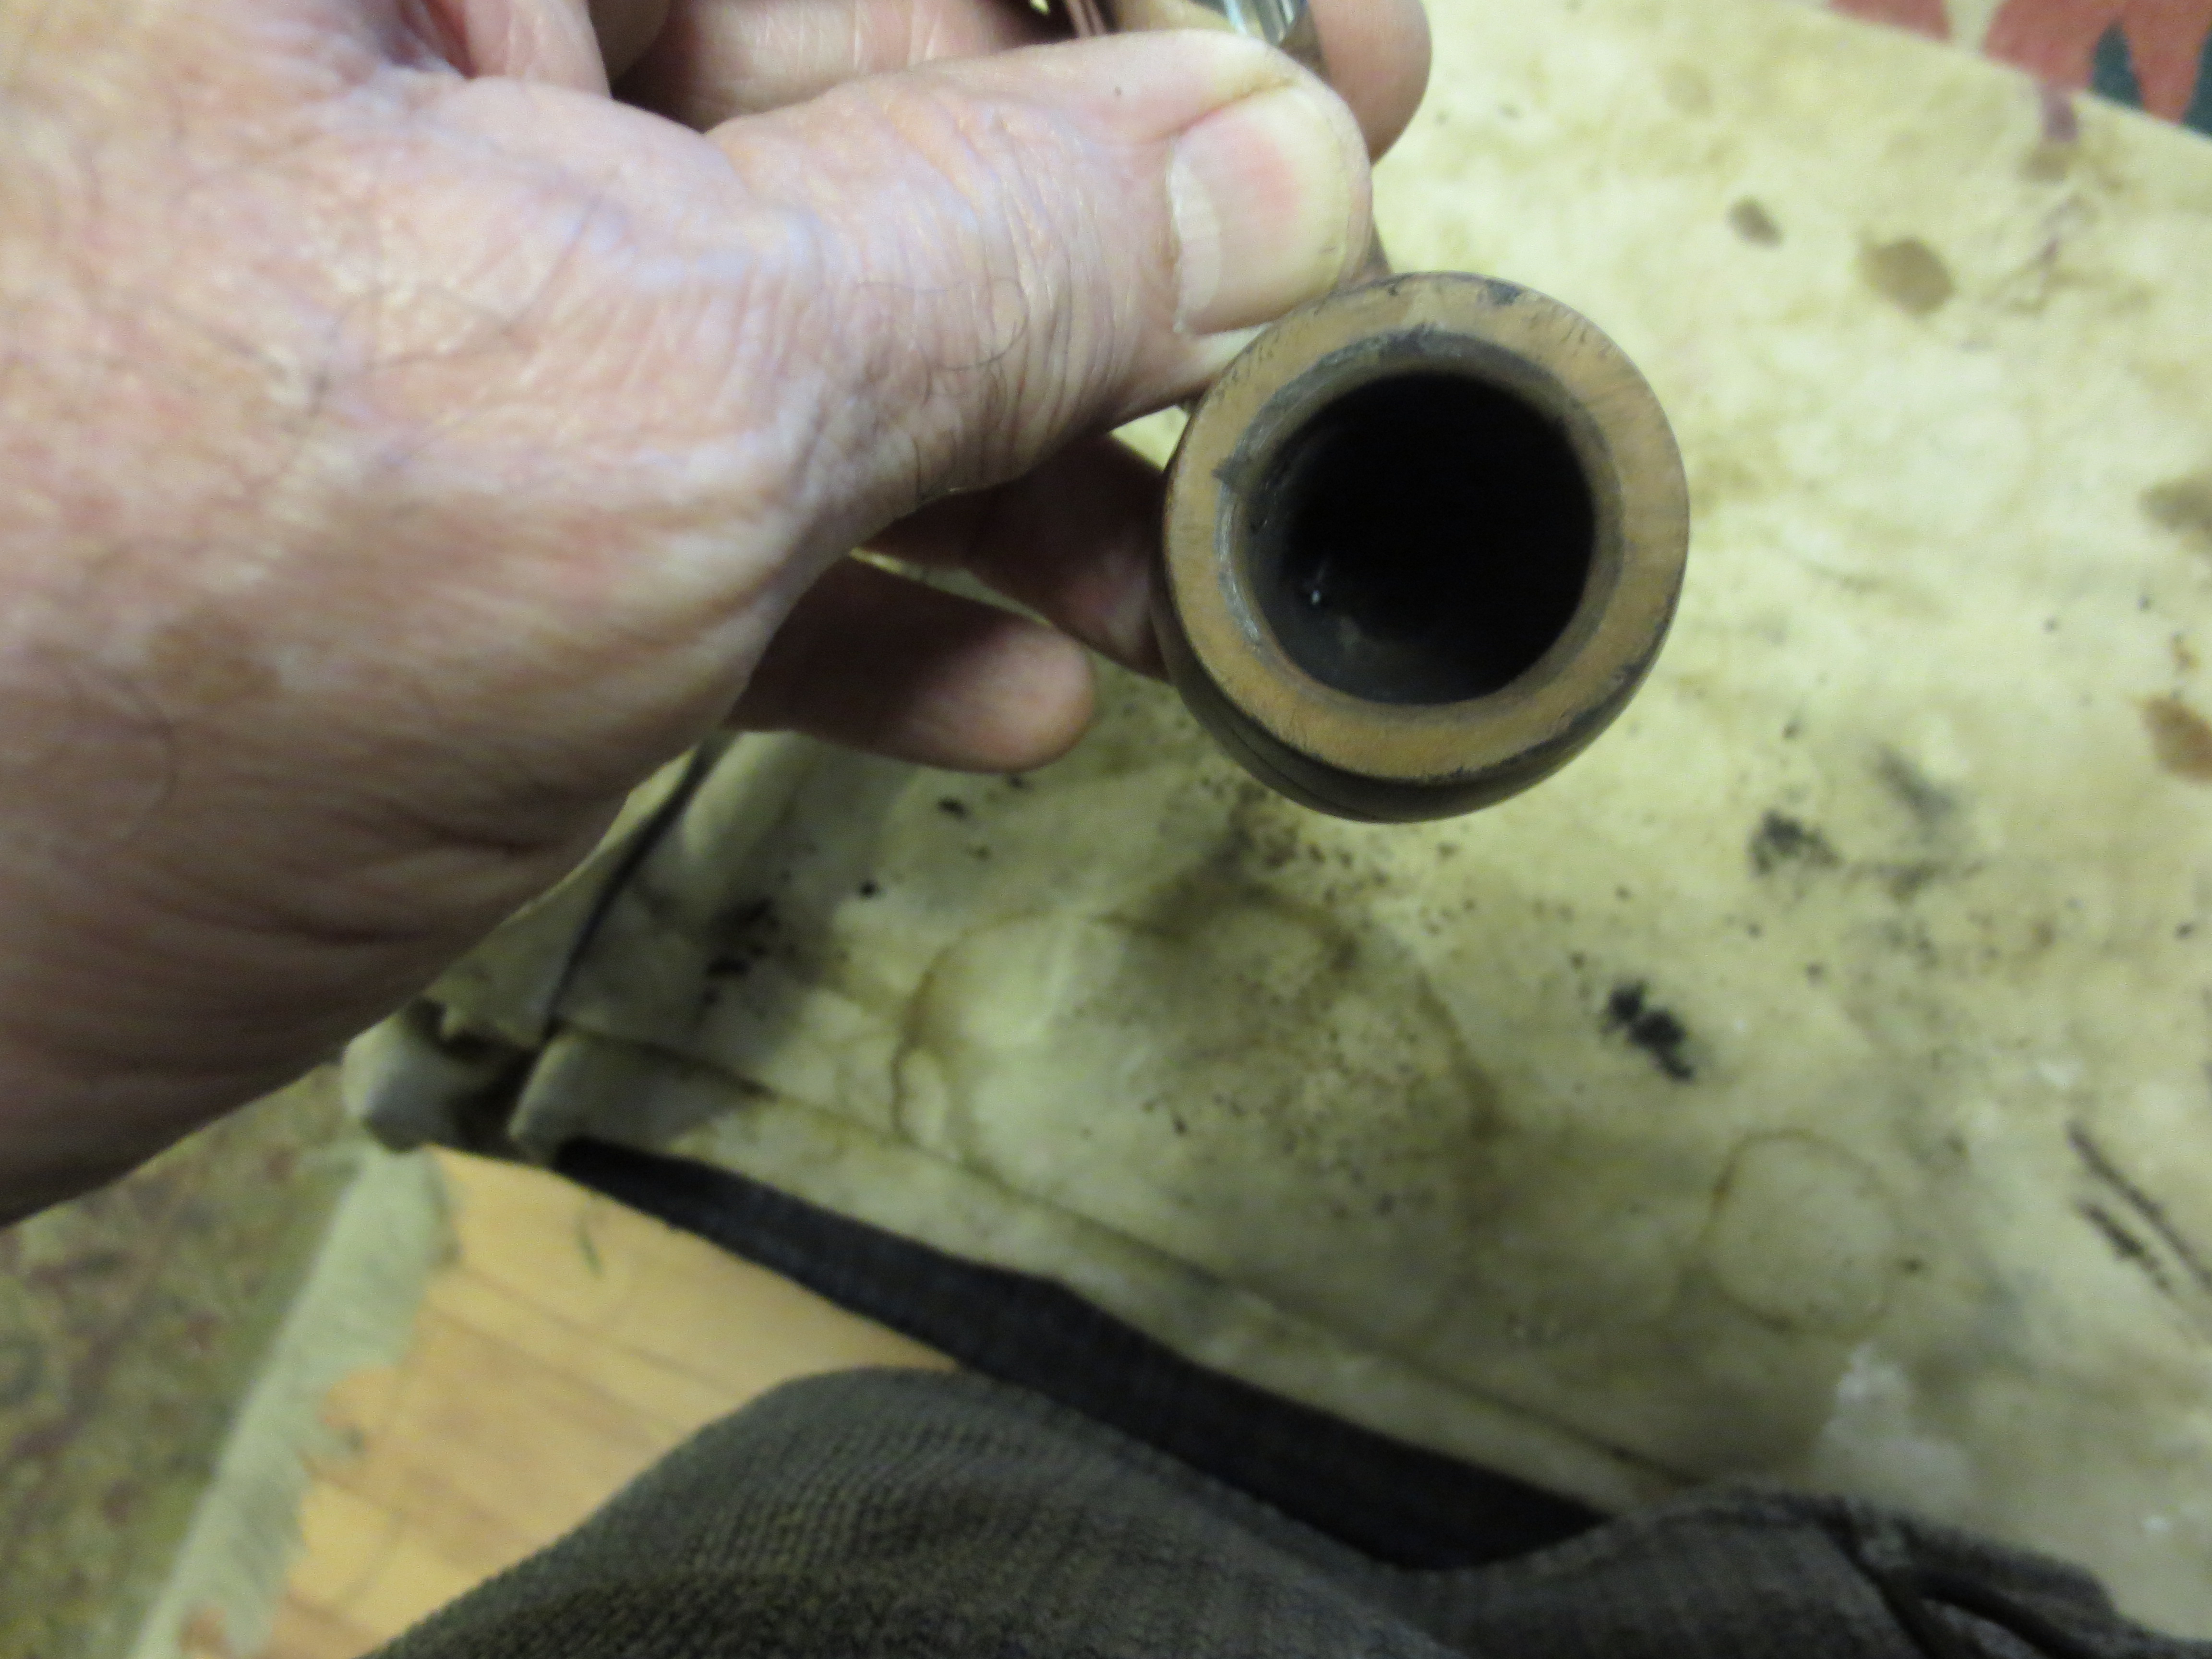
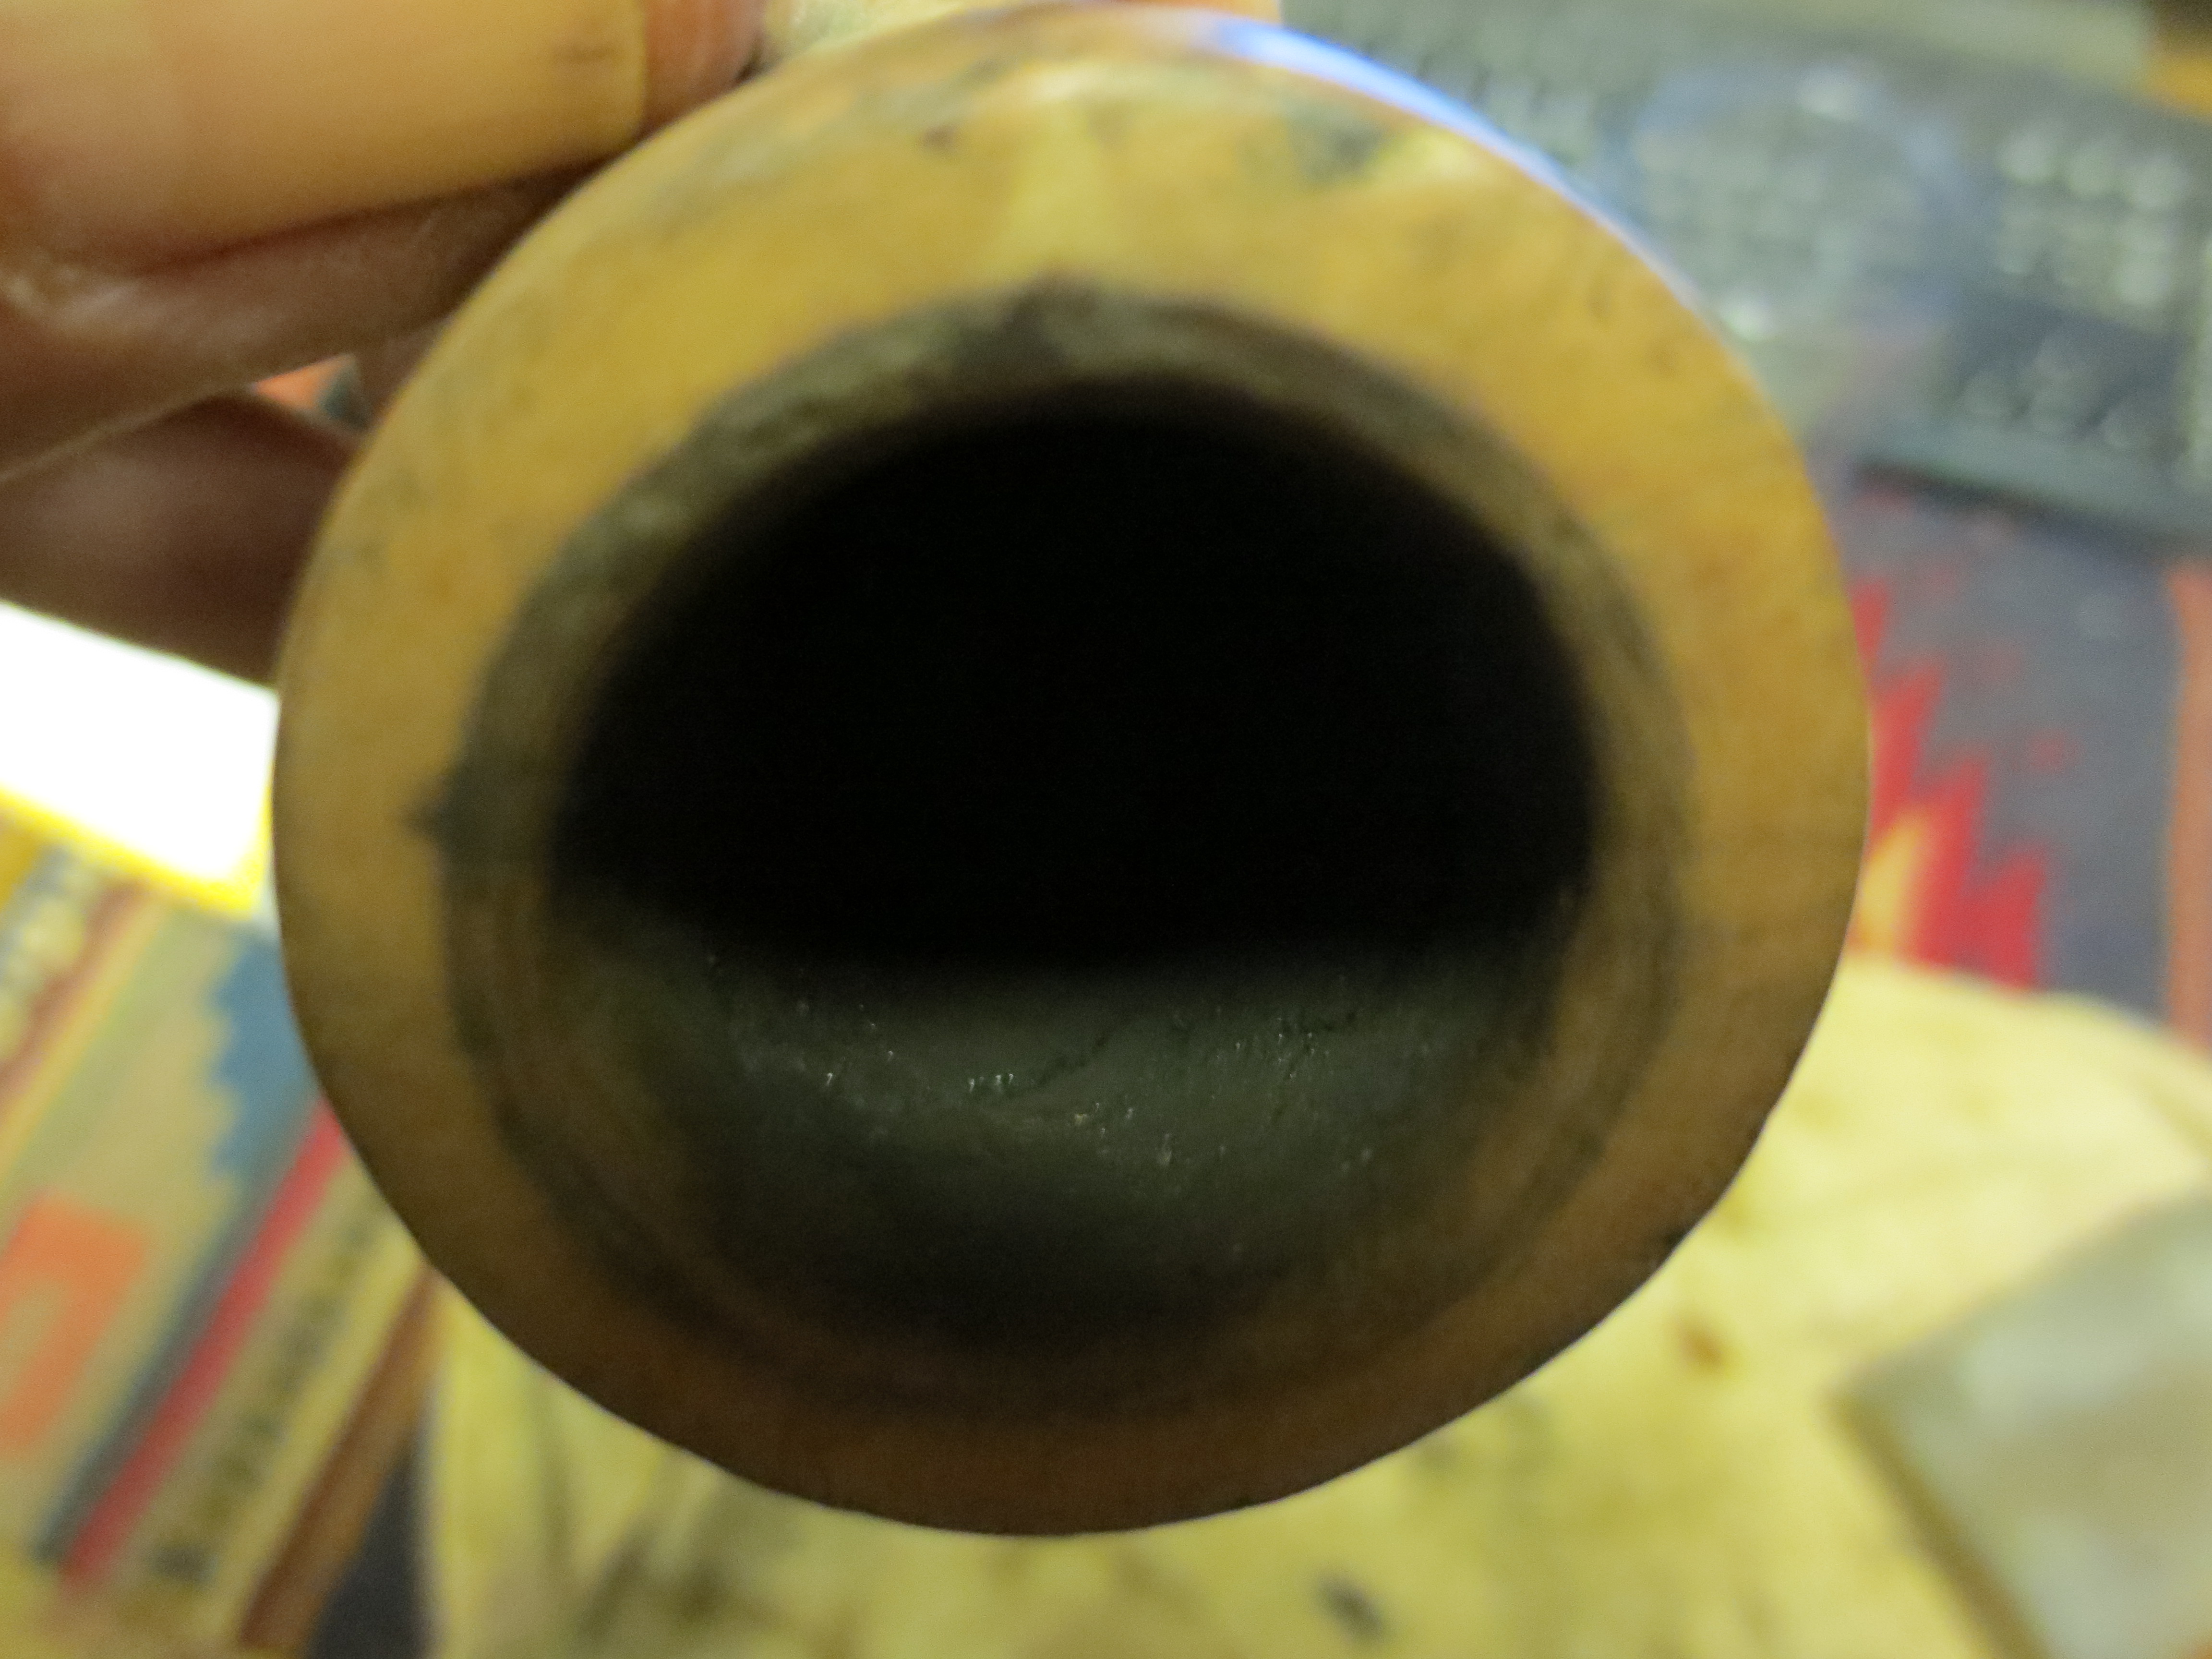
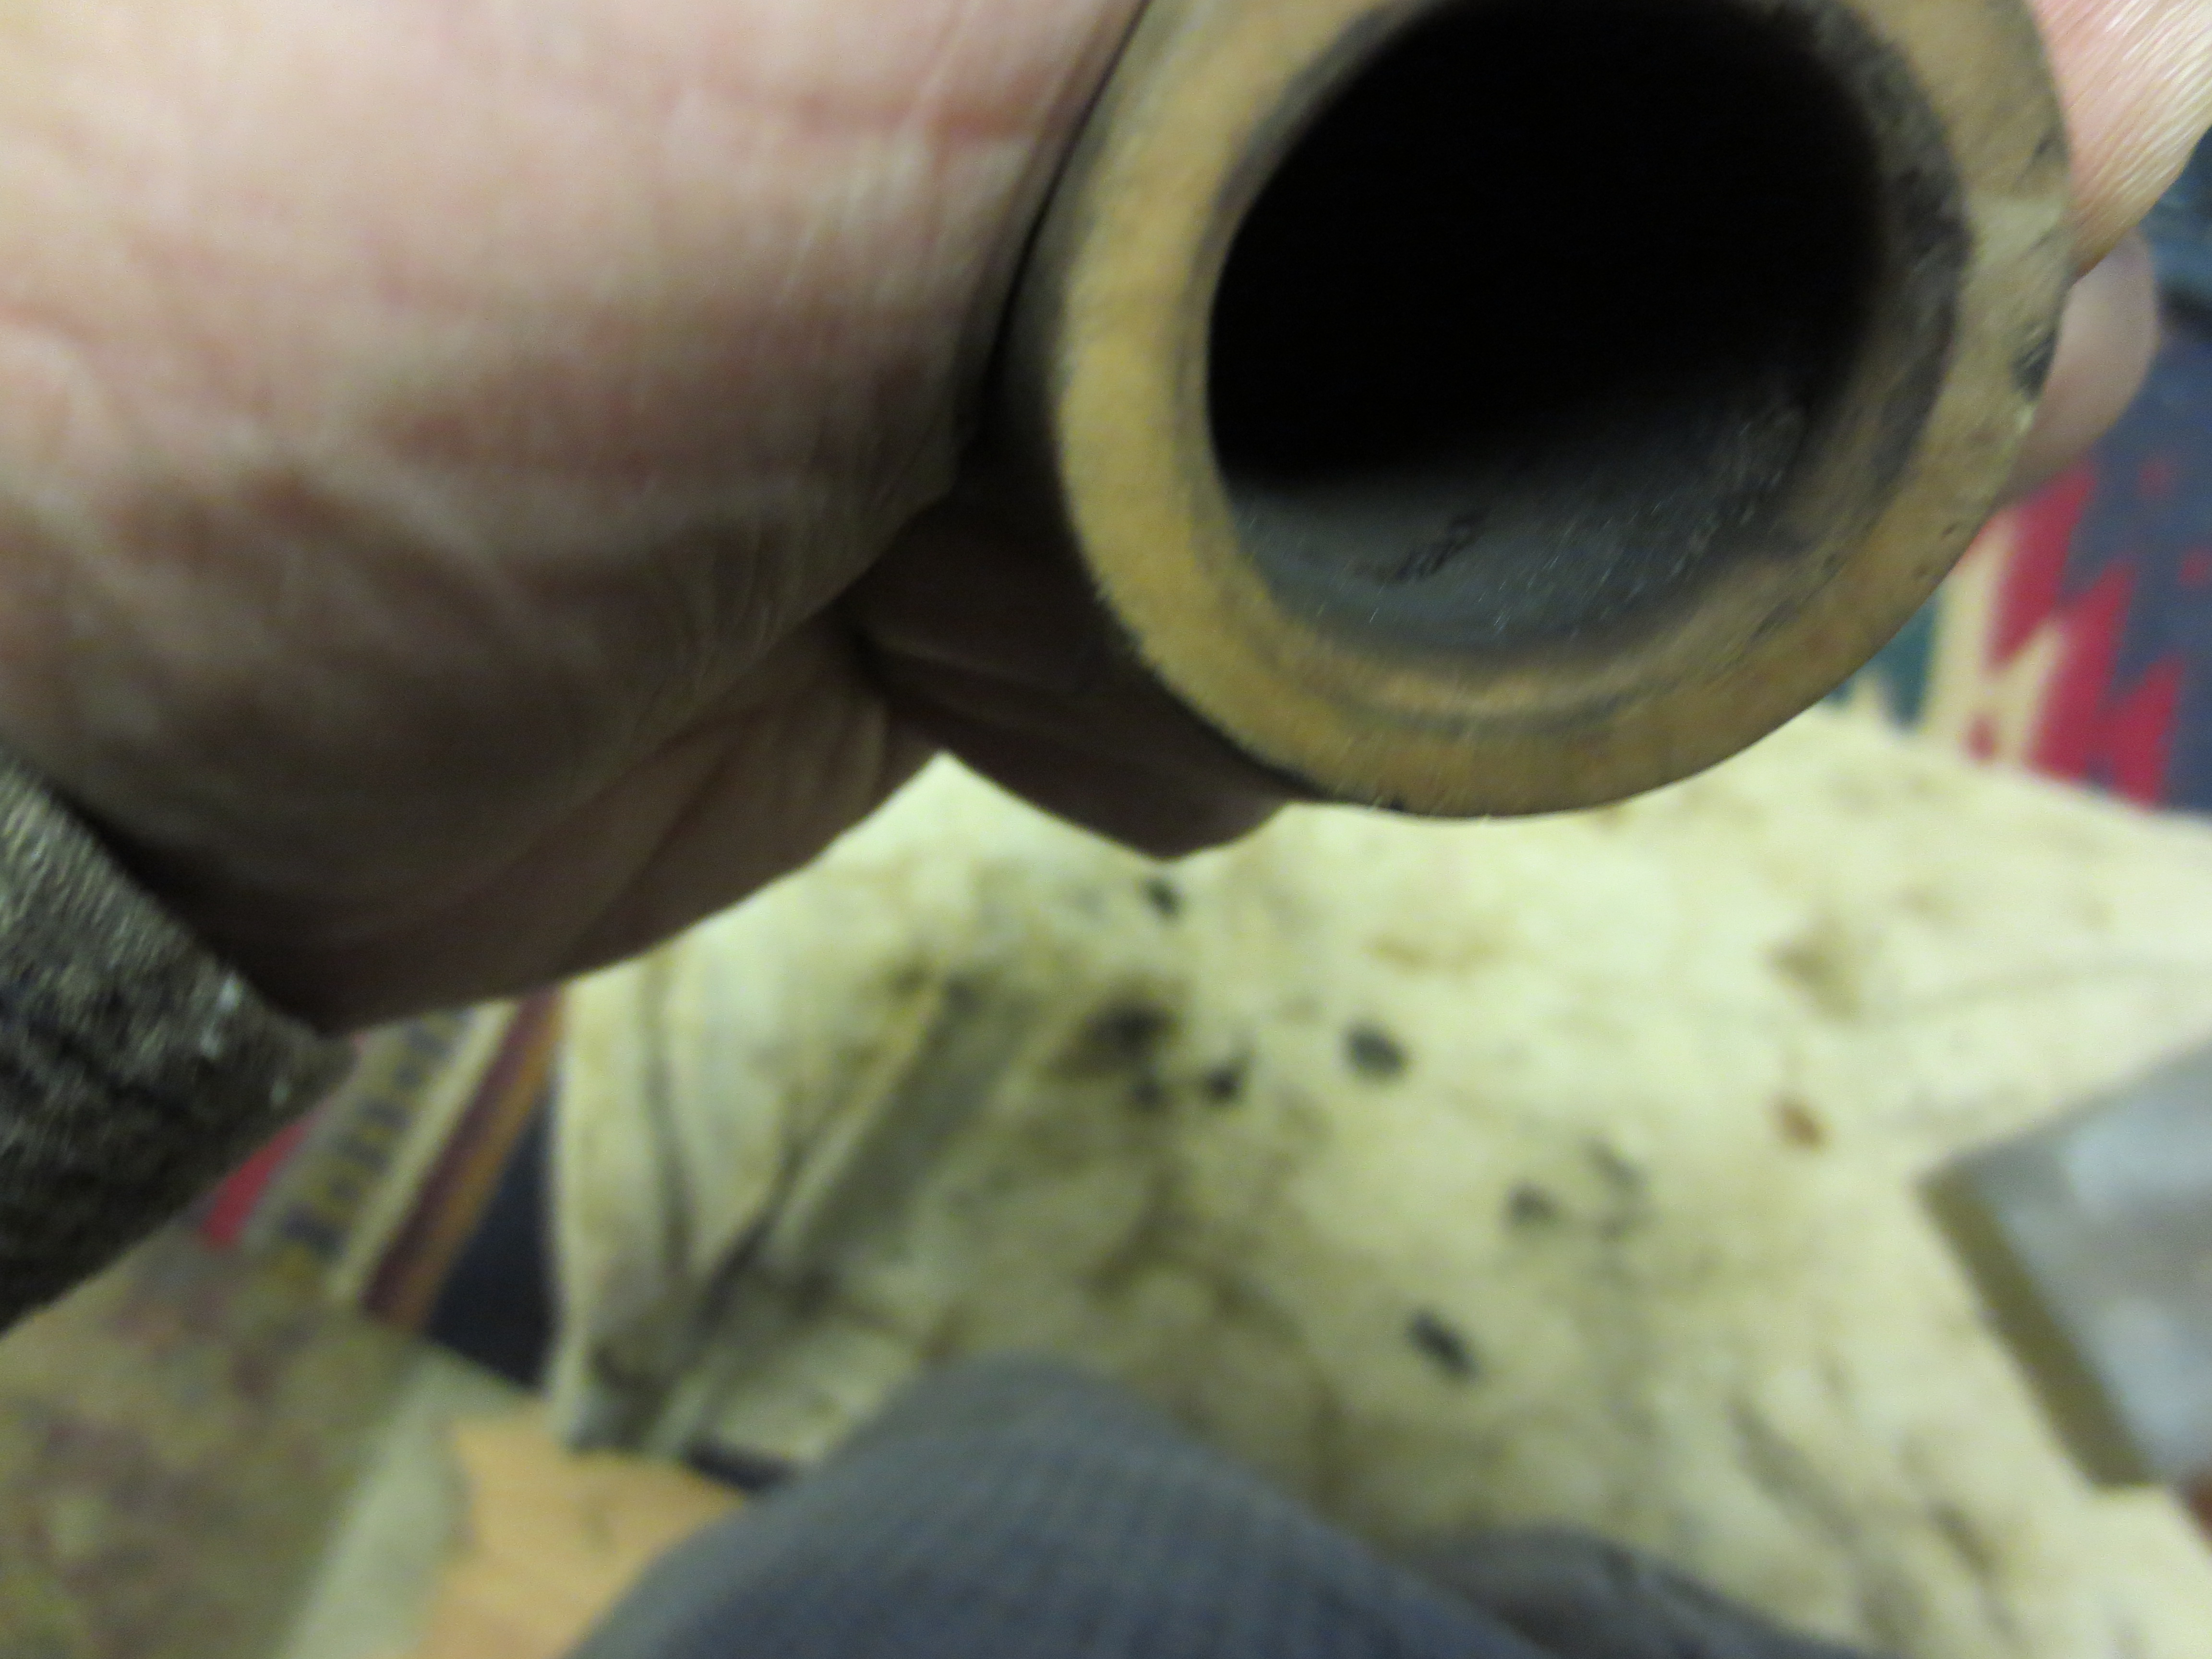
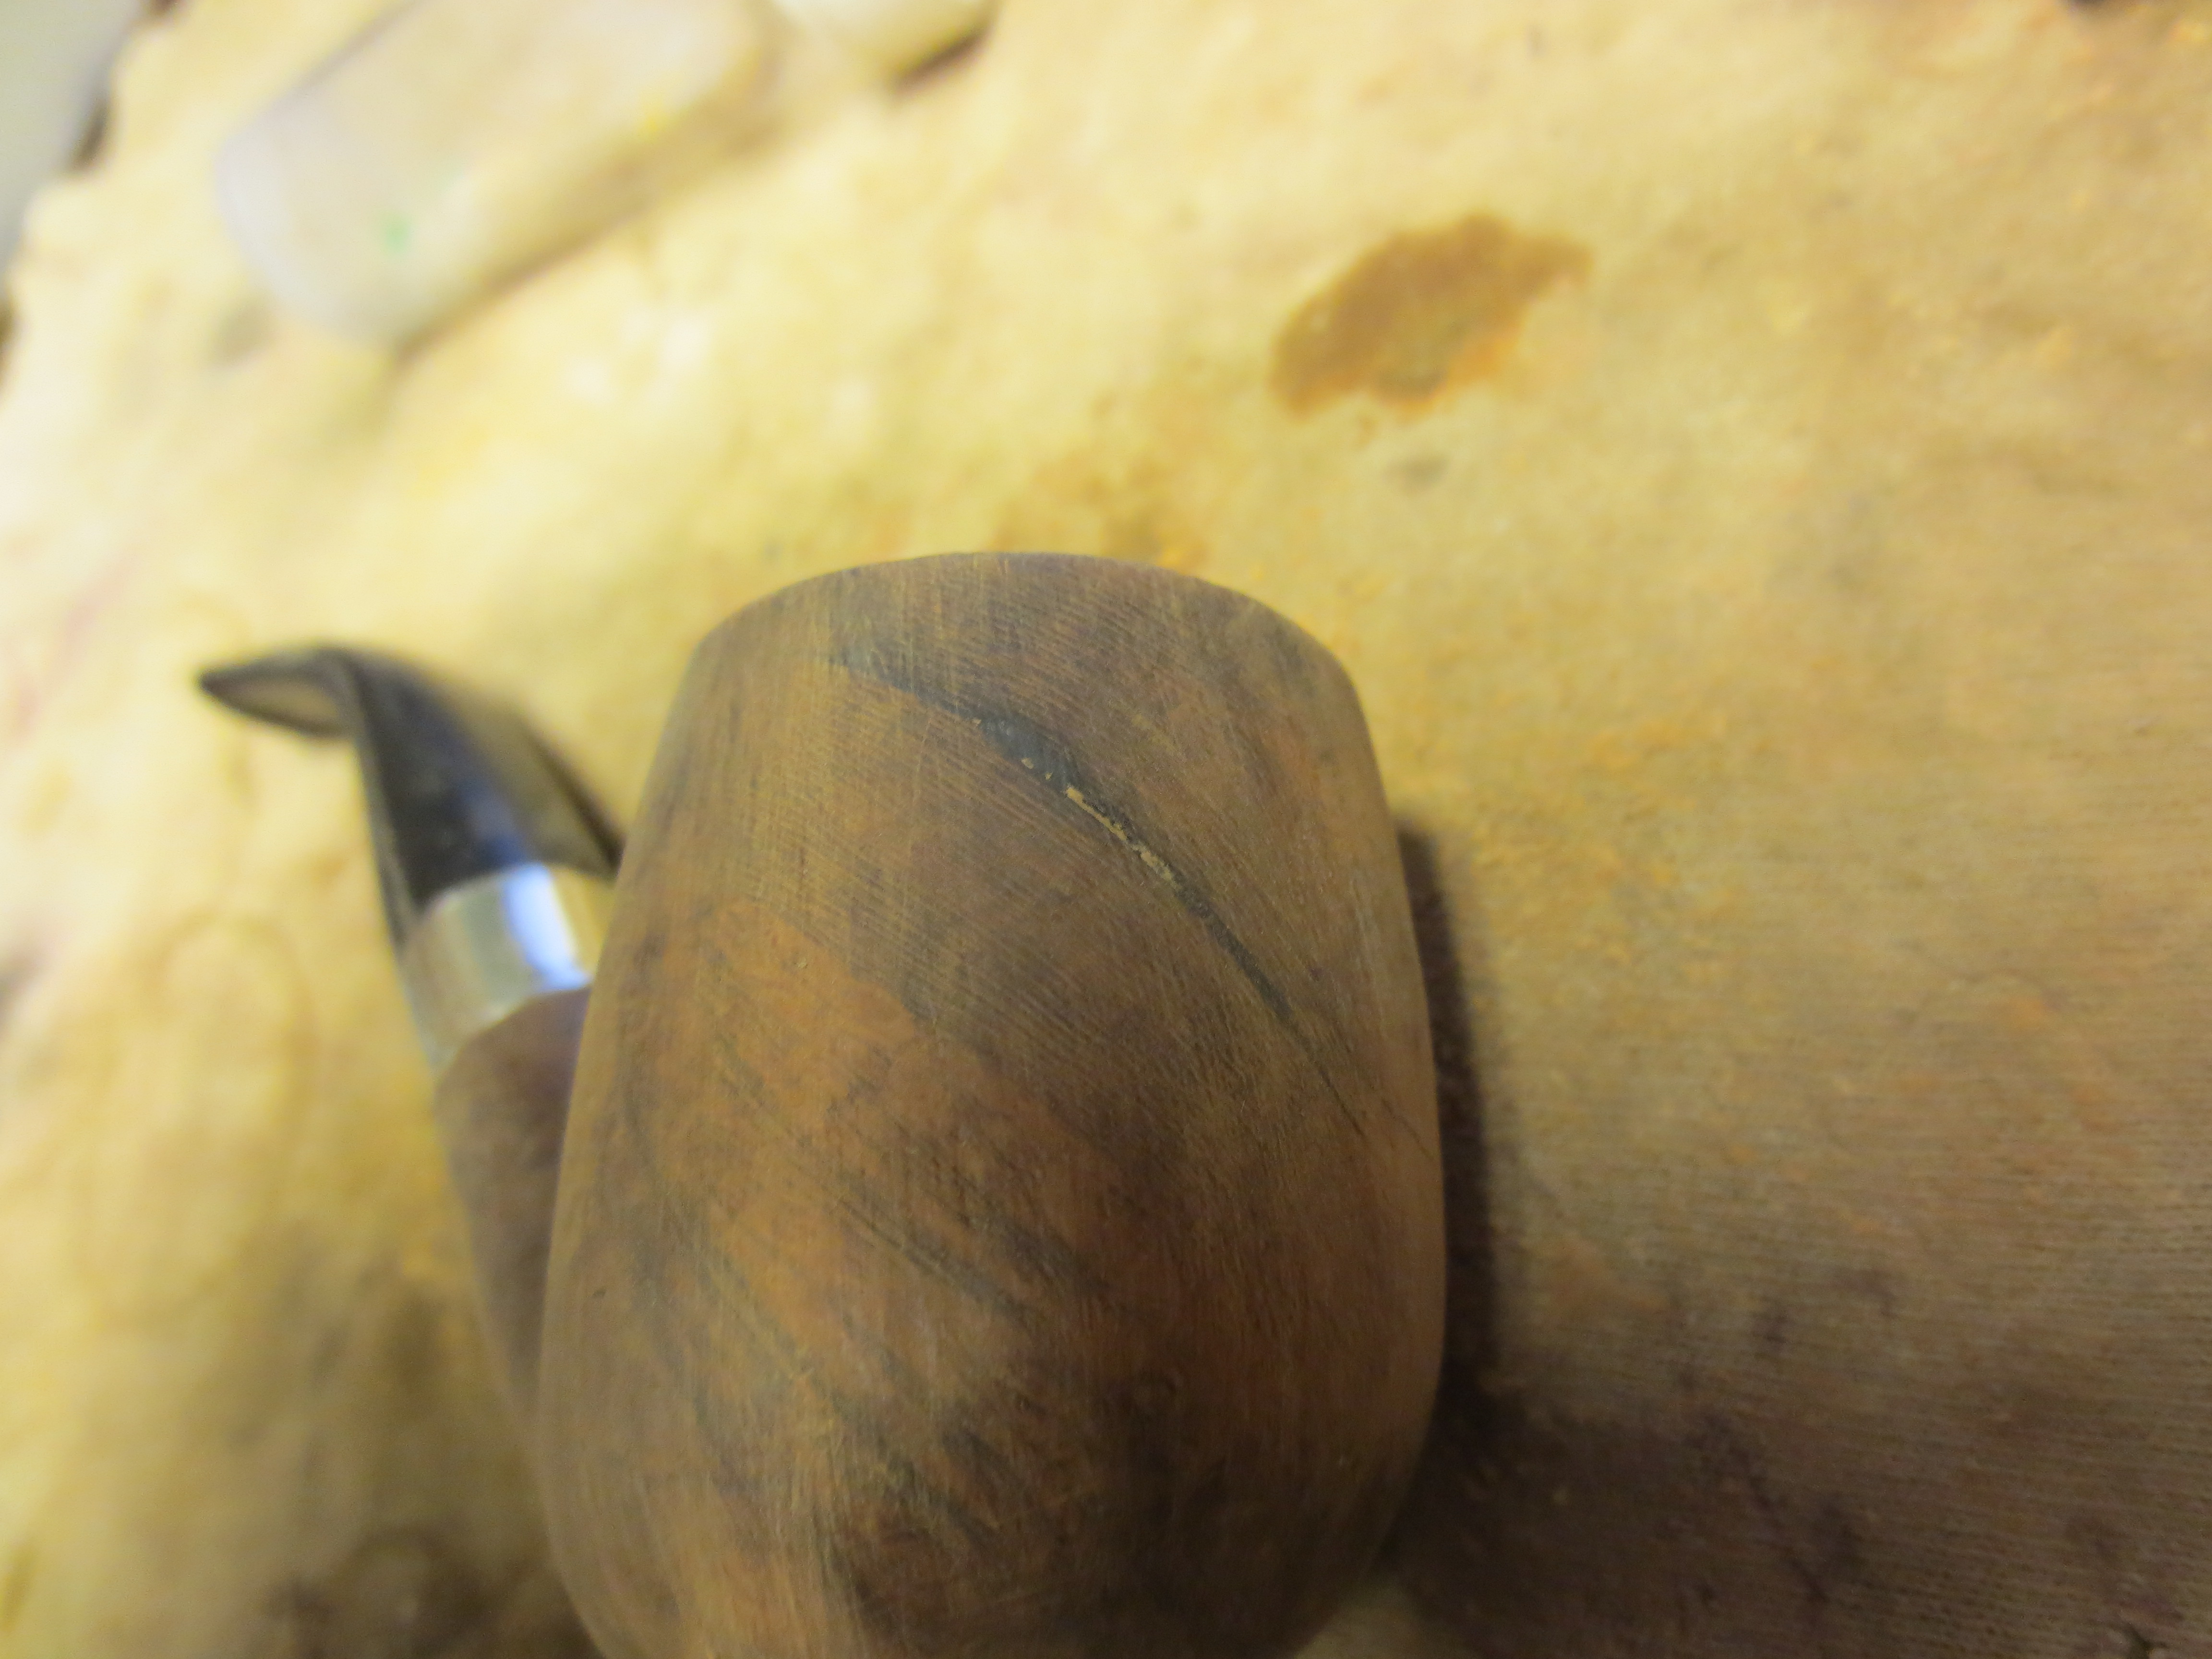
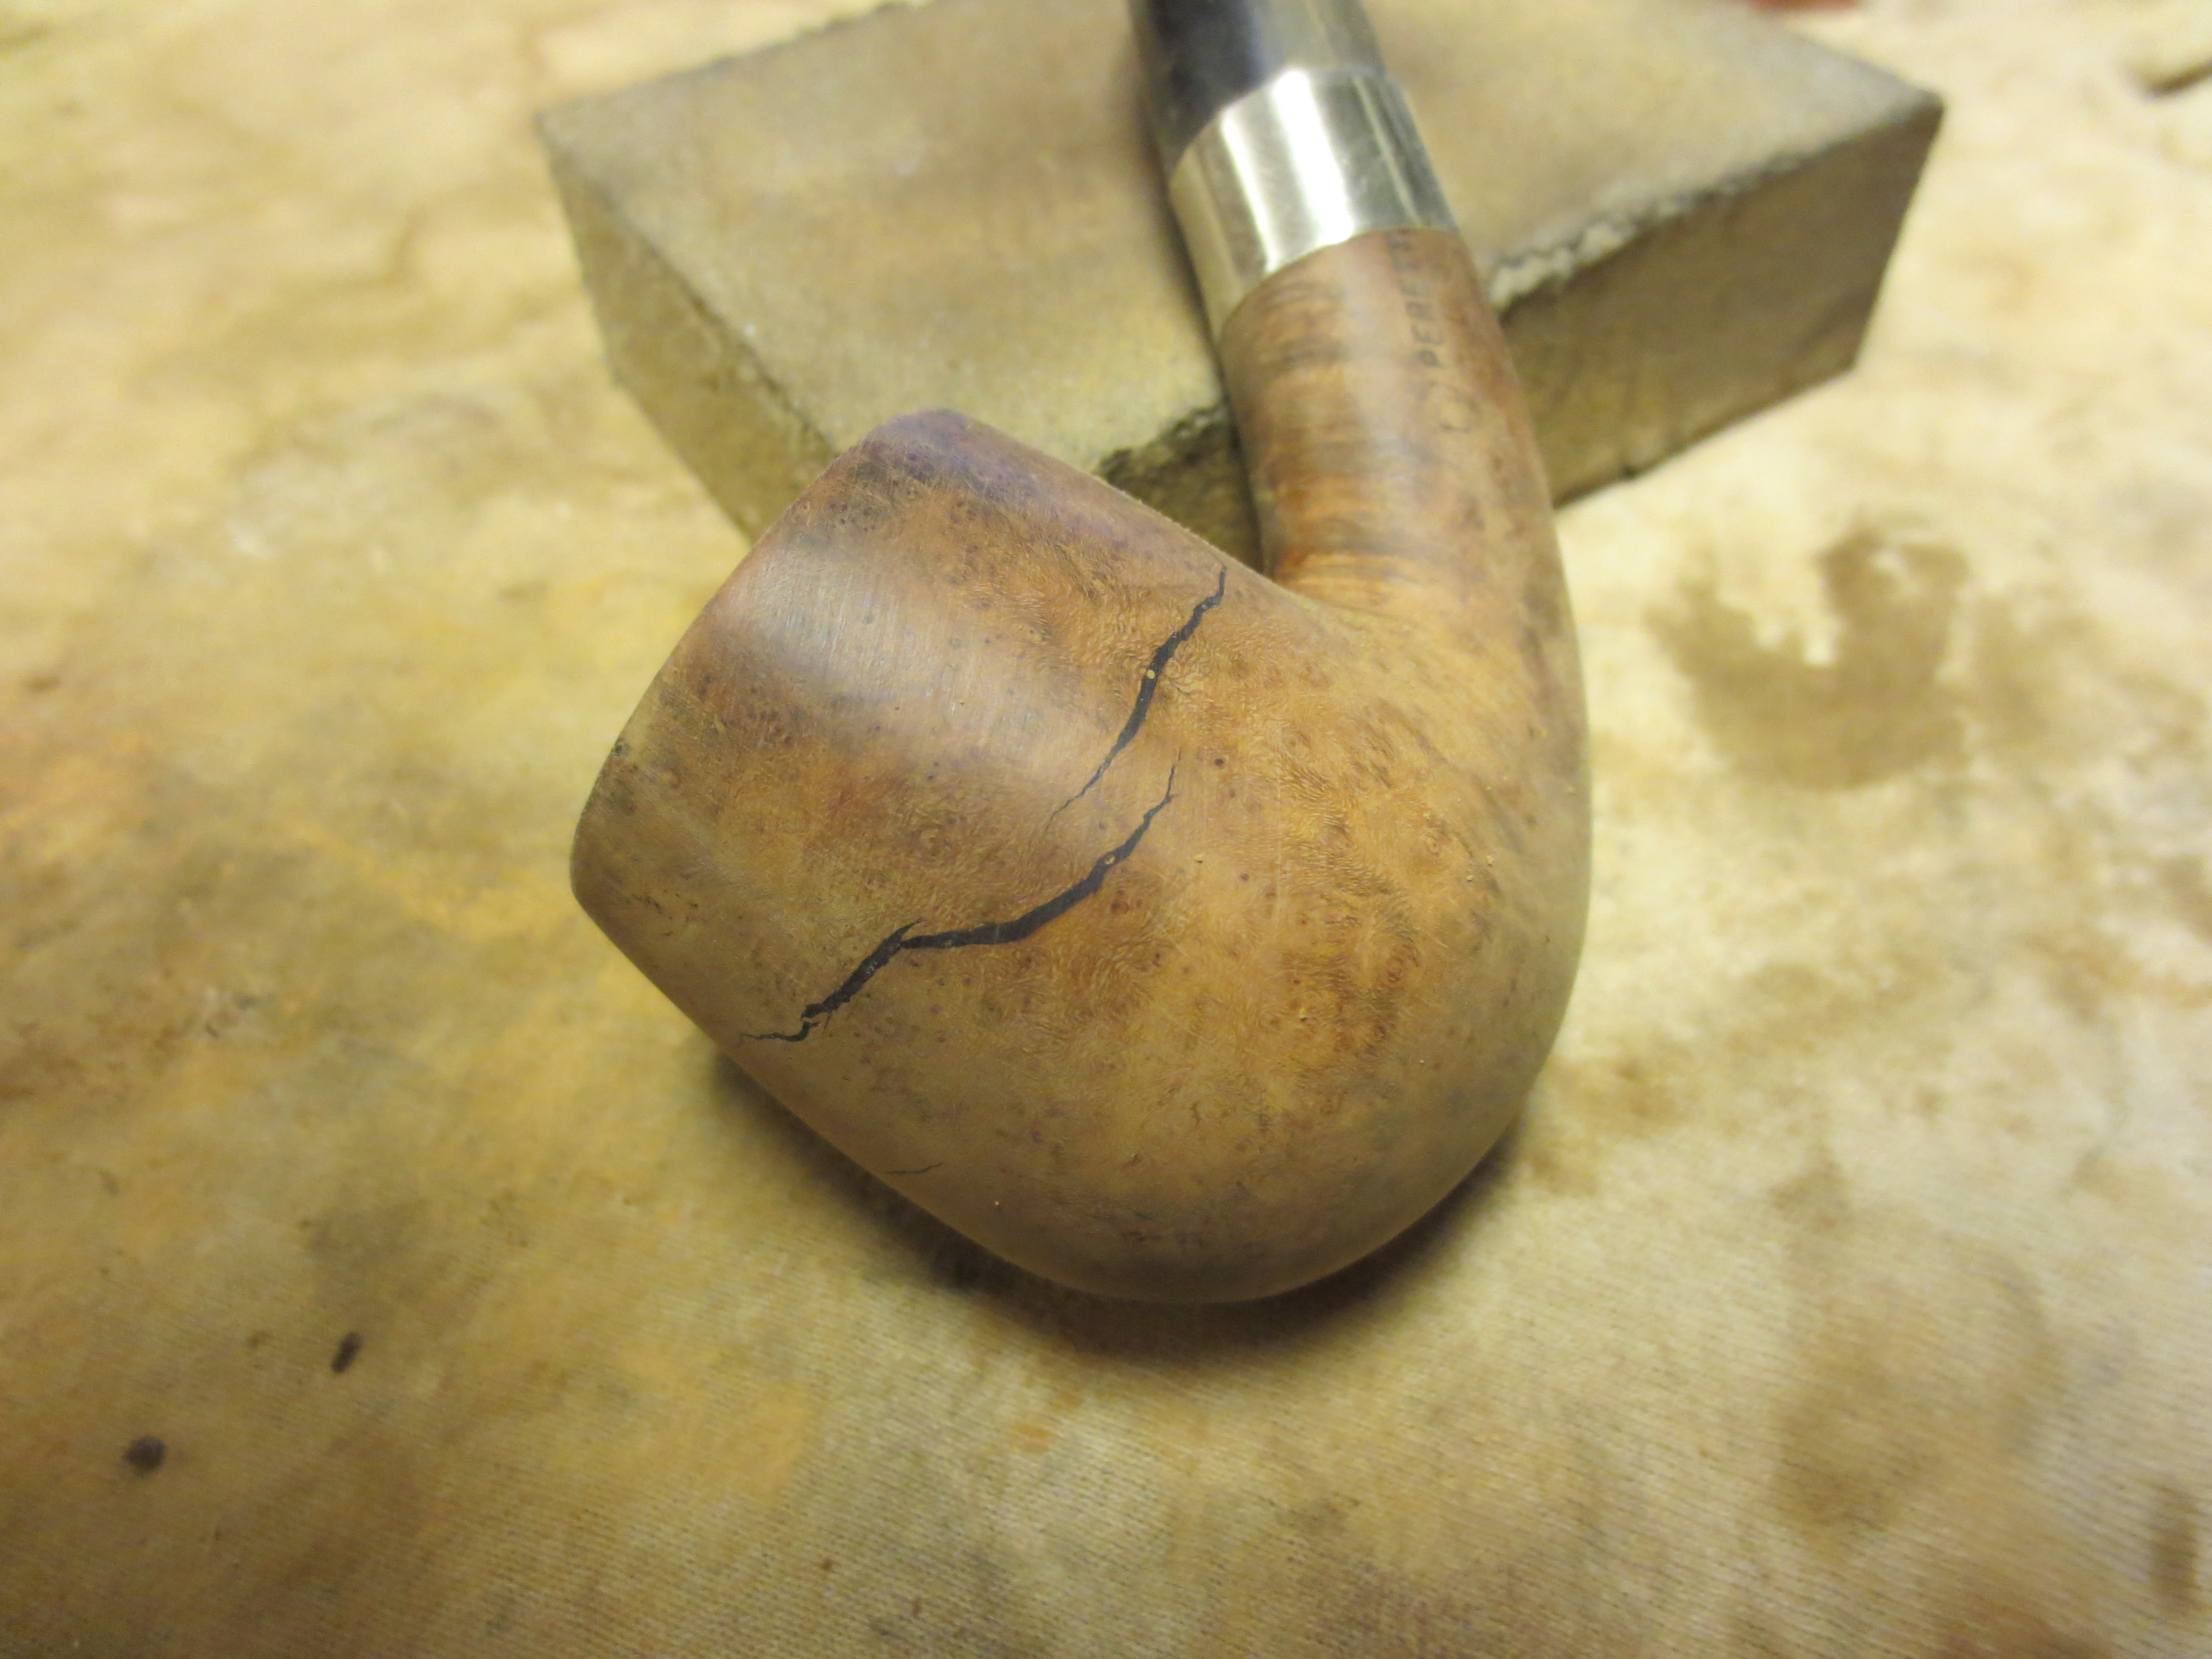
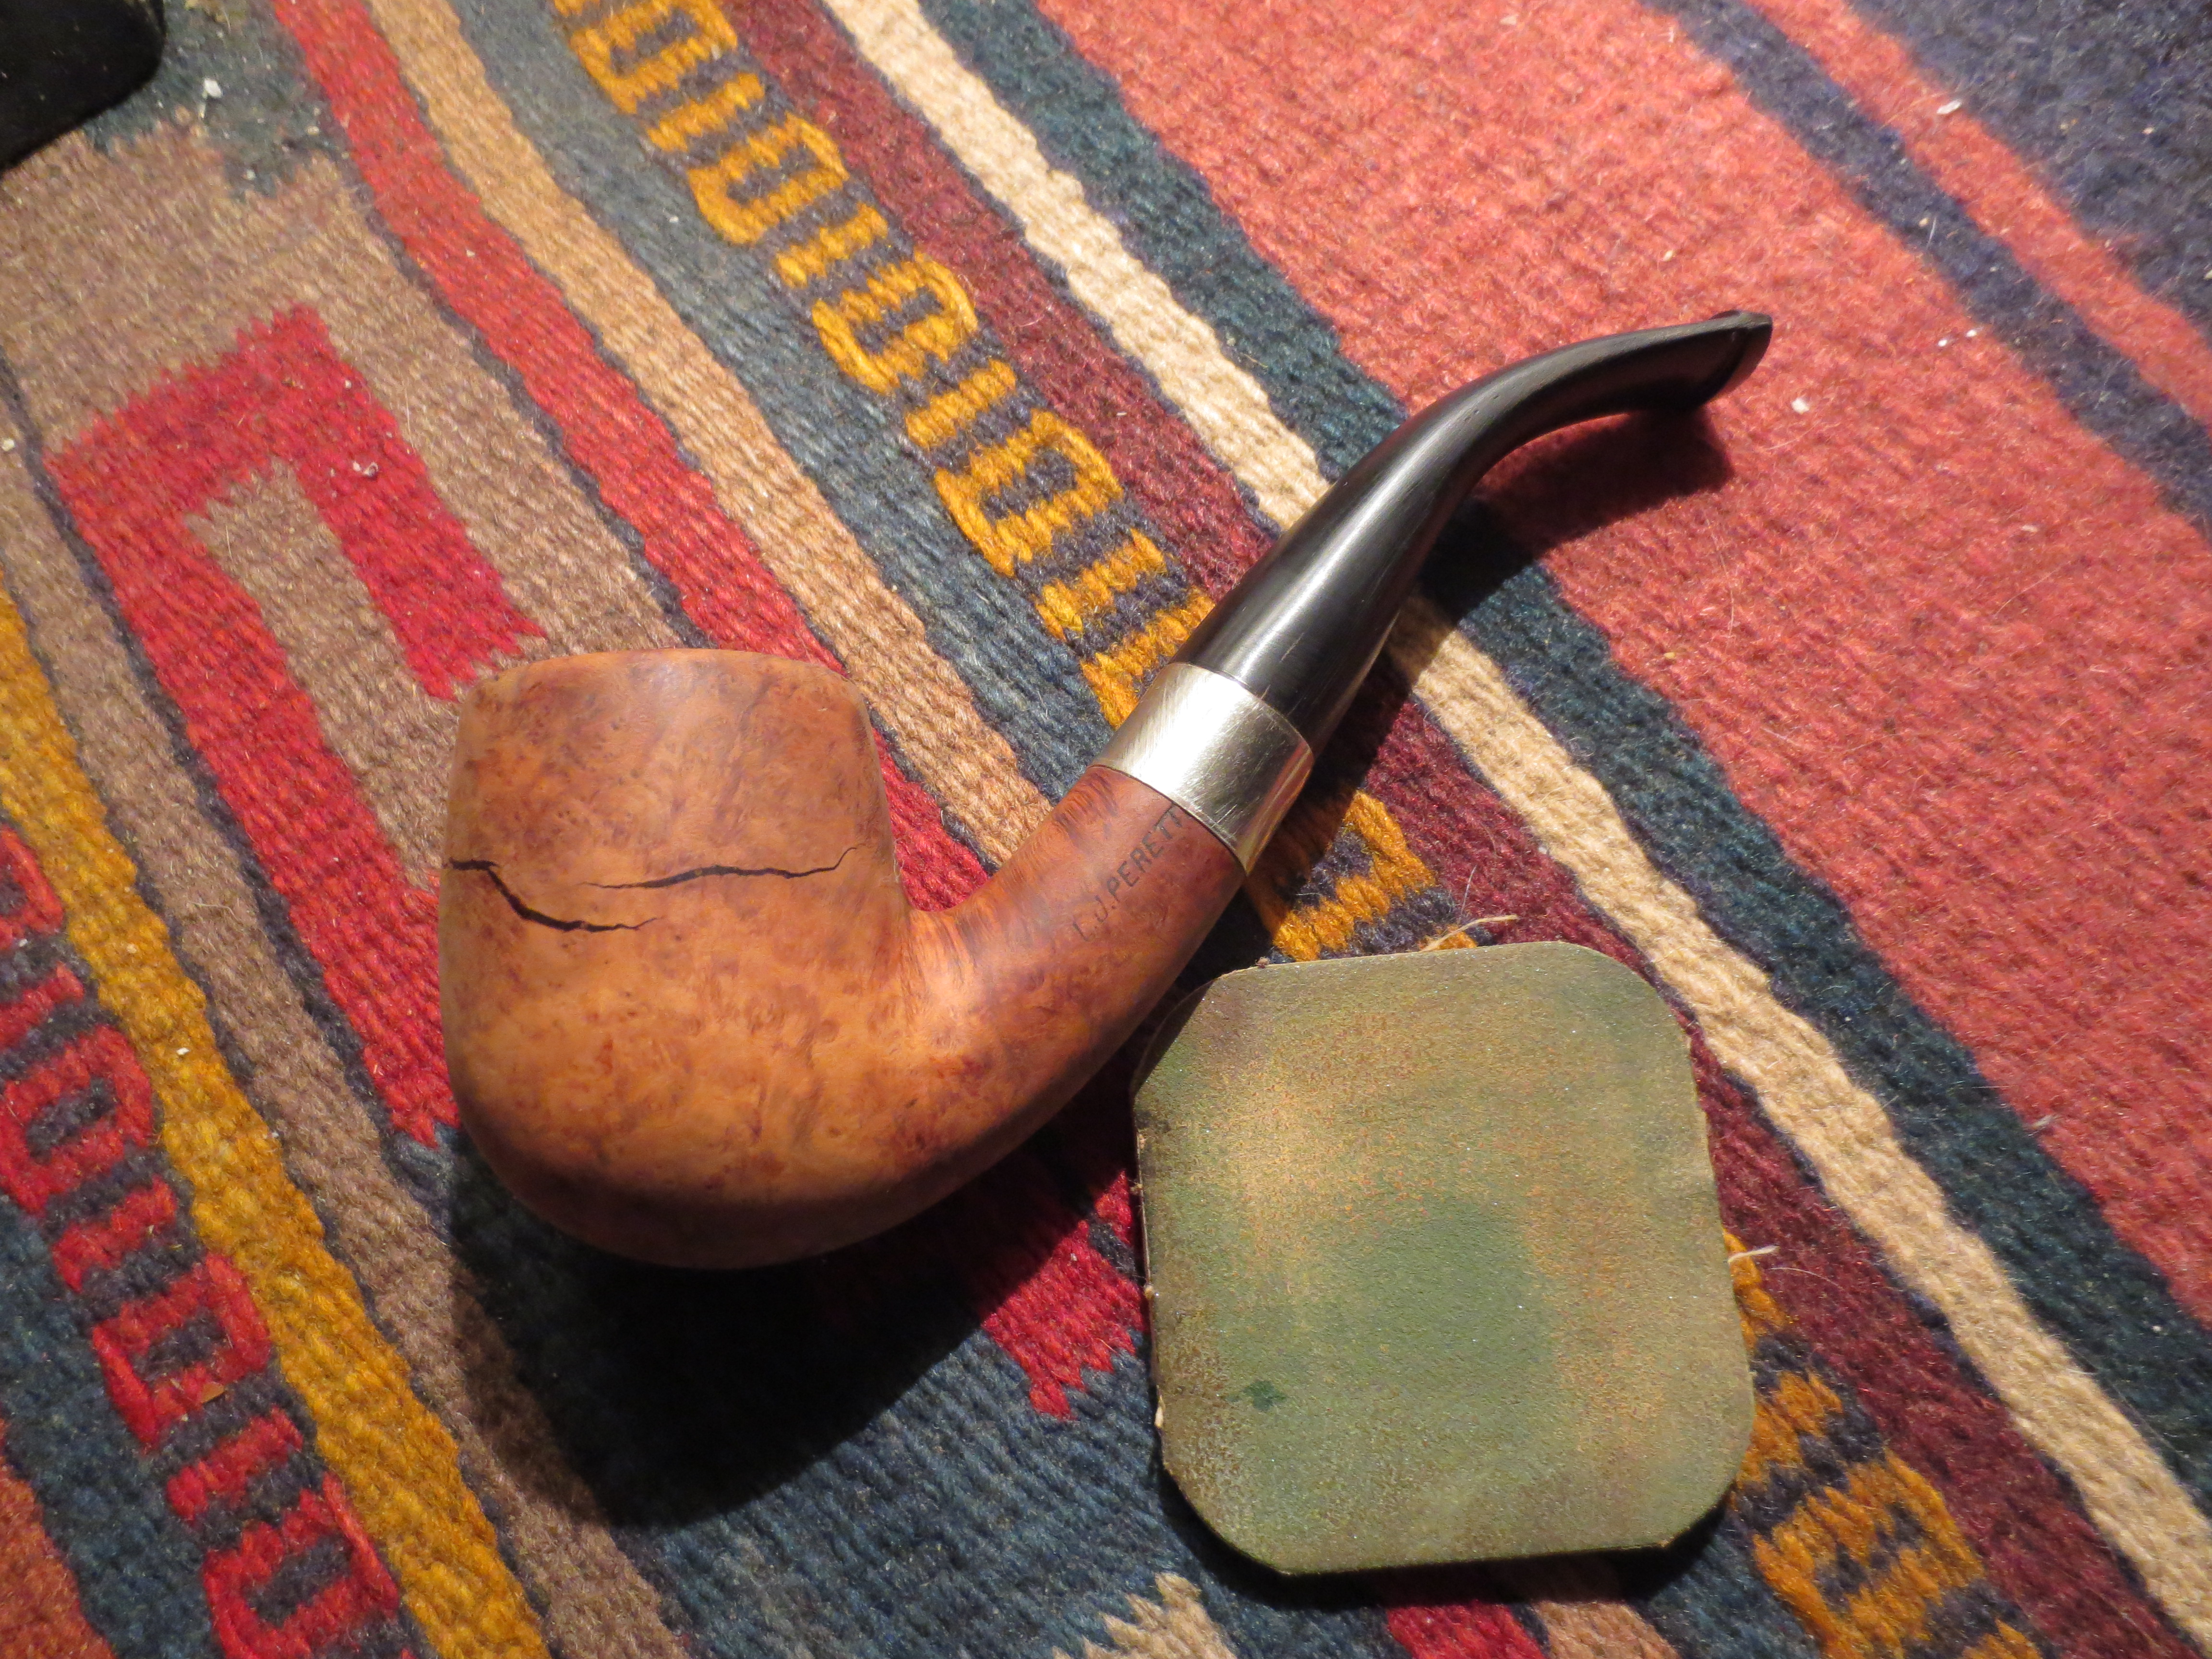
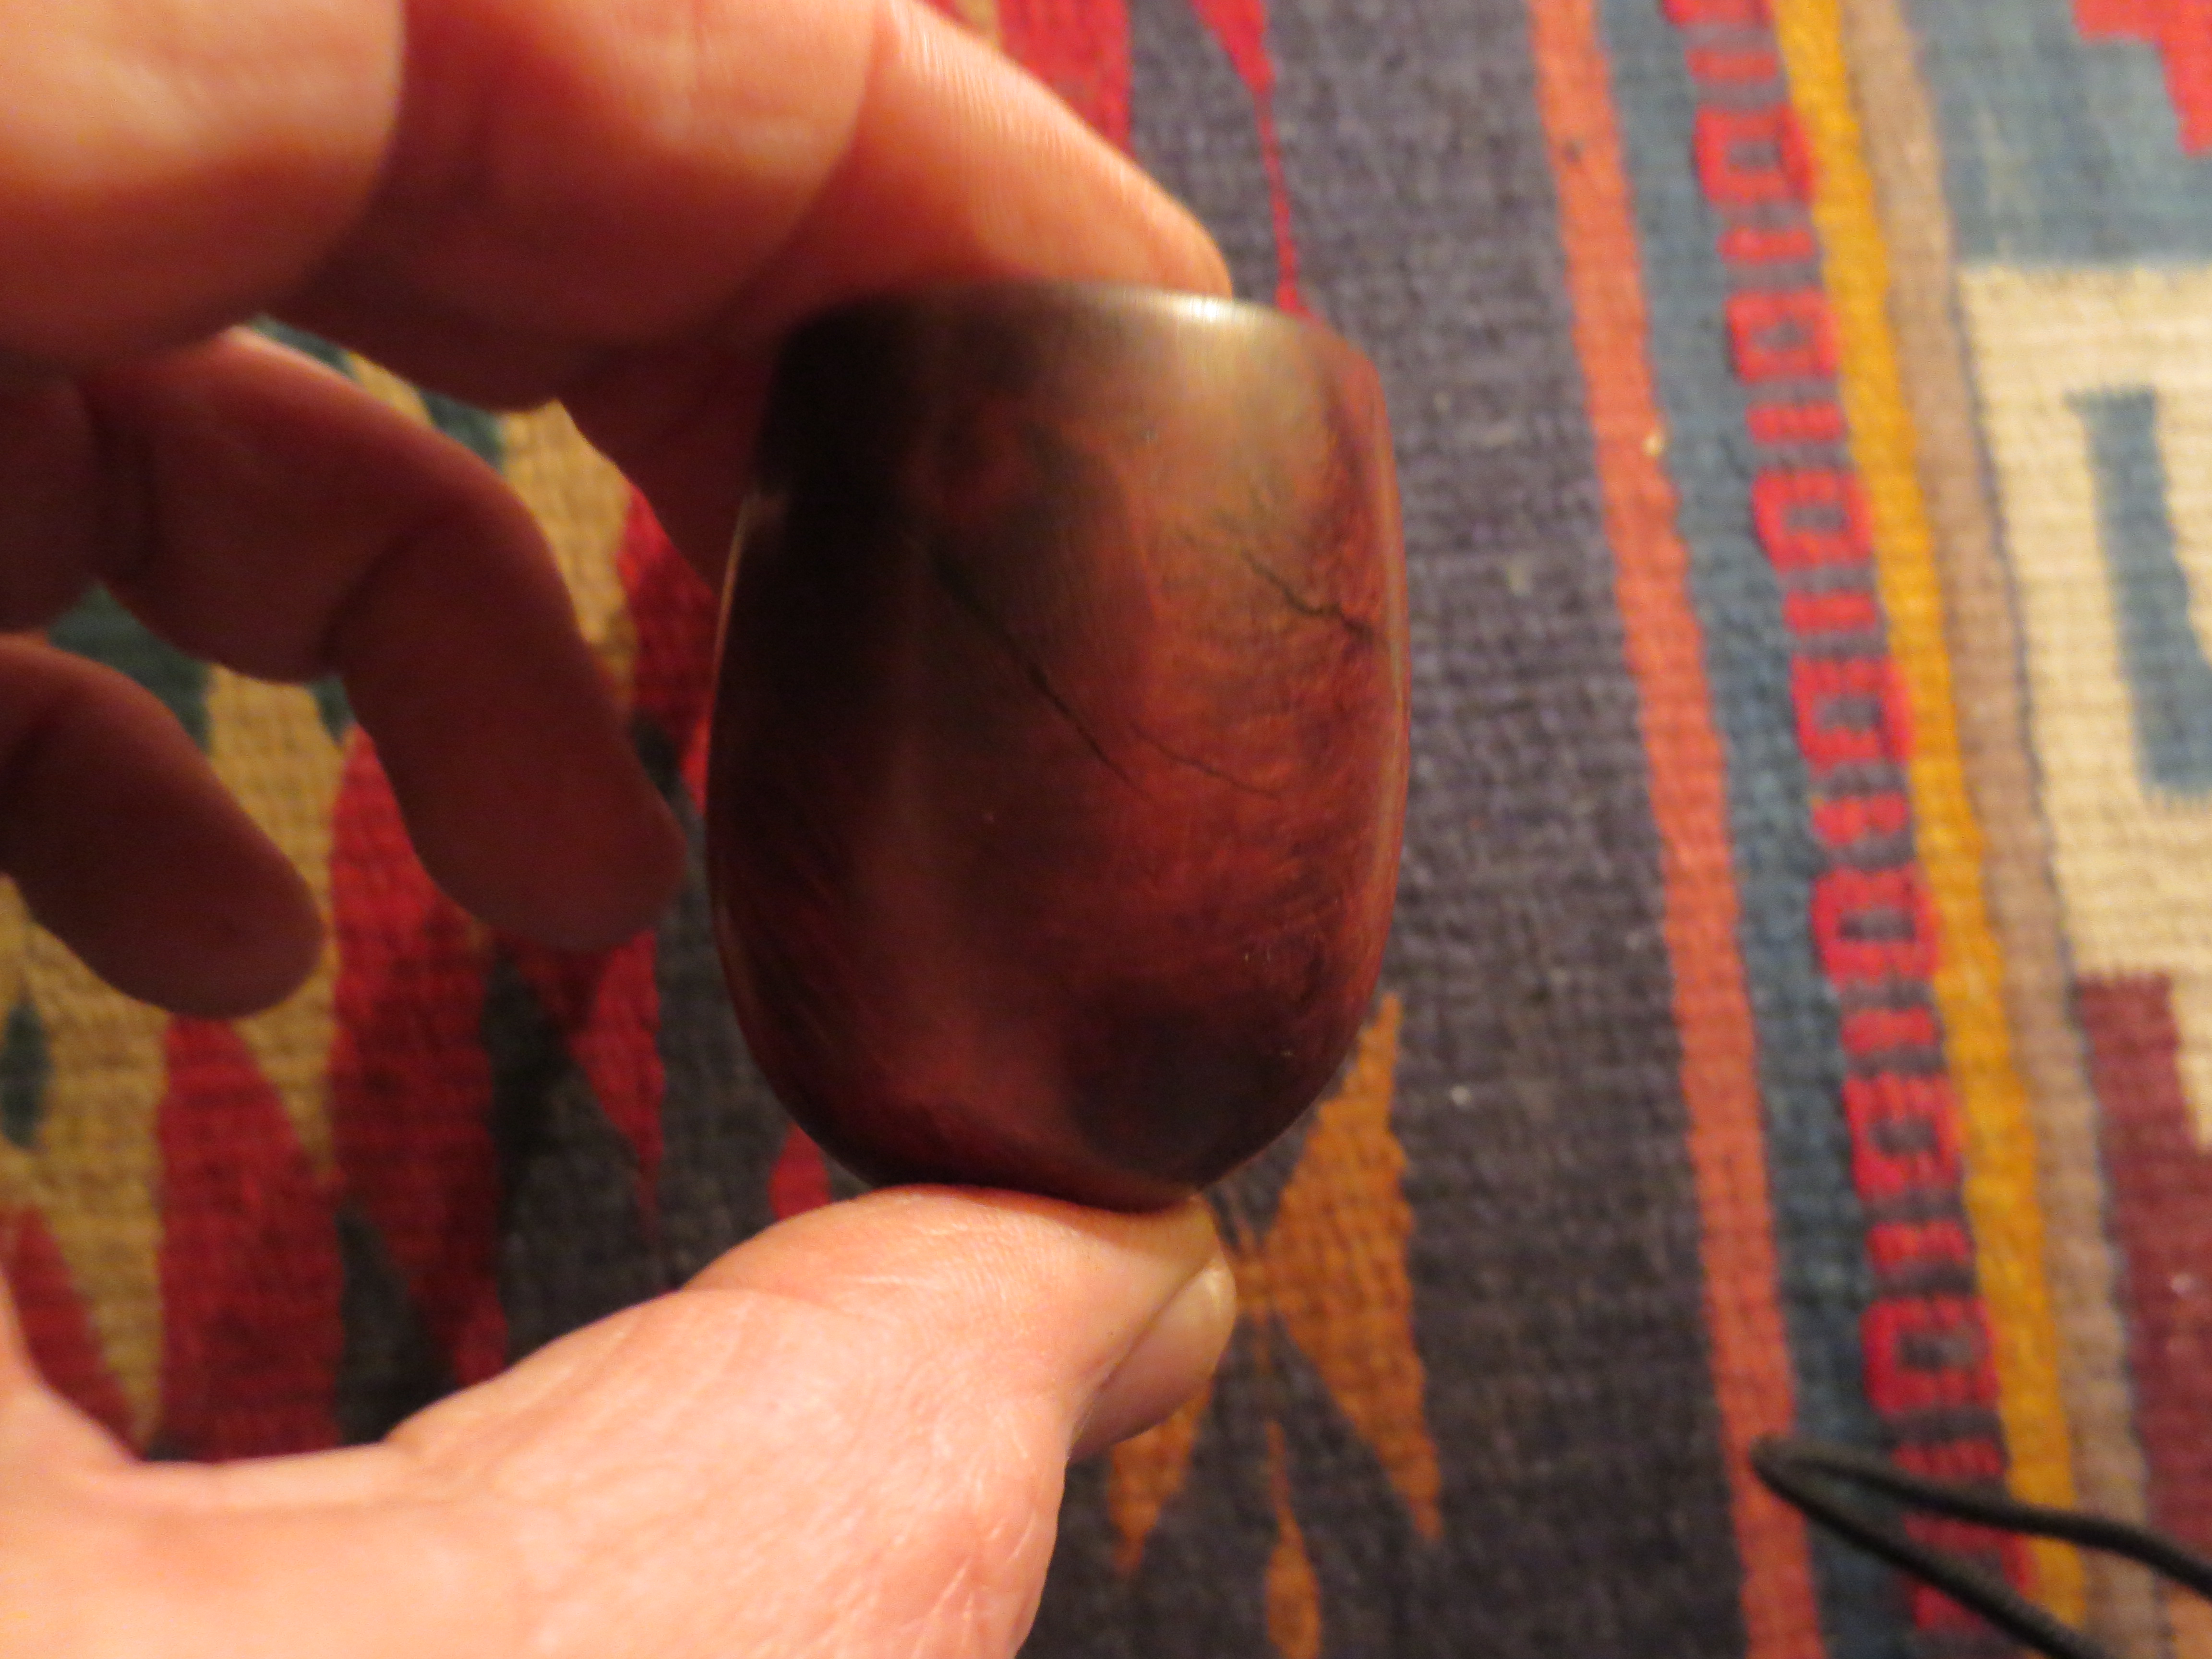
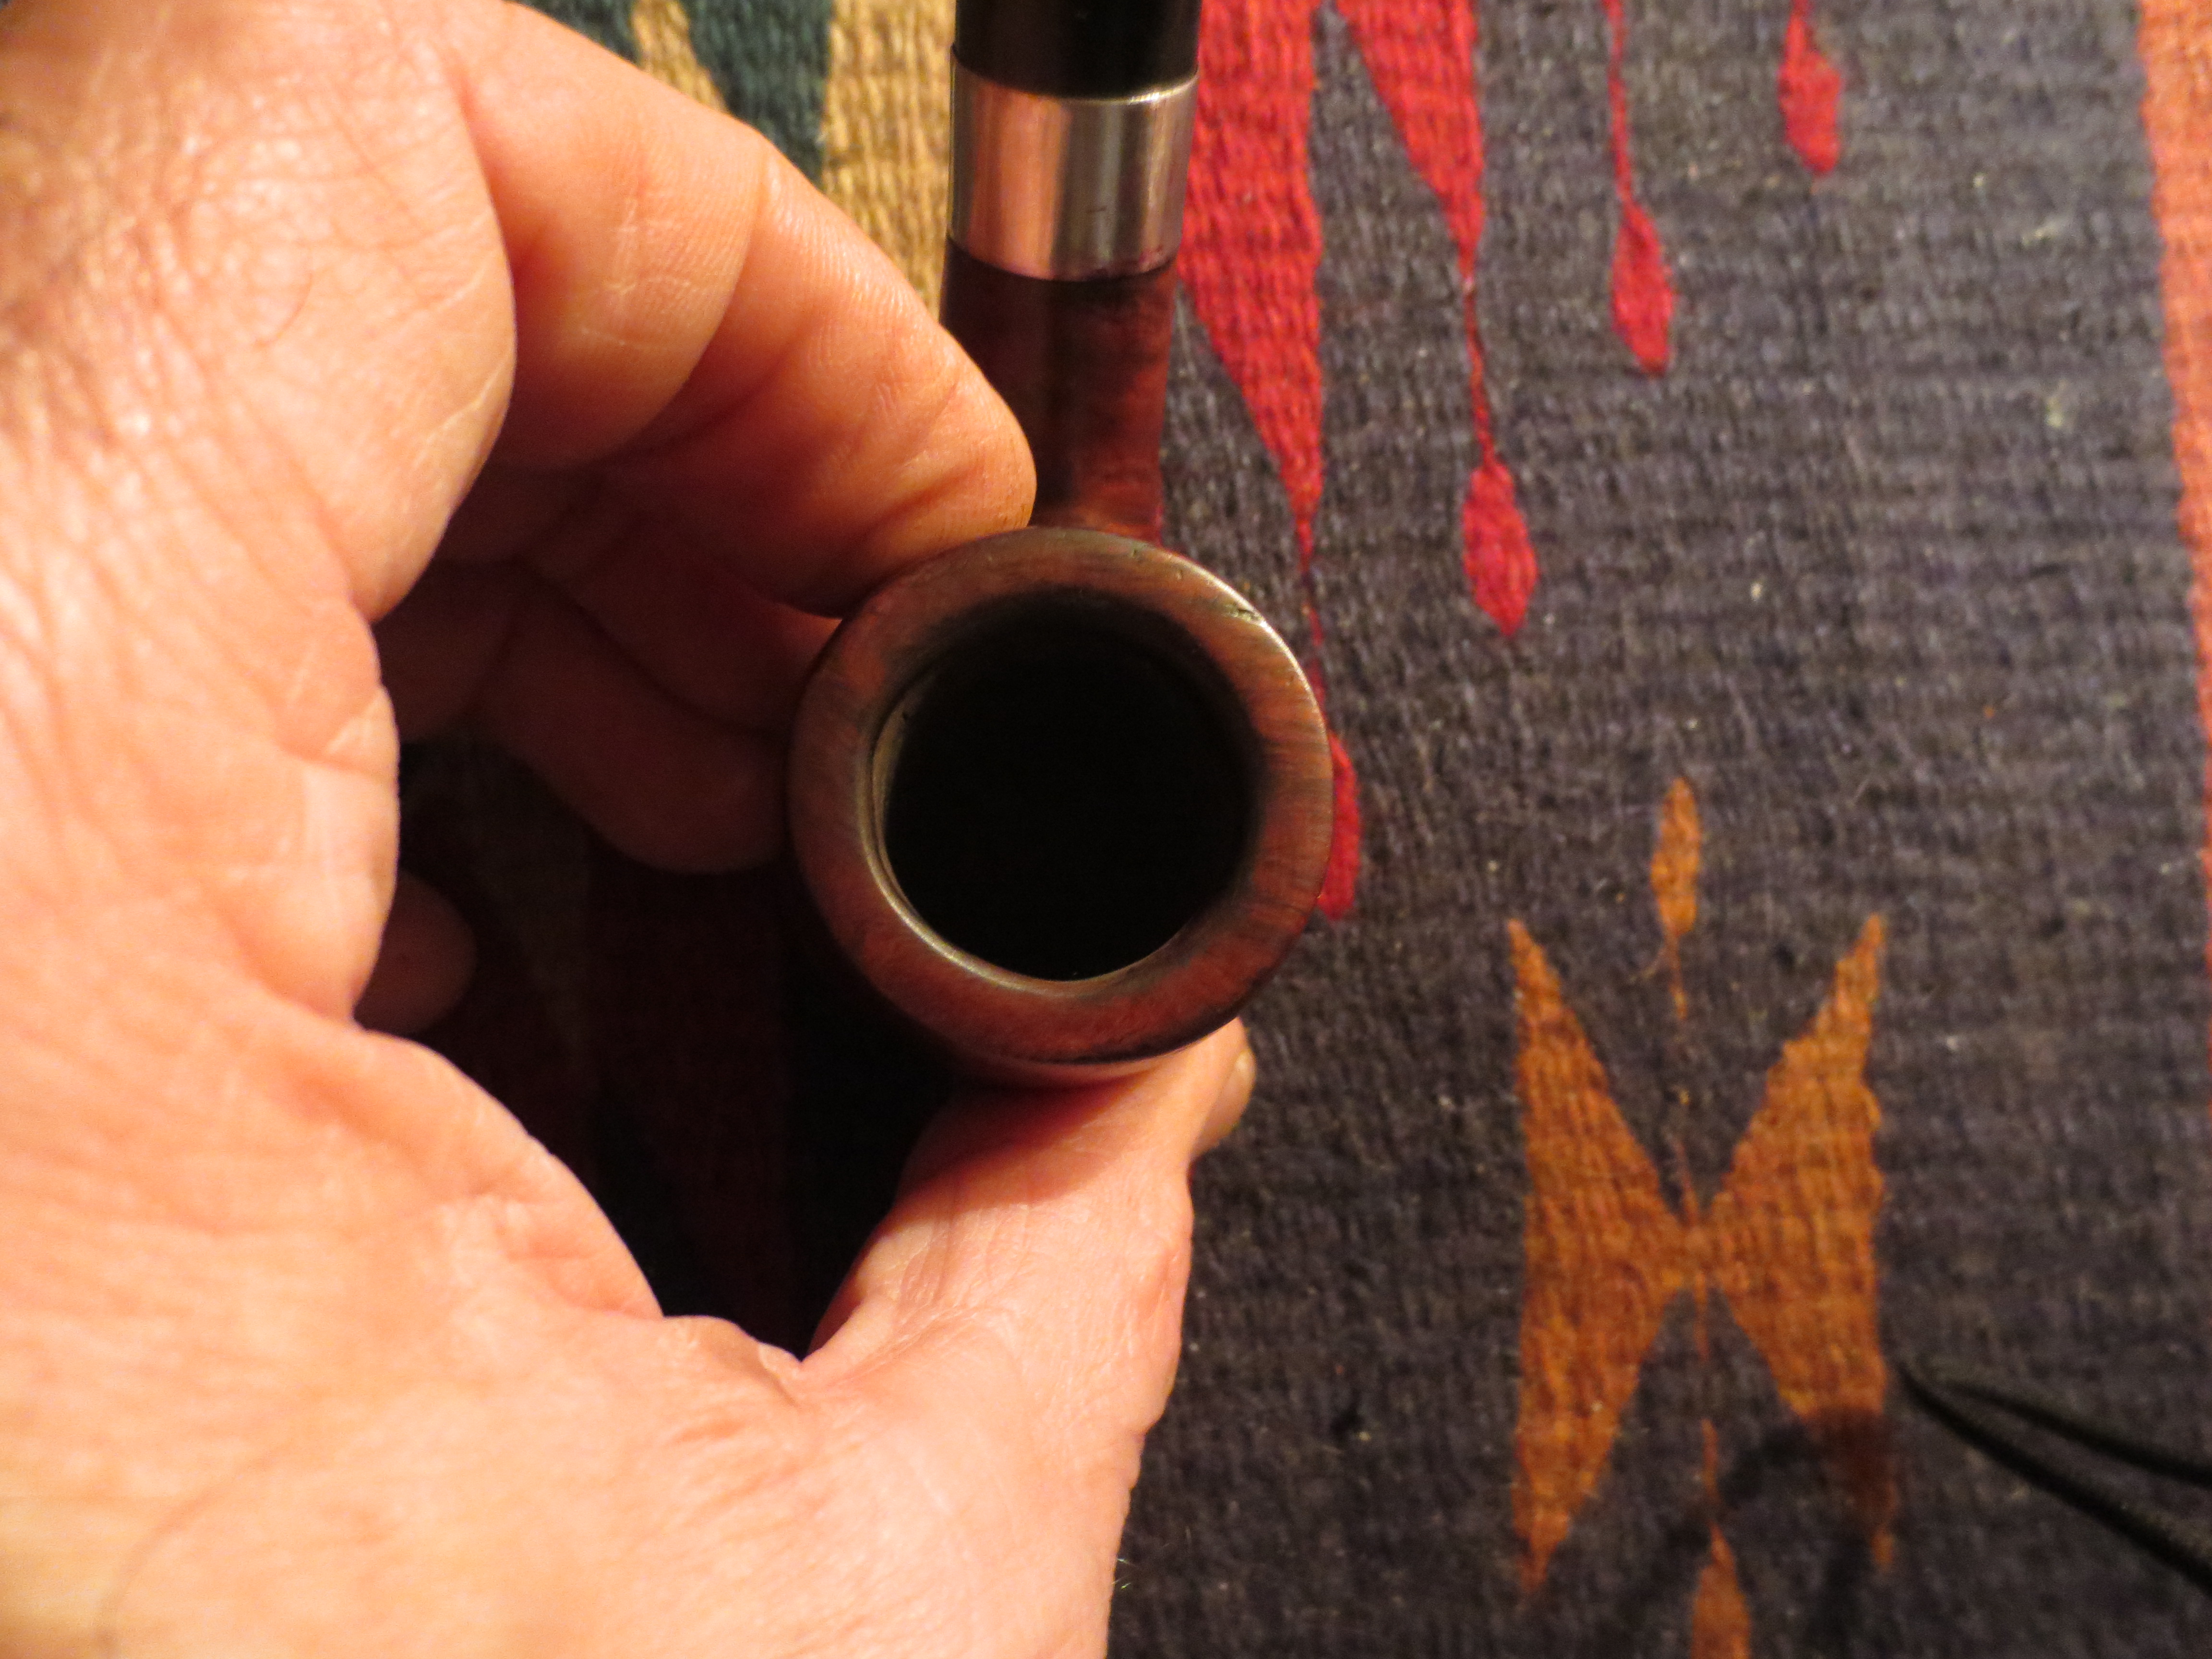
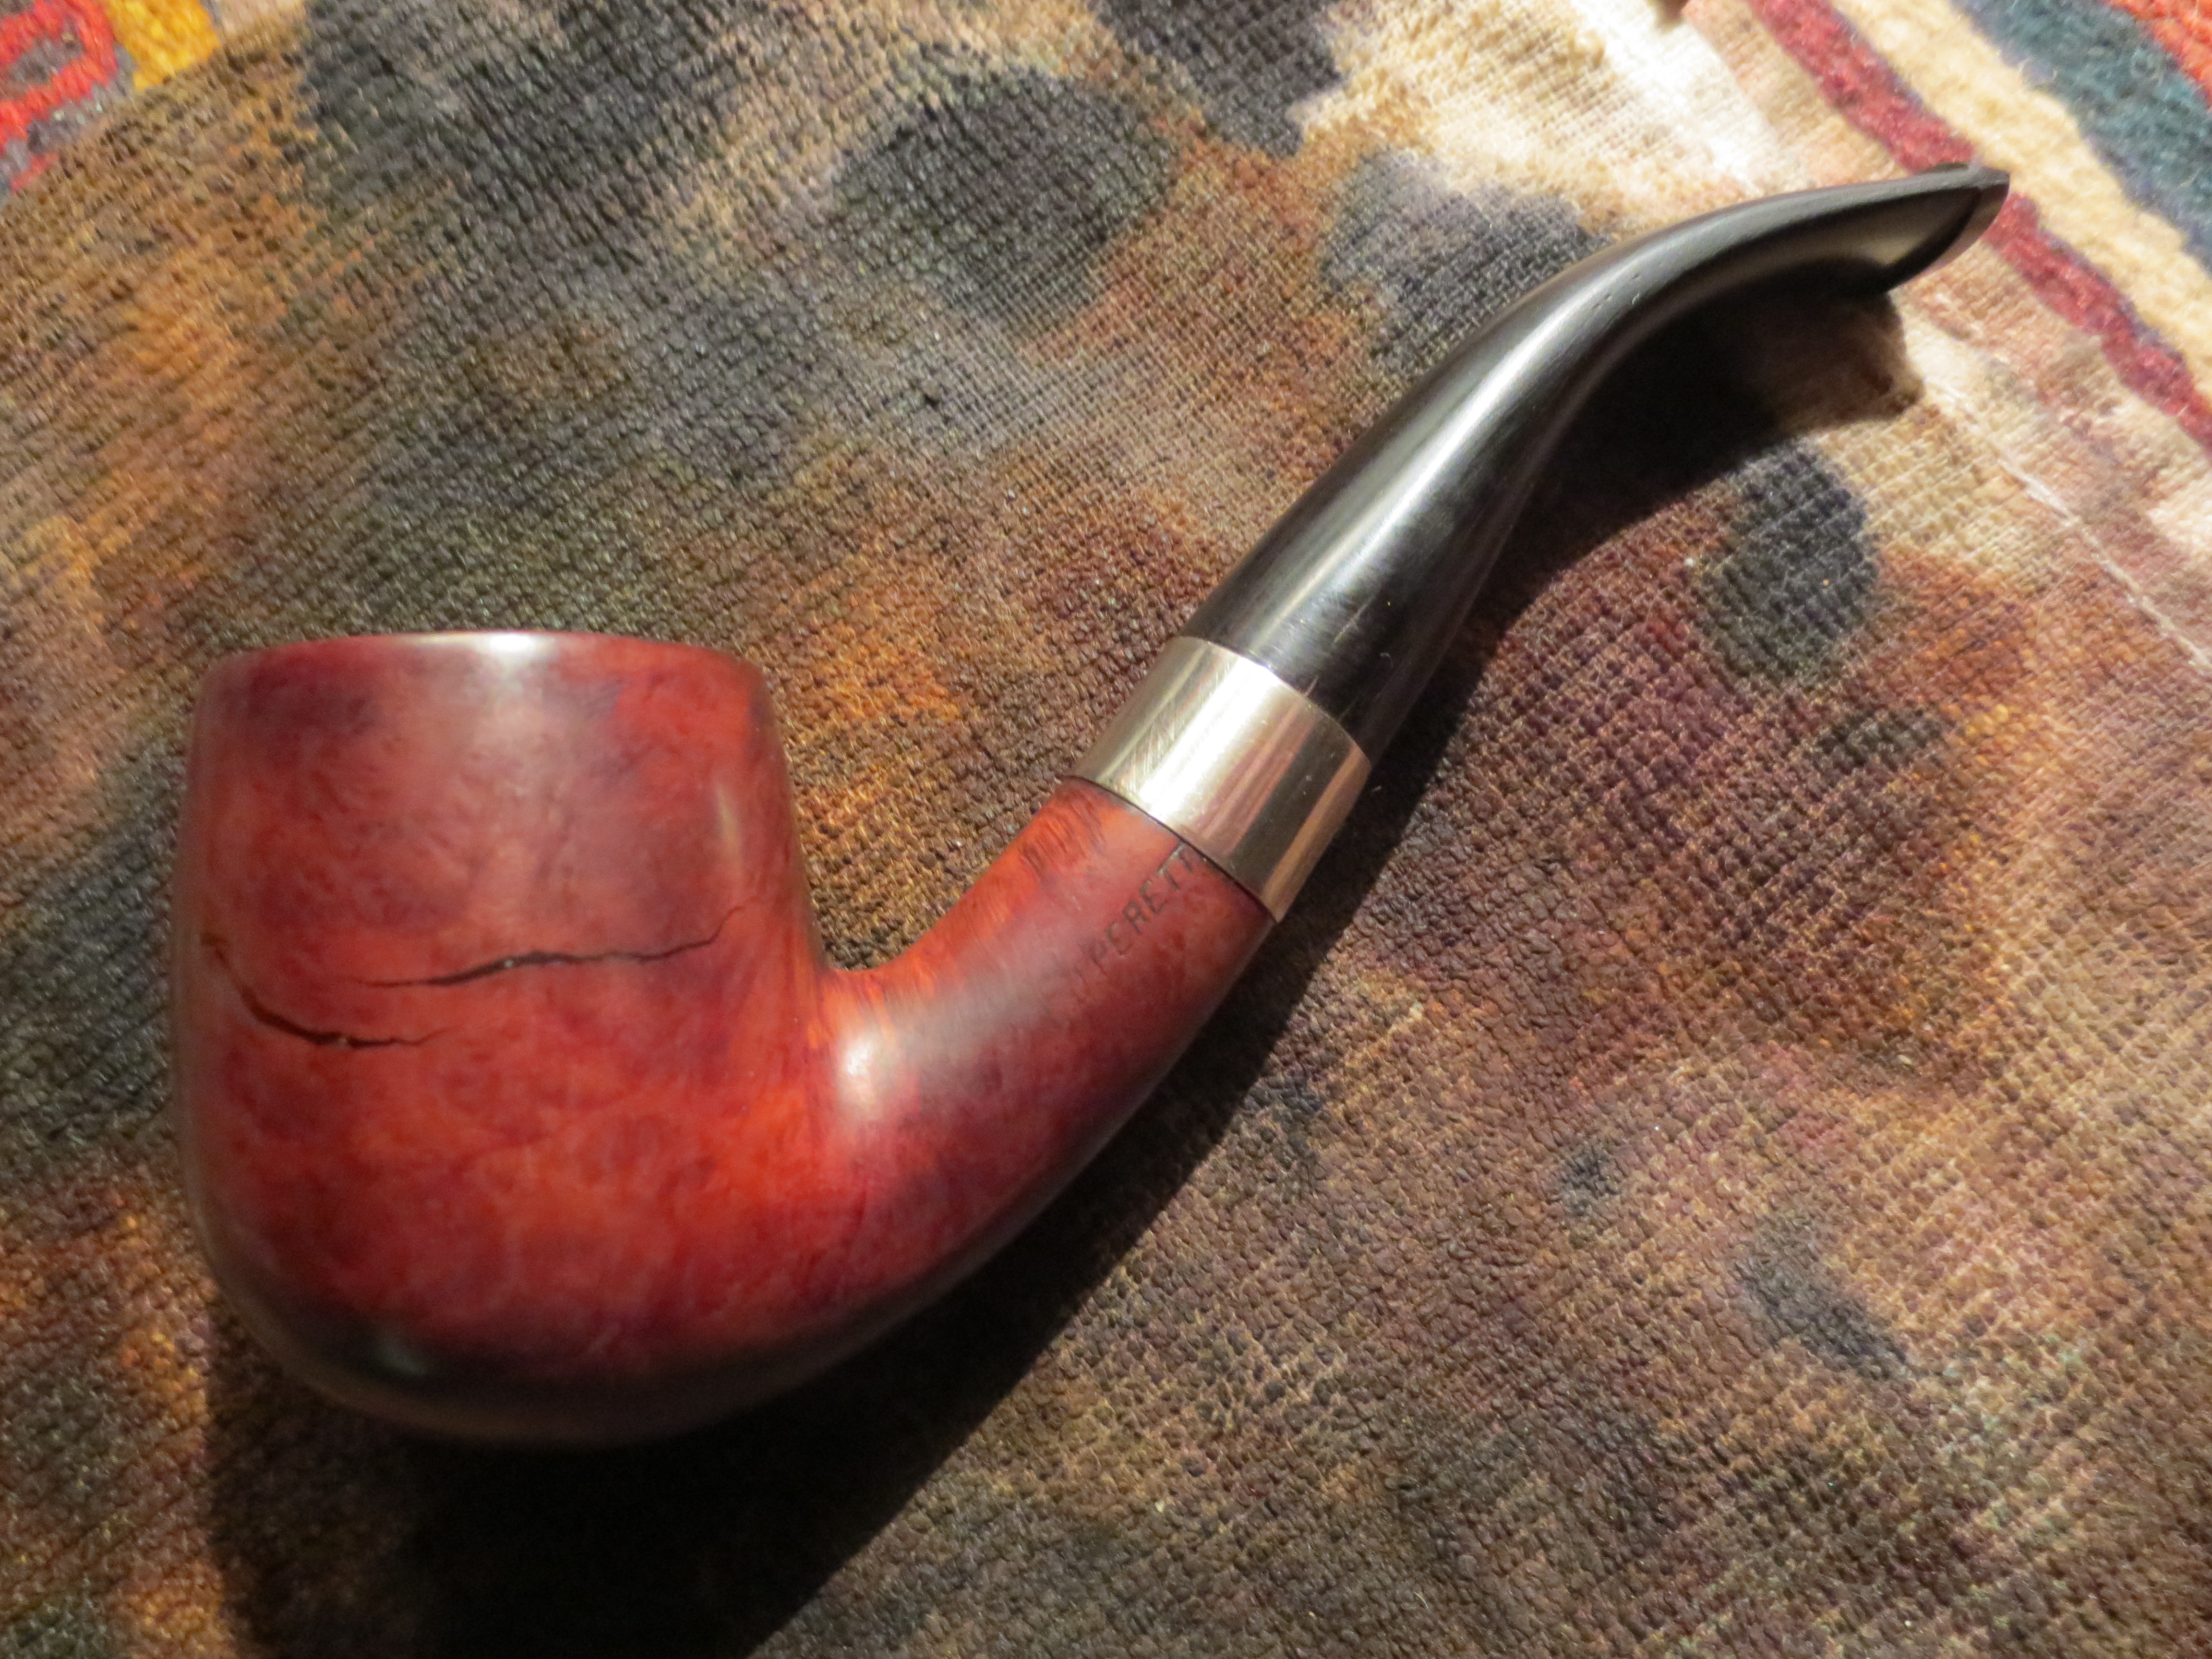
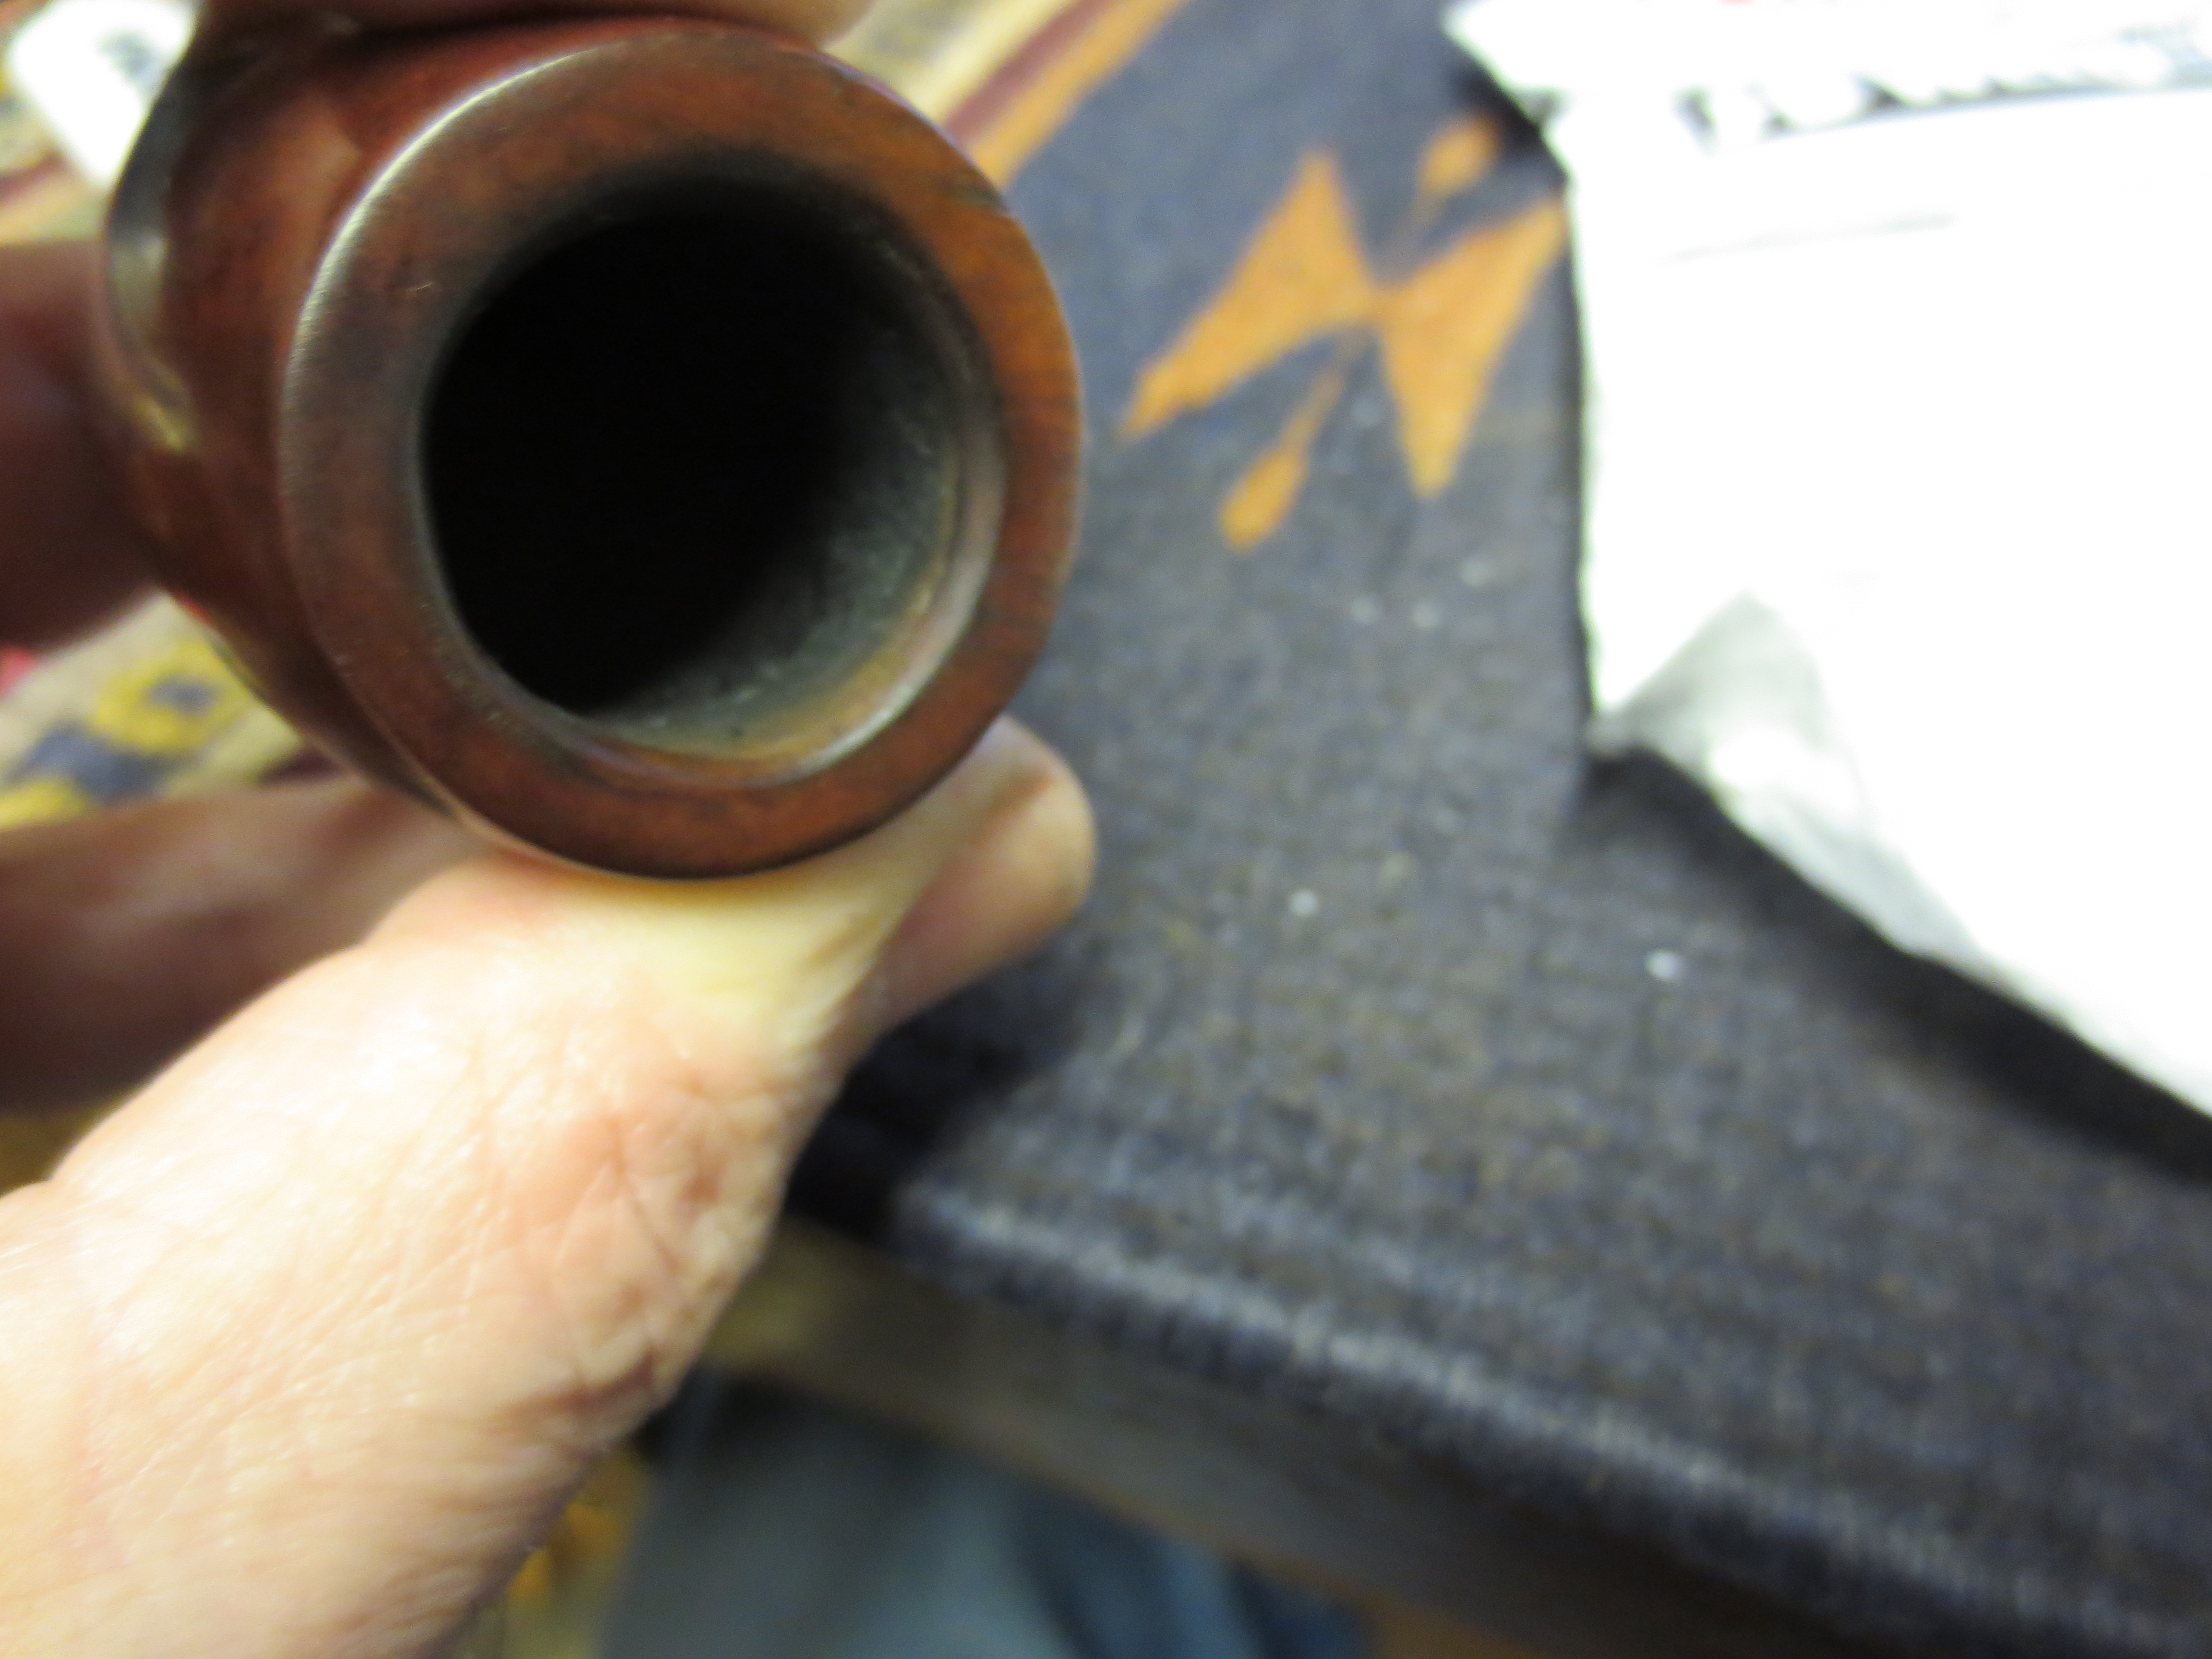
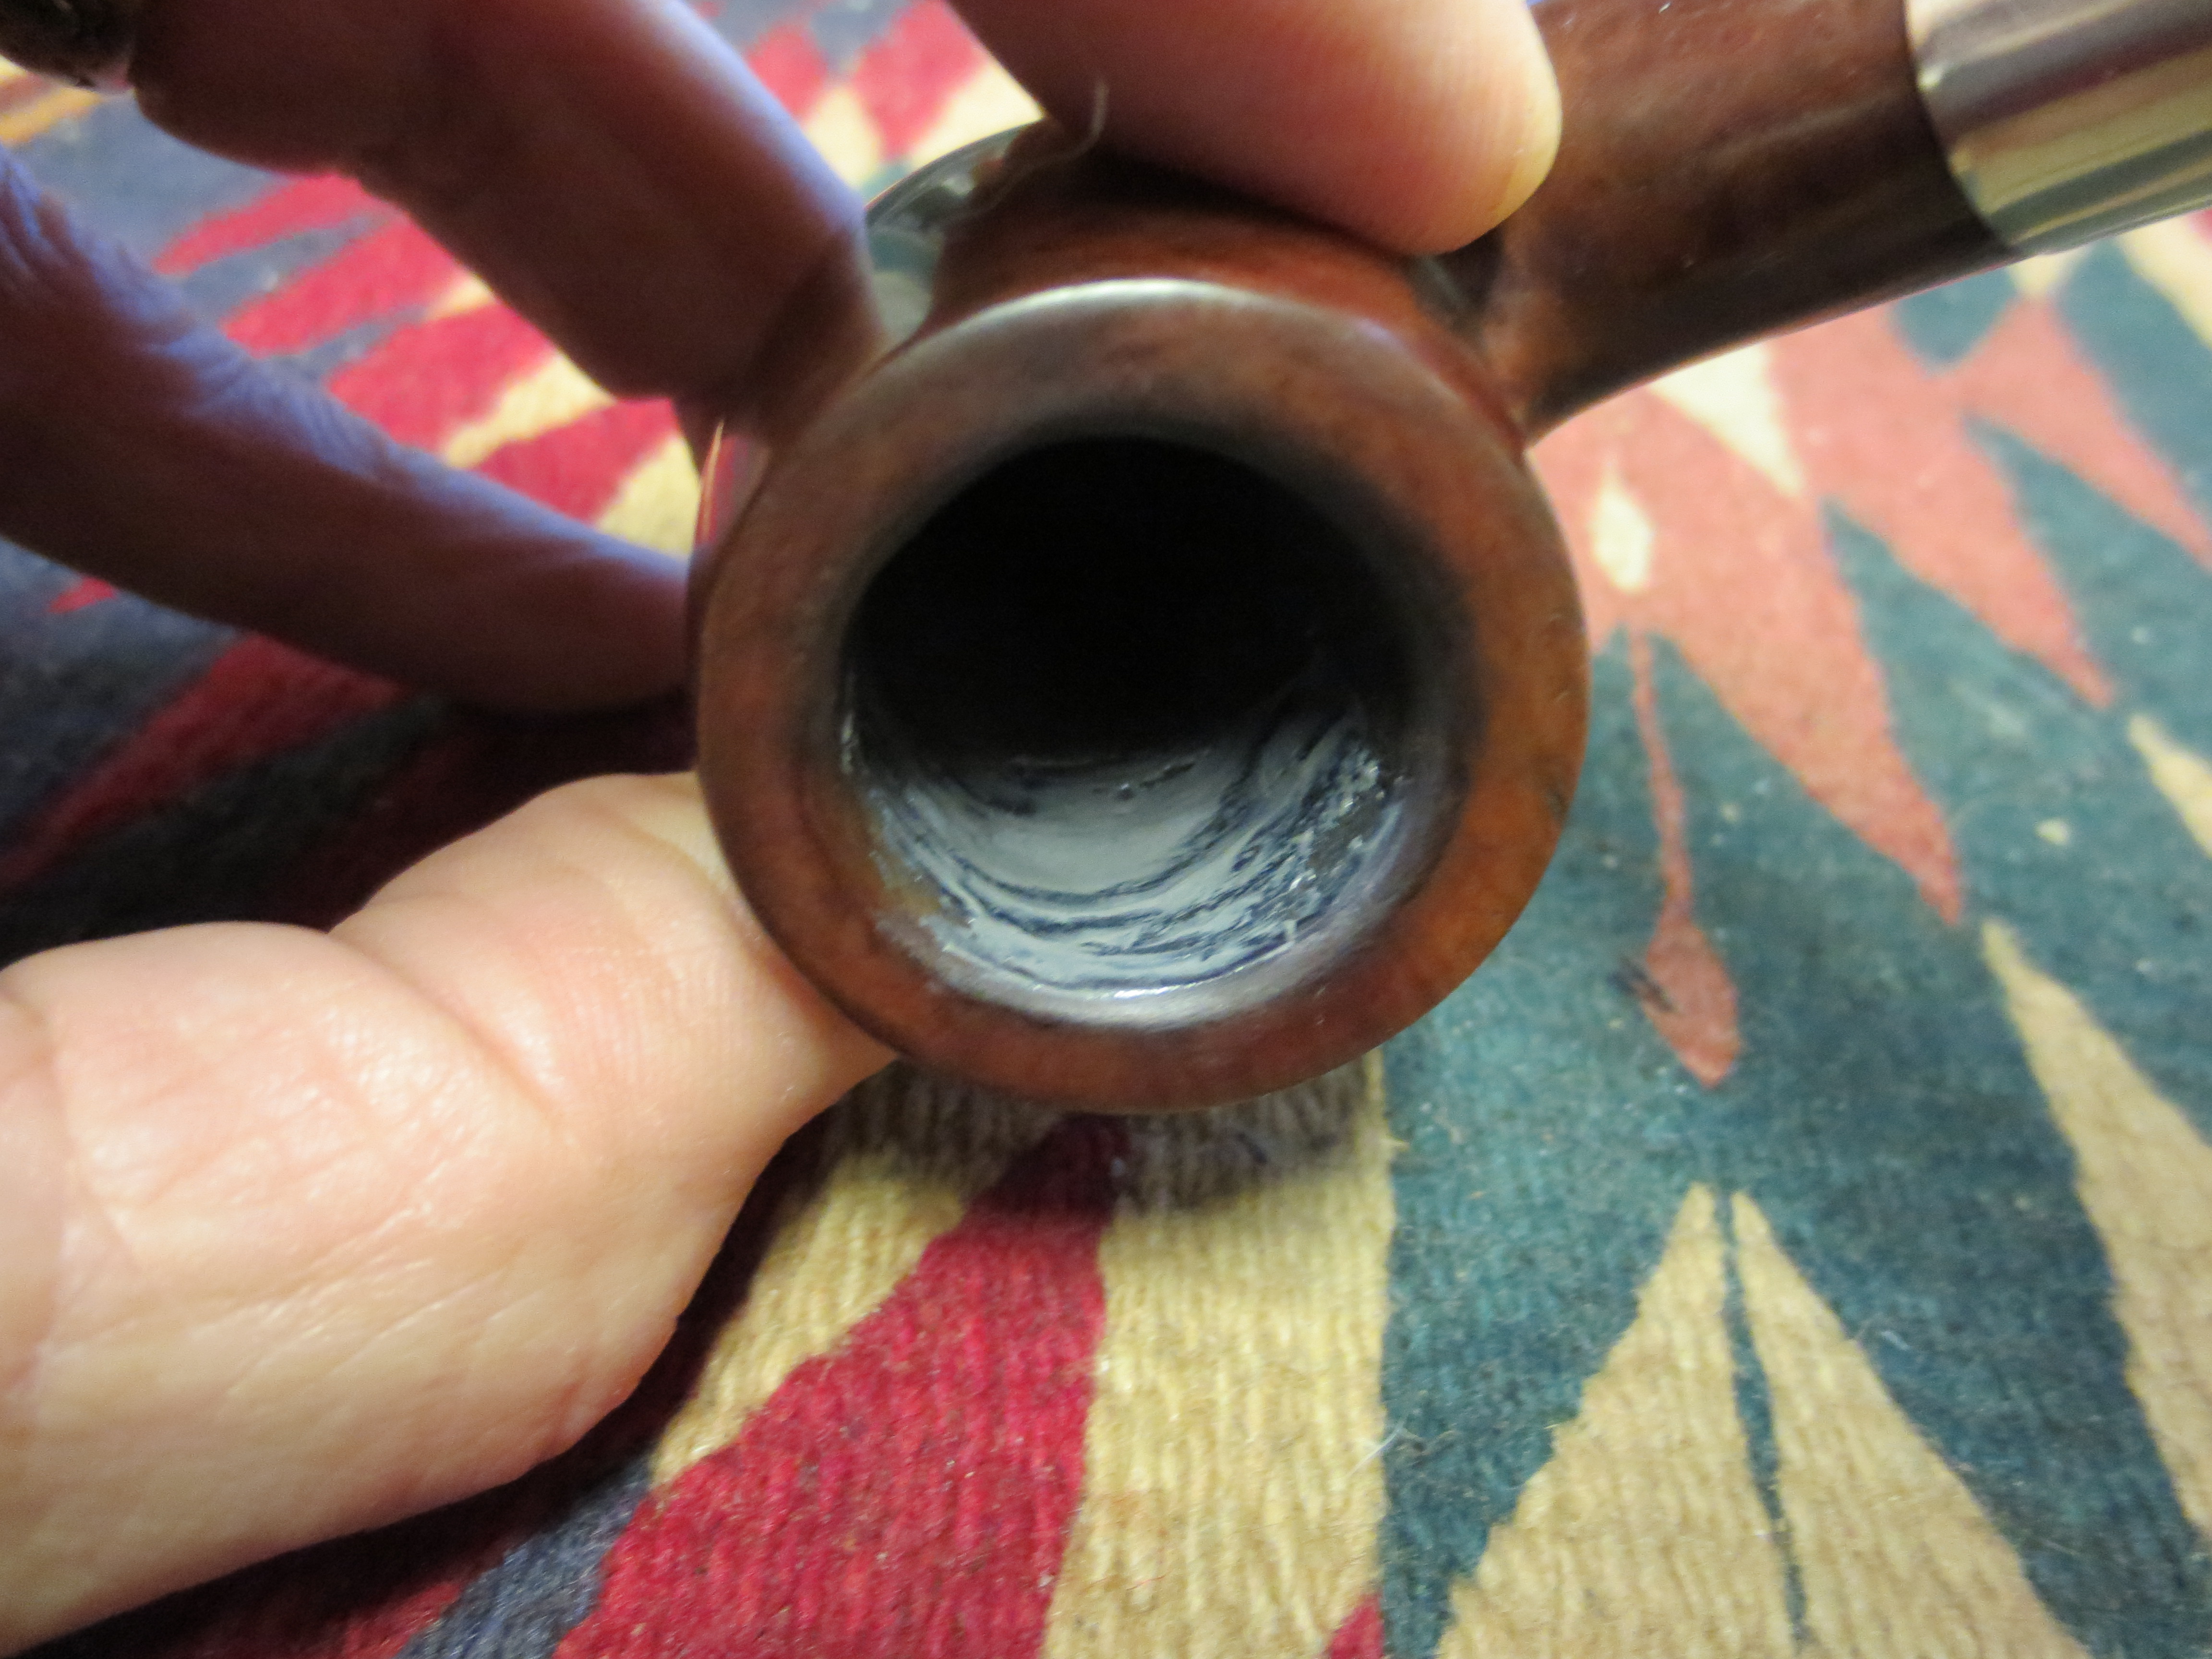
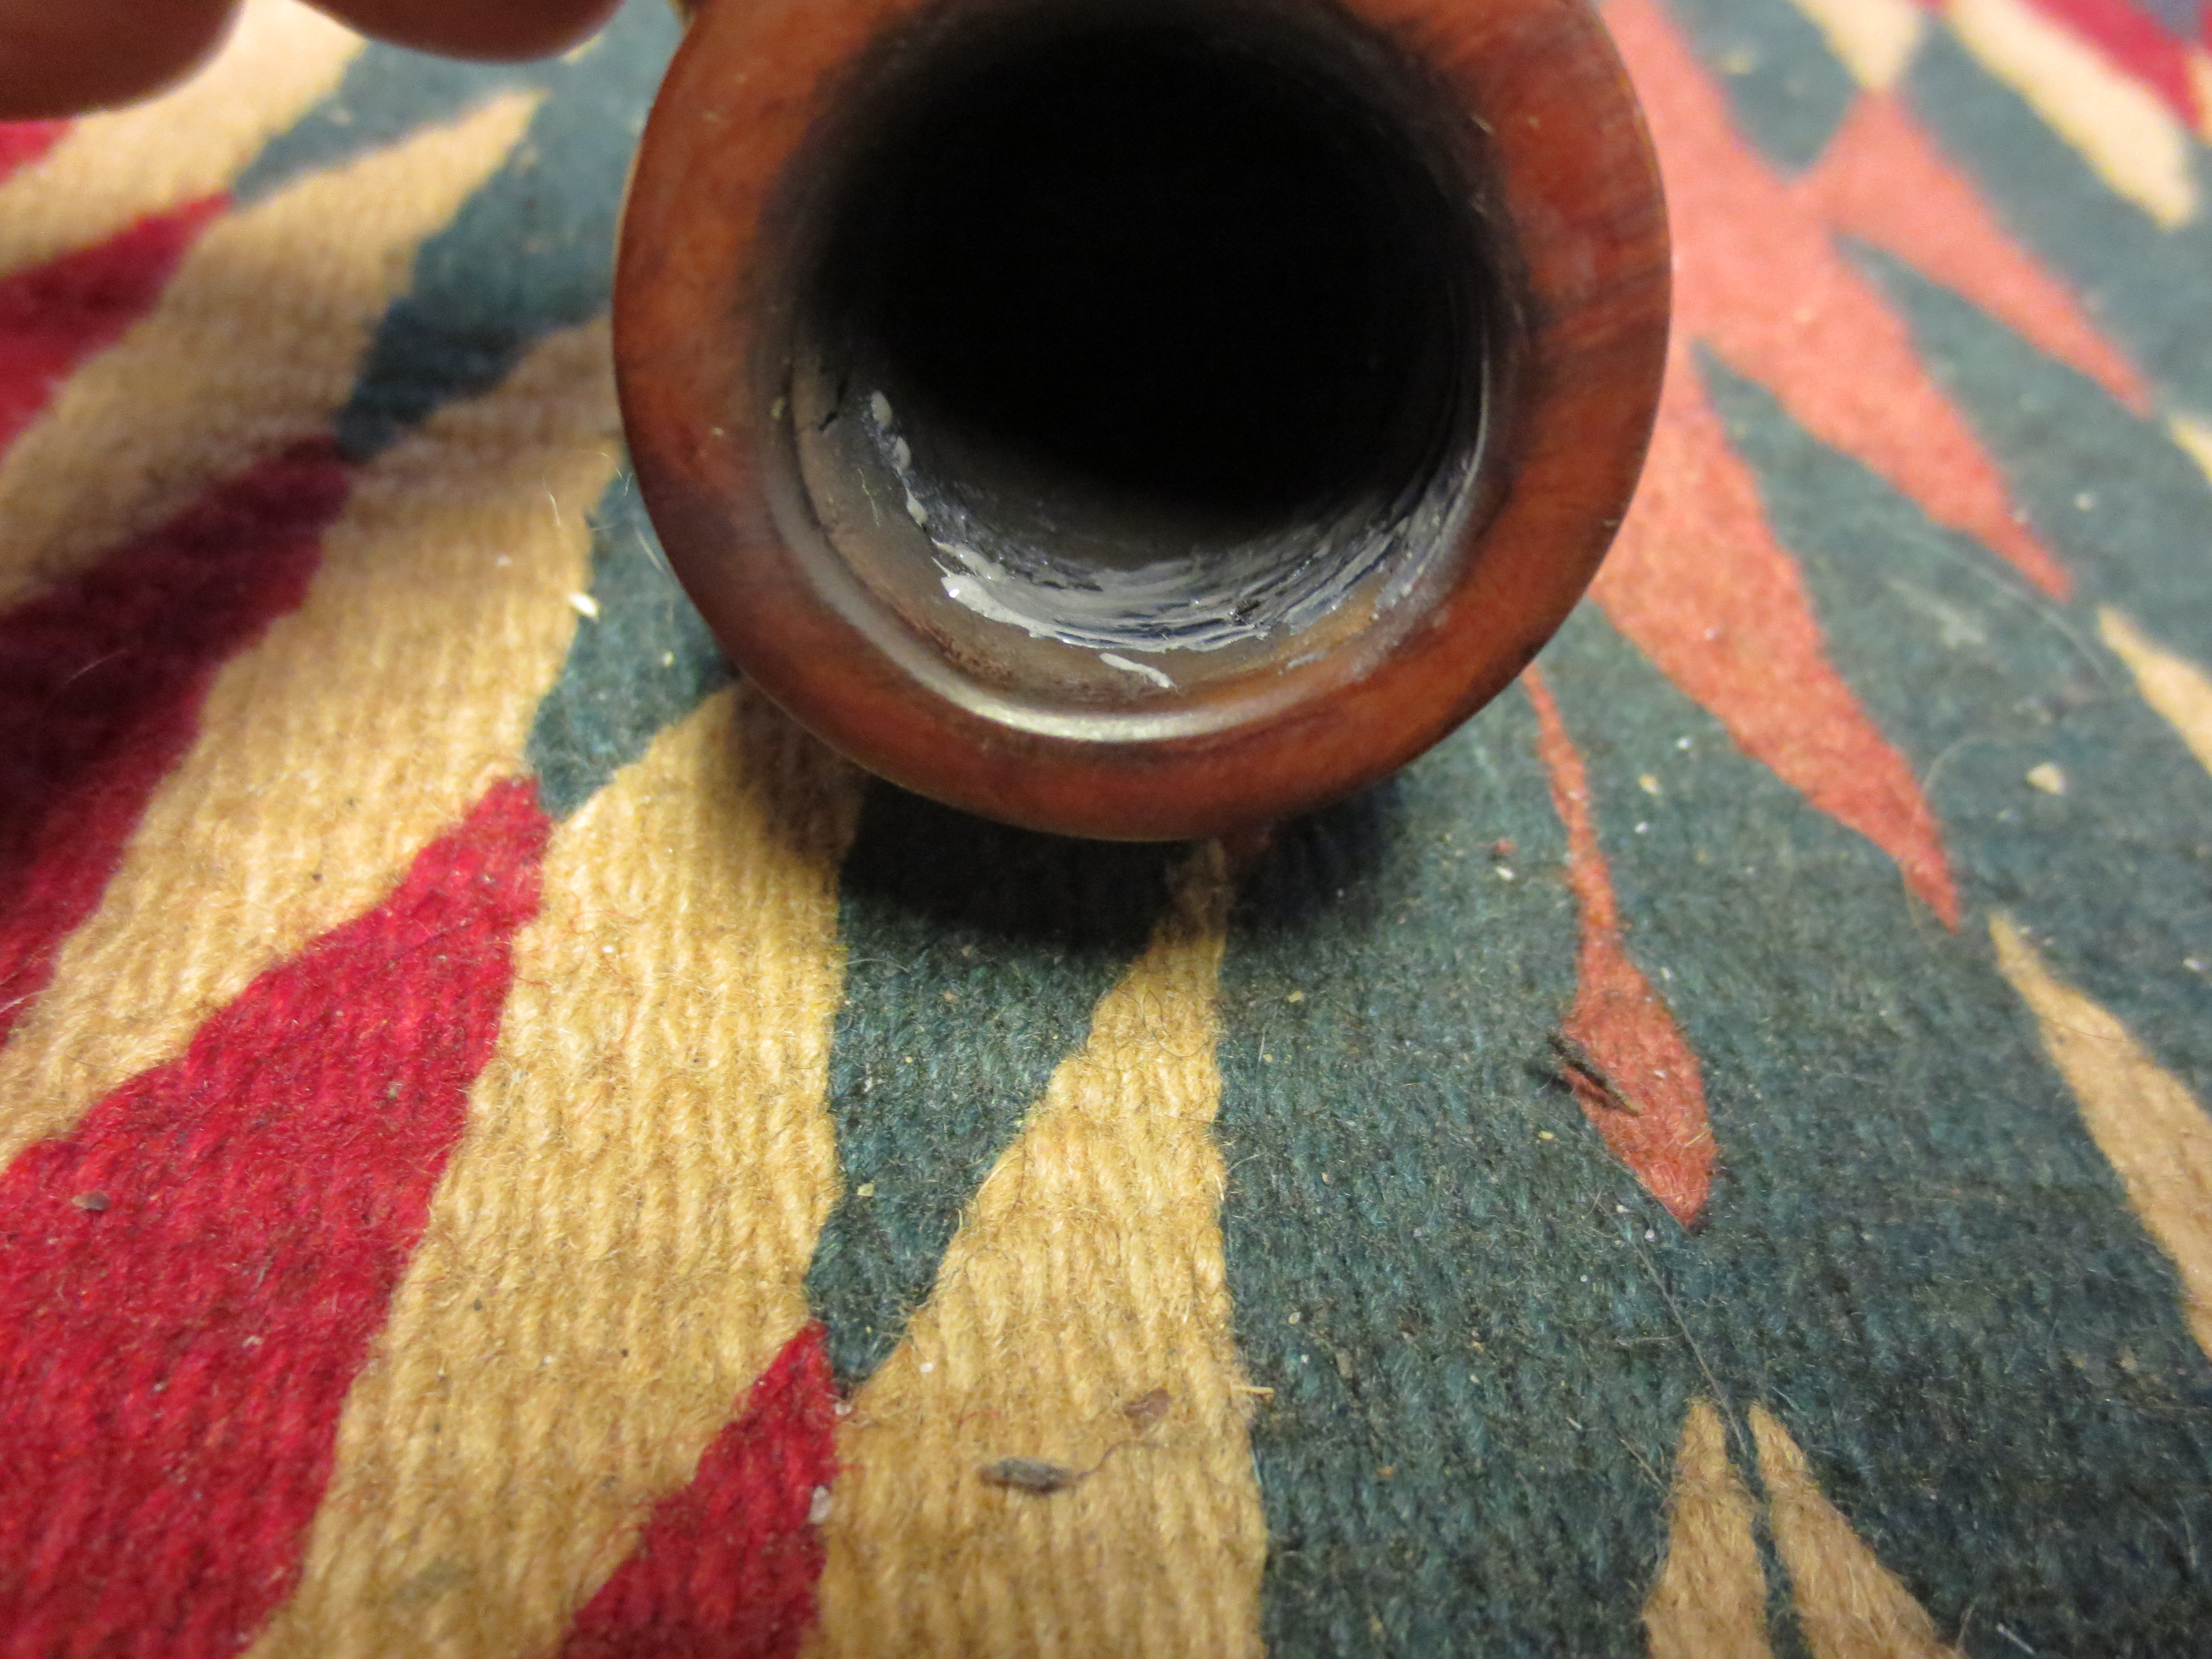
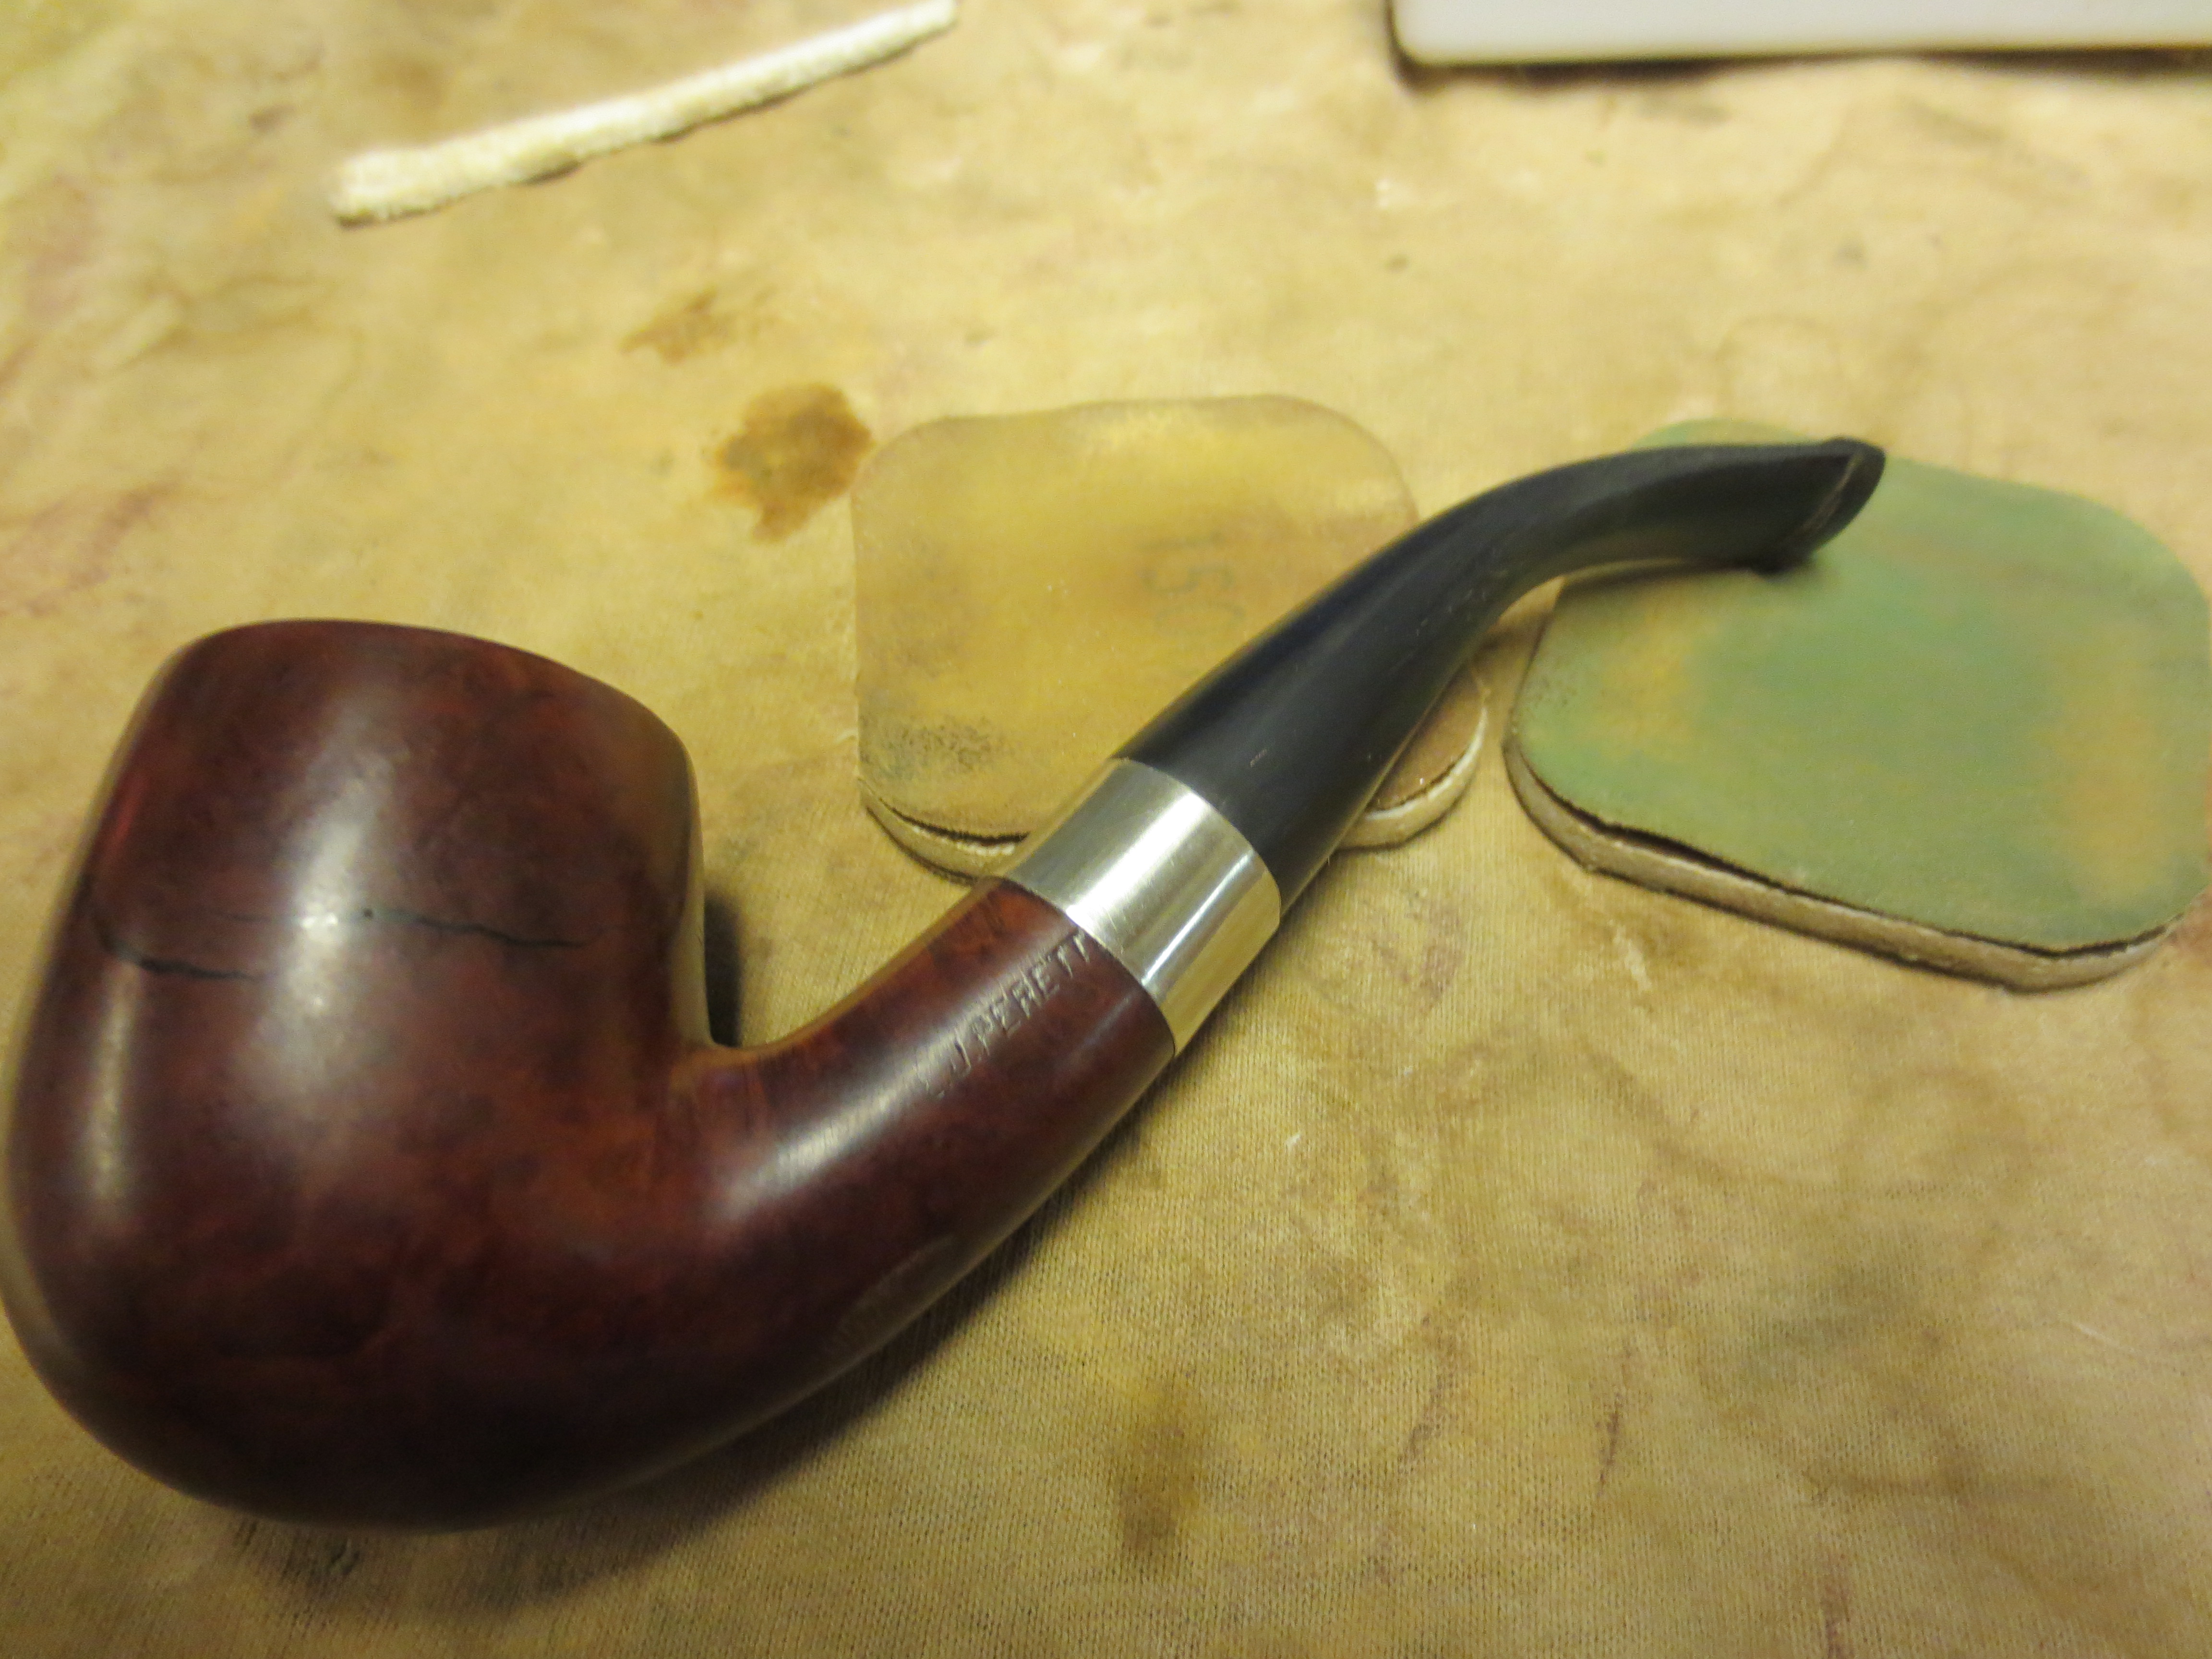
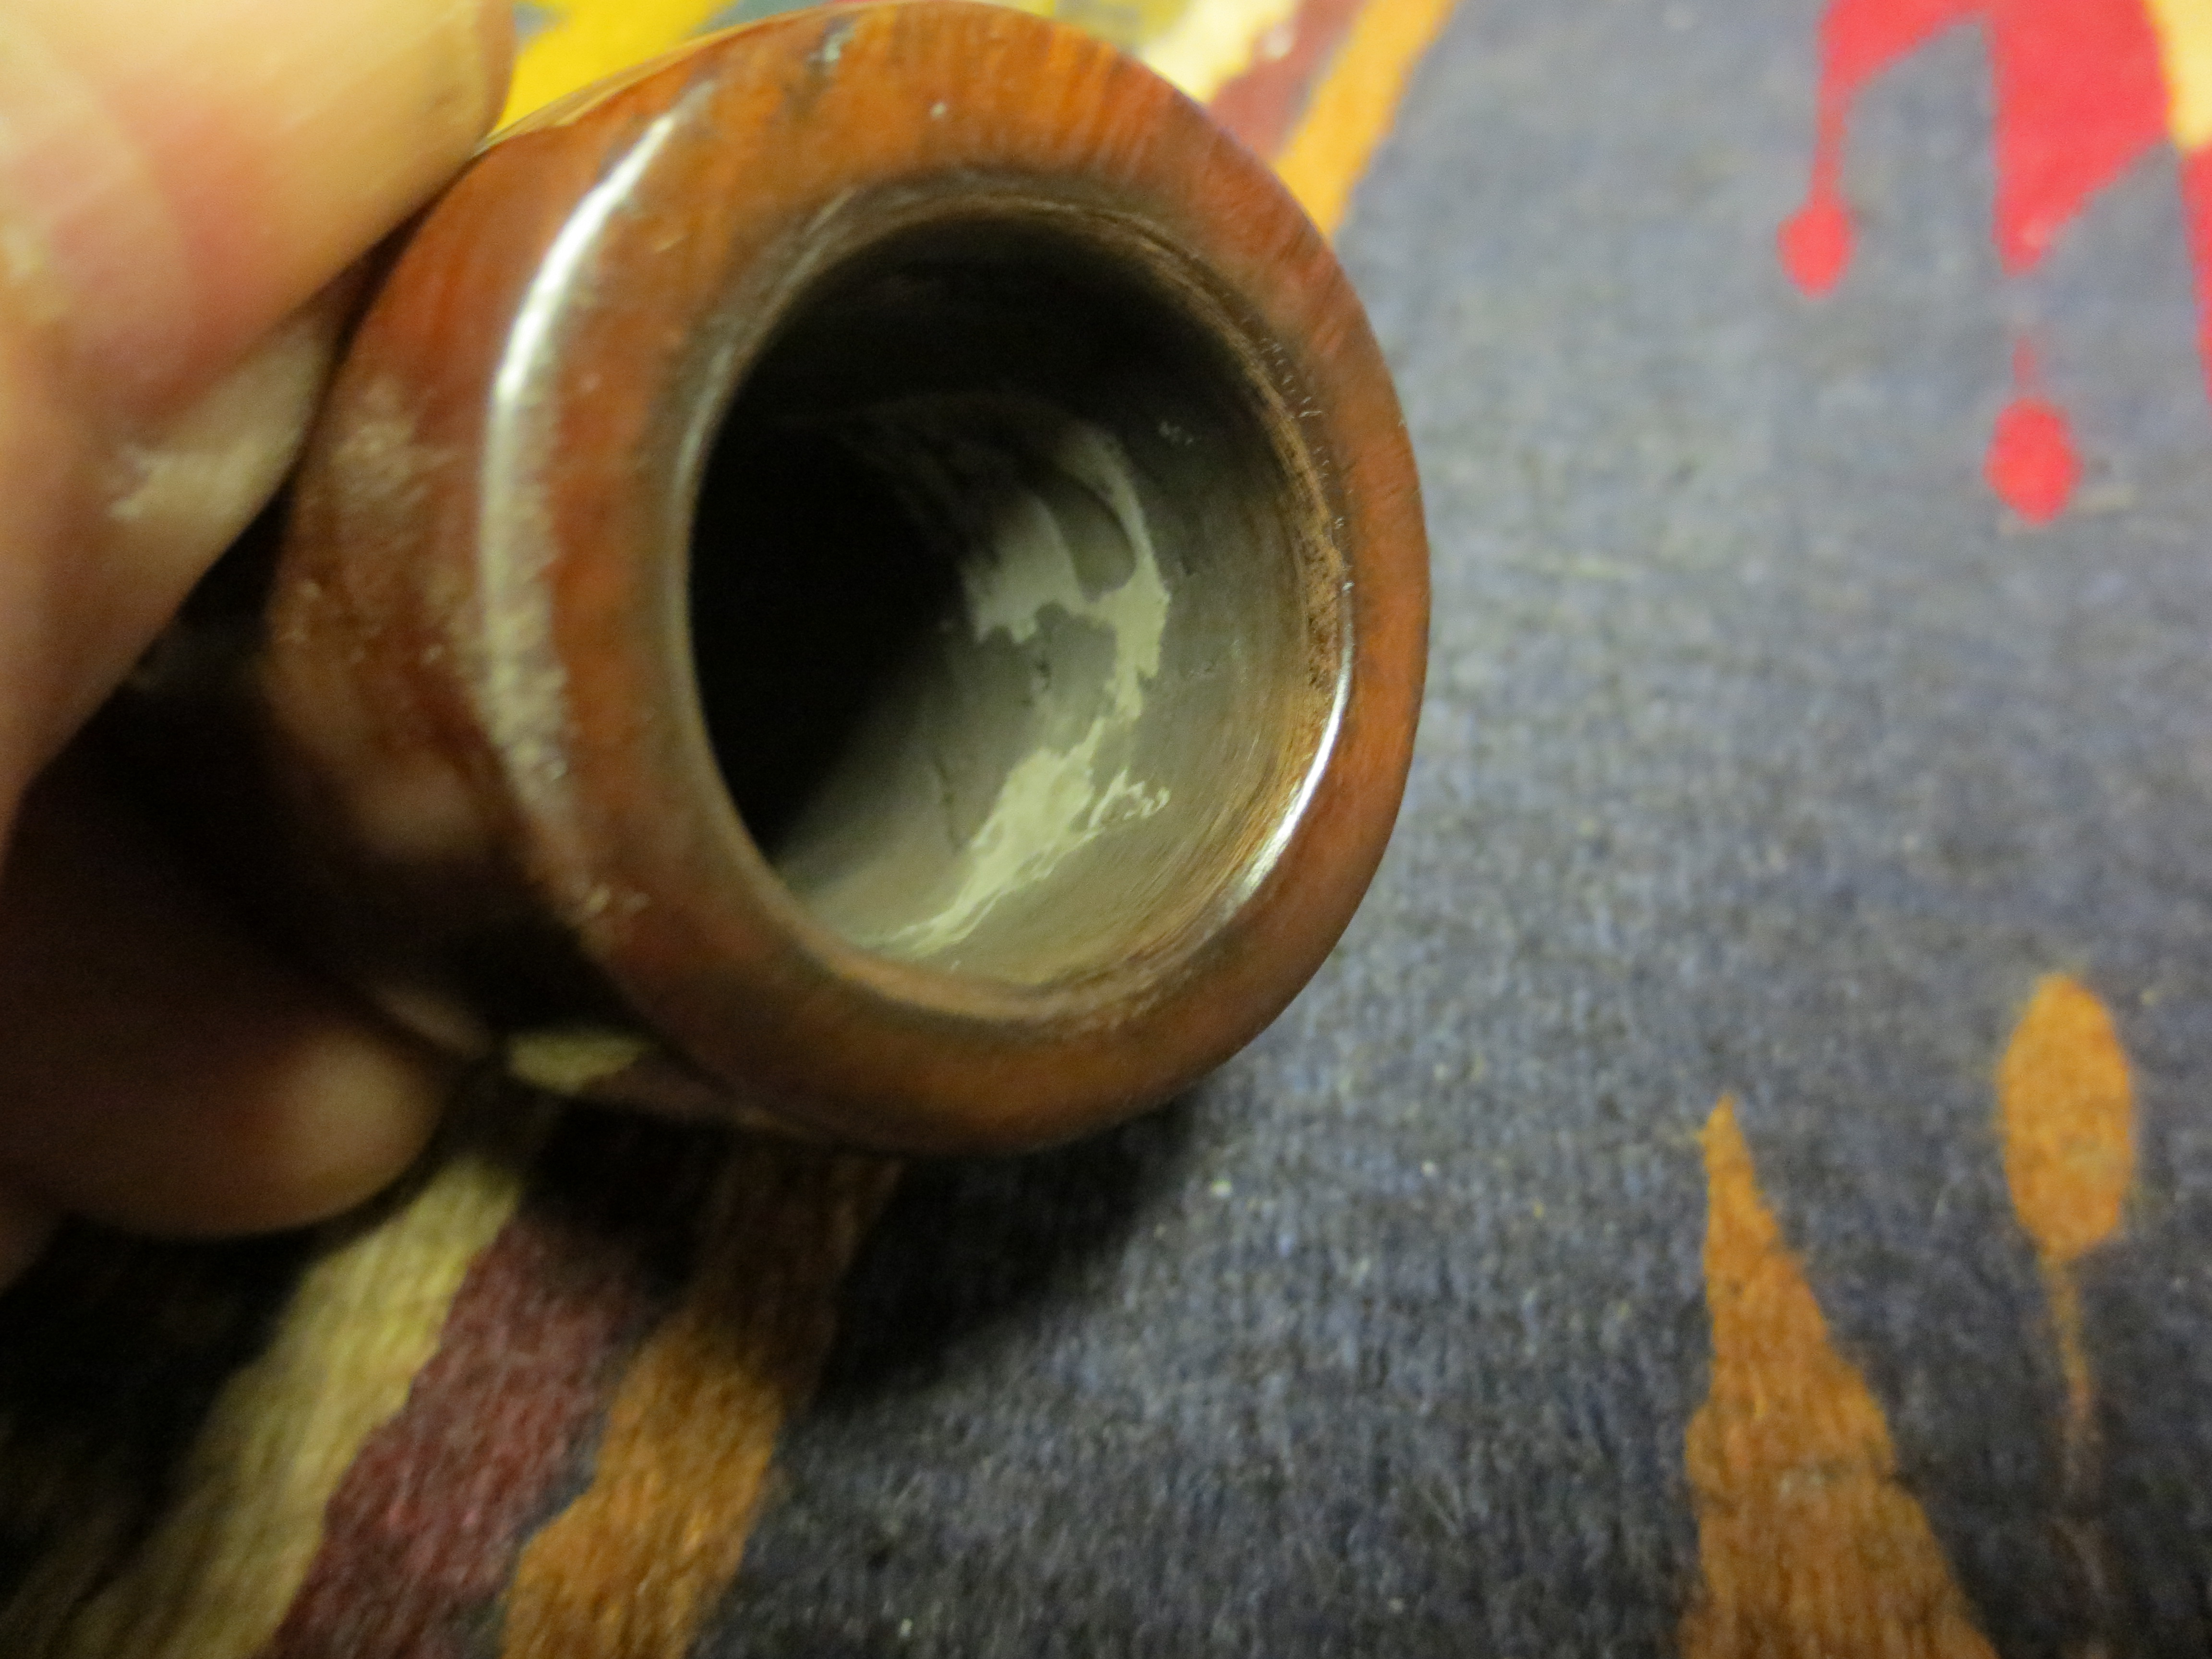
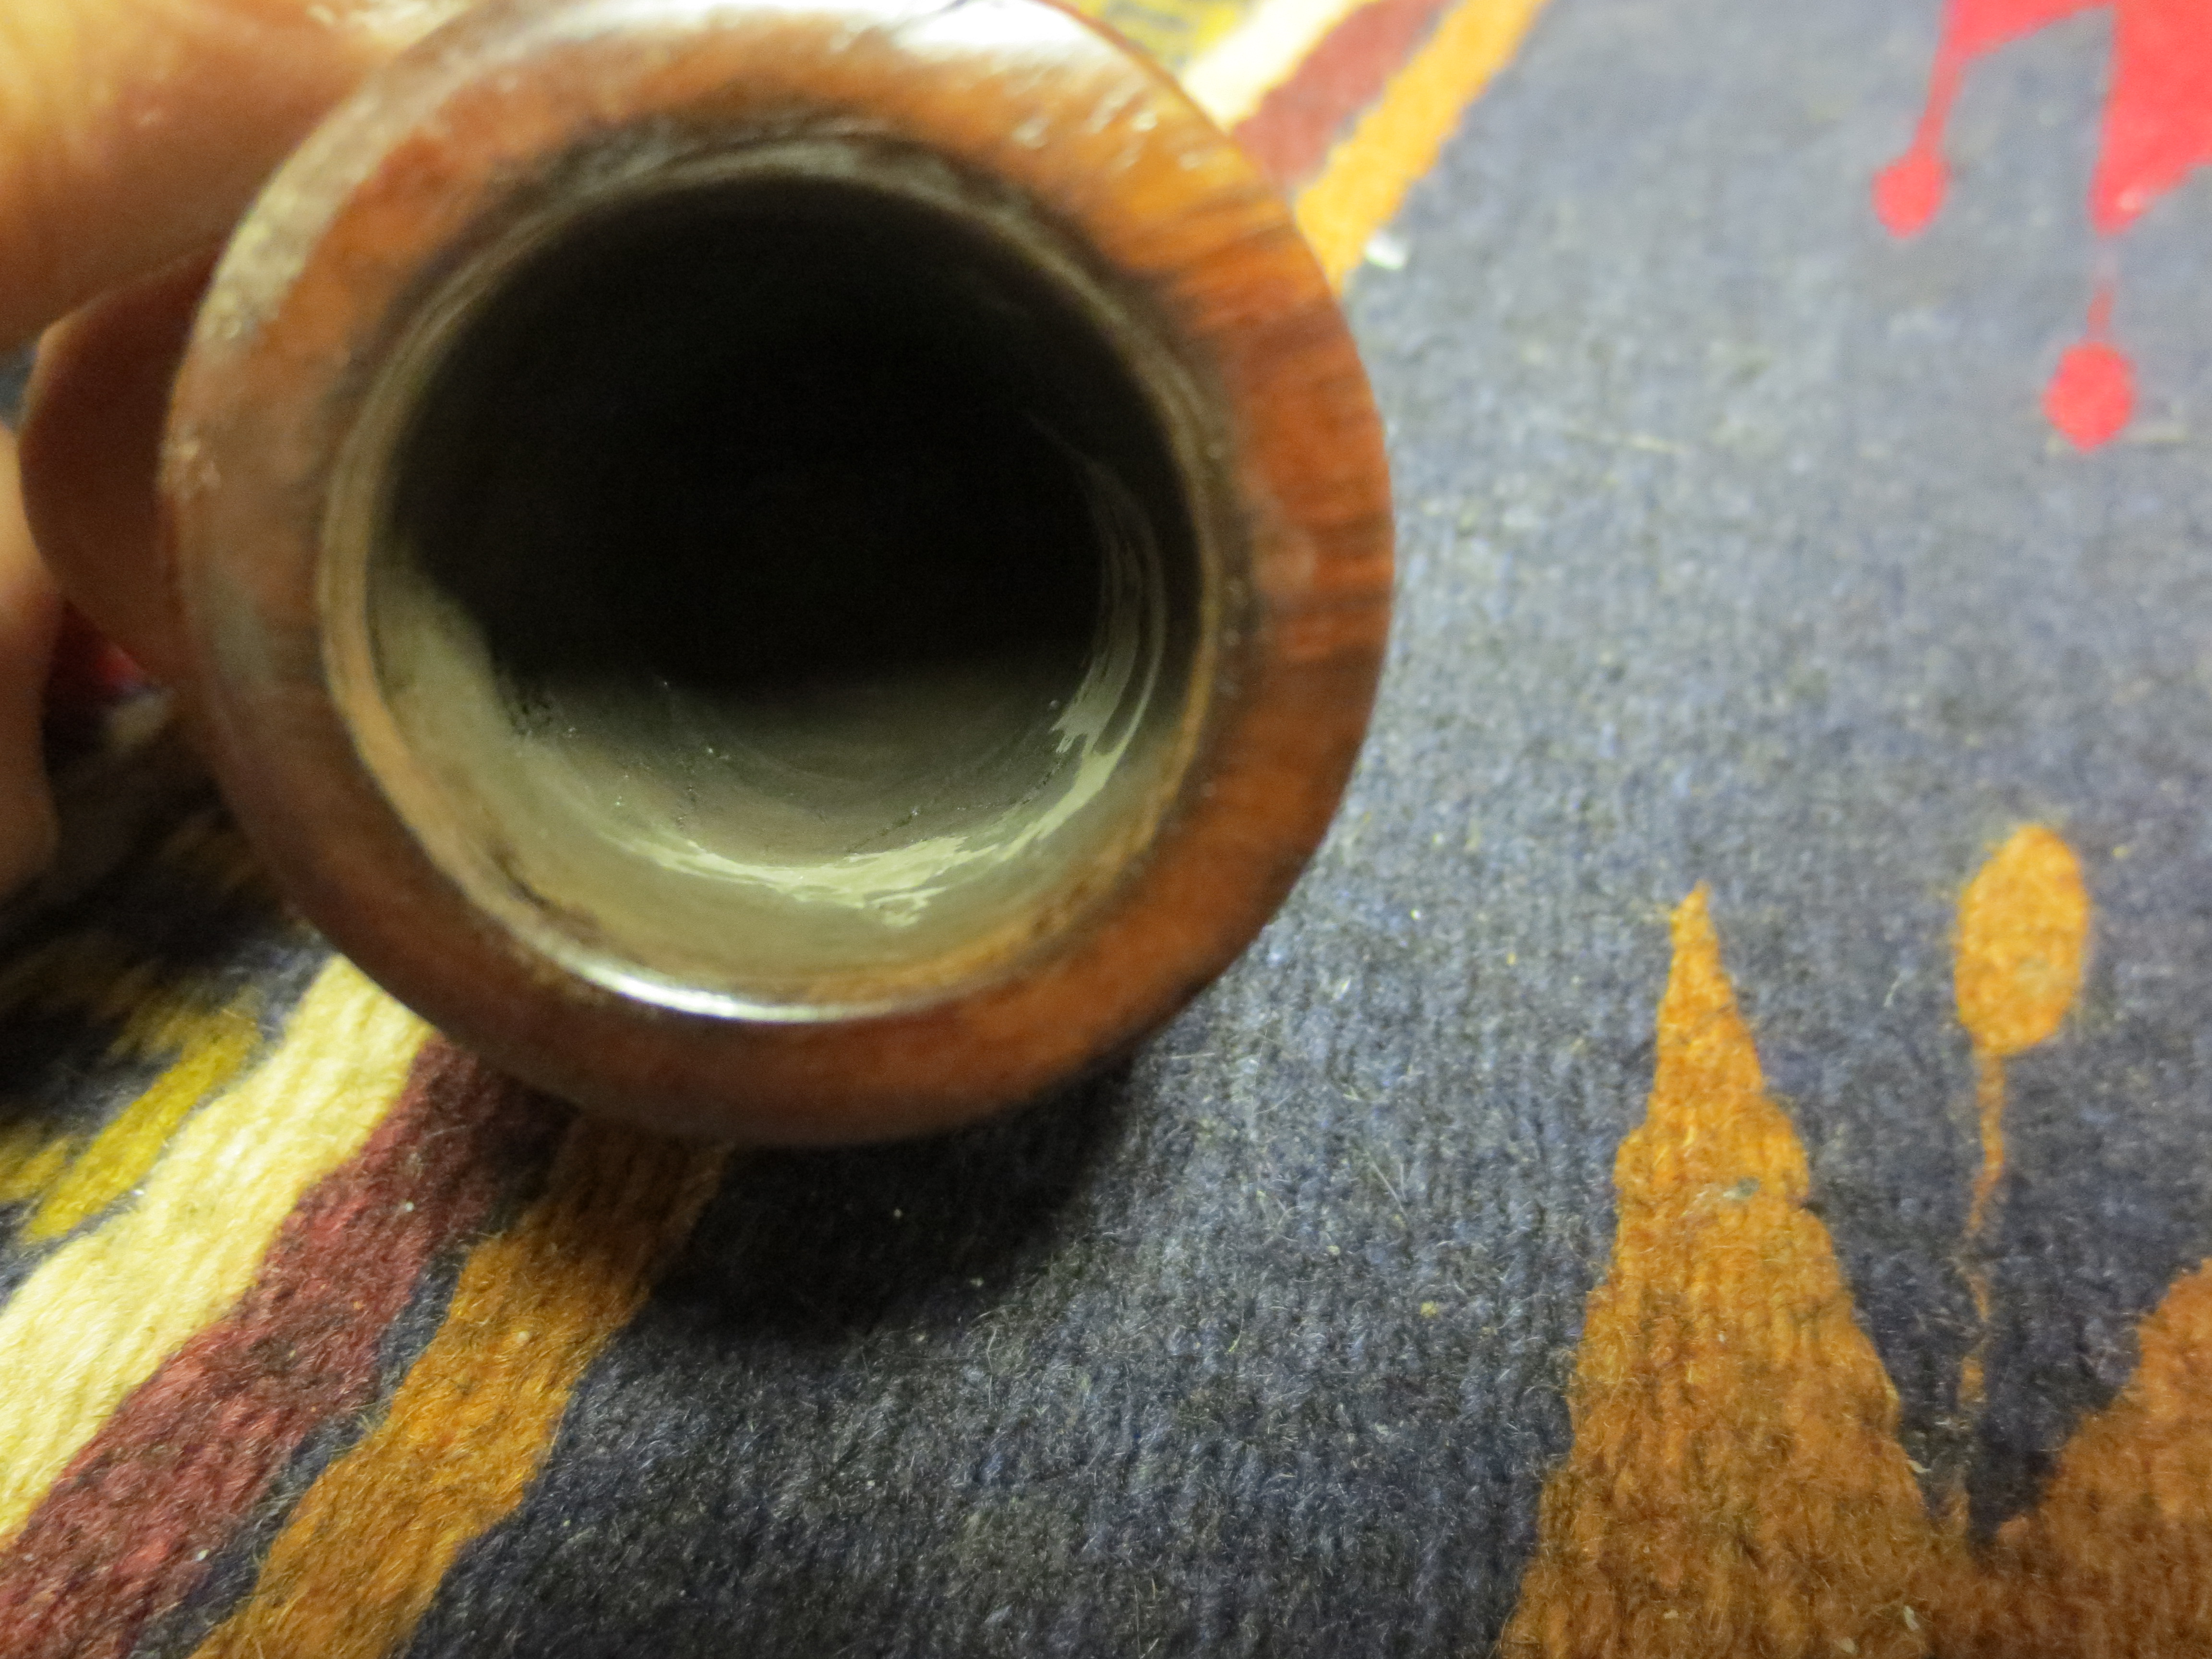
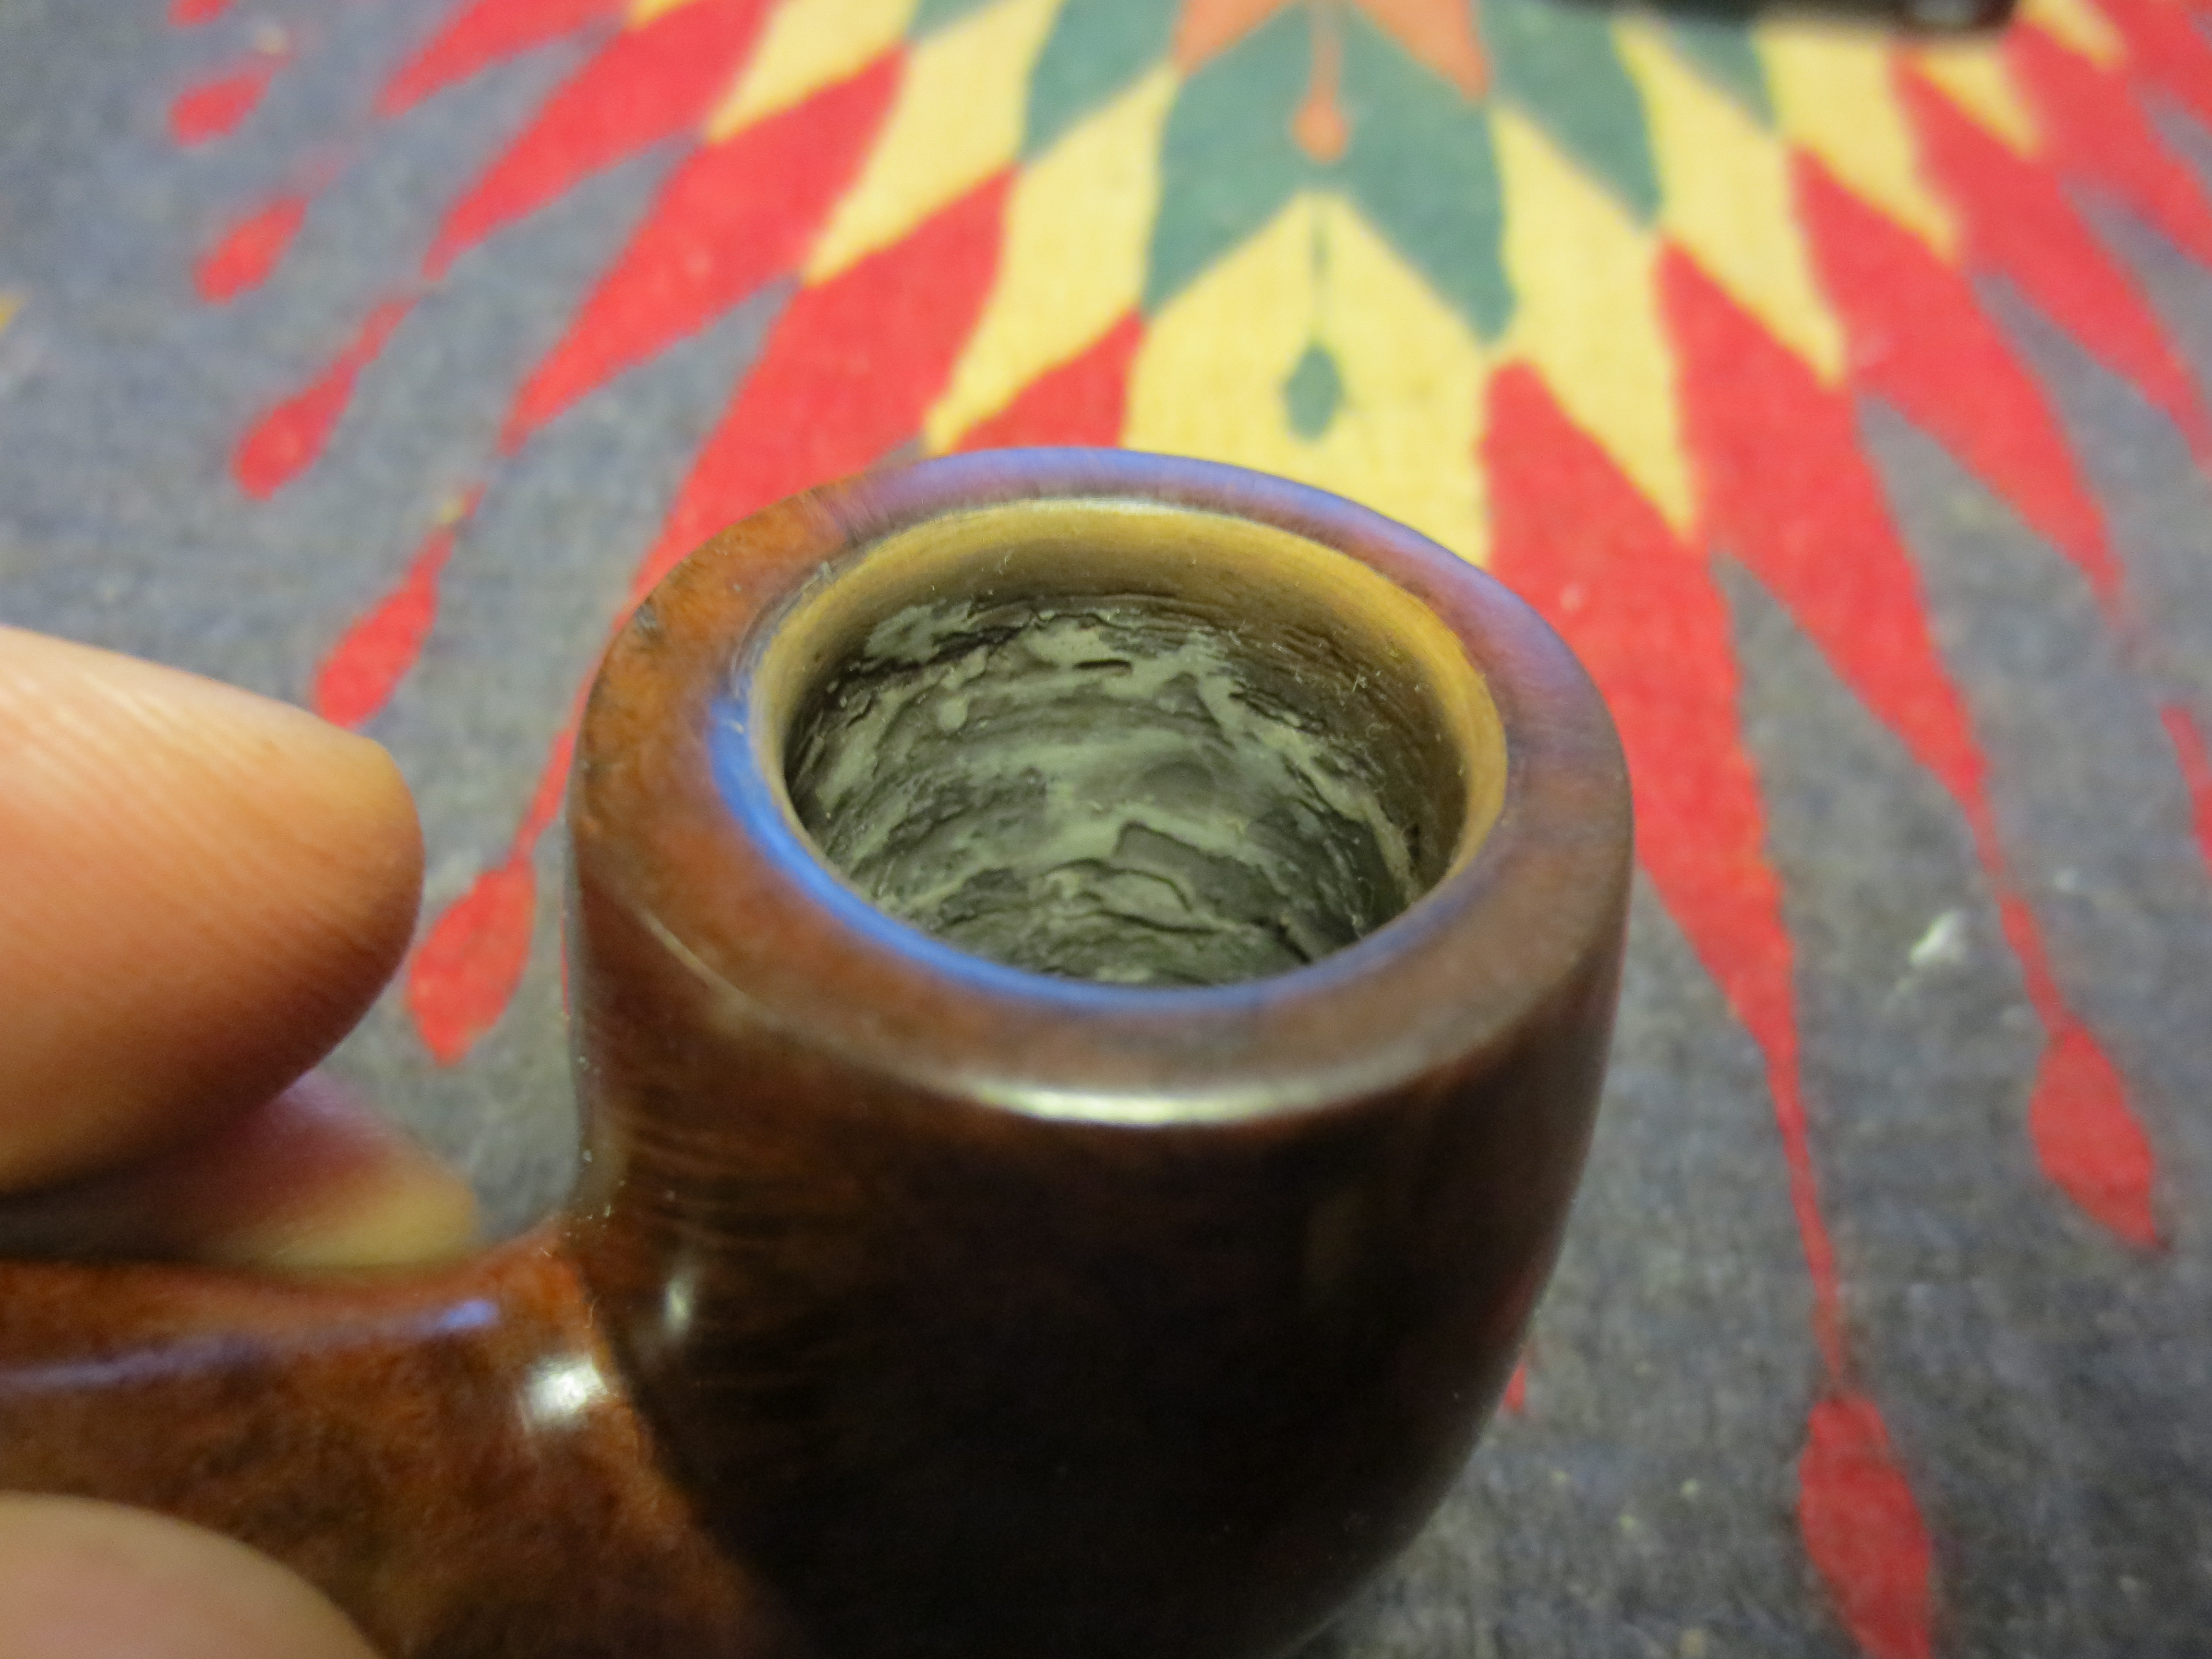
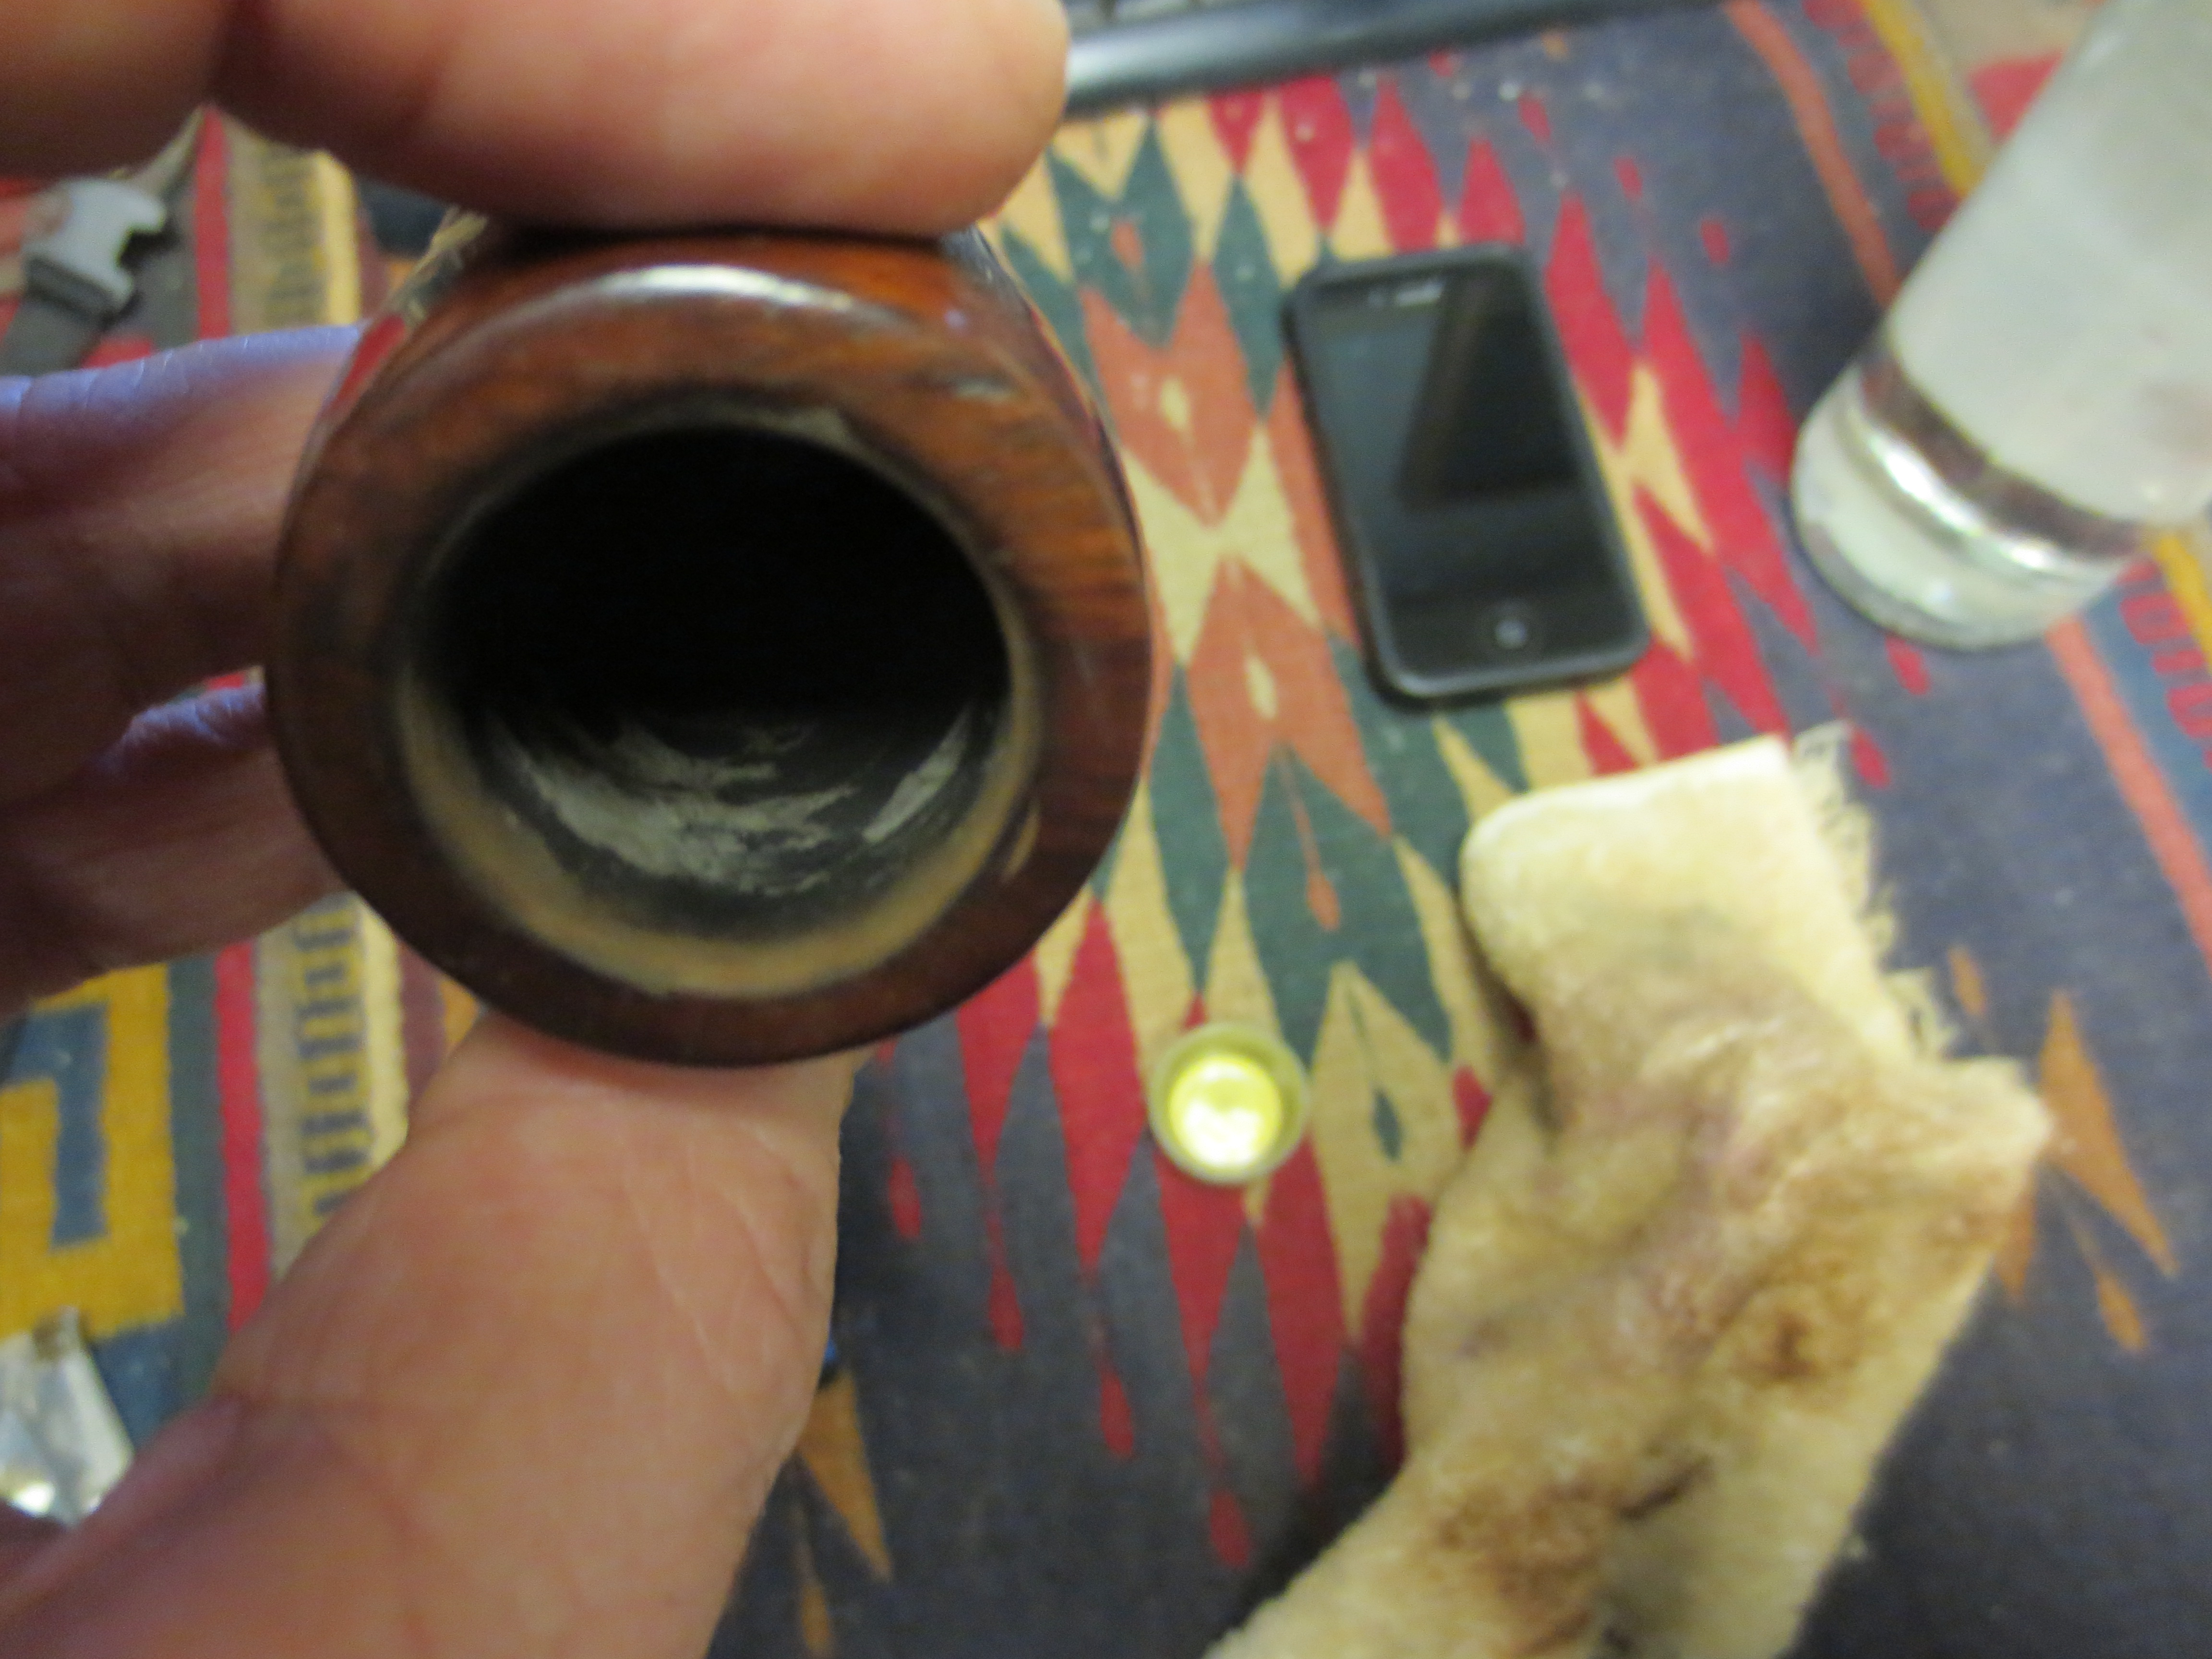
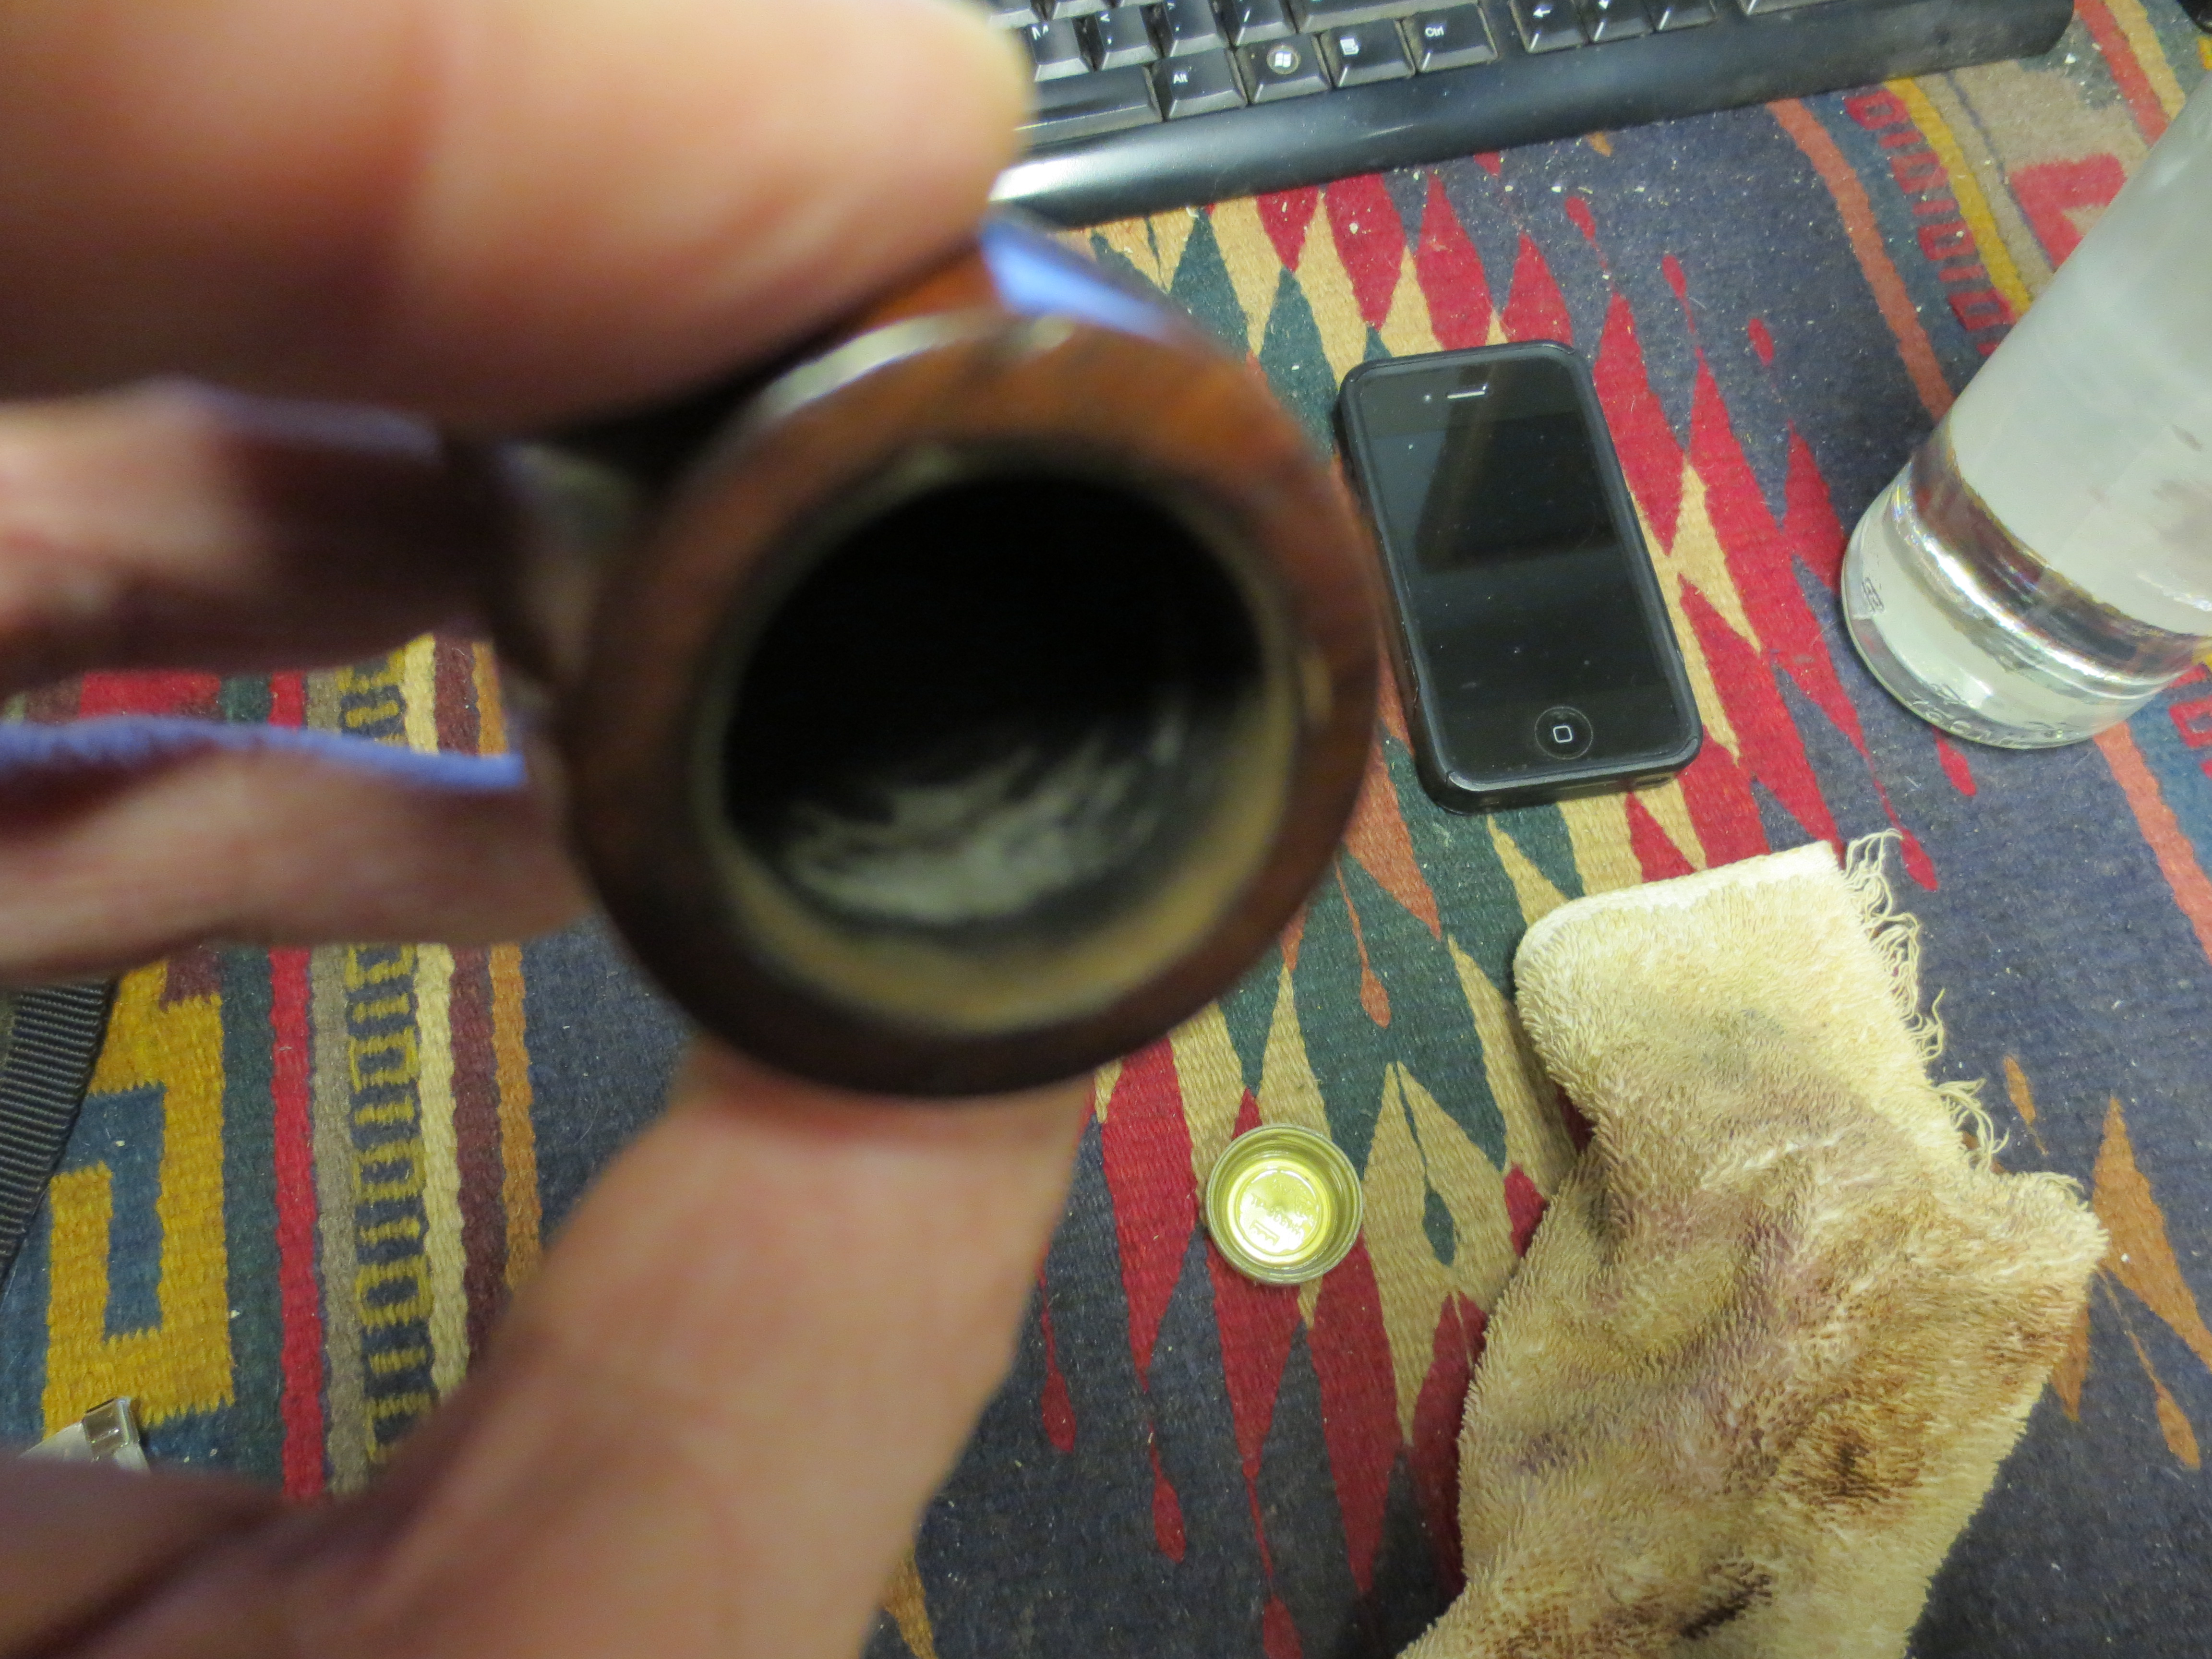
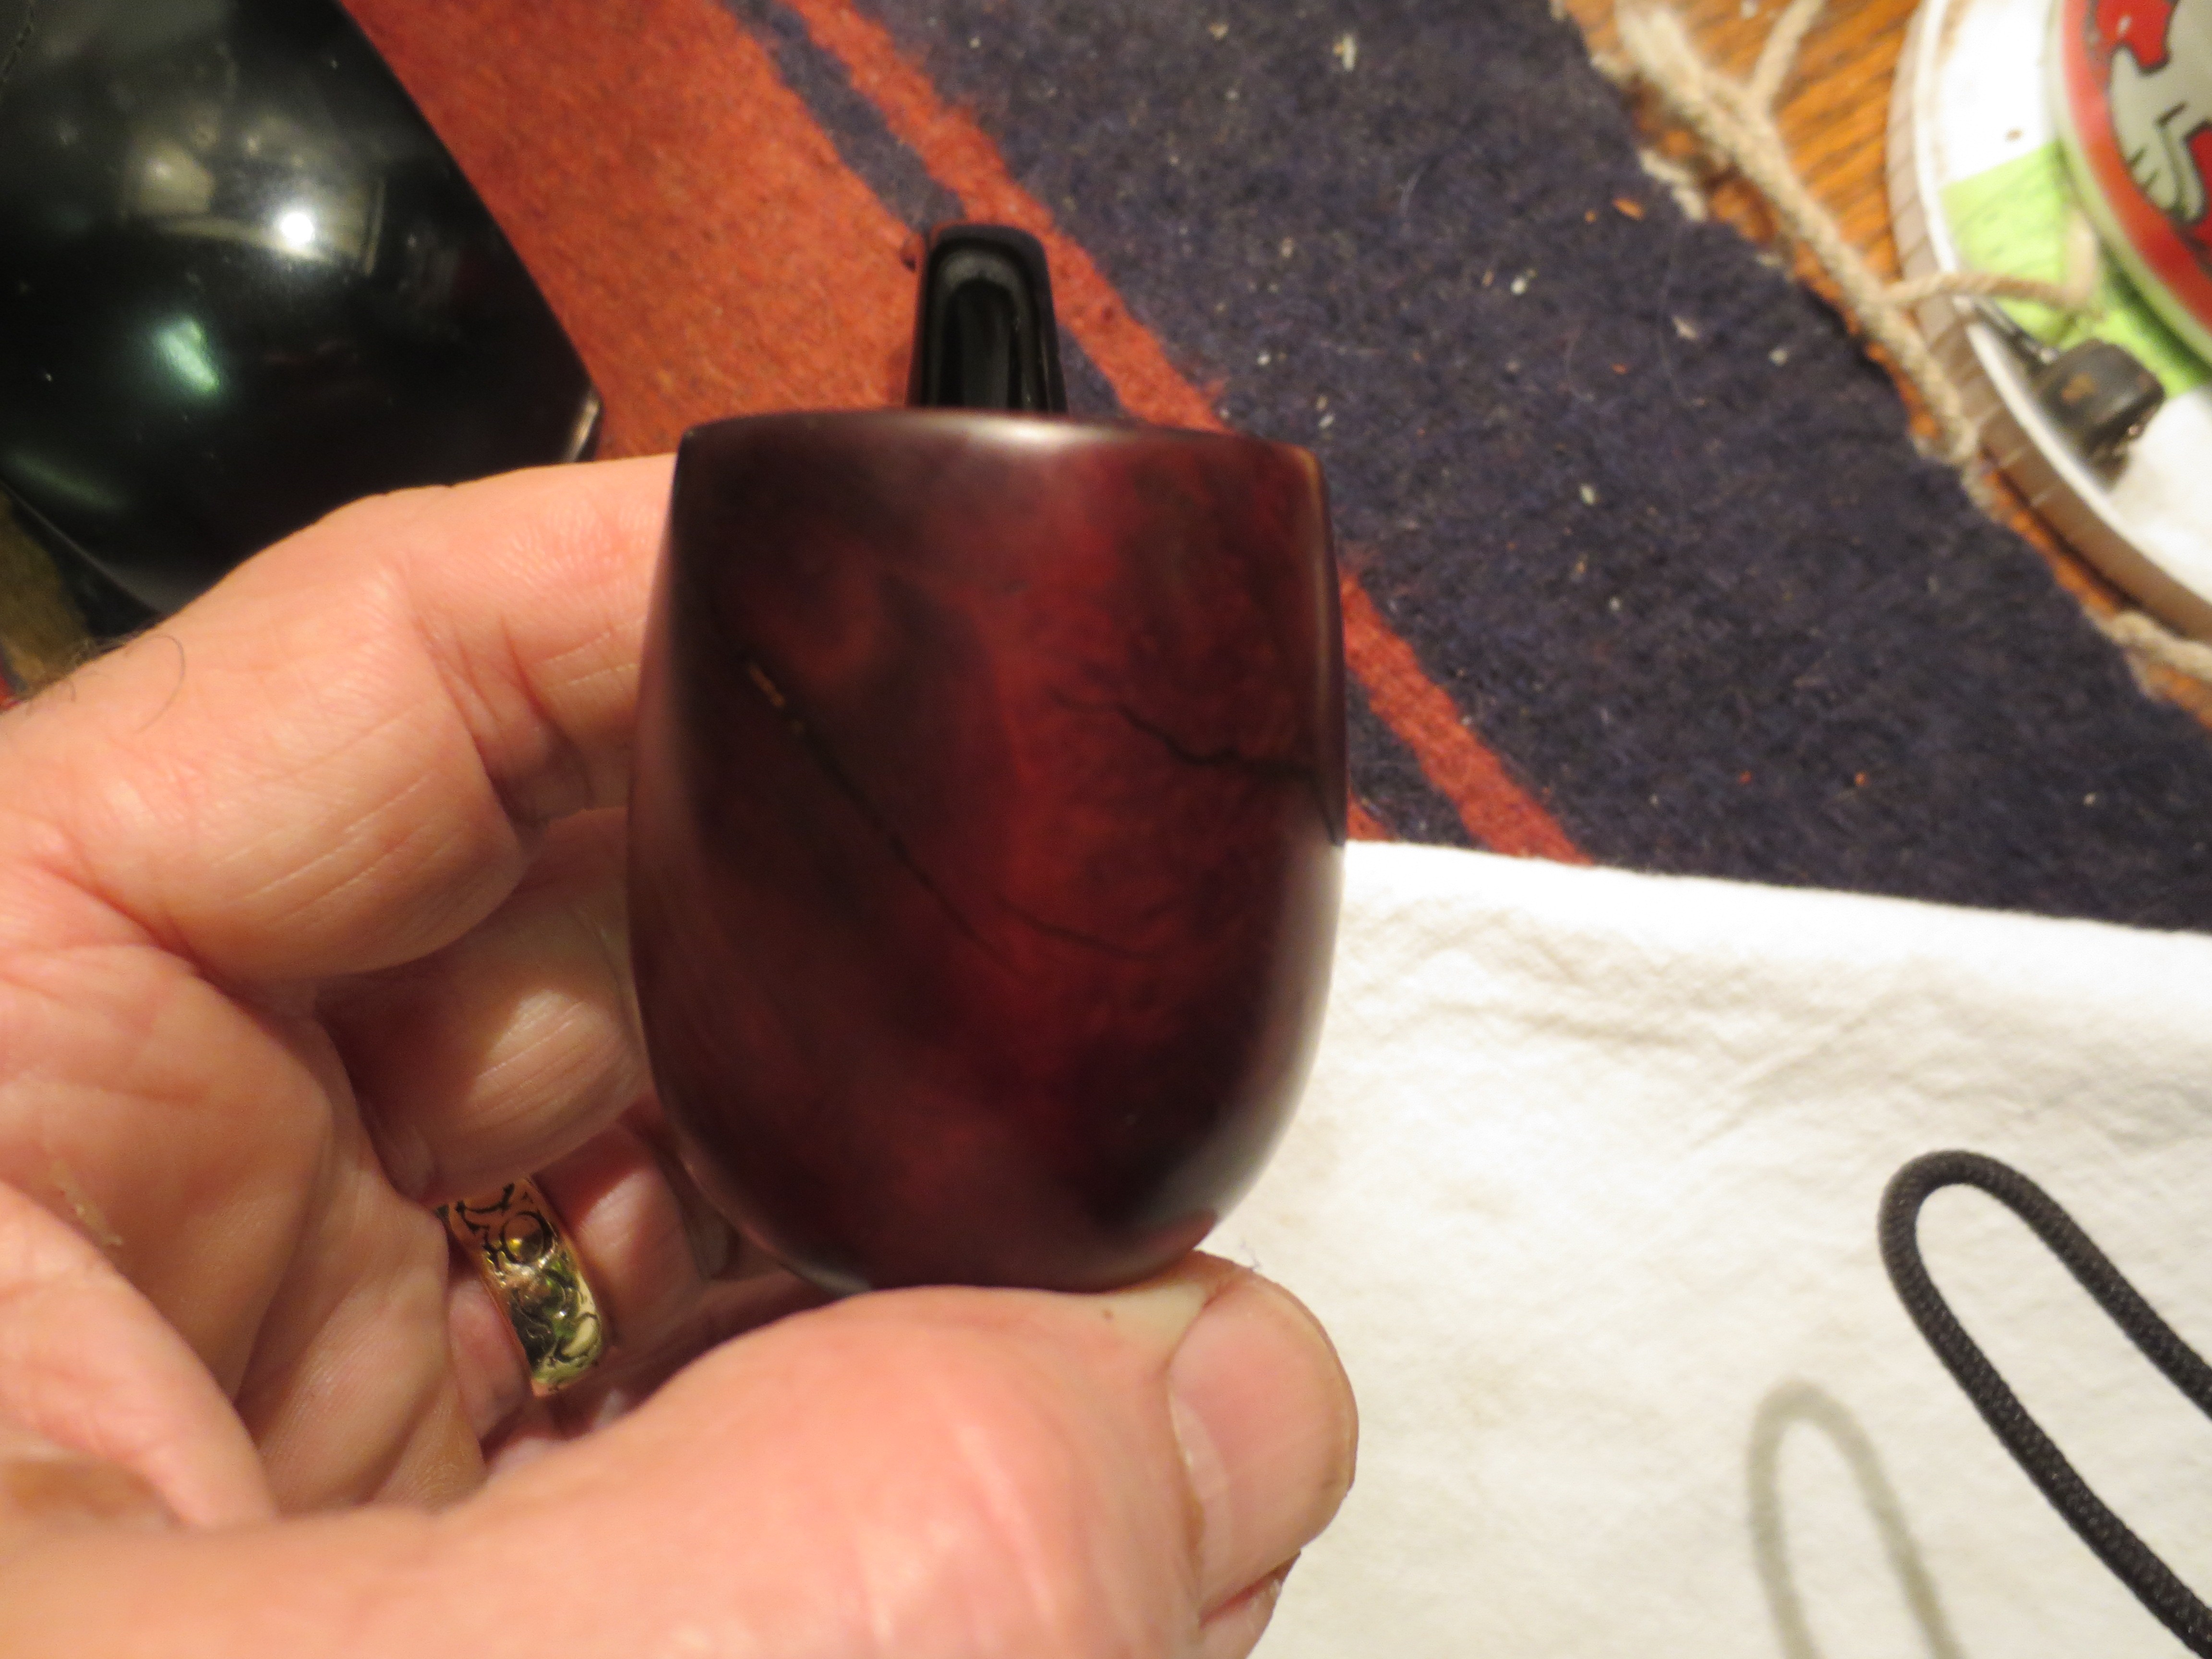
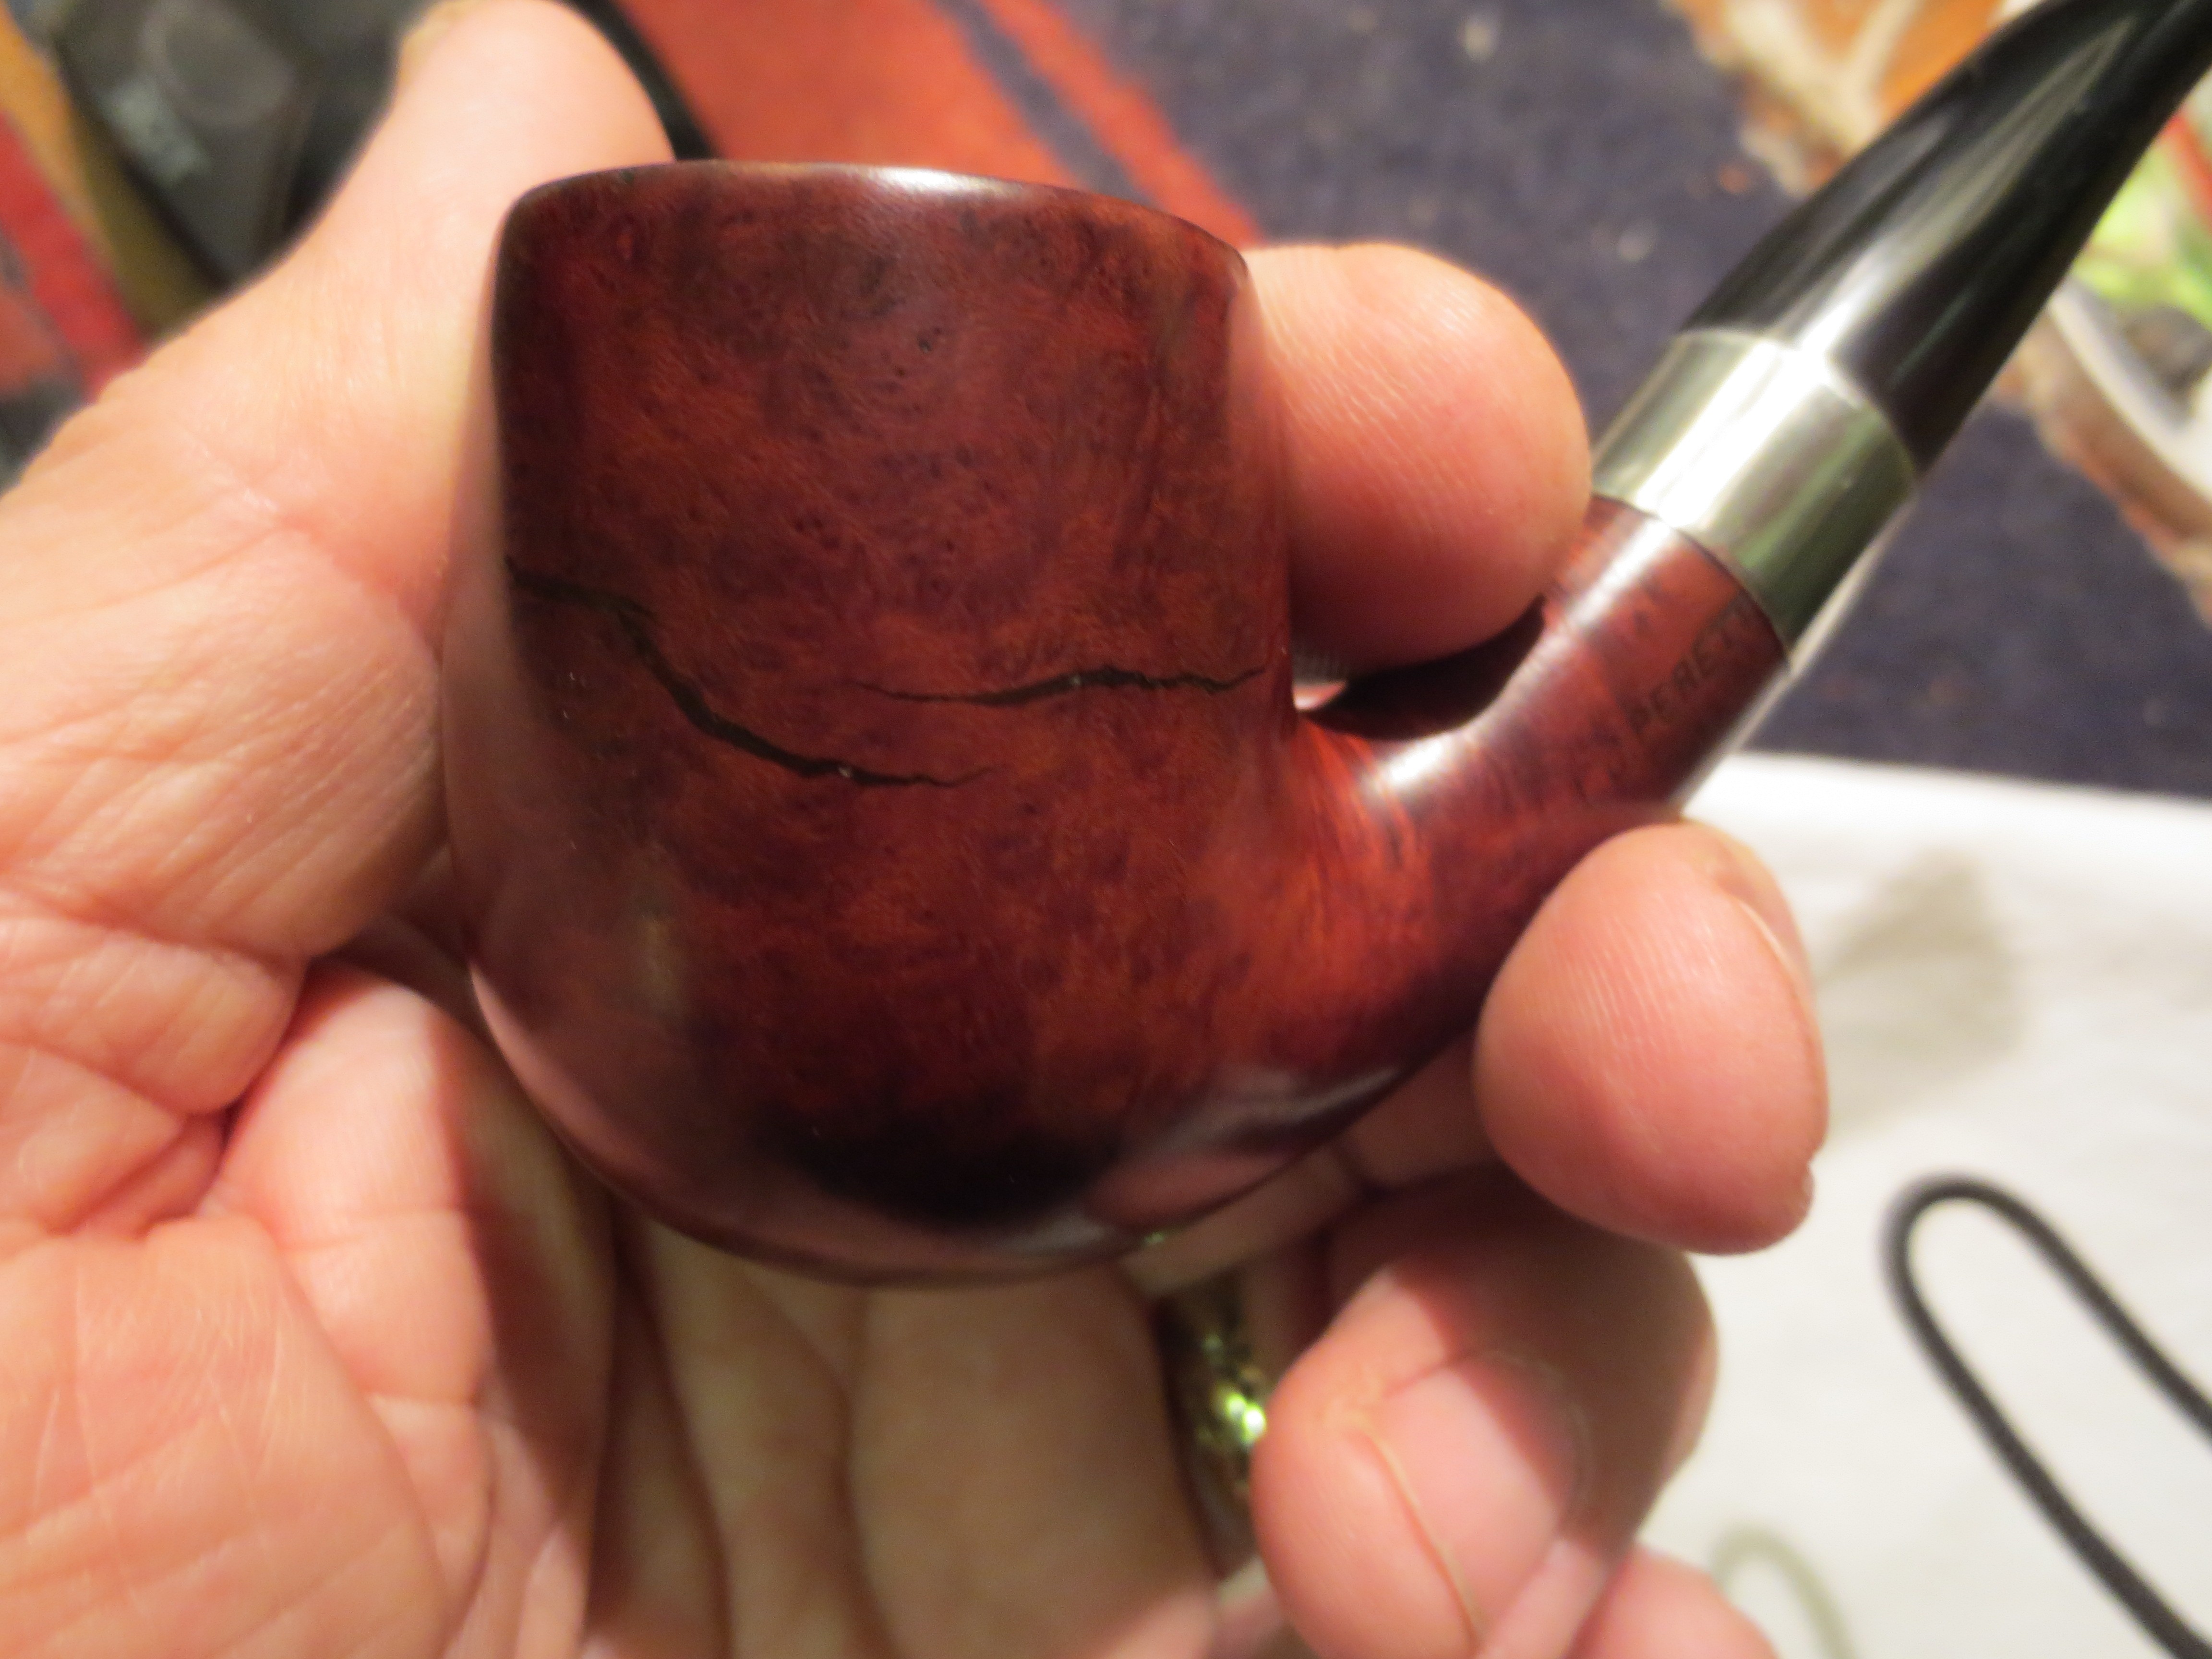
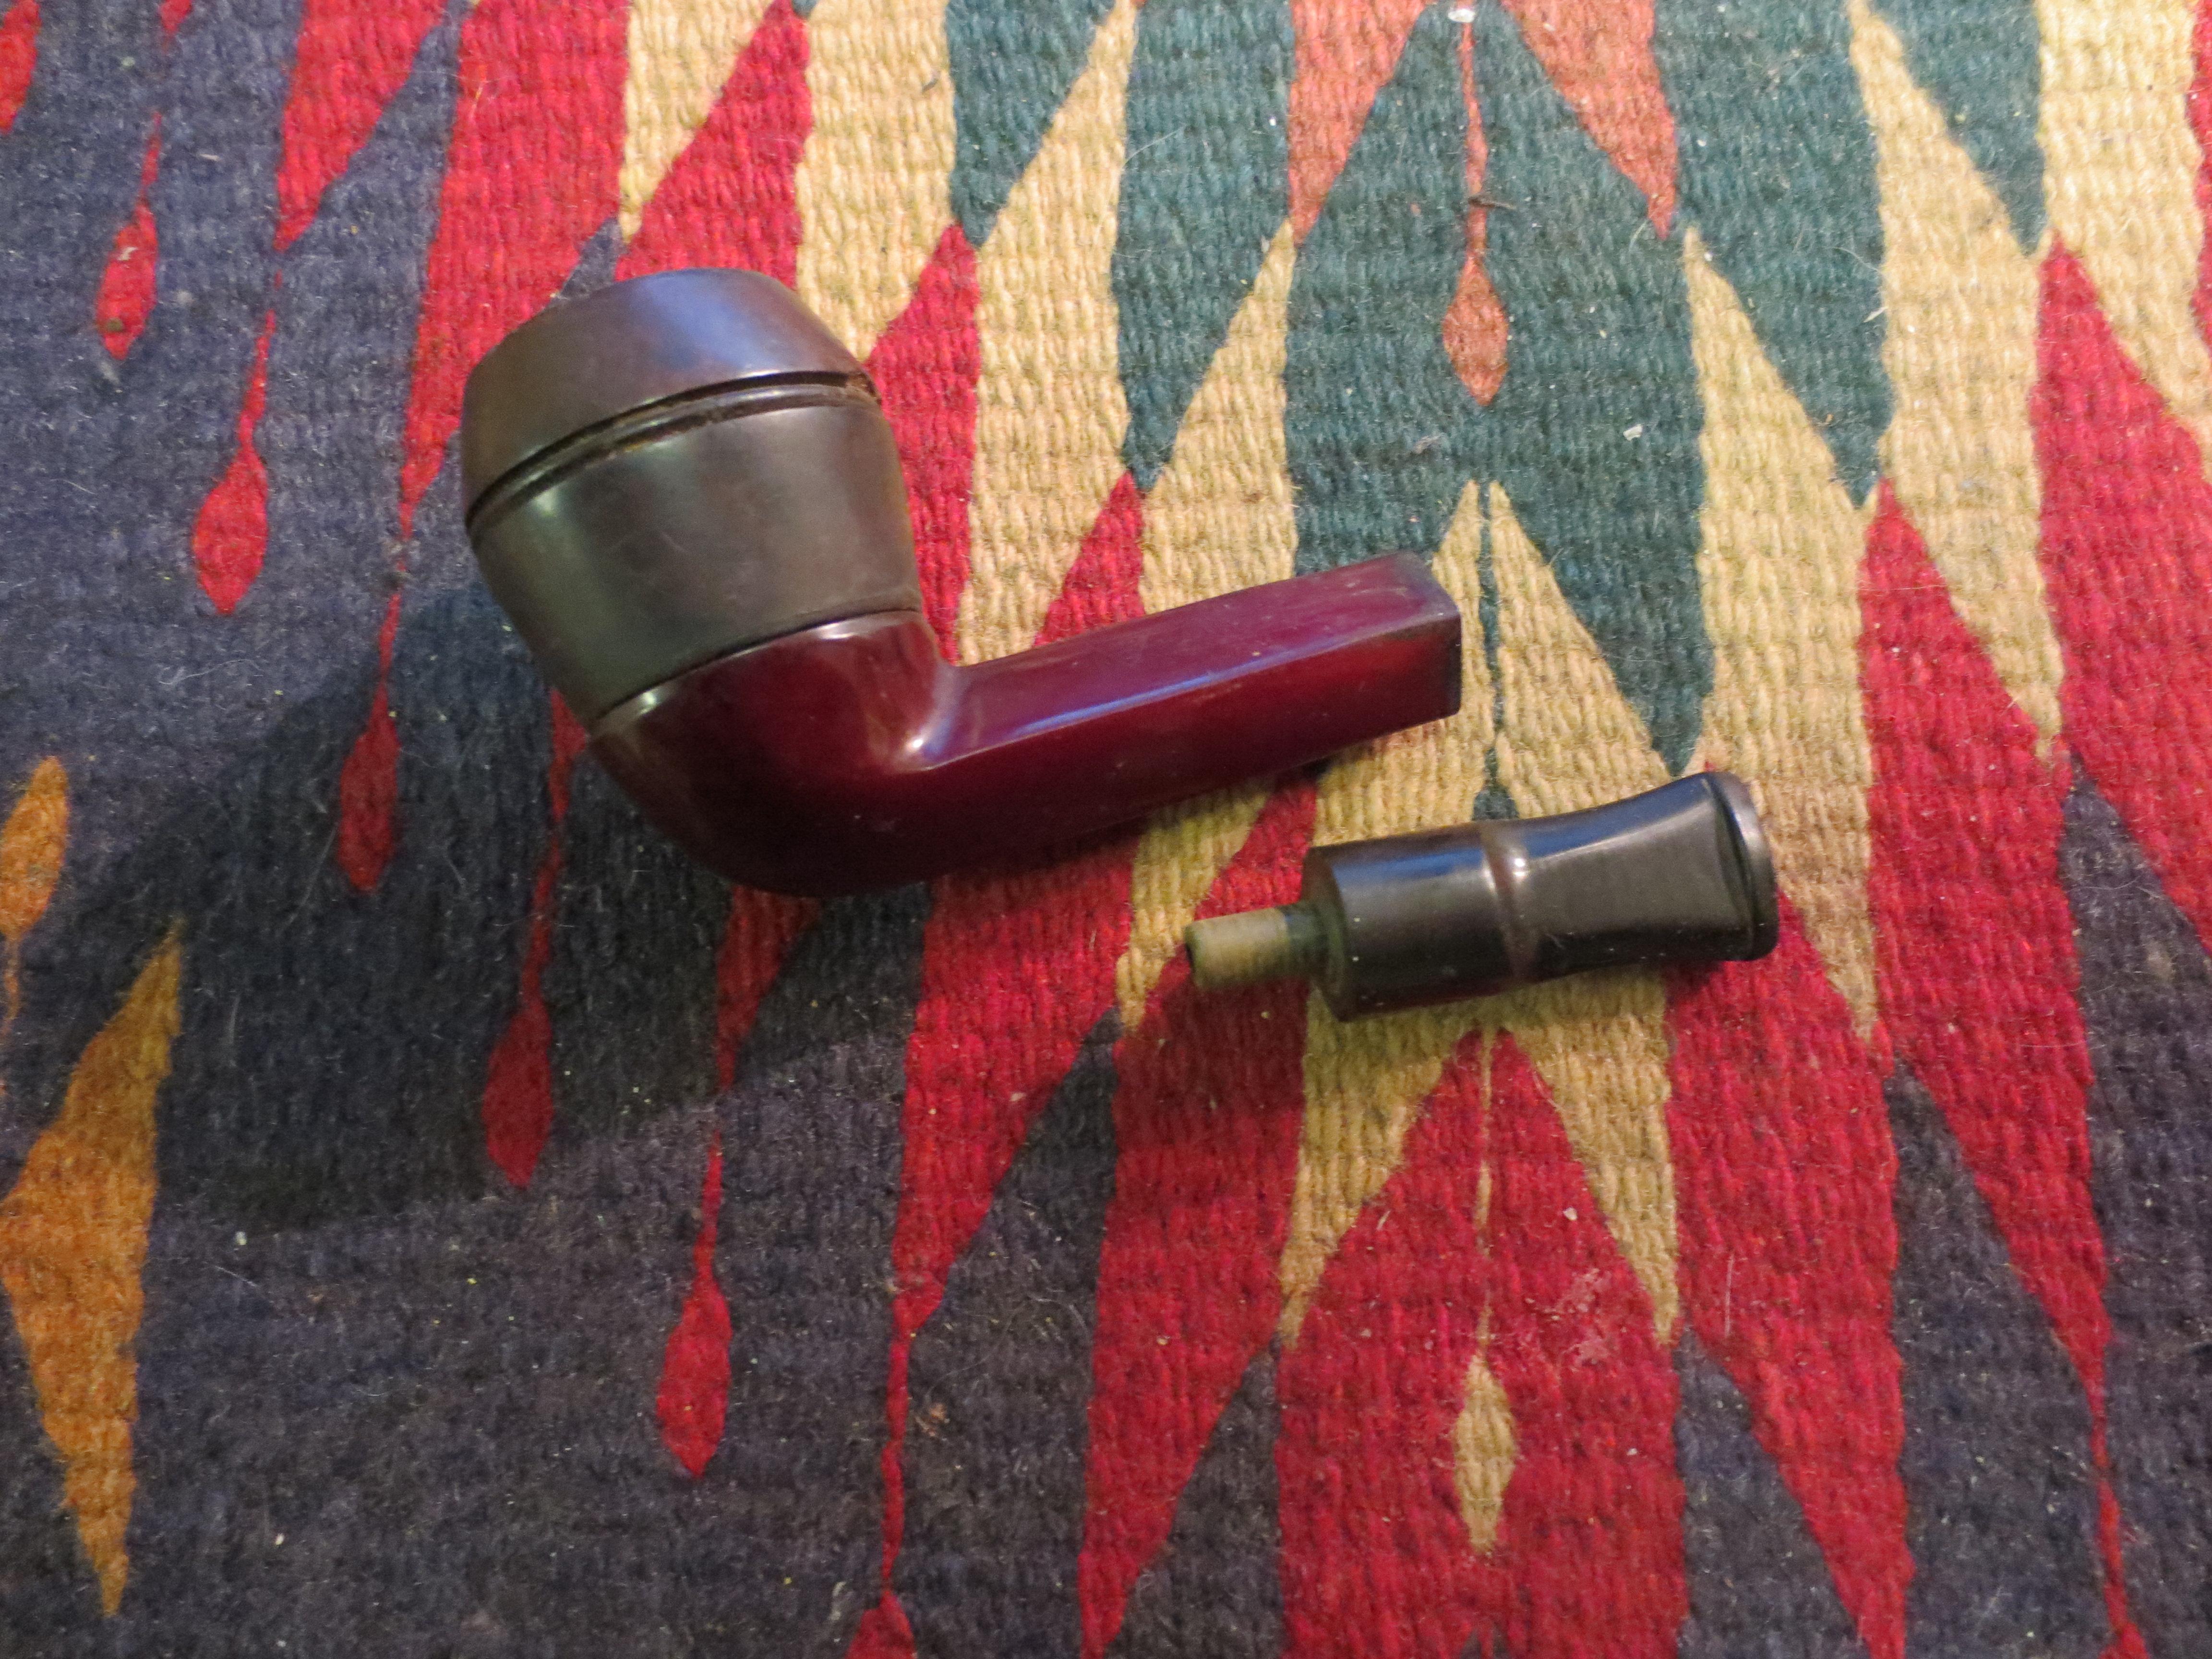
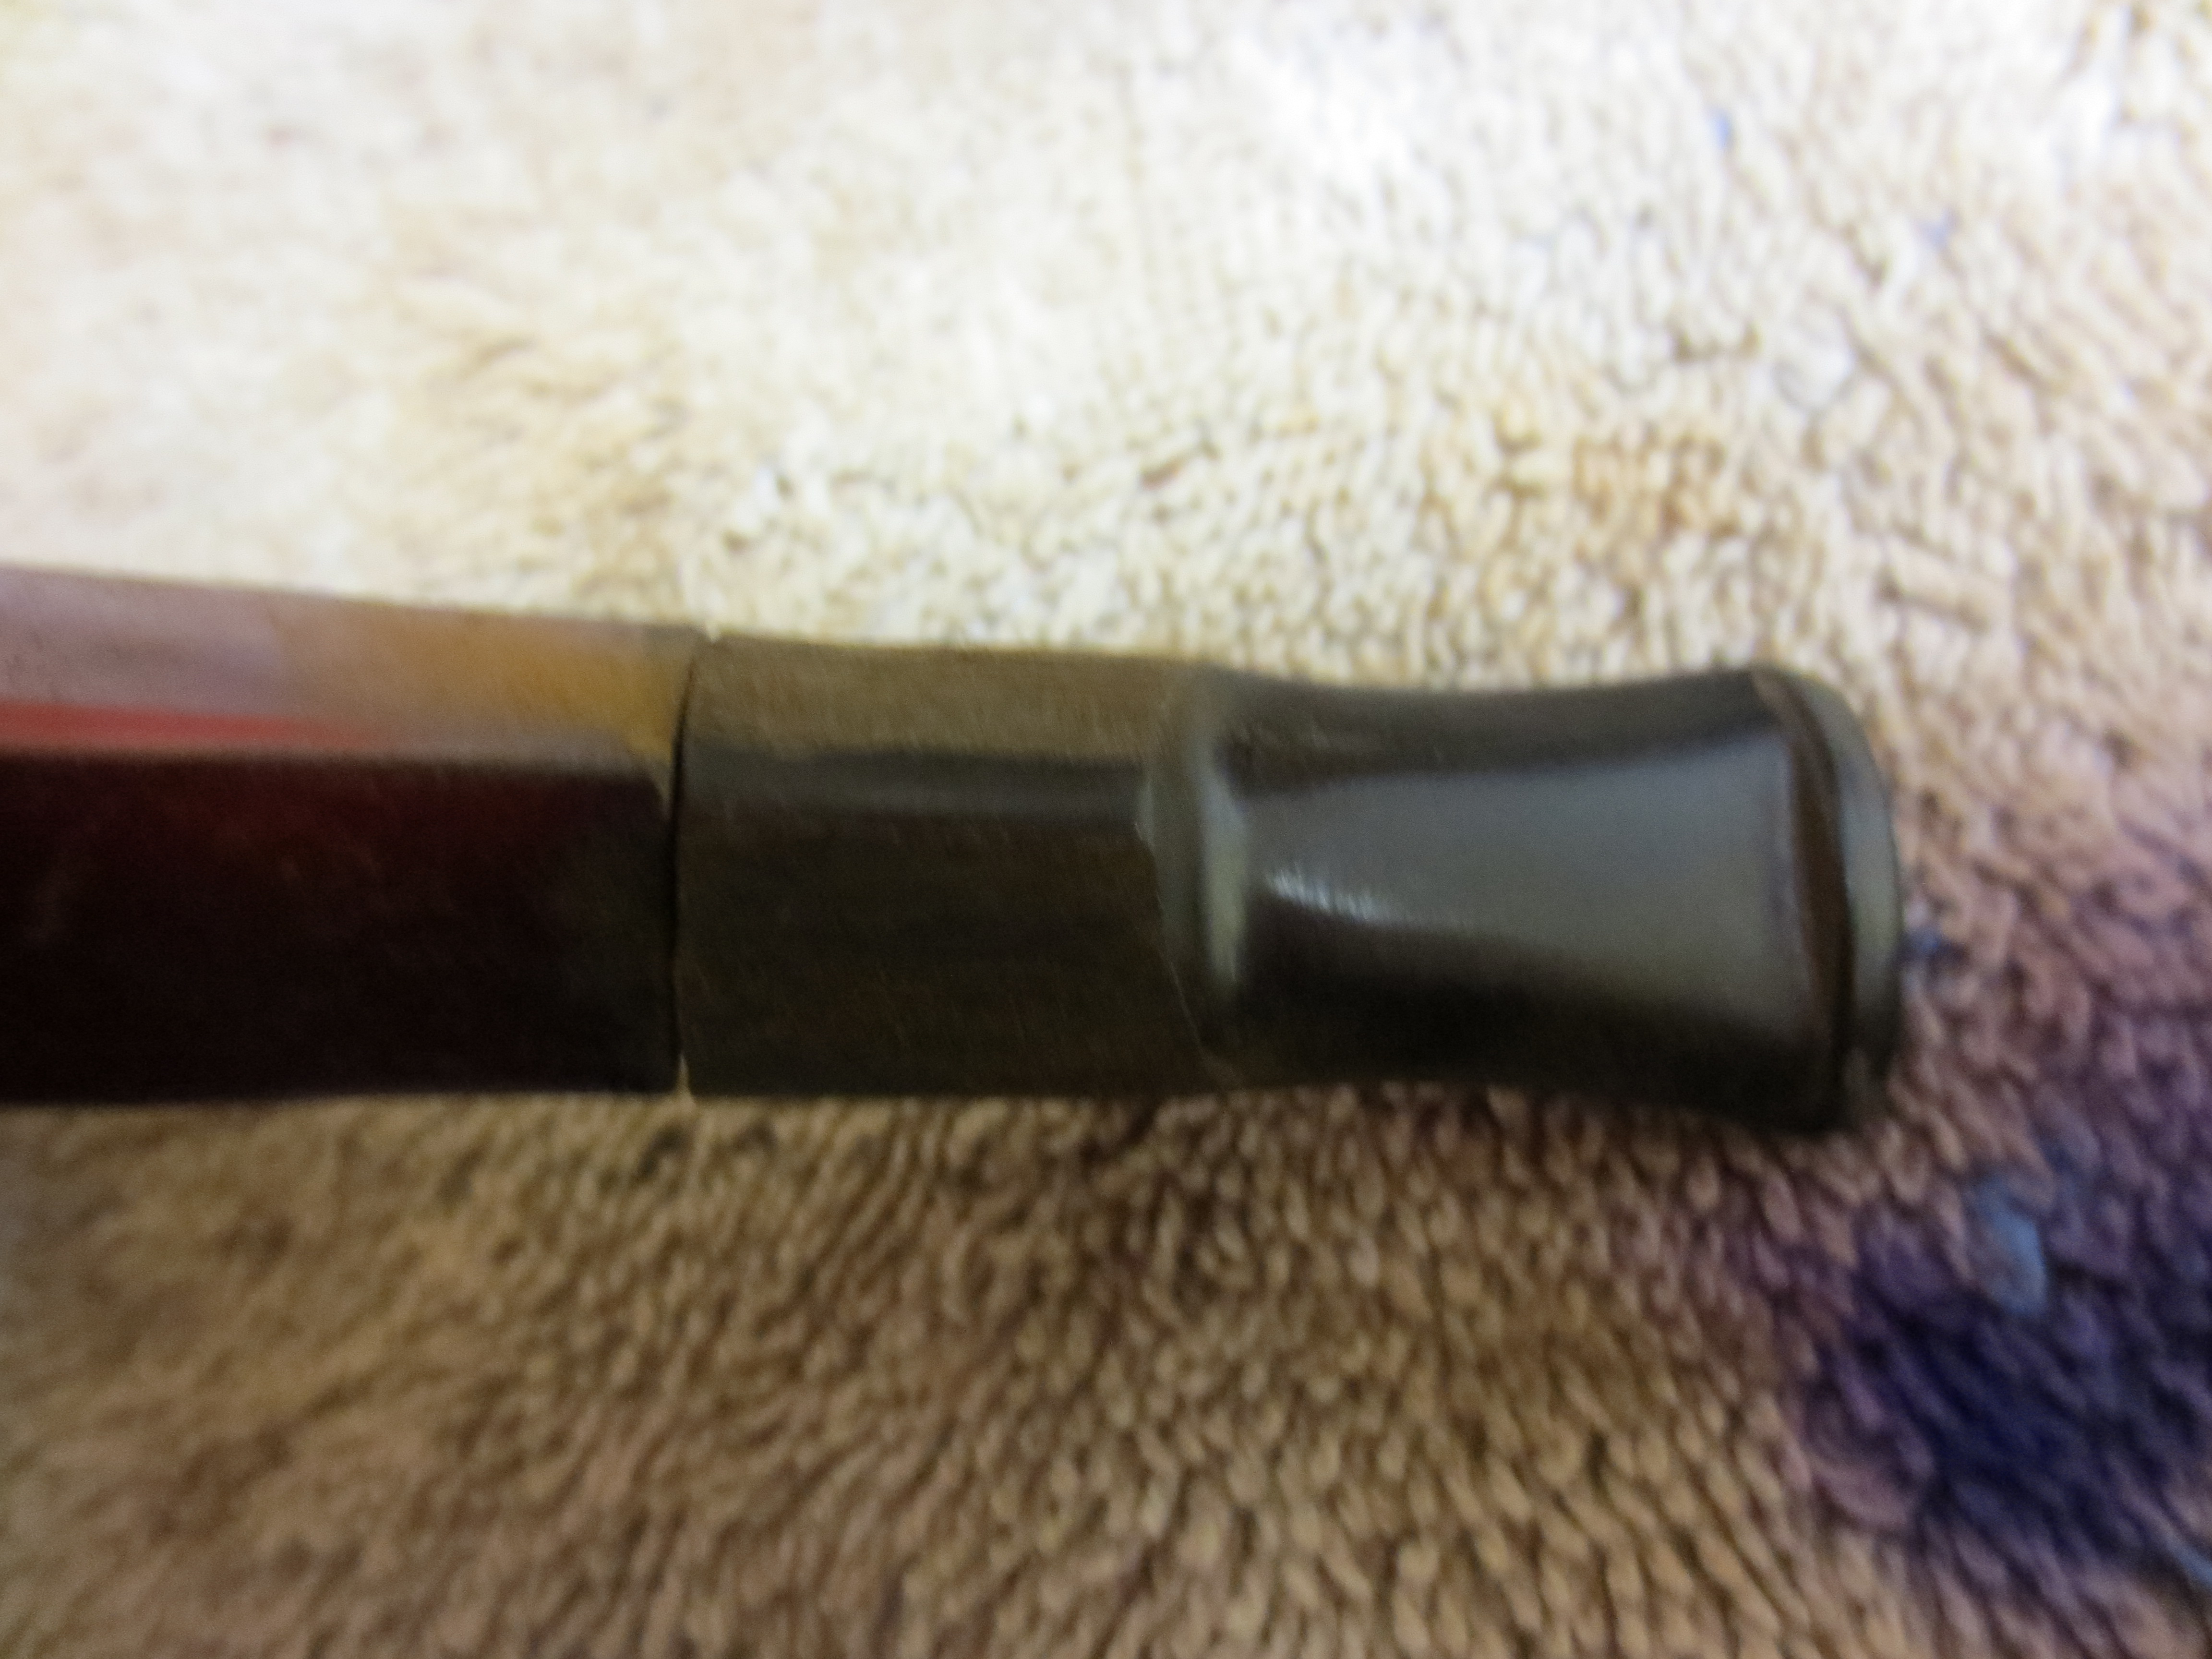
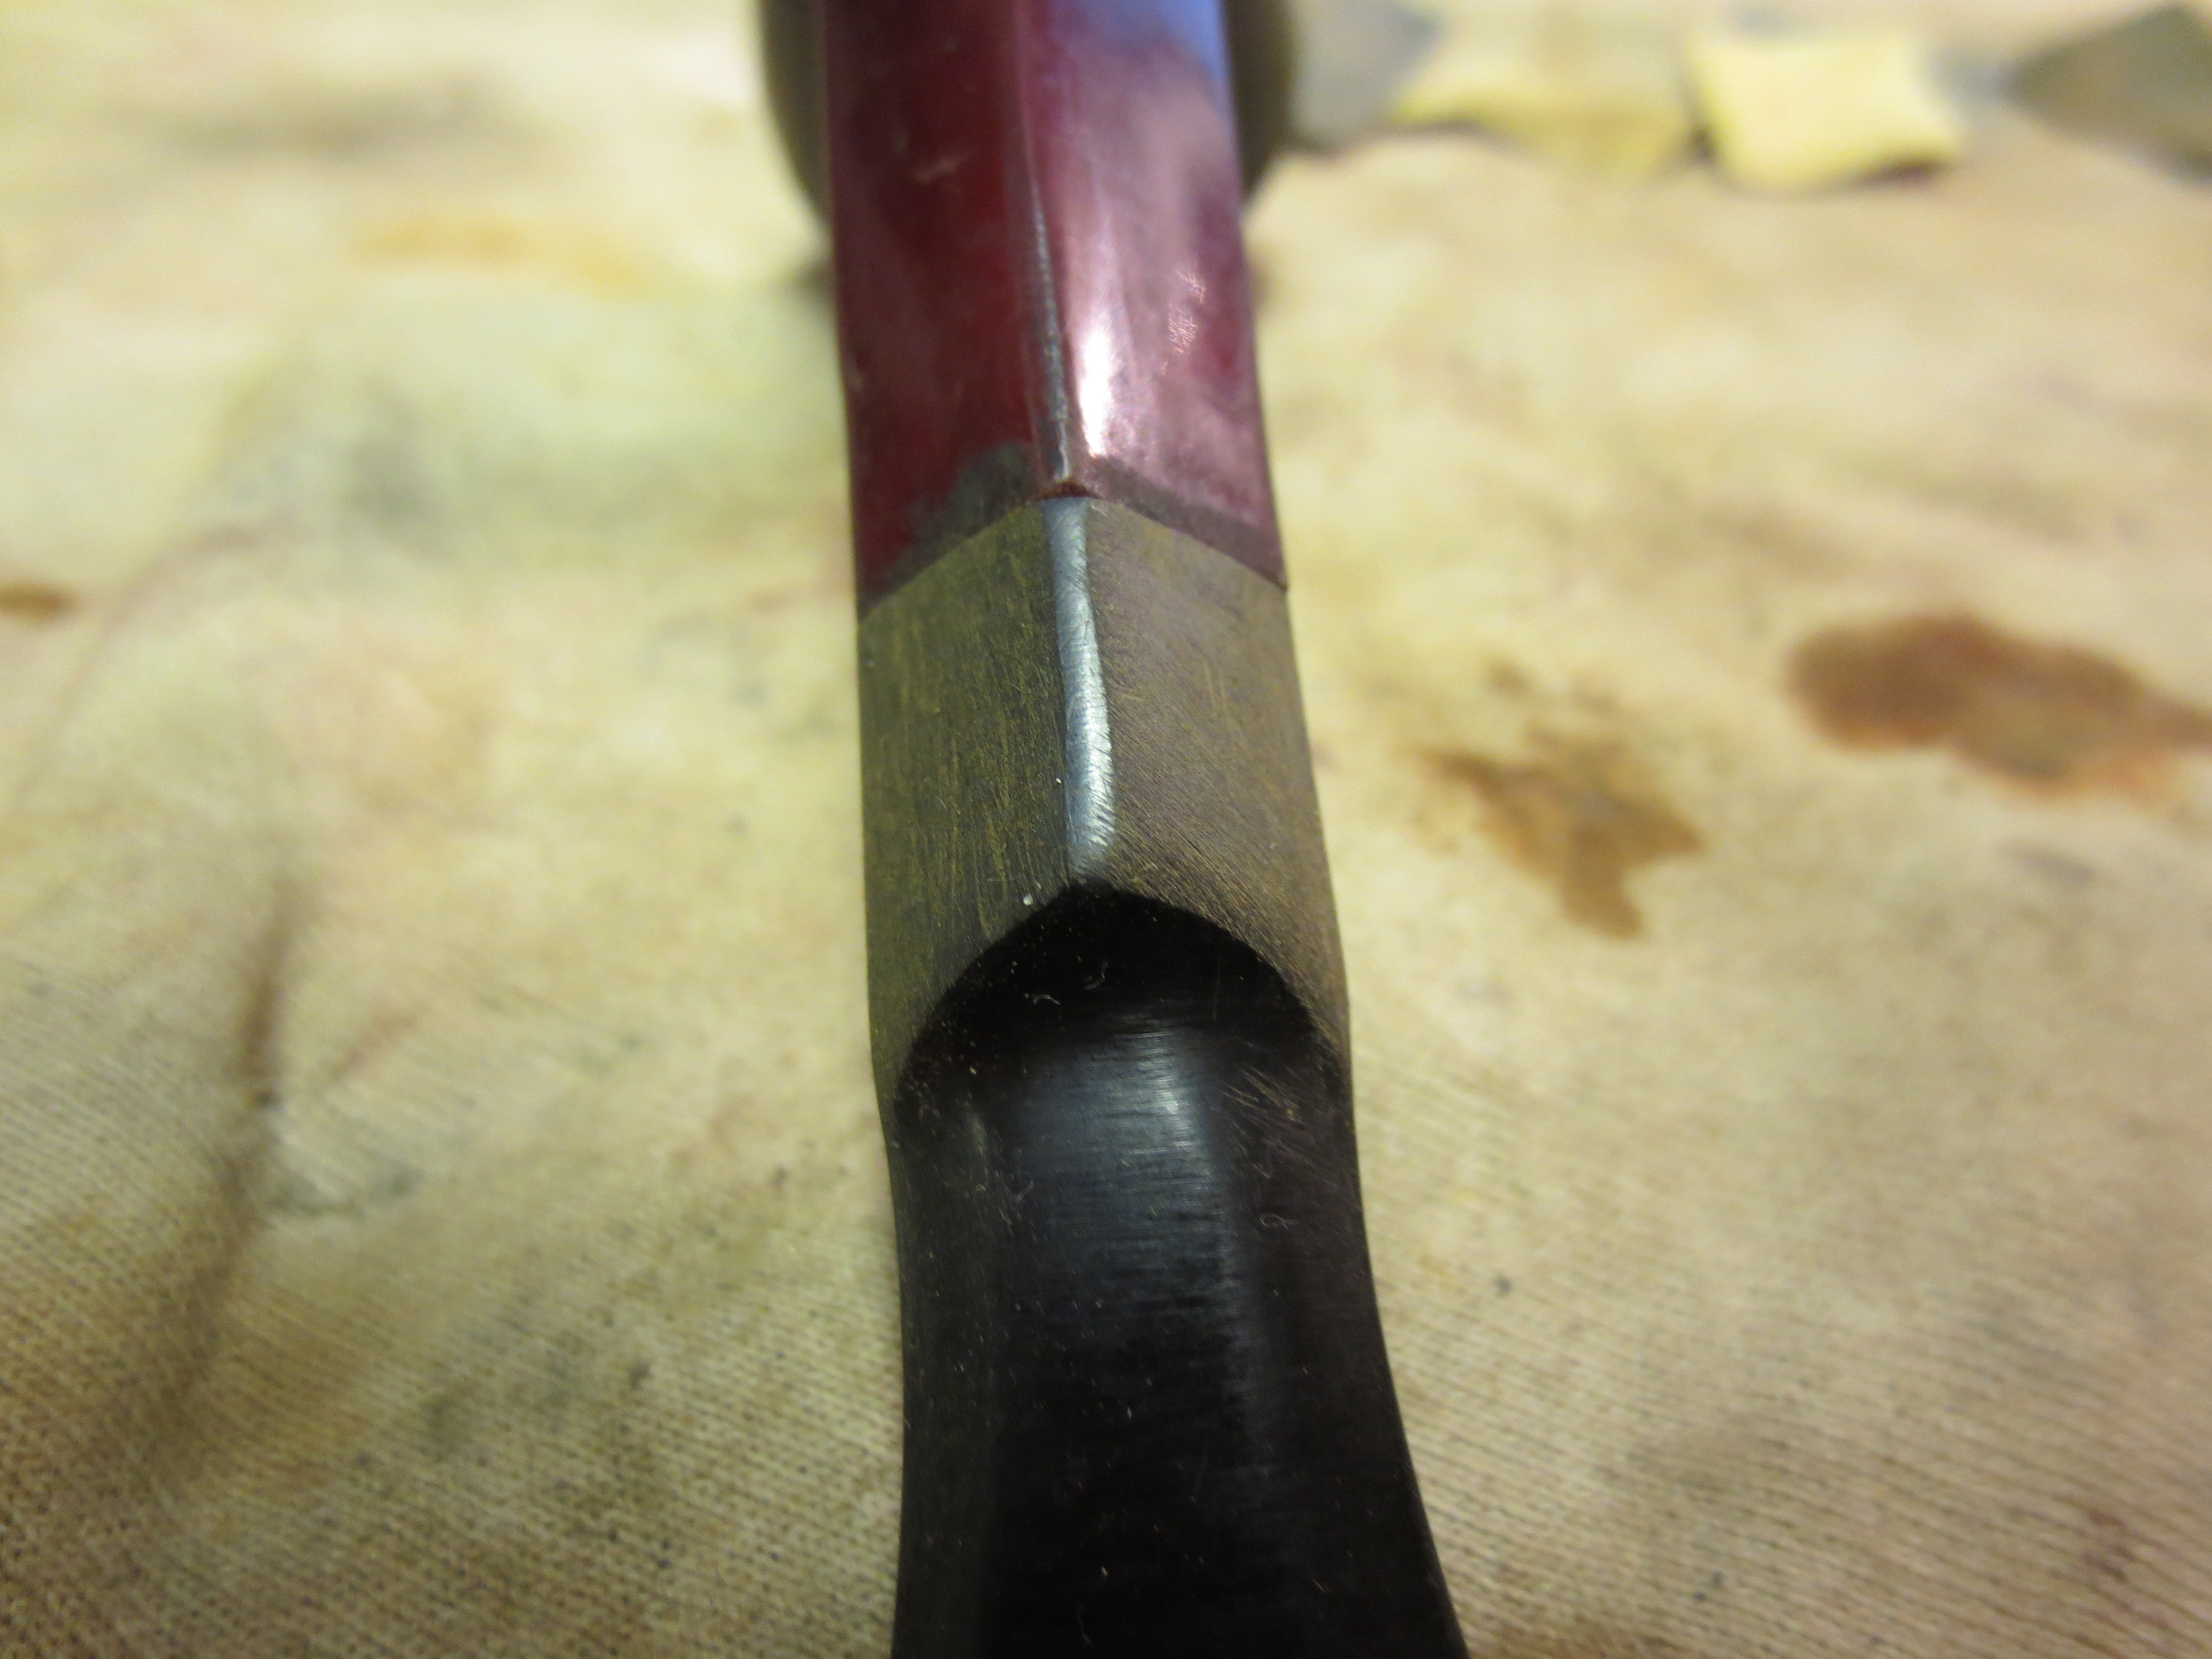
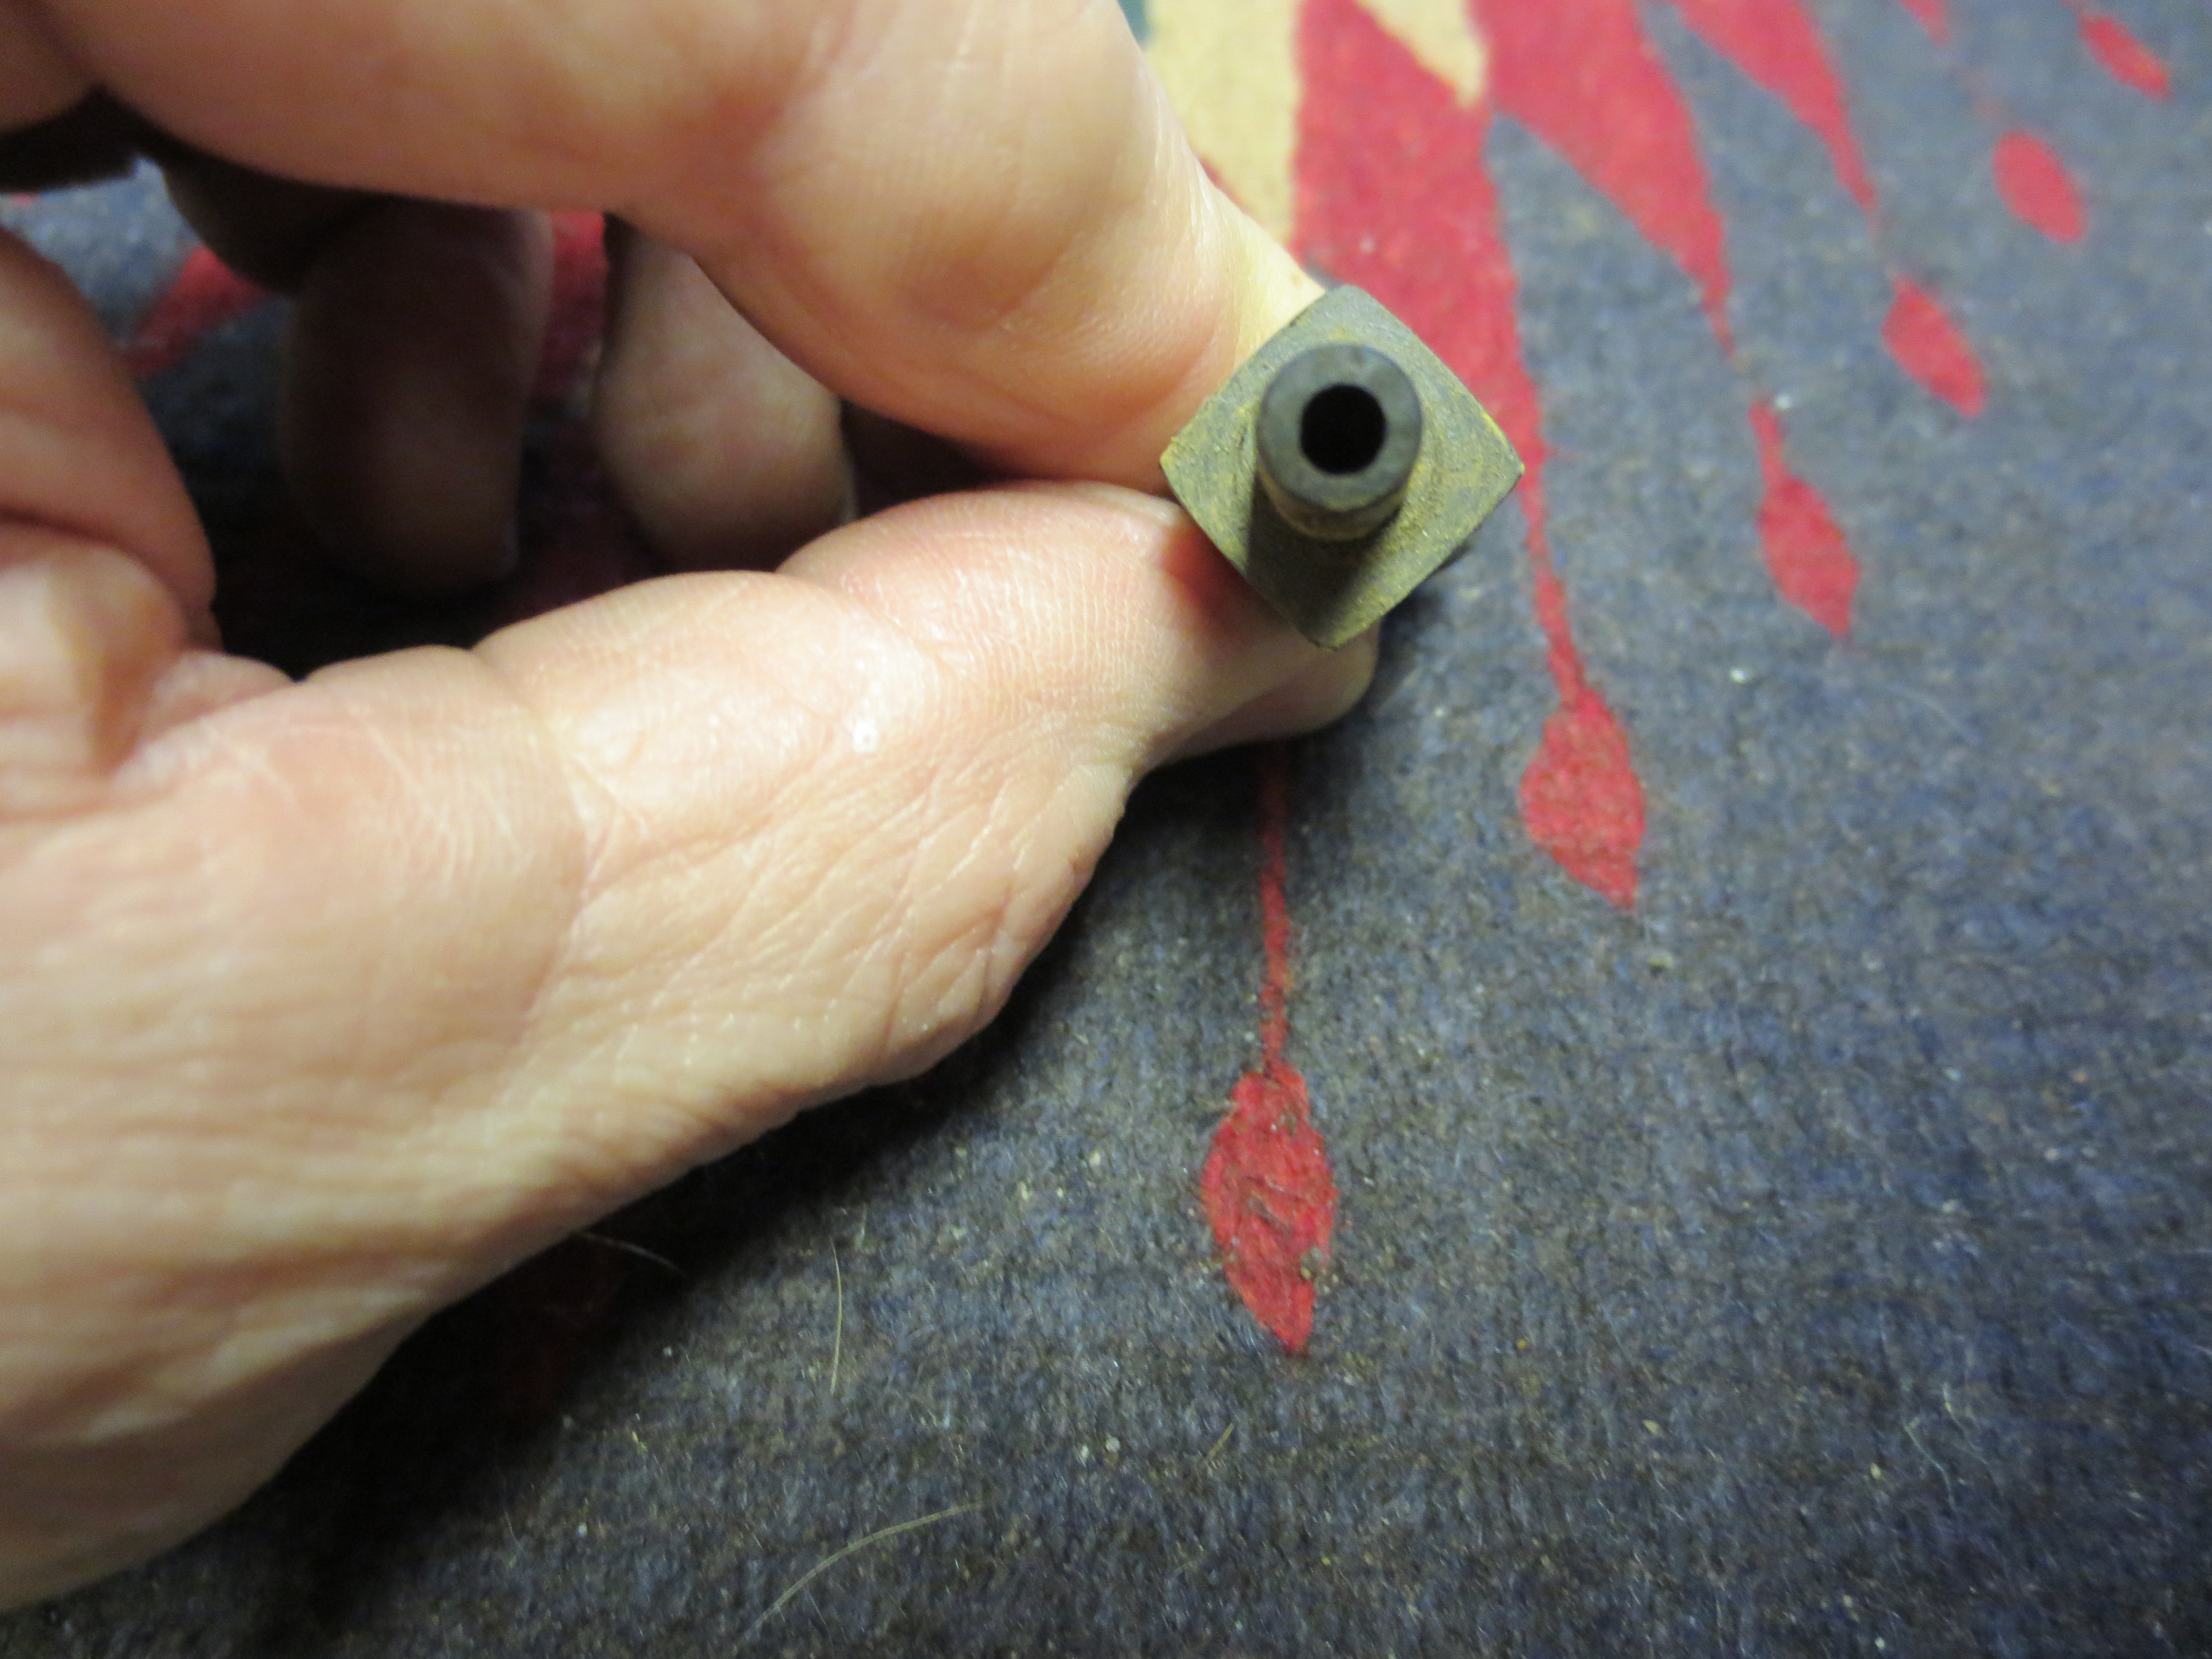
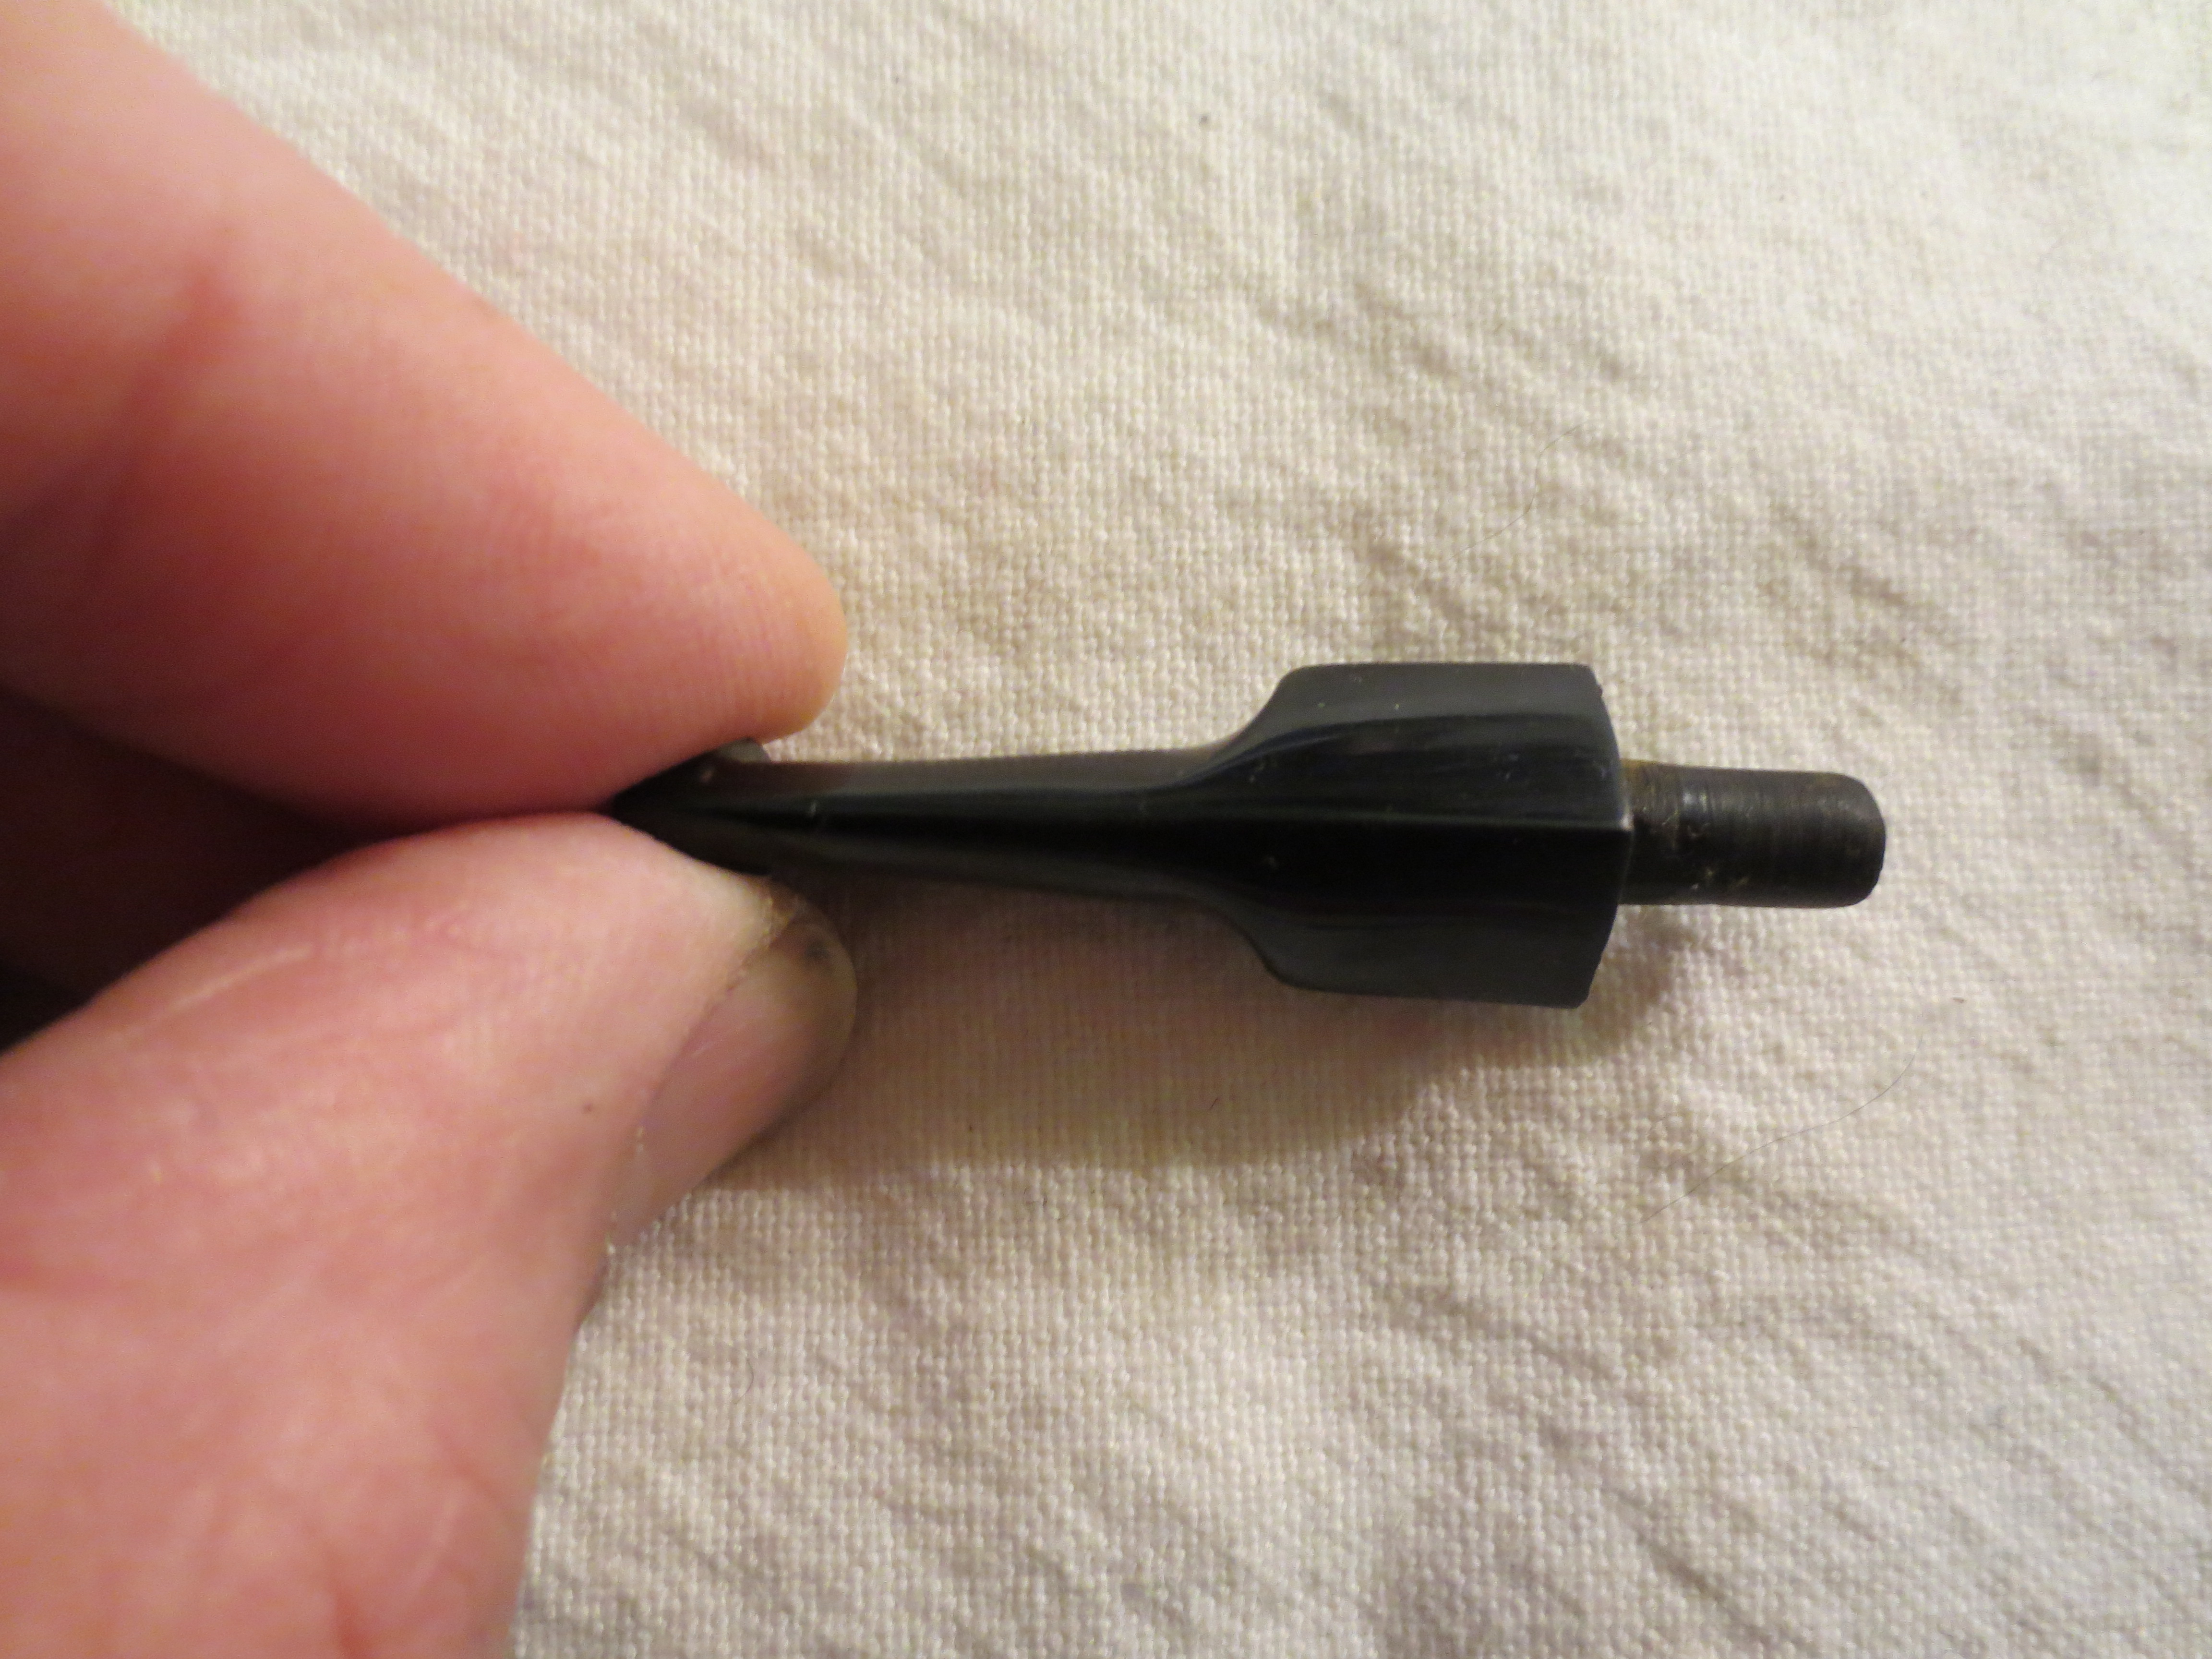
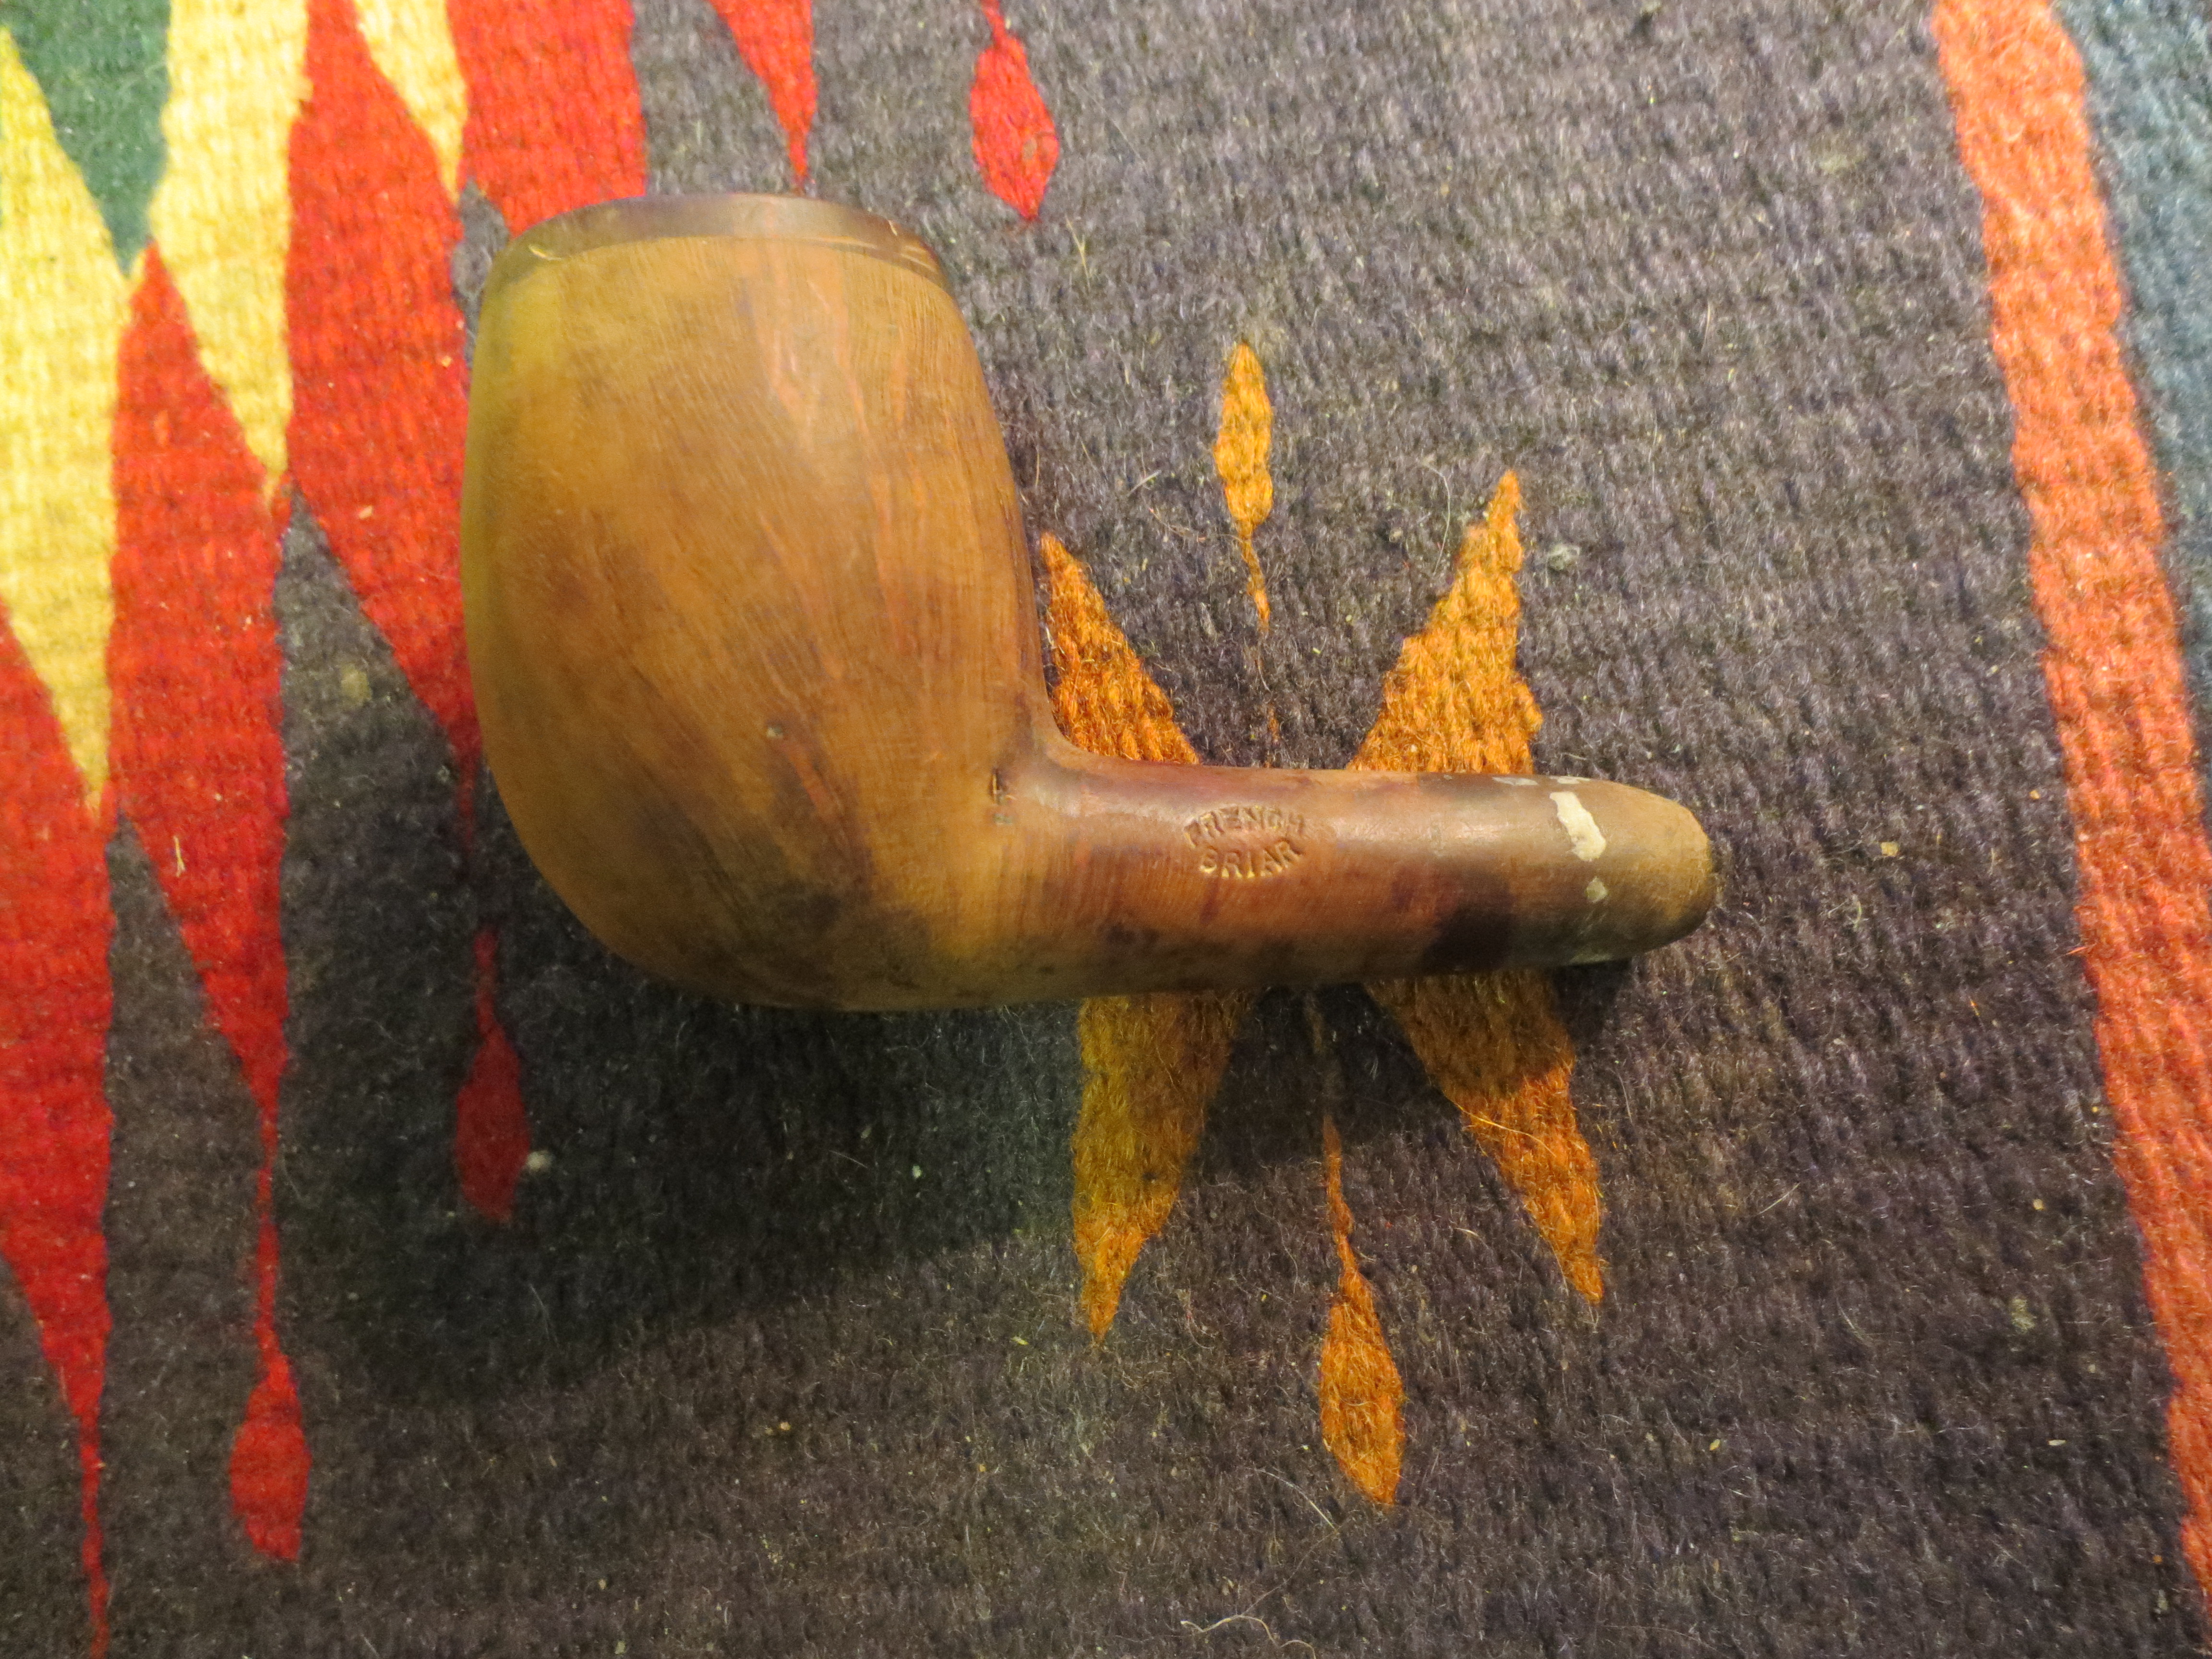
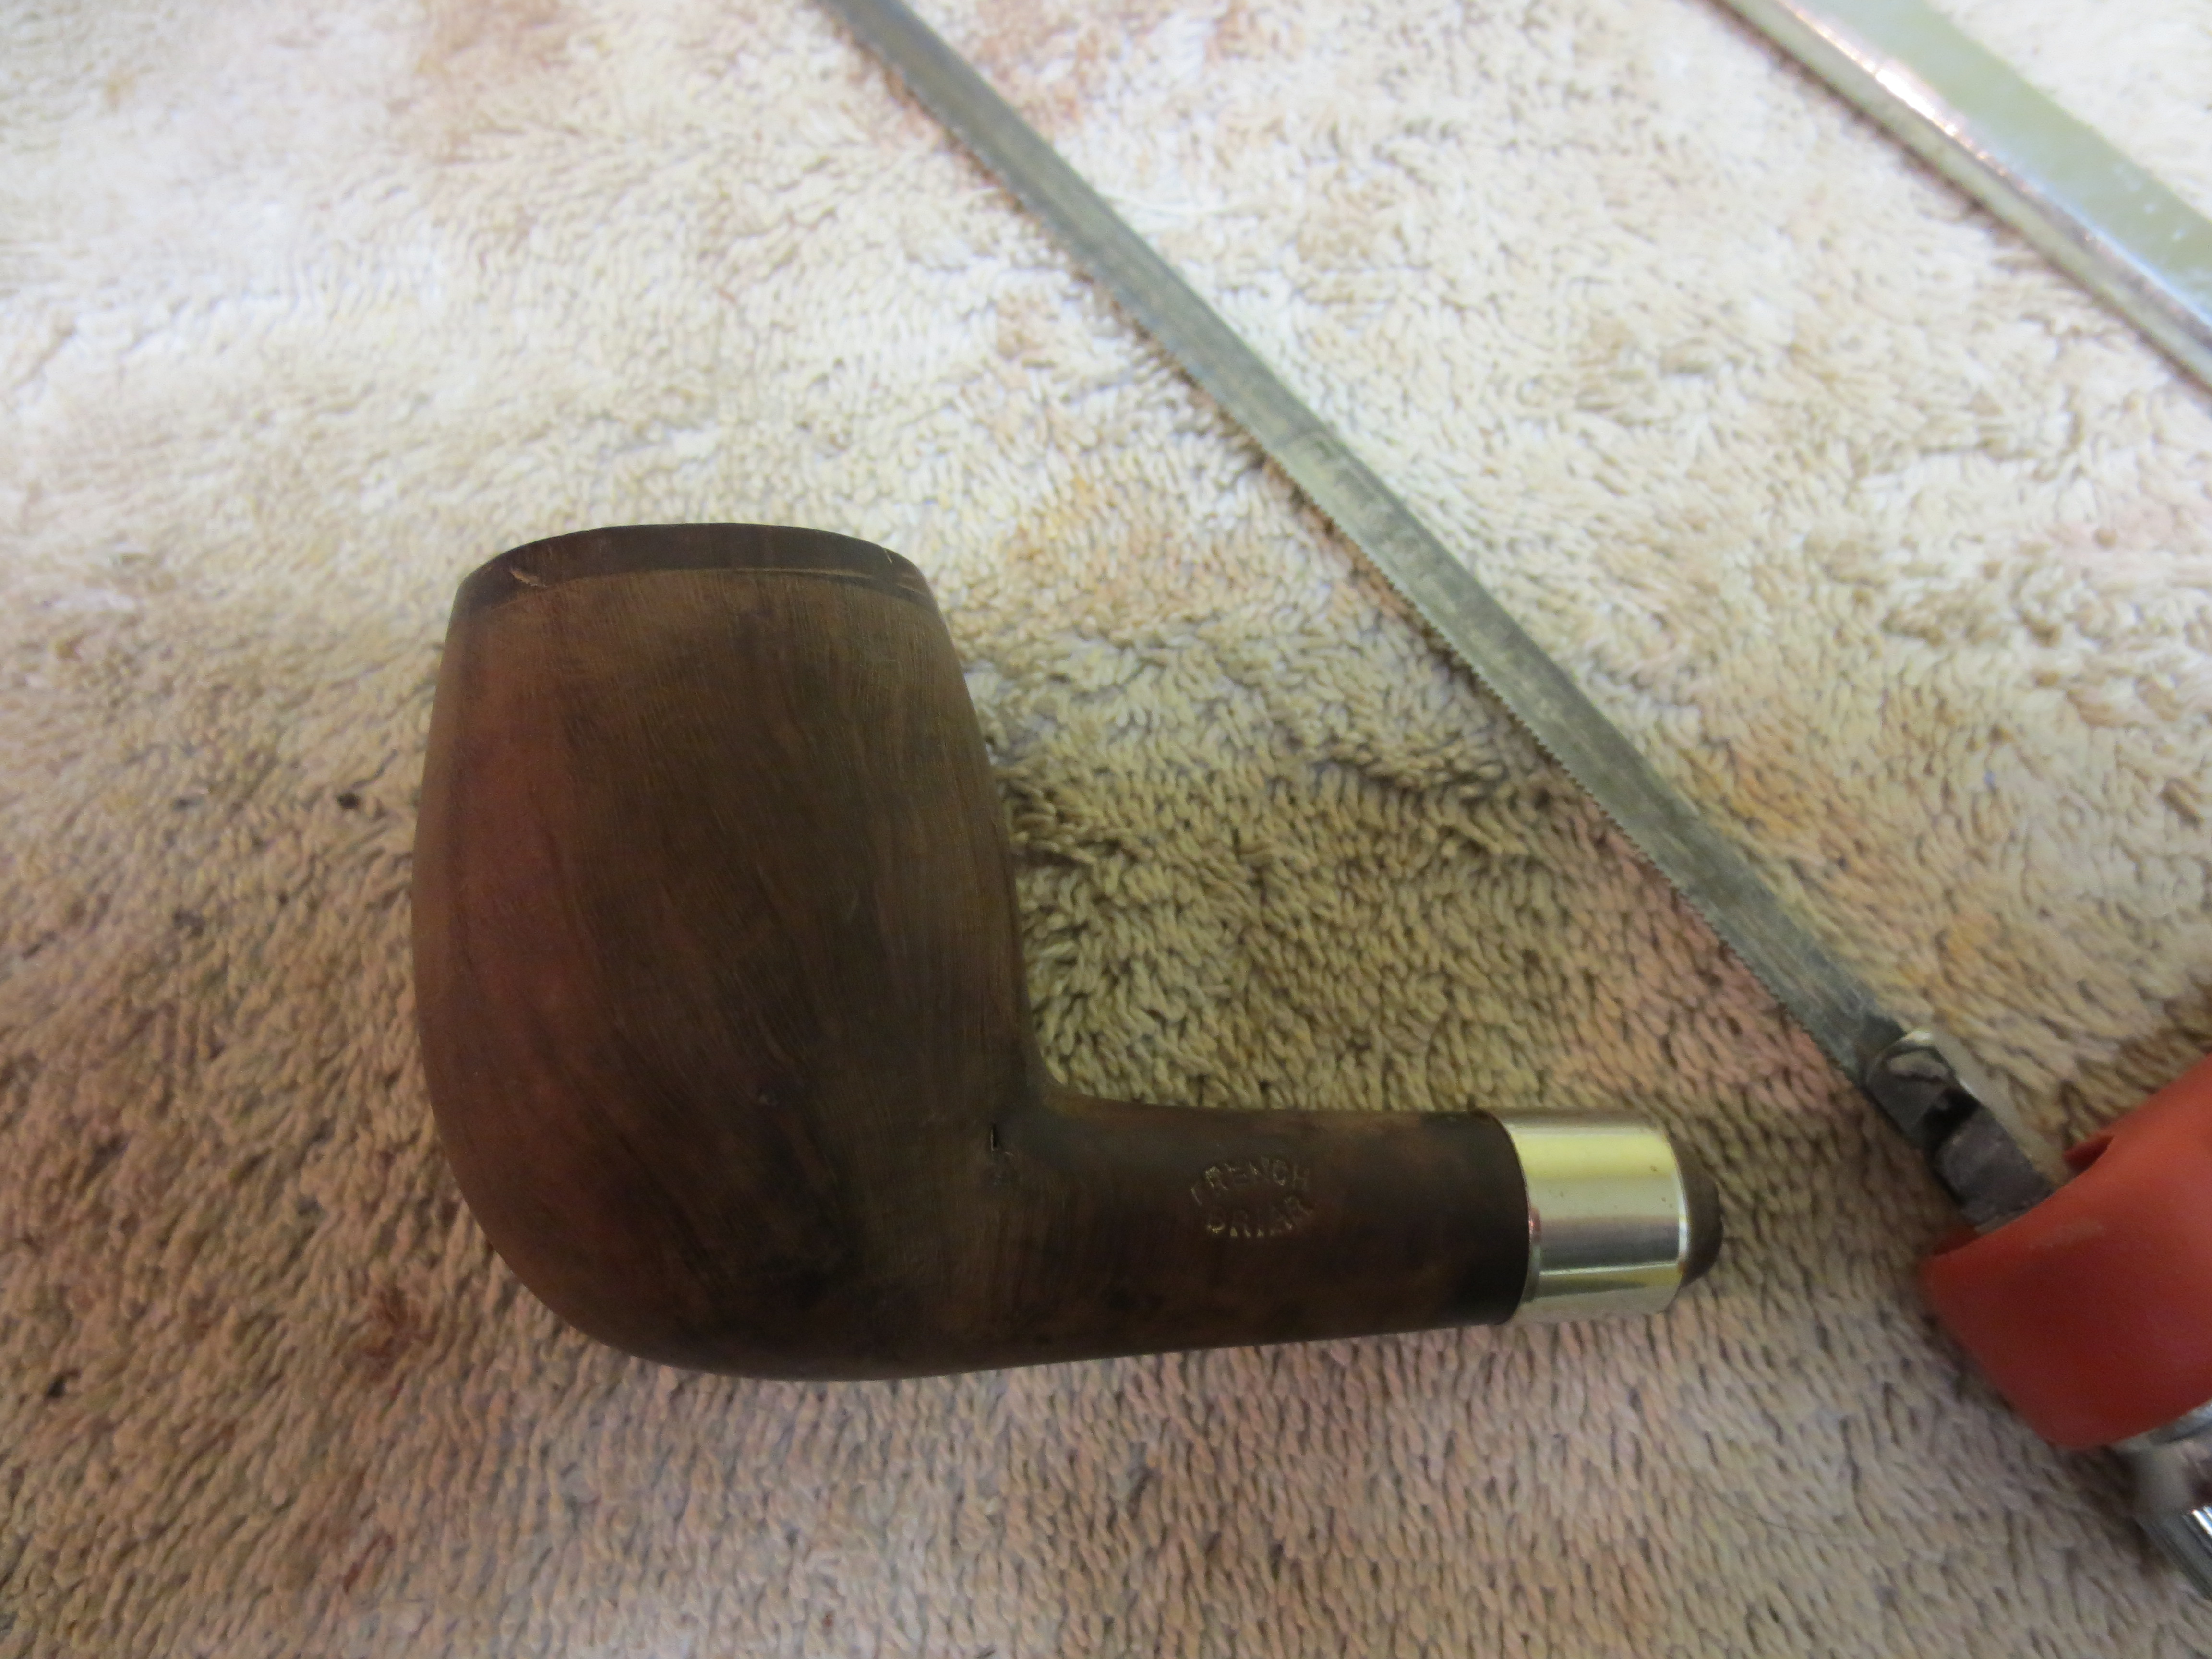
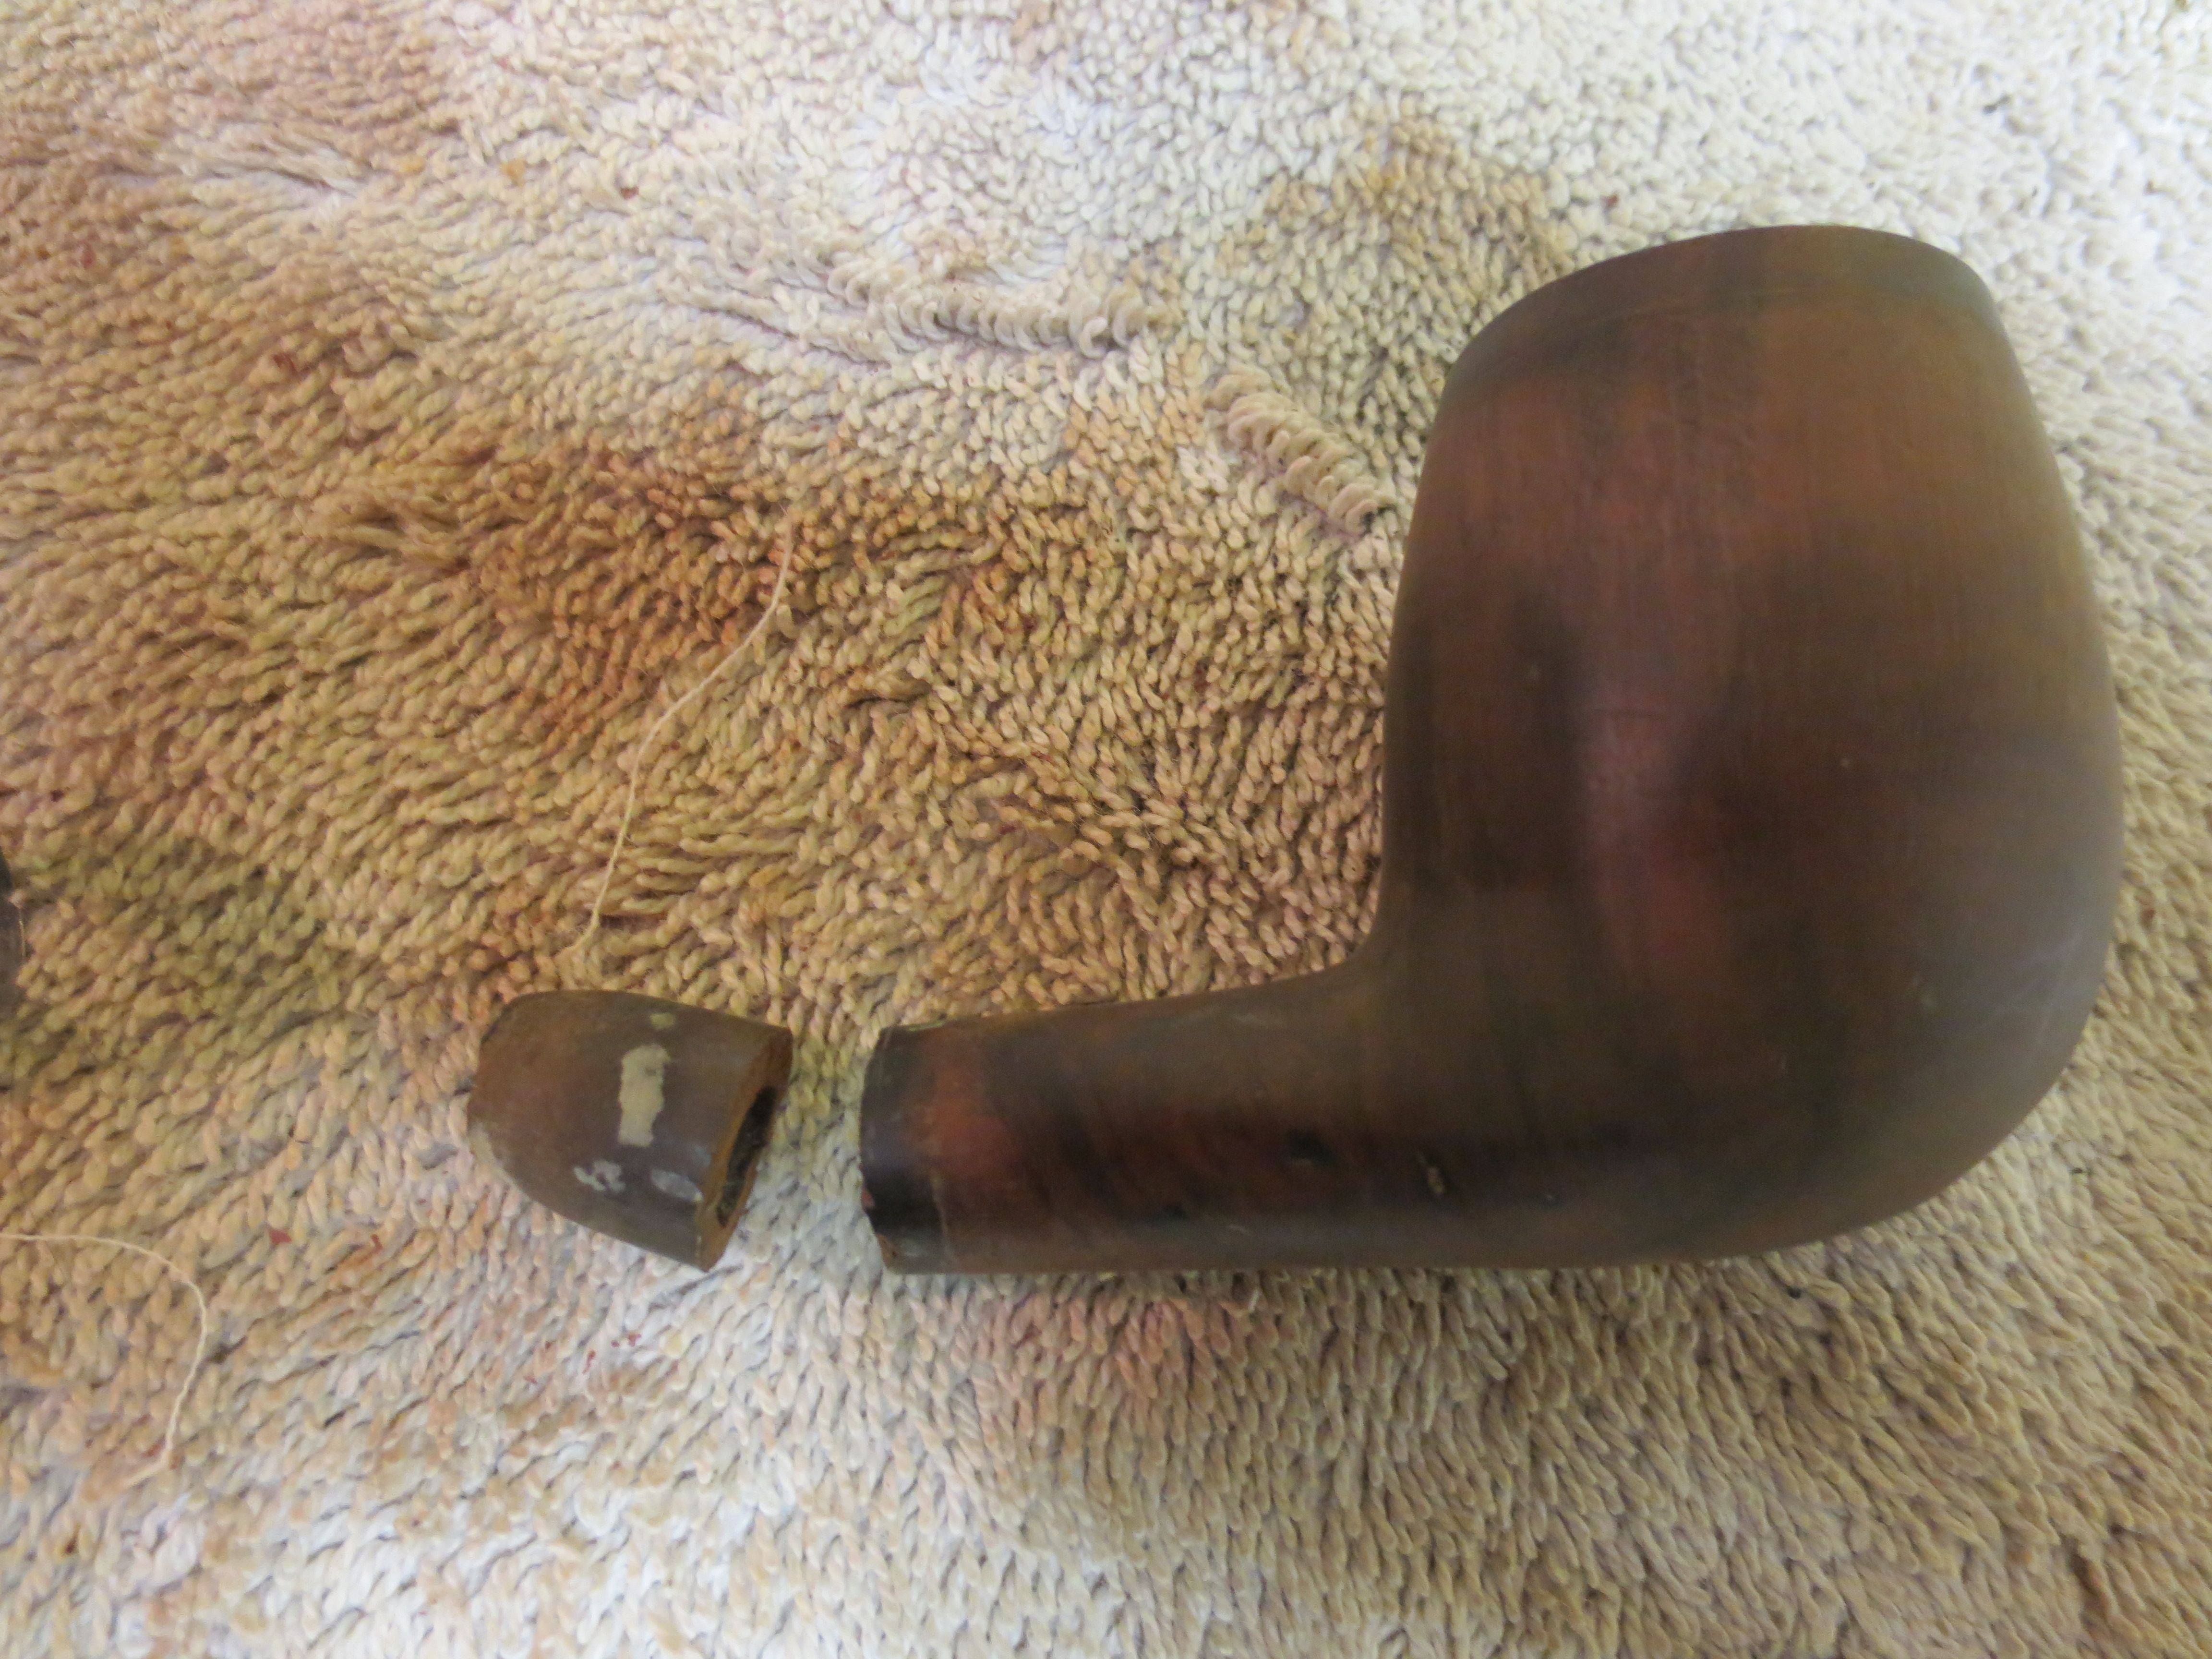
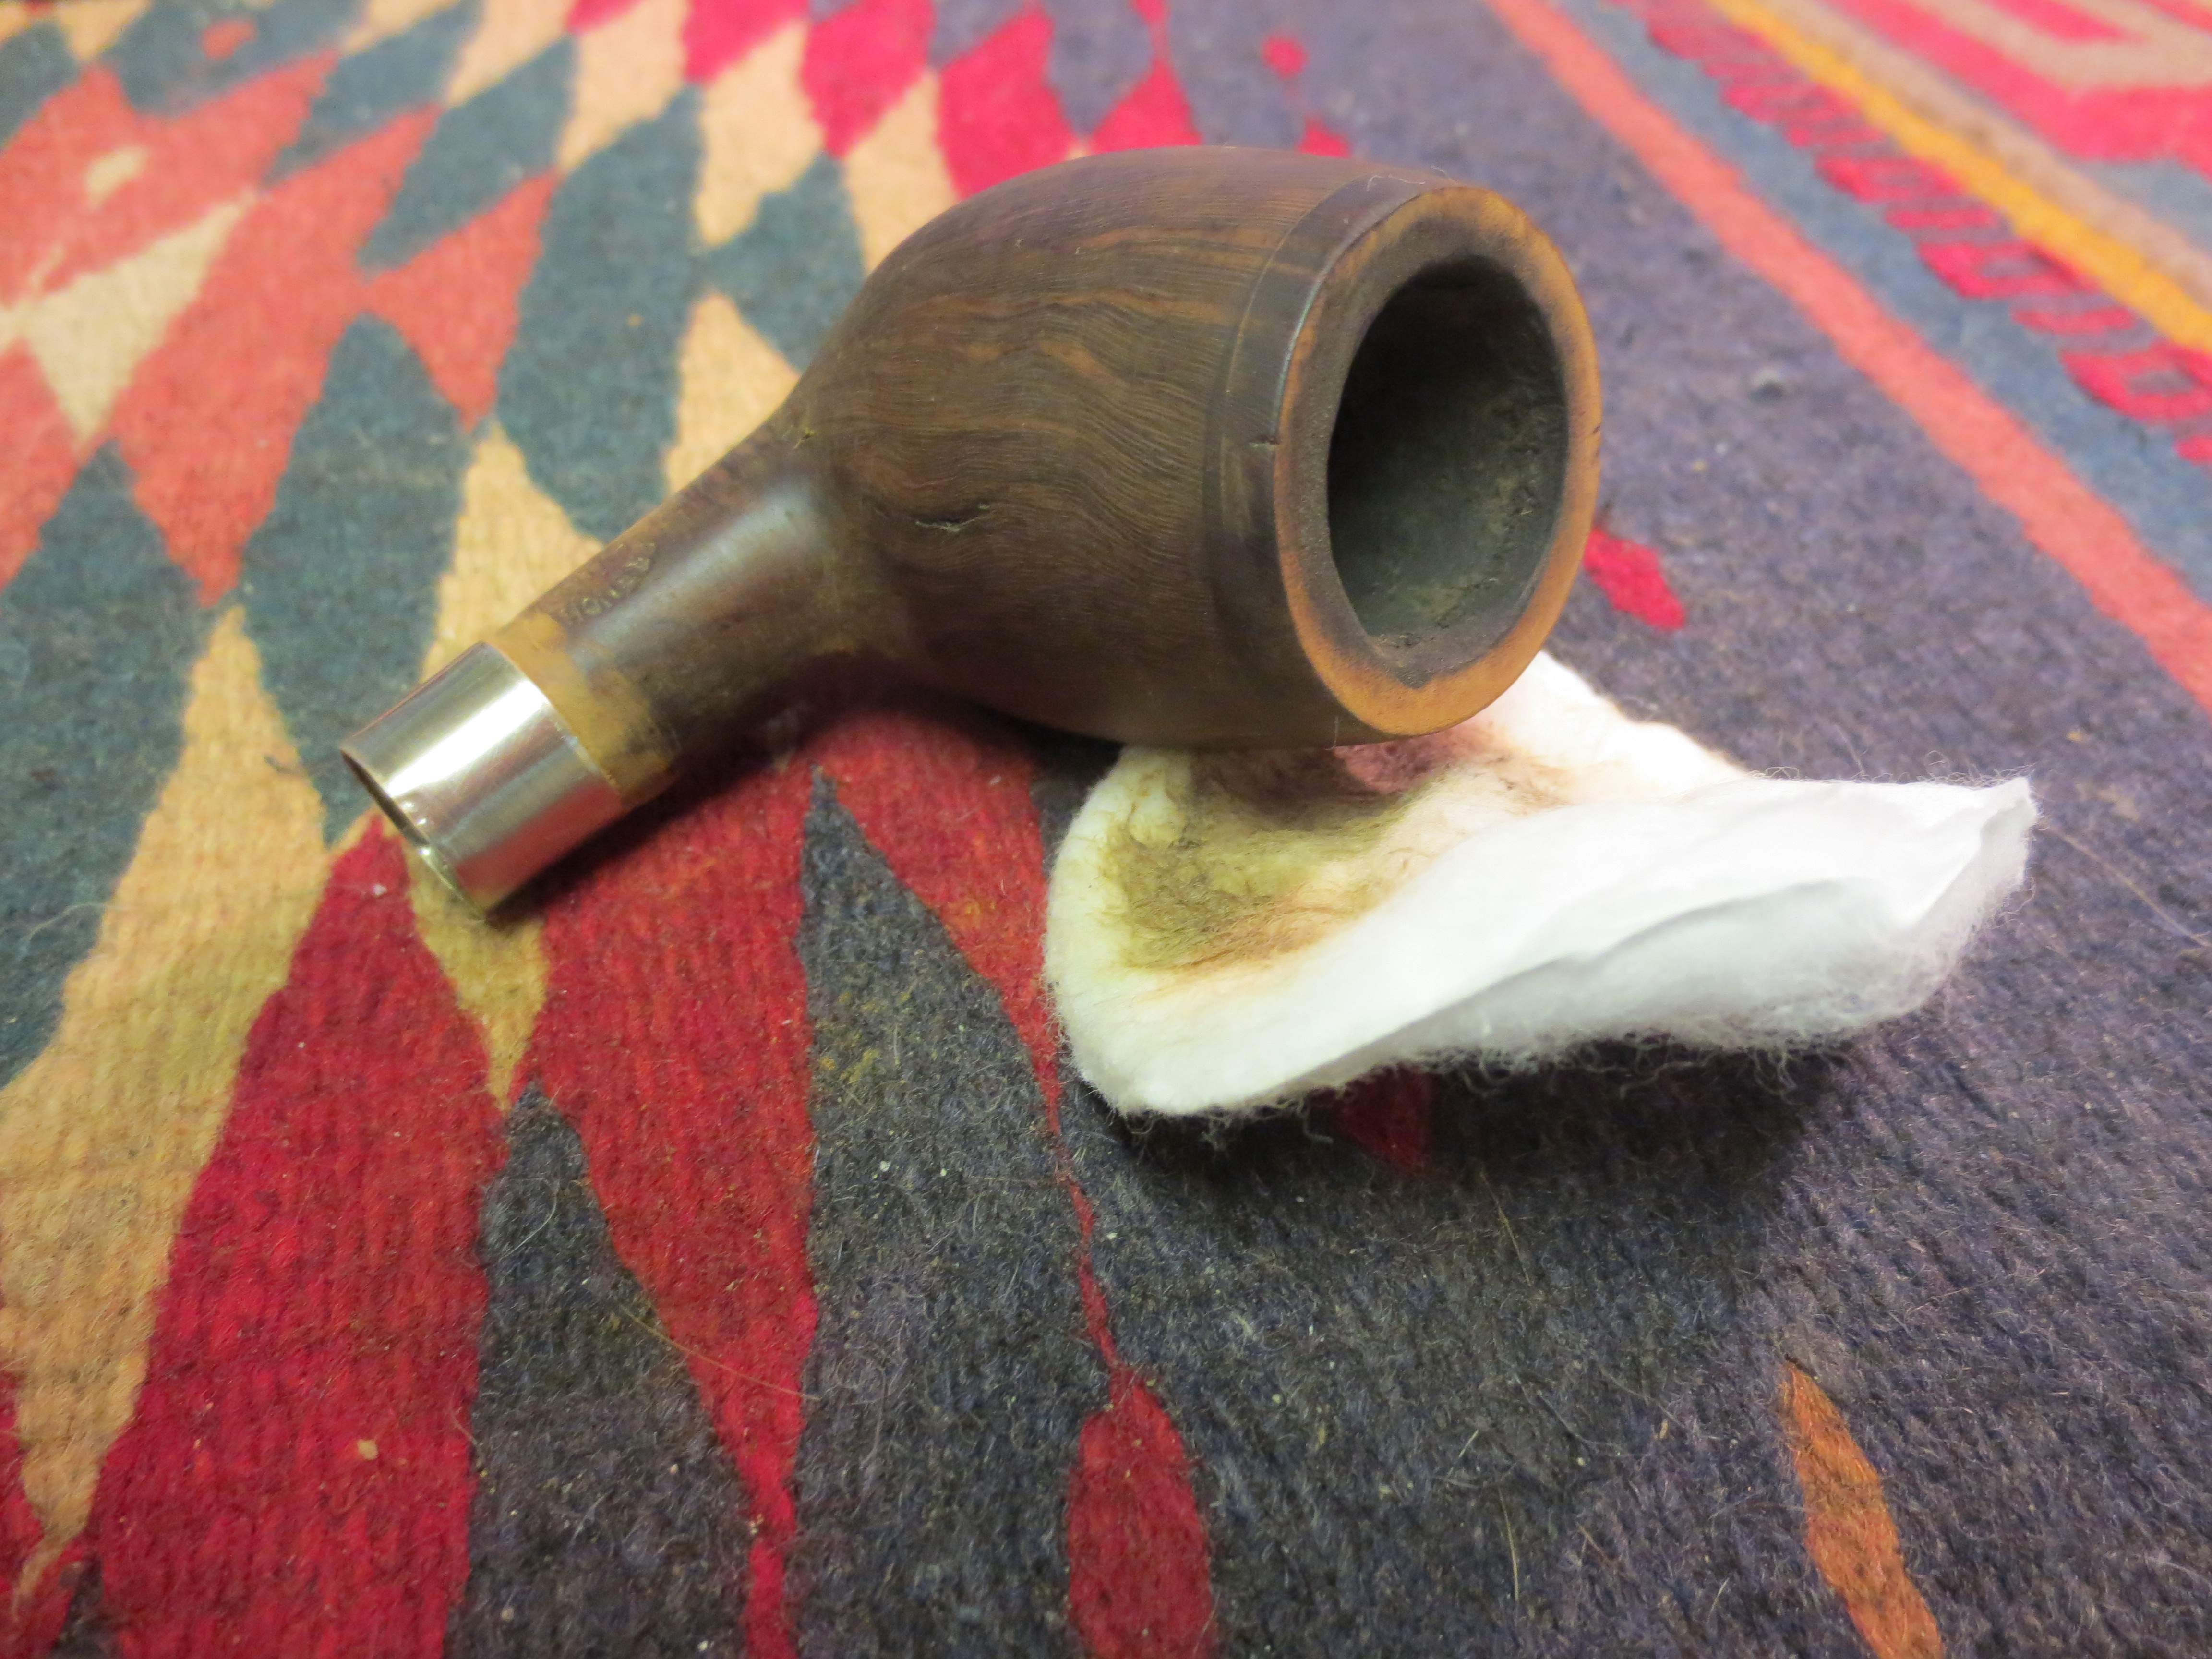
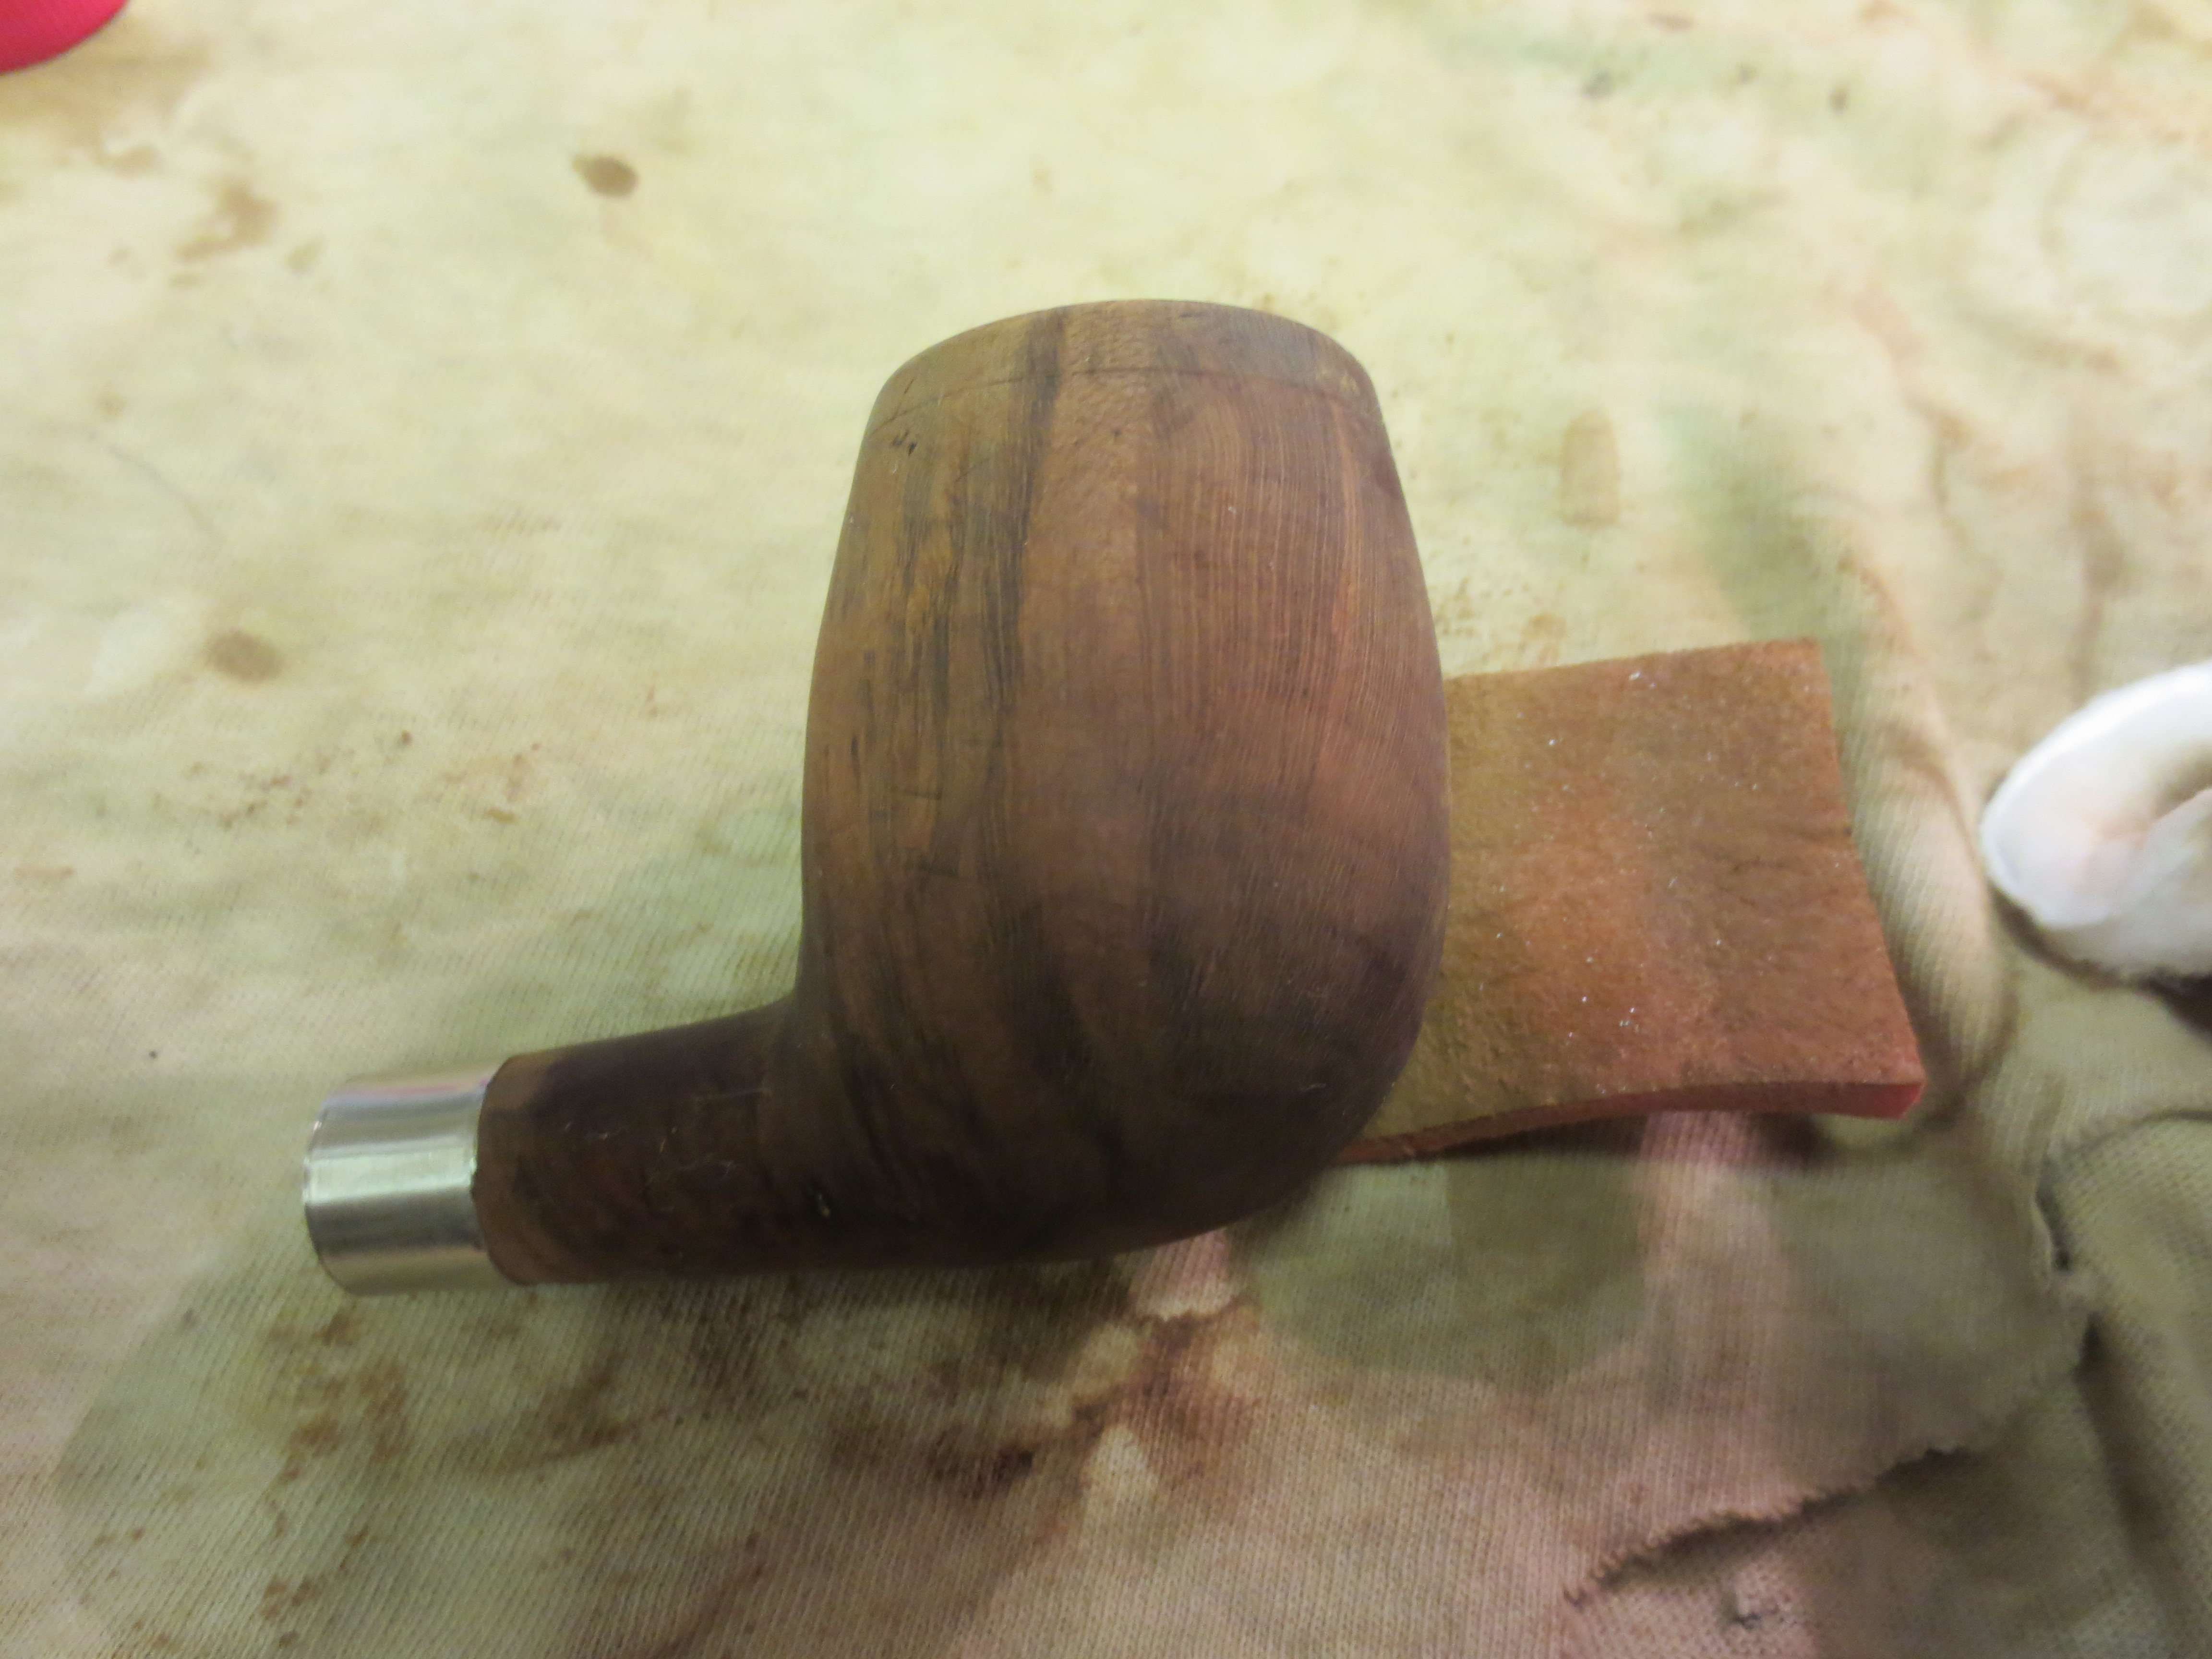
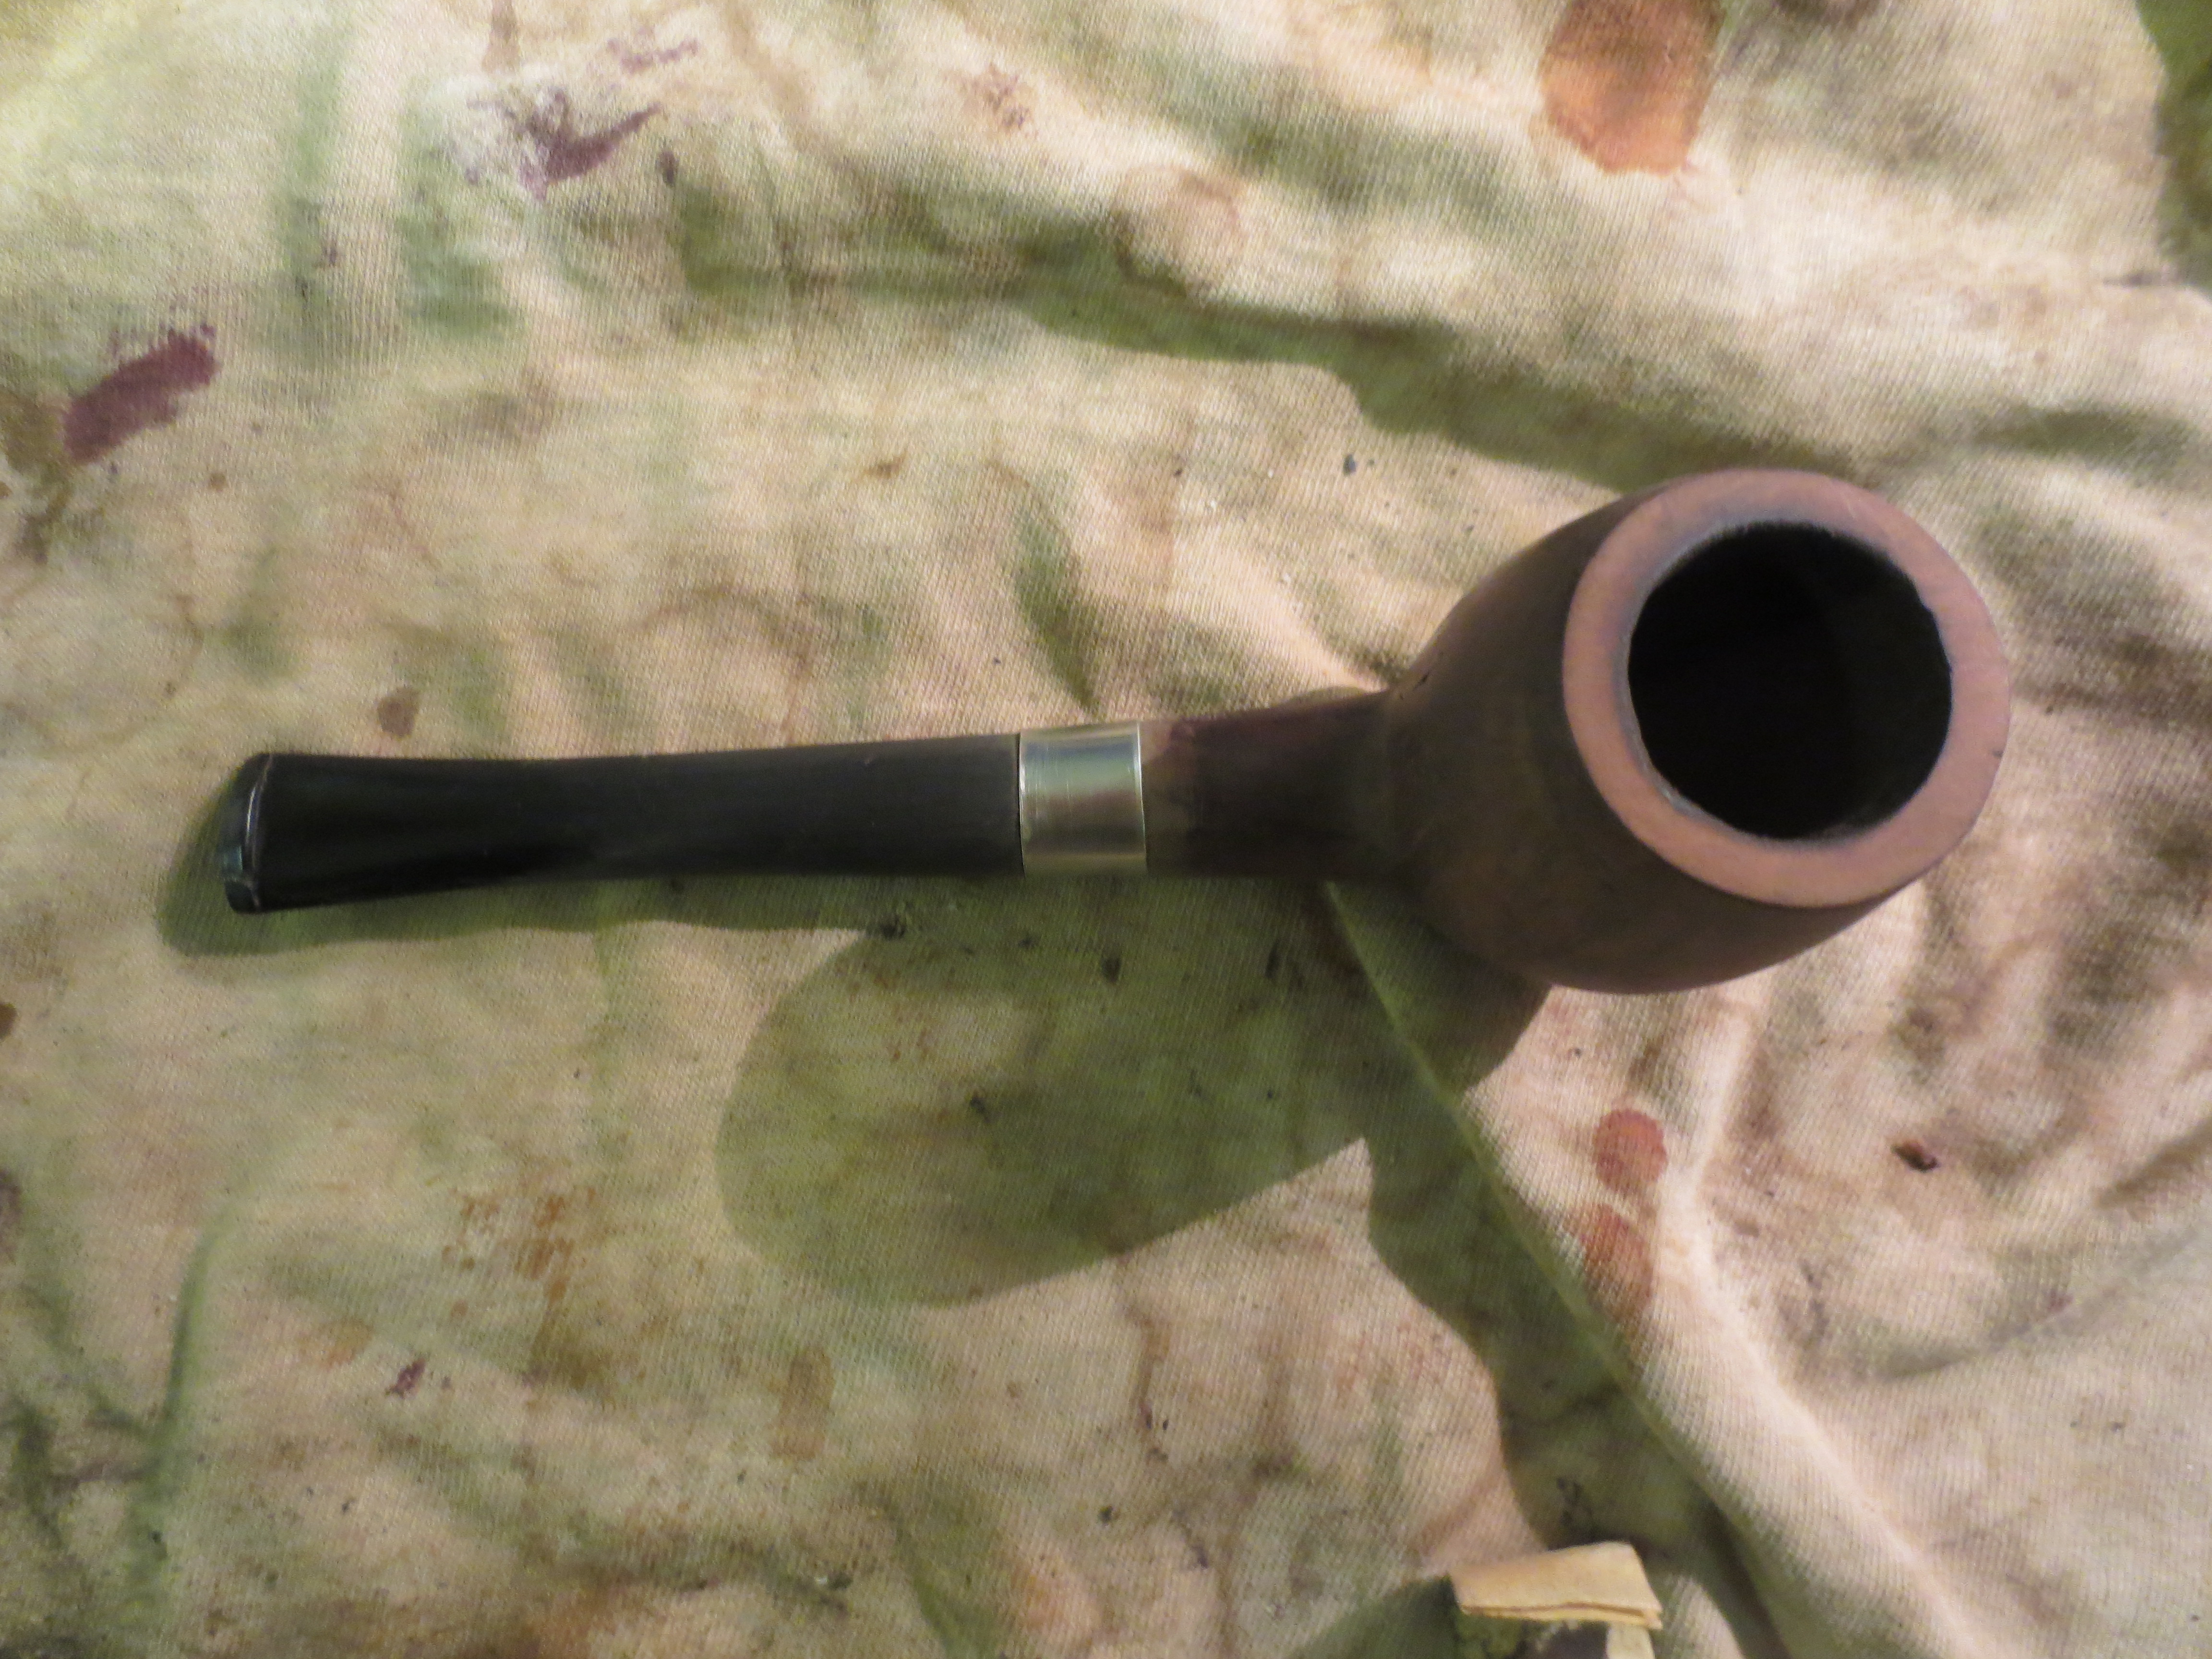
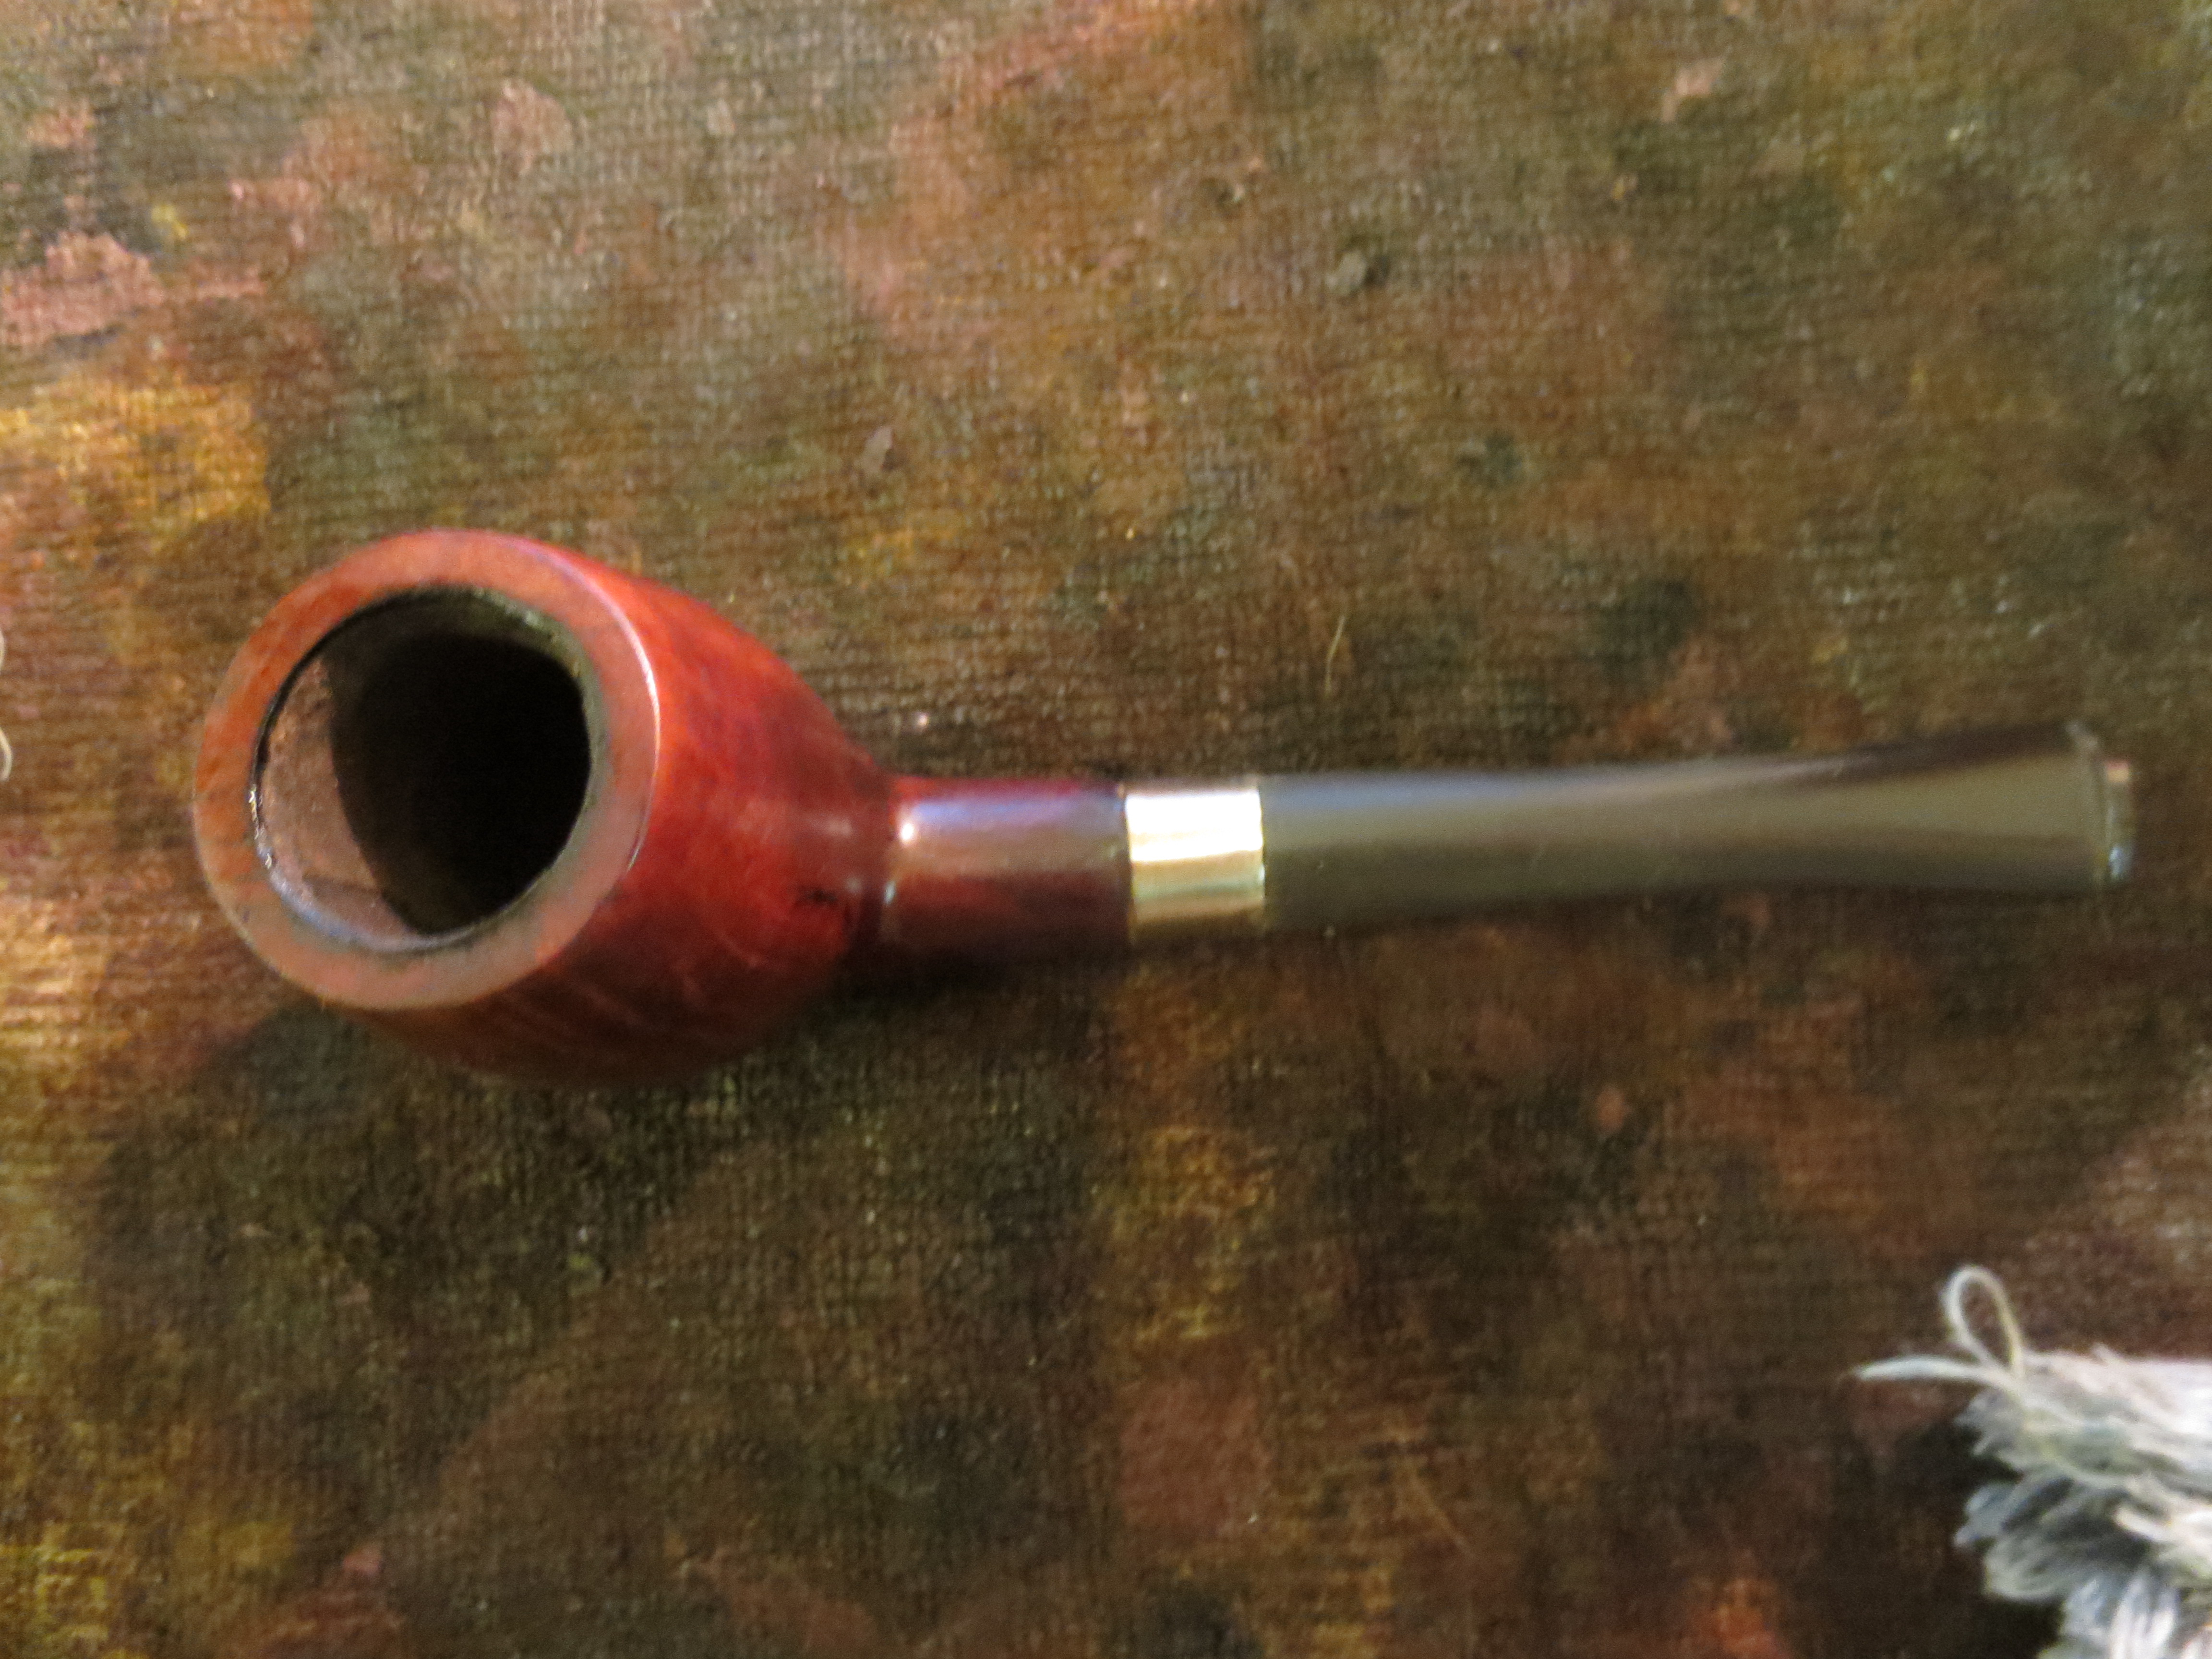
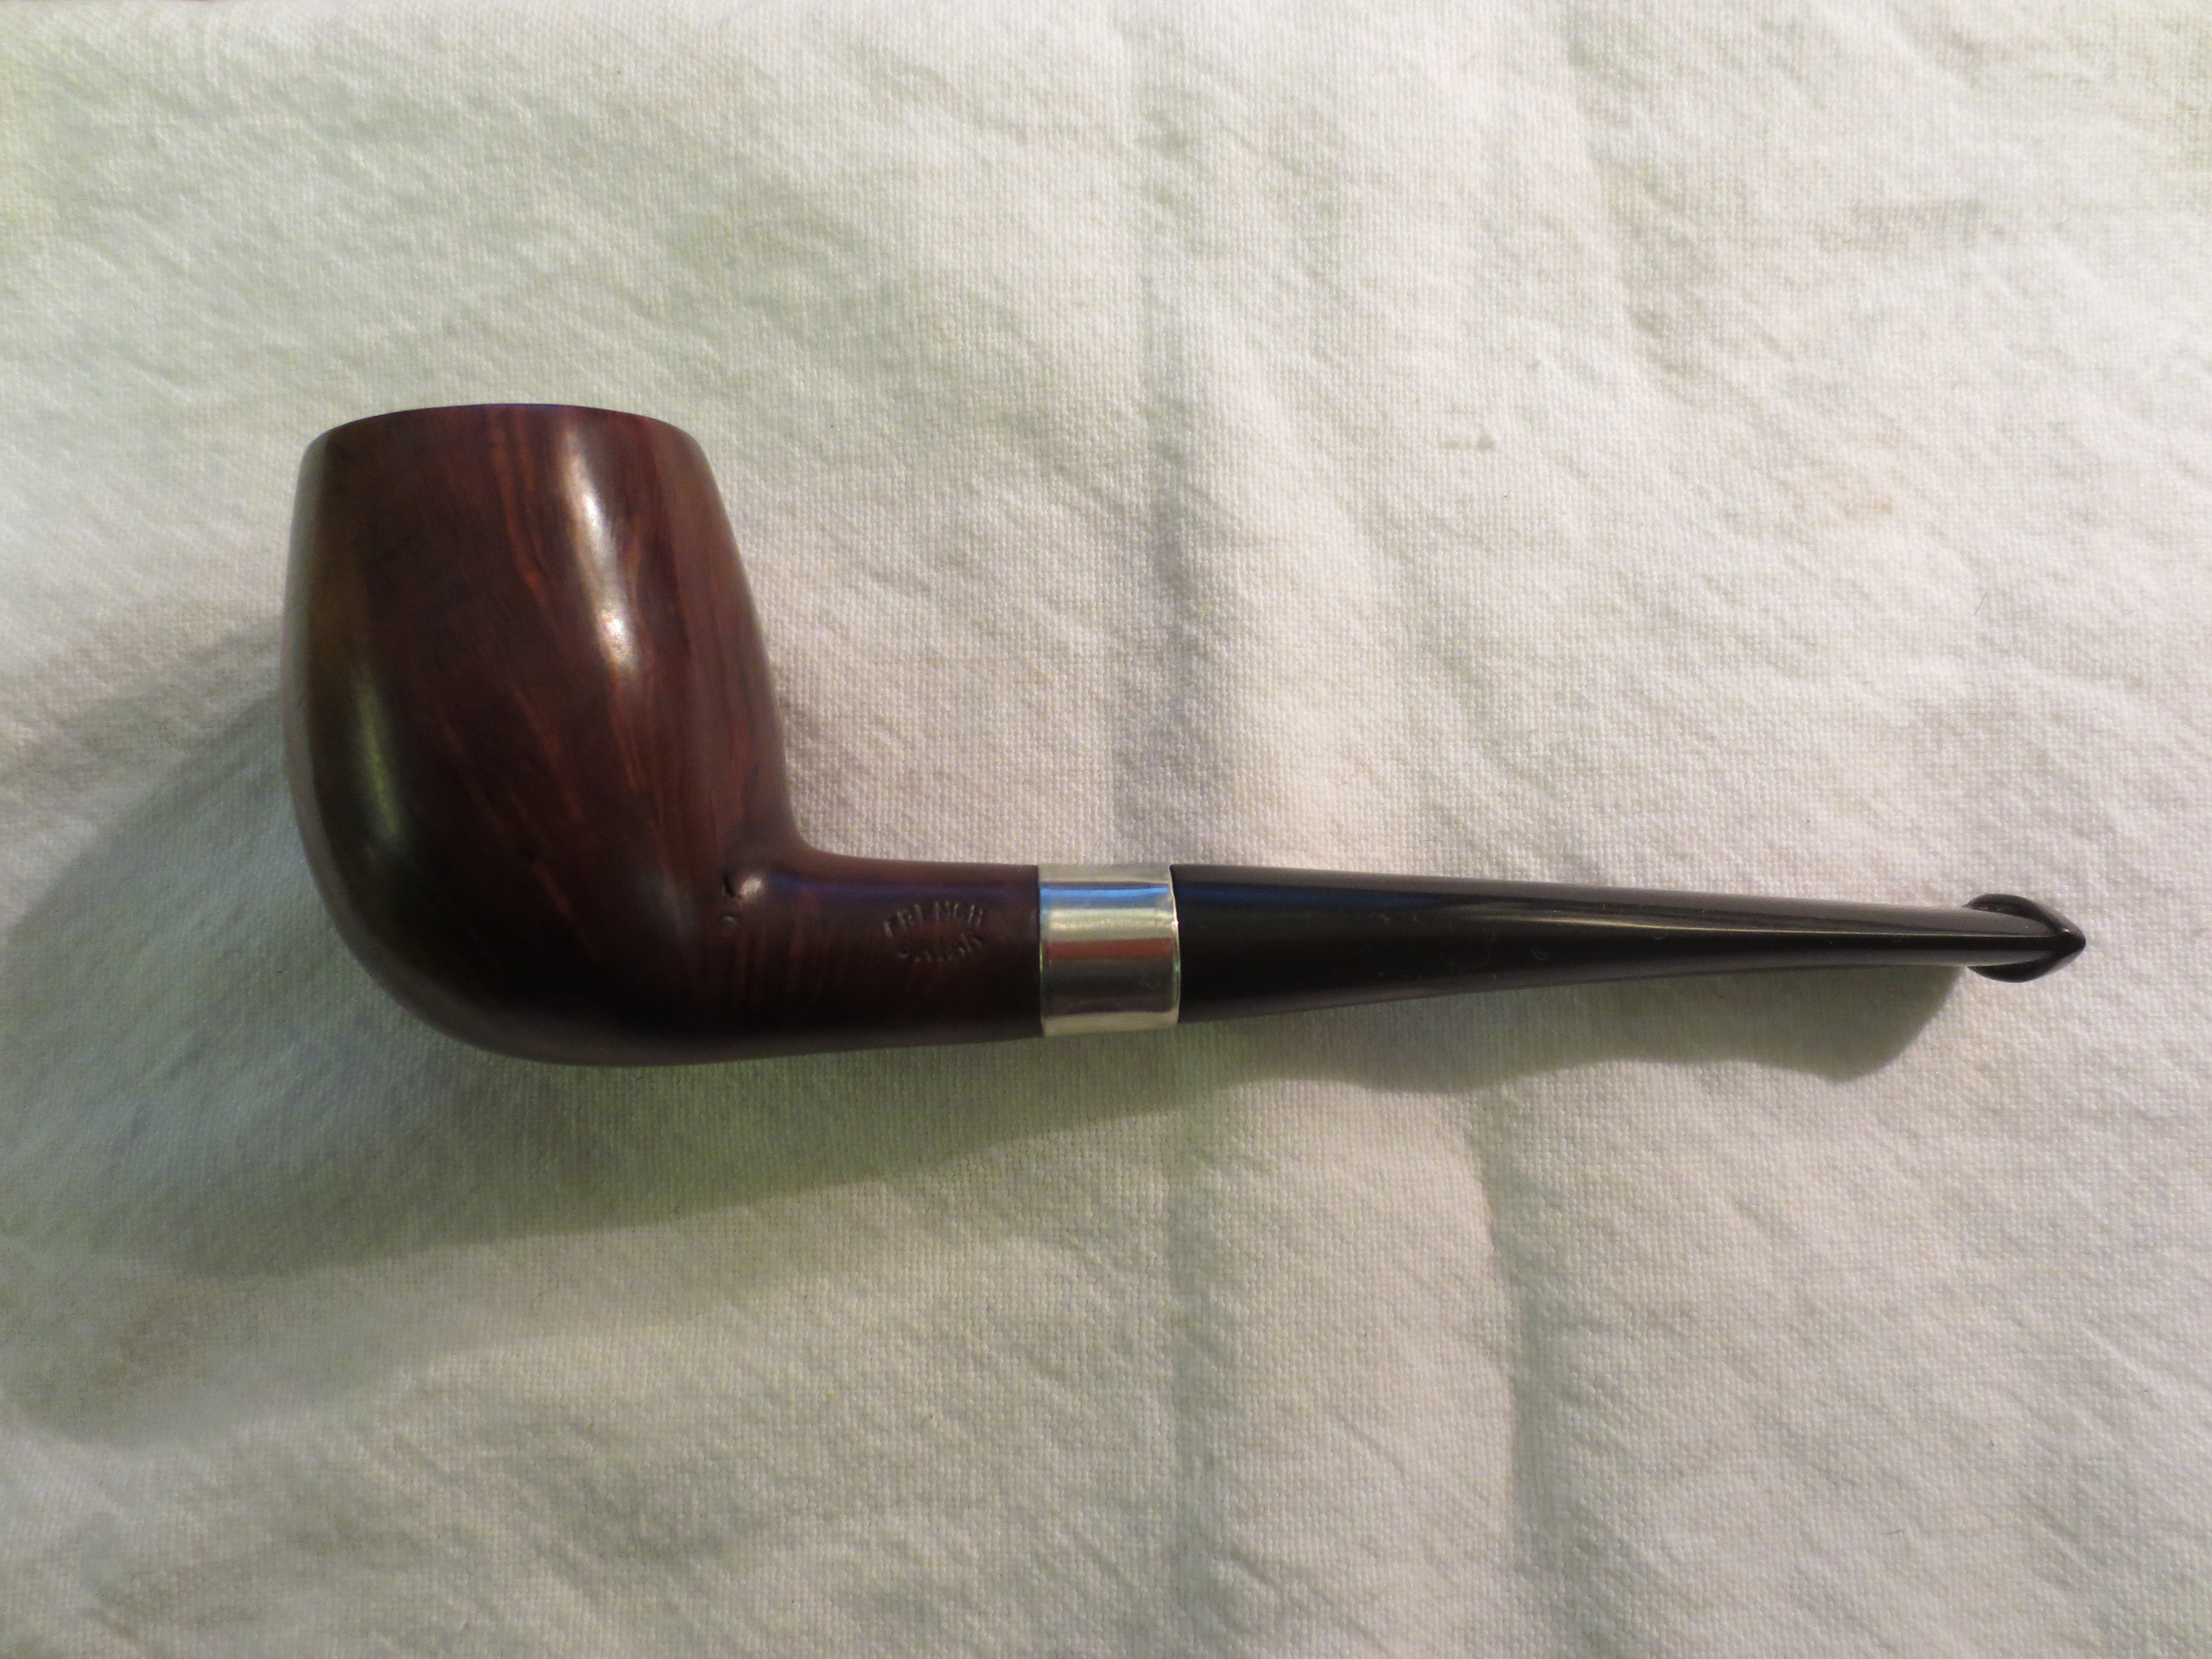
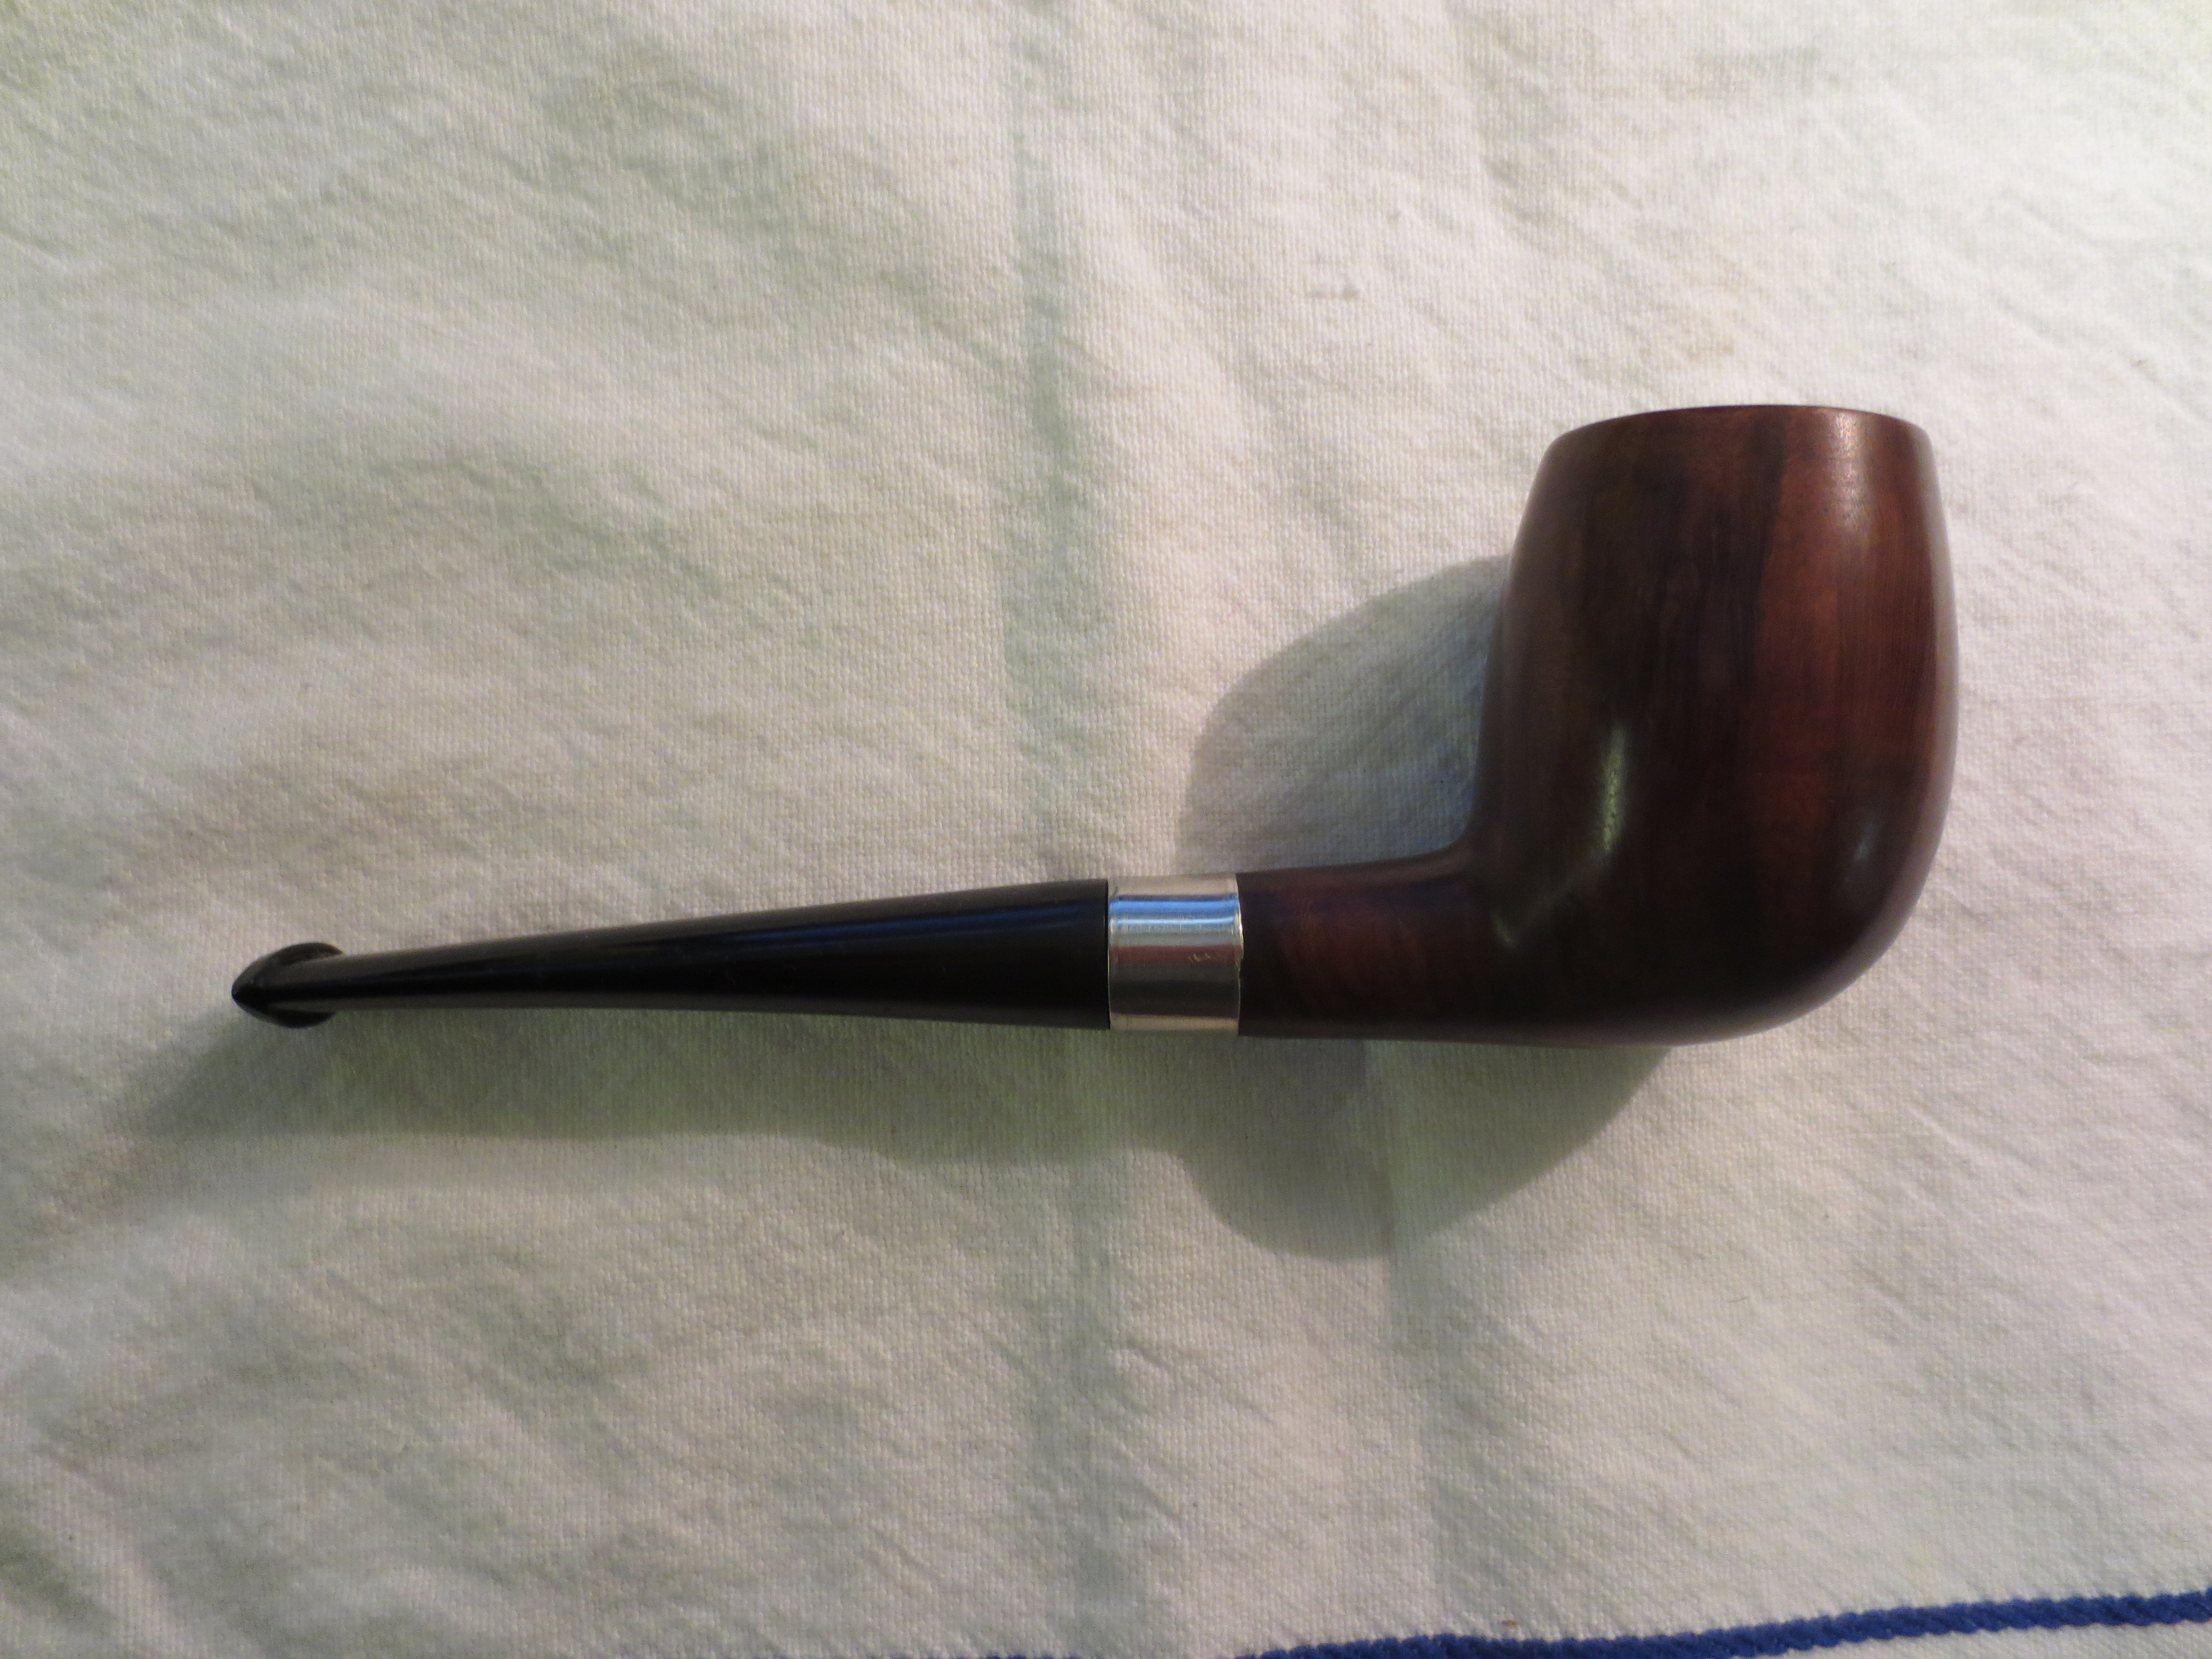
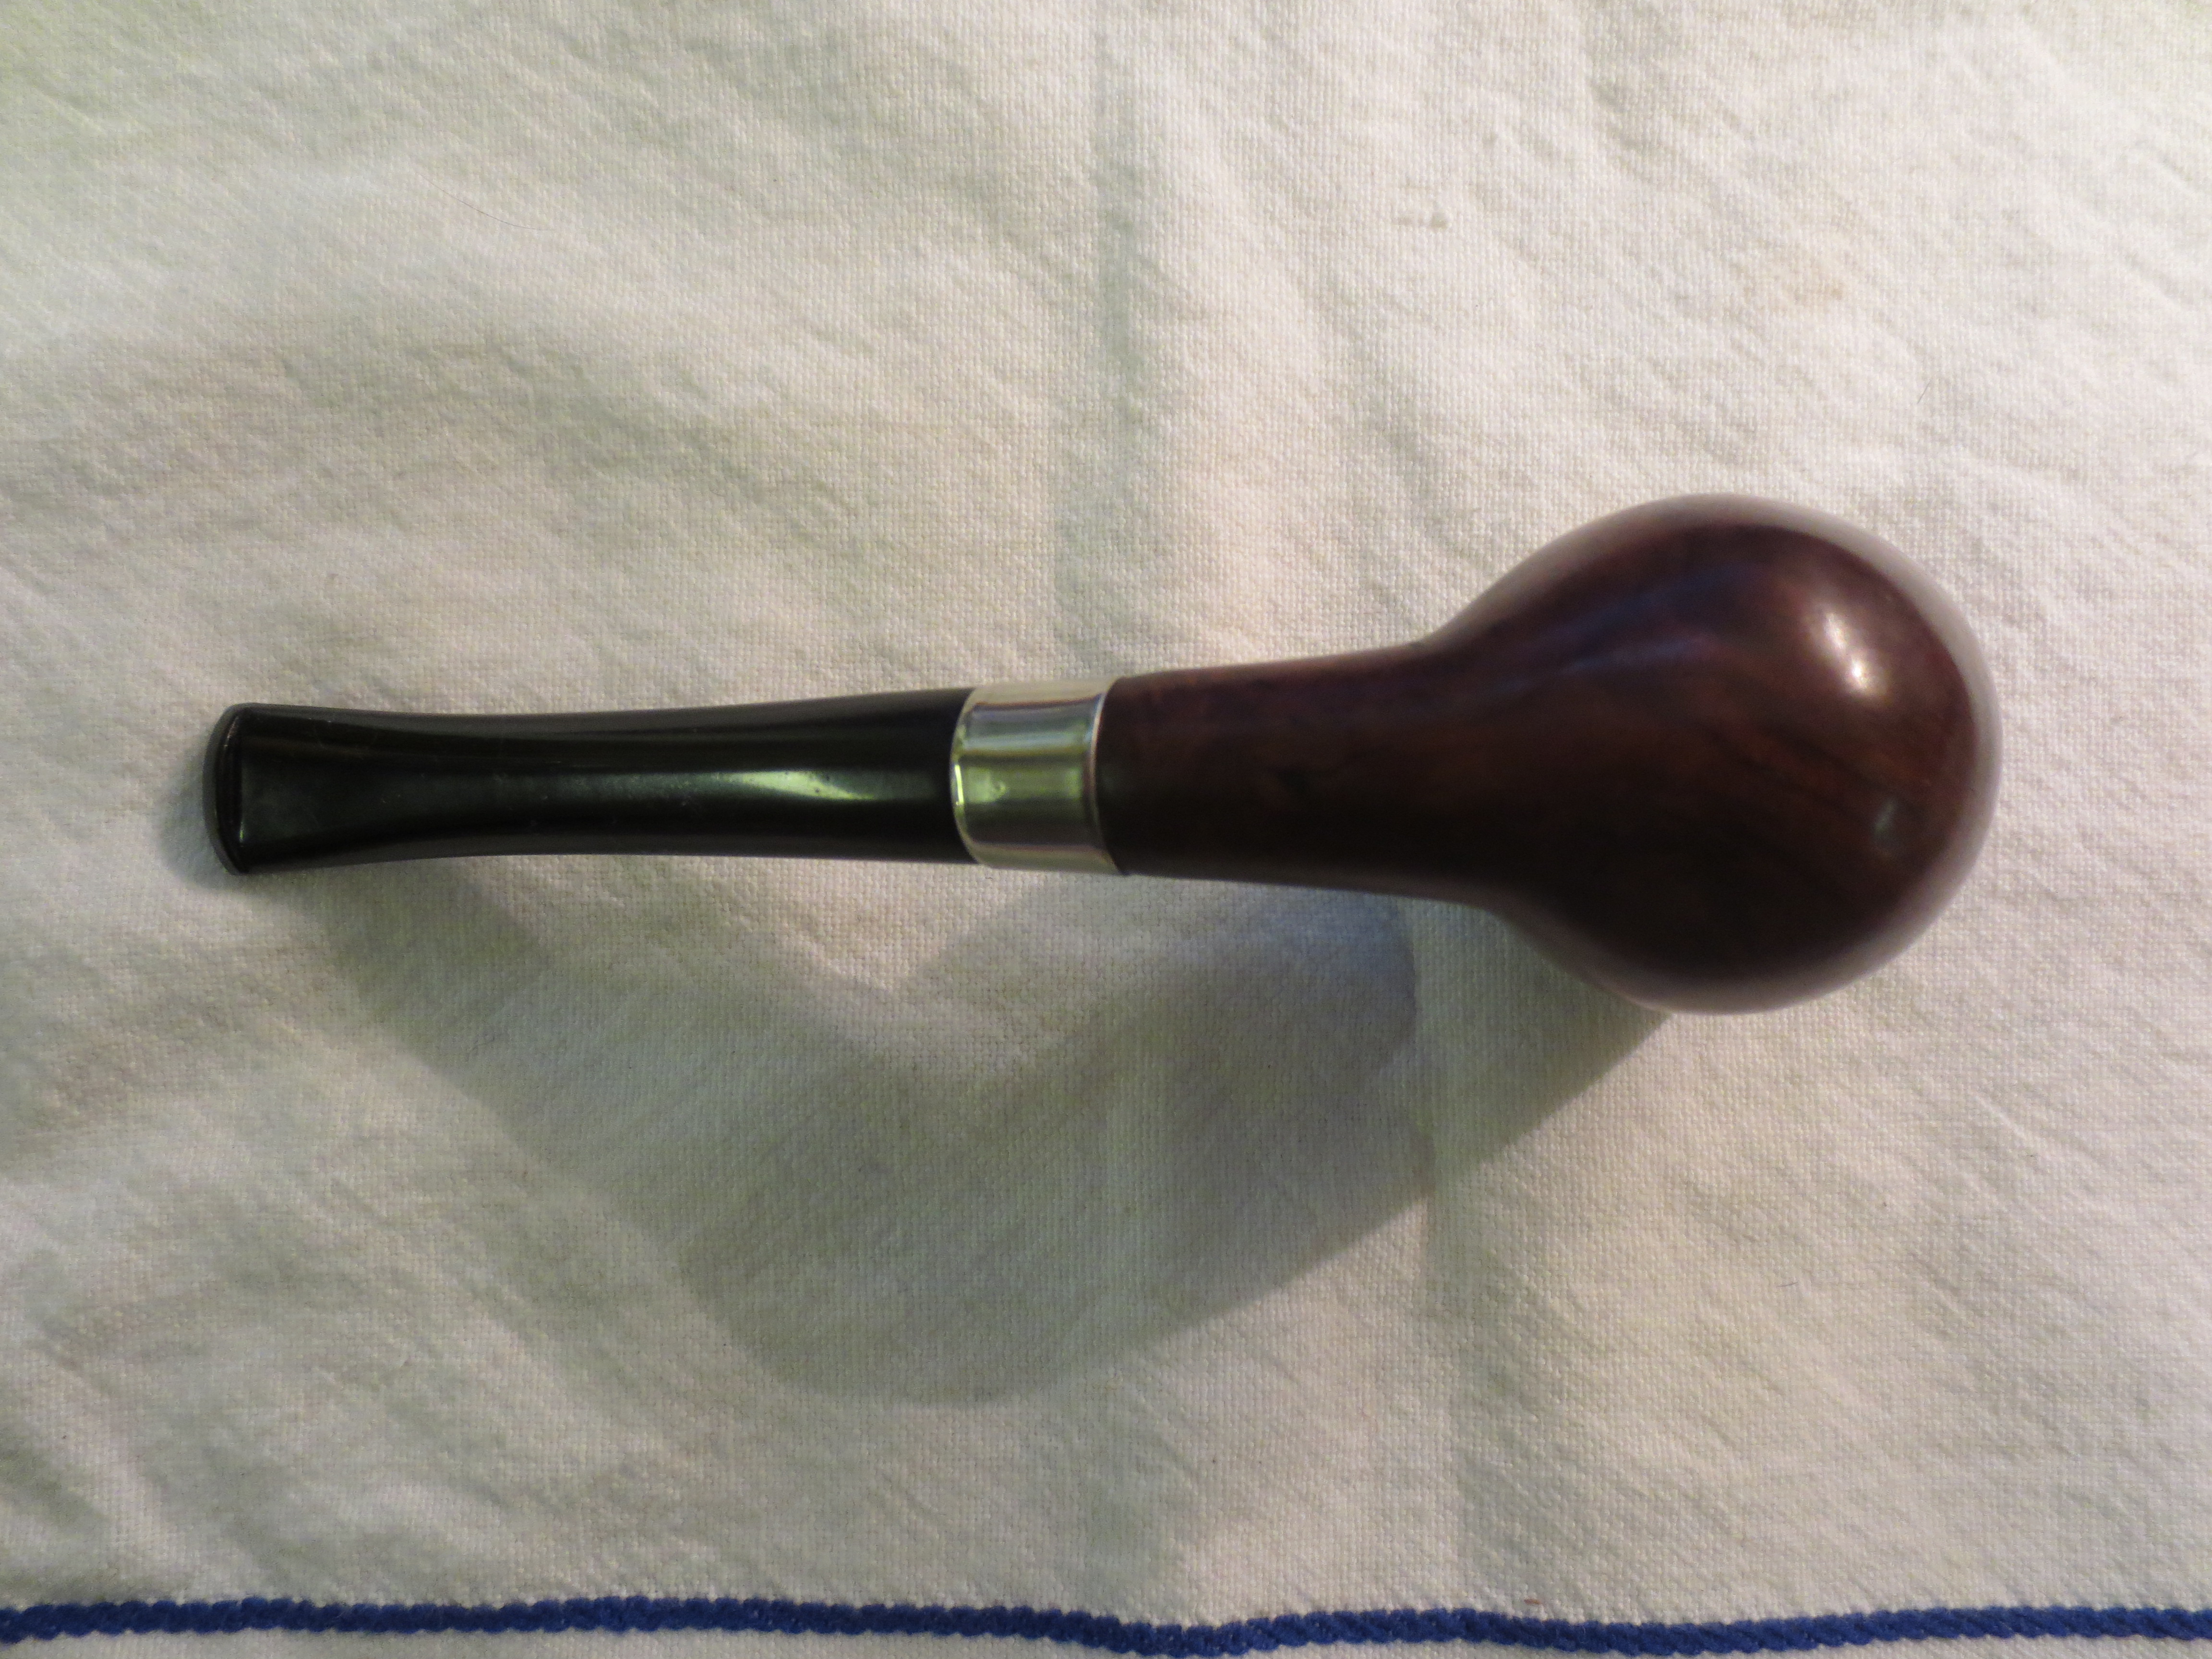
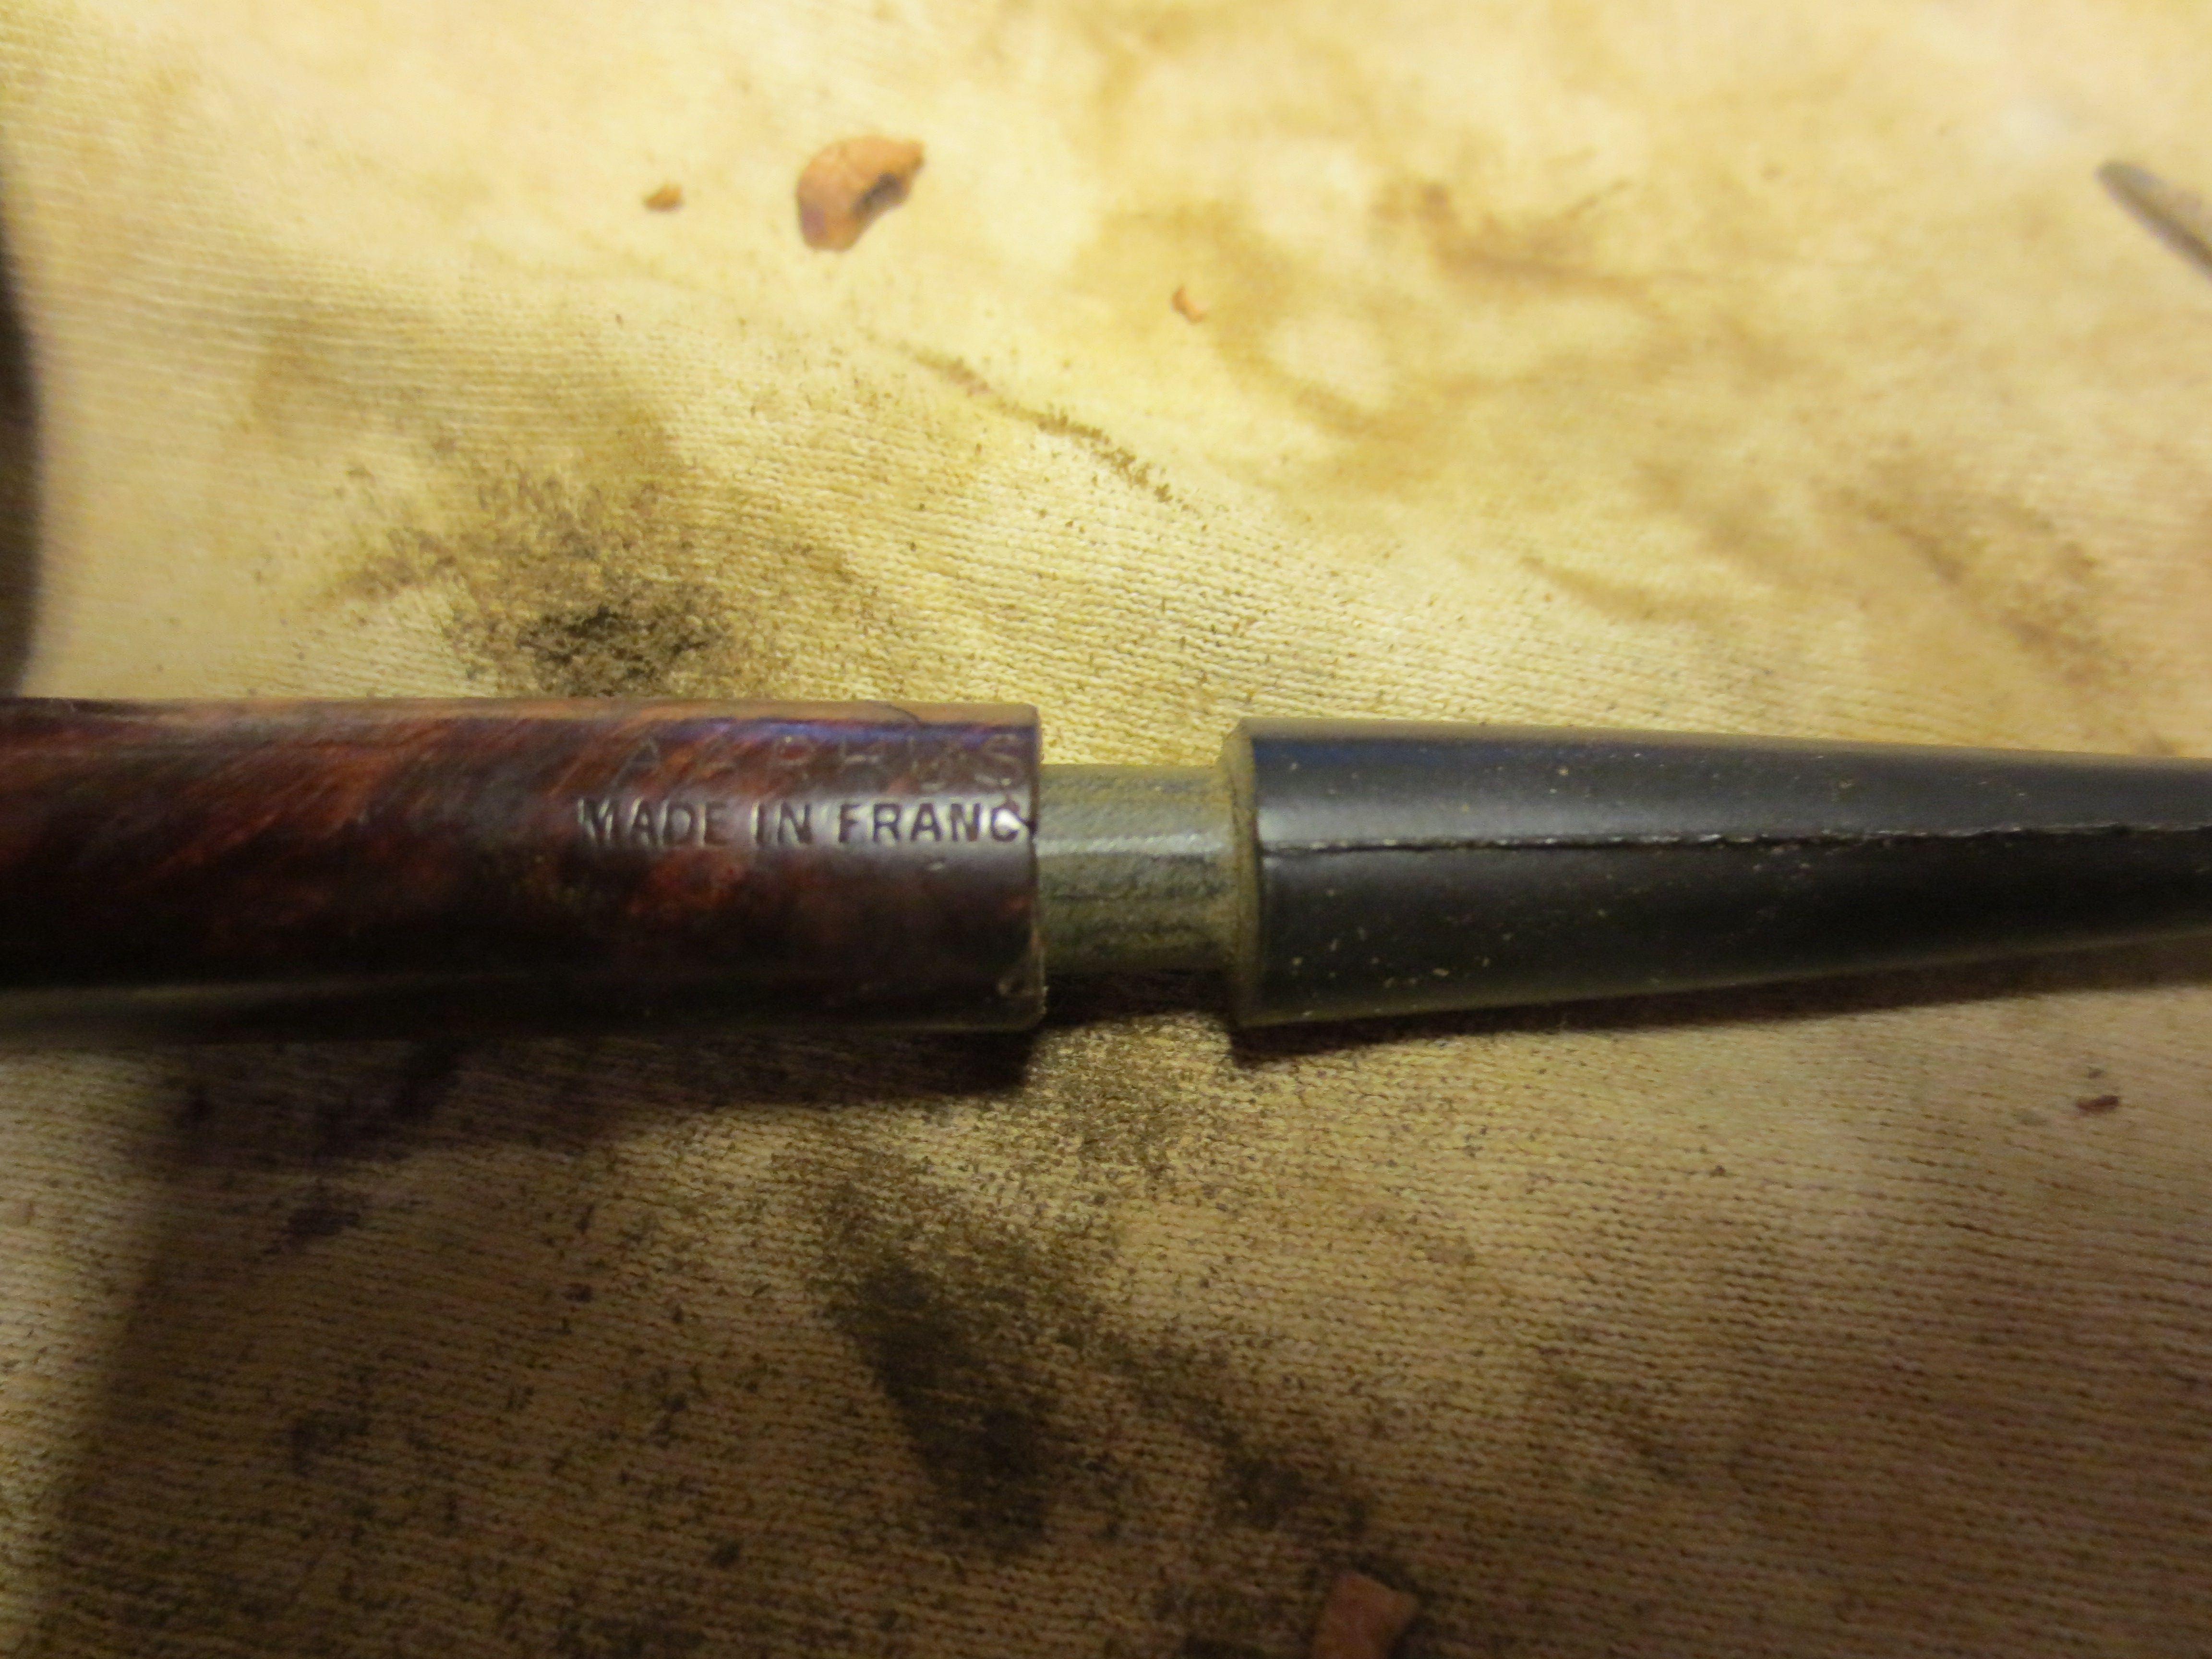
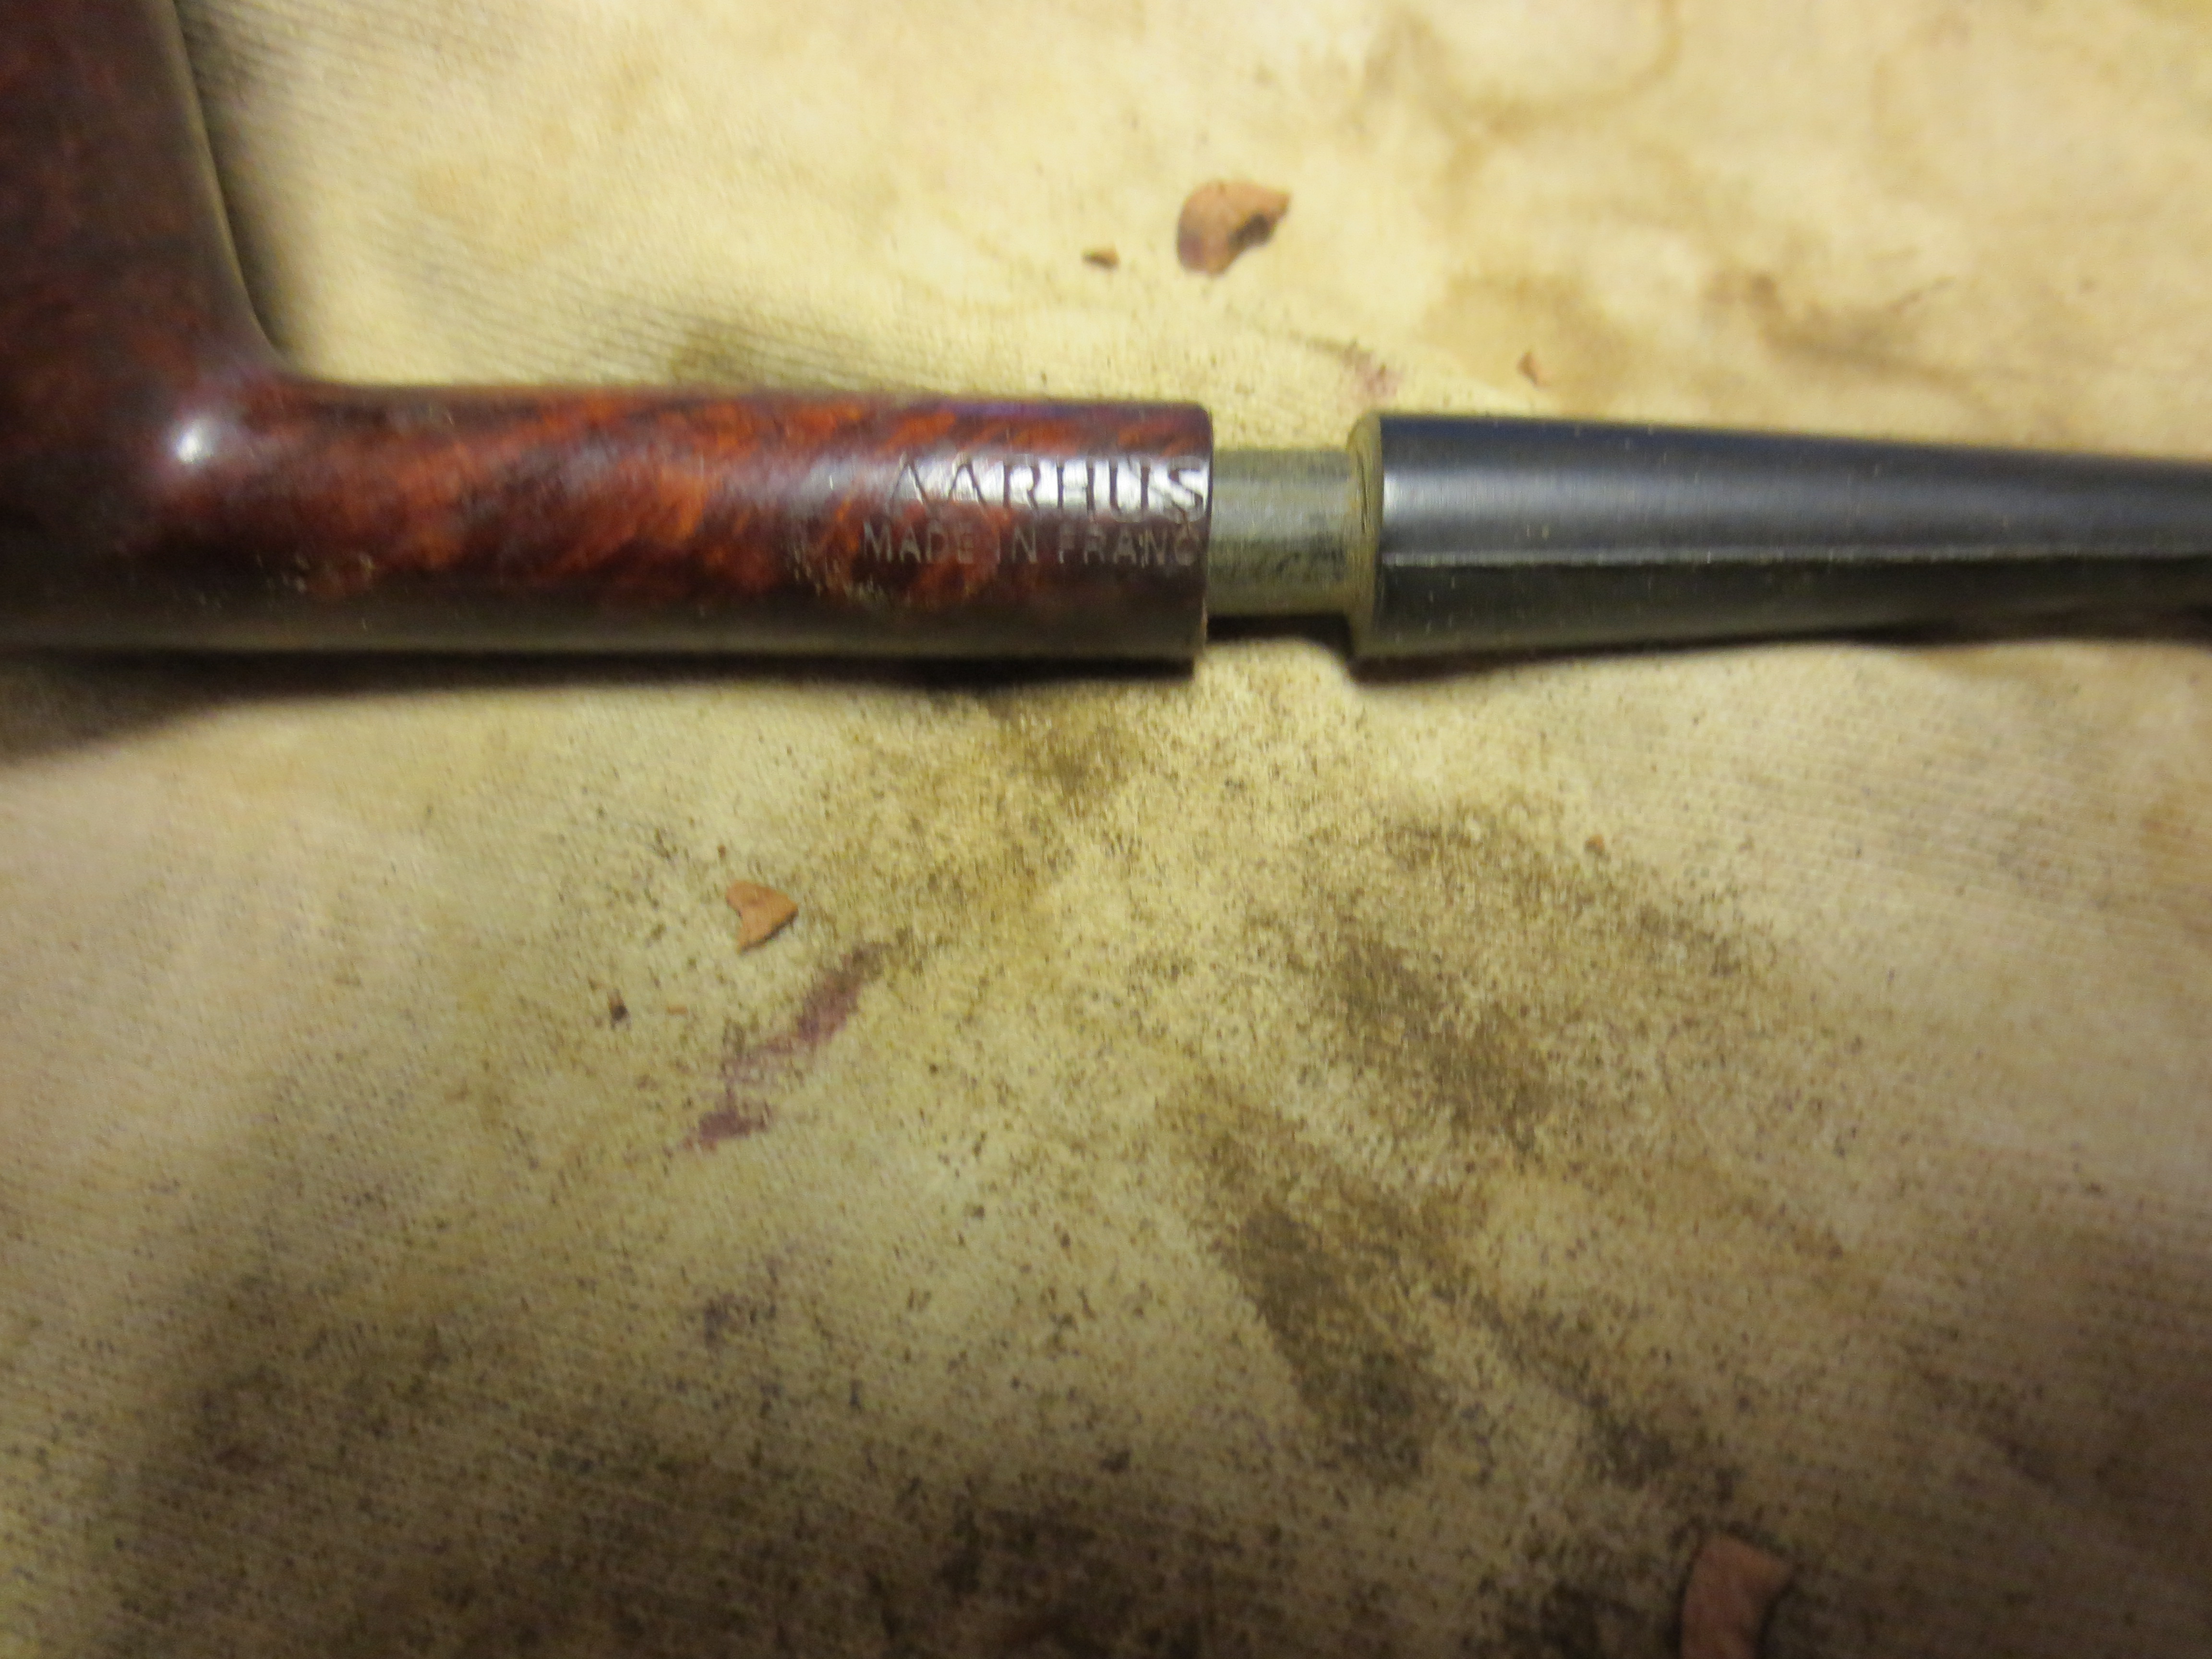
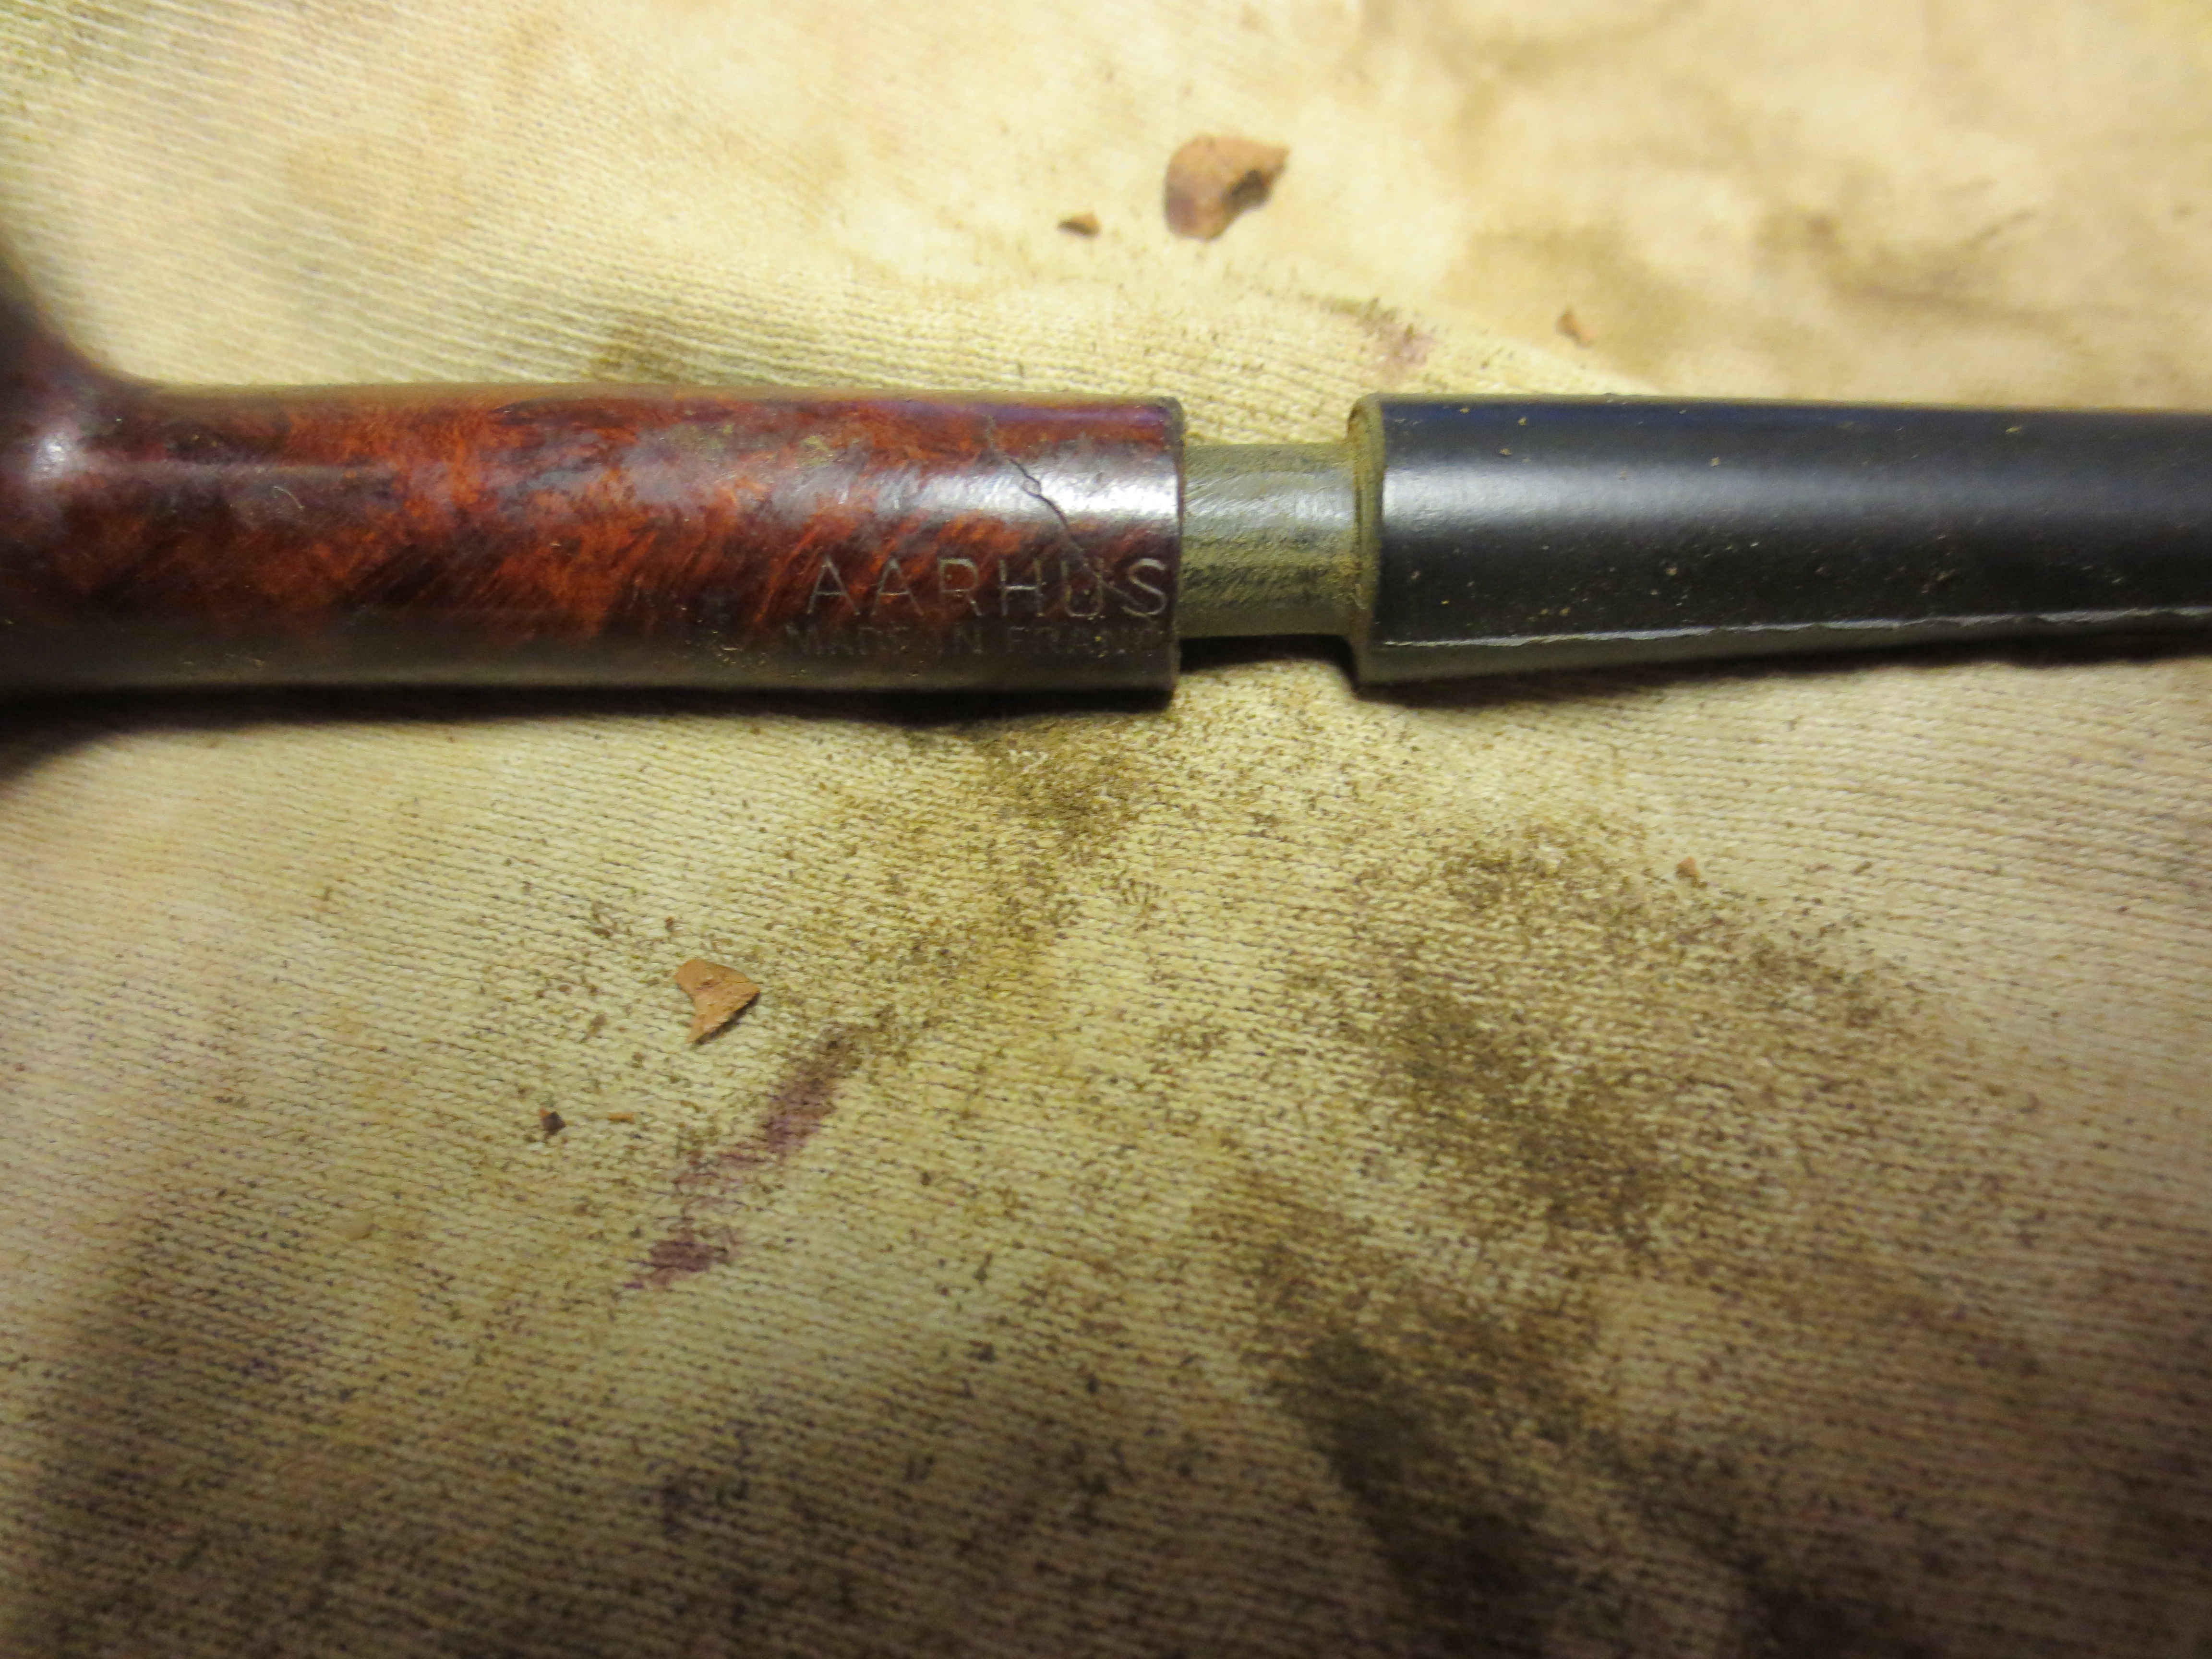
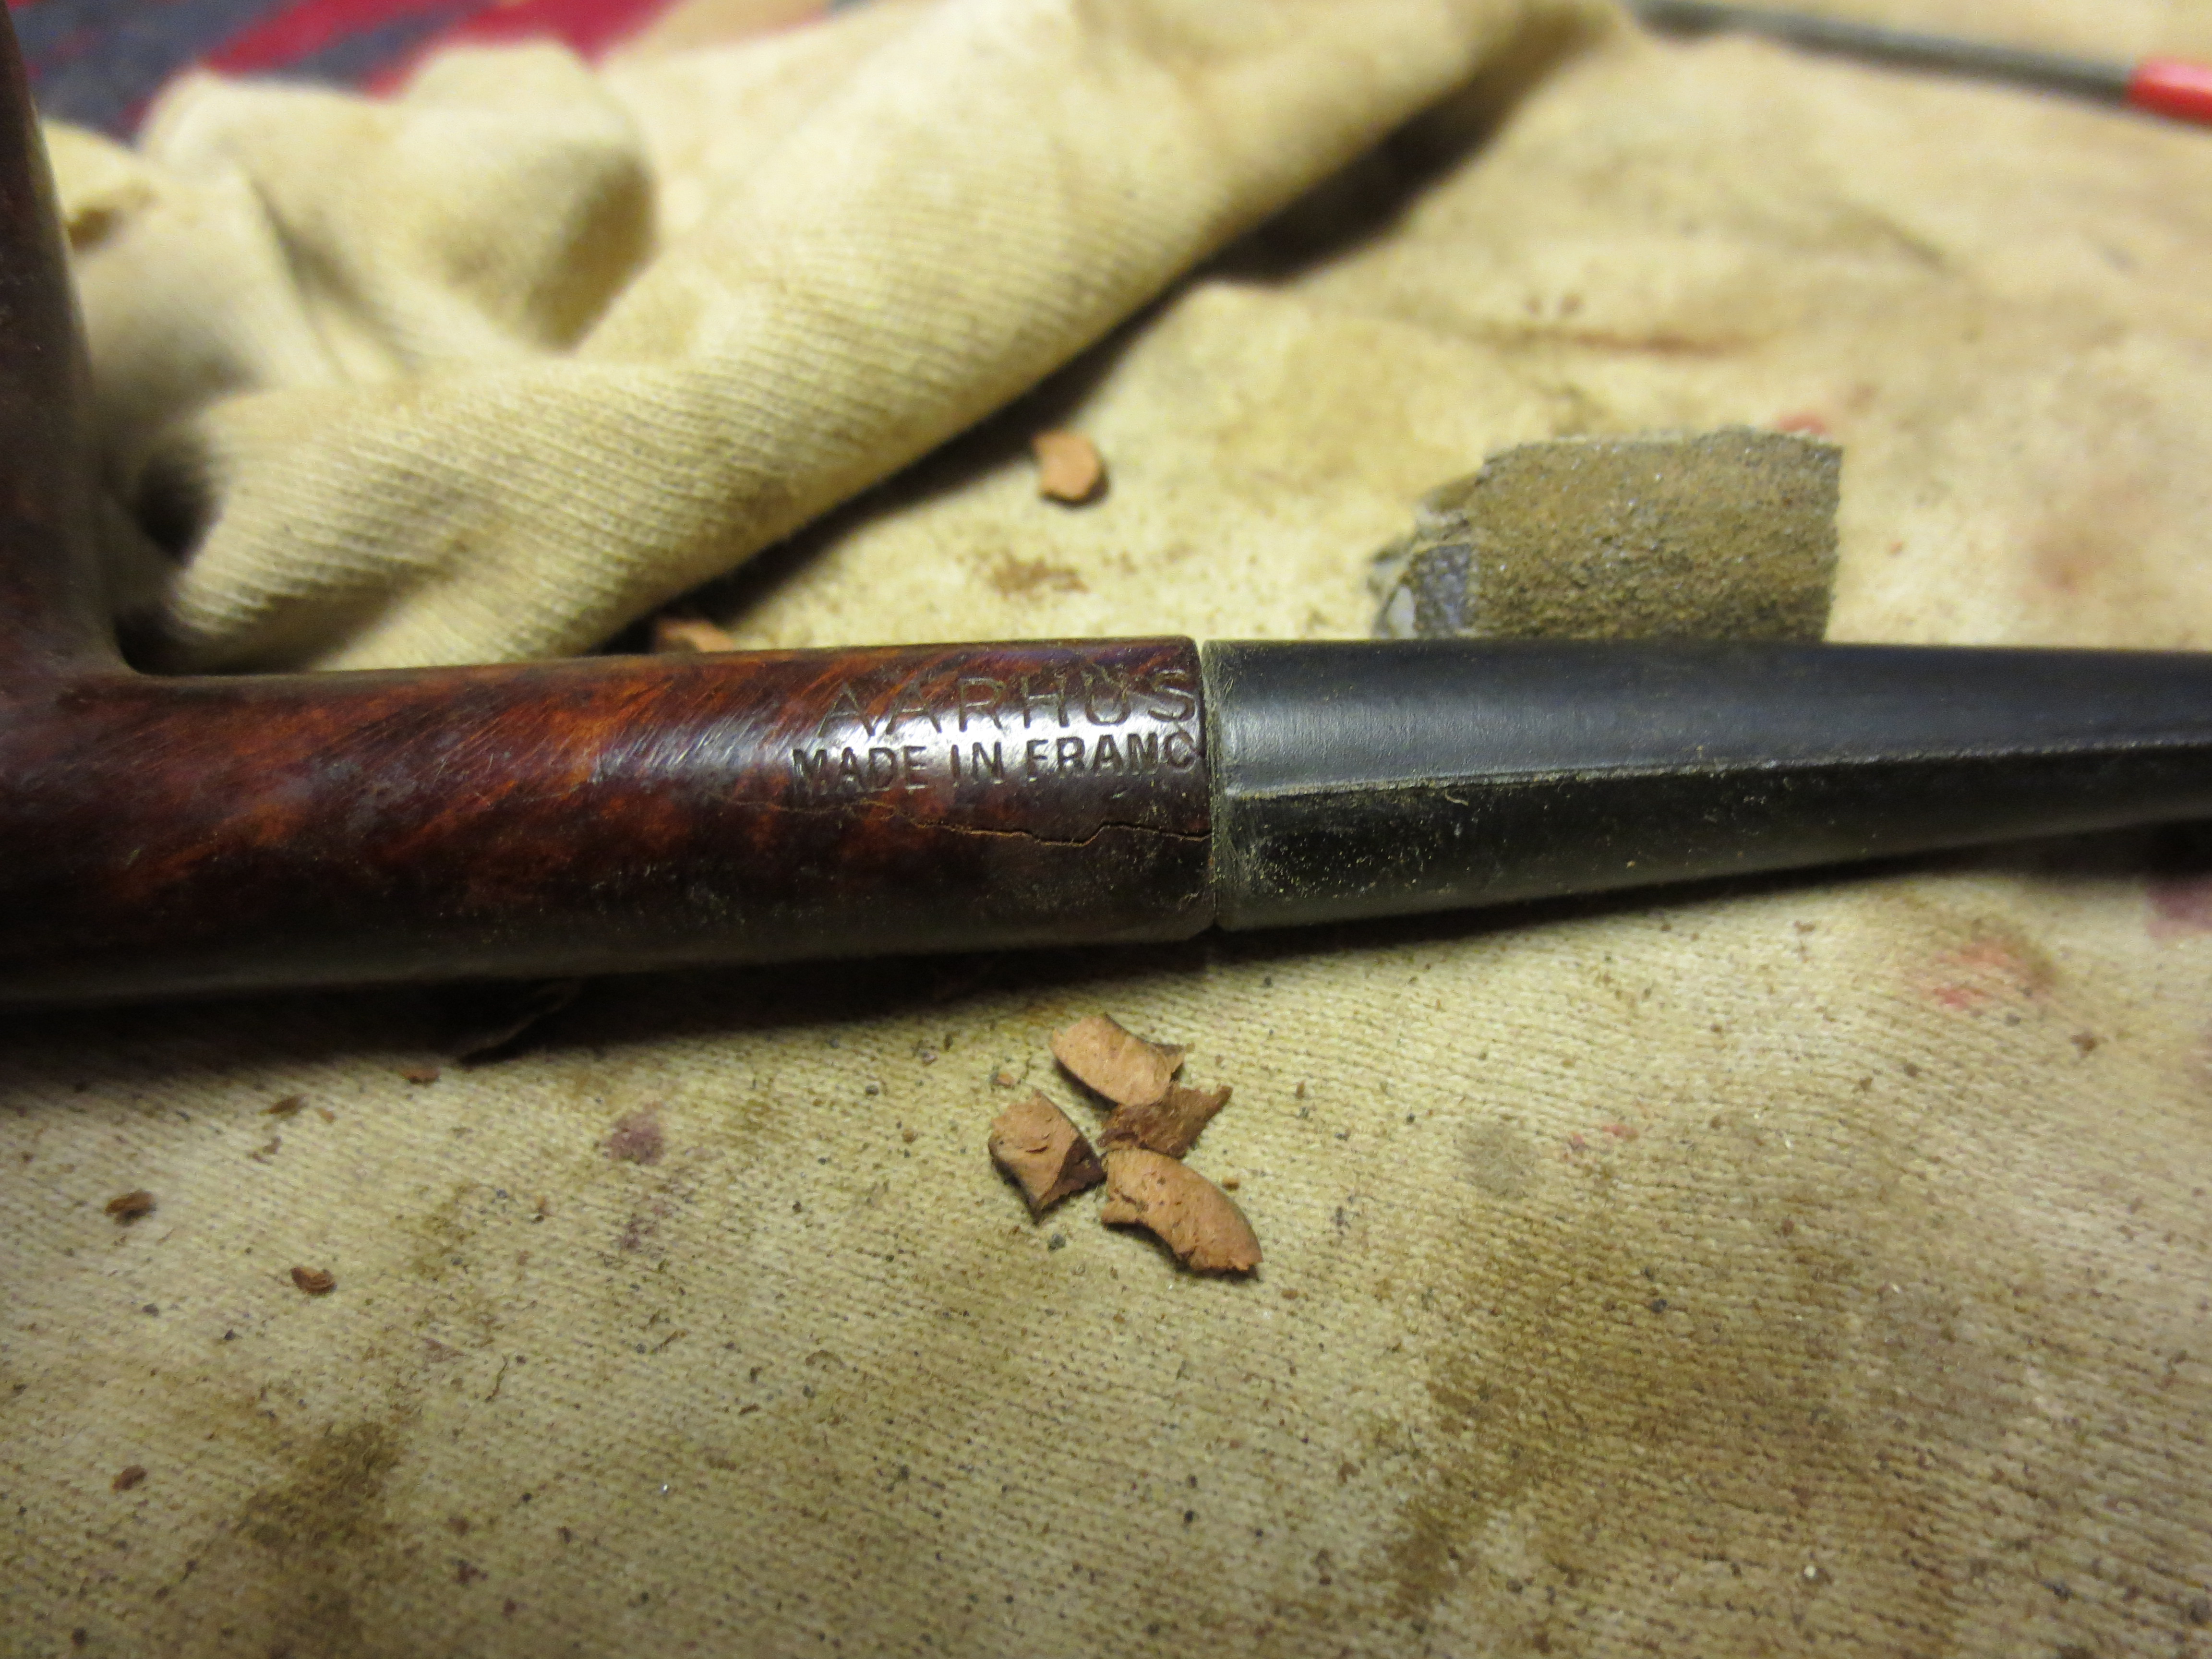
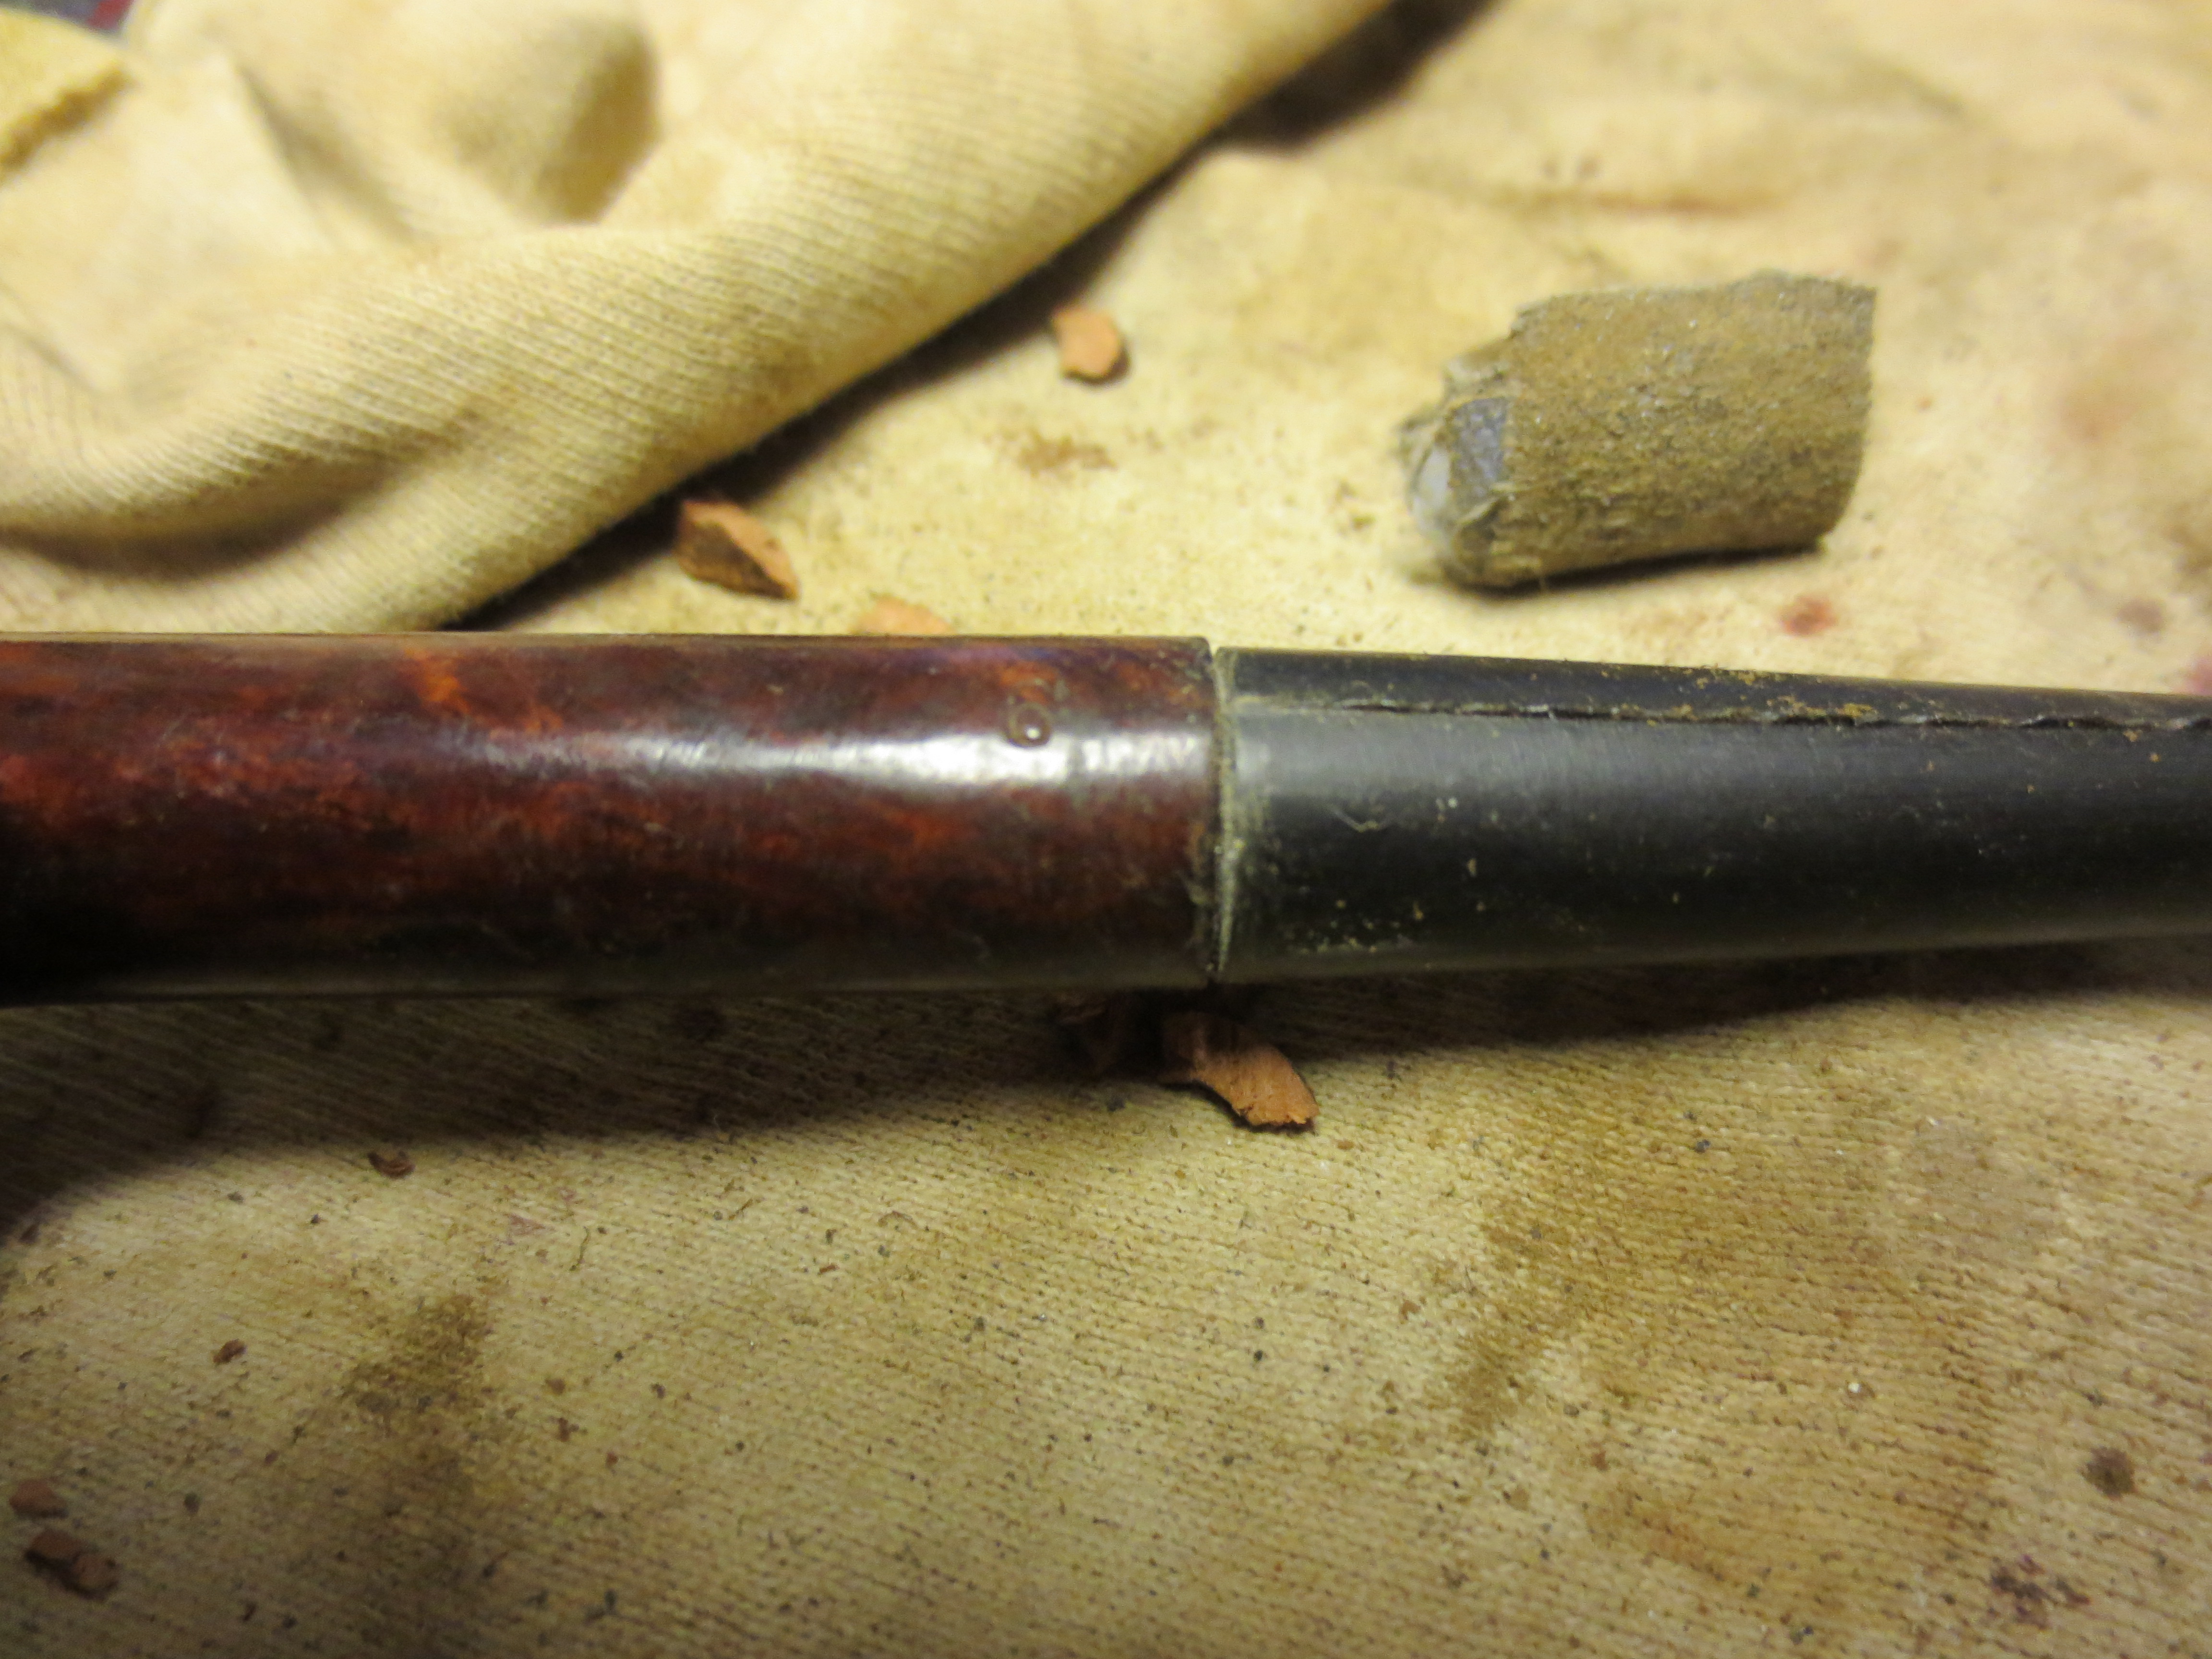
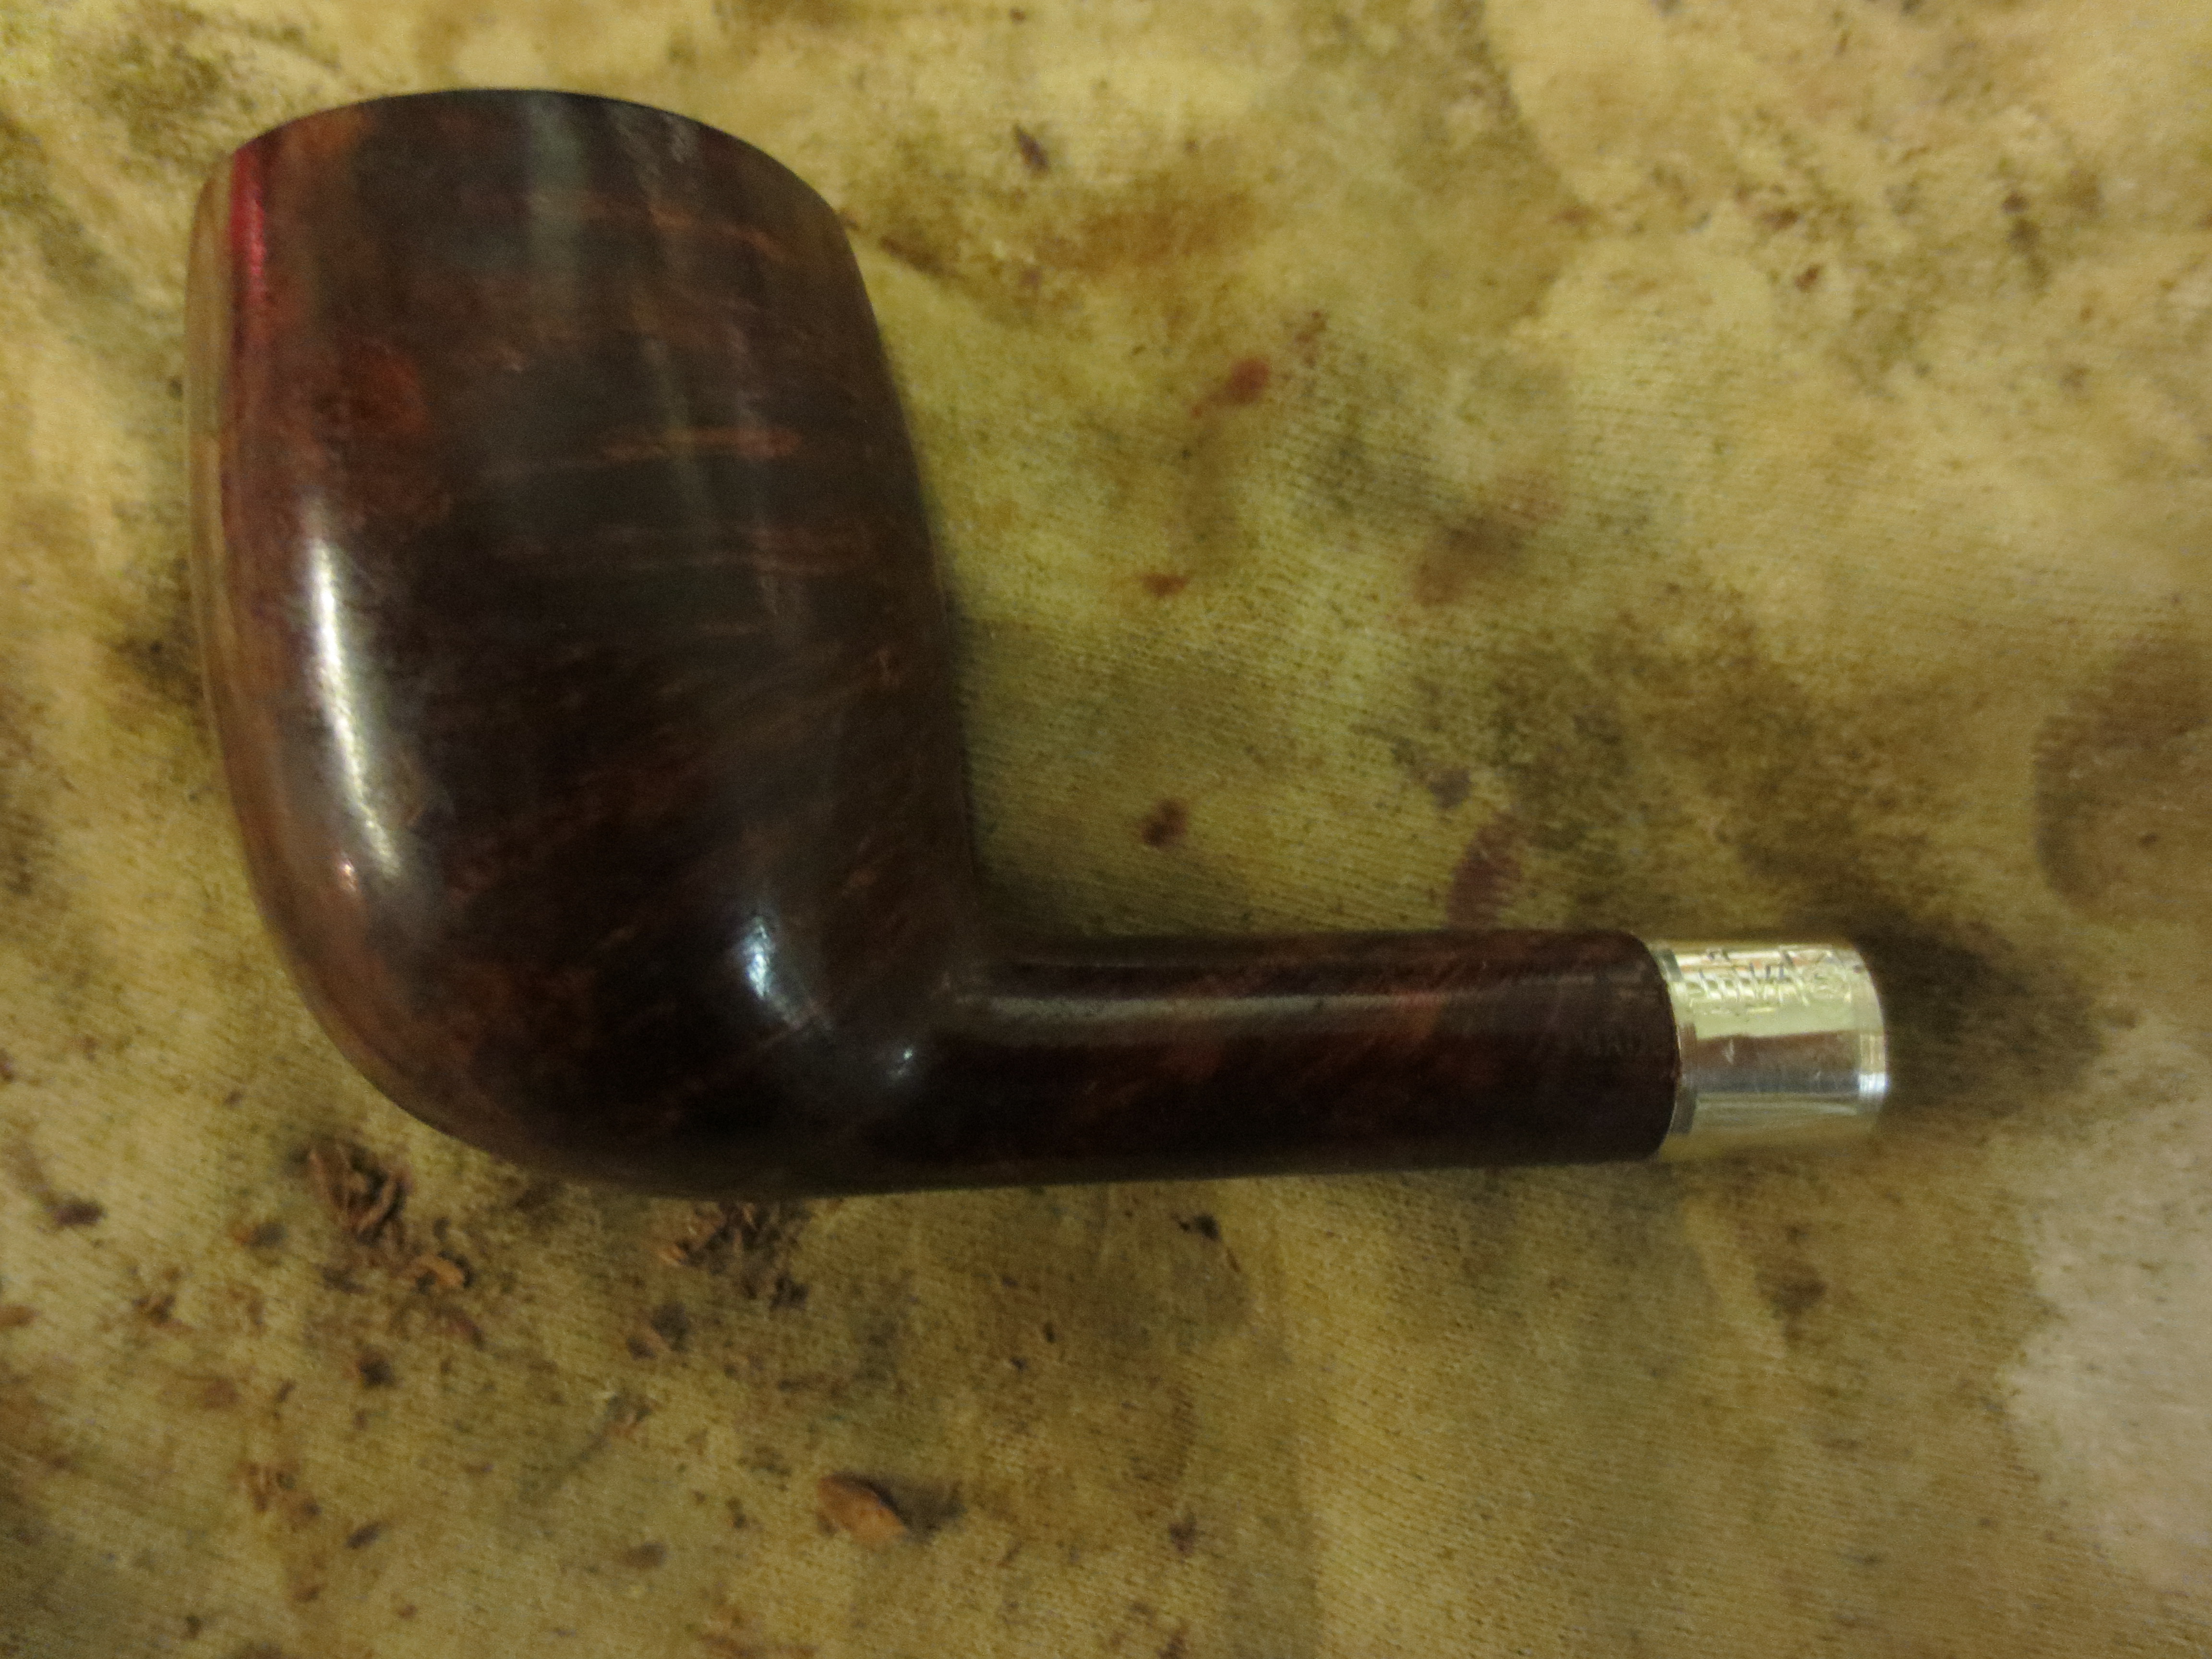
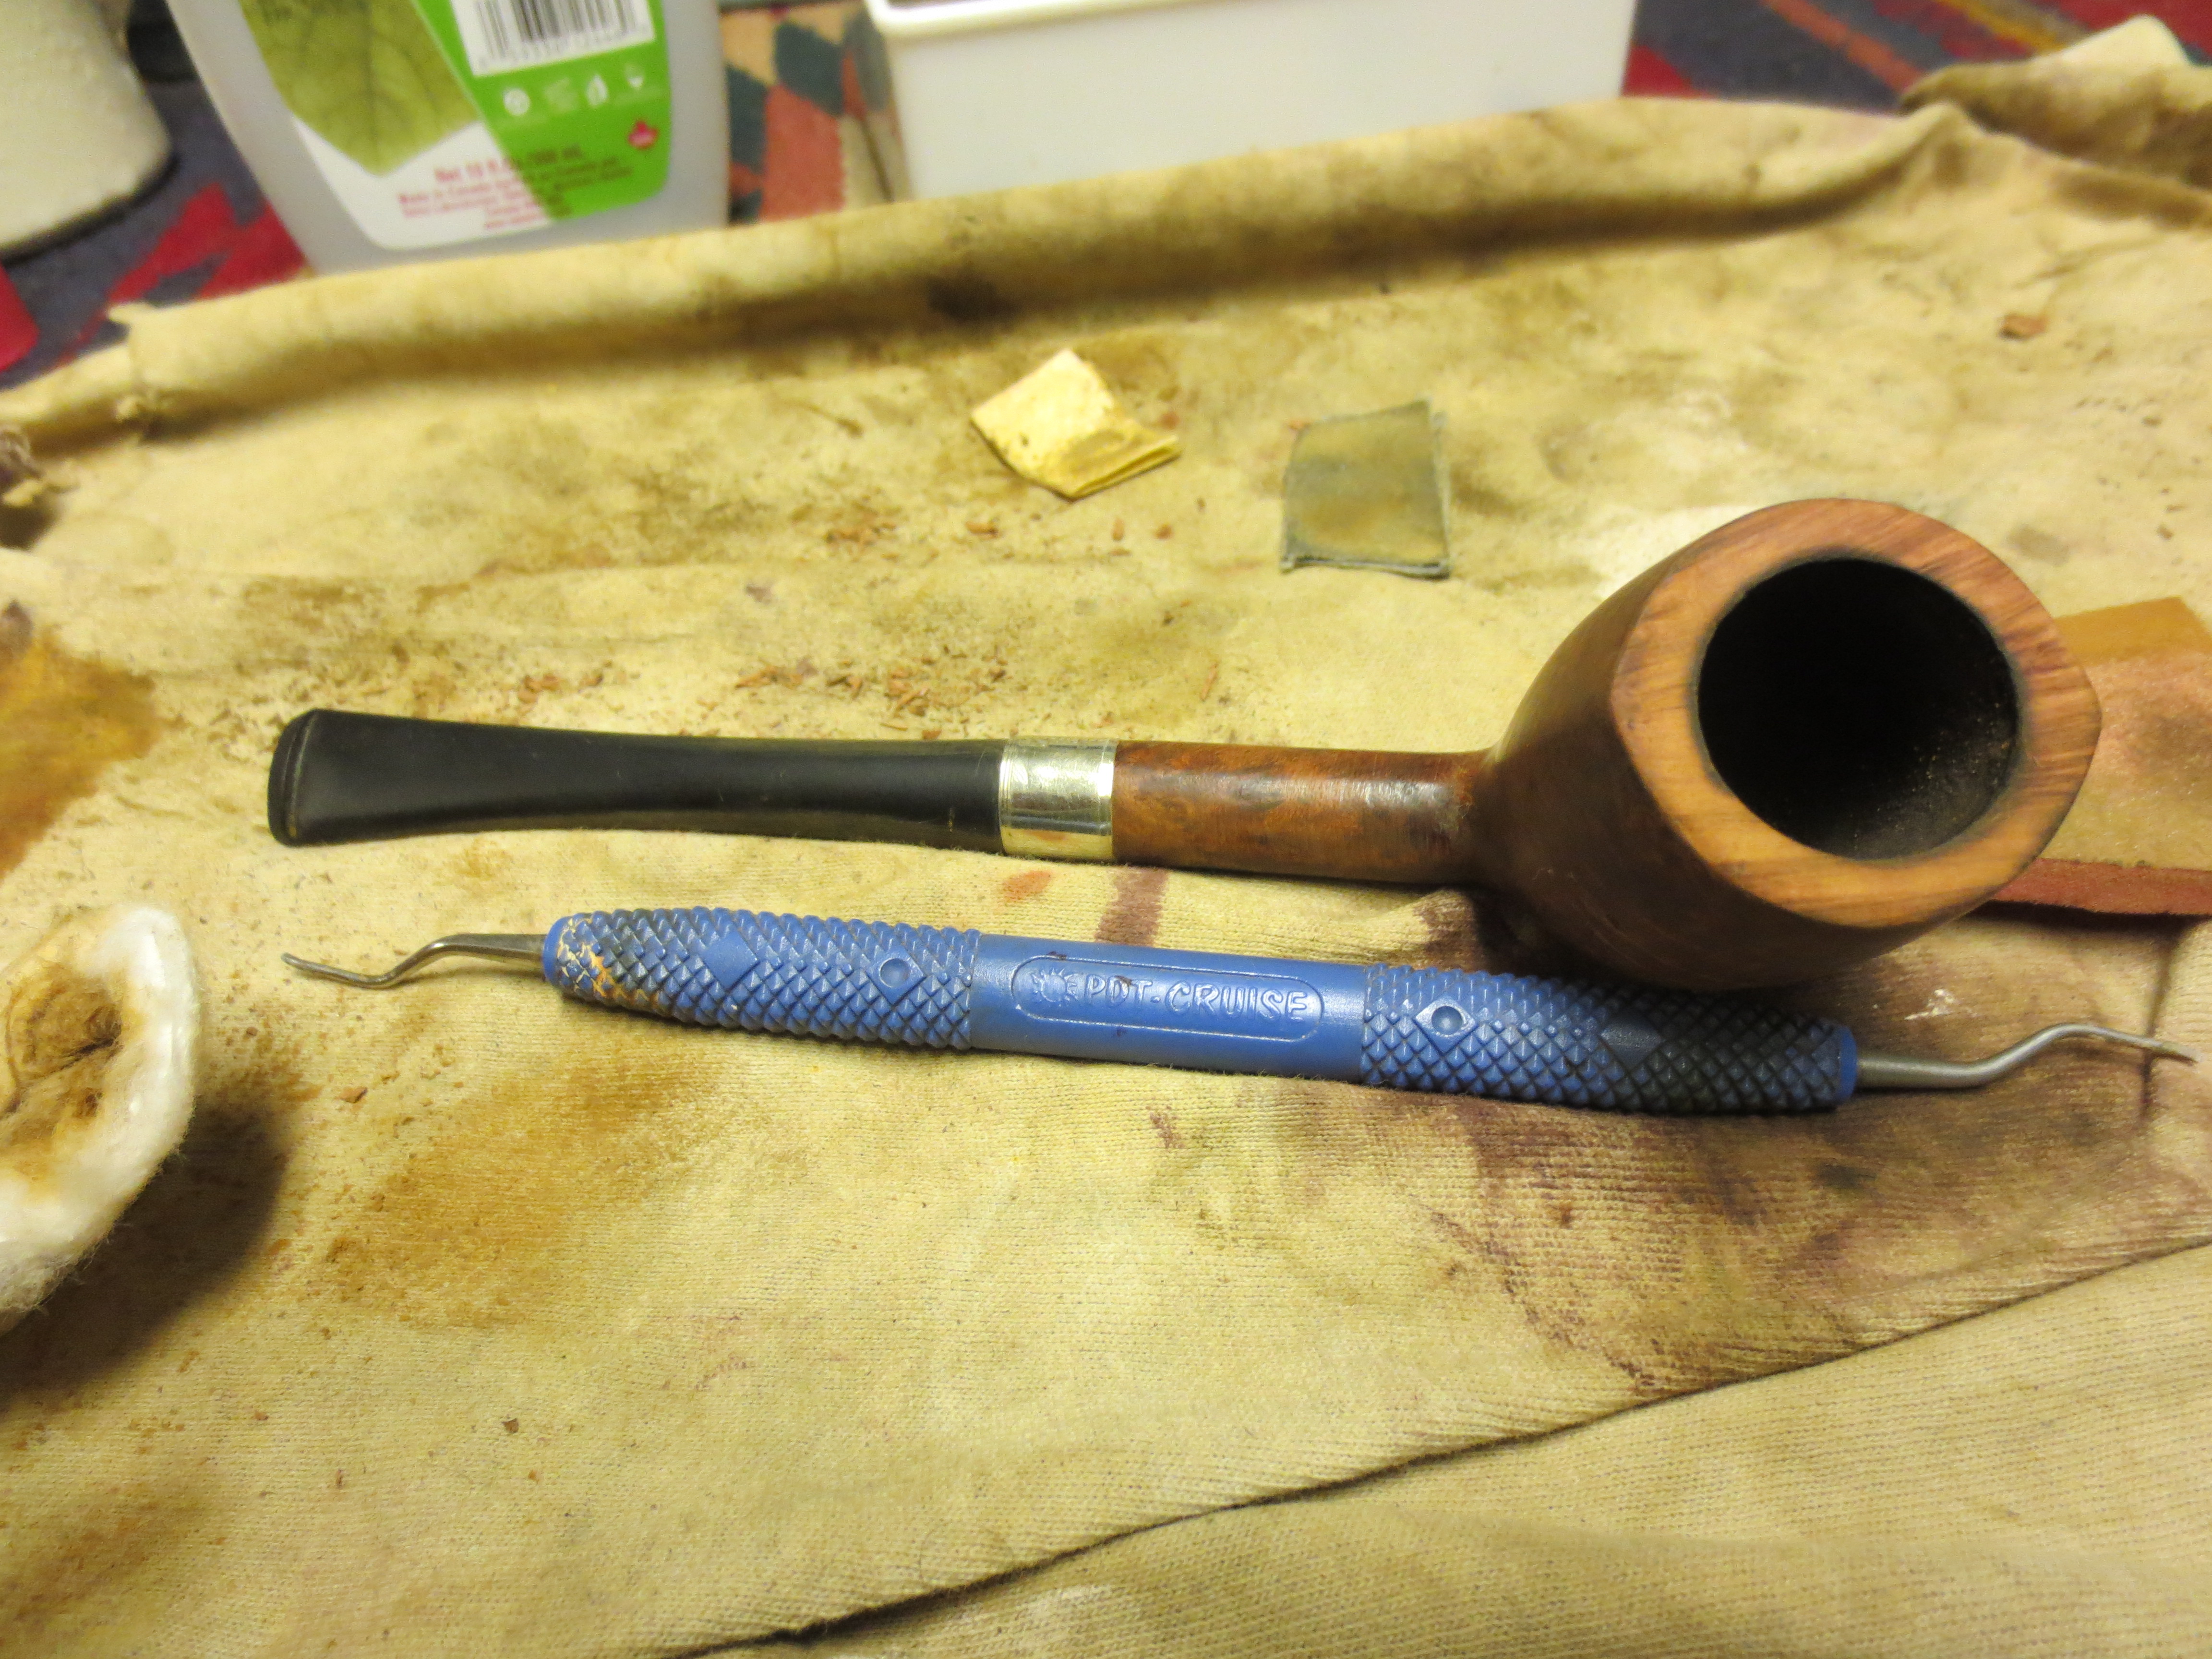
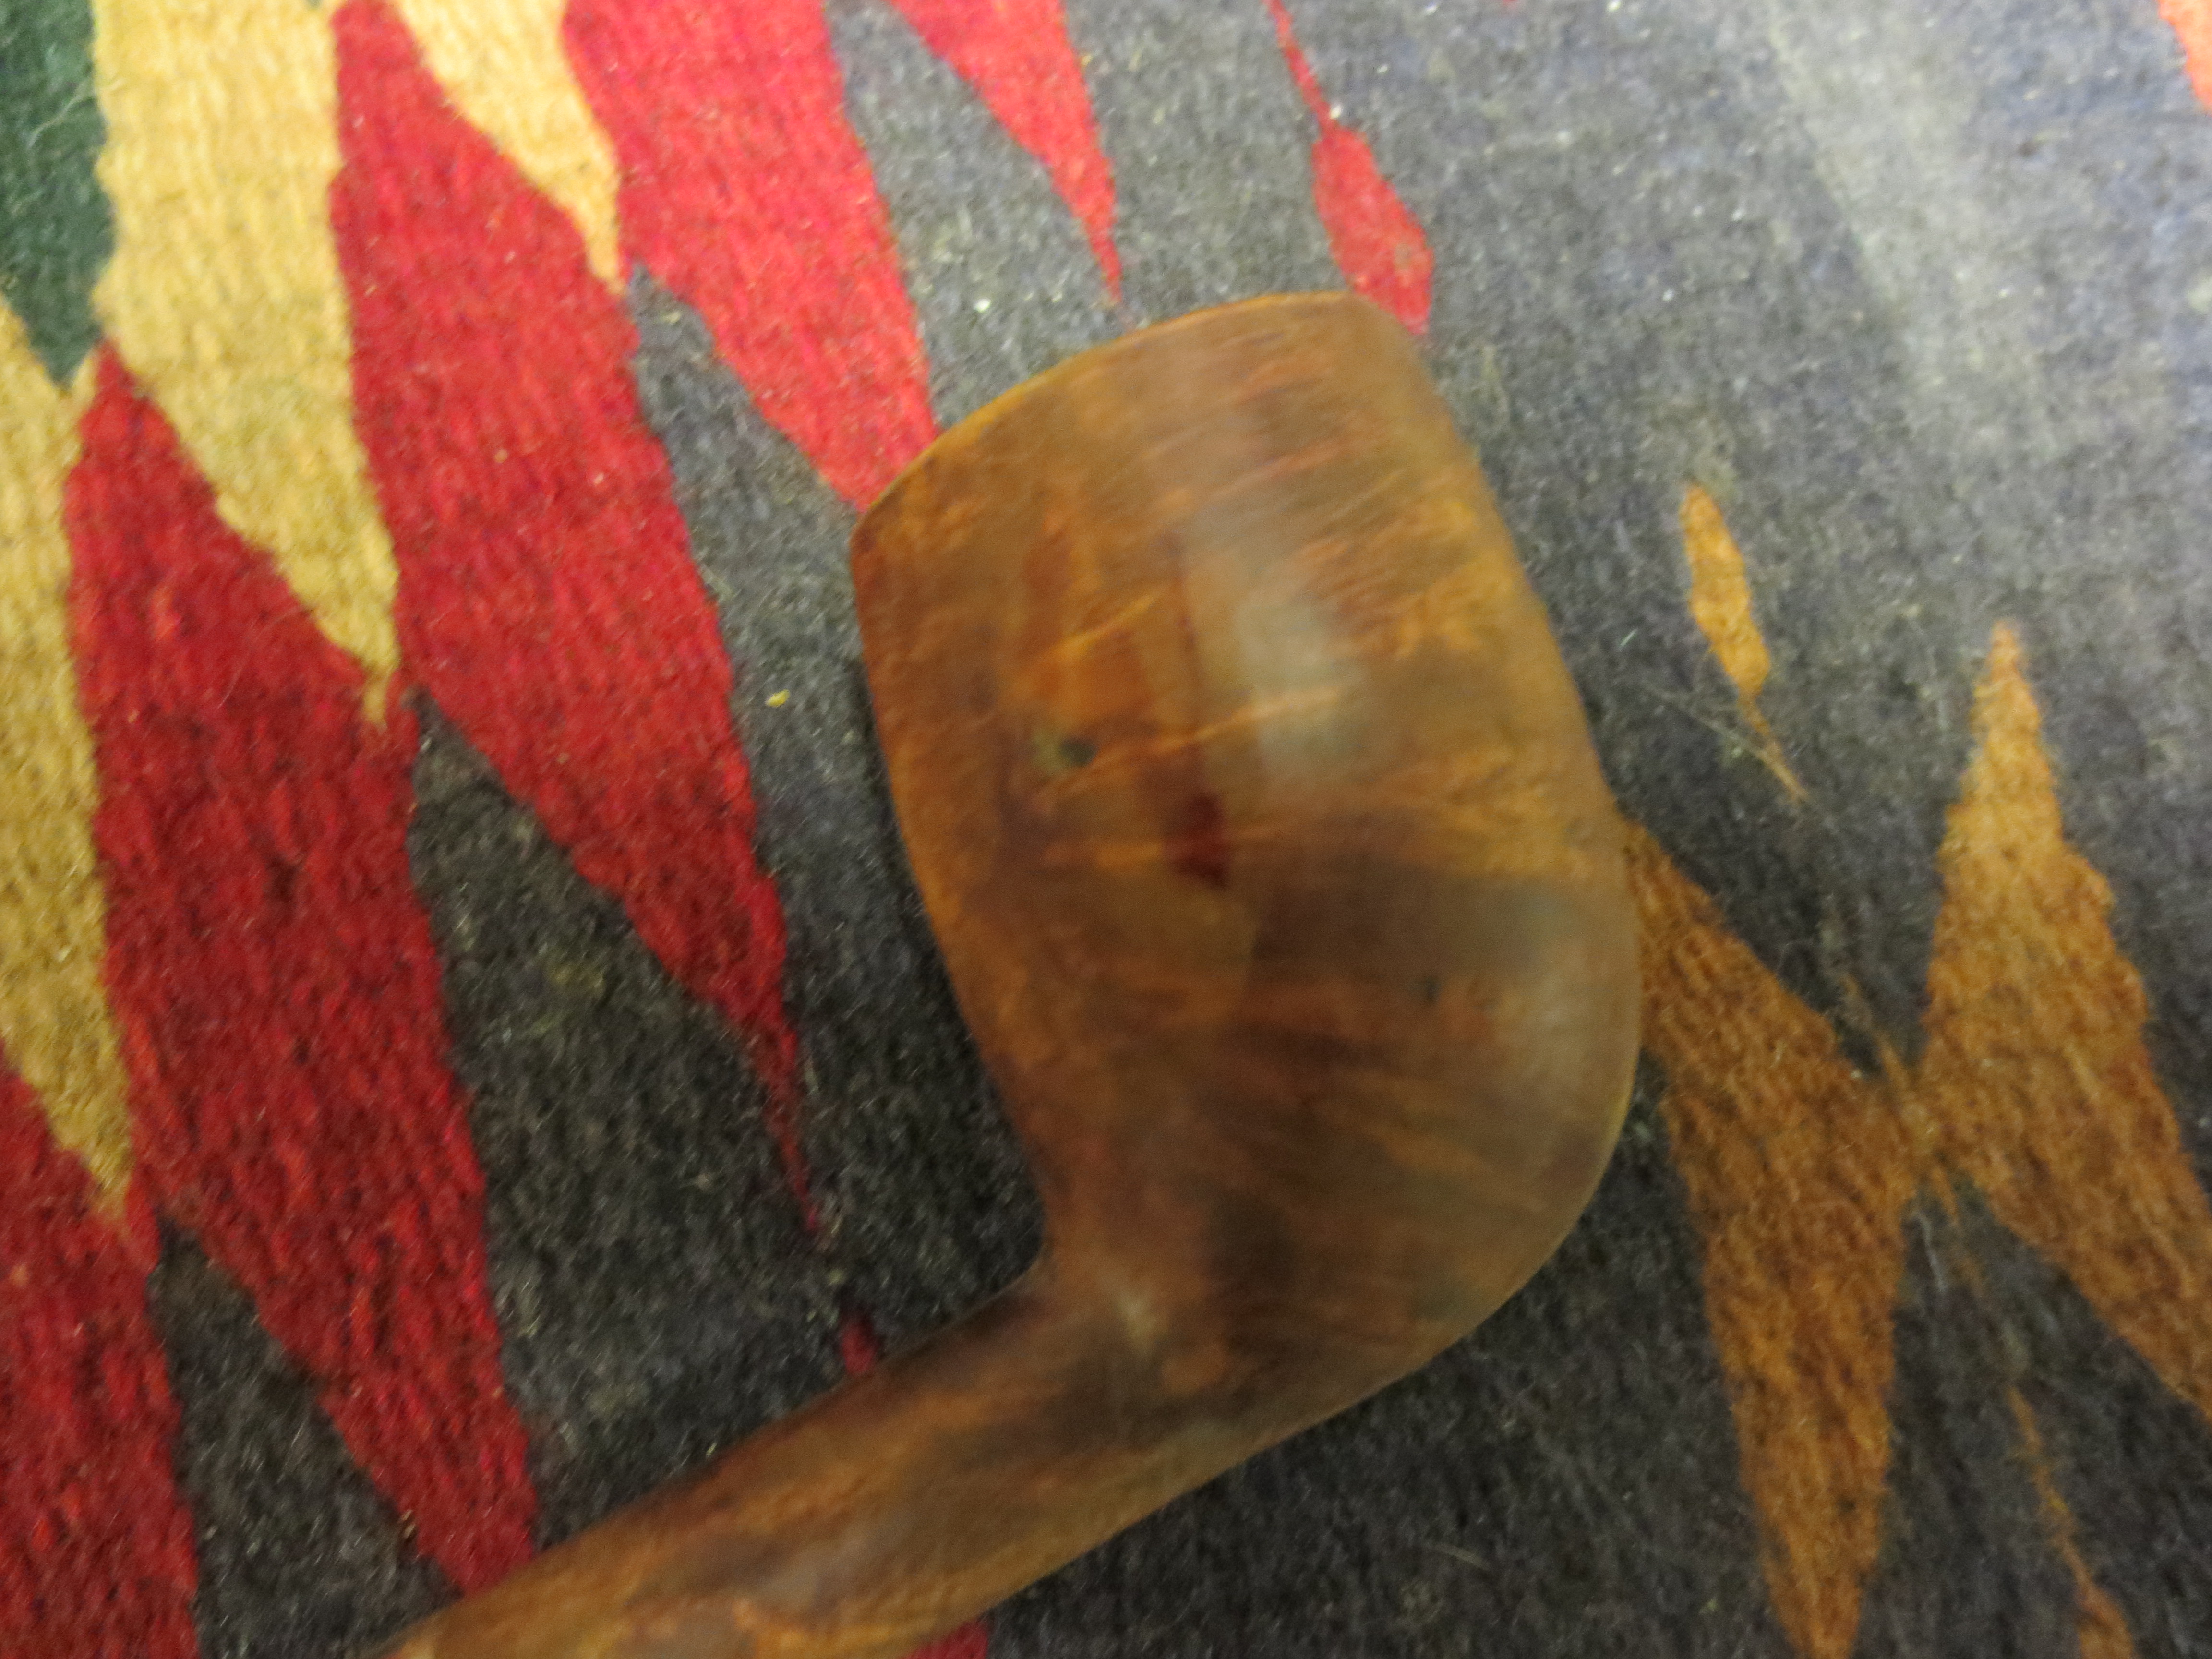
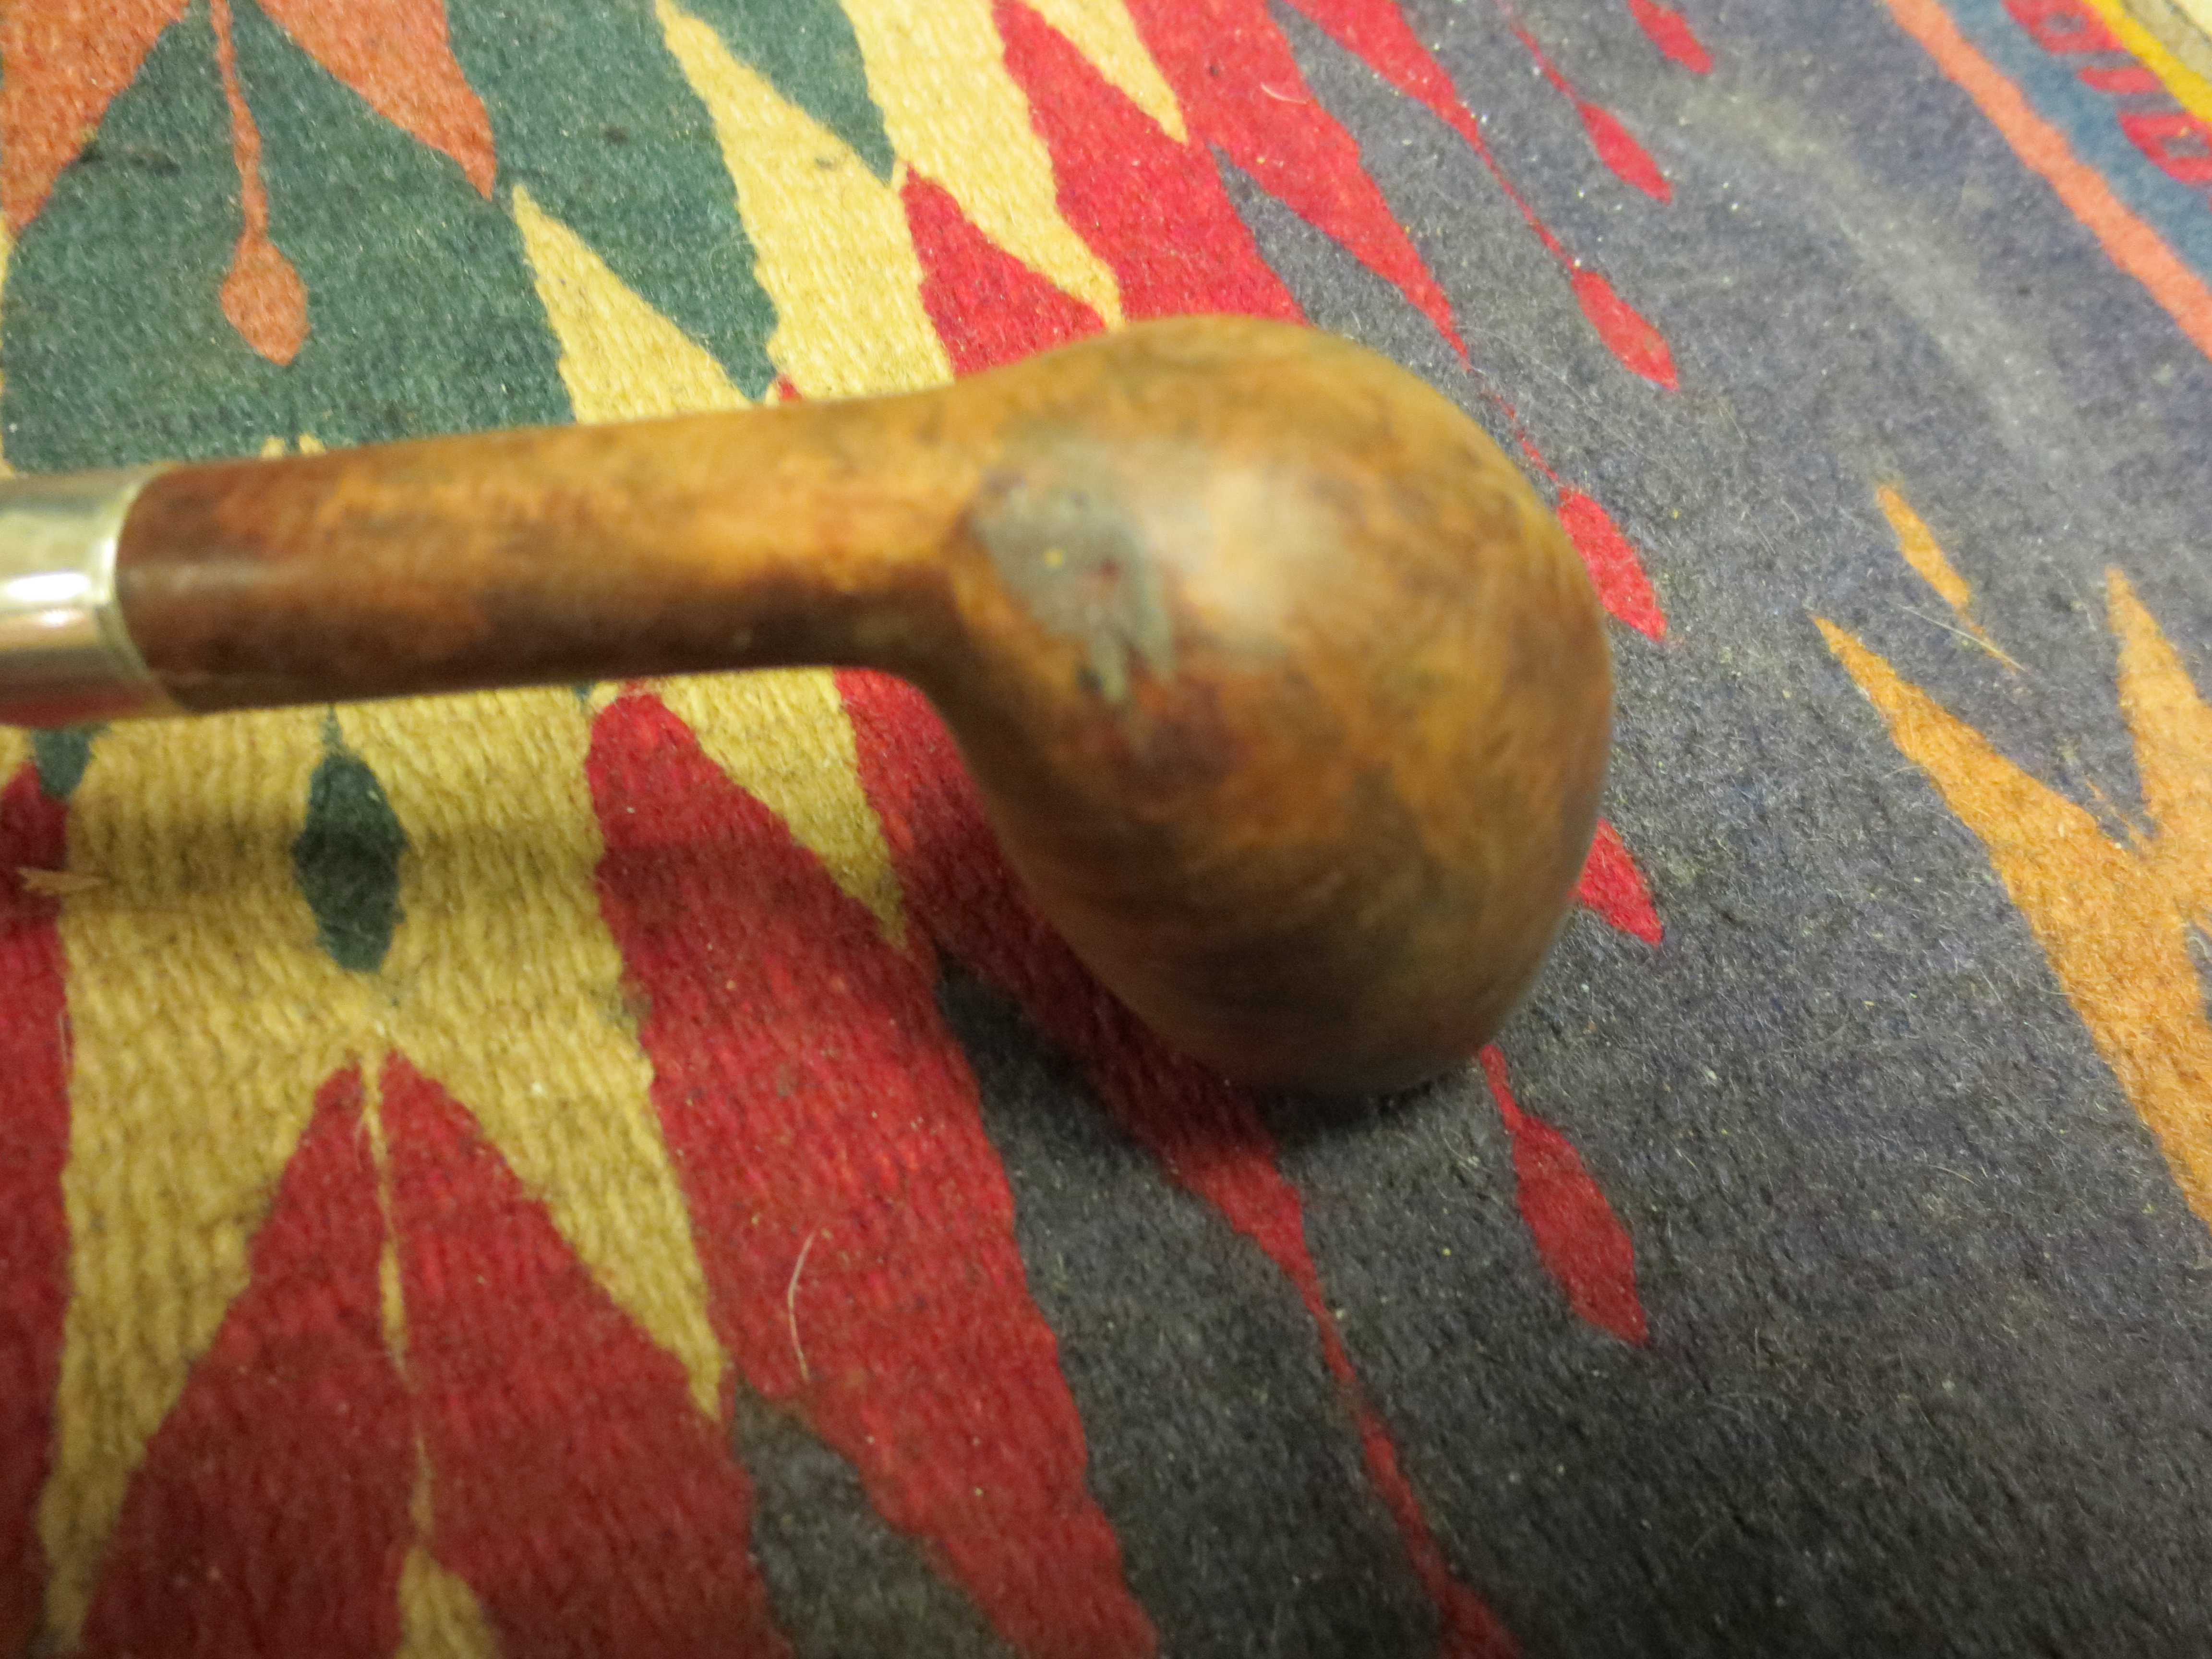
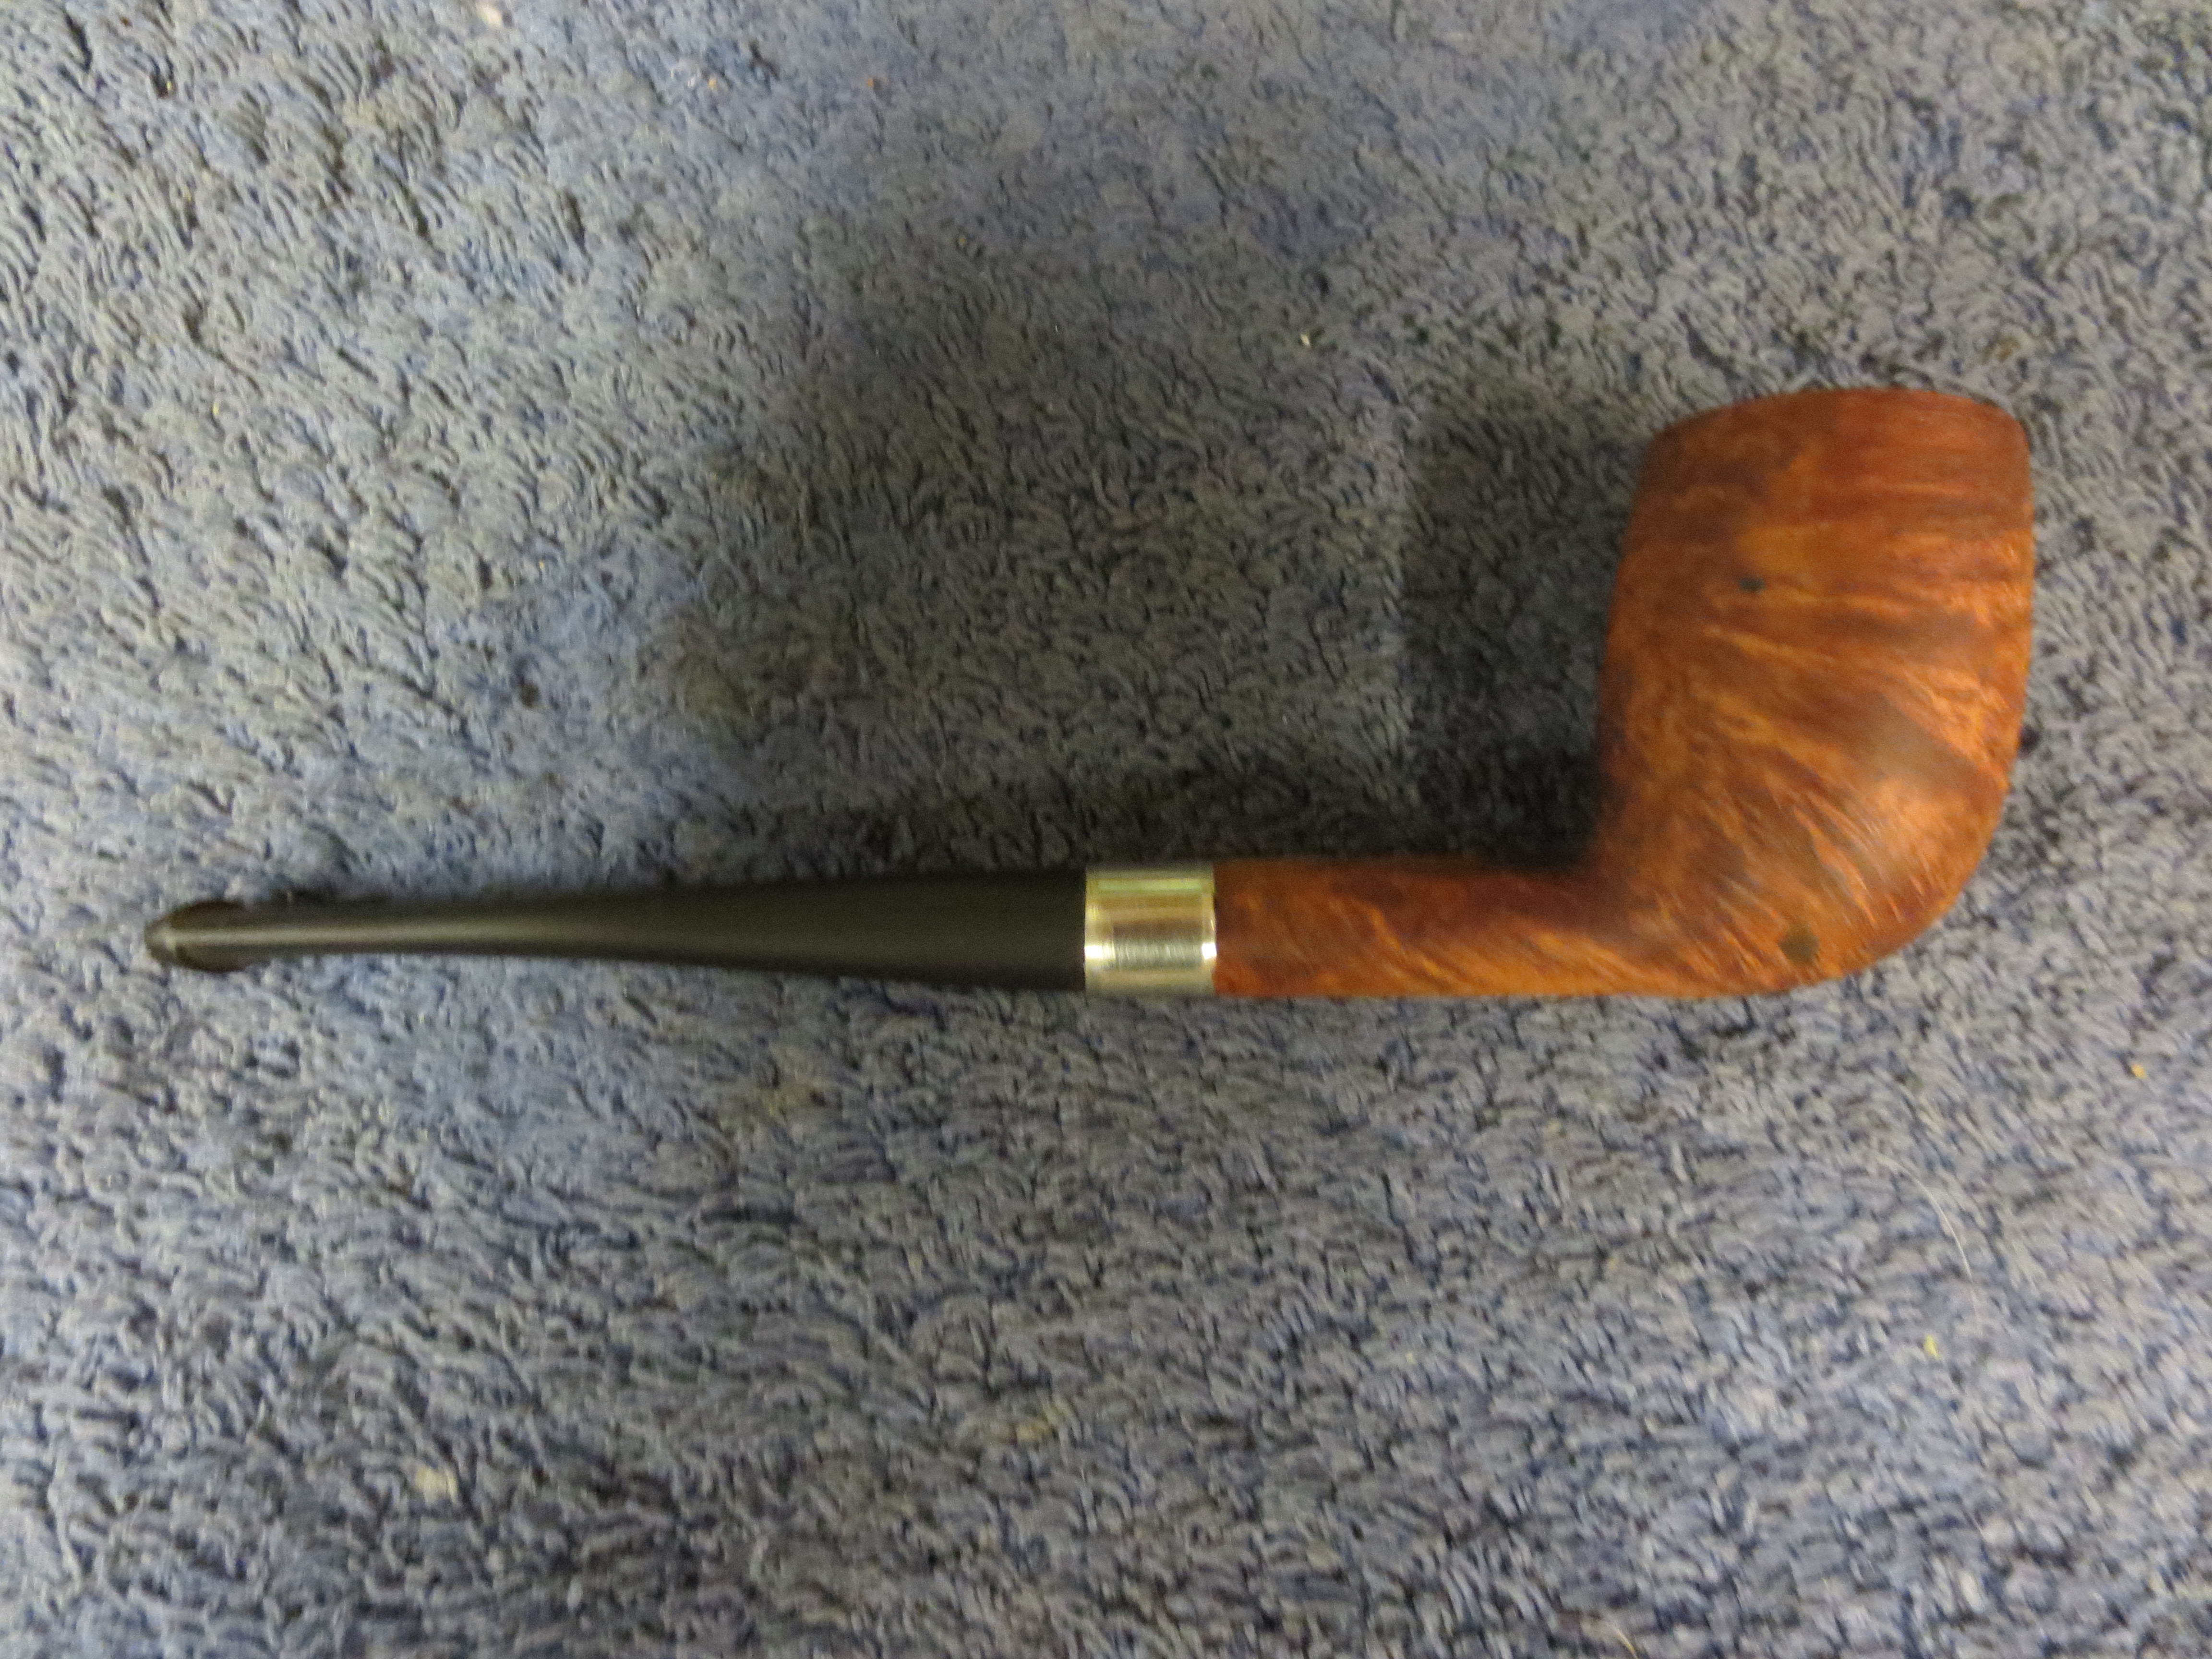
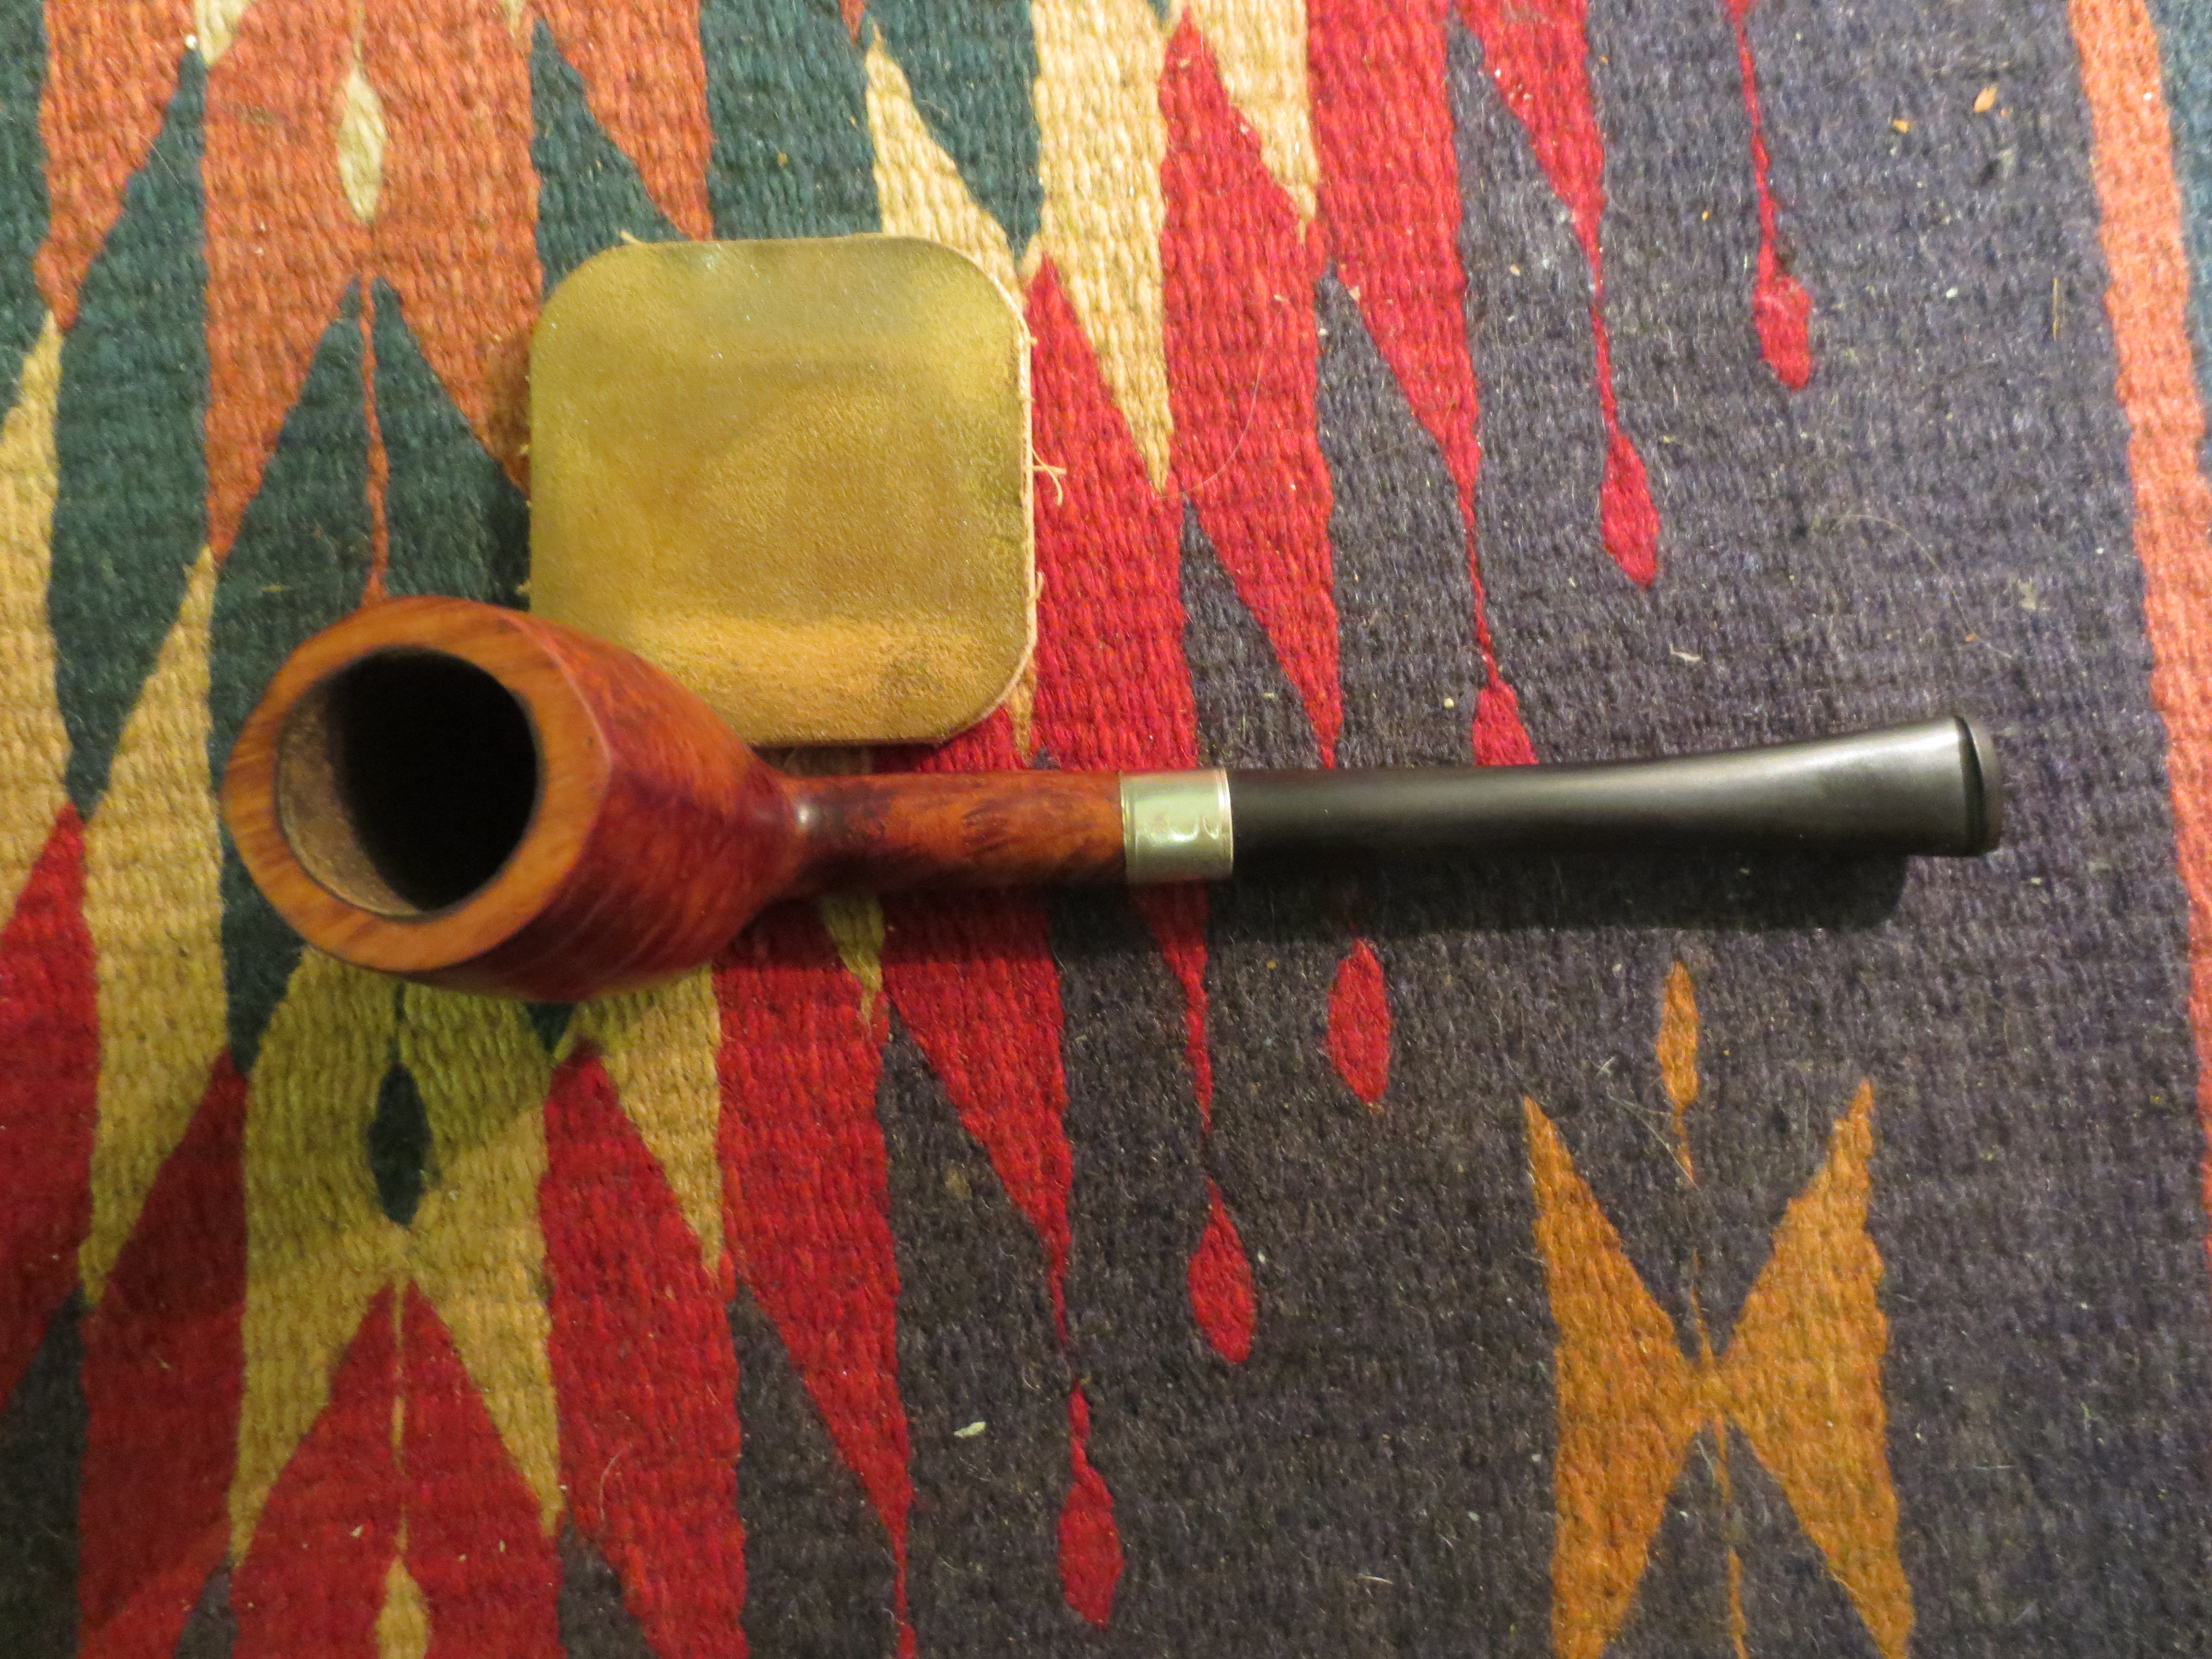
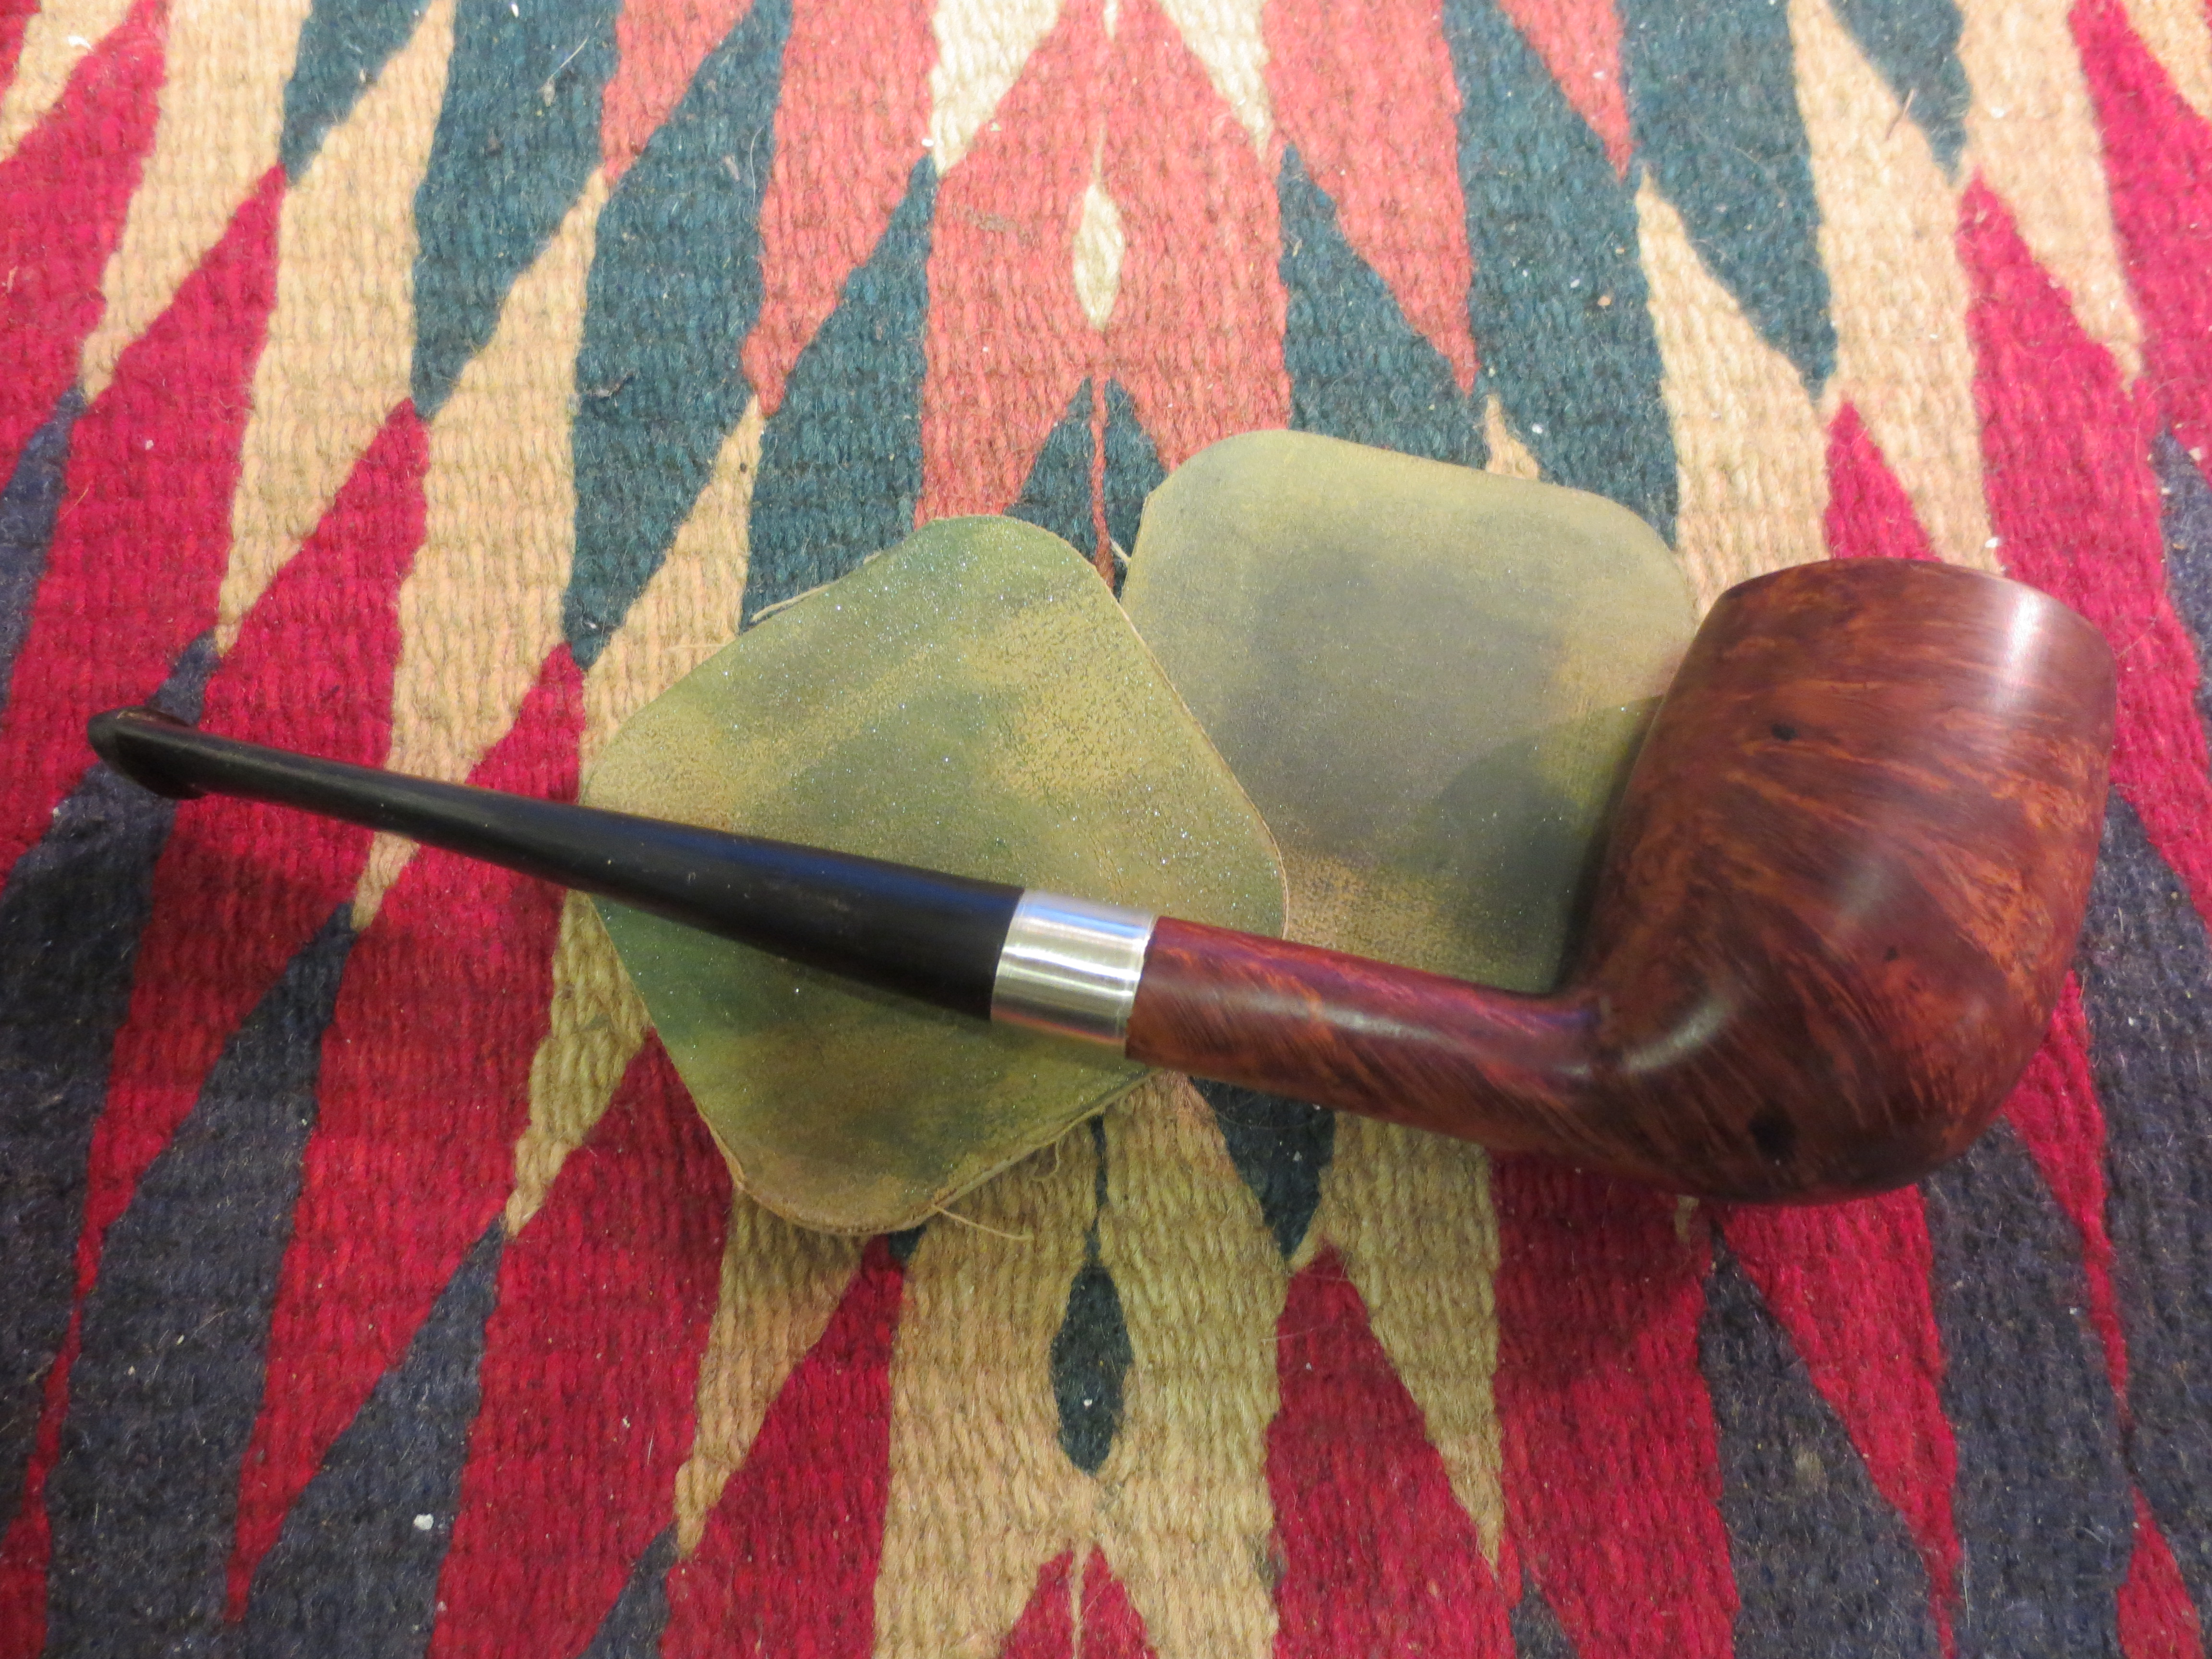
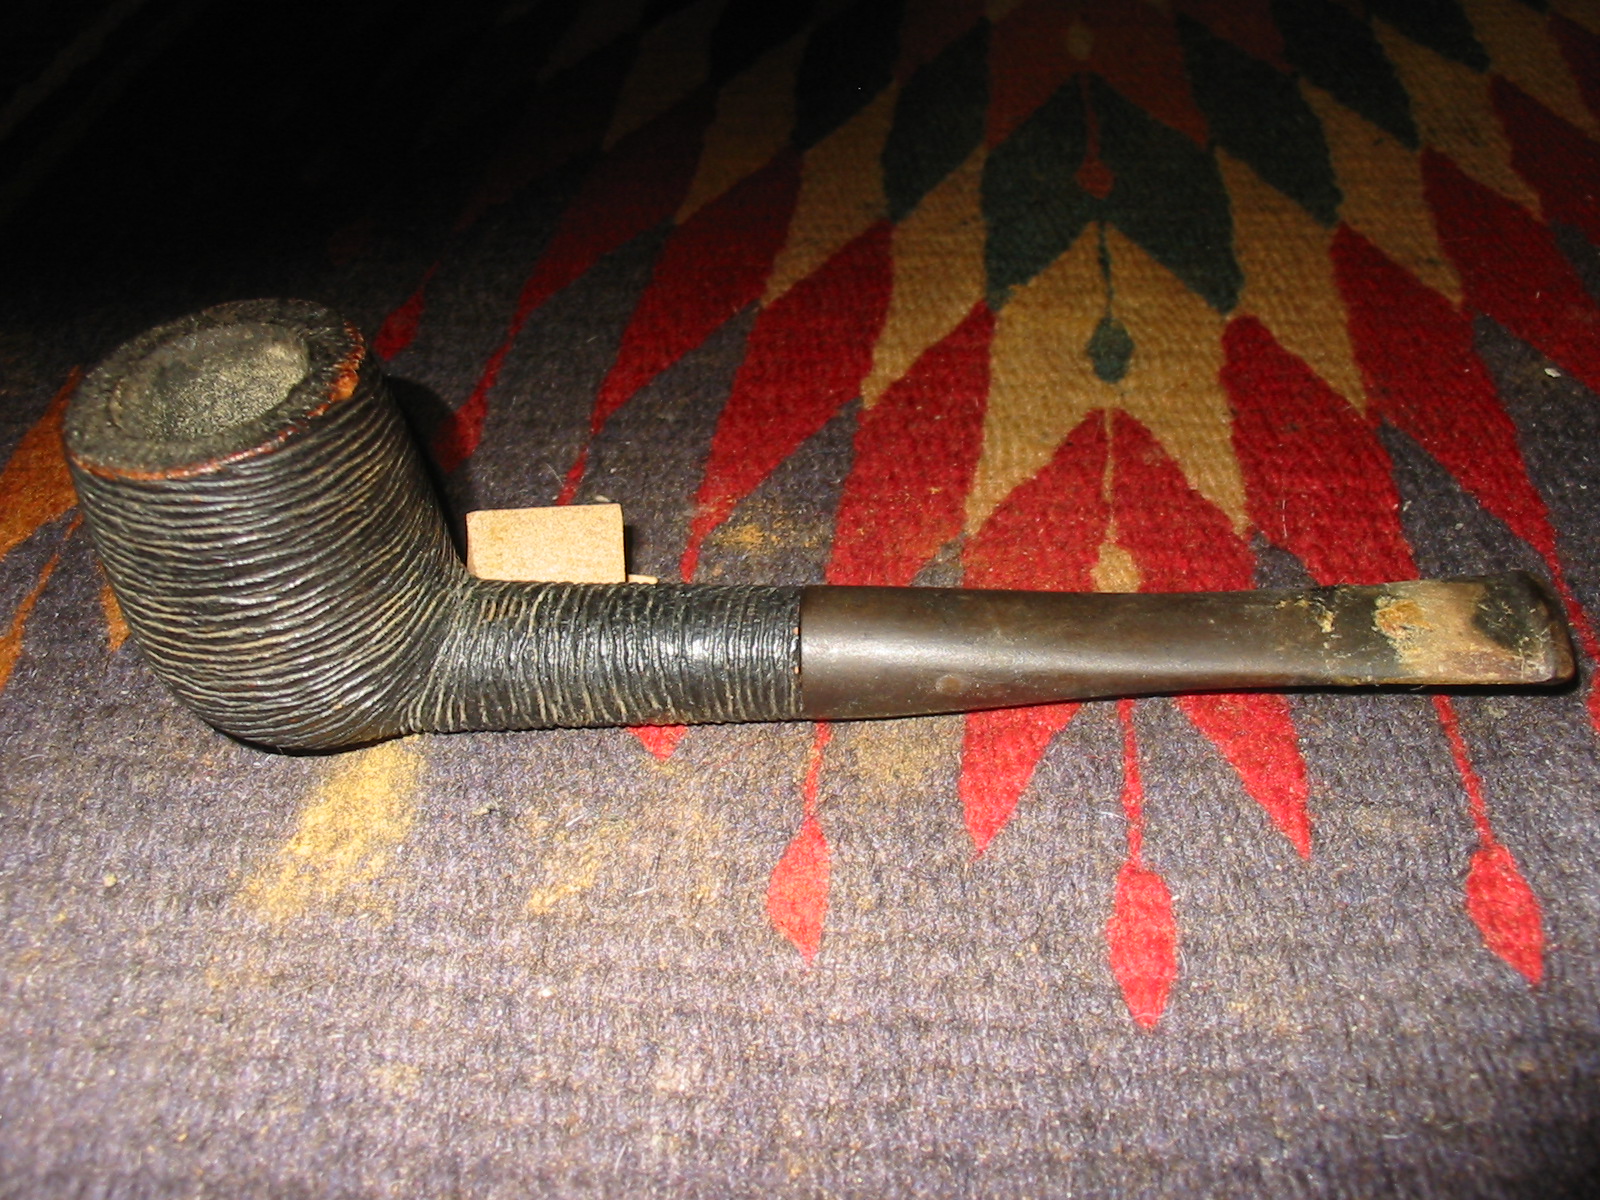
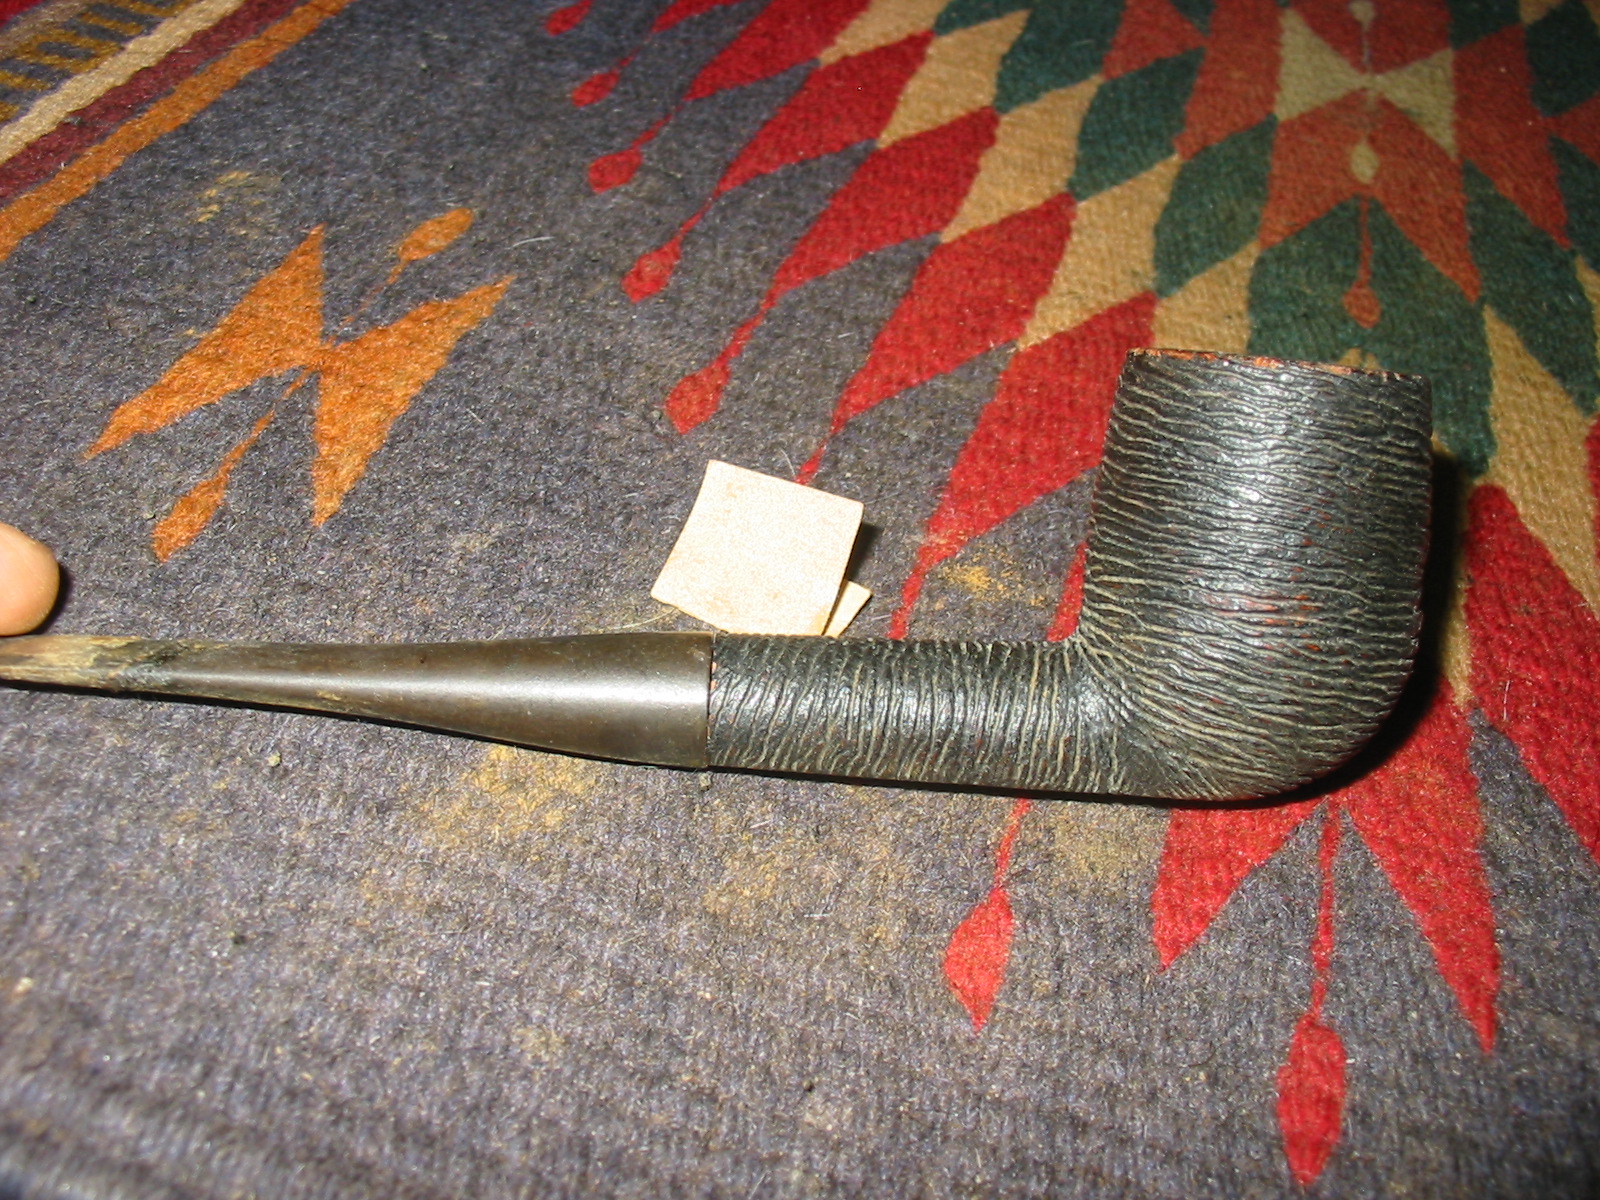
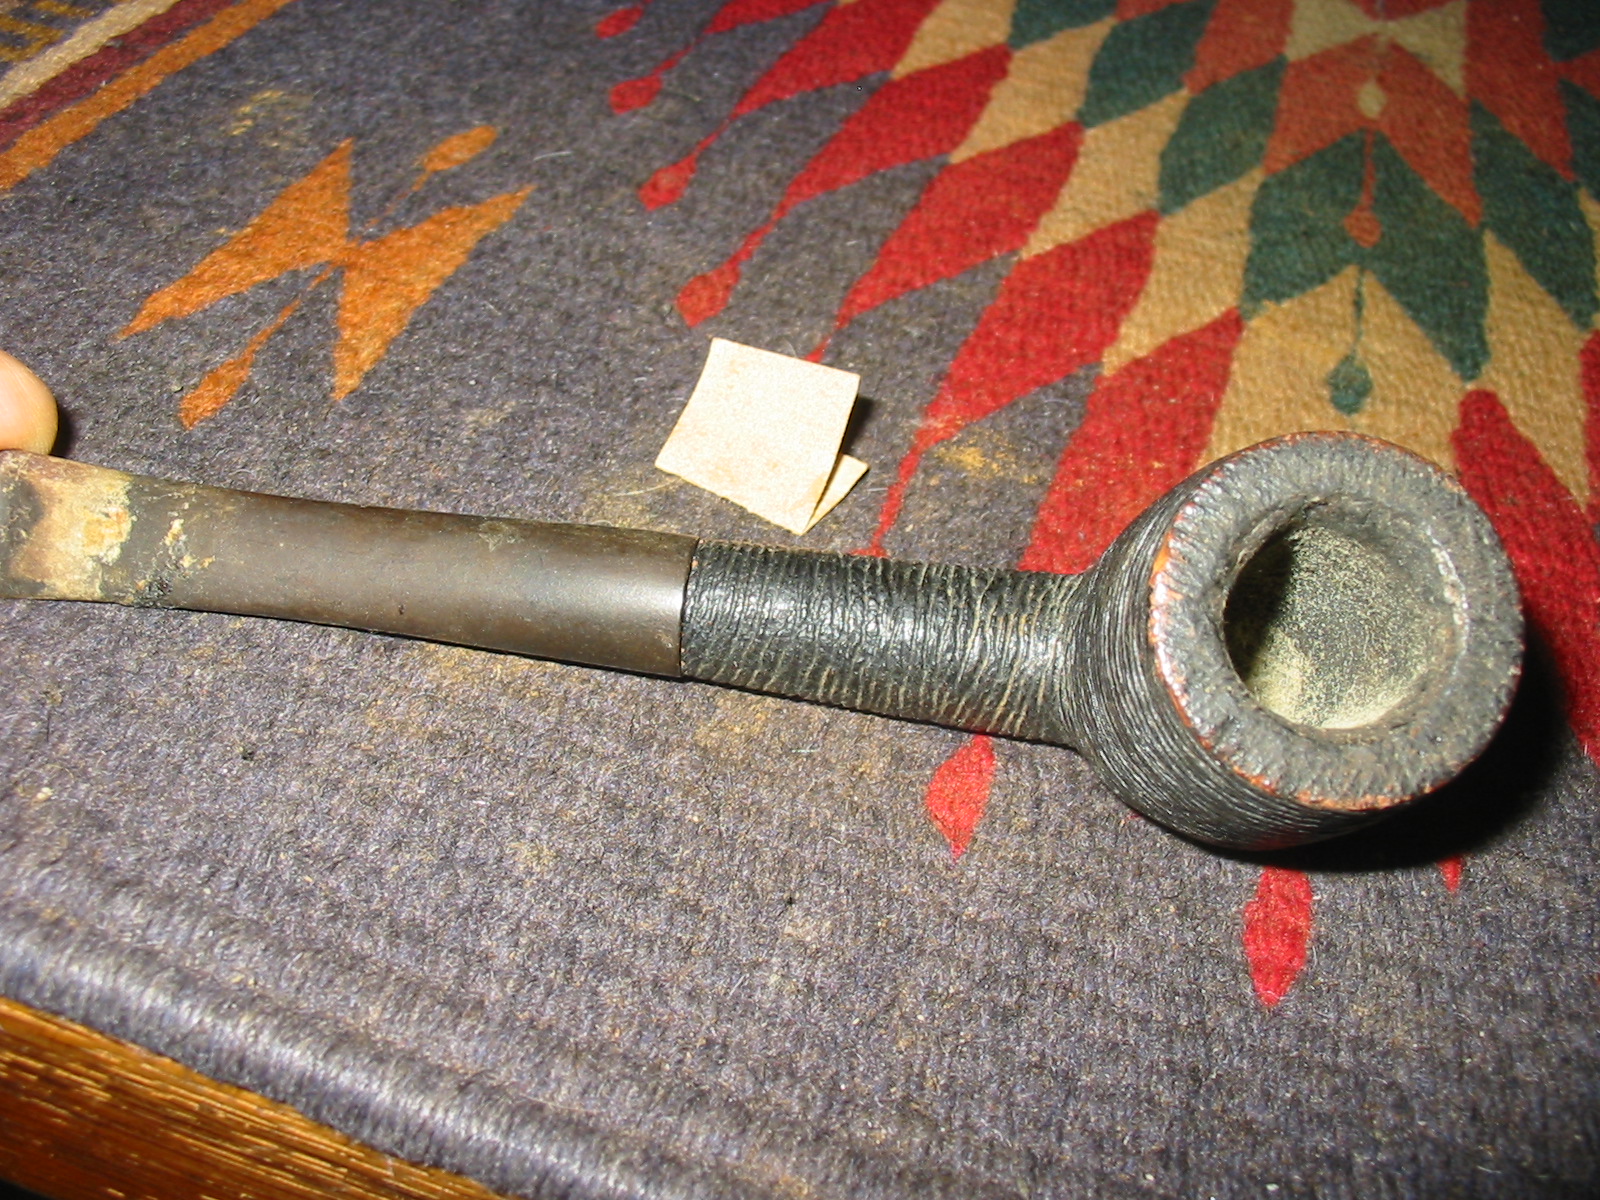
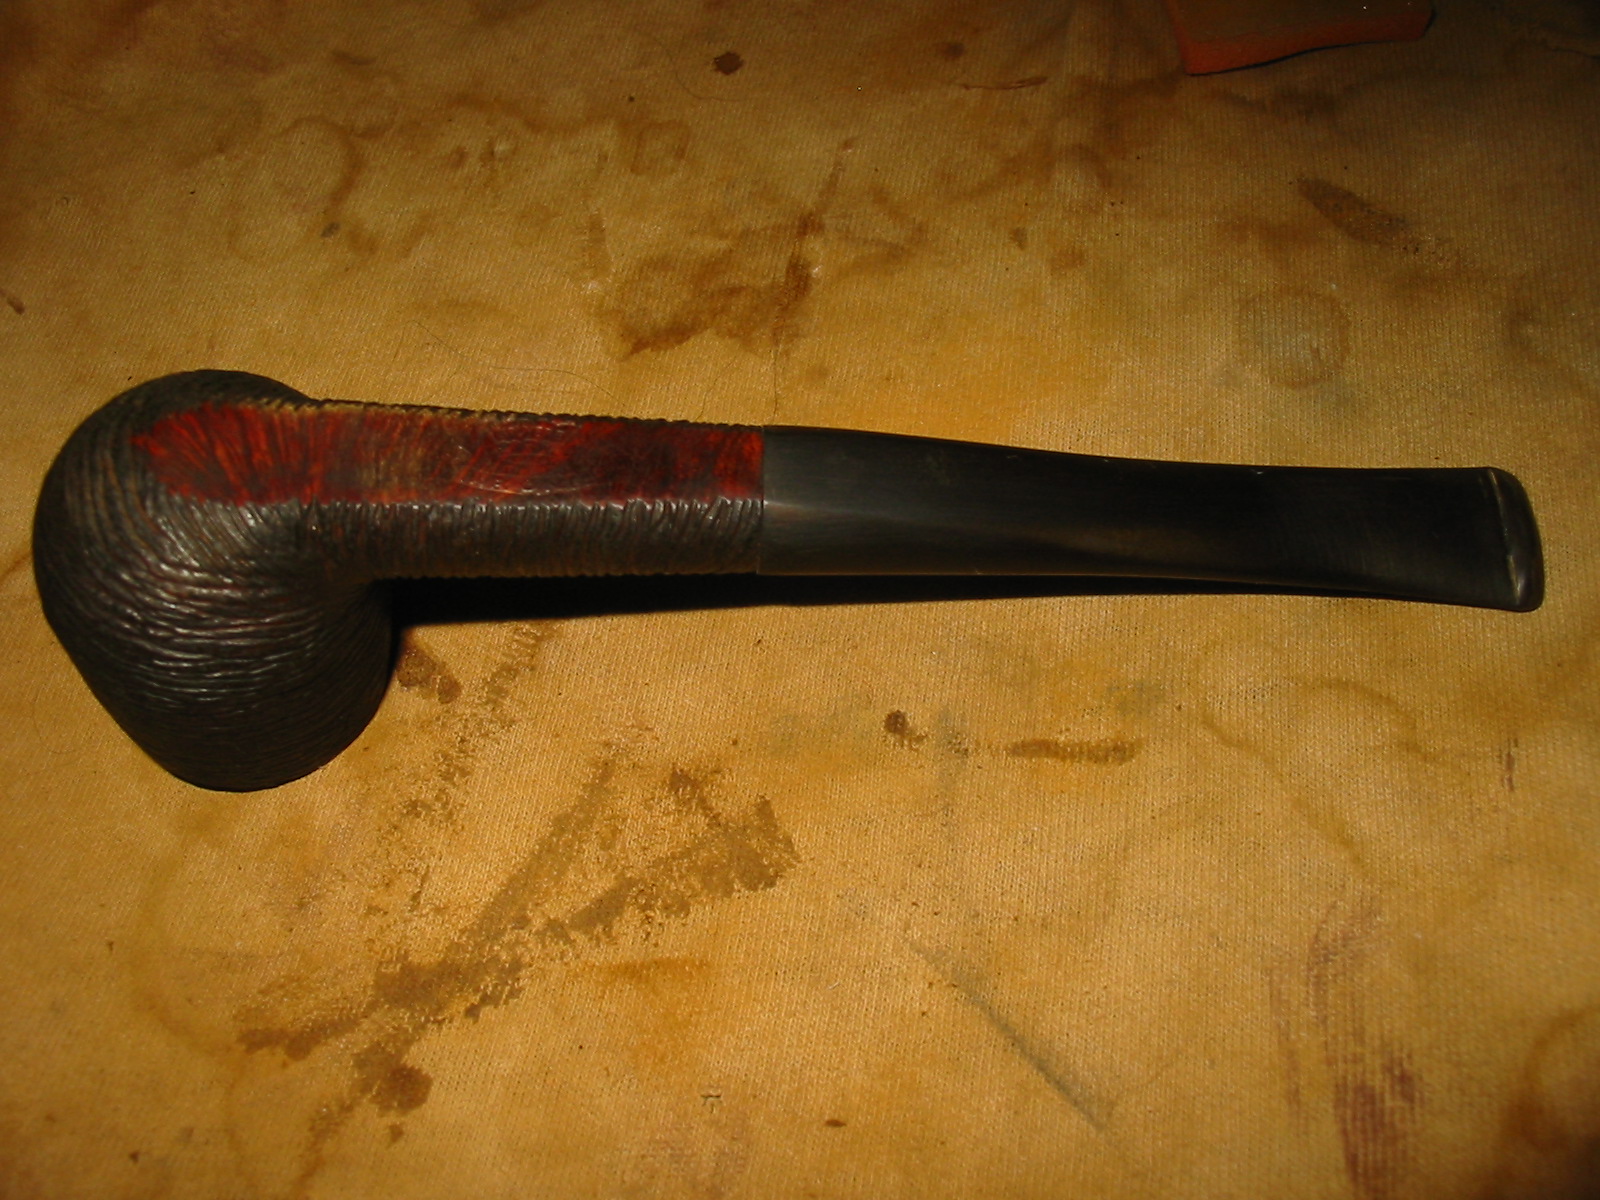
I am just about finished restemming the lot of pipe bowls I picked up on EBay. This is one of the last two pipes that I have left in the lot below. It is the fourth pipe down in the left column. It has an interesting rustication pattern that reminds of one that is done on Saseini pipes. It is striated around the bowl and then tapers up from the bottom to a striated pattern around the shank. It has a flat bottom on the shank that is smooth and stamped Bruyere in a crown with a large R in the centre of the band on the crown. Underneath the crown is an unfurled banner that is stamped K R O N E. I have no idea of who the maker is or when and where it was made. The stamping is faint so I may be missing a few letters but I think this is an accurate rendering of what is stamped. The finish was pretty dirty with grime in the grooves on the bowl and shank. The rim was caked with a tarry buildup and the grooving on the rim was not visible. There were also place on the finish where the stain was missing and the briar underneath exposed. The inside of the bowl had dust and cob webs and a pretty large cake buildup that would need to be removed. The bowl came without a stem and fitting one would take flattening of the stem on the underside to match the shank.

bowls1

sas

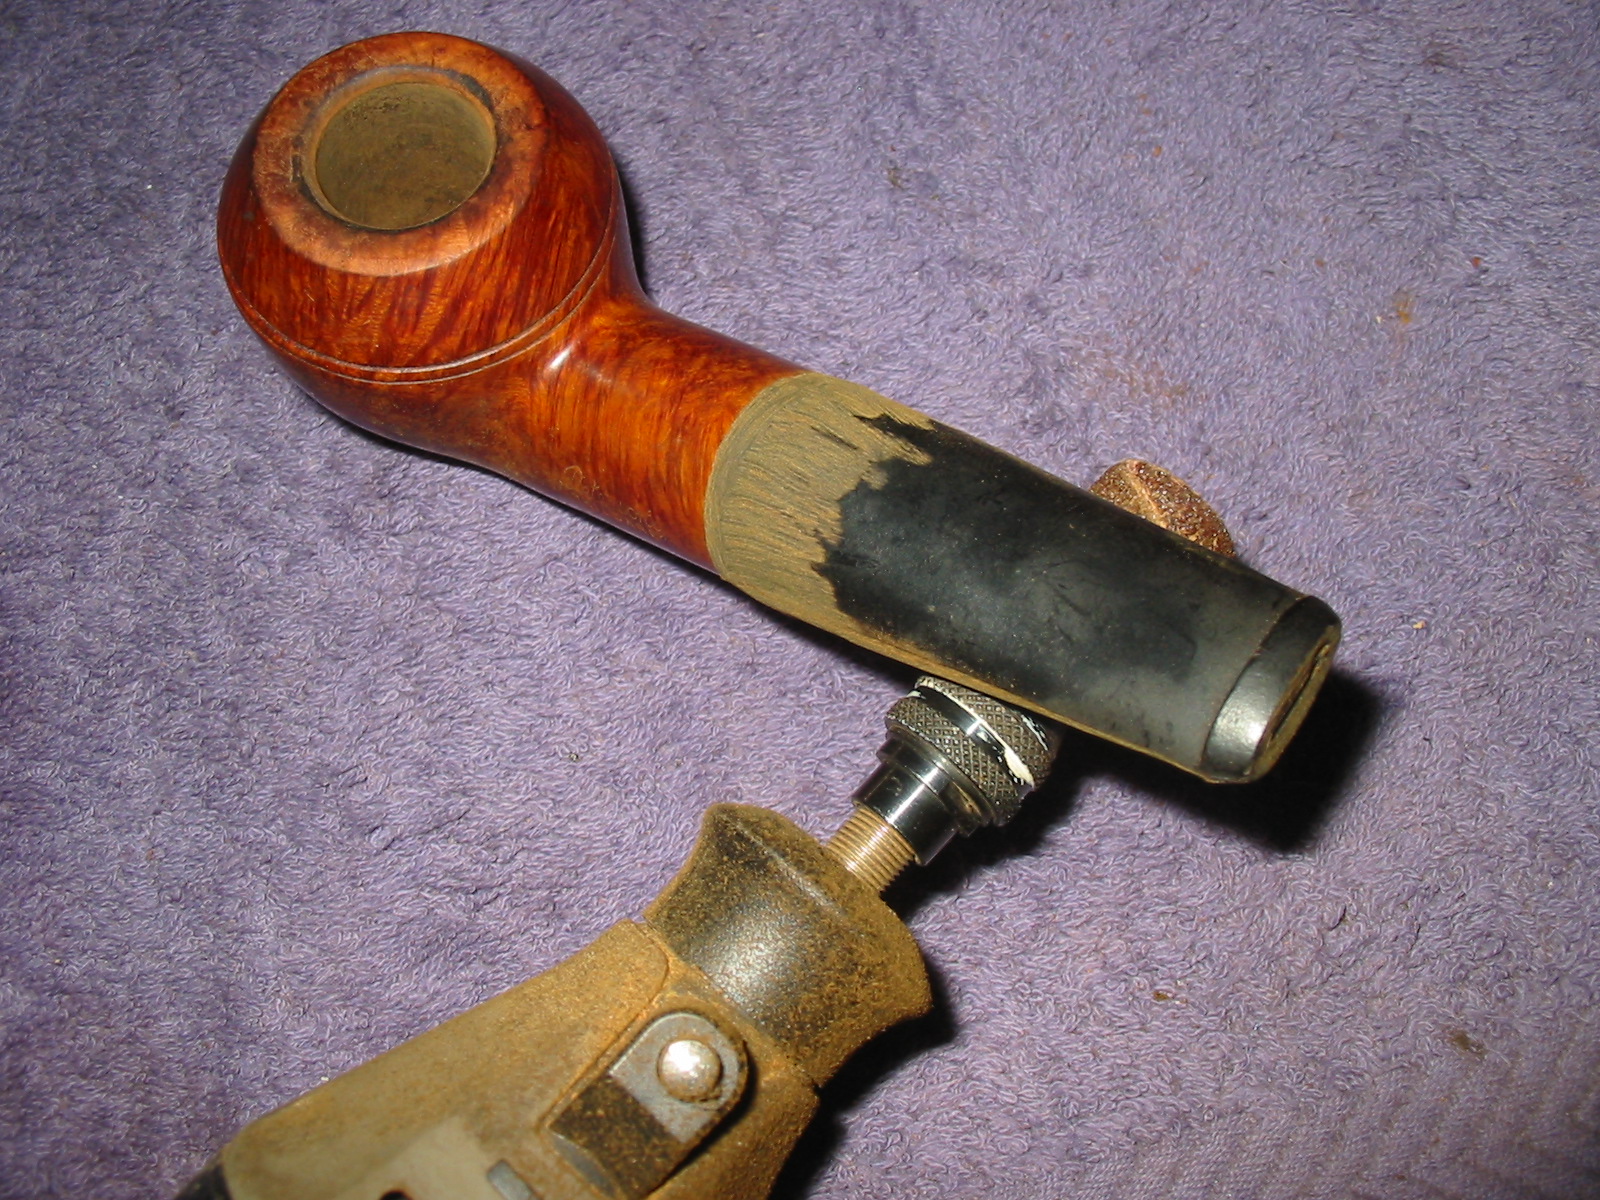
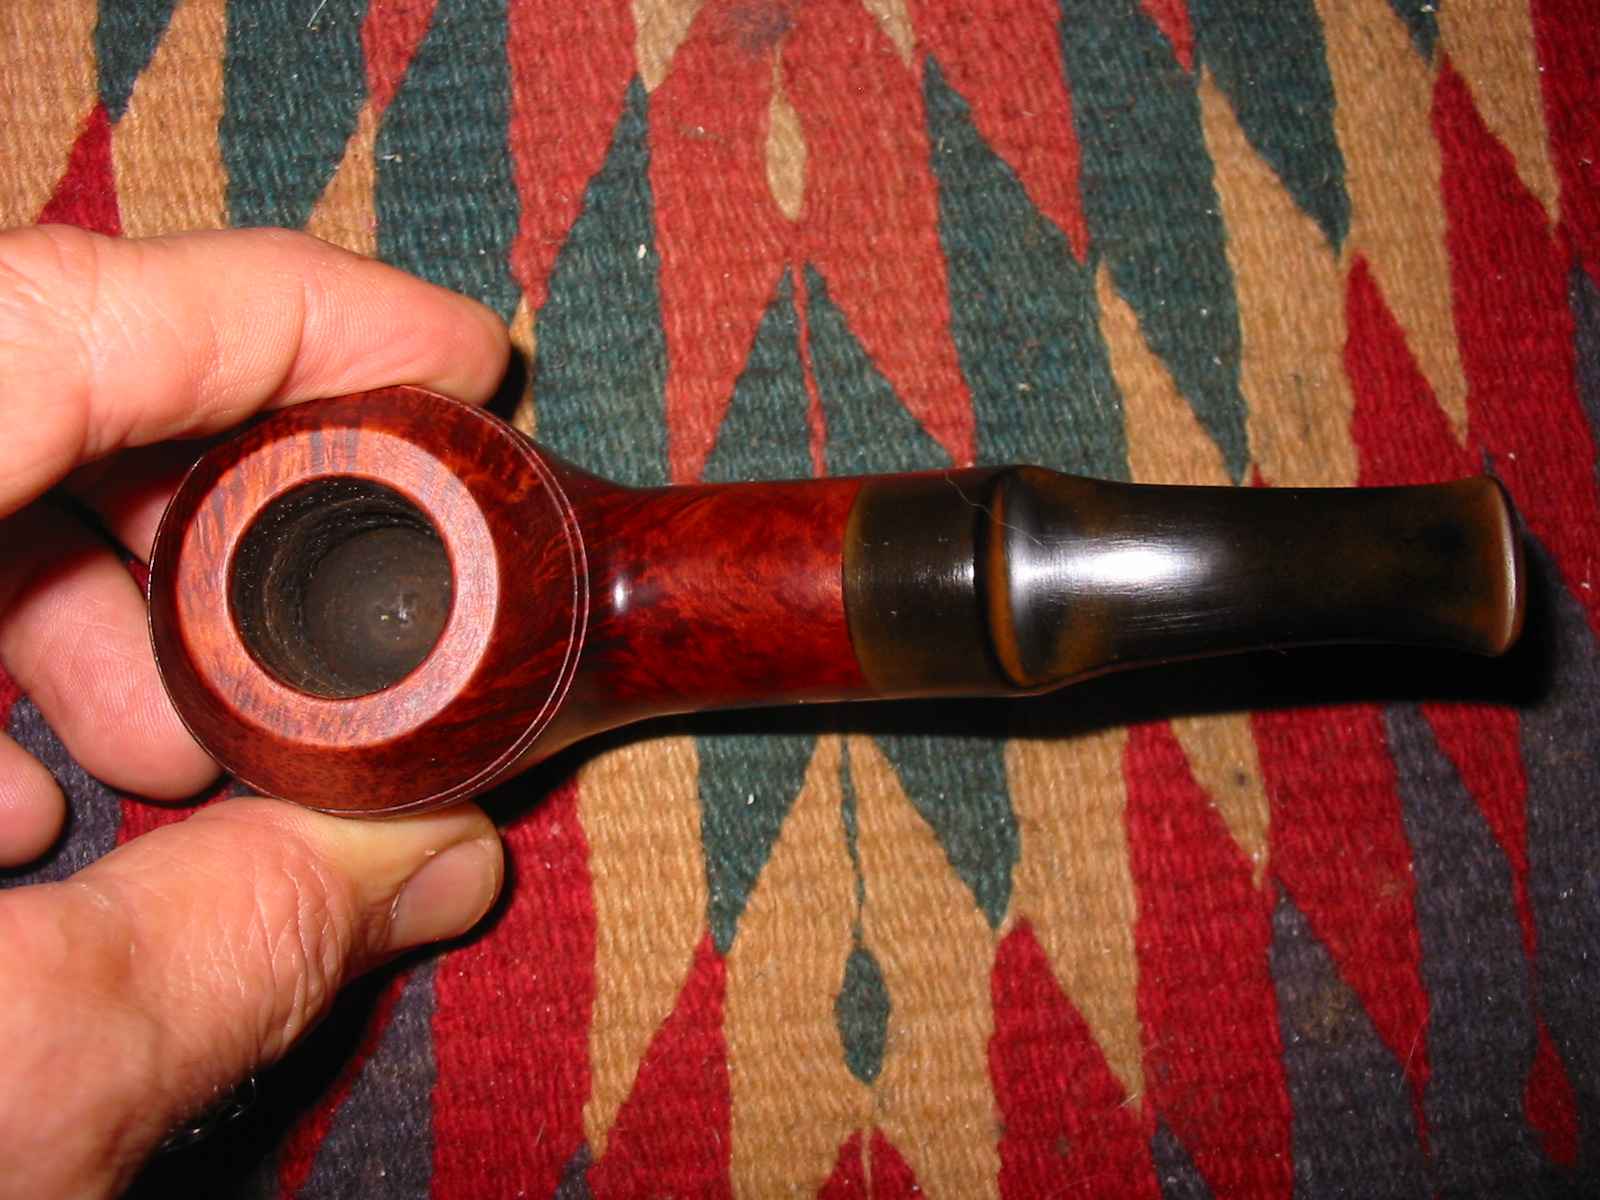
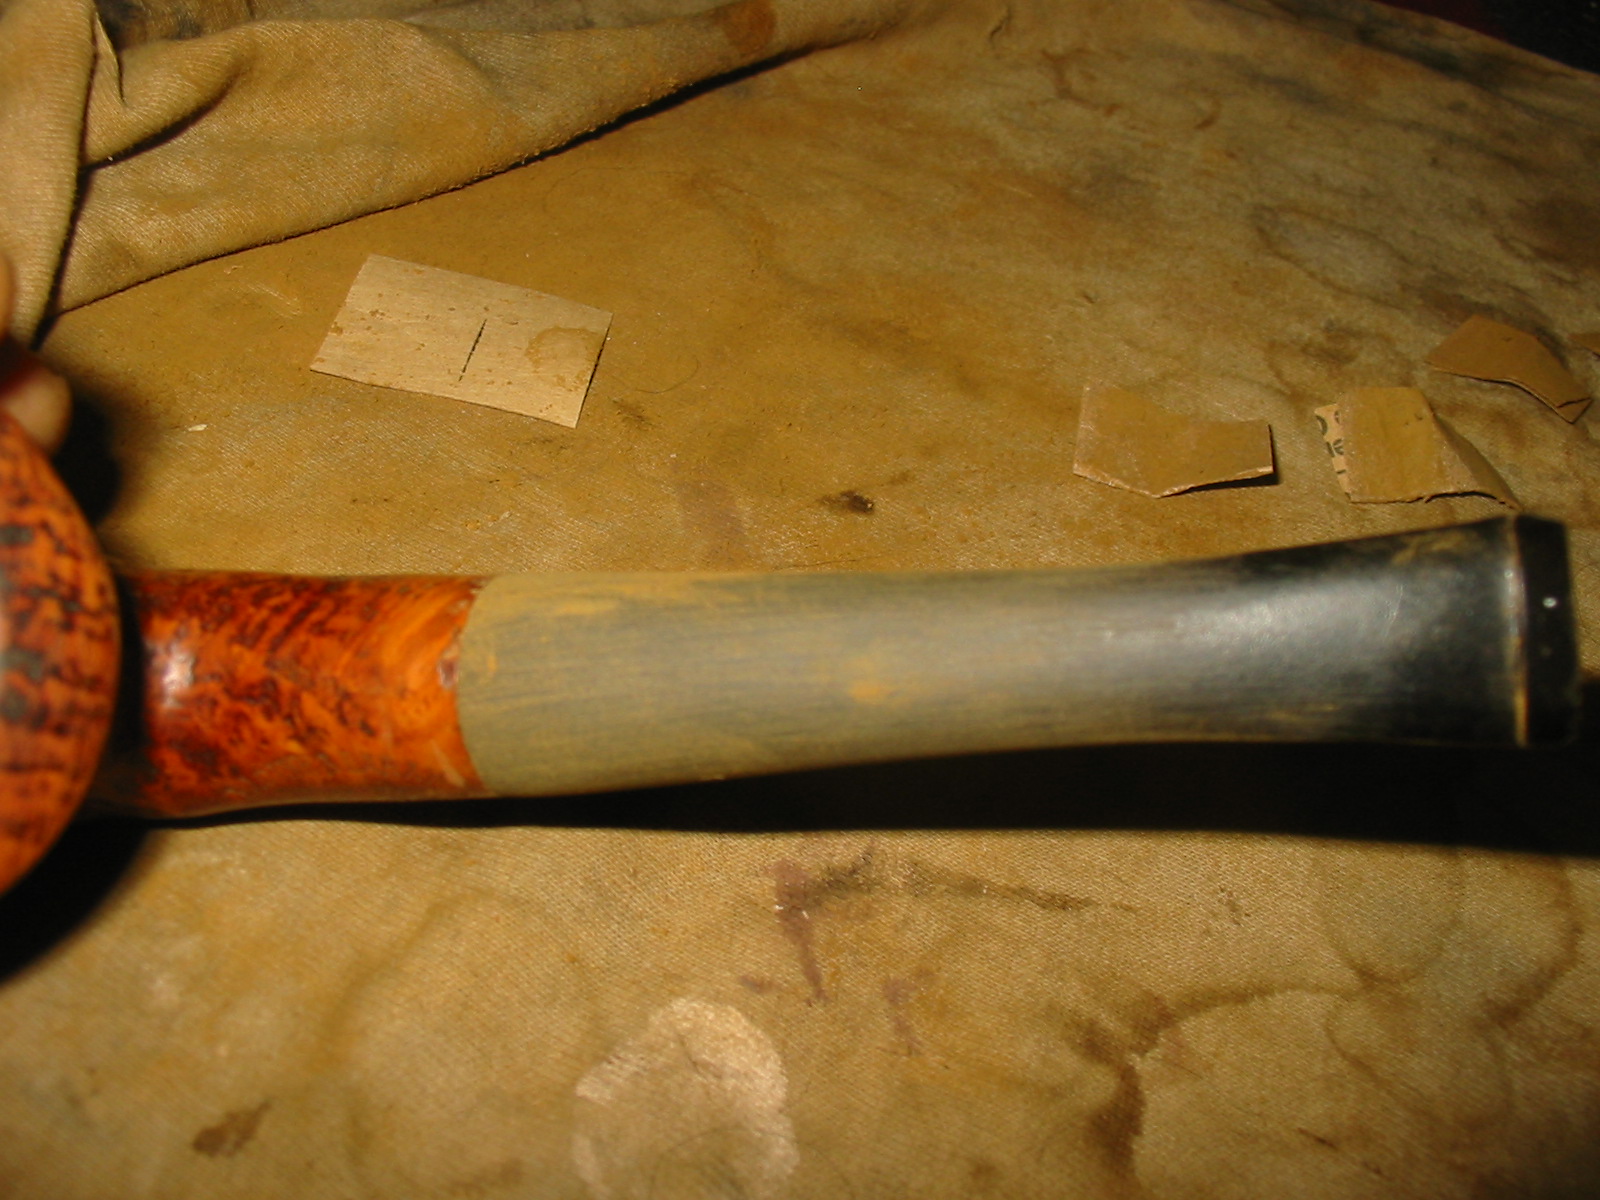
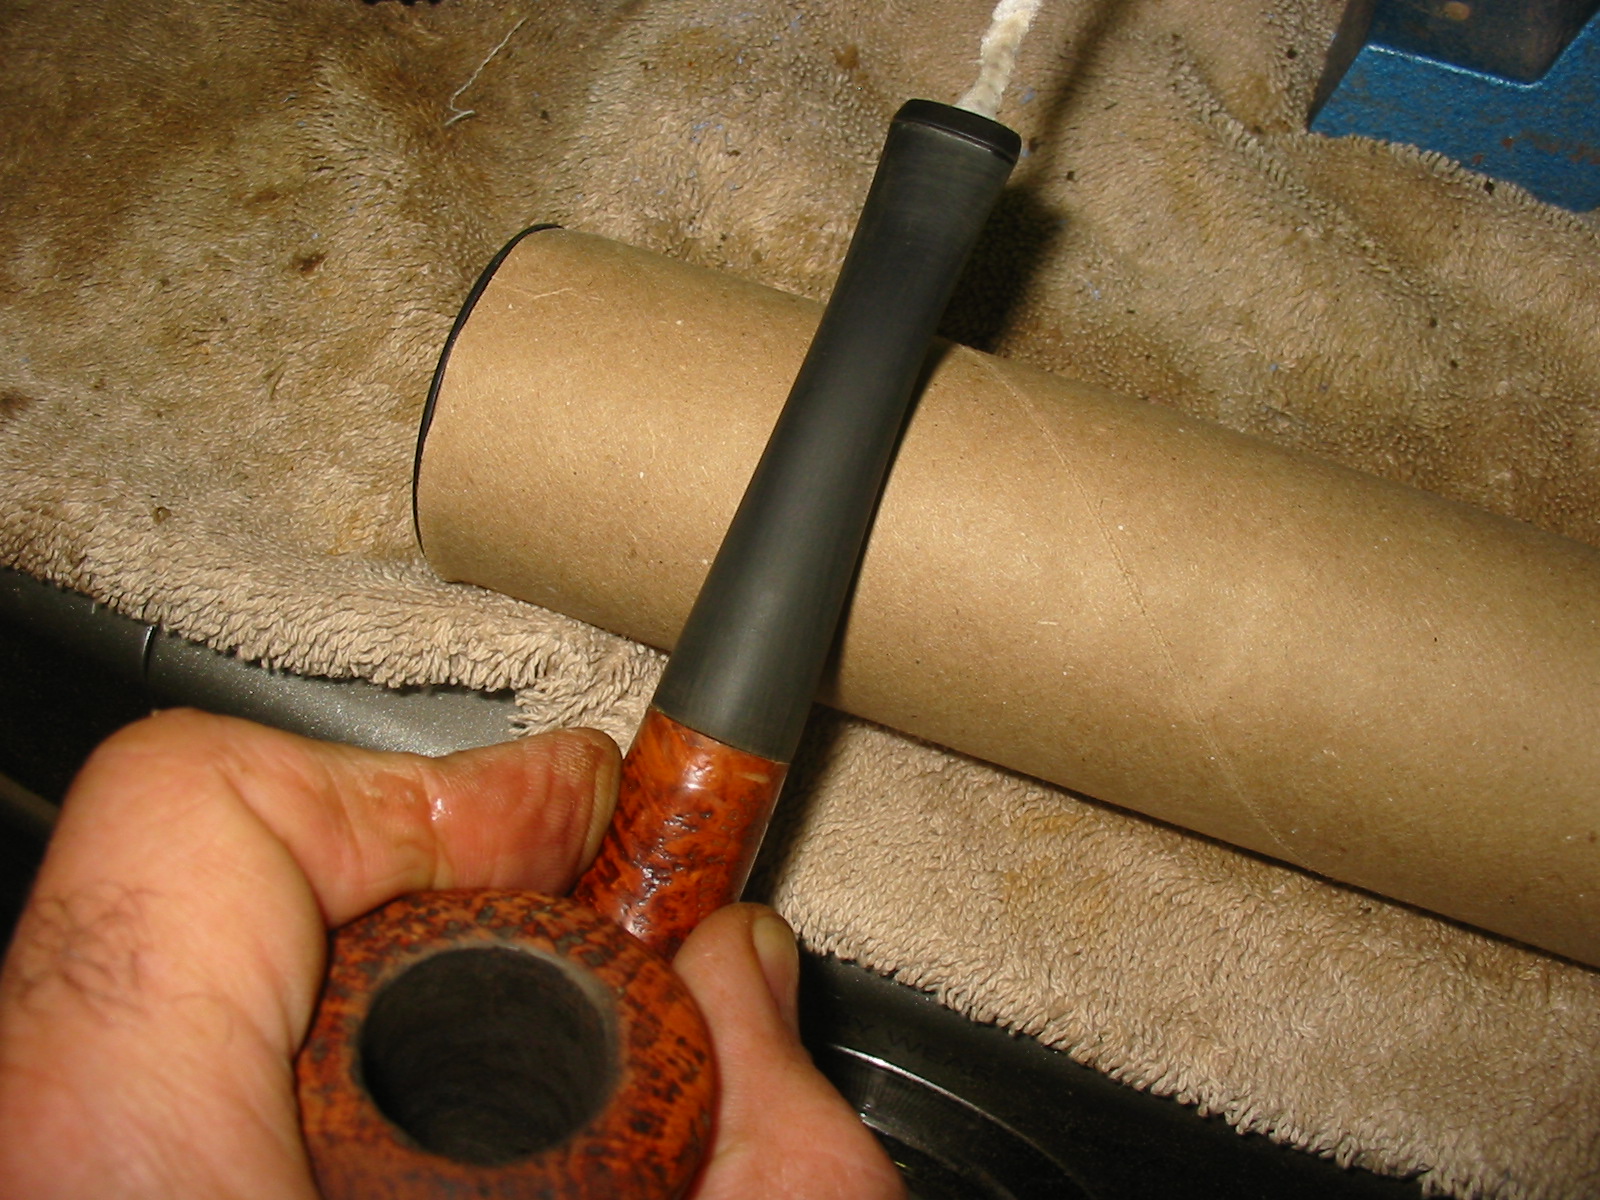
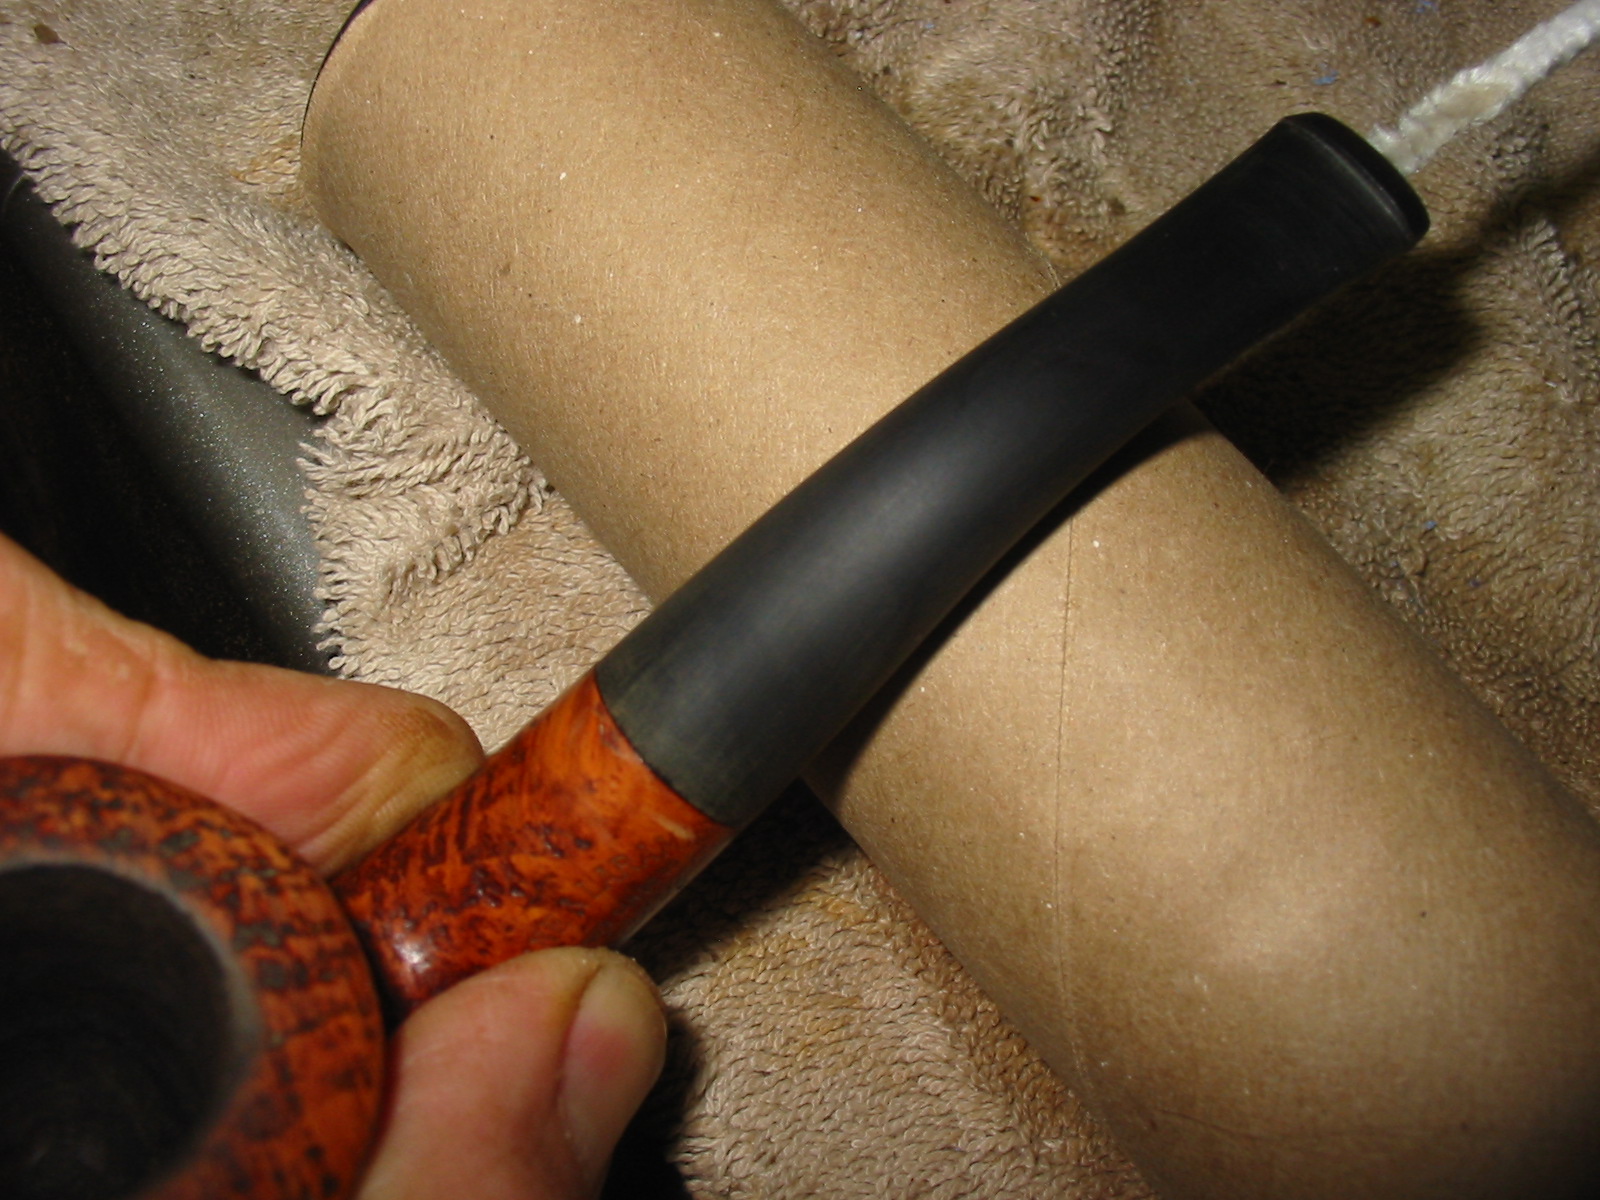
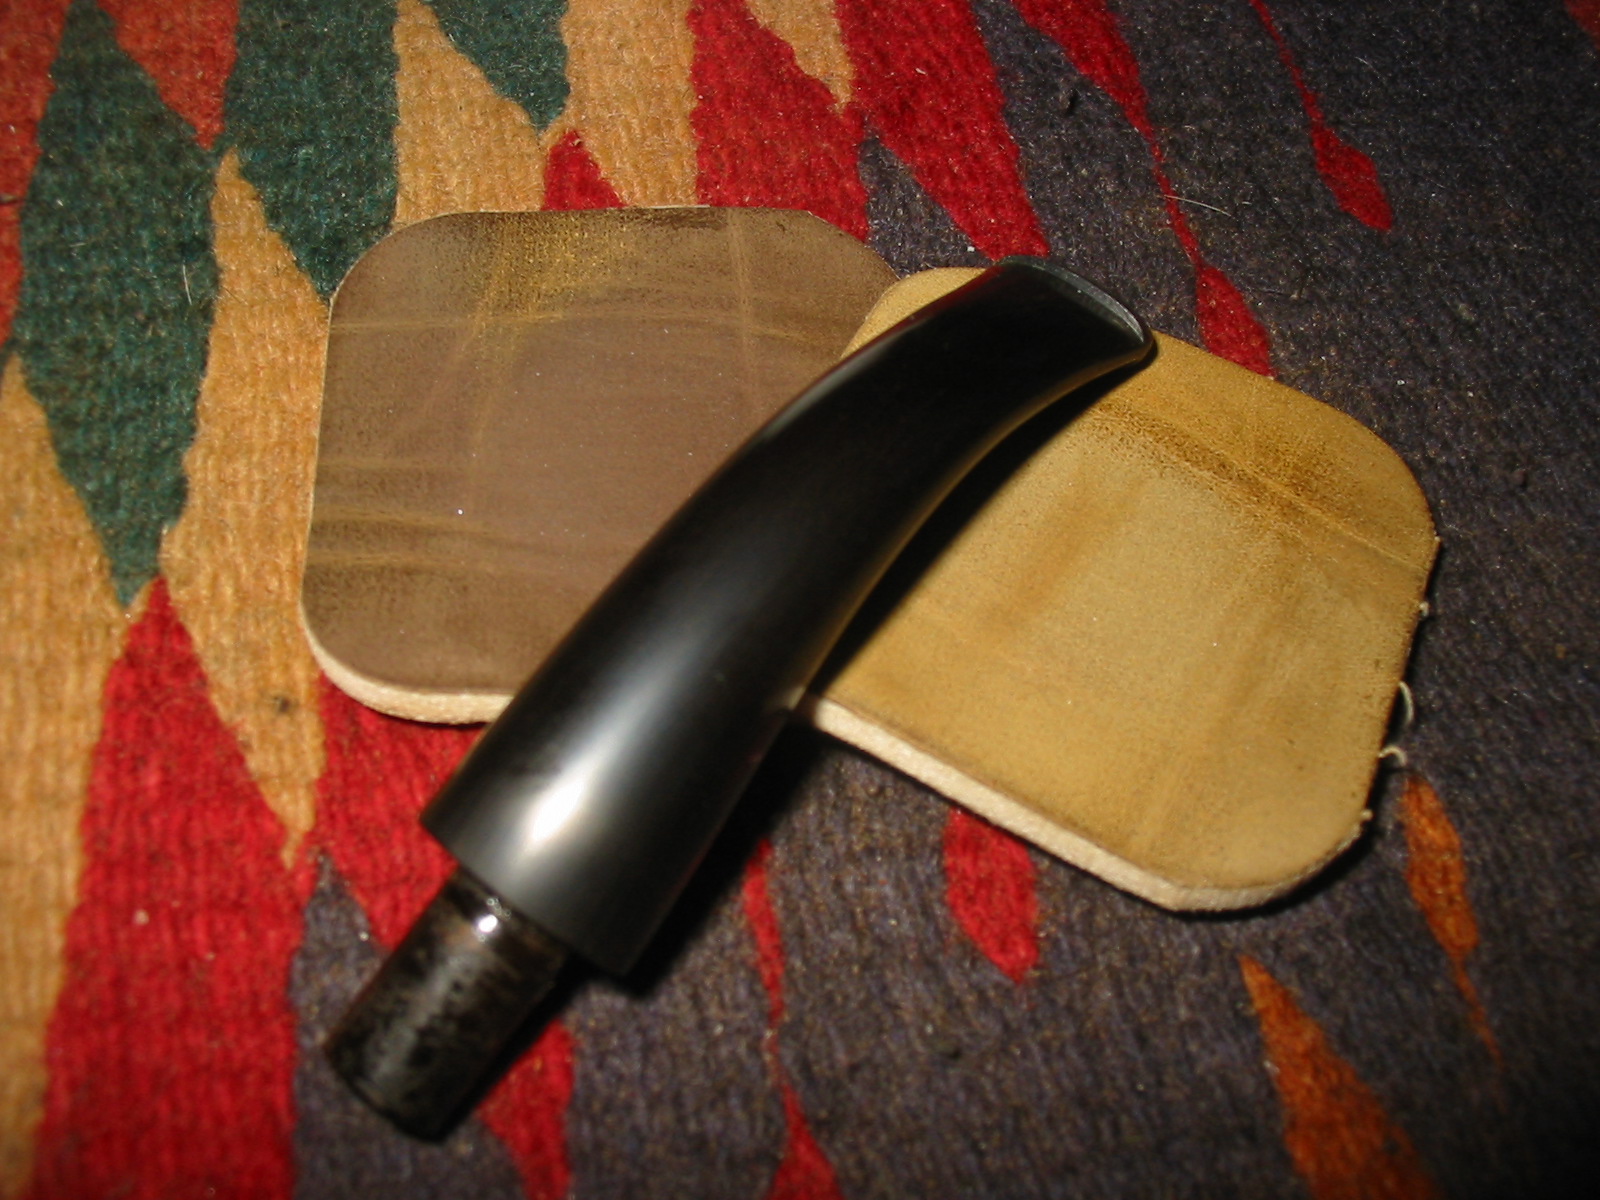
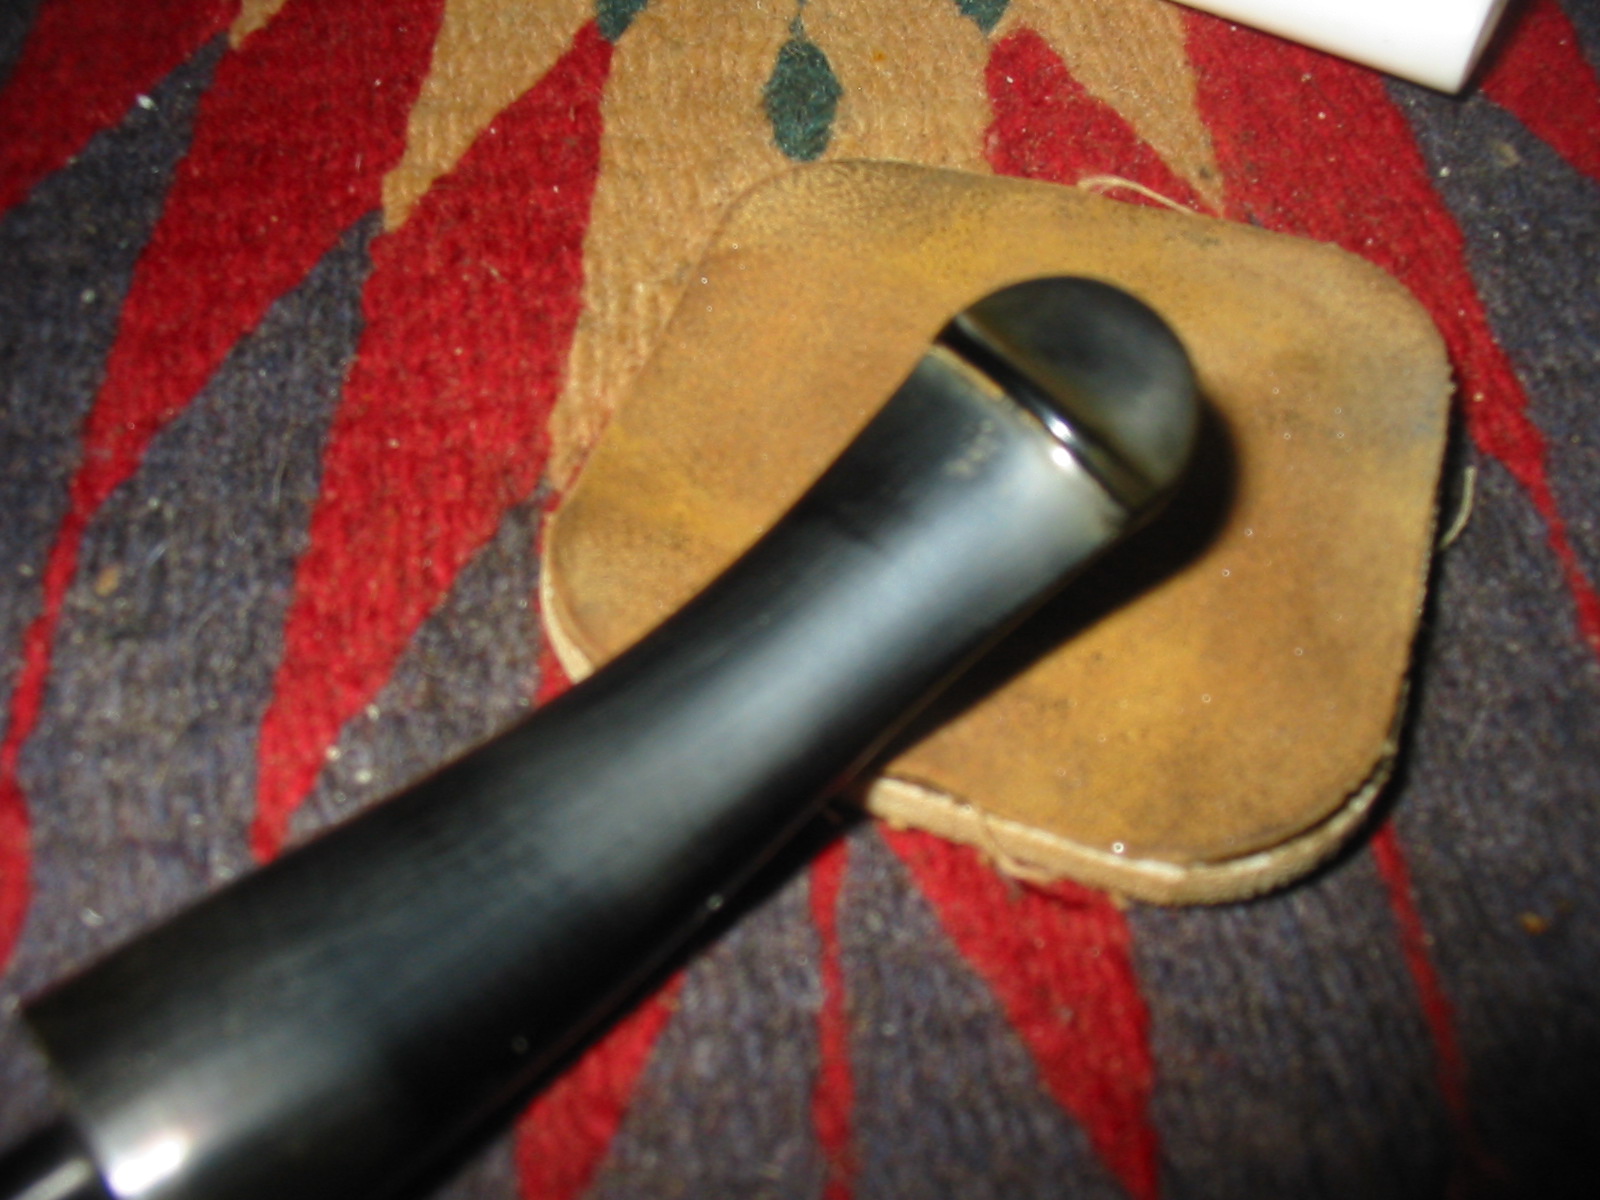
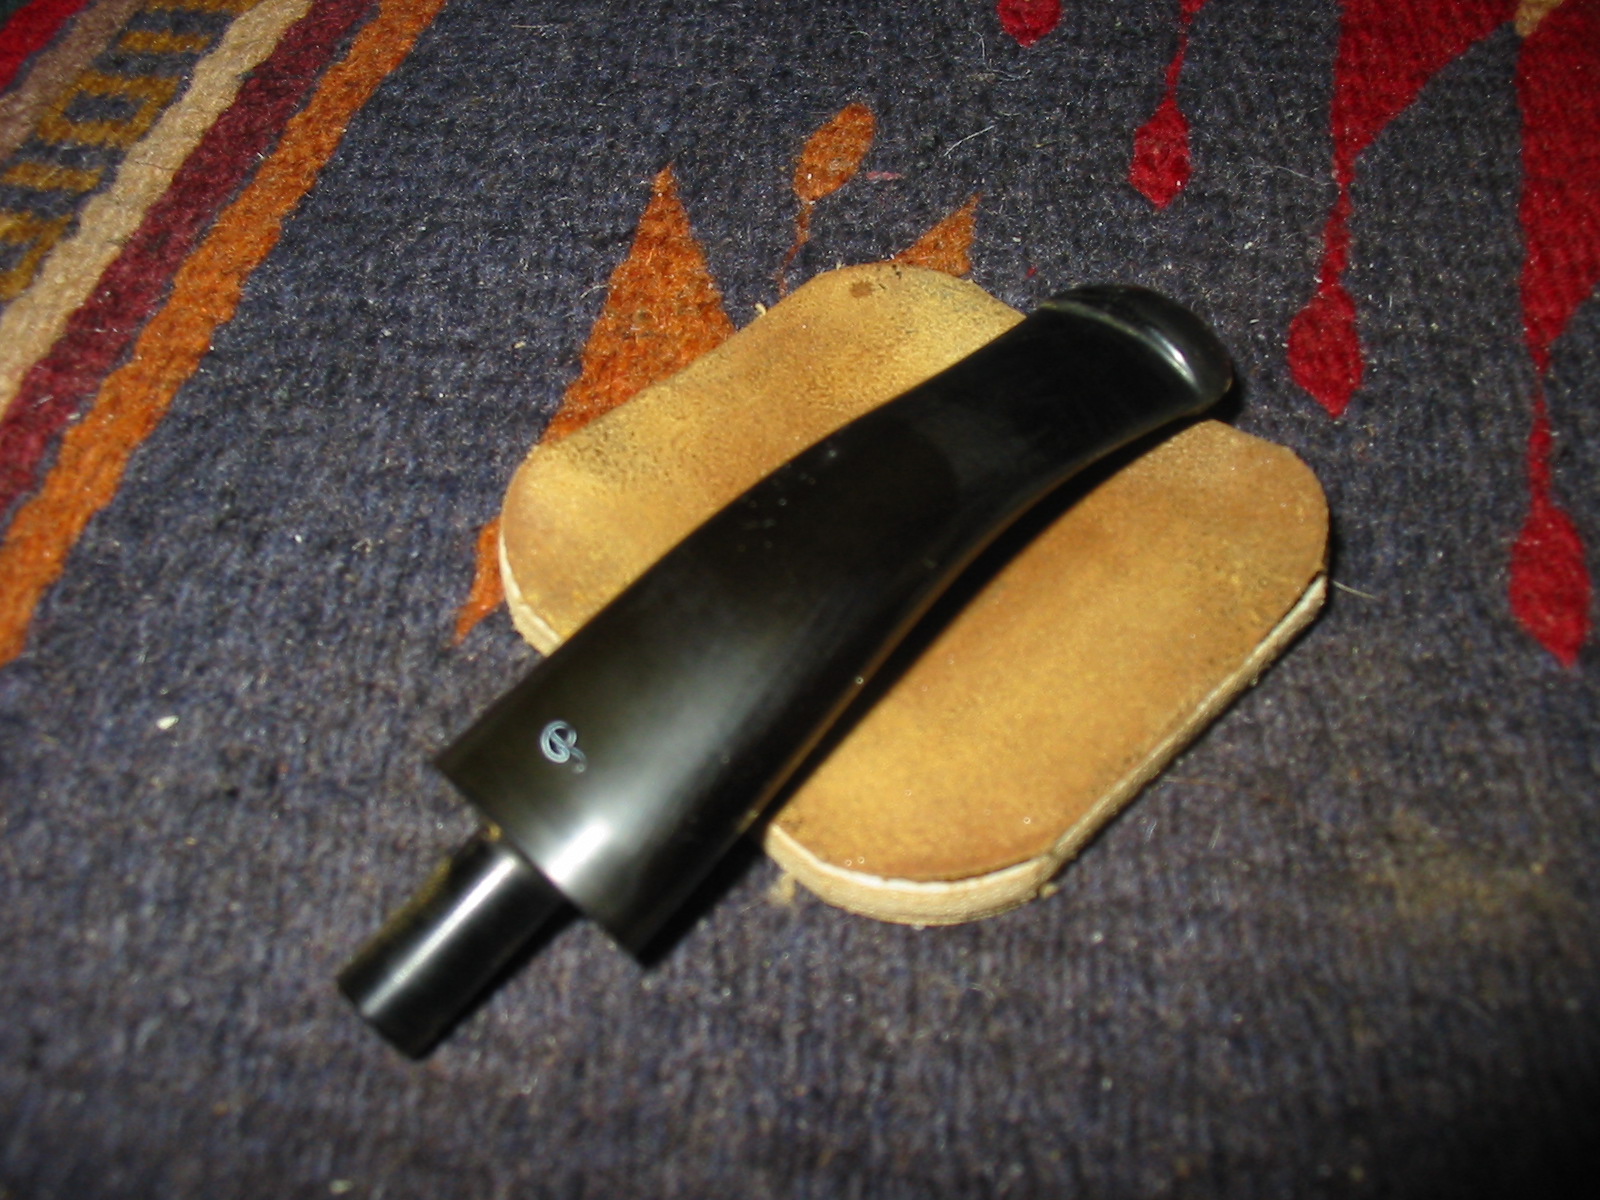
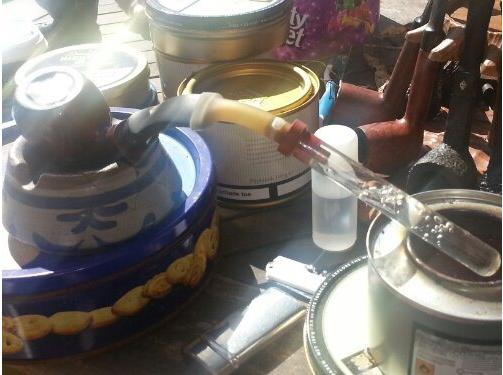
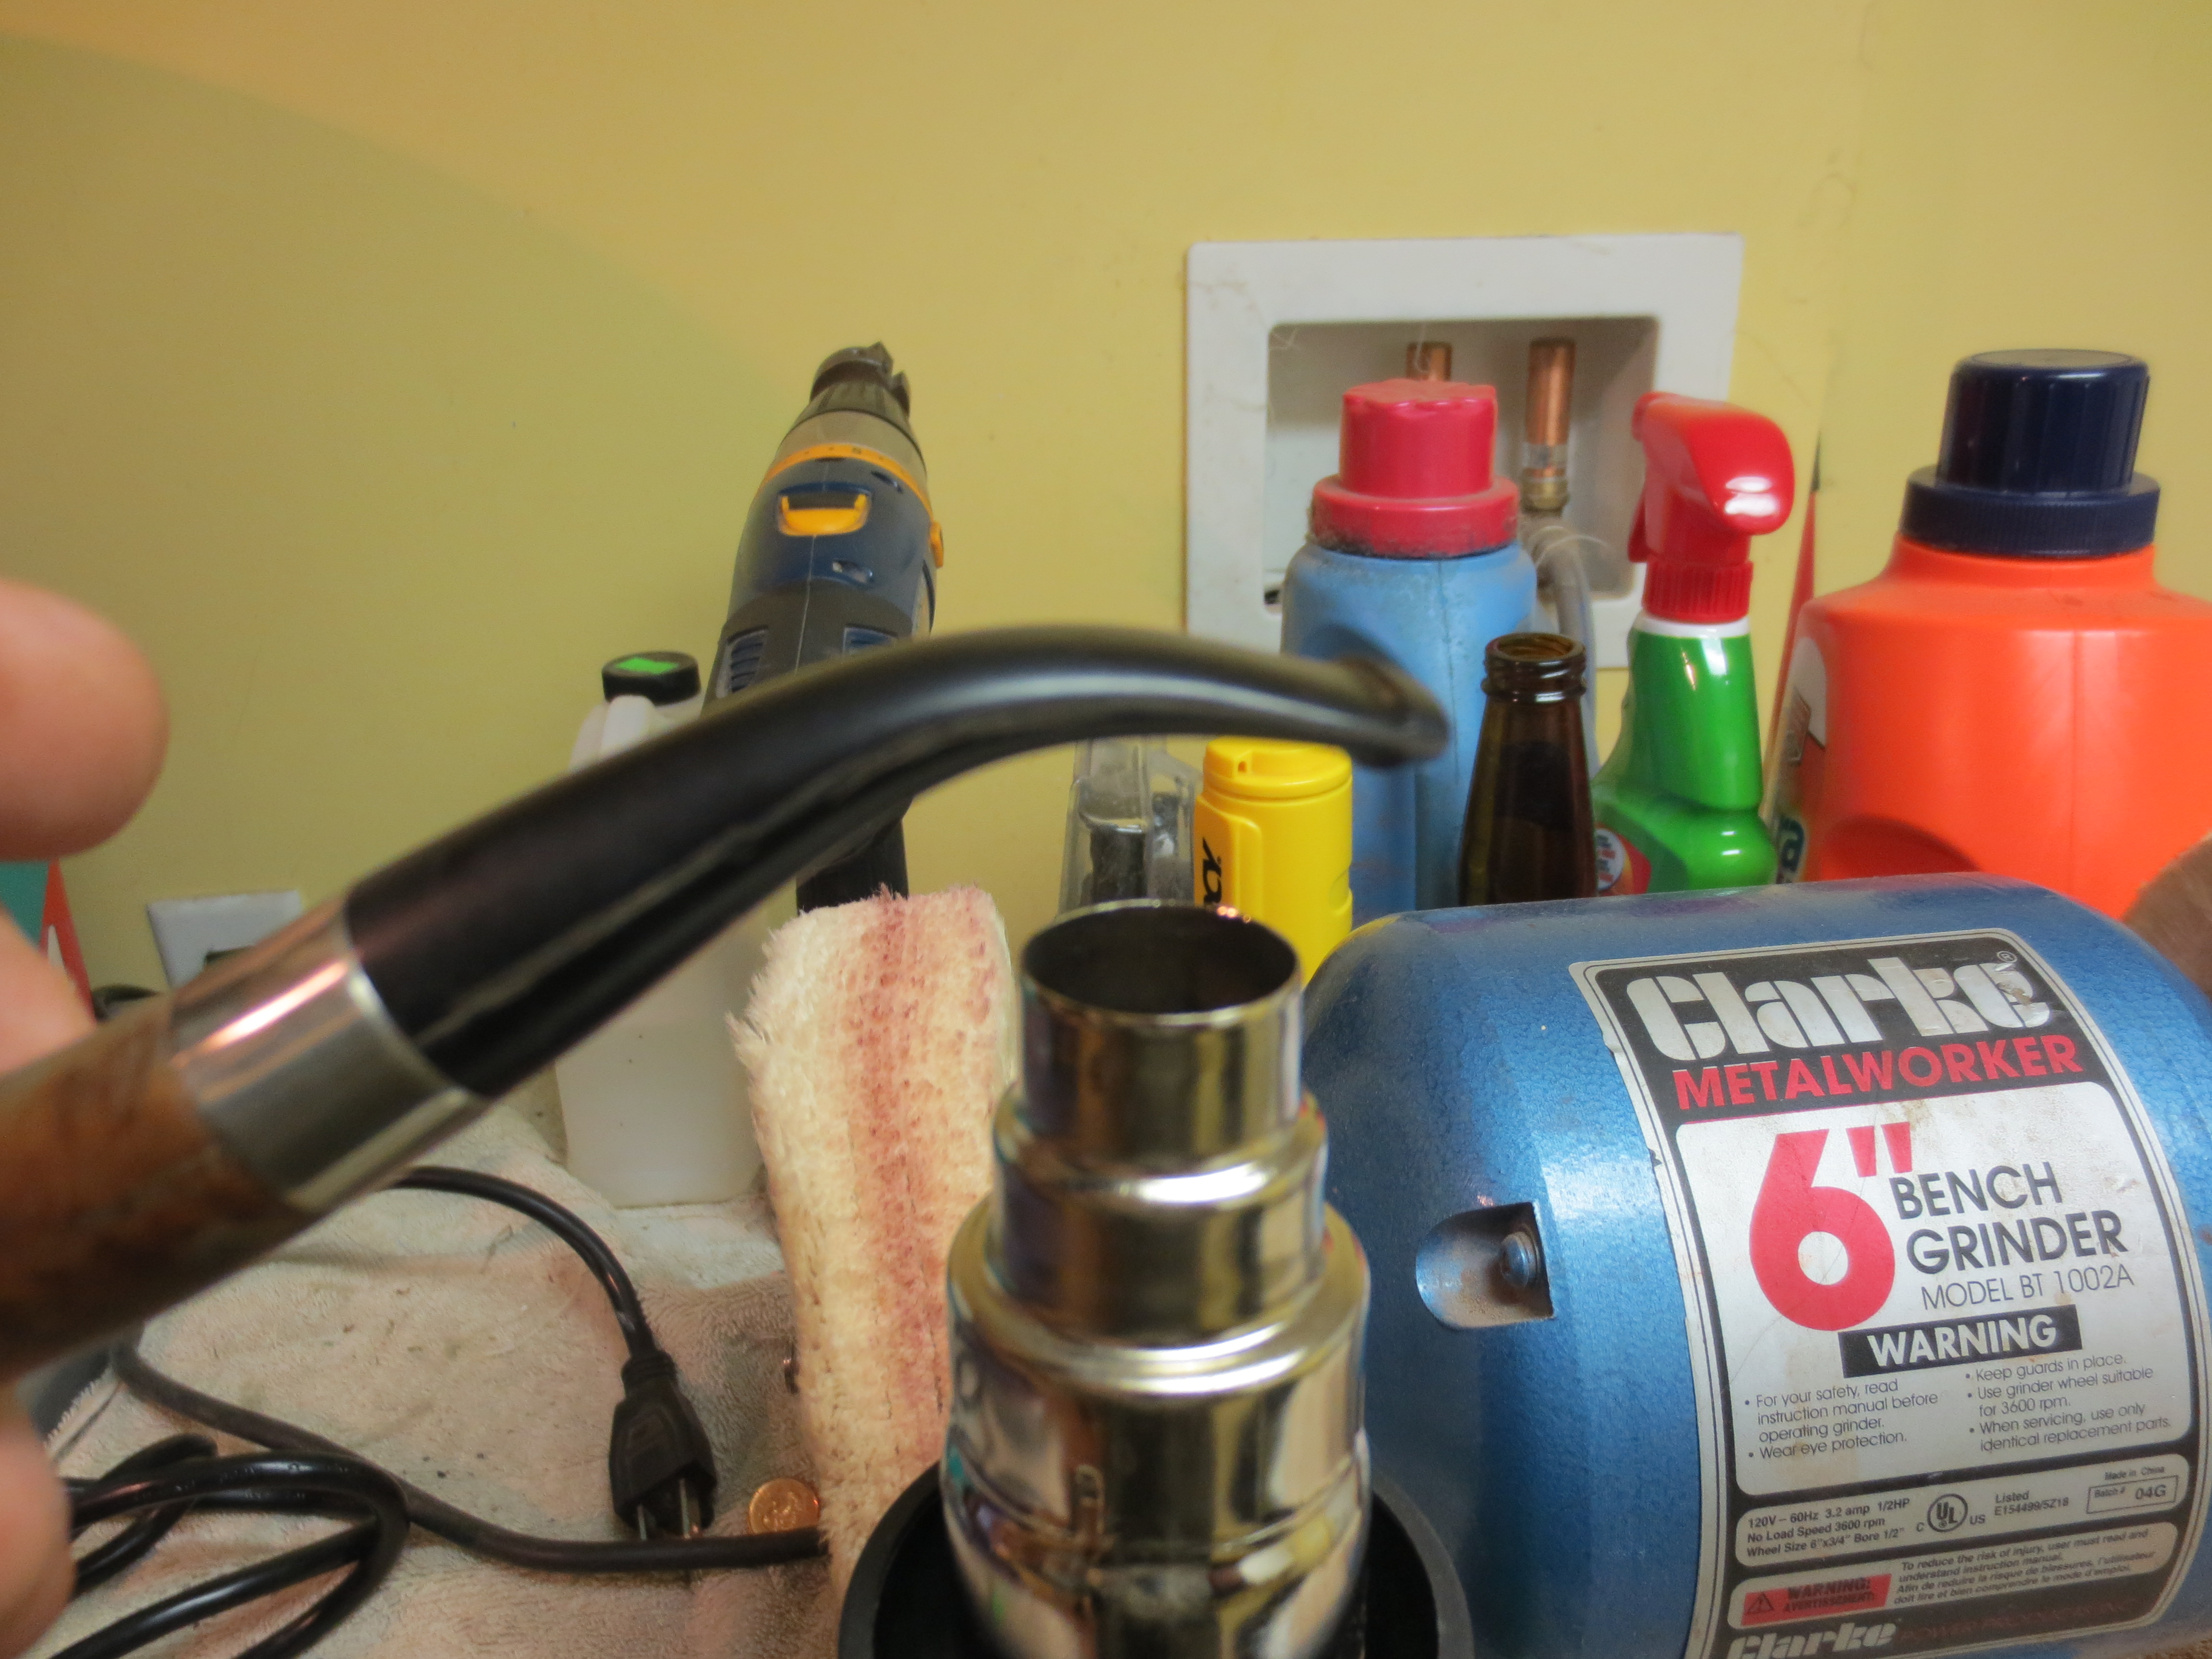
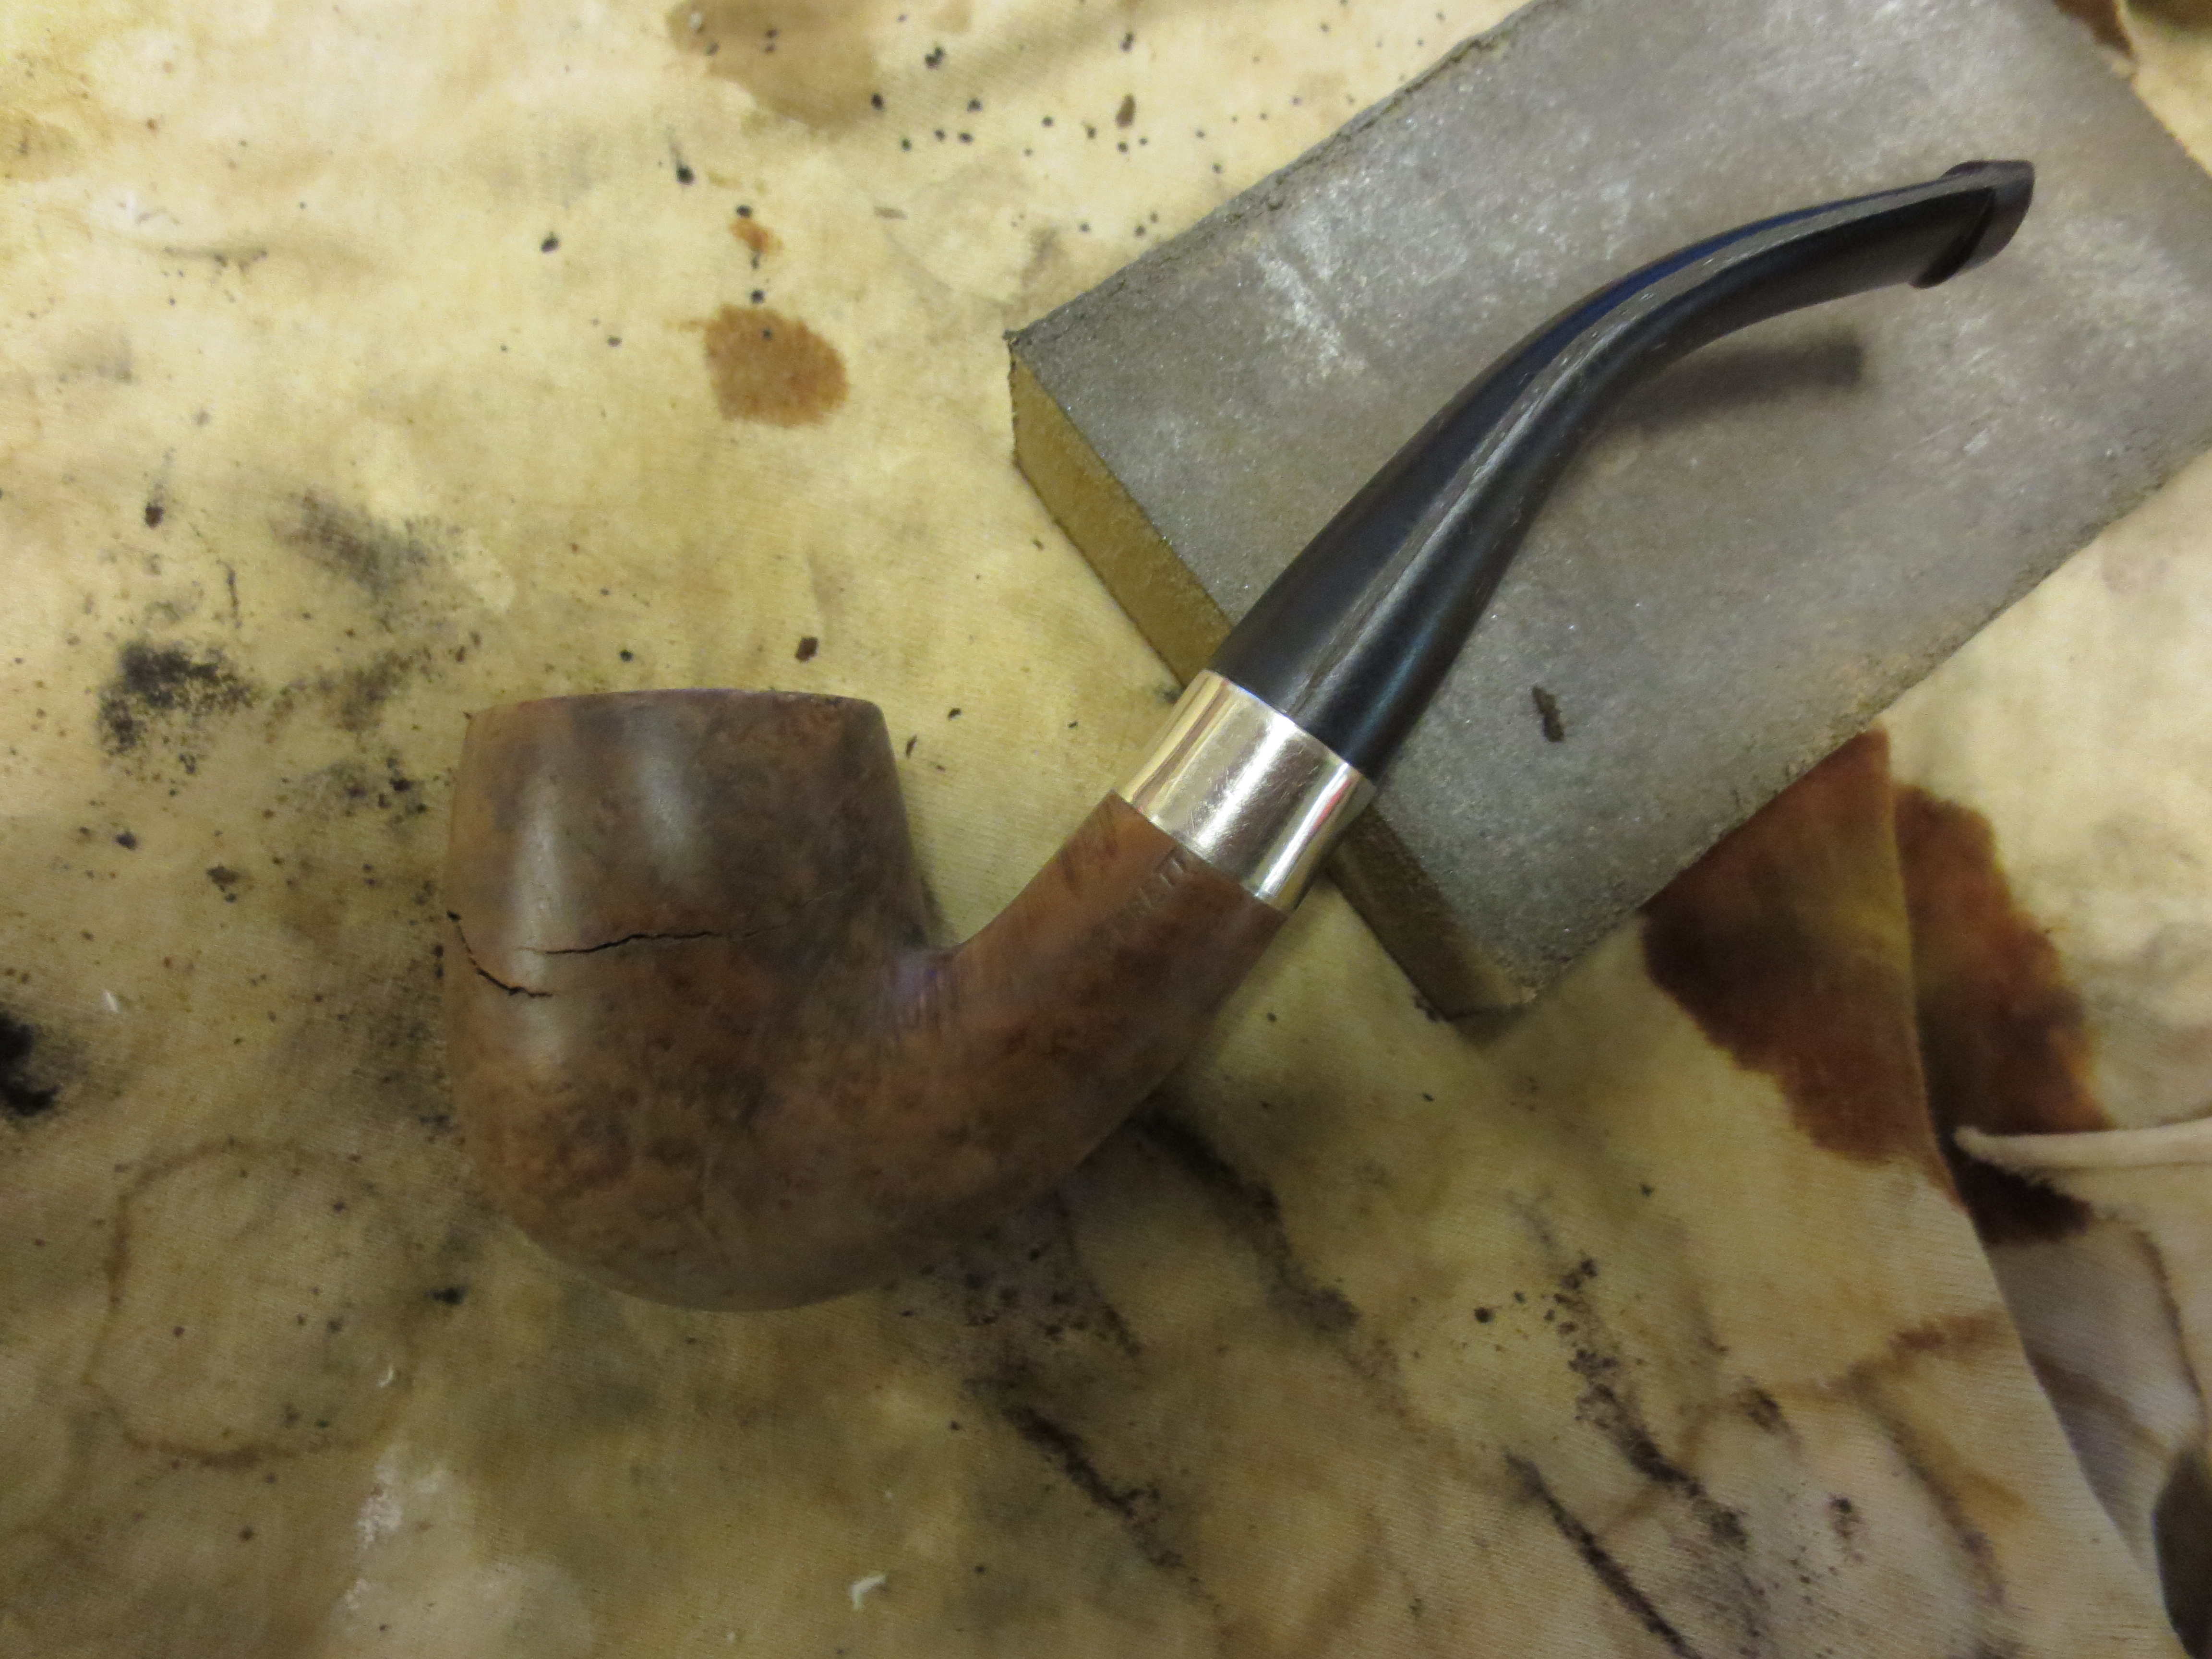
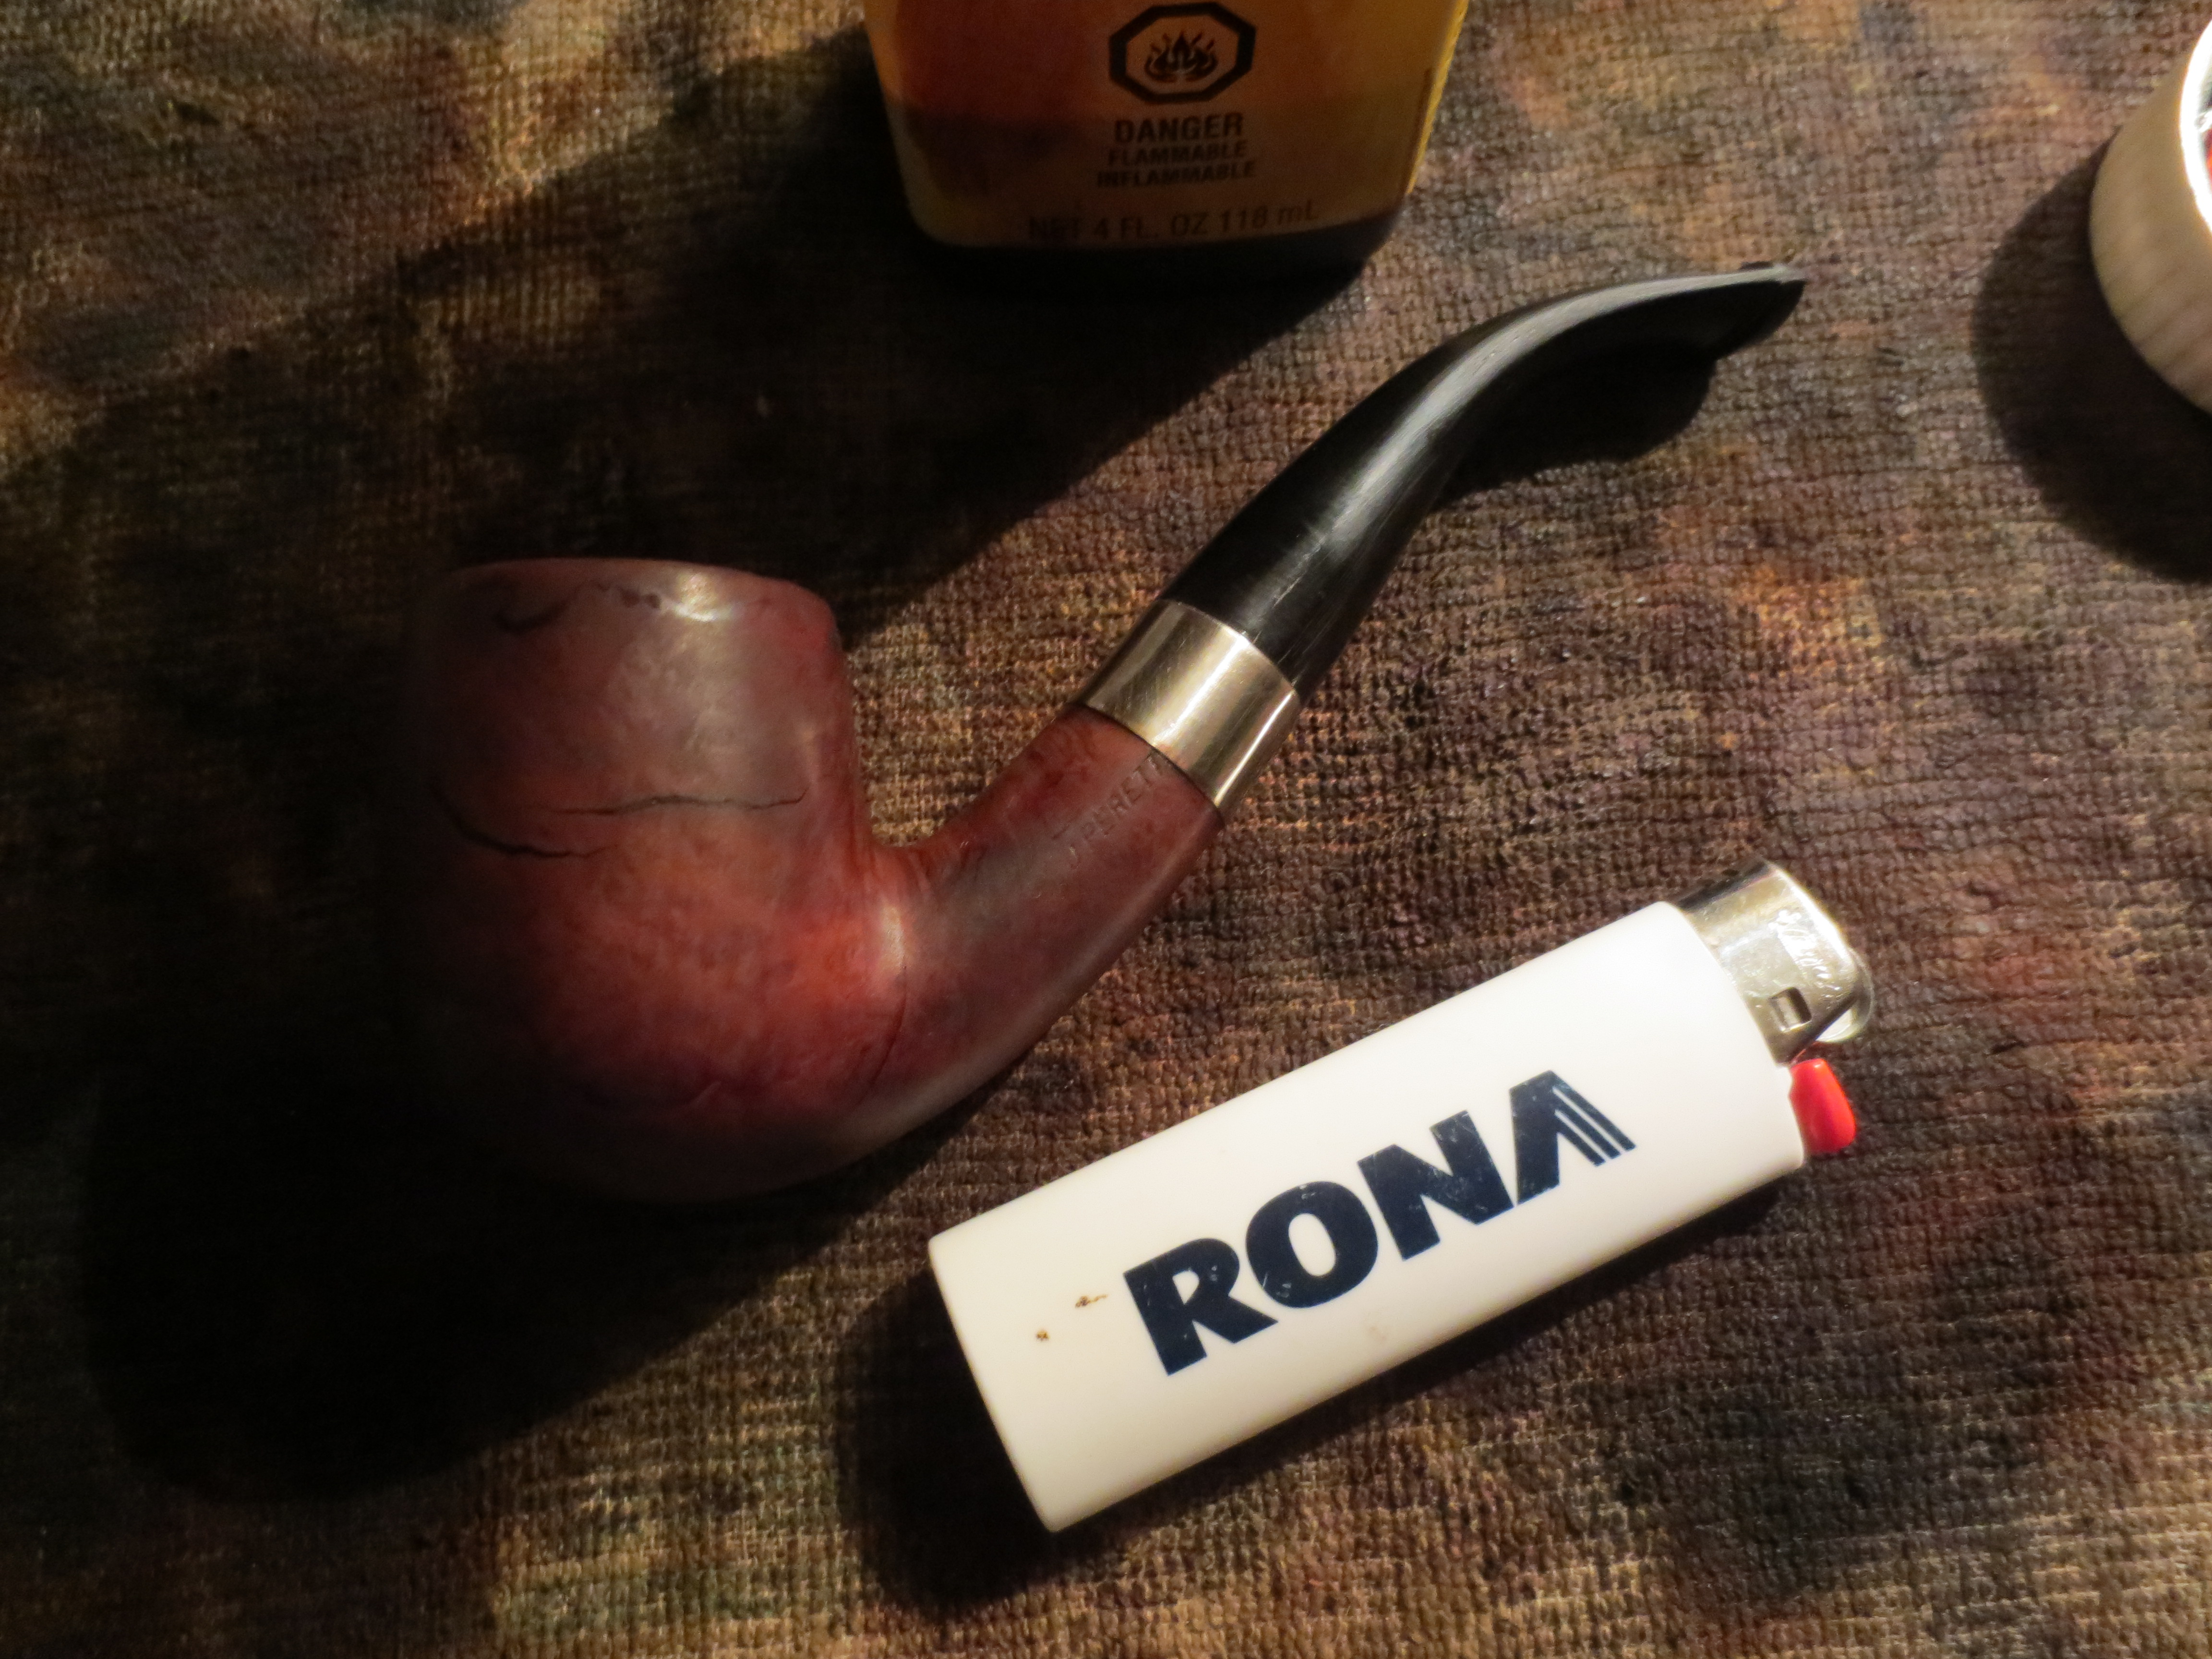
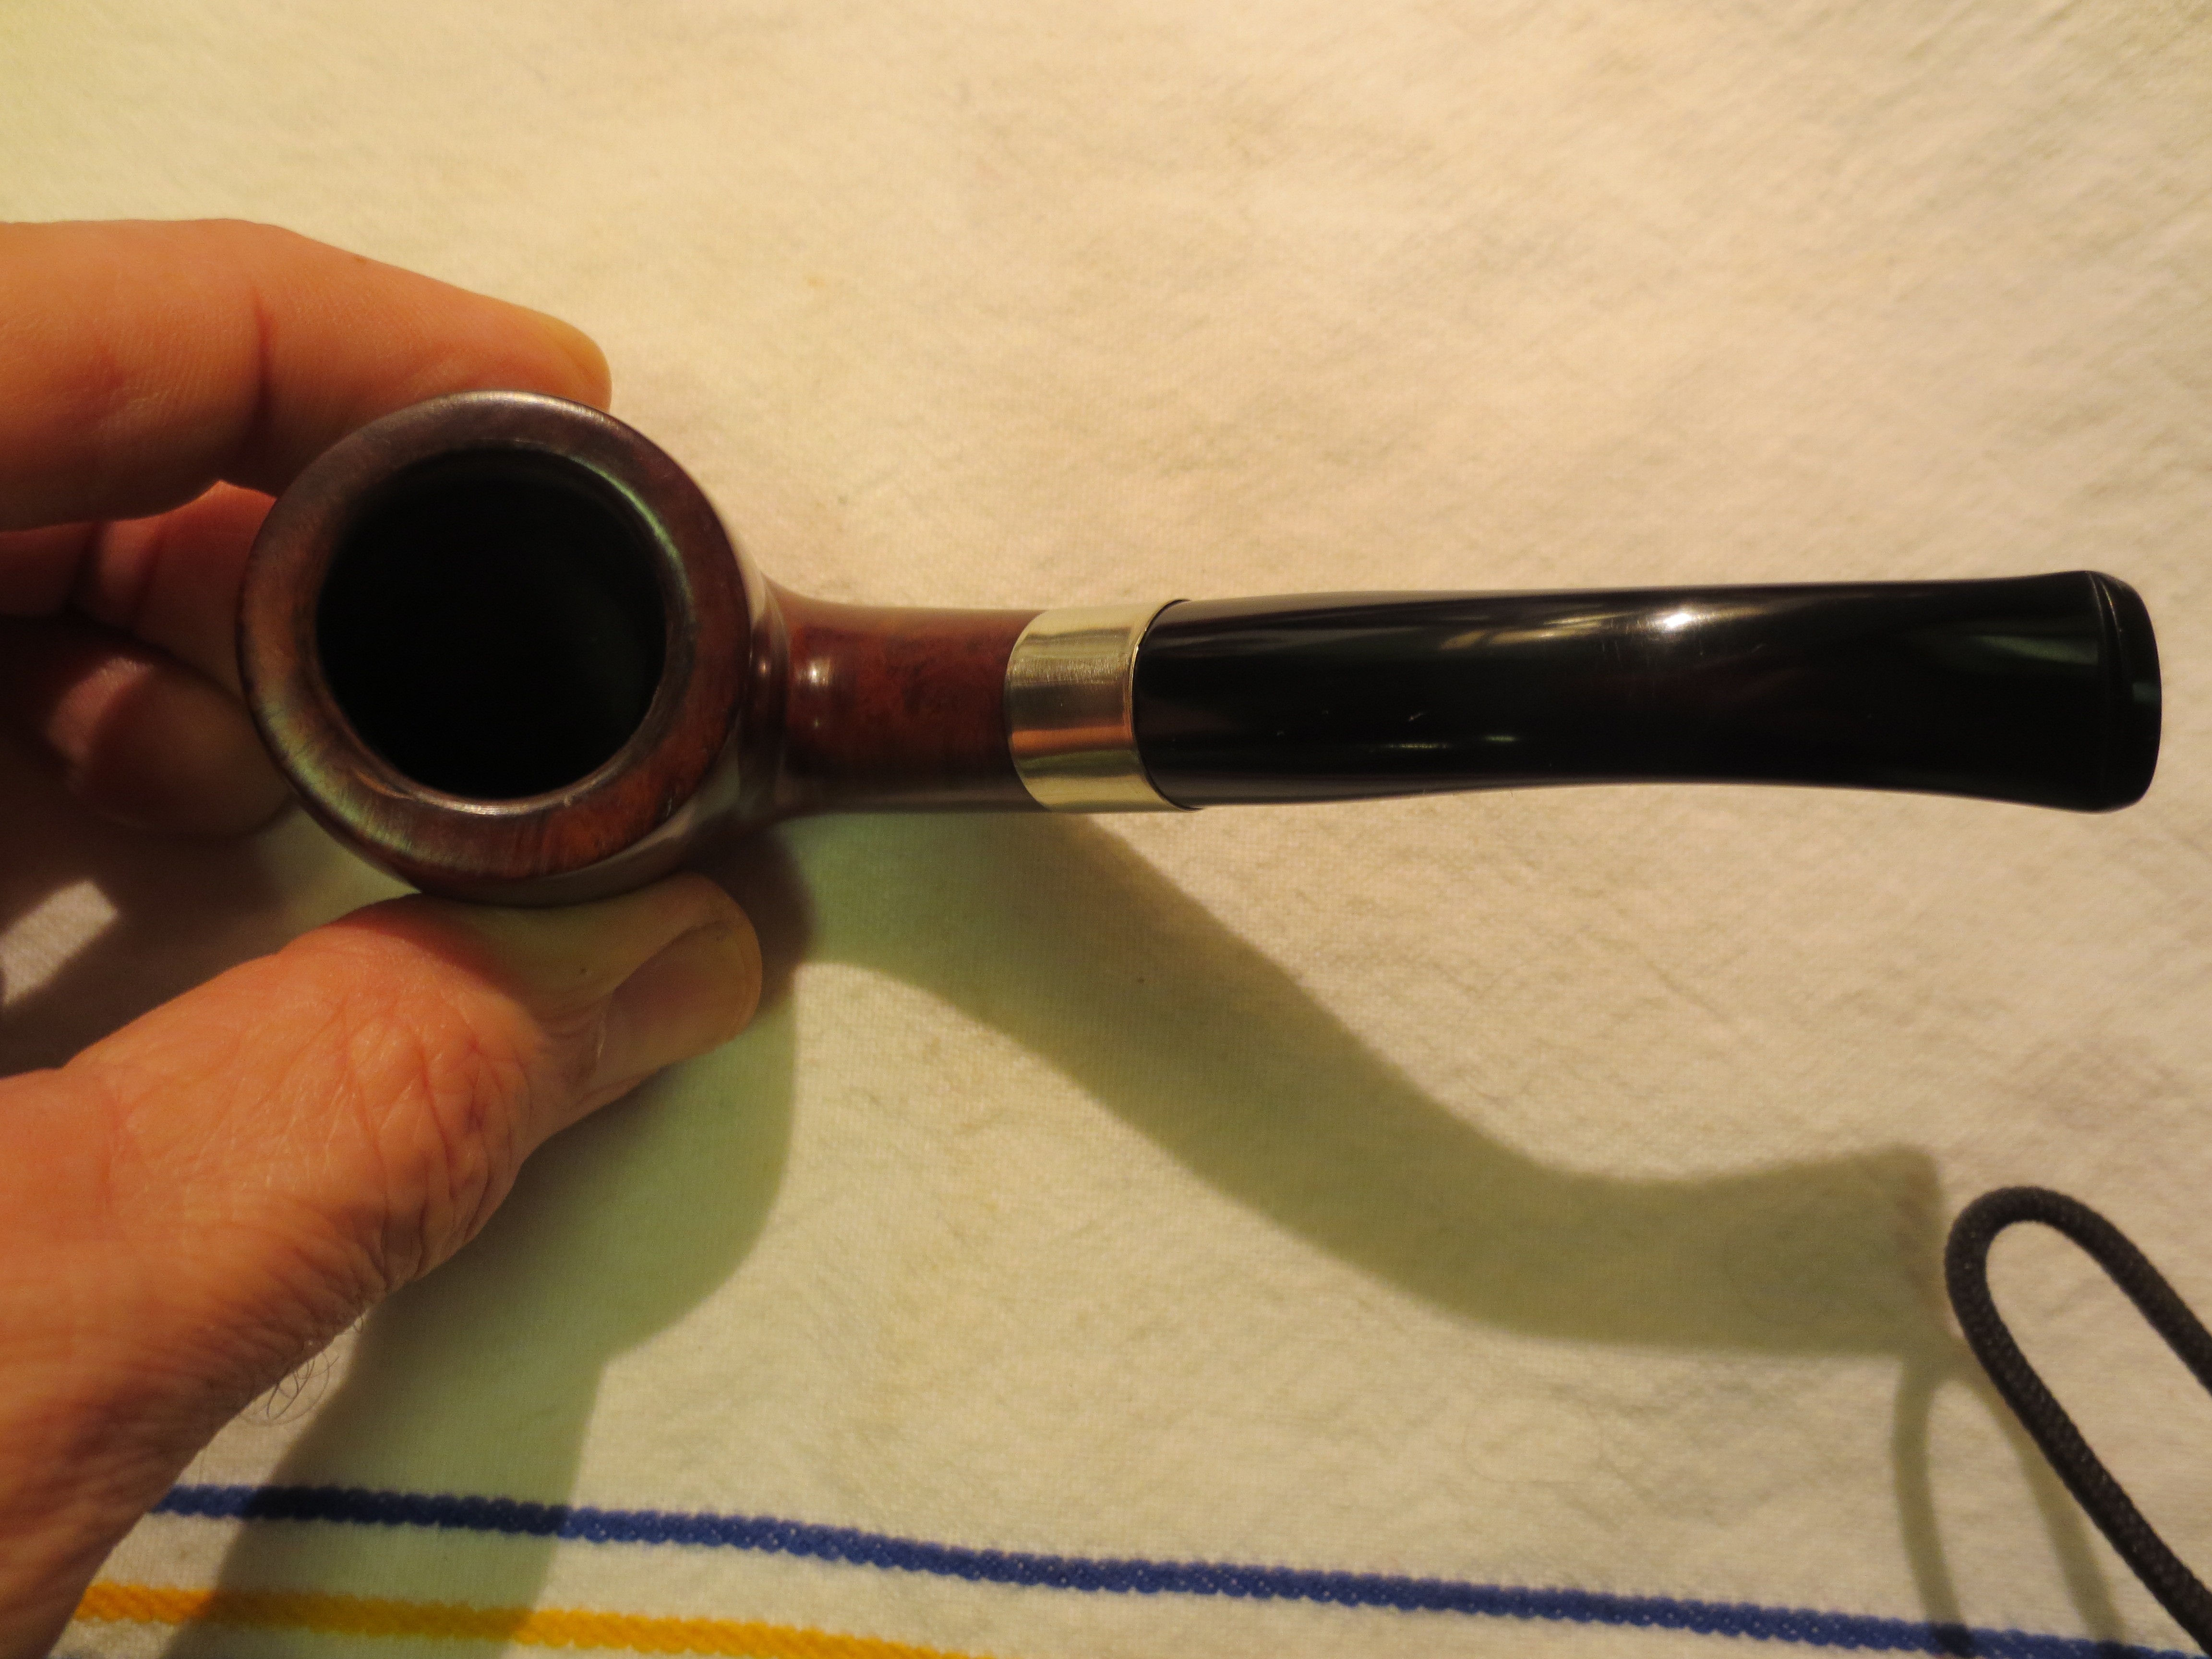
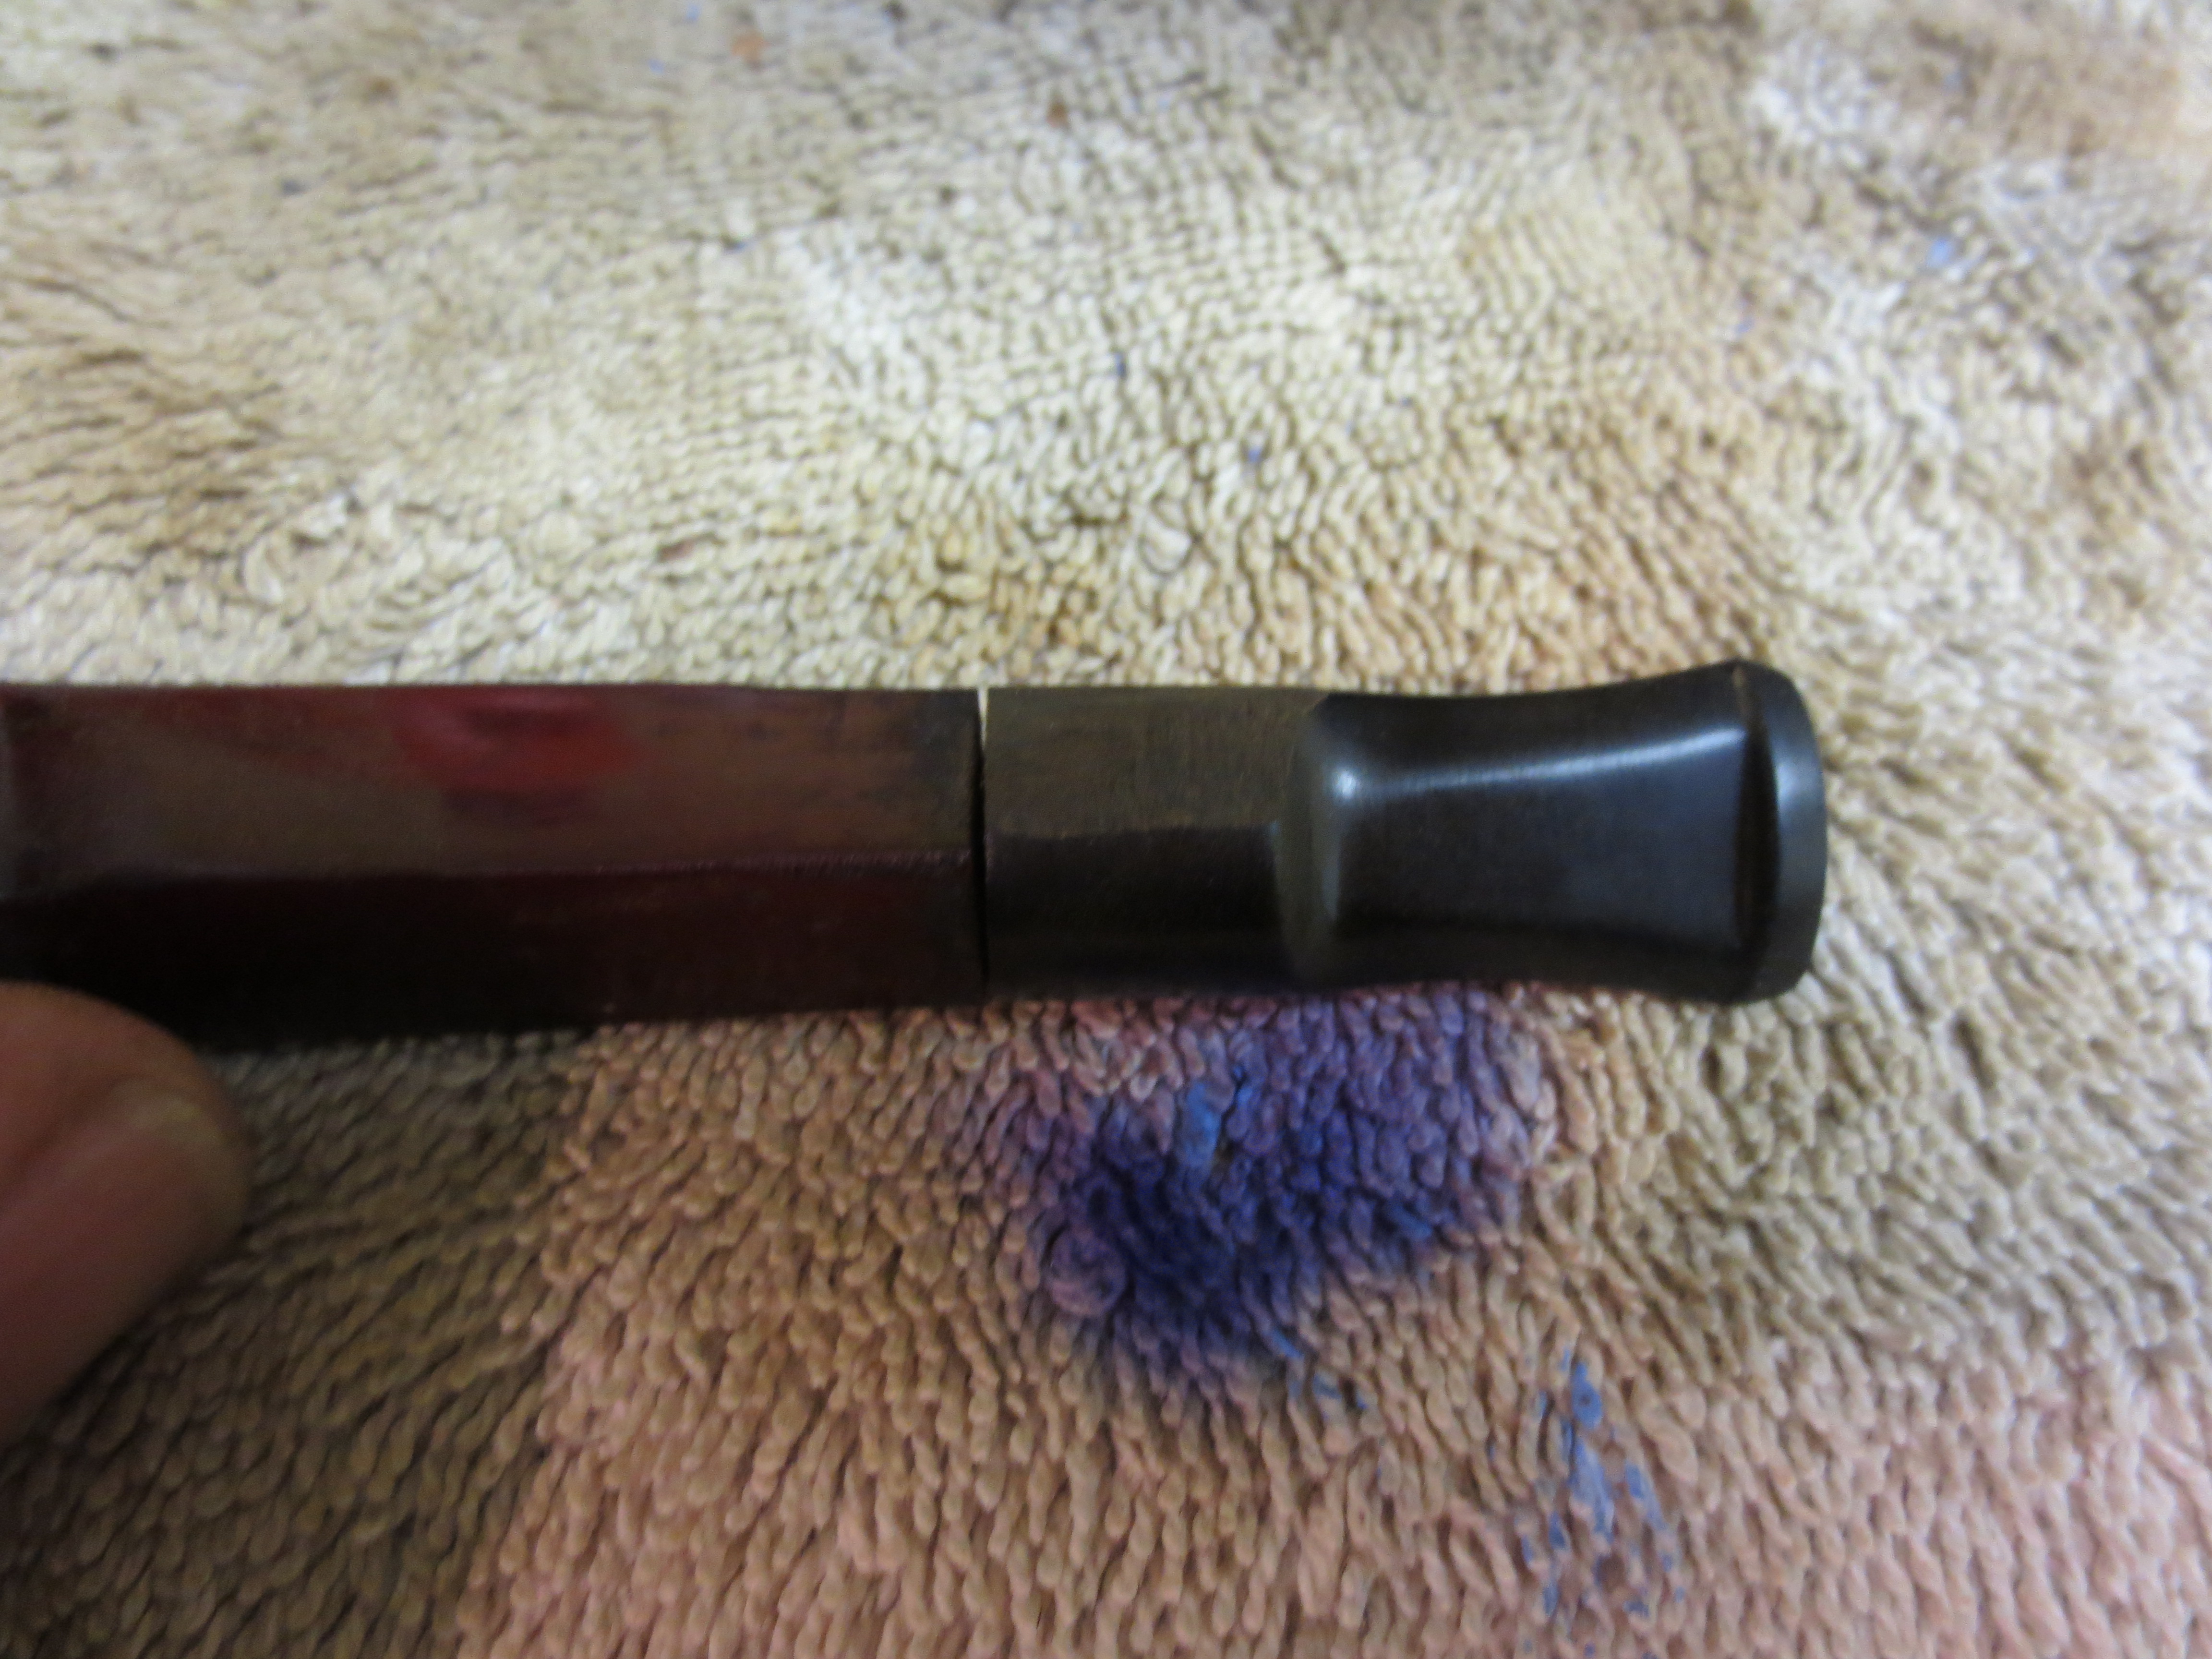
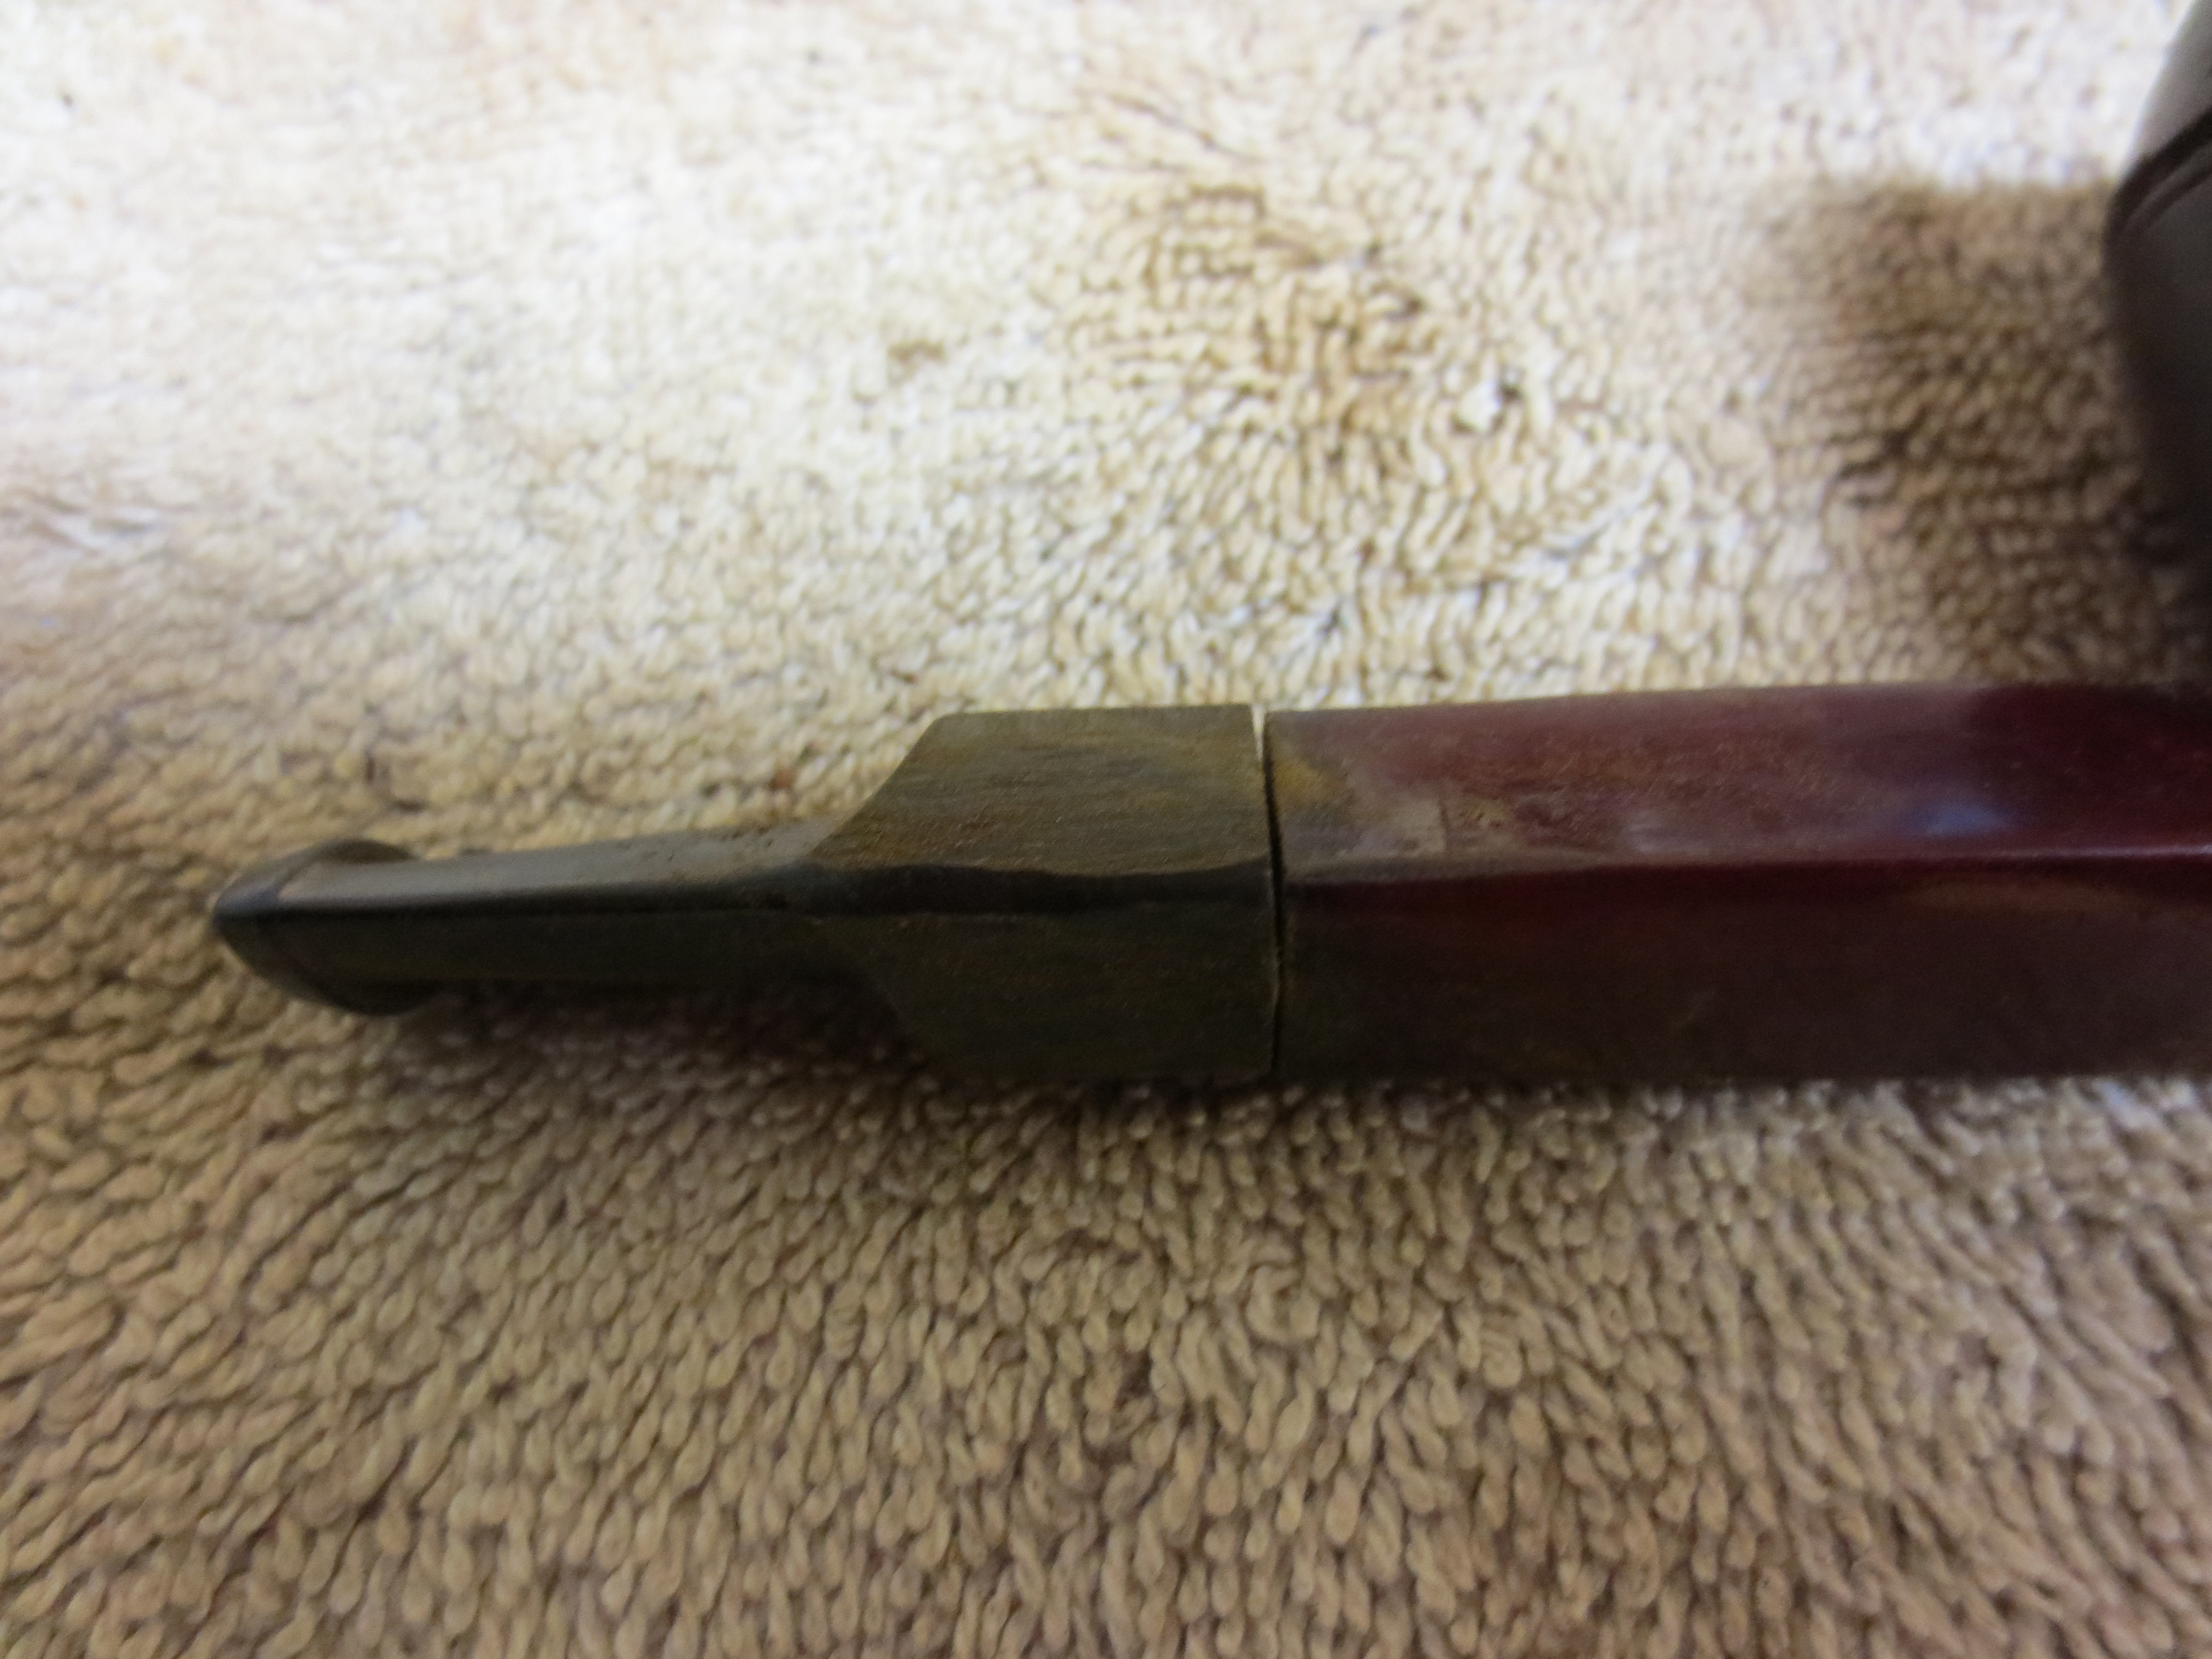
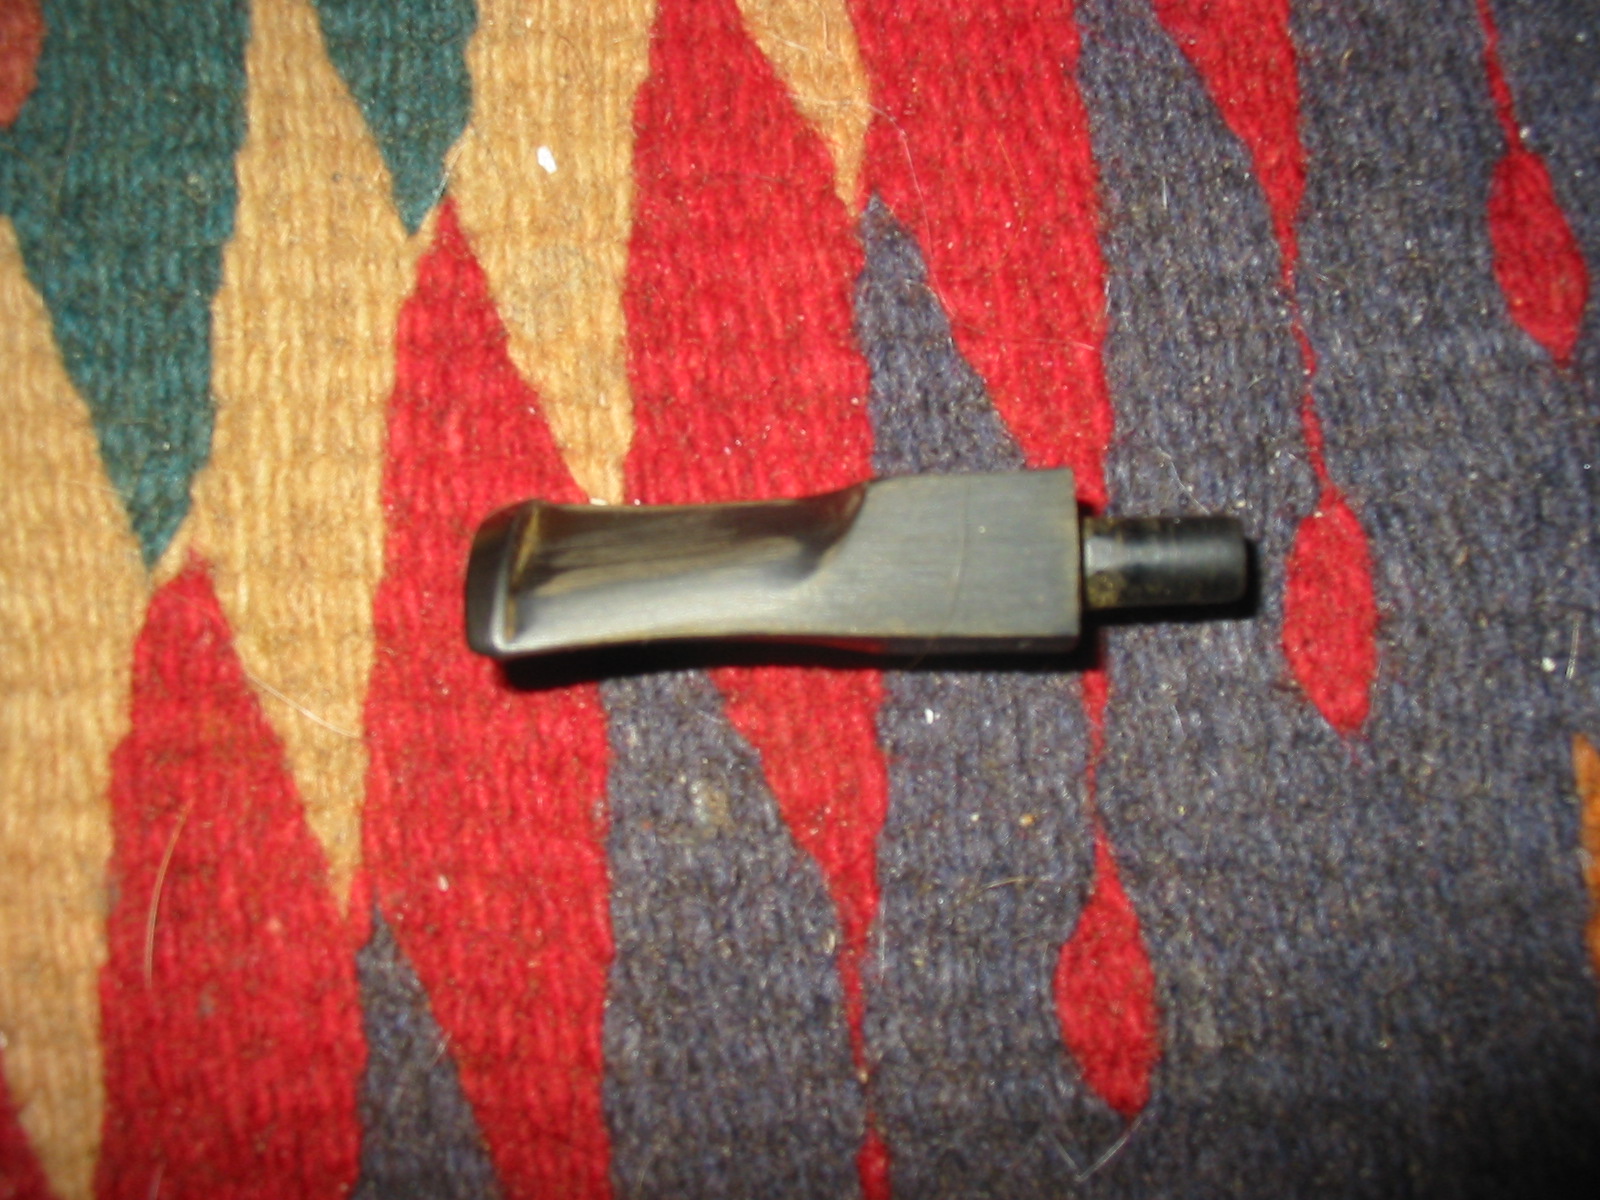
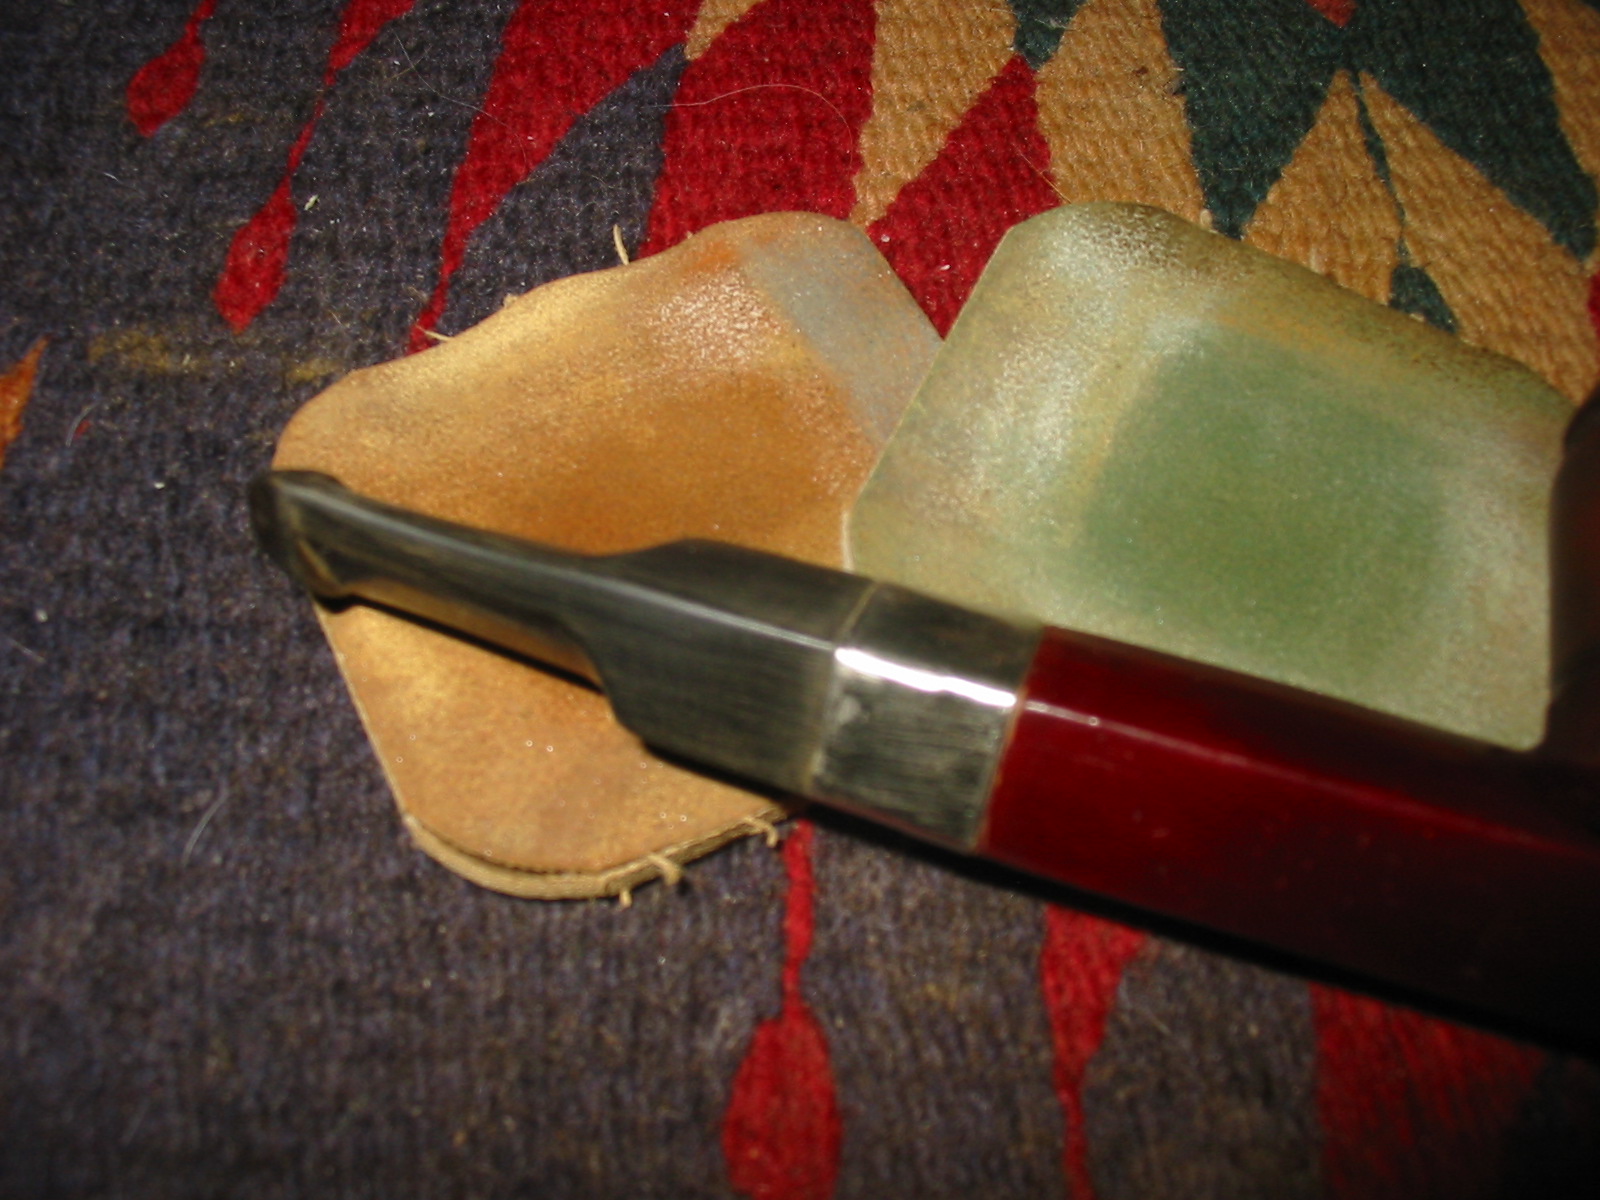
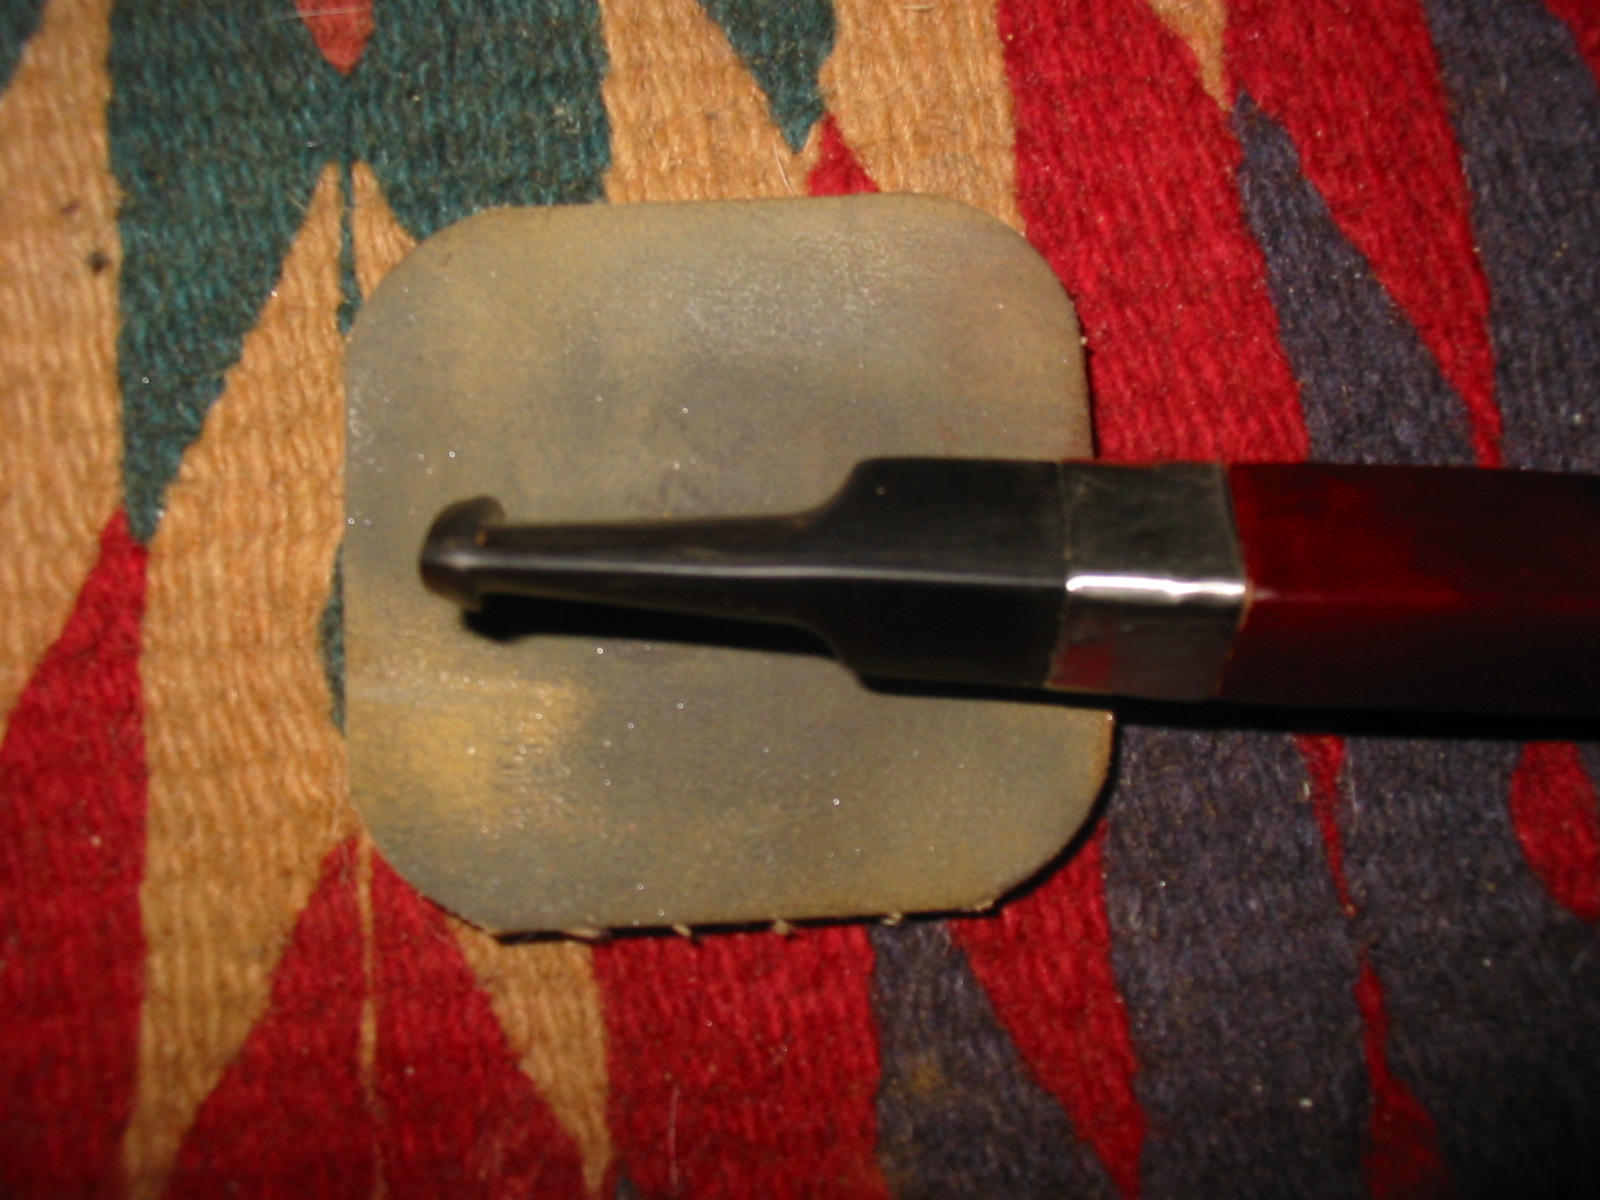
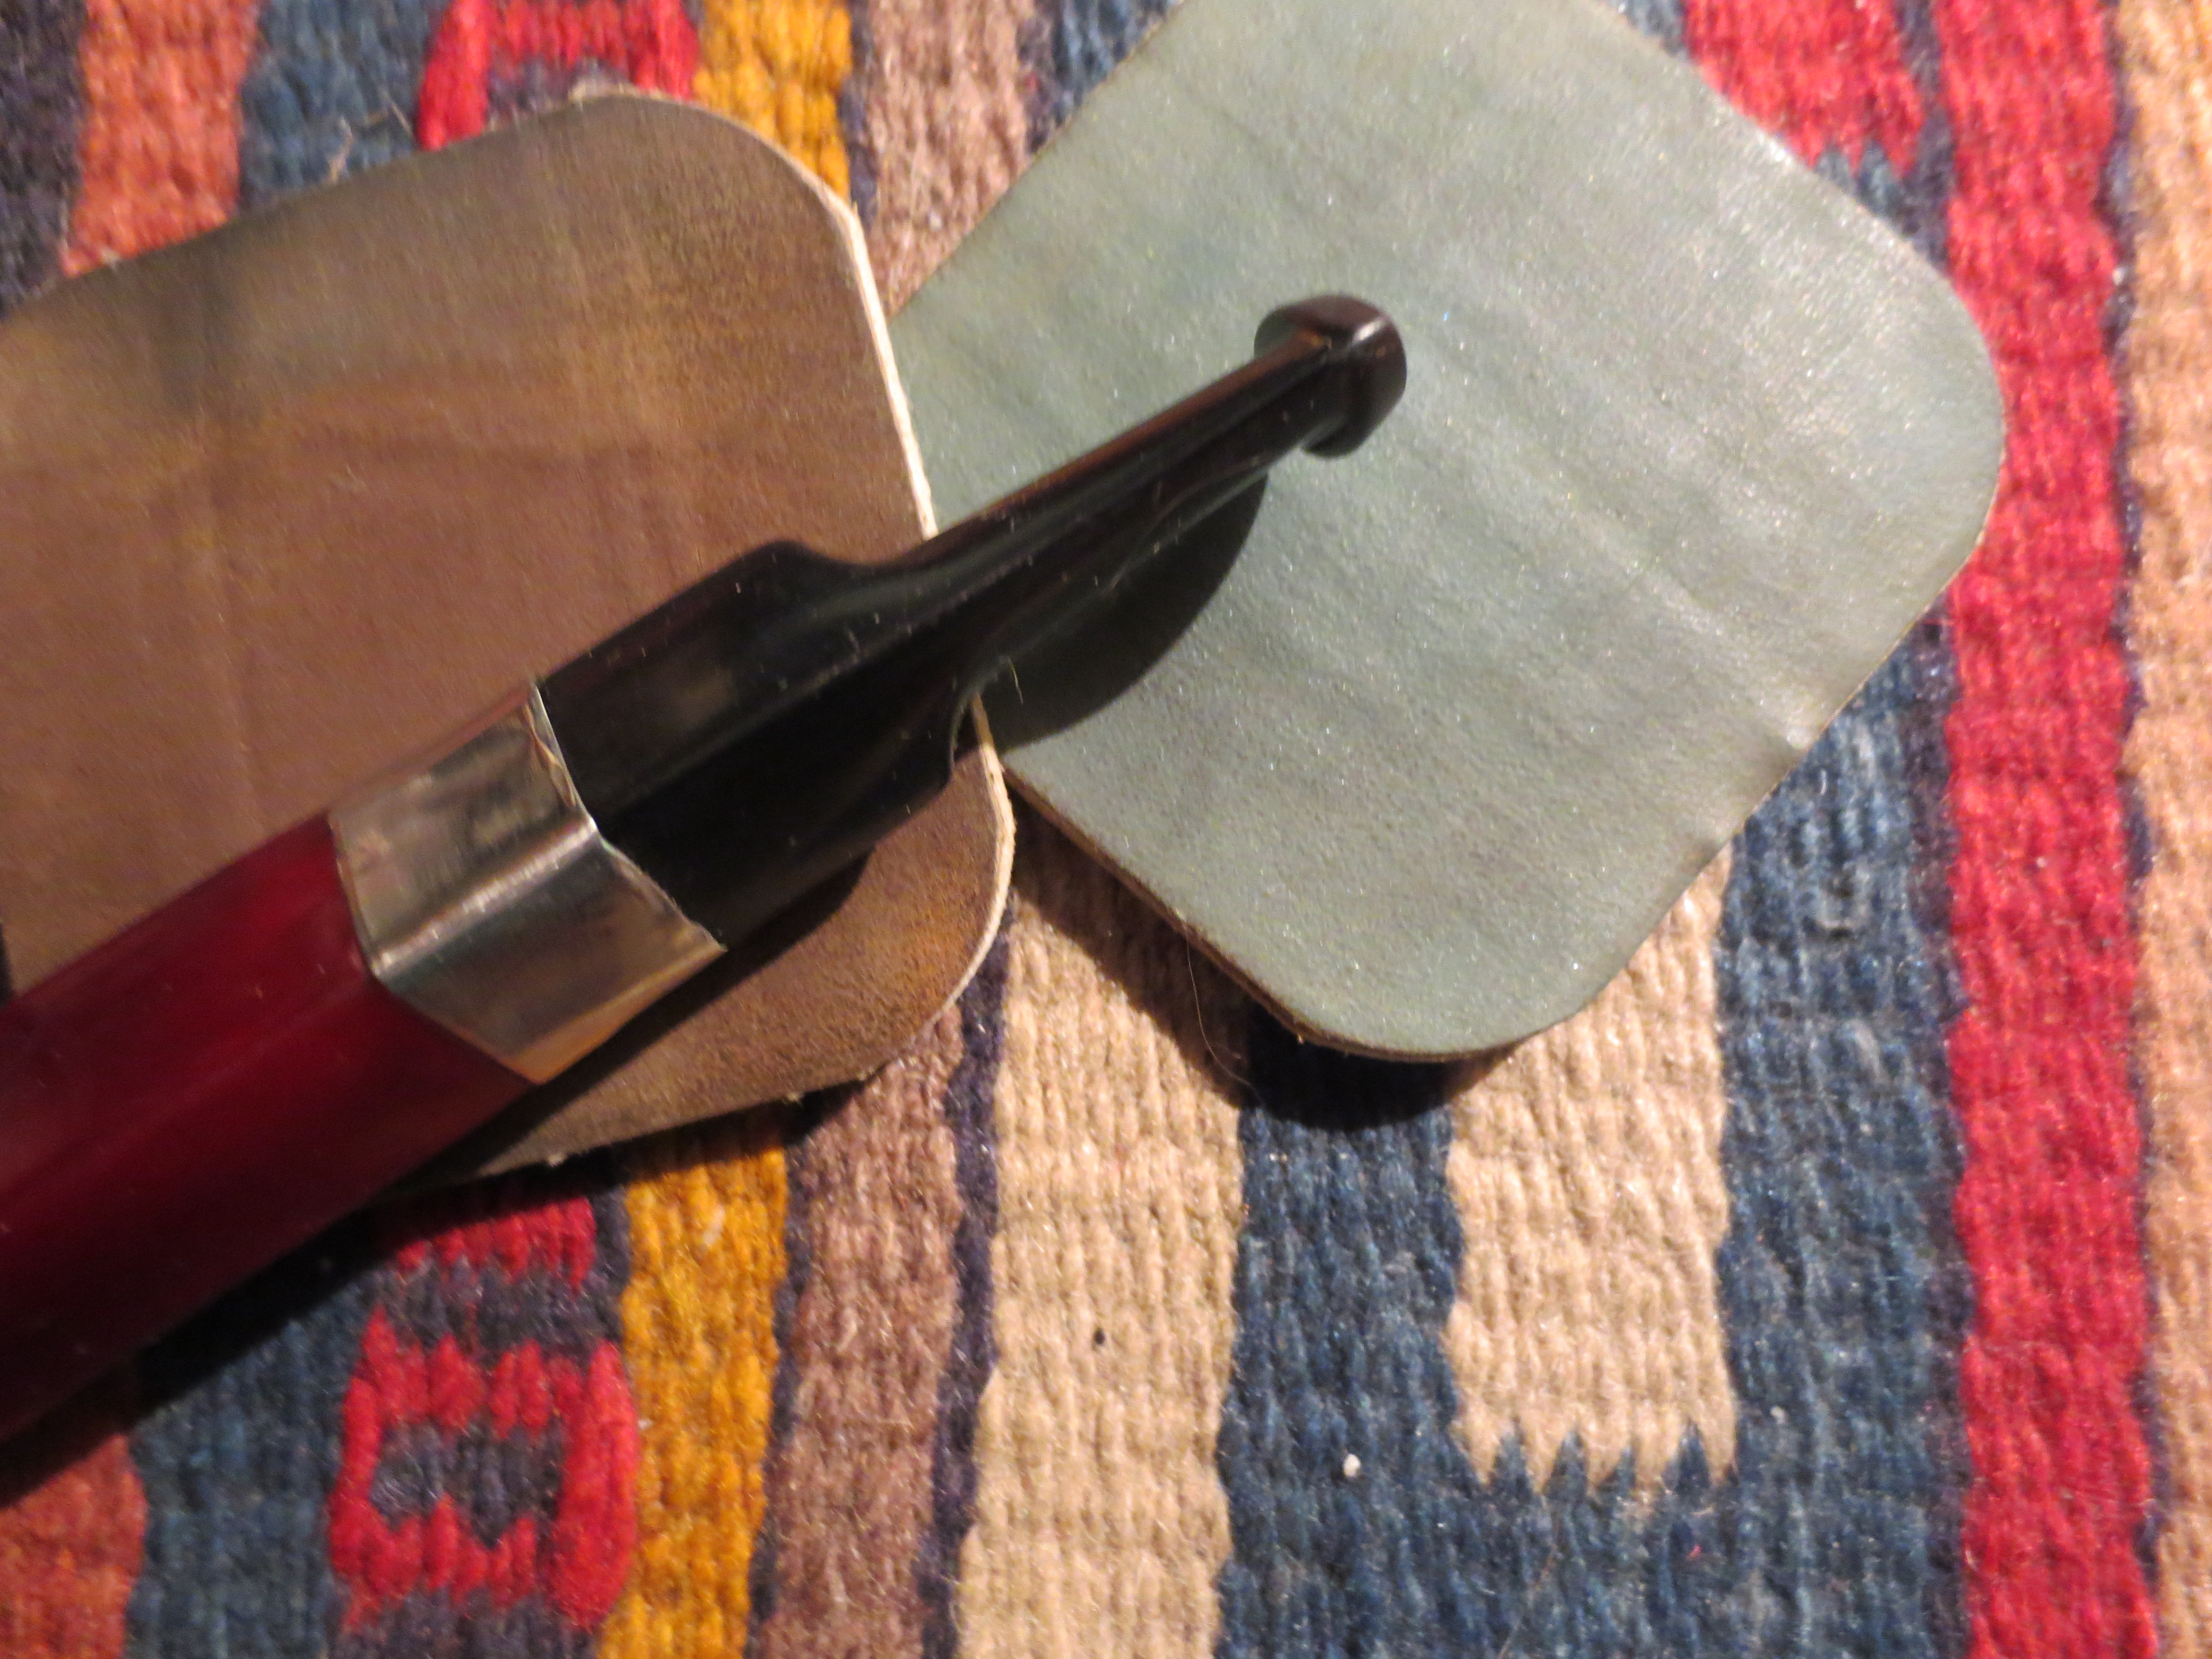
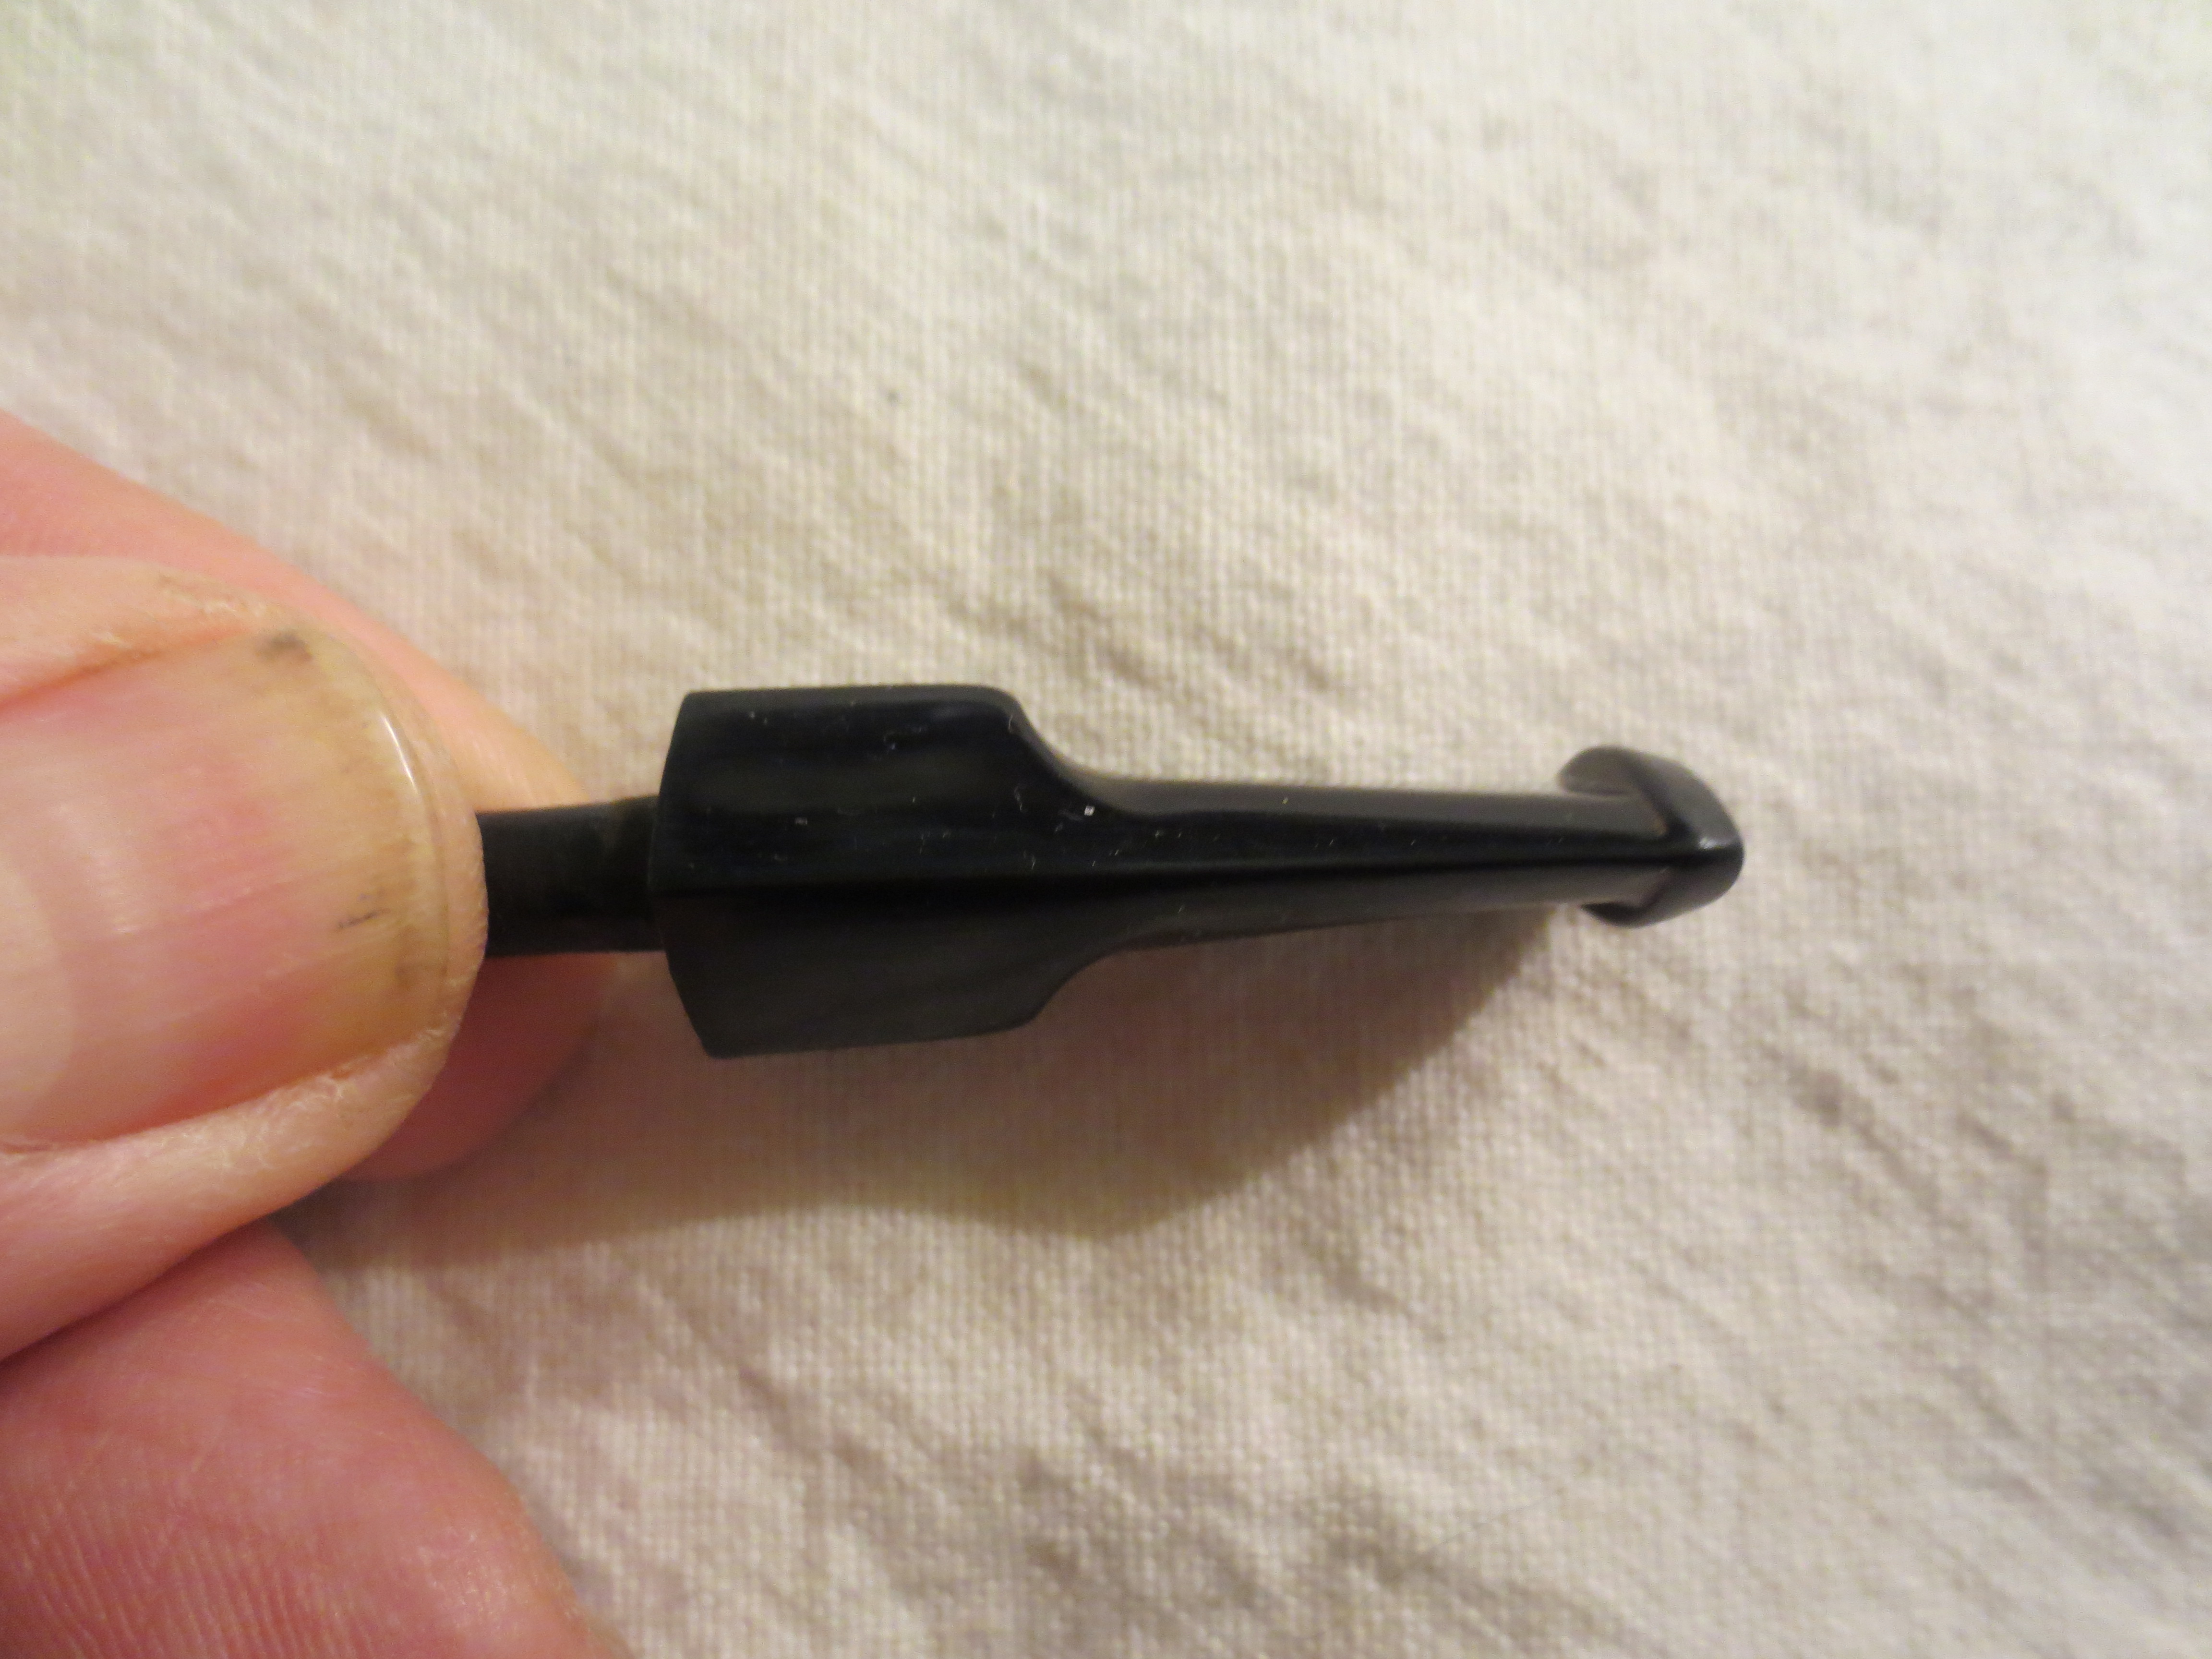
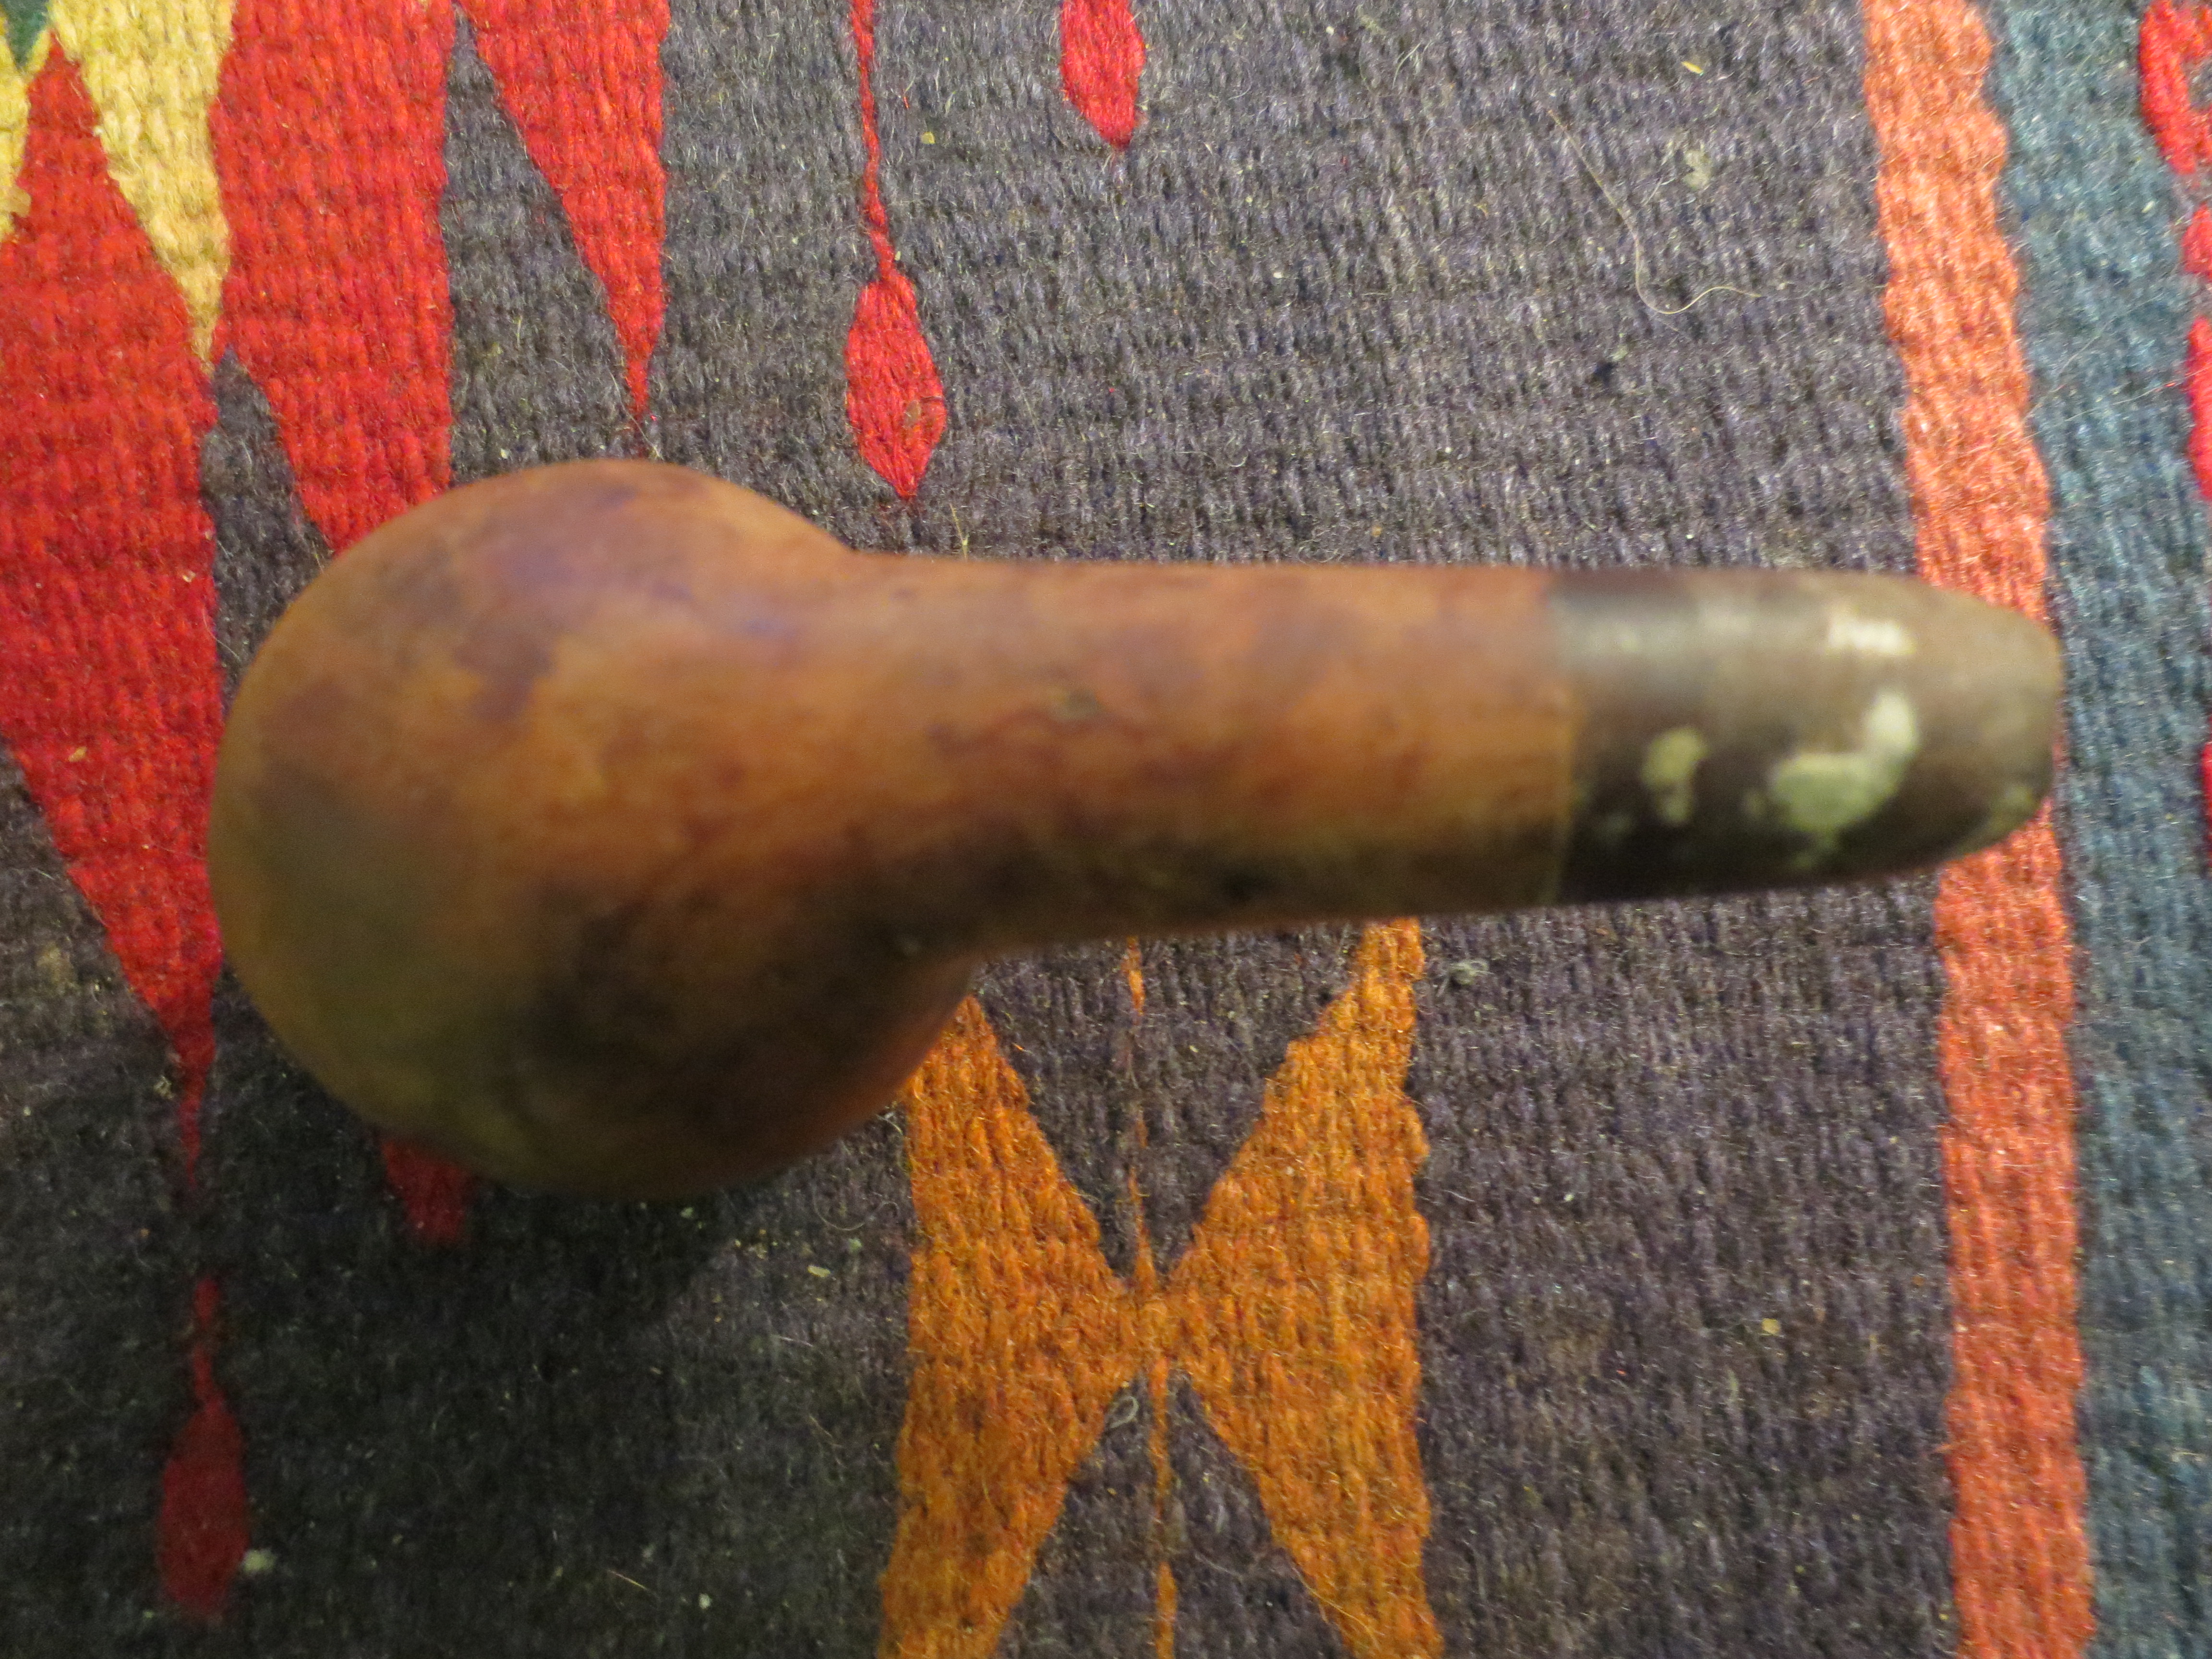
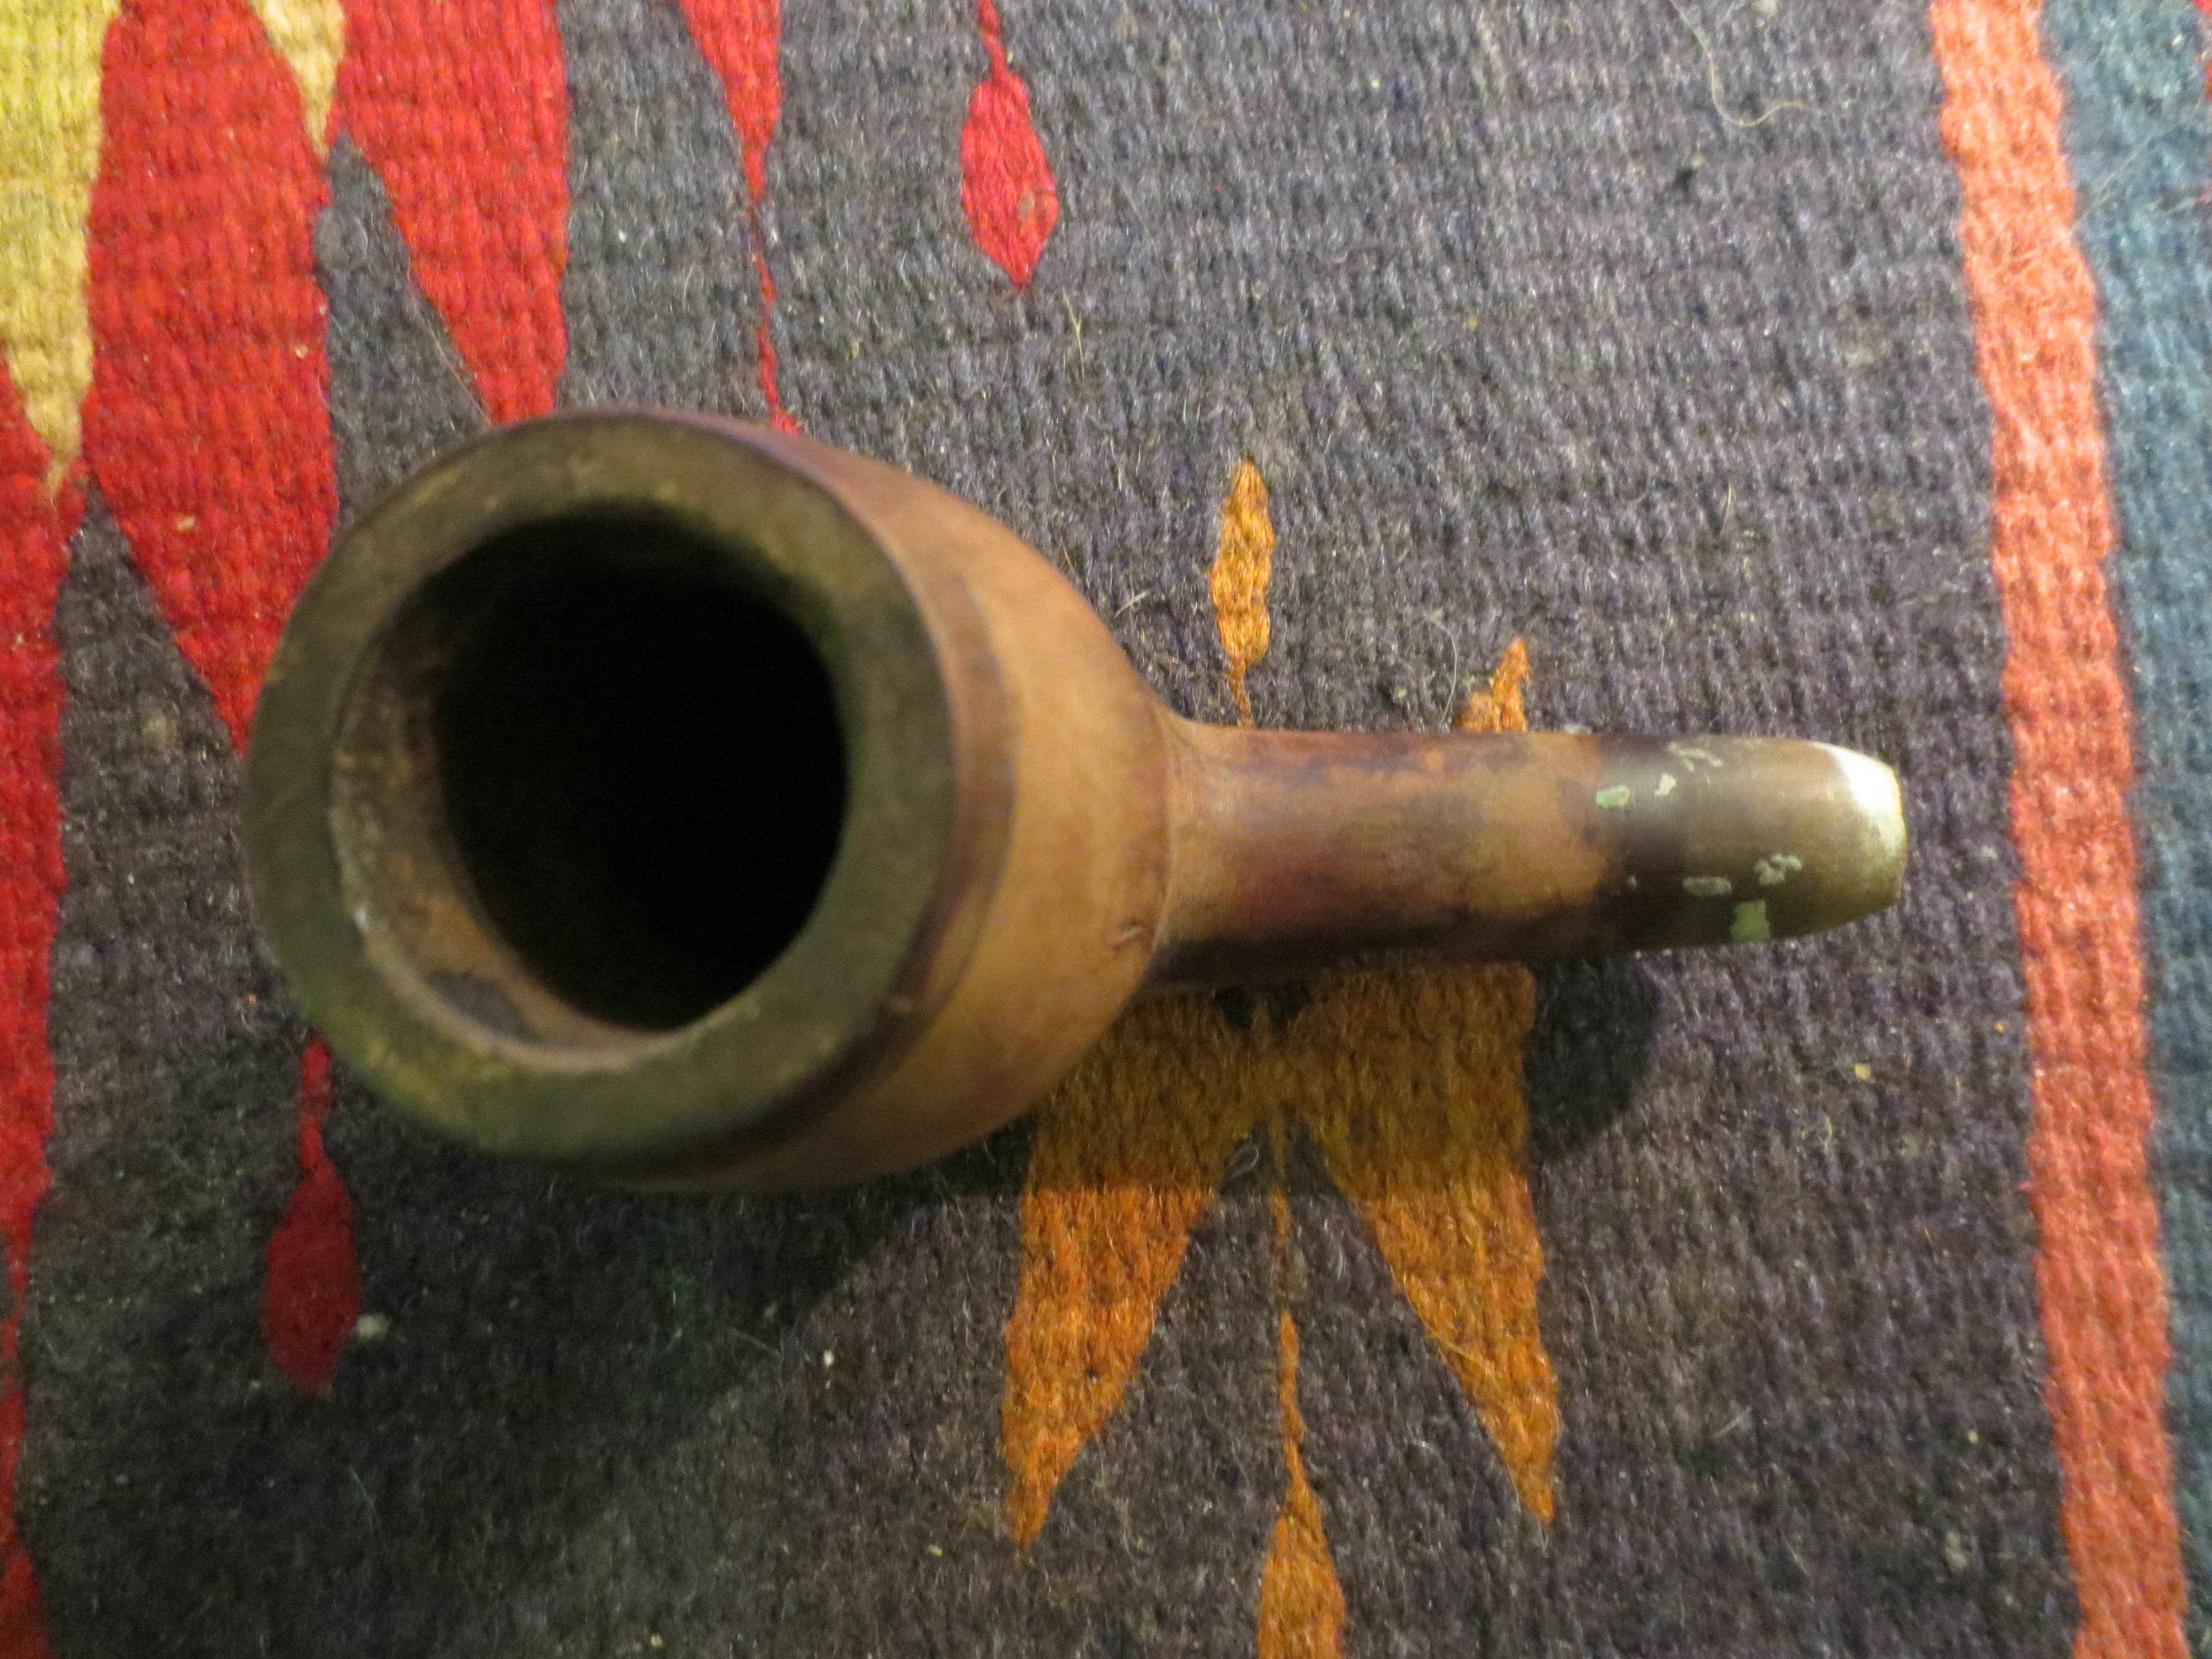
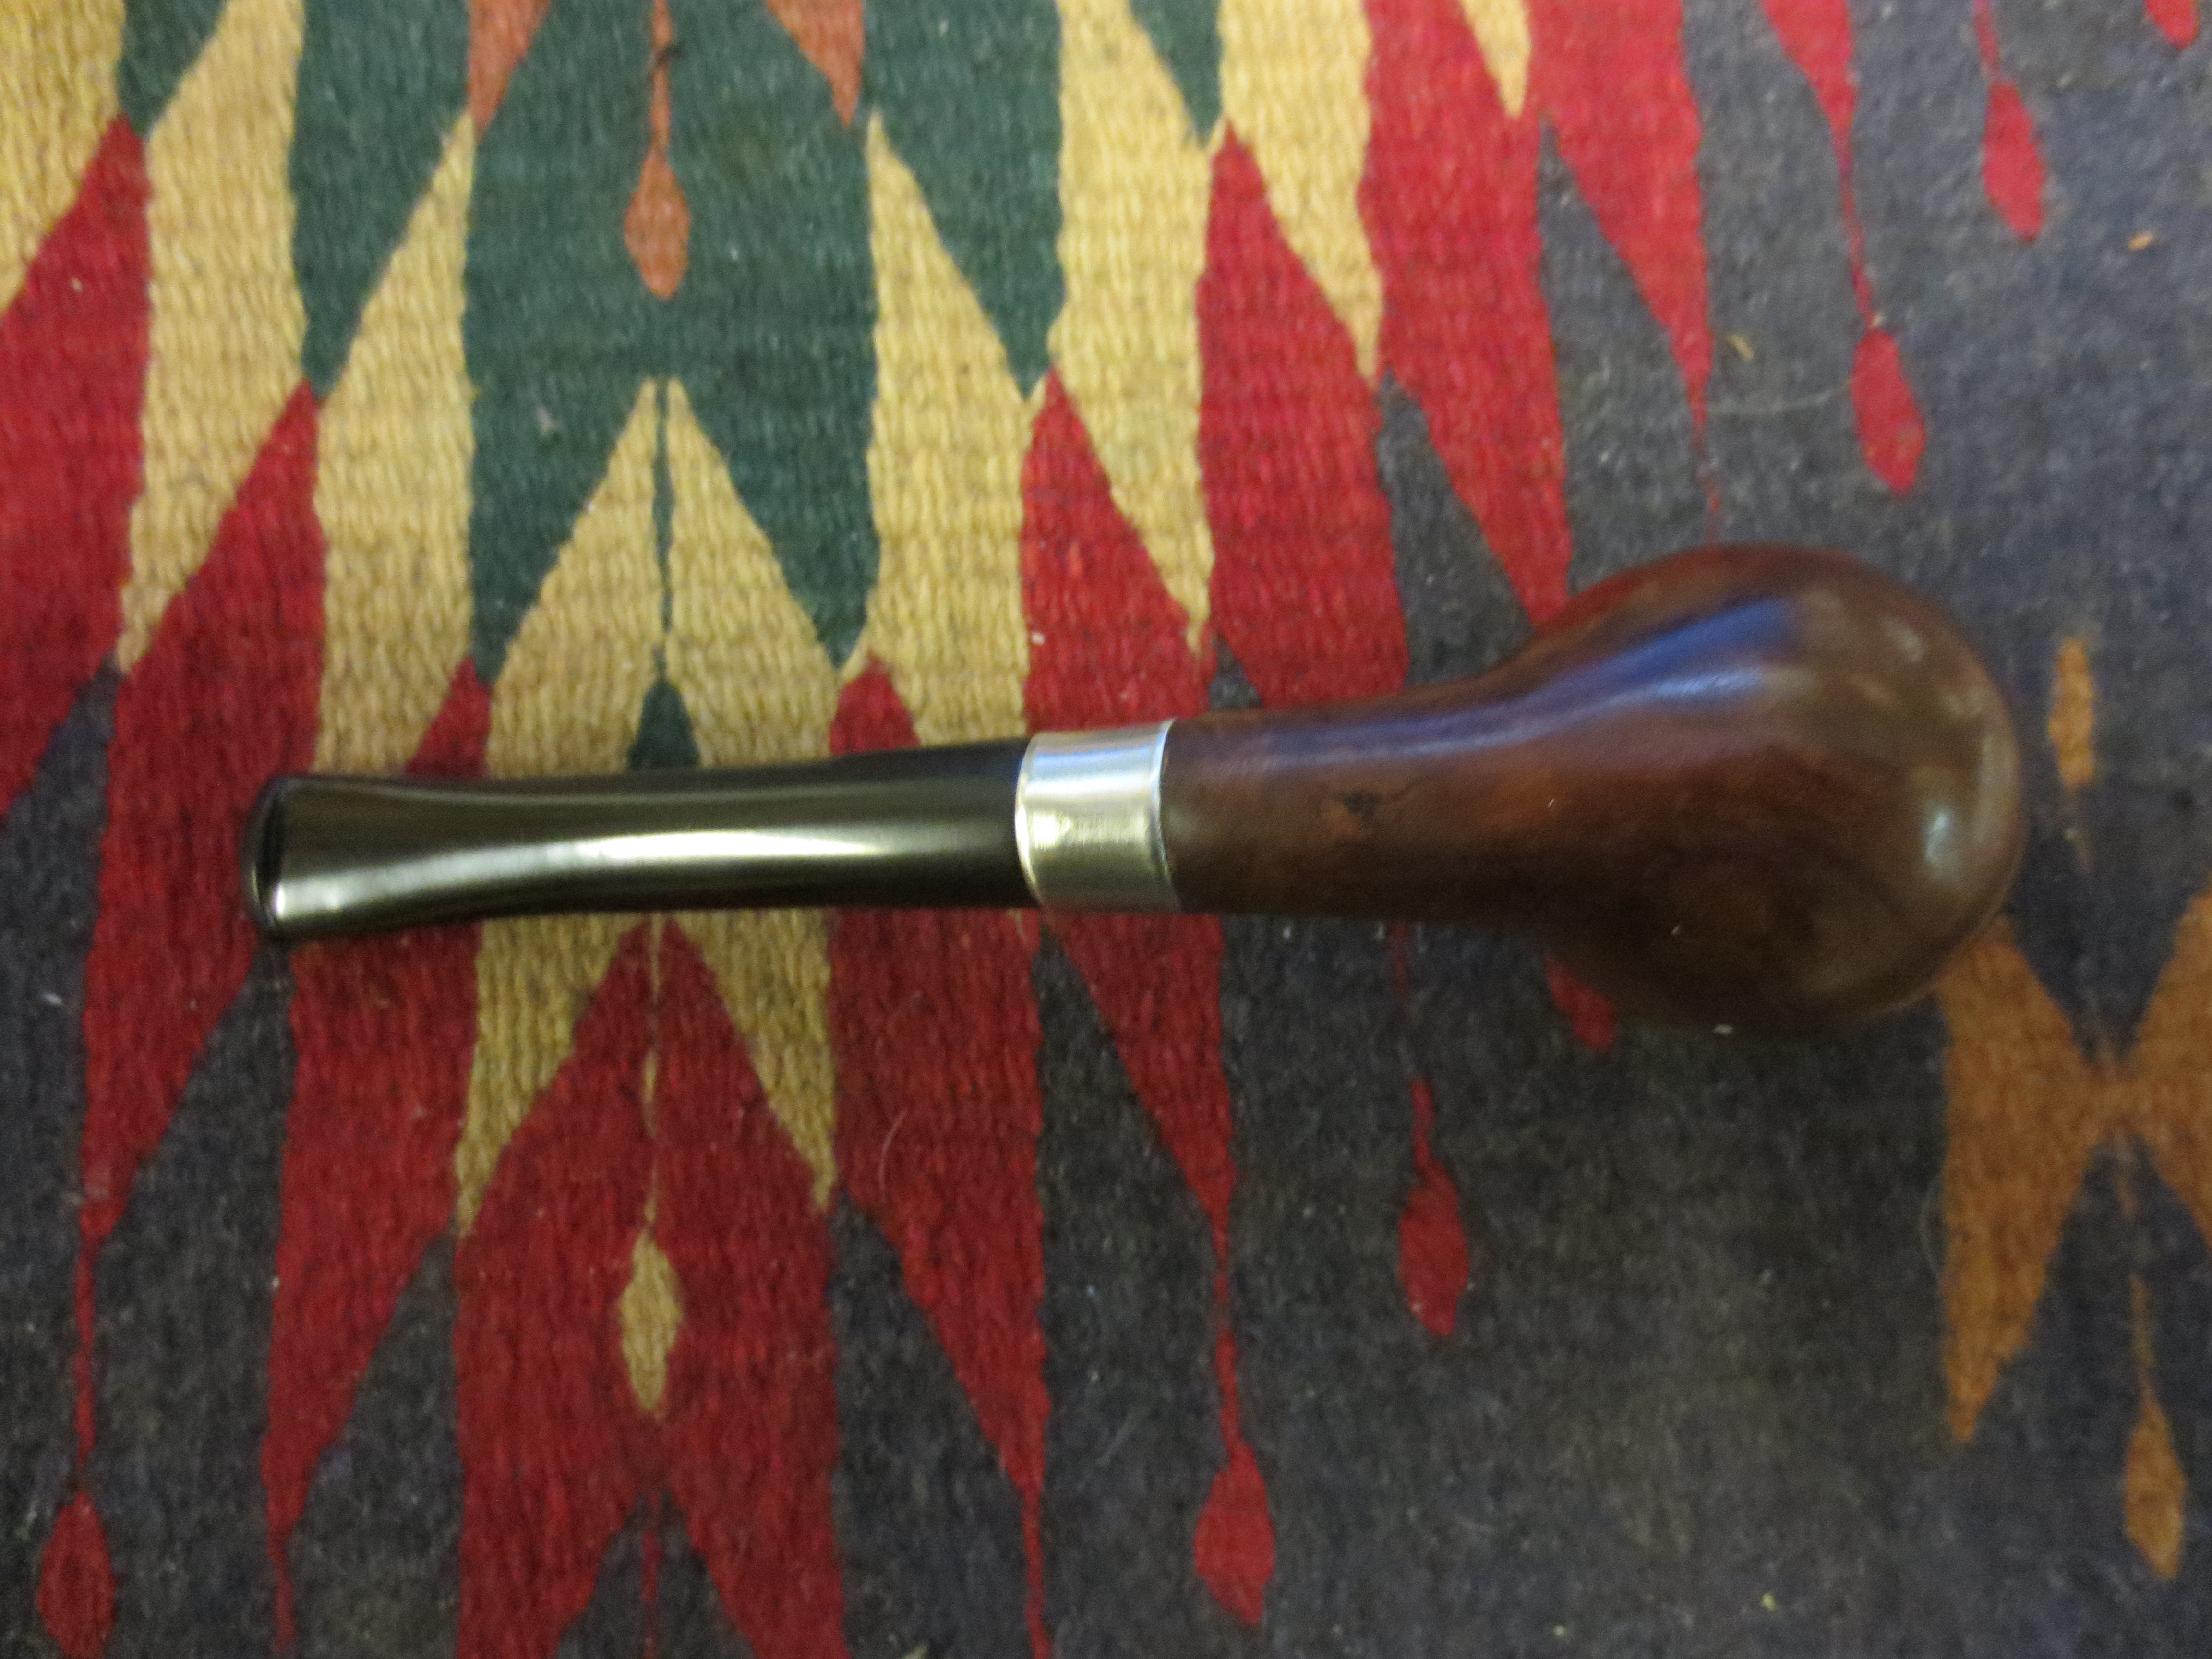
I went through my box of estate stems and found one that was a good fit to the shank. Once the cleanup of the stem was done and a flattening of the underside of the stem the pipe would look like it came with that stem. The stem had a calcified buildup around the button and some tooth marks as well. The oxidation was not too bad but was present.

IMG_1492

IMG_1493

IMG_1494

IMG_1495

IMG_1496

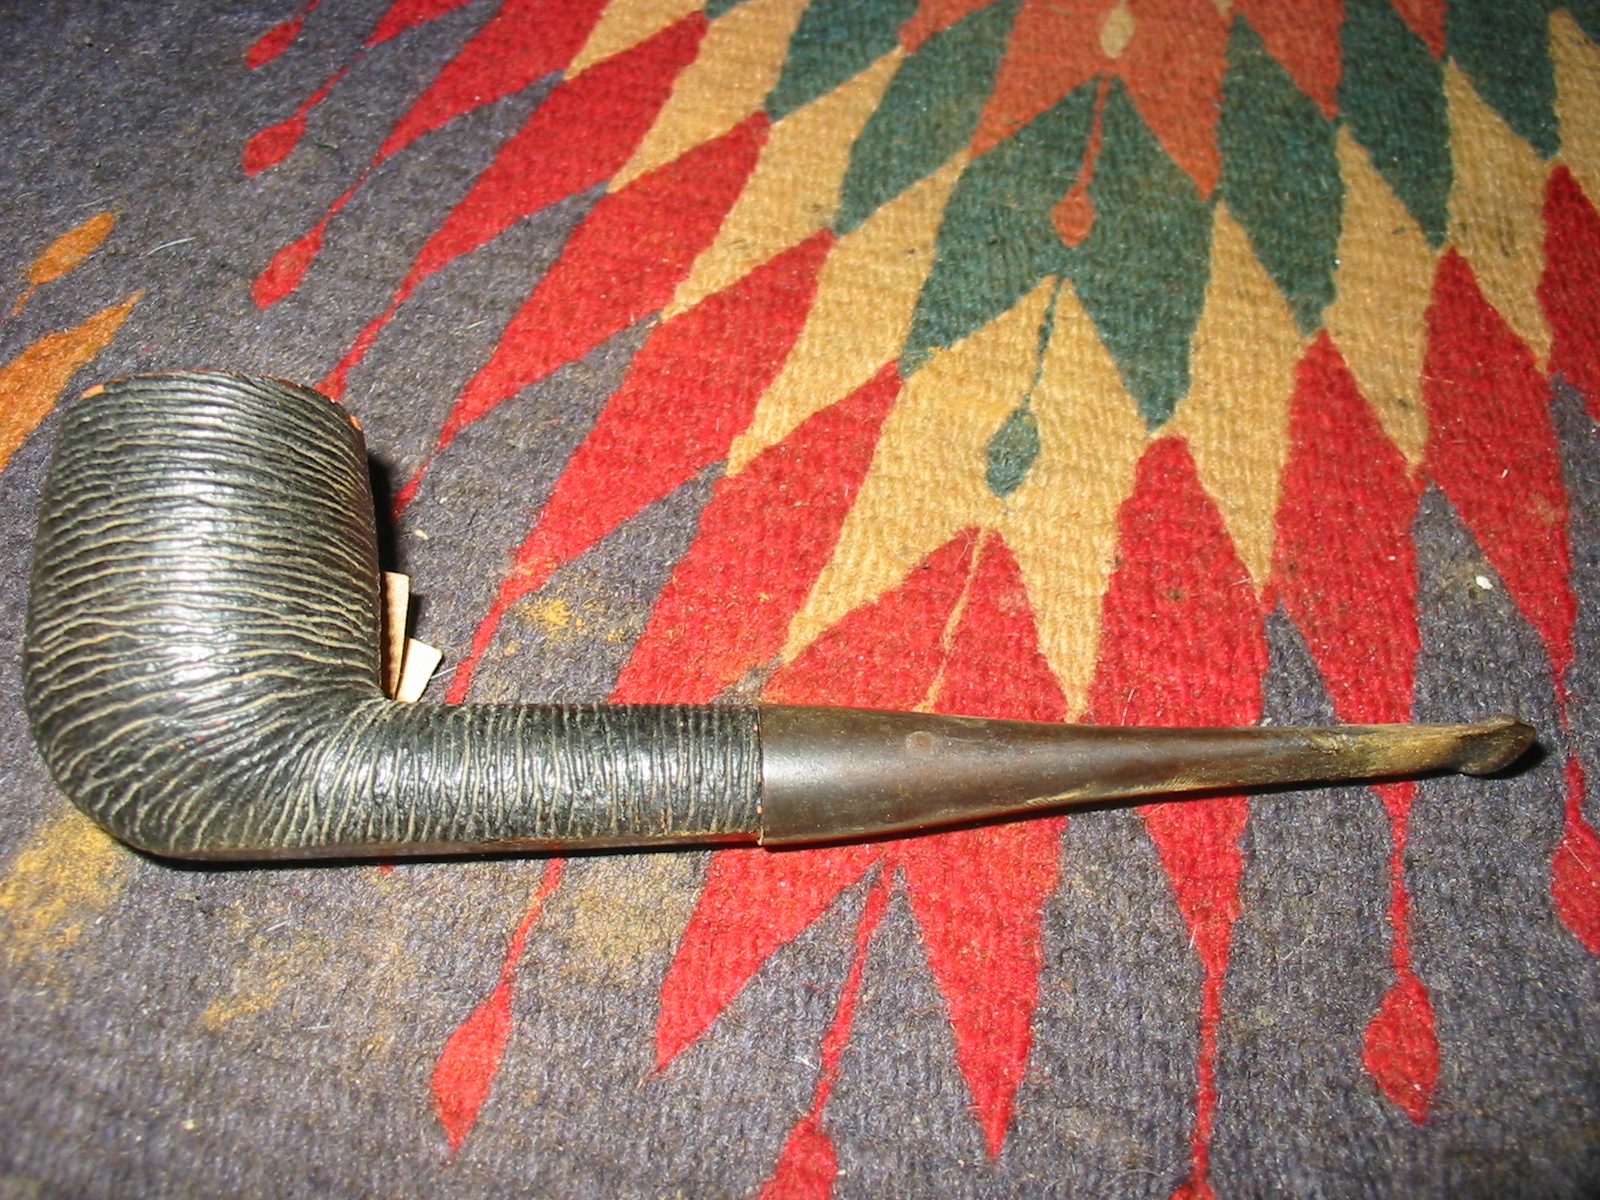
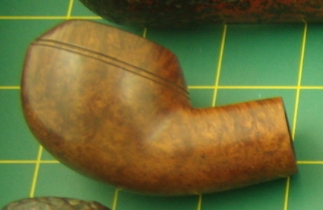
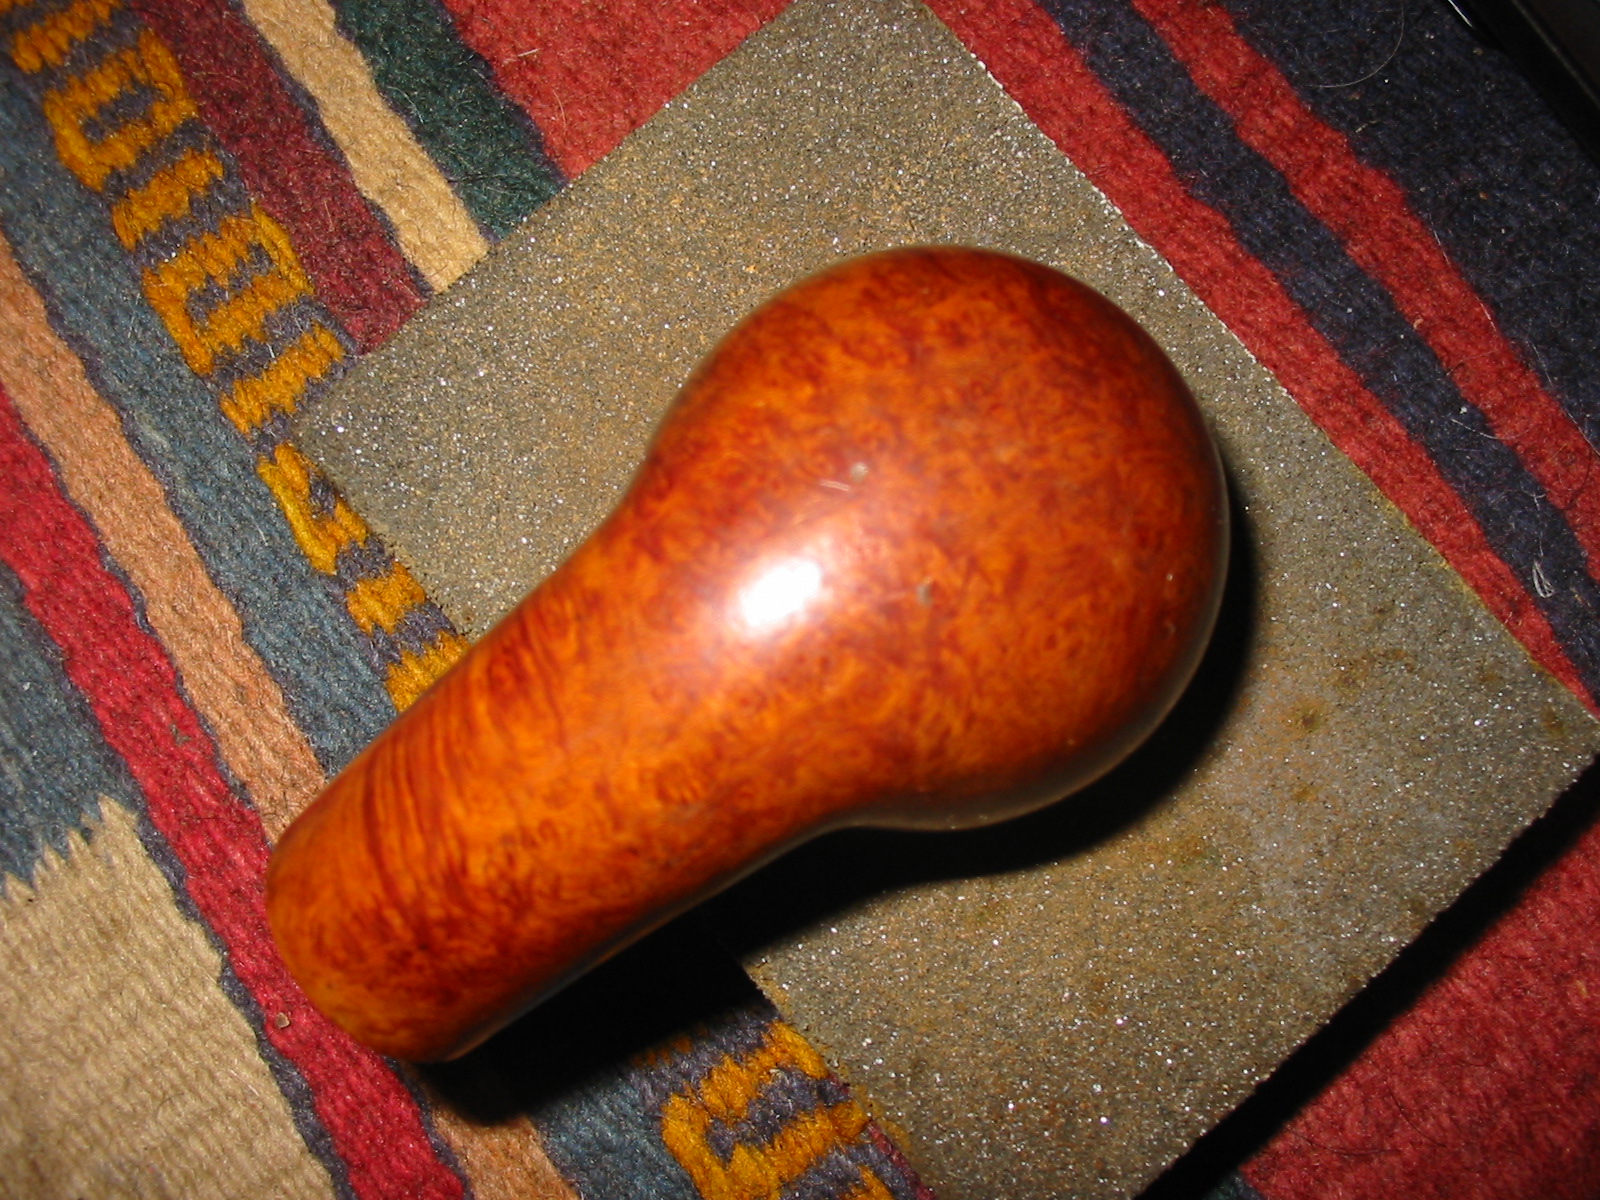
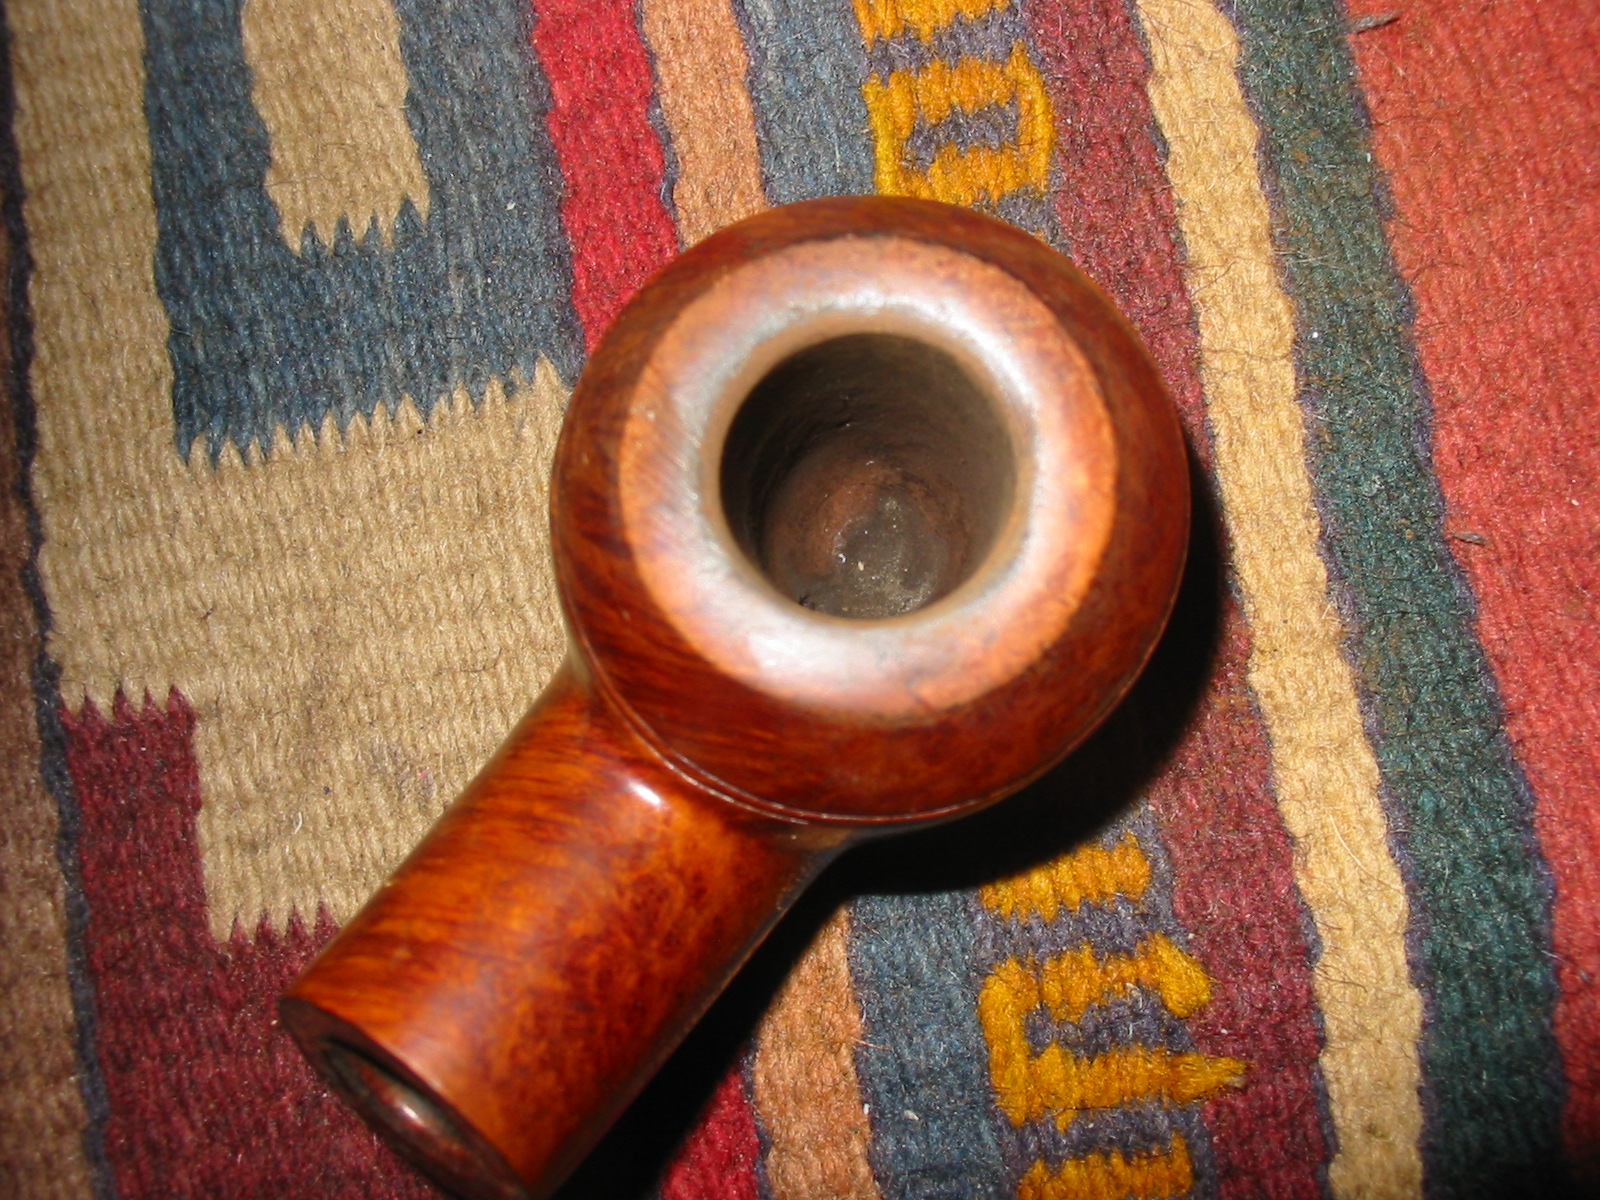
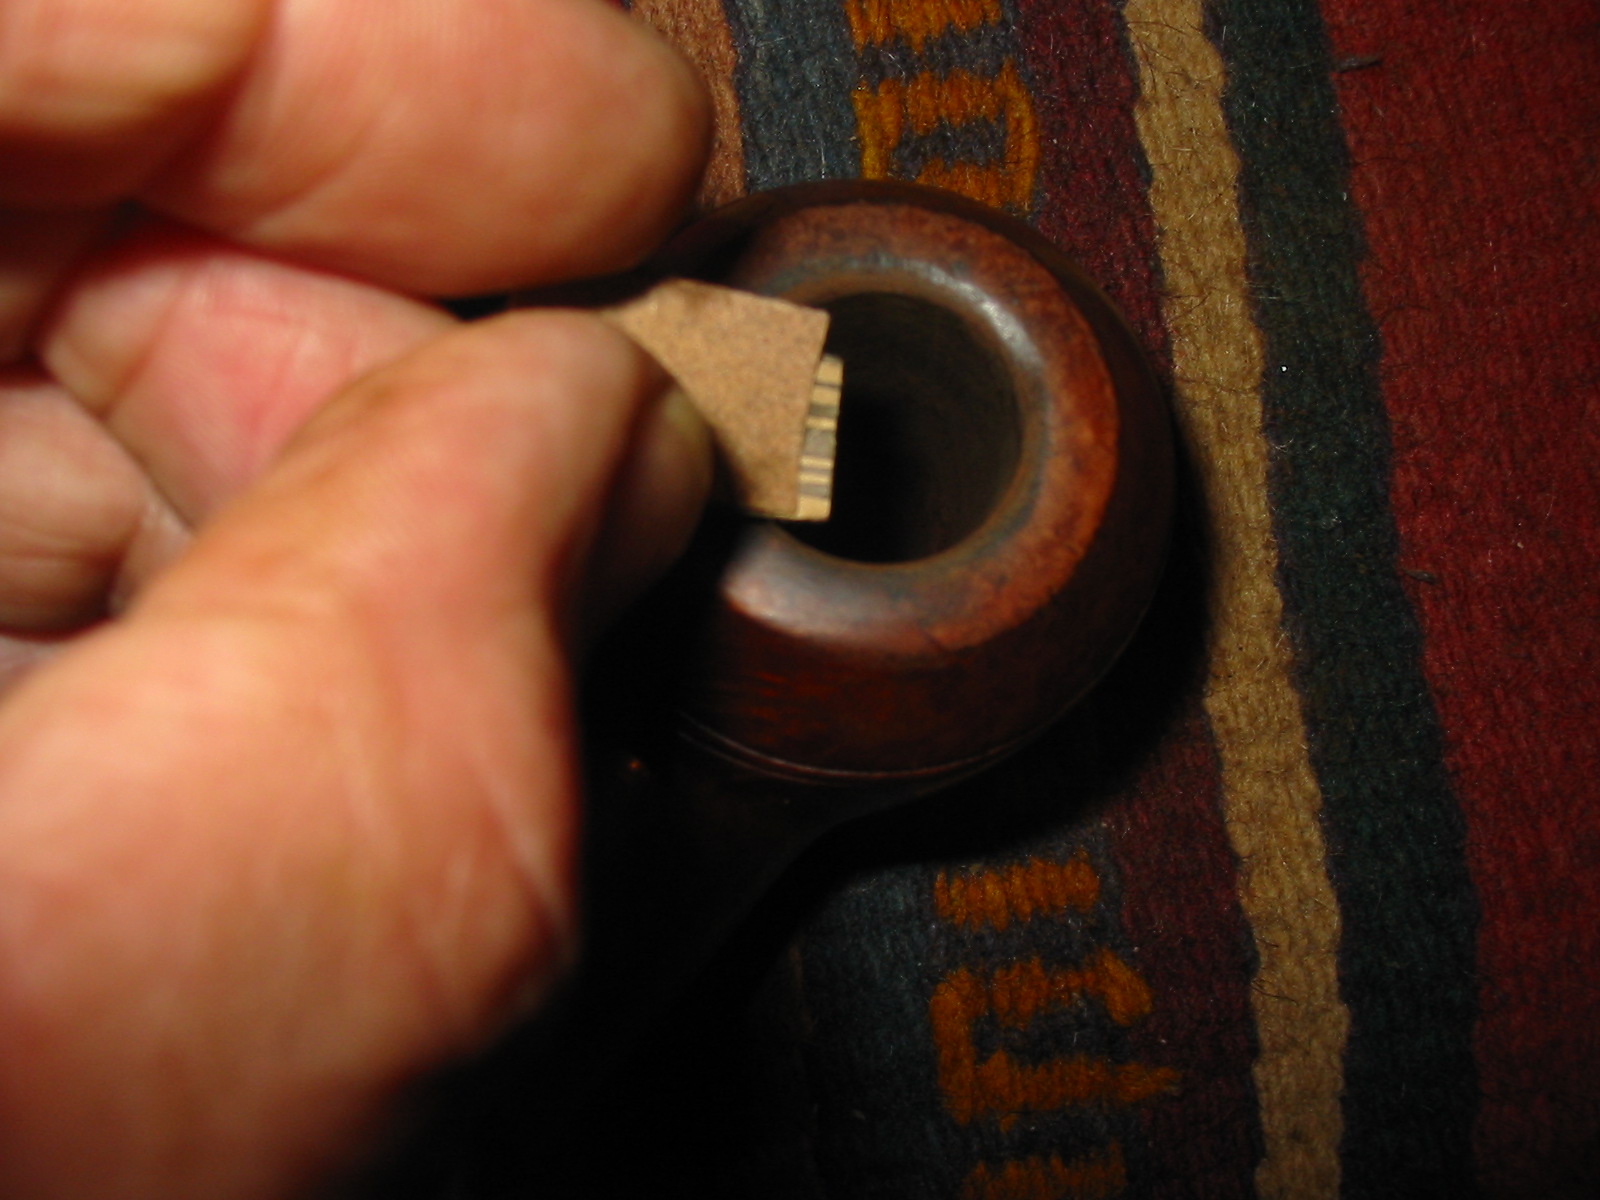
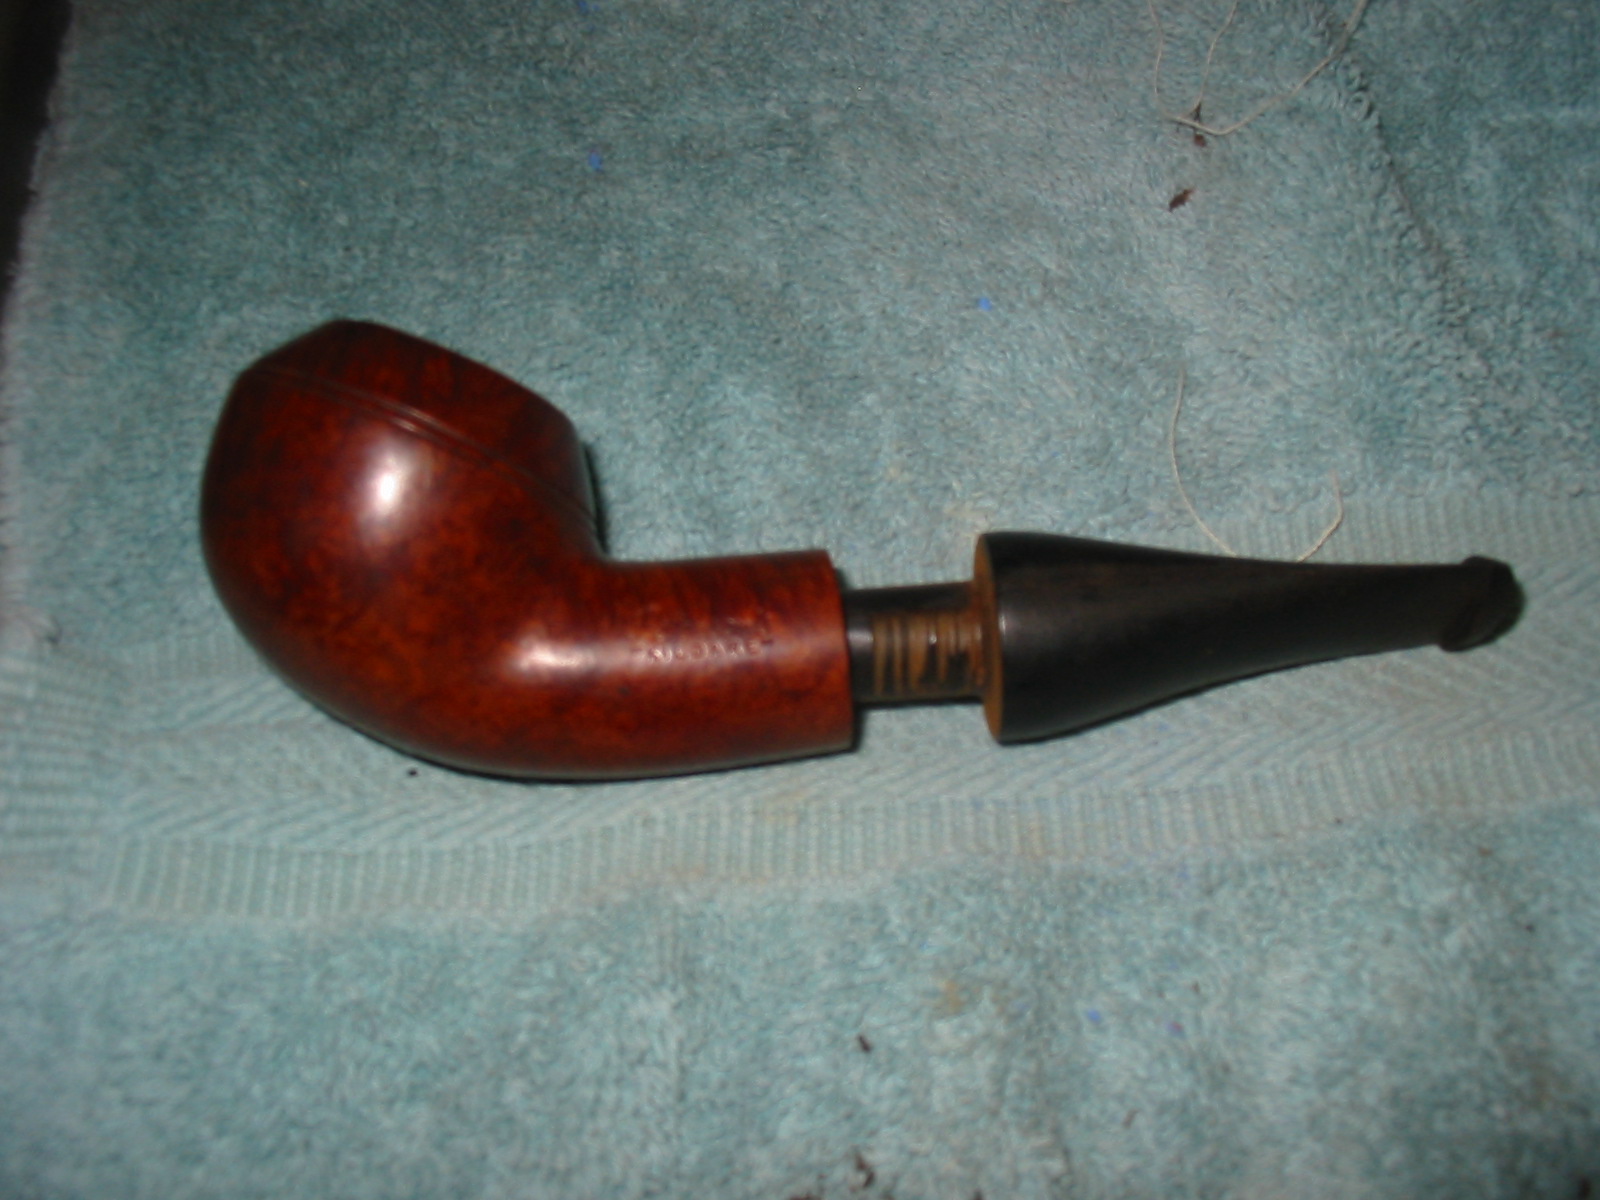
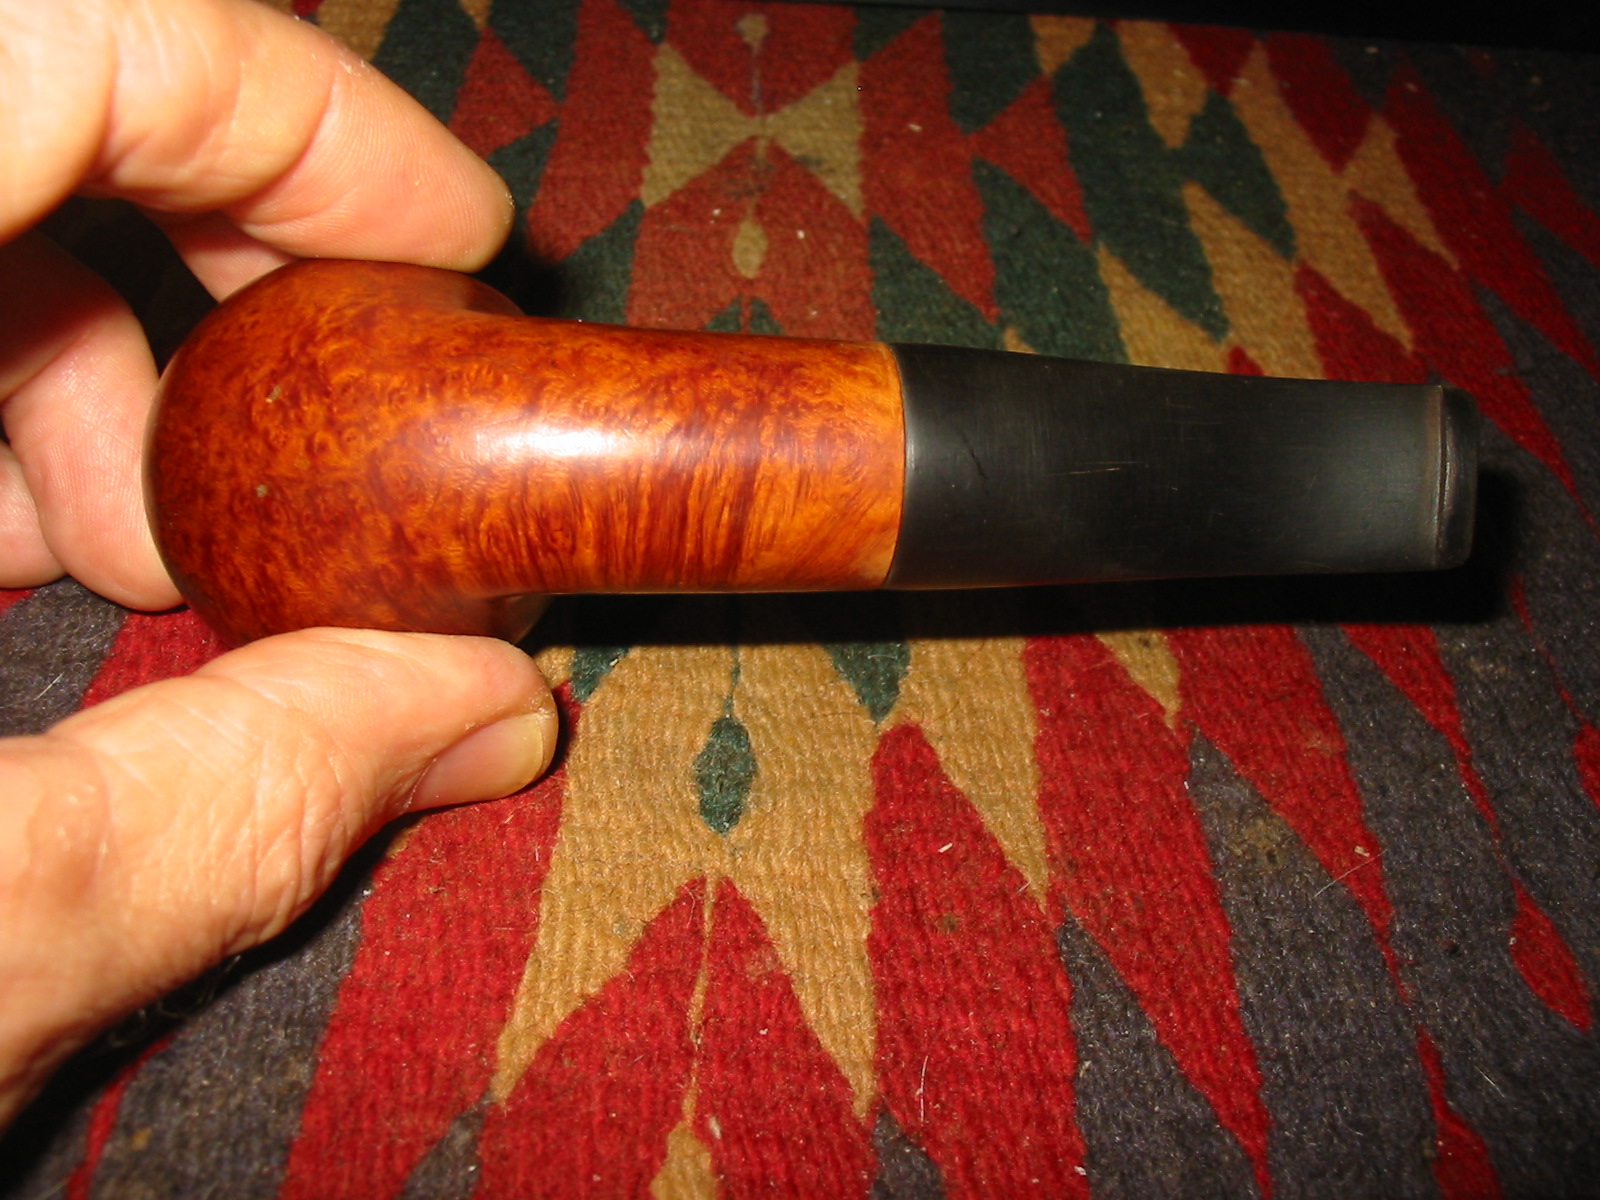
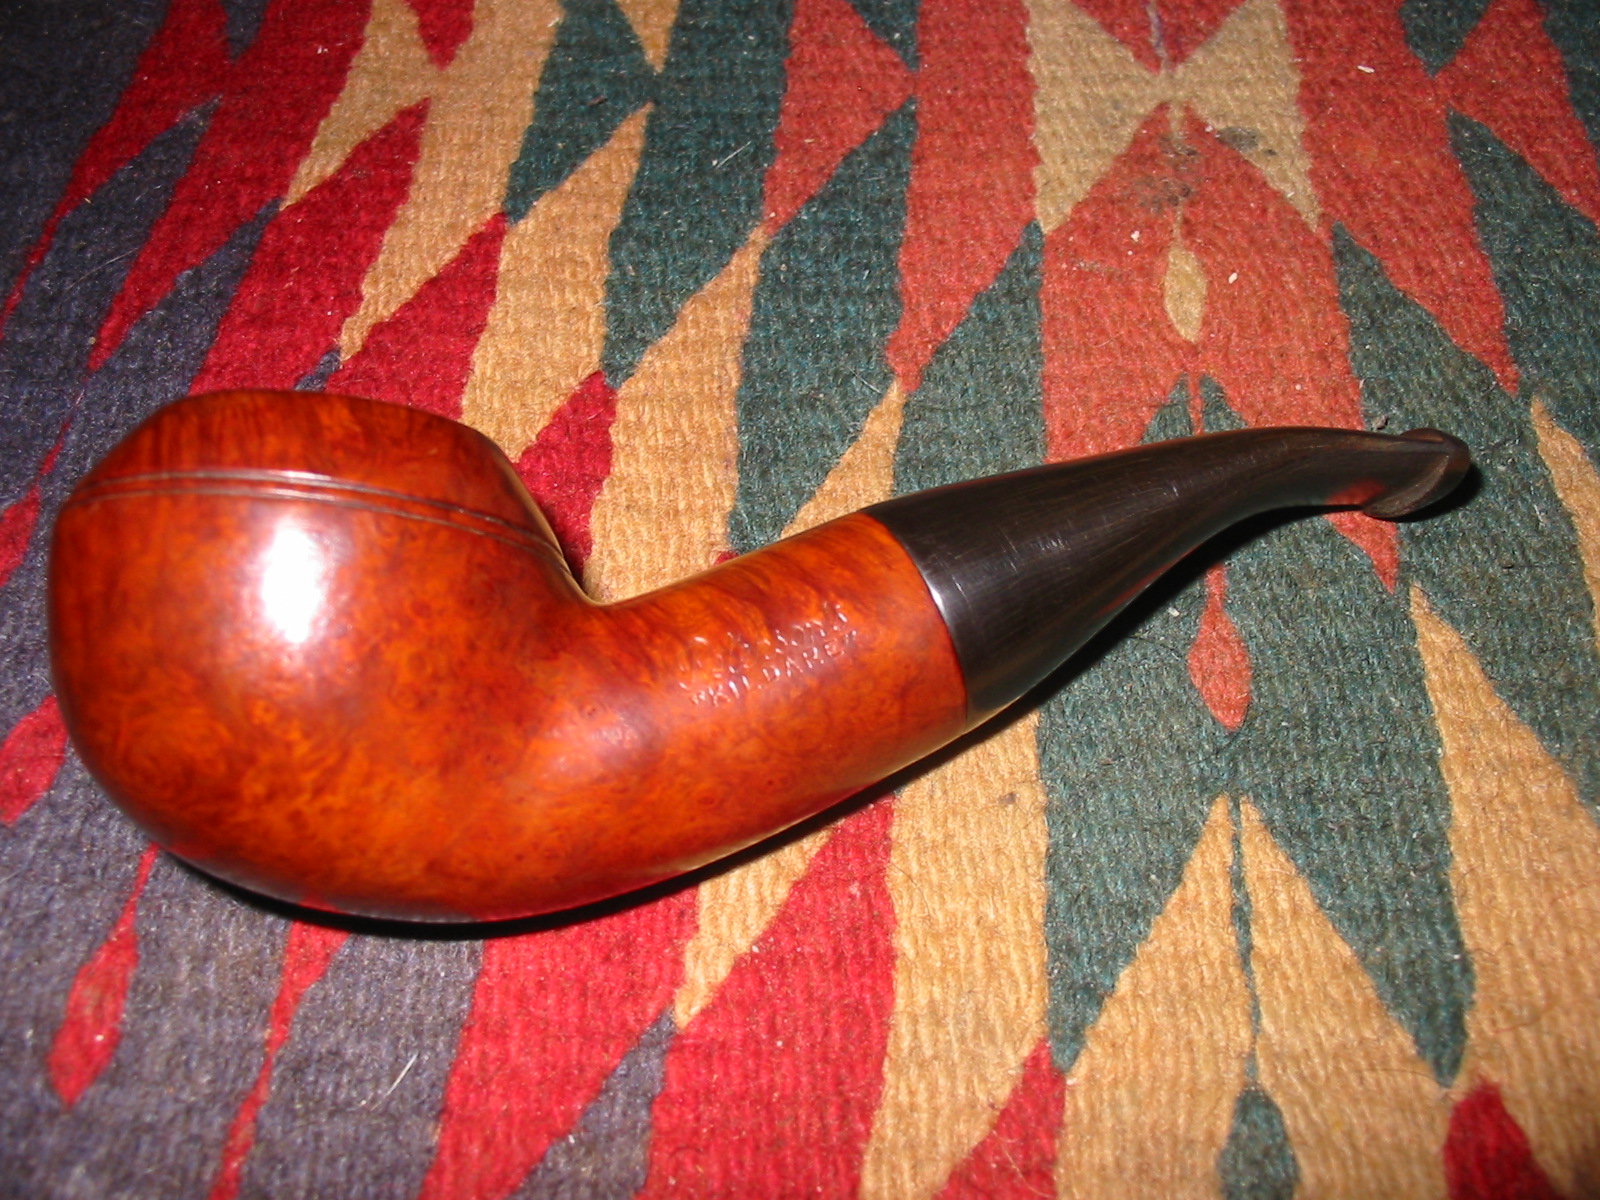
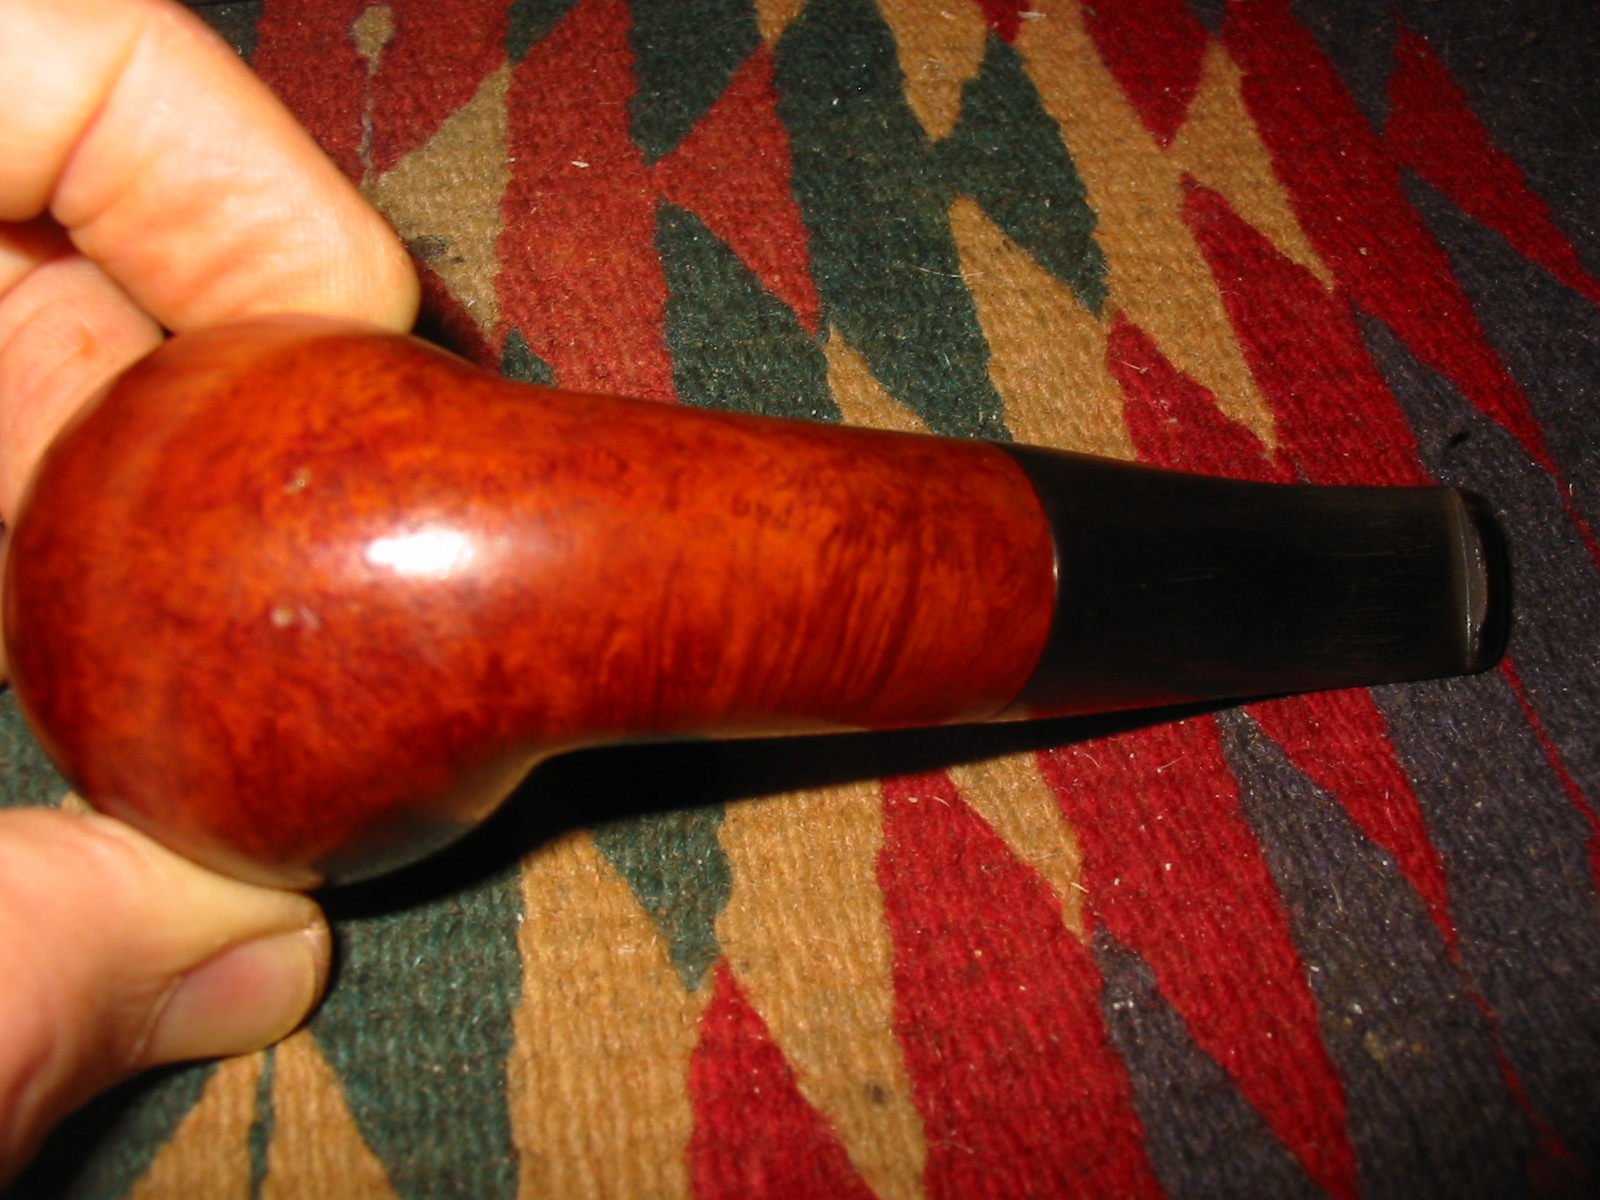
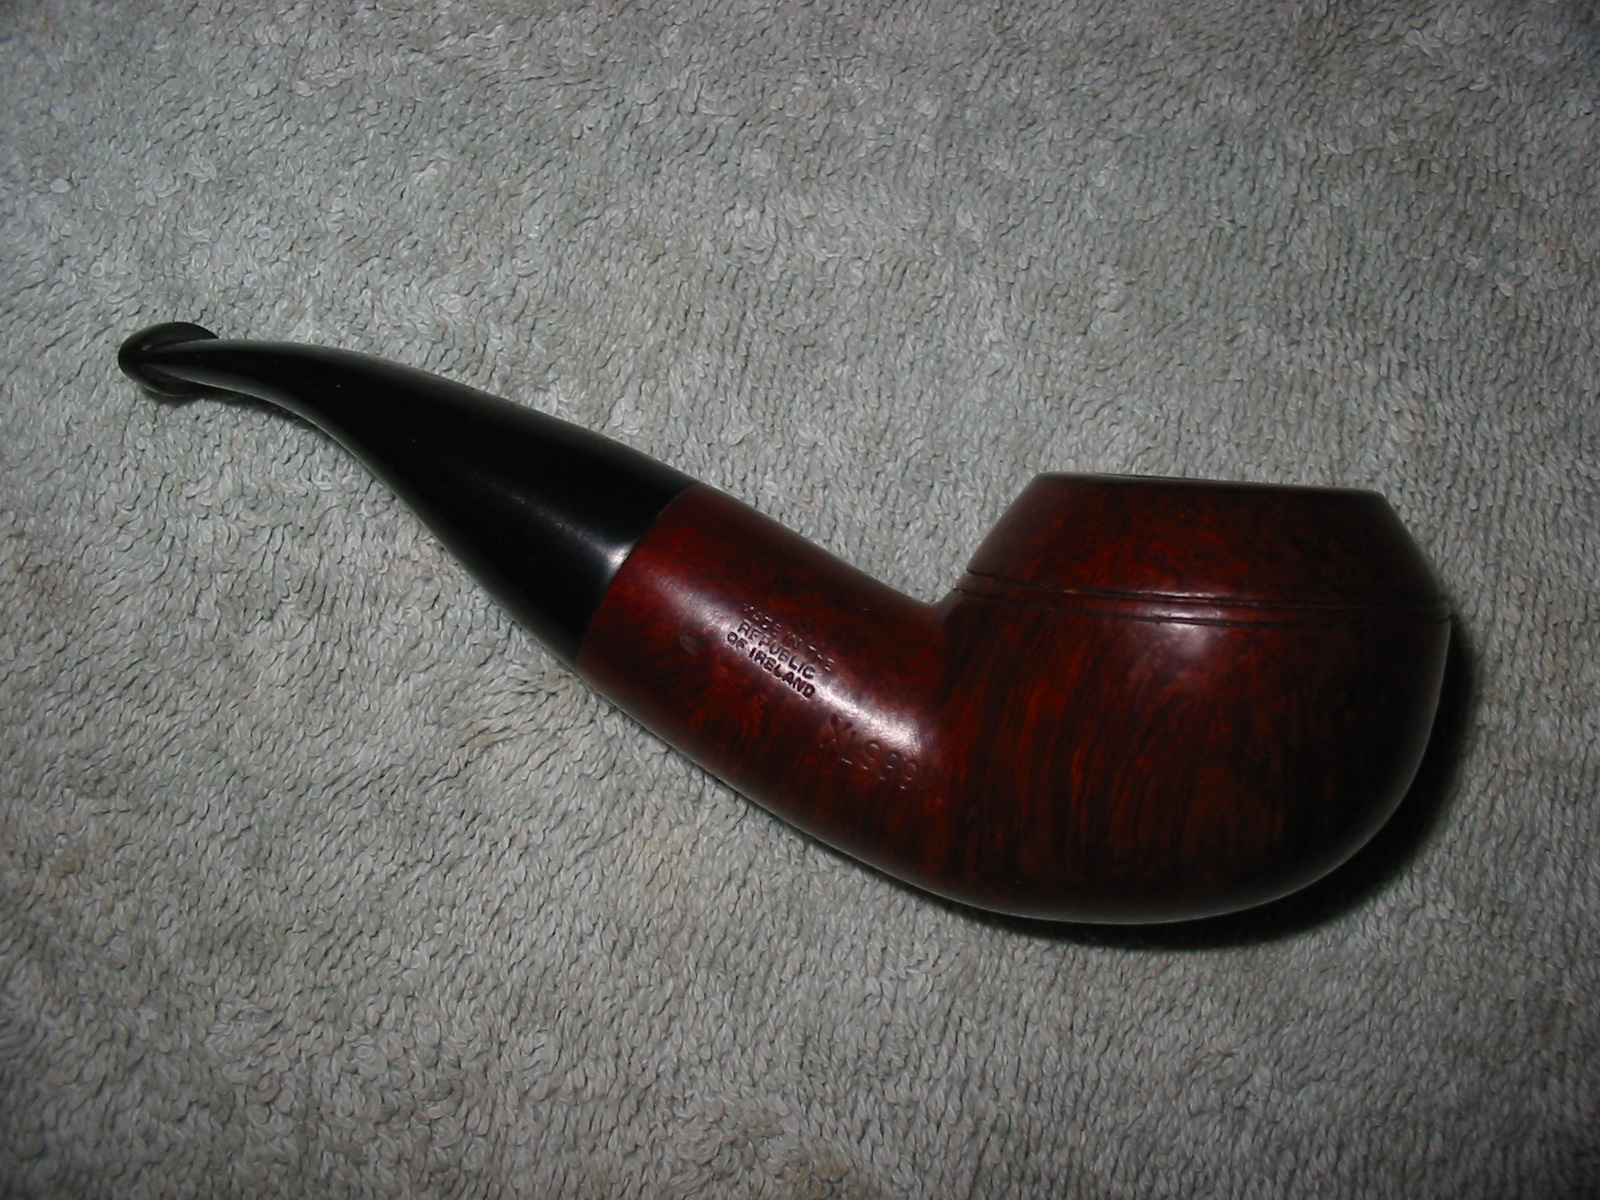
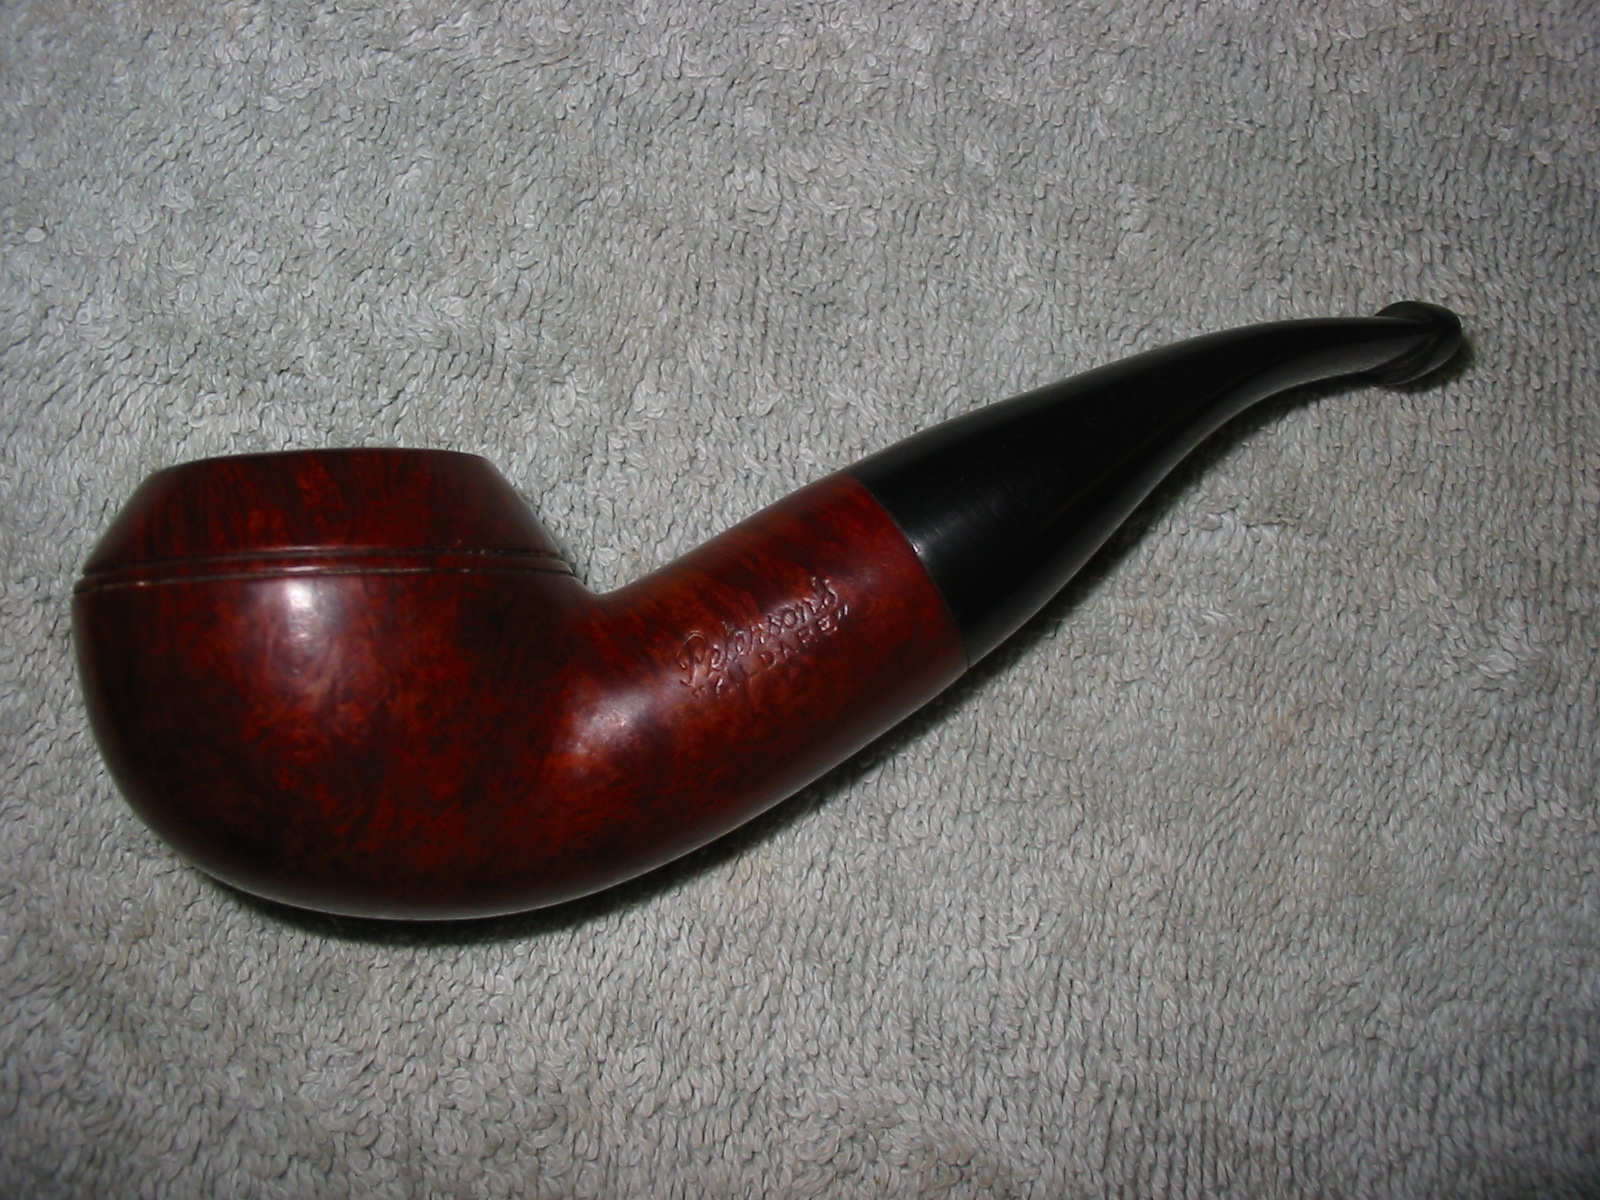
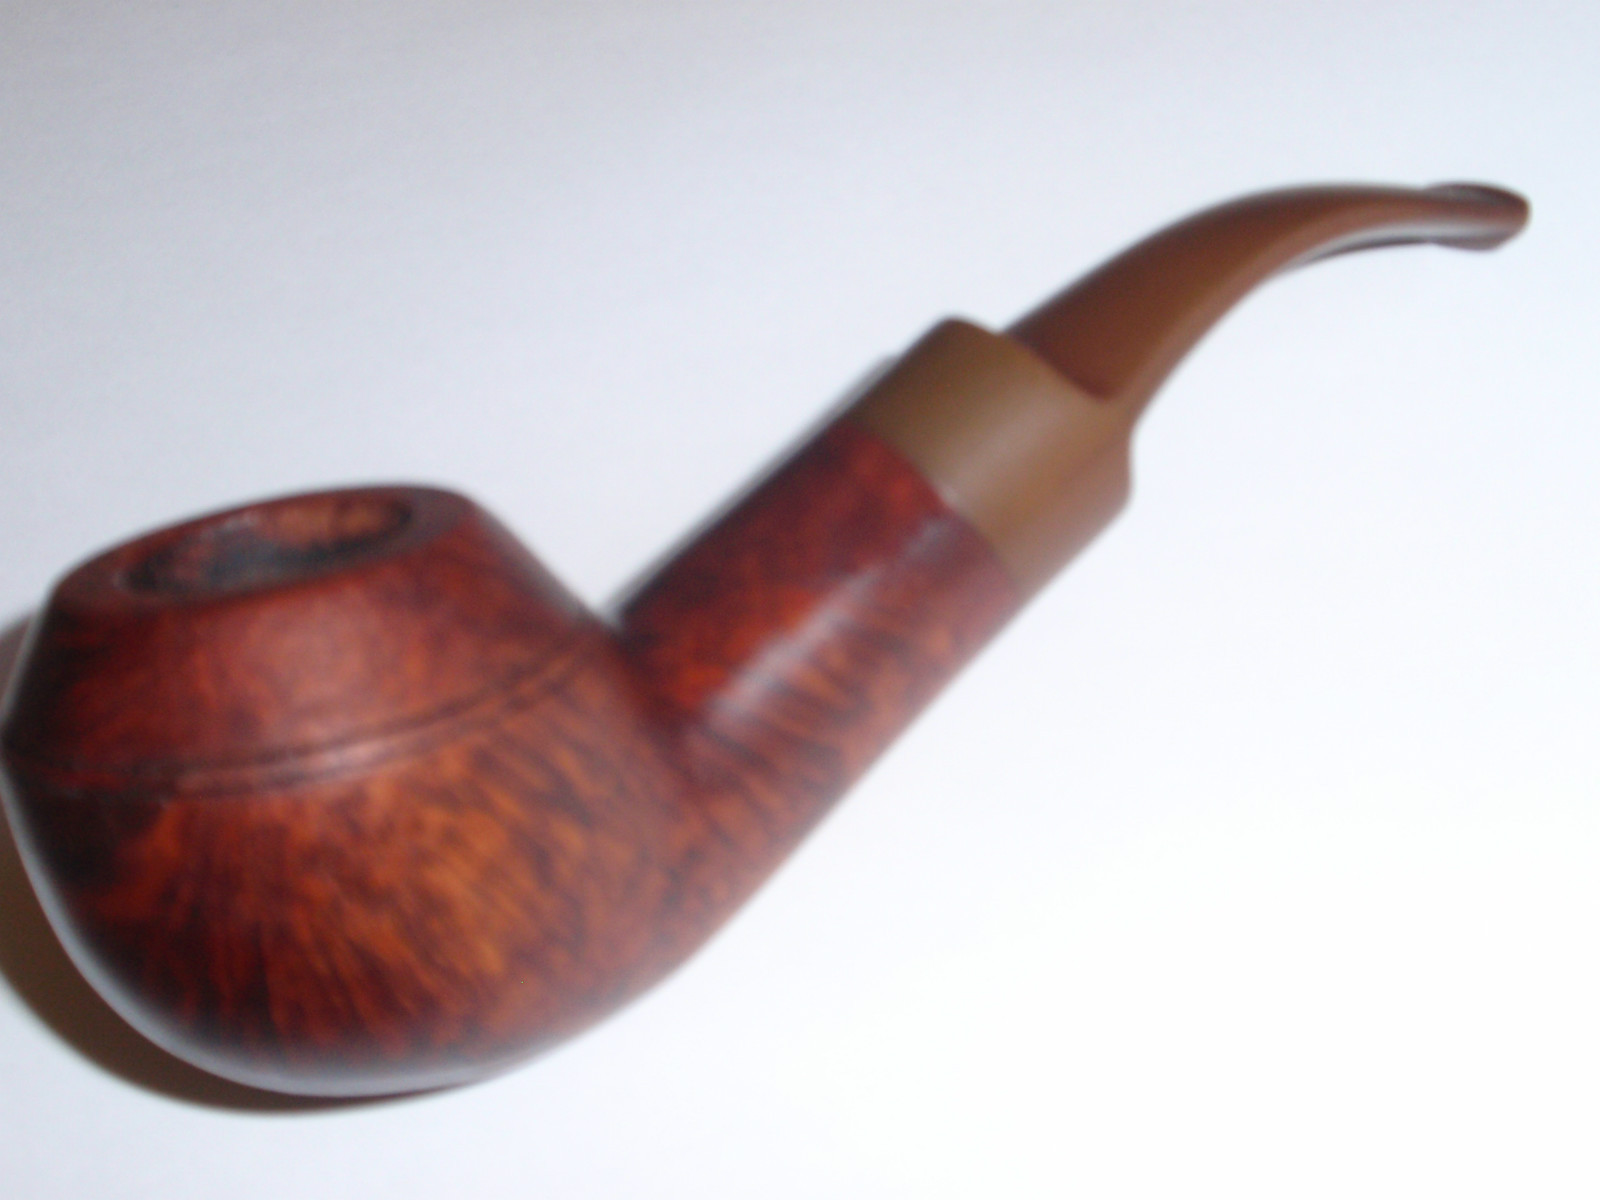
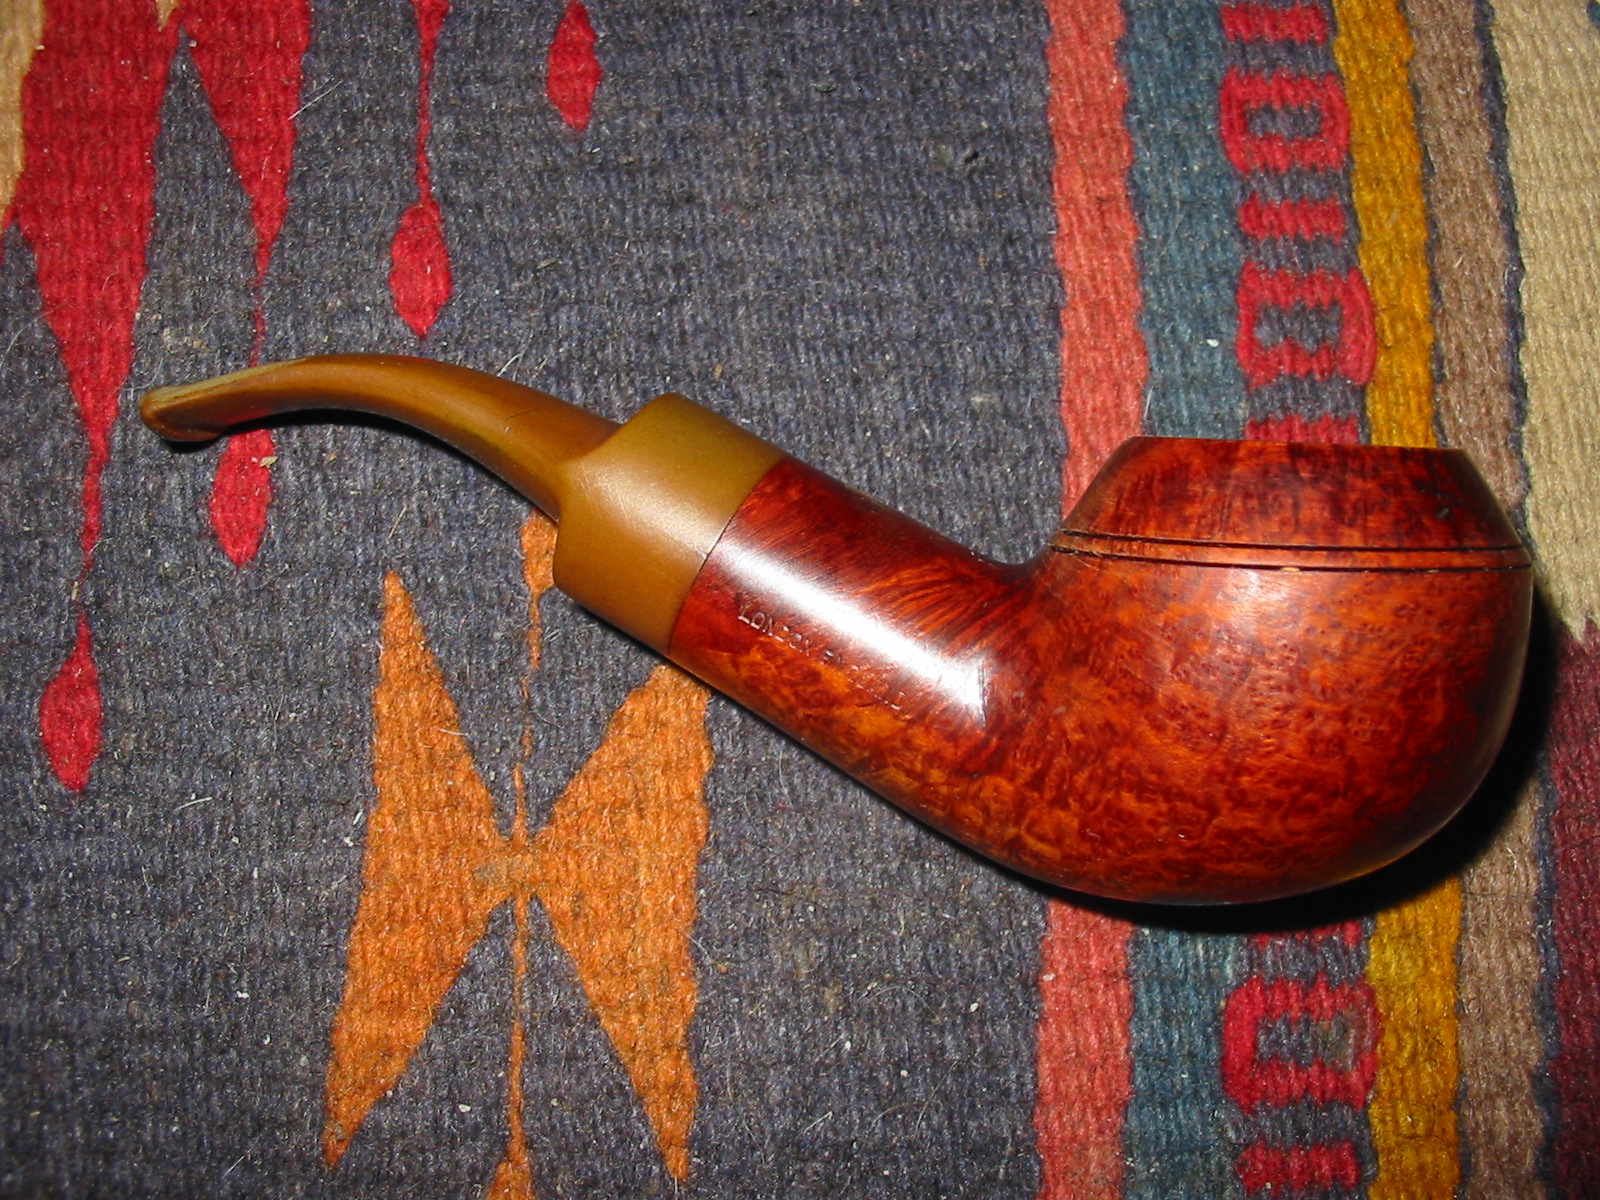
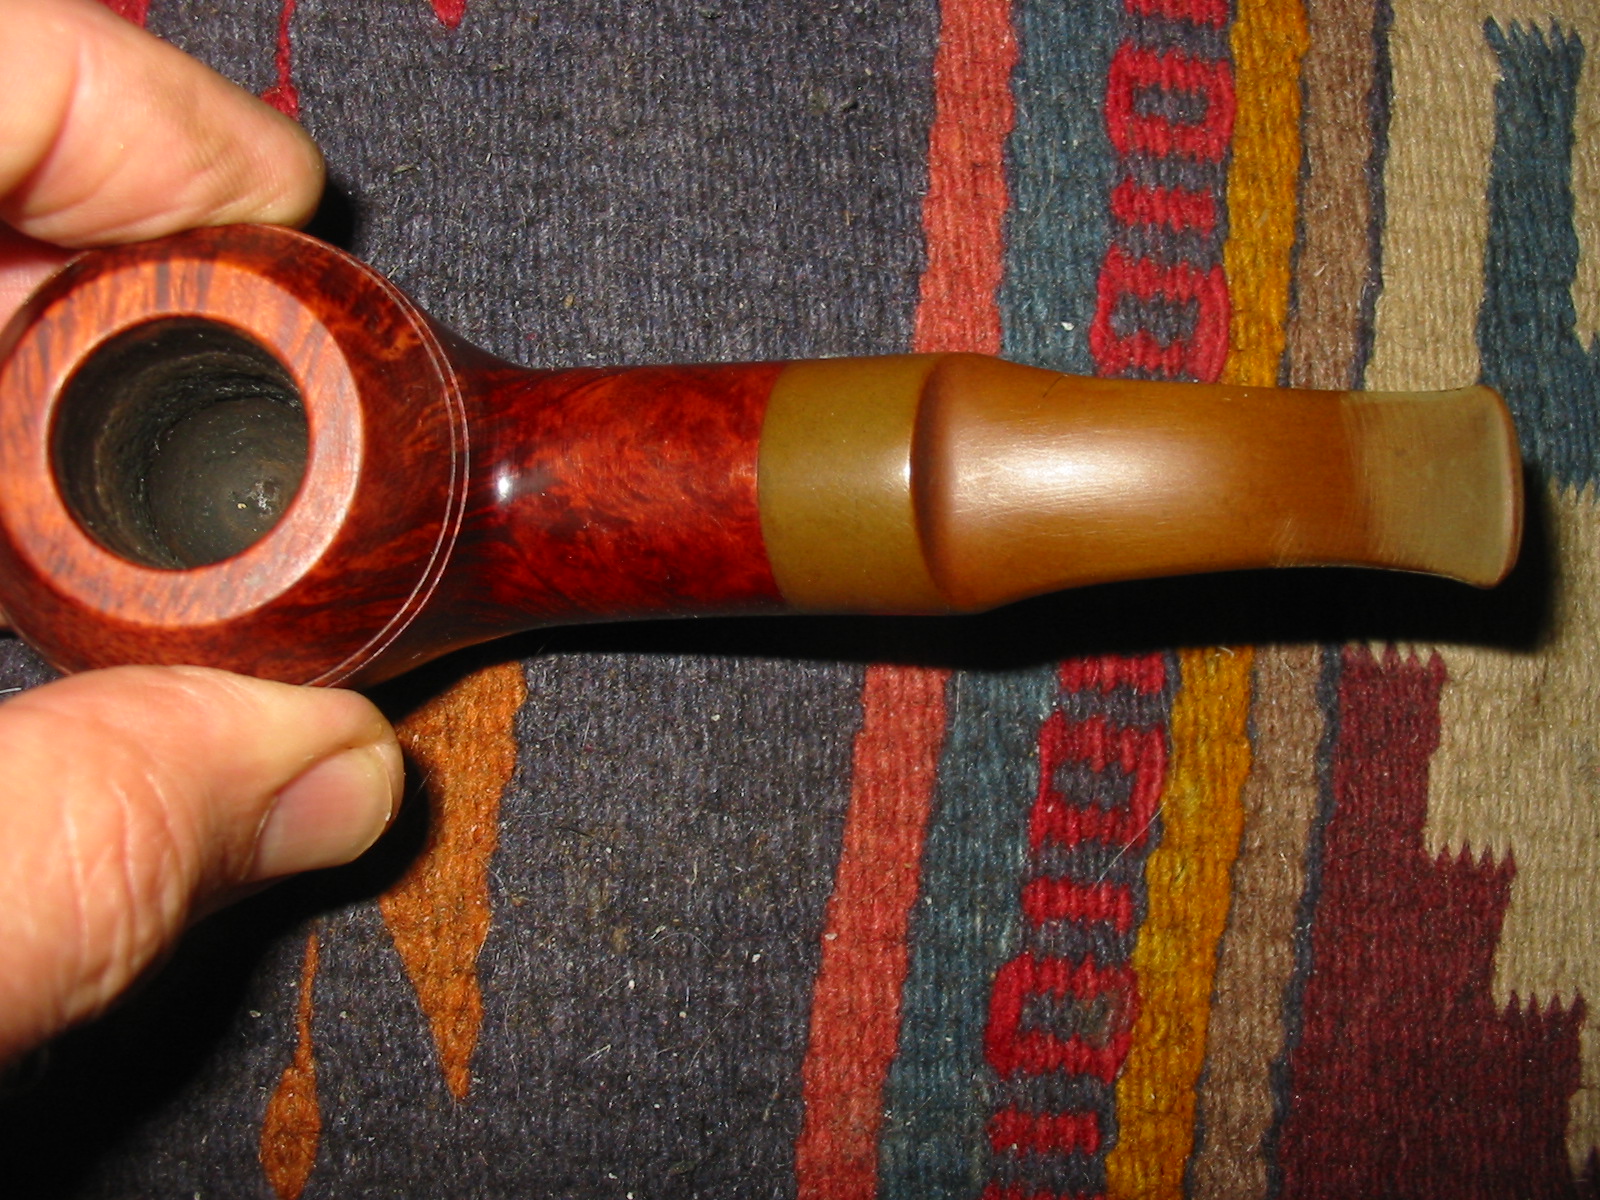
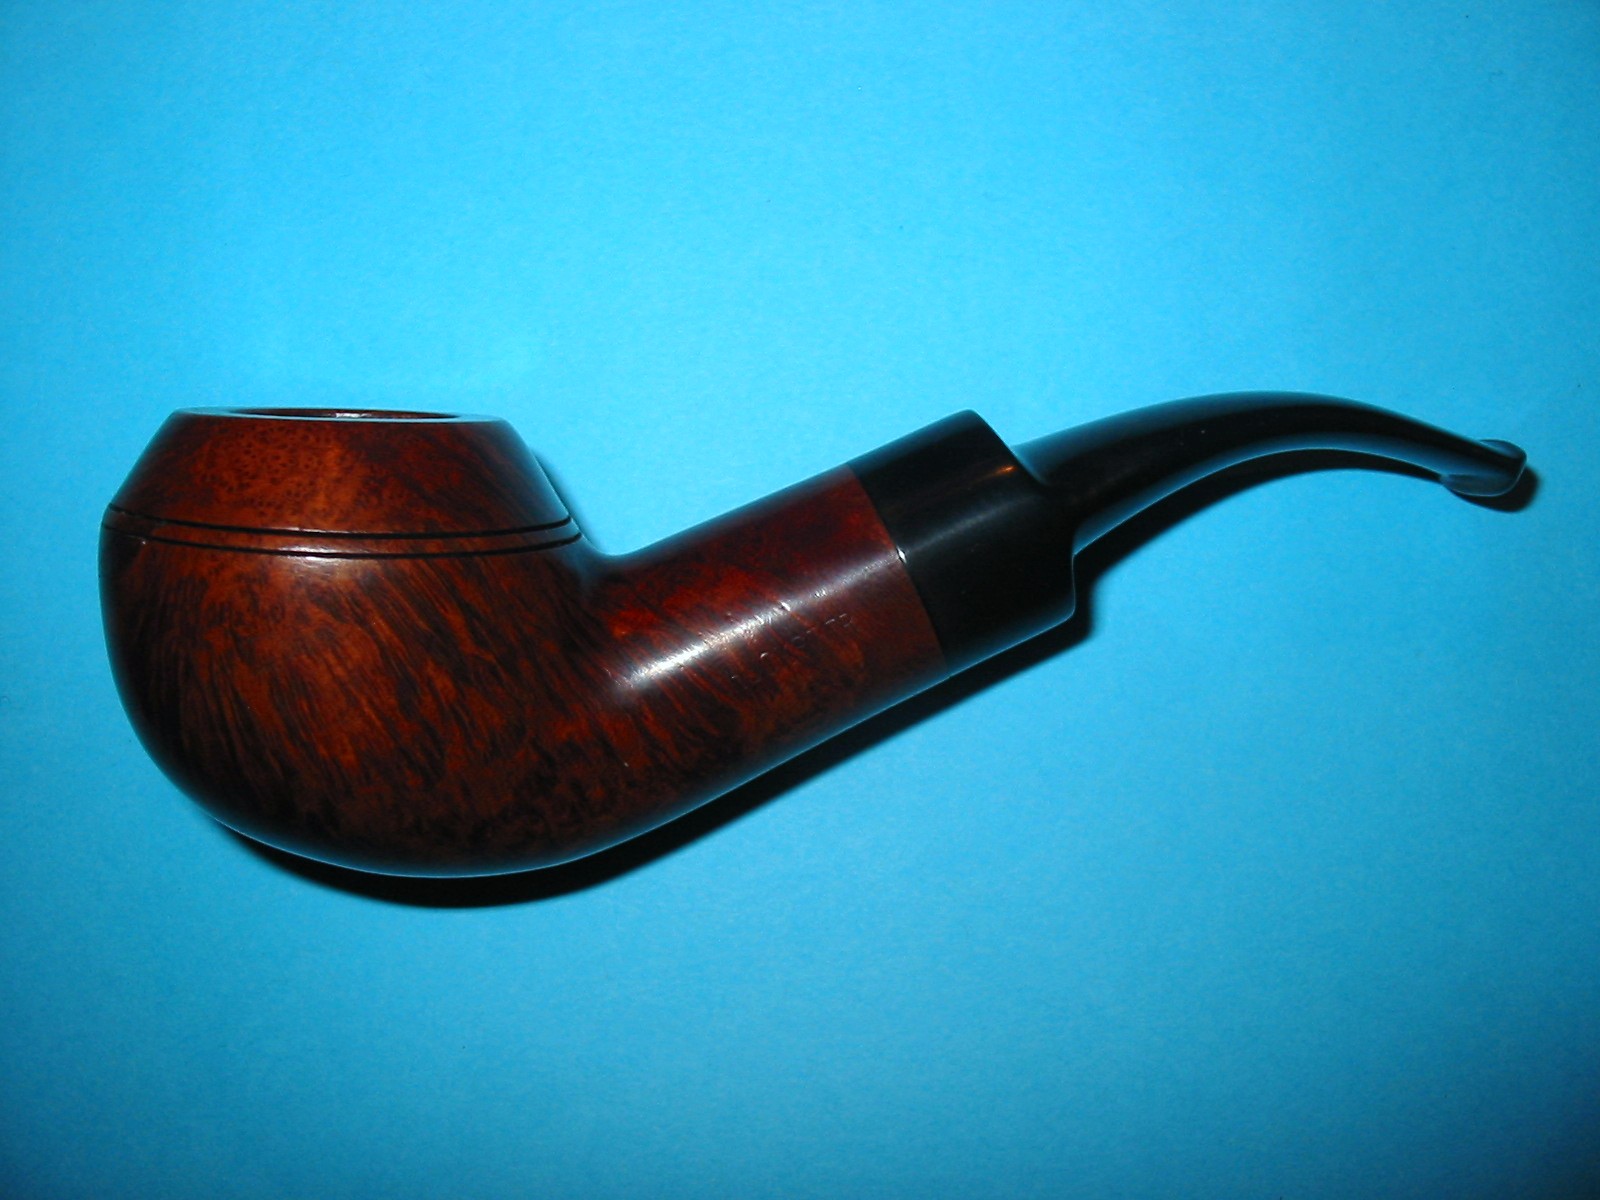
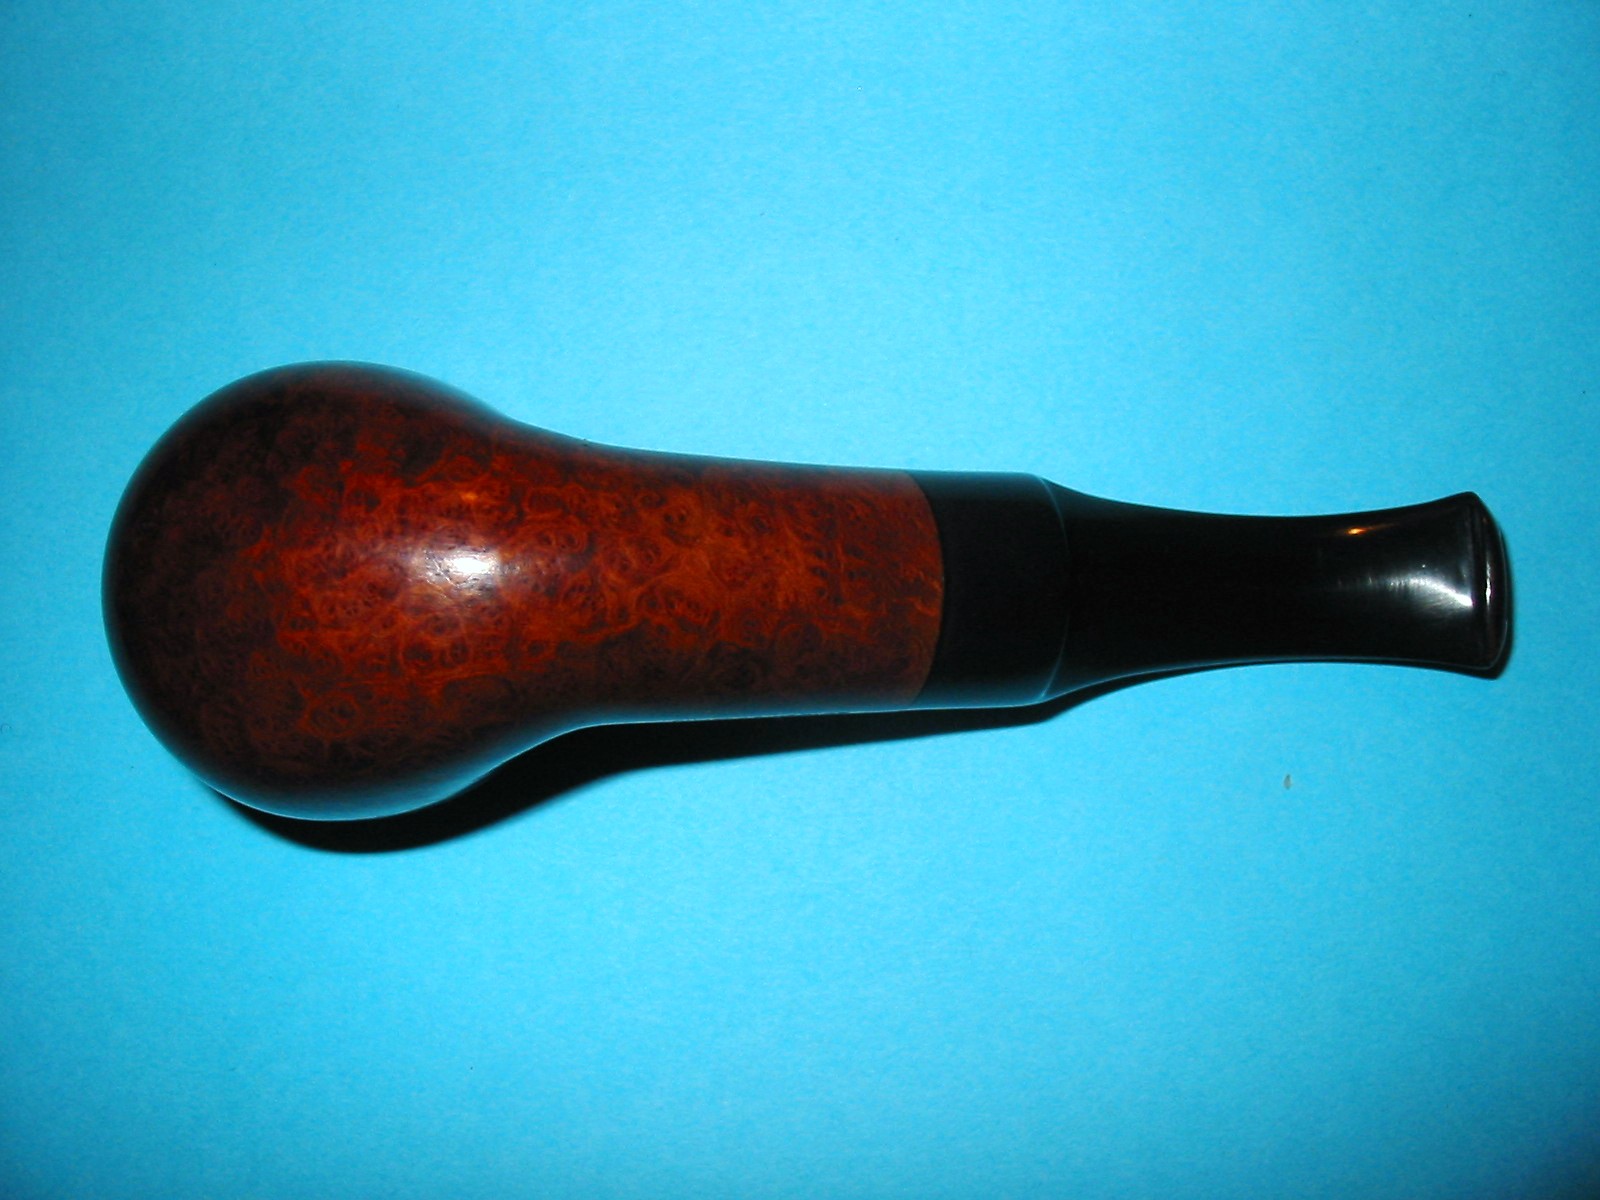
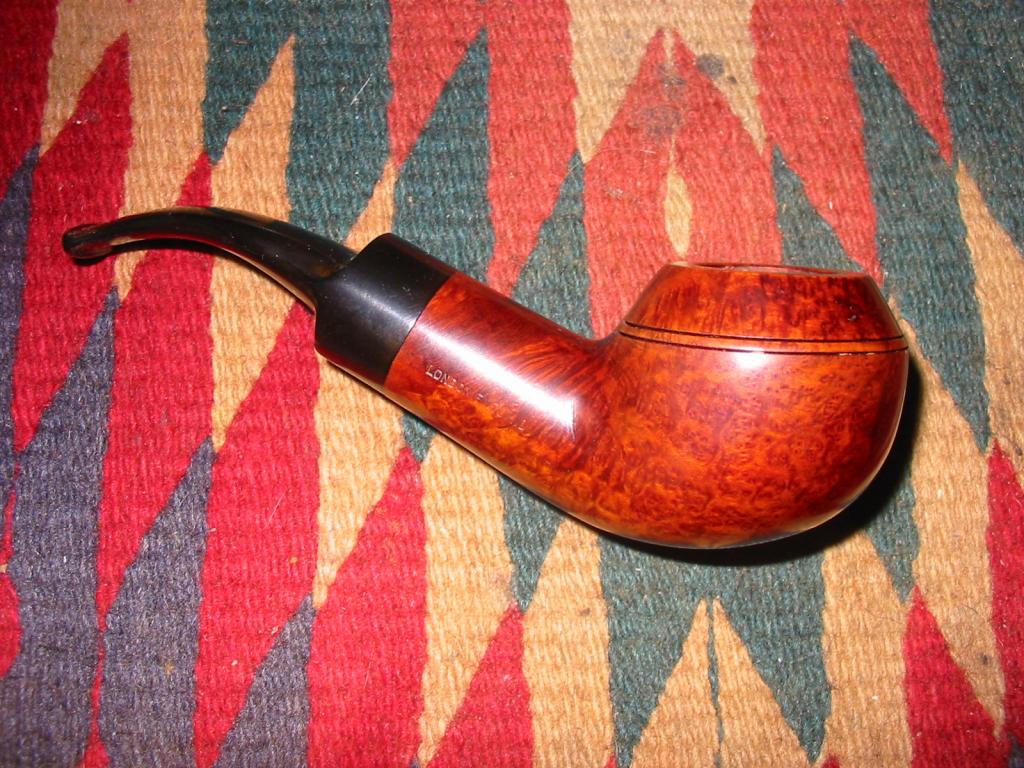
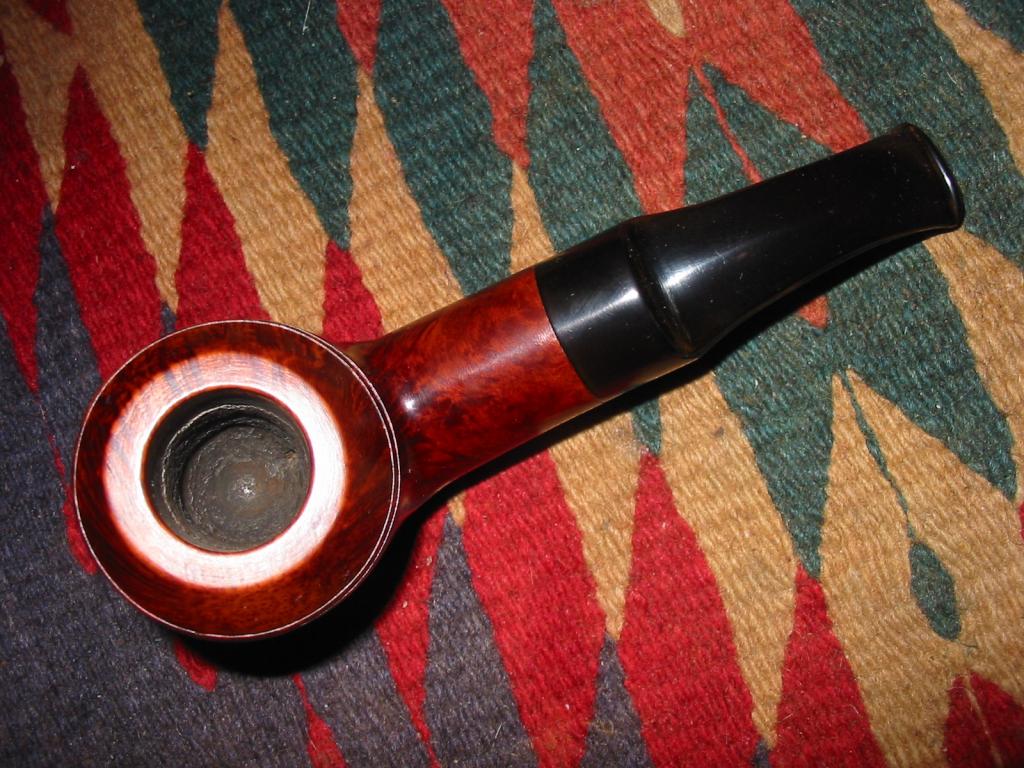
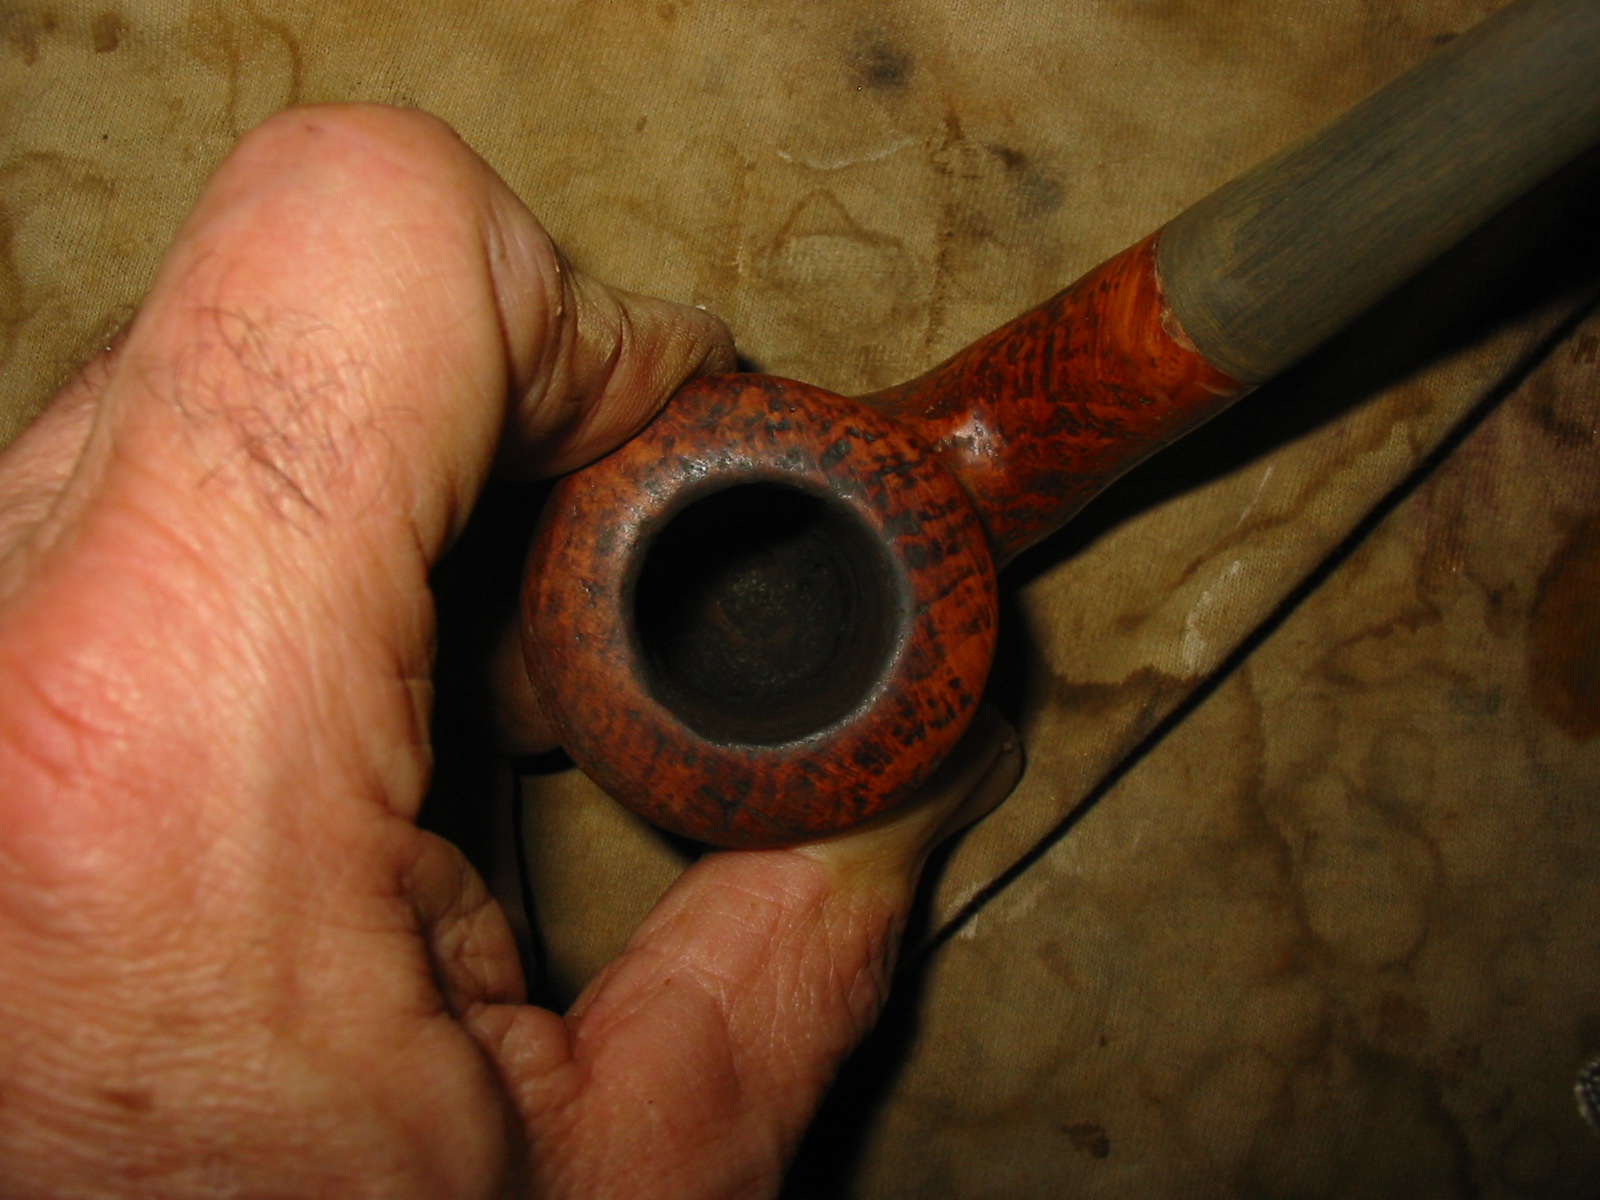
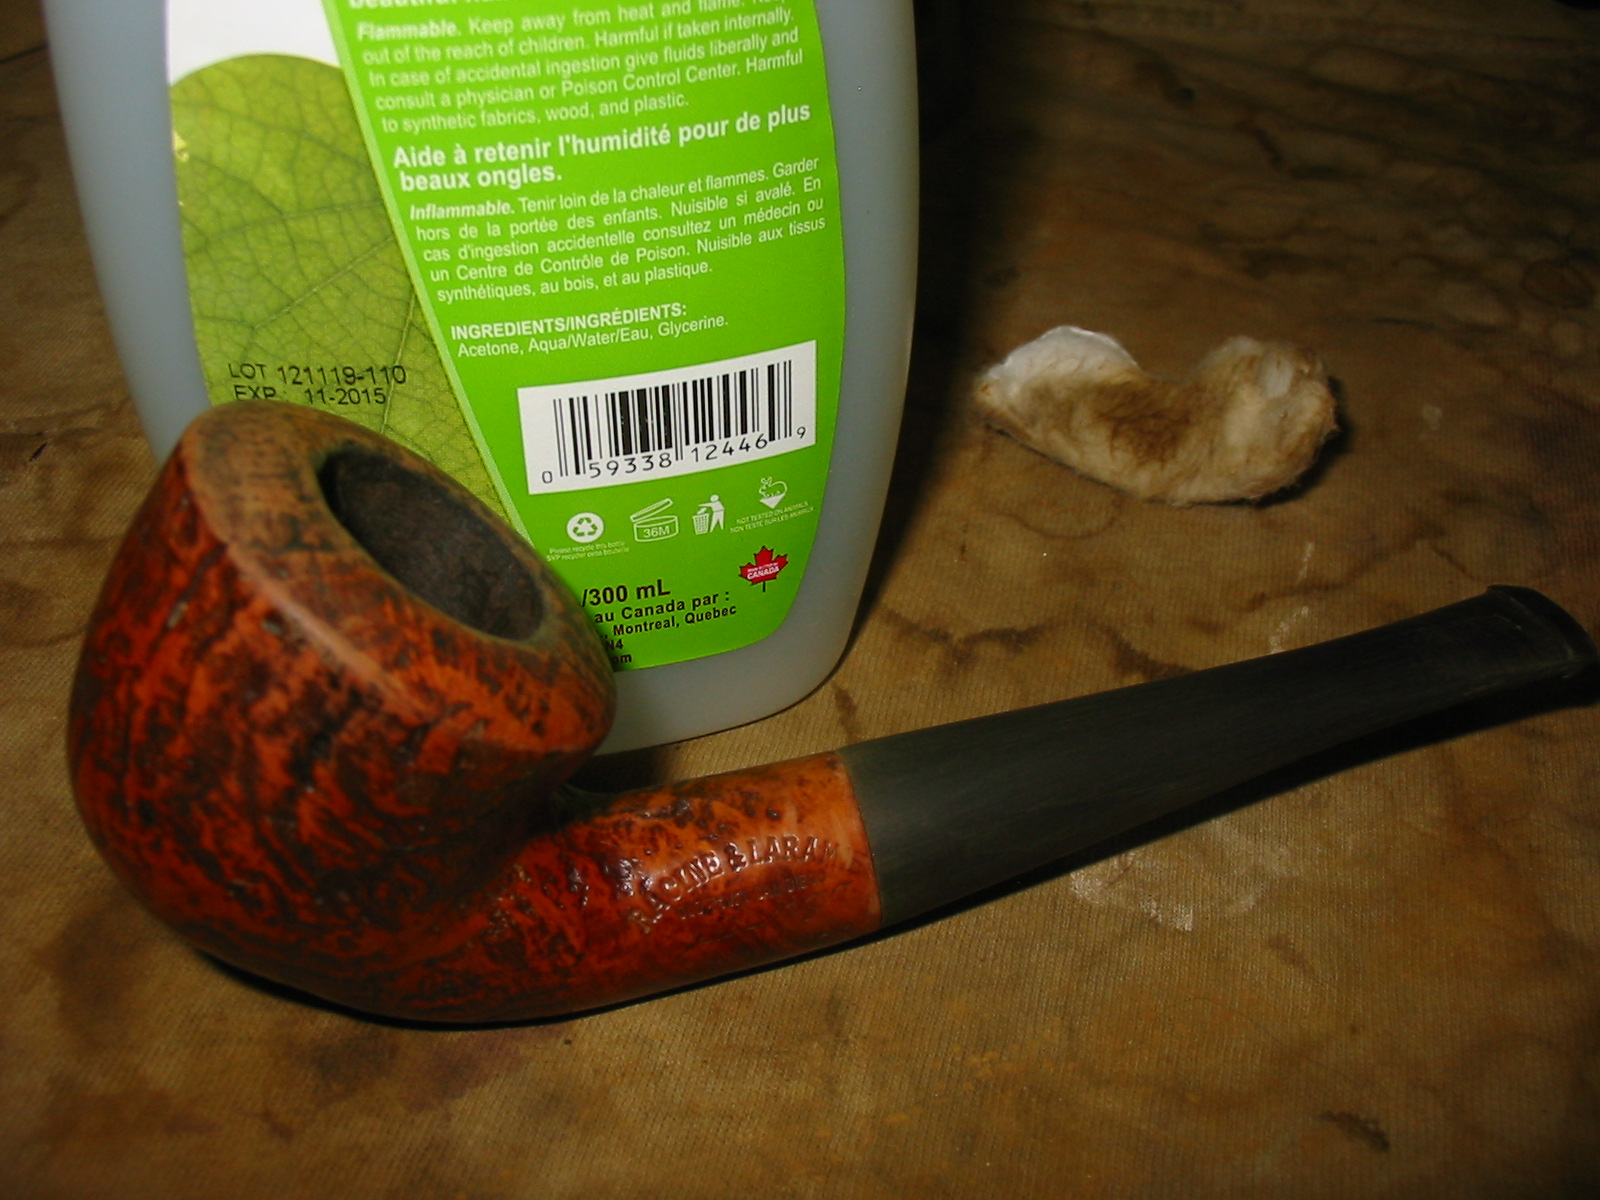
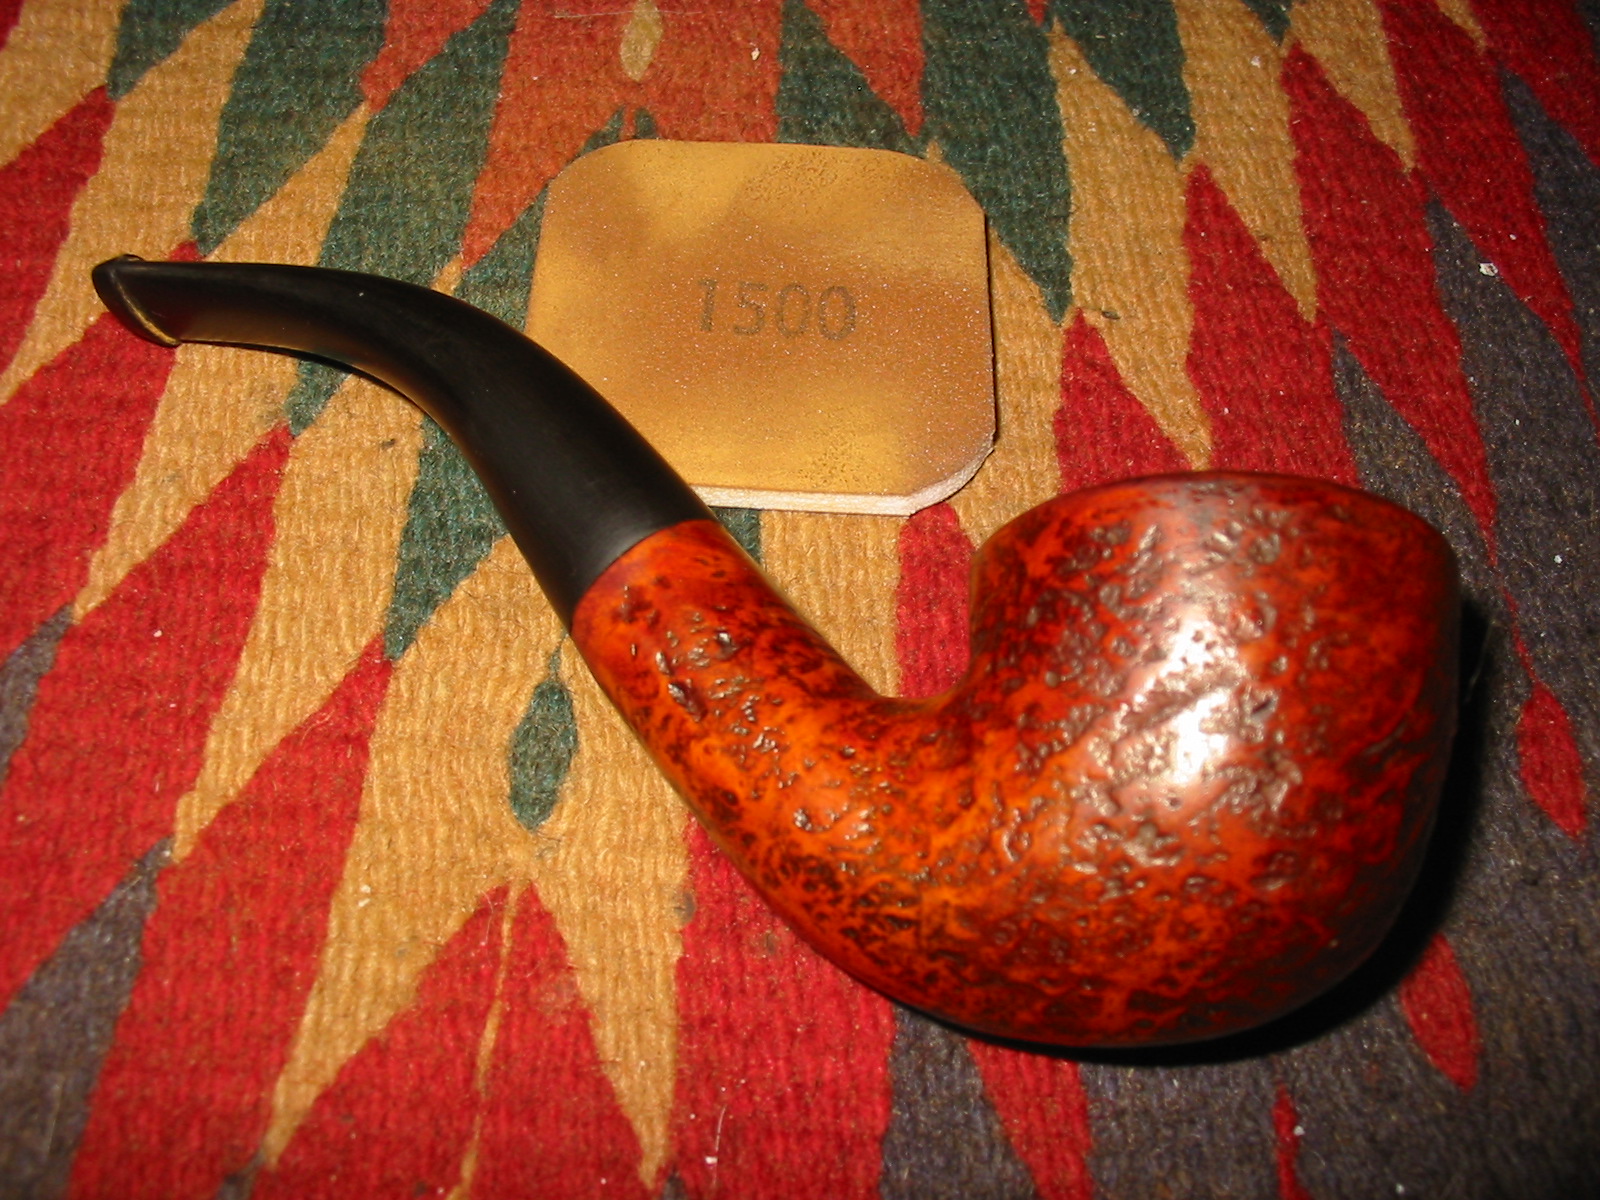
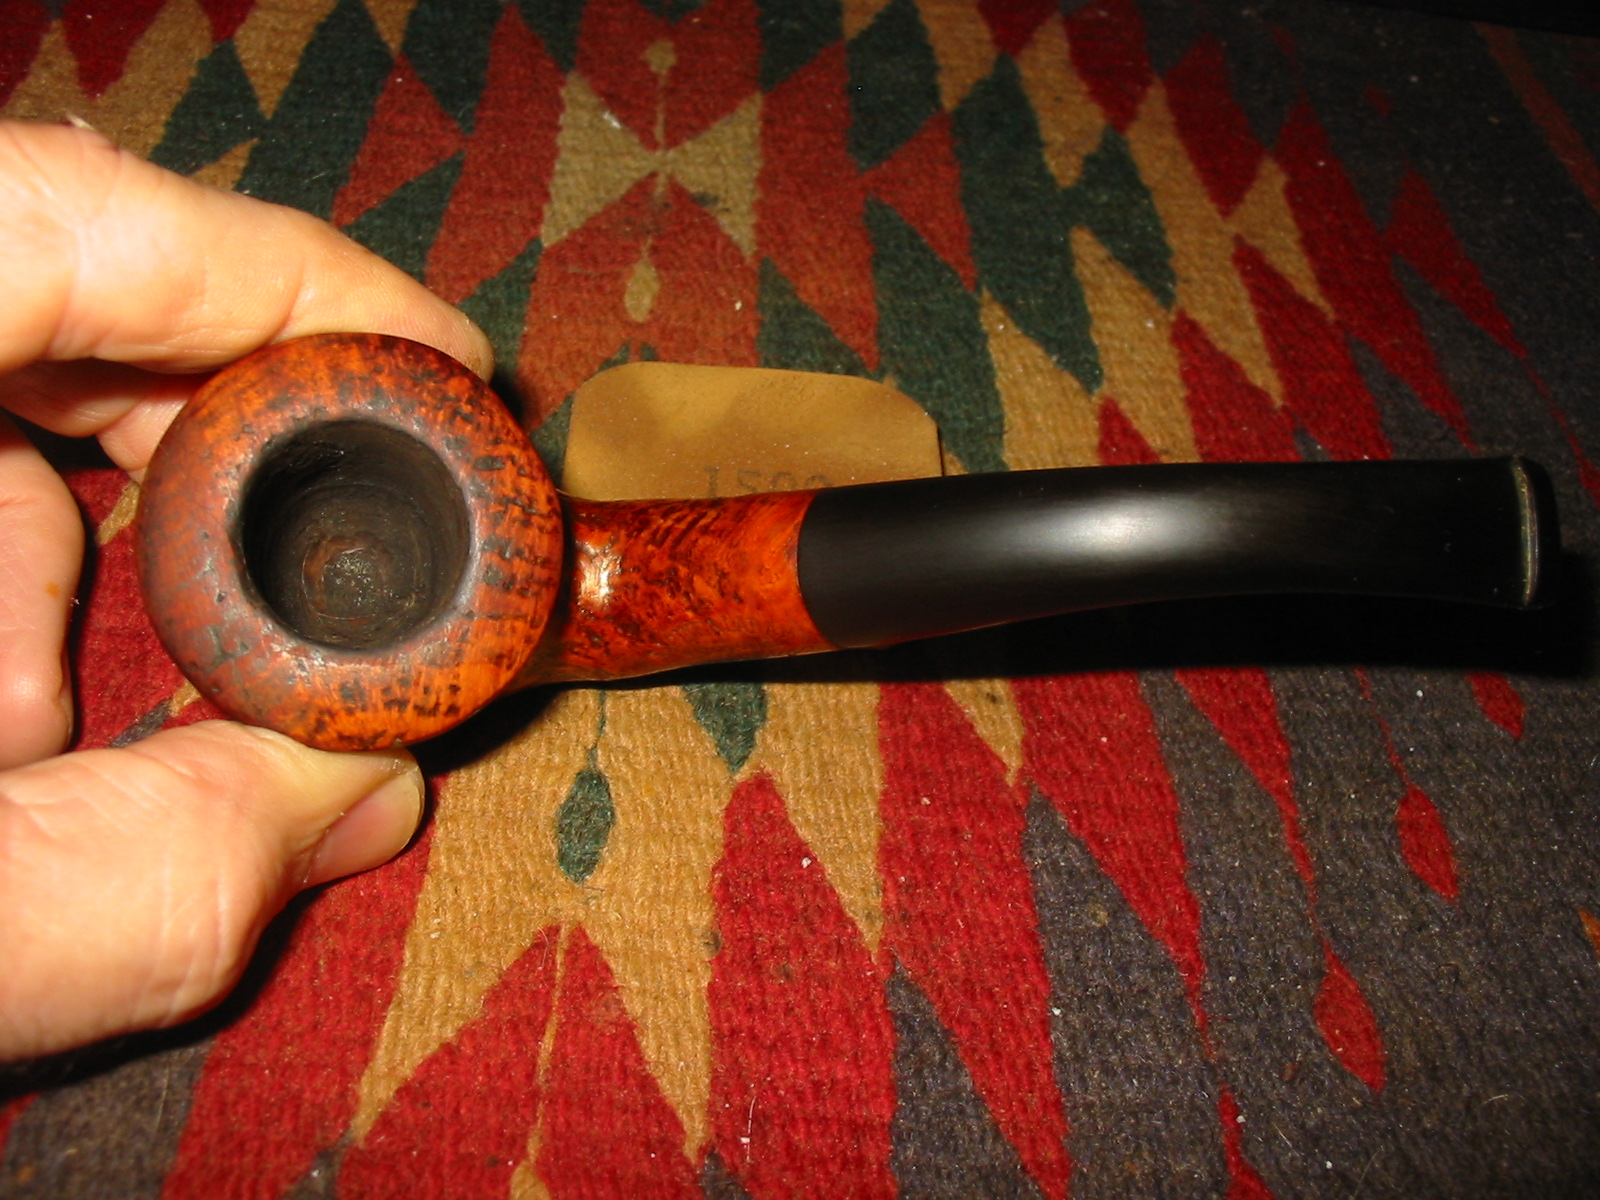
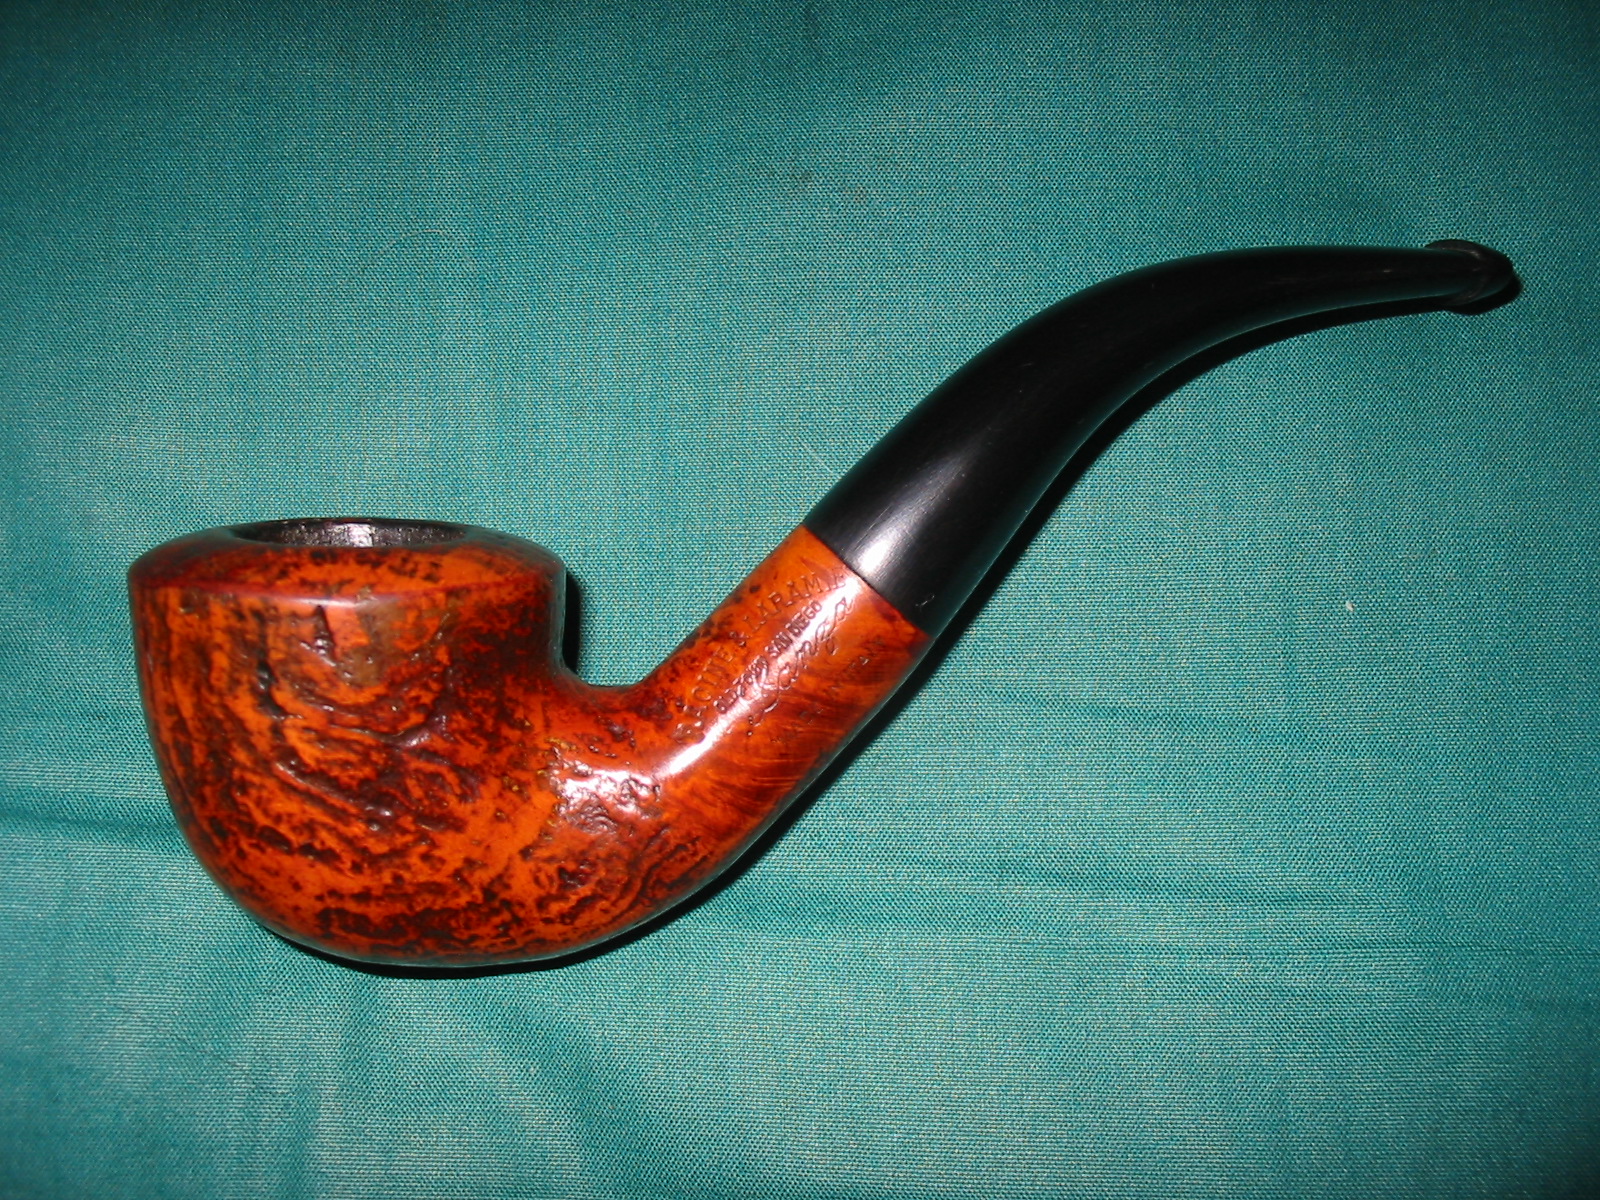
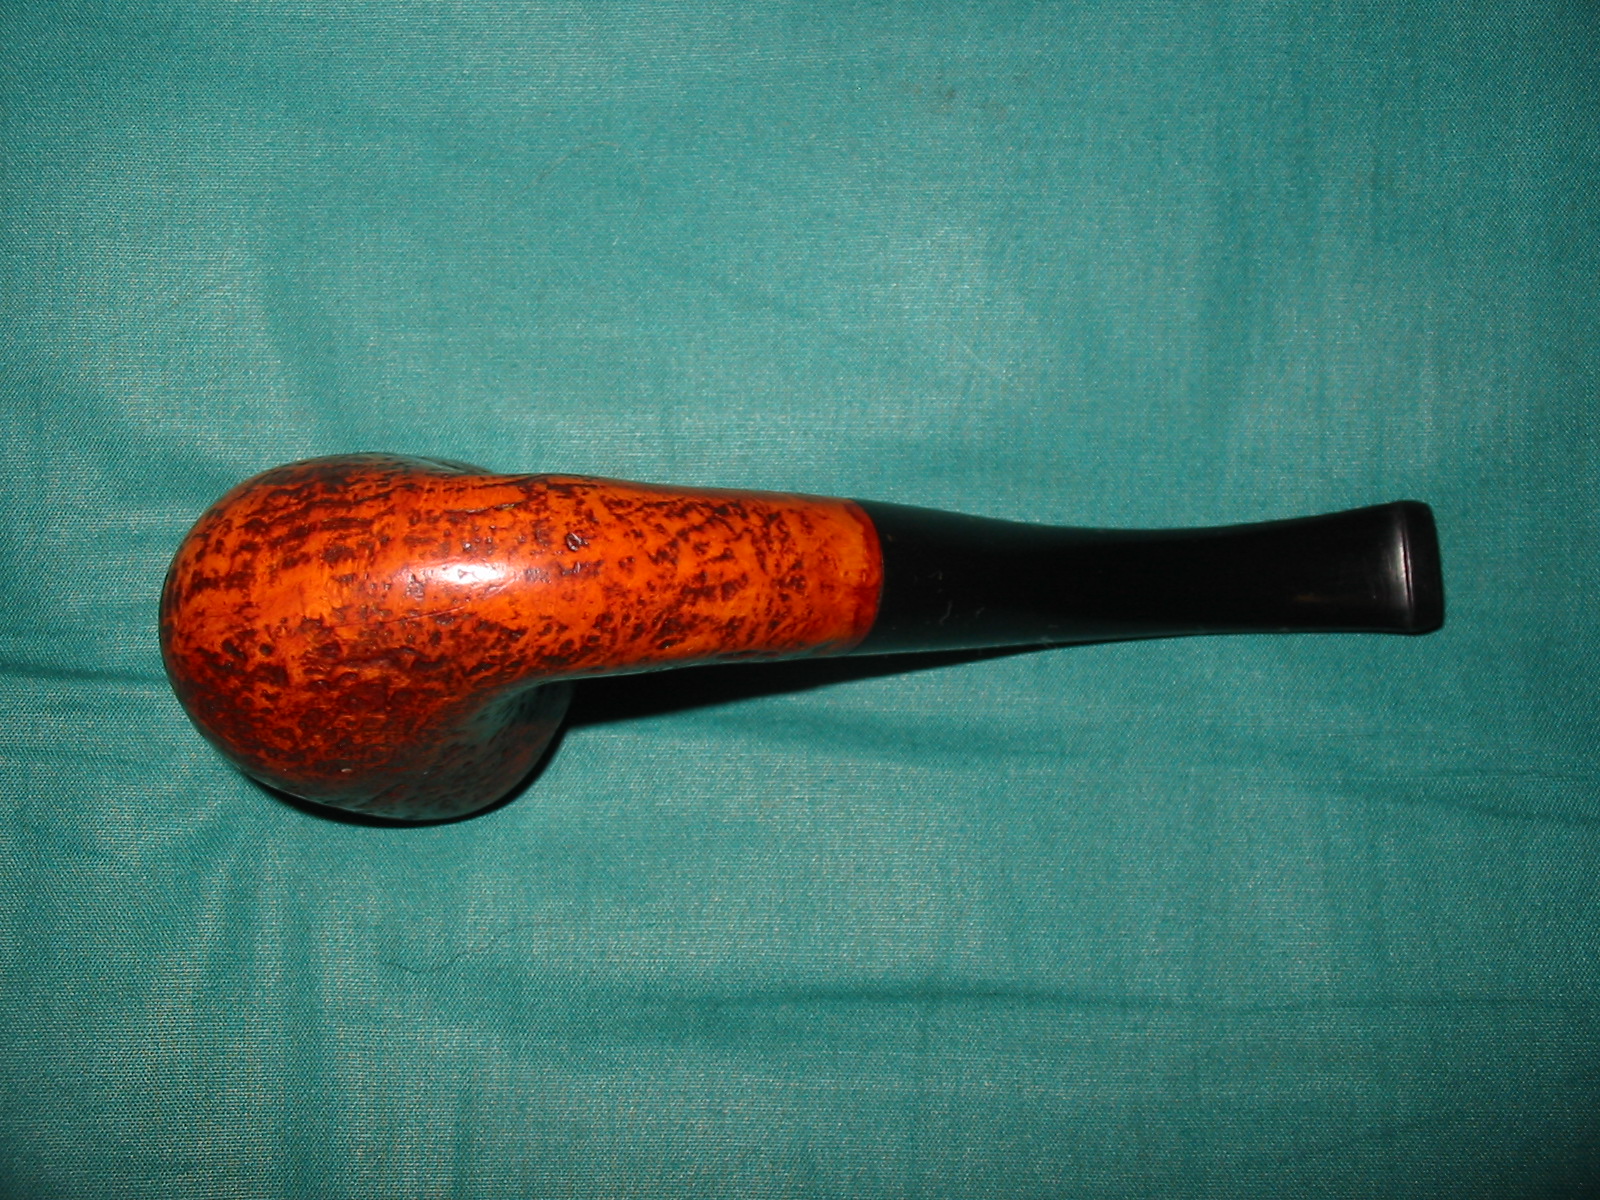
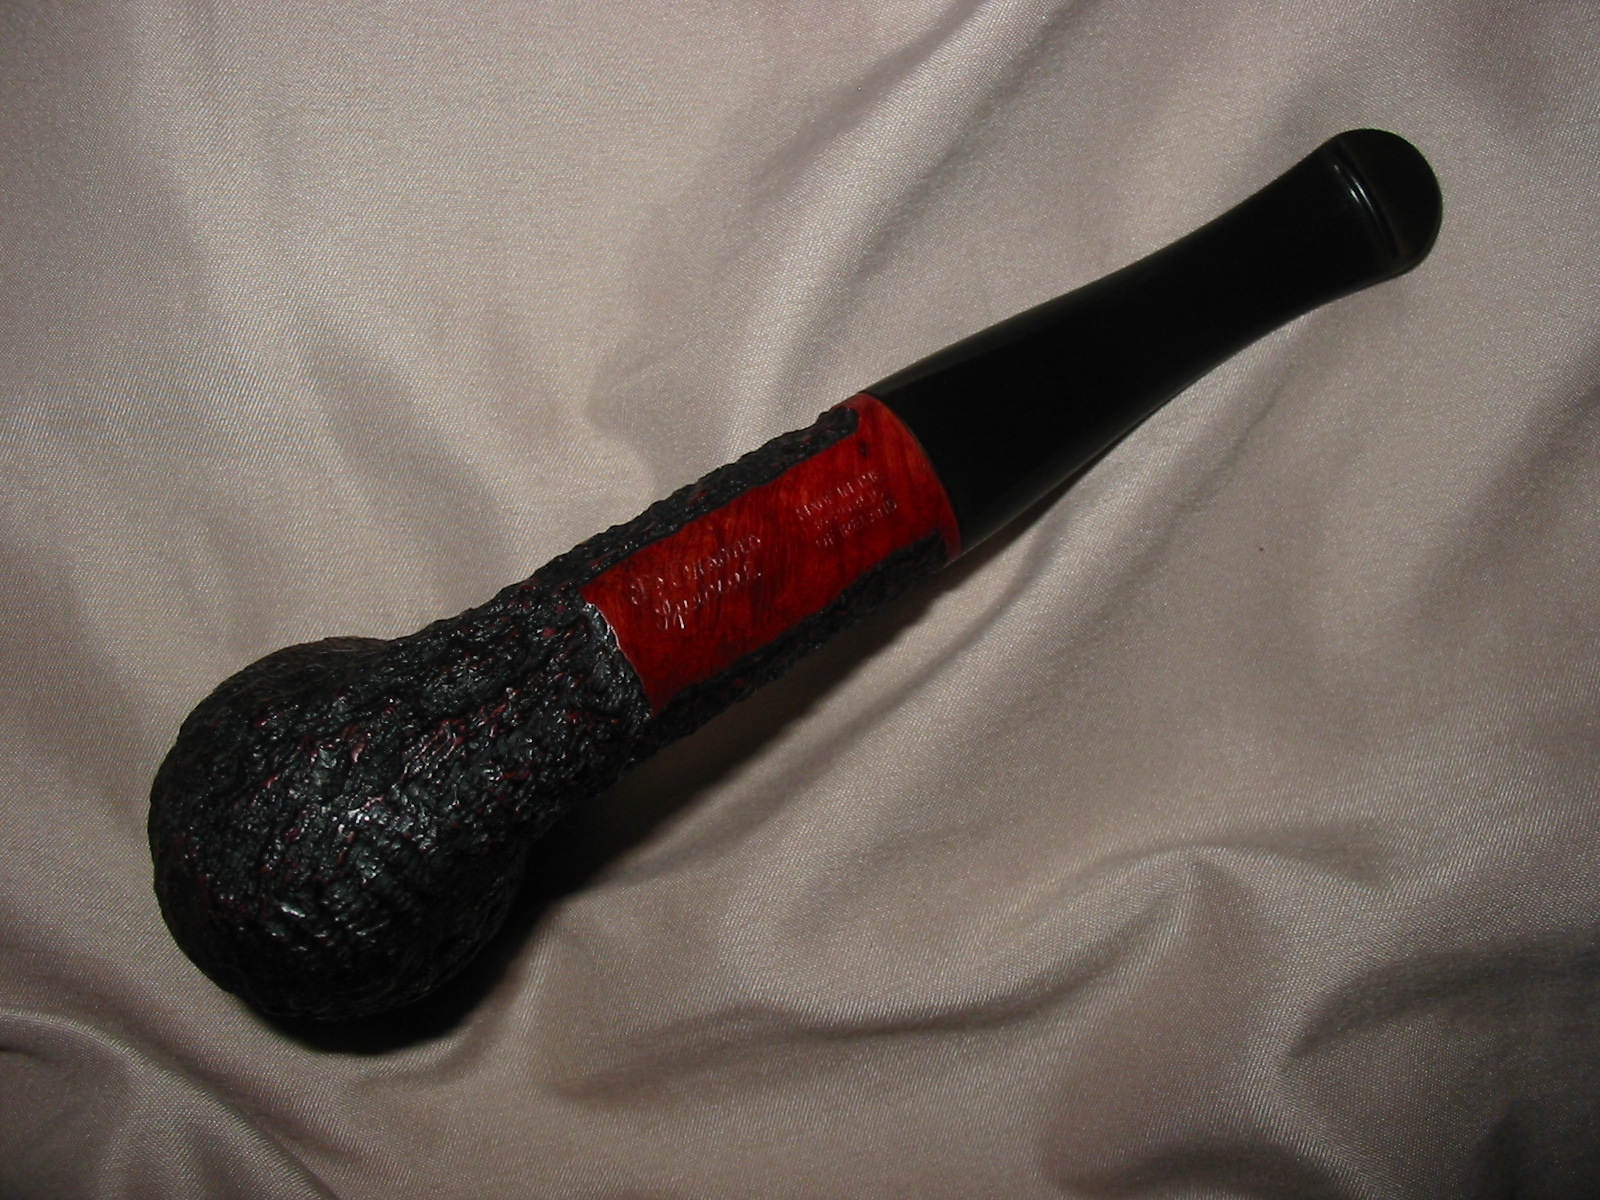
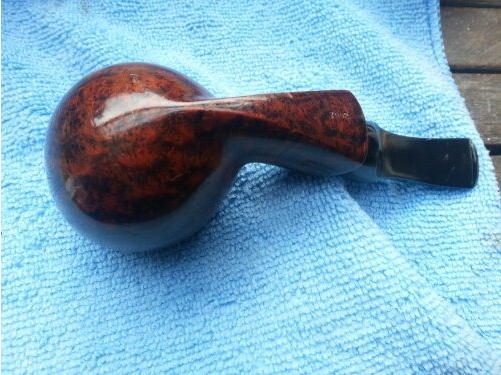
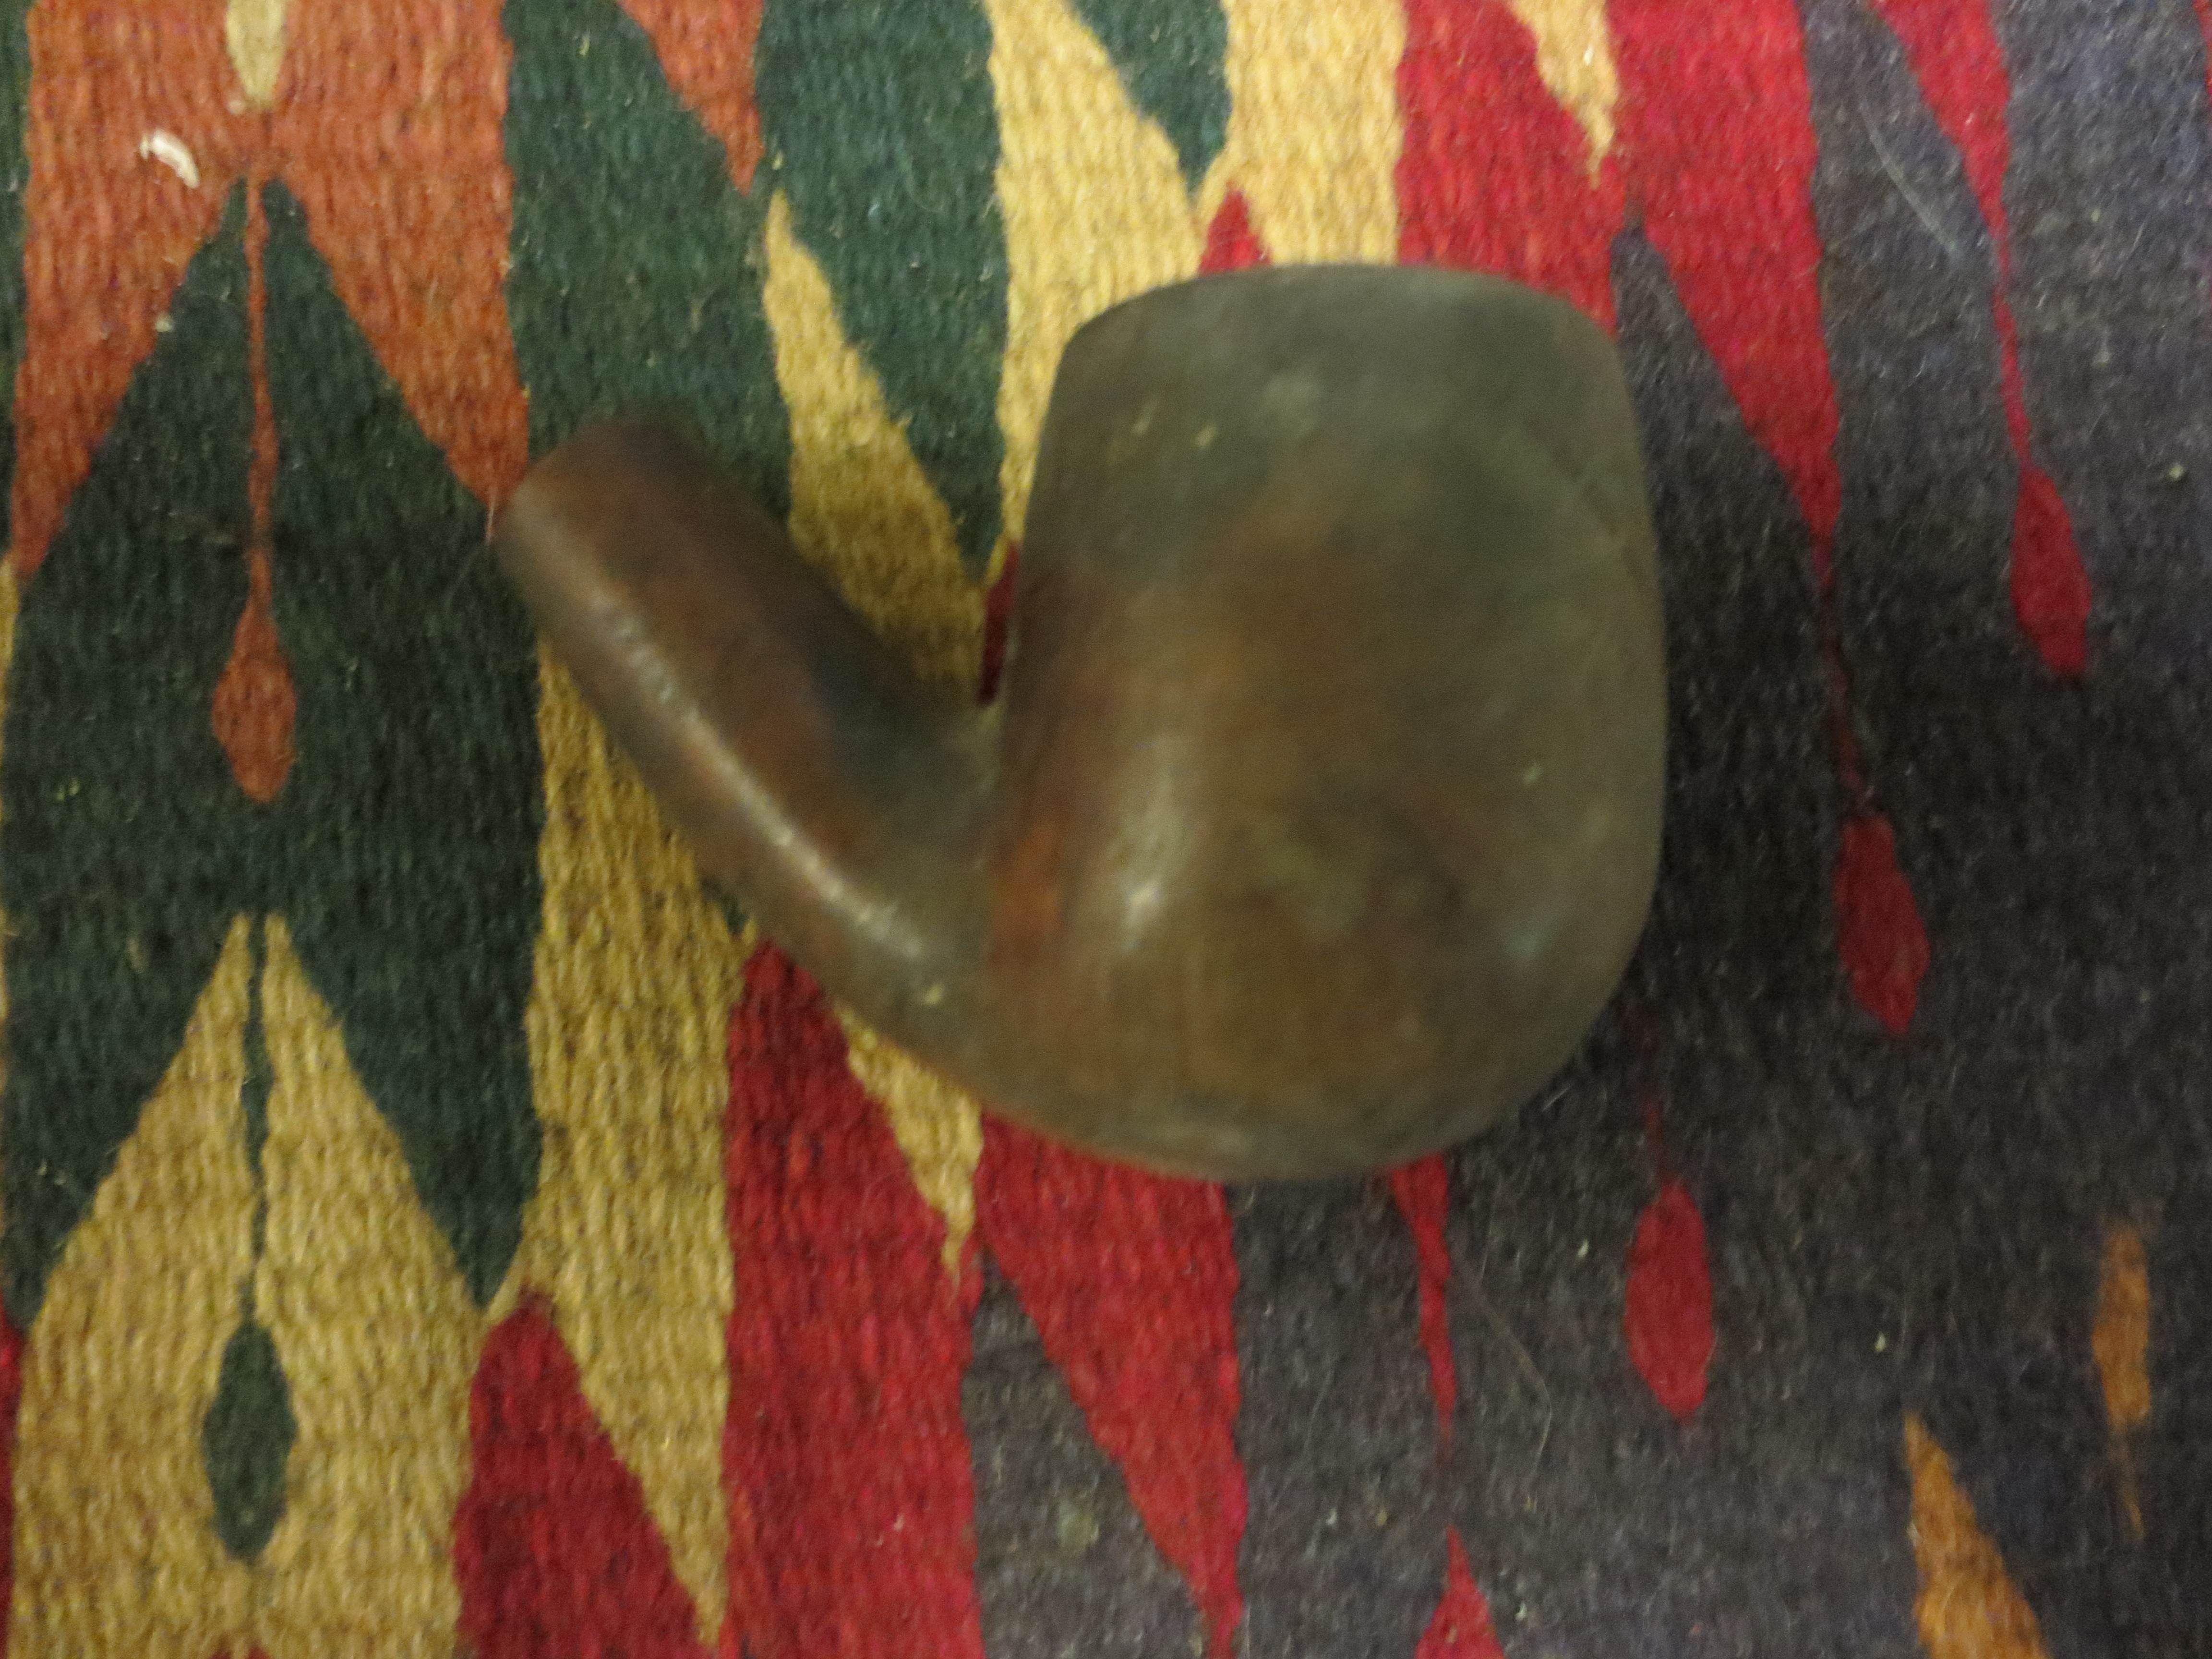
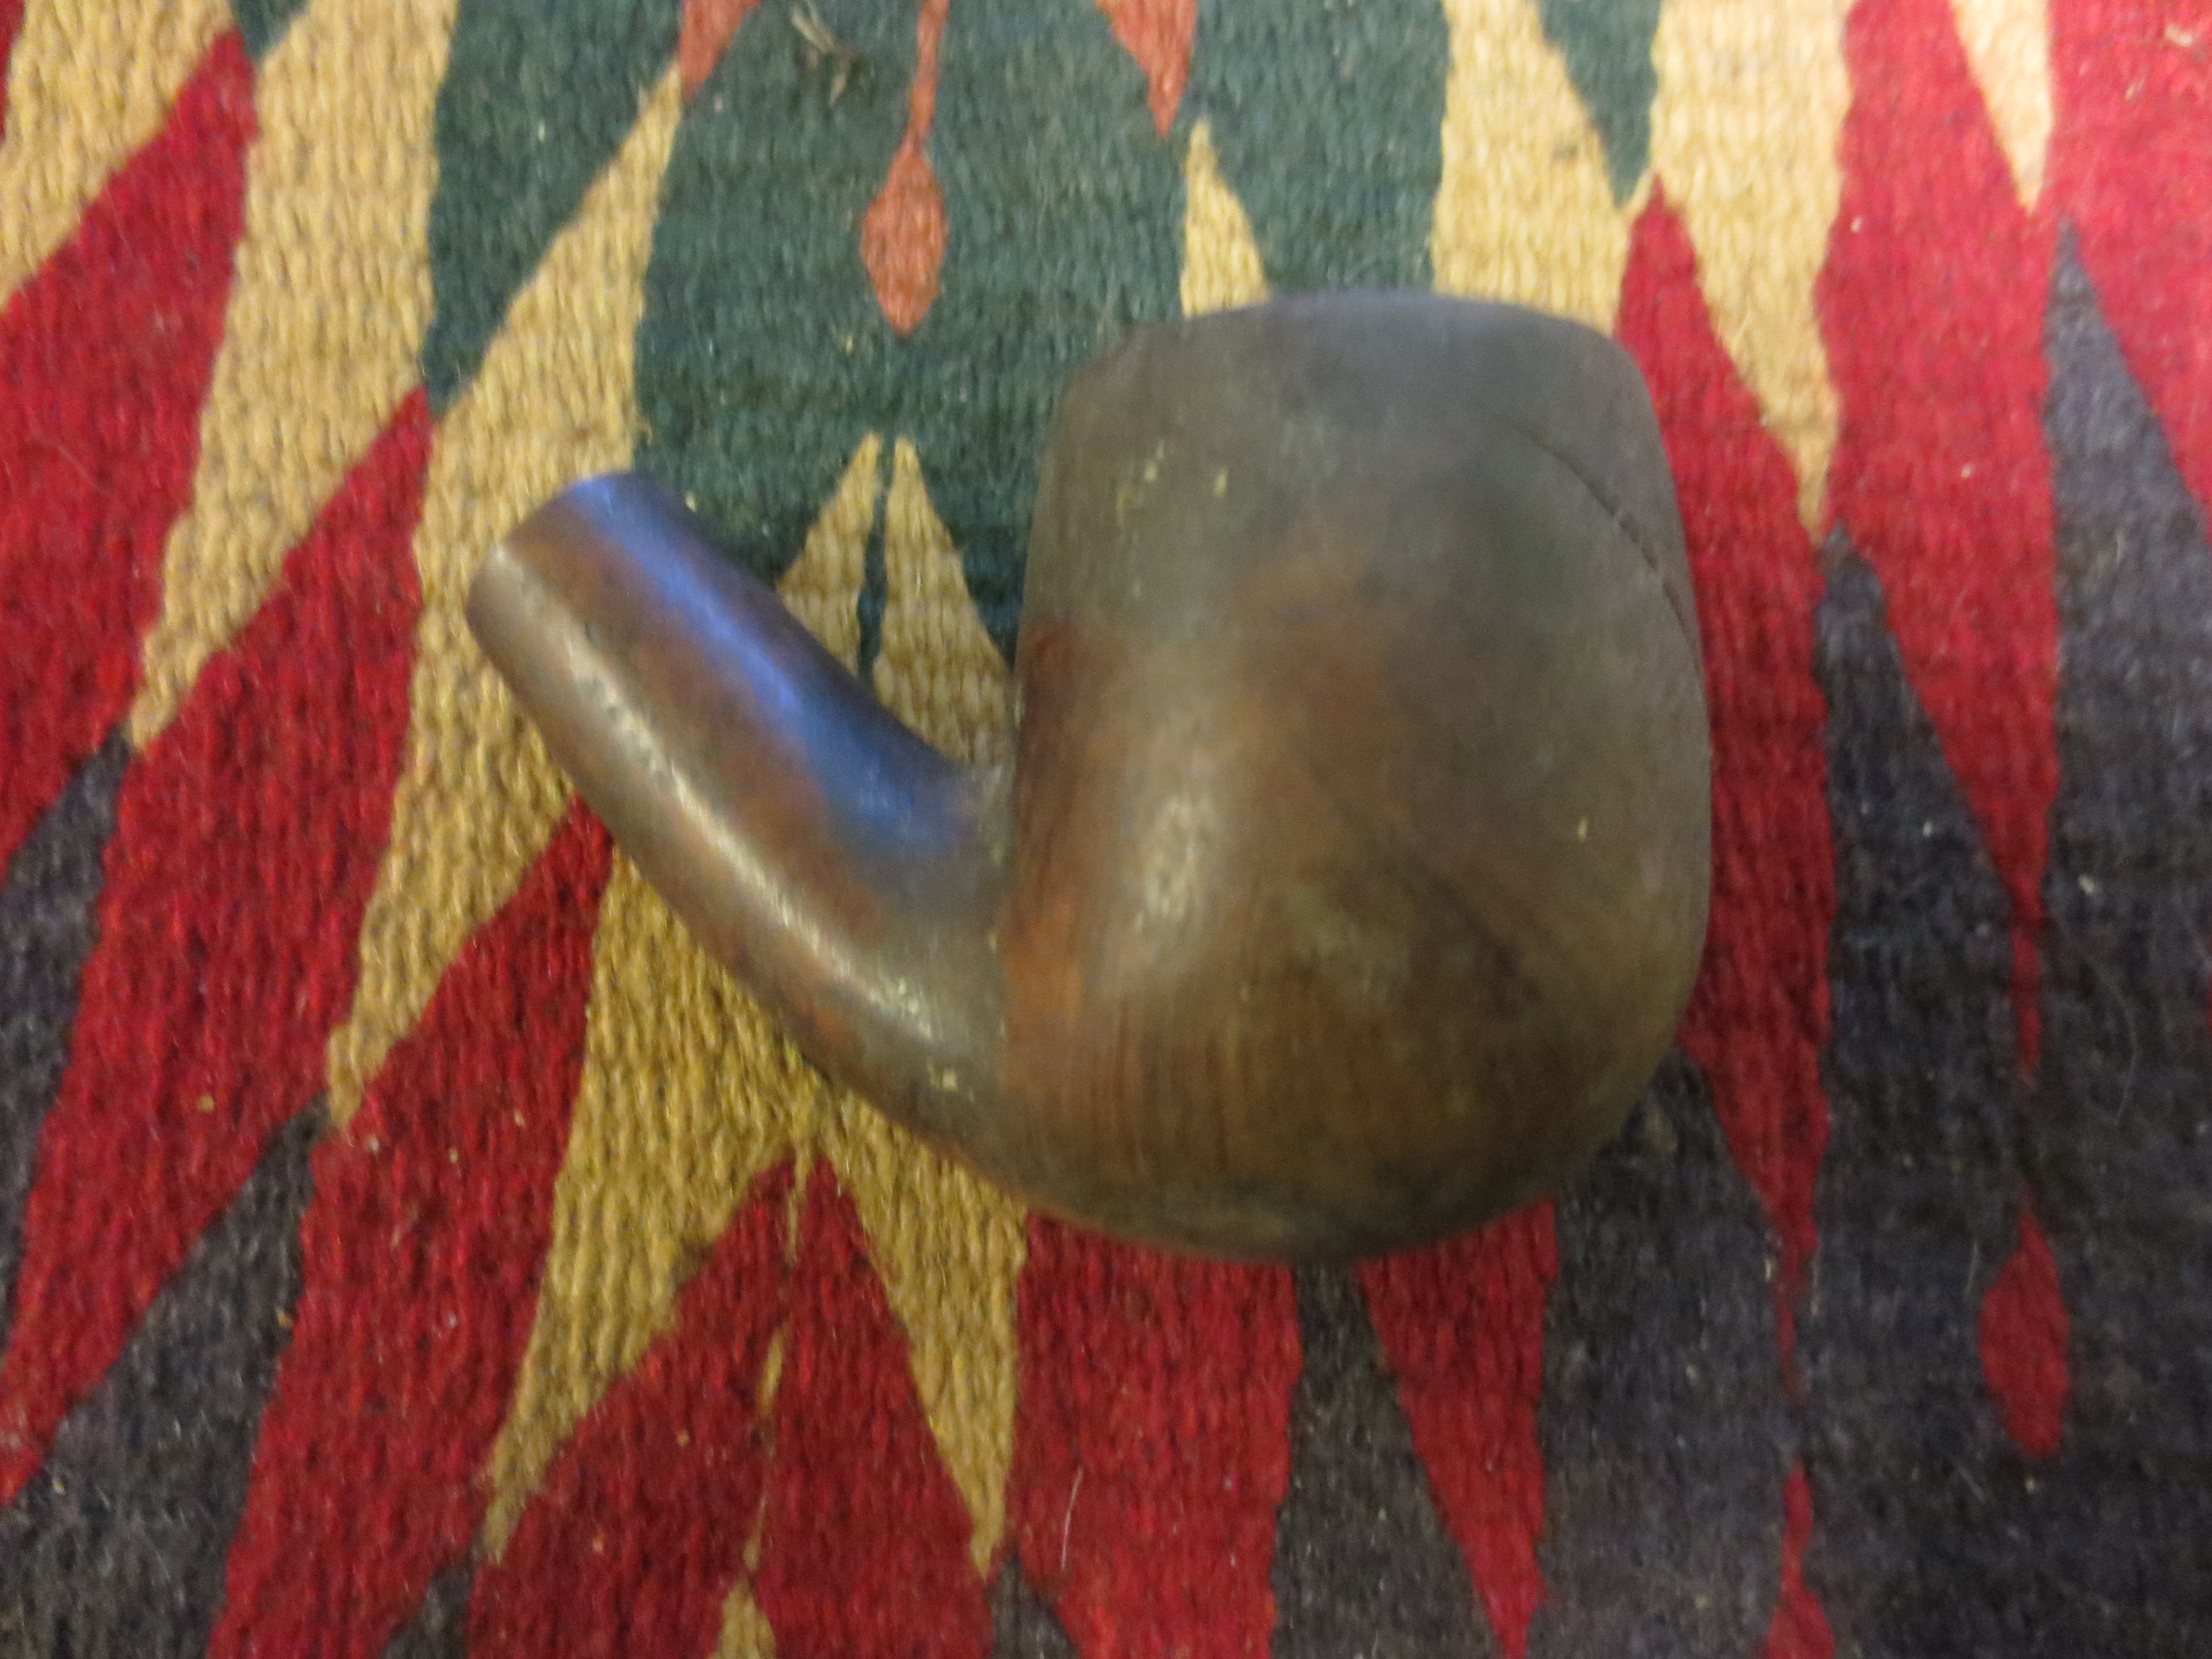
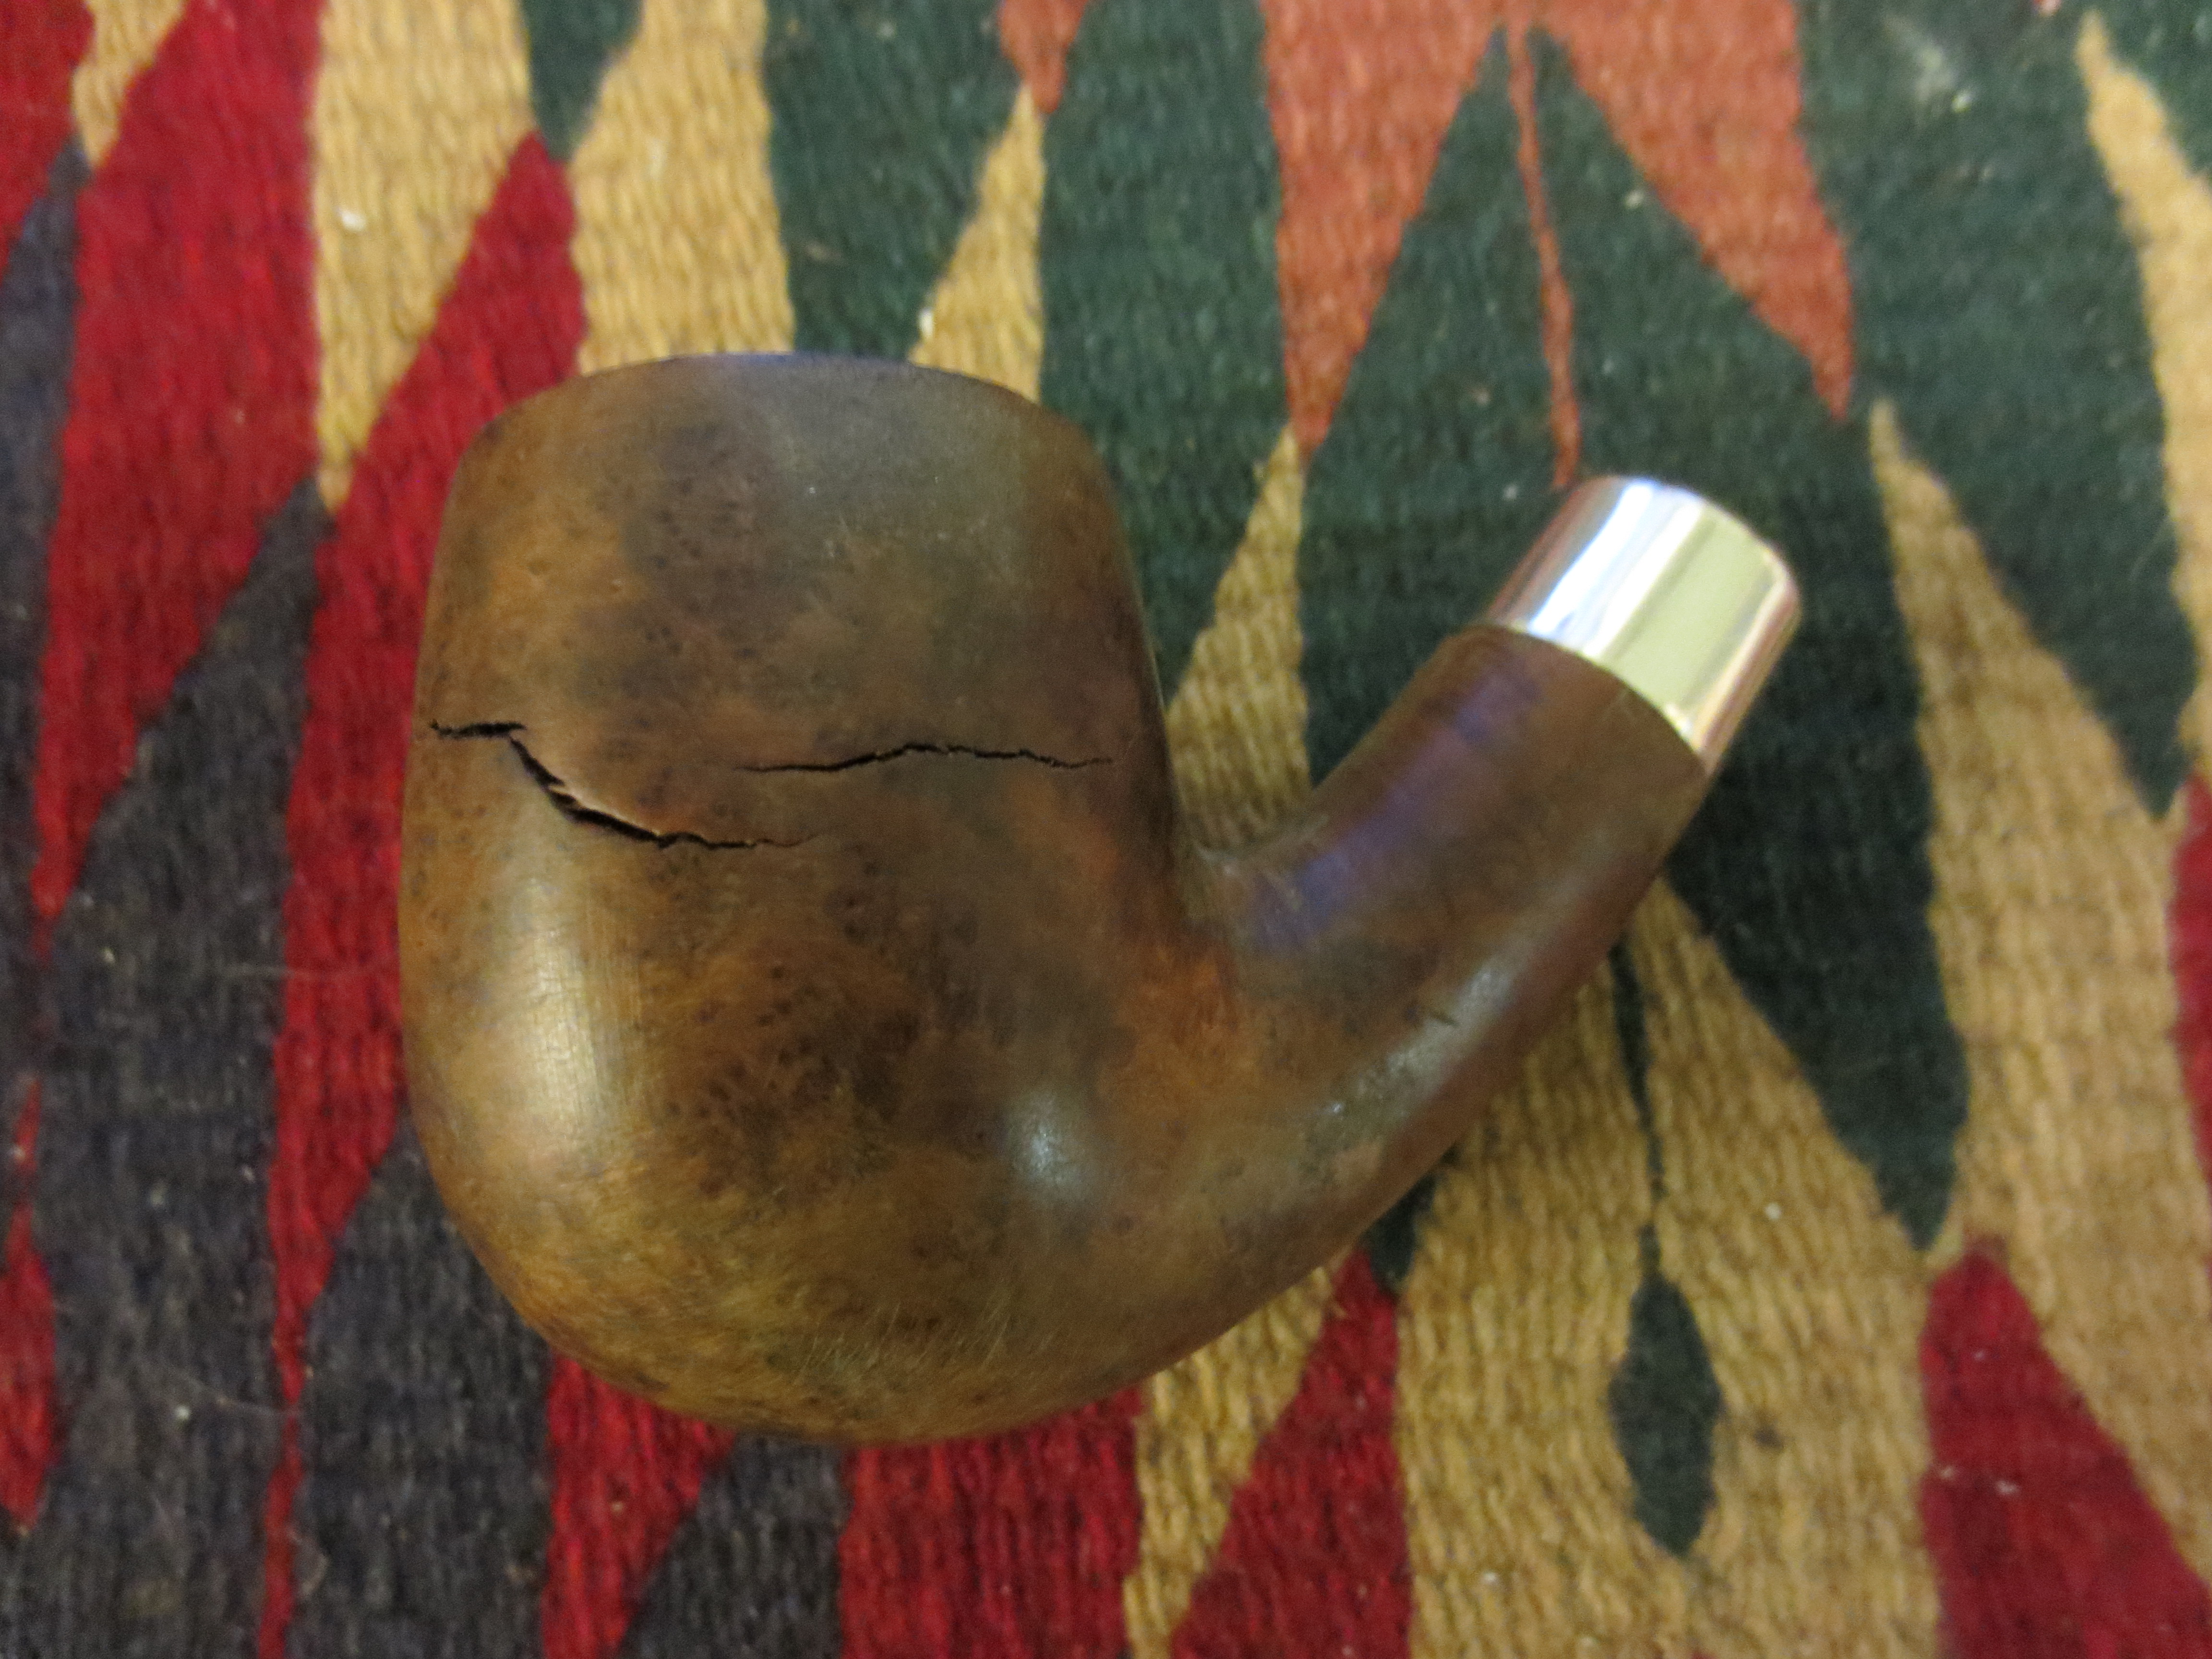
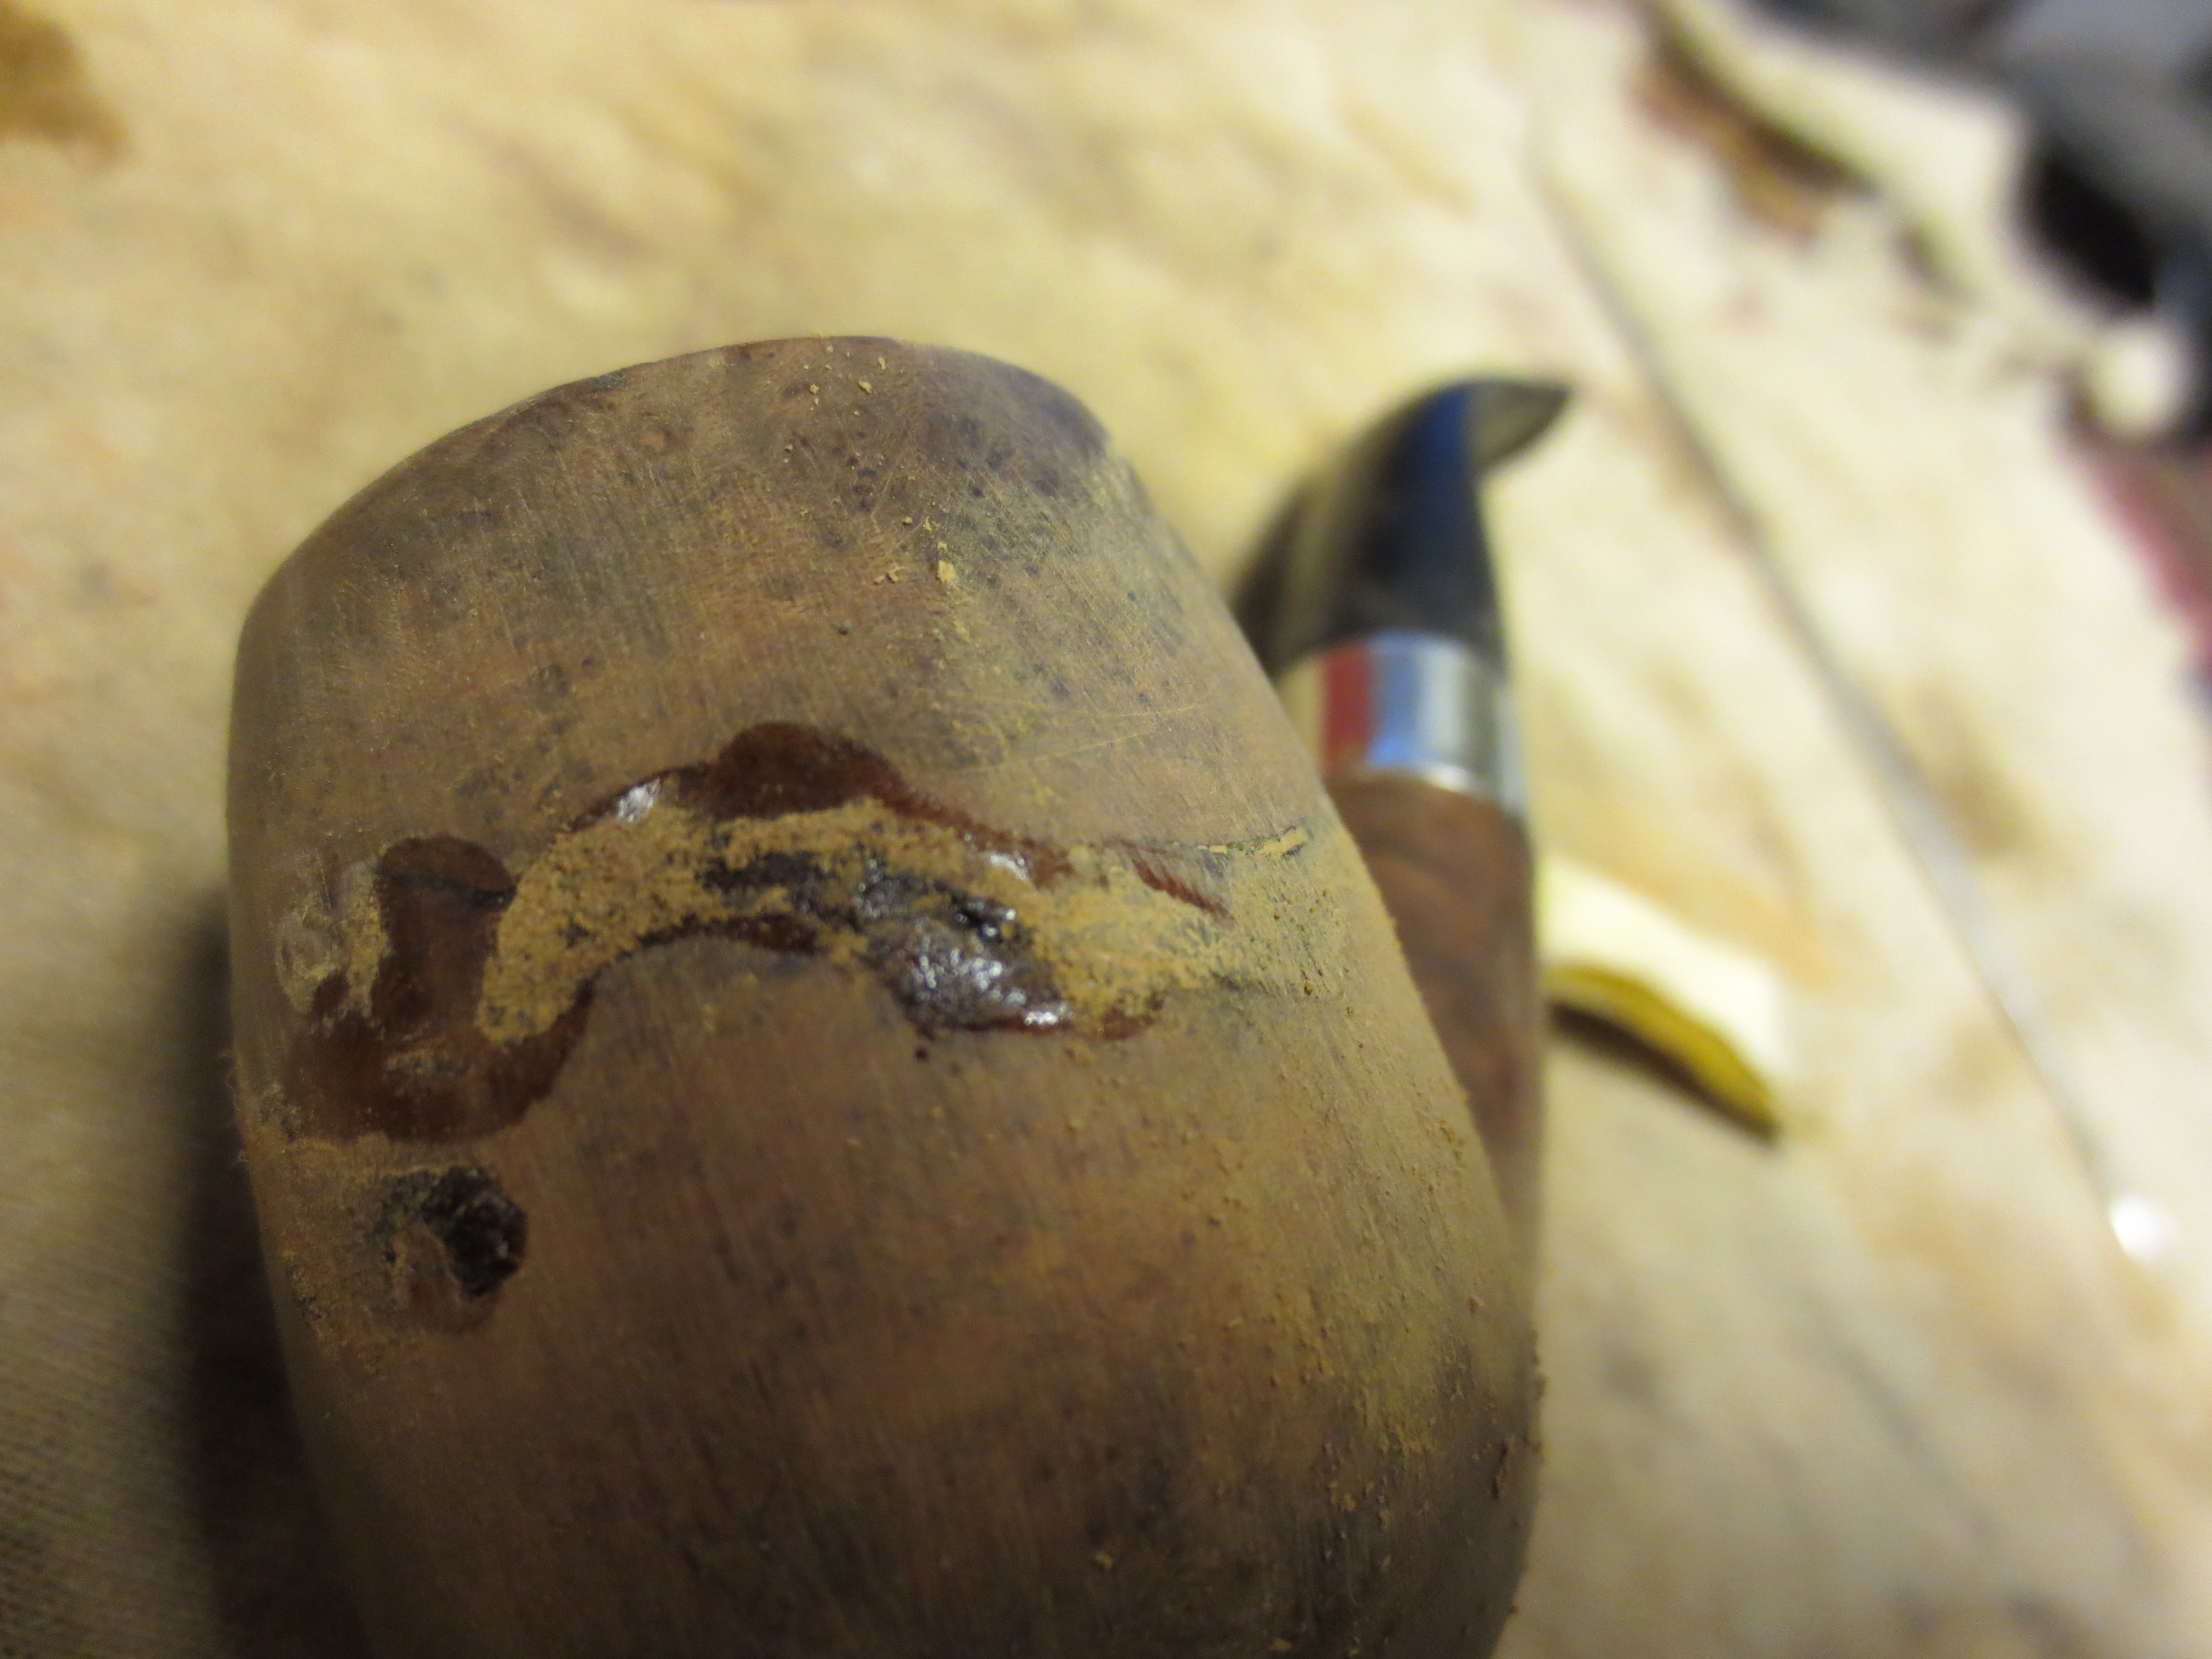
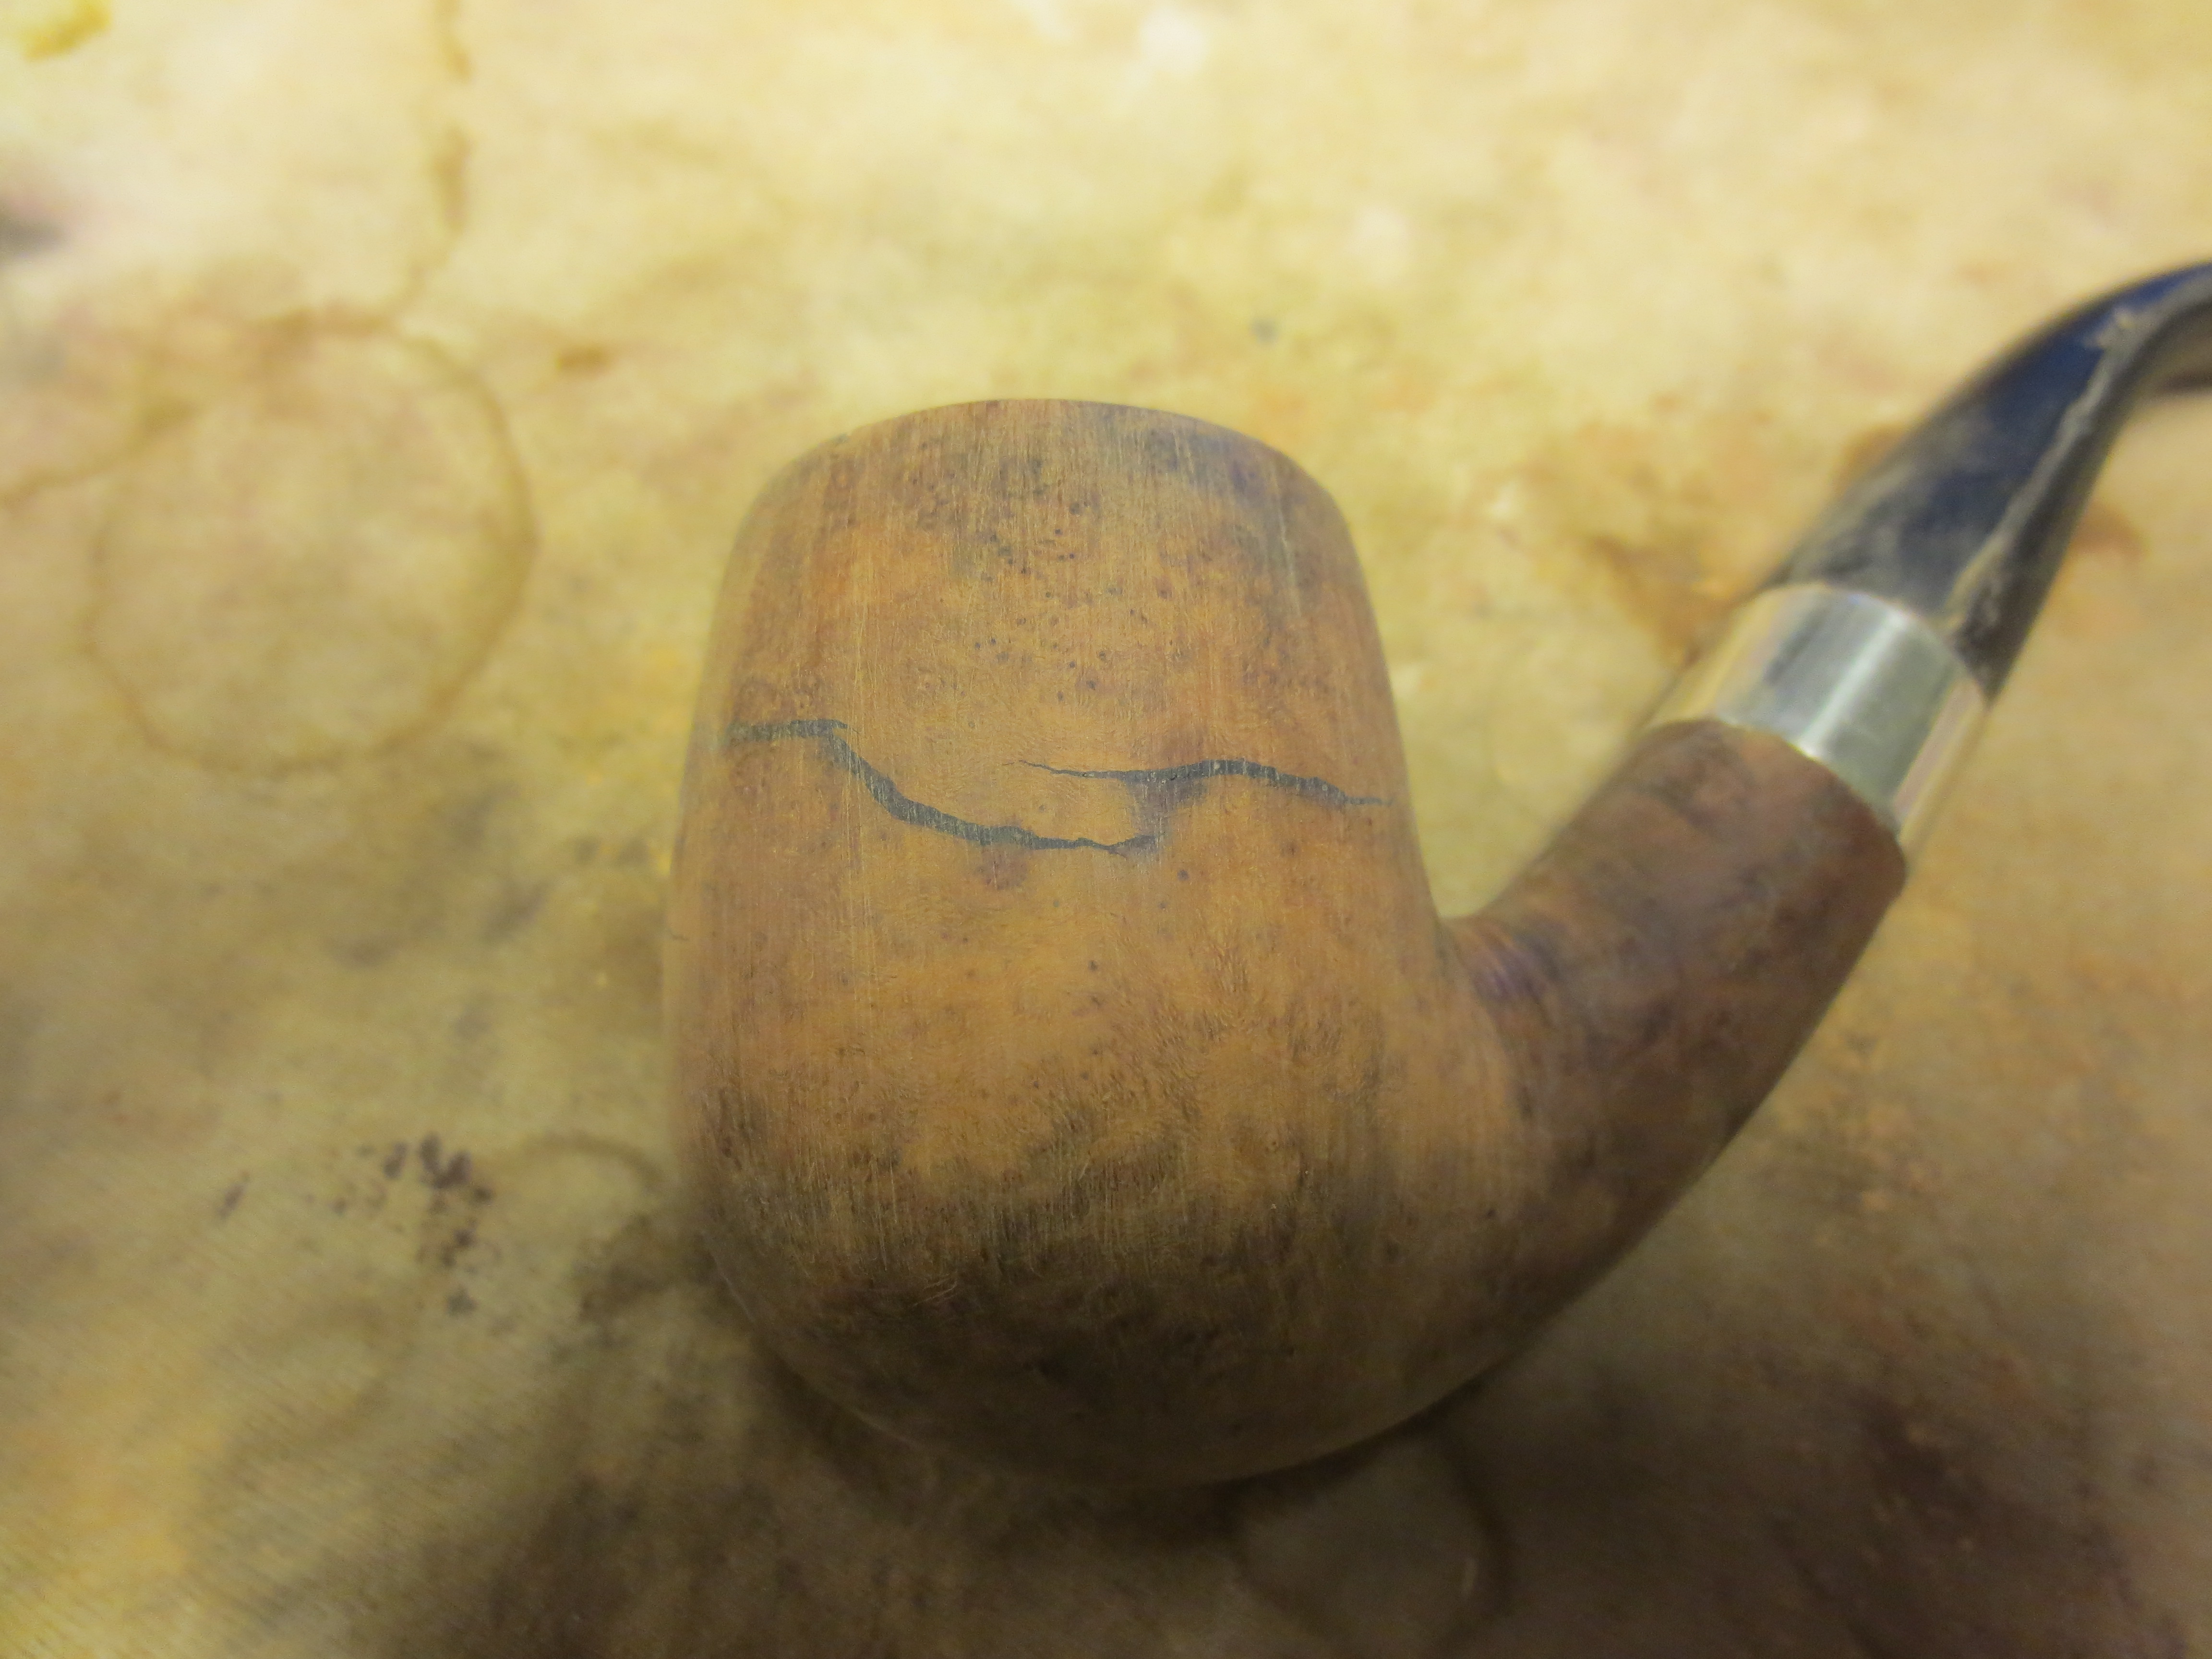
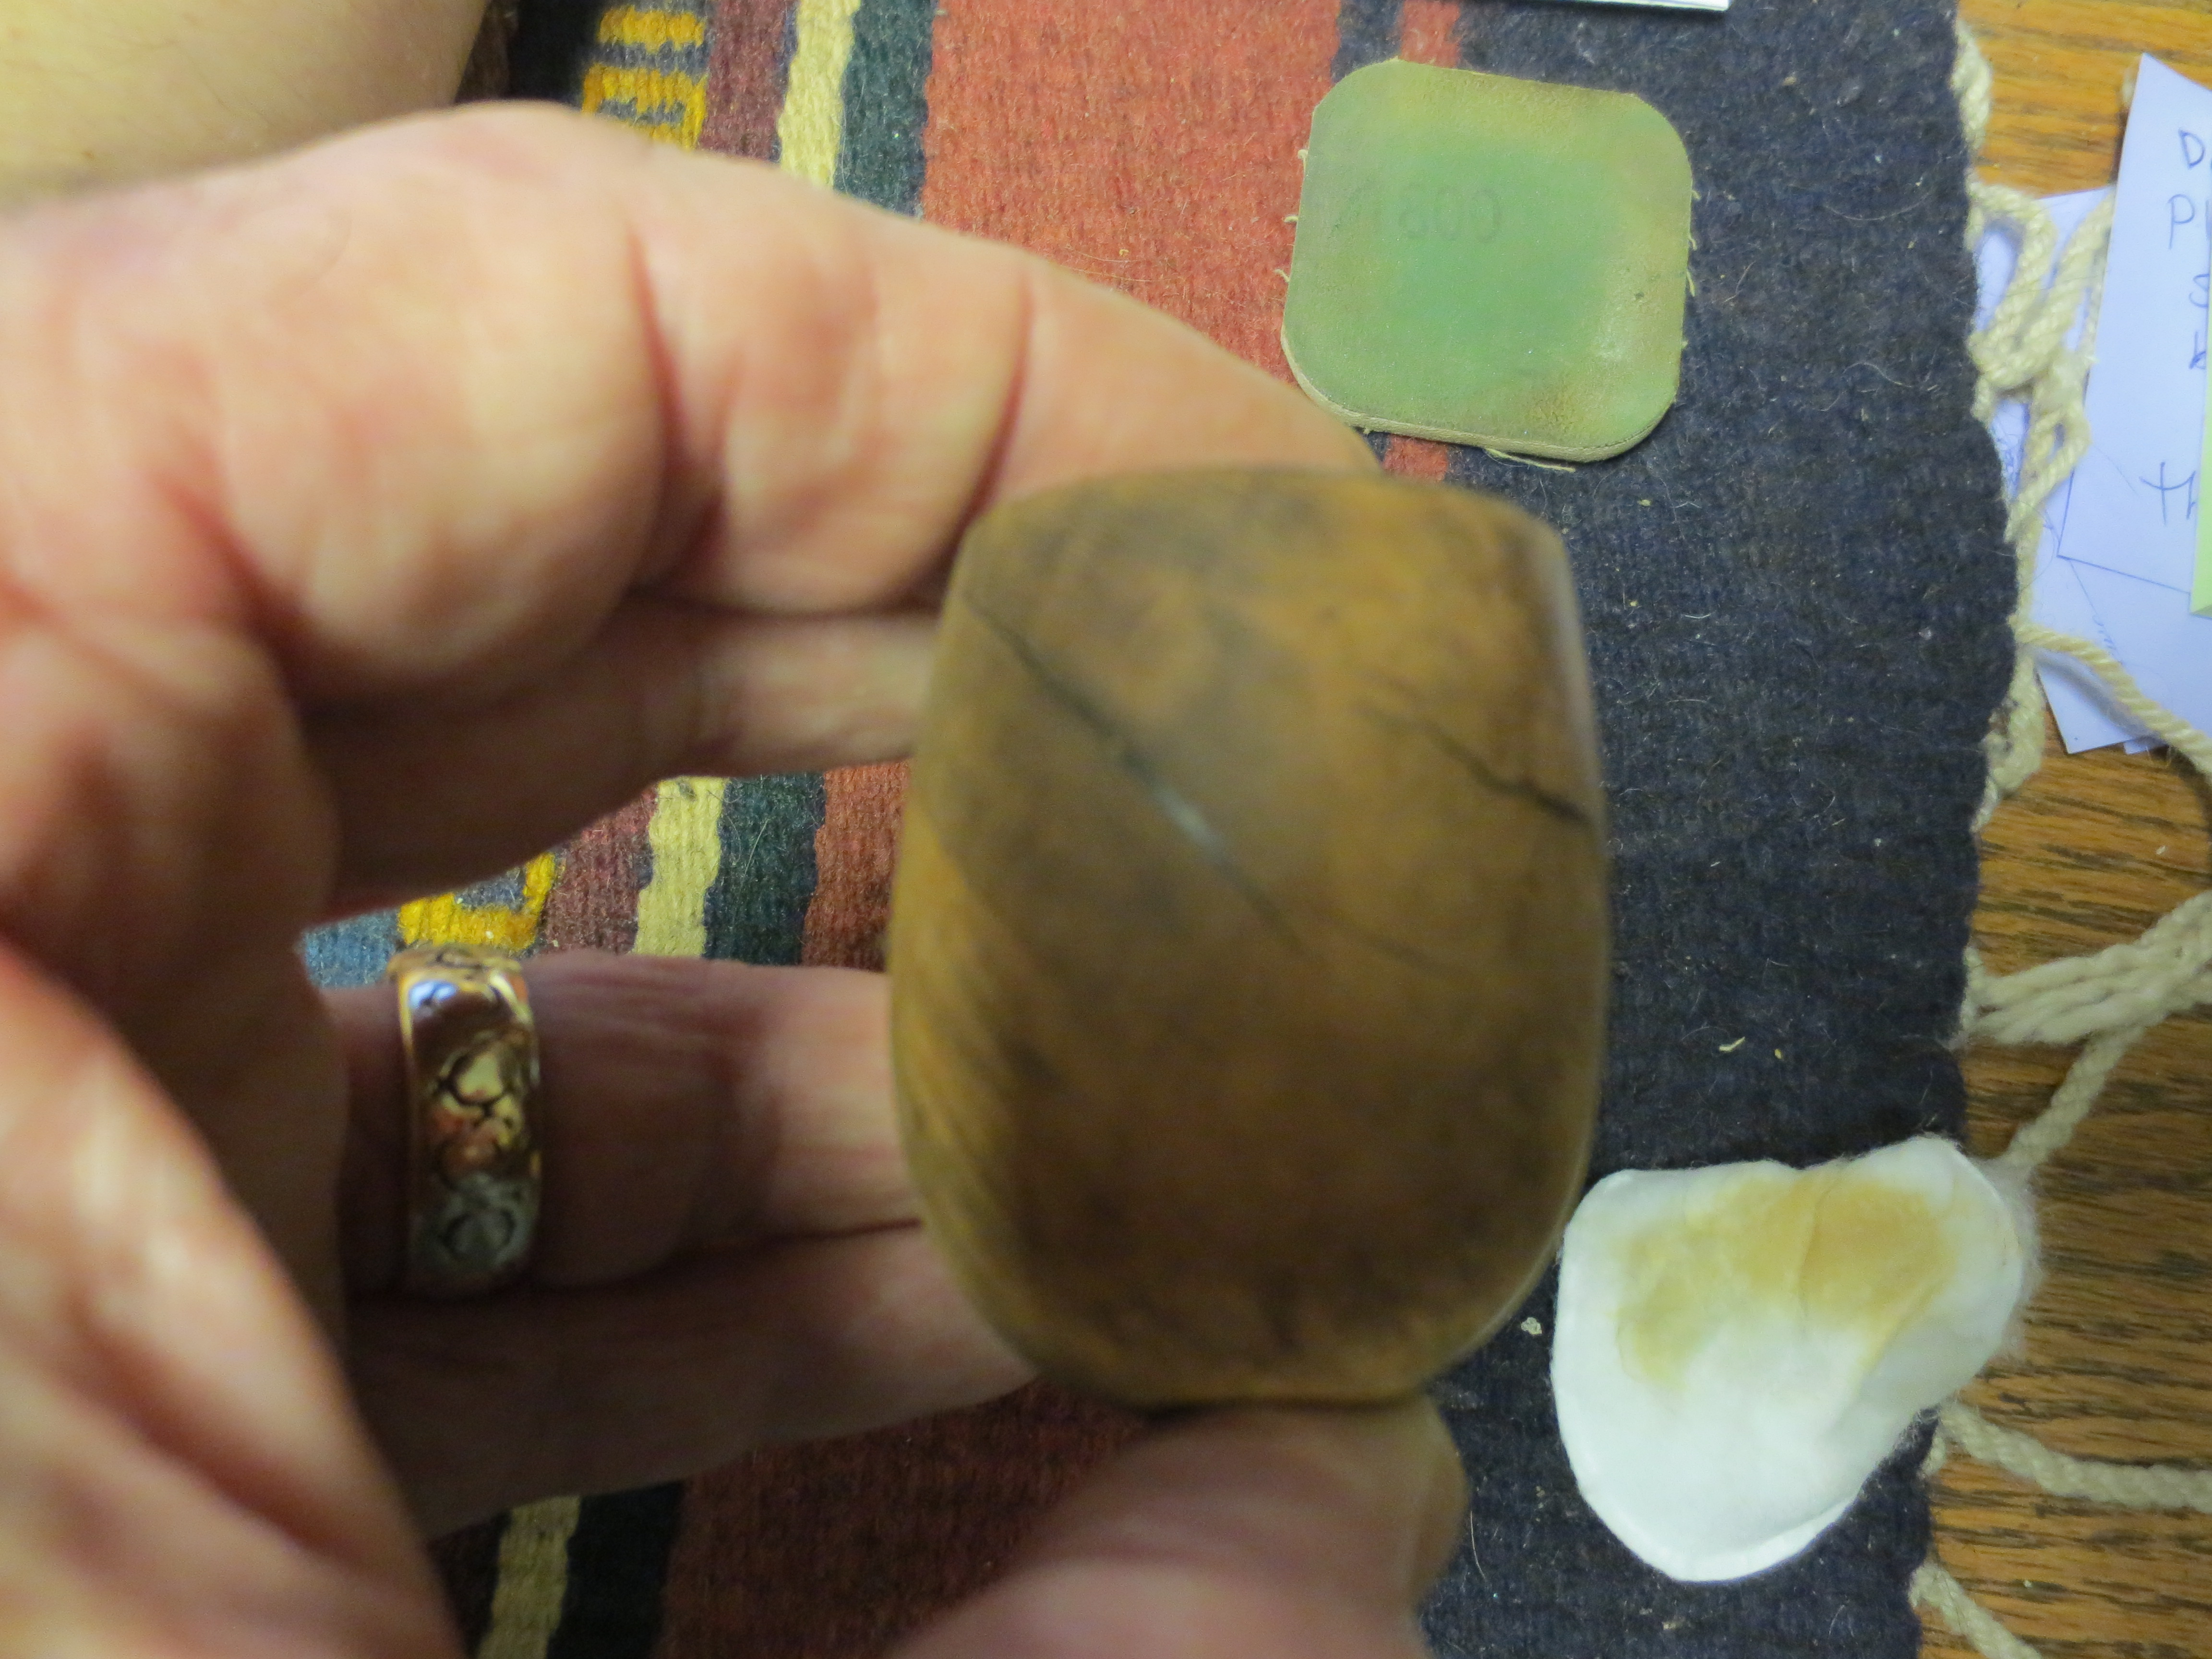
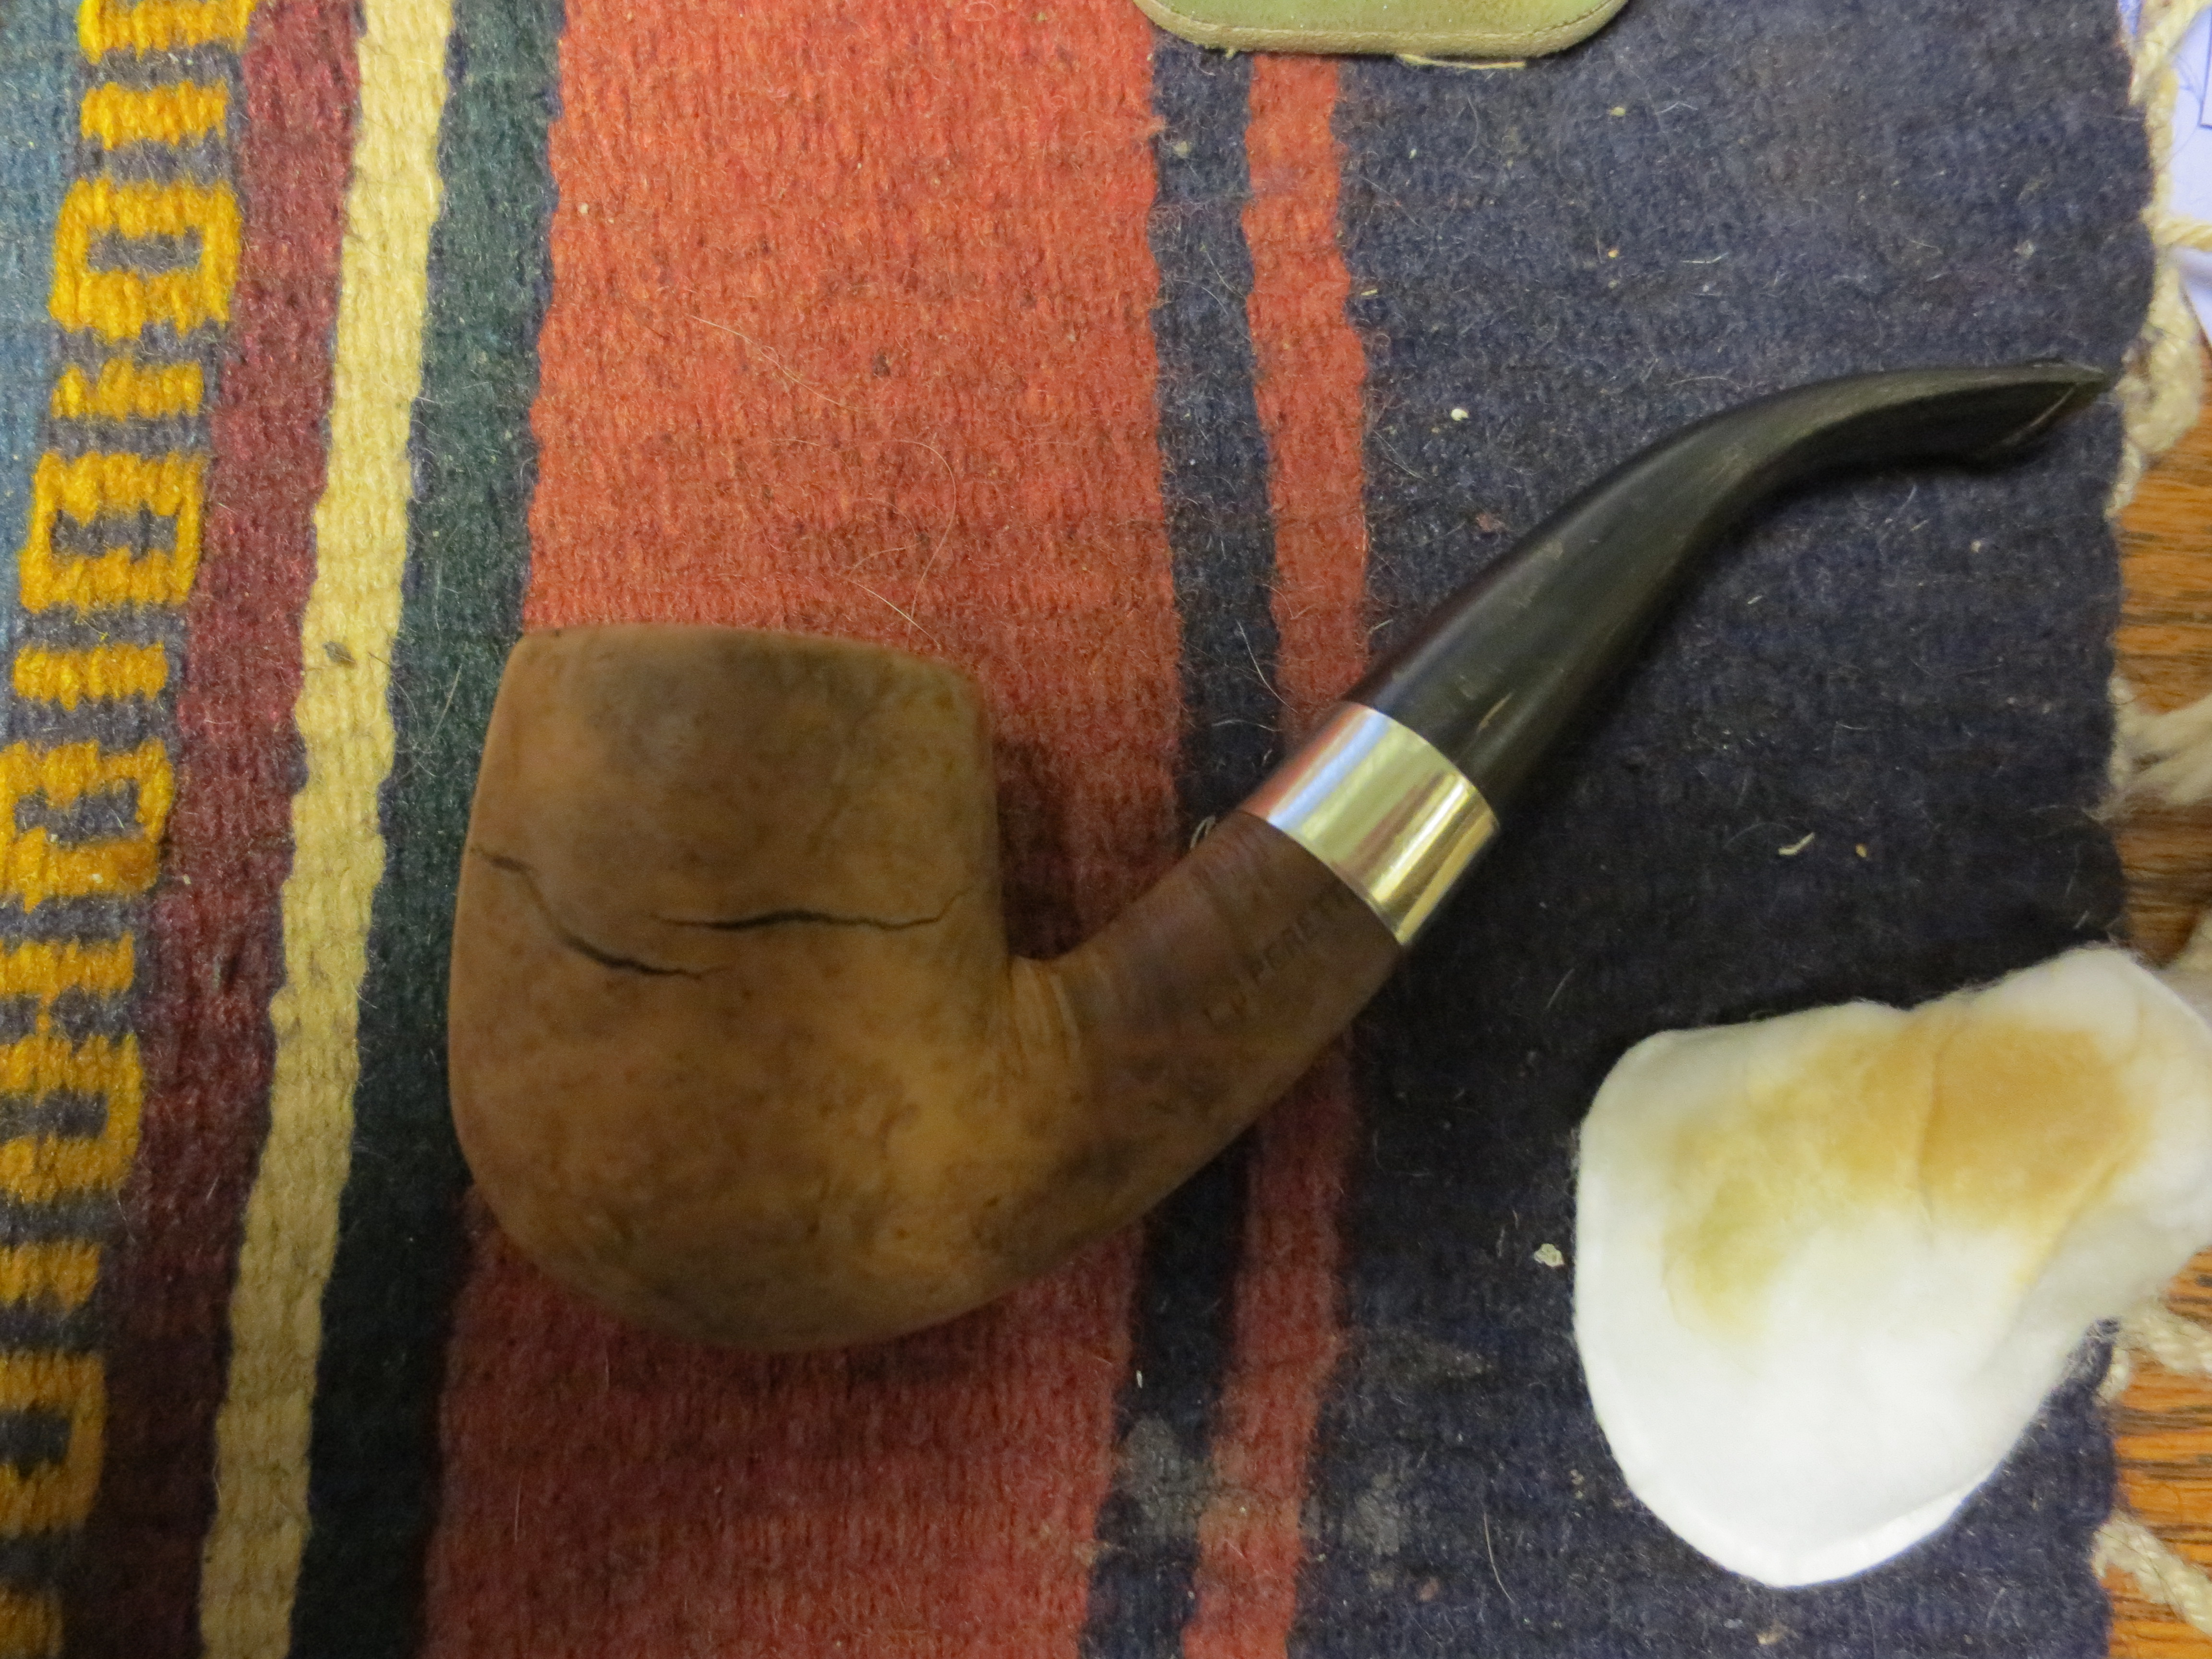
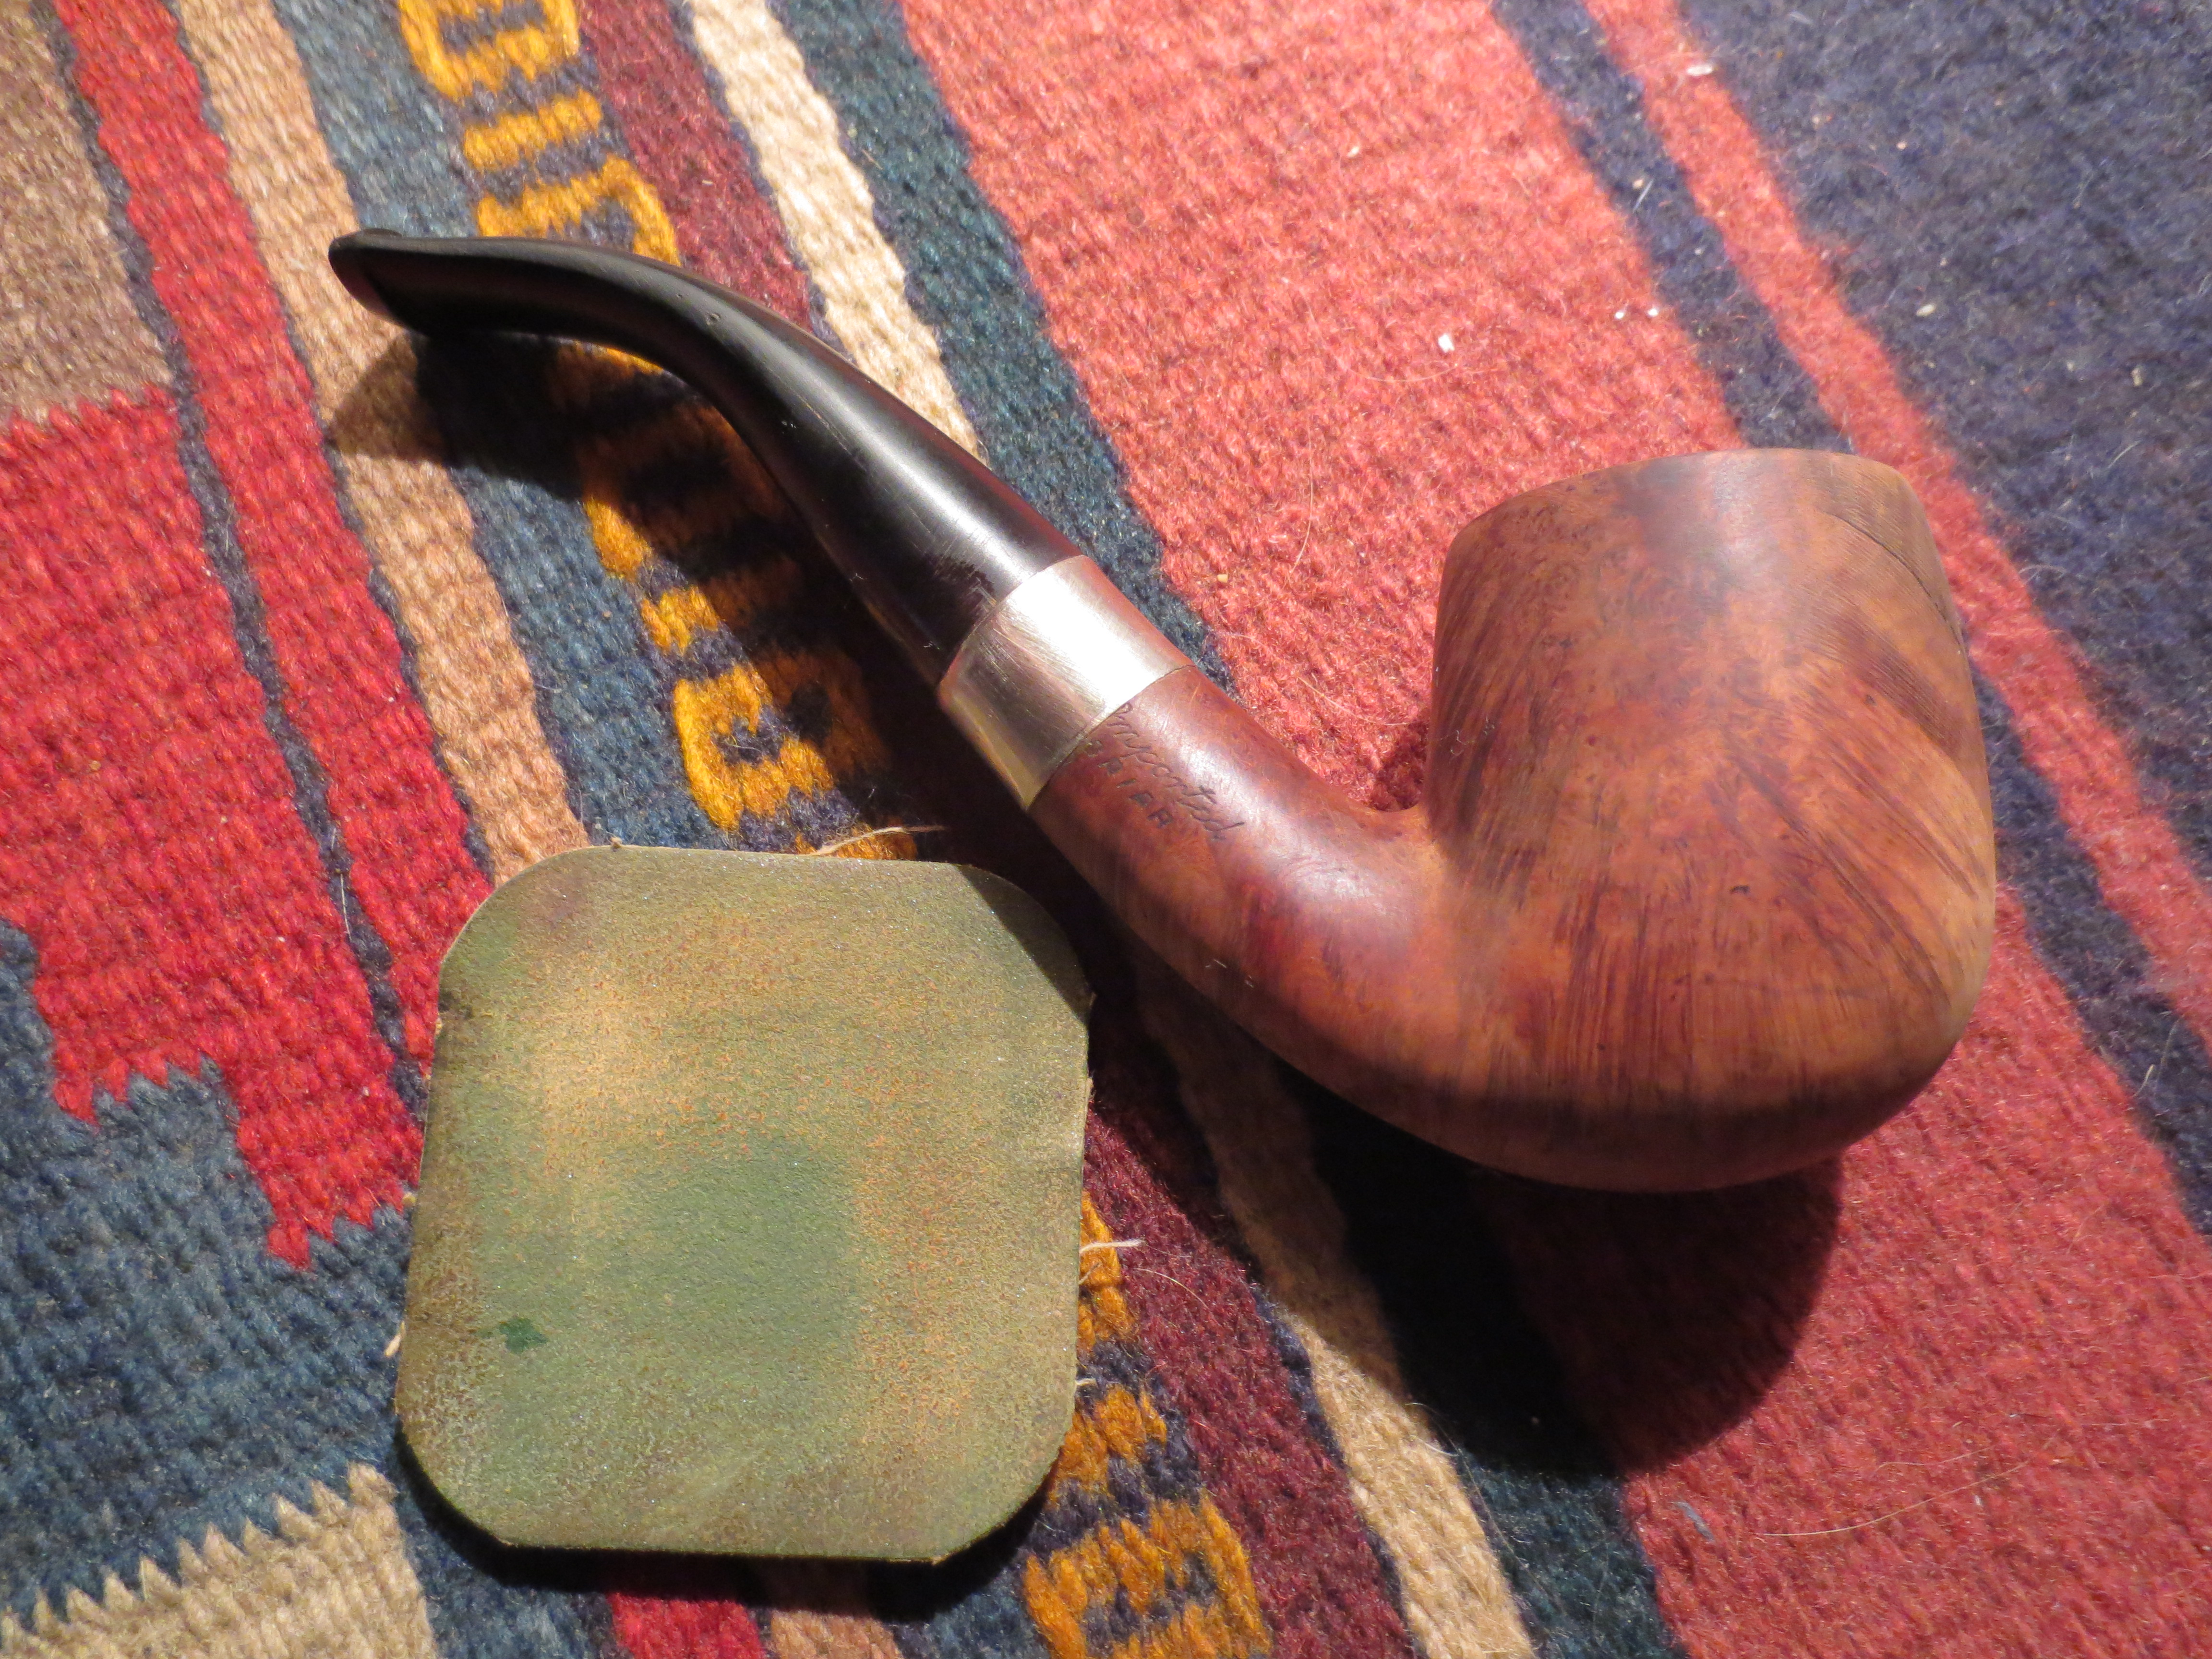
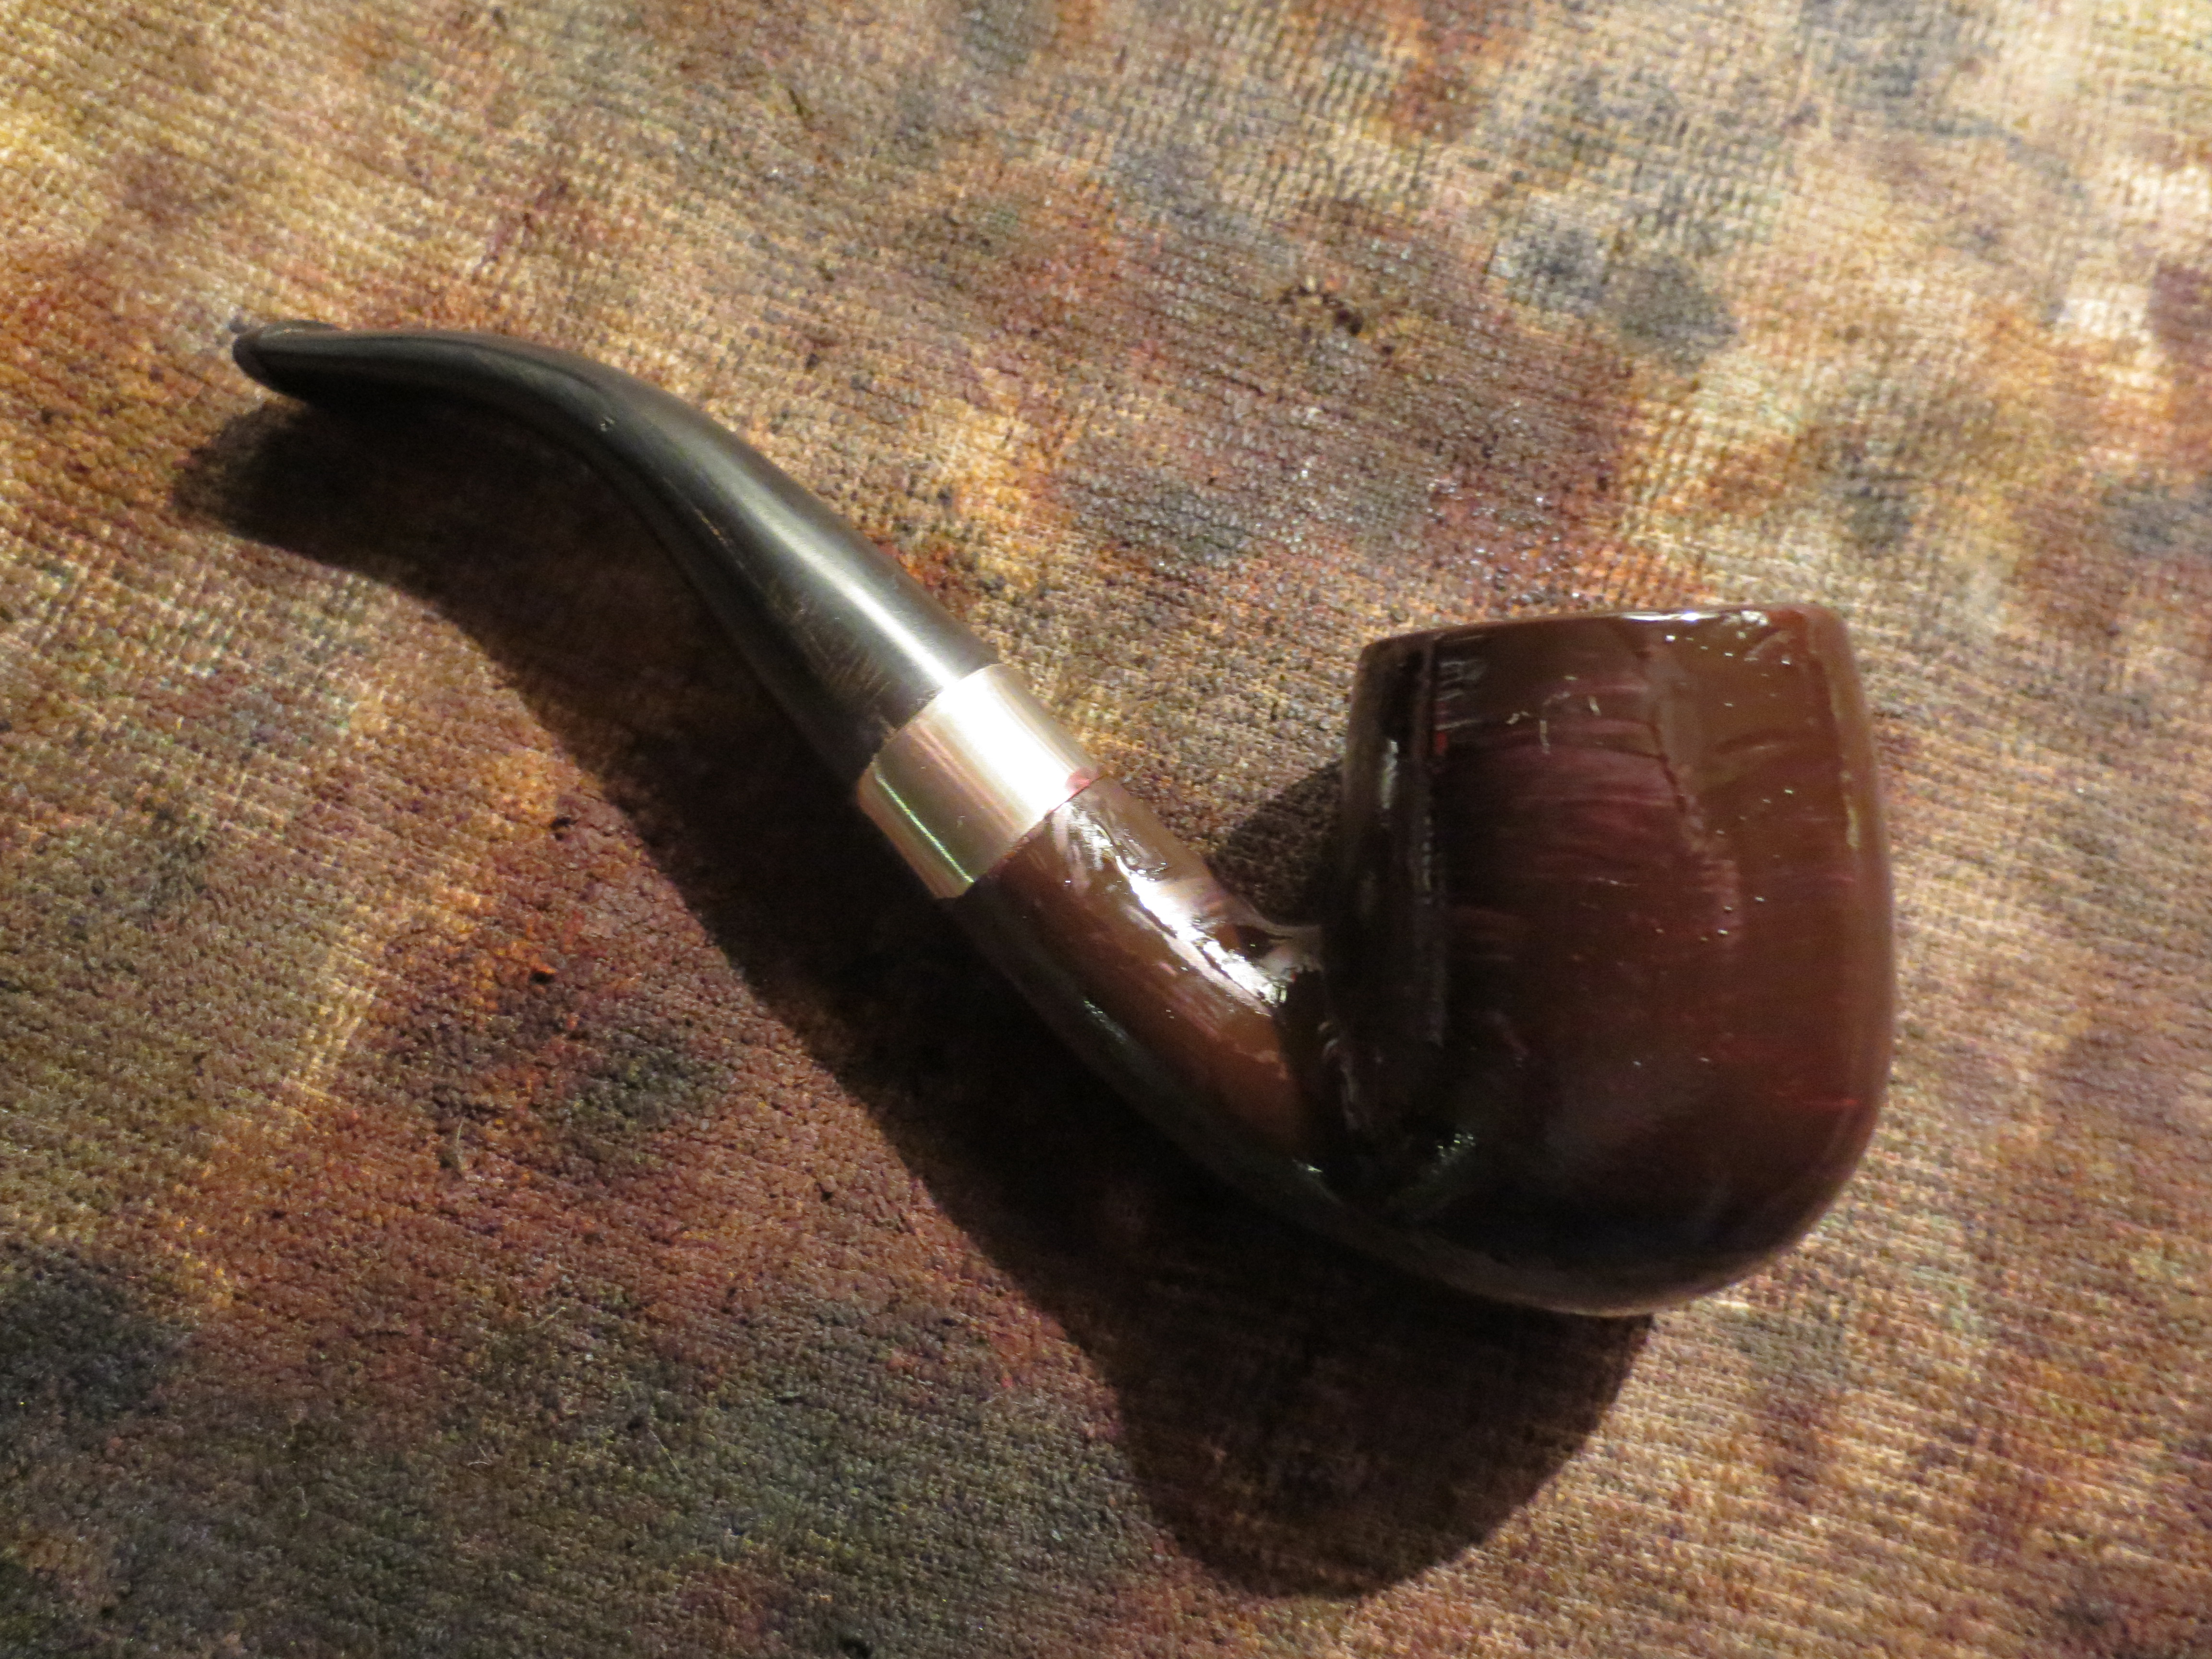
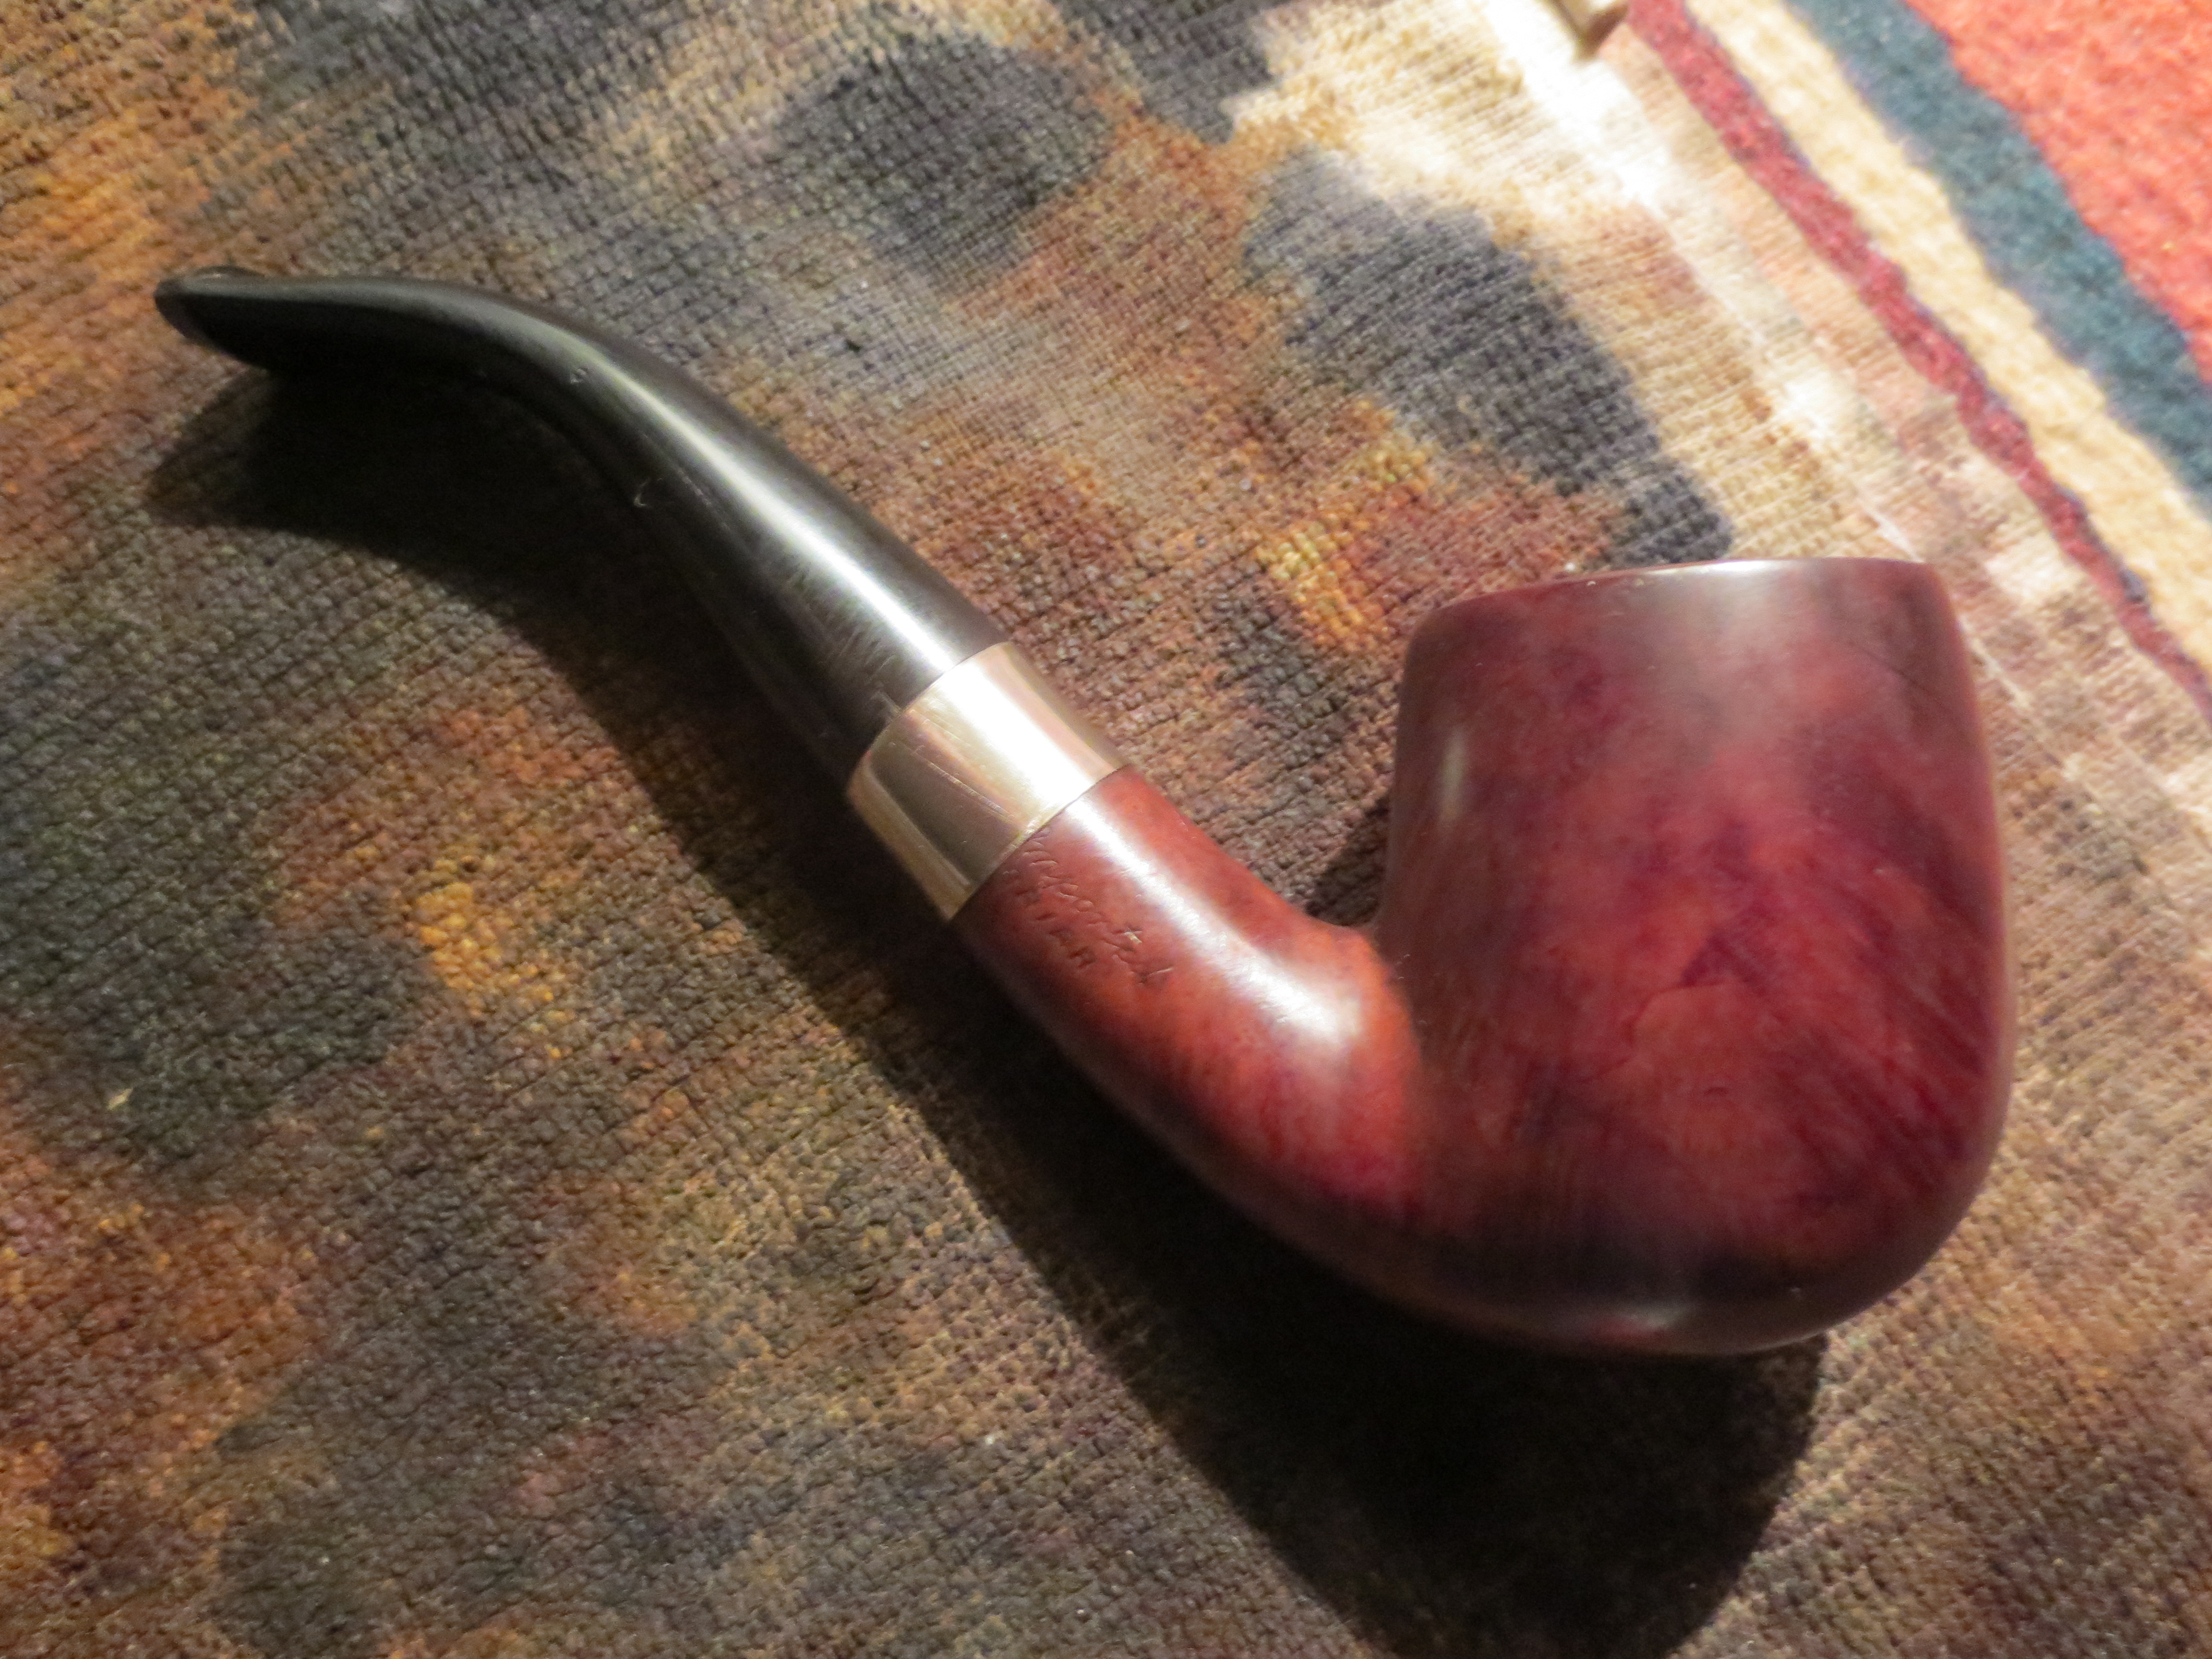
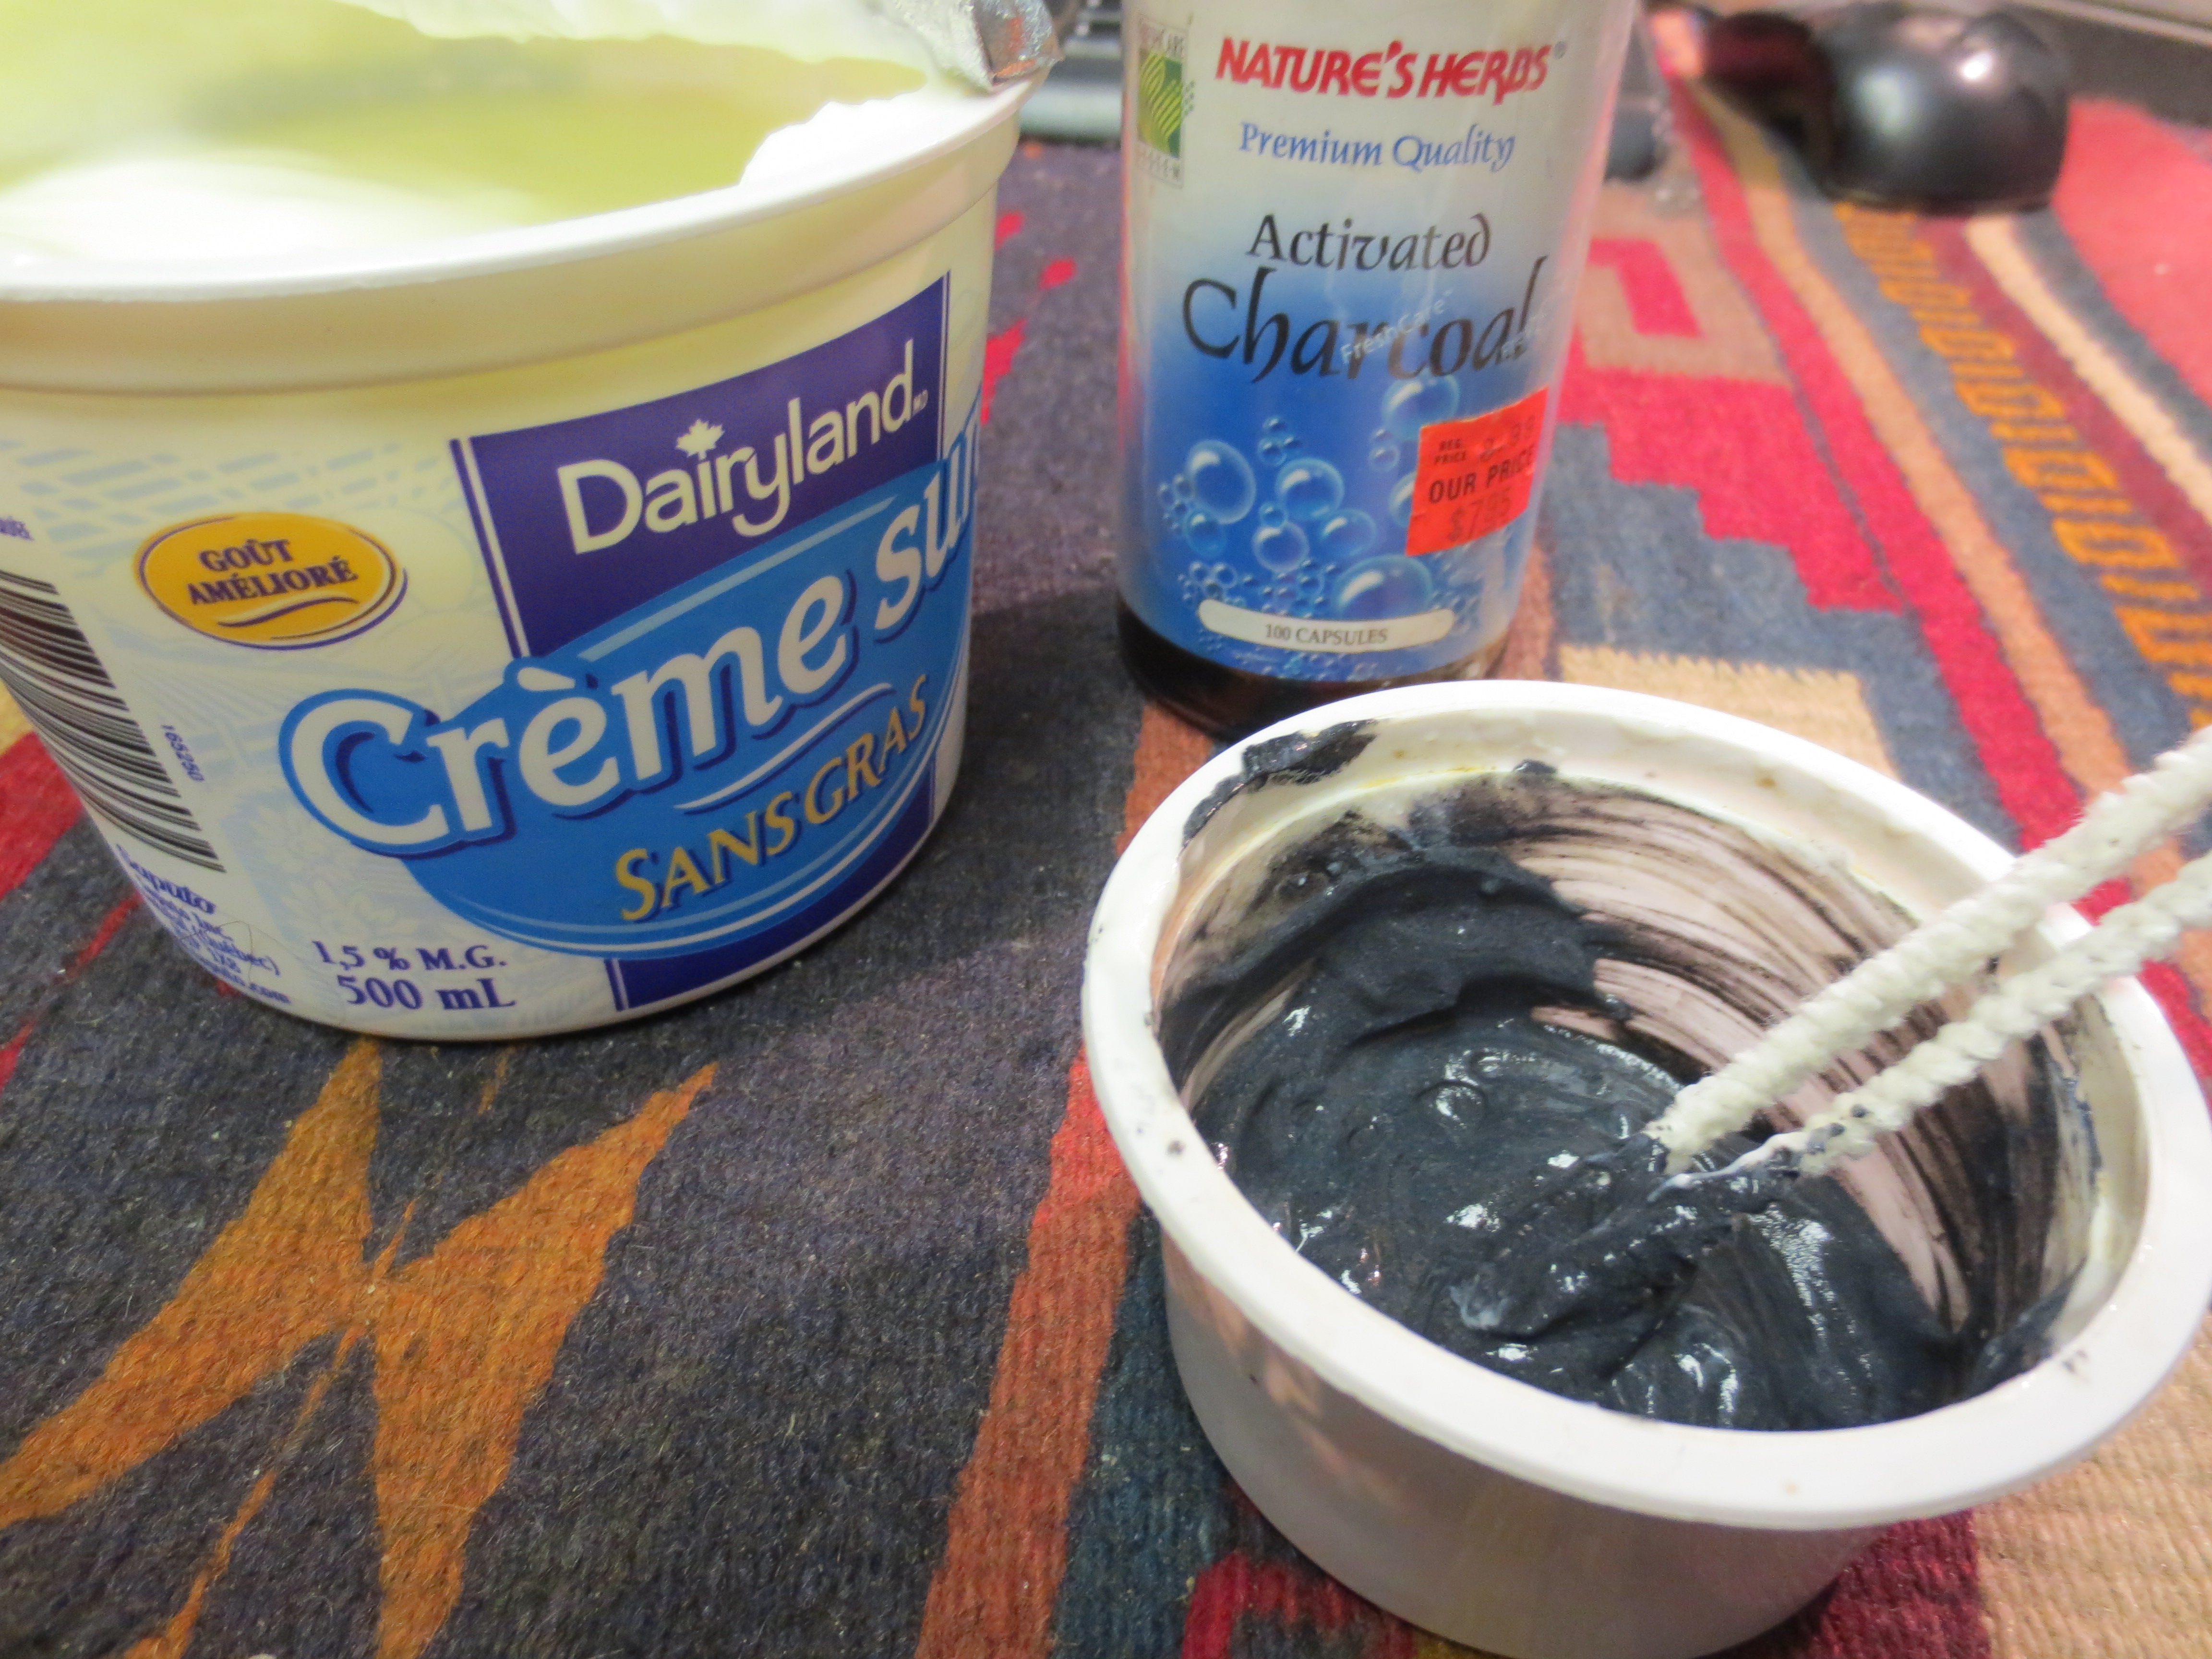
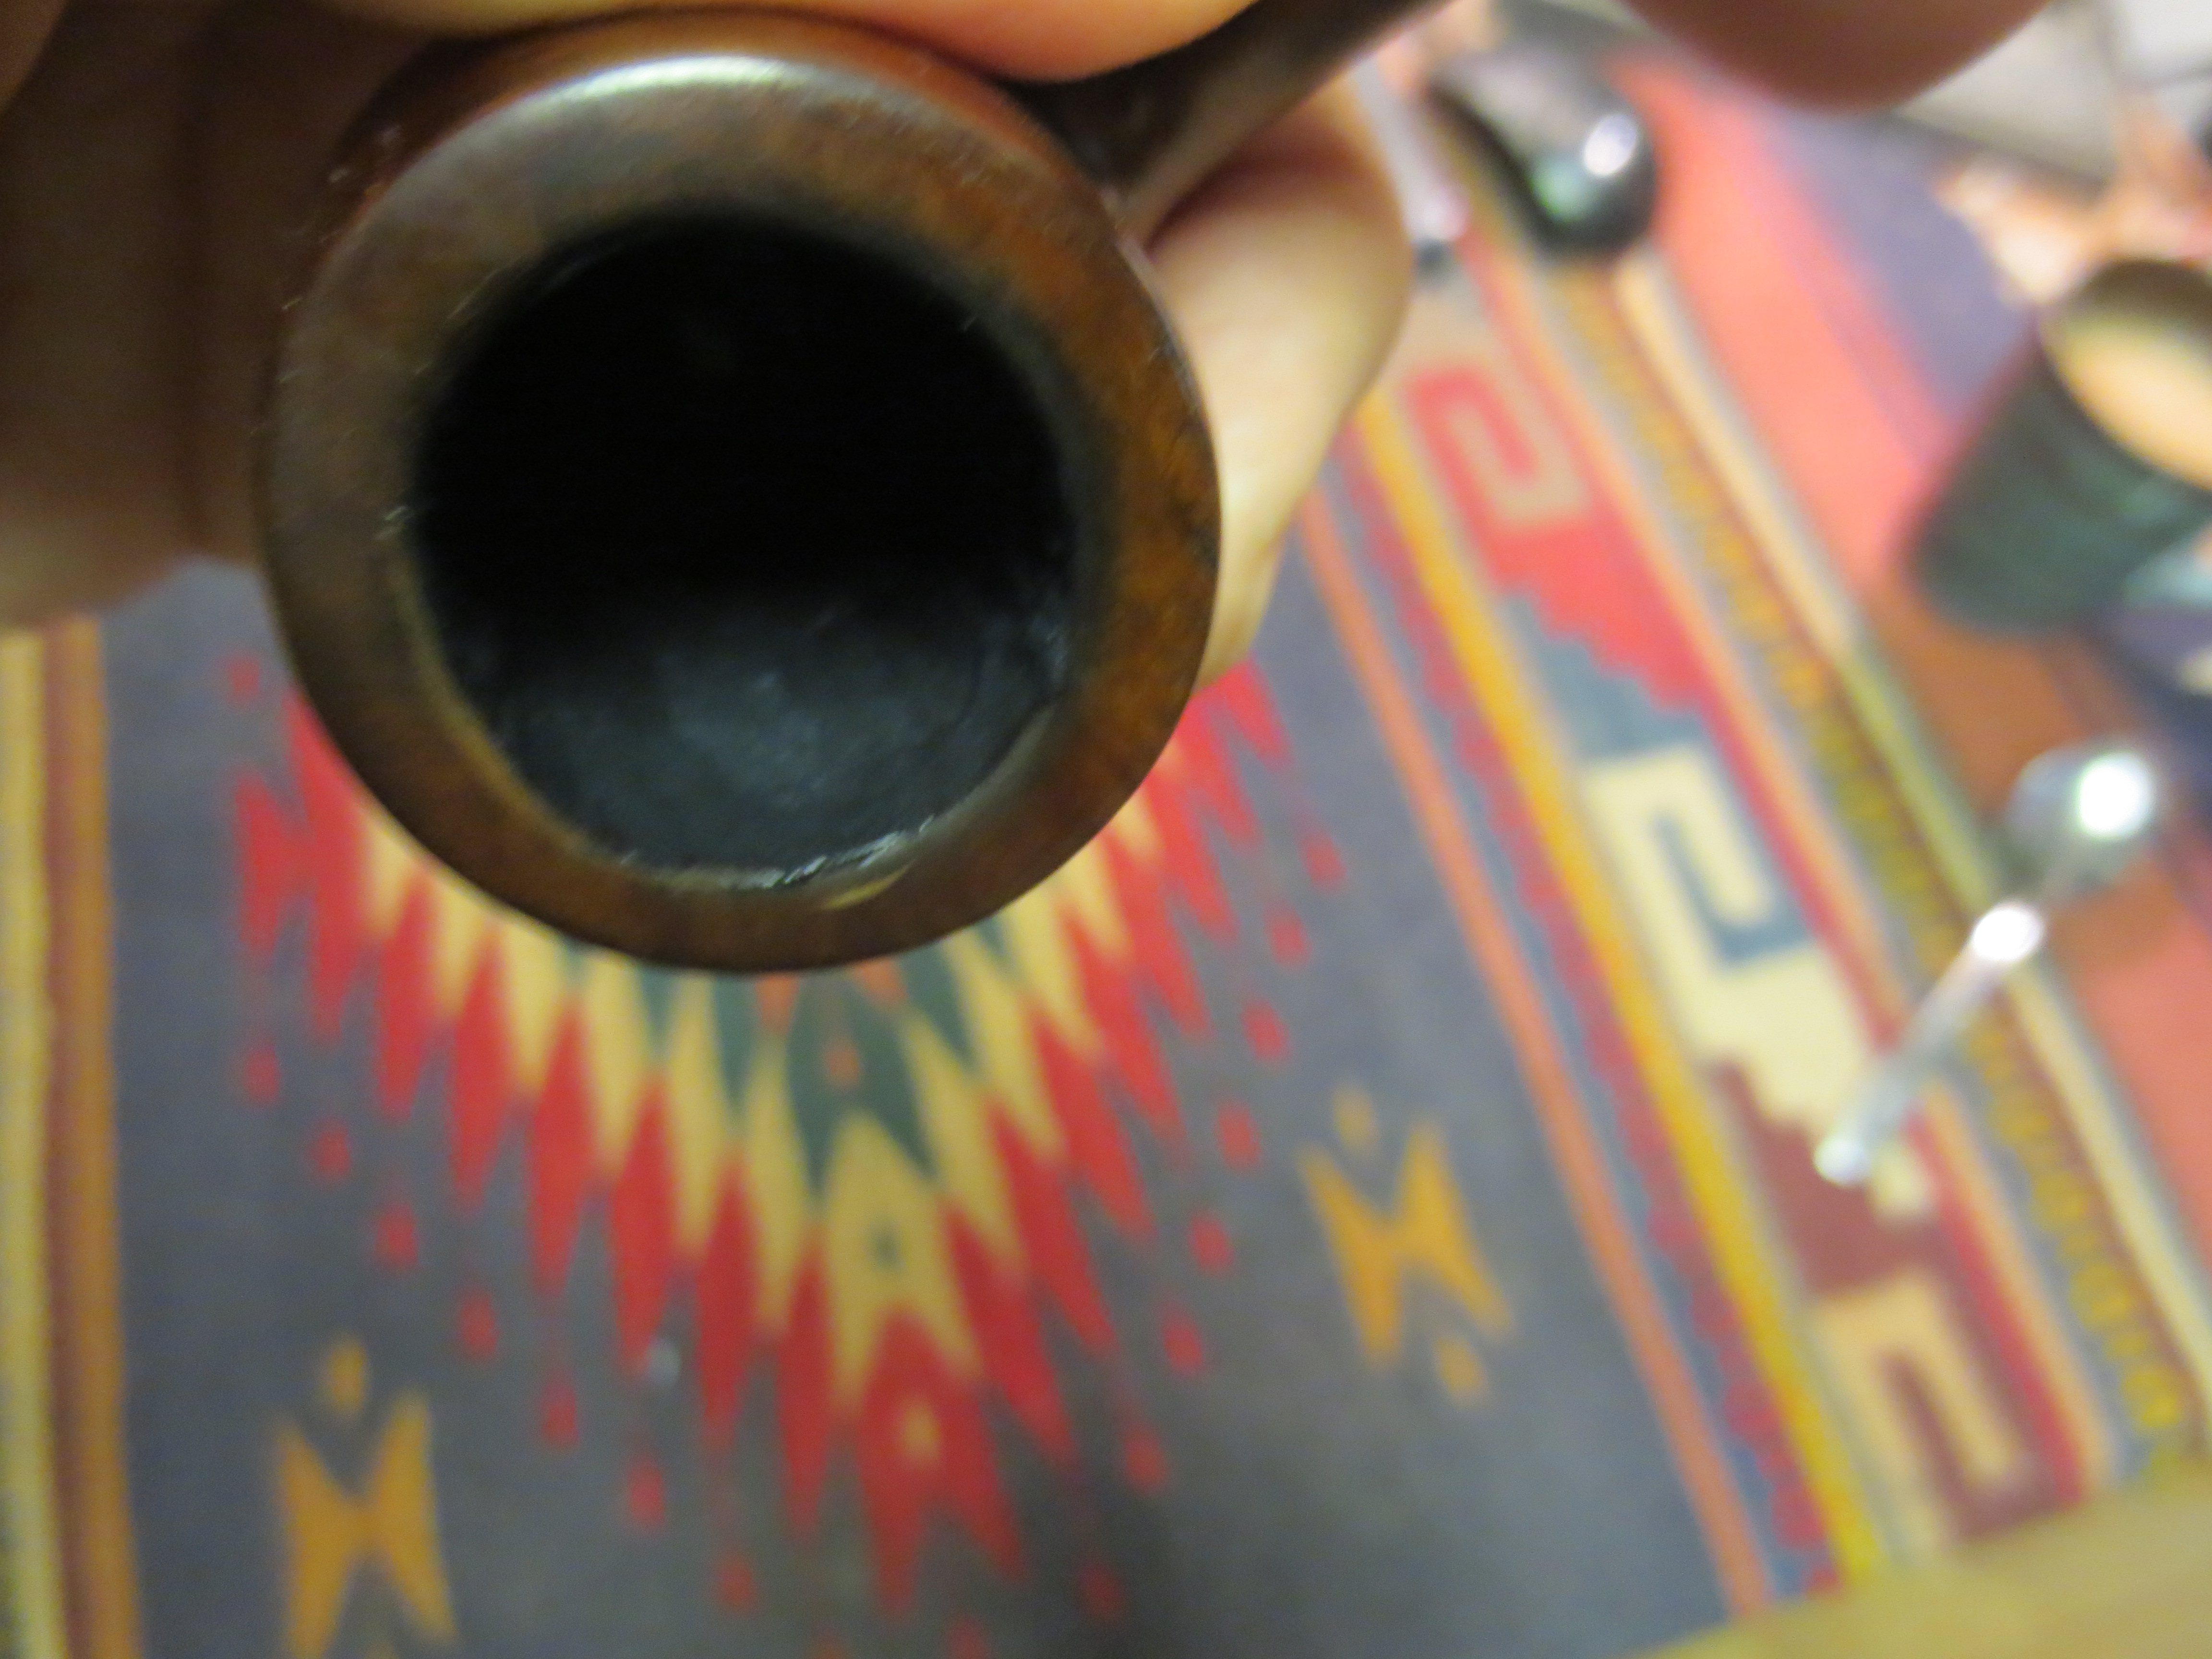
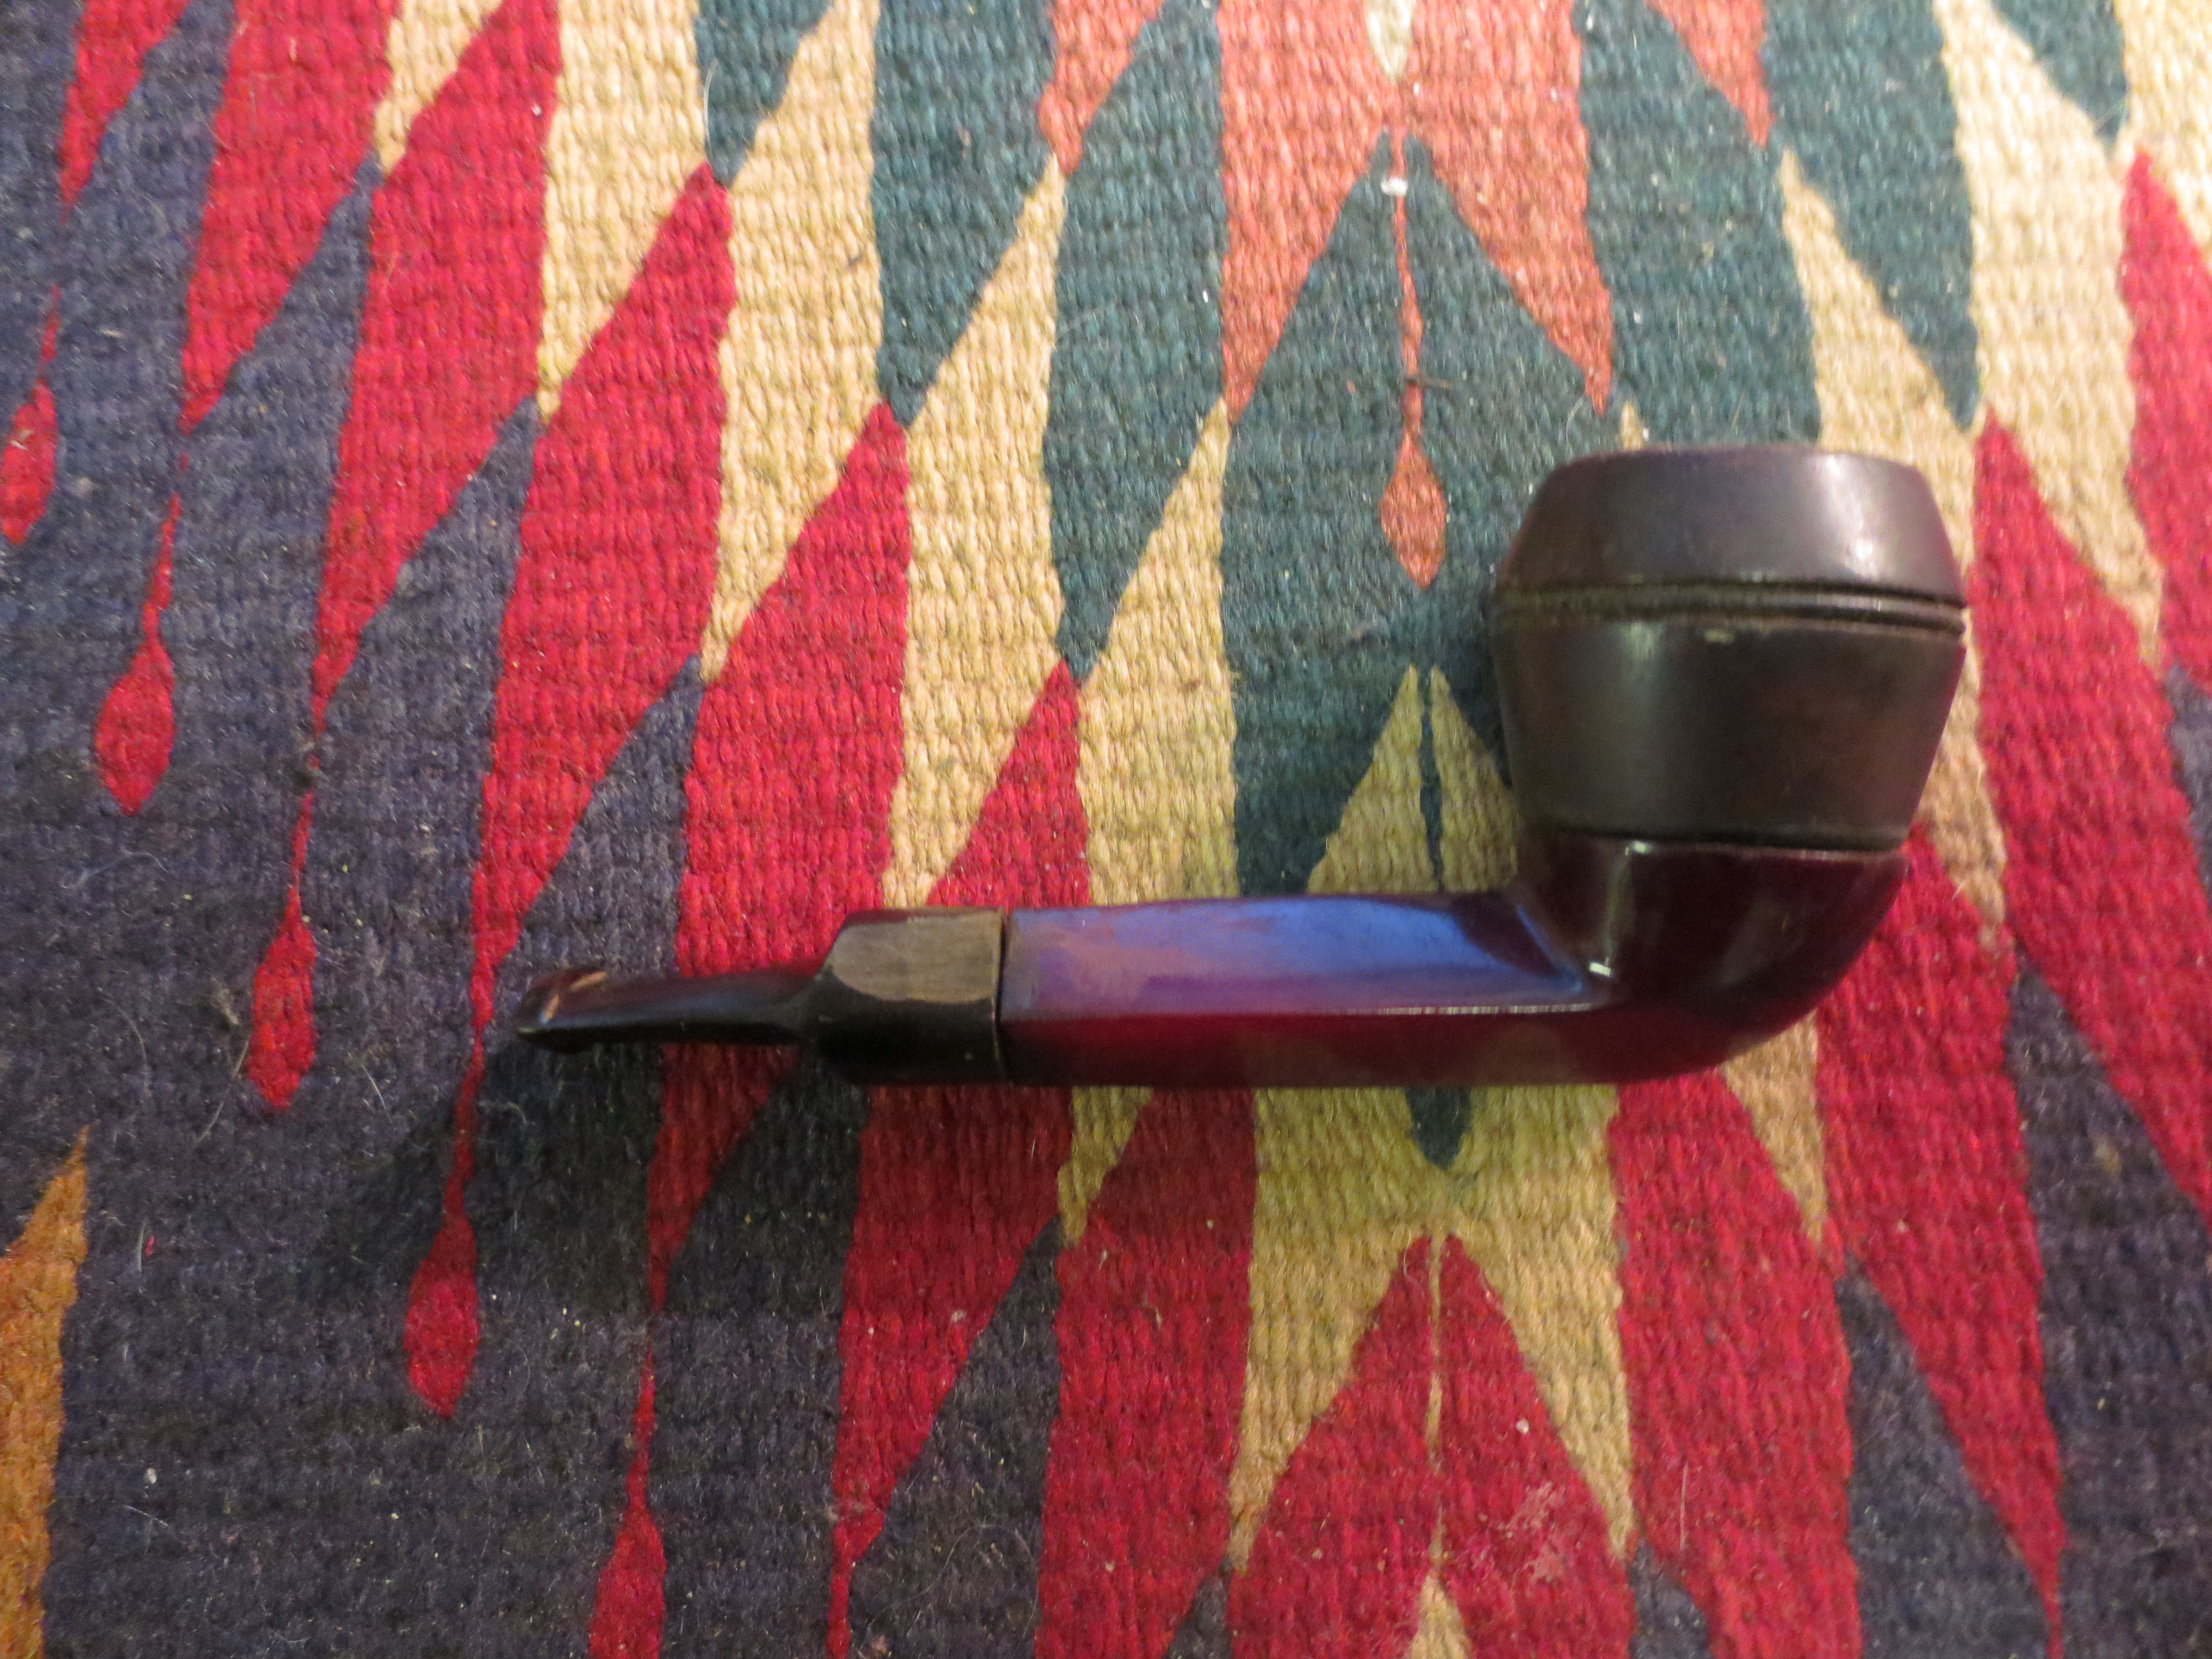
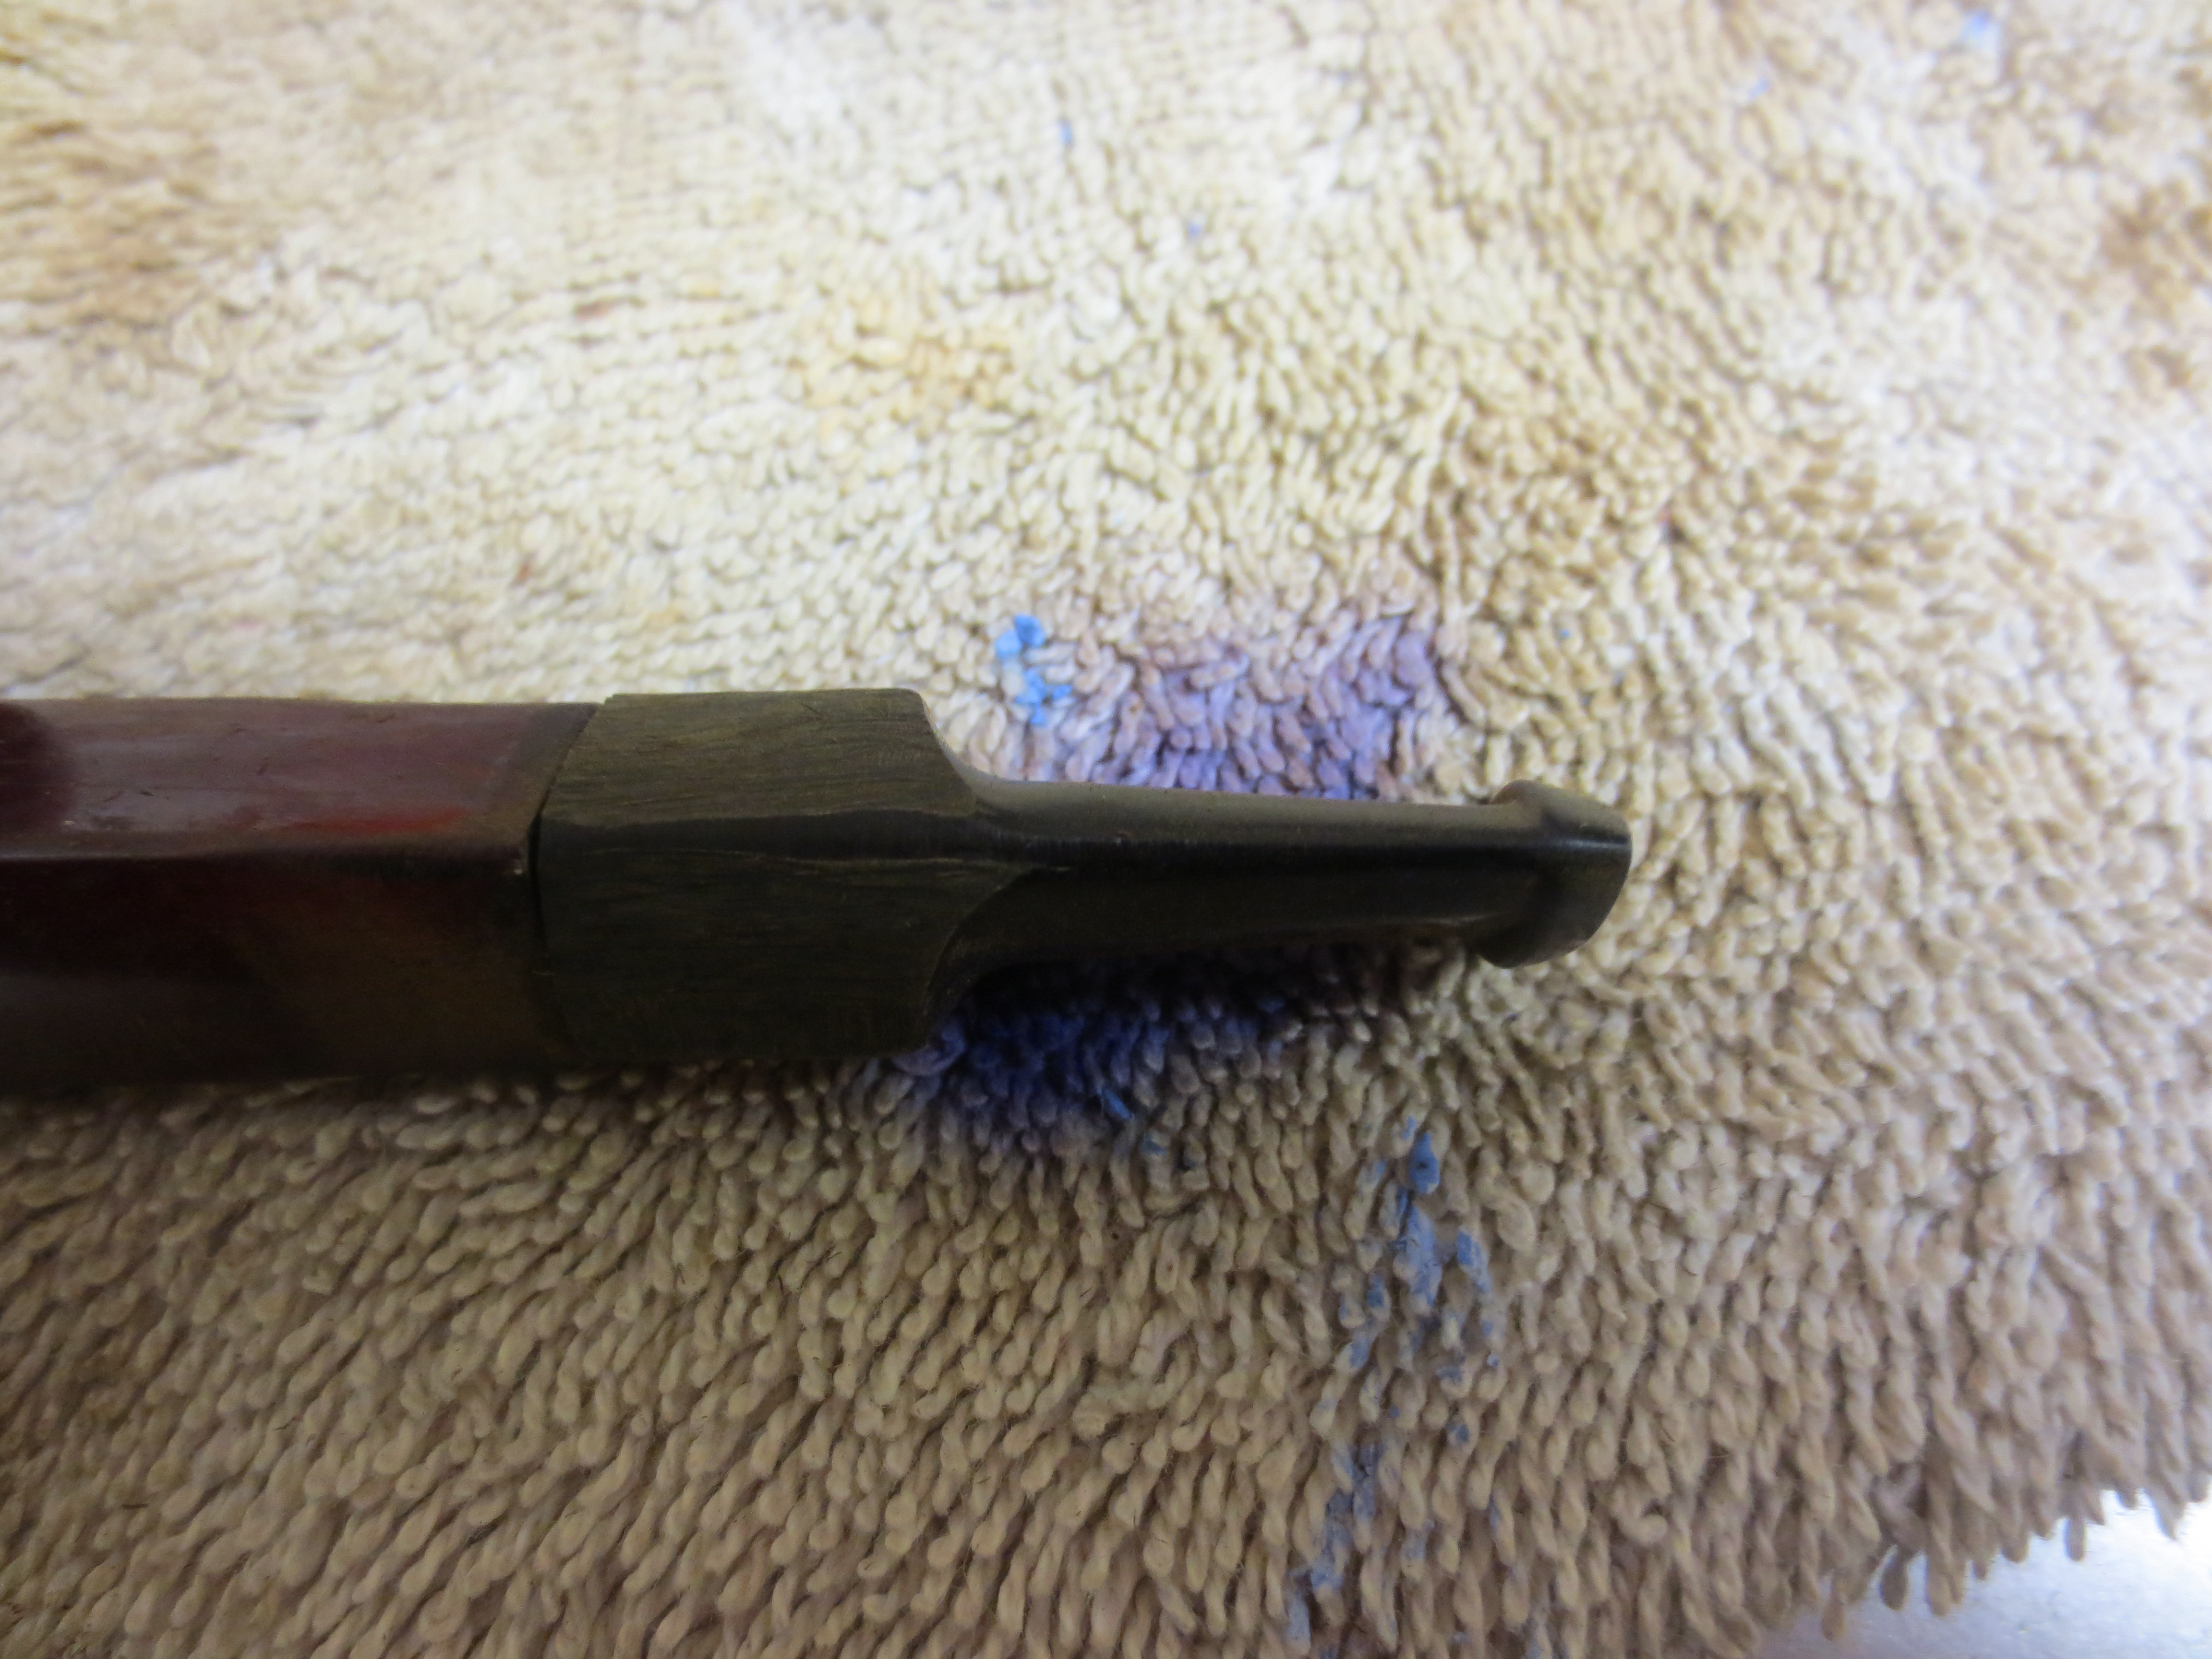
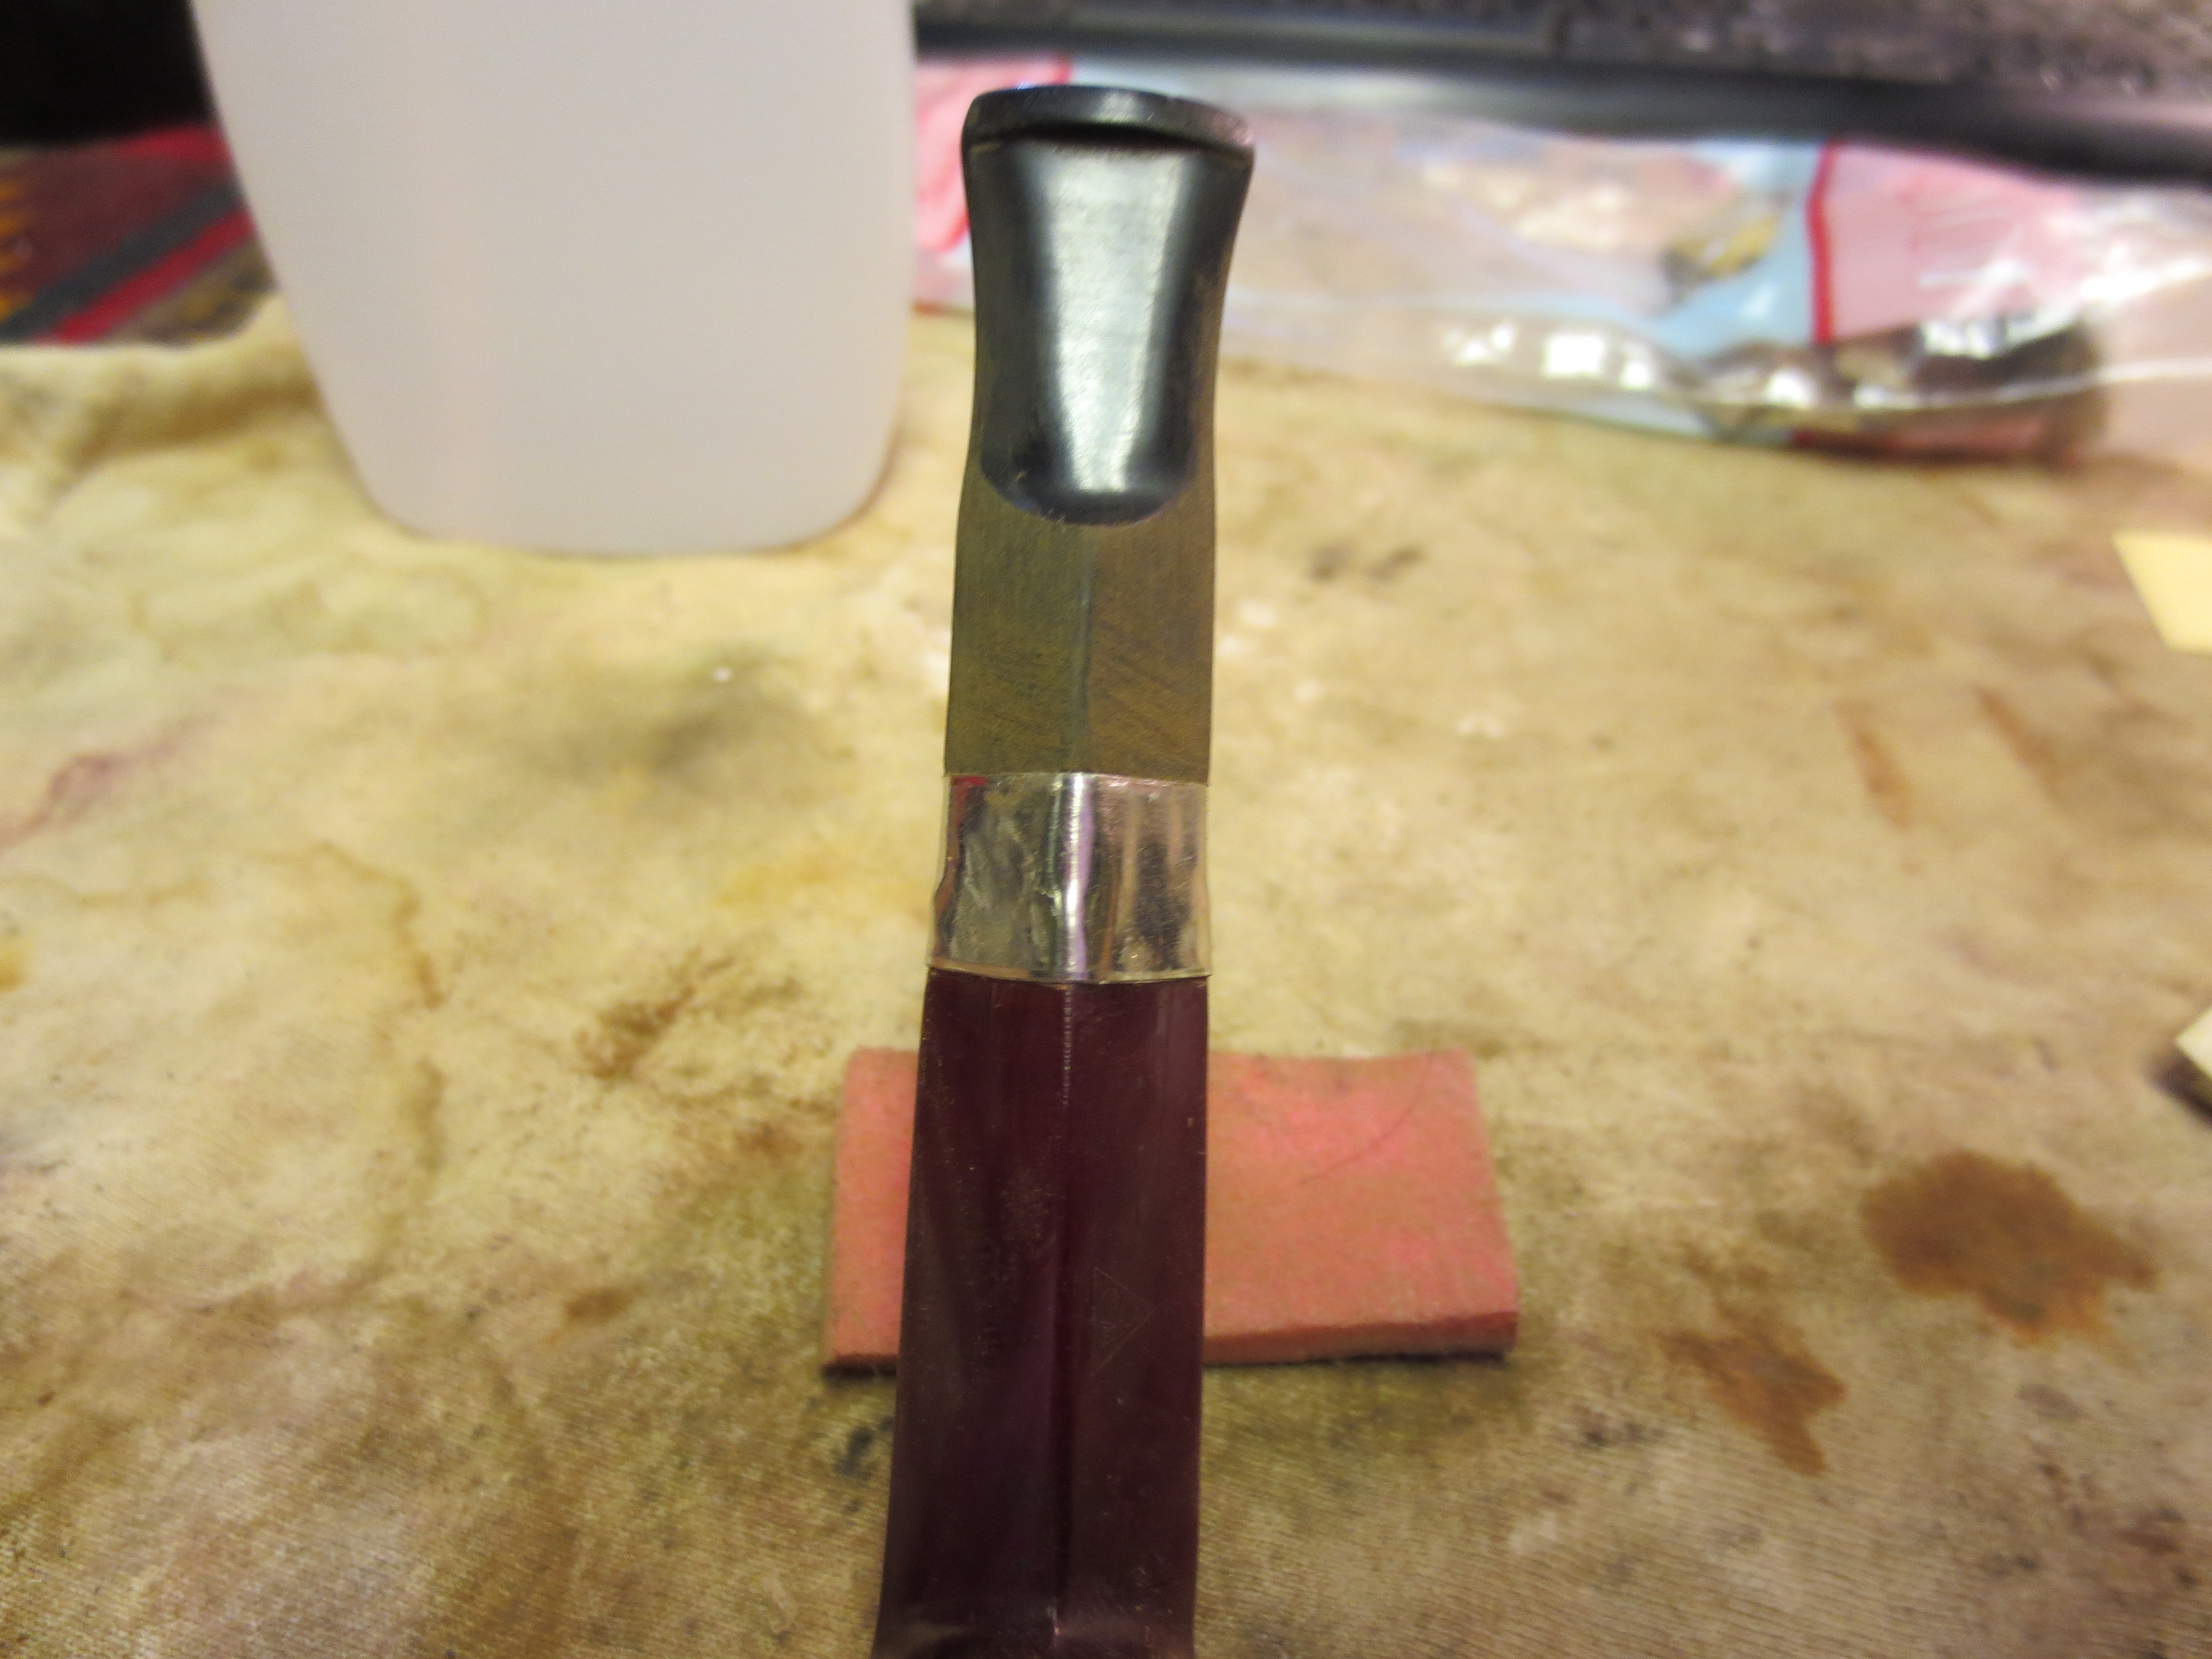
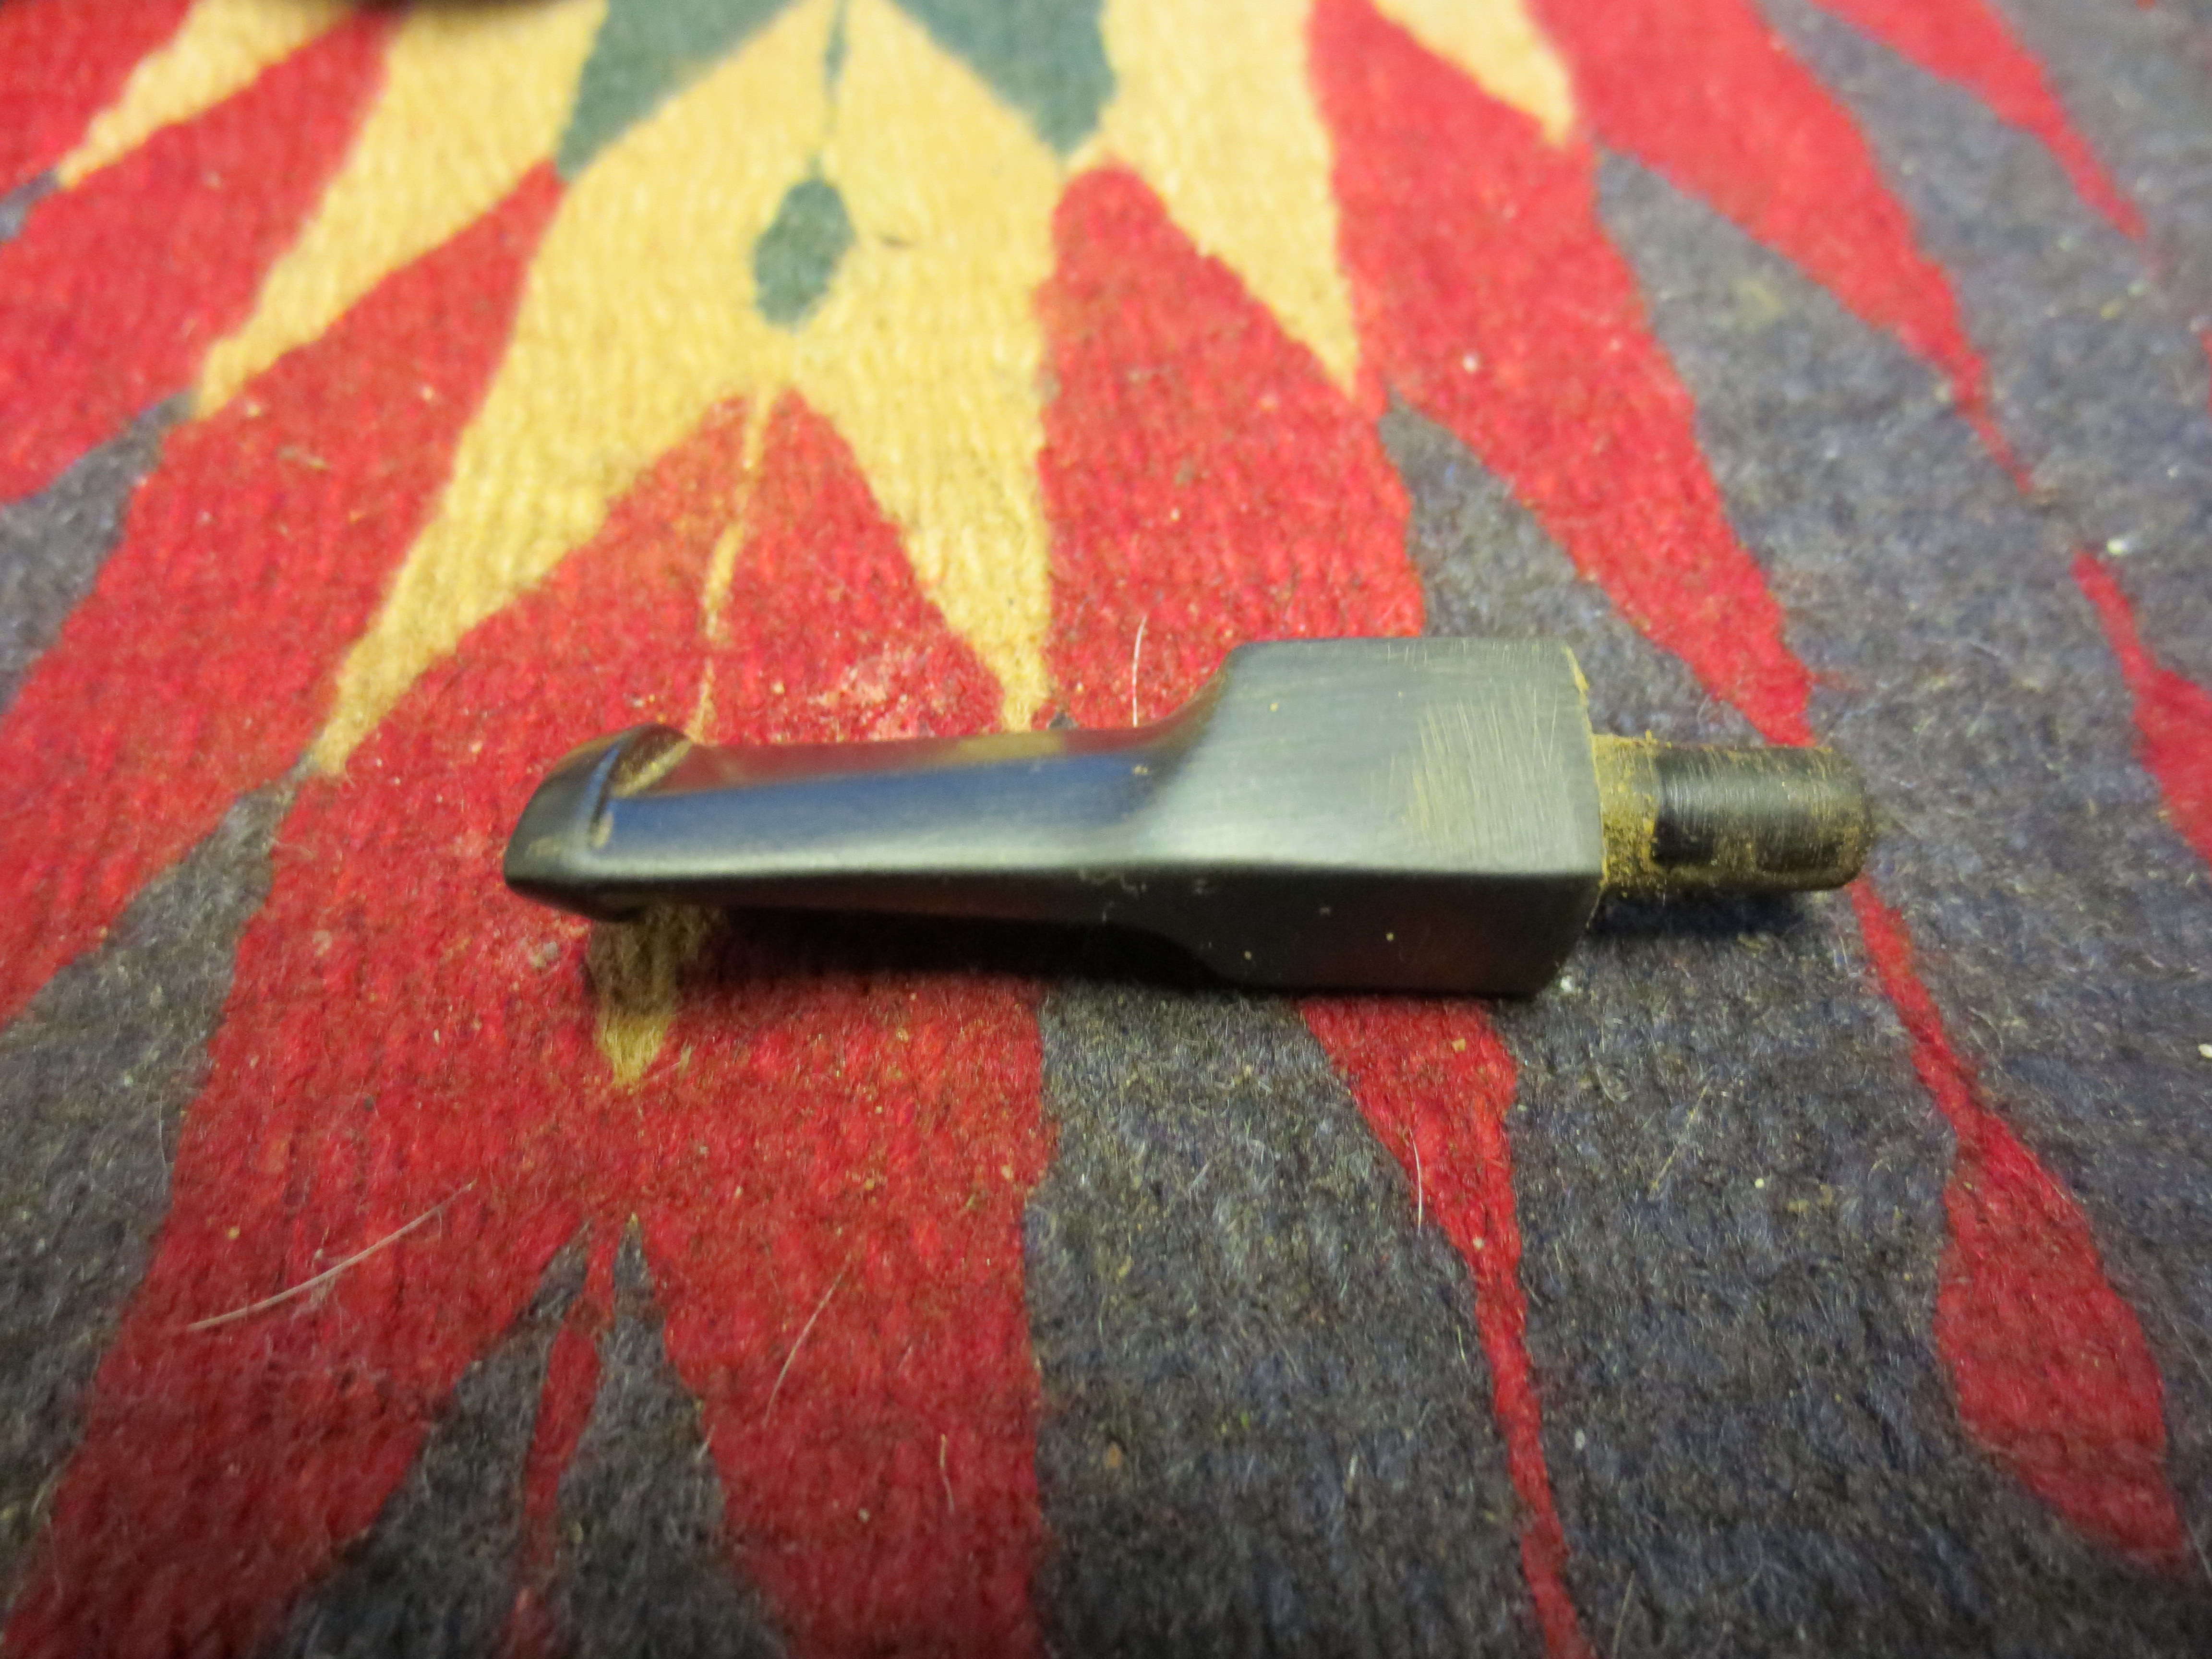
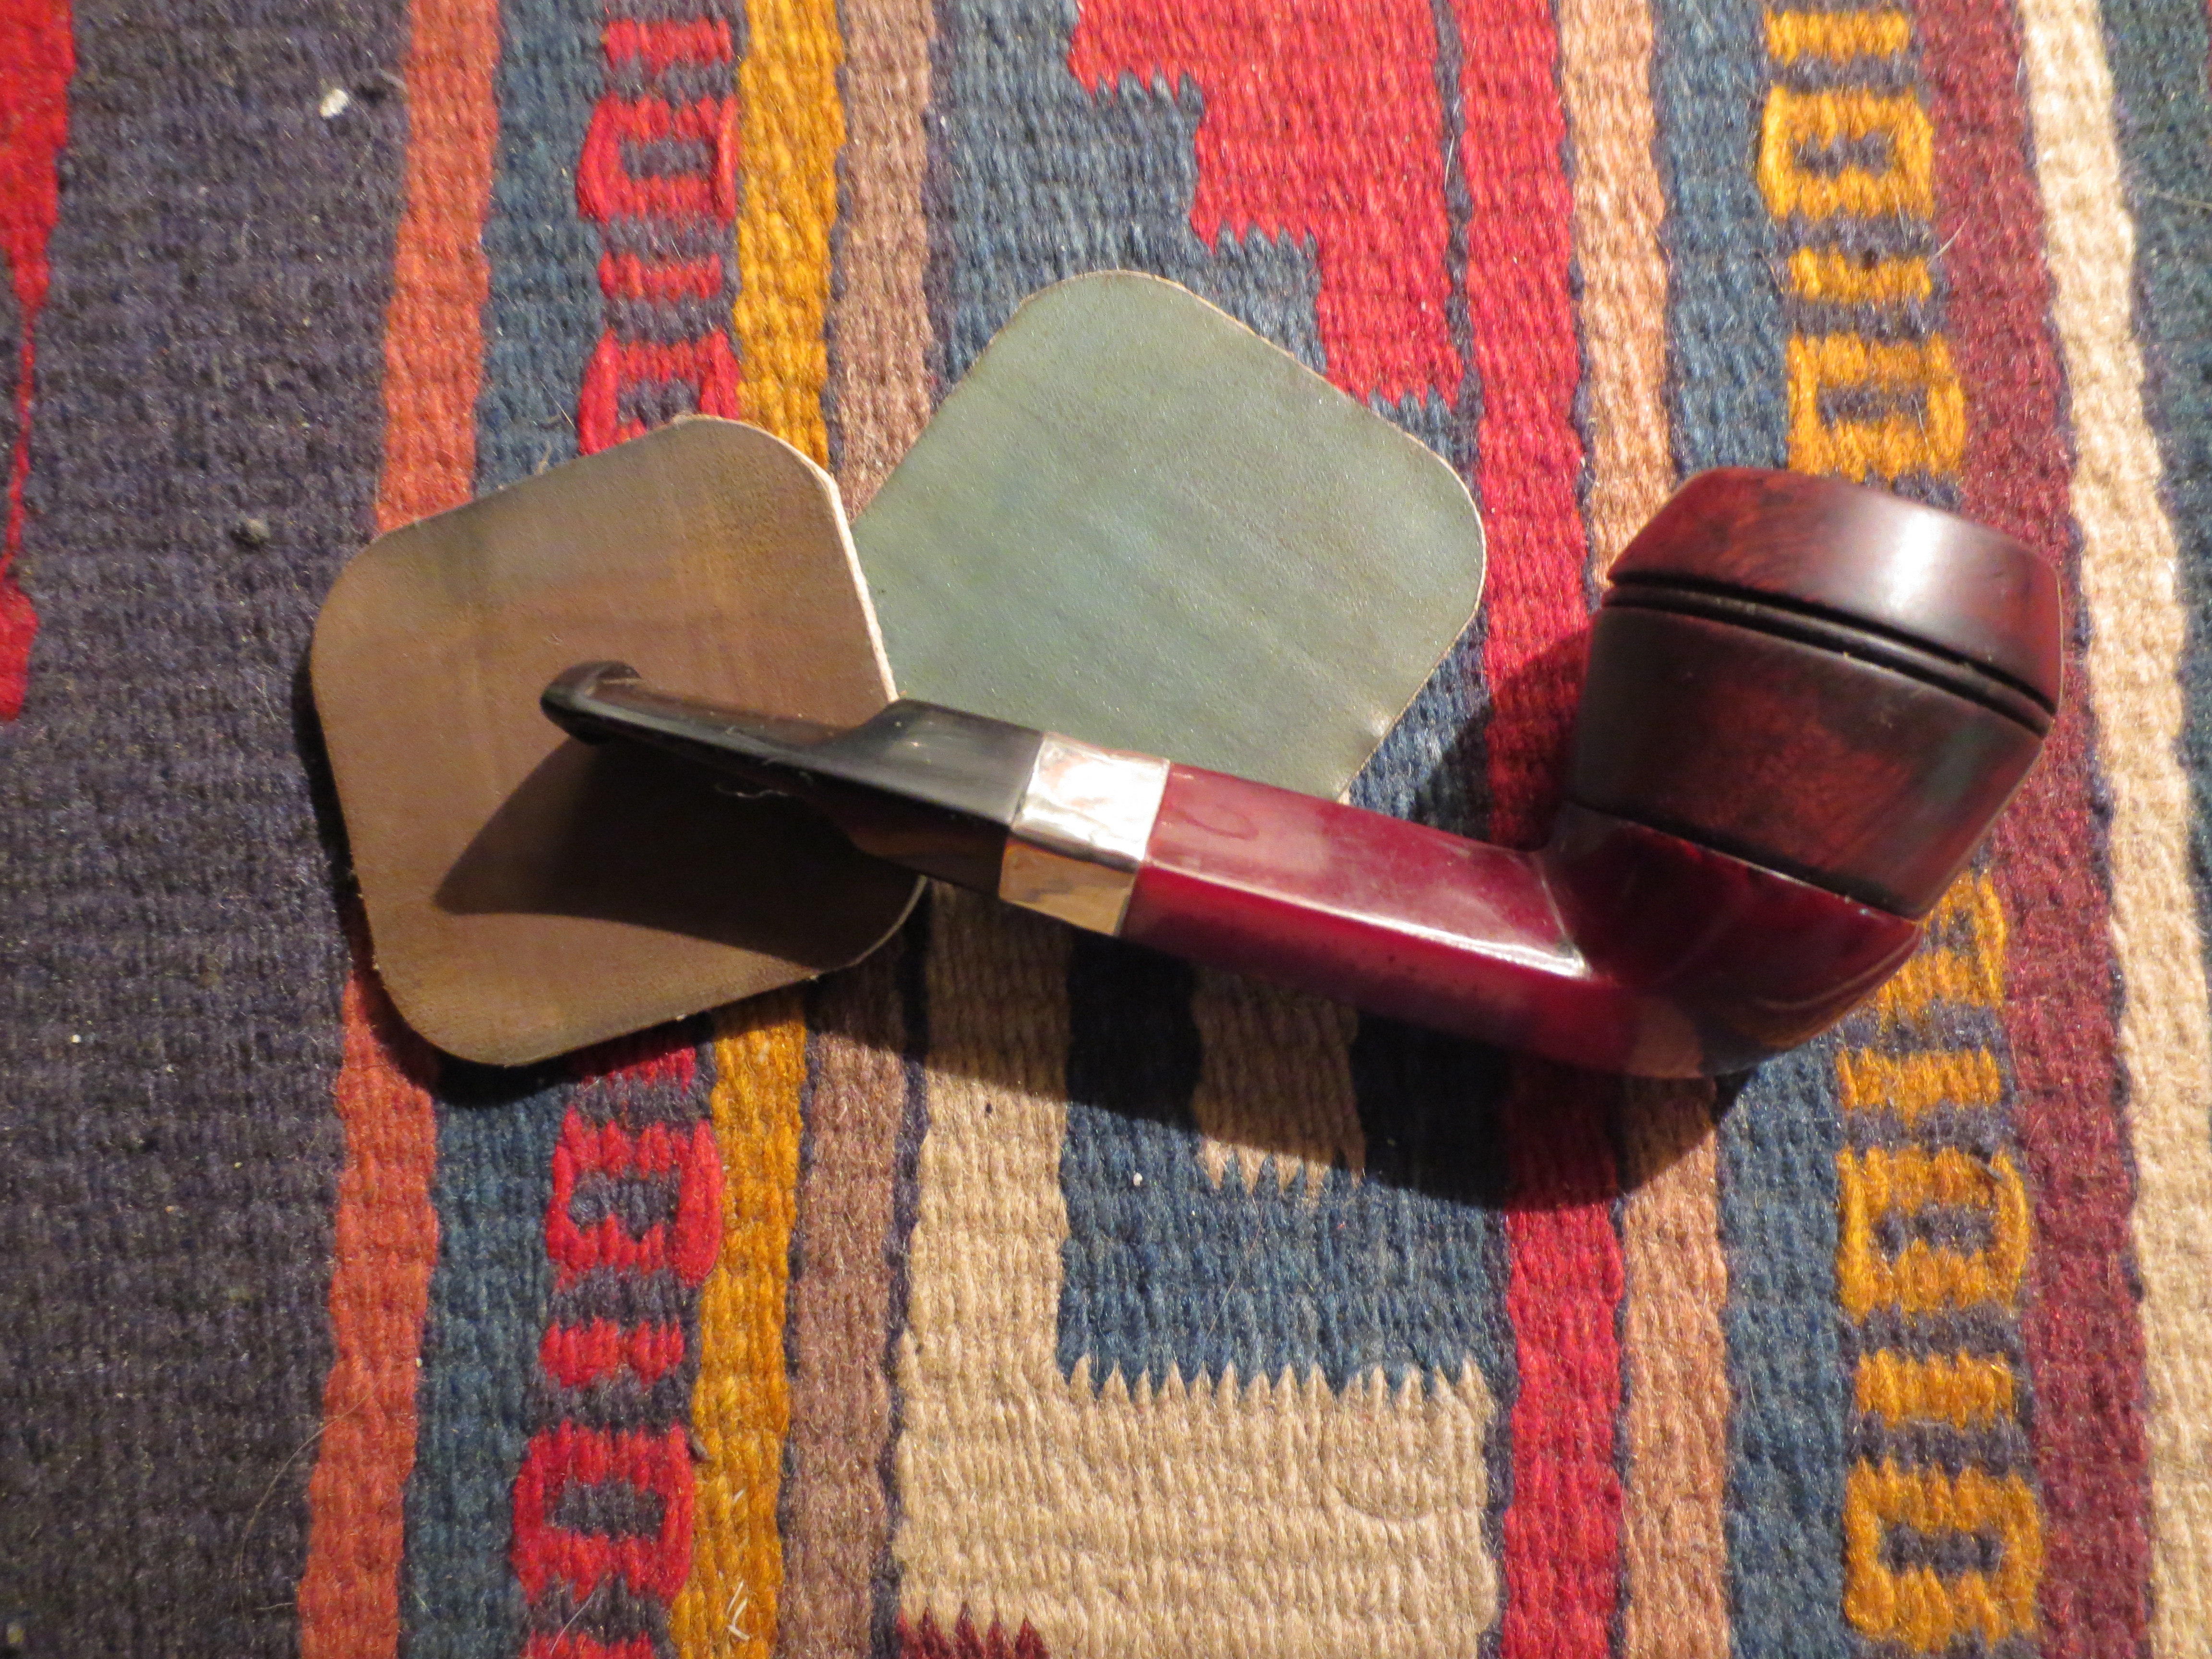
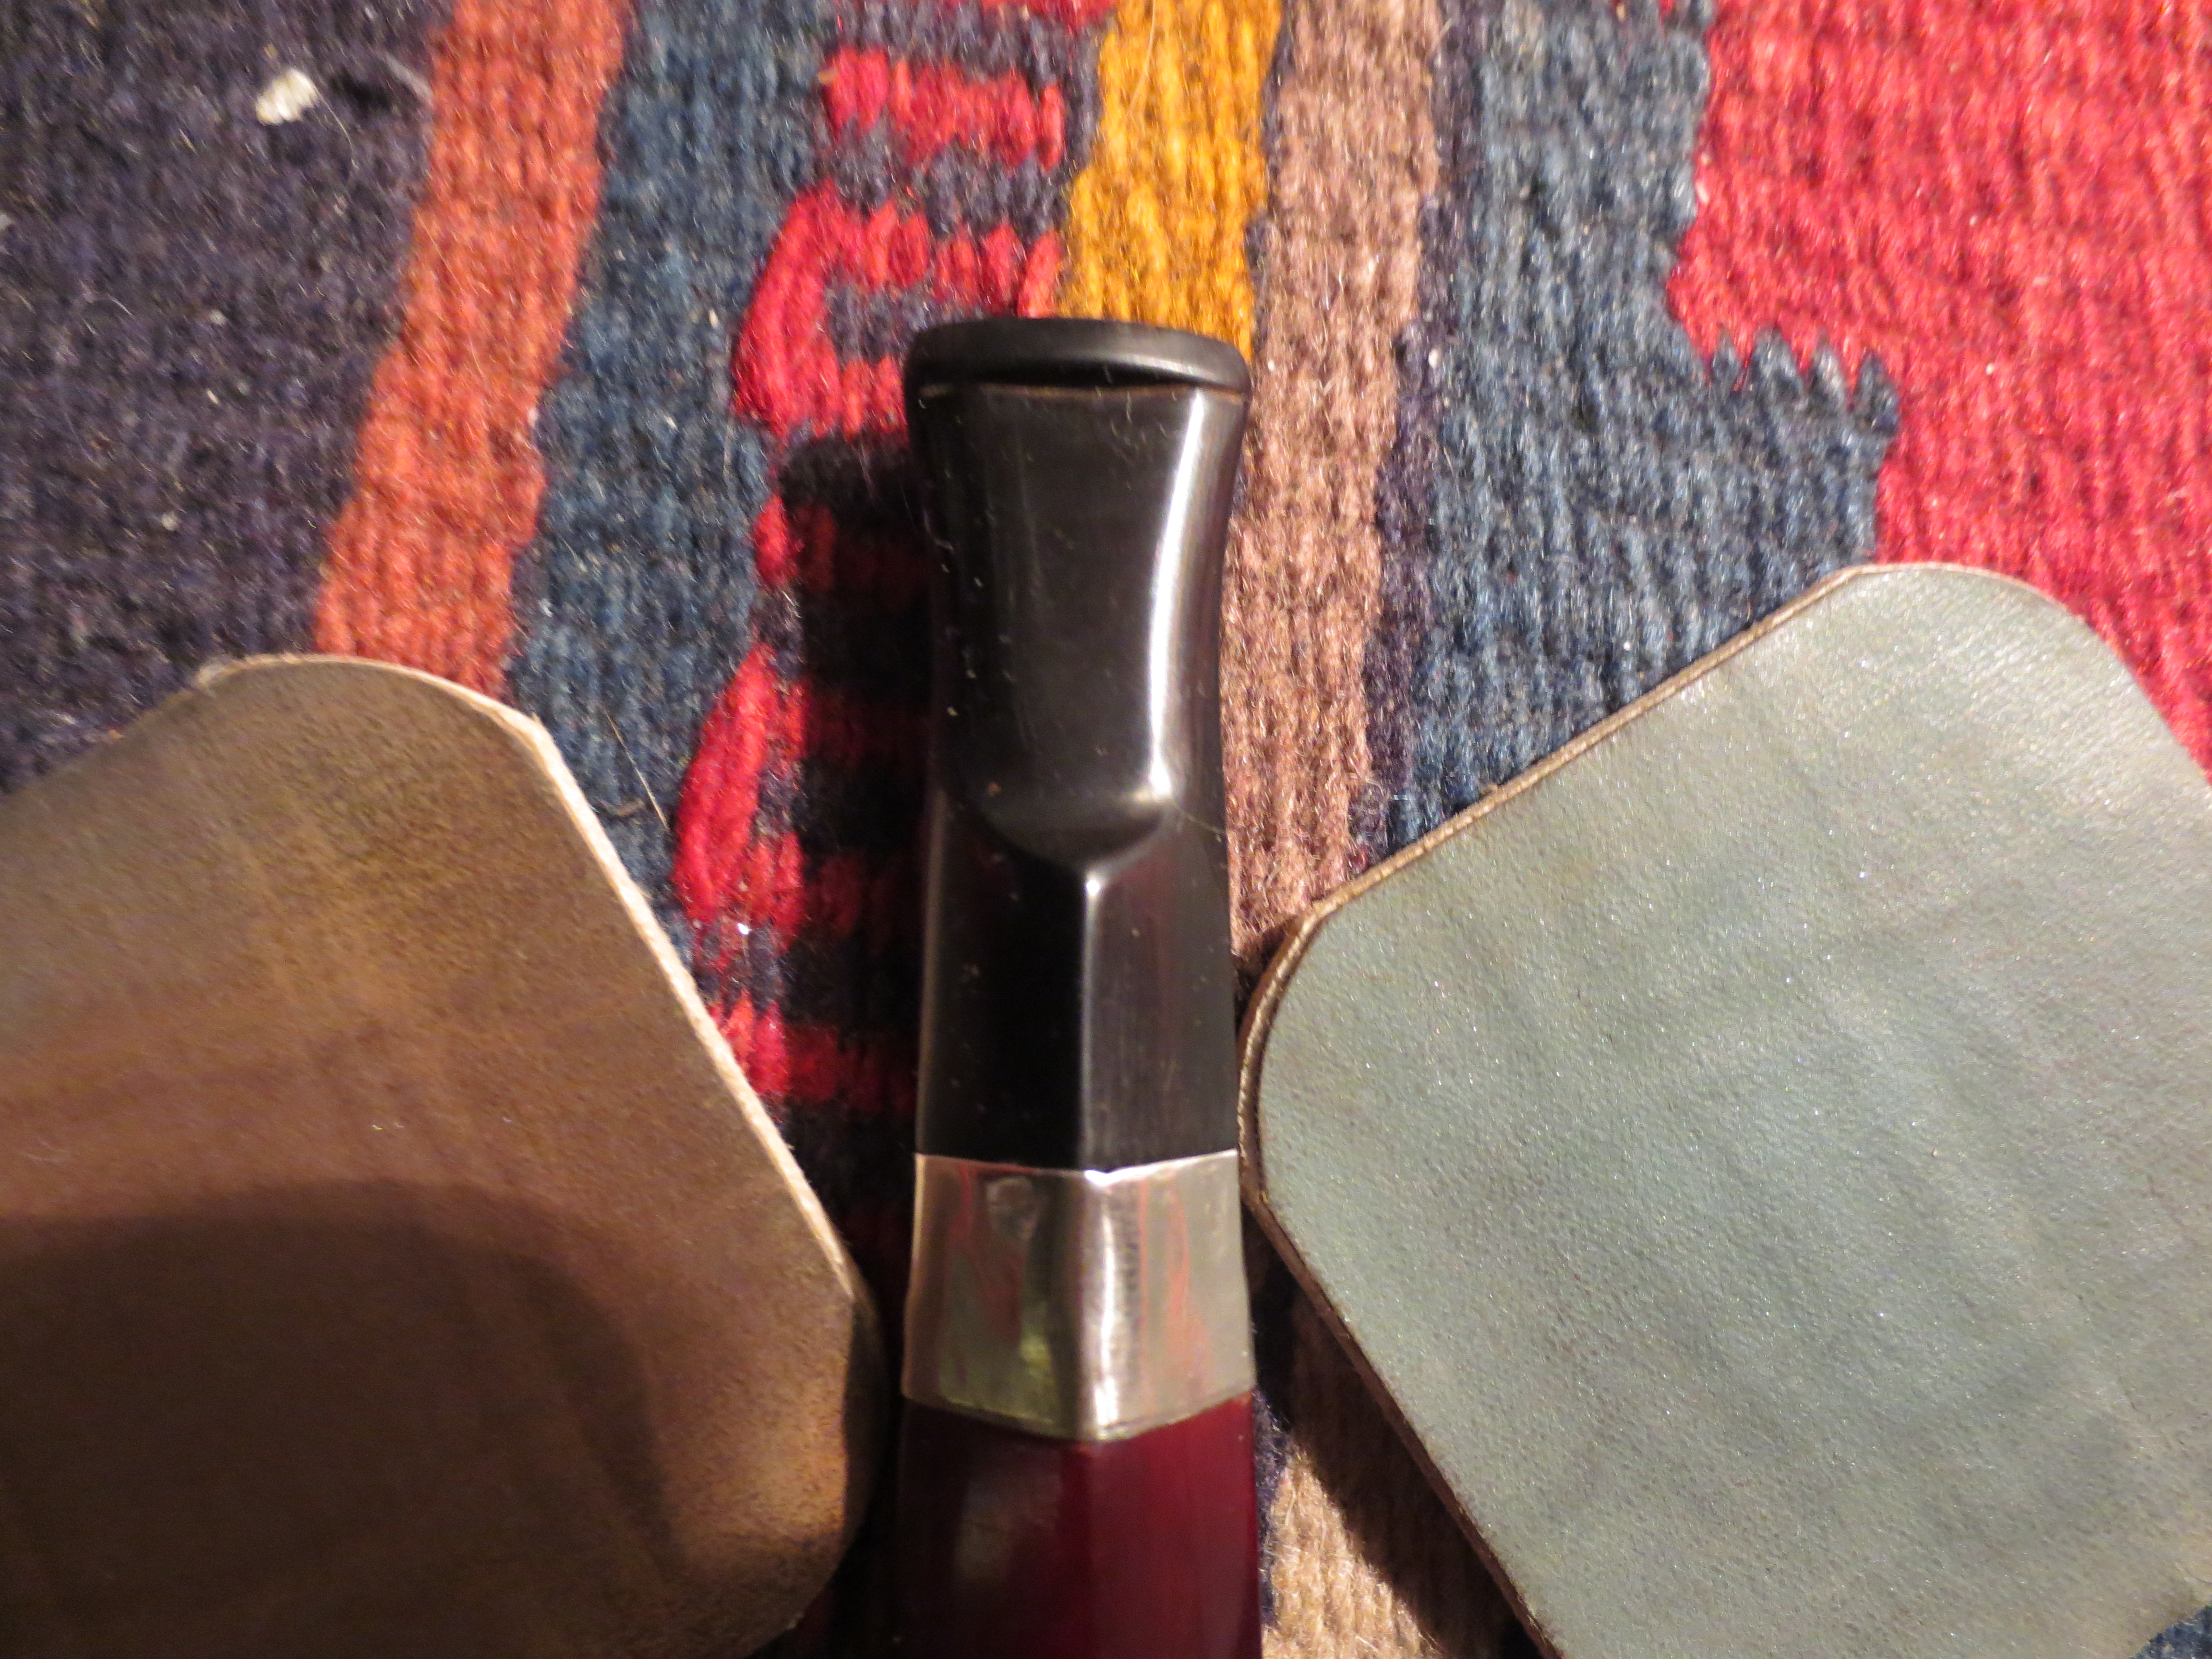
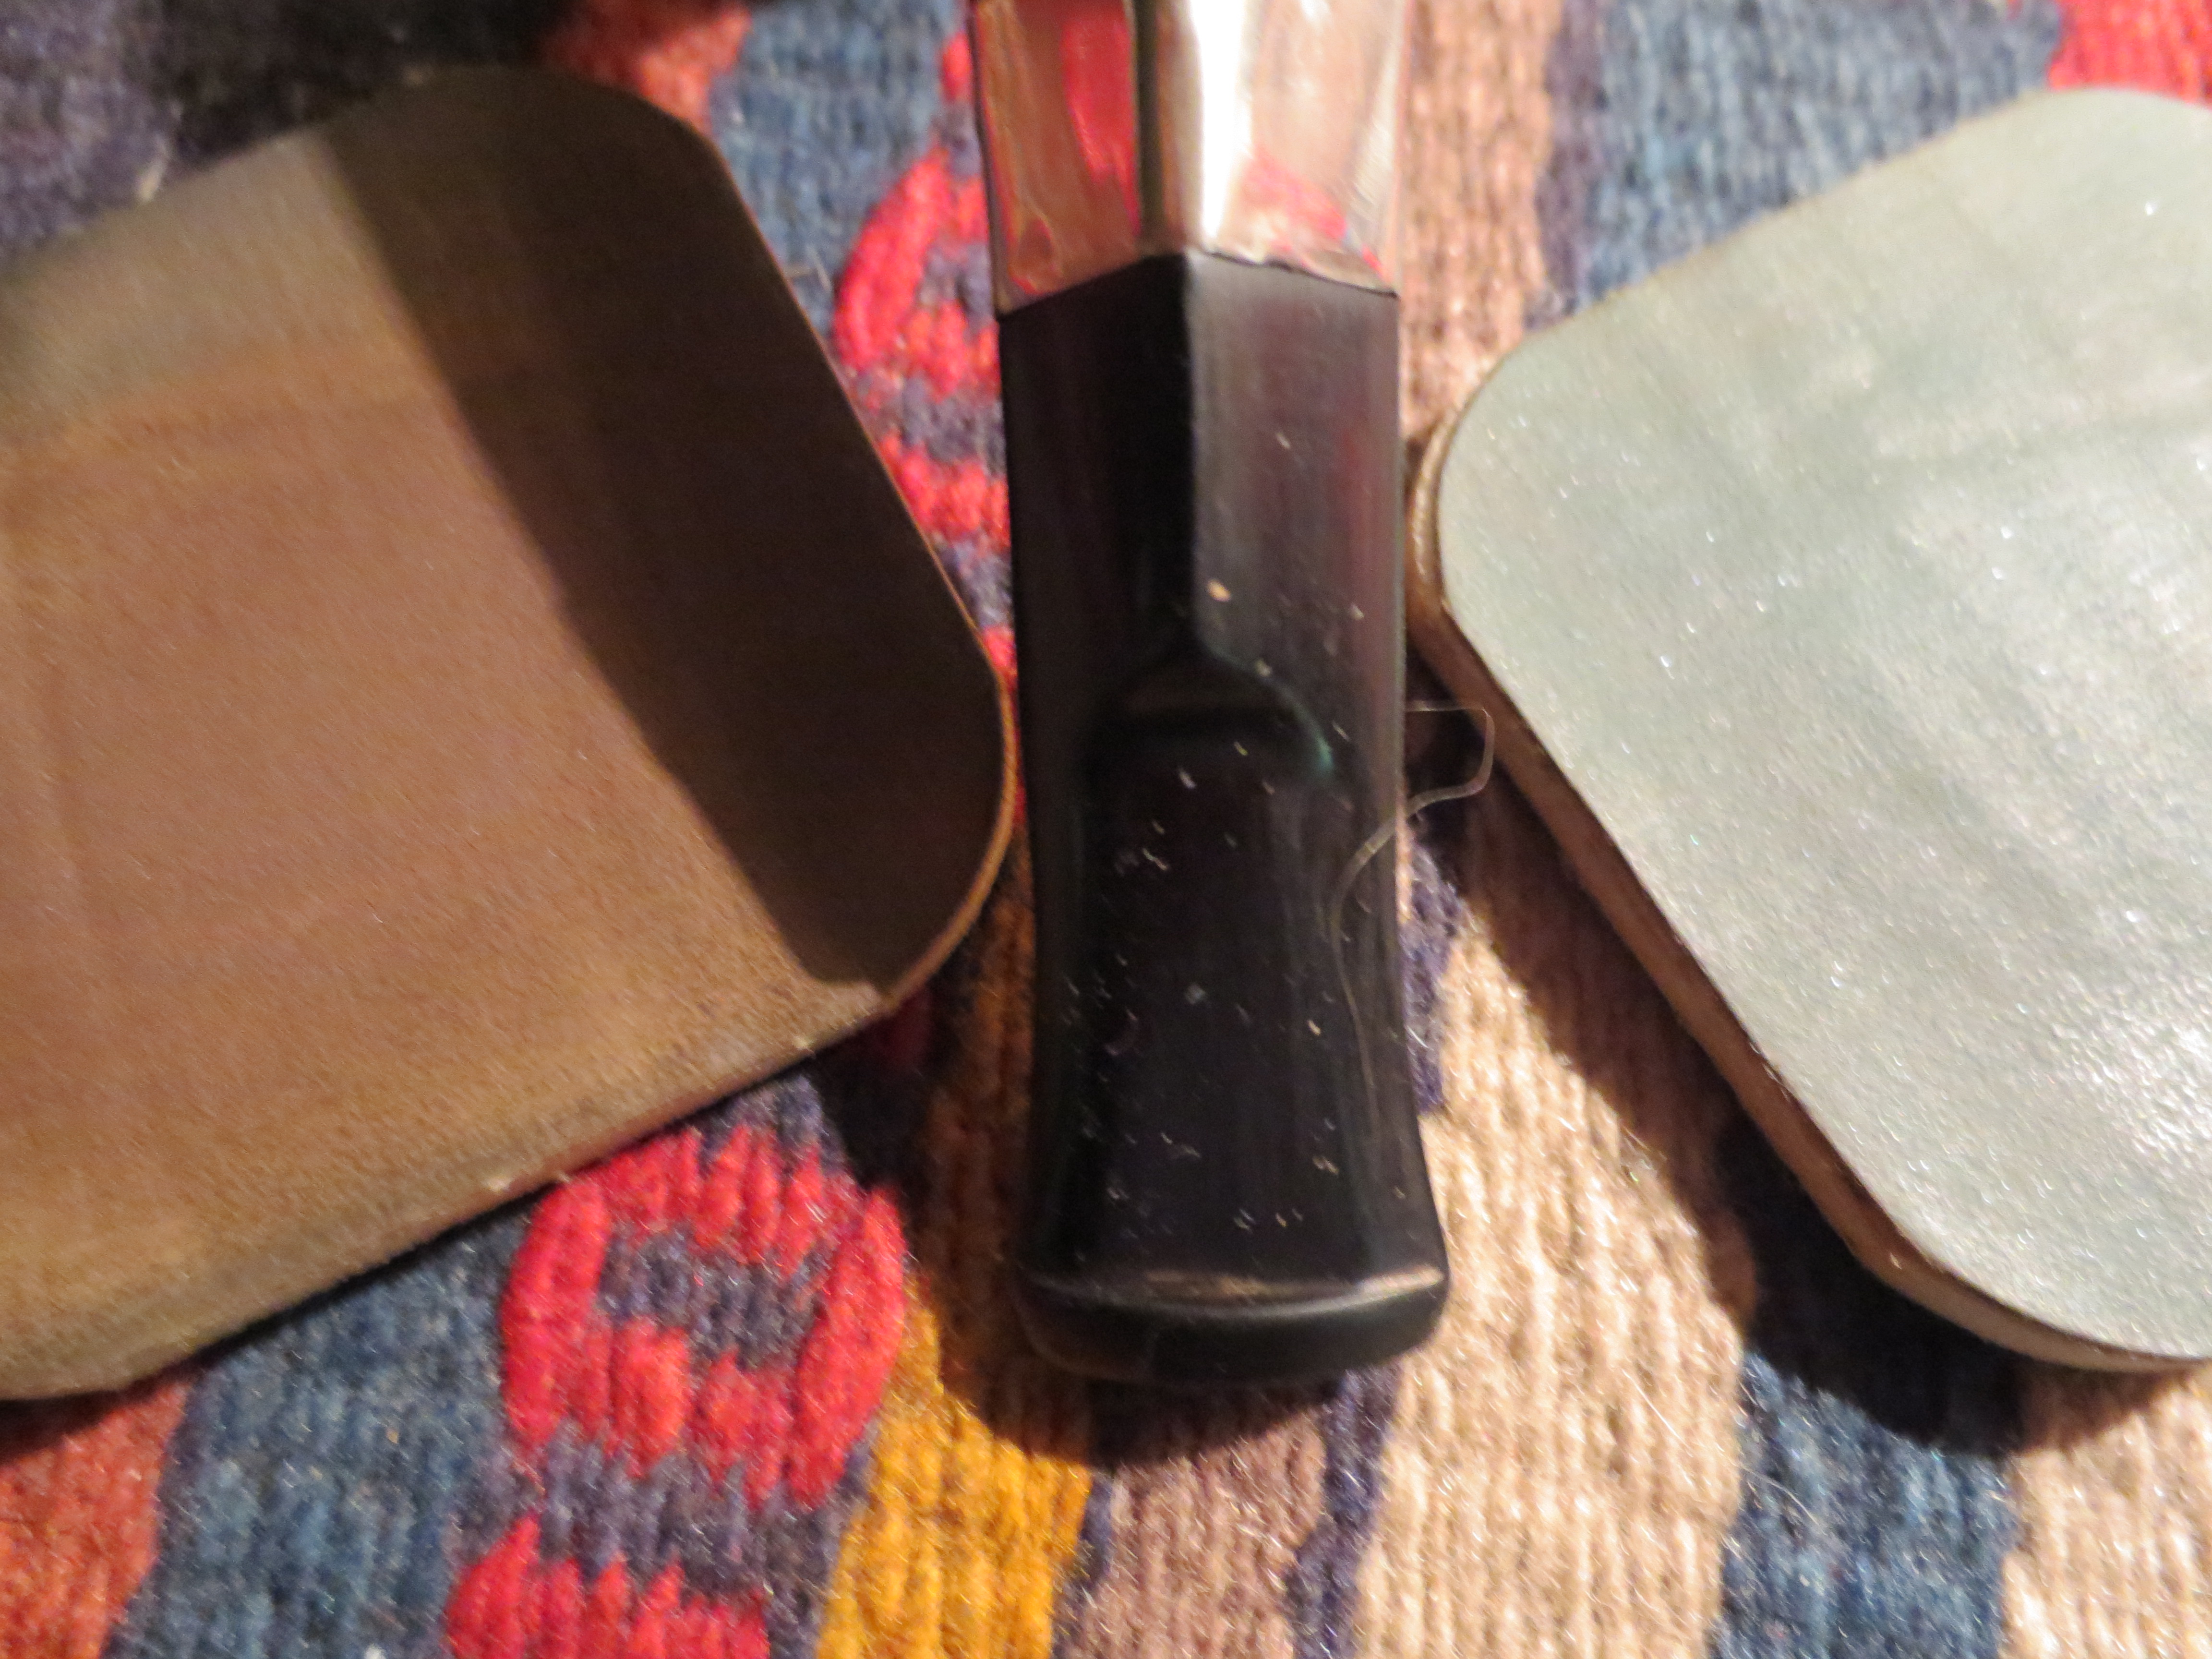
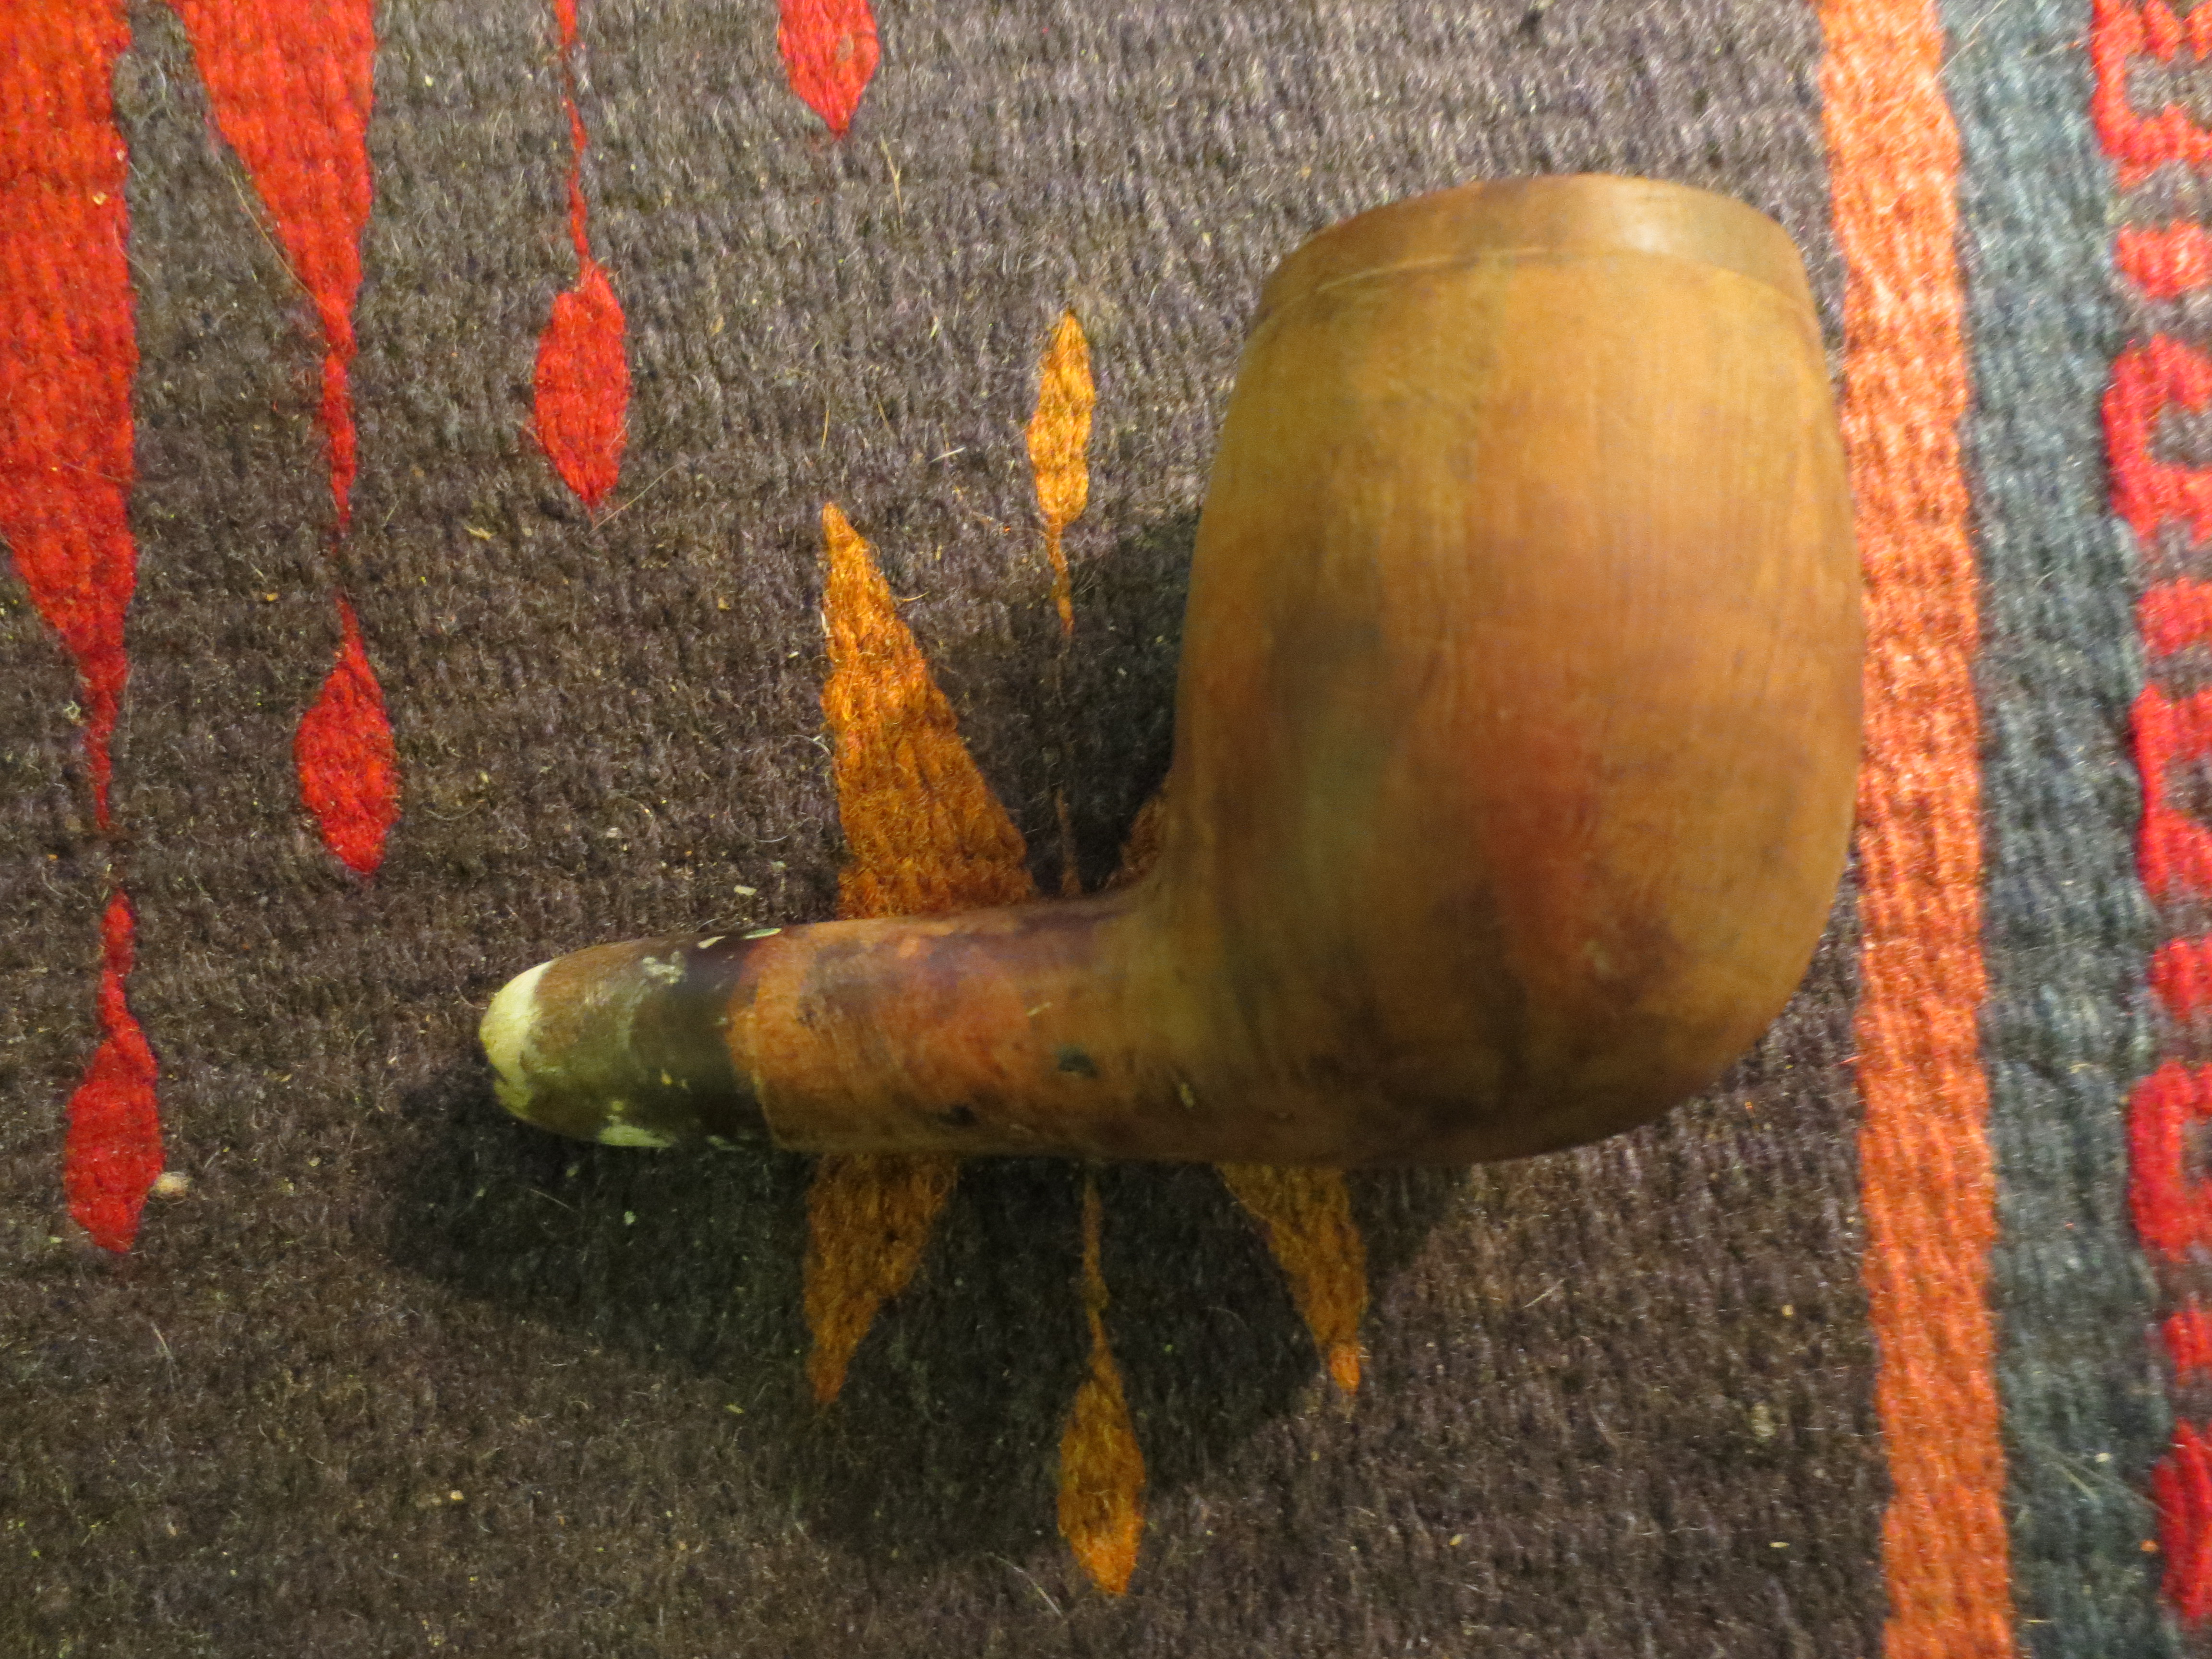
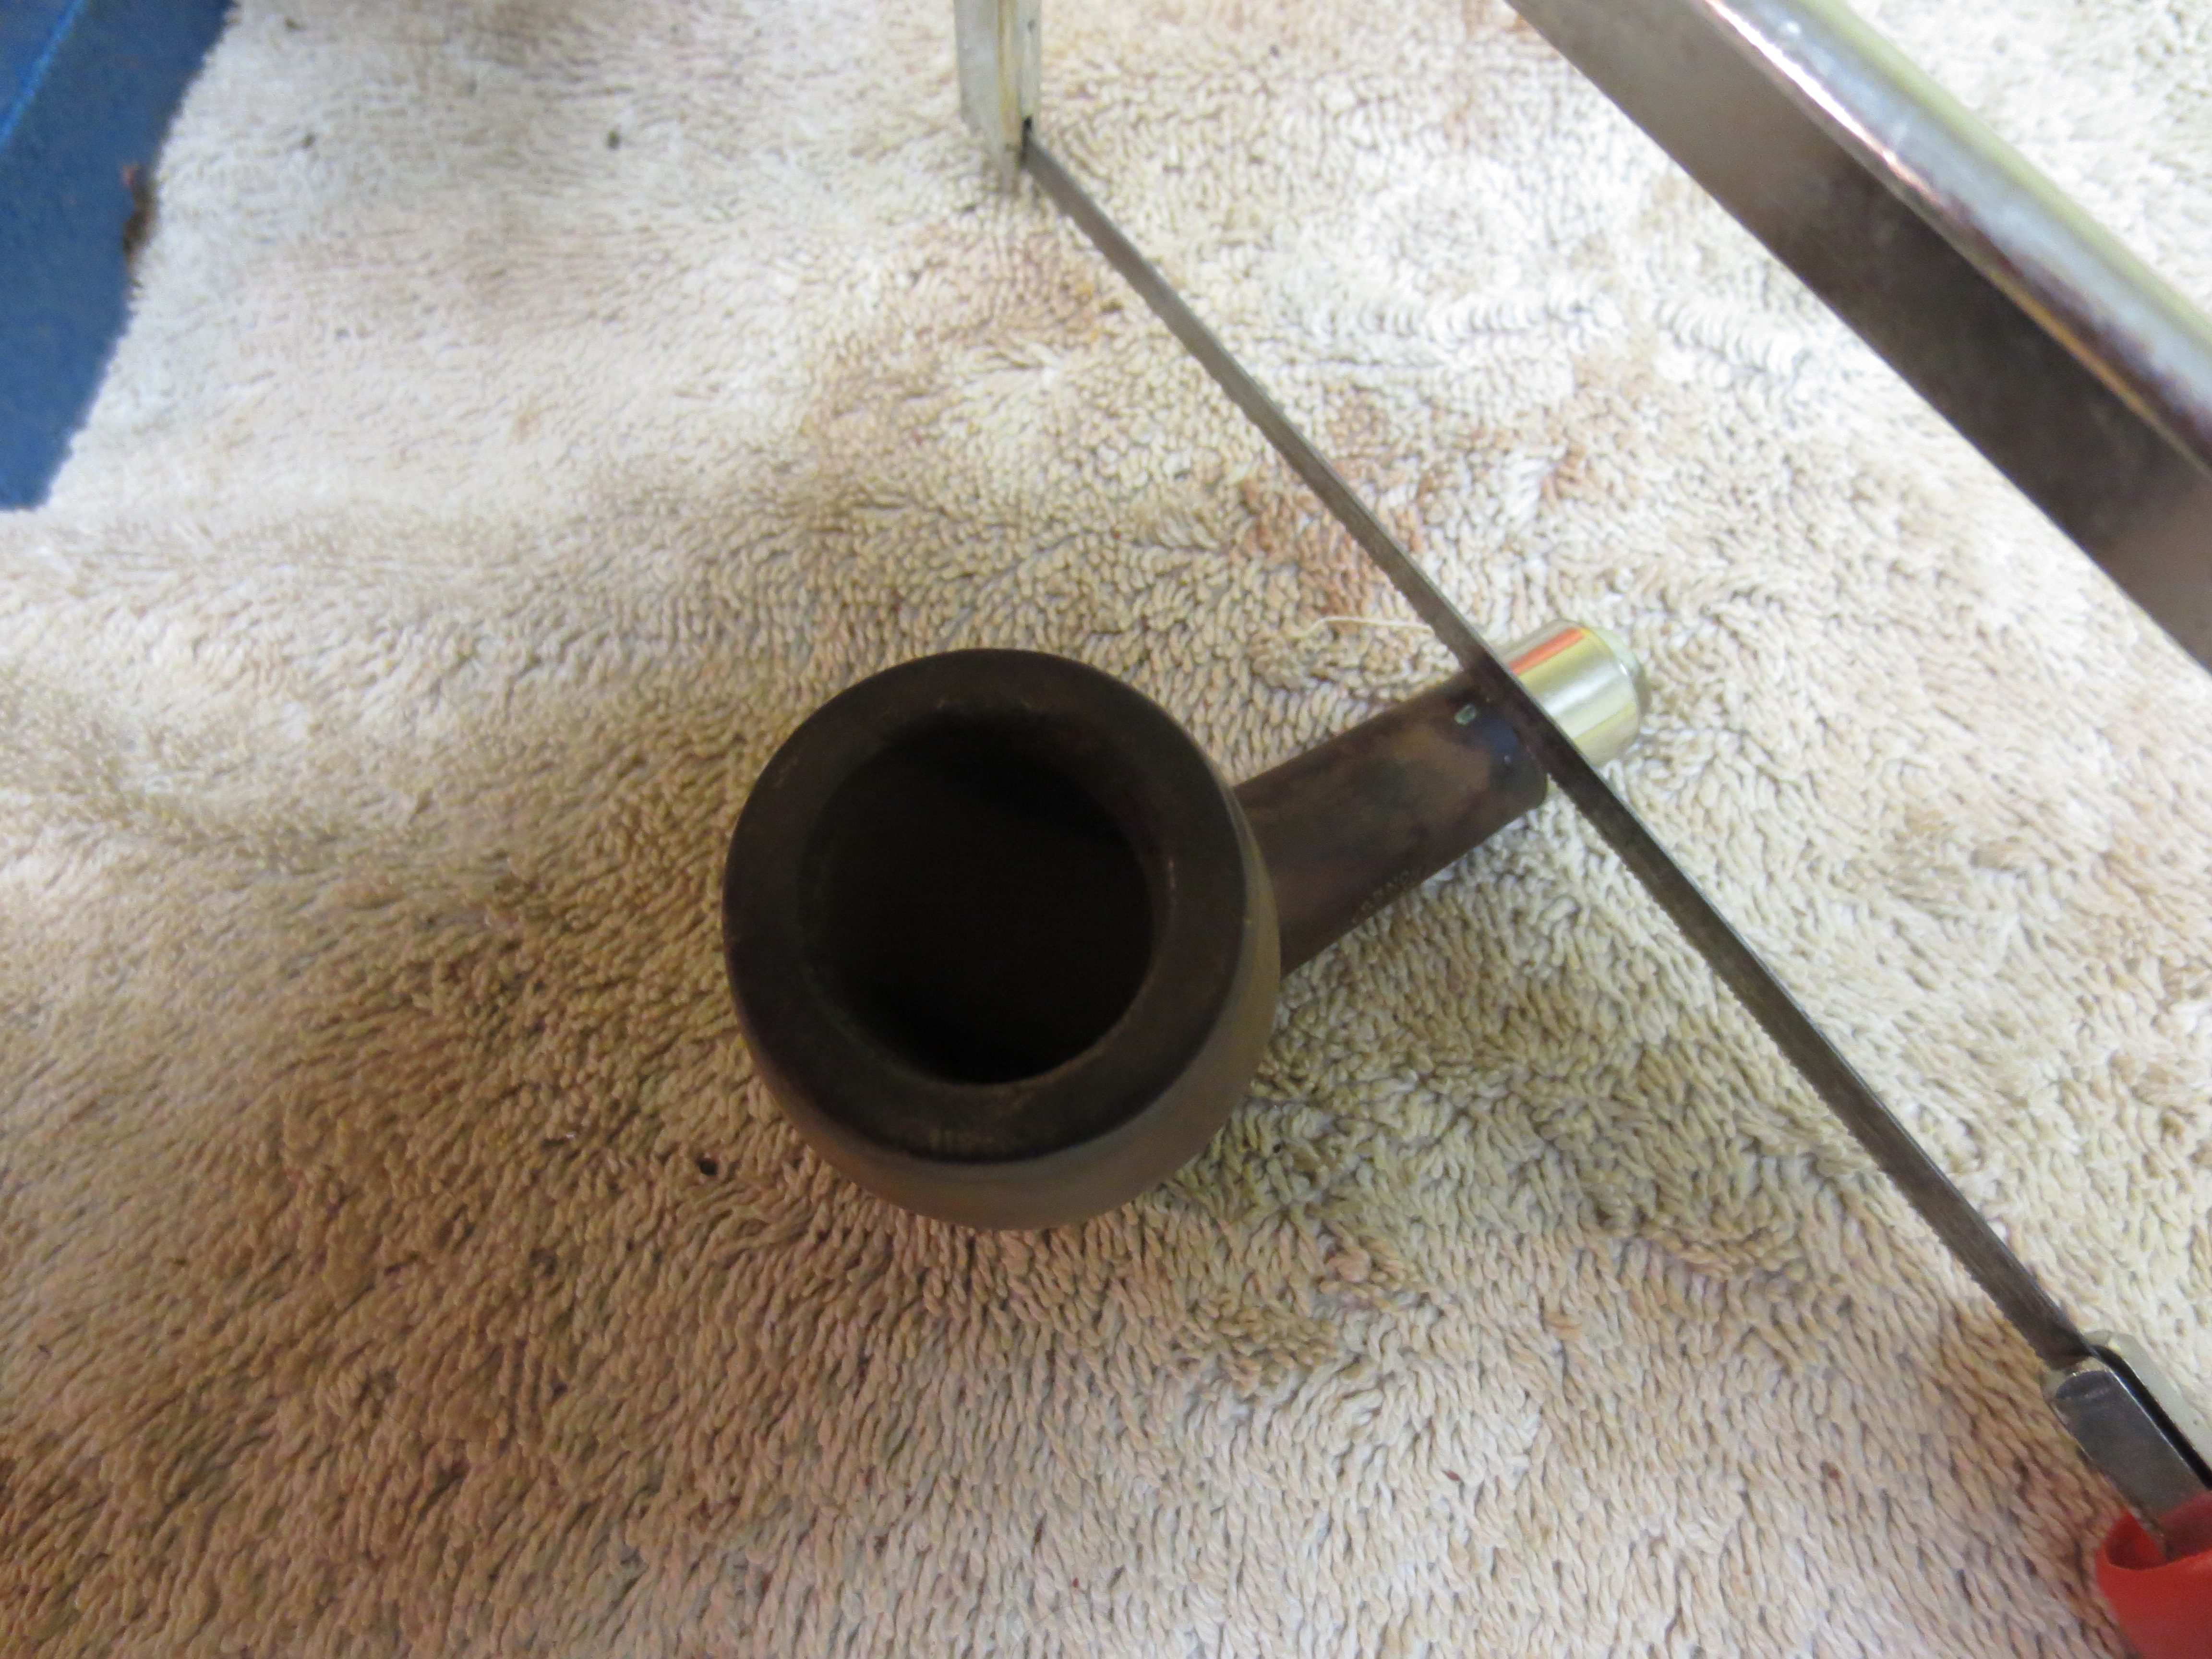
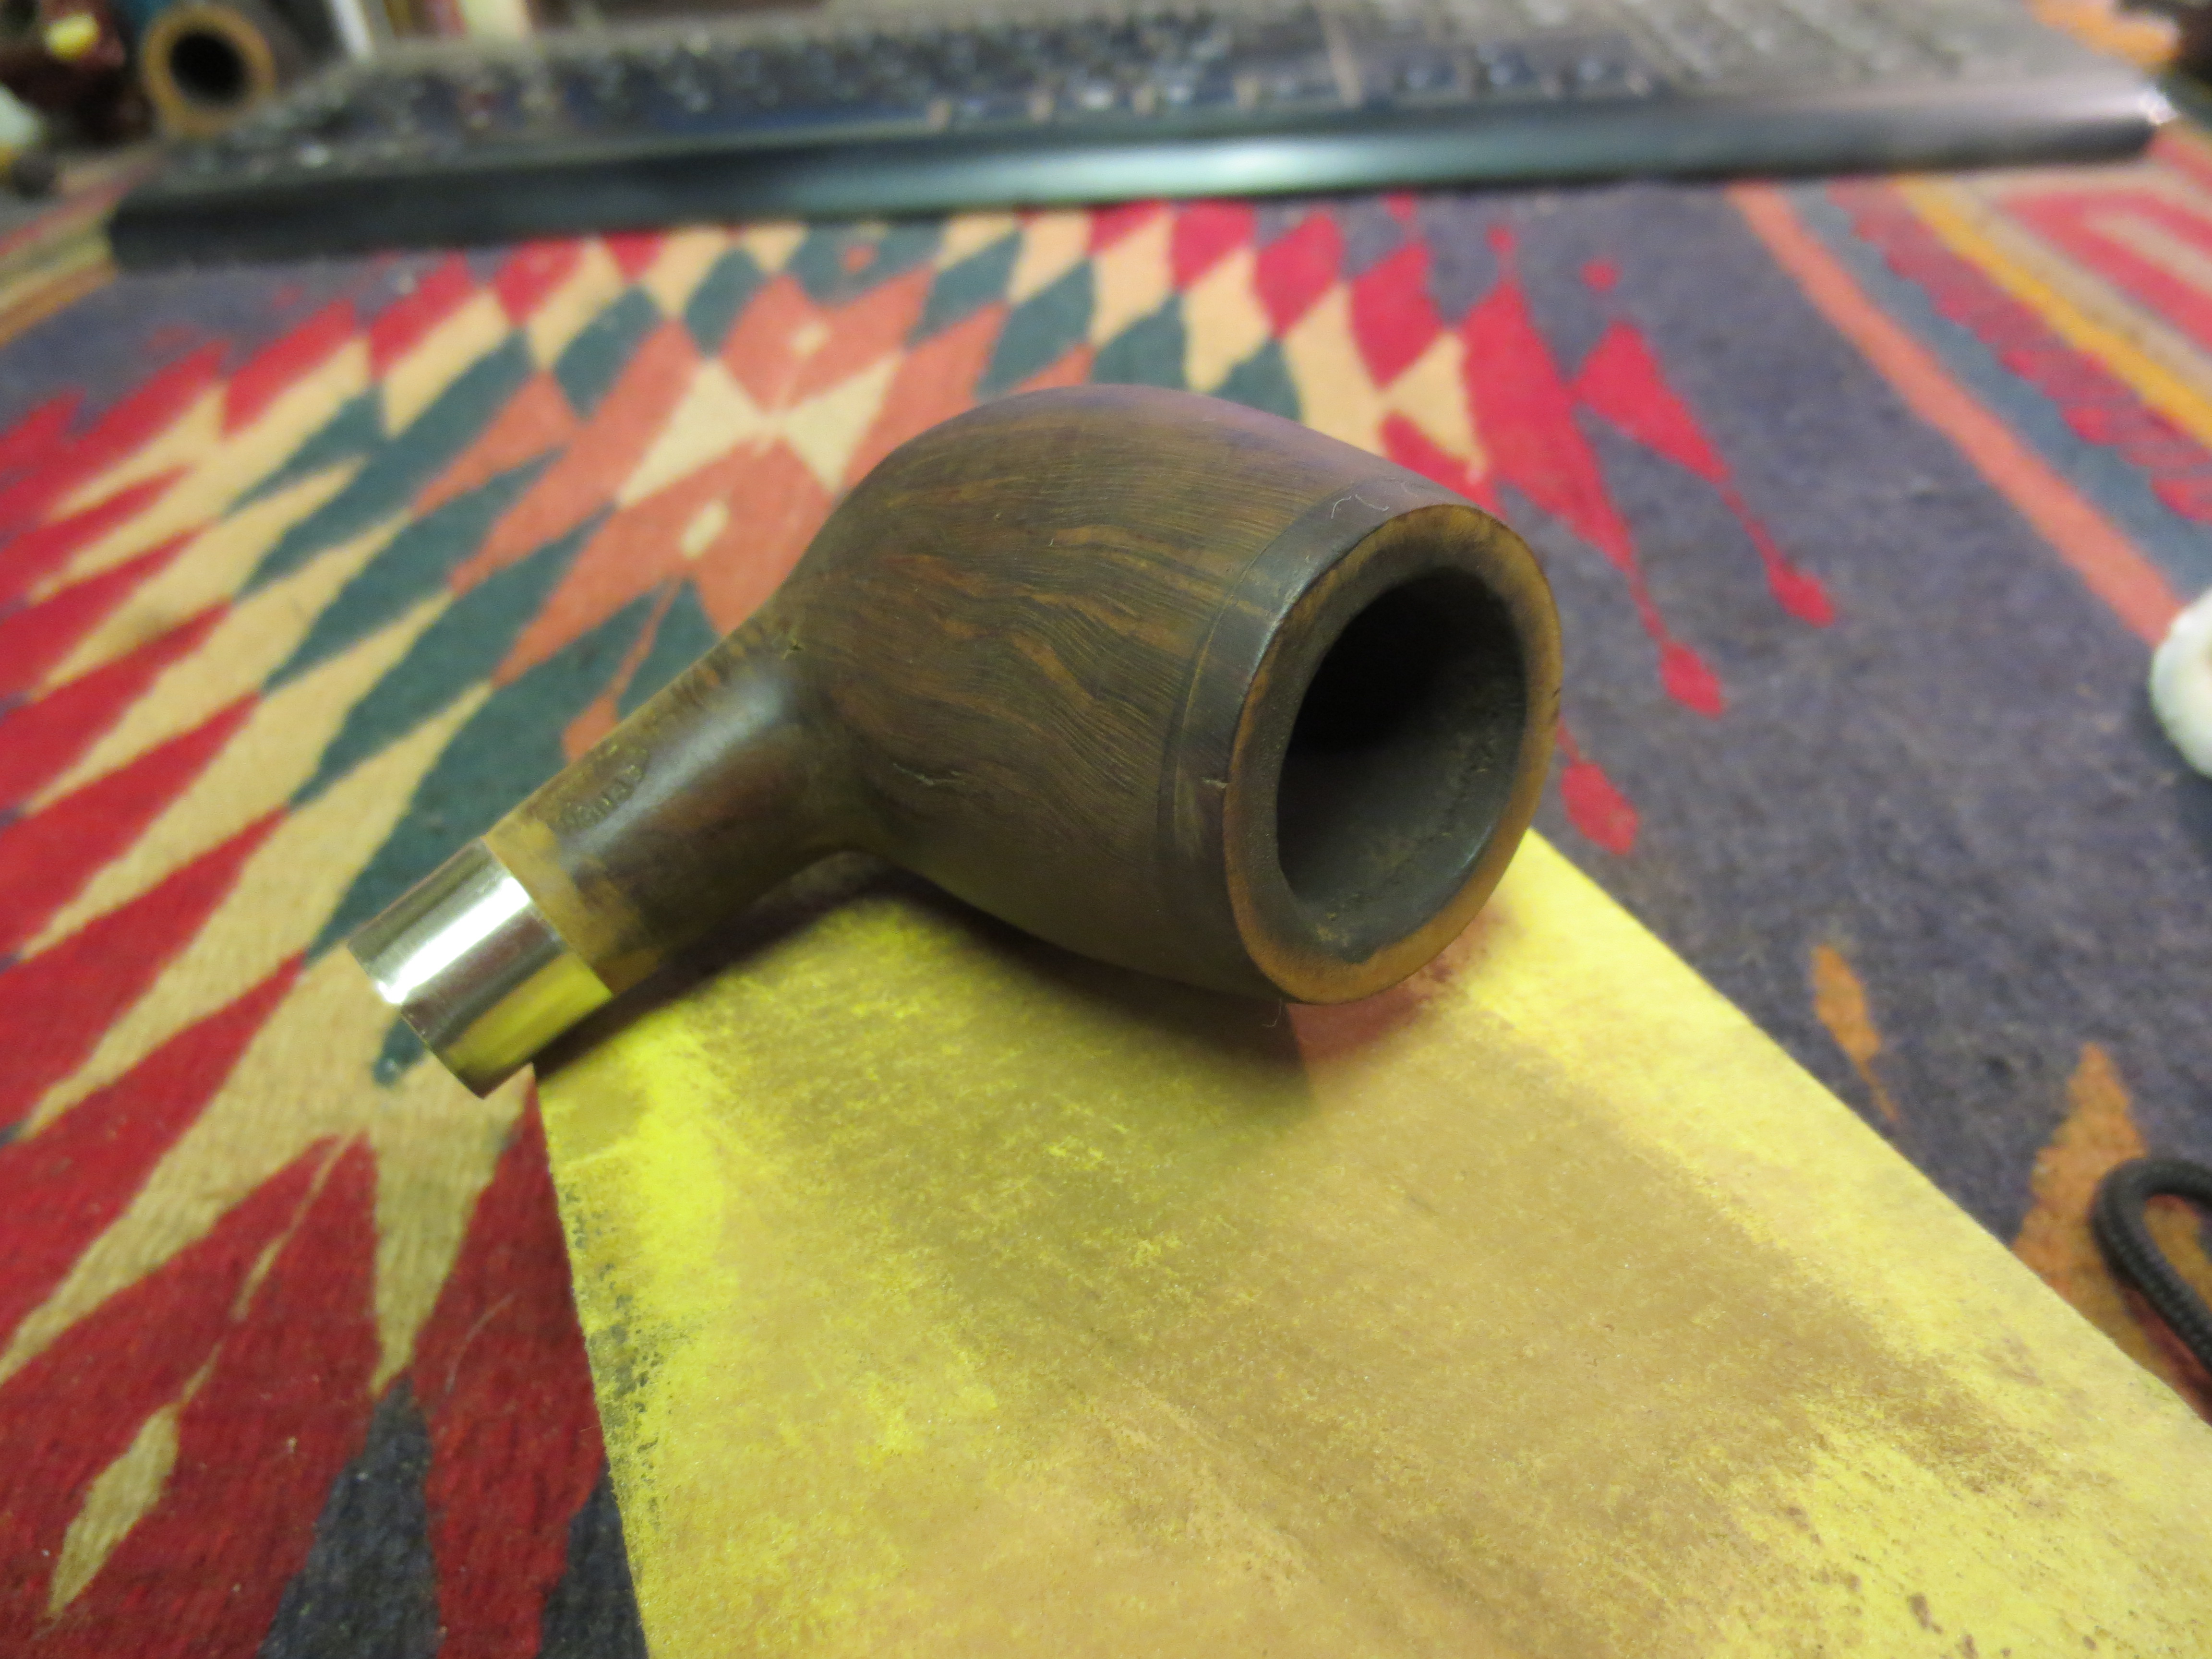
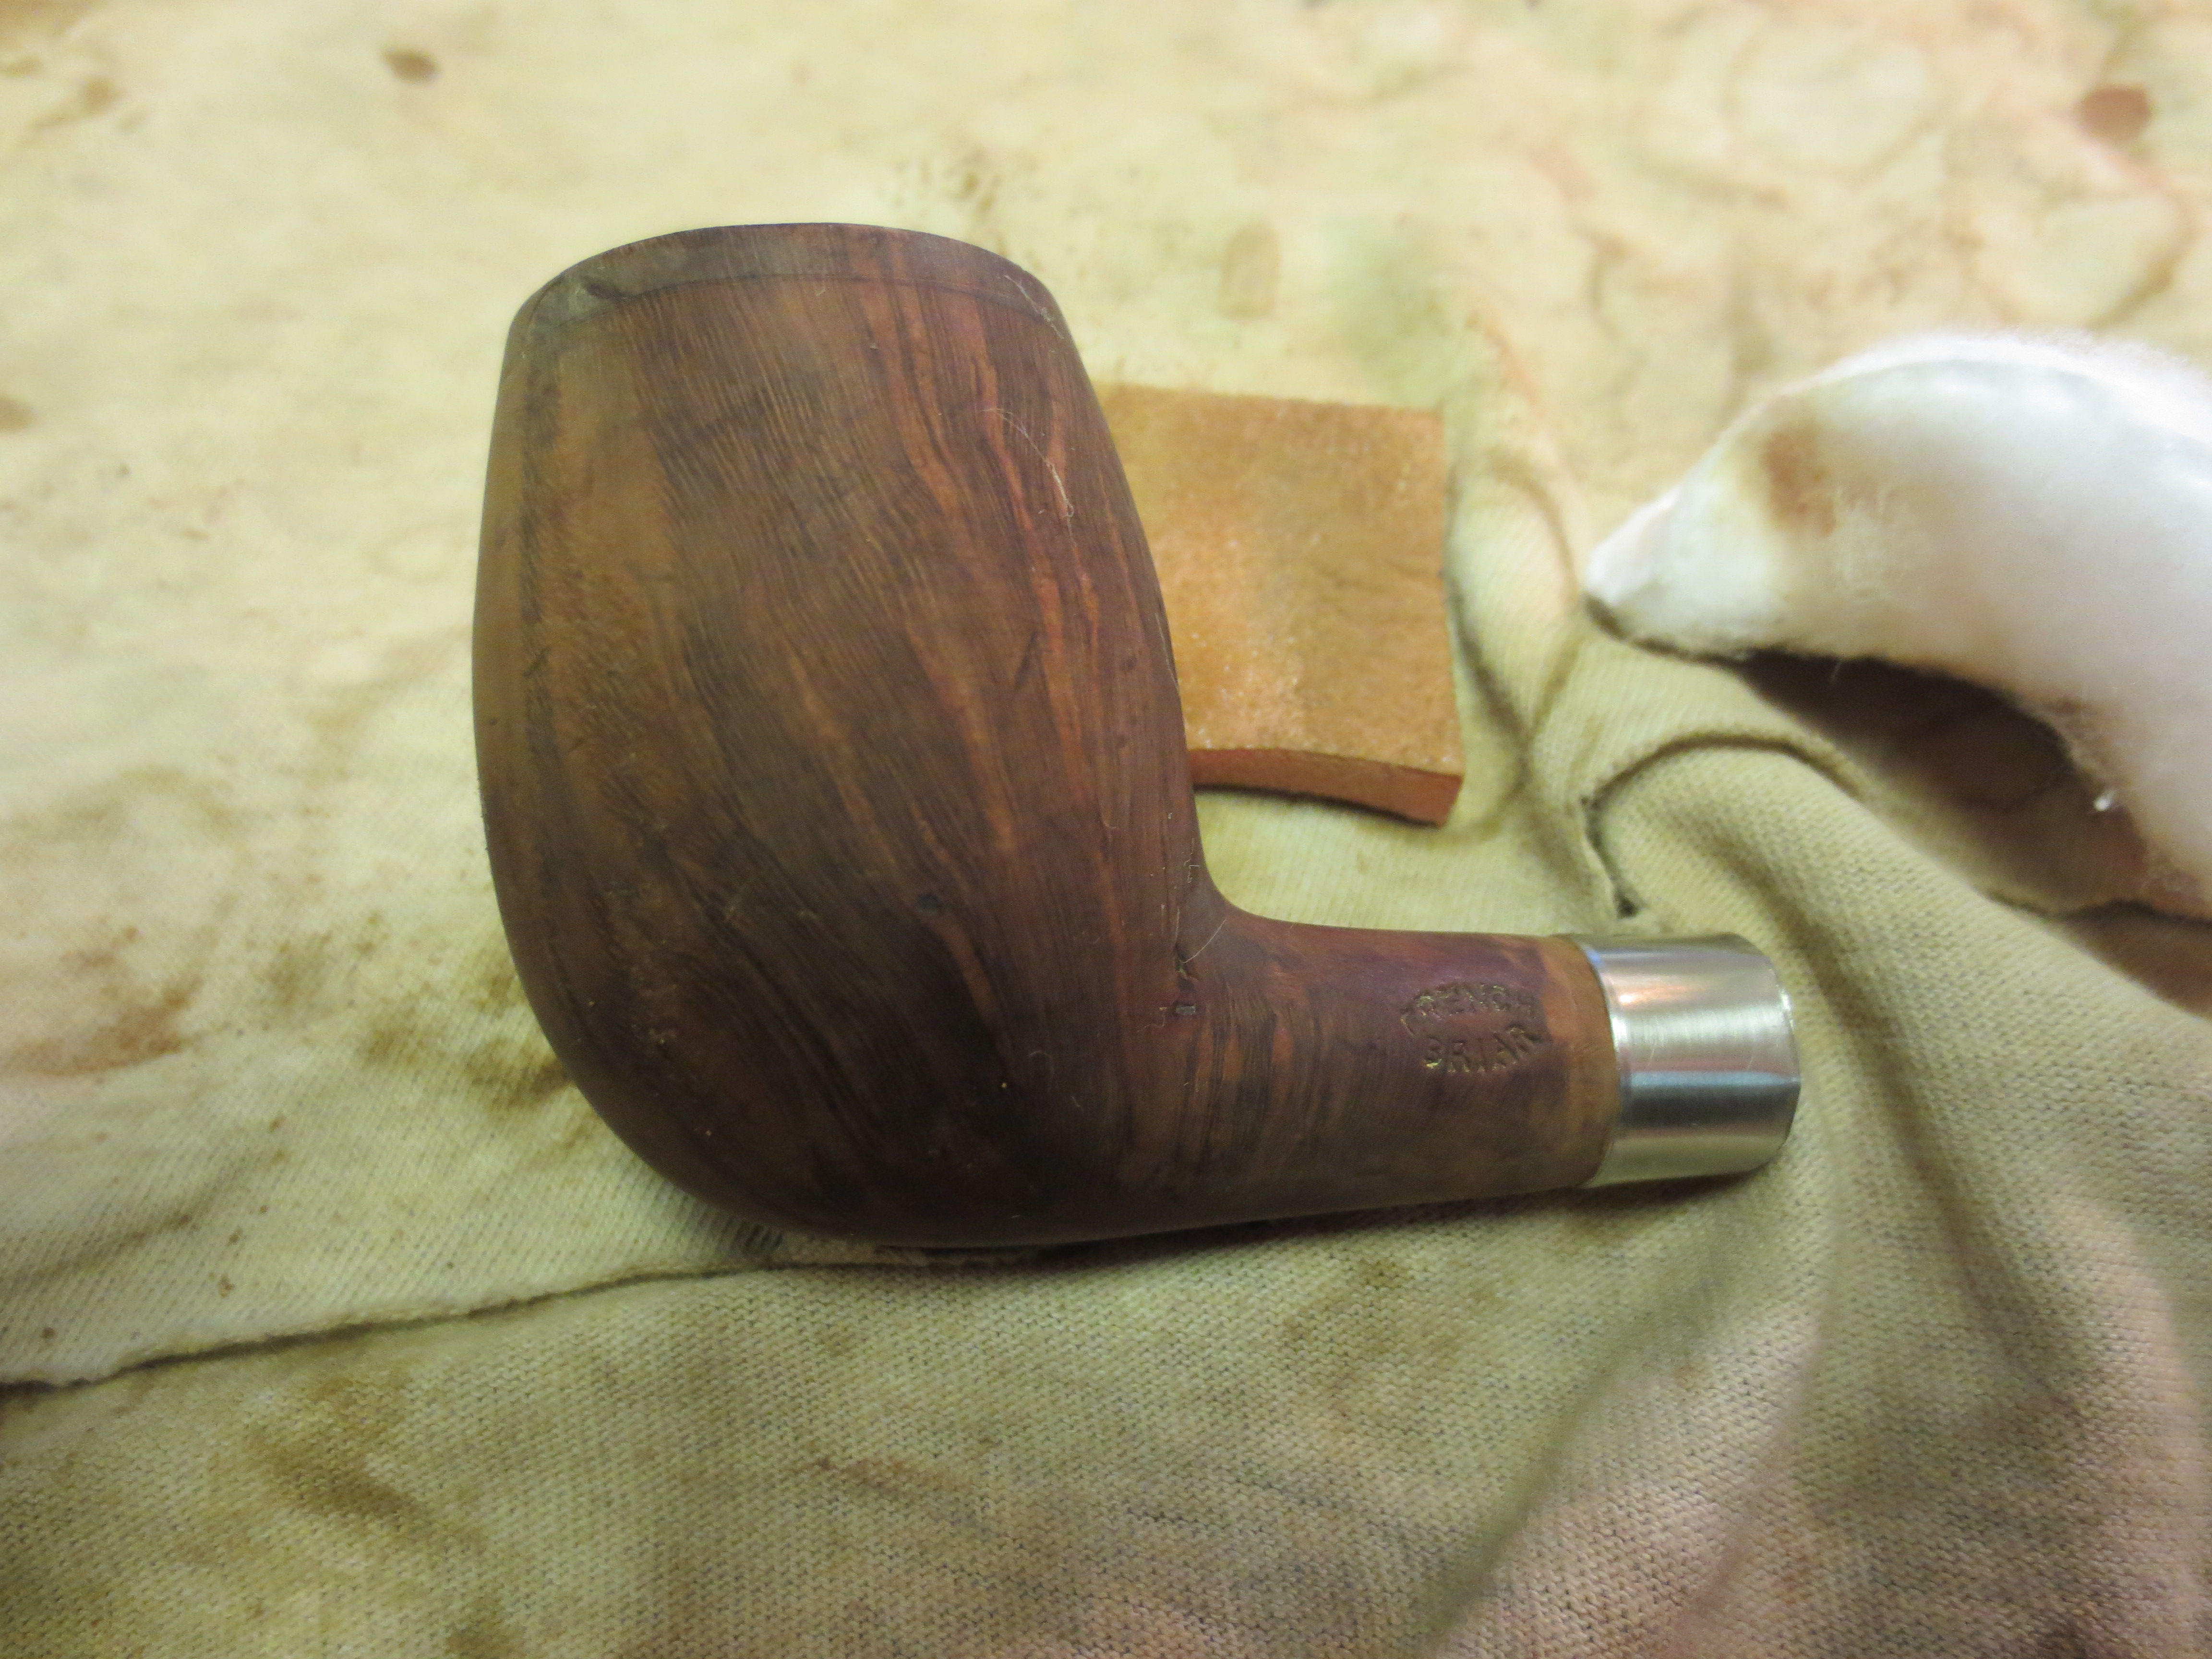
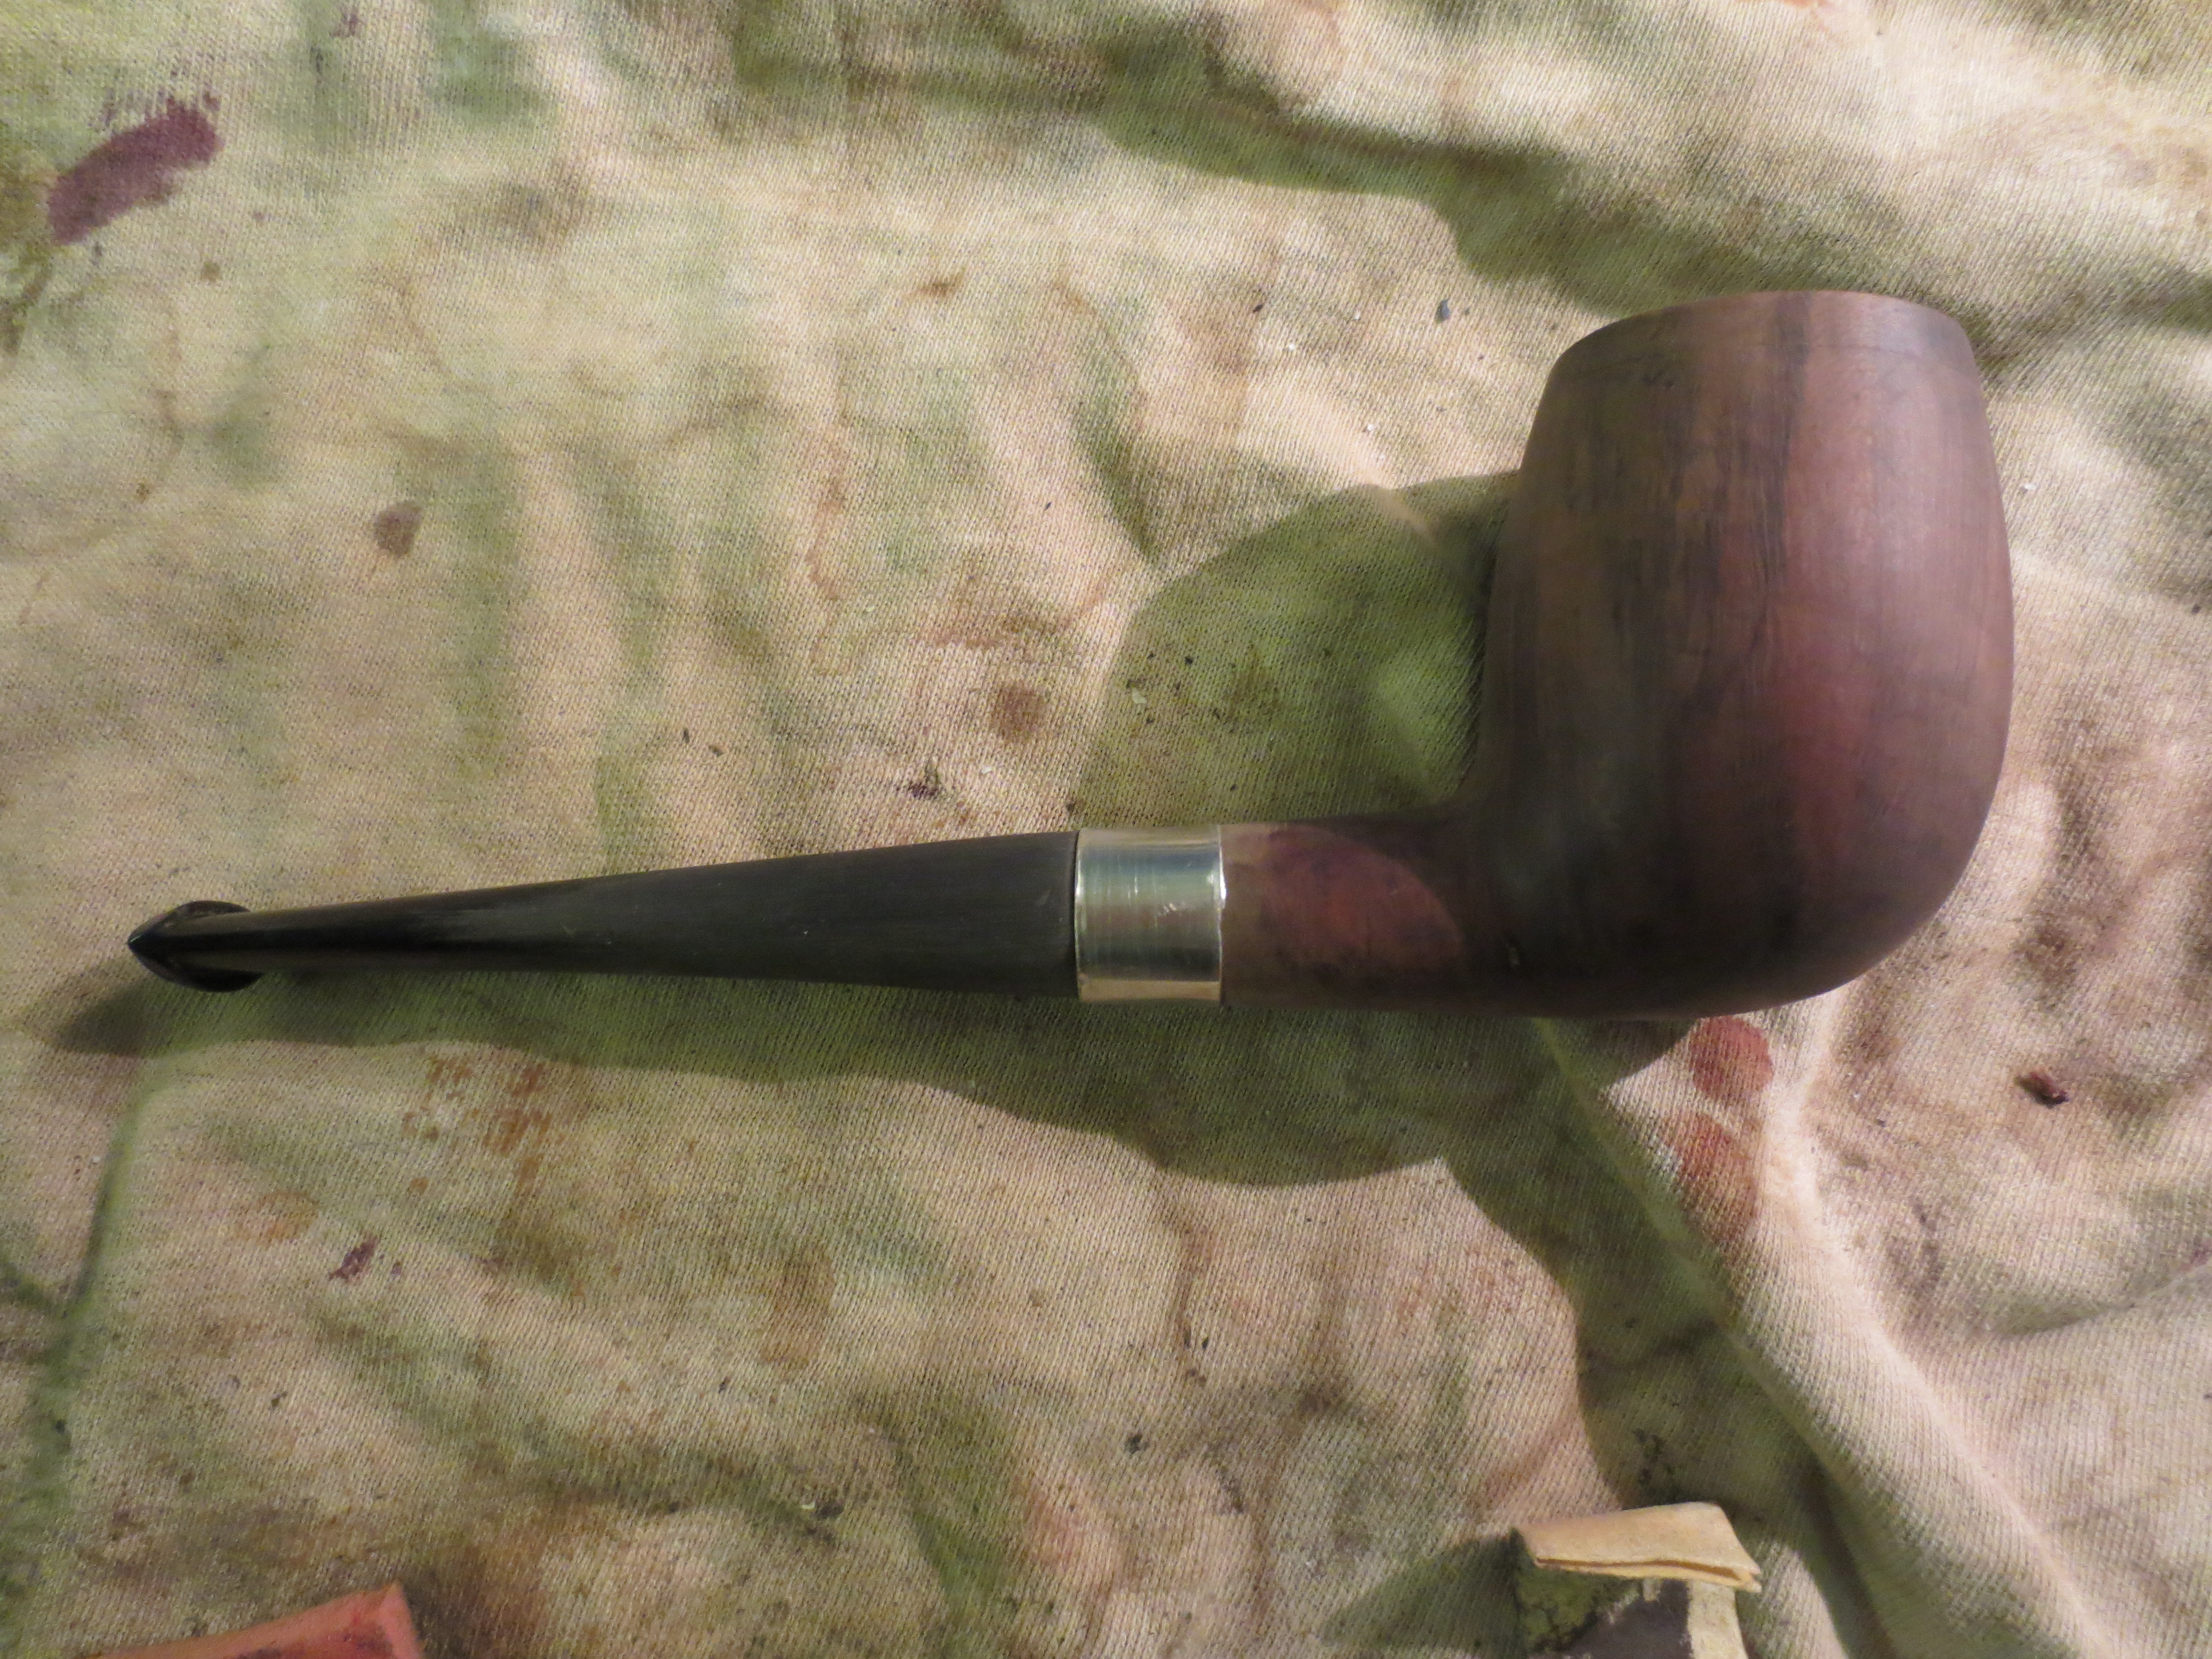
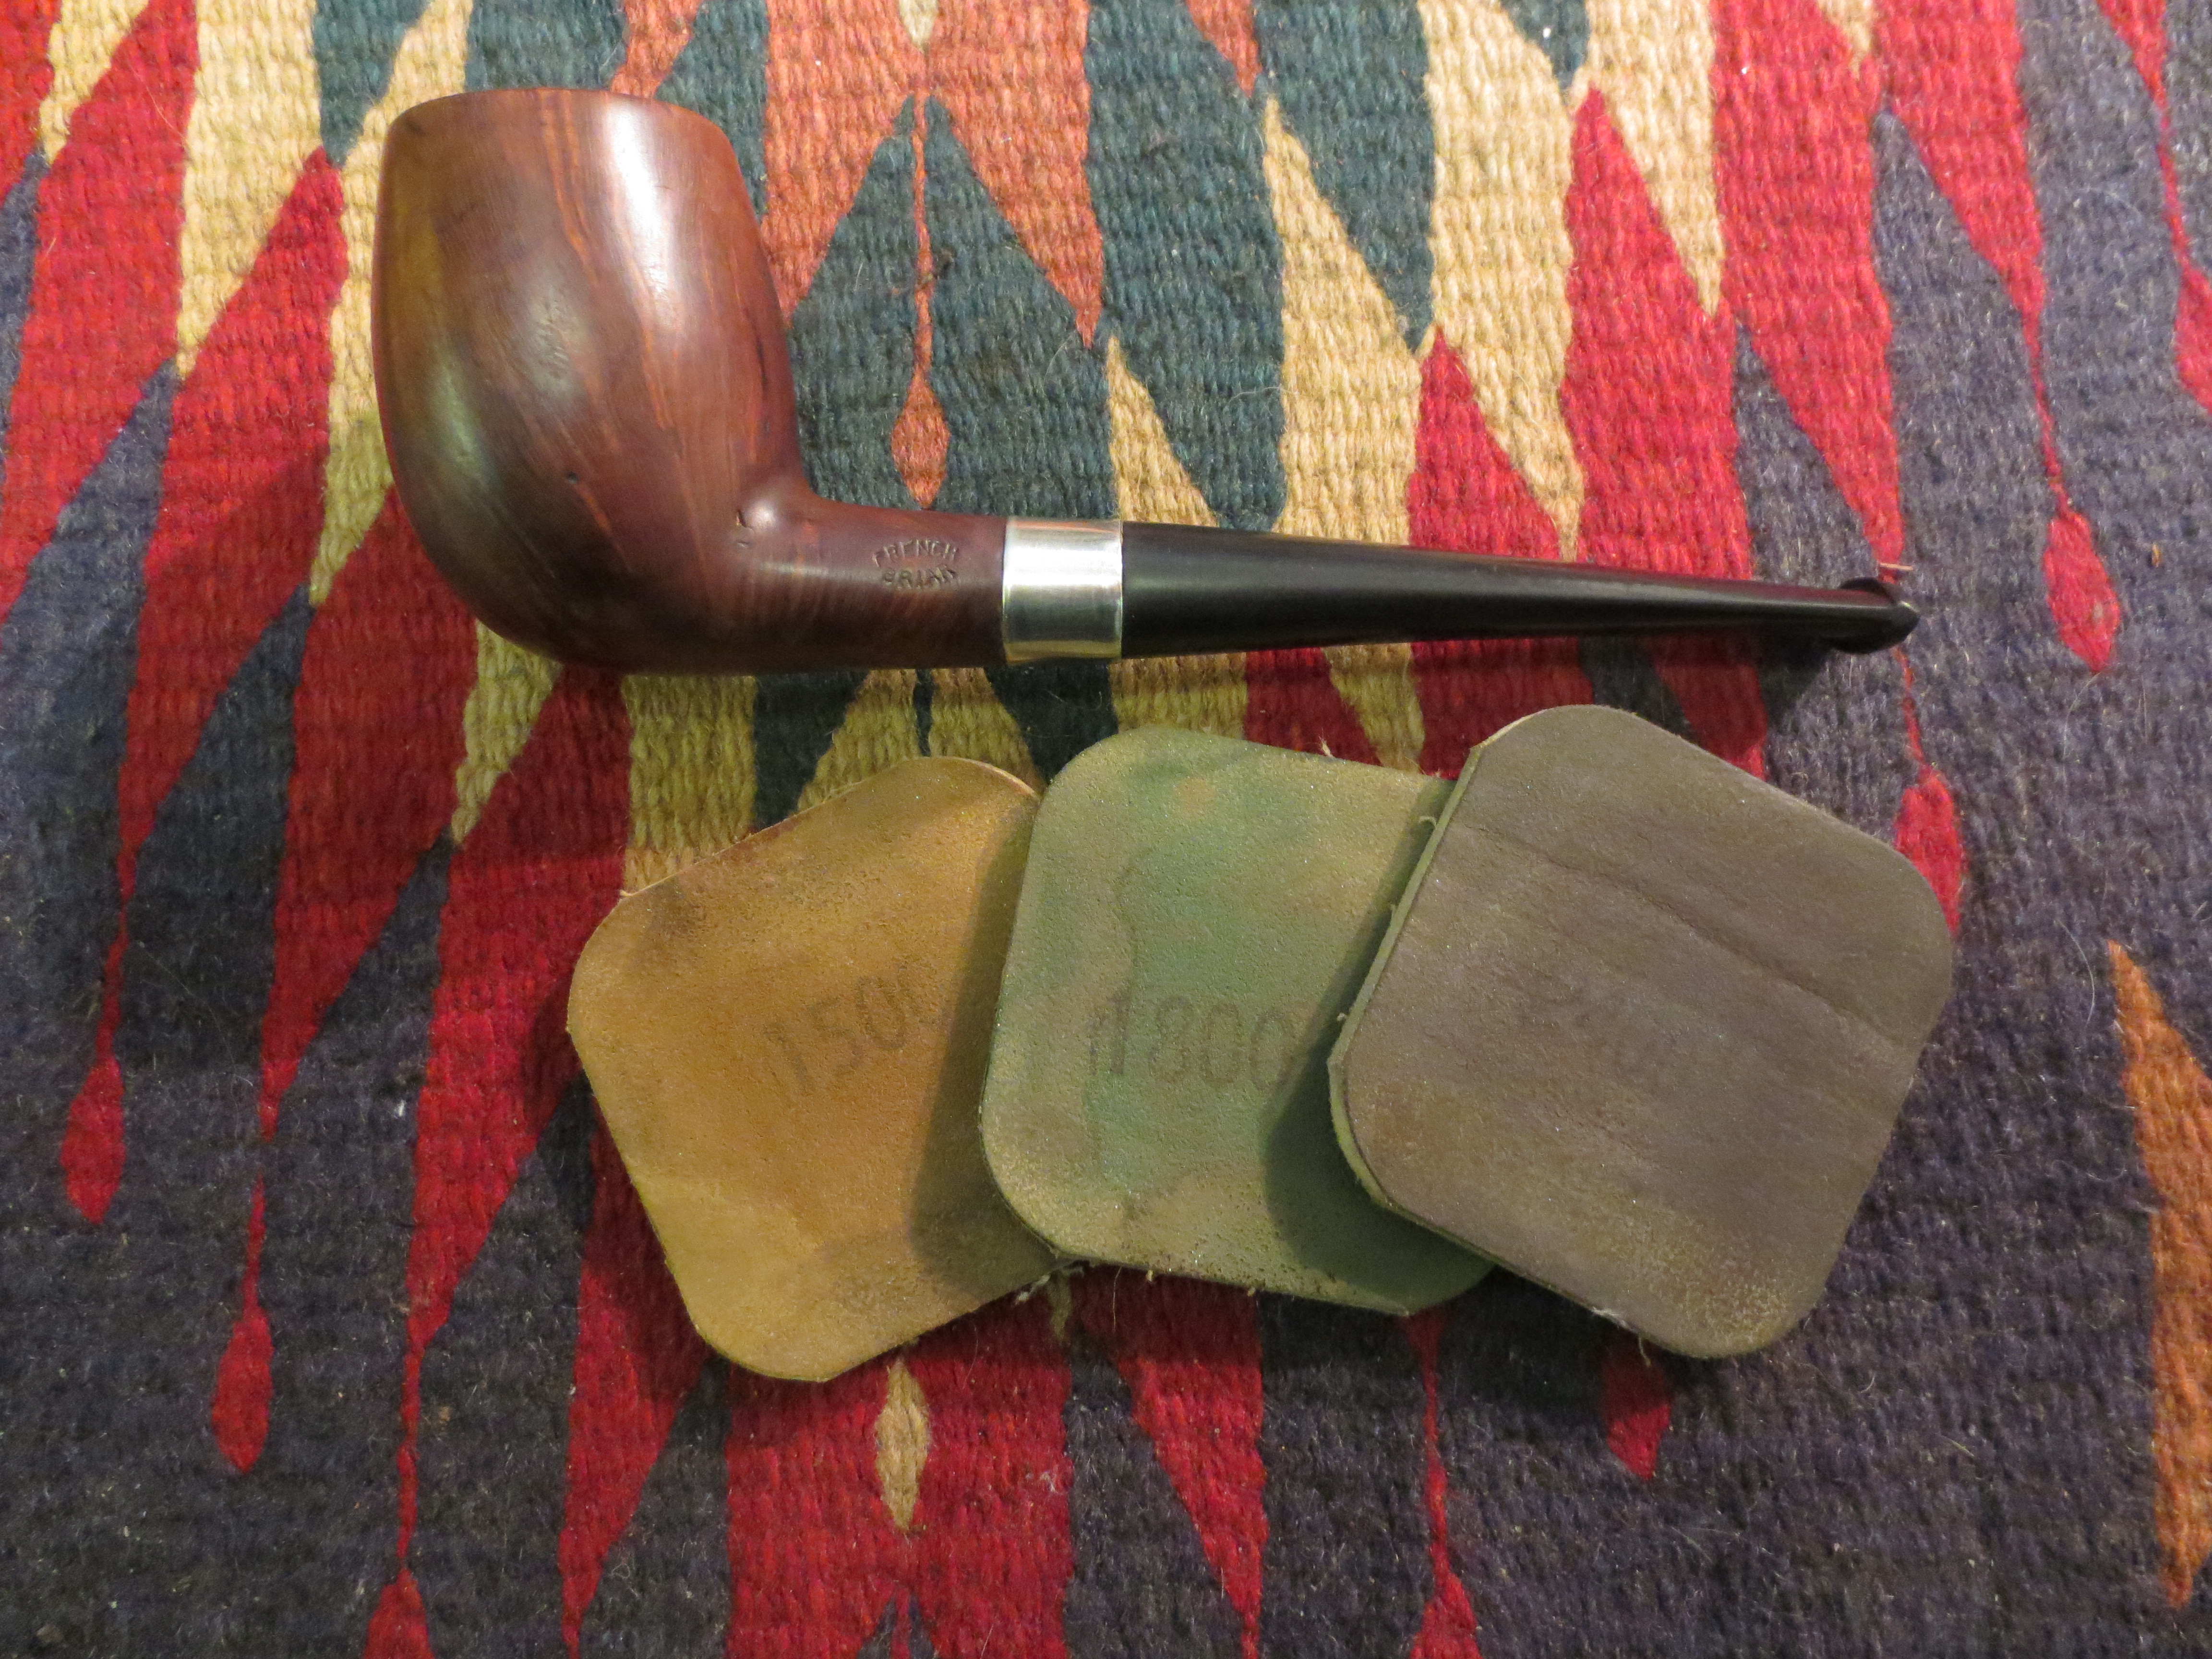
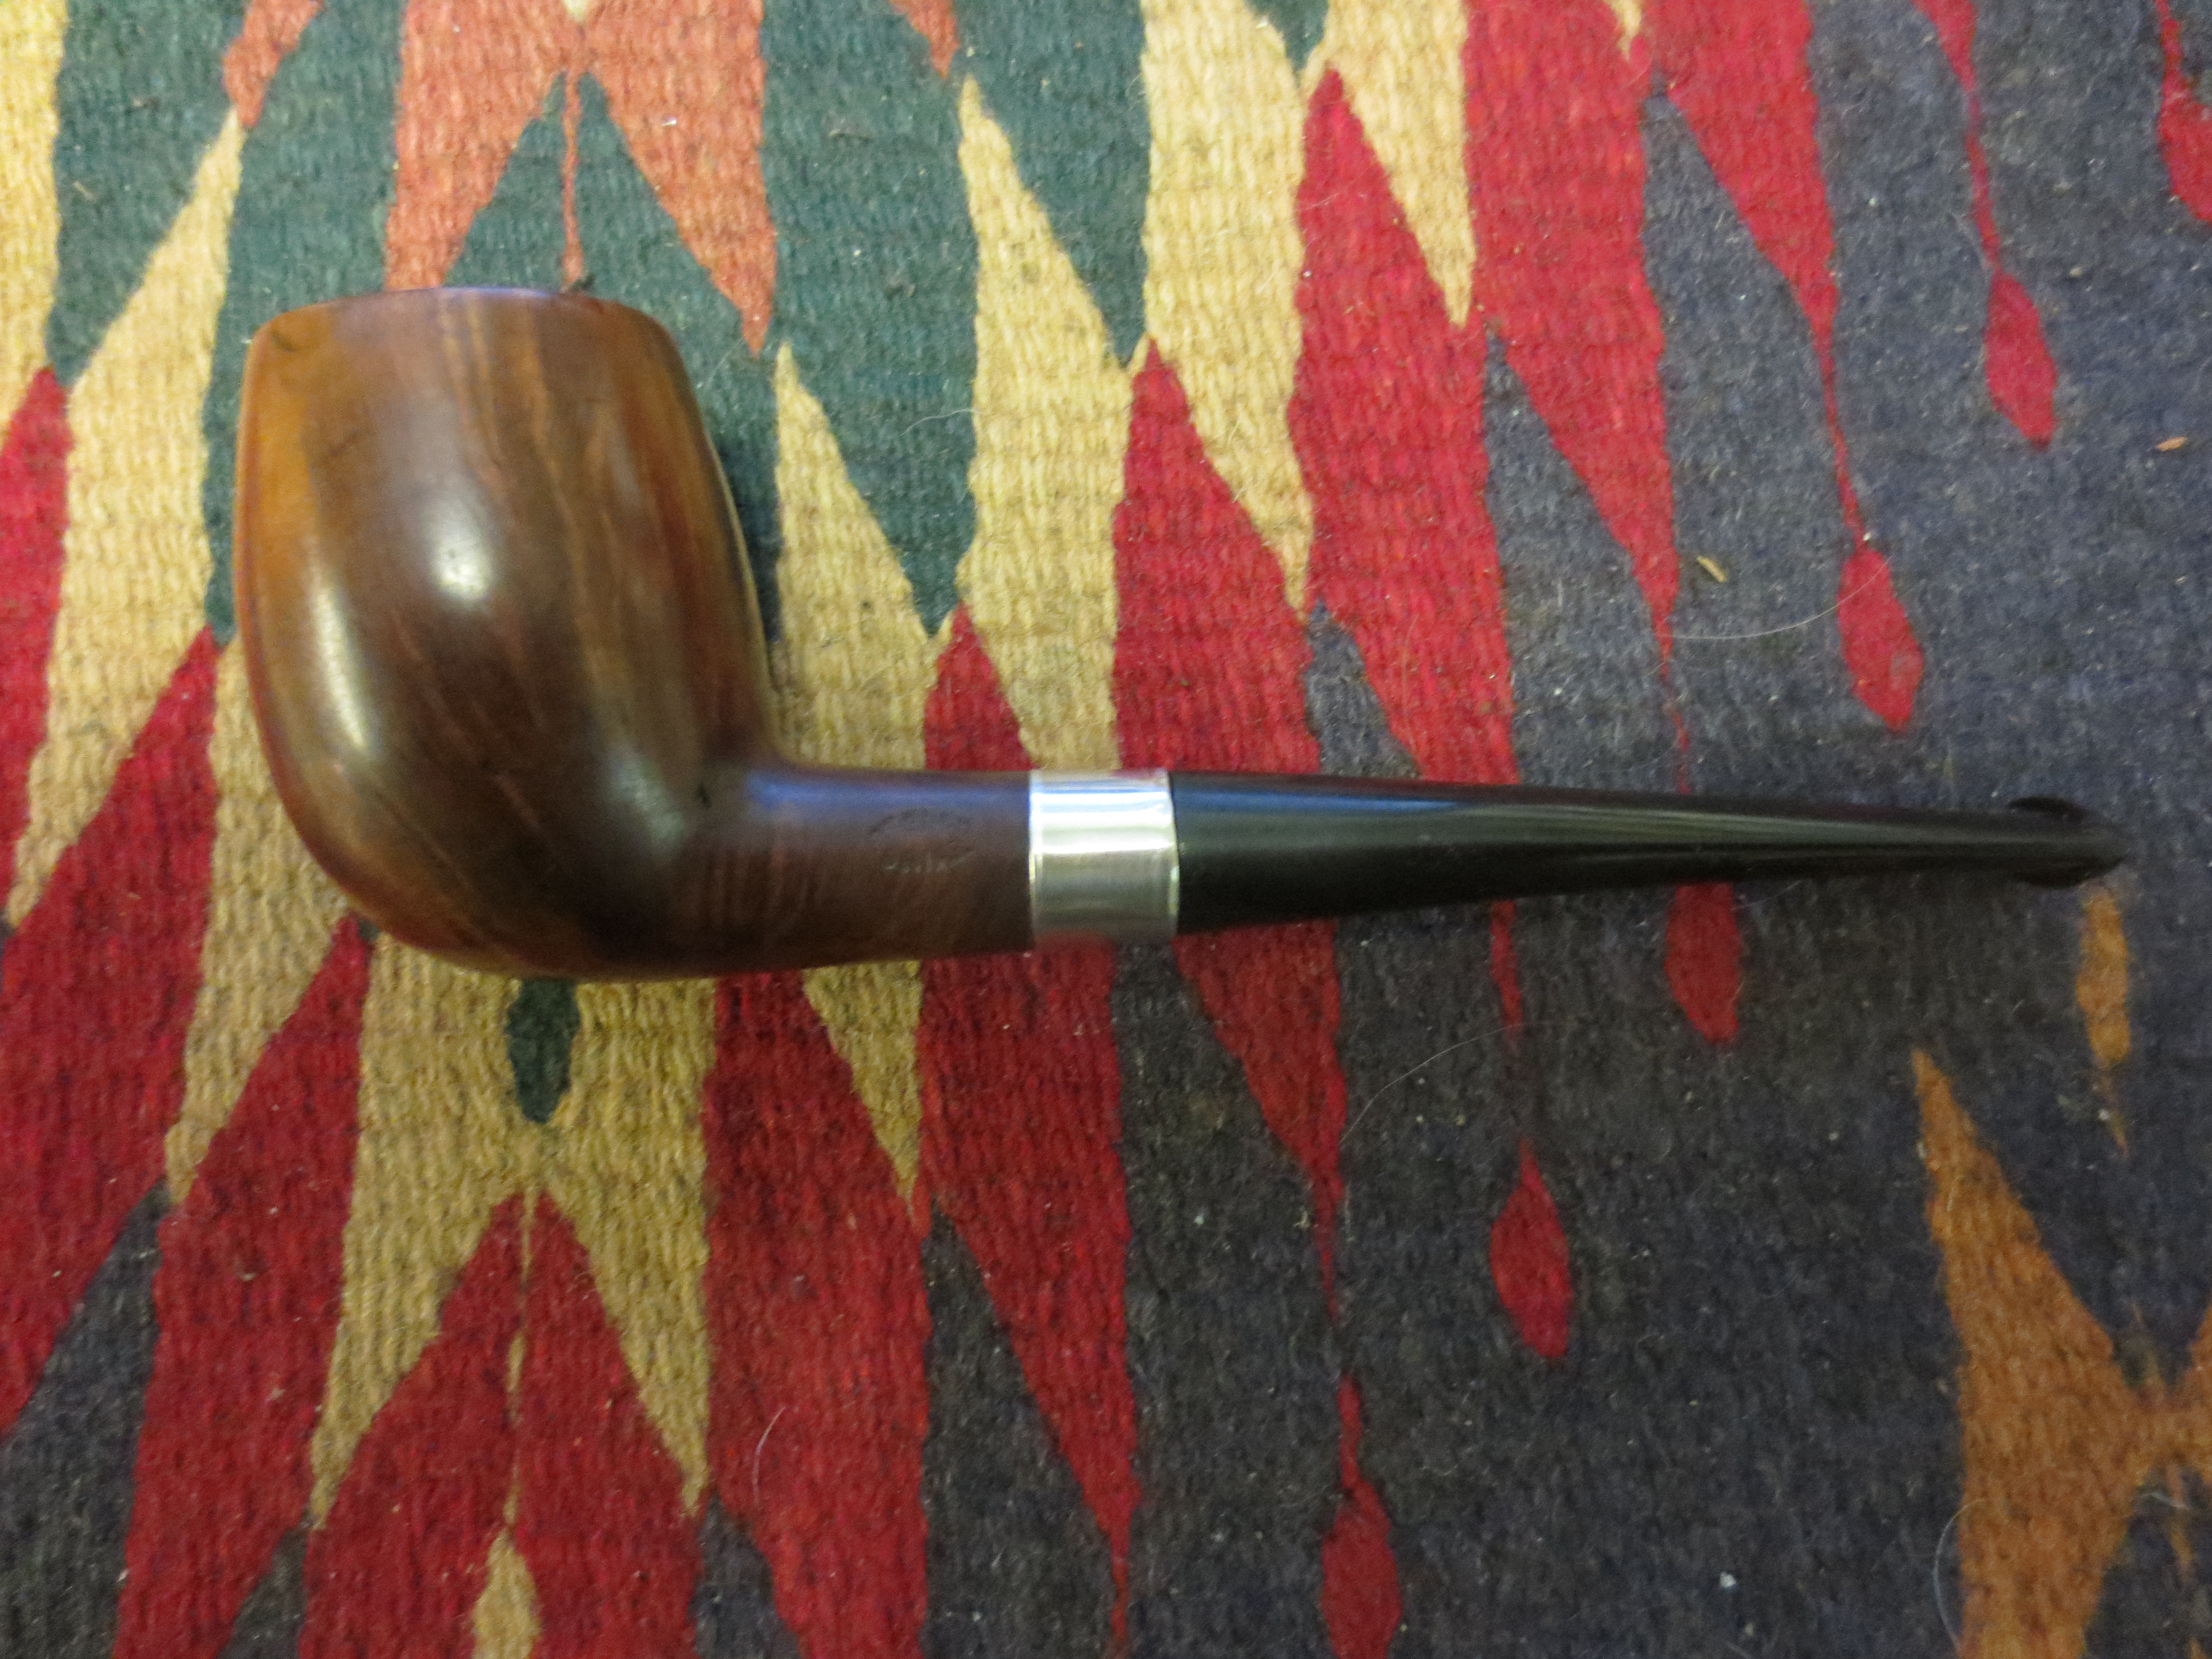
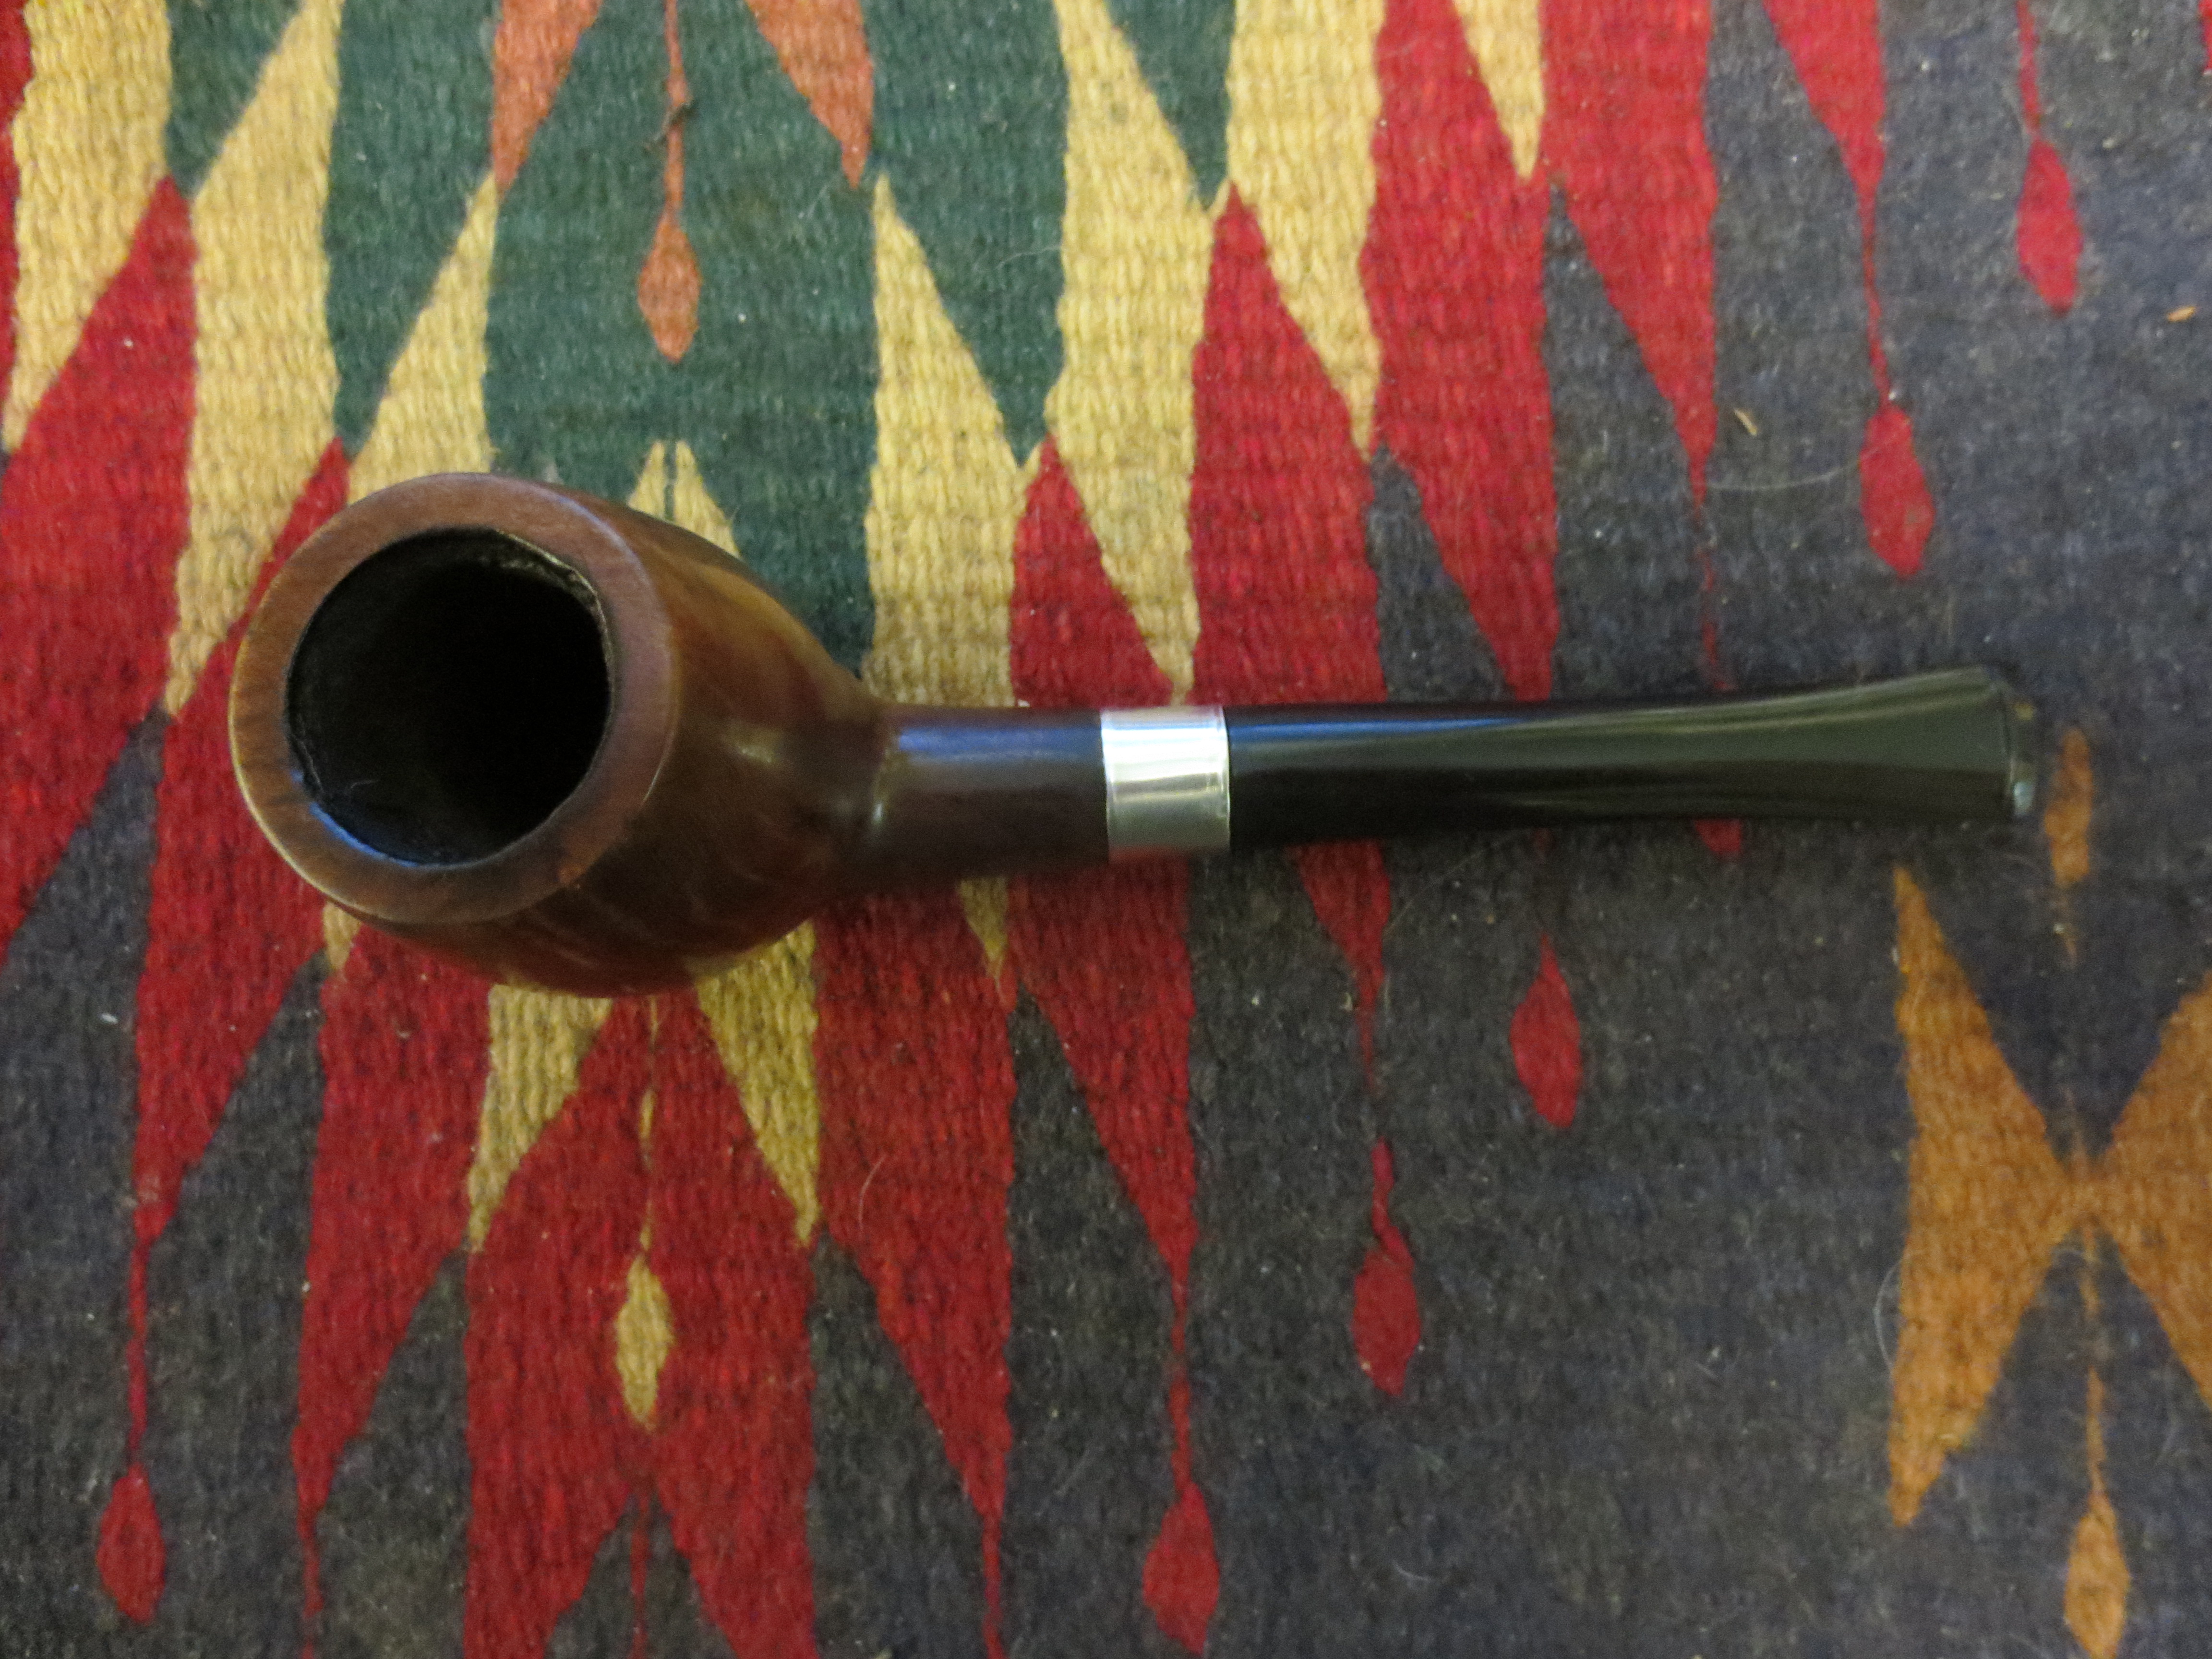
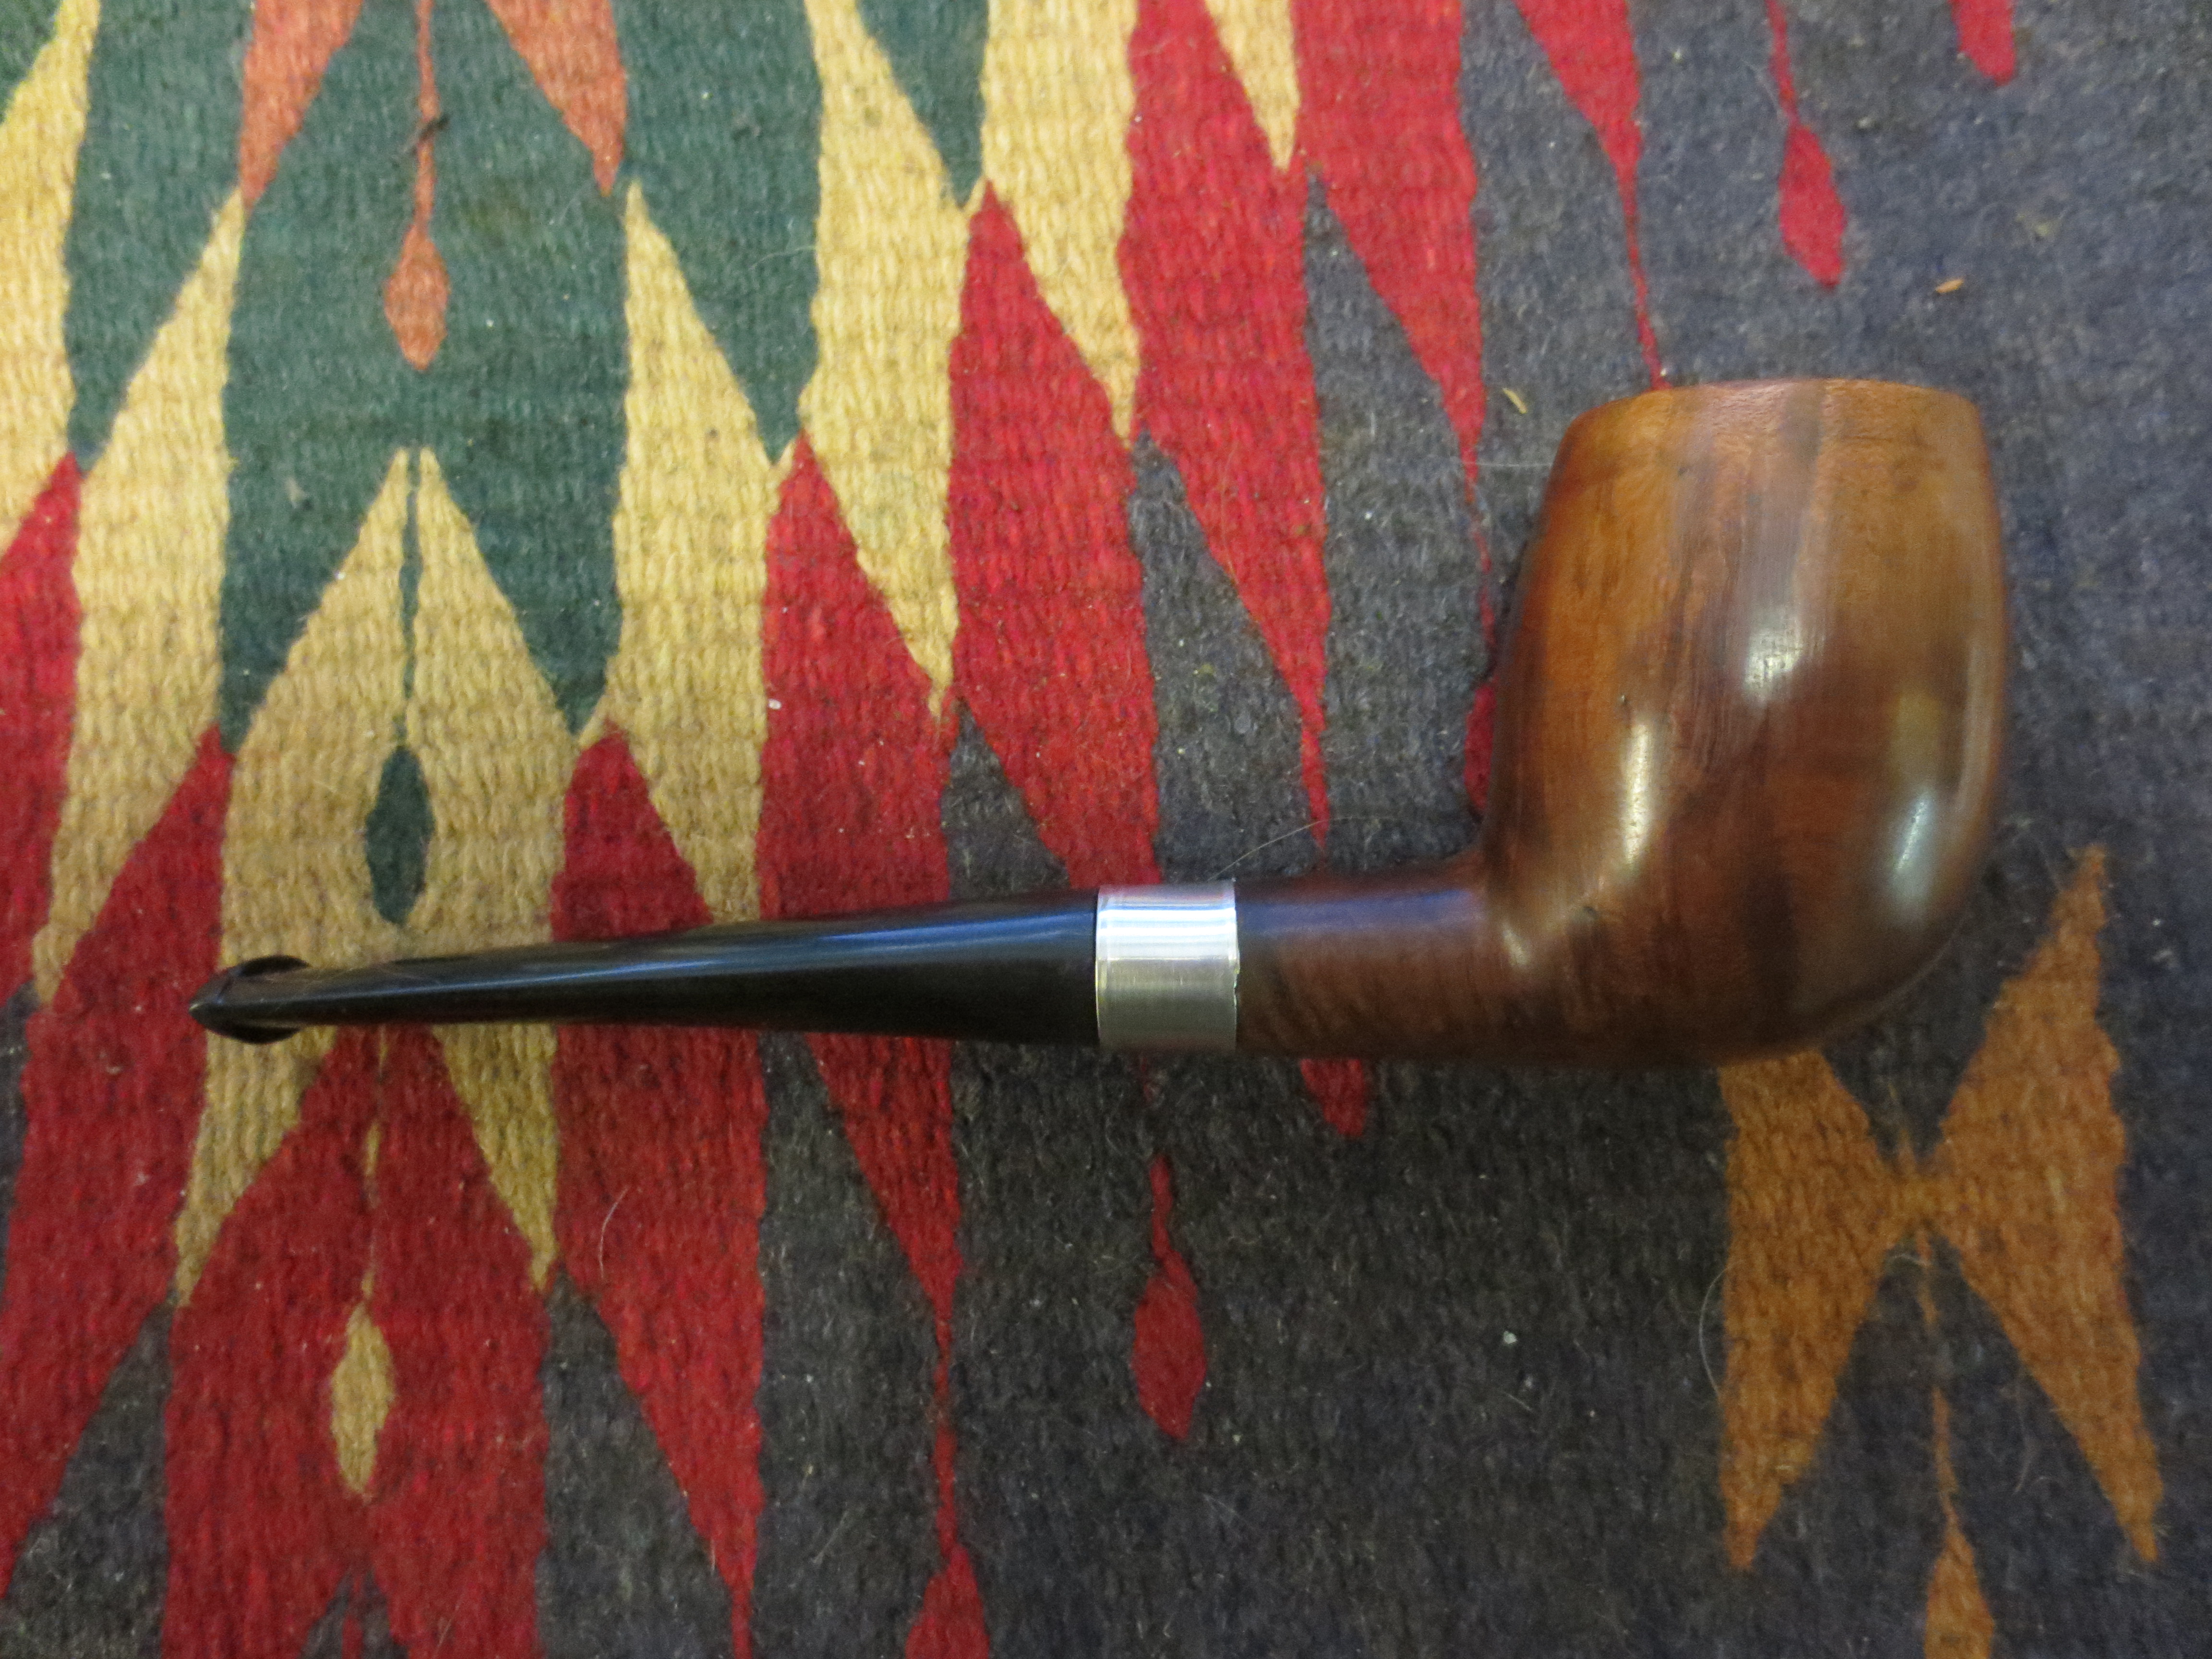
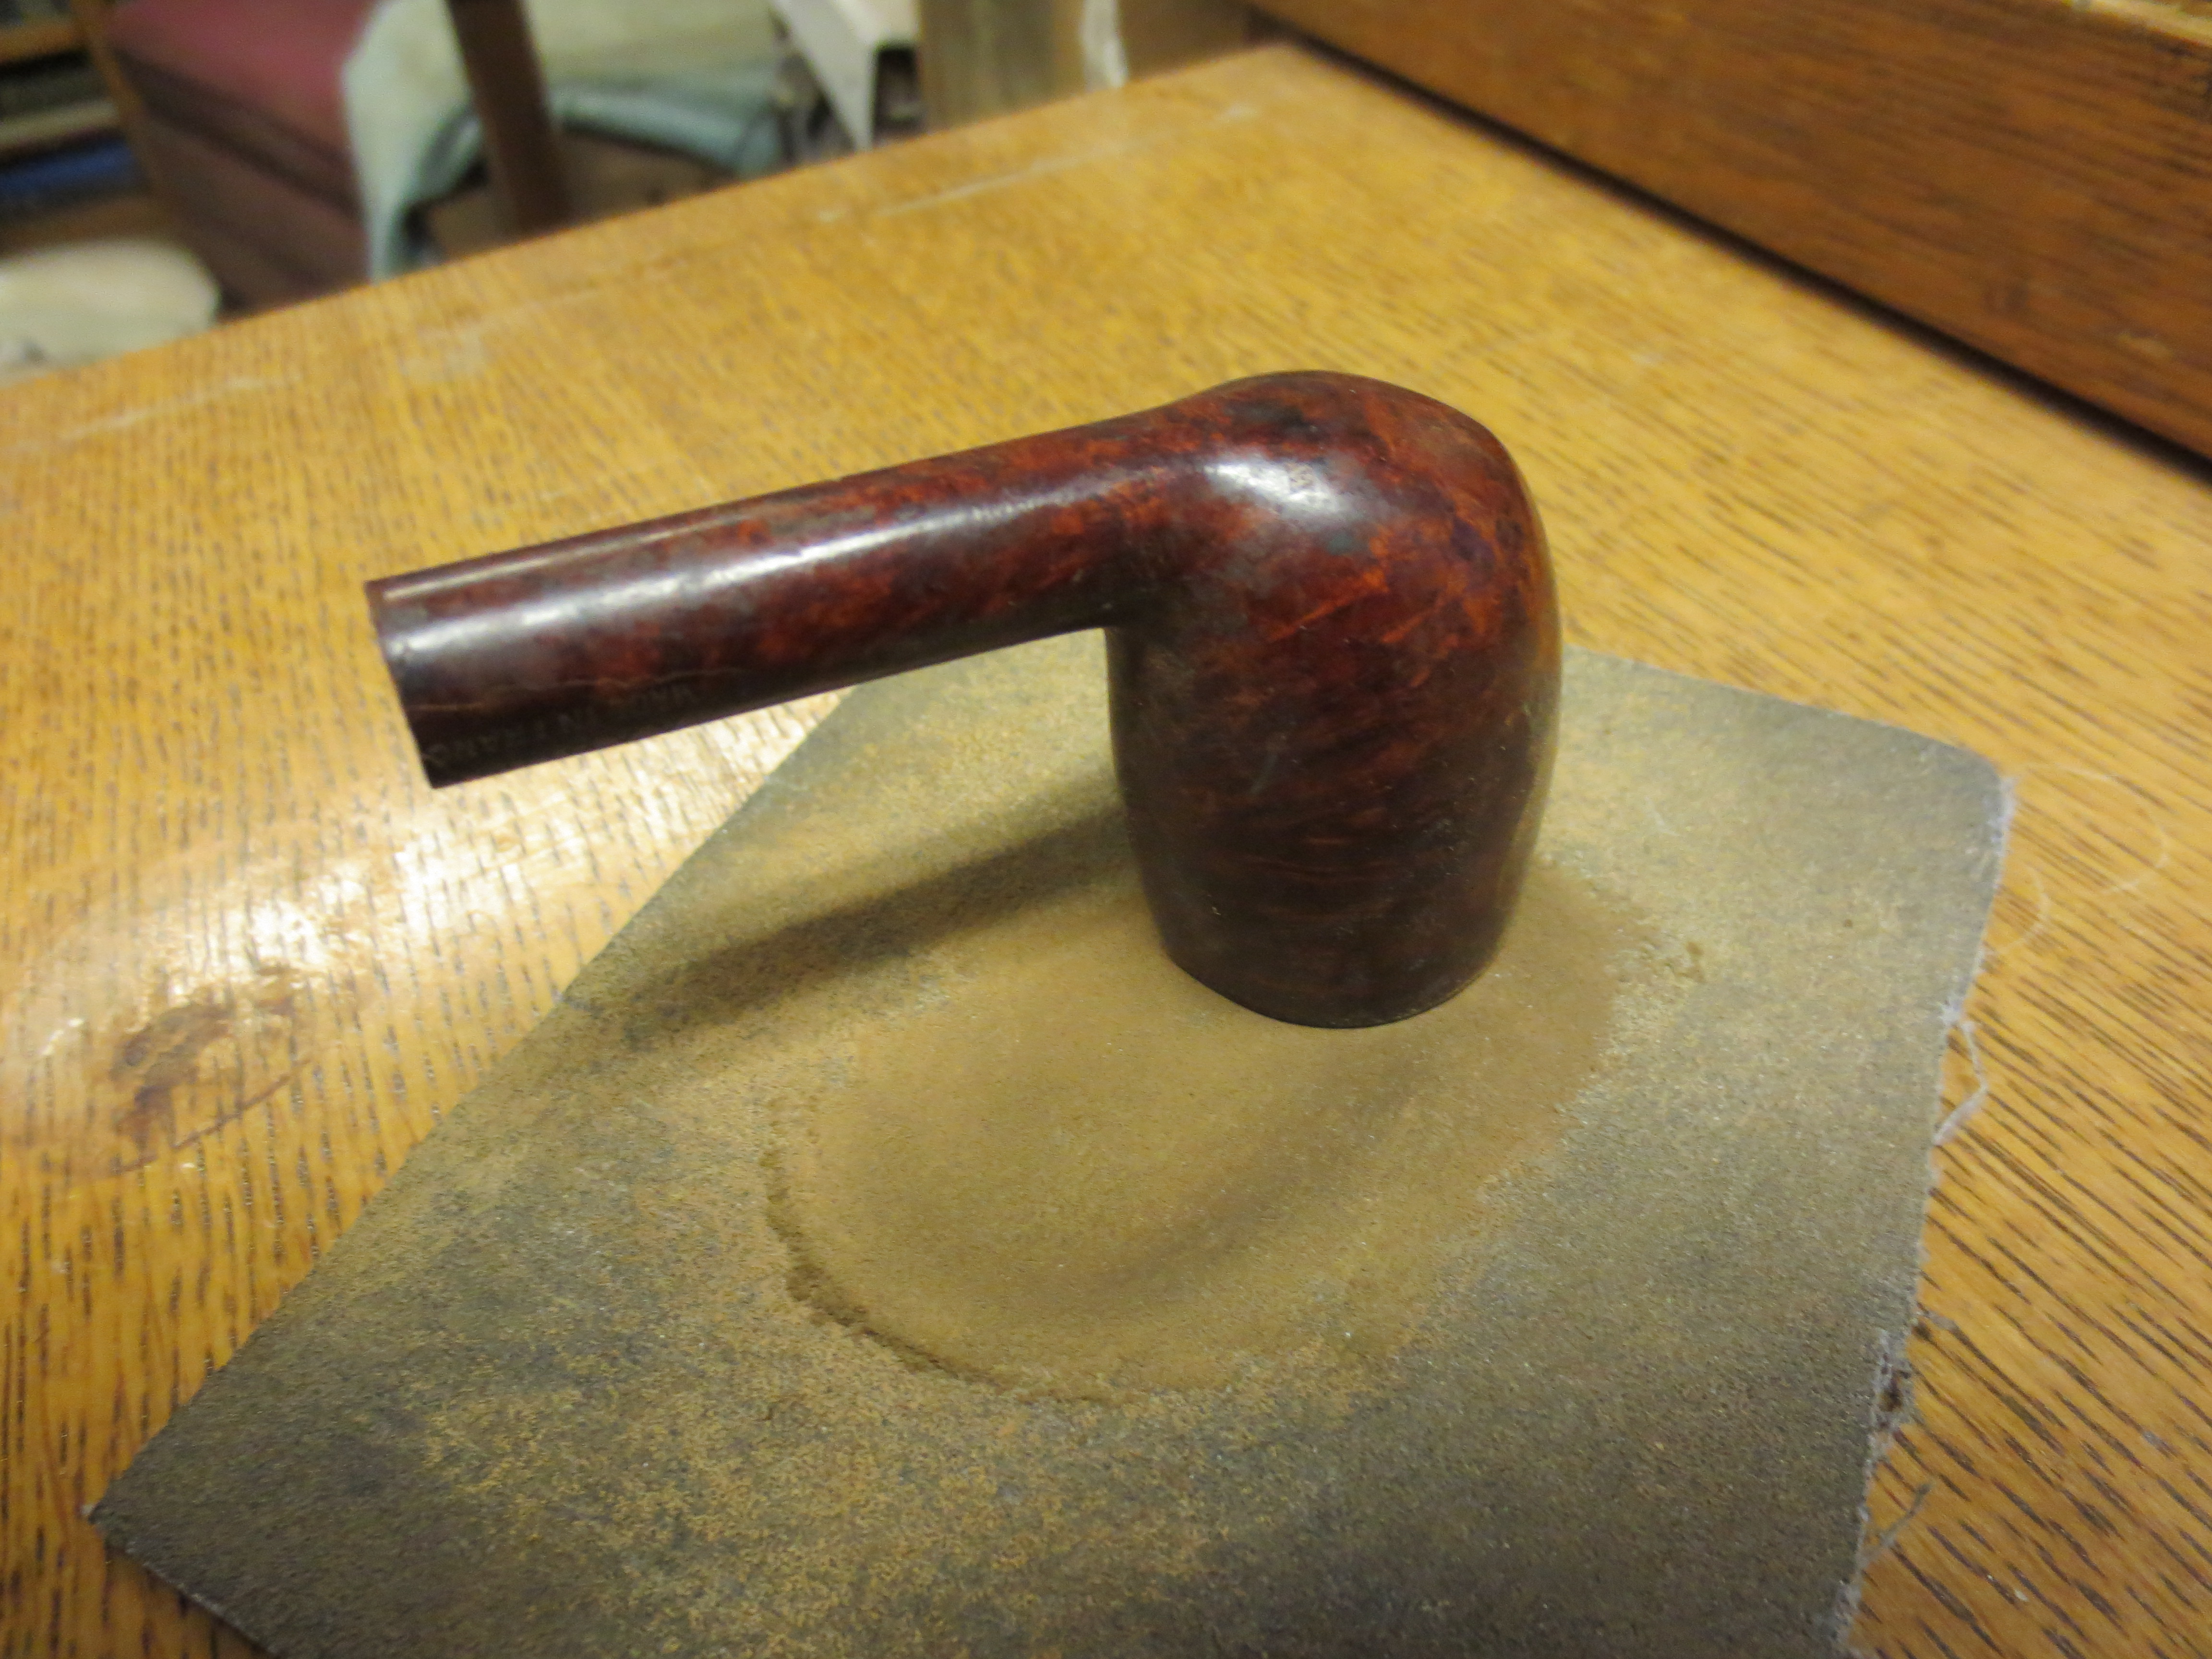
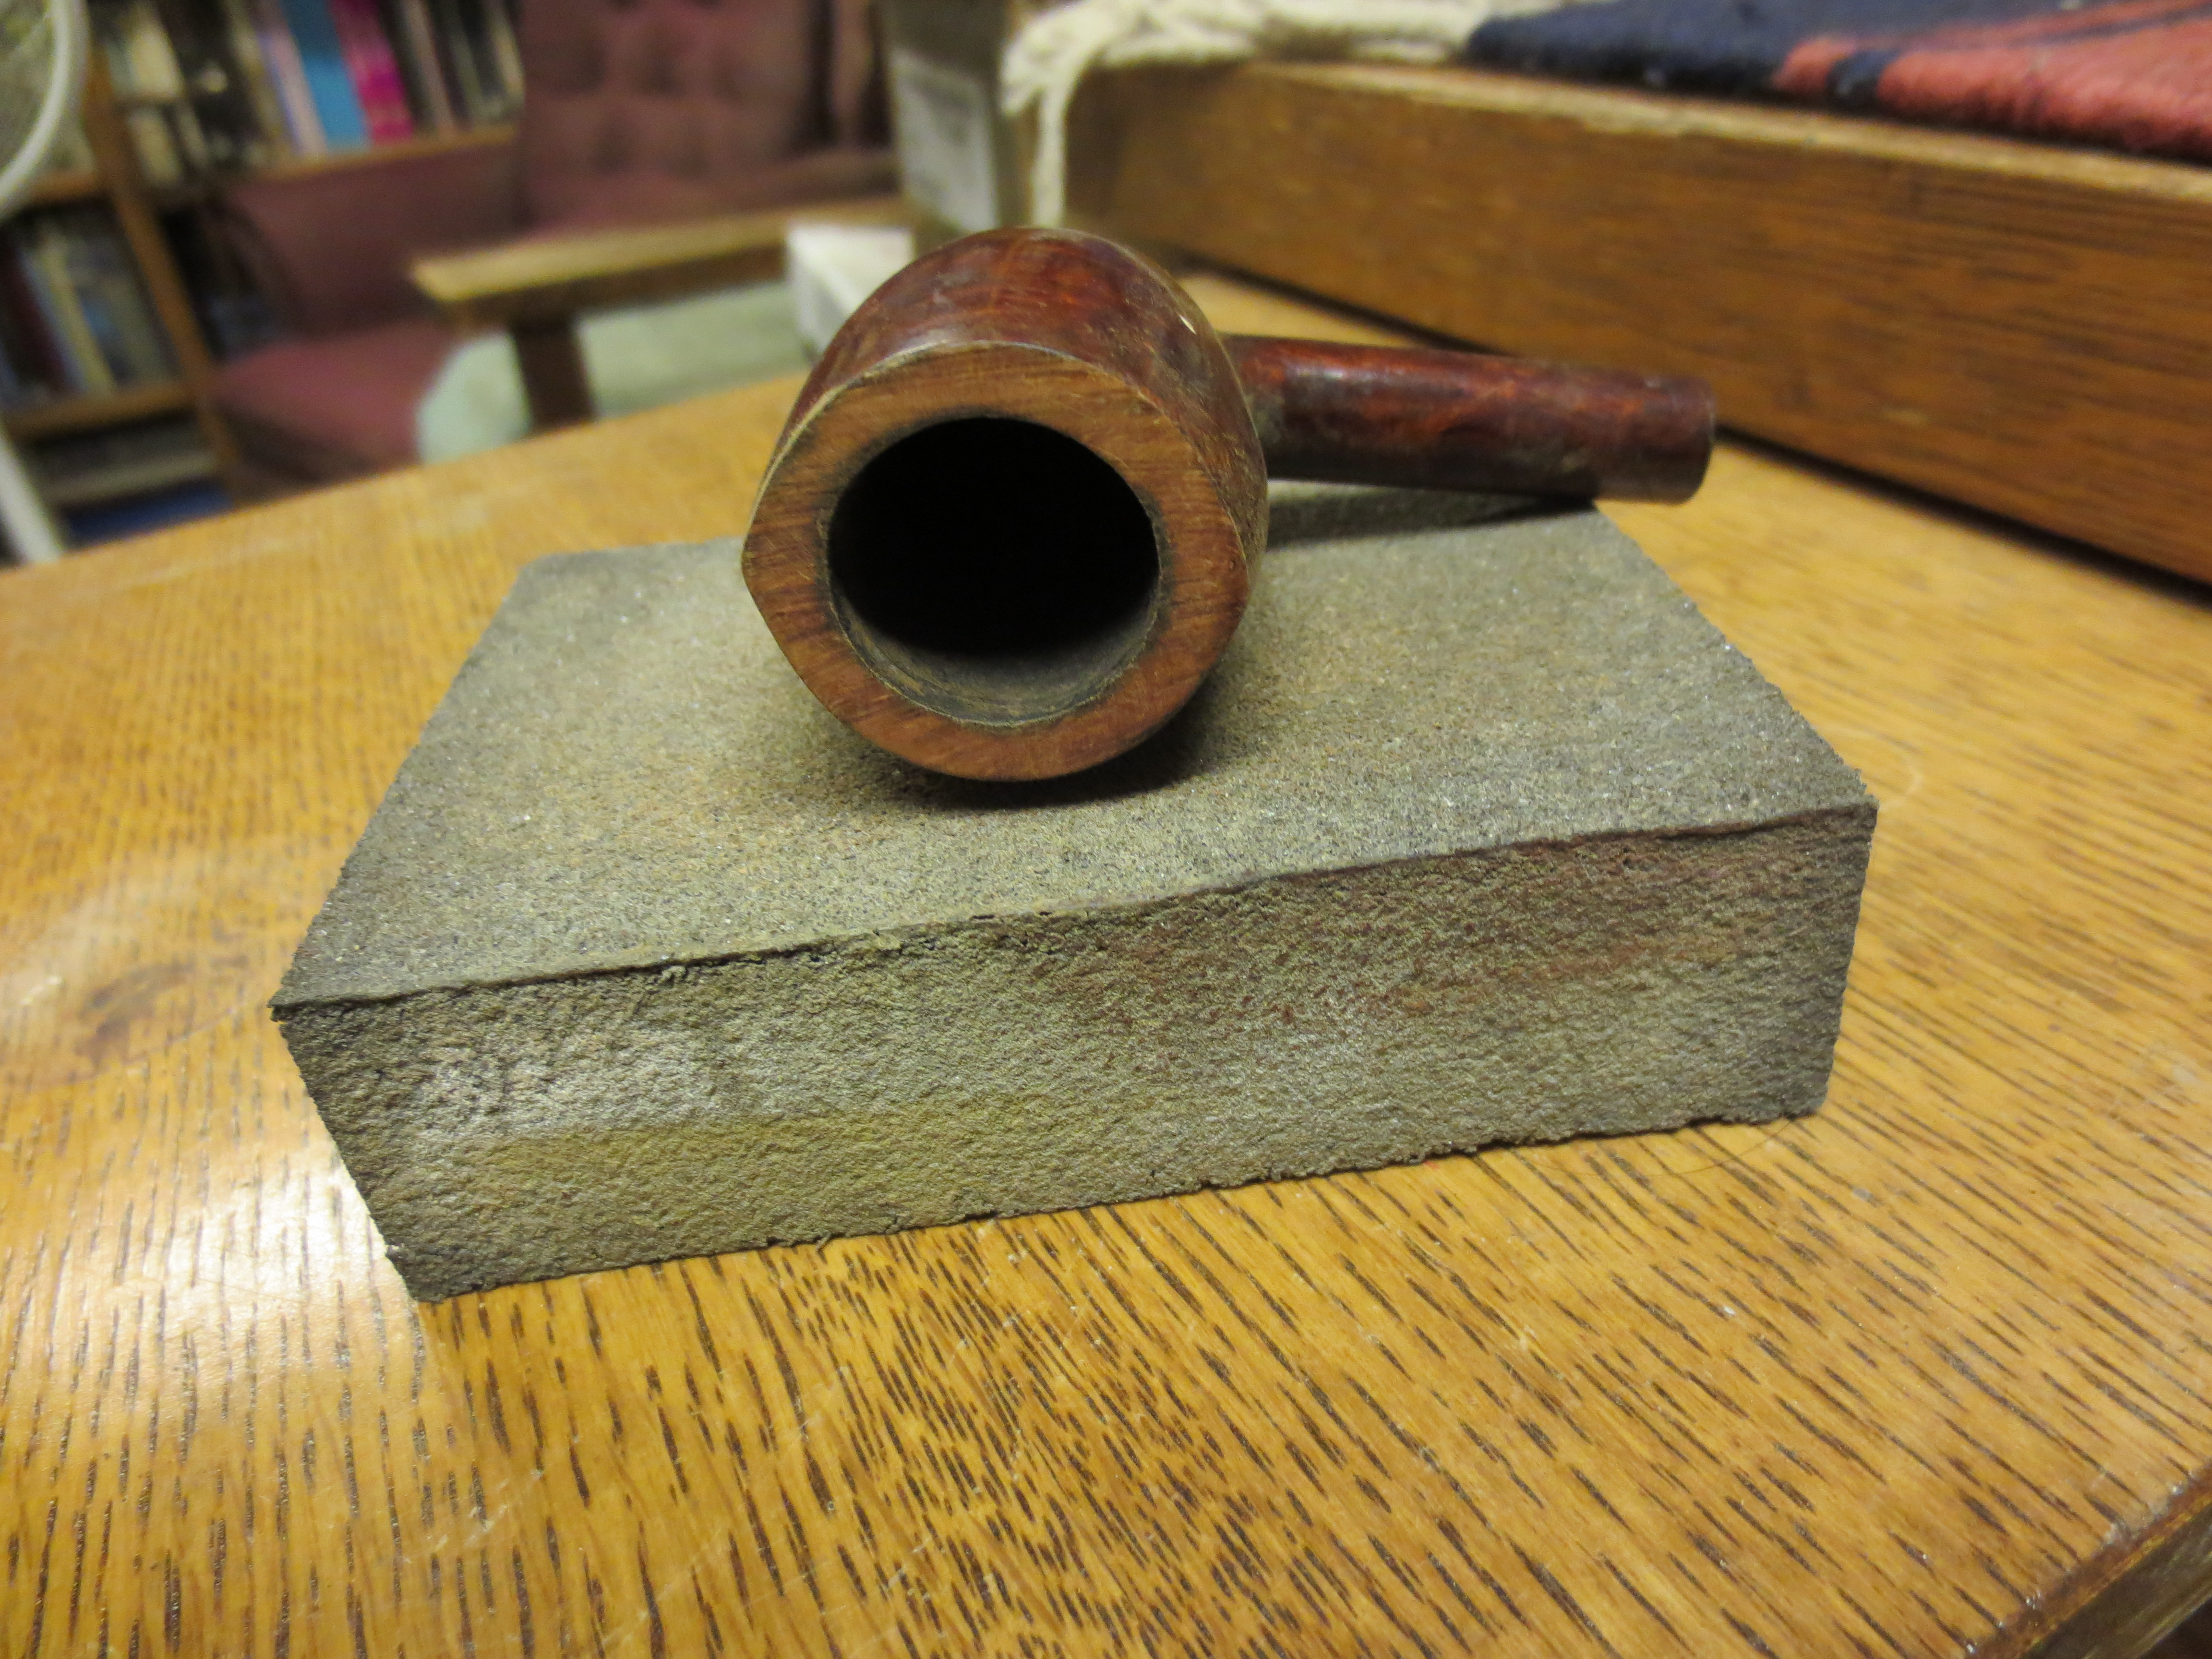
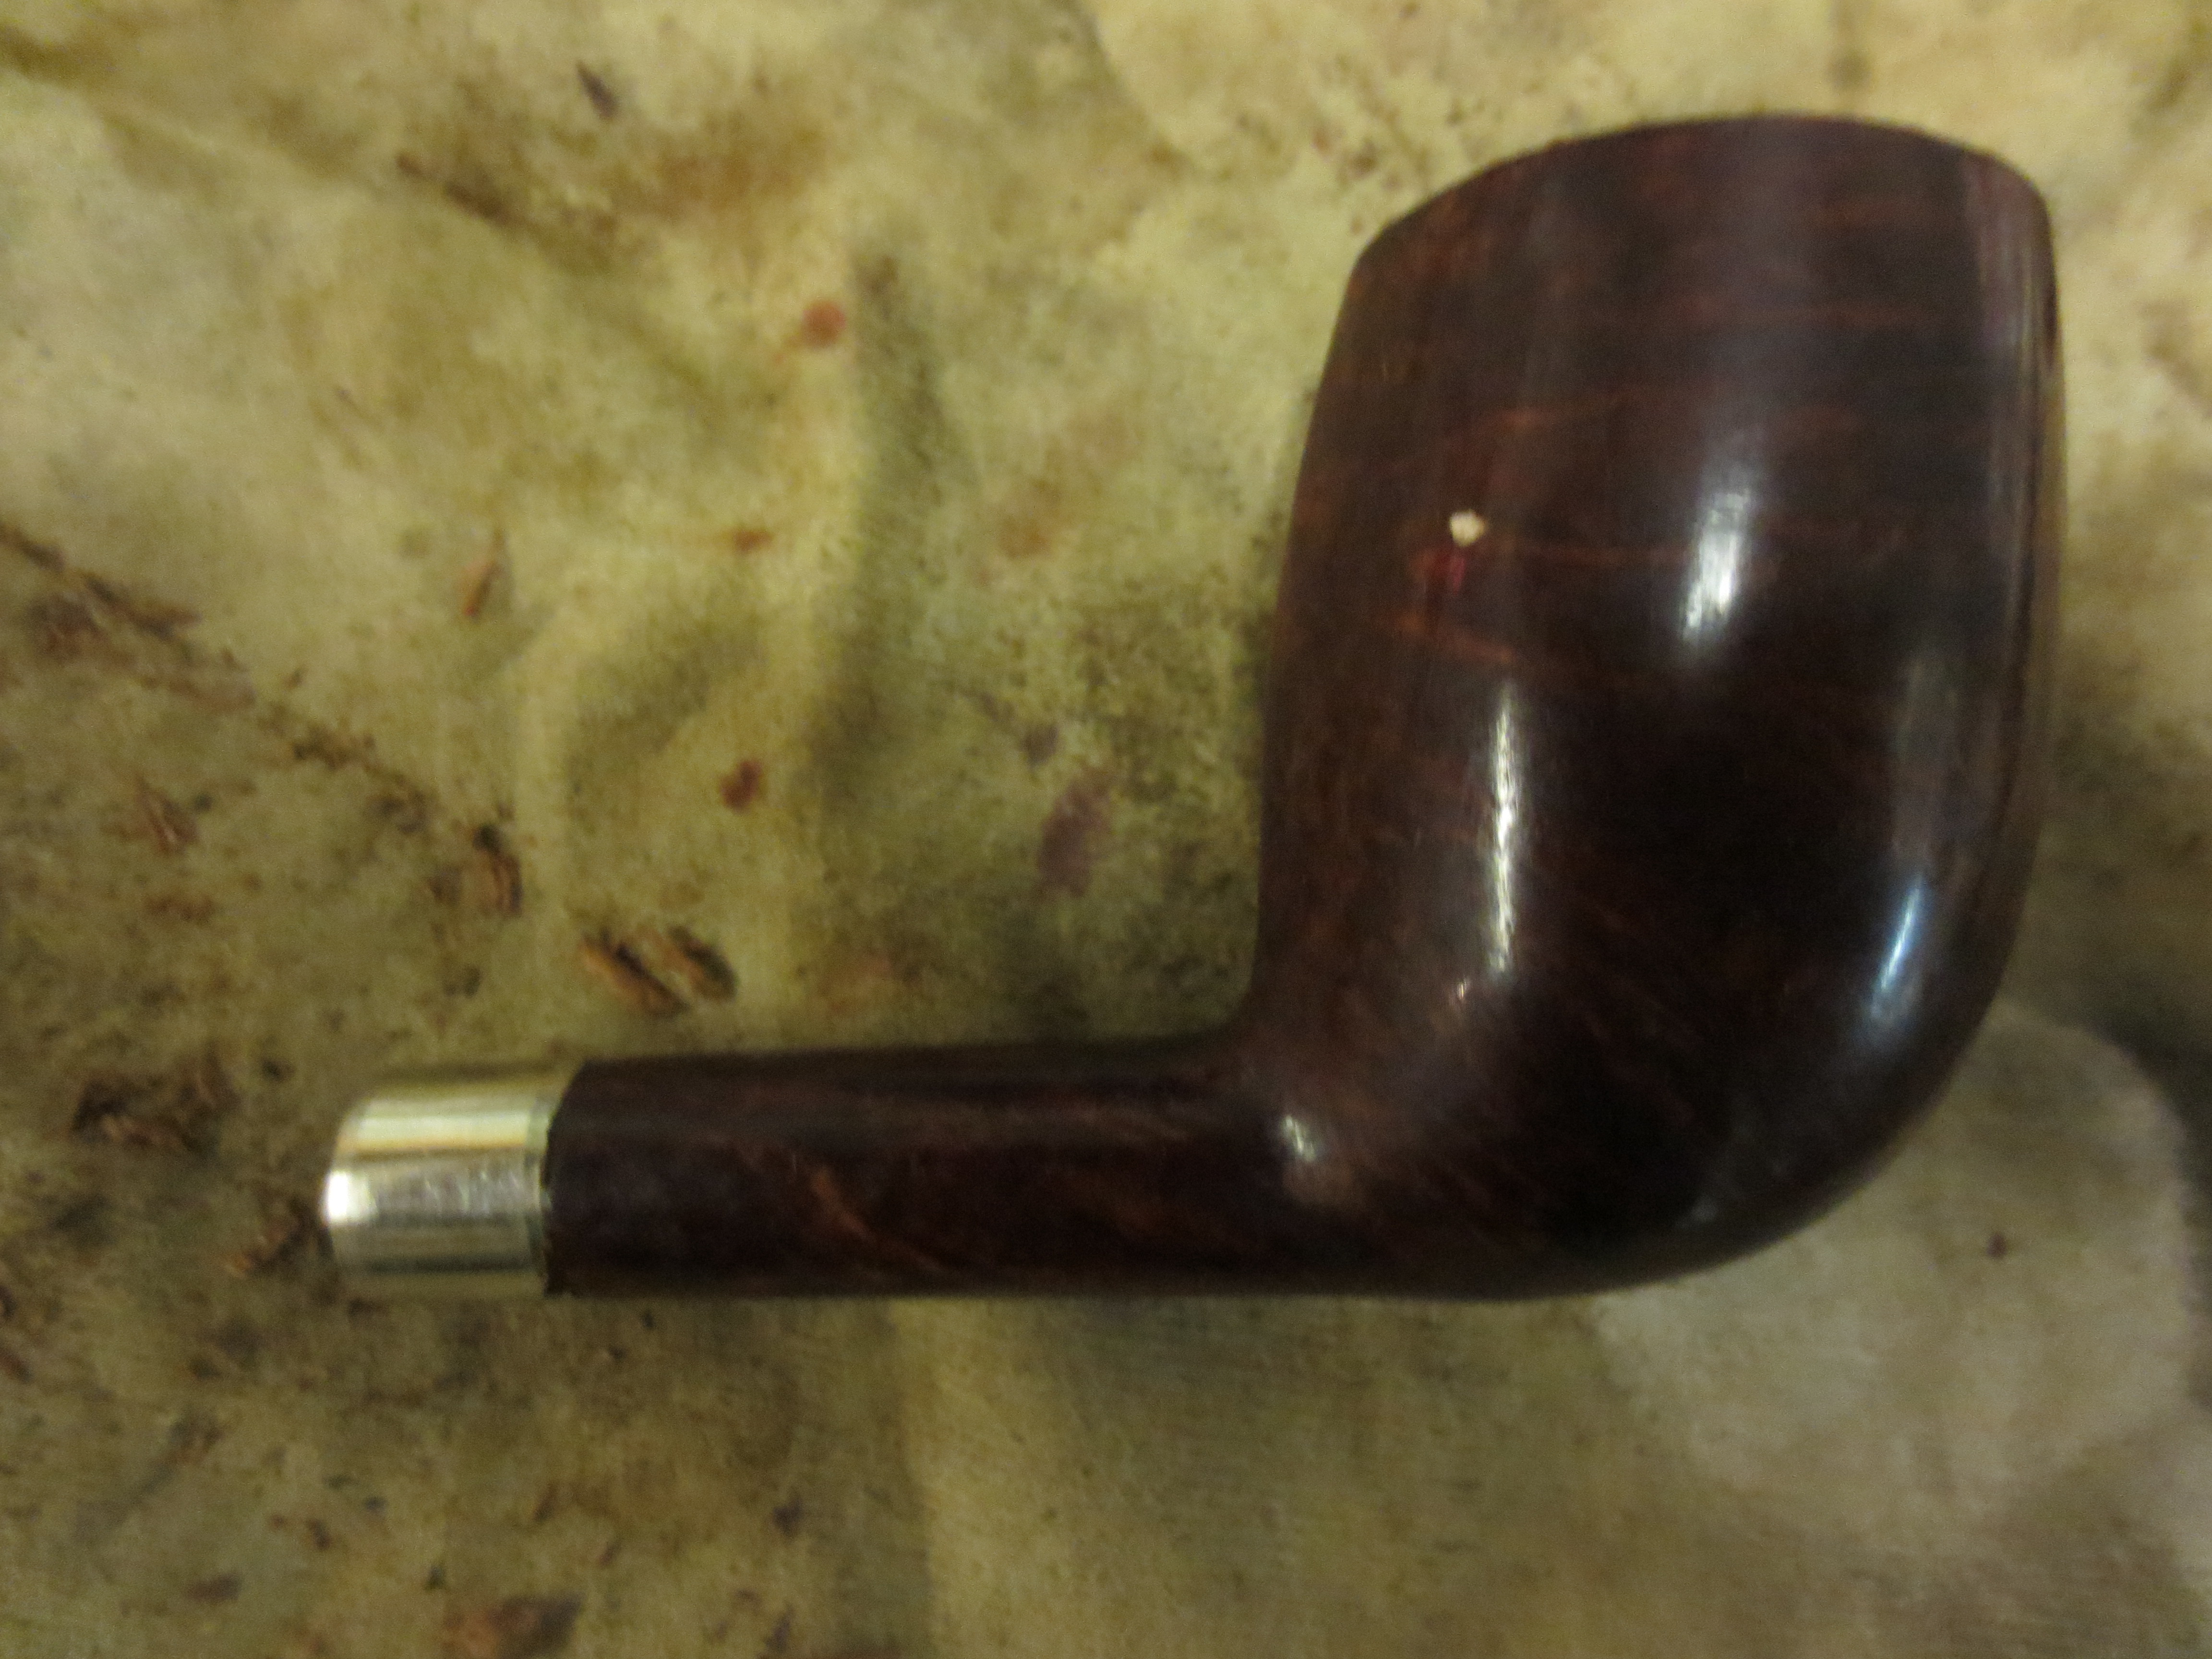
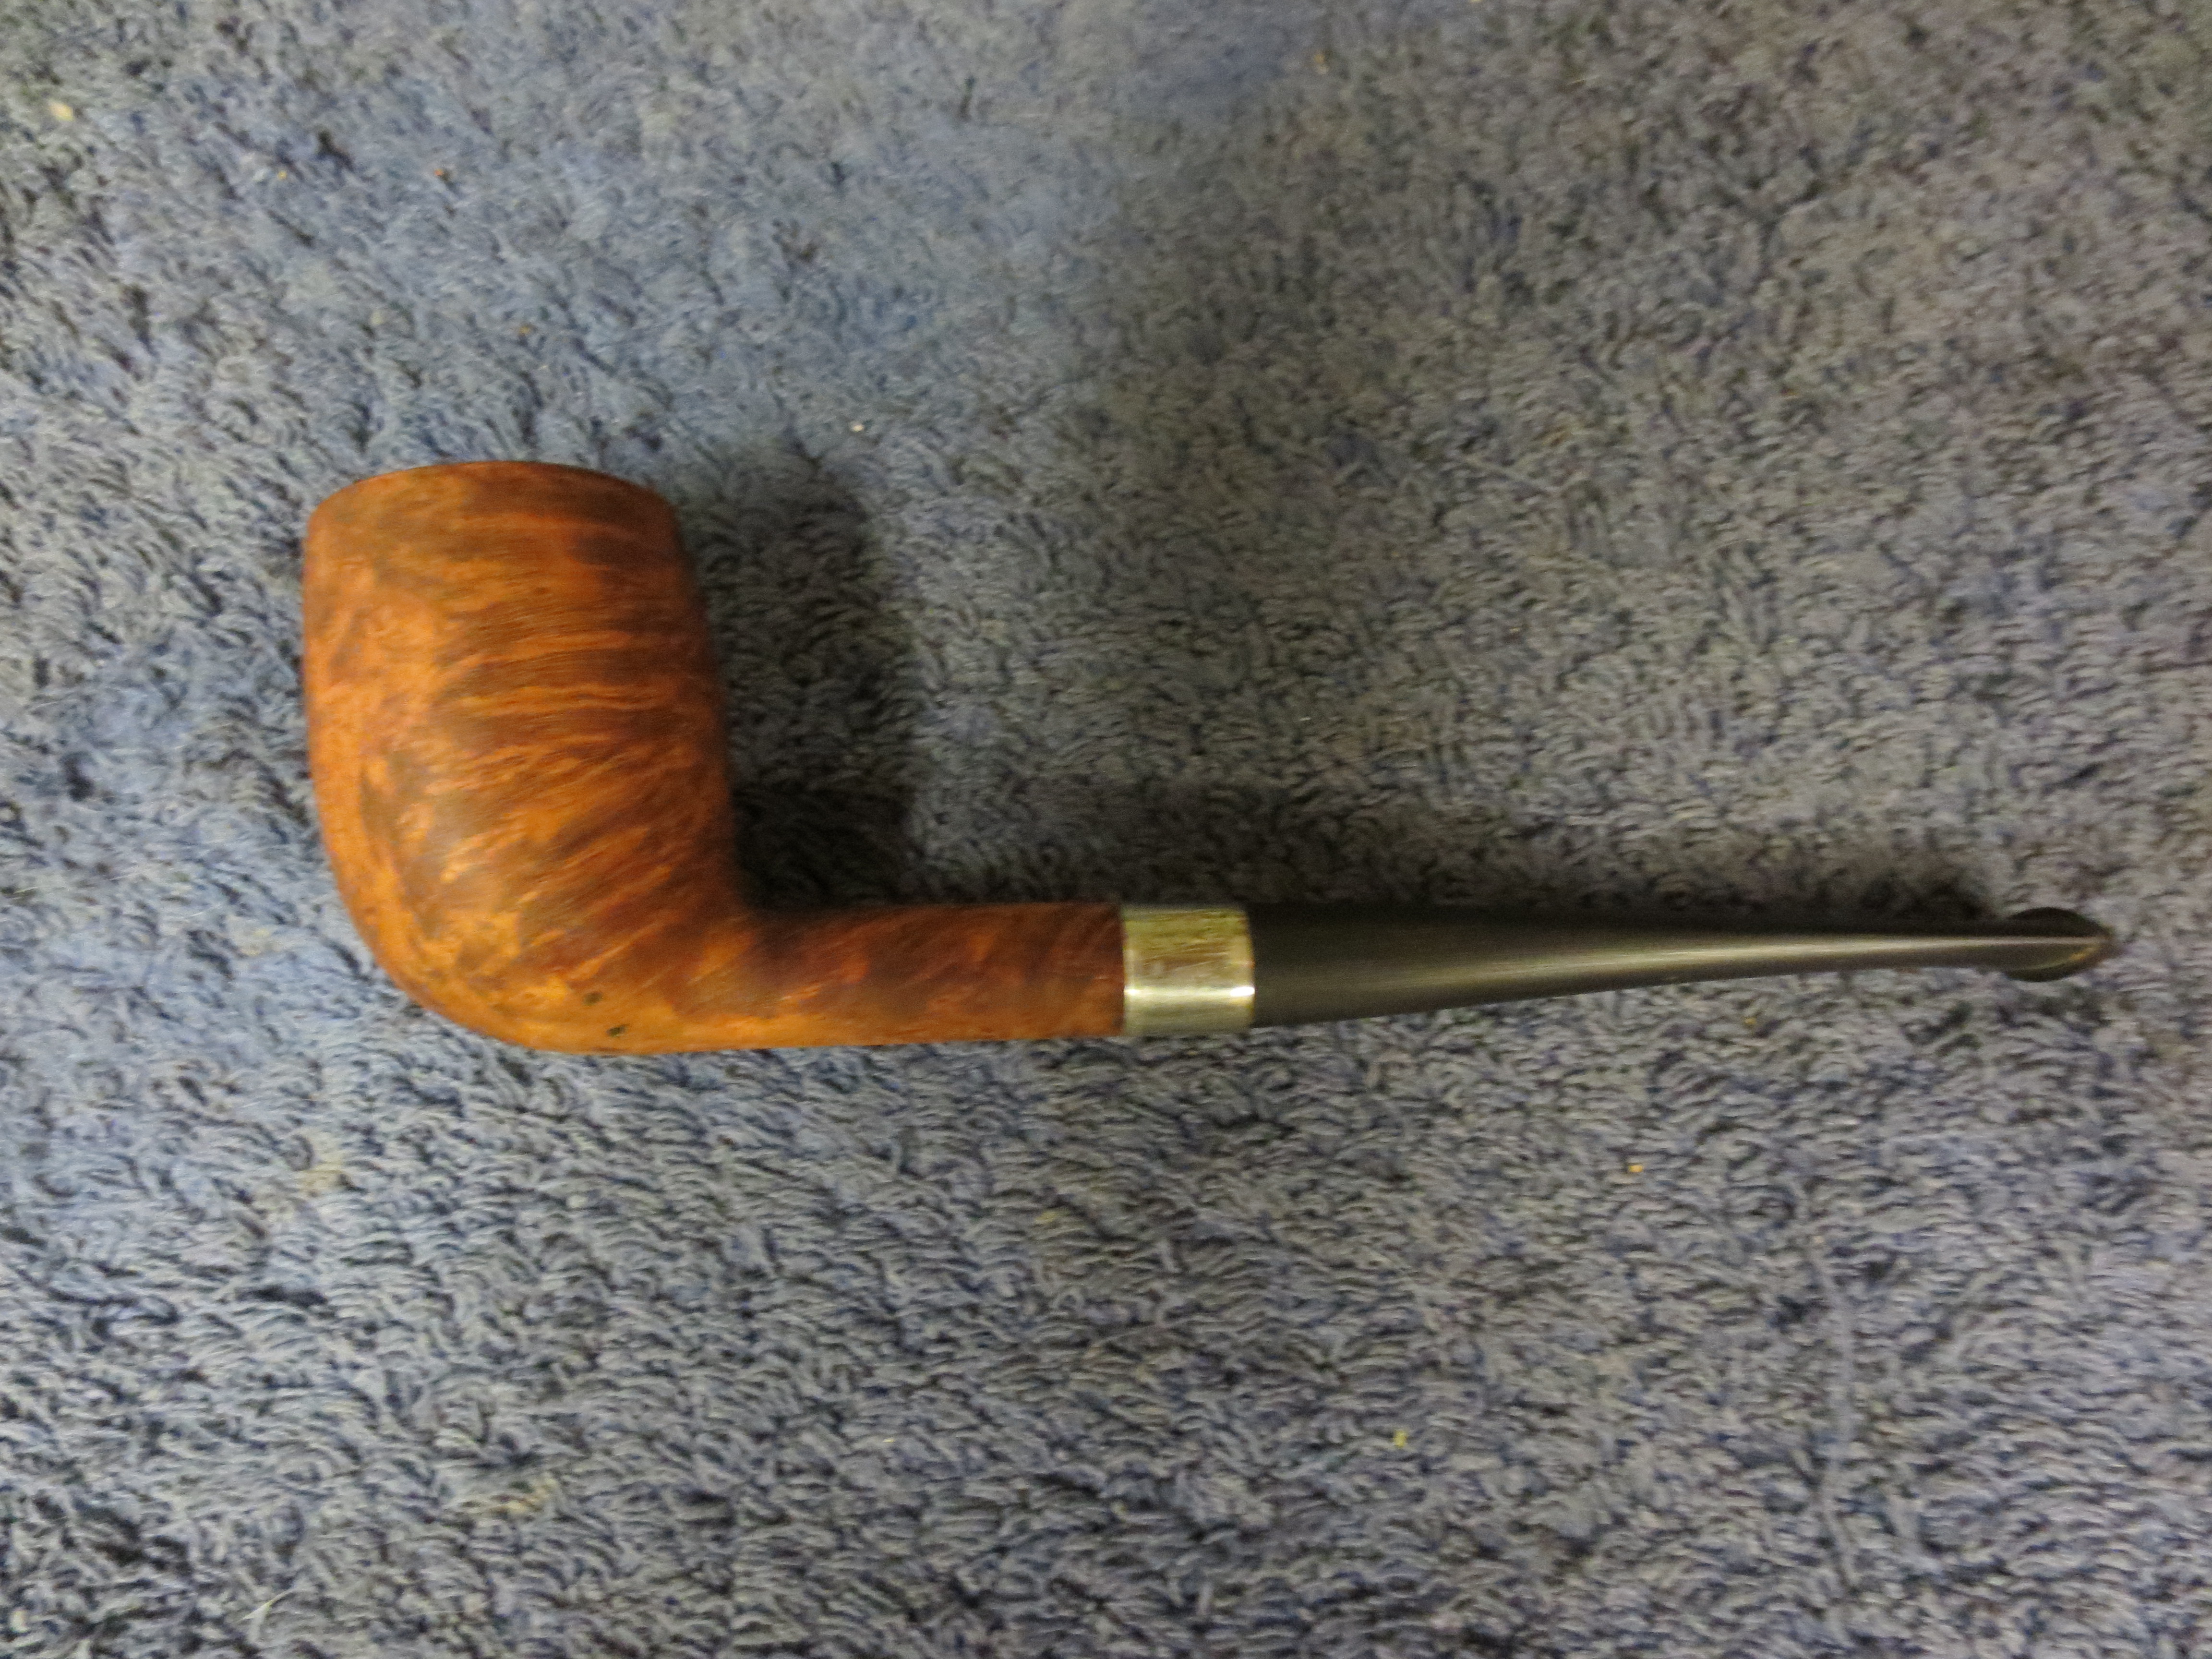
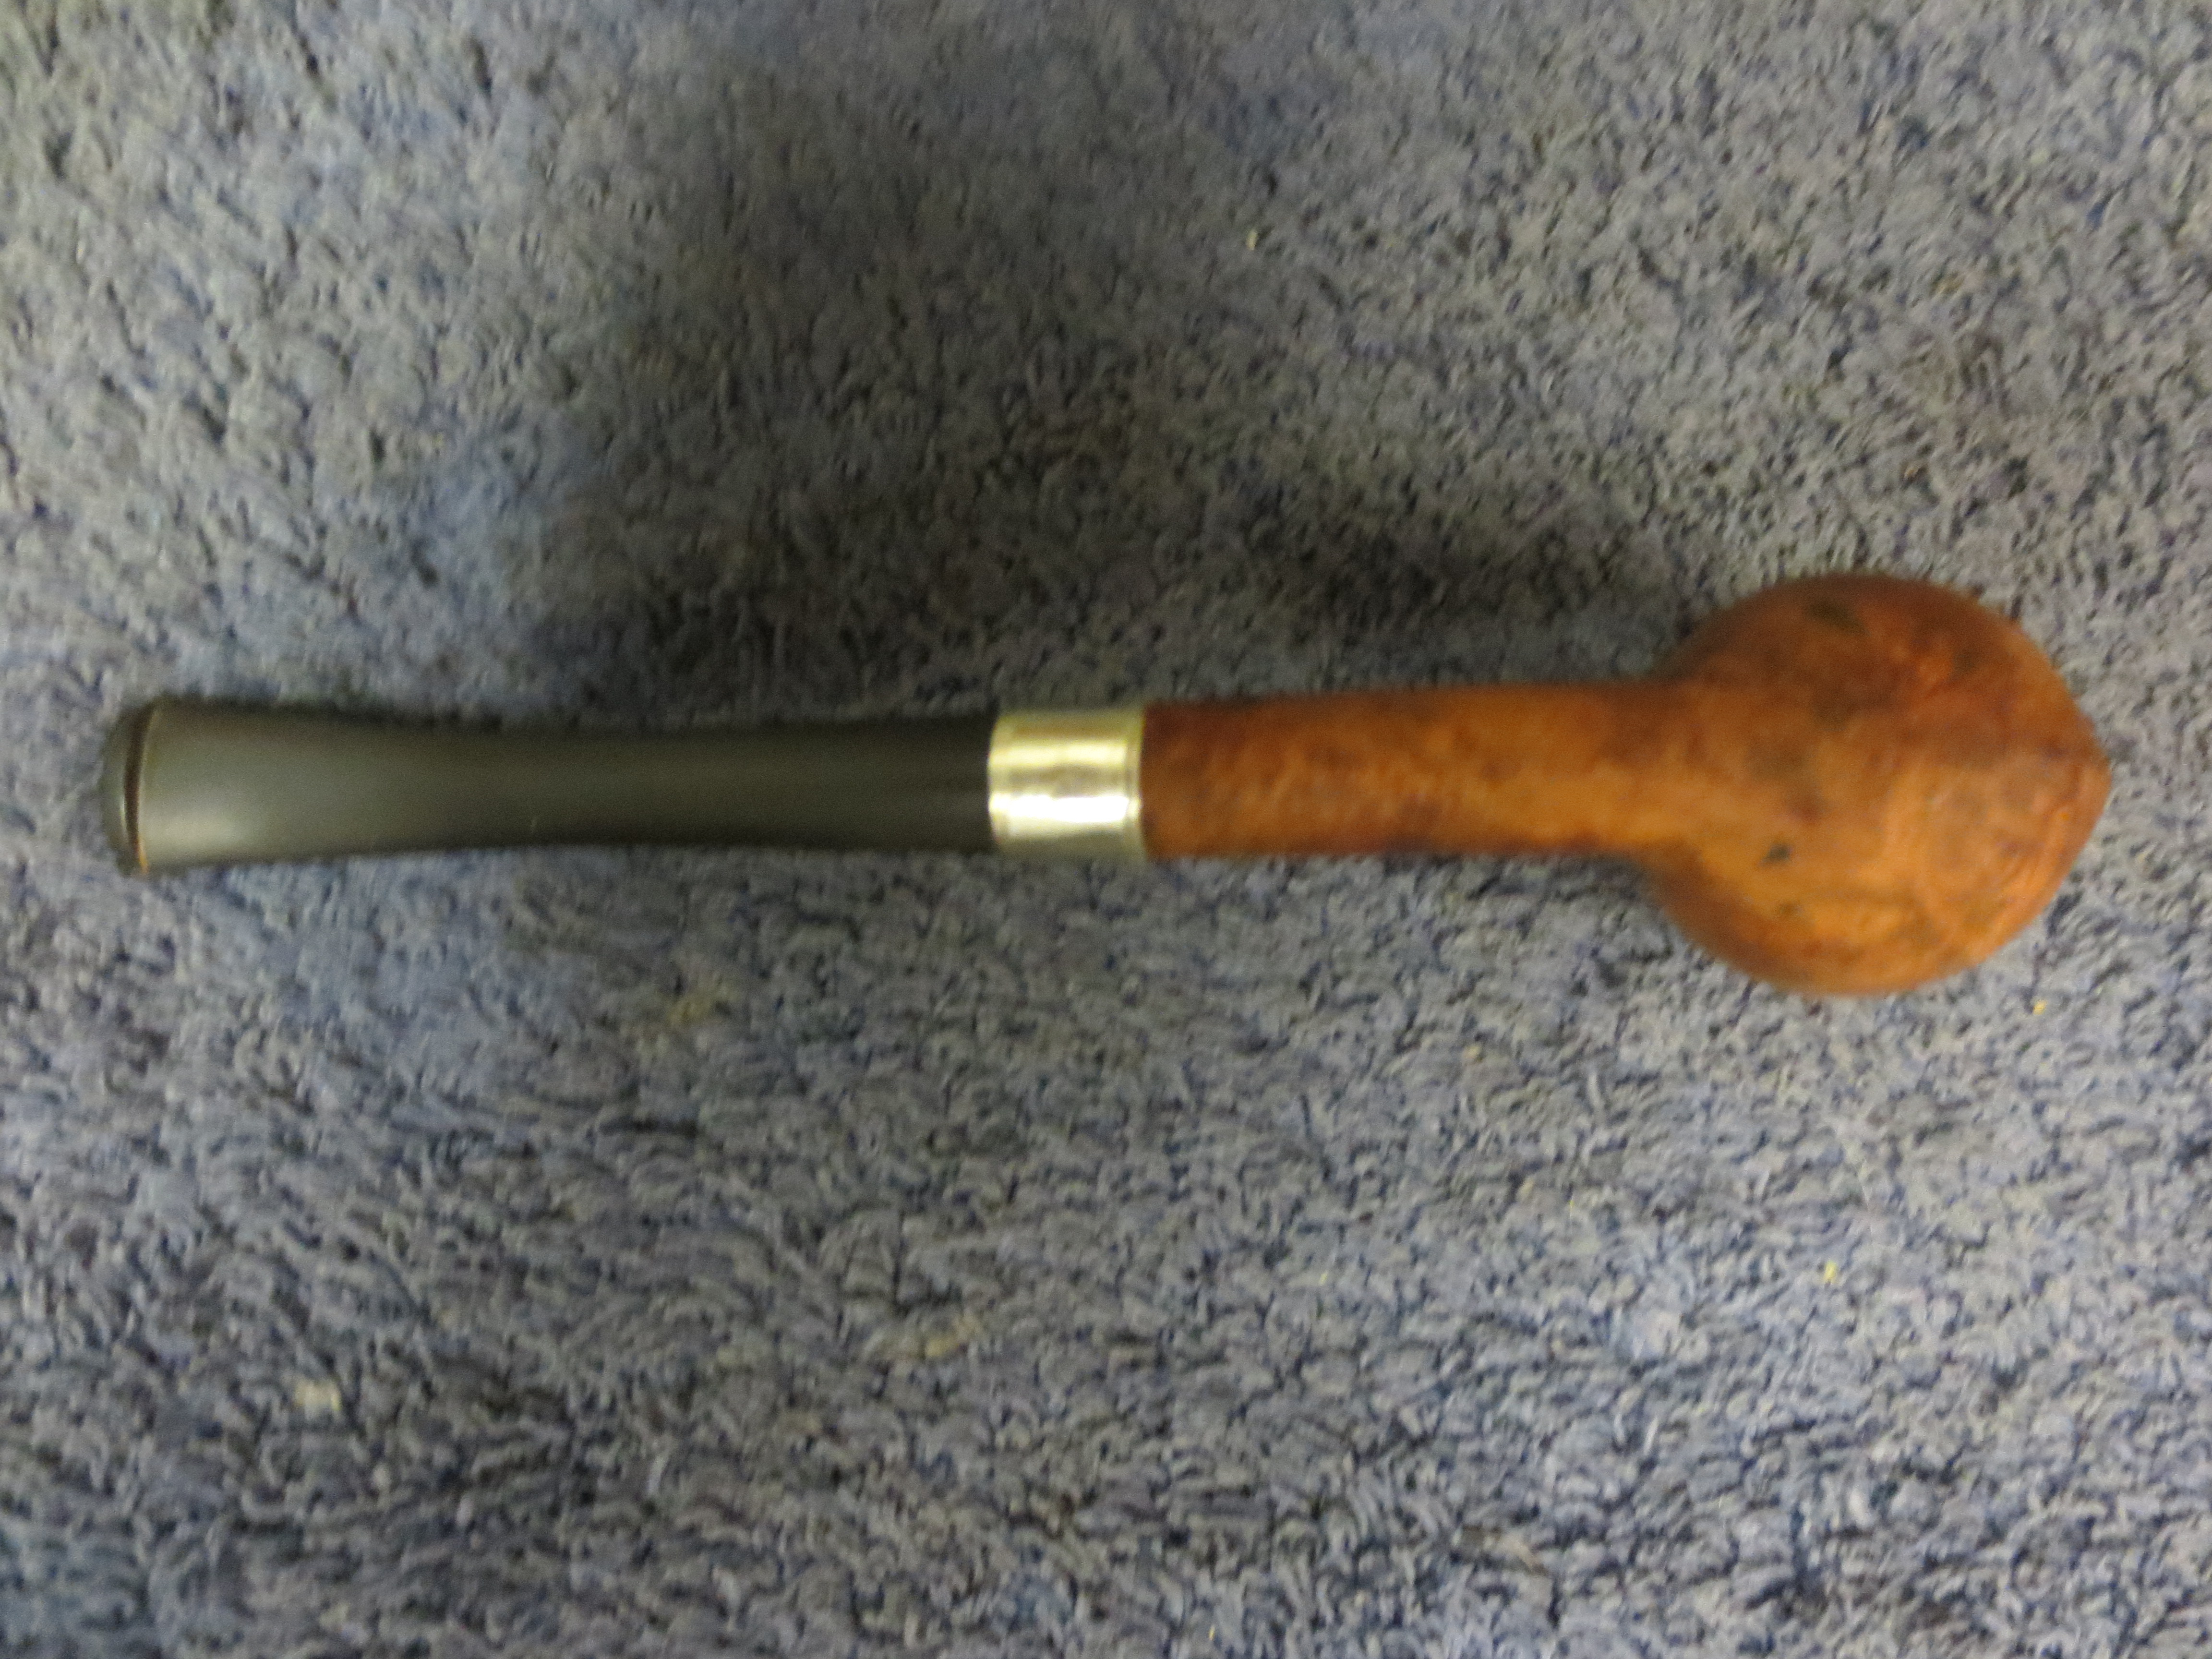
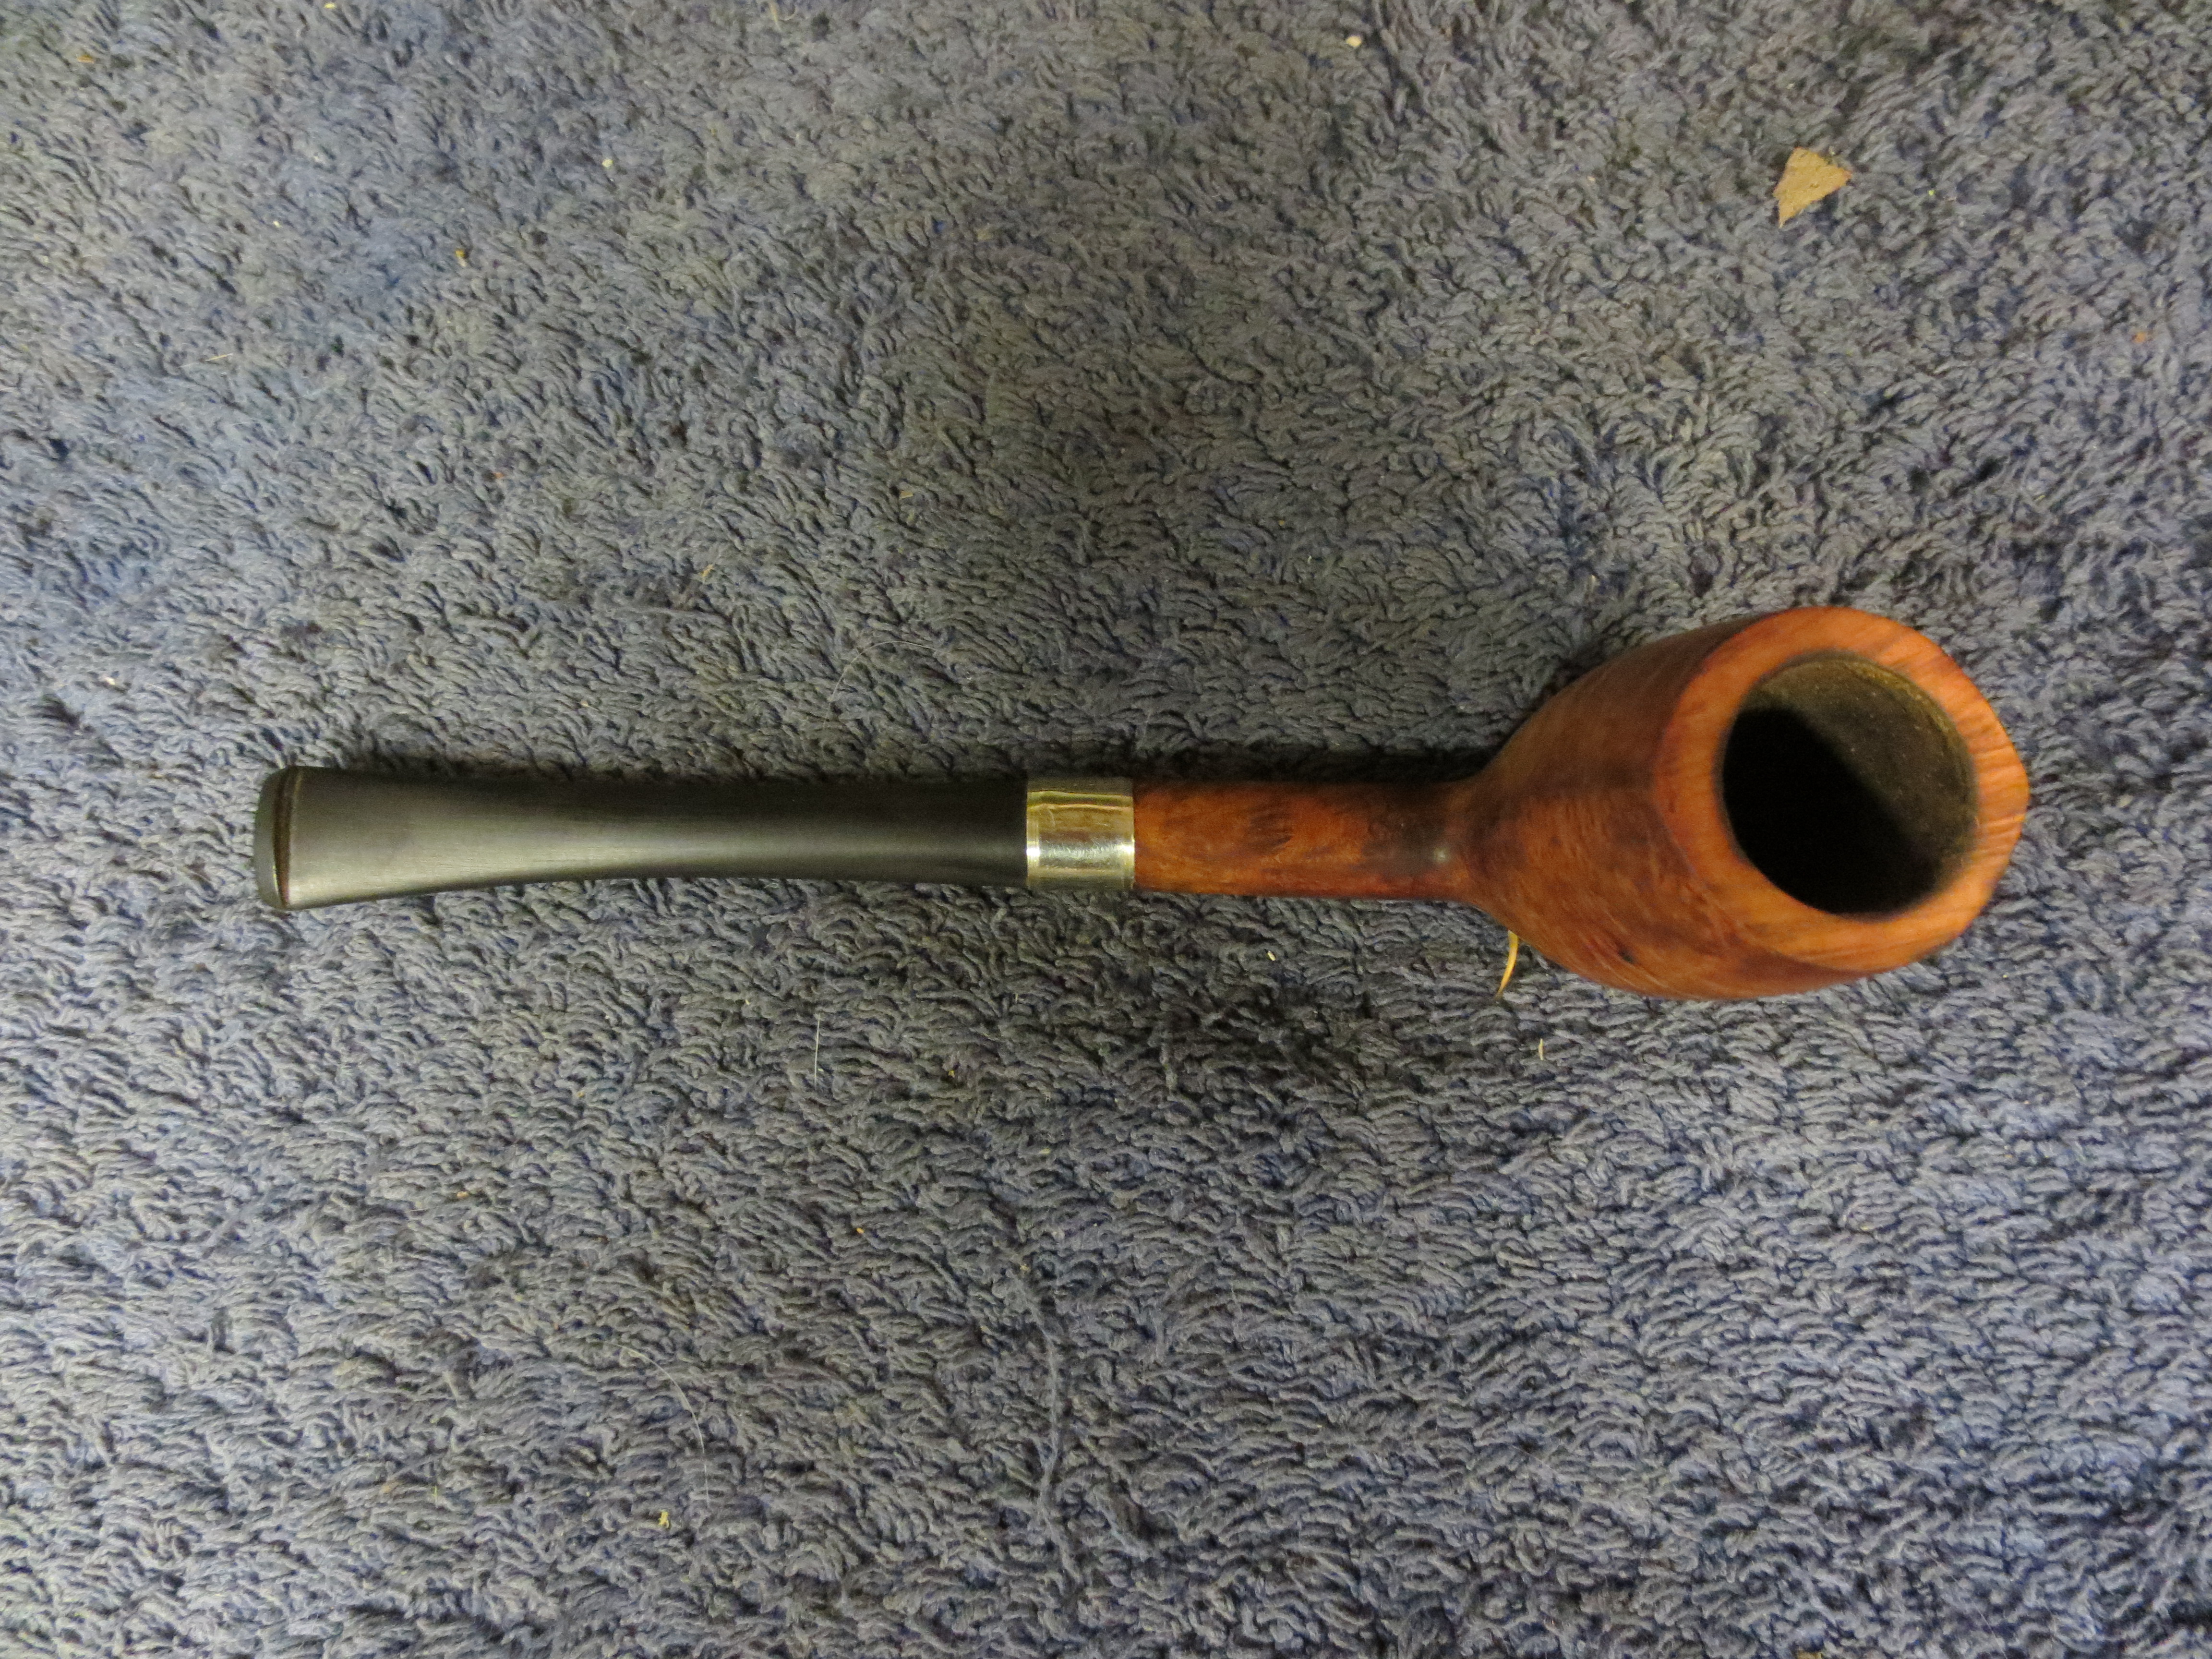
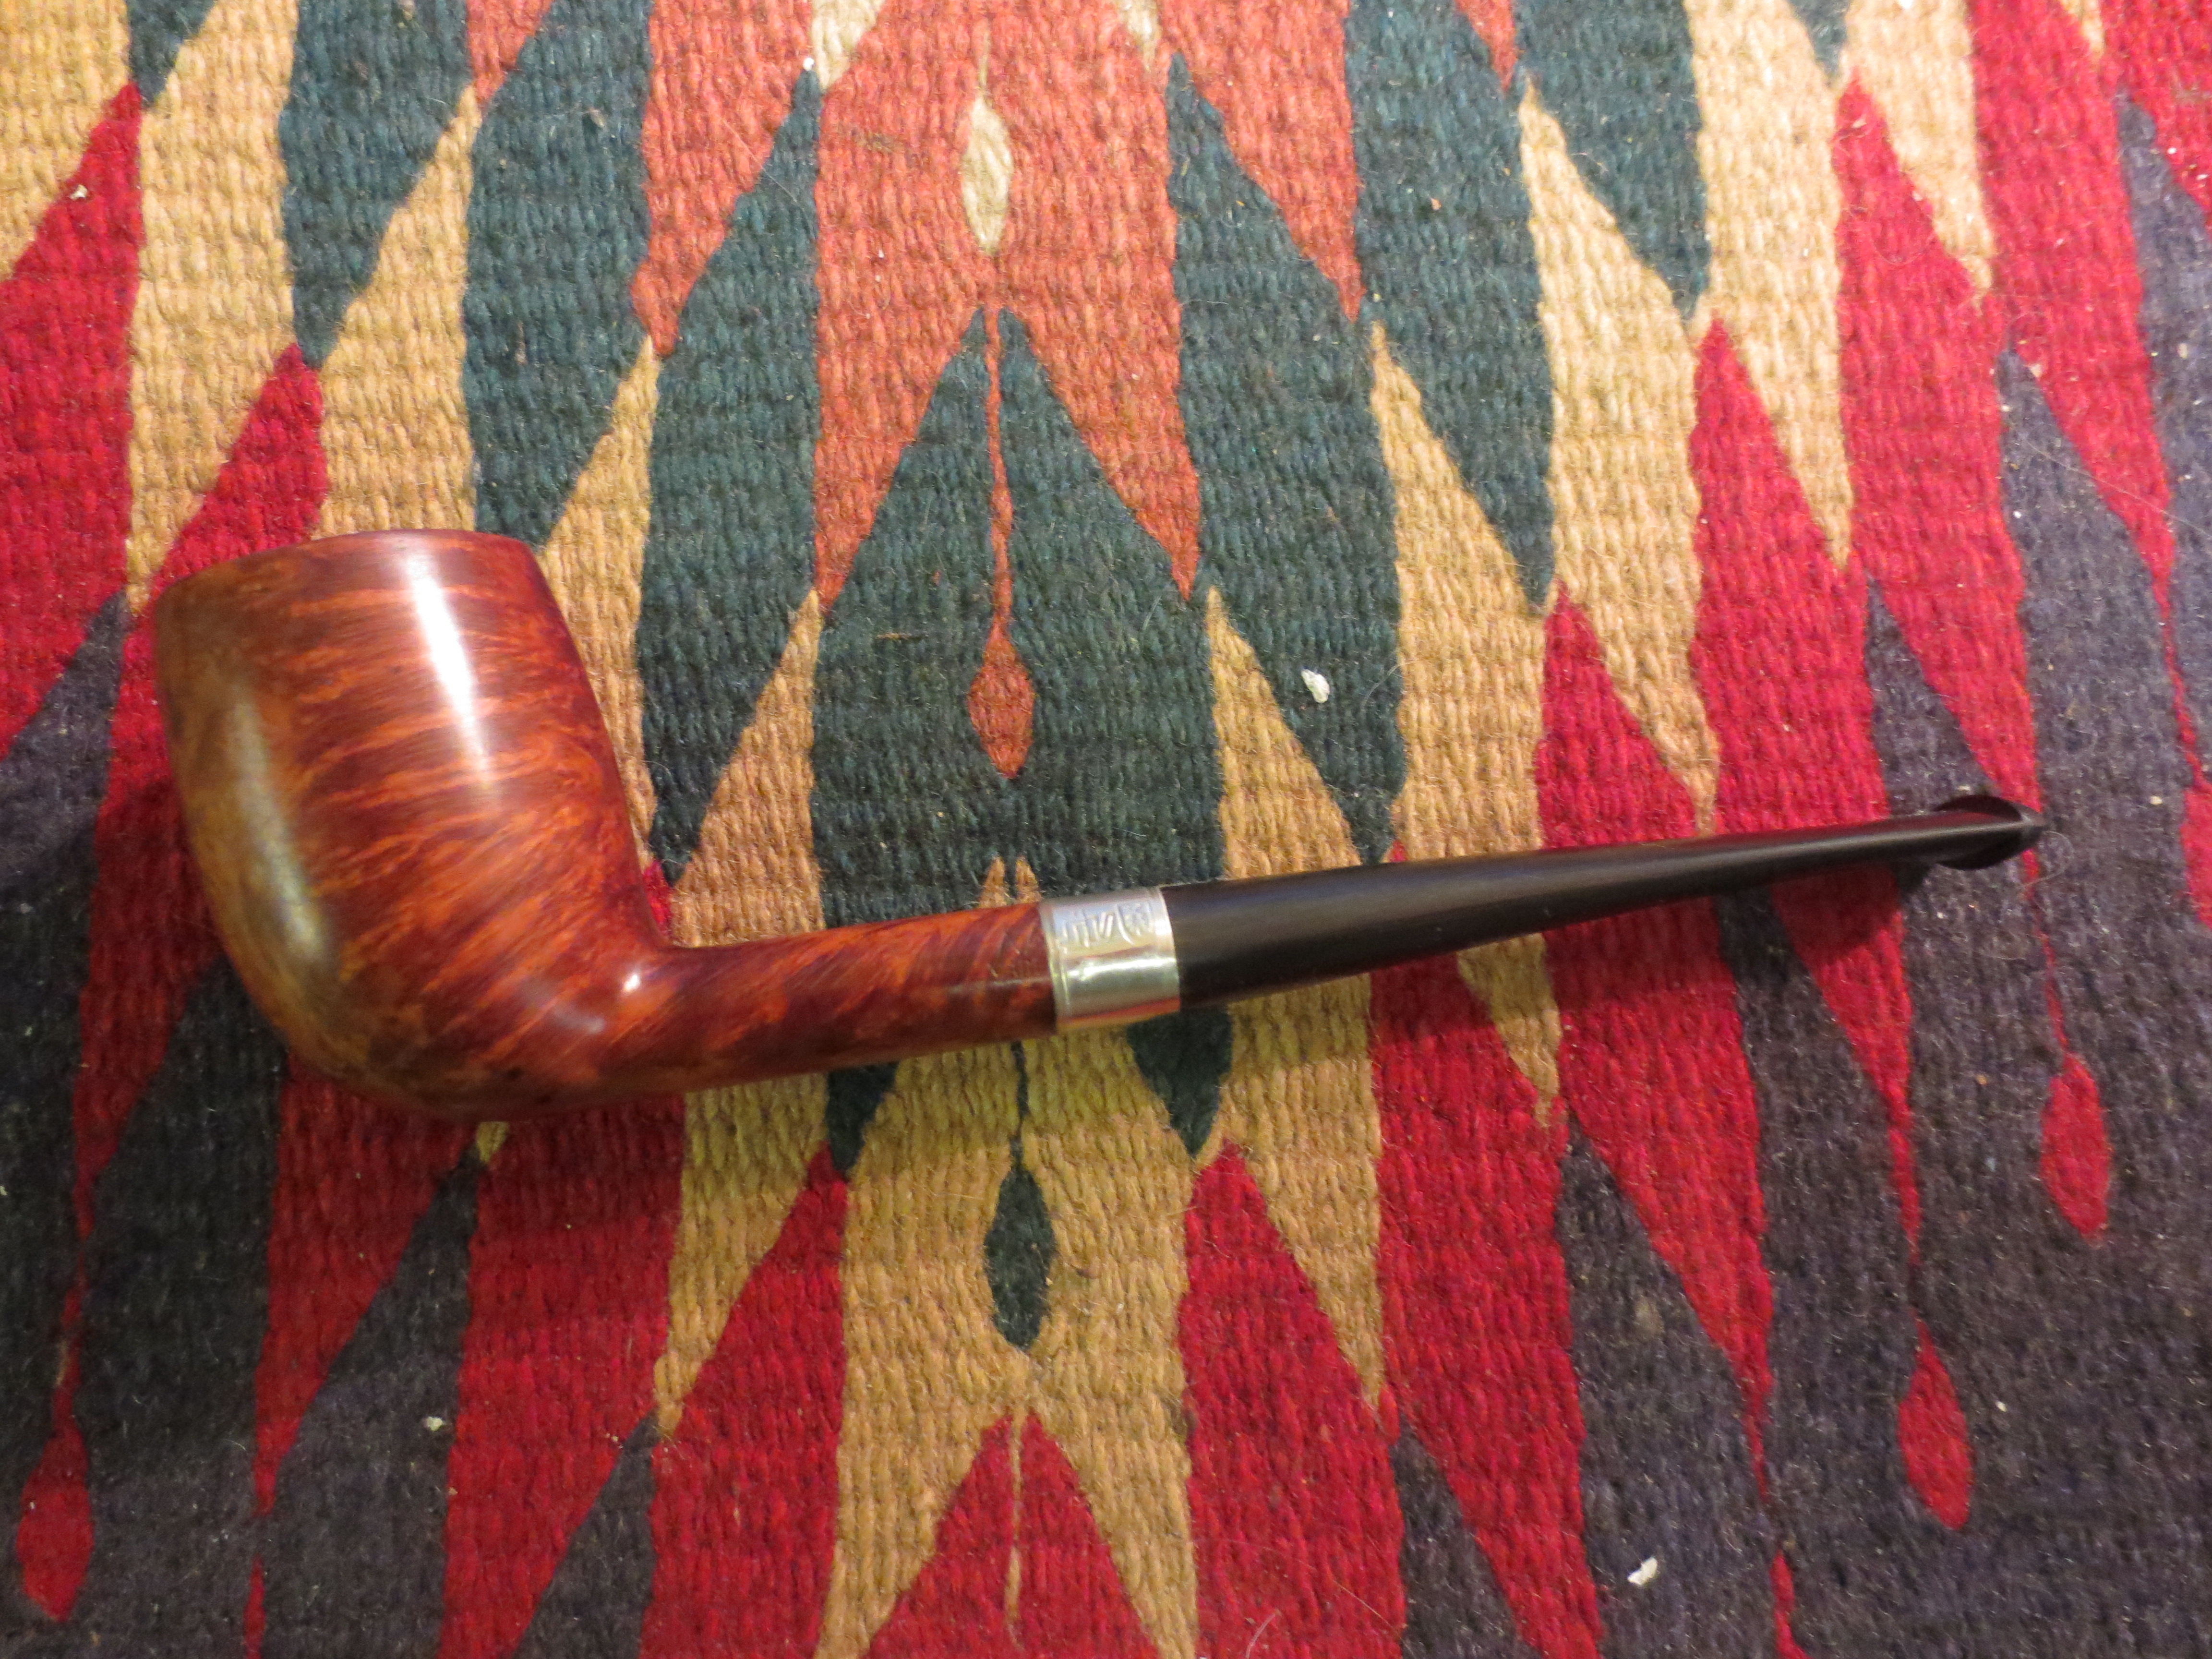
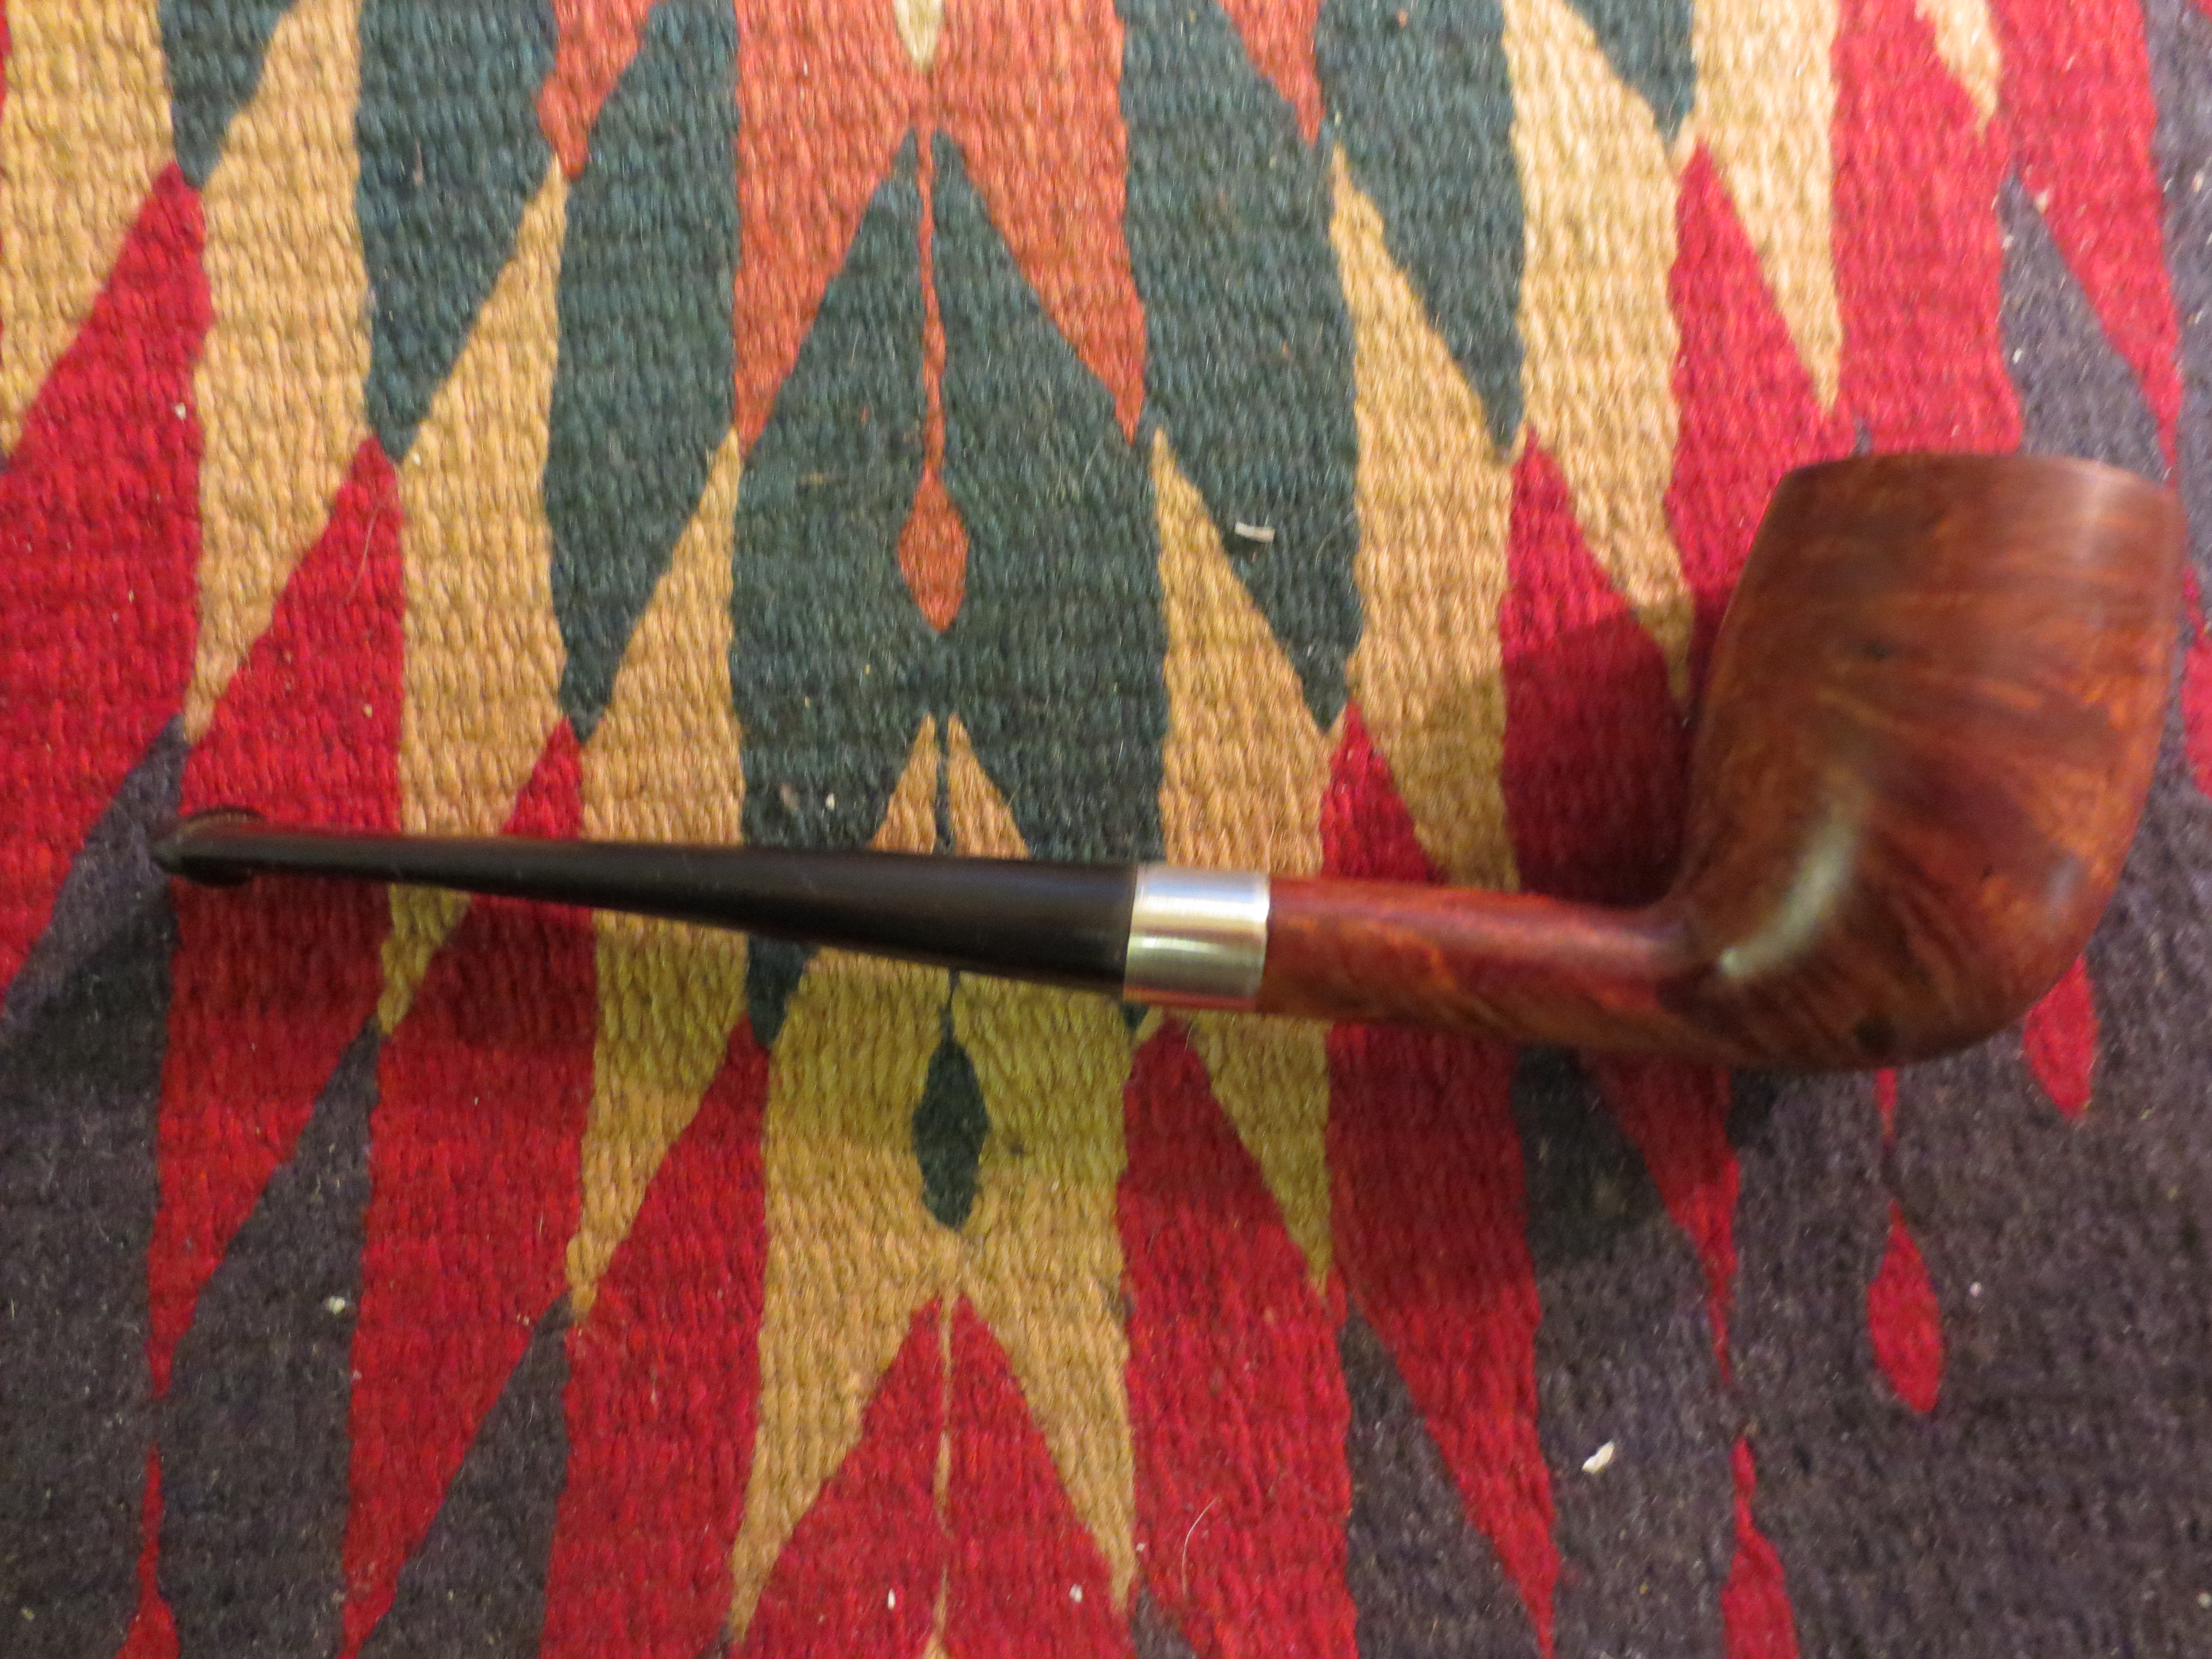
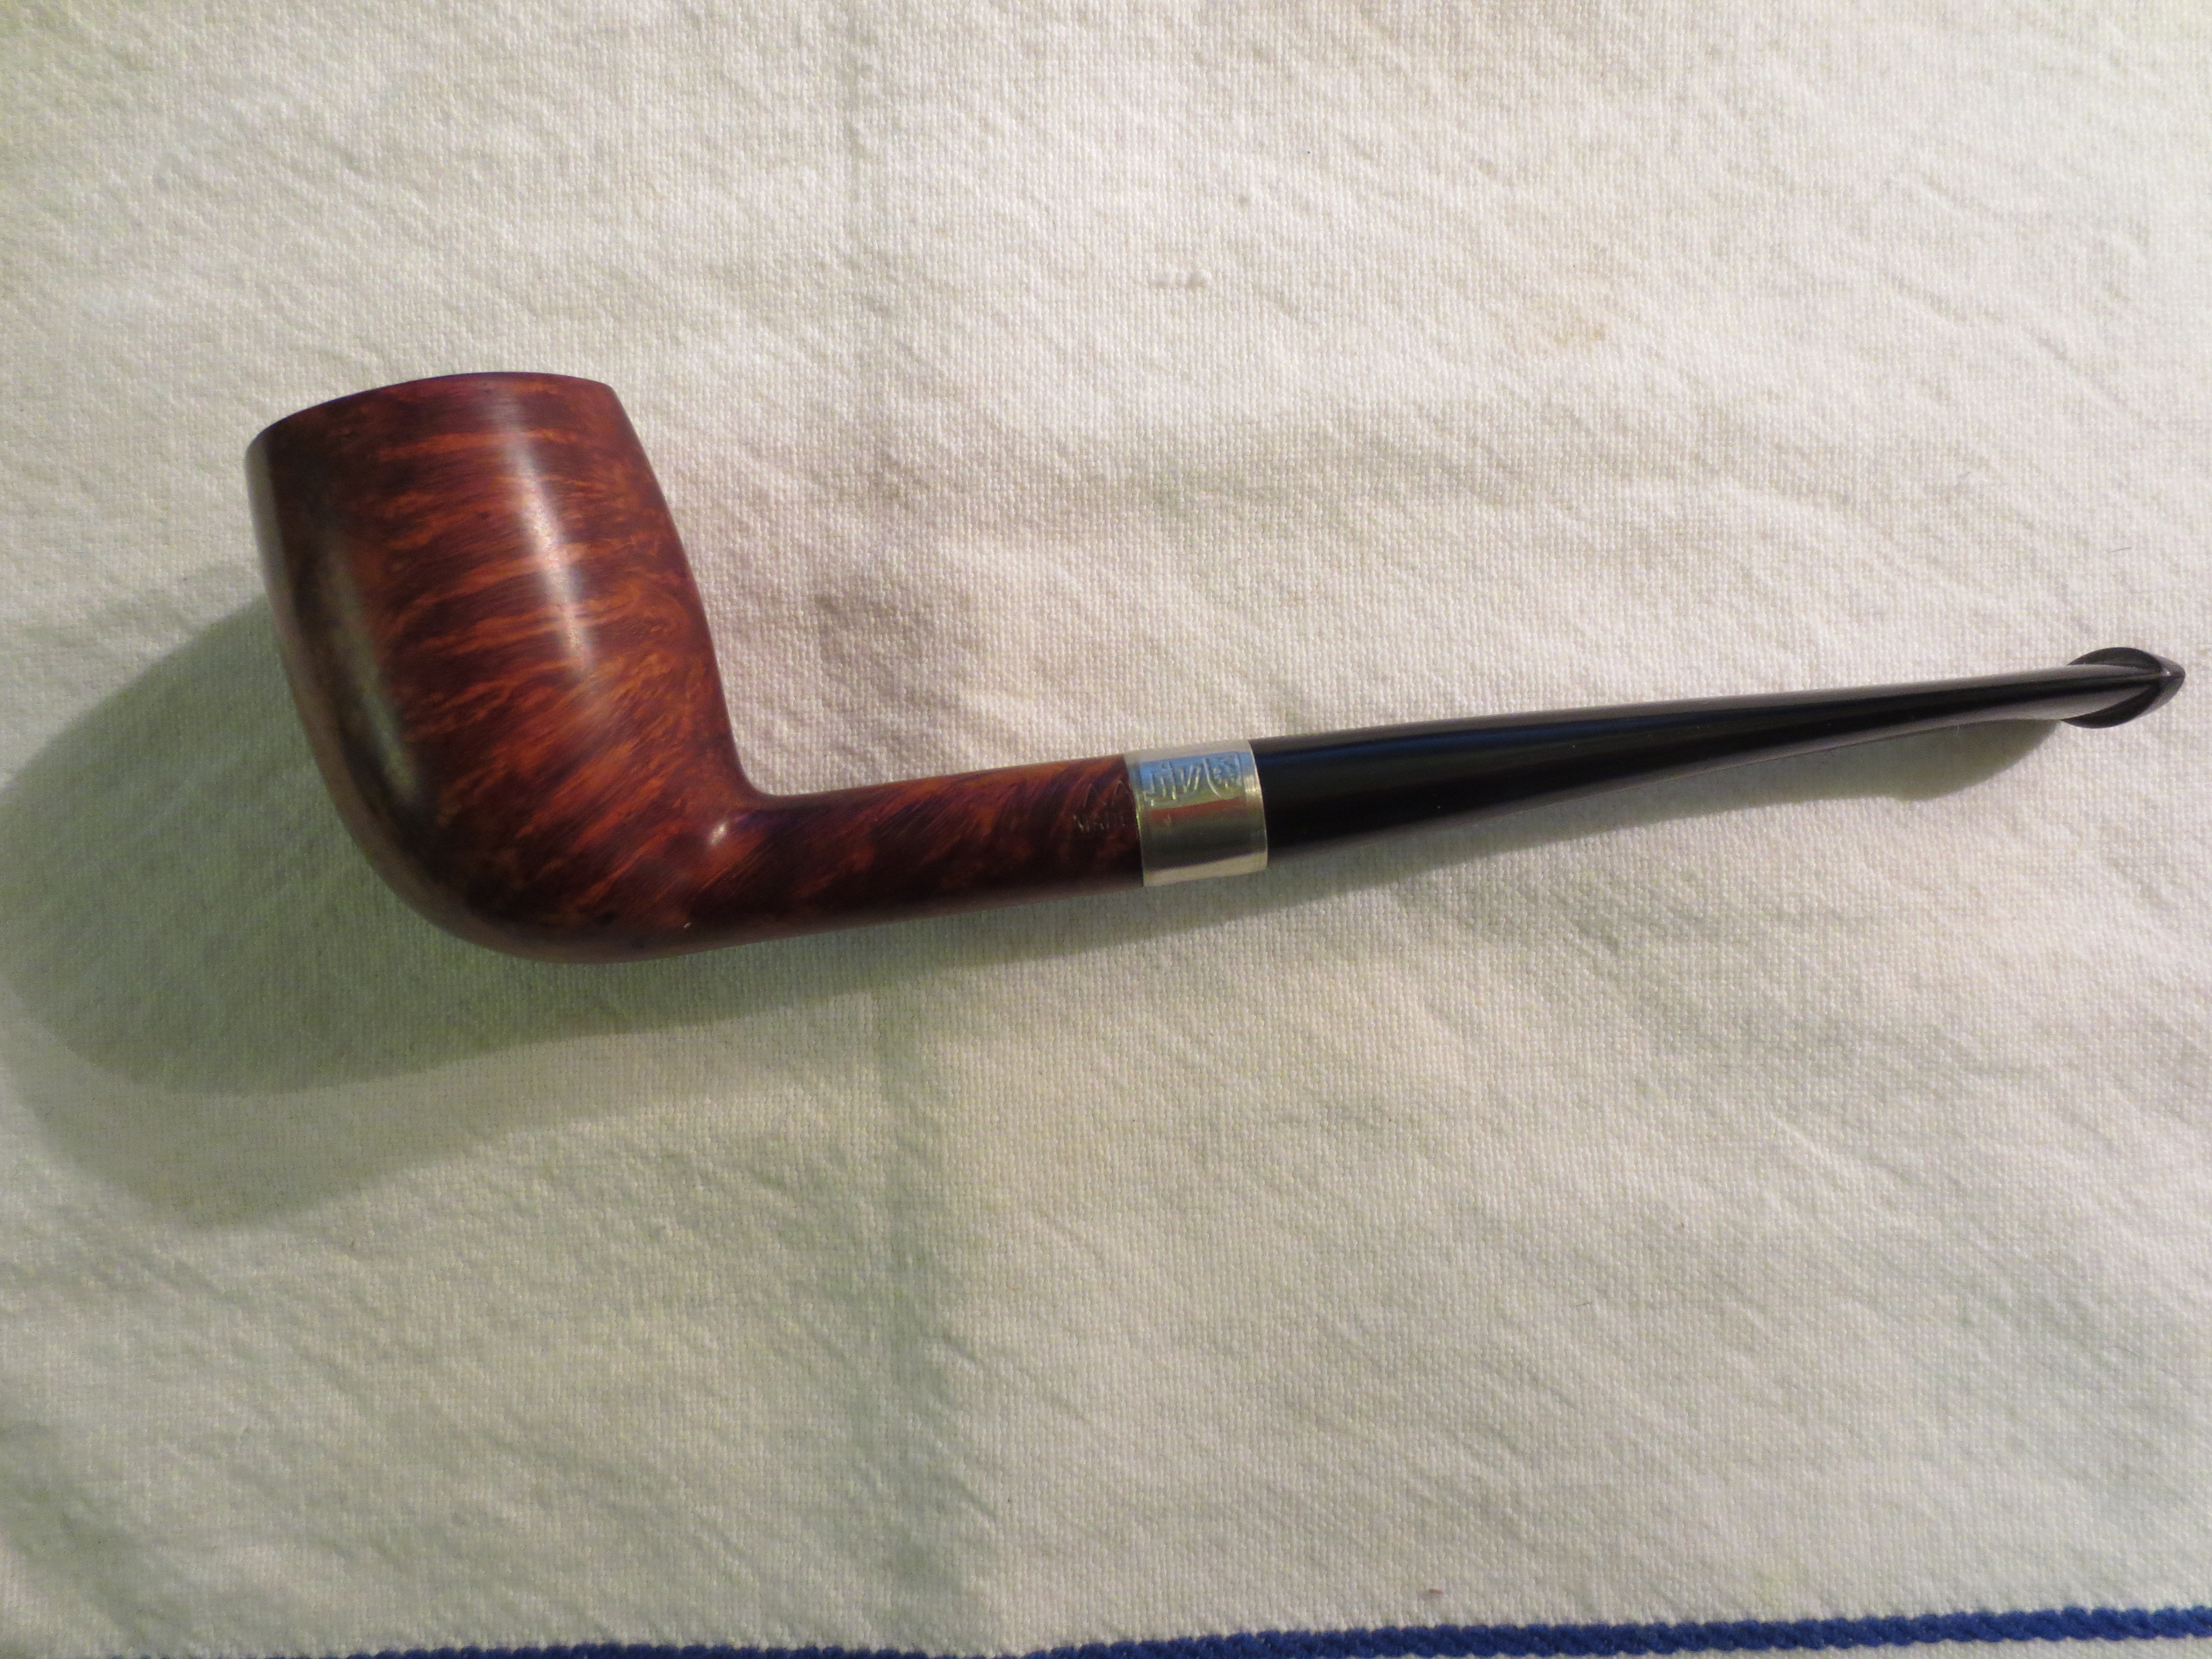
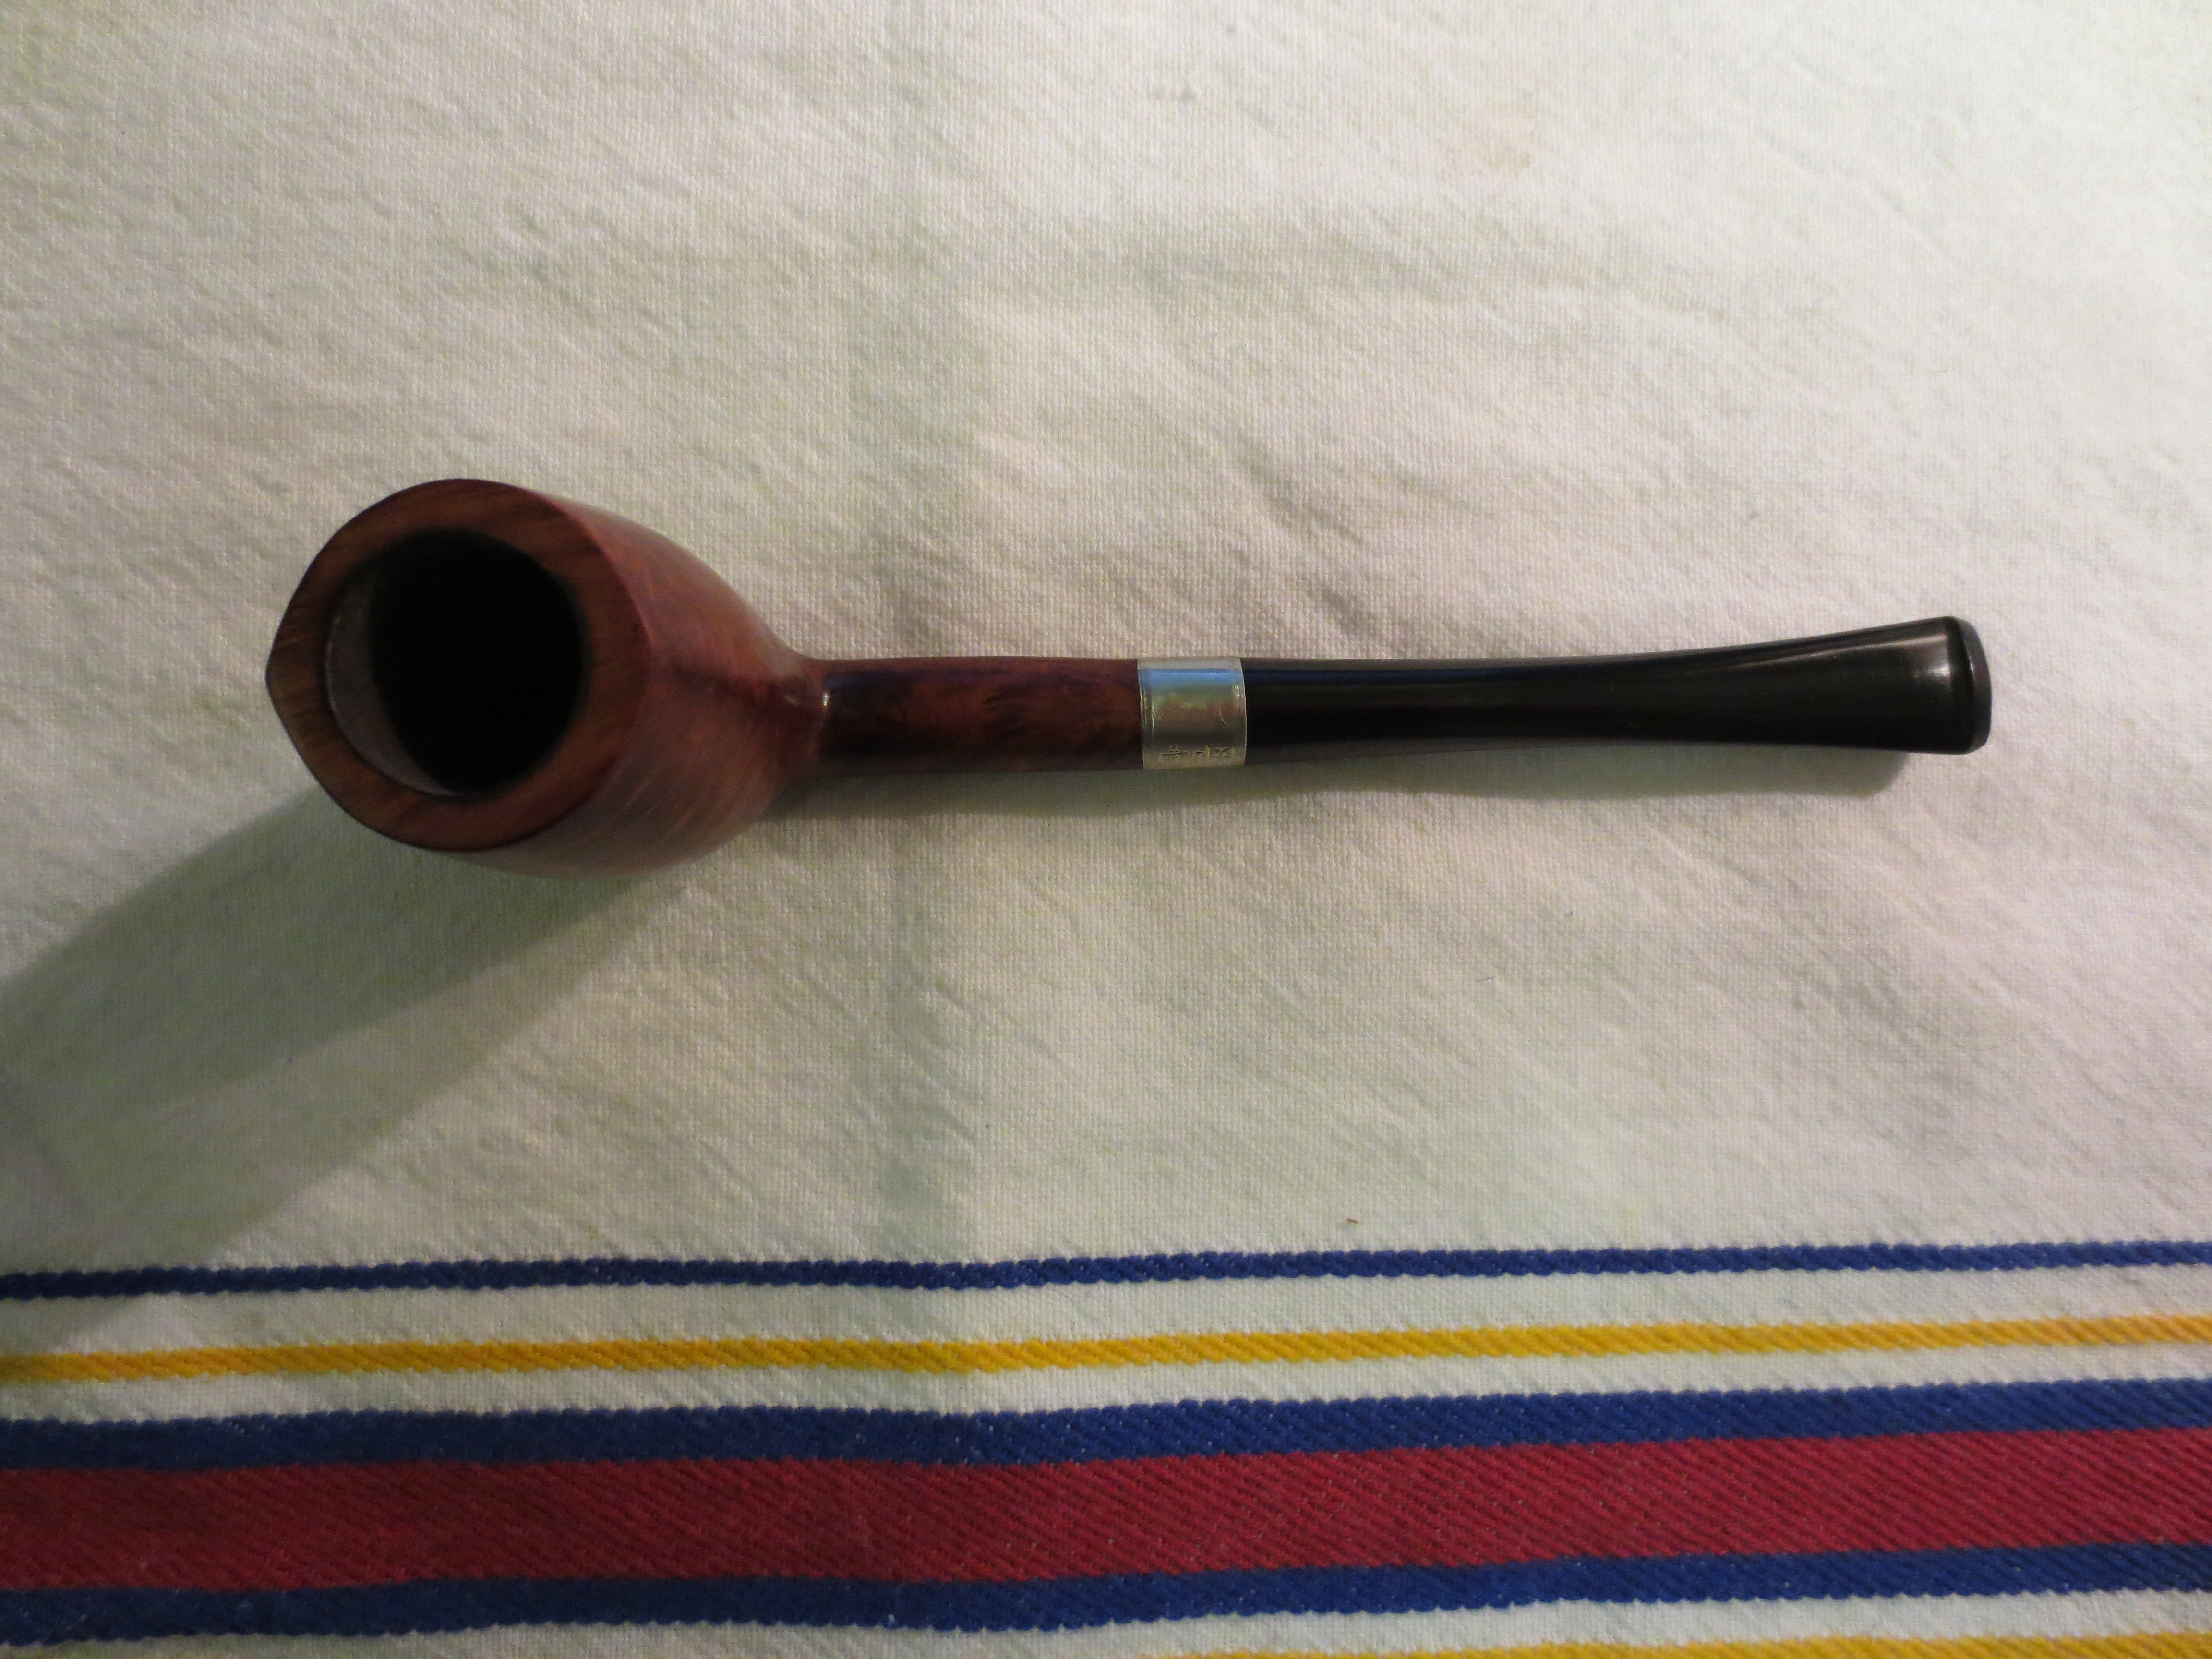
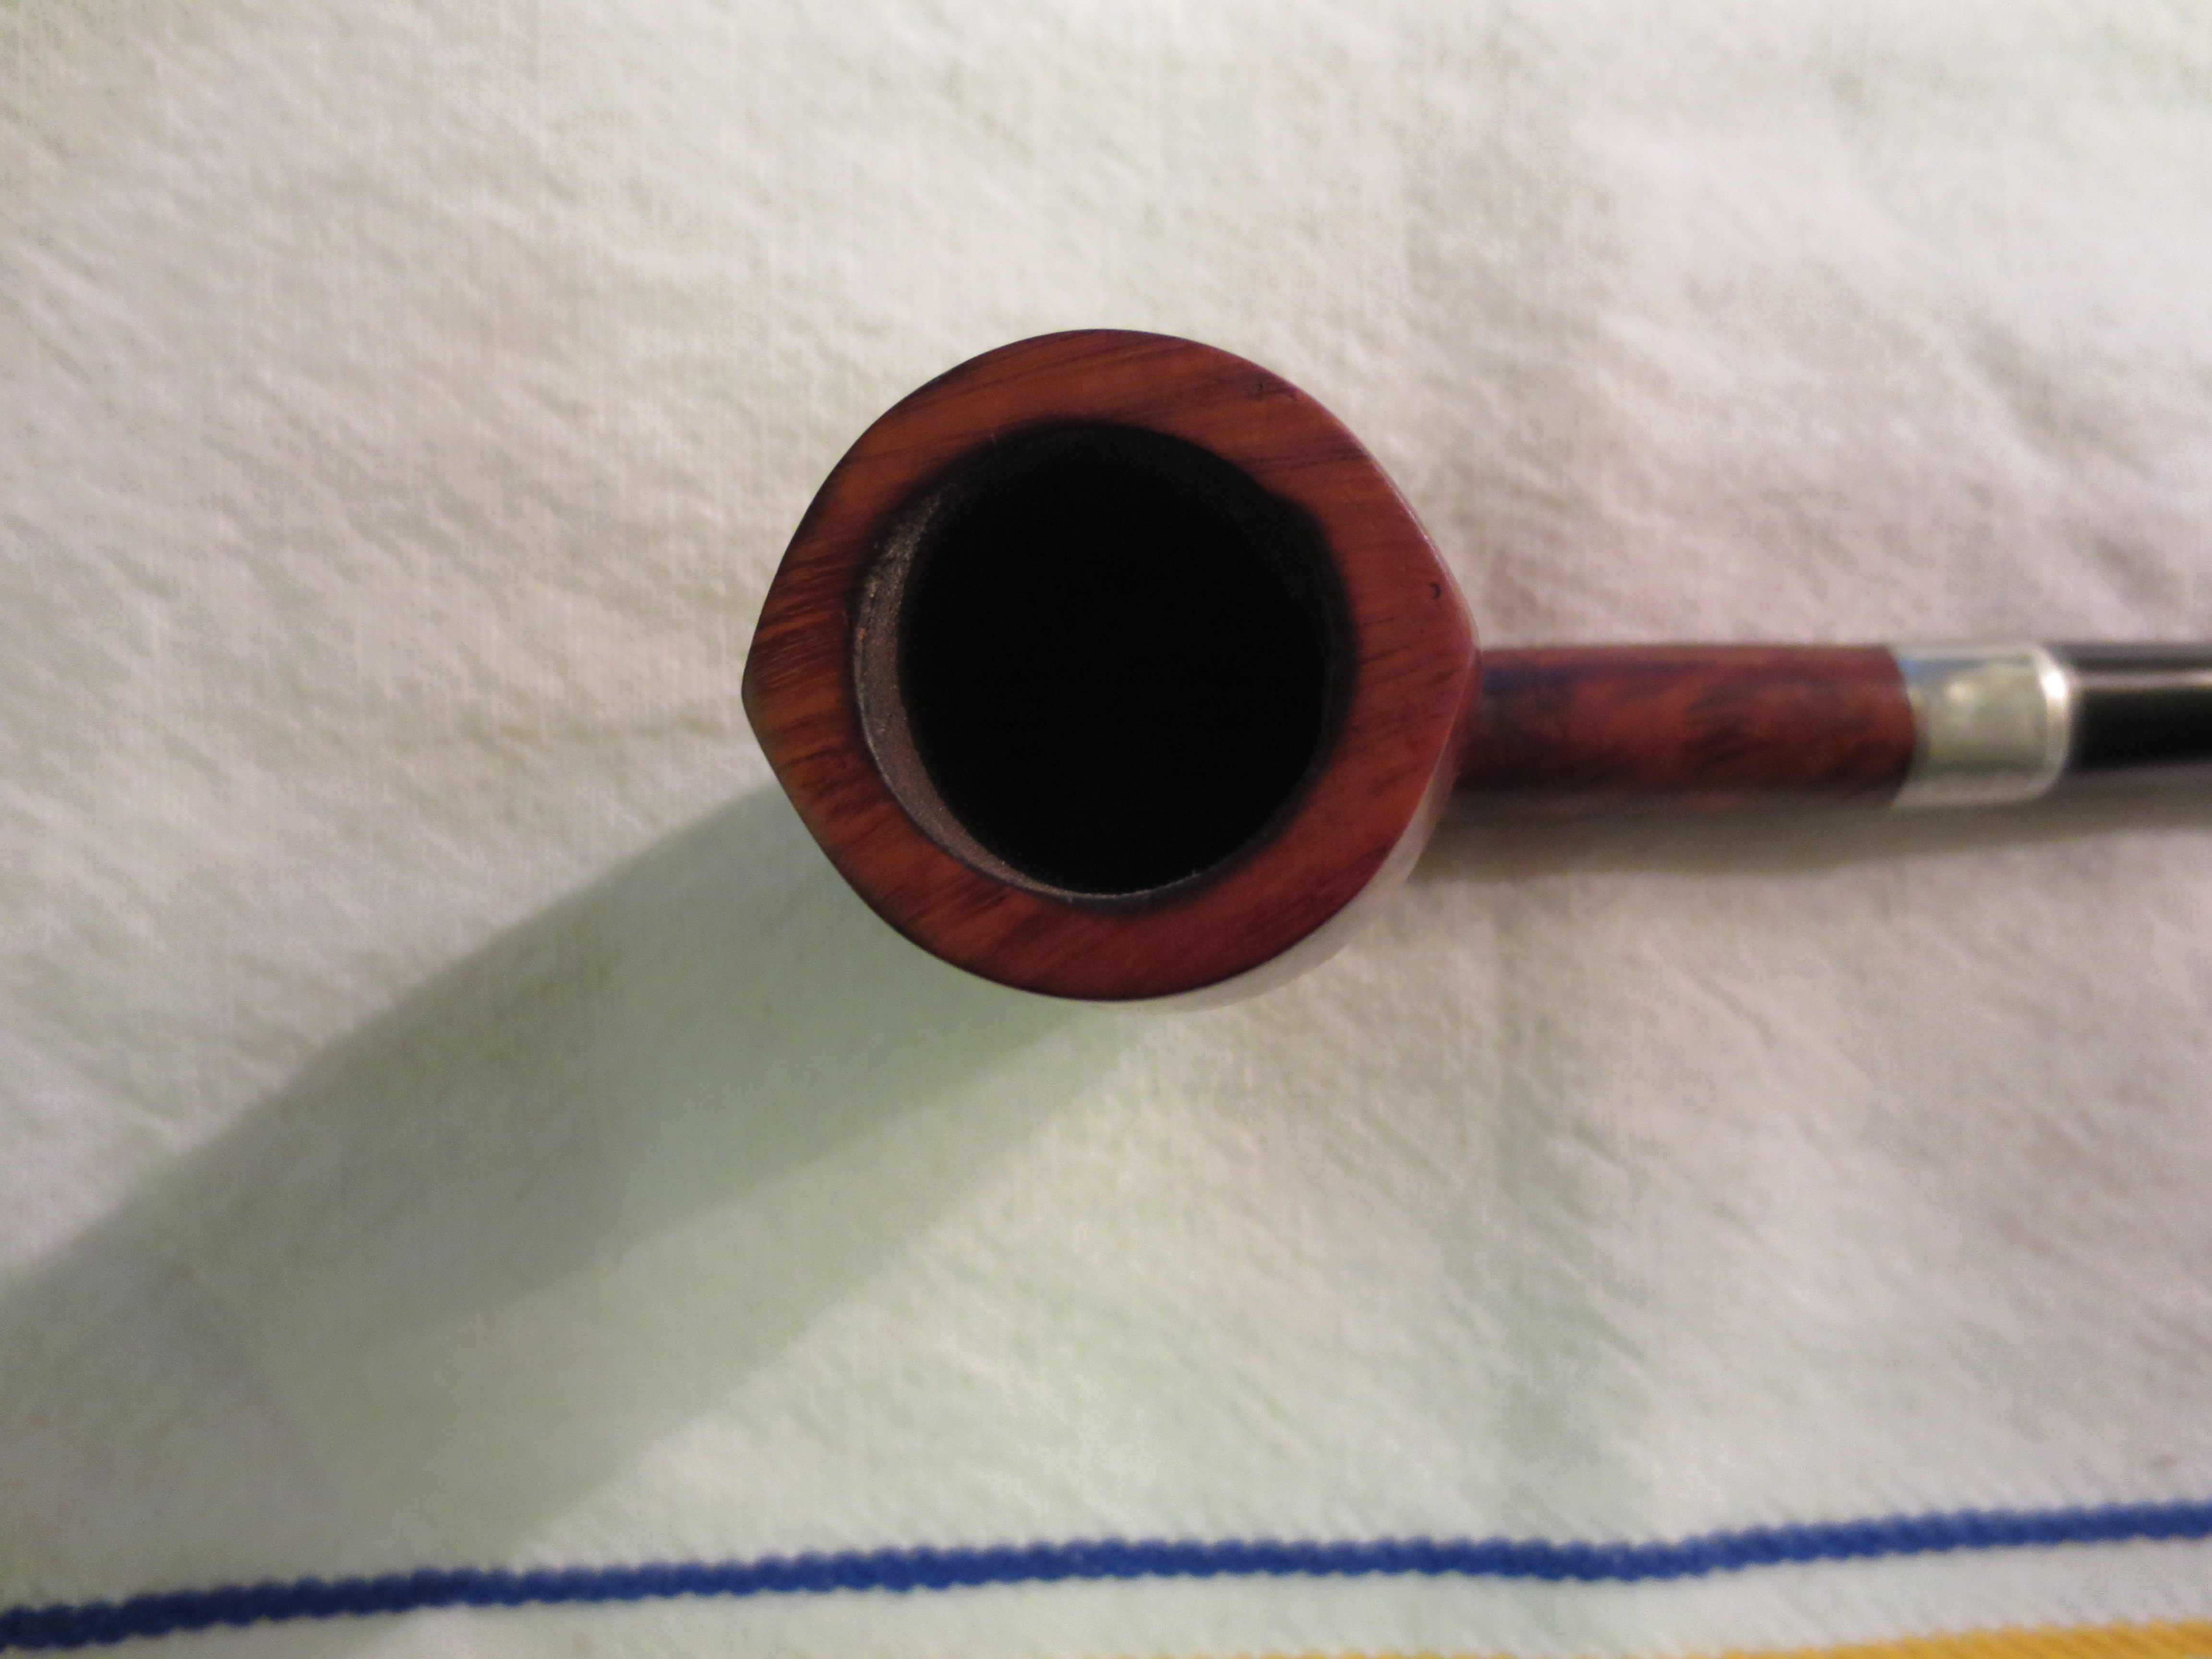
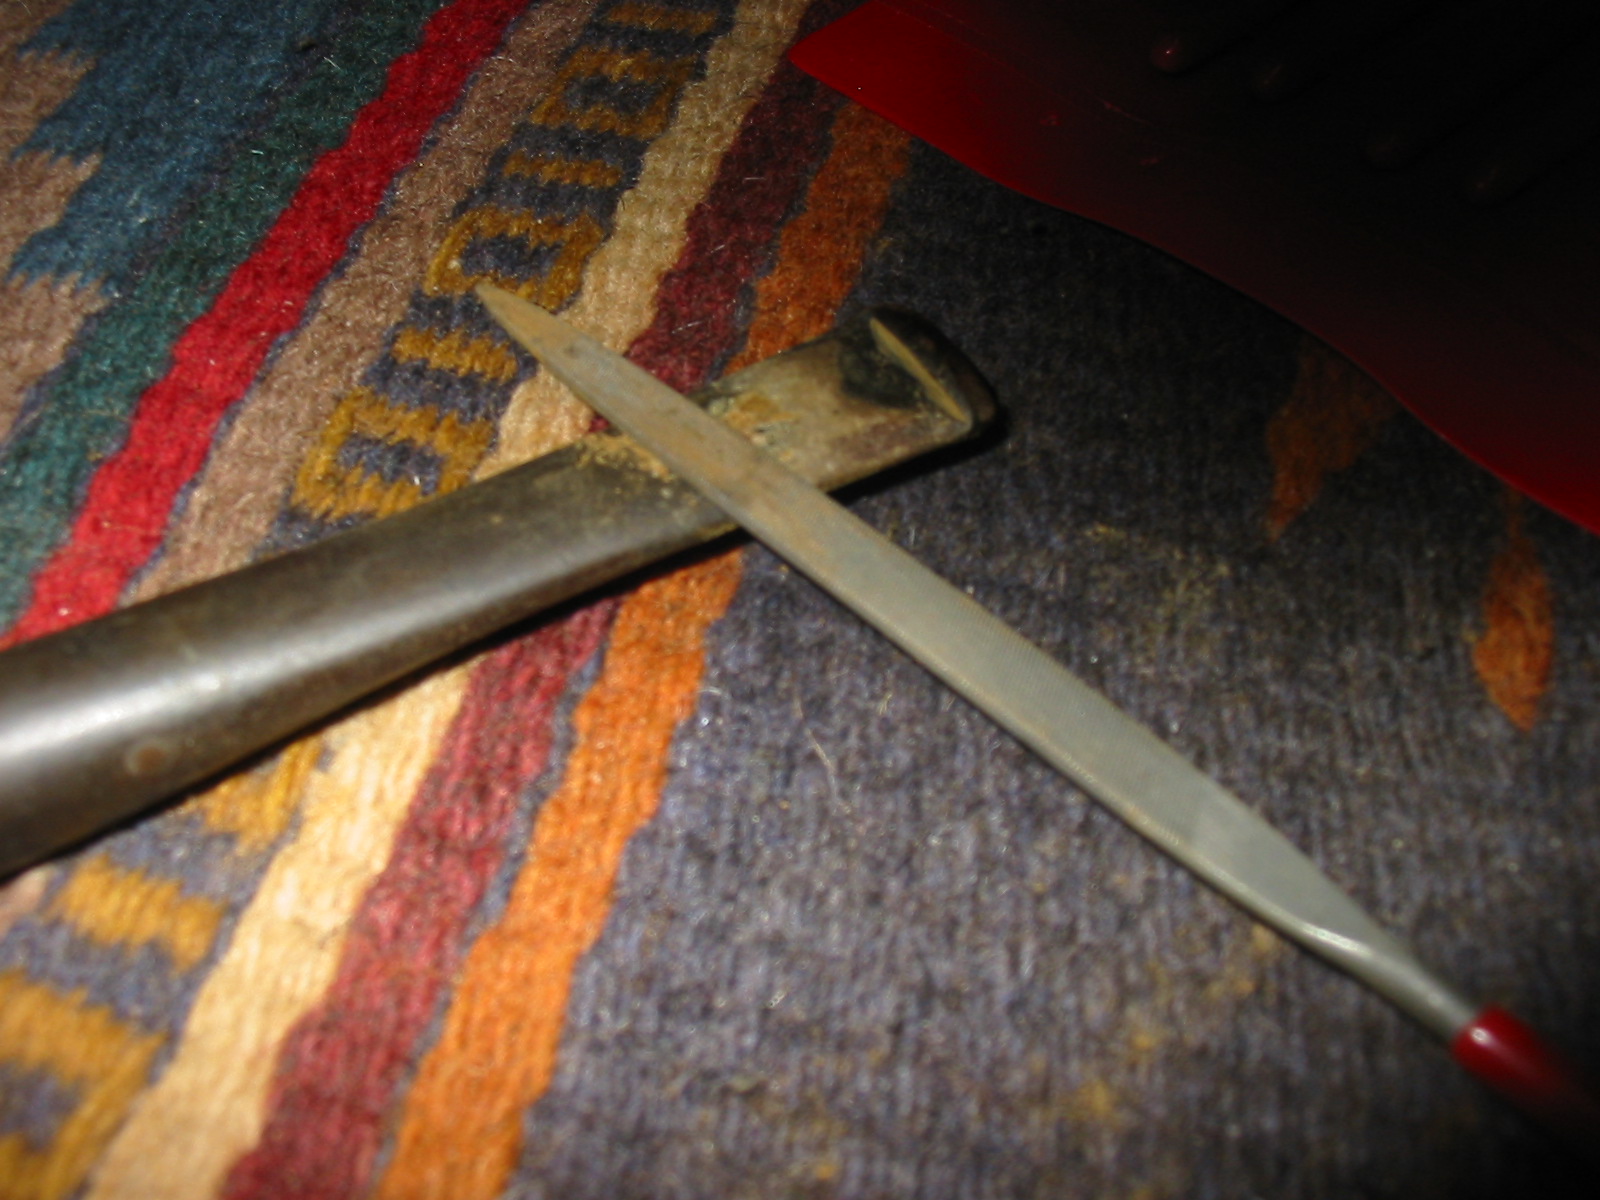
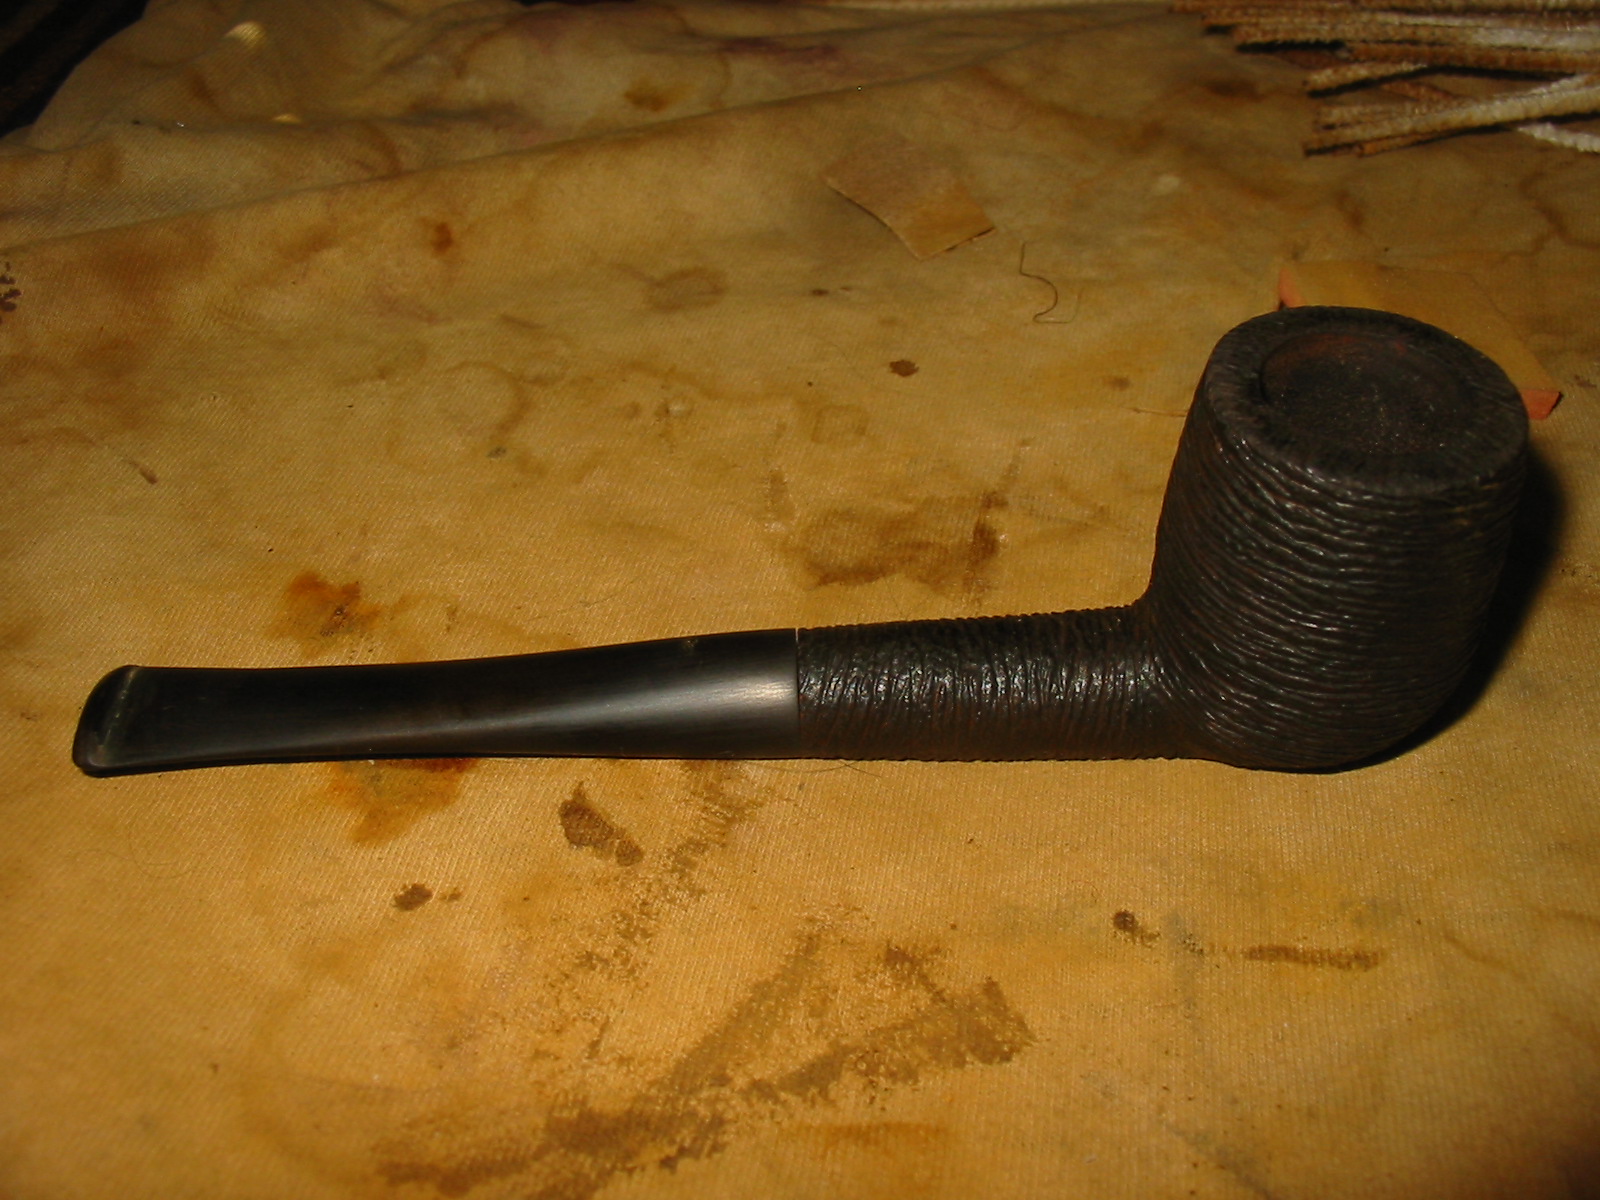
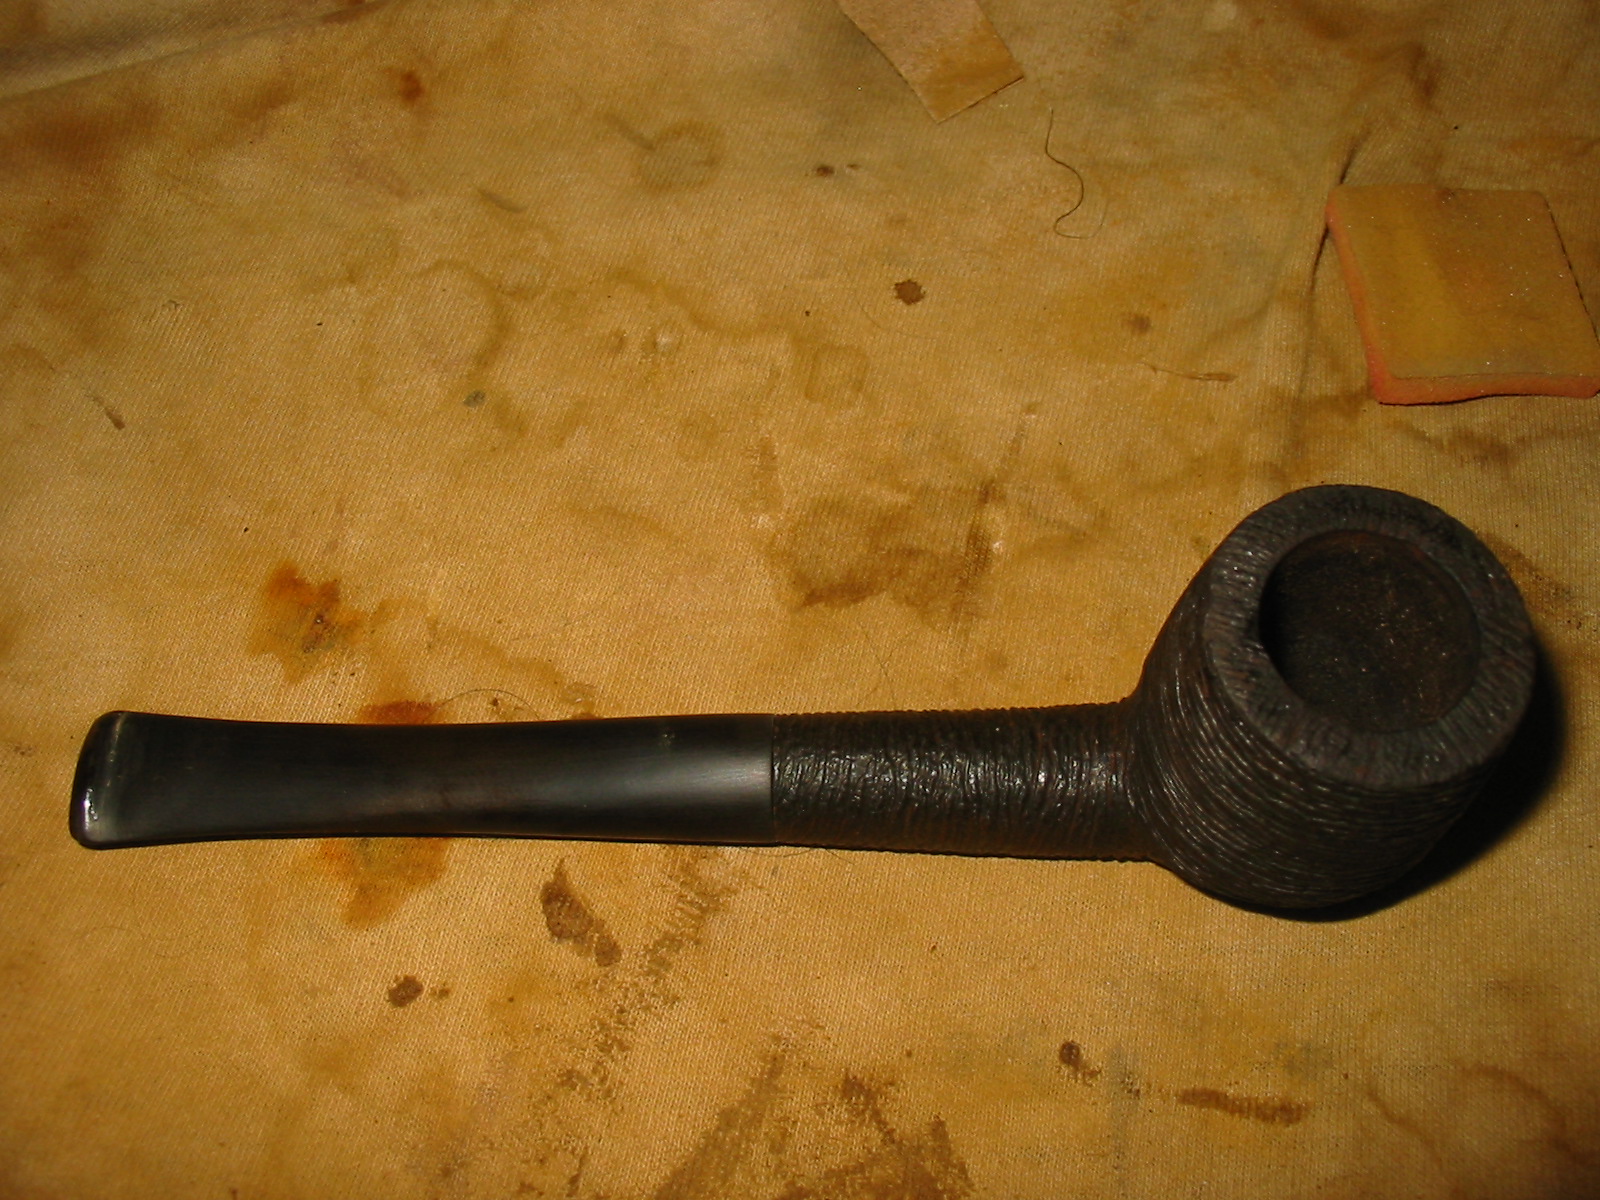
The clean angles of the button against the stem were gone so I recut them with needle files to clean up the edge. I reamed the bowl back to bare briar with a PipNet reamer starting with the smallest cutting head and progressing to the one that was the diameter of the bowl without the cake. Once it was cleaned out I scrubbed down the bowl with Murphy’s Oil Soap and a soft bristle tooth brush to remove the grime. I scrubbed the buildup on the rim with a soft bristle brass tire brush to remove the tars. Once I had scrubbed it I rinsed it with warm water to remove the soap and dried it off with a cotton towel. I wiped down the bowl with acetone on a cotton pad and prepared it to be stained. After heating it with a heat gun I stained it with a dark brown aniline stain. I used a permanent black marker to touch up the raw briar areas where it was scratched or damaged. I reapplied the stain and flamed it. The newly stained pipe is shown in photos 2 and 3 below.

IMG_1497

IMG_1498

IMG_1499

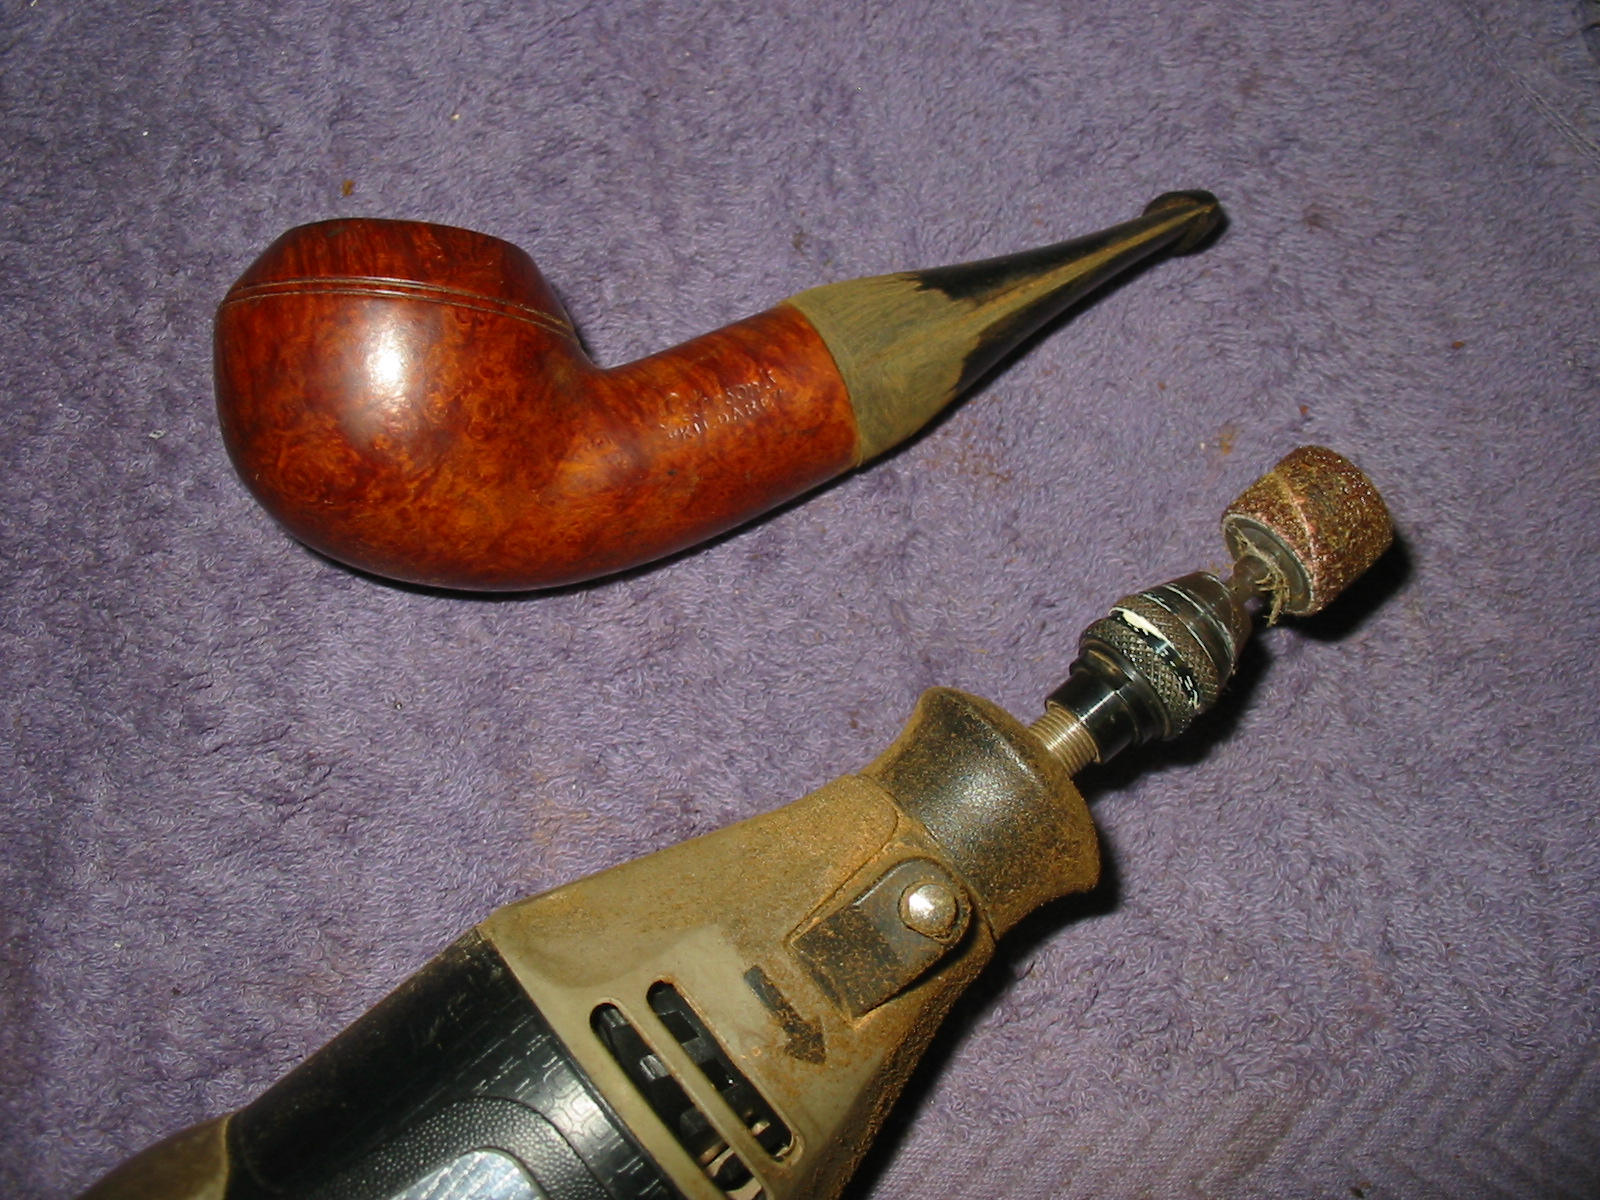
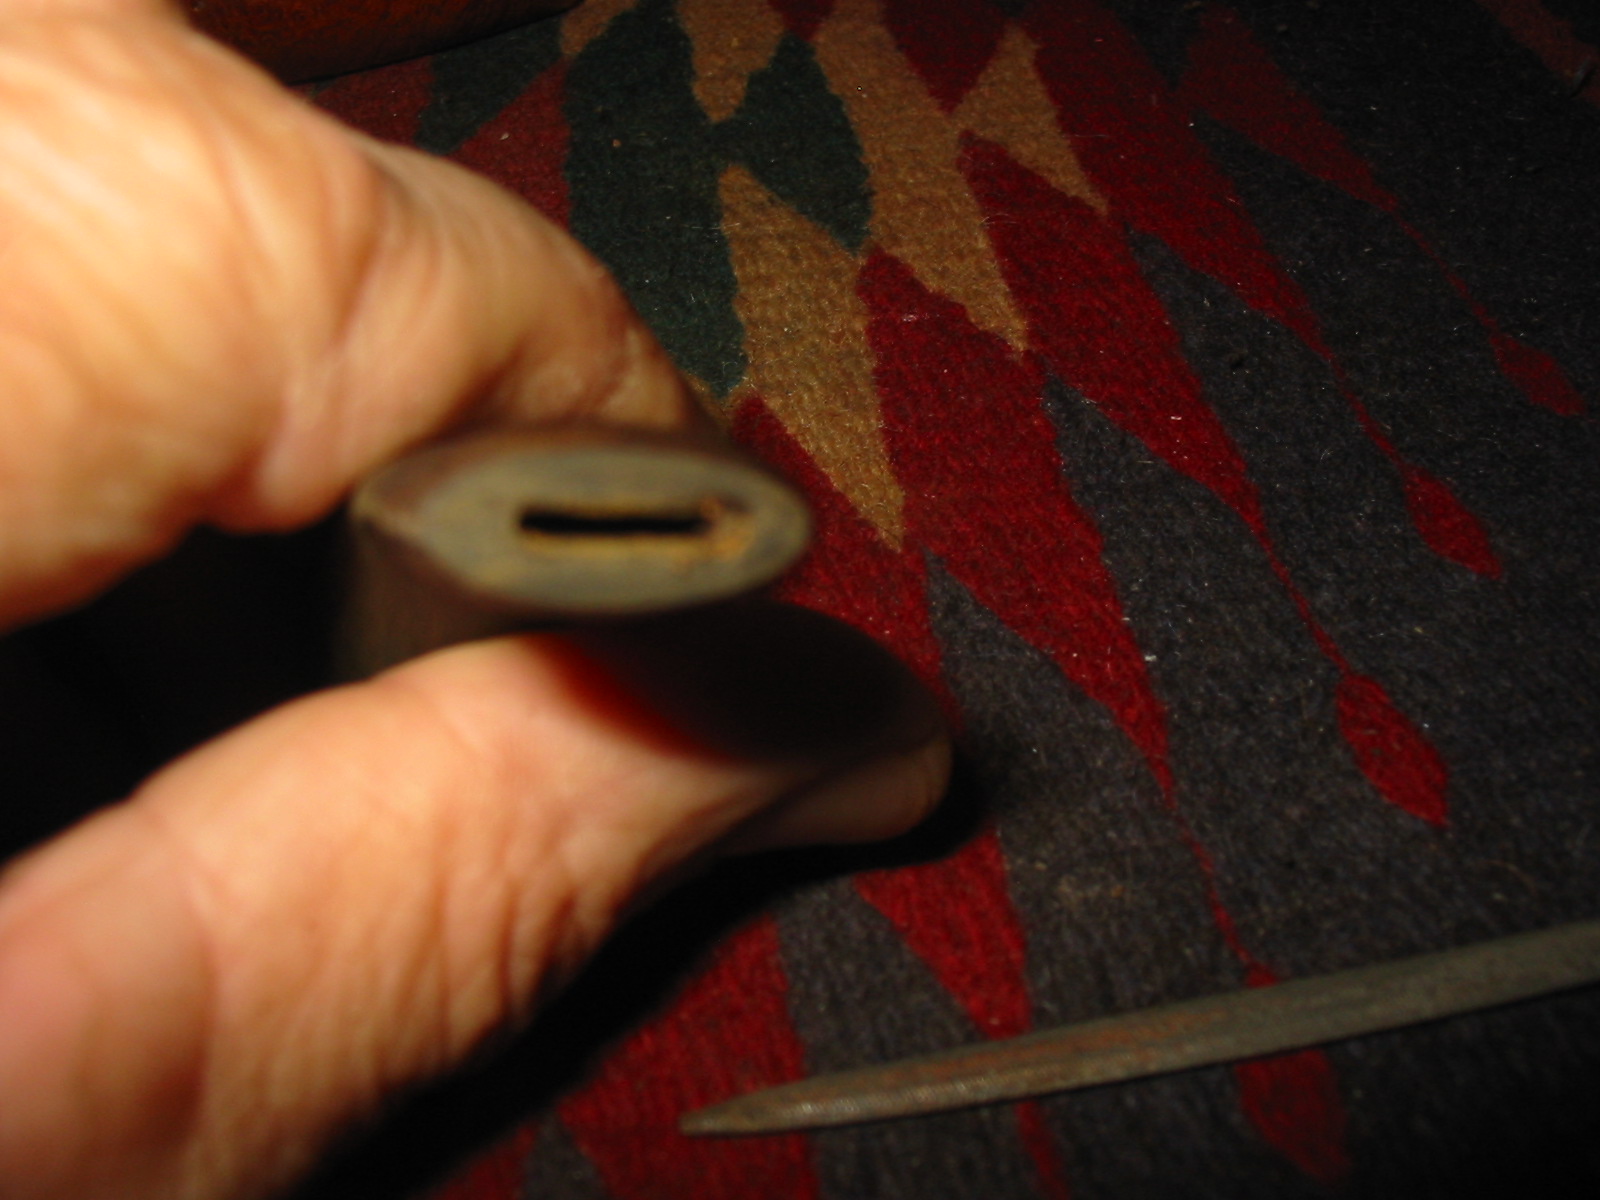
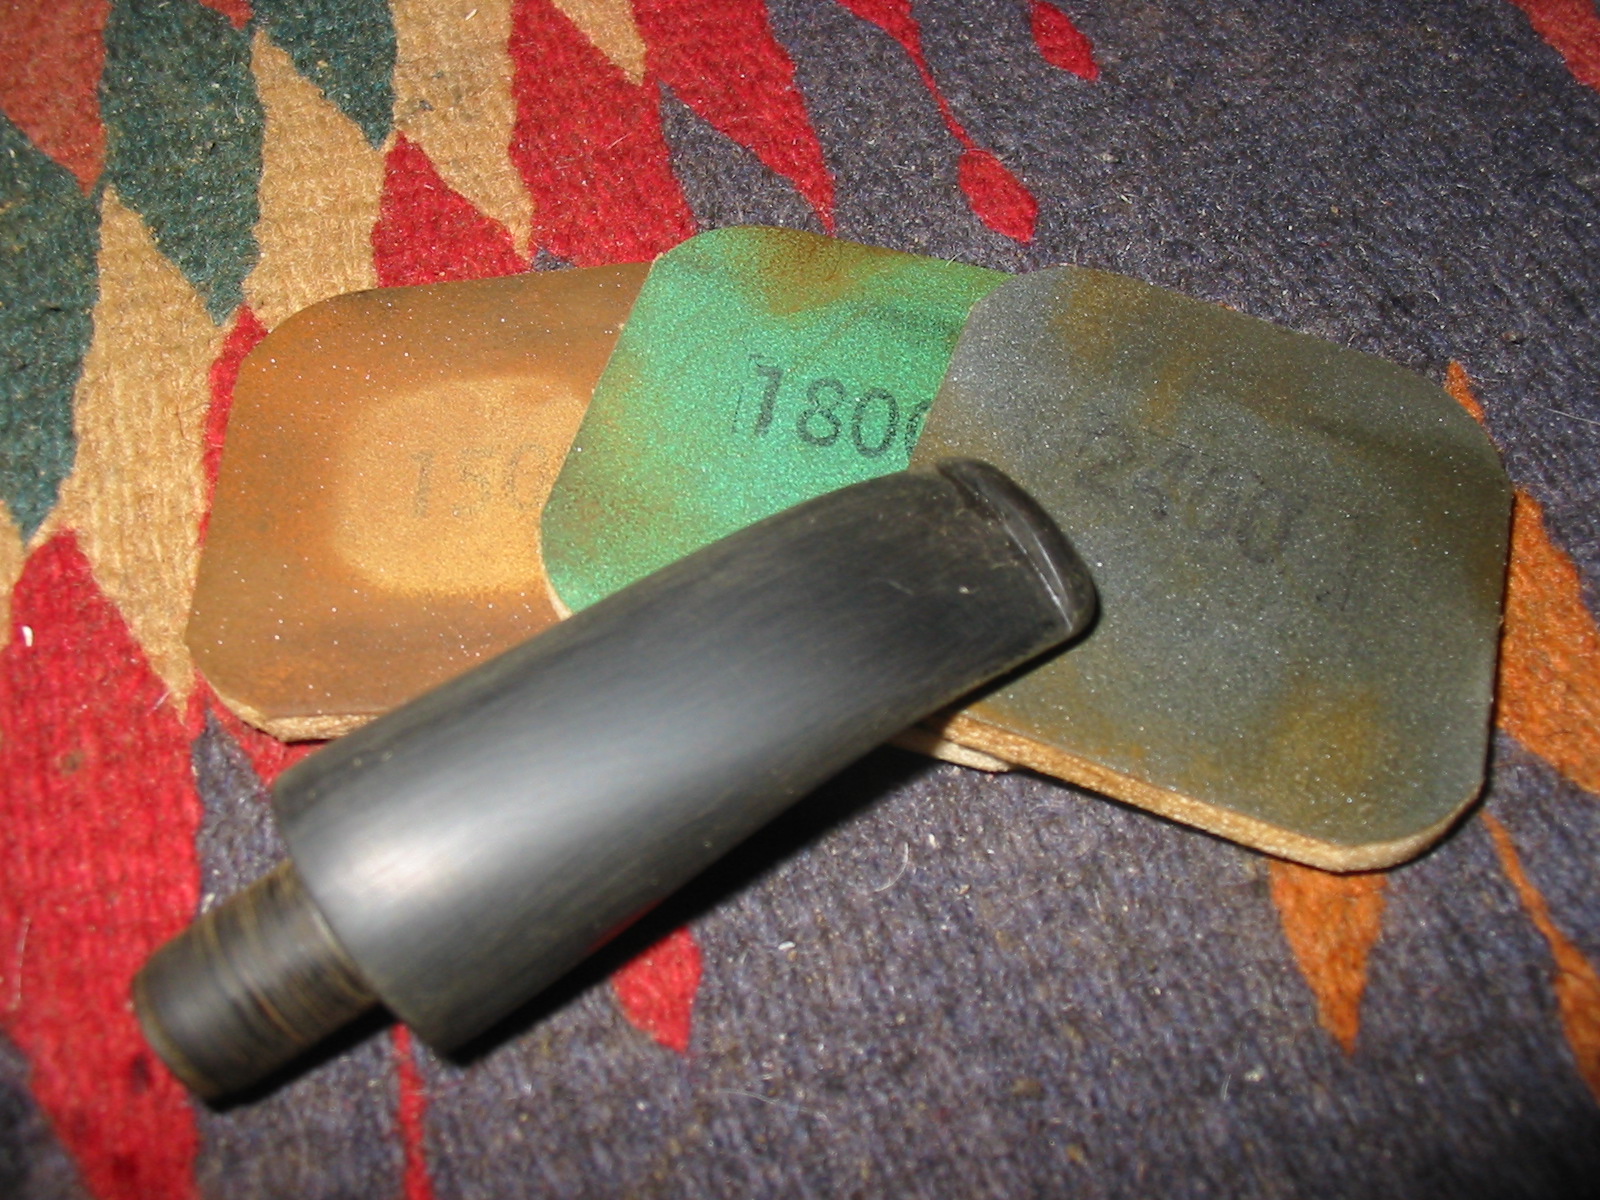
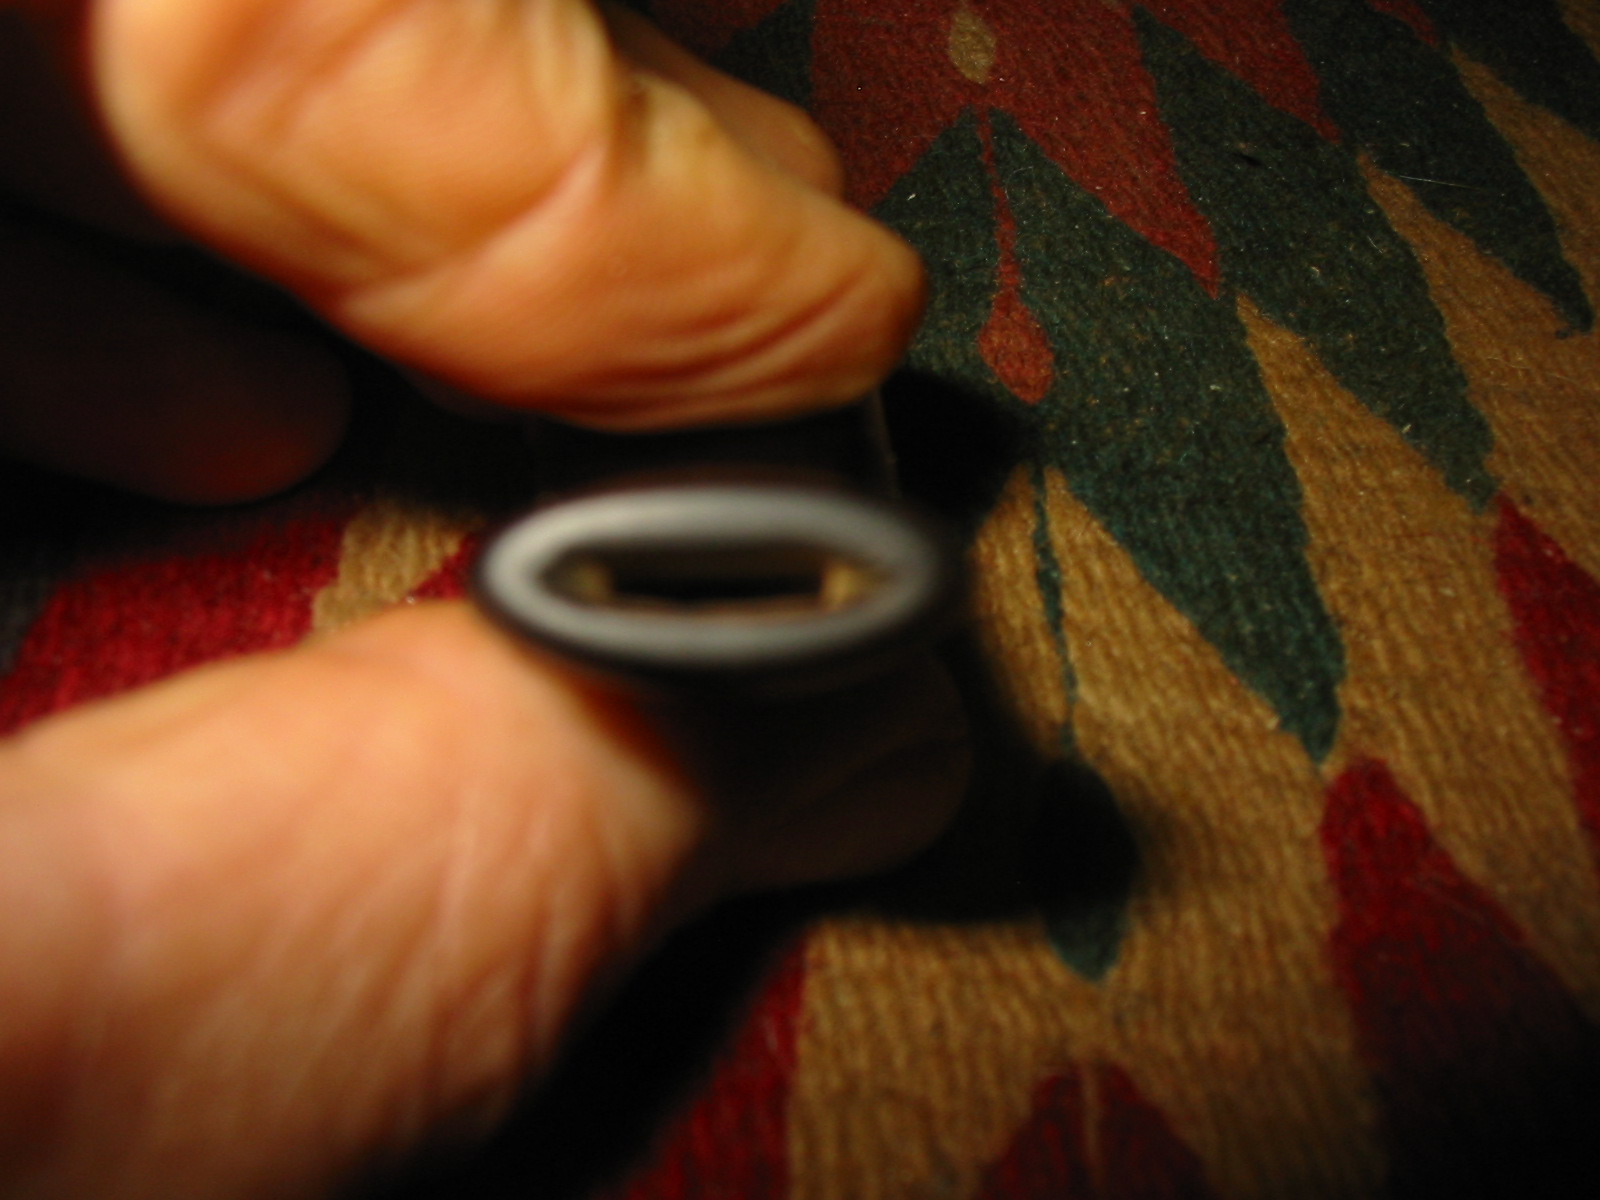
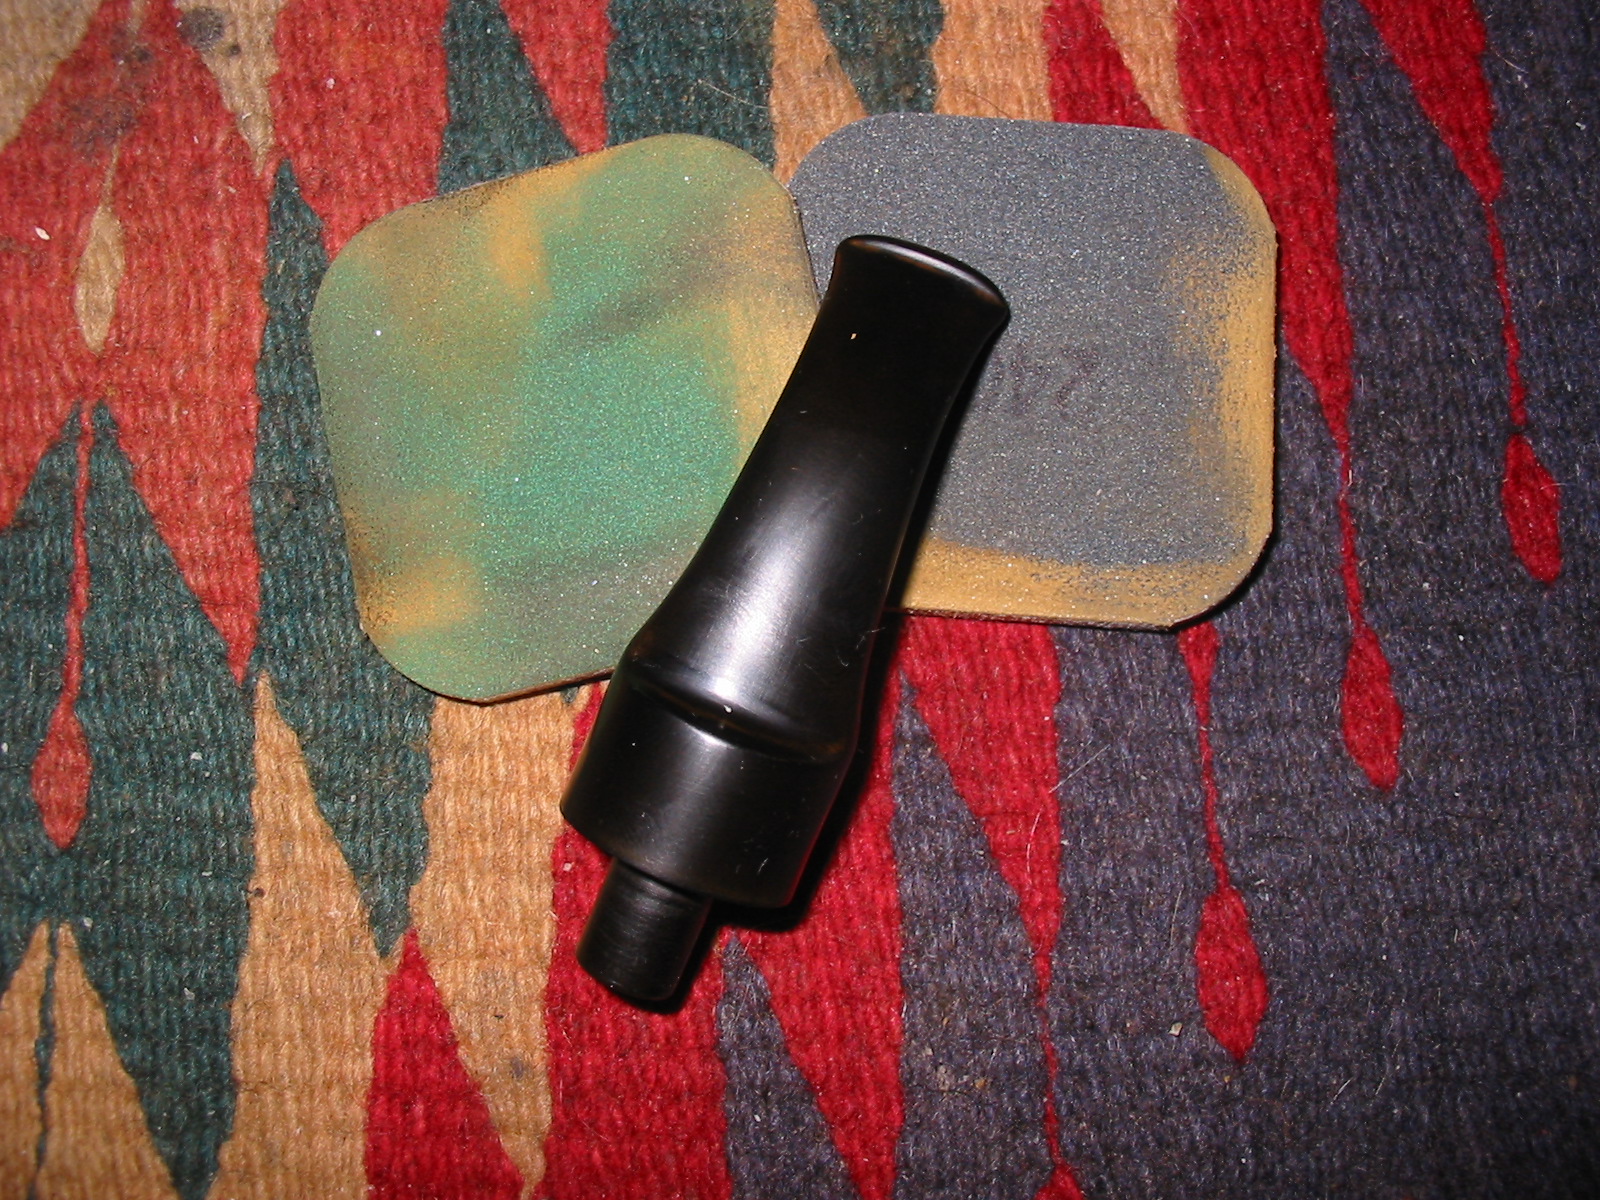
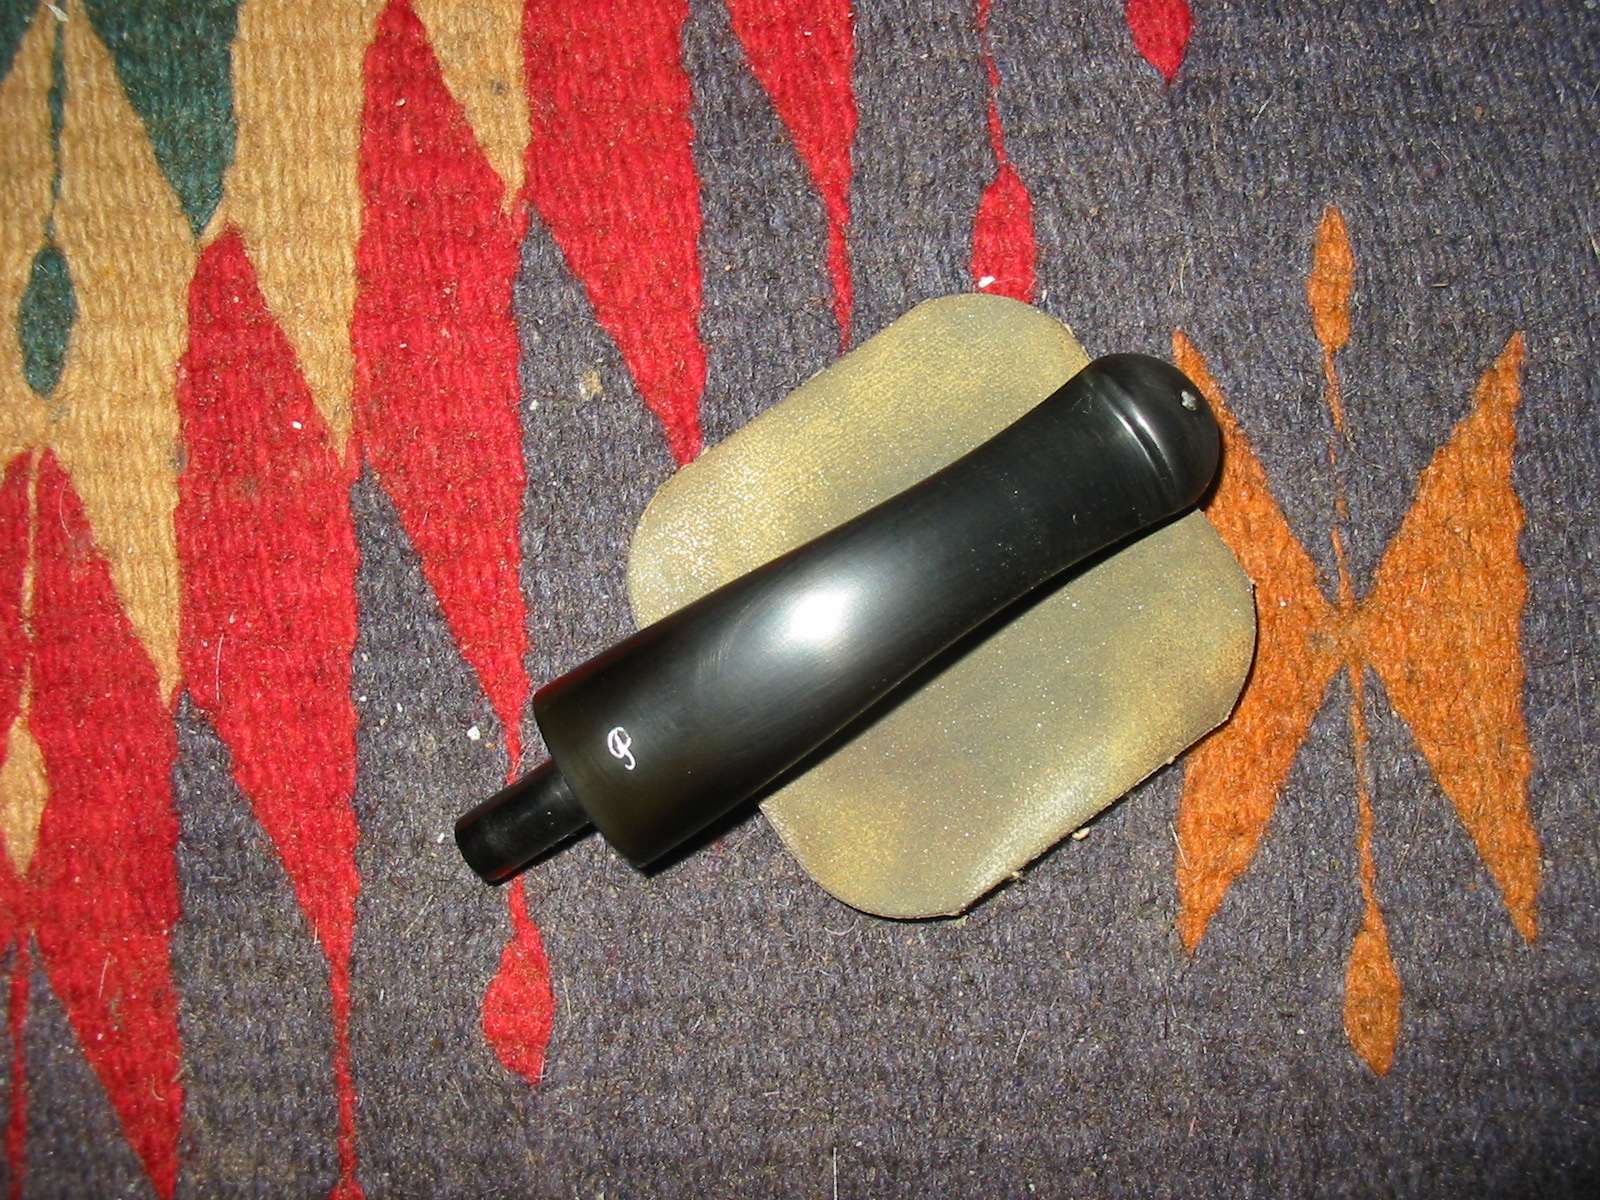
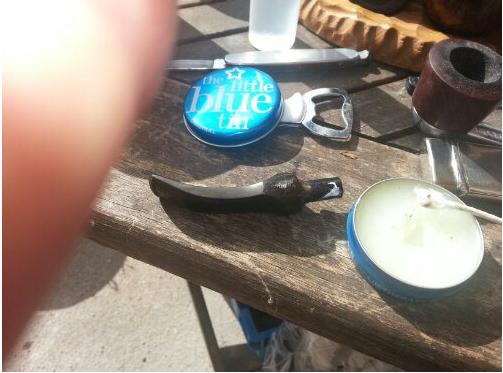
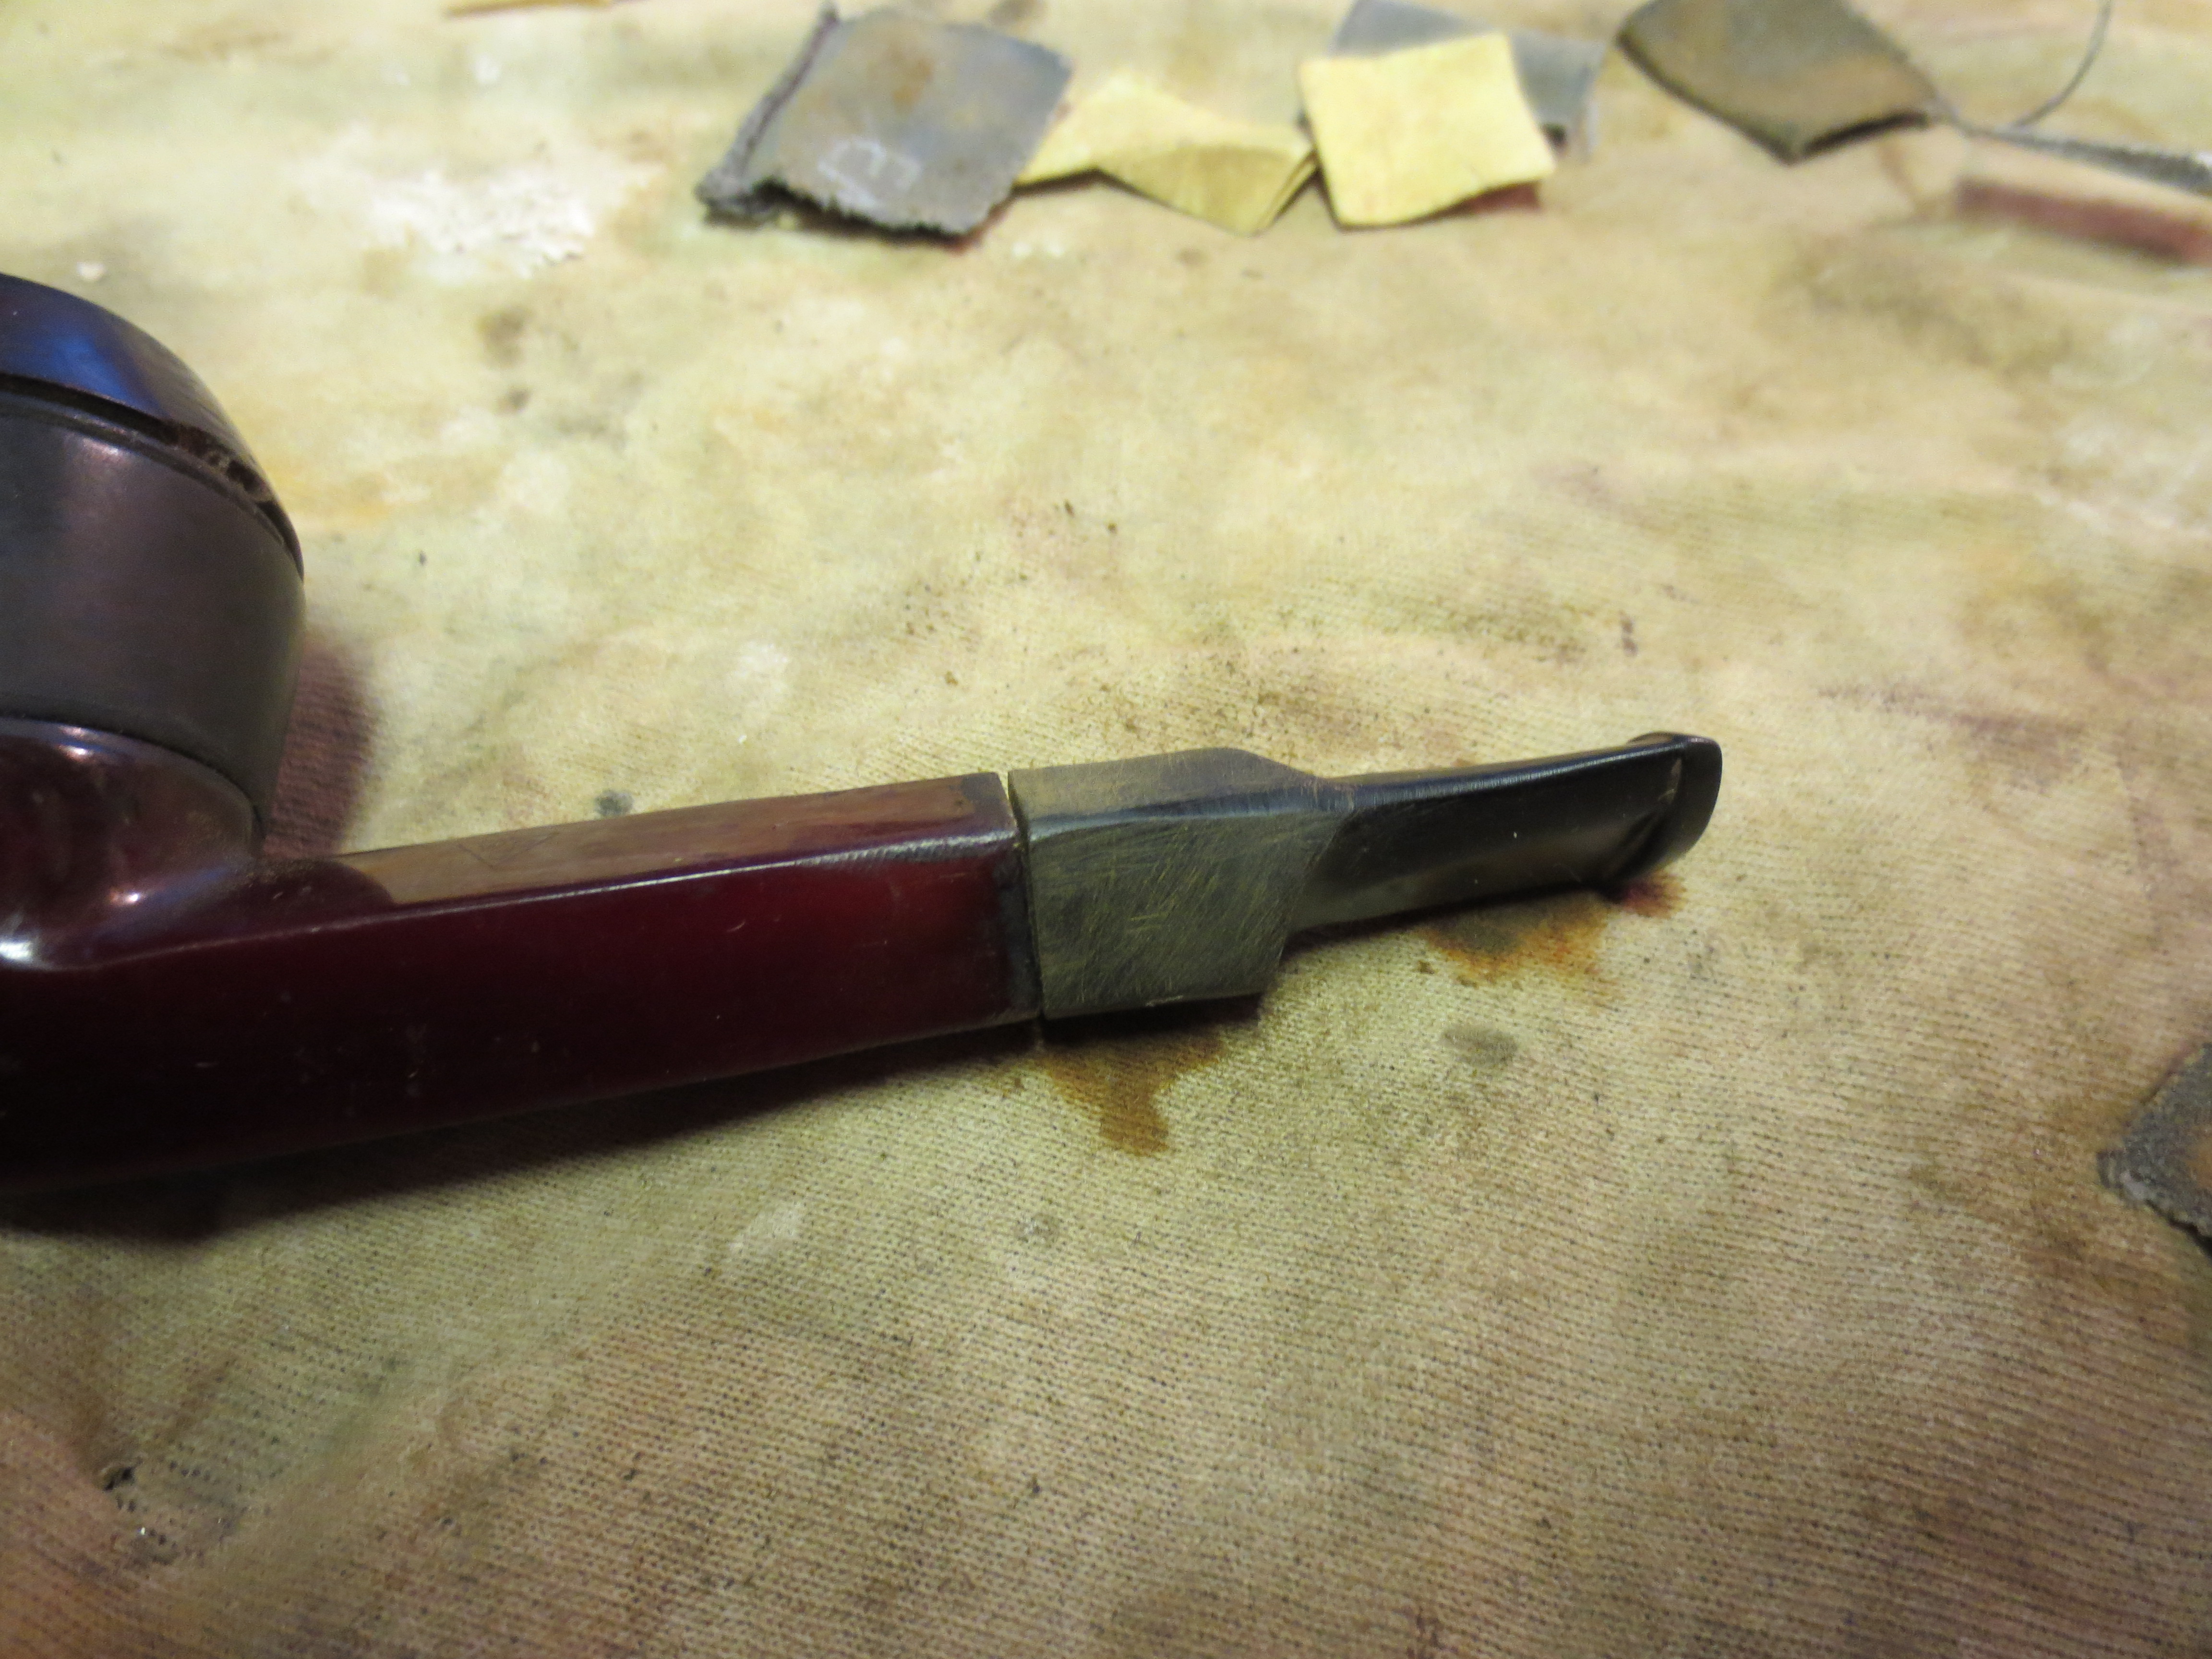
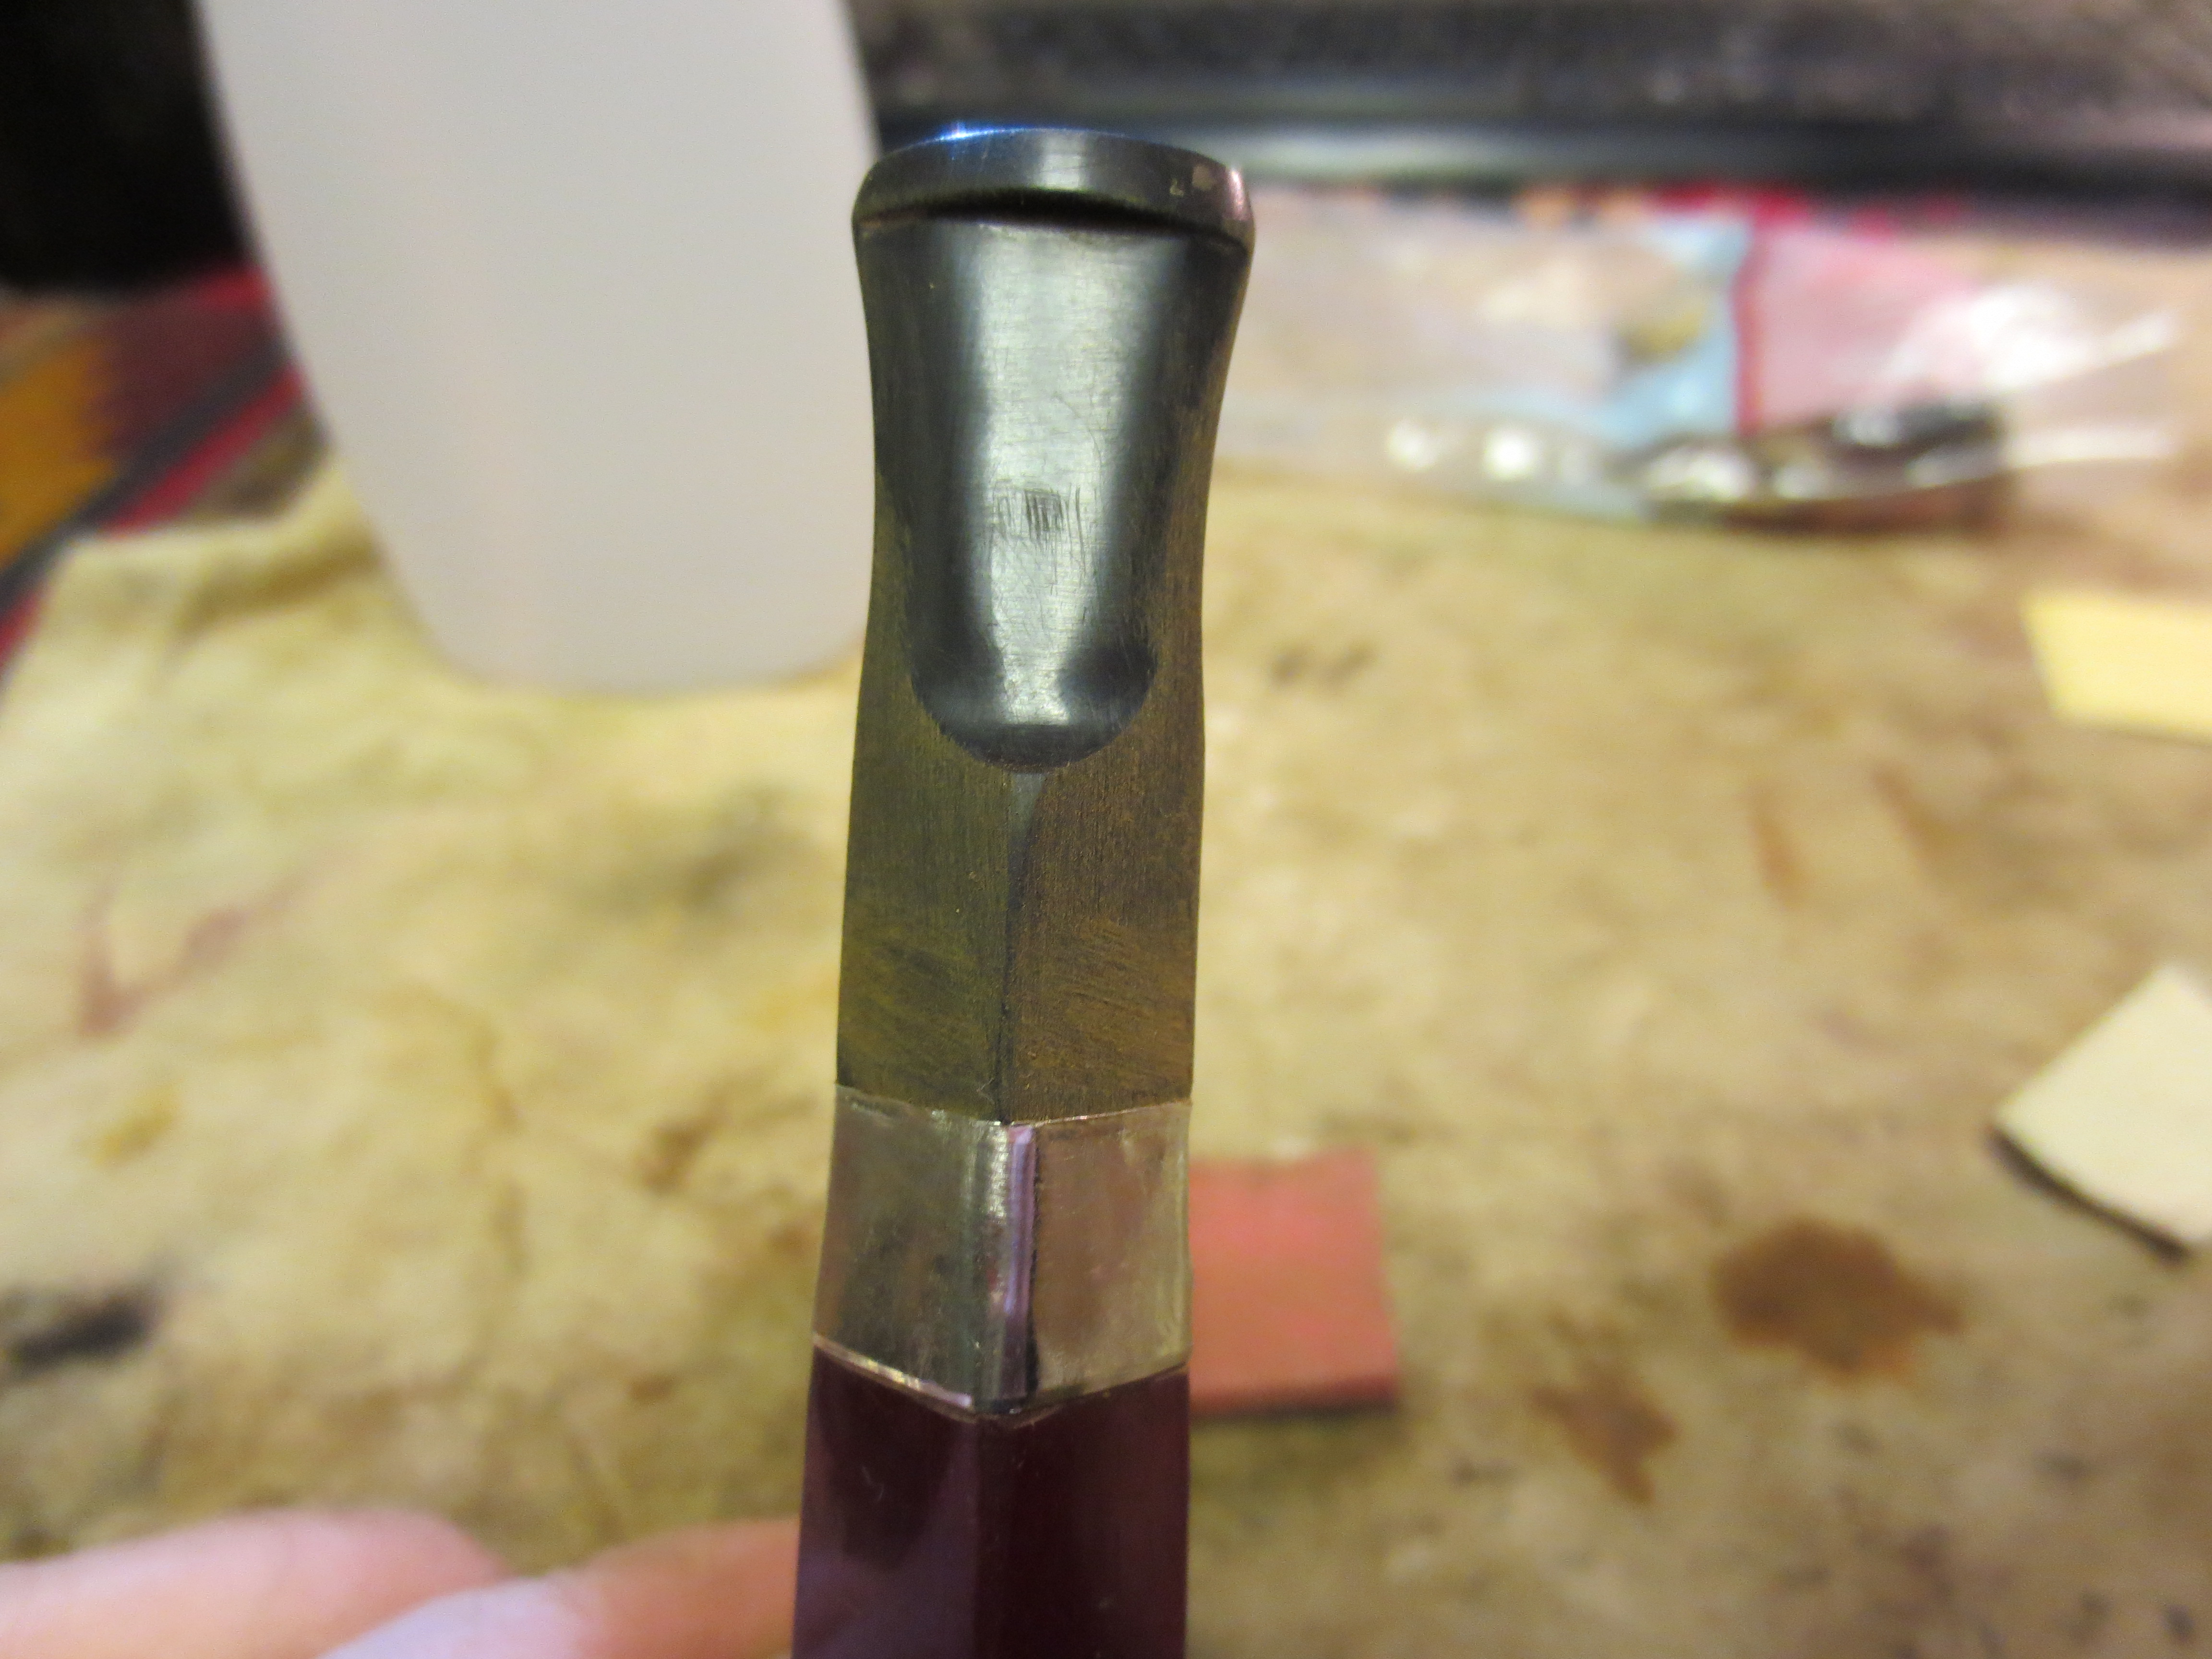
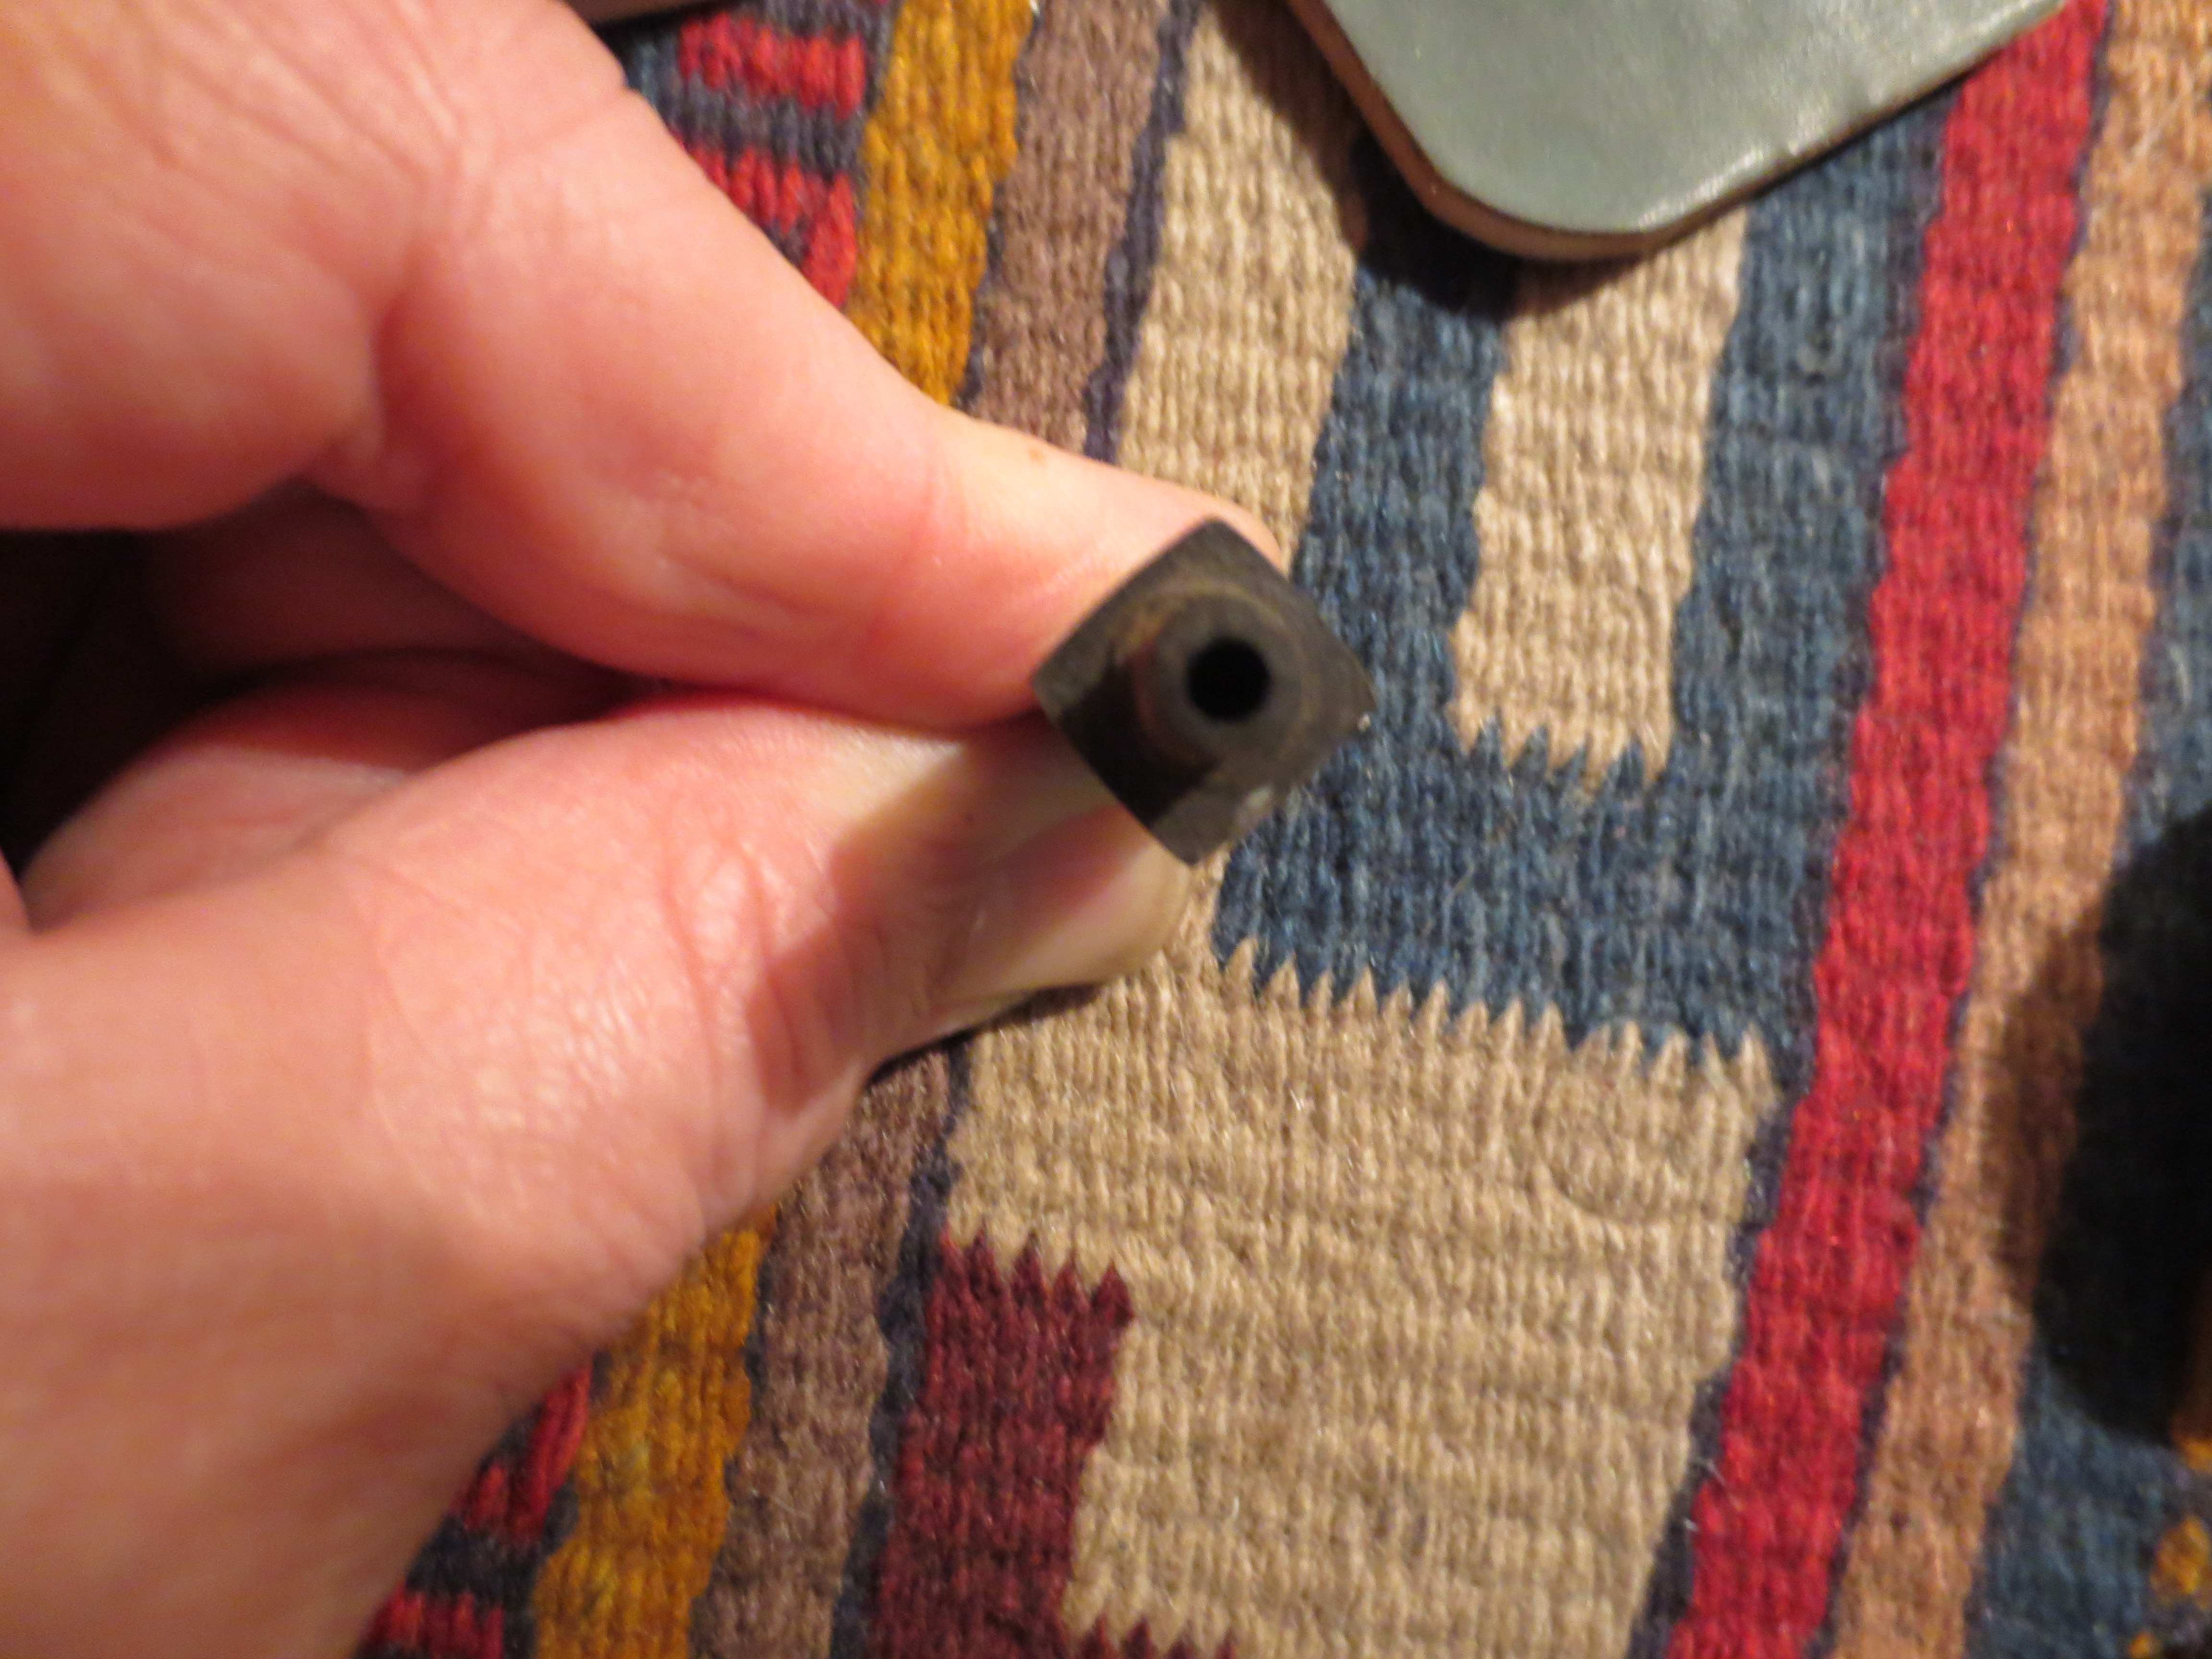
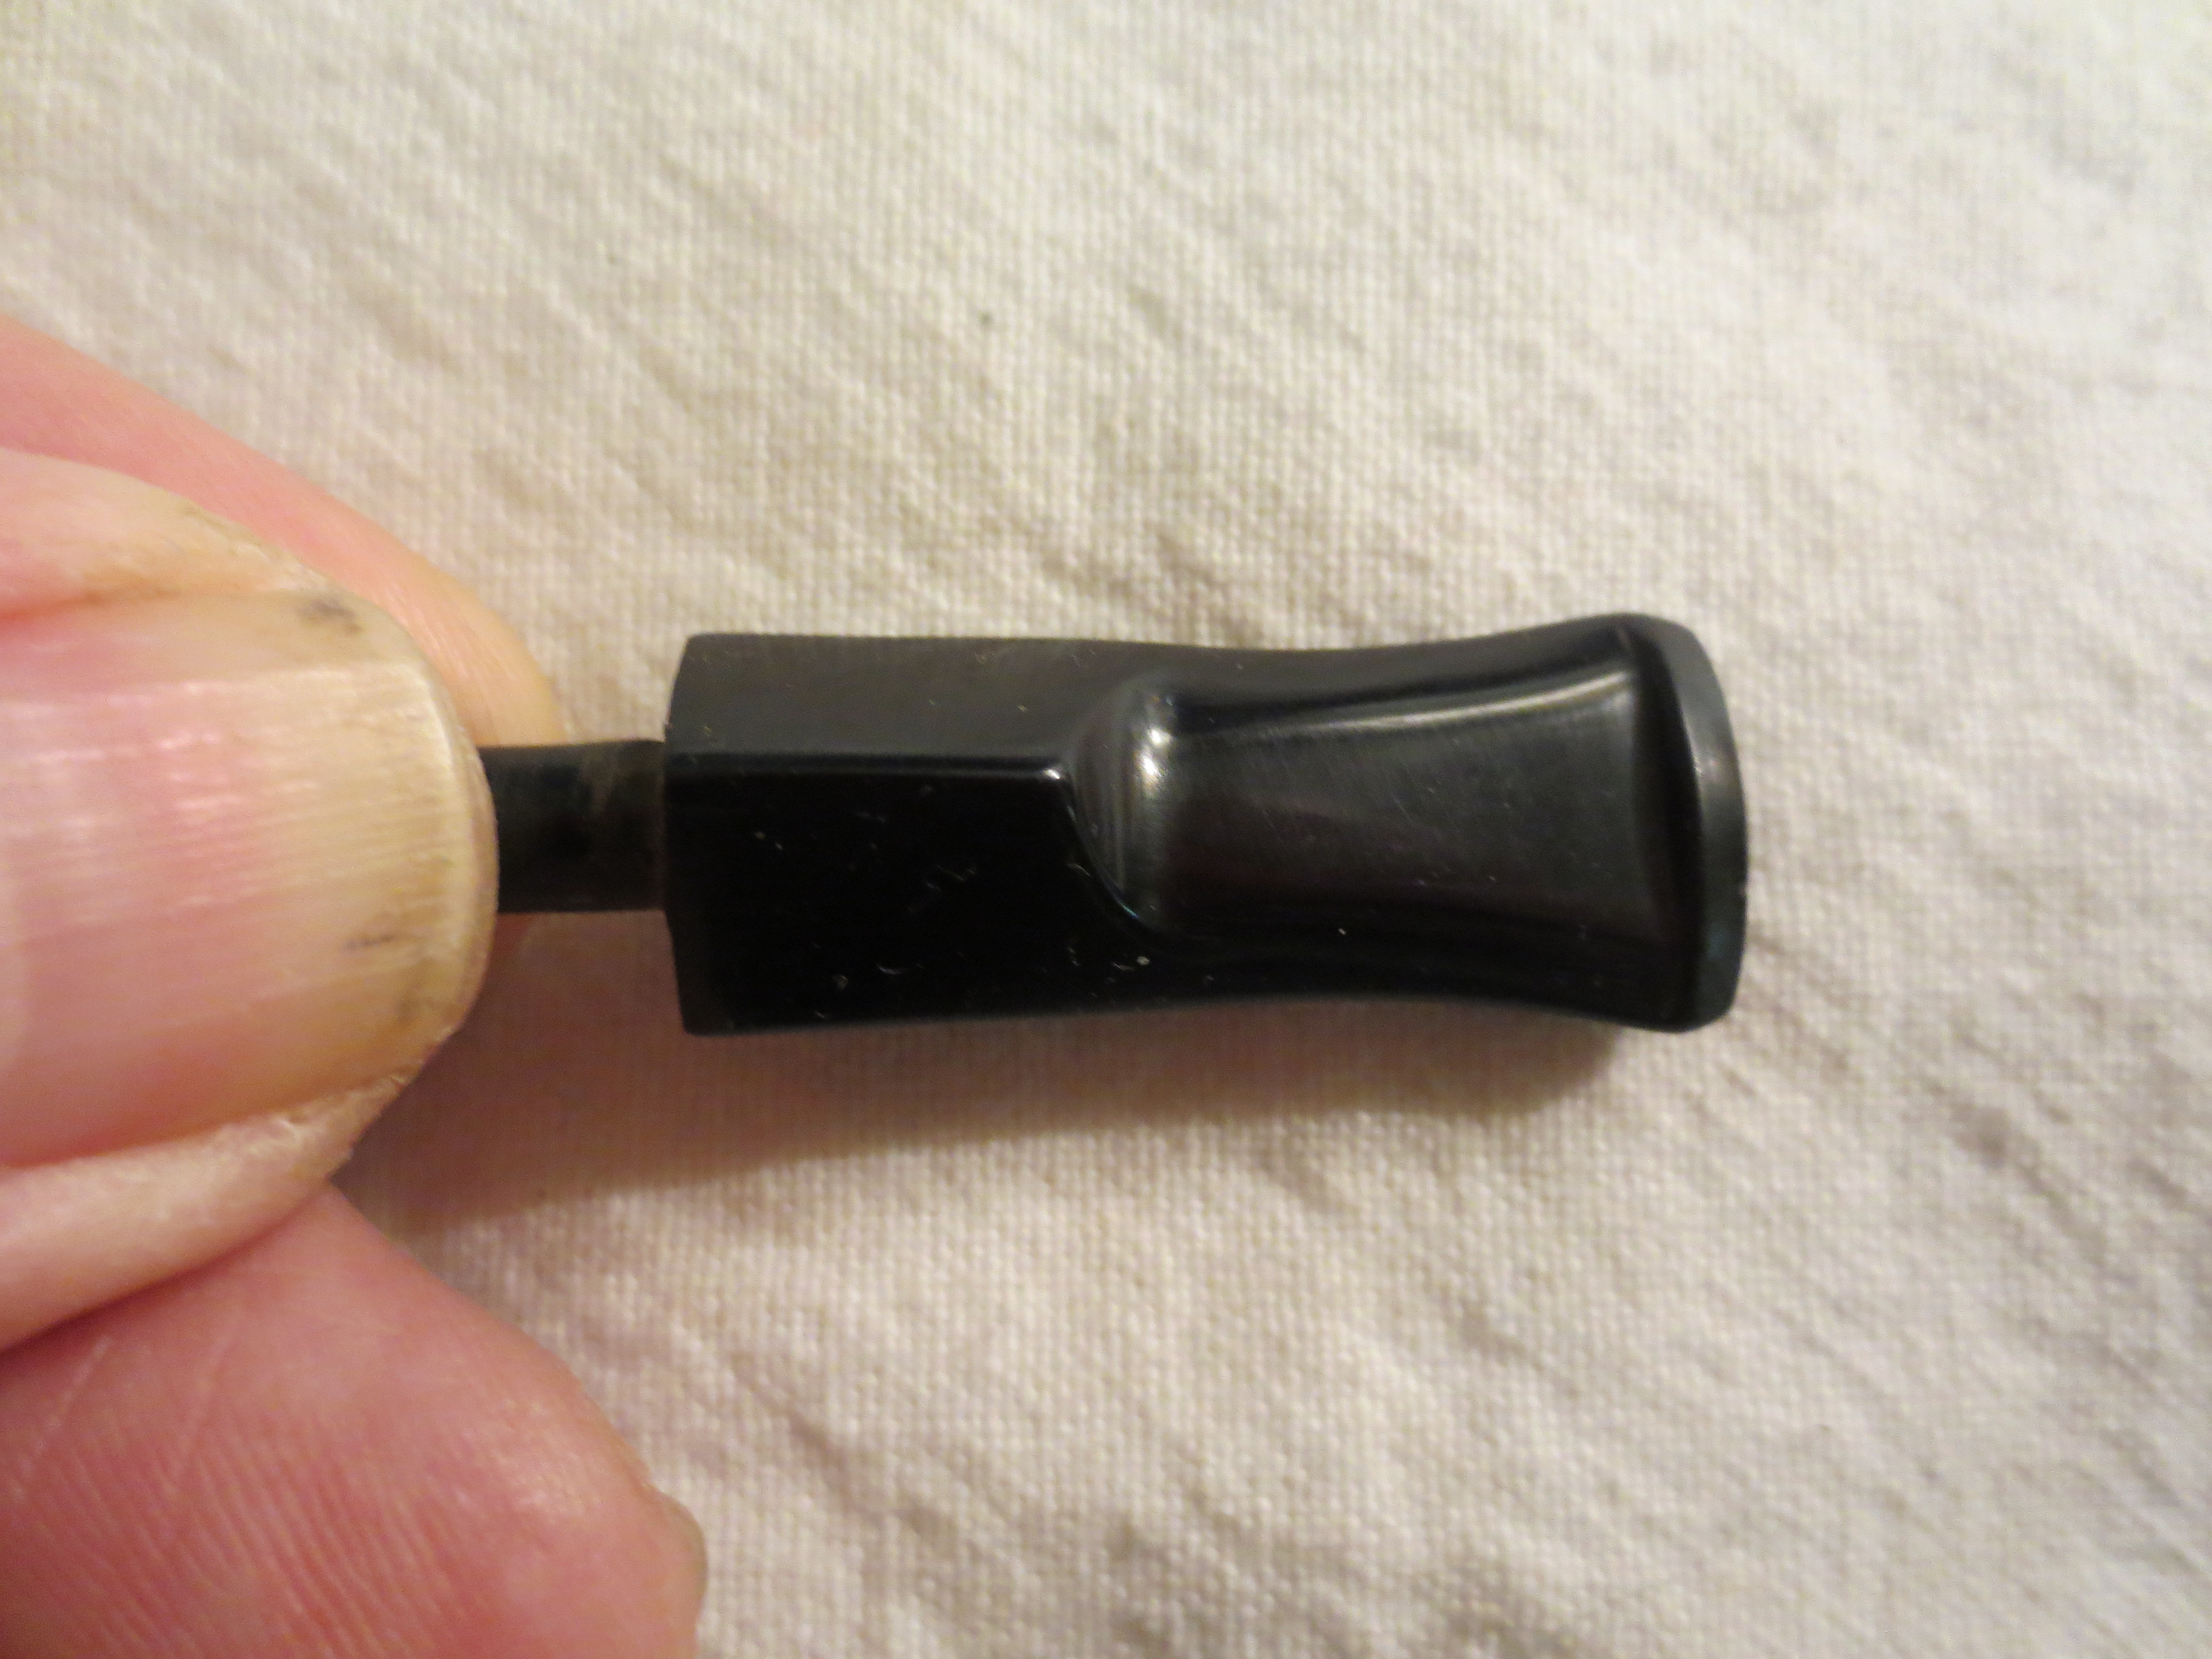
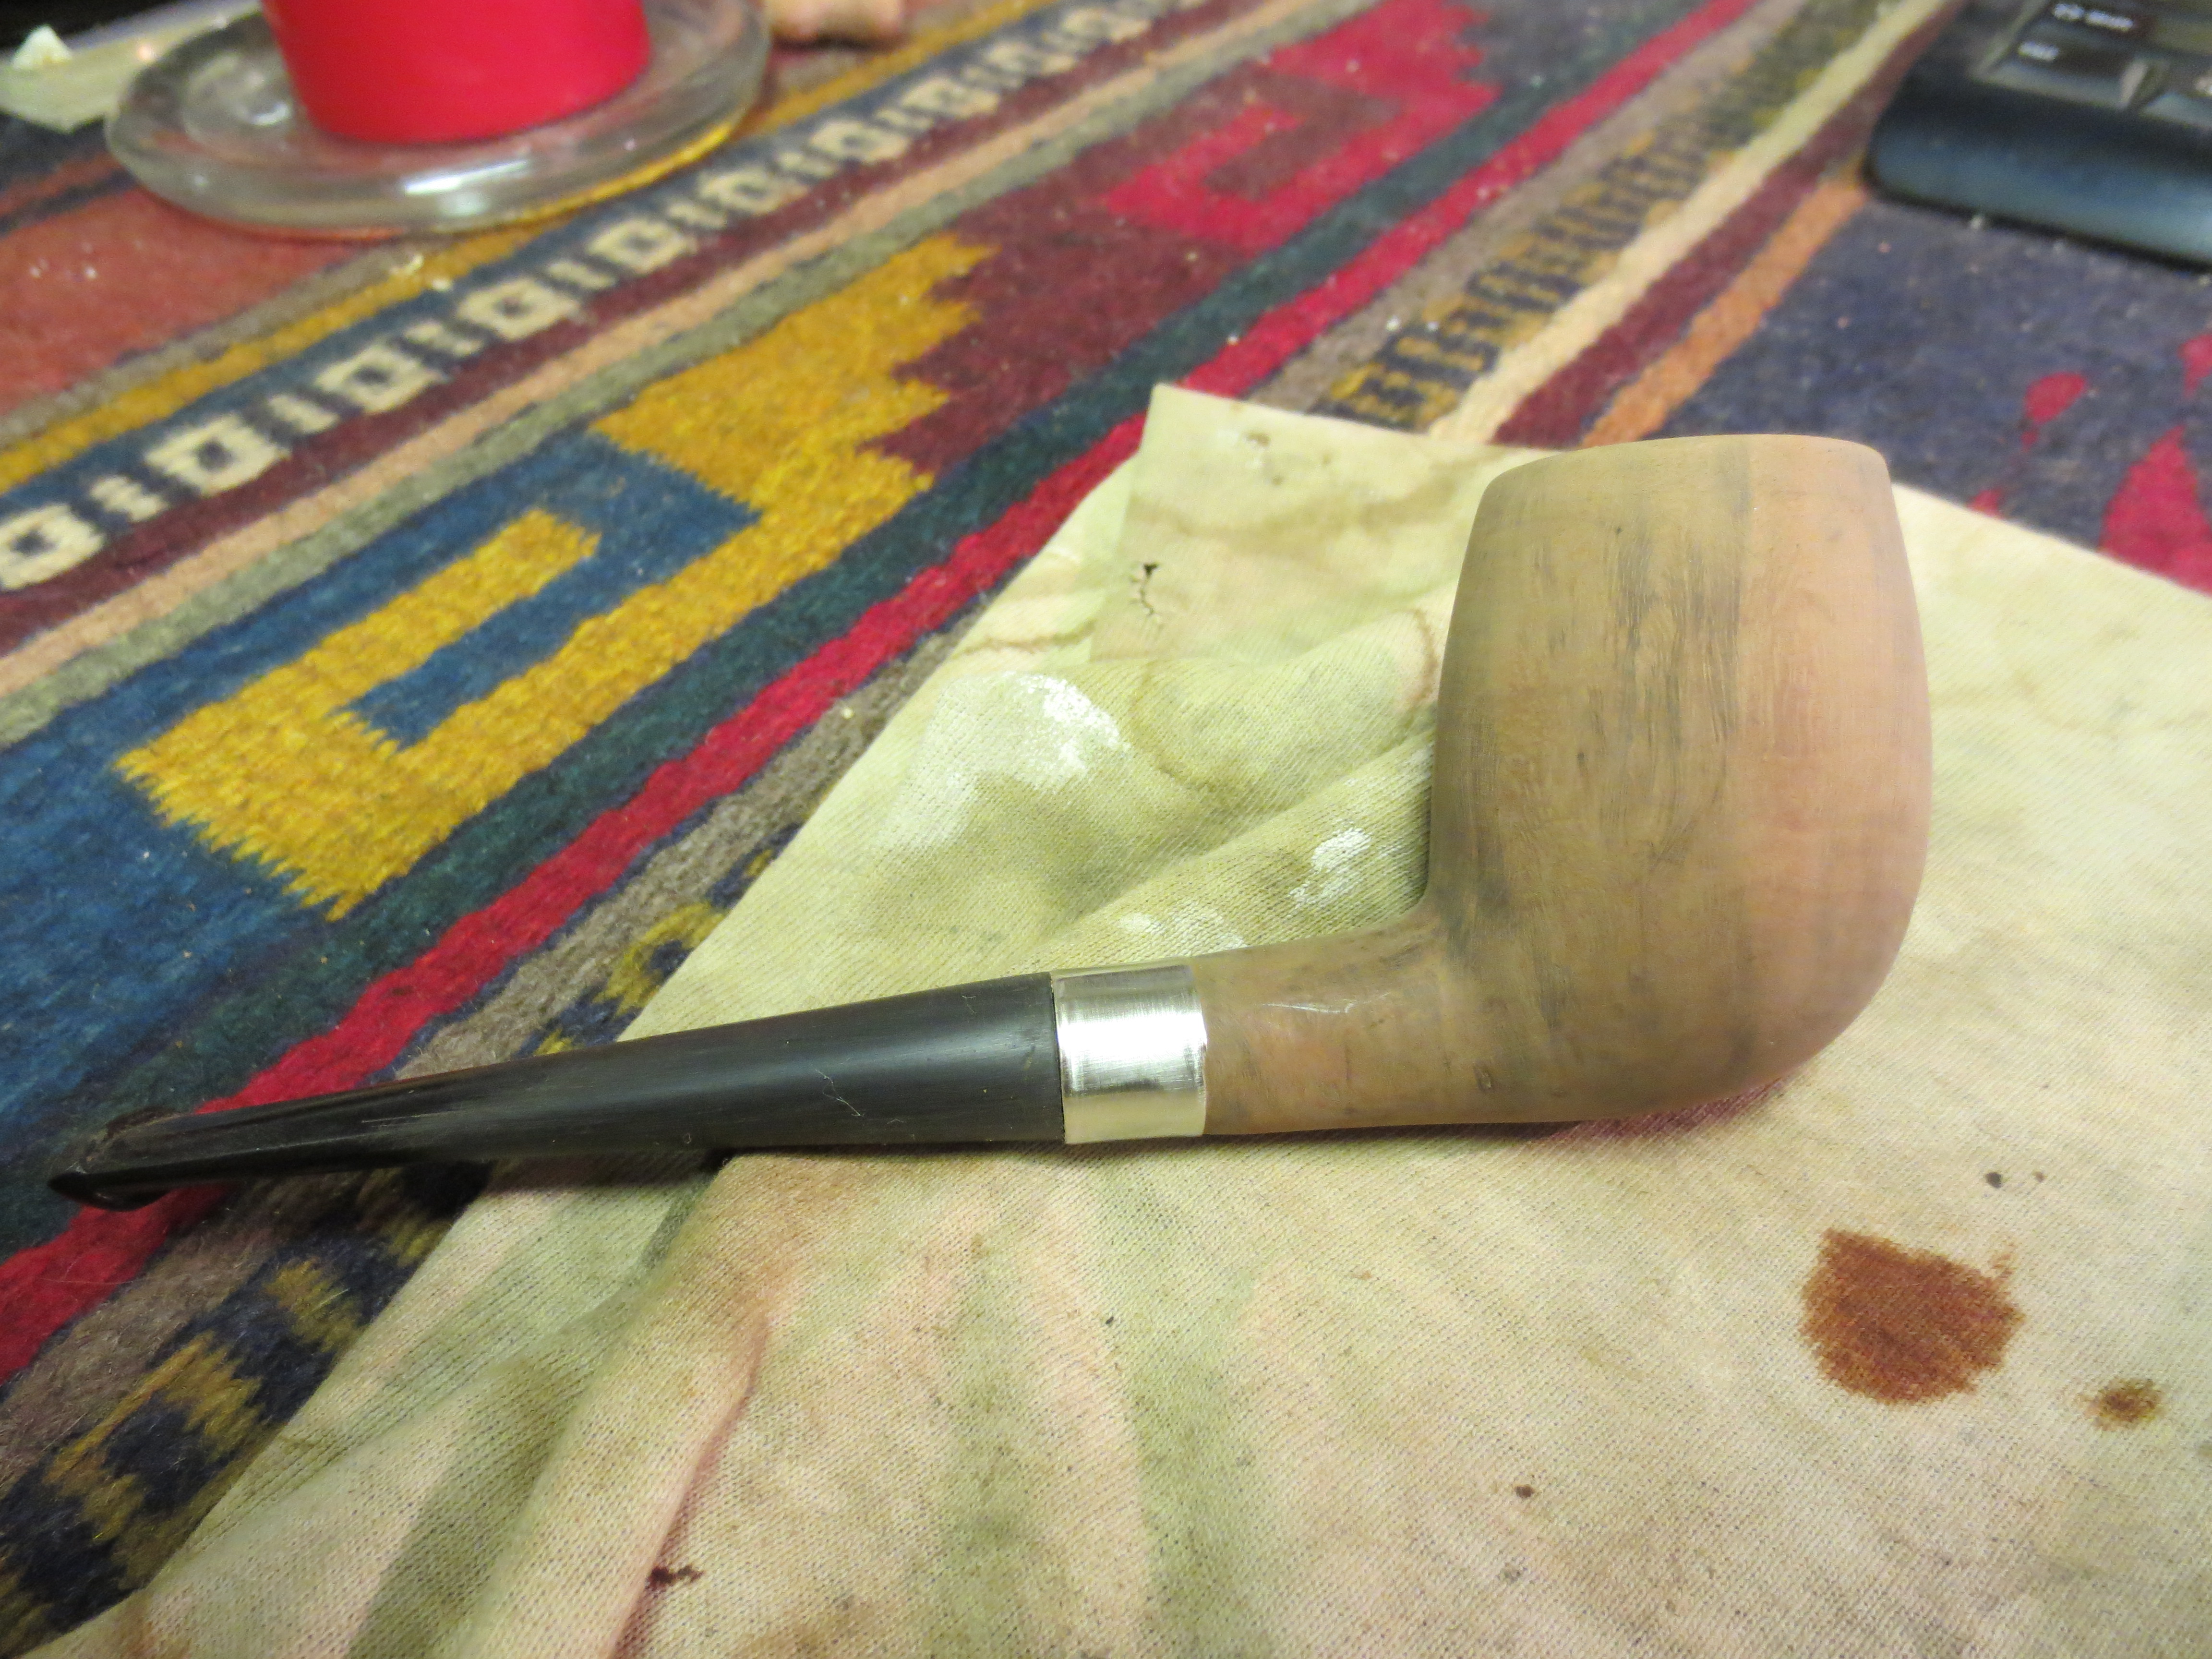
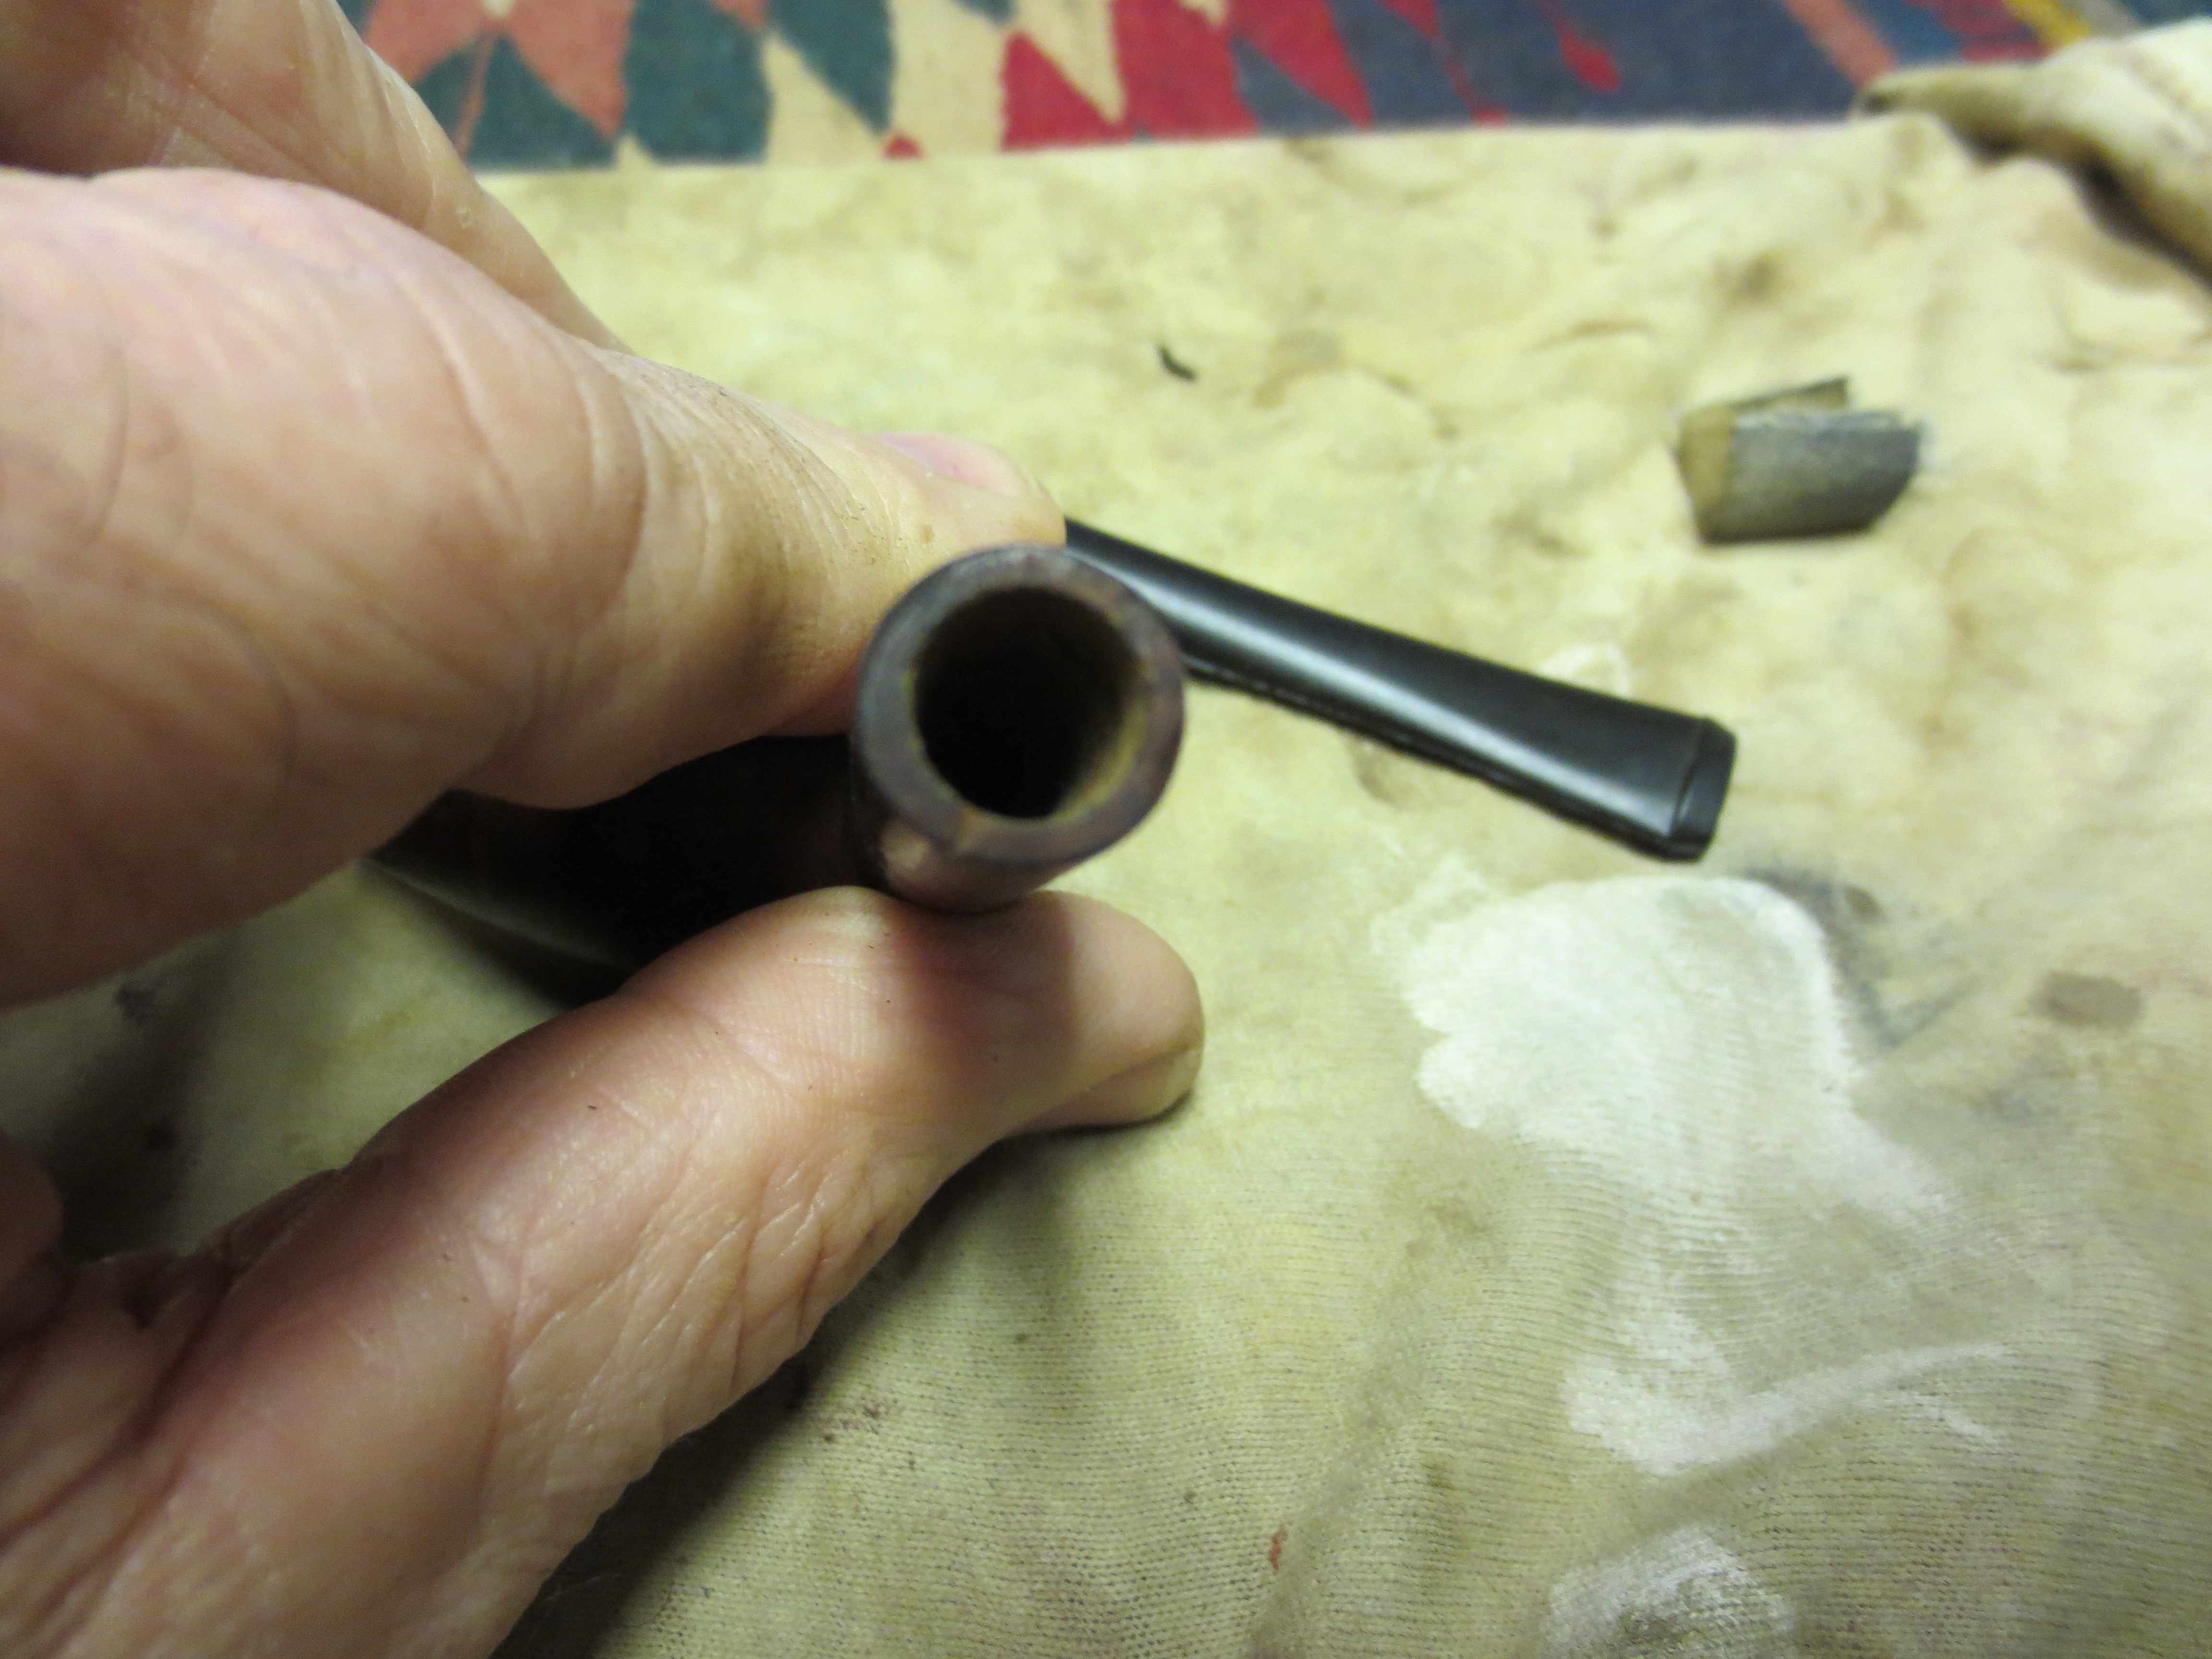
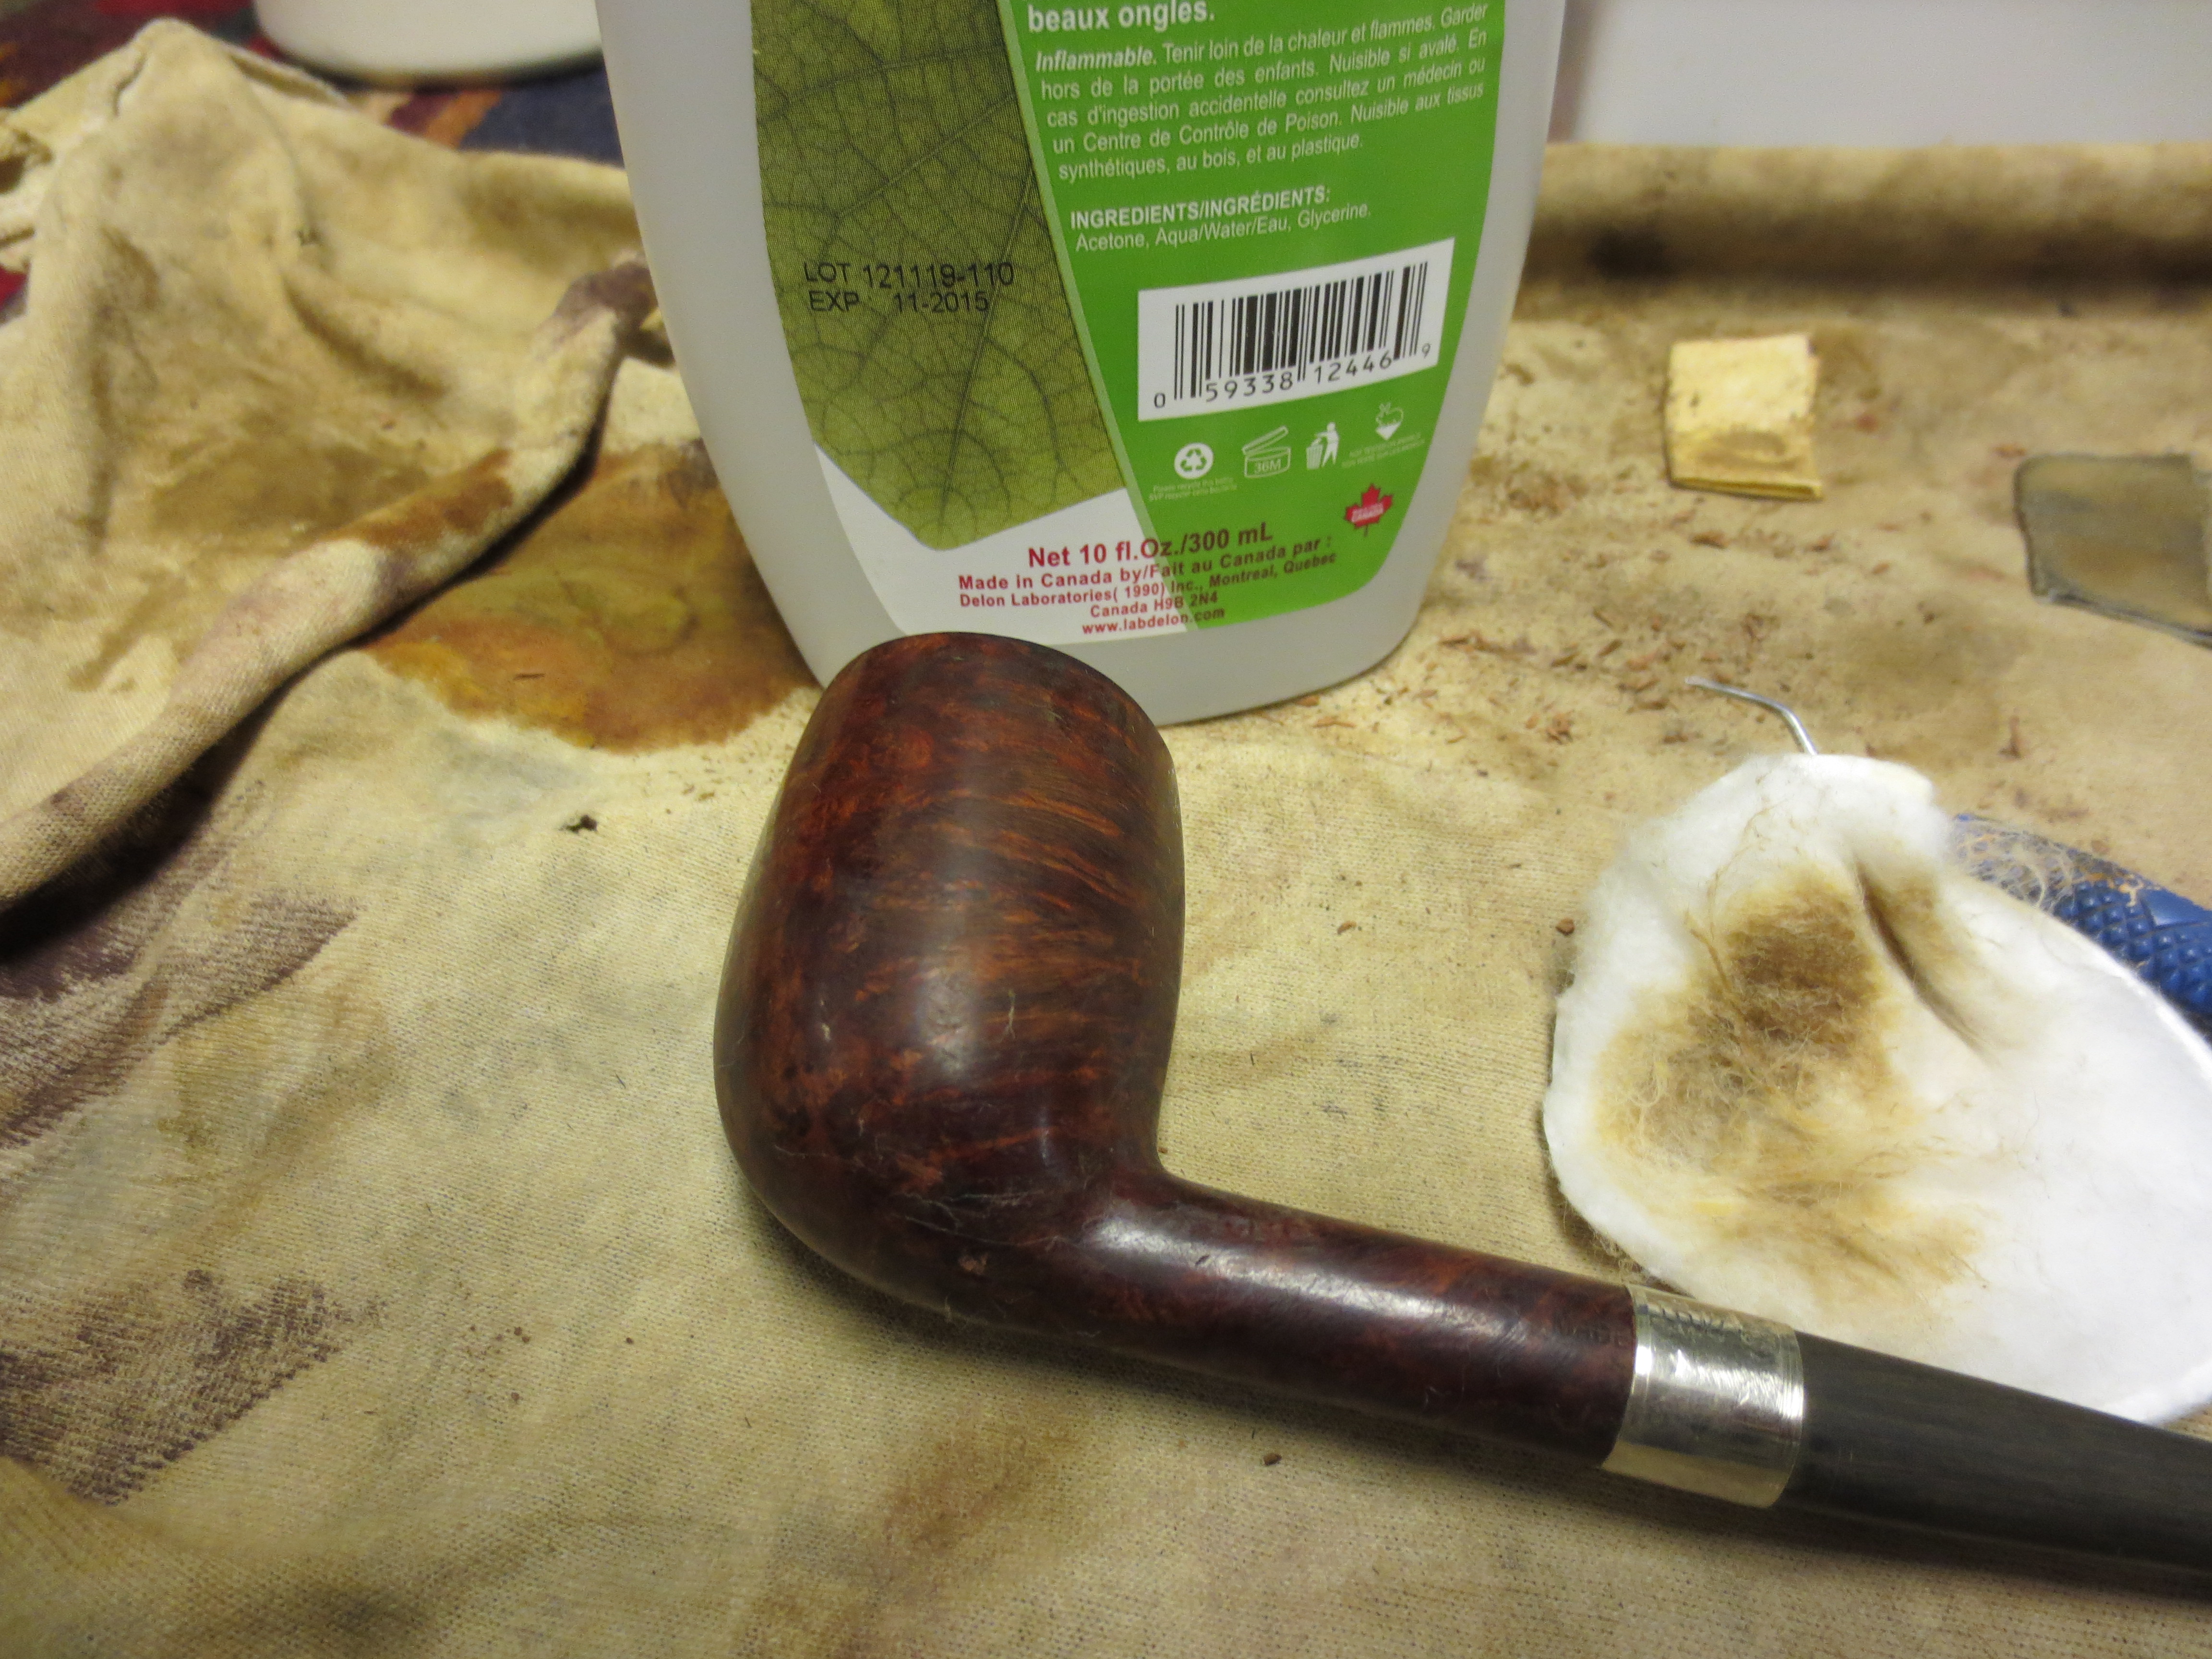
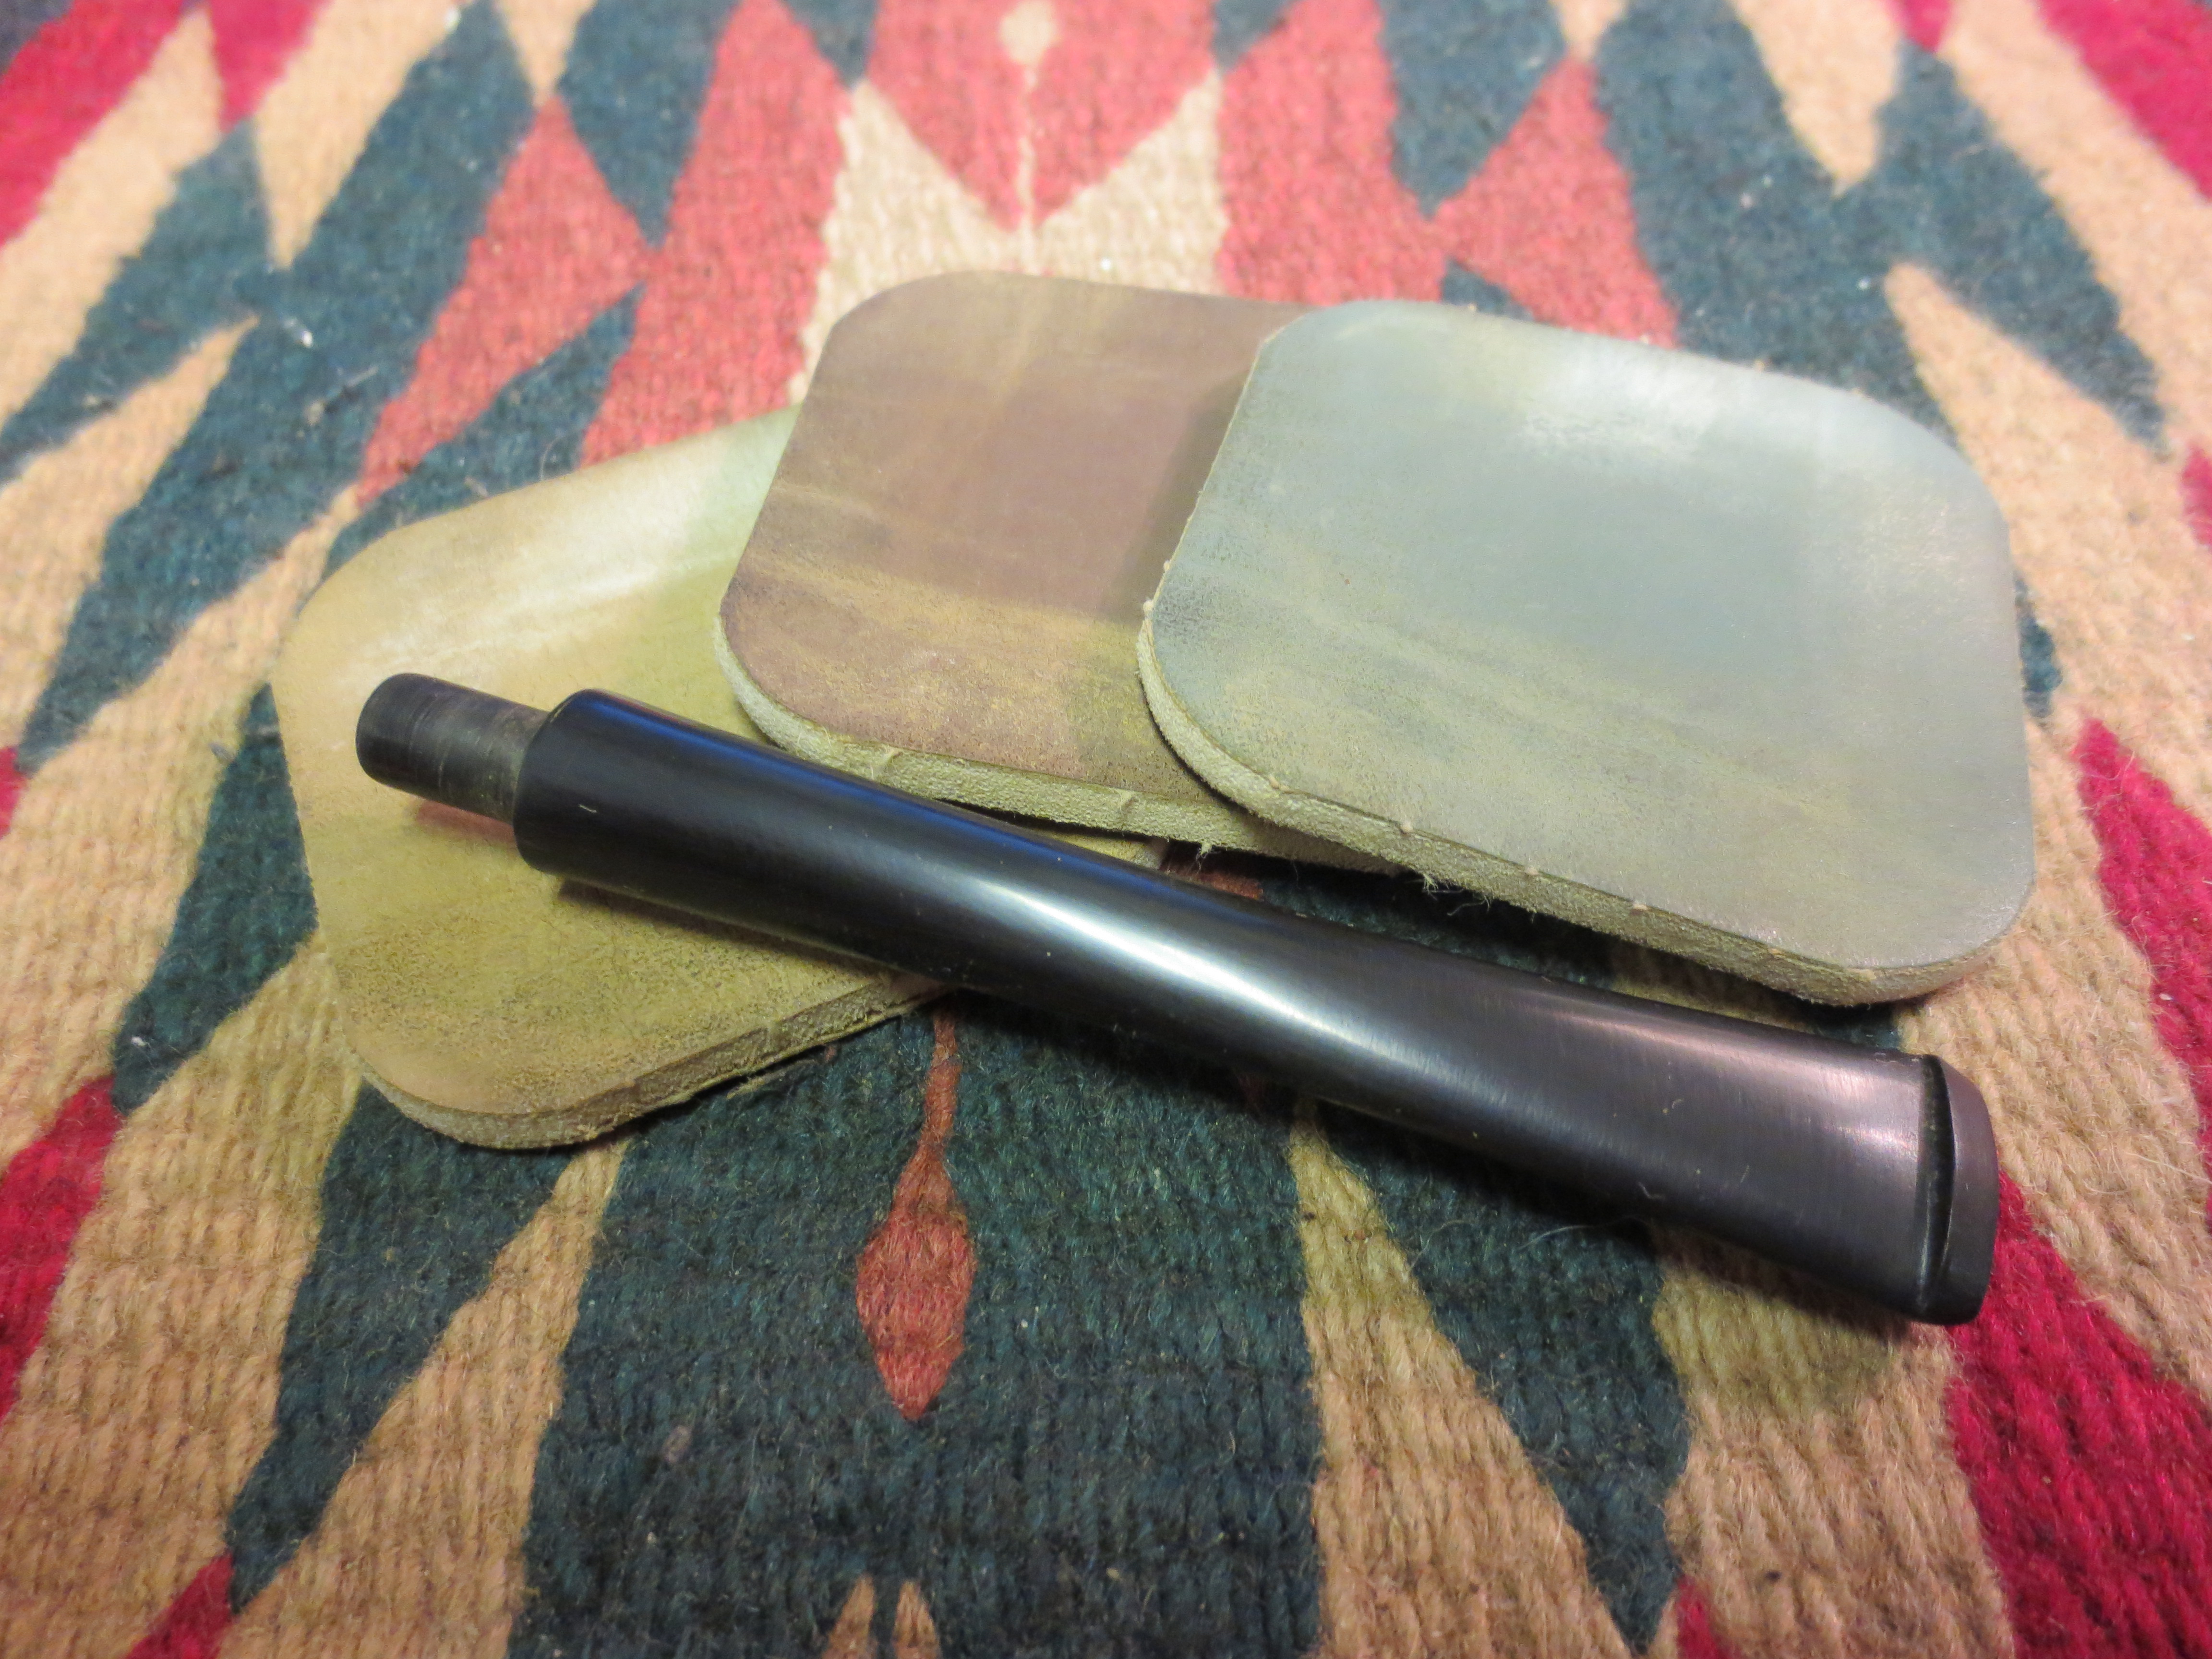
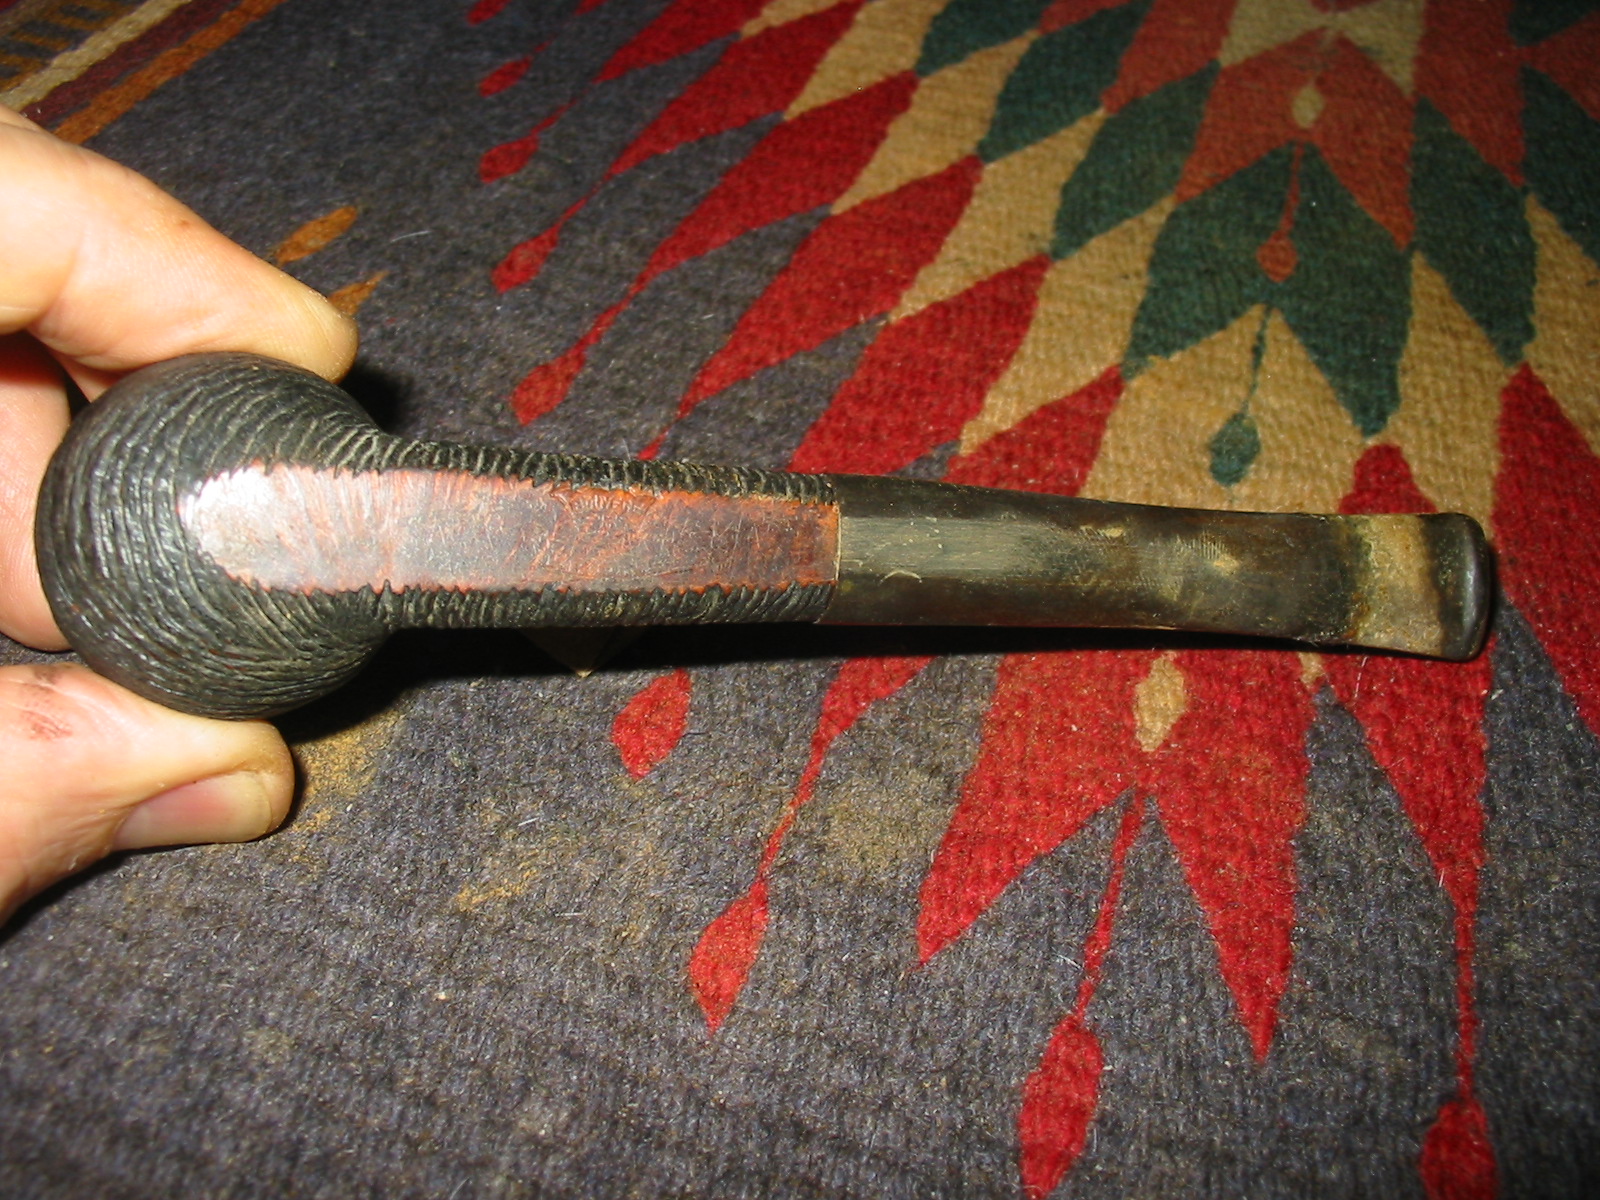
I sanded the stem with medium grit emery paper to remove the calcification around the button and also heated the tooth marks with a Bic lighter to lift them as much as possible. I “painted” the surface of the stem with the flame to burn off the sulfur of the oxidation that I had loosened by sanding. I repaired the tooth marks on both sides of the stem with black superglue and set it aside to dry overnight.

IMG_1500

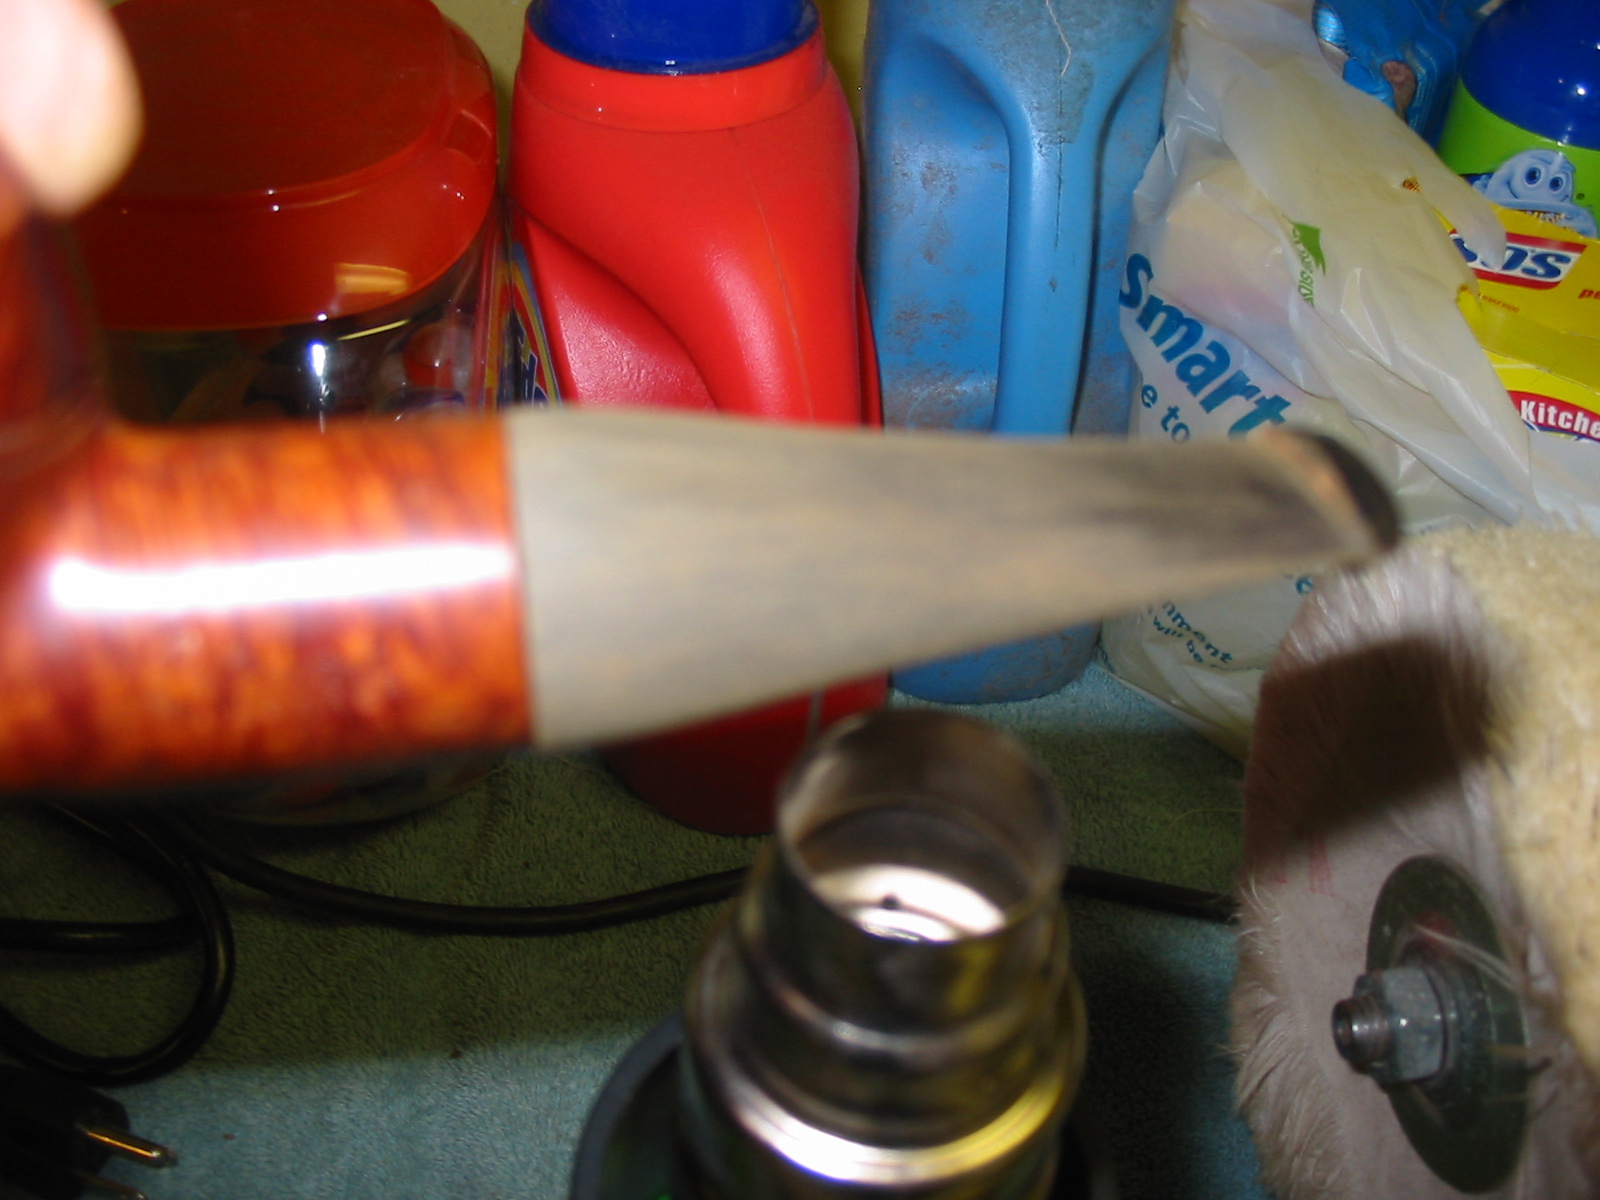
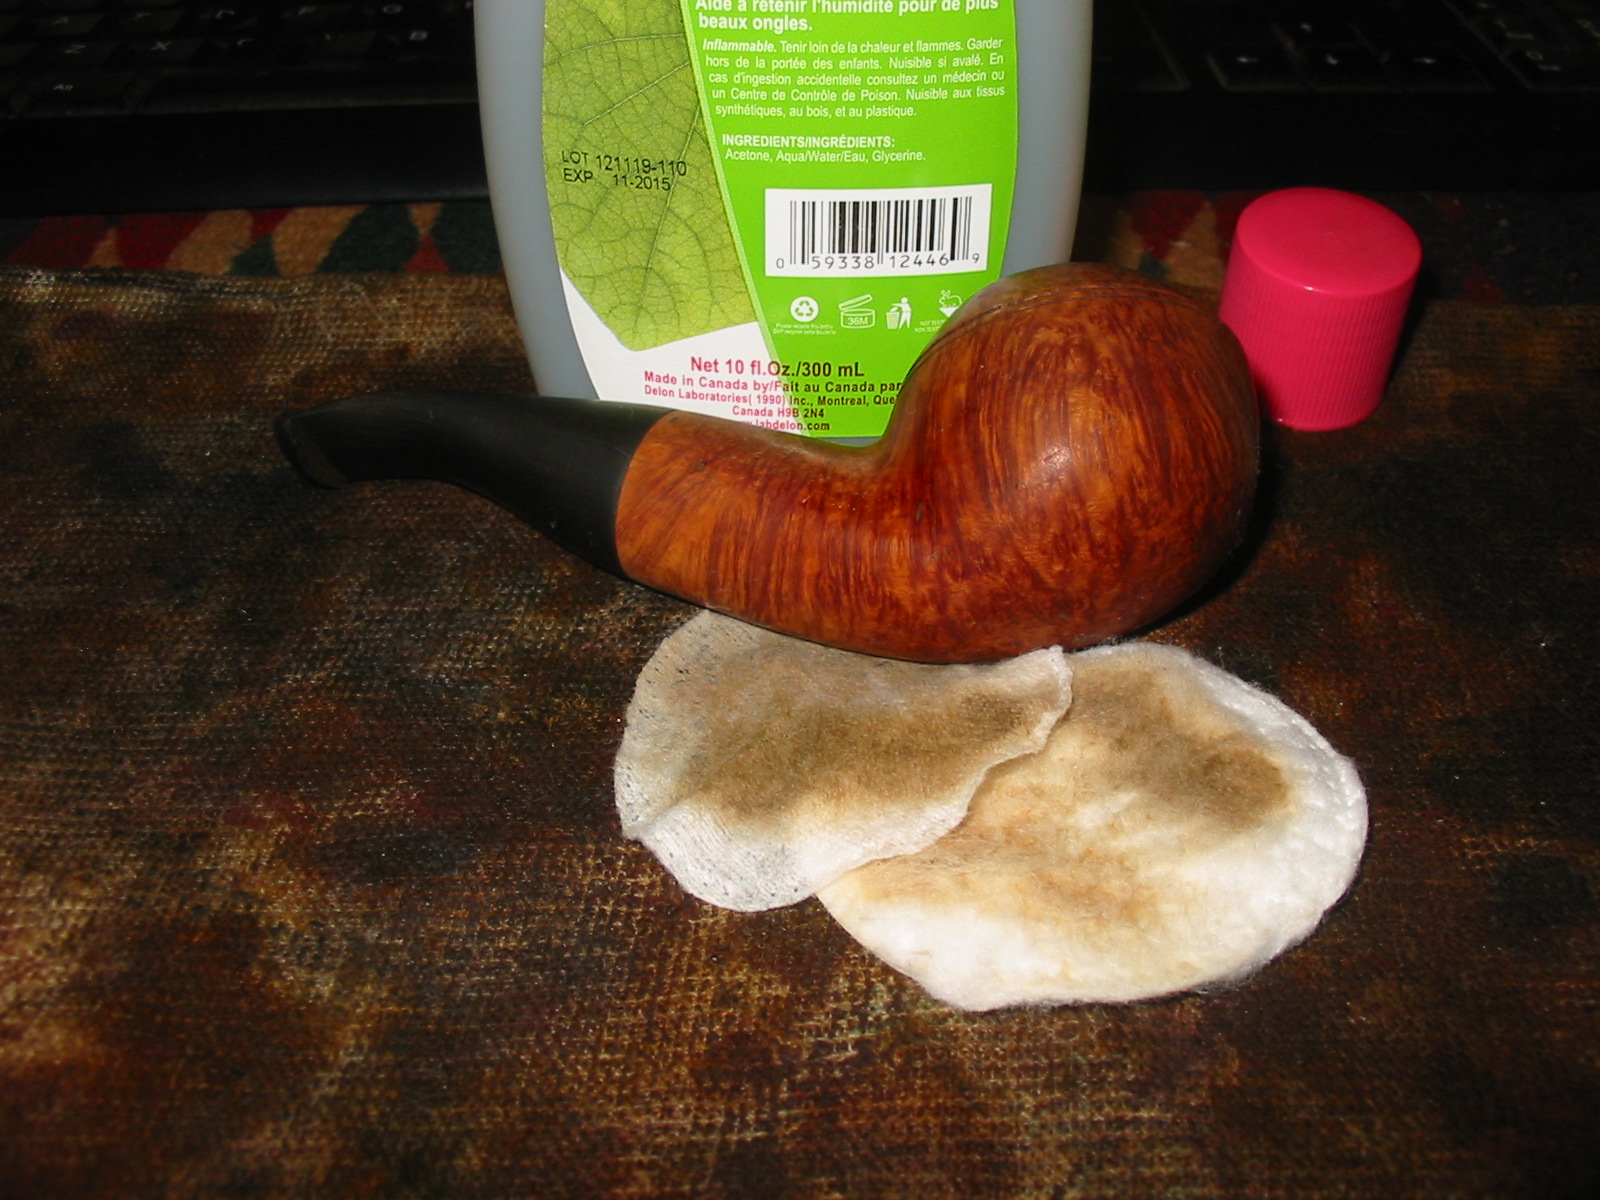
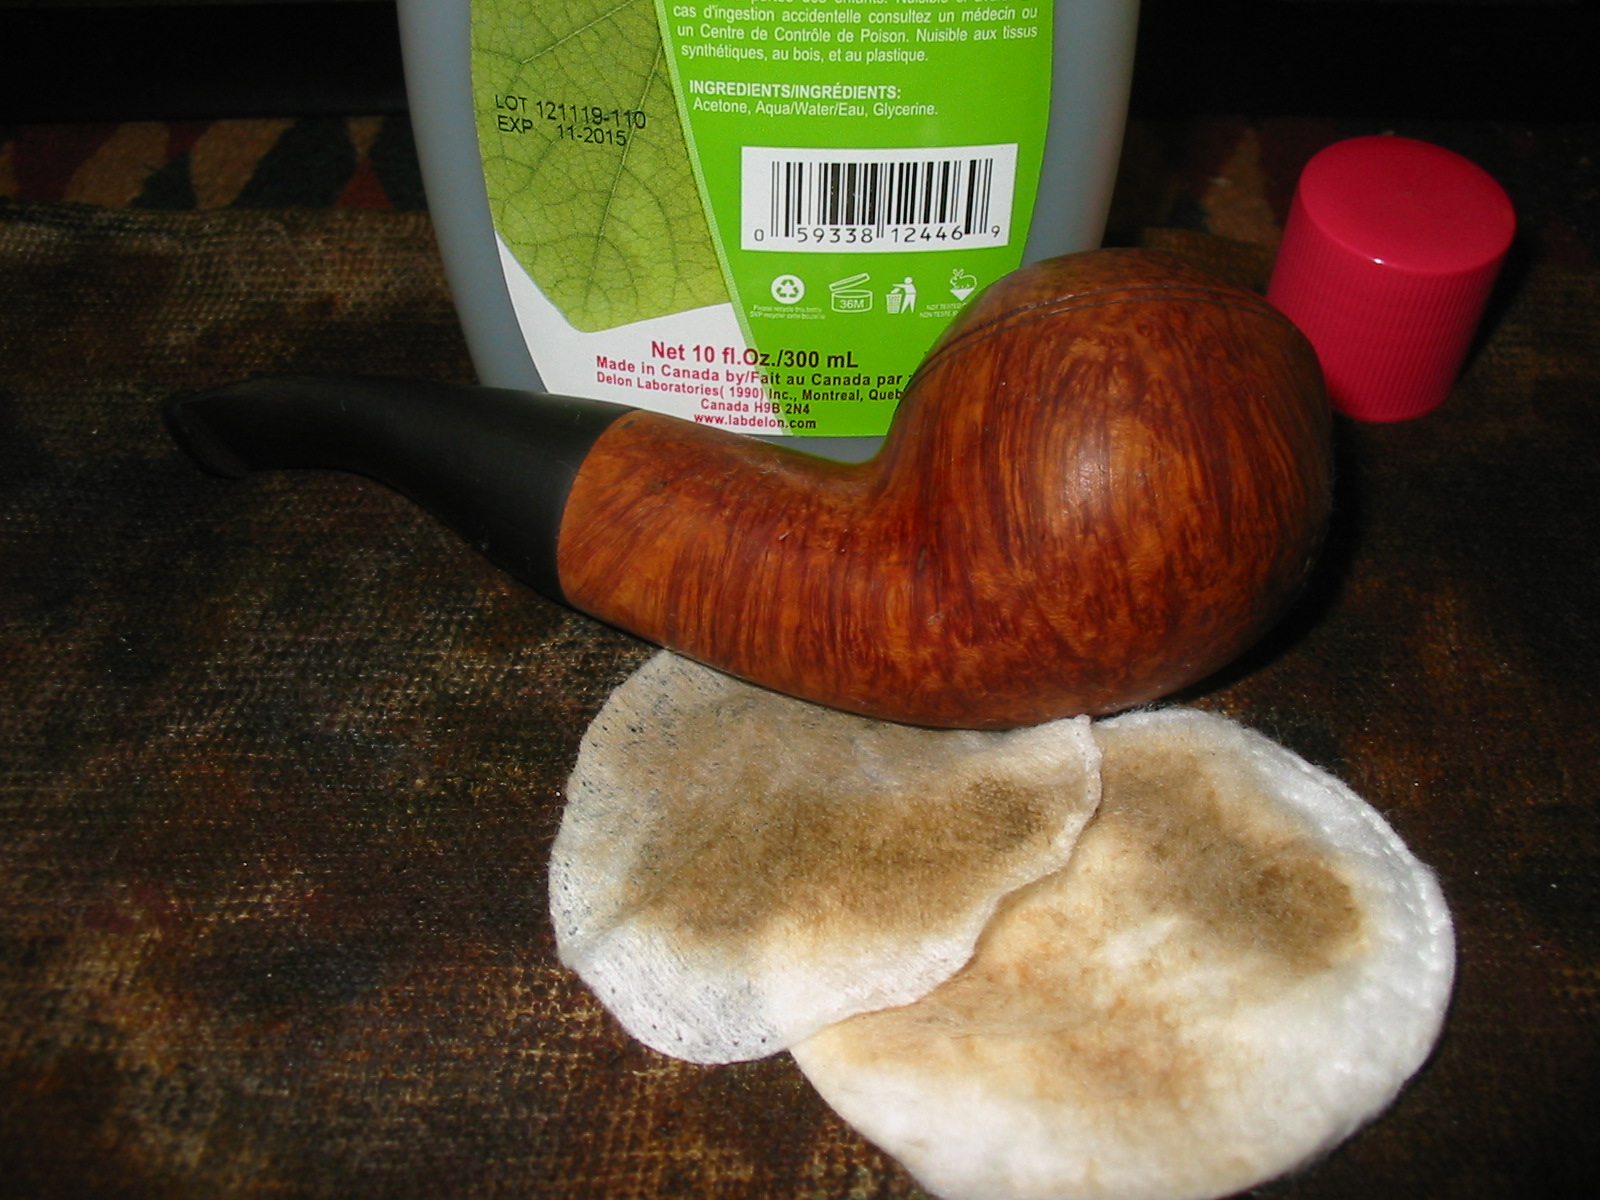
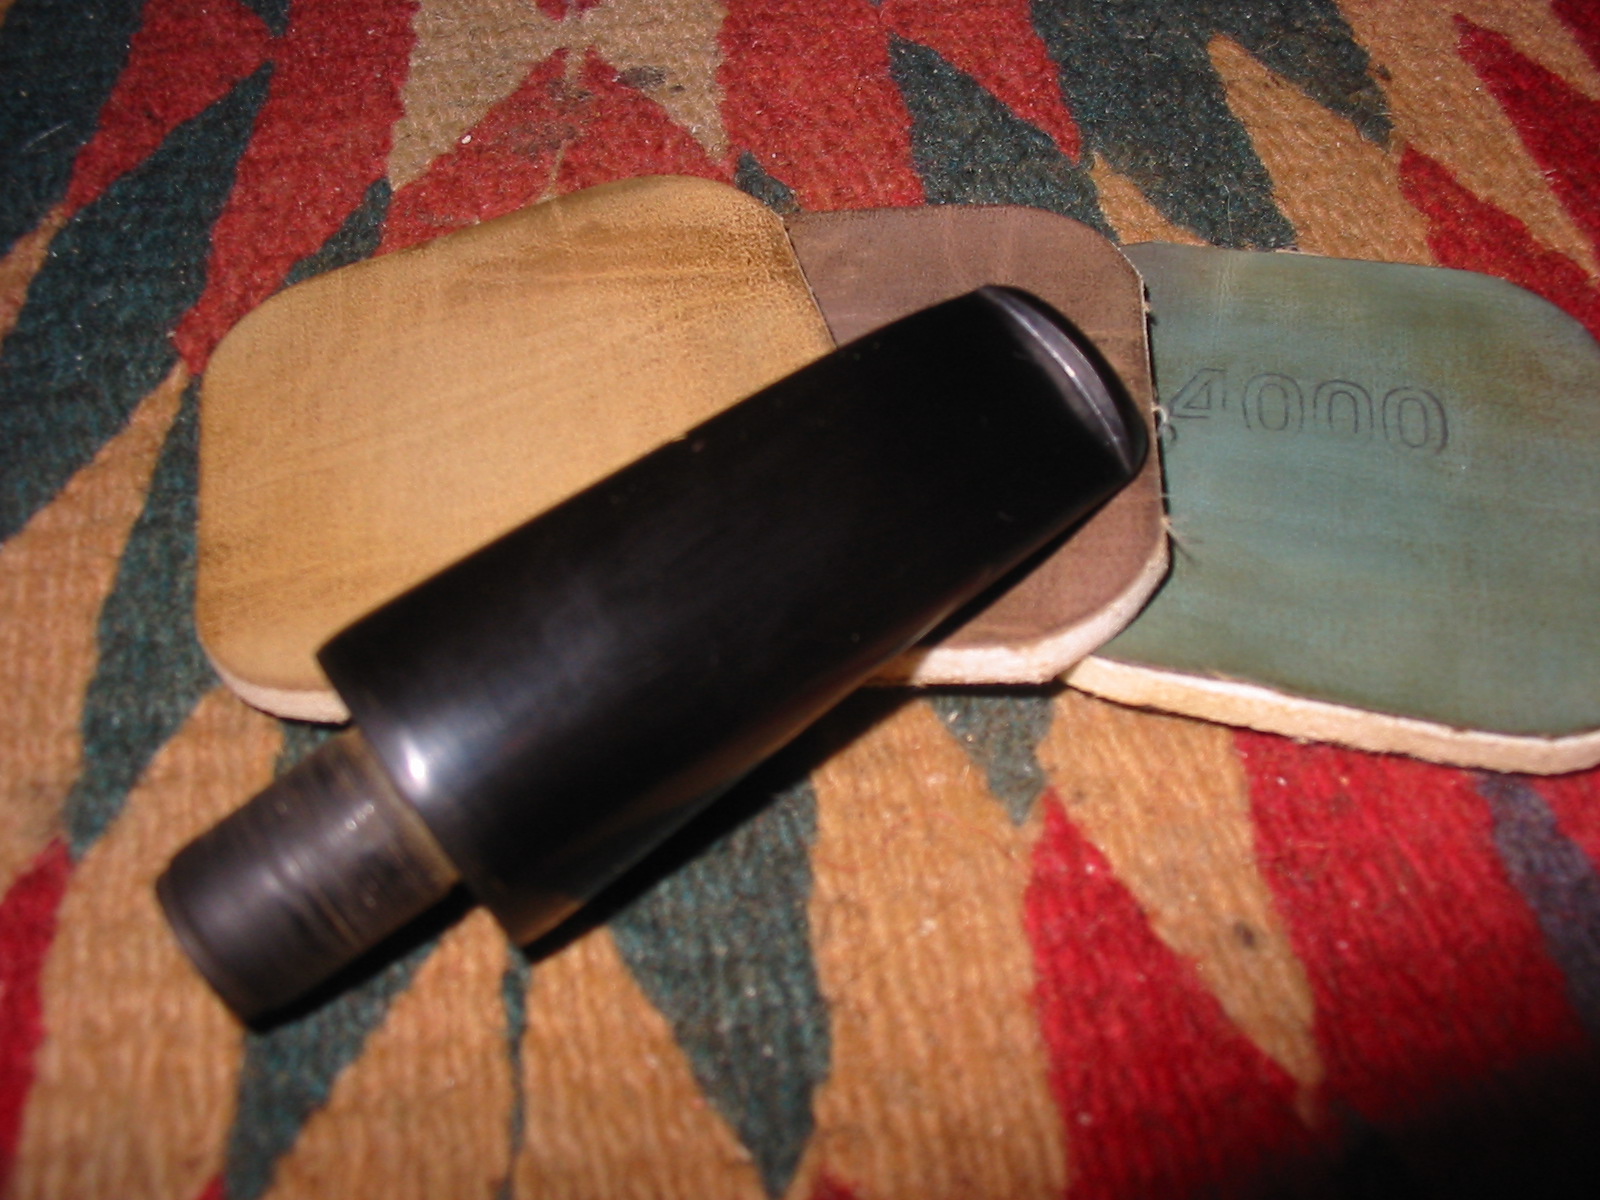
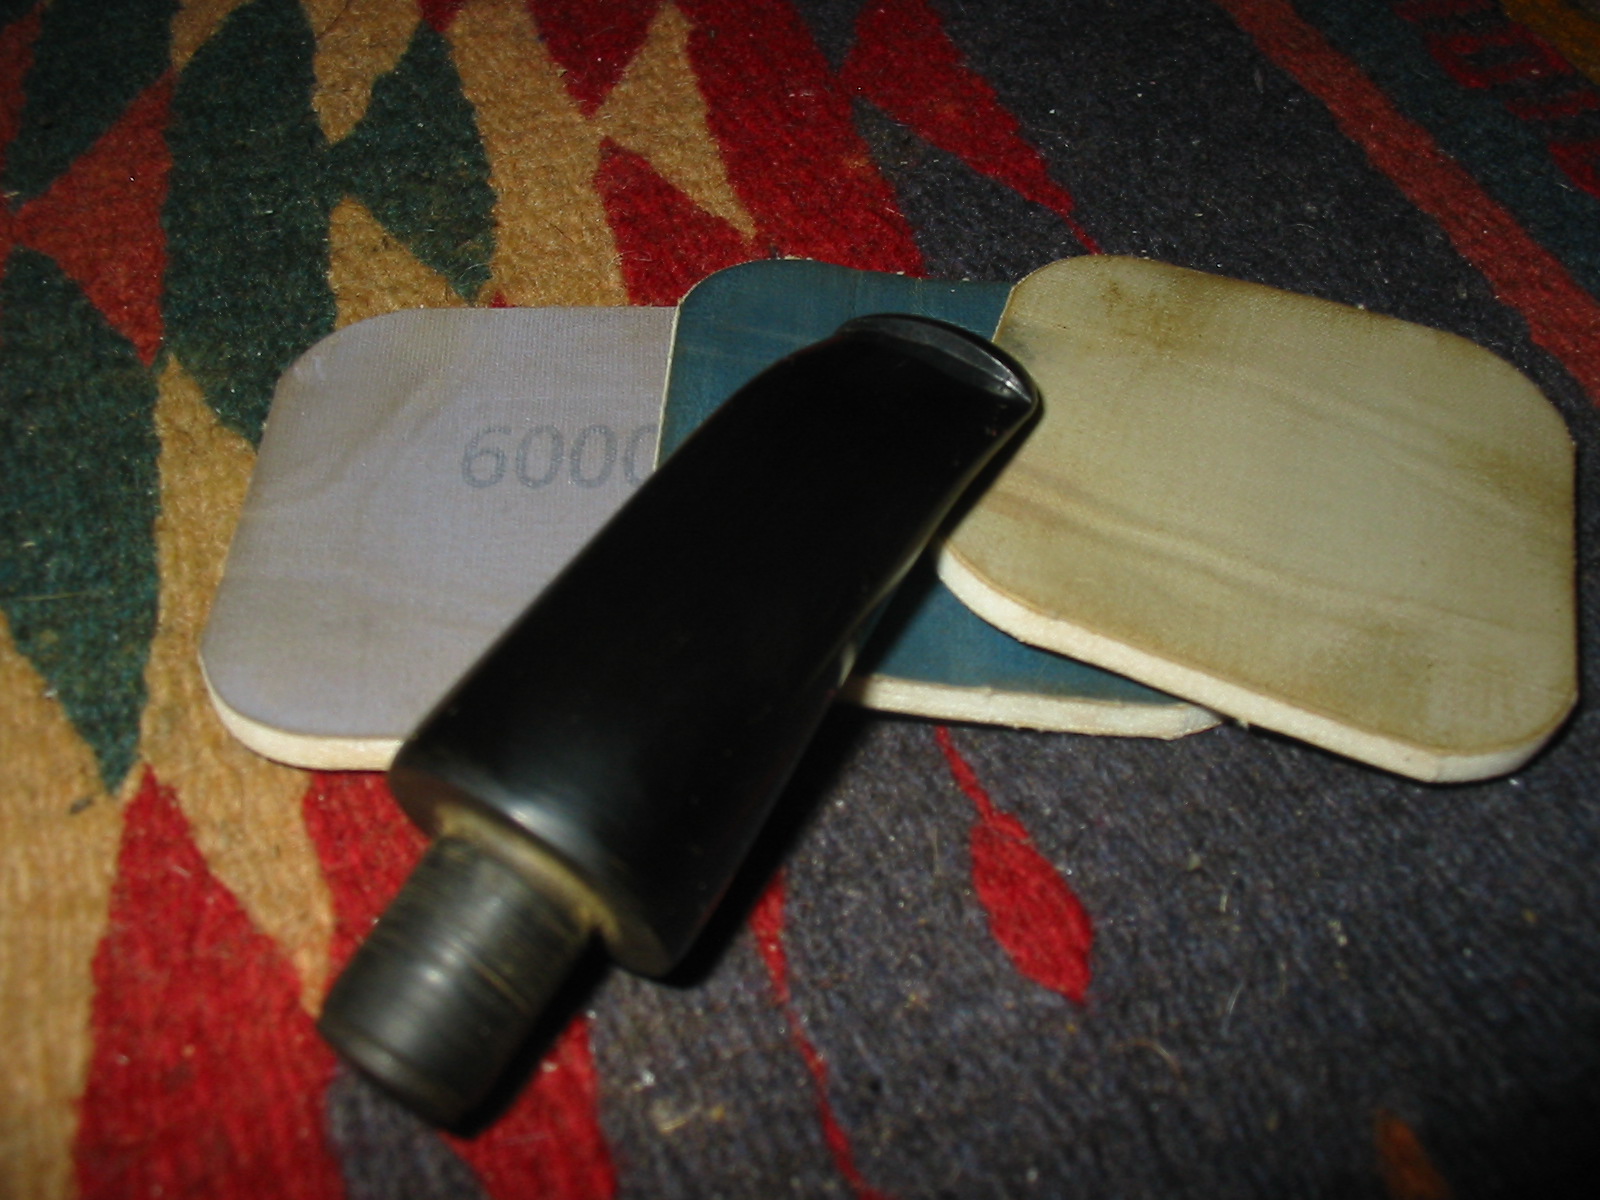
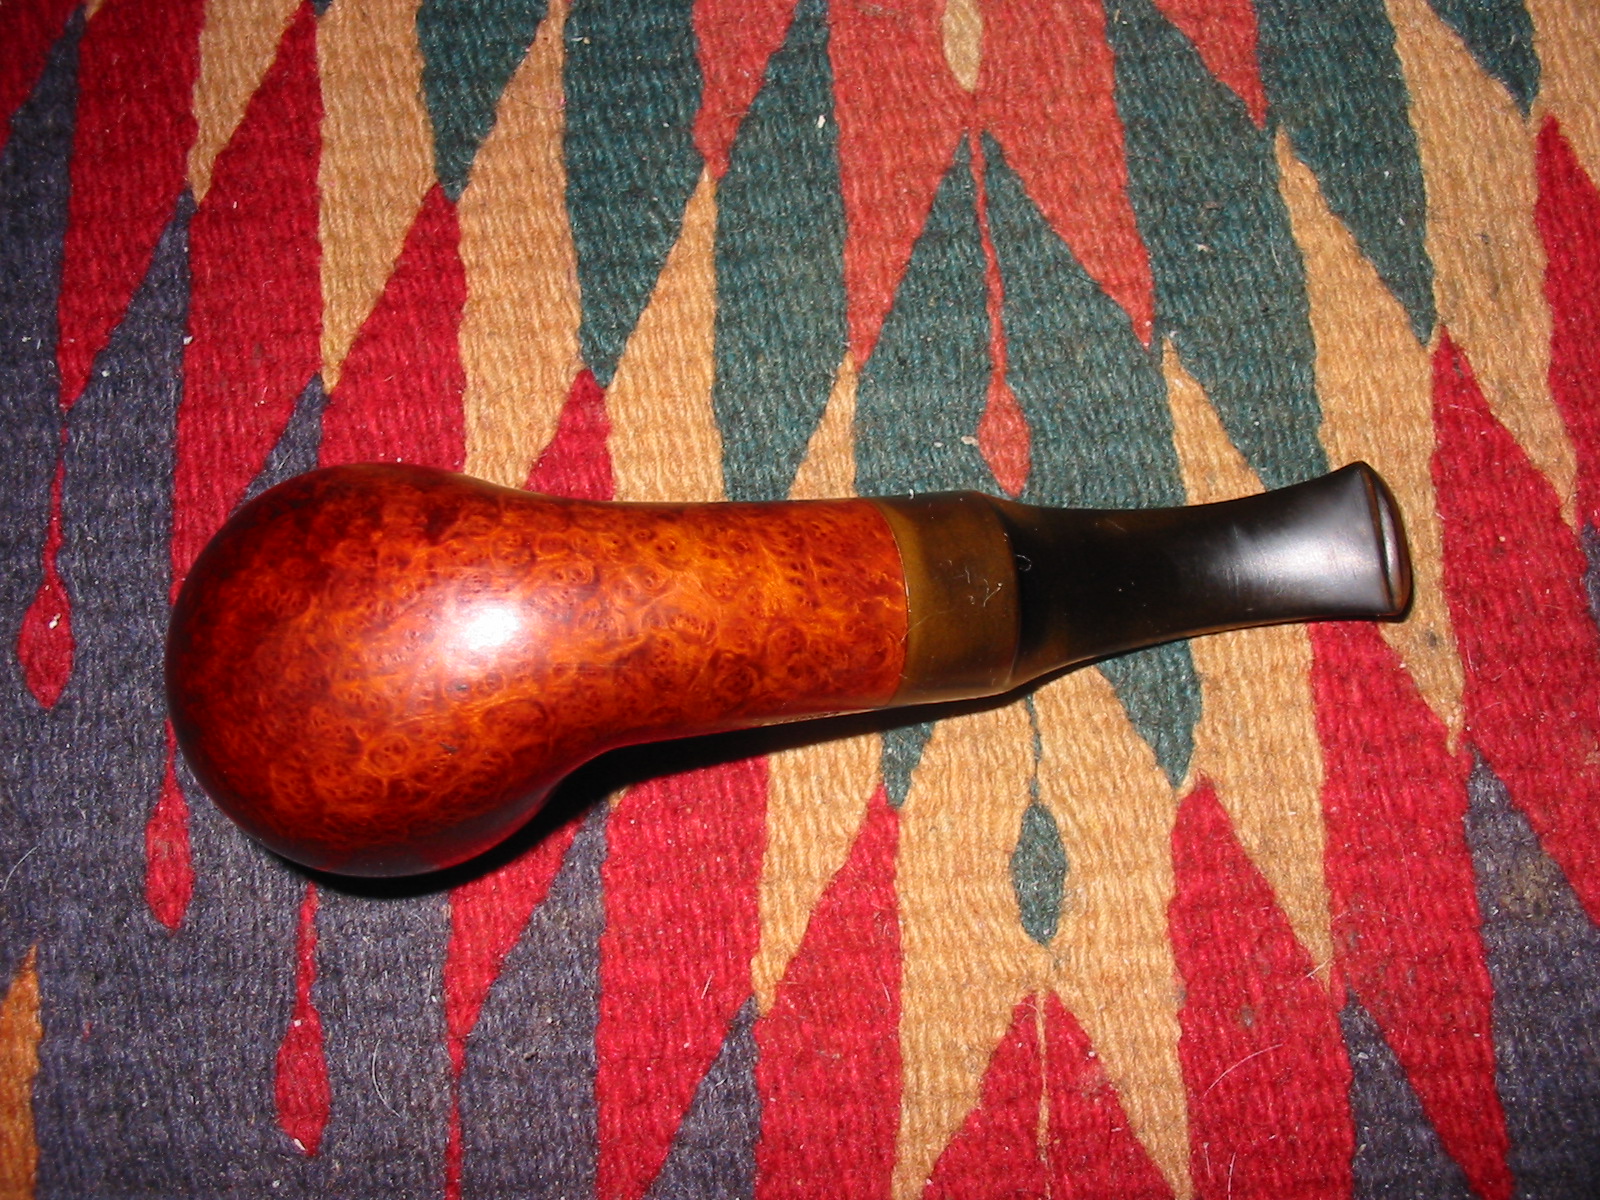
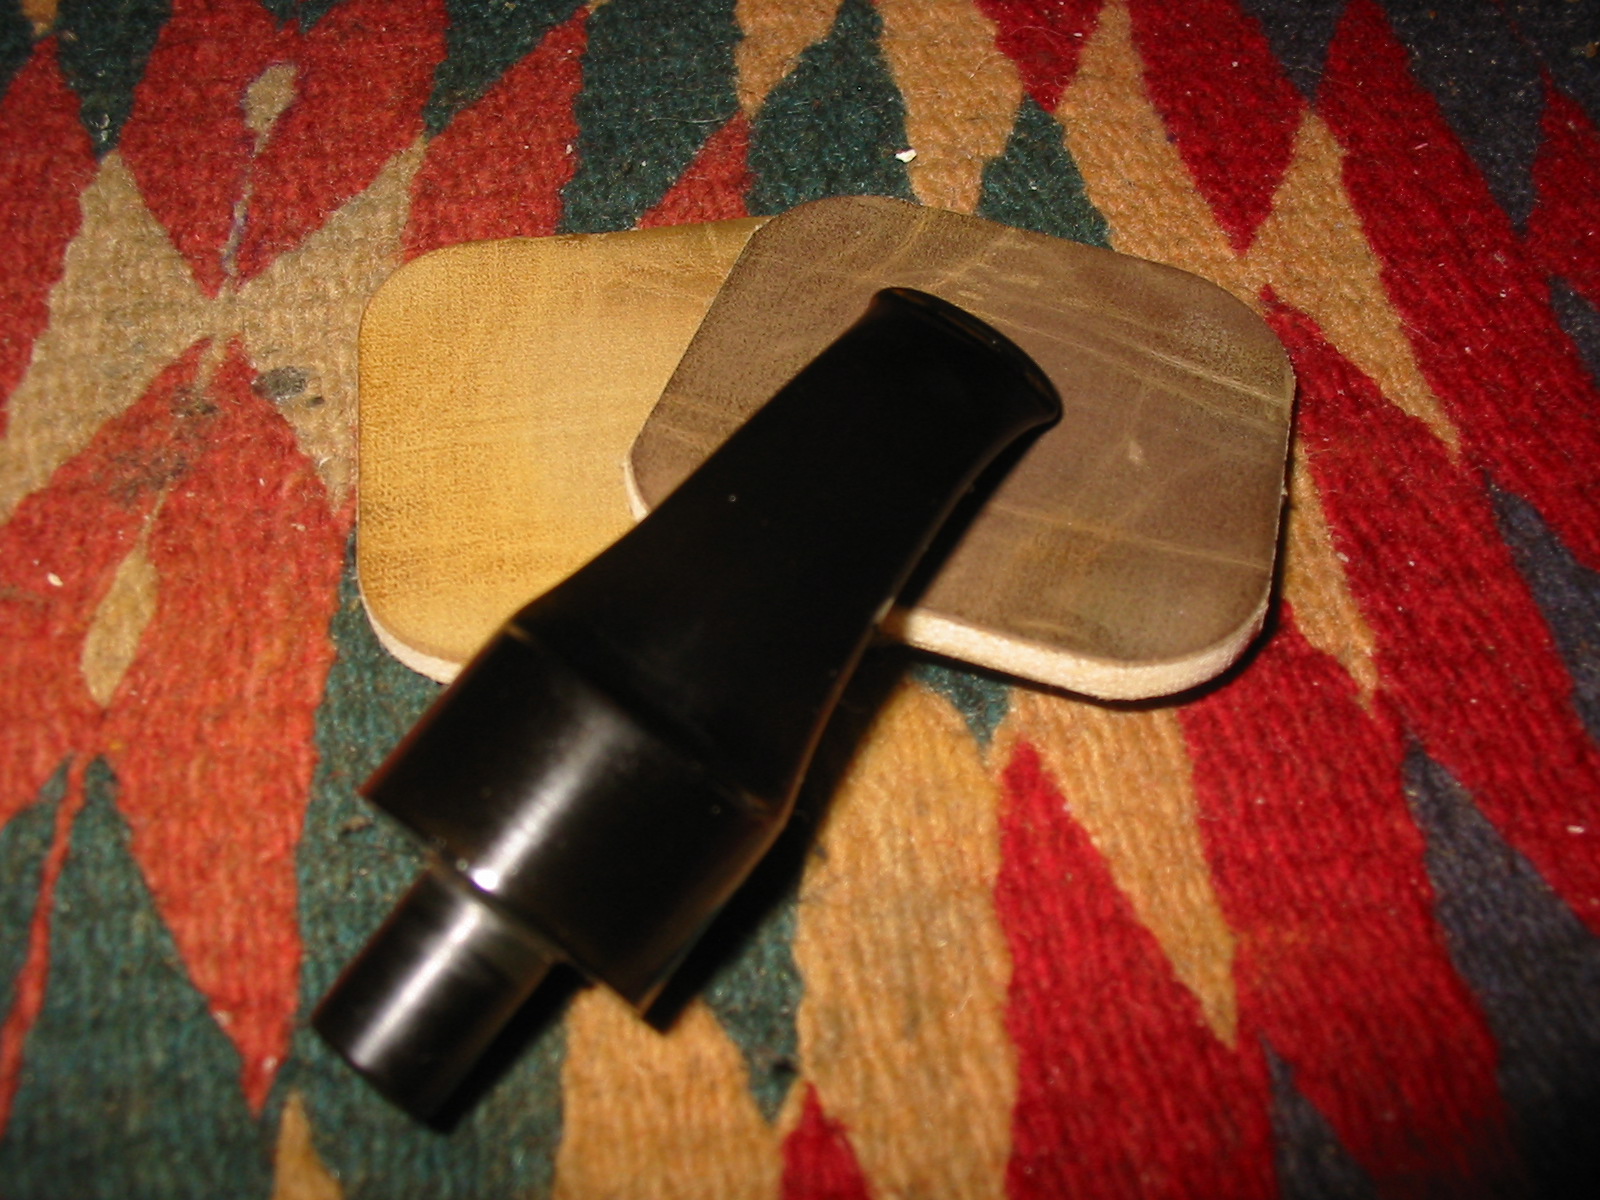
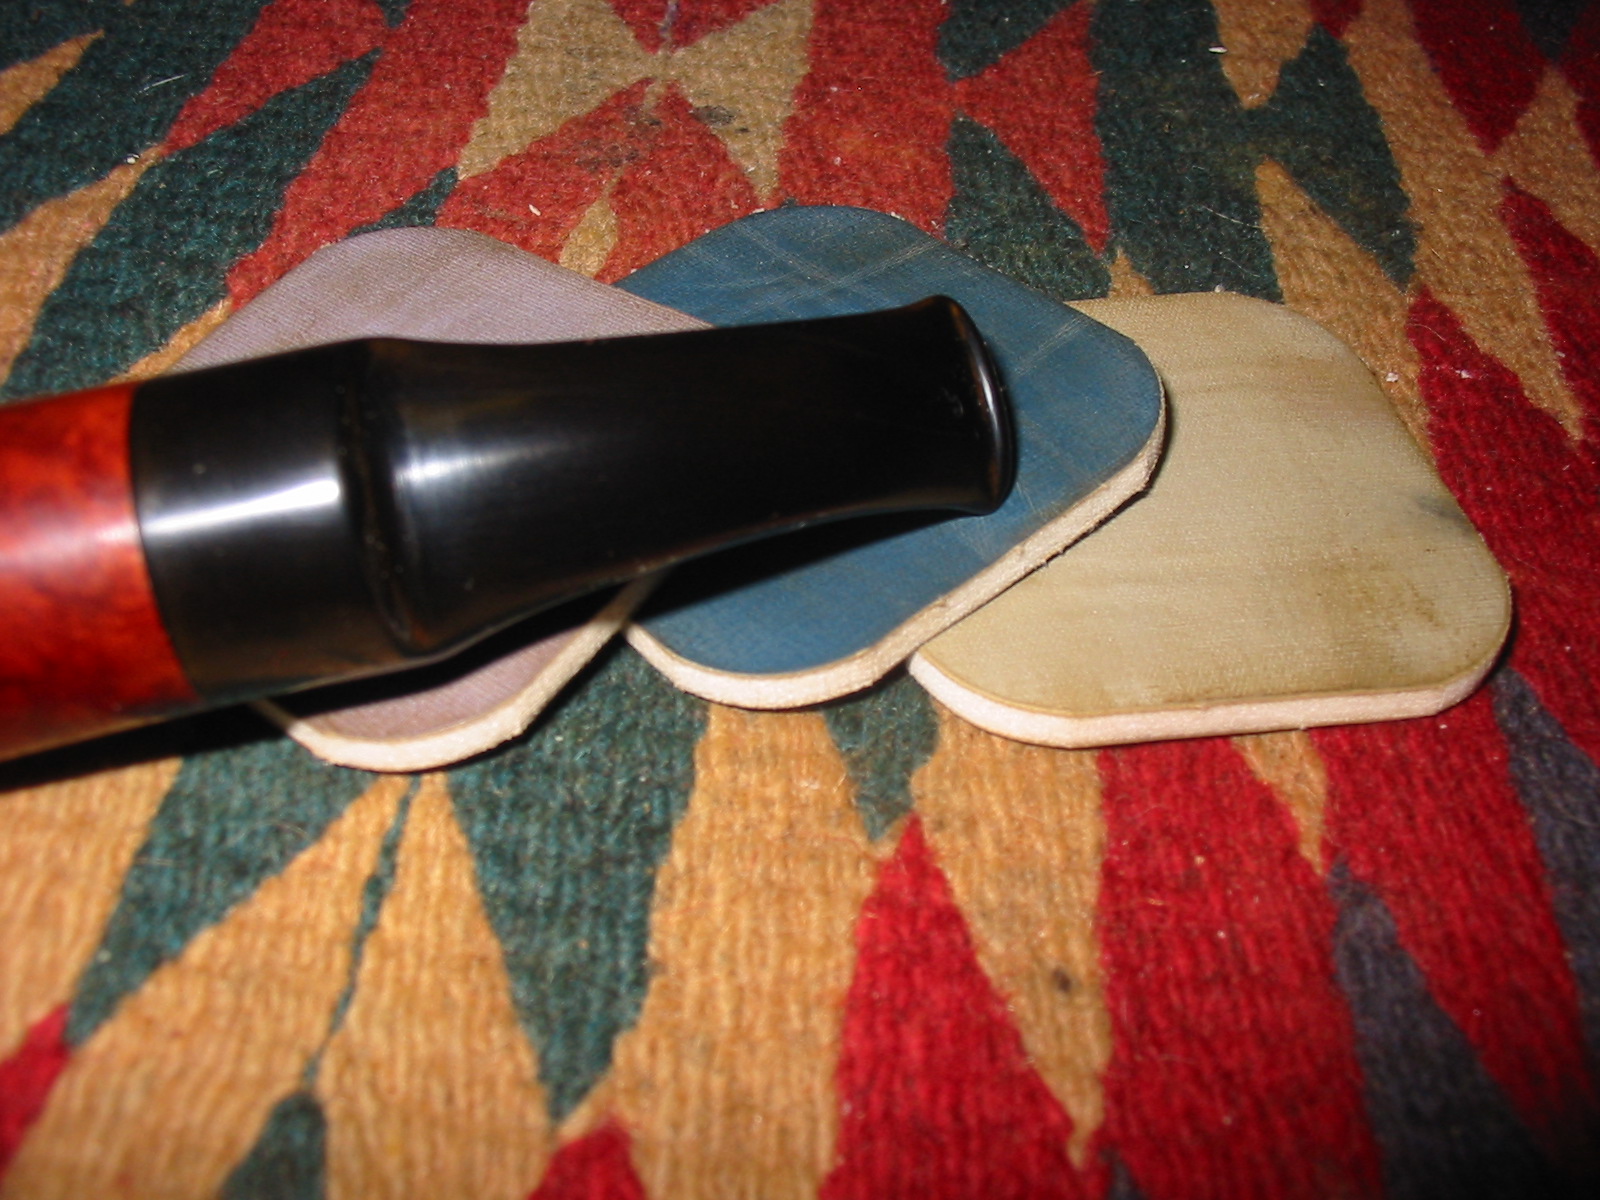
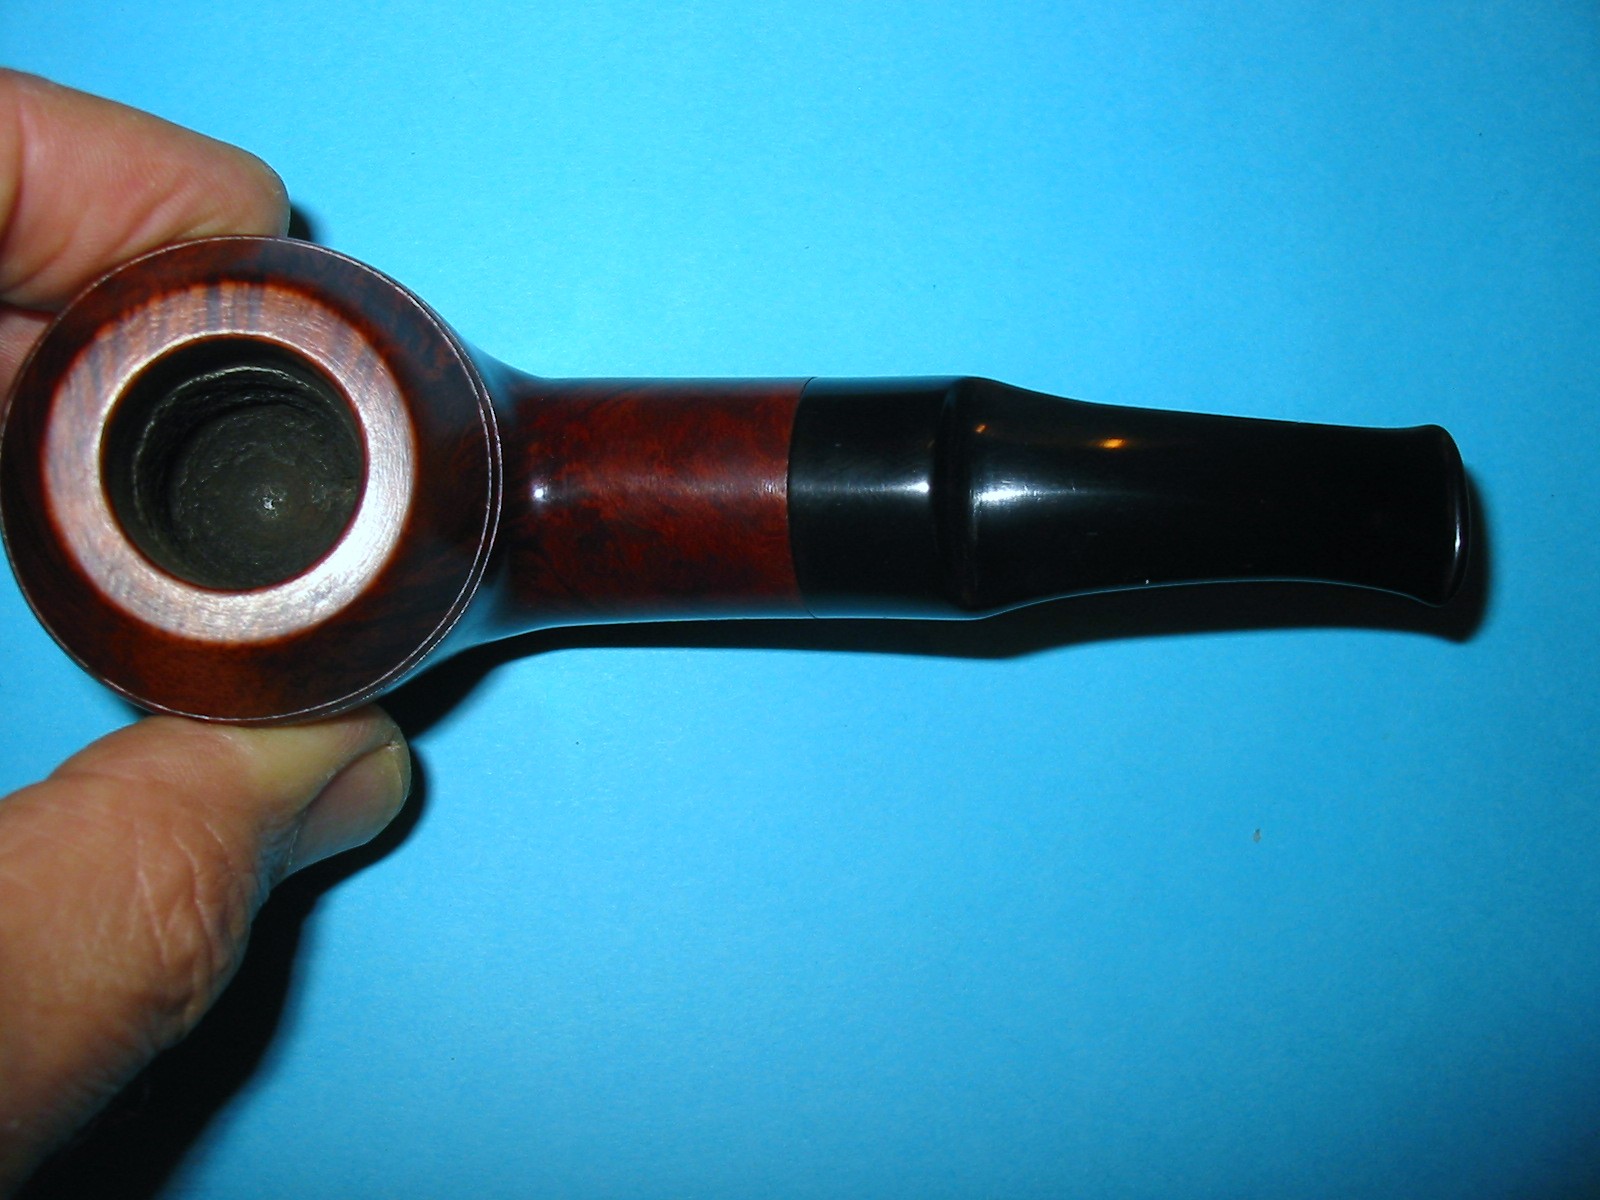
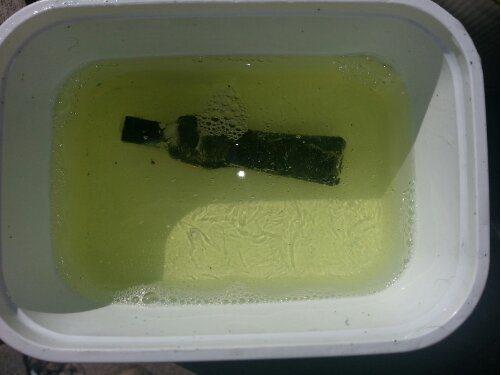
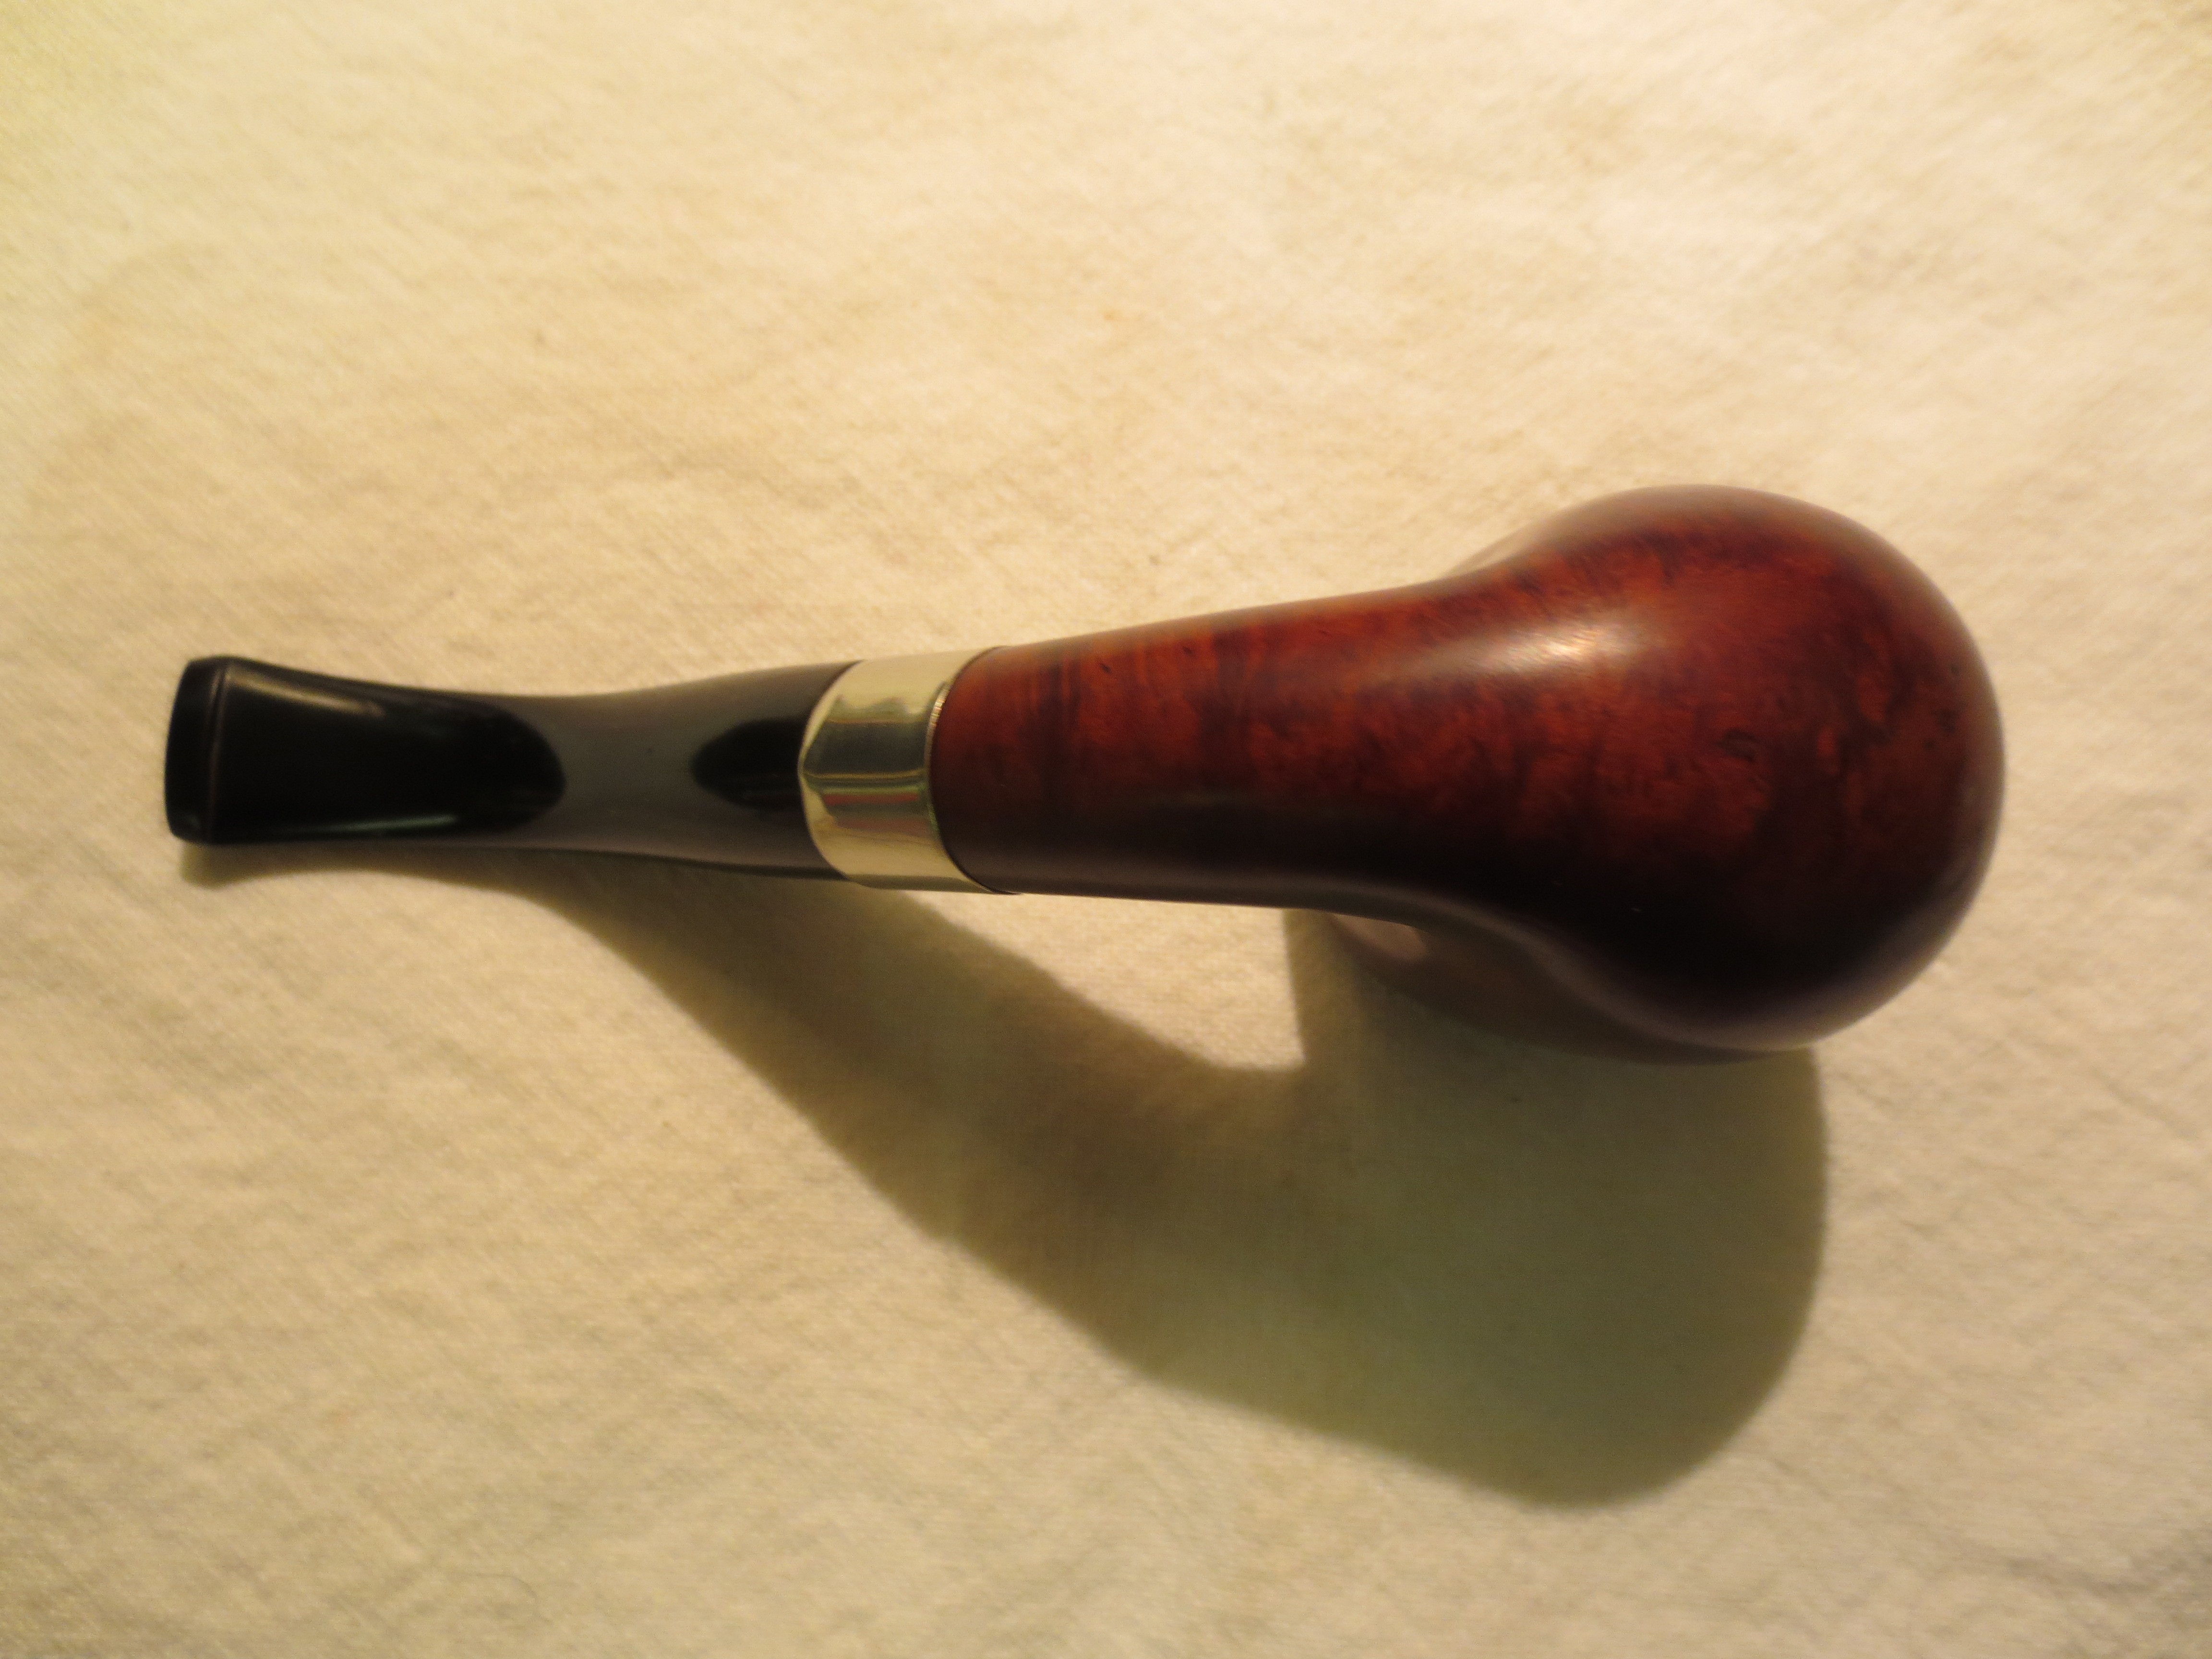
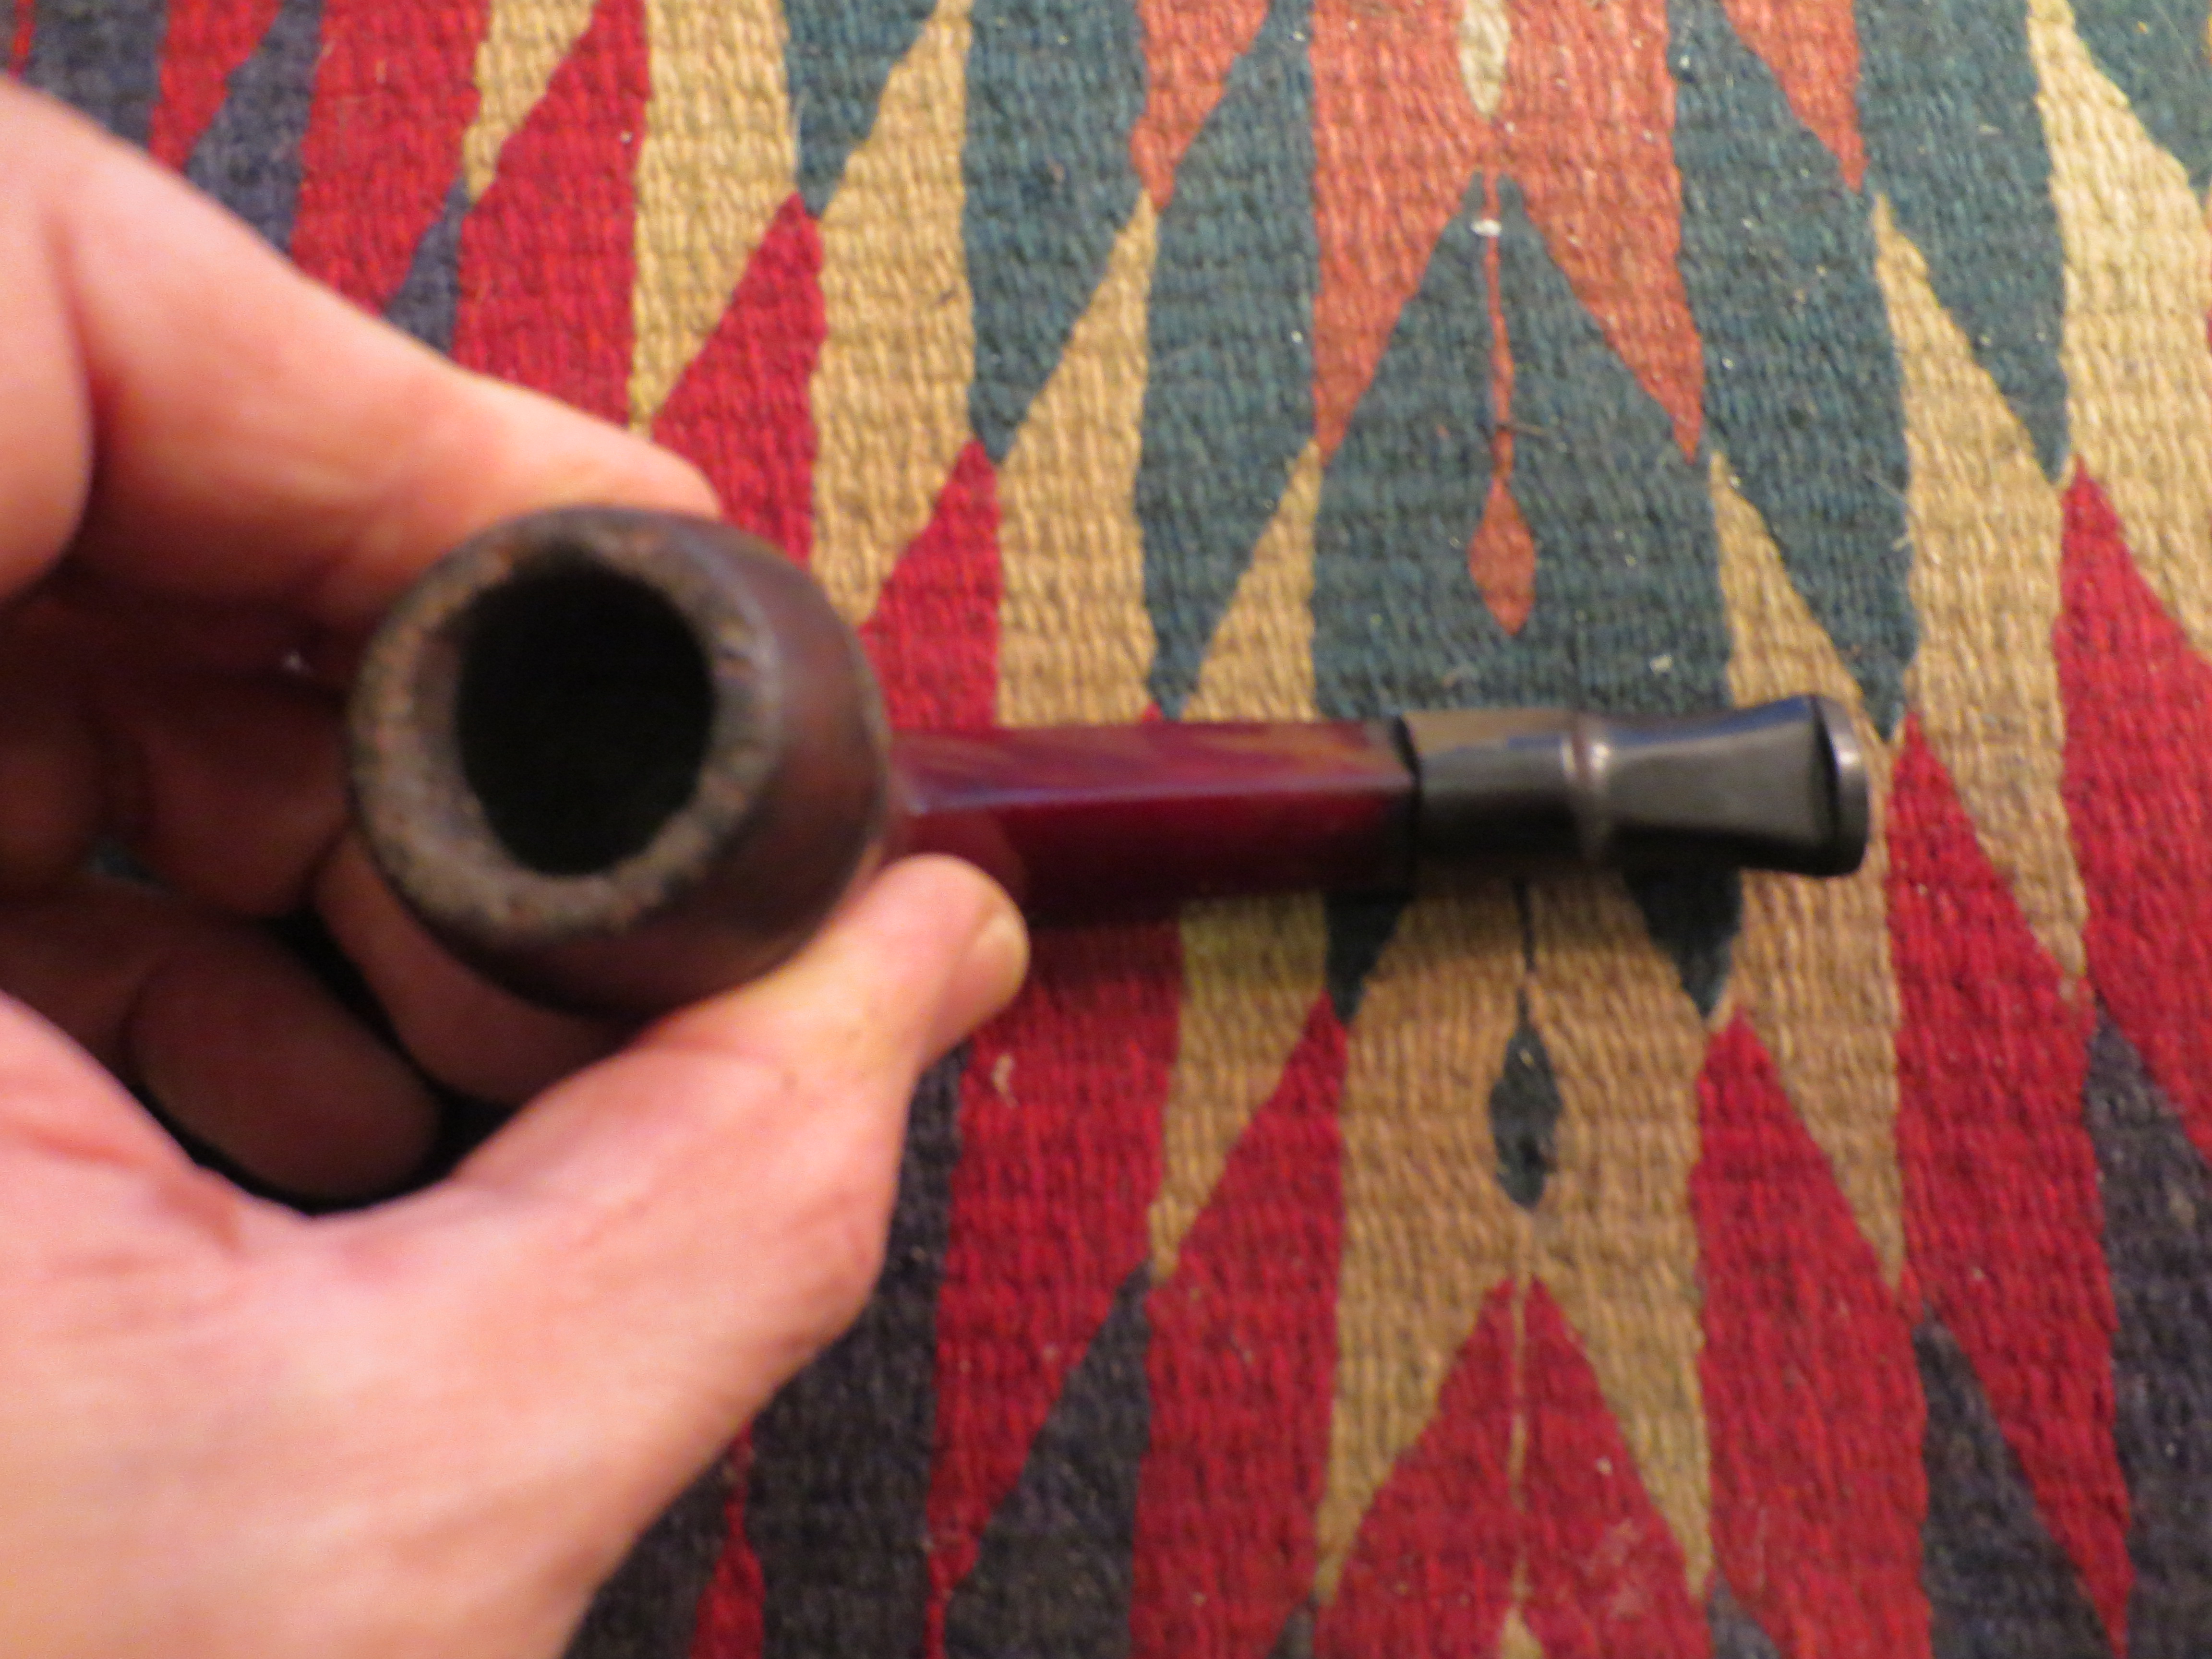
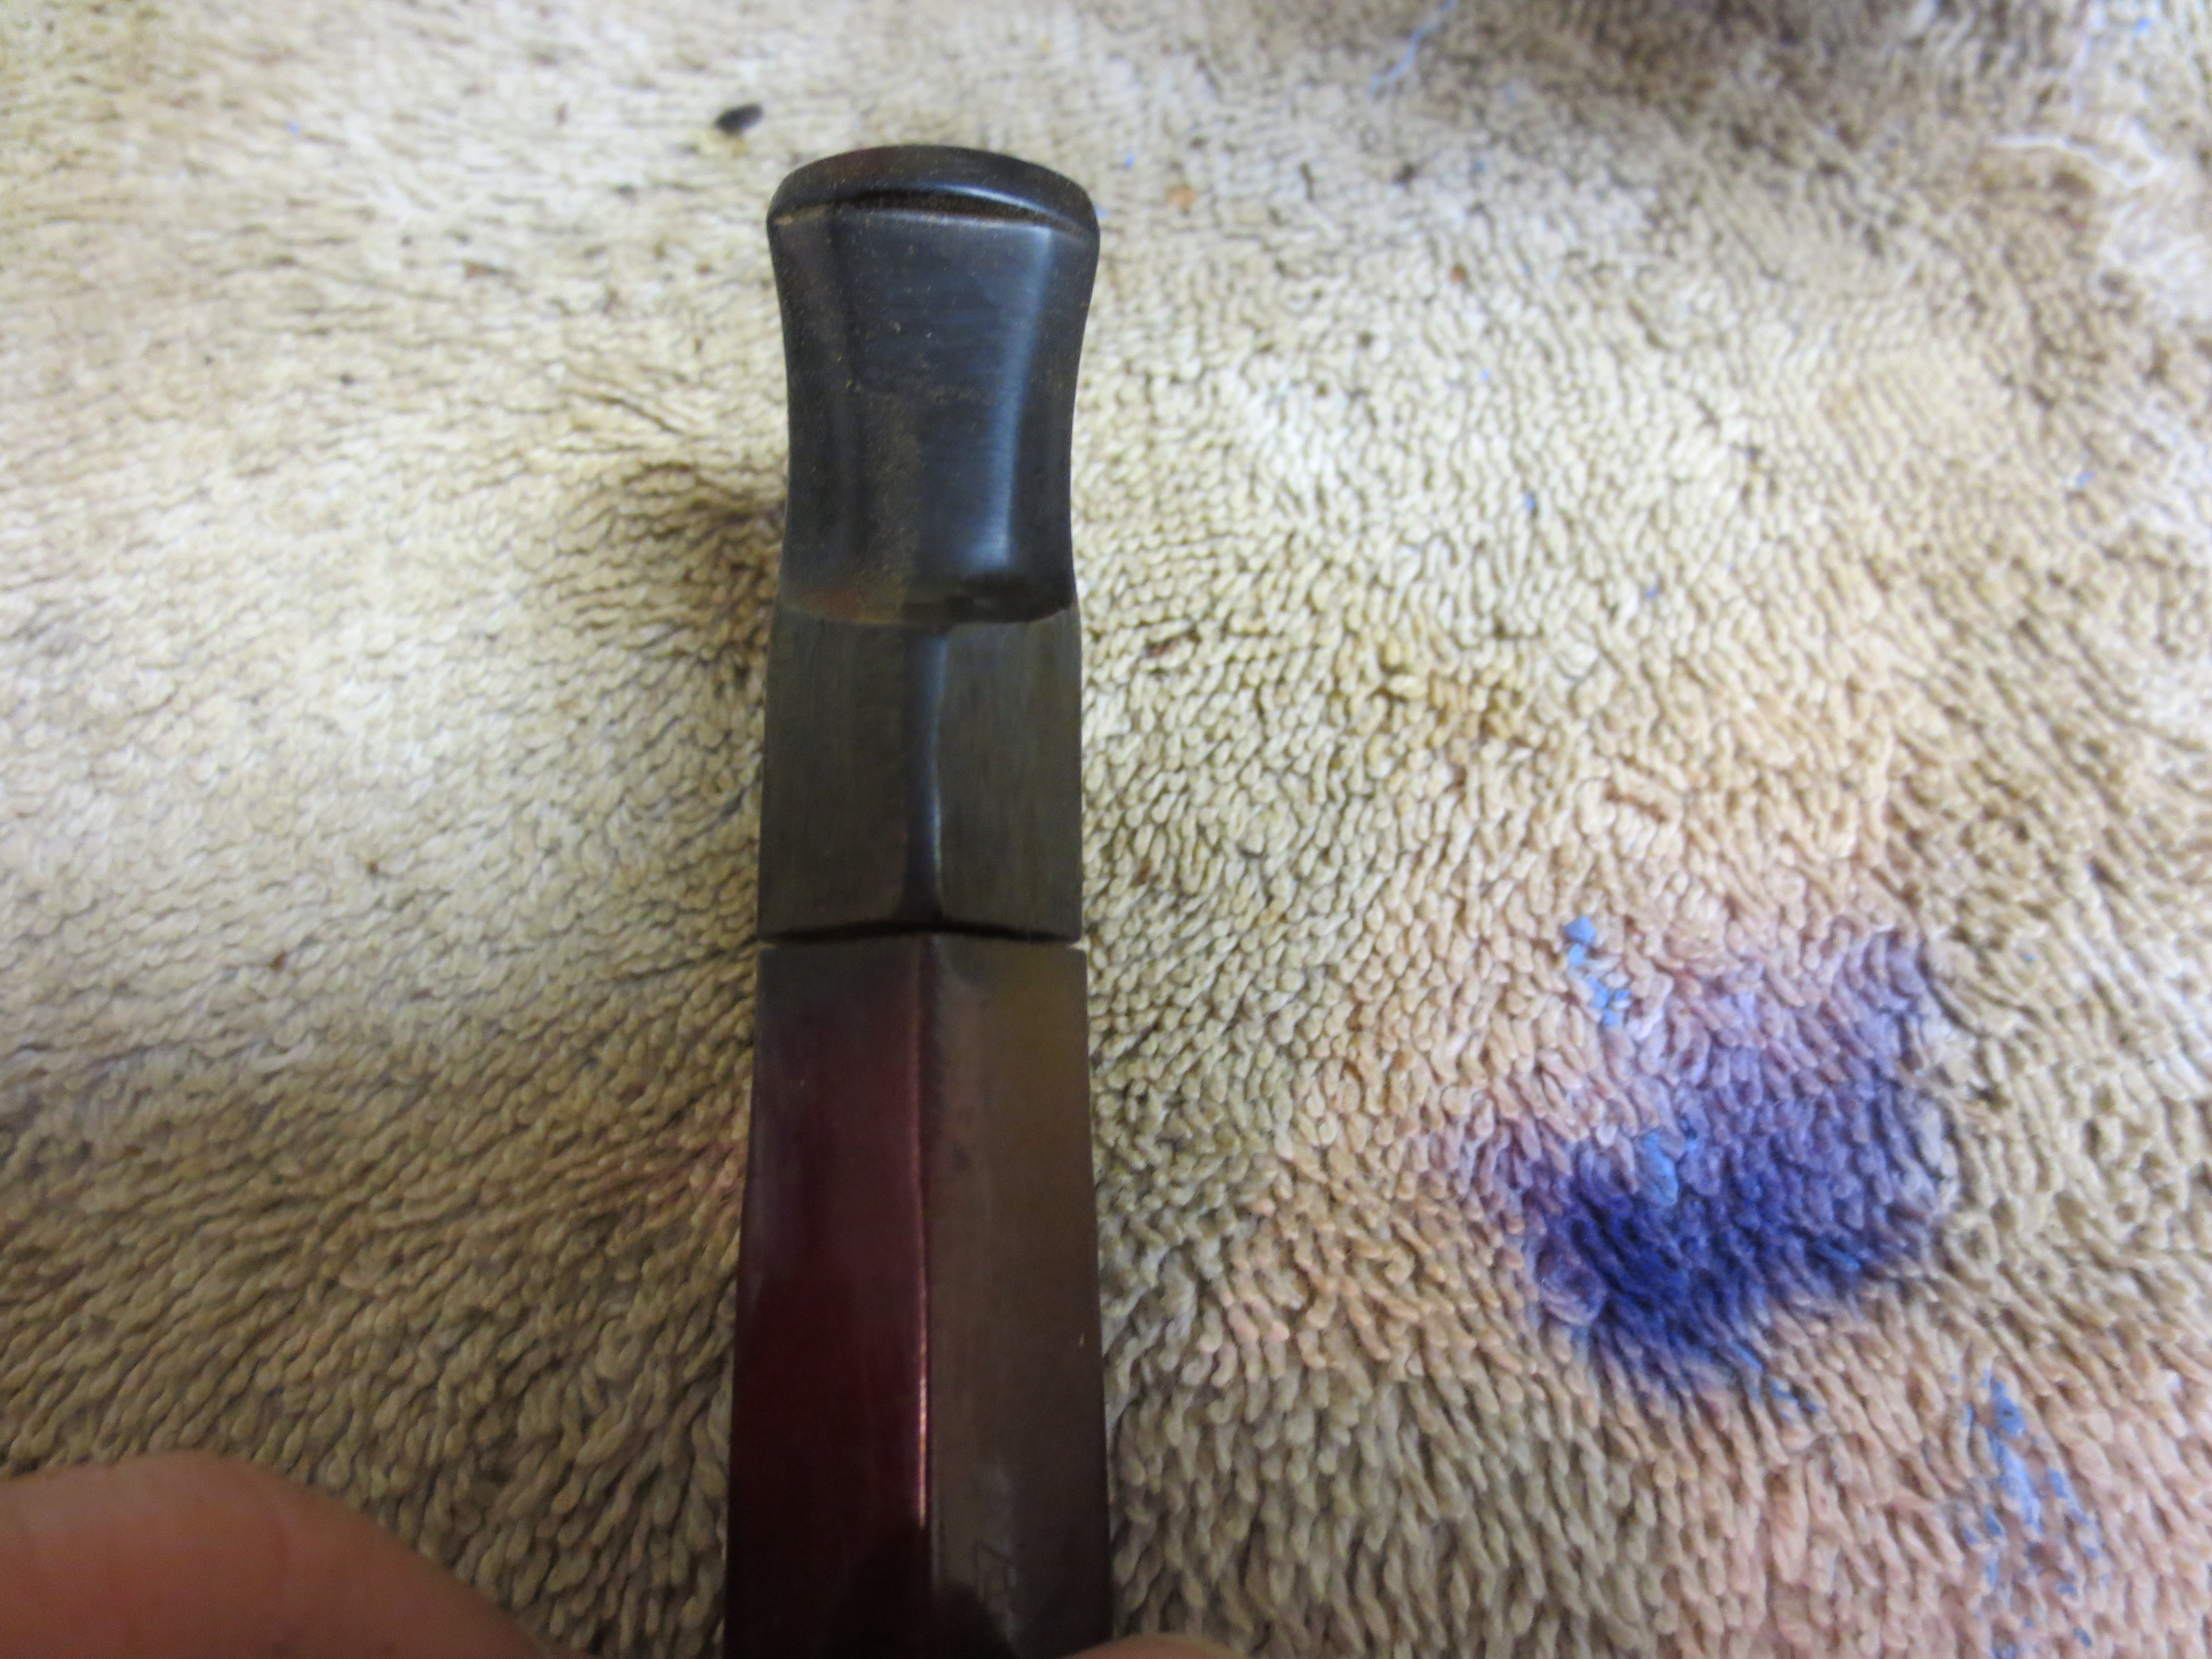
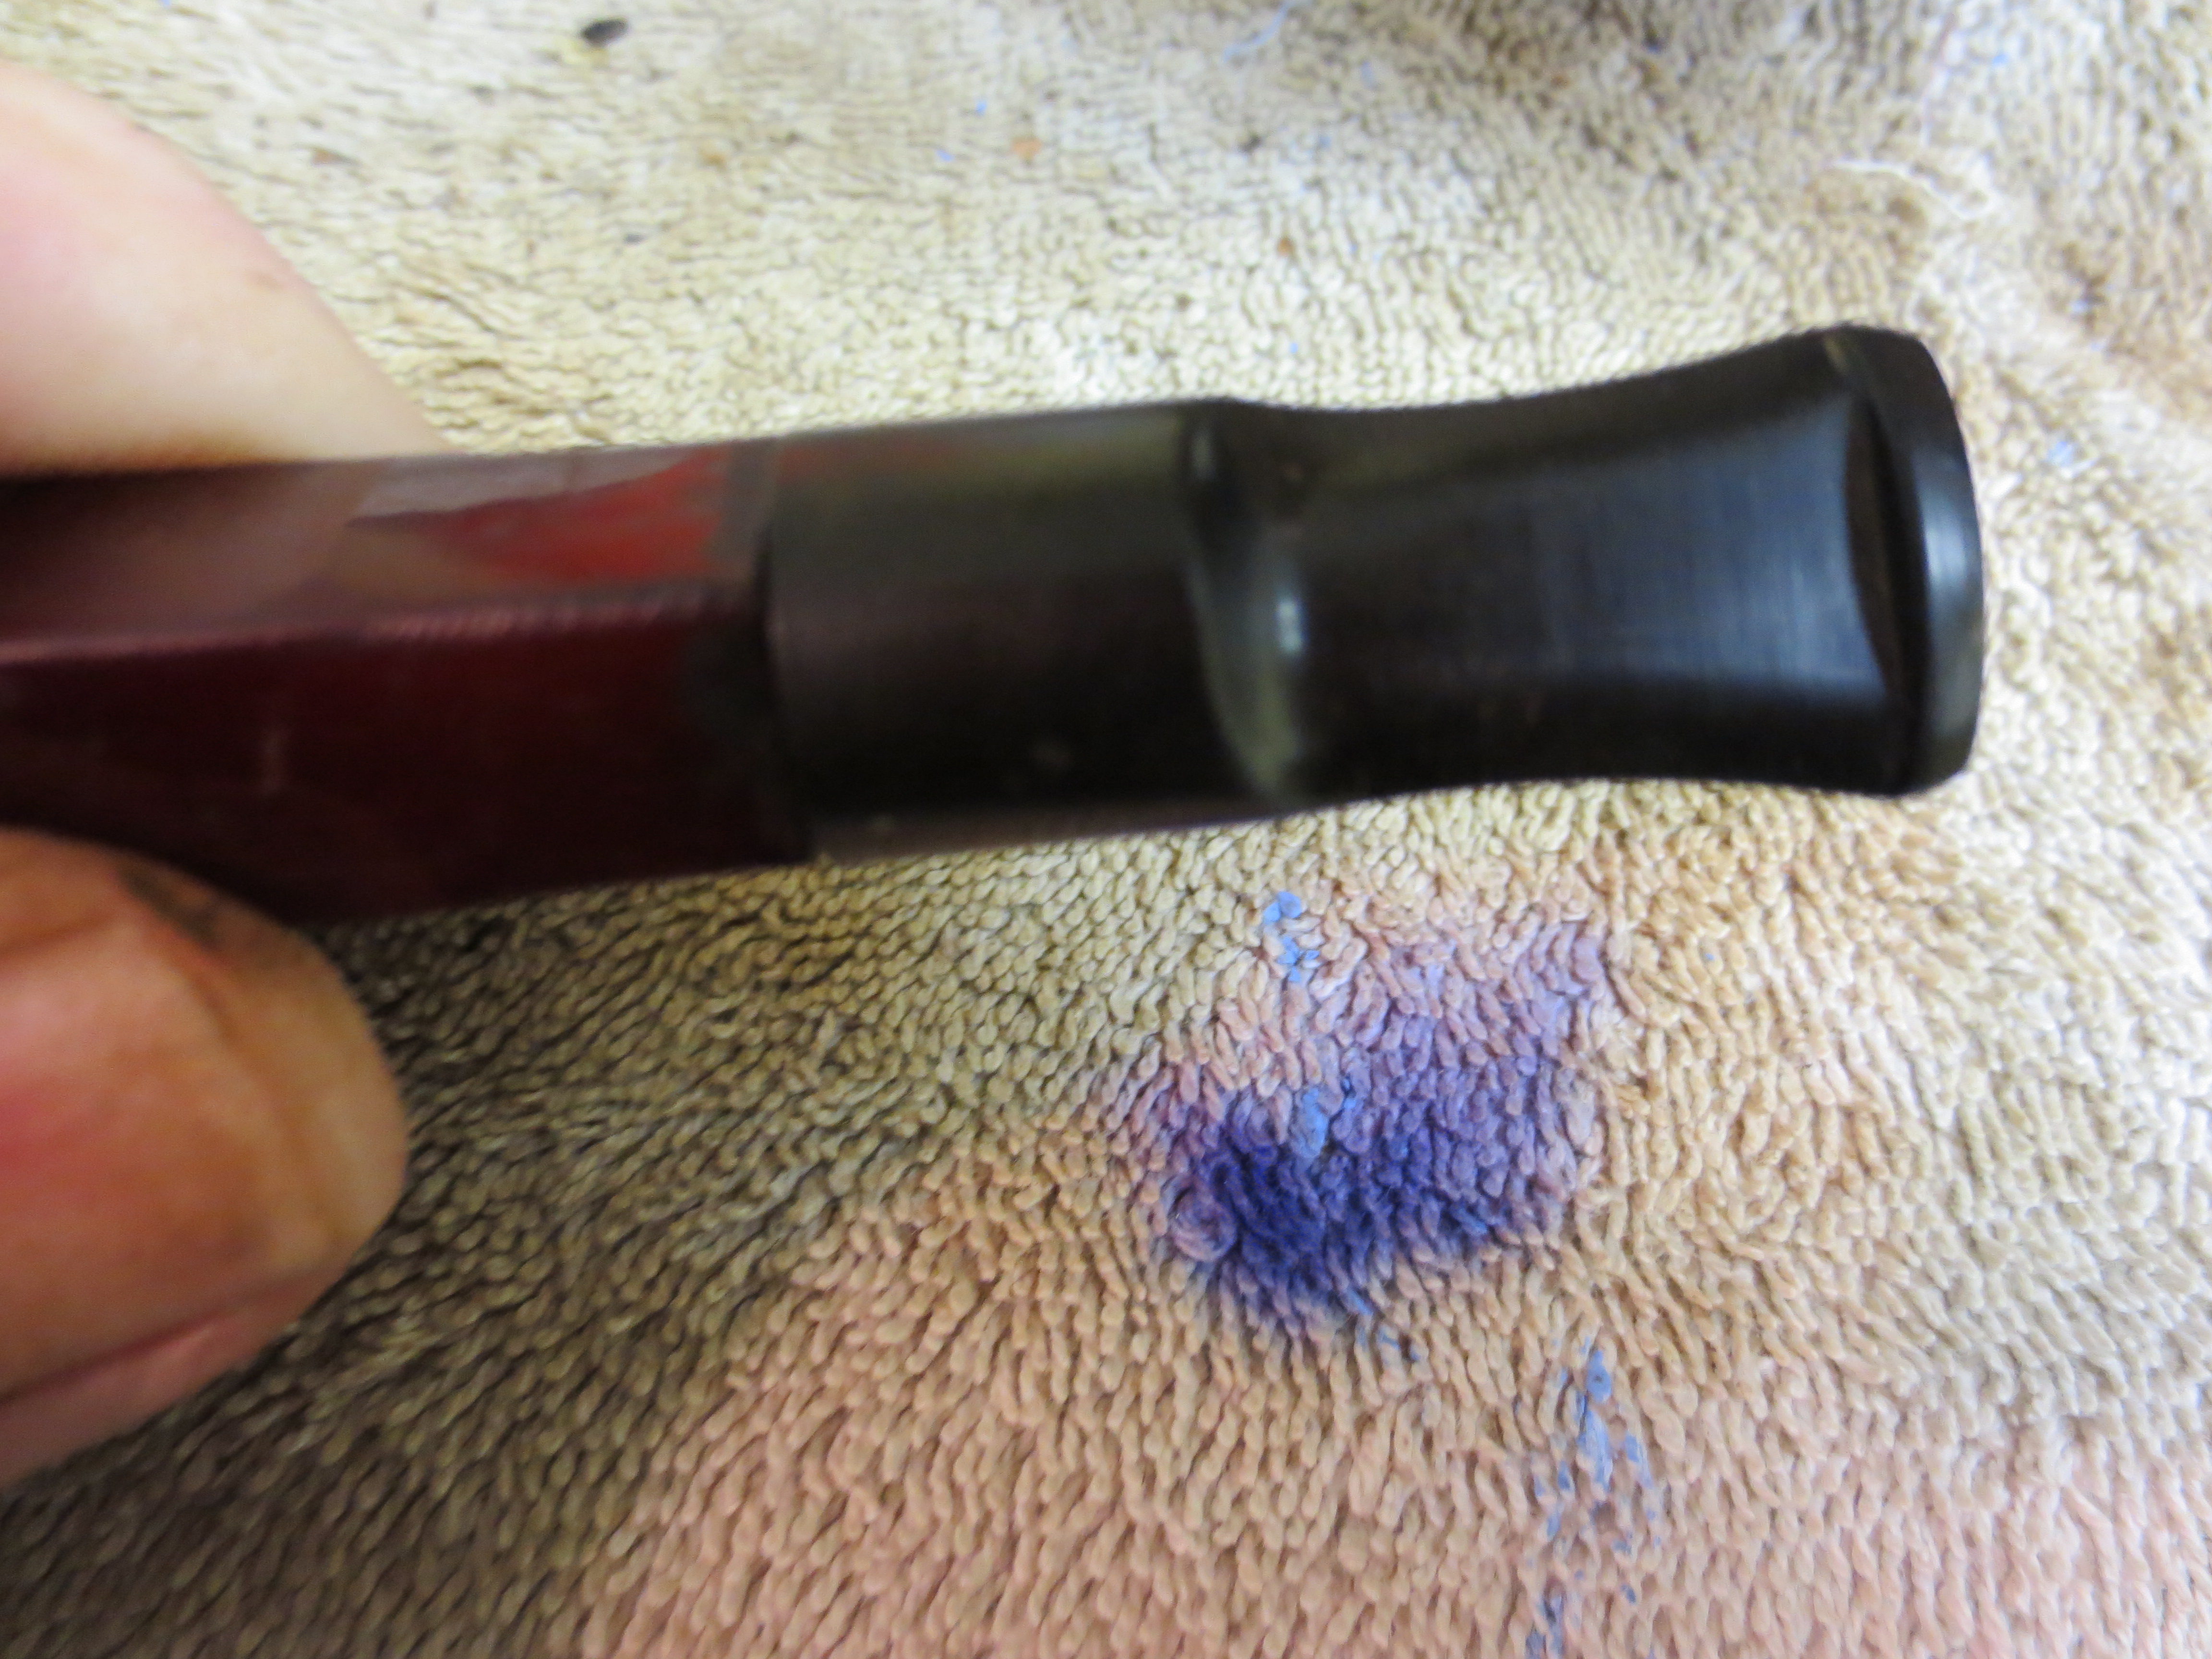
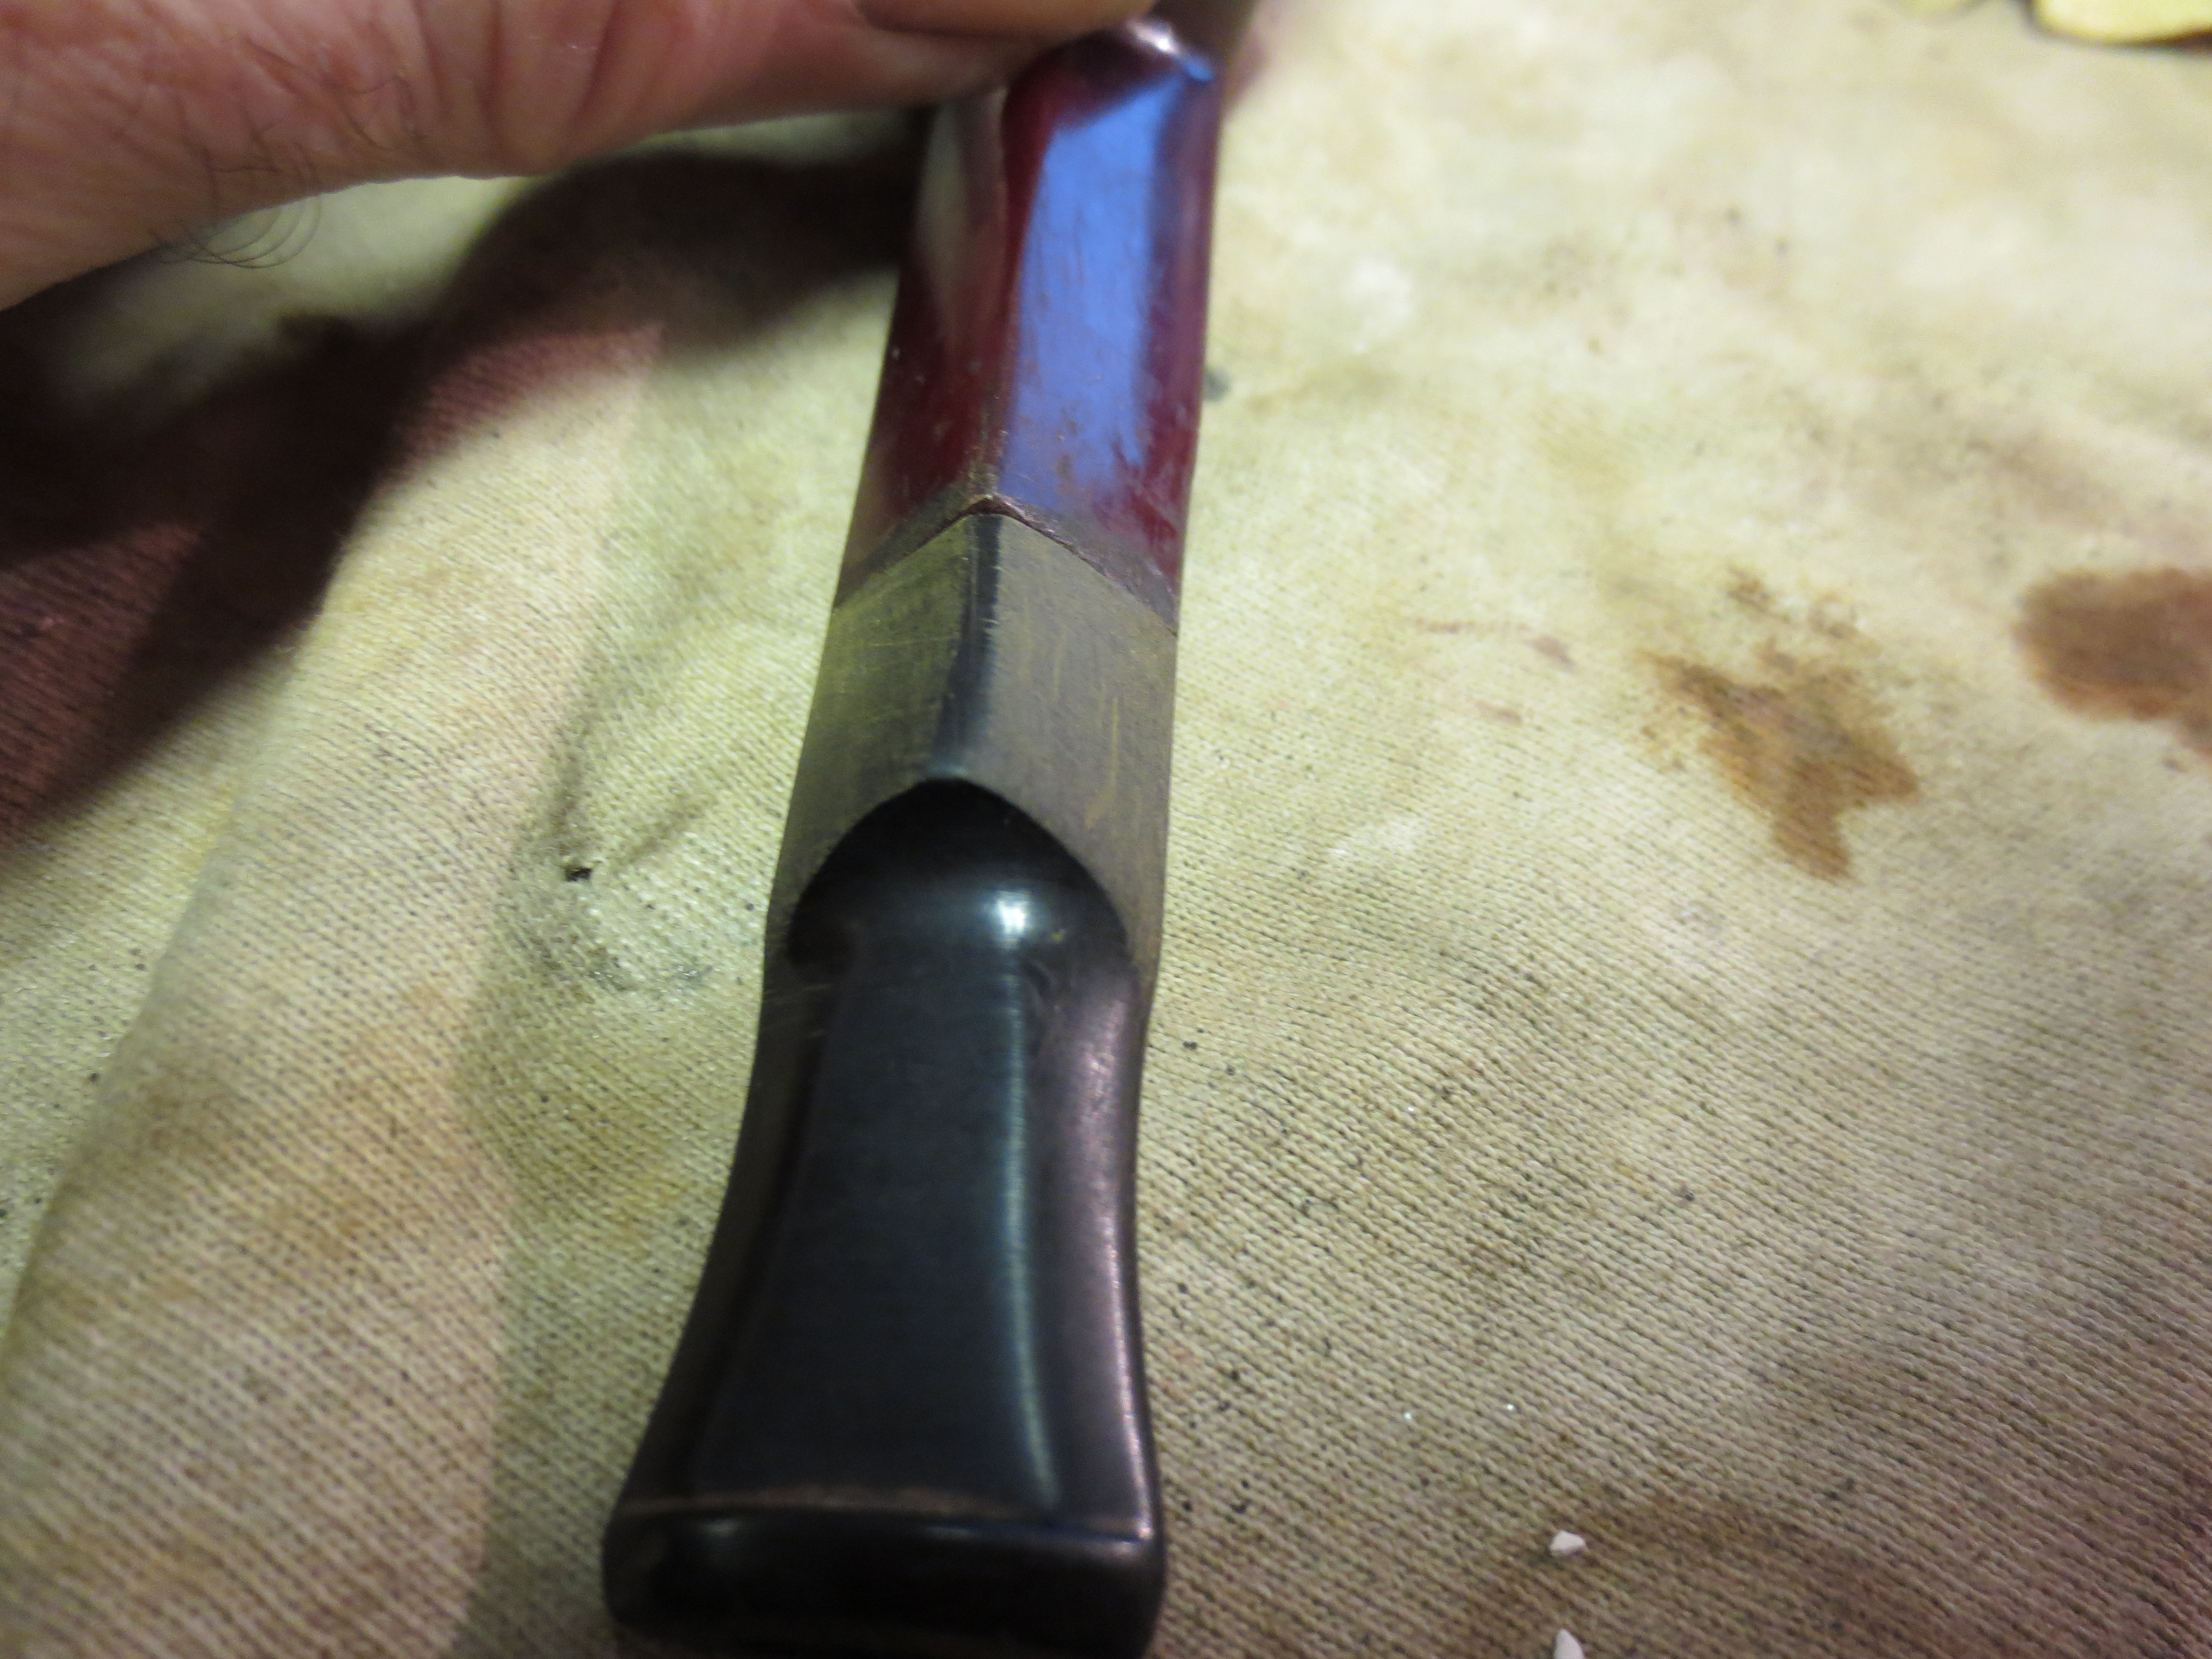
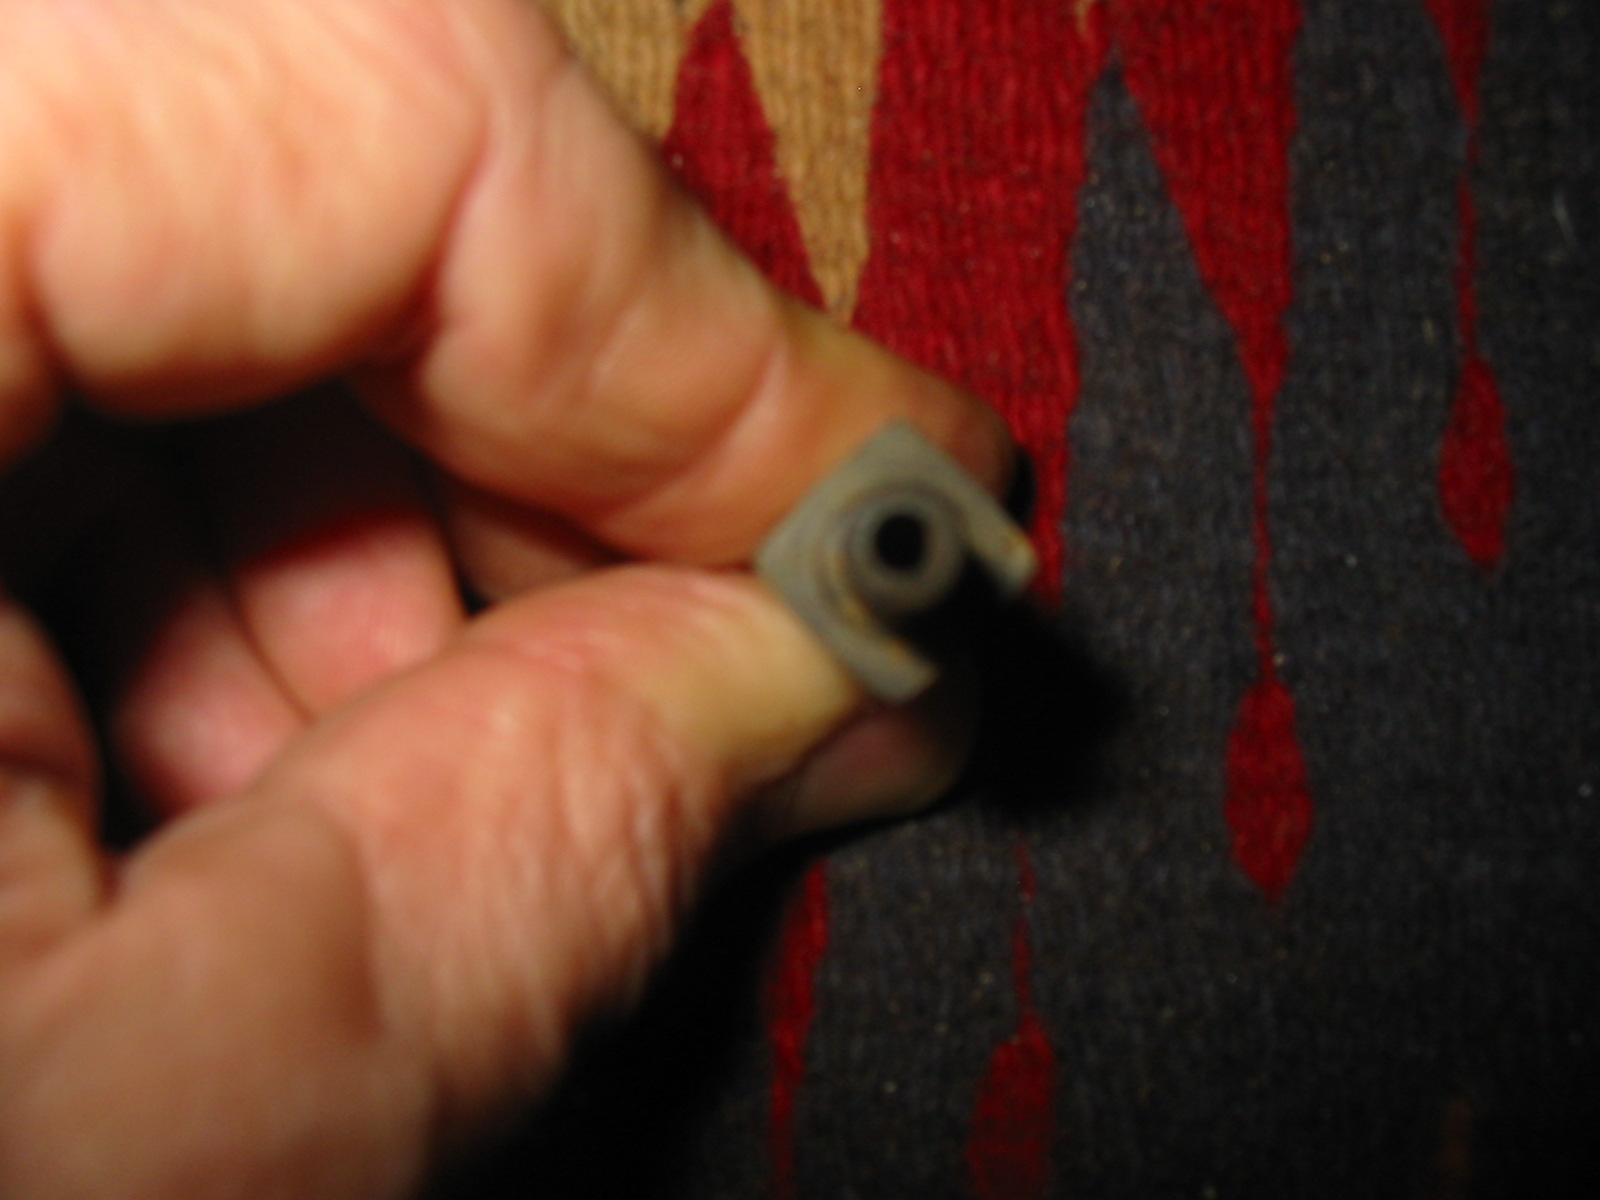
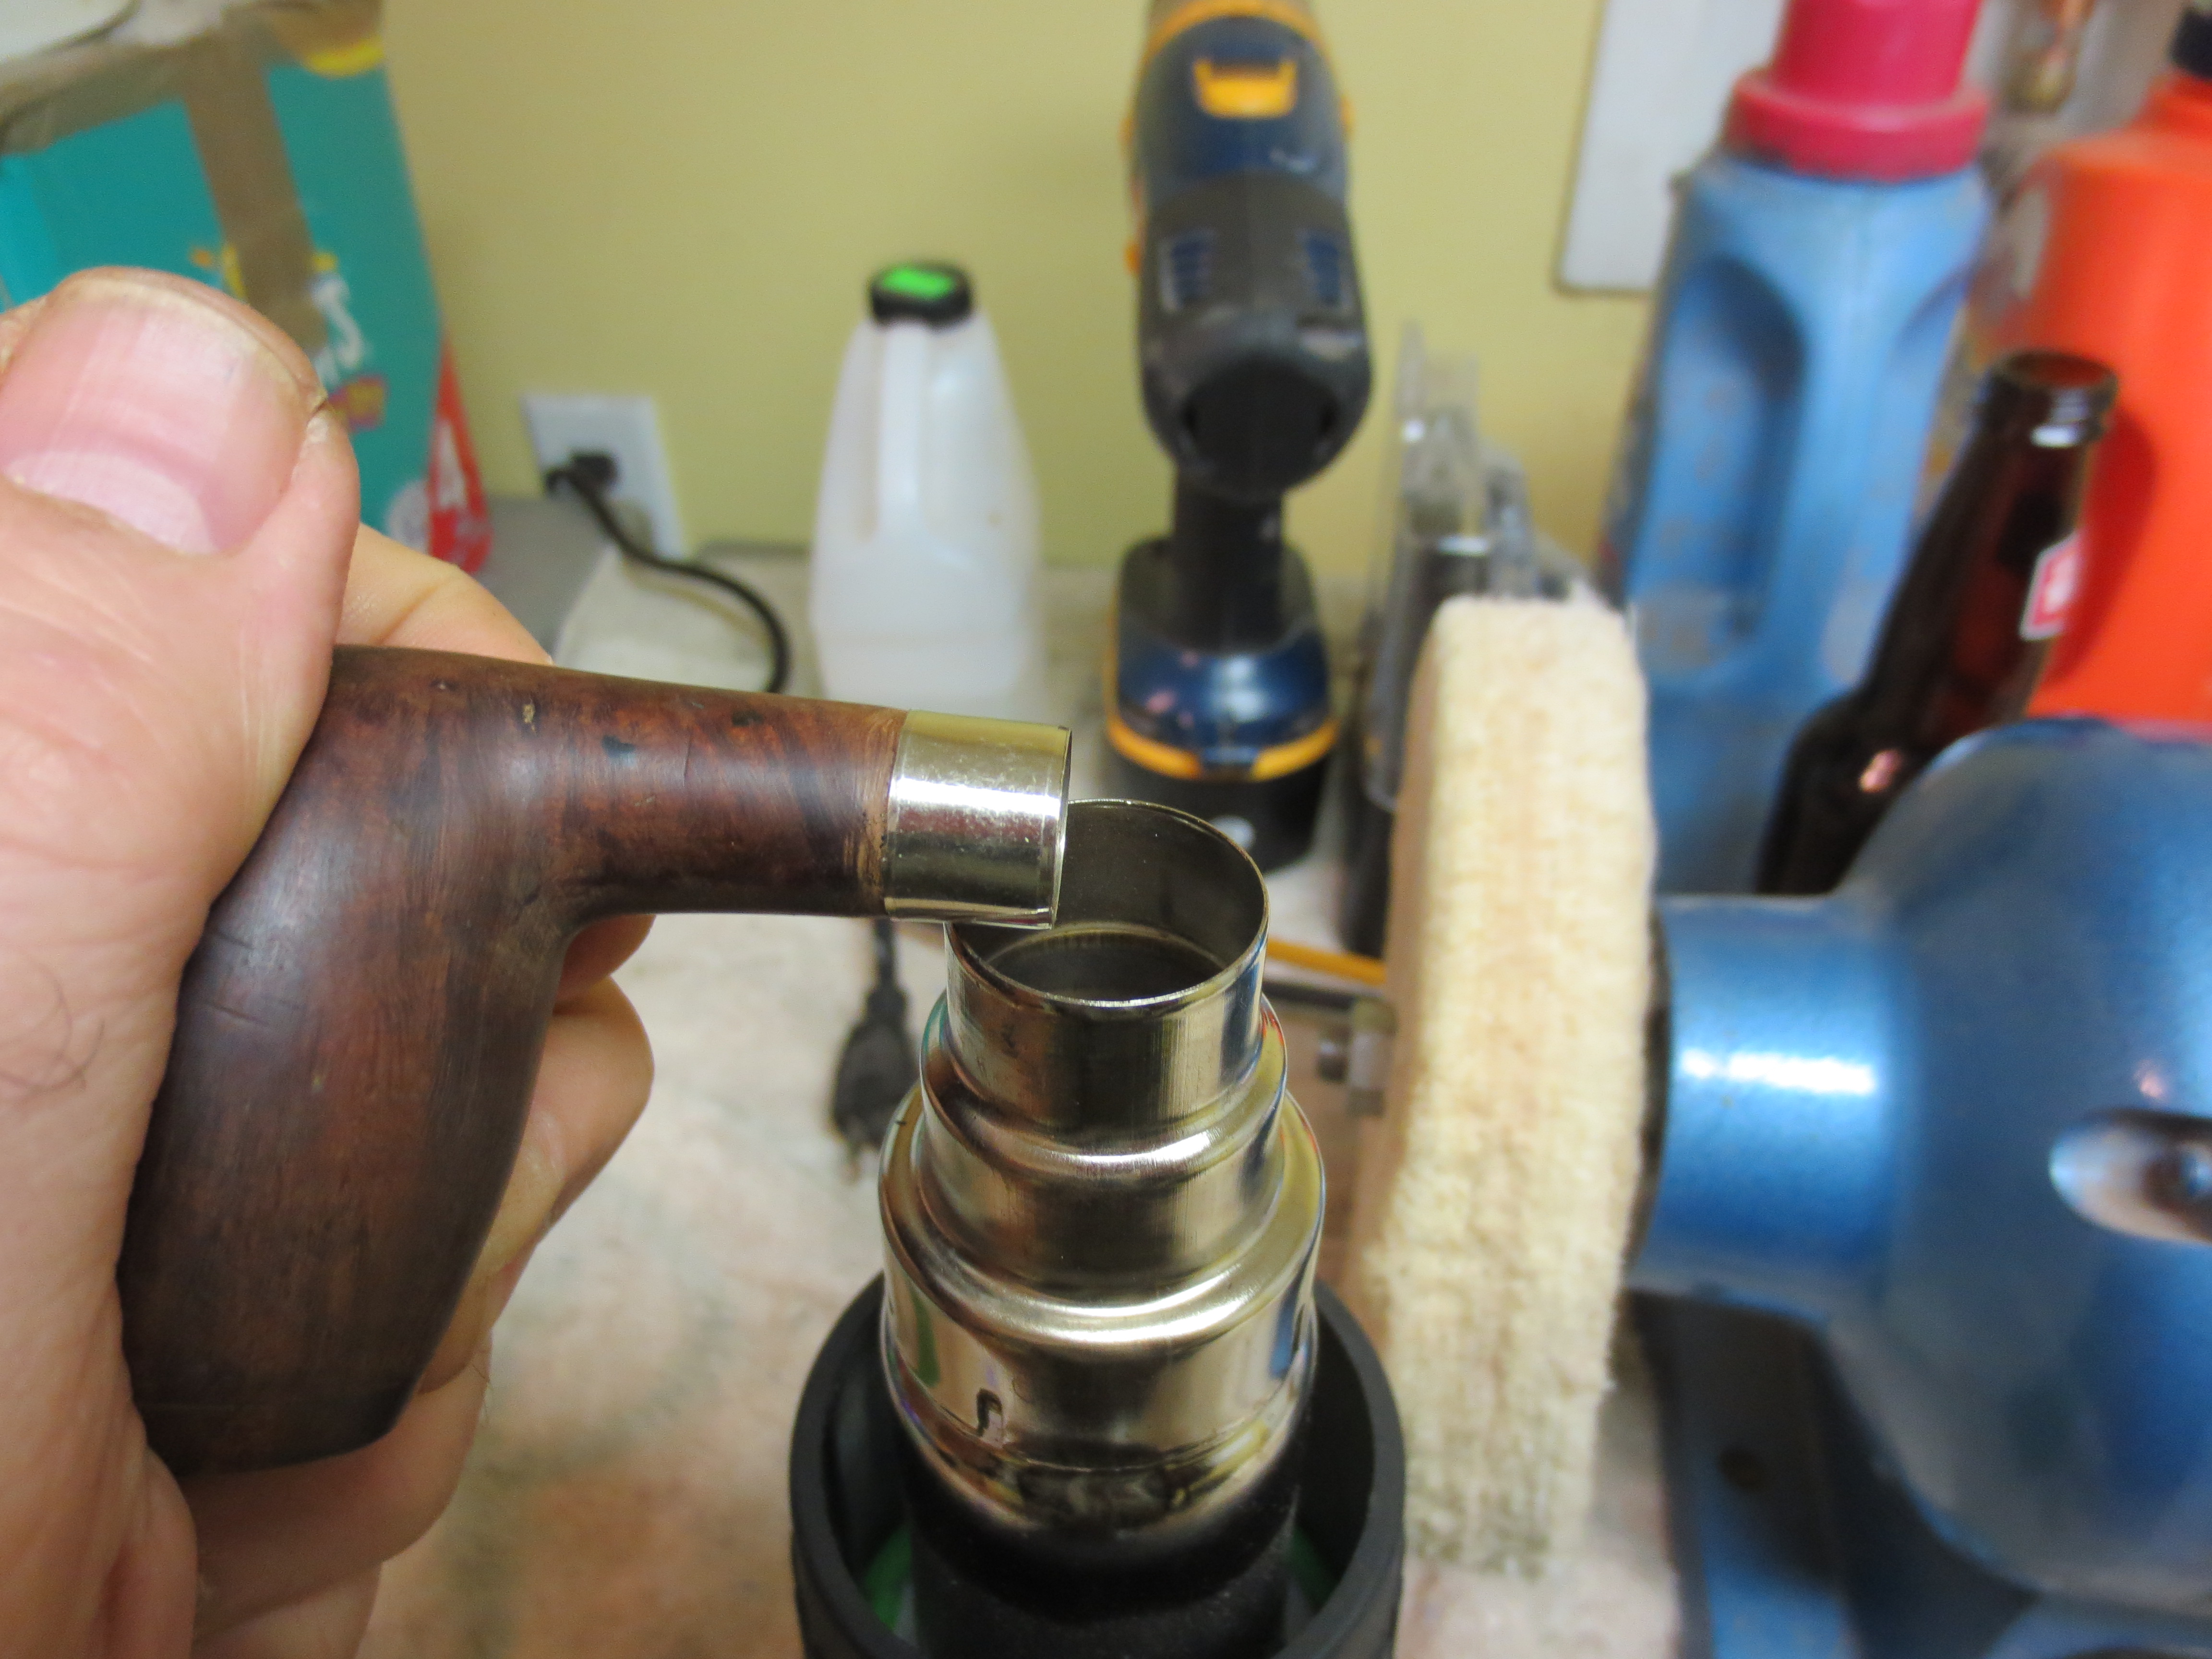
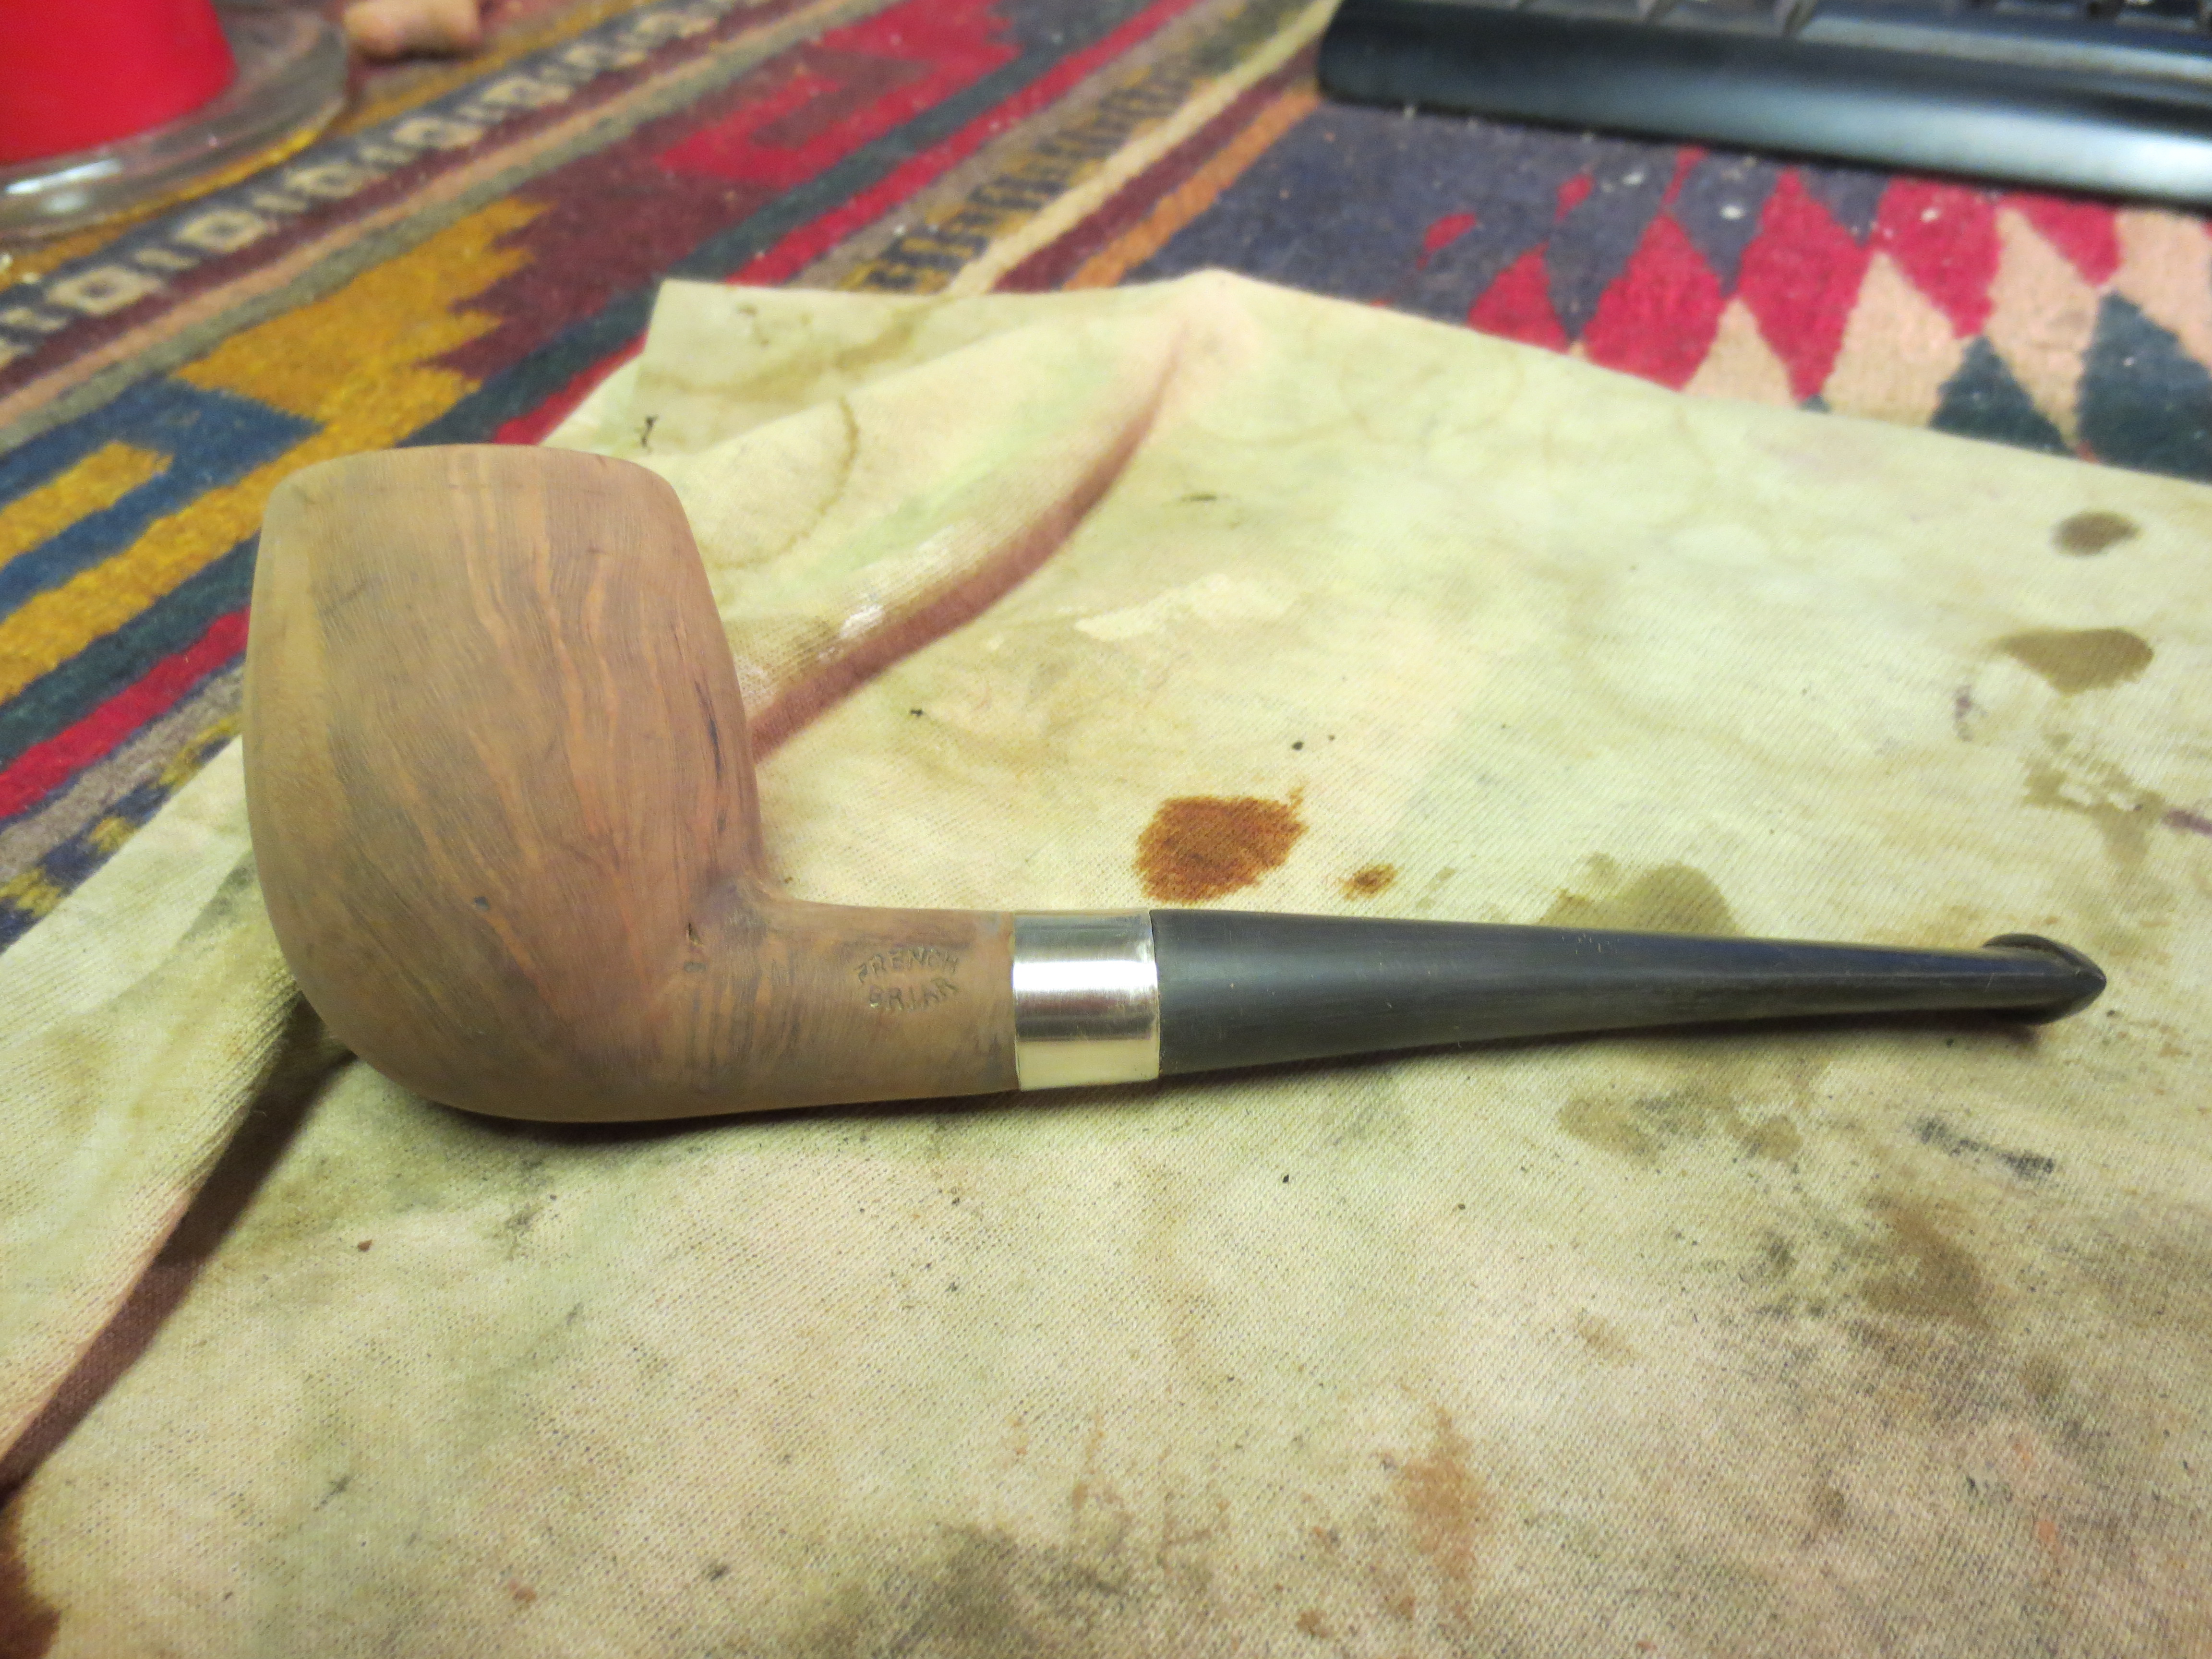
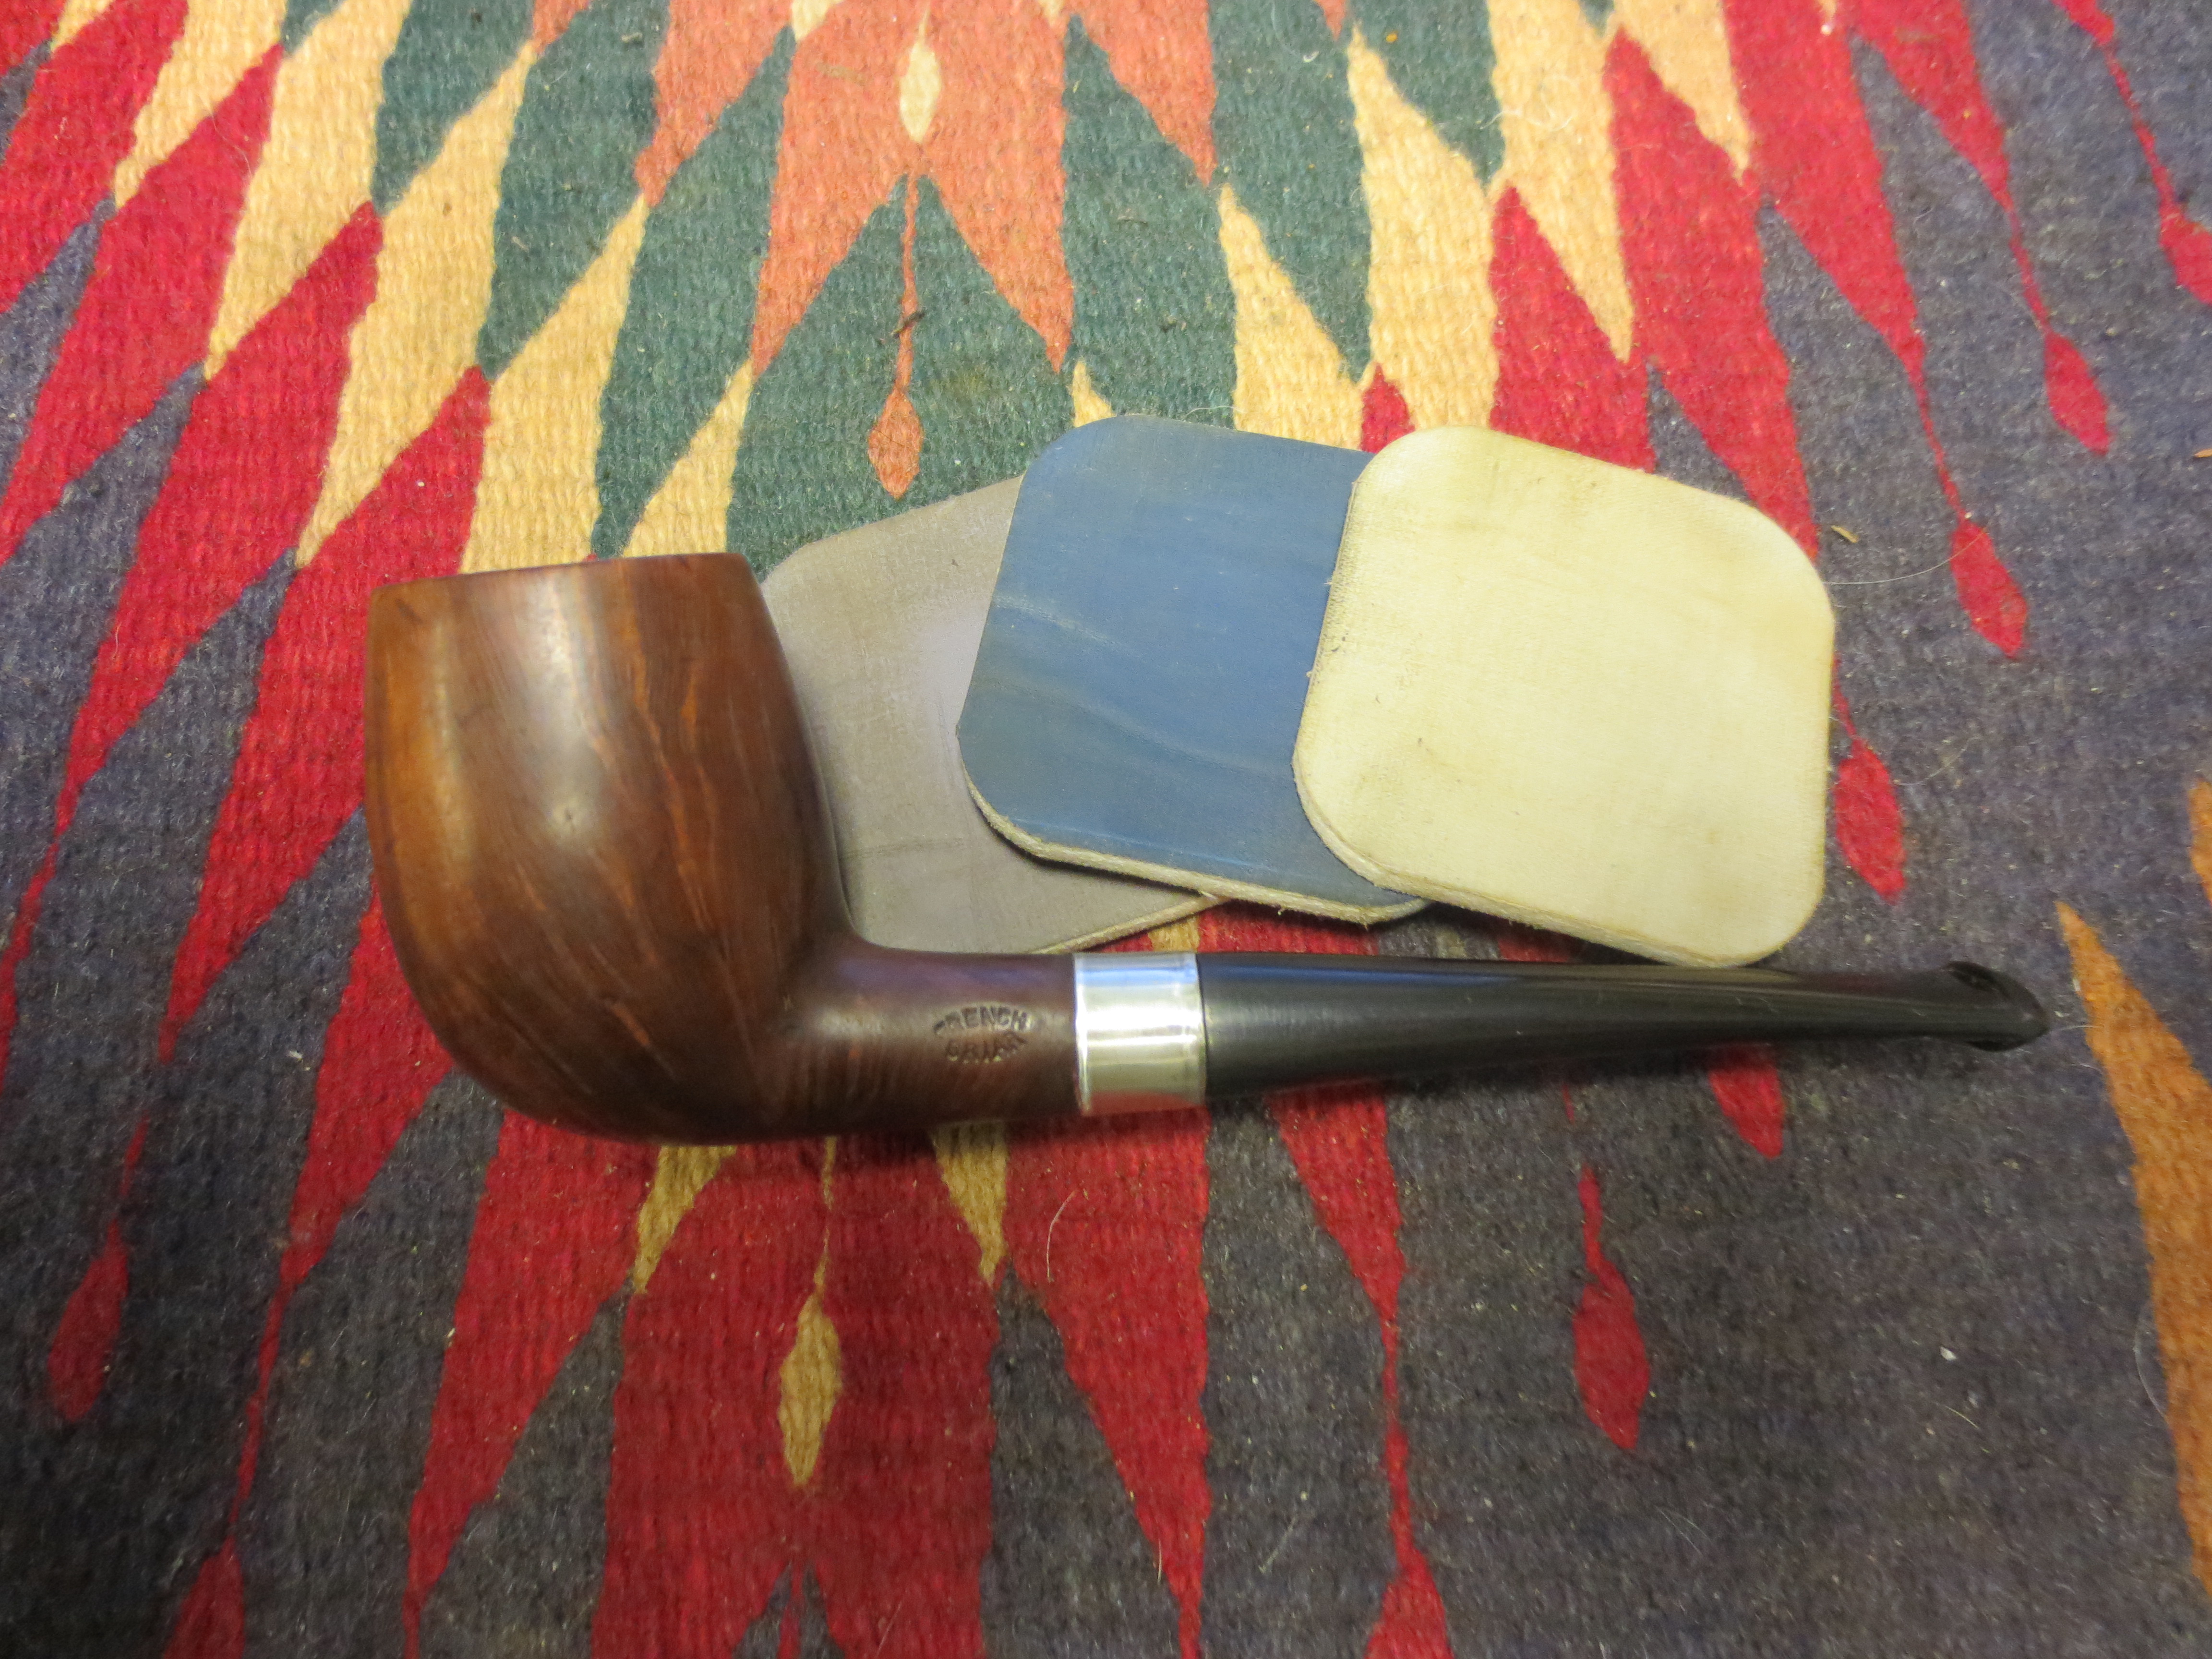
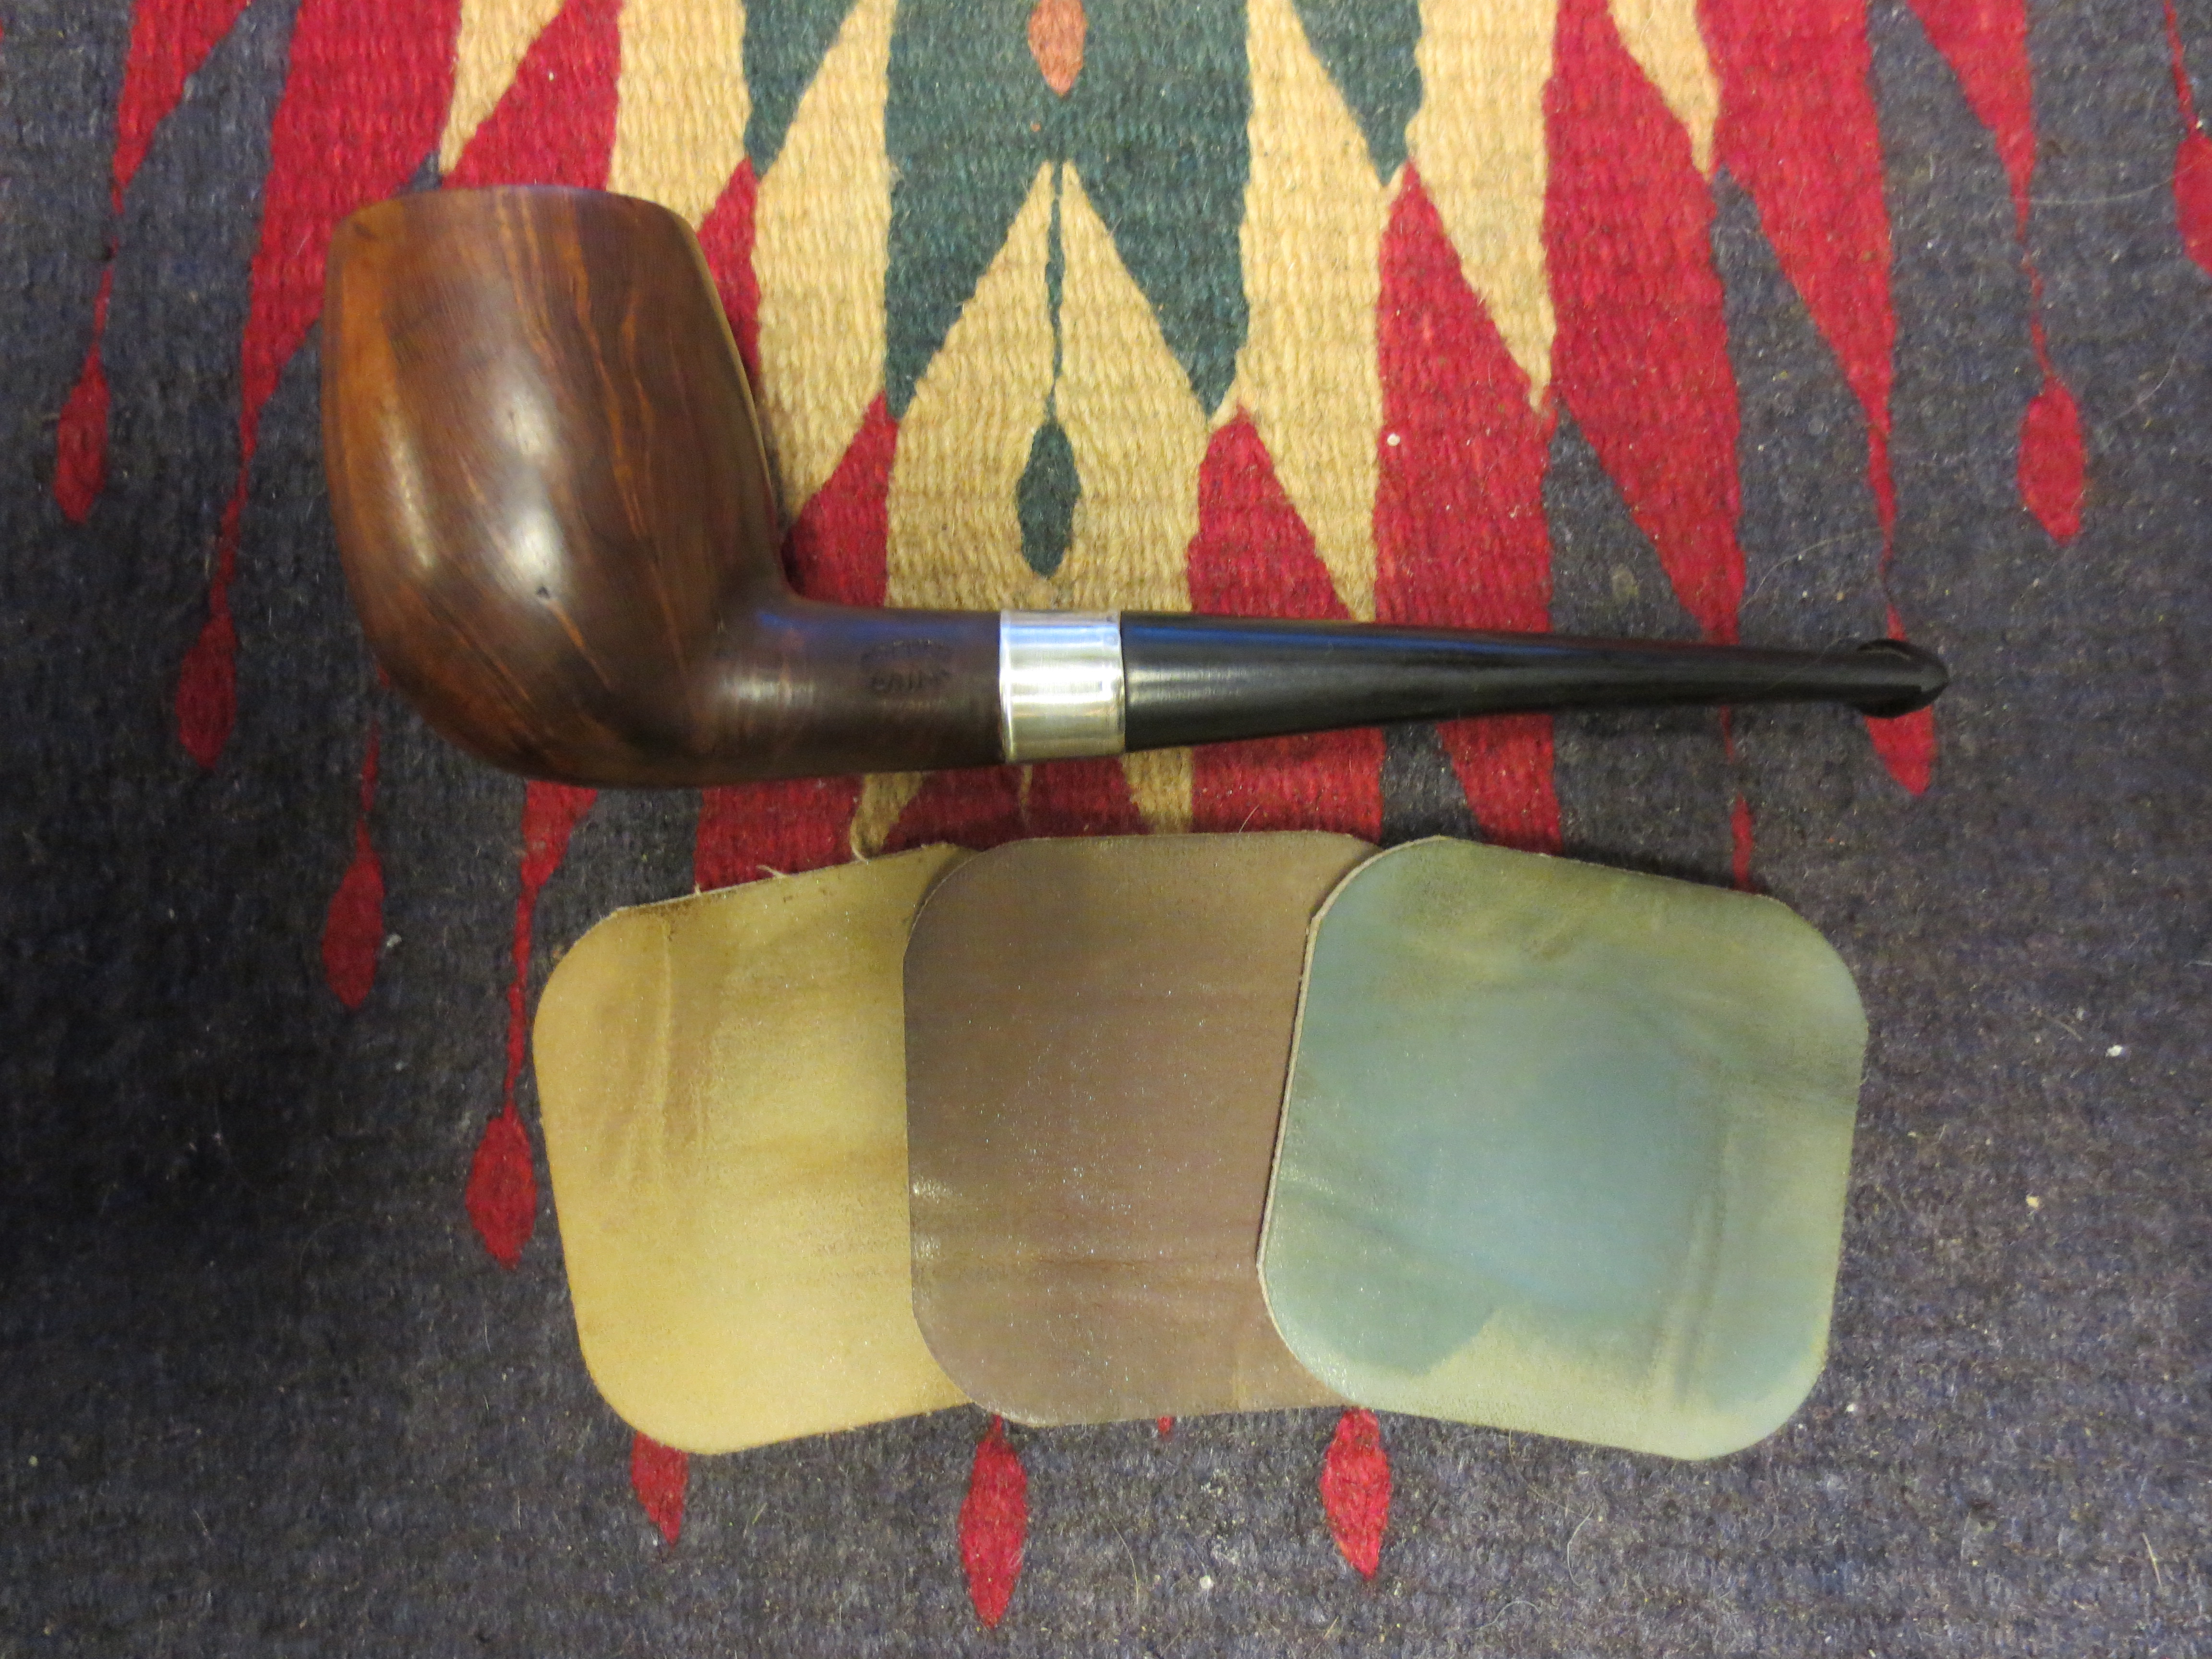
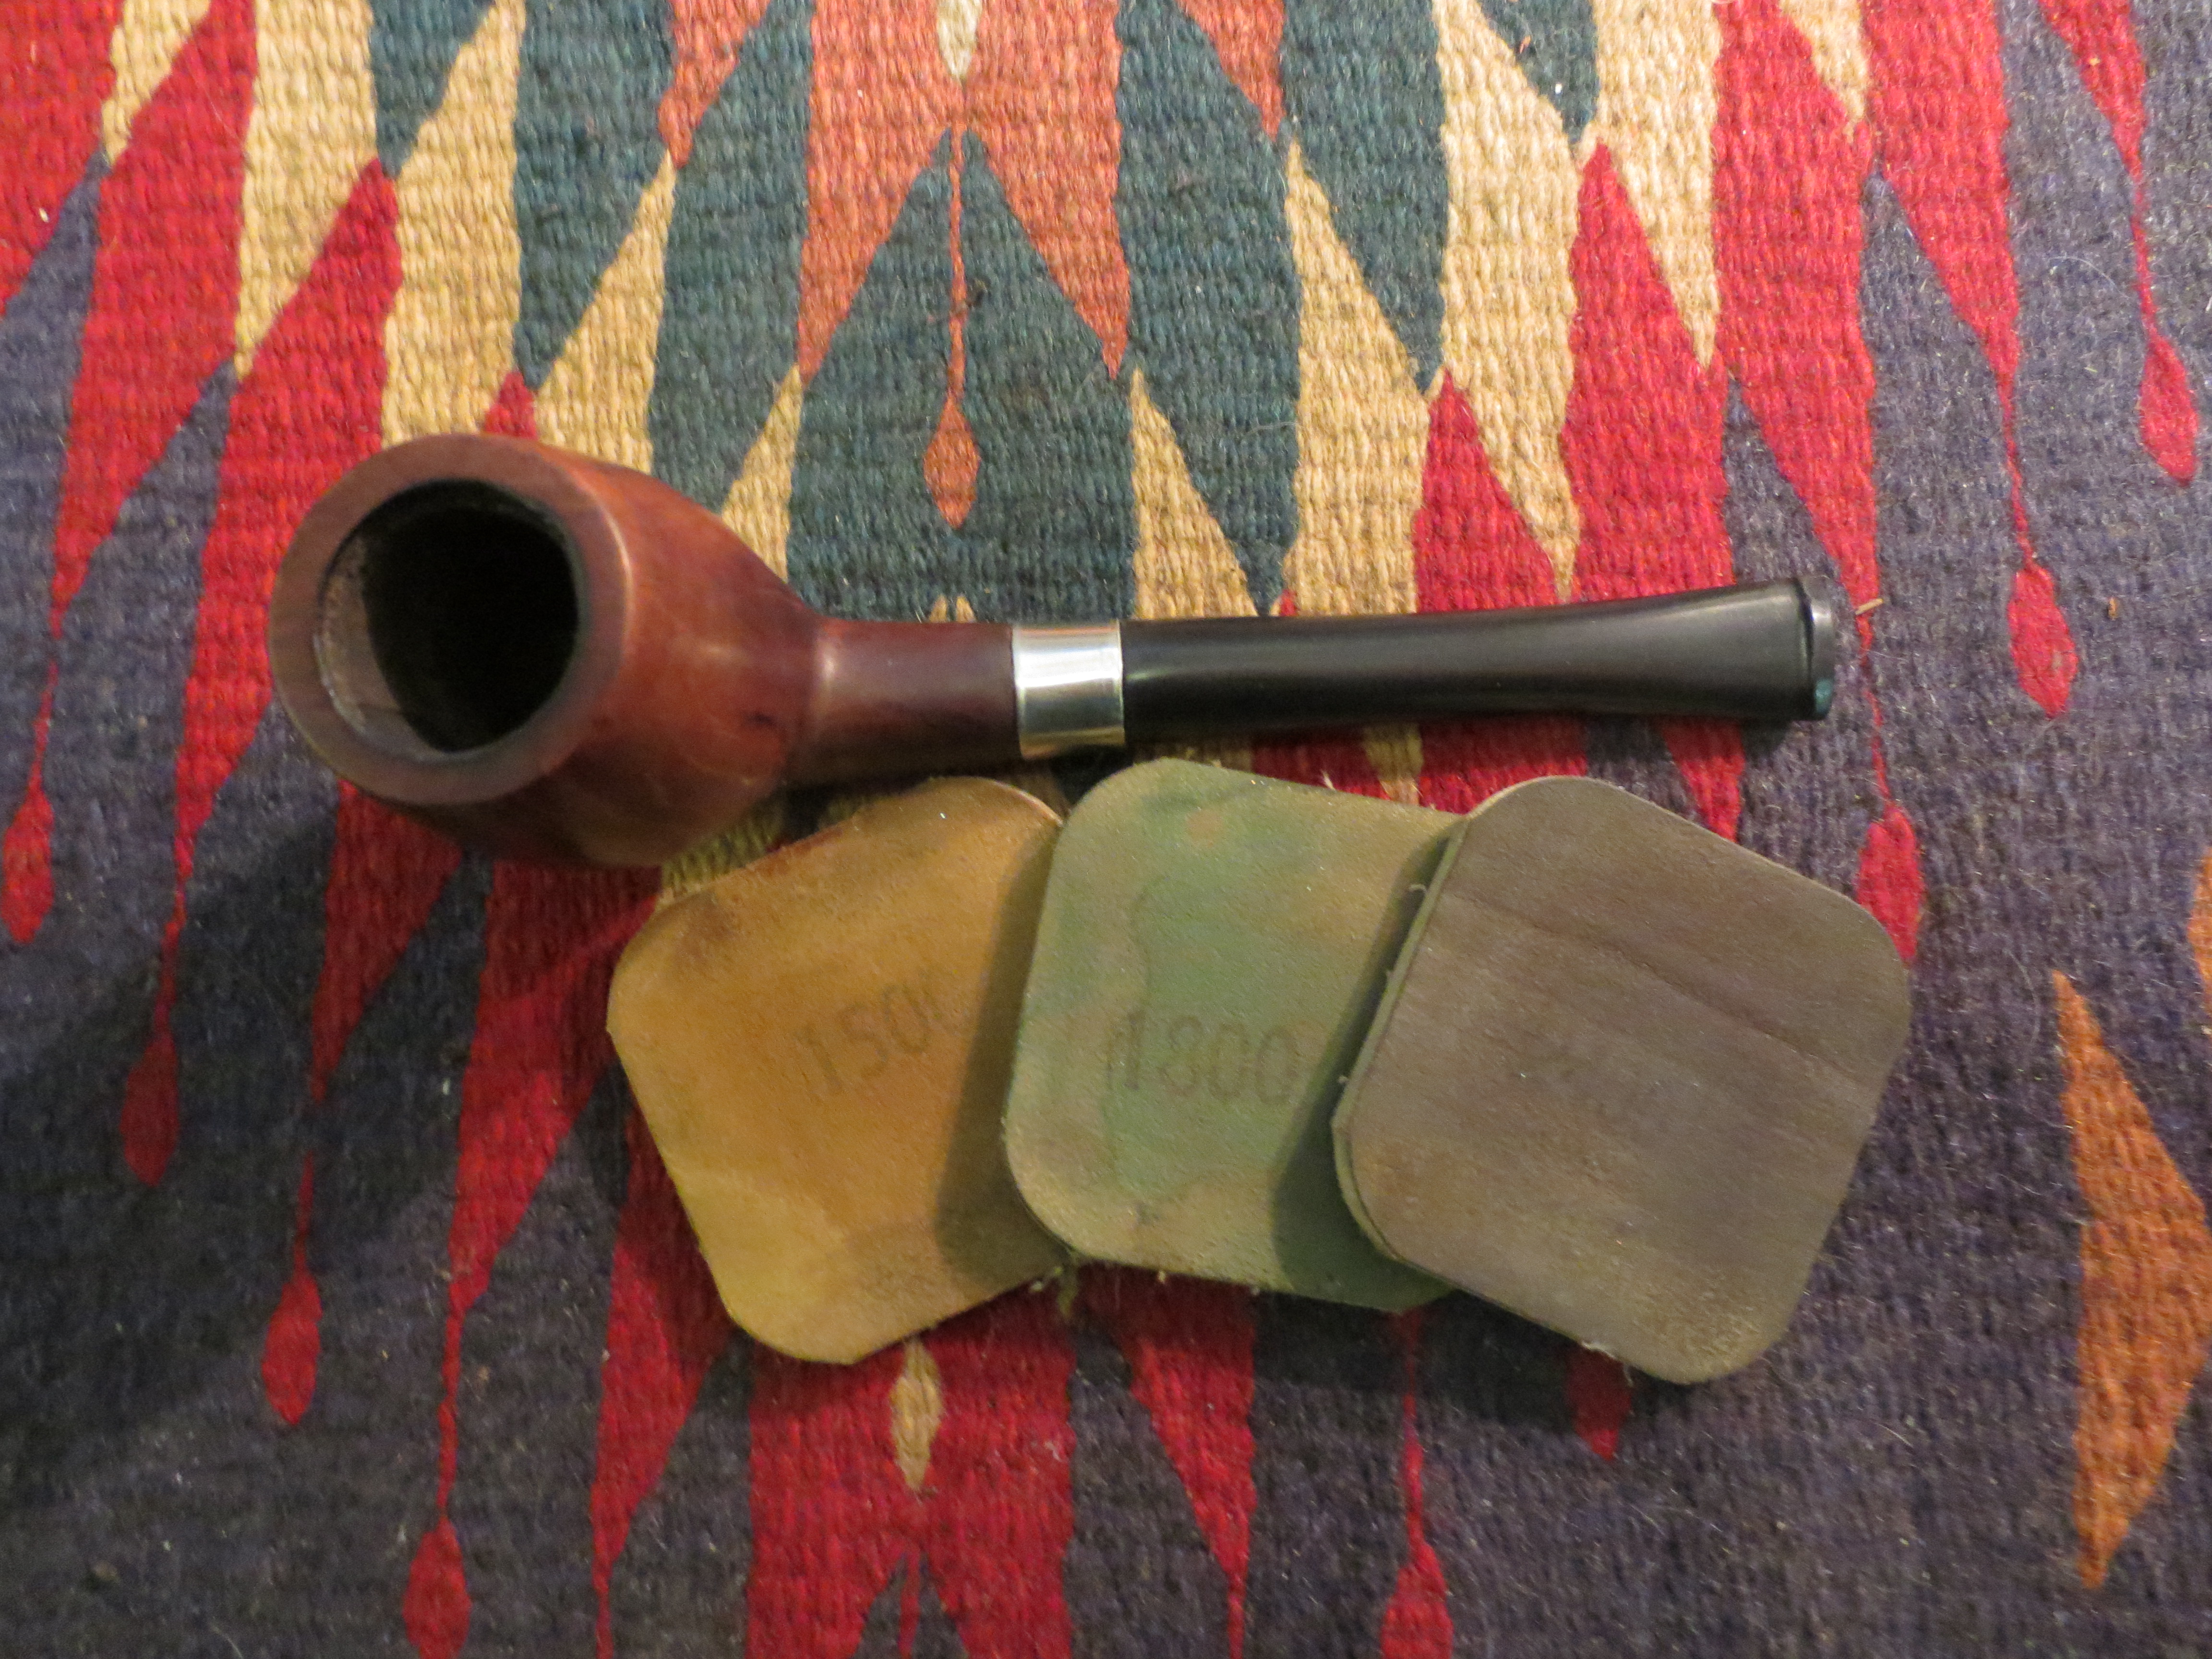
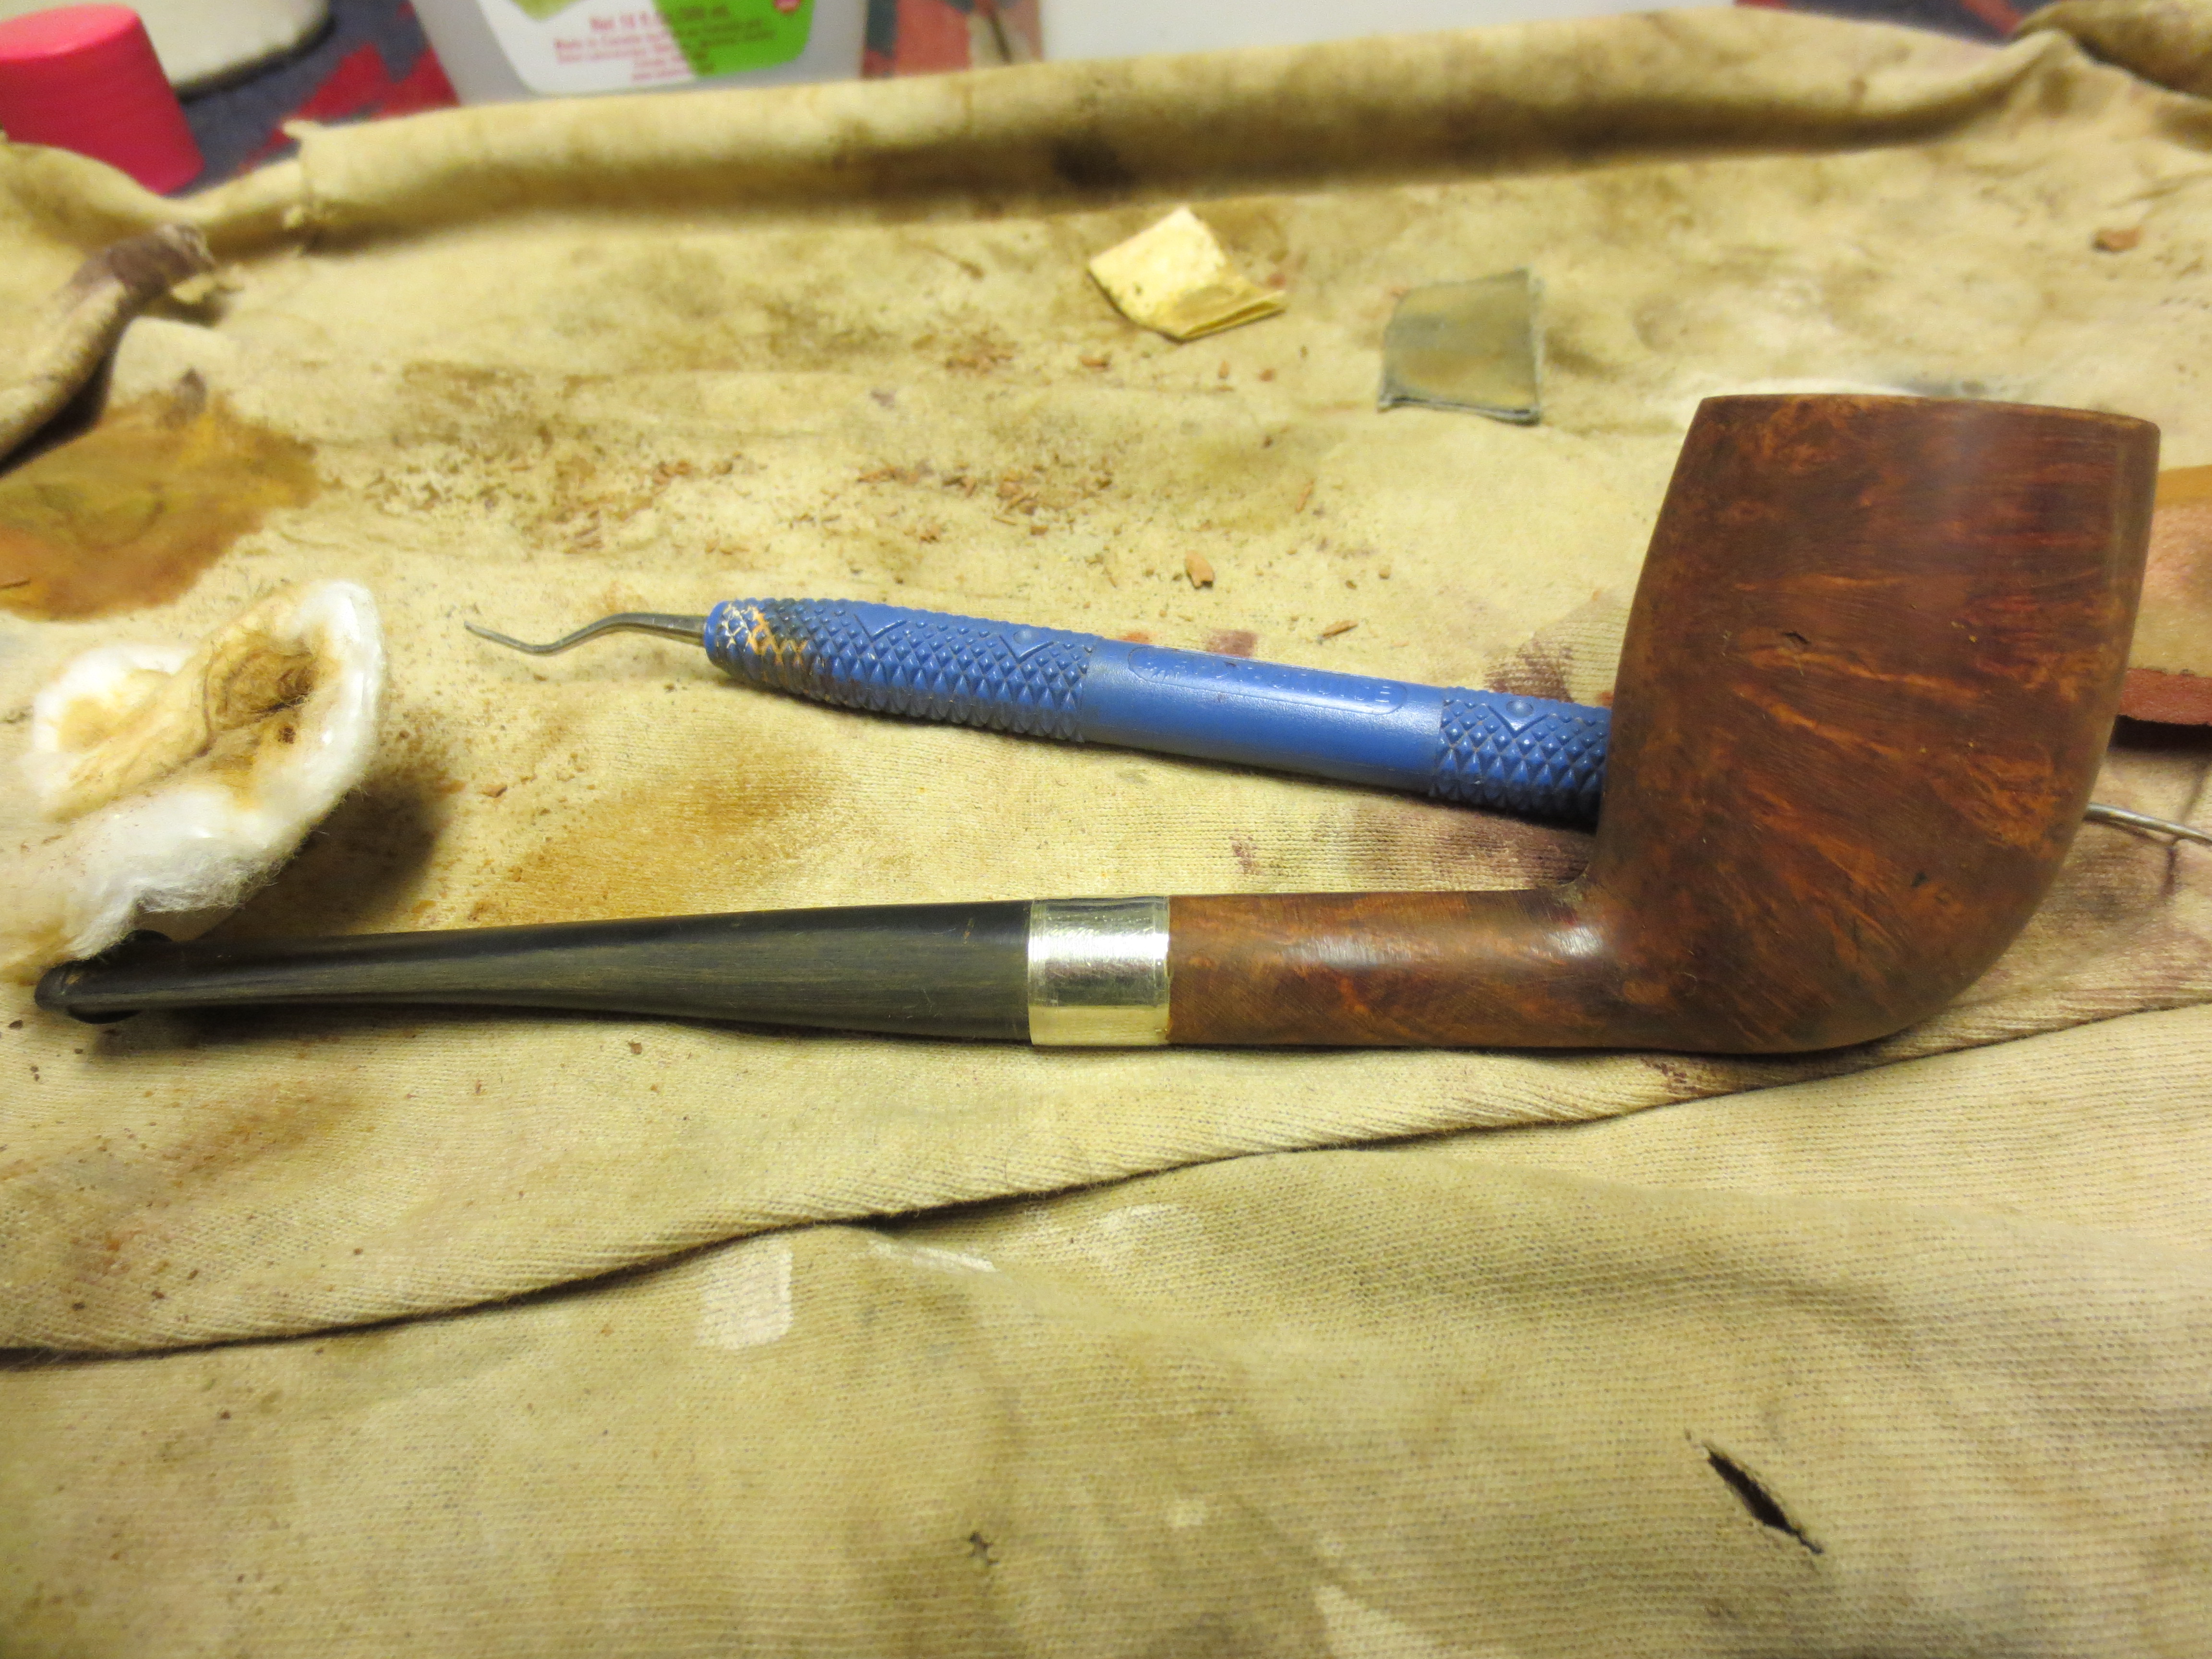
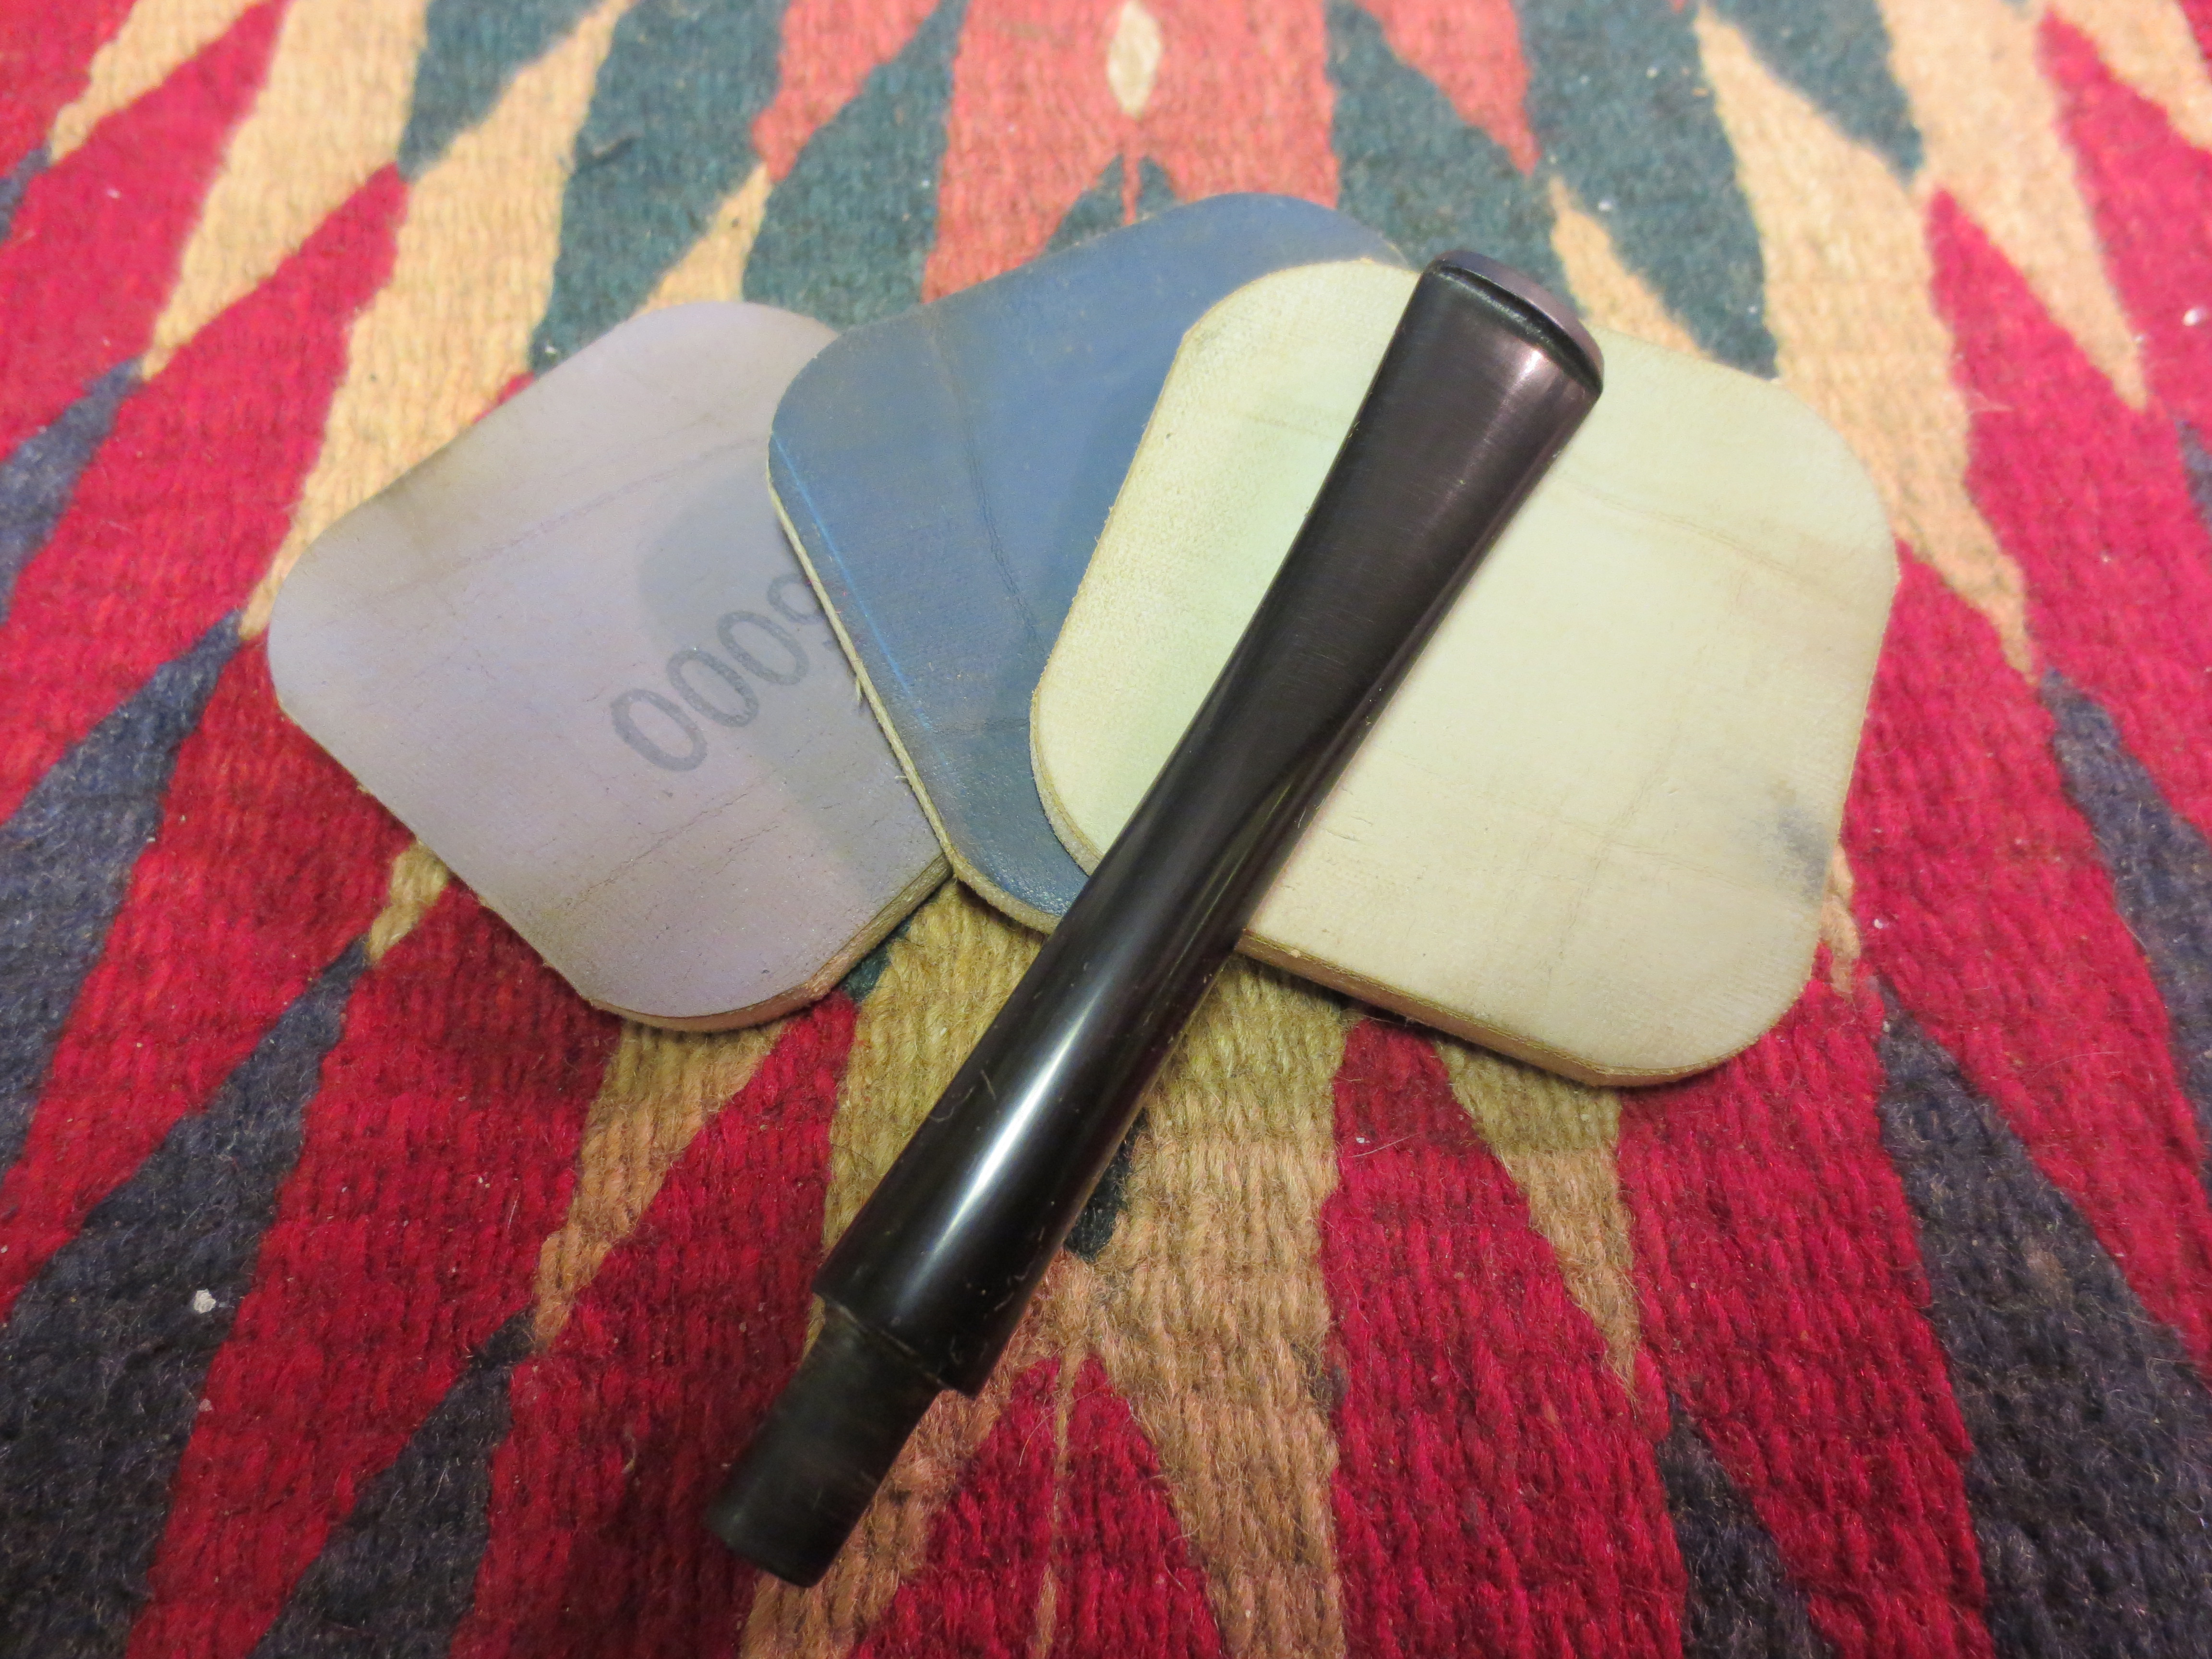
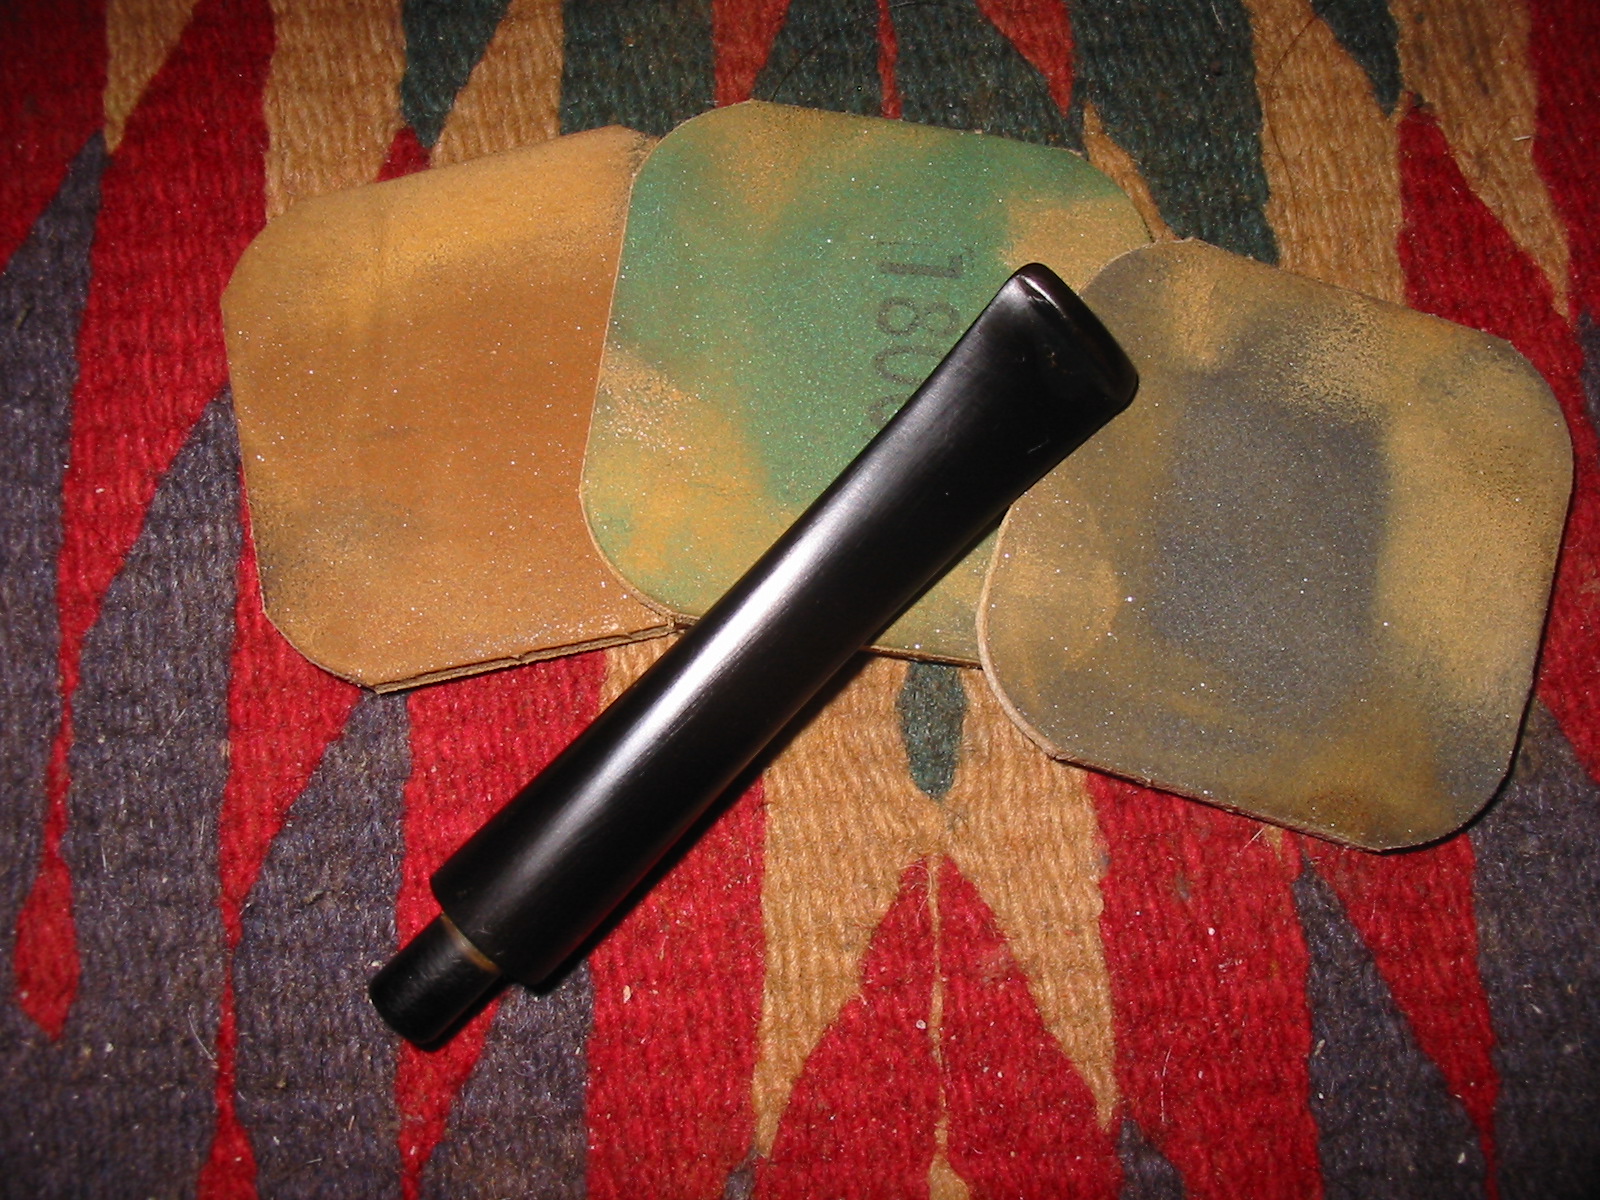
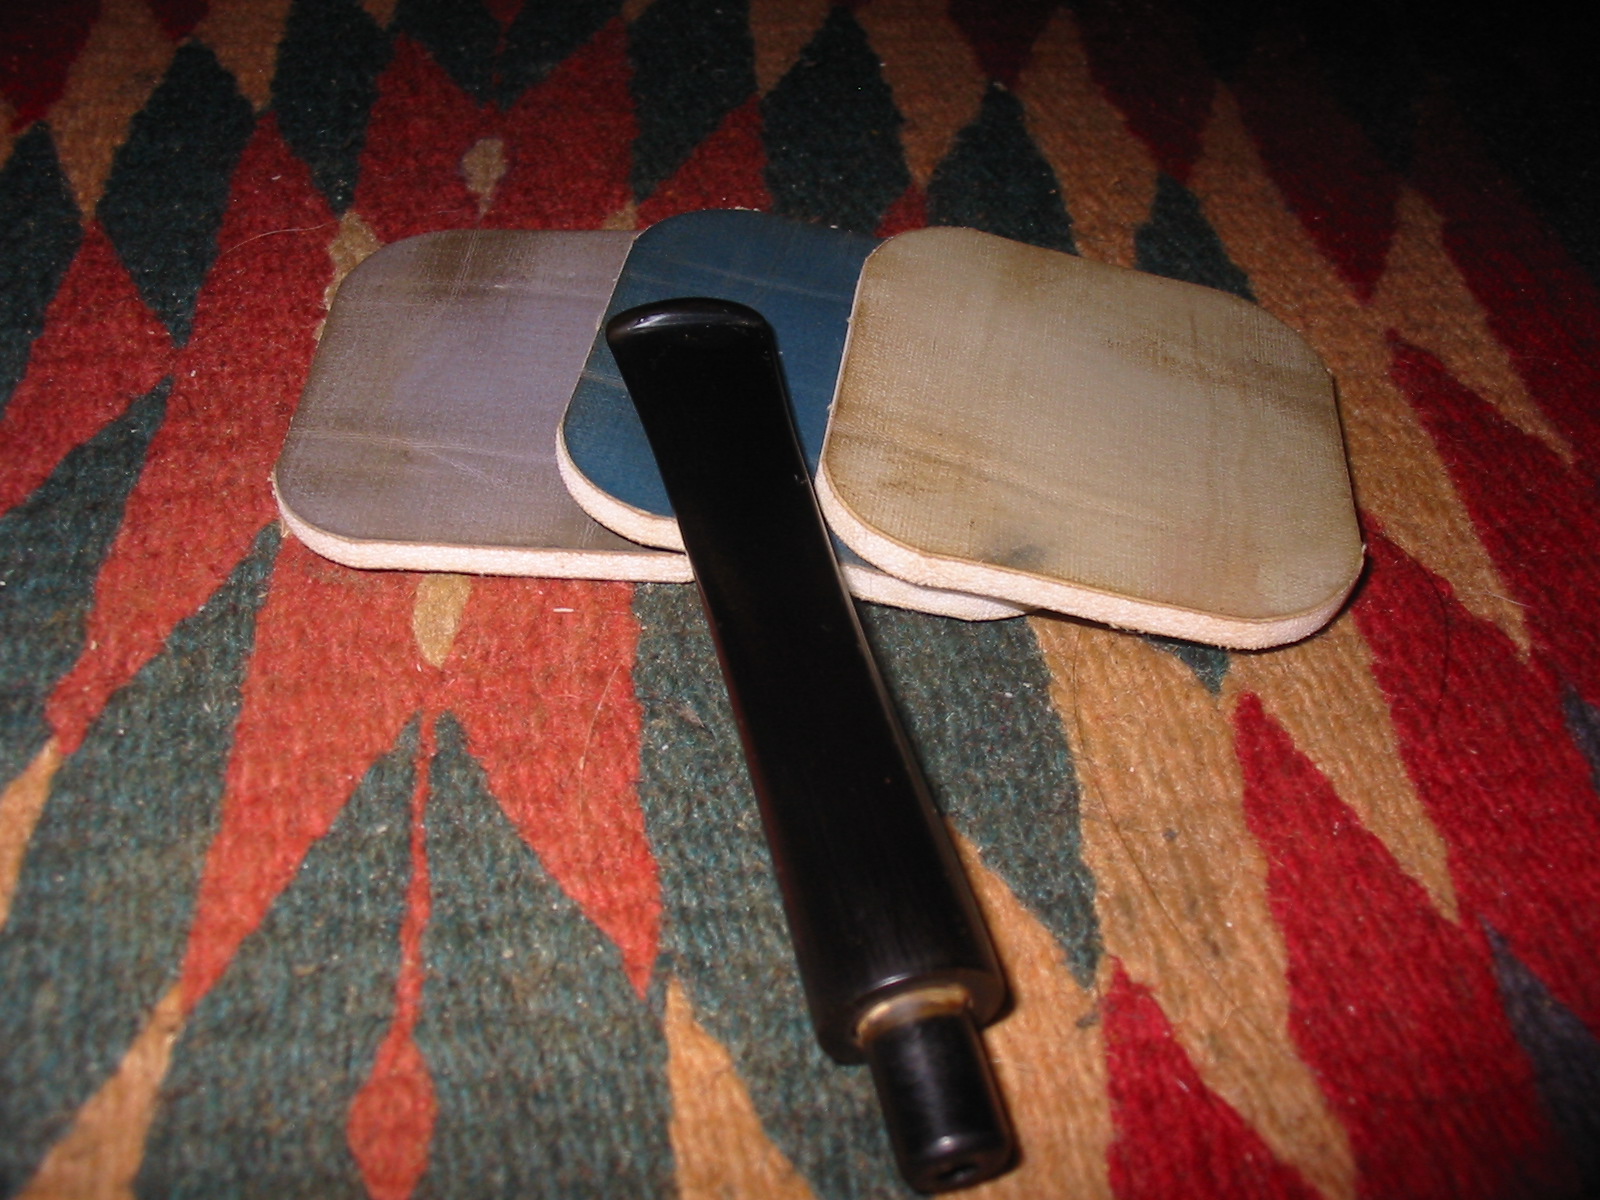
The next morning I cleaned out the bowl and shank with pipe cleaners, cotton swabs and Everclear. I sanded the stem and the superglue patch with 220 grit sandpaper and then with a medium grit sanding sponge to clean up the scratches in the finish. I put it back on the bowl to get an idea of the overall look of the pipe and see if the diameters of the stem fit the shank. I needed to flatten the bottom of the stem some more to match the bottom of the shank and also removed some more of the material on the diameter of both sides to bring it into line with the shank. Once the stem was well fitted I moved on to sanding with micromesh sanding pads from 1500-12,000 grit.

IMG_1501

IMG_1502

IMG_1503

IMG_1504

IMG_1505

IMG_1506

IMG_1507

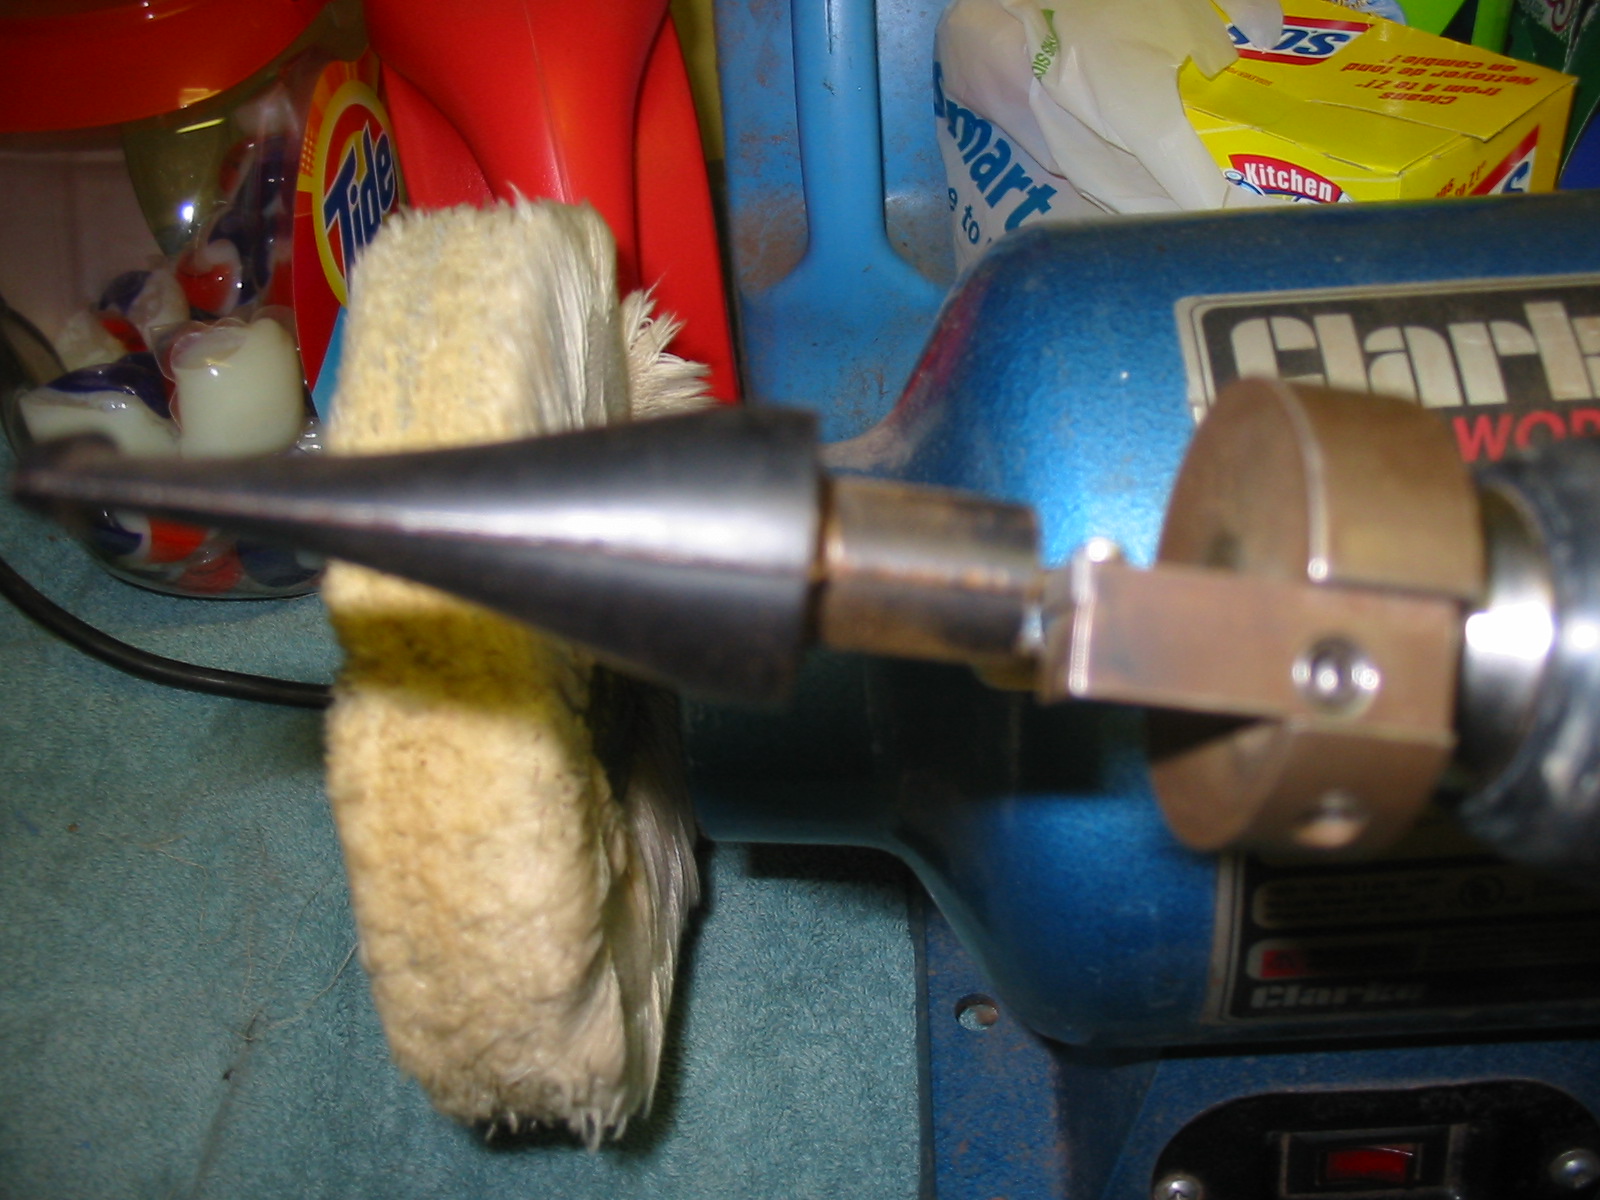
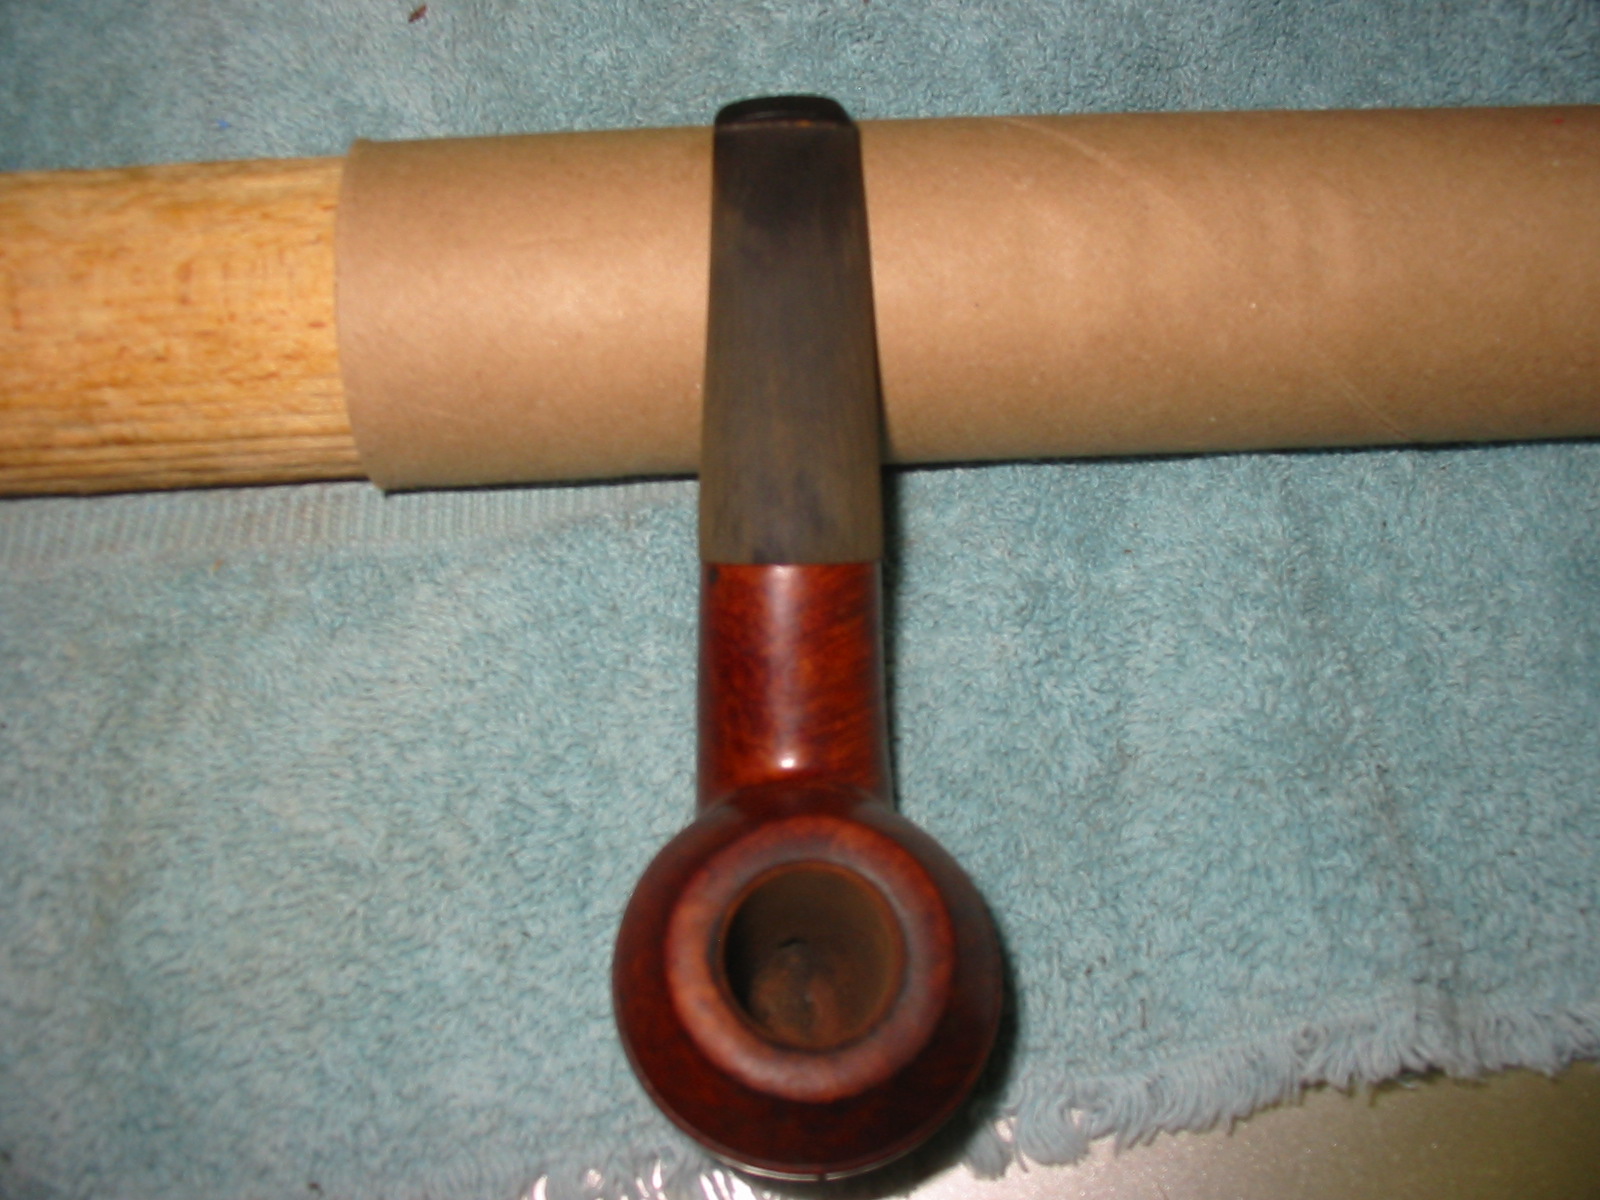
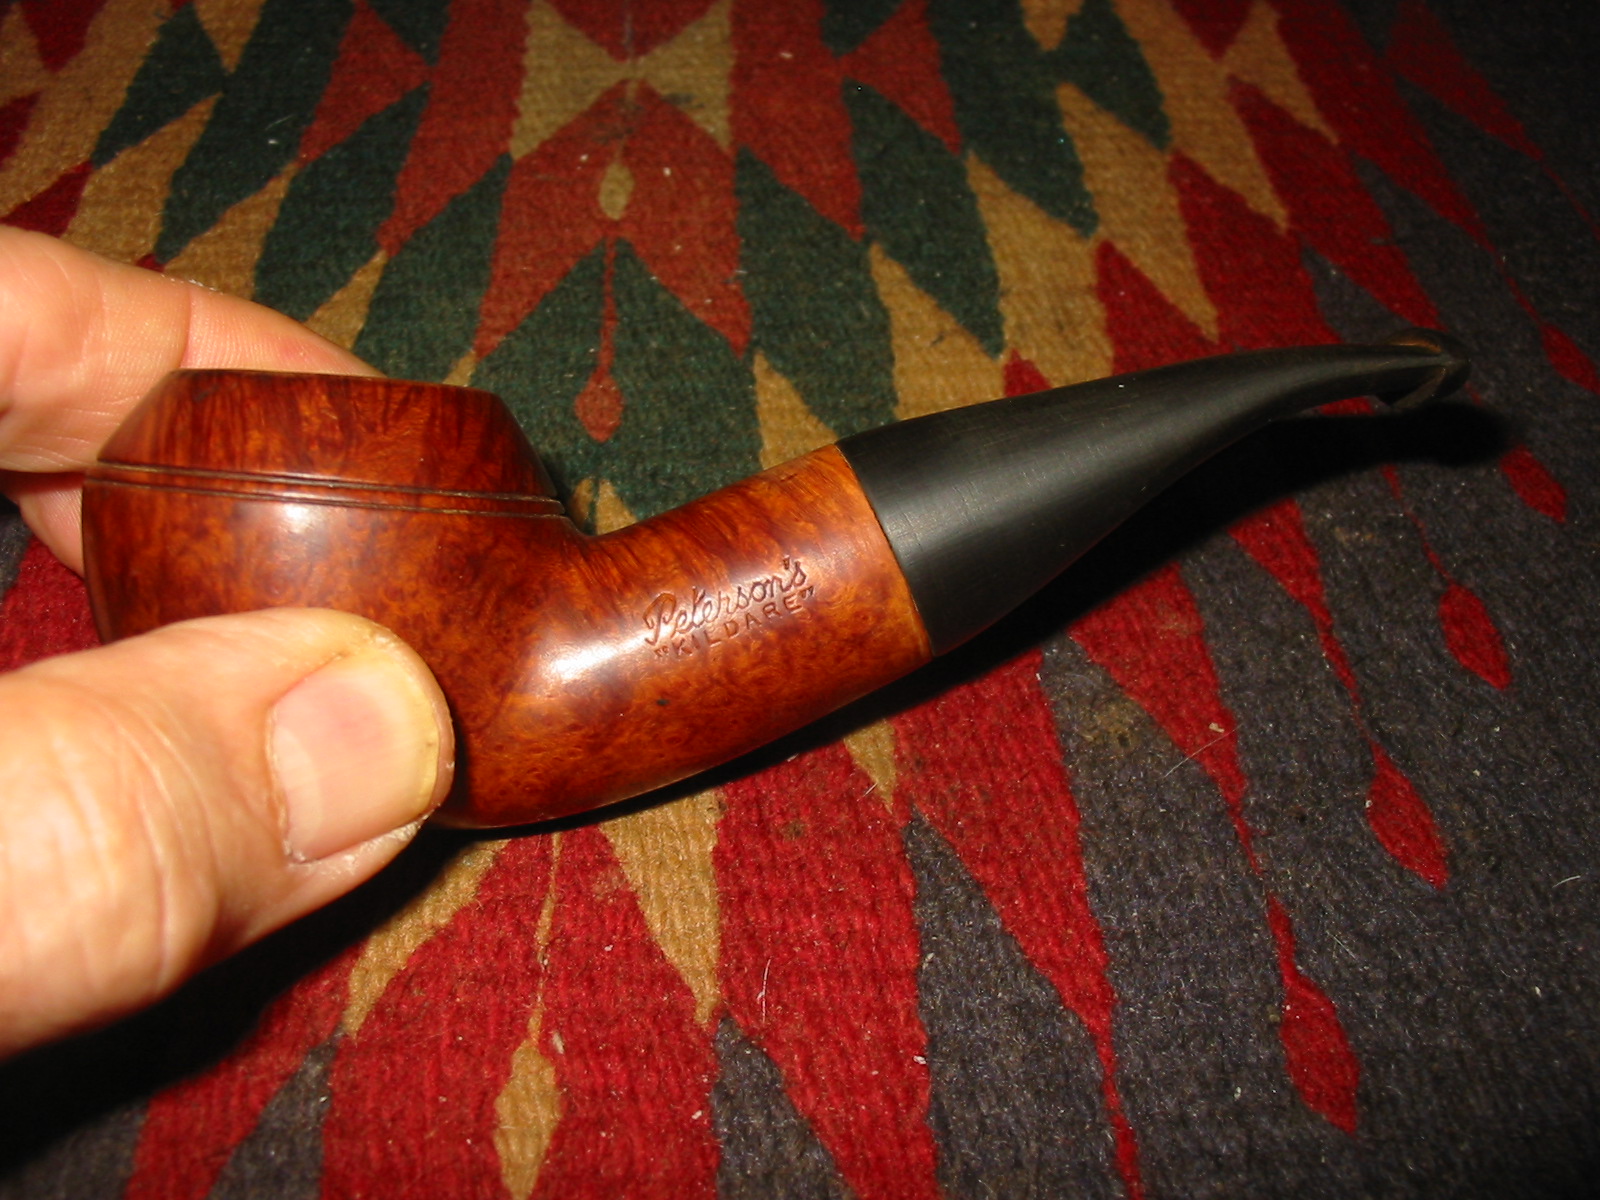
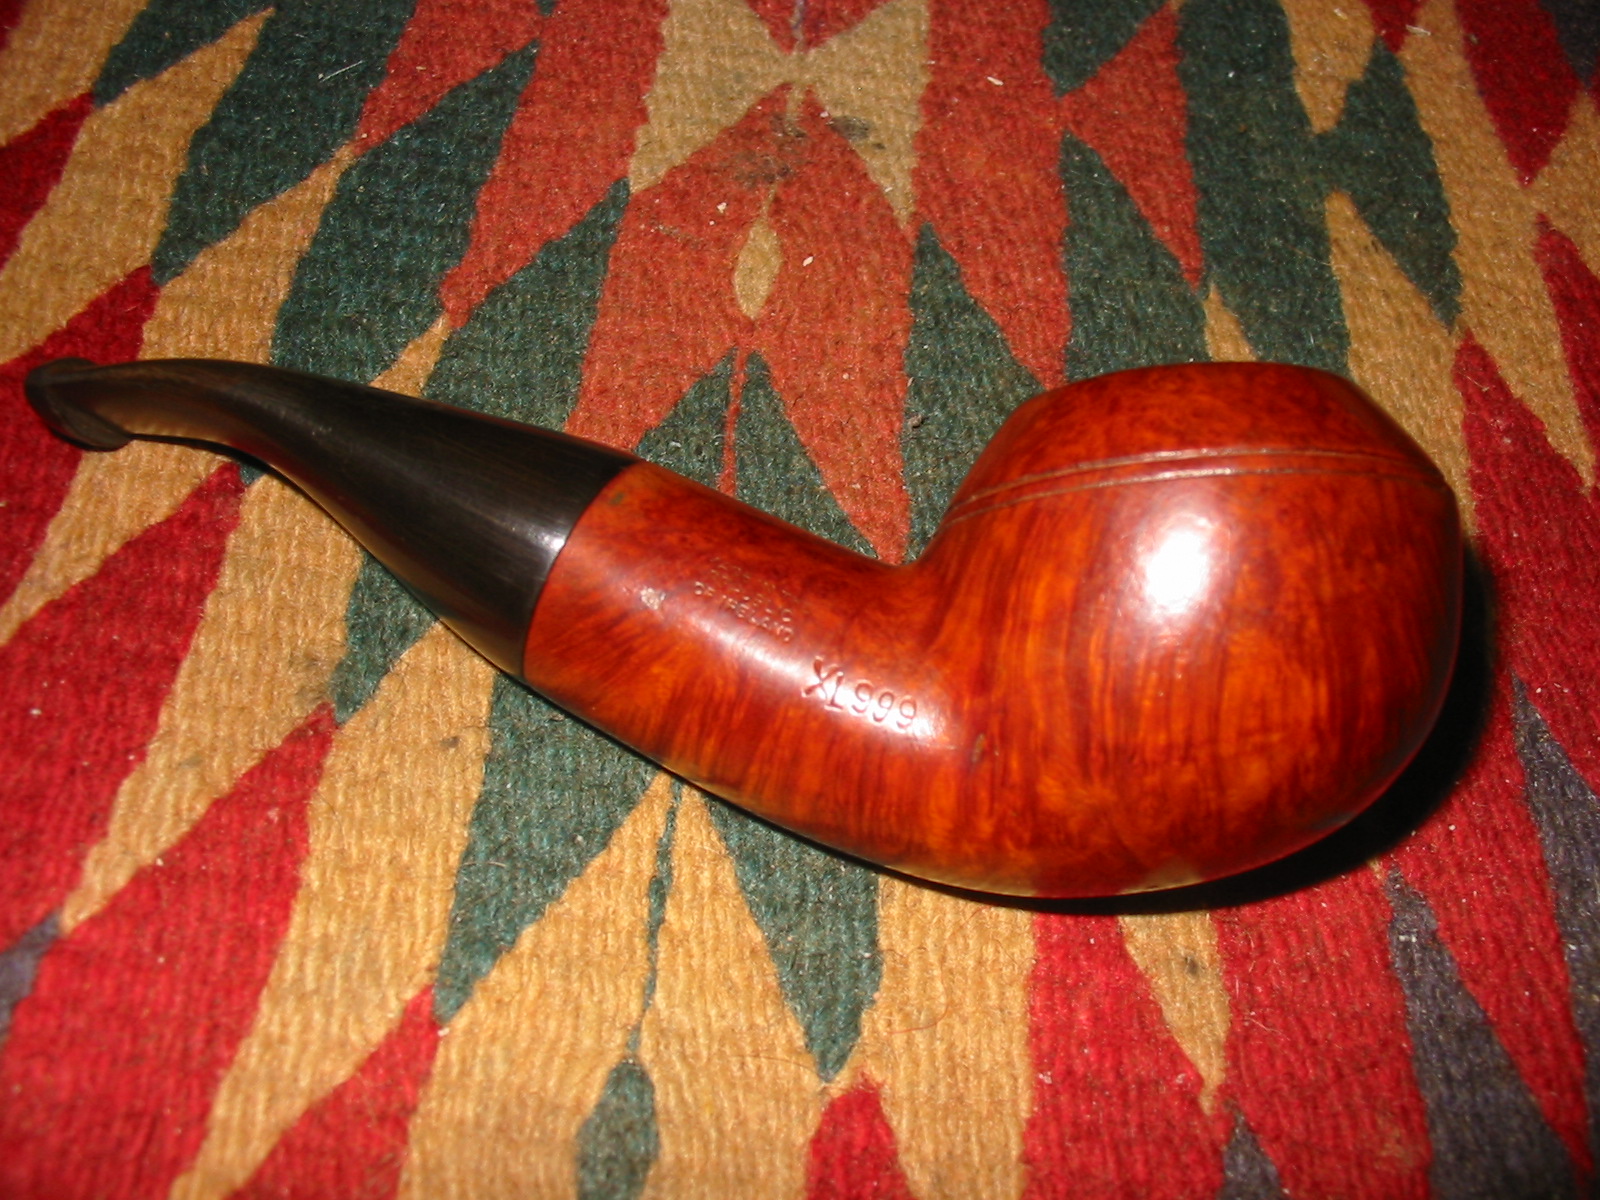
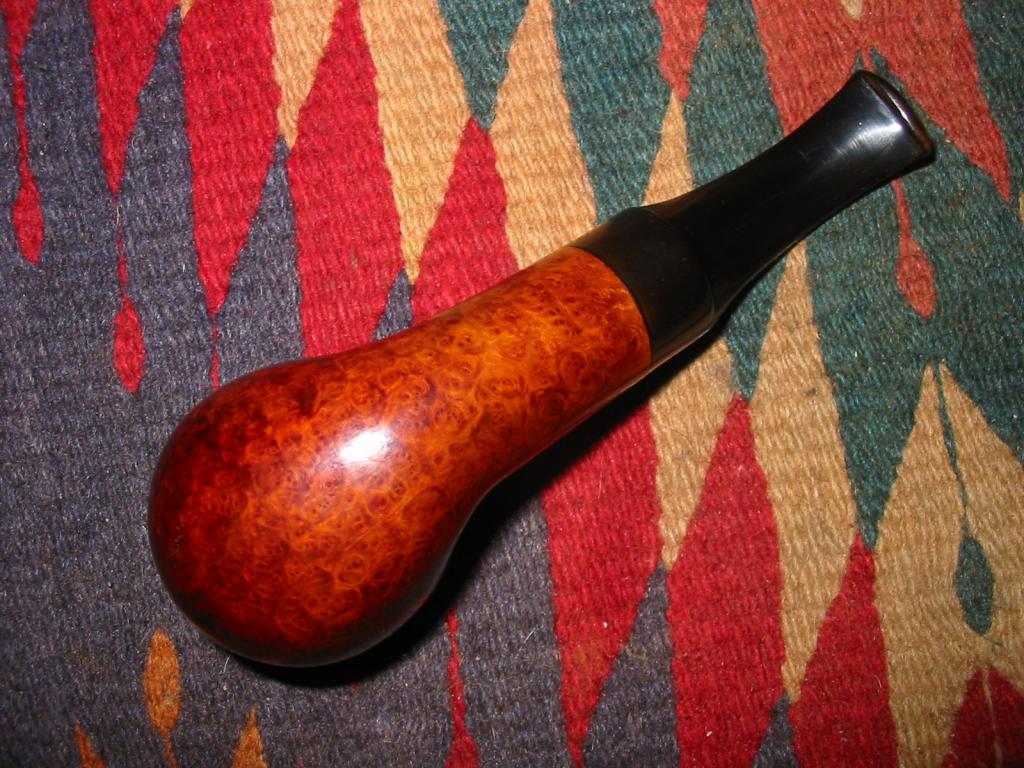
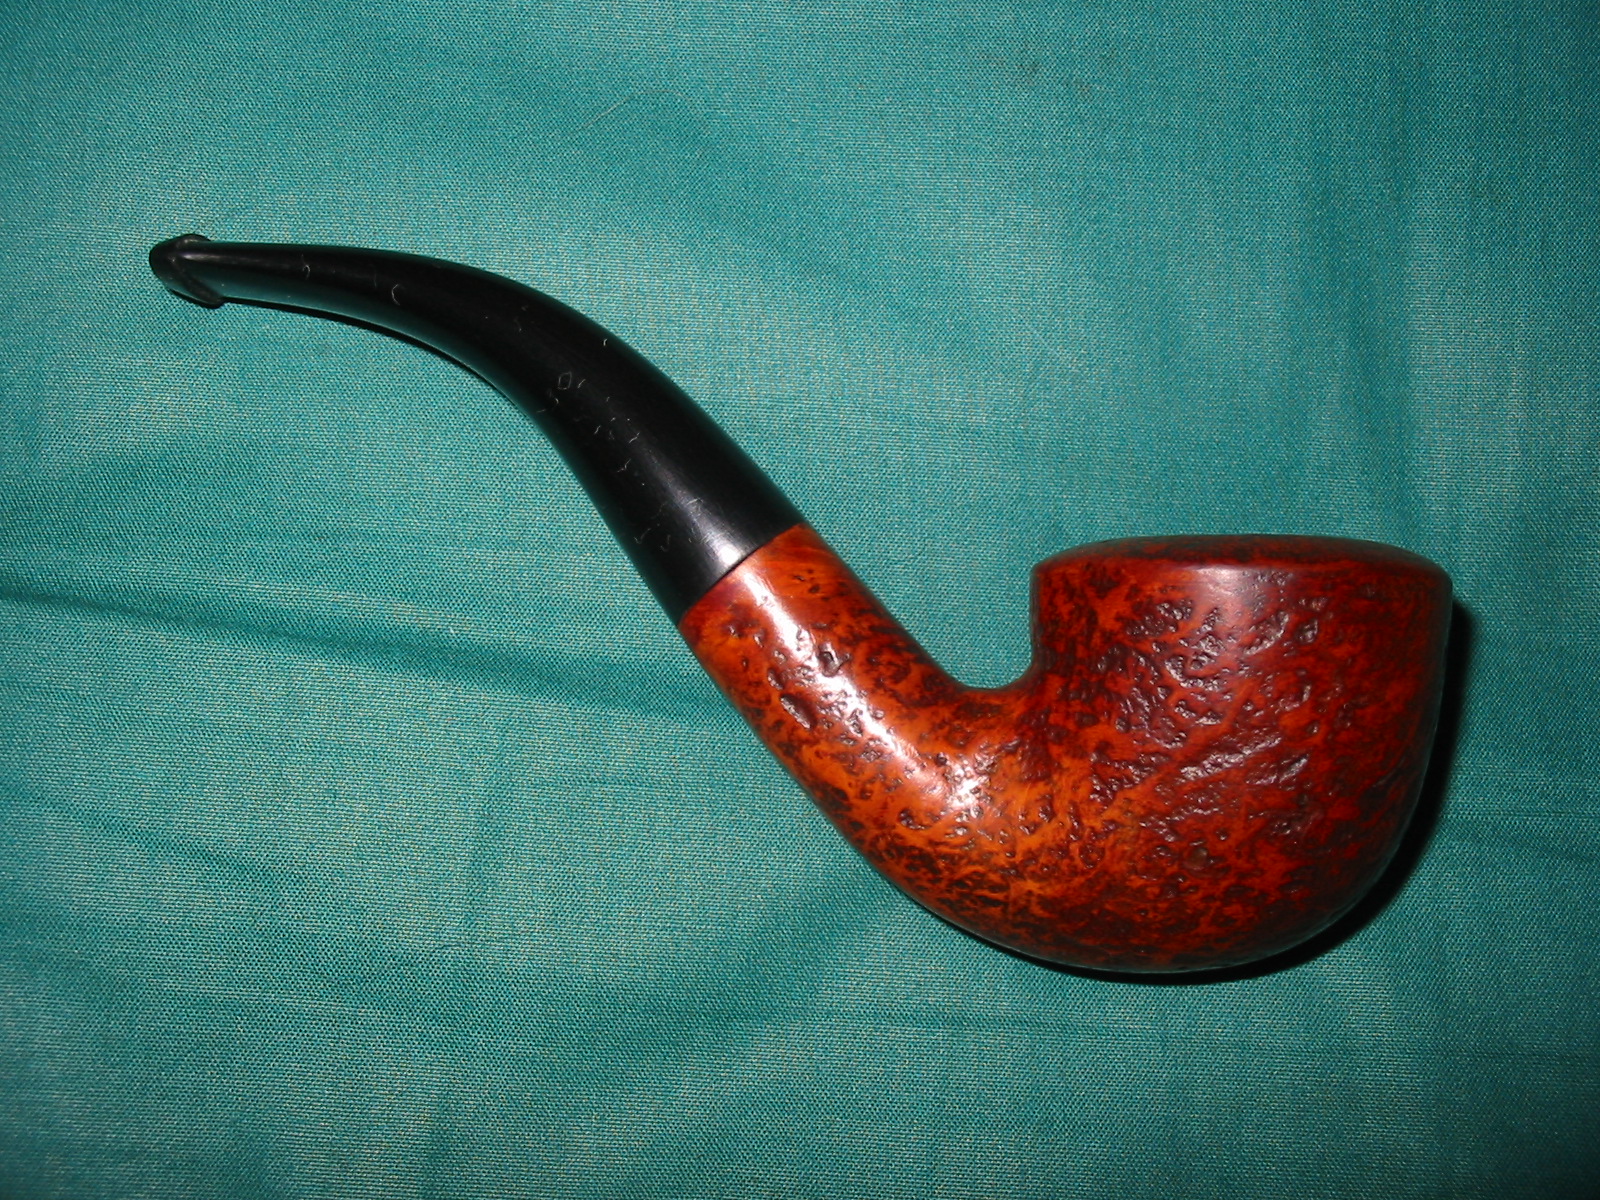
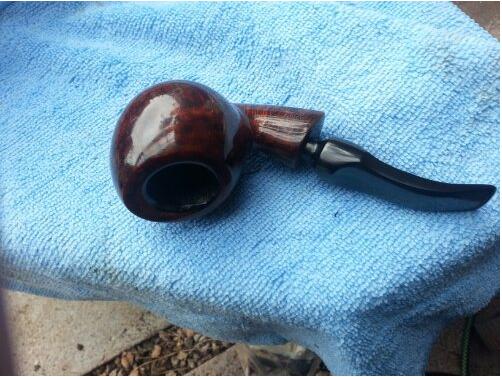
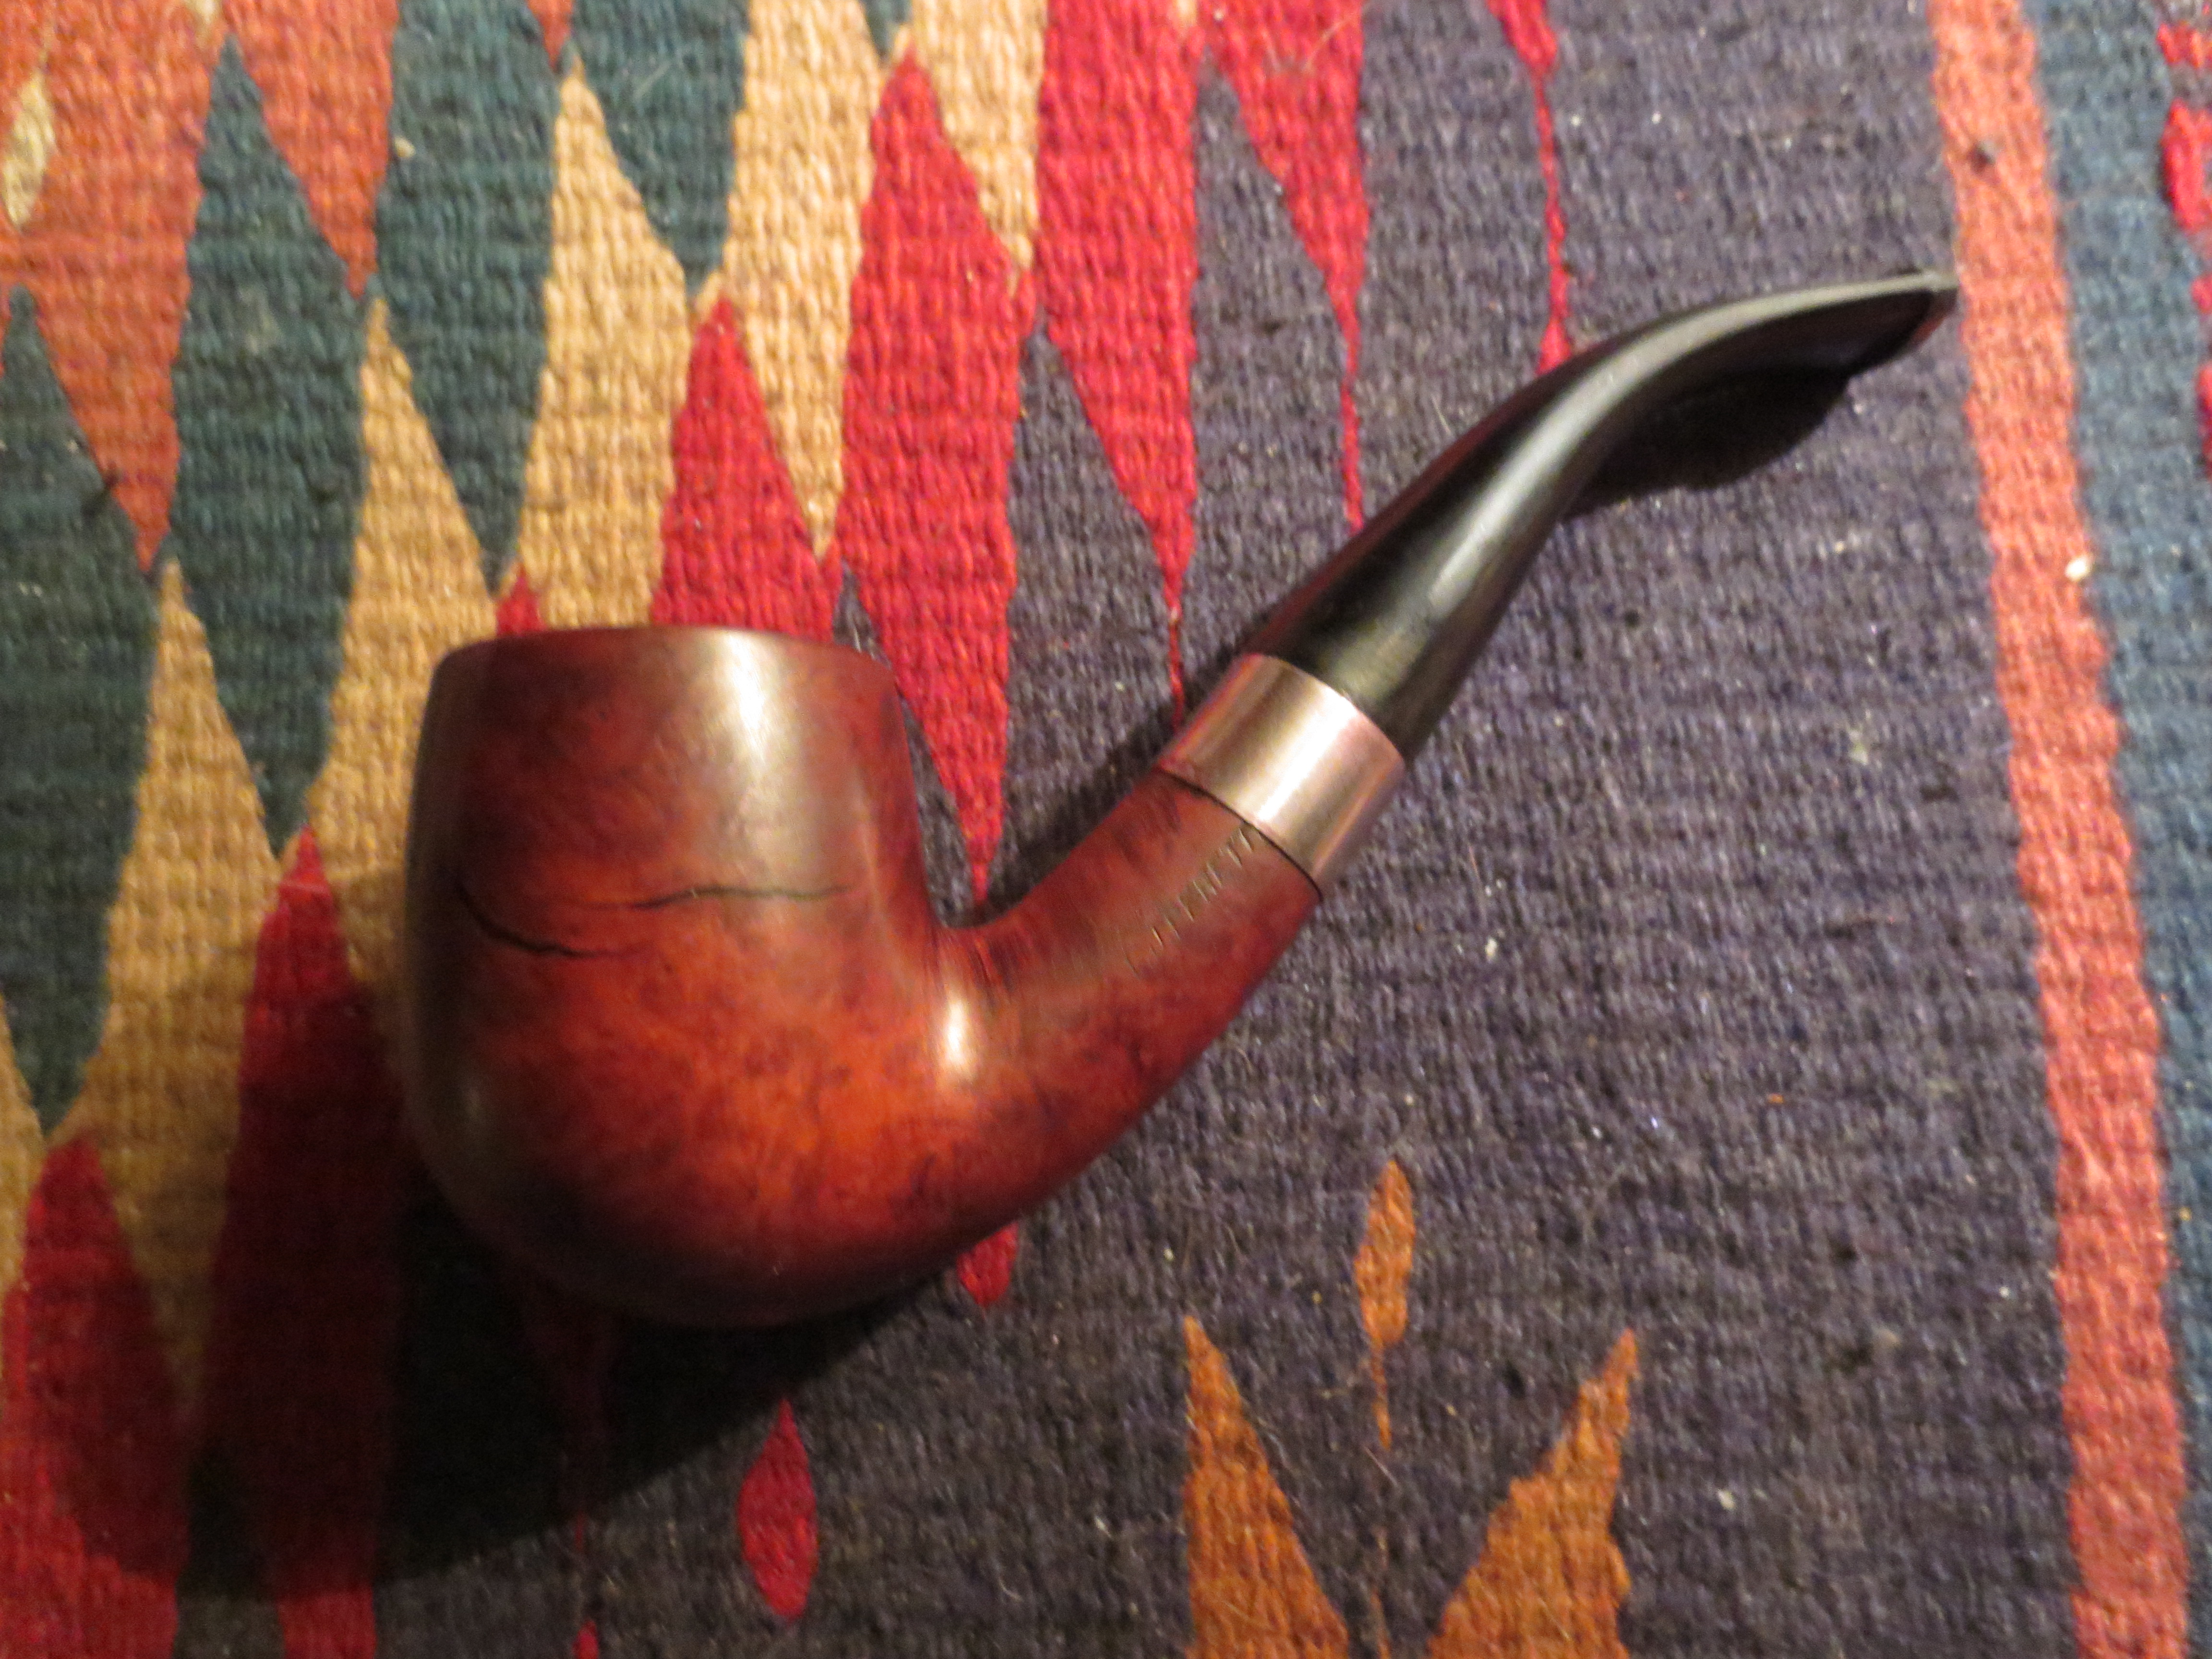
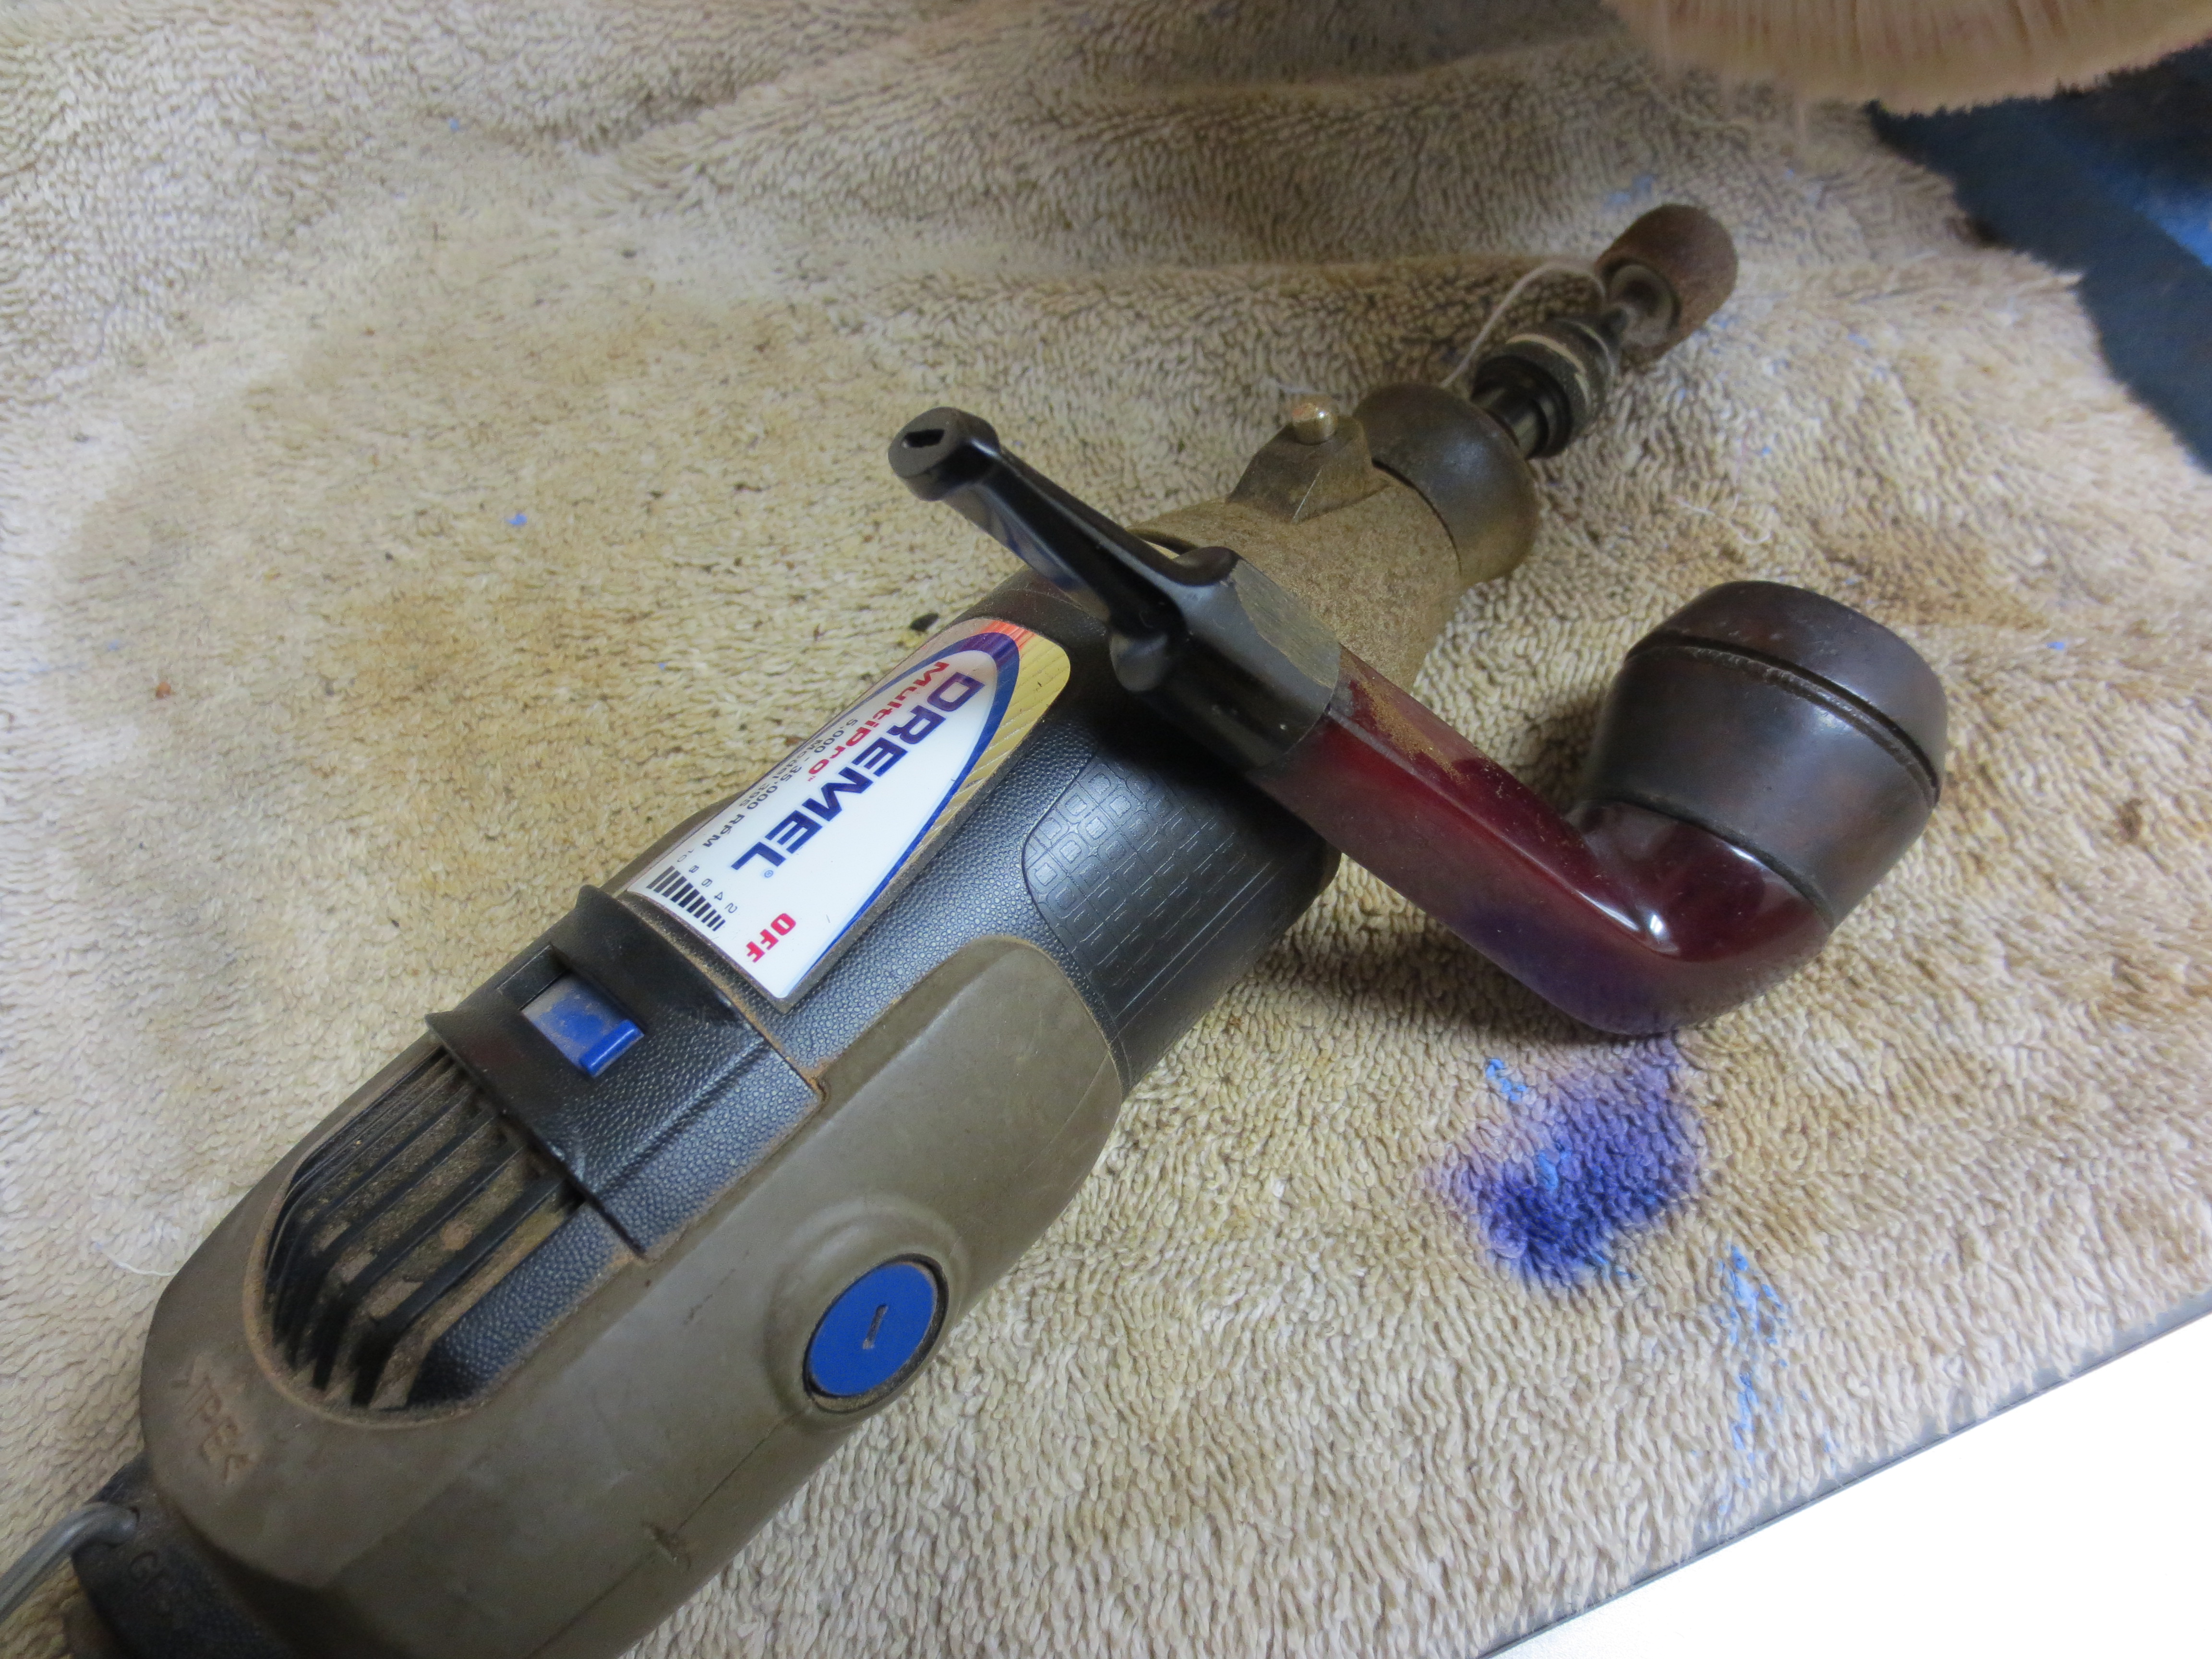
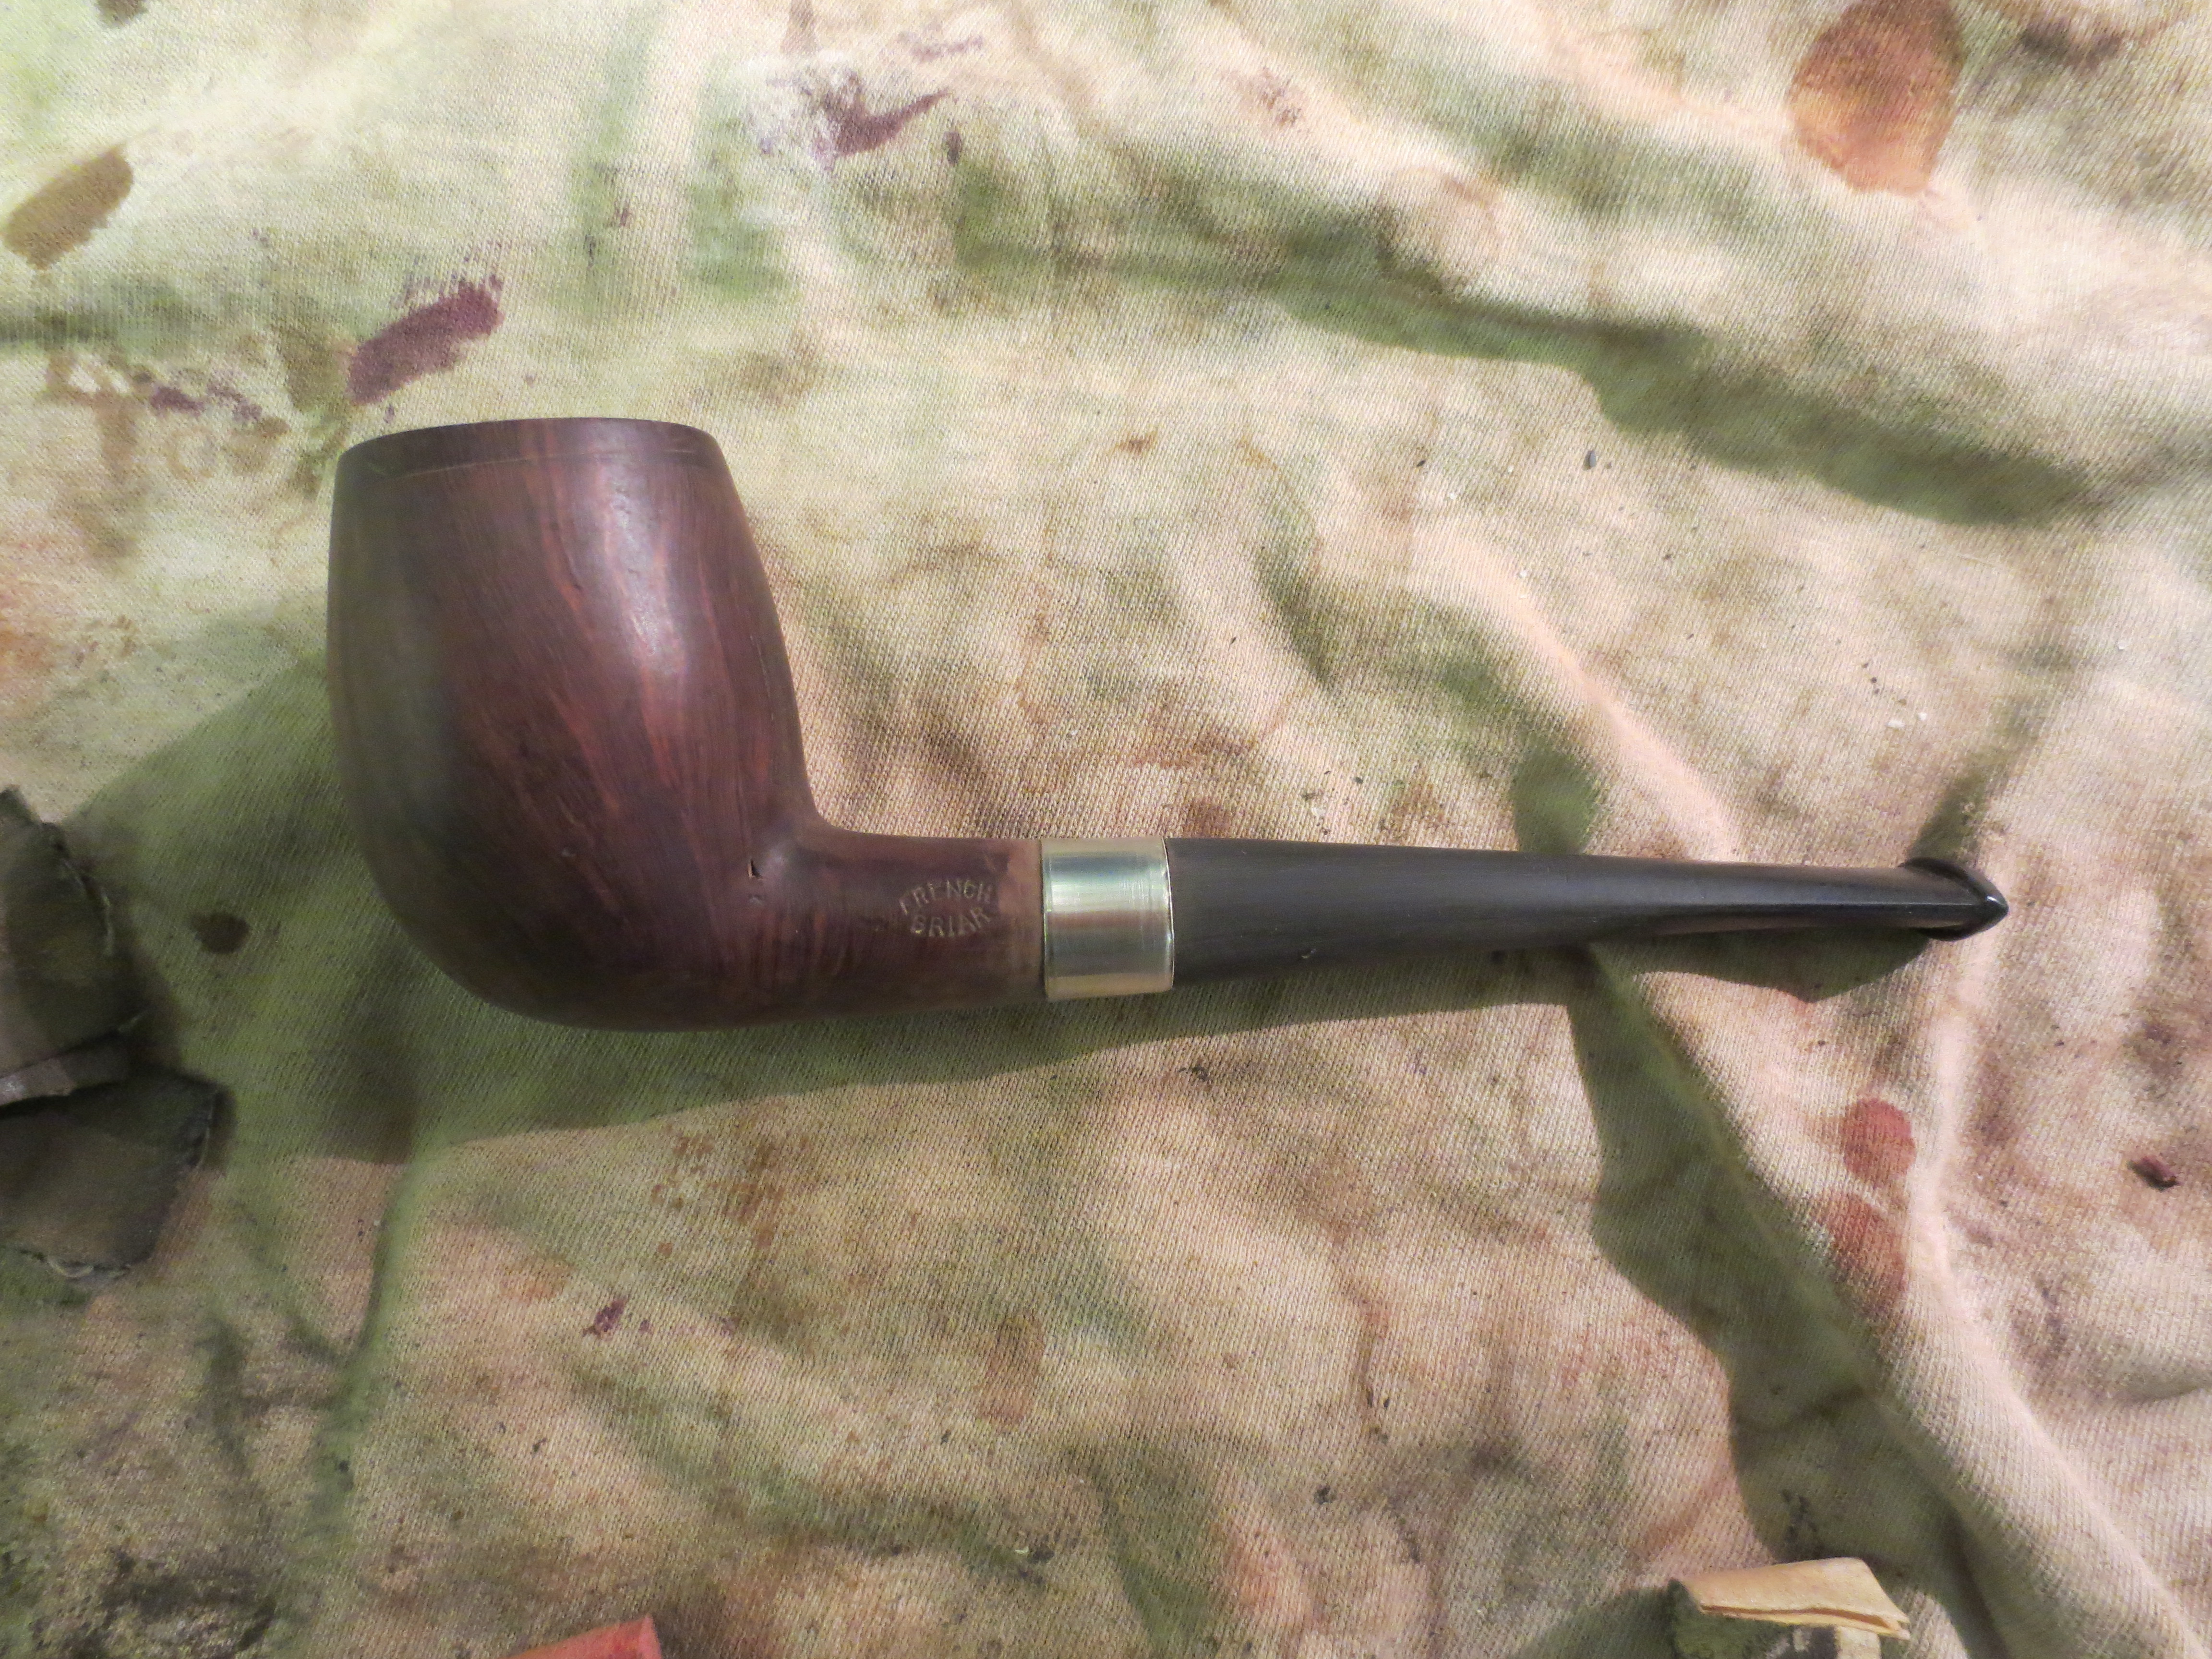
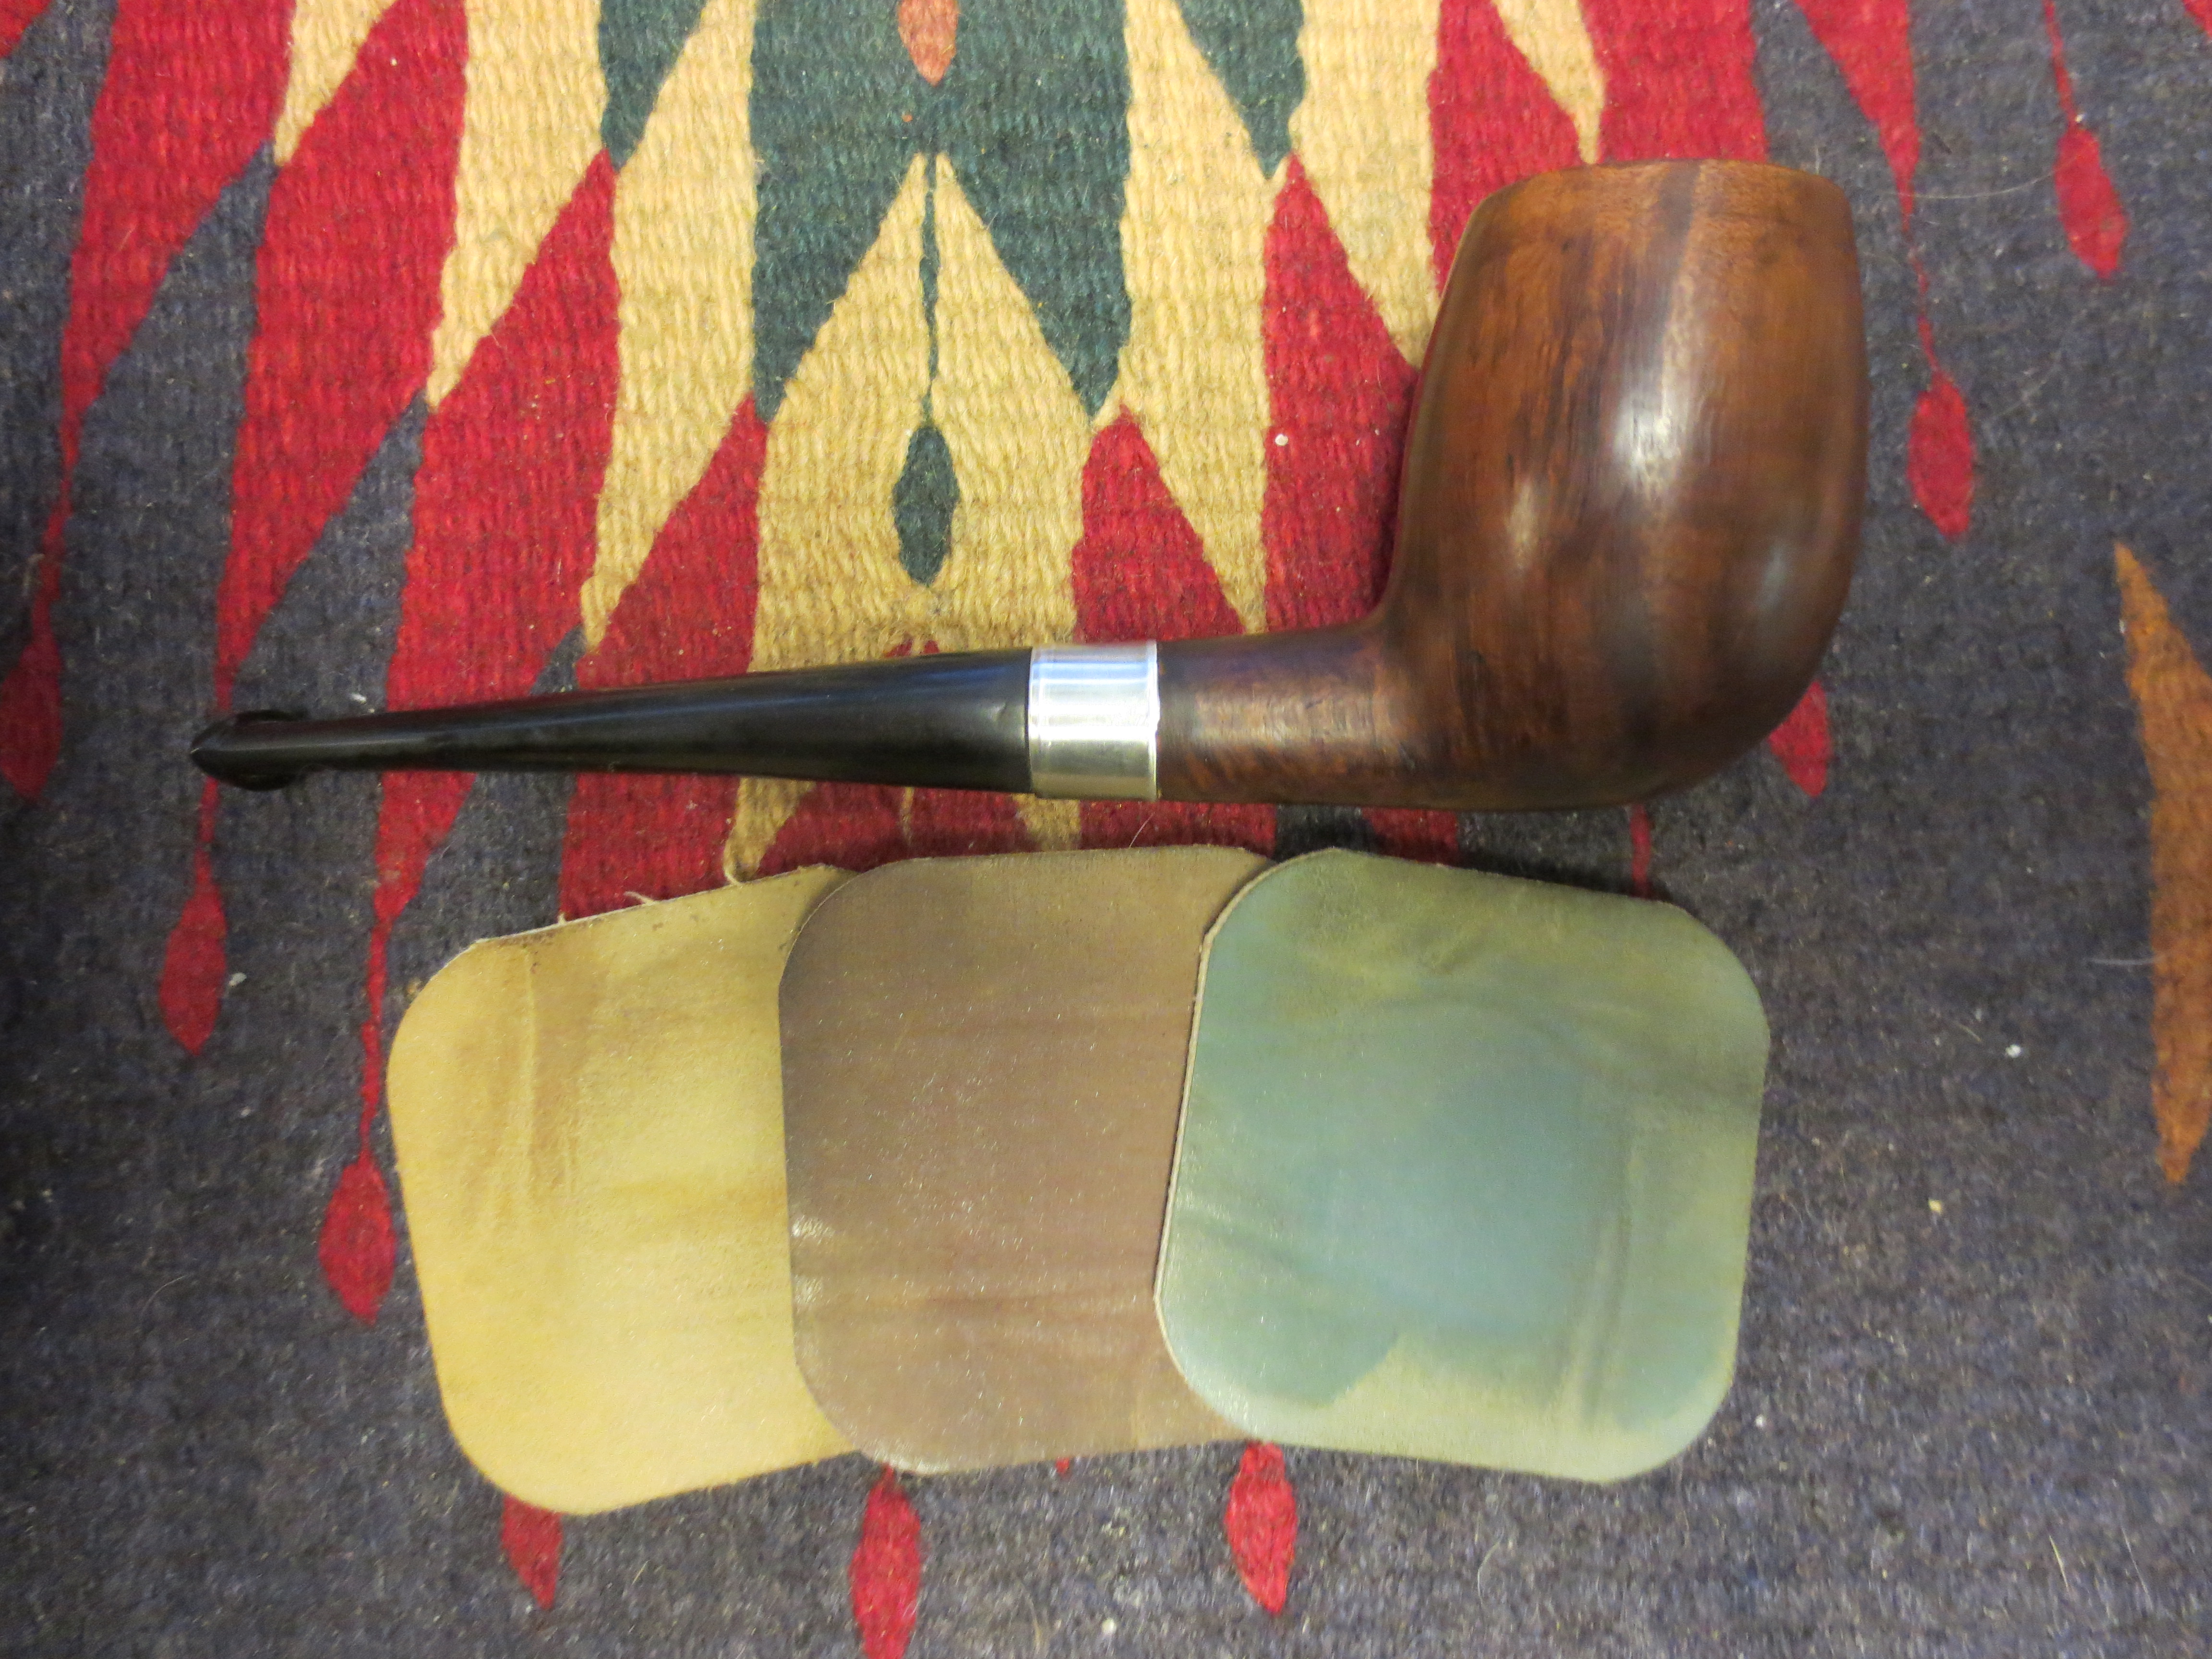
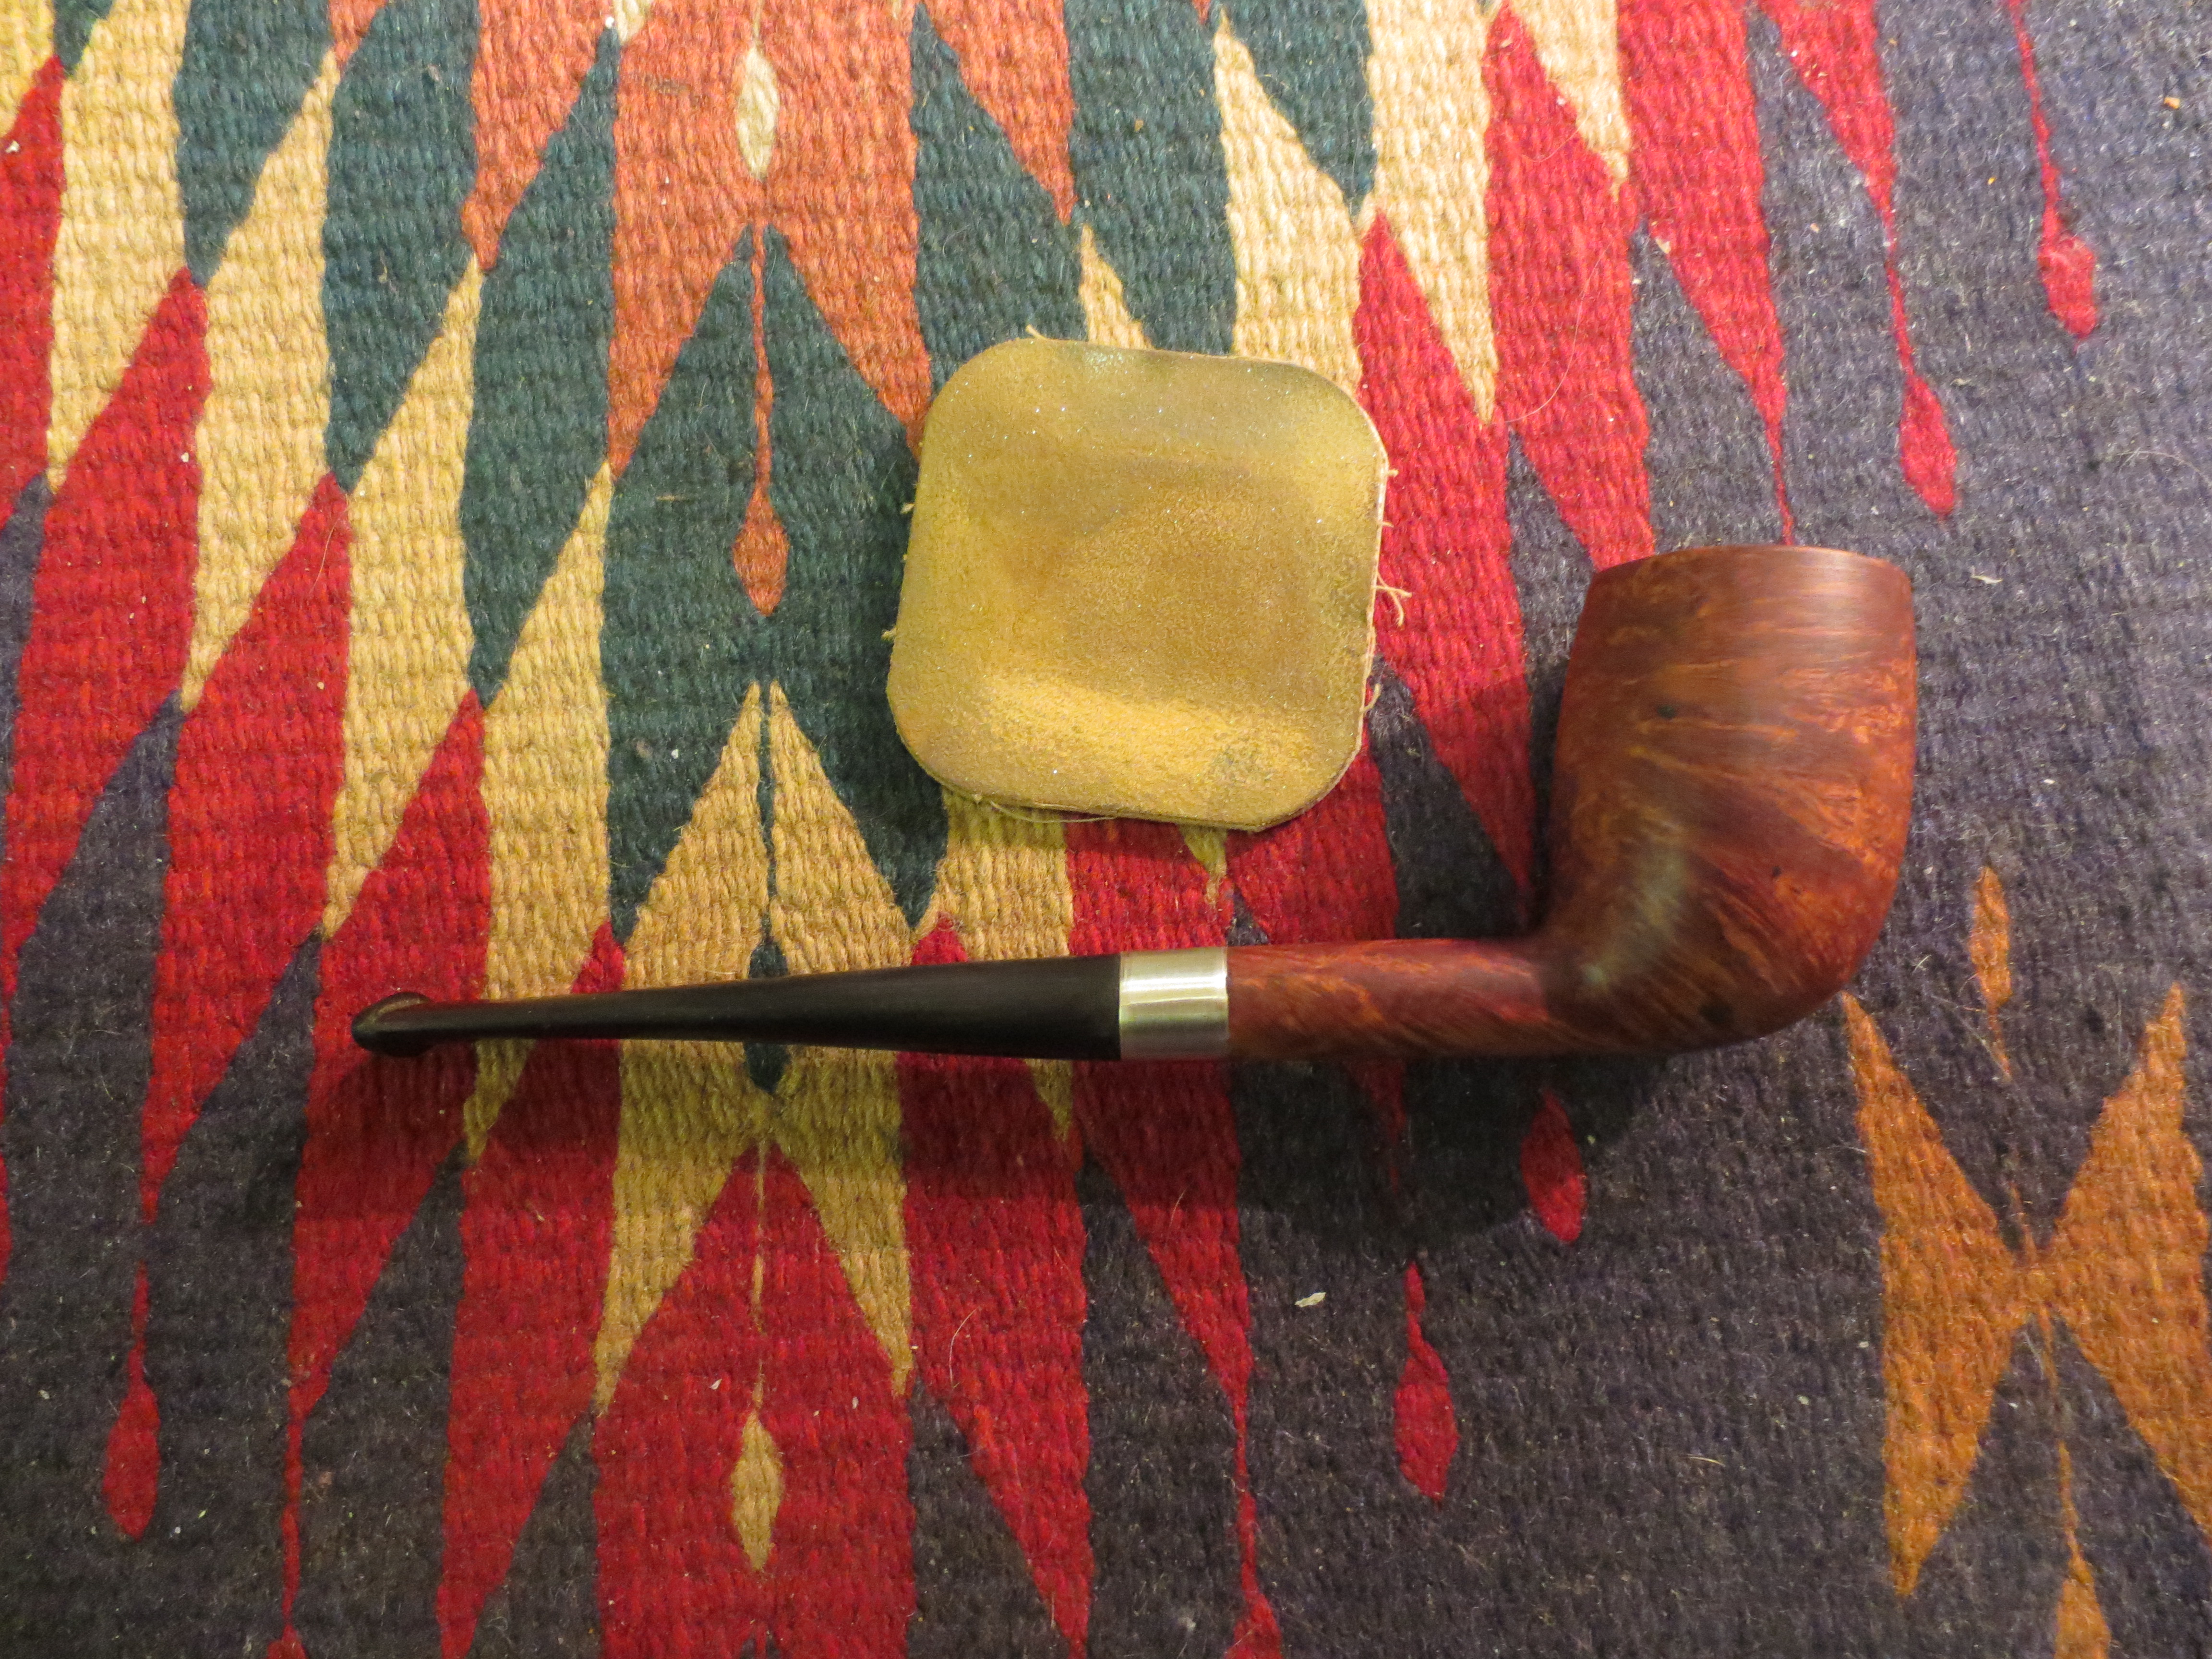
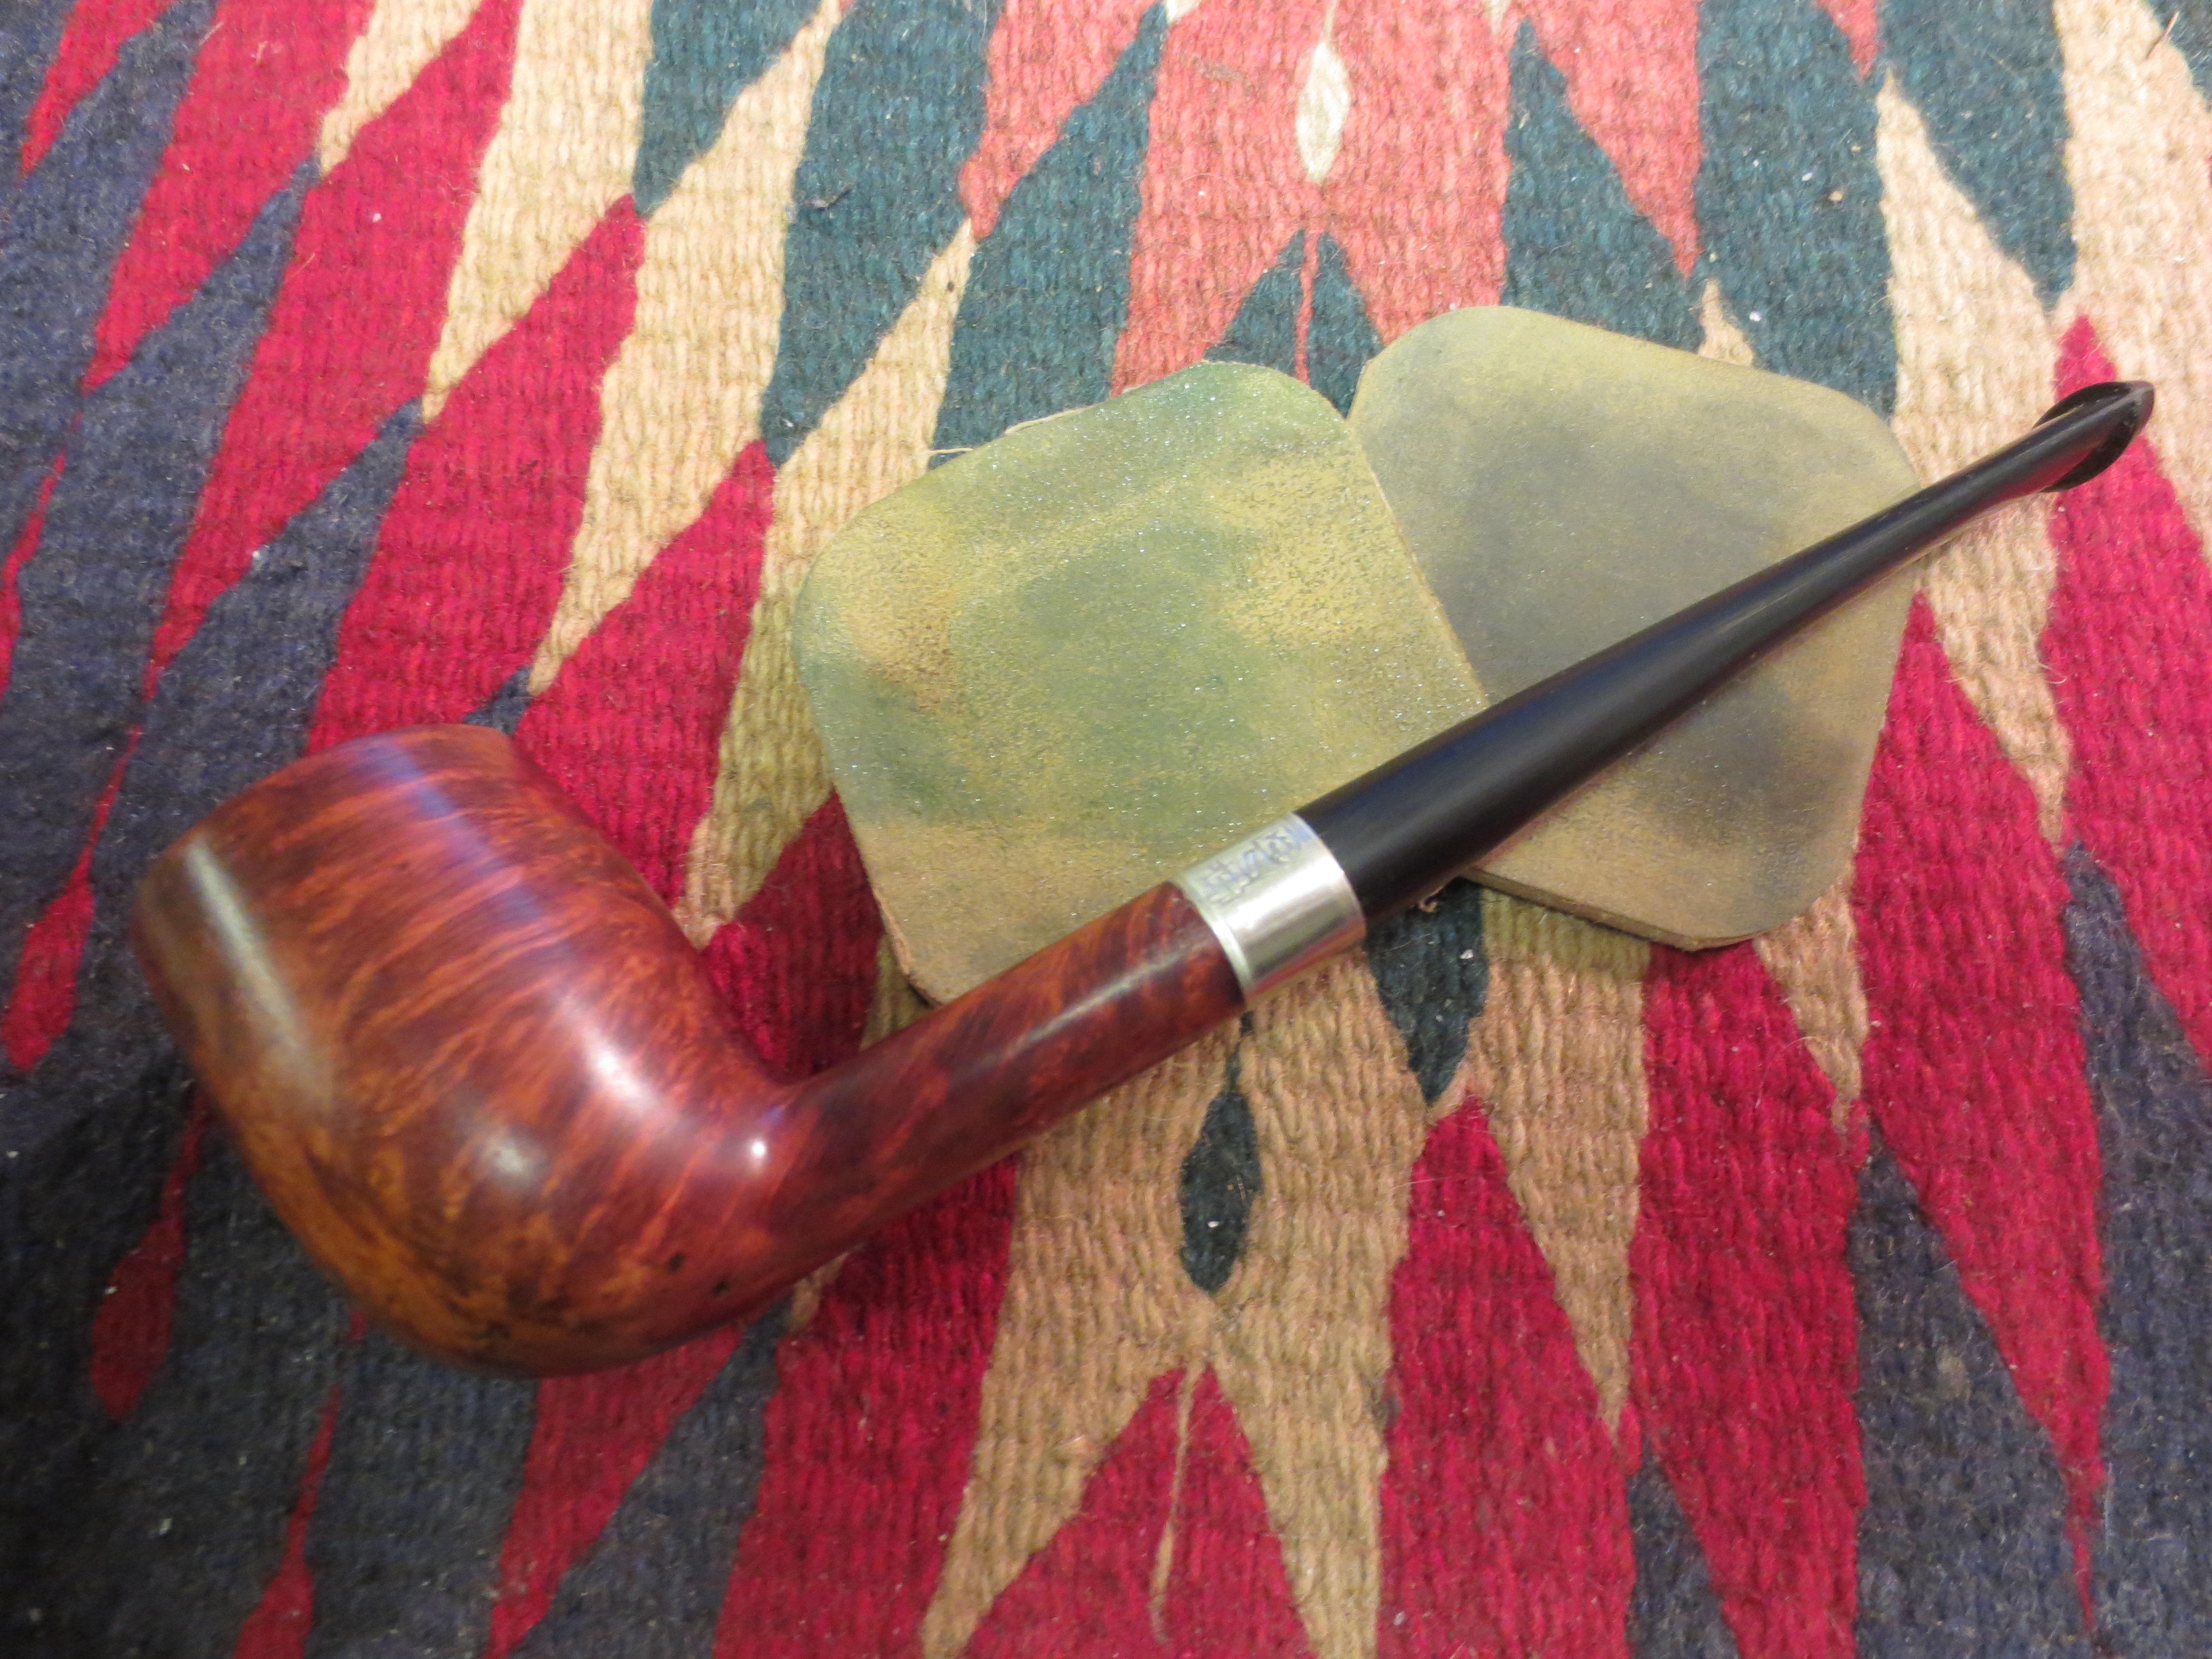
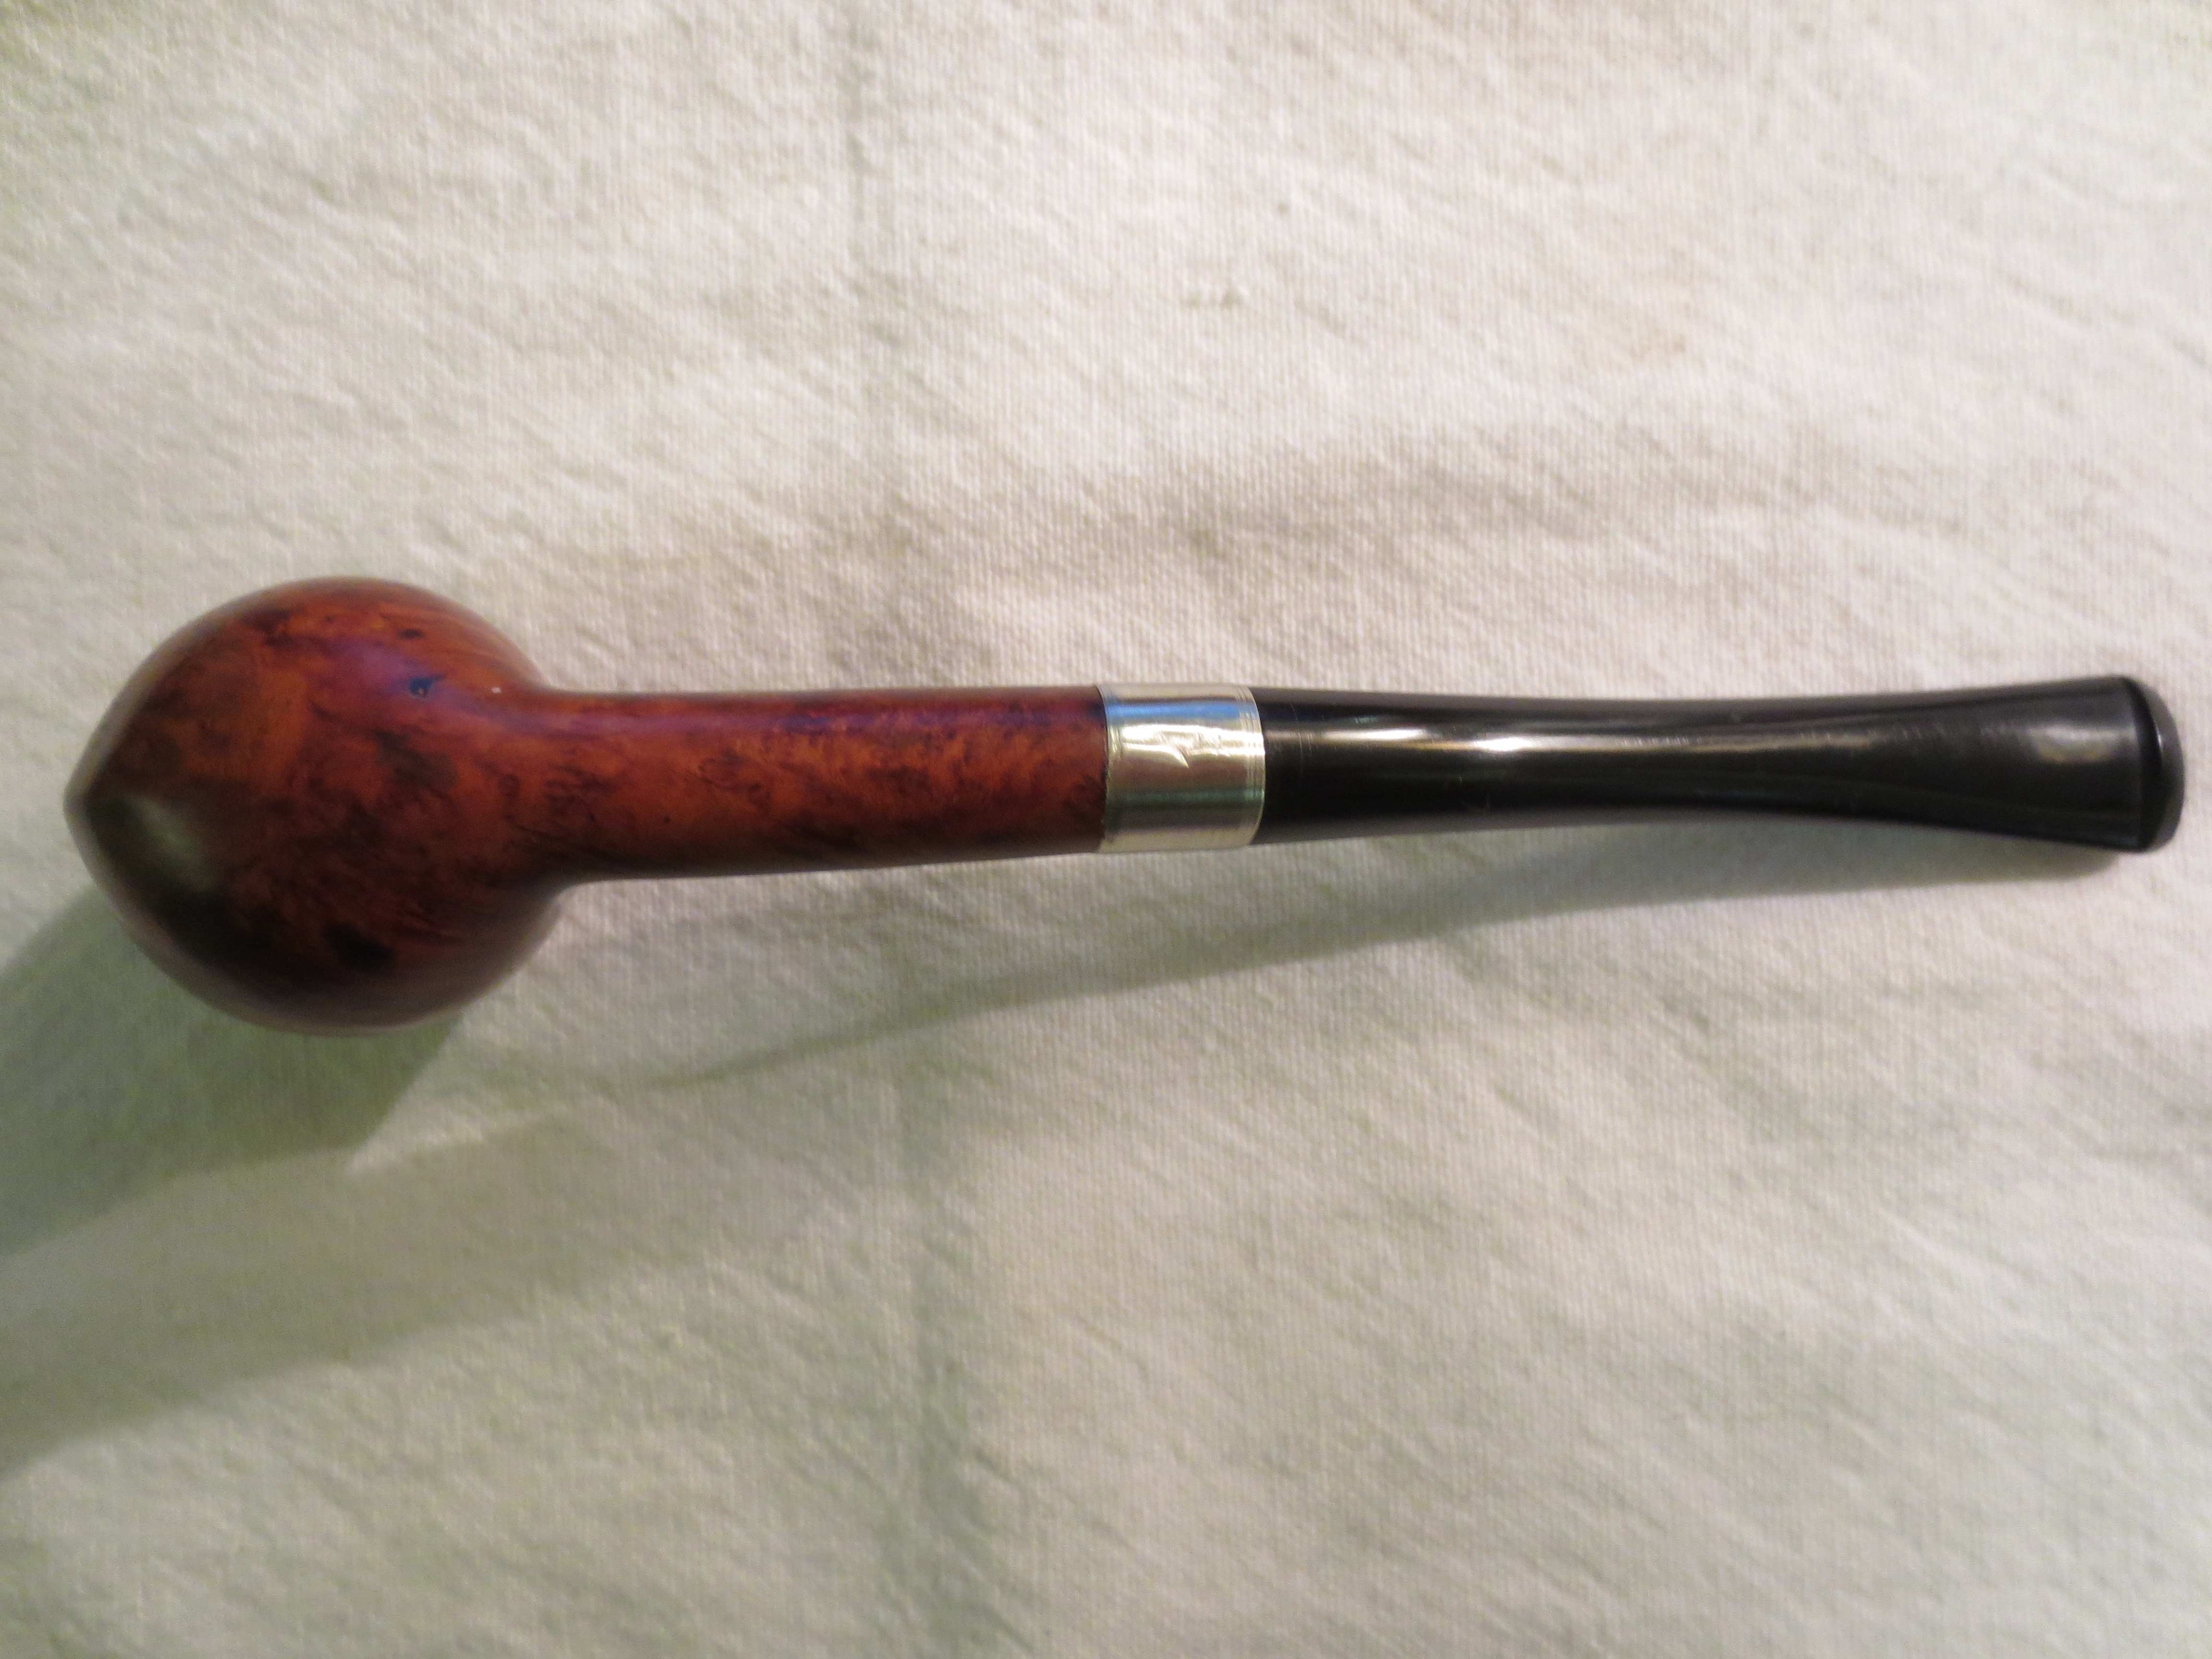
I buffed the stem with White Diamond and a Blue polish. I gave the bowl a light buff with White Diamond to bring up the shine. I gave the bowl a coat of Halcyon II wax and buffed it by hand with a shoe brush. I gave the stem multiple coats of carnauba and buffed it on the buffer with a clean flannel buff. I think the pipe came out well. Does anyone know anything about the brand?

IMG_1508

IMG_1509

IMG_1510

IMG_1511

Making a New Stem for a Peterson’s Kildare XL999


The Peterson’s Kildare is the second pipe down in the left column in the photo below. The second and third photos are of the pipe bowl apart from the lot. The externals were in pretty decent shape but the rim has a heavy buildup of tars and the cake in the bowl is quite thick and hard. To give an idea of the thickness of the cake I was unable to put my little finger in the bowl. The shank was quite large – the tenon is ½ inch in diameter for a snug fit in a clean tenon. The shank itself is 7/8 inches in diameter. It is a large mortise and airway. The pipe is stamped Peterson’s “Kildare” on the left side of the shank and Made in the Republic of Ireland XL999 on the right side of the shank. The finish is quite clean. The top will need to be topped to remove the buildup and dents. I also will need to chamfer the inner edge of the rim to repair the damage that is present on the surface of the rim.

bowls1

Pete999

Pete9992

I reamed the pipe with a PipNet Reamer beginning with the smallest cutting head on the T handle and working up to the diameter of the bowl. I carefully ream the cake so as not to damage the bowl roundness or the inner edge of the rim any more than it already is. I emptied the carbon out of the bowl repeatedly until it was clean and empty. I reamed the cake back to bare wood to begin to rebuild on a clean surface. I scoured the bowl and shank with Everclear and cotton swabs and pipe cleaners.

IMG_1379

IMG_1380

Once the inside was clean I decided to gently top the bowl. I used a medium grit sanding sponge flat on the table top and worked the rim against that to remove the buildup of tars. The first photo shows the set up and the second the result of the topping. Very little briar was removed from the rim, mostly tars. The finish however also was removed so the rim would need to be restained. The third photo shows how I used a folded piece of 220 grit sandpaper to bevel/chamfer the inner rim to repair the damage that had been done to the rim.

IMG_1381

IMG_1382

IMG_1383

I sent out several emails and private messages to folks on the online forums to see if I could find a Peterson stem with these dimensions. I received many answers and several possible stems that could work for this pipe. Thanks to those who sent them. For the most part they were either too long or the diameter of the stem was not large enough to fit the shank. Chuck (desertpipe on SF) sent me several that would work. I also have a piece of brindle rod coming that Todd (Sasquatch on SF) was willing to cut for me. So in the end I will have two different stems for the pipe. While awaiting the arrival of the Cumberland stock I decided to turn the tenon on a vulcanite stem blank from Chuck. I turned it with a PIMO tenon tool and fit it to the bowl. The end fit was a ½ tenon for the mortise so I did not need to remove much of the existing vulcanite on the cast stem to make it fit well. To fit the stem on the tool I drilled the airway so that it slid easily over the pin on the tool but did not have too much play. I held the stem and ran the drill over the tenon for a first pass (second photo below) I adjusted the cutting tip and spun it several more times until the fit in the mortise was close. I used the Dremel with a sanding drum to take off more of the material and fine tune the fit (third photo below). I spun it one last time to clean up the face of the stem where it sat against the shank. I want that surface to be smooth and seamless in its fit.

IMG_1427

IMG_1428

IMG_1429

After fitting the tenon to the mortise I used the Dremel with a sanding drum to remove the excess vulcanite on the diameter of the stem. I carefully sand with the Dremel and bring the stem as close to the diameter of the shank as possible without nicking the briar. I also sand down the sides of the stem to remove the casting overrun on the stem and button. The idea is to get as close as possible to the stem diameter and then sand the rest of the fit by hand with medium grit emery cloth and 220 grit sandpaper.

IMG_1438

IMG_1443

IMG_1444

I took the pipe back to my work table and removed the stem and sanded it until the fit was perfect and the marks left by the Dremel were gone. The hand sanding is probably the longest part of the process of fitting a new stem. I sanded it repeatedly with emery paper and 220 grit sandpaper until it was smooth enough to move to the next step in the process. At this point I am not looking for a smooth and perfect fit but one that is getting close. I then heat the stem with my heat gun in order to bend the stem to fit the flow of the pipe. I heated it until it was pliable and then bent it over the rolling pin and cardboard tube that I use for getting the curve of the stem smooth and correct.

IMG_1445

IMG_1446

IMG_1448

I took the pipe back to my table and showed it to my sidekick and helper, Spence for his approval. He gave it a sniff and looked it over. It passed his inspection so I continued to sand and shape the shank/stem union. Lots of pieces of sandpaper and emery paper later the stem is getting closer and closer to a good fit.

IMG_1449

IMG_1450

IMG_1451

The button was very tight and I was not able to push a pipe cleaner through the slot so I opened the slot with needle files and reshaped it into an oval that was open and flared back to the airway in the stem.

IMG_1453

I sanded the stem with a medium grit sanding sponge and a fine grit sanding sponge to remove the scratches left behind by the sandpaper. Each step of sanding brought both the fit and finish closer to the look I was aiming for with the finished stem.

IMG_1460

IMG_1461

IMG_1462

I wiped the bowl down with acetone on a cotton pad to remove the finish and prepare the bowl for a new coat of stain. I have found that if I do not remove the stain then it is very hard to match the rim to the colour of the bowl. With the finish gone the staining is very simple.

IMG_1463

IMG_1464

I thinned the stain, a dark brown aniline stain, with isopropyl alcohol – 1 part stain to two parts alcohol. I had picked a stain that matched the previous colour of the bowl and also matched another 999 Peterson that I have here. I heated the surface of the bowl with my heat gun to warm the briar and open the pores in the wood. Once it was warmed I applied the stain with a cotton swab and repeated until I had good coverage over the entire surface. I flamed the stain, repeated the application and flamed it a second time. Once it was dry I took it to the buffer and gave it a light buff with White Diamond to even out the stain coverage and remove the excess on the surface of the briar. I wiped down the inside of the bowl where the stain ran in with a cotton swab dipped in Everclear.

IMG_1465

IMG_1466

IMG_1467

IMG_1468

IMG_1469

IMG_1470

With the bowl finished and ready to buff it was time to finish the work on the stem. I sanded it with micromesh sanding pads. I wet sanded with 1500-2400 grit and dry sanded with 3200-12,000 grit. Each successive grit brought more of a shine to the stem and removed the scratches left behind by previous sanding.

IMG_1471

IMG_1472

IMG_1473

I worked on the slot with a folded piece of sandpaper to smooth out the surface of the inside. I also shaped it with the sandpaper until I had the look I wanted. The oval slot now easily took a pipe cleaner no matter how fluffy.

IMG_1474

After much sanding and fitting, the vulcanite stem is finished. The pipe is smokeable while I wait for the Cumberland/brindle rod stock to come from Todd. I like the look and feel of the pipe as it is very close in size and design to the GBD 9438 with a tapered stem. The finished pipe is pictured below after buffing with multiple coats of carnauba wax and with a clean flannel buff.

IMG_1488

IMG_1489

IMG_1490

IMG_1491

Reborn Huckster Pipe – Is It a GBD 9438?


When I hear the word Huckster I think of an aggressive salesperson or a promoter, a snake oil salesman or someone not to be trusted. The definition from the dictionary is one who uses aggressive, showy, and sometimes devious methods to promote or sell a product. The stamping on this pipe is HUCKSTER on the left side of the shank. On the right side of the shank it is stamped LONDON ENGLAND. The pipe is clearly either made by GBD or by someone doing an amazing copy of the GBD 9438 shape. The shape is perfect in comparison with my GBDs of this shape number. I have been researching on the internet to see if I can find out who the pipe was made by/for and develop some background on it but so far I have found nothing.

Hukster5

The five pictures below were included in the EBay sale by the seller of the pipe. While they are out of focus they gave me a clear enough picture to place the bid. I was one of a few bidders on this one so I picked it up for a very good price in comparison to that of GBD 9438s. When it arrived I was happy to see that the seller’s photos actually were poor in comparison to the pipe that I held in my hand. The grain is extremely nice – the left side and the bottom of the shank and bowl have some beautiful birdseye grain. The right side has great flame grain. The front of the bowl has a bald spot with a well hidden fill in the grain (In the photos it is just above the lighter spot on the front of the bowl. There were a few dents that would need to be steamed out of the finish but the stain and finish was impeccable. The rim was unblemished with no burn marks. There were a few small sand pits in the bowl above the double rings. The bowl had a slight cake in the bottom half but the shank is clean and spotless with some raw briar that has not been stained with smoking. If it weren’t for the slight cake in the bottom of the bowl it would appear to be unsmoked. The stem was badly oxidized and did have one slight tooth dent on the underside near the button. I think that the seller must have cleaned up the pipe before selling as there were also scratches from sanding on the stem – top and bottom sides.

Hukster1

Hukster3

Hukster4

Hukster6

When it arrived I took the next four photos to show what the pipe looked like before I worked on it. My description above formulated by and large from the photos online was accurate though in fact the pipe was very clean.

IMG_1416

IMG_1417

IMG_1418

IMG_1419

The bowl did not require any work other than a quick cleaning of the shank – more by habit than necessity. The stem on the other hand required a lot of work. I sanded it with a medium grit sanding sponge to break up the oxidation. I also used the flame of a Bic lighter to paint the surface of the stem. The flame from the lighter also raised the slight tooth indent next to the button. This combination of methods removed a large portion of the oxidation as can be seen in the next four photos below.

IMG_1421

IMG_1422

IMG_1423

IMG_1424

I then sanded the stem with micromesh sanding pads. I wet sanded with 1500, 1800 and 2400 grit sanding pads. I wet the pad by dipping it in a bowl of water and then sand the stem with it. Once I had wet sanded with those grits of micromesh I followed by dry sanding with 3200-12,000 grit micromesh pads. The next series of five photos show the progress of the sanding. I took it to the buffer after the wet sanding and buffed it with Tripoli to get an idea of where I stood with the oxidation. I also ran the flame over the hard to get angles on the saddle and against the button to further remove hard to get oxidation.

IMG_1425

IMG_1426

IMG_1430

IMG_1431

IMG_1432

After I was finished sanding with the final grit of micromesh I rubbed the stem down with Obsidian Oil and once it was dry buffed it with White Diamond. I then buffed a final time with a blue plastic polishing bar. I gave the bowl and stem multiple coats of carnauba wax and buffed it with a soft, clean flannel buff to raise the shine on the bowl and stem. The next four photos show the finished pipe.

IMG_1455

IMG_1457

IMG_1458

IMG_1459

Here are a few more shots with a different background
Huckster1

Huckster2

Huckster3

Huckster4

A Restemming Job with Memories of the Past


The third pipe I worked on in the lot below is the second one down in the third column. It is a Dublin like shape but probably properly is a freehand. It has a shallow sandblast finish with a two-tone stain. The undercoat is black and the top coat is brown. It is stamped on the left side of the shank Racine & Laramie in an arch over OLD TOWN SAN DIEGO over Banza in a script and then a line stamped Made in Italy. The look and feel of it says to me it is made by Lorenzo but I am not sure. When I read the stamping is when the memory came back. I have been in the Racine & Laramie tobacco shop in Old Town San Diego, California. It is a museum like tobacco shop that has a wide range of tobaccos and pipes in an old California mission style village setting. You can almost imagine cowboys riding up and tying up their horse to go in and get a pouch of fixin’s. The picture below is what I remember of the shop. It is from the website http://www.racineandlaramie.com/

Racine & Laramie

The following excerpt on the history of the shop comes from the website as well. I find it incredibly interesting reading.

History of Racine & Laramie
In 1868 Racine & Laramie became San Diego’s first Cigar Store. Having come from eastern Canada in the prosperity following the War Between the States, Messrs. Racine and Laramée sold cigars, tobacco, stationery, pipes, cutlery and gentlemen’s furnishings. The adobe they rented had been built in the 1820’s as the retirement home for leather-jacket soldier, Juan Rodriguez of the Royal Presidio. It was one of the first six buildings in the small pueblo, 500 registered voters, thousands of Kumeyaay. The Rodriguez family held ownership through periods of depression and Gold Rush boom, and their son, Ramon, was on the City Council. The widow Rodriguez had the building remodeled in 1867 and rented to Racine & Laramie and the Bank Exchange saloon. All was lost in the fire of 1872.

Using archeology, historic research and photographs this building has been reconstructed with the interior furnished and stocked as it may have been in that remote, frontier Pacific port. This picture gives a panoramic view of the interior of the shop looking at the cigar humidor.

Humidore

It was this shop that I visited many times over the years. It is like stepping back in time to enter the old town and then to walk into the shop itself. I think the last time I was there was about six years ago now. I took the train from the downtown harbor area to the old town site. I walked through the reconstructed village. I must have spent 3 or 4 hours wandering around the site and ending up in the old tobacco shop. I looked at pipes and tobaccos before settling on a couple of tins. I think I picked up some Dunhill EMP and maybe a tin of McClelland Dark Star before catching the train back into town.

Needless to say when I found this pipe bowl among the lot pictured below I restemmed it and while working on it relived my visits to the pipe shop in Old Town San Diego.

bowls1

The finish on the pipe was in pretty good shape – slight wear on the shank area and on the rim left the stain spotty in those areas. The bowl was caked – but differently than most of the pipes I work on. Its cake was primarily in the bottom half of the bowl. The bottom half was thickly caked while the top was not as bad. The photo below shows the bowl as it was when I took it to the work table. The sandblast is either worn from use or it is a lightly blasted finish. The shank was in very good shape and there were no cracks of damage to the inside. The drilling is a bit funny on this as well. It is drilled with a relatively deep mortise and the airway is drilled at the top of the arc of the mortise. It then drops at a sharp angle into the bowl coming out just left of centre in the bottom of the bowl. Because of the high drilling the mortise acts as a sump similar to the Peterson sump in the shank of the system pipes. It was dirty but not with any aromatic residue. Rather the pipe smelled of Virginias and would take little to clean it up.

new1

This pipe that took me several tries to get a stem that would work. This was not due to the look or feel of the stem but due to unforeseen troubles. The first was a nice saddle stem. I turned the tenon and had a great fit on it. I heated it with my heat gun and tried to bend it over my rolling pin to aid in getting the right angles on it. The heat made it very flexible and as I bent it to the correct angle it just snapped in two parts. Those things happen and in this case it was a frustration to be sure – so back to the drawing board. This time I chose a tapered stem. I turned the tenon and fit it to the mortise. I then used the Dremel with the sanding drum to remove the excess material and fit it to the diameter of the shank. I then sanded it with 220 grit sandpaper to finish the fit of the stem. The next three photos show the newly fit stem.

IMG_1227

IMG_1228

IMG_1229

I reamed the pipe with the PipNet reamer and cleaned out cake from the bottom of the bowl. I had to use two different cutting heads on the reamer to get it to remove the cake. The smallest head fit into the bottom half of the bowl and I was able to cut it back until the third head fit and removed cake from the top half and the remaining cake on the bottom half.

IMG_1230

I wiped down the bowl and shank with acetone on a cotton pad to remove some of the top coat of stain and even out the lighter areas and the darker areas where the stain was still present. My goal was not to remove all of the stain present but merely even out the top coat so that I could more easily blend in the new stain coat.

IMG_1231

Then with a bit of fear and trepidation, after breaking the first stem, I took the stem to the heat gun and heated it so that I could bend it into shape. I inserted a pipe cleaner in the airway as the bend would be quite significant and I did not want to risk having the airway collapse or kink. I heated it a high heat setting until the stem was flexible. I want the bend to be quite high up the stem toward the shank and not just on the thin portion of the stem so it took some time over the heat to make the stem bendable. I kept the stem moving over the heat as I did not want to burn the vulcanite. Once it was pliable I bend it over an old rolling pin that I have absconded with for that purpose. I have a heavy cardboard tube over the pin so that the surface is very smooth for the bend. Any cracks or rough spots on the rolling pin translate into wrinkles in the hot vulcanite.

IMG_1232

IMG_1233

IMG_1234

In the first photo below the bend in the stem can be seen after the first heating. I took it back to my worktable and took the photo below so that I could have a clear look at the bend in comparison with the curves in the bowl. It was not bent enough so I took it back to the heat gun, reheated it and bent it further. The second and third photos below show the final bend that I was aiming for. The bend in the stem reflects the curve of the bottom of the bowl and gives the pipe a pleasant flow. It is also bent perfectly for the pipe to sit well in the mouth.

IMG_1235

IMG_1236

IMG_1237

With the stem bent to the proper angle I worked on its finish with the micromesh sanding pads. I wet sanded the stem with 1500 grit until the major surface flaws were no longer present. The scratches left behind by the sandpaper were gone when I had finished wet sanding it.

IMG_1239

IMG_1240

IMG_1241

IMG_1242

I restained the bowl with a dark brown aniline stain thinned to 2 parts stain to 1 part isopropyl alcohol to match the existing stain on the bowl. I applied the stain with a cotton swab, flamed it with a lighter, reapplied more stain and then flamed it again to get the match correct. When finished I took the pipe to the buffer and buffed the pipe and the stem with White Diamond. The next three photos below show the pipe as it stood at this point in the process. The finished shape is very clear in these photos.

IMG_1243

IMG_1244

IMG_1245

I brought it back to the worktable and continued sanding with the micromesh sanding pads. I wet sanded the stem with 1800 and 2400 grit sanding pads. I wiped the stem down between sanding to see how it was progressing. Then I dry sanded with 3200-12,000 grit sanding pads to finish polishing the stem. The next series of four photos show the progressive shine on the stem.

IMG_1246

IMG_1247

IMG_1248

IMG_1249

Once the stem was polished I buffed it a second time with White Diamond and then coated the stem with a rub down of Obsidian Oil and let that soak in. After it was dry I rubbed down the stem with a clean cotton rag to bring out the shine even more.

IMG_1250

The final four photos show the finished pipe with its new stem. The old Racine & Laramie pipe was back in action and ready to smoke. The back story to this one is as interesting as the old pipe. I wonder the path it took from San Diego to Chicago area and then up to Vancouver, British Columbia. I wonder where it lost its stem along the path it travelled. I only wish it could tell the stories of its travels and the pipemen who smoked it along that journey. I will probably never know the story but at least my imagination can create a suitable tale for the pipe before I too send it on its way, for I am sure it will outlive me as it passes into the hands of future pipemen who come after me.

IMG_1251

IMG_1252

IMG_1253

IMG_1254

A Peterson Pipe Finds Its Way Home


I don’t think I have ever had a pipe I gave a way or sold come back to me years later. Usually they are gone from my radar. I have a record of the pipes I have sold but rarely record the ones I give away. They are gifts and as such the moment they leave my hand they are no longer on my radar. There has been times when I wished they would come home but never truly expected it to happen. That is until yesterday!

The pipe that came home has been there and back again! Its residence with me began when I visited Mike Glukler in Aldergrove many years ago. Periodically I would visit and look through the pipes he had for sale through Briar Blues. This time I looked through and was drawn to a Peterson Special in a rusticated Dublin shape. I checked it out and the purchased it. I brought it home with me and smoked it a couple of times but never quite enjoyed it enough to make it a regular in my rotation. So it sat neglected for a while. On day I was going through my rack and deciding which pipes to sell and which to keep and I came across this one. I almost put it in the “to be sold pile” but instead I cut a new fishtail stem for it. I smoked it more often then.

I have always had a curiosity about the estate pipes that I purchase. I want to find out as much as possible about them. In the case of this Peterson that meant I would contact Mike Leverette. I wanted to get an idea of what I had in my hands. I wanted to know a bit about the age and details of the pipe. Mike was excited when he heard about this pipe. He said he had never seen a Special in this shape. I sent him photos of it and he sent back replies about it that were very helpful to me. I had it in the rack and smoked it occasionally with the new fishtail stem but never truly seemed to reach for it that often.

Through my work I would travel to Atlanta several times a year and stay for a week or more at a time. I always took along pipes and tobacco that I would gift to other pipemen that I would call and meet for a bowl and a chat. I met John Offerdahl and Mike Hagley on some of those trips. But I would always get together with Mike Leverette. He would drive up from his home to Atlanta where I was staying in a hotel by the airport and we would have lunch or dinner together. We would talk about all kind of things – history, Vikings, architecture, pipes, history, pipes. WE kept in touch by email and phone over the years and when he was diagnosed with cancer and underwent surgery we talked and afterwards we met together. When I was diagnosed with cancer and was scheduled for surgery we talked and met together. Mike was my friend and a kindred spirit in terms of pipes, history, writing and many other things. If you have a picture in your mind of two old gents sitting together over dinner chatting and later adjourning to the open space near my hotel to smoke our pipes and talk some more you have the right image in your mind. I always enjoyed those visits. Several times John Offerdahl would join us for dinner and a pipe. I have missed those visits and conversations since Mike died.

LTR: John Offerdahl, your’s truly, Mike Leverette

LTR: John Offerdahl, your’s truly, Mike Leverette

It was on one of those trips, quite a few years ago now, that I gave that Peterson’s Special Dublin to Mike when I visited him in Atlanta, Georgia. I remember sitting in an Italian restaurant near the hotel and each of us pulled out our gift pipe and tobacco to exchange. It had become a bit of a ritual with us. We would exchange our gifts before even opening the menu! I remember on this particular occasion Mike gave me two old sandblasted Barling Canadians that needed to be restemmed and a tin of Virginia Flake tobacco. My gift to him was wrapped like most of my presents (at least that is what my daughters tell me) in a grocery bag. When he opened it and took out the Pete Dublin the look on his face was a mixture of surprise and excitement. He turned it over in his hands and read the stamping and commented on the history of the pipe. He took it apart and looked down the long shank and examined the stem. He loved that pipe a lot. I had included a tin of Latakia Flake for him as it was a favourite of his.

We finished our dinner that evening and went back to the hotel and adjourned to the bench out front. He loaded up the pipe with some of his own tobacco and I loaded mine. He smoked it and thoroughly enjoyed the smoke. I am sure there was much more that went on that evening but this is what my memory brings up. That evening was in the pre-cancer days for both of us so we did not have a care in the world or a worry on our minds. I remember a bit of the conversation that evening – we spoke of the route of the Exodus of Israel from Egypt. Mike had done a lot of work on that in a paper he sent me and he wanted some feedback. It was a great evening and we talked and smoked until the sun went down. We parted company that evening both richer for the conversation and friendship. That was the last I saw of the Dublin.

Now jump ahead about 12 or more years. I was on the phone with a buddy who is selling Mike’s pipes for Mike’s widow, Jeanette. We were talking about the pipes in the lot that he was selling. There were several of them that he wanted to send me to recondition and document the process I used on them. As we talked I asked him in passing about the Peterson Special Dublin. I was curious as to what happened to that pipe after Mike died. I told him a bit of the story I have written above. He laughed and said that he happened to have that pipe in his hand at just that moment. I asked him about its condition and what he thought of it. It was at that point he offered to send it back to me. He would call Jeanette and tell her about our conversation and then ask her about the pipe coming back to me. She told him she was more than happy to have it come home! He let me know that it would be shipped out to me soon!

I knew it was coming but not when. Today I came home from work and found a package waiting for me. It was addressed from my buddy in Texas. I excitedly opened it and carefully unwrapped “Mike’s Pipe”. It had come home to Canada. As a kindness my friend had include a small bag of HH Dark Flake tobacco for me to try. I know he had said it was too strong for his liking but the funny thing is I think it is just the tobacco that Mike would have loved. I took the pipe down to my work table and gave it a thorough examination. It was actually in great shape. The cake was minimal, just the way I like it. The finish was in excellent shape with no dings or scratches. There was a little darkening and dust on the rim but that would clean up easily. The stem had some oxidation around the P stamp and on the underside as well (to be honest I think this was there when I gave it to Mike, or at least it looked like I remembered it). There was some small tooth chatter on the top of the stem and on the underside just ahead of the button and the shelf, but none of it was too deep. I decided to clean up the pipe right then. The next three photos show the pipe as it looked when I took it from the box.

IMG_1155

IMG_1156

IMG_1157

I used a Bic lighter and passed the flame over the tooth chatter on the top and underside of the stem. I then sanded it lightly with 1500 grit micromesh to make the tooth marks very visible. I used 220 grit sandpaper to remove the tooth ridges and remnants left after the heat of the lighter raised the dents. I wet sanded it with the 1500 grit micromesh to smooth out the scratches left by the 220 grit. I also decided to add some white to the stamping on the stem. I use a whiteout pen to do that. I apply the whiteout heavily to the stamping and once it is dried I sand it off with the 1500 grit micromesh sanding pad.

IMG_1163

IMG_1158

IMG_1159

IMG_1161

The next series of three photos show the progress of polishing the stem with the micromesh sanding pads from 1500-12,000 grit. The recoloured stamping is also visible. At this point in the process I scrubbed the top of the bowl with warm water and a tooth brush. The darkening and light build up was easily removed by this method. I then buffed the stem with White Diamond to give it a final polish and lightly buffed the bowl. I buffed the stem with carnauba to protect it from oxidizing and then took the pipe back to my table. I gave the bowl a coat of Halcyon II wax and hand buffed it with a shoe brush. I have found that this keeps the rustication crisp and fresh where a buff on the buffer can flatten the rustication and change the feel in the hand.

IMG_1164

IMG_1165

IMG_1166

The next series of four photos show the rejuvenated pipe. The stem is a bright black and the tooth marks are gone. The bowl and internals are also cleaned and the pipe is ready to load up with the HH Dark Flake and smoke. This pipe will always be “Mike’s Pipe” to me. I raise the bowl in his honour!

IMG_1182

IMG_1183

IMG_1185

IMG_1187

Can a Cracked Bowl be Repaired? – Taking a Lesson from Gan Barber’s Work


Blog by Steve Laug

Many of you have read the piece that Gan wrote on “All the King’s Horses and All the King’s Men – A Peterson Adventure” https://rebornpipes.wordpress.com/2012/10/03/all-the-kings-horses-and-all-the-kings-men-a-petersen-adventure-gan-barber/ In it he described the process of reconstructing a Peterson that was in pieces. It arrived with cracks and he put the pieces back together. Since interacting with Gan on that pipe and rereading his article I have wanted to try my hand at repairing a cracked bowl. Finally I picked one up in an EBay lot that I purchased. It was an L. J. Perretti Smooth Bent Billiard. It was in rough shape and needed a stem. I figured I would practice some of the magic Gan used on the Peterson pipe he wrote about on this one.

This Perretti had some deep cracks that ran through the bowl from outside to the inside. Once I had reamed the extremely thick cake out of the bowl I could see that the cracks went all the way through the briar. There were deep gouged areas on the inner walls of the bowl directly behind the cracks. The wood was not charred so it was not a true burnout. I think that a combination of too thick a cake and possible flaws in the briar made these cracks appear. Interestingly the cracks follow the grain all the way through the pipe. I shined a light through the cracks and I could see light on the opposite wall of the pipe bowl. There were two large cracks on the left side and one running with the grain on the front of the bowl. The one on the front was not as open and it did not go all the way through the briar. The ones on the left side were quite open and cavernous.

The first series of seven photos shows the state of the bowl when I began the experiment. I figured I had nothing to lose on this one. If it fell apart or did not work out it was not a great loss at all, but it would fun giving it a try. I wanted to try out some of the methods that Gan used in his reconstruction of the Pete on this one and see what I could do with it.

IMG_0880

IMG_0881

IMG_0957

IMG_0961

IMG_0958

IMG_0959

IMG_0960

After reaming thick cake back to the bare wood I sanded the exterior with 240 grit sandpaper to clean off the finish and get a better look at the nature and depth of the cracks. I wanted to be able to more clearly see how far across the bowl they stretched and if the cracks followed the grain. I had already seen the state of the inside bowl walls. The left side interior showed damage from the crack extending into the bowl. The front side was less damaged. It had some very minor cracks on the inside walls. I blew air through the shank into the bowl and plugged the top of the bowl to see where the air came through the walls. The only one that really allowed airflow was the larger crack on the left side toward the front of the bowl. The next three photos show the sanded bowl. I left sanding dust in the cracks to highlight their depth and the extent of damage.
IMG_0961

IMG_0962

IMG_0963
I decided to put the bowl in the alcohol bath. I wanted to soften the remaining cake in the cracks and crevices inside the bowl and also soften the grime within the cracks. I had no idea what would happen to the bowl as it soaked. I almost expected it to come out of the bath in several pieces. I got busy with work and other demands and ended up leaving it in the bath for over 24 hours. When I finally removed it and let it dry for several days I figured that the drying would probably make the cracks worse.
IMG_0964

IMG_0965
When I removed the bowl from the bath it was not in pieces but the cracks did open a bit wider on the side of the bowl. The finish and grime was gone and I could clearly see what I had to do if I was going to repair this bowl. The end of the shank had also been damage and chipped so I decided to band it to give me a smooth edge for the new stem I was going to turn for it. I used a nickel band, heated it with the heat gun and pressure fit it on the shank of the pipe. The one bonus in the process was that the grain on this pipe was actually quite nice. The next three photos show the dried and banded bowl and shank. There was still a lot of sanding that would need to be done to prepare the bowl for the repairs and even more sanding once those were done.
IMG_1037

IMG_1036

IMG_1038
I selected a stem that had the same diameter as the shank and turned the tenon on the Pimo Tenon Tool. I finished the fit by hand with a little help from the sanding drum on the Dremel. Once I had a good fit I set up the heat gun and heated the stem to bend it to match the bend of the bowl and bring the tip even with the top of the bowl. The next three photos show the heating and bending process as well as the finished look of the pipe with its new stem.
IMG_1039

IMG_1040

IMG_1041
After I restemmed the pipe I did some more sanding on the bowl. I wanted a clean surface to work with when I did the patches on the cracks. I also cleaned out the inside of the bowl with sandpaper and a dental pick. I wanted to clean out the interior cracks in the bowl as well as the exterior ones. Each would use a different kind of patch but each needed a clean surface to work with. The next five photos show the cleaned exterior of the pipe and two photos of the interior. Still more work needed to be done to clean them up before I patched them.
IMG_1042

IMG_1043

IMG_1044

IMG_1045

IMG_1046
For the exterior cracks I decided to use a patch mix of briar dust and superglue. I cleaned the cracks out with my dental pick and some Everclear. Once they were clean I packed them with briar dust, tamping it into the cracks with both the flat head of a tamper and also the tip of the dental pick. Once they were filled the first time I dripped the superglue into the cracks. The glue binds the dust and the surrounding briar and also compacts the briar dust. I then retamped in some more briar dust and repeated the process until it was filled. The next six photos show the process of filling the cracks around the bowl.
IMG_1047

IMG_1048

IMG_1049

IMG_1050

IMG_1051

IMG_1052
Once all the cracks were filled I sanded the bowl with 240 grit sandpaper to remove the excess material on the surface of the bowl. You will note the scratches in the surface of the briar. These would be removed in the successive sanding that still would be done to the bowl. The cracks are filled and the surface hard. The briar dust and superglue form a good bond with the crack and when dry are dark black in colour. They are hard to the touch even with the dental pick. The next four photos show the bowl after sanding. The surface is smooth to the touch.
IMG_1053

IMG_1054

IMG_1055

IMG_1056
The scratches on the bowl have been minimized with the fine grit sanding sponge pictured above. I continued to sand until the marks were gone using 320 grit sandpaper. Once I had the bowl to that point I wiped it down with Everclear on a cotton pad. The three photos below show the bowl after the wash.
IMG_1057

IMG_1058

IMG_1059
I continued to sand the bowl with micromesh sanding pads from 1500-12,000 grit to smooth out the surface of the bowl. The micromesh left the surface ready to be stained. The cracks are still visible in terms of the black lines but the cavernous gaps are filled and repaired.
IMG_1058

IMG_1060

IMG_1061
I decided to stain the bowl with a rich oxblood aniline paste stain. I applied it to the bowl, flamed it and applied it a second time and flamed it. Once it was dry I wiped it off and hand buffed the surface. My purpose was not to hide the flaws but to minimize the glaring nature of the repairs. The next six photos show the staining and rubbed down bowl. I was not happy with the coverage but I buffed it quickly with White Diamond to see what I had to work with. The final photos in the series of six show the buffed and polished look of the bowl.
IMG_1063

IMG_1064

IMG_1065

IMG_1066

IMG_1067

IMG_1068
I decided to give the bowl a second staining of a dark brown aniline colour. This was a mix of dark brown and alcohol 1:1. I applied it and flamed it. I repeated the process to darken the colour of the bowl. The four photos below show the result of the application of the brown stain.
IMG_1069

IMG_1070

IMG_1071

IMG_1072
After the stain had dried it was time to address the inside of the bowl. I sanded it out quickly with a Dremel with a sanding drum attachment. I was careful not to change the shape of the bowl but to merely remove any carbon cake that still remained. I wiped the inside down with Everclear and then flamed it to dry out the surface of any moisture. I then mixed a batch of JB Weld. This would be the first step in doing the interior repairs. I packed it into the cracks on the inside of the bowl using the spoon end of the pipe nail. I continue to pack it into the bowl cracks until they were smooth. The four photos below show the mix and the patch in the bowl. It has a drying time of 6 hours to dry to touch and 24 hours to cure.
IMG_1073

IMG_1074

IMG_1075

IMG_1076
While the bowl was drying I worked on the new stem. I sanded down the castings on the side of the stem and polished it with micromesh sanding pads. I used 1500-12,000 grit micromesh pads on the stem. I pictured three photos below to show the process.
IMG_1077

IMG_1078

IMG_1079
The next series of eight photos show the patch after it had dried. I also reapplied the JB Weld after the initial 12 hours so that it filled in the places where it had shrunk as it dried. The patch dried a fine grey coloured. I sanded it down until it was only in the cracks themselves and not in the clean briar. I wanted to give the briar as much absorption area as possible as the JB Weld does not absorb moisture at all. It dries to a neutral, hard metallic material that has no taste.
IMG_1080

IMG_1081

IMG_1082

IMG_1083

IMG_1084

IMG_1085

IMG_1086

IMG_1087
Once the JB Weld was cleaned up and reduced to only filling the cracks it was time for the second step of the bowl interior renewal. I mixed a batch of bowl coating composed of activated charcoal powder and sour cream. I stirred the batch until it was a consistent blue/black grey colour. I applied it to the entire bowl from top to bottom with a folded pipe cleaner. Once it dries it is a solid black colour and neutral in taste. It gives the bowl an additional layer of protection until the cake builds up. The next three photos show the mix and the application in the bowl.
IMG_1105

IMG_1107

IMG_1108
With that done, both the inside and the outside cracks are repaired and the pipe is back in service. I gave the entire pipe a final buff with White Diamond and then applied multiple coats of carnauba wax for protection. The final photos below give you an idea of how the pipe looks today. It is still curing from the bowl coating but I will load it and smoke it once that has cured. The finish of the two stains worked well to blend in the repairs but not hide them. The surface is smooth and the open cracks have been repaired. Now the ongoing test begins. Will the patches hold up or will the new heat from the fired tobacco open them a second time? Time will tell but it is worth the experiment in my opinion.
IMG_1089

IMG_1090

IMG_1091

IMG_1092

IMG_1093

IMG_1094

Shaping a Diamond Shaped Stem from a Round One


Blog by Steve Laug

This morning I found myself in need of a diamond shaped stem – a short Lovat style stem for a long shanked pipe I was restemming. I did not have any diamond shaped stems in my can of stems so I decided to craft one. I took a round stem that had the same diameter as the high points on the diamond shank and turned the tenon to fit. It was a tiny diameter mortise so I did a lot of work on it with my dremel and with files and sandpaper. Once I had the fit on the mortise I inserted it in place and used the Dremel to reduce the round sides of the stem to match the diamond shank.

Figure 1 WDC base in need of a diamond shaped stem. Necessity is the mother of invention. I used a round Lovat stem.

Figure 1 WDC base in need of a diamond shaped stem. Necessity is the mother of invention. I used a round Lovat stem.

Figure 2 I turned the tenon to fit the mortise and then inserted the stem against the shank.

Figure 2 I turned the tenon to fit the mortise and then inserted the stem against the shank.

I worked on one side at a time with the sanding drum on the Dremel running at medium speed. I worked holding the pipe bowl and shank in hand and holding the Dremel with the sanding drum perpendicular to the stem. I worked it the length of the saddle until each side was set at the same angle as the shank of the pipe. This took care so as not to damage the Bakelite of the shank and base.

Figure 3 I used a Dremel to shape the stem to match the diamond angles of the shank. I worked on one side at a time.

Figure 3 I used a Dremel to shape the stem to match the diamond angles of the shank. I worked on one side at a time.

Figure 4 Pipe resting against the Dremel with a sanding drum. Shaping progressed quite quickly. This picture shows one side beginning to take shape.

Figure 4 Pipe resting against the Dremel with a sanding drum. Shaping progressed quite quickly. This picture shows one side beginning to take shape.

5 Top view of the shank. Both sides of the round stem are beginning to take on the shape of the shank.

5 Top view of the shank. Both sides of the round stem are beginning to take on the shape of the shank.

I finished the top side of the stem with the Dremel before going on to the underside. I worked the Dremel so as to leave a relatively straight line down the centre of the stem. The goal was to align the line with the line of the shank on each side. I eye balled it at this point and would fine tune it when I worked it with sandpaper.

Figure 6 Top view after more shaping with the Dremel.

Figure 6 Top view after more shaping with the Dremel.

Figure 7 Bottom view before the Dremel did its work.

Figure 7 Bottom view before the Dremel did its work.

Figure 8 Left side view after the first side has begun to take shape.

Figure 8 Left side view after the first side has begun to take shape.

Figure 9 Bottom view after both sides have begun to take shape.

Figure 9 Bottom view after both sides have begun to take shape.

Figure 10 Right side view of the stem after it began to take shape.

Figure 10 Right side view of the stem after it began to take shape.

From this point in the process all the work was done by hand with a variety of sandpapers from medium grit emery paper through 220 grit sandpaper. I wanted to smooth out the angles and align the edges with the straight line of the shank.

Figure 11 Back to the worktable and the hand sanding.

Figure 11 Back to the worktable and the hand sanding.

Figure 12 Hand sanding continues.

Figure 12 Hand sanding continues.

Figure 13 Hand sanding continues.

Figure 13 Hand sanding continues.

Figure 14 View from the tenon end of the diamond stem at this point in the process.

Figure 14 View from the tenon end of the diamond stem at this point in the process.

Originally the Bakelite base had a band on it. I used an older complete one I have here for an example so that I could get the feel for it. The original was more of a brass/gold coloured ornamental band. I have none of those bands so I used a nickel band. After fitting the band I needed to reduce the tenon slightly for a snug fit and also work on the angles of the sides and corners of the diamond to match the banded shank.

Figure 15 Top view after more hand sanding with a medium grit sanding sponge.

Figure 15 Top view after more hand sanding with a medium grit sanding sponge.

Figure 16 Bottom view after more hand sanding with a medium grit sanding sponge.

Figure 16 Bottom view after more hand sanding with a medium grit sanding sponge.

At this point in the process I removed the stem from the shank and worked on the sides with a fine grit sanding sponge to remove the scratches and marks from the previous grits of sandpaper. Once I was finished with this portion I cleaned off the stem with a soft cotton pad and Everclear so I could see the scratches that were left before I moved on to sanding with the micromesh sanding pads.

Figure 17 Top view. Shape is finished. Now to sand out the scratches and polish the stem.

Figure 17 Top view. Shape is finished. Now to sand out the scratches and polish the stem.

Figure 18 Side view. Shape matches the shank perfectly. Need to remove scratches and polish.

Figure 18 Side view. Shape matches the shank perfectly. Need to remove scratches and polish.

Figure 19 Bottom view. Need to remove scratches and polish.

Figure 19 Bottom view. Need to remove scratches and polish.

Figure 20 Tenon end view of the diamond shape of the shank. The hardest part of shaping a diamond stem on an old pipe shank like this one is that all sides of the shank were slightly different measurements so that all sides of the stem would have to be as well to match the angles.

Figure 20 Tenon end view of the diamond shape of the shank. The hardest part of shaping a diamond stem on an old pipe shank like this one is that all sides of the shank were slightly different measurements so that all sides of the stem would have to be as well to match the angles.

Once I saw the scratches that remained I worked over the stem with 320 grit sandpaper to remove the scratches and clean up the surface so that when I sanded with the micromesh the deeper scratches would be gone.

Figure 21 Left side after sanding with 320 grit sandpaper.

Figure 21 Left side after sanding with 320 grit sandpaper.

Figure 22 Right side after sanding with 320 grit sandpaper.

Figure 22 Right side after sanding with 320 grit sandpaper.

Figure 23 End view showing the diamond shape after sanding with 320 grit sandpaper.

Figure 23 End view showing the diamond shape after sanding with 320 grit sandpaper.

Finally with the scratches removed it was time to move on to the micromesh sanding pads. Photos 1 & 2 show the stem after sanding with 1500 and 1800 grit micromesh. It should clean up nicely with each successive grit of micromesh. Photo 3 shows the stem after sanding with the 2400 grit micromesh. With all three of these grits I wet sanded the stem.

Figure 24 Left side after sanding with 1500 and 1800 grit micromesh sanding pads

Figure 24 Left side after sanding with 1500 and 1800 grit micromesh sanding pads

Figure 25 Right side after sanding with 1500 and 1800 grit micromesh sanding pads.

Figure 25 Right side after sanding with 1500 and 1800 grit micromesh sanding pads.

Figure 26 Right side after sanding with 2400 grit sanding pads

Figure 26 Right side after sanding with 2400 grit sanding pads

I moved on to the higher grits of micromesh. The next five photos below show the 3600 and 4000 grit micromesh. I dry sanded with these pads. The scratches have pretty much disappeared and the higher grits will give the stem a deep shine.

Figure 27 Sanding with 3600 and 4000 grit micromesh.

Figure 27 Sanding with 3600 and 4000 grit micromesh.

Figure 28 Right side sanded with 3600 and 4000 grit micromesh pads.

Figure 28 Right side sanded with 3600 and 4000 grit micromesh pads.

Figure 29 left side of the stem - sanding with 600 and 4000 grit micromesh.

Figure 29 left side of the stem – sanding with 600 and 4000 grit micromesh.

Figure 30 Top view of the stem after sanding with 3600 and 4000 grit micromesh.

Figure 30 Top view of the stem after sanding with 3600 and 4000 grit micromesh.

Figure 31 Bottom view of the stem after sanding with 3600 and 4000 grit micromesh

Figure 31 Bottom view of the stem after sanding with 3600 and 4000 grit micromesh

The next photo shows the view of the stem from the tenon end. The diamond shape is complete and the remnants of it being a round stem are gone. More polishing will bring this to life.
IMG_1027
From this point on in the process I dry sanded with 6000, 8000 and 12,000 grit micromesh to finish the polishing. Once finished I buffed it with White Diamond and then gave it multiple coats of carnauba wax to preserve the stem. The next four photos show the finished stem.

Figure 33 Right side view of the finished stem.

Figure 33 Right side view of the finished stem.

Figure 34 Left side view of the finished stem.

Figure 34 Left side view of the finished stem.

Figure 35 Top view of the finished stem.

Figure 35 Top view of the finished stem.

Figure 36 View of the stem from the tenon end.

Figure 36 View of the stem from the tenon end.

At this point the stem is finished and ready to be added to the WDC pipe that I was restemming. This process proved a point I have held forever – within in every stem resides another smaller stem or at least one of a different shape. That is why I rarely get rid of a stem. They can be reshaped, the button added on a second time a new tenon added… you get the picture.

Reworking and Reshaping an Old French Briar (CPF?) Billiard


Blog by Steve Laug

This old timer was one of the pipe bowls that I picked up in that EBay lot that had others with the French Briar stamping. The others had the same stamping but also had been stamped CPF on the shank or on the end cap. This one was missing the end cap so it remains a bit of a mystery as to its maker. It was also stemless. From the photos below you can see that at one point in its life it also had a rim cap that was also missing. What was left was the line around the top of the bowl and a darkened rim where the silver cap had covered it. The end of the shank was in pretty good shape but the likelihood of finding another end cap that fit or in making one was pretty low for me. The four photos below show the general state of the pipe when it came to my desk top. The finish was gone. There were several visible fills that stood out. It was one that I had to give a little thought about how I was going to tackle it. I knew that I would have to modify the shank and rework the bowl. I would also have to redrill the mortise way and fit a stem for the newly formed pipe. Ah well… let’s begin the work.
IMG_0789

IMG_0792

IMG_0791

IMG_0790
After many failed attempts over the years to get a good straight cut on the shank and end up with a smooth and even mortise I finally figured out a way with my limited tools to accomplish that. I slip a nickel band on the shank to the place that I want to cut it off. I use the band as a guide for my hacksaw to follow. So far this method has worked for me and left me with some nice evenly cut shanks. The next three photos show the process from start to finish.
IMG_0793

IMG_0795

IMG_0794
After cutting off the shank I sanded the area where the new band would be fitted. I used my Dremel with a sanding drum to begin the process of cutting back the shank to receive the band and finished by hand sanding it with medium grit emery cloth. I set up my heat gun on it end stand, slipped the band in place and set the heat on low to warm the band so that I could press it into place. The next two photos show that process.
IMG_0796

IMG_0797
With the band in place I wiped down the bowl with acetone on a cotton pad to clean off the grit and the remnants of the finish on the pipe. After I had cleaned the bowl I topped the rim with a medium and fine grit sanding pad to remove the damage to the rim edges. The next four photos show that process. During that time I also used superglue and briar dust to fill the obvious sand pits on the bowl (at the back of the bowl near the shank and on the underside). I sanded them once they were dry and was able to blend them into the bowl quite well. In the first photo below you can see the first large sand pit clearly. It was quite long and fortunately flowed with the grain so that it was easy to blend in with the briar dust and superglue. The one on the bowl bottom was a bit more difficult to blend in. In either case both are now smooth surfaces that the finish sanding would blend in as much as possible.
IMG_0798

IMG_0799

IMG_0800

IMG_0801
I sanded the bowl with a medium grit sanding sponge to remove the damage caused by the rim cap and to remove the darkened line around the top of the bowl. The next series of three photos show how the bowl is shaping up after initial sanding. The wood is stamped French Briar but as I work it I am wondering. It is very hard, dense wood with interesting grain. It is very light weight and the feel of the sanding dust and the wood itself calls this into question for me. Maybe it is only a question of age on the pipe as it is probably from the late 1800’s or early 1900’s.
IMG_0802

IMG_0803

IMG_0804
I inserted the stem and took it to the buffer to see what it looked like at this point after buffing. I buffed it with Tripoli. The next four photos show the pipe after buffing. There was a natural reddish colour to the wood that came out more and more as I sanded it.
IMG_0805

IMG_0808

IMG_0807

IMG_0806
After buffing the pipe I reamed it with my PipNet reamer to clean out the crumbling and broken cake that was on the surface of the bowl (Photo 1). I sanded it some more and then wiped it down with an alcohol dampened cotton pad and prepared tit for restaining (Photos 2 & 3).
IMG_0809

IMG_0811

IMG_0810
I receive regular tweets from Grant Batson, pipemaker. In one of the latest he wrote of experimenting with Danish Oil in finish the bowl of a pipe. I have several cans of that around from my refinishing furniture days so I decided to use some medium walnut coloured Danish Oil on this bowl. The next four photos show the stained pipe. I had yet to buff it or polish it at this point in the process. I just rubbed on the Danish Oil and then rubbed it off.
IMG_0812

IMG_0815

IMG_0814

IMG_0813
I set the pipe aside for the evening so that the finish had a chance to dry well. This morning I worked on the stem and the bowl with the micromesh sanding pads. I used all grits that I have available from 1500 – 12,000 grit to sand both the bowl and the stem. The next series of six photos shows the progressively developing shine on both the stem and the bowl.
IMG_0816

IMG_0821

IMG_0820

IMG_0819

IMG_0818

IMG_0817
After finishing with the micromesh sanding pads I took it to my buffer and buffed it with White Diamond. I find that this buffing with a light touch really sets the shine to a glossy finish. The next four photos show the pipe after buffing. I still had to put on the wax but the shine is very evident.
IMG_0822

IMG_0825

IMG_0824

IMG_0823
The final series of four photos show the finished pipe. I gave it multiple coats of carnauba wax and buffed it with a soft flannel buffing pad. I am pleased with the way it turned out. The pipe is ready for smoking and should provide service for many years to come.
IMG_0826

IMG_0827

IMG_0828

IMG_0829

New Life to an Aarhus?? Unique


I have no idea what the final letters of the name on this pipe are supposed to be. The shank had been poorly cut off and there were two cracks, one on each side. It is stamped Aarhus over Made in France on the left side of the shank and the number 6 on the right side. The walls of the shank were quite thin. The bowl top was caked and dirt. The bowl was caked and needing cleaning. There was no stem on the bowl. The finish on the pipe was worn and dirty. There were two small sandpits that had been patched with white putty that had fallen out and left two white spots on the bowl. The shape of the pipe is what interested me. It has a pencil shank and the bowl tapers to a ridge on the front and the back. The bowl is also canted toward the front similar to a cutty and from the top is almond shaped. It is a uniquely interesting shape. The grain on this one is quite nice – birdseye front and back and cross grain on the sides. It does not quite align with the cut of the bowl but is very close. The pipe was a part of the lot that I have been working on lately – a purchase from EBay of 12+ pipe bowls that needed to be stemmed. The first series of four photos below show the state of the bowl when I began. The final photo of the four gives a closer look at the mortise and the thinness of the walls of the shank. Note the notches out of the end that give evidence of the shortening of the shank. In the photo I also included the stem that I took out of my can of stems and turned the tenon on.
IMG_0733

IMG_0734

IMG_0735

IMG_0736
The next three photos show the stamping on the shank and the angle of the cut of portion. It actually cut off the last letter or letters of Aarhus (pipe brand) and the E of France. The third photo shows the crack on the left side of the shank. There was a matching crack on the right side as well.
IMG_0737

IMG_0738

IMG_0739
I reamed the pipe and then topped the bowl to remove the damage to the rim and smooth out the surface. I was intending to refinish the pipe anyway so I started with fine grit emery paper to clean off the thick tars on the surface (Photos 1 &2). I then used a medium grit sanding sponge to clean up the surface from the scratches of the emery paper (Photo 3).
IMG_0740

IMG_0741

IMG_0742
I worked on the tenon in order to get a good smooth fit in the mortise. In Photo 1 below you can see how I used the stem to open the crack so I could repair it. I dripped in some superglue and squeezed it back together. You can see in Photos 1 and 2 the fit of the stem against the shank. The gap between stem and shank shows the angular cut that had been done on the shank. There were also small pieces of briar missing on the bottom edge of the shank. The end was rough and with the cracks left no choice but to band it. (In the photos there are some chunks of briar. These were inside of a band that I was cleaning up to reuse on the tenon of this pipe.)
IMG_0743

IMG_0744
I set up my heat gun and placed the band on the end of the shank. It was a tight band and I was able to just insert the edge in the band so that I could heat the band for pressure fitting it on the shank. The next four photos show the heating of the band and the metal plate that I use to press it into place on the shank. I heated it and pressed it on in three different increments as the band cooled before it would go all the way into place.
IMG_0745

IMG_0746

IMG_0747

IMG_0748
The next two photos show the newly banded shank. In the second photo you can also see the white putty fill about half way down the side of the bowl.
IMG_0749

IMG_0750
I finished fitting the stem on the pipe and sanded down the slag from the edges and end of the stem. I also wiped down the bowl with acetone. It had a coating of varnish on it that was crackling and also did not allow me to rework the fills properly. Once I had it wiped down I picked out the white putty in the two fills that were present with a dental pick and wiped down the bowl again with the acetone. The fills were on the right side mid bowl and on the left side at the bottom of the shank bowl junction.
IMG_0751

IMG_0752
I sanded the bowl and shank with 320 grit sandpaper and then a fine grit sanding sponge to remove the finish completely. The next three photos show the sanded bowl and shank. The grain was quite nice on the pipe. The dark stain had hidden it pretty well. I was beginning to think about not restaining the bowl but leaving it with the remaining colour and polishing and buffing it. Time would tell.
IMG_0753

IMG_0754

IMG_0755
I packed briar dust into the clean sandpit areas on the pipe and then dripped superglue on top of the briar dust. The next two close up photos of the bowl show the patches before I sanded away the excess and cleaned them up to match the surface of the briar.
IMG_0757

IMG_0758
I used 320 grit sandpaper to remove the excess that was shown in the above photos and smooth out the surface. I followed that by sanding with a fine grit sanding sponge. The next four photos show the replaced fills. There were also some dark stains on the bowl that I wanted to work on. I continued to sand the bowl as a whole with the sanding sponge to minimize the dark stain marks on the briar. The colour of the briar is really starting to look great.
IMG_0759

IMG_0760

IMG_0761

IMG_0762
I then sanded the bowl and the stem with micromesh sanding pads. I wanted to remove the scratches and begin to develop a shine. I wet sanded with the 1500-2400 grit micromesh sanding pads and then went on to dry sand with the 3200-12,000 grit sanding pads. The next 9 photos show the developing shine on the bowl and the stem. I also sanded the nickel band with the micromesh pads.
IMG_0763

IMG_0764

IMG_0765

IMG_0766

IMG_0767

IMG_0768

IMG_0769

IMG_0770

IMG_0771
By the time I finished sanding with the 12,000 grit micromesh sanding pad the bowl looked really good. I decided against restaining it and instead reinserted the stem and took the pipe to the buffer. I buffed the entirety lightly with White Diamond to remove any remaining light scratches and to brighten up the shine on both bowl and stem. I then wiped down the stem with Obsidian Oil, and buffed the pipe with carnauba and a soft flannel buff. The final five photos show the finished pipe. It is ready to use. The only remaining question is, “What is the brand? What letters follow Aarhus???” Can any of you help me with that information? It is an unfamiliar brand to me and I can find nothing on the Pipephil Logos and Stampings website or in Who Made that Pipe. Thanks ahead of time for your help.
IMG_0772

IMG_0773

IMG_0774

IMG_0775

IMG_0776