Blog by Paresh Deshpande
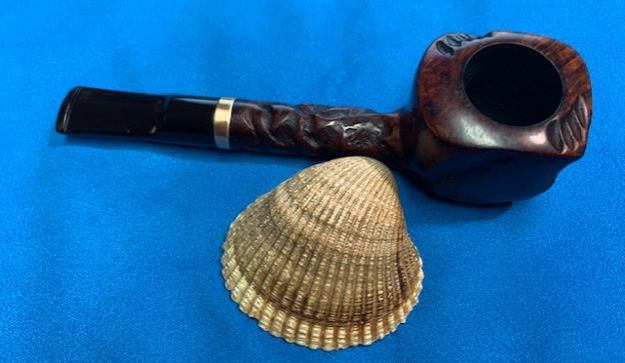
Abha, my wife, has been working with me on pipes for the last three years and never has she voluntarily suggested/recommended any pipe for purchase. One day while surfing eBay for some good pipes, Abha chanced upon this pipe and she liked it. Well, the fact that this is the first pipe that called out to her (she is a non smoker!!), makes it very special and soon the pipe made its way to Pune where Abha was indeed surprised to receive this pipe.
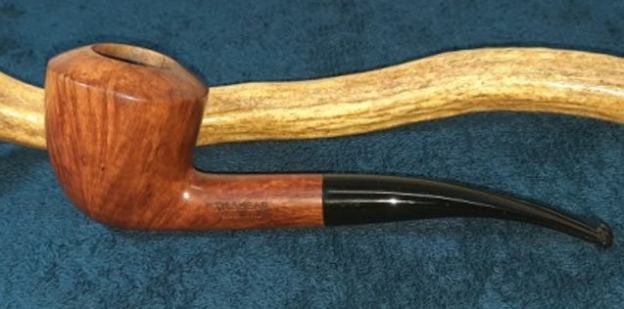
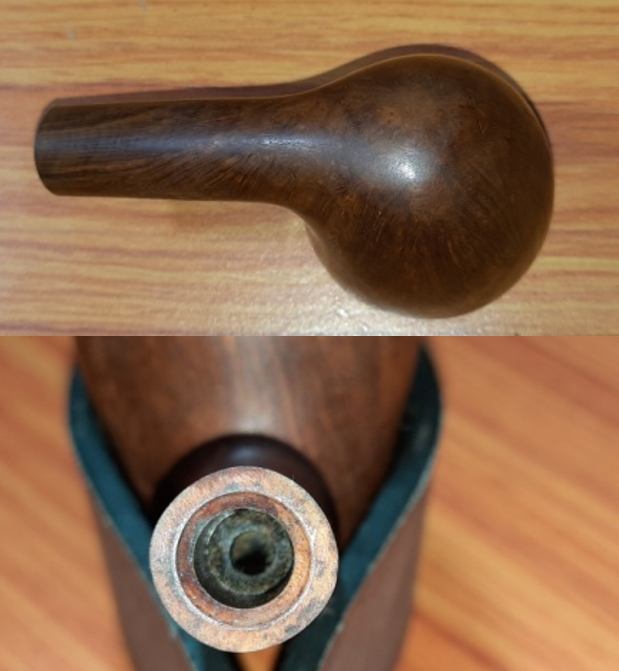
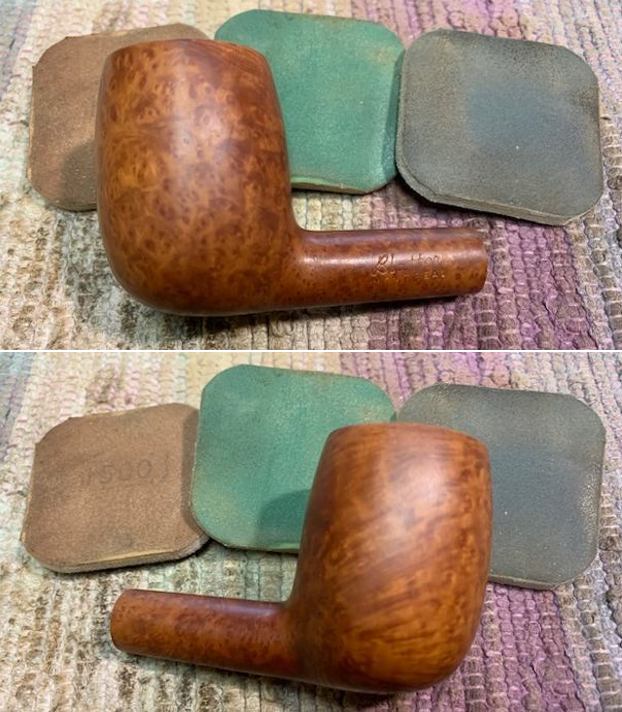
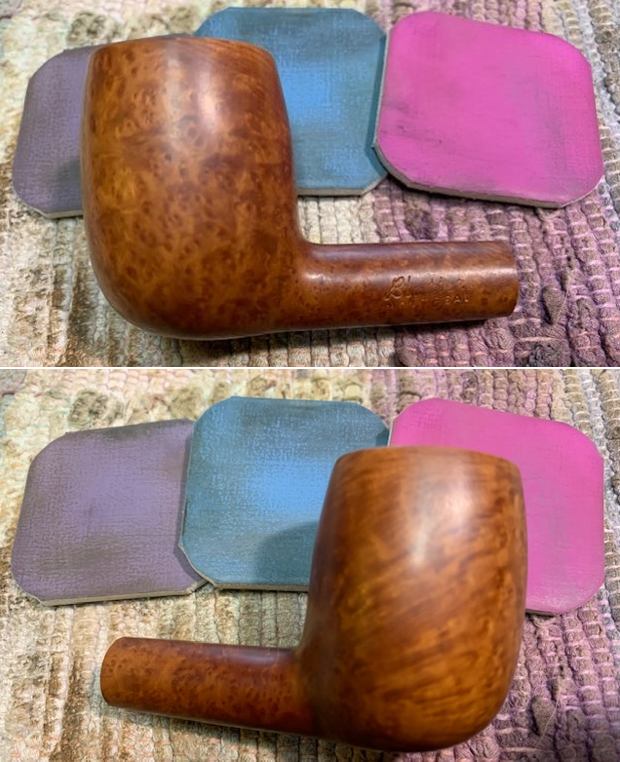
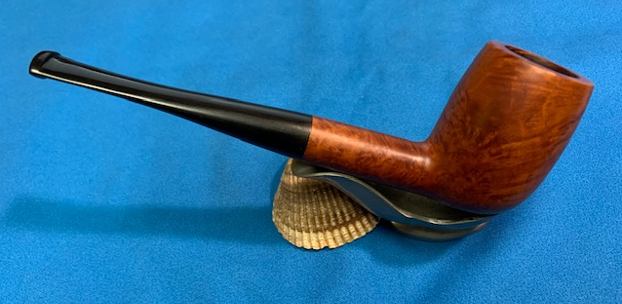
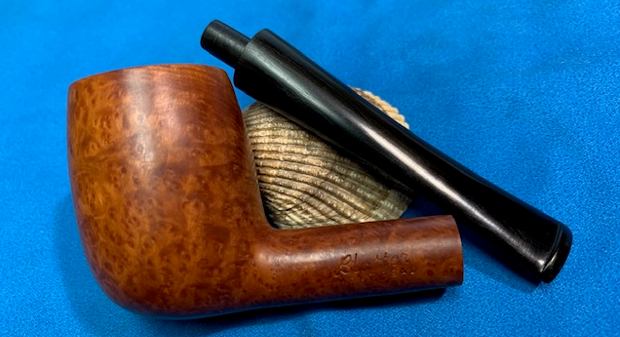
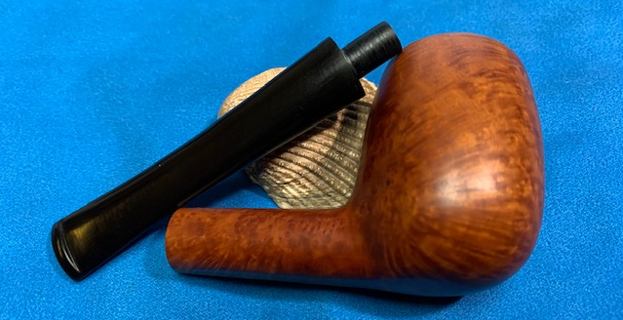
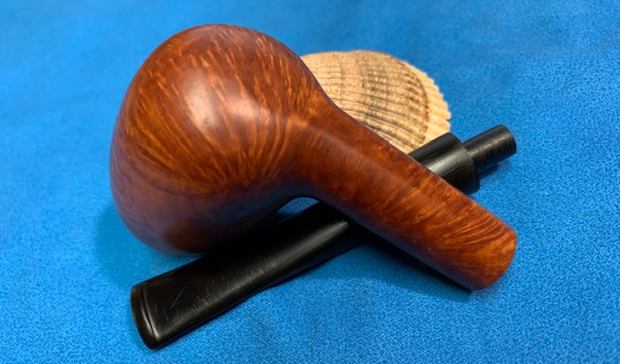
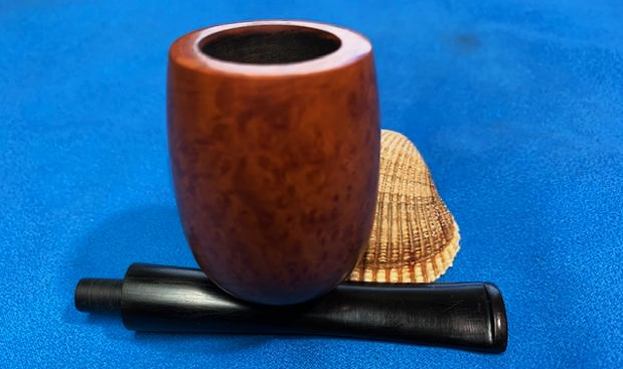
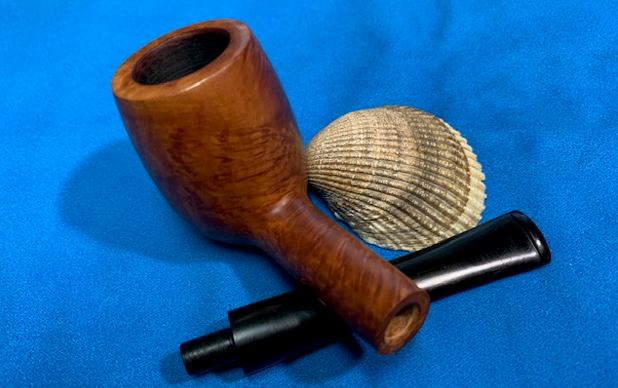
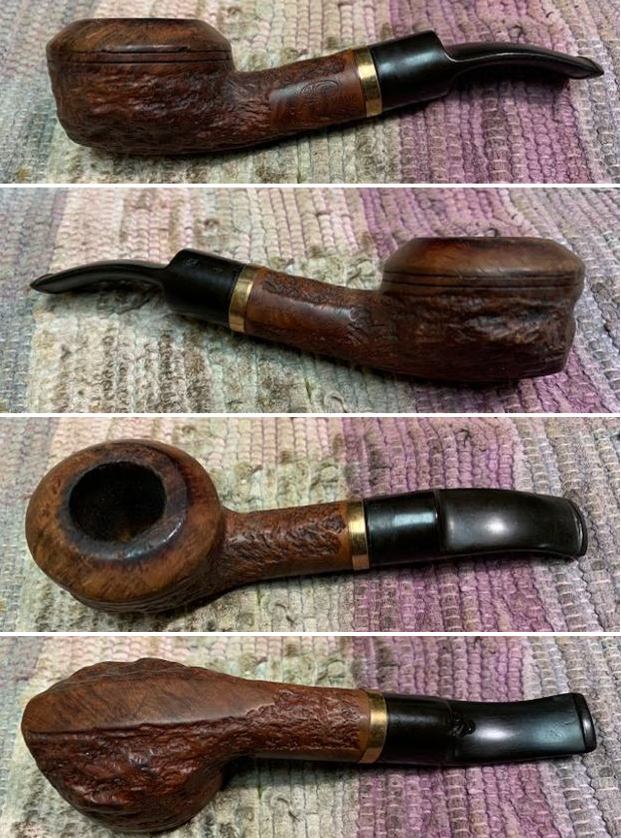
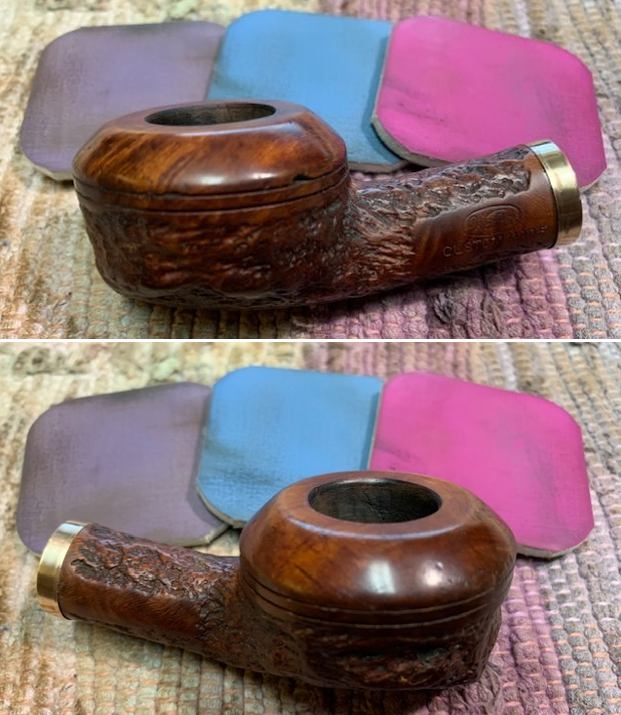
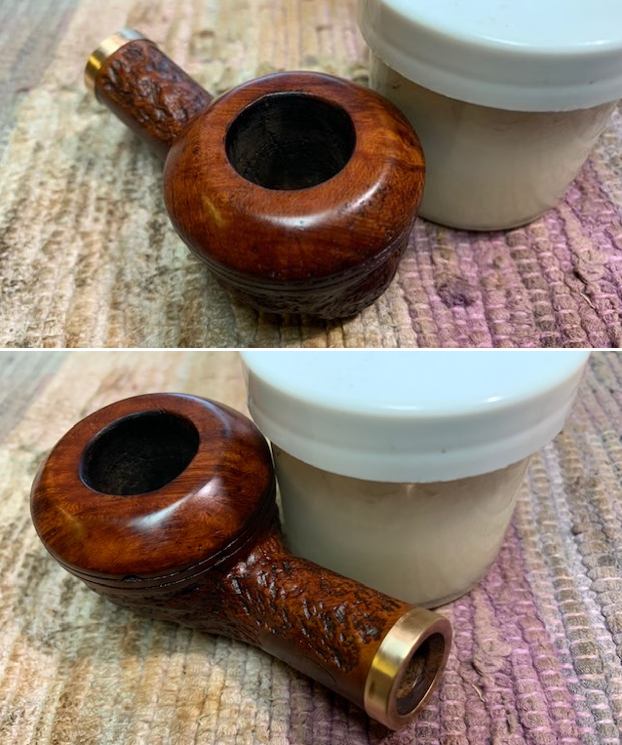
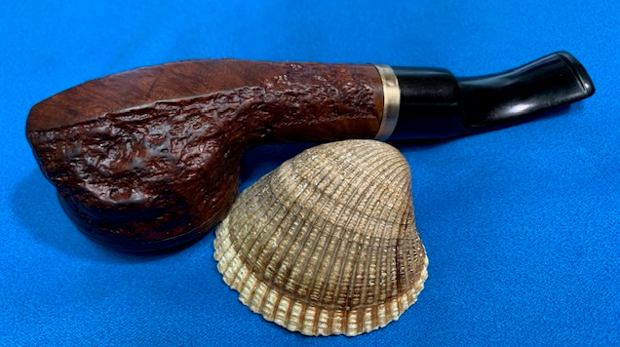
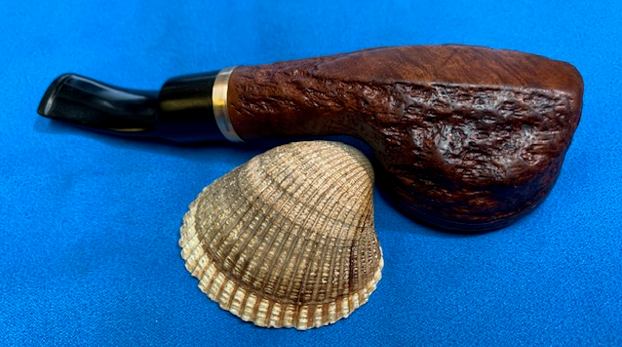
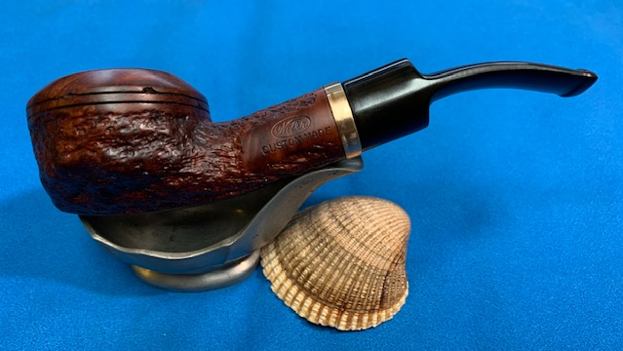
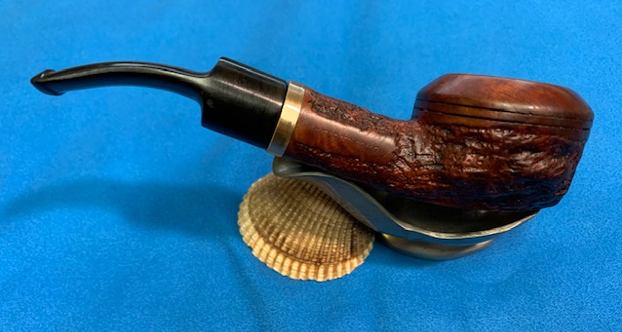
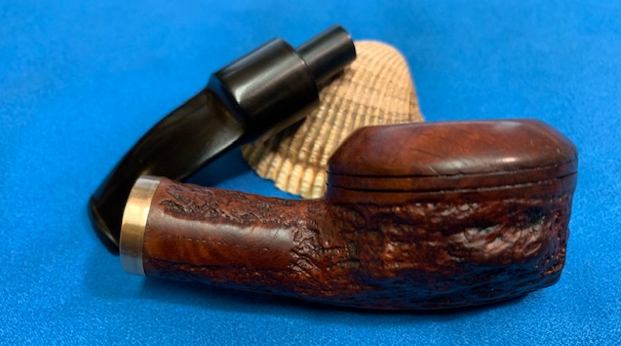
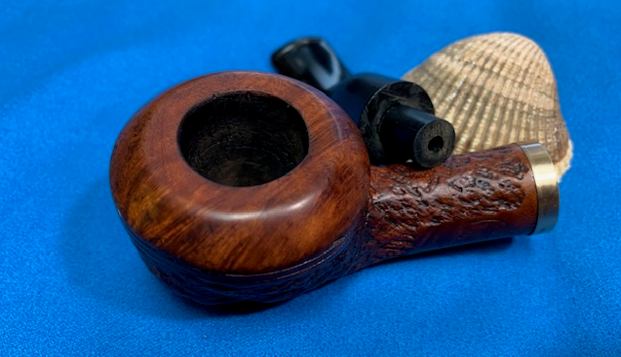
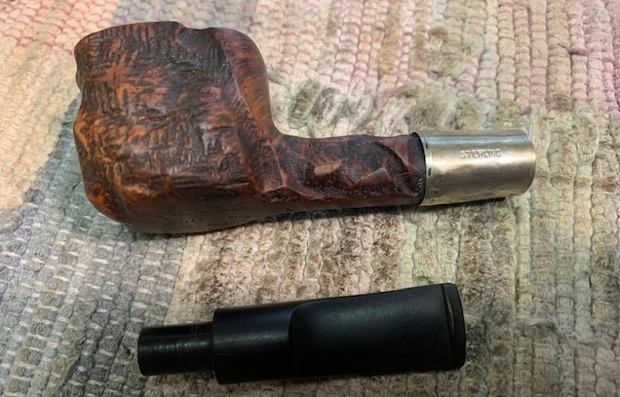
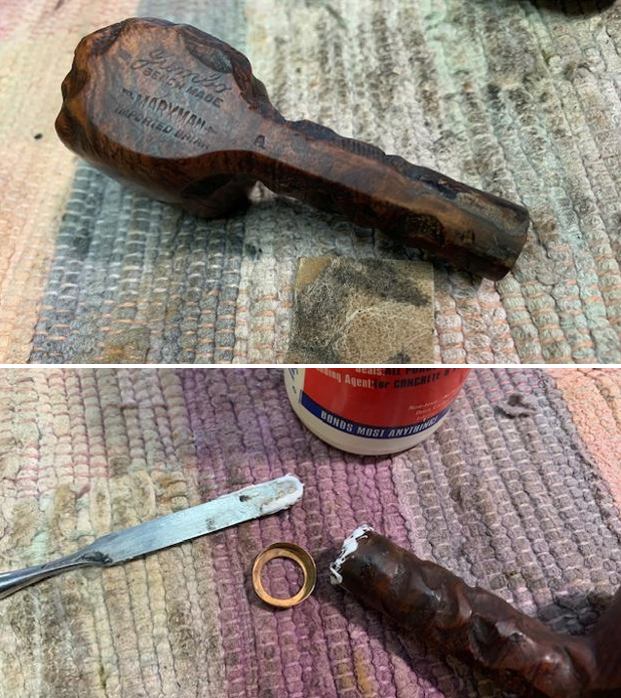
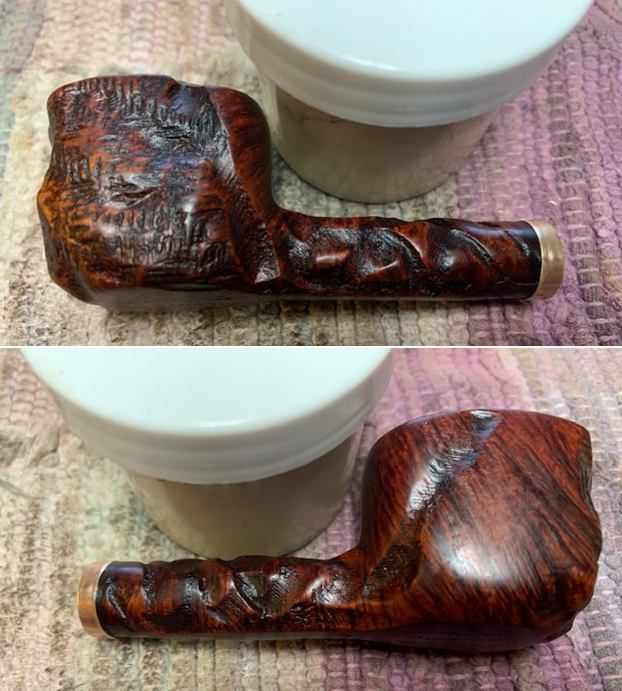
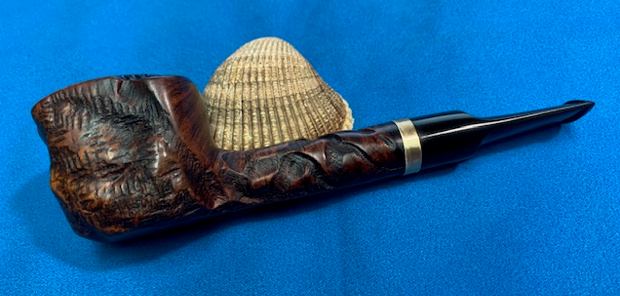
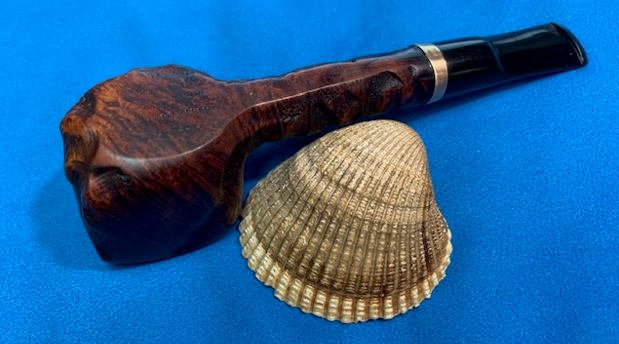
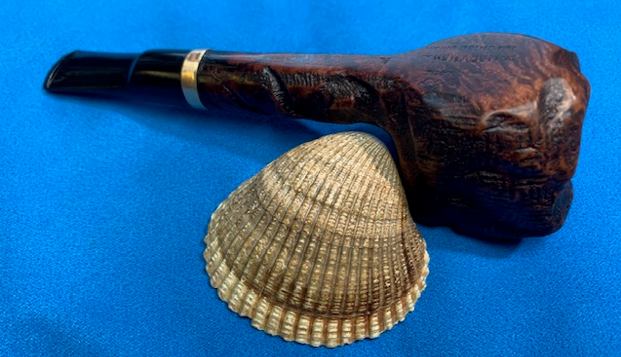
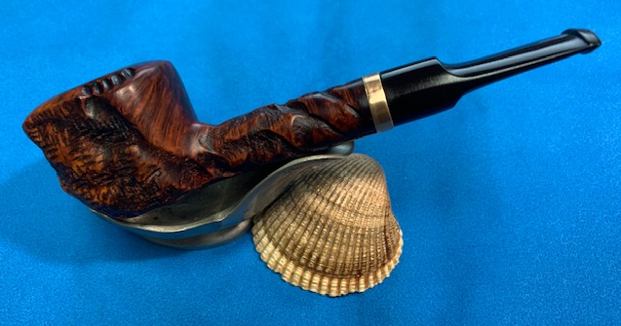
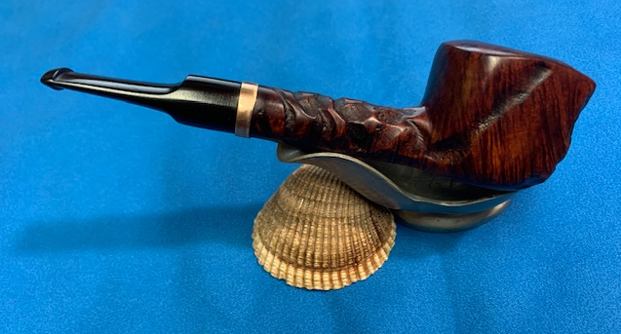
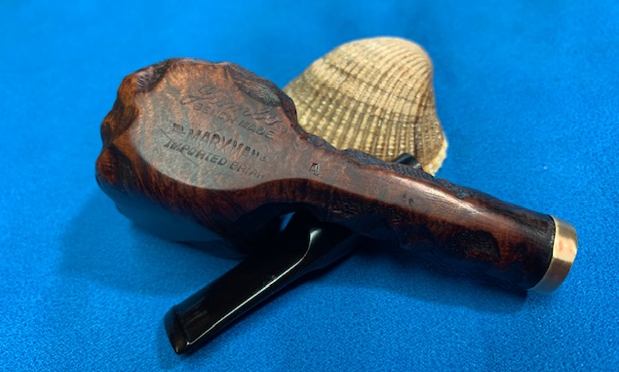
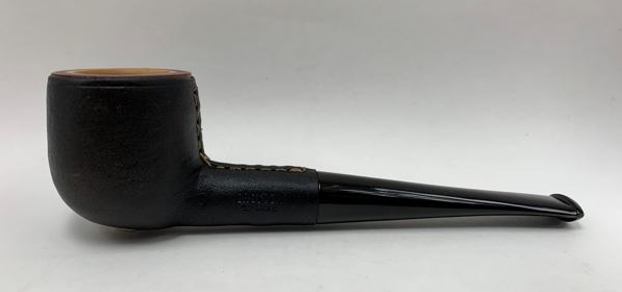
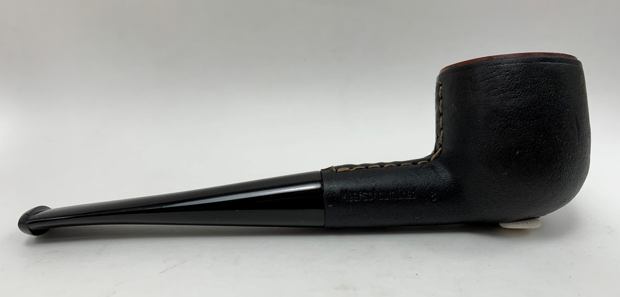
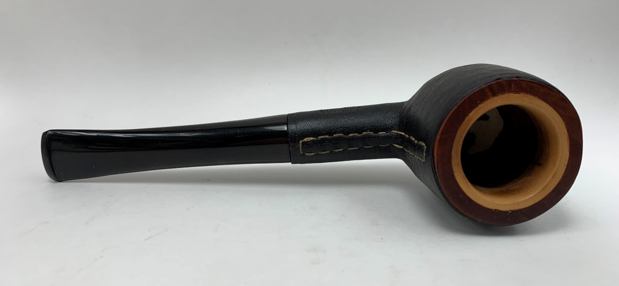
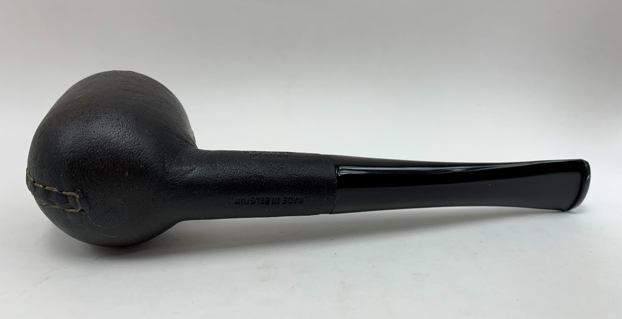
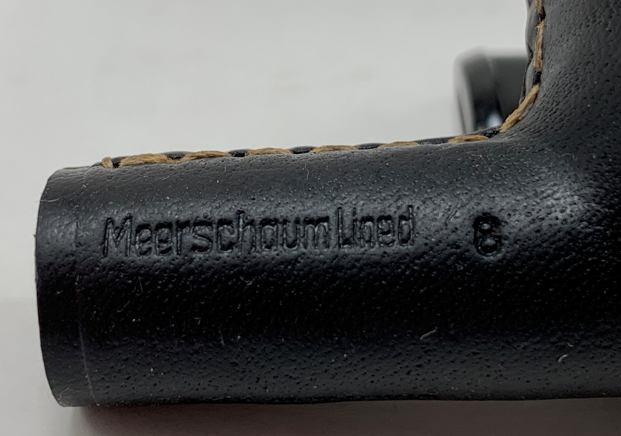
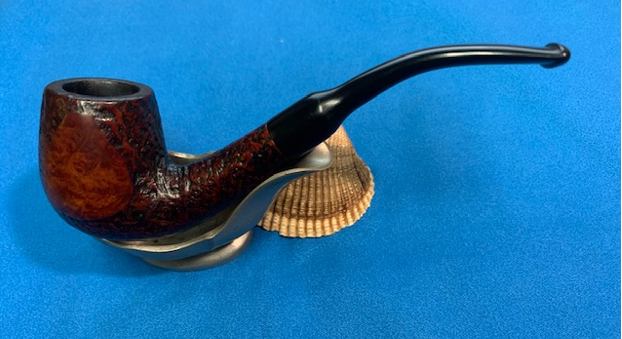
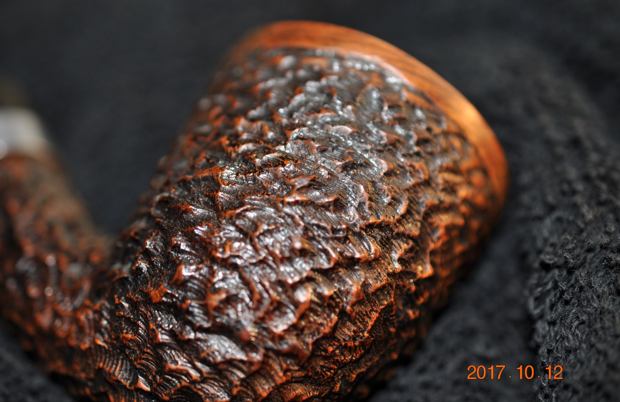
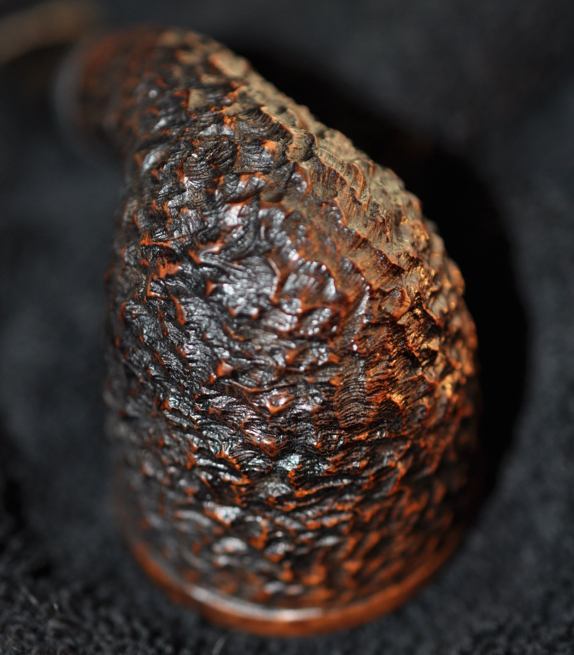
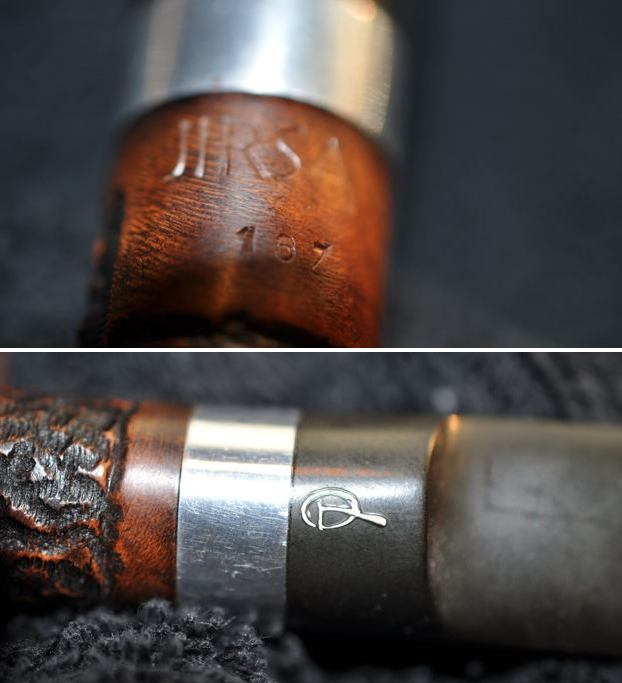
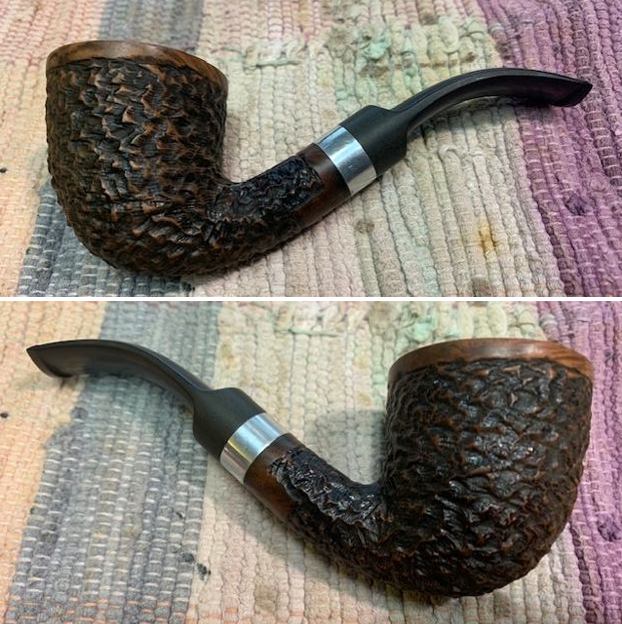
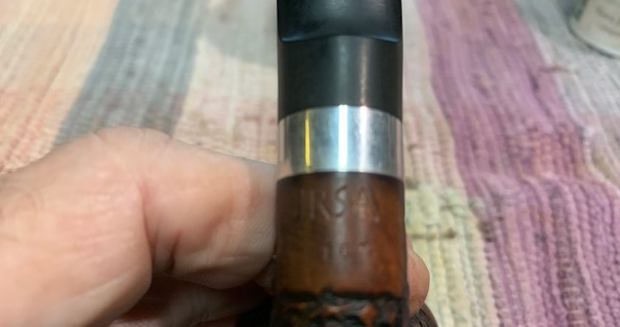
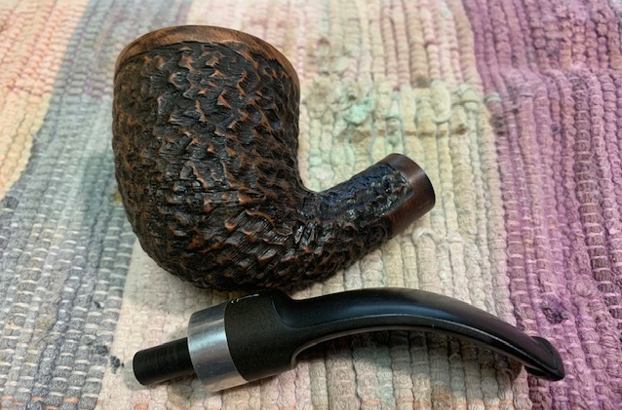
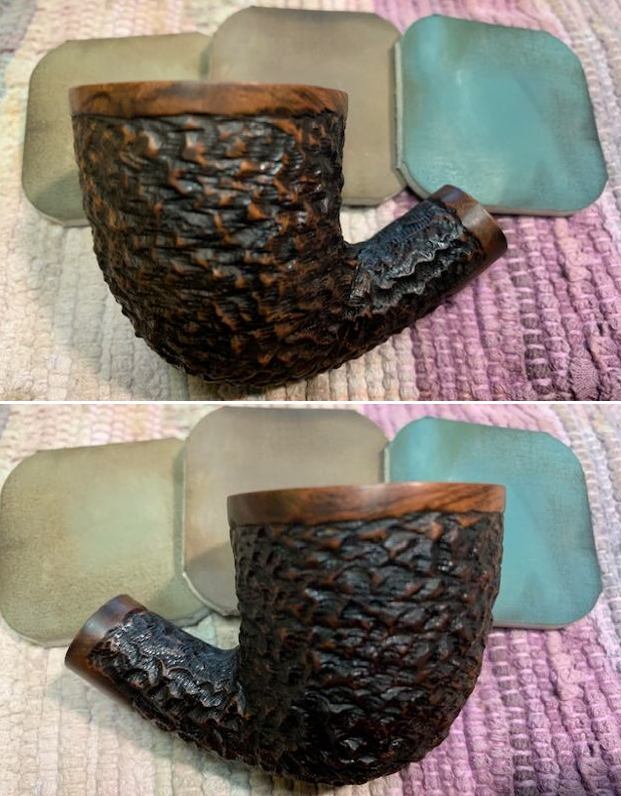
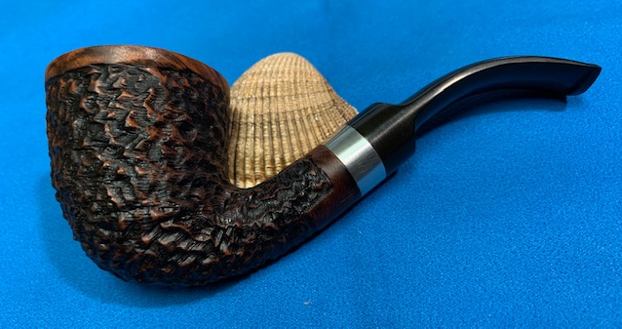
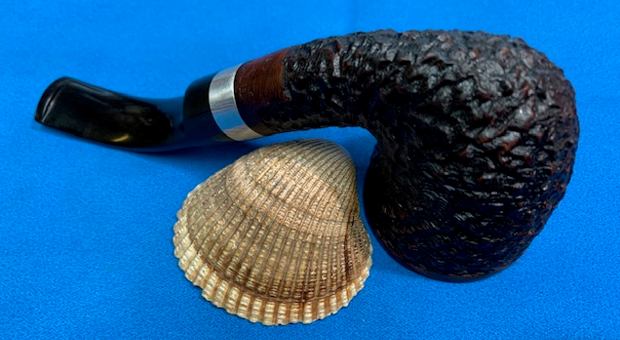
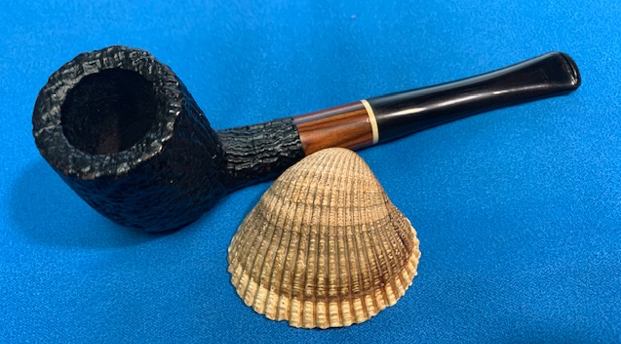
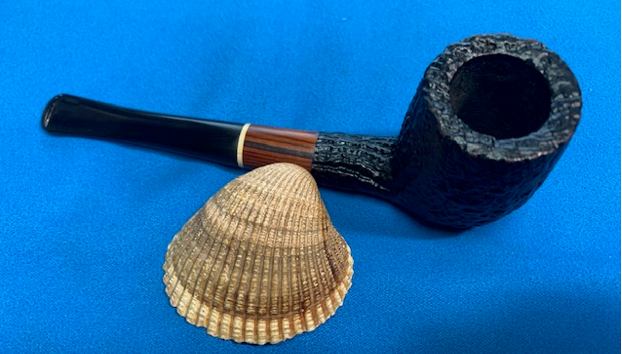
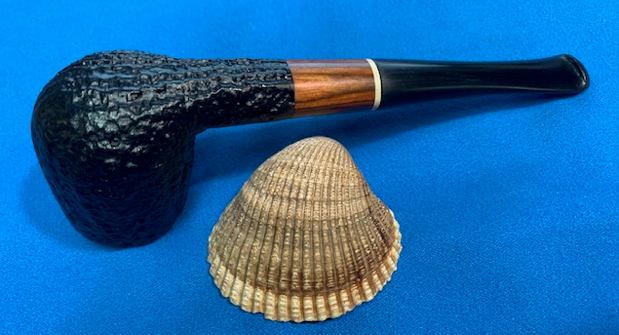
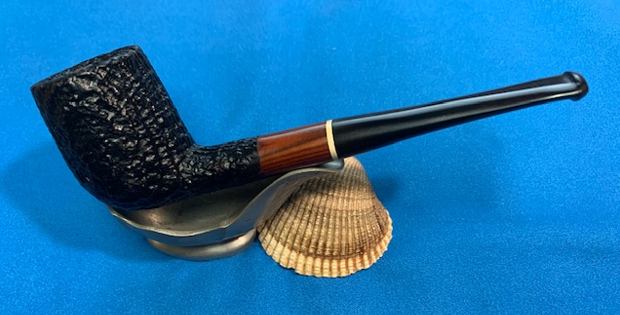
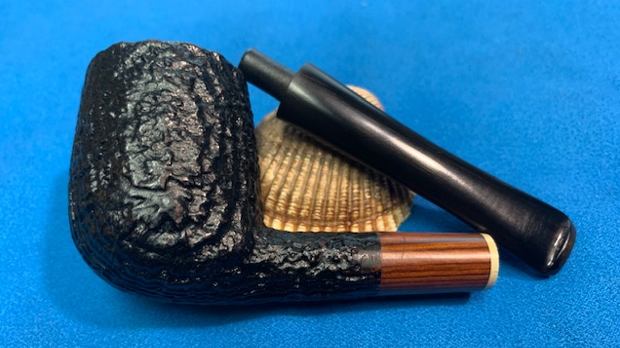
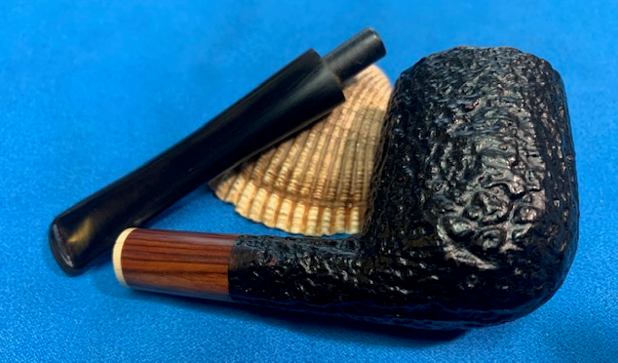
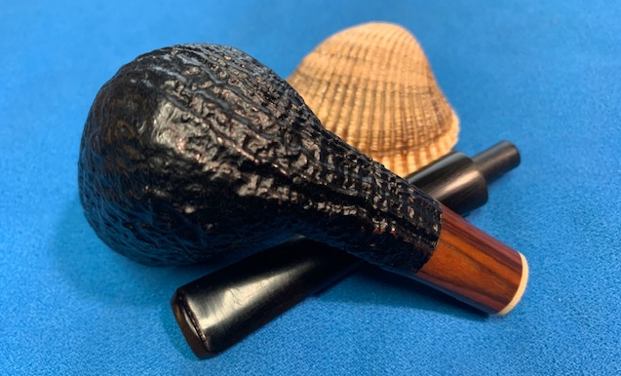
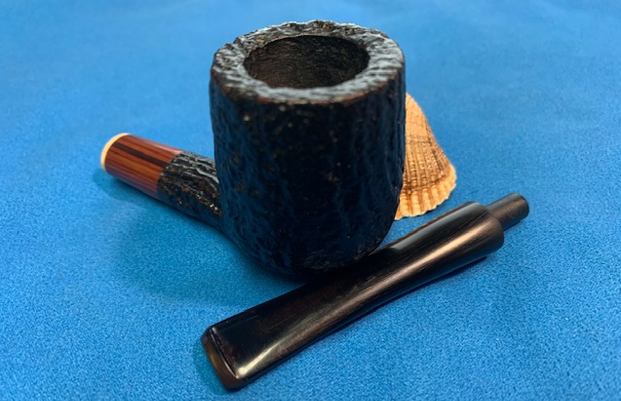
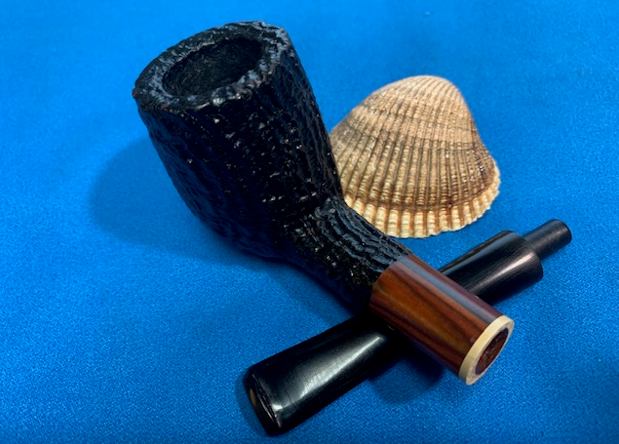
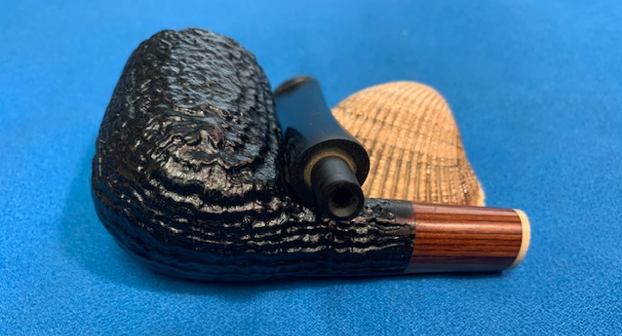
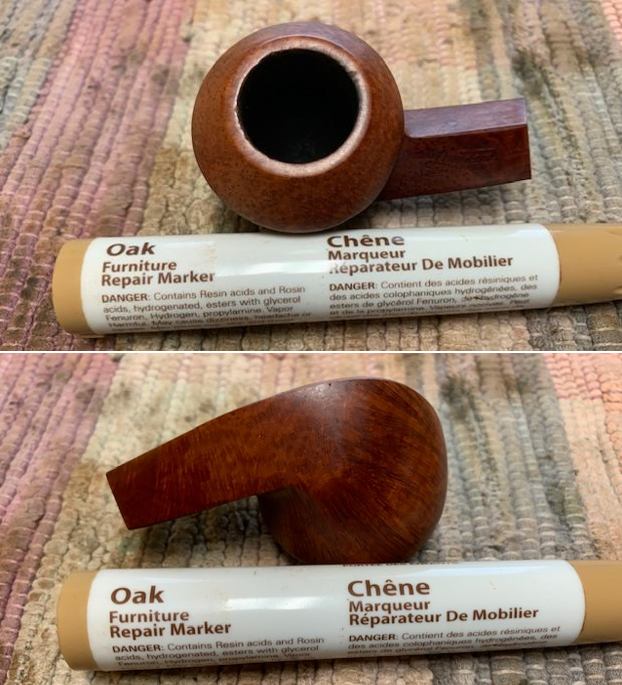
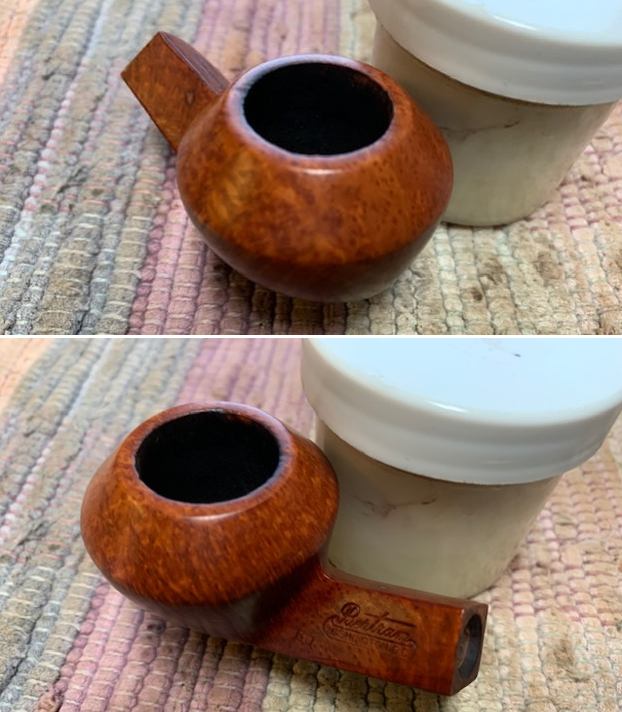
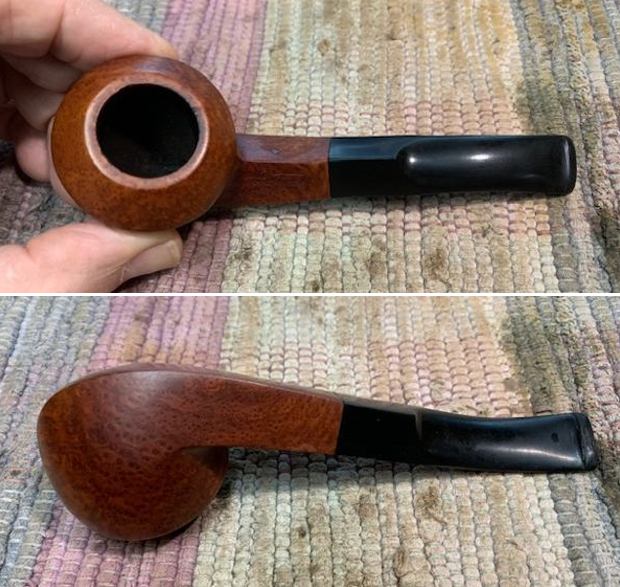
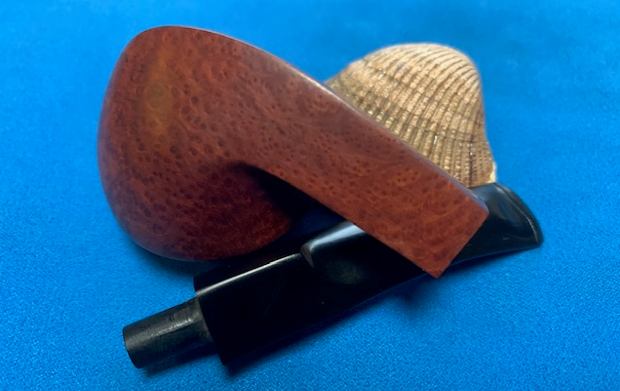
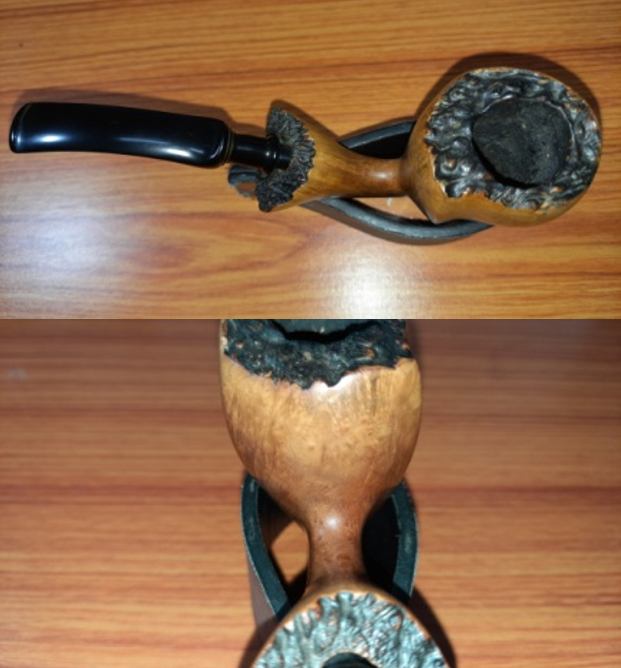
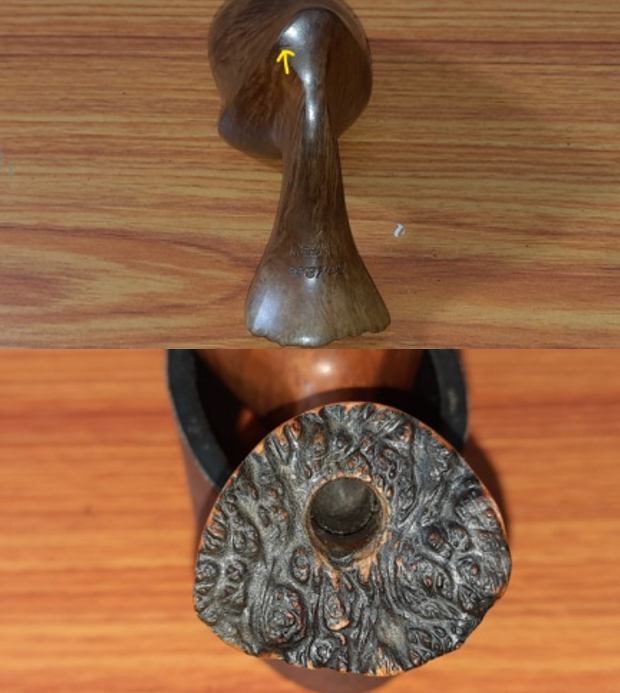
This special pipe that I selected to work on is a beautiful freehand appears like a tulip with some great flame grains all around the stummel and shank. The shank end has a nice outward flare with a flattened lower edge and the rim top is a nice plateau. The pipe is stamped on the bottom of the flared shank end as “KARL ERIK” in cursive hand over “HAND CUT IN” over “DENMARK”, all in block capitals. The shank towards the bowl end bears the numeral “4”, in all probability the grading of this pipe (?). All the stampings are crisp and easily readable. The fancy vulcanite stem is devoid of any stampings.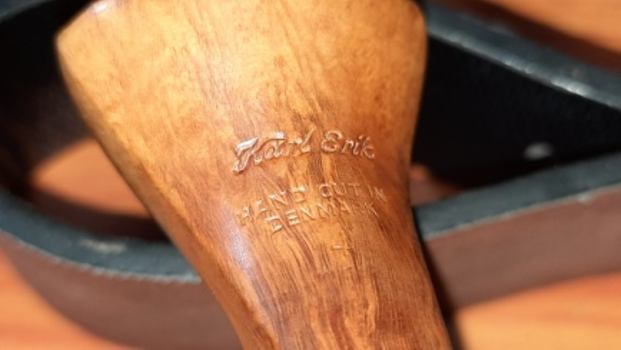 There is a lot of interesting information on the carver, Karl EriK Ottendhal, on pipedia.org (Karl Erik – Pipedia) which makes for an interesting read and provides a great insight in to the life struggles, successes and pipe making philosophies of Karl Erik. I have reproduced a few interesting general snippets of information while focusing on the aspect of determining the vintage of the pipe.
 Karl Erik Ottendahl (1942 – 2004) was born in Aalborg (Jutland), just a few miles from the very northernmost tip of Denmark. He began smoking a pipe when he was 14 and upon leaving school he started an apprenticeship in the craft as a lithographer at the age of 16.
While working as an apprentice he began hand carving pipes as a hobby. Many were given as gifts to his more senior colleagues. Upon completion of his apprenticeship he moved to Nairobi, Kenya to work as a lithographer during the 1962 war. While in that war torn country, he was unable to procure pipes for himself. In the face of such a predicament, he chose to continue to make pipes for his own use rather than go without.
Returning to Denmark after three years he couldn’t find a well paid occupation in his job, and so he began making a few pipes on the side to boost his income choosing his prenames “Karl Erik” – logo “KE” – for his label. When he managed to find some major Copenhagen pipe stores willing to sell his pieces his reputation grew little by little and he was finally able to purchase more and better machinery and began working full time as a pipe maker.
The Manufacture Era
Growing demand for his pipes made it necessary to look for a larger workshop and hiring first co-workers around 1967/68. A most important step ahead in his career was the contract with Wally Frank, Ltd. of NYC who was in search of attractive, well made but affordable Danish freehands and fancy pipes fitting to their vast offer of low end or midrange pieces but with a stress on quality.
“Attractive, well made but affordable Danish freehands and fancy pipes” – this was exactly what Karl Erik offered! So to say that’s the kernel of his lifelong philosophy as a pipemaker! And indeed, Karl Erik always did it his way and always somewhat differently as others.
Grading and the II S Problem
KE’s old grading used numbers ascending from 4 to 1. The entirely hand made one of a kind pieces were stamped “Ekstravagant”. Quite simple. But then there are the II S stamped pipes! (And furthermore seen so far II SM, I S, I M and I B.) Three fairy tales, often told:
- II S stands for the initials of a pipemaker who worked for Preben Holm before he changed to KE.
- II S pipes are a second brand of KE. Nonsense comparing the quality of II S and normal KE pipes!
- II S was used when there was no space for stampings otherwise.
But it is almost certain, that II S pipes were exclusively sold in the United States only.
KE discontinued all exports to the United States in 1987 due to waning sales and attempts of his business partners to screw down prices. Now, freehand sales were downward bound worldwide in those years and KE gradually grew tired running a pipe manufacture.
Though Karl Erik’s favorite briar mostly came from Morocco or Greece, but he frequently purchased elsewhere, too. He didn’t consider the briar origin to be particularly important provided the briar was well cured. Therefore, he simply purchased the best briar he could find, rather than purchasing from only one or two regions.
Concentrating on more classical influenced shapes Karl Erik’s style emphasized the wood over all other contributing factors by allowing the grain to determine the ultimate shape of the piece. He further emphasized the natural, organic, flowing shape of his bowls with hand cut stems and a broad variety of decorating materials.
KE’s new grading used numbers ascending from D to A. The unique “Ekstravagant” pipes C, B, A, AA to AAA. These superb pieces of remarkable quality were, almost certainly, the least expensive high- quality hand made pipes coming from Denmark today!
In the 90’s he was honored by Stanwell to design some models for the very popular H.C. Anderson line which is named for the great Danish poet.
Around 1998/99 he traded the German rights to his brand name “Karl Erik” to Planta, better known as the proprietor of Design Berlin (db). Thus – though db copied the style of the old Karl Eriks pretty closely – a recent KE offered for sale in Germany is unfortunately about as Danish as Eisbein mit Sauerkraut. But even though Planta did one thing of merit: a series of pipe tobaccos was named for Karl Erik!
While everywhere else a Karl Erik pipe remained a Karl Erik pipe made by Karl Erik himself, he began signing some of his pipes with his family name Ottendahl. The new label was strictly used to continue distributing his own pipes in Germany only! But as his Viking ancestors some Ottendahl pipes discovered a way to cross the pond and turned up in the United States. KE officially resumed sales to the USA after 13 years in 2000! This caused a certain confusion among US pipesmokers and some clever US pipetraders imputed the Ottendahls with a better quality than the usual Karl Erik pipes to take advantage of the favorable situation asking considerably higher prices for Ottendahl pipes.
During the following years KE produced a little more than 2000 pipes per year, selling the bulk of them in Germany and the US. That is surely a respectable output, considering the largely hand-made character of these pipes. Karl Erik Ottendahl was planning to make 2500 pipes in 2004 but he died surprisingly suffering a stroke in his home in Korsør on Zealand on the 12th of September 2004.
It sad that the community lost a talented artisan but his pipes will continue to be repaired/ restored, like the one currently on my work table, and be remembered for generations to come.
From the above, it is evident that this pipe is from the early manufacturing era of Karl Erik and is the lowest grade of pipe leaving his table.
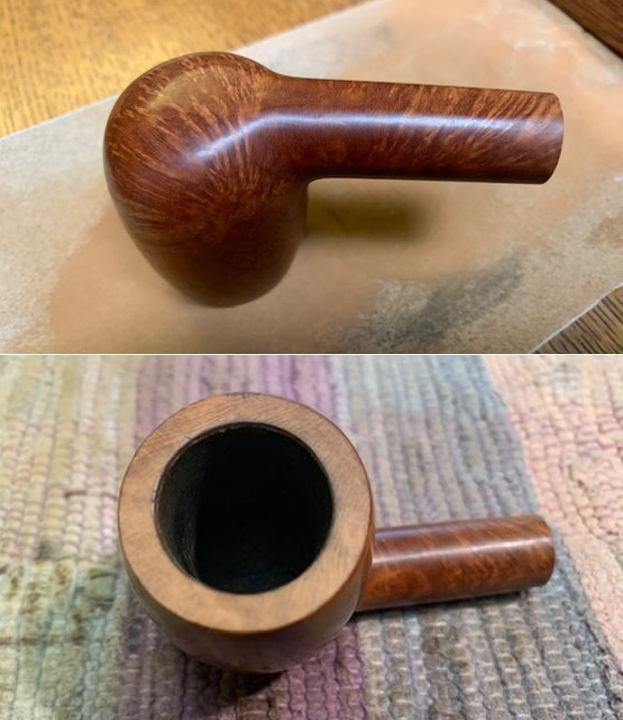
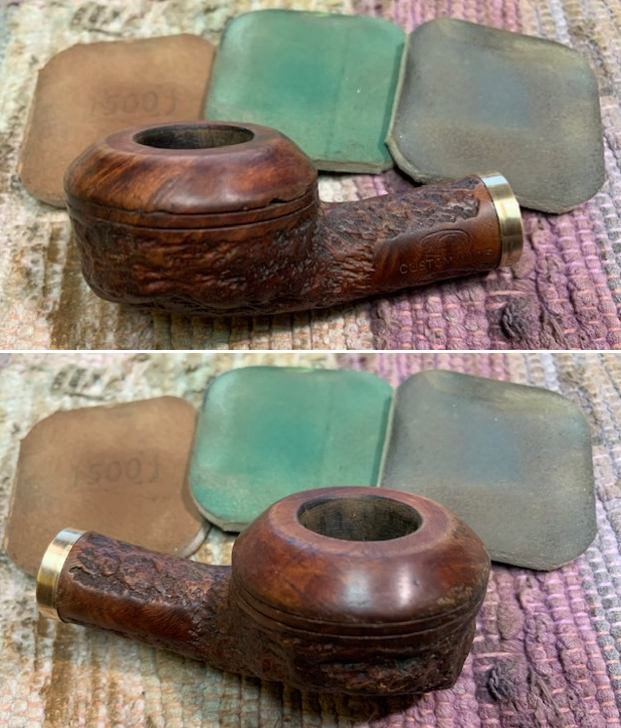
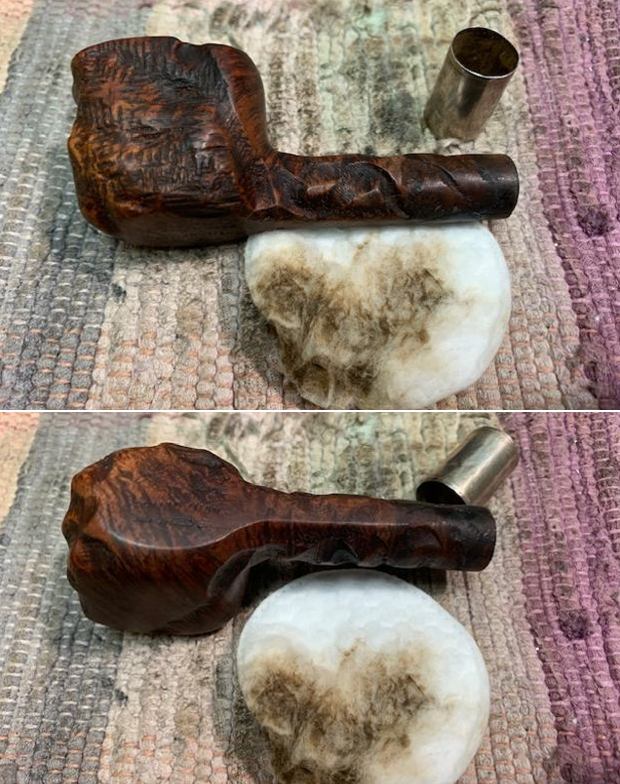
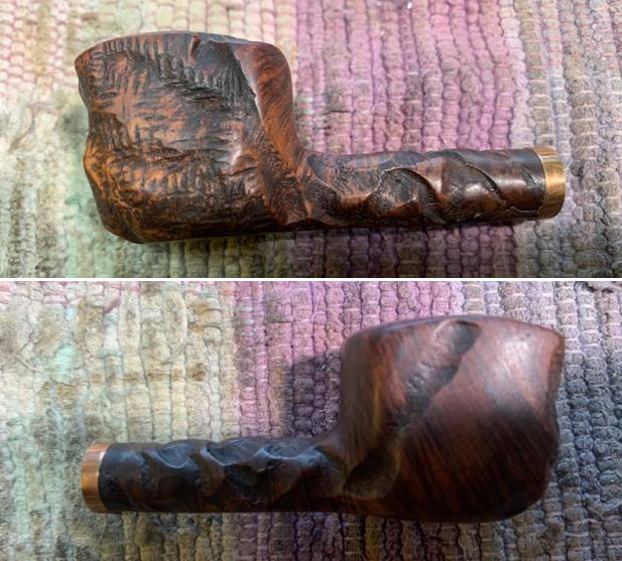
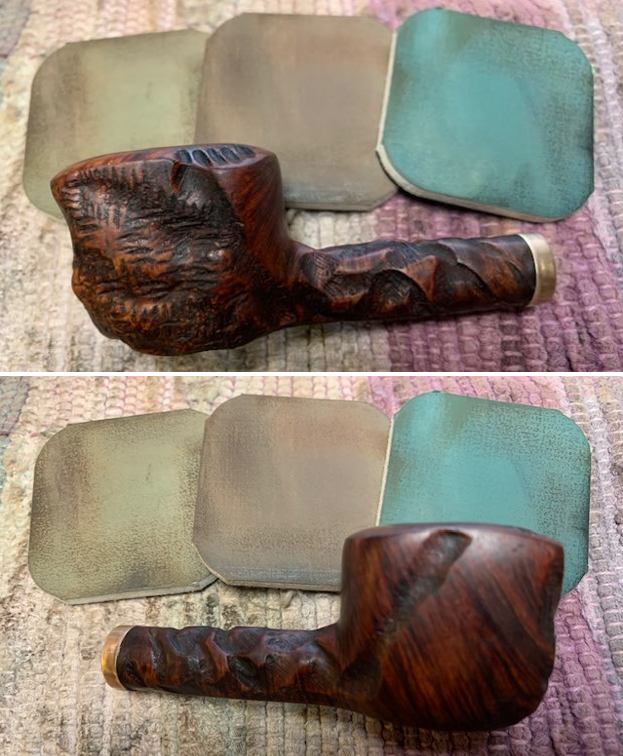
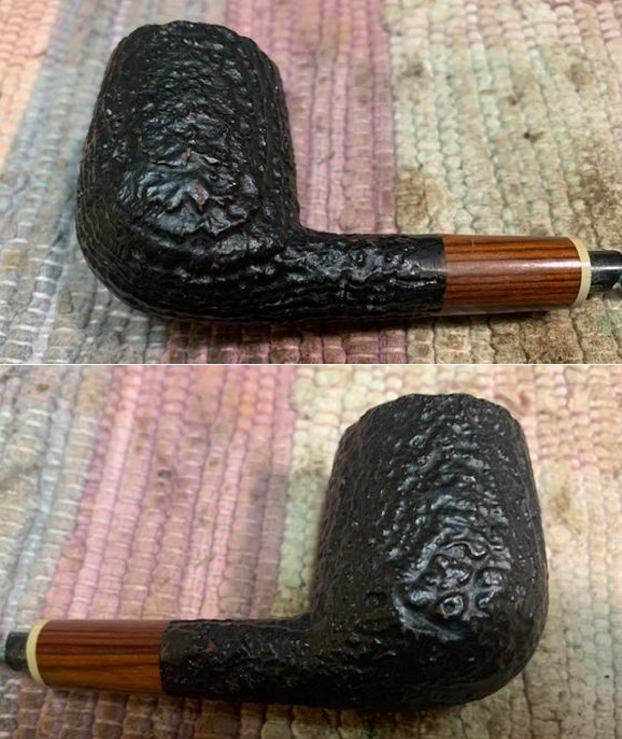
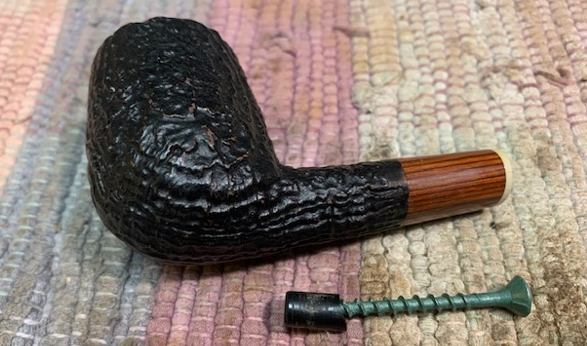
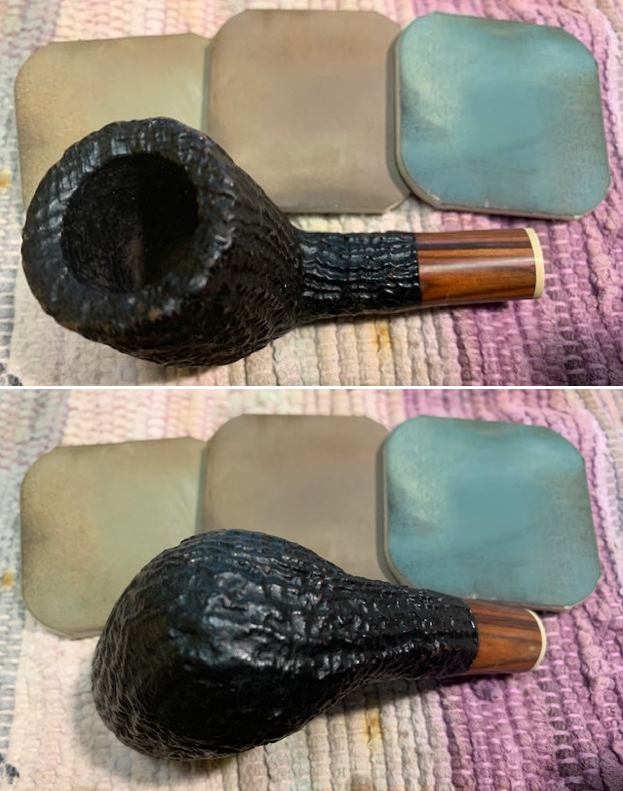
Initial Visual Inspection
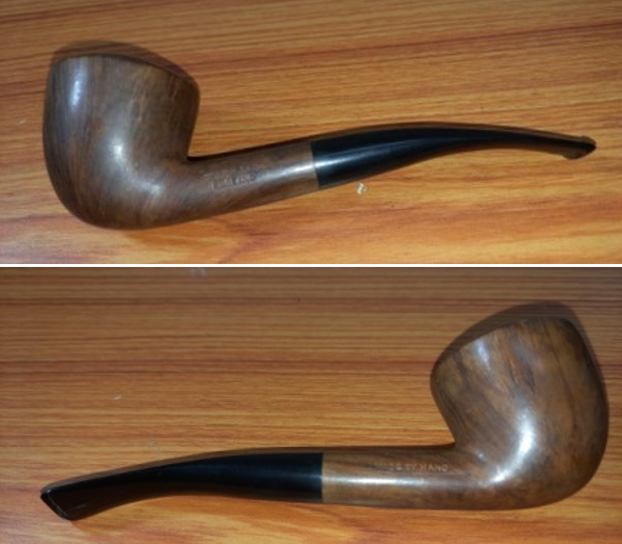
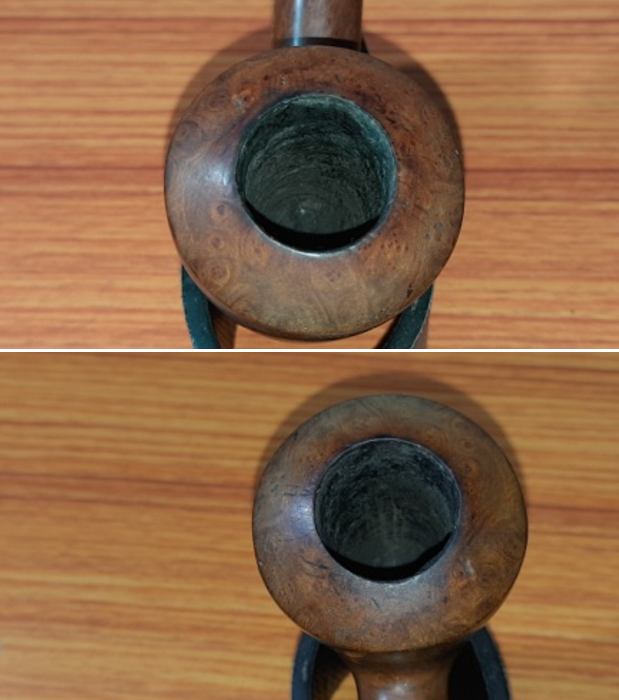
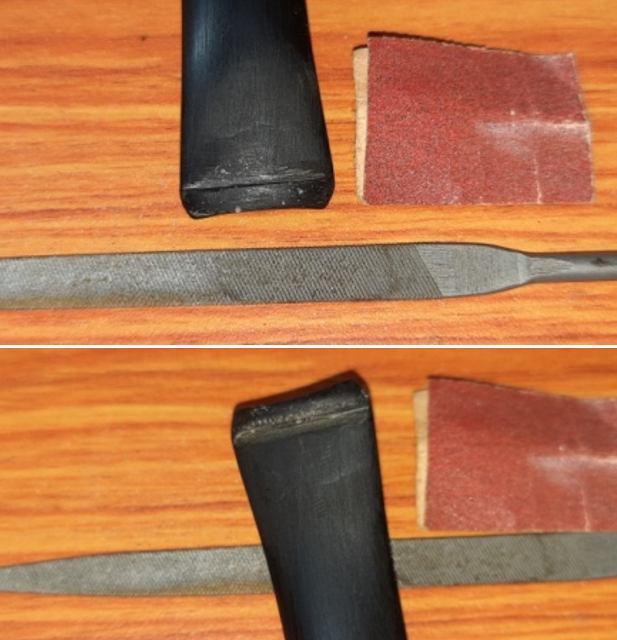
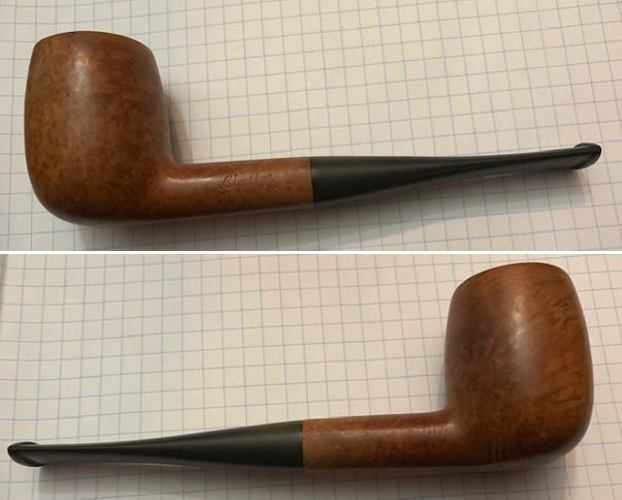
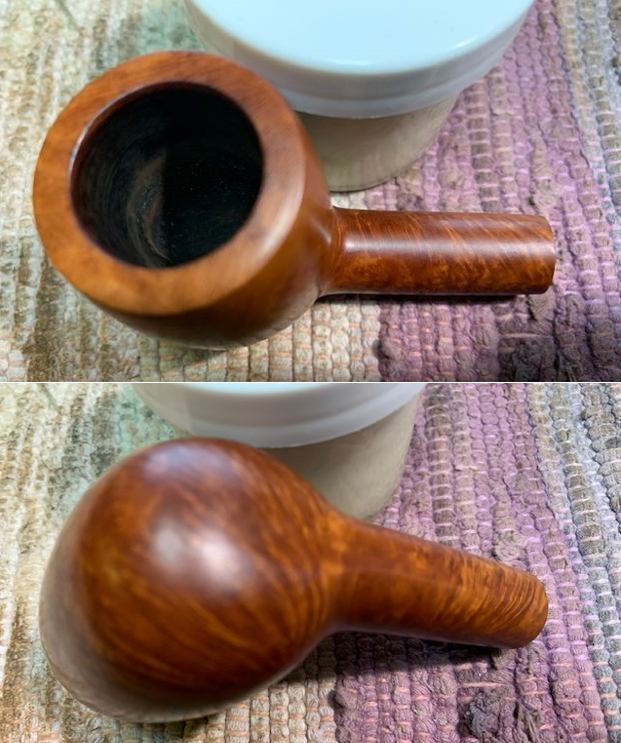
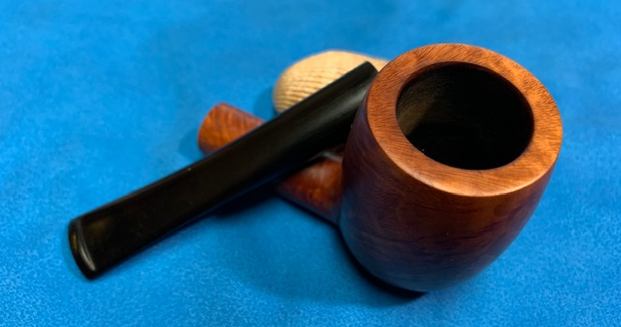
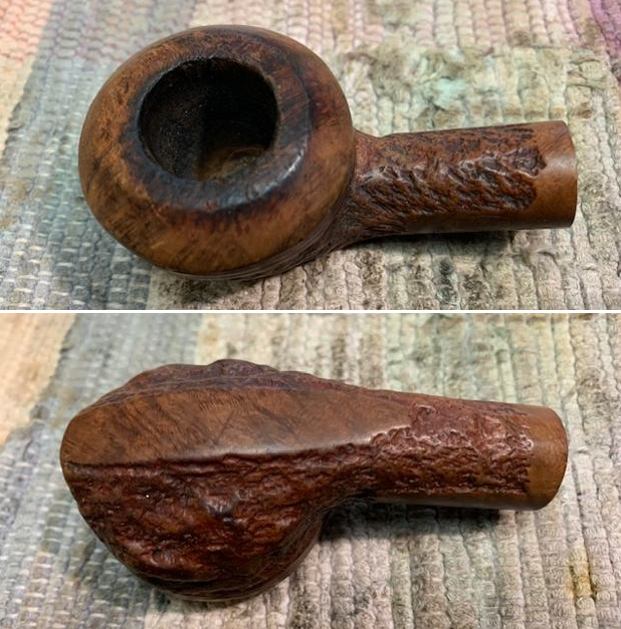
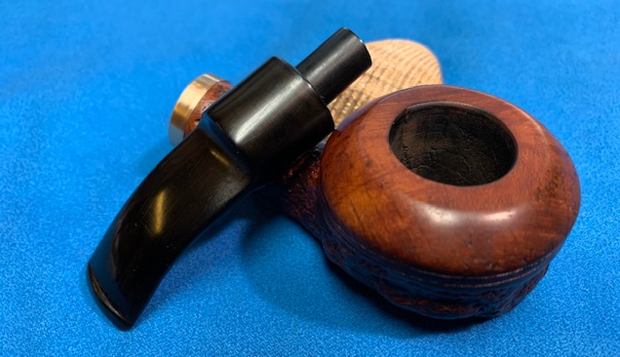
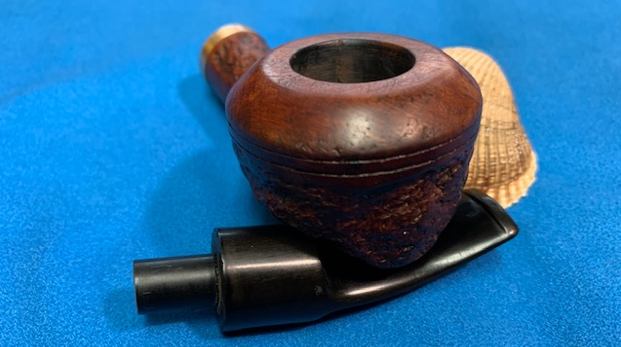
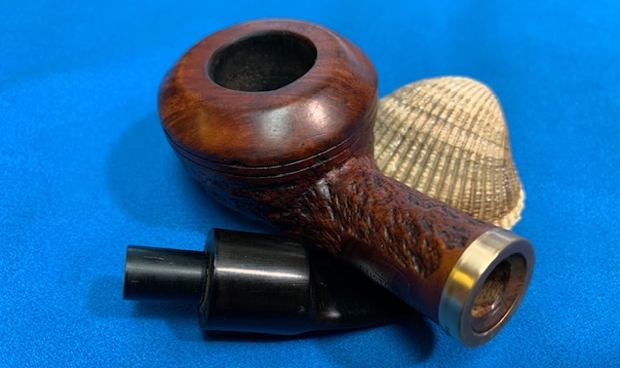
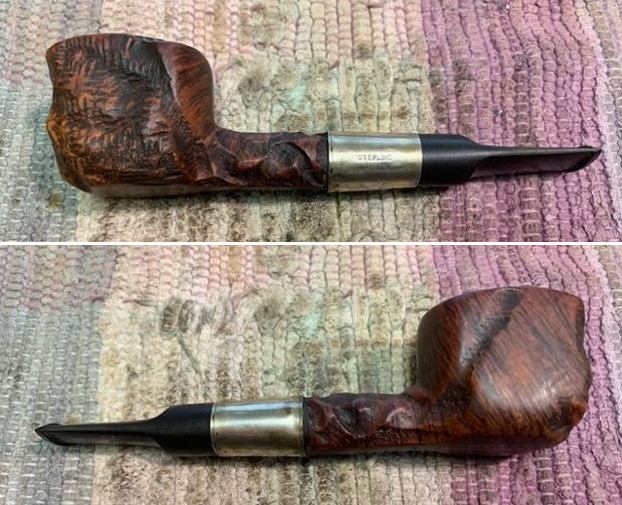
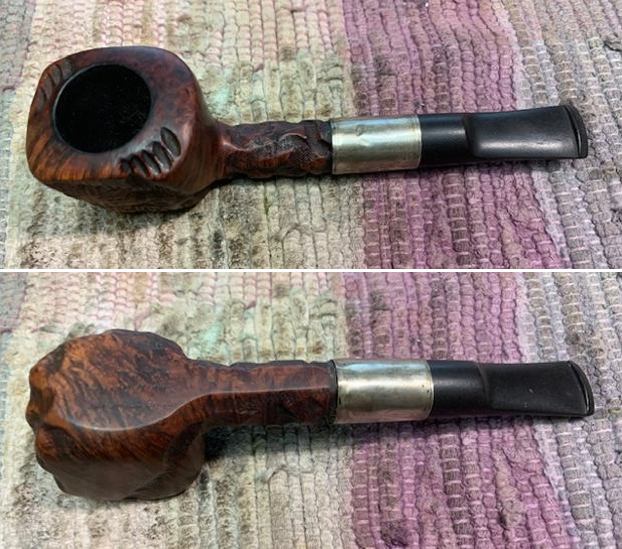
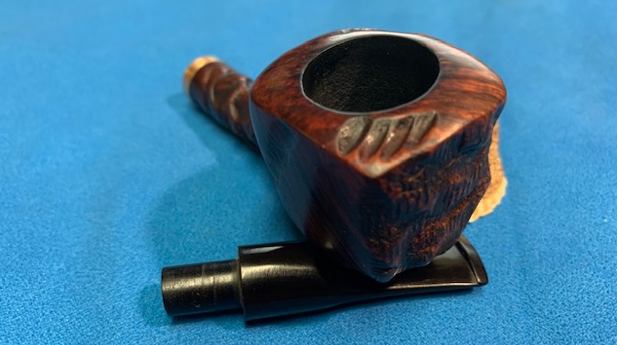
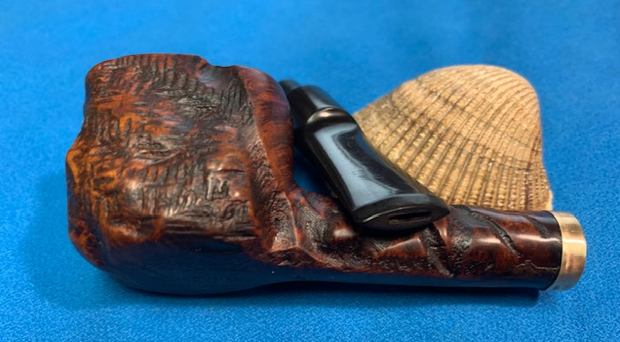
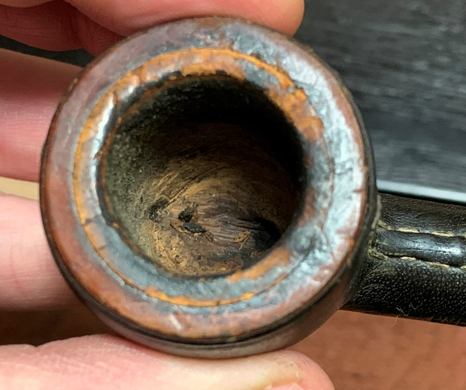
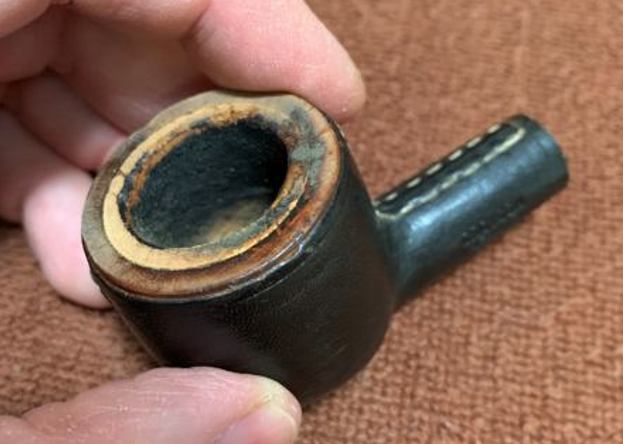
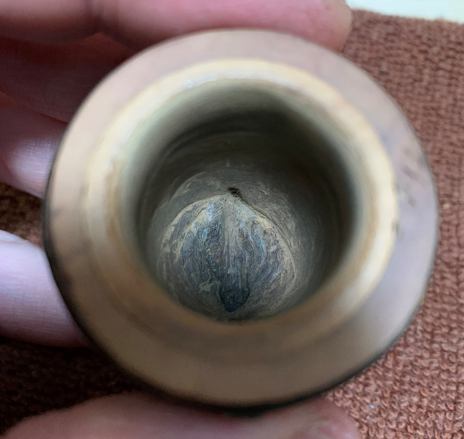
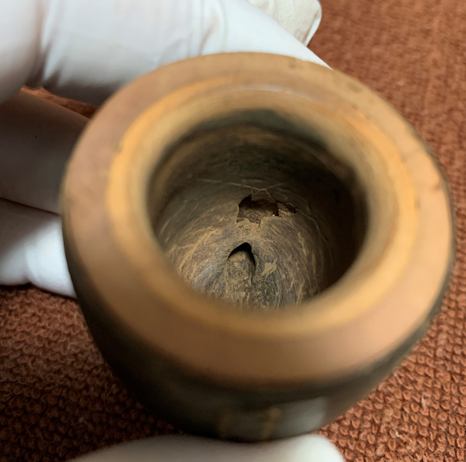
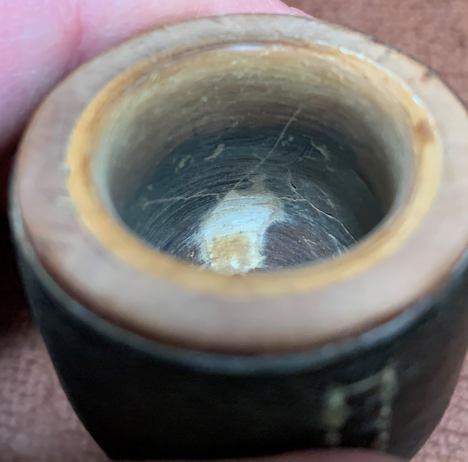
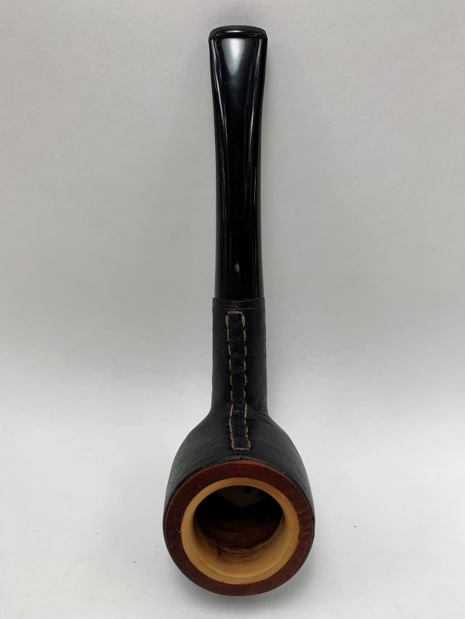
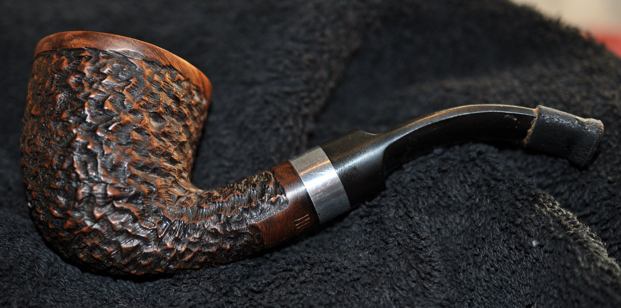
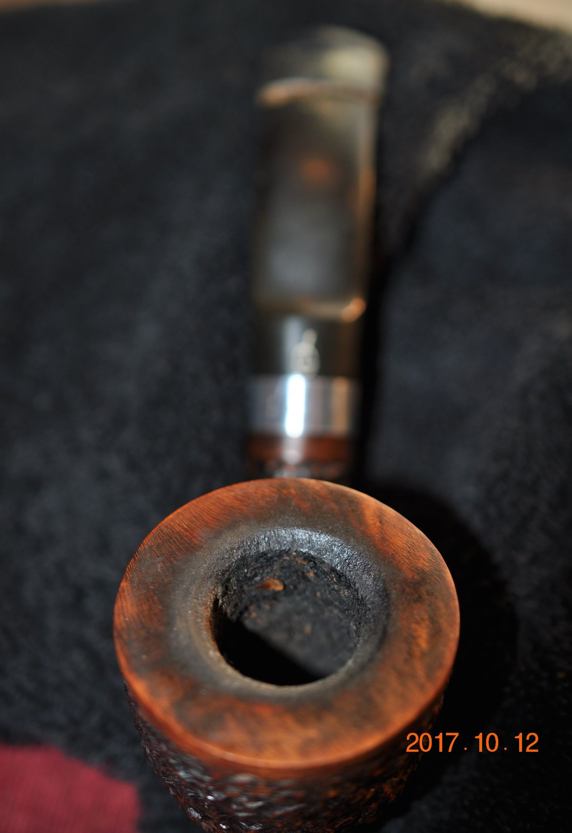
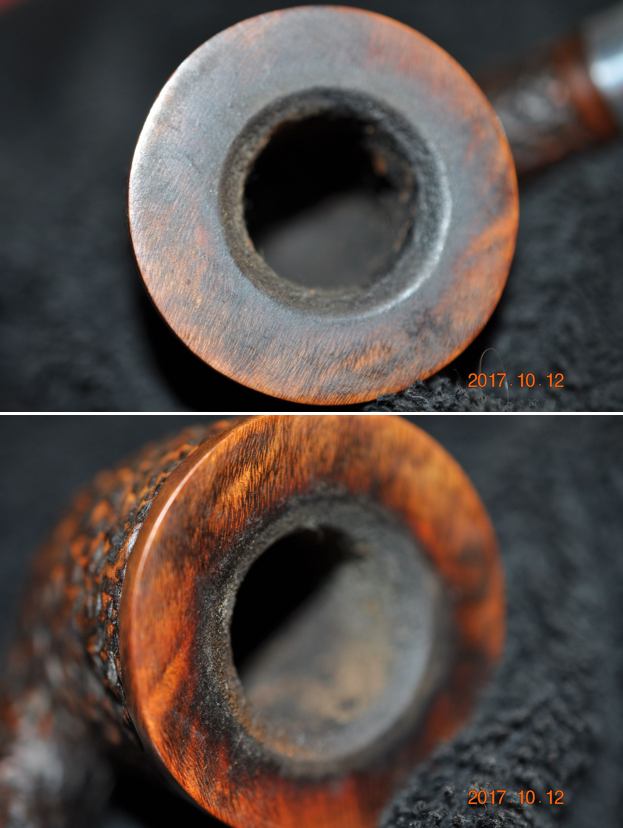
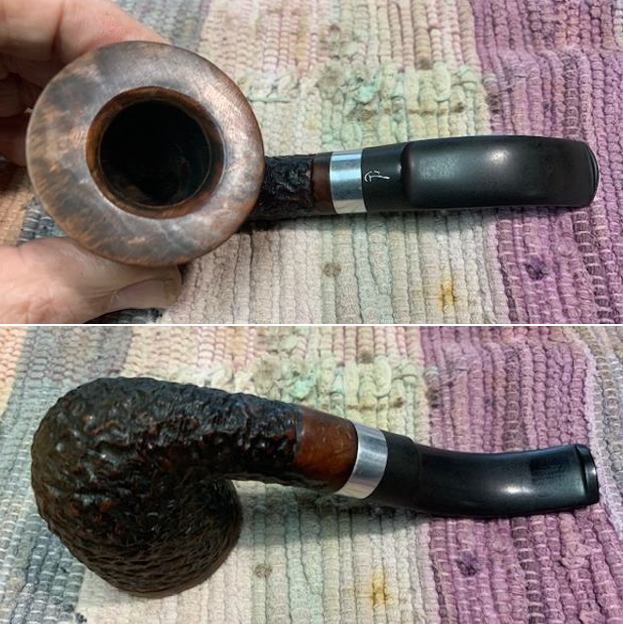
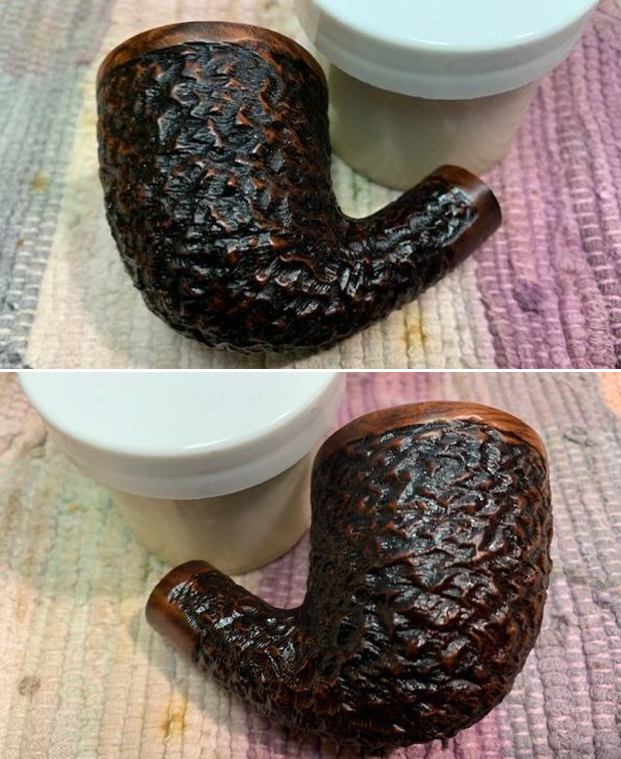
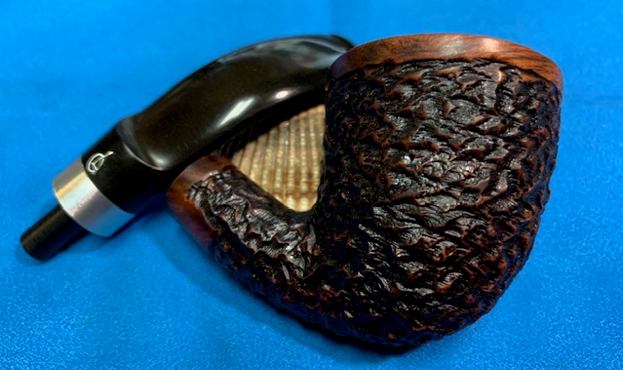
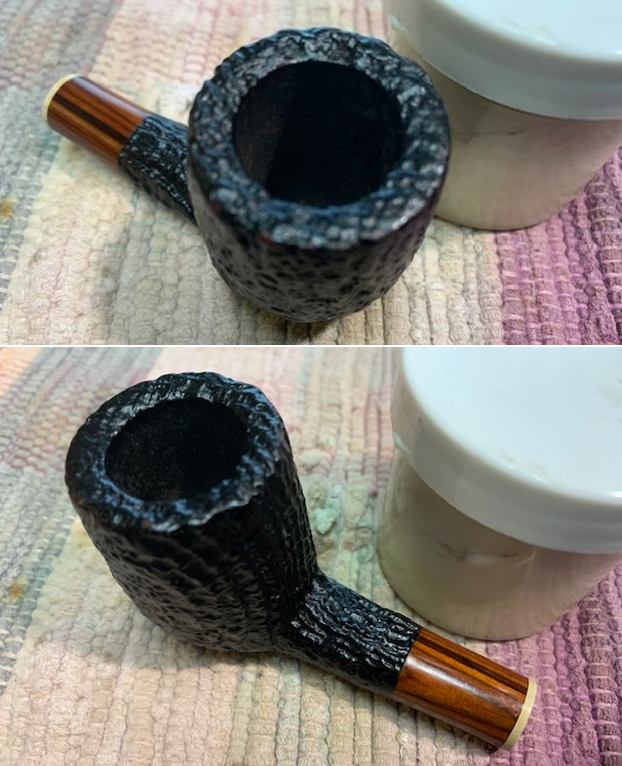
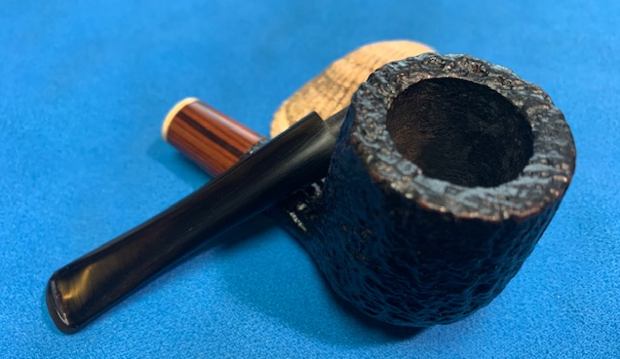
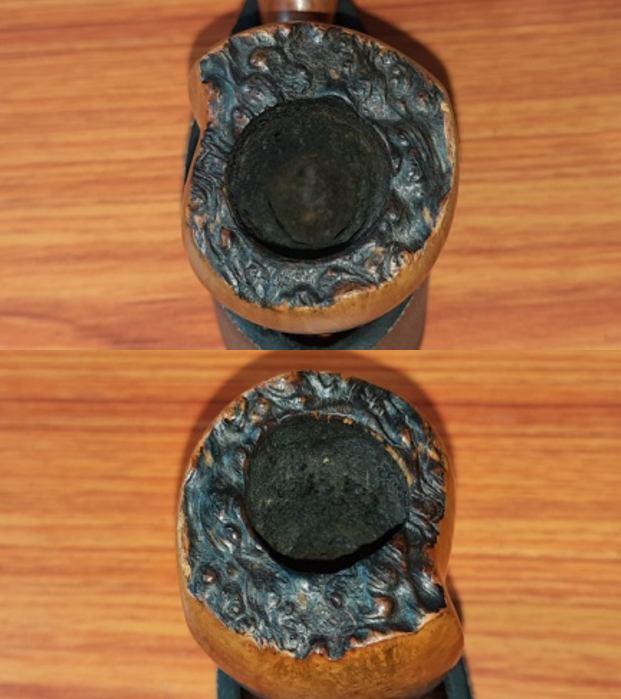
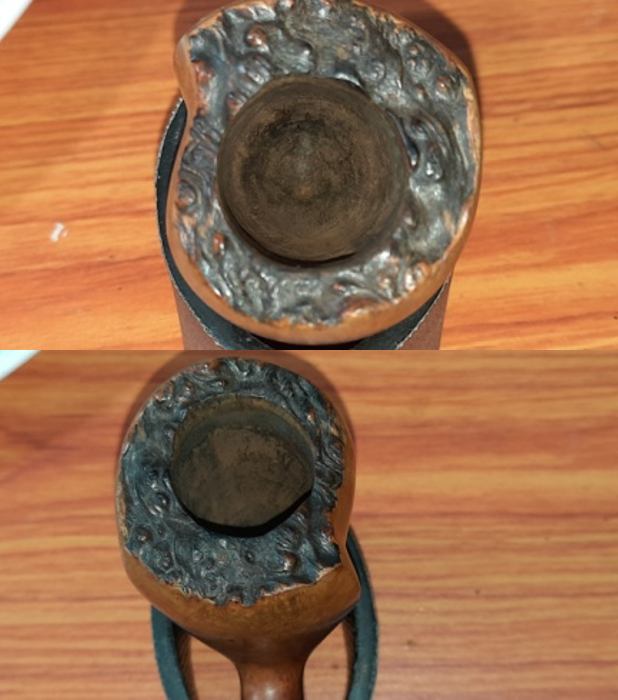
The chamber has a decent layer of cake that is thin at the rim and thick towards the bottom half of the chamber. The plateau rim top and the flared shank end is stained black. The stummel surface is covered in dust and grime that gives it a lifeless appearance. However, through this dirt and grime, beautiful flame grains can be seen all over the stummel surface without a single fill. The mortise has small traces of dried oils/ tars accumulation and yet, should be an easy clean. The high quality vulcanite stem is in excellent condition without a single bite mark. Overall, this old pipe has been well cared for and should finish up really beautiful.
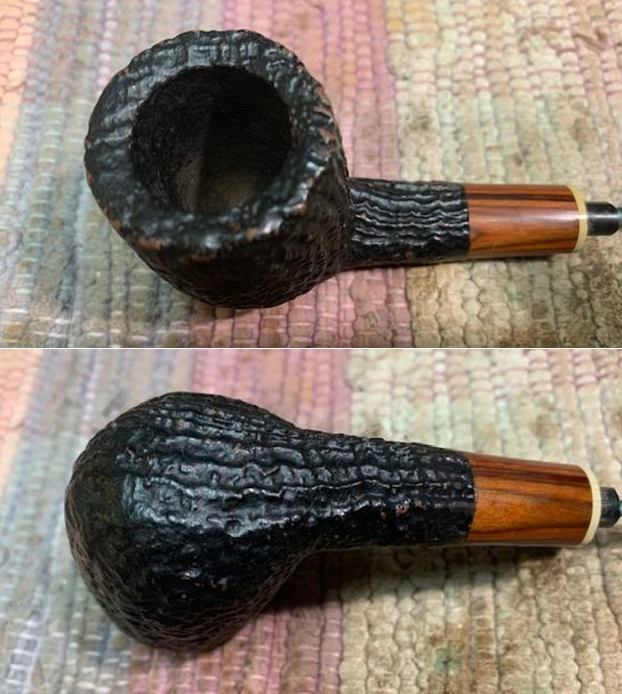
 Detailed Inspection
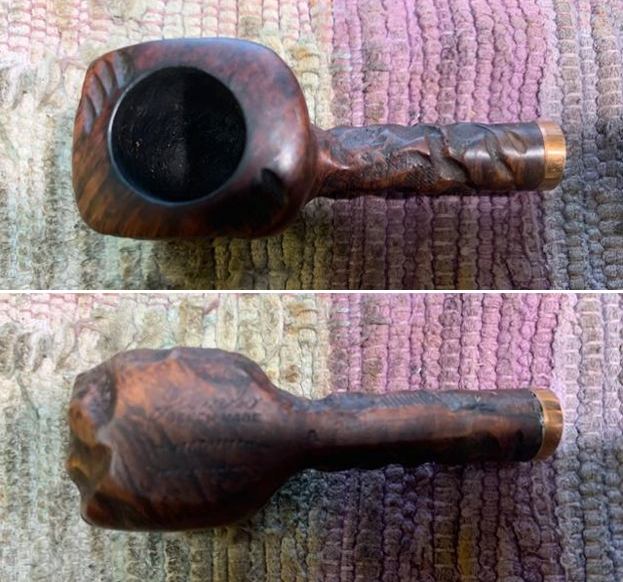
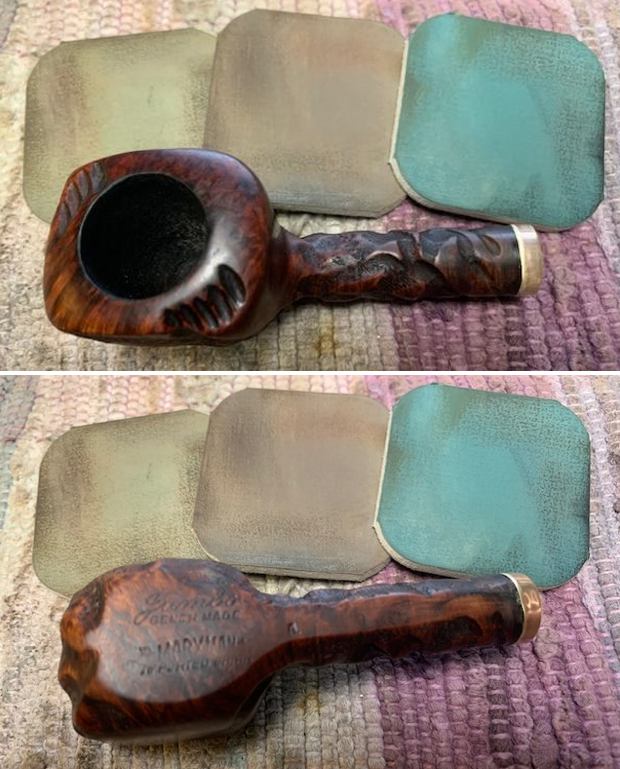
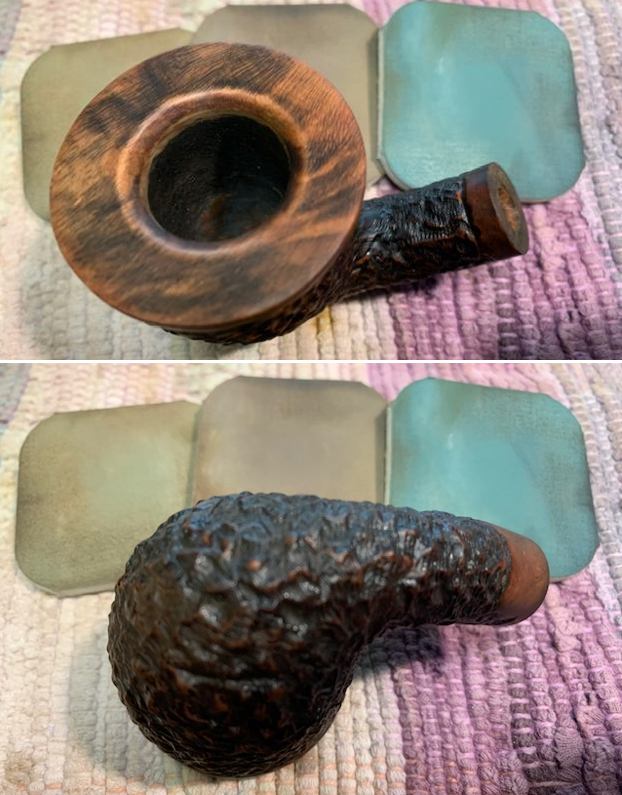
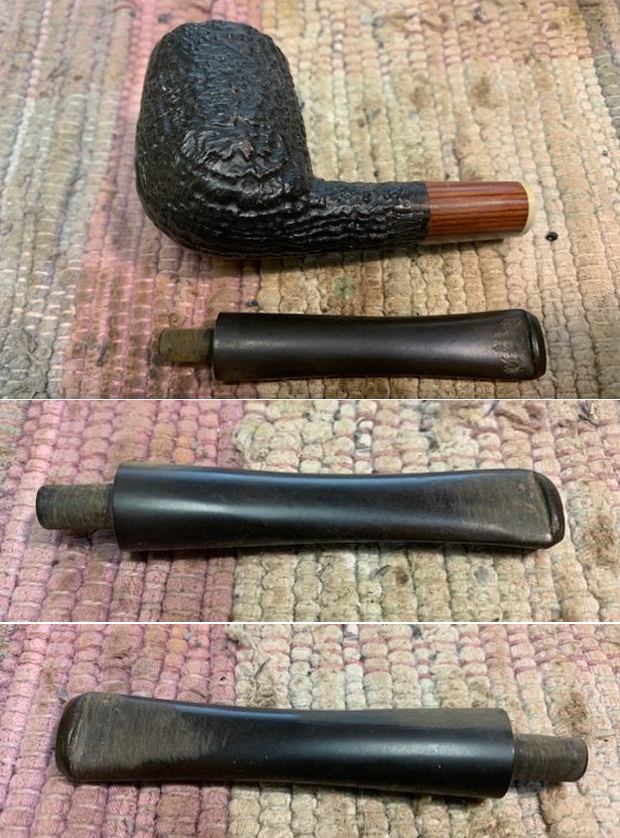
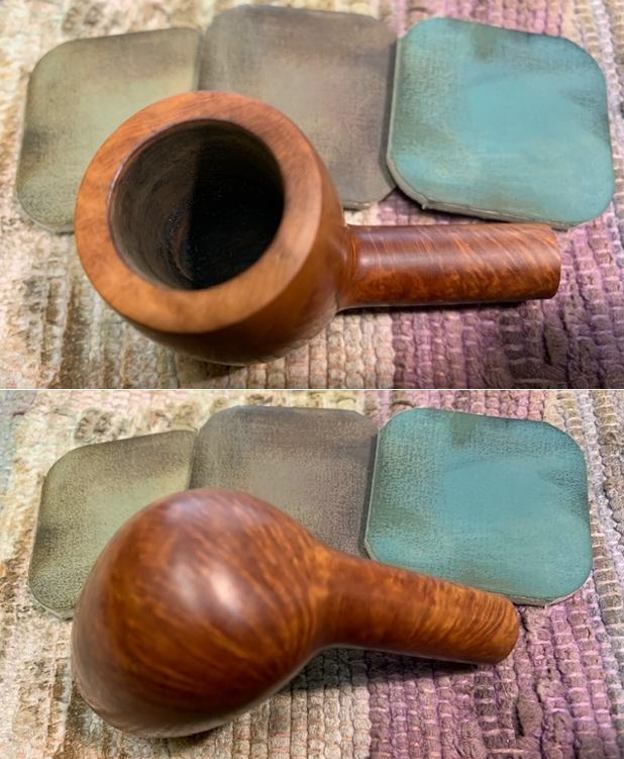
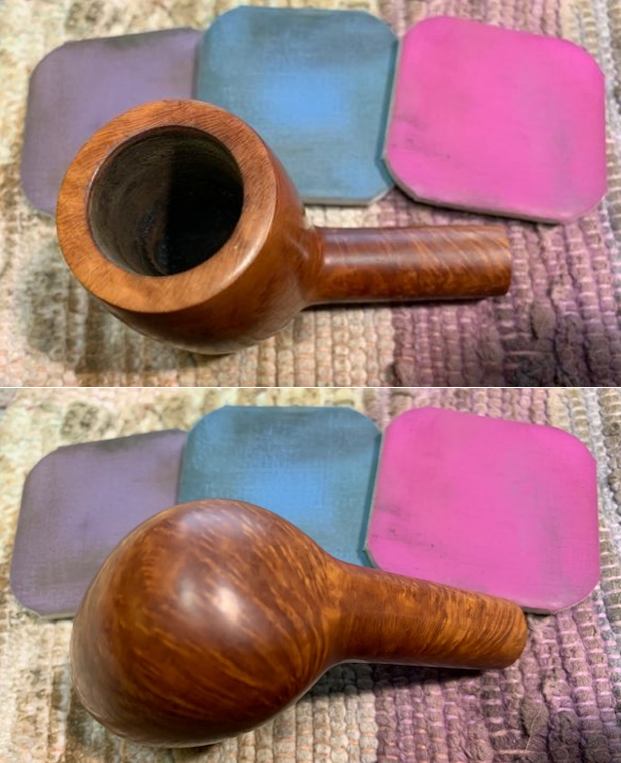
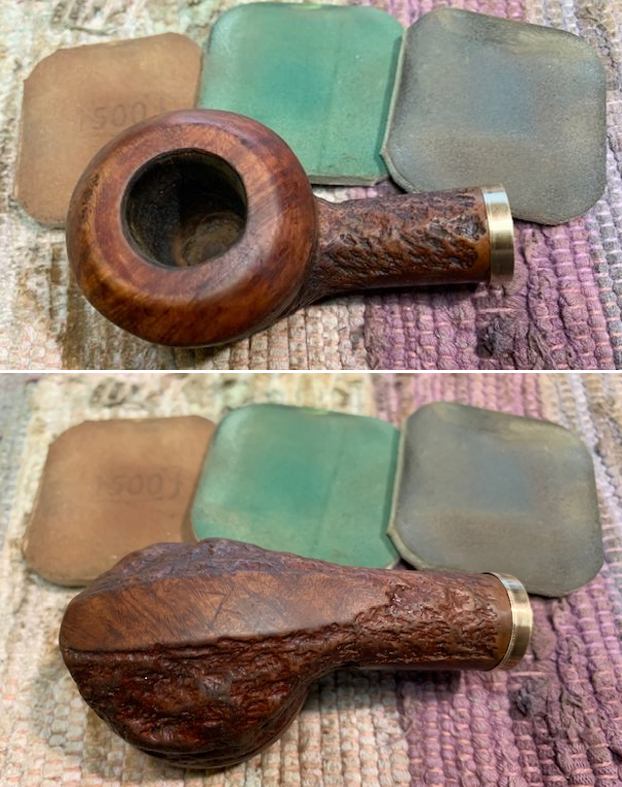
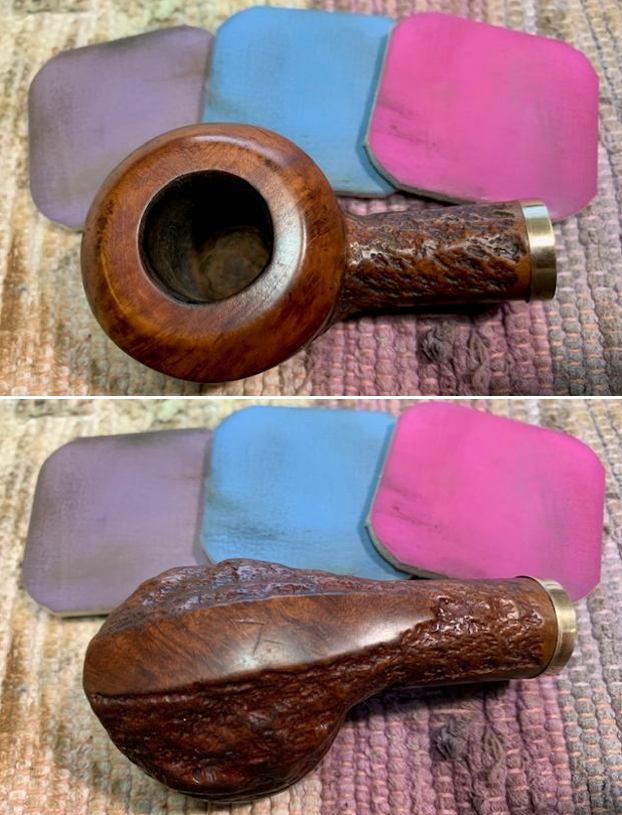
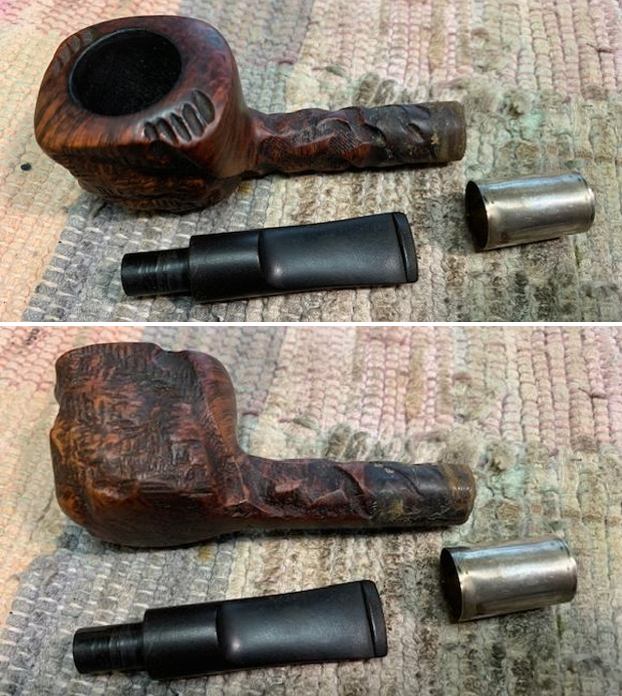
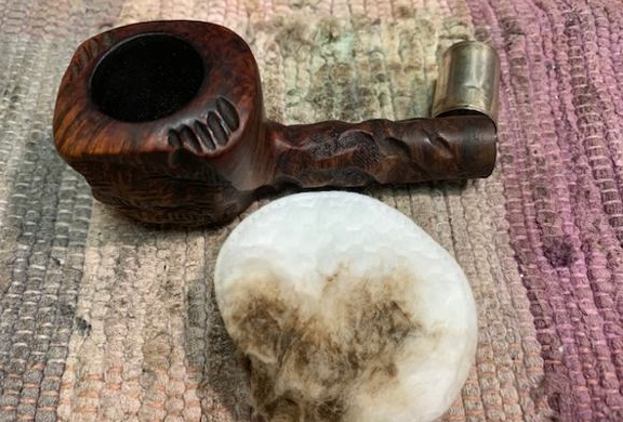
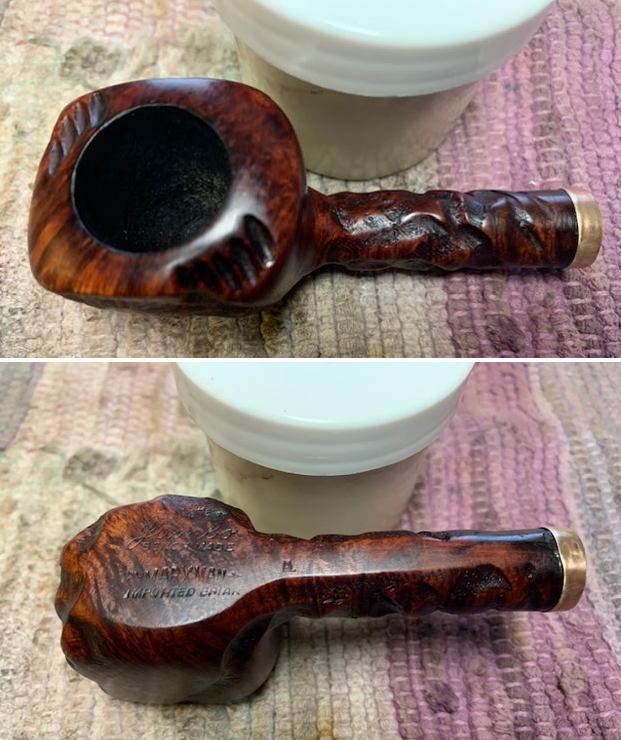
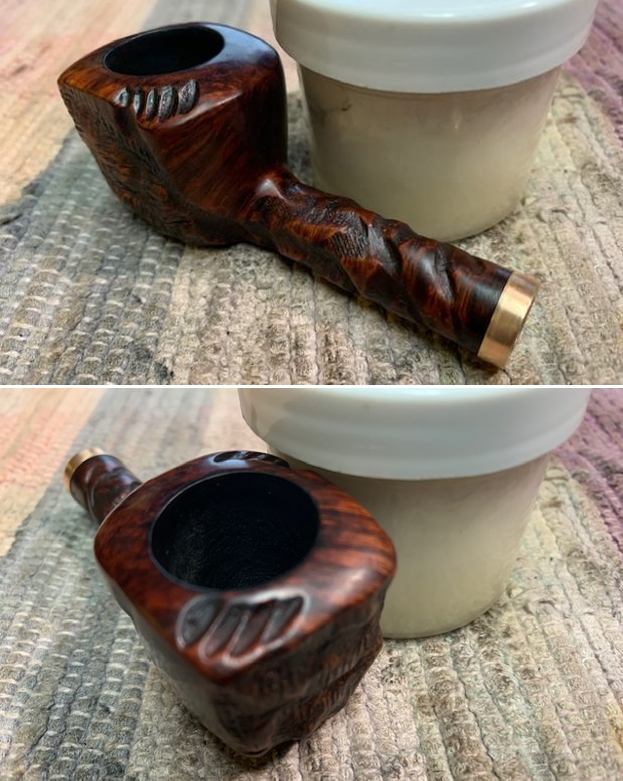
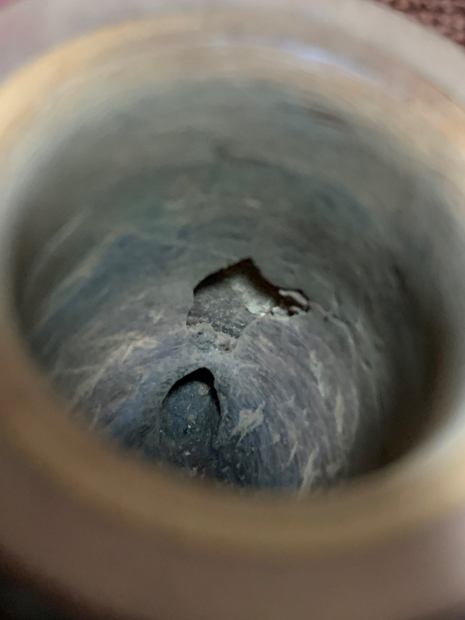
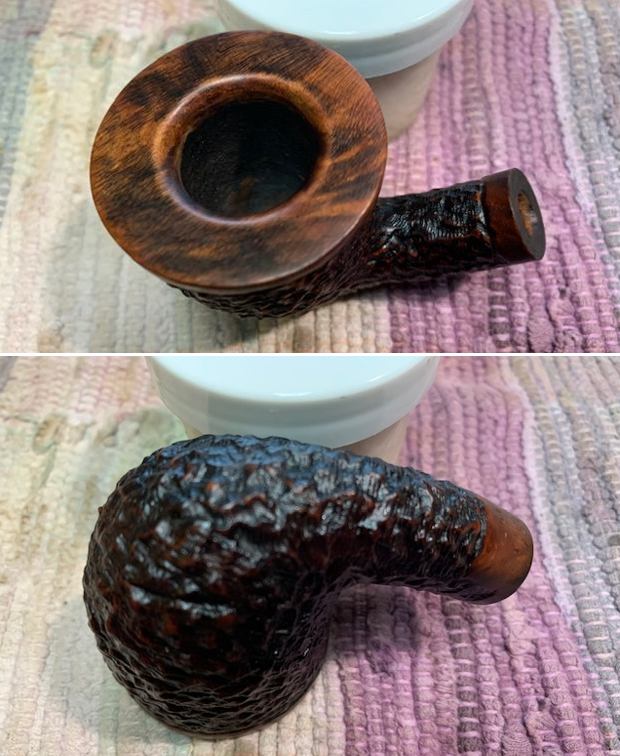
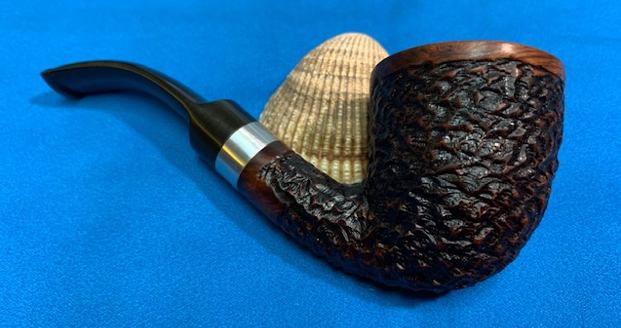
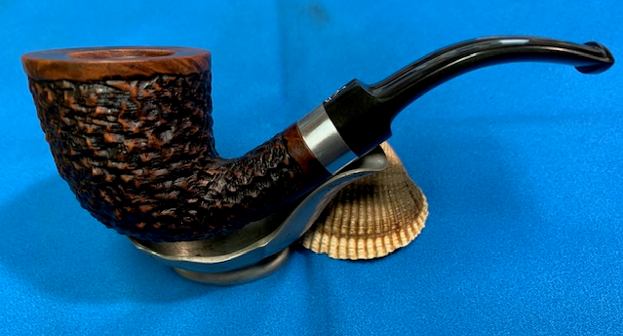
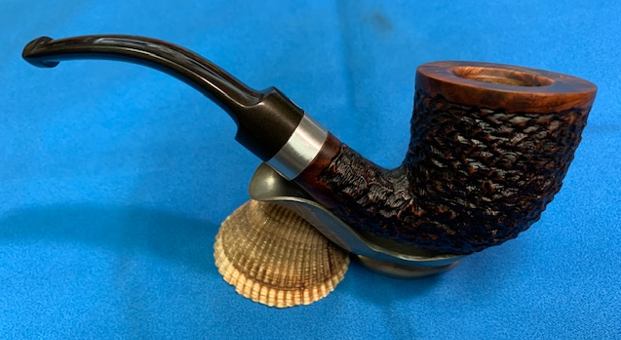
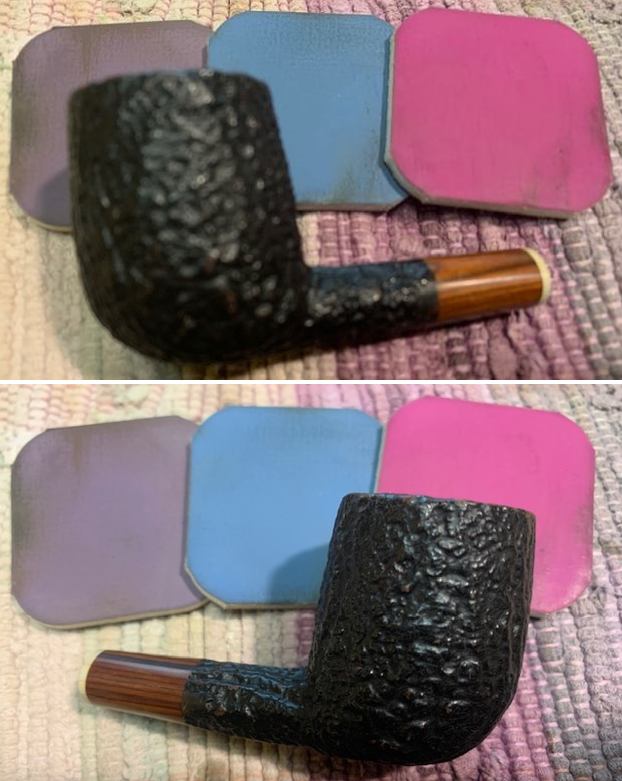
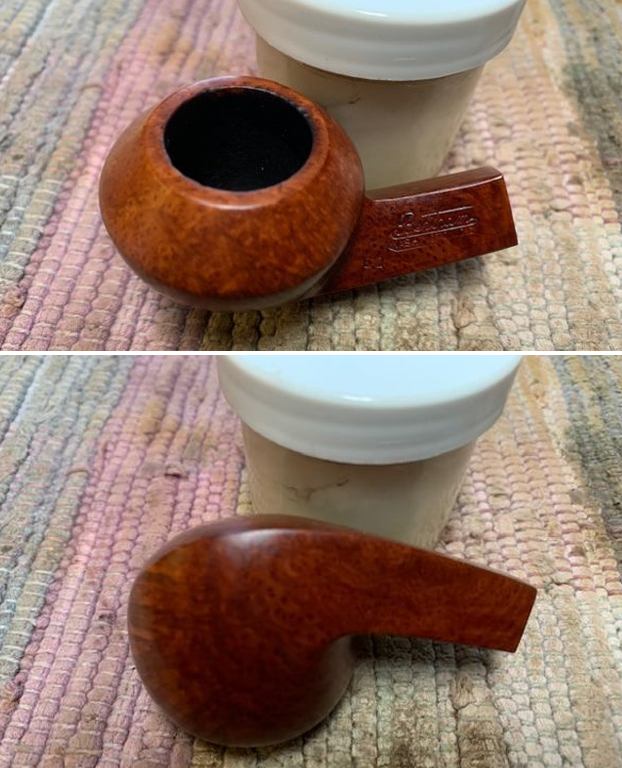
The chamber has a thick layer of dry and hard cake at the bottom half towards the heel and progressively reduces towards the rim top. The plateau rim top surface is very clean with no lava overflow or issues of charring to the inner rim edge. The condition of the inner walls of the chamber can be checked and ascertained only after the cake has been taken down to the bare briar. The rim top and the flared shank end are stained black and provide a nice contrast to the natural virgin hues of the rest of the stummel. However, this was a contentious issue as Abha was of the opinion that black stained rim top gives an unclean appearance whereas I was looking at the contrast.
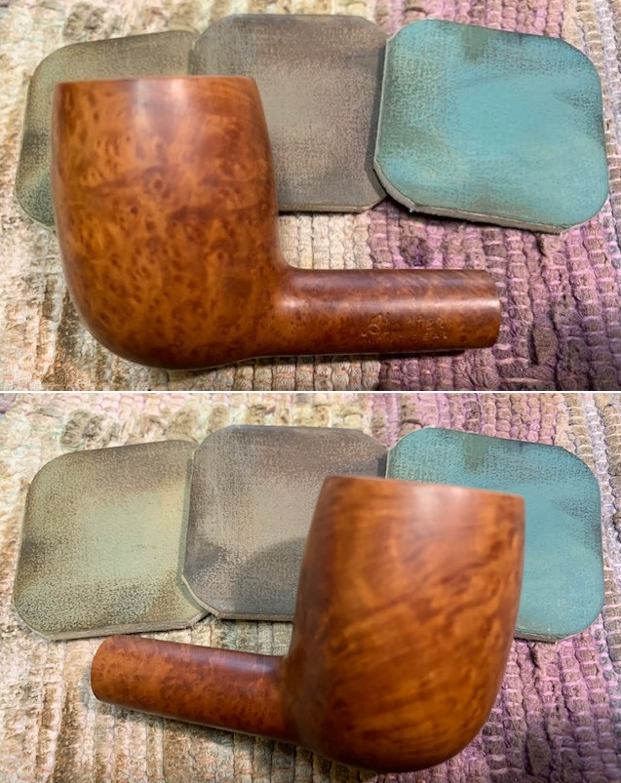
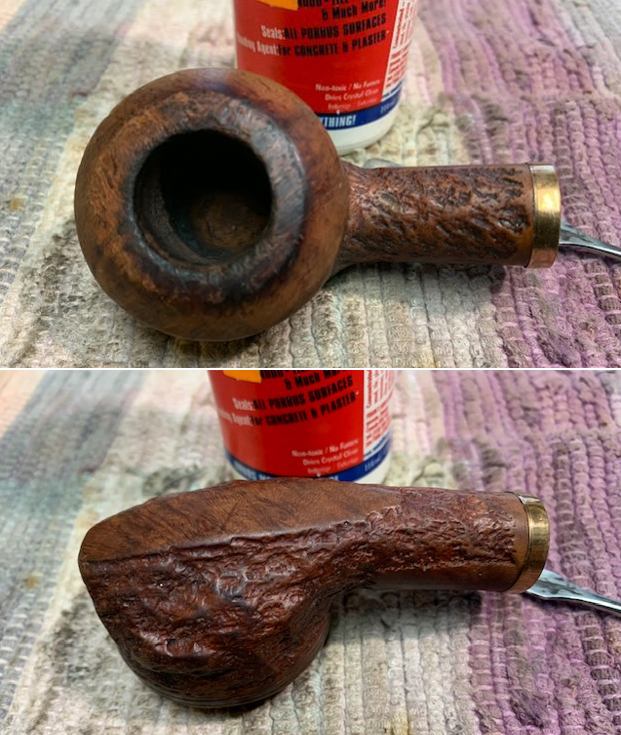
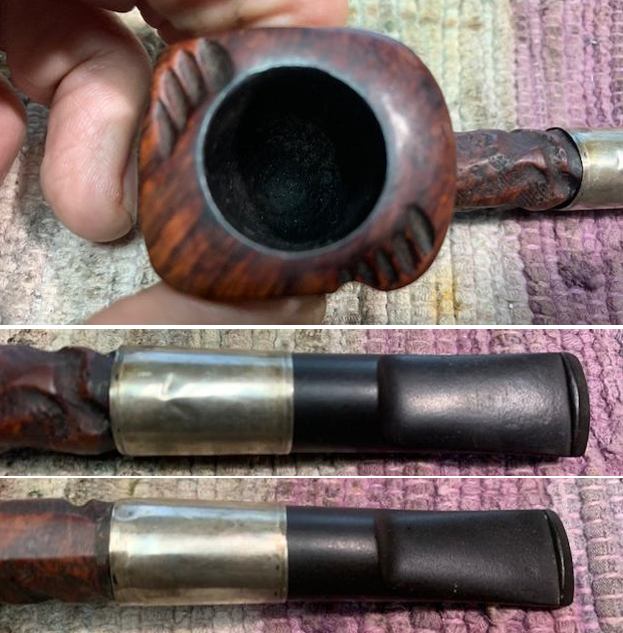
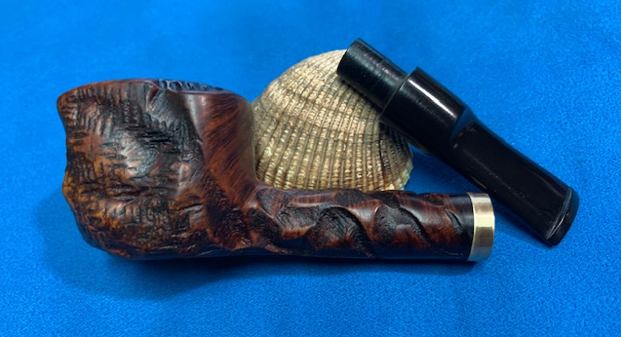
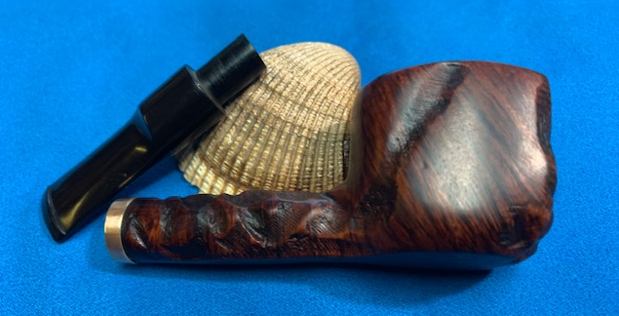
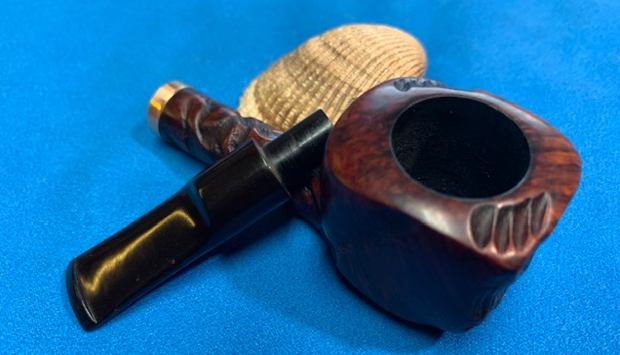
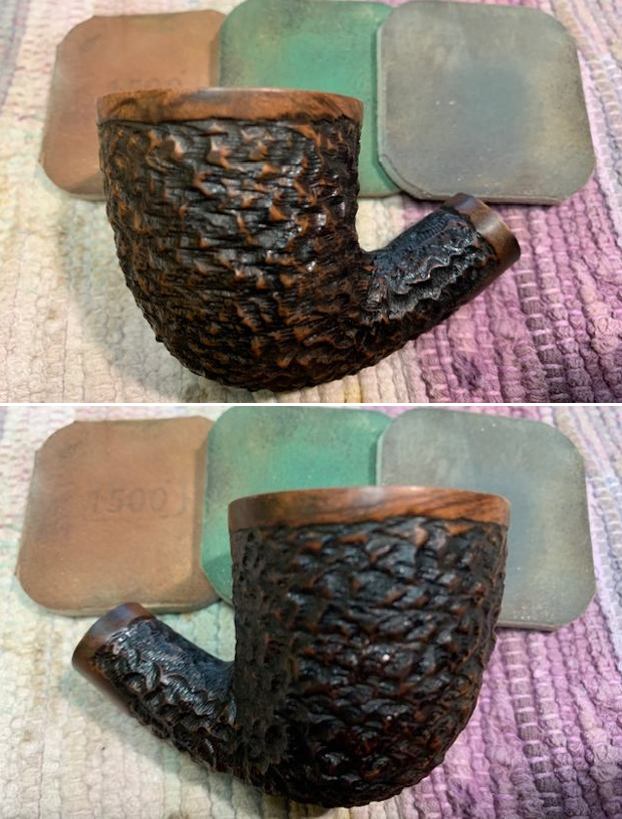
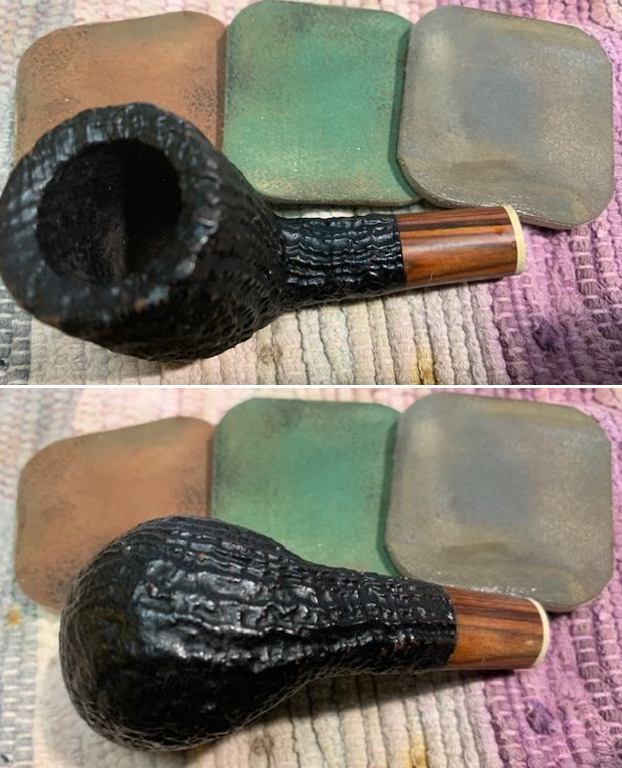
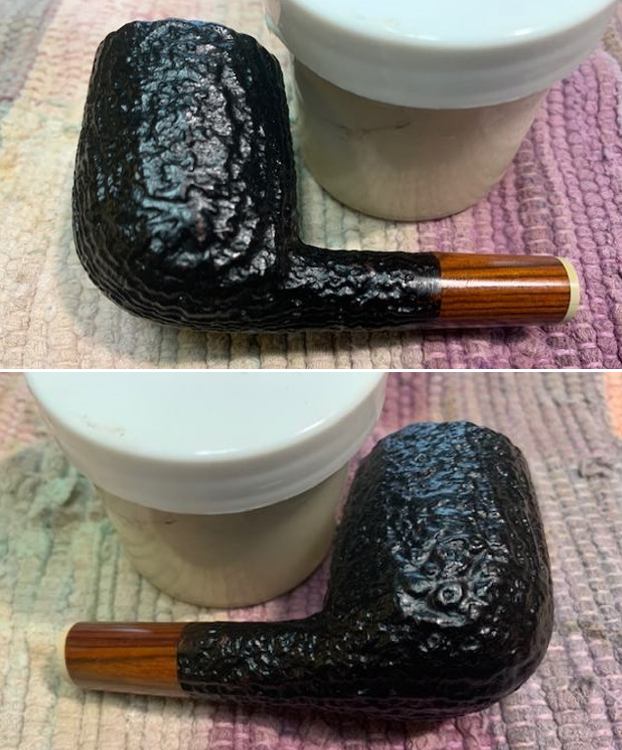
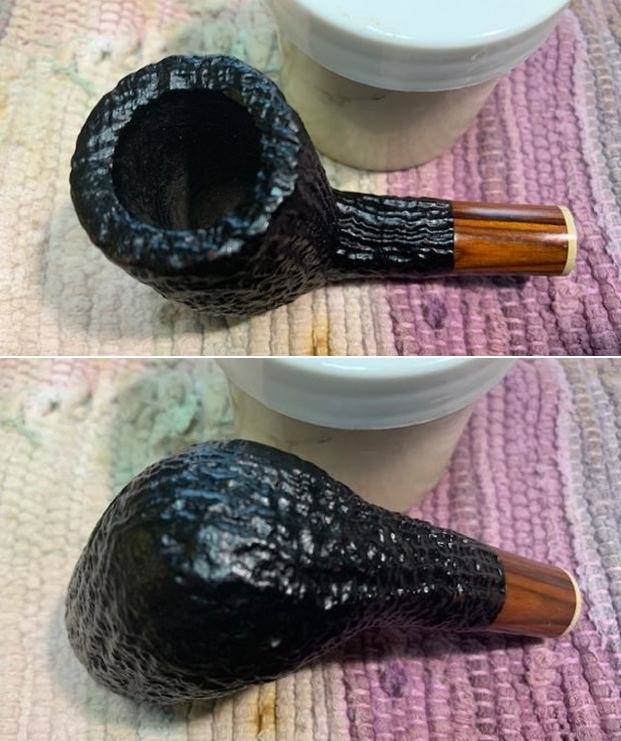
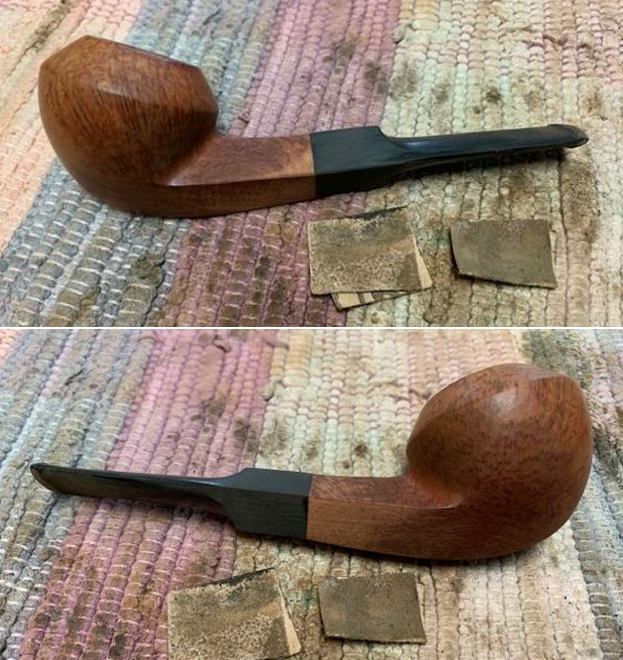
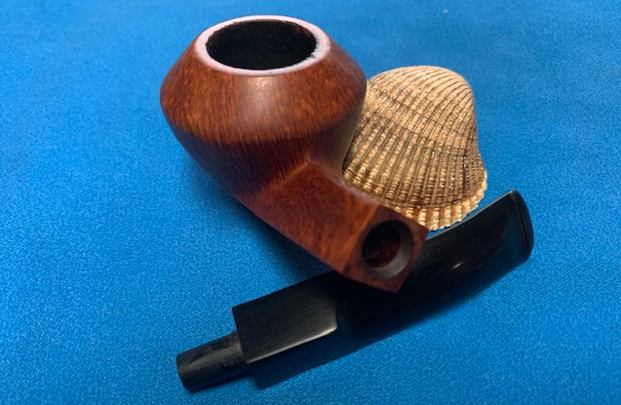
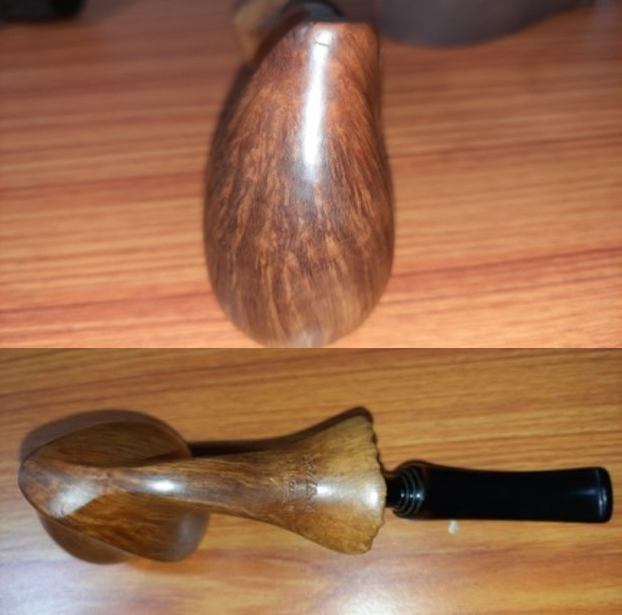
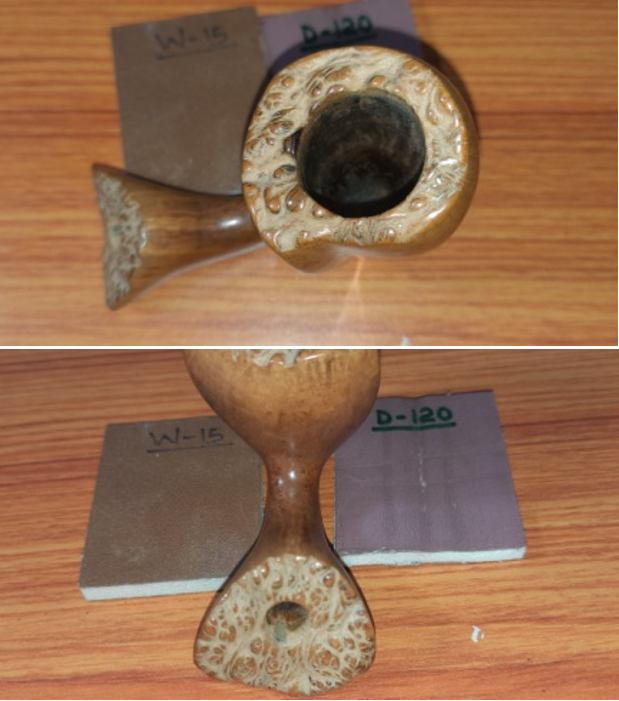
 The stummel boasts of beautiful flame grains all around and extends over the shank surface too!! The surface is lightly covered in grime and dust. However, the stummel surface is without any fills save for a few scratches/minor dings (indicated by yellow arrows/ encircled in same color) that could have been caused during routine use. The flared plateau of the shank end shows traces of accumulated dust and dirt which should be a breeze to clean. The foot of the stummel shows beautiful bird’s eye grains and is sans any damage. The mortise is clean with minor traces of old oils and gunk. Overall, the stummel presents a well cared for pipe. A closer look at the stummel surface shows beautiful and distinct flame grains all around, including the stummel, less the right side of the bowl where the grains are not prominent and this could only be the reason for this piece being classified as Grade 4!

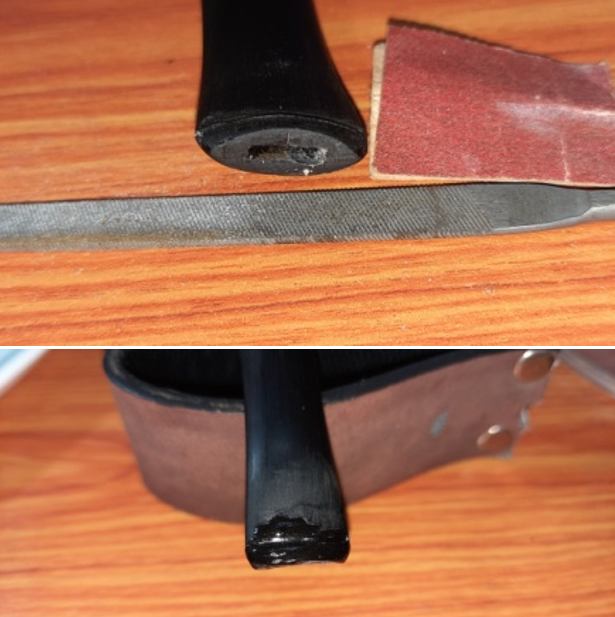
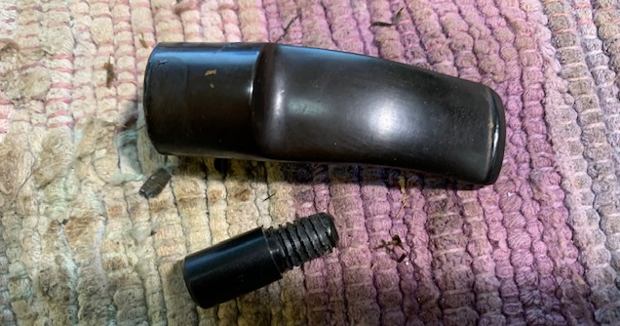
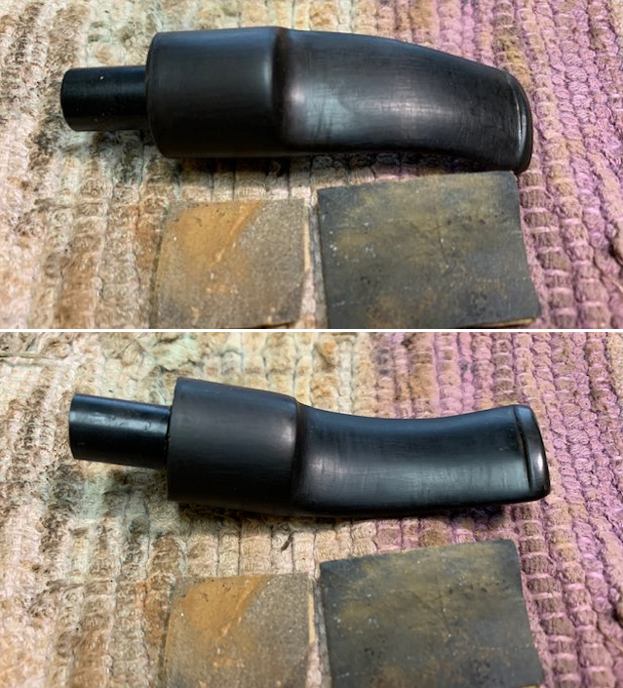
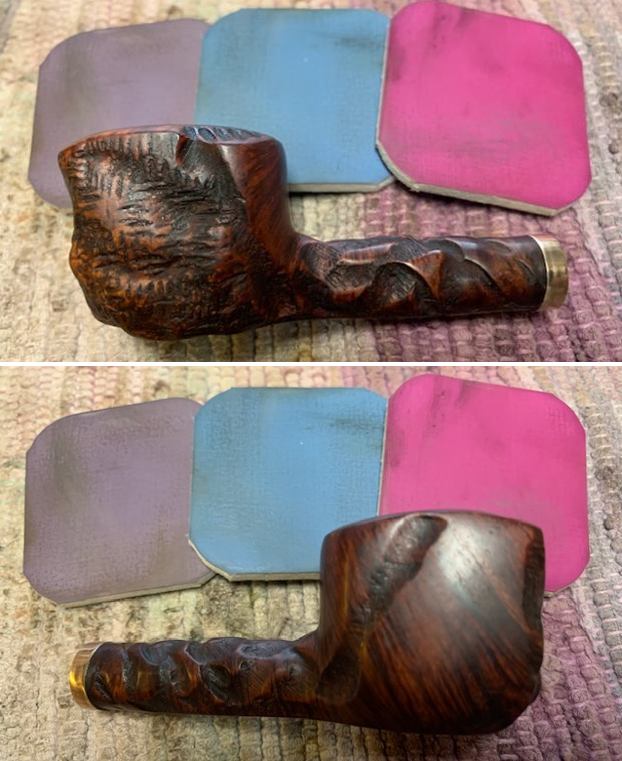
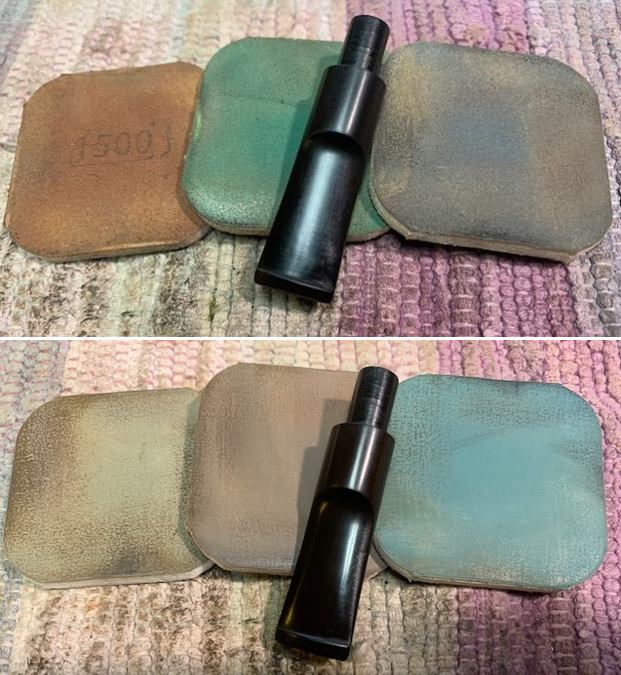
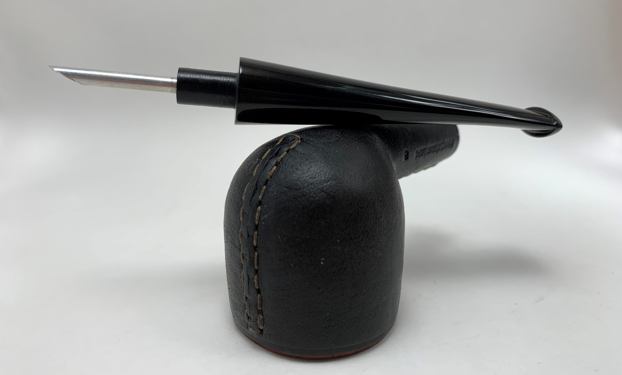
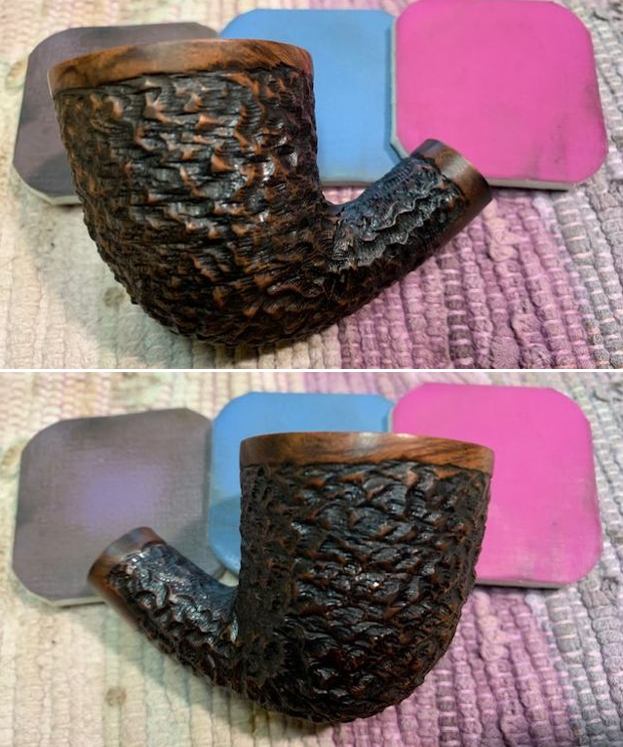
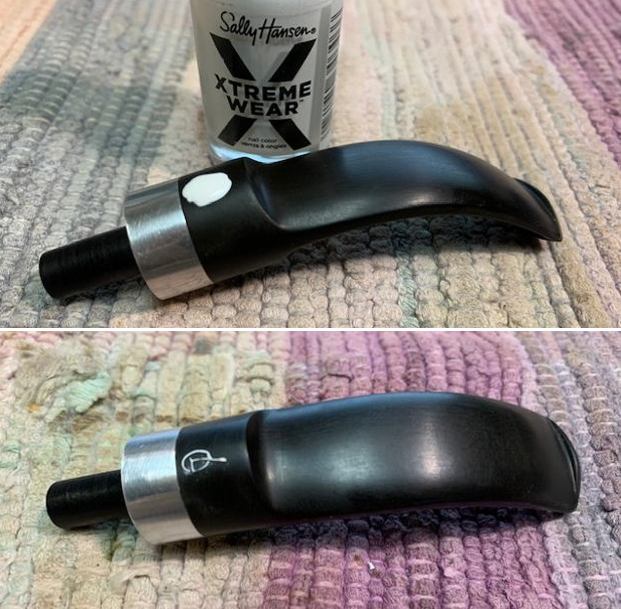
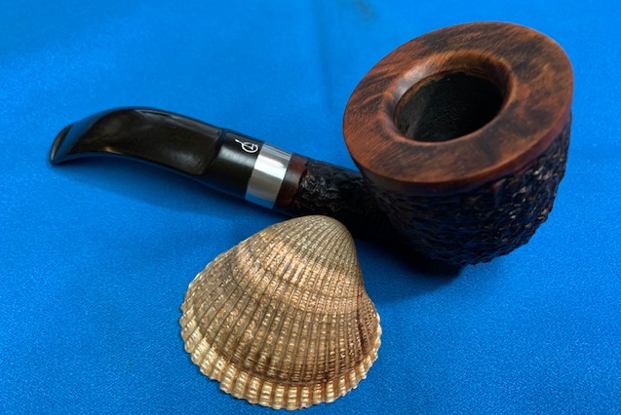
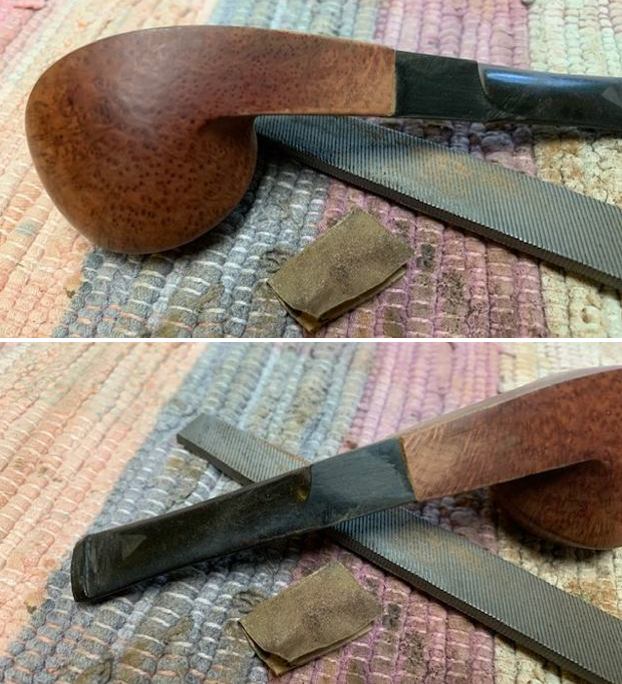
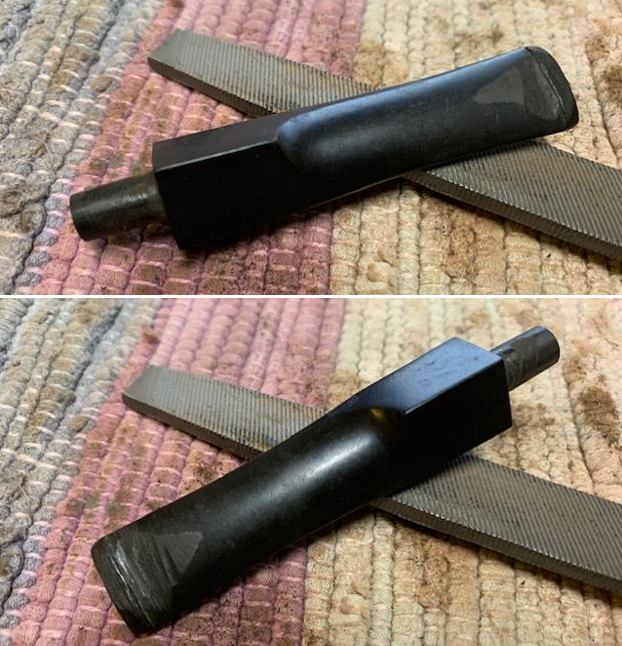
 The fancy slightly bent vulcanite stem is lightly oxidized and with no tooth chatter or bite marks or chewed off button edges. The tenon and slot end are both clean and this makes me believe that the stem airway would be clean too. The fancy stem, though looks beautiful when black and shiny, is a bear to clean with all the dips and narrow gaps between the beads and rings etc.
 The Process
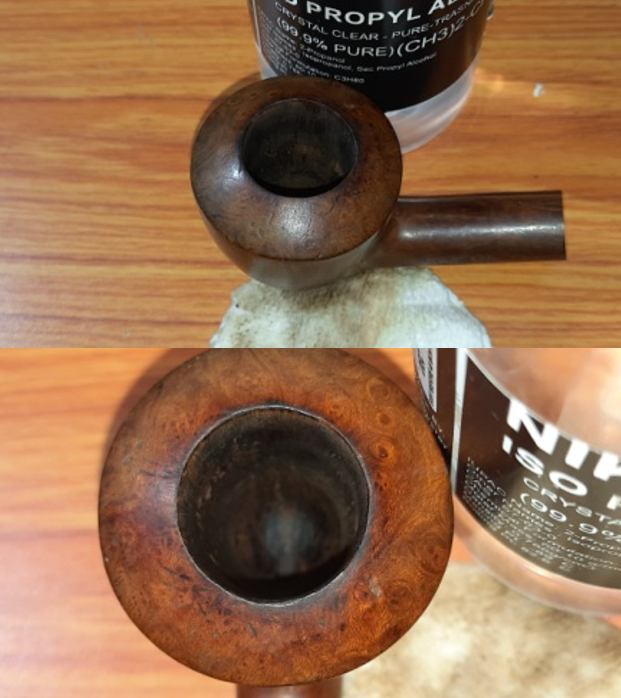
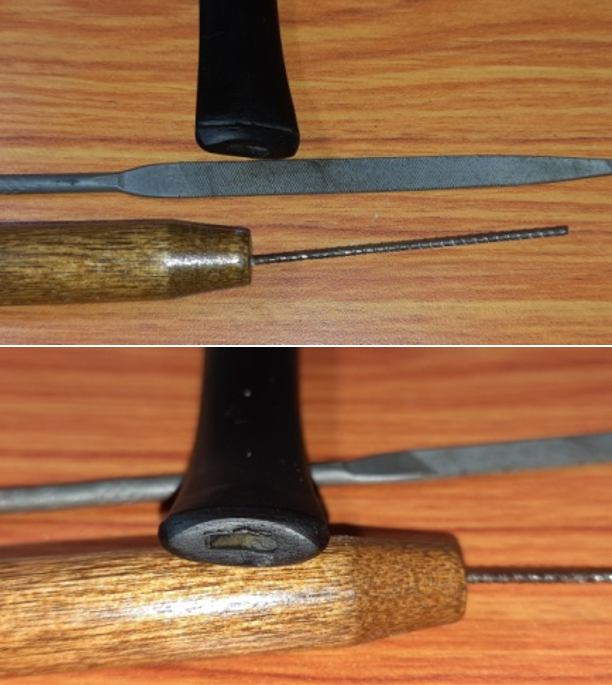
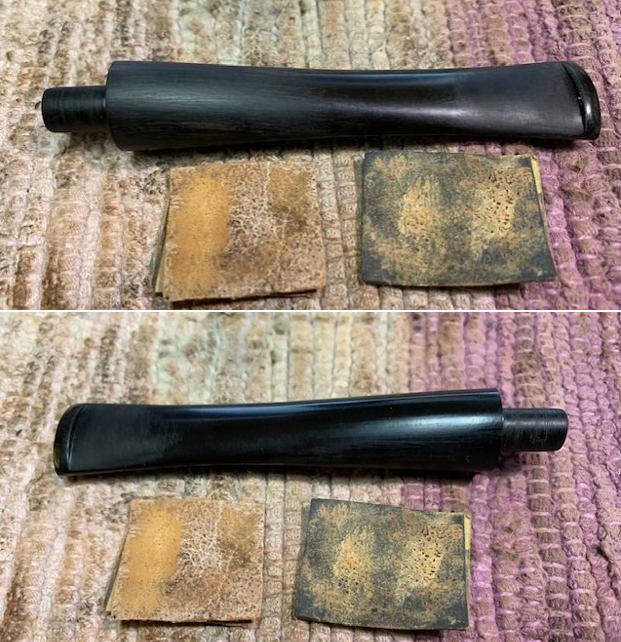
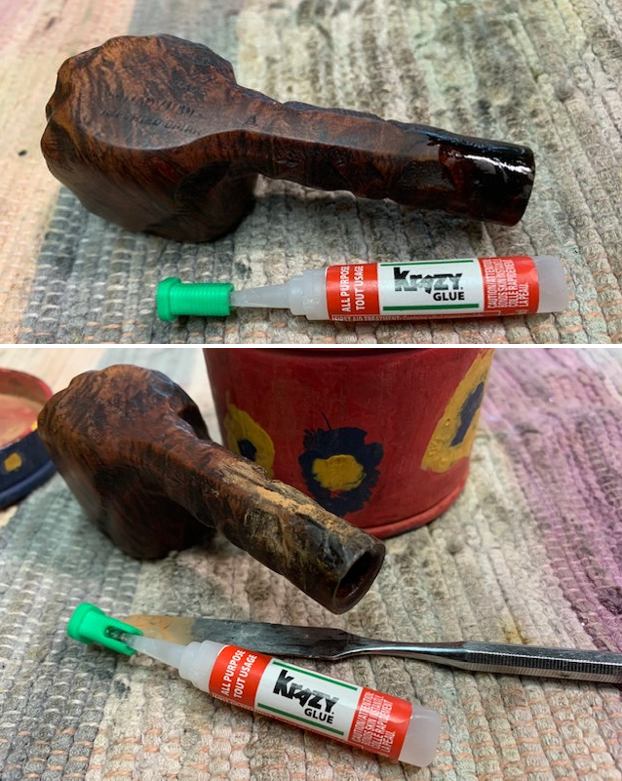
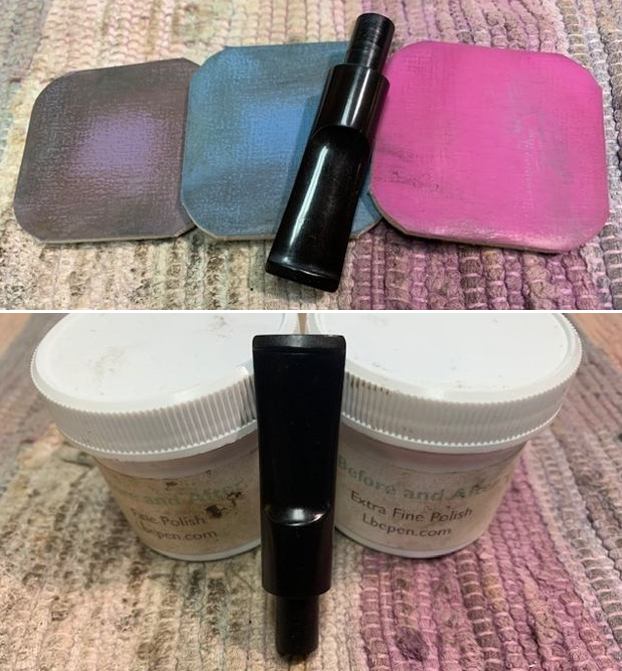
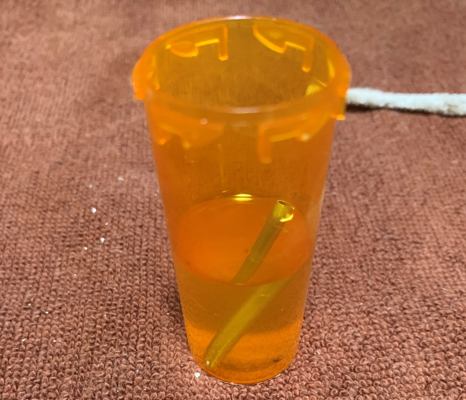
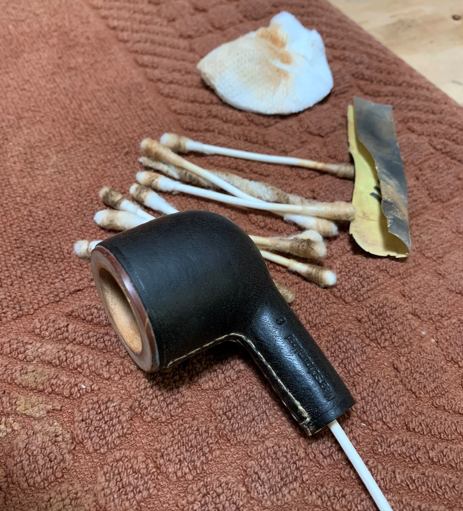
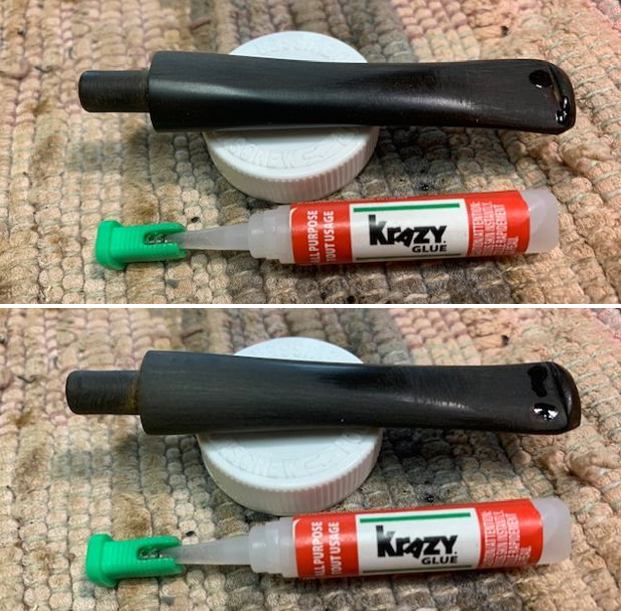
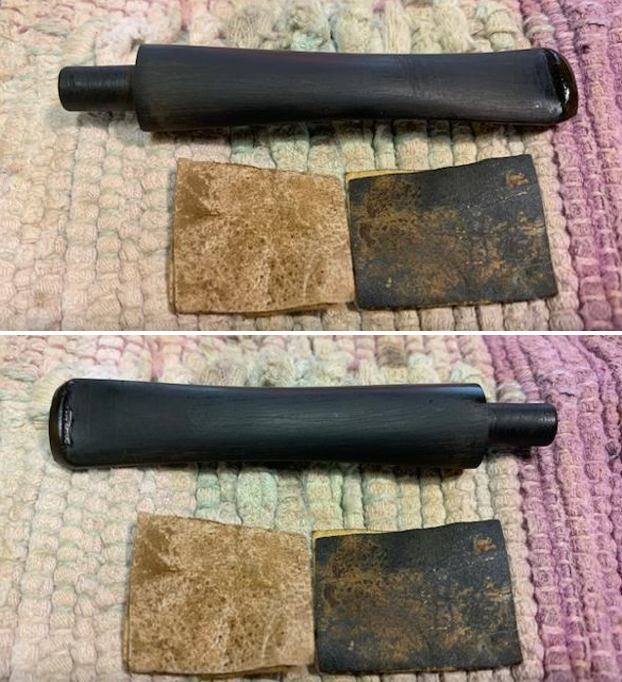
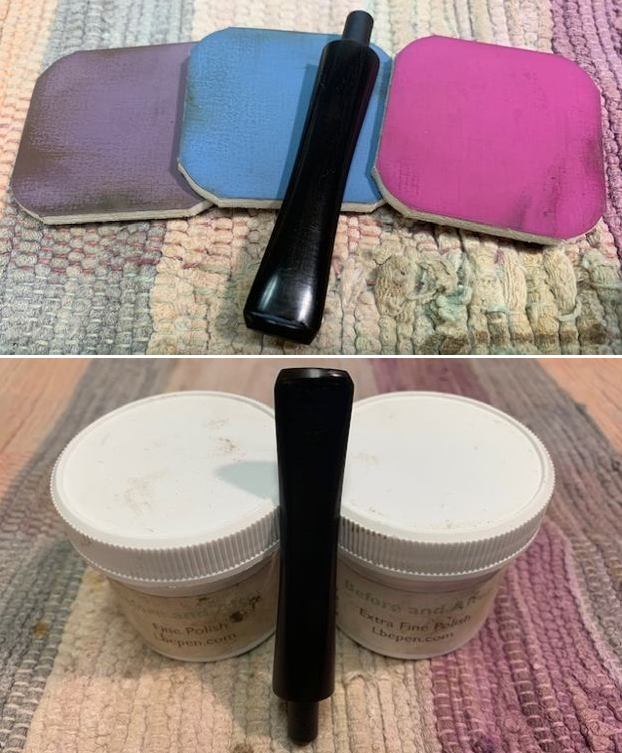
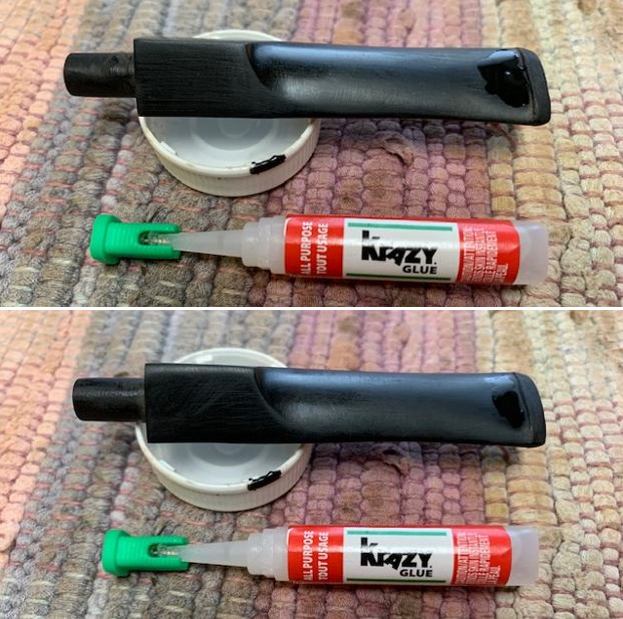
I began the process of refurbishing this pipe with cleaning the internals of the stem using pipe cleaners with isopropyl alcohol (99.9% pure) followed by further cleaning using anti oil soap and shank brush. Next I sand the entire stem surface with a folded piece of 220 grit sand paper to remove surface oxidation. It has been our experience that the solution works best when the surface is sanded. Thereafter I immersed the stem in “Before and After Deoxidizer” solution developed by my friend Mark Hoover. The solution helps to draw out oxidation to the surface making its further removal a breeze, while the minor oxidation is eliminated to a very great extent. I generally allow the stems to soak in this solution overnight for the solution to do its work.
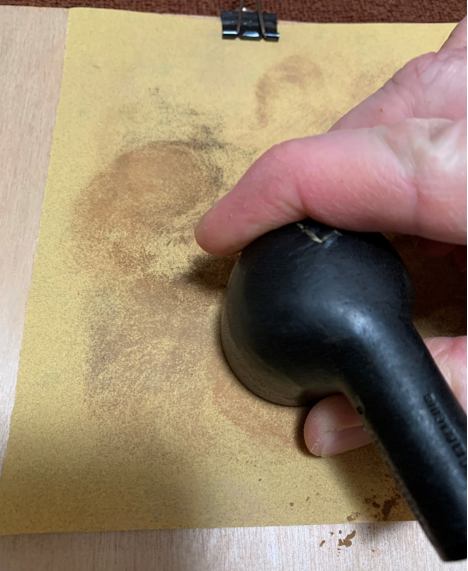
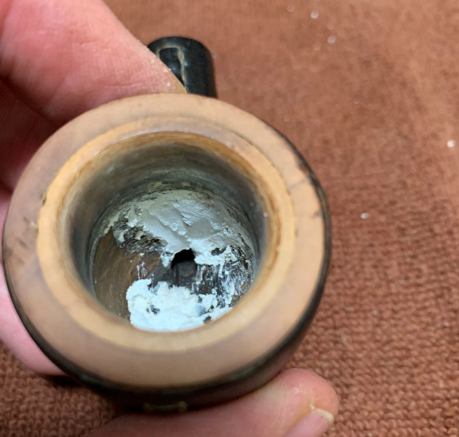
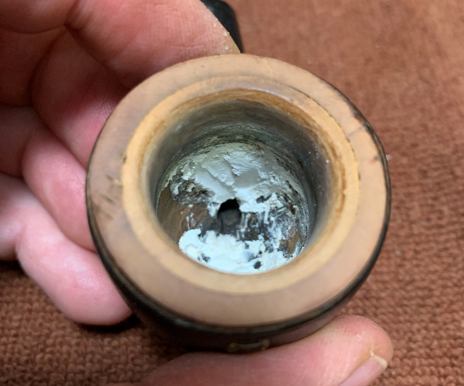
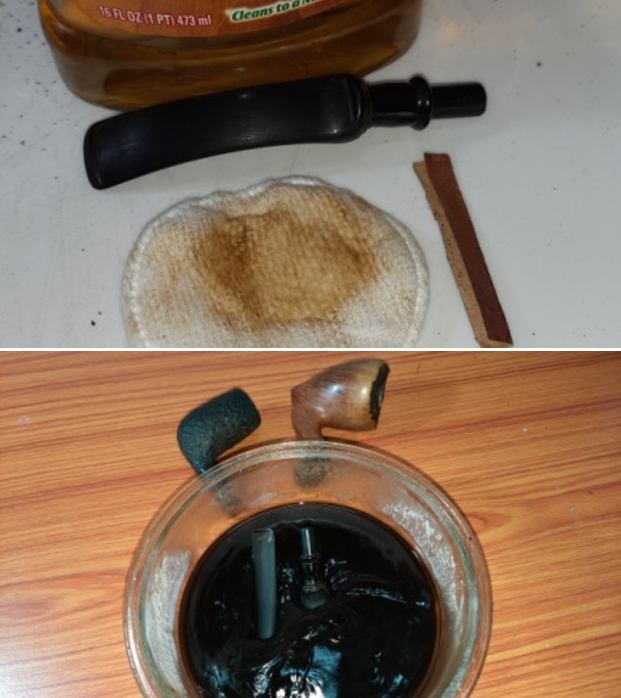 With the stem soaking in the deoxidizer solution, I worked the stummel, starting with reaming the chamber with a PipNet reamer tool and used the first, second and third head of the tool. With my fabricated knife; I further took the cake down to the bare briar. With a 150 grit sand paper, the walls of the chamber were rid of all the remnants of the cake, revealing smooth and solid chamber walls. I further wiped the chamber with a cotton swab wetted with isopropyl alcohol to completely remove the sanding dust.
 This was followed by cleaning the shank internals with pipe cleaners and isopropyl alcohol. I further scrapped out the entire moistened gunk with a dental tool. The shank internals cleaned up nicely with a smooth and full draw. The mortise will be cleaned further with anti oil soap and shank brush while cleaning the exterior of the stummel.
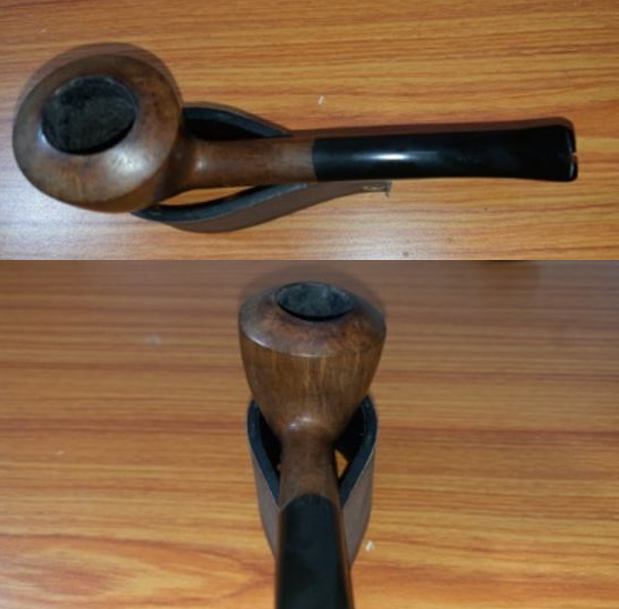
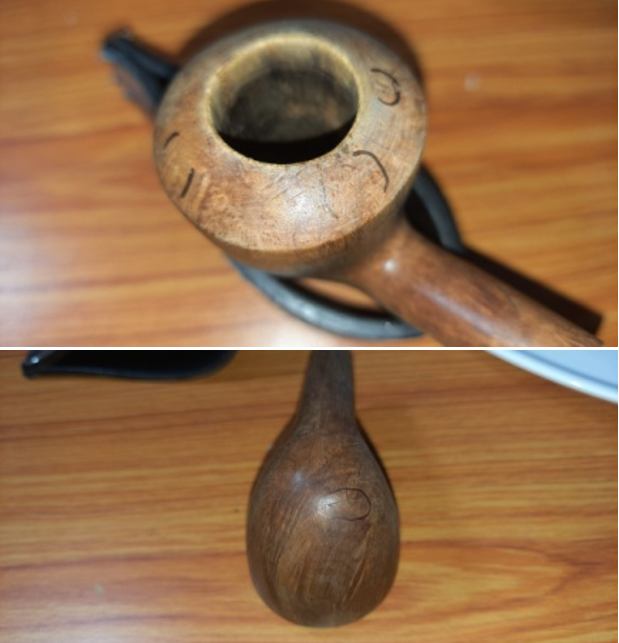
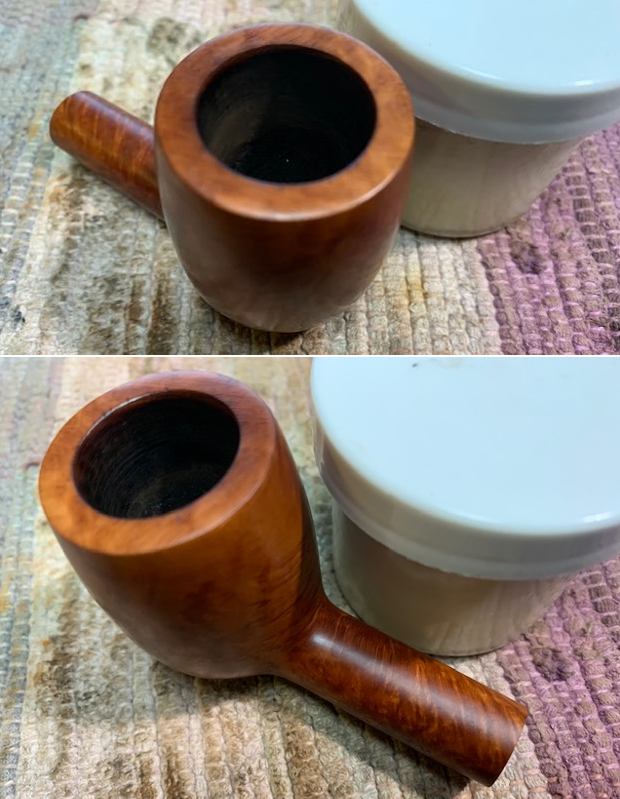
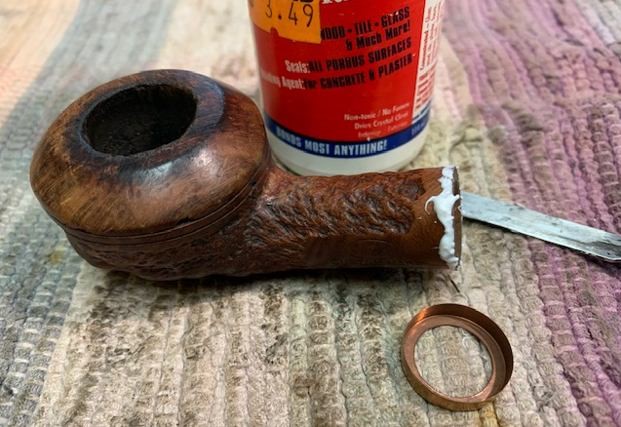
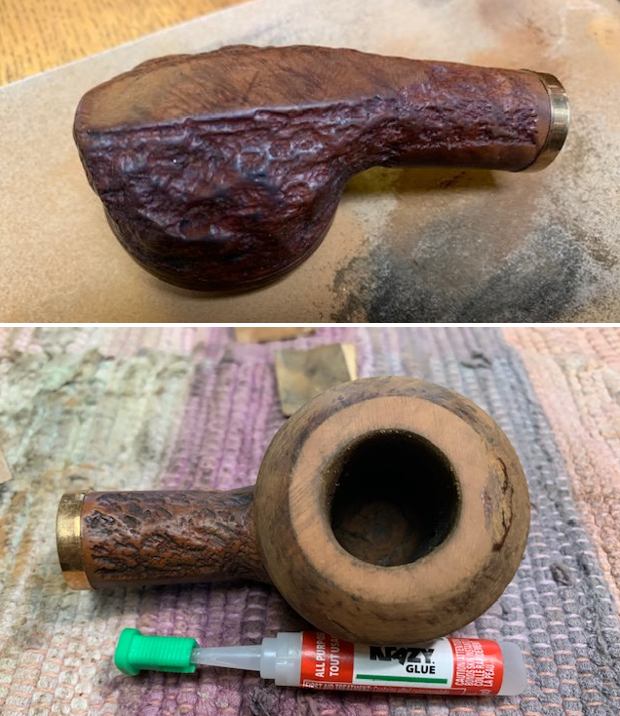
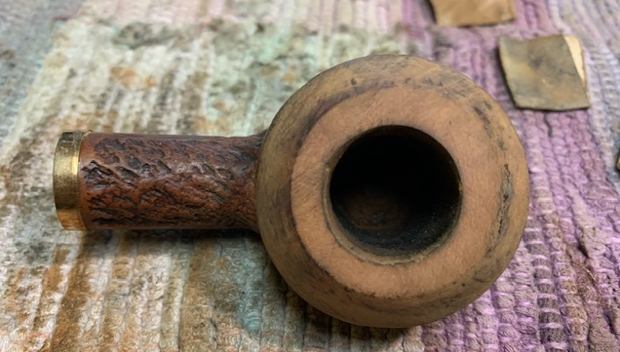
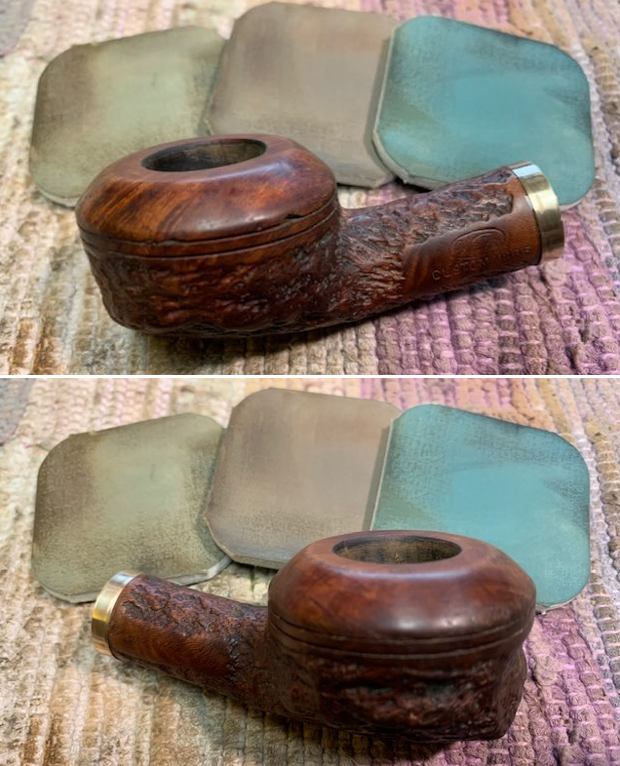
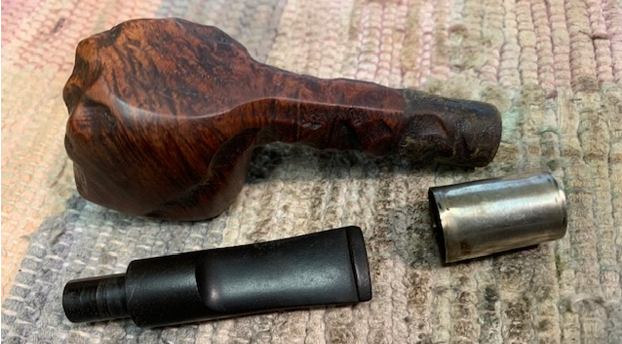
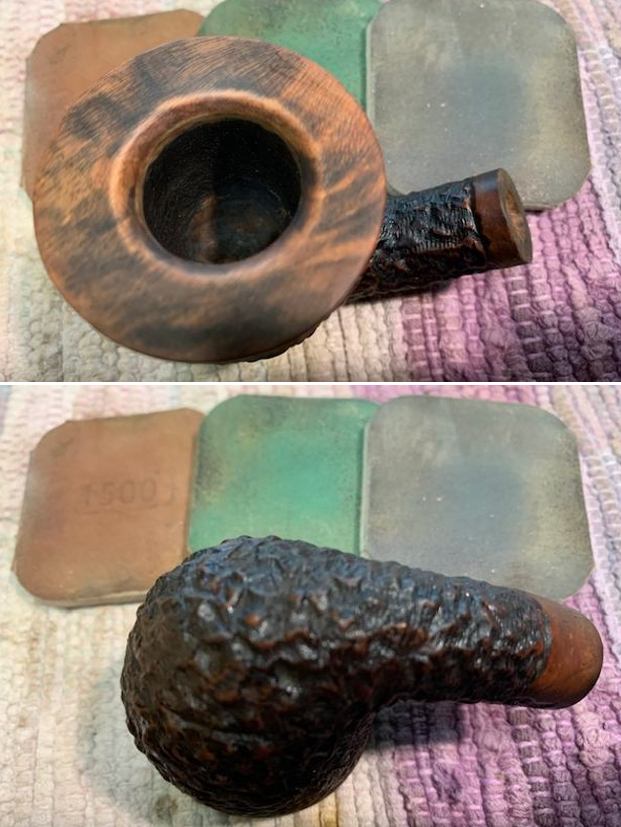
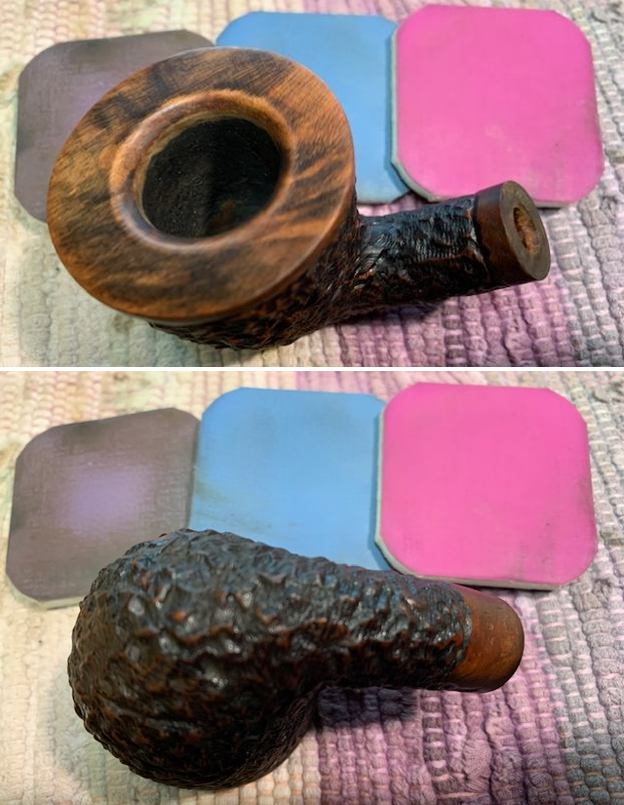
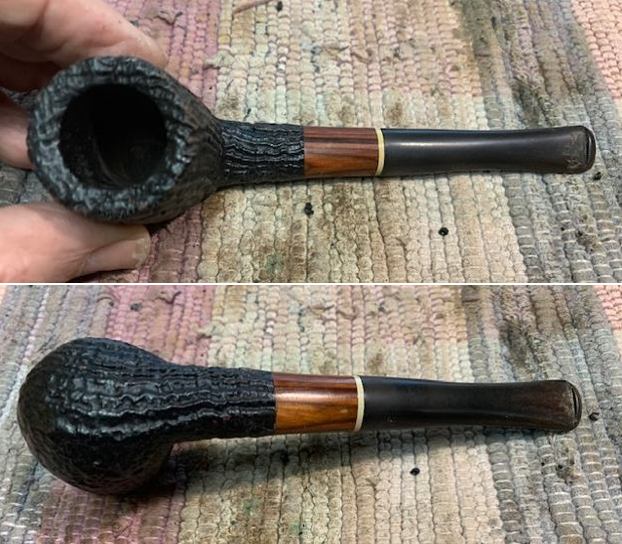
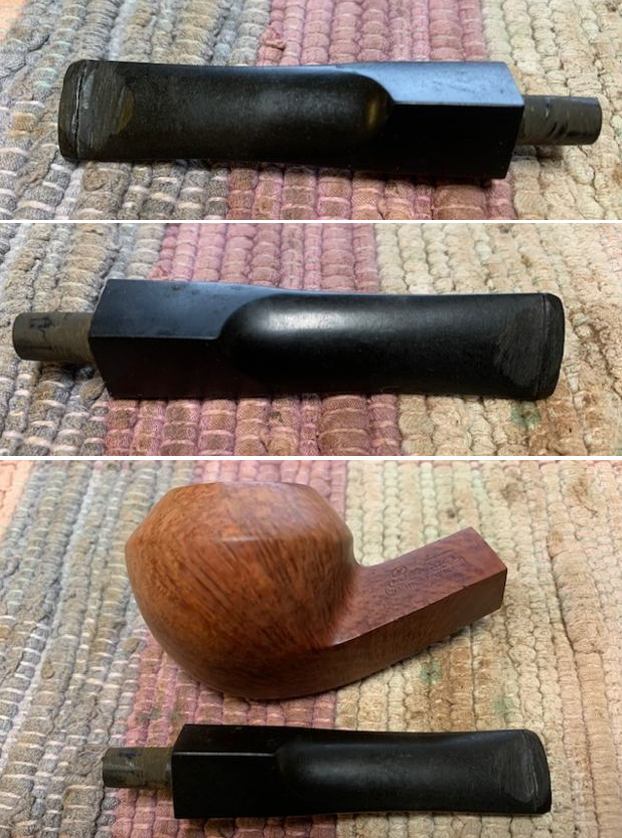
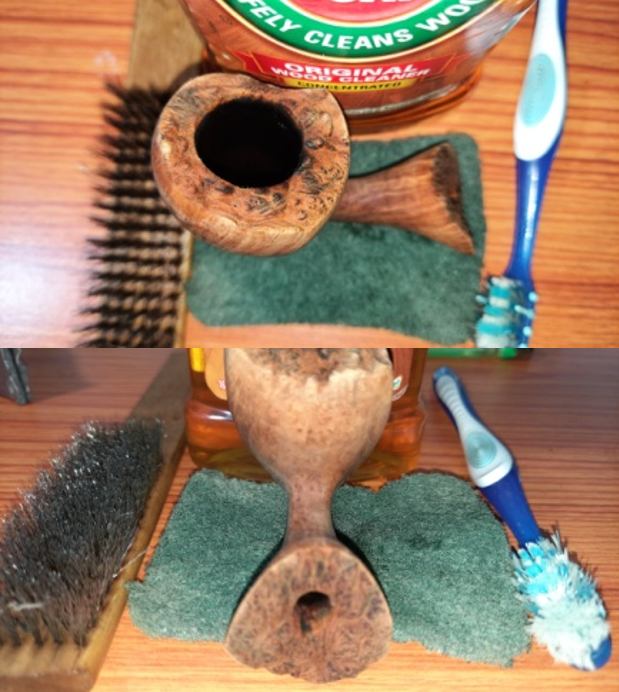
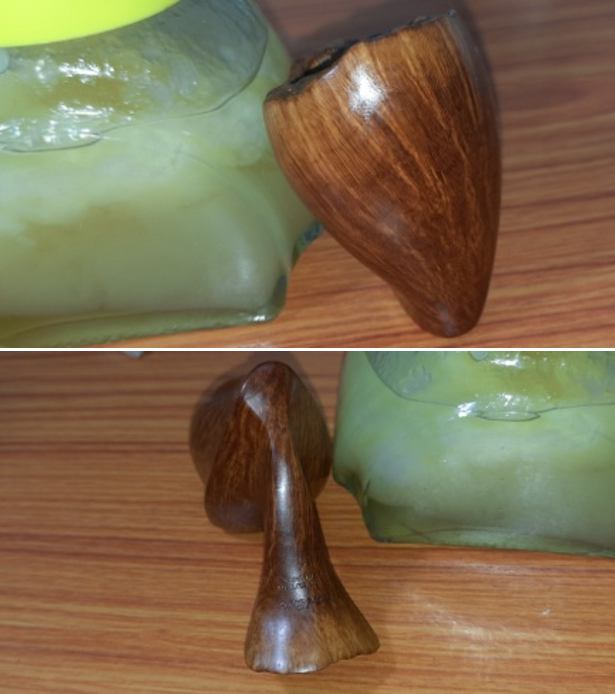
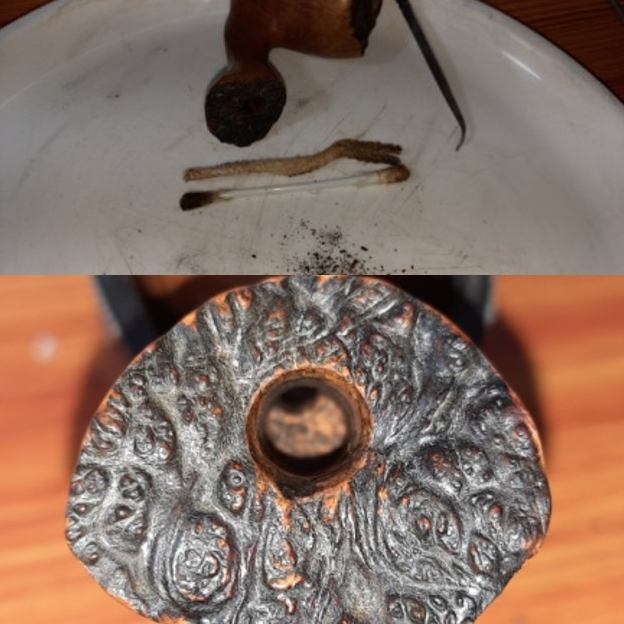 I scrubbed the external surface of the bowl with undiluted Murphy’s oil soap and hard bristled tooth brush and dried it using paper towels and soft cotton cloth. I deliberately cleaned the plateau rim top surface. The entire stummel cleaned up nicely. I set the stummel aside to dry out naturally. The plateau rim top and flared shank end were rid of the black stain. This is how the rim top and the shank end appear sans the black stain. Further discussions with Abha only resulted in postponement of the decision to stain or otherwise till completion of the sanding cycle with sandpaper, micromesh polish cycle and application of the restoration balm.
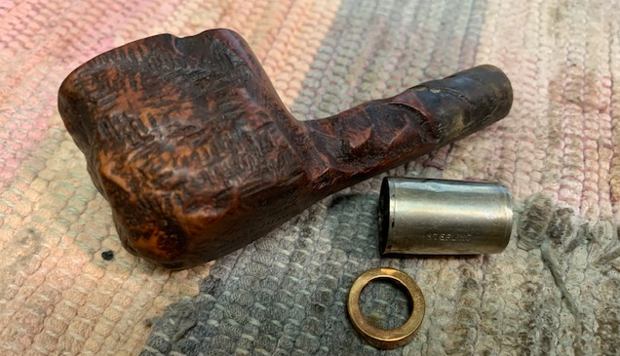
 I simultaneously cleaned the mortise with anti oil soap and shank brush.
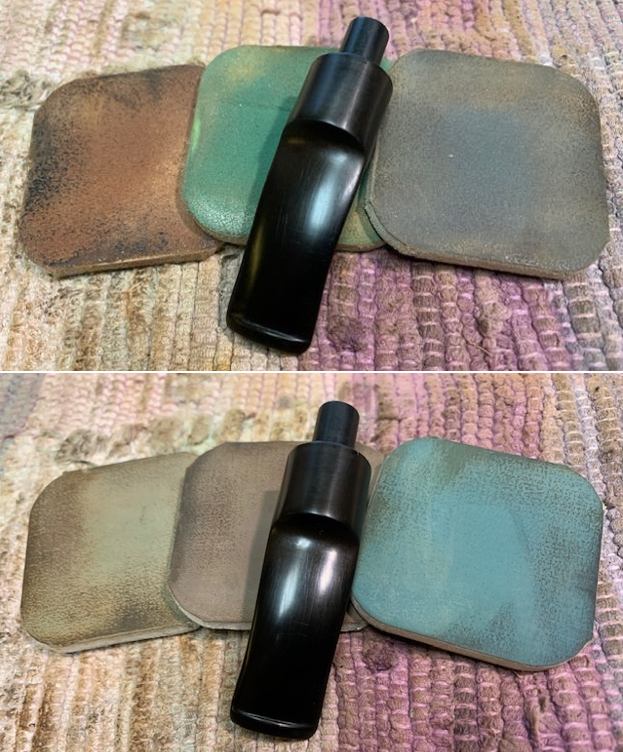
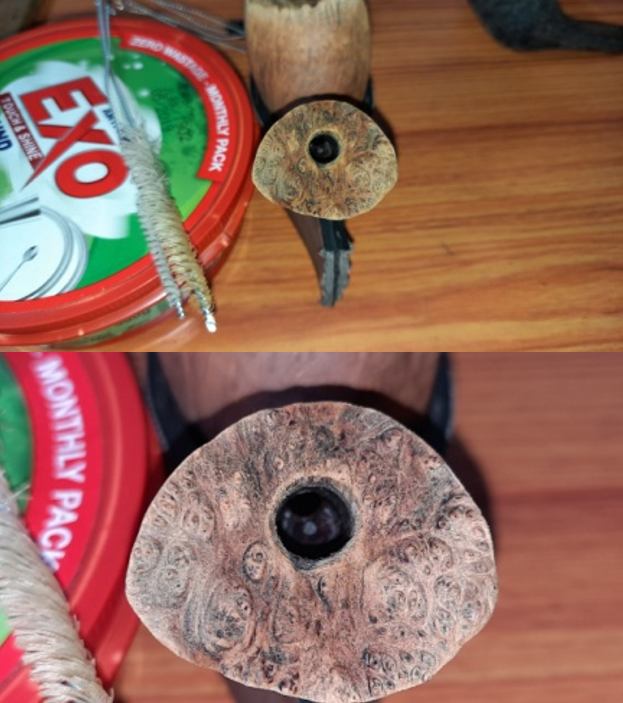 While I was cleaning the stummel, Abha fished the stem out from the deoxidizer solution and scrubbed out the raised oxidation with a Scotch Brite pad followed by a scrub with 0000 grade steel wool to further remove the oxidation and smooth out the stem surface. She cleaned the stem under running warm water to remove the solution from the crevices and internals of the fancy stem. Next she went through the regime of sanding with sandpapers to completely eliminate (or that’s what the aim always is) the oxidation from the stem surface. She applied a little EVO at the end and set the stem aside for the oil to be absorbed.
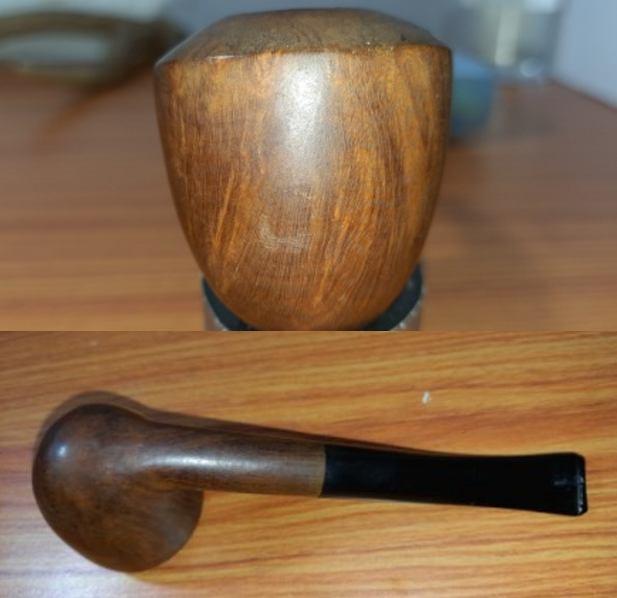
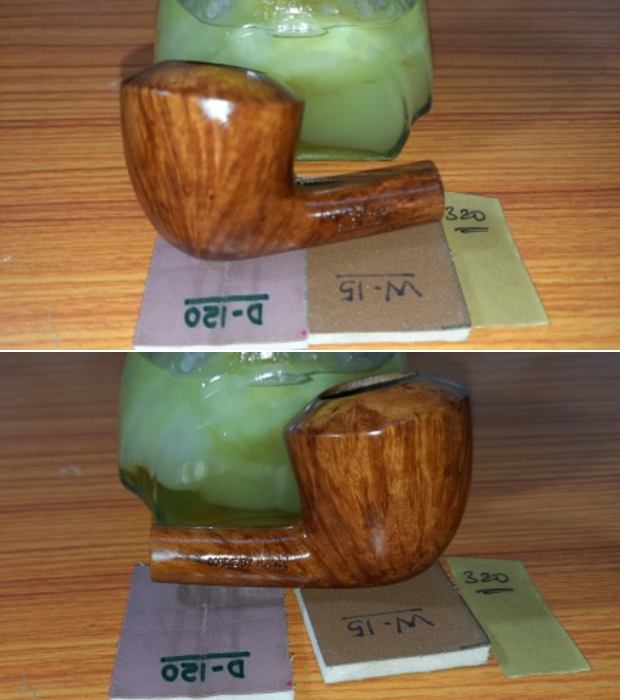
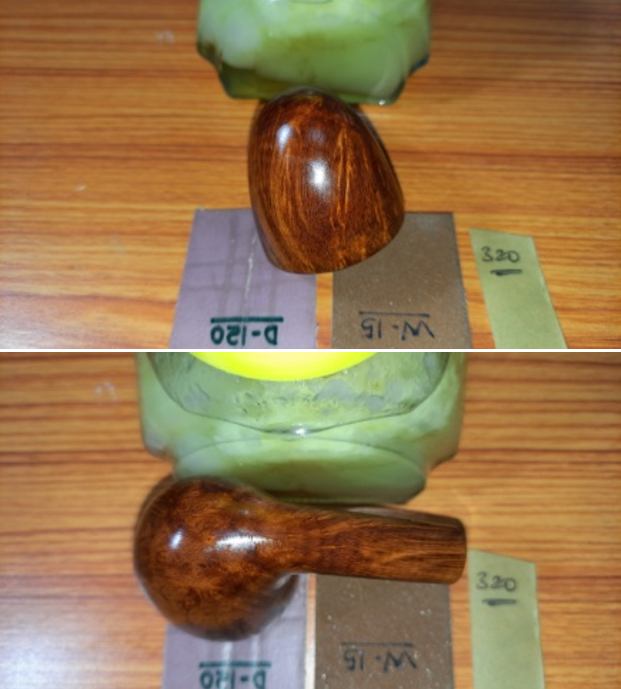
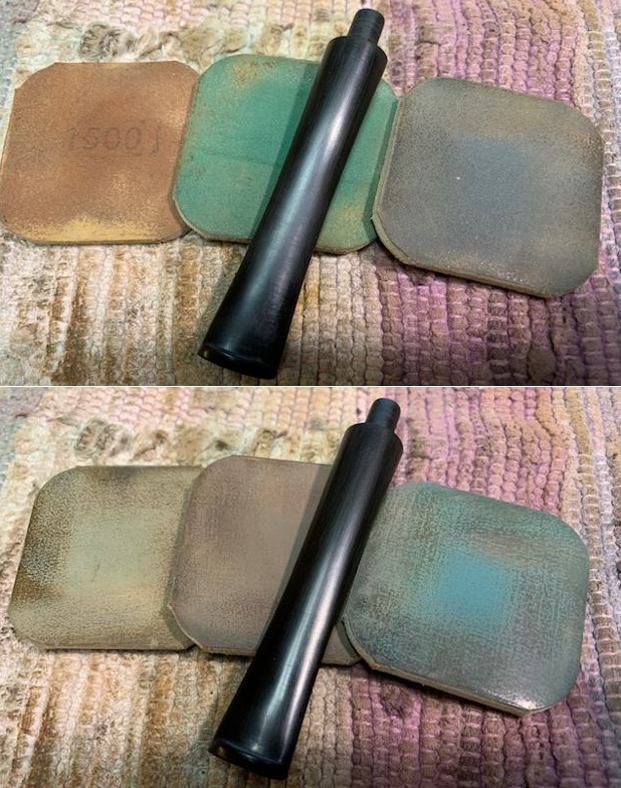
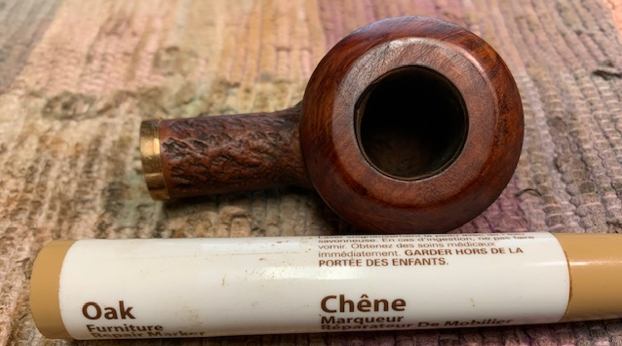
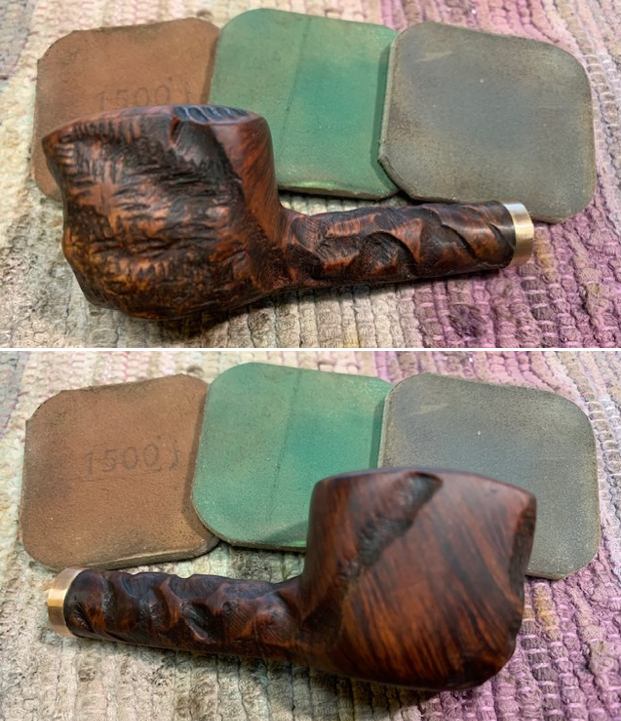
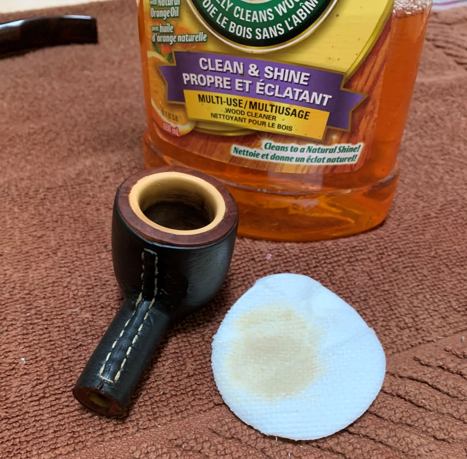
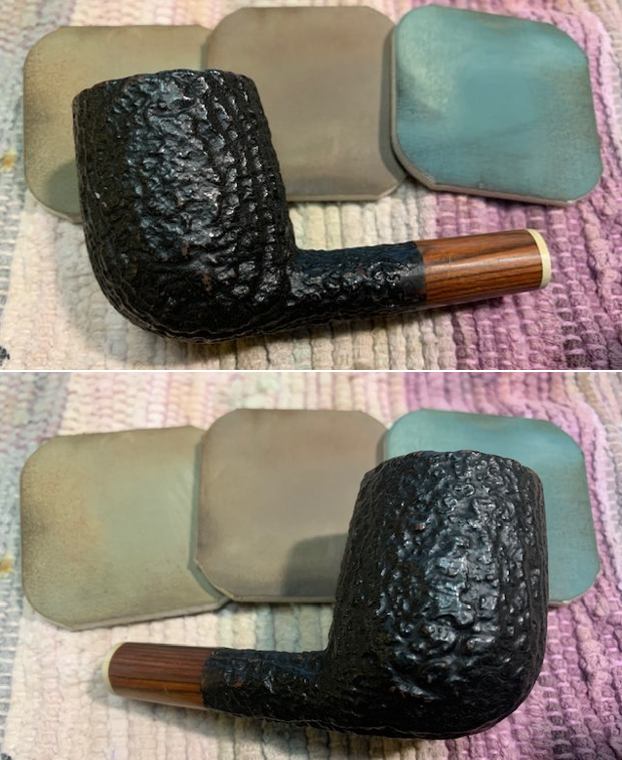
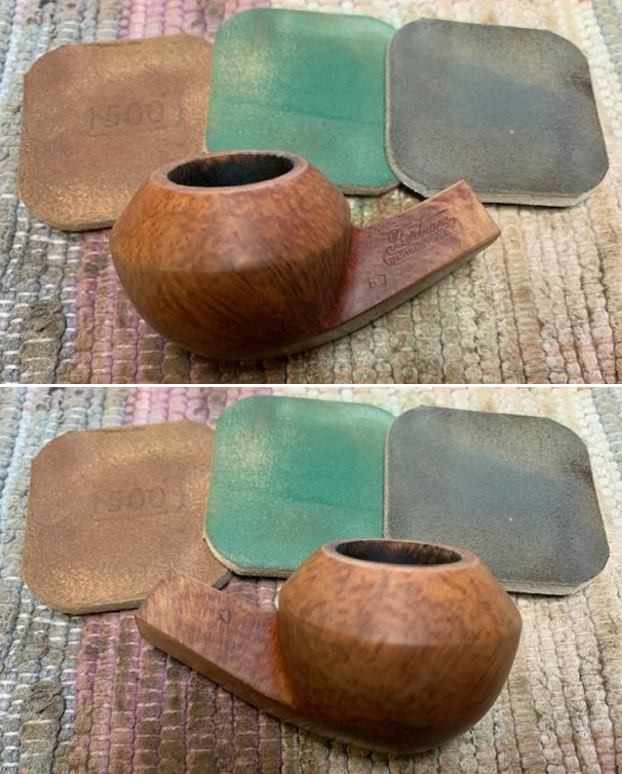
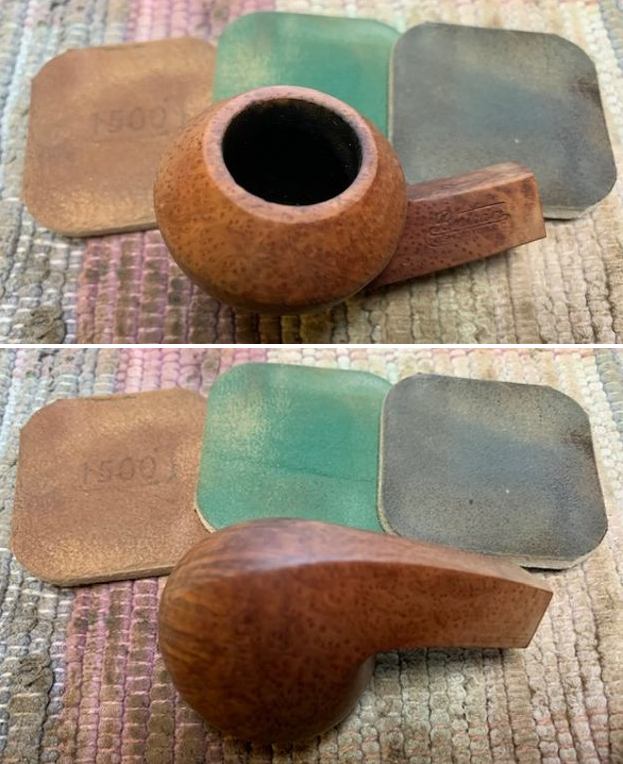
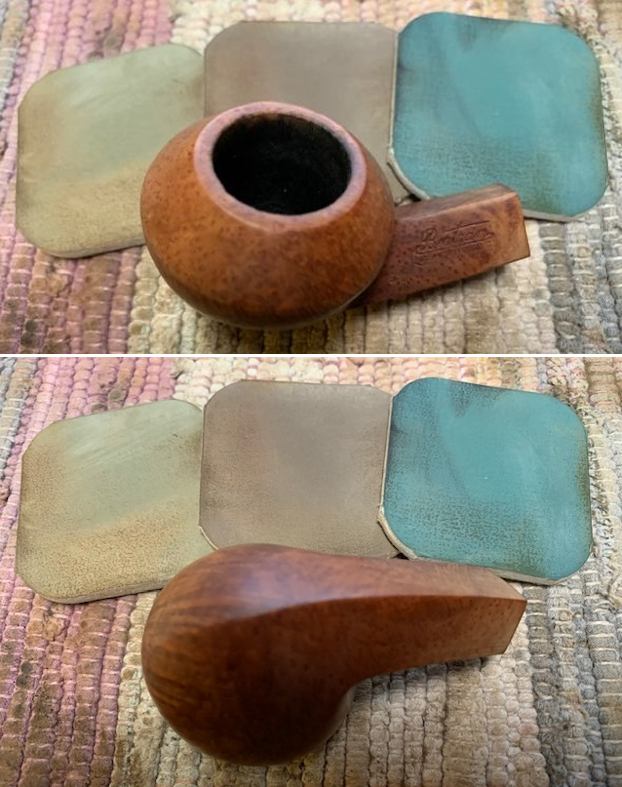
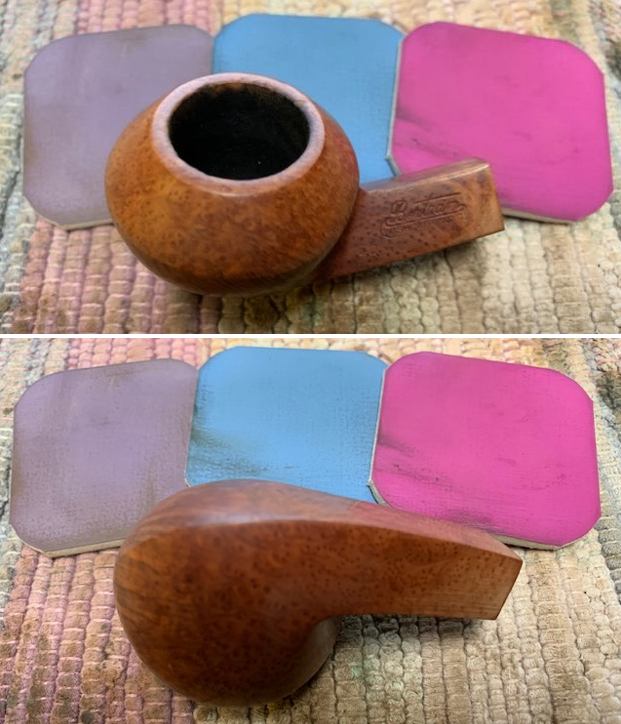
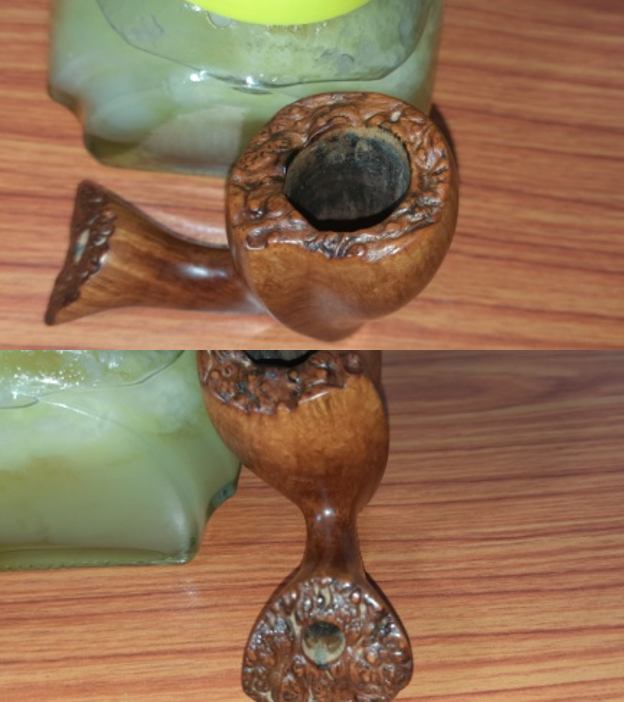
 Simultaneously, I continued working with the stummel restoration. I polished the stummel with micromesh pads, wet sanding with 1500 to 12000 pads. I polished the raised surfaces on the plateau rim top and the shank end by dry sanding with 1500 to 12000 grit micromesh pads. This dry sanding of the plateau surface does not leave behind the moist sanding dust in the nooks and crannies of the surface, which is a bear to clean later. I wiped the surface with a soft cloth at the end of the micromesh cycle. The stummel looks amazing with a deep shine and beautiful grains popping over the stummel surface.
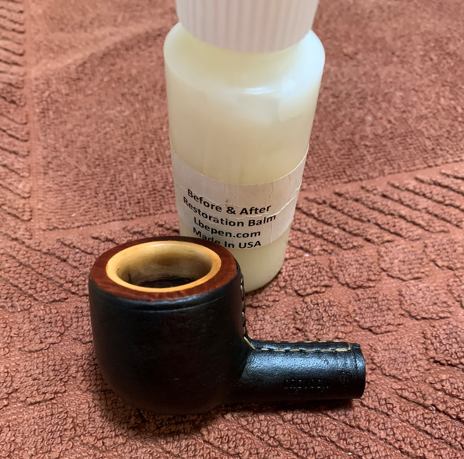
 I rubbed a small quantity of “Before and After Restoration Balm” in to briar. I rubbed this balm deep in to the nooks and crannies of the plateau rim top surface with my fingers and let it rest for a few minutes. The balm almost immediately works its magic and the briar now has a nice vibrant appearance with the dark brown hues of the grain contrasting with the rest of the stummel surface. I further buff it with a horse hair shoe brush.
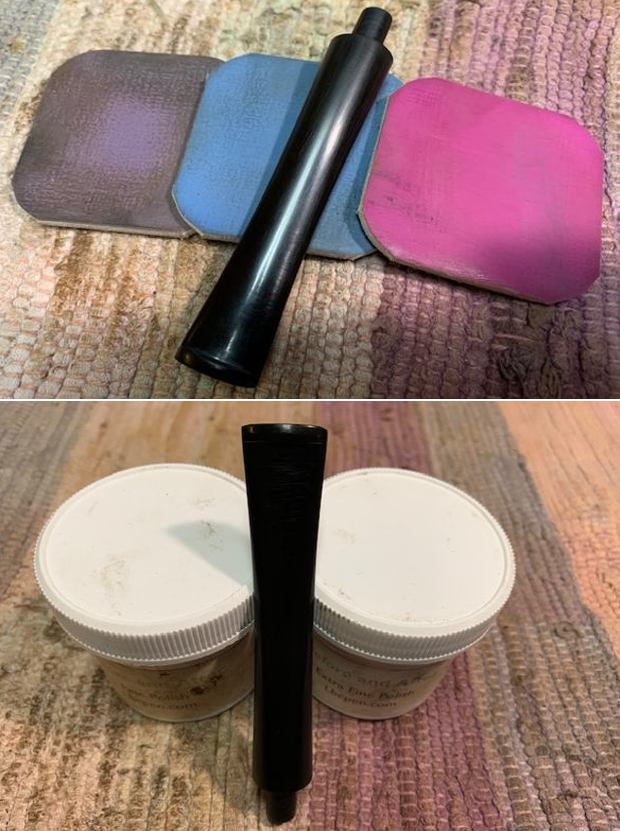
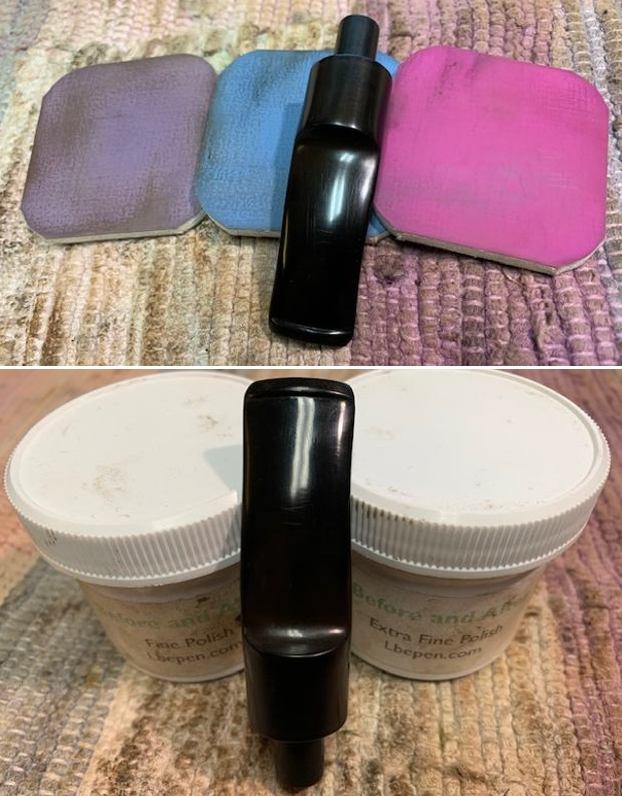
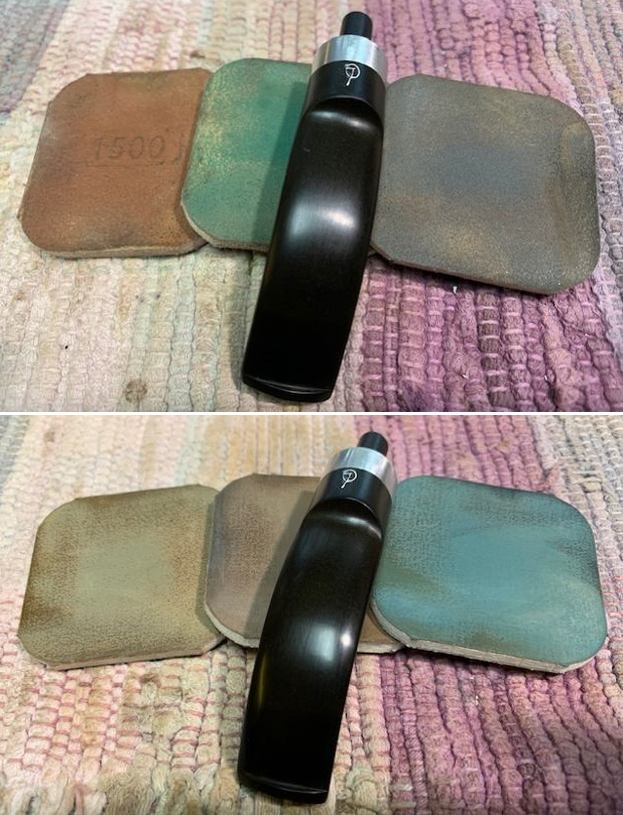
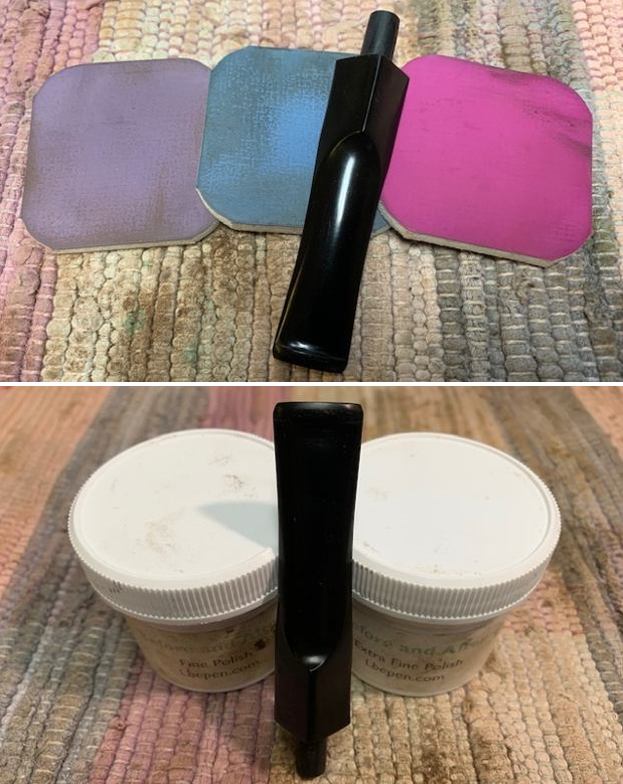
 Once I was done polishing the stummel with micromesh pads, Abha polished the stem, wet sanding with 1500 to 12000 grit micromesh pads. She rubbed a little extra virgin olive oil in to the stem at the end of the micromesh pads polishing cycle. She completed the polishing regime of the stem by rubbing a small quantity of “Before & After Fine” stem polish and giving it a final polish with a soft cotton cloth. The stem is now nice, smooth and shiny.
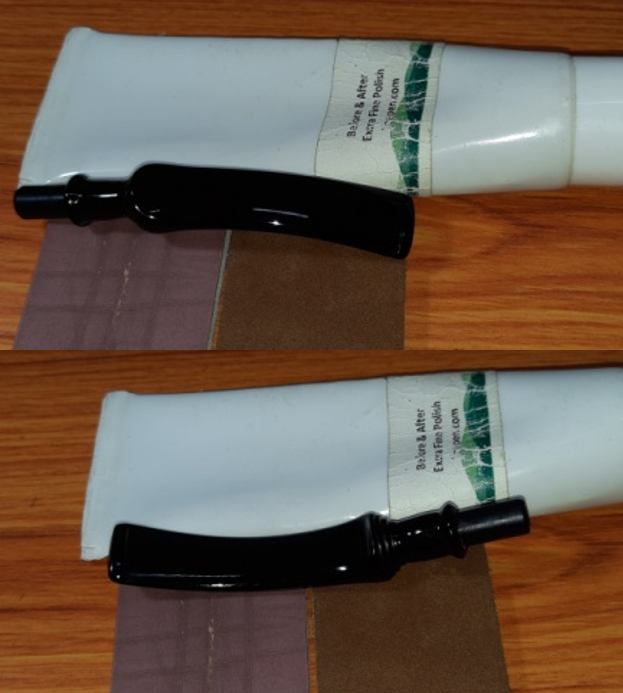 This is that part in pipe refurbishing that I love and enjoy the most. I began the final polishing cycle by mounting a cotton cloth buffing wheel on to my hand held rotary tool and applying a coat of Blue Diamond to the entire pipe to polish out the minor scratches.
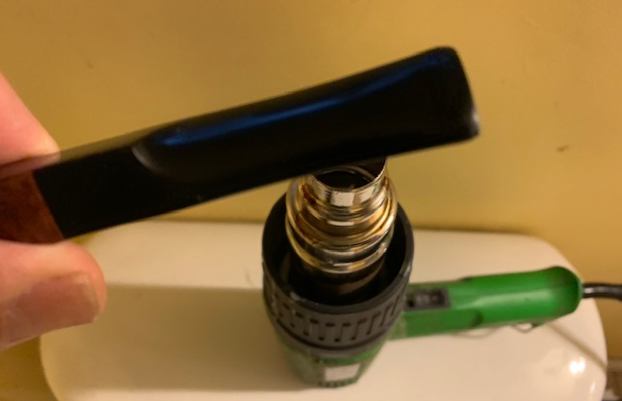
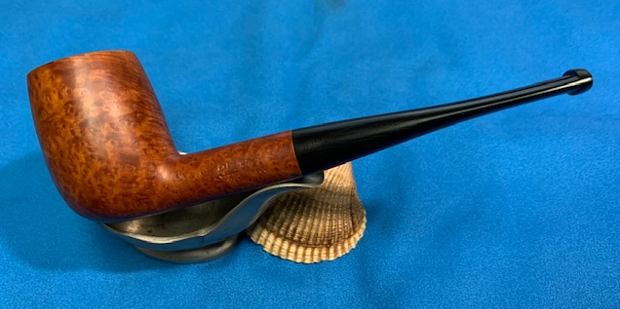
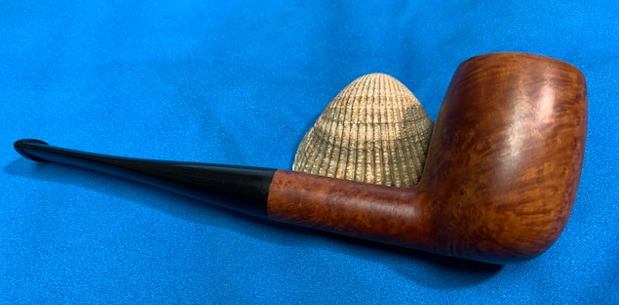
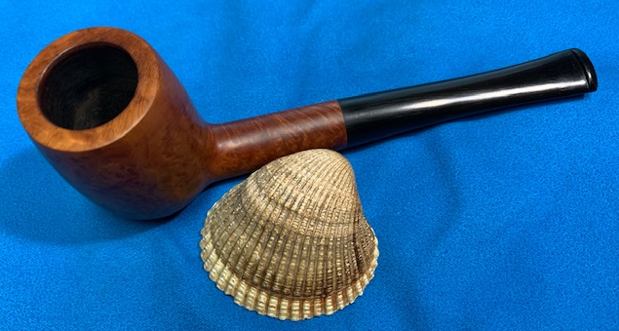
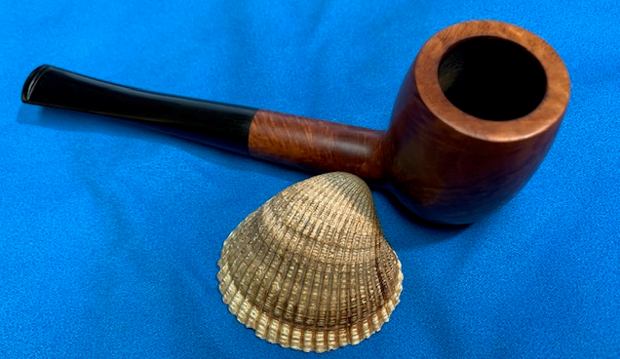
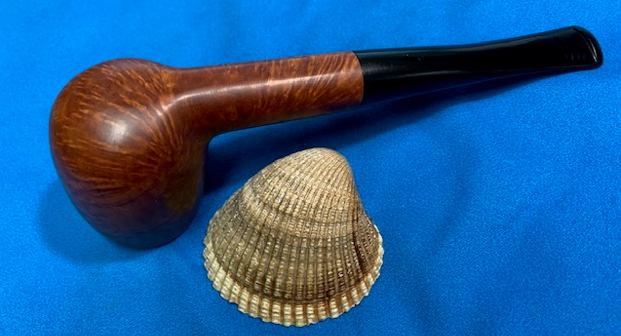
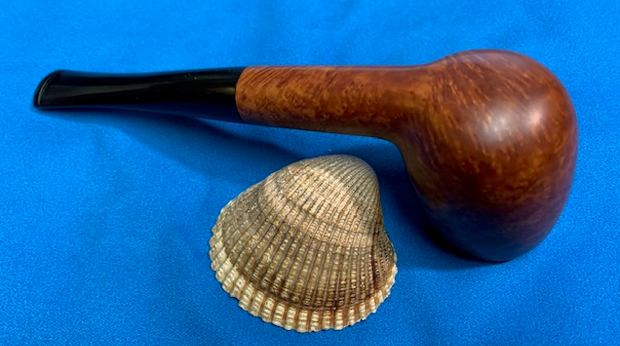
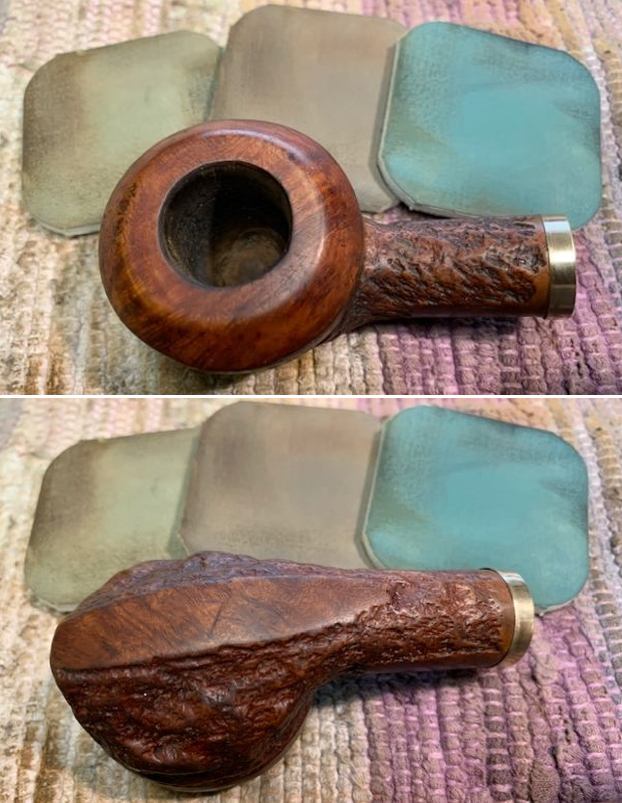
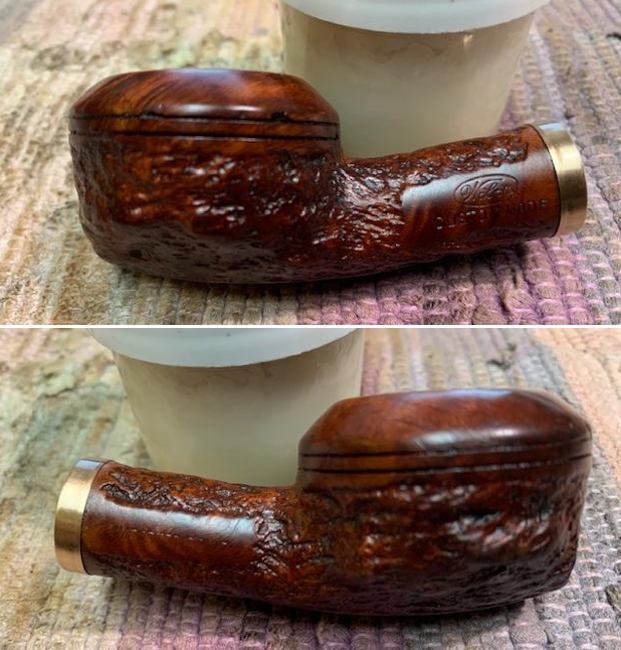
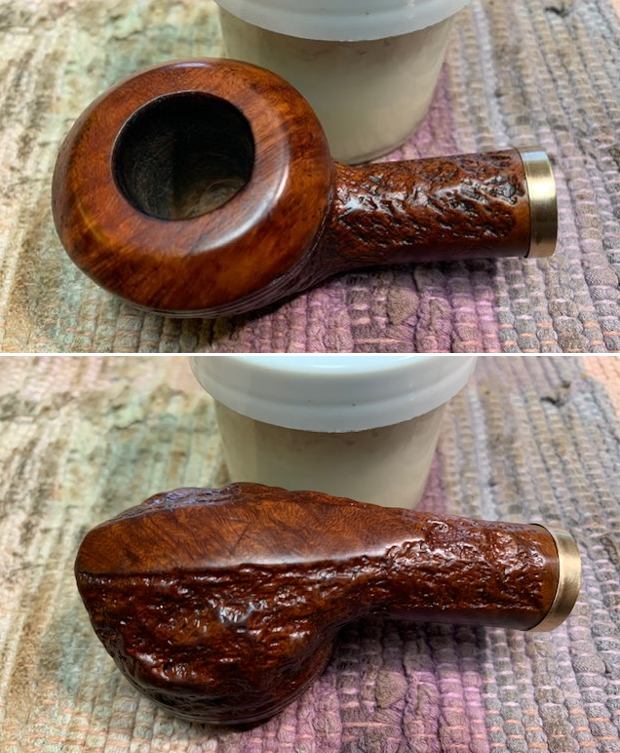
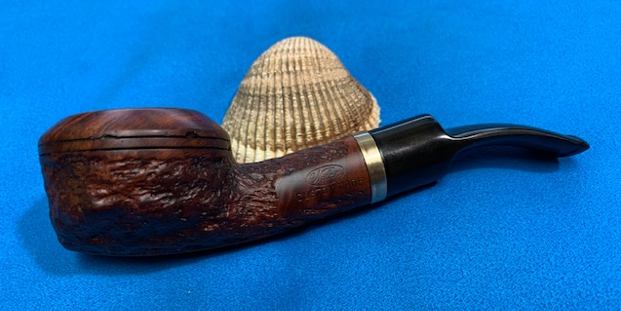
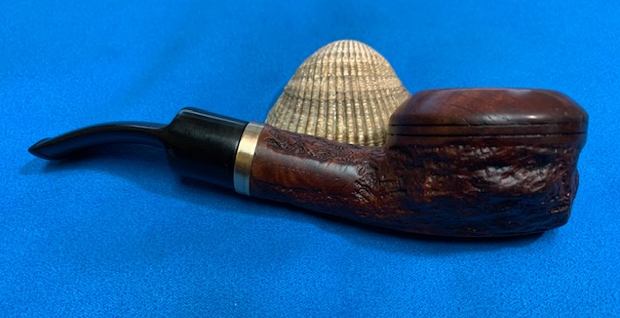
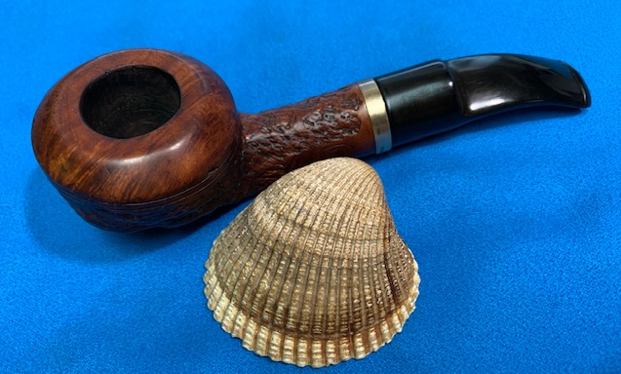
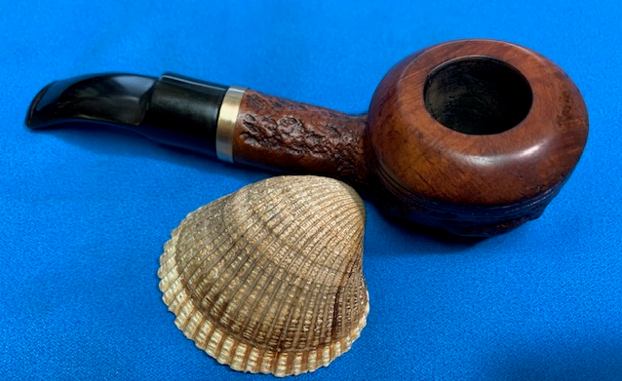
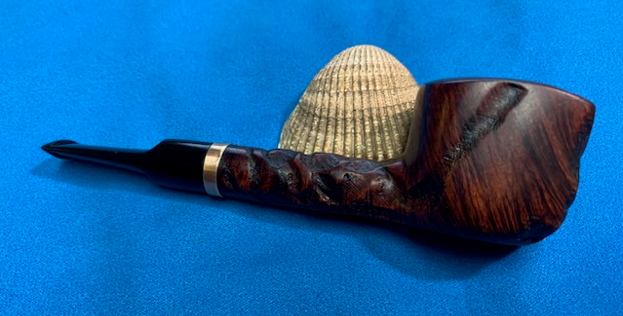
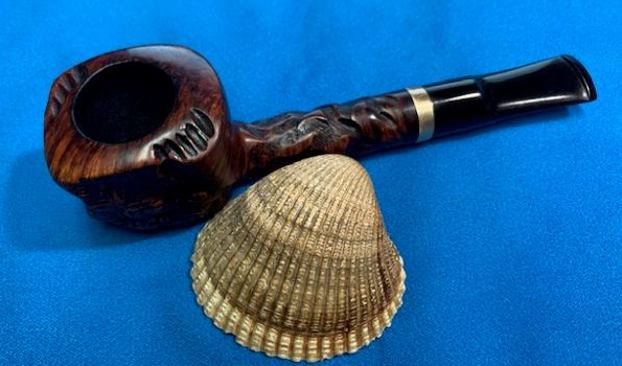
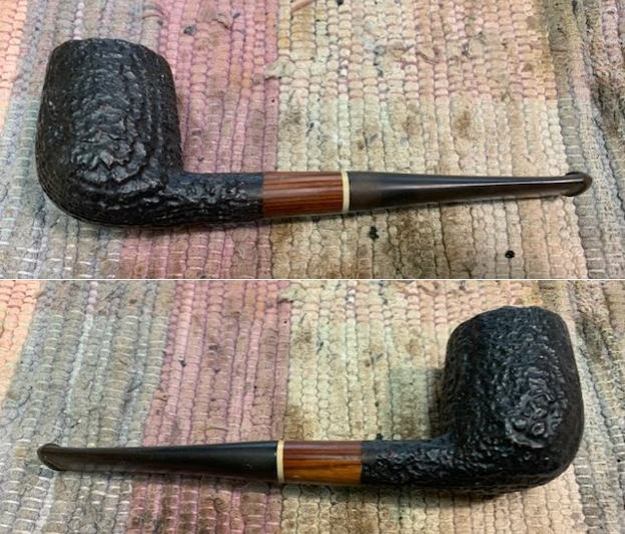
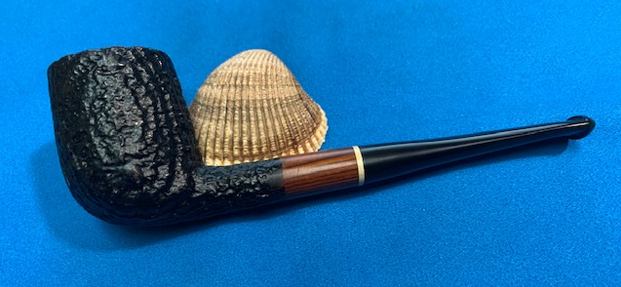
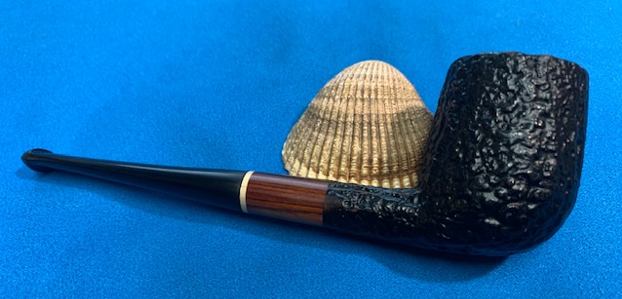
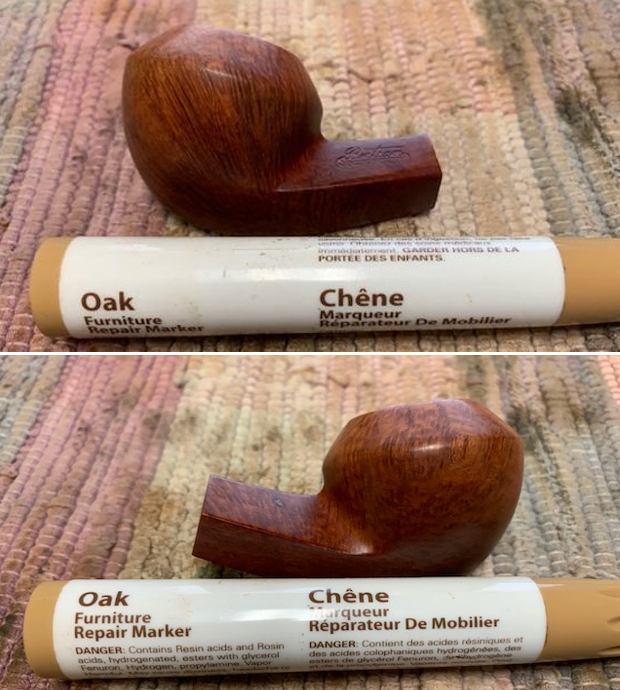
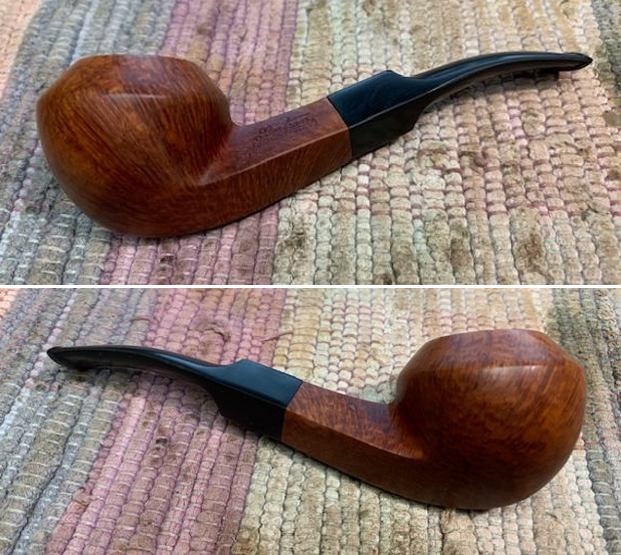
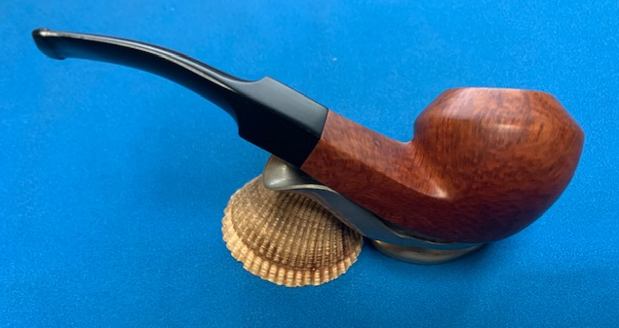
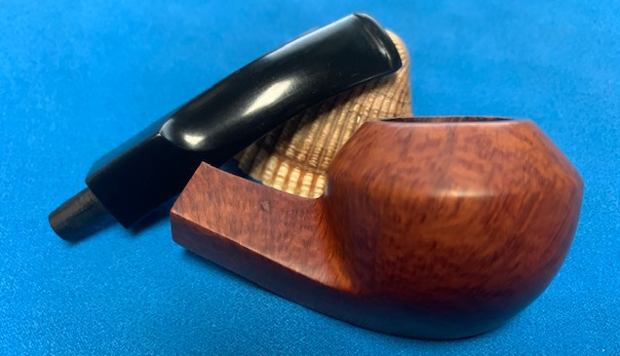
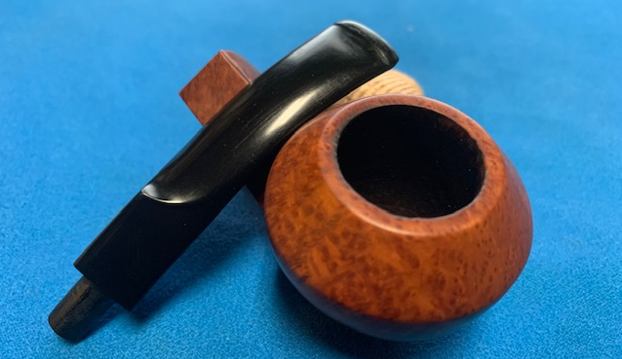
 With a cotton buffing wheel that I use for carnauba wax, I apply a coat of carnauba wax to the stummel and stem and continued to work on it till the complete coat of wax had been polished out. I mount a clean cotton cloth buffing wheel and gave the entire pipe a once over buff. I finished the restoration by giving the entire pipe a rigorous hand buffing using a microfiber cloth to deepen the shine further. The finished pipe is shown below and shall always remain with me…after all it’s a special pipe!!


 P.S. – This was an indeed an easy restoration. However, we couldn’t come to a conclusive decision and it has now been decided to seek the opinions of all those have read this write up and majority shall decide if the plateau rim top and the flared shank end should be stained black or leave it be. Please help me make this pipe more special by letting me know your opinions. Thanking you all in anticipation.
Praying for the health and safety of you and your loved ones.
Thanks for your patience and looking forward to inputs to help resolve our dilemma about staining. Cheers…