Tag Archives: Stanwell made Royal Danish pipes

New Life for a Stanwell Made Royal Danish 970 Volcano


Blog by Steve Laug

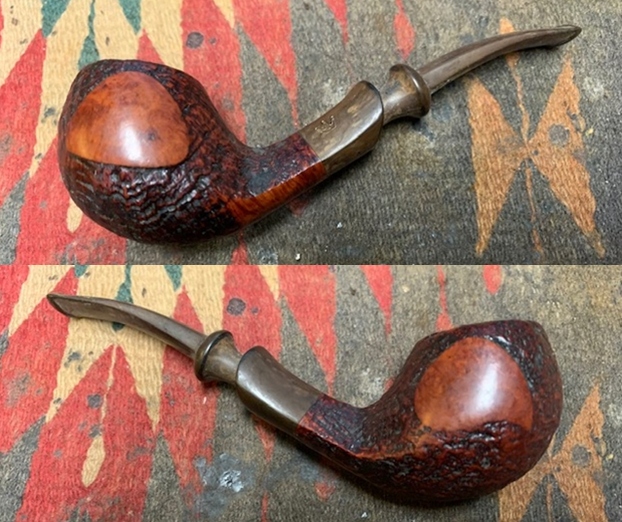
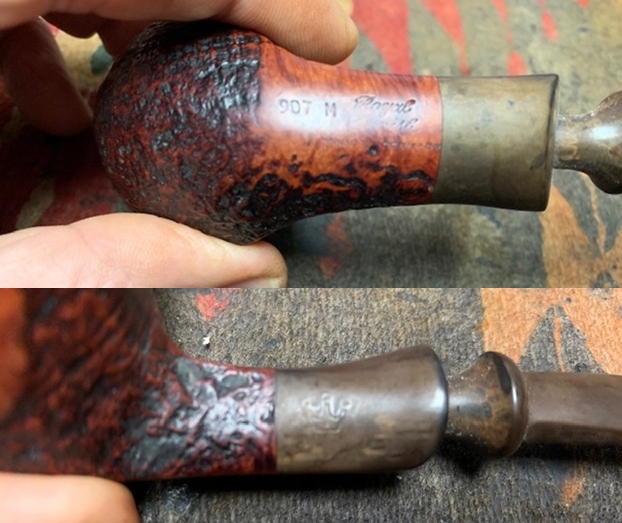
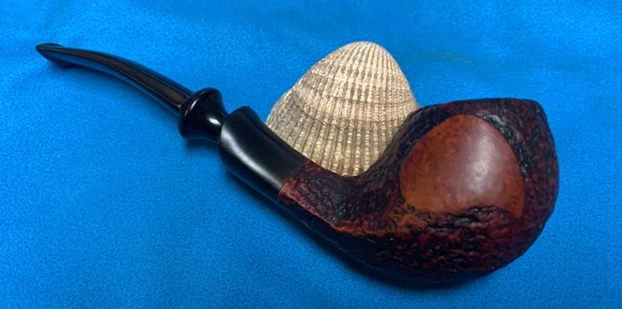
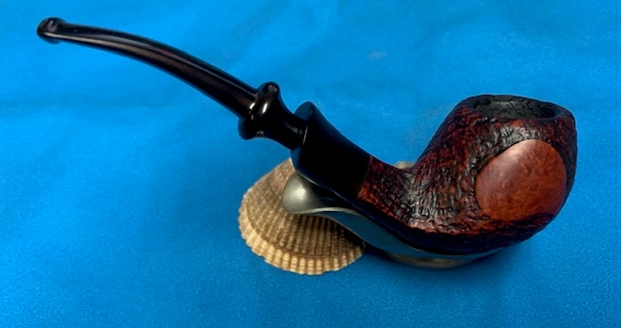
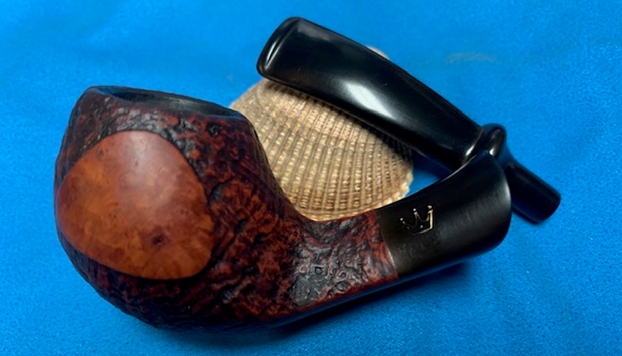
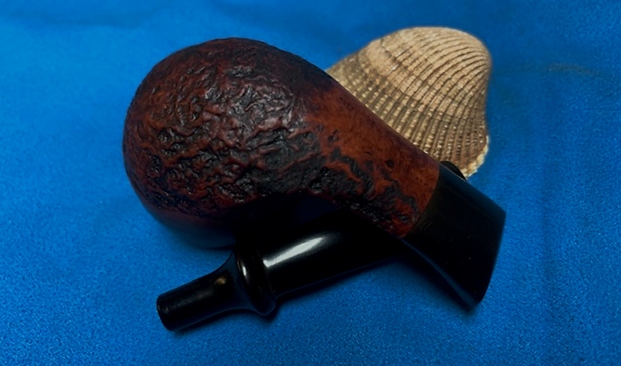
The next pipe on the table is a mixed finish – both sandblast and smooth panels on a shape I would call a volcano. We are not sure where we picked this one up. I took in on a trade or else found on one of my long ago pipe hunts. I cannot remember to be honest with you all. Sometimes I just put the pipes in a box to work on at a later date and forget about them. Strange I know but it is the truth. The pipe had been reamed and cleaned as had the internals. The pipe is stamped on a smooth panel on the underside of the shank and reads Royal Danish [over] Made in Denmark. Next to the shank/stem union it was stamped with the shape number 970. The bowl had been reamed and cleaned somewhere along the way. The finish was clean but dull and lifeless. The stem was still lightly oxidized and there was some calcification on the underside that remained. The stem had light tooth marks or chatter. There was a gold crown logo on the topside of the taper stem. The pipe smelled clean but I would run some pipe cleaners through it for good measure. I took photos of the pipe before I started my cleanup work on it. 
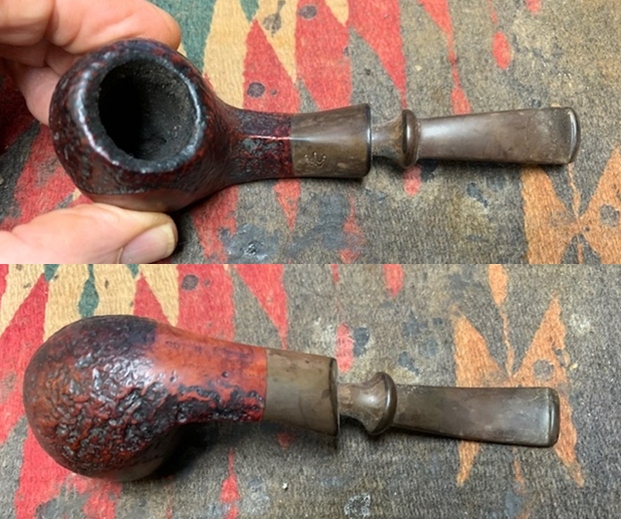
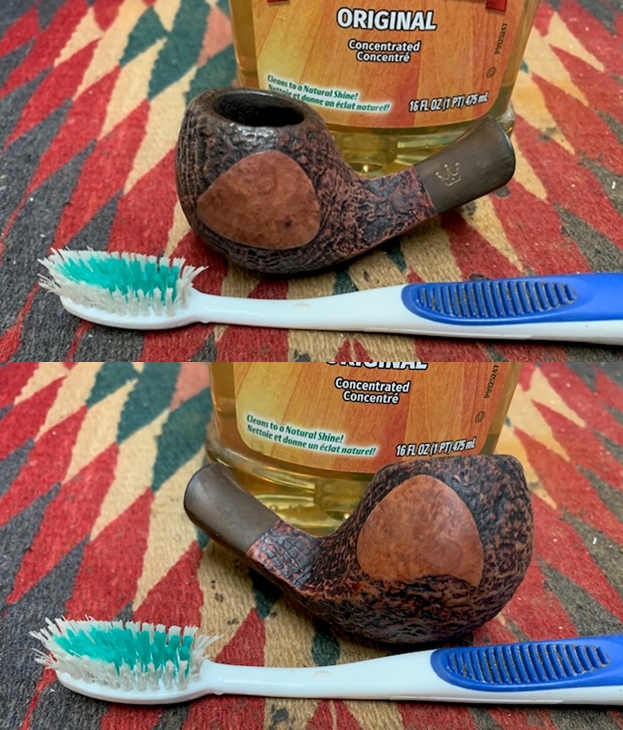
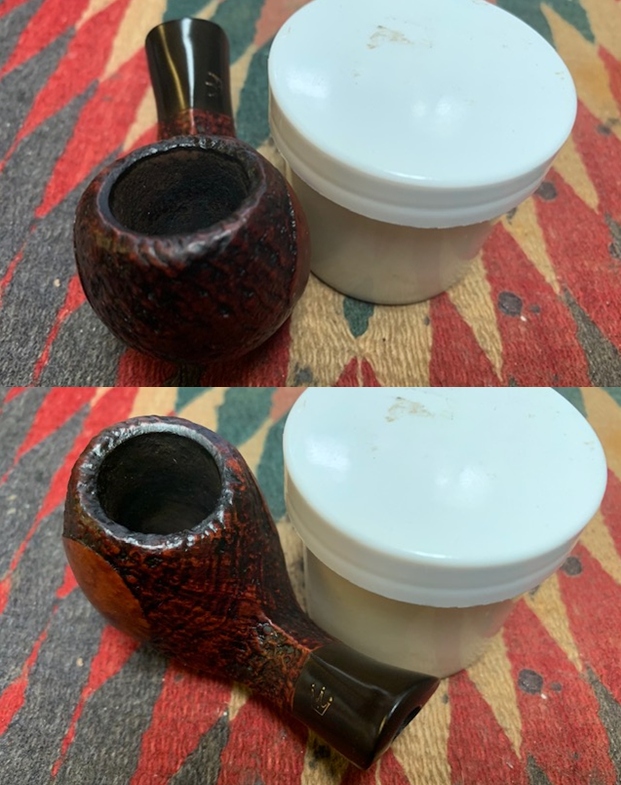
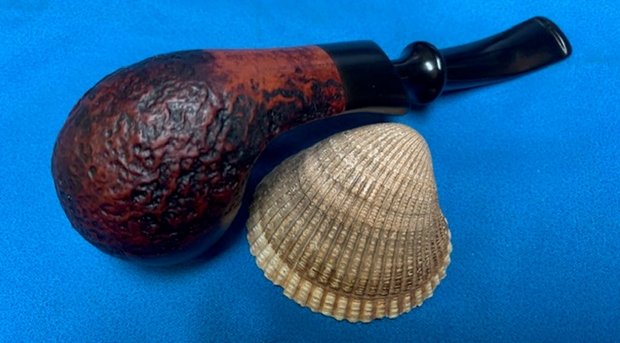
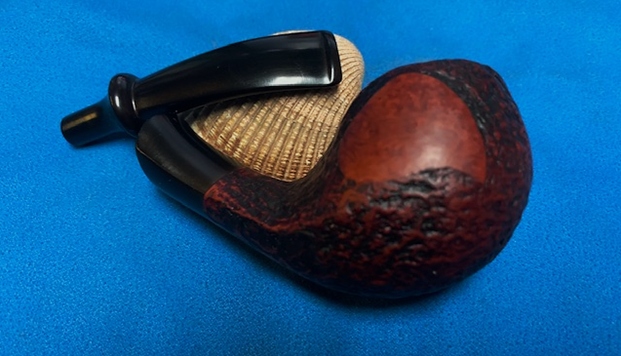
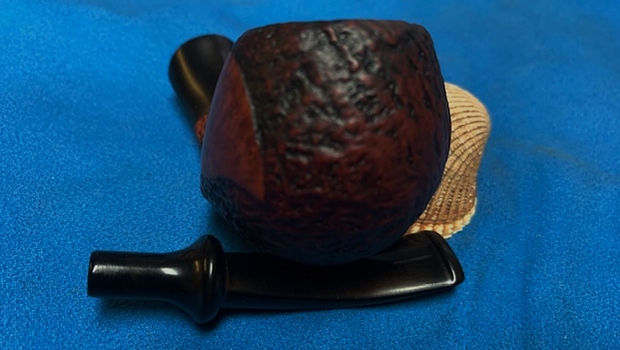
I took a close up photo of the bowl and rim top to show the cake in the bowl. The sandblasted rim edge were worn but looked good. The bowl was clean and the reaming nicely done. I took photos of the top and underside of the stem surface and button to show its general condition. It was lightly oxidized and had some calcification on the underside. There were some light tooth marks on the stem ahead of the button.
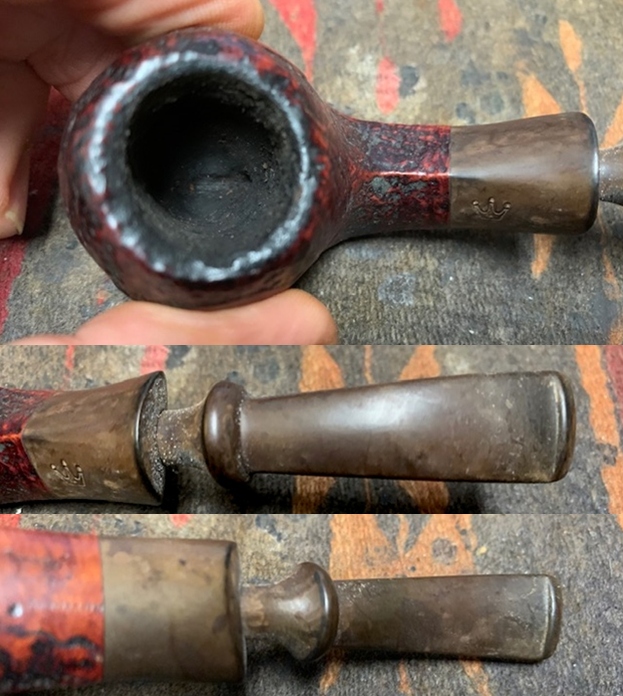
The stamping is faint in parts but it readable as noted above. The stem had the Royal Danish logo on the stem top that was missing some of the gold stamping.
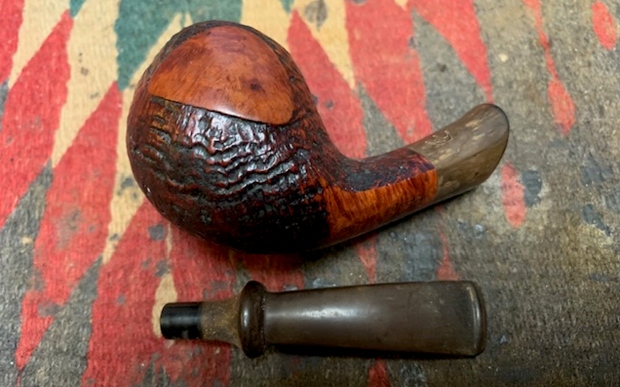
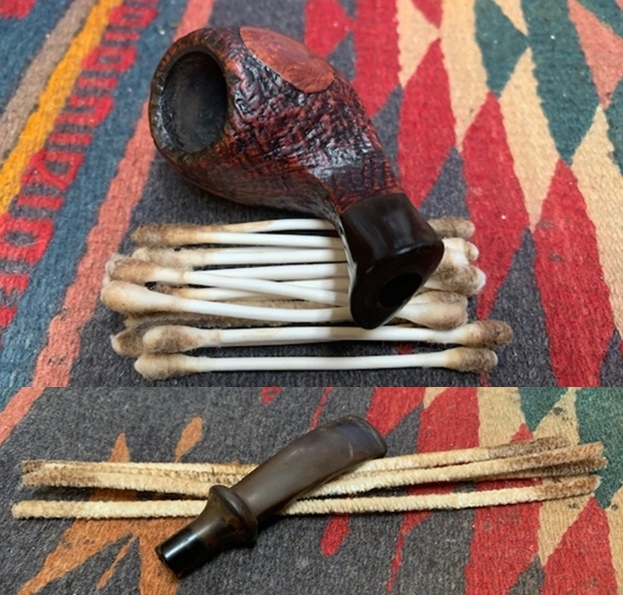
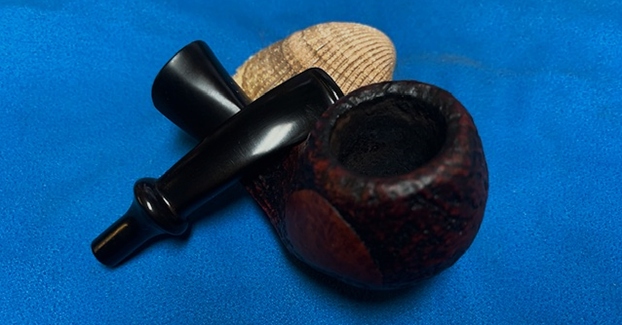
I removed the stem from the shank and took a photo to give a sense of the over all look of the pipe.I turned to Pipephil’s site (http://pipephil.eu/logos/en/logo-r6.html) to see what information I could garner that linked the brand to Stanwell like I assumed. It made the link definitive to the brand. I have included a screen capture of the information as well as the side bar information below.
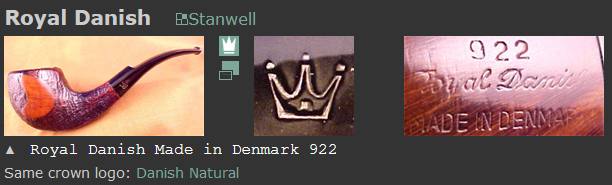
It gives a list of Stanwell seconds: Christian, Danish Natural, Danish Sovereign, Danske Club, Henley, Majestic, Royal Danish, Royal Guard, Scandia

I turned also to Pipedia’s section regarding Royal Danish pipes to see what I could learn about  it (https://pipedia.org/wiki/Royal_Danish). There was one short line that connects the brand to Stanwell as a second. You could also read the article on Stanwell pipes for history.

I knew I was dealing with a Stanwell made pipe in the shape number 970 – a mixed finish volcano shape.

I began my work by polishing the edge of the rim top and the smooth panels on the bowl sides and the top of the shank. I used 1500-12000 grit sanding pads and wiped the bowl down with a damp cloth between each pad. It is a great looking pipe. 
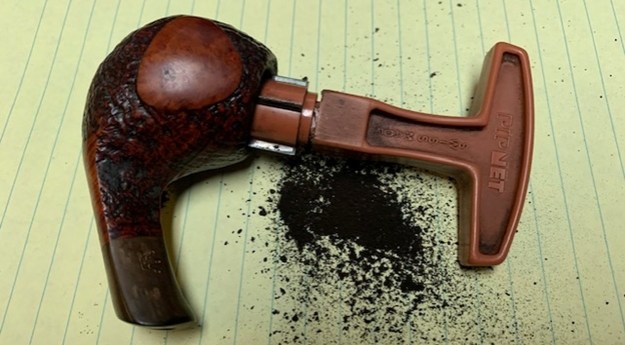
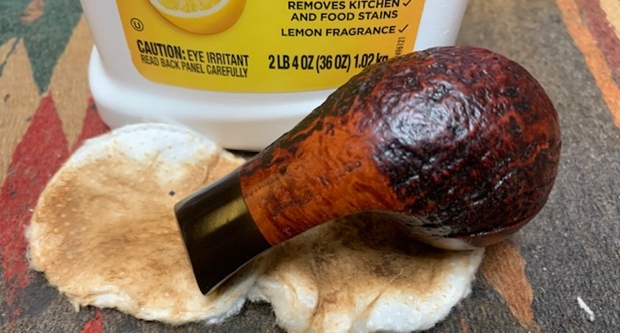
I worked some Before & After Restoration Balm into the surface of the briar with my fingertips and a horsehair shoe brush to clean, enliven and protect the briar. I let the balm sit for 15 minutes and then buffed with a cotton cloth to raise the shine. The photos show the bowl at this point in the restoration process. 
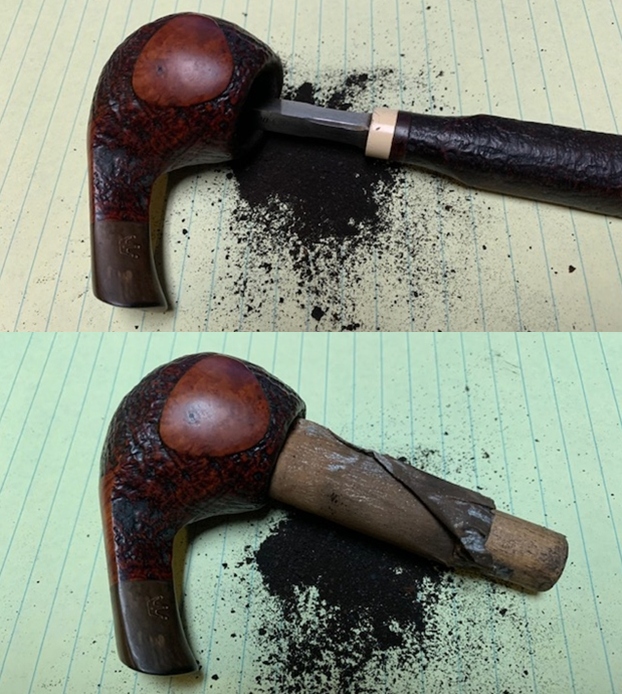
With that done the bowl was finished other than the final buffing. I set it aside and turned my attention to the stem. I “painted” the stem surface with the flame of a lighter and was able to lift all of the tooth marks on the surface. I sanded the stem surface smooth with 220 grit sandpaper to remove the small scratches and nicks in the stem surface. I started polishing it with 400 grit sandpaper.  
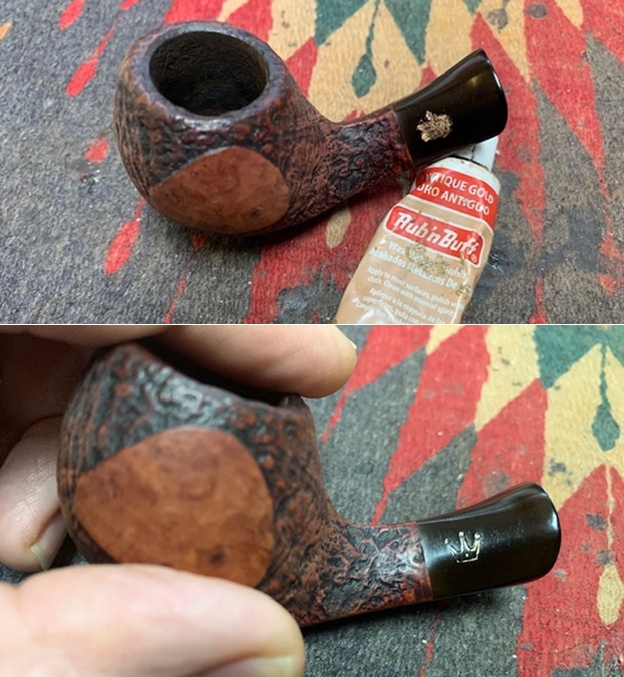
I paused and touched up the Gold Crown logo on the top of the stem with Rub’n Buff Antique Gold. I  pressed it into the stamping and buffed off the excess with a soft cloth. While it was better it was not flawless.Though the pipe smelled and looked clean it had been sitting in a drawer here for quite a few years and I figured it would need a cleaning. I ran pipe cleaners and isopropyl alcohol through the shank, airway in the shank and stem. It cleaned up nicely. There was dust as well as stain that came out on the pipe cleaners.
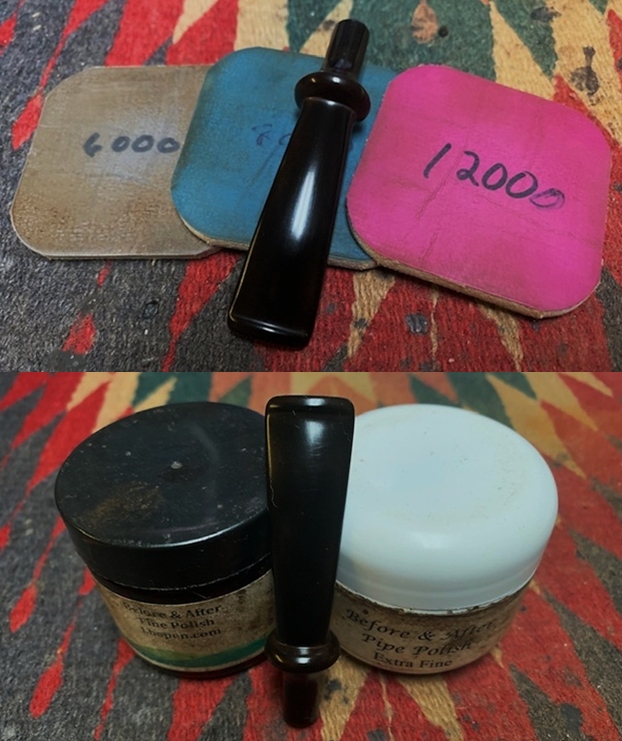
I polished the stem with micromesh sanding pads – wet sanding with 1500-12000 grit sanding pads. I wiped it down after each sanding pad with Obsidian Oil. I polished it with Before & After Pipe Stem Polish – both Fine and Extra Fine. 
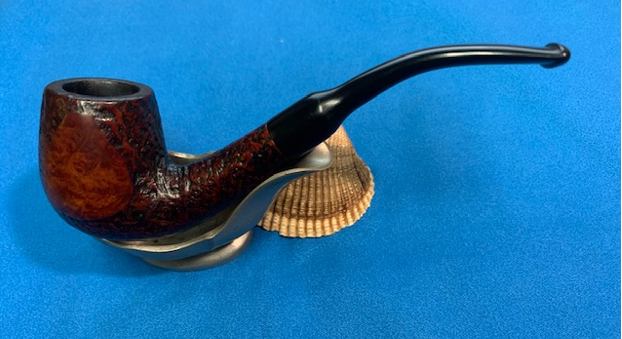
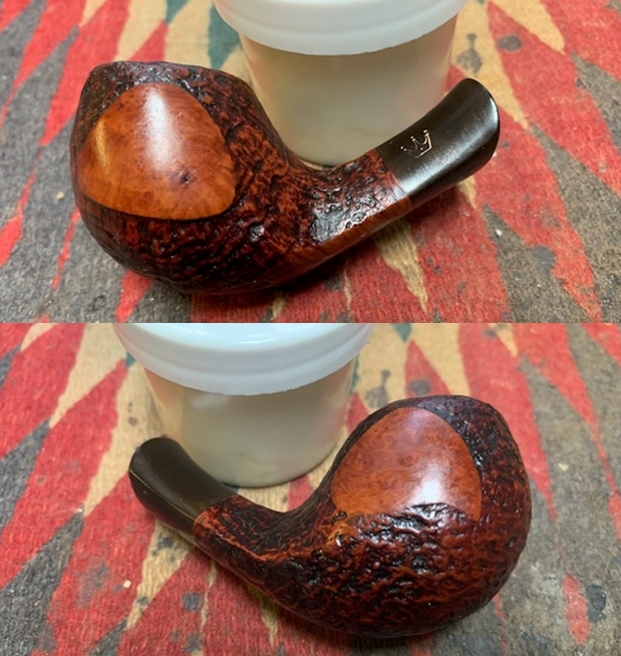
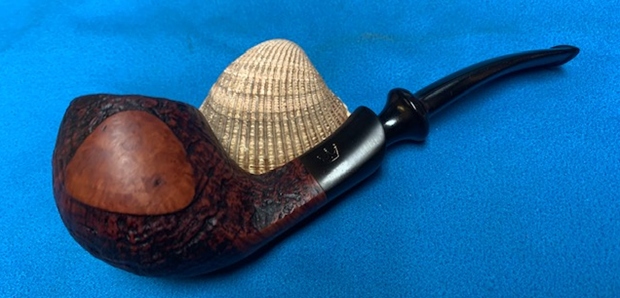
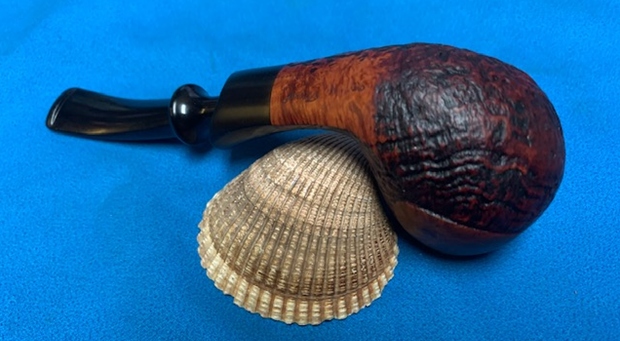
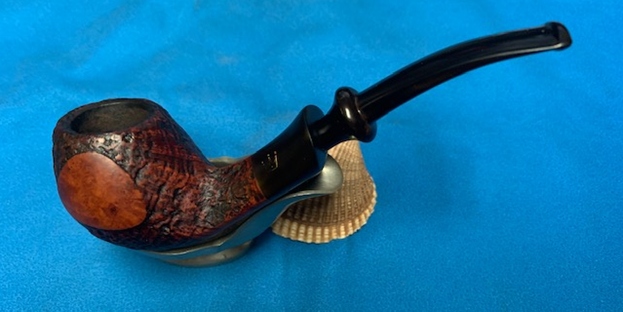
This Stanwell Made Royal Danish 970 Volcano is a really nice looking pipe. The finish is what I have found on 60s-70s era pipes – a mix of sandblast finish around the bowl and shank with smooth panels on the sides of the bowl and end of the shank. I put it back together and buffed it with Blue Diamond on the buffing wheel. I gave the bowl multiple coats of Conservator’s Wax and the stem multiple coats of carnauba wax. I buffed the pipe with a clean buffing pad on the wheel to raise the shine and hand buffed it with a microfiber cloth to deepen the shine. It is fun to see what the polished finish looks like with the polished black vulcanite stem. The pipe really is beautiful. This volcano shaped Royal Danish 970 Volcano is nice looking and the pipe feels great in my hand. It is light and well balanced. Have a look at it with the photos below. The dimensions are Length: 5 ½ inches, Height: 1 ½ inches, Outside diameter of the bowl: 1 1/8 inches, Chamber diameter: ¾ of an inch. The weight of the pipe is 42 grams/1.48 ounces. It is a beautiful pipe and one that will soon be on the rebornpipes store in the Danish Pipemaking Company section. If you are interested in adding it to your collection let me know. Thanks for walking through the restoration with me as I worked over this pipe. Please we are not pipe owners; we hold our pipes in trust until they pass on into the trust of the next in line. 

Restemming & Restoring a Royal Danish 983 Bent Billiard


Blog by Steve Laug

I think I must be on a bit of a roll with restemming some of the bowls I have collected over the years. I decided to do yet another one that has been here for a very long time. The pipe I chose to work on first is a lovely Bent Billiard stummel with a sandblast finish and a smooth panels on the sides of the bowl. The bowl looked very good. The blast, while not deep was quite nice and a the smooth panels had some interesting grain. The rim top was in excellent condition. The interior of the bowl was clean and there were not any chips, cracks or checking on the walls. The finish was dull and bit and tired but still quite redeemable. The stamping on the pipe was clear and readable. On the underside of the bowl an shank it read 983 followed by Royal Danish [over] Made in Denmark. I took some photos of the bowl before I started to work on it. I took a photo of the stamping on the left side of the shank. It reads as noted above and is clear and readable.I went through some of stems and found this fancy saddle style stem that was close to the right diameter and had a tenon that would work as well. It has a few tooth marks and chatter near the button but it would clean up well.I knew that I was working on a Stanwell second from previous experience but decided to have a look on Pipephill anyway (http://pipephil.eu/logos/en/logo-r6.html). I have included a screen capture of the information that was present there.Pipedia also verifies that it is a Stanwell second (https://pipedia.org/wiki/Royal_Danish).

Armed with the confirmation about the maker of the pipe it was time to work on the pipe itself. I started my work on it by fitting the new stem to the shank. I trimmed down the tenon diameter slightly with a file so that the fit in the shank was snug. The stem diameter needed more work so I worked on it with 180 grit sandpaper to match it to the shank. I sanded it with 220 grit sandpaper to smooth out the shank fit. I heated the stem with a heat gun to bend it to the correct angle to match the flow of the bowl and shank.I removed the stem and turned my attention to the bowl of the pipe. I sanded the inside of the bowl with a piece of dowel wrapped 2w9th 220 grit sandpaper to smooth out the walls and further check them for issues. Fortunately the bowl was in excellent condition. I used a brass bristle wire brush to clean off the remaining debris in the sandblast finish on the rim top.I cleaned out the internals of the pipe and the stem with alcohol, cotton swabs and pipe cleaners to remove the sanding debris on both. It also removed any remnants of tars and oils in the shank and stem.I worked some Before & After Restoration Balm into the surface of the briar with my finger tips and a shoe brush to get into the valleys and crevices of the blast finish. The product is amazing and works to clean, enliven and protect the briar. I let it sit on the briar for 10 or more minutes and then buff it off with a soft cloth. It really makes the briar come alive and look quite rich. I set the bowl aside and turned my attention to the stem. I sanded out the tooth marks and smoothed out the sanding I had done on the diameter of the saddle portion of the stem with 220 grit sandpaper. I started polishing the stem with 400 grit wet dry sandpaper.I polished the stem with micromesh sanding pads – dry sanding with 1500-12000 grit pads. I wiped the stem down after each pad with a cloth and Obsidian Oil. I finished the polishing with Before & After Pipe Stem Polish – both Fine and Extra Fine. I gave it a final coat of Obsidian Oil. I put the pipe together – the bowl with its new stem. This restored and restemmed Royal Danish 983 Sandblast Bent Billiard turned out to be a real beauty. I think the chosen stem works well with it. The finish on the bowl came alive with the buffing. I used Blue Diamond on the buffing wheel on both the bowl and stem. I gave both multiple coats of carnauba wax on the wheel then buffed it with a clean buffing pad to raise the shine. I hand buffed it with a microfibre cloth to deepen the shine. The Royal Danish Bent Billiard feels great in the hand. It is lightweight and the contrast in the browns of the sandblast and smooth briar and the polished vulcanite stem with the popping grain on the mixed brown stained bowl is quite amazing. The dimensions of the pipe are Length:5 ½ inches, Height: 1 ¾ inches, Outer diameter of the bowl: 1 1/8 inches, Chamber diameter: ¾ of an inch. The weight of the pipe is 1.16 ounces/33 grams. It really is a beauty. I will be putting it on the rebornpipes store in the Danish Pipe Makers section shortly if you are interested in adding it to your collection. Thanks for walking through the restemming and the restoration with me. Cheers.

Cleaning up a Stanwell Royal Danish 907M Sandblast Scoop


Blog by Steve Laug

The next pipe on the work table is one that is a bit of a mystery to me. It is obviously one that I picked up on one of my hunts or in a trade as it has not been cleaned at all. The mystery is that I have no recollection of finding the pipe so I have no way to connect it to a time period. I do know that it has been here for quite a while and I am just now getting to it. I try to eventually work the pipes we find into the restoration queue so that I can keep them moving. The one is obviously a Stanwell from just looking at it. It has a mix of sandblast finish around the bowl with smooth panels on the sides. The shank extension is vulcanite and has a large Crown stamped in the left side. It was stamped on the underside of the shank on a smooth panel. The shape number 907M is stamped near the heel of the bowl and the M identifies it as having a military mount stem. Following that it reads Royal [over] Danish [over] Made in Denmark. The finish was dirty with dust and grime ground into the nooks and crannies of the sandblast finish. There was a thick cake in the bowl and lava overflow on the rim top. The inner edge of the rim was covered so thickly in lava it was hard to know what was underneath. The vulcanite stem was oxidized and had tooth marks and chatter ahead of the button on both sides. There was no identifying stamp on the stem surface though the shape says that it is definitely Stanwell stem.

Before I started working on it I did a bit of research on the brand to get a feel for where it fit in the Stanwell line. I was pretty sure that it was a second but wanted confirmation. I turned to Pipephil’s site to see if I could get a feel for it (http://www.pipephil.eu/logos/en/logo-r6.html). I did a screen capture of the information on the site. I found that the brand was indeed made by Stanwell and was one of many second lines that they made. I did a screen capture of the pertinent information and have included it below.I then turned to Pipedia and found that it was also listed as a second or a sub-brand made by Stanwell (https://pipedia.org/wiki/Stanwell#Sub-brands_.2F_Seconds). I have included the list of seconds from the site below. I have highlighted the Royal Danish in blue in the text.

Sub-brands / Seconds – Bijou (discontinued), Danish Quaint, Danish Sovereign, Danske Club,    Henley (discontinued), Kong Christian (discontinued), Majestic, Reddish (discontinued),  Royal Danish, Royal Guard, Royal Sovereign, Sailor (discontinued), Scandia, Sorn (discontinued), Svendson.

Now it was time to clean up this pipe and get it restored. I cleaned the pipe with the methodology that Jeff and I have developed. It was a mess when I took it out of my box here so I was curious to see how well it cleanup. I took some photos of the pipe before I started my work on it. You can see that it is filthy but has some great grain in the blast and on the smooth panels. It is also an intriguing shape. I took some close up photos of the rim top and the stem surface. I wanted to show the condition of the cake in the bowl and look of the rim top and lava overflow. You can also see the heavily oxidized shank extension and the faint Crown stamp showing through on the left side. I also took close up photos of the stem to show the tooth marks and the calcification, oxidation and generally condition of the stem surface.    I took photos of the stamping on the smooth panel on the underside of the shank and it is faint but readable under the grime. It is stamped as noted above. The Crown logo is visible on the left side of the shank extension. I removed the stem for the shank and took a photo of the bowl and stem to give a picture of what it looked like. It is a great looking pipe under the grime.I decided to start my restoration by getting rid of the cake in the bowl and cleaning up the rim top. I reamed it with a PipNet pipe reamer and cleaned up the reaming with a Savinelli Fitsall Pipe Knife. I sanded the inside of the bowl with 220 grit sandpaper wrapped around a piece of dowel. Once I finished the bowl was smooth and clean. I was glad to see that there was no internal damage. I scrubbed the exterior of the bowl with Murphy’s Oil Soap and a tooth brush to remove the grime and grit on the briar and the lava on the rim top. The finish looks very good with good looking grain around the bowl and shank. Once it is polished it will come to life. I scrubbed the vulcanite shank extension with Soft Scrub on cotton pads to remove the oxidation. With a lot of scrubbing and rubbing it down the oxidation slowly but surely gave way to dark rubber. In the process the oils from my hands from the cotton pads and Soft Scrub gave the briar some life that would come out more as I polished it.   I wiped it down with a cotton pad and some alcohol to remove the oils on the vulcanite and the briar. I touched up the gold Crown stamp with Antique Gold Rub’n Buff. I worked it into the stamp with a tooth pick and buffed it off with another pad.I rubbed the bowl down with Before & After Restoration Balm. I worked it into the surface of the briar with my fingertips to clean, enliven and protect it. I let the balm sit for a little while and then buffed with a cotton cloth and shoe brush to raise the shine.       I scrubbed out the internals of the shank and the airway in the stem with alcohol, pipe cleaners and cotton swabs until the pipe was clean.    I set the bowl aside and turned my attention to the stem. I scrubbed the stem with Soft Scrub polish to remove the oxidation. While it did not take it all out it removed much of. What was left would polish out with micromesh sanding pads.  I polished the vulcanite with micromesh sanding pads – 1500-12000 grit pads. I wiped it down with a damp cloth after each sanding pad. I used Before & After Pipe Polish – both Fine and Extra Fine to further polish the stem.  I left a little oxidation around the stamp so as not to damage it more.         This Stanwell made Royal Danish 907M Scoop is known as a Stanwell second but for all intents and purposes to my eye it is not much different in cut, blast or finish to a regular Stanwell. The only thing I see is a small sand pit on the underside of the shank otherwise is a nice looking pipe. The restored Royal Danish turned out to be a great looking pipe. The contrasting brown stains on the pipe worked really well with the polished vulcanite shank extension and the taper stem. I put the stem back on the bowl and carefully buffed the pipe with Blue Diamond on the buffing wheel. I gave the bowl and stem multiple coats of carnauba wax on the buffing wheel keeping a light touch on the buffing wheel for the bowl. I followed that by buffing the entire pipe with a clean buffing pad. I hand buffed the pipe with a microfiber cloth to deepen the shine. The finished Royal Danish Scoop fits nicely in the hand and feels great. Give the finished pipe a look in the photos below. The dimensions of the pipe are Length: 5 ½ inches, Height: 1 ¾ inches, Outside diameter of the bowl: 1 ¼ inches, Chamber diameter: ¾ of an inch. If you are interested in carrying on the previous pipe man’s legacy with this pipe send me a message or an email. I have more to work on of various brands. Perhaps one of those will catch your attention. Thanks for reading this blog and my reflections on the pipe while I worked on it.

An Easy Restore – A Royal Danish 984R Canadian


Blog by Steve Laug

Along with the recent Kaywoodie Original (https://rebornpipes.com/2019/01/25/new-life-for-a-kaywoodie-original-imported-briar-freehand-stack/) that I worked on, my brother Jeff sent me a nice looking multi finished Canadian. It is a classic Danish version of the Canadian shape with an oval shank and a long tapered stem. The pipe is sandblasted with two smooth patches on the sides of the bowl. It is a nice looking pipe that looks a lot like the variegated finished pipes that Stanwell issued in the 60s and 70s. The underside of the shank is stamped Royal Danish in script followed by Made in Denmark and finally the shape number 984R. Like the other pipes that came from this Idaho auction the pipe was in pretty decent condition – dirty but really not too bad. The finish was dusty and dirty with grime worked into the sandblast finish. The bowl had a moderate cake in it but it did not go all the way to the bottom of the bowl – in fact the pipe was not even broken in. The rim top had a thick coat of lava and was dirty. The inner and outer edges of the bowl were in great condition. The stem was oxidized but in decent condition. Jeff took these pictures of the pipe to show its condition before he started his cleanup work.Jeff took a close up of the bowl and rim. The bowl had a moderate to medium cake but the lava overflow onto the rim top was quite thick. He also took a close up photo of the side and underside of the bowl and shank.On the underside of the shank the stamping was very clear and readable. It is stamped in a smooth panel that runs from the heel of the bowl to end of the shank. The Royal Danish Brand is a Stanwell second line. It is no wonder that the pipe looks very similar to a Stanwell. The shape number is also a Stanwell shape number.He took photos of the stem to show the oxidation on the stem. The first photo shows the faint/light Royal Danish Crown on the top side of the taper near the shank. The second and third photo show the oxidation and the otherwise pristine stem surface. Jeff had reamed the bowl with a PipNet pipe reamer and followed up with a Savinelli Fitsall pipe knife to remove the cake. He scrubbed out the mortise and the airway in the shank and the stem with alcohol, cotton swabs and pipe cleaners. He scrubbed the exterior of the bowl, rim, shank and stem with a tooth brush and Murphy’s Oil Soap to remove the oils and tars on the bowl, rim and shank. He rinsed it under running water. He dried it off with a soft cloth. He was able to remove the majority of darkening on the rim top without harming the finish underneath it. Without the grime the finish looked good. Other than the light oxidation, the stem was actually in pretty good condition and would only need to be polished. I took photos of the pipe to show its condition before I started my work on it. I took close up photos of the rim top that shows the clean bowl and the remaining lava in the grooves of the sandblast rim top. The stem was clean and Jeff had used Before & After Deoxidizer to soak and remove much of the oxidation. He rinsed out the inside of the stem and rinsed off the exterior as well. The photos of the stem show how good the stem actually looked after this treatment. I used a brass bristle wire brush to clean up the rim top of the bowl and loosen the remaining debris and dust in the grooves of the blast.I rubbed the bowl down with Before & After Restoration Balm into the sandblast finish of the bowl and the shank to deep clean the briar. I worked it into the smooth portions the sides and the bottom of the bowl. The product works to clean, enliven and protect the briar. I hand rubbed it with my fingers and wiped it off with a soft cloth. I buffed the bowl with a horsehair shoe brush to polish it. The briar really began to have a rich shine. I took some photos of the bowl at this point to mark the progress in the restoration. The stem was in really good condition so I skipped sanding it with 220 grit sandpaper. I polished the stem with micromesh sanding pads – wet sanding it with 1500-2400 grit pads and dry sanding it with 3200-12000 grit pads. I wiped the stem down after each pad with a damp cloth to remove the sanding dust. I used the Before & After Pipe Polish to remove the small minute scratches left in the vulcanite. I finished by wiping the stem down with a final coat of Obsidian Oil and set it aside to dry. I polished the stem with Blue Diamond to polish out the remaining small scratches and gave it several coats of carnauba. I polished the bowl and shank with Conservator’s Wax and buffed it with a shoe brush. I buffed the pipe with a clean buffing pad to raise the shine. I hand buffed it with a microfiber cloth to deepen the shine. The pipe polished up pretty nicely. The finished pipe is shown in the photos below. The dimensions are Length: 6 1/2 inches, Height: 2 inches, Outside diameter of the bowl: 1 3/8 inches, Chamber diameter: ¾ of an inch. I will be adding it to the rebornpipes store shortly. If you are interested in adding it to your collection email me at slaug@uniserve.com or send me a message on Facebook. Thanks for walking through the restoration with me as I worked over this beautiful Stanwell made Canadian.