Blog by Steve Laug
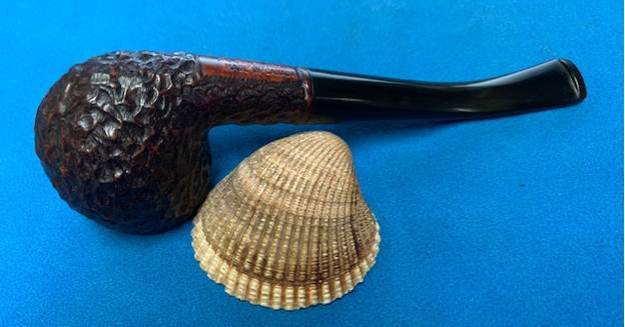
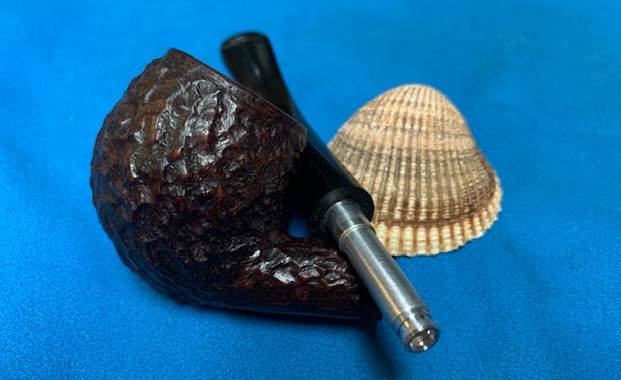
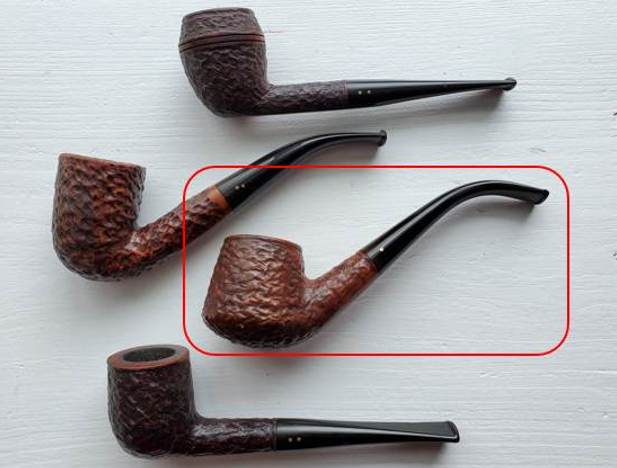
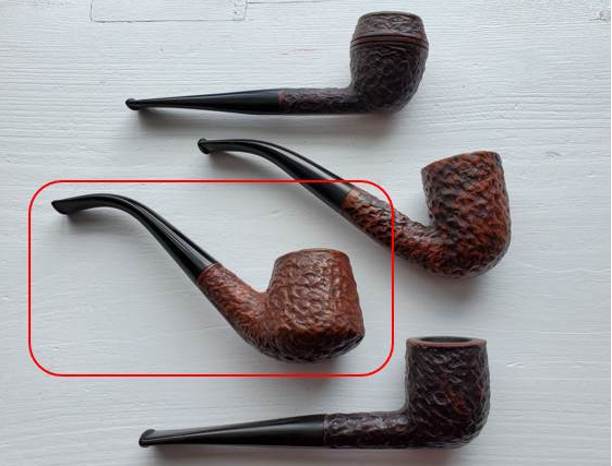
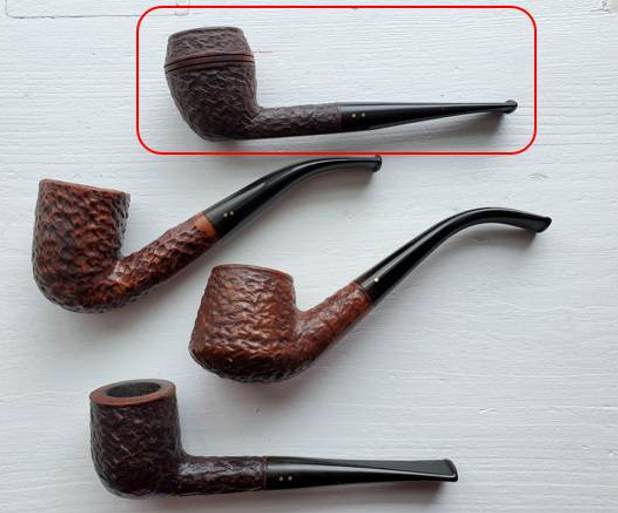
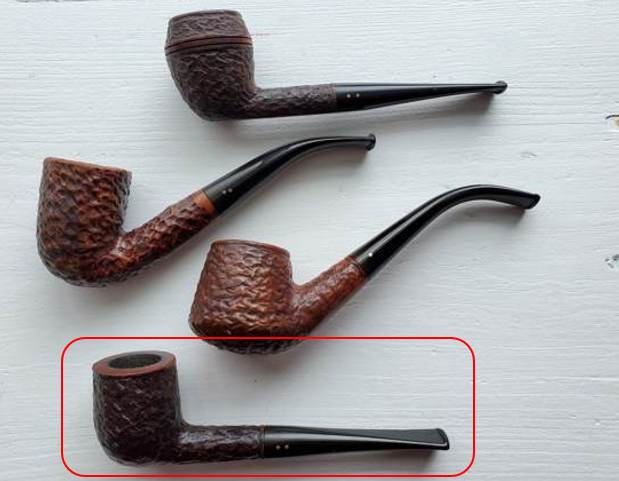
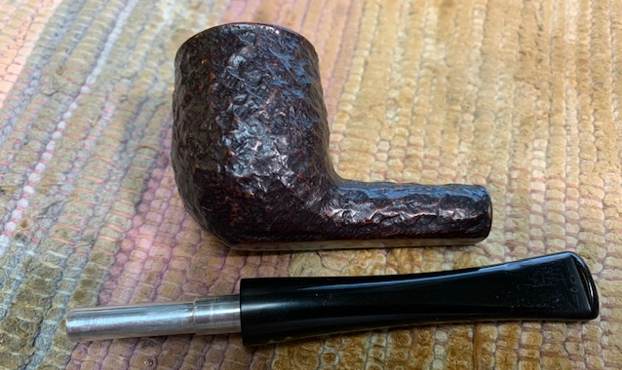
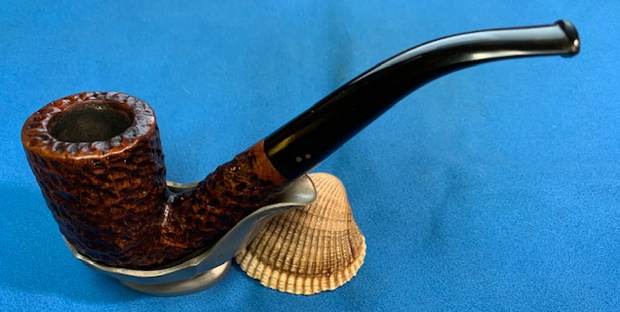
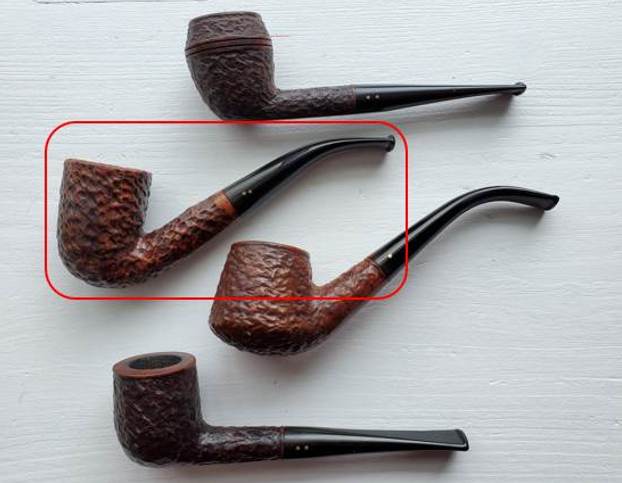
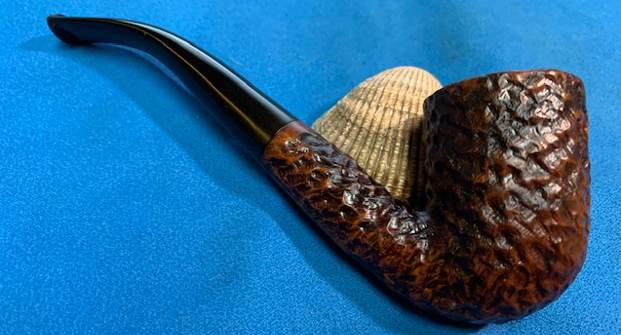
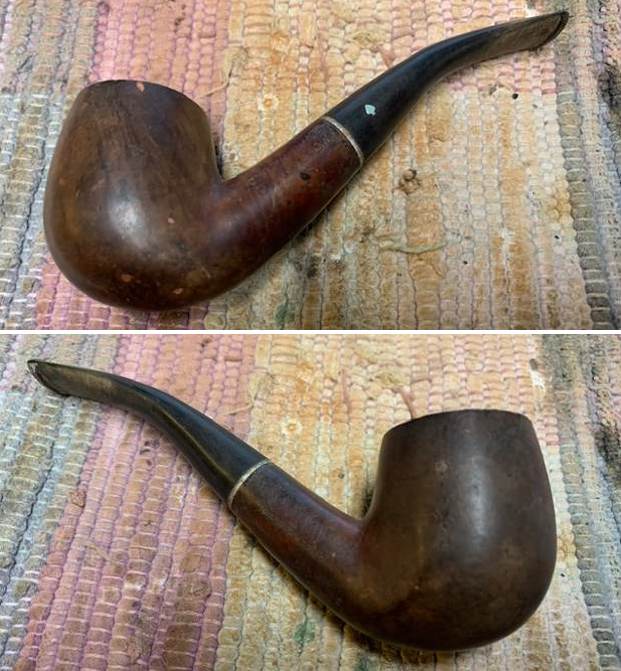
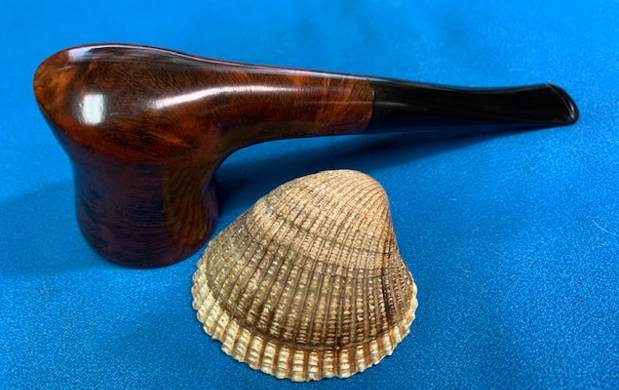
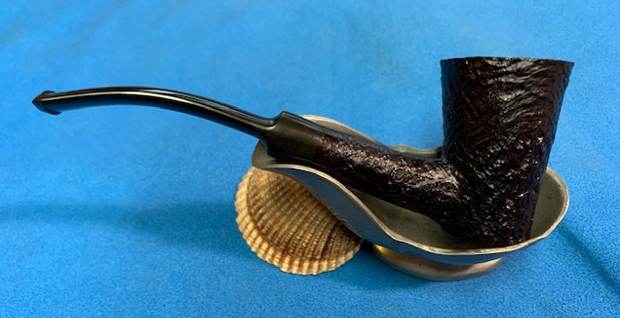
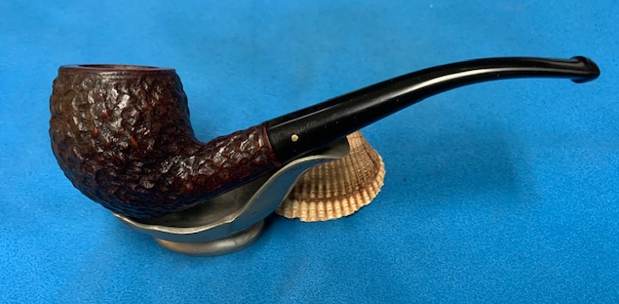
Not too long ago my wife and I had dinner with some good friends here in Vancouver – first time since COVID-19 so it was good to see them. At the beginning of the meal he handed me a box that he said was for me. In it were some pipes that he was giving to me and a bunch of cigars. The pipes included two Brigham rusticated pipes that I have included photos of below. The two pipes in the photo were clean but well smoked. The bowls had light cake and some lava and darkening on the rim top. The stems were lightly oxidized and had tooth chatter on both sides ahead of the button. I decided I would work on them next. I finished the Sportsman Dublin first and now turned my attention to the second pipe. It is a classic Brigham Shape I call an acorn. It is well carved with a rusticated finish and a smooth rim top. It is stamped on the underside and reads 189 followed by Brigham [over] Made in Canada. There was one dot on the stem side and tooth chatter and oxidation. It was going to be a beauty once cleaned up.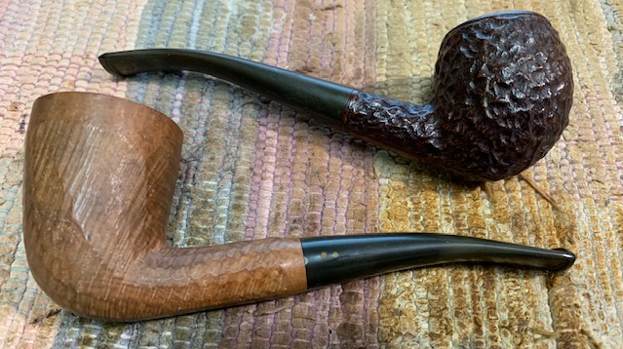
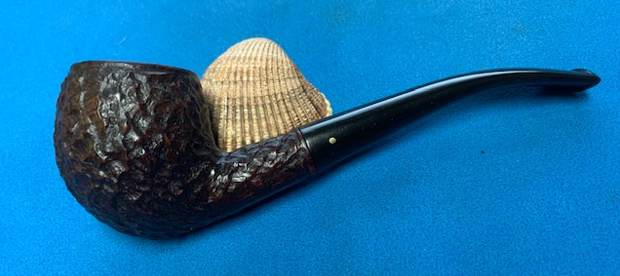
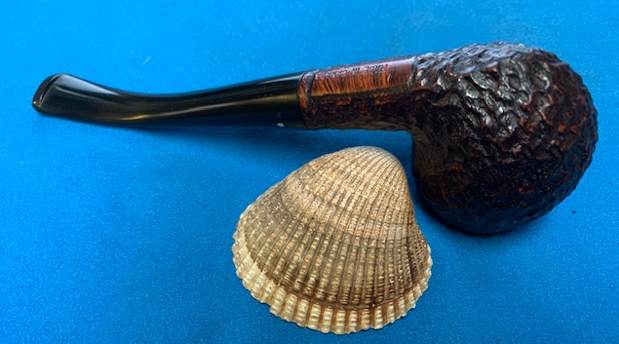
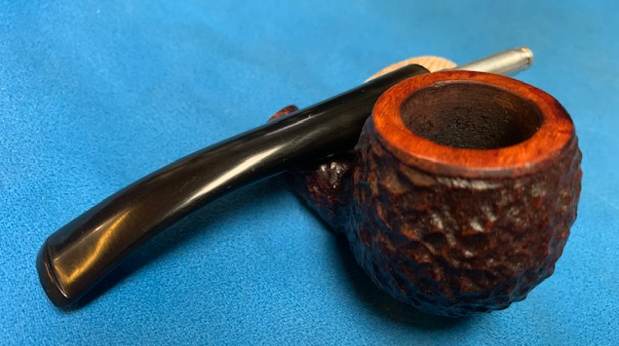
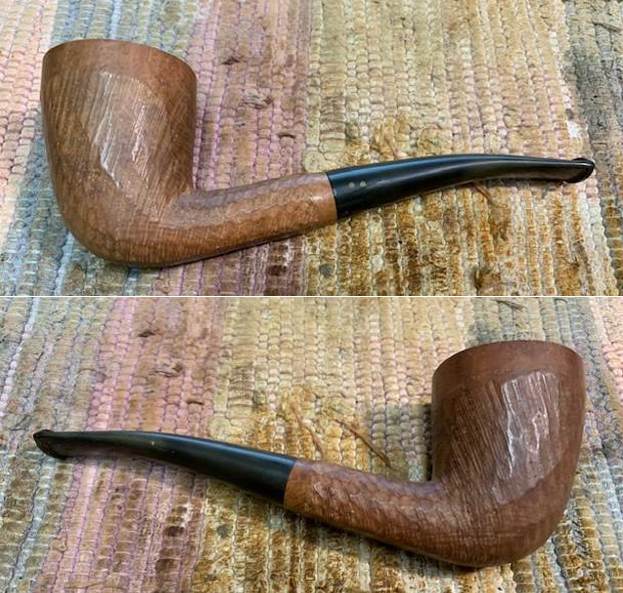
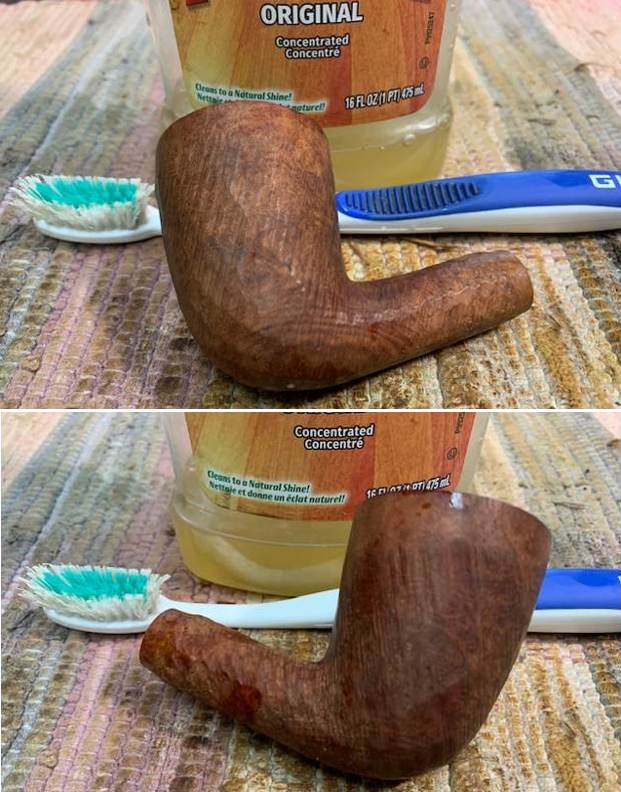
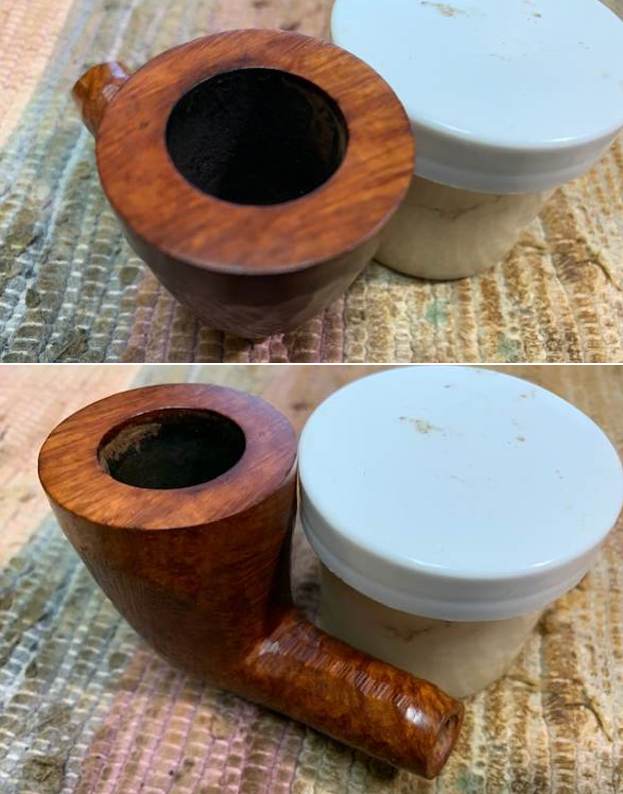
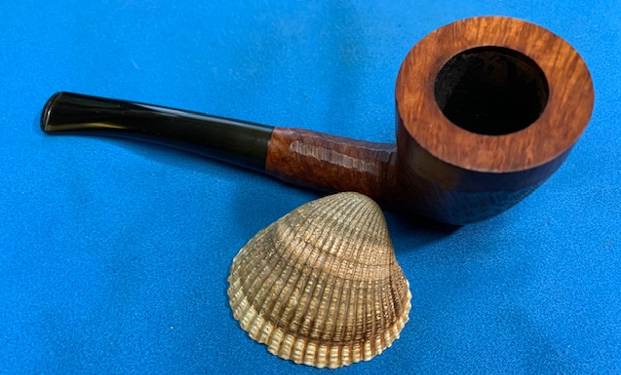
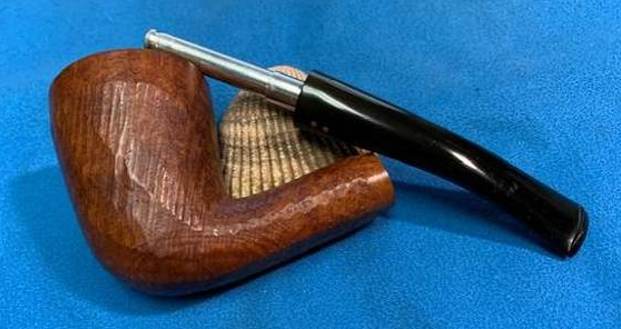
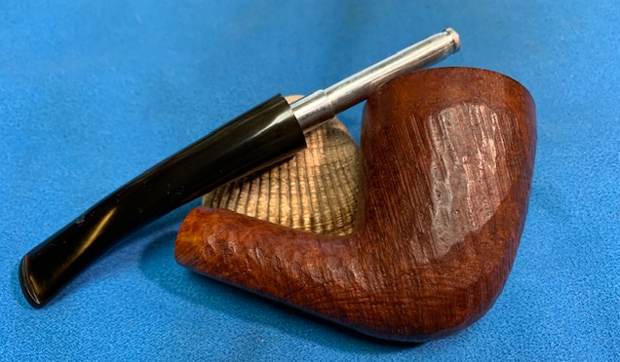
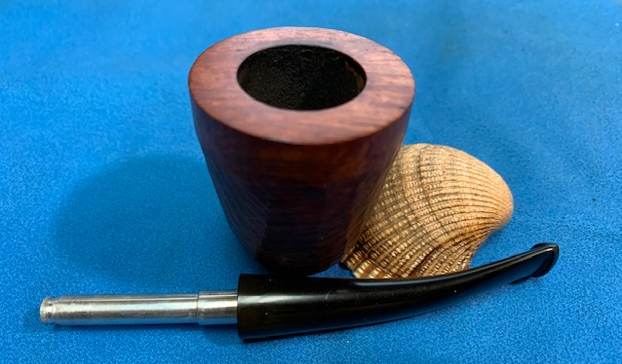
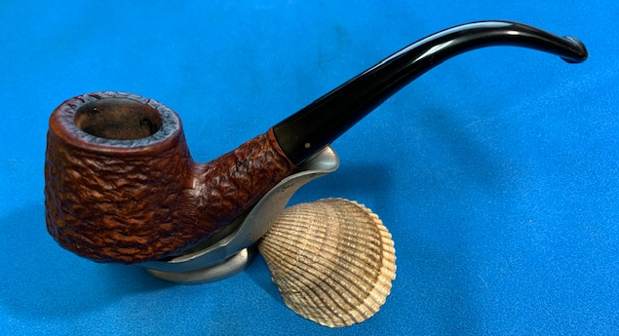
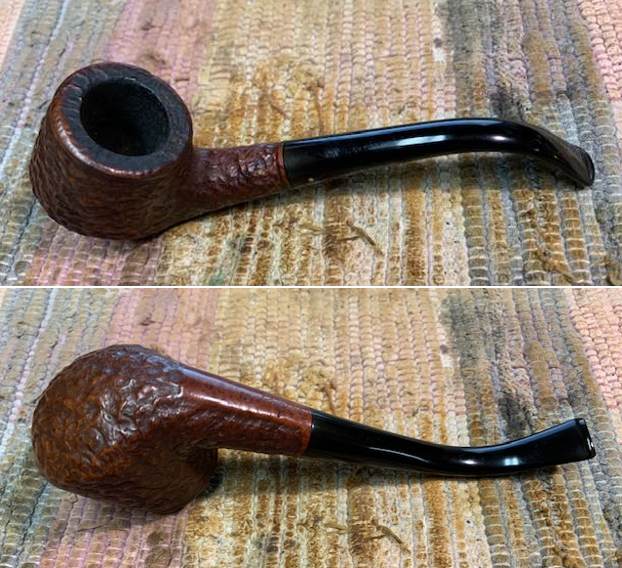
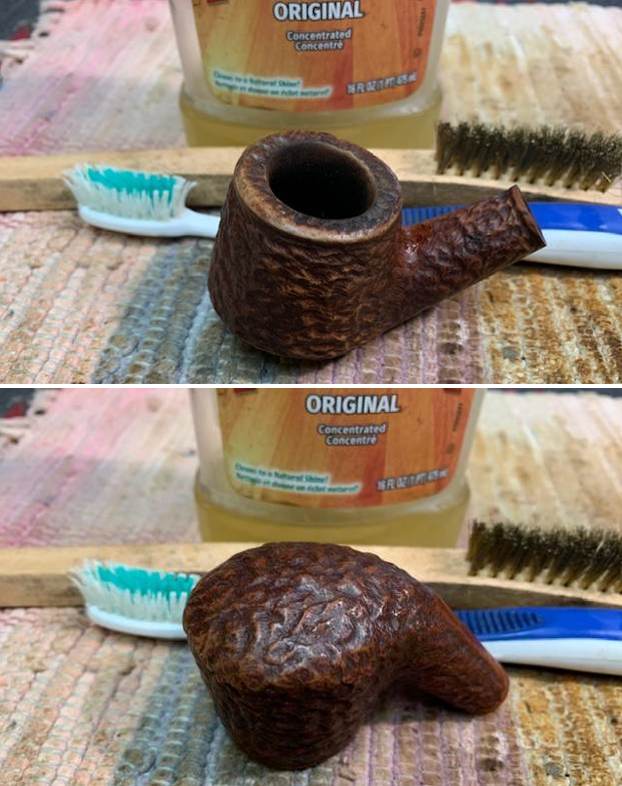
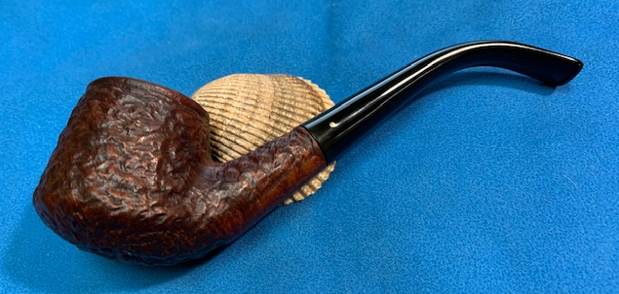
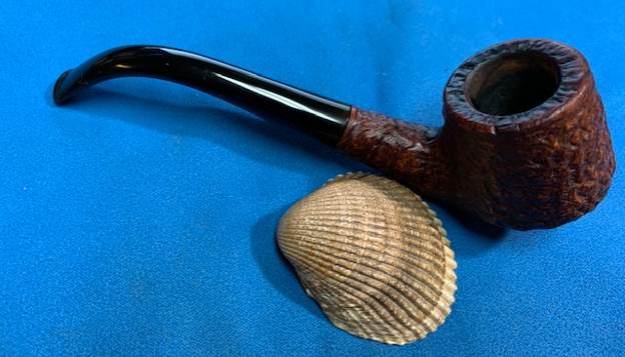
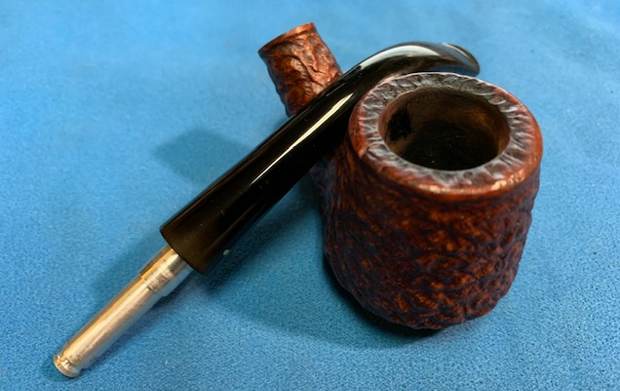
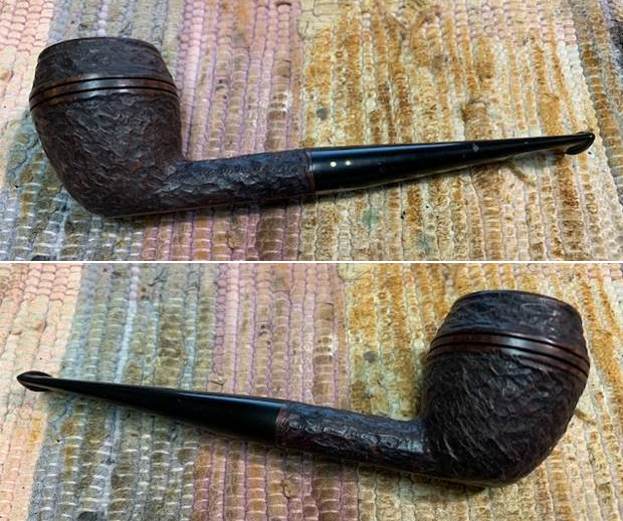
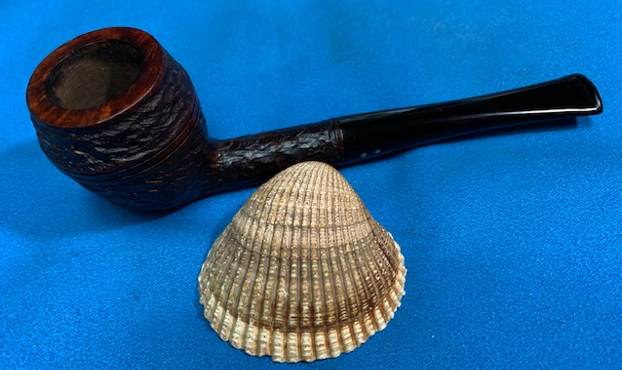
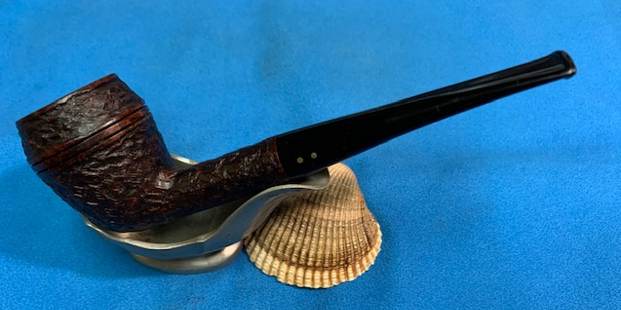
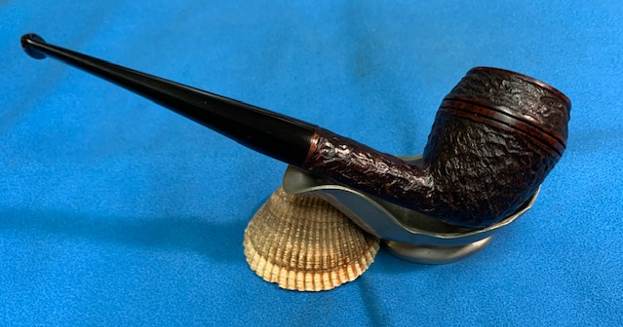
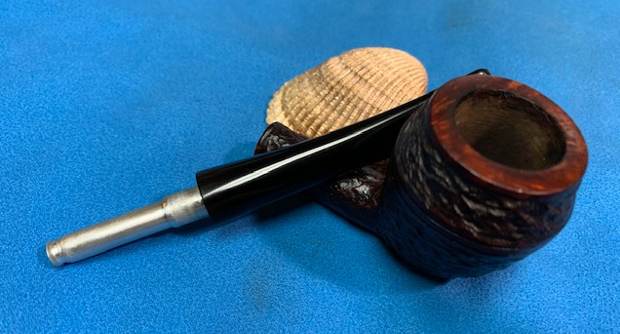
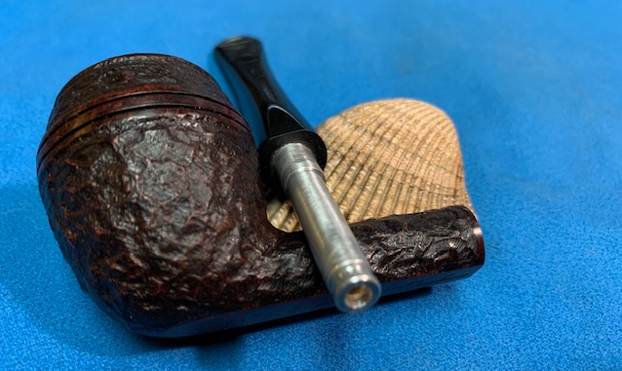
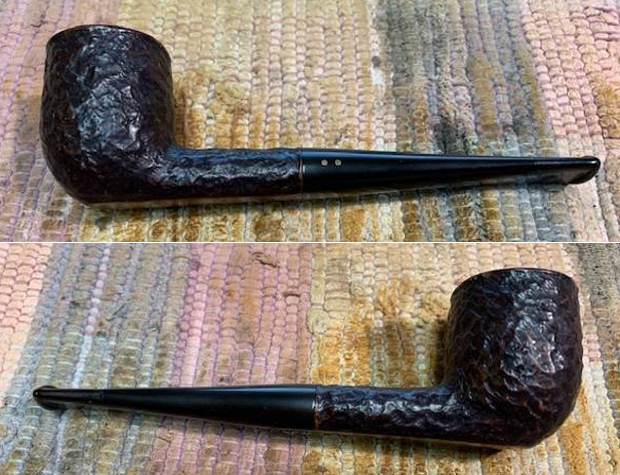
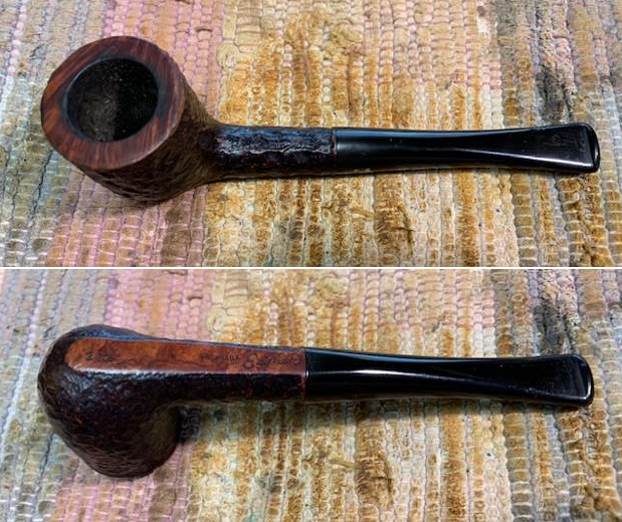
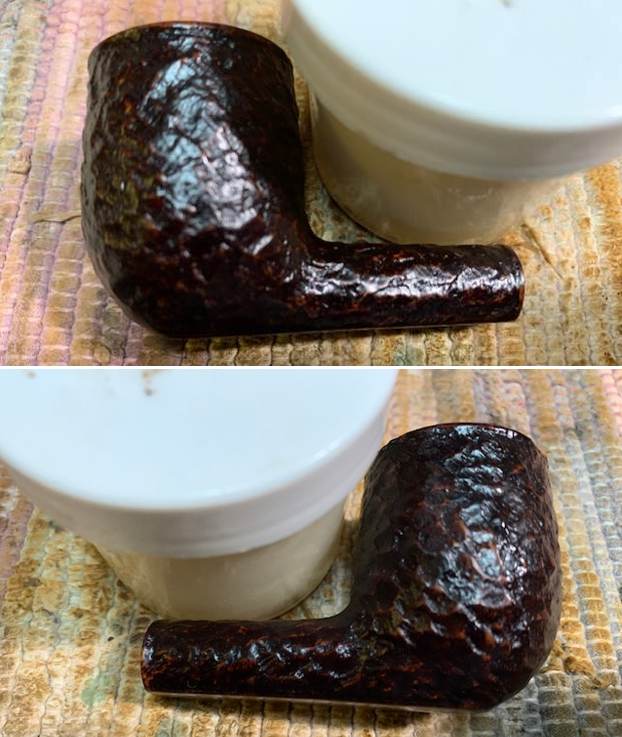
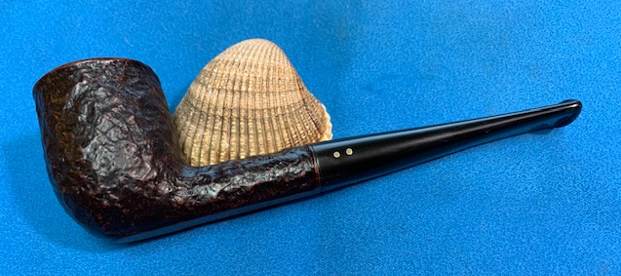
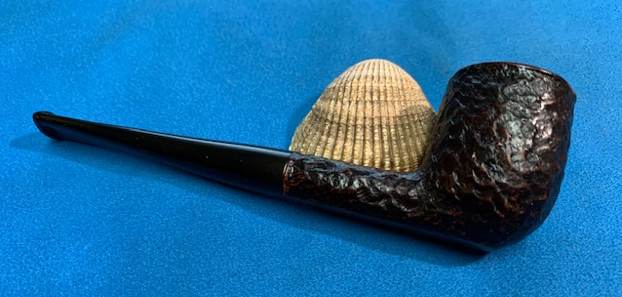
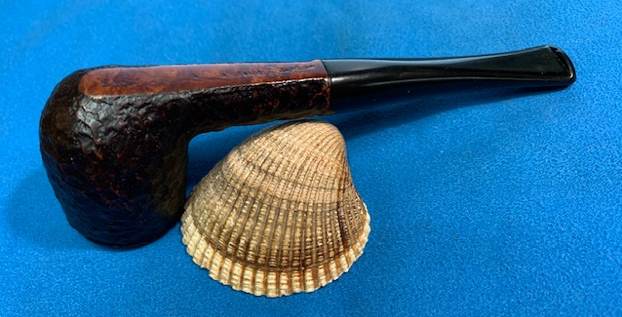
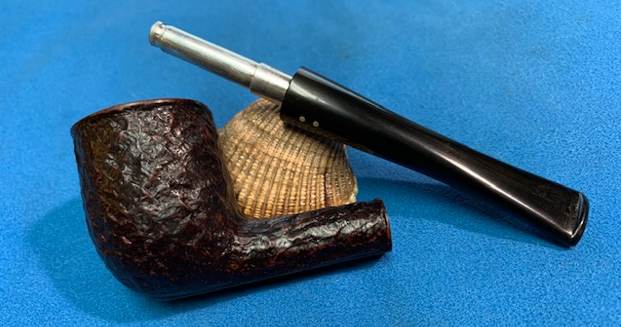
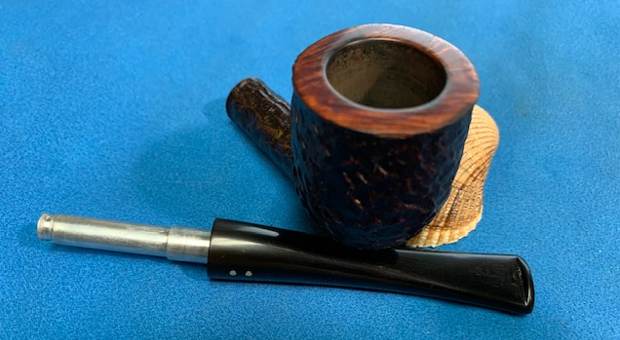
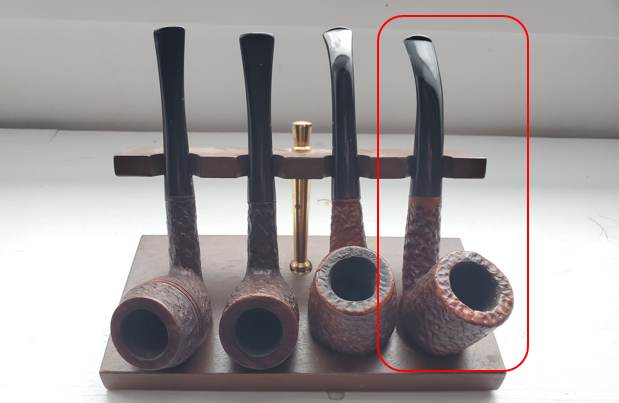
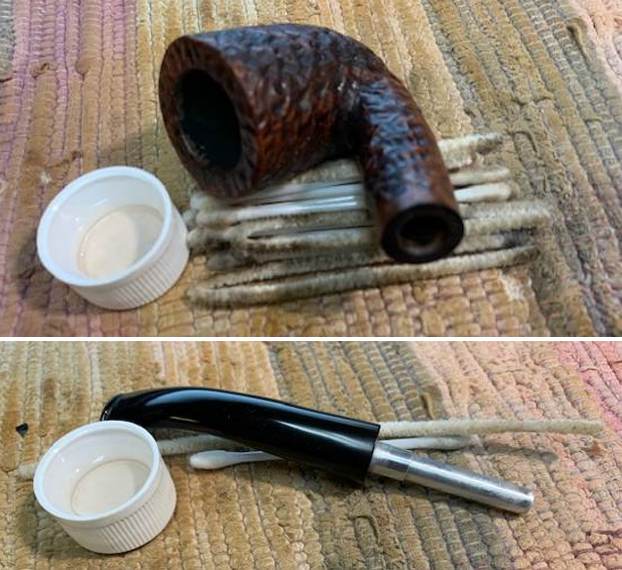
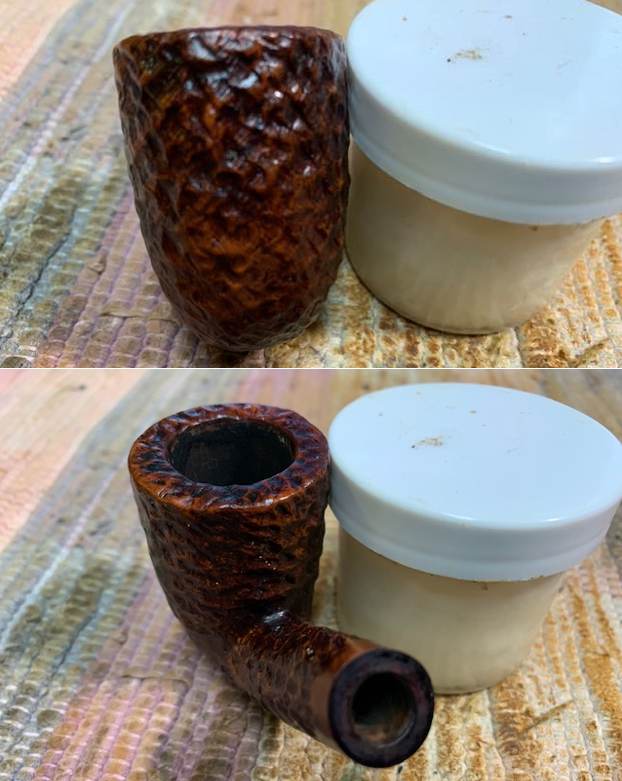
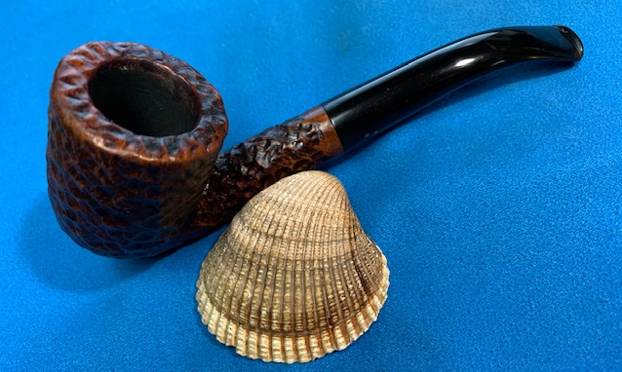
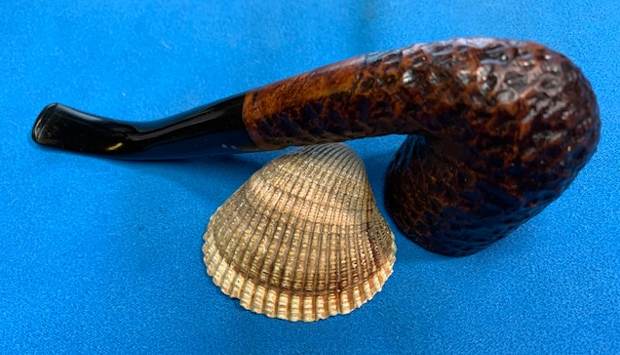
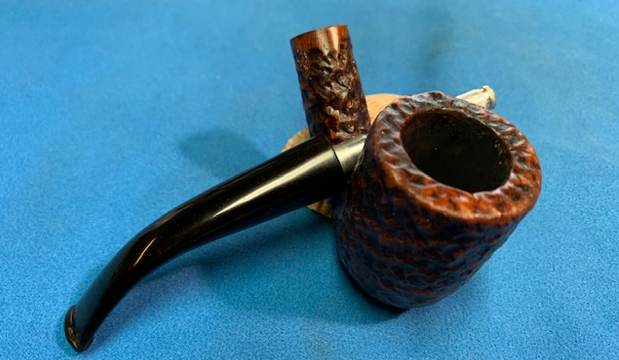
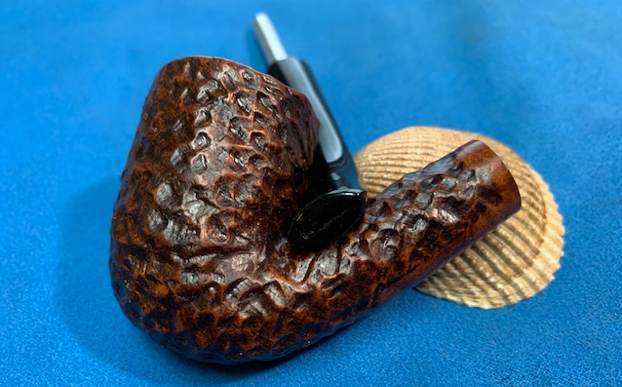
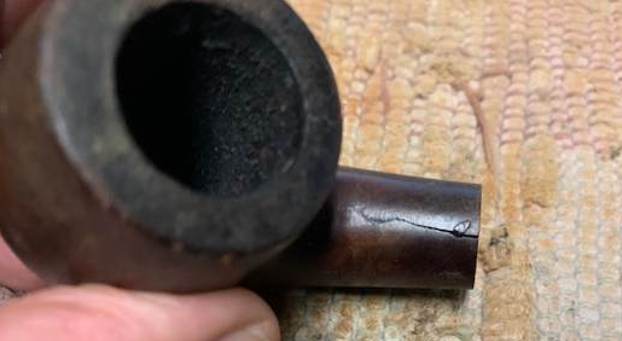
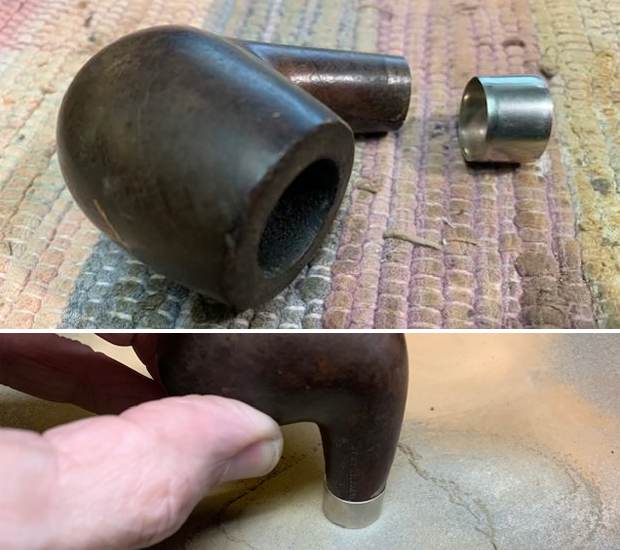
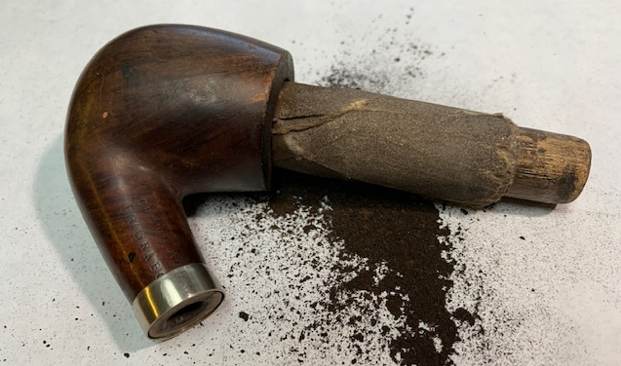
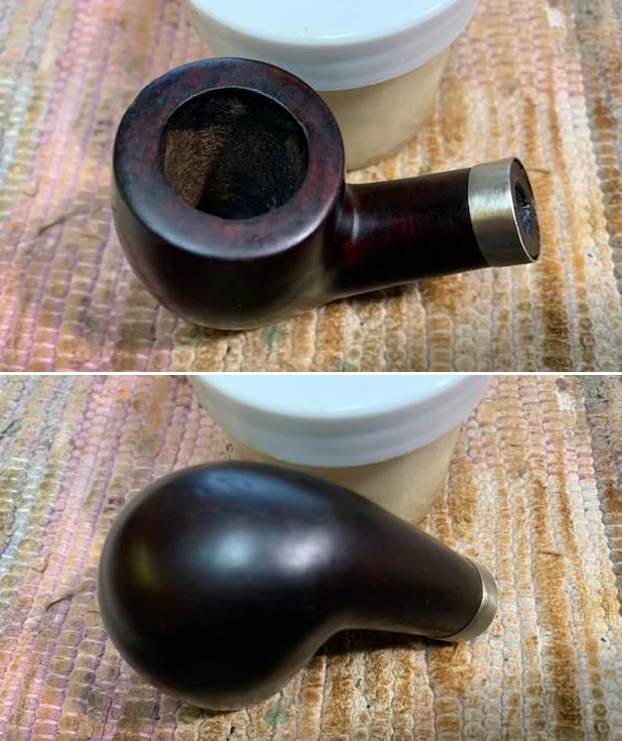
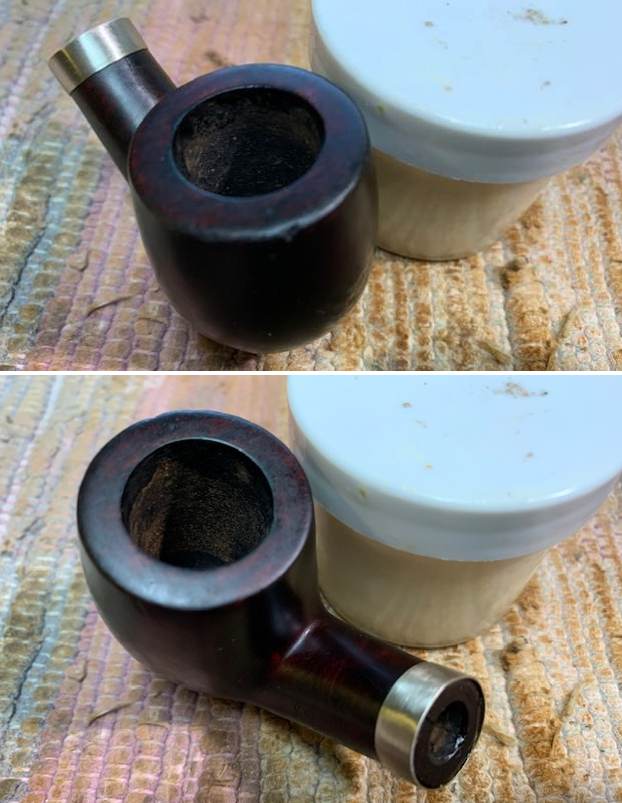
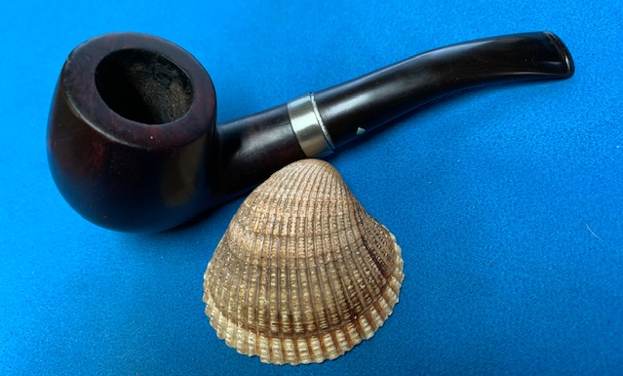
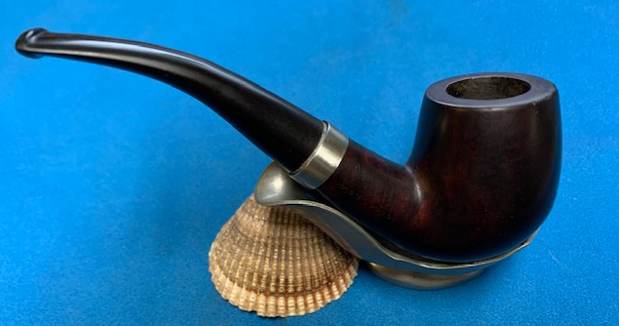
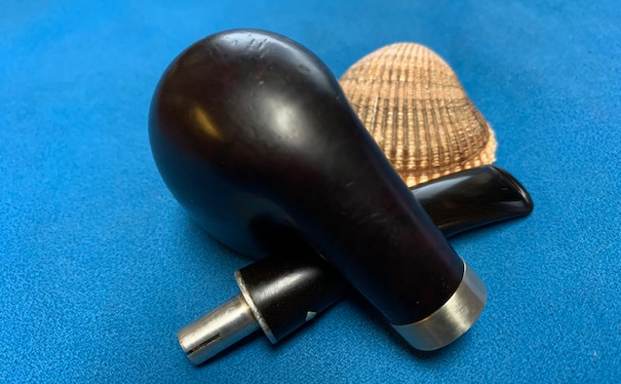
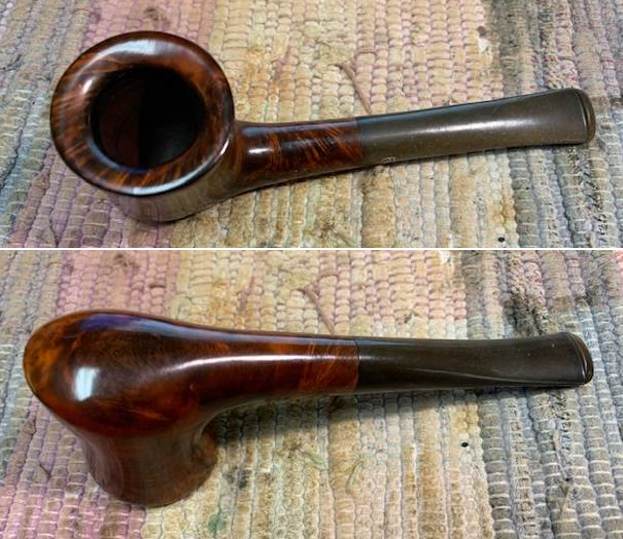
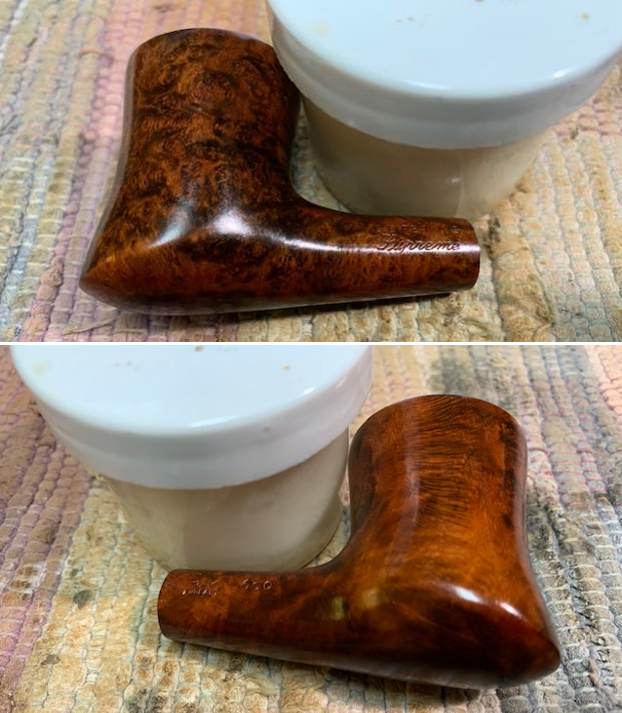
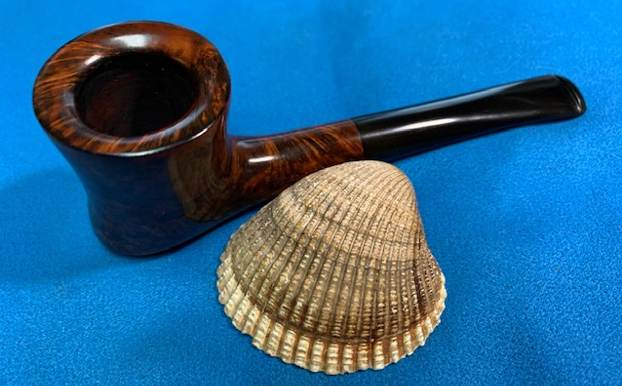
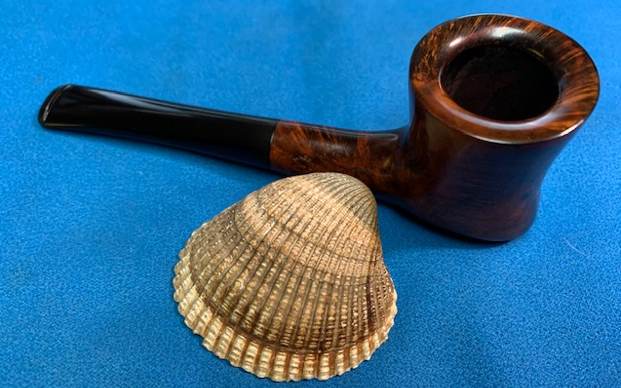
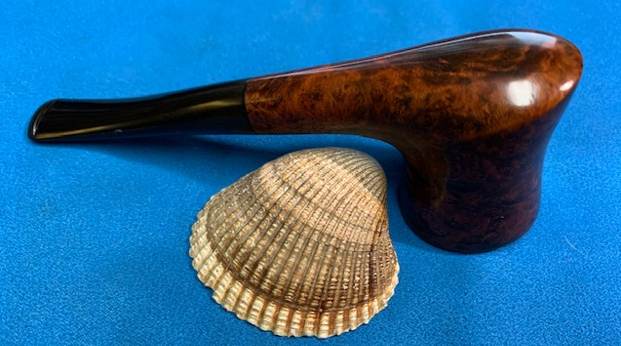
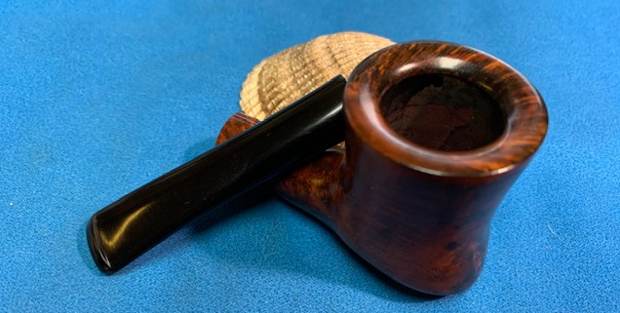
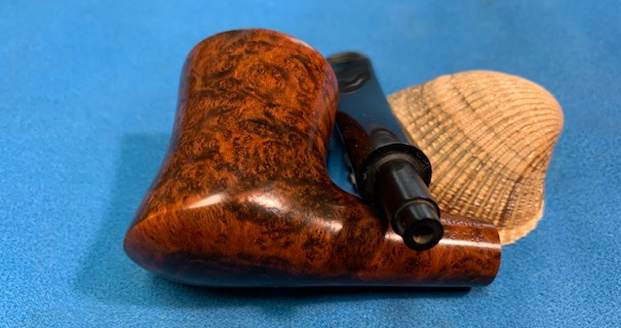
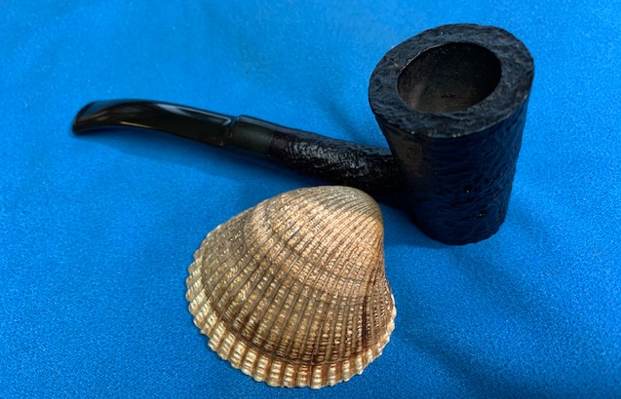
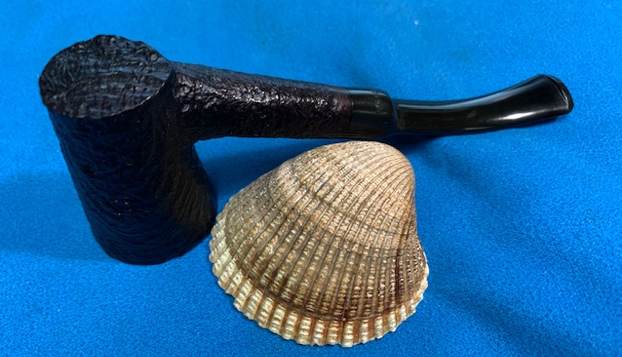
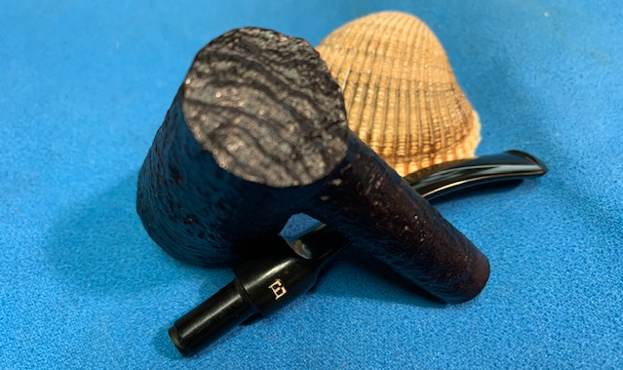
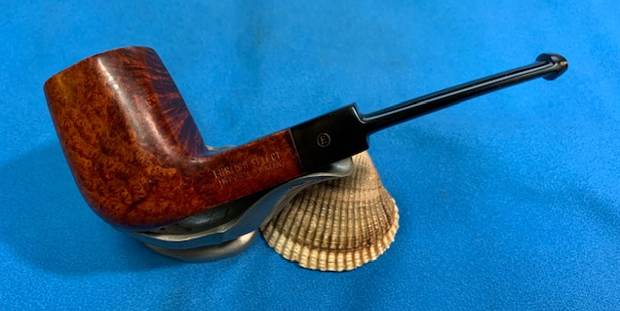
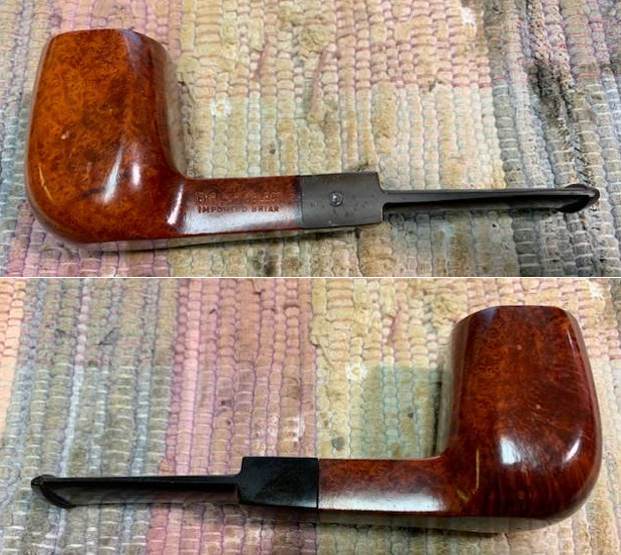
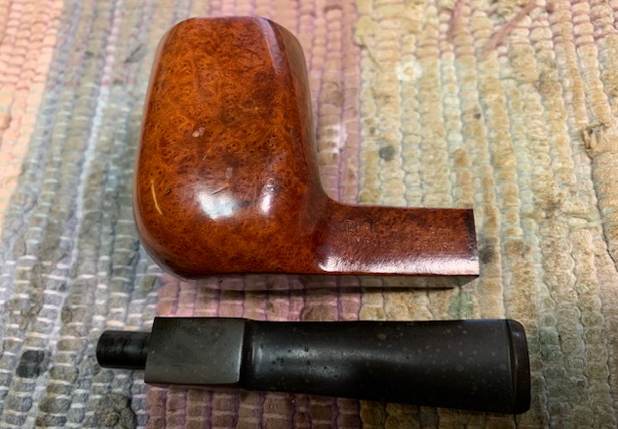
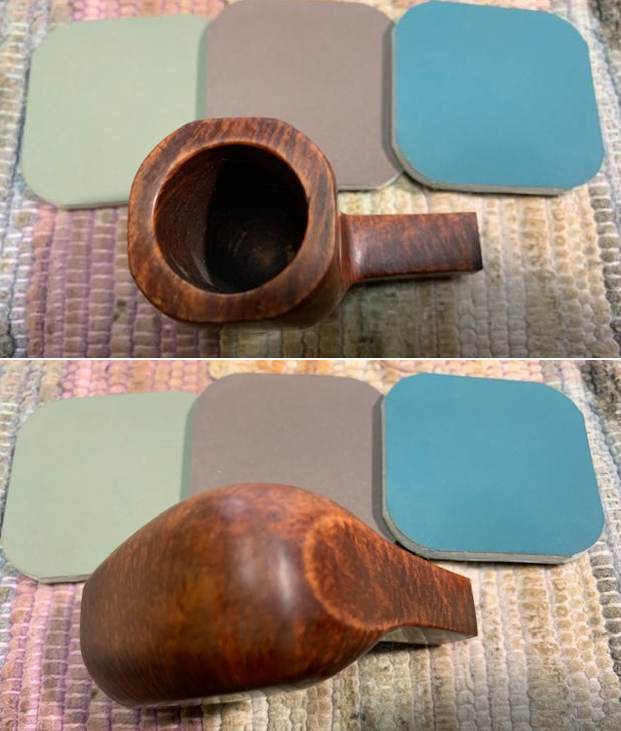
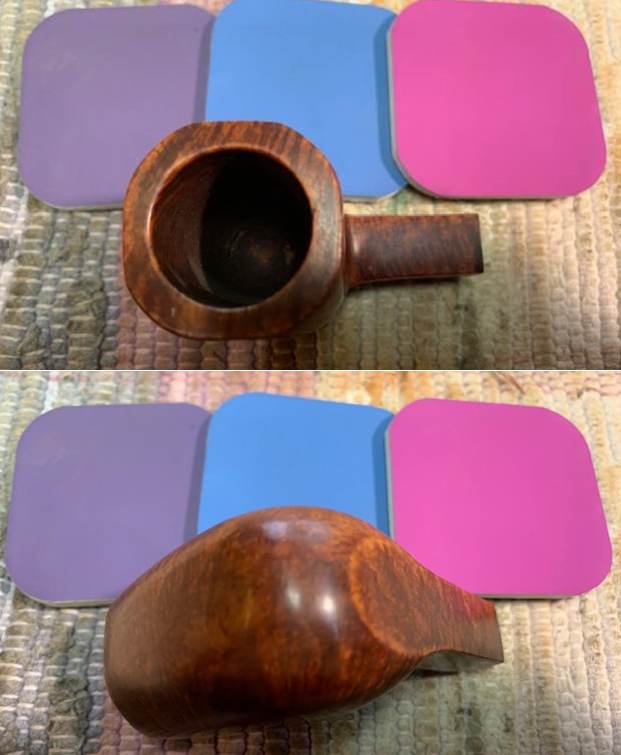
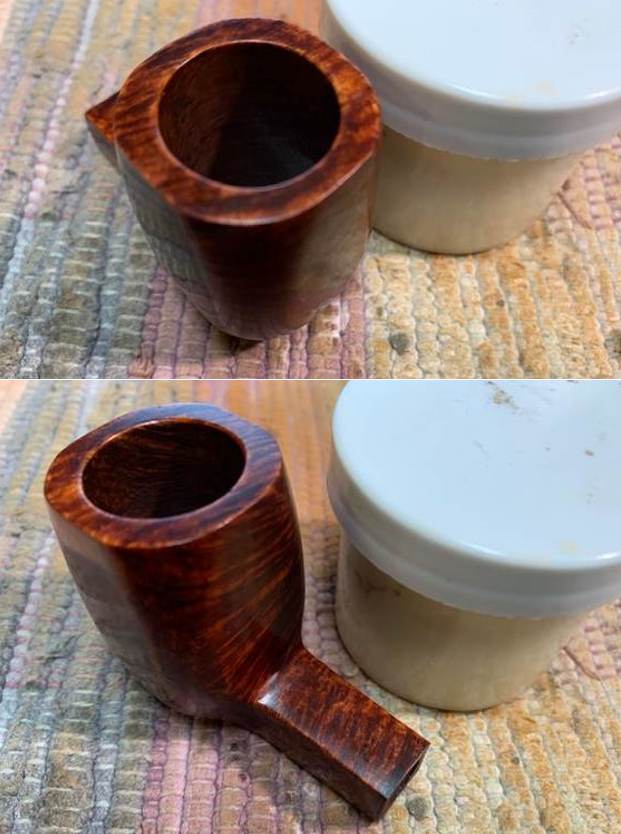
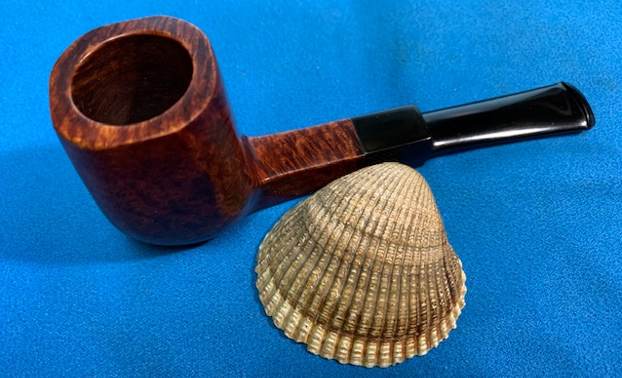
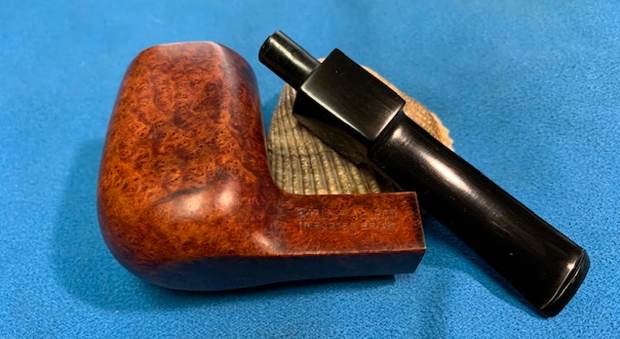
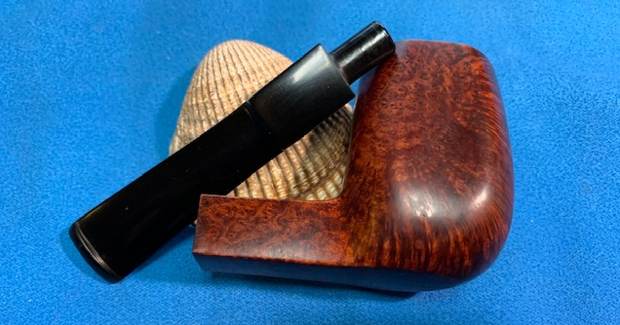
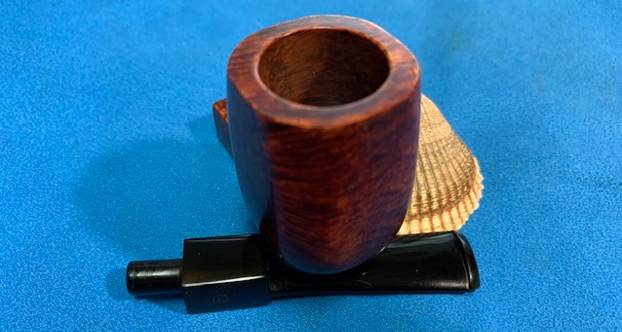
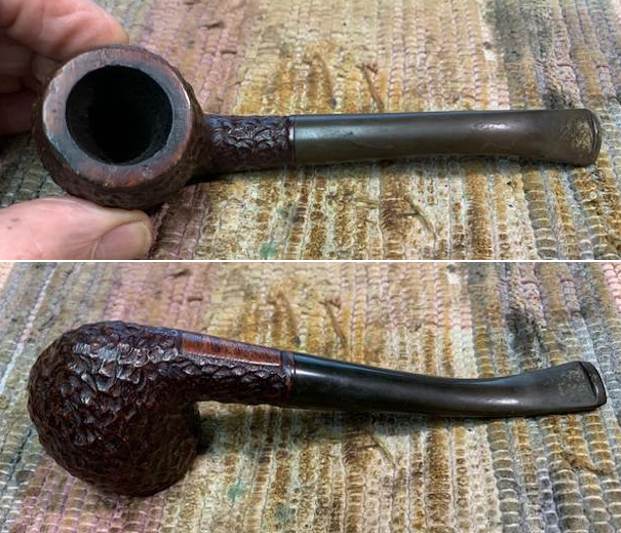
 I took photos of the pipe when it brought it to the desk top. There was a moderate cake in the bowl in the bowl with lava overflowing into the rim top. There were some dark spots on the top of the rim on the front and the back sides. There was also some damage on the inner edge of the rim that would need to be dealt with. The shank and airways were dirty with tars and oil. The finish was dirty and would need scrubbing. I was hoping to bring it back to the natural finish. There was no Hard Rock Maple filter in the tenon and the pipe smelled of stale tobacco. The stem was lightly oxidized and there was some light tooth chatter to the top or underside of the stem. The button had no damage. Overall the pipe looked good even though it was a dirty one.
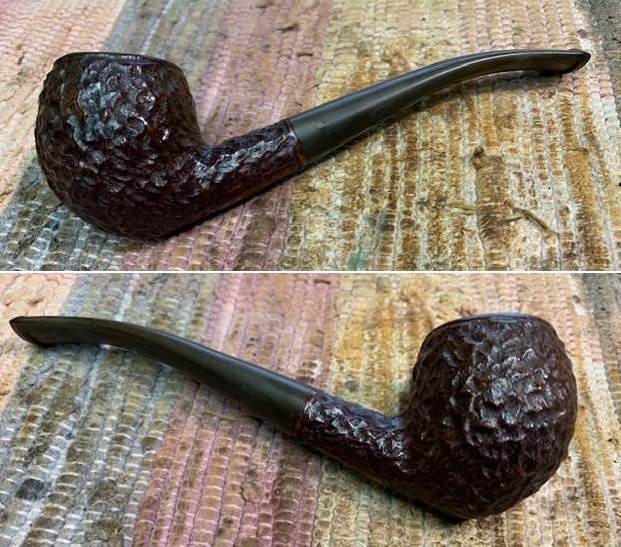
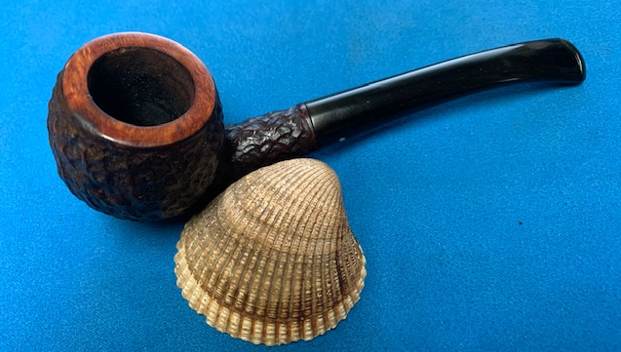
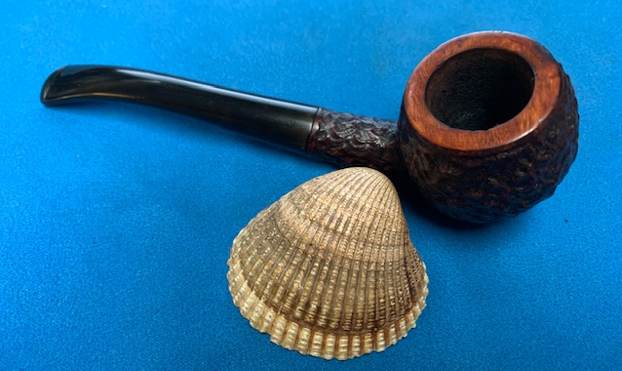
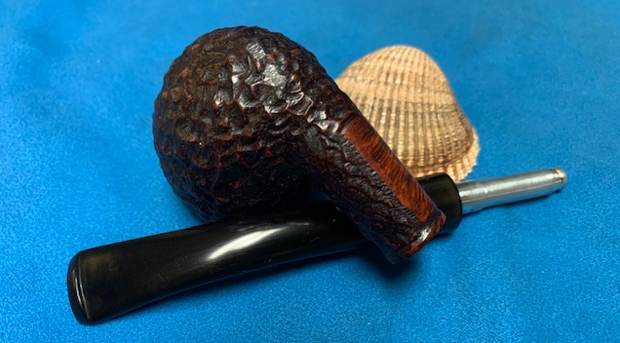
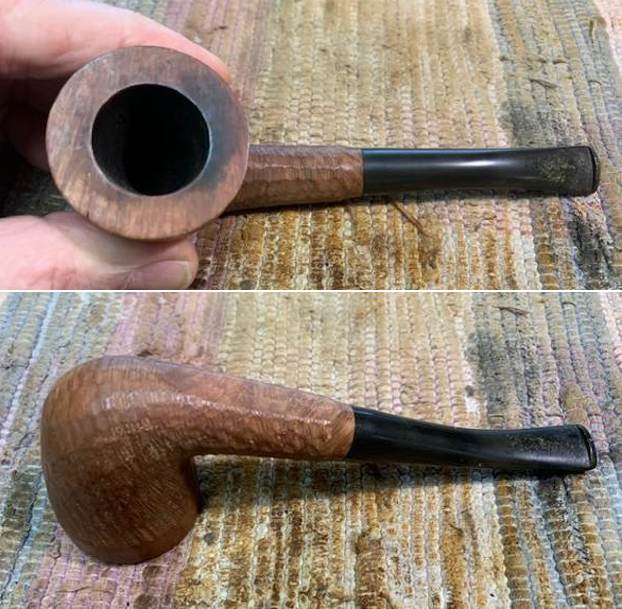
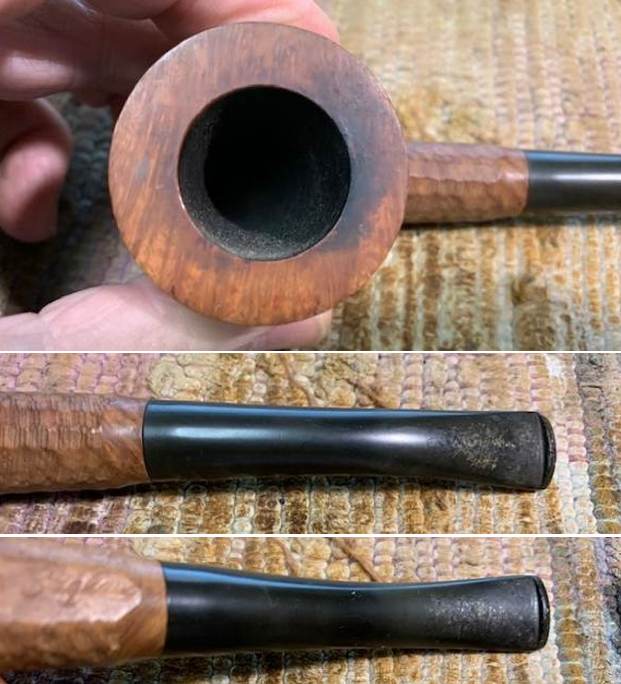
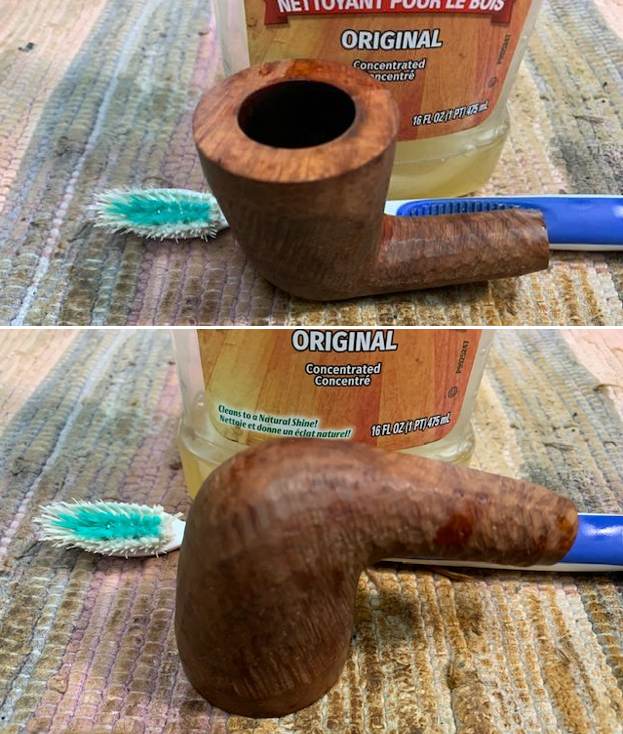
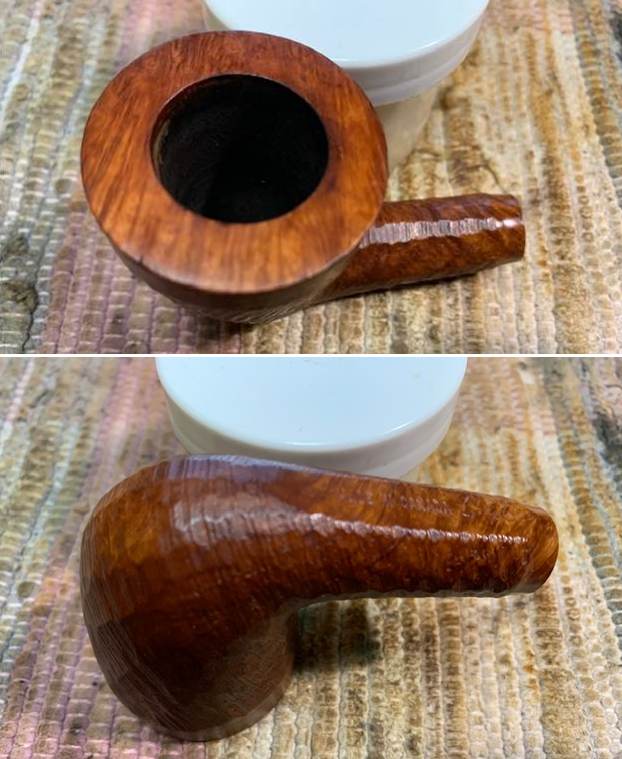
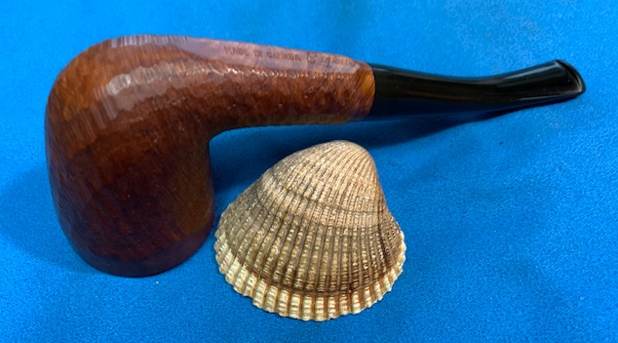
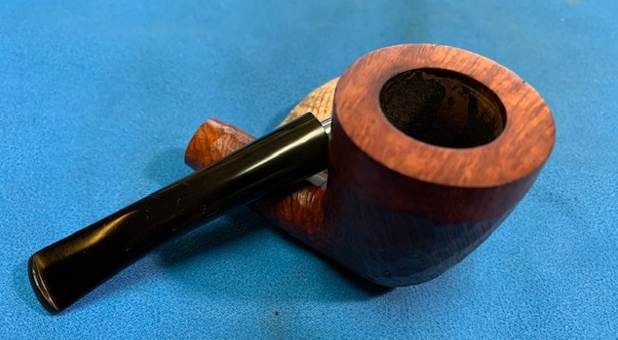
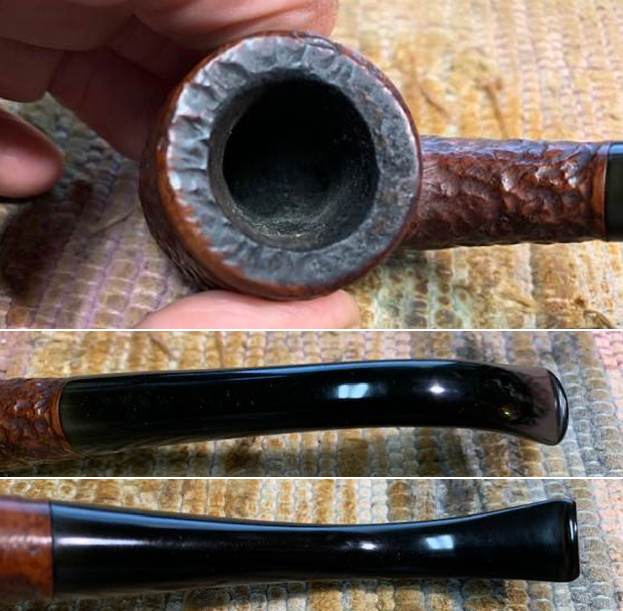
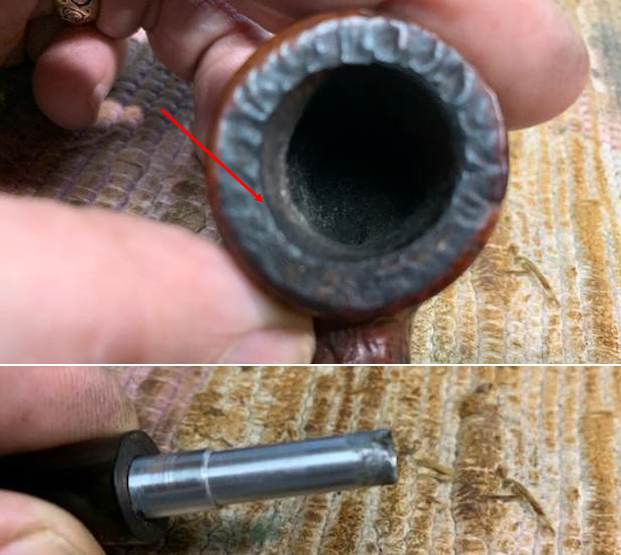
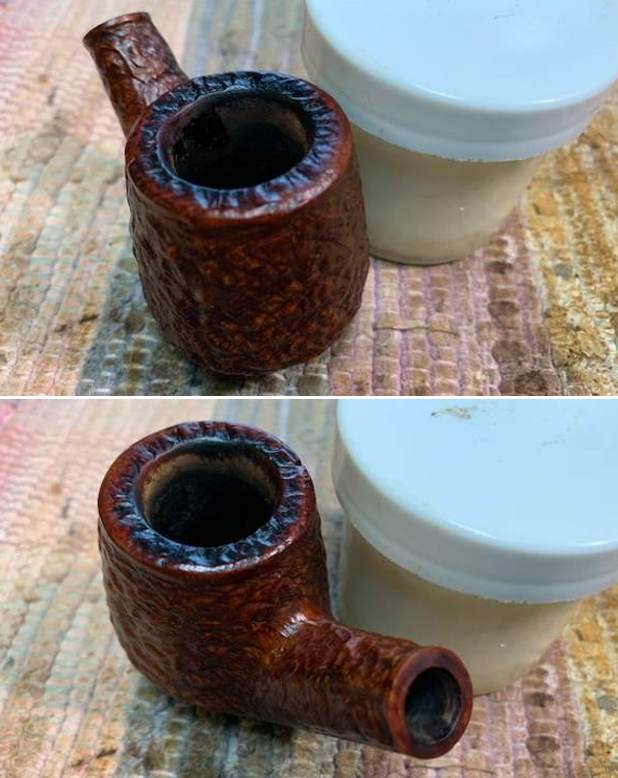
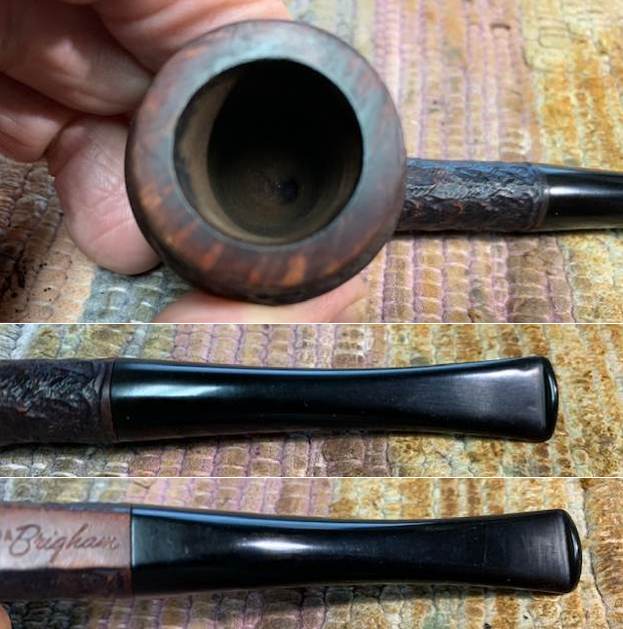
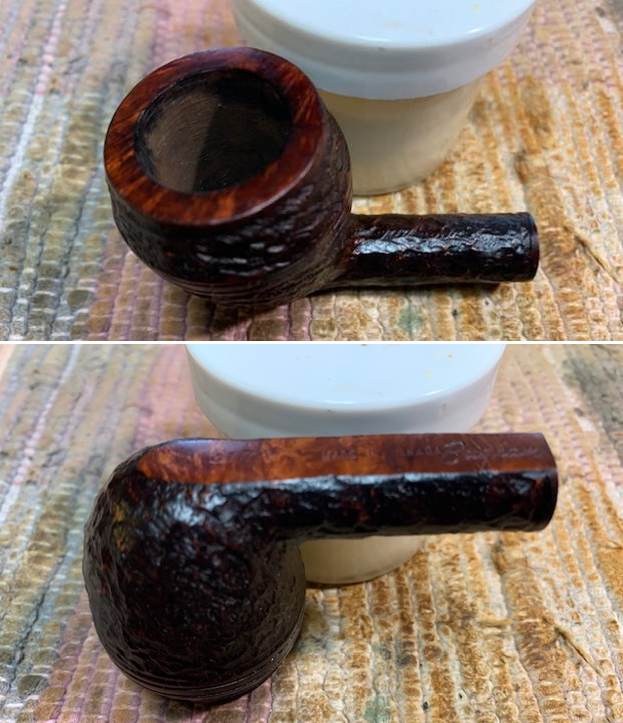
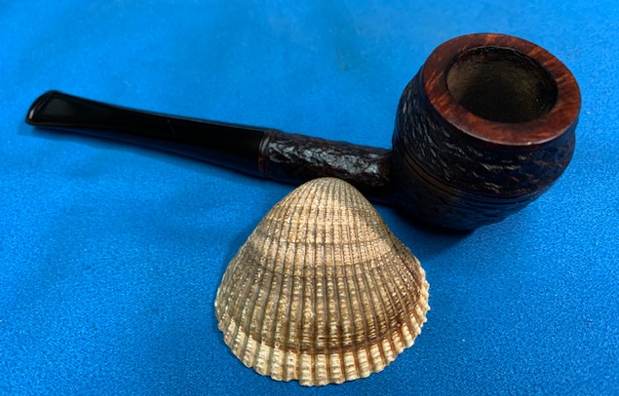
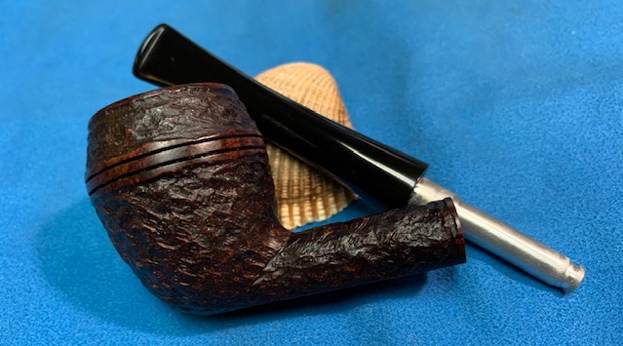
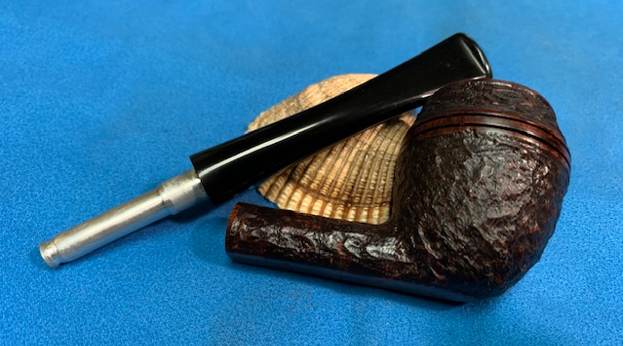
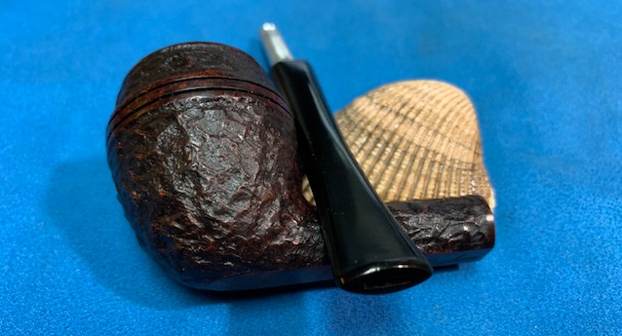
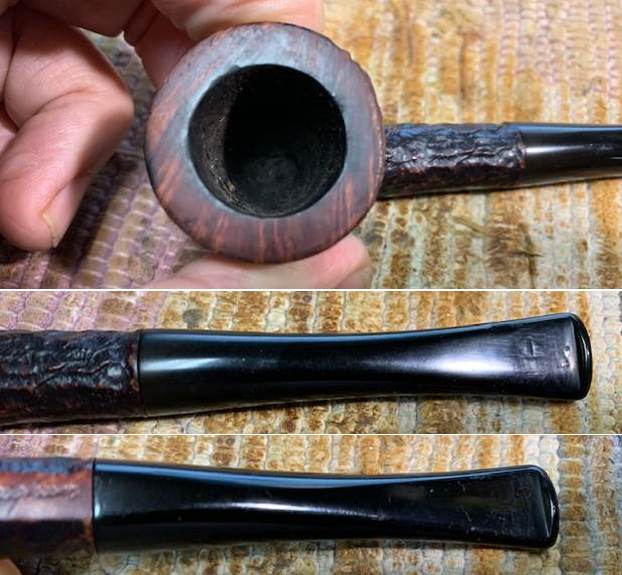
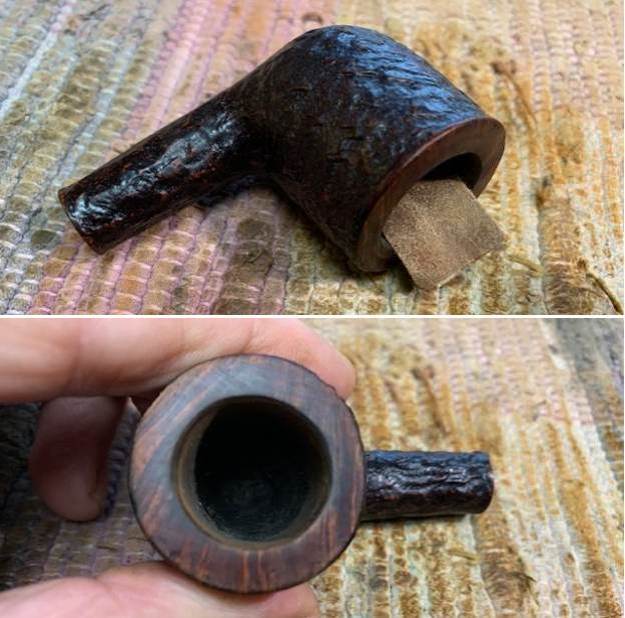
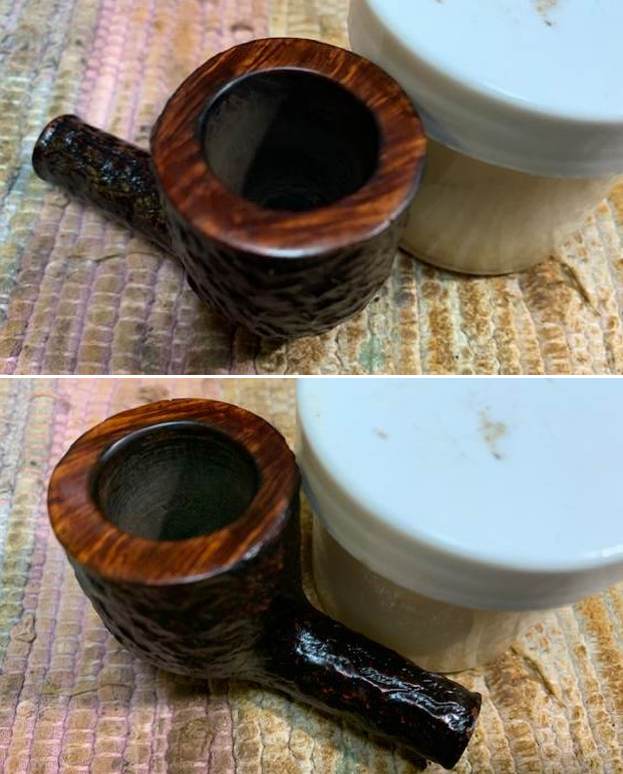
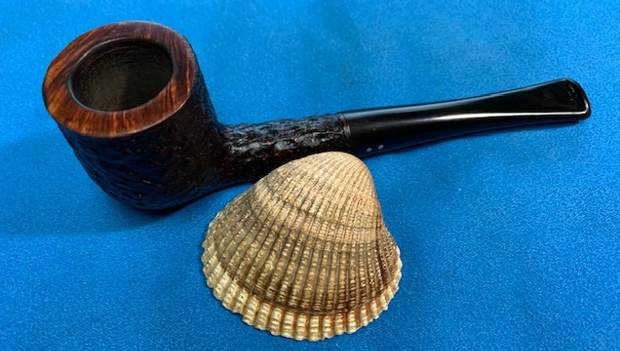
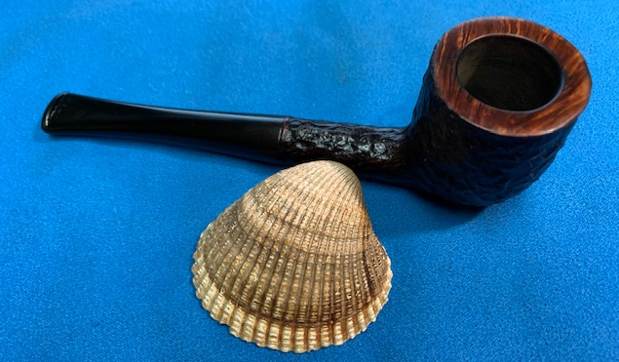
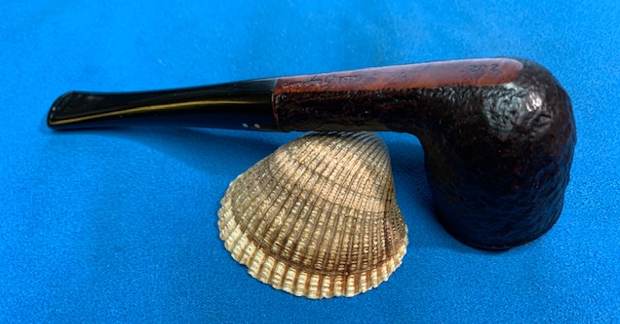
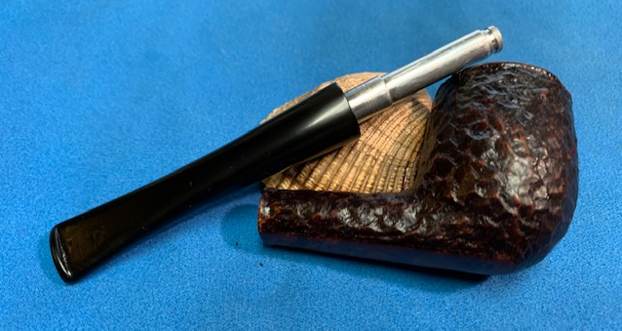
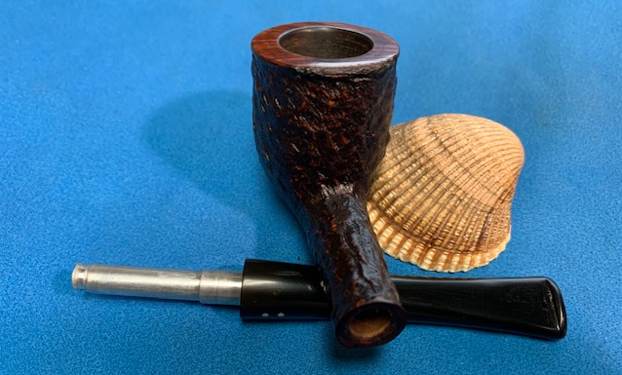
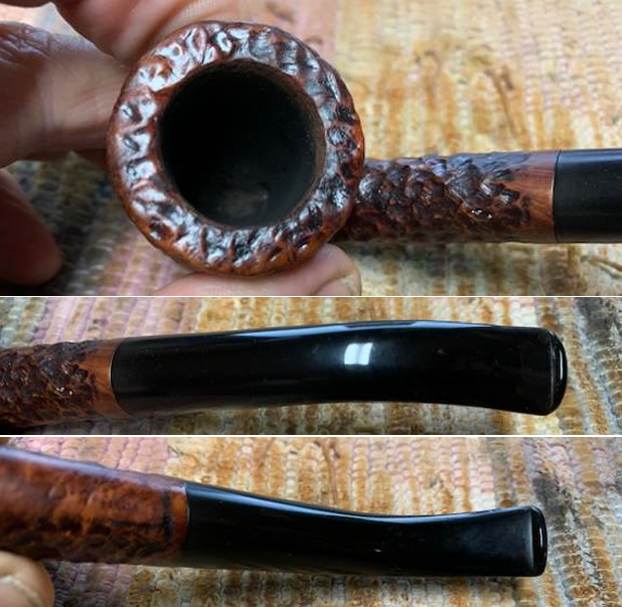
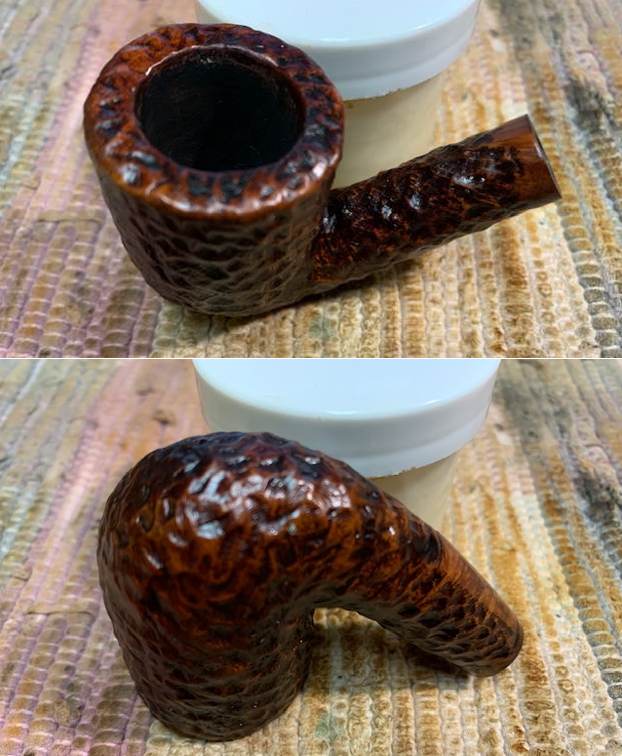
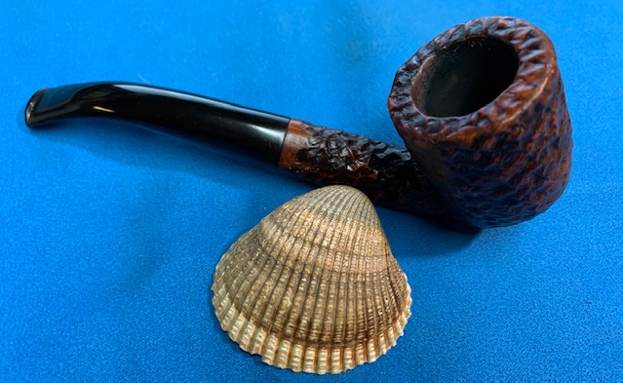
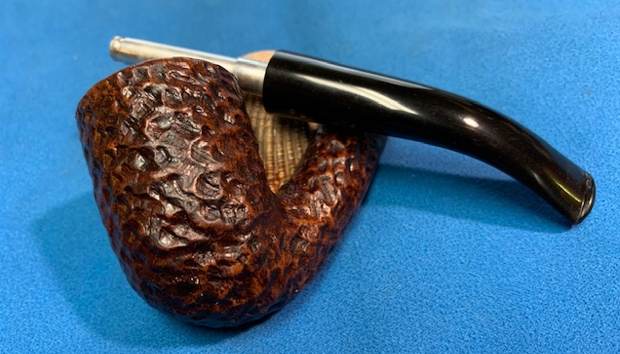
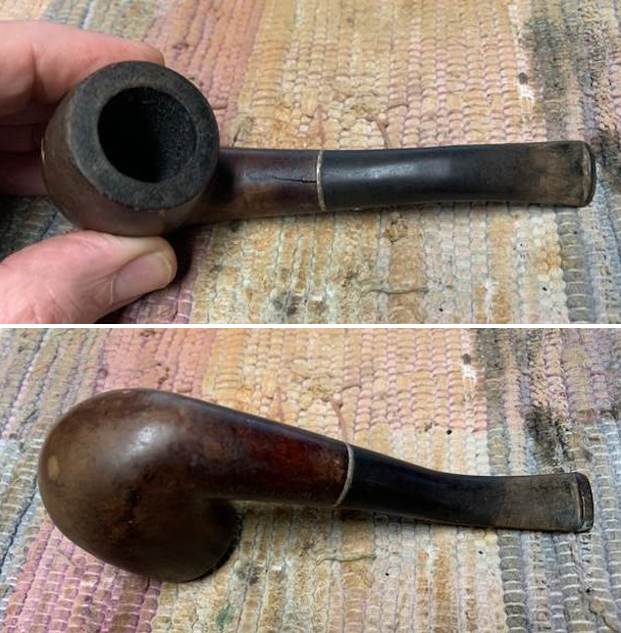
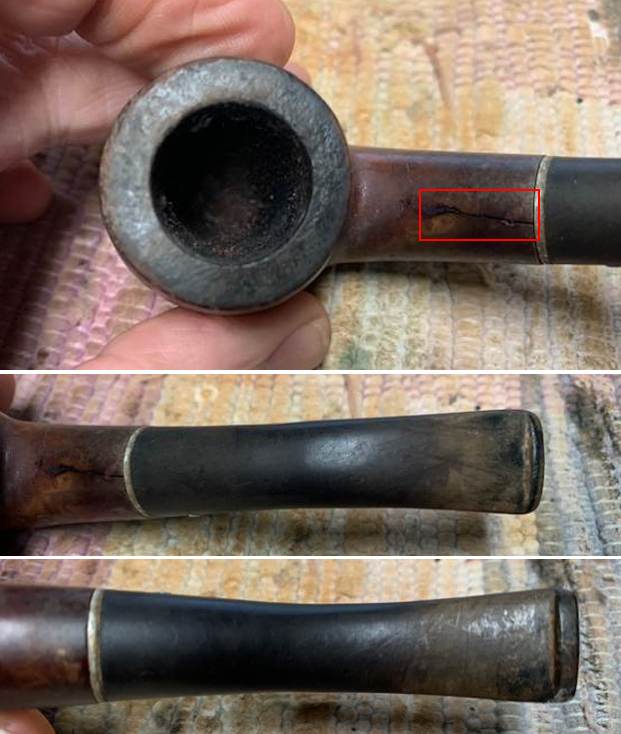
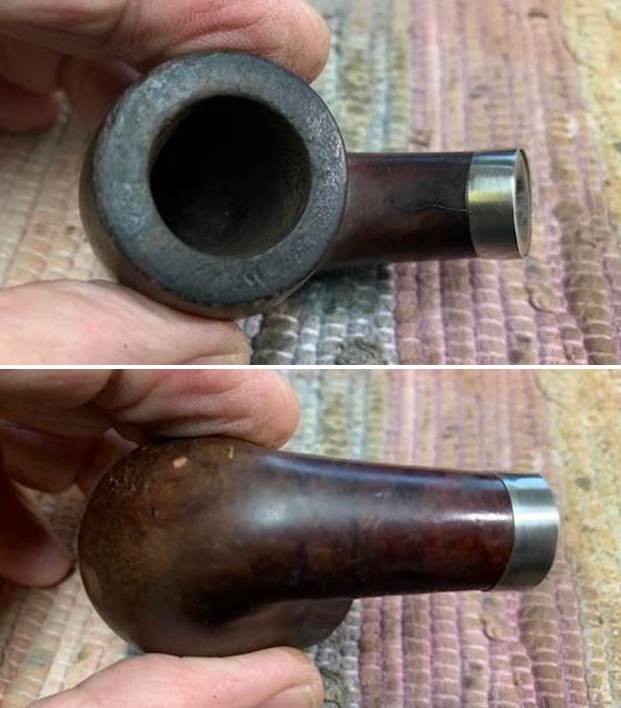
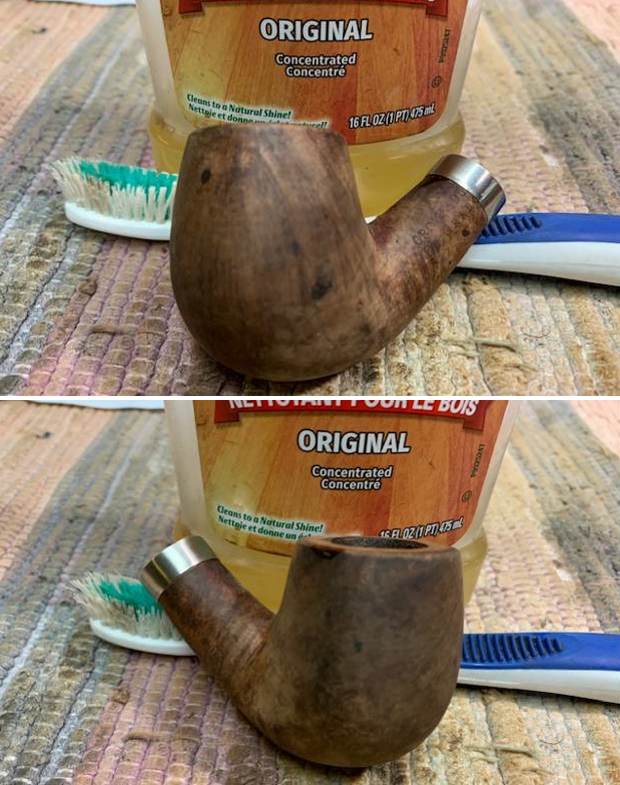
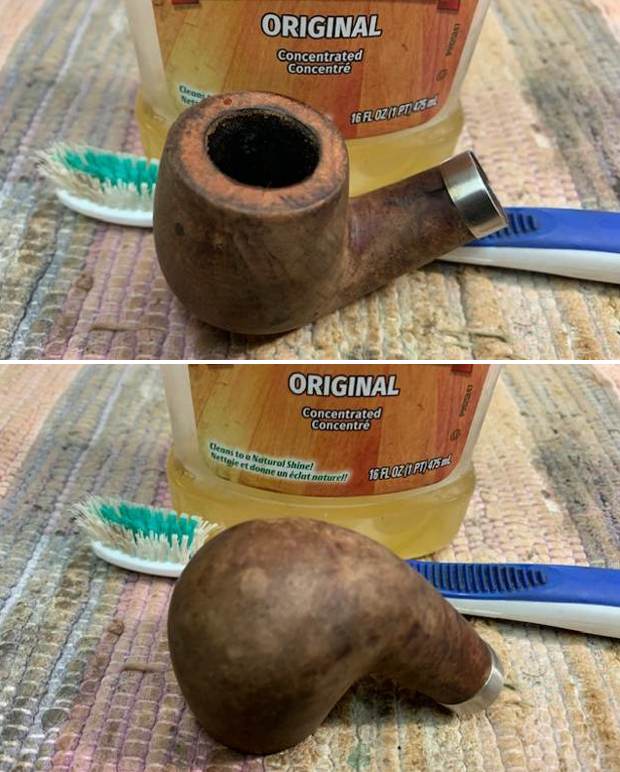
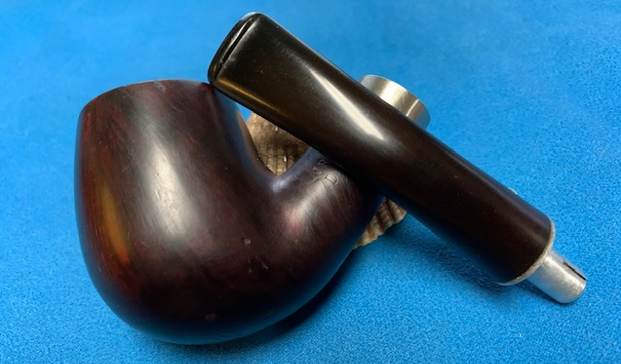
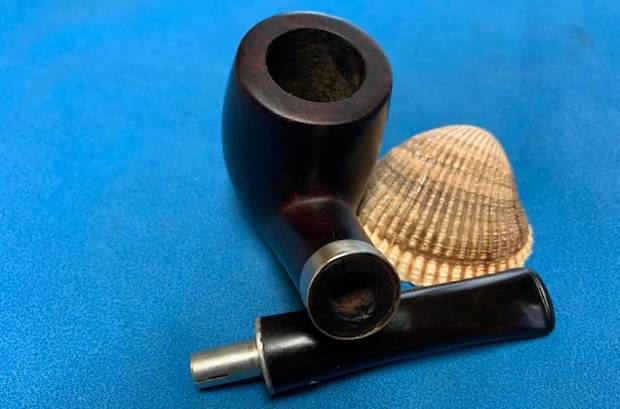
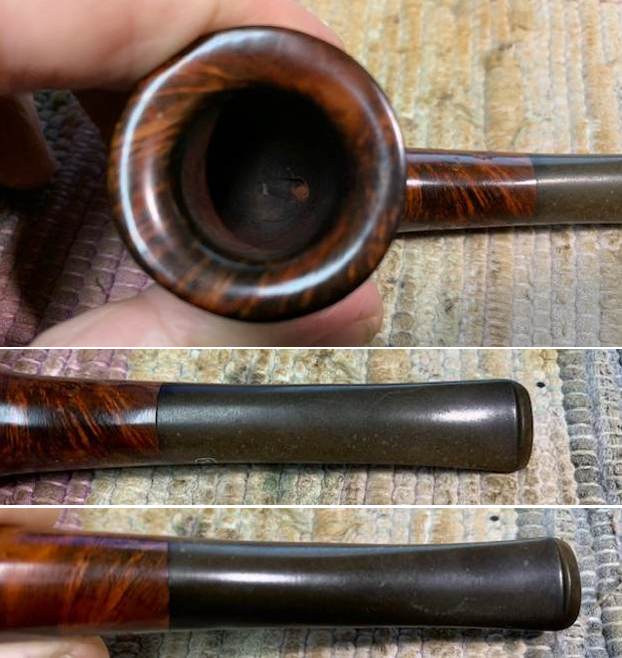
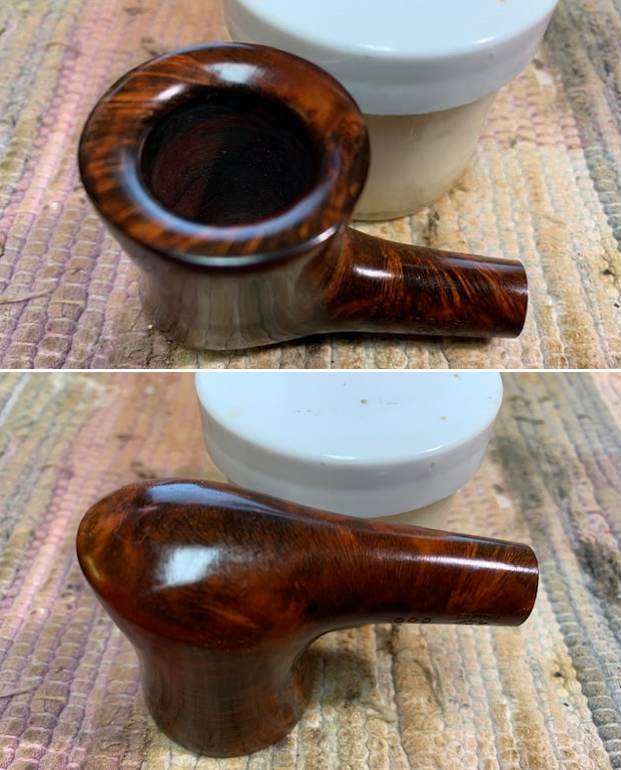
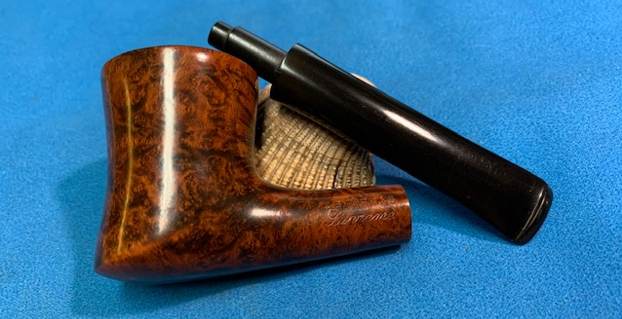
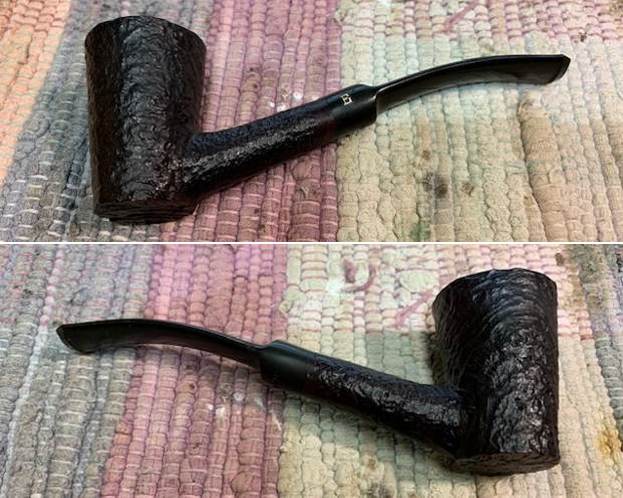
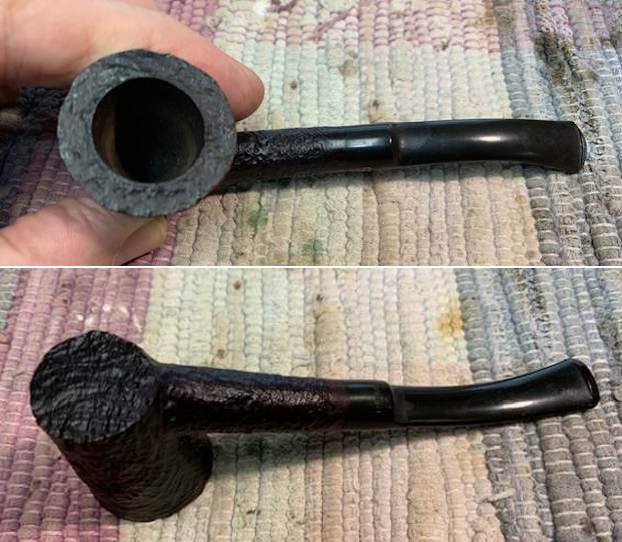
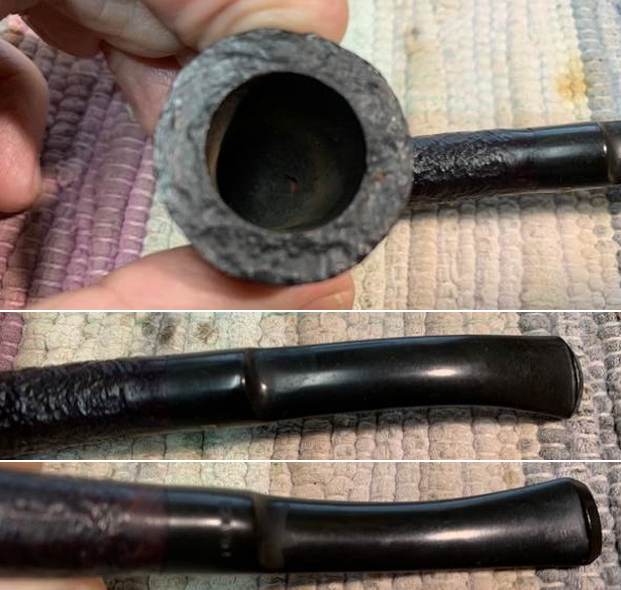
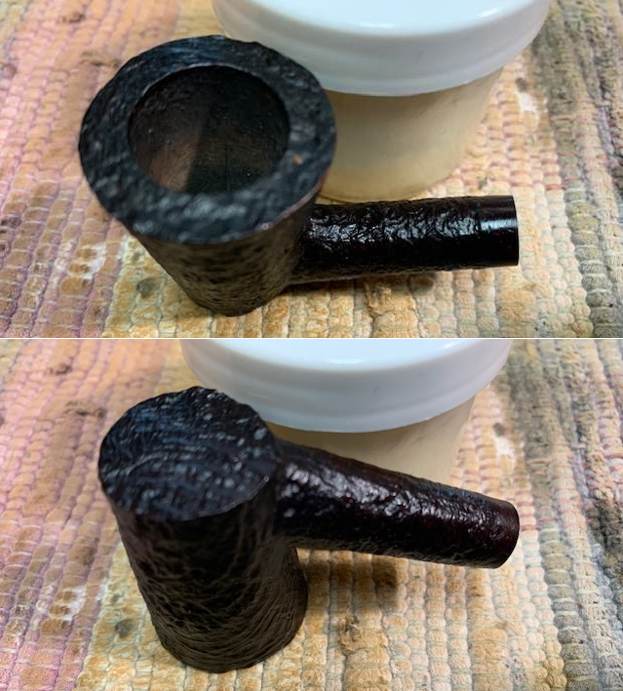
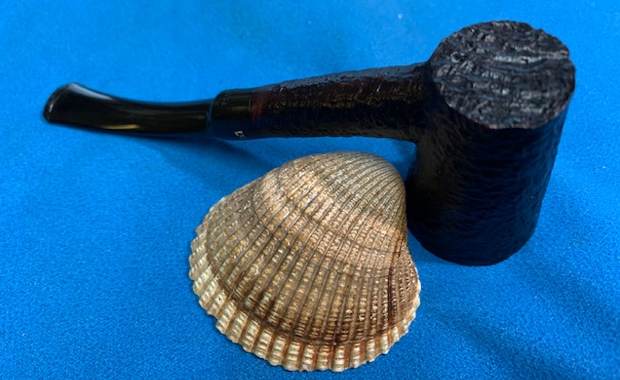
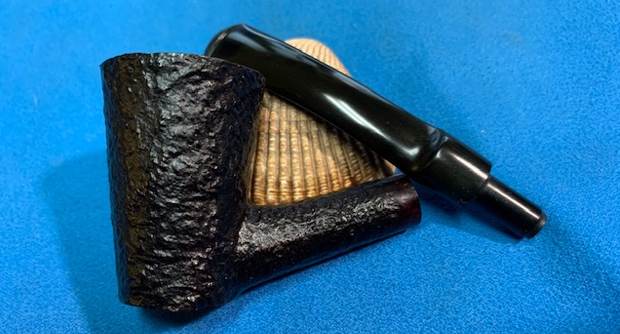
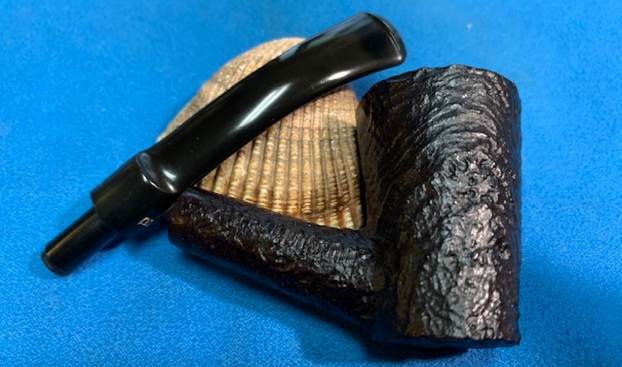
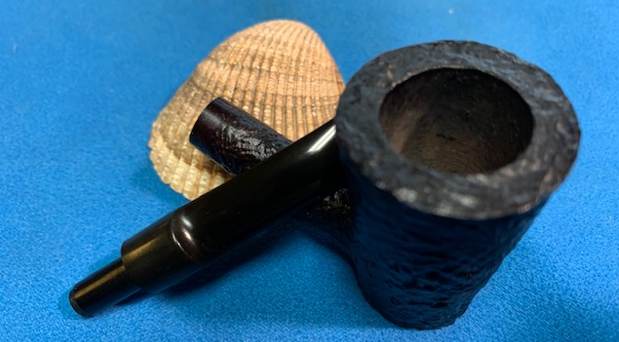
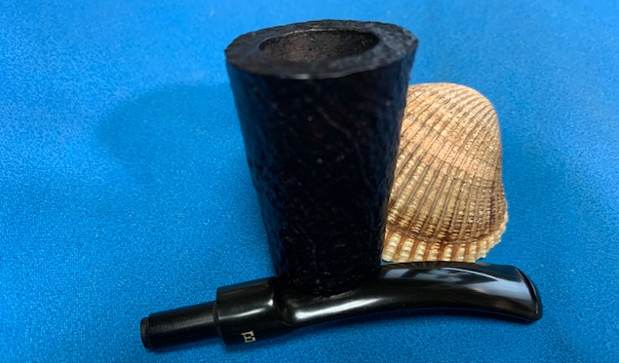
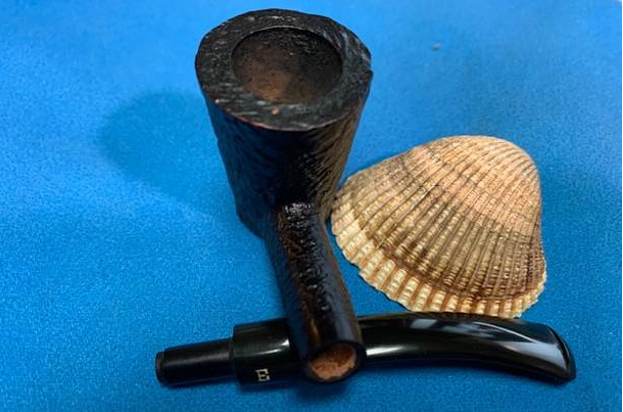
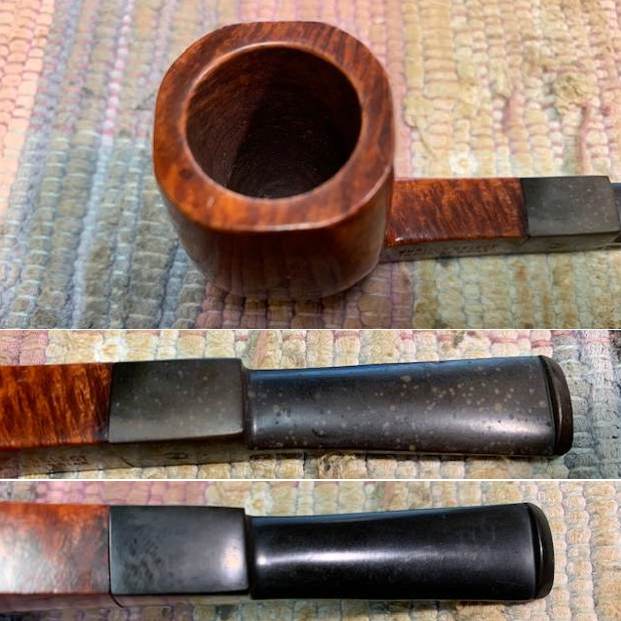
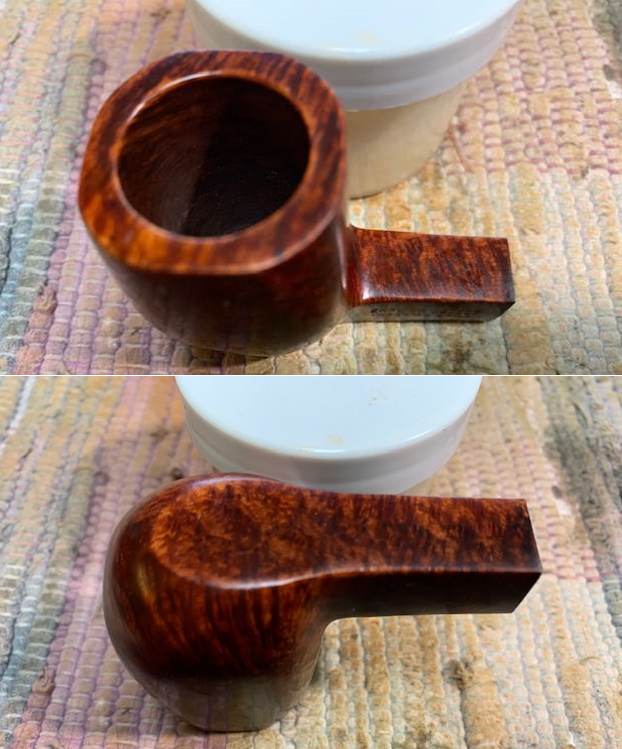
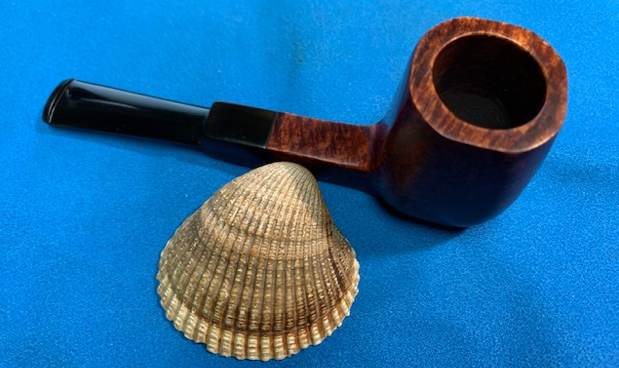
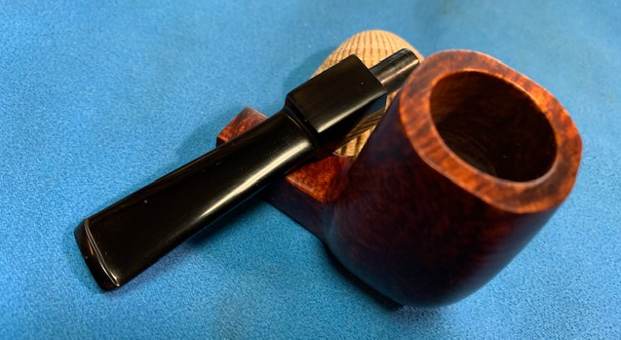
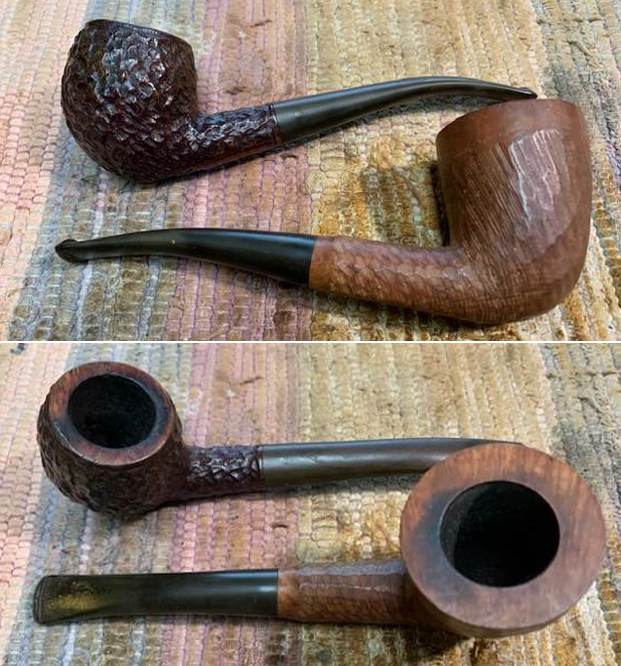
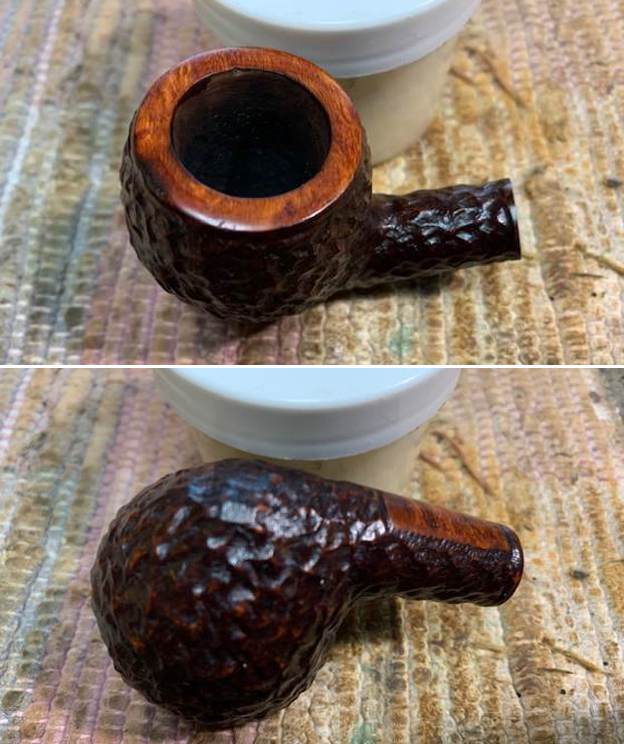
 I took photos of the rim top and the bowl to show the condition. The rim top was smooth with some nicks and dents in the surface. It also had some darkening around the top and damage to the inner edges. I also took photos of both sides of the stem to show the tooth marks and chatter. Over all the pipe was in okay condition.
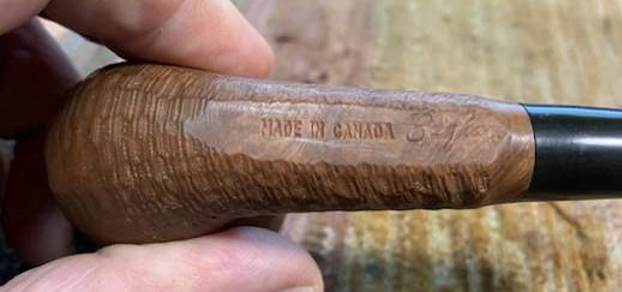
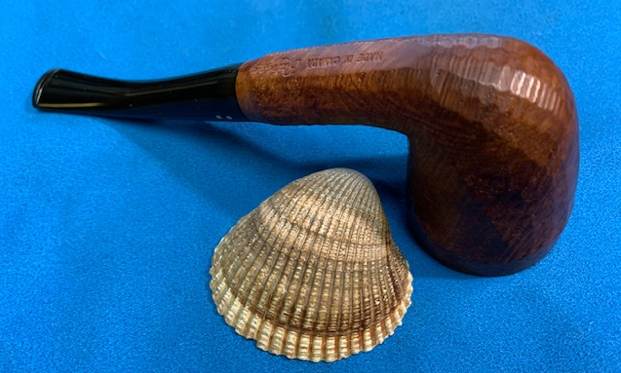
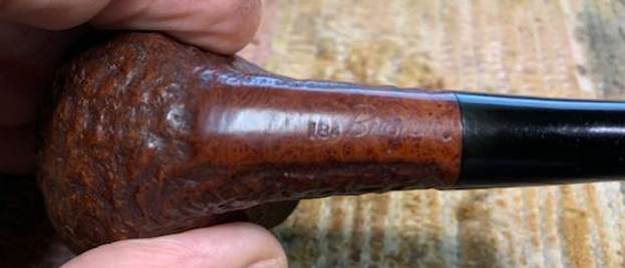
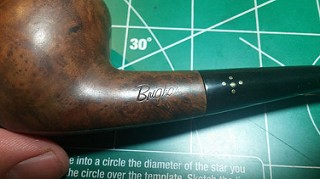
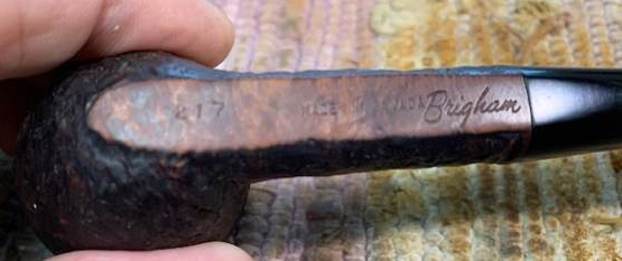
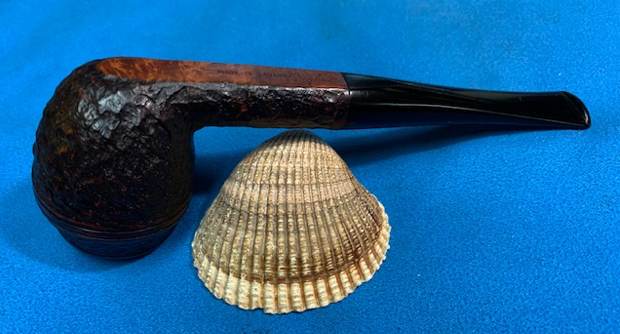
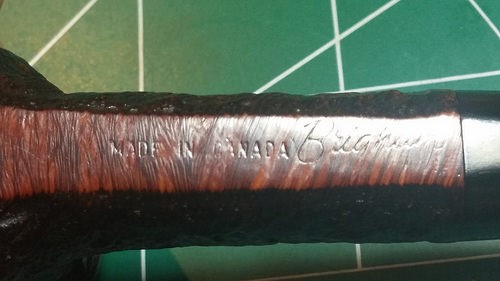
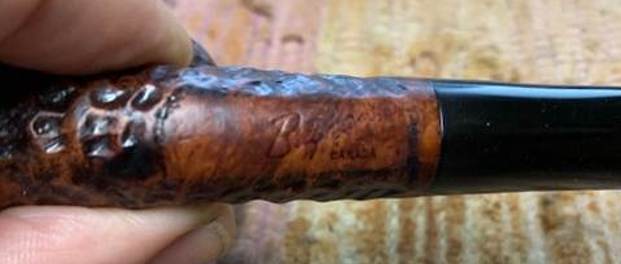
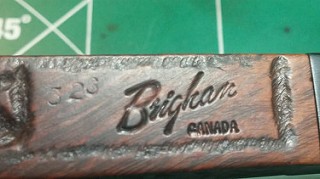
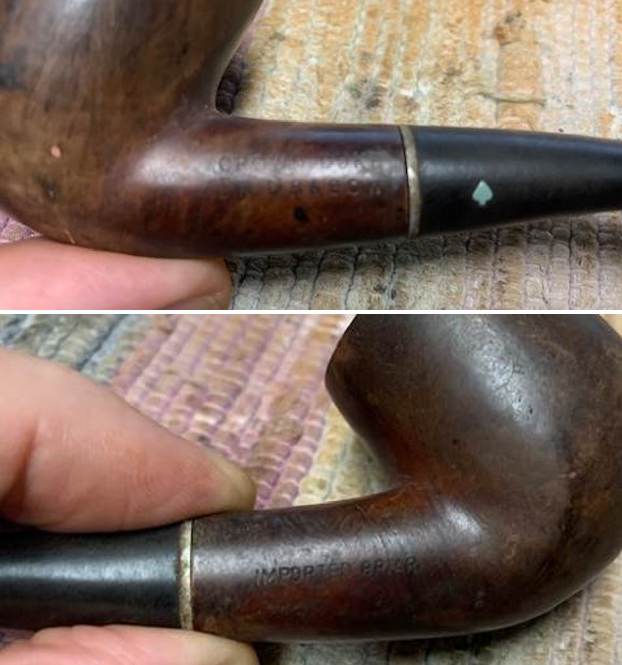
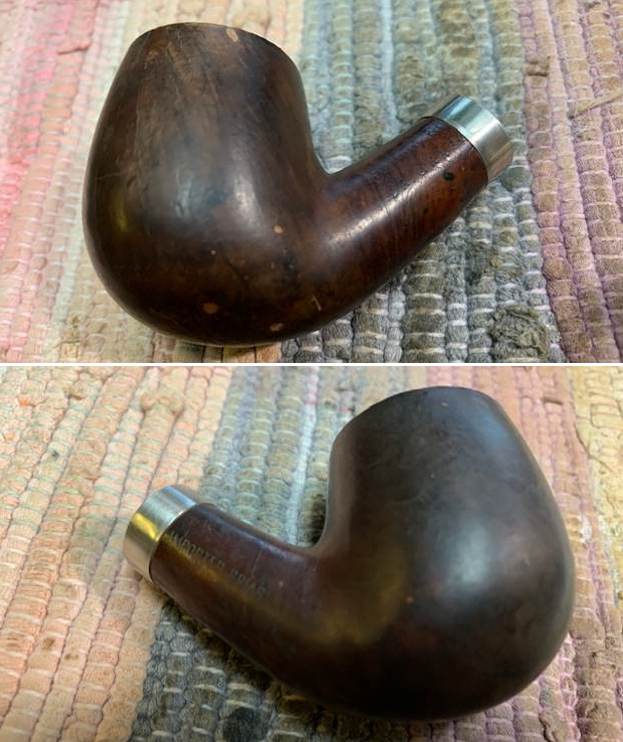
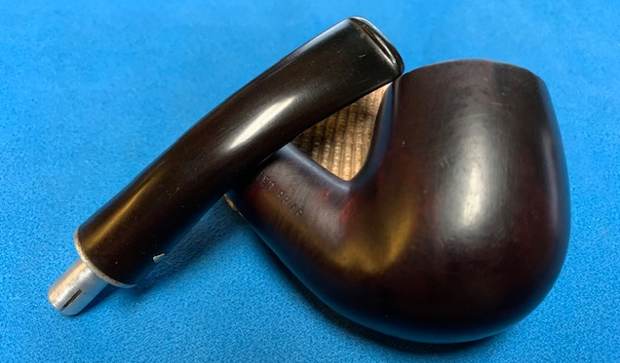
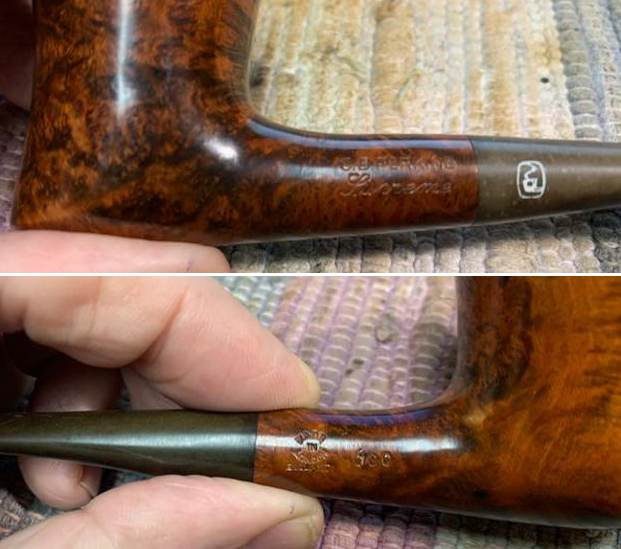
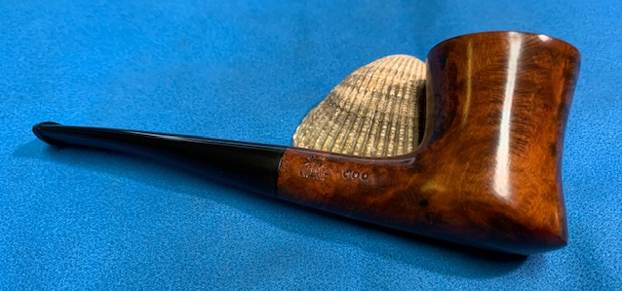
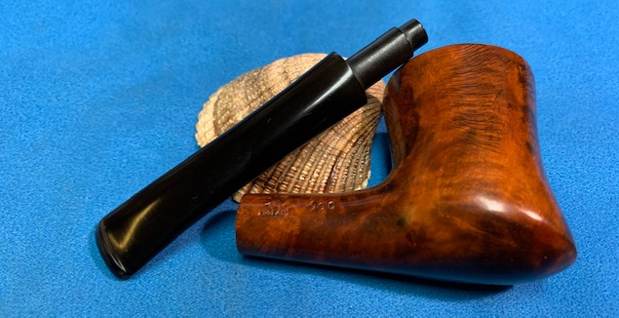
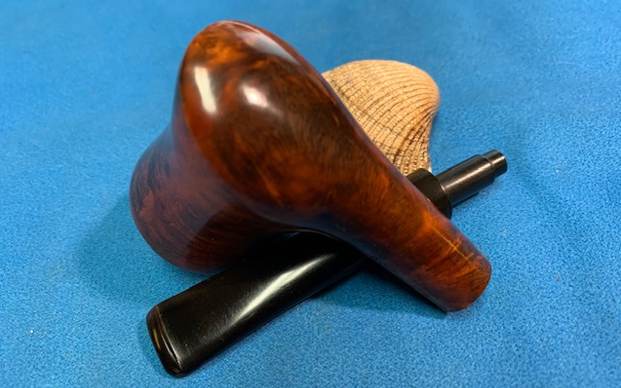
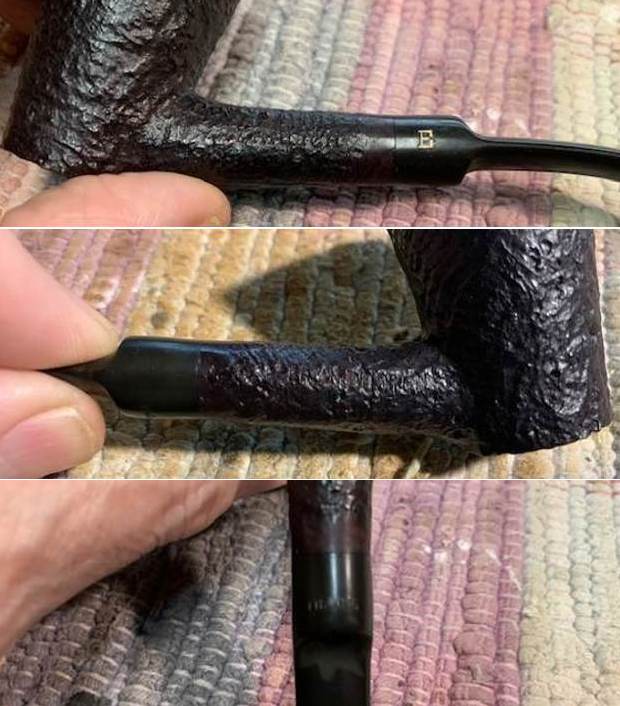
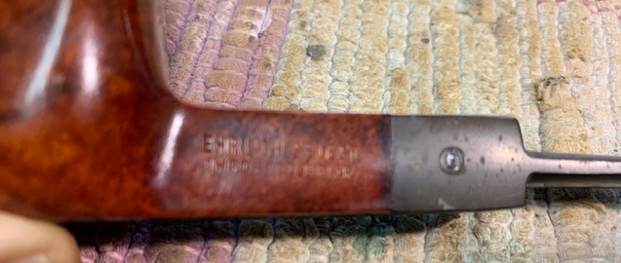
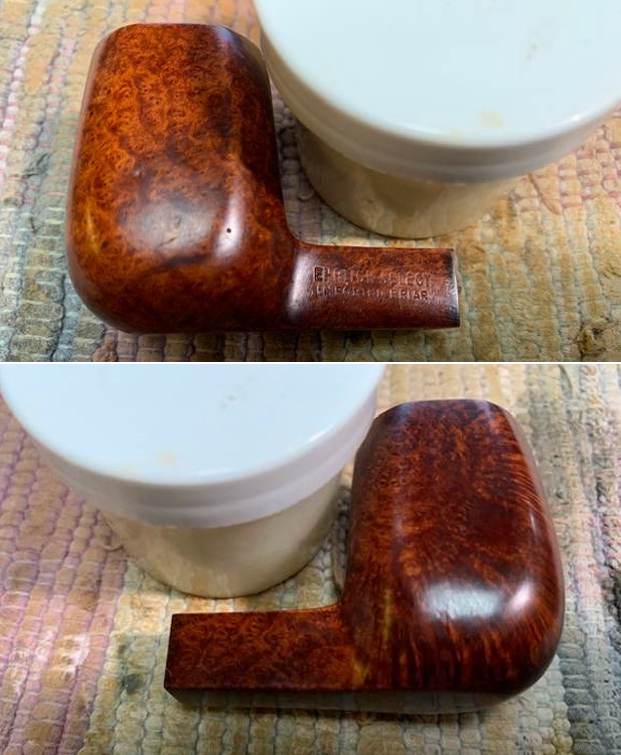
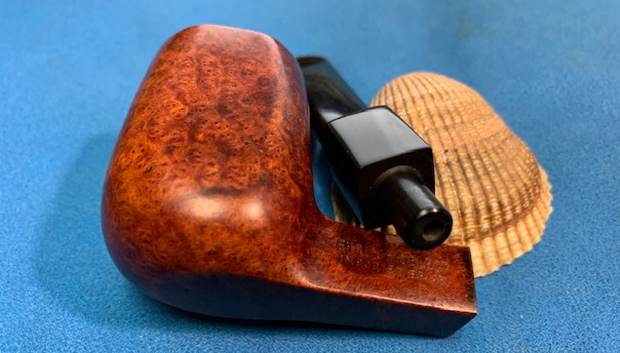
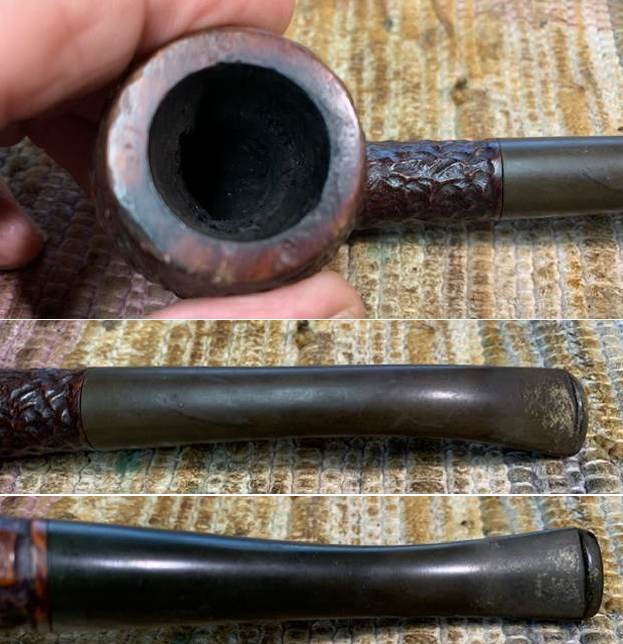 I took a photo of the stamping on the underside of the shank. It is clear and t it reads as noted above.
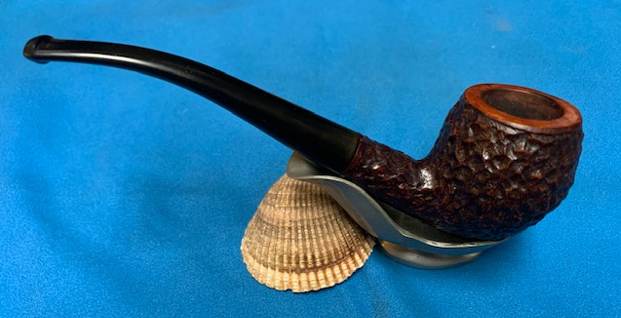
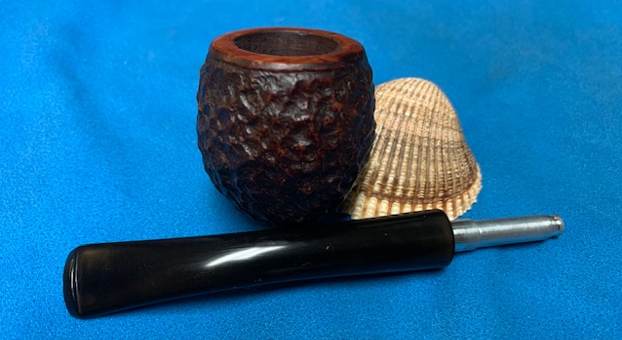
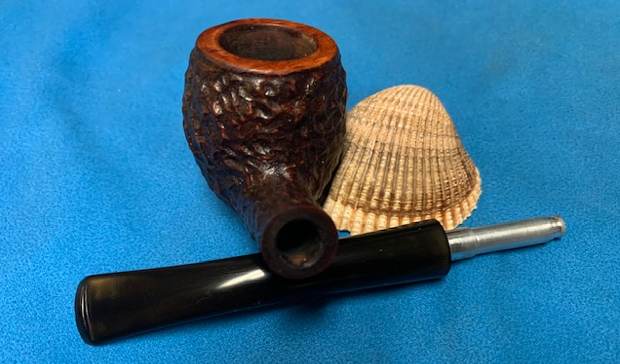
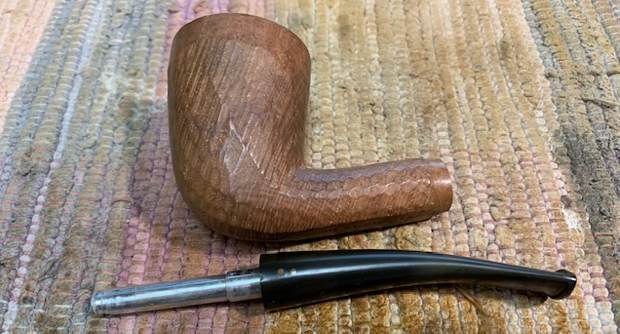
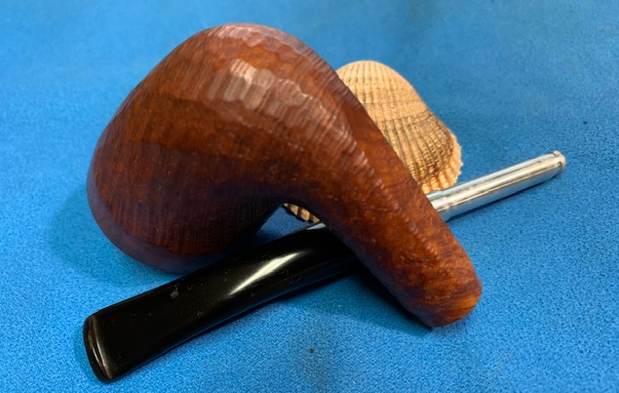
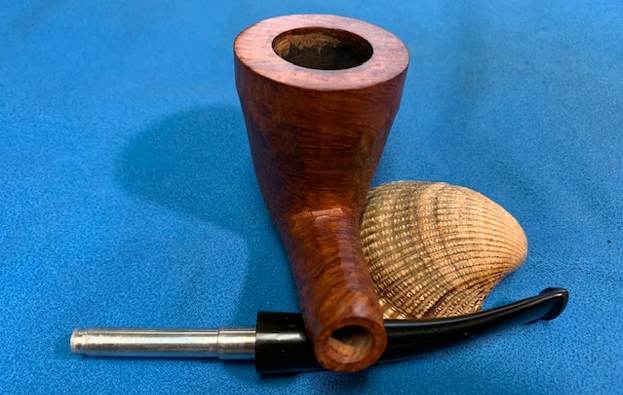
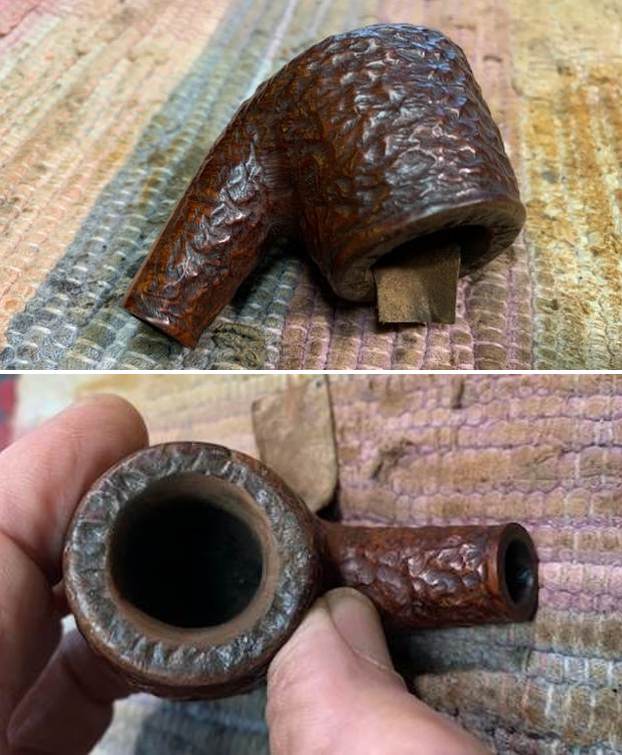
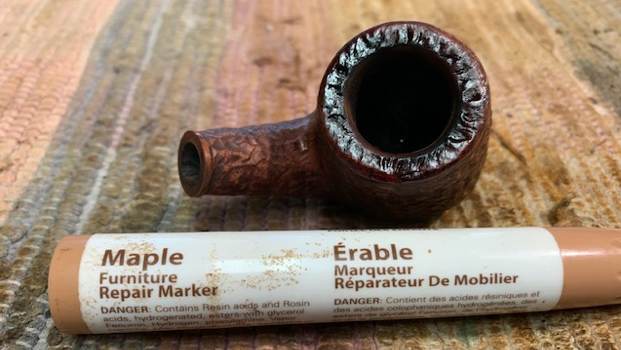
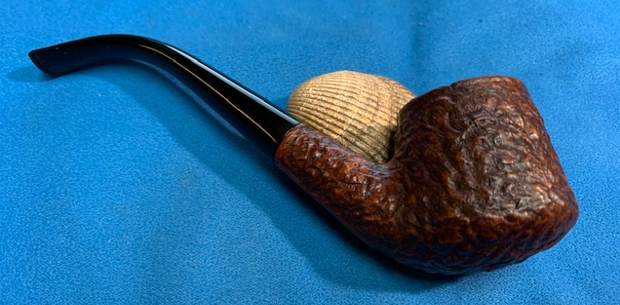
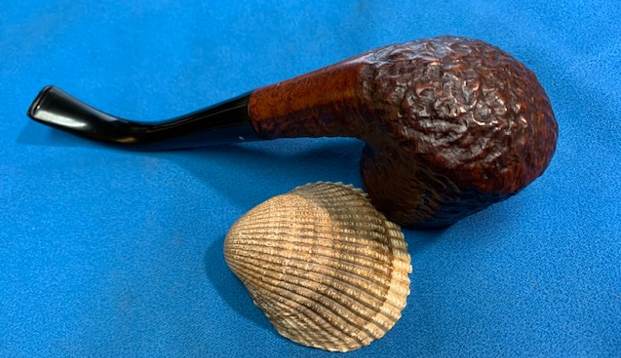
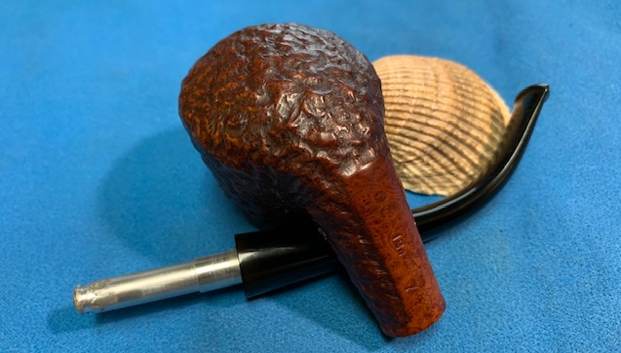
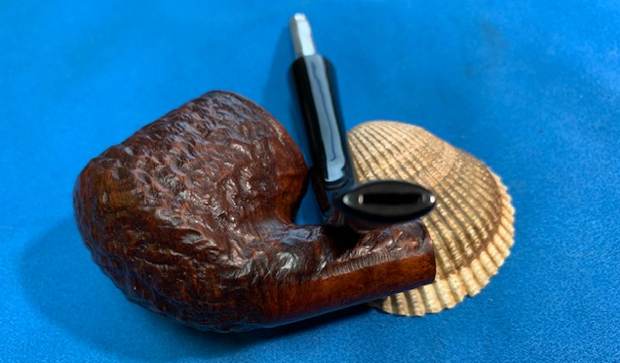
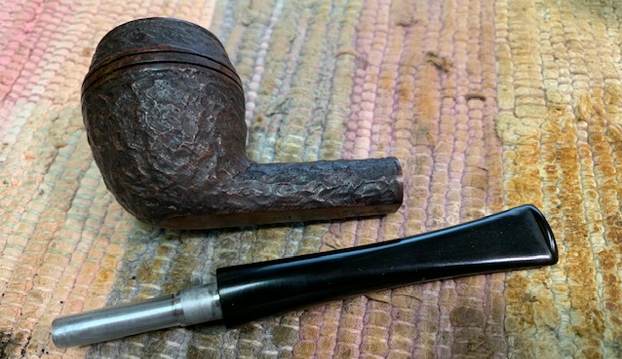
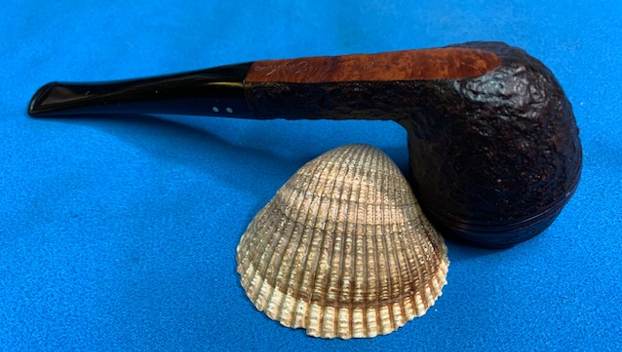
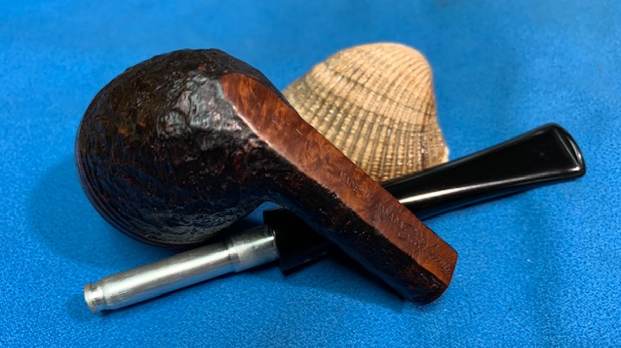
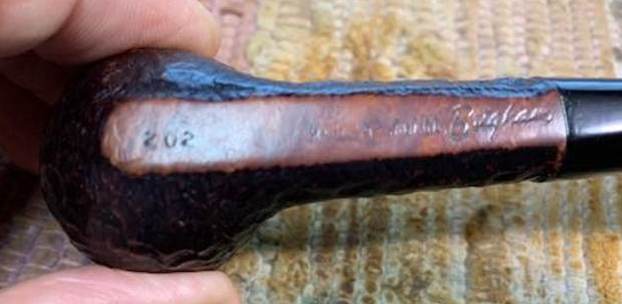
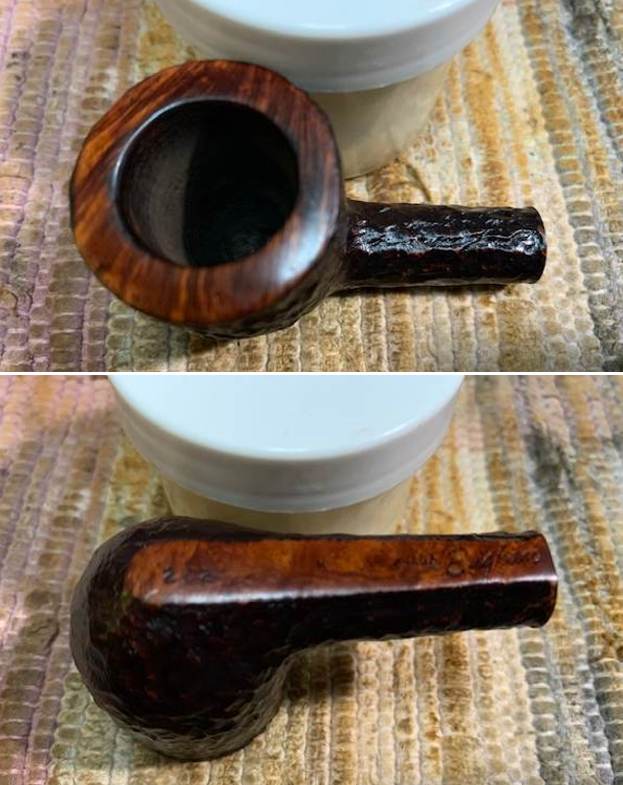
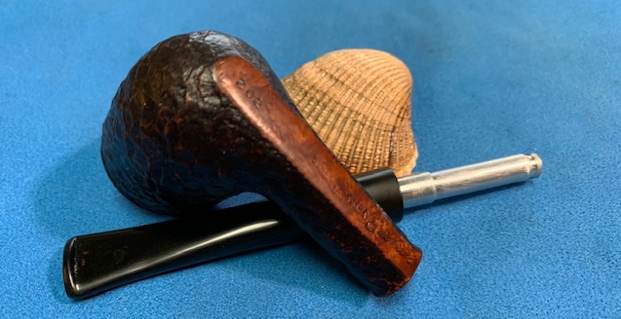
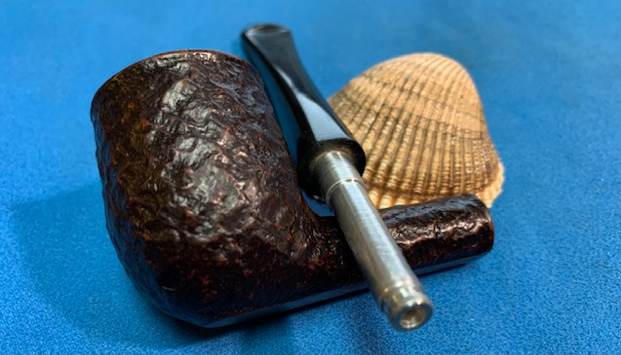
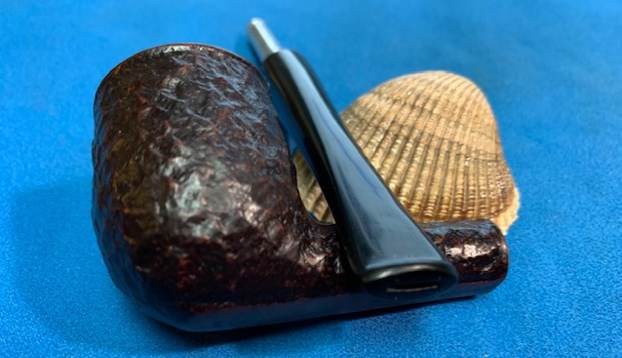
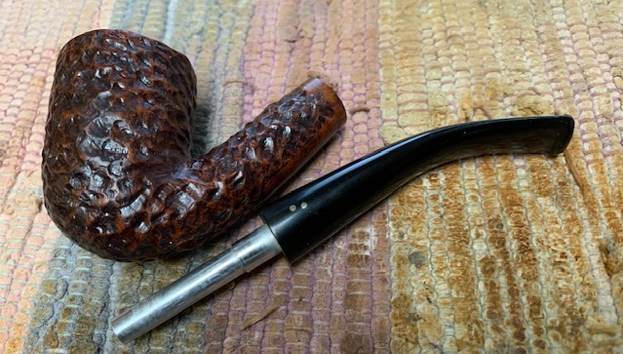
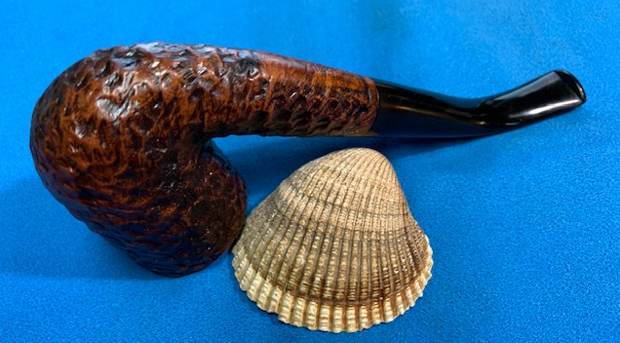
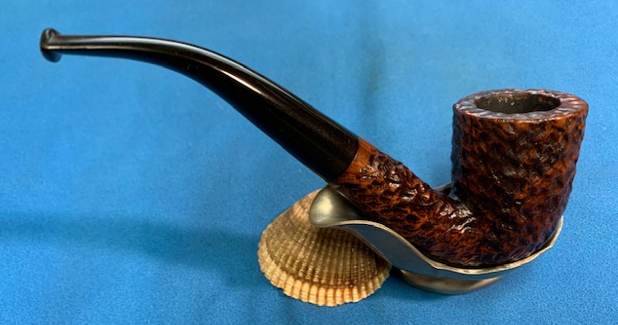
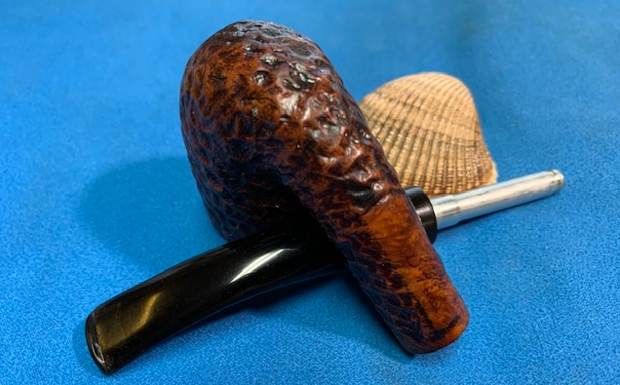
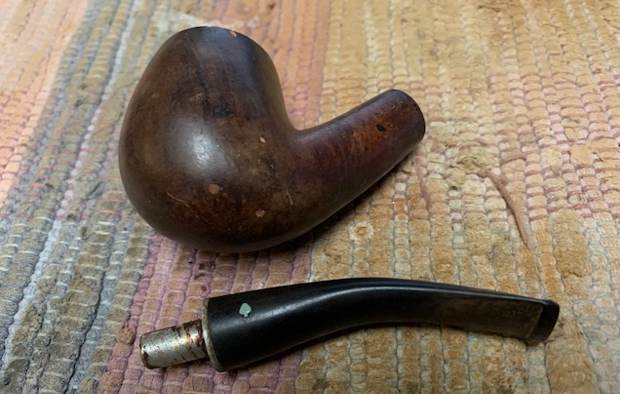
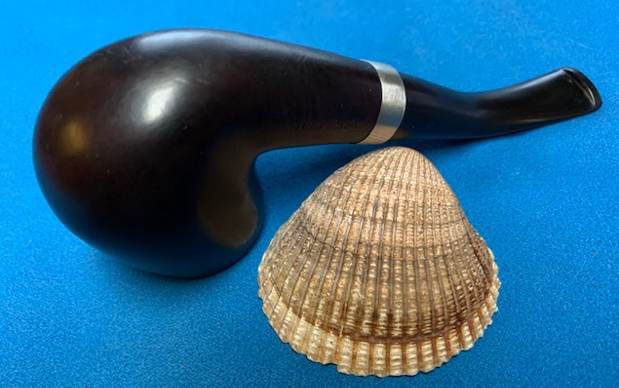
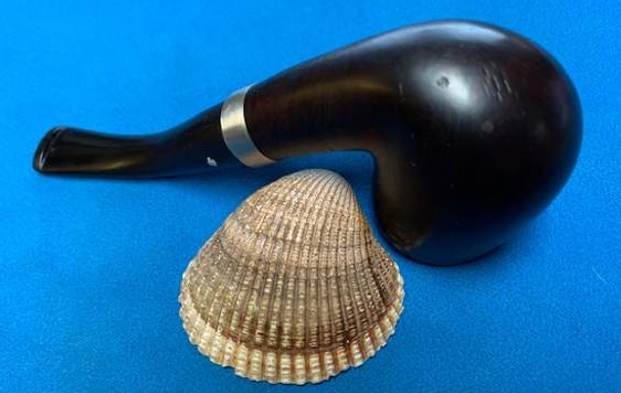
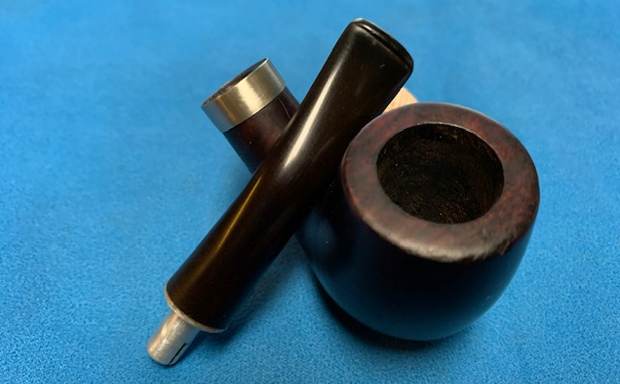
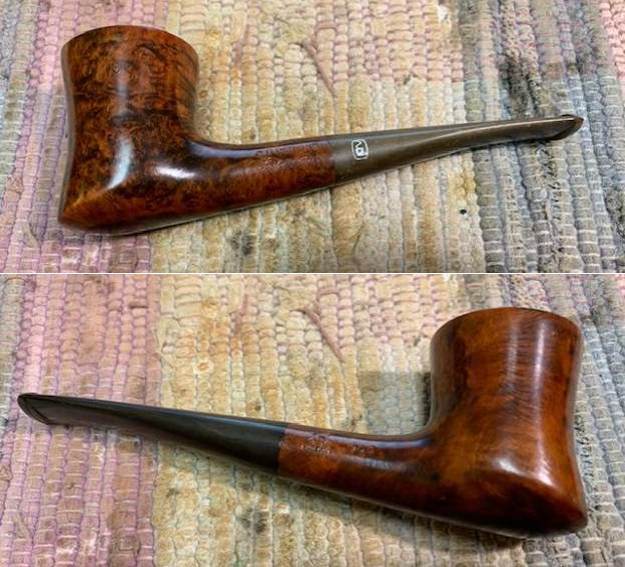
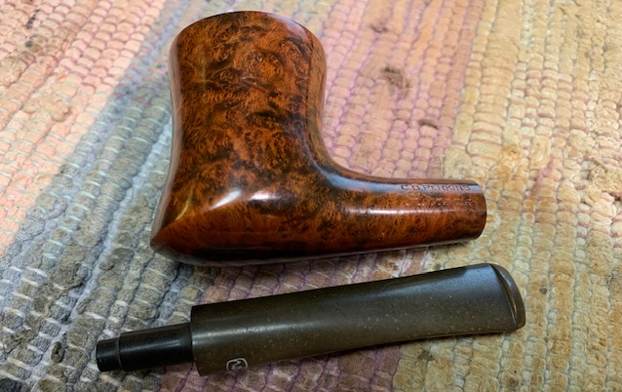
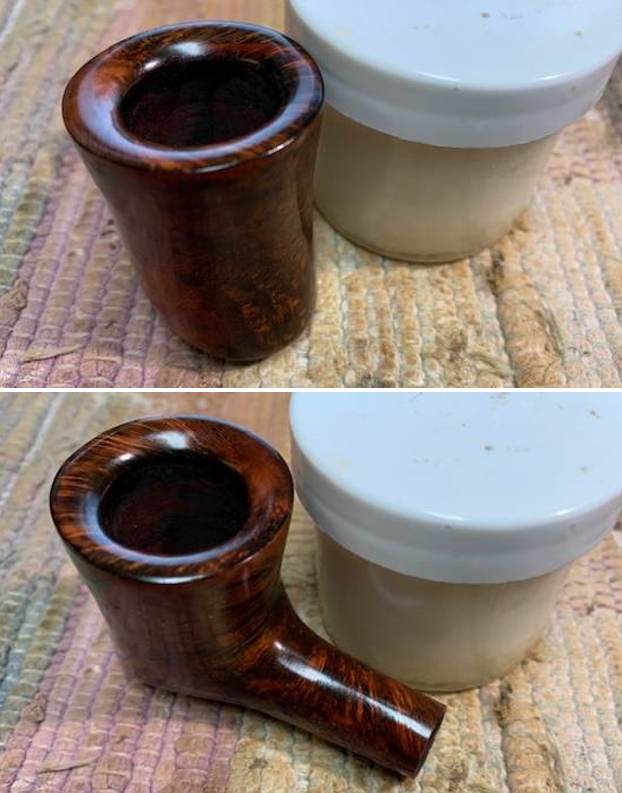
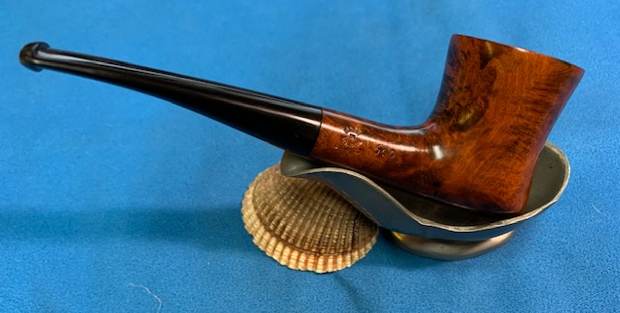
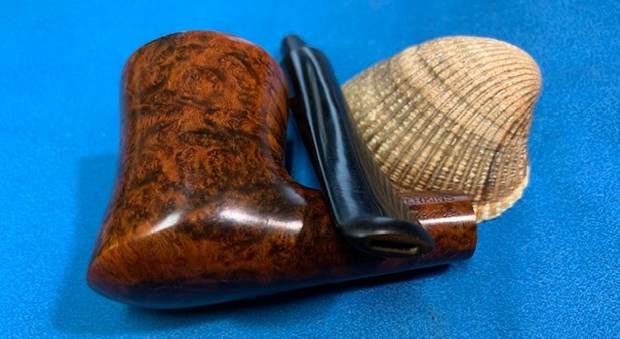
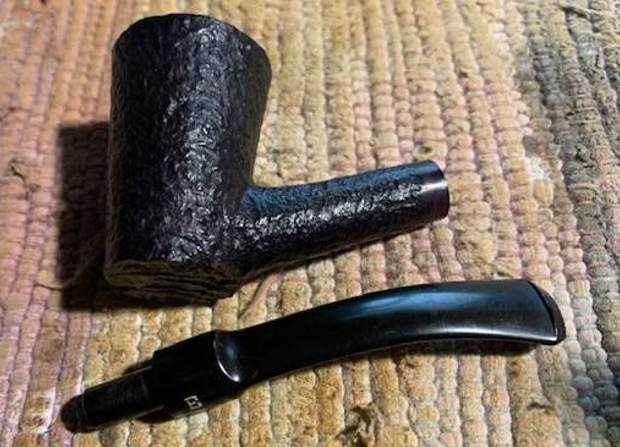
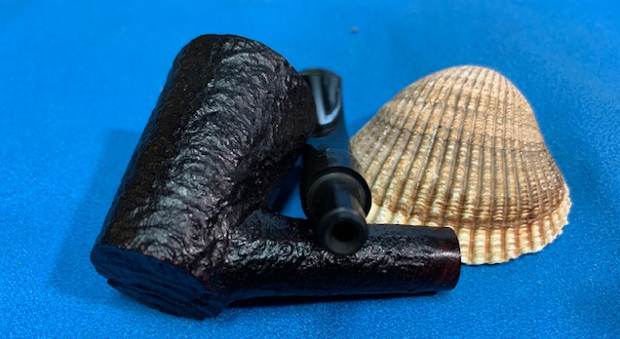
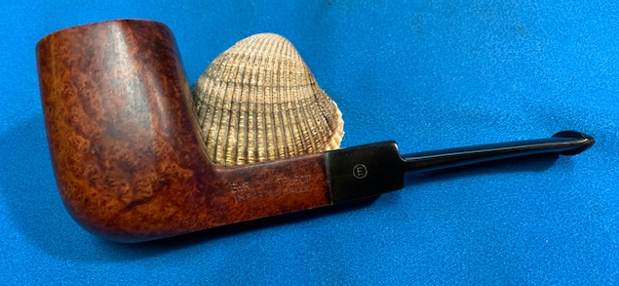
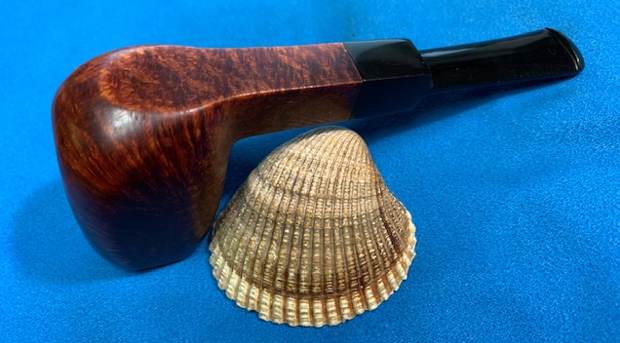
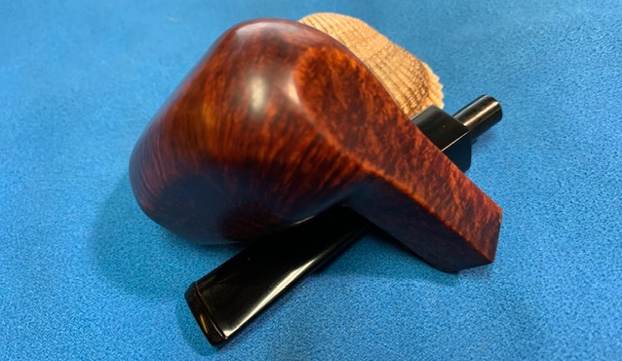
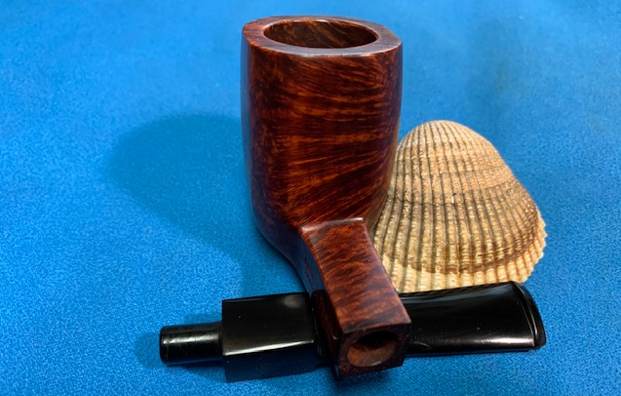
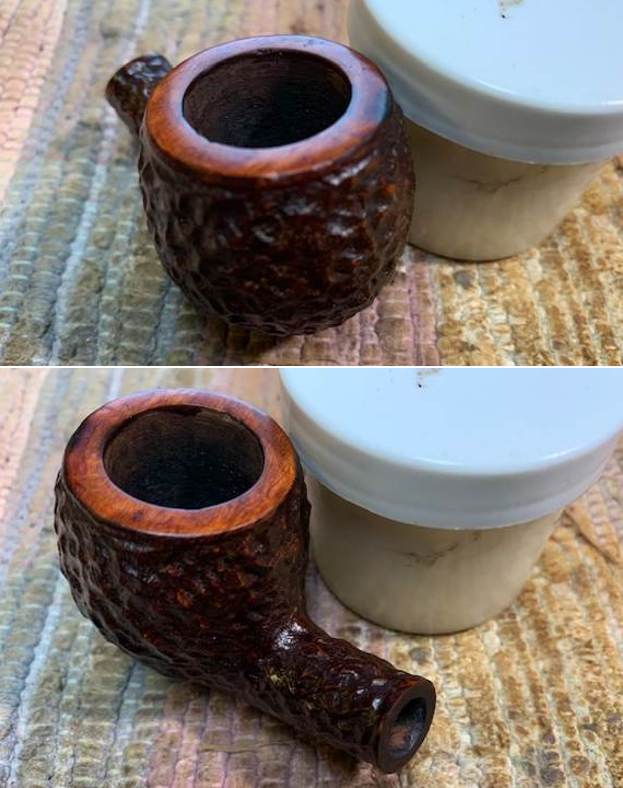
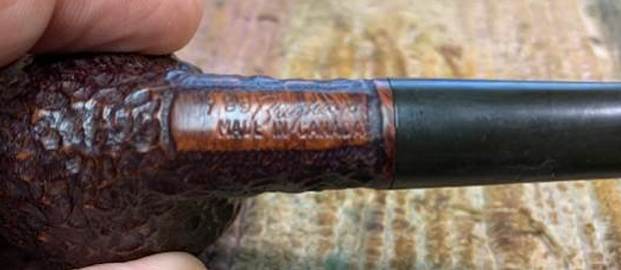 I took a photo of the pipe with the stem removed to give an overall picture of the pipe. It really is quite beautiful.
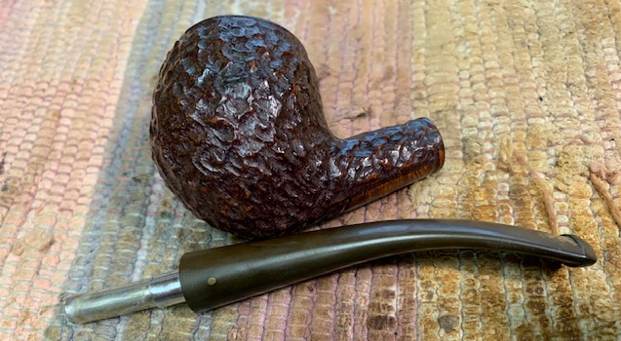 For historical background for those unfamiliar with the brand I am including the information from Pipedia on Brigham pipes. It is a great read in terms of the history and background on the pipes (https://pipedia.org/wiki/Brigham_Pipes). Charles Lemon (Dadspipes) is currently working on a book on the history of the brand. Until that is complete this article is a good summary. I have included it below.
Roy Brigham, after serving an apprenticeship under an Austrian pipesmith, started his own pipe repair shop in Toronto, in 1906. By 1918 the business had grown to include five other craftsmen and had developed a reputation across Canada for the high quality of workmanship. After repairing many different brands of pipes over the years, Roy noted certain recurring complaints by pipe smokers, the most common referred to as “tongue bite”. Tongue bite is a burning sensation on the smoker’s tongue, previously thought to be due to the heat of the smoke (i.e. a “hot smoking pipe”).
He soon began manufacturing his own pipes, which were lightweight, yet featured a more rugged construction, strengthening the weak points observed in other pipes. The problem of tongue bite intrigued him, and he decided to make overcoming it a future goal.
About 1938, Roy’s son Herb joined him to assist in the business. The business barely survived the great depression because pipes were considered to be a luxury, not a necessity, and selling pipes was difficult indeed. In approximately 1937 [1], after some experimentation, Roy and Herb discovered that tongue bite was in fact a form of mild chemical burn to the tongue, caused by tars and acids in the smoke. They found that by filtering the smoke, it was possible to retain the flavour of the tobacco and yet remove these impurities and thereby stop the tongue bite.
Just as Thomas Edison had searched far and wide for the perfect material from which to make the first electric light bulb filaments, Roy & Herb began experimenting with many materials, both common and exotic, in the quest for the perfect pipe filter. Results varied wildly. Most of the materials didn’t work at all and some actually imparted their own flavour into the smoke. They eventually found just two materials that were satisfactory in pipes: bamboo and rock maple. As bamboo was obviously not as readily available, rock maple then became the logical choice.
They were able to manufacture a replaceable hollow wooden tube made from rock maple dowelling, which when inserted into a specially made pipe, caused absolutely no restriction to the draw of the pipe, yet extracted many of the impurities which had caused tongue bite. The result was indeed a truly better smoking pipe…
Interestingly the pipe I have in hand is a 1 Dot grade but very well done. It is stamped with the shape number 189 followed by Brigham [over] Made in Canada.
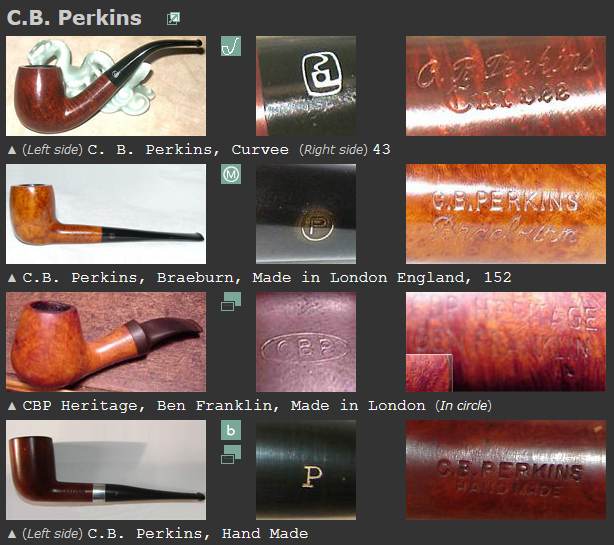
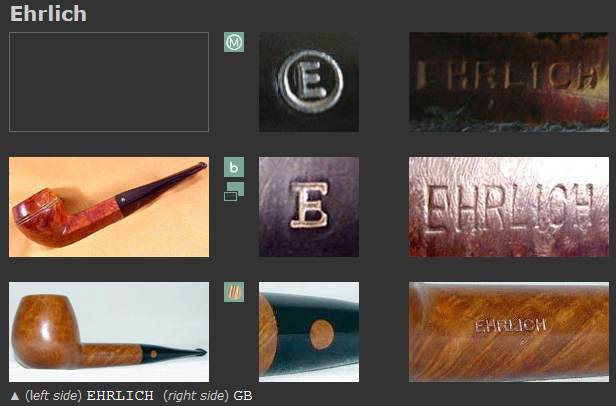
Charles Lemon has also written a great article on the stampings and marking on the Brigham pipes that fit into a time line that he has drafted. It is well worth a read and is fascinating. (https://pipedia.org/wiki/Brigham_Pipes_%E2%80%93_A_Closer_Look_at_Dots,_Dates_and_Markings). I quote from the pertinent section on the time frame for this pipe.
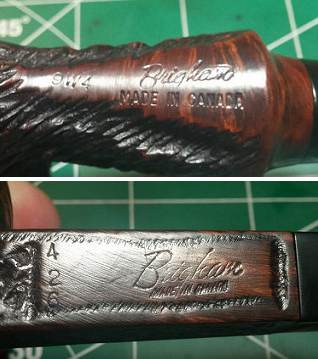 Around the late 1960s or early 1970s, at the beginning of what I’ve called the Canadian Era (roughly 1970 – 1980), the stampings changed again as Brigham moved to modernize its logo. Pipes are stamped with the 3-digit shape number and “Brigham” over “Made in Canada”. Note these two variants of this stamping.
This solidly places the pipe I am working on in the period of Brigham production that Charles calls the Canadian Era (1969/70-1980). It is a great looking pipe with the classic rusticated style of finish.
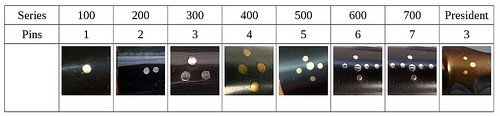
The Original Brigham Dot System 1938 – 1980
Brigham pipes are renown in the pipe world for their famous “Brigham Dots”, a system of brass pins inset in the stem to denote the grade of each pipe. The original 8-grade pinning system, used for 42 years between 1938 and 1978 (spanning the Patent, Post-Patent and Canadian Eras) looked like this: I knew that I was dealing with a pipe made between 1969-1980 from Canadian Era. It sports 1 dot making it Brigham Standard pipe. There is a 189 shape number on the pipe. Now to do a bit of spiffing with the pipe itself.
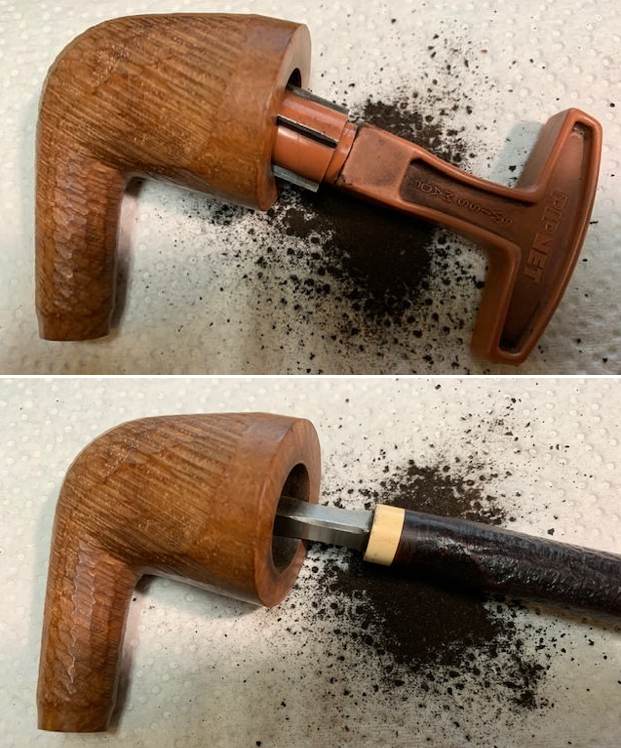
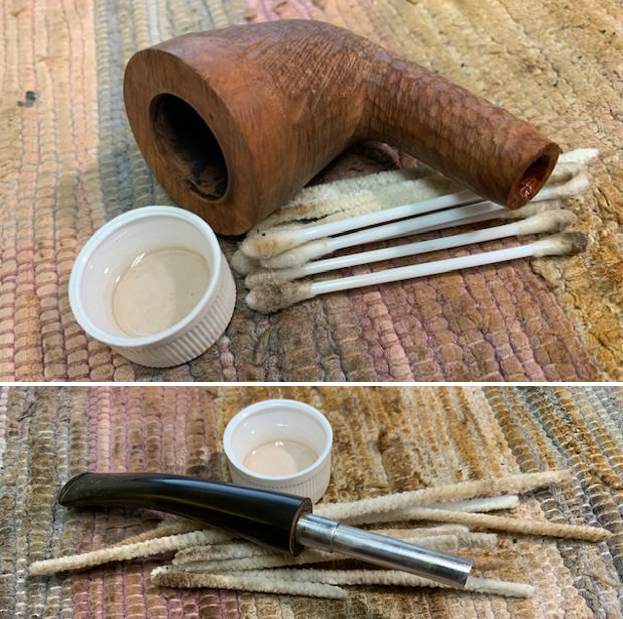
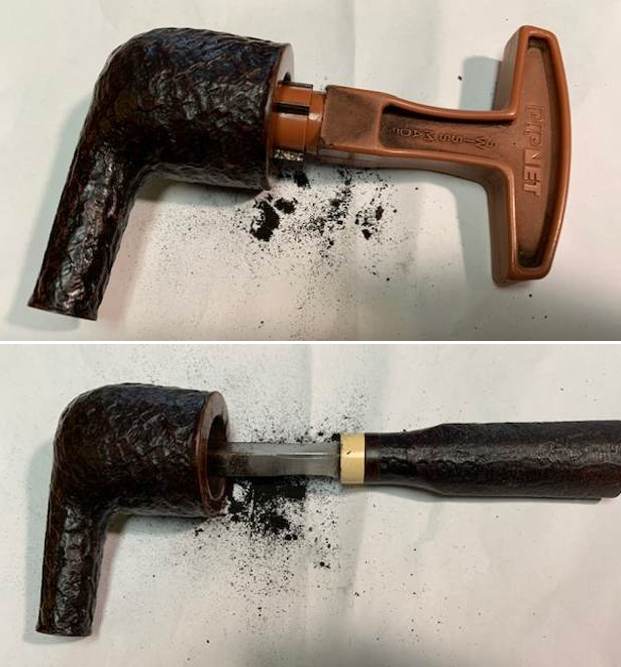
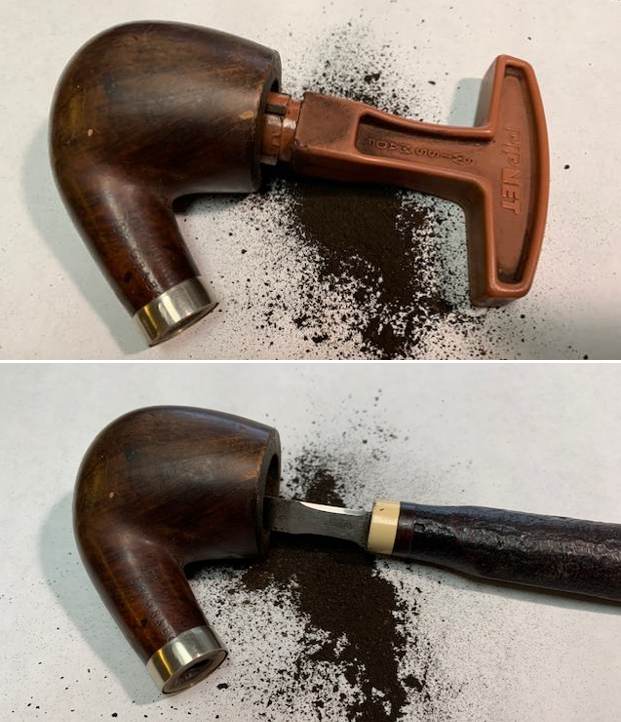
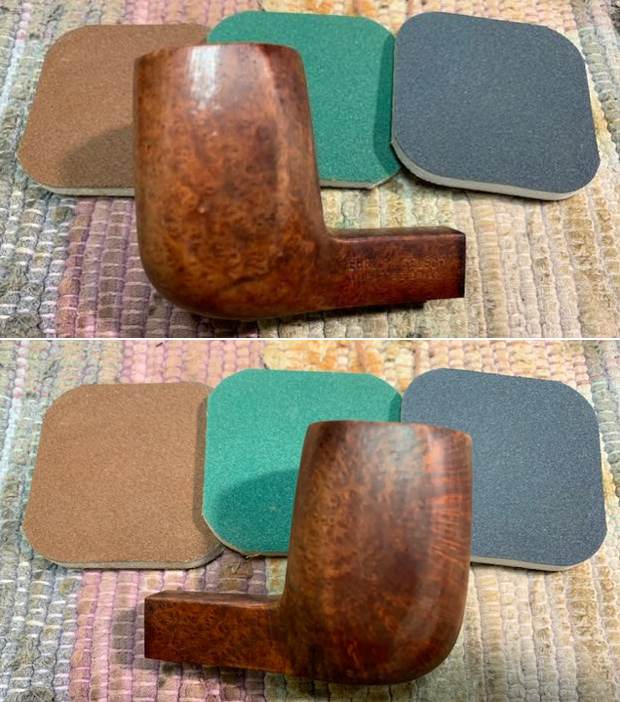
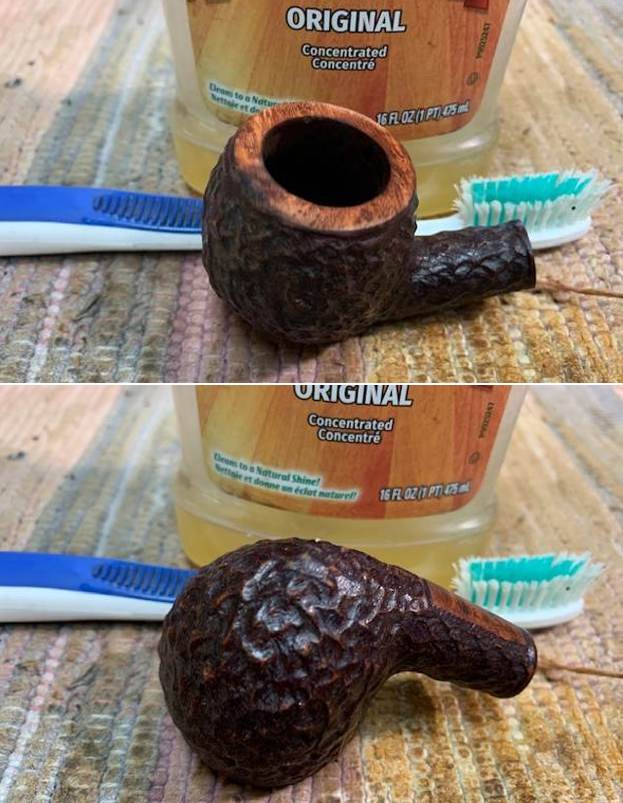
I reamed the pipe with a PipNet pipe reamer to remove the light cake from the bowl walls. It was uneven and needed to be removed so I took it back to bare briar. I cleaned up the reaming with a Savinelli Fitsall Pipe Knife and then sanded the bowl with a dowel wrapped with 220 grit sandpaper to smooth out the walls. 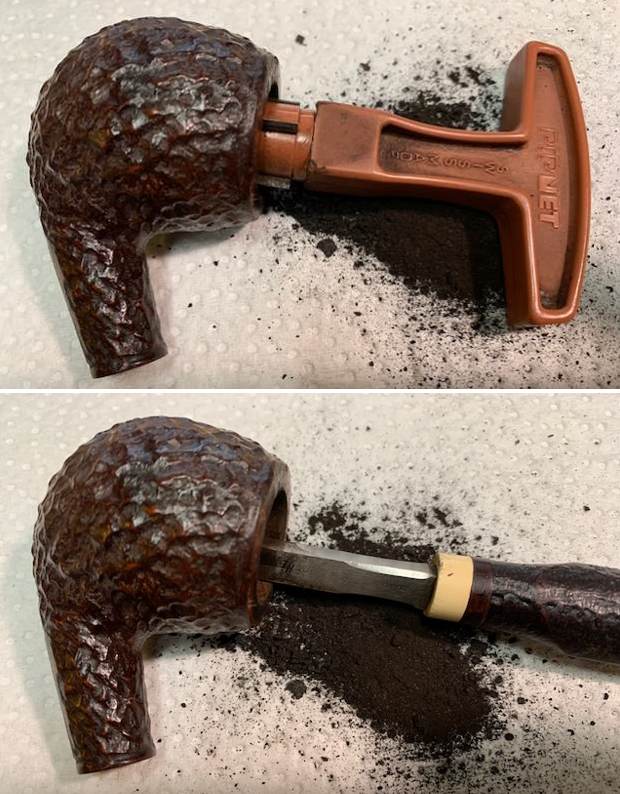
 I worked on the damage to the rim top and the inner edge of the rim with 220 grit sandpaper. It looked much better.
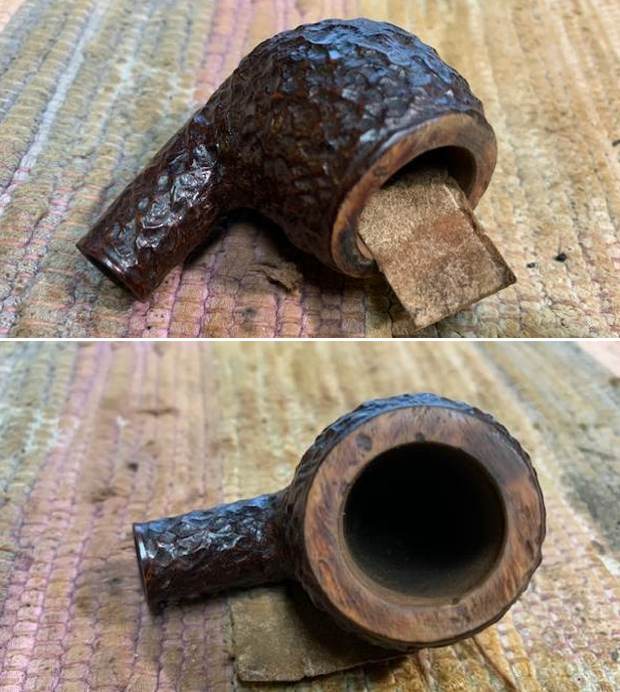 I scrubbed the exterior of the pipe with a tooth brush with undiluted Murphy’s Oil Soap. I scrubbed it to remove the build up on the rim top. I rinsed it with warm water and dried it off with a soft cloth.
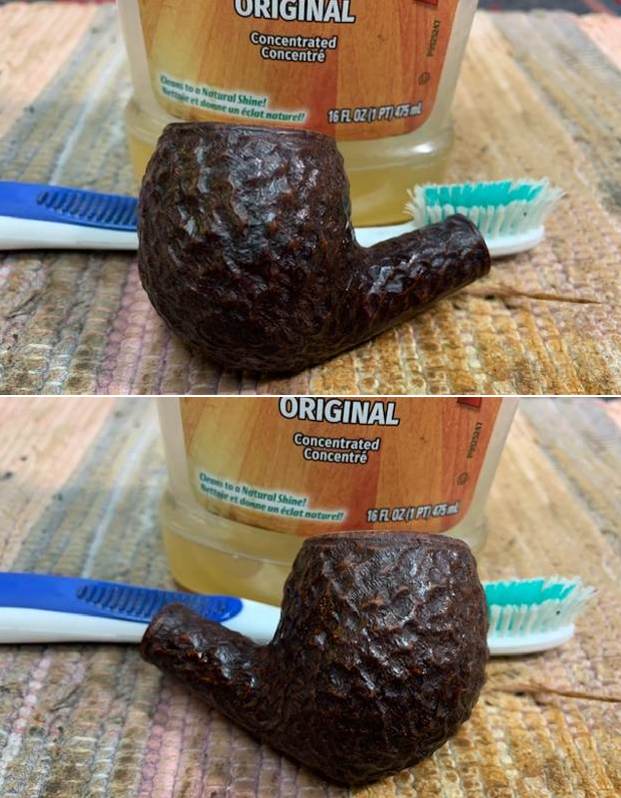
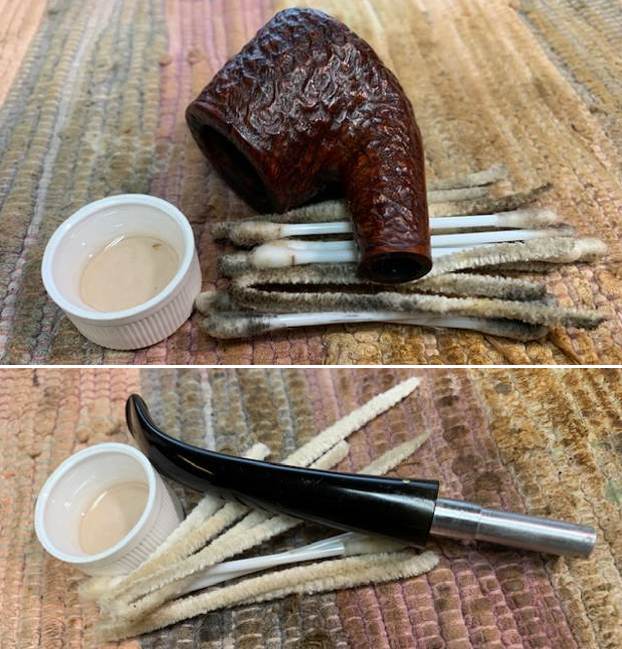
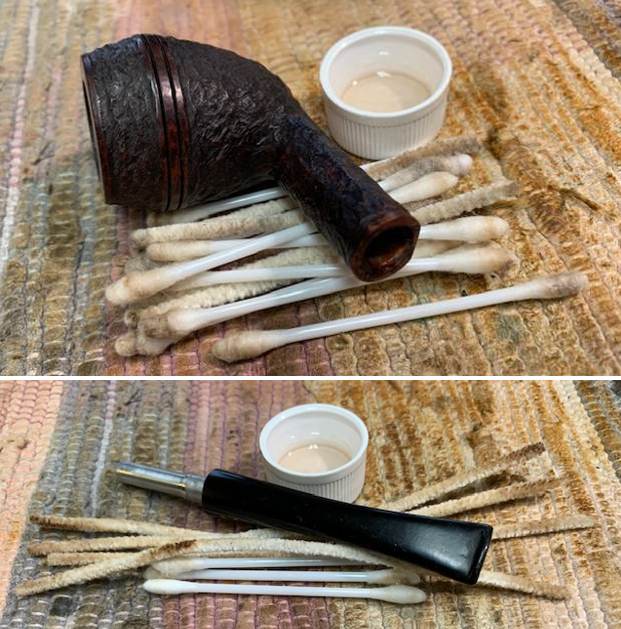
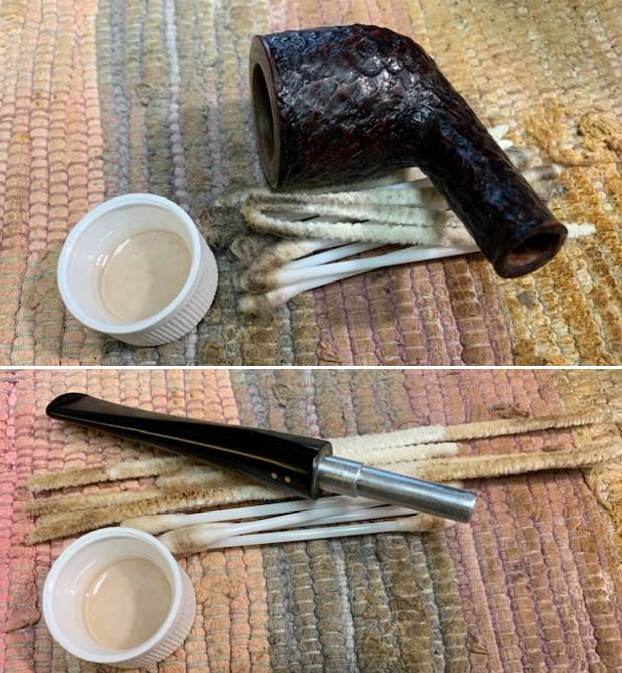
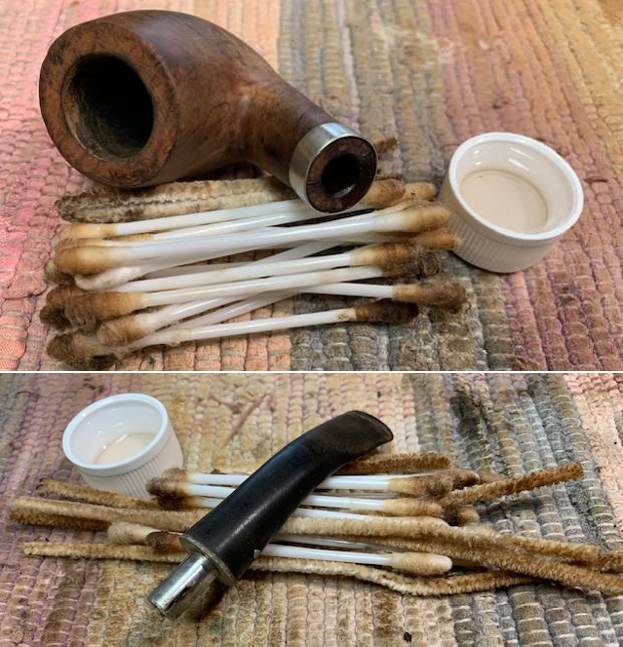
 I cleaned out the internals with alcohol, cotton swabs and pipe cleaners to remove the debris and the oils from the shank and tenon as well as the airway into the stem and bowl.
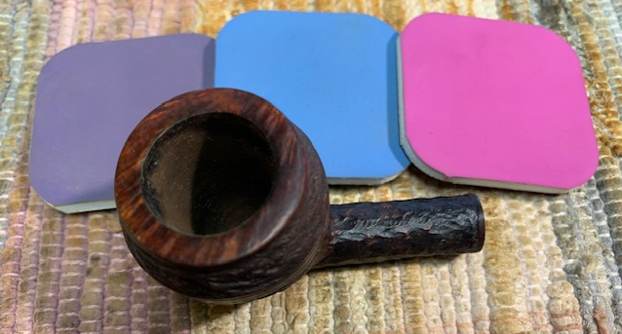
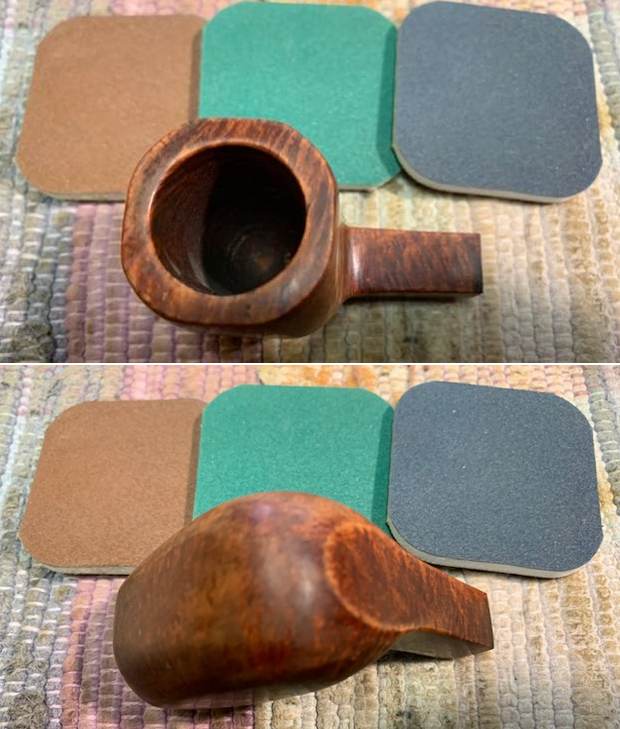
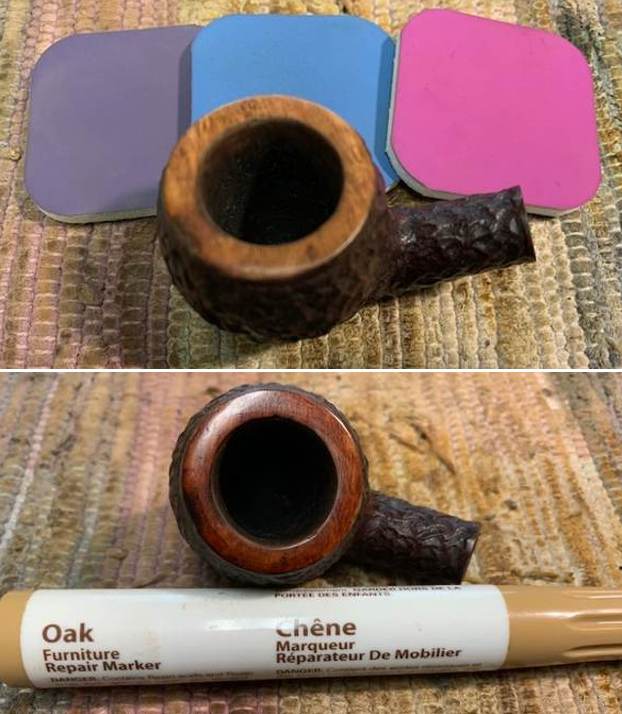
 I polished the darkening on the rim top with micromesh sanding pads – dry sanding with 1500-12000 grit pads to remove as much of the darkening as I could. Once it was complete I stained the rim top with an Oak stain pen to match the smooth portions of the finish on the shank end and underside.
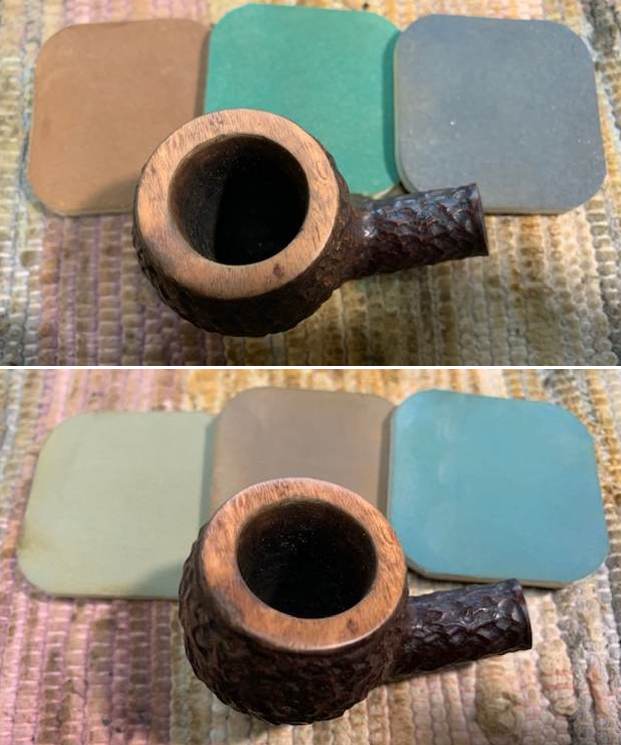
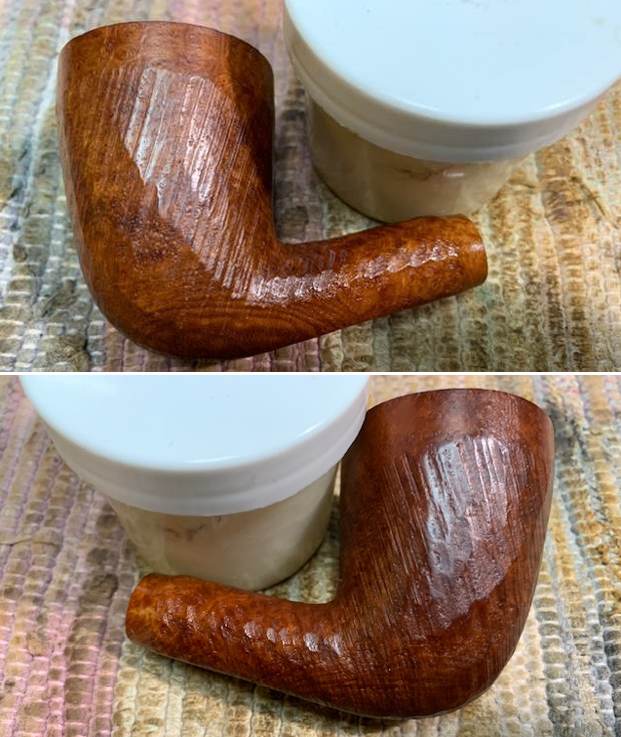
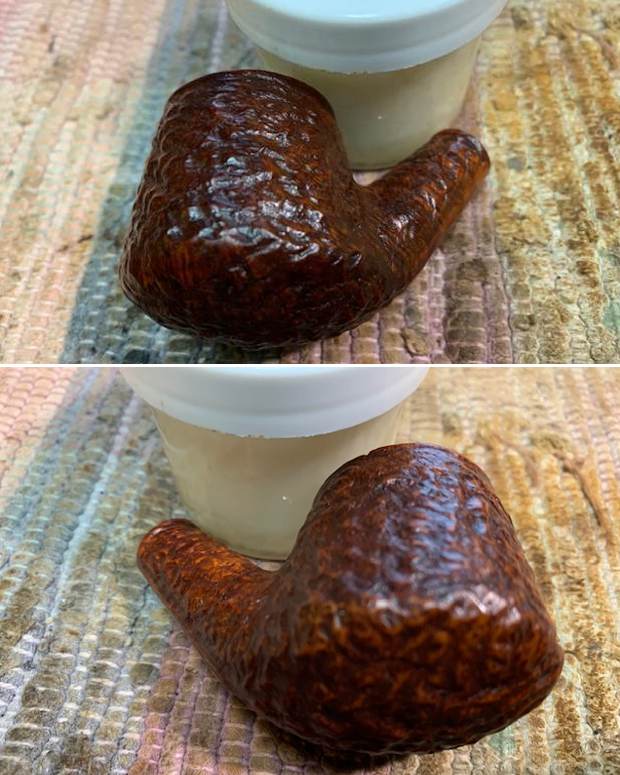
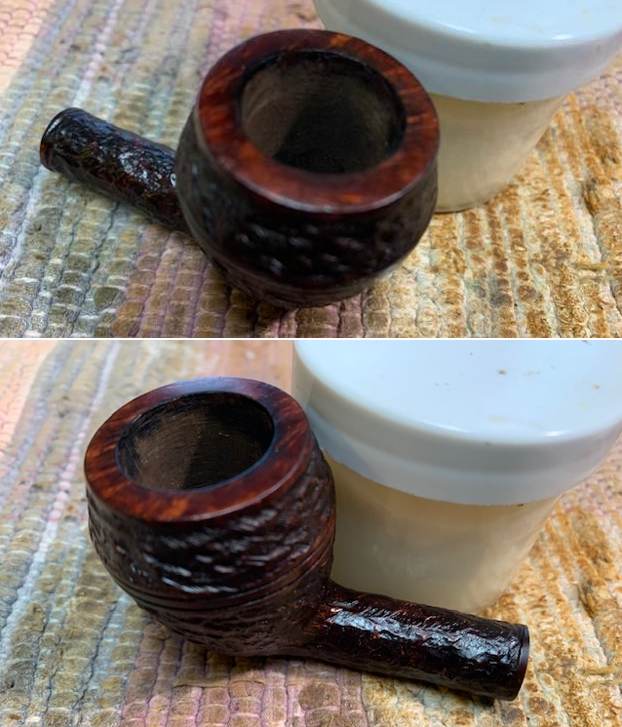
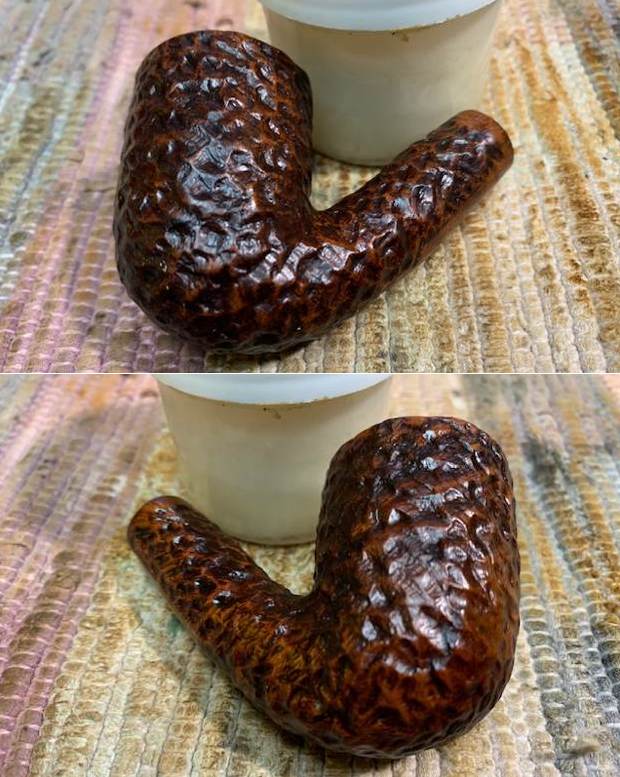
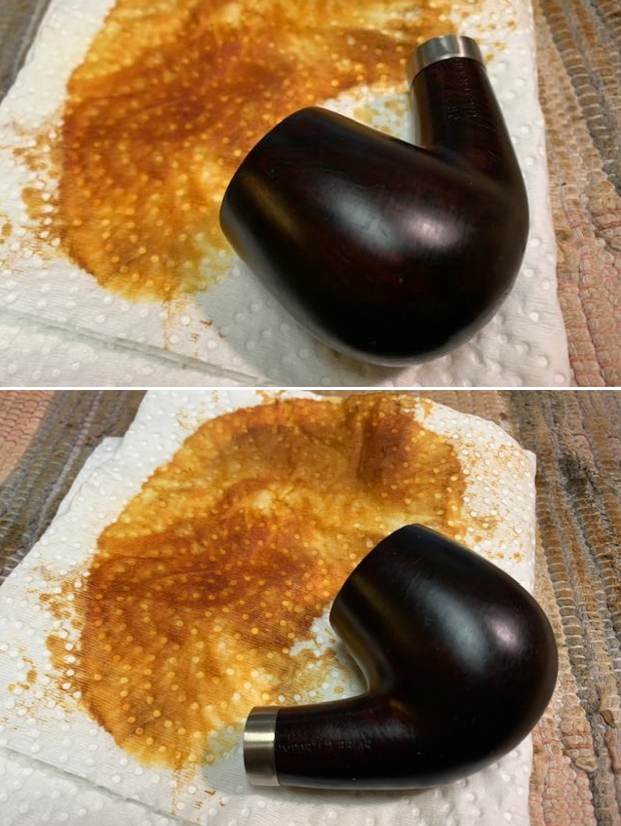
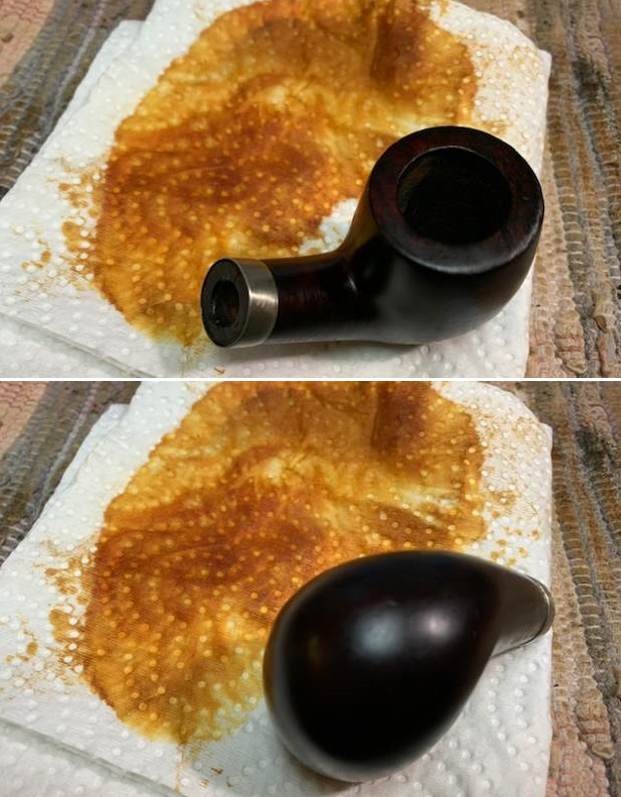
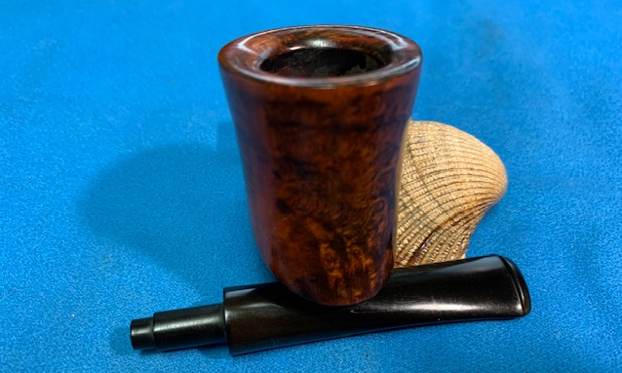
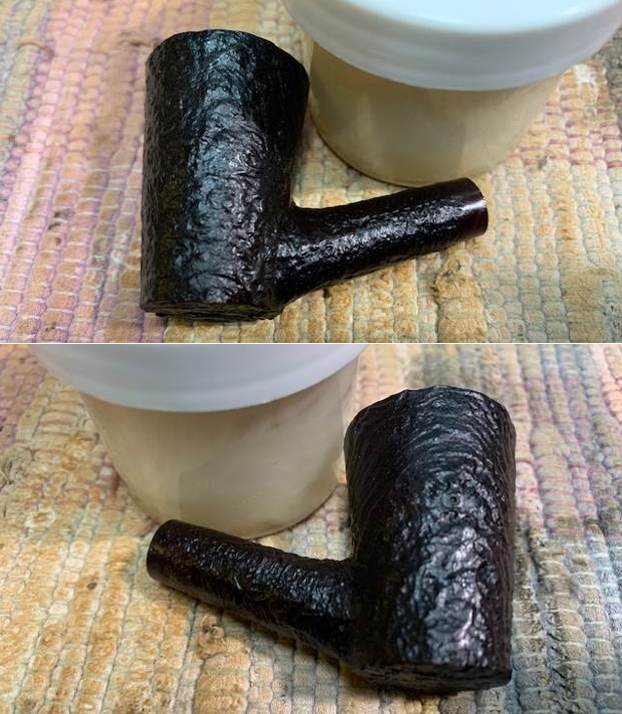
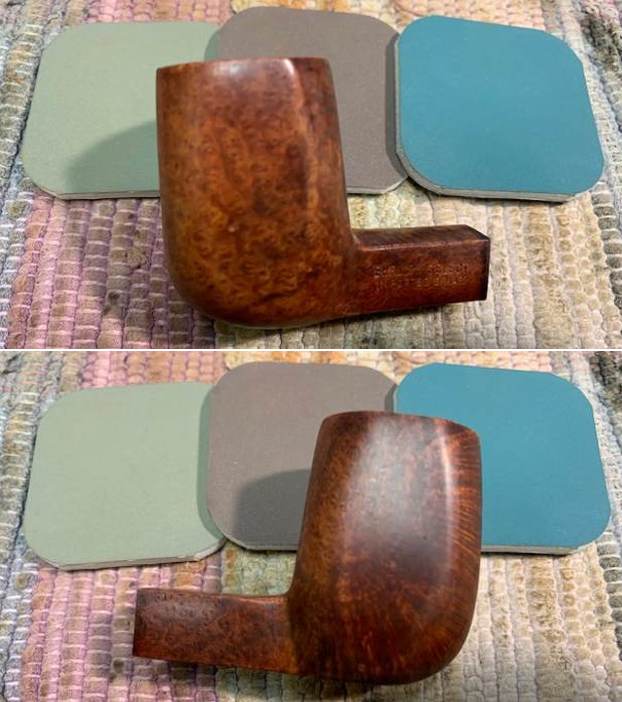
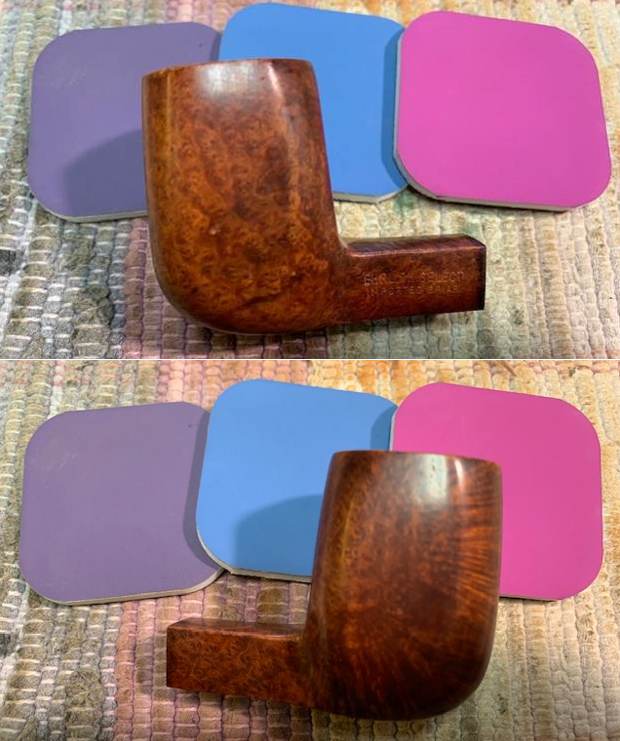
 I rubbed the bowl down with some Before & After Restoration Balm. I worked it into the briar with my fingertips and a horse hair shoe brush. The product works to clean, renew and protect briar. I let it do its work for 15 minutes then buffed it off with a soft cloth. The pipe is really quite a beauty.
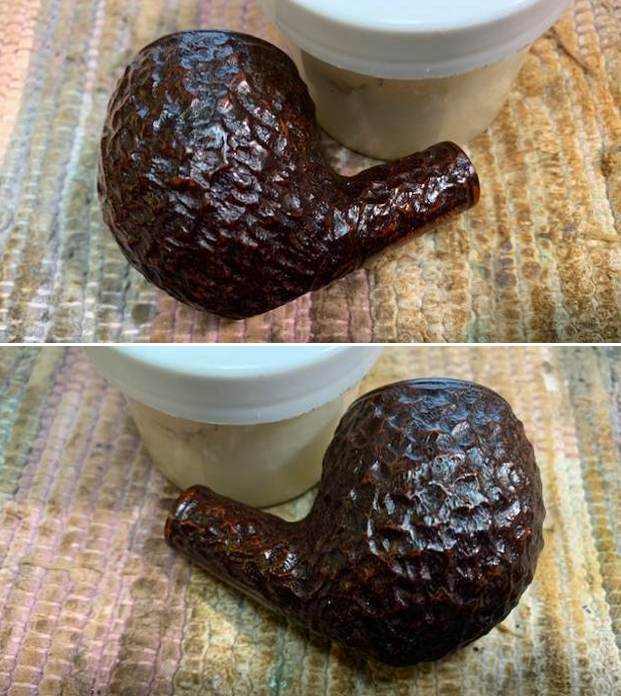
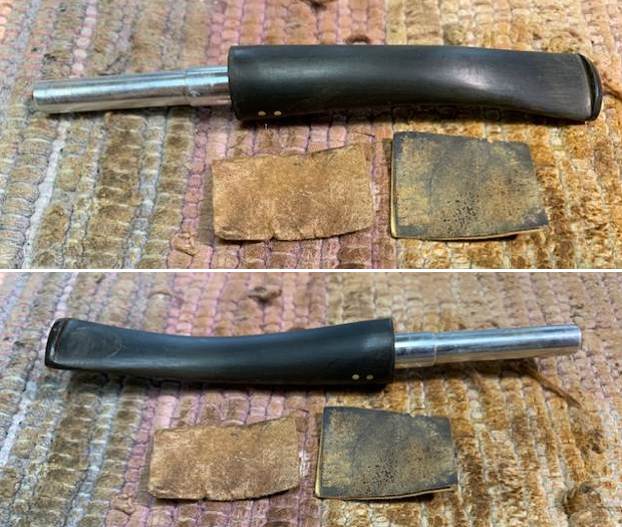
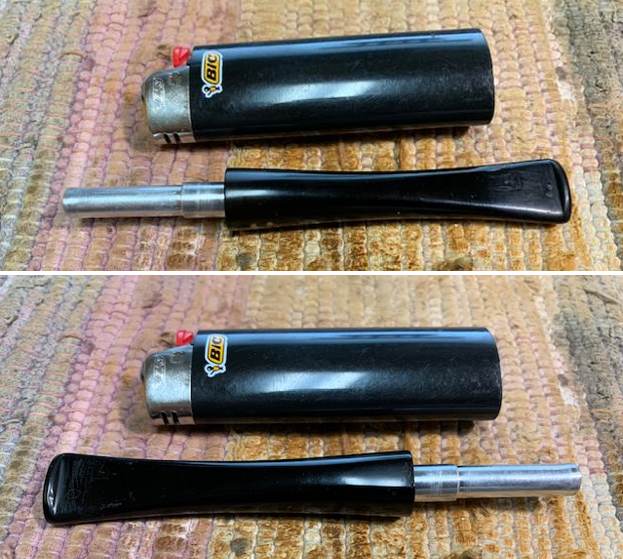
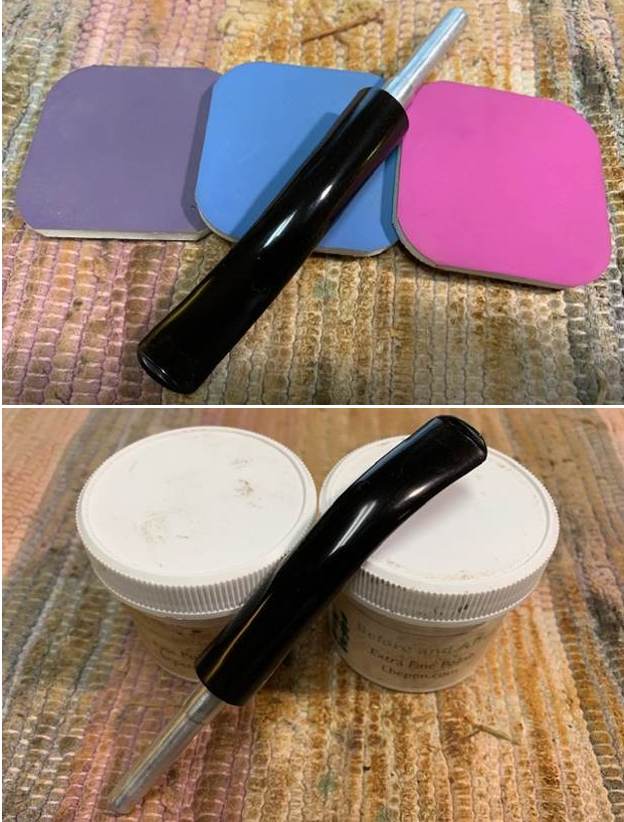
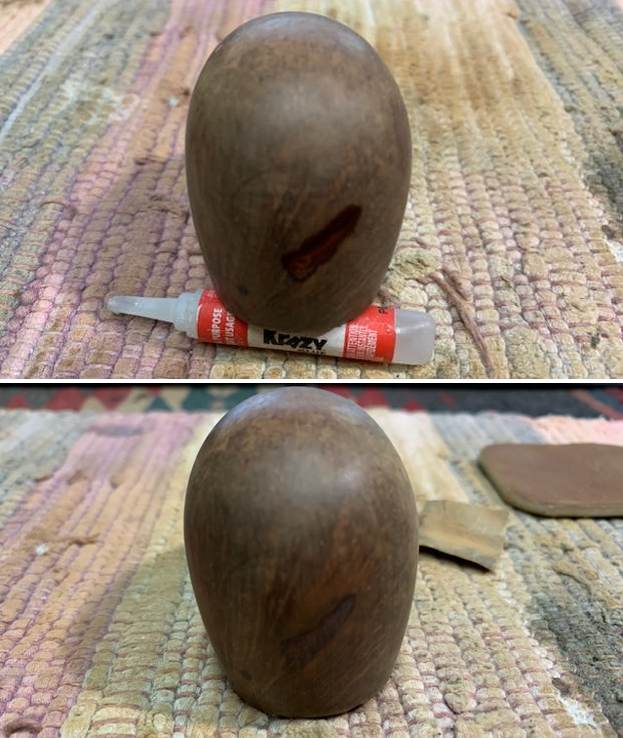
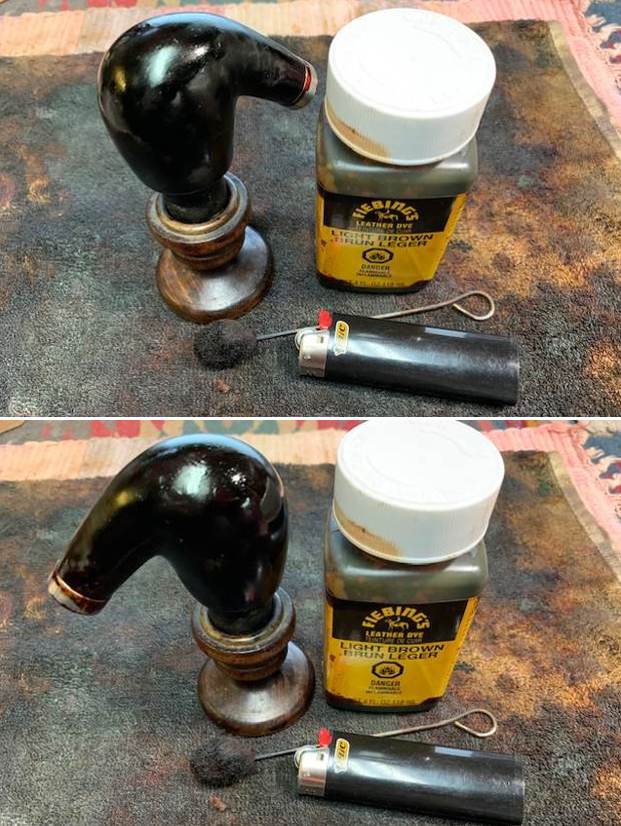
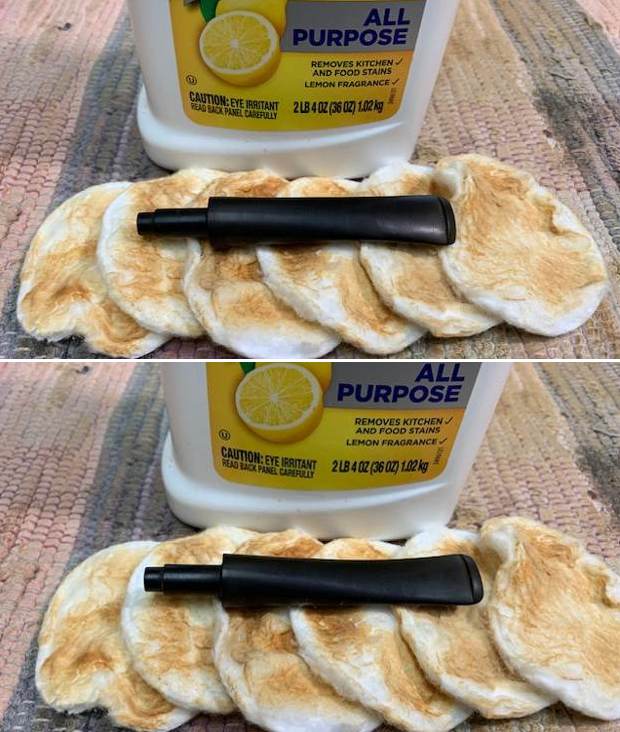
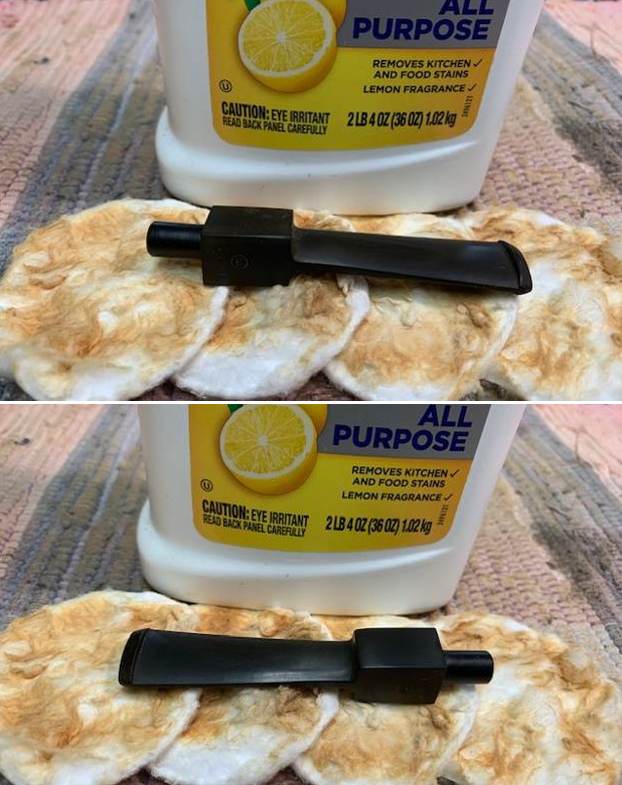
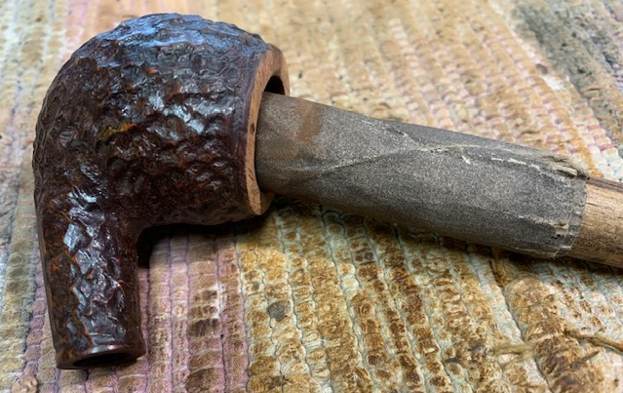
 I set the bowl aside and turned my attention to the stem. I scrubbed it with Soft Scrub All Purpose cleaner to remove the oxidation as much as possible. It needed to be clean before I could address the tooth marks.
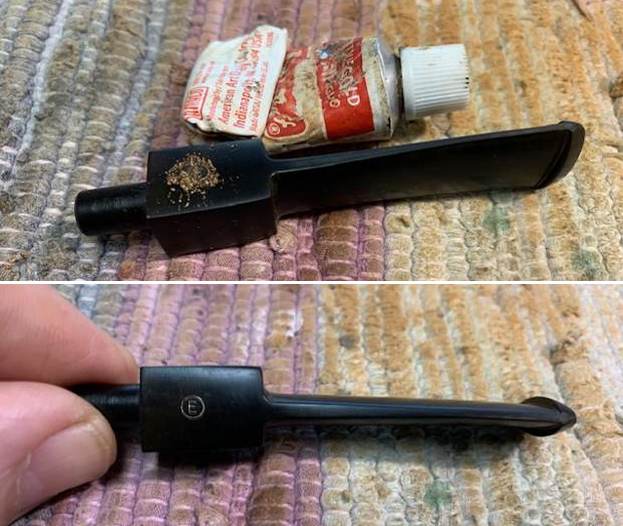
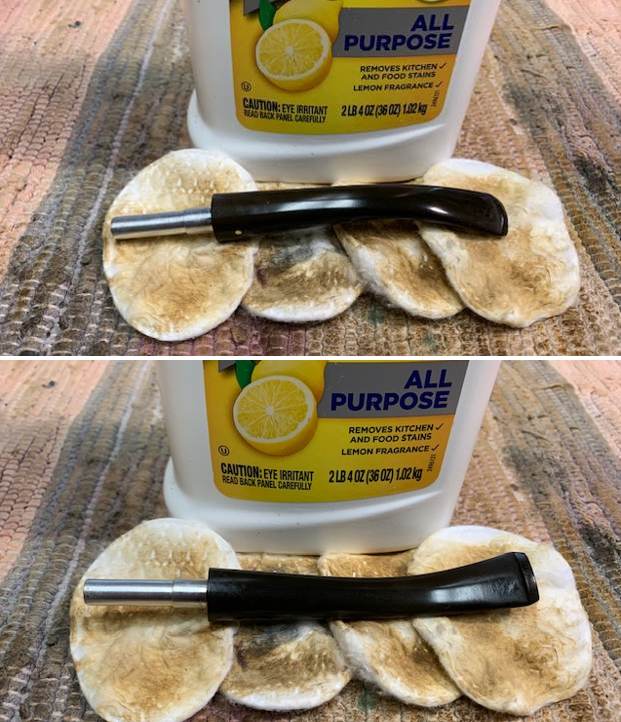 Once it was clean I “painted” the tooth marks and chatter with the flame of a lighter. I was able to raise all of the damage on the underside of the stem and the majority on the topside. I lightly sanded the topside with 220 grit sandpaper to prepare for the repair. I filled in the tooth marks that remained with black superglue and set the stem aside to cure. Once it cured I flattened out the repaired area with a small file to start the process of blending it into the surrounding briar. I sanded the surface with 220 grit sandpaper to remove the remaining oxidation and also finish blending in the repair. I started polishing it with 400 grit wet dry sandpaper. It is beginning to look quite good.
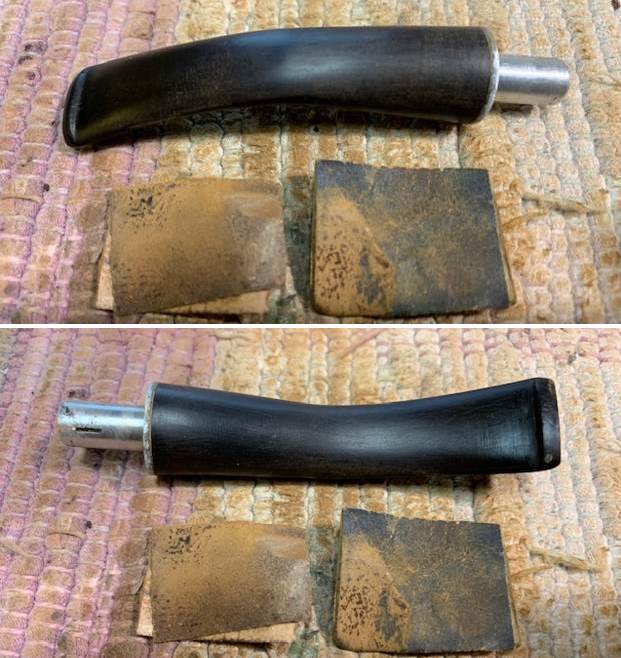
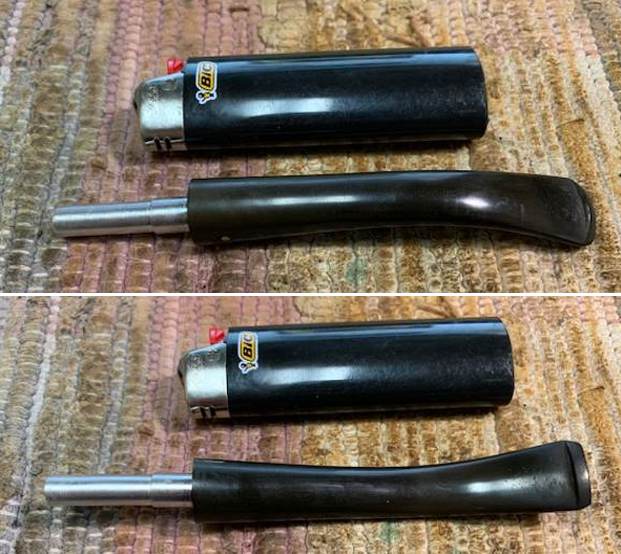

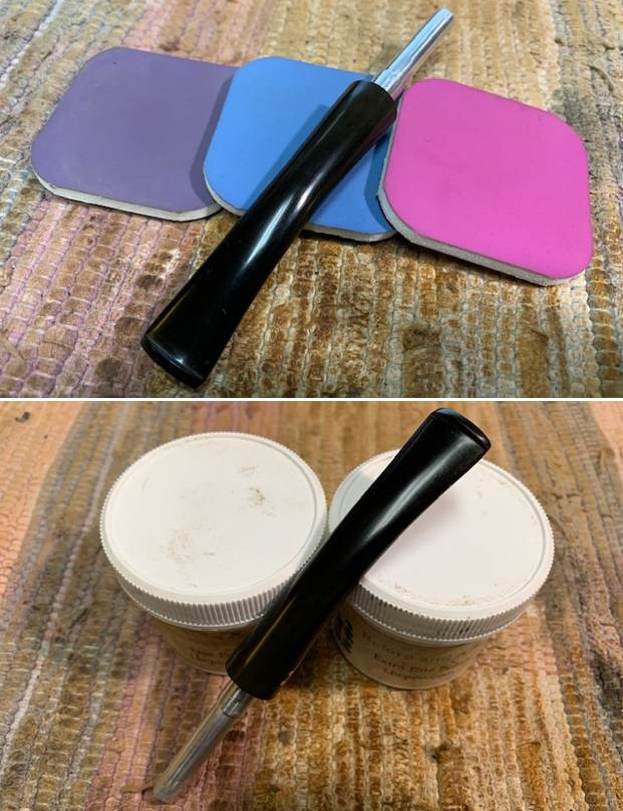
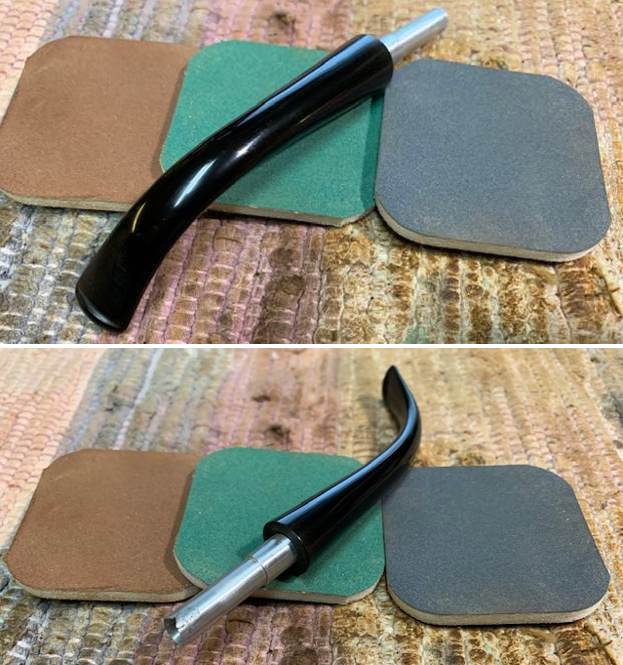
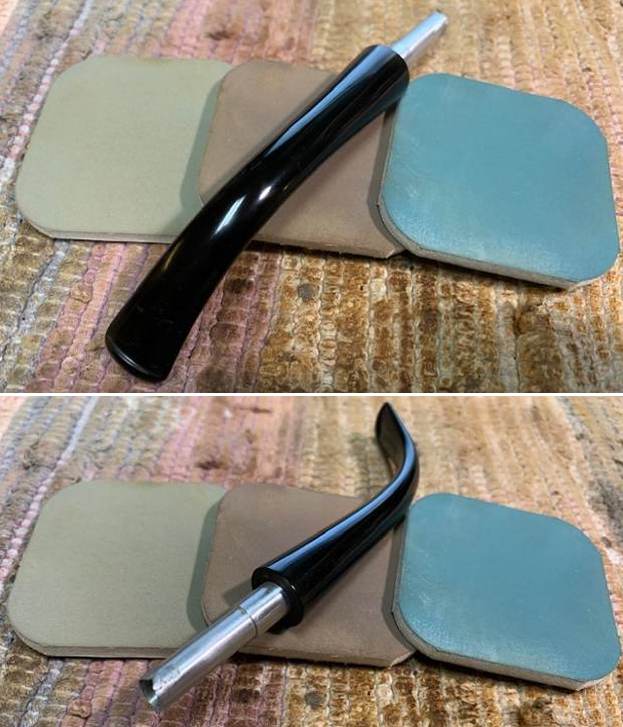
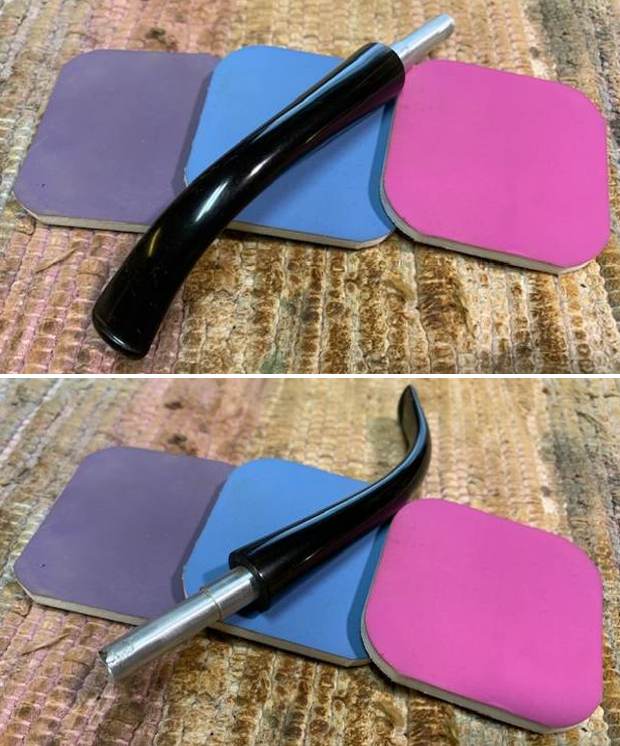
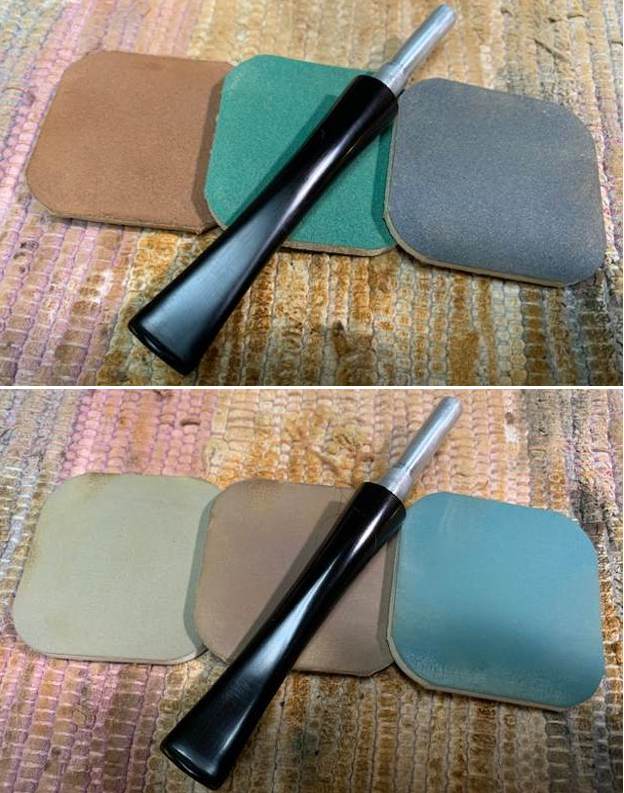
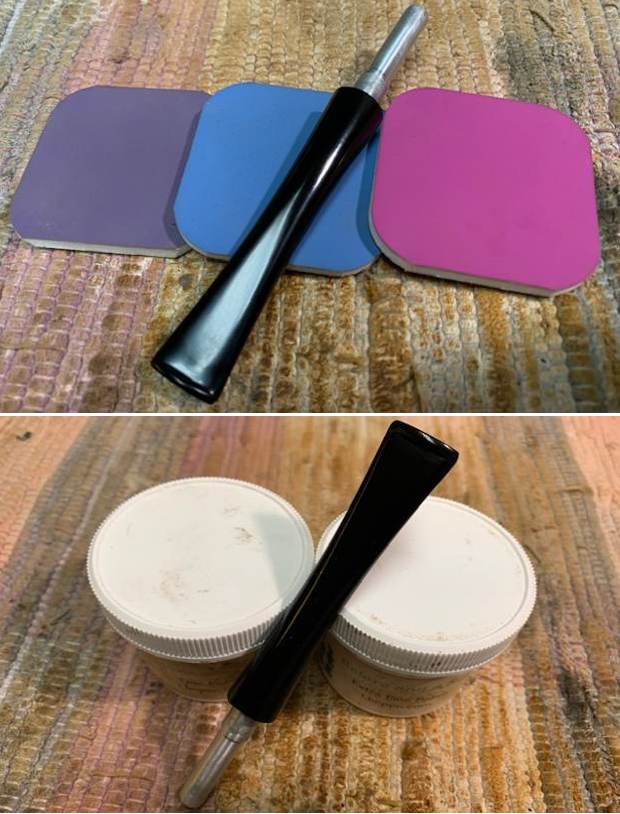
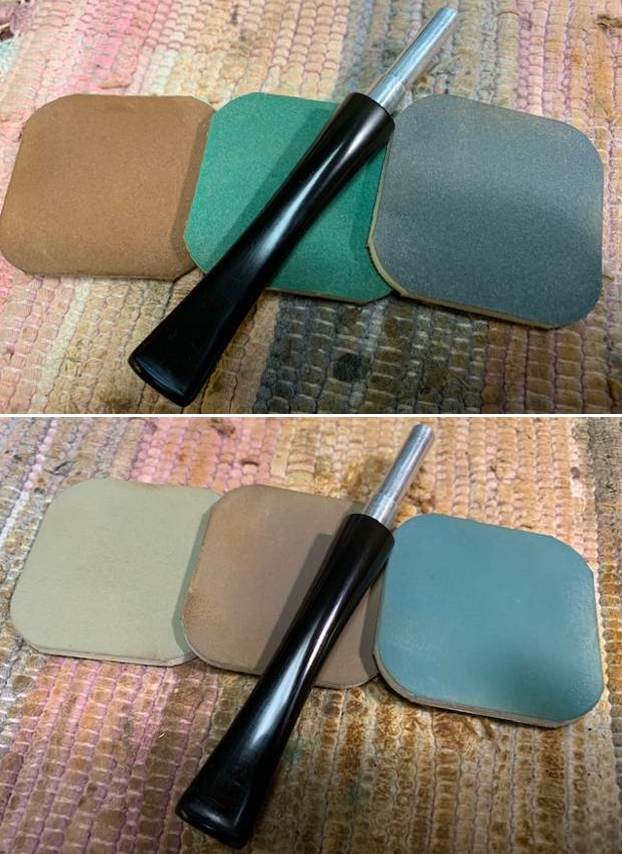
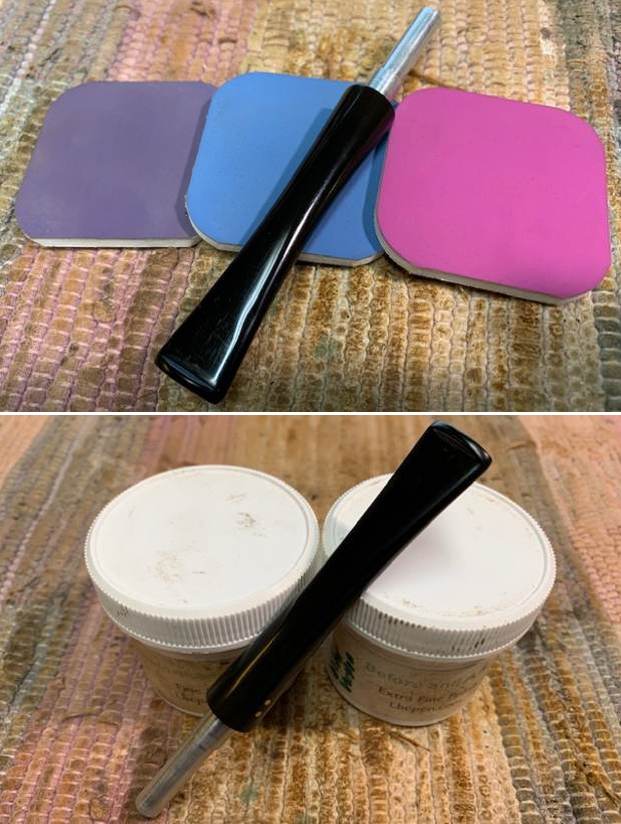
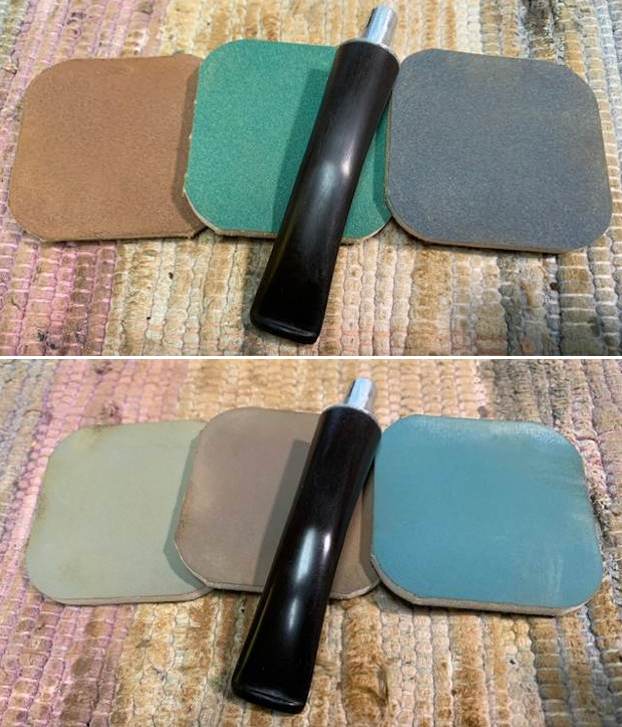
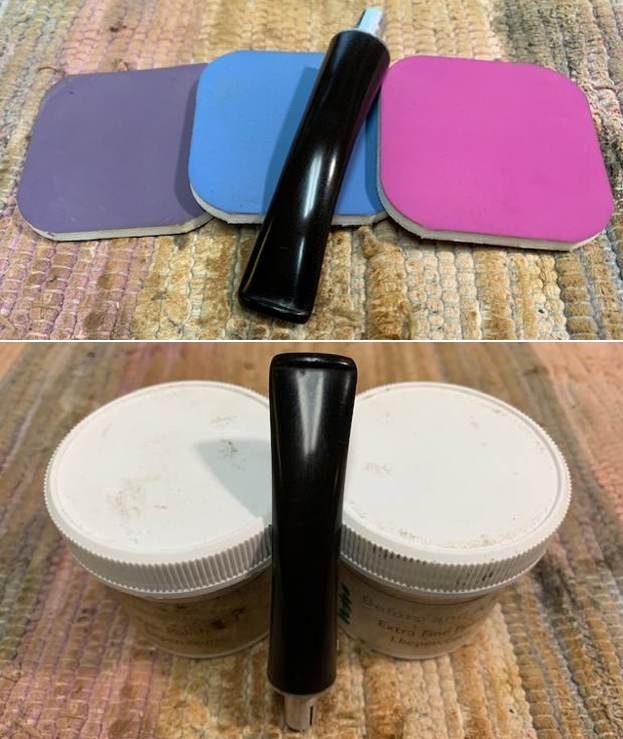
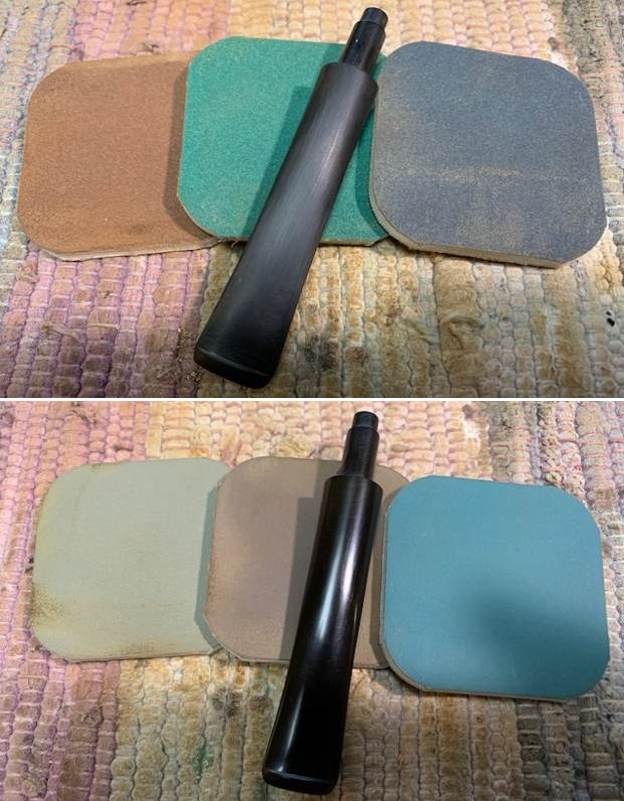
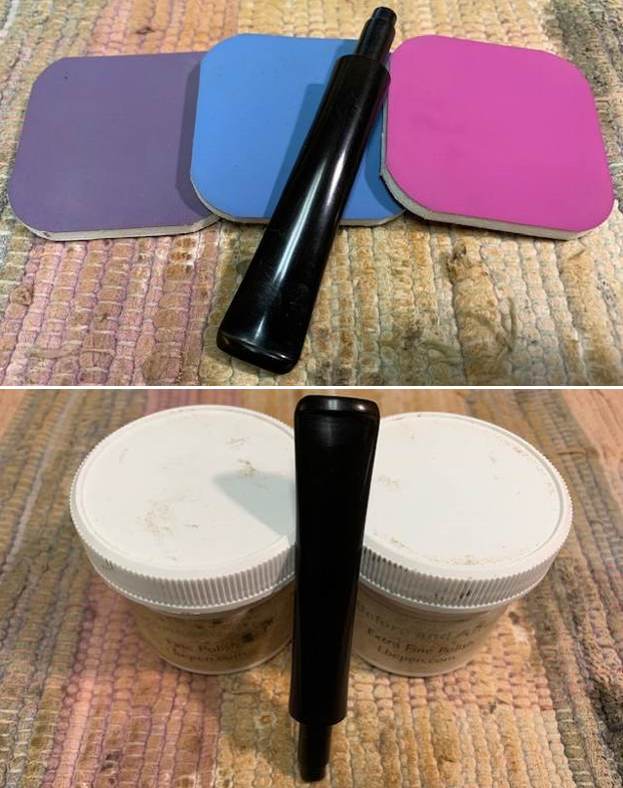
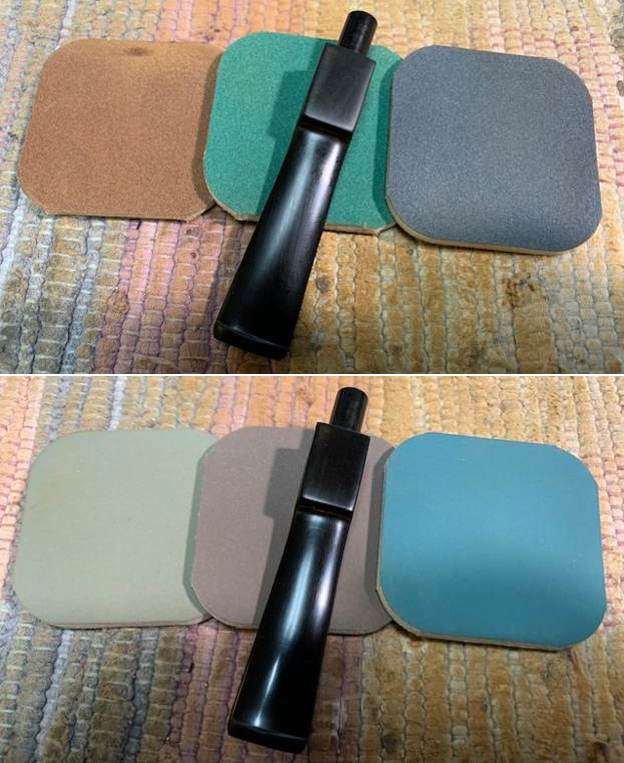
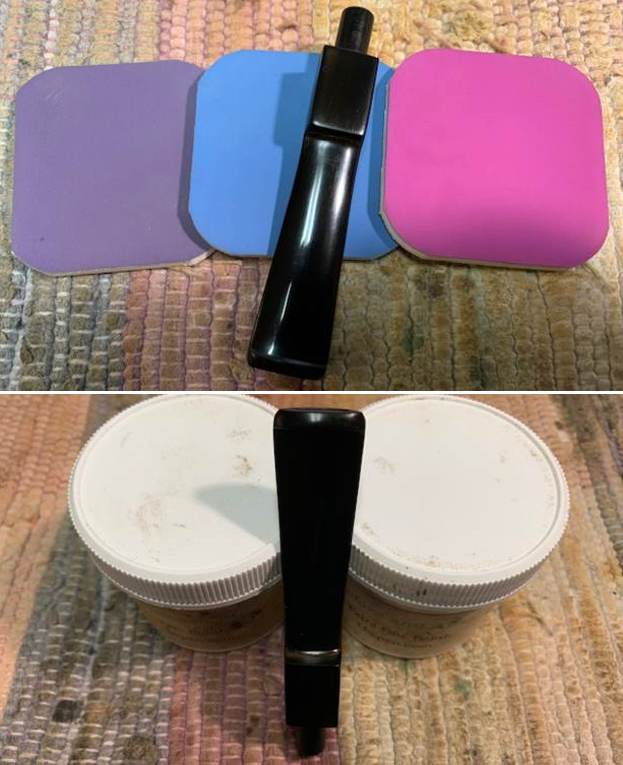
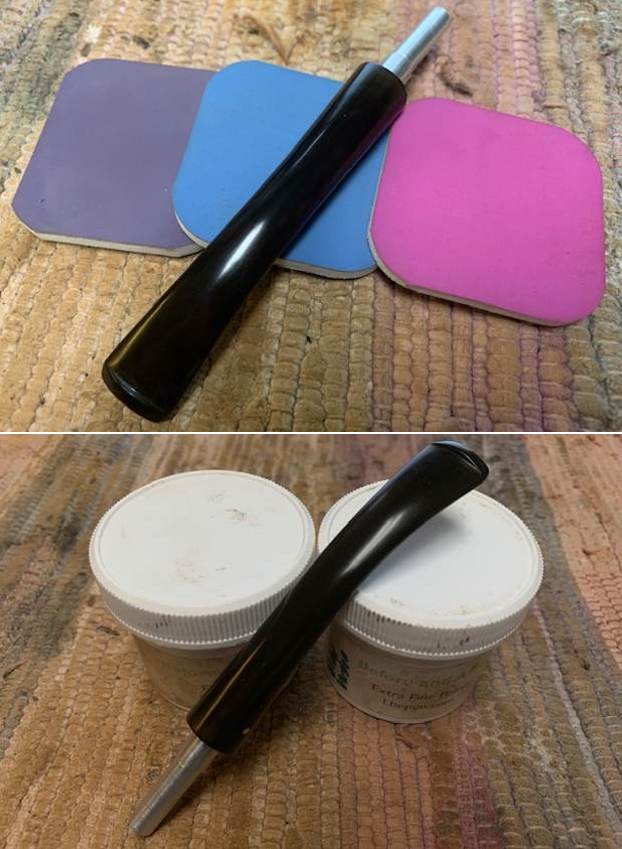
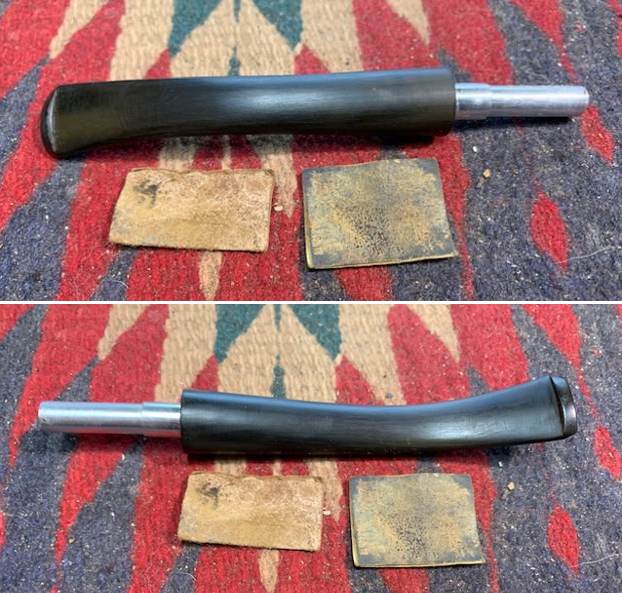 I polished the surface of the stem on both sides using micromesh sanding pads. I dry sanded the stem with the 1500-12000 grit pads, then wiped it down with a cloth impregnated with Obsidian Oil. I finished polishing it with Before & After stem polish – both Fine and Extra Fine. I gave it a final coat of Obsidian Oil and set it aside to dry.
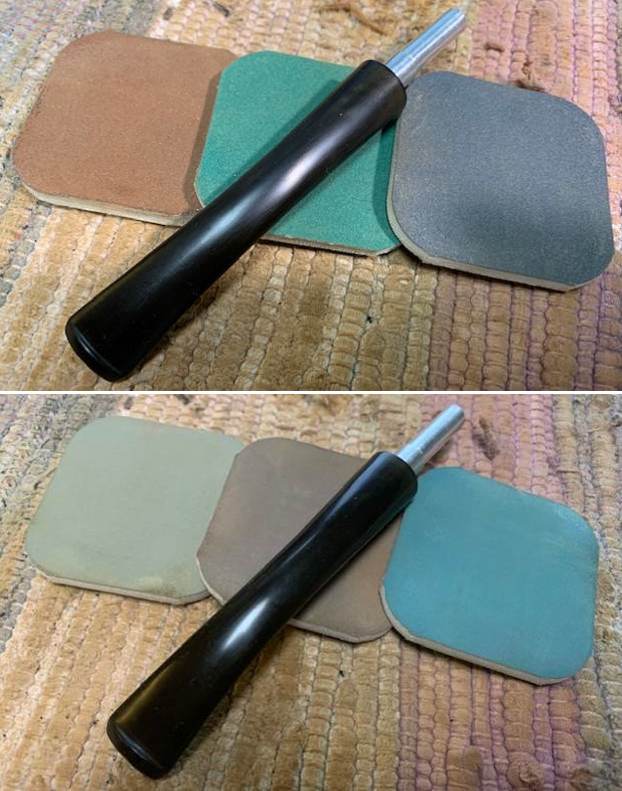
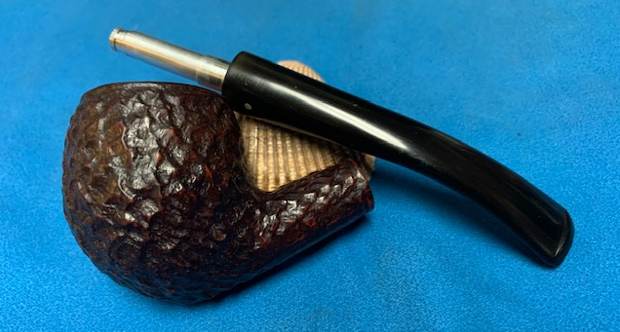
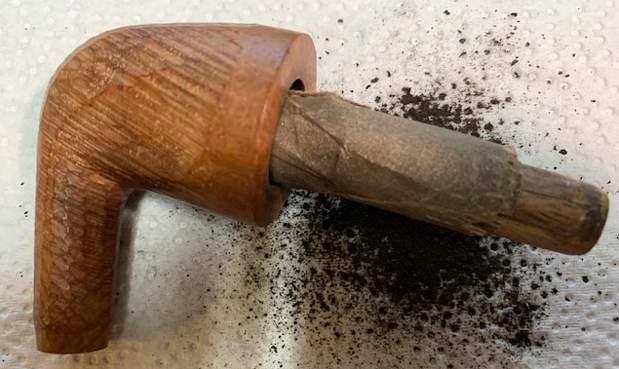
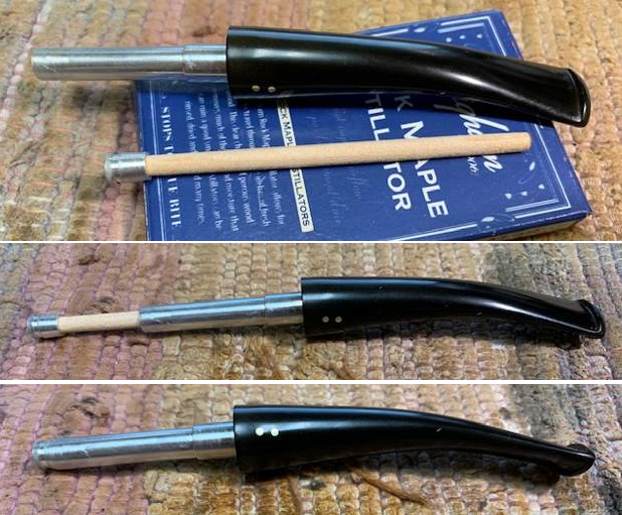
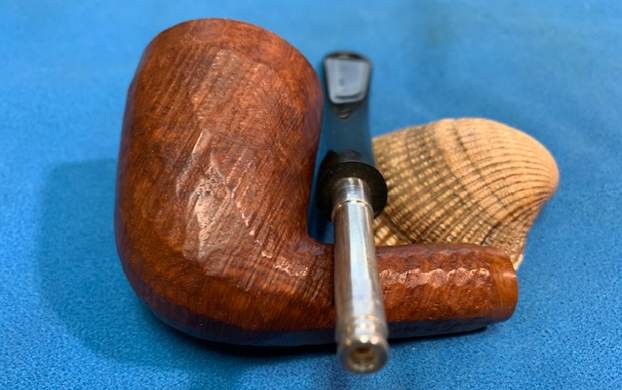
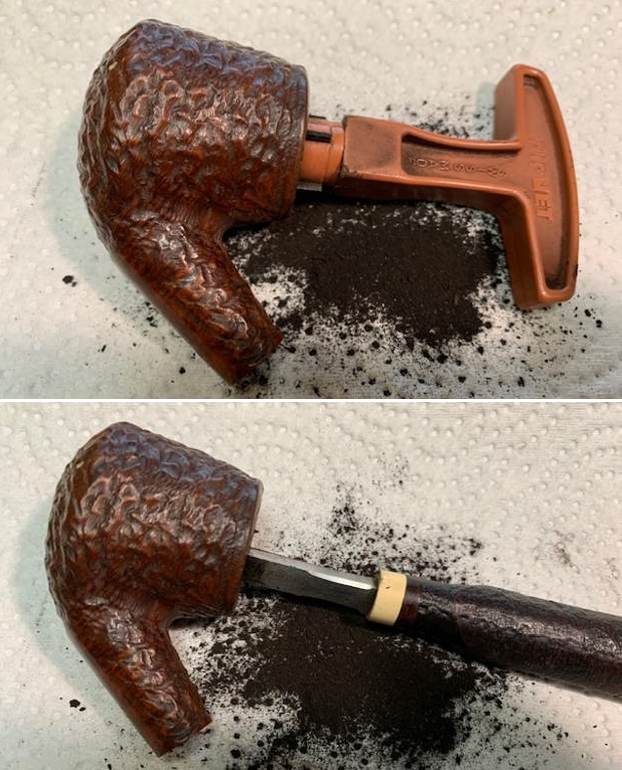
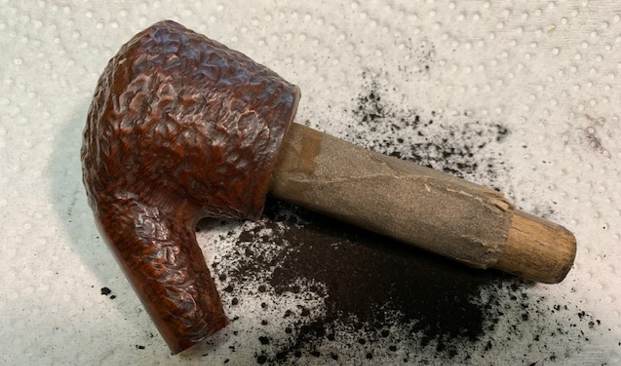
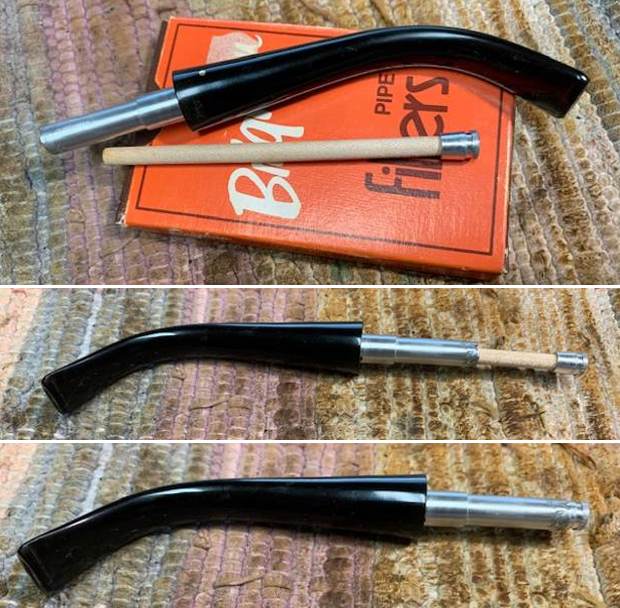
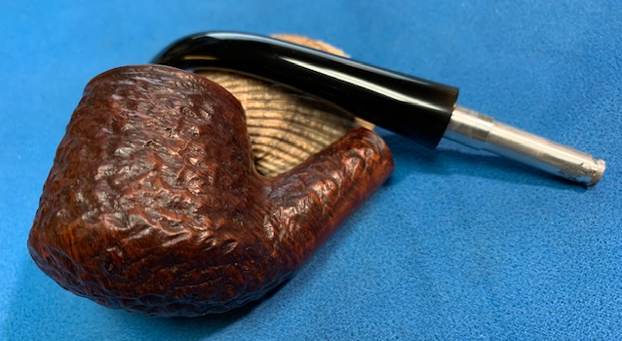
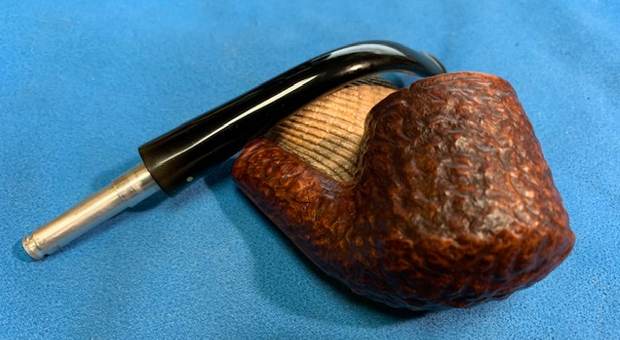
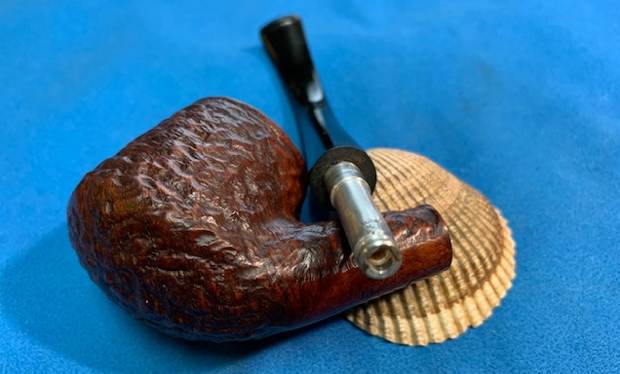
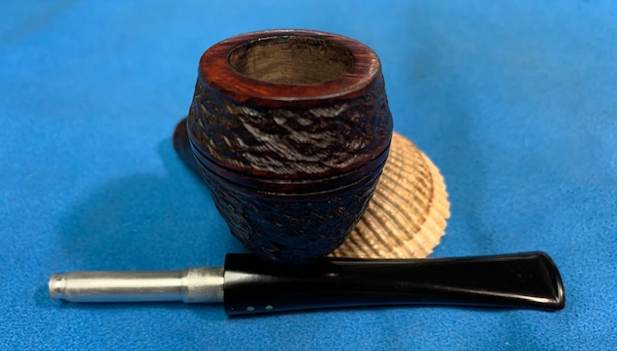
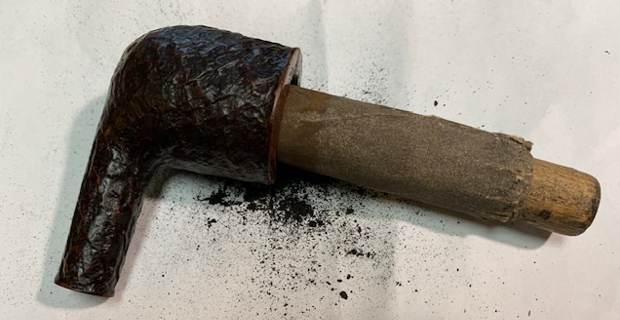
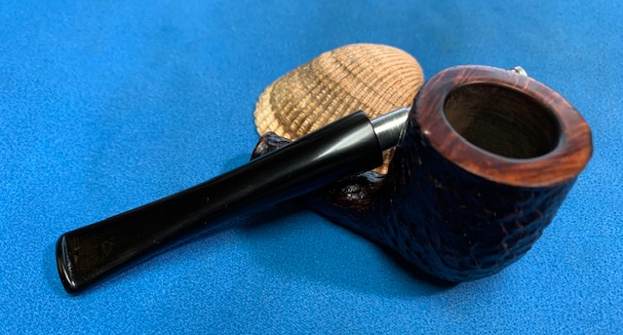
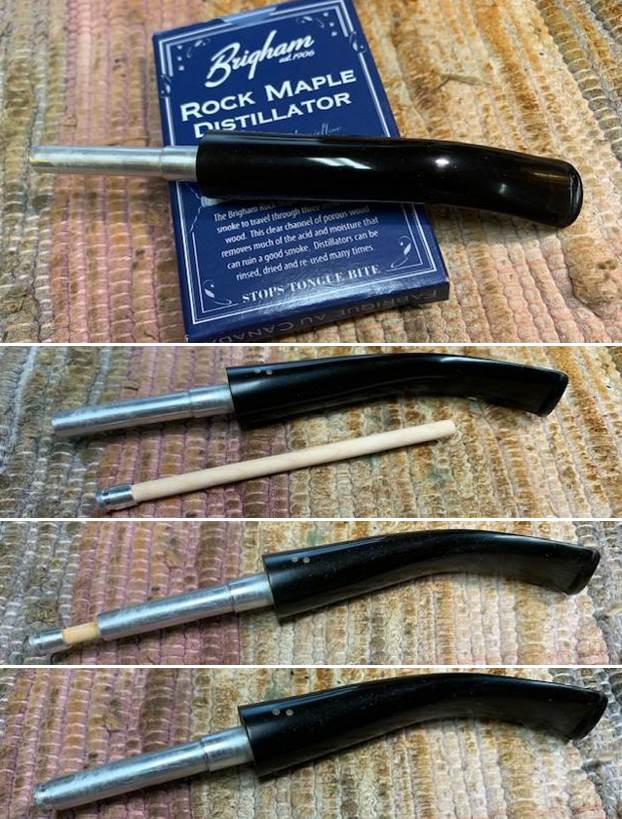
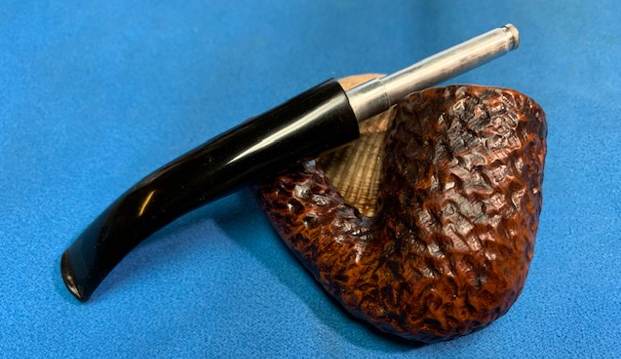
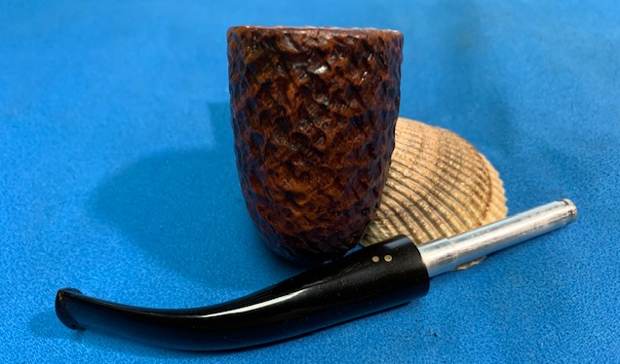
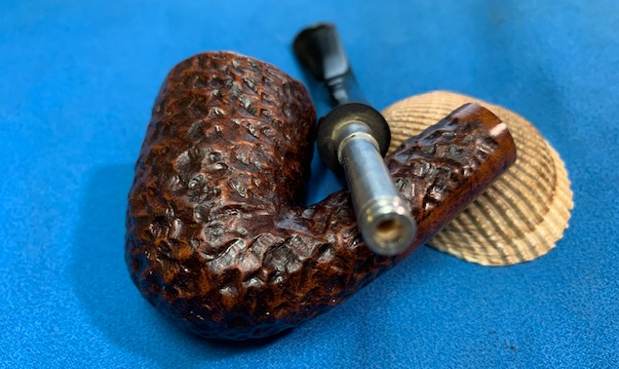
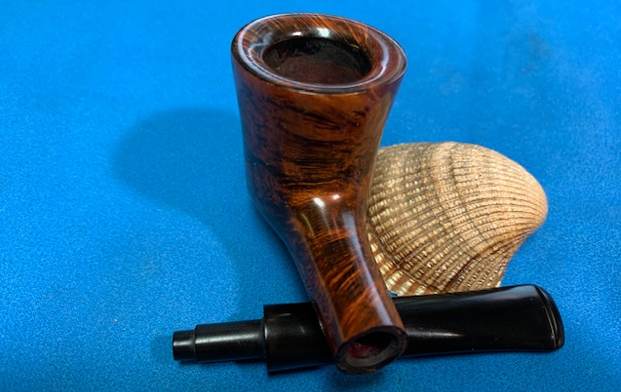
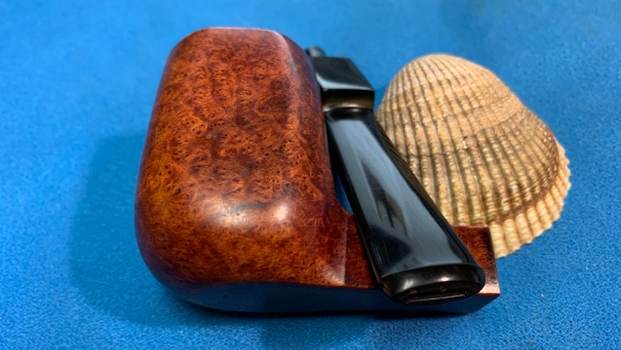
 I fit the clean and polished stem with the Brigham Rock Maple Distillator and took photos to show what it looked like. This is in essence a hollow Maple wood tube that serves to filter out the moisture and deliver a clean and flavourful smoke.
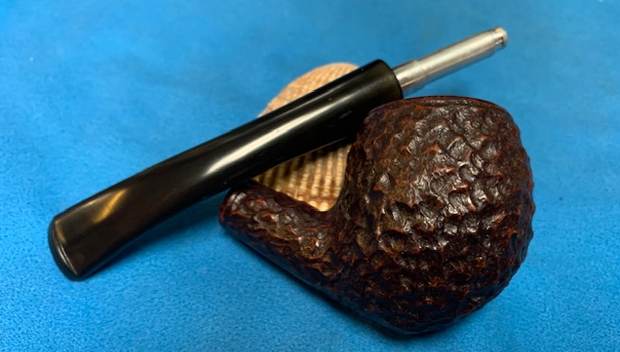
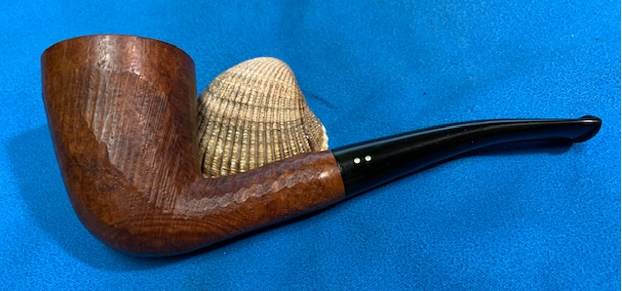
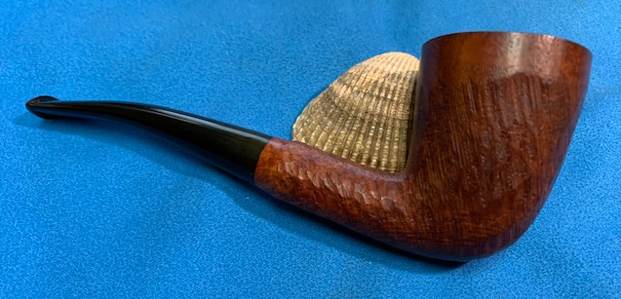
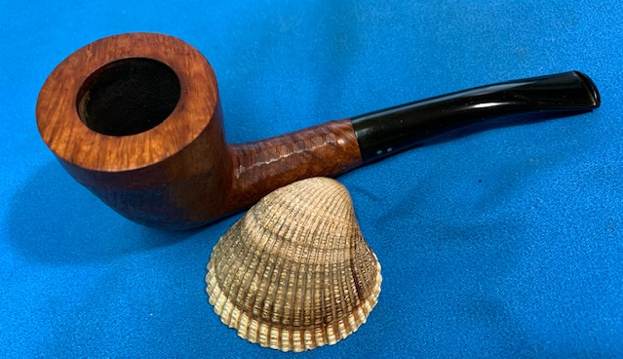
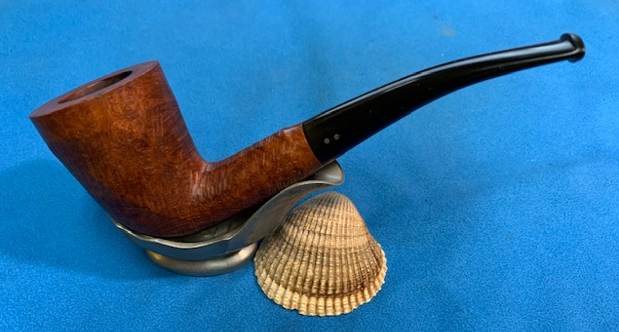
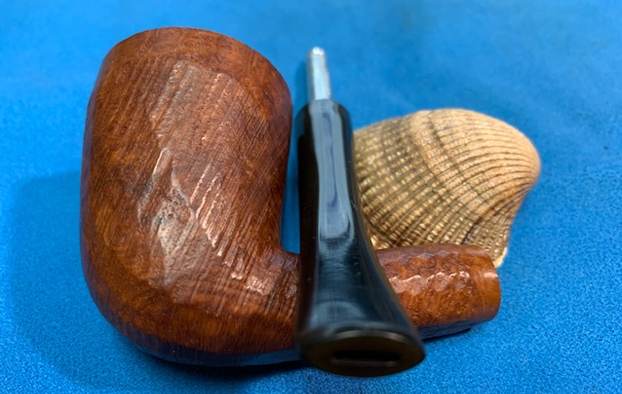
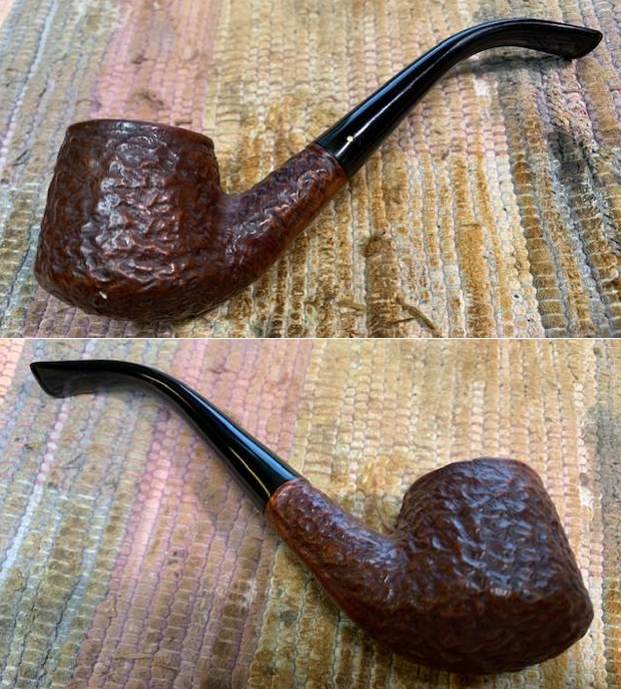
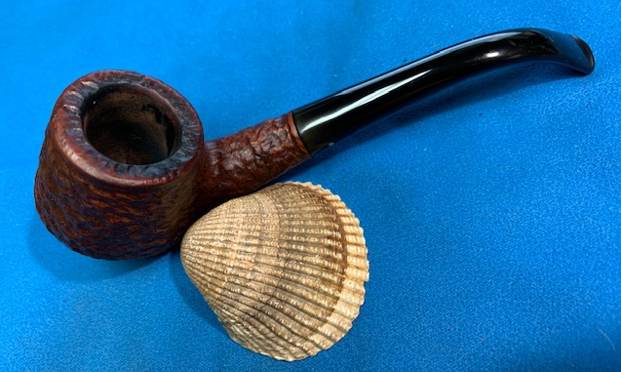
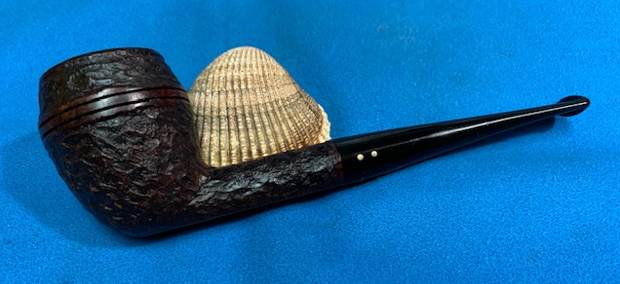
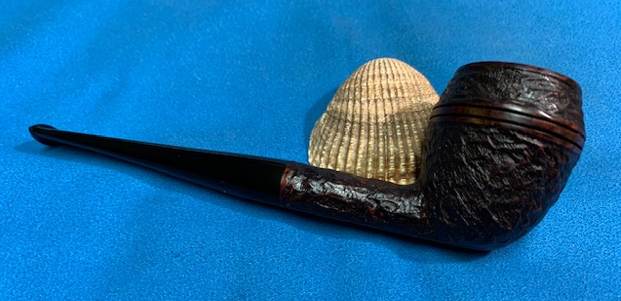
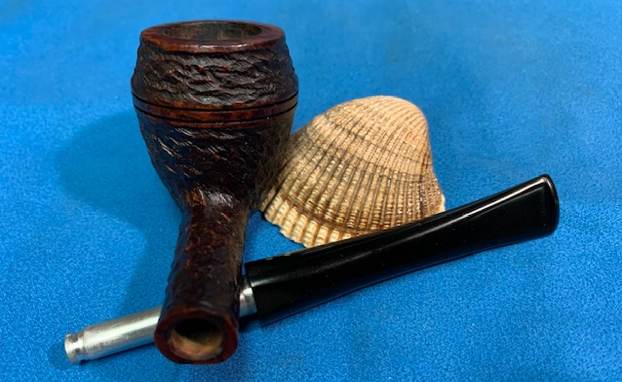
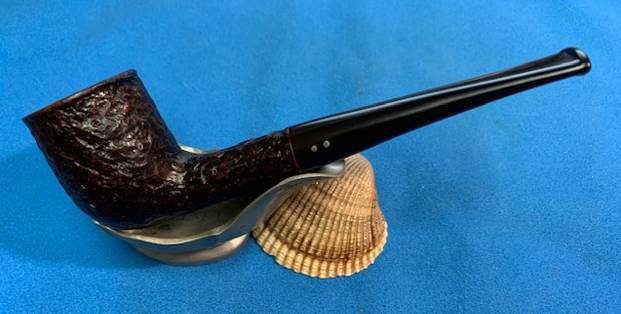
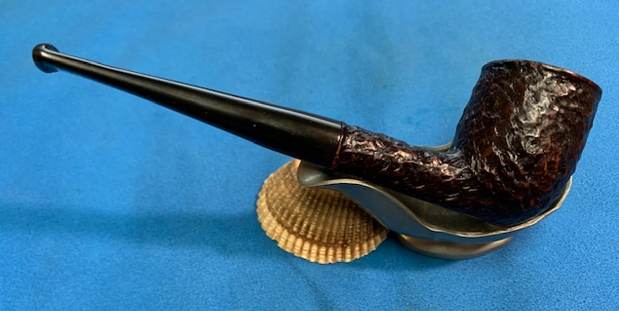
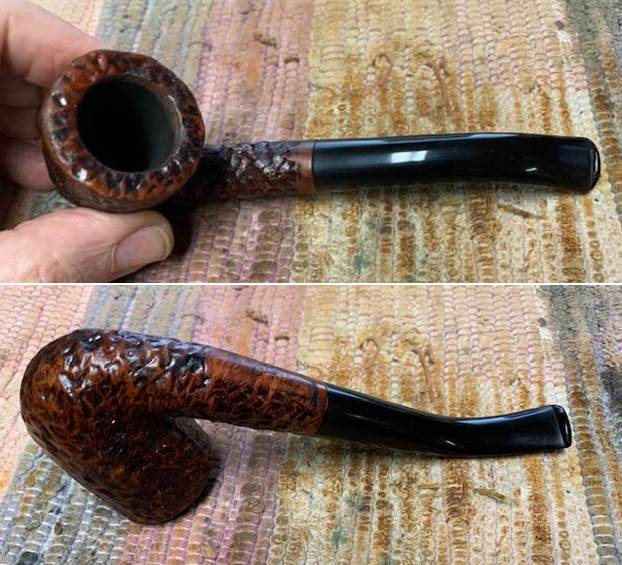
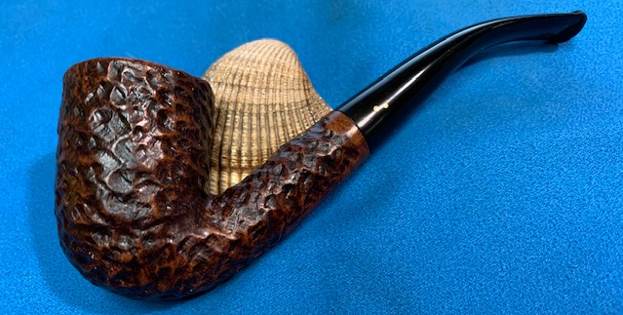
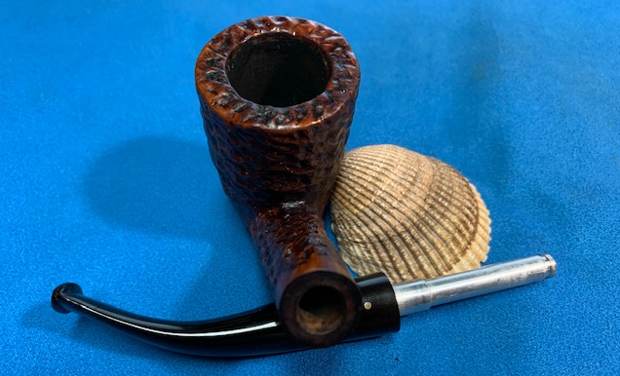
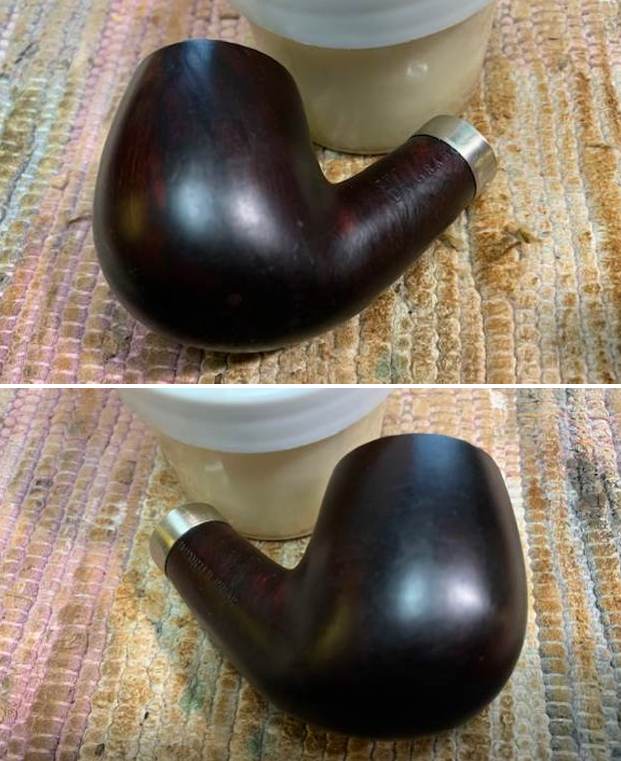
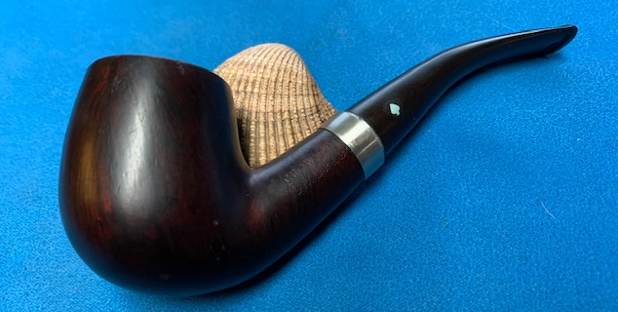
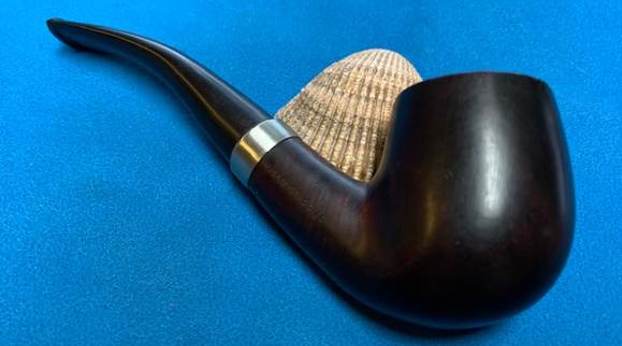
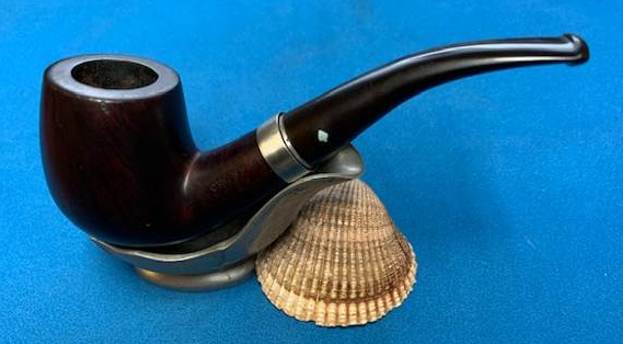
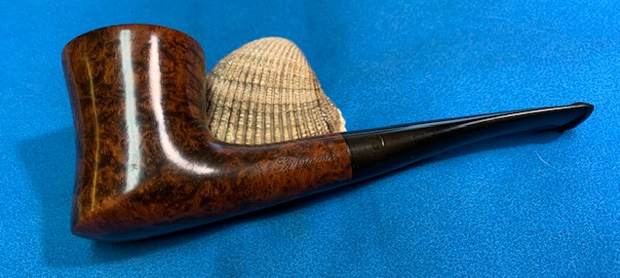
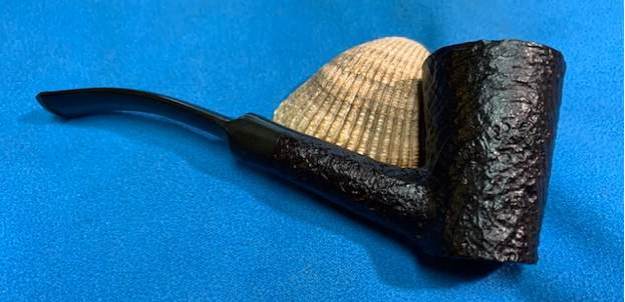
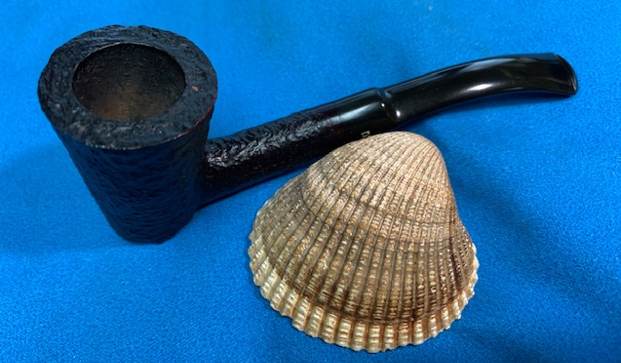
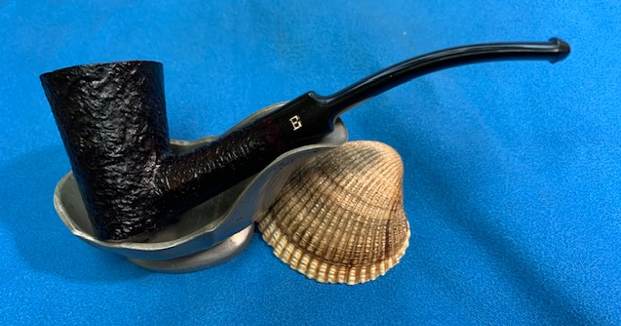
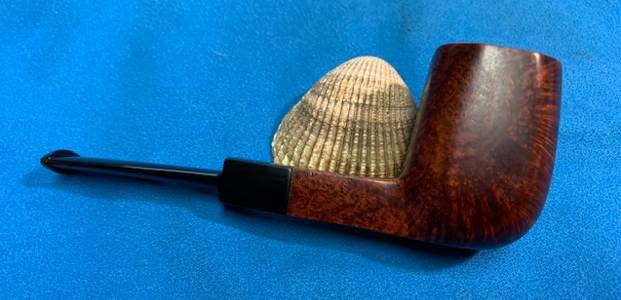
 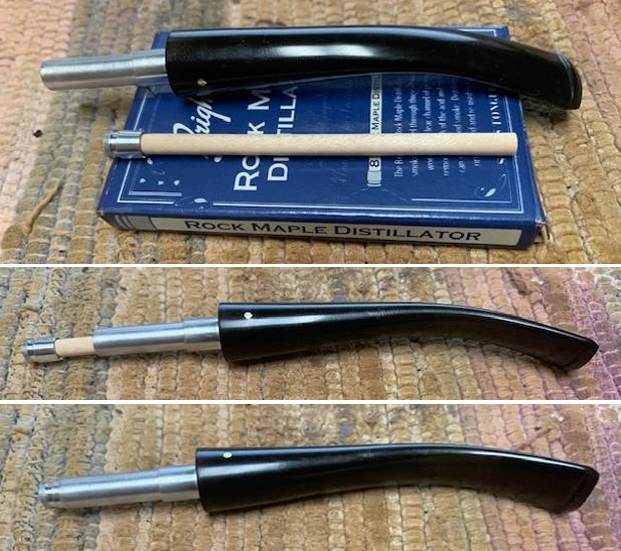 I am excited to finish this 1969-1980 Brigham Made in Canada Acorn 189 – 1 Dot from the Canadian Era. I put the pipe back together and buffed it with Blue Diamond on the buffing wheel. I gave the bowl multiple coats of Conservator’s Wax and the stem multiple coats of carnauba wax. I buffed the pipe with a clean buffing pad to raise the shine and hand buffed it with microfiber cloth to deepen the shine. It is fun to see what the polished bowl looks like with the rusticated finish. Added to that the polished black vulcanite stem with the shining brass pins was beautiful. This mixed grain on the rusticated Brigham Standard 1 Dot 189 Acorn is nice looking and the pipe feels great in my hand. It is light and well balanced. Have a look at it with the photos below. The dimensions are Length: 6 inches, Height: 1 ¾ inches, Outside diameter of the bowl: 1 ¼ inches, Chamber diameter: ¾ of an inch. The weight of the pipe is 1.45 ounces/41 grams. It is a beautiful pipe and one that will be on the rebornpipes store in the Canadian Pipe Makers Section soon. If you are interested in adding it to your collection let me know. Thanks for walking through the cleanup with me as I worked over this pipe. Thanks to each of you who are reading this blog. Remember we are not pipe owners; we are pipemen and women who hold our pipes in trust until they pass on into the trust of those who follow us.