Tag Archives: turning a tenon

Fashioning a Churchwarden as a Christmas Gift for my Son


Blog by Dal Stanton

One of the advantages of having ‘The Pipe Steward’ in the immediate family is that there’s a very good probability that his gifting patterns might reflect one of his favorite pastimes – restoring pipes!  Over the years, it has given me great joy to gift my loved ones – sons and daughters(!), with pipes that I’ve restored.  There are at least two reasons for this.  First, they receive a beautiful pipe which has been given the TLC that brings it again to a pristine condition – often better than new!  They can enjoy the composite beauty of its shape, grain formations and hues.  Additionally, understanding a pipe’s story through the research and write-up that accompanies each recommissioned pipe adds to the overall appreciation for the pipe.  The pipe itself is the first part of a growing legacy.  Secondly, the fact that the gift has passed through the care and attention of my hands, restoring the pipe’s condition, adds my personal part to the pipe’s legacy.  The ‘Giver’s’ story is added to the pipe and is then associated with the pipe by the loved one that that receives the pipe, becoming its new steward.

My son, Josiah, is coming from St. Louis to join his mother and I for Christmas here in Bulgaria.  He joins his sister, Johanna and her husband, Niko, who have come to Sofia from Nashville.  Both Josiah and Johanna, our two youngest, lived here with us when they were teens.  So, they are coming ‘home’ for Christmas and this is special for them and for us.  Two additional things add to the specialness of this Christmas reunion.  First, Josiah is bringing with him a young lady for mom and dad to meet!  They met in college and have cultivated a relationship.  She’ll be coming to meet his parents….no pressure!  Secondly, Johanna and Niko are also bringing a special gift – we just found out that they are expecting their first little one to add to our growing number of grandchildren!  Gifts are special during Christmas and they come in different ways.  The greatest gift is the reason we celebrate Christmas – God’s gift of his Son, Christ, given to a dying and broken world to bring the gift of life.

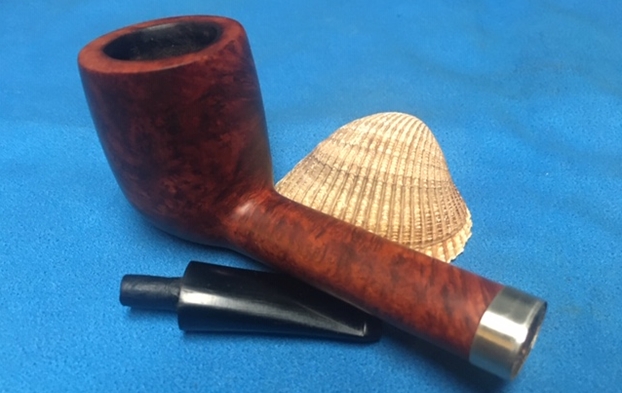
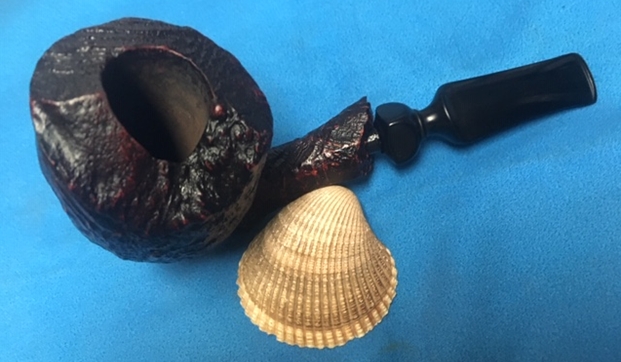
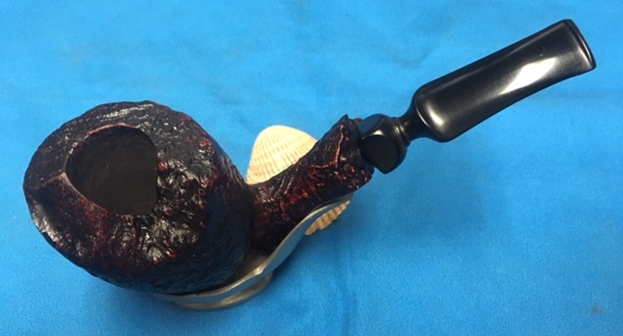
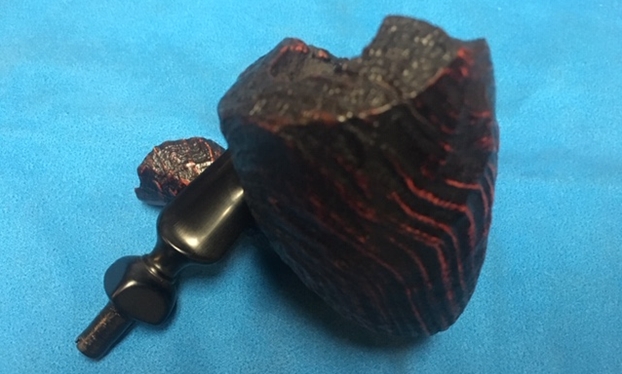
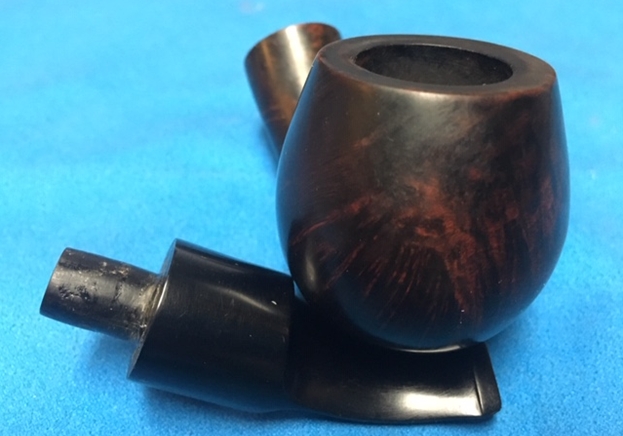
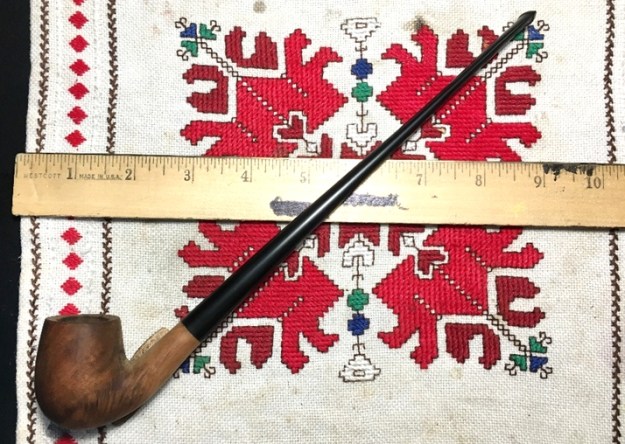
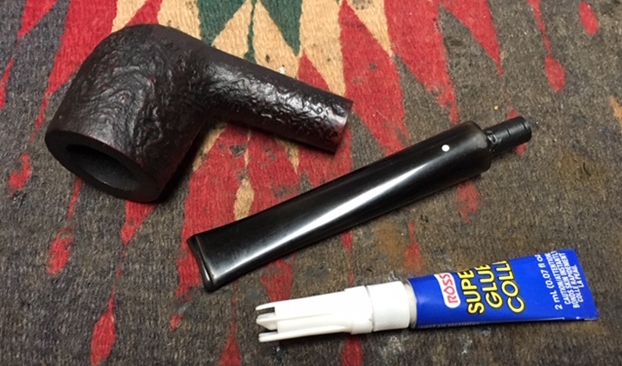
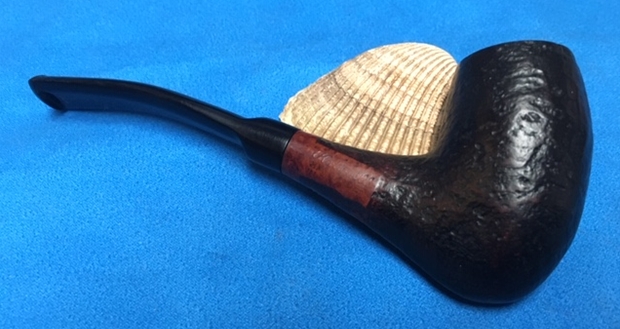
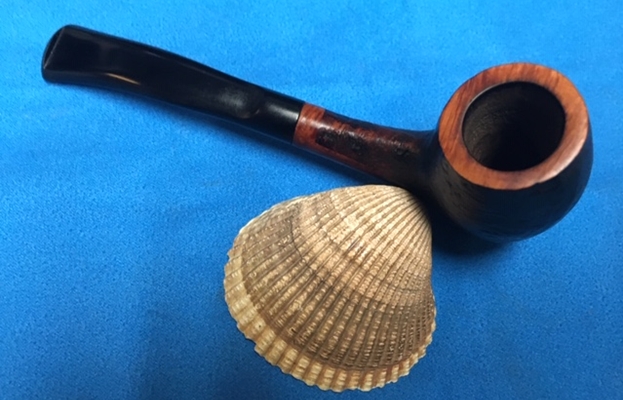
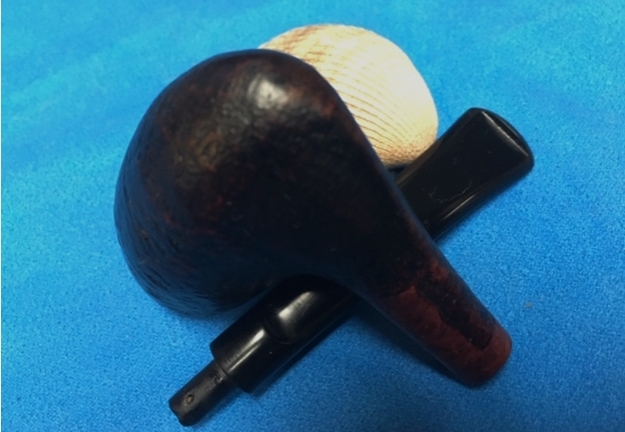
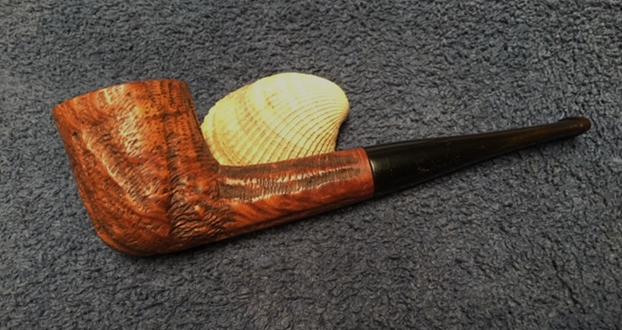
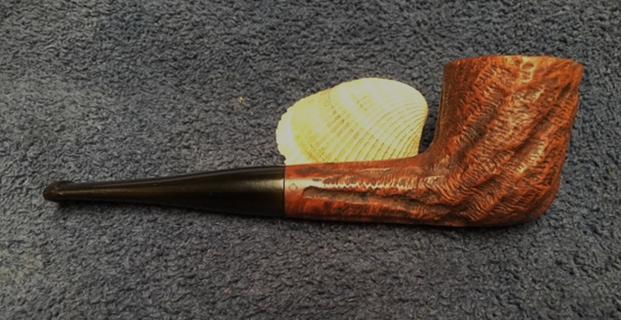
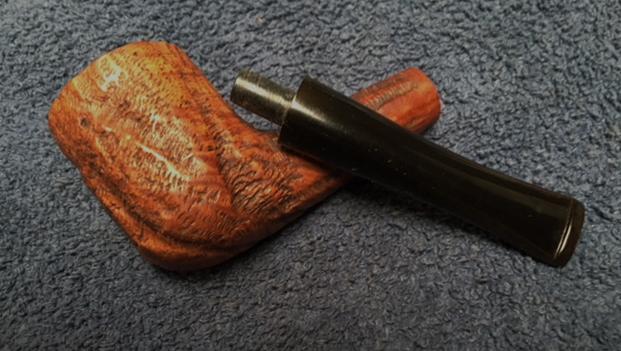
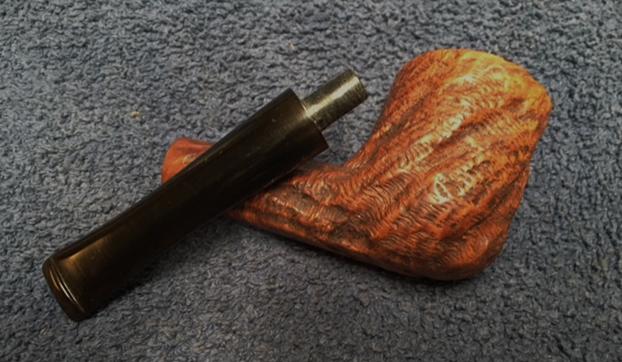
For this Christmas, a Churchwarden will be fashioned for Josiah.  I enjoy repurposing forgotten bowls to give them new life by simply mounting them to a long, flowing Warden stem.  The uniqueness of the Churchwarden is that it is not primarily the style of bowl that makes it a Churchwarden, but the length and style of the stem.  From Bill Burney’s description in Pipedia we discover this information.I found two bowls in my box that held CW potential.  A petite ‘Made in England’ Bent Billiard with the shape number 950 on the shank.  No other markings.  It’s a classic petite English pipe which is attractive by itself, but so far, no one has shown interest in adopting him from the ‘For “Pipe Dreamers” Only!’ online collection where pipe men and women commission pipes for restoration benefitting our work here in Bulgaria with women and girls who have been trafficked and sexually exploited – the Daughters of Bulgaria (Incidentally, if you go to this link you will see our daughter, Johanna, a few years ago painting a picture depicting our work with the Daughters).  I believe this bowl will serve as a gift for my son-in-law, Niko – next in queue.  The other bowl is a rusticated bowl with the sloppy stamping not fitting the smooth panel on the shank’s left flank.  Here are the candidates.
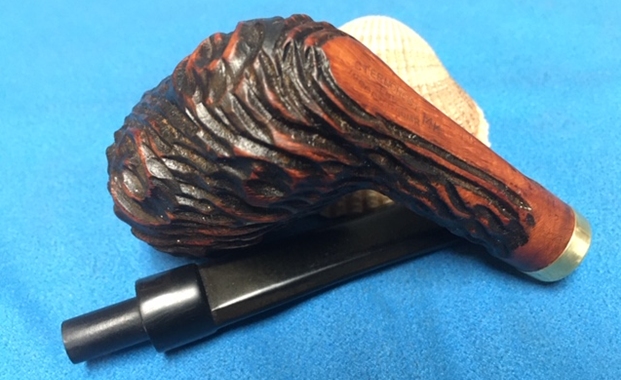
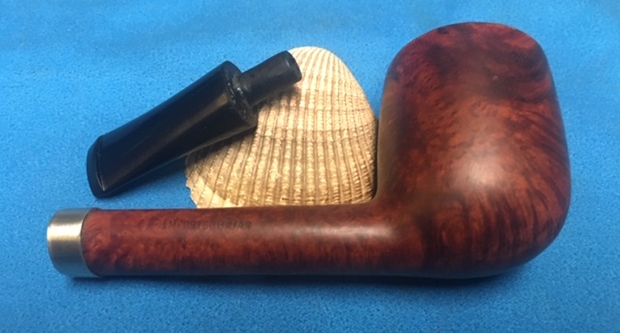
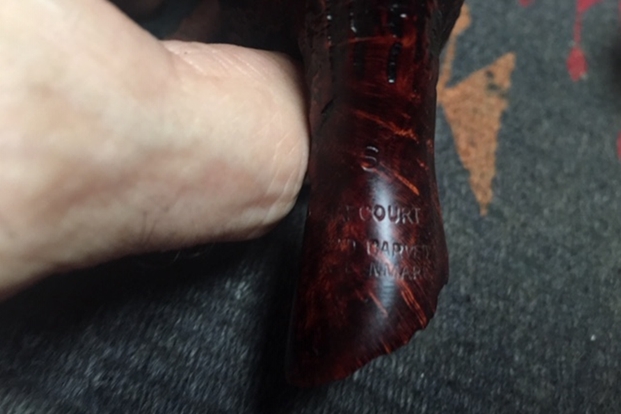
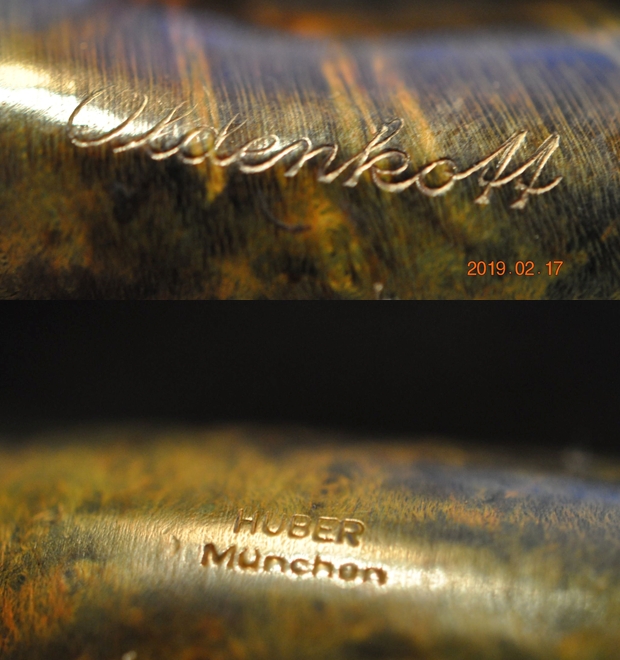
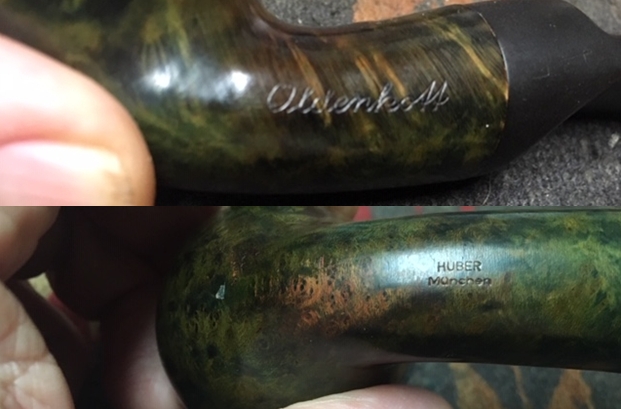
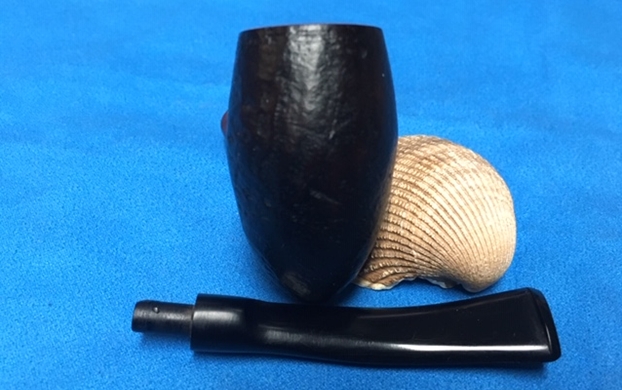
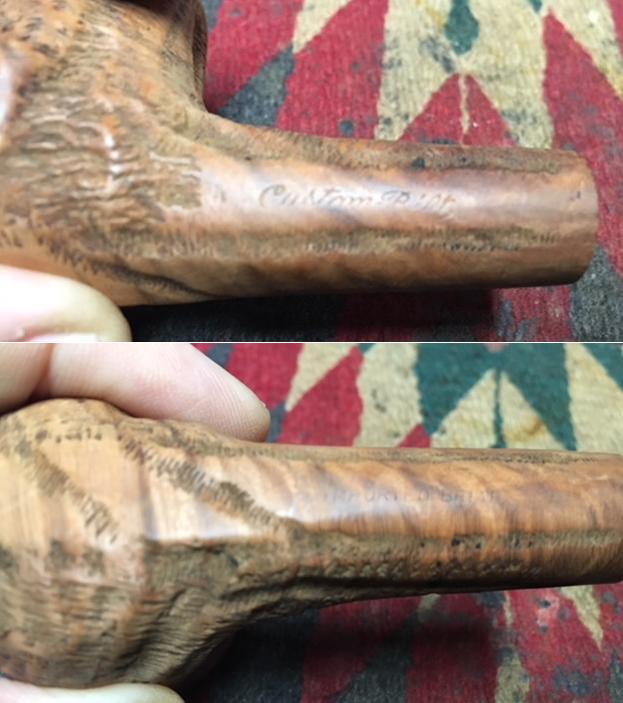
As I evaluated the two, I decided on the rusticated bowl for my son, that is rustic and will give the newly fashioned CW an ‘Ole World’ feel.  I take a closer look at the ‘Rustic’s’ nomenclature.  The sloppy stamping shows ‘ERMOFILTER’ – with ‘’ER” running over onto the metal stem facing and stem, [over] ‘ORTED BRIAR’ (with the ‘IAR’ running over!) [over] ‘ITALY’, the COM.  Undoubtedly, the stamping’s aim was to reveal the name, ‘Thermofilter’ which is not found in Pipedia but Pipephil.eu has this panel of information with a ‘?’ indicating the COM.  The Thermofilter on my work desk adds Italy as the country of origin.
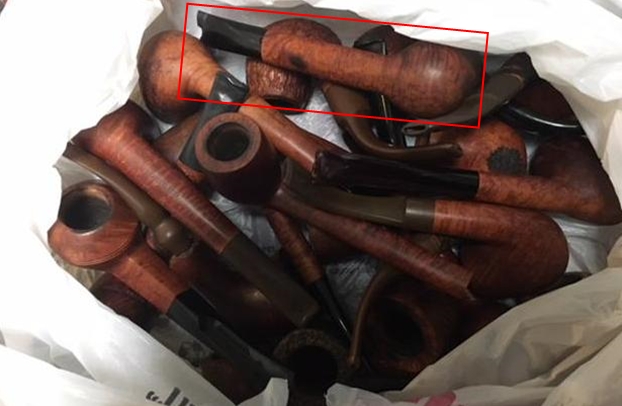
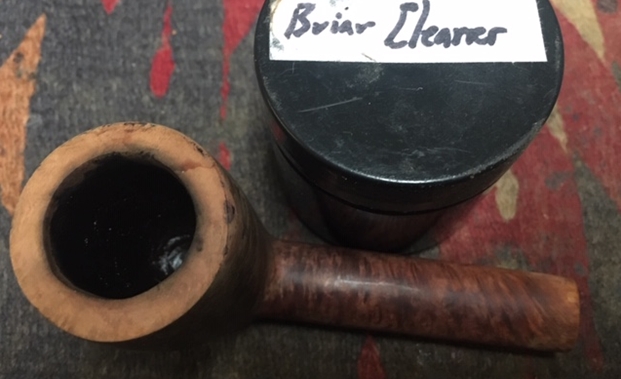
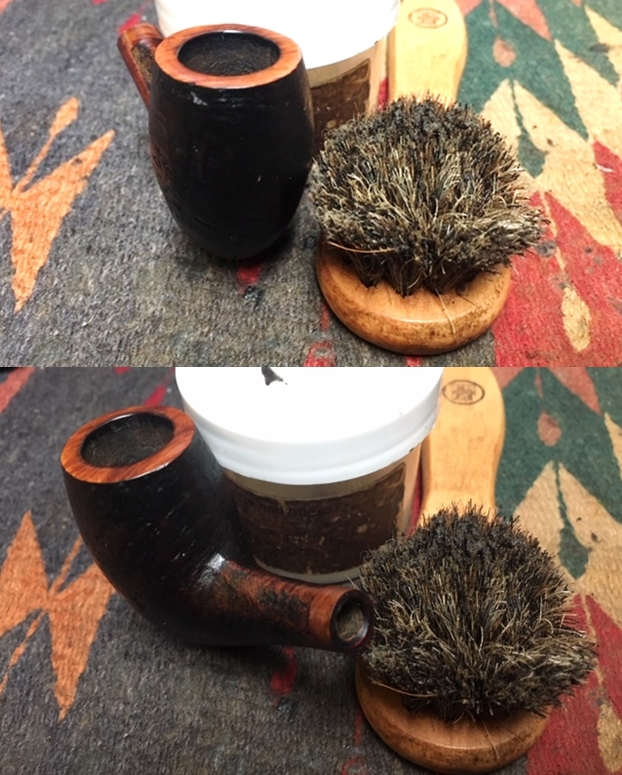
I acquired this pipe while in the US a few years back at Madeline’s Antique Store in Manchester, Tennessee, just off Interstate 24.  It was a quick stop as we were traveling through and saw the billboard and decided to stop.  It was a very fruitful detour as I found a Dunhill in the wild and purchased it for a pittance.  In the picture below, the Dunhill (see link for this restoration: Another Wedding Trip Pick: A 1961 DUNHILL EK Shell Briar Made in England 1 4S) is visible (3rd from the bottom) and reminded me that this was on the trip when Johanna and Niko were married!  The Thermofilter is barely visible on the right edge in the pipe stand.
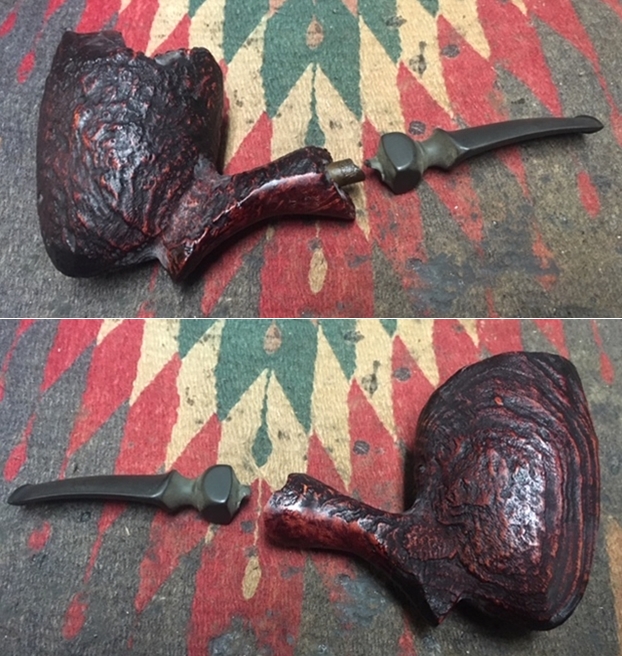
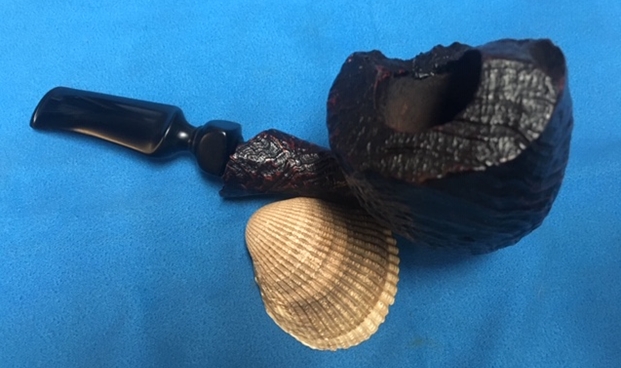
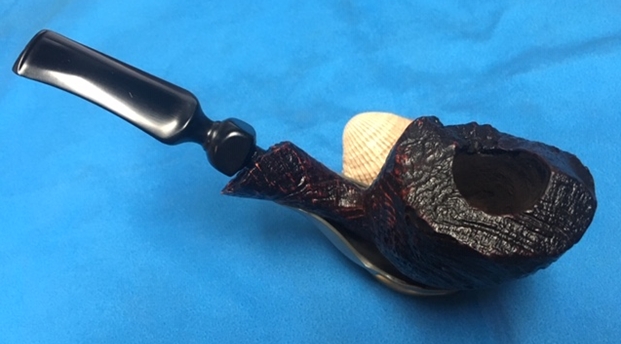
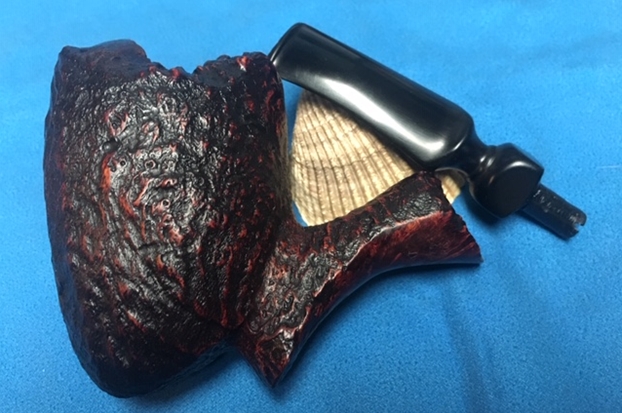
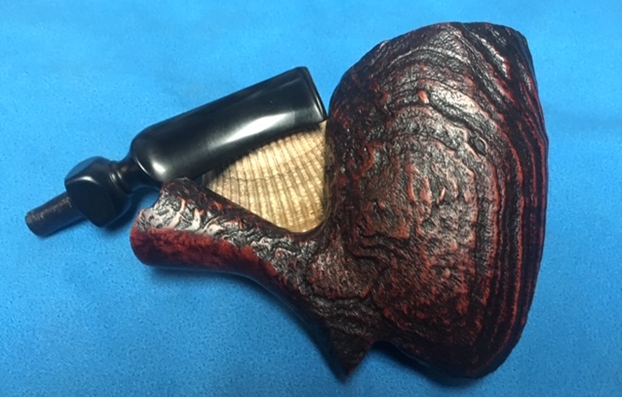
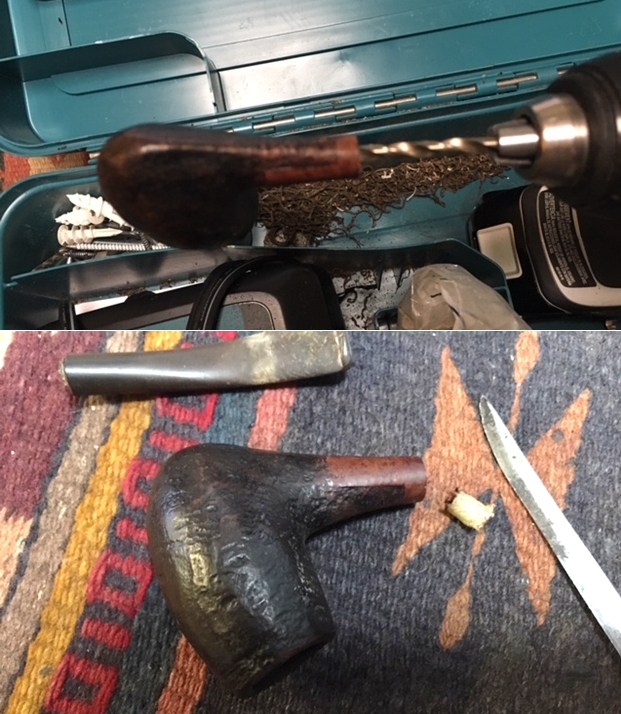
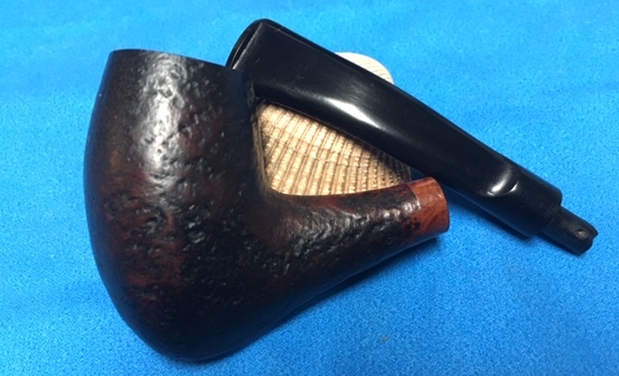
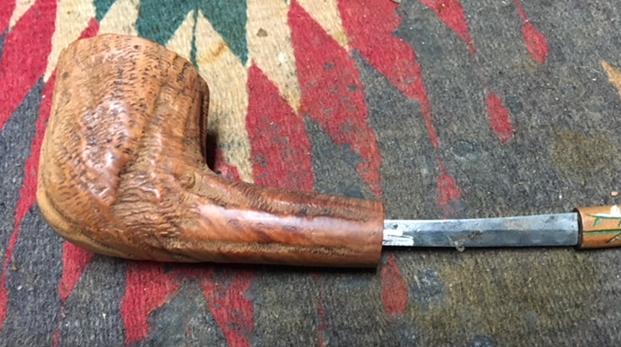
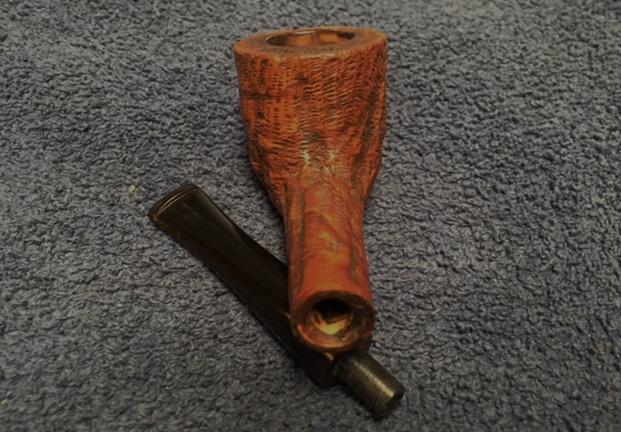
I take some pictures of the rusticated bowl to get a closer look and to mark the start. 
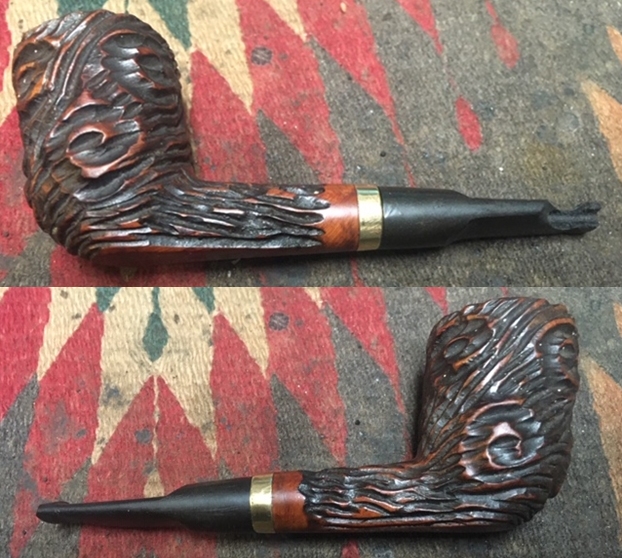
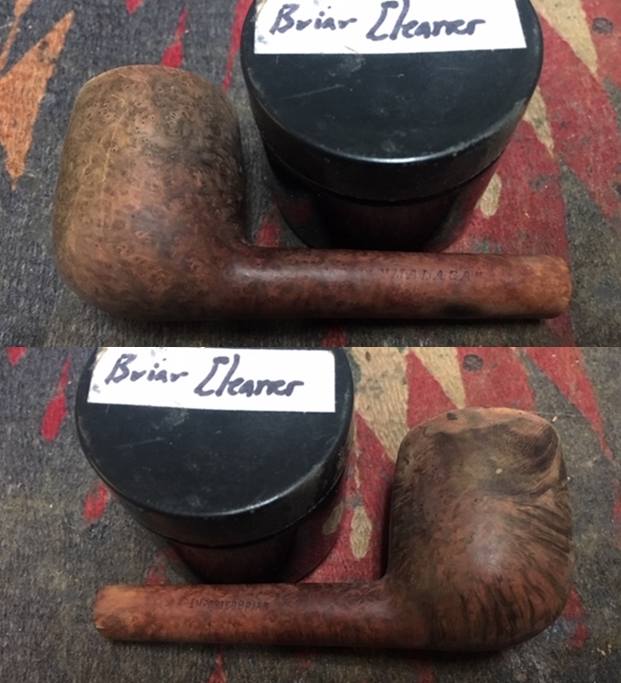
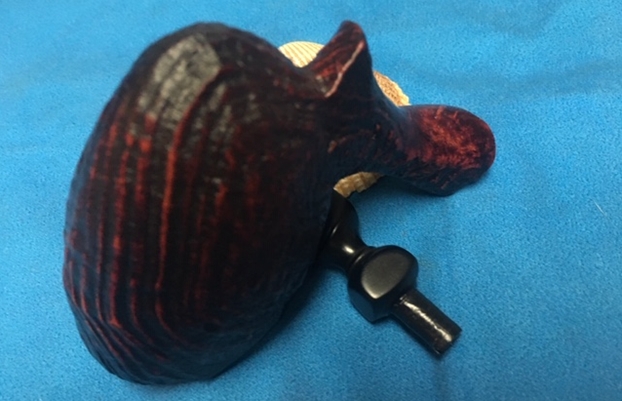
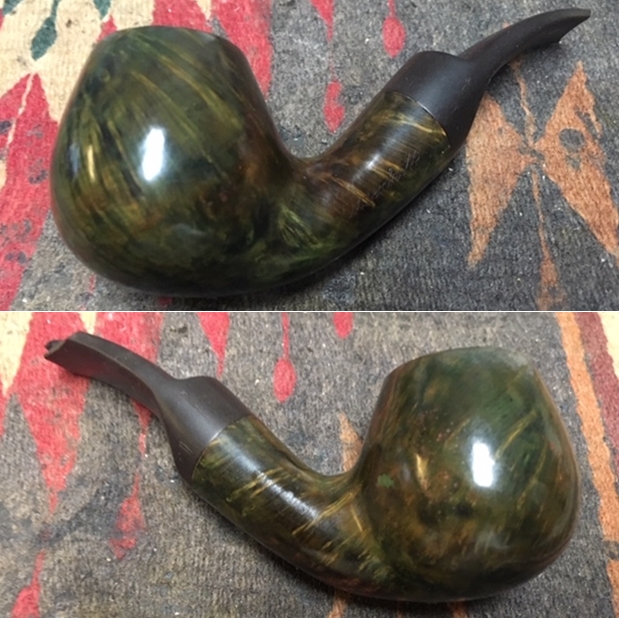
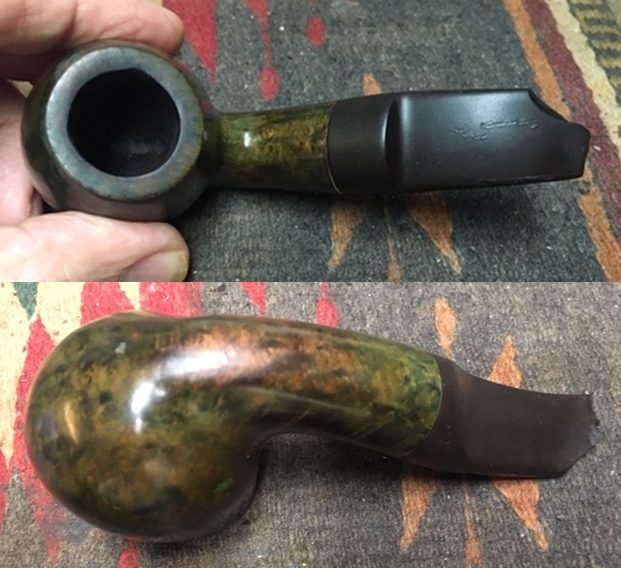
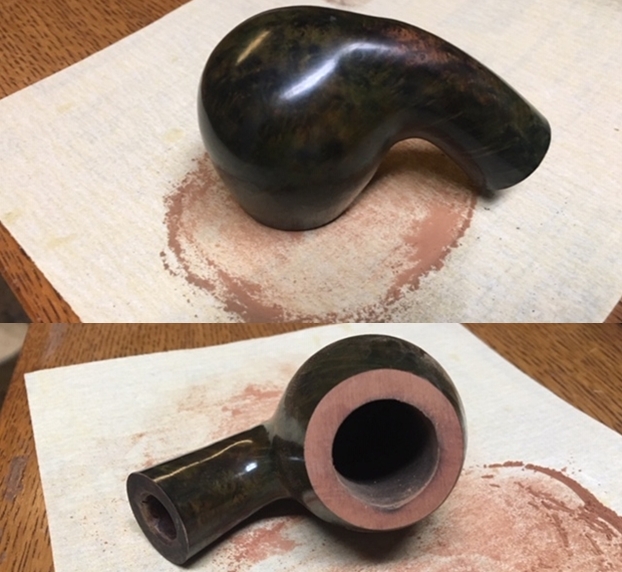
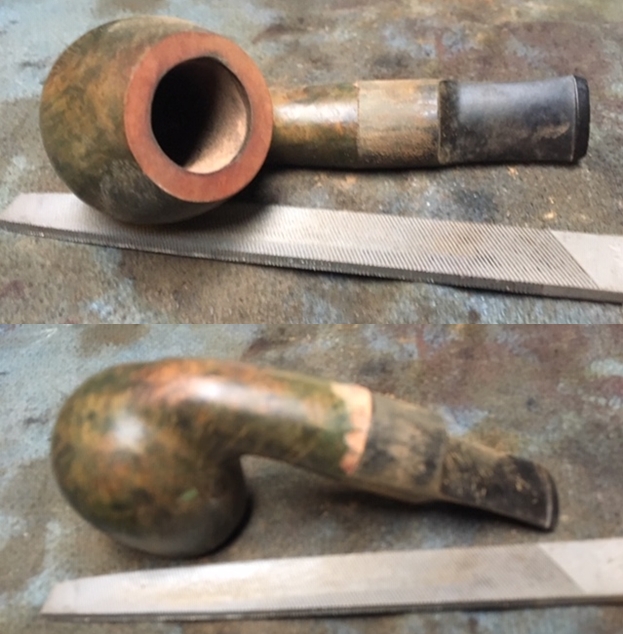
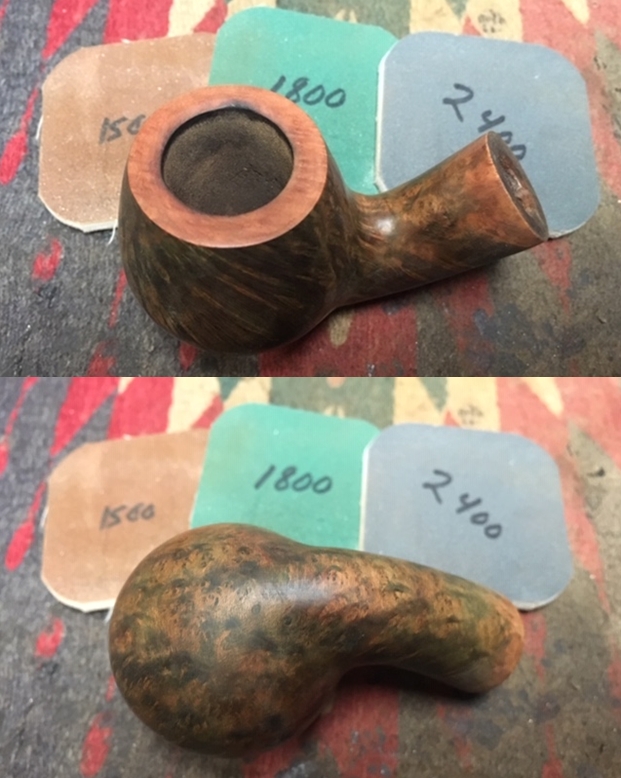
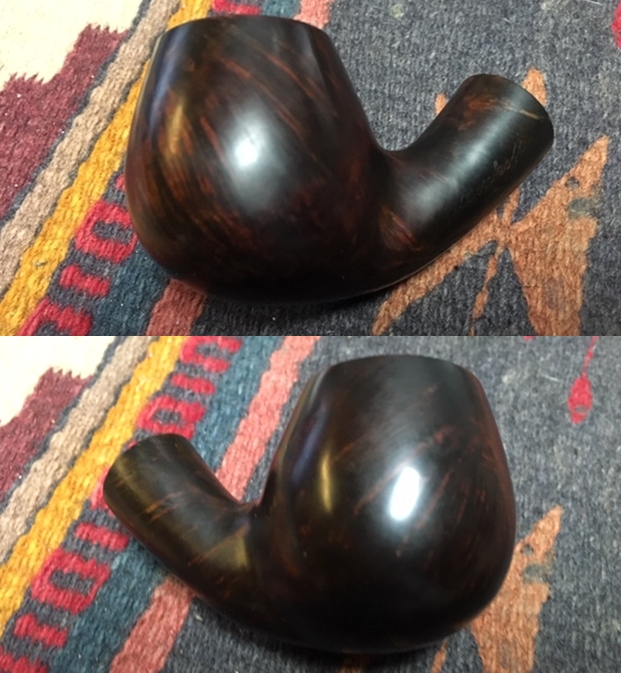
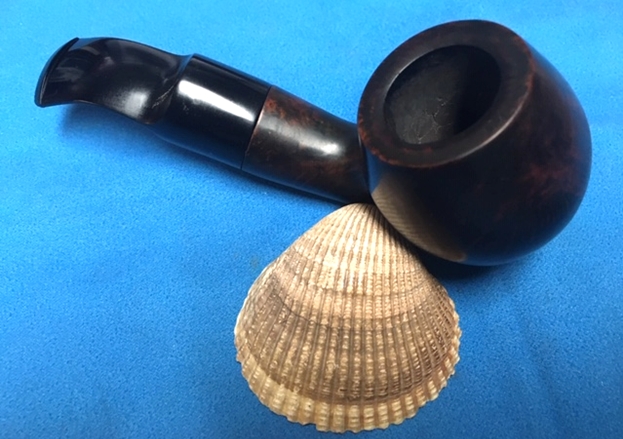
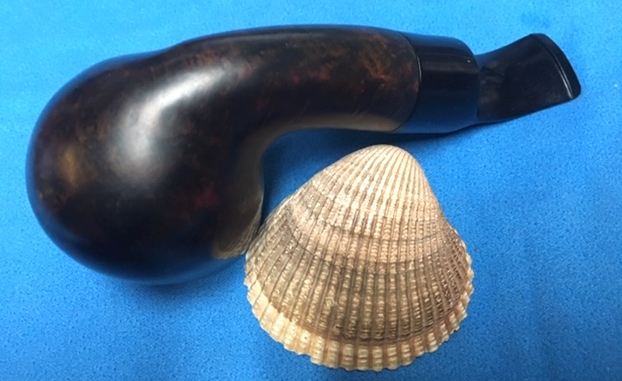
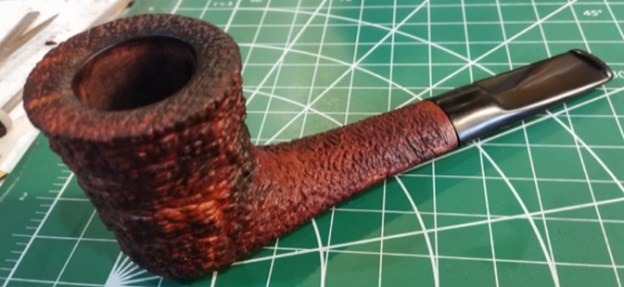
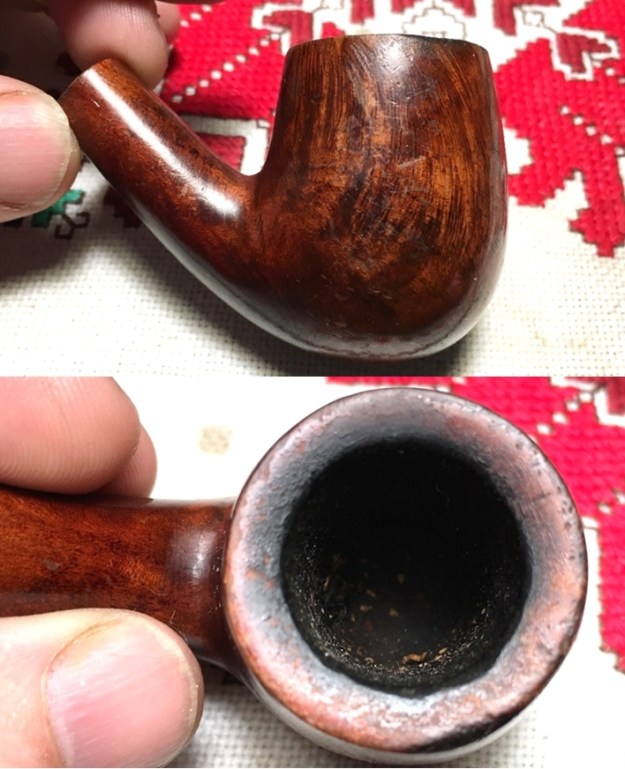
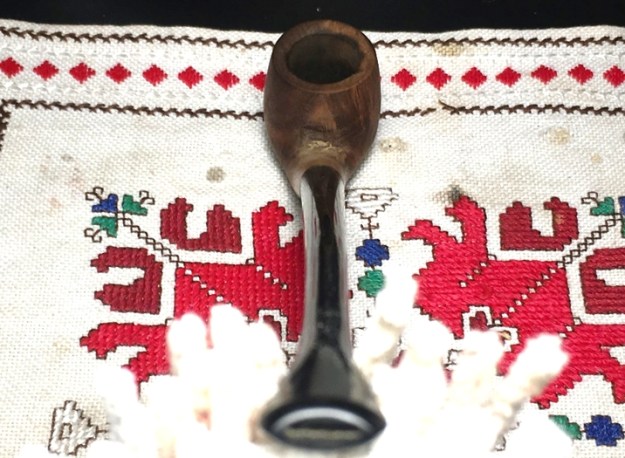
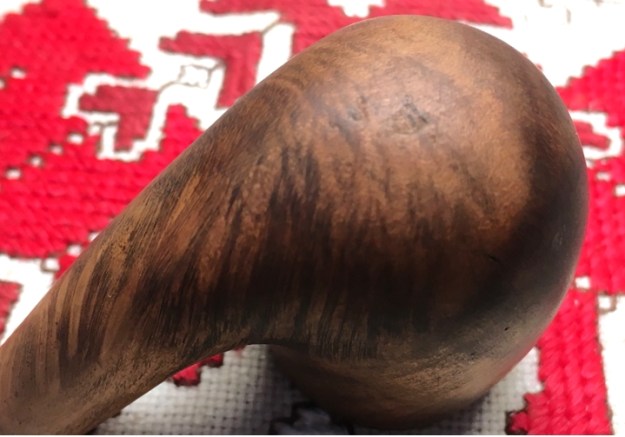
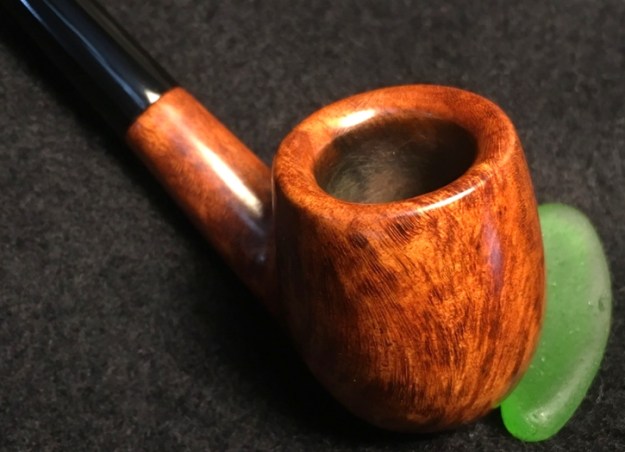
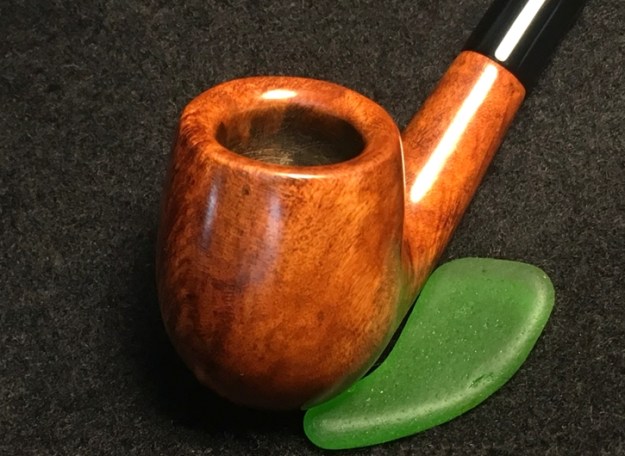
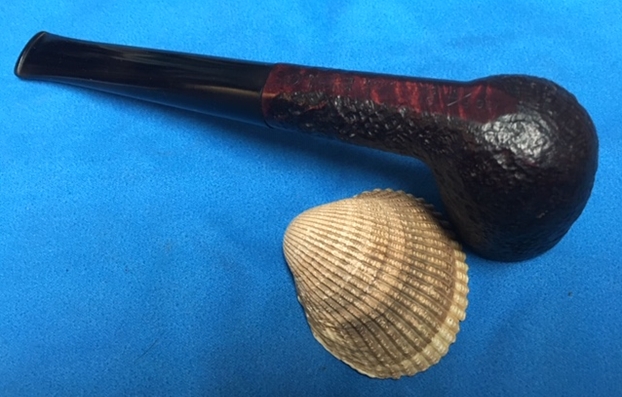
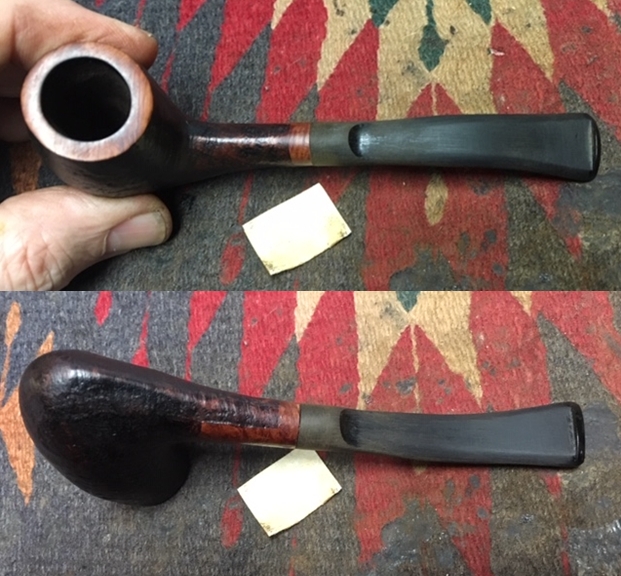
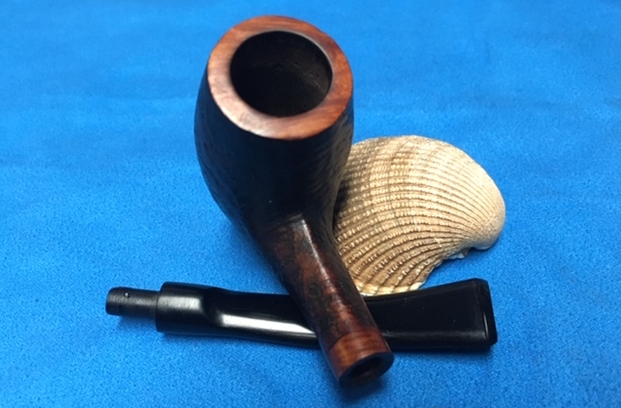
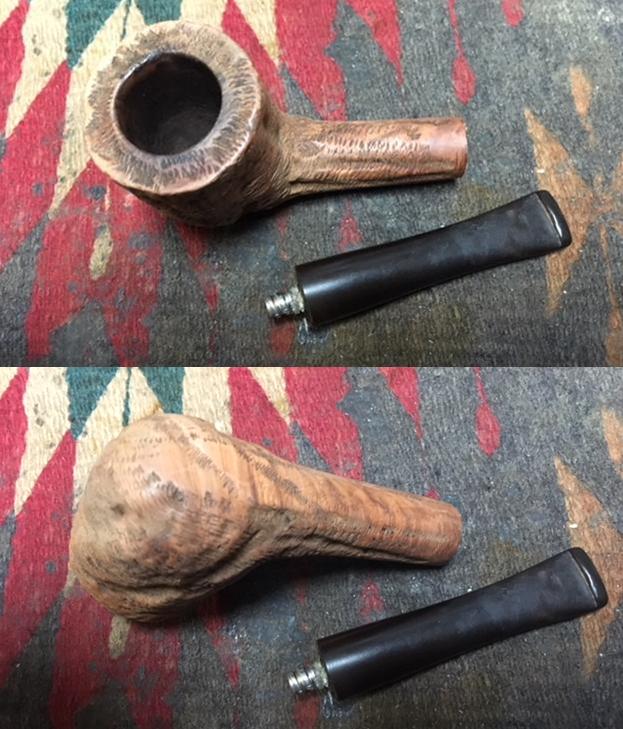
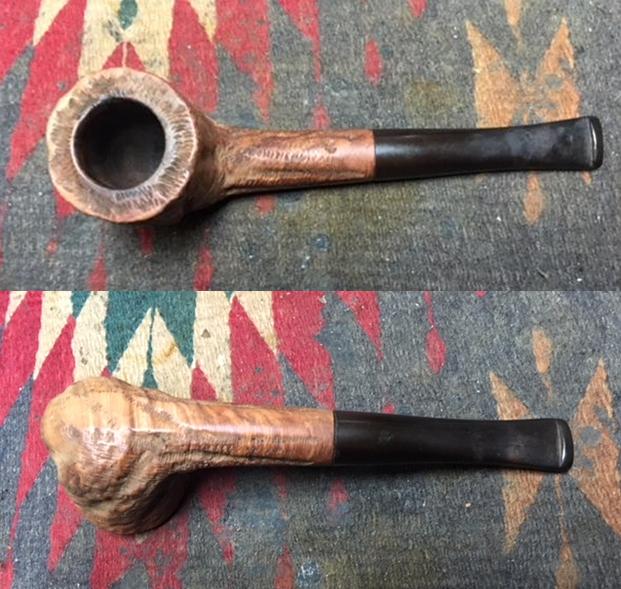
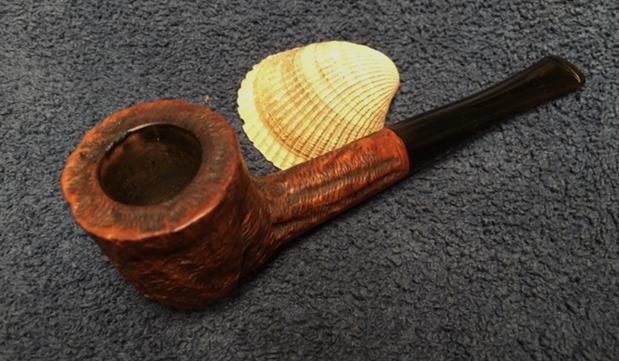
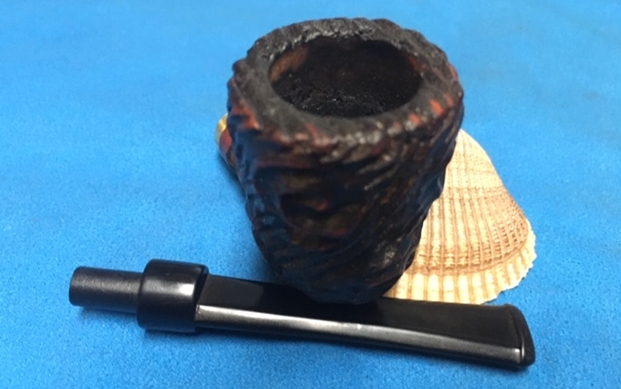
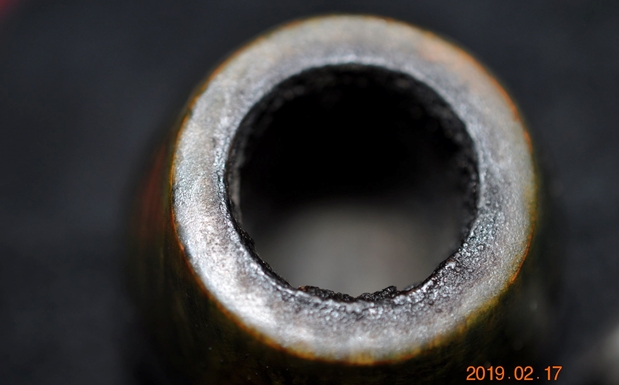
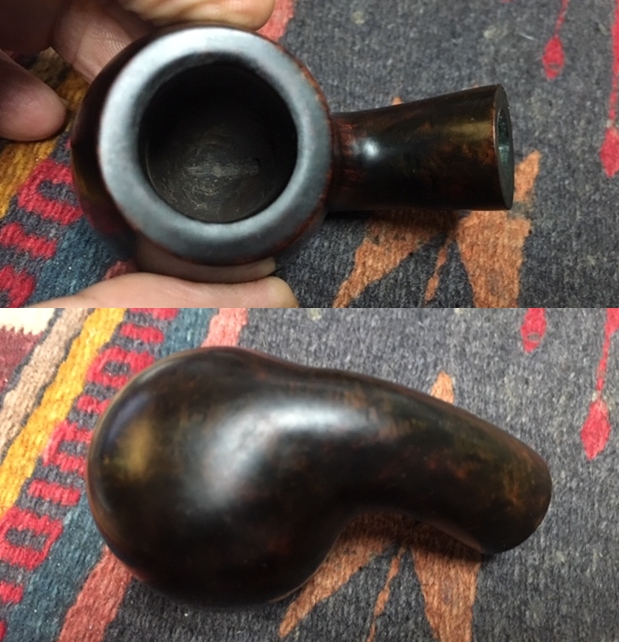
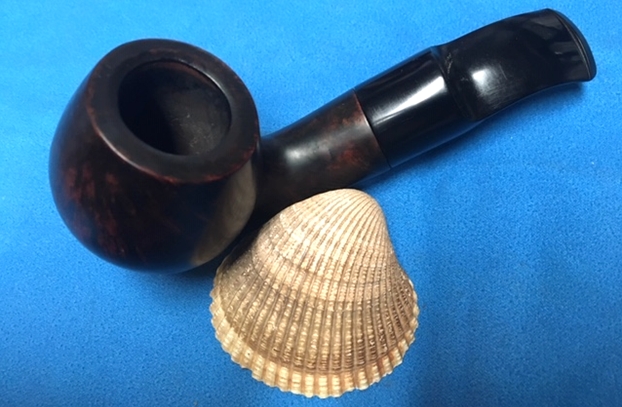
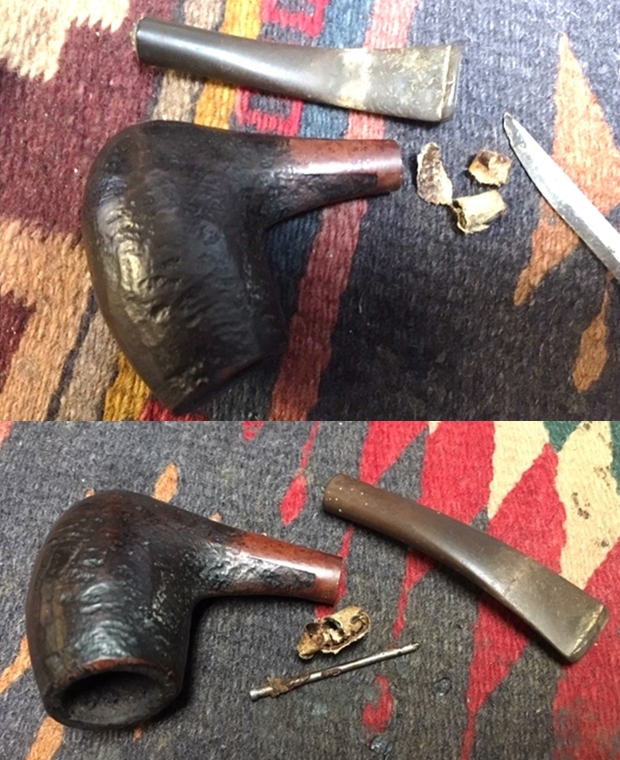
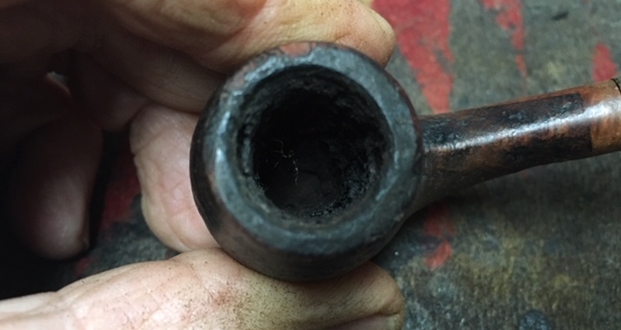
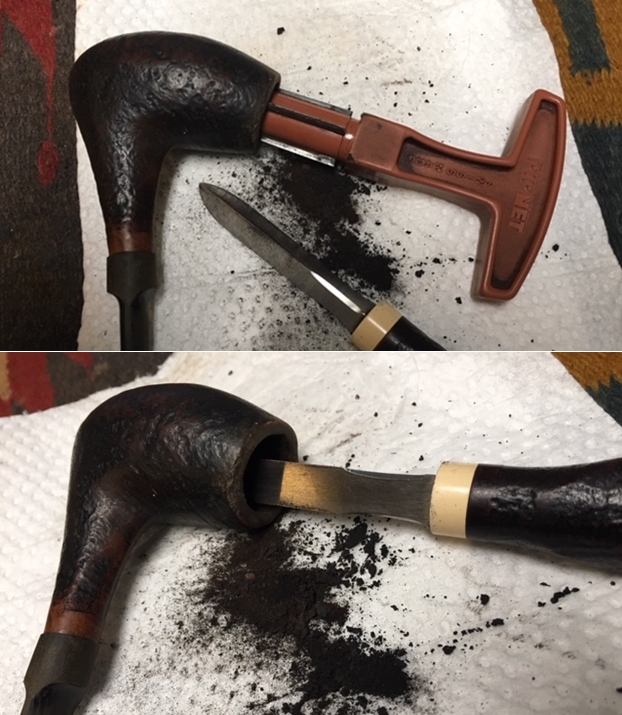
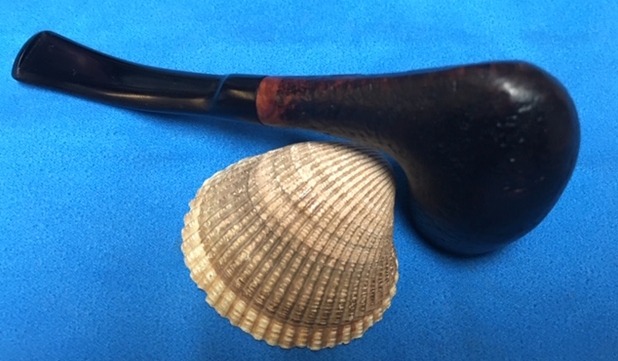
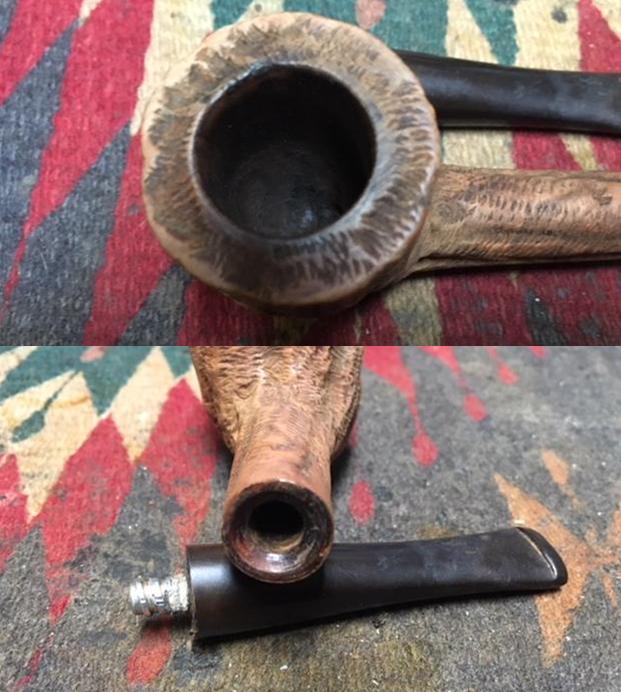
The bowl is a perfect size for a Churchwarden, which tend to be on the diminutive side.  The half bend will provide a great sweeping trajectory for the Warden stem.  The rusticated surface is dirty and needs a thorough cleaning of the crevasses. I’m attracted to the deep burgundy red finish of the briar.  It should clean up very nicely.  To begin the project, an inspection of the chamber reveals almost no cake at all, if any.  I go directly to the Savinelli Fitsall Tool to scrape the sides and then sand the chamber using 240 grade paper wrapped around a Sharpie Pen.  To clean the chamber of debris, I wipe it with a cotton pad wetted with isopropyl 95%.
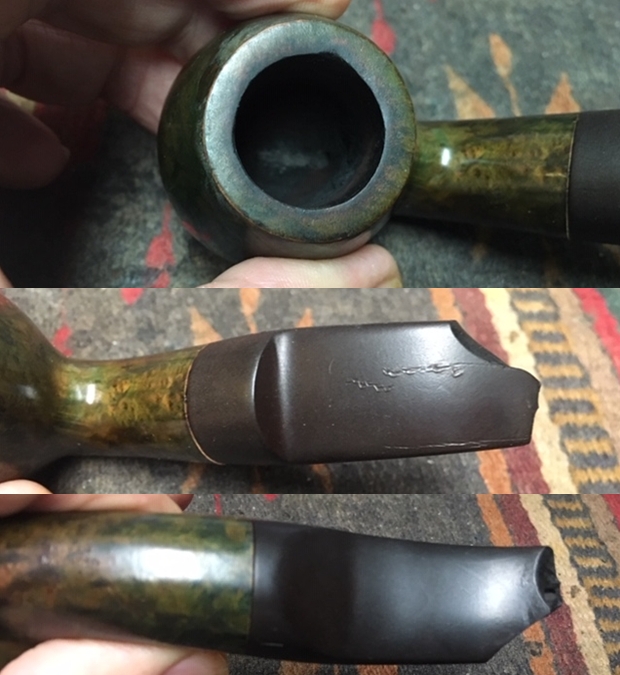
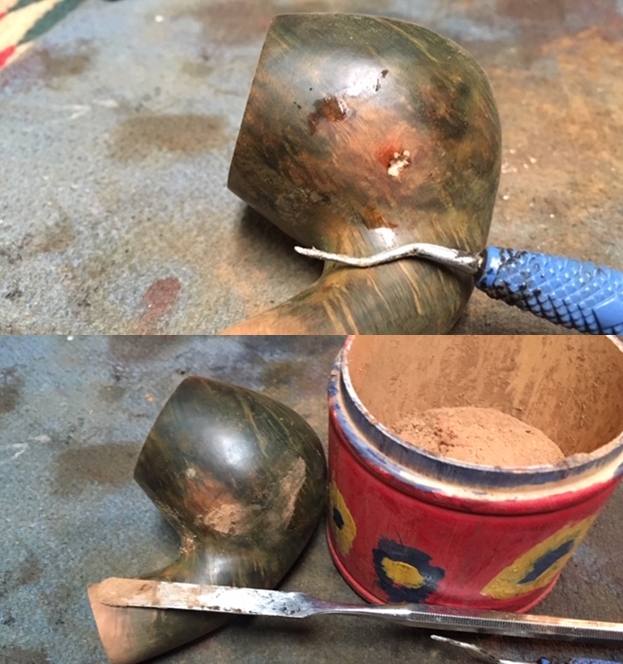
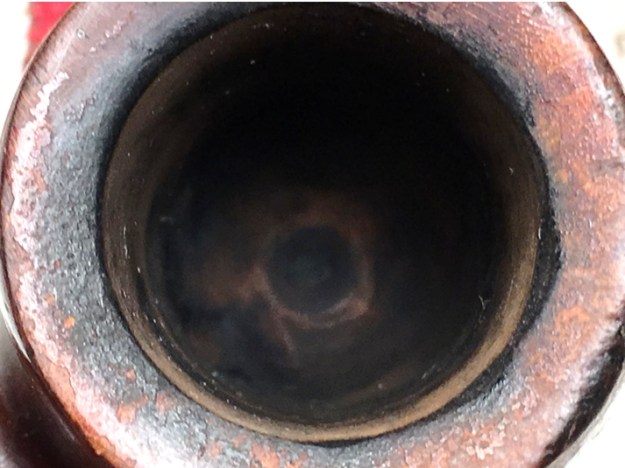
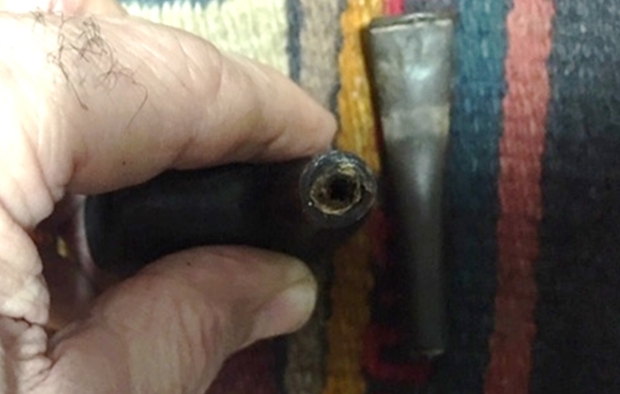
After cleaning the chamber, an inspection reveals no problems with heating cracks or fissures.  Yet, I discover something strange.  On opposite sides of the chamber wall I discover stampings of numbers and perhaps some letters.  I’ve never seen this before and I decide to send a note to Steve to find out if his rebornpipes experience would lend any help. Steve’s response to my inquiry was brief:

Nope never seen that. I have seen small numbers in the bottom of the bowl. Maybe heated like a branding iron. What is the nomenclature?

With no resolution to this mystery, I move on to cleaning the external surface. 
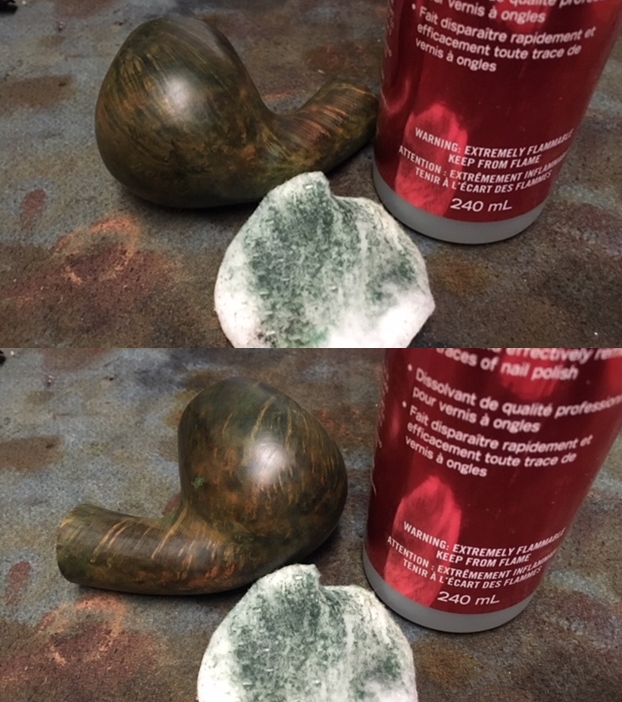
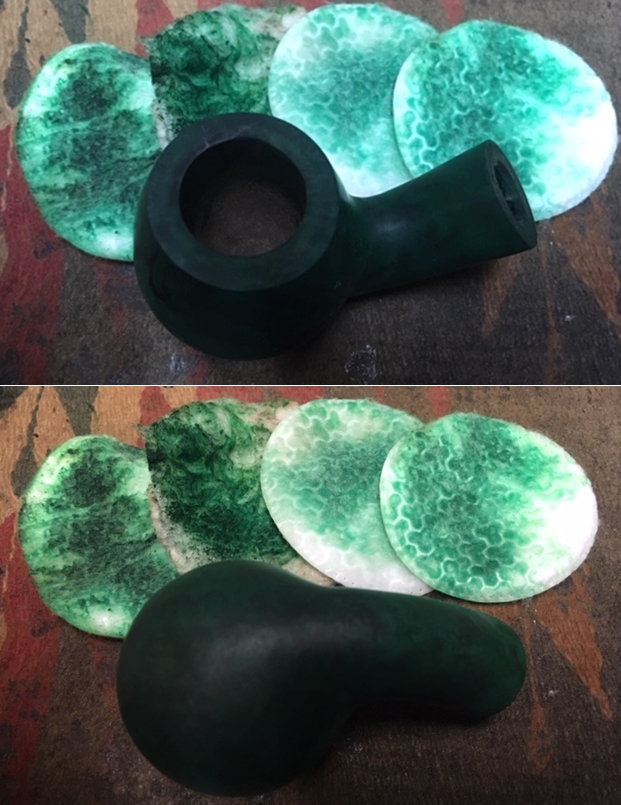
I clean the rusticated surface with undiluted Murphy’s Oil Soap.  A cotton pad starts the process, but I transition to a bristled toothbrush quickly to clean in the craggy cuts of the rusticated surface.   
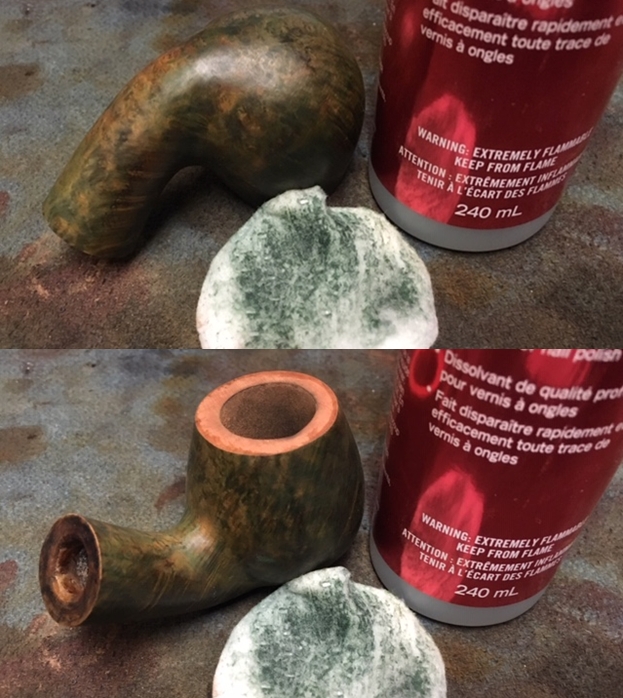
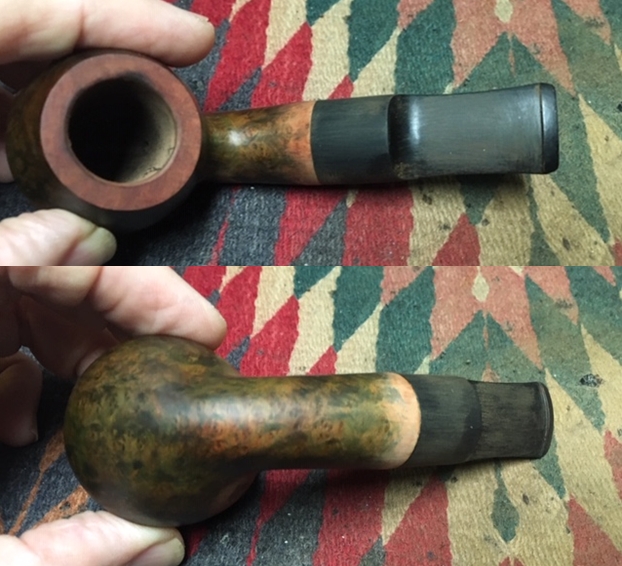
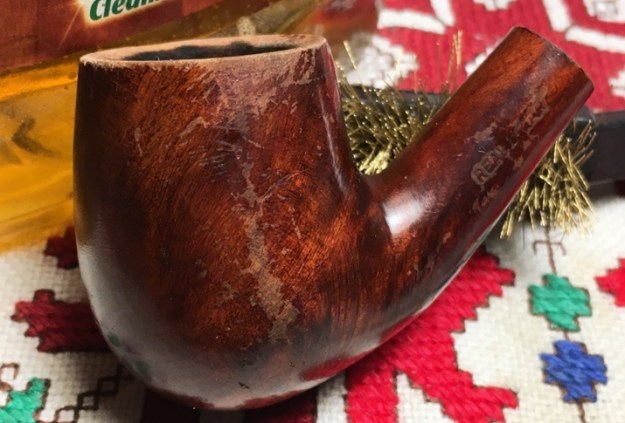
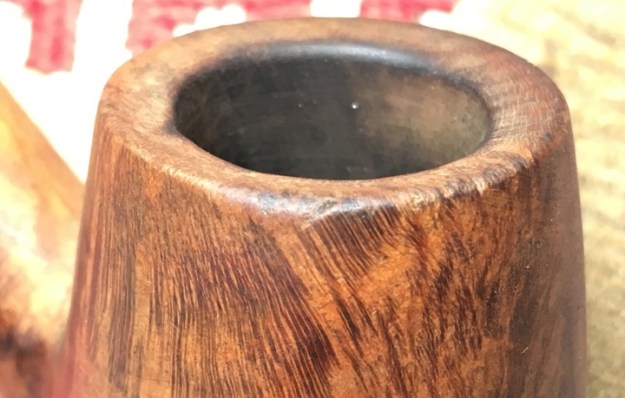
From the worktable scrubbing, I transfer the stummel to the kitchen sink where I continue to rinse the stummel with warm water and clean the internals using long shank brushes.  With warm water, I add anti-oil dish liquid soap and scrub using the shank brushes.  After rinsing again, returning to the worktable I take the following picture of the cleaned stummel.  I notice that the finish is partially removed from the smooth briar panel holding the nomenclature.
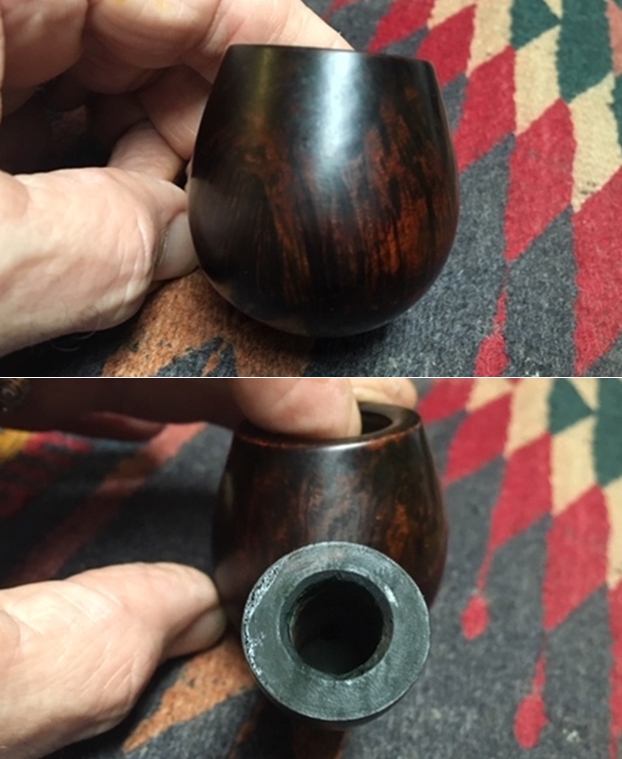
To complete the removal of the finish on the panel, I wet a cotton pad with isopropyl 95% and rub the smooth briar panel as well as the smooth briar ring circling the shank end.  This will provide a distinct contrast later during the finishing stage. What I also notice from the soiled cotton pad is that the finish color appears to be an Oxblood hue.     
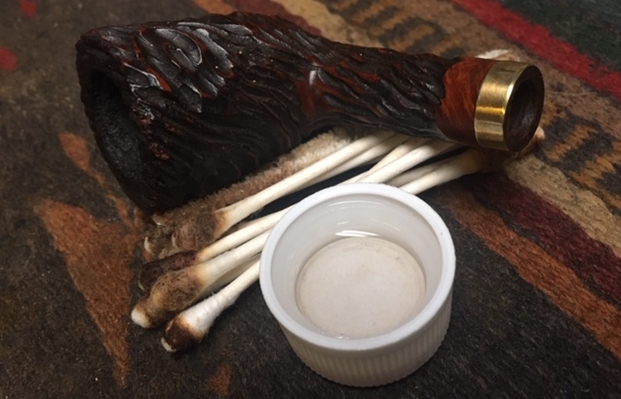
Moving now to cleaning the internals in earnest with cotton buds and pipe cleaners wetted with isopropyl 95%, I find that the mortise is clean!  This doesn’t happen often and I’m thankful for the shortened work!
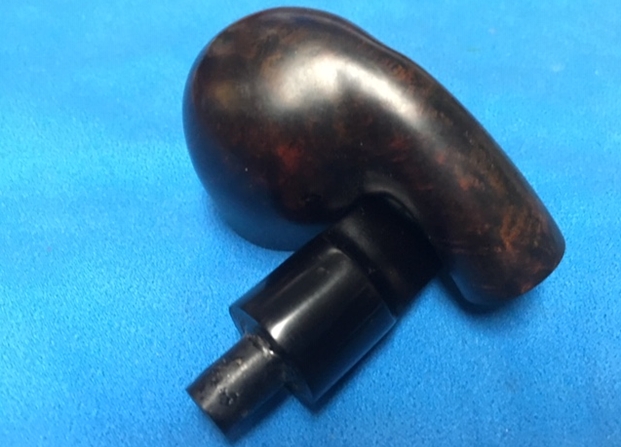
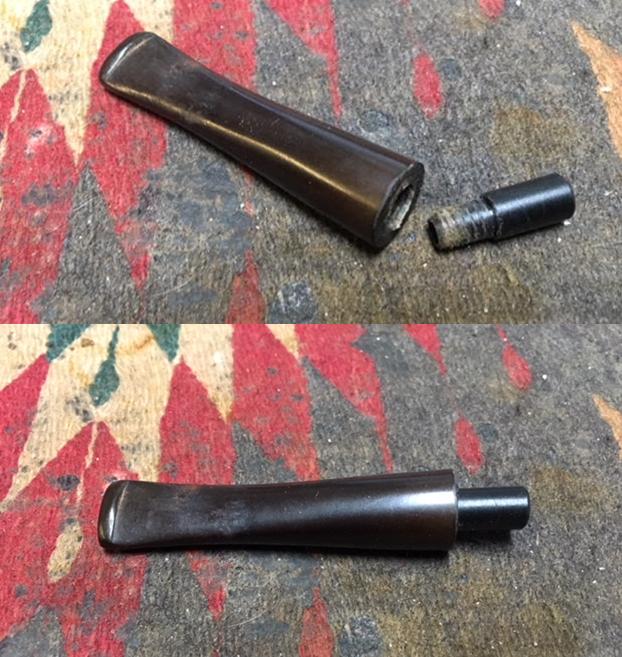
I now transition to fashioning the Churchwarden stem.  The first step is to fashion the oversized tenon of the precast Warden stem.  Using the electronic caliper – which was one of the best additions to my tool chest! – I take a measurement of the mortise diameter which is 7.86mm.  This represents the eventual sizing diameter of the tenon after sanding it down to size.The next step is to cut a starting test cut on the tenon using another great addition to my tool chest – the PIMO Tenon Turning Tool that I acquired from Vermont Freehand (https://vermontfreehand.com/).  I keep the directions on the wall in front of me for easy reference!  
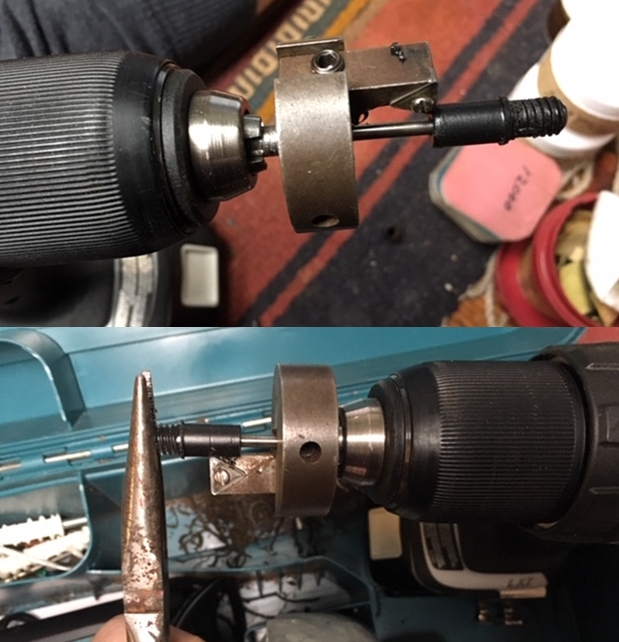
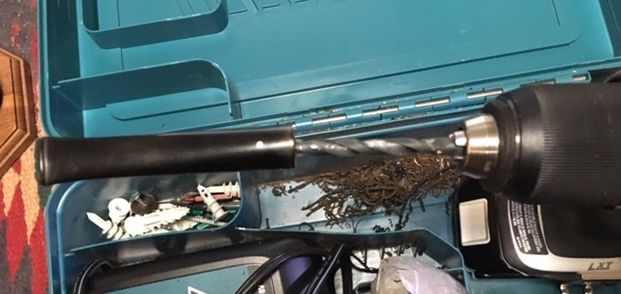
Before using the tool, the PIMO kit provides a drill bit to pre-drill the airway of the precast stem to fit the Tool’s guide pin.  After mounting the bit on the hand drill, I drill the airway.  
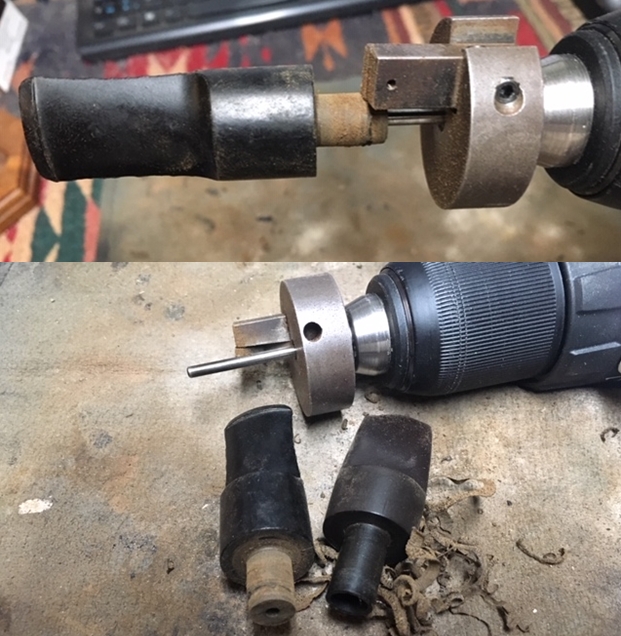
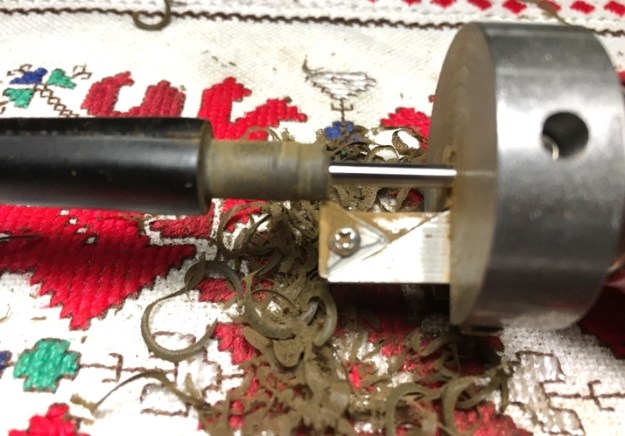
Next, I mount the stem onto the PIMO tool which has replaced the drill bit on the hand drill.  Opening the carbon cutting arm to just a bit smaller than the diameter of the raw tenon, I make an initial cut of the tenon for measurement purposes.  The sizing is 9.79mm.  This is the starting point for sizing down the tenon.  Generally, it’s not a good idea to cut the tenon with the PIMO tool aiming for an exact finished target size (7.86) because of the danger of taking off too much.  It is also true that each fitting tends to be different.  So, the approach is to come to the target sizing in a more patient, conservative pace.  I add about .40 mm to the target size of 7.86 which identifies what I call the ‘fat’ target to aim for with the PIMO tool then transitioning to sanding by hand.  Adding .40mm to 7.86 results in a fat target of about 8.26mm.  This means I need to remove additionally about 1.50mm (9.79 minus 8.26) with the PIMO tool.Using the Allen wrenches to adjust the carbide cutting arm to a tighter cut, I first cut a test and measure.  I want to make sure I’m not over cutting before traversing the entire length of the tenon. And I’m glad that I did the test cut!  The test cut measured 6.72 – smaller than the target size!  The second test cut measures at 8.10mm – falling between the fat target and the target size – I go with it.  I cut the entire tenon as well as cutting into the stem facing just a bit to make sure that the edge is squared and not shouldered from the original precast stem.The cut is ideal.  The tenon is still larger than the mortise so that sanding now will ease into the fit and make it more customized.It doesn’t take too long with sanding for the mortise fully to receive the newly shaped tenon.  A coarse, 120 grade paper is used initially to do the heavy lifting then 240 follows to fine tune.  The fit is good.
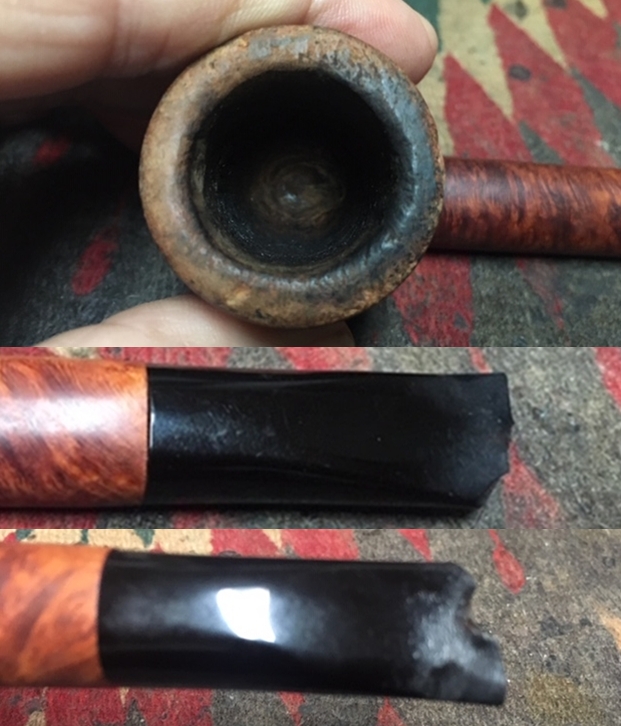
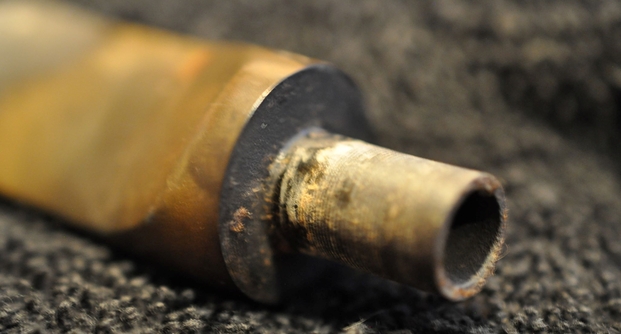
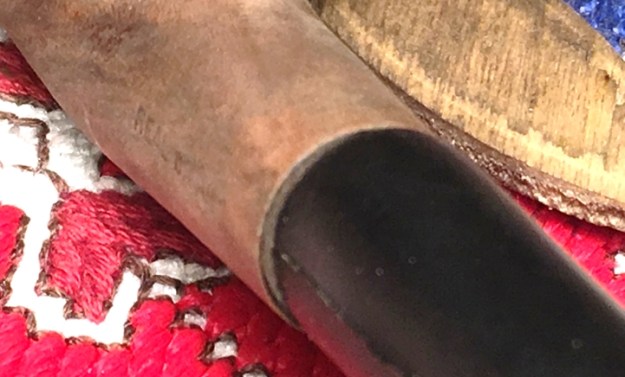
There is no perfect union and this picture shows the shank facing extending a bit beyond the stem facing.I wrap the shank with masking tape to provide some protection to the rusticated finish as I sand to bring the shank facing and stem into alignment.  As before, focusing on the fitting first, I start with coarse 120 and follow with 240 to sand the junction.    
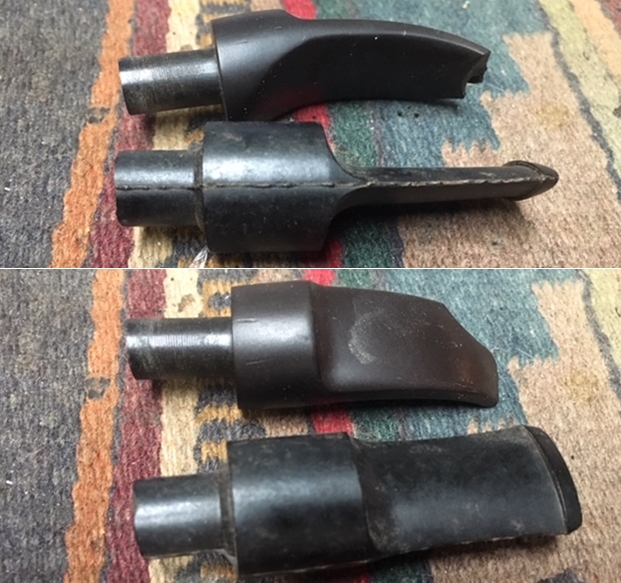
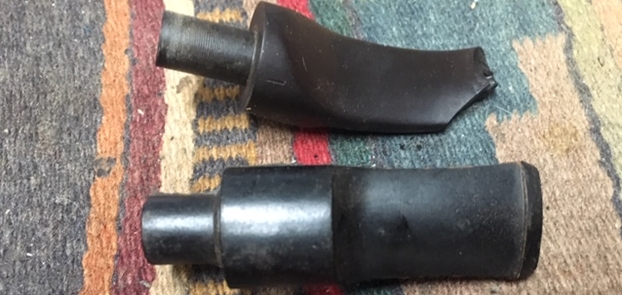
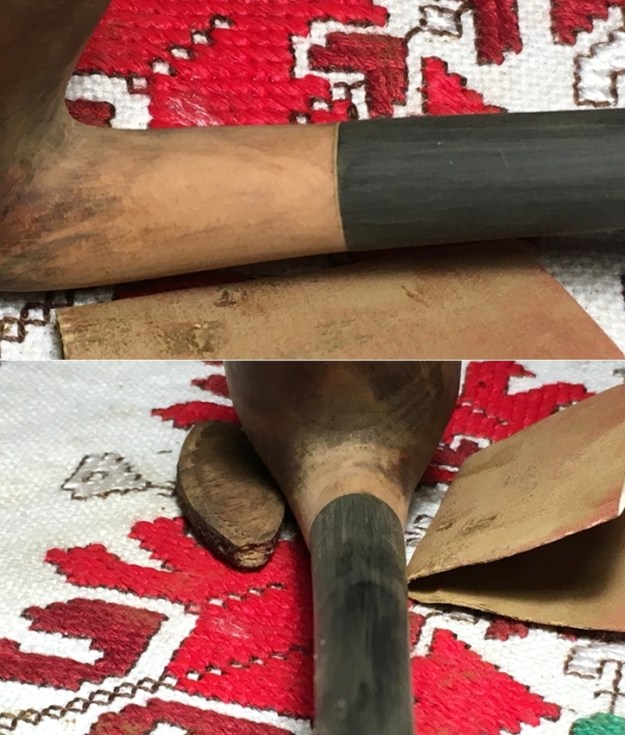
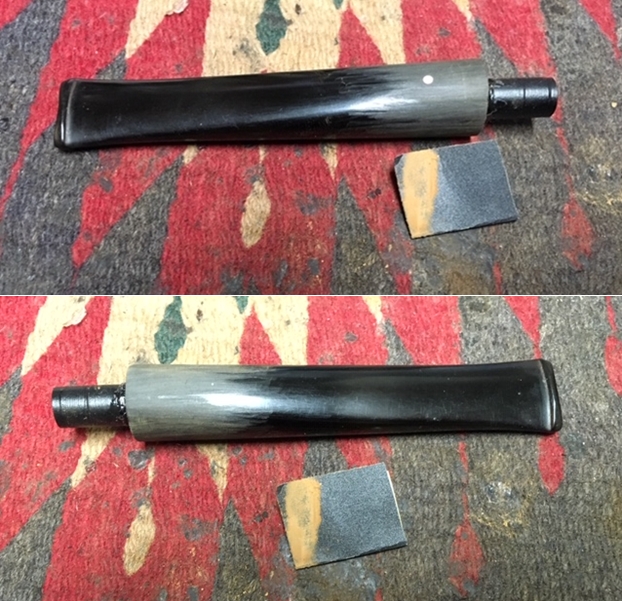
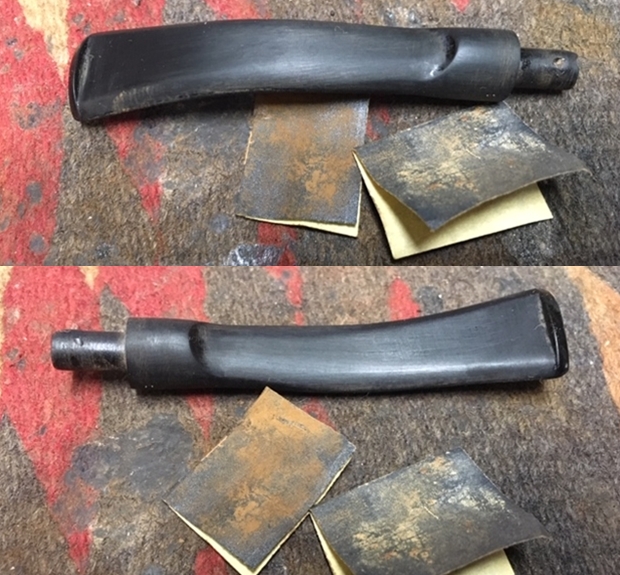
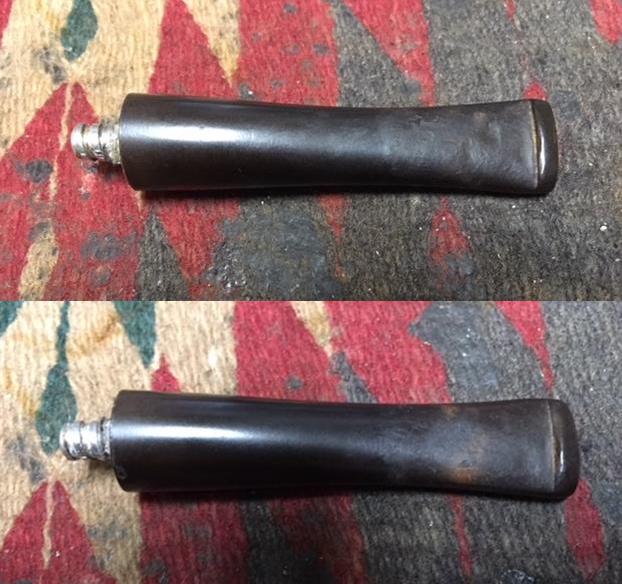
When the junction transitions smoothly from the shank to the stem, I transition to the stem proper.  The picture below shows the casting seam down the side of the stem.  This seam as well as the ripples that are always present in a precast stem are sanded out.
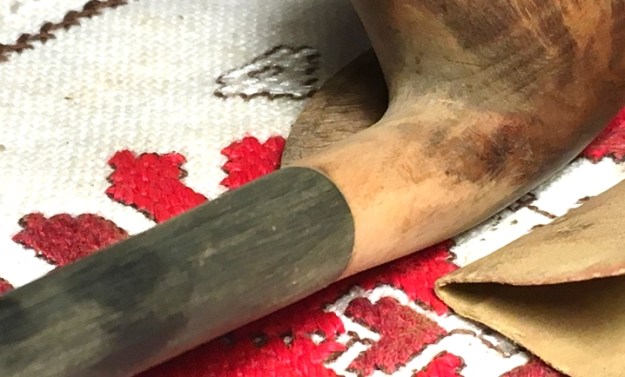
After some effort, and a lot of rubber dust(!), the ripples and seams are sanded with coarse 120 grade paper.  These pictures are not easy to see detail, but if ripples remained, they would be evident with the different hues on the stem.
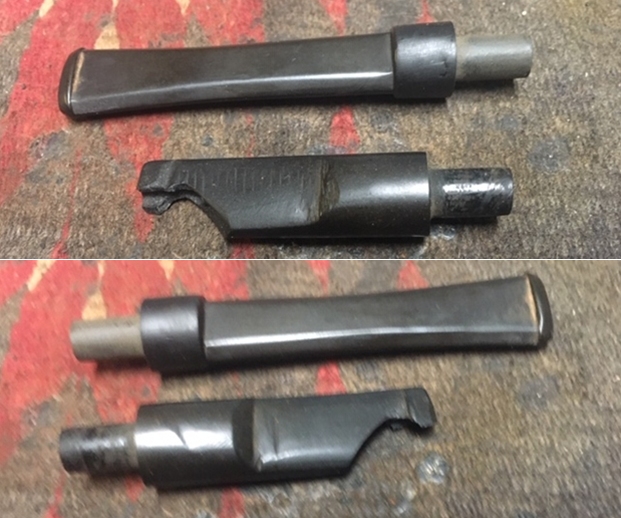
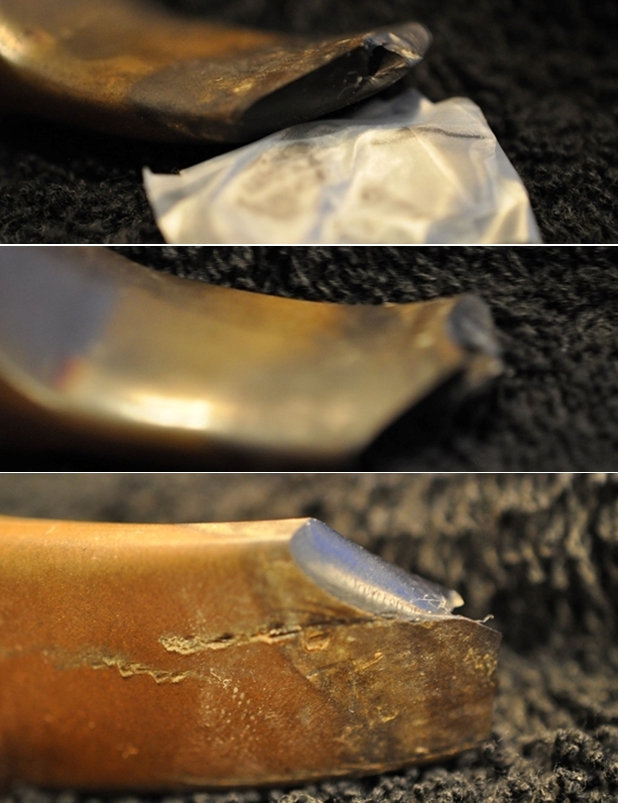
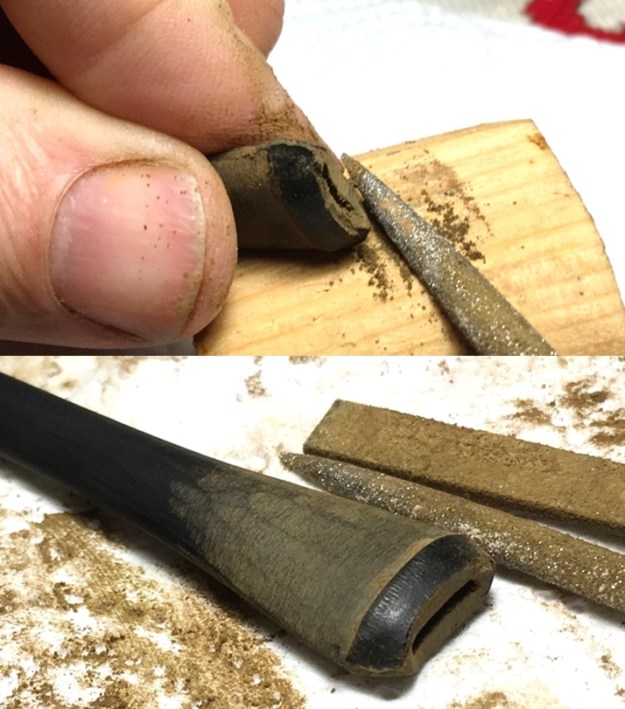
Next, I work on the bit and button shaping.  You can see the rough condition of the button and the vulcanite excess on the slot.  The darkening of the vulcanite forming a ‘V’ in the middle of the bit shows how the surface of the precast stem dips as it flares out to the stem edge. This will be filed out and the button shaped using a flat needle file.   The following two pictures show the progress of filing.  To remove the valley dip of the surface, I file down the outside valley ridges that are higher.  At the same time, the filing sharpens the button lip.  The first picture shows the initial lateral filing to bring the bit surface into a more level state.The next picture shows the leveled bit surface after the outer quadrants have been rounded and shaped toward the stem edges.The final filing for the lower bit completed.The slot is rough.  After filing the excess vulcanite to level the slot facing, I see a small divot in the inner edge of the slot which I didn’t picture!  A round pointed needle file fits nicely into the slot allowing uniform filing of the inner slot edges – upper and lower.  With the heavy-duty sanding and filing completed. I use 240 paper to fine tune the bit and button shaping.  At this point, the button perimeter is sanded.I follow the fine tune sanding of the button by sanding the entire stem with 240 grade paper.The next picture was to remind me to remark about how nasty working in rubber dust is!  It, without question, is the least desirable part of fashioning new Churchwardens!  This Bulgarian designed work cloth will be going into the soak tonight!The Warden stem is transitioned to the kitchen sink where 600 grade paper is employed to wet sand the entire stem. During the entire sanding process, the stem and stummel remain joined so that the sanding creates a perfectly uniform union with stem and shank. 
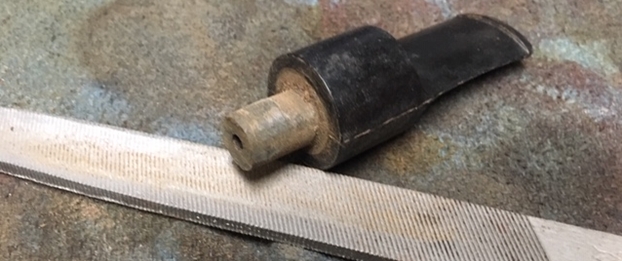
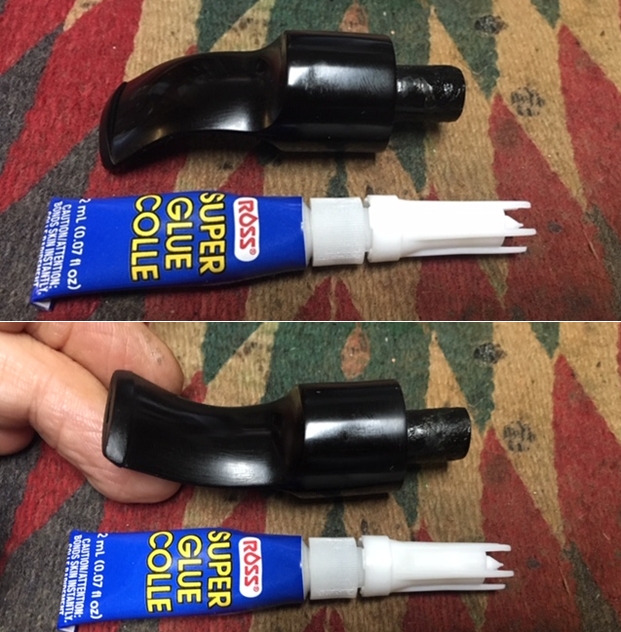
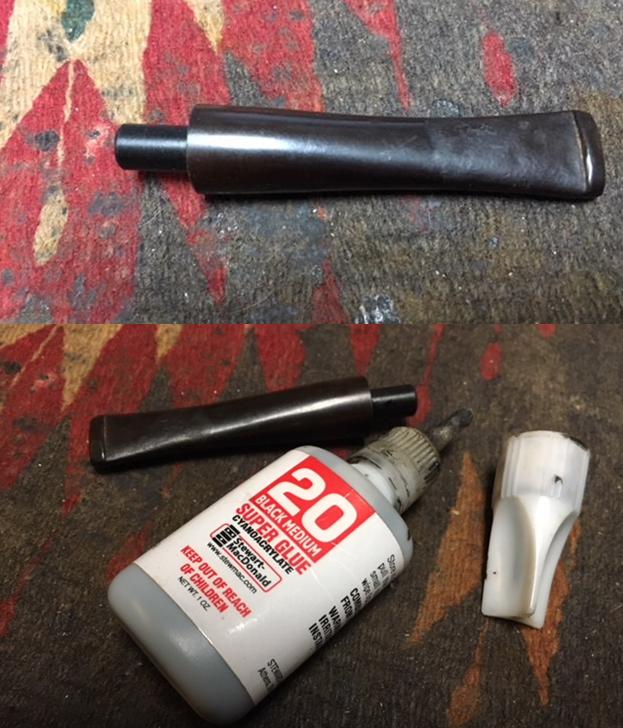
Before transitioning to the micromesh phase, I file the end of the tenon where excess and rough vulcanite persists.  Using the flat needle file, it is dispatched quickly.
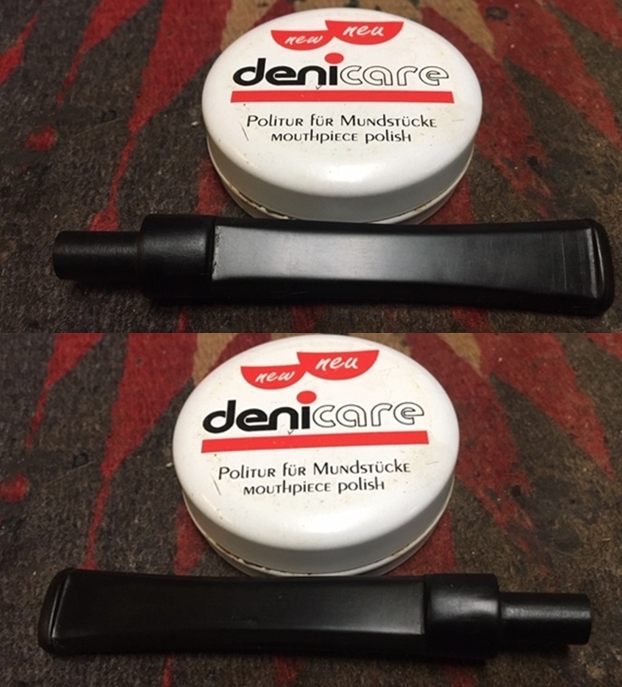
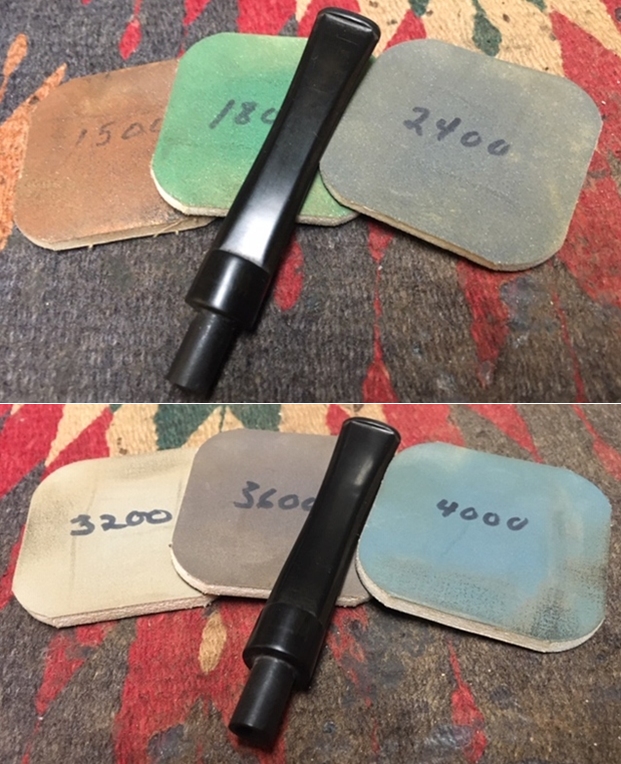
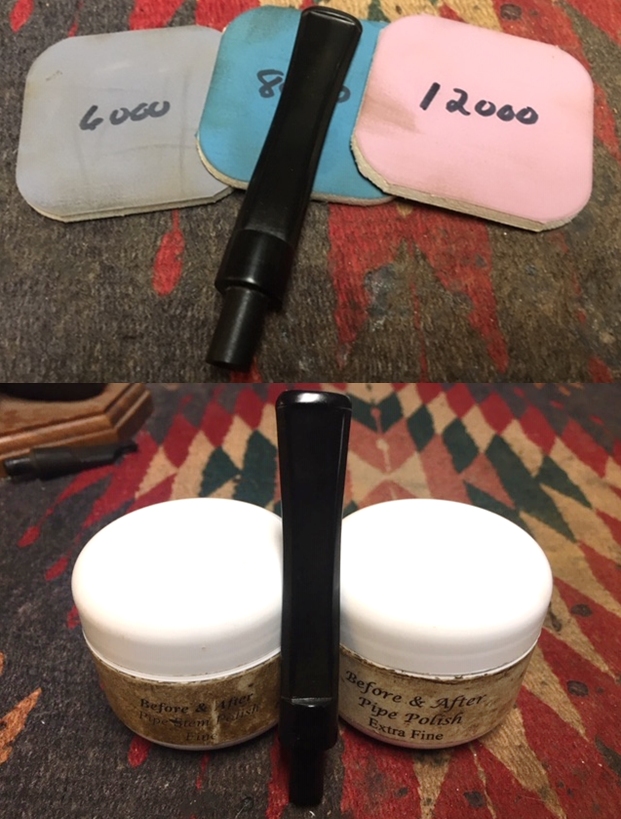
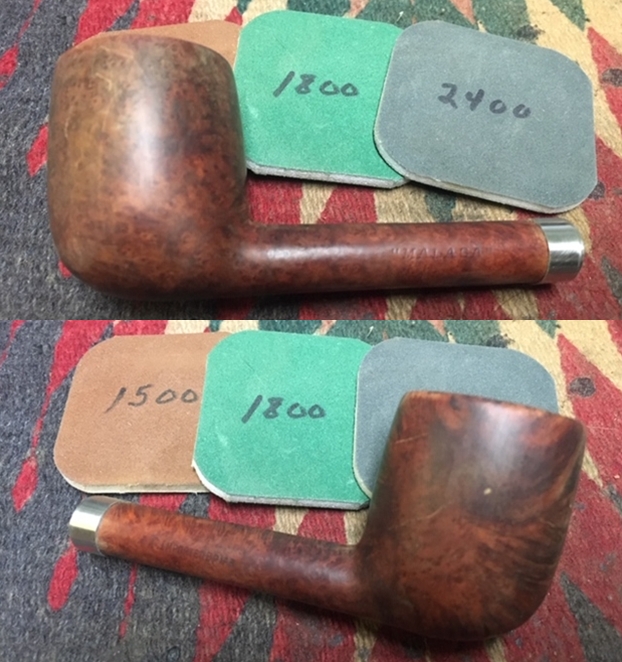
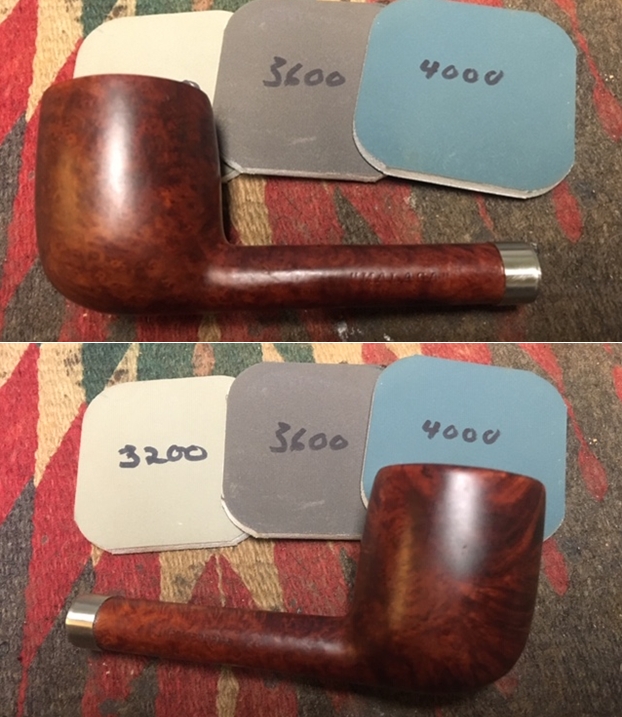
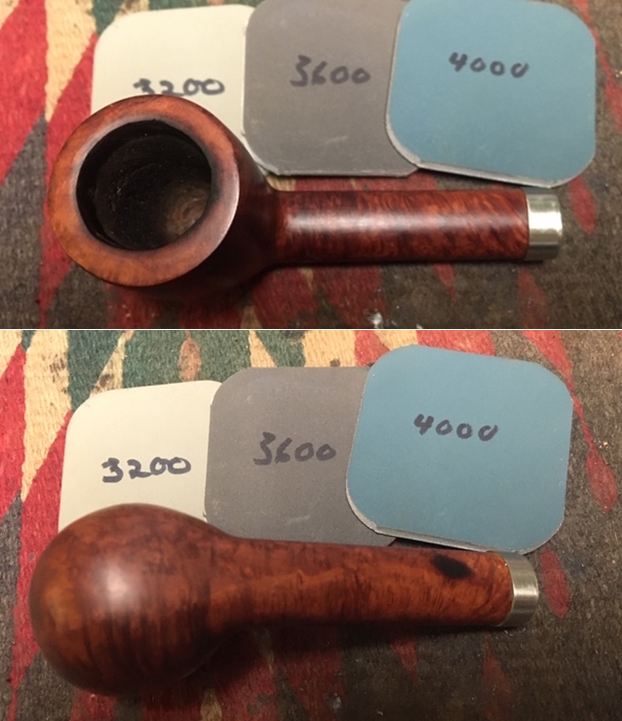
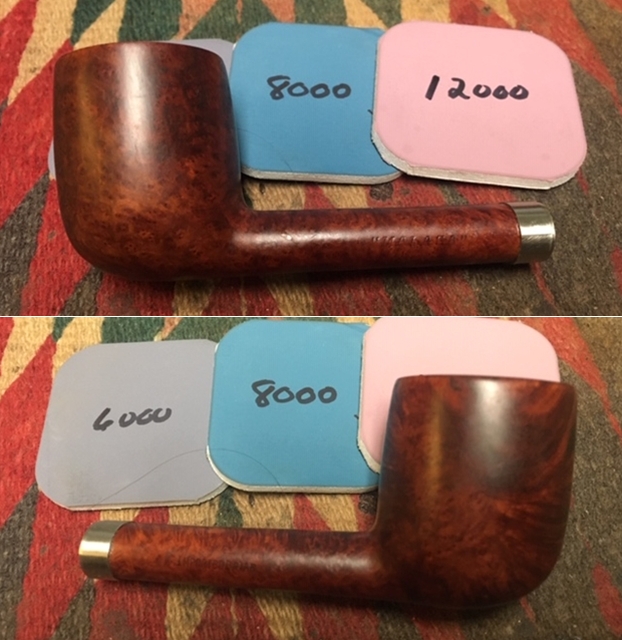
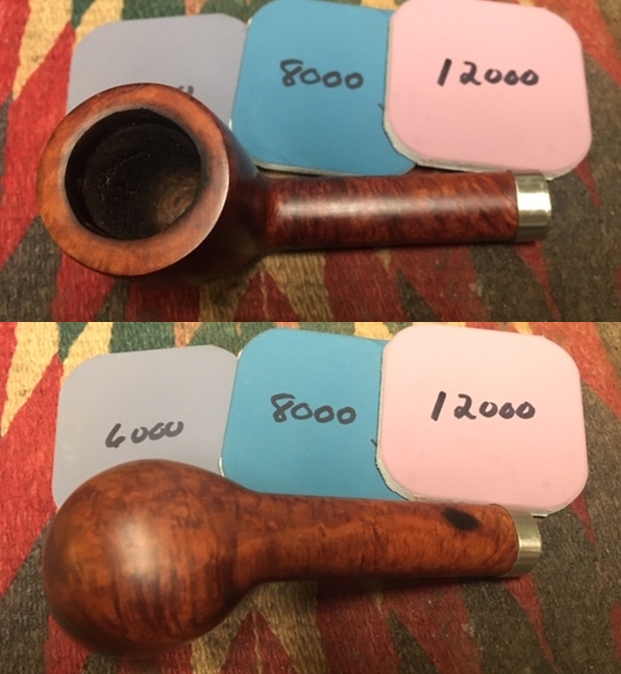
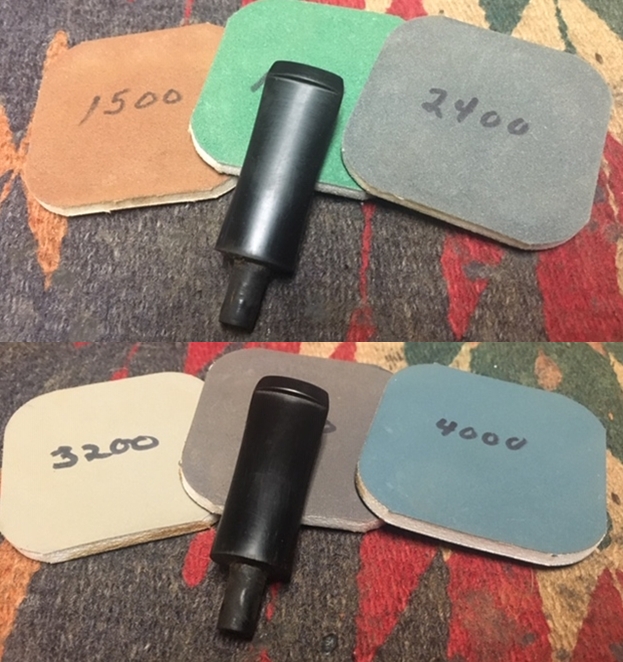
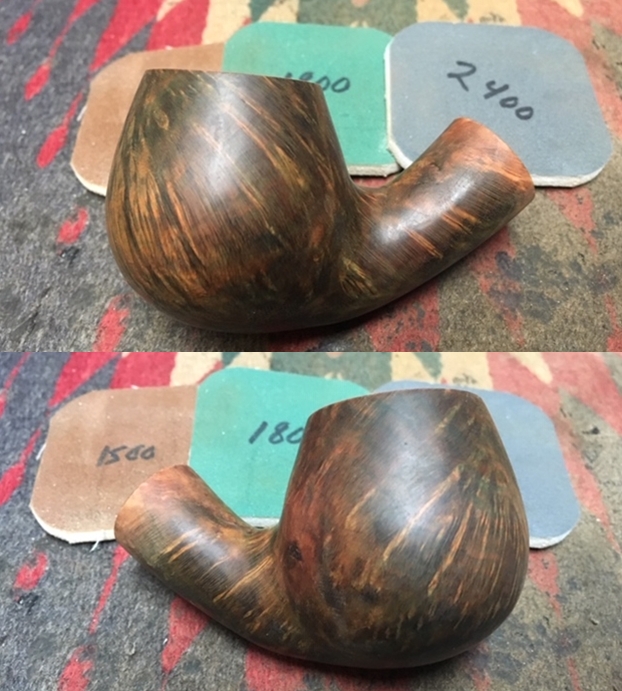
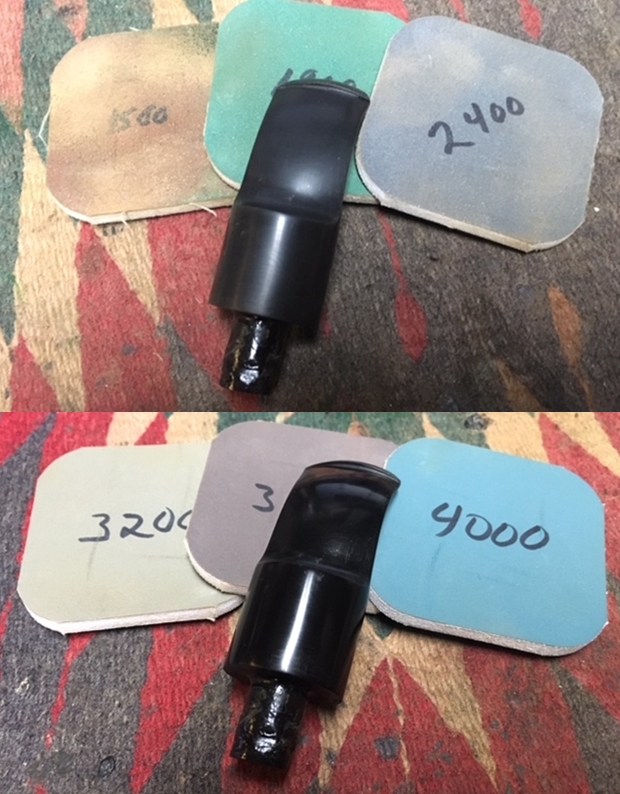
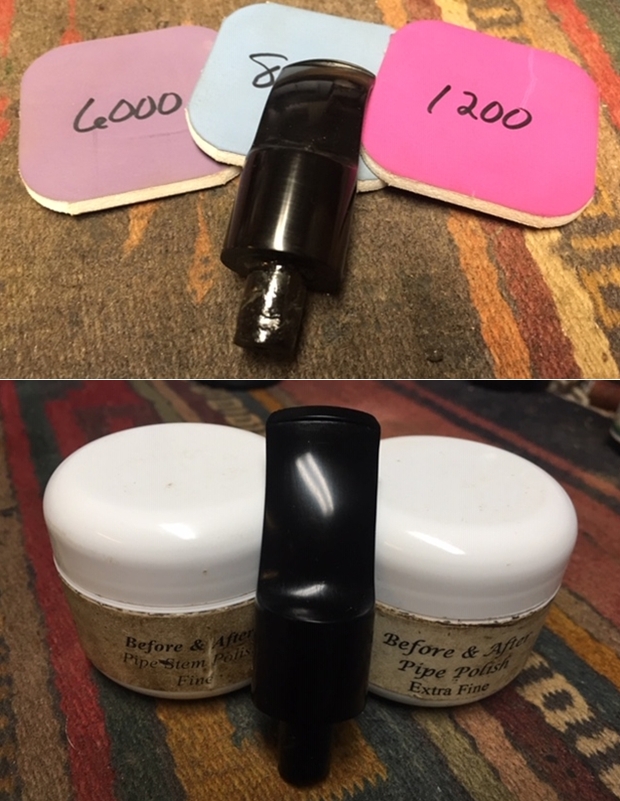
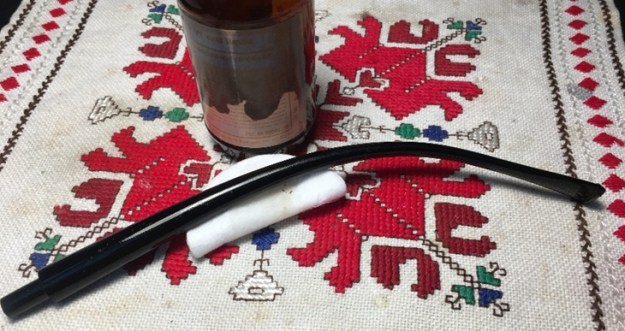
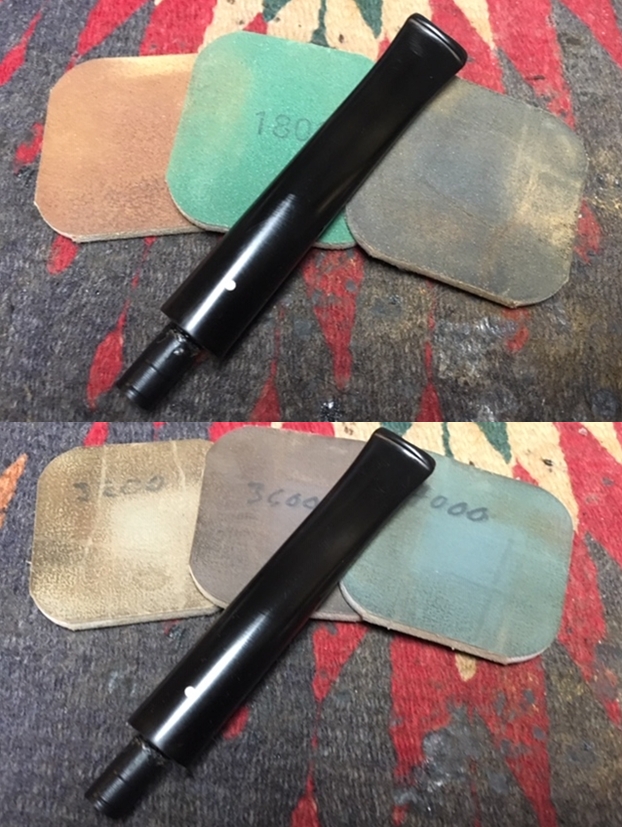
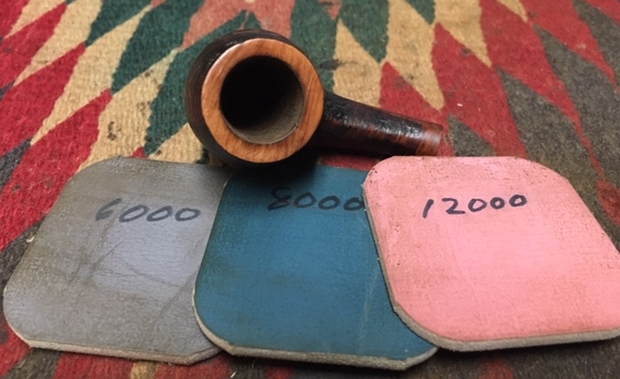
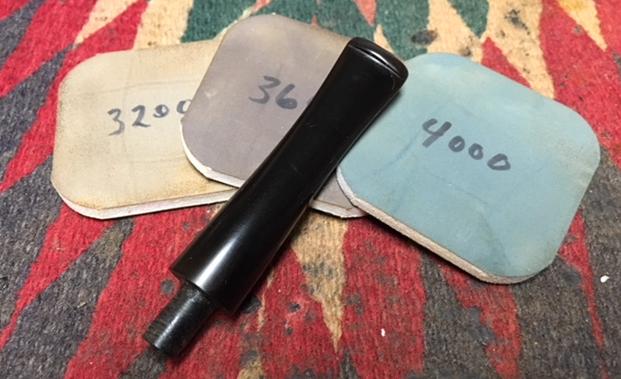
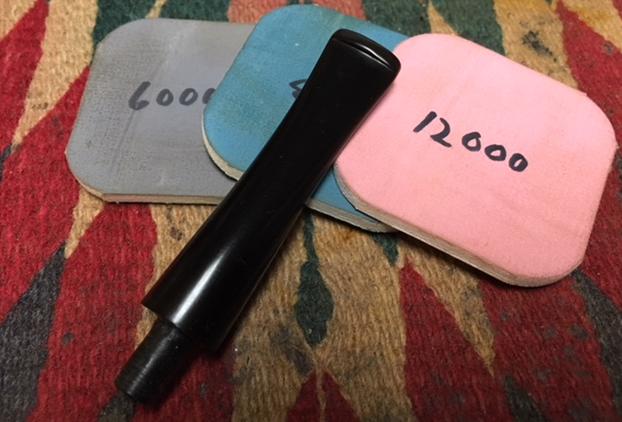
The question in my mind is whether to bend the stem now or go directly into the micromesh phase.  By leaving it unbent at this point makes continued sanding easier, and this is what I do. Using 1500 to 2400 grade micromesh pads I wet sand the stem followed by dry sanding with pads 3200 to 4000 and 6000 to 12000.  Between each set of 3 pads I apply Obsidian Oil to condition the vulcanite.  I only show one picture of this process instead of the usual 3 because capturing the detail with the long stem is not possible. I do, however, take close-ups of the upper and lower bit. 
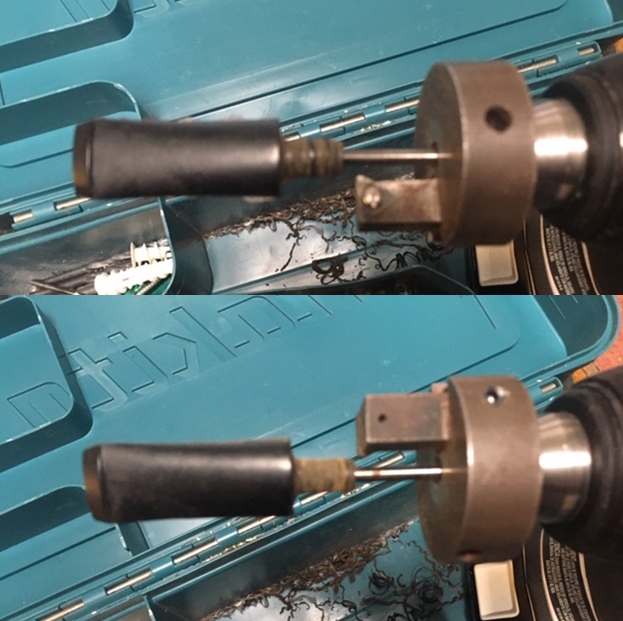
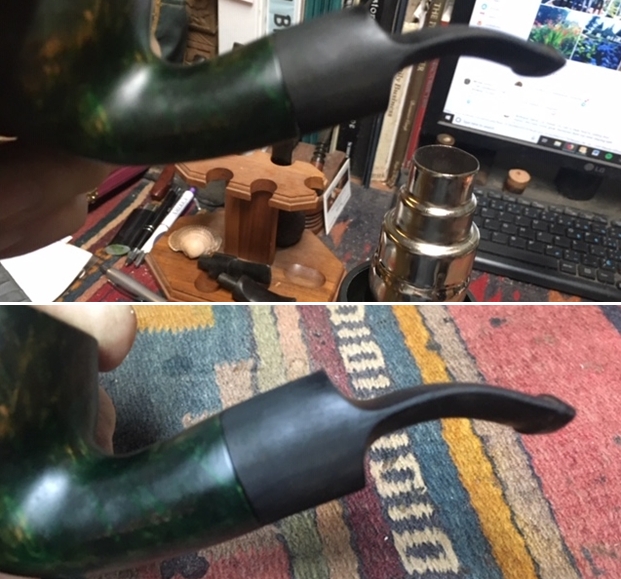
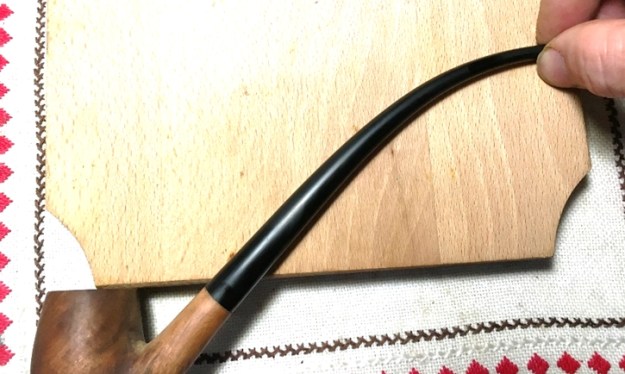
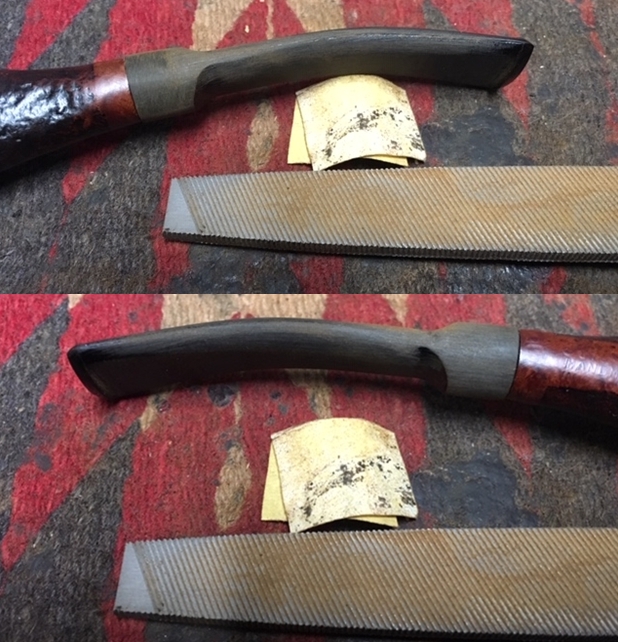
The next step is to bend the Churchwarden stem.  The goal is to bend the stem so that the end of the stem, the bit, is on a parallel trajectory with the plane of the rim of the stummel.  I sketch a template to help visualize and compare.I use a hot air gun to heat the vulcanite.  I continually rotate and move the stem over the hot air to avoid scorching the stem and to heat more evenly a section of the stem.  To begin, I focus the bend more toward the middle of the stem, where the stem is thicker.  If I heat the entire stem at once the thinner portion at the end of the stem will heat and bend first creating a sharper angle – which I am trying to avoid.  A sweeping bend is what I like best.As the stem is heated, gentle pressure is applied so I know when it becomes supple enough to start bending.  The first step focusing on the middle bend is below.  After I bend it, I hold it in place until I run it under cold water in the kitchen sink to hold the bend.  As expected, the trajectory of the end of the stem is still a little high.  
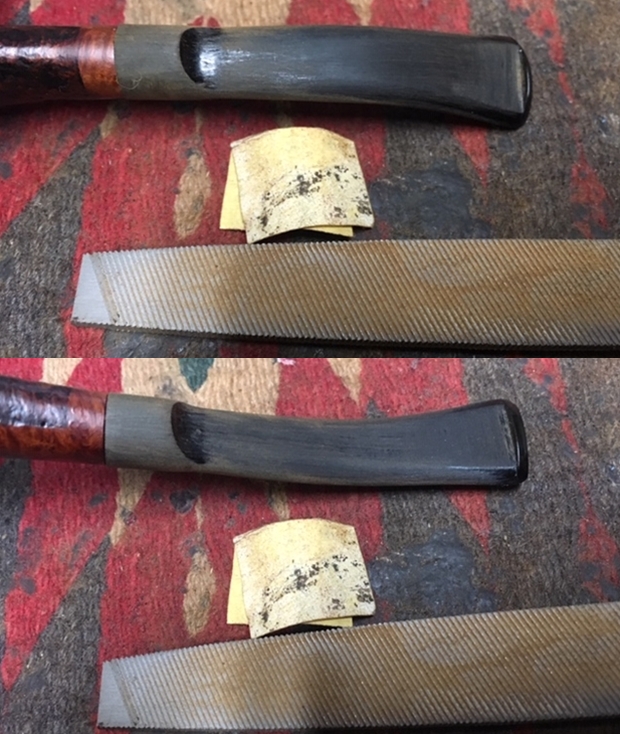
The next step of heating I avoid the middle of the stem and heat the section about 3/4 up the stem – the thinner section.  After heating and bending more, again I take the stem to the sink to cool the stem with water to hold the angle.  The template shows that I’m in the sweet spot.  Notice I inserted a pipe cleaner in the end of the stem to be on the safe side – guarding the integrity of the airway as it bends.  It looks good and I move on. 
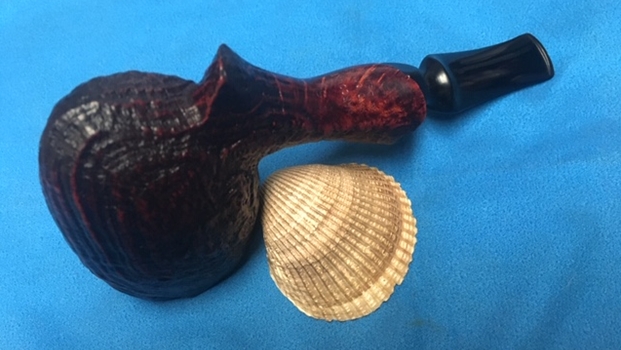
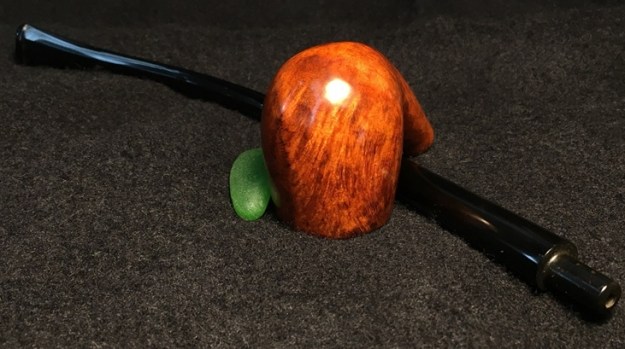
Next, the stummel awaits attention.  After removing the freshly bent CW stem and putting it to the side, I take a fresh look at the rusticated stummel that, to me, resembles craggy tree bark.  I like it! 
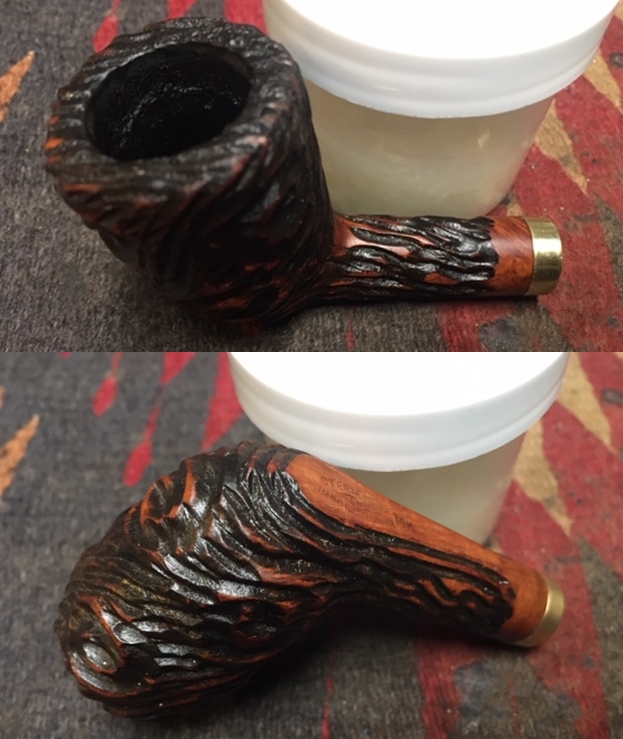
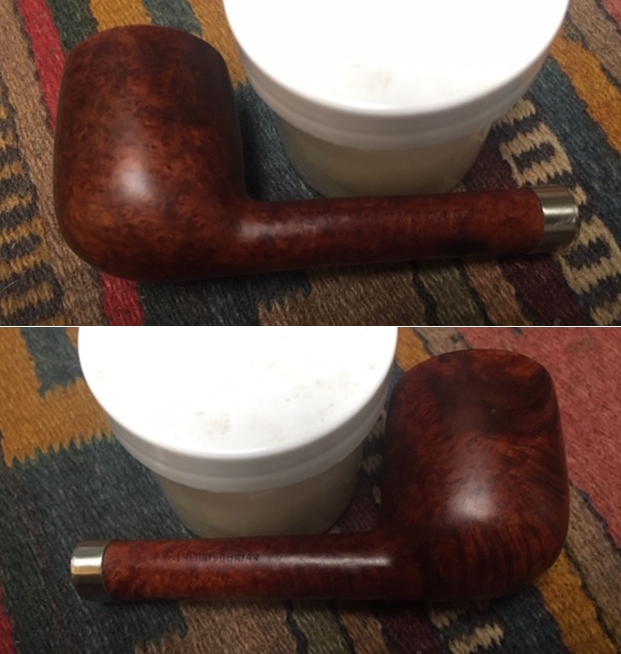
Before addressing the stummel, I first run the smooth briar nomenclature panel and ring around the end of the shank though the full battery of micromesh pads, 1500 to 12000. I like the craggy/smooth contrast.
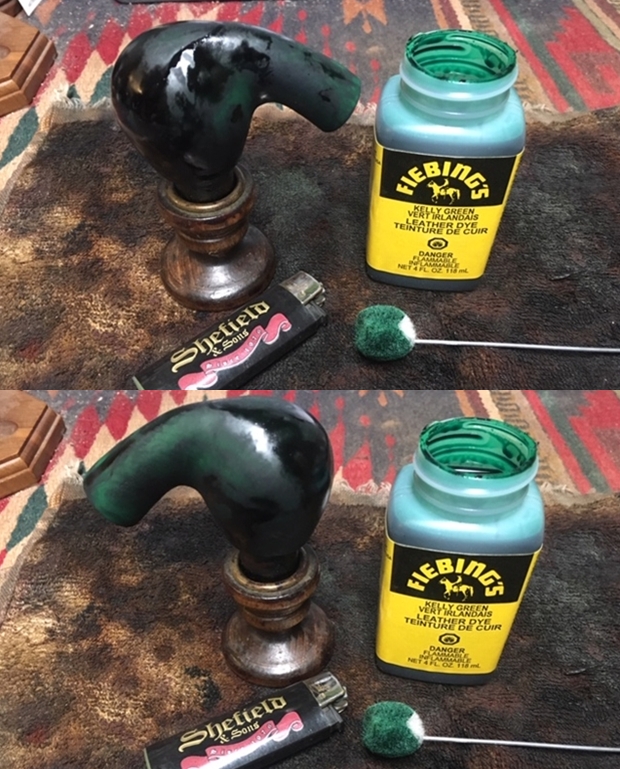
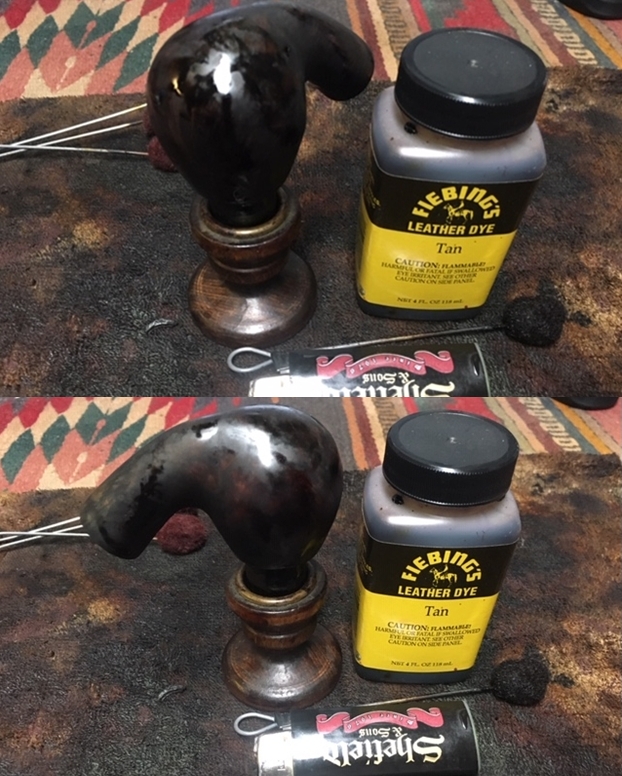
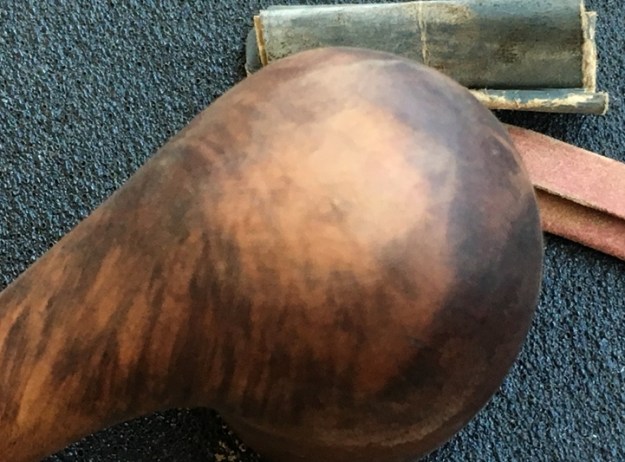
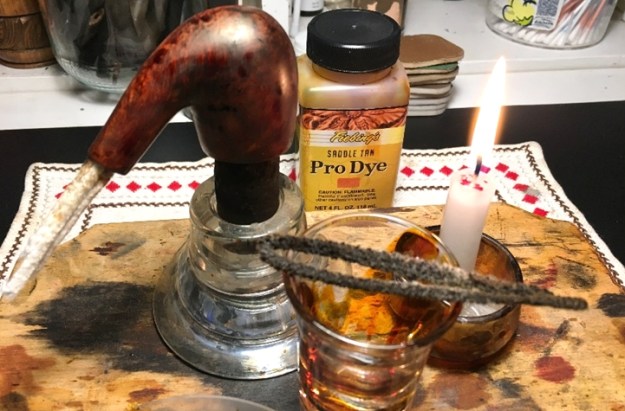
My aim with the stummel is to refresh the hue, which appears to be a subtle Oxblood.  Using Fiebing’s Oxblood aniline dye, I will apply it like I usually do – painting and flaming with a lit candle.  Then, during the following ‘unwrapping’ stage, I will not use Tripoli compound as I usually do.  The reason for this is that the compound will get caught in the crags and that would not be fun to remove.  I think the felt buffing wheel on the Dremel will be enough by itself to effectively unwrap and abrasively buff to remove excess crusty flamed dye.  Creating more contrast in the craggy landscape of the rusticated surface and the smooth peaks of the rustication is the aim.  At least this is my hope!  I assemble my desktop staining kit.  After wiping the stummel with a cotton pad wetted with alcohol to clean it, I warm the stummel over the hot air gun to expand the pores in the briar to help it be more receptive to the dye.  
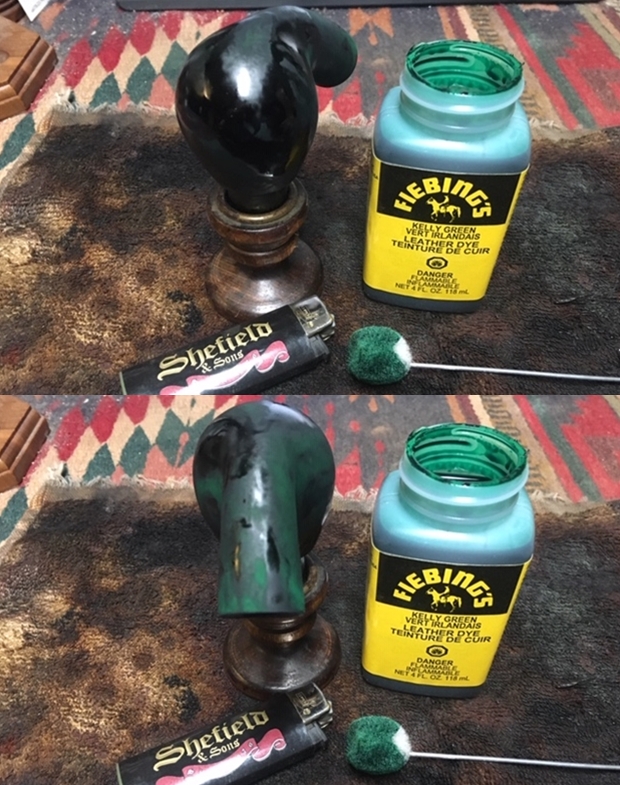
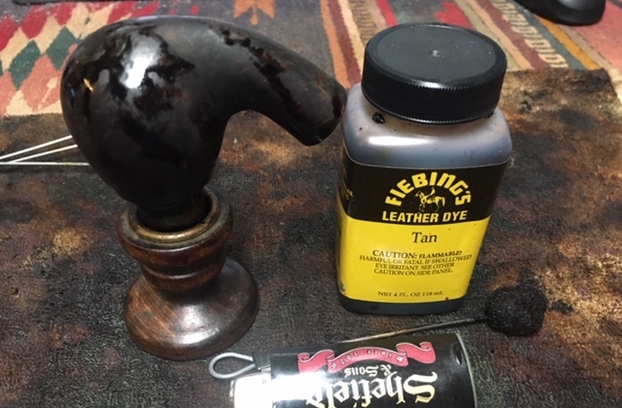
Then, using a bent over pipe cleaner, I apply the Oxblood dye in sections and flame the wet dye with a lit candle.  The alcohol in the dye combusts with the flame and sets the dye in the briar surface. After working through the entire stummel painting and flaming, I set the stummel aside to rest for several hours allowing the dye to set.Later, with a cotton cloth wheel mounted onto the Dremel and the speed set to 40% full power, I apply Tripoli compound only to the smooth briar nomenclature panel and ring around the shank end.Next, I mount a felt cloth buffing wheel onto the Dremel, setting the speed to the slowest possible, and go over the entire surface working the edges of the buffing wheel in the valleys and ridges of the rusticated surface.  The slower speed is to avoid over heating – I don’t want to start a fire with the coarser buffing wheel!
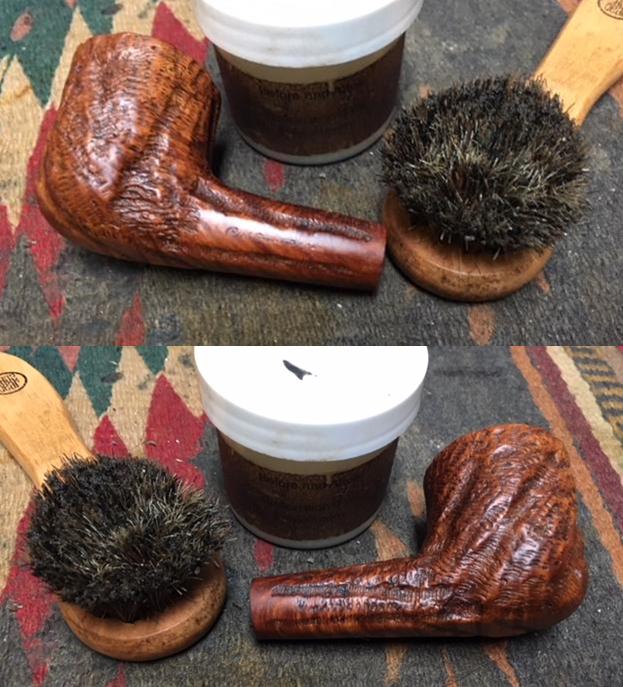
I also concentrate on the upper peaks of the ridges that present very small smooth briar surfaces that are buffed.I like the contrasting effect of this process – the changing hues of the Oxblood from valleys to peaks with the smooth briar and rough briar – nice.
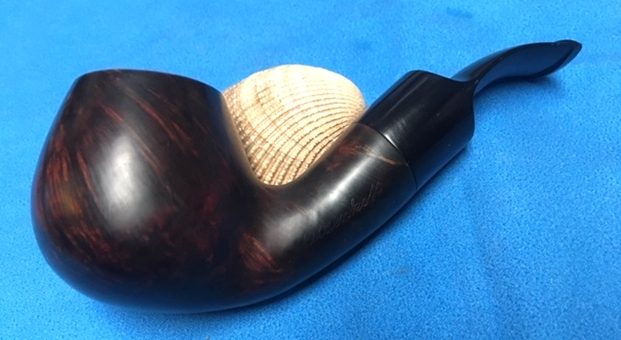
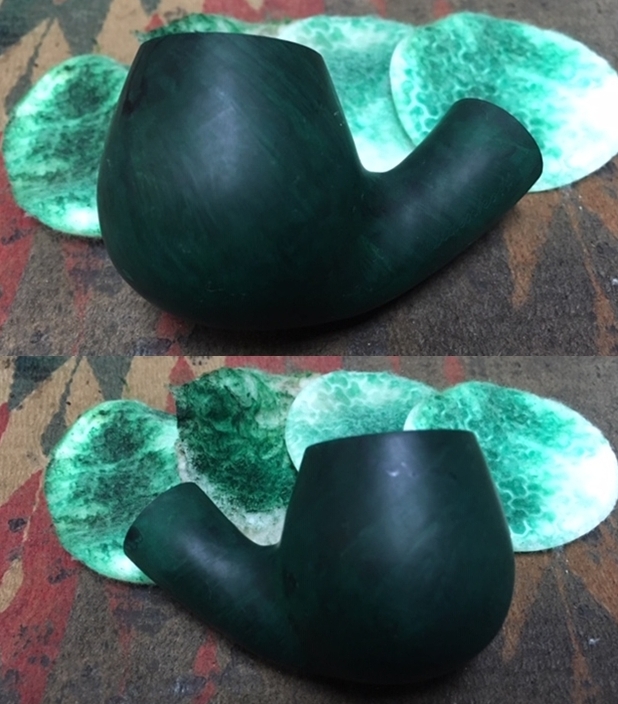
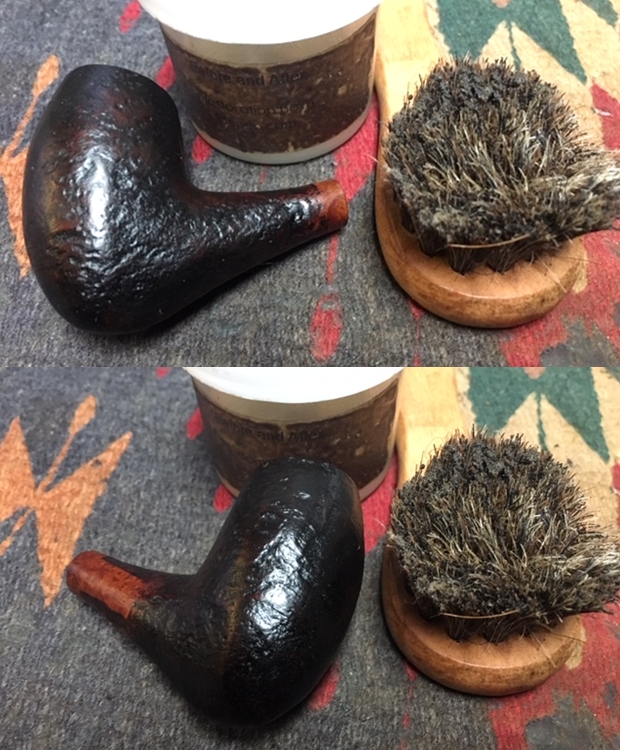
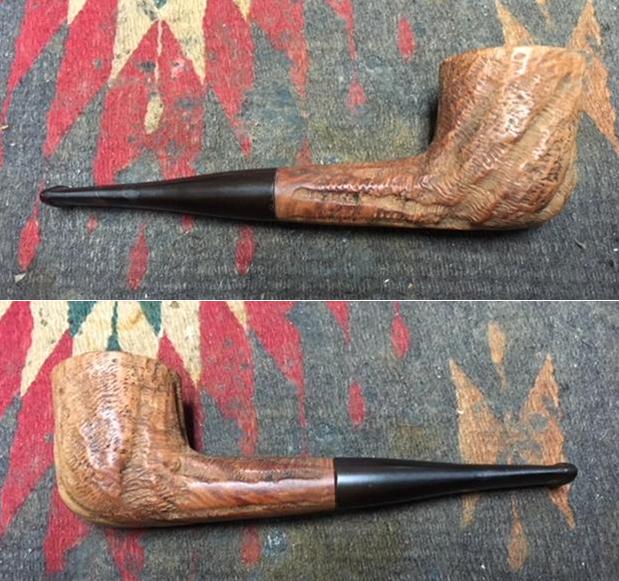
Not pictured is mounting another cotton cloth buffing wheel onto the Dremel, setting the speed at 40%, and applying Blue Diamond compound only to the smooth briar nomenclature panel and ring around the end of the shank and to the Warden stem remounted to the stummel.  Finally, with another cotton cloth buffing wheel mounted onto the Dremel, set at the same speed, I apply carnauba wax to the entire pipe – stem and stummel. Over the rusticated surface, I increase the speed of the Dremel to about 60% full power to create more heat to dissolve the wax in the rusticated landscape.  This helps in keeping the wax from caking in the rough surface. I finish the newly formed Churchwarden by hand buffing with a micromesh cloth and brushing the stummel with a horsehair brush to raise the shine.

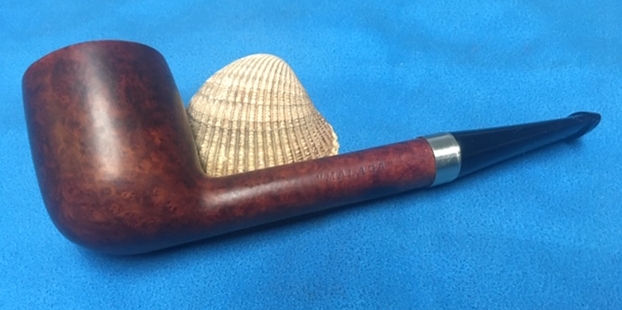
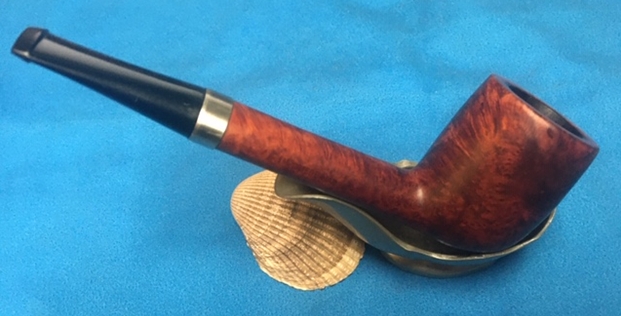
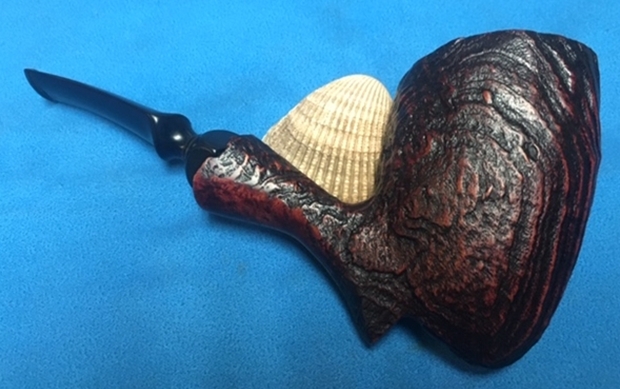
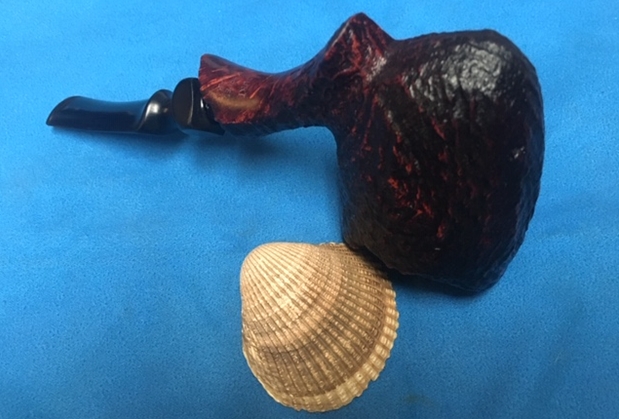
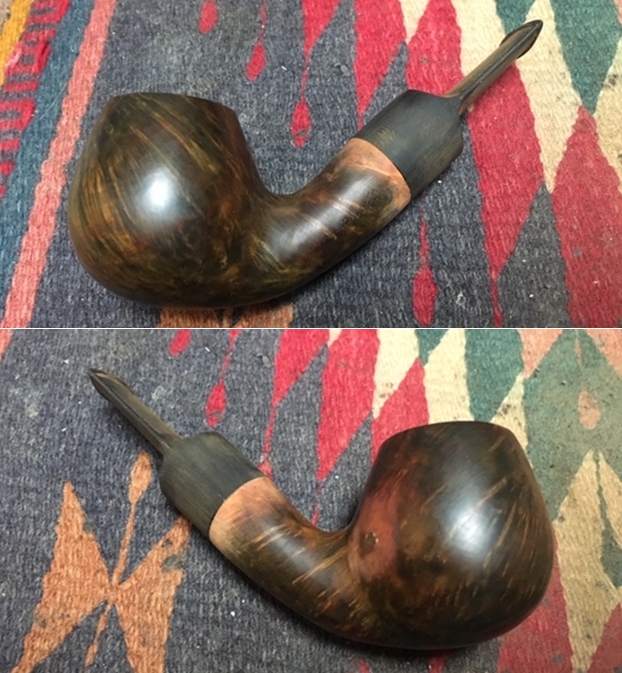
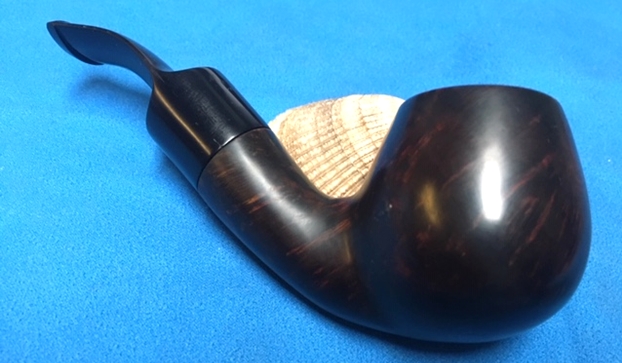
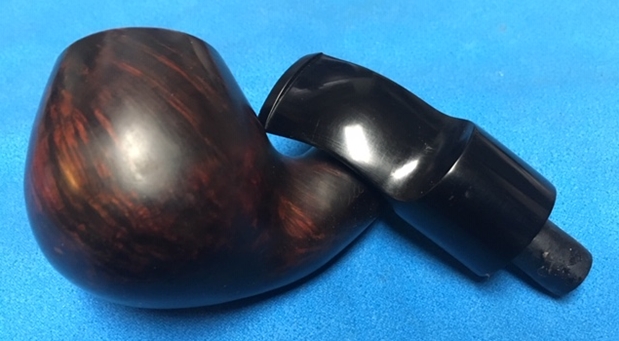
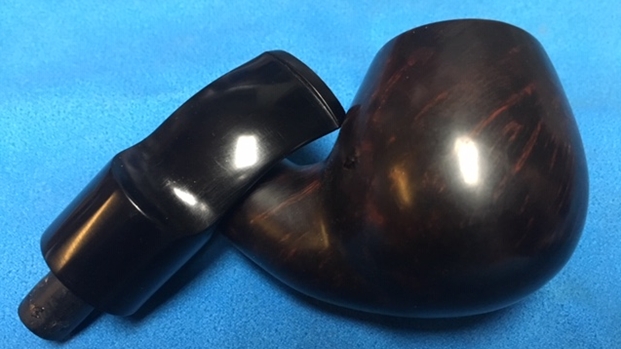
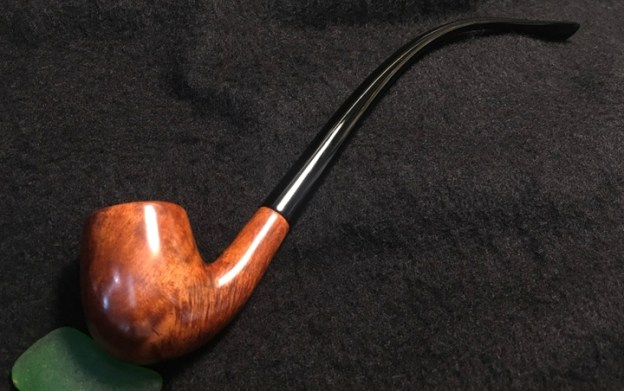
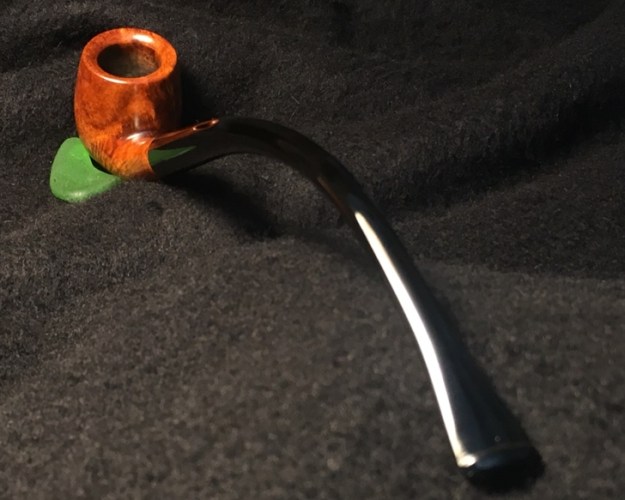
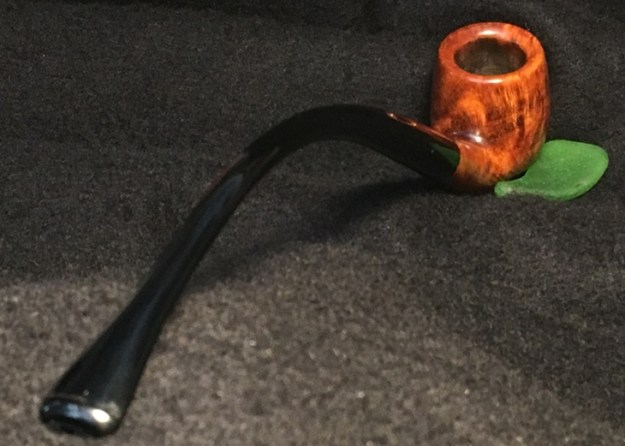
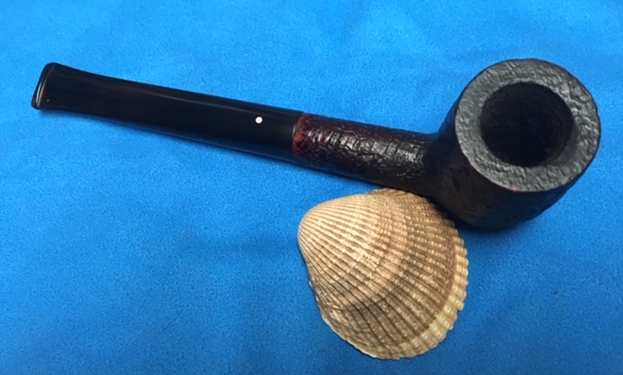
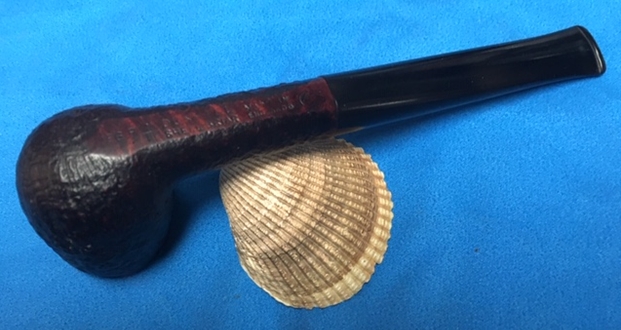
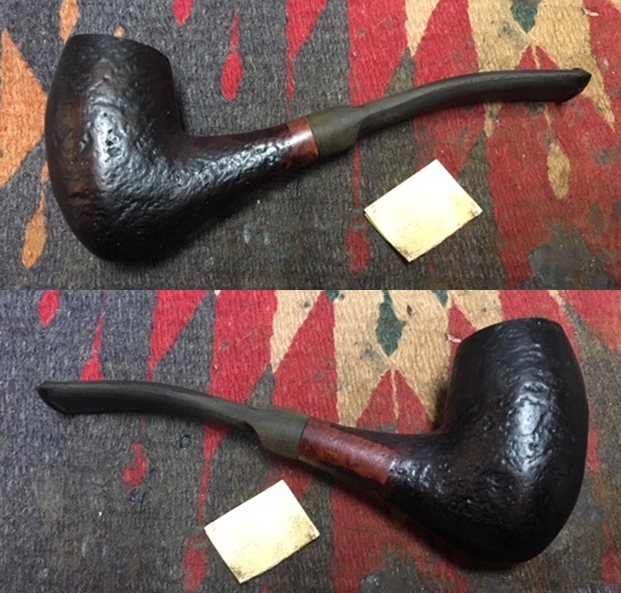
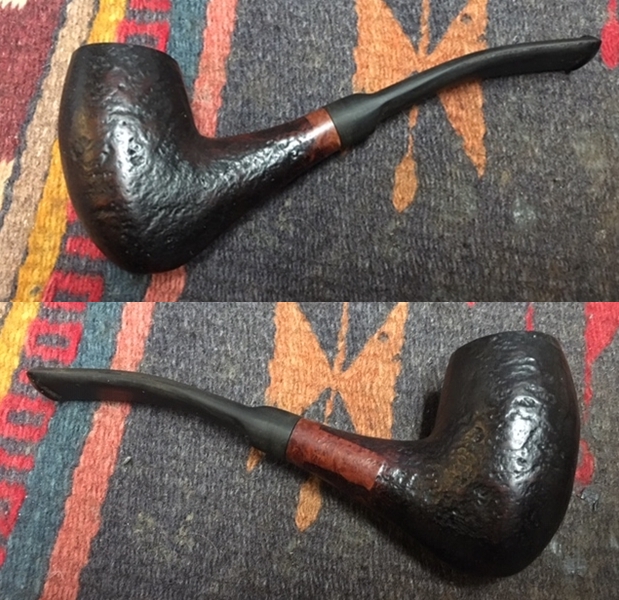
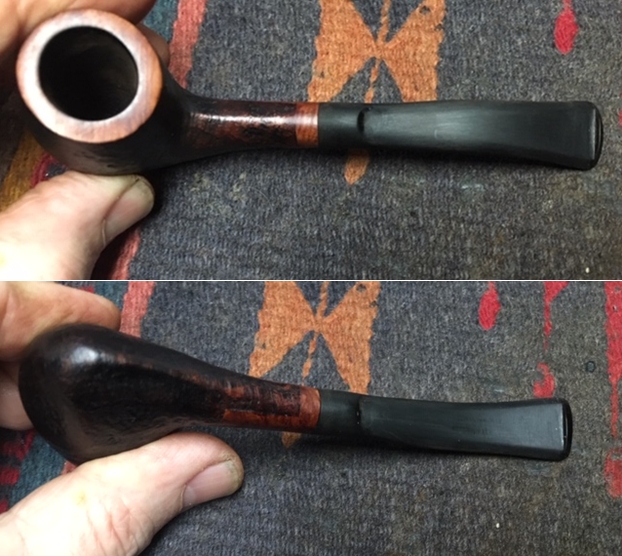
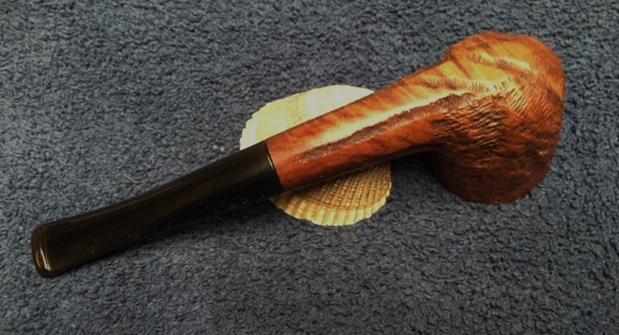
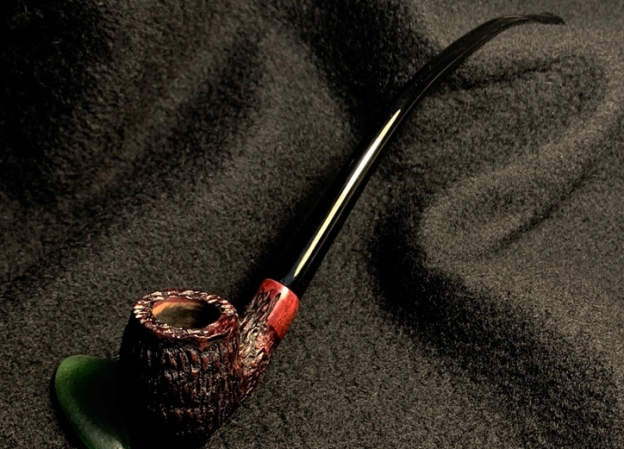
The Oxblood coloring of this rusticated bowl came out exceptionally well. My eyes are drawn to the contrasting of the flecks of smooth reddish briar populating the rusticated landscape.  The rustic feel of the bowl is enhanced by the ring of Oxblood smooth briar transitioning from the rough bowl to the long, black Warden stem.  The Oxblood shank ring contrasting with the stem simply pops.  Of course, the long, sweeping bend of the stem is why every pipe man or woman wants at least one Churchwarden in their collection.  This Churchwarden is heading under the Christmas tree here in Bulgaria as a gift for my son. My joy is completed knowing that in the future, when he pulls it out and fills it with his favorite blend and settles in to have some moments of reflection that he will reflect on this special Christmas in Bulgaria!  Thanks for joining me!  Merry Christmas!

Restoring and Restemming an LHS Rusticated Sterncrest Billiard


Blog by Steve Laug

I am doing periodic repairs for a local pipe/cigar shop. They give my card to people who come in needing pipe repair. On Monday I received a call from a fellow who had an older LHS pipe that he had picked up in Europe on a trip. It turned out he lived around the corner from my house and he and his wife walked over with the pipe. It had an interesting rustication pattern around the bowl and shank that was unique. It sported a gold band on the shank that was original. The bowl exterior was very dirty. The rim top had lava overflow in the grooves and the bowl had a very thick cake inside it. The inner and outer edges of the rim looked very good. The stem had been jerry-rigged to function on the pipe before half of the button and back end of the stem had broken off. It looked like someone had used a knife and cut down the stem to make it a saddle stem. They had also carved a button on the stem. The saddle on the stem was in very rough condition and the carving marks in the stem surface were very rough. The young guy and his wife who dropped it off were hoping to get a new stem made and I was hooked and want to do that for them. I took photos of the pipe when it arrived so I had a benchmark to work with. I took a photo of the stamping on the underside of the shank. It was very readable and was stamped Sterncrest of LHS in a diamond and underneath Imported Briar. Next to it was stamped 14K. The gold band was also in good condition but scratched. I also include a photo of an LH Stern sign that was included on Pipedia (https://pipedia.org/wiki/LHS). I have included the information below from the article on Pipedia (https://pipedia.org/wiki/LHS). It gives a great brief history of the brand that is a quick overview of the Company.

Ludwig Stern, a successful pipe manufacturer since 1893 and closing around 1960, reorganized his company along with his brother Hugo Stern, opening a factory in 1911. They named the company L&H Stern Smoking Pipes & Holders. The newly formed company was moved into a six story building on the corner of Pearl and Waters street Brooklyn, NY.

Thoroughly organized in all departments, and housed in a well-lighted and ventilated modern office and manufacturing building, the firm of L&H Stern Inc. is located near the first arch of the Manhattan bridge, near the river and convenient to the Brooklyn bridge, which makes it accessible from all the hotels in the metropolis for visiting buyers. The structure is six stories with a seventeen-foot basement, with light on three sides through prismatic glass windows, the first floor being seven feet above the sidewalk. Light enters the upper floors from all four sides.

L&H Stern is known to every important wholesaler and jobber in the country. LHS manufactures a complete line of briar pipes. Ginmetto wood pipes are also made, as well as Redmanol goods, the man-made amber. The first substitute for amber. Everything, even down to the sterling silver and other metal trimmings are made under one roof.

To begin the process of the restoration on this pipe I decided to see what kind of stem I had to replace the one that came with the pipe that was dropped off for me. I went through my can of stems and found a thin tapered saddle stem. It was more delicate looking than the broken one and I felt like it would look very good with the lines of the rustication on the bowl and shank. It was in good condition other than some light oxidation. I set the new stem aside and turned my attention to the bowl. I needed to clean out the bowl and shank before I fit the new stem on it. I reamed it with the third cutting head on the PipNet pipe reamer. I took the cake back to bare briar. I cleaned up what was left with a Savinelli Fitsall Pipe Knife and finished with sanding the bowl with a piece of dowel wrapped with 220 grit sandpaper to smooth out the walls on the bowl.   With the cake cleaned out of the bowl, it was time to clean the shank and airways. I used alcohol, cotton swabs and pipe cleaners to scrub out the shank. I scraped the walls of the shank and mortise clean with a dental spatula to clean up the built tobacco lacquer on the walls. Once it was scrubbed clean the pipe smell much better.I scrubbed the exterior of the bowl with Murphy’s Oil Soap and a tooth brush to remove the grime. I used a brass bristle brush to scrub the rim top with the soap. I rinsed the grime off the bowl with warm water and dried it off with a soft cotton cloth. Once the grime was gone I found flecks of white paint in the grooves of the rustication. I picked them out with a dental pick and used the wire brush to clean up the debris of the paint flecks. I rubbed the bowl and rim down with Before & After Restoration Balm. I worked it into the surface of the briar with my fingertips to clean and worked it into the rustication with a horsehair shoe brush. The balm work to enliven and protect the briar. I let the balm sit for a little while and then buffed with a cotton cloth to raise the shine. I really like watching the Balm do its magic and bring the briar alive.  I sanded the scratches and tooth chatter out of the stem surface and the saddle with 220 and 400 grit sandpaper. I worked it over to remove the oxidation that remained in the stem surface.I rubbed the stem down with Denicare Mouthpiece Polish. I have a few tins of this laying around so I am trying to use them up. It does a pretty good job polishing the stem.The stem was looking much better. I polished it with micromesh sanding pads – wet sanding with 1500-12000 grit pads. I wiped the stem down after each sanding pad with Obsidian Oil. I polished it with Before & After Pipe Stem Polish – both Fine and Extra Fine. Once I had finished the polishing I gave it a coat of a new product I am experimenting with from Briarville Pipe Repair. It is called “No Oxy Oil” and it is made to protect the stem from oxidizing. I set it aside to dry.   As usual at this point in the restoration process I am excited to be on the homestretch. I look forward to the final look when it is put back together, polished and waxed. I put the bowl and stem back together. I polished the bowl and stem with Blue Diamond to polish out the scratches in the briar and the vulcanite. I gave the bowl and the stem multiple coats of carnauba wax. I buffed the pipe with a clean buffing pad to raise the shine. I hand buffed it with a microfiber cloth to deepen the shine. The pipe polished up pretty nicely. The grain really pops with the wax and polish. The shiny black vulcanite stem is a beautiful contrast to the textures and the various browns of the bowl and shank. This LH Stern (LHS) Sterncrest Billiard was another fun pipe to work on thanks the fact that I could in essence start over with it. The thin saddle stem looks really good with the rustication on the bowl and shank. The original 14K Gold band on the shank looks very good breaking up the shank and the stem. It is a real contrast and binds it all together. It really is a quite stunning piece of briar with an unusual rustication on the bowl. The pipe is comfortable pipe to hold in the hand. The finished pipe is shown in the photos below. The dimensions of the pipe are Length: 5 ½ inches, Height: 2 inches, Outside diameter of the bowl: 1 ¼ inches, Chamber diameter: ¾ of an inch. This newly stemmed piece of  pipe history will soon be going back to my neighbour who I think is really going to enjoy it. It is a piece of he and his wife’s travels so now he can enjoy it with the memories of the find. Thanks for reading this blog and my reflections on the pipe while I worked on it. This is an interesting estate to bring back to life.

Restemming & Restoring a “Malaga” Canadian from Kathy’s Dad’s Pipes


Blog by Steve Laug

I have been working on a lot of different estate pipes and selling them for different families. This morning I was looking through the bag of pipes that I have left from George Koch’s estate. There are only three of them and all were in pretty rough shape. The rims were well knocked about and the stems were either chewed off or through and really would need to be carefully worked over and have new stems fit to them. The first of these three Malaga pipes that need a lot of attention was the one I picked up this morning. It is a Canadian with a broken or chewed off stem. The rim top was used as a hammer or at least spent a lot of time being knocked against hard surface. But sides of the bowl had a mix of grain styles that was fascinating. It is one of the last three Malaga pipes that came to my brother and me in several shipments of pipes from George’s daughter Kathy. Alex had gone through the bag in essence had passed on these three. Jeff unwrapped the pipes when they came to him and took the following photo to give an idea of the volume of the pipes that we purchased. This Malaga is actually shown in the photo of the box of pipes below. I have drawn a red box around it so you can see it clearly.In each of the previous blogs that I have written on the restoration of George’s pipes I have told his story. If you have followed the restorations you will have read the information and the background piece that Kathy did on her father. Here is a link to one of the previous blogs on his Malaga pipes where I included her tribute in full (https://rebornpipes.com/2019/01/26/back-to-kathys-dads-pipes-restoring-a-%c2%bc-bent-malaga-author/). You can also read the bio on her Dad, George Koch. It is an interesting read and one that shows just how far our pipe collecting passion can go when we find a brand of pipes that we enjoy. I am going to only include the portion on the Malagas at this point. If you wish to read the rest follow the link above.

Kathy writes…We lived in Livonia, and that’s where his love for Malaga pipes began. After a few years he returned to Allis Chalmers and we moved back to Springfield. I remember that when we went back to Michigan to visit friends, Dad had to go to the Malaga store and acquire a few new pipes. Many a year I wrote to Malaga and they picked out a pipe for me to purchase that I could give Dad for a Christmas or birthday present. He was always pleased. His favorites were the straight stemmed medium sized bowl pipes, but he liked them all. 

He had some other pipes, but the Malagas were his favorites. I remember him smoking them sitting in his easy chair after work, with feet up on the ledge by the fire burning in the fireplace.  Growing up it was my job to clean them and he liked the inner bowl and stem coated with Watkins vanilla, leaving a little of that liquid in the bowl to soak in when I put them back on the rack…I’m very happy they are being restored by you and your brother and hope they find homes who enjoy them as much as Dad did. Thank-you for your care and interest. — Kathy, the oldest daughter

The “Malaga” Canadian on the table is in rough condition. But even under the damage and dirt I can see that the carver did a great job of shaping the pipe to follow the grain on the briar. The large bowl, oval shank and short broken stem give a clear picture of what the pipe must have looked like when George bought it at the shop. I did not bother Jeff for the pre-cleanup photos because really it was obvious what the pipe must have looked like. From the condition of the bowl and rim post cleanup I could see that it originally had a thick cake that overflowed with lava onto the rim so that there was damage on the inner edges. The rim top had been knocked hard against rough surfaces to knock out the dottle and left damage. The sides of the bowl and shank are very dirty with grime and oils from prolonged use. The stamping on the left side of the shank read “MALAGA”. On the right side it read Imported Briar. There was a burn mark on the underside of the shank near the stem/shank junction that looked like the pipe had been set down in an ashtray. The acrylic stem had been broken or gnawed off leaving a useless stem that would need to be replaced. Since Paresh is not here in Canada it will be replaced rather than rebuilt! 😉 I took photos of the pipe before I started my work. Somehow the rest of the before photos of the pipe as a whole were out of focus. The condition of the pipe will be shown in the remaining photos however.I took a photo of the  rim top and bowl to show the condition of the pipe. You can see why I said it was used as a hammer. The surface of the rim is very rough. The outer and inner edges fo the rim are  also in very bad condition. There is some darkening on the back edge and surface of the rim top. I think that this pipe must have been kind of shop pipe or knock about pipe for George as it was very well smoked! I took photos of the stem to show the broken and chewed condition it was in. Remember this is hard acrylic so it took some real gnawing to do this to it!I took a photo of the burn mark on the underside of the shank. It was not a deep mark and the wood was still solid so it was not badly damaged.I took a photo to capture the stamping on each side of the shank. The photos show the stamping “MALAGA” on the left side of the shank and Imported Briar on the right side. The stamping is faint but still readable. I am also including the link to a blog that I wrote that gives some of the history of the Malaga brand and the Malaga Pipe Shop in Royal Oak, Michigan in the USA. I have written an earlier blog to give a little history of the Malaga Brand and the pipemaker, George Khoubesser. Here is the link – https://rebornpipes.com/tag/malaga-pipes/.That blog also includes links to a catalogue and the history of the pipemaker George Khoubesser. Follow the link to get a feel for the brand and the pipemaker.

Jeff had gone to the trouble to ream the bowl with a PipNet pipe reamer and followed up with a Savinelli Fitsall pipe knife to remove the cake. He scrubbed out the mortise and the airway in the shank and the stem with alcohol, cotton swabs and pipe cleaners. He scrubbed the exterior of the bowl, rim, shank and stem with a tooth brush and Murphy’s Oil Soap to remove the oils and tars on the rim and the grime on the finish of the bowl. He rinsed it under running water. He dried it off with a soft cloth. All of his work gave me a clean pipe to work on to say the least. I decided to start with the new stem. I went through my collection of stems to find one that was the same dimensions as the broken stem. I found one in my can that would fit the bill. I set up my cordless drill with the PIMO Tenon Turning Tool in the chuck and started turning the tenon on the new stem back to match the broken one. I usually do the turning in several passes, adjusting the depth of the blade between each cut. In this case I did it in three passes. I got it close and finished the fit with my Dremel and sanding drum.I sanded off the castings on the sides and slot end of the stem with the Dremel and sanding drum and did a few turns on the tenon with the sanding drum. You can see from the first photo below that it was very close. I took it back to the Dremel and did a few more passes on the tenon and cleaned it up with a folded piece of 220 grit sandpaper. You can see the fit in the second photo. There was some gap where it did not sit flush against the shank. The issue was not the fit of the tenon but rather the shank end. I could see that it was uneven and rough so I would need to make a few decisions on how to address that issue.I decided that the best way to address the fit and give the pipe a little pizzazz would be to use a nickel band. They come from the maker quite thick – ½ of an inch and I wanted something about ¼ of an inch thick. I used the topping board and the Dremel to thin down the height of the band. It took a bit of time but I like the way it looks once it is finished. Once I had the band done I set it aside and cleaned the briar. The third photo shows the finished band glued in place on the shank using Weldbond all-purpose glue. The ¼ of an inch thick band works for me!I topped the bowl on a new piece of 220 grit sandpaper on the topping board. Once I had the top smooth I filled in the deeper nicks and chips in the outer edge of the rim with clear Krazy Glue. Once the repairs cured I sanded them smooth with 220 grit sandpaper and retopped the bowl to remove the excess glue. I used a folded piece of sandpaper to sand out some of the burn damage on the underside of the shank. I scrubbed the briar with Before & After Briar Cleaner and a tooth brush. I rubbed it into the surface of the briar with my finger tips and let it sit for about 10 minutes then rinsed it off with running water. I dried it off with a soft cloth. I polished the bowl with micromesh sanding pads to smooth out the rim top repairs and the nicks in the bowl sides. I wet sanded with 1500-12000 grit pads and wiped the bowl down with a damp cloth after each pad. The photos show the progress. I used an Oak Stain Pen to blend in a few of the spots on the rim top and edges that were lighter than the bowl. I buffed it with a clean buffing pad. You can see from the photo below that I was able to blend it into the rest of the bowl.I worked some Before & After Restoration Balm into the surface of the briar with my fingertips to clean, enliven and protect it. I let the balm sit for a little while and then buffed with a cotton cloth to raise the shine. The following photos show the bowl at this point in the restoration process. I am very happy with the results. I turned to the stem and started by sanding the surface. I wanted to smooth out the surface of the vulcanite to remove the castings and the sanding marks. I sanded it with 220 grit sandpaper and 400 grit sandpaper to clean up the stem.I polished the stem with micromesh sanding pads – wet sanding with 1500-12000 grit sanding pads. I wiped it down after each sanding pad Obsidian Oil. I finished by polishing it with Before & After Pipe Stem Polish both Fine and Extra Fine and then wiped it down with a final coat of Obsidian Oil. This is a restemmed and restored “Malaga” Canadian with a vulcanite tapered stem. The nickel band adds a touch of class that truly makes the pipe stand out from the other Malaga pipes that I have worked on. It has a great look and feel. The shape of the bowl, the reshaped and repaired rim top and the cut of the briar work well to highlight the grain around the bowl sides. I polished stem and the bowl with Blue Diamond polish on the buffing wheel. I gave the bowl and the stem multiple coats of carnauba wax. I buffed the pipe with a clean buffing pad to raise the shine. I hand buffed it with a microfiber cloth to deepen the shine. The pipe polished up pretty nicely. The grain took on life with the buffing. The rich oil cured colour works well with the polished vulcanite stem. The finished pipe has a rich look that is quite catching. Have a look at it with the photos below. The shape, finish and flow of the pipe and stem are very well done. The dimensions are Length: 5 ½ inches, Height: 1 7/8 inches, Outside diameter of the bowl: 1 ¼ inches, Chamber diameter: ¾ of an inch. I will be adding the pipe to the finished Malaga pipes that I have completed. I am looking forward to a new pipeman picking up this pipe and will carry on the trust for George Koch. Thanks for walking through the restoration with me as I worked over another one of Kathy’s Dad’s Pipes.

Replacing a Broken Tenon and Restoring a Harcourt Hand Carved S Freehand


Blog by Steve Laug

About a month ago I received a phone call from a guy from Nova Scotia who was visiting in Vancouver and had made a stop at City Cigar on 4th Ave. W. and asked about having a pipe repaired. He told me that he had a freehand pipe that had been sitting in a bag for years with a broken tenon. He was going to leave it with his brother in law and they would get in touch with me about repairing it. Earlier this week I received a text from his brother in law with photos of the pipe that needed the repair. I have included those photos below. It was a nice looking Freehand with a fancy turned stem. The tenon was snapped off in the shank and was stuck from the look of the photos. The shape and the look of the pipe reminded me of other freehands I have worked on that were made by Preben Holm. We made arrangements and we booked a time for him to drop the pipe off. Today I had the day off and I received a text that he was dropping the pipe by today for a repair. I took some photos of the pipe before I started working on it. The tenon was stuck in the shank and was not moveable. The finish was dusty but in excellent condition. The rim top and edges were in excellent condition. There was a light cake in the bowl and the pipe smelled of a strong vanilla aromatic in the bowl. The stem was lightly oxidized and was snapped very close to the square/diamond turned piece on the fancy stem. I took a photo of the plateau on the rim top and the shank end. The pipe was dusty but otherwise the finish was in great condition. I took a photo of the stem surfaces. Other than being lightly oxidized there were no tooth marks or chatter on the stem surface. I took a photo of the stamping on the underside of the shank. It had a uppercase S at the top of the stamping. Under that it read Harcourt over Hand Carved in Denmark.After I took the photos I put the bowl in the freezer so that I would be able to pull the broken tenon from the shank. The time in the freezer causes the briar to release the broken tenon that was stuck.  After a half hour in the freezer I took it out and the broken tenon easily came out of the shank. I took photos of the parts.I decided to refresh my memory about the brand before I started working on it. I did a quick search on rebornpipes to read the posts that I had there. The first of these was by Charles Lemon of Dad’s pipes (https://dadspipes.com/2016/10/20/in-praise-of-international-cooperation-cleaning-up-a-large-harcourt-grade-d-freehand-by-preben-holm-for-dunhill/). I quote the pertinent part of Charles piece.

By all accounts, the Danish Fancy pipe boom of the 1960s and 1970s caught the great English pipe house of Dunhill unprepared. Dunhill was unable to produce the new Freehand shapes in-house, so if the firm was to capitalize on the surging demand for Danish pipes, it would have to look elsewhere. The answer came in the form of a contract with the Preben Holm factory for the production of what became the Harcourt brand of pipes, destined for distribution through Dunhill’s network of principal pipe dealers.

The Harcourt on my worktable arrived in excellent estate condition. It is easily one of the largest pipes I’ve worked on – its overall length is just 5.75 inches, but the stummel is a real fistful of briar measuring 2.5 inches tall by 1.6 inches wide with a copious tobacco chamber of nearly one inch in diameter and 2.25 inches deep! Despite its size, the pipe weighs only 2.3 ounces or 64 grams.

That helped me confirm the connection to Preben Holm that I remembered. It connected Preben Holm with Dunhill as well. The other blog was one that had written on a Harcourt that I restored (https://rebornpipes.com/2018/06/29/a-harcourt-hand-carved-freehand-7-of-anthonys-dads-pipes/). I quote a portion of the blog and include one of the photos that I had used in that blog:

I had some vague memory about the Harcourt brand that had a connection to Preben Holm and the stamping seemed a lot like the way that he stamped his pipes. I did a bit of research on the brand to see the connection. The first place I looked was on Pipedia at the following link: https://pipedia.org/wiki/Harcourt. There I found the following information which I quote in full.

The brand Harcourt was produced by Preben Holm (†) for Dunhill to secure a share of the Danish fancy boom for Dunhill’s principal pipe dealers. Later Erik Nørding made Harcourt pipes for a shorter period. These pipe are sometimes (partially) rusticated.

It had been reported that the second generation of Harcourt pipes were sold exclusively through Dunhill stores, but we now know through Rich Mervin that the Brick Church Pipe Shop, a chain of 3 stores in NJ sold Danish freehands in the 1970s and 80s including Knute, Ben Wade, and Harcourt. They were also an authorized Charatan and Dunhill retailer. So, apparently Harcourt freehands were sold through at least some Dunhill dealers as well as the Dunhill stores.

I then turned to the pipephil site at this link and found out some more information on the brand. http://www.pipephil.eu/logos/en/infos/harcourt1.html. I followed the links there to some photos of a boxed pipe and the stamping on the shank.

This box contains a pipe carved for Dunhill in the 1970s. Harcourt pipes were Dunhill’s answer to the passion Danish style raised during this period.From my previous research I confirmed the connection between the pipe I am working on and the Harcourt pipes that were made by Preben Holm. The connection between Preben Holm and Dunhill’s desire to tap into the Danish Freehand market in the US was also helpful as it gave me a potential date for the pipe. It was made in the 1970s – the height of the Danish period in the US. Now it was time to replace the broken tenon.

I used the Dremel and sanding drum to smooth out the face of the stem and remove the damaged portion of the broken tenon. I also went through my box of tenons and found one that would be a good replacement for the broken one. It was a threaded tenon that was a Jobey replacement tenon. It had the correct diameter and with a bit of work the threaded portion would anchor well in the stem.    I used my cordless drill to open the airway in the stem to the diameter of the threaded portion of the new tenon. I started with a bit slightly larger than the current airway. I drilled it to the depth of the threaded portion of the tenon. I worked my way through various drill bits until I had one that was slightly larger than the new tenon.I took a photo of the open airway on the stem. I roughed up the threads on the tenon replacement and removed the ridge in the middle with the Dremel and sanding drum. I coated the end of the tenon with super glue and pressed it into the open airway on the stem. Once the glue cured I took photos of the stem in the pipe. Once the glue cured I took photos of the stem in the pipe. The pipe still needed to be cleaned up but the look was very good and the feel in the hand and mouth was perfect. I took a photo of the stem out of the shank to show the finished tenon replacement. The stem and tenon needed to be polished but the fit and shape is perfect.With the stem repaired it was time to do the restoration on the pipe as a whole. I started with the bowl. I reamed the bowl with a Savinelli Fitsall Pipe Knife, scraping the light cake from the bowl. I sanded the inside of the bowl to remove the rest of the cake with 220 grit sandpaper wrapped around a piece of dowel.I cleaned out the inside of the shank and the airway to the bowl with alcohol, pipe cleaners and cotton swabs. I cleaned the inside of the airway in the stem at the same time.I rubbed the bowl down with Before & After Restoration Balm. I worked it into the surface of the briar with my fingertips and a horsehair shoe brush to clean, enliven and protect it. I let the balm sit for a little while and then buffed with a cotton cloth to raise the shine. Mark Hoover’s Balm is a product that I have come to appreciate and one I use on every pipe I have been working on.  I set the bowl aside and turned my attention to the stem. I sanded the stem with 220 grit sandpaper to break up the oxidation. I started the polishing with 400 grit wet dry sandpaper to remove the scratching. It is starting to look good.     I have one more tin of Denicare Mouthpiece Polish left from a few that I have picked up over the years. It is a coarse red pasted that serves to help remove oxidation. I polished the stem with that to further smooth out the surface of the vulcanite (and to be honest – to use it up). I polished the stem with micromesh sanding pads – wet sanding with 1500-12000 grit pads. I wiped the stem down after each sanding pad with Obsidian Oil. I polished it with Before & After Pipe Stem Polish – both Fine and Extra Fine. Once I had finished the polishing I gave it final coat of oil and set it aside to dry. When this pipe was dropped off yesterday I told the fellow that it would be a couple of weeks before I got to work on it. However, yesterday afternoon I felt like doing something a bit different in the restoration process. I finished the repair yesterday and finished the polishing it today. With every pipe I work on, I look forward to when it all comes back together, polished and waxed. I put the bowl and stem back together. I polished the bowl and stem with Blue Diamond to polish out the scratches in the briar and the vulcanite. I gave the bowl multiple coats of Conservator’s Wax and the stem multiple coats of carnauba wax. I buffed the pipe with a clean buffing pad to raise the shine. I hand buffed it with a microfiber cloth to deepen the shine. The pipe polished up pretty nicely. The sandblast finish looked really good with the polished black vulcanite. This Harcourt Hand Carved Preben Holm Freehand was another fun pipe to work on. It really has a great Freehand look that catches the eye. The combination of various oxblood, black and brown stains really makes the pipe look attractive. It is another comfortable pipe to hold in the hand. The finished pipe is shown in the photos below. The dimensions of the pipe are Length: 6 inches, Height: 3 inches, Outside diameter of the bowl: 2 inches, Chamber diameter: ¾ of an inch. I look forward to when the fellow picks it up and I get to hear what he thinks of the pipe. Thanks for reading this blog and my reflections on the pipe while I worked on it. This is an interesting estate to bring back to life.

A Nightmare Restoration of an Oldenkott Munchen Huber Filter Pipe


Blog by Steve Laug

I have had this old pipe kicking around in my box for refurbishing for a long time now. I have picked it up numerous times and put it back as I just had no desire to do anything with it. That changed yesterday. I took it out and looked at it to think about what needed to be done to it. The stem was a mess – it had shattered when the guy who owned it tried to take it off. He sent me these photos of the pipe. It was green which did nothing for me and there was nothing about it that called my name. It was an Oldenkott pipe – a brand that I had worked on before but not a shape that I was interested in. The stem was broken and the pipe was a mess. After seeing the photos below, I had declined purchasing it as it really was not interesting to me. But even my declining it did not matter much – He had mailed it as part of a group of pipes that Jeff and I had purchased from him them.The pipes had been sent to Jeff and in the box was this one. Jeff opened the box and showed me this pipe and really it was in even worse shape than I imagined. The pipe came with the stem pretty well stuck in the shank and a small plastic bag with stem pieces was rubber banded to the tenon. Jeff chucked it in the freezer and the stem came off easily enough. It was a mess and it was a filter pipe! The bowl had a thick in it and a thick lava overflow on the rim top. It was hard to know the condition of the inner edge of the rim because of this. The bowl had a lot of bright green fills around the sides and heel. The stem was a disaster – broken off and shattered at the same time. It was definitely one for the garbage. He took photos of the pipe before he started working on it so I could see what he was dealing with. He took a photo of the rim top and bowl to try to capture the mess of both. The thick cake in the bowl and the overflow of lava are both visible. The cake was thick and hard and the lava overflow was a thick band around the bowl. One consolation is that considering the mess it was in, this must have been a great smoking pipe.The next photos show the side and bottom of the bowl and give a clear picture condition of the green stain. It was spotty and worn. The fills in the bowl were very green spots, like painters green tape and stood out like a sore thumb to me. They were just ugly and almost obscured the interesting grain around the bowl for me. Hopefully you get a feel for why I just kept putting it back in the restoration “to do” box.Jeff took photos of the stamping to capture the clarity of it even under the grime. The Oldenkott name is stamped on the left side of the shank. On the underside it is stamped Huber over Munchen. Jeff took photos of the stem to show the shattered condition. It really was not redeemable even by such a stalwart stem rebuilder as Paresh Deshpande! It was also a 9mm filter stem and to me that also was another strike against it. It was useless in my opinion. I knew I was dealing with a German pipe from previous ones that I had worked on. I had been told that the brand was the German equivalent of Dunhill pipes in England. This one certainly did not make a case for that assumption. I turned first to Pipephil to see if I could get a brief review (http://www.pipephil.eu/logos/en/logo-oldenkott.html). The site gave various lines that had been made by the factory before its closure in 1992.

I went on to Pipedia knowing that there would be some more detailed information and I was correct in that assumption (https://pipedia.org/wiki/Oldenkott). I quote in full from that article.

Very little is known about the company. According to the albums the company was founded in 1760 in Amsterdam as Hermann Oldenkott, and in 1819, a subsidiary in Ahaus (Germany). There were likely other factories as well, as in 1838 August Kersten from Rees (Germany) bought the factories from Heinric Oldenkott in Elten (Germany) and Weesp (Holland), although it is not clear whether these were part of the of the original Oldenkott company. The German company increased rapidly and became one of the largest German tobacco companies. In 1929 the factories from Hermann Oldenkott in Ahaus and Neuss (Germany) were bought by the German Oldenkott company. The German company produced pipes starting in 1932. In 1972 the German company was bought by the Dutch company Niemeijer. Tobacco production ceased in 1974 and only pipes were made afterward. In 1987 the German pipe company was bought by the Kersten family again, but closed in 1992.

The pipes were machine made and in general of mediocre quality. The most important pipes of Oldenkott were the so called “Porsche” design pipe. The bowl was turned like the motor block of a racing car and was lacquered with a silver-grey color. Today these special pipes are very rare and expensive.

In spite of the apparent quality of both Oldenkott and VAUEN pipes, they are known as good smokers.

The site also quotes from the book “Pipes, Artisans and Trademarks, by José Manuel Lopes’ –“Oldenkott is an early 20th century German brand by Henry Oldenkott. His factory in Hallen closed in April 1982, with some of the workder moving to VAUEN. Oldenkott made ipes with and without filters. It was in this company that Porsche pipes were produced.”

Armed with that information I turned to address the pipe itself. Jeff had cleaned up the pipe before sending it to me. He reamed the bowl with a PipNet pipe reamer and cleaned it up with a Savinelli Fitsall Pipe Knife. He scrubbed the exterior with Murphy’s Oil Soap and a tooth brush to clean off the grime off the finish and the heavy overflow of lava on the rim top. He cleaned up the internals of the shank, mortise and stem with pipe cleaners, cotton swabs and alcohol to remove all of the oils and tars in the pipe. He cleaned up the stem so that it did not stink and soil the other clean pipes he sent me. When it arrived here in Vancouver it was a clean pipe and I knew what I had to work with. I took photos of it before I started my part of the restoration. I took a close up photo of the bow and rim to capture the burn damage on the right side inner edge of the bowl. I also took photos of the shattered stem to show the extent of the damage.I took a photo of the left side and the underside of the shank to show the stamping on the pipe. It read as noted above. After the cleanup it was still readable.I decided to address the broken stem first. I went through my can of stems and found a suitable saddle stem that was roughly the same length as the broken one. It had a different saddle arrangement but to be honest I like the new one better. It was a new cast stem that I had picked up from a fellow who was selling out his father’s refurbishing supplies. I measured the diameter of the tenon on the broken stem and set the PIMO Tenon Turning Tool to crank out a tenon on the new stem that would match. I turned it carefully and once I took it off the tool and measured both were identical in diameter – BUT (and this part is very irritating to me) the new tenon though identical and in size was loose in the mortise!!!I filed out the nubs left behind from the tool and the new stem was now functional. I would need to expand the tenon to get a good snug fit but it was done. I gave the tenon a coat of clear fingernail polish to snug up the fit in the mortise. I set it aside to dry. While the stem was drying I decided to work on the damage to the inner edge of the bowl on the right side. I topped it on a topping board with 220 grit sandpaper and removed as much of the damaged area as possible.I knew that I needed to deal with the uneven green stain coat on the bowl so that I could smooth it out. I also needed to deal with the fills in the bowl. I wiped it down with acetone on a cotton pad to evenly remove the stain. I picked out the largest fill on the right side of bowl with a dental pick. Under the bright green top coat the fill was bright white putty. Once I picked it out wiped it down with alcohol. I filled in the hole with briar dust and clear super glue to replace the fill. I put the stem on the shank and worked on the fit against the shank. I used a wood fill to reduce the diameter on the stem giving it a bit of a conical shape to match the flow of the shank. I also worked on the shank diameter because like everything else that is a bit of a deficit on this pipe the shank was not perfectly round and the stem had to be hand fit to the shank. I sanded the shank and stem with 220 grit sandpaper to smooth out and shape the shank and stem union. I also sanded the repaired fill on the right side of the bowl to blend it into the surface. The stem was looking pretty good as was the new fill. I wiped the bowl down with a damp cloth to have a look at it at this point. I removed the stem and worked on polishing the bowl with 1500-2400 grit micromesh sanding pads. I wiped the bowl down after each pad. I decided to only use these three grits because I had decided to experiment with staining this pipe GREEN once again. (I have to tell you this was an experiment and in many ways a failed one. But I get ahead of the story!). Here is where the restoration took a horrible turn for me. I should have left well enough alone but I wanted to tryout the Kelly Green stain that I had picked up earlier for some Peterson’s St. Patrick’s Day pipes that I have not dealt with yet. I figured this would be a good place to learn about the idiosyncrasies of green stain. I heated the briar and stained and flamed the pipe to set the stain in the wood. I looked at it and just shook my head. The stain set really well. I wasn’t sure how the fills received it and was a bit worried when I saw them shining through the dark green stain. I set the bowl aside to let the stain cure. Once the stain was dry I moved to my next “normal” step which is to wipe the bowl down with alcohol on cotton pads to make it more transparent and make the grain stand out more. Here is where my next issue rose – I wiped it down with four pads and alcohol and kept repeating the wipe down and it did not become more transparent. All that happened was that the fills turned white. I touched them up with green but there was no remedy to the issue. I like the pipe better before I stained it green. Now what was I going to do to make it LESS GREEN? At this point the experiment was a failure in my opinion. The GREEN NOT ONLY SET IN THE GRAIN BUT IN THE WHOLE PIECE OF BRIAR. I have to admit that at this point it crossed my mind that I probably could have thinned the stain a lot and made a green wash but after thought is too late. I buffed the pipe with Red Tripoli to try to remove it from the briar but it really had little effect. I was getting pretty frustrated and know from experience it is time to change things up a bit before I make things worse!

So I decided to address the stem for a while instead of the bowl. I put the stem on the shank and heated it with my heat gun until it was soft. I bent it to match the angles of the bottom of the bowl and set the bend with cool water. It was a good diversion from the GREEN bowl.I took the stem off and went back to work on the bowl. I wiped it down with acetone to try to reduce the green stain and while it partially worked it still was too green to my liking. I sanded the bowl and shank with 1500-2400 grit micromesh sanding pads to further reduce it. I still was not happy with the results. The green was just not to my liking. It needed to go. I restained the bowl with Tan stain and flamed and repeated the process until the coverage was good. I set it aside to cure and went to lunch with a friend. After lunch I buffed the bowl with Red Tripoli to unveil with the bowl looked like at this point. The tan stain had worked together with the Green stain to create a colour that I really liked. I buffed it with Blue Diamond to further polish it. I like the way the bowl looked at this point. I still needed to polish it and wax it but I wanted to finish the stem as well. I wet sanded it with 1500-12000 grit micromesh sanding pads to polish it. I wiped the stem down with Obsidian Oil after each pad. I finished polishing it with Before & After Pipe Polish – both Fine and Extra Fine. I gave it a final coat of Obsidian Oil and set it aside to dry. In looking at the photos above you can see a few nicks in the tenon. I filled them in with clear super glue to smooth them out and set the stem aside to dry. I sanded them smooth with 1500-2400 grit micromesh sanding pads. I wiped it down with Obsidian Oil and again let it dry.  With the parts finished it was time to polish up this nightmarish experiment that took me far longer than it rightly should have taken. I learned a ton in terms of Green stain – such as using it as a wash instead of as it comes in the bottle. I learned that it sinks deep into all of the grain not just the softer parts. I found that it is very hard to remove once it is once it is on the briar. Learning all of that I was finally glad that it was time to finish this pipe. I put the stem and bowl back together and buffed the pipe with Blue Diamond on the buffing wheel. I polished the briar and the minute scratches still in the vulcanite of the stem until there was a rich shine. This Oldenkott turned out better than I expected and has some nice grain showing through. The finish really highlights the grain and hides the fills on a proportionally well carved pipe. Once I buffed the pipe the briar came alive and the mixture of grain popped with polishing. The black vulcanite replacement stem had a rich glow. The finished pipe is a beautiful grained bent Apple. The dimensions are Length: 5 1/4 inches, Height: 1 3/4 inches, Outside diameter of the bowl: 1 1/4 inches, Chamber diameter: ¾ of an inch. Thanks for walking through the long, experimental restoration with me as it was a learning experience for me.

Restoring and Restemming a Savinelli Capri 915


Blog by Lee Neville

Over the past few months I have been continuing my correspondence with Lee via email. He picked up a couple of pipes for me at a local antique shop in Edmonton, Alberta, Canada and sent them to me. We have fired emails back and forth on restoration questions and issues. He also included Charles Lemon of Dad’s Pipes in the conversations and we had a great time. Earlier this week he sent Charles and me an email about a restoration of another pipe that he restemmed. Charles and I spoke with him of the style and size of stem to use. He did a great job on the restemming and the description of the work so I asked him if I could post it on rebornpipes. He was glad to have me do so. Thanks Lee for your work and this second write up. It is great to have you on rebornpipes as a contributor once again! – Steve

Thought I would share my pipe rehabilitation effort of a Savinelli Capri 915.  It showed up in the Winnipeg Ebay lot as a dirty stummel with a snapped-off stem tenon wedged into its shank. Alas, the original stem was not included in the lot.

This is a “Birks” pipe – Henry Birks & Sons, or what it’s now known by these days – “Maison Birks”, is a Montreal-based jewellery/glassware/fine leather goods/timepieces/ silver & gold flatware / object d’art firm in business here in Canada since the late 1800s.  It appears Birks would commission pipes from manufacturers and stamp them with their house name and offer them for sale during special promotions – Christmas, Father’s Day etc.  This Savinelli is the first of two “Birks” pipes I’ve got on my bench to restore.The plan is to clean this stummel up to the natural briar,  treat it to a wax protective finish and fit a replacement stem.  This will be fun as I just received the PIMO stem tenon cutter tool which will make short work of fitting a properly sized tenon on a replacement stem blank.

Stummel clean up
The bowl was in good shape. The rim showed minor discolouration from lighting.  The rim was not obscured by any lava. The previous owner was not a dottle-knocker – luckily no dents or chips on the bowl rim.  I reamed the bowl out with my newly arrived Pipnet set – I started with the smallest head, applying light twisting force and allowing the tool to make its way into the bowl.  This was repeated by the following two larger reaming heads to remove existing cake close to briar.  This was followed by twists with a dowel covered with 220 grit sandpaper to remove the remaining cake, then more twists with 320 / 400 grits to finish the bowl interior smooth. There are no cracks or burnouts in the bowl. The shank cleaned up with a few runs of alcohol-soaked pipe cleaners and q-tips.

I attacked the stummel with a soft toothbrush and Murphy’s Oil Soap to remove the rim discolouration and surface dirt/grease. The accumulated grunge lifted right off after two scrubbing sessions.  I was delighted to see the proprietary sandblasting/rustication is scarcely worn – the deep relief is quite attractive.

The stummel was then covered with masking tape. I clamped the padded stummel in my dremel vise and using a drill bit sized just over the ID of the snapped off stem tenon, ran it in a smidge gently, then reversed the drill and the tenon remnant came out with the drill bit.  This revealed a very fine crack in the mortise end of the stummel.  Using thin CA glue, I lightly dabbed the crack, watching it wick into the crack, then sprayed accelerant to instantly set the glue.  I lightly sanded the mortise face and mortise with 1000 grit paper to ensure any glue squeeze-out was removed before attempting to fit replacement stem

Fitting a new stem
I viewed the Savinelli web site to glean pipe proportions (stummel to stem) as well as canvassing yourselves for your thoughts on replacement stem length. I also found a high-definition image of a Capri 915 online.  Applying some ‘Edmonton Windage’, I ordered an oval tapered stem blank in a 2.25″ length from Vermont Freehand Pipes.

The stem blank on arrival was a bit wider than the stummel shank, so there was some filing and final sanding required to match the stem to the shank profile.

I mounted the replacement stem into the vise and drilled the stem draught hole to accept the guide rod of the PIMO stem tenon cutting tool.  I then mounted the PIMO stem tenon cutting tool and gently took a succession of cuts to arrive with a couple of thou of tenon final size.  I used a strip of 320 grit sandpaper to work the circumference of the tenon to a snug fit into the stummel mortise.  I used a variety of tools to flatten the stem tenon face so it would meet up with stummel mortise surface properly – needle files, sandpaper, a few licks with a very small chisel – all under a magnifier lens working the stem mating surface – testing fit/working it/test fit/working it until I got the proper fit.

Rough file work was then required to narrow the stem.  This took about an hour.  I then worked in the round with a file to shape the circumference of the stem to match the stummel profile. Last steps were using 220 sandpaper to work the circumference down as close to the final dimension. I followed that with 400 and 600 grit sandpaper.  I was now a scant hairs-width proud on the stem.  I then replaced the masking tape covering the stummel shank with clear scotch tape and brought the stem into line with the shank profile with 1500 and 1800 micro mesh pads.I filed the stem button into shape and from that point on, it was just applying a succession of micro mesh pads to 12000 to polish the replacement stem. Here is the clean stummel and new stem before finishing.Finishing the Pipe 
I treated the stummel to a coat of Howards Feed and Wax (beeswax, carnauba and citrus oils), let it sit for 30 minutes, then wiped off the excess, followed with a thin coating of carnauba wax over the whole pipe and a rub in with a polishing brush.  Using a cotton buff on my Dremel at 4000 rpm, I ran the buff over the entire pipe to bring out the shine. This pipe cleaned up very nicely and is a joy to hold.  I had fun fitting a new stem that is in proportion to the stummel and I think it’s a close resemblance to the stem originally fitted to the pipe.

Thank you Charles and Steve for your help on stem selection.

Onward and upwards!

Lee 

Crafting a Churchwarden for a Lord of the Ring’s Enthusiast


Blog by Dal Stanton

After restoring 3 pipes which Tina chose to gift special men in her life, the final request was to fashion a Churchwarden for her oldest son Thomas, who is a Lord of the Rings “groupie” and of course, he wants a ‘Gandalf Pipe’ to aid in blowing inspired smoke rings!  Tina’s son has been married for a few years and apparently, he and his wife have a Lord of the Rings movie binge at least once a year!

In my research on the Churchwarden shape, as the story goes, there were men back in the days when they didn’t lock churches at night, who were employed as ‘wardens’ of the church – whose responsibility was to guard the premises.  To be faithful to their charge, they were not allowed to leave the walls of the church.  That created an unusual dilemma between guarding the holy confines and the desire to enjoy one’s evening smoke.  The moral dilemma was creatively solved by a stem.  The length of the stem enabled the church wardens to tend to their evening bowls as they stood vigilantly inside the church walls while the stems extended through the windows…so the story goes (see Pipedia’s article).  Of course, everyone knows that Churchwardens were prevalent in Middle Earth as Gandalf spun up fireworks and smoke rings!

I found a bowl that I put aside quite some time ago that

Courtesy of Gonzalo Kenny https://lotr.fandom.com/wiki/Balrogs

I believed would serve well as a repurposed stummel to be mounted as a Churchwarden.  I know that there are strict Warden purists out there who question the validity of repurposing a bowl for use in fashioning a Churchwarden.  Yet, I appeal to Bill Burney’s description of the Churchwarden in his excellent Pipe Shapes Chart published in Pipedia where he says: “Interestingly, all the other styles of pipe are identified by the shape of their bowls, but the churchwarden is identified by its long stem.  The stem can be bent or straight, but it is always very long – 9” to 18” long.”.  There may be ‘true born’ Churchwardens and there are also those Churchwardens who are adopted into the ranks through the promotion of a discarded and forgotten stummel surviving from another lifetime where they served among other mere mortal pipes that they used to be.  For a common bowl to be remounted onto a Warden stem and to experience that metamorphosis is perhaps like when Gandalf transformed through fire in his mortal combat with Balrog – transforming from The Grey to The White….  Perhaps, only Gandalf knows for sure!  The bowl and stem I chose for this transformation are now on my table.The pre-molded Warden Stem comes from my main supplier, Tim West at http://www.jhlowe.com/bits.htm.  The stummel has ‘Real Briar’ stamped on the side of the shank, but what I like a lot is the 1/2 bent shank.  This will yield a very nice sweeping bend in the Warden stem.  The bowl’s size is not too large – perfect for a Churchwarden. Looking closely at the stummel, I see potential grain underneath the dark, marred surface.  The rim has lava flow but has an attractive inwardly slanted rim.  The chamber has light cake.  I take some pictures of the stummel in its current condition. Before I start working on fashioning the new preformed stem, I clean the stummel.  I start by reaming the chamber using the Pipnet Reaming kit.  I only use the smallest of the blade heads and then transition to the Savinelli Fitsall Tool to fine tune the scraping and cleaning.  Then I sand the chamber using a piece of 240 grade sanding paper wrapped around a Sharpie Pen.  Finally, after wetting a cotton pad with alcohol, I wipe the chamber cleaning it from the carbon dust.  I inspect the chamber after finishing and all looks good. Next, turning to the external surface, I take a few more pictures to show the nasty layer of grime over this stummel!  I use Murphy’s Oil Soap undiluted on a cotton pad and begin the scrubbing process.  I also utilize a brass wire brush to clean the rim. The results are good, but the reality is revealed by the cleaning!  The reality of the condition of the stummel is the reason it was in the box with other lonely stummels having given their all and discarded!  The finish is shot and the rim in mangled. Restoring this stummel to fashion a Churchwarden will be a noble endeavor! Next, I turn to cleaning the internals.  Using cotton buds and pipe cleaners wetted with isopropyl 95%, I go to work.  The internals are nasty.  I also utilize and small dental spatula to scrape the mortise walls.  There was a lot of resistance, but the buds started lightening until I was satisfied that the largest part of the cleaning was accomplished.  I’m not too concerned at this point because I’ve already made the decision to put the stummel in a soak of acetone to totally remove all the old finish which will also take care of residual internal tars and oils. The next morning, I fish the bowl out of the acetone bath.  Some of the finish was removed during the soak, but with the use of 0 grade steel wool, I’m able to dispatch the old finish easily after the night’s soak softened the old finish.  The pictures show the raw briar that allows me to start over. With the stummel cleaning process completed, I turn now to fashioning the preformed Churchwarden stem.  I use an electronic caliper to measure the diameter of the mortise to mark the target sizing of the tenon of the preformed stem that will eventually be seated.  The mortise measurement is 7.38mm in diameter.  Using Charles Lemon’s (of Dad’sPipes) methodology, I add 50mm to this exact measurement to give me my ‘fat’ target.  The ‘fat’ target is what I will aim for when bringing the tenon down to size using the PIMO Tenon Turning Tool.  The ‘fat’ target is 7.88mm.  From this point, I will sand the tenon by hand which gradually and patiently custom fits the mortise. The first thing needed is to pre-drill the tenon airway with the drill bit provided by the PIMO tool.  This enlarges the airway slightly enabling the insertion of the PIMO tool guide pin.  I mount the drill bit to the hand drill and drill out the airway.Next, the PIMO Tenon Turning Tool is mounted on the hand drill and I cut a small test sizing to measure to give me the distance between the test cut and the ‘Fat’ target.  After cutting the test, I measure it with the caliper and record 8.72mm and subtract the ‘Fat’ target, 7.88mm leaving .84mm to remove using the PIMO tool. Using the Allen wrench provided with the PIMO tool, I close the gap of the cutting arm and cut again.  The measurement of the next cut after closing the gap of the carbide cutter arm took off more than I wanted – the measurement is 7.47mm – beyond the 7.88 fat target.  This is why you only to partial cuts at the beginning!I enlarge the gap of the cutter arm a small amount and cut again.  The next measurement is 7.75mm – much better, just falling under the 7.88mm fat target.With this measurement reached, I cut the entire tenon down to the 7.75mm width.  I take the cut to the stem shank facing so a nice straight edge is created, and a ‘shoulder’ is not left from the rough preformed stem.I begin the sanding process by wrapping the tenon with 240 grade paper and rotating the stem and applying pressure strategically with my finger and thumb. I smooth and shorten the tenon a little so that it looks better and doesn’t butt into a ridge that I detect in the mortise which would block the full insertion of the tenon.  I use a flat needle file to do this.The process is slow with a lot of tests and sands… But in time the tenon seats very nicely in the mortise.  Nice!With the tenon snuggly seated in the mortise, the work is far from finished!  The picture shows the offset of the stem and the lip of briar hanging over the stem.  No stem fits automatically!The preformed Warden stem also is not straight but bows to the left through the reach of the stem.  I’ll work on this when I bend the stem later.Using 240 grade paper I begin the process of sanding the junction of the stem and shank.  My goal is to have a seamless transition from shank to stem with no overhanging ridges.  The other issue I see is that both the shank and stem have high spots that need to be sanded down and blended into a uniform flow.  What I want to avoid is the bloomers or stuff-pants look – where the shank balloons out when the sanding has not tapered the flow of the shank from the stem width as it transitions into the shank. It takes time, but in time the ridges have been removed and the tapering through the shank to the bowl looks good. I continue sanding the entire stem with 240 grade paper.  The precast stem is full of ridges and the casting seam down both sides – all of which needs to be sanded away and smoothed.  I also use the flat needle file to form and shape the new button.  I want to retain the curved button slot.  It looks classy! After sanding out the main issues with the new precast Warden stem, I transition to wet sanding using 600 grade paper.  With the bowl and stem united, I sand not only the stem including the shaped button, but also the junction of stem and shank to continue to smooth and blend the tapered transition.  After completing the wet sanding with 600 grade, I use 000 grade steel wool to sand in the same way.  The distance pictures with a Warden stem are always too far away to see detail, but a close-up shows some progress.With the main fabricating and sanding completed with the Churchwarden’s stem, the next step is to bend it.  The 1/2 bent shank of the stummel provides a wonderful trajectory for the bend and sweep of the stem – which emulates more directly Gandalf’s style of Warden.  My goal is to bend the stem so that the final orientation of the bit is generally on a parallel orientation with the plane of the stummel rim which is what is suggested by the ruler in the picture. I remarked earlier that the stem is also a little catawampus to the left as you look down the shaft toward the bowl.  Interestingly, I set up a renewed picture to show this looking down the shaft and my second look at this isn’t as pronounced as it appeared to me before.  The sanding and shank tapering may have mitigated this to some degree. Bending the stem is usually by trial and error to get it right, but the good thing is that the vulcanite stem is very forgiving!  To be on the safe side, though I don’t really believe it to be necessary, I put a pipe cleaner into the end of the stem to protect the airway integrity.I use the hot air gun to warm the vulcanite.  As it’s warming, I gently apply pressure to the bend as the rubber compound becomes supple.  When the stem becomes pliable enough and the bend reaches what appears to be at the right place as I eyeball it, I transfer the pipe to a chopping board where I can use the flat surface and the overhang for the bowl and button expansion at both ends, I press down to straighten the shaft orientation as I hold the bend.  This works very well. The first time around, I decide I need a bit more bend, so I reheat, bend further and then hold the stem firmly against the chopping board until the vulcanite sufficiently cools so that I don’t lose the bend.  To make sure the bend holds I run cool tap water on the stem to seal the bend.I like the results!  The bend is perfect and will present a true Gandalf experience for the new steward of the Churchwarden taking shape.Before I put the newly bent Warden aside to turn to the stummel, I apply paraffin oil to vitalize the vulcanite.Turning now to what was a ‘throwaway’ stummel, I like the grain that made an appearance after the cleaning.  It’s in there!  It just needs some TLC to restore it to the condition that allowed for more beauty to come through.  The briar surface is in surprisingly good condition. There are a few dents and nicks to be expected. There’s a more significant heel bruise where it appears the bowl was thumped on a hard surface.The rim has an attractive inwardly sloping cant which will serve to my advantage in dealing with the residual burn marks and the right side (top in the first picture) of the rim.  The outer edge of the rim is also chewed up a bit. Starting with the rim, I begin by using a coarse 120 grade paper to clean and remove the scorched wood and the dents on the edge.  I follow this with 240 grade paper sanding the canted rim surface.  I’m hopeful this will remove the blemishes but also serve to freshen the rim canted pitch and lines.  I then fine tune with 600 grade paper. The results are great.  The transformation is more than hoped for!  The rim is actually very attractive and some grain peeking out.I do the same with the heel bruise.  I dispatch the blemish quickly with 240 grade paper followed by 600 grade paper.Continuing the sanding, I now sand the entire stummel using sanding sponges.  I start with a coarse sponge, followed by a medium grade then finish with the light grade sanding sponge.  The briar grain is showing up!Following the sanding sponges, I apply the full regimen of 9 micromesh pads.  First, I wet sand using pads 1500 to 2400 then dry sand with pads 3200 to 4000 and 6000 to 12000.  For a ‘throwaway stummel’ this piece of briar is looking very nice. Throughout the micromesh process, I knew I was approaching a decision point.  The natural briar came out way more than I had thought possible when I began with this stummel.  I can remain with the natural briar or apply a dye.  I decide to apply Fiebing’s Saddle Tan Pro Dye to the stummel not for the purpose of covering blemishes but to bring out the briar grain more which is still somewhat subdued as I look at it.  I assemble my desktop dying components.  After I wipe the stummel with alcohol to clean the surface, I insert two folded pipe cleaners into the shank to serve as a handle.I then heat the briar stummel with an air gun.  As the briar heats, this expands the grain enabling the grain to be more receptive to the dye when it’s applied.Using a folded pipe cleaner, I paint the bowl with the aniline based dye in sections and flame each section as I go.  I use the lit candle to combust the painted section of wet dye and it immediately combusts the alcohol in the dye leaving the pigment to set in the heated wood.  I eventually apply the Saddle Tan dye to the entire stummel and repeat the painting and flaming process again to assure full coverage.  I then put the dyed and flamed stummel on the cork to rest through the night. With the dyed bowl resting I take the Churchwarden stem through the full micromesh regimen.  I wet sand using pads 1500 to 2400 and then dry sand with pads 3200 to 4000 and 6000 to 12000.  Between each set of 3 pads I apply a healthy coat of Obsidian Oil to the stem to vitalize the vulcanite.  The newly polished vulcanite pops!  I take one concluding picture instead of the usual 3 because the picture shows no detail because of the size of the stem!The next morning, I’m ready to unwrap the flamed bowl.  After mounting a felt cloth buffing wheel on the Dremel, I set the speed to the lowest possible to reduce the heating factor.  I then apply Tripoli compound to the bowl to remove the flamed crust to reveal the briar beneath. With the assistance of my wife, she takes a few pictures to show the initial removal of the flamed crust.  It takes me a good bit of time to slowly and methodically go through this ‘plowing’ and polishing process.  I remove dye blotches to make sure what is revealed is the minutia of the grain texture.  Not pictured is after I complete the process with the felt wheel (pictured below) I change to a cotton cloth buffing wheel and increase the speed of the Dremel to 40 % of full speed and again go over the entire stummel with Tripoli compound.  I do this first, to reach into the crook of the shank that is too tight for the felt wheel to reach.  Also, I like the further fine tuning of the Tripoli compounds polishing of the briar surface.  The grain sharpens even more providing the contrasts between the harder and softer woods of the briar.I then wipe the bowl with a cotton pad wetted with isopropyl 95% to blend the dyed finish.  The wipe of alcohol evens out the finish and blends it.  Wiping with alcohol will also lighten the finish if I continue to wipe, but I like the tone of the hue where it is so I only to a light wipe for blending purposes.I switch to another cotton cloth buffing wheel, keep the speed on the Dremel and 40% and apply Blue Diamond compound to the stem and stummel.  I don’t join the two because it is easier to work with each individually.  After completing the application of the compound, I wipe both stem and stummel with a felt cloth to remove the compound dust left behind.Finally, I reunite the Warden stem with the repurposed stummel and apply a few coats of carnauba wax to the Churchwarden.  When finished, I give the pipe a vigorous hand buffing with a microfiber cloth to bring out the shine.

Wow!  When I think of where this throwaway stummel was at the beginning of the process and what I see now, it is truly amazing. This Churchwarden’s 1/2 bent shank provides the perfect trajectory for the stem’s gentle, flowing bend to project a pipe that is truly Gandalf worthy!  The grain of the bowl is varied from a vertical flame, a knot with outwardly flowing concentric circles and some bird’s eye thrown in for good measure!  This Churchwarden is certified for Middle Earth distribution for Tina’s son, Thomas.  Tina commissioned  this Churchwarden project along with 3 other restorations (to learn more about commissioning pipes see: For “Pipe Dreamers” Only! ) and each will be boxed and heading to Birmingham, Alabama, USA, from Bulgaria.  All these pipes benefit our efforts here in Bulgaria working with women and girls who have been trafficked and sexually exploited – the Daughters of Bulgaria.  Thank you, Tina!, and thank you for joining me!


Replacing a Broken Tenon in a Dunhill 196F/T Shell Briar


Blog by Steve Laug

This is one of the Dunhill Shell Briar pipes that I sold earlier this year. It is a 196F/T Shell Billiard. Not too long ago I received an email from Bill the buyer of the pipe saying that there had been an accident and that the stem had broken off the pipe leaving the tenon in the shank. He was a bit forlorn in asking if it was repairable or not. I assured him that it could be fixed and told him to send it up to me in Vancouver. I had to laugh in that when it arrived it was in the original box that I had used to ship it to him – all the packing etc. was the same. Great use of the boxes. It will soon make its second trip to Bill. This is a well-traveled box and pipe – twice to the East Coast of the US from Canada and once back to me for repair. I put the pipe in queue as I have a large backlog of pipes to work on from several estates that the families are waiting on. I figured I would be able to slip into the work somewhere along the way.

Today was the day. I finished a lot of pipes lately so I felt ok about working on this one. I figured it would be pretty straight forward to pull the broken tenon and replace it. Boy was I wrong. The broken tenon was stuck in the shank. My usual tricks for pulling a broken tenon – a screw in the airway and wiggling it free – did not work. Even a trip to the freezer did not work. I had to resort to more serious tools.I got out my cordless drill and chucked up a series of drill bits to see if I could pull it that way. I have often found that in the process of drilling out the tenon it will stick to the bit and come out as I back out the drill. That did not happen on this pipe! I ended up working through the bits until I finally was finished and the mortise was smooth and clear of the old tenon.With the airway cleared in the mortise I measured it for a new tenon. Yet again another setback. I did not have any tenons that were the right diameter for the mortise! I chucked the PIMO tenon turning tool in my cordless drill and reduced the diameter of a threaded tenon replacement that I had in stock until it was the right diameter to fit the mortise. I tried to hold the tenon by hand and turn it but soon realized that did not work this time. I used a pair of needle nose pliers to hold it until the tenon was finished.When I finished there was a small hip between the threaded portion and the smooth portion of the new tenon. I worked the tool back and forth to remove that. I also held a needle file against the hip while the tenon was spinning on the drill. It did not take too long to remedy that issue. The new tenon was almost ready to use. I would still need to reduce the diameter of the threaded portion before I could use it but it was good for the moment.I drilled out the airway in the stem to receive the new tenon. This is always a little tricky as you need to keep the stem absolutely straight so that you do not angle the airway. I always start with a bit slightly larger than the airway and work my way up to the size of the tenon insert. In this case I also needed to be careful not to drill the stem too deeply as the tape is quite long and it would be easy to ruin the stem. With the airway opened in the stem to take the threaded tenon end I used a tap to thread the airway inside the bowl. I had to open the airway a little more so I used a penknife to widen the diameter to take the tap. I used a Dremel with a sanding drum to reduce the diameter of the threaded portion of the new tenon until it could be screwed into the stem.I coated the threaded end of the tenon with super glue and turned it into the end of the stem. I pressed it completely in place against the table top so there was not a gap. I filled in the slight gap with some clear super glue and laid the stem aside to let the repair cure.When the glue cured I addressed some oxidation at the shank end of the stem. I sanded it with 400 grit wet dry sandpaper until the oxidation was removed from the stem surface. I wiped the stem down with Obsidian Oil and let it dry.I polished the stem surface with micromesh sanding pads to bring back the shine to the vulcanite. I wet sanded it with 1500-2400 grit pads and dry sanded it with 3200-12000 grit pads. I rubbed it down with Obsidian Oil after each pad and a final coat after the 12000 grit pad. I polished the stem with Blue Diamond on the buffing wheel and gave it several coats of carnauba wax. I gave the bowl several coats of Conservator’s Wax. I buffed the finished pipe with a clean buffing pad to raise the shine. The finished pipe is shown in the photos below and I think it came out looking pretty good. I just got back from the Post Office and sent it back to Bill. I look forward to seeing what he thinks once it is in hand once again. Thanks for reading this.

New Life for a Sad, Old Kriswill Bent Egg


Blog by Steve Laug

The next pipe in the queue is from a group of pipes that Paresh purchased from a rag picker in Mumbai, India. The fellow had found a large number of pipes as he was going through rubbish bins and contacted Paresh. This is a tired and worn looking Kriswill. I knew looking at it even before the stamping was checked that this was a Kriswill because there is something distinctive about the shapes. The pipe is stamped (though it is faint now from wear) Kriswill Hand Made in Denmark. The pipe was filthy and unusable. I think it was from the generation who smoked a pipe to death and then pitched it. The finish on the pipe is very dirty and the sandblast is almost worn smooth. There is a thick cake in the bowl and a lava overflow on the rim top. I can see some damage to the inner edge of the rim but because of the cake and tars it is hard to know what the inner edge looks like. The stem was broken at the tenon and there was a very strange set up keeping the pieces together. I took photos of the pipe before cleaning it. The photos give a pretty clear picture of the shape of the pipe and its general condition when I received it. At first glance I thought that the tenon was broken off in the shank but as I examined it I came to believe it was even worse. It looked like someone had glued something in the shank and Gerry-rigged a connection to the stem. The photo below shows what I saw. What is not clear in the photo was a piece of metal in the centre of the mortise area. It looked like a tube but when I tried to push air through the shank it was absolutely plugged.I was going to have to try to drill out the shank but before I did that I examined the shank and stem more closely. The stem had been hacked pretty seriously so that the diameter was not even close to the diameter of the shank. In the centre of the mortise the metal tube turned out to be a 2 inch long finishing nail. It appears that the nail was used to keep the stem in place in the shank. For what? I don’t have an answer for that as it was utterly unsmokable. Once I removed the nail with a pair of needle nose pliers I was able to blow air through the shank. It was at least clear. I used a drill bit slightly larger than the mess in the shank and carefully drilled the shank. It did not work to clear out the shank! However, it was clear what was there – it was a tube made of masking or painters tape! I took a pen knife and twisted it into the mortise and was able to pull the tube free of the shank. The last photo shows everything that had been in the shank to hold the stem in place on the shank. I could surmise from the length of the stem what I would need for a replacement stem. I went through my can of stems and found one that had the right sized tenon and was the same length and width as the broken stem. It was a saddle stem instead of a taper but I liked the look of it on the pipe. I pushed it in place and took the following photos. I would need to reduce the diameter of the saddle, bend the stem and do a general cleanup, but it was a keeper. I took a photo of the stamping on the shank to show that it reads Kriswill. Underneath it says Hand Made in Denmark but that stamping is faint and only readable in a bright light or with a lens.With the stem chosen I set it aside to work on the bowl. I really hate working on dirty pipes! I can’t say enough how much I appreciate my brother Jeff doing the lion’s share of the reaming and cleaning before I even work on pipes… It is these few that I have to clean up that make me thankful and realize how much work he does before I get them here to restore. Thanks Jeff. The bowl had a thick cake and a heavy overflow of lava. It was obviously someone’s favourite pipe.I reamed the bowl with a PipNet pipe reamer using the smallest cutting head. The bowl on these old Kriswill pipes is conical so the PipNet only goes so far down the inside. I reamed out the bowl as far as the reamer would reach and then used Savinelli Fitsall pipe knife to finish the project. I scraped the rim top with the pipe knife to remove the majority of the lava and could see that the rim edges and top were damaged with burn marks.To remove the damage to the top of the rim I topped it on a topping board with 220 grit sandpaper. I worked on it to remove the burned areas and the damage to the inner edge of the rim as much as possible. I am happy with how it turned out.I lightly beveled the inner edge of the rim with a folded piece of 220 grit sandpaper to give it a cleaner look. The look of the bowl at this point is far better than when I started the rim clean up. I will still need to polish the rim and match the stain to the shank end smooth portion. Fortunately for me this old Kriswill originally had a smooth rim top so it will look like new.I polished the topped bowl rim with 3200-12000 grit micromesh sanding pads. With each successive grit of micromesh the grain stood out more and gave a good finished look to the pipe. I liked what I saw when I looked at it. There was a little variation in stain colour between the rim top and the shank end so I decided to stain both to get a good blend. I used an Oak stain pen to match the colour of the shank and smooth spot where the stamping was. Once the stain had cured for that time I moved on to the next step in the process.It dawned on me at this point that I had been so intent on getting the plug out of the shank and topping the bowl that I forgot to clean out the shank! I normally do that right after reaming the bowl but forgot. It goes to show you that if you vary an habitual pattern even a bit you will leave steps out. I stopped the process and went back and cleaned out the shank and airway to the bowl with pipe cleaners, cotton swabs and isopropyl alcohol until the pipe was clean and smelled fresh.With the rim top and bowl polished and the shank and airway CLEAN, I worked some Before & After Restoration Balm into the surface of the briar with my fingertips to clean, enliven and protect it. I let the balm sit for a little while and then buffed with a cotton cloth to raise the shine. The following photos show the bowl at this point in the restoration process. The bowl and the rim top look really good and the darkening and lava are gone. The finish looks very good with the contrast between the rich, dark brown and the Oak stain on the rim and shank end. I am very happy with the results. With the bowl finished I set it aside and turned my attention to the stem. I used a file and a folded piece of 220 grit sandpaper to shape the diameter of the saddle portion of the stem to fit the diameter of the shank. It took a lot of filing and sanding to get it to this point but there is a lot of fine tuning work to do. The shank is not round but it is more of a vertical oval in shape so the stem will need to match it to have a seamless fit. It is a lot of hand shaping work to get the two to match. I sanded the scratches and the tooth marks on the stem with 220 grit sandpaper to bring the shank and saddle portion into line. I further sanded and shape it with 400 grit sandpaper to remove the scratches. This is the beginning of the polishing process on the stem. I wiped the stem down with Obsidian Oil and put it back in the shank to take progress photos. I polished the stem with micromesh sanding pads – wet sanding it with 1500-2400 grit pads and dry sanding it with 3200-12000 grit pads. I wiped the stem down with Obsidian Oil after each pad. I further polished it with Before & After Pipe Polish – both Fine and Extra Fine. I gave it a final coat of Obsidian Oil and set it aside to dry. This pipe has had quite a journey to this point in time and space. It somehow traveled from Denmark where it was made to Mumbai, India. There is was found abandoned, binned and found by a rag picker who then sold it to Paresh in another region of India. From Paresh it traveled to me in Vancouver, Canada. In April it will travel to Nepal with me and back Paresh in India. I only wish that it could tell its story. All I know is that I have extended its life of usefulness and given its purpose back as it was intended.

I polished stem with Blue Diamond polish on the buffing wheel. I gave the bowl multiple coats of Conservator’s Wax and the stem multiple coats of carnauba wax. I buffed the pipe with a clean buffing pad to raise the shine. I hand buffed it with a microfiber cloth to deepen the shine. The pipe polished up pretty nicely. The contrasting grain came alive with the buffing. The rich contrasting browns and black colouring works well with the new, polished black vulcanite stem. The finished pipe is a beauty and feels great in the hand. Have a look at it with the photos below. The dimensions are Length: 5 ½ inches, Height: 2 inches, Outside diameter of the bowl: 1 inches, Chamber diameter: 5/8 of an inch. I will be taking this pipe with me to India soon and giving it back to Paresh. Thanks for walking through the restoration with me on this battered and weary Kriswill.

Finishing the Restoration and Restemming a Custom-Bilt Billiard


Blog by Steve Laug

Not long ago I was speaking with Paresh and Abha on Facetime and they showed me a second pipe that they wanted me to finish for them. This one was a Custom-Bilt billiard that had come to him from the estate of his Grandfather. It had a threaded tenon stem and a shank that had no threads. I have never seen a Custom-Bilt with a threaded mortise and tenon so it was a fair assumption that the stem was not original. It had been wrapped with glue and tape to make it fit in the shank and the fit was awful. Paresh wanted me to fit a new stem on the pipe for him. Abha had done a magnificent job cleaning the pipe so it was really a simple restoration for me – just fit a stem and finish the bowl. The briar was clean and lifeless so it would need some attention to breathe life into it again. He wanted me to pick up where he had left off and finish the pipe for him. The pipe was stamped on the left side of the shank Custom-Bilt and on the underside it was stamped Imported Briar. It would be interesting to see what I could do with it. When the pipe arrived this is what it looked like. You can see the remnants of wrapping and glue on the metal threaded tenon. There were tooth marks in the surface of the vulcanite stem on both the top and underside near the button. The first photo below shows the rim top and the inside of the bowl. Both were very clean and the rustication was in great condition as were the inner and outer edges of the bowl. The second photo shows the end of the shank with the glue on the inside of the mortise and the lack of threads that would be present if the tenon that was on the stem would work with this pipe.I took some photos of the stamping on the left and underside of the shank. The left side reads Custom-Bilt and the underside reads Imported Briar.I took close up photos of the stem. You can see the metal tenon on the end of the stem. There is some oxidation and there are the tooth marks on the stem top and underside.I wanted to refresh my memory on the history of the brand. I knew that his one was one of Tracy Mincer’s pipes because of the hyphenated name stamp. I looked on Pipedia and read Richard Esserman’s write up on Bill Unger’s Book. He gives a great summary of the history there. I quote a section of it below. (https://pipedia.org/wiki/Custom-Bilt(Rich Esserman))Tracy Mincer started the original Custom-Bilt pipes it appears in 1934. Bill meticulously details the start of the Company, how it was financed, the changes in the original ownership, how the company distributed its product, the manufacturing process, certain patented items, and other interesting stuff.

Mentioned briefly in this chapter was the fact that Custom-Bilt was producing big, carved pipes using Algerian briar for production up to WW II. One important employee, Hetzer Hartsock, stated: I can tell you something about that rough texture that Custom-Bilt had. One reason rough textured was used was not only for looks but it could hide flaws in the briar. [The process gave] A very uncontrolled cut. Then he [Tracy] would buff it out. [page 25]

Custom-Bilt pipes retailed between $5.00 and $15.00 in the 1940s. According to an ad, standard Dunhill pipes were selling for $12.00 and $13.50, Parker pipes $7.50, GBD for $6.00 and Comoy’s $7.50. Not mentioned was that special Dunhills could retail up to $100 and certain Comoy’s up to $25.

In 1946, the name was changed to Custombilt after Mincer began an association with Eugene J. Rich, Inc. There were some big changes in advertising and distribution. The slogan “AS INDIVIDUAL AS A THUMBPRINT” began at this time as well.

In the early 1950’s, Tracy Mincer developed severe financial problems that caused him to stop making the Custombilt, and he lost the name. In 1953, Leonard Rodgers bought the company and emphasized tobacco pouches and butane lighters. (However, it appears Mincer was working on his new pipe, the Doodler.) In 1968, Rodgers sold the Company to Consolidated Cigars. In the early 1970s, Wally Frank Co. bought the Custombilt trademark and began to produce their version of the pipe in 1974 or 1975. Hollco Rohr owned the Weber pipe factory, located in New Jersey, and produced the Custombilt pipes there. In 1987, the pipes were made out of the Butz-Choquin factory (France) and then Mexico until the late 1990s. Currently, the Custombilt name is owned by Tobacalera of Spain.

I set the bowl aside and decided to work on the stem. The diameter of the stem was perfect for the pipe so I needed to remove the metal threaded tenon and replace it with a Delrin tenon. I heated and scraped away all of the glue and tape on the threads of the tenon and those that bound it to the stem. I held it tight with vise grip pliers and turned the stem. It would not come out no matter how I turned or pulled on it. I decided I would have to use more drastic measures. Using the vise grip pliers as a vise I set up my cordless drill to drill out the tenon. I started with a bit slightly larger than the airway in the tenon and drilled it. I was hoping it would catch and pull the tenon out. First bit was a failure. I worked my way up to a bit slightly smaller than the diameter of the tenon and worked on it. The extended portion of the tenon broke off and I was left with the piece in the stem. I drilled it out with a bit and the bit grabbed the piece and it all came out.Once the metal was removed from the stem I cleaned out the hole in the stem with alcohol, cotton swabs and pipe cleaners to remove the debris. I smoothed out the threads to leave grooves in the tenon insert. Once I had it smoothed out enough I tried it in the stem. The fit was perfect. I cut deeper grooves in the tenon with a file and coated it with black super glue. I pressed it into the stem and lined it up so the fit was straight.  I set it aside to let the glue cure. While the glue cured I worked on the bowl. I scraped the glue out of the inside of the mortise using a pen knife. The glue had hardened so it took repeated scraping to get rid of it and bring the mortise back to bare wood.When the glue cured I tried the fit of the stem in the mortise. The stem fit well on the shank. I put it in place on the shank and took photos of the pipe at this point in the process. I rubbed down the briar with Before & After Restoration Balm. I worked it into the smooth surface of the briar with my fingertips and into the rustication patterns with a horsehair shoe brush to clean, enliven and protect it. I let the balm sit for a little while and then buffed the bowl with a cotton cloth to raise the shine. The following photos show the bowl at this point in the restoration process. The grain is really starting to stand out. I polished the stem with micromesh sanding pads – wet sanding with 1500-2400 grit pads and dry sanding with 3200-12000 grit pads. I wiped the stem down after each pad with Obsidian Oil to remove the sanding dust on the vulcanite. I wiped it down with a final coat of Obsidian Oil and set it aside to dry. I polished stem and bowl with Blue Diamond to polish out the remaining small scratches. I gave the bowl and the stem multiple coats of carnauba wax. I buffed the pipe with a clean buffing pad to raise the shine. I hand buffed it with a microfiber cloth to deepen the shine. The pipe polished up pretty nicely. The natural oil finish works well when polished to really highlight the variety of grains around the bowl and shank. The polished black vulcanite stem works together with the beautiful grain and worm trail rustication in the briar to give the pipe a rich look. The finished pipe is shown in the photos below. The shape, finish and flow of the pipe and stem are very well done. The dimensions are Length: 5 3/4 inches, Height: 1 3/4 inches, Outside diameter of the bowl: 1 1/2 inches, Chamber diameter: 3/4 inches. I will be sending the pipe back with the others that belong to Paresh. I have one pipe left to finish for him. Thanks for walking through the restoration with me as I worked over this well-made Tracy Mincer Custom-Bilt.