Blog by Steve Laug
A while back I received a small box of pipes from a fellow pipeman who wanted to donate them to support the non-profit organization I work for – the SA Foundation (www.safoundation.com). The organization has been providing long term recovery, housing and job training for women who have escaped sexual exploitation and trafficking. For over thirty years the work has gone on and thousands of young women and their children have been empowered to start over with skills and options. The work is currently in 7 countries and 12 cities around the world. If you are interested give the website a look.
Now back to the pipes. There were eight total pipes in the lot that he sent me. The first one I restored was a large Irish Second 05 Calabash that is heading off to Michigan. The second pipe was a Peterson’s Kapet pipe in a shape 124 (https://rebornpipes.com/2021/08/16/restoring-a-republic-era-petersons-kapet-124/). The third pipe was a very Danish looking Made in London, England Sandblast Acorn. (https://rebornpipes.com/2021/08/17/restoring-a-very-danish-looking-made-in-london-england-acorn/). The fourth pipe was a Bromma Bent Billiard with a screw on bowl (https://rebornpipes.com/2021/08/18/restoring-what-looks-like-a-swedish-bromma-pipe/). The fifth pipe is a Canadian Made Paradis Pipe (https://rebornpipes.com/2021/08/19/restoring-canadian-made-paradis-rustic-246-bent-dublin/). The sixth pipe was an unsmoked small carved figural meerschaum that is for sale on the rebornpipes store (https://rebornpipes.com/rebornpipes-store/meerschaum-pipes-smooth-figurals/). The seventh pipe was a Medico Ventilator Bent Billiard (https://rebornpipes.com/2021/08/20/restoring-a-sandblast-medico-ventilator-bent-billiard/). All of the pipes were in clean condition and had been lightly reamed.
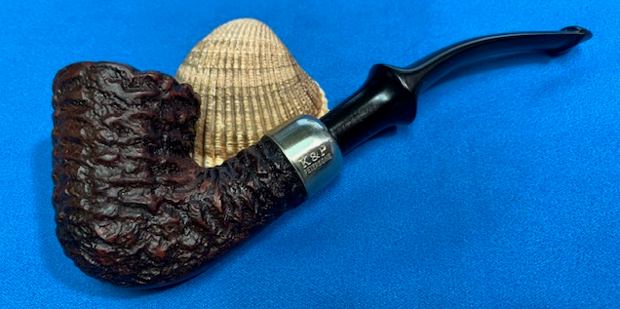
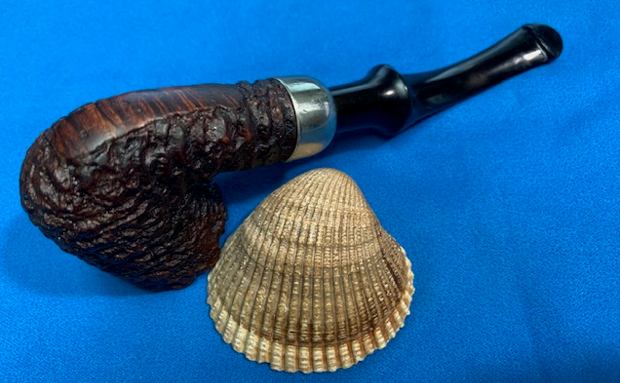
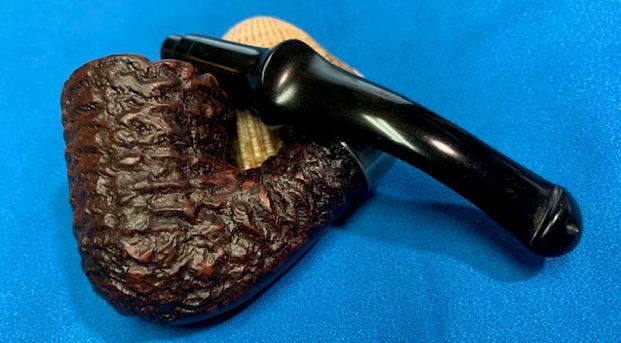
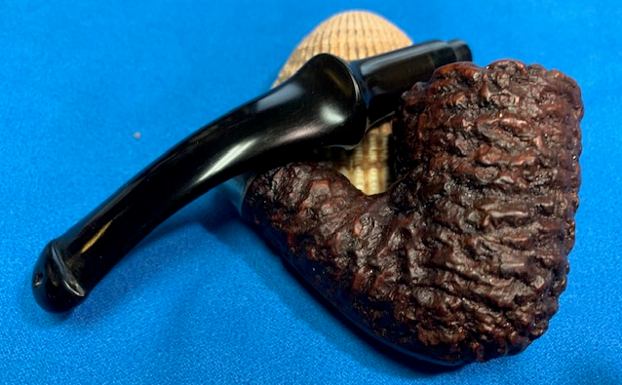
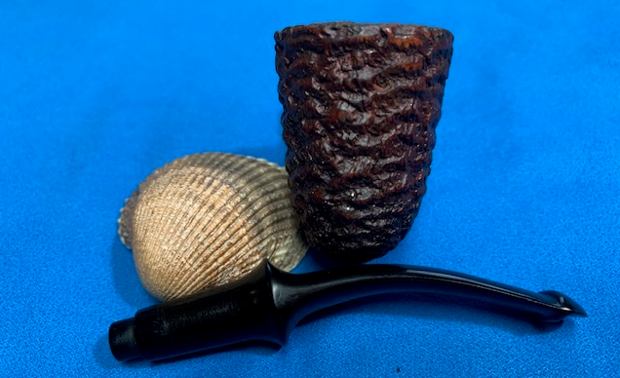
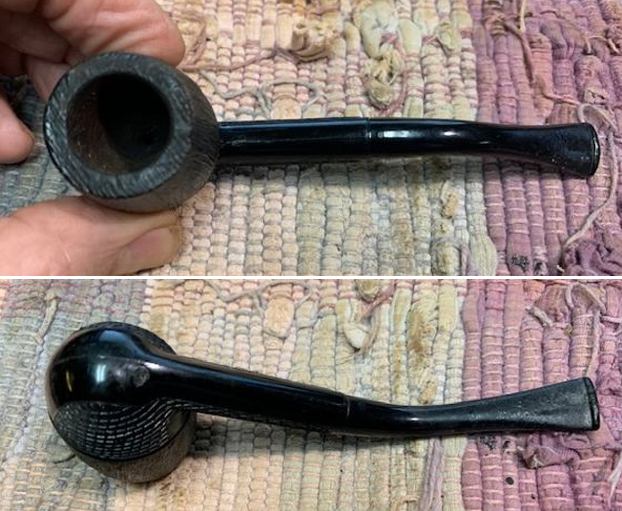
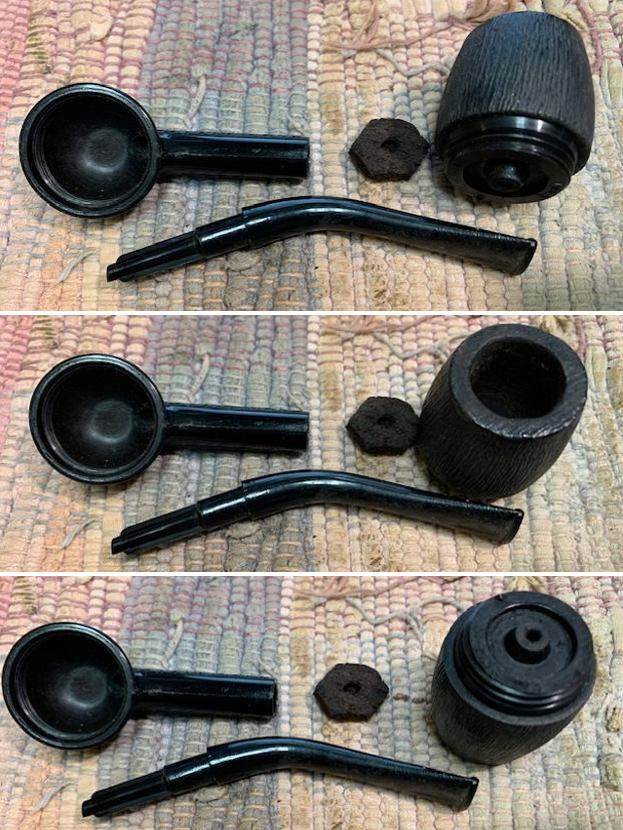
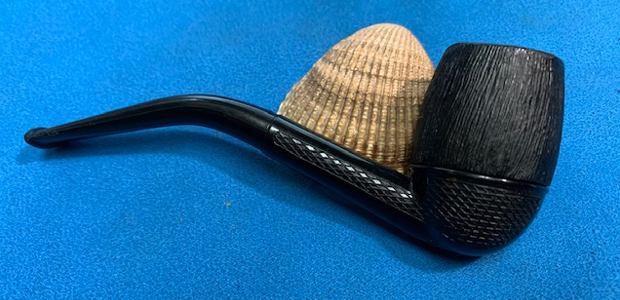
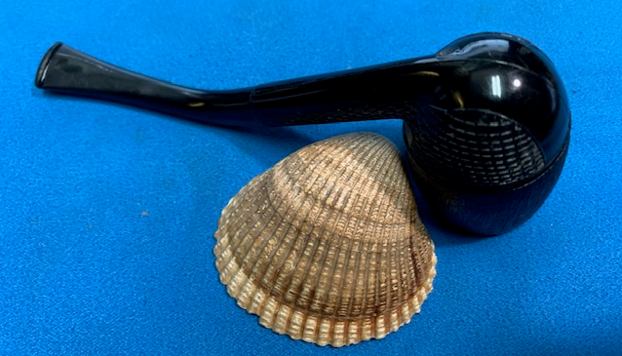
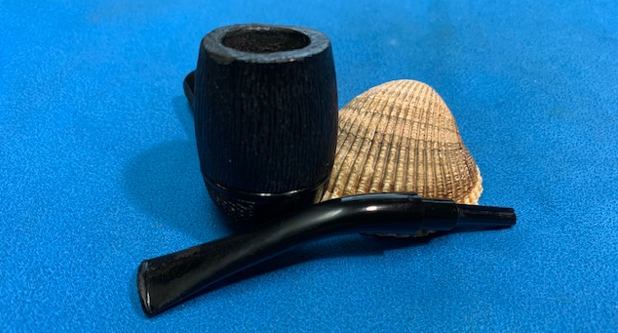
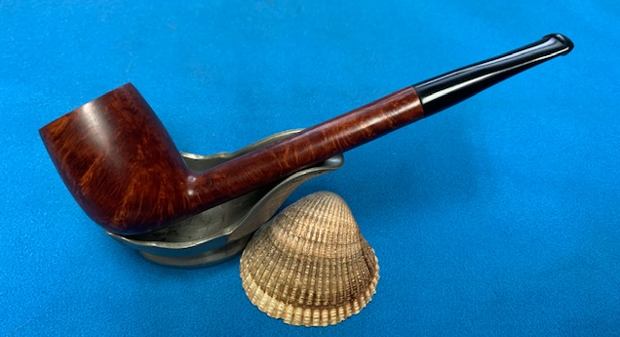
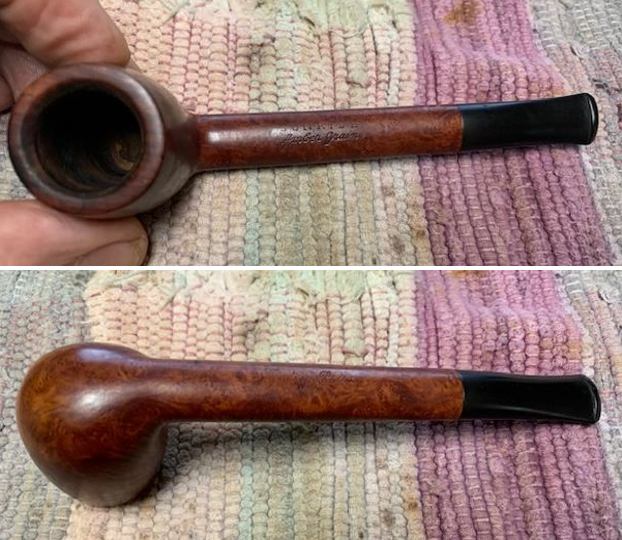
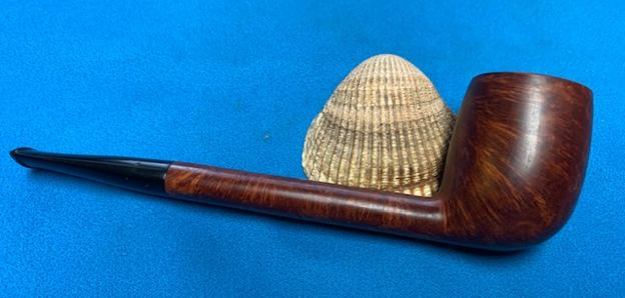
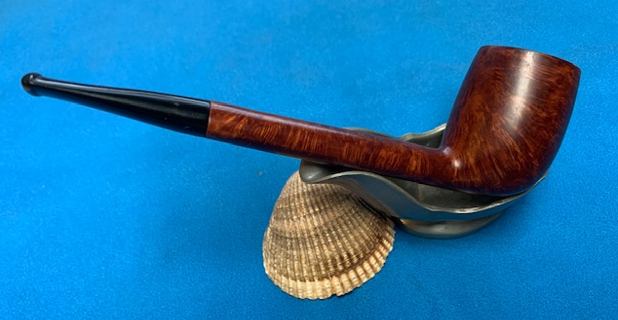
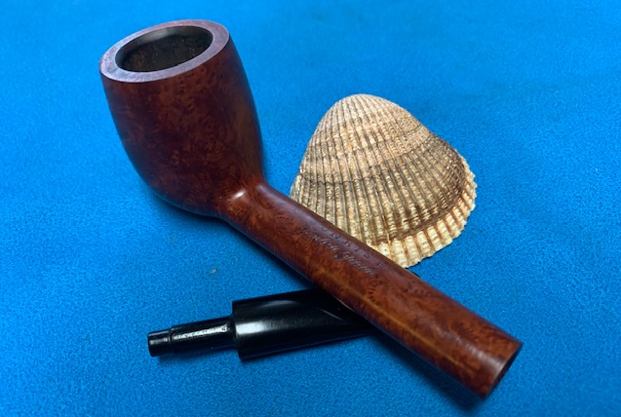
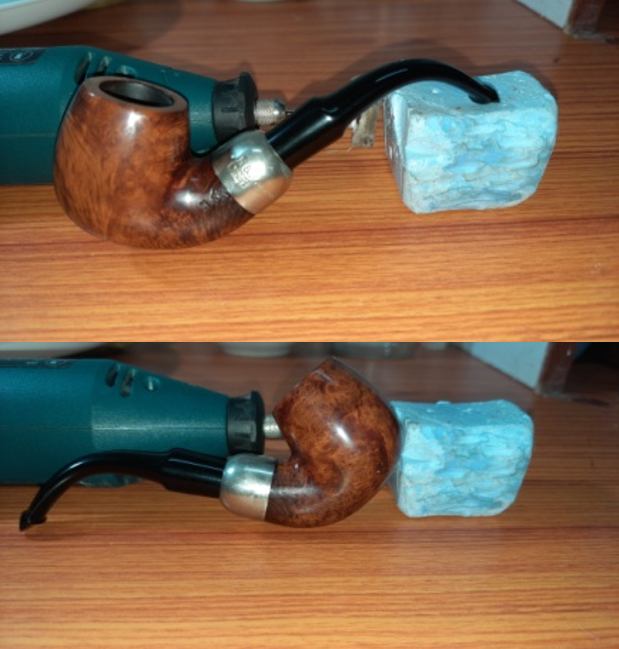
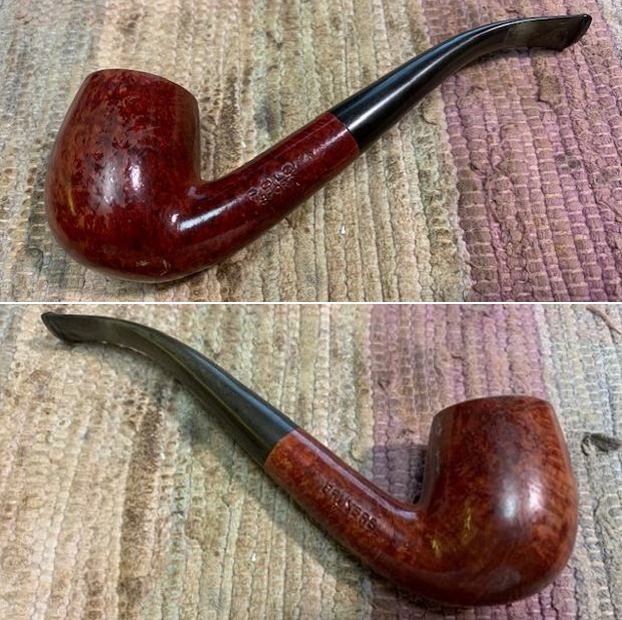
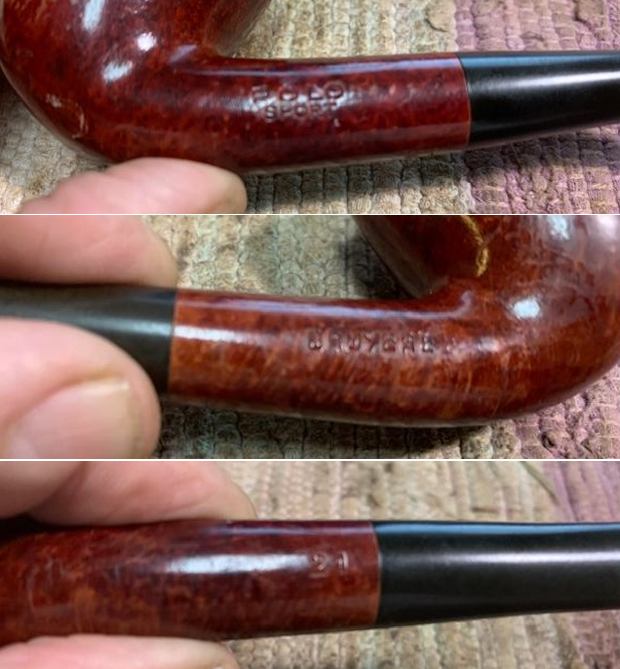
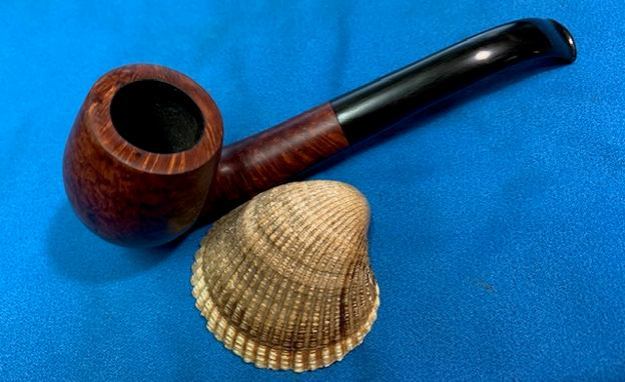
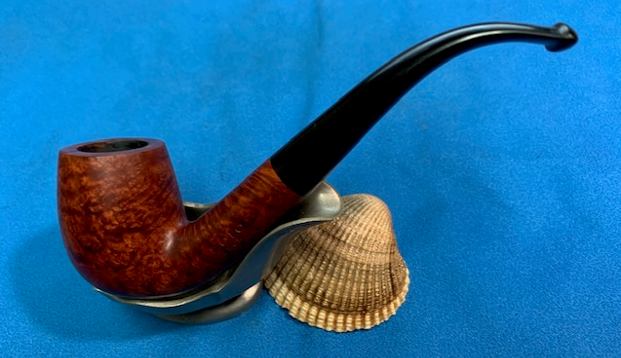
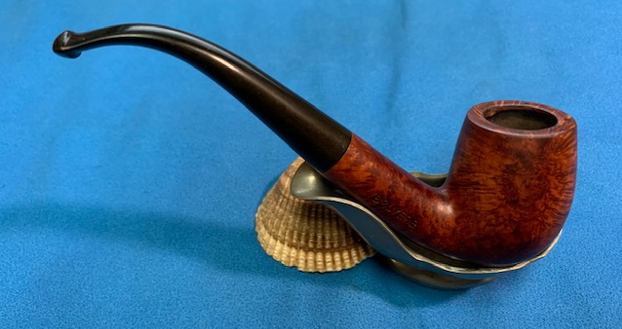
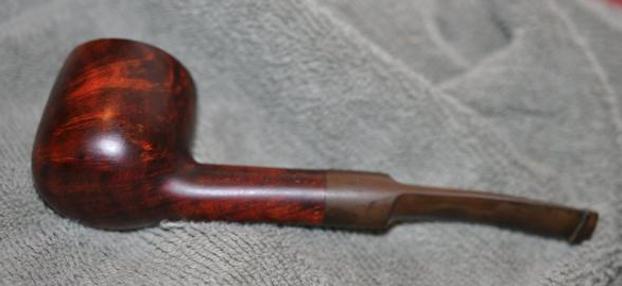
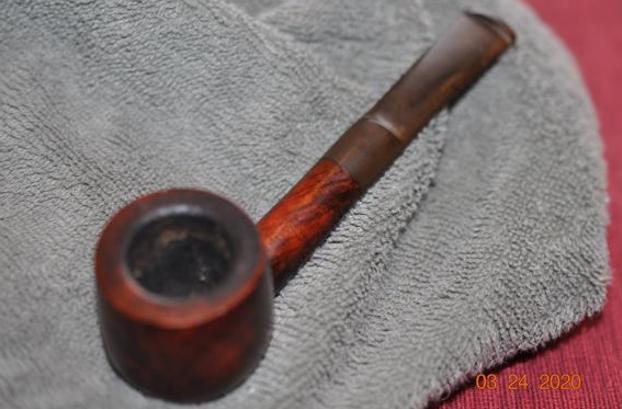
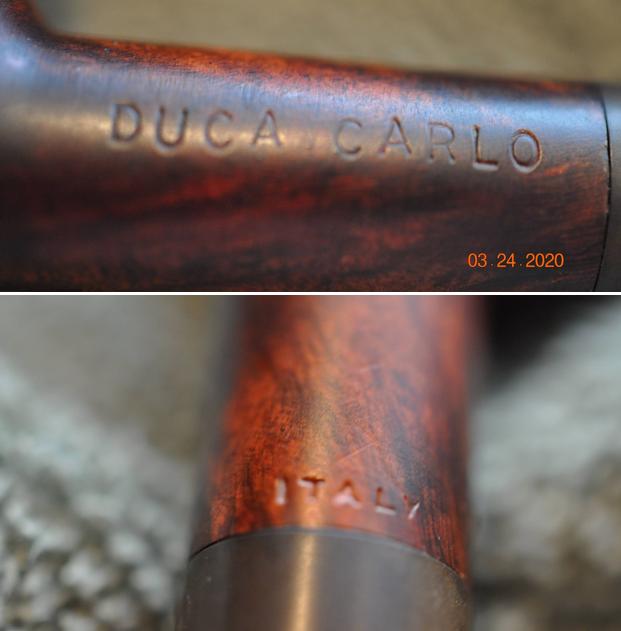
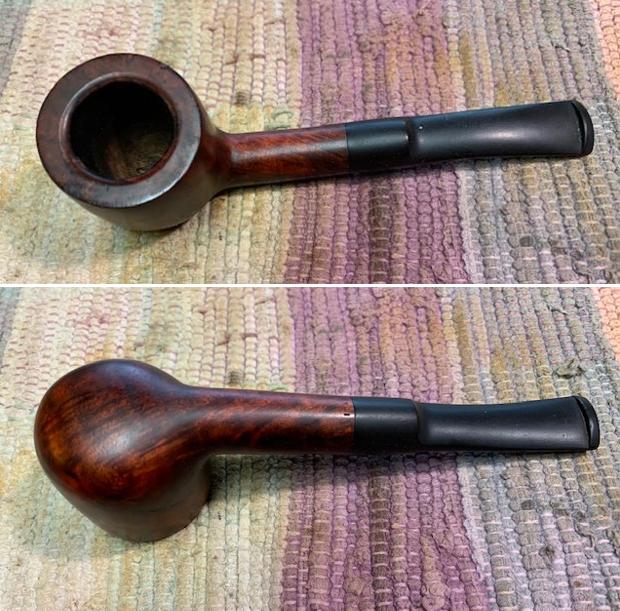
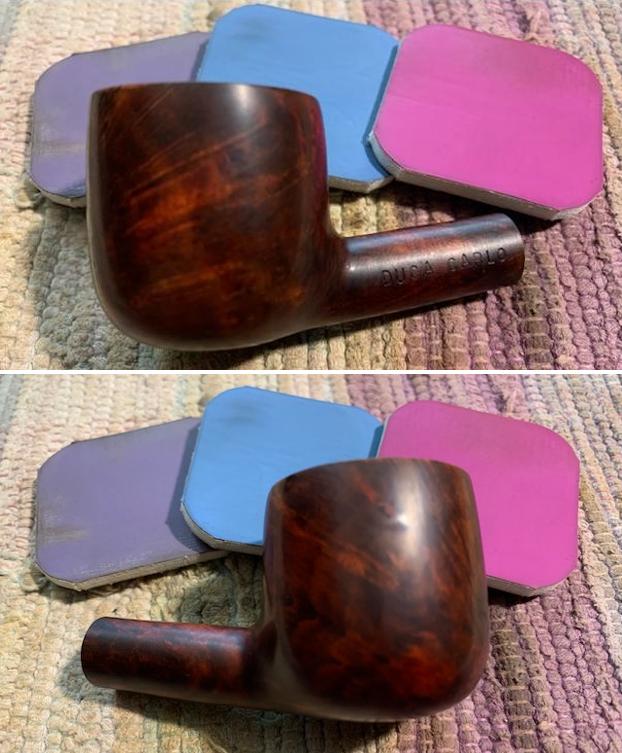
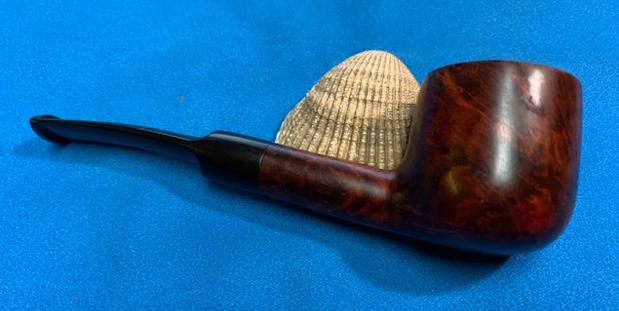
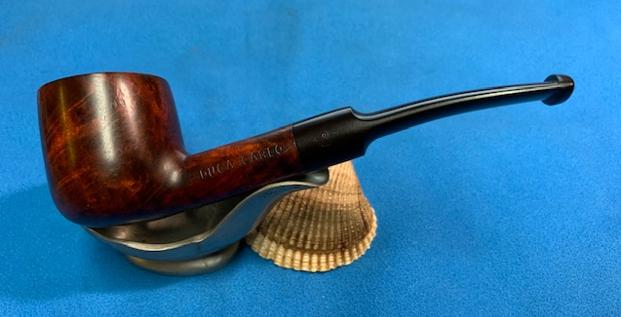
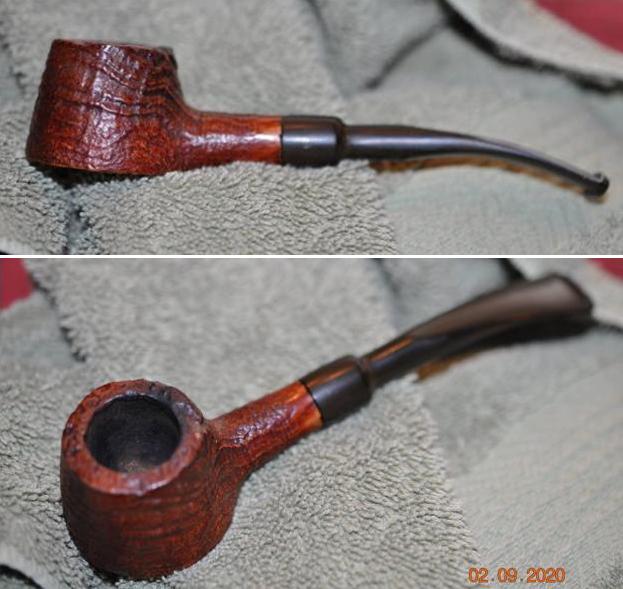
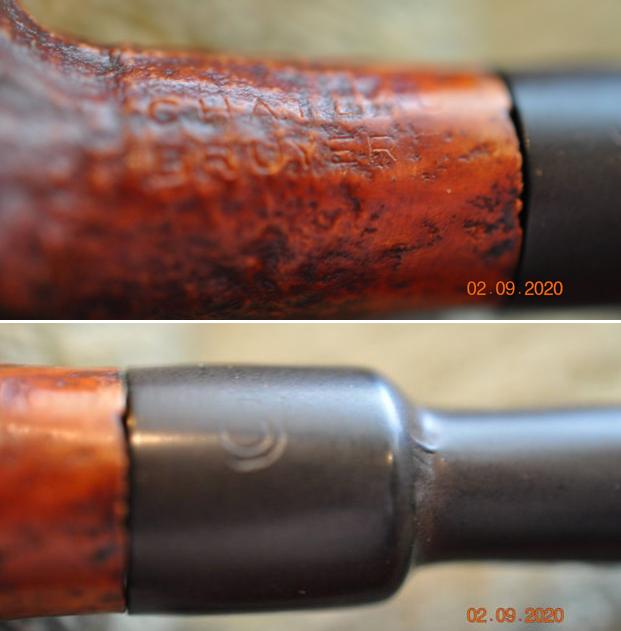
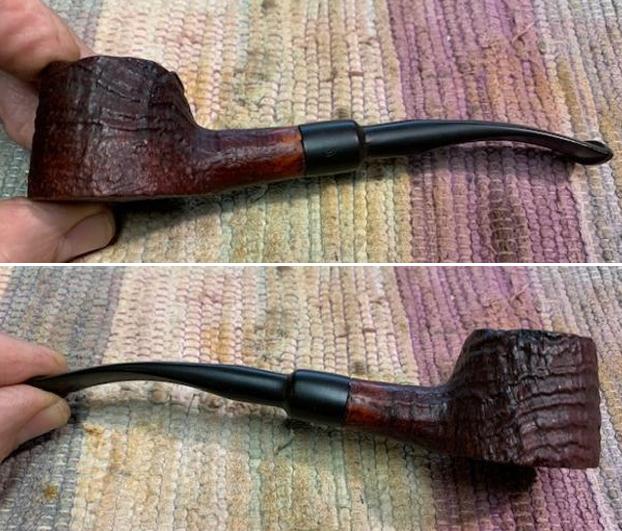
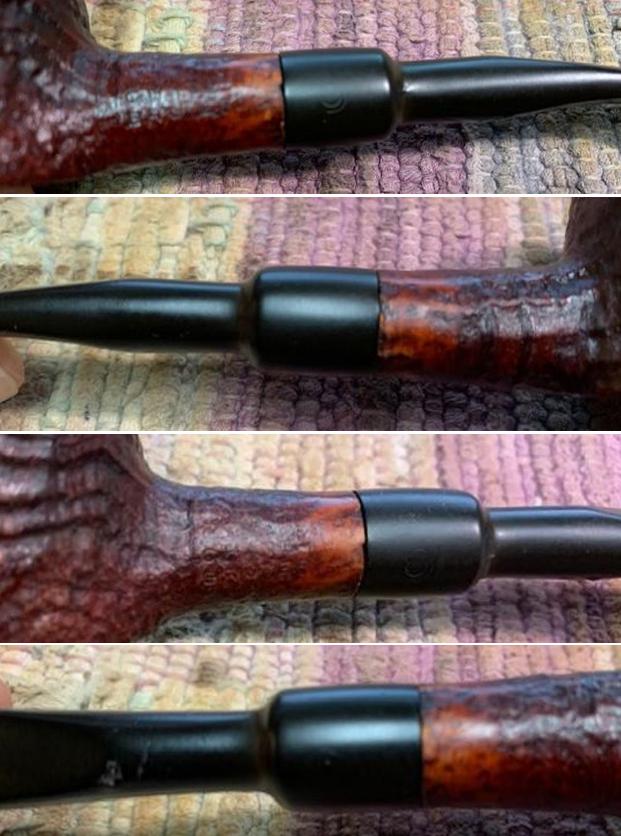
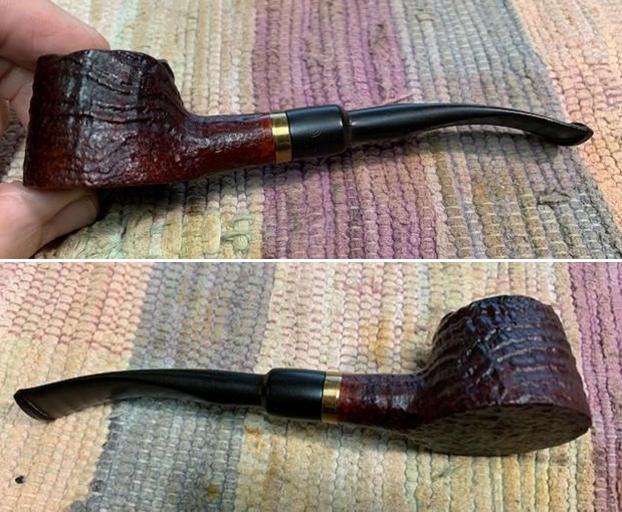
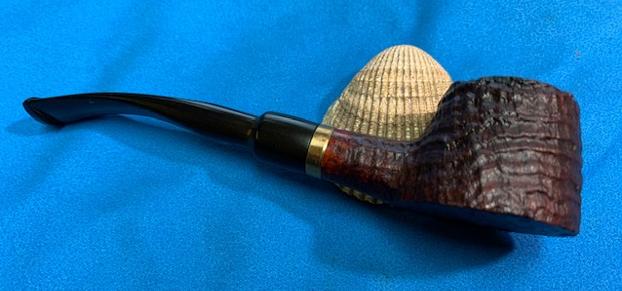
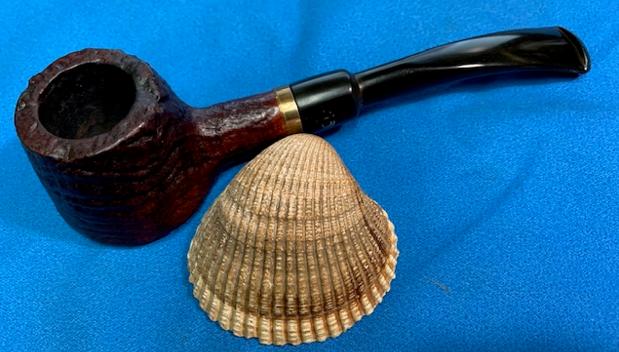
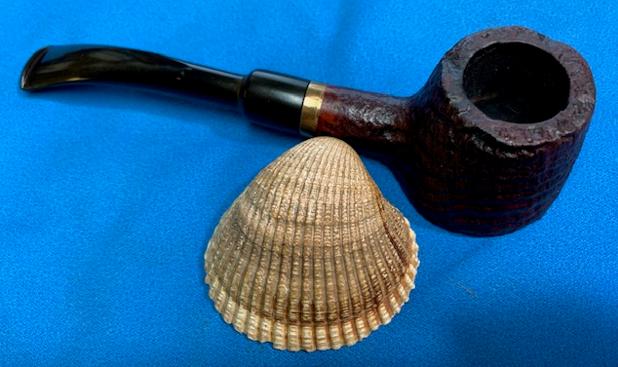
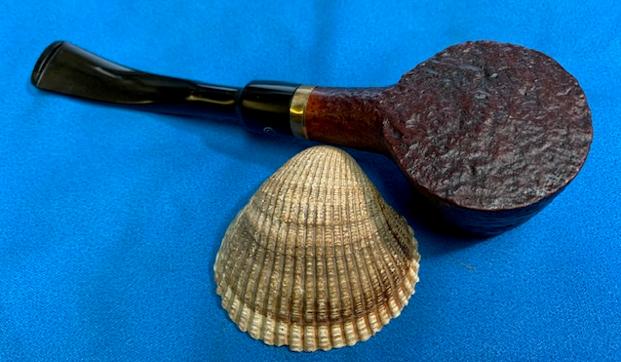
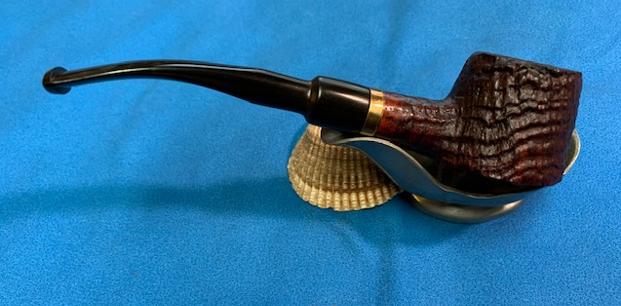
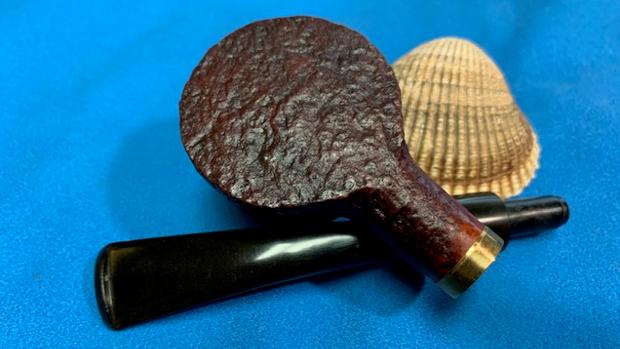
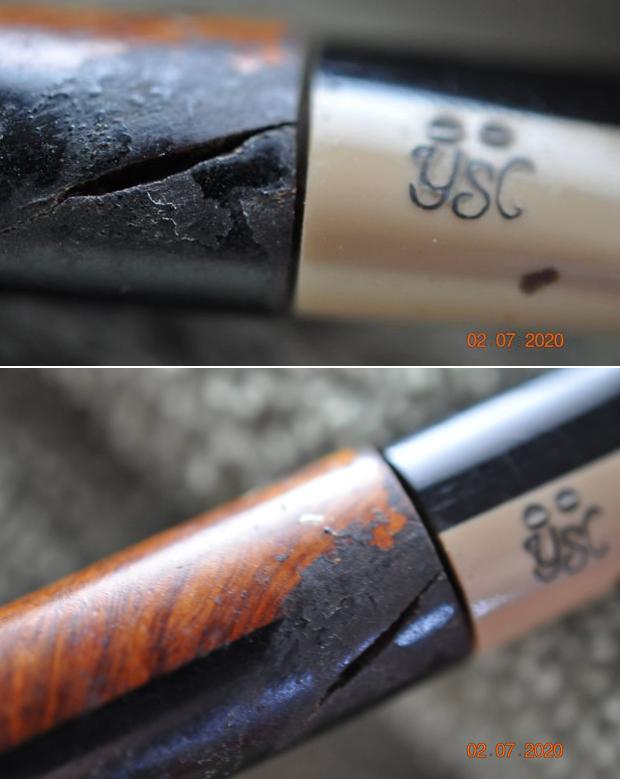
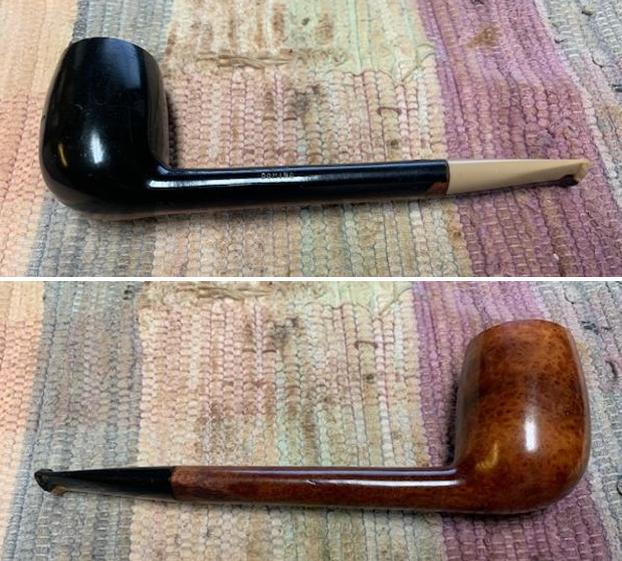
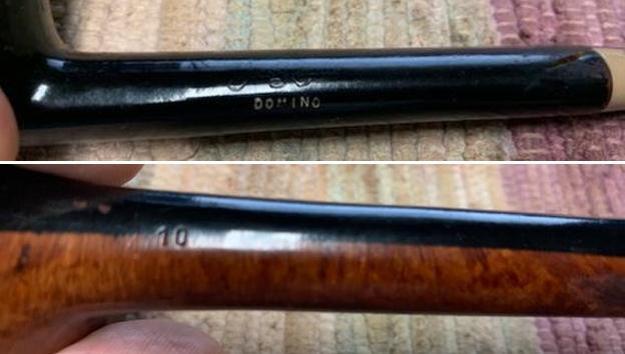
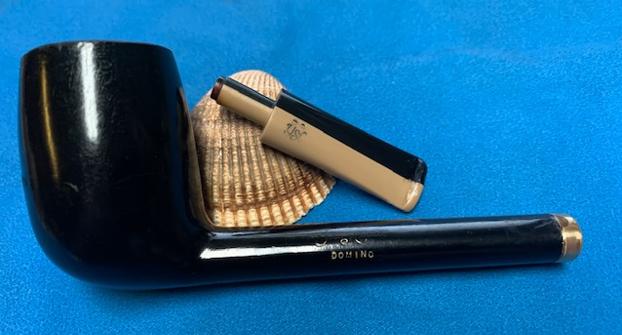
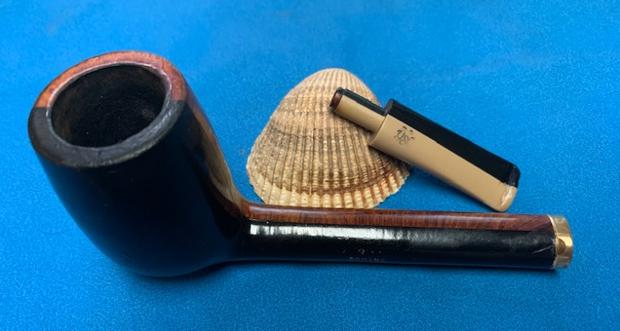
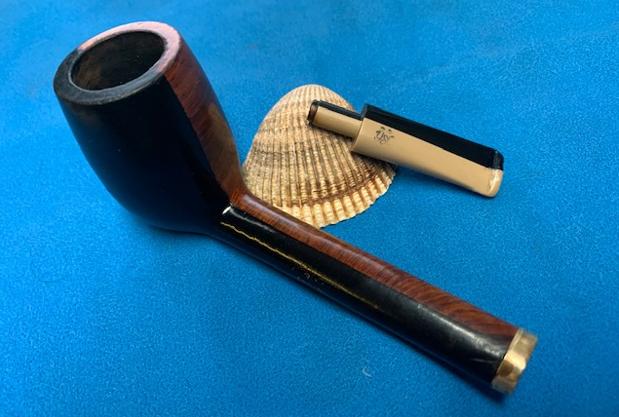
The next pipe, the eighth and final one is a bent Peterson’s System Standard 305 Rusticated Bent Dublin. The pipe was clean on the inside but dusty on the sandblast finish. The classic Peterson rustication was very well done and quite rugged. The rim top and edges looked very good. The pipe was stamped on the shank and read Peterson’s [over] System [over] Standard. That is followed by the stamping Made in the Republic of Ireland in three lines. Finally at the end of the smooth panel is the shape number 305. The nickel ferrule was stamped on the left side and read K&P [over] Petersons. The vulcanite P-lip stem had a small hole in the topside ahead of the button that looks like a bite through. There is a lot of tooth chatter and marks on both sides ahead of the button. There was no P stamp on the side or top of the stem. I took some photos of the pipe before I started my clean up work on it.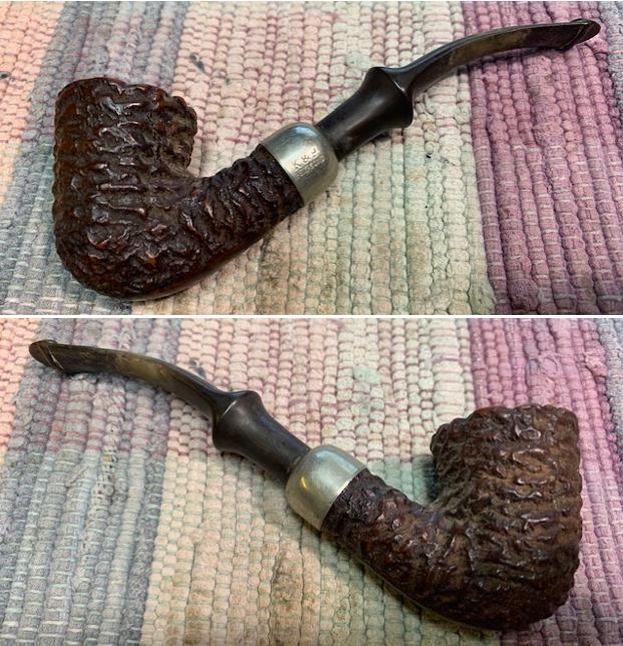
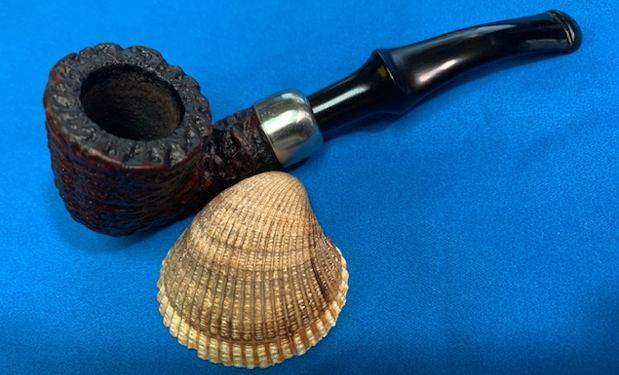
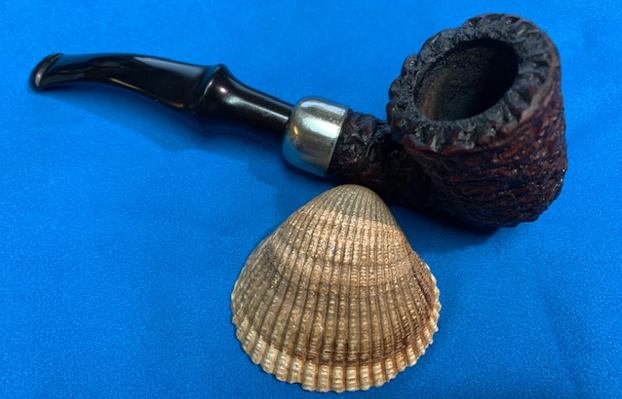
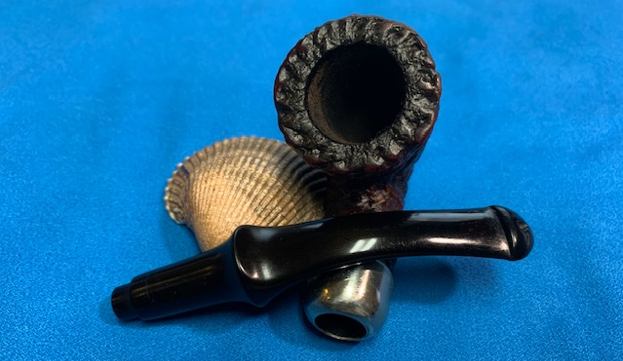
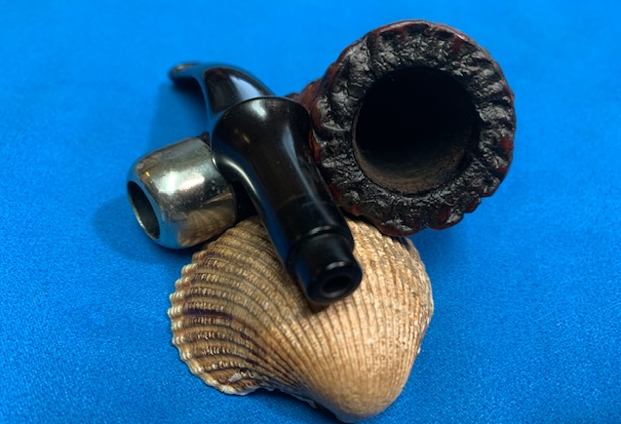
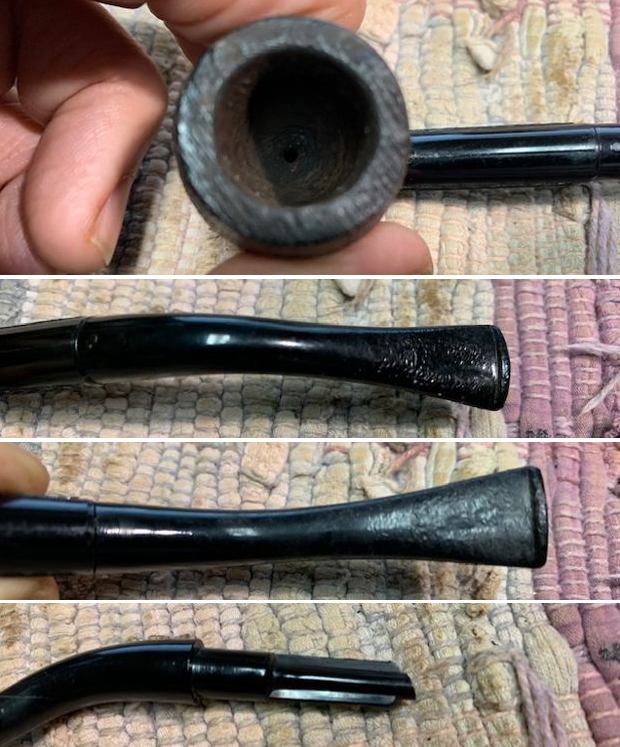
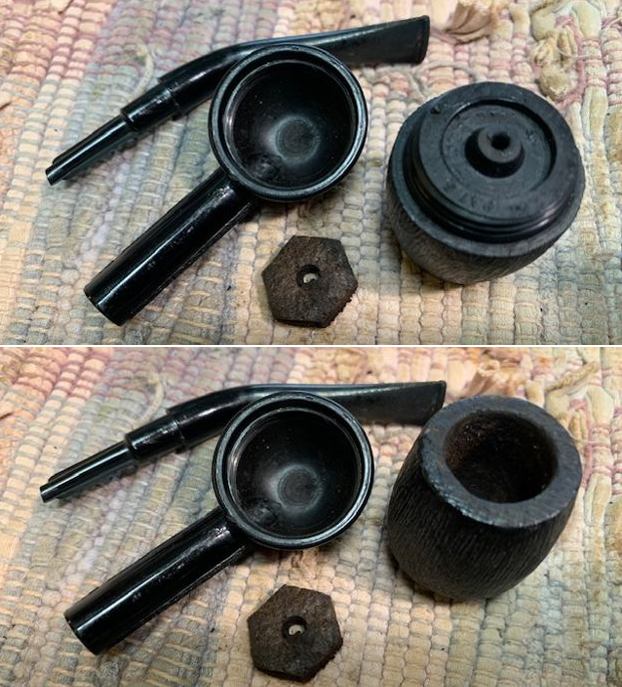
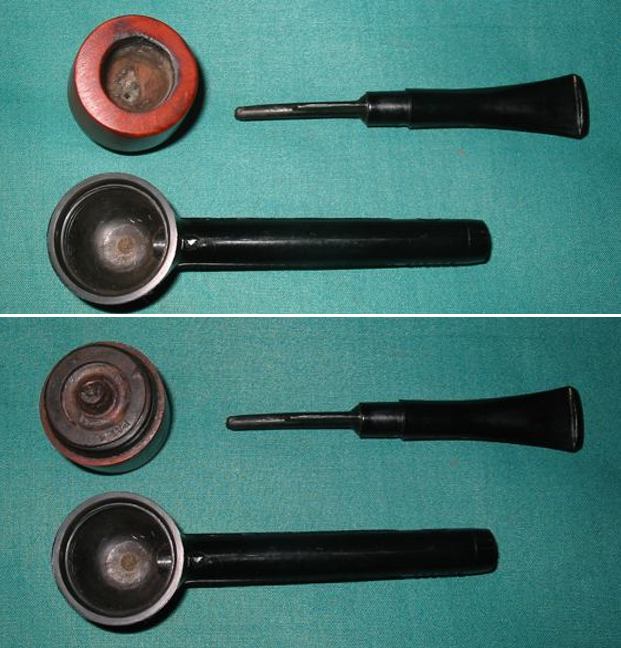
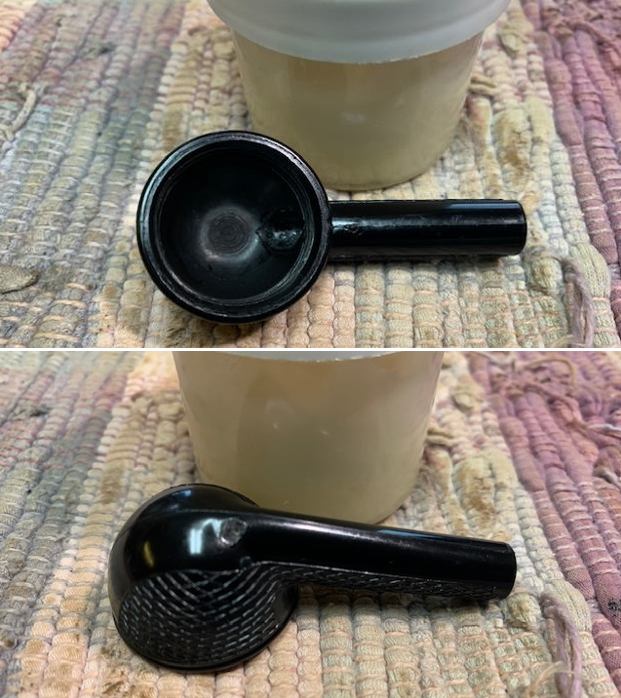
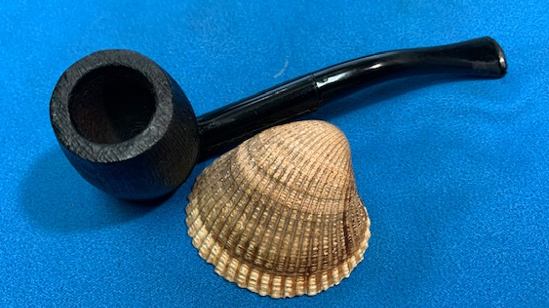
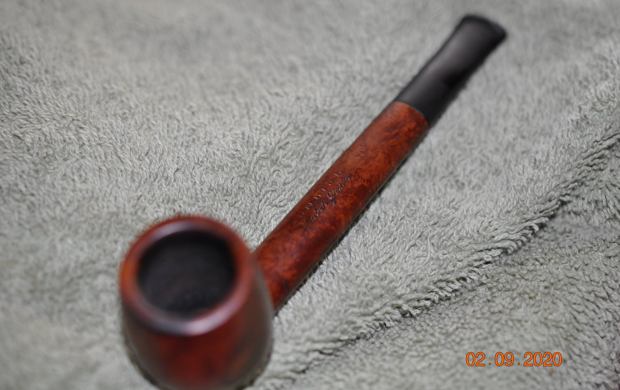
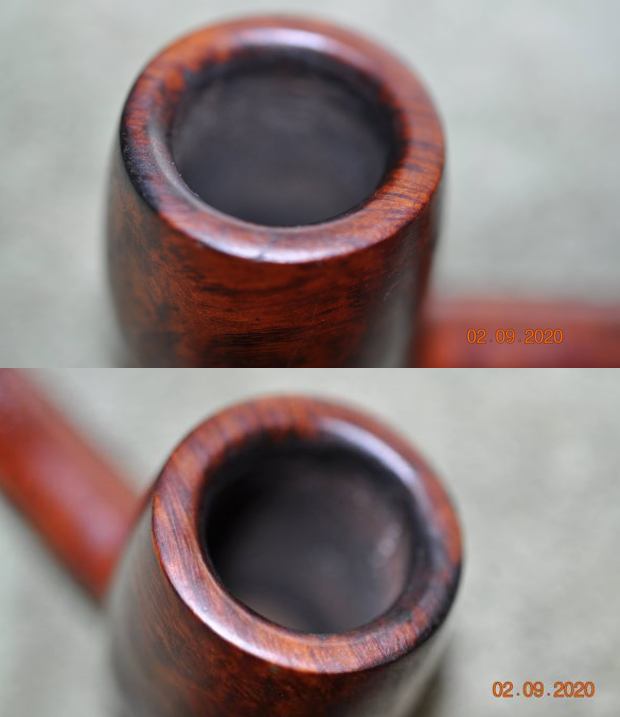
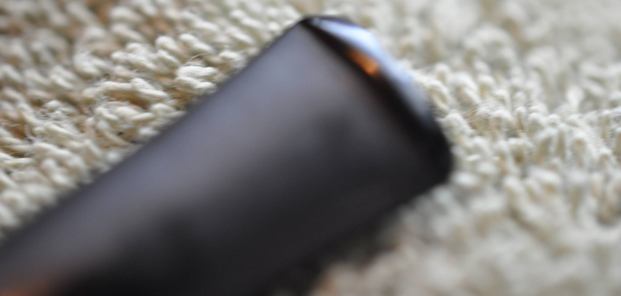
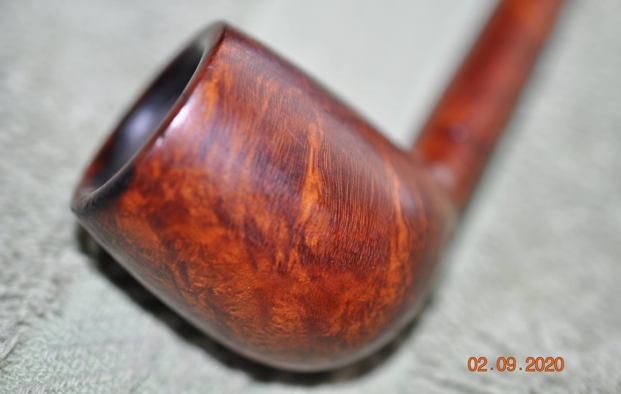
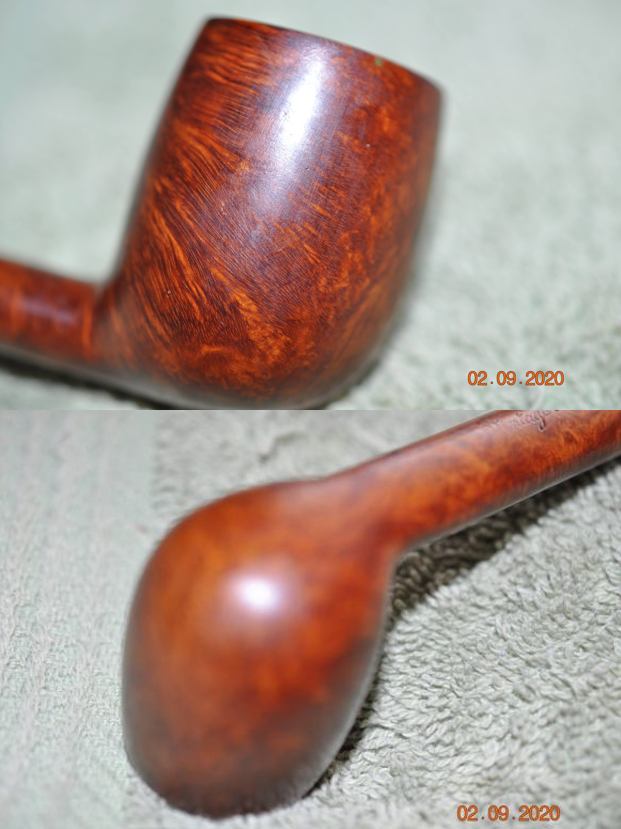
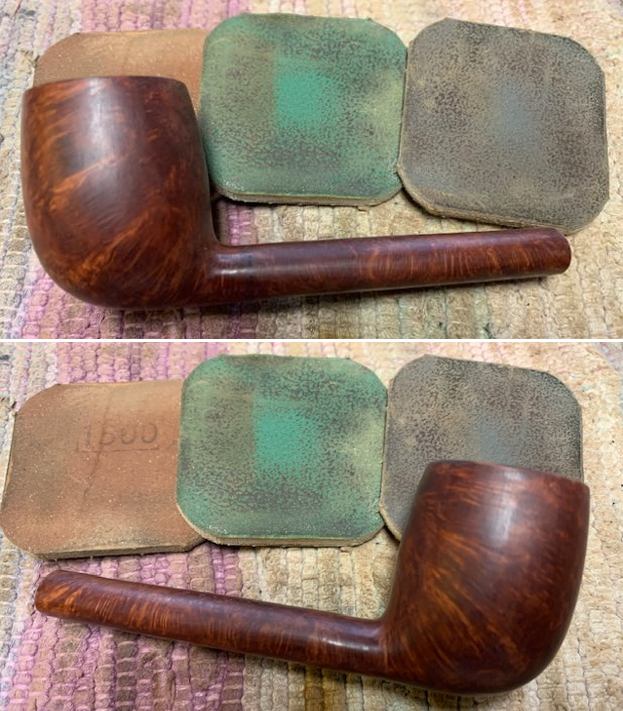
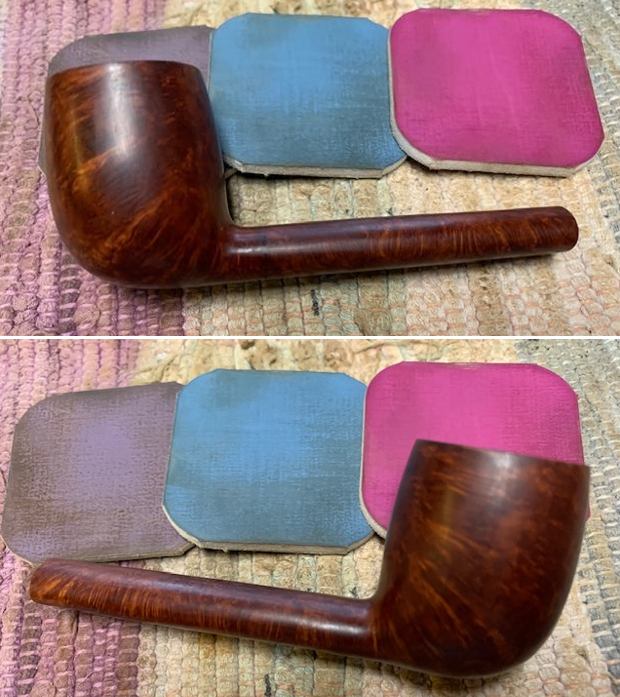
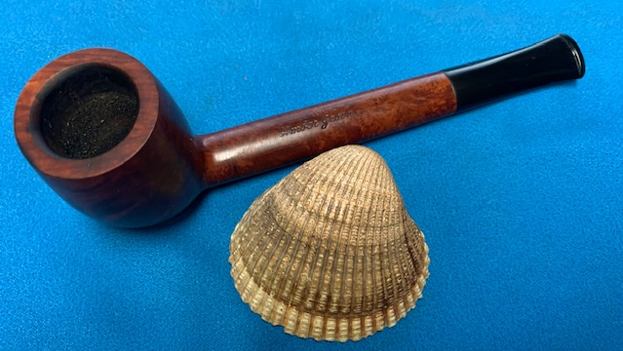
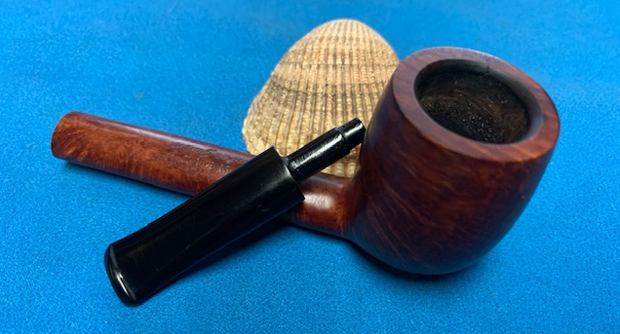
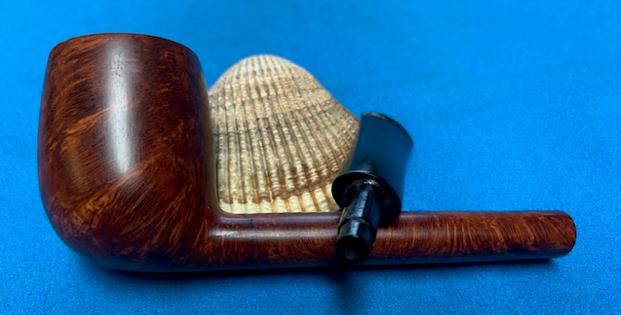
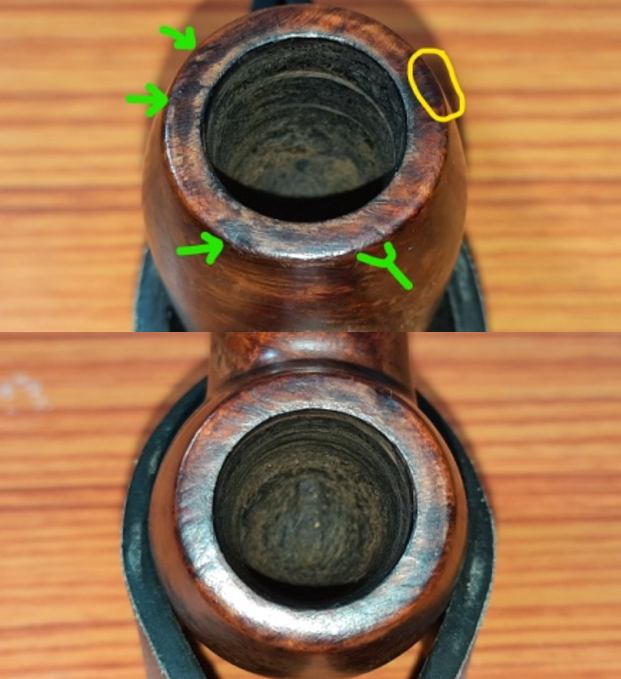
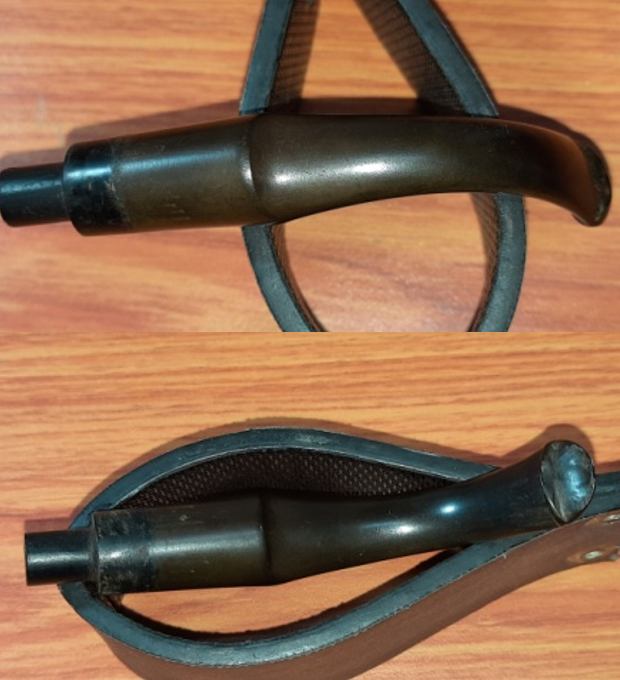
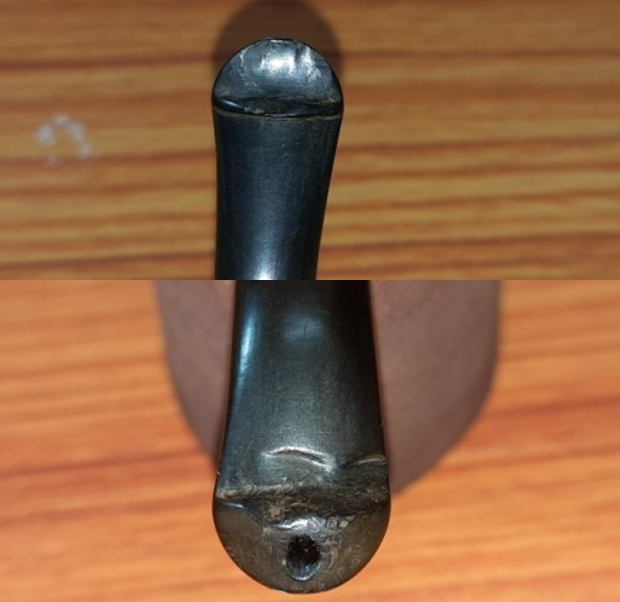
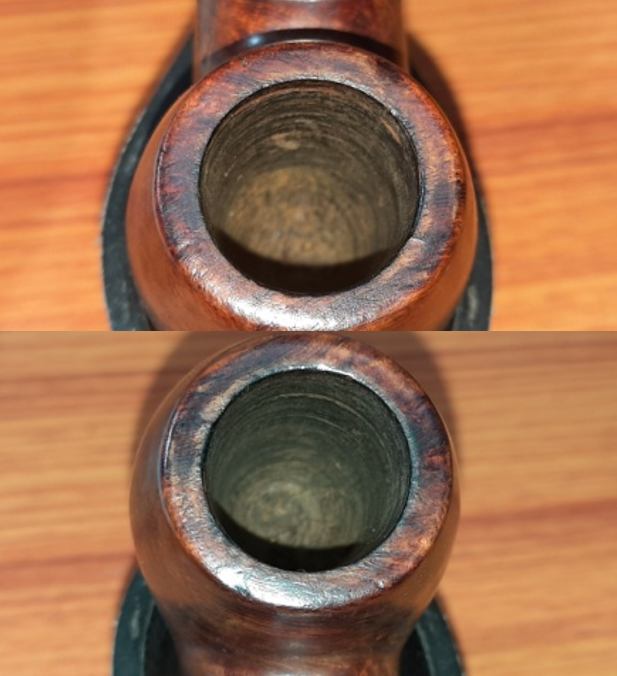
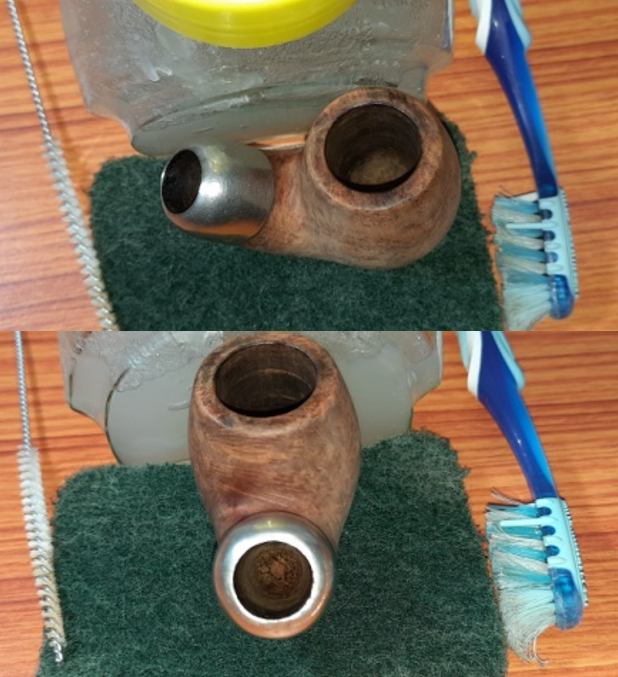
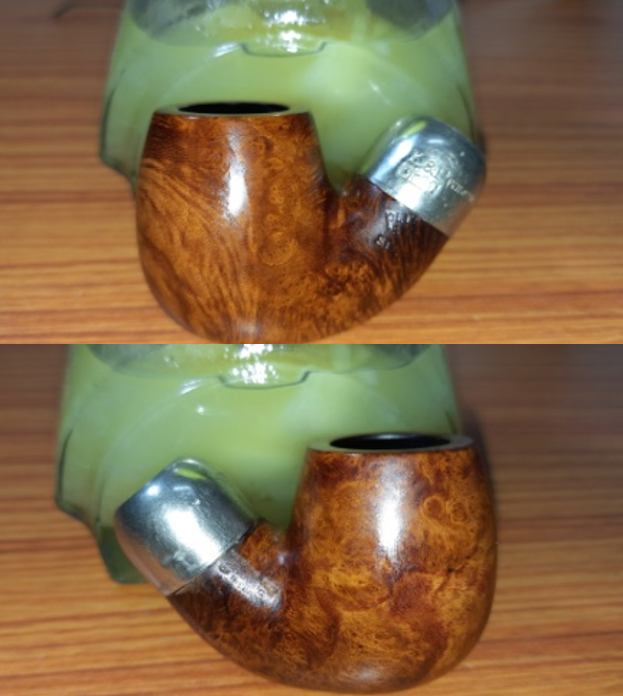
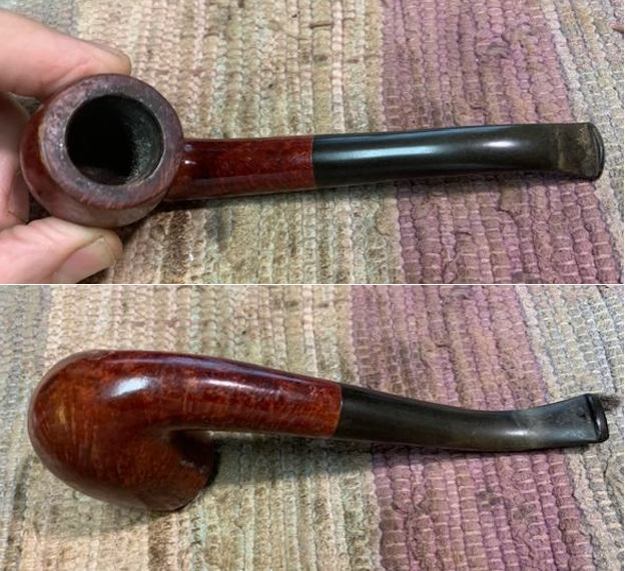
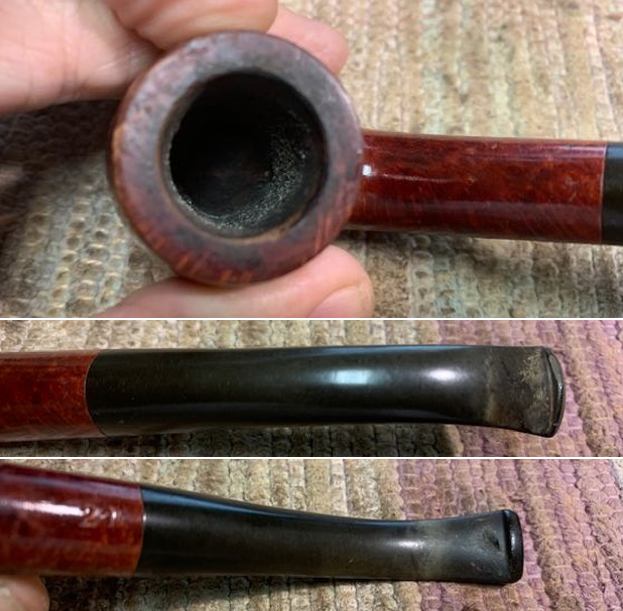
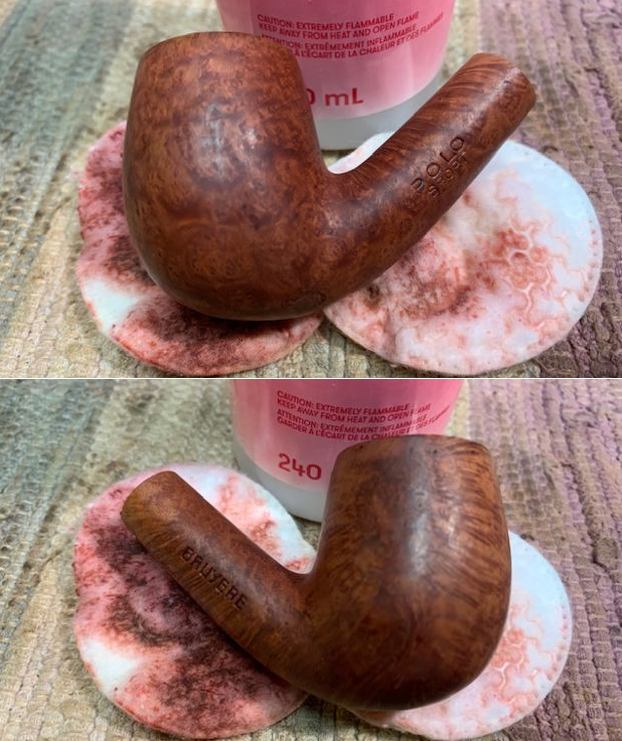
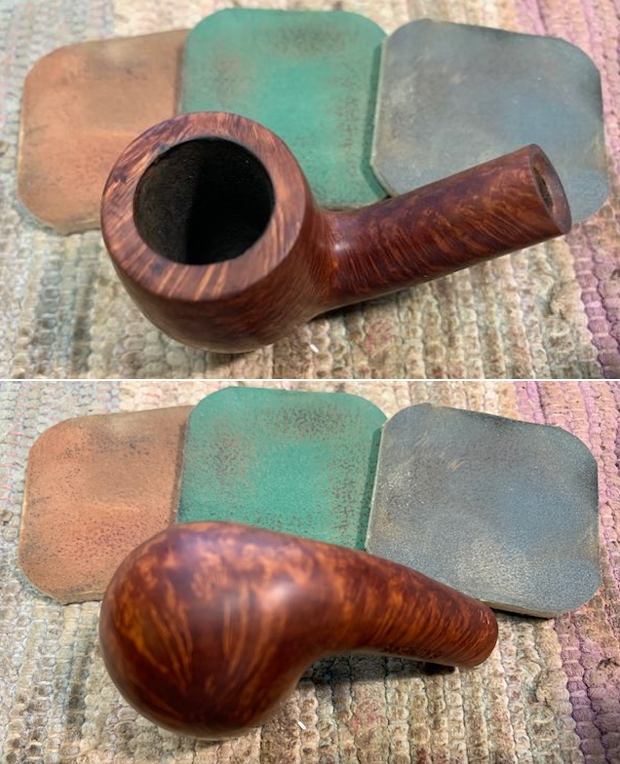
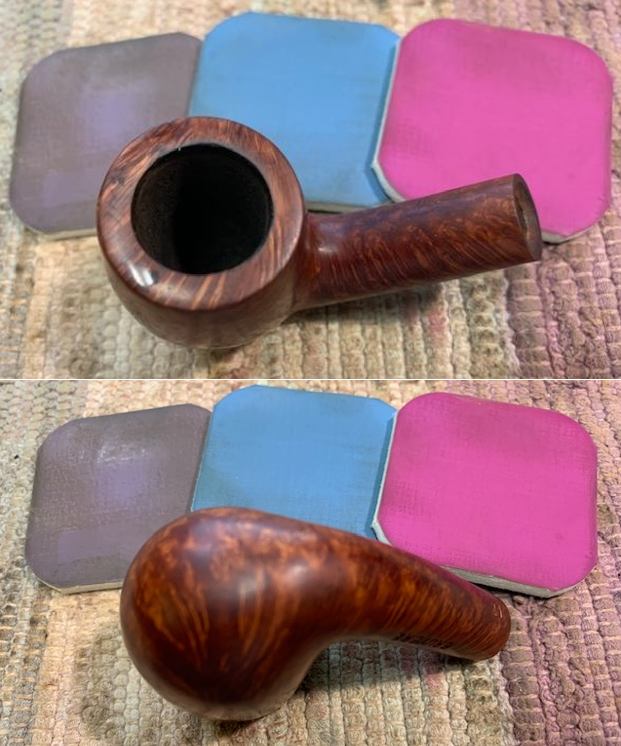
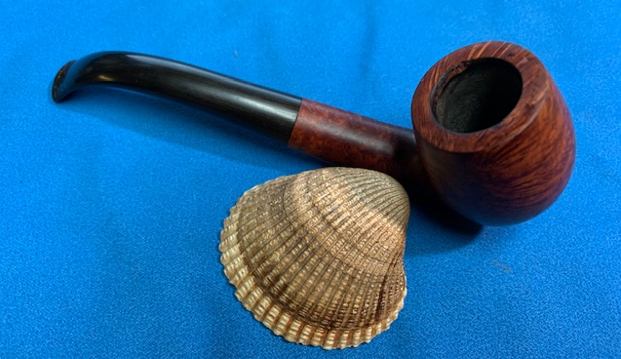
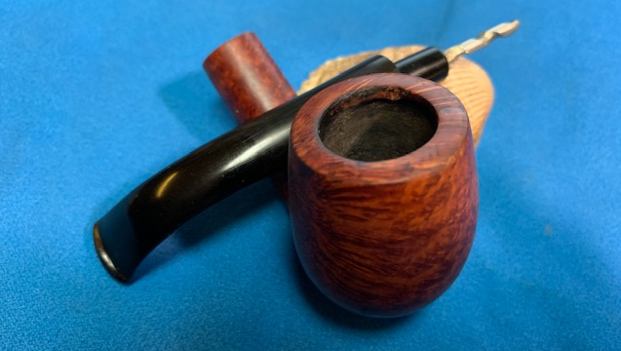
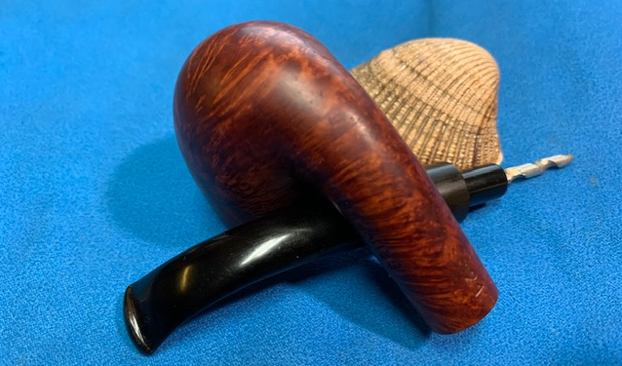
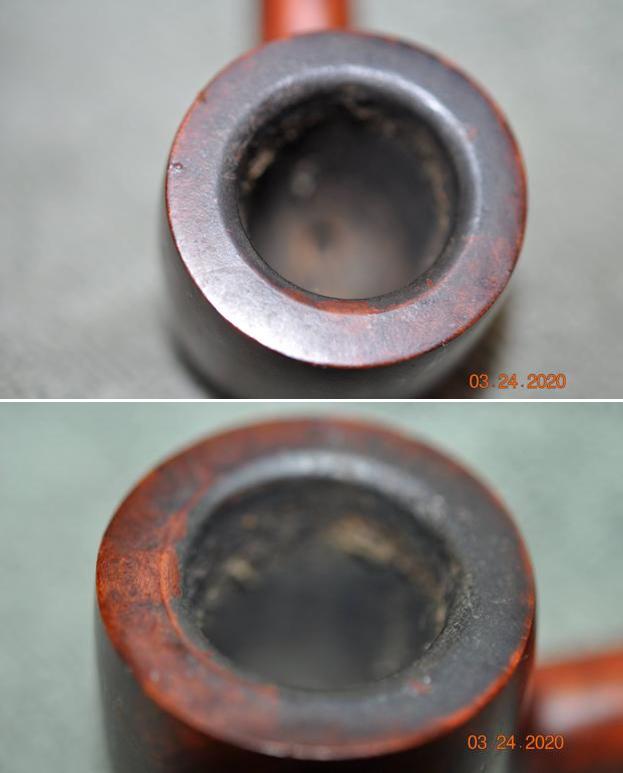
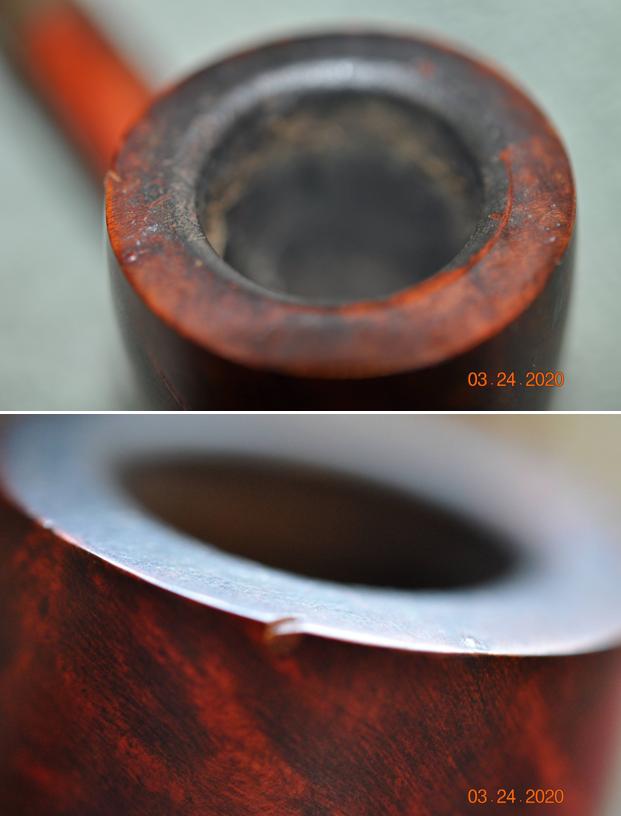
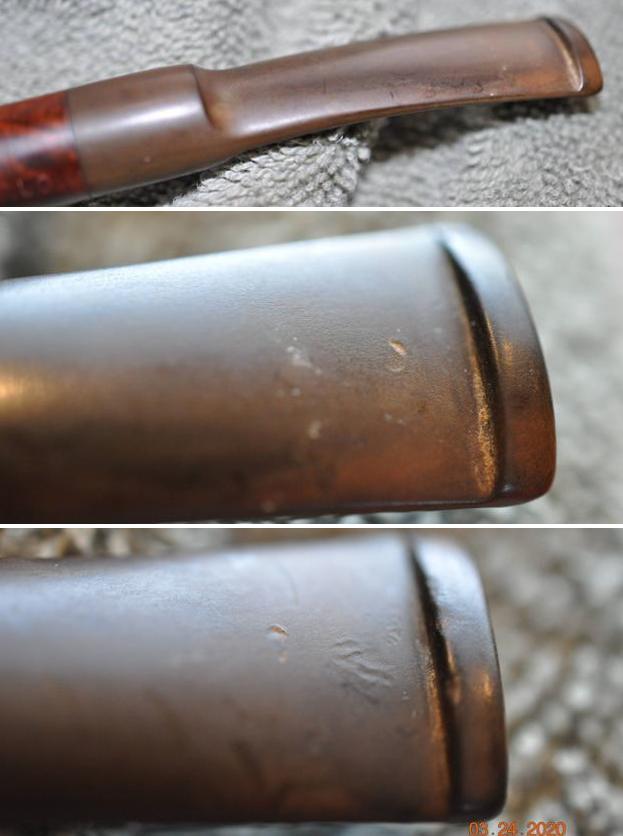
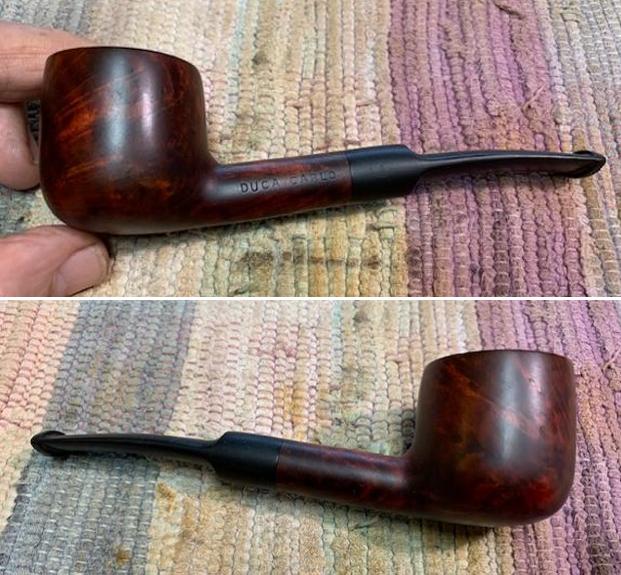
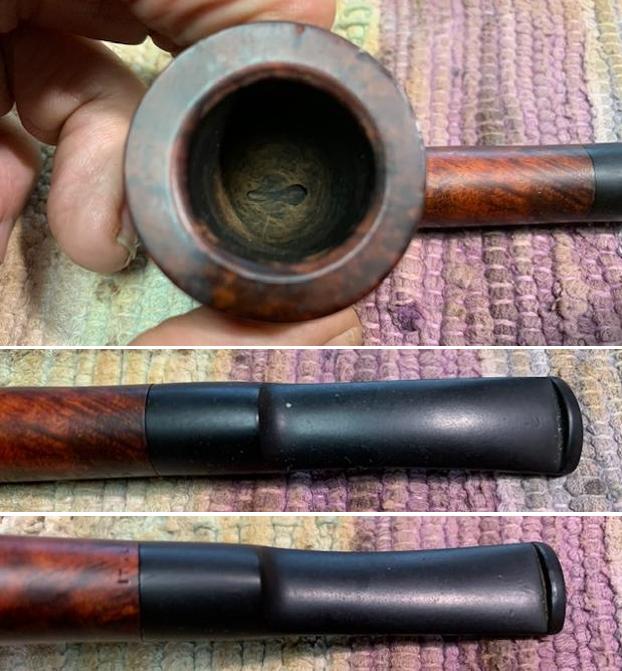
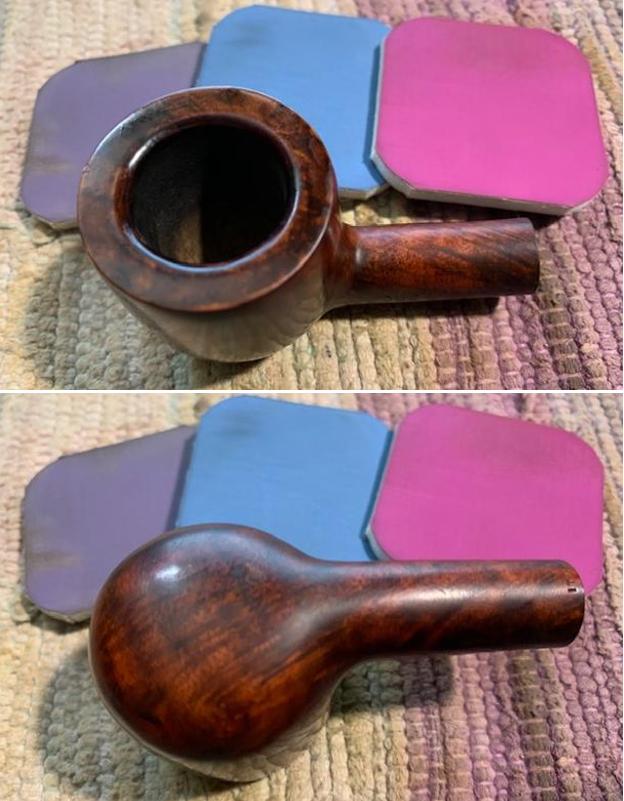
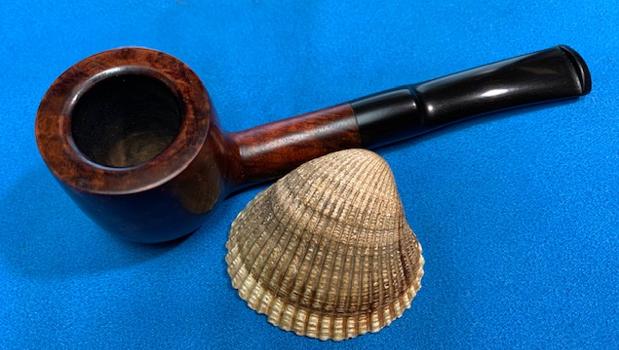
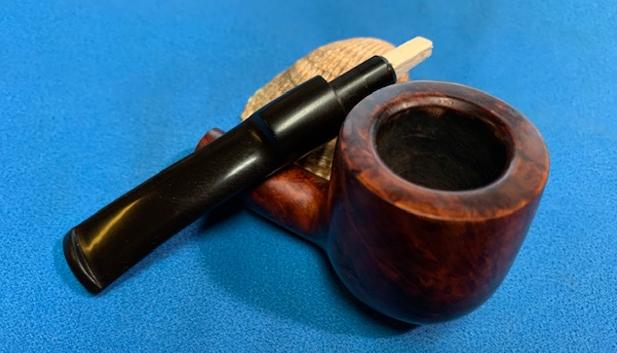
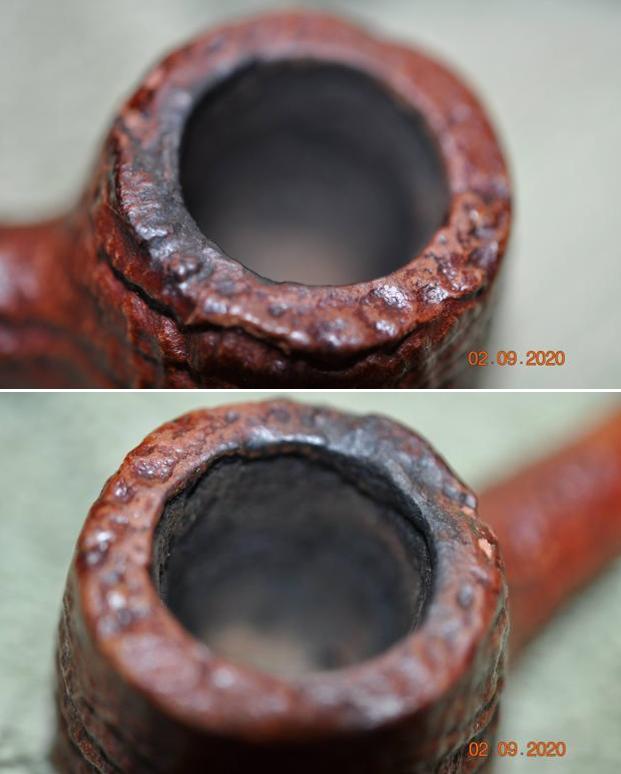
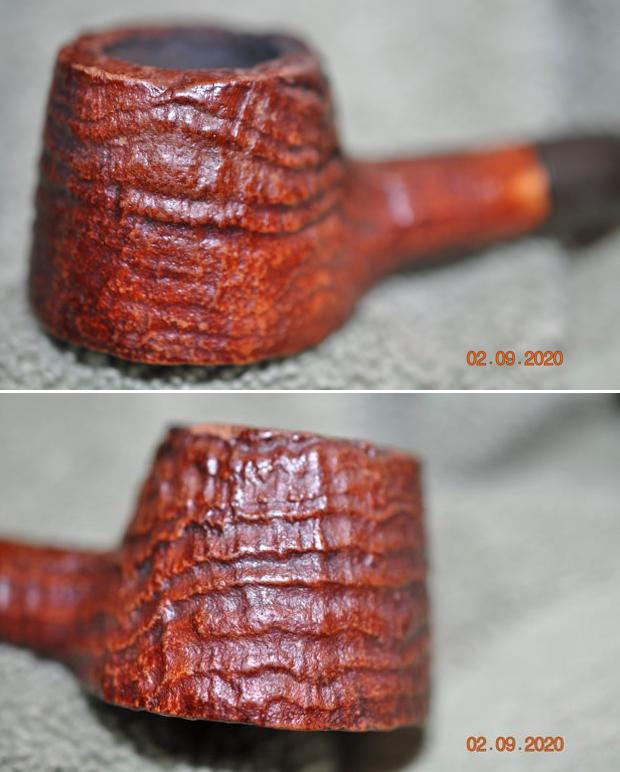
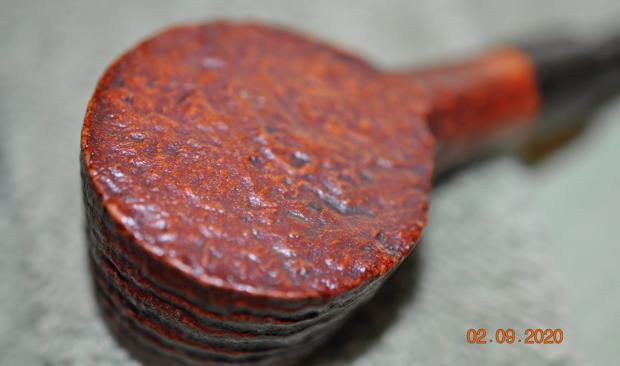
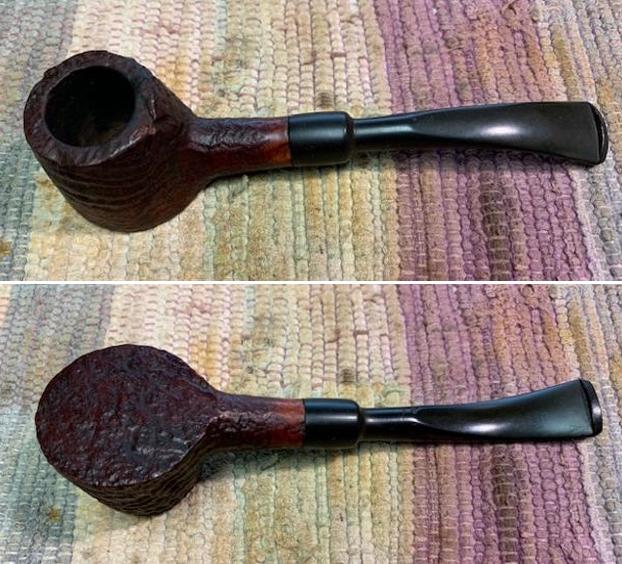
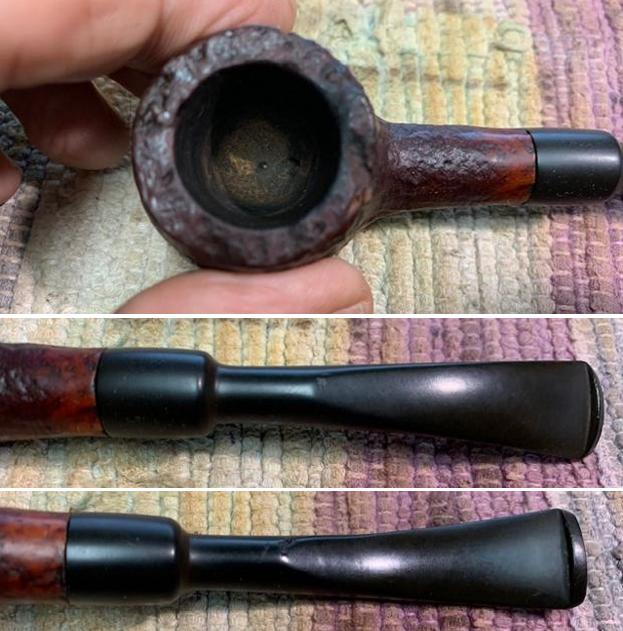
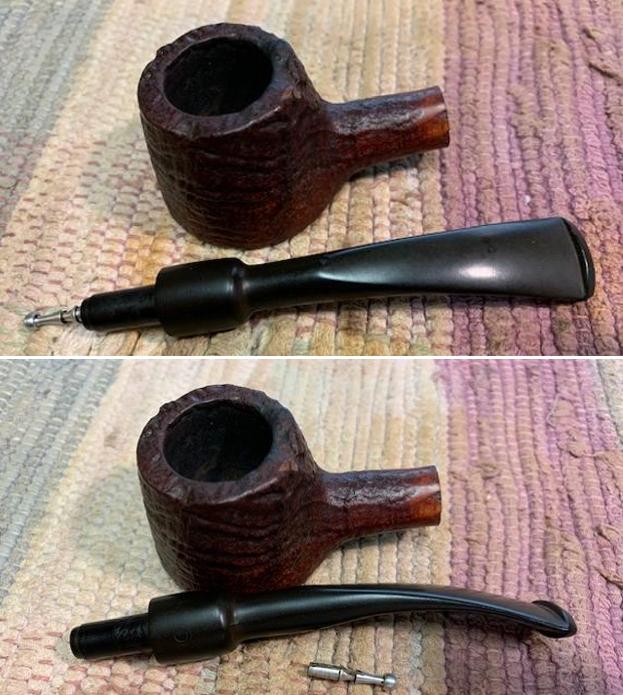
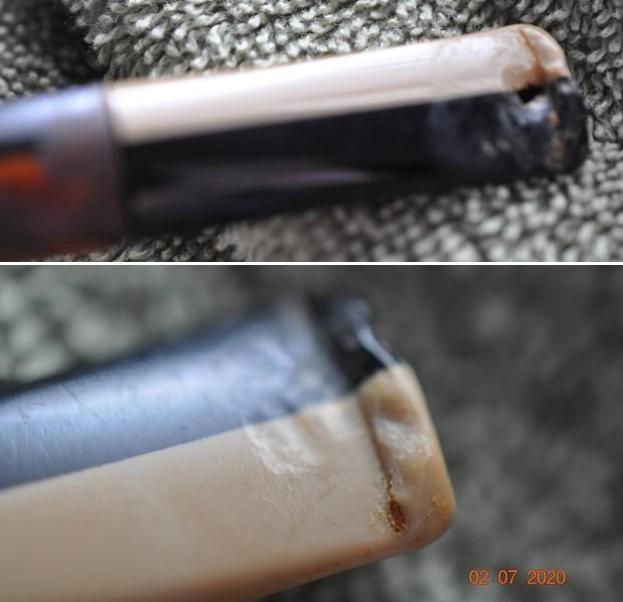
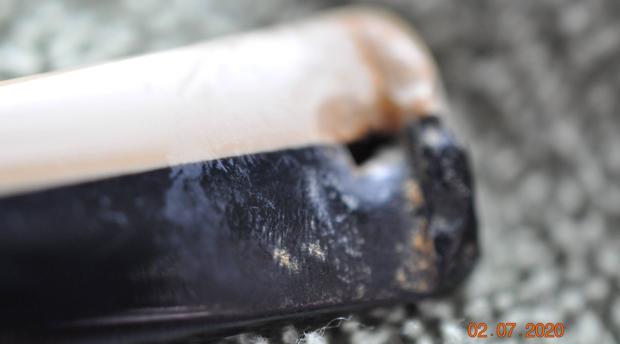
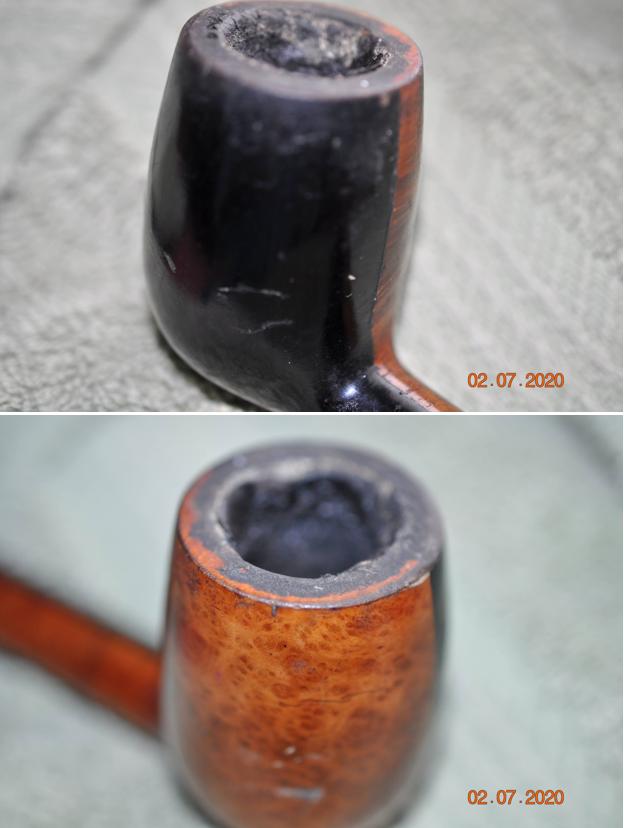
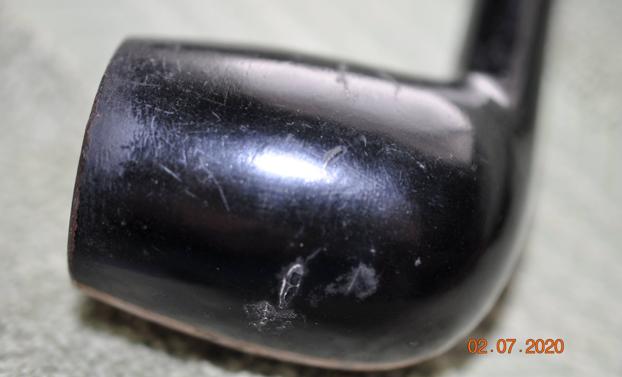
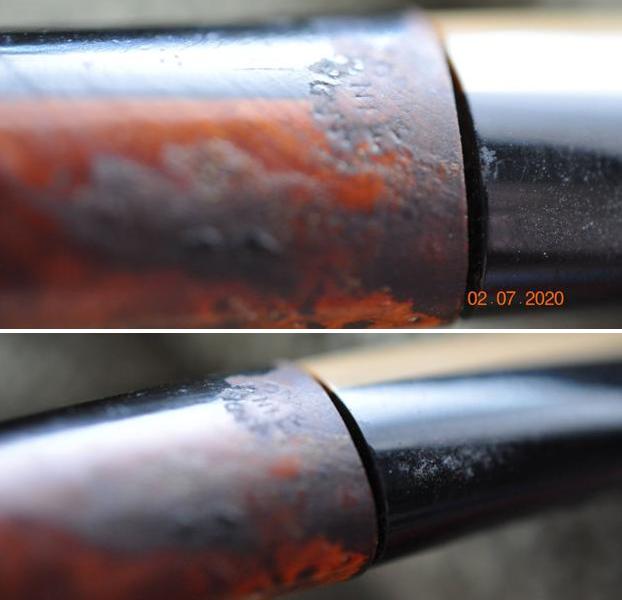
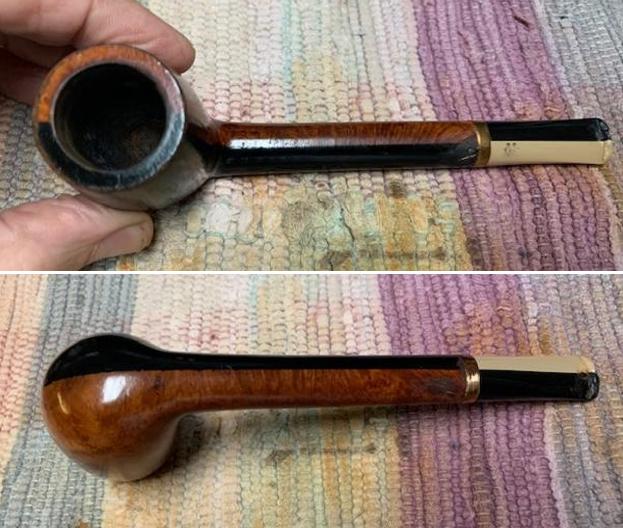
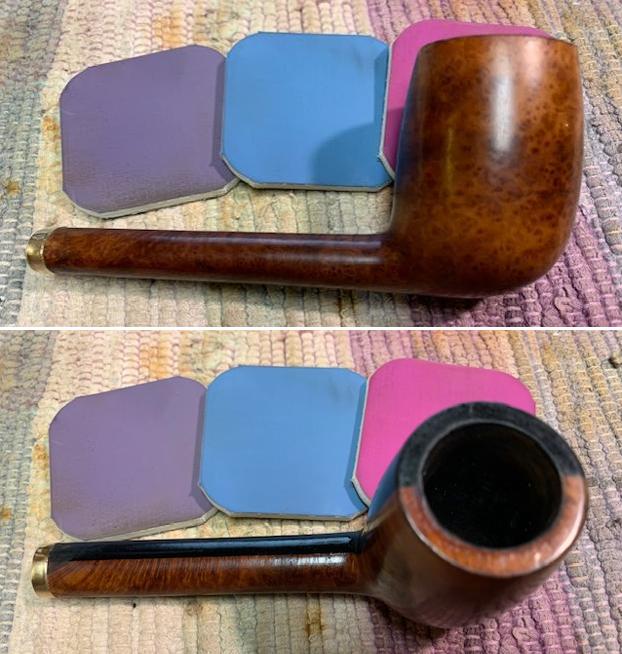
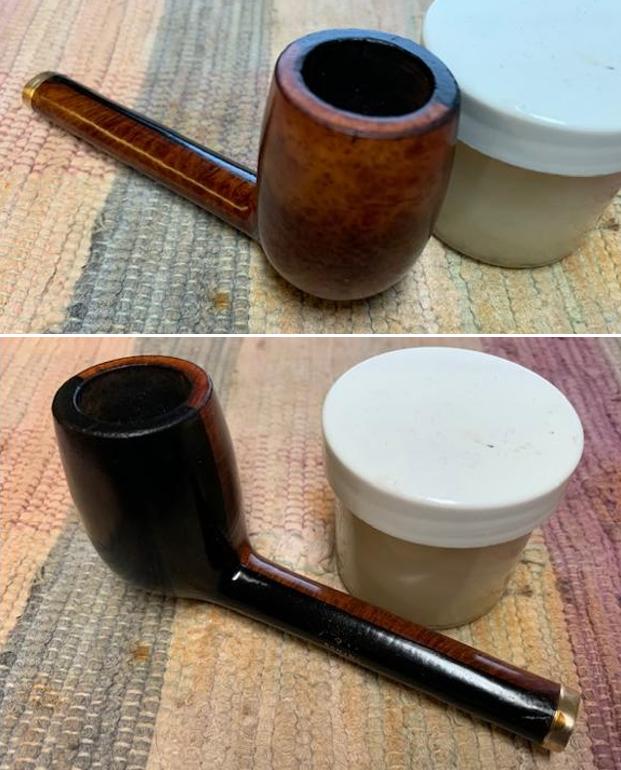
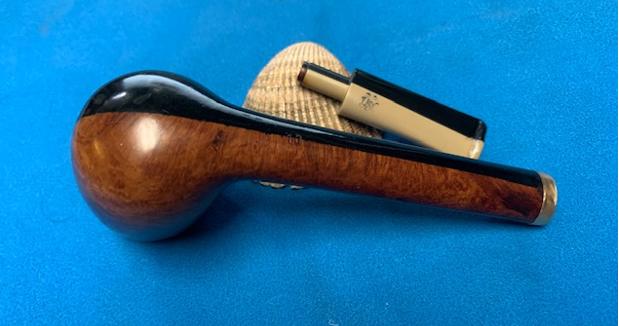
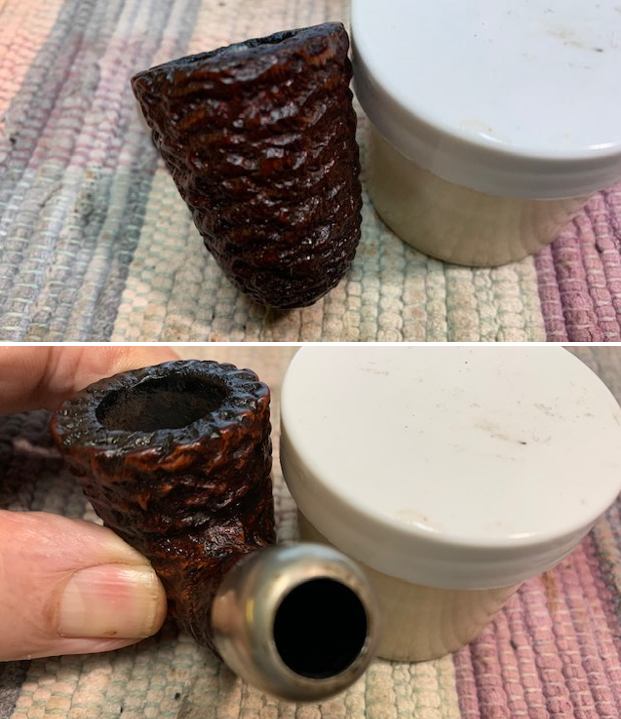
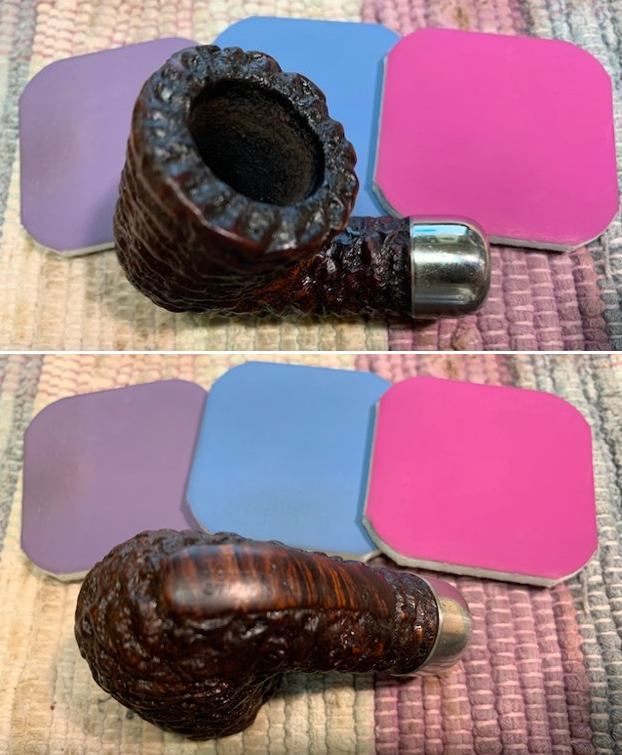
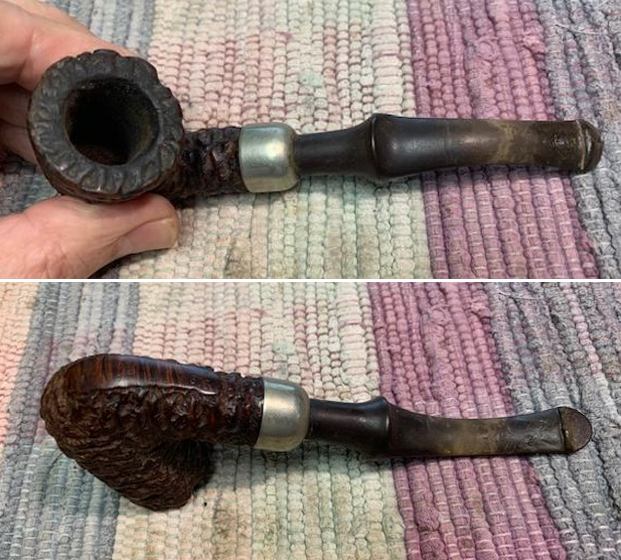 I took photos of the bowl and rim top as well as the stem to show the condition of the pipe. The rim top was dusty and had some lava build up in the rustication. There was a thin cake in the bowl as well. The finish on the bowl had paint flecks and dust in the crevices of the rustication. The stem was oxidized, calcified and had a lot of tooth chatter and some deep tooth marks on both the top and bottom. There was a small bite through on the topside ahead of the button. This was obviously a great smoking pipe and someone’s favourite!
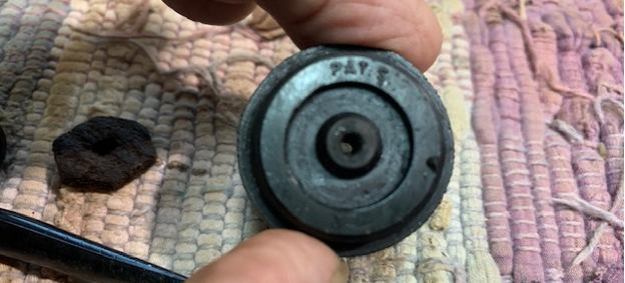
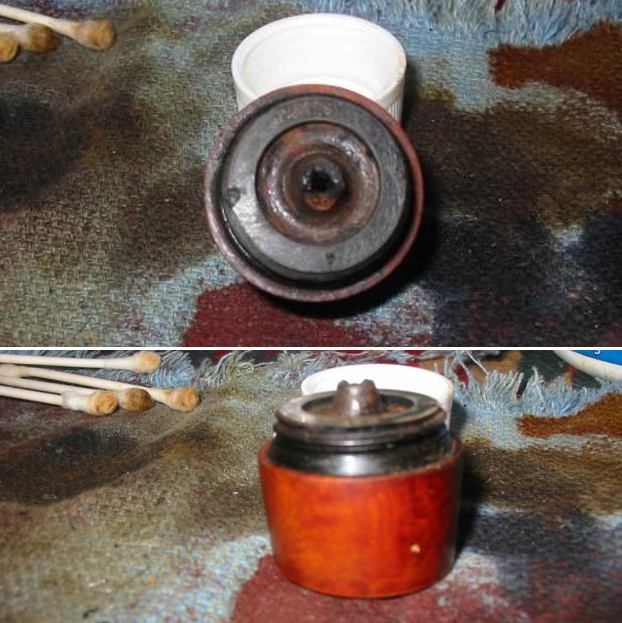
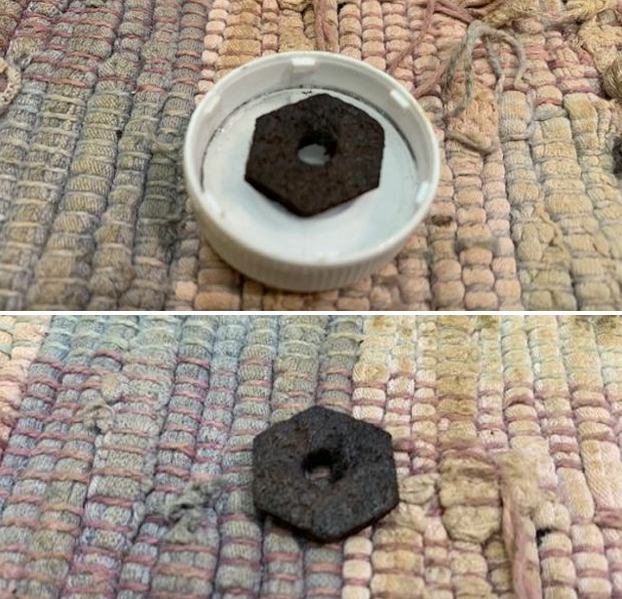
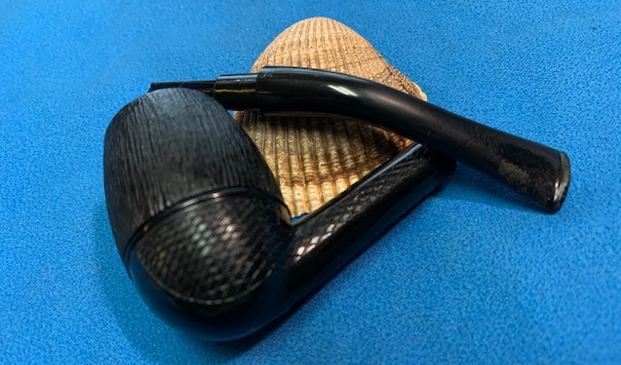
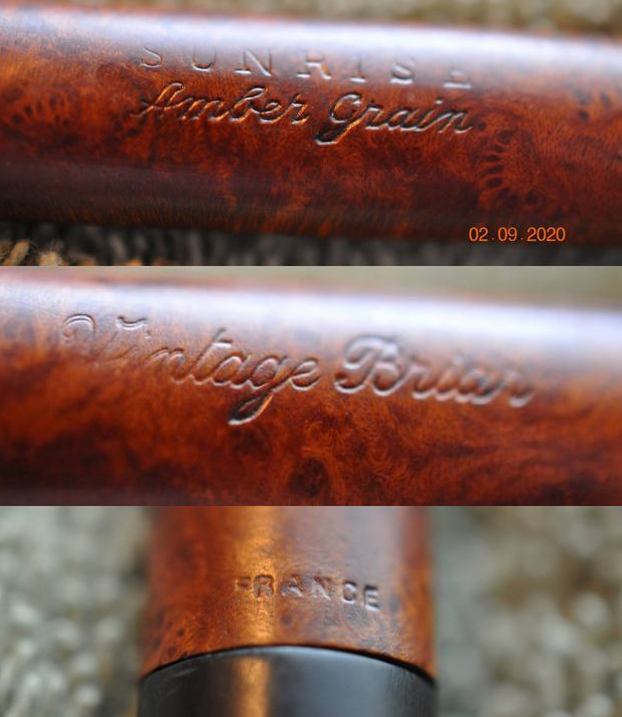
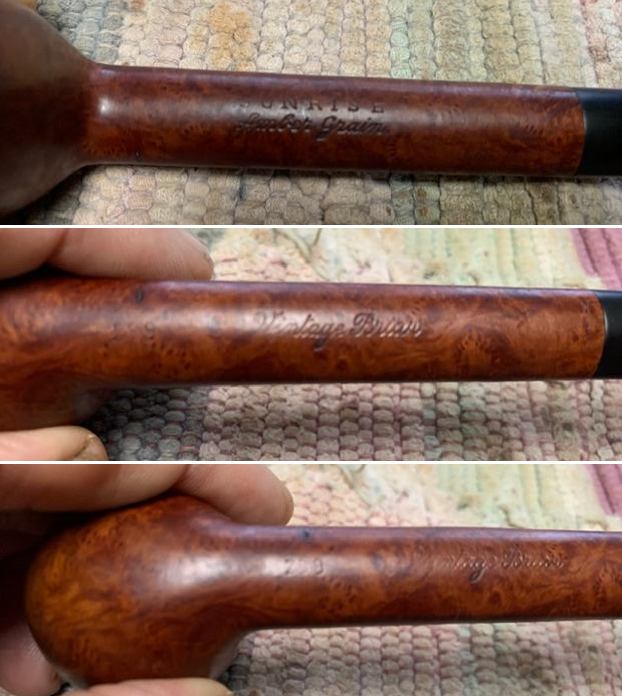
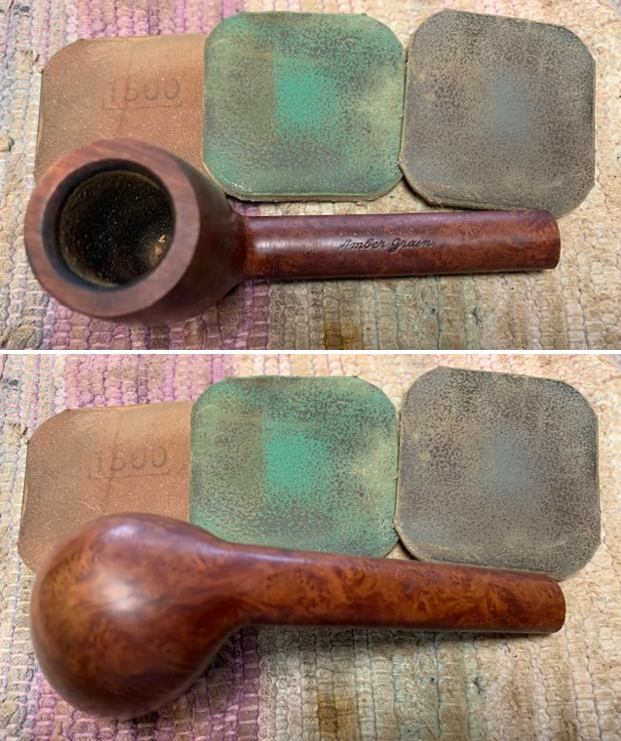
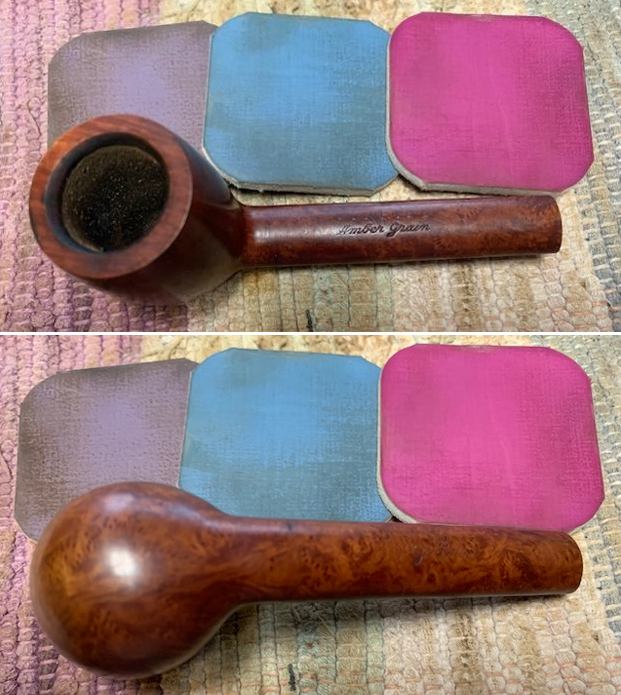
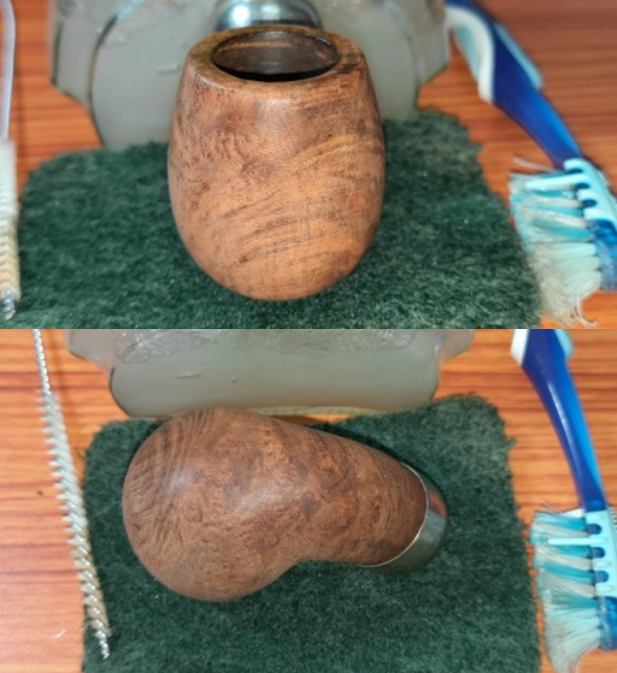
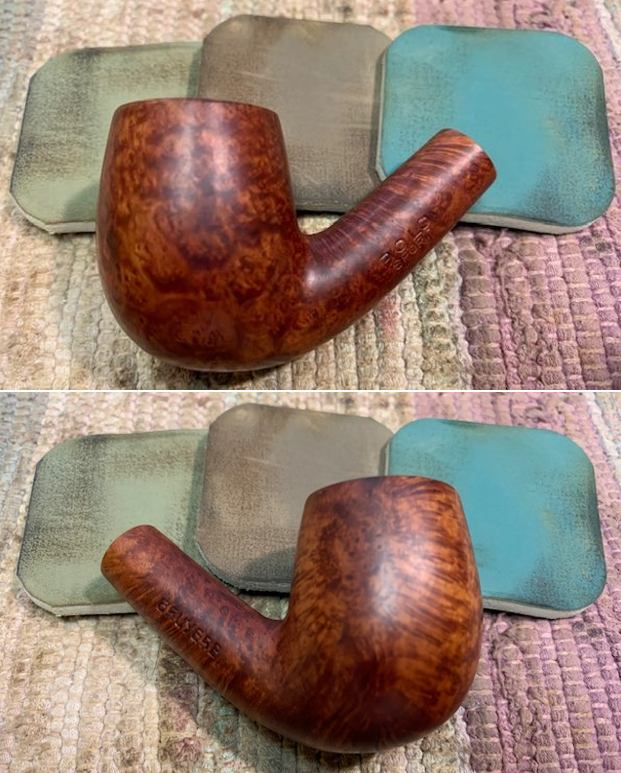
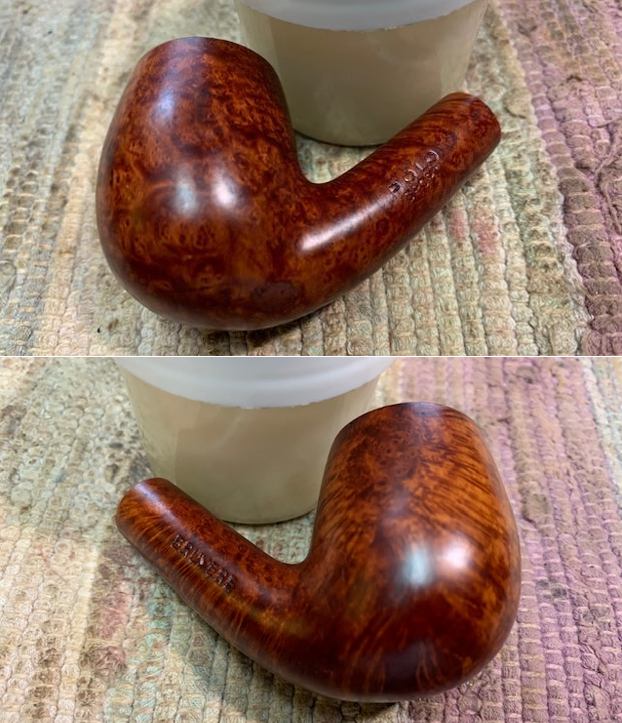
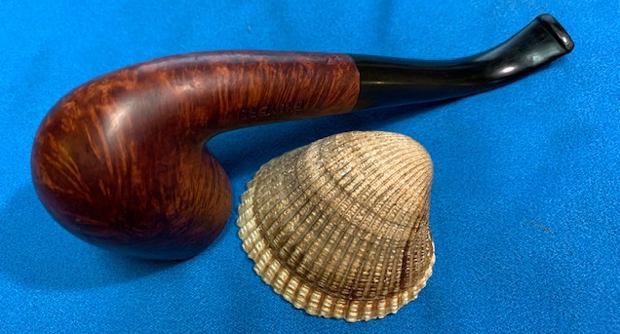
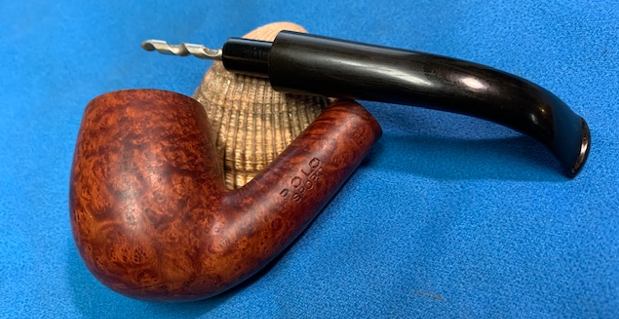
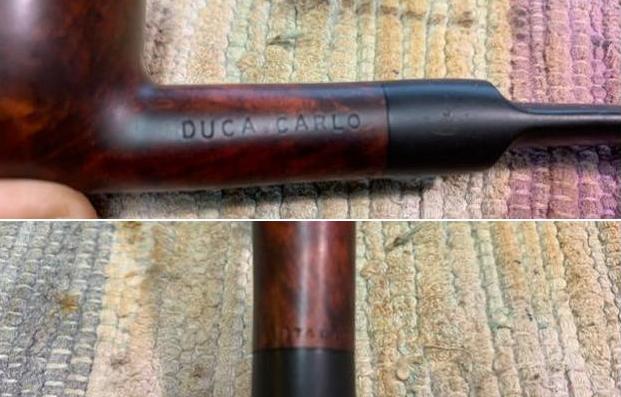
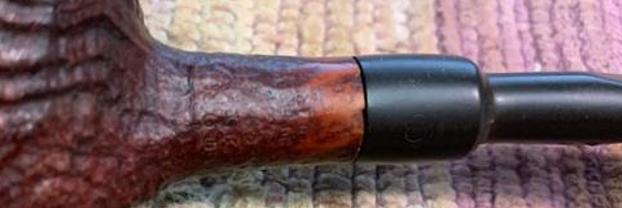
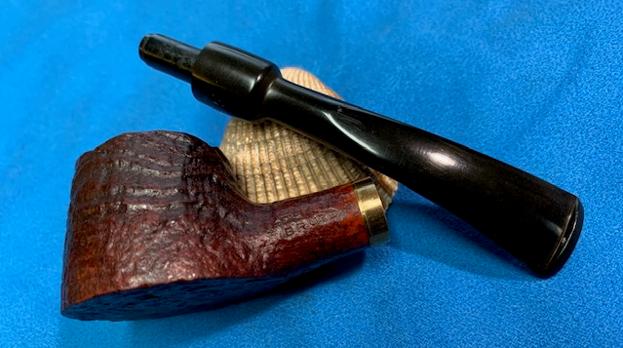
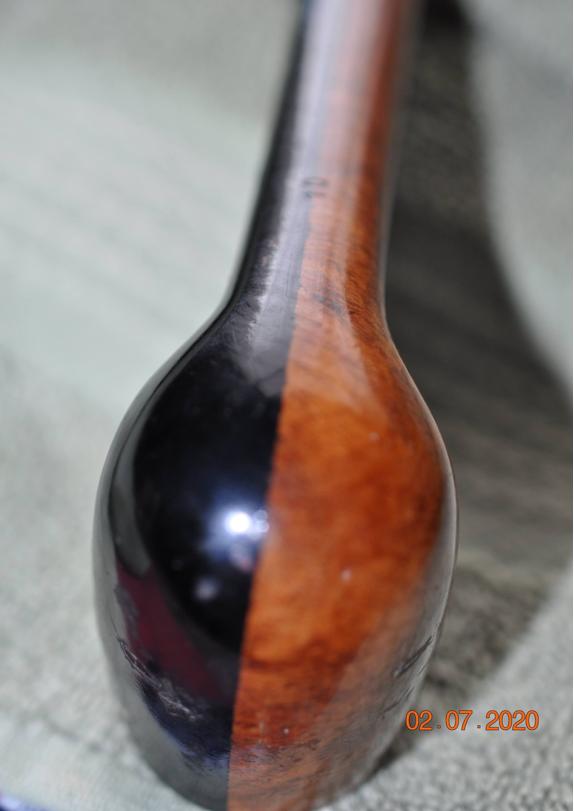
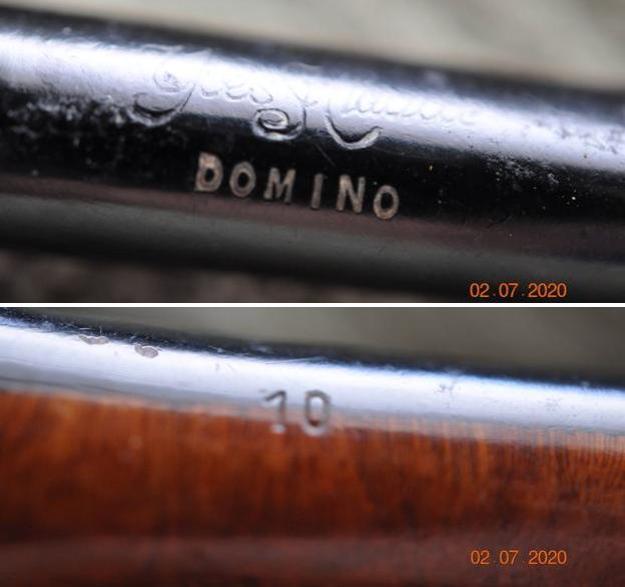
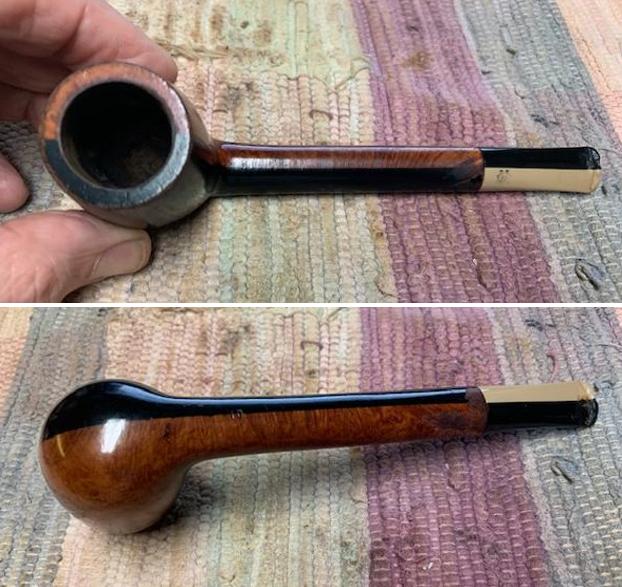
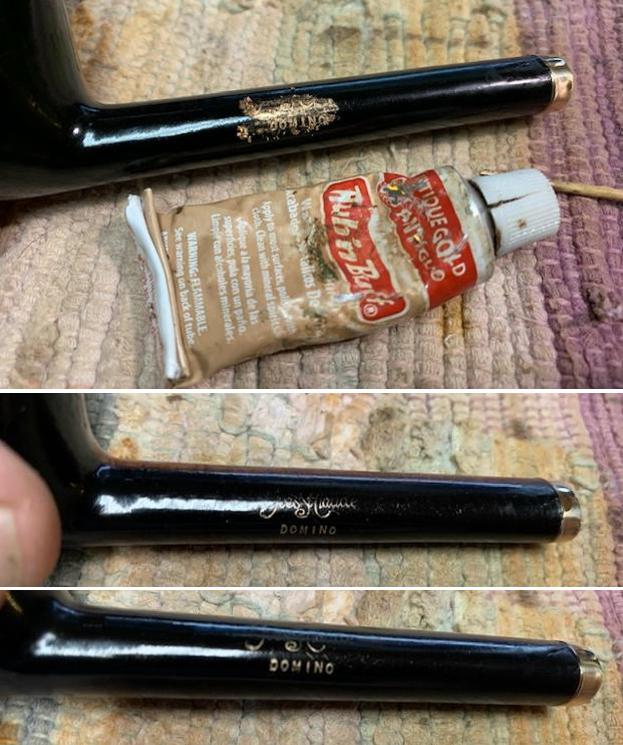
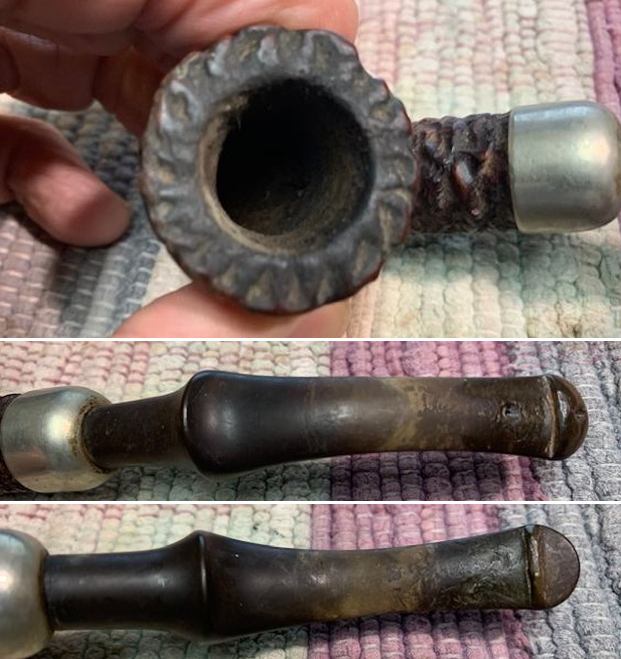 I took a photo of the stamping on the underside of the heel of the bowl. It was clear and readable as noted above.
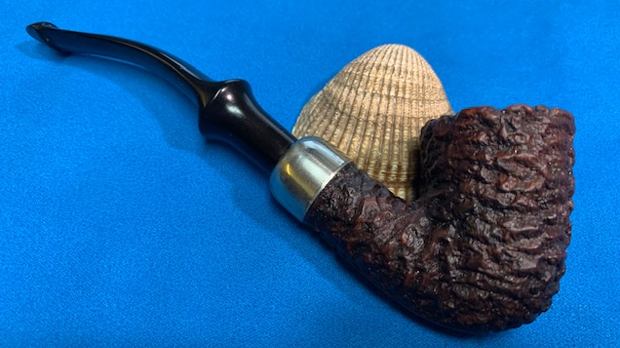
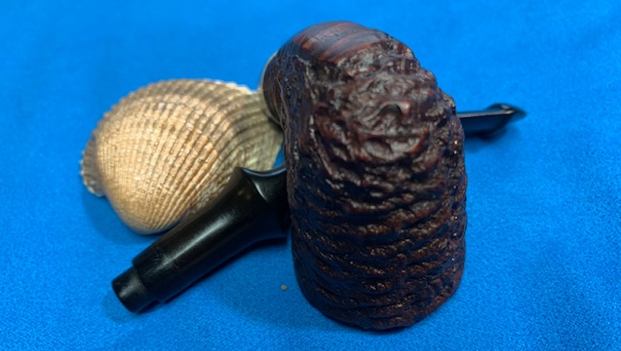
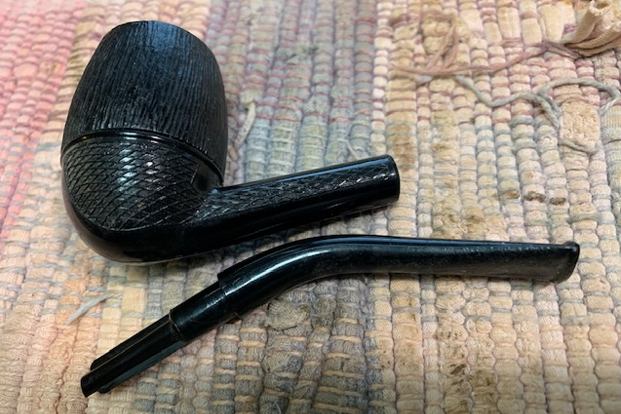
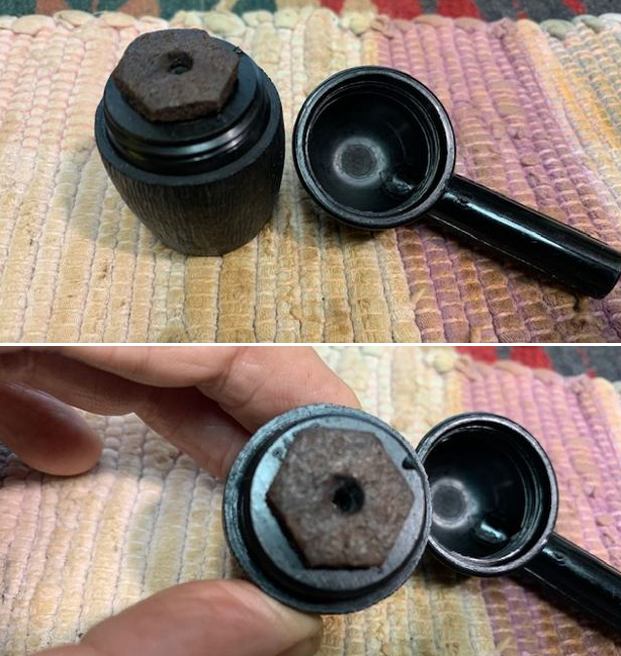
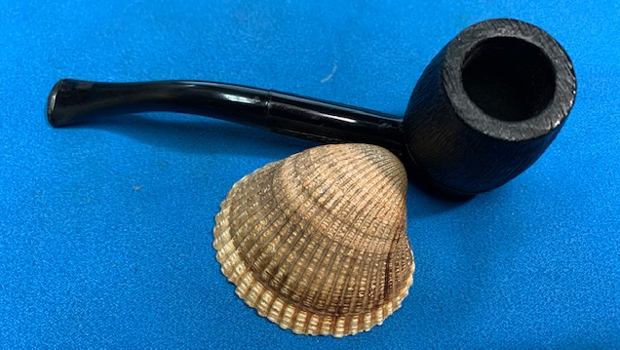
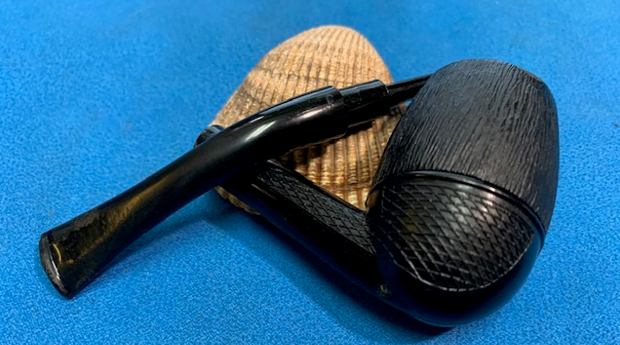
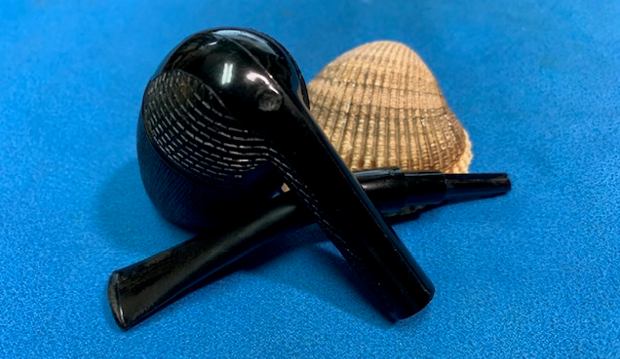
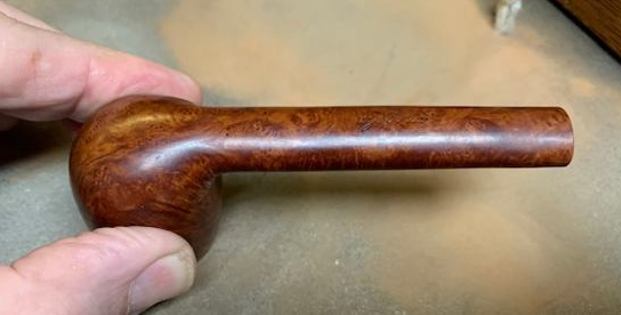
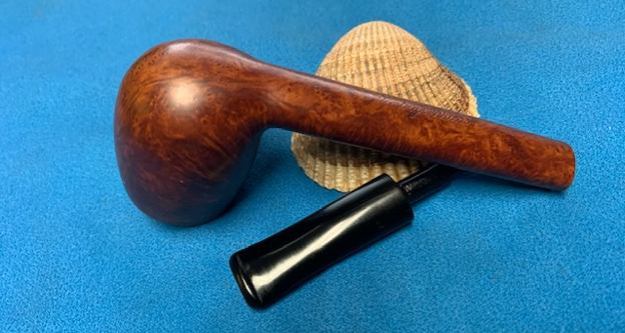
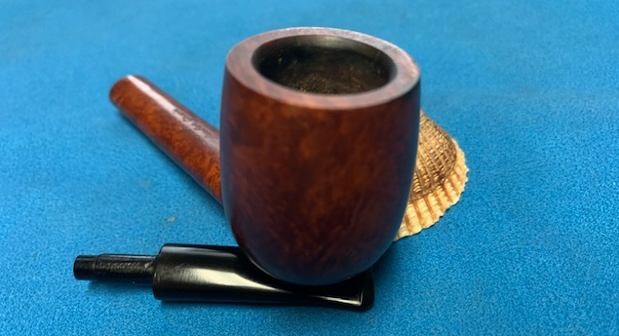
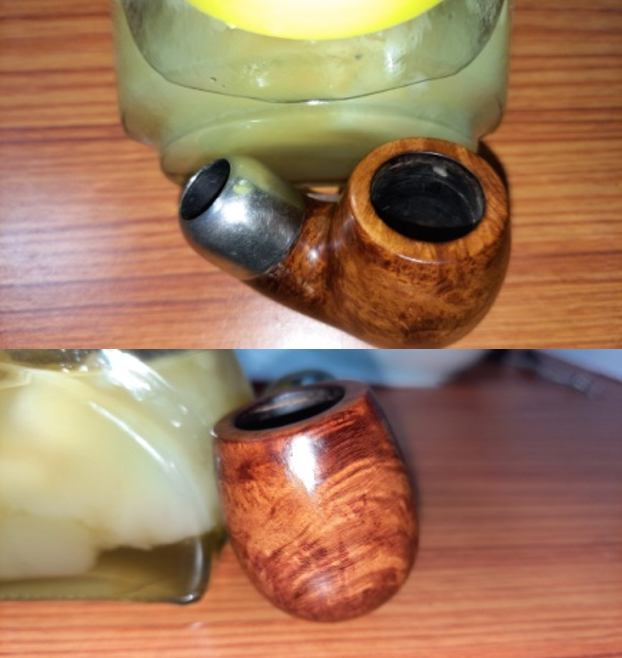
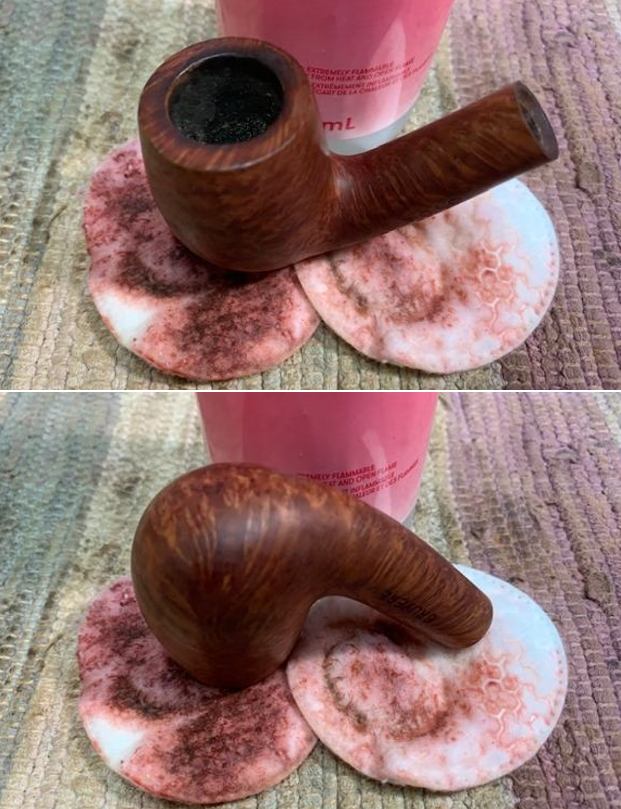
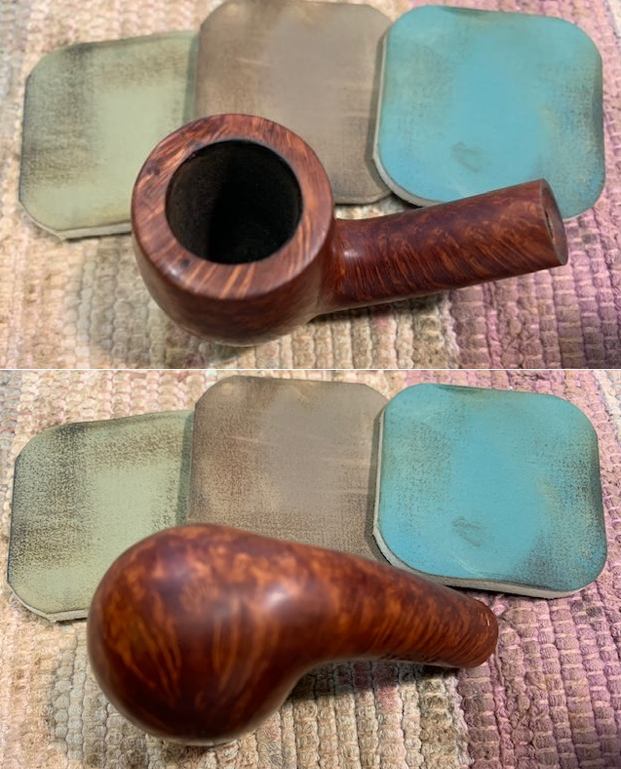
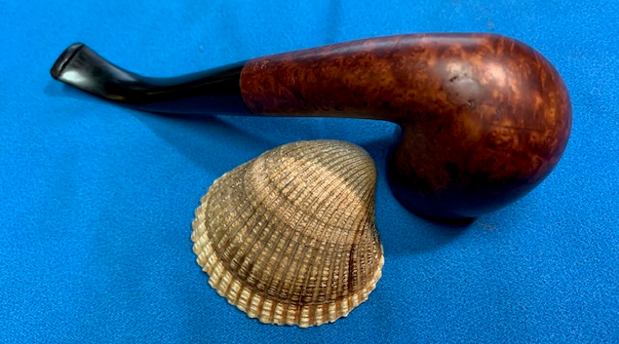
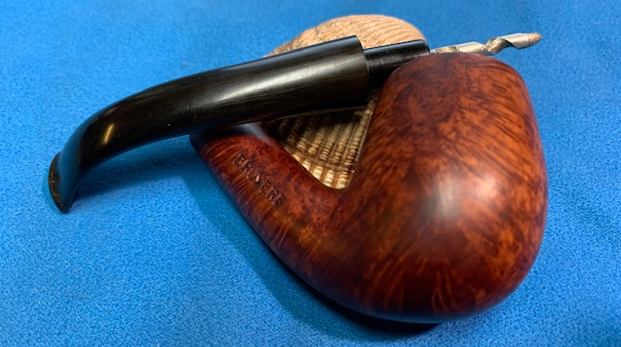
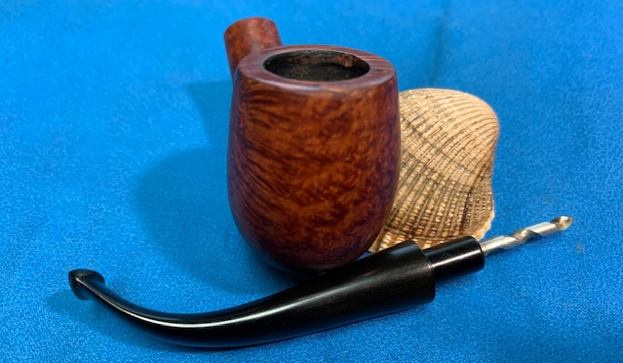
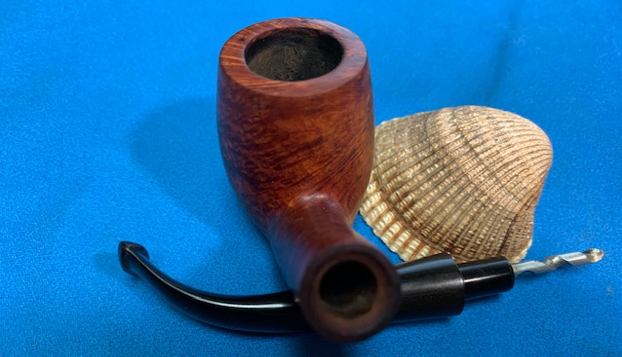
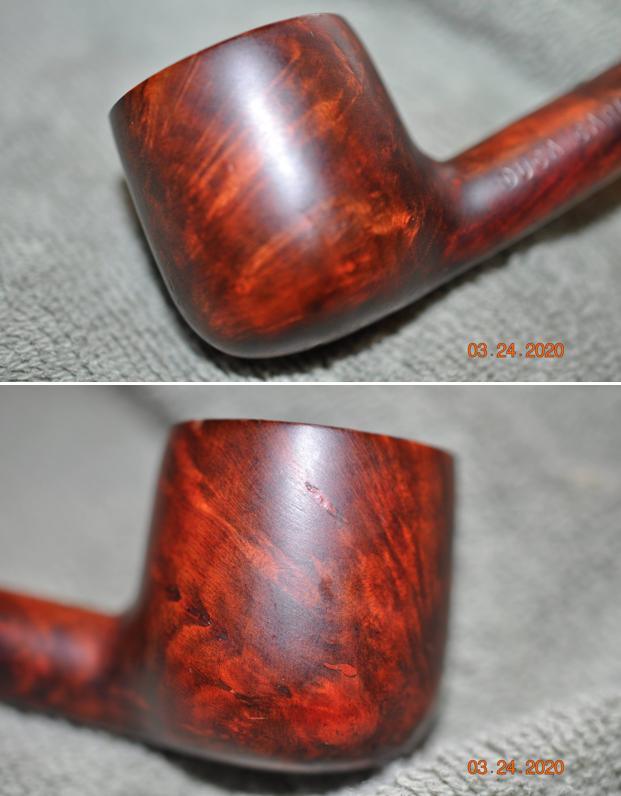
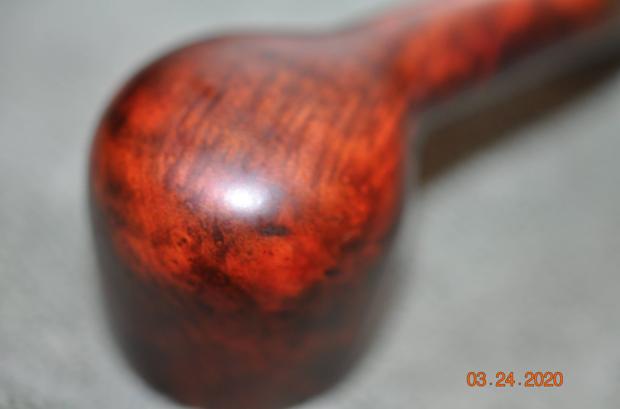
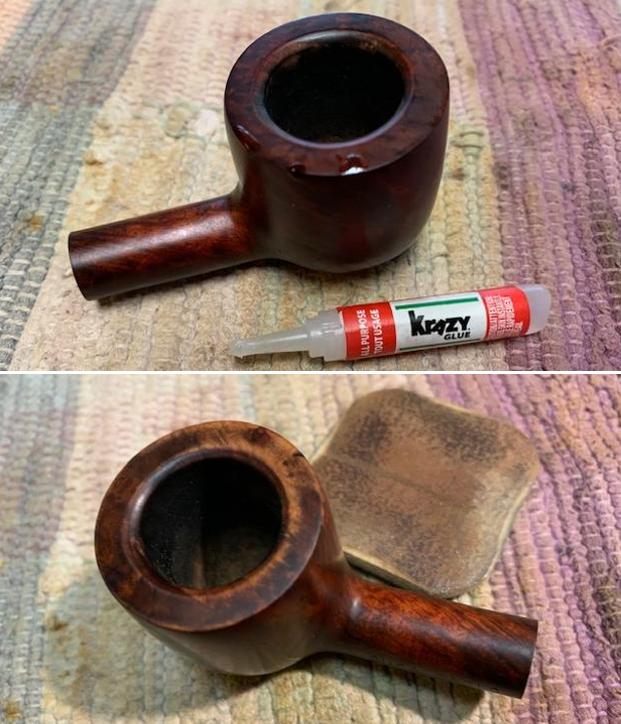
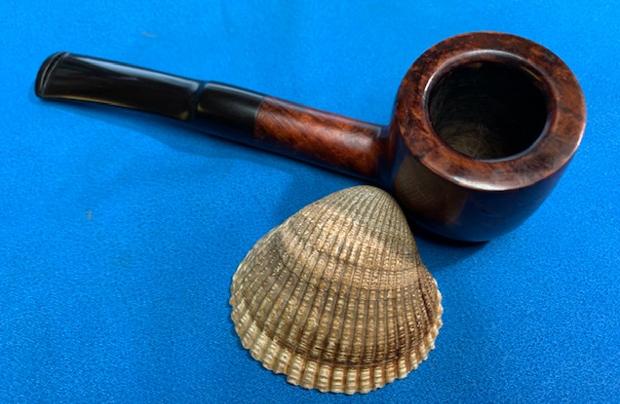
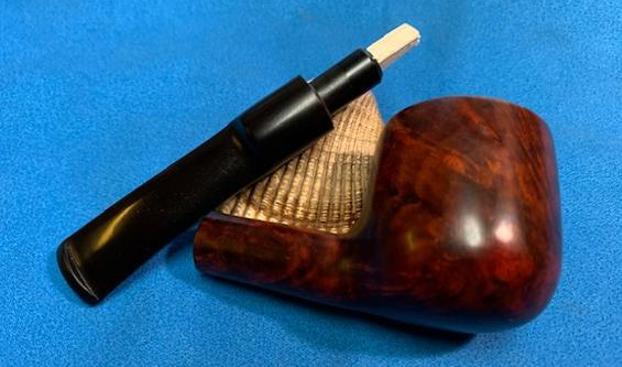
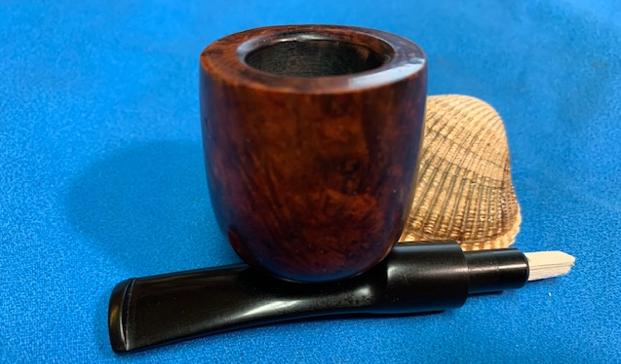
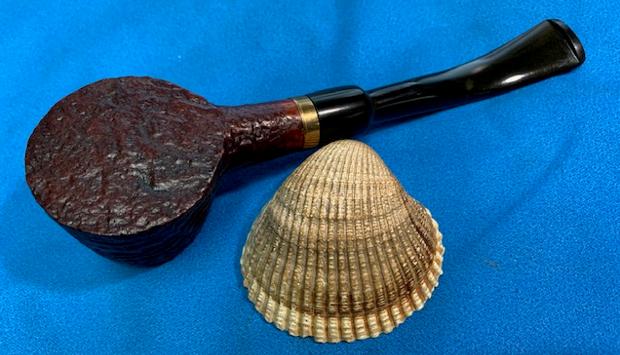
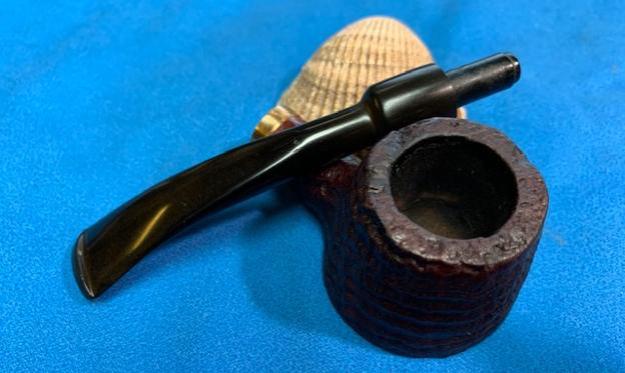
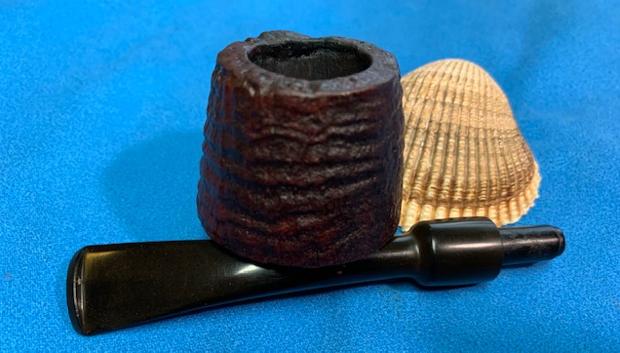
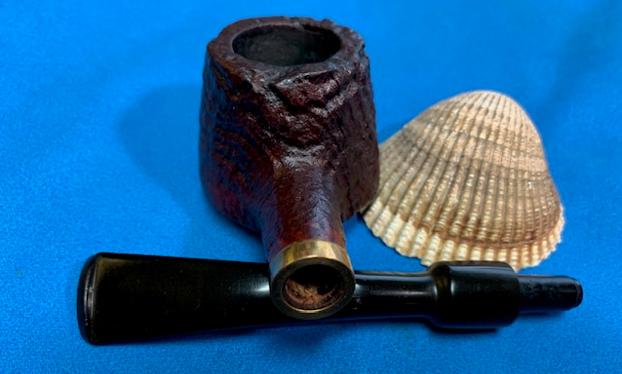
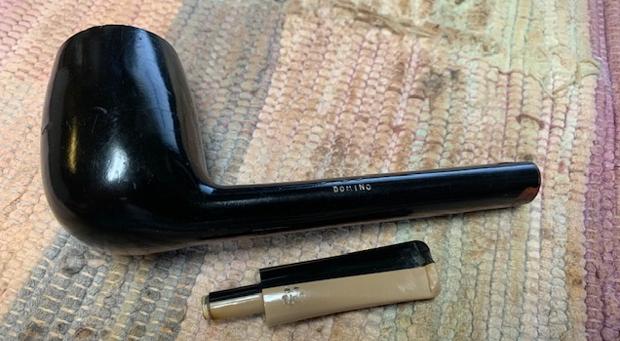
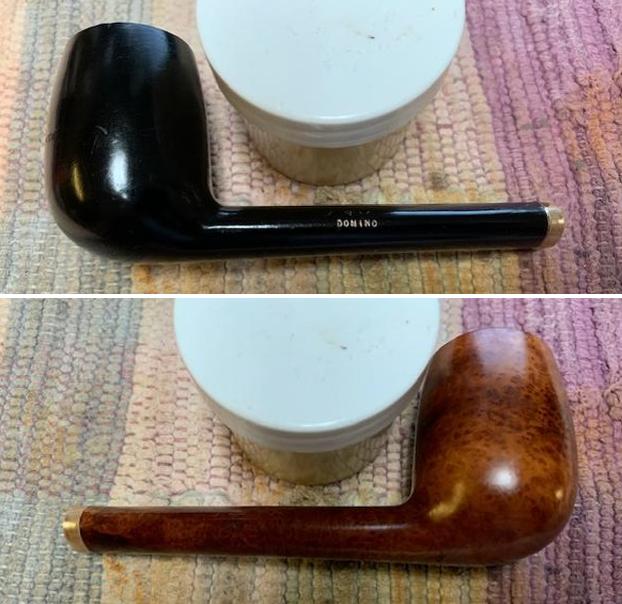
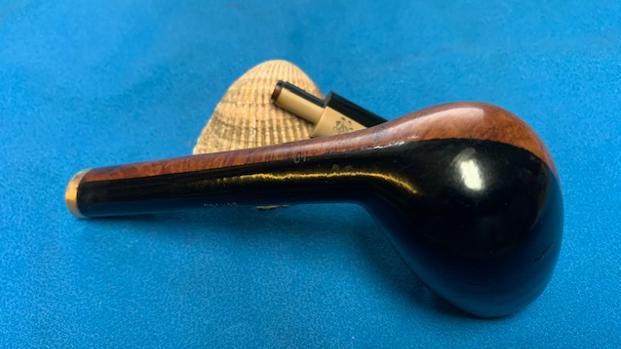
 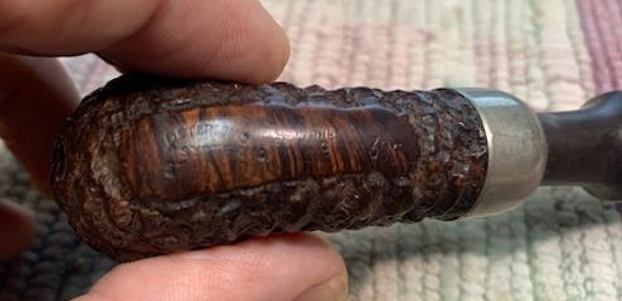 I removed the stem from the shank and took a photo of the pipe. The great rustication and charm of the pipe are visible even with the grime and dust.
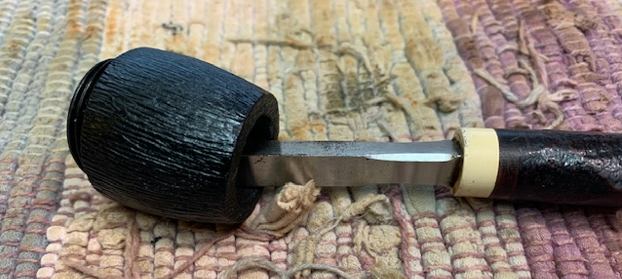
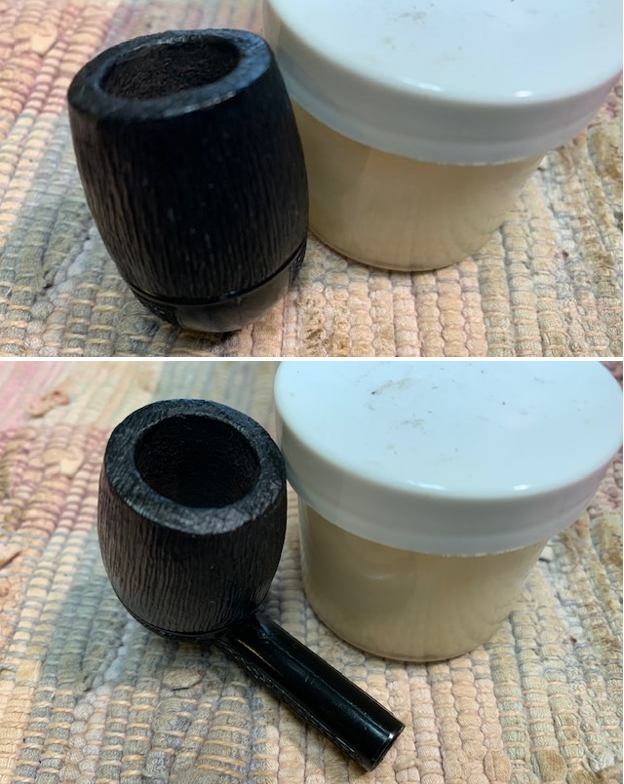
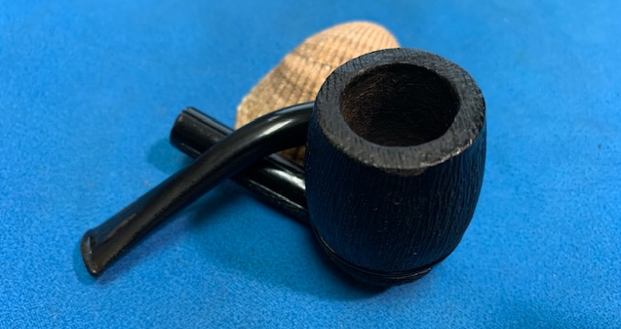
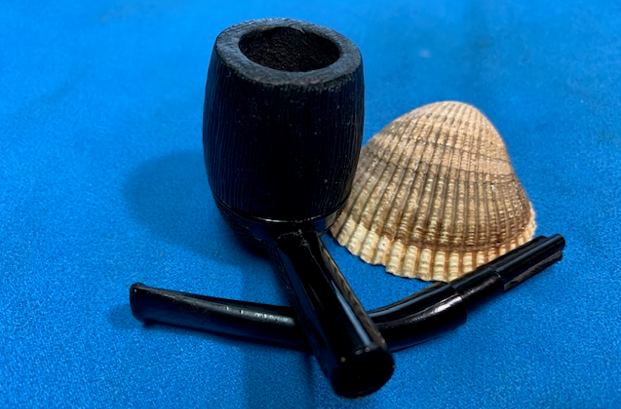
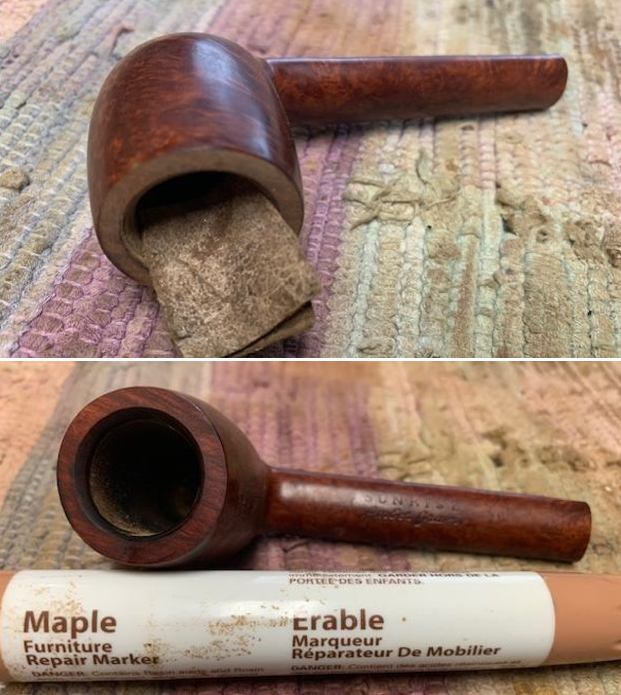
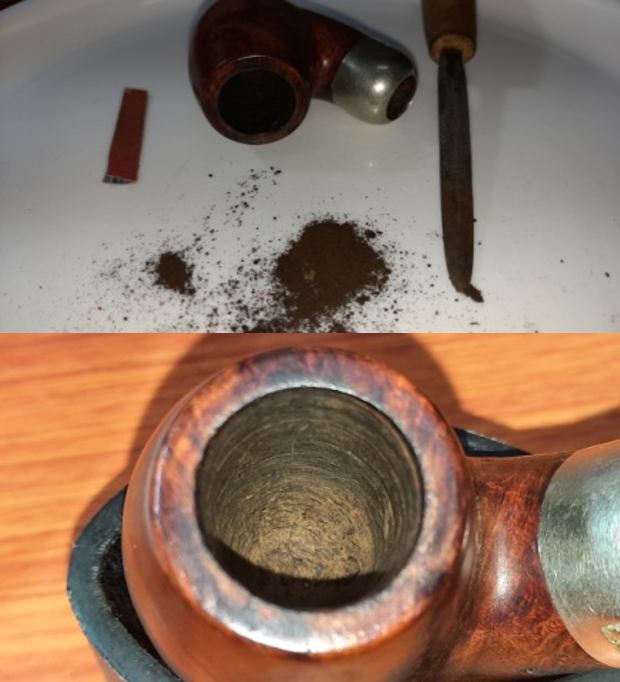
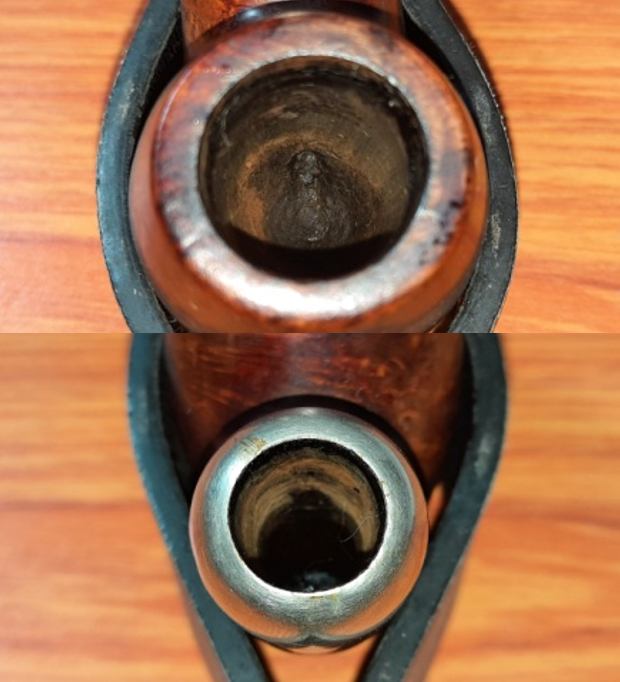
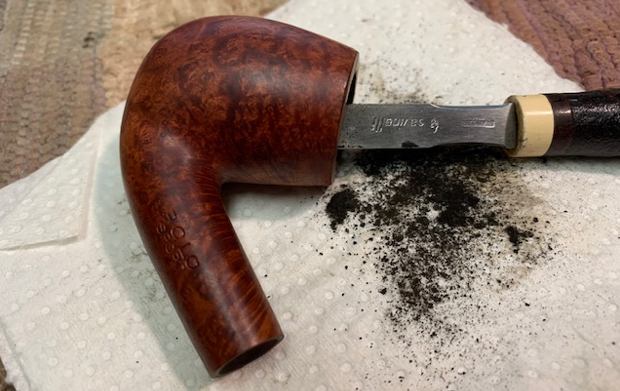
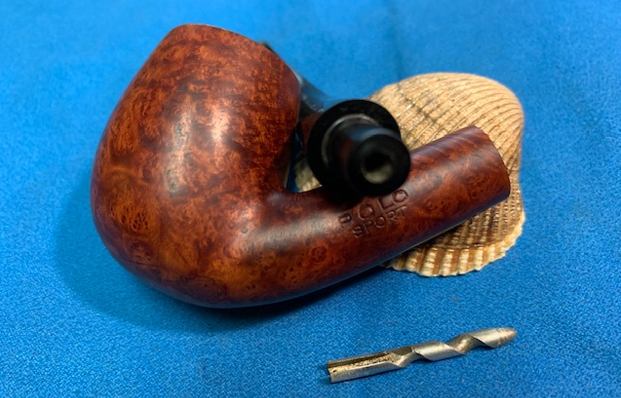
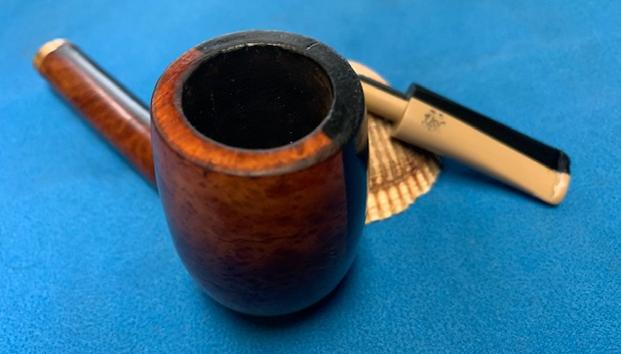
 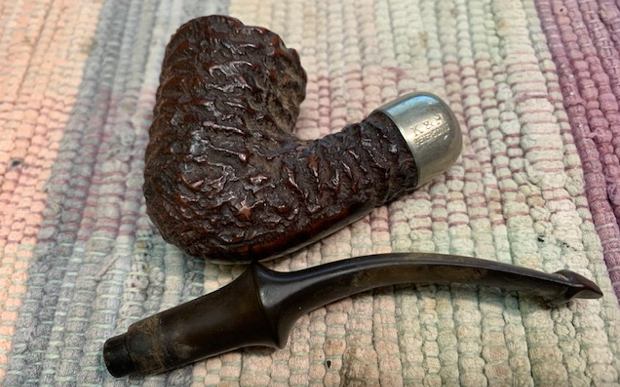 Now it was time to work on the pipe. I started my work on the pipe by cleaning up the reaming. I removed the remaining cake with a Savinelli Fitsall Pipe Knife and took it back to bare briar so that I could examine the bowl for heat damage. It looked good.
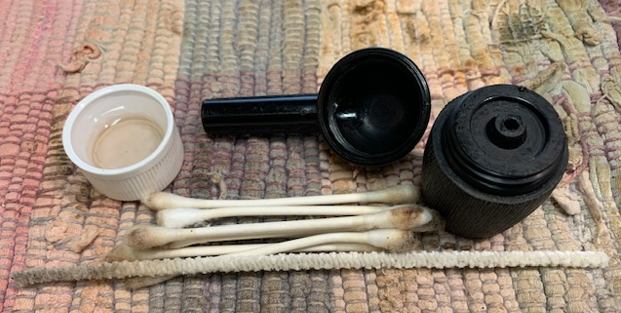
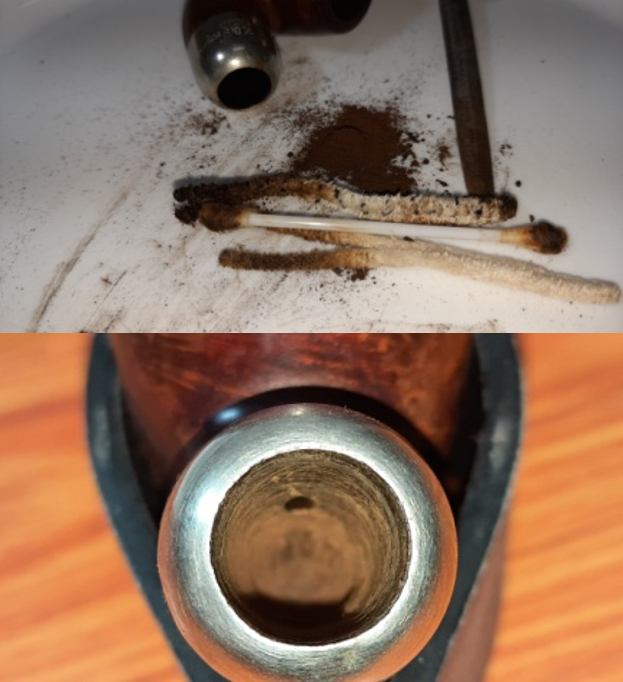
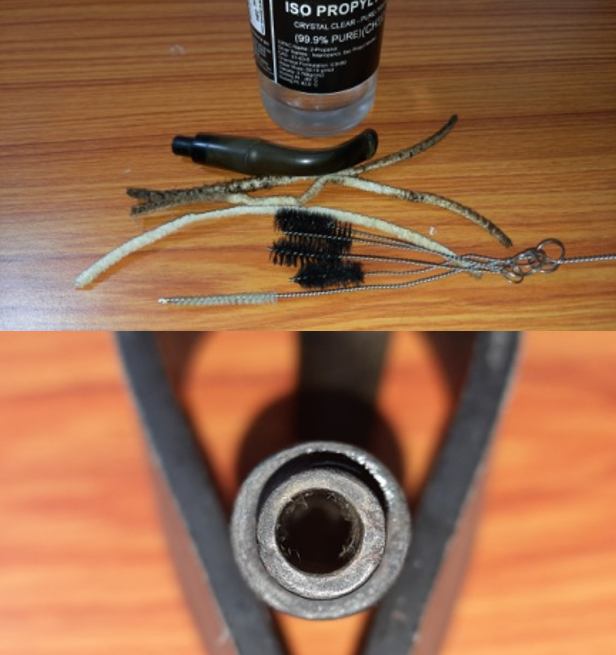
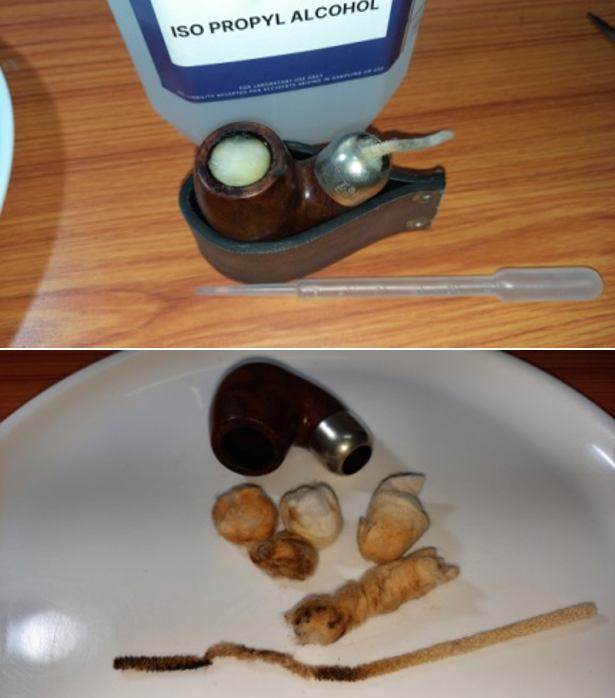
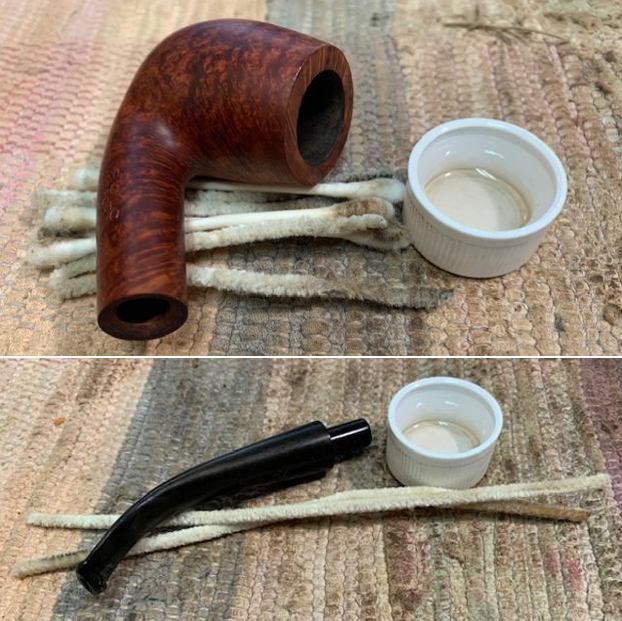
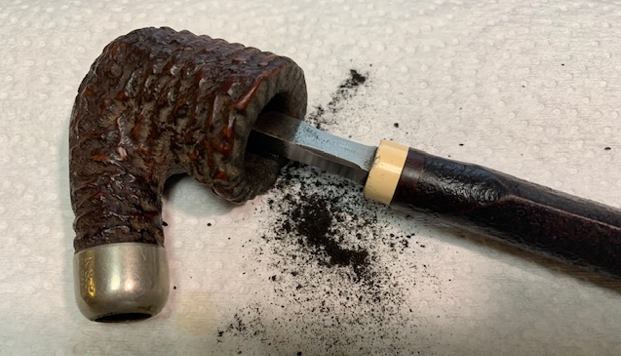 I cleaned the mortise, sump and shank along with the airway in both the shank and the stem with 99% isopropyl alcohol, pipe cleaners and cotton swabs until the interior of the pipe was very clean.
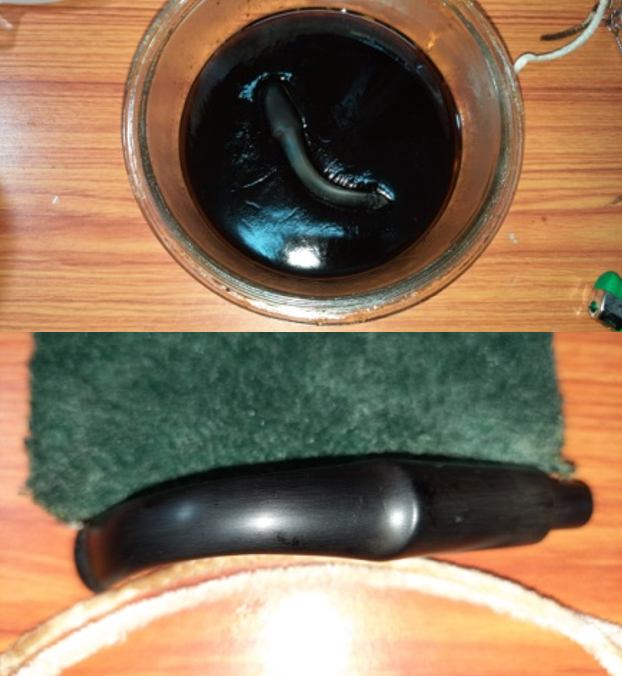
 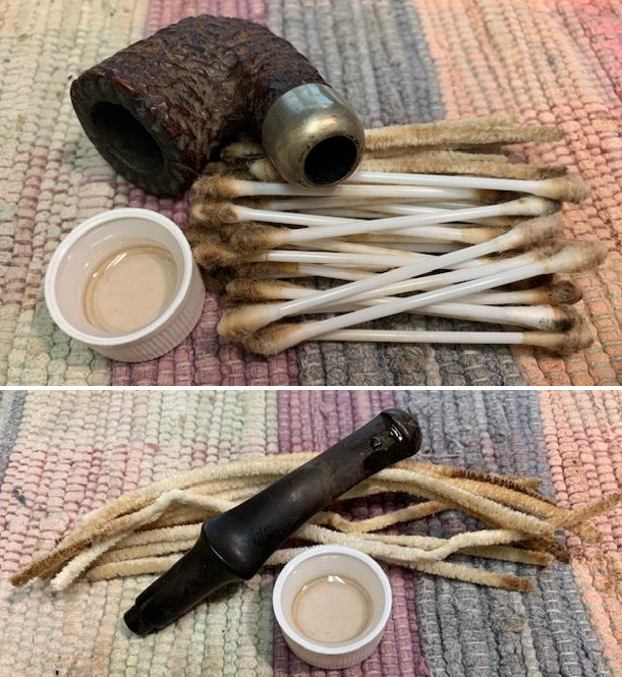 I dropped the stem in a bath of Briarville’s Stem Deoxidizer to soak while I worked on the bowl.
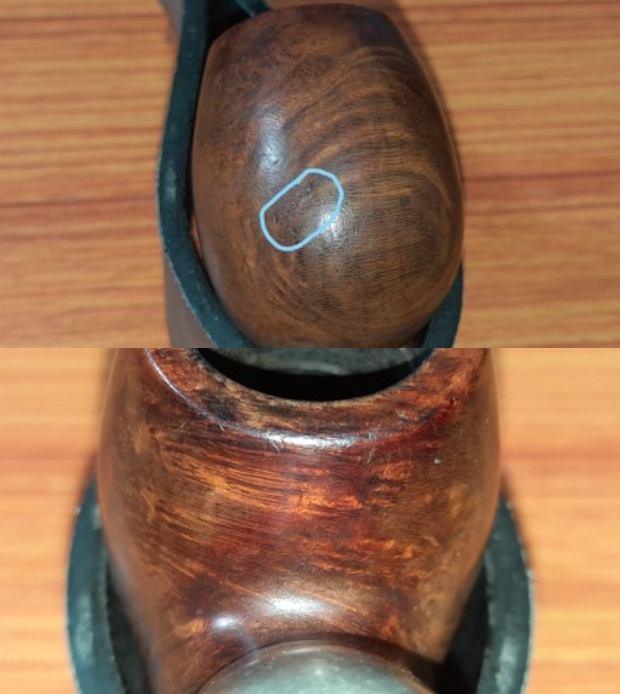
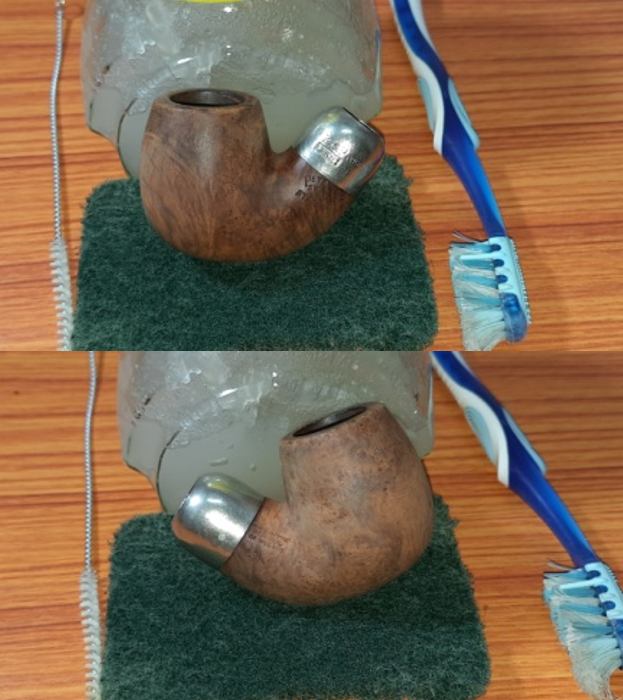
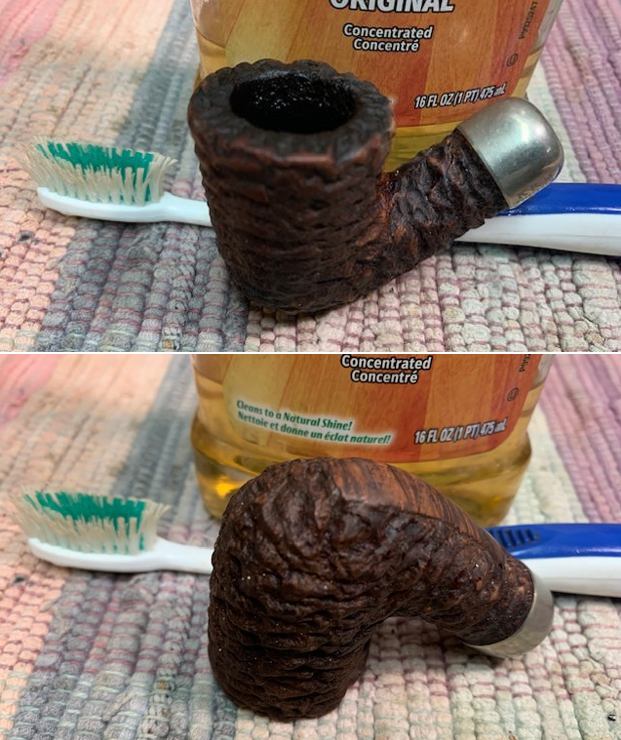
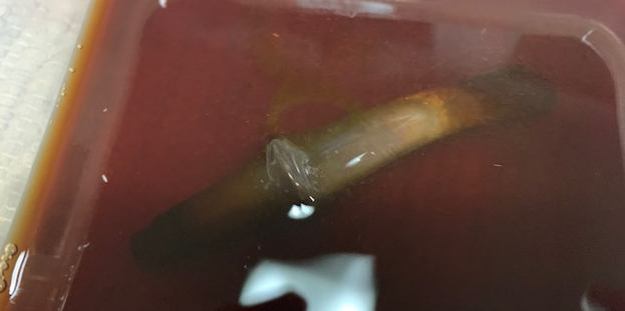 I scrubbed the exterior of the pipe with undiluted Murphy’s Oil Soap. I scrubbed the rustication and paid serious attention to the lava on the rim top. I used a tooth brush and the soap and rinsed it off with running water. I dried it off with a cotton towel. There were still some small flecks of white paint on the bowl sides.
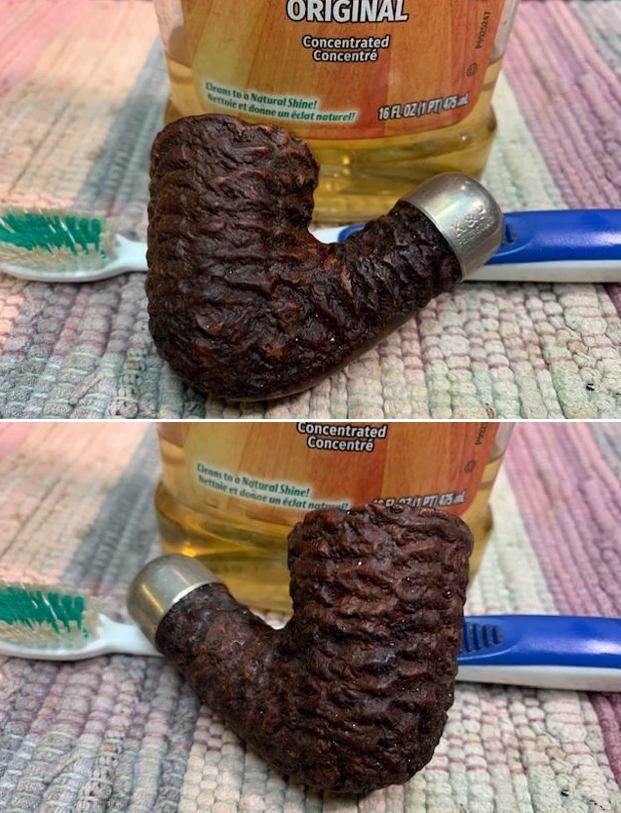
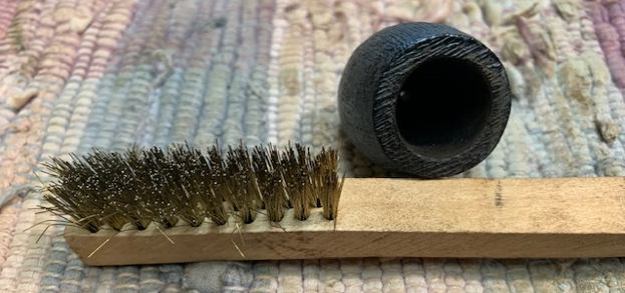
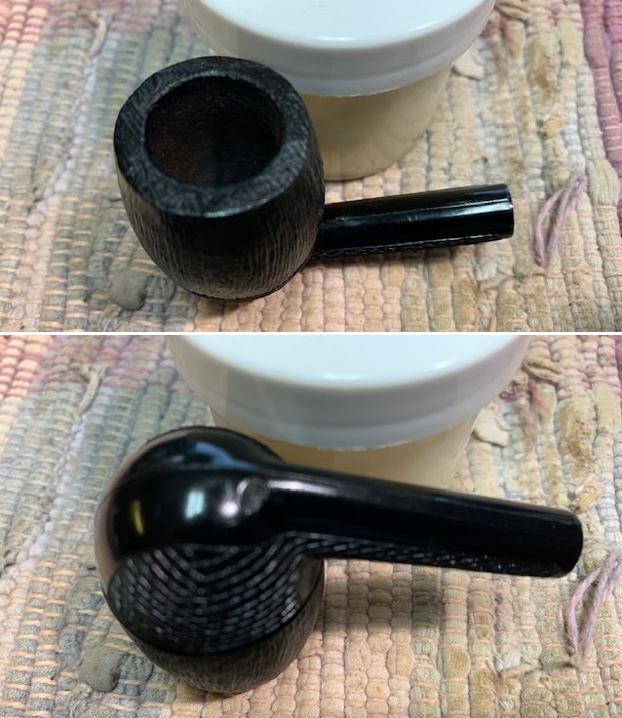
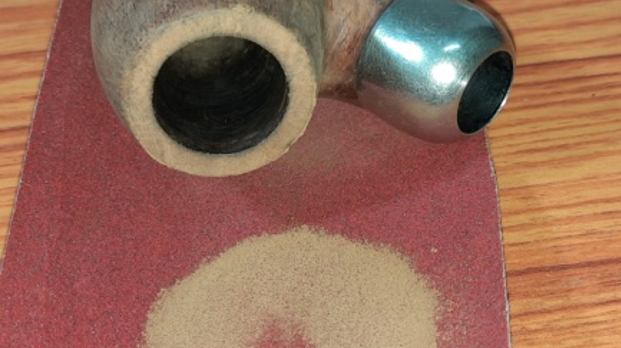
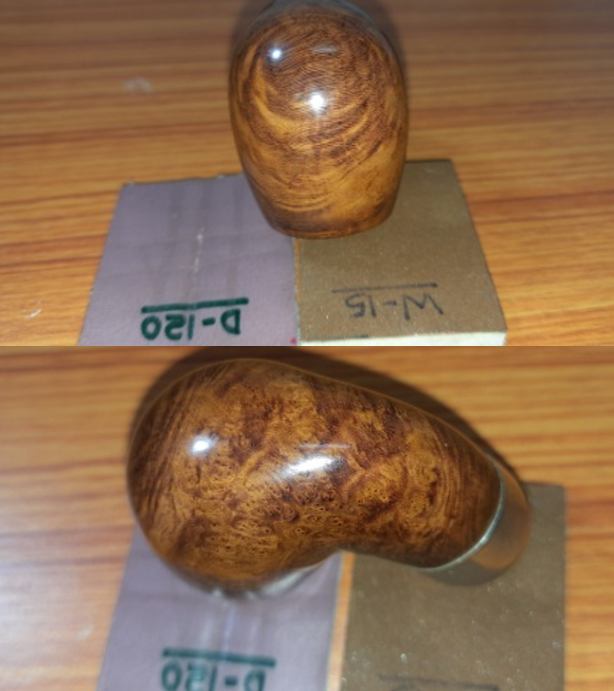
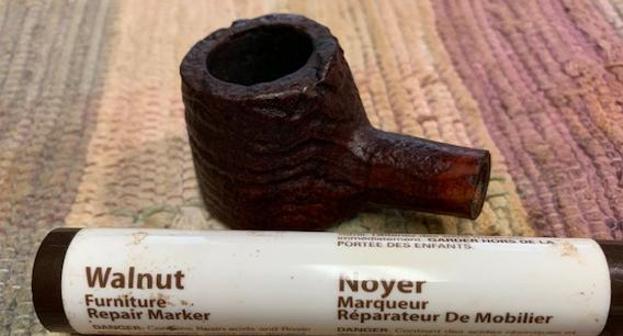
 I used a brass bristle brush to work on the white paint flecks in the rustication and to clean up the remaining debris on the rim top. It works well and leaves the surface clean.
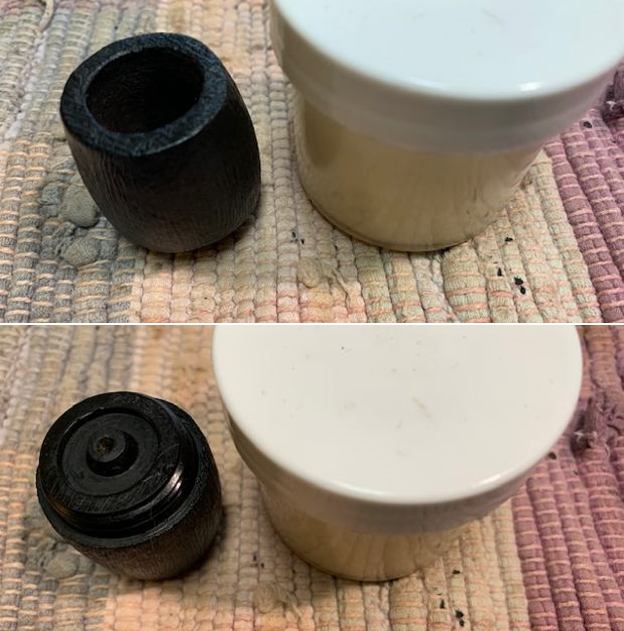
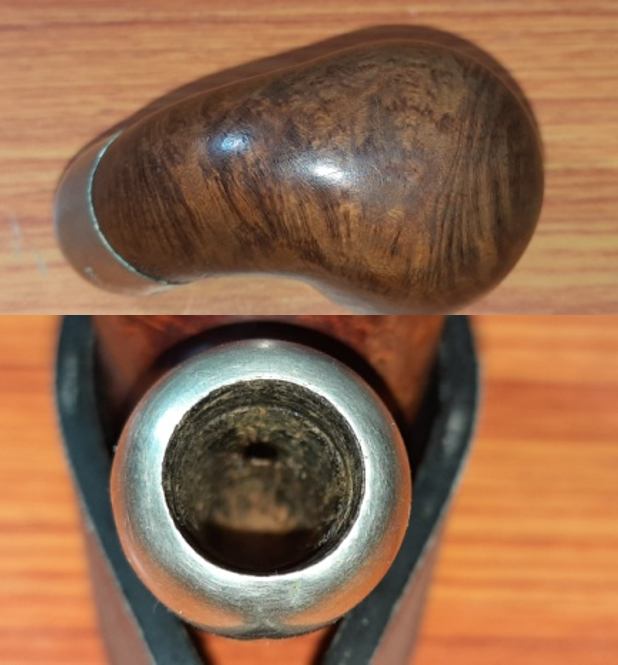
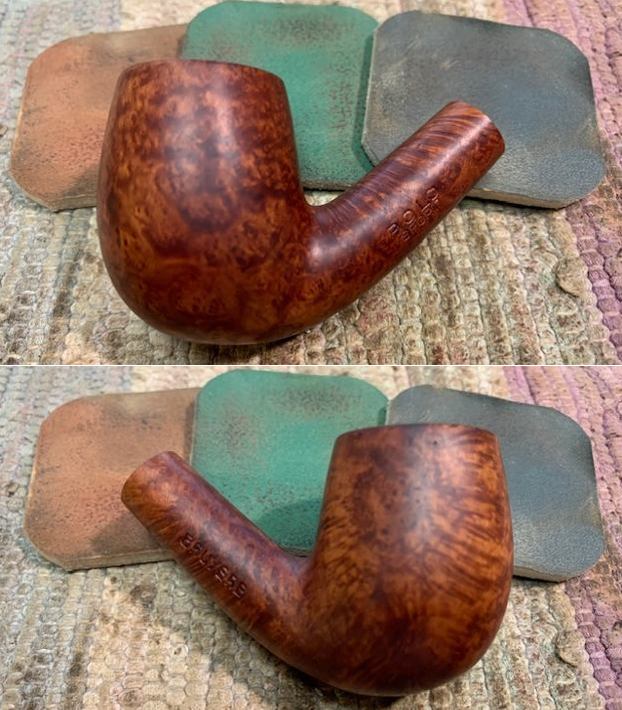
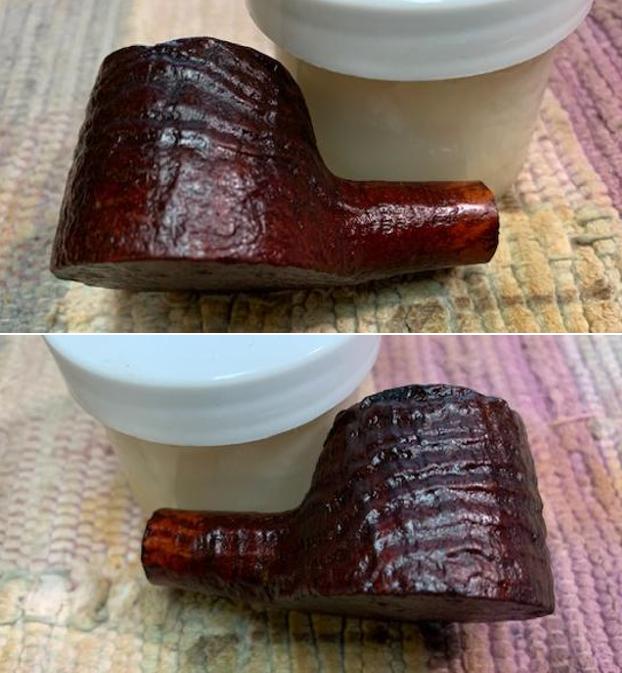
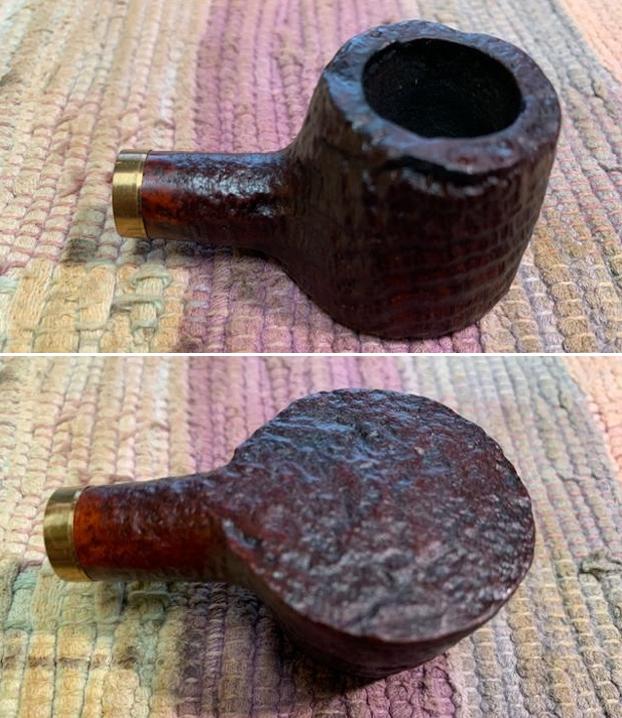
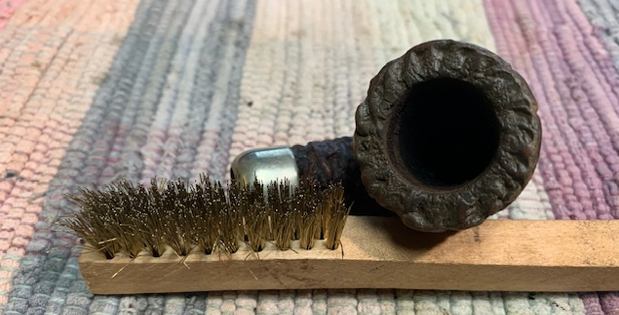 With the surface clean I was ready for the next step in the process. I rubbed the bowl and shank down with Before & After Restoration Balm. I worked it into the surface of the bowl sides and shank with my fingertips and a horsehair shoe brush to clean, enliven and protect the briar. I let the balm sit for ten minutes then buffed the bowl with a cotton cloth to raise the shine.
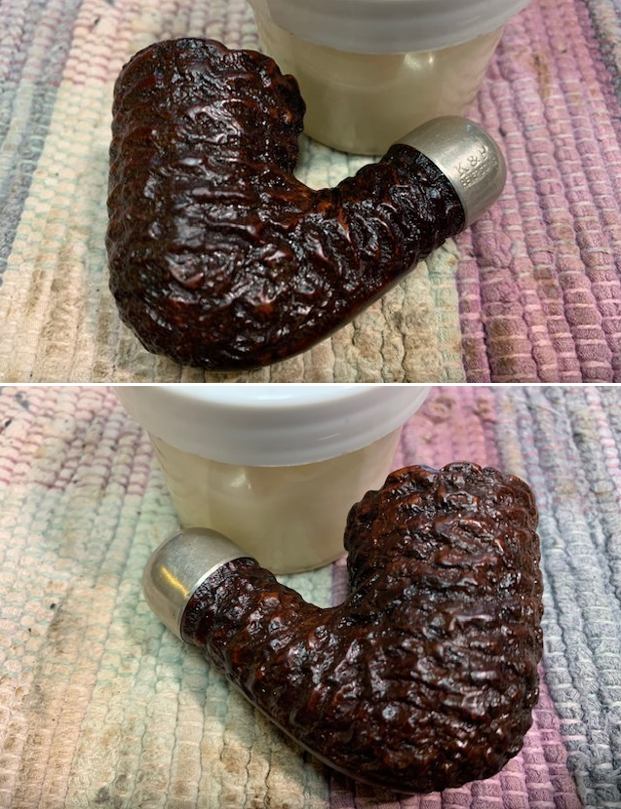
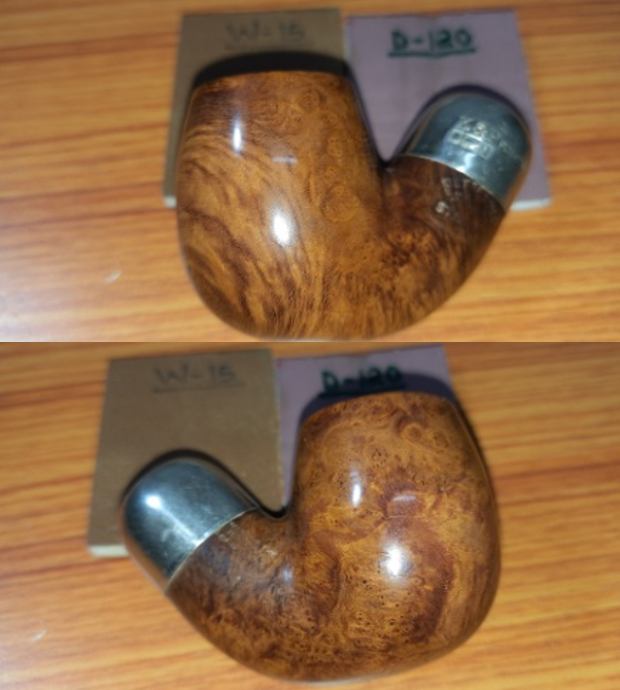
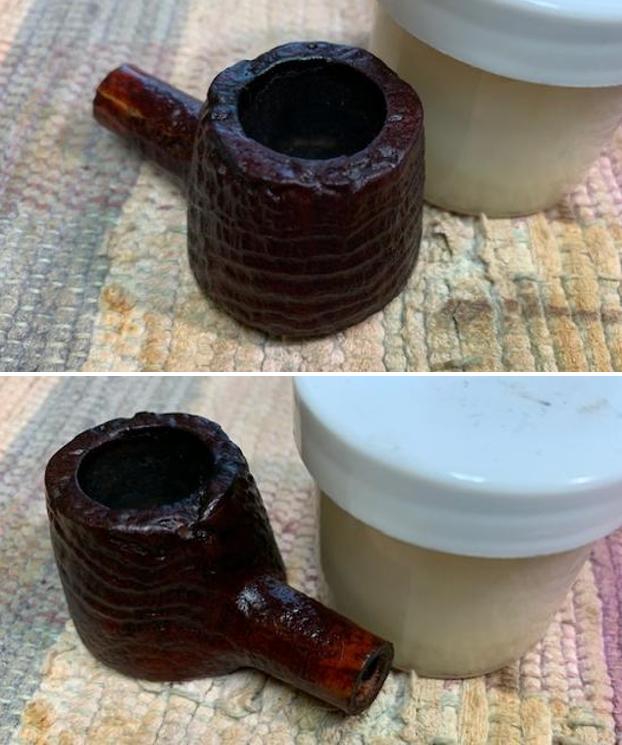
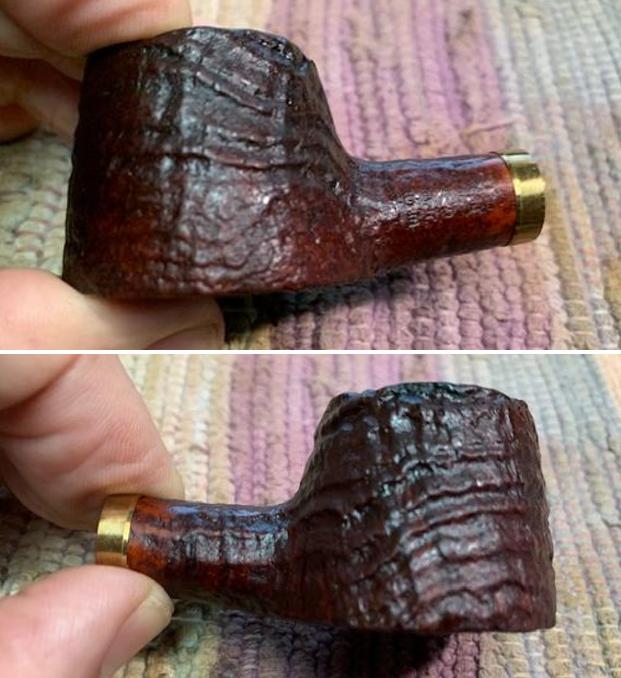
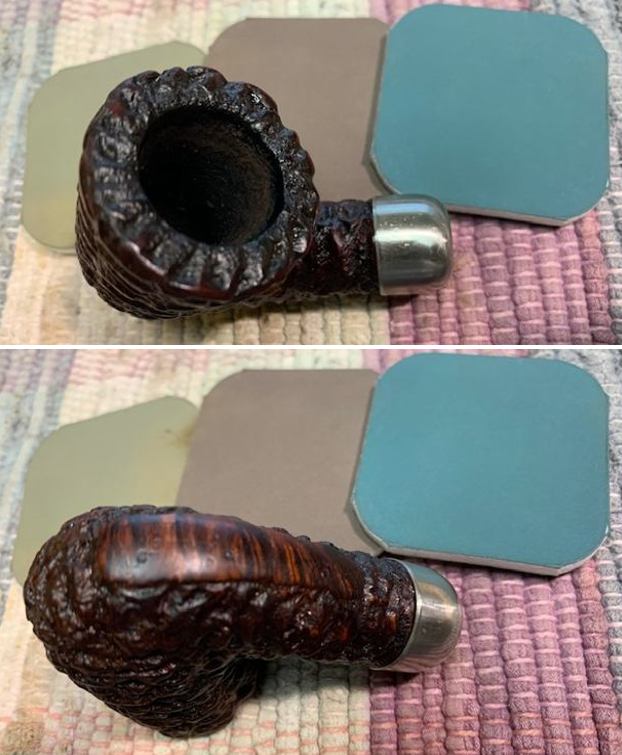
 I polished the nickel ferrule with micromesh sanding pads – using 3200-12000 grit pads and wiping it down after each pads with a damp cotton pad. The nickel took on a rich shine and looked really good with the rusticated bowl.
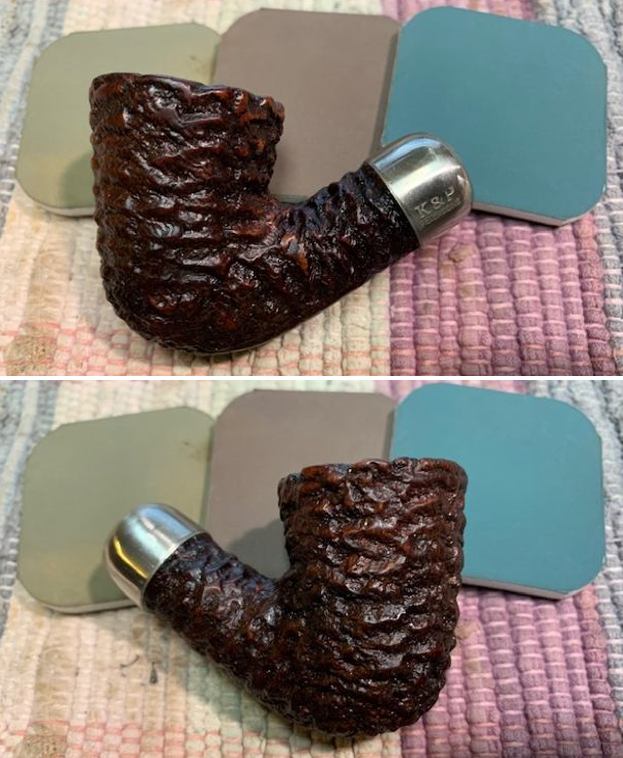
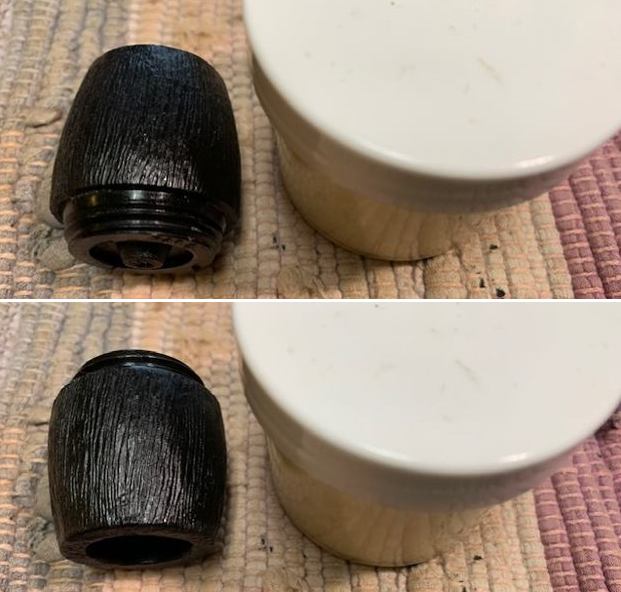
 I set the bowl aside and turned my attention to the stem. I removed it from the Briarville Pipe Stem Deoxidizer and cleaned it off with a paper towel. It looked much better.
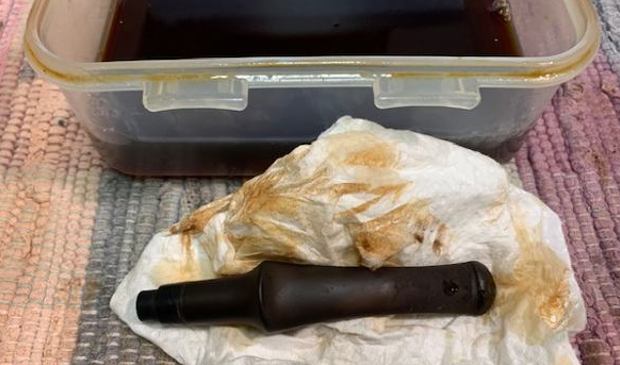 I scrubbed the stem surface with Soft Scrub to make sure I had removed as much of the remaining oxidation as I could before moving on to the repair that needed to be done on the bite through on the top of the stem.
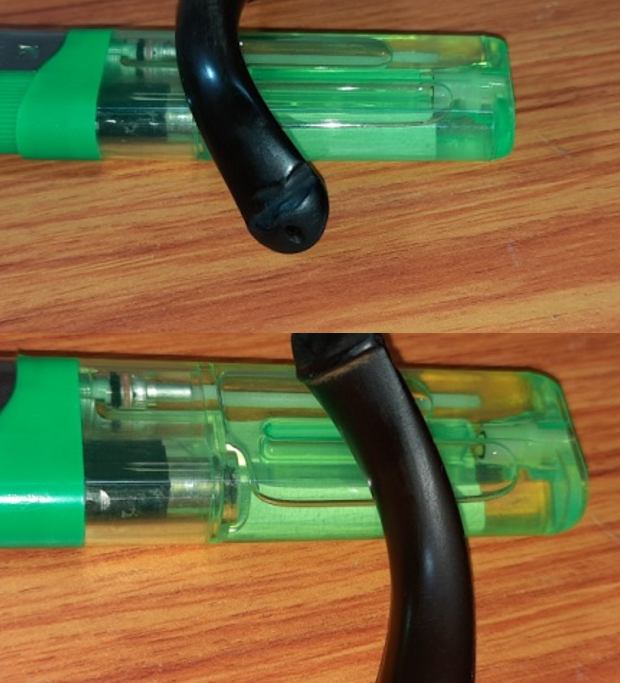
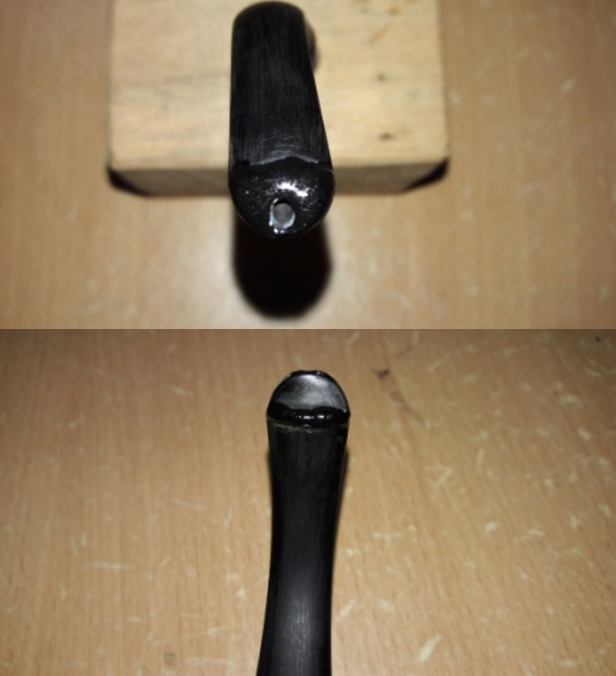
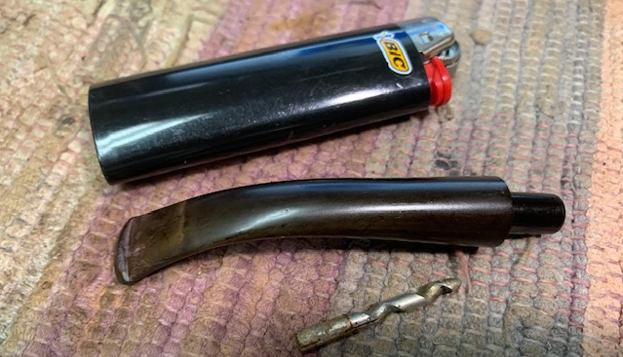
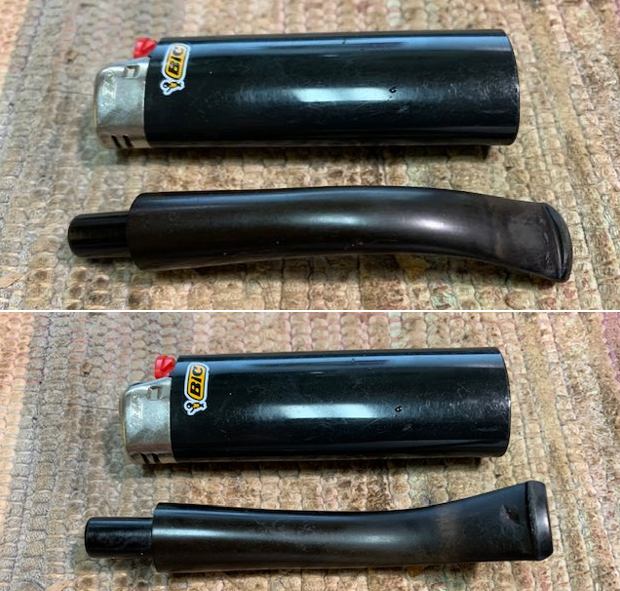
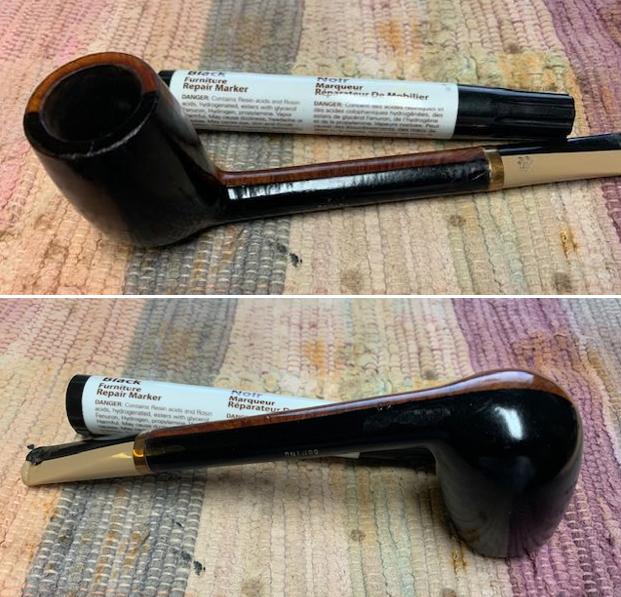
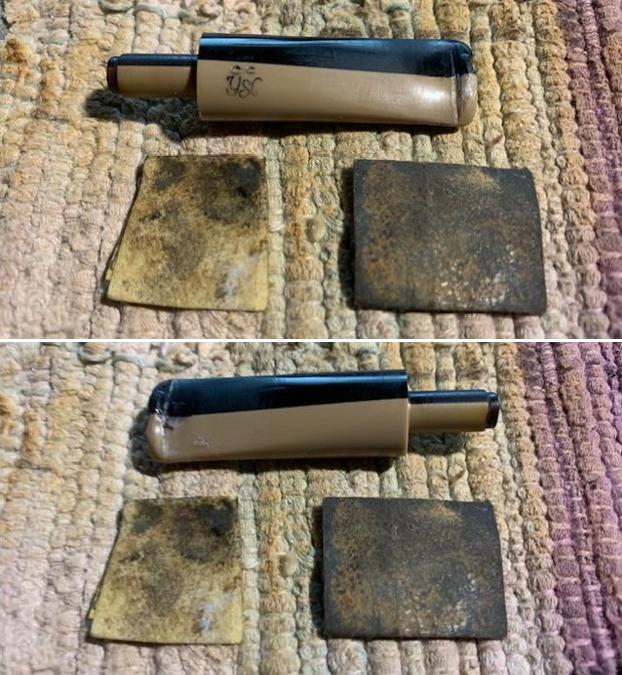
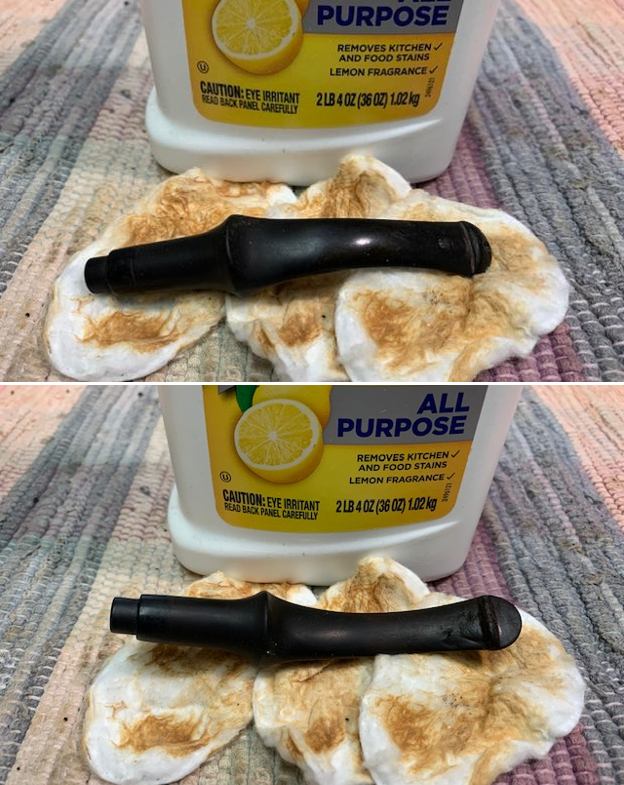 Once clean, I “painted” the tooth marks and chatter on the stem surface with the flame of a lighter to try and raise the dents. It worked relatively well and lifted the majority of them so that they were either gone or smaller.
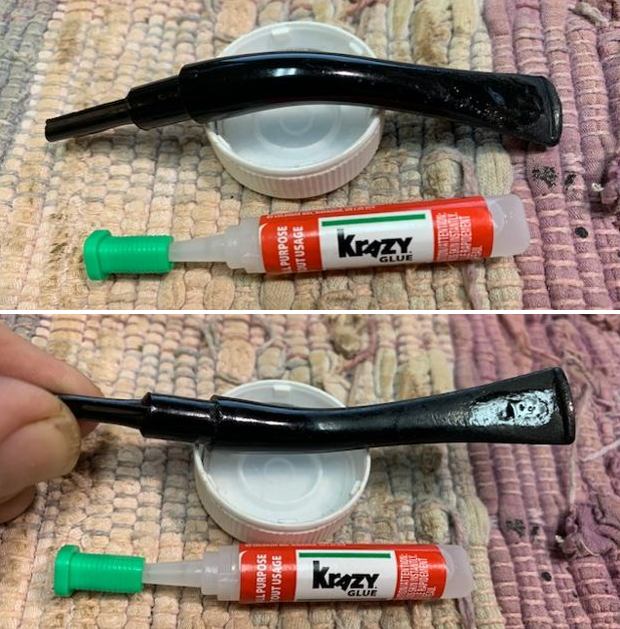
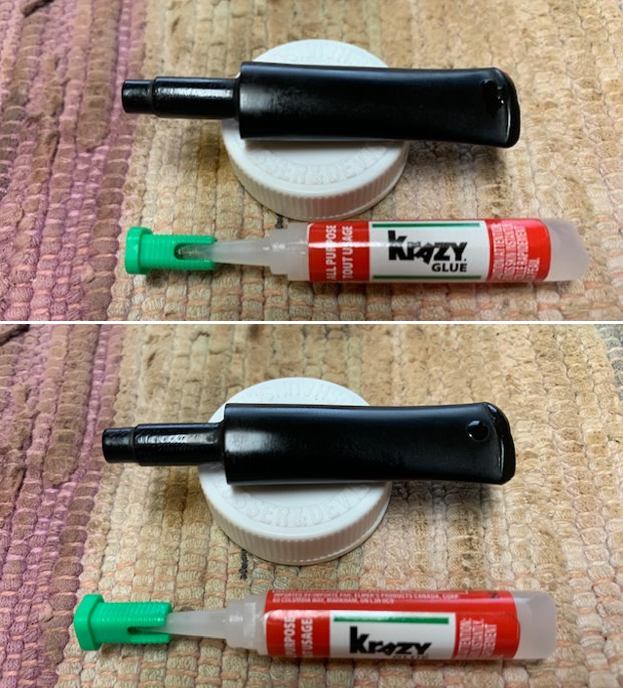
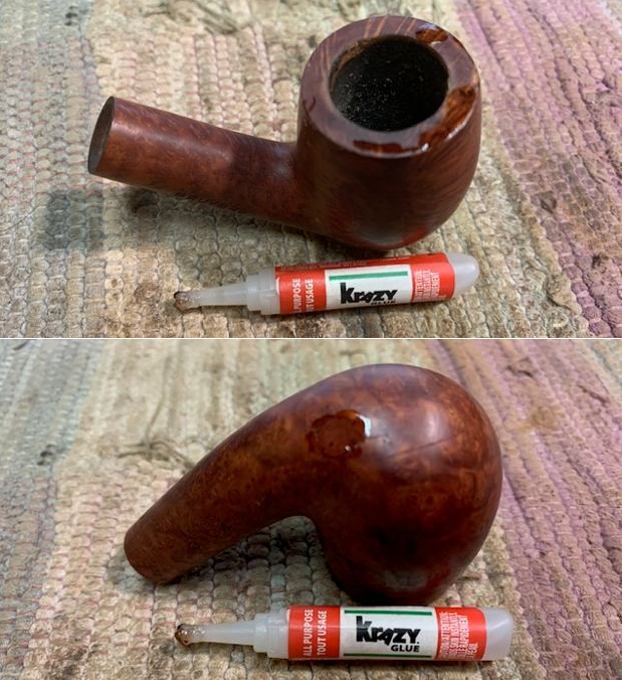
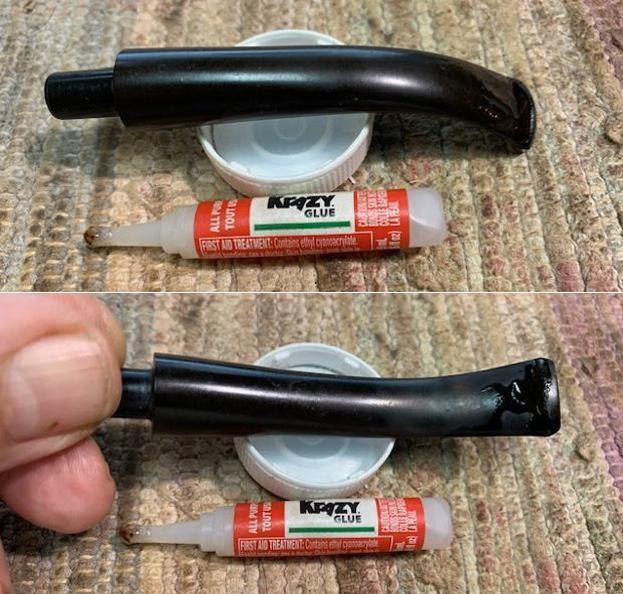
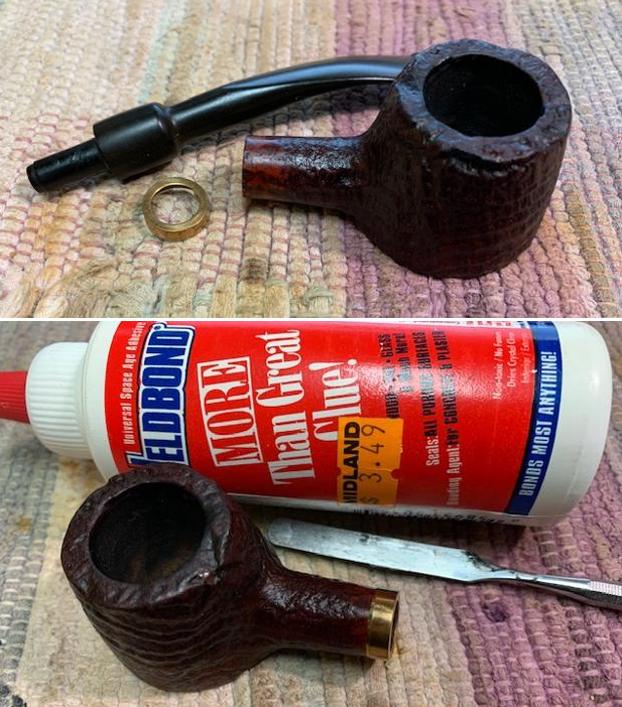
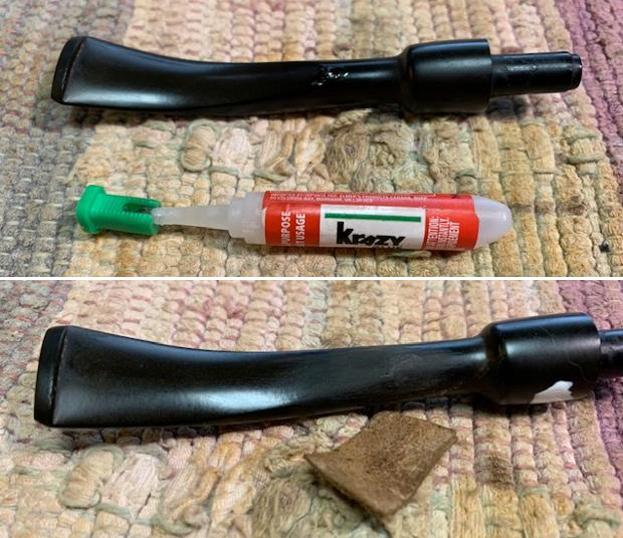
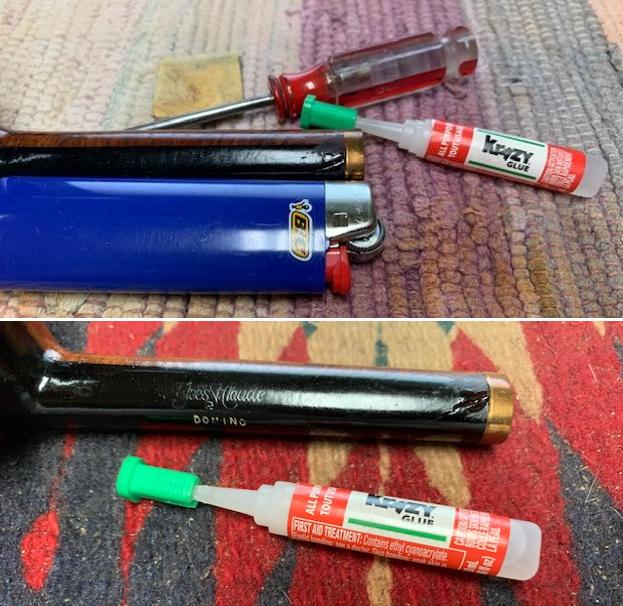
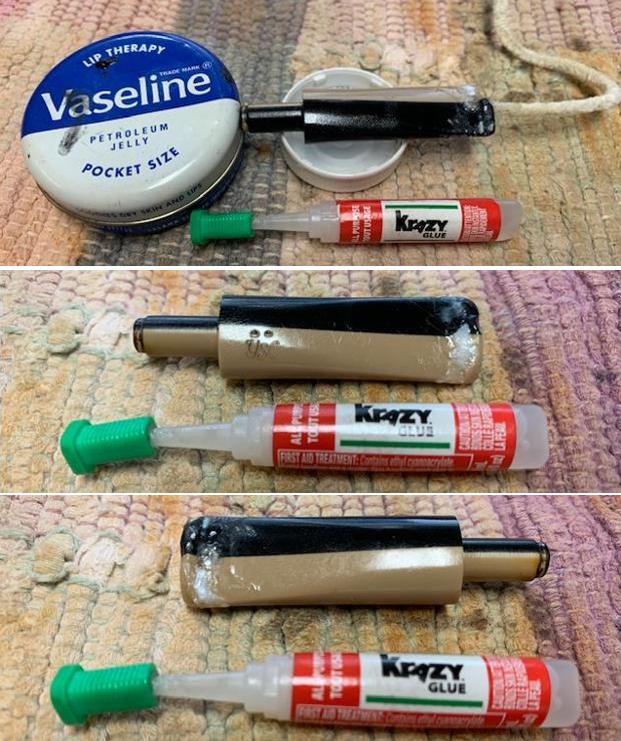
 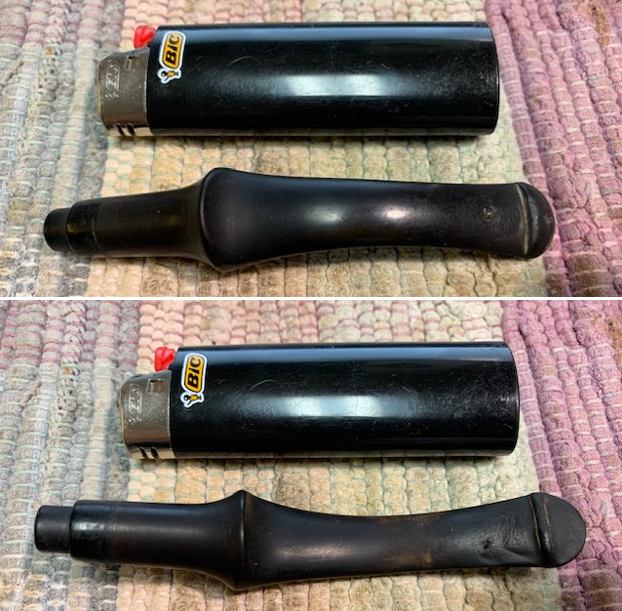 With that finished I greased a pipe cleaner with Vaseline and inserted it in the stem until it was below the bite through. I mixed a paste of black super glue and charcoal powder to make the repair. I pressed the paste into the hole on the stem top. I filled the remaining tooth chatter and marks in with the mixture and set it aside to cure. I sprayed it with an accelerator then removed the pipe cleaner. I did not want it to dry and stick in the airway.
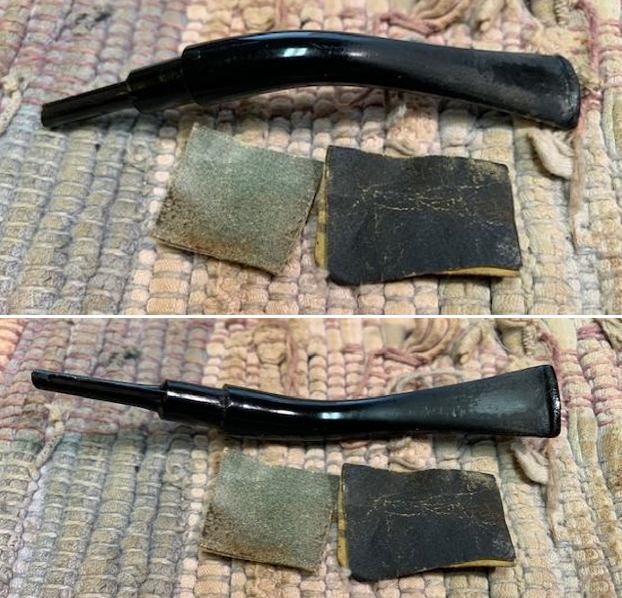
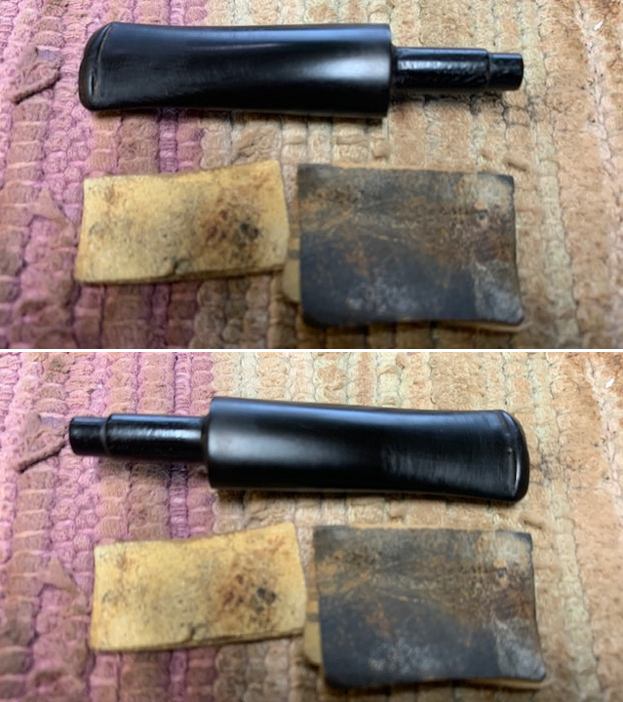
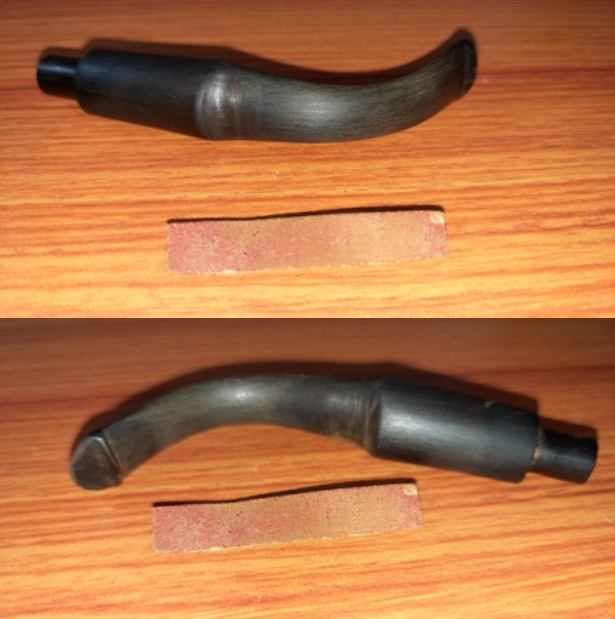
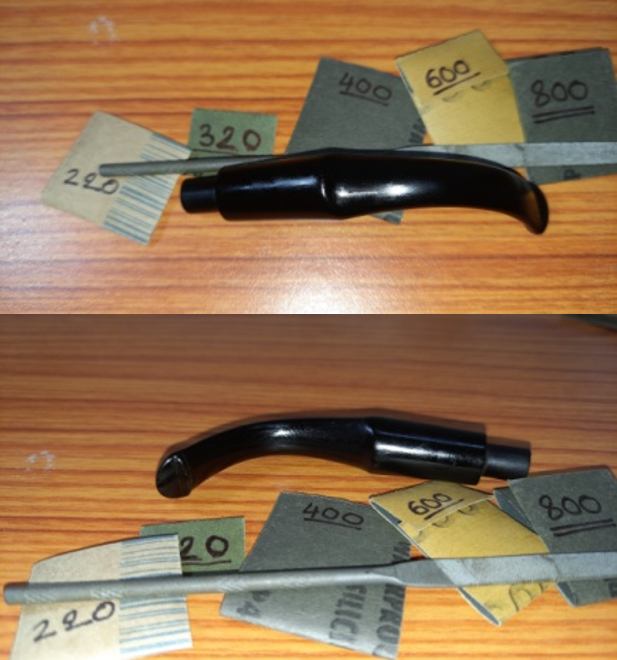
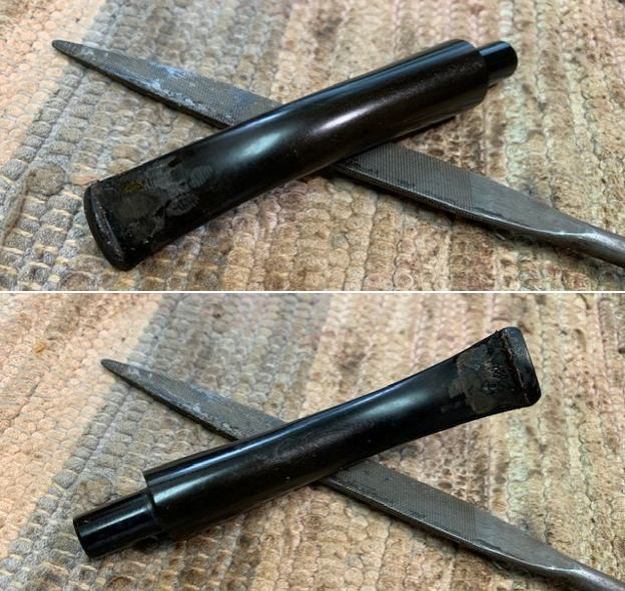
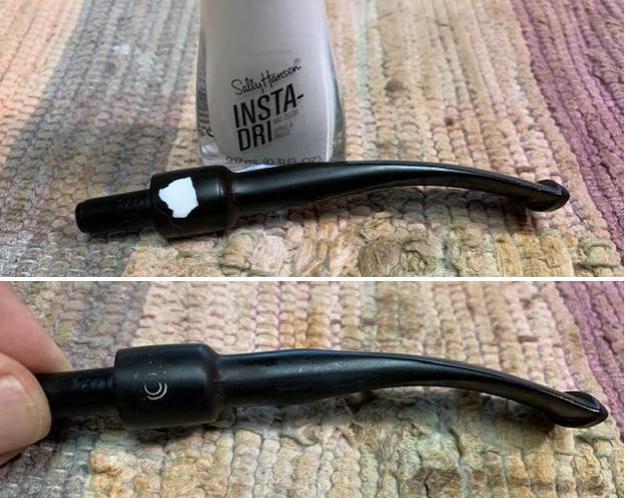
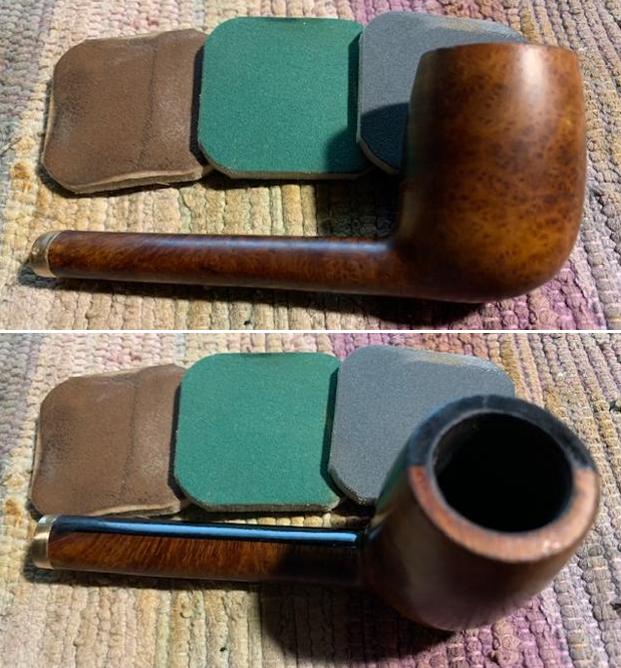
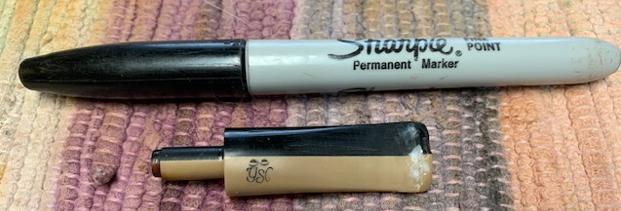
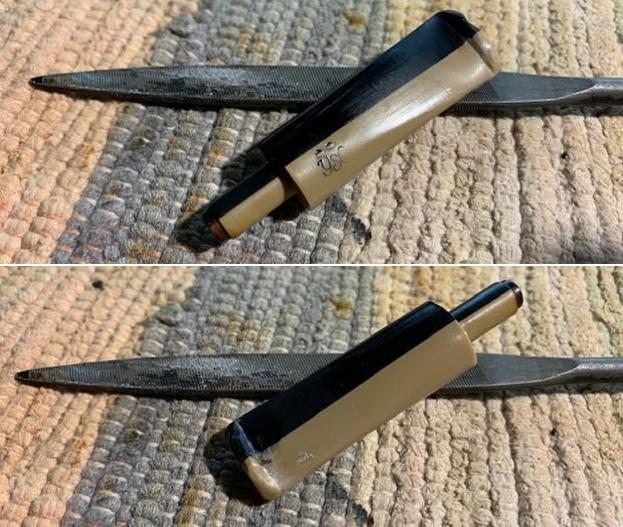
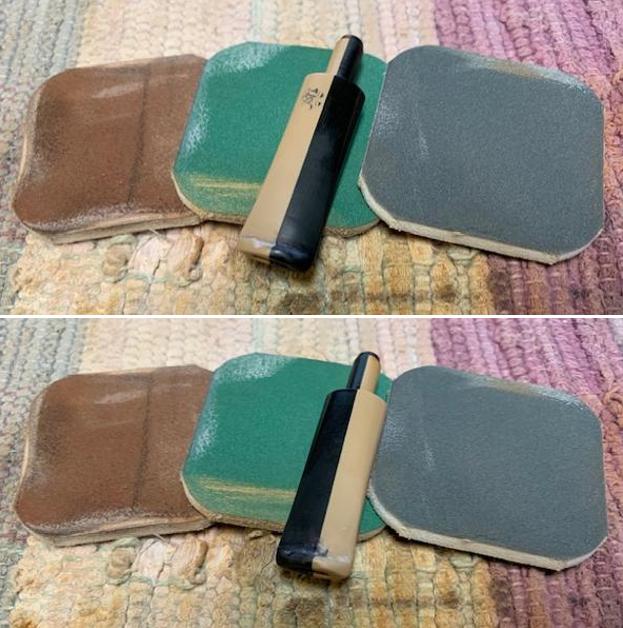
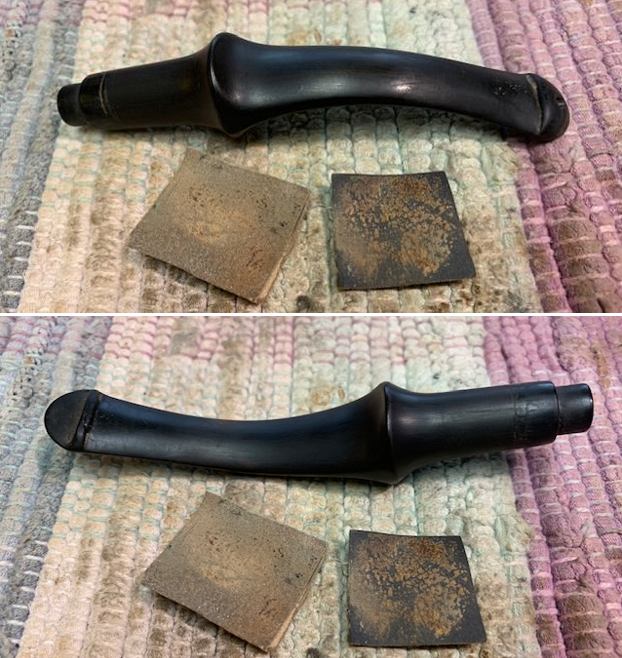
 Once the repairs cured I used a small file to flatten out the repairs and reshape the P-lip style button edges. I used 220 grit sandpaper to smooth out the repairs on both sides of the stem. I started to polish it with 400 grit wet dry sandpaper. The stem is looking much better.
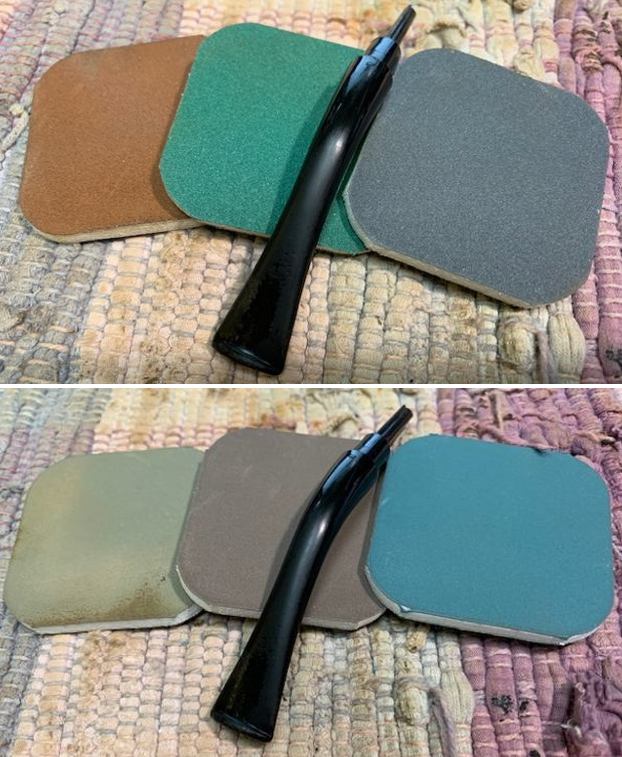
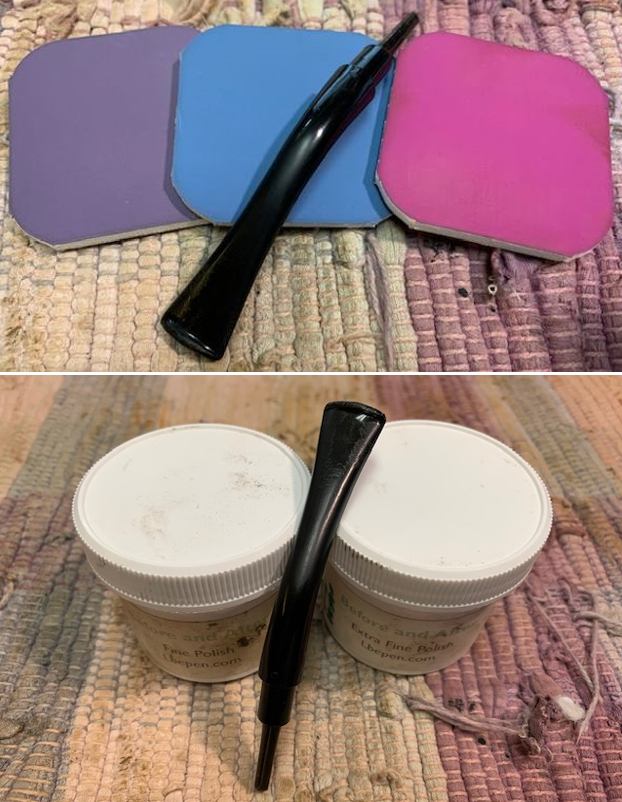
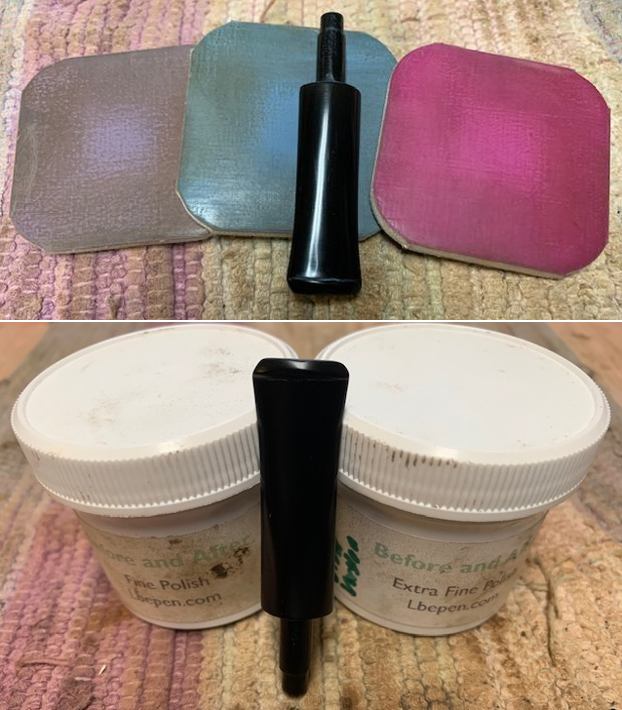
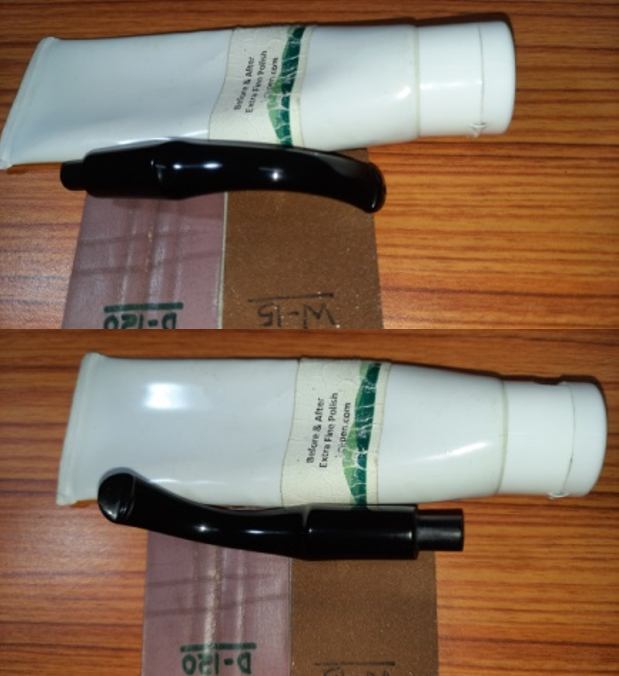
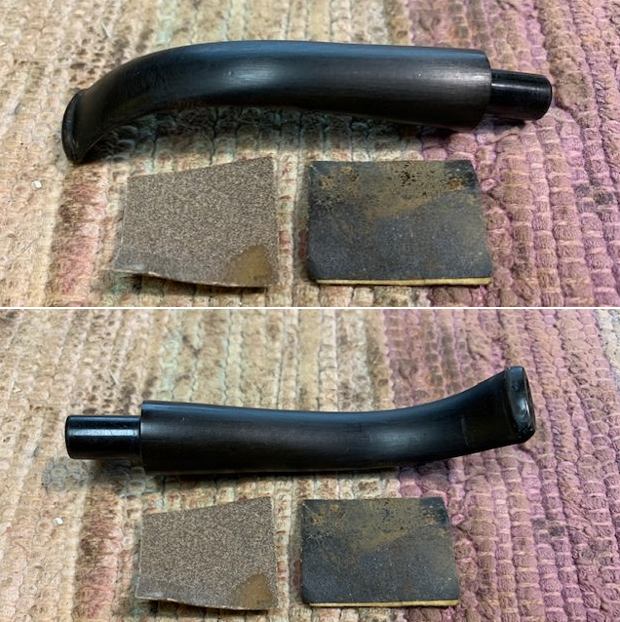
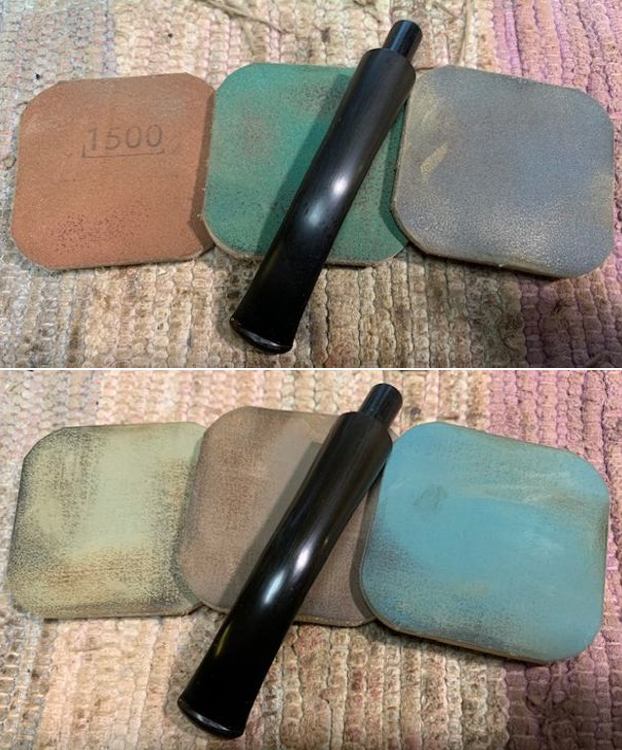
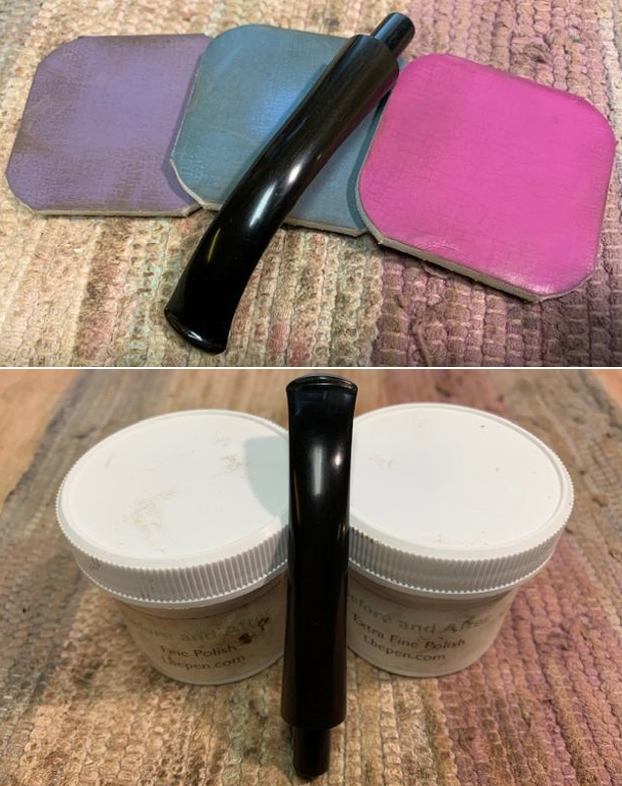
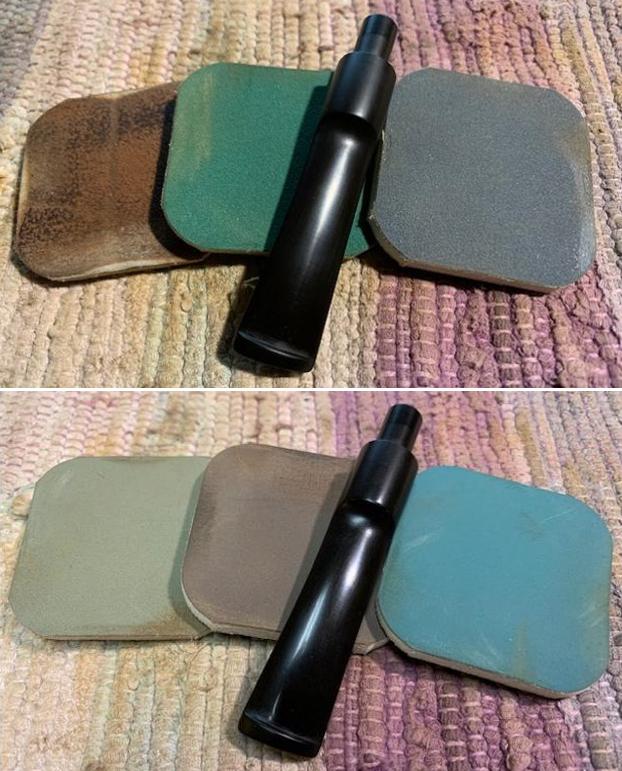
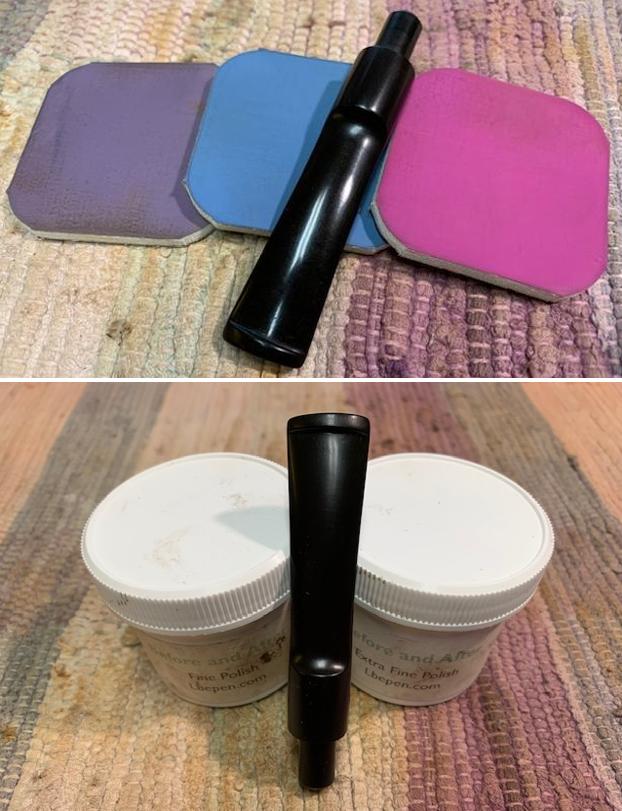
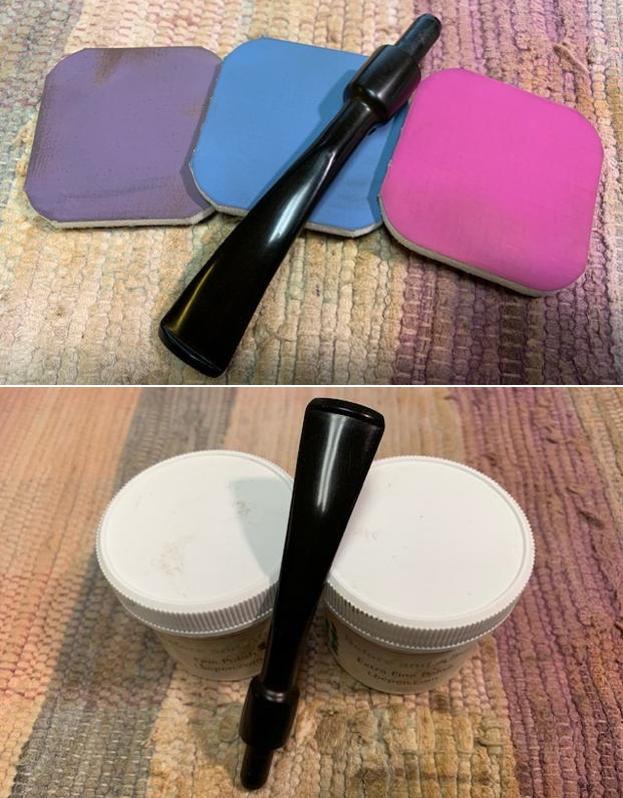
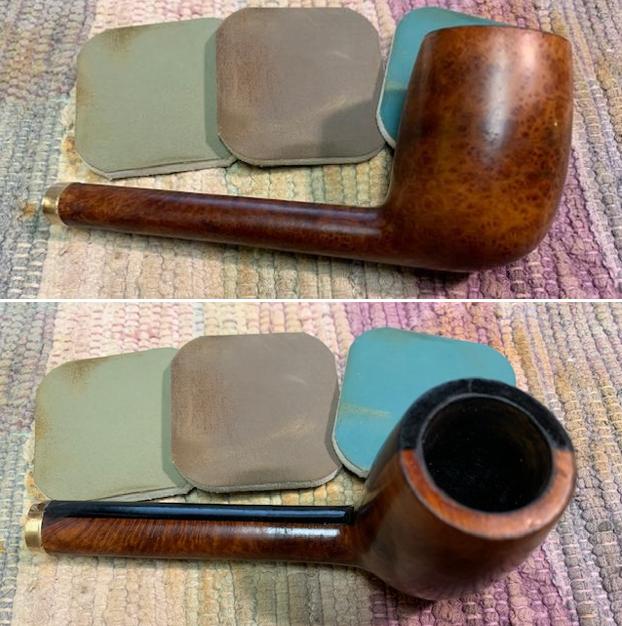
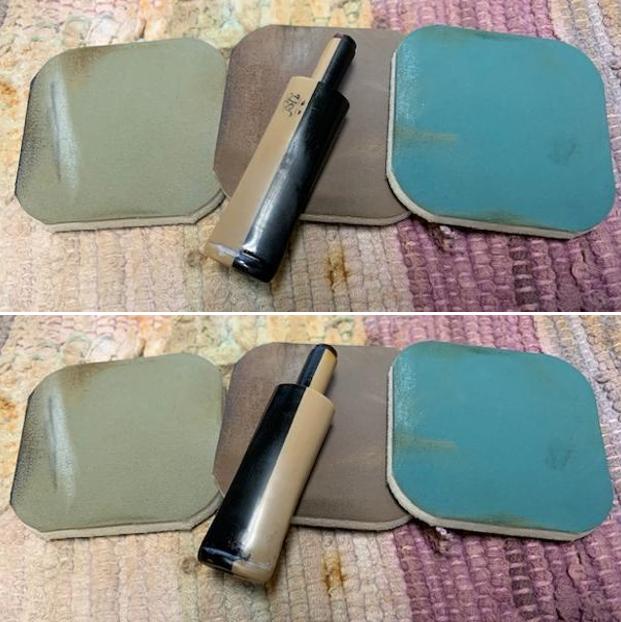
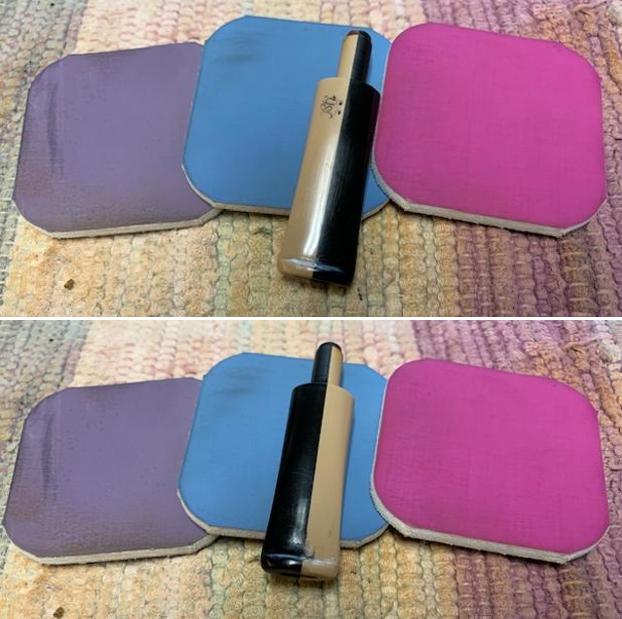
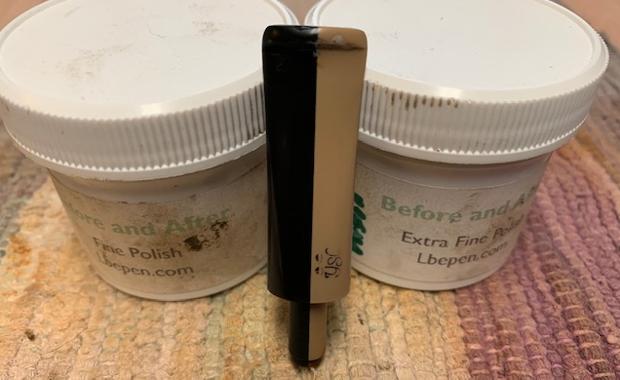
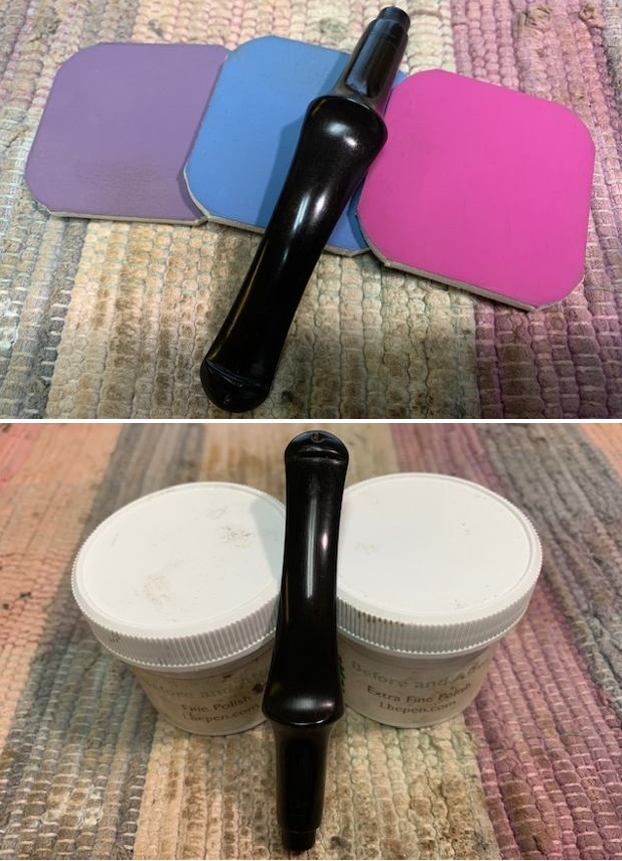
 I polished the stem with micromesh sanding pads – 1500-12000 grit pads. I wiped it down with Obsidian Oil after each sanding pad. I used Before & After Pipe Polish – both Fine and Extra Fine to further polish the stem. I gave it a final rubdown with Obsidian Oil and set it aside to cure.
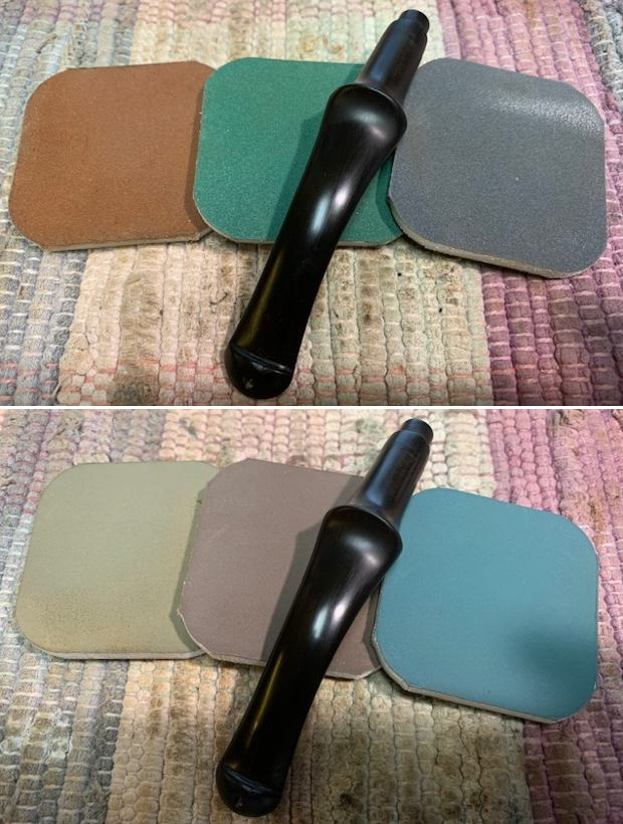
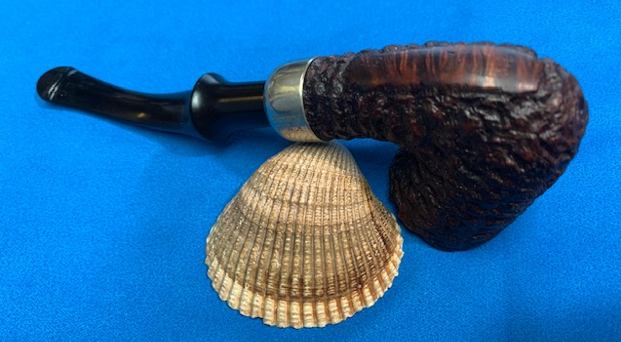
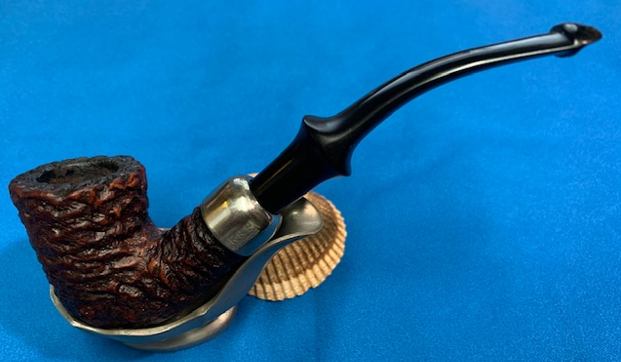
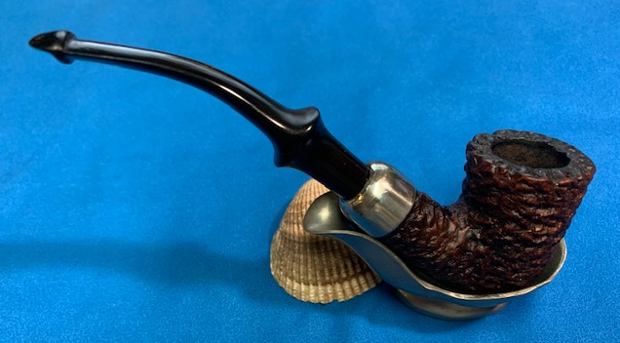
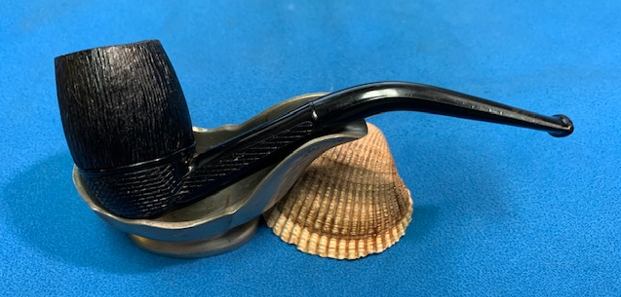
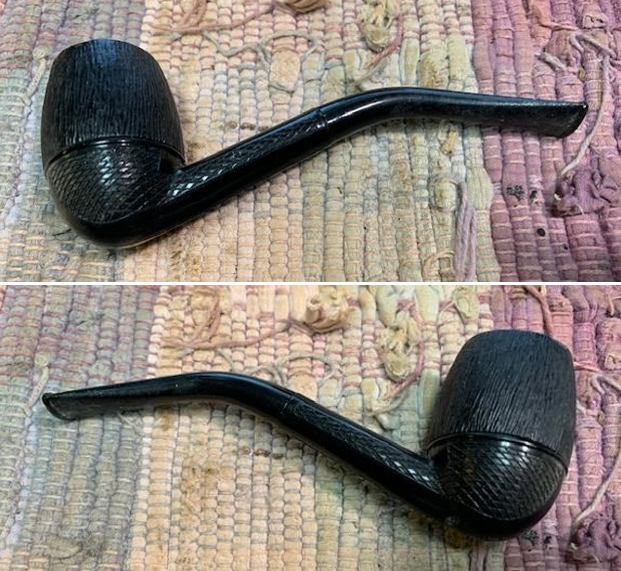
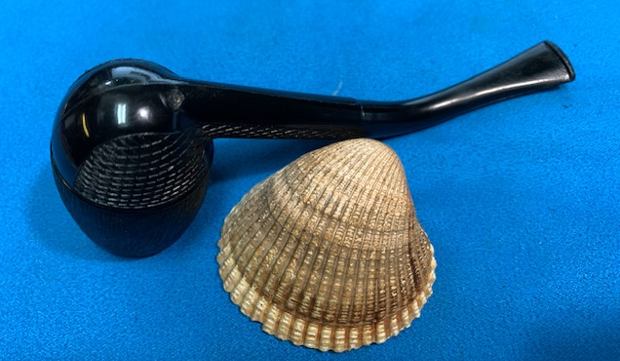
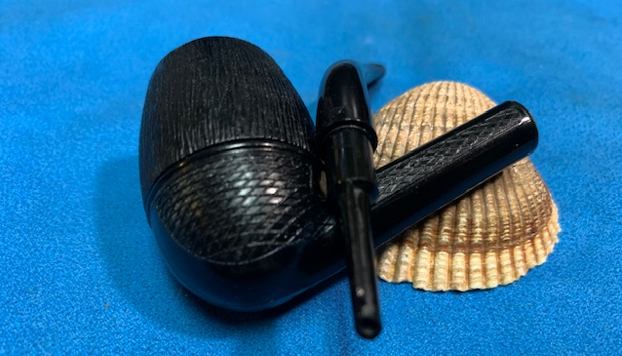
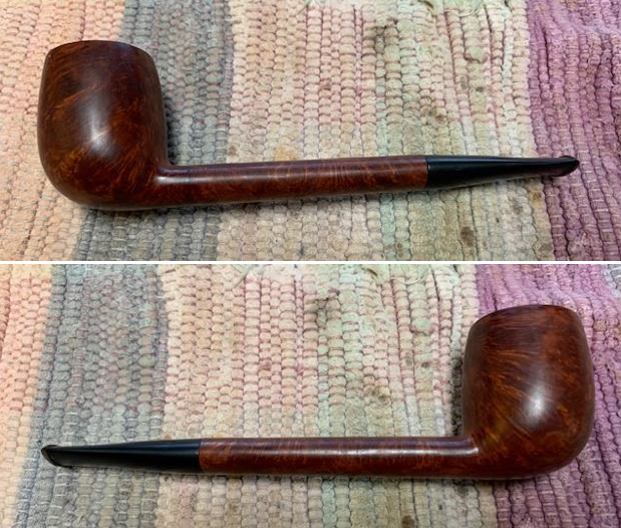
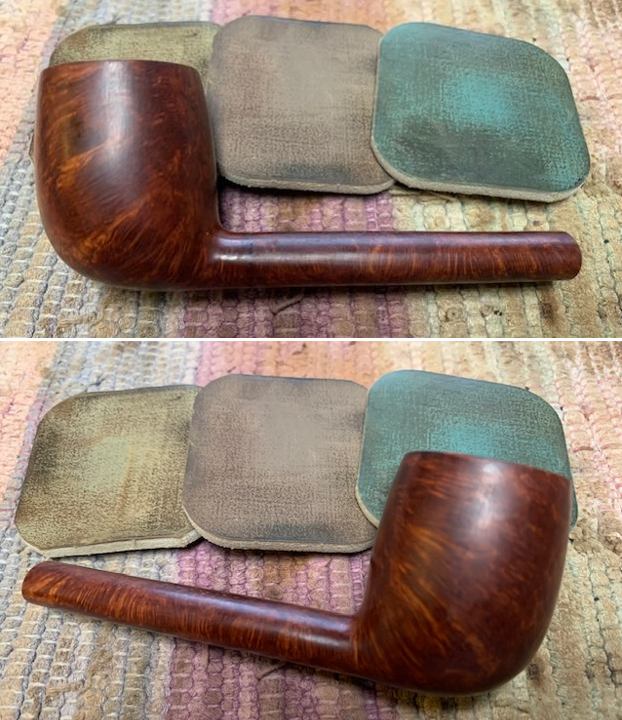
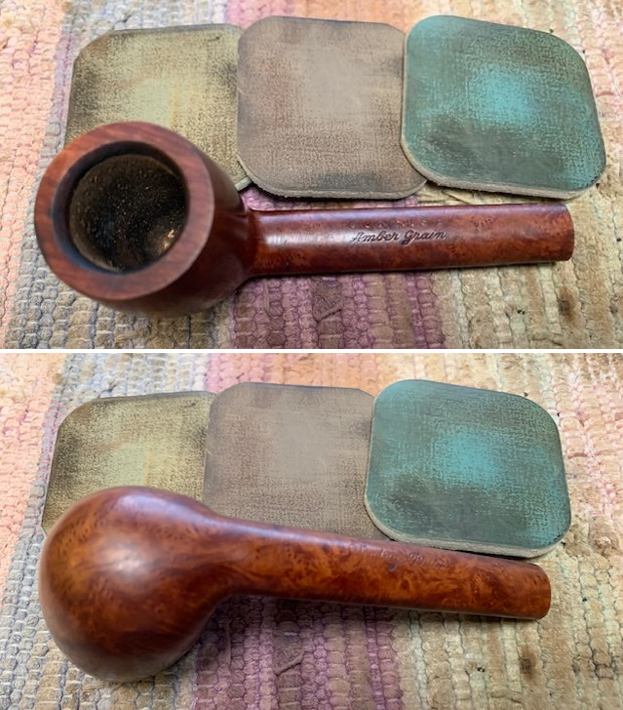
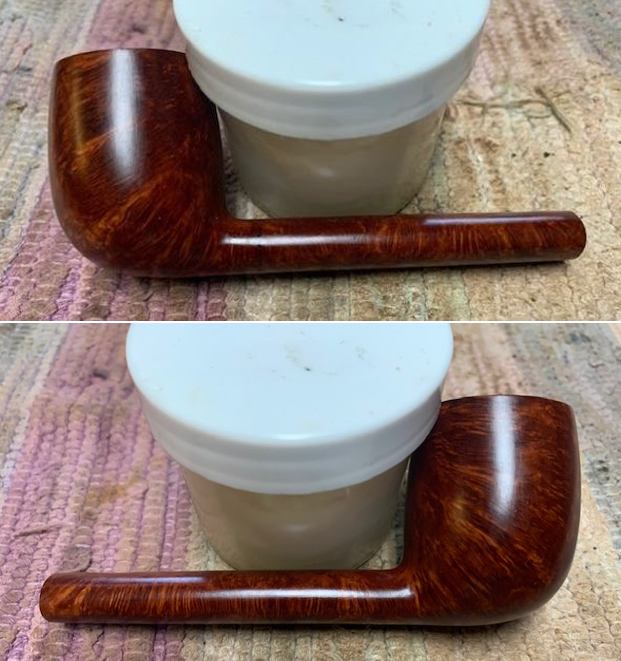
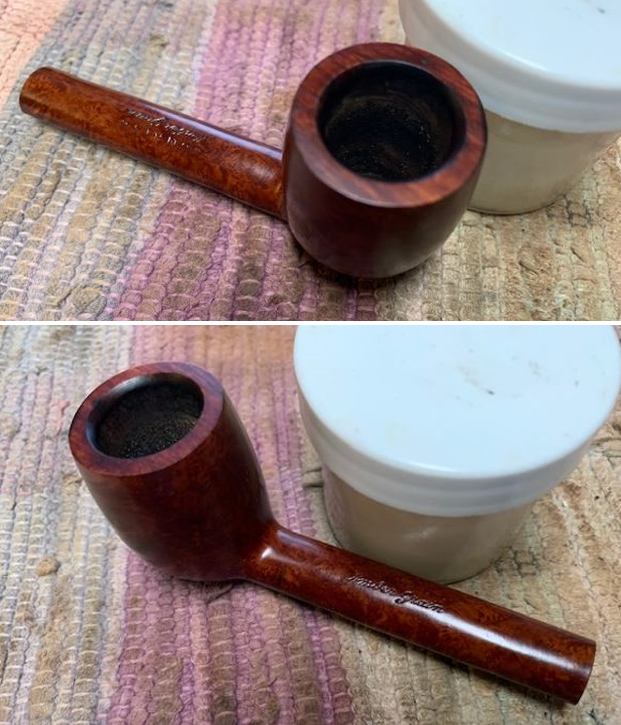
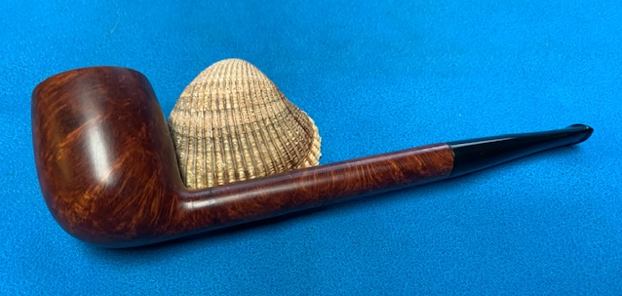
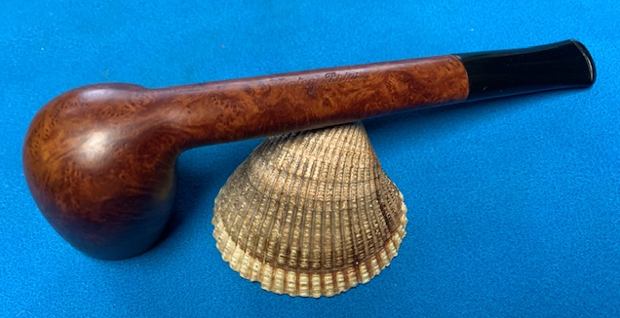
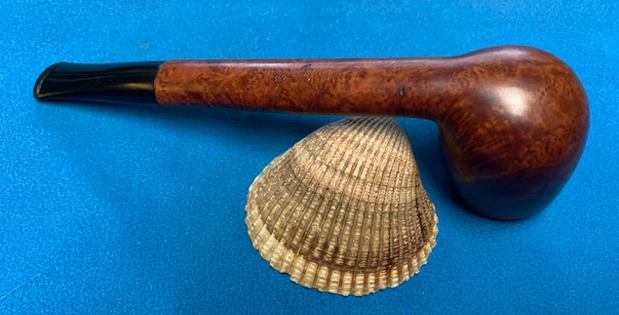
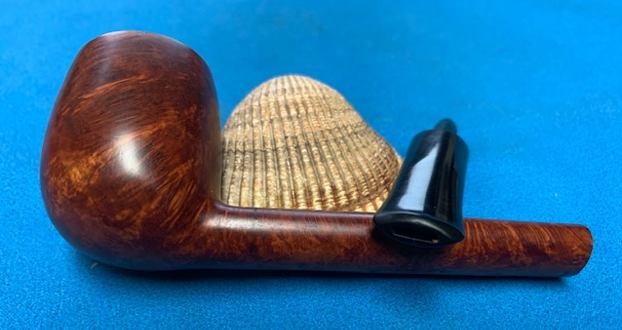
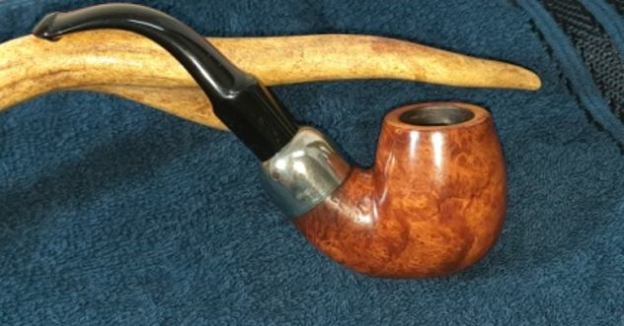
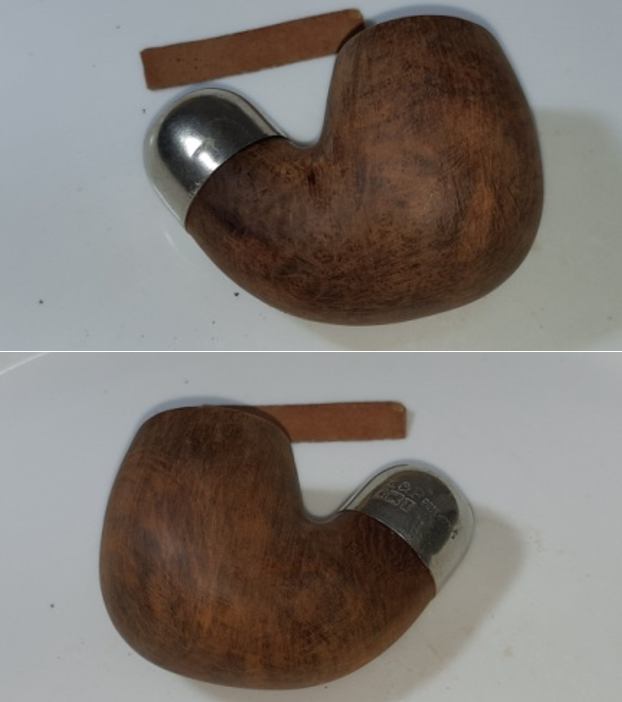
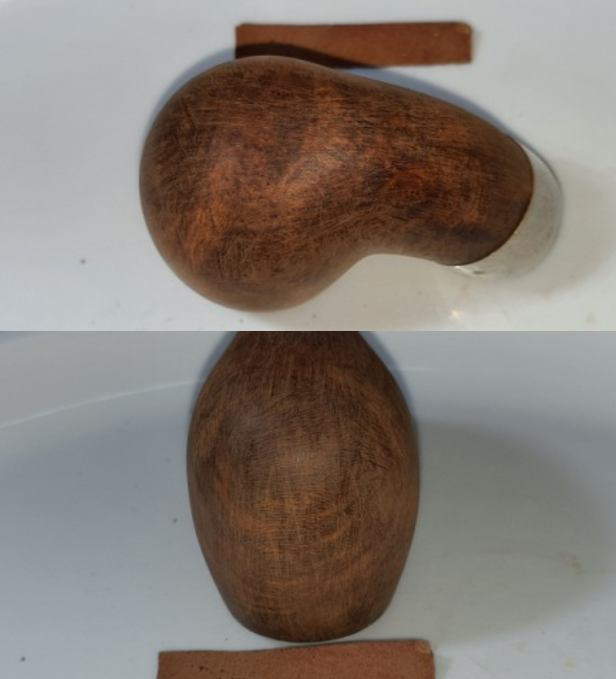
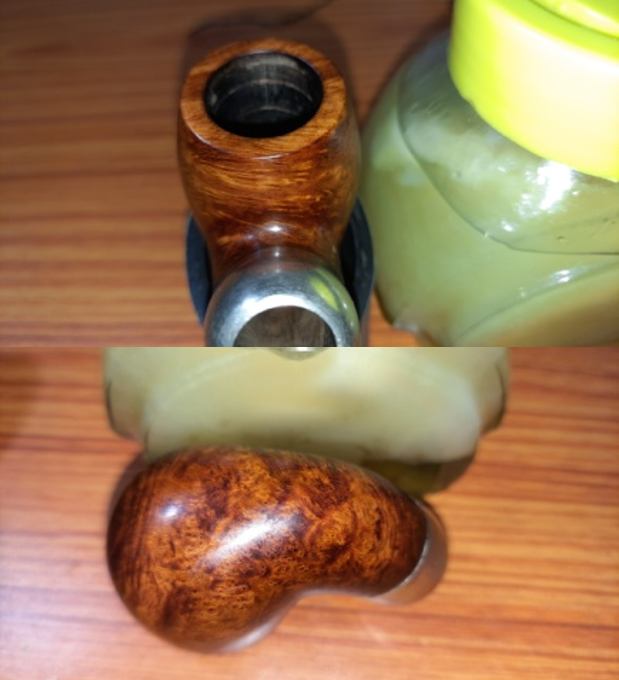
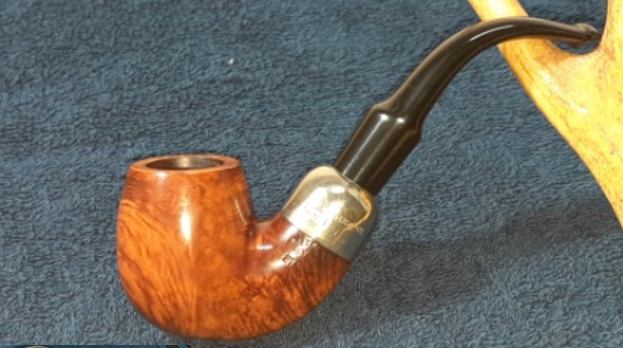
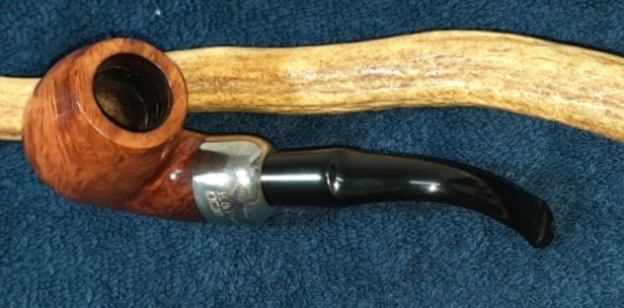
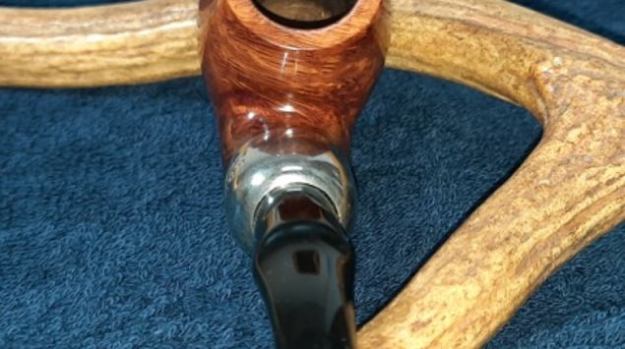
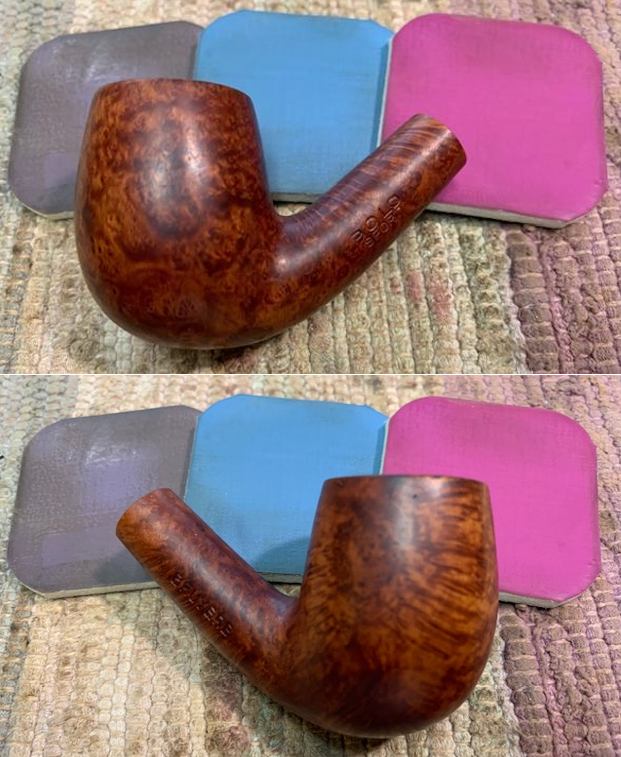
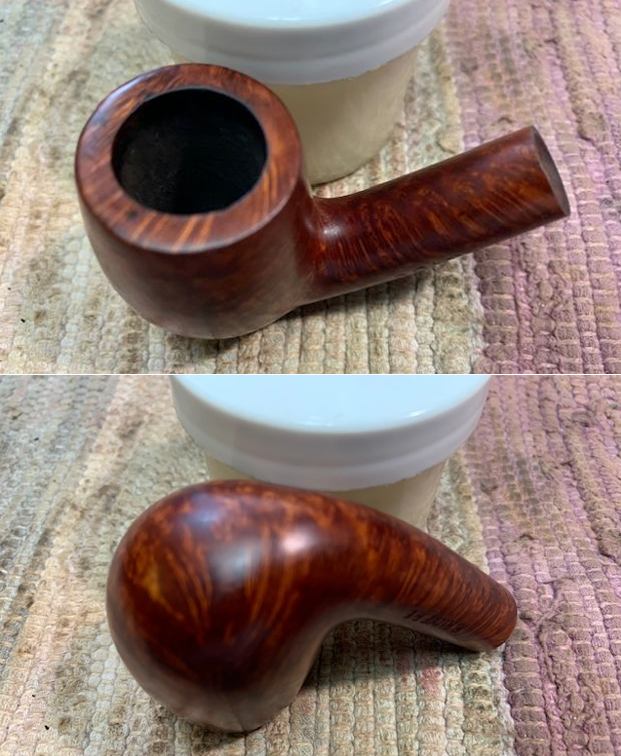
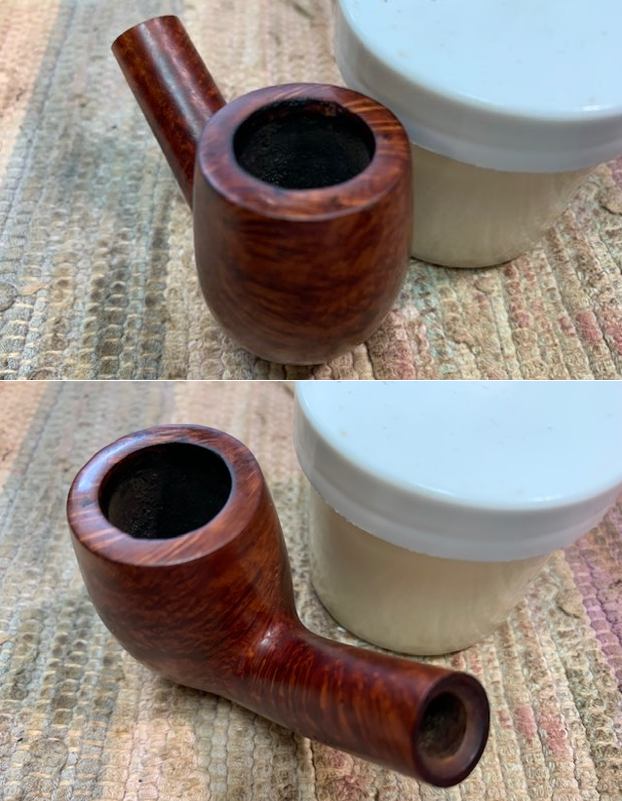
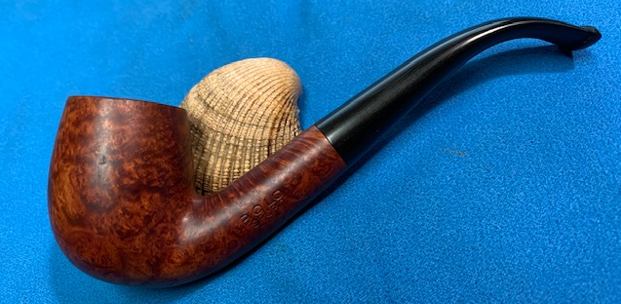
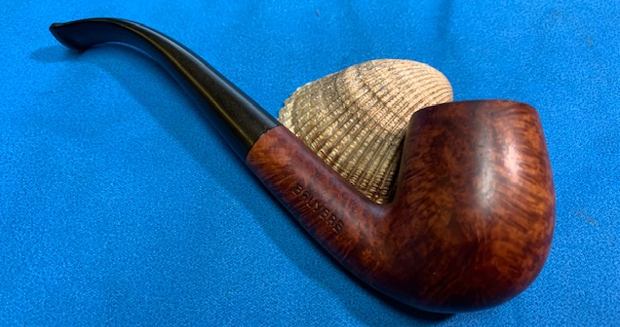
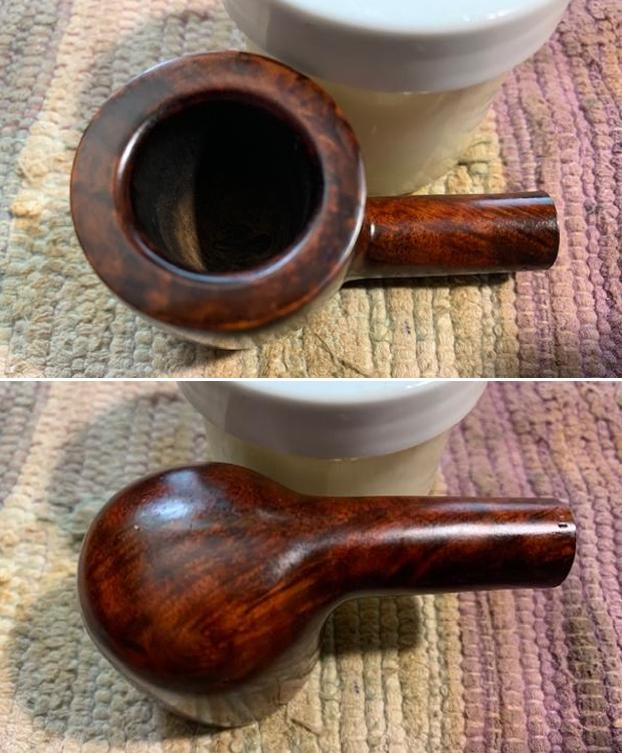
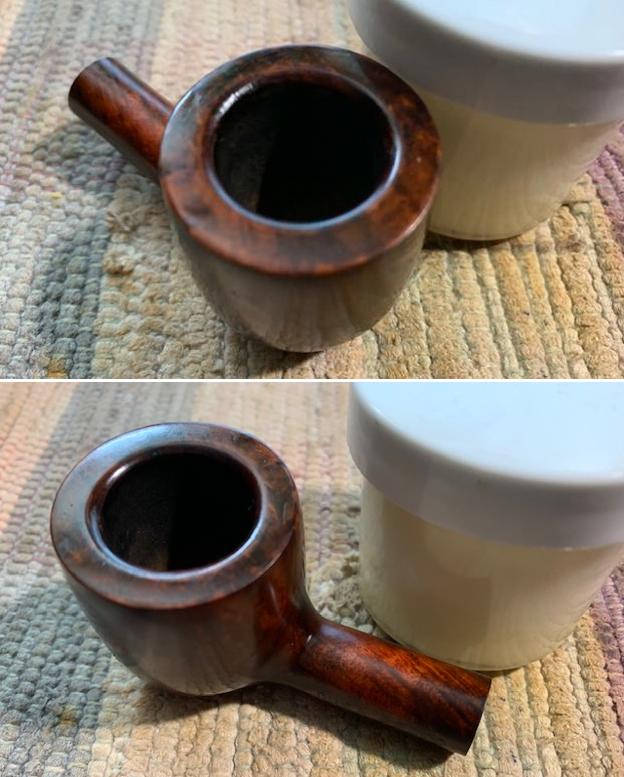
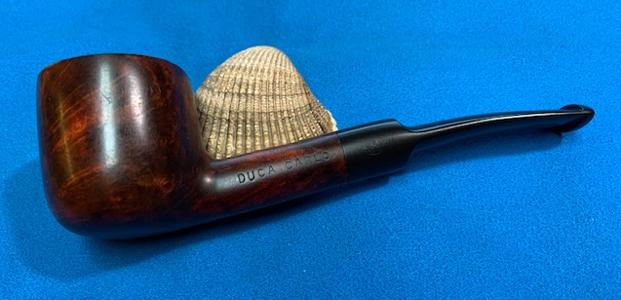
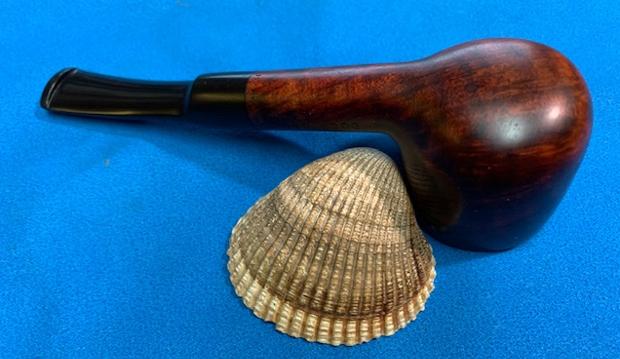
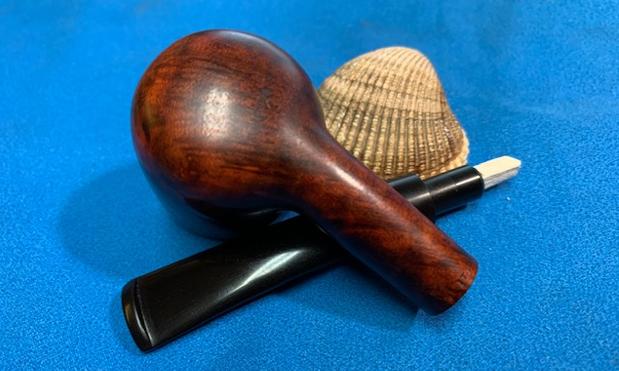
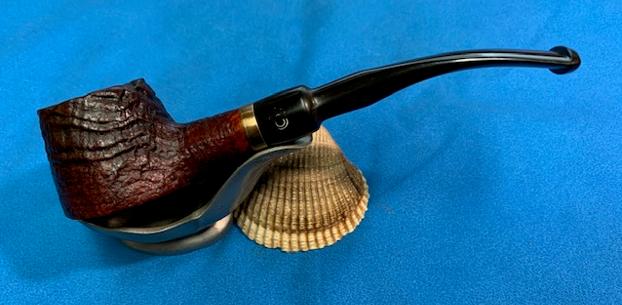
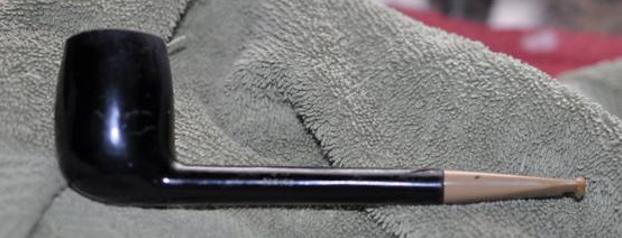
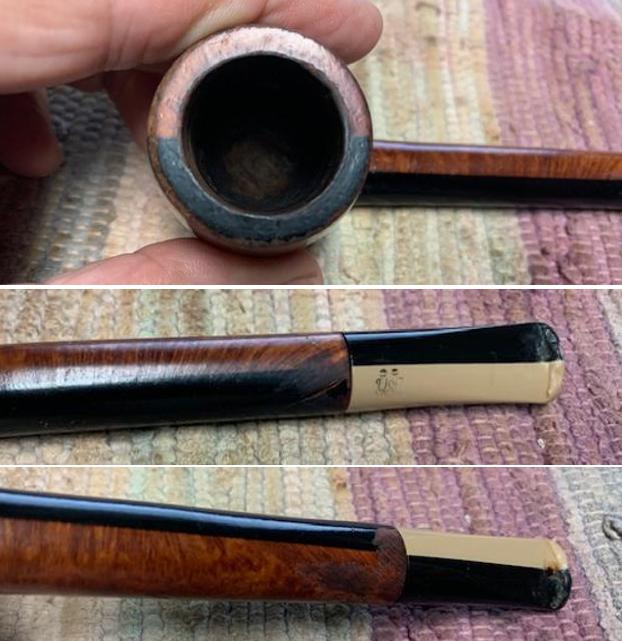
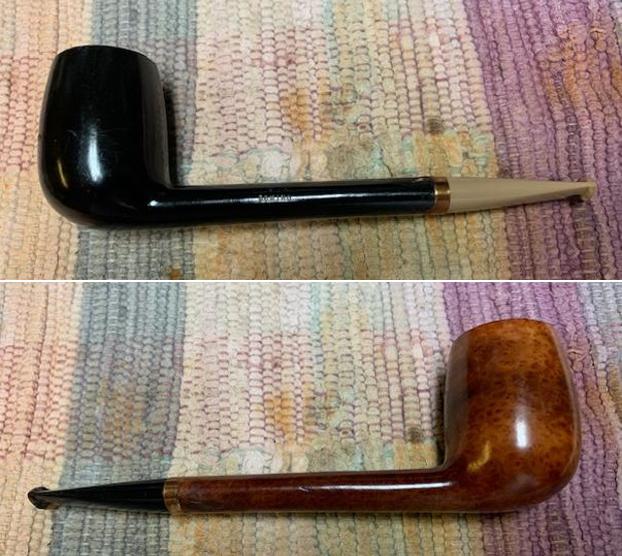
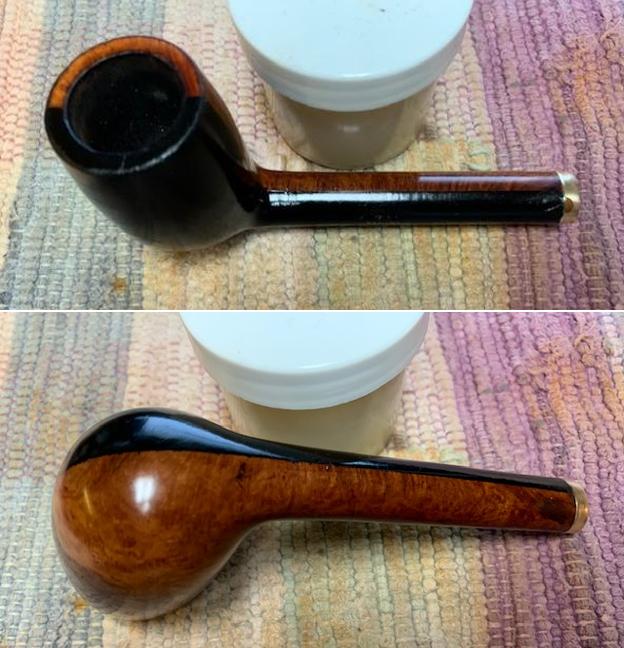
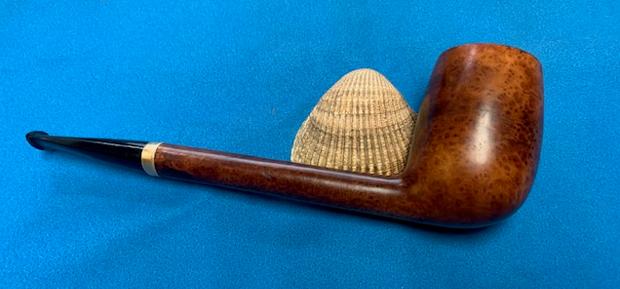
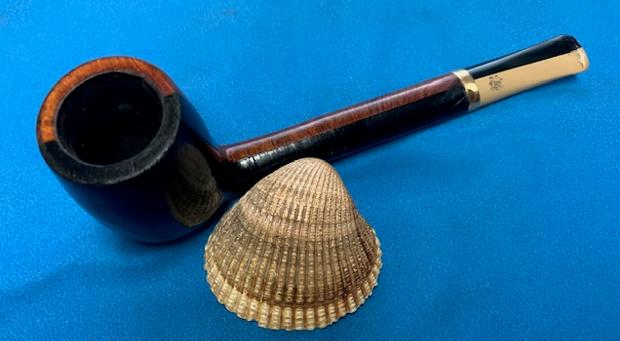
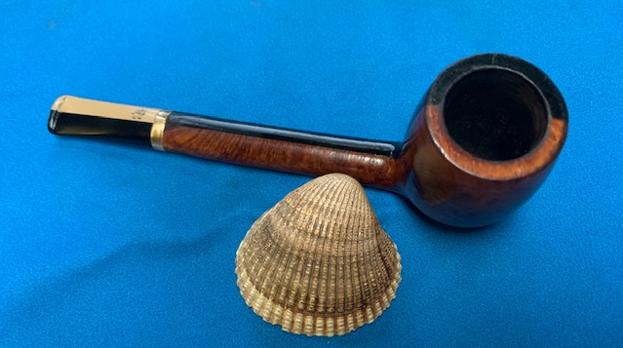
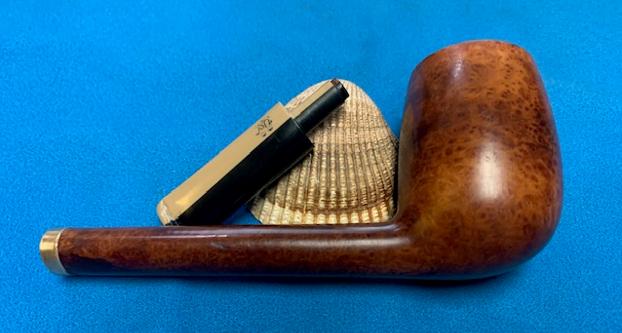
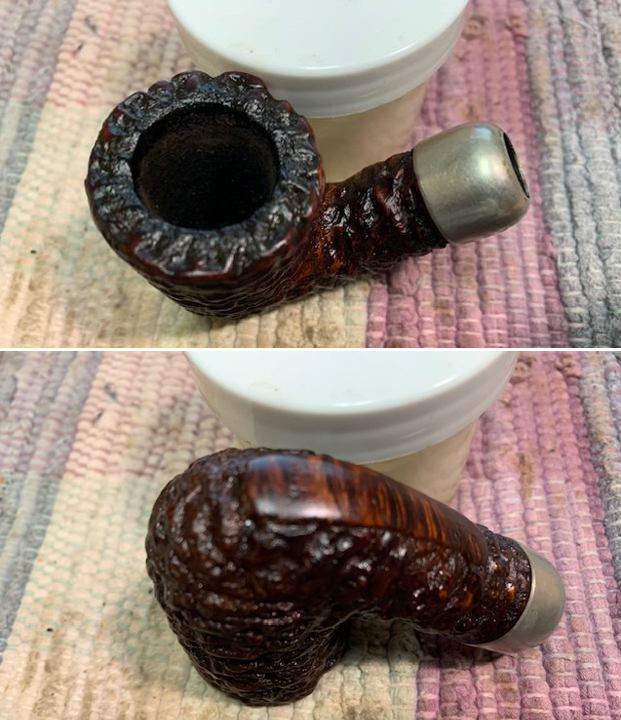
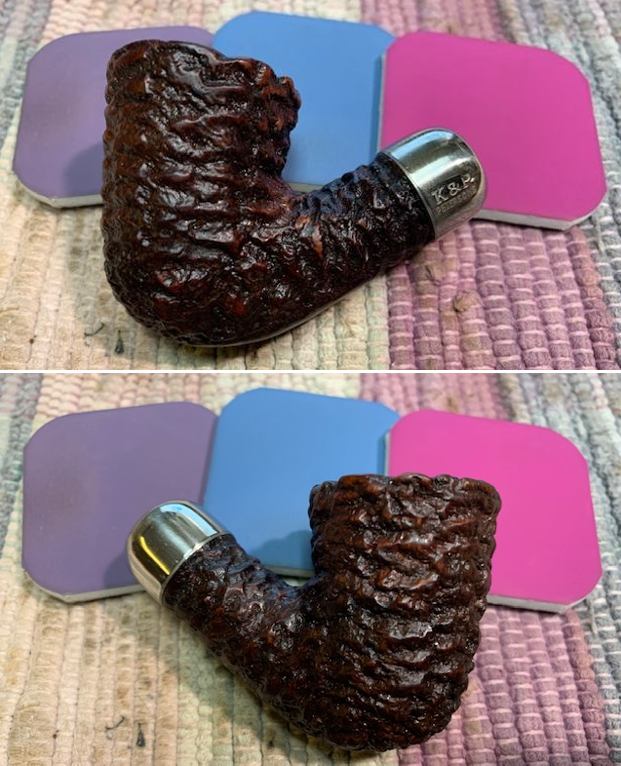
 I put the parts back together. This Republic Era Peterson’s System Standard Rusticated 305 Bent Dublin is a great looking pipe with a great rustication on the bowl. The rich, dark brown stained sandblast bowl and shank look surprisingly nice. The combination works well with the polished nickel ferrule and the polished black, vulcanite P-lip stem. I carefully buffed the pipe with Blue Diamond on the buffing wheel using a light touch on the briar. I gave the bowl multiple coats of Conservator’s Wax and the stem multiple coats of carnauba wax on the buffing wheel and followed that by buffing the entire pipe with a clean buffing pad. I hand buffed the pipe with a microfiber cloth to deepen the shine. The finished Peterson’s System Standard 305 is light and sits nicely in the hand and feels great. Give the finished pipe a look in the photos below. The dimensions of the pipe are Length: 5 ¾ inches, Height: 2 inches, Outside diameter of the bowl: 1 ¼ inches, Chamber diameter: ¾ of an inch. The weight of the pipe is 37 grams /1.31 ounces. I will be putting it on the rebornpipes store shortly in the Irish Pipemakers Section. If you are interested in adding this pipe to your collection send me a message or an email. Thanks for reading this blog and my reflections on the pipe while I worked on it. There are many more to come!