Blog by Steve Laug
The next pipe I have chosen to work on is a bit of a Frankenpipe – one I have cobbed together from a variety of pipes. A Frankenpipe is simply a pipe composed of parts from a variety of sources. In this case it included a Brigham bowl, a Copper Plumbing fitting as a ferrule and a vulcanite freehand stem. Put together these parts create a totally unique pipe that is more than a total of its parts.
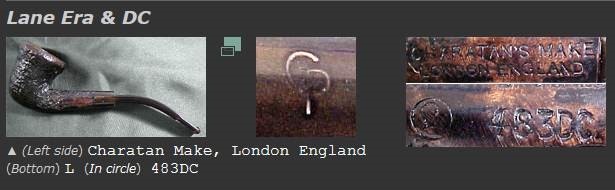
I originally received it in a lot of pipes that I worked on for a fellow here in Vancouver. It was a bowl sans stem that was in a bit of rough shape. I described it as follows when I first received it (https://rebornpipes.com/2018/08/03/converting-a-brigham-voyageur-109-into-a-churchwarden/). The pipe is an apple shaped bowl that is stamped on the left side of the shank and reads Brigham [over] Voyageur [over] 109 Italy in a smooth panel on the rusticated bowl and shank. The shank end had nicks and chips but was in fair condition. There was no stem with the bowl. The stem would have had the lighter weight nylon system tenon since the pipe is one of the Italian made Brighams. It was another one of the fellow’s pipe finds on a recent pipe hunt in Vancouver. The rusticated finish had almost a scale like rustication pattern with flecks of paint in the finish. The rim top was damaged and was darkened toward the back of the bowl. The finish was very dirty and there was a thick cake in the bowl.
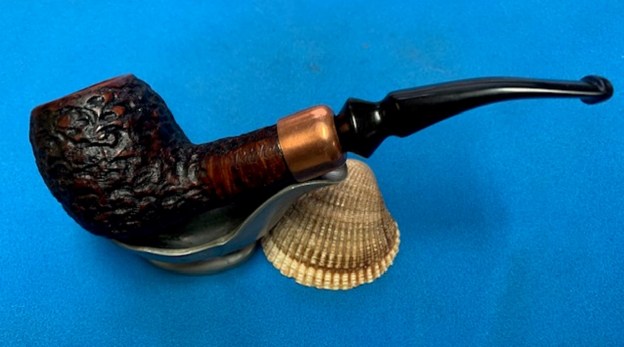
 When I first received the bowl from the fellow we talked about replacing the missing stem with an original Brigham stem. I talked with Charles Lemon and he sent me a stem blank and an aluminum system shank for the Brigham. When it arrived, I talked with the Vancouver fellow about that and together we concluded that a churchwarden stem might look good on it. I ordered some from JH Lowe and found that they only have one diameter size stem. I ordered it and when it arrived it was significantly smaller in diameter than the shank. I had an interesting copper ferrule that I thought might work to provide a different look to the pipe and provide a way of using the smaller diameter churchwarden stem. I slipped the ferrule on the shank and put the stem partially in place in the mortise and took the following photos to send to the fellow to see what he thought. He liked it so I moved forward with the restoration of the bowl and the fitting of the stem. I am including the cleanup description of the work on the bowl as it adds to the story of the next stage of the creation of the new Frankenpipe.
 I slipped the ferrule off the shank and took a photo of the stamping on the left side of the shank. It is very clear and readable. I sanded the shank to smooth it out for fitting the ferrule. I cleaned out the inside of the shank with a dental spatula to remove the heavy tar buildup on the shank walls. The shank was ready for the new ferrule.
 I used a heat gun to heat the copper ferrule and pressed it onto the shank end. I repeated the process until it was set on the shank as far as I wanted it to be. To remove the paint flecks on the rusticated finish on the bowl I scrubbed it with a brass bristle wire brush and used a dental pick to remove the flecks. I wiped down the bowl with alcohol on a cotton pad to remove the dust and debris from the finish.
 I reamed the bowl with a PipNet Piper Reamer using the first two cutting heads to remove the majority of the cake. I cleaned up the remnants on the walls of the bowl with a Savinelli Fitsall Pipe Knife. I used a dowel wrapped with sandpaper to sand down the walls on the bowl.
 I cleaned out the airway in both the bowl and stem with alcohol (99% isopropyl), pipe cleaners and cotton swabs until they were clean on the inside.
 When I restored the pipe originally I polished the rim top with micromesh sanding pads – wet sanding with 1500-2400 grit pads and dry sanding with 3200-12000 grit pads. I also polished the smooth portions of the rustication with the micromesh pads at the same time. I rubbed down the briar with Before & After Restoration Balm. I worked it into the finish with my fingertips and finished working it in with a shoe brush. The balm worked to clean, preserve and enliven the surface of the finish on the small bowl. The briar was coming alive so I took some photos of the pipe at this point. I gave the bowl multiple coats of Conservator’s Wax and buffed the bowl with a shoe brush.
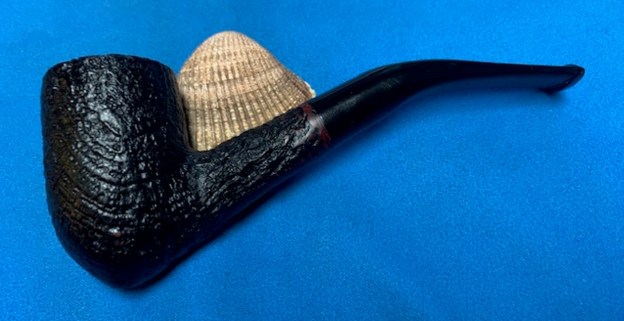
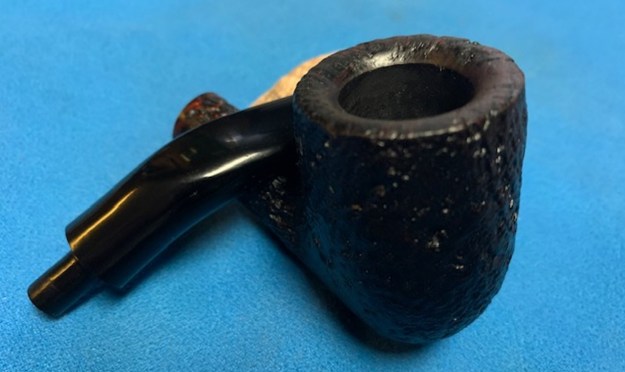
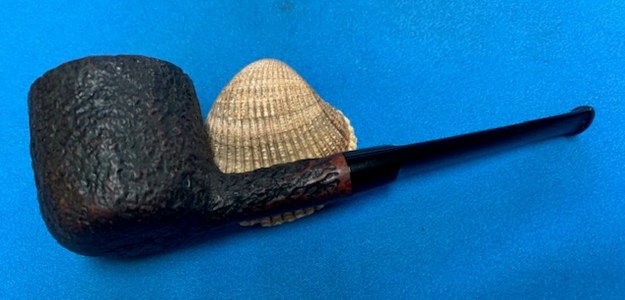
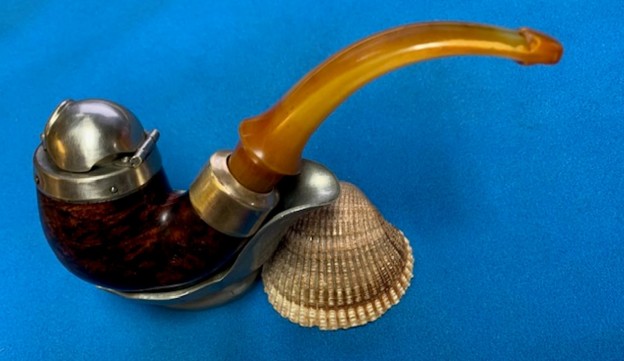
I finished the stem as well and put it in the shank of the pipe. I took photos of it to show the look of the Church Warden that we had designed. The fellow smoked the pipe and enjoyed for a while but decided the Church Warden was not for him. We tried different stems and looks but, in the end, it came back to me. It has been here in a small box on the shelf behind my desktop. I had several stems in the box along with the last stem I had fashioned for it a few years ago. Today I decided it was time to work on it again and finish crafting a new Frankenpipe. I took some photos of the pipe before I started my part of the work.
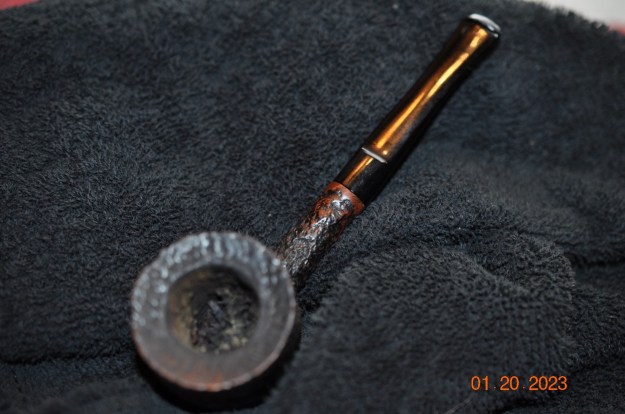
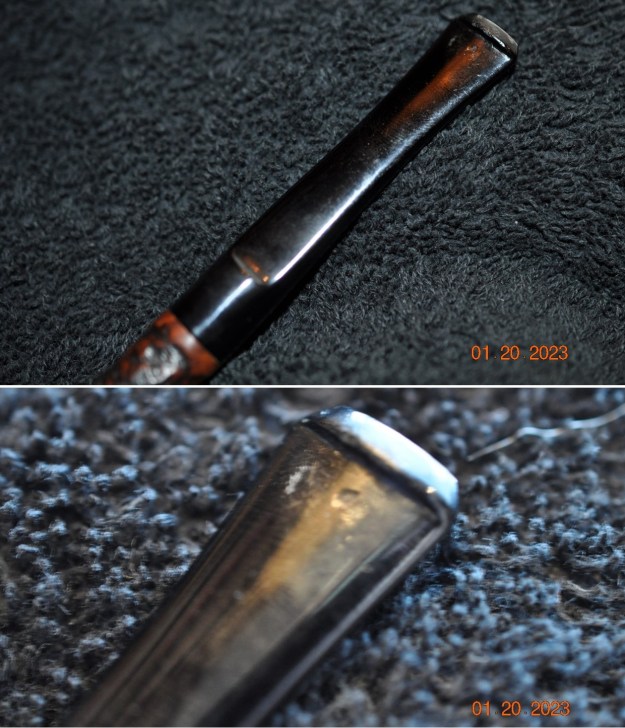
 I took some close up photos of the rim top and also of the stem surface. The rim top was and inner edge showed darkening and damage. The bowl was nicked and out of round. I also took close up photos of the stem to show the condition of the stem surface. There were marks and chatter on the stem ahead of the button on both sides.
 I took a photo of the stamping on the shank side. It read as noted above. When I had placed the copper ferrule earlier I was careful to not cover the stamping on the shank… surprising as I usually don’t worry about that when I am crafting a new pipe from a damaged bowl.
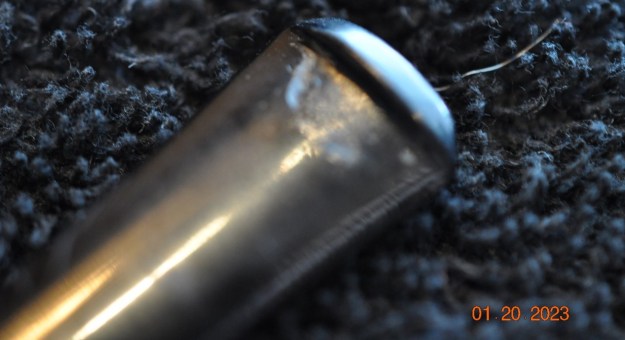
 I took photos of the elongated tenon on the stem that I crafted for the pipe. I wanted to not use a Brigham system filter so I worked to make a long tenon that left a small gap between the entrance of the airway into the bowl and shank end. It functioned quite well.
 Now it was time to rework the bowl and rim. I started by cleaning up the inner edge of the bowl with a folded piece of 220 grit sandpaper. I gently topped the bowl with 220 grit sandpaper on a topping board to remove some of the rim damage.
 I used a wooden ball and a piece of 220 grit sandpaper wrapped around it to give the inner edge of the bowl a bevel to help minimize the burn damage on the briar.
 I touched the stain on the rim top with a Walnut stain pen to blend it into the surface of the briar. I let it dry before I polished it with micromesh sanding pads.
 I polished the rim top with micromesh sanding pads. I dry sadded it with 1500-12000 grit pads and wiped it down between the pads with a damp cloth.
 With that finished the bowl was very clean and the sandblast looked great. I rubbed the bowl and rim down with Before & After Restoration Balm. I worked it into the sandblast surface of the briar with my fingertips and a horse hair shoe brush to clean, enliven and protect it. I let the balm sit for 10 minutes and then buffed with a cotton cloth to raise the shine. I really like watching the Balm do its magic and bring the briar alive.

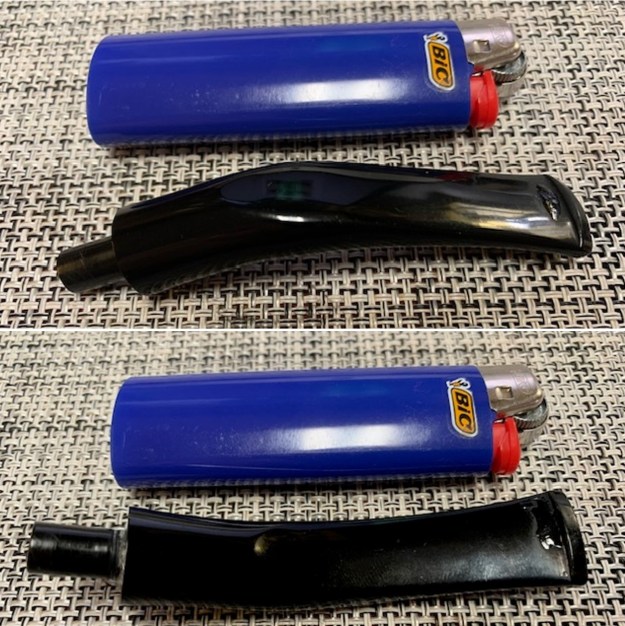
 I set the bowl aside and turned my attention to the stem. I “painted” the tooth marks on both sides of the stem with the flame of a Bic lighter and as expected I was not able to lift them at all. I filled in the tooth marks with clear CA glue and let the cure. I flattened out the repairs with a small file to start blending them in. I sanded the areas smooth with 220 grit sandpaper and started polishing with 600 grit wet dry sandpaper, though I forgot to take photos of this part of the process.


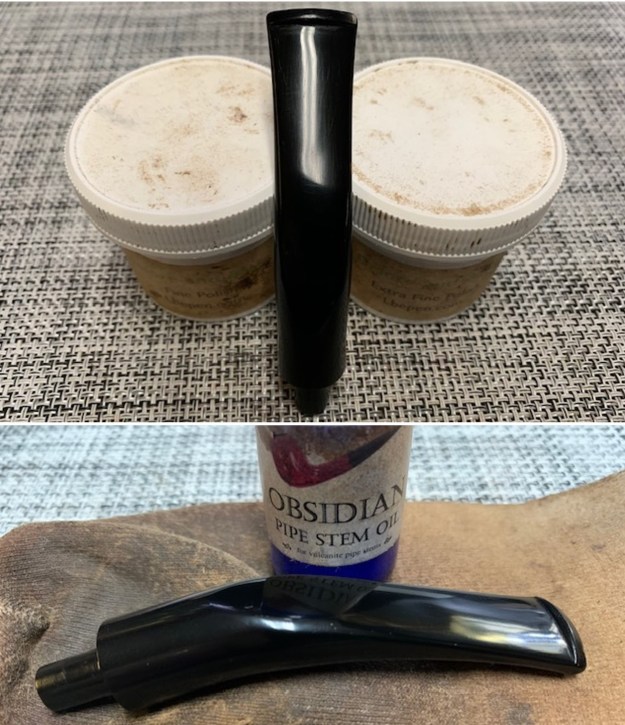
 I polished the stem with micromesh sanding pads – wet sanding with 1500-12000 grit pads. I wiped the stem down after each sanding pad with Obsidian Oil to give the sanding pads some bite.
 I polished it with Before & After Pipe Stem Polish – both Fine and Extra Fine. I gave it a coat of Obsidian Pipe Stem Oil. It works to keep the stem from oxidizing as quickly. I set it aside to dry.
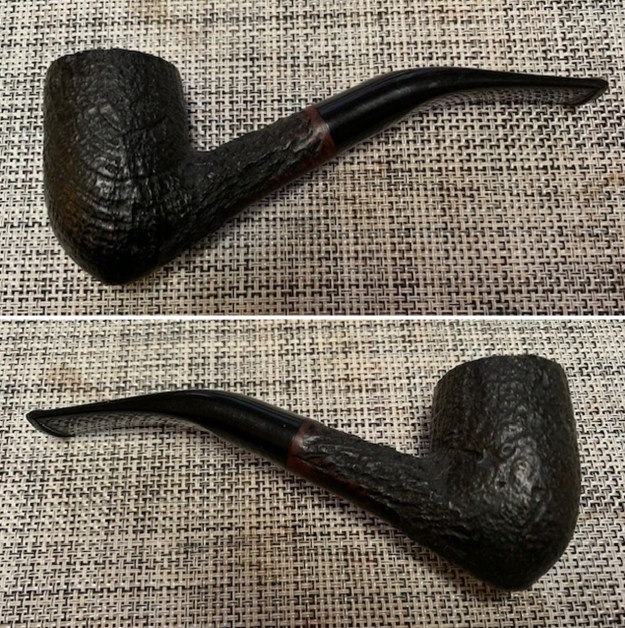
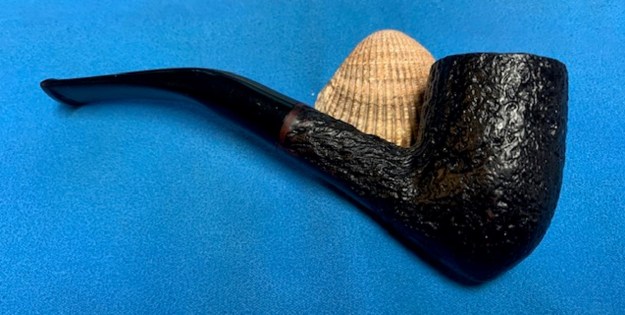
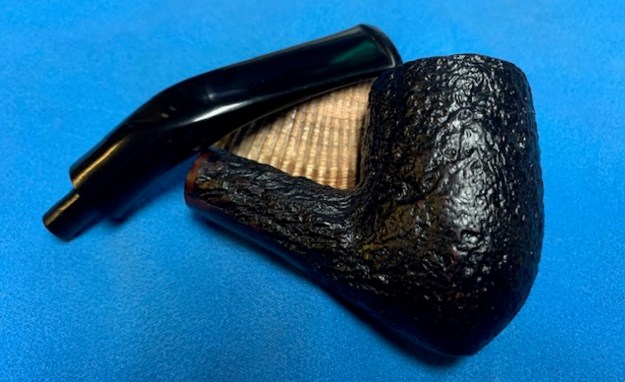
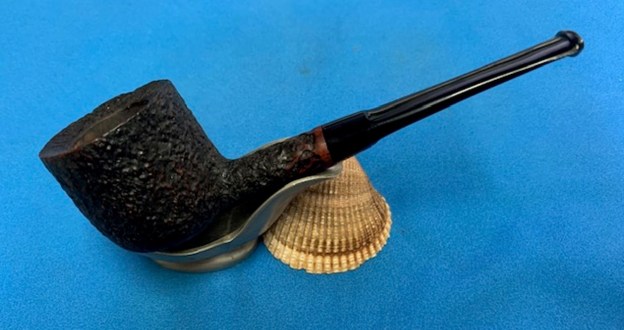
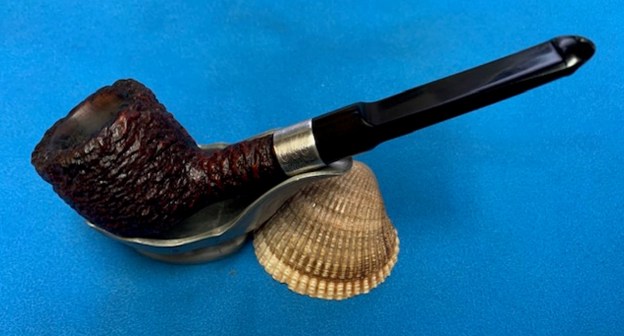
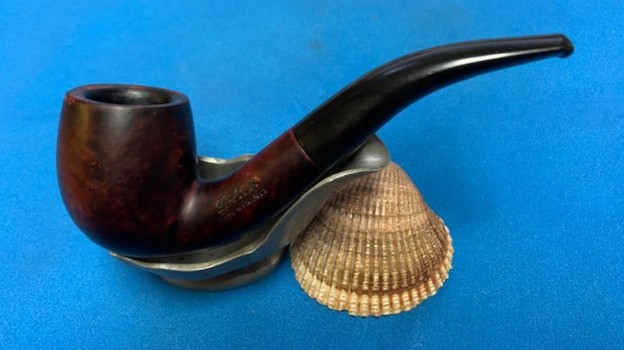
  Once again at this point in making Frankenpipes I am excited to be on the homestretch. I look forward to the final look when newly fashioned Brigham Voyageur 109 Apple is put back together, polished and waxed. I put the bowl and stem back together. I lightly polished the bowl and the replacement stem with Blue Diamond. I gave the bowl and the newly fit stem multiple coats of carnauba wax. I buffed the pipe with a clean buffing pad to raise the shine. I hand buffed it with a microfiber cloth to deepen the shine. The pipe polished up pretty nicely. The depths of the rustication come alive with the wax and polish. The shiny black vulcanite stem is a beautiful contrast to the browns of the bowl. This Frankenpipe Brigham Voyageur Frankenpipe with a copper ferrule and modified Freehand stem was fun to create. It really is a quite stunning looking creation. The pipe feels great in the hand will be better when warmed up while smoking. The finished pipe is shown in the photos below. The dimensions of the pipe are Length: 5 ¾ inches, Height: 1 ¾ inches, Outside diameter of the bowl: 1 ¼ inches, Chamber diameter: ¾ of an inch. The weight of the pipe is 1.73 ounces/49 grams. I will be putting it on the rebornpipes store in the Canadian Pipemakers Section if you would like to add it to your rack and carry on the previous pipeman’s legacy. This is an interesting estate to bring back to life.
As always, I encourage your questions and comments as you read the blog. Thanks to each of you who are reading this blog. Remember we are not pipe owners; we are pipe men and women who hold our pipes in trust until they pass on into the trust of those who follow us.


