Blog by Paresh Deshpande
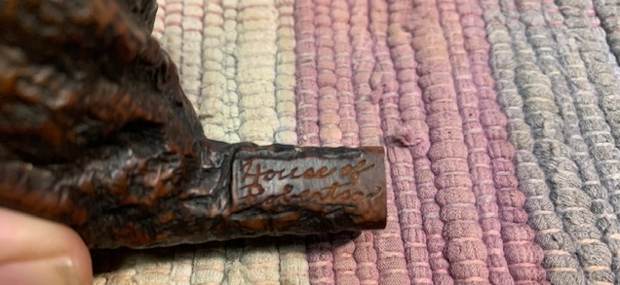
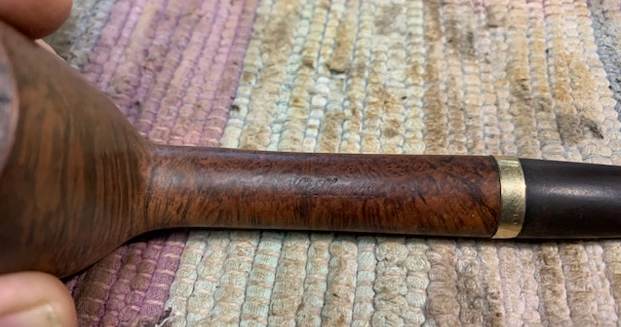
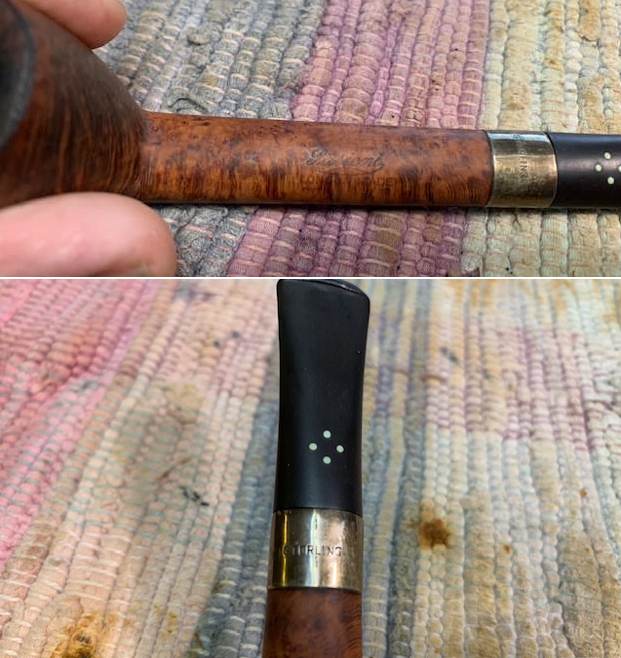
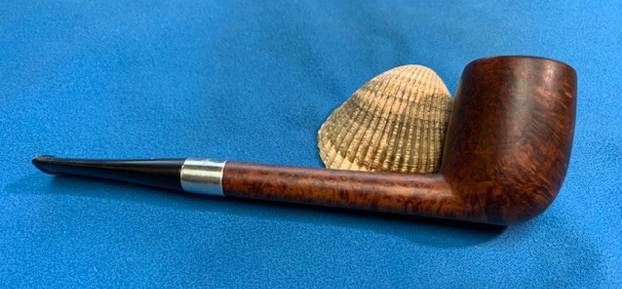
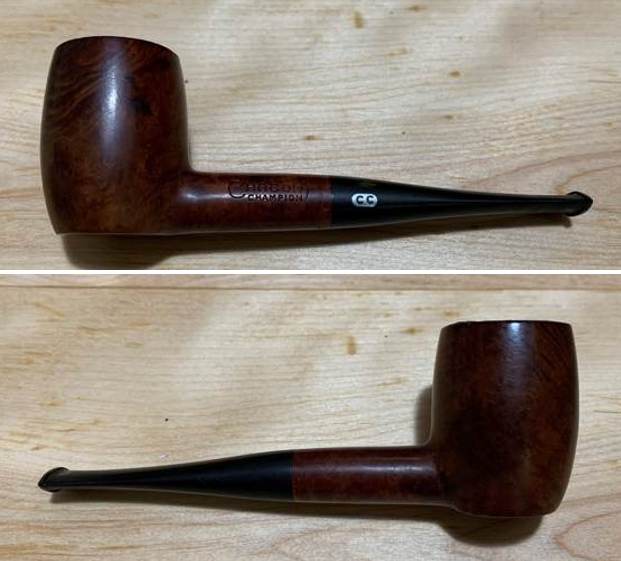
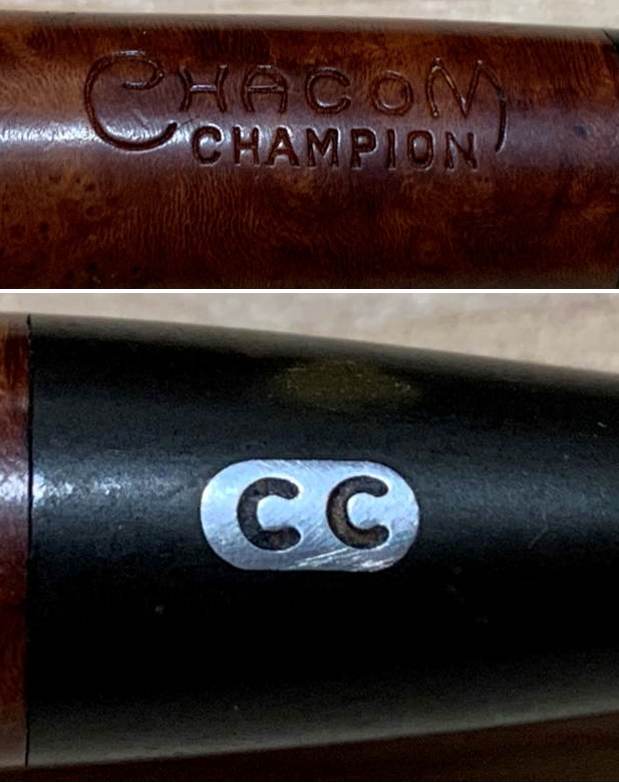
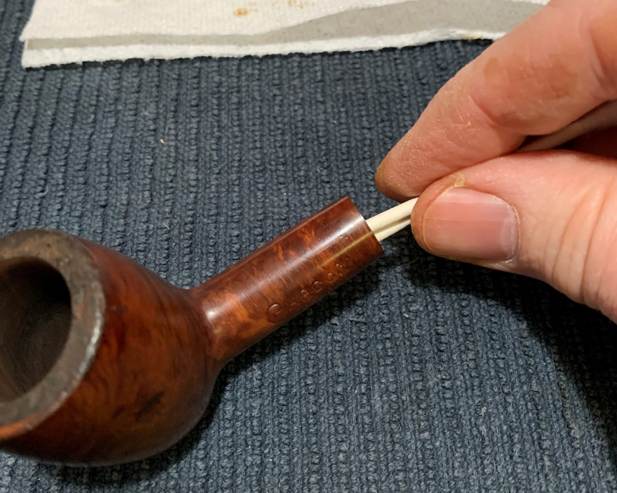
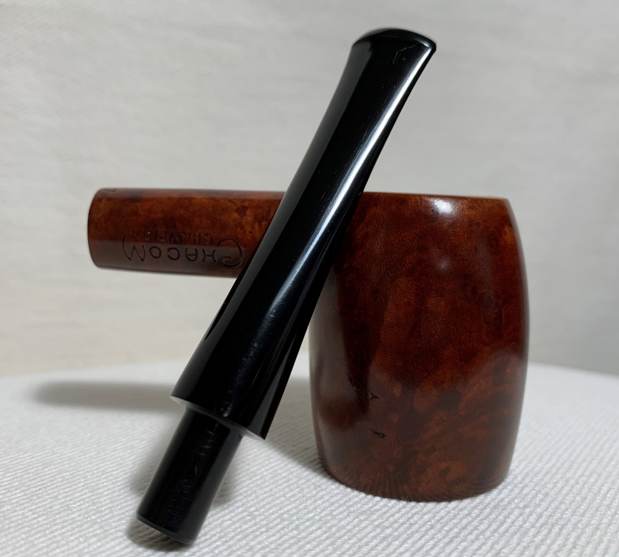
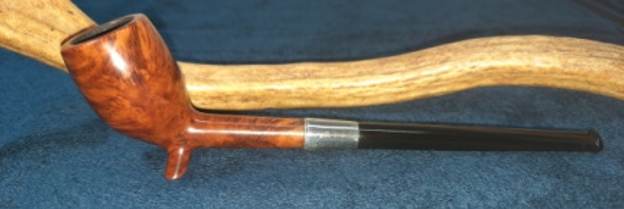
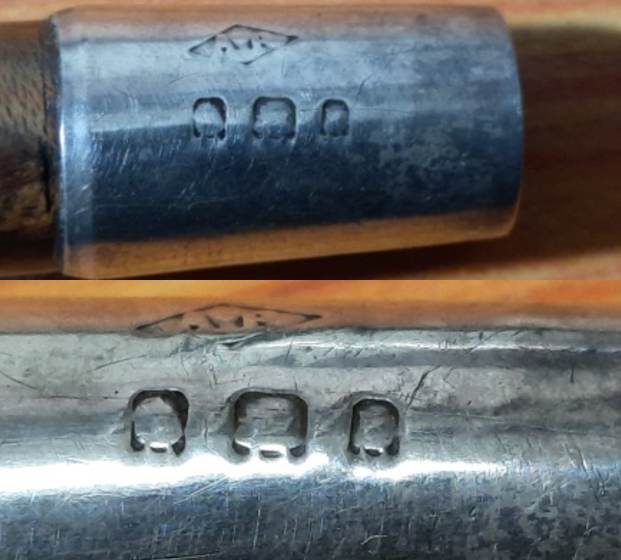
The next pipe that I chose to work on was a petite slender two legged classic Cutty shaped pipe that is stamped as “FCC”, each letter in a square and all the squares are co-joined to form a rectangle. Apart from the FCC stamp, there is no other stamp on the briar. The shank end has a nickel ferrule (most probably) with a squat diamond bearing letters “A–B” over three cartouches with its engravings completely worn out. Now the reasoning for assuming the ferrule to be nickel plated is firstly that I could not find any silversmith with letter “A B” in a diamond on my usual go to sites as well as searching the net. Secondly, during the course of restoring the pipe, the ferrule came loose revealing a prominent crack to the shank end and this ferrule was a repair band that was put by the previous repairman. Here are the pictures of the stampings. It would be interesting to know the views and opinions on my musings.
 There was no information about this pipe that was available on the internet. The lack of COM stamp also contributed to the mystery of this pipe. Even “Who Made That Pipe” by Herb Wilczak and Tom Colwell finds no mention of this brand and as stated above the ferrule has faux stampings. The only pointer that this is an old timer comes from the oval stem slot which was seen on early pipes.
In the interest of pipe collector community, I request the readers to share any information that they may have about this brand.
Initial Visual Inspection
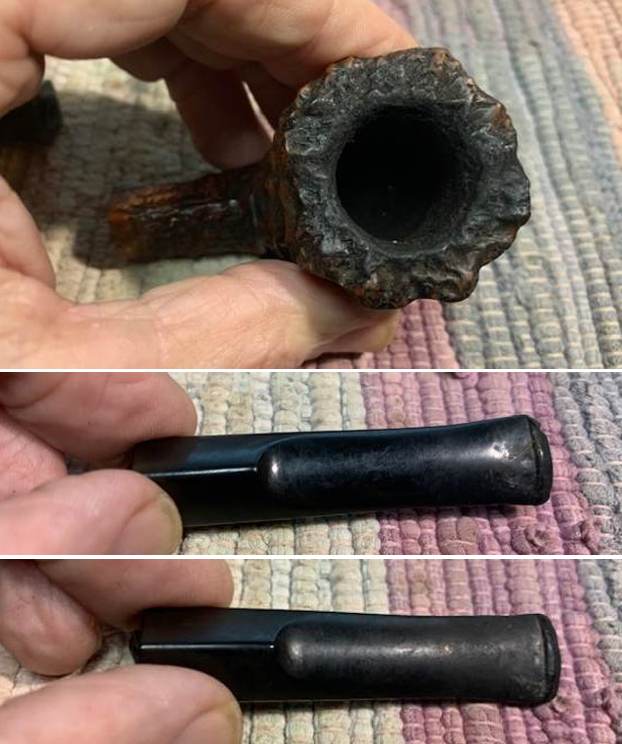
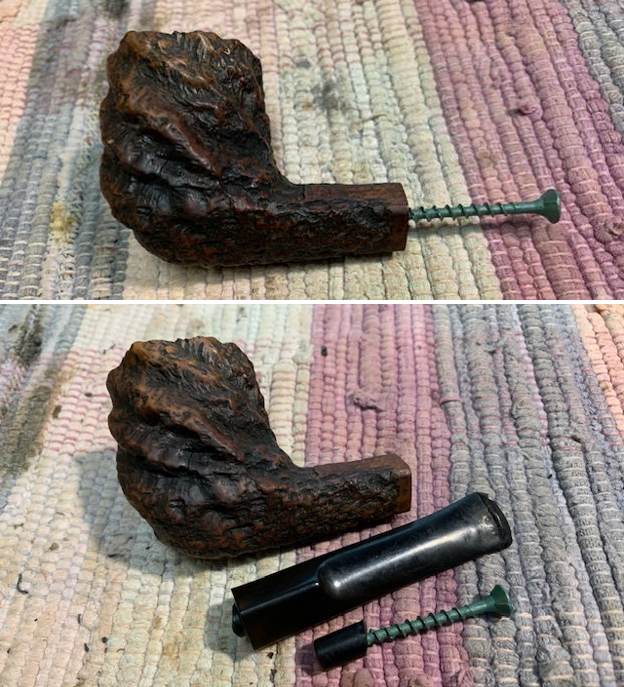
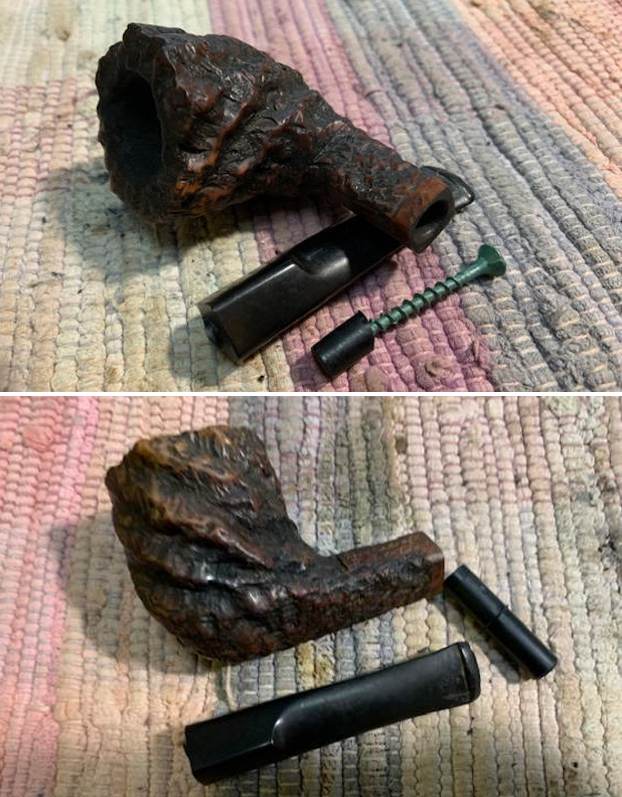
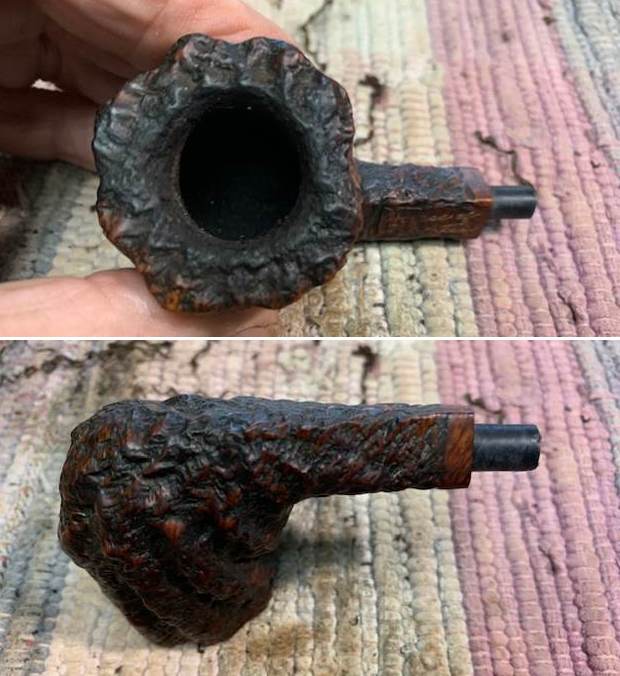
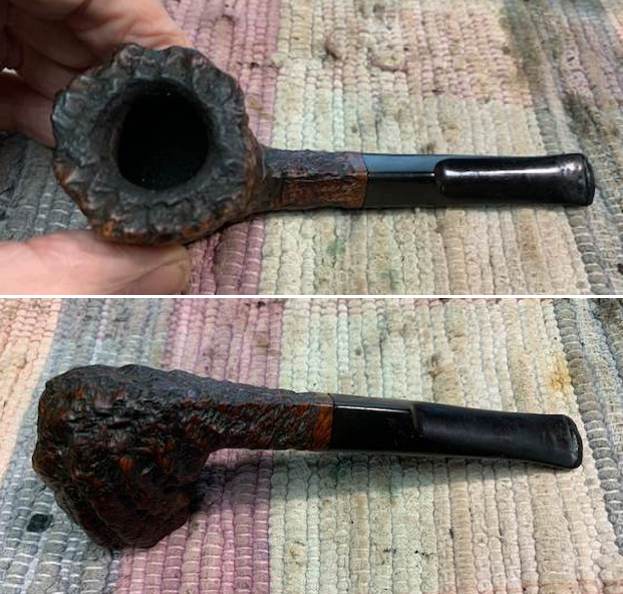
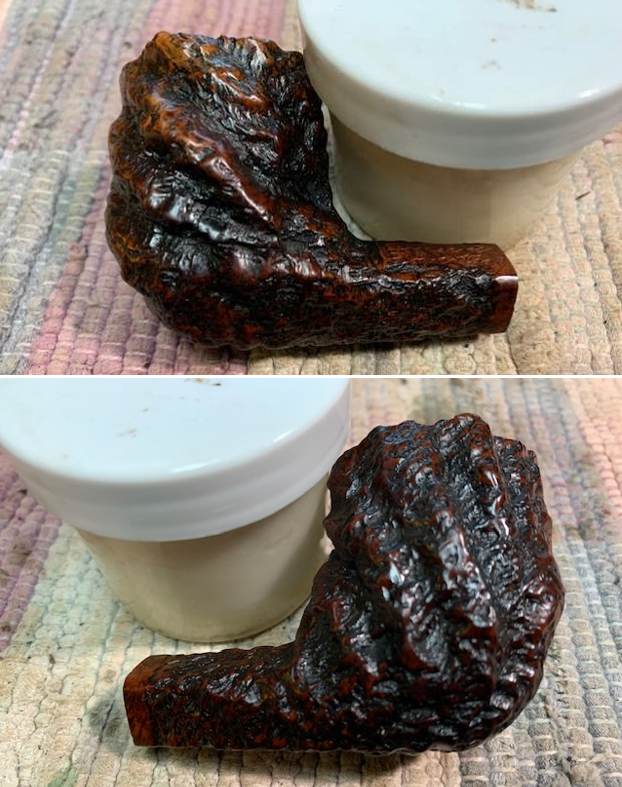
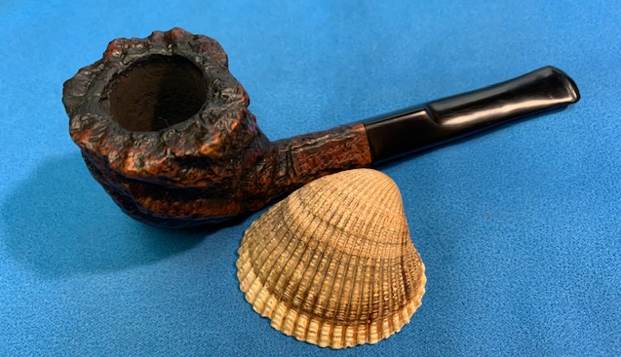
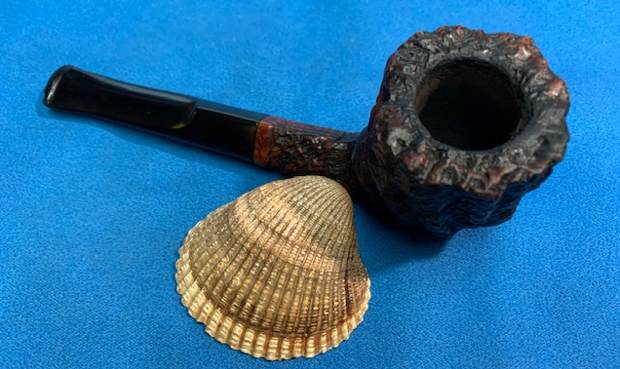
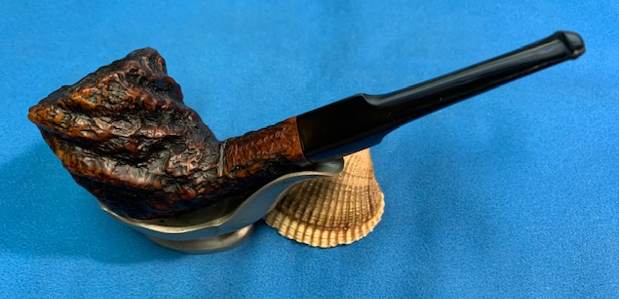
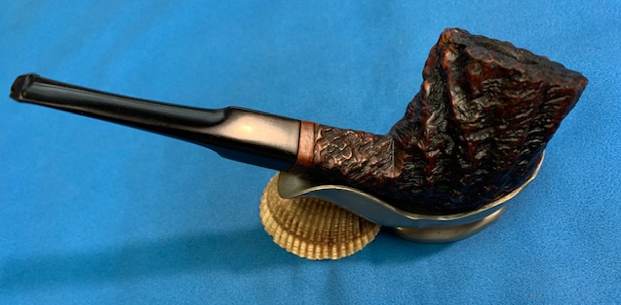
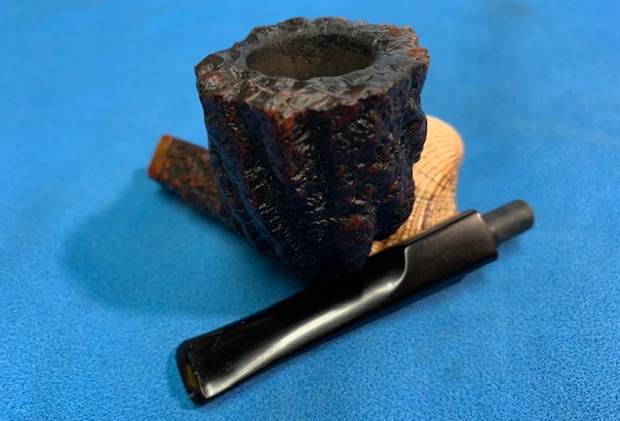
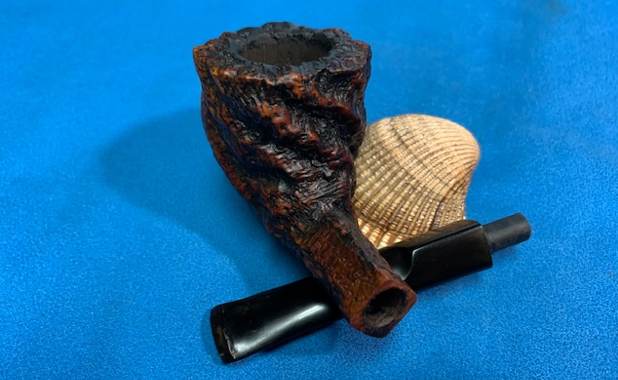
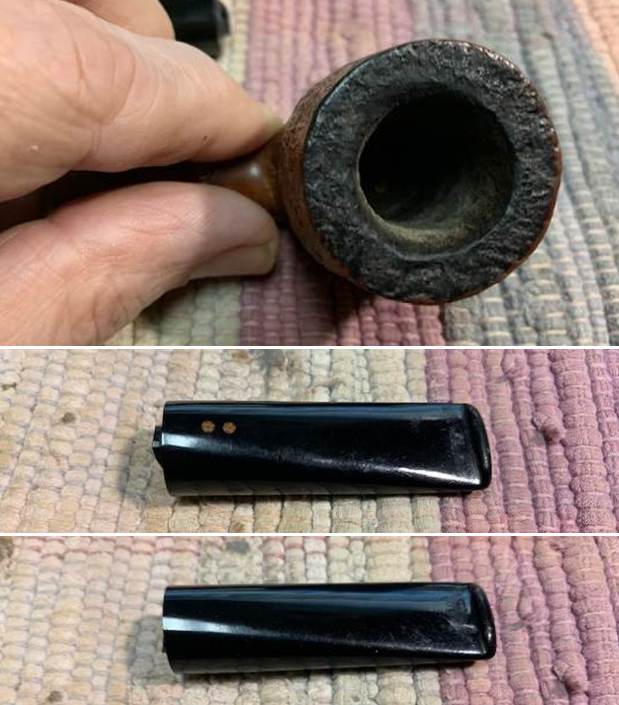
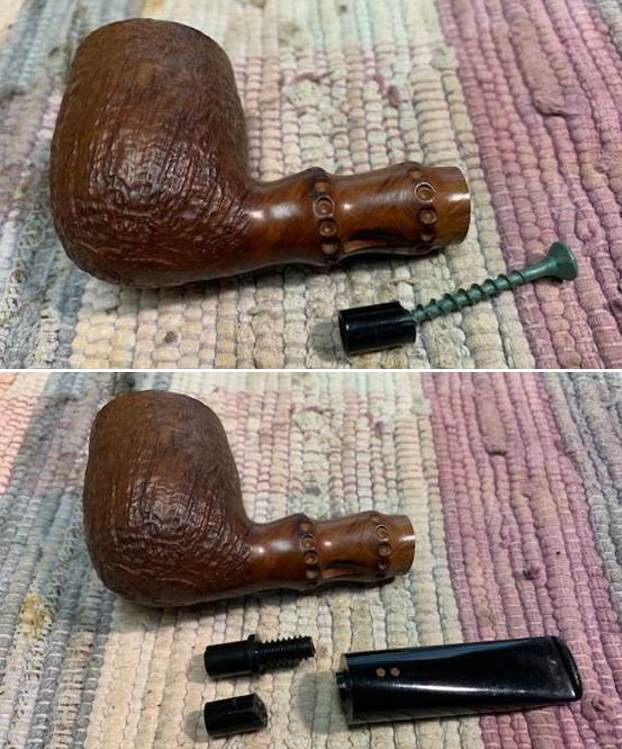
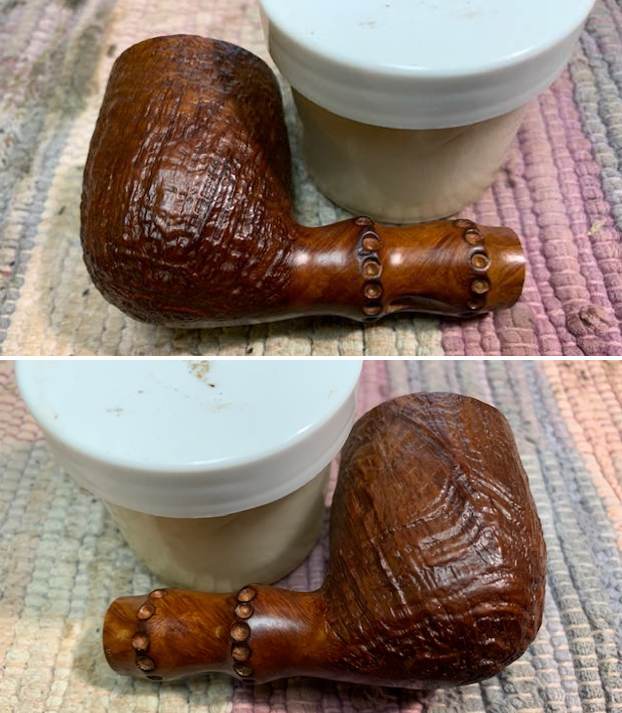
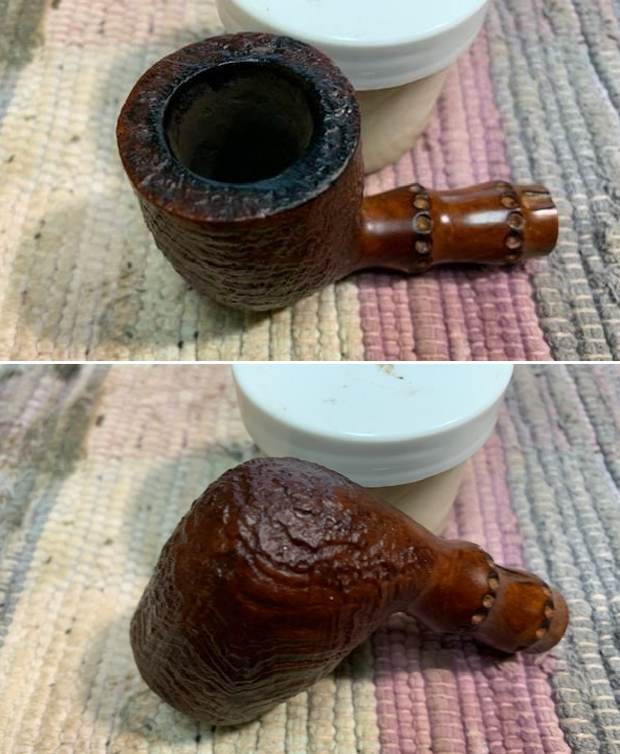
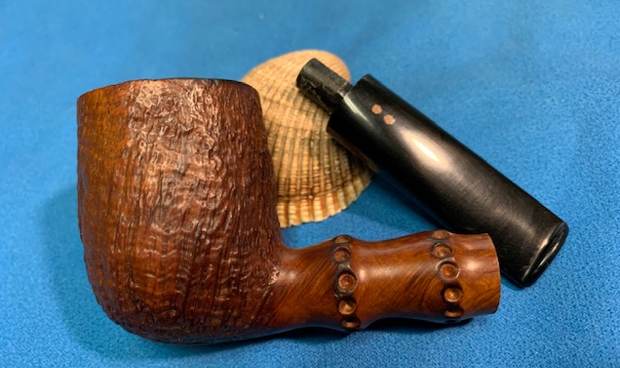
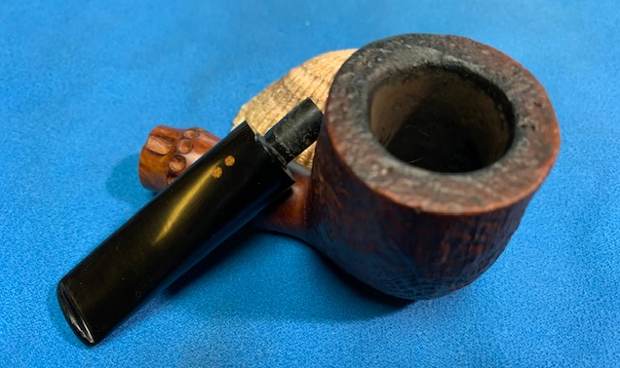
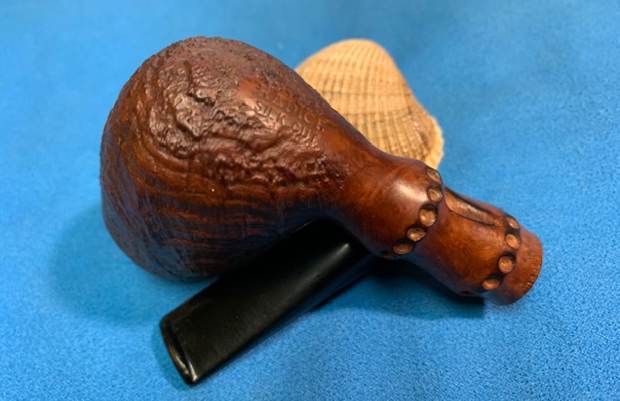
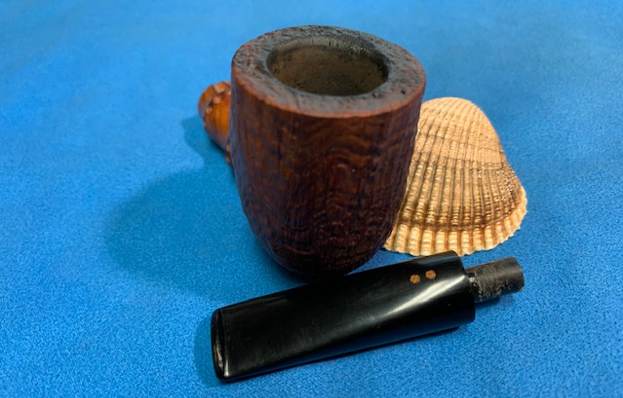
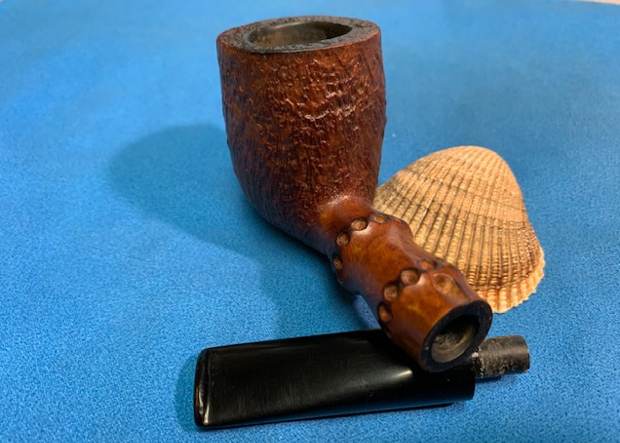
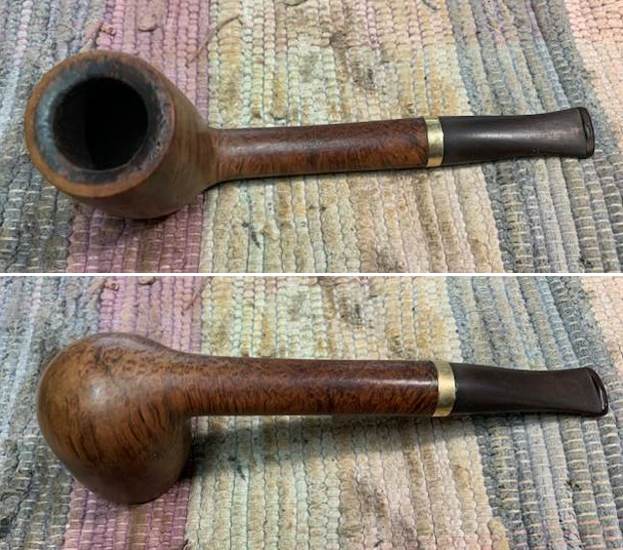
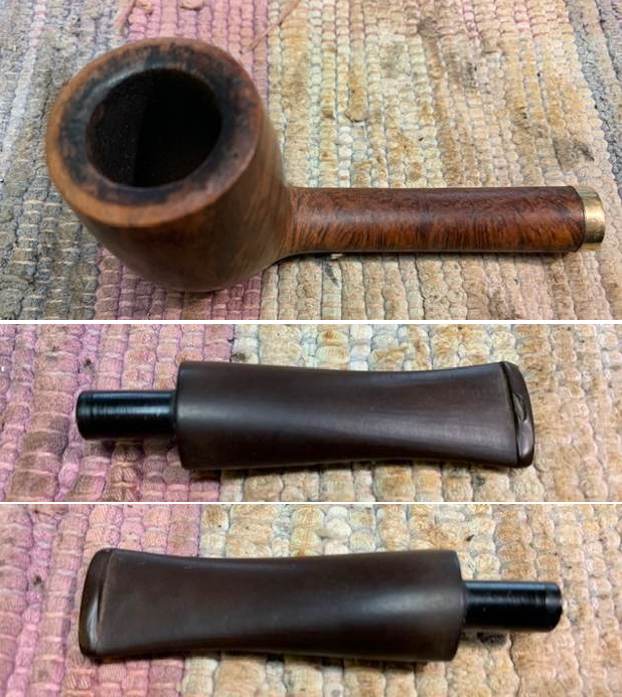
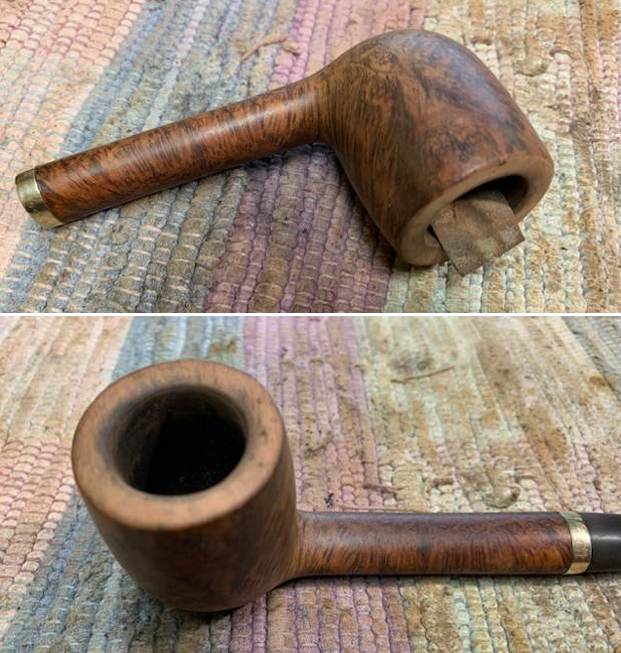
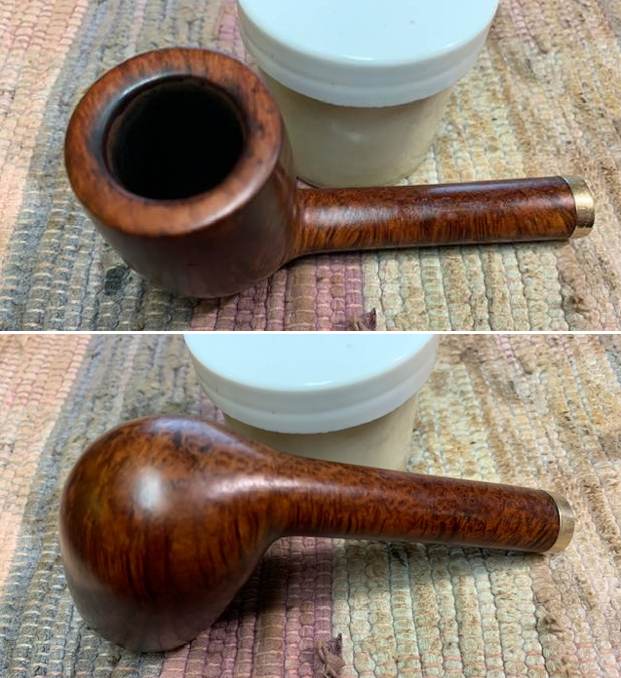
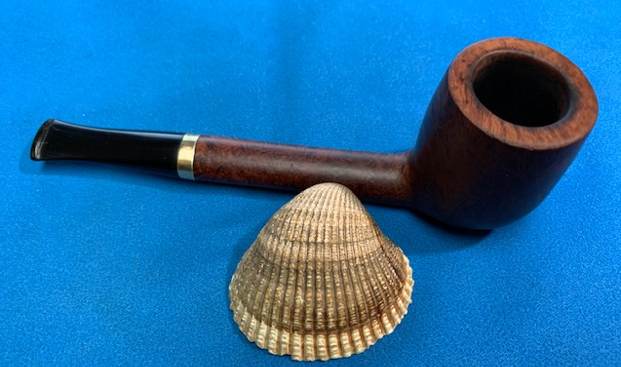
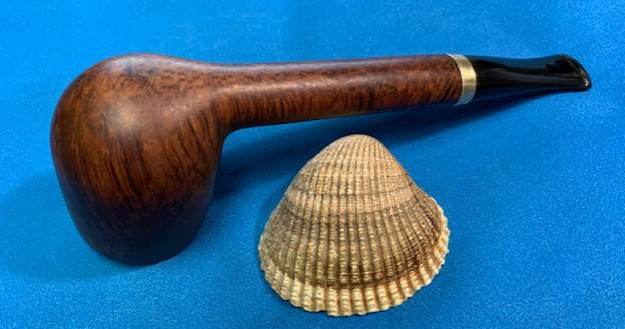
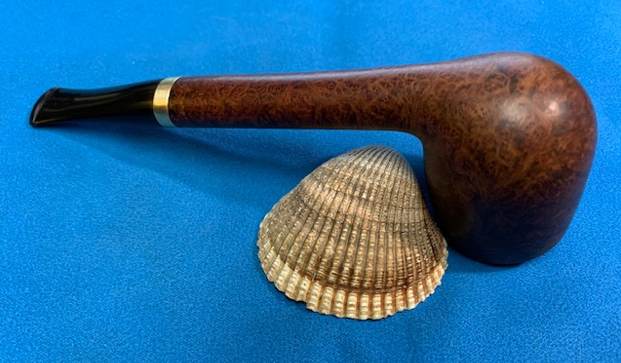
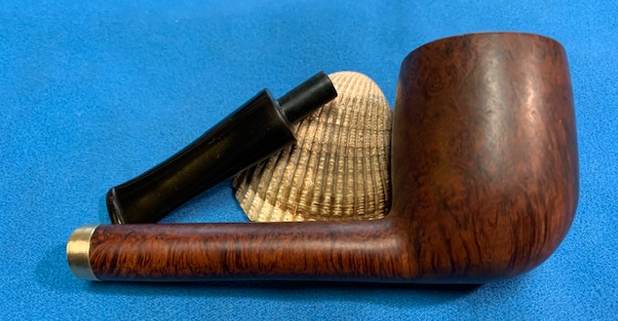
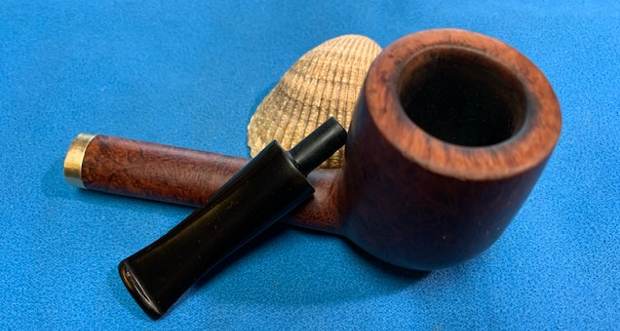
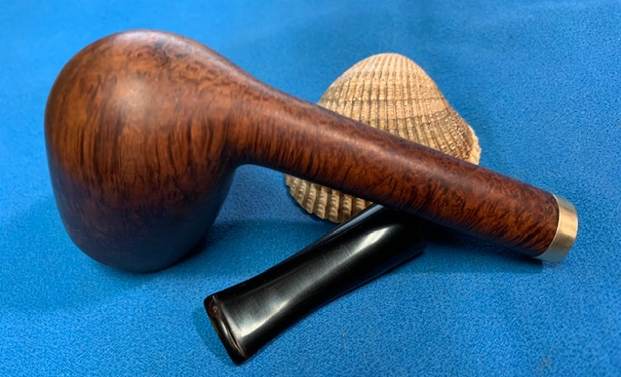
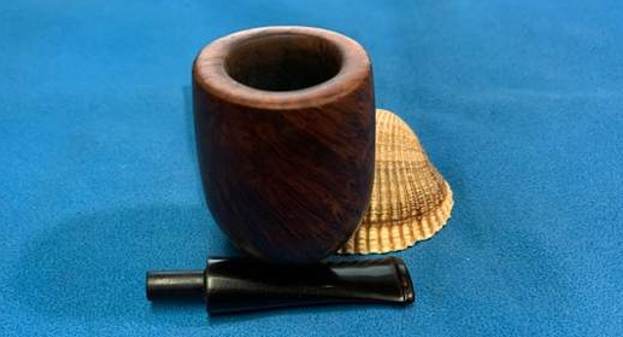
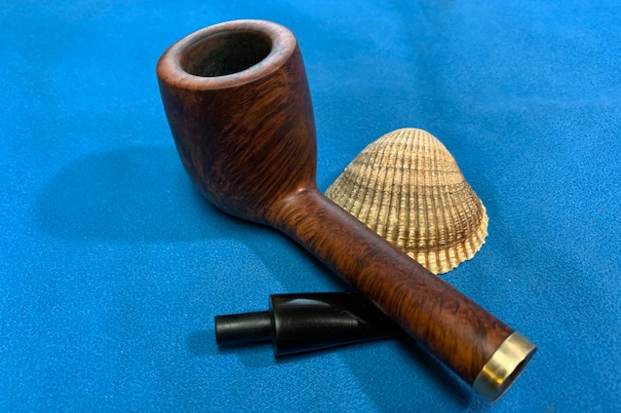
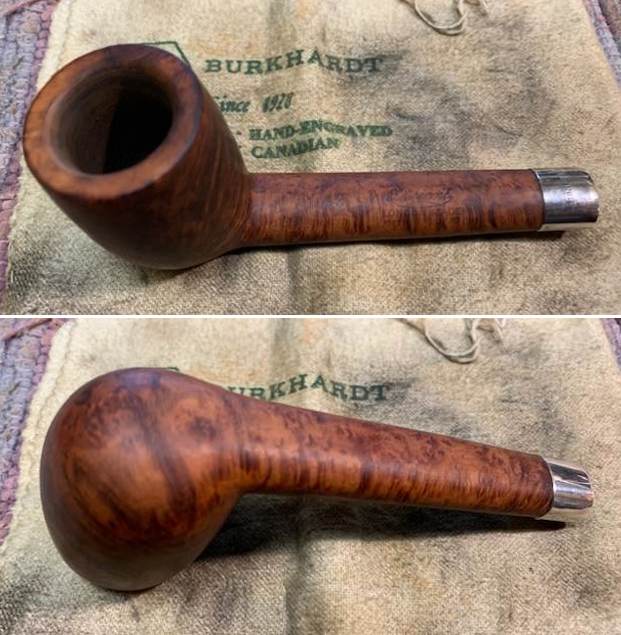
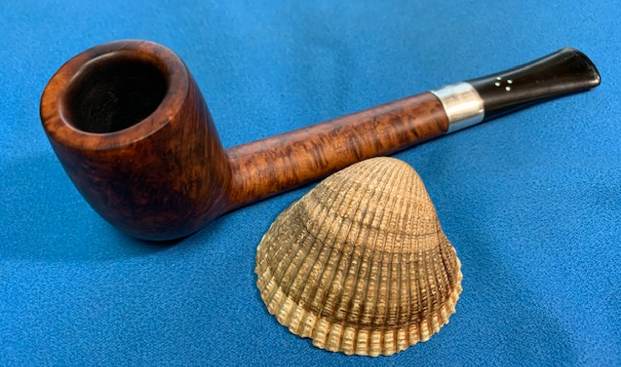
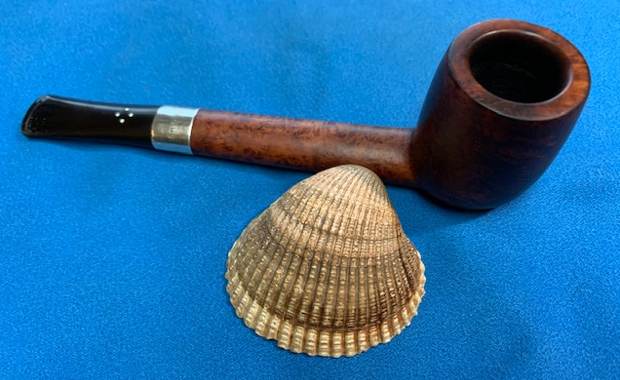
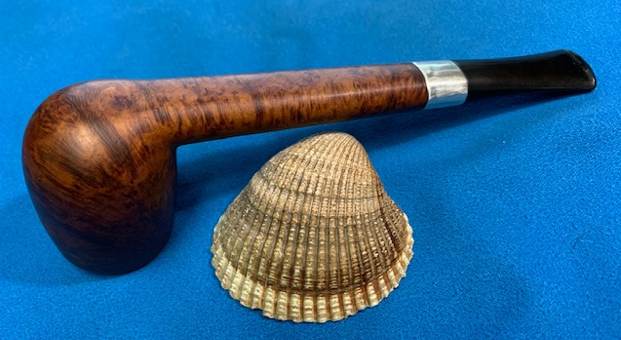
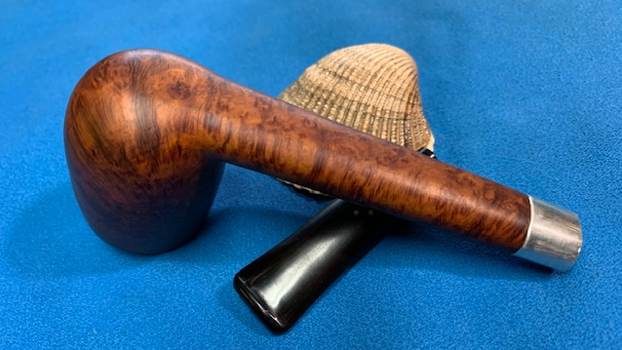
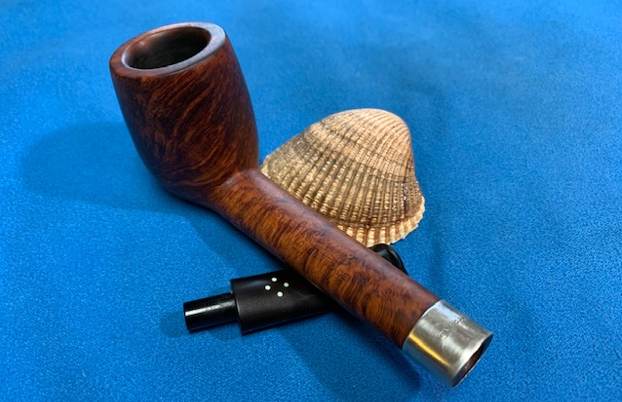
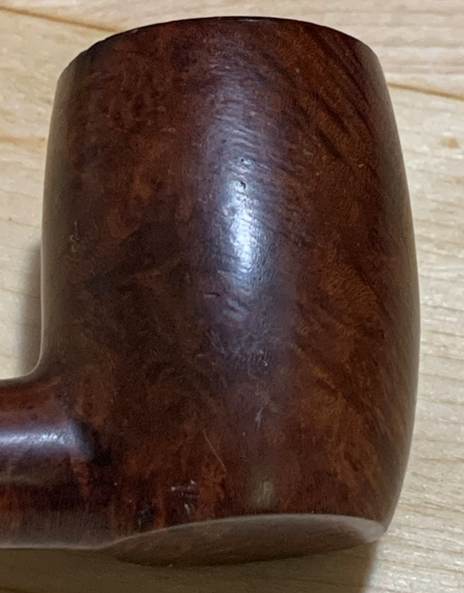
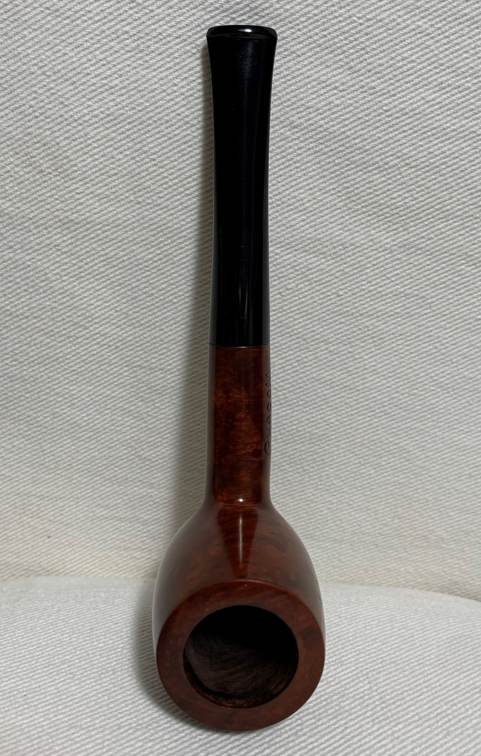
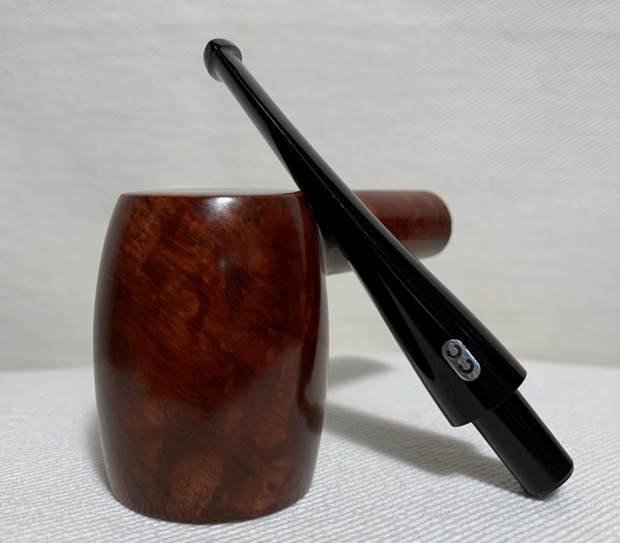
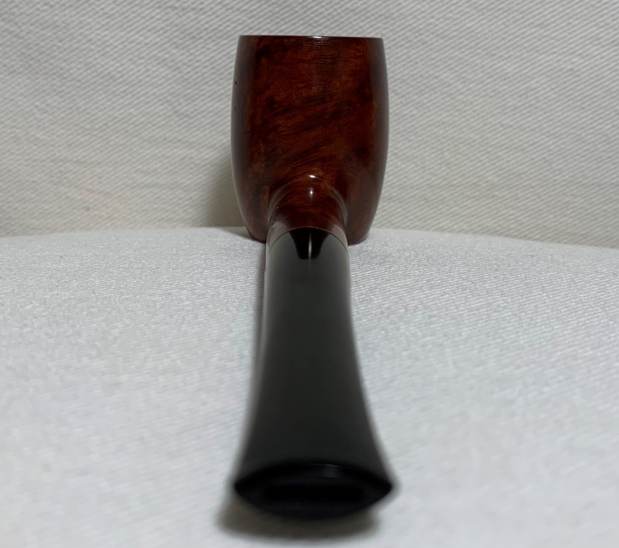
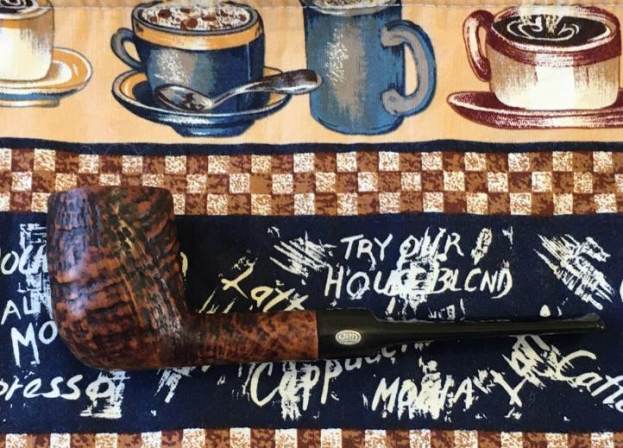
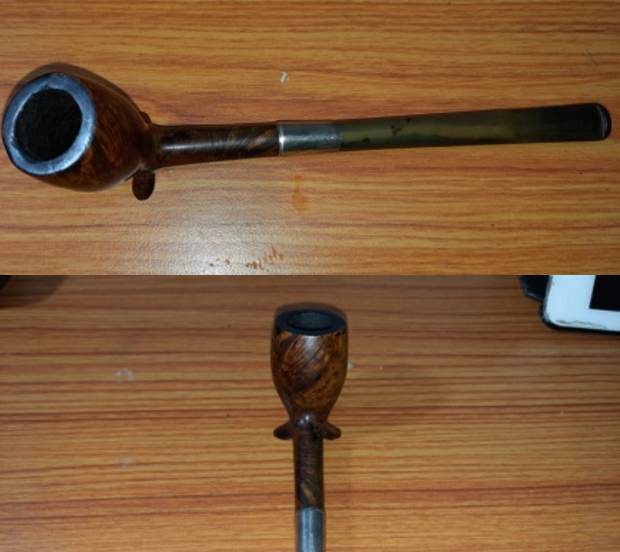
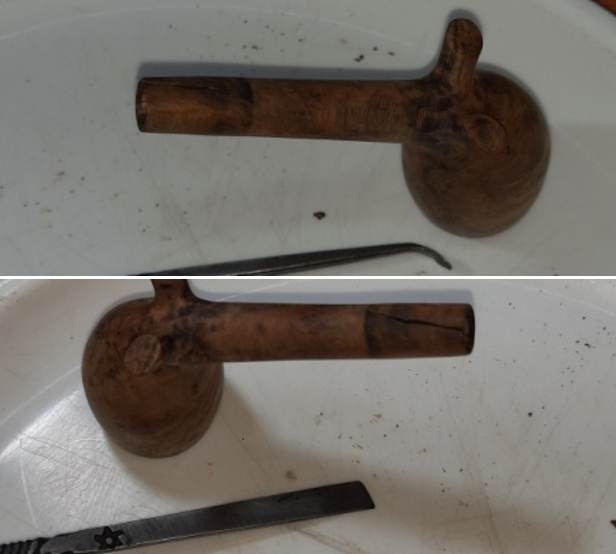
The double legged Cutty shaped pipe has beautiful mixed grains around the stummel which is covered in dust. The stummel has a couple of deep scratches and one fill towards the foot. The rim top is covered in lava overflow with some serious damage to the inner rim edge and as a result appears out of round. There is a thick layer of cake in the chamber. The slender vulcanite stem is heavily oxidized with a chunk of vulcanite missing from end of the step tenon. There are issues that need to be addressed, but it still is a beautiful pipe and once it is restored, the elegance and beauty of this pipe shall be worth appreciating. Here are a few pictures of the pipe before I begin working on it.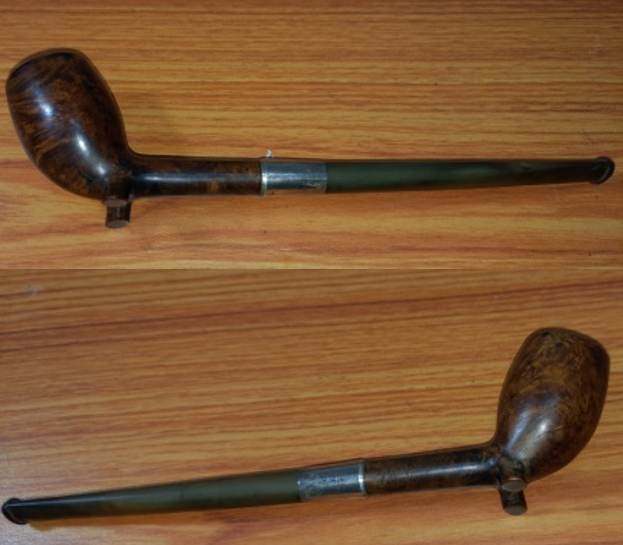
 Dimensions Of The Pipe
(a) Overall length of the pipe: 6 inches.
(b) Bowl height: 1.4 inches.
(c) Inner diameter of chamber: 0.6 inches.
(d) Outer diameter of chamber: 1.1 inches.
Detailed Inspection…
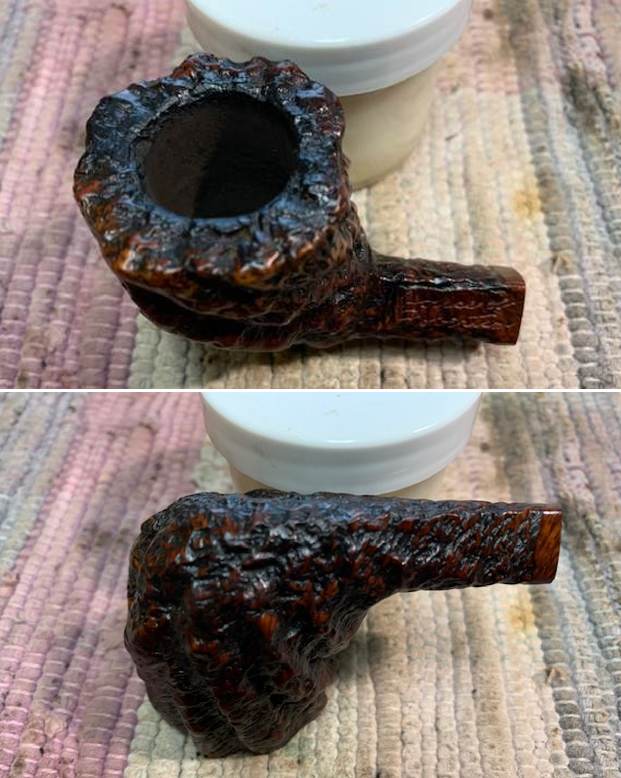
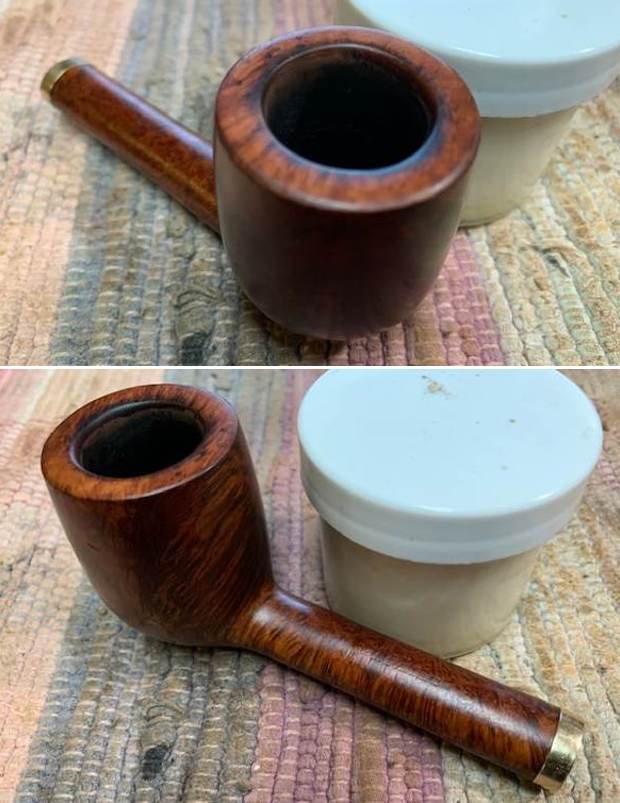
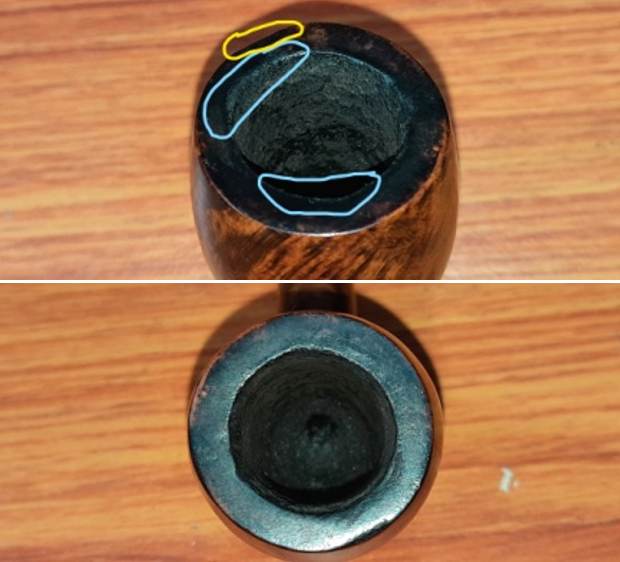
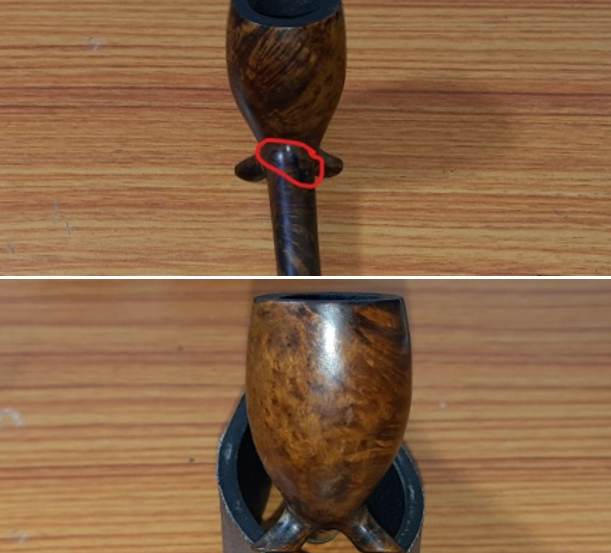
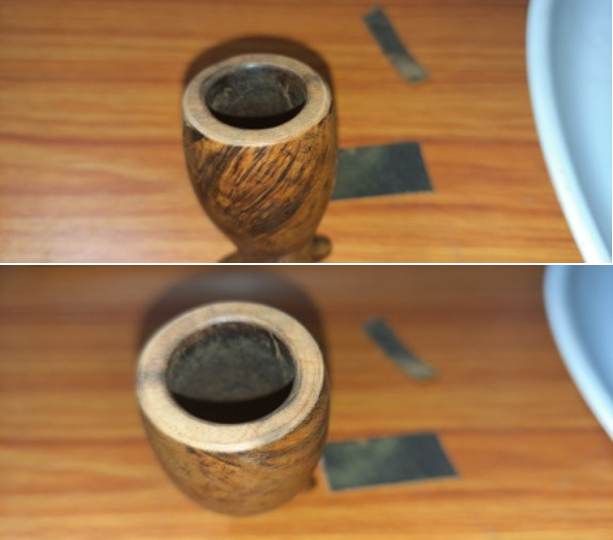
The chamber has a thick layer of even cake and has a strong sweet smell to it. The rim top surface has darkened due to lava overflow which is not very thick. The inner edge is uneven, but closer inspection makes me believe it to be more so because of uneven cake at the rim edge. The inner edge appears to be charred in 11 o’clock and 6 o’clock direction (encircled in pastel blue). The outer edge has a very shallow ding which is encircled in yellow.
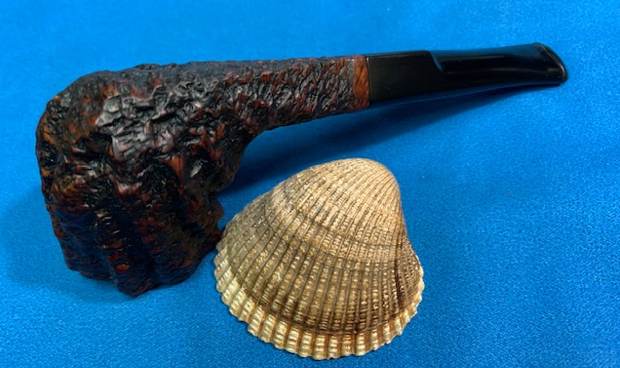
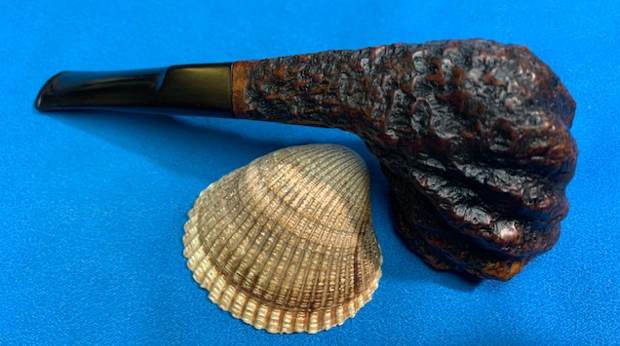
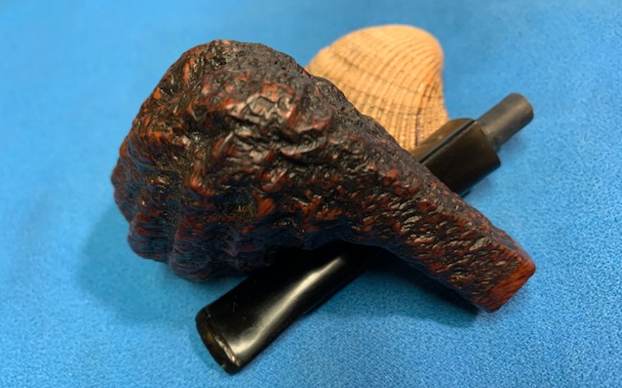
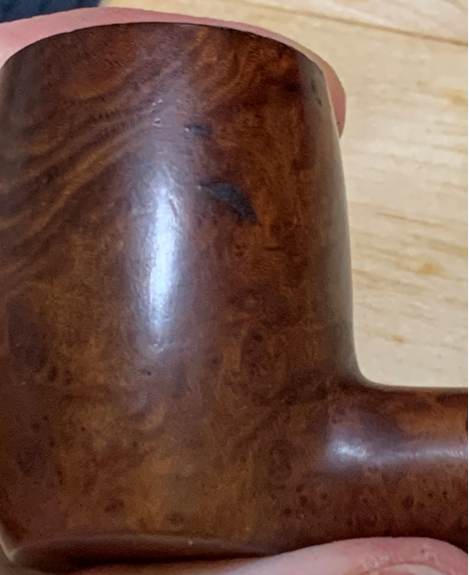
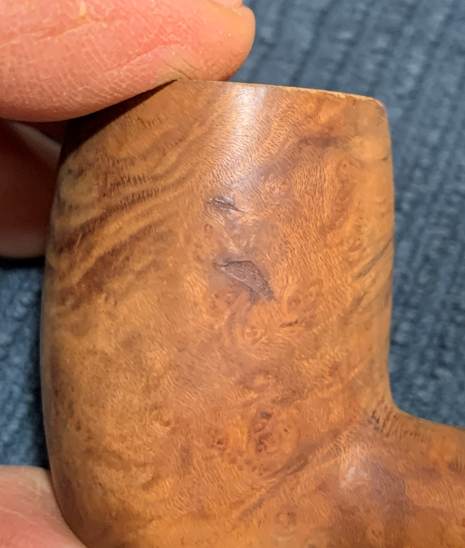
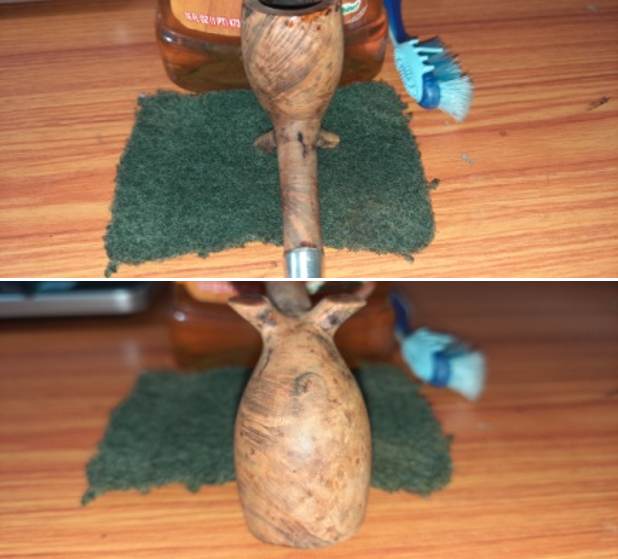
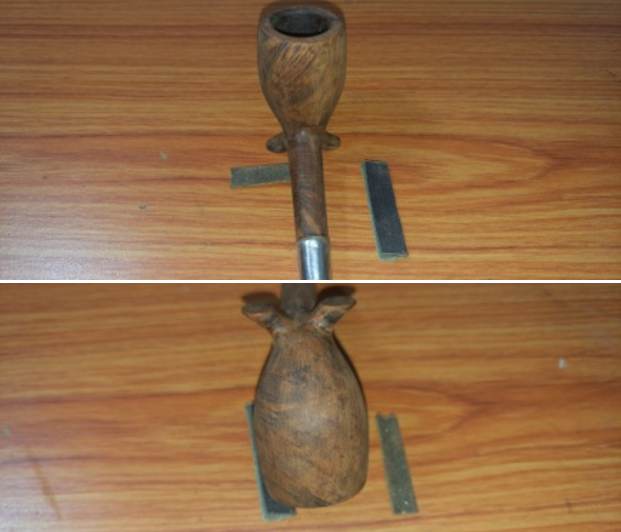
 The stummel has some interesting grain patterns hidden under the dust that has accumulated over the surface. There is a fill towards the foot of the stummel on the left side and is encircled in green. This fill seems like a crack but it is not. The stummel surface has a few scratches but the two on the right side of the stummel are prominently visible (encircled in yellow). The two legs of the bowl are perfectly flat and angled making the pipe a sitter. The long slender shank has a dark patch (encircled in red) at the bowl shank junction and is likely another fill or a crack. I shall be sure about this only once the surface is thoroughly cleaned. The shank has heavy accumulation of oils, tars and gunk. The sweet smell is pretty strong here too.
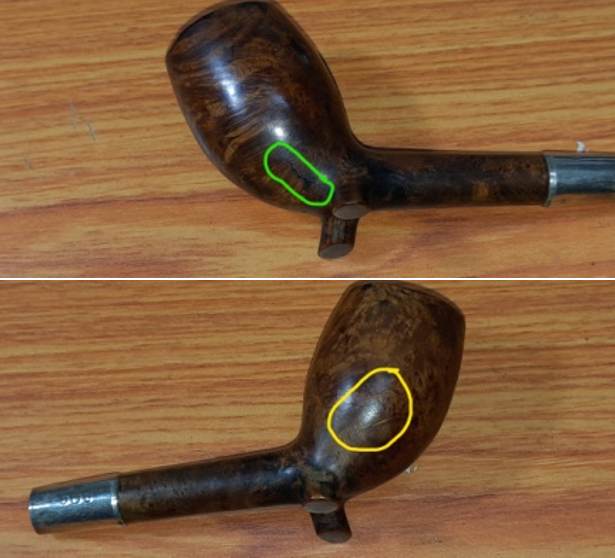
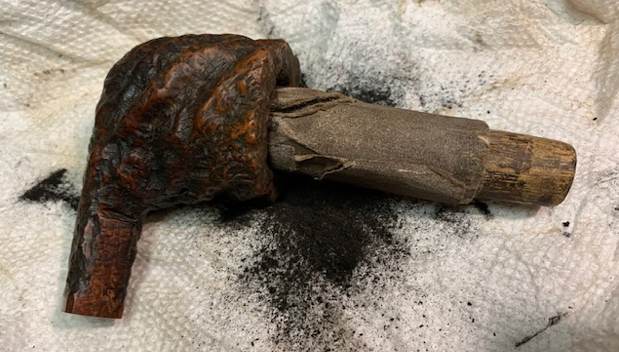
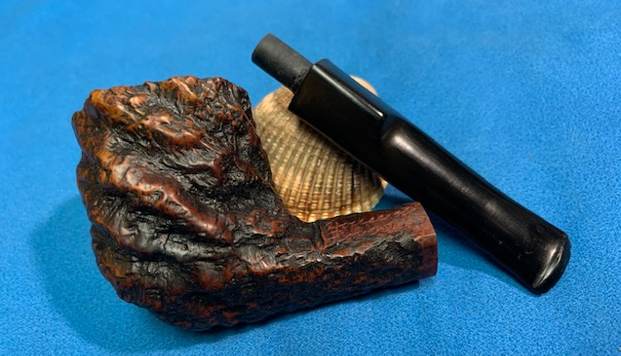
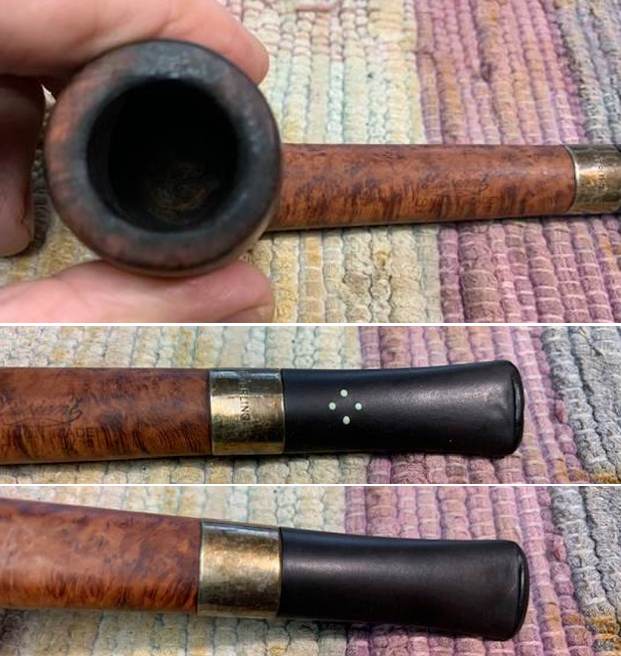
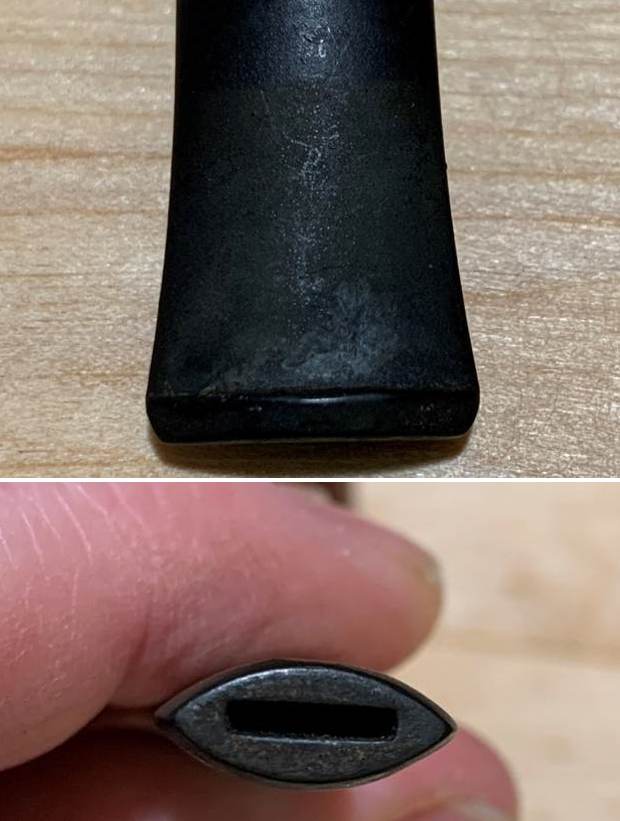
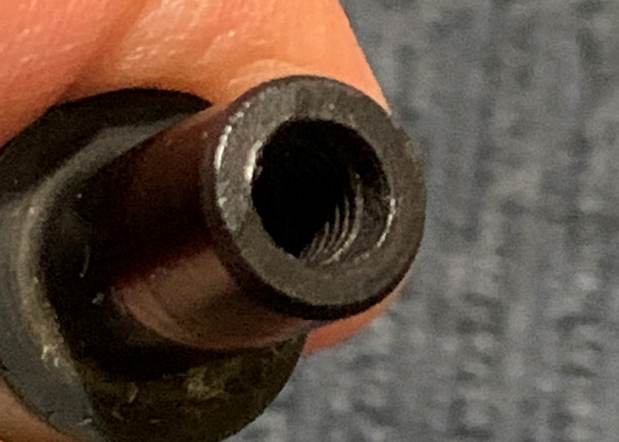
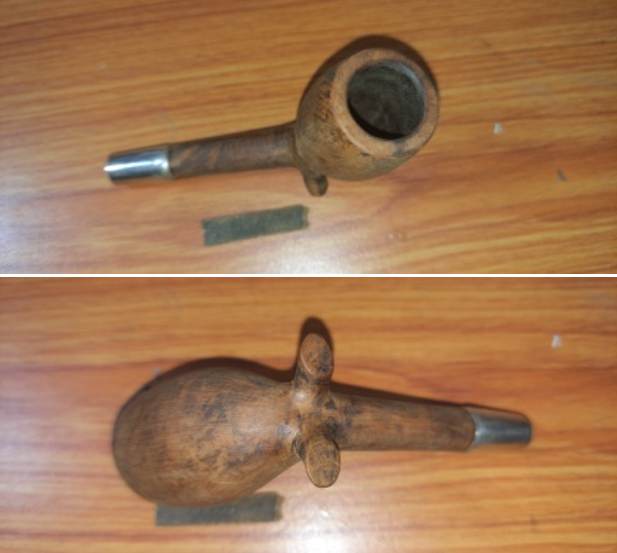
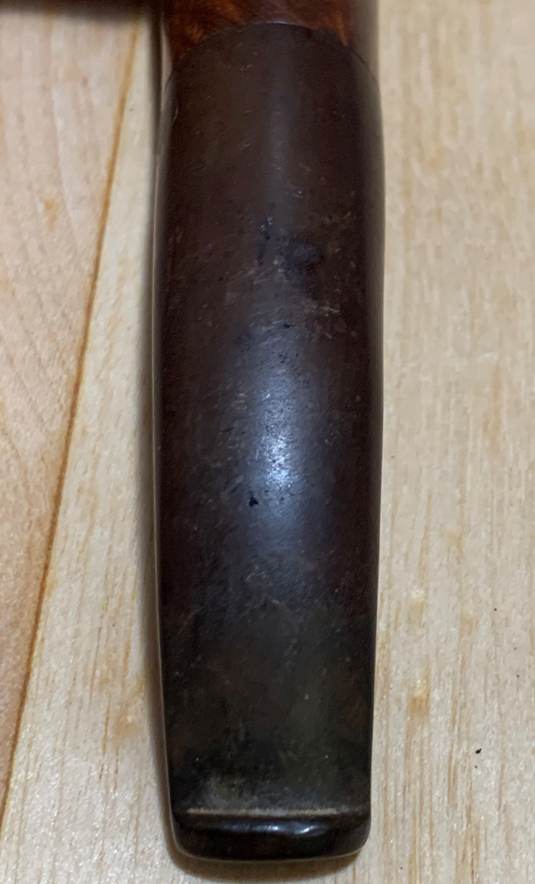
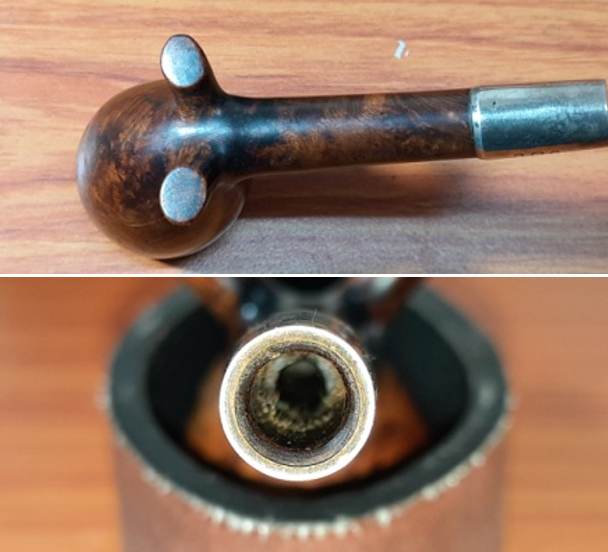 The long and slender vulcanite stem slightly tapers towards the tenon end giving a very classy look to the pipe. The step tenon has a chunk of vulcanite missing from the end and would need to be rebuilt. The stem has deep seated oxidation that imparts to it a greenish brown hue. The bite zone has minor tooth chatter and the buttons are sans any damage. The oval shape of the slot end and the slot itself is old fashioned and is a pointer to this being an older pipe from the 20s- 30s. Both the tenon end and slot end shows heavy accumulation of gunk and has an awful stink to it. This stem is going to be a bear to clean.
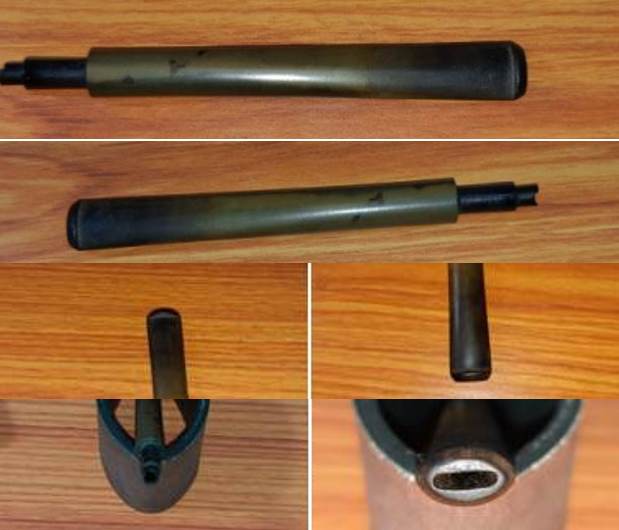 The Process…
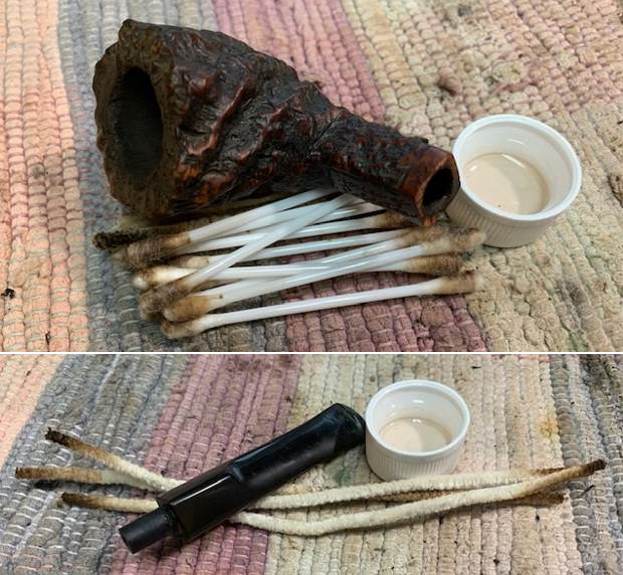
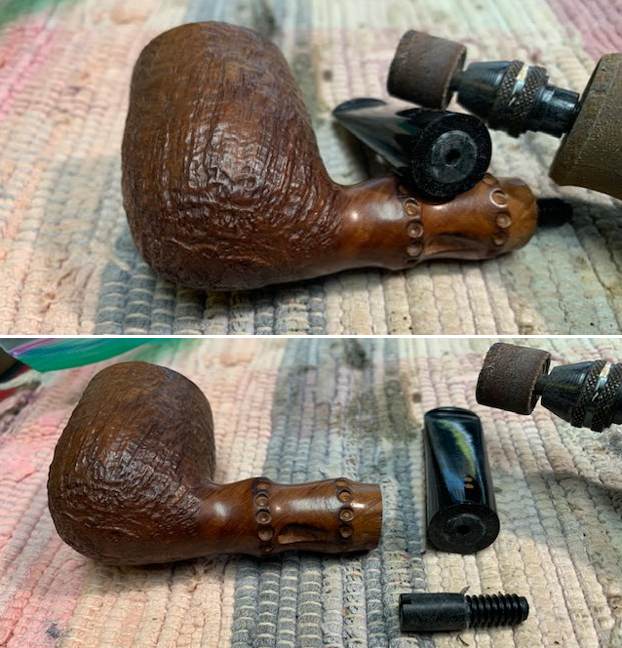
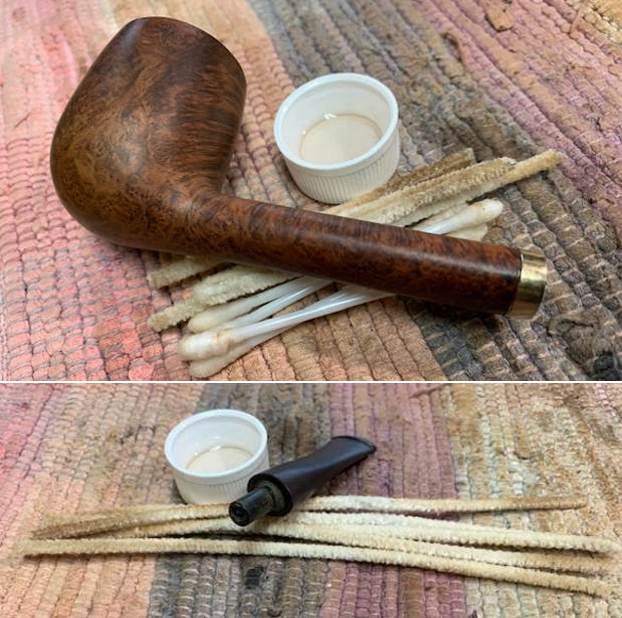
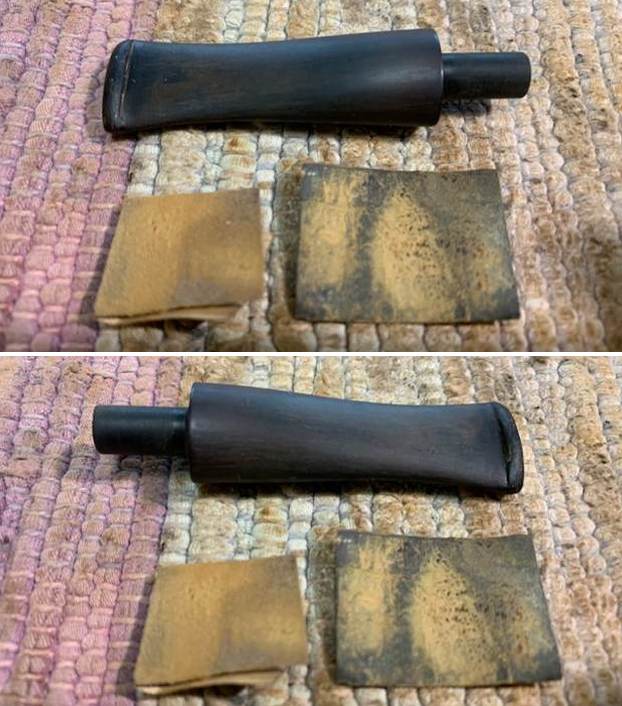
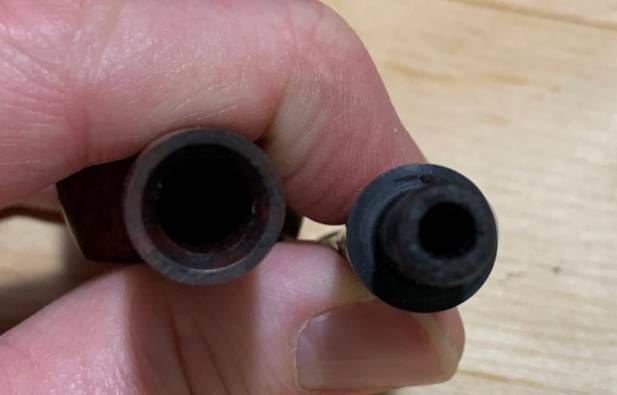
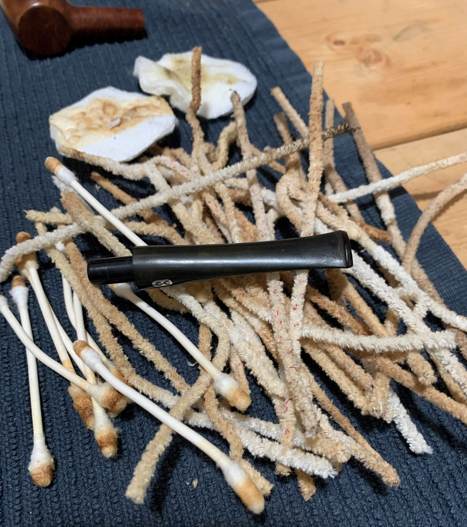
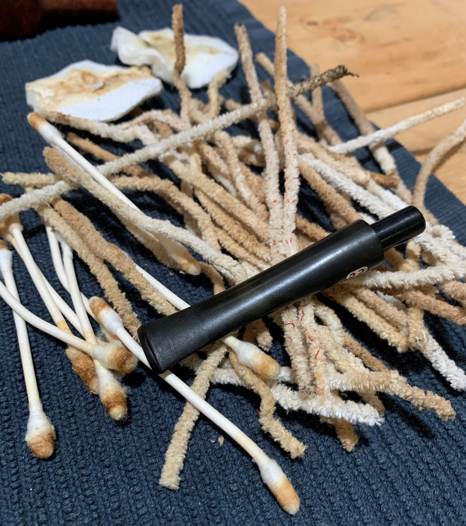
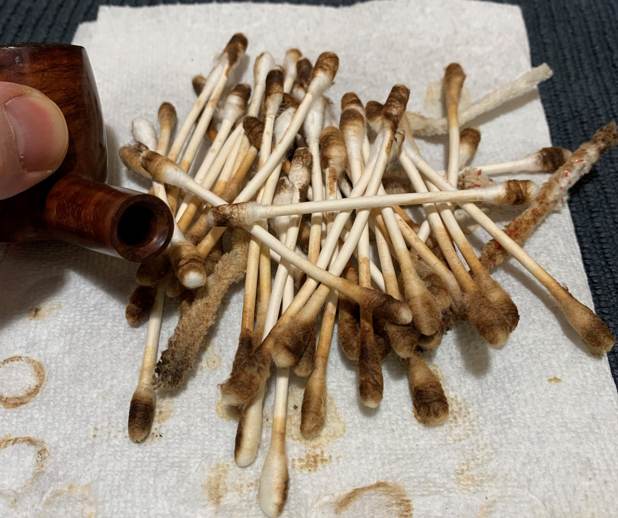
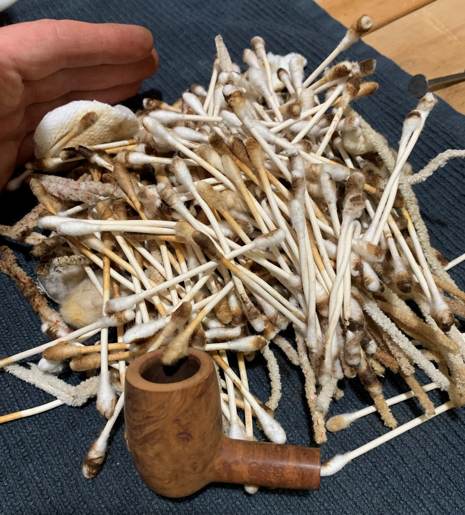
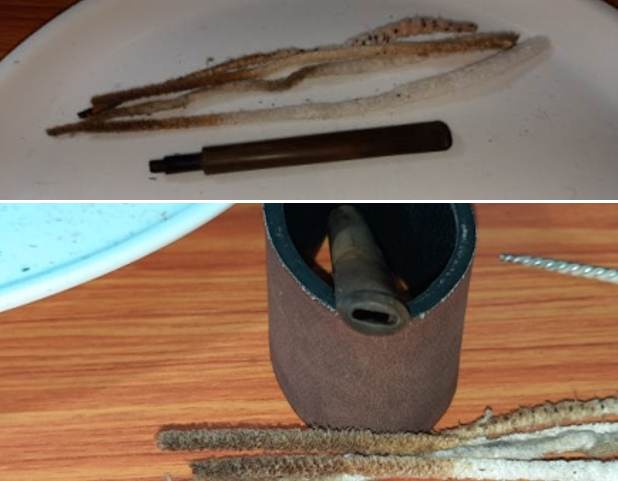
Since there were other stems that were ready to be put into the stem deoxidizer solution, I decided to clean the internals of this stem first so that it could be put in the solution with other stems. I cleaned the stem airway with a thin shank brush and anti oil soap. The amount of gunk that was cleaned can be judged from the pictures below. It took considerable time and elbow grease to get the stem airway clean. I further cleaned the internals with regular and bristled pipe cleaners dipped in alcohol.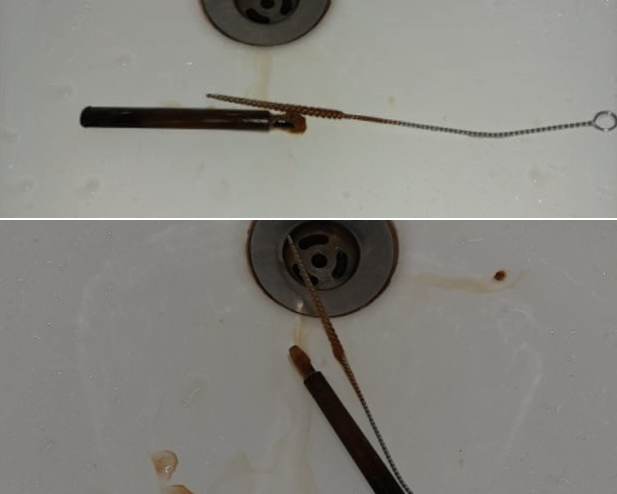
 Once I was done with the internal cleaning of the stem airway, I sanded the stem surface with a folded piece of 220 grit sandpaper to loosen and remove superficial oxidation from the stem surface. I wiped the stem clean with Murphy’s Oil Soap on a cotton swab. It has been our experience that such sanding yields the best end results after the deoxidizer solution has completed its assigned task.
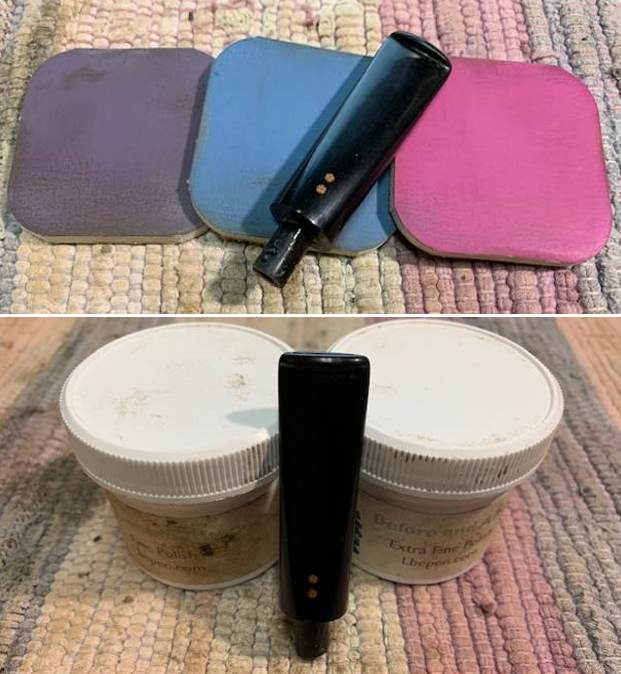
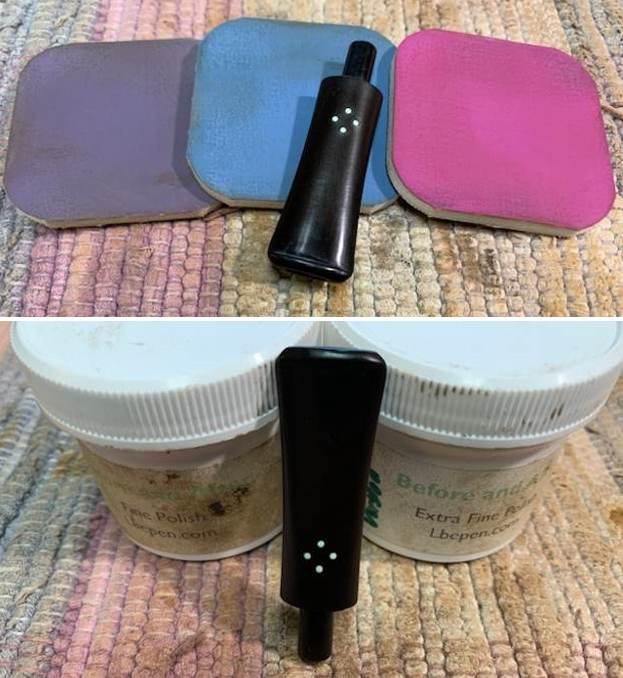
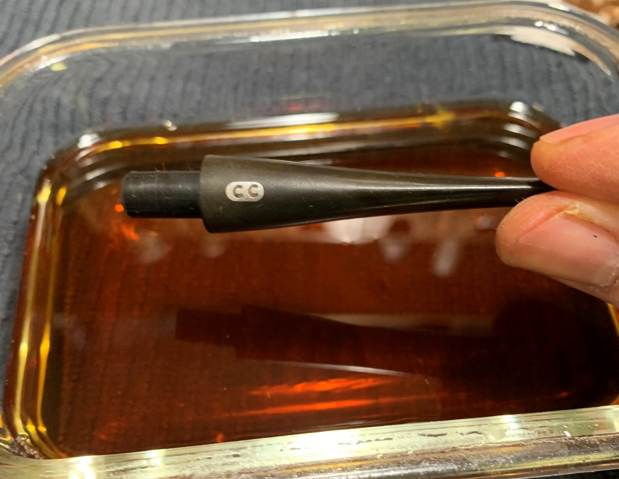
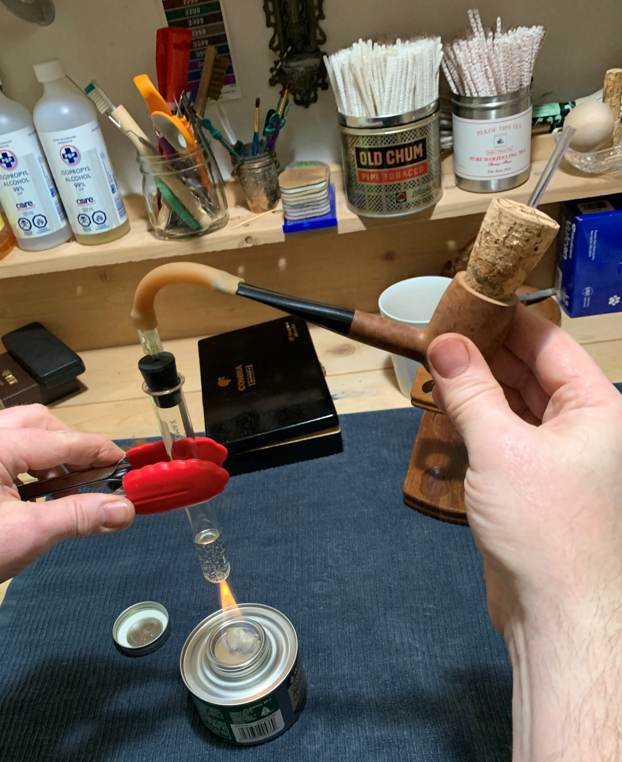
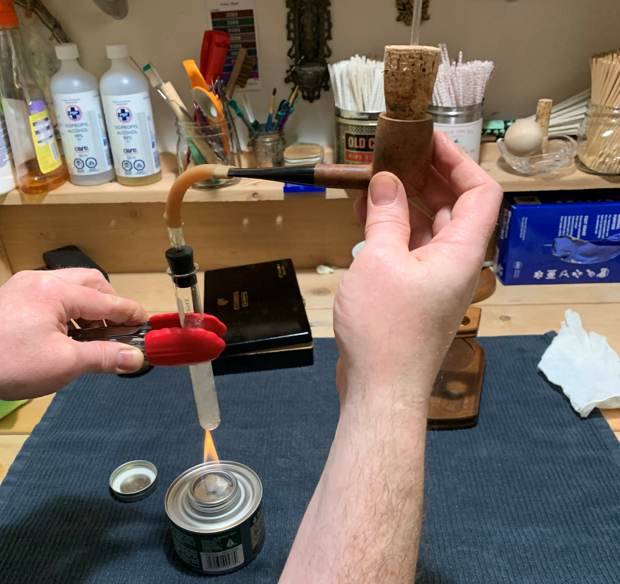
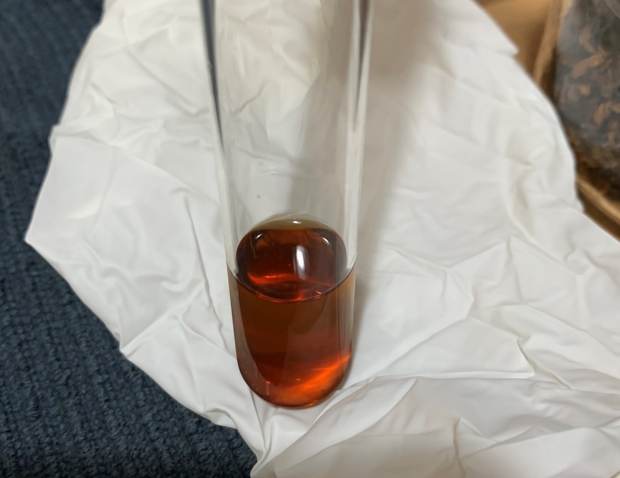
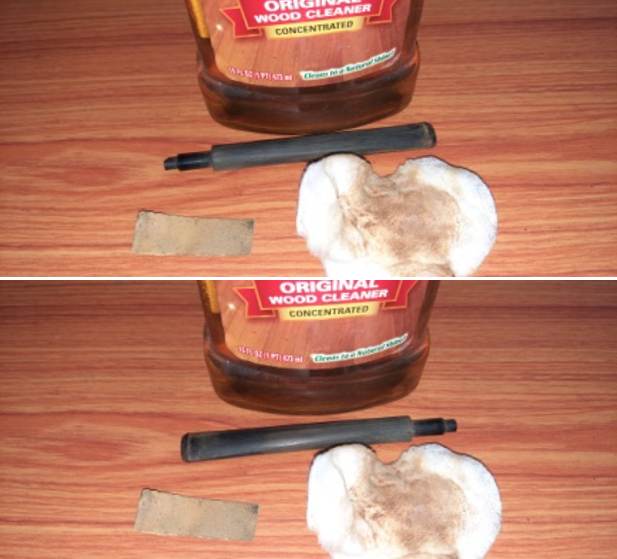 The stem was immersed in the Before and After Deoxidizer solution, a product that has been developed by Mark Hoover. This solution raises the oxidation to the stem surface and helps in easy removal and imparting a nice shine to the stem after polishing. The pipe is indicated with a yellow arrow indicator. The stem was allowed to soak into this solution overnight.
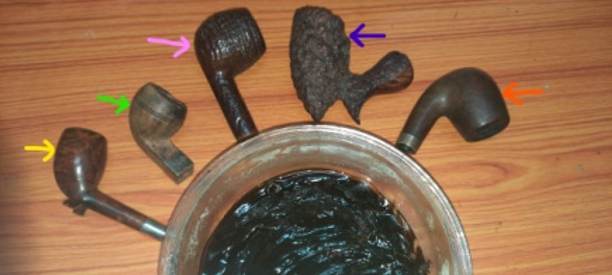 The next morning, Abha took the stem out from the solution. She cleaned the stem under running warm water and scrubbed the raised oxidation from the stem surface using a Scotch Brite pad and cleaned the airway with a thin shank brush. She further removed the oxidation by scrubbing the stem with 0000 grade steel wool and applied a little EVO to rehydrate the stem. She ran a couple of pipe cleaners through the stem airway to clean the airway of the deoxidizer solution and water.
 Staying with stem repairs, I warmed up the bite zone with the flame of a lighter to raise the minor tooth indentations to the surface. The heat helps the vulcanite to expand and regain its original shape. This method may not always completely raise the depressions to the surface, but most of the times, to a great extent. In this case the tooth indentations were raised completely to the surface. I followed up the heating of the stem surface with sanding the bite zone with a piece of 220 grit sandpaper to even out the surface.
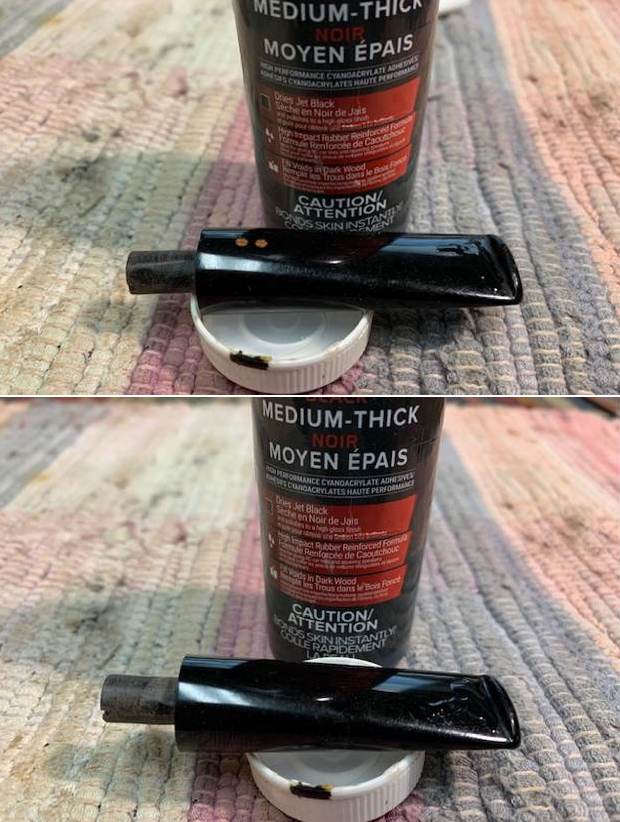
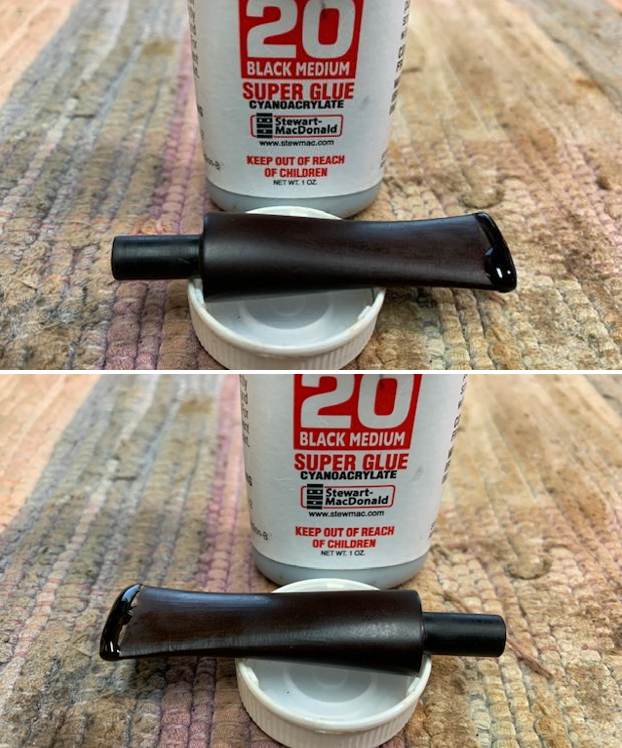
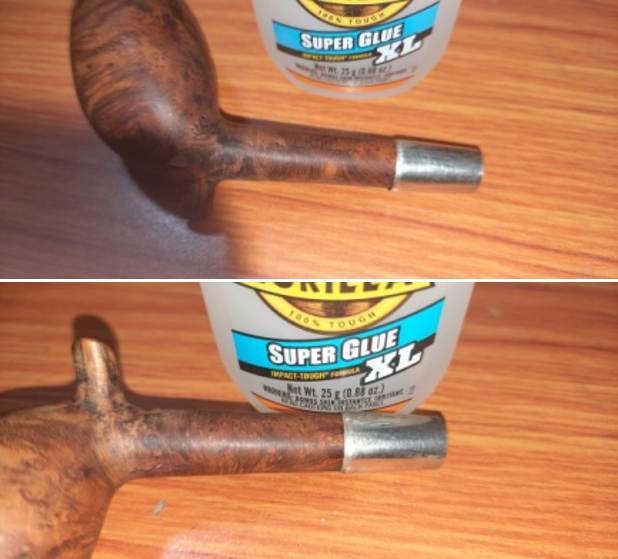
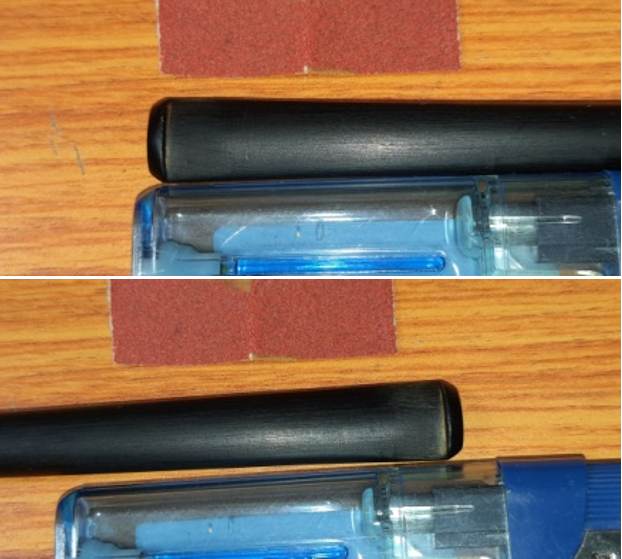 Next, I decided to address the broken end of the step tenon. I first inserted a pipe cleaner that had been smeared with petroleum jelly (Vaseline) through the tenon end into the stem air way. This helps prevent the CA superglue and charcoal mix from sticking to the pipe cleaner and prevents the mix from running down into the air way and clogging it. I generously applied a mix of CA superglue and activated charcoal over the tenon end to be rebuilt. I applied a thick layer of the mix as this provides sufficient patch material to work with during subsequent filing and shaping to match the repairs with the stem surface. Once I had applied the mix, I set it aside to cure overnight.
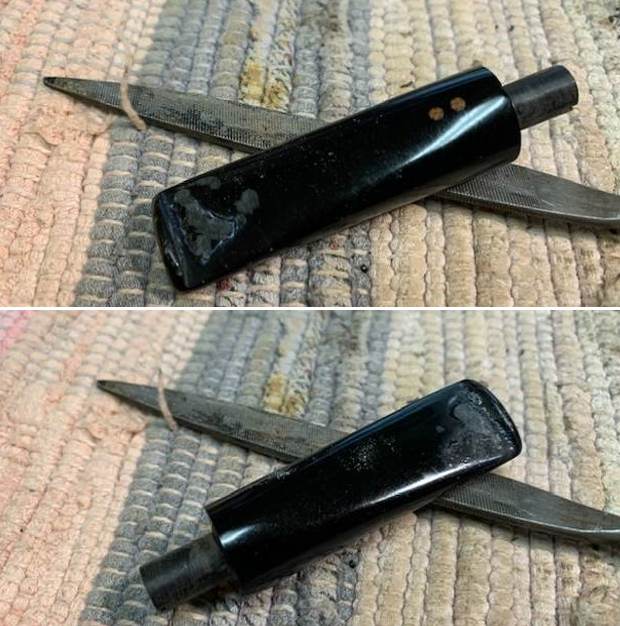
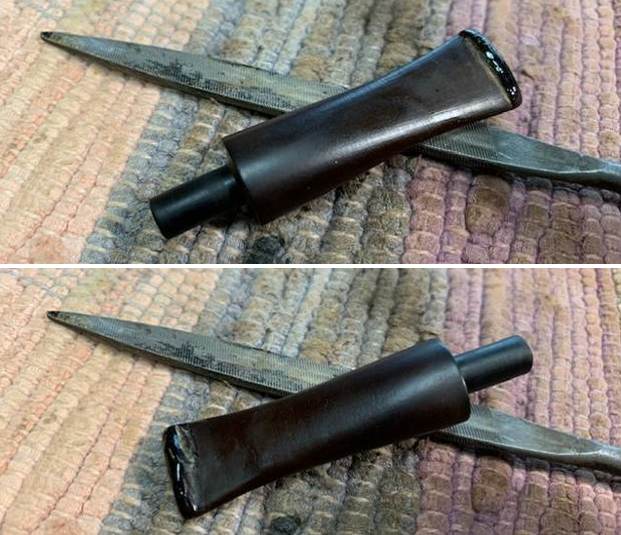
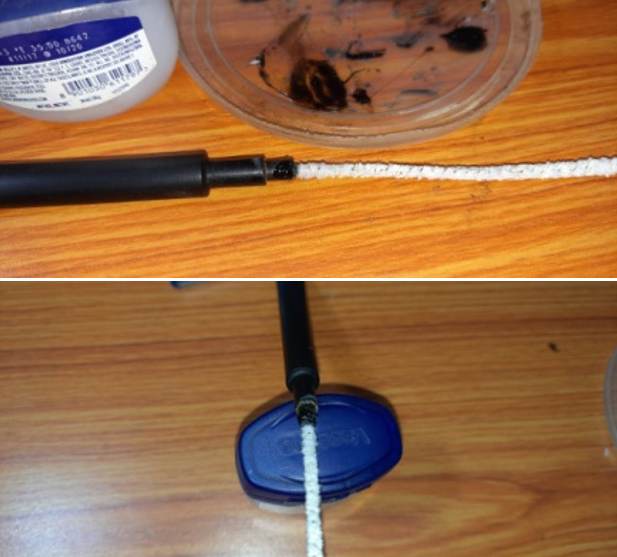 By next afternoon, the tenon rebuild had cured perfectly and was fit to work on. I used a folded piece of 220 grit sand paper to sand the patch and achieve an even match with the rest of the tenon surface. I shaped the opening of the rebuilt tenon for smooth and even airway surface using a round needle file and topped the tenon face on a piece of 220 girt sand paper to achieve a perfect seating of the step tenon into the mortise.
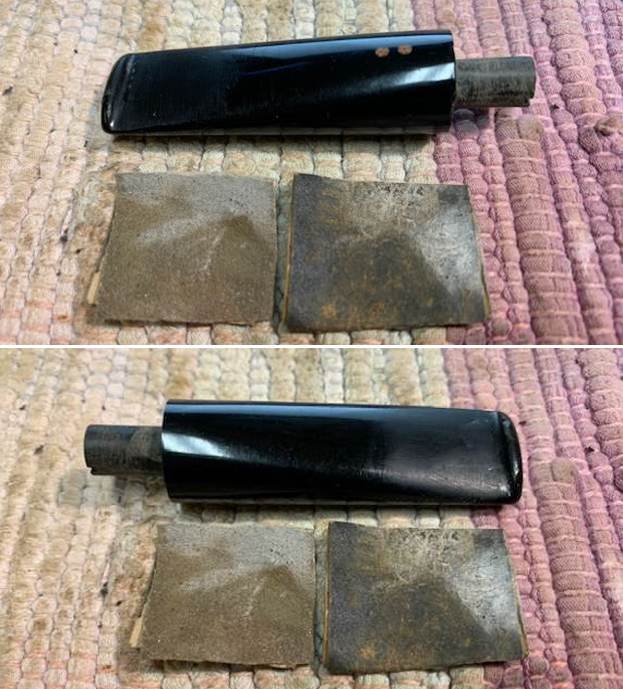
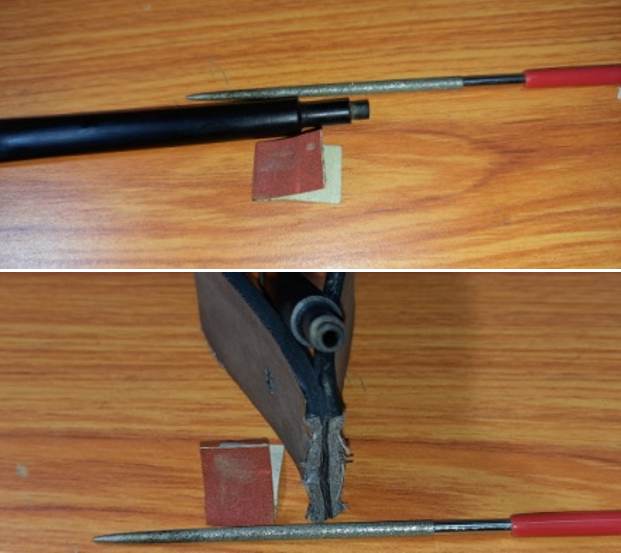 I further sanded the entire stem with 320 followed by 400, 600, 800 and 1000 grit sand paper. This helps to reduce the scratch marks left behind by the more abrasive 220 grit paper and also to remove complete oxidation from the stem surface. I rubbed a small quantity of EVO to rehydrate the stem and set it aside.
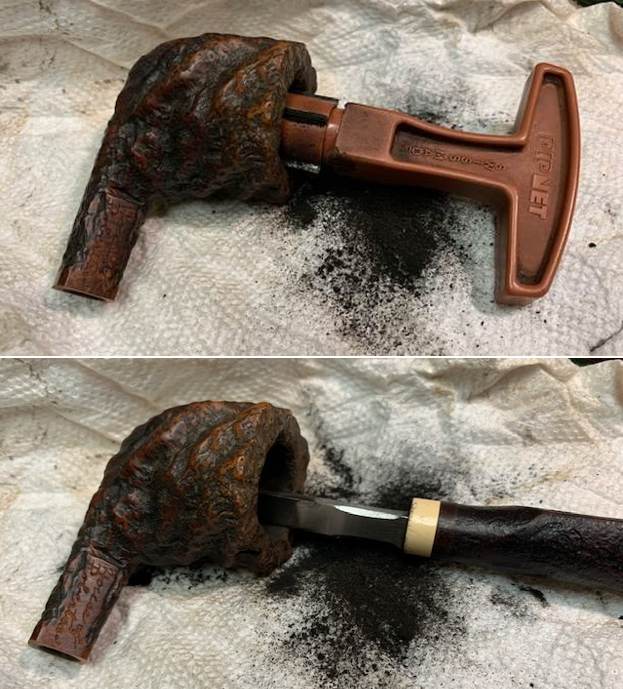
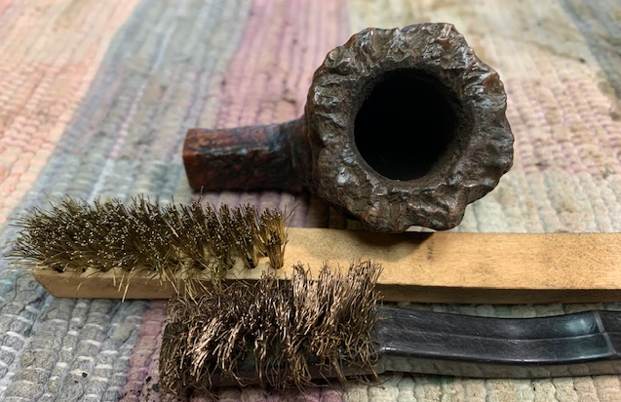
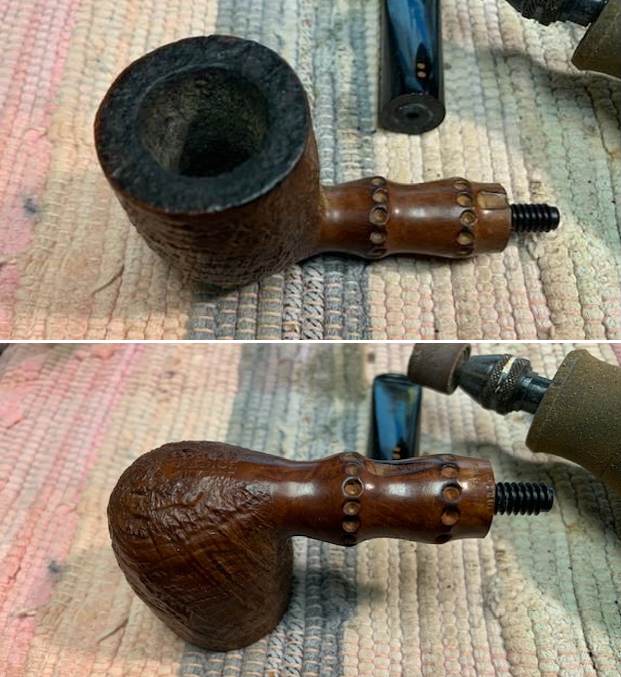
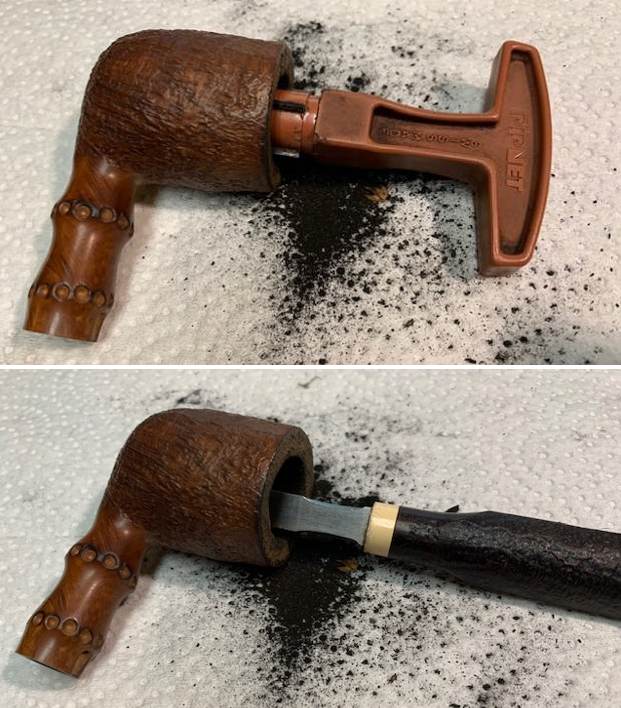
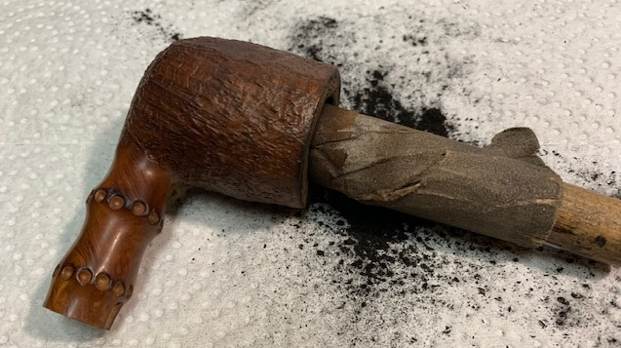
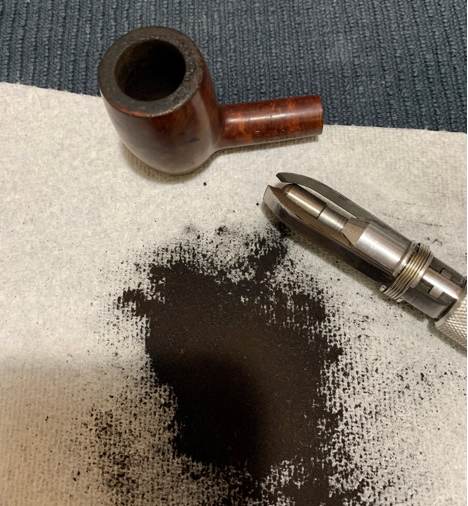
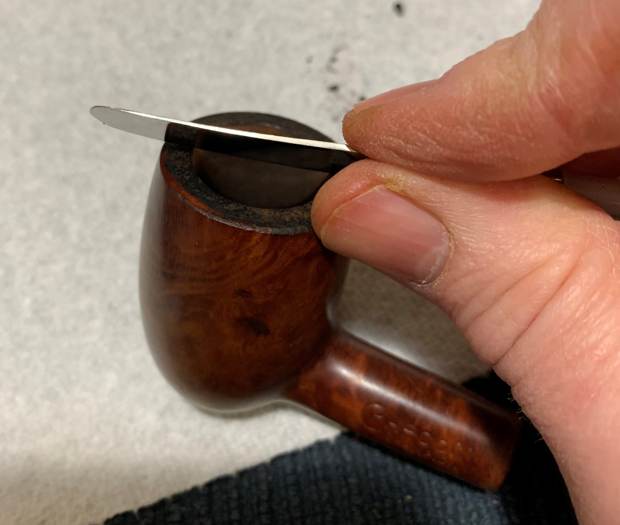
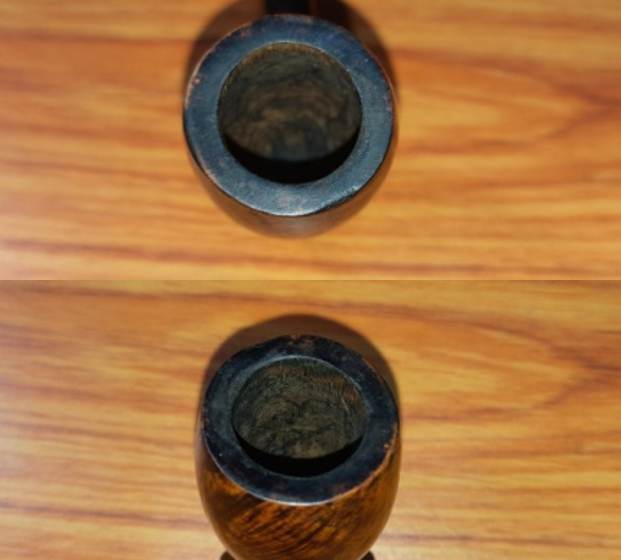
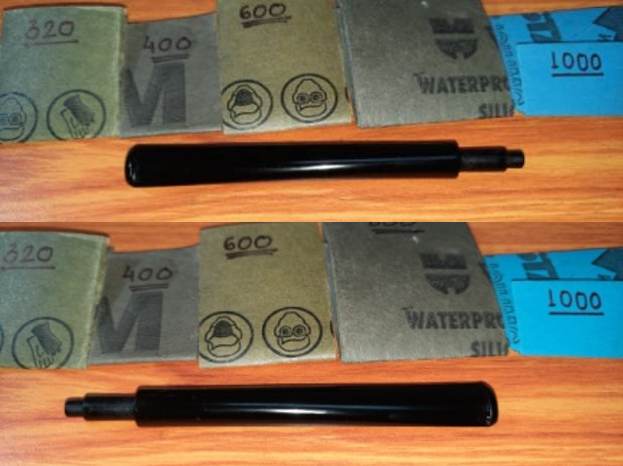 With the stem set aside, I had a second look at the stummel and decided to start with reaming the chamber. Using size 1 head of the PipNet reamer, I took the cake down to the bare briar. I used my fabricated knife to remove the carbon layer from areas which could not be accessed by the reamer head. Next, with a folded piece of 220 grit sandpaper pinched between fingers, I sanded the wall surface to a smooth finish and ensured there are no traces of residual carbon anywhere in the chamber. I cleaned the chamber with a cotton swab wetted with alcohol. There are a couple of heat fissures that can be seen over the surface of the wall but they seem to be superficial. It could be just a thin layer of residual cake that has hardened rock solid or could be a heat fissure proper and in that case, I would need to fix it. But first, I would need to soften the cake.
 I cleaned the mortise using q-tips, pipe cleaners and alcohol. I scrubbed out the dried oils and tars from the walls of the shank using a bent dental tool. It was only once the shank internals were cleaned that I could see the thin crack to the shank. However, the repair band was firmly glued to over the shank end. I shall continue further cleaning of the shank internals when I clean the external surface of the stummel.
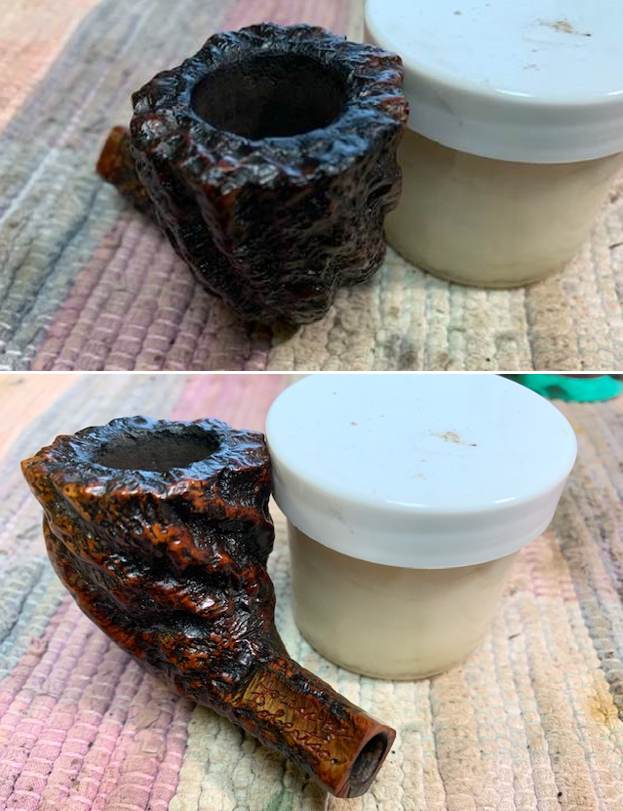
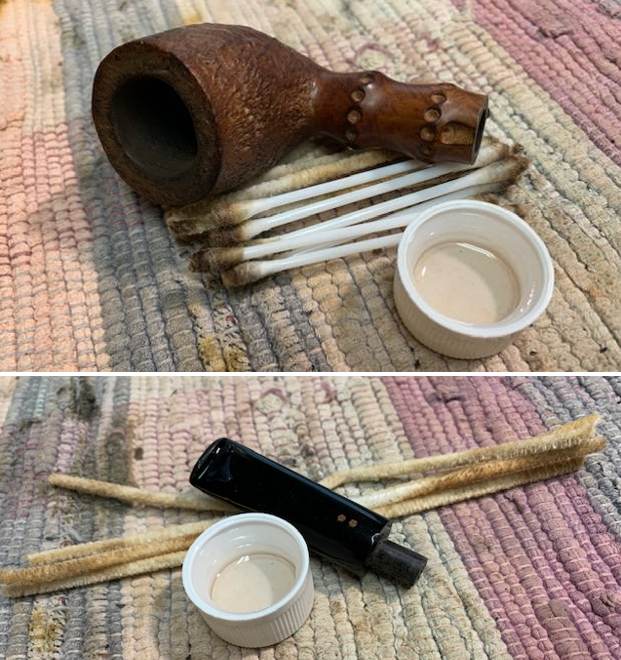
 I decided to give the stummel a salt and alcohol treatment. This would address three issues, firstly the strong sweet ghosting smell secondly, loosen the rock hard carbon layer from the chamber wall and lastly the alcohol may loosen the glue that kept the repair band firmly attached to the shank. I wrapped a little cotton around a pipe cleaner and inserted it through the mortise into the chamber. I packed the space around this pipe cleaner in the shank with cotton balls. Next, I firmly packed the cotton balls in to the chamber about half an inch below the rim and soaked the cotton balls with isopropyl alcohol up to the brim. About half an hour later, the level of alcohol had gone down, having being absorbed by the cotton. I topped it up once again and set it aside overnight. By next morning, the cotton and alcohol had drawn out all the remaining oils and tars from the chamber and mortise, fulfilling its intended task. I removed the cotton balls and ran pipe cleaners through the mortise to clean out all the loosened tars and gunk and further cleaned it with alcohol and q-tips. The chamber now smells clean and fresh. I set the stummel aside to dry out naturally. All the three issues that I wanted to address with this process have been achieved as will be brought out subsequently.
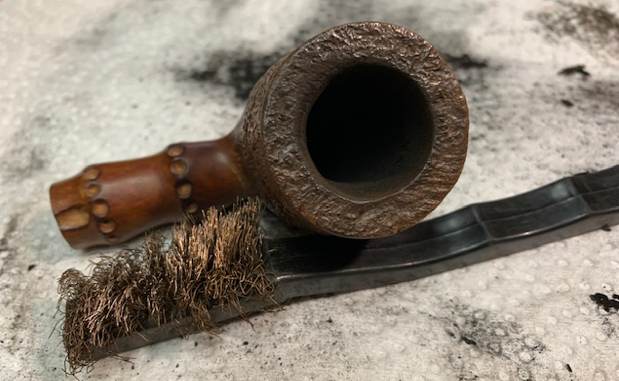
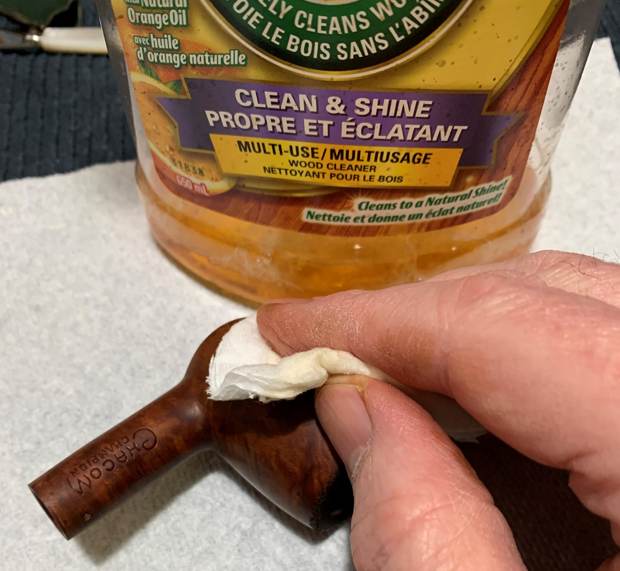
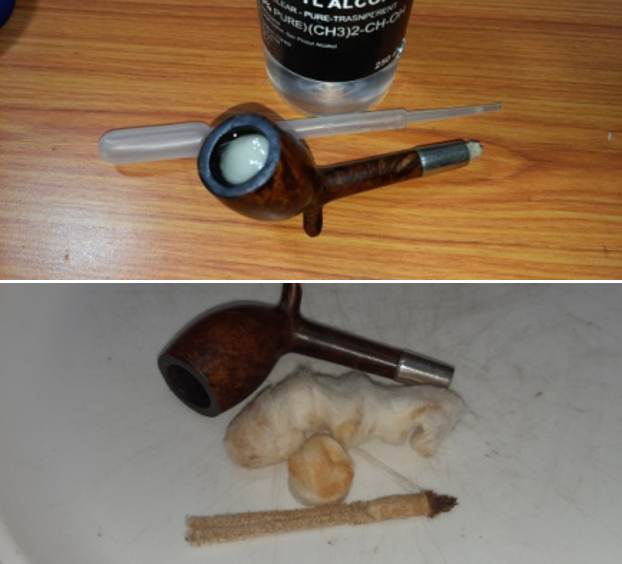 With the bowl internals clean, I moved to clean the exterior of the stummel. I used a hard bristled tooth brush and Murphy’s Oil soap to scrub the stummel and rim top. For this stummel cleaning, l used Murphy’s Oil soap as I wanted to preserve the old patina that had developed on the stummel and was not sure how the Briar cleaner product would affect it. After the scrub with oil soap, I washed the stummel under running warm water with anti oil dish washing detergent till the stummel surface was clean and dried it using paper towels and a soft cotton cloth. I simultaneously cleaned the shank internals with the detergent and hard bristled shank brush and set the stummel aside to dry out naturally. This cleaning had now exposed all the fills (encircled in pastel blue), charred rim surface at 11 and 3 o’clock directions (encircled in yellow) and scratches over the stummel surface.
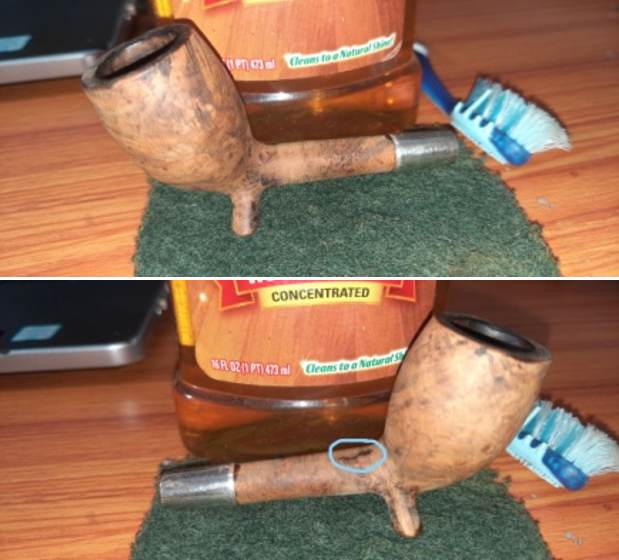

 As spelled out earlier, during the alcohol bath, alcohol had seeped through the crack in the shank and loosened the glue that held the band over the shank and during the external cleaning the band came out easily revealing the crack that it had covered. It’s a large crack that would need to be addressed.
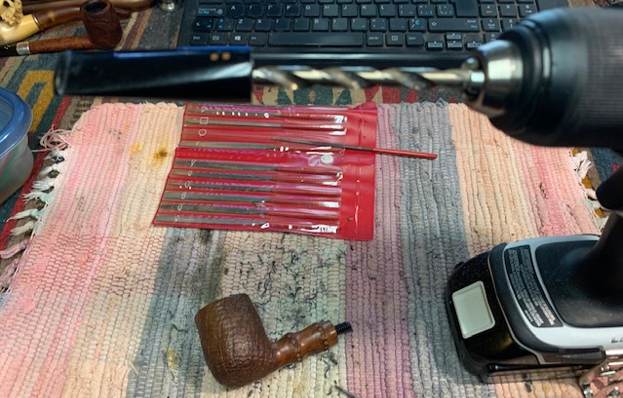
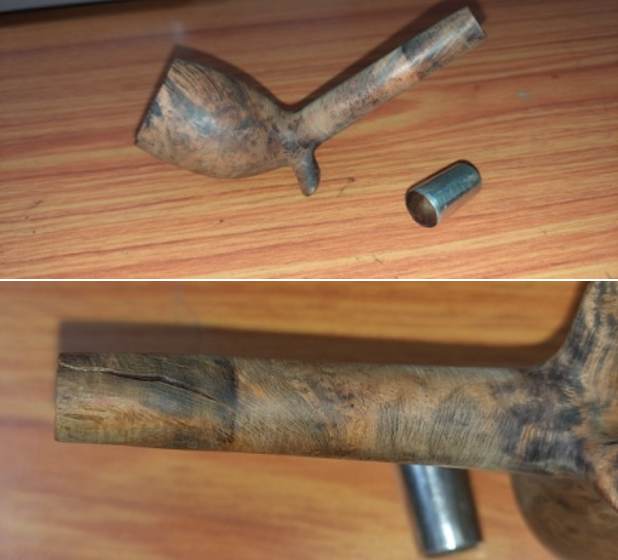 I cleaned the mortise and shank internals with anti oil soap and shank brushes. I also removed all the debris and old glue from within the crack using a thin sharp fabricated tool. I further cleaned the crack using cotton swab and alcohol.
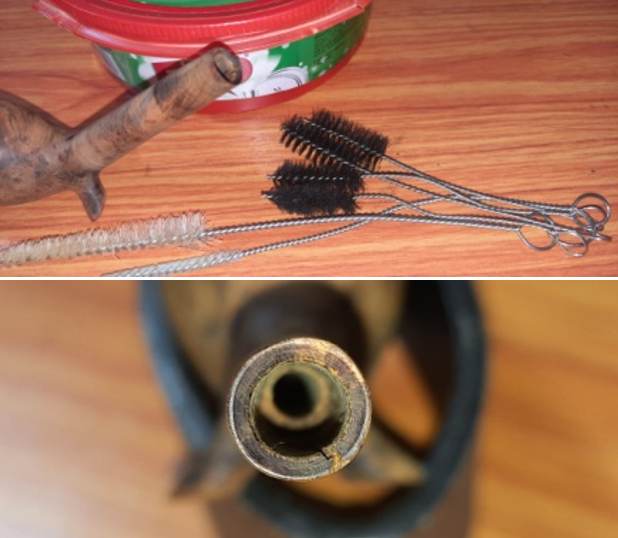
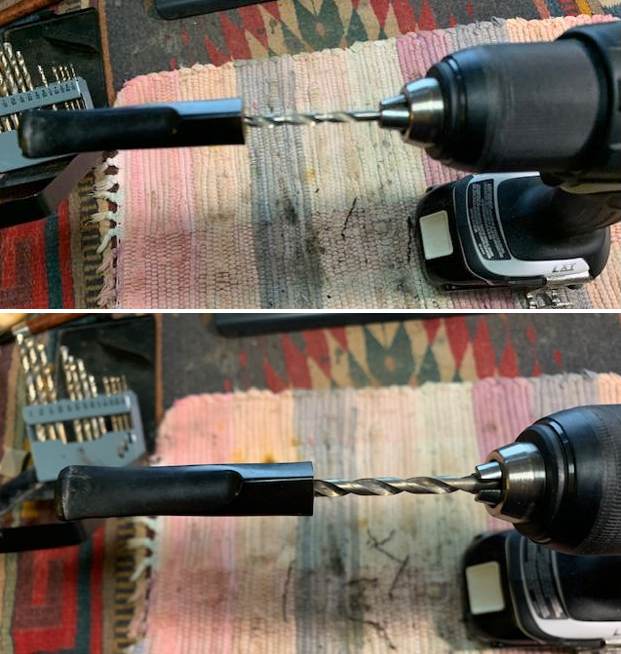
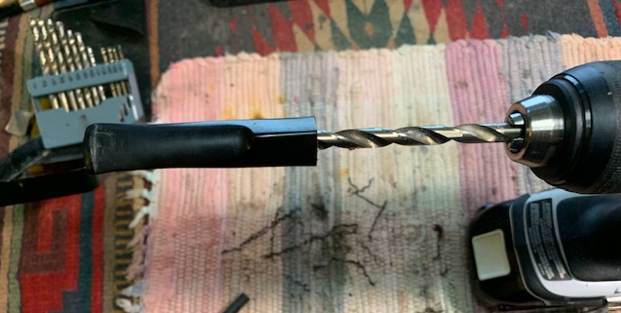
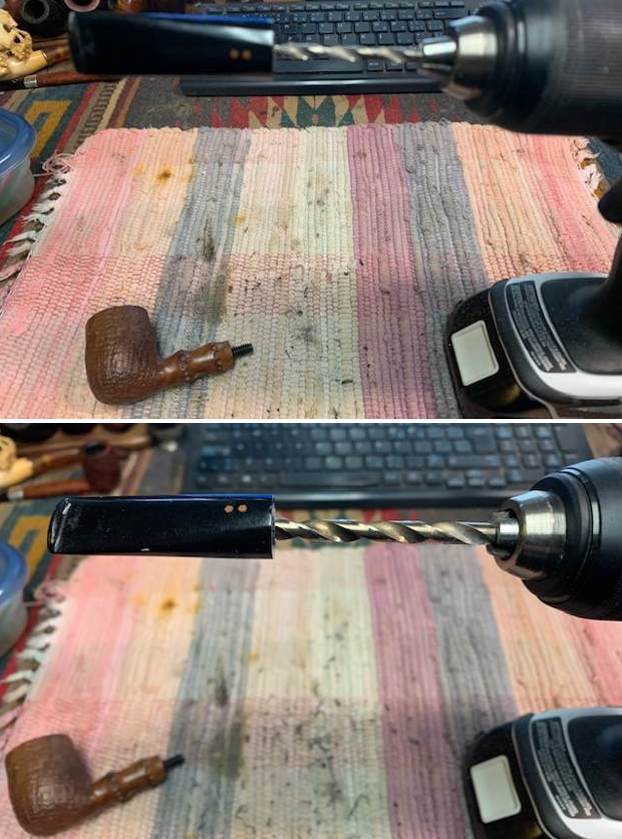
 With the prep for the crack repair completed, it was time to move on with the task. Under a magnifying glass, I marked the end point of the crack with a marker pen. This is the guide point where I shall drill a counter hole to prevent further spread of the crack in any direction. Using a 1mm drill bit mounted on my hand held rotary tool, I drilled a counter hole at the end of the crack. I also inspected the fills that I had observed after external cleaning of the stummel. The only fill that would need to be refreshed was the one on the left side of the stummel near the foot. With my fabricated sharp knife, I removed the old putty fill and cleaned the pit with alcohol.
 I filled the pit and the shank crack, counter hole included, with a mix of briar dust and superglue. I sprayed an Accelerator over the fills to hasten the process of curing.
 Remember the issue of heat fissures I had brought out earlier? Well, after the alcohol bath, I checked the chamber again and it was confirmed that these are not just a result of hardened carbon cake but indeed the briar had charred along these heat lines. Using a sharp and thin knife, I checked all the heat lines and removed the charred briar from the two of these heat fissures (indicated with green line). I needed to address this as it could lead to a burnout at a later date when it is smoked.
 Once the shank crack and the refreshed fill had completely cured, using a flat head needle file, I sanded the repaired areas to achieve a rough match of the fills with the surrounding surface. I used a round needle file to even out the fill which had seeped inside the shank. I further evened out the fills with a folded piece of 320 grit sand paper. I checked the seating of the repair band over the shank and fine tuned the adjustment and glued it in place once it was perfect.
 Next I addressed the charring to the rim surface that I had ascertained after the cleaning of the stummel. I topped the rim surface over a piece of 220 grit sandpaper, frequently checking for the progress being made. It was peculiar to note that the charring at 11 and 3 o’clock directions was over both the inner and outer rim edges. I masked these charred marks by creating a bevel over both the edges with a piece of 220 grit sandpaper pinched between fingers. The results were definitely satisfactory.
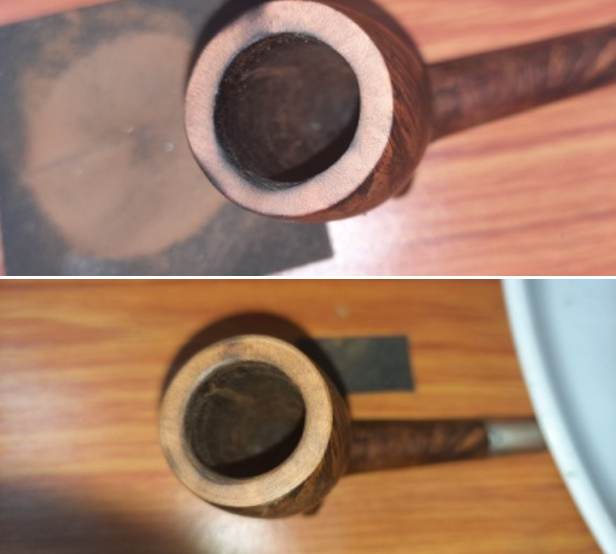
 I sanded the entire stummel with a folded piece of 220 grit sandpaper. This addressed many of the scratches and dings from the surface. Those that remained are being accepted as part of the pipe’s journey thus far. I have addressed all the repair issues of the pipe and now handed it over to Abha, my wife, to work her magic in polishing the stummel and stem.
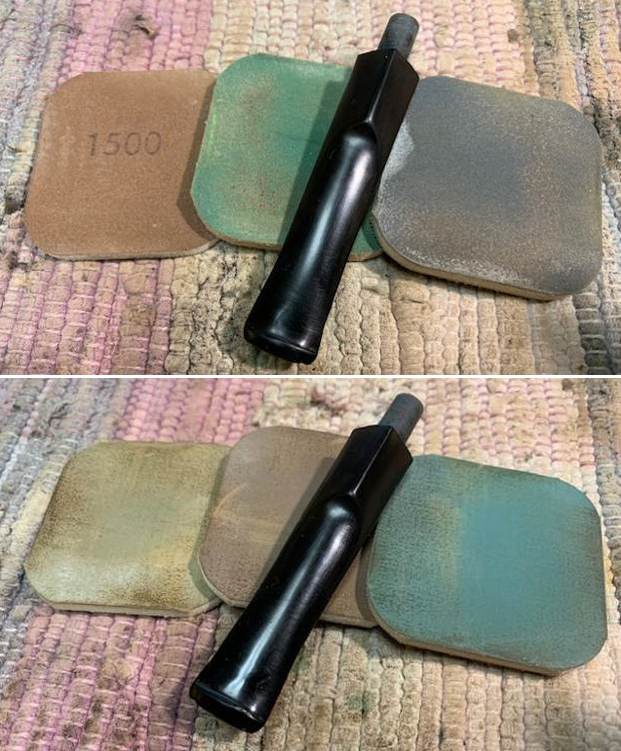
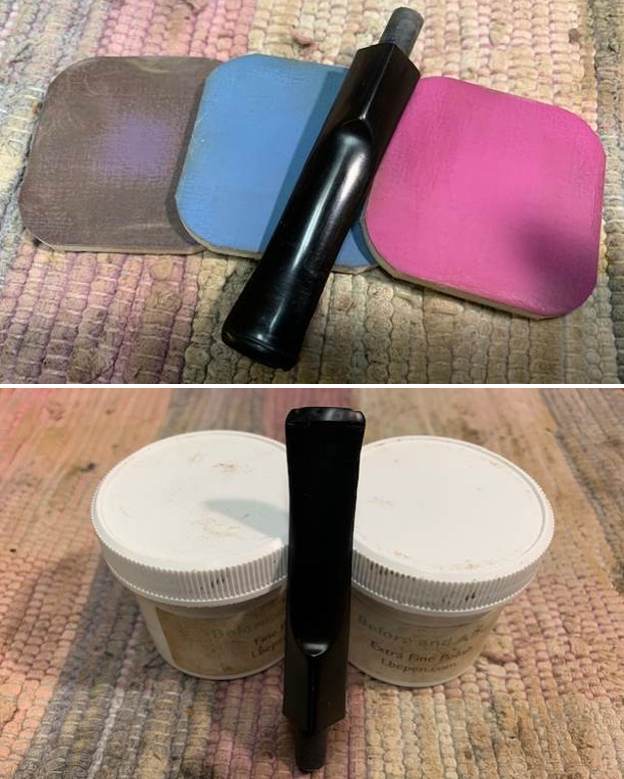
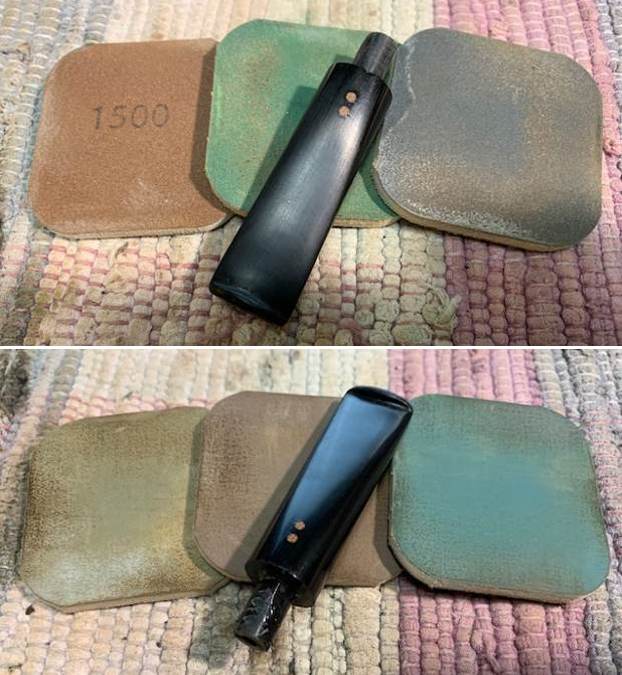
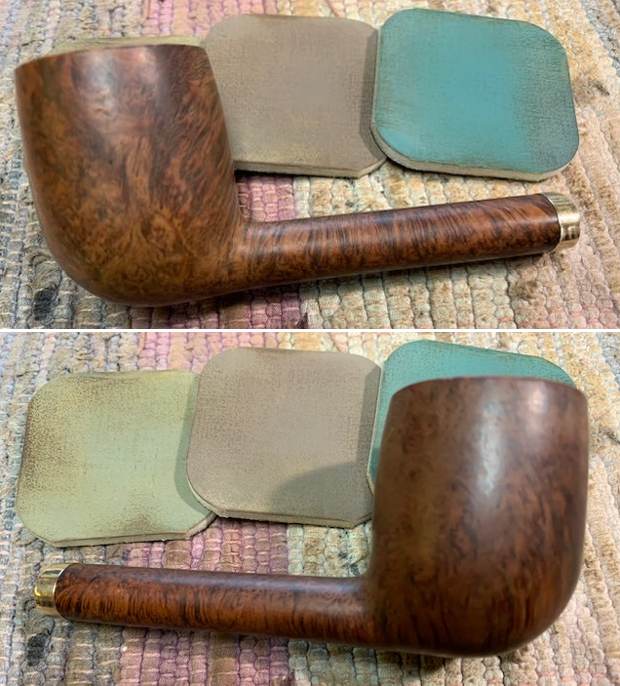
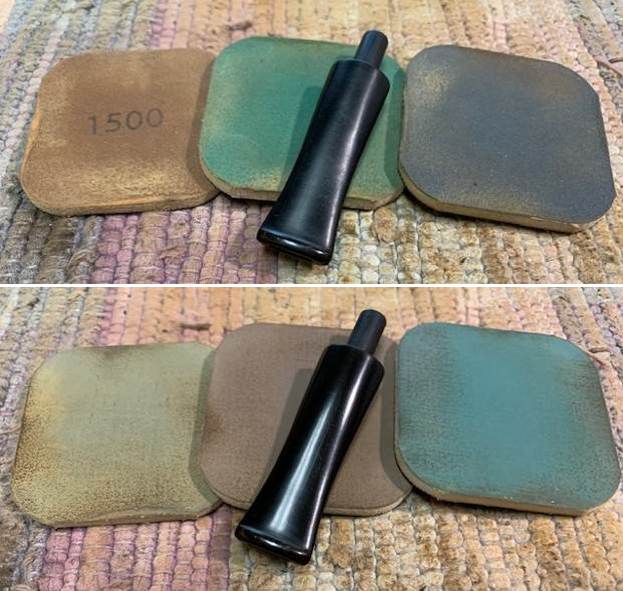
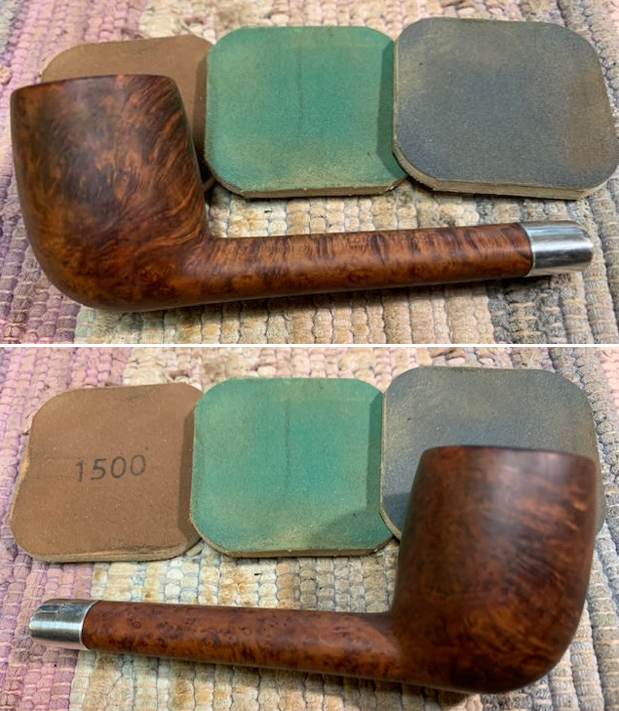
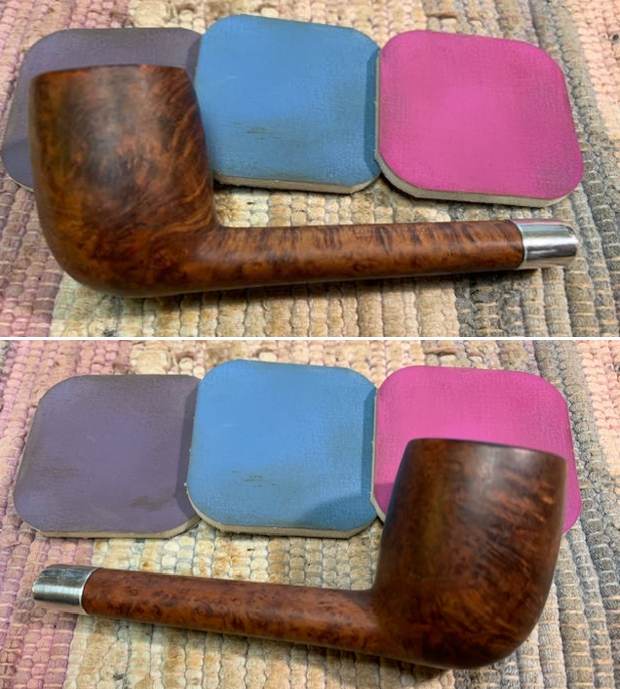
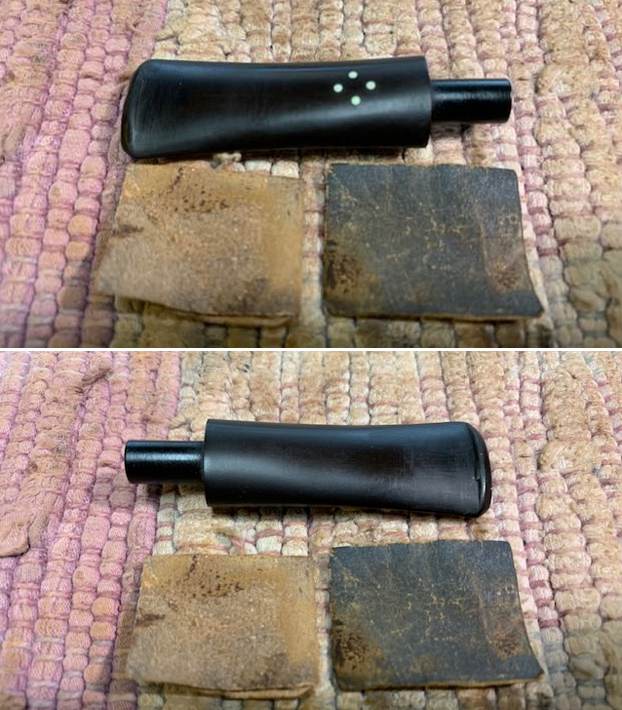
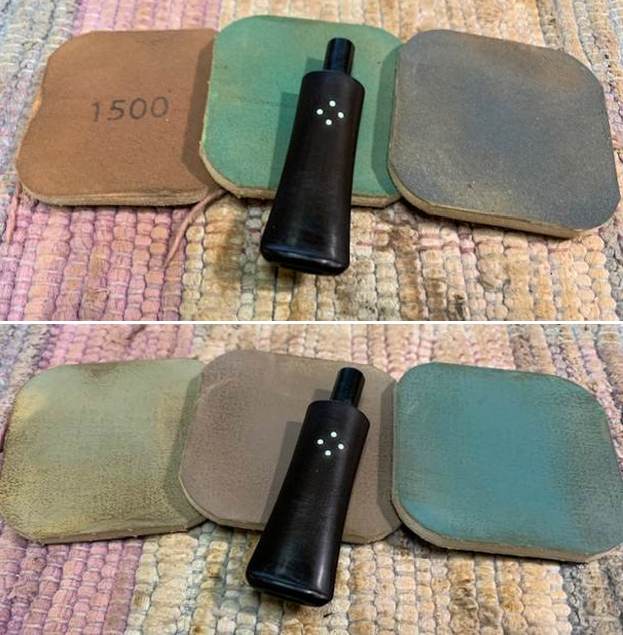
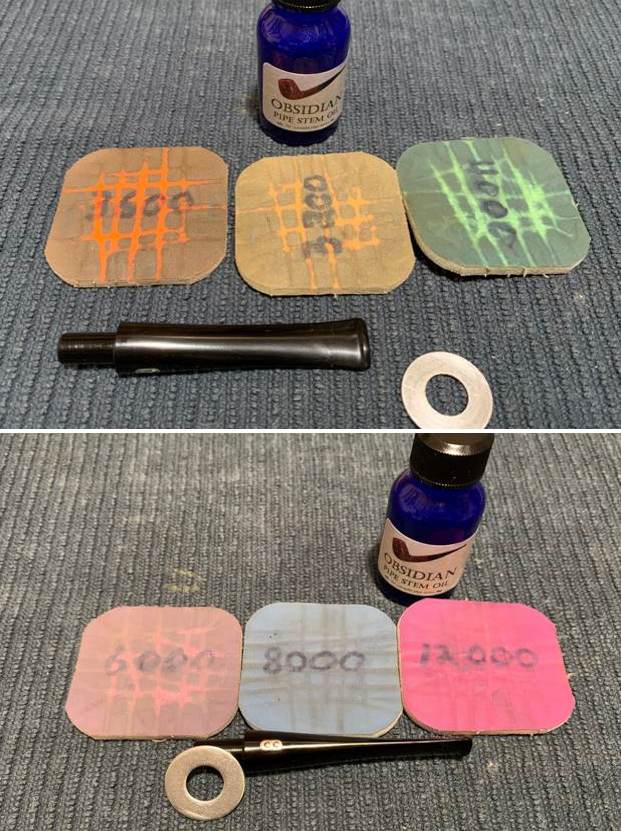
 To bring a deep shine to the vulcanite stem, Abha went through the complete set of micromesh pads, wet sanding with 1500 to 12000 grit pads. She wiped the stem with moist cloth after each pad and rubbed it down with Extra Virgin Olive oil to rejuvenate the vulcanite. The finished stem is shown below.
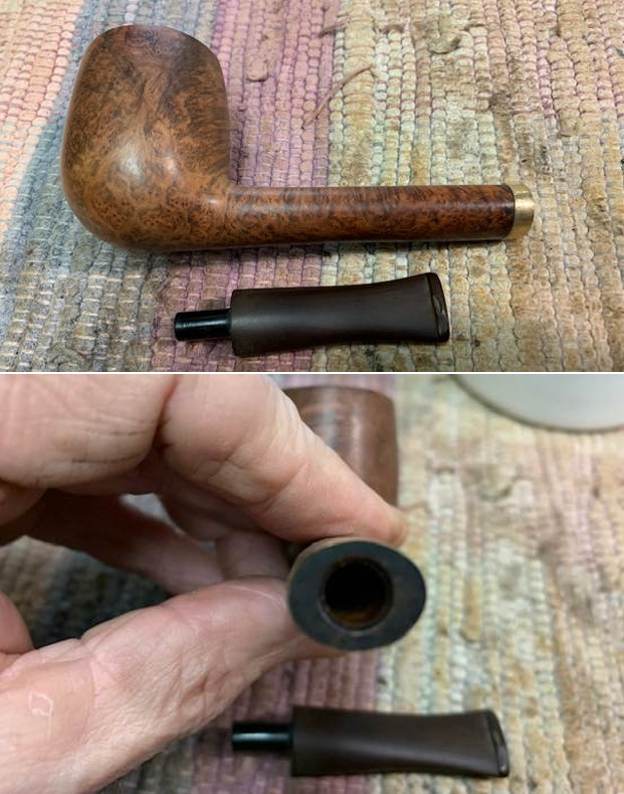
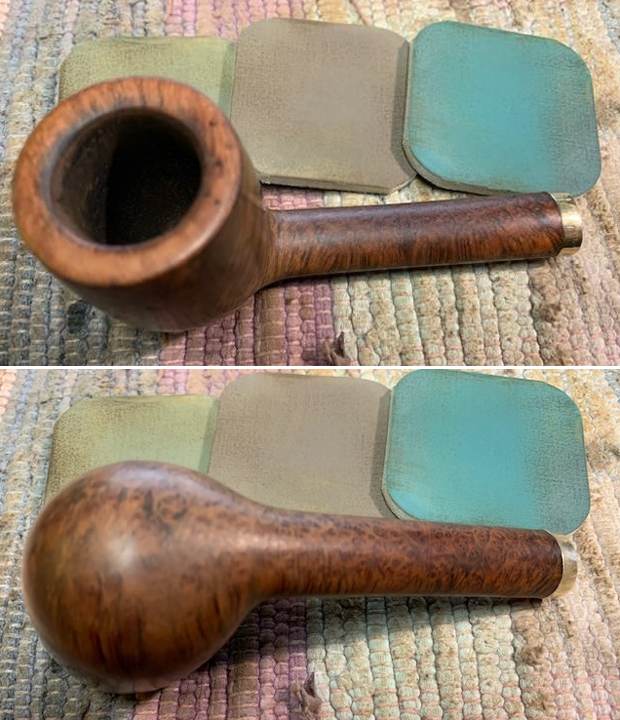
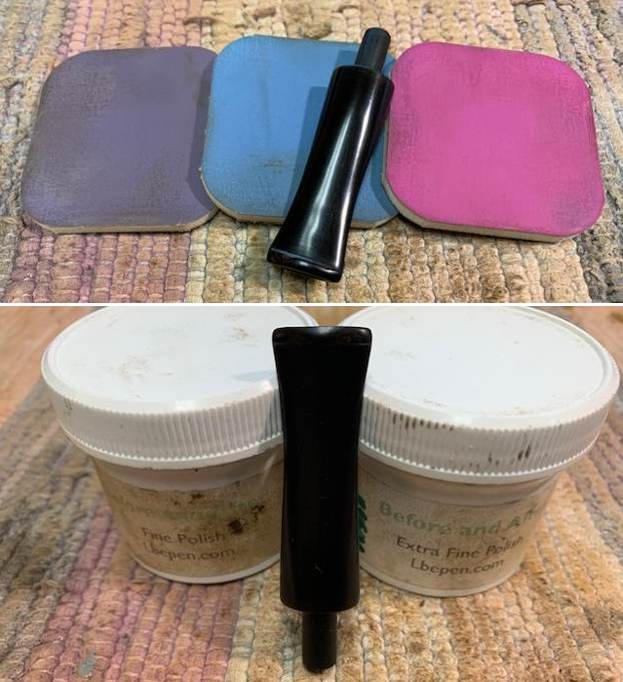
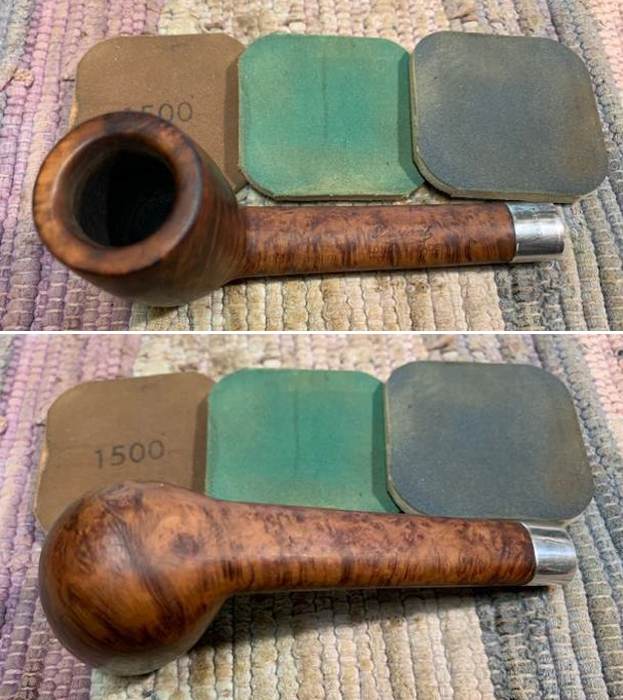
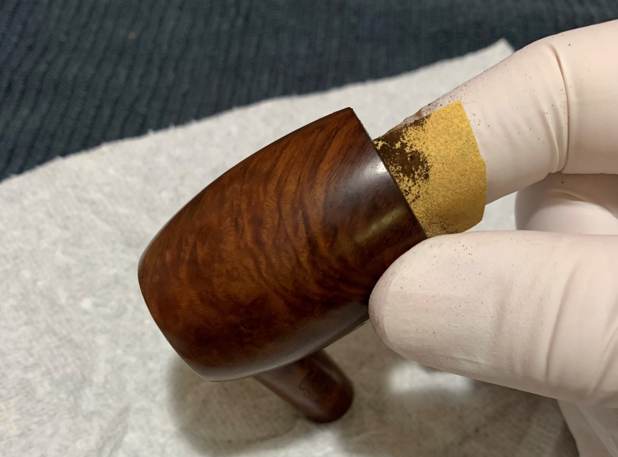
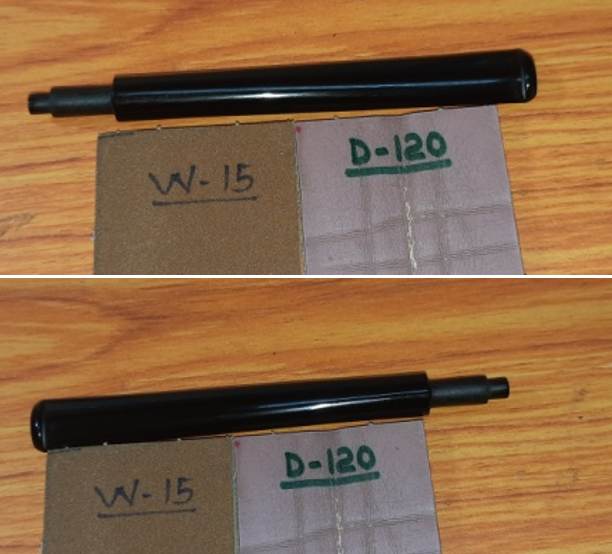 She wet sanded the entire stummel with 1500 to 12000 grit micromesh pads, wiping frequently with a moist cloth to check the progress. Next, she rubbed a small quantity of “Before and After Restoration Balm” deep in to the briar with her finger tips and let it rest for a few minutes. The briar now has a nice vibrant appearance with the beautiful grain patterns displayed in their complete splendor. She further buffed it with a horse hair brush.

 After Abha handed over the shining stummel, I ran my fingers along the chamber walls and realized with a cringe that I had not addressed the issue of heat fissures. I decided to fill only the heat fissures from where I had removed the charred briar with layer of J B Weld. J B Weld is a two-part epoxy Cold Weld in two tubes; hardener and steel which are mixed in two equal parts (ratio of 1:1) with hardening time of 5-6 minutes and complete curing time of 6-8 hours. I poured the contents of the two tubes and mixed it well. I applied this mix, as evenly as possible, over the heat lines in the chamber wall surface. I worked fast to ensure an even coat before the weld could harden. I set the stummel aside for the application to harden and cure overnight.
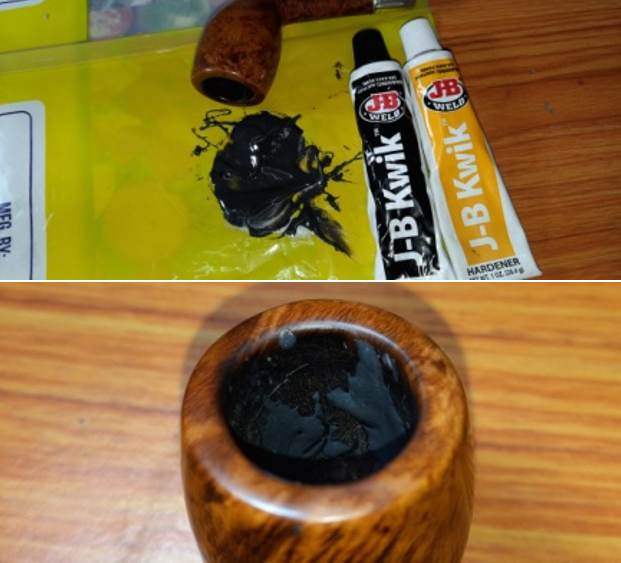
 By the next afternoon, the J B Weld had cured and hardened considerably. With a folded piece of 150 grit sandpaper, I sanded the filled JB Weld from the heat lines till all that remained was a smooth surface with the weld deeply embedded into the heat lines and protecting the briar from further damage.
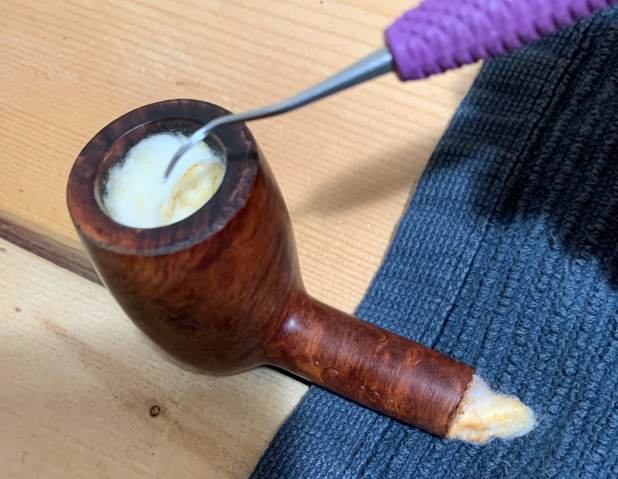
 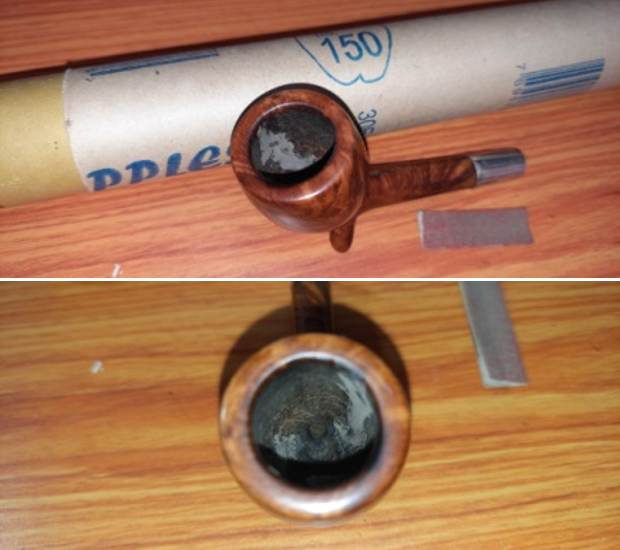 There was only one more issue that needed to be addressed and one that could not be ignored, being a functional issue. After I had lined the walls of the chamber with a thin coat of J. B. Weld, it was necessary to prevent the walls from coming in to direct contact with the burning tobacco. I addressed this issue by mixing activated charcoal and plain yogurt to a thicker consistency, just enough that it would spread easily and thereafter applied it evenly all along the chamber walls after inserting a folded pipe cleaner through the draught hole to keep it open. Once dry and set, this will not only protect the walls but also aid in faster build up of cake.
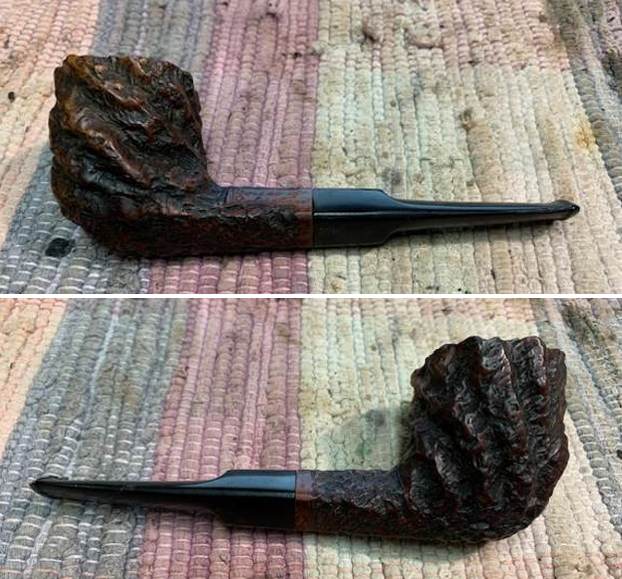
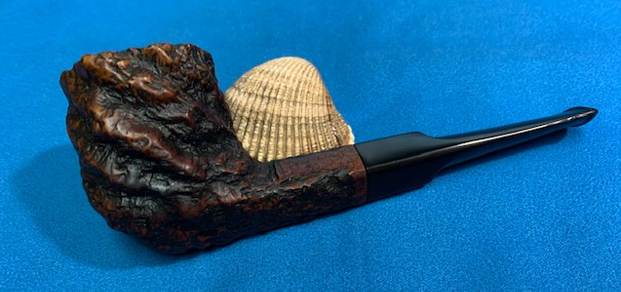
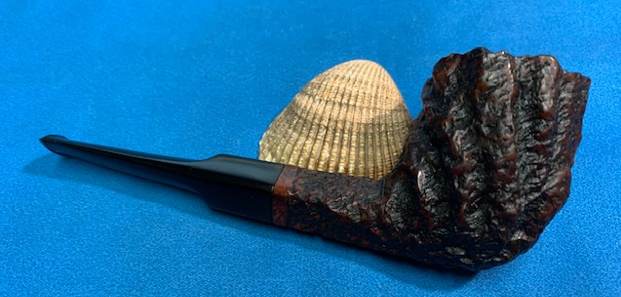
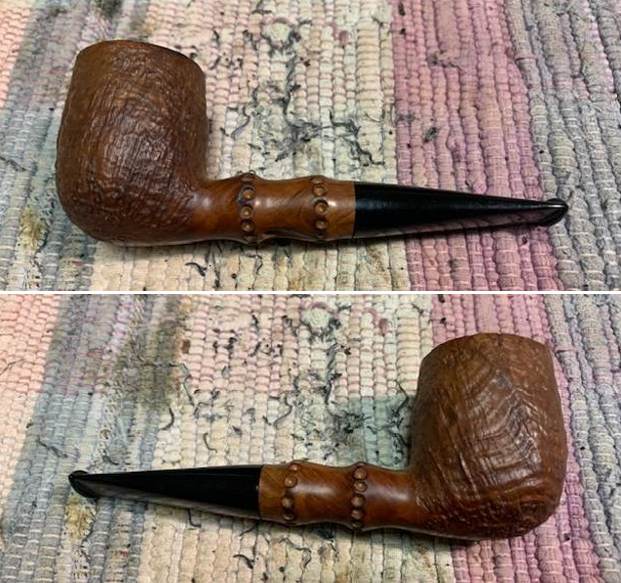
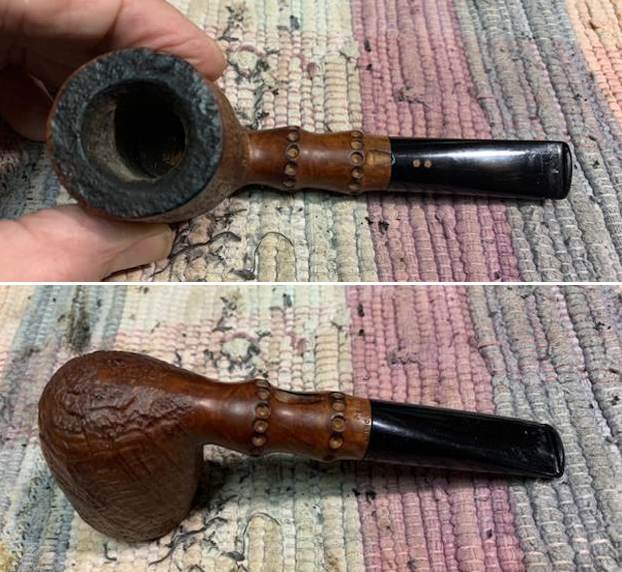
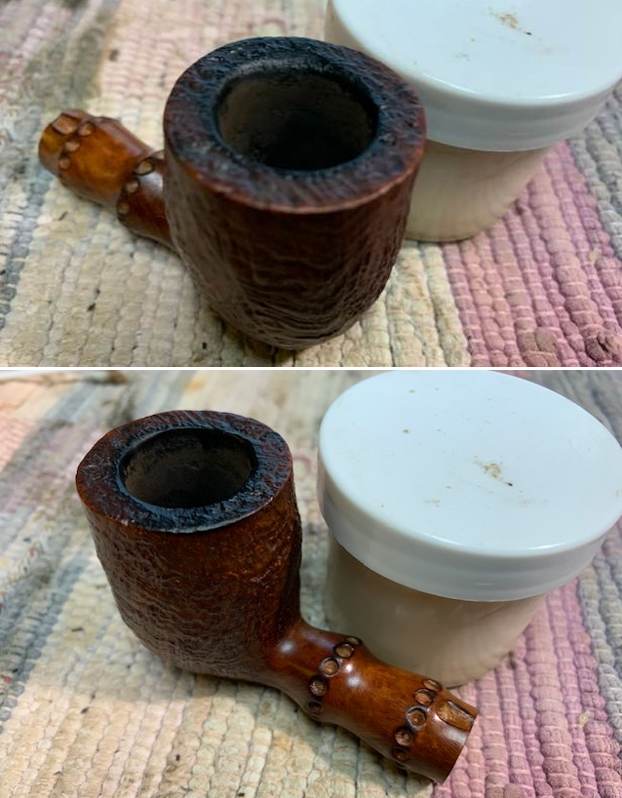
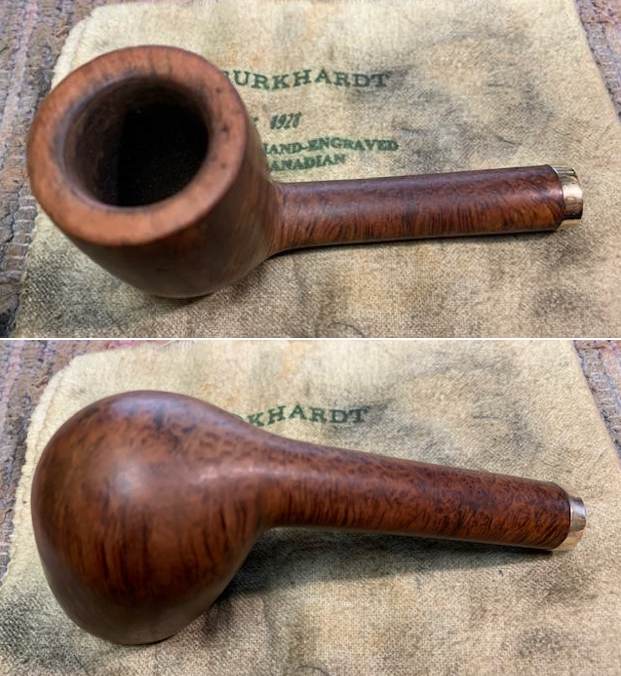
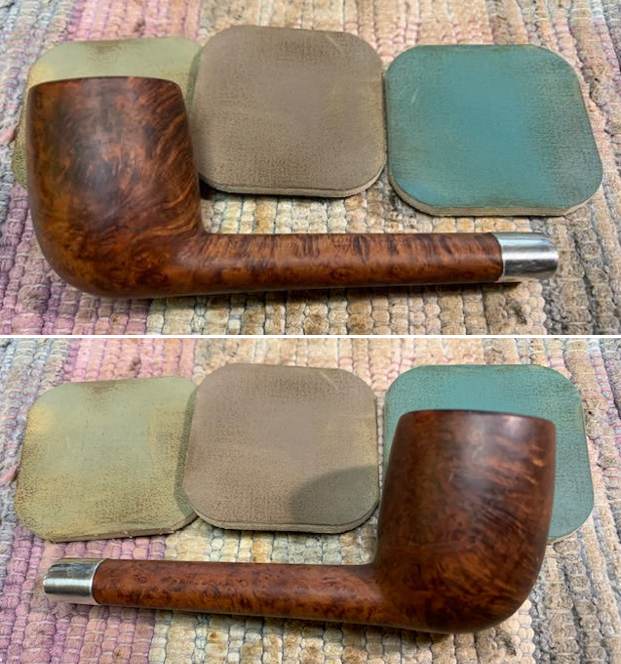
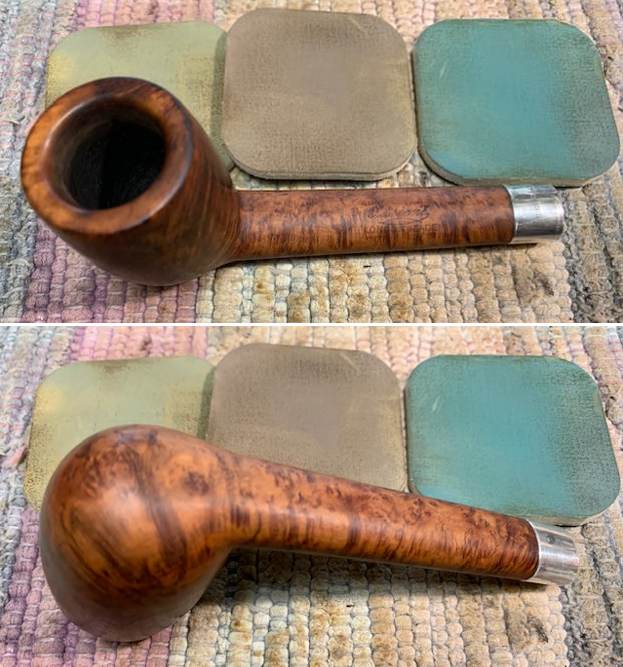
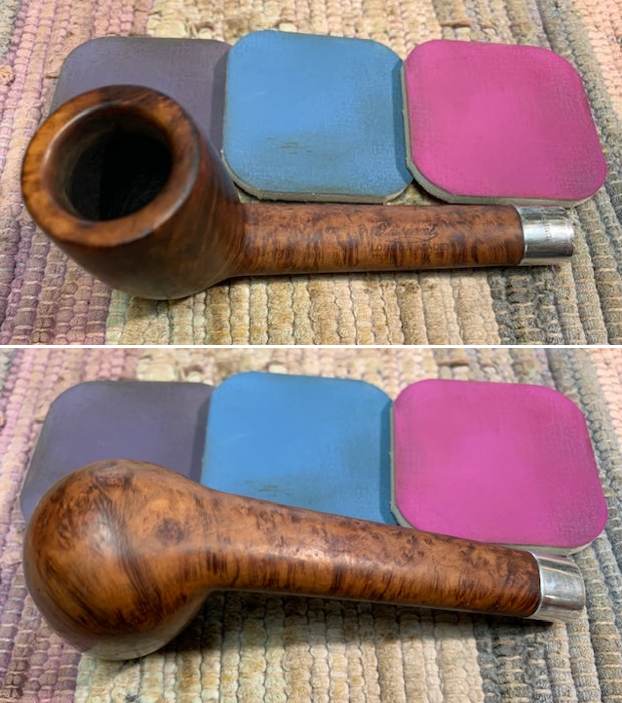
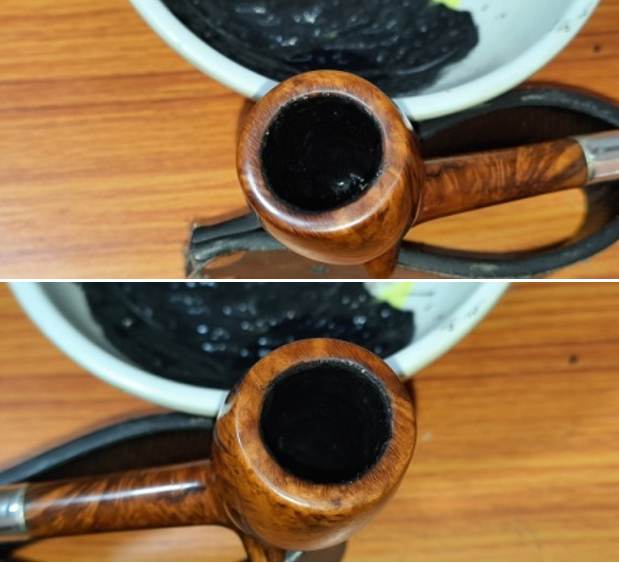 Now onto the home stretch… To complete the restoration, I re-attached the stem with the stummel. I mounted a cotton cloth buffing wheel to my hand held rotary tool, set the speed at about half of the full power and applied Blue Diamond compound to the entire pipe to remove all the minor scratches that remained. I wiped/ buffed the pipe with a soft cotton cloth to clear it of any leftover compound dust. With a cotton buffing wheel earmarked for carnauba wax, I applied several coats of carnauba wax. I worked the complete pipe till the time all the wax was absorbed by the briar. The pipe now boasted of a beautiful and lustrous shine. I vigorously rubbed the pipe with a microfiber cloth to deepen the shine and also clean away any residual wax that had been left behind. I vigorously buffed the nickel ferrule with a jeweler’s cloth and brought it to a nice shine. I was very happy with the way this beauty had turned out. The following pictures speak of the transformation that the pipe has undergone.


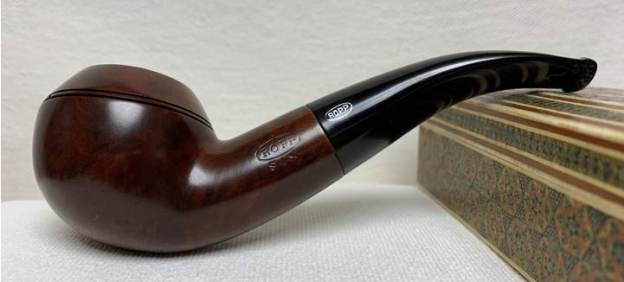


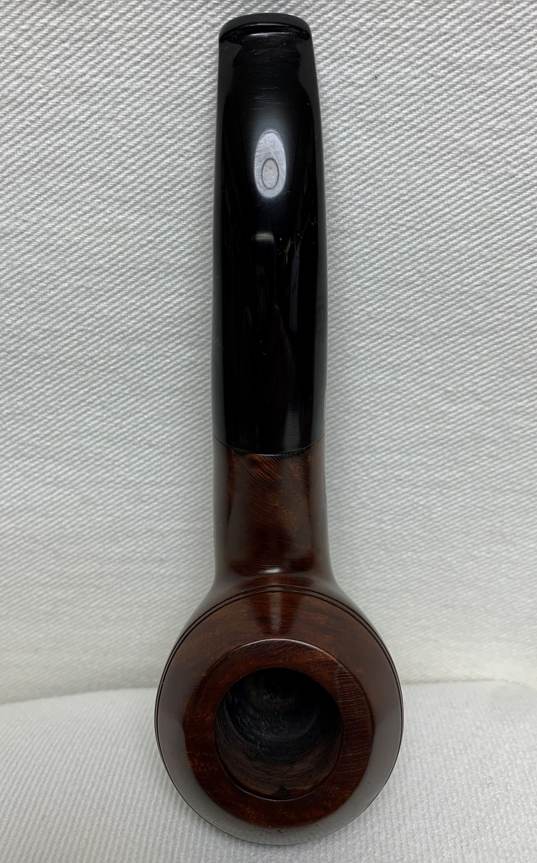
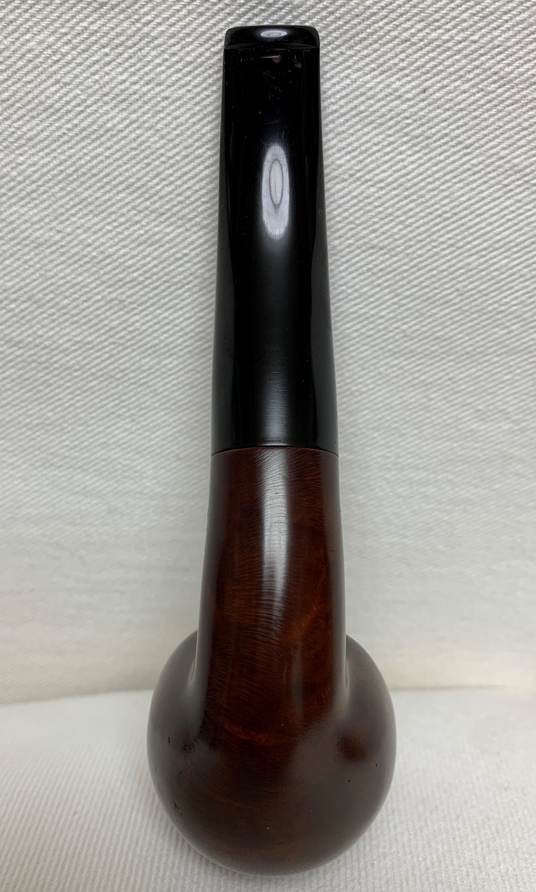
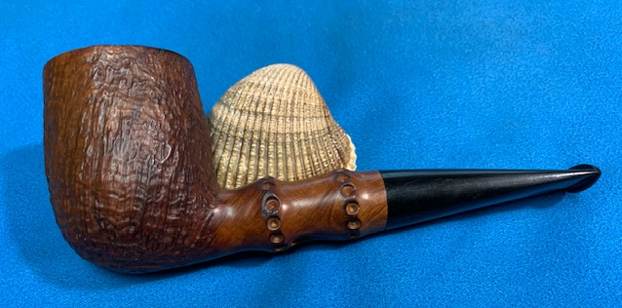
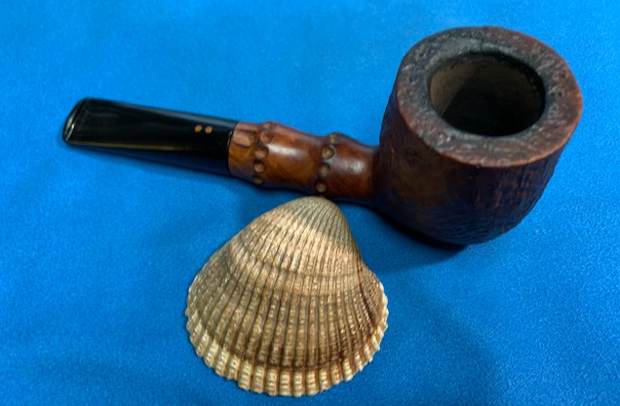
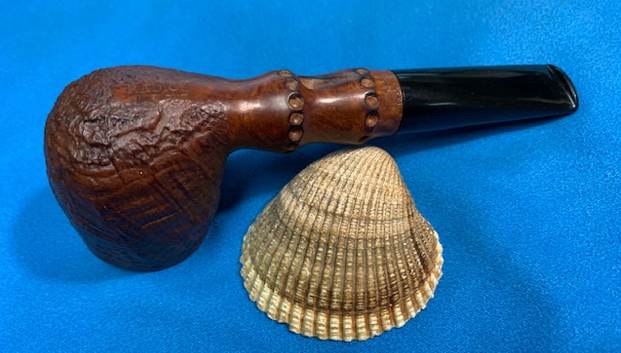
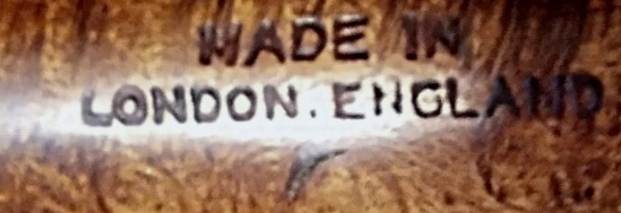
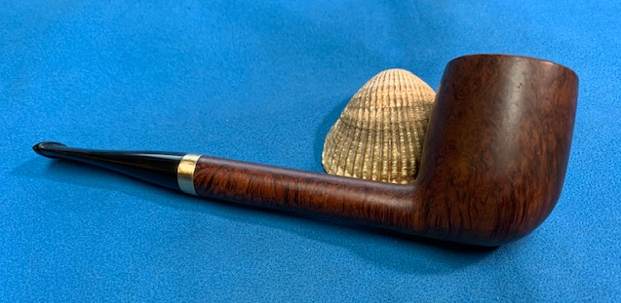
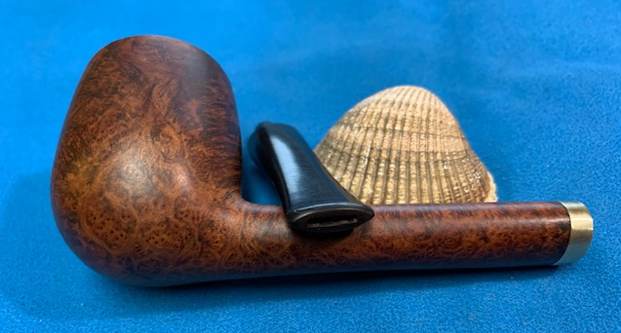
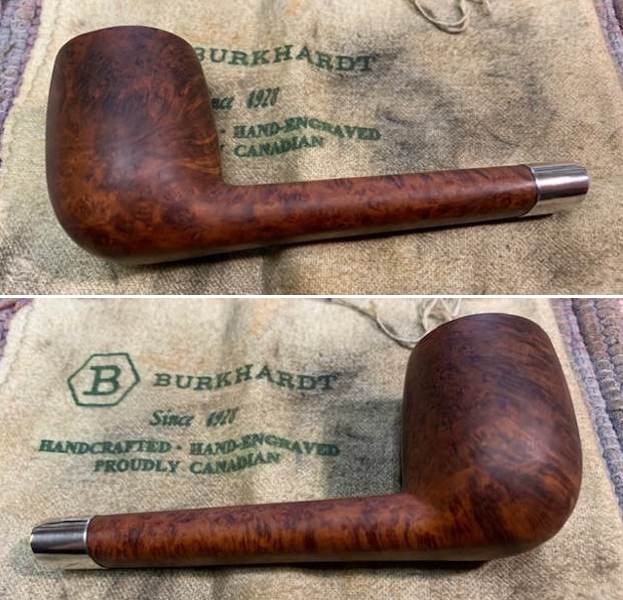
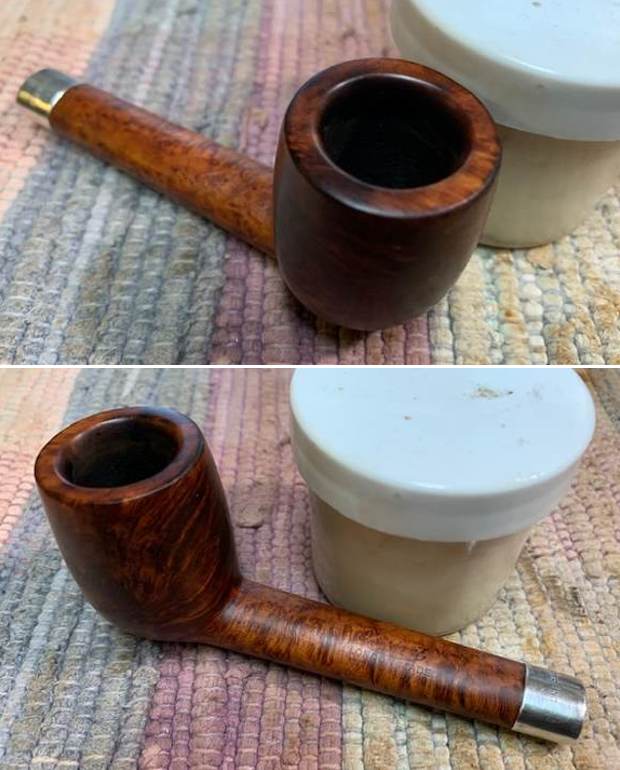
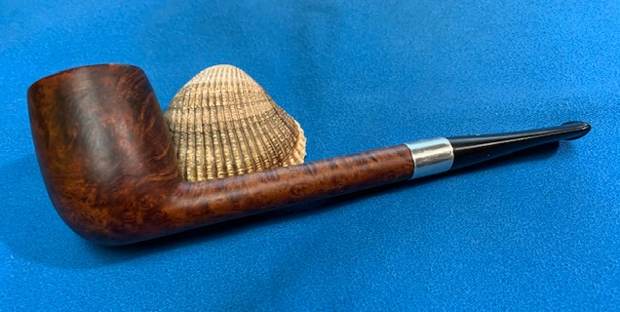
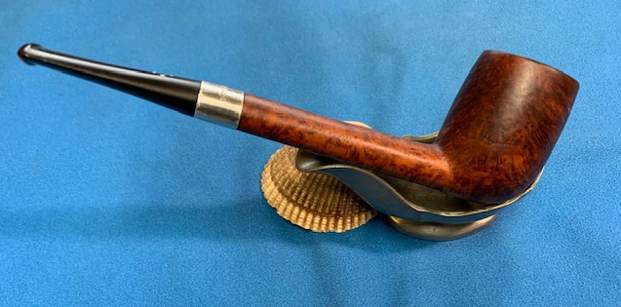
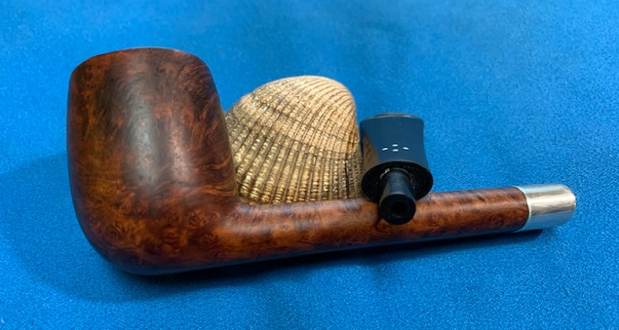
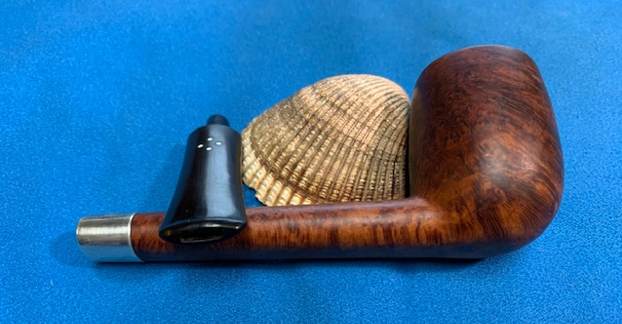
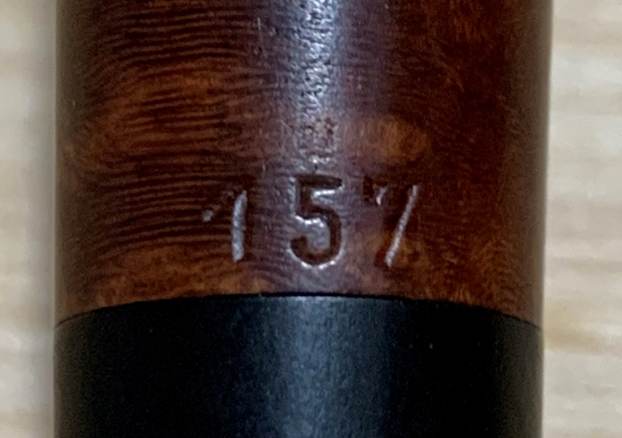
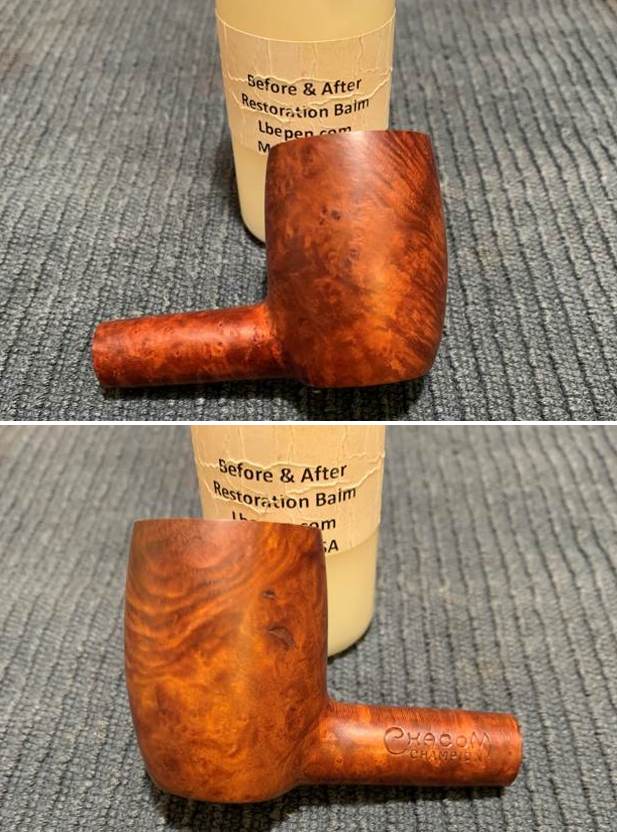
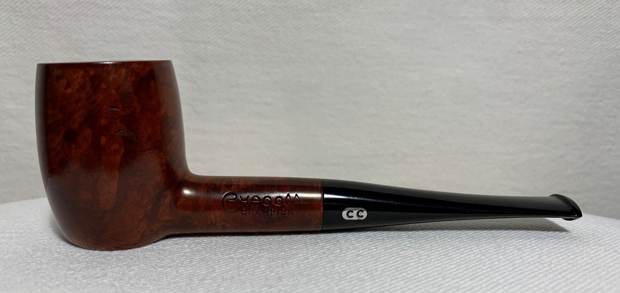
 This pipe was made by the venerable French pipe company, Ropp. Ropp has been around for a long time and their early pipes are really quite wonderful (the less said about their modern pipes, the better). The markings on the left-hand side of the shank read Ropp [over] Six. The right-hand side of the shank reads 886, presumably the shape number. Also, on the stem, there is the Ropp logo: Ropp, encircled in an oval.
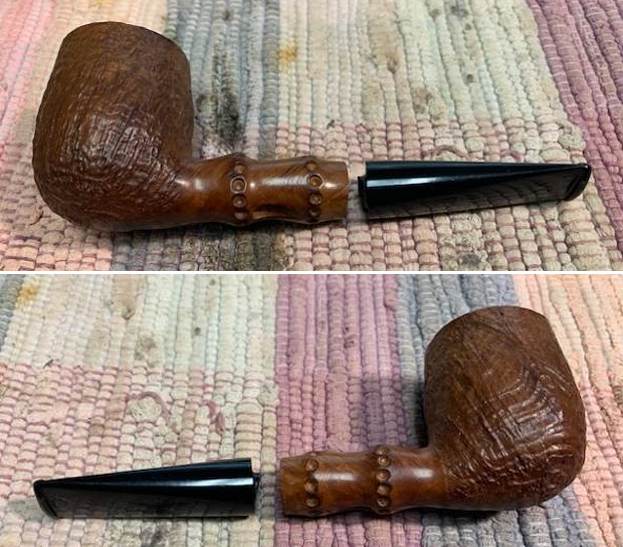
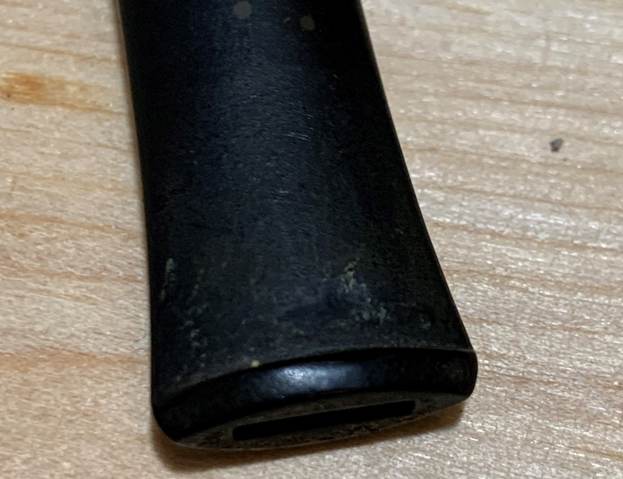
 This pipe shape is a Rhodesian – a variation of the classic Bulldog. A Rhodesian will have a cylindrical shaped shank, not a diamond shank like the Bulldog. This is a really pretty pipe and feels very comfortable in the hand.
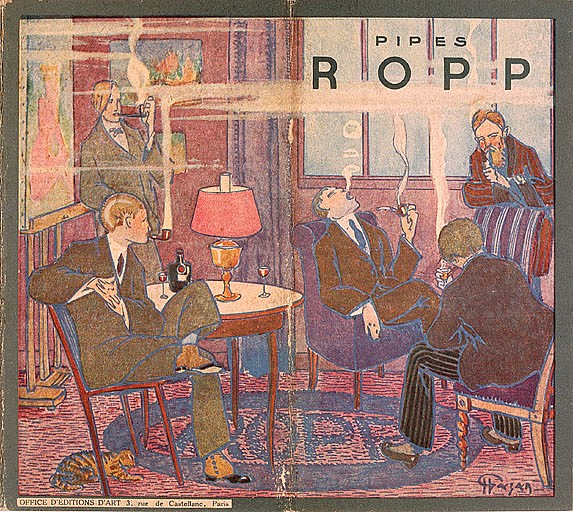
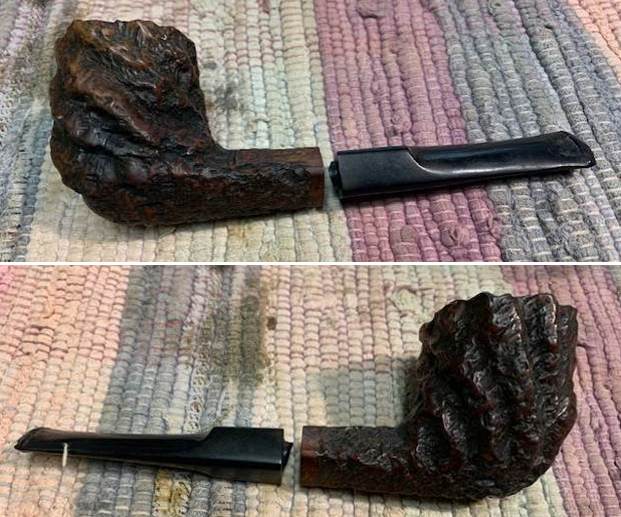
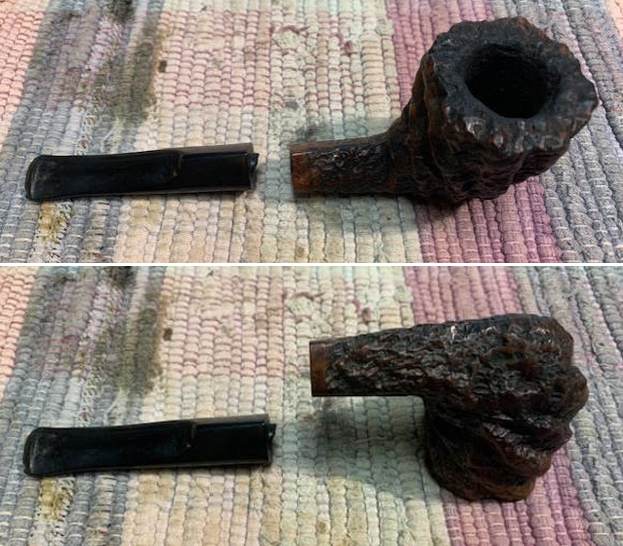
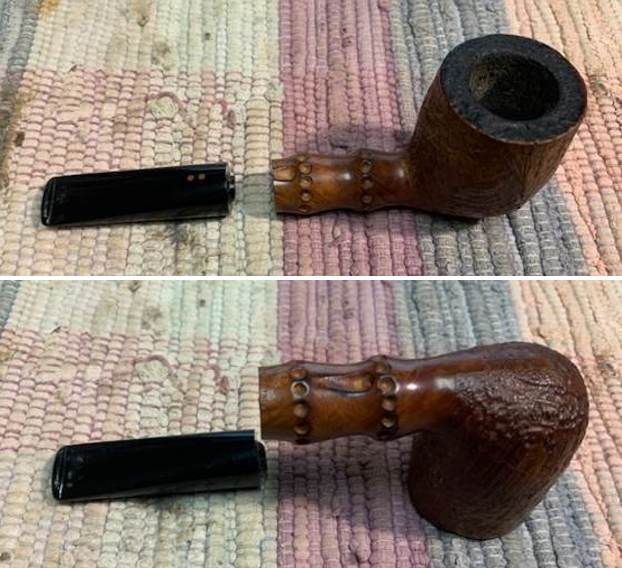
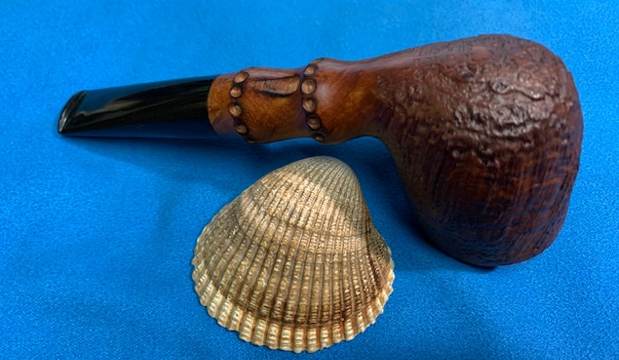
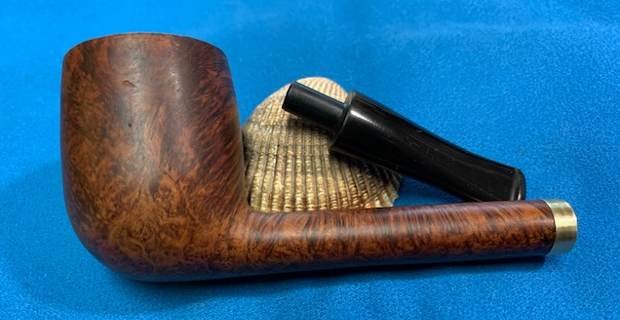
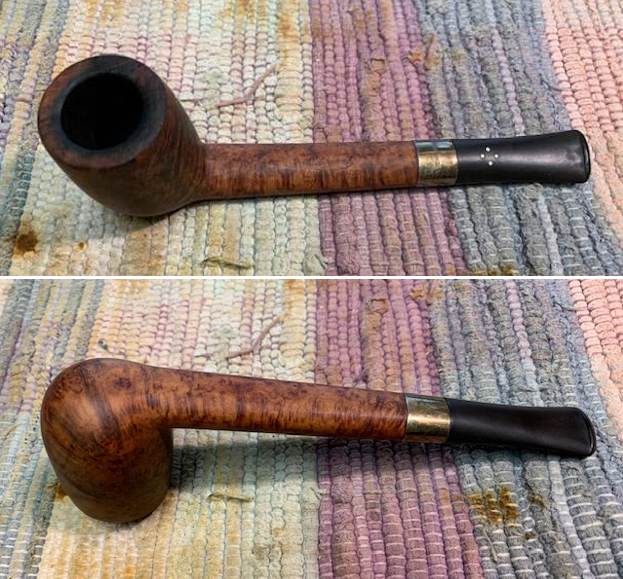
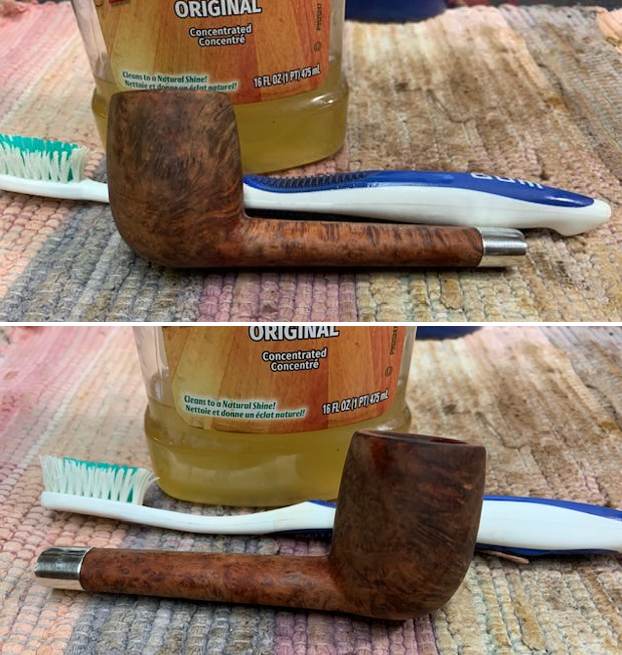
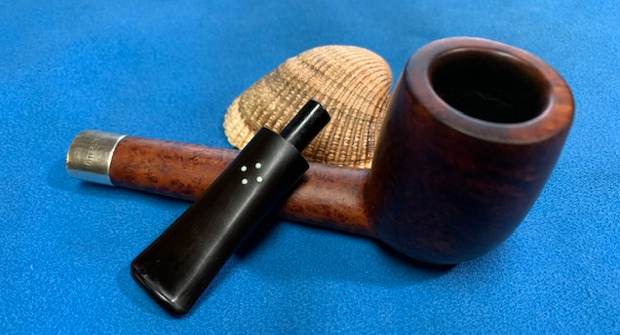
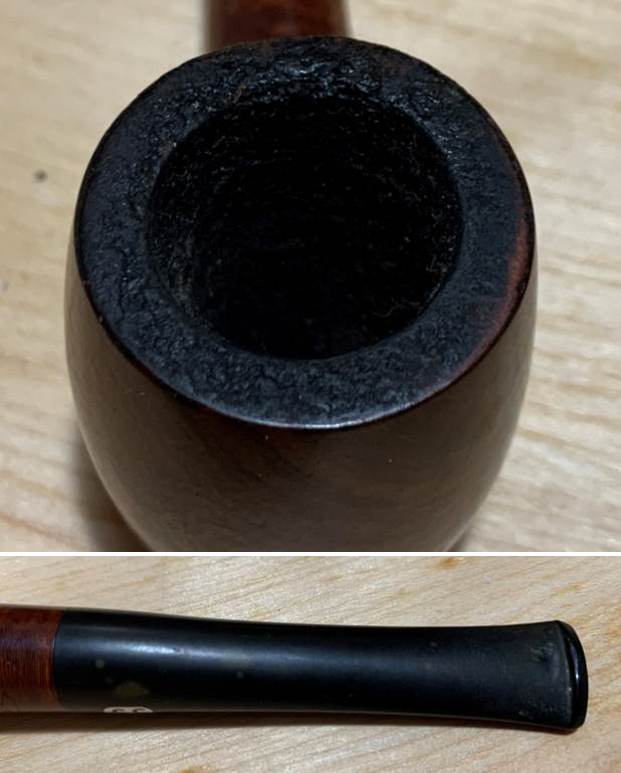
 On to the pipe: it was in decent shape, but it had a few issues. The stem had a bit of oxidation and calcification, but – mostly notably – it had substantial bite marks, top and bottom. The stummel also had a few issues. The outside of the bowl had some scratches and a couple of fills that needed to be addressed. These are the “decorations” I referred to in the title of this article. There was lava and debris on the rim, and a few burn marks too. The inside was pretty dirty too – it would need a thorough cleaning.
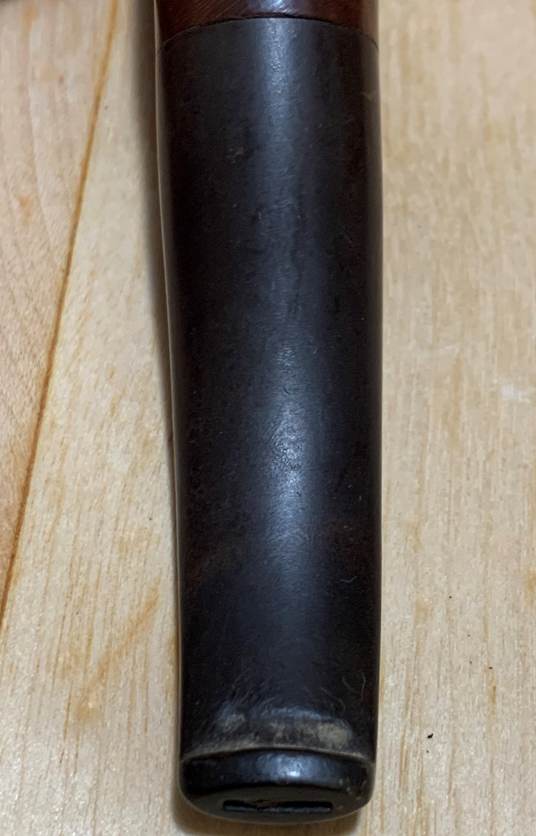

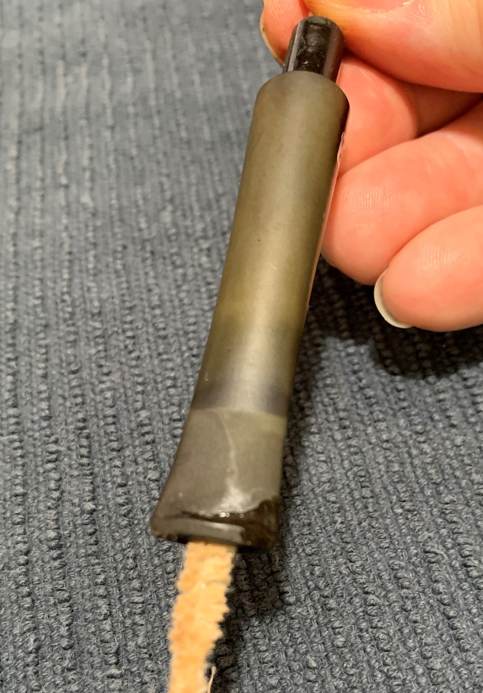
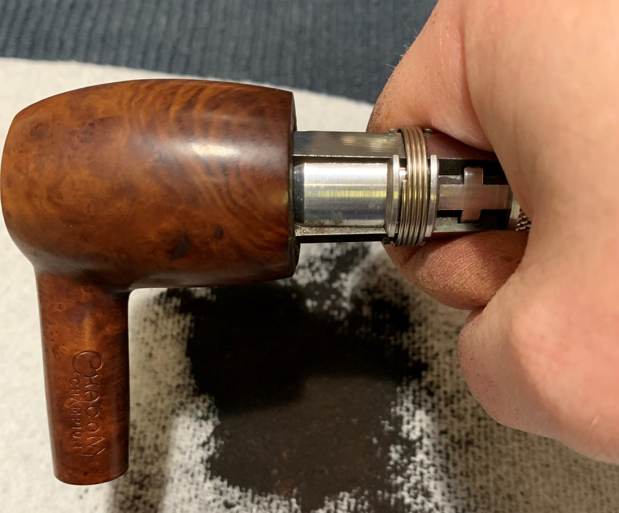
 The stem was first on my list. This stem has a stinger in it – and it was being quite stubborn about coming out of the tenon! I opted to warm the stem and stinger with my heat gun and this provided just enough softening of the internal goo to allow me to pull it out.
 The stinger then went for a soak in some lemon-infused isopropyl alcohol. I let it set for several hours and then cleaned it off and it looked much improved. I then finished it with some metal polish and moved on.
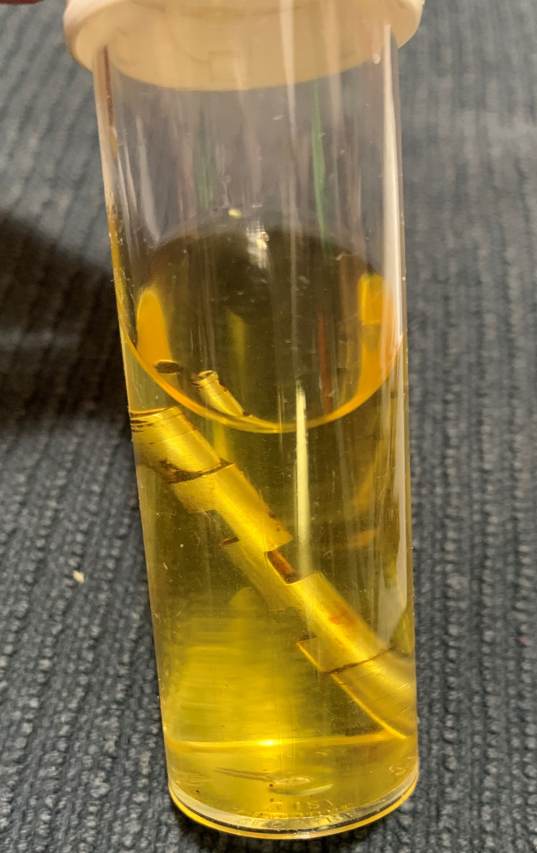


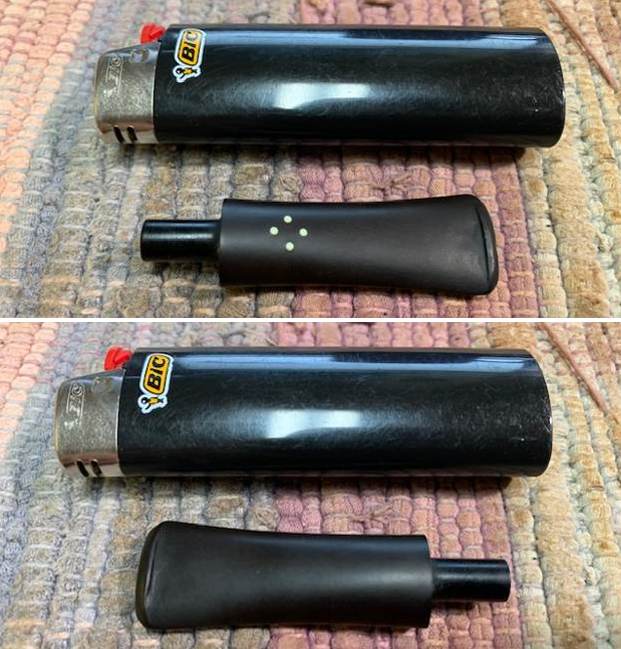
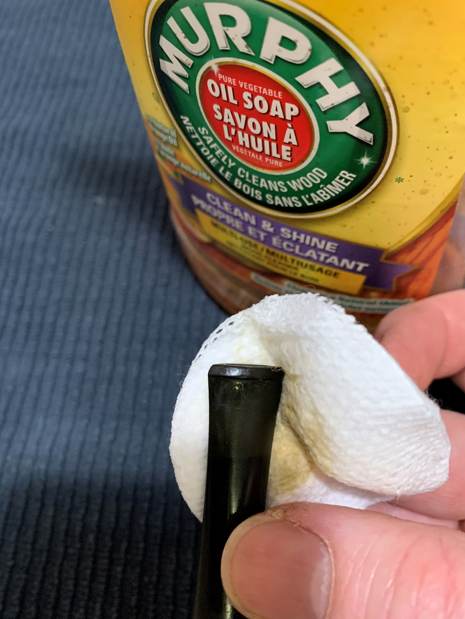
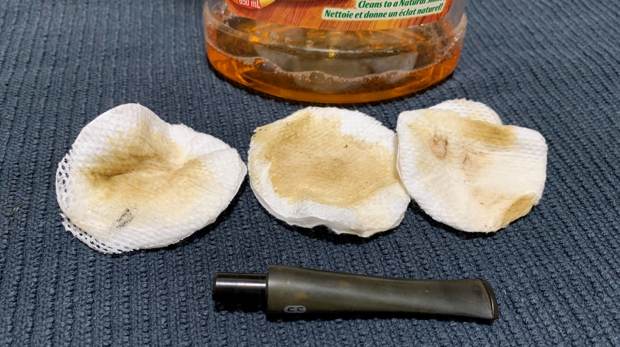
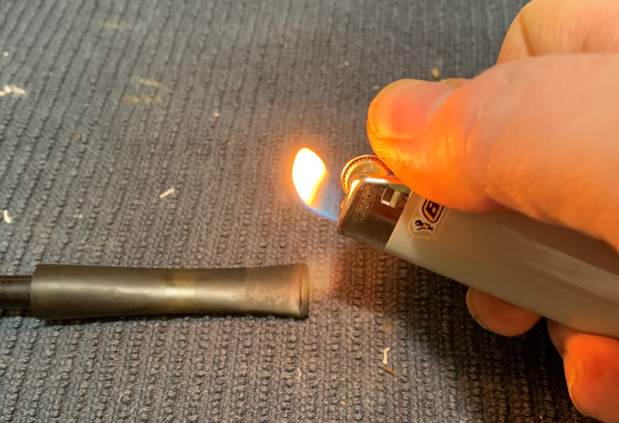
 I wiped down the outside of the stem with Murphy’s Oil Soap on some cotton pads. I also took a BIC lighter and ‘painted’ the stem with its flame in order to lift the bite marks and dents. This was not successful at all in raising the damage. More work would need to be done. Then, I cleaned out the insides with pipe cleaners and isopropyl alcohol. Even the bore was clogged with debris! It took an awful lot of work to get this clean!


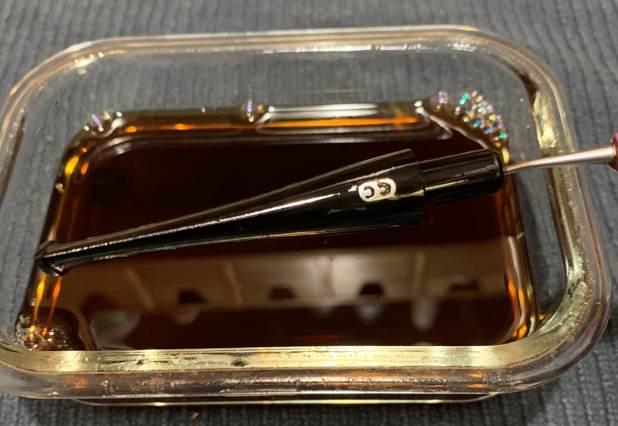
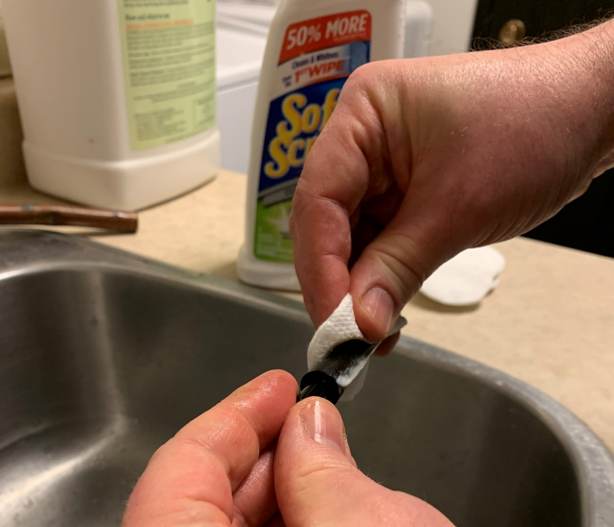
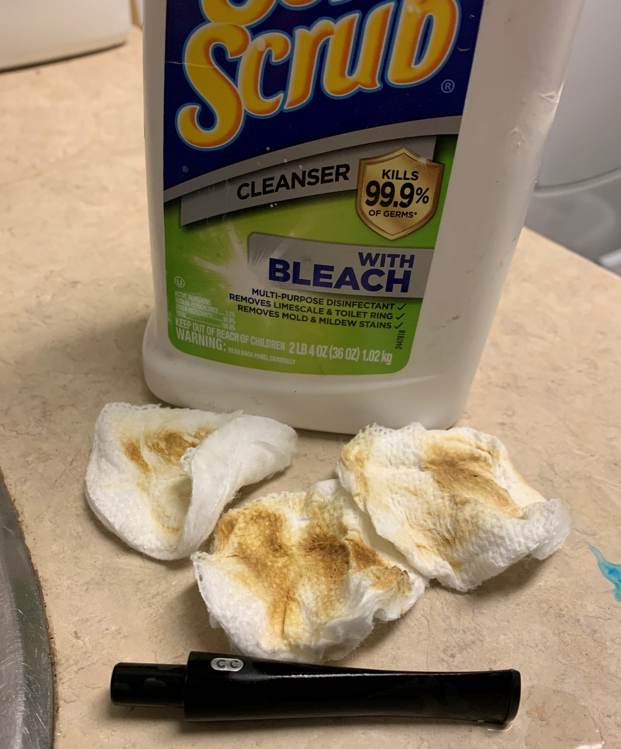
 Once this process was done, the stem went for an overnight soak in the Pipe Stem Oxidation Remover. The following day, I cleaned all of the de-oxidizing mess off with alcohol, pipe cleaners, et cetera. The oxidation had migrated to the surface and would be fairly straightforward to remove. I scrubbed with SoftScrub on some cotton pads to remove the leftover oxidation.


 After this, I used some nail polish to restore the Ropp logo on the stem. I painted the area carefully and let it fully set before proceeding.
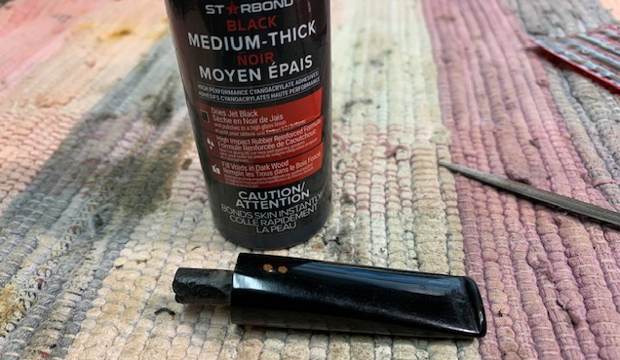
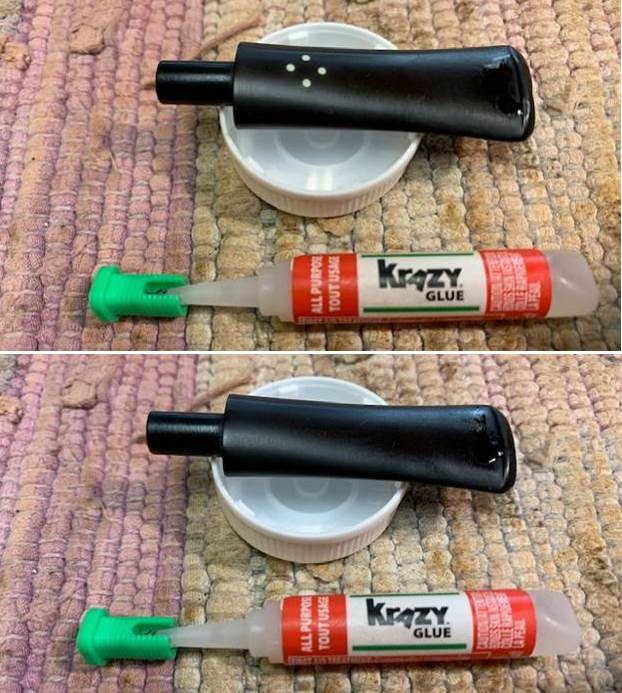
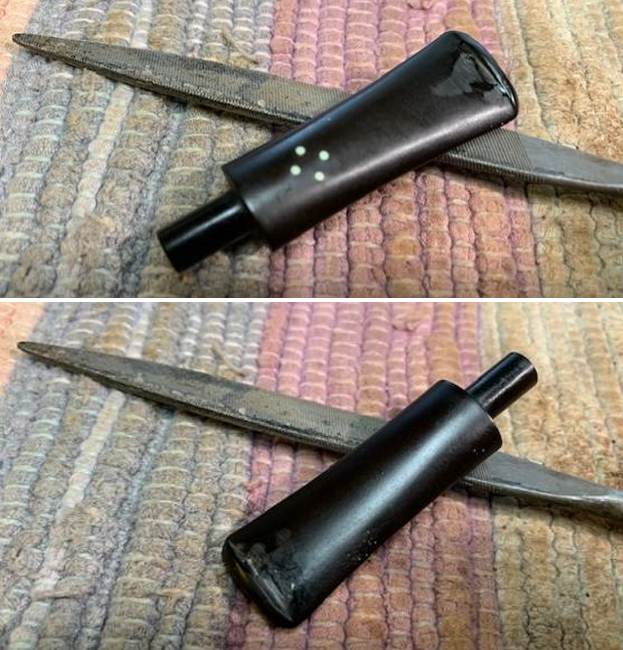
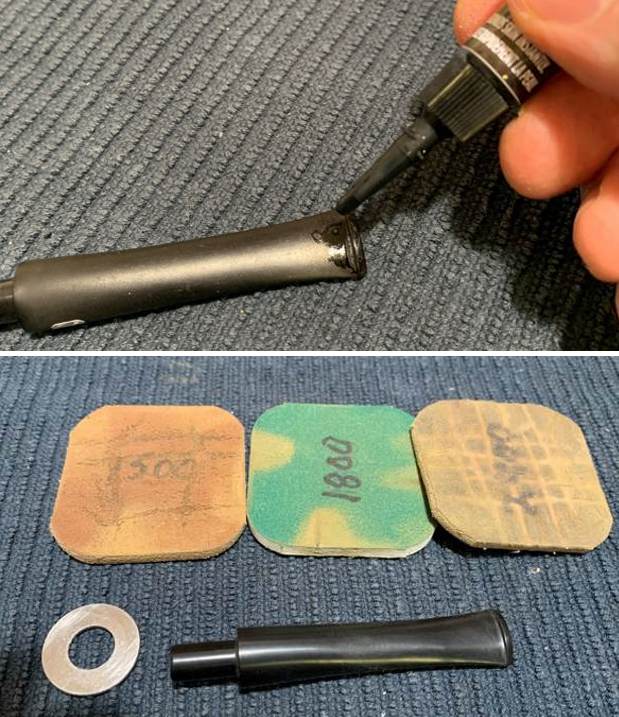
 I built up the dents on the stem with cyanoacrylate adhesive and let them fully cure. On this occasion, I actually built up several layers of the glue over a few days. I must admit, it was an annoying and frustrating process because, at this stage, it never looked quite right. I then sanded the adhesive down – first with a small file – then with 220-, 400-, and 600-grit sandpapers to meld seamlessly into the stem. I then used all nine Micromesh pads (1,500 through 12,000 grit) to bring out the lovely black lustre on the stem. I also used Obsidian Pipe Stem Oil in between each pad scrubbing.

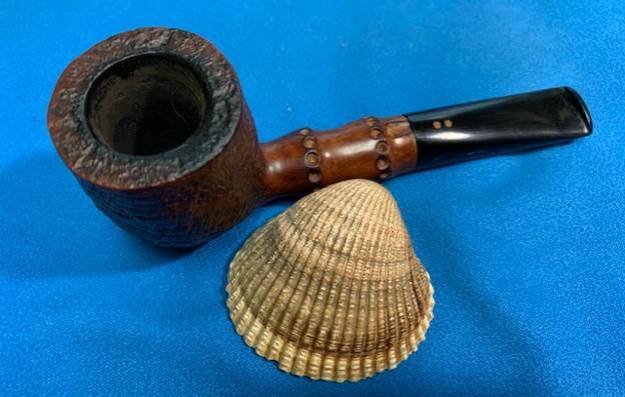
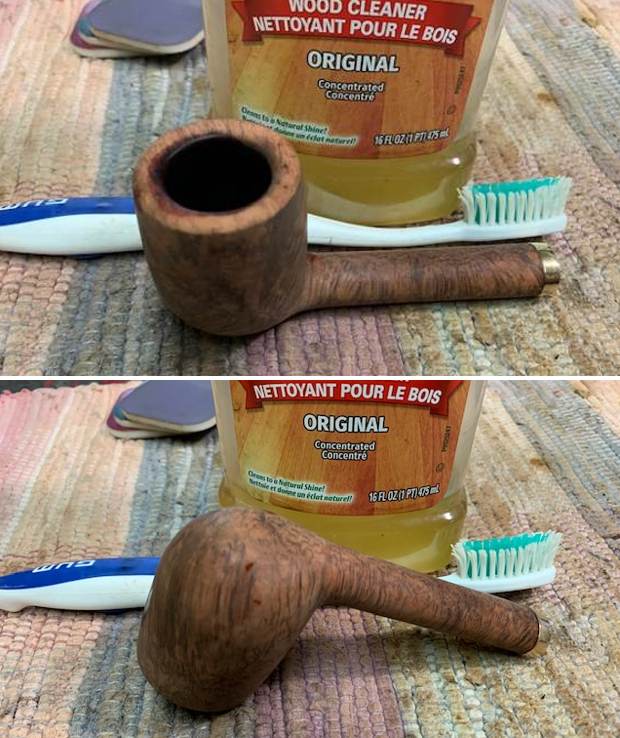
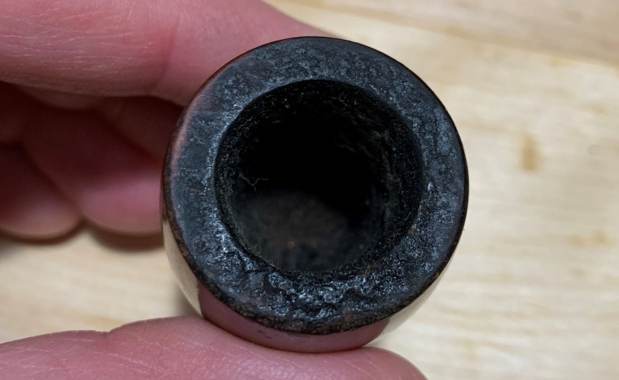
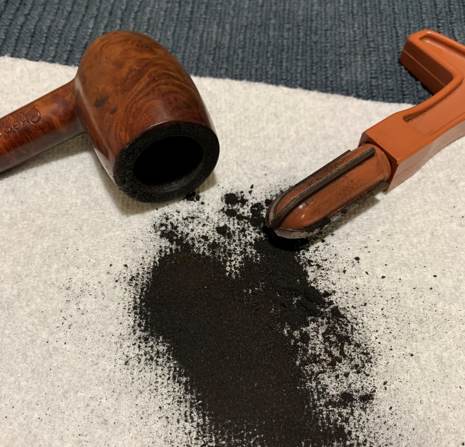
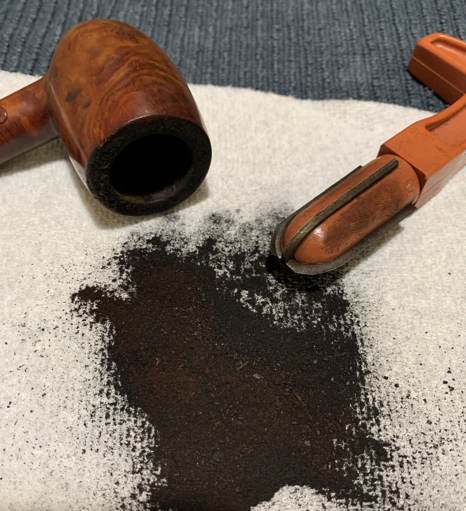
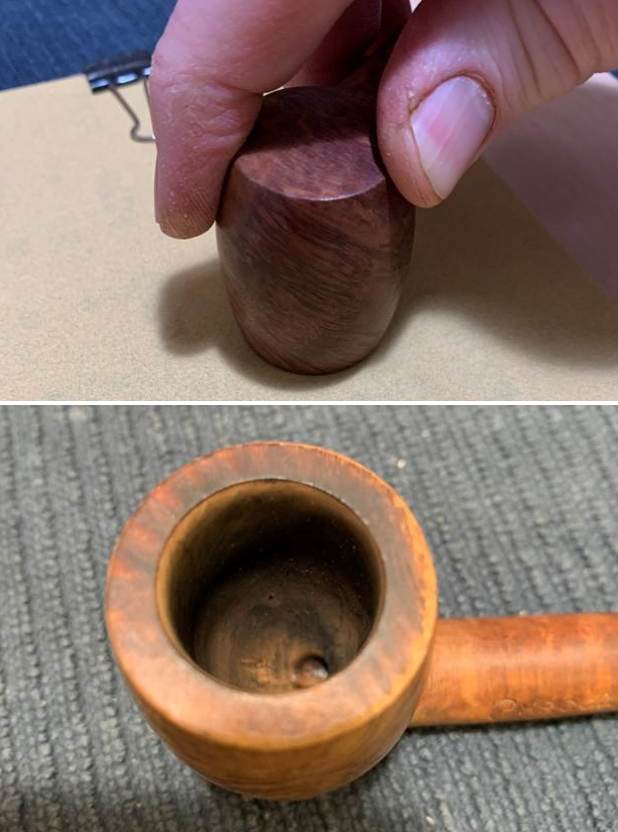
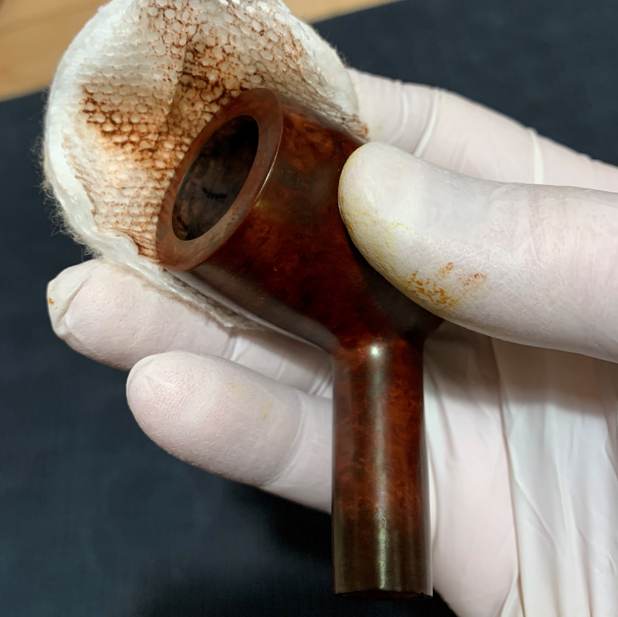
 On to the stummel, and the usual cleaning procedures were in order for this pipe. This stummel was a bit of a mess inside, so I first decided to ream out the bowl. I used both the PipNet Reamer and the KleenReem to remove the built-up cake and followed that with 220-grit sandpaper to eliminate as much as I could. I took the bowl down to bare briar, as I wanted to ensure there were no hidden flaws in the walls of the bowl. There were some very thin craze lines inside the bowl, but they were small enough that I elected to leave them as they were.


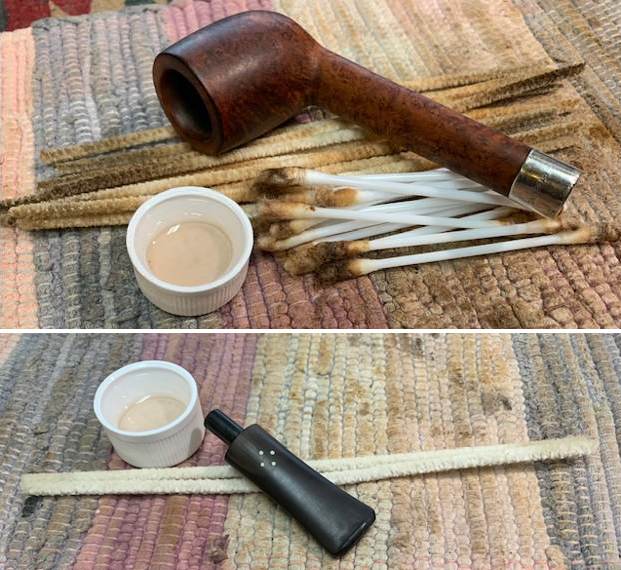
 I then proceeded to clean out the insides of the shank with Q-tips, pipe cleaners, and isopropyl alcohol. There was considerable filth inside this stummel and it took a lot of cotton to get it clean. I followed that up by cleaning the insides with some dish soap and tube brushes.
 Having completed that, I was able to address the small nicks on the stummel. I dug out my iron and a damp cloth to try and raise the nicks. The hot and moist steam can often cause the wood to swell slightly and return to shape. There was some movement – not a lot, but it was better than doing nothing. The repair was not perfect, but the remaining scratches would be improved by sanding.
 I lined the fills with cyanoacrylate adhesive and briar dust.


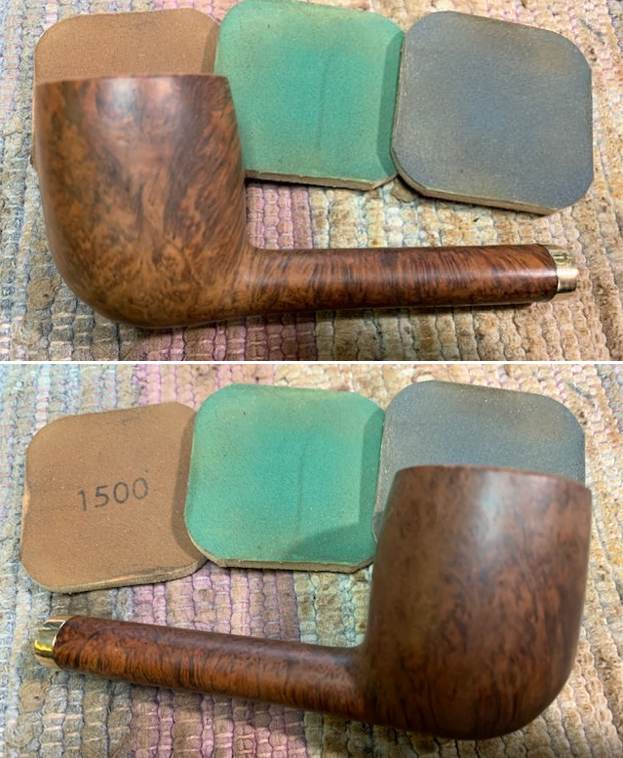
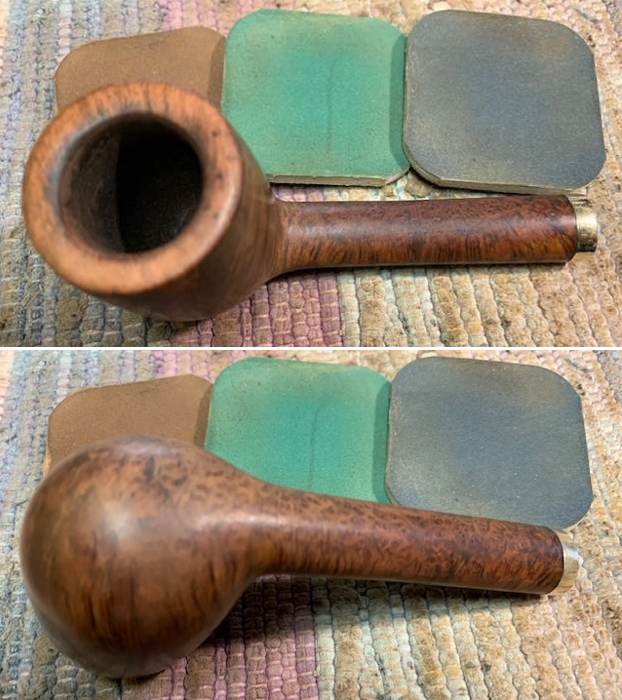
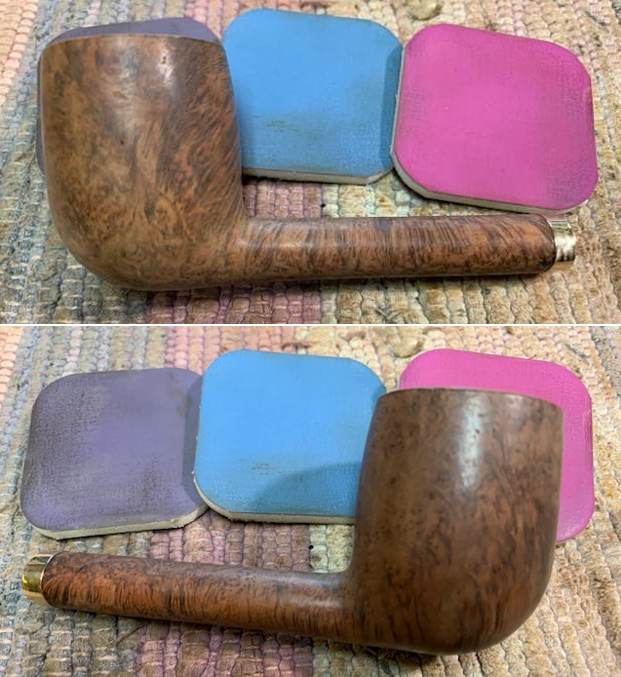
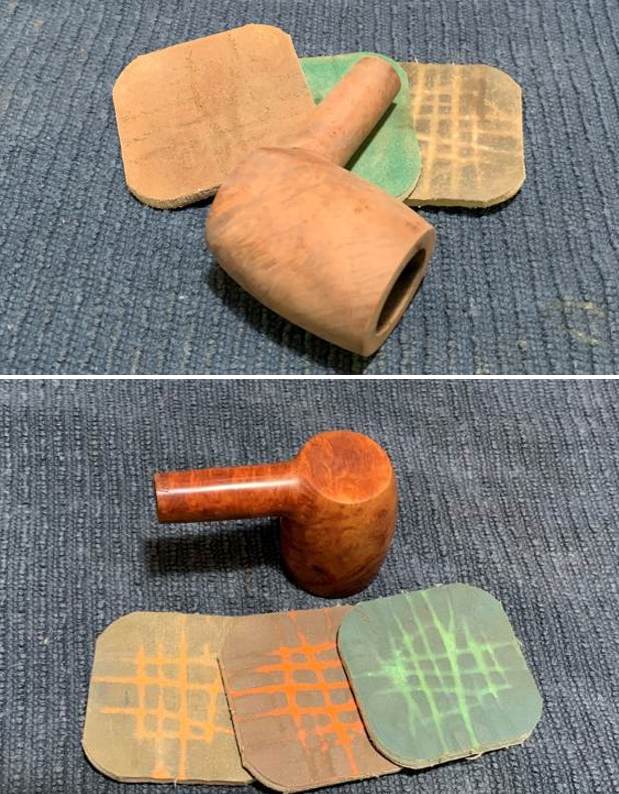
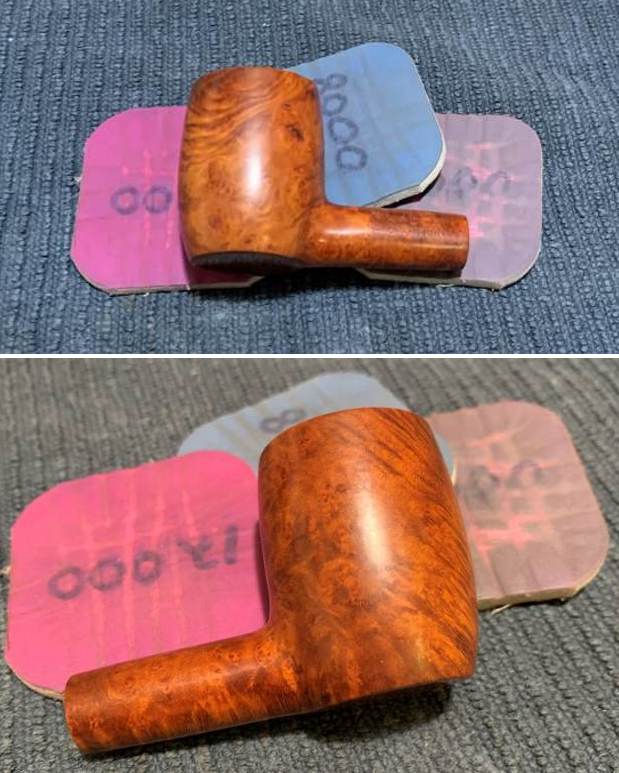
 After letting them cure, I sanded the fill repairs down with 200-, 400-, and 600-grit sandpaper. I then used all nine Micromesh pads (1,500 through 12,000 grit) on the stummel to finish it off.
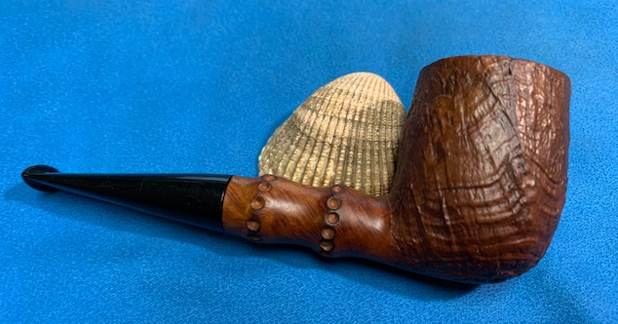
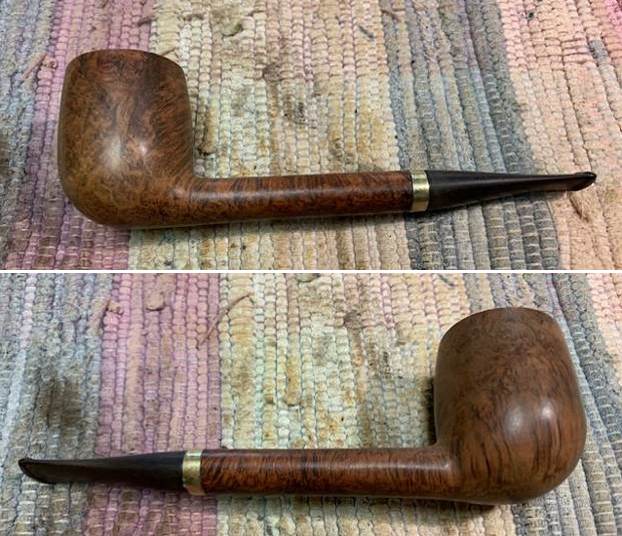
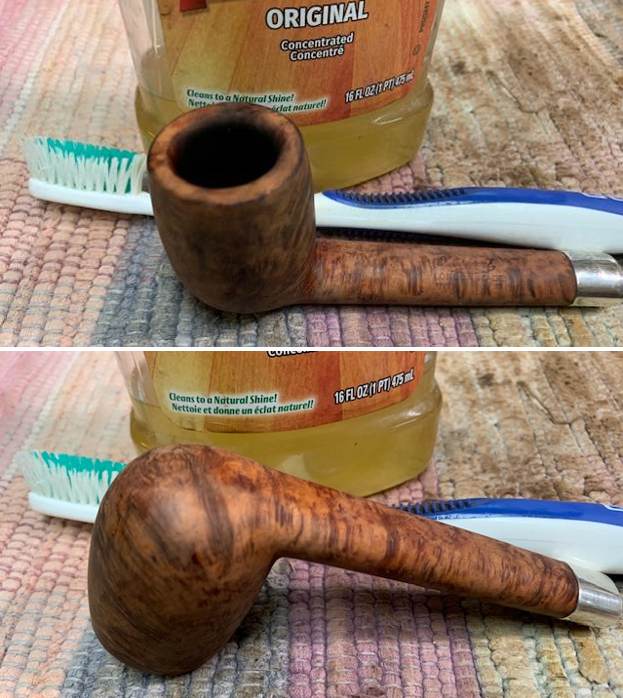
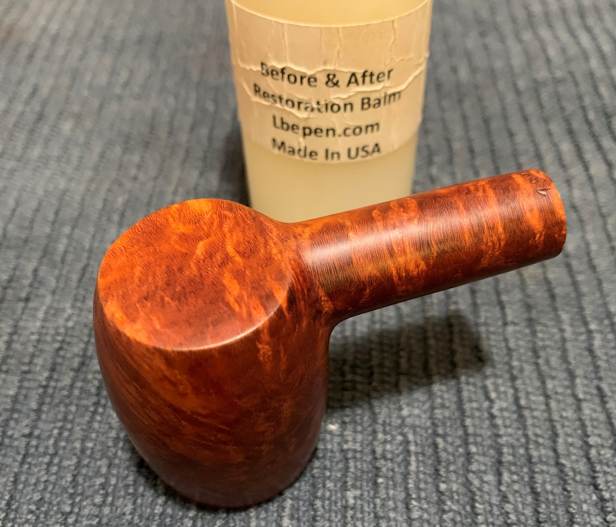
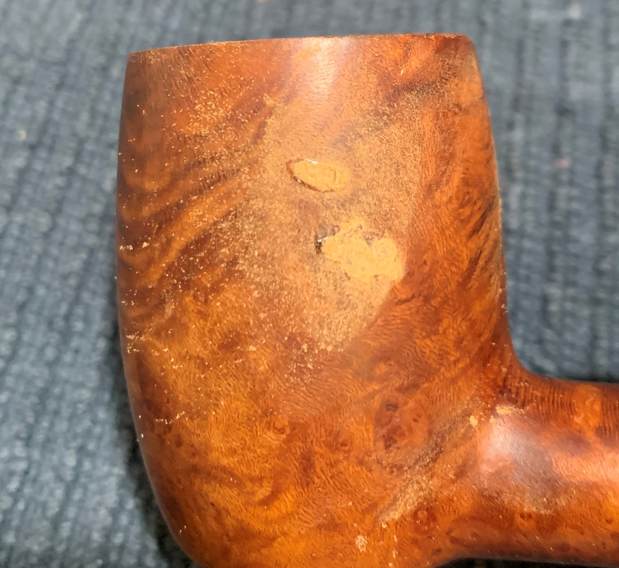
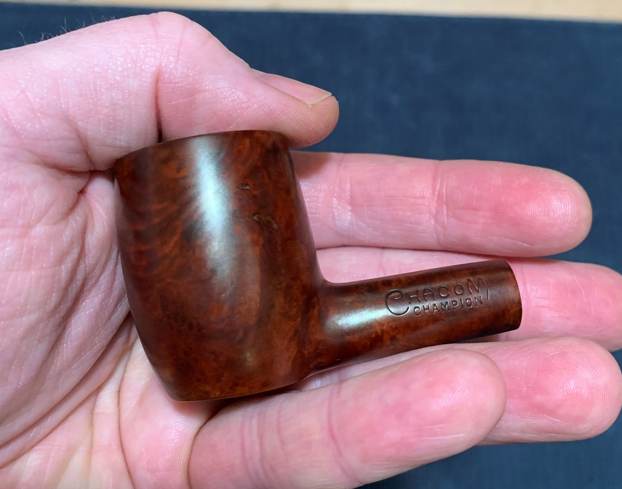
 After that, a light application of Before & After Restoration Balm brought out the best in the stummel’s grain. There is some beautiful wood after all. It is a very handsome, decorated veteran.

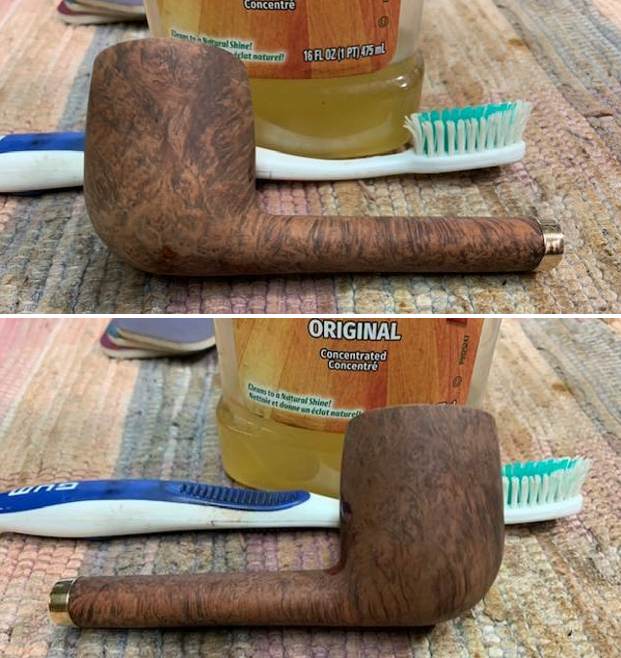
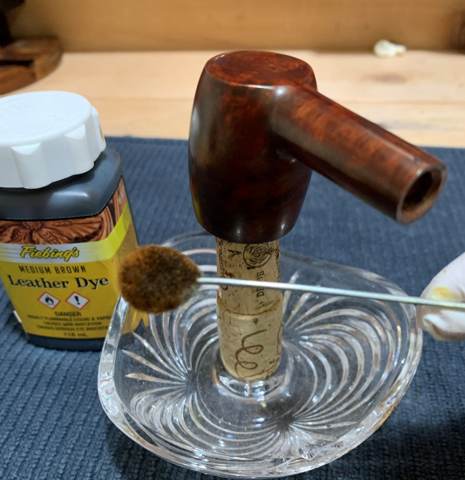
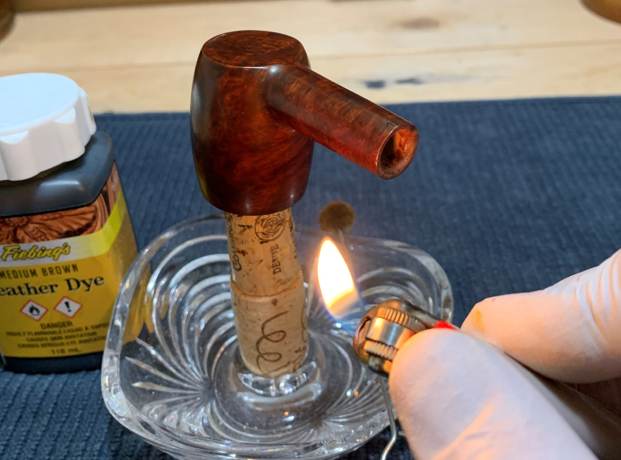
 In order to accentuate the external beauty of this pipe, I opted for aniline dye. I applied some of Fiebing’s Medium Brown Leather Dye. As usual, I applied flame from a BIC lighter in order to set the colour. I then added a second coat – just to make sure. What a difference that made! It looked so much better with a fresh coat of stain.


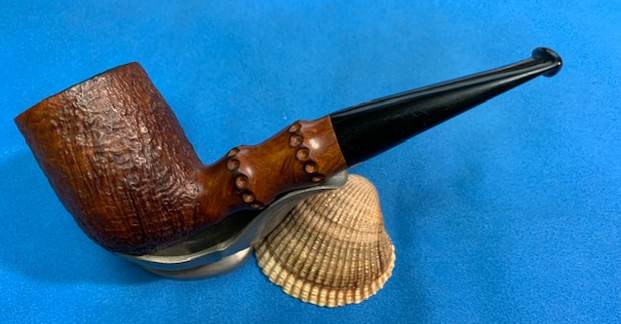
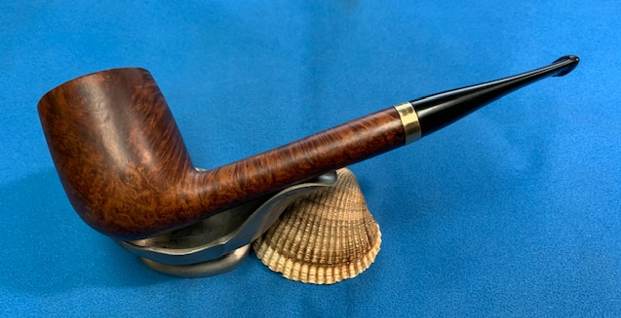
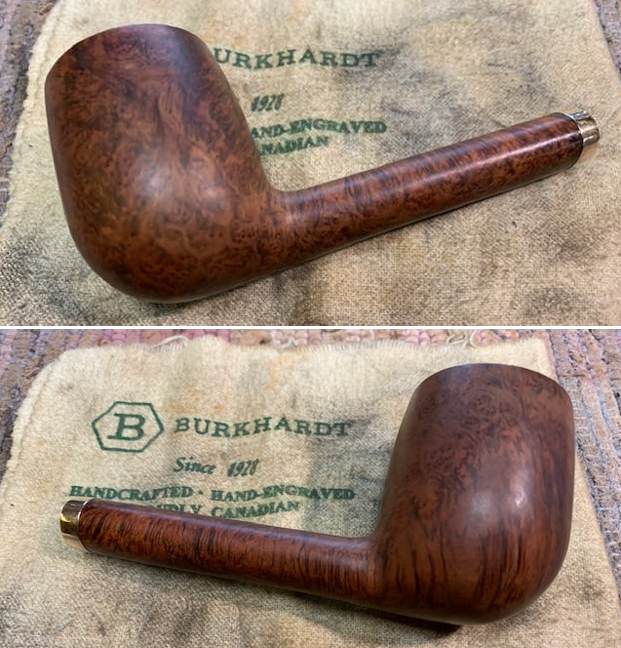
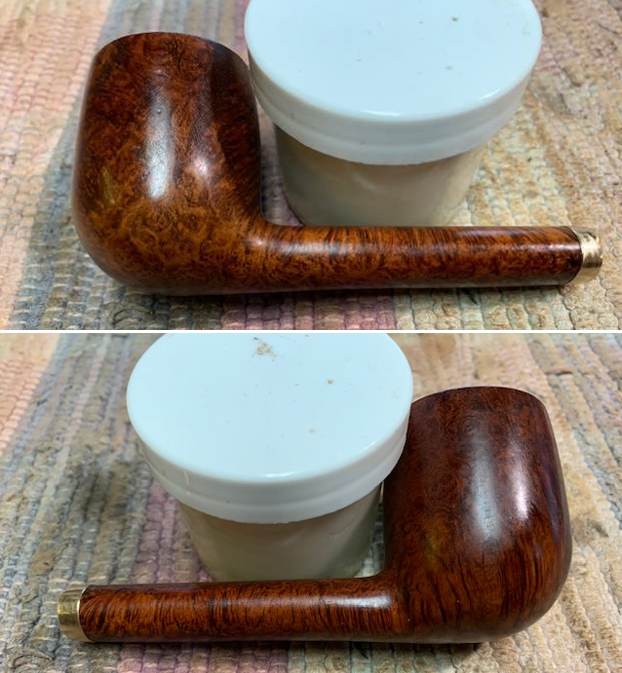
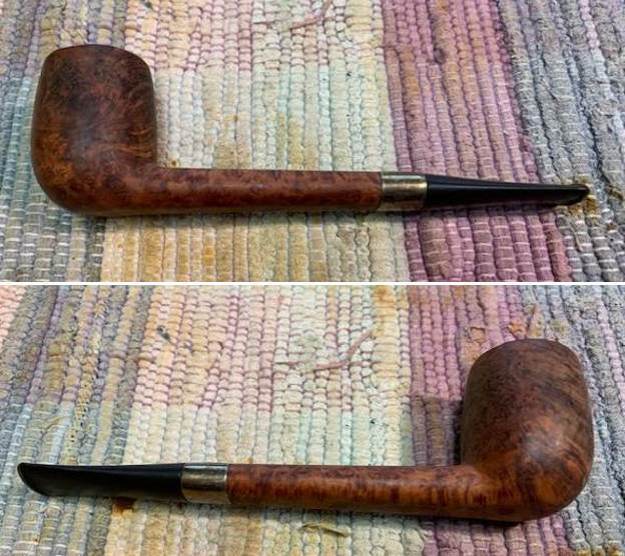
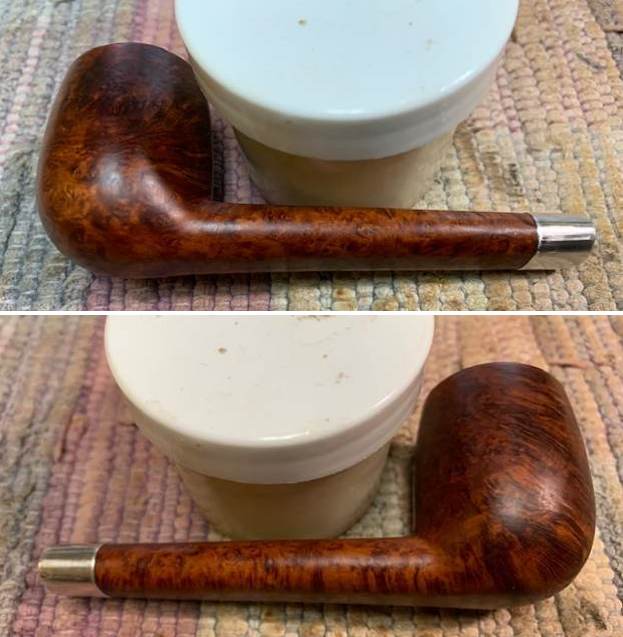
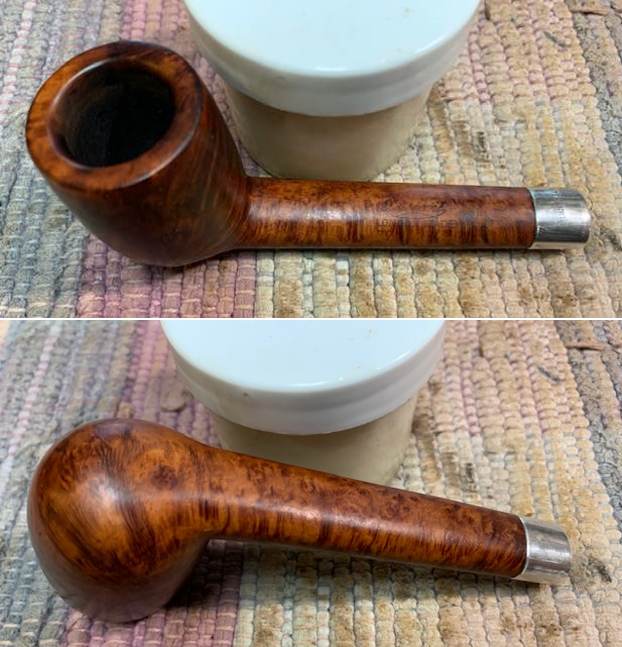
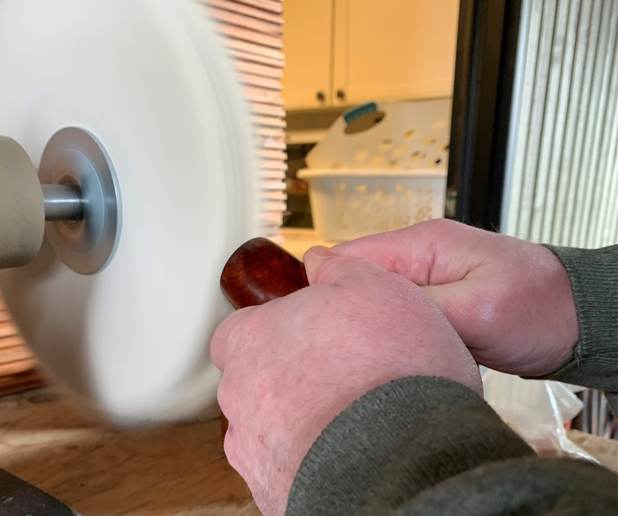
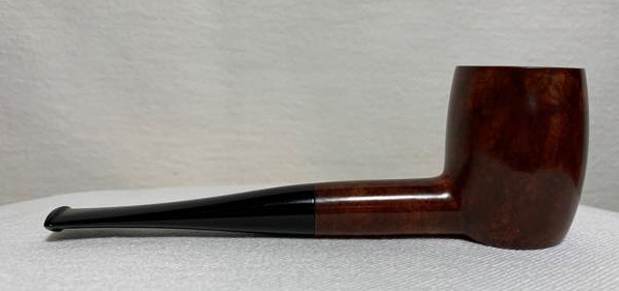
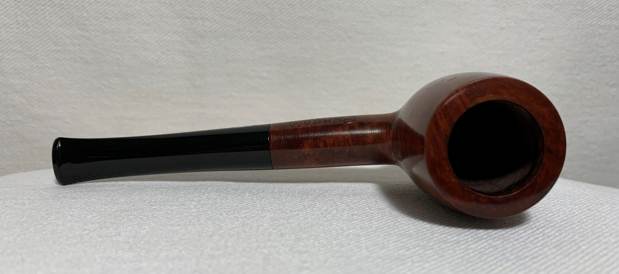
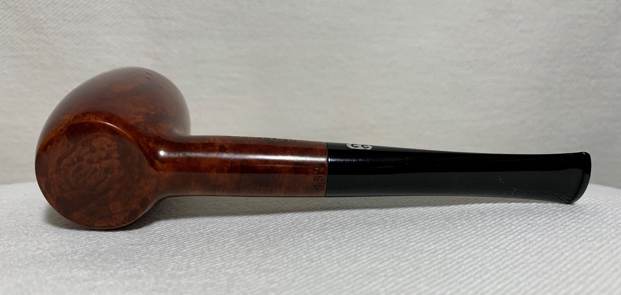
 I applied some more Before & After Restoration Balm and then it was off for a trip to the buffer. A dose of White Diamond and a few coats of carnauba wax were just what this pipe needed. The lovely shine made the wood very attractive. This is a very handsome pipe and will provide many years of smoking pleasure.
 This is a wonderfully crafted pipe and has a very elegant feel to it. It took some work, but I am proud of it and the final product suits me to a T. It retains some wounds from battle, but, as Steve would say, they are part of this pipe’s story. This is one pipe that I am keeping for myself and adding to my collection. I am sure that I will be enjoying this one for many years to come. I hope you enjoyed reading the story of this pipe as much I as I did restoring it. If you are interested in more of my work, please follow me here on Steve’s website or email me directly at kenneth@knightsofthepipe.com. Thank you very much for reading and, as always, I welcome and encourage your comments.