Tag Archives: Stem repairs

Restoring a Kaywoodie Flame Grain Imported Briar 16 President


by Steve Laug

I received an email from a fellow a bit ago about two of his pipes that he wanted me to restore. I have included his email below.

Hey Steve,

It’s been a little while but I’d like to send in the Kaywoodie President for restoration. I also have a Marxman apple that I would like an assessment on–it’s a bit more of a challenge than a standard restoration. Can you let me know if you have an opening and if so, what address to send them to? Thanks!  – Devin

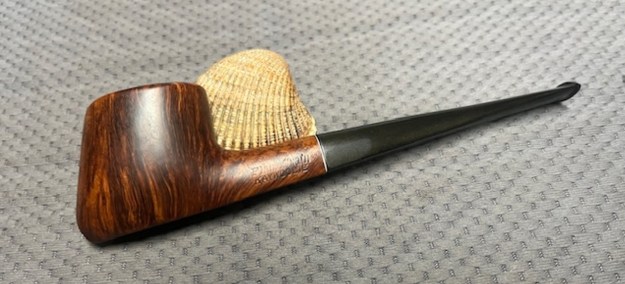
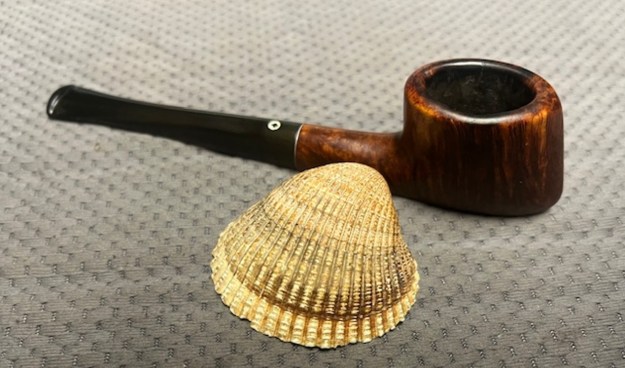
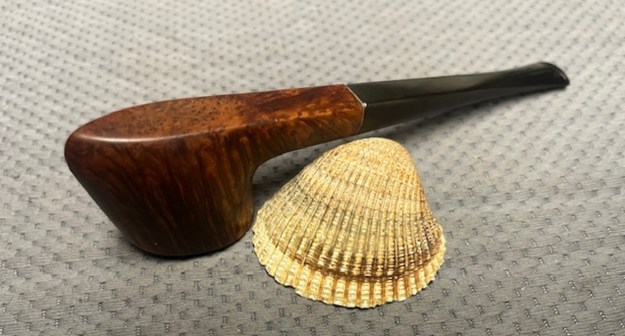
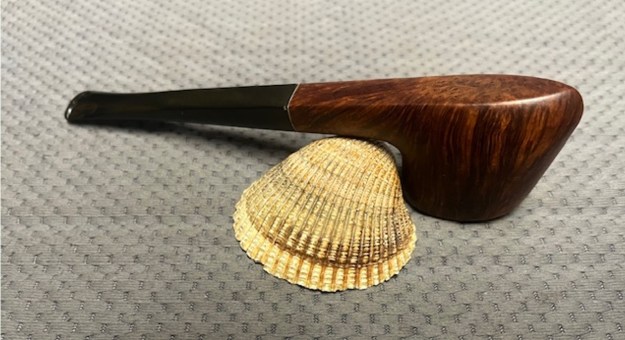
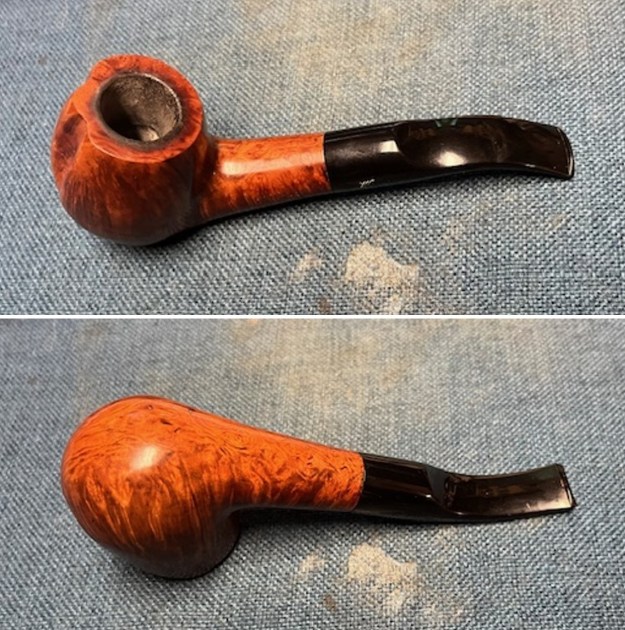
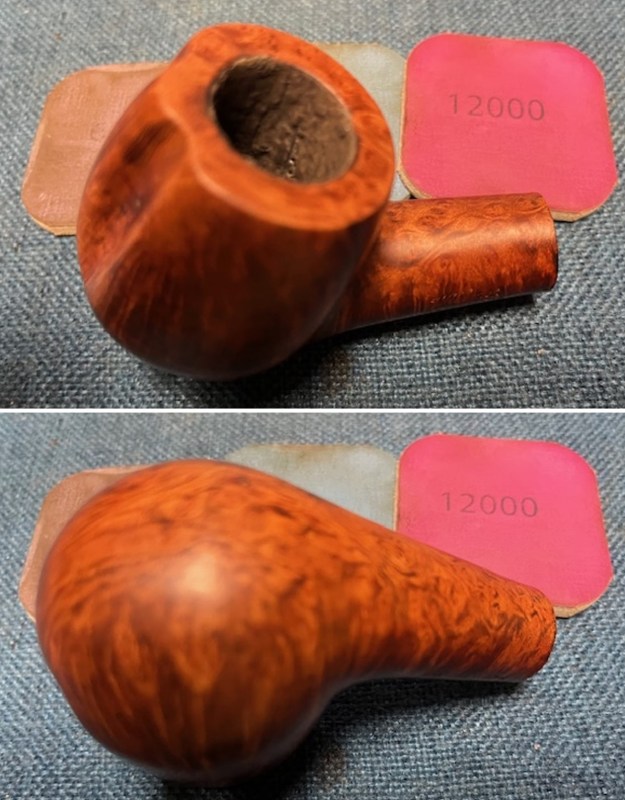
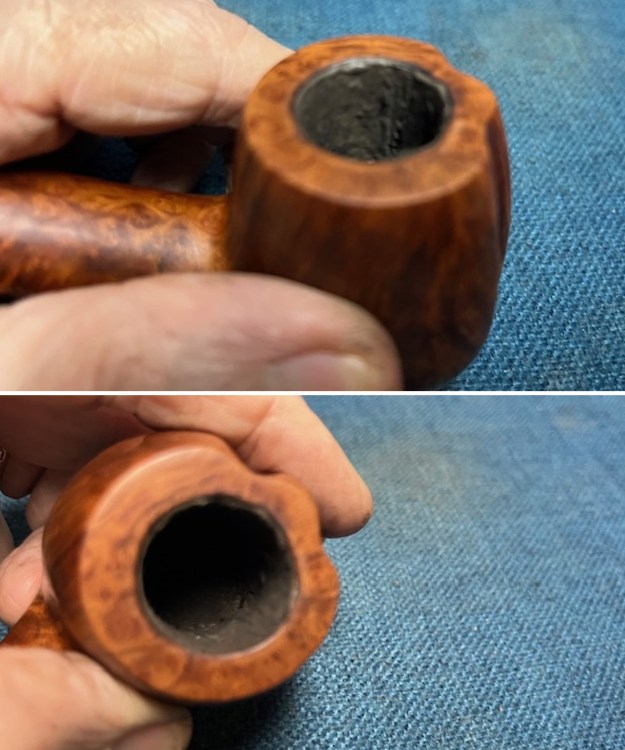
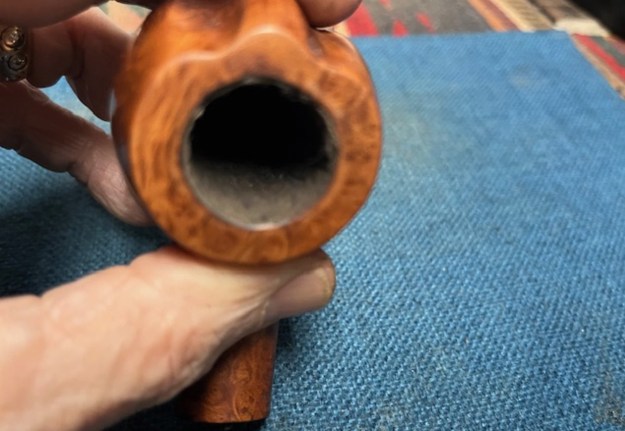
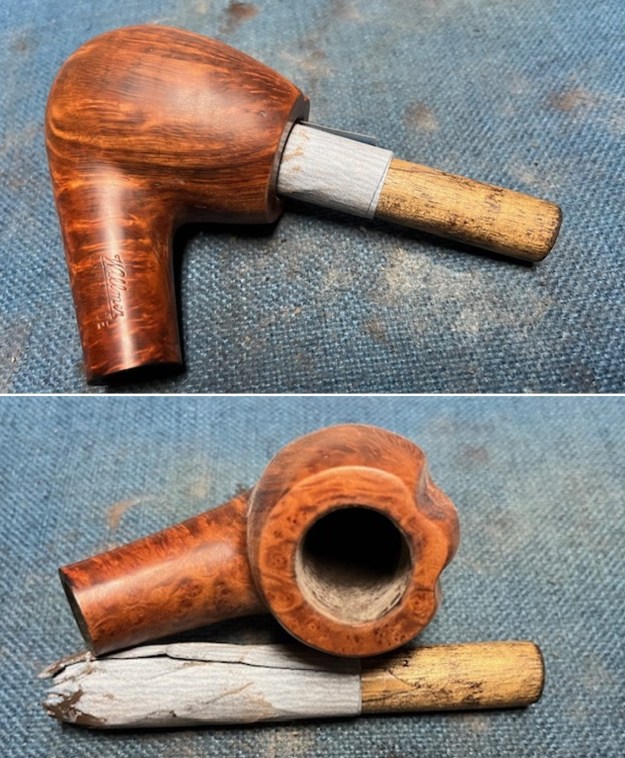
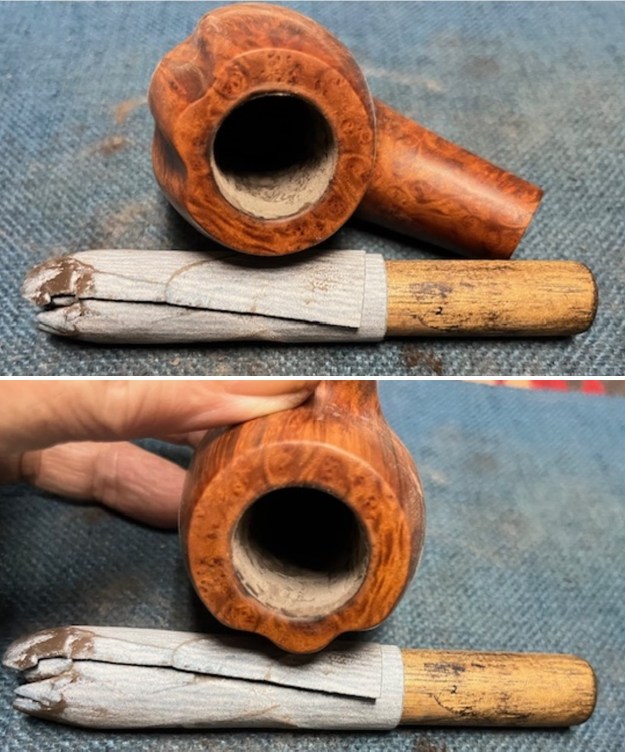
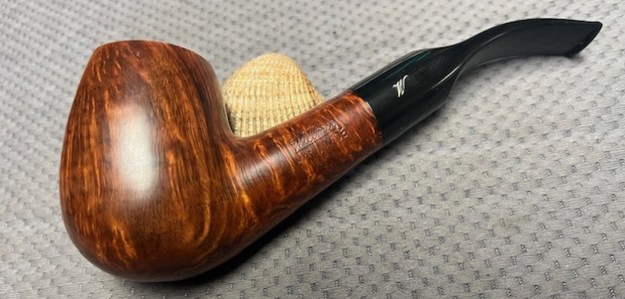
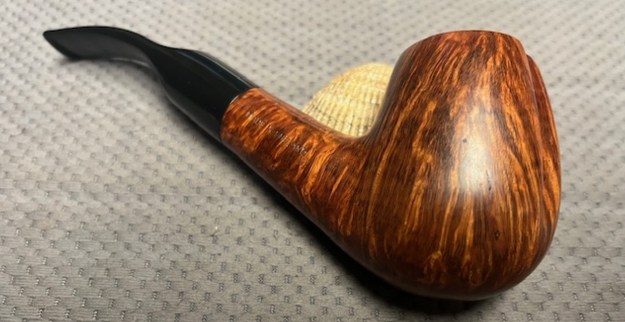
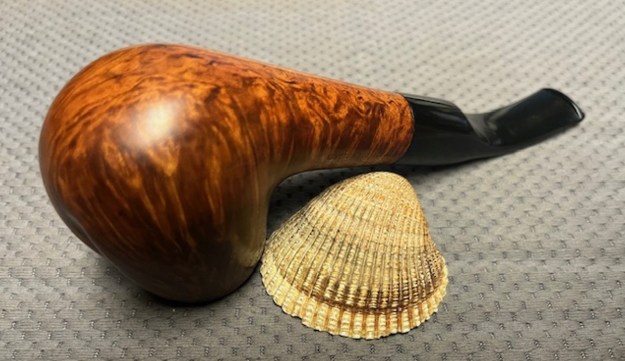
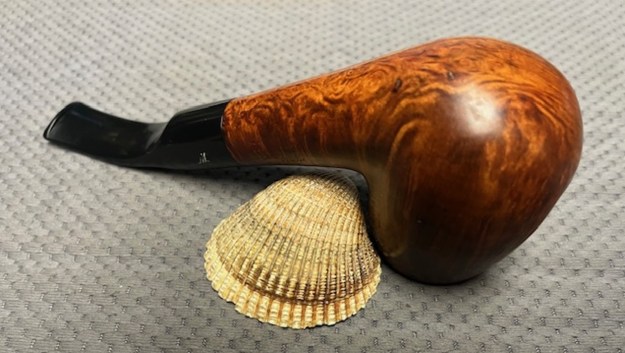
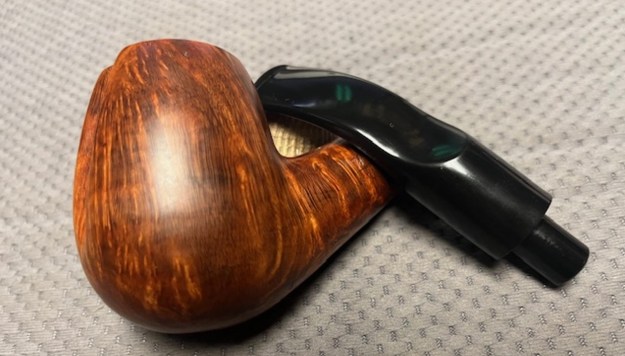
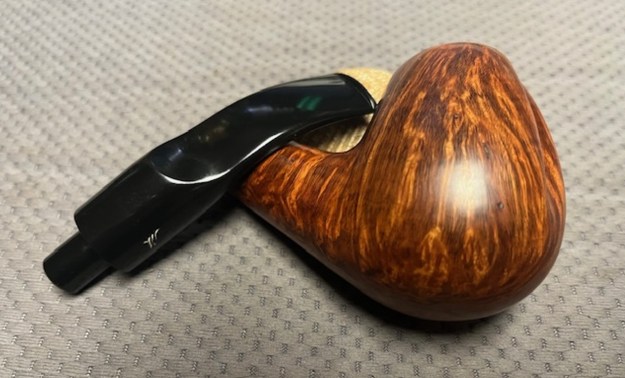
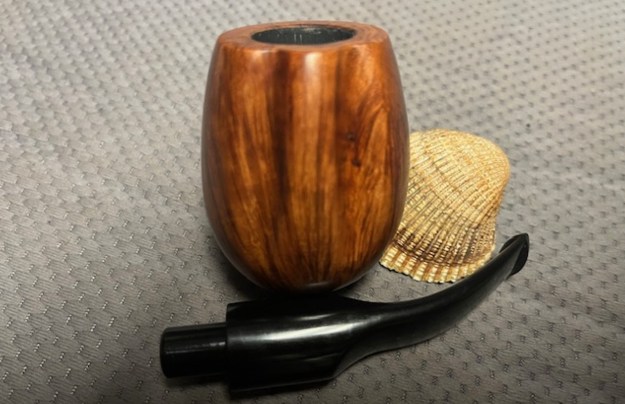
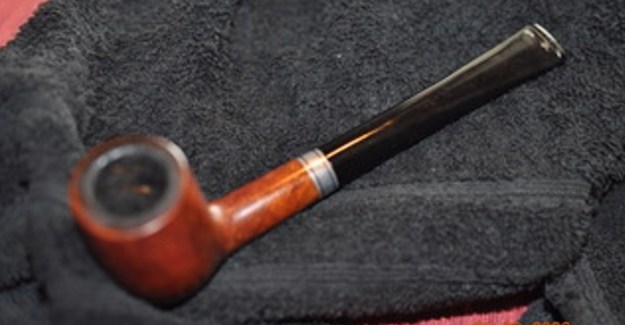
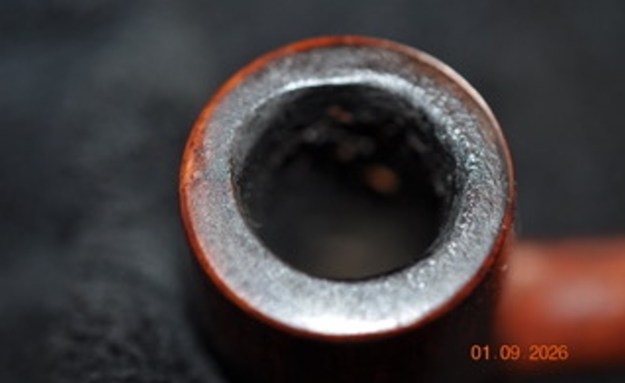
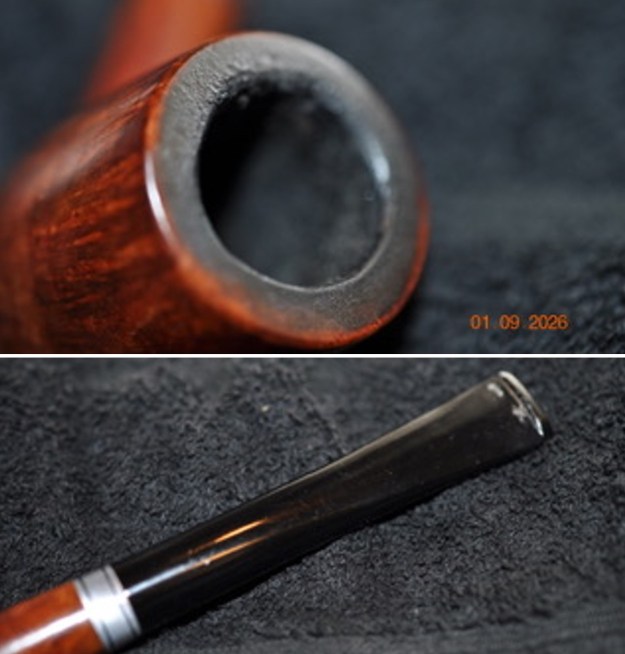
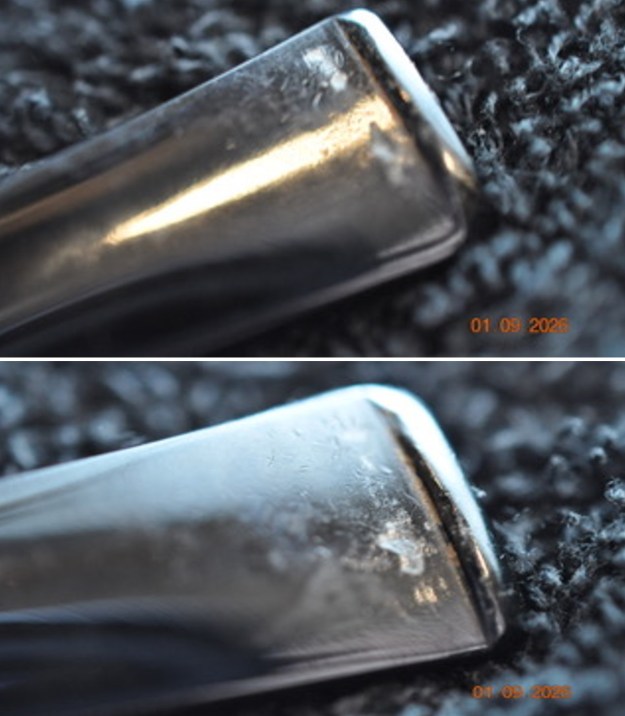
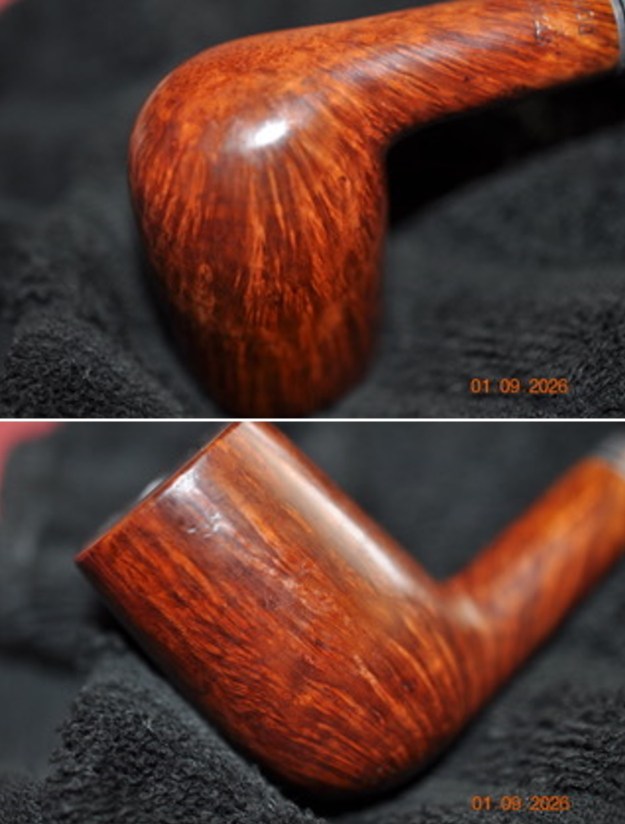
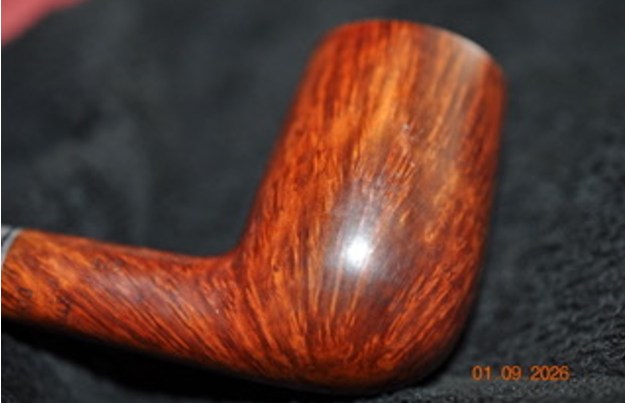
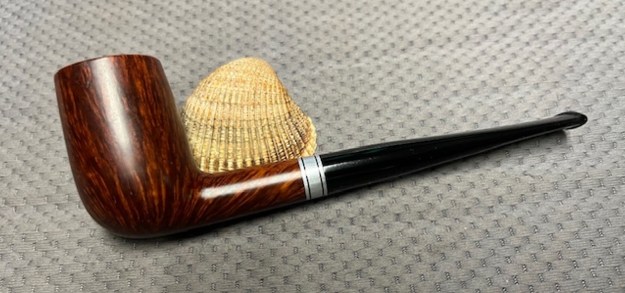
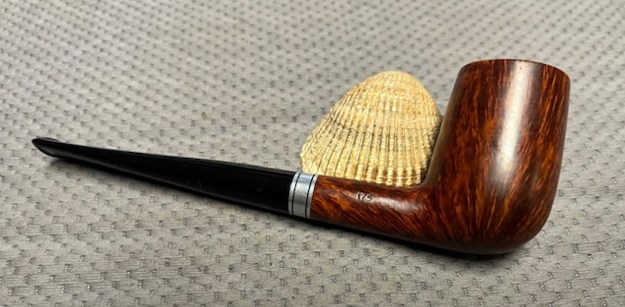
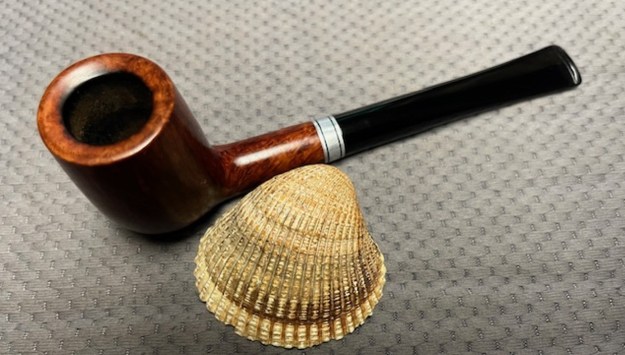
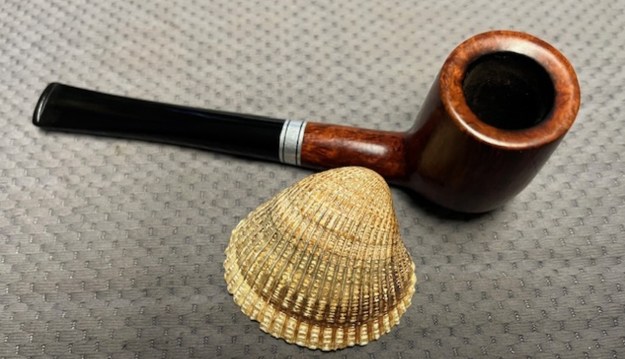
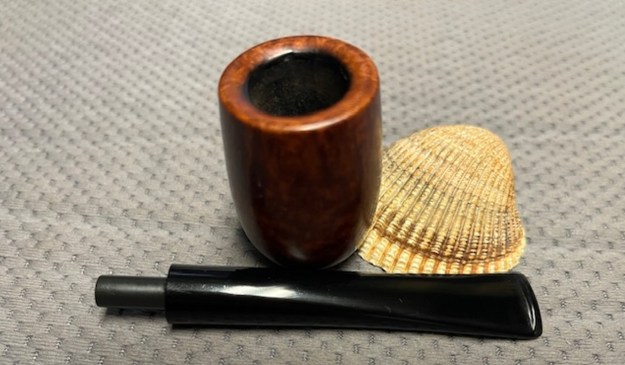
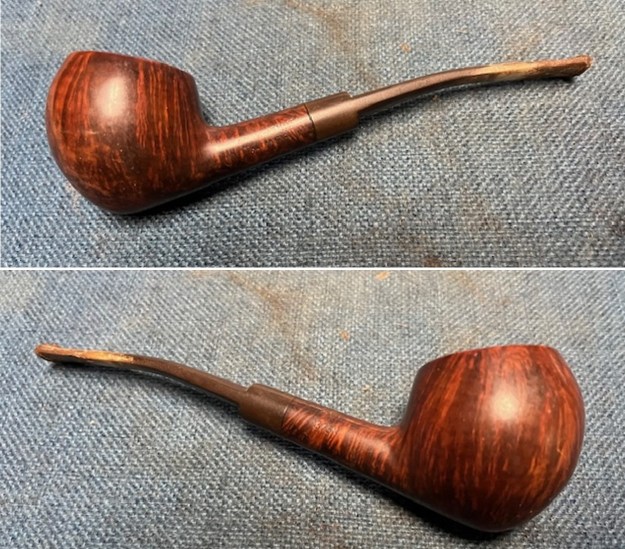
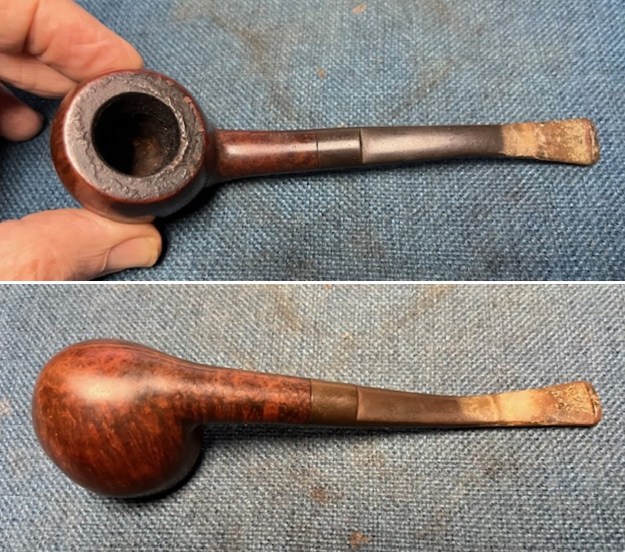
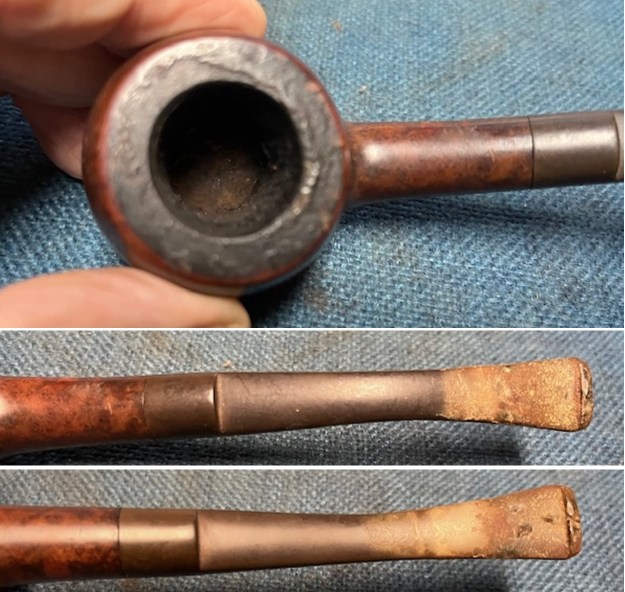
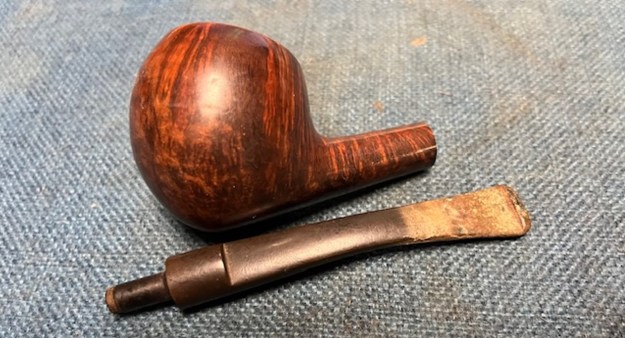
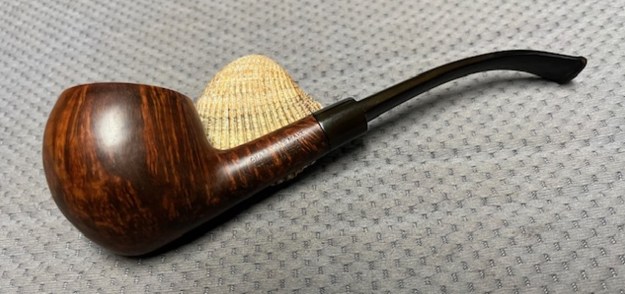
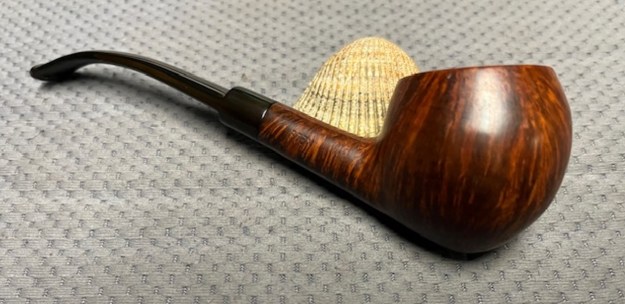
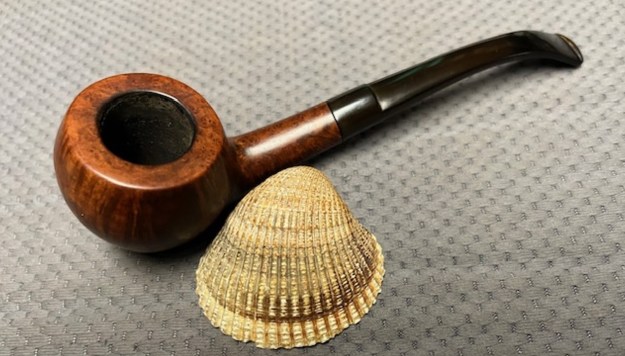
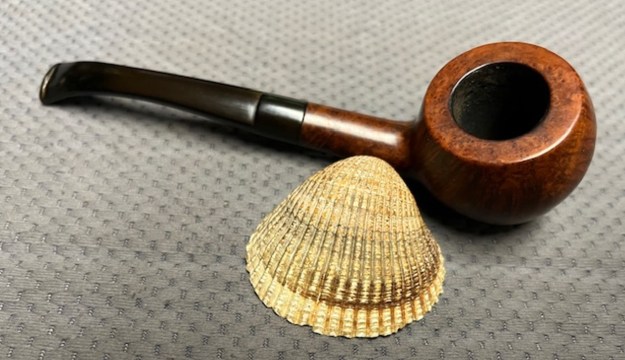
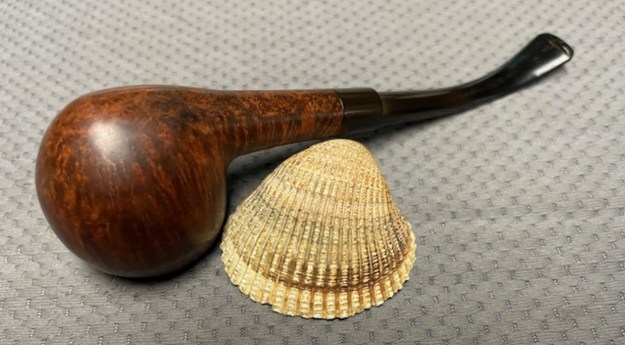
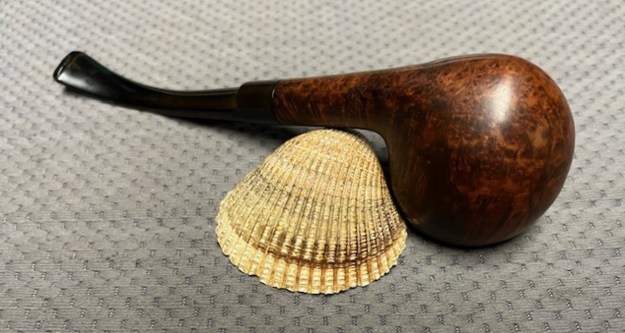
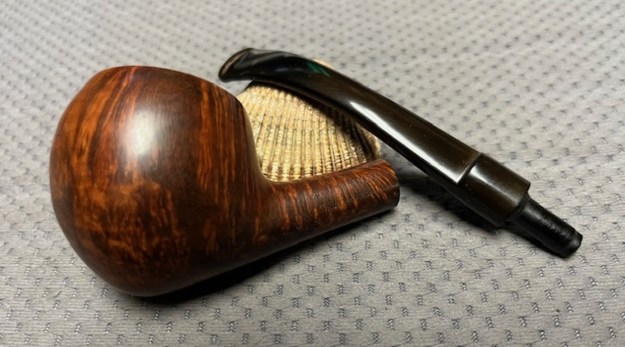
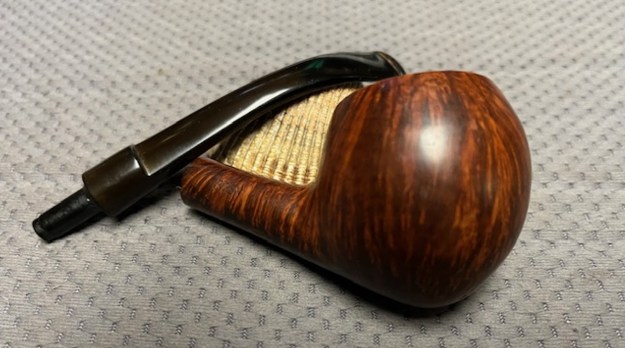
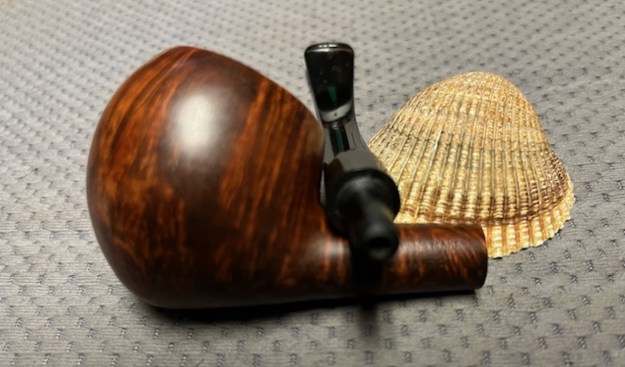
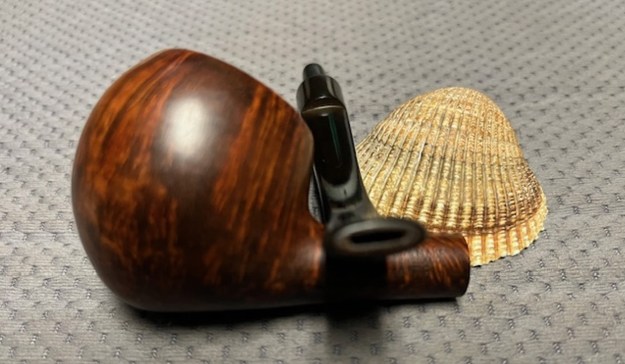
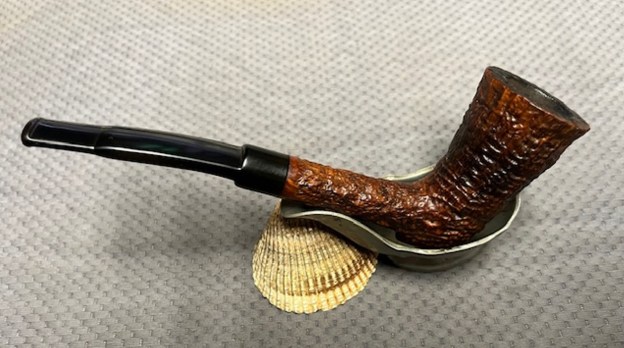
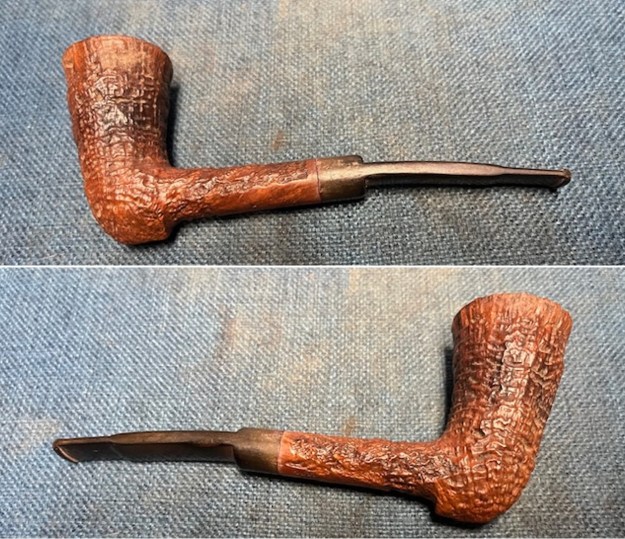
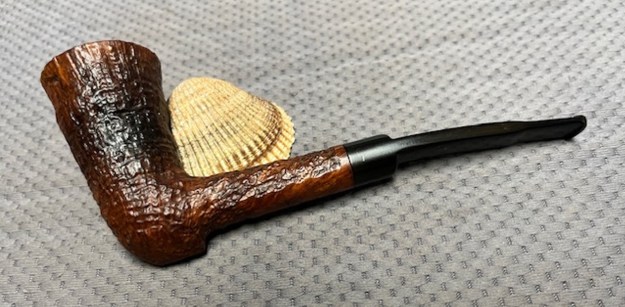
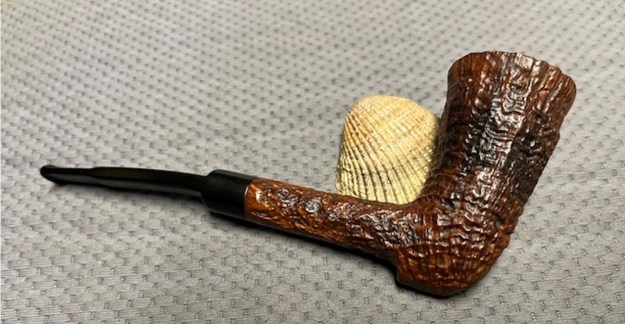
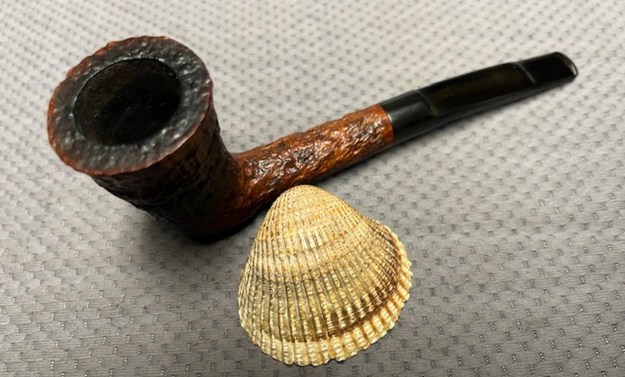
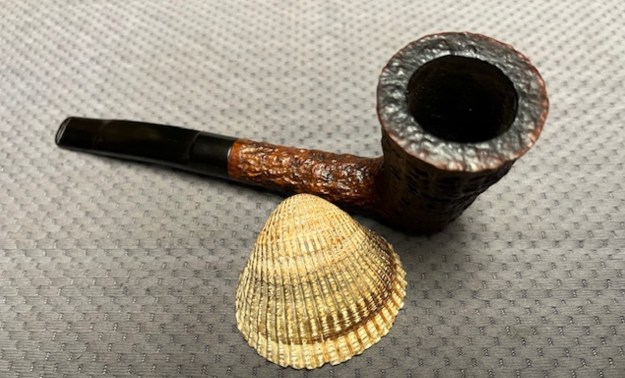
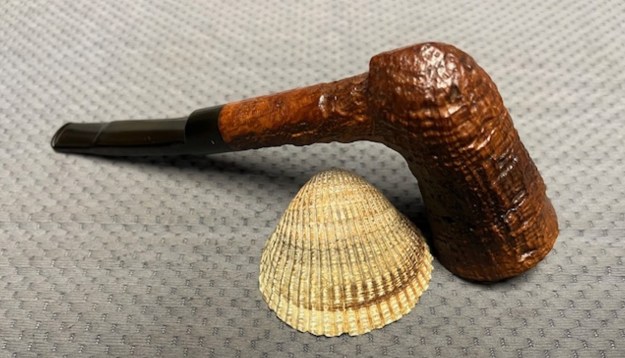
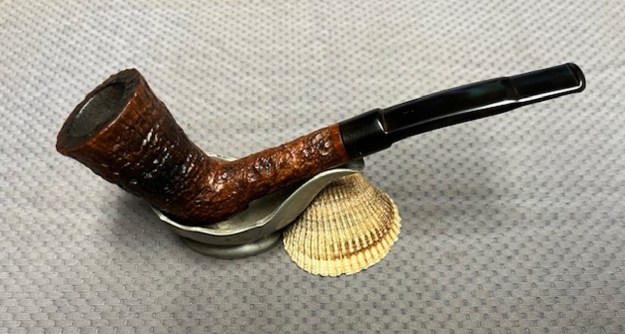
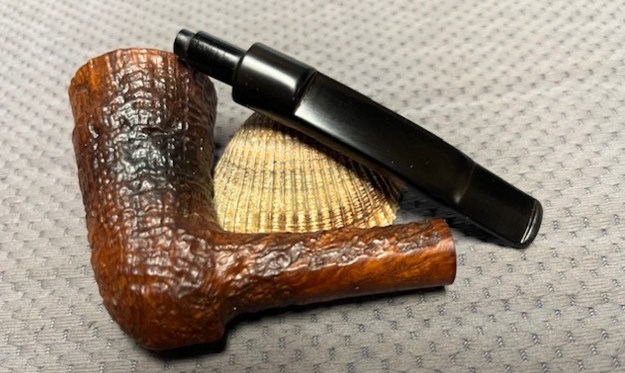
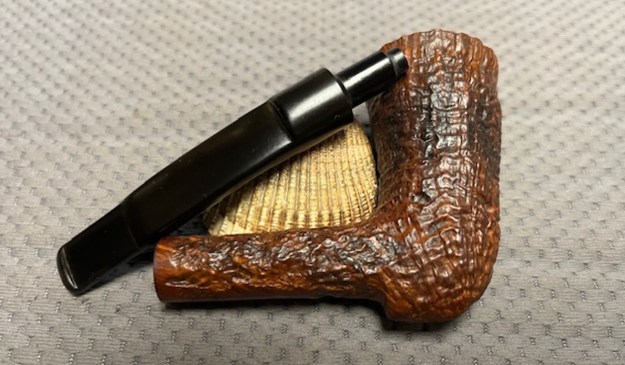
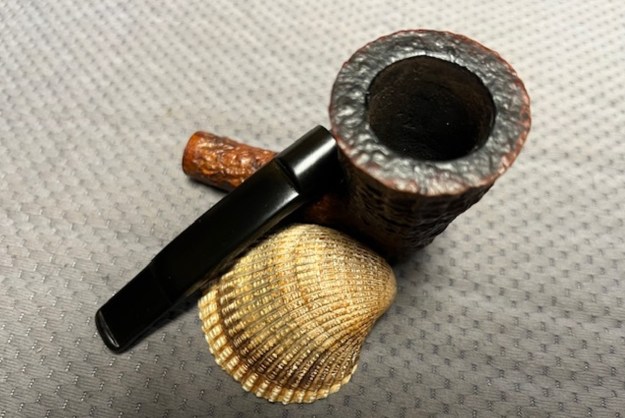
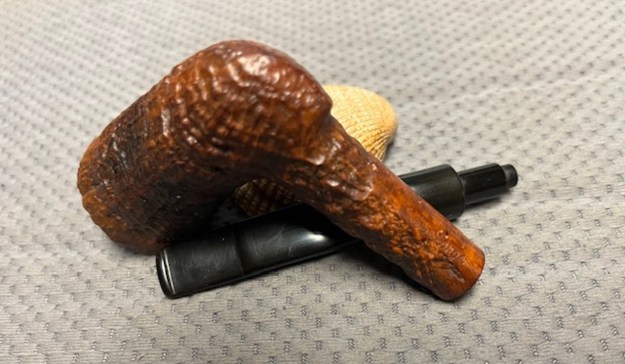
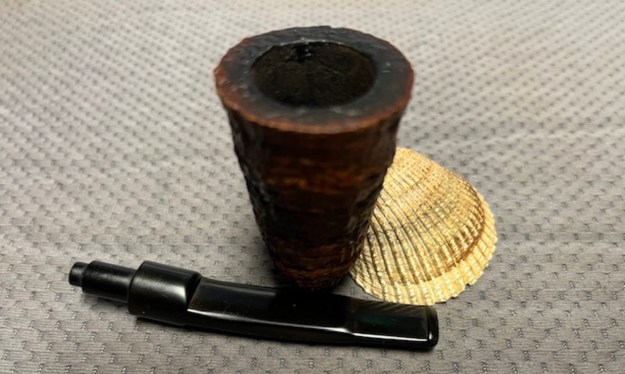
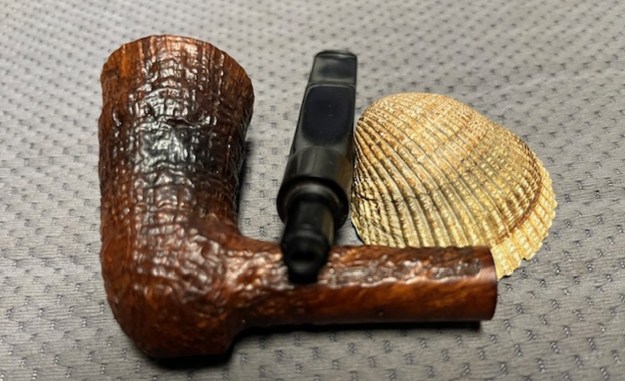
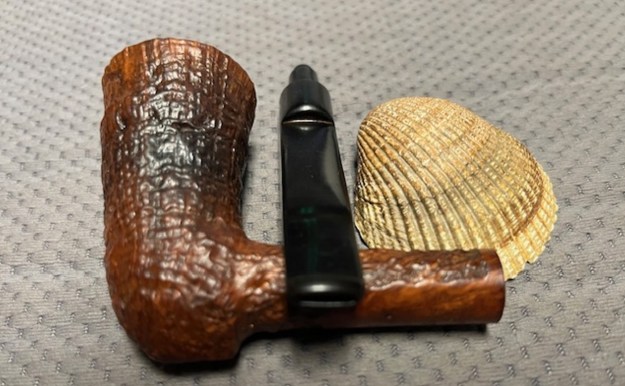
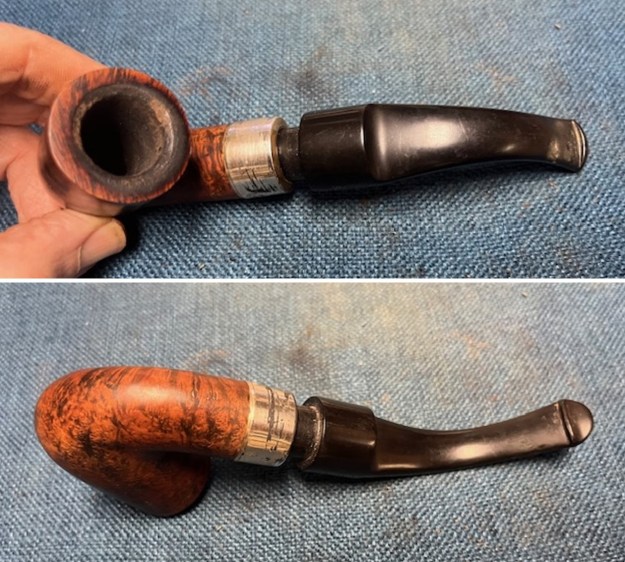
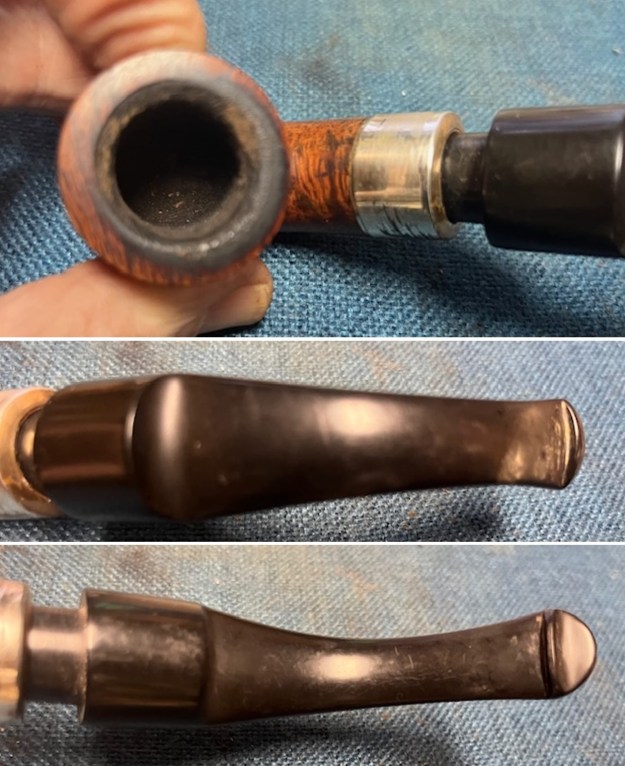
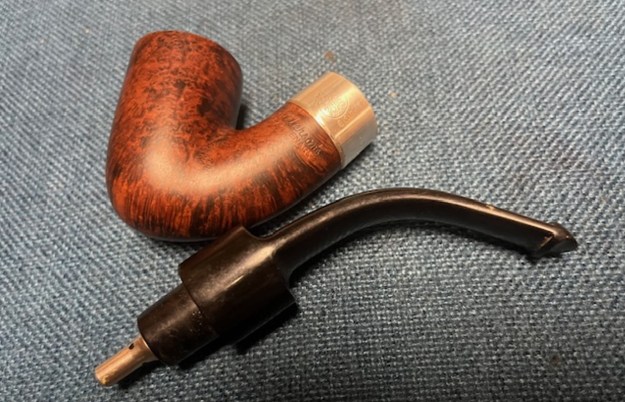
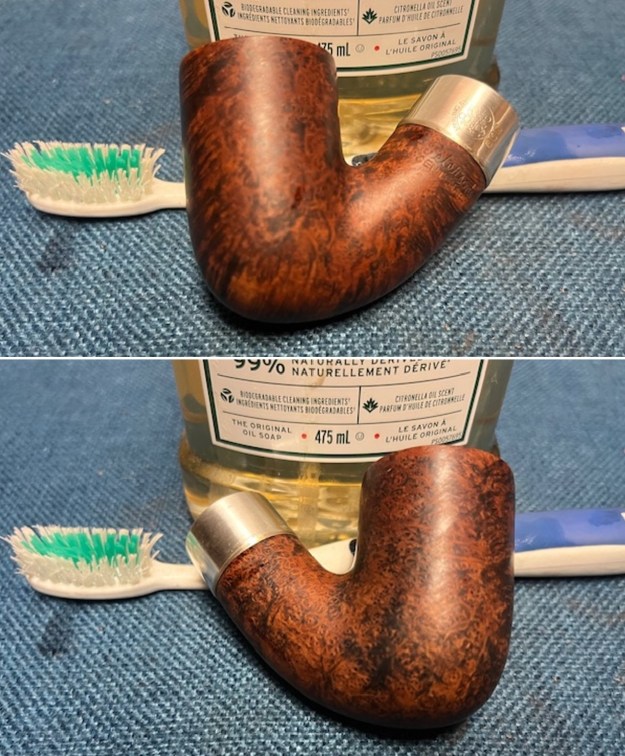
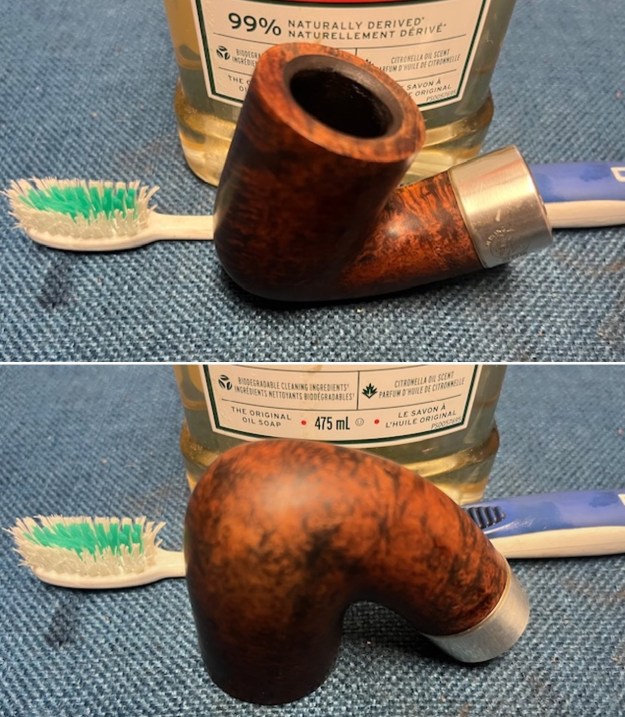
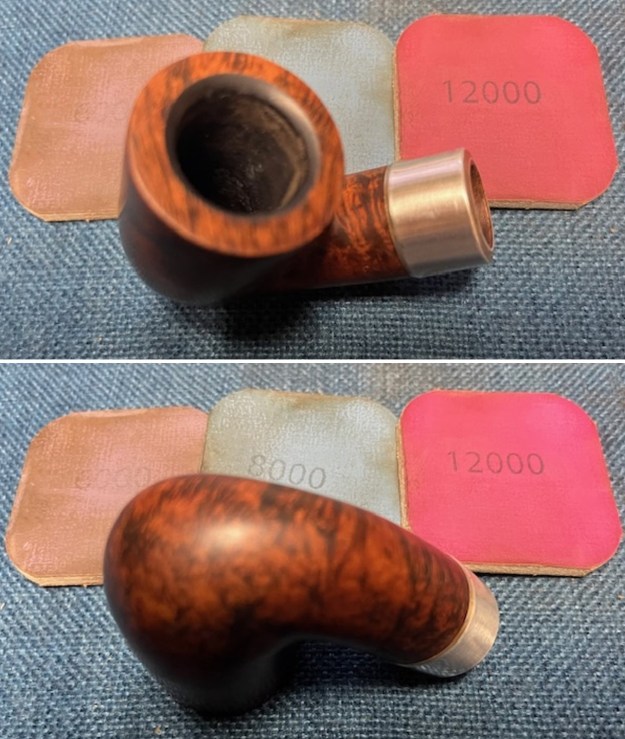
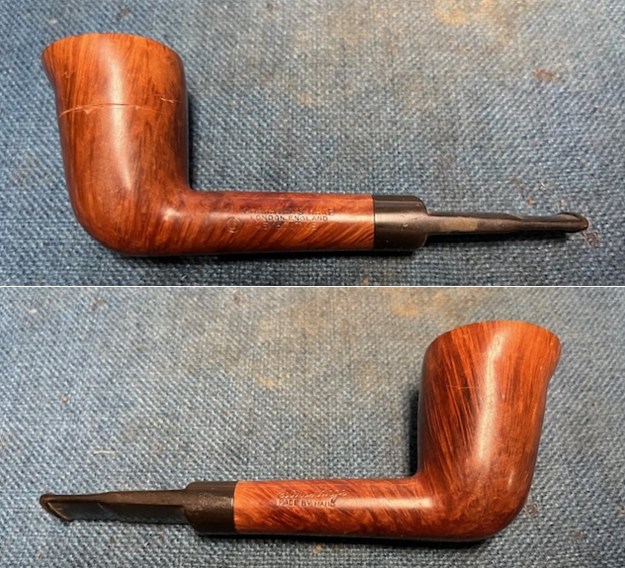
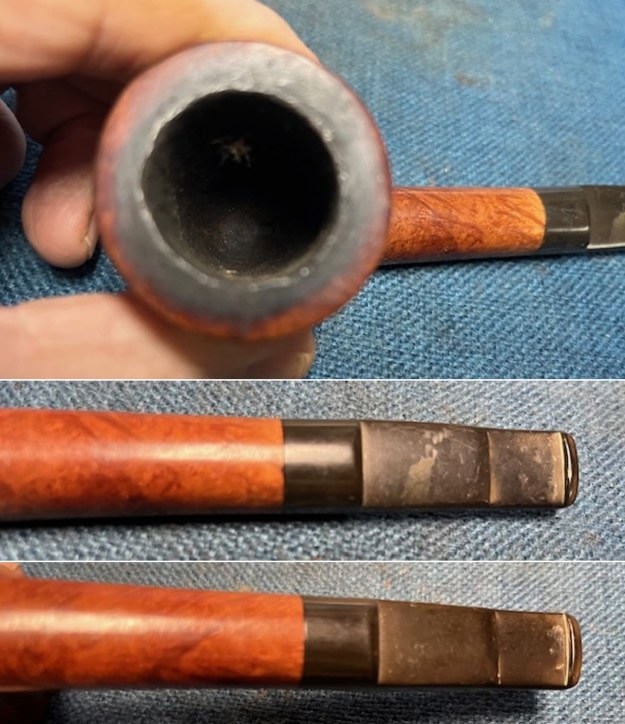
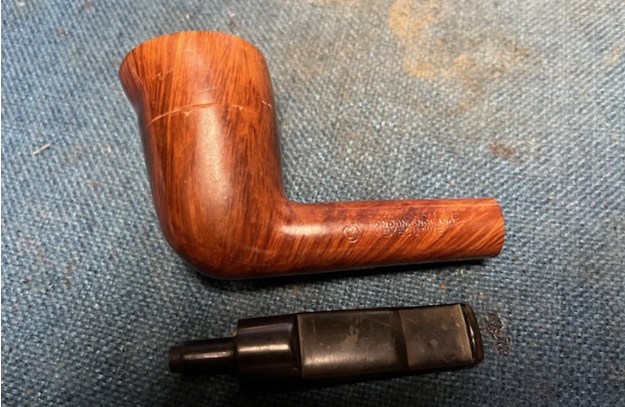
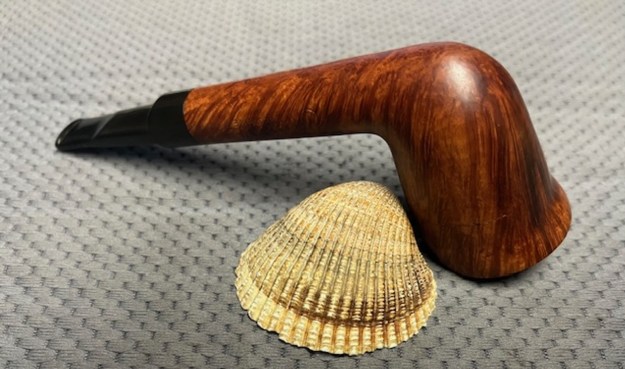
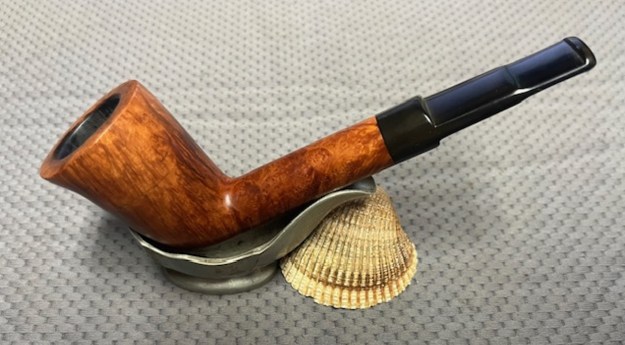
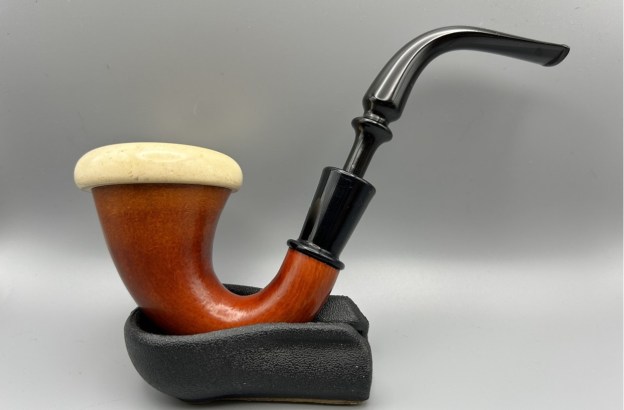
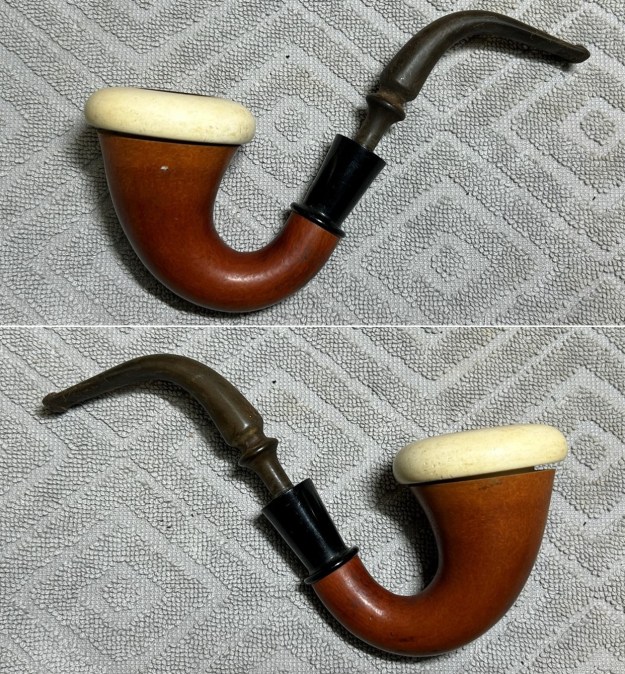
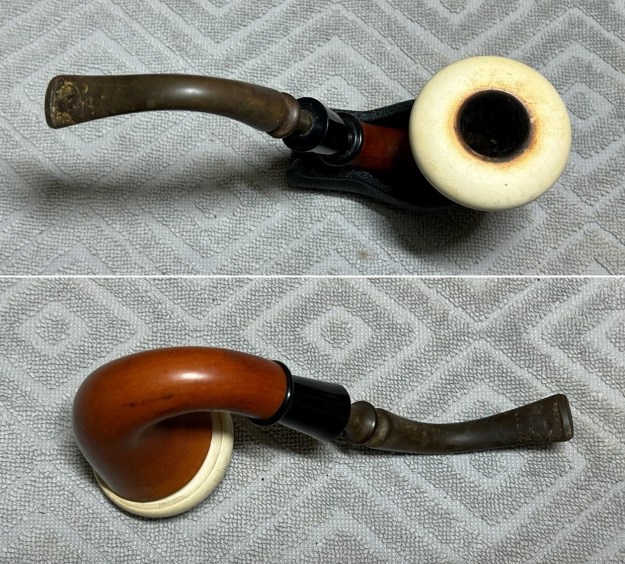
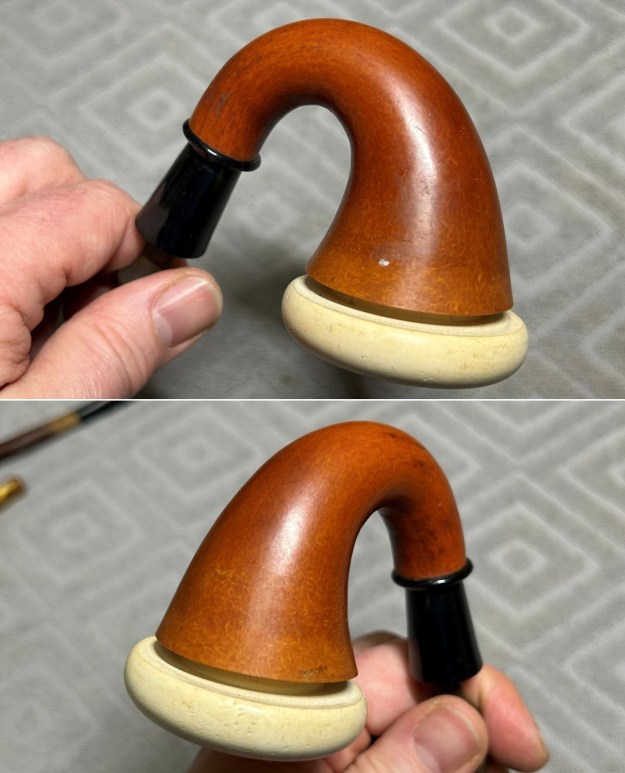
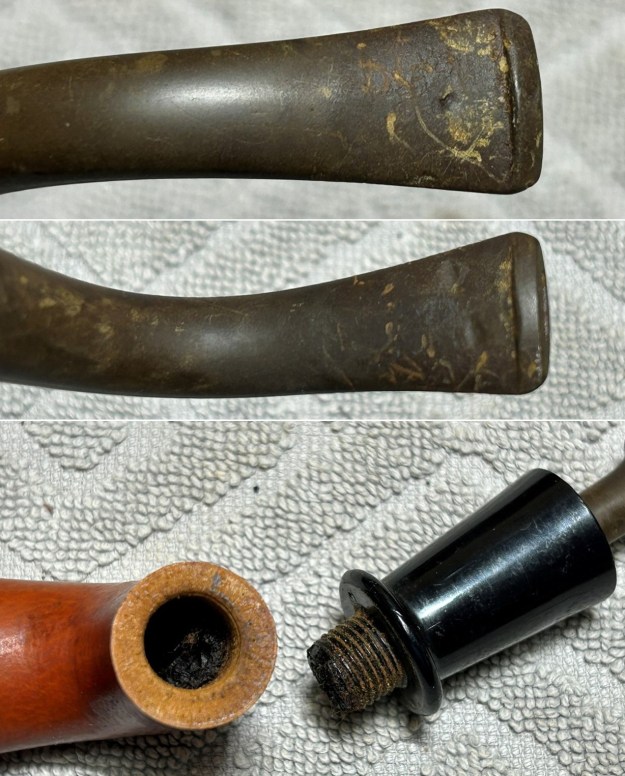
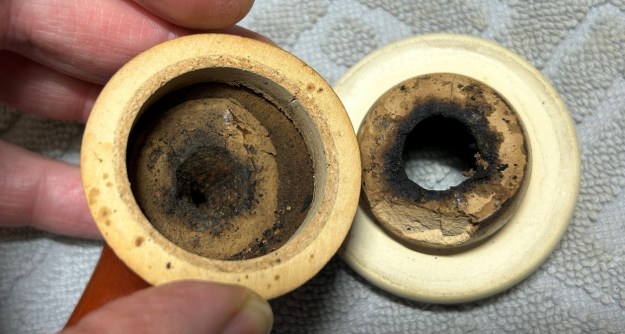
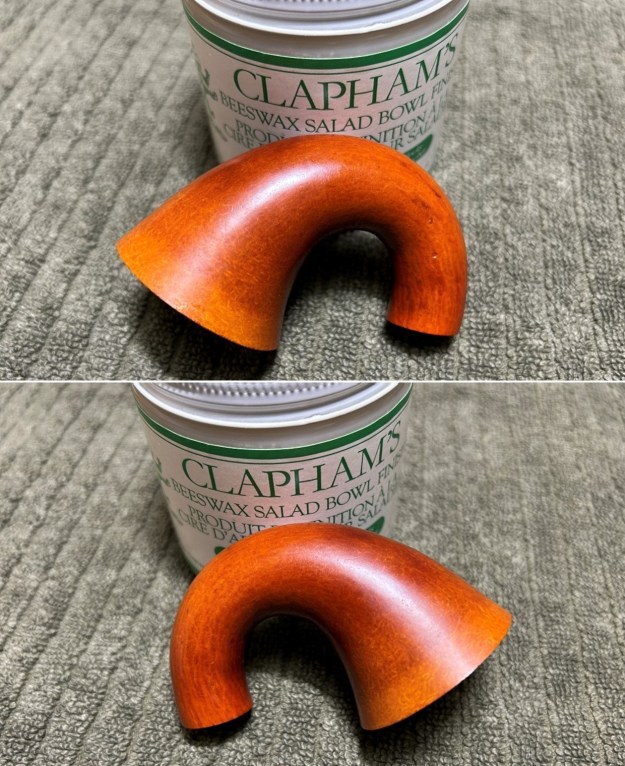
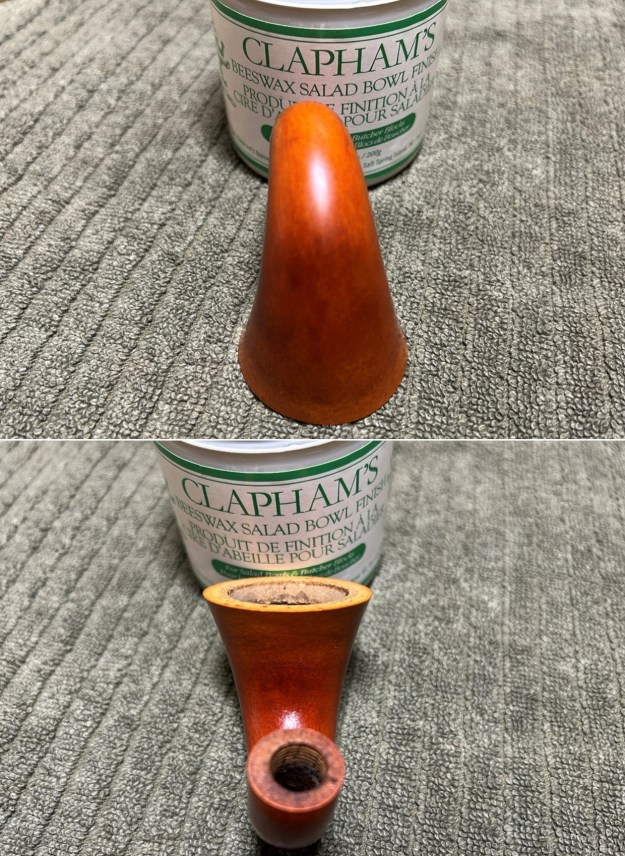
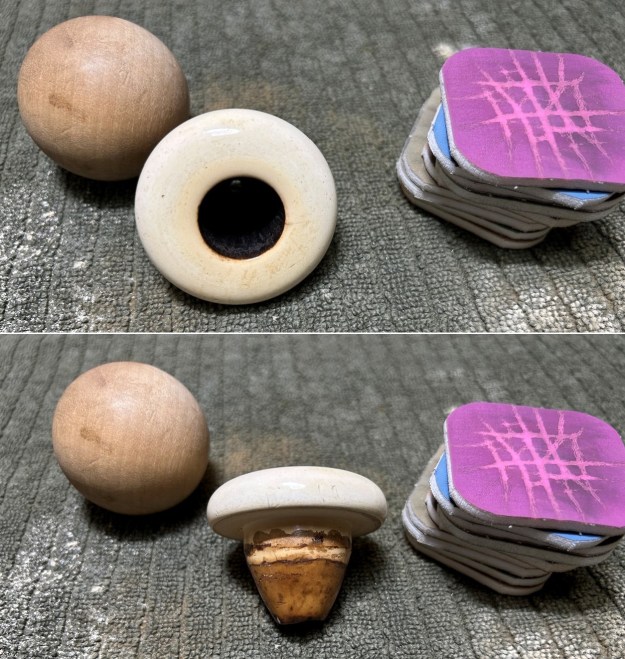
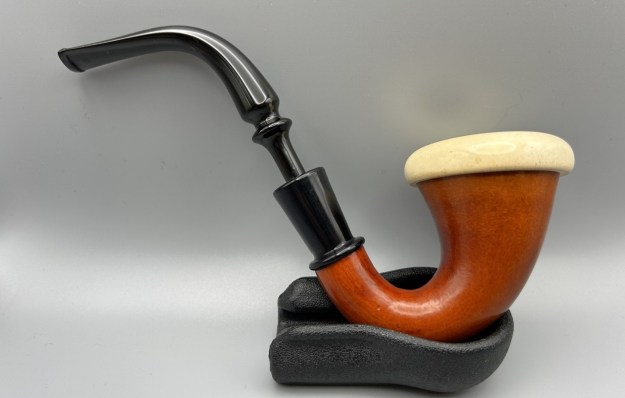
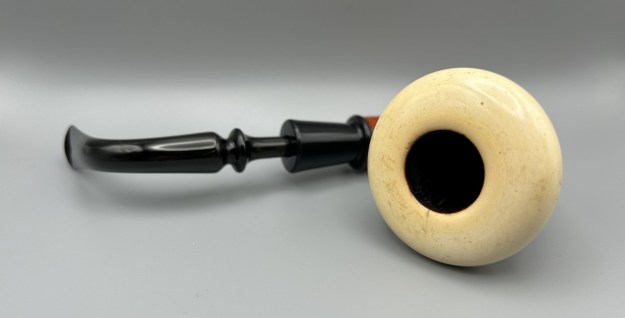
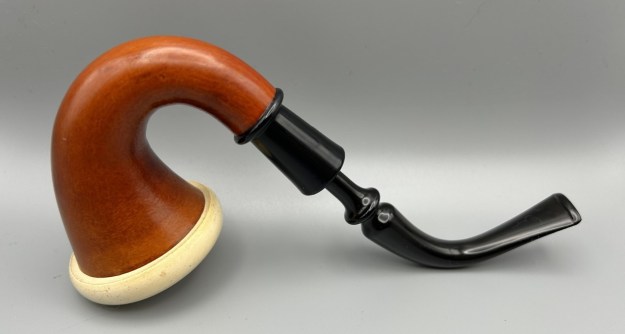
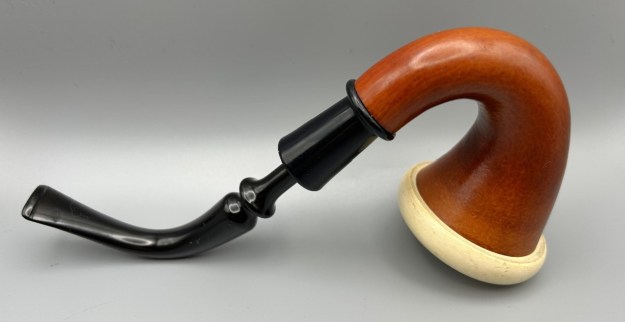
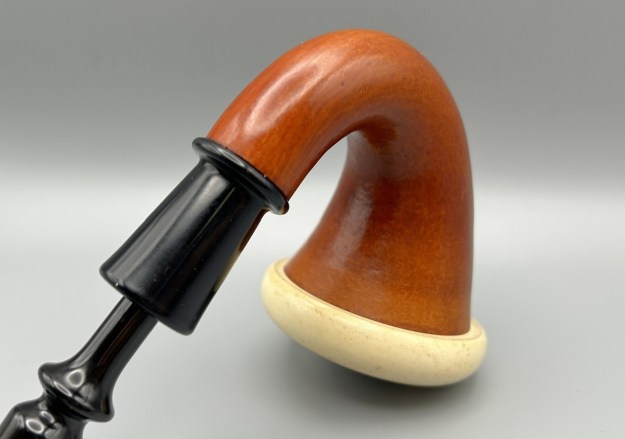
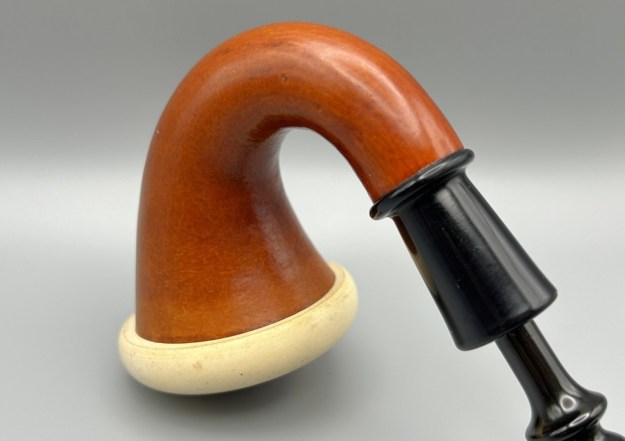
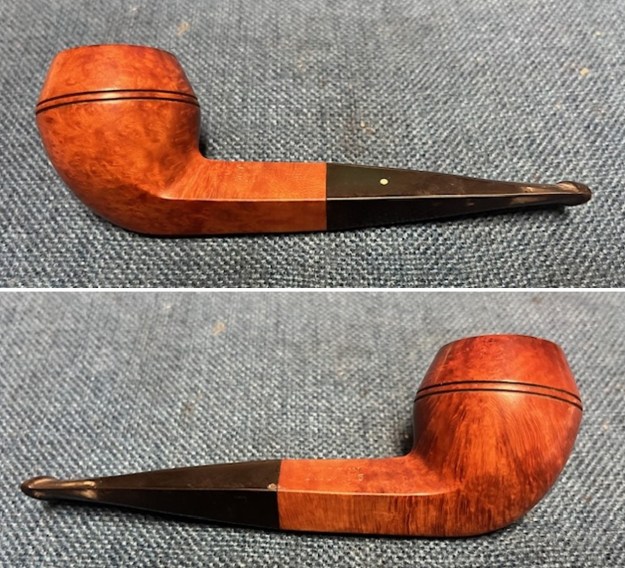
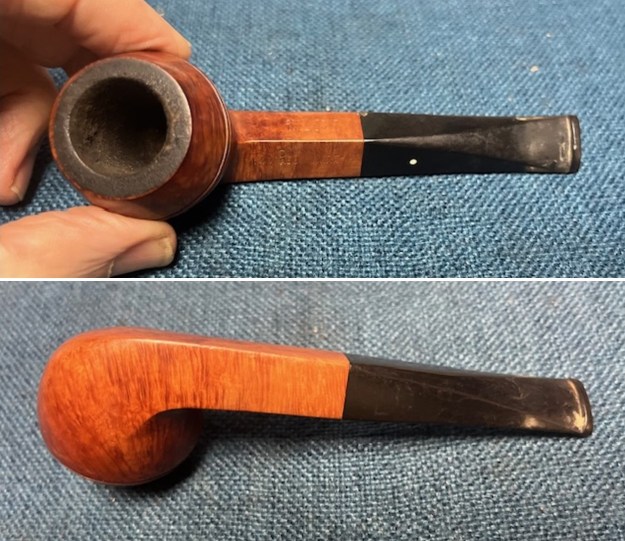
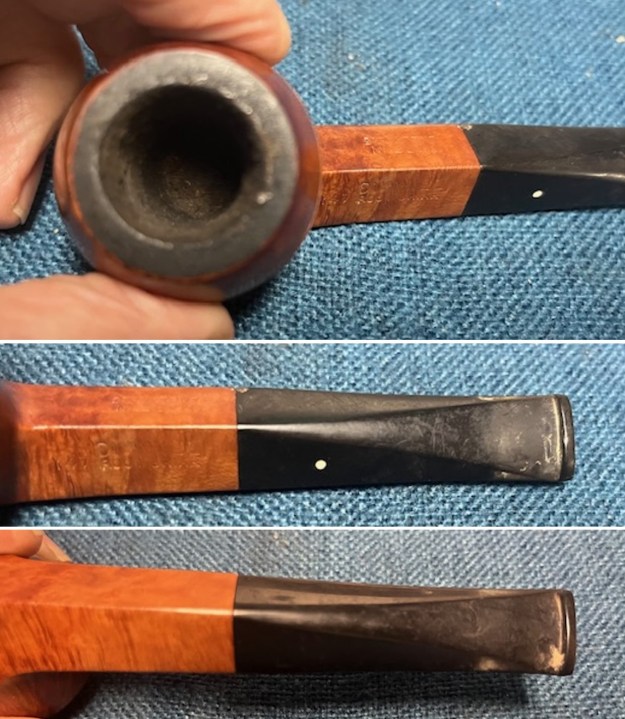
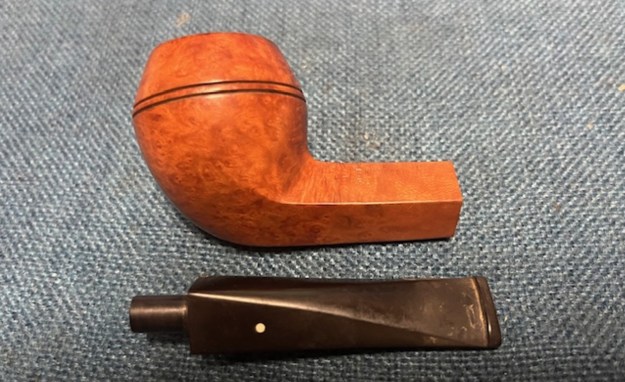
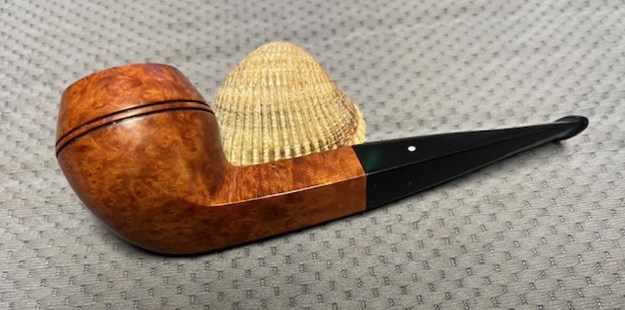
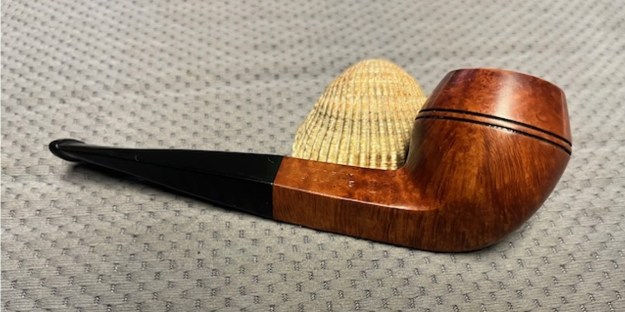
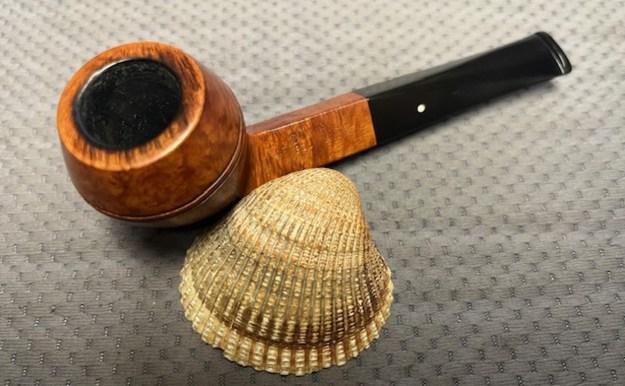
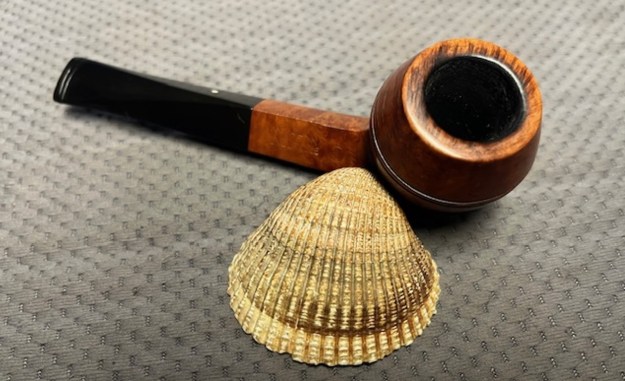
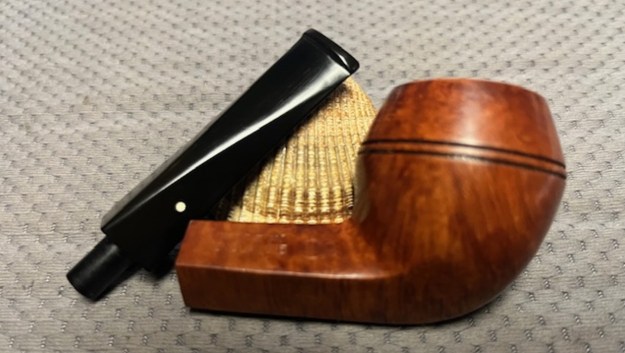
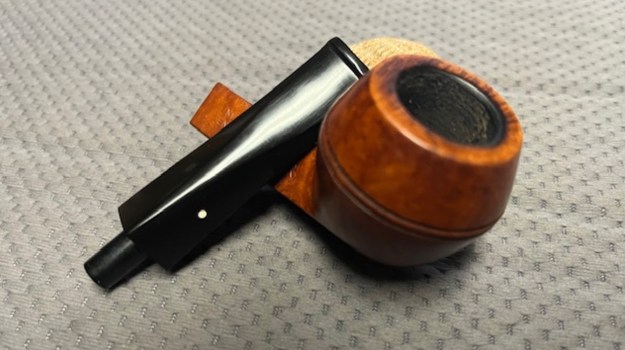
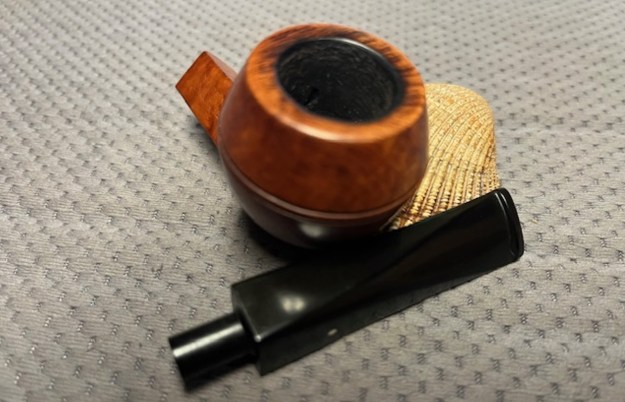
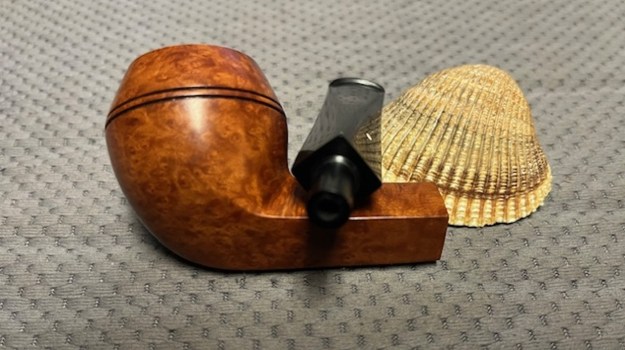
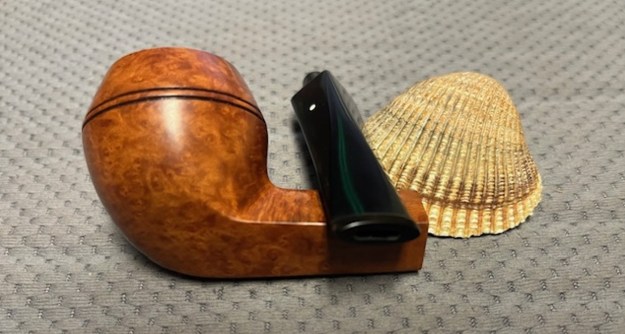
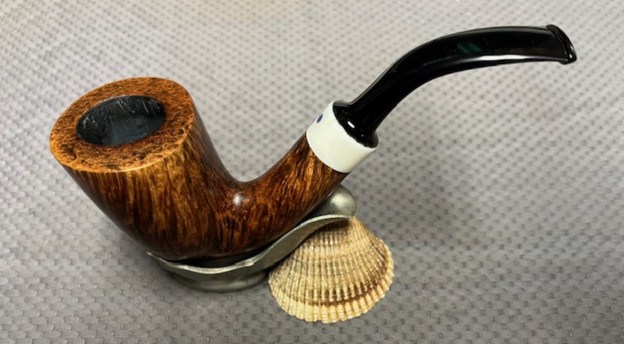
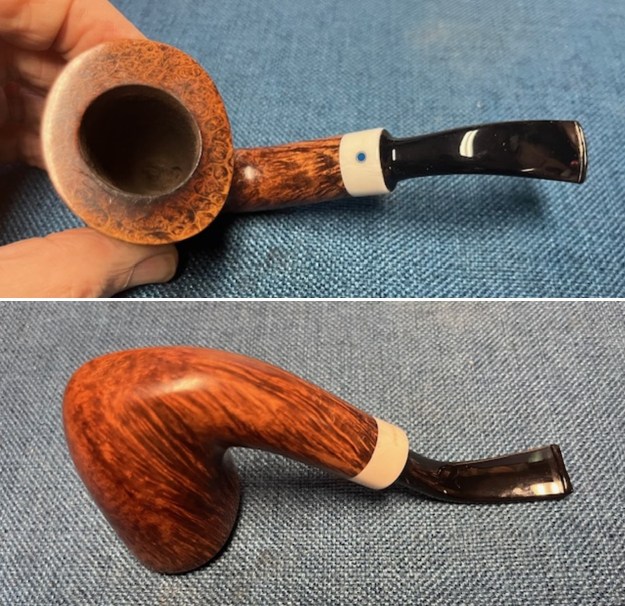
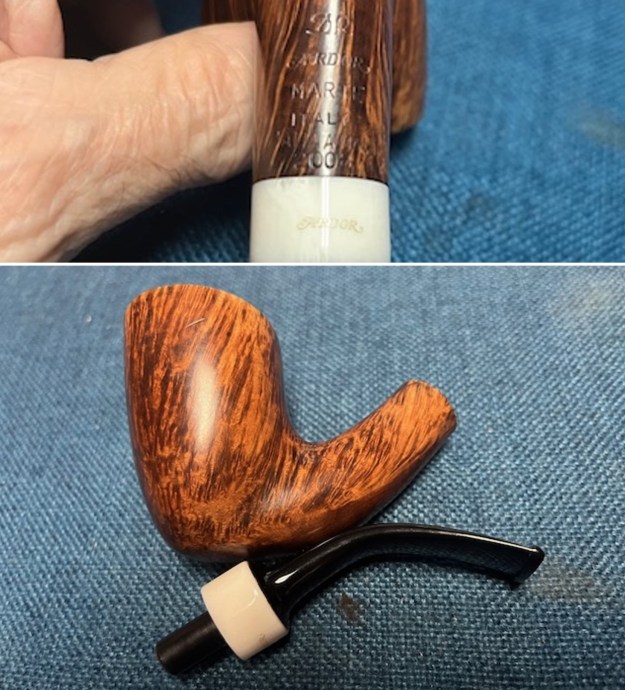
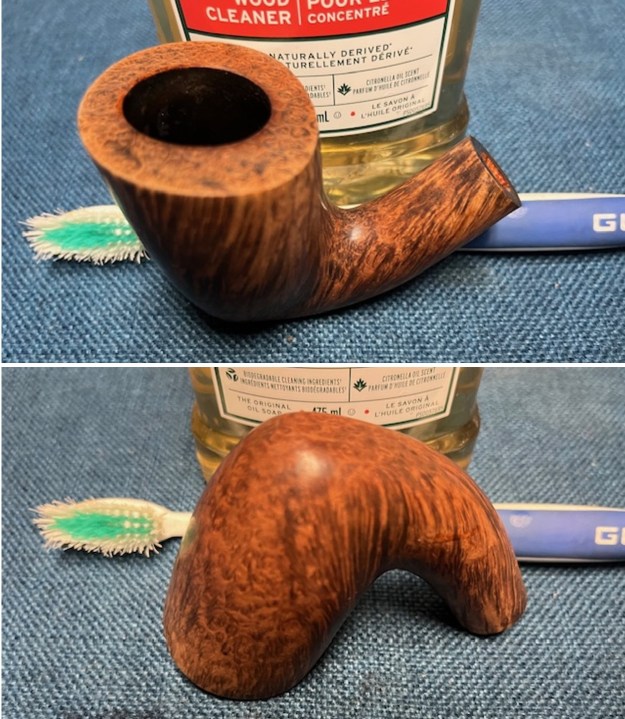
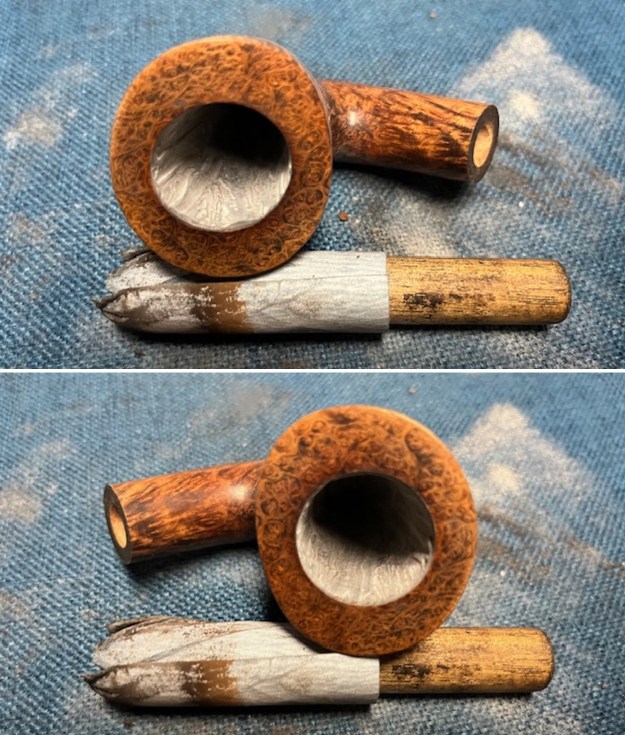
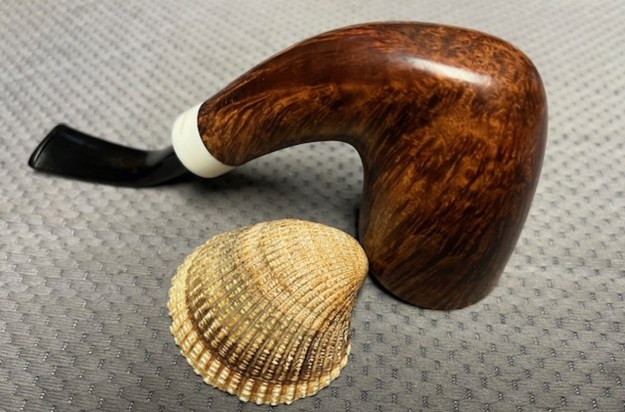
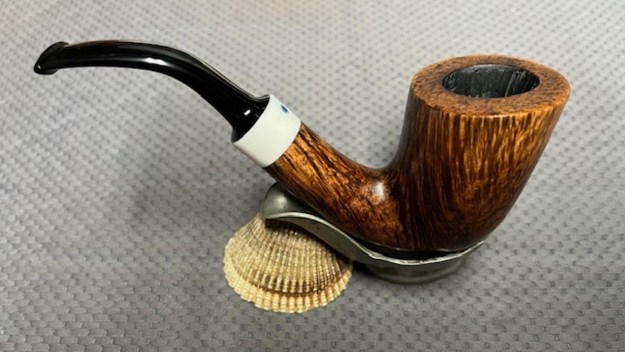
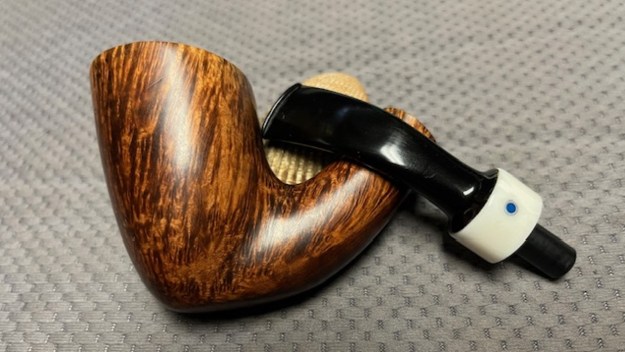
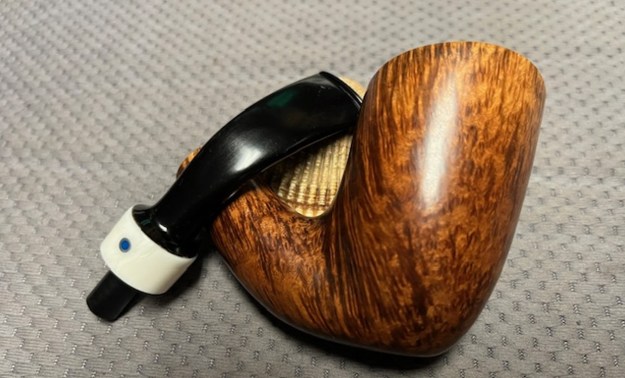
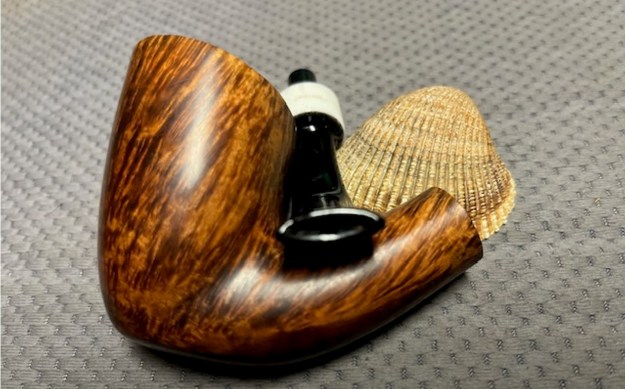
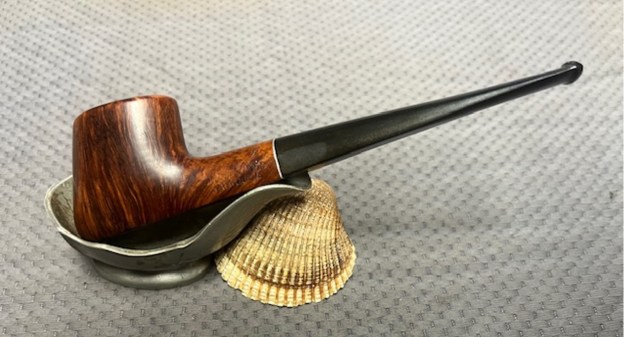
I asked him to send me some photos of the pipes before he shipped them to me. I gave my address and he shipped them to me. Here are the photos of the Marxman pipe that he sent.
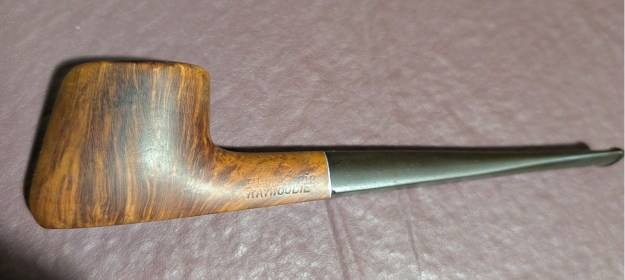
He included some close-up photos of the bowl and shank to show the condition they were in. The photos show the condition the bowl and rim top. There is no cake in the bowl but the rim top and inner edge show damage from burning and possibly overzealous reaming. The stem has a lot of tooth marks and dents in the top and underside ahead of the button. He also removed the stem from the shank and took a photo to show the condition of the aluminum stinger apparatus. 
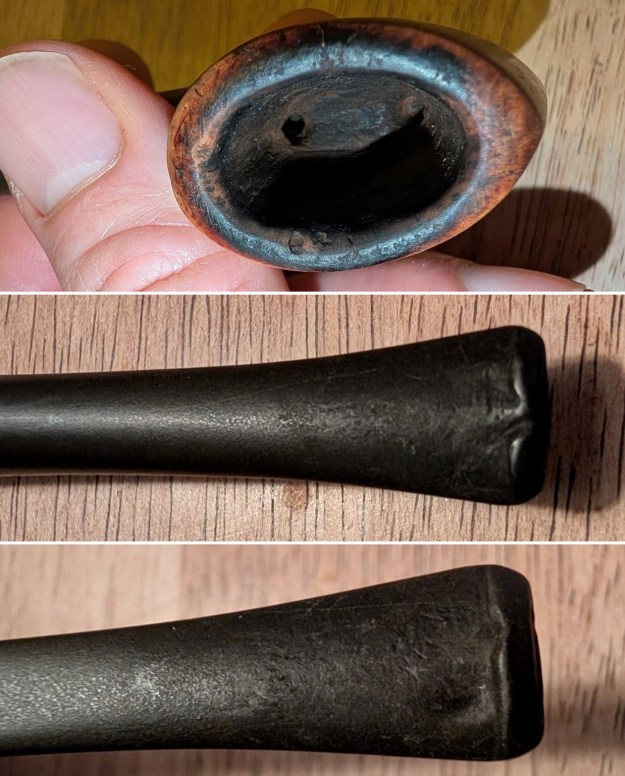
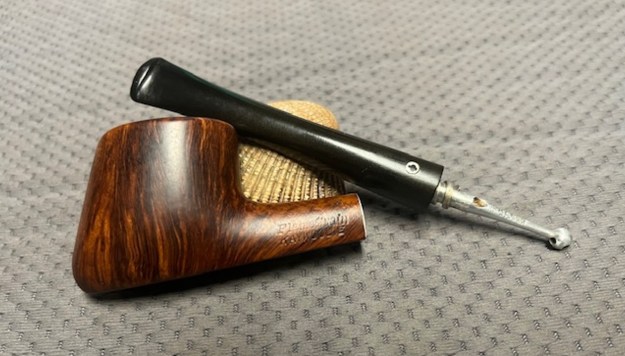
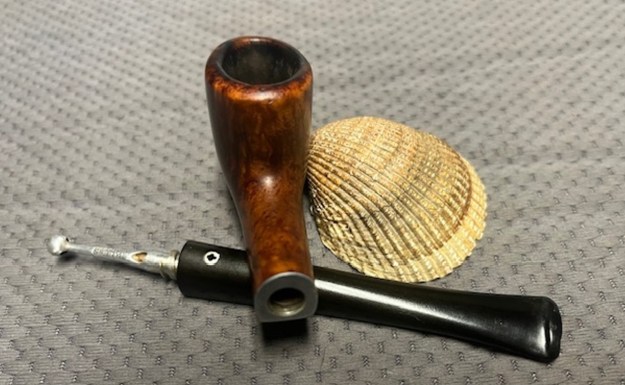
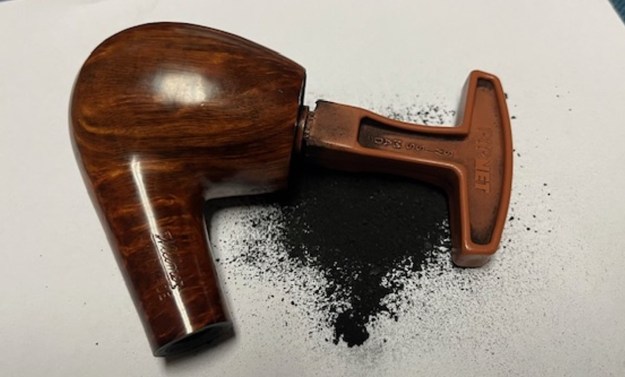
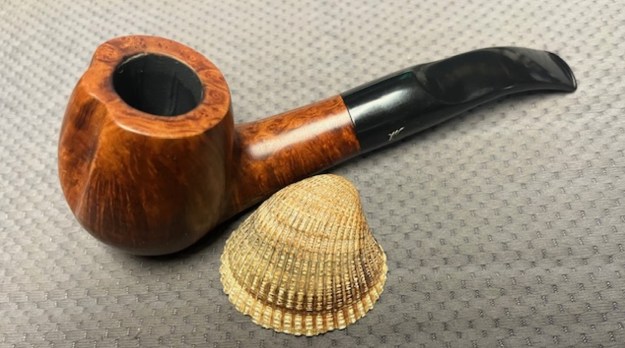
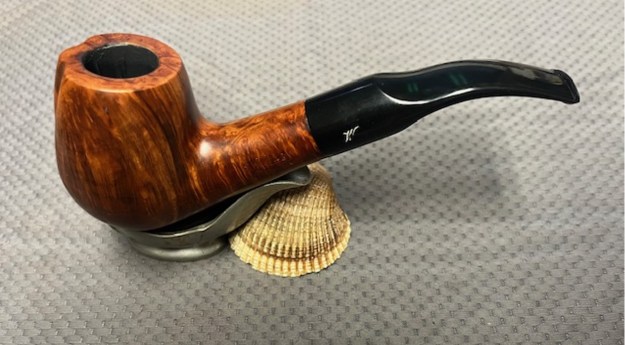
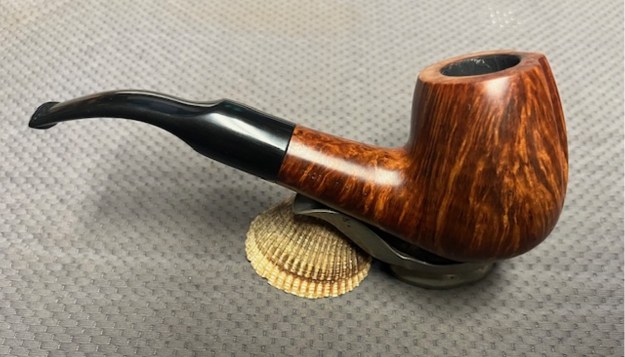
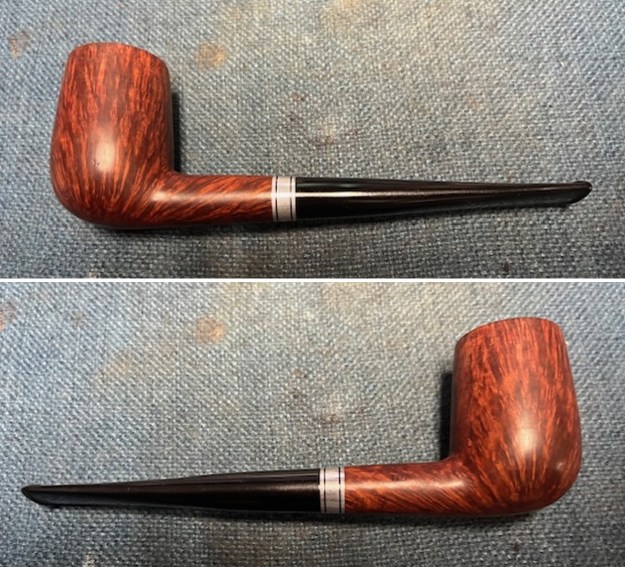
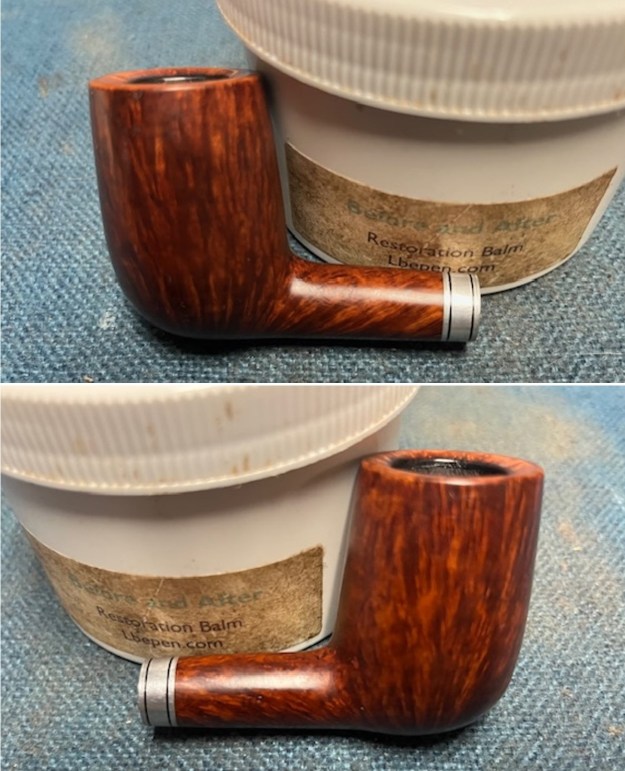
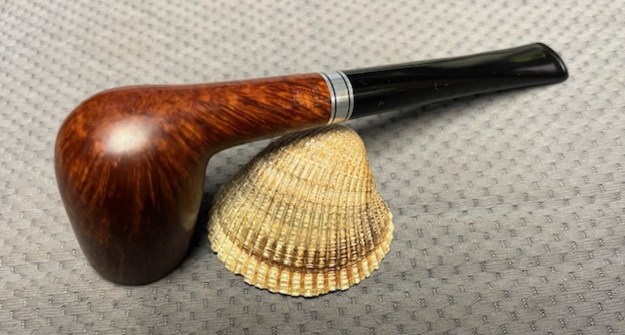
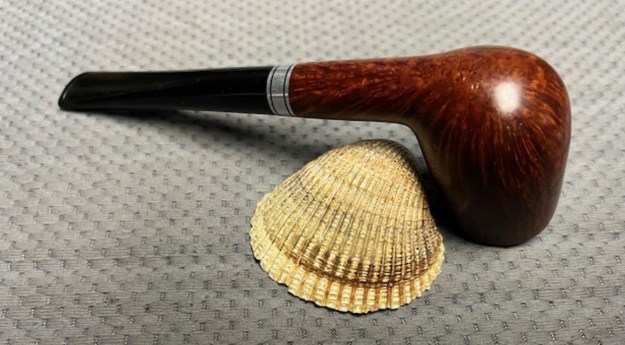
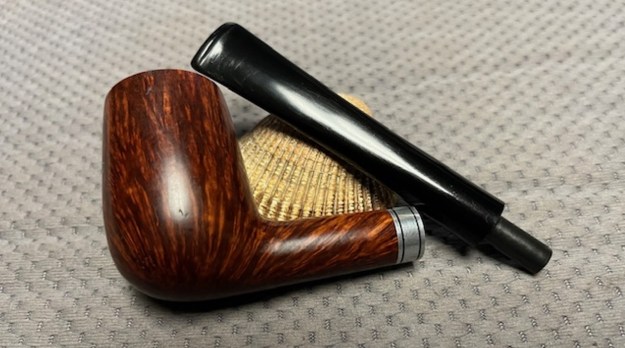
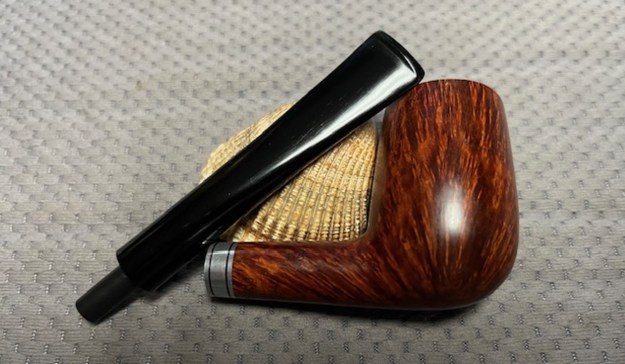
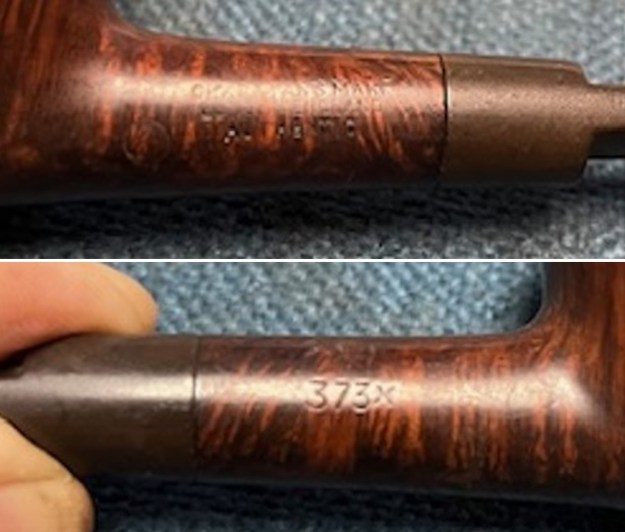
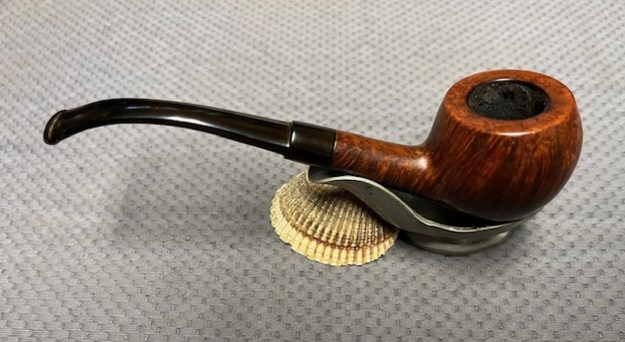
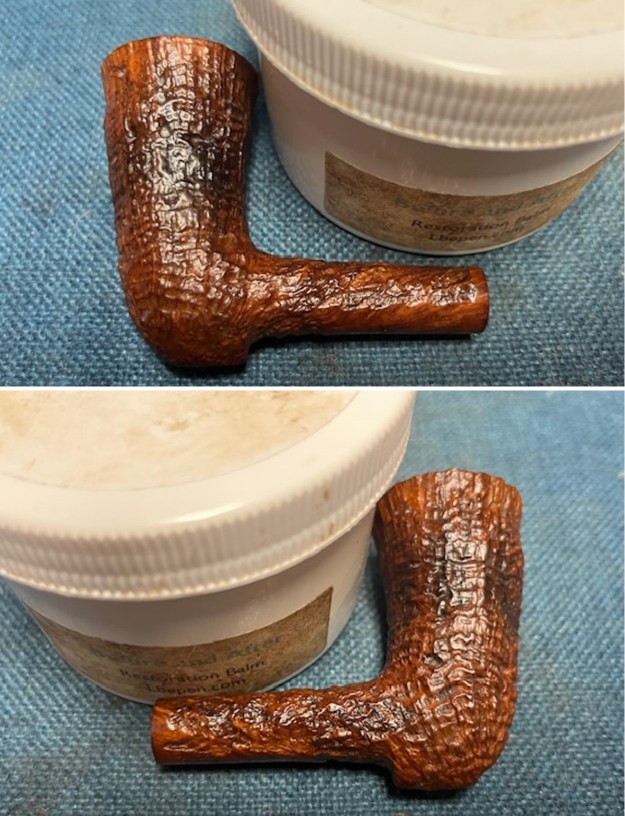
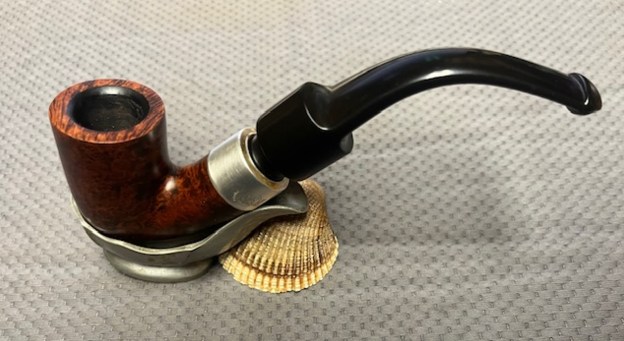
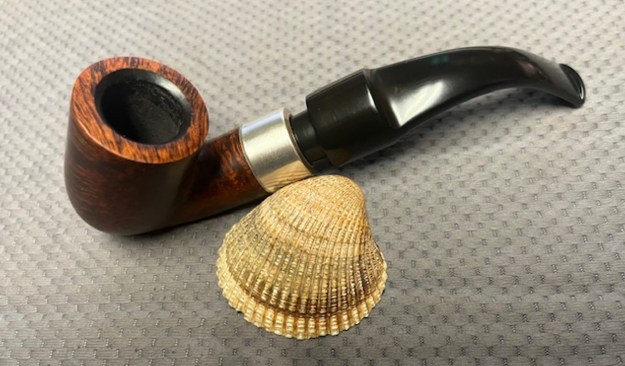
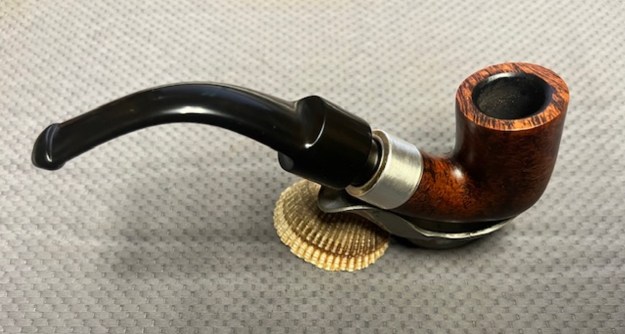
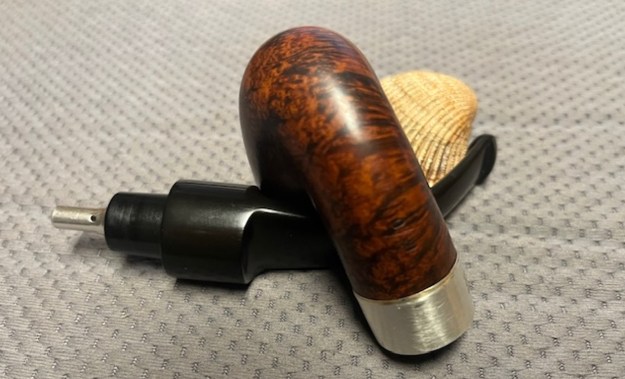
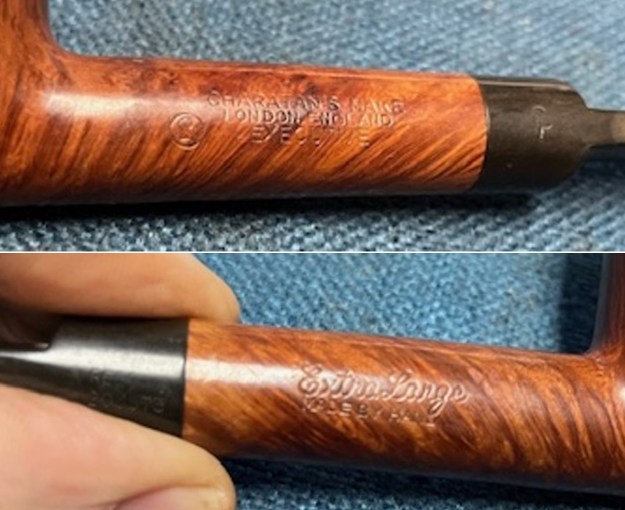
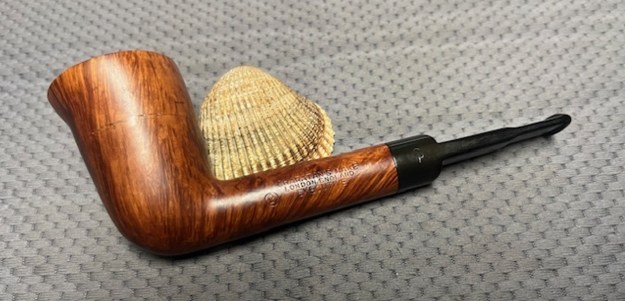
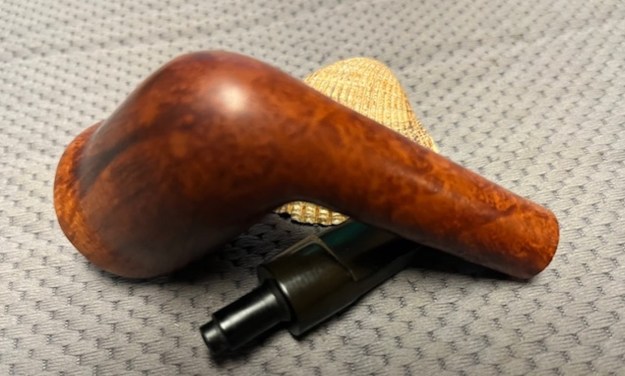
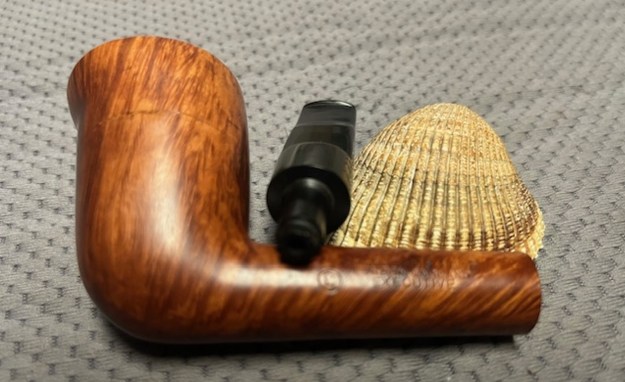
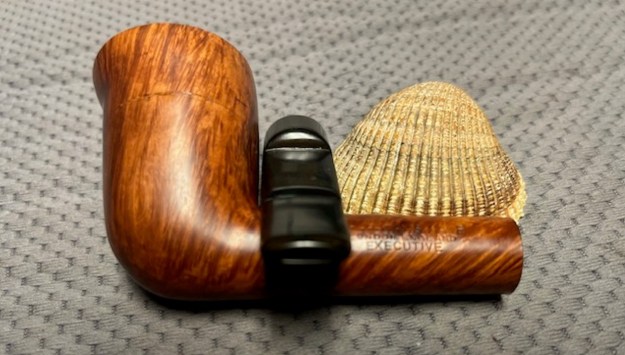
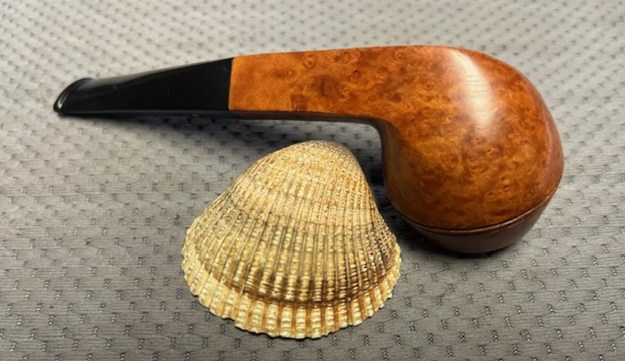
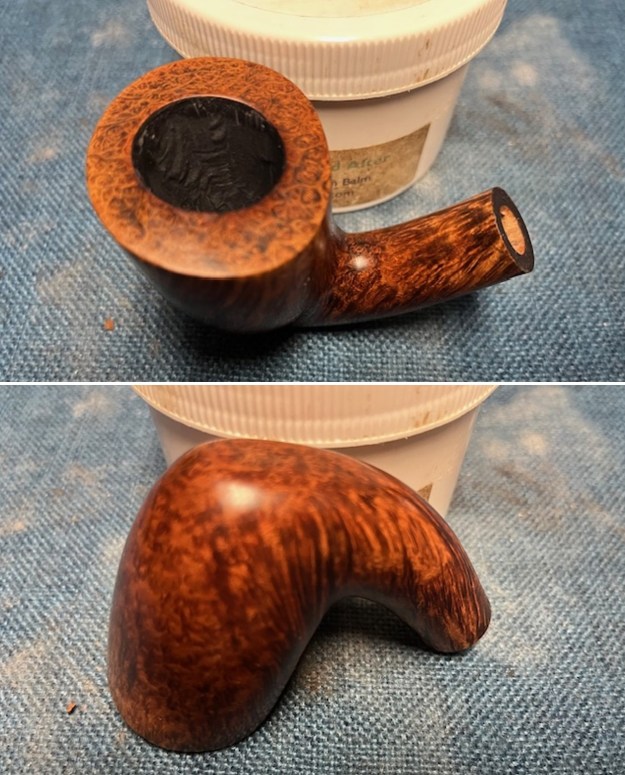
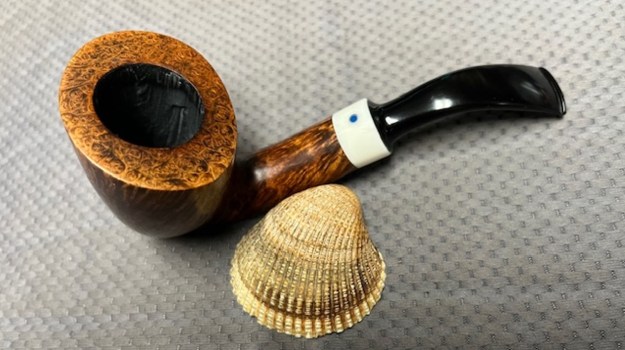
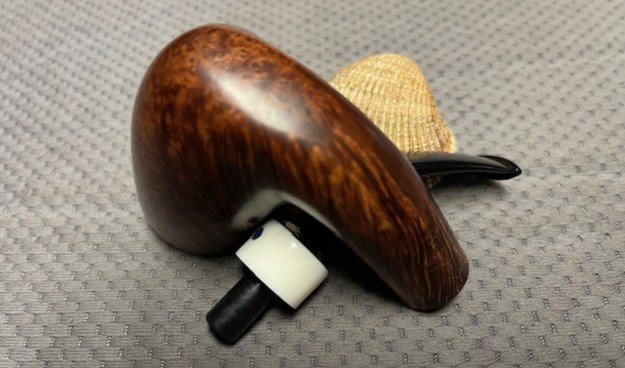
The pipes arrived here last evening. I took the Kaywoodie President to the table to look it over. It was very clean inside and out. The rim top had burn damage on the rim top and inner edge of the bowl. The finish was dirty on the bowl and shank. The pipe was stamped on the left side of the shank read Flame Grain [over] Kaywoodie. On the right side it is stamped Imported Briar [over] the shape number 61. The stamping was clear and quite readable. The stem was oxidized and had tooth damage on the top and underside ahead of the button and on the button edge itself. The vulcanite stem was fat on the bottom side and has the Kaywoodie black clover logo in a white circle on the topside of the stem. 
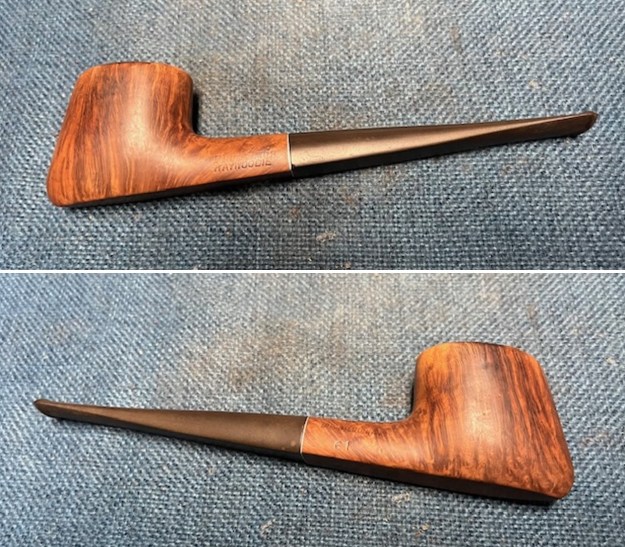
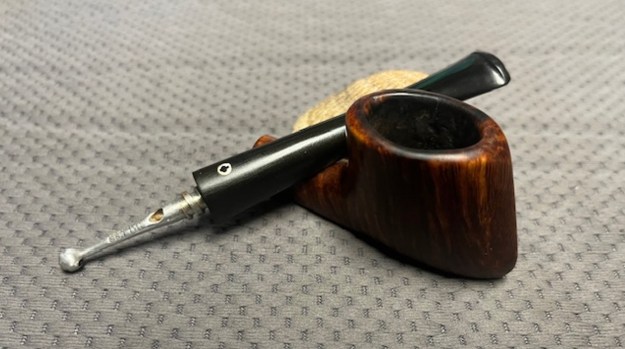
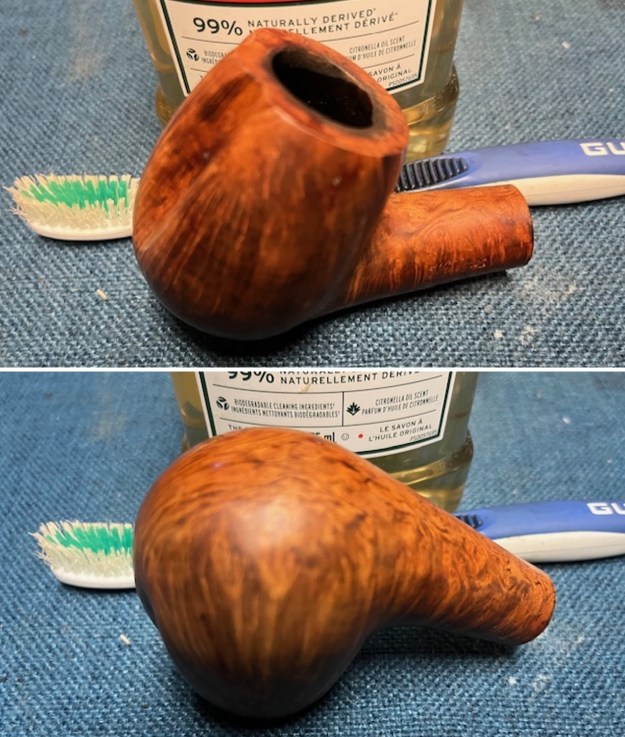
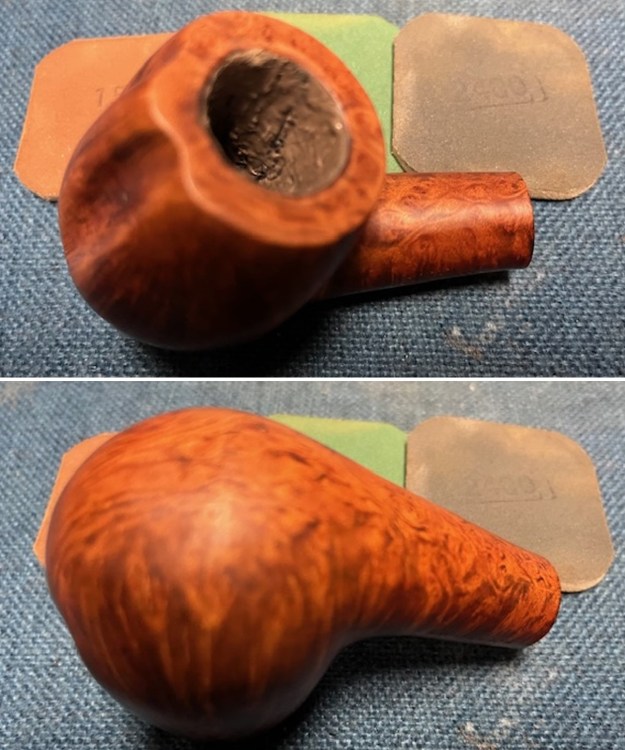
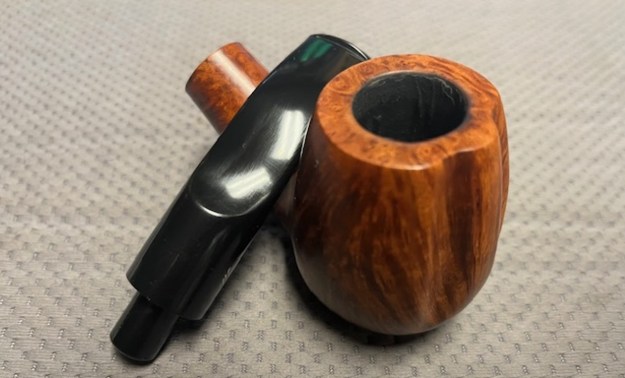
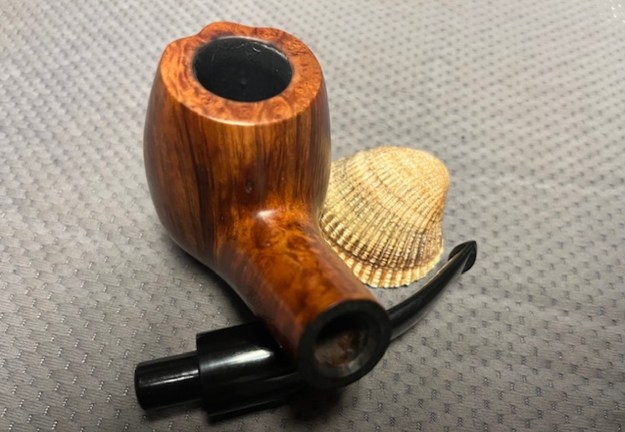
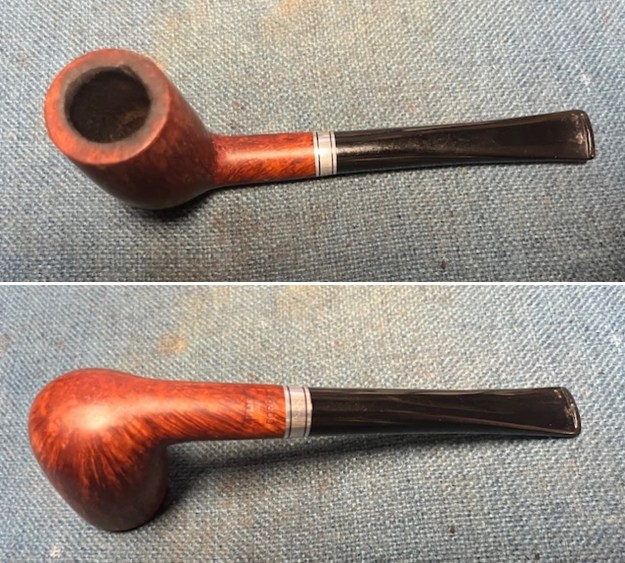
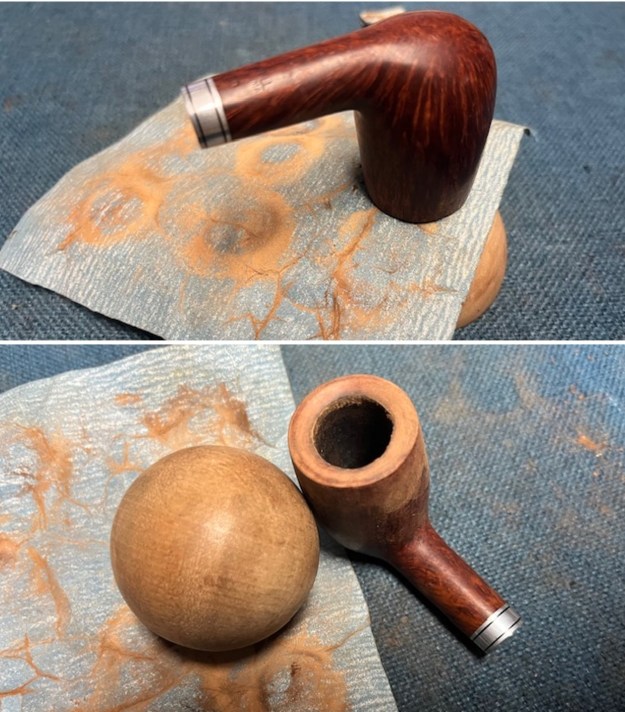
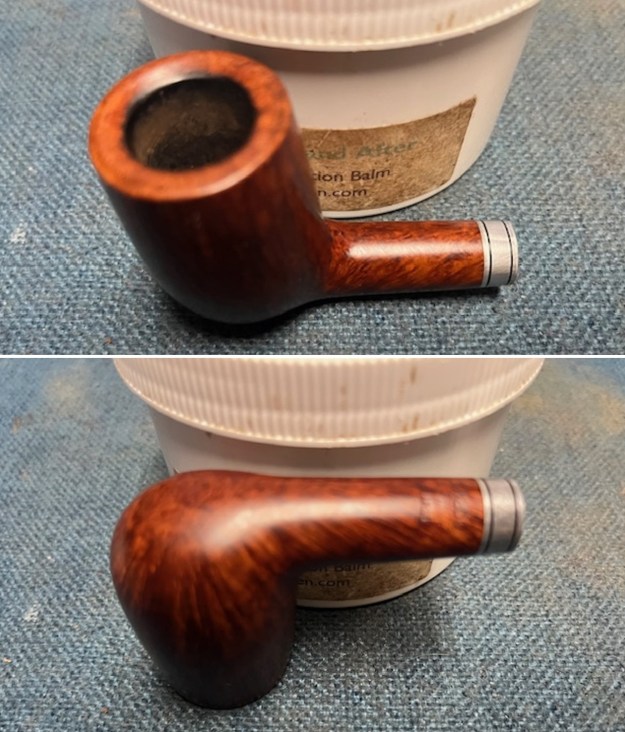
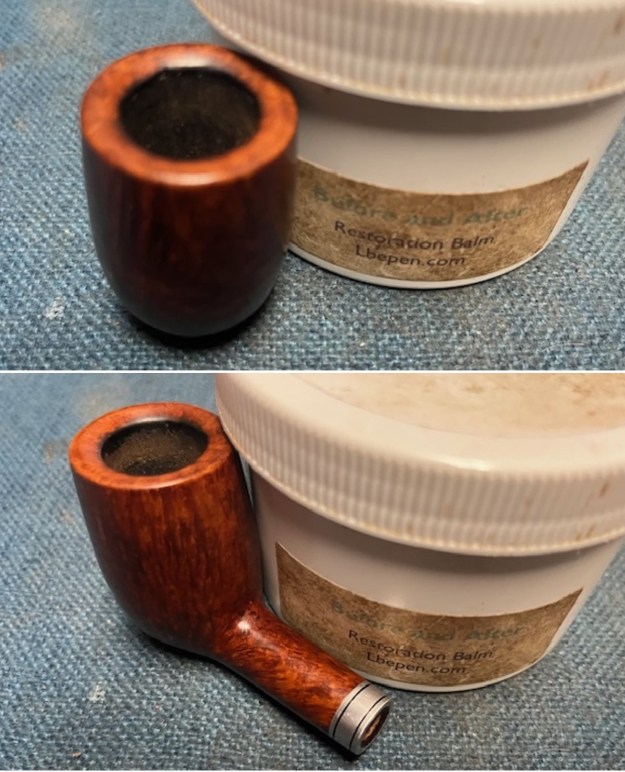
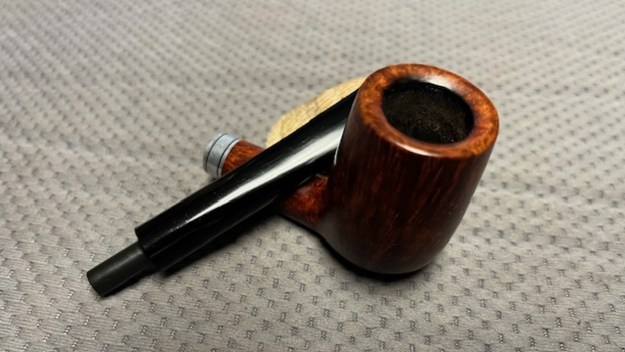
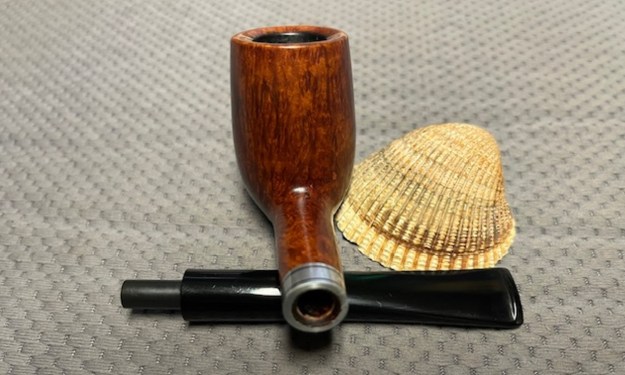
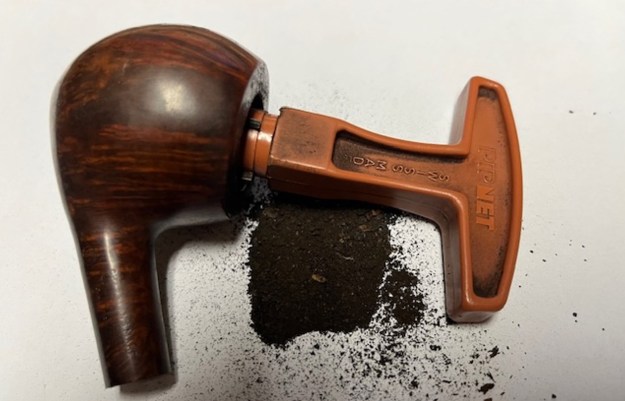
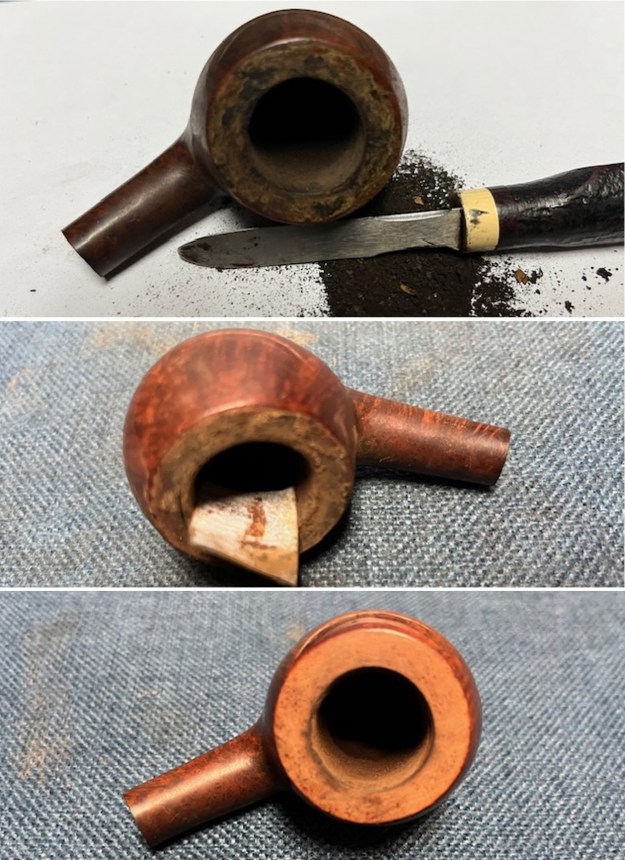
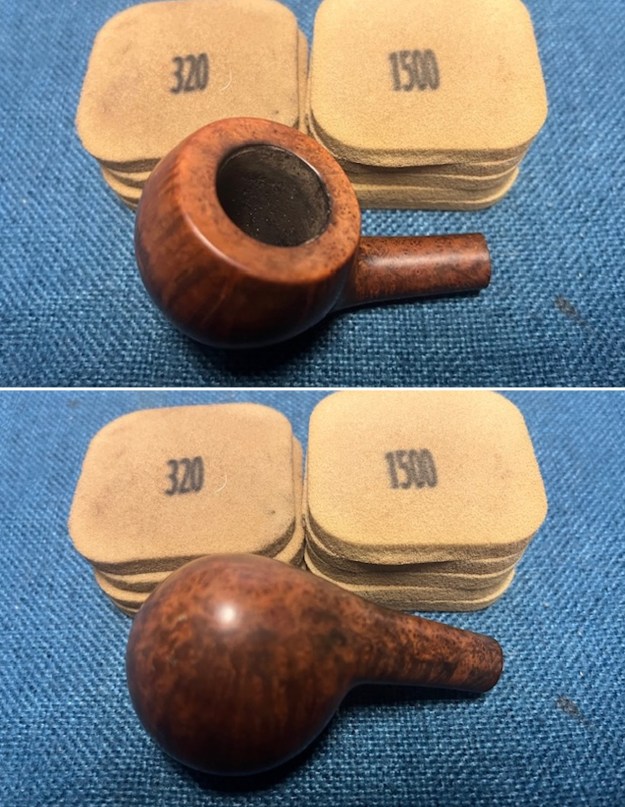
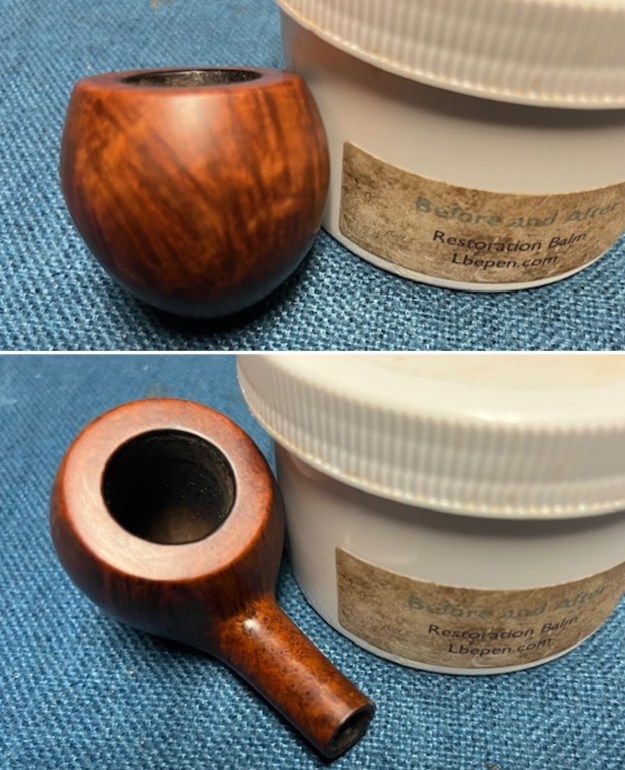
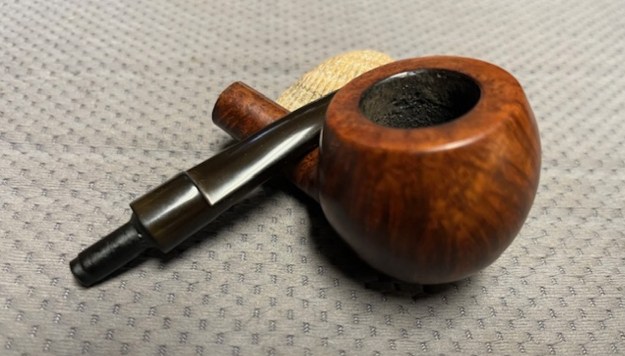
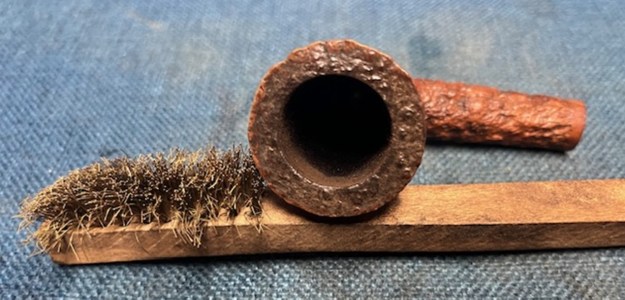
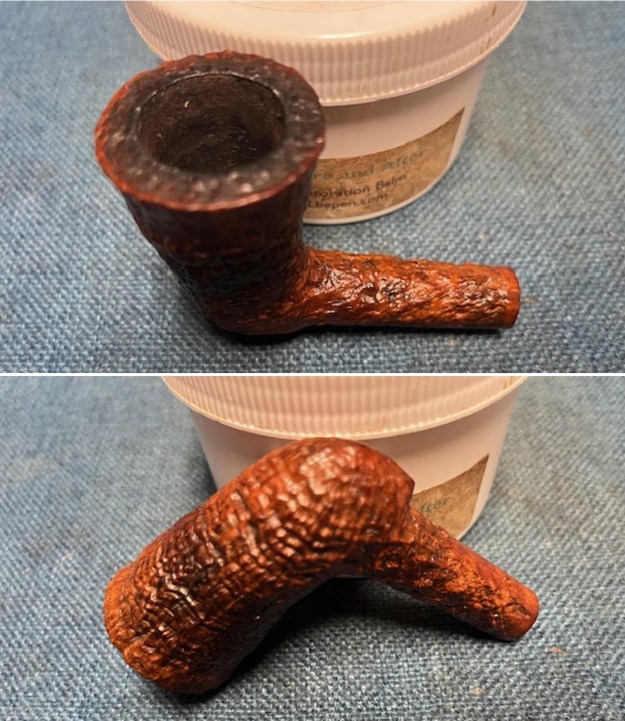
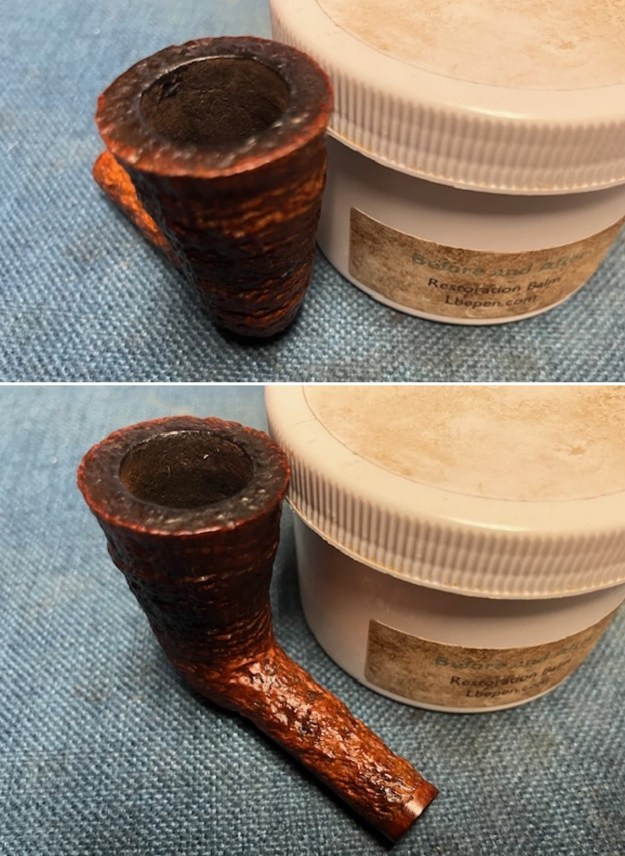
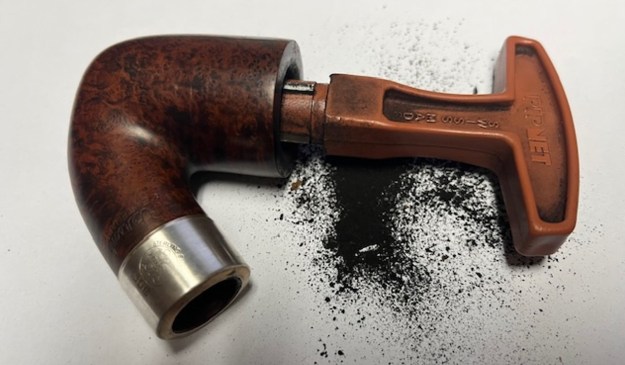
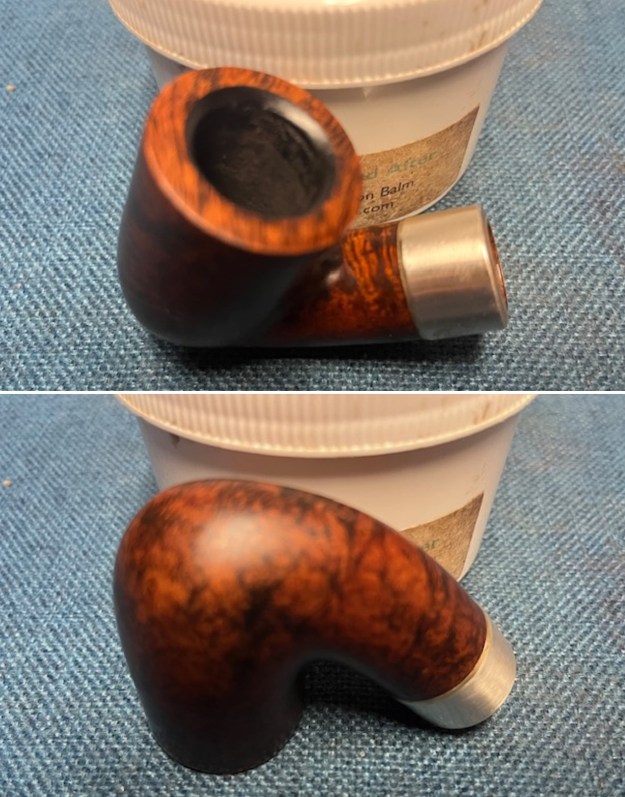
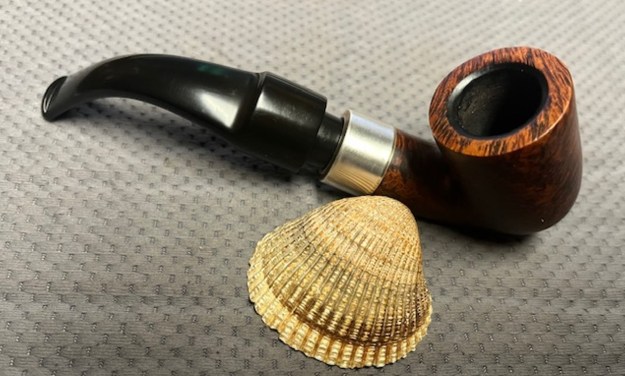
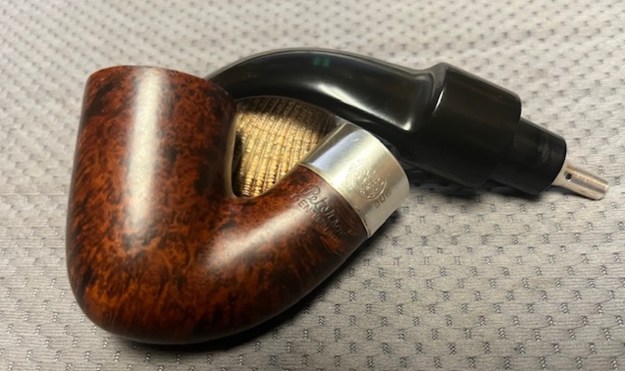
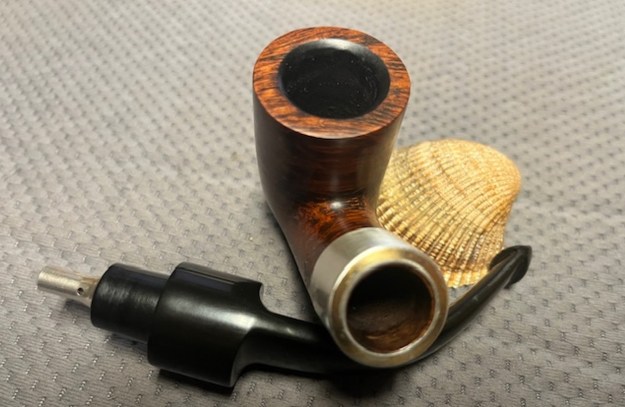
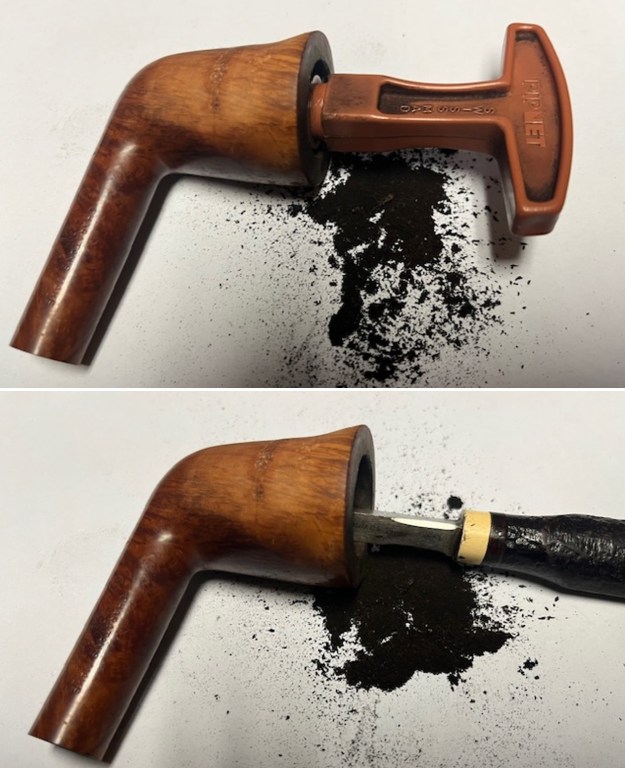
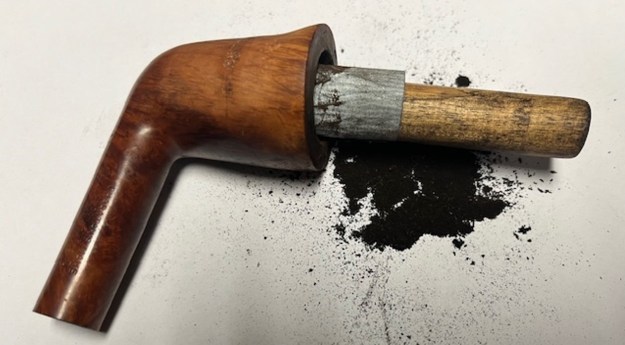
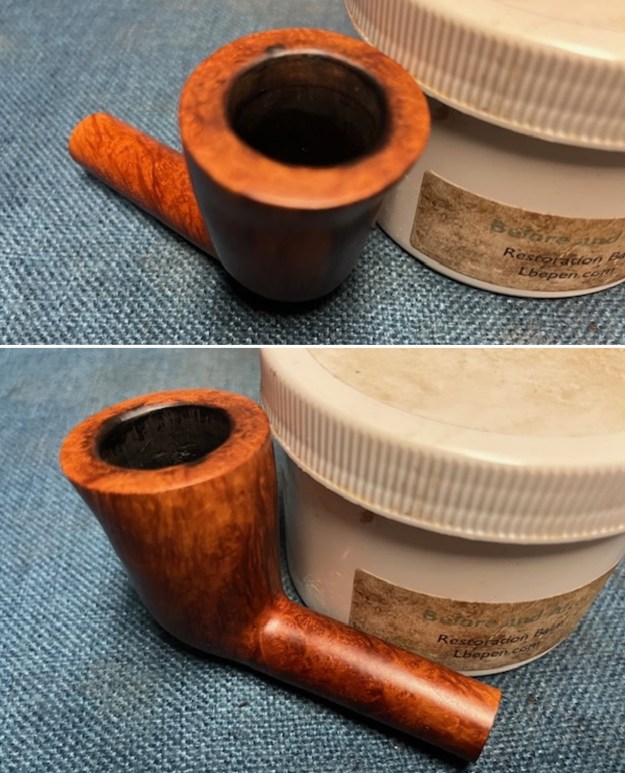
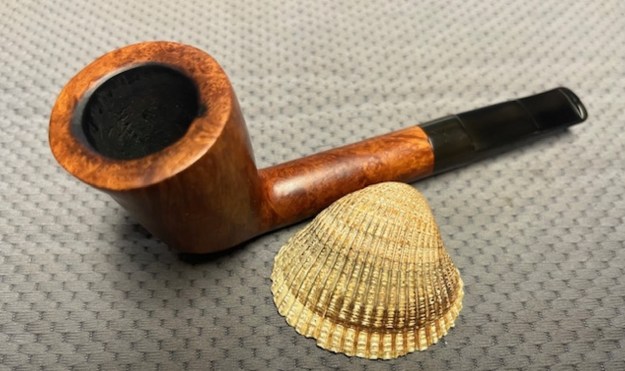
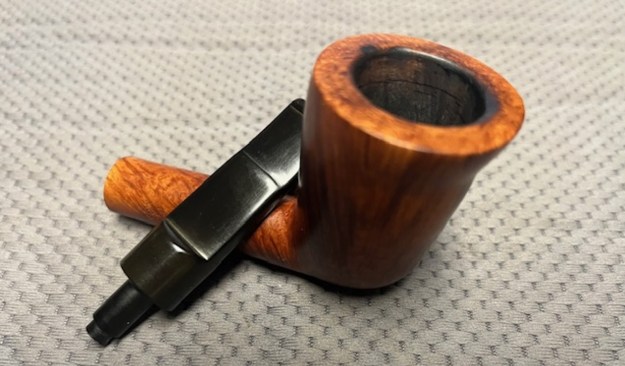
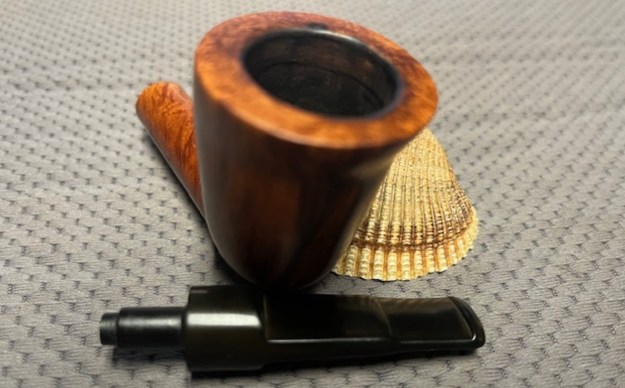
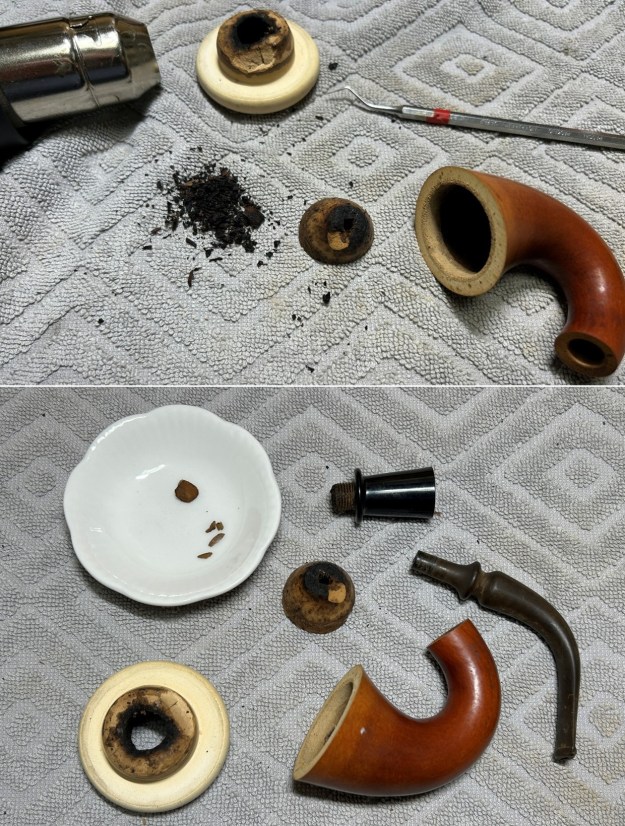
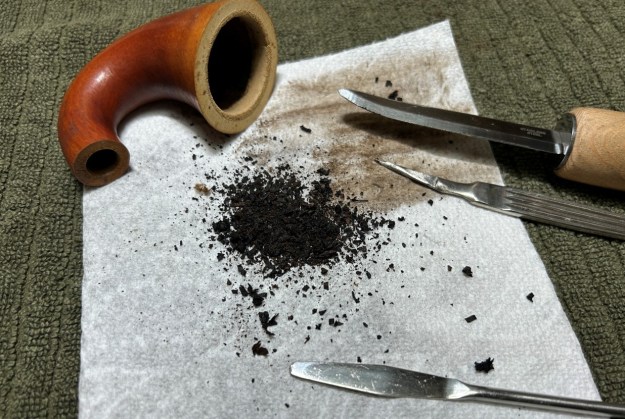
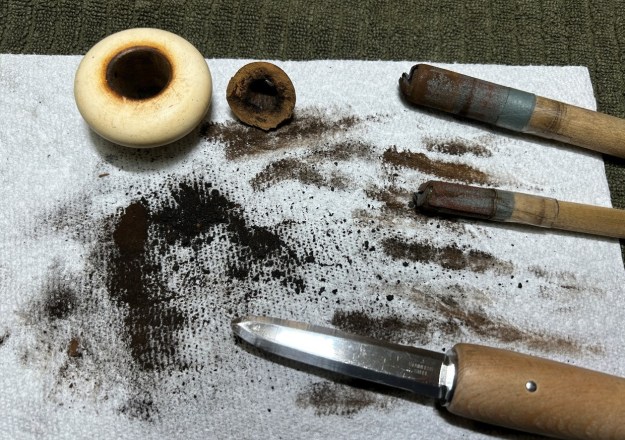
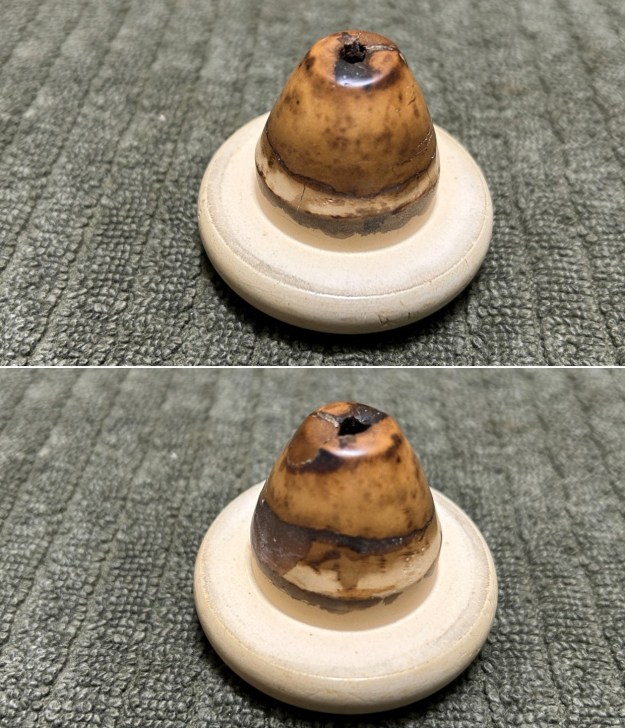
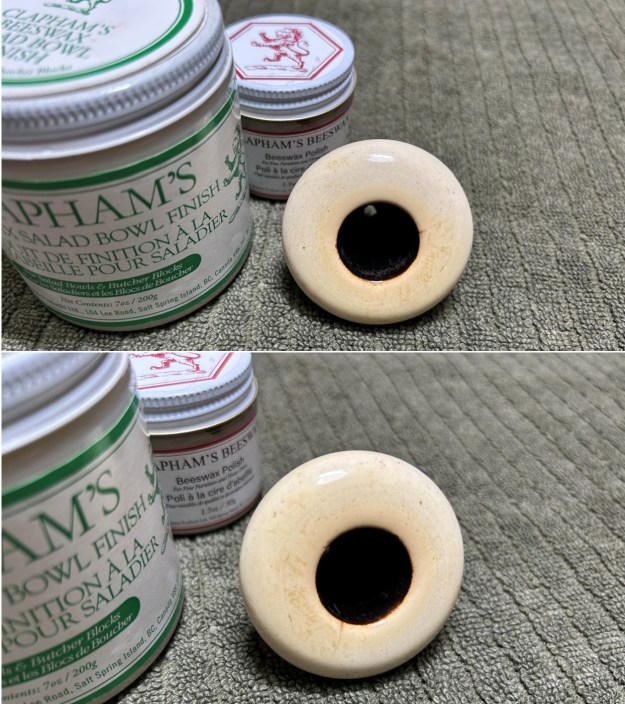
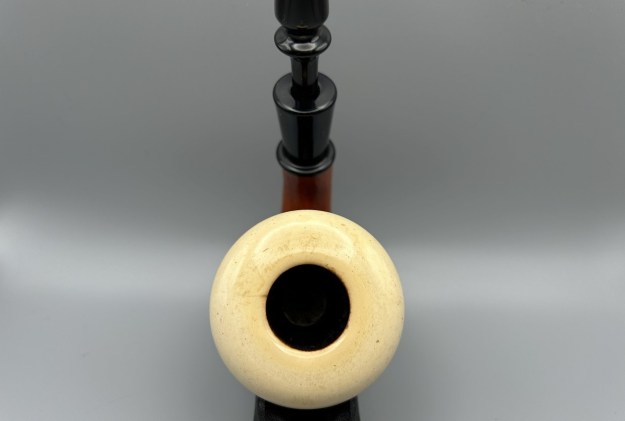
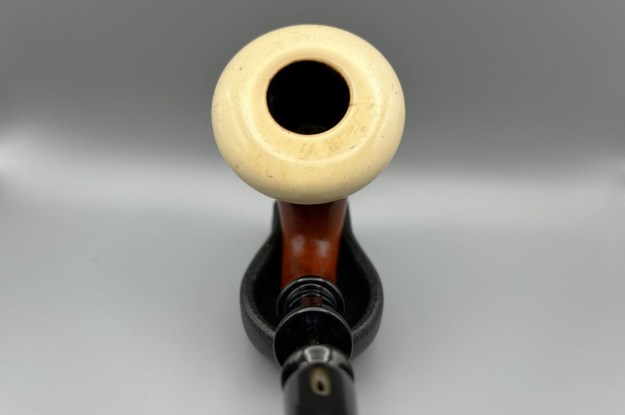
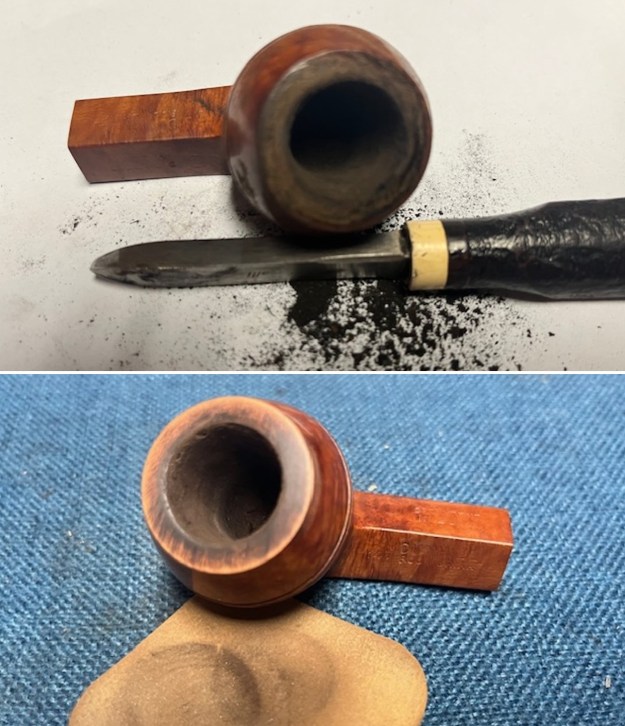
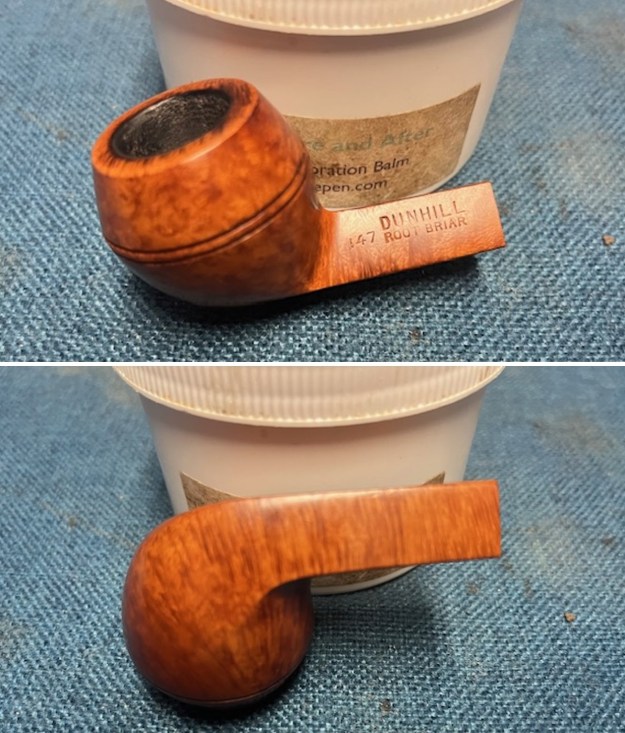
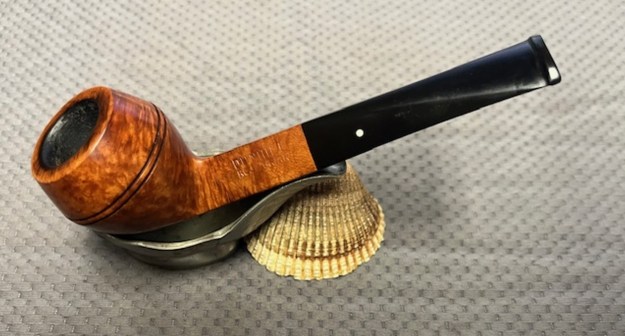
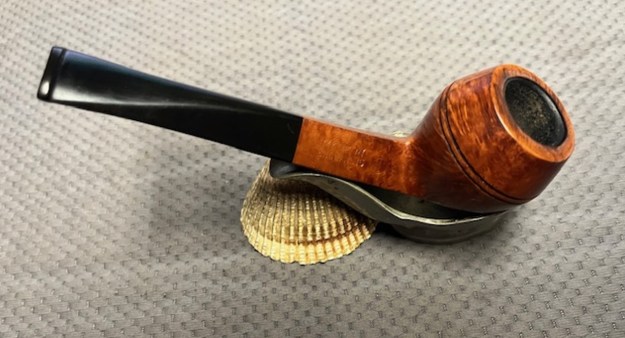
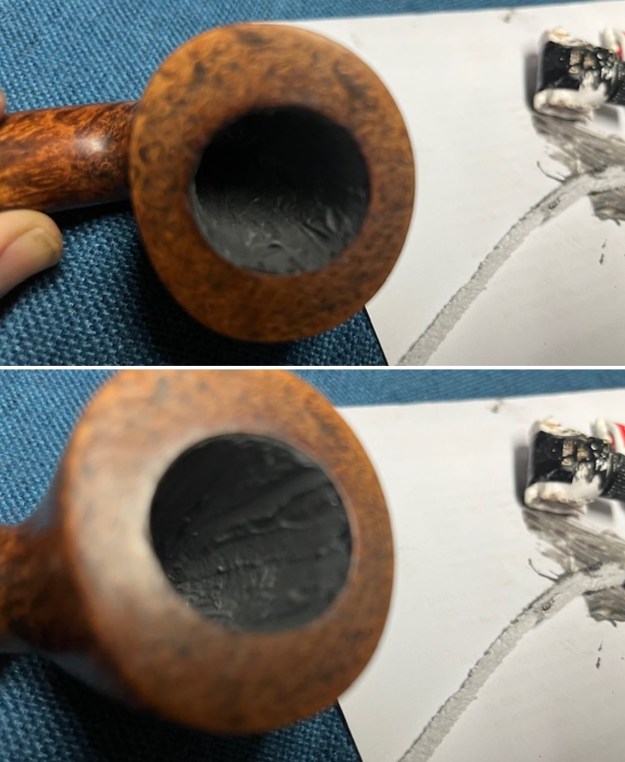
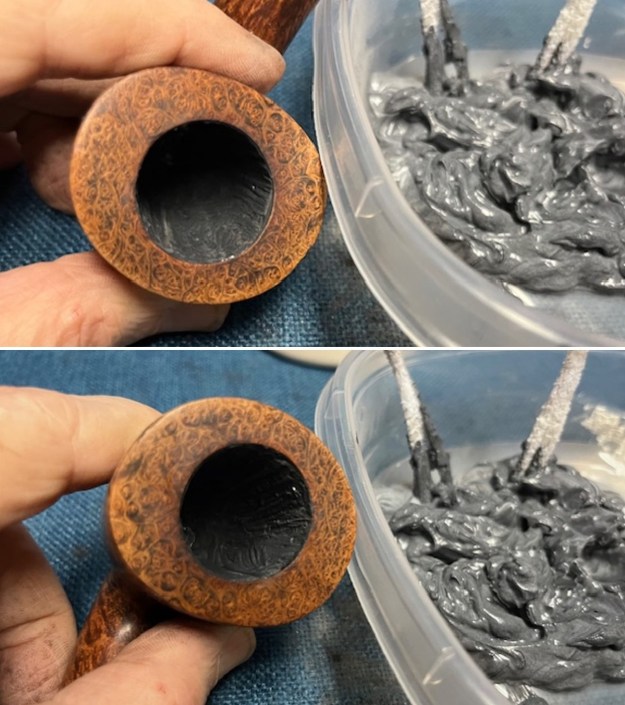
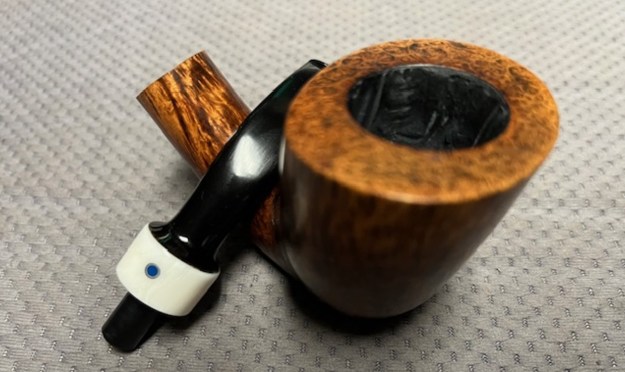
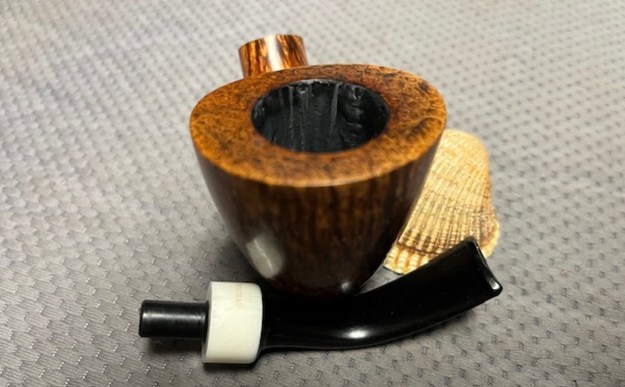
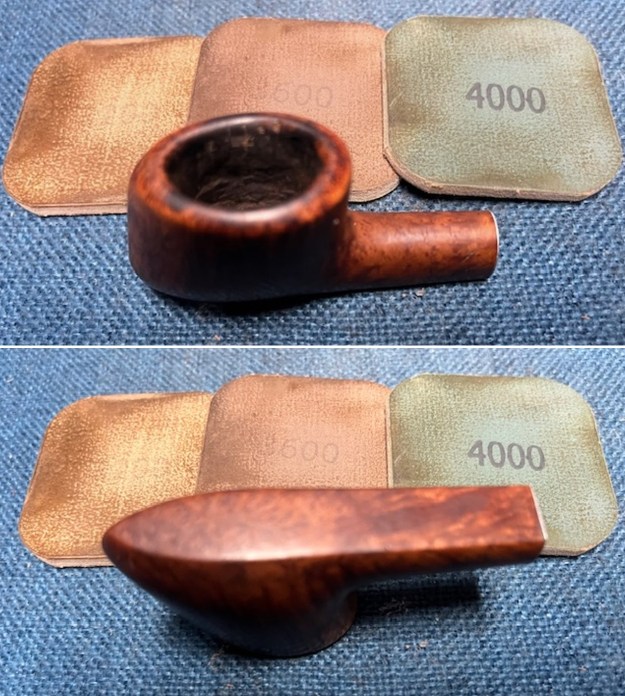
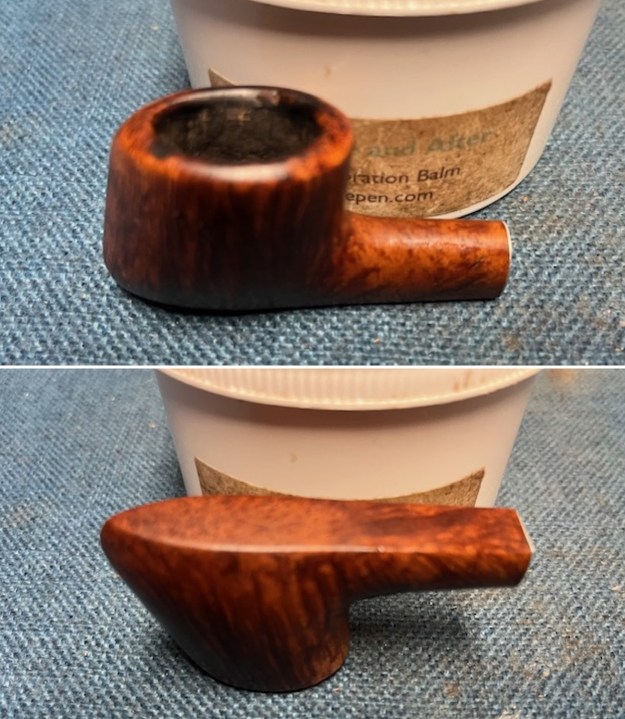
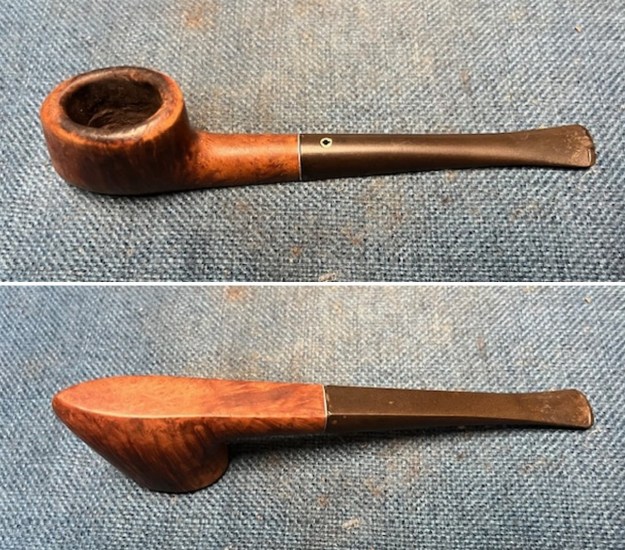
I took a photo of the rim top to show the condition. You can see the bowl has been reamed and the burn damage on the rim top and inner edge of the bowl. It needed some work. The stem was oxidized and has some deep tooth marks on the top and underside ahead of the button and on the edges. 
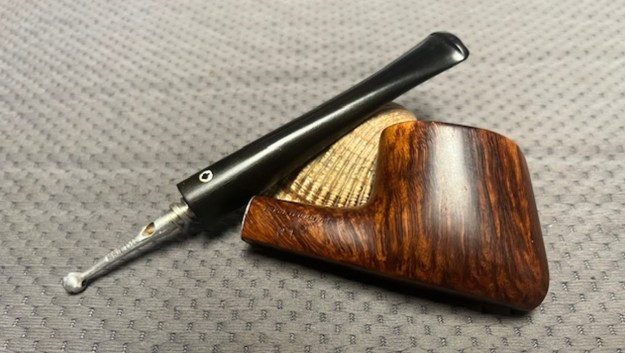
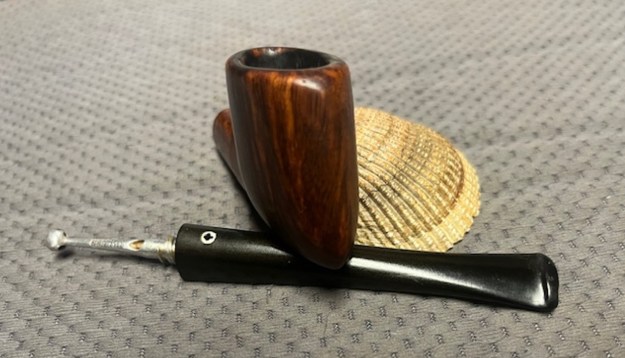
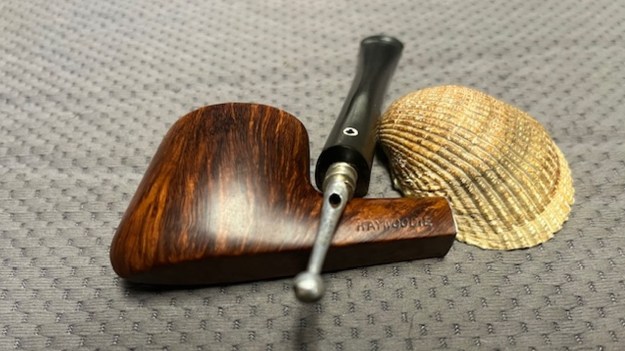
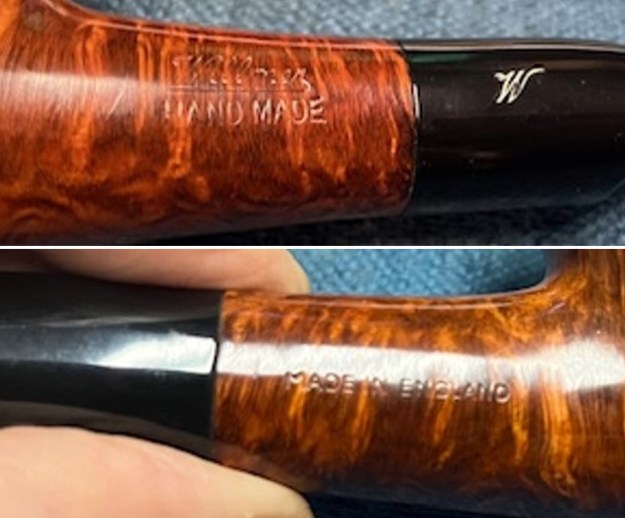
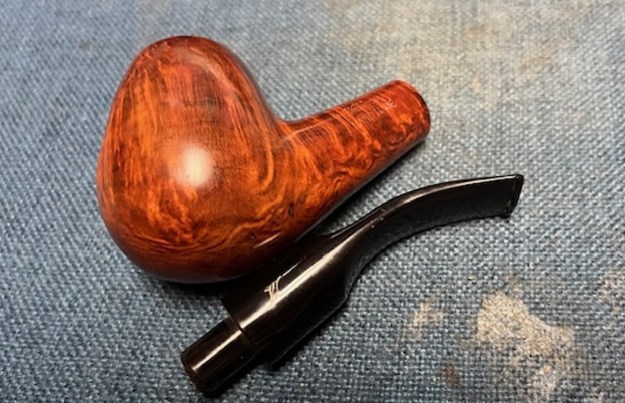
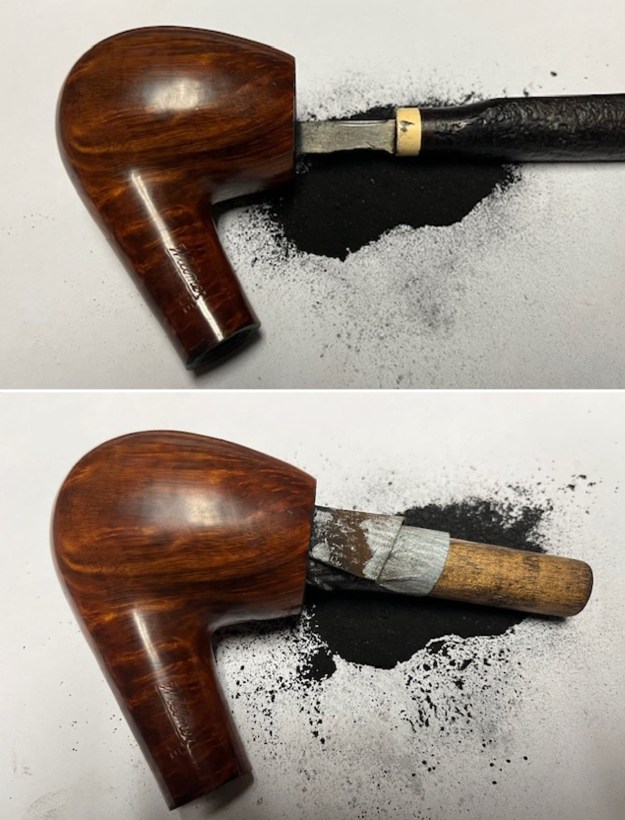
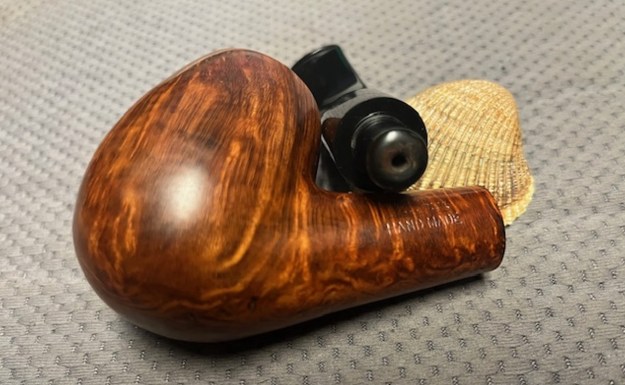
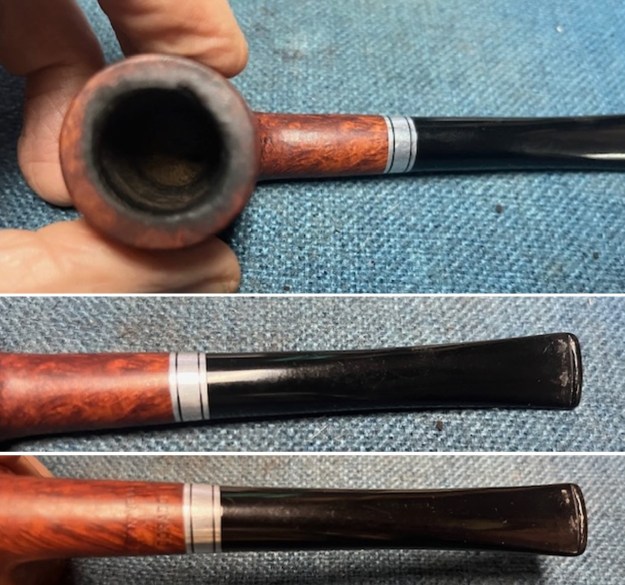
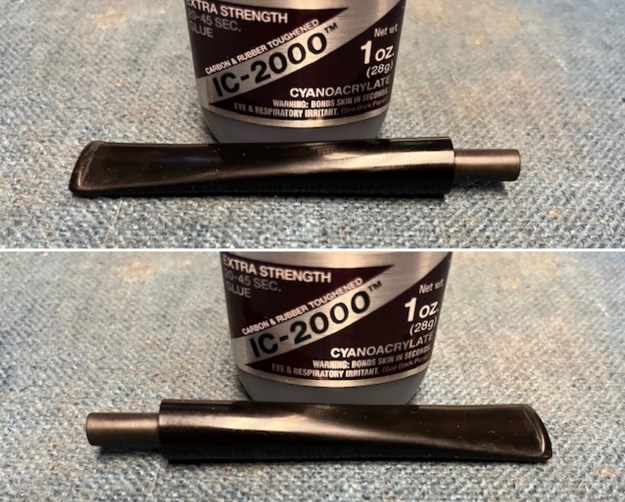
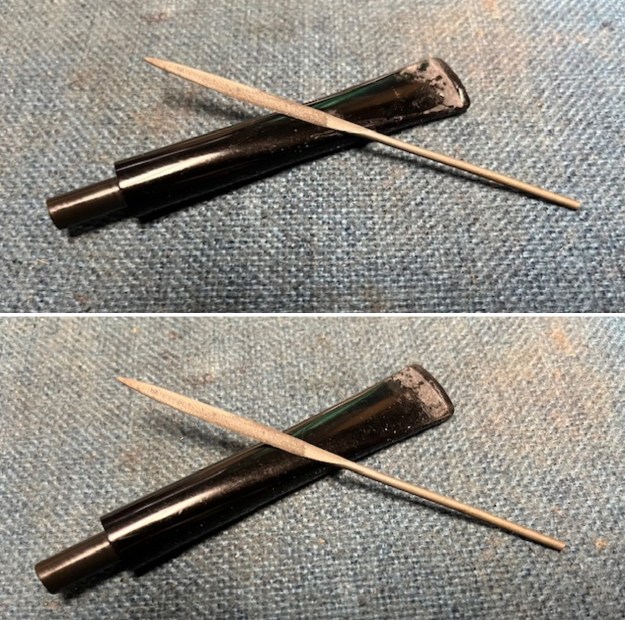
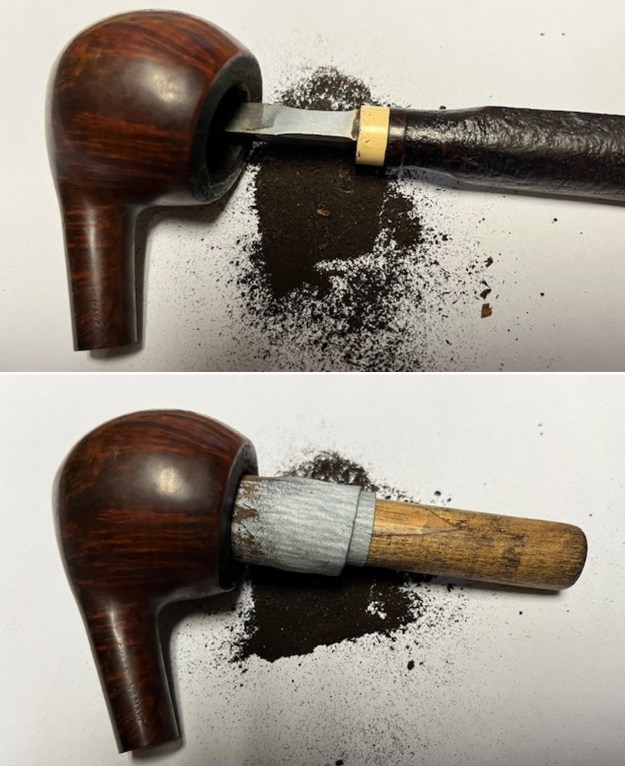
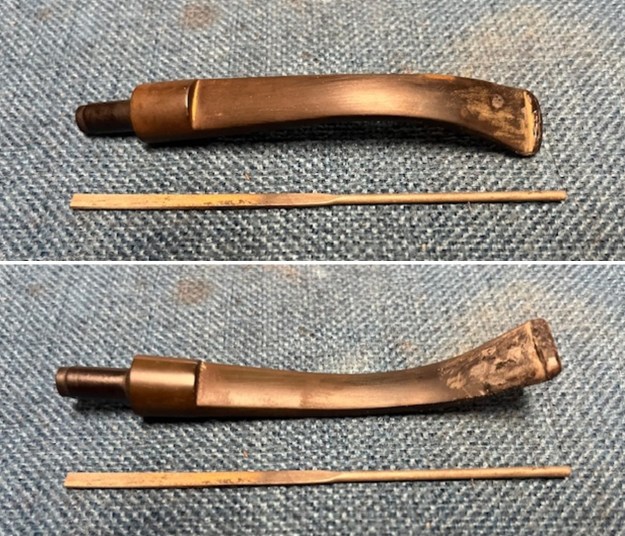
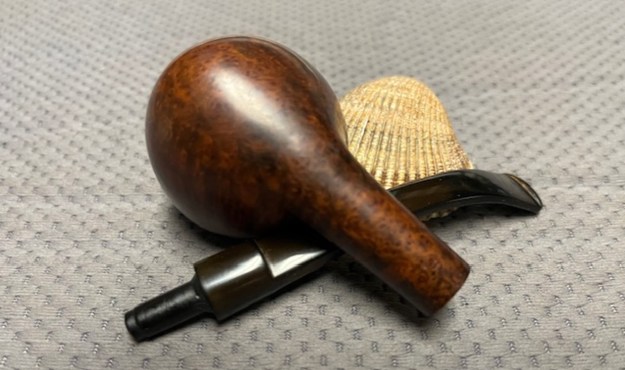
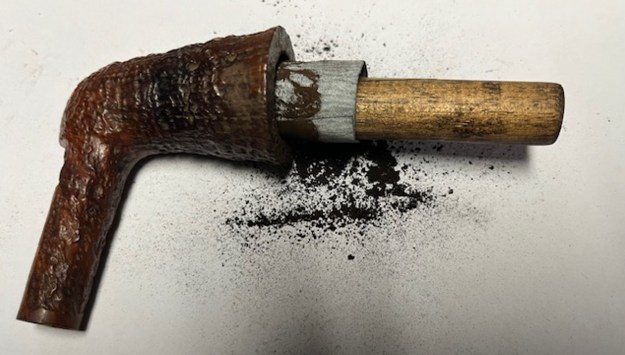
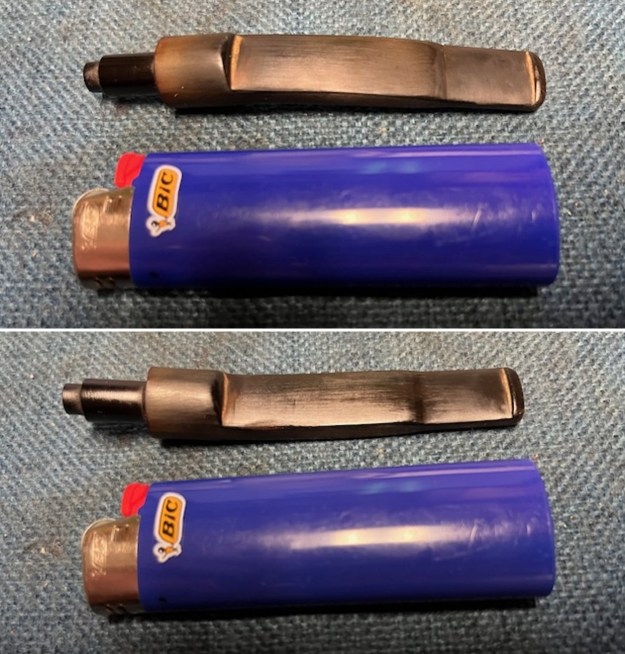
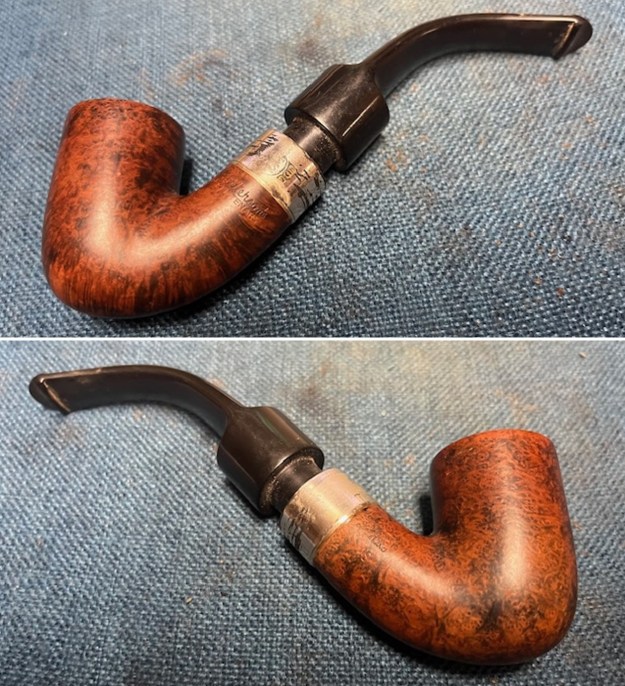
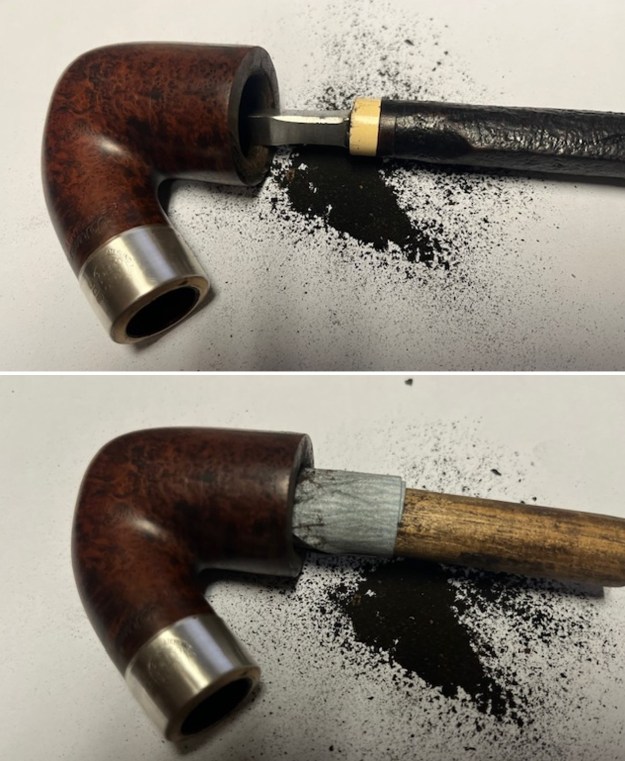
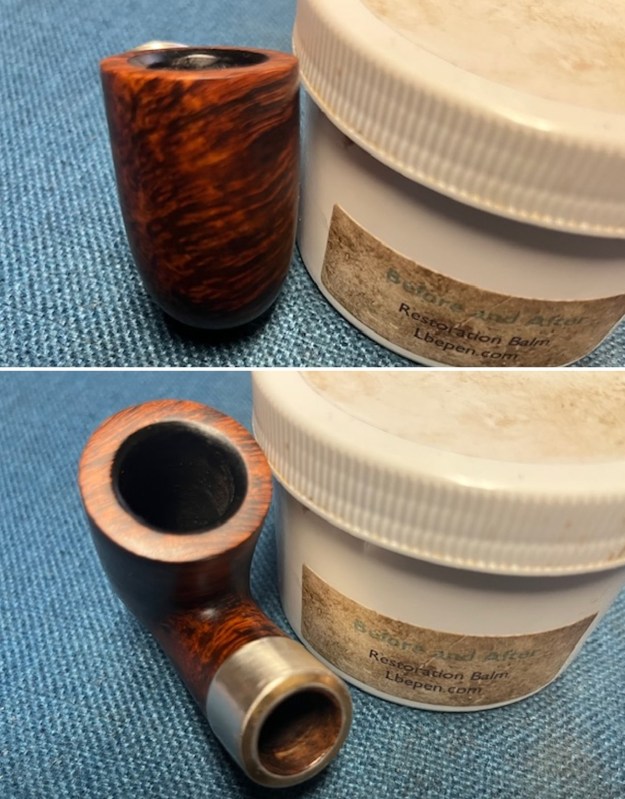
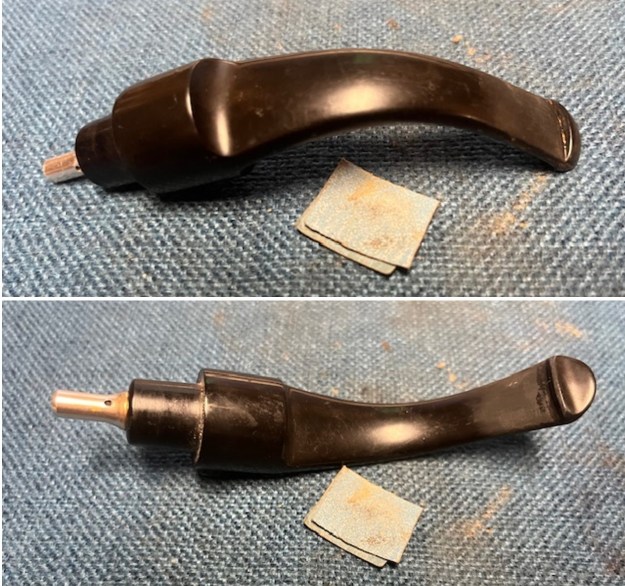
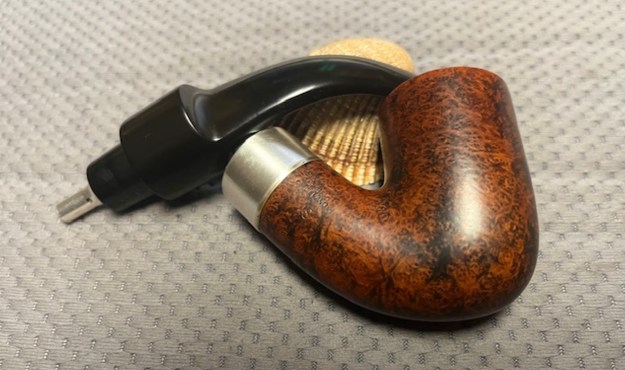
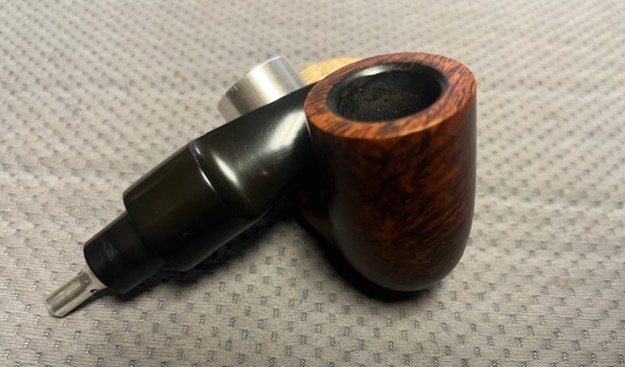
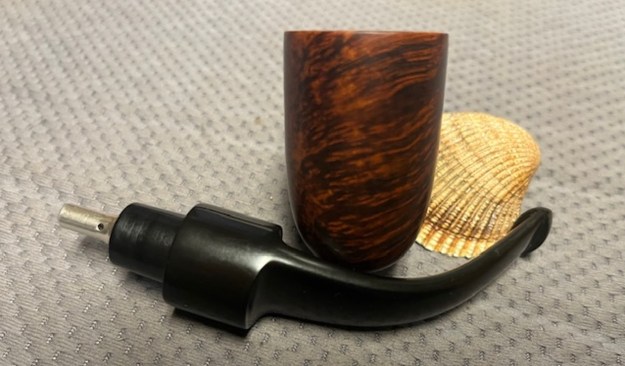
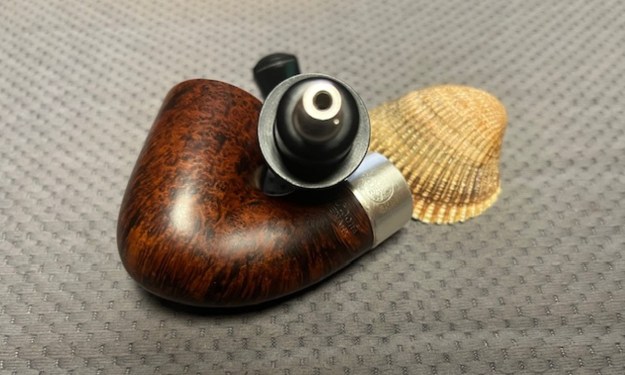
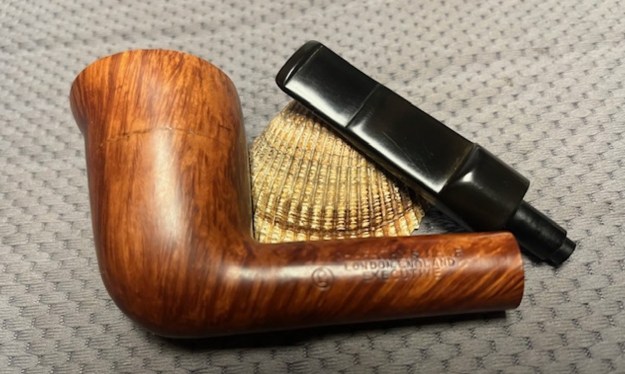
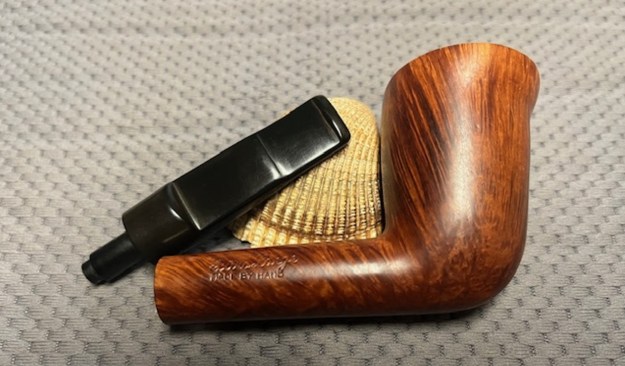
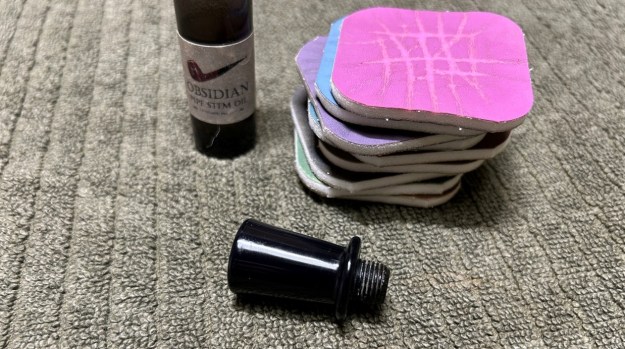
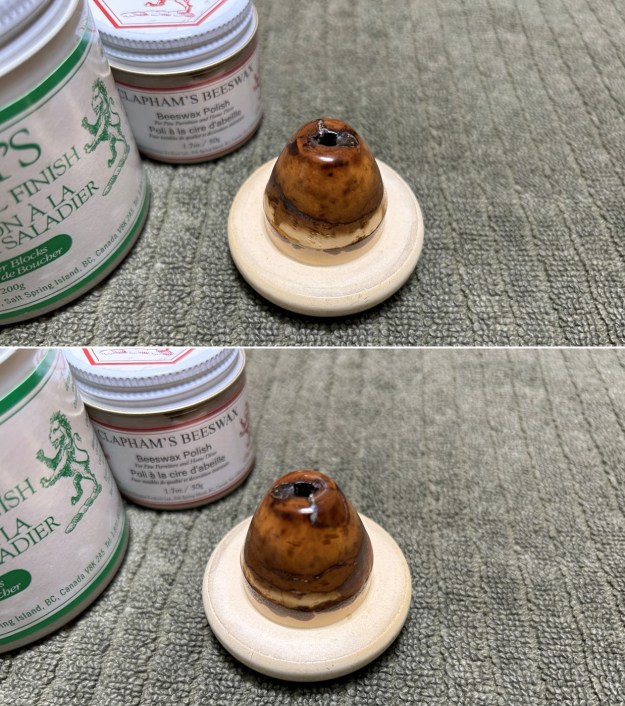
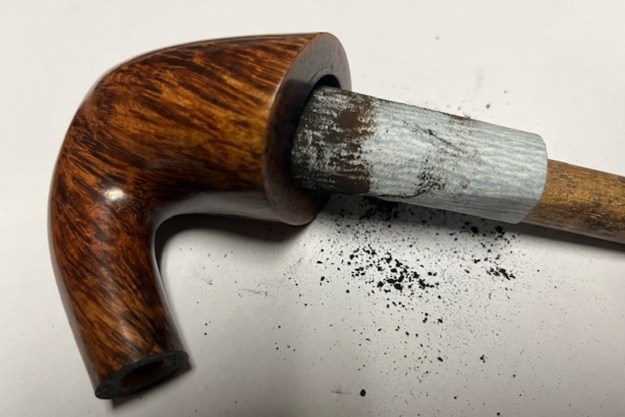
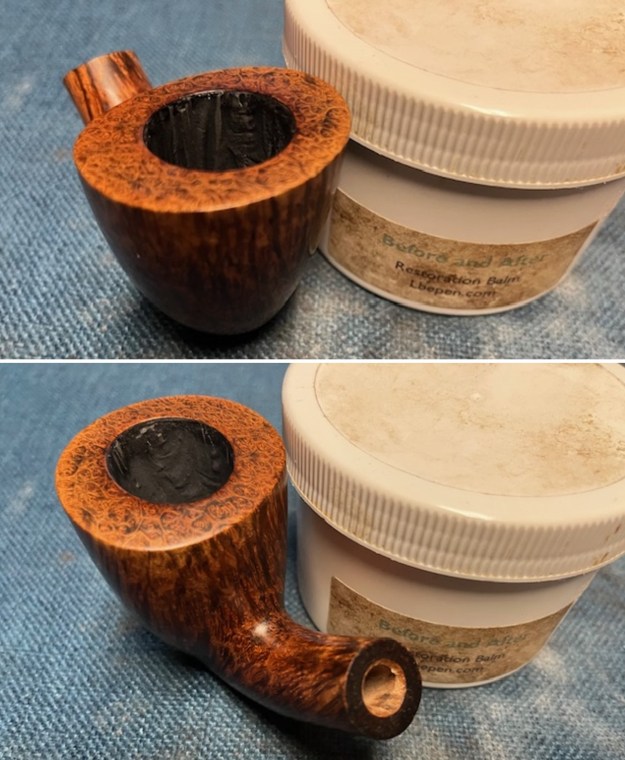
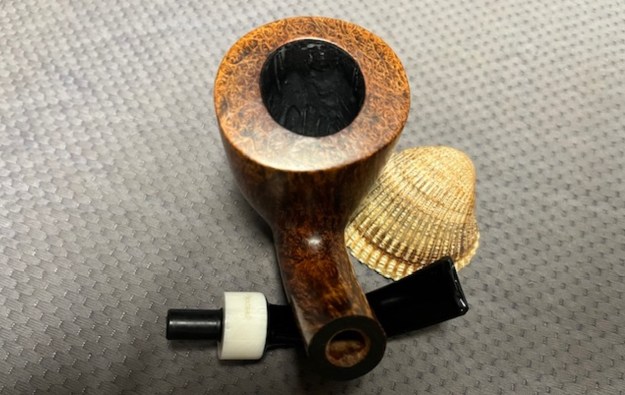
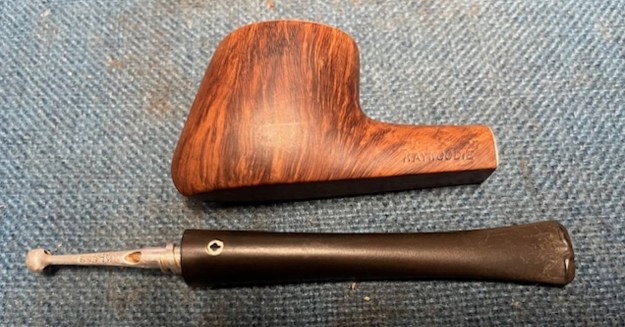
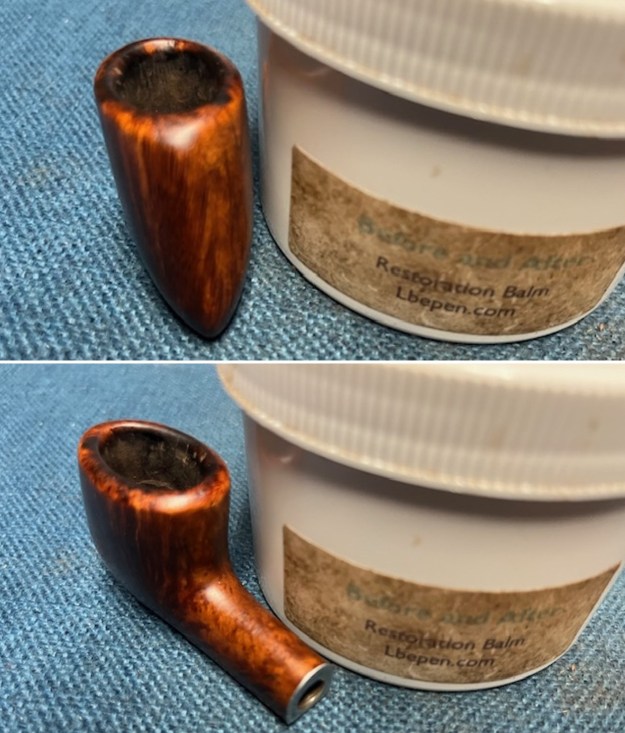
I took photos of sides of the shank to show the stamping. The stamping is clear and readable. I also took a photo of the logo on the stem top. I removed the stem from the shank and took a photo of the pipe parts to show what I was working with. The stinger apparatus is shown in the photo as well. It is a nicely grained unique.
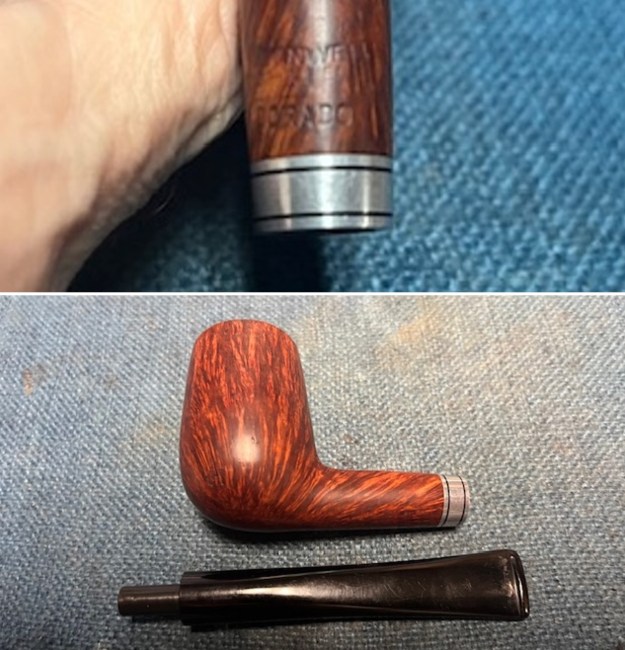
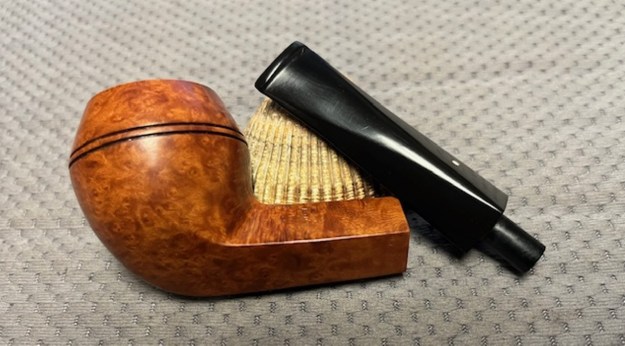
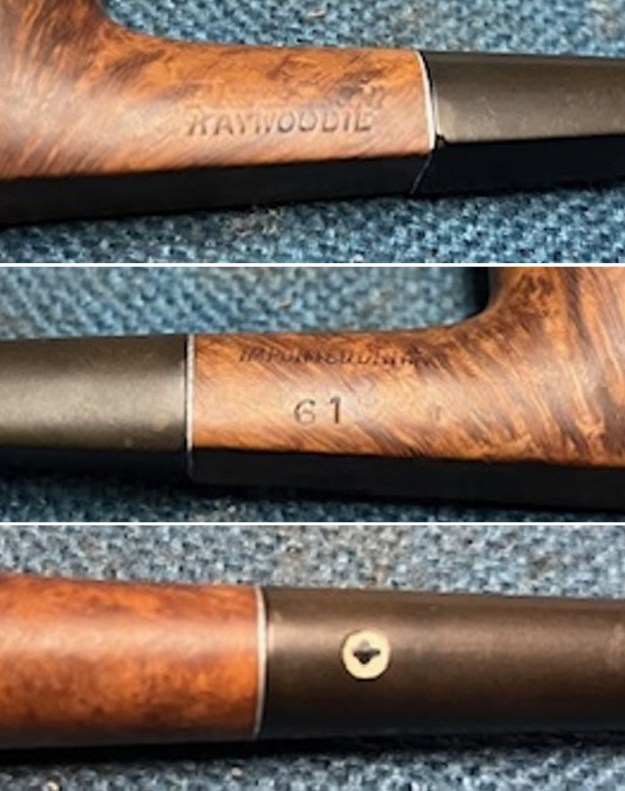
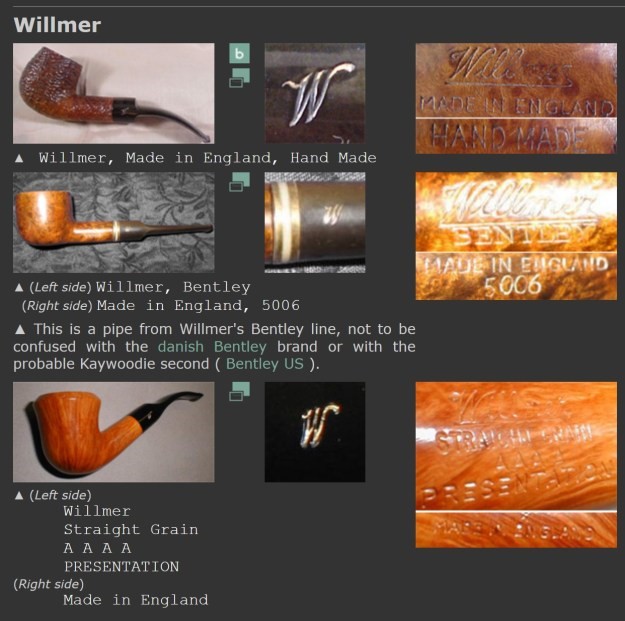
I turned to Pipephil’s site to look at the data that was available on Kaywoodie President pipes and see if there were any pipes like the bowl I had (http://www.pipephil.eu/logos/en/logo-kaywoodie.html
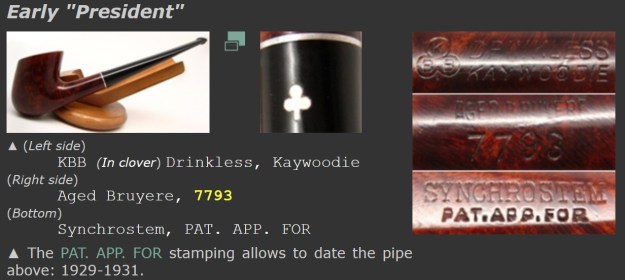
The shape called “President” is a Kaywoodie’s distinctive production. It has never been copied. Until late 1930’s pipes were stamped with a 4 digit code (this pipe: 7793).

  • The first 2 numbers (77) designate the style or finish.
  • The last 2 are the shape numbers (93).
  • The numerical code may be reinforced by a letter for variants.

Thus the small “President” pipes are stamped 93S while the larger bear a 93L (see also this Super Grain pipe).

Later Kaywoodie will cancel the 2 first style/finish numbers keeping the 2 last shape numbers and the letter for variants (i.e. Allbriar or Connoisseur).

I further worked on the name and shape number of this Kaywoodie. It was stamped on the right side of the shank with the shape number 61. I turned to Pipedia to a specific article on the various shape numbers (https://pipedia.org/wiki/Kaywoodie_Shape_Numbers). I found the following line below. It identifies the shape 61 as follows.

61 EZ set Vest pocket President (streamliner shape) oval bowl 1935-1937, 1952-1960

From that information I knew that the pipe originally had been released in 1935-37 and then released again between 1952-60. The pipe in hand was the later release as the earlier version had a different shape number and often had the patent number. This one had a two digit number and no patent.

I turned to Pipedia to the article on Kaywoodie pipes (https://pipedia.org/wiki/Kaywoodie) to see if I could find information on the shape and President line. There was a sales flyer on Kaywoodie pipes for Father’s Day. I have included a copy of the flyer below in a section called Streamliners.
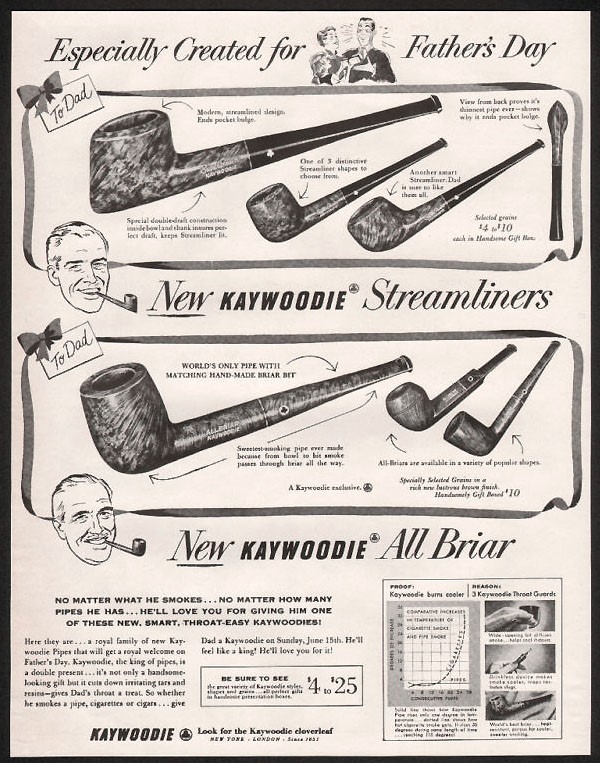
The article also included a shape chart that was helpful. The last shape in the chart was a Kaywoodie 61 E-Z-Set Vest Pocket President which is the same shape as the one that I am working on.
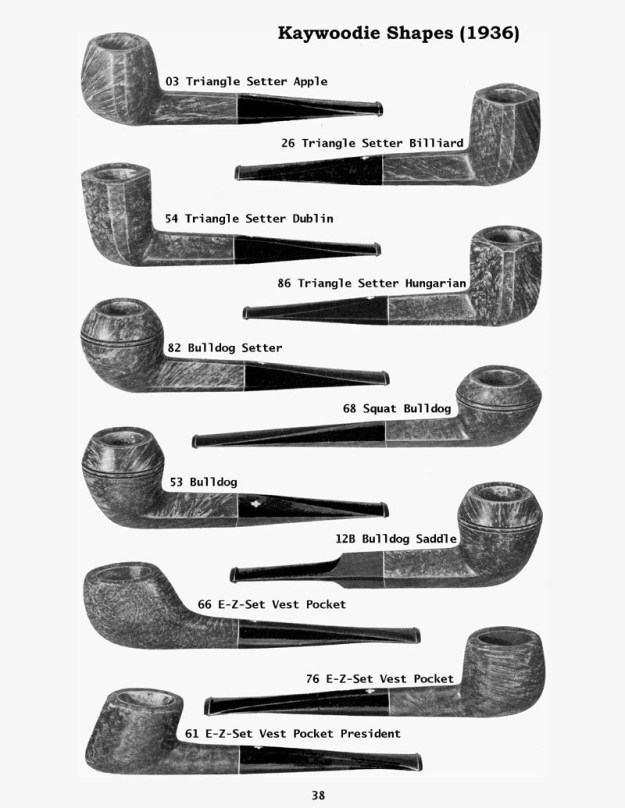
From the above information I knew that I was working on a Kaywoodie President shape 61. It is a great looking unique pipe. It was now time to start working on the pipe.

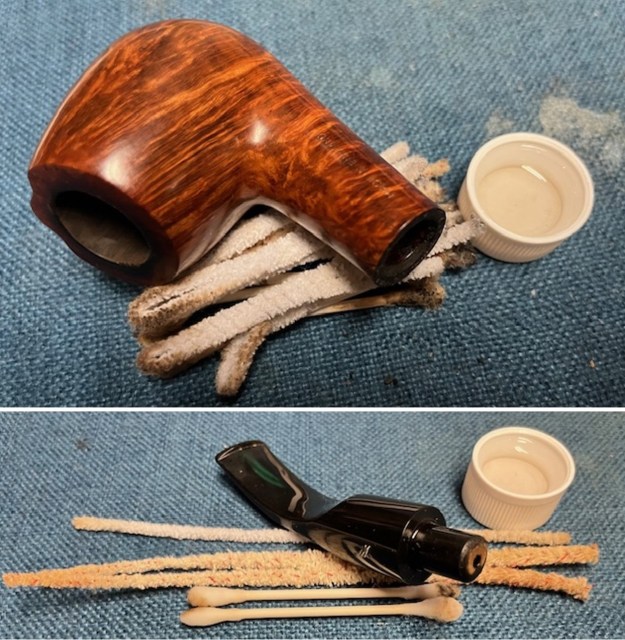
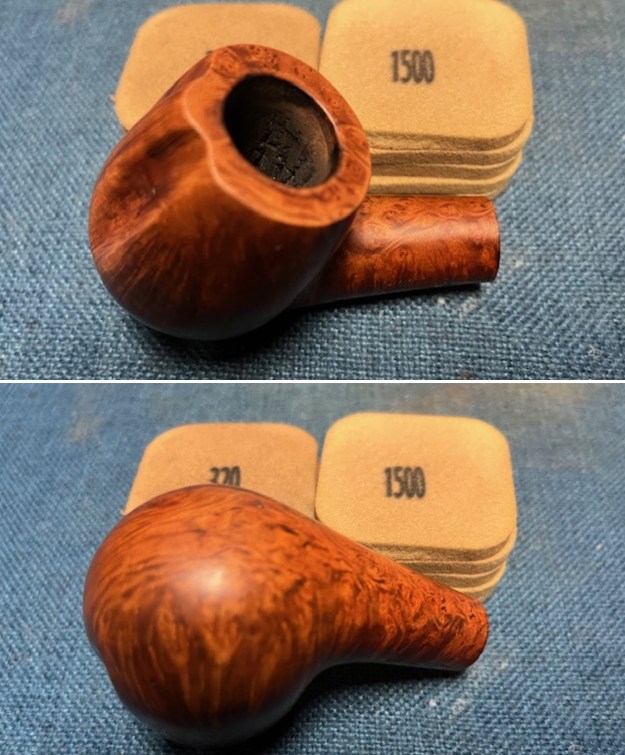
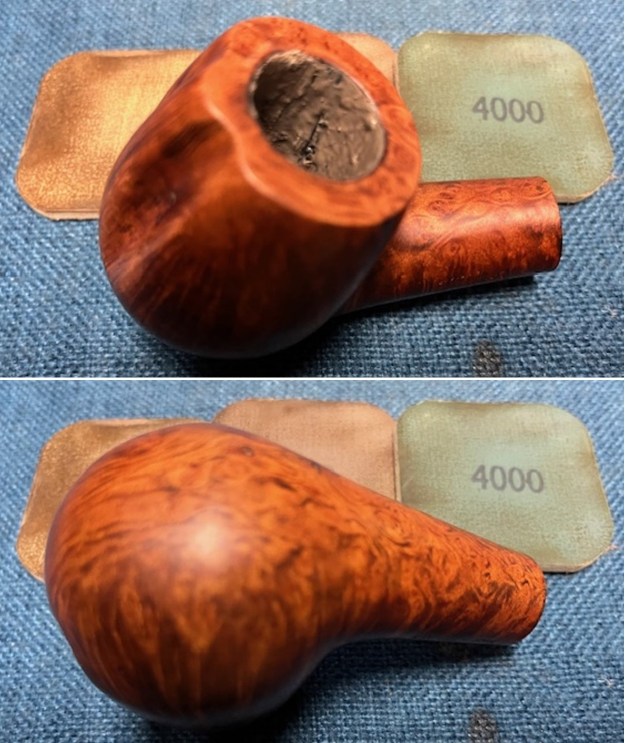
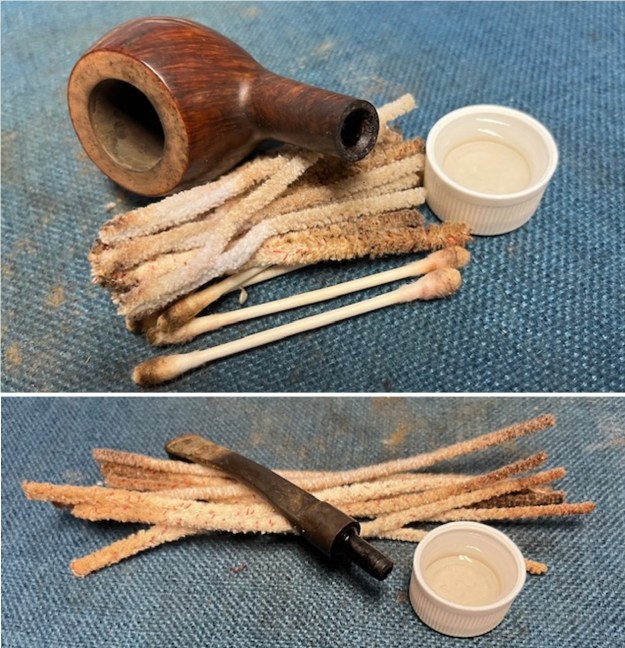
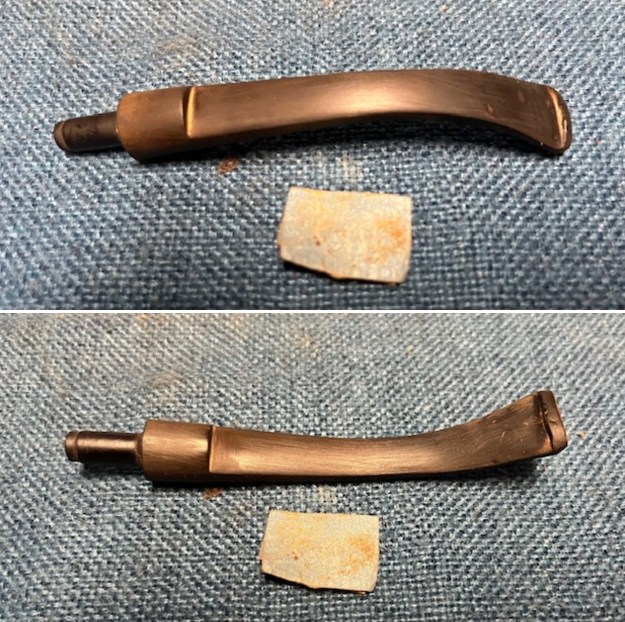
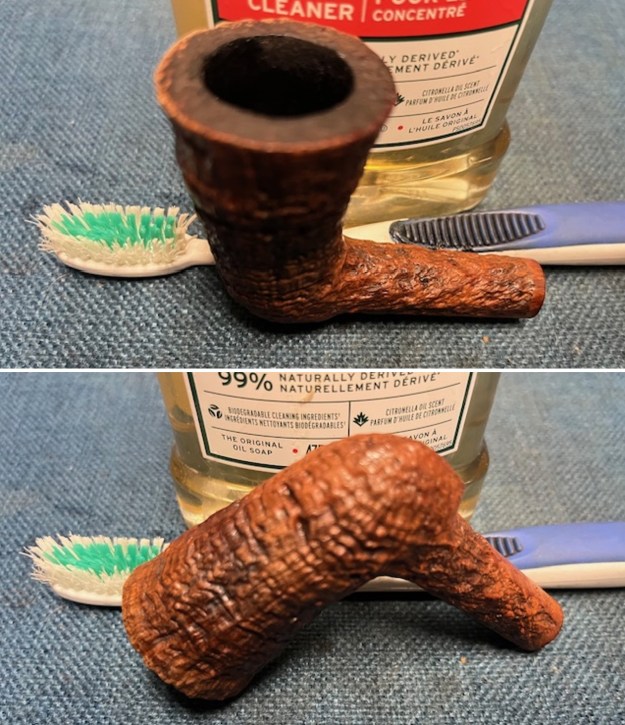
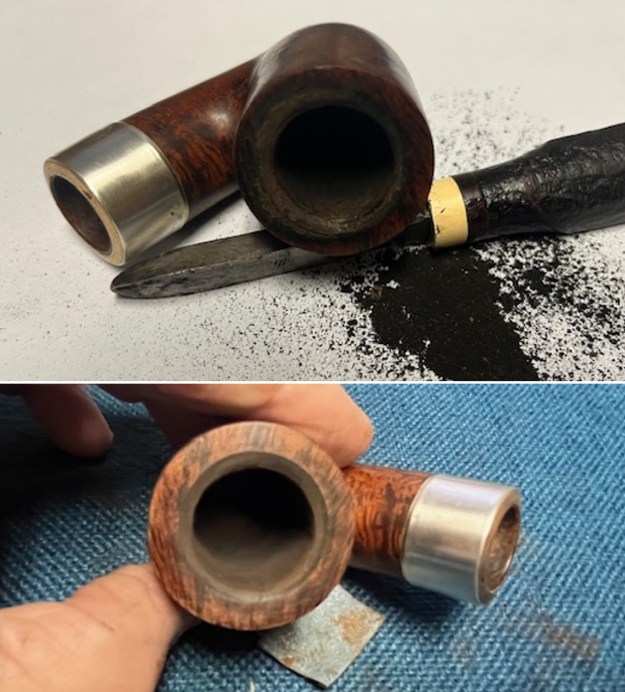
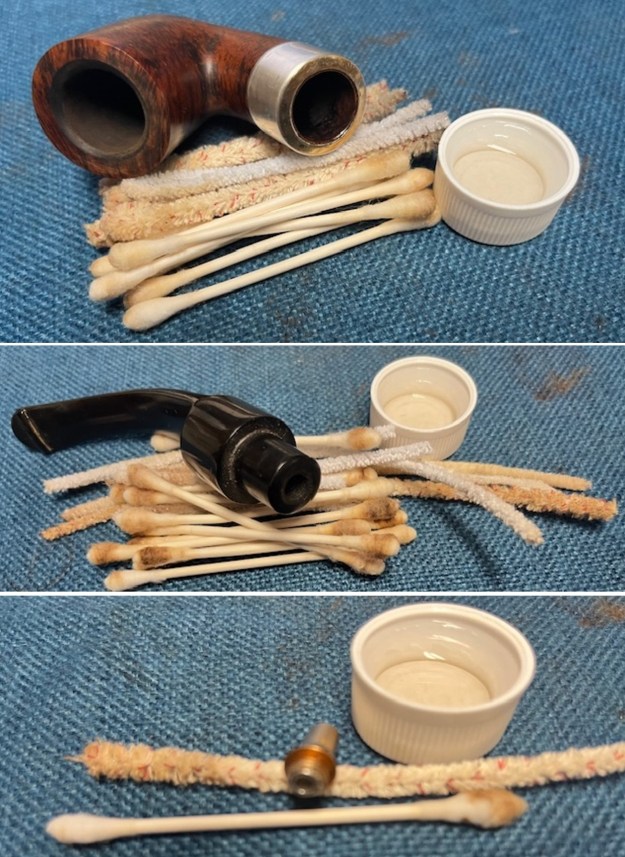
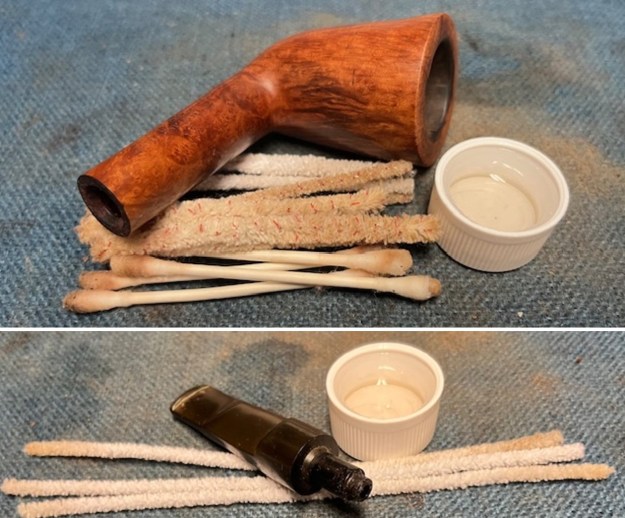
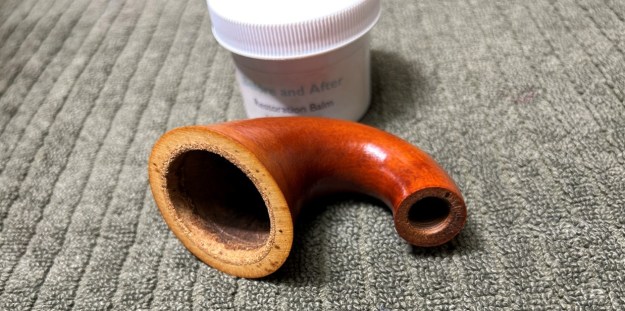
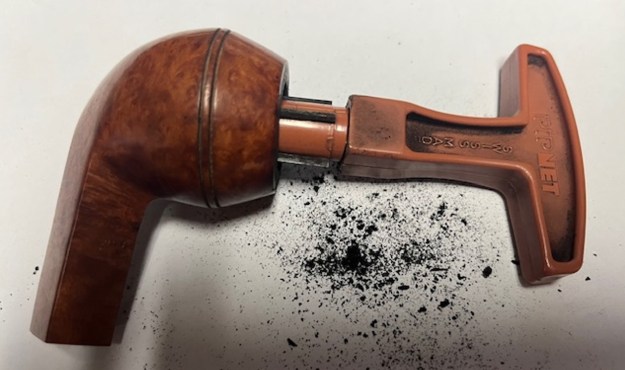
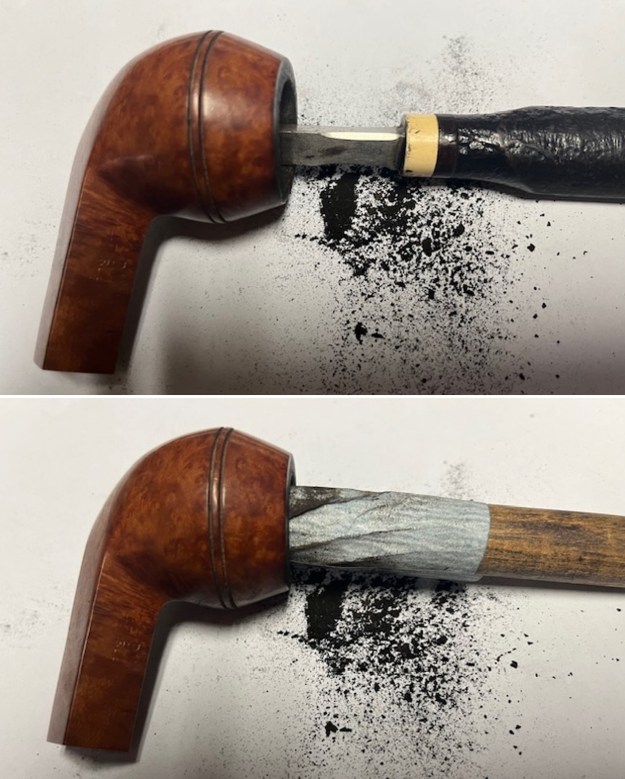
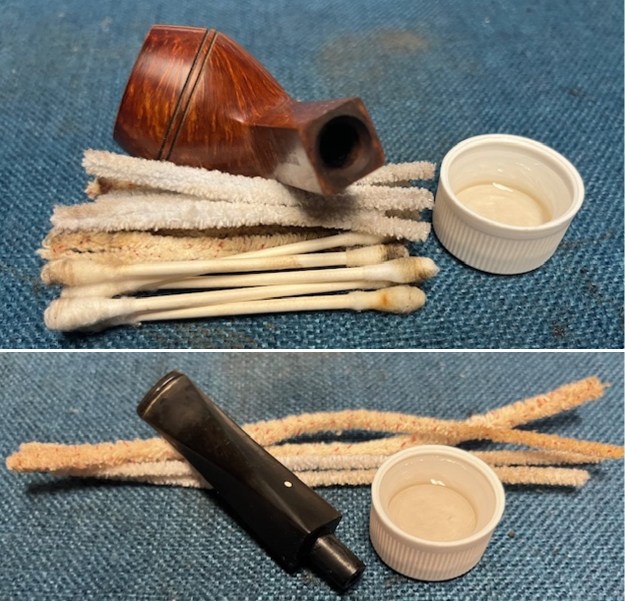
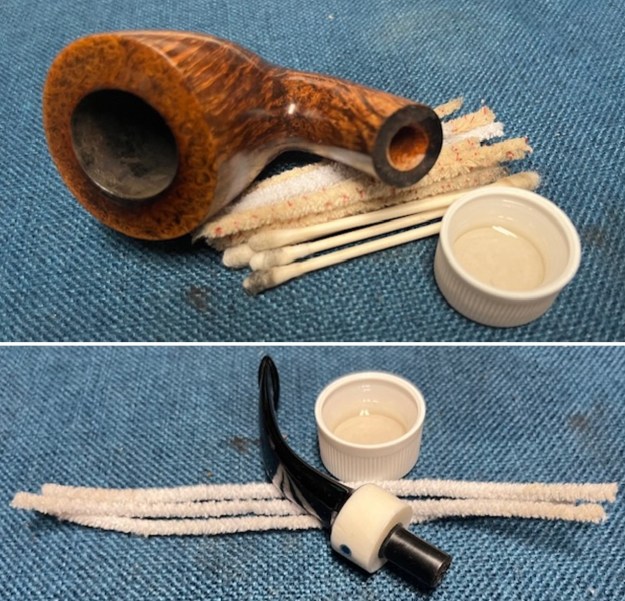
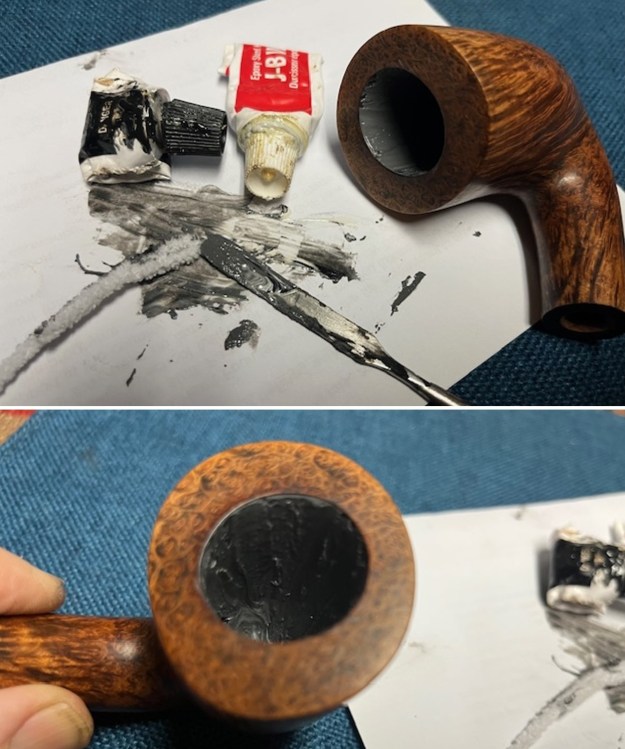
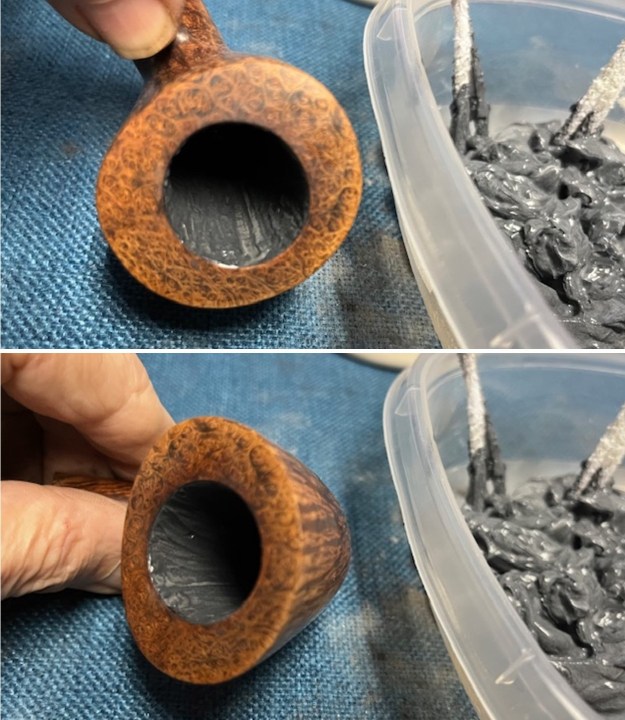
I cleaned out the shank and the airway in the stem with pipe cleaners – bristle and smooth and cotton swabs and alcohol. It was an incredibly dirty shank and airway in the stem. It smelled significantly better once finished.
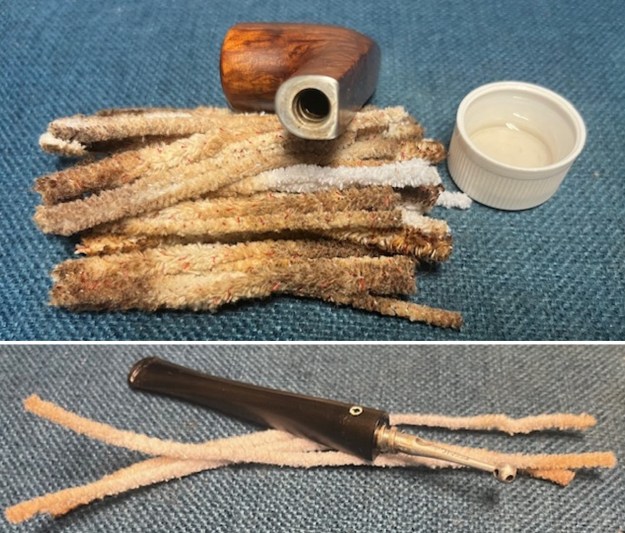
I decided to address the damage on the rim edge and top. I wanted to do so with minimal effect on the shape of the edge and rim. I used a folded piece of 220 grit sandpaper to smooth out the damage on the inner edge of the bowl and to remove the burn damage. It looked much better. 
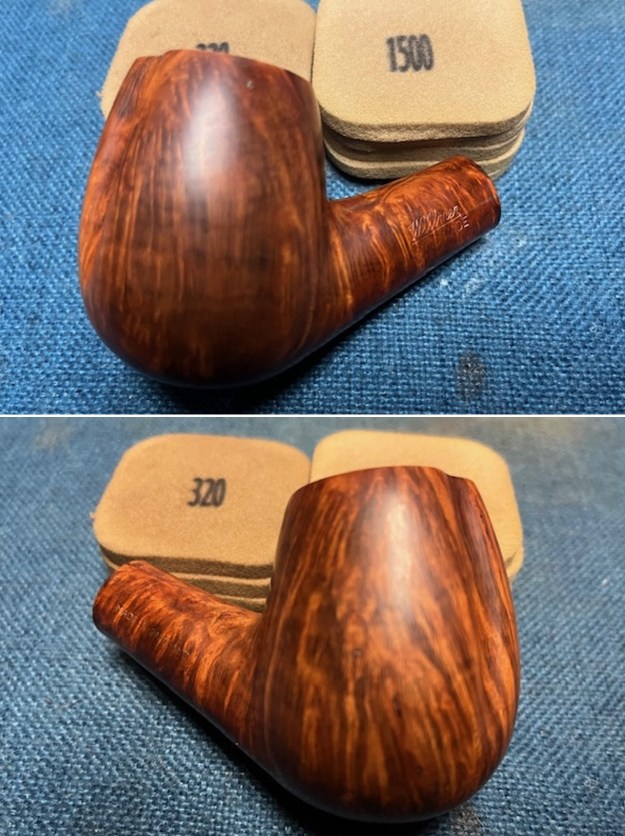
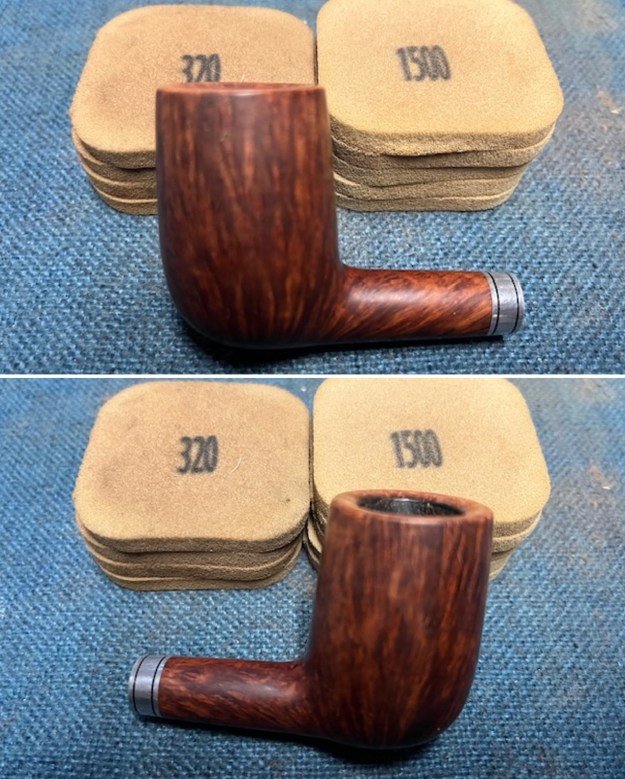
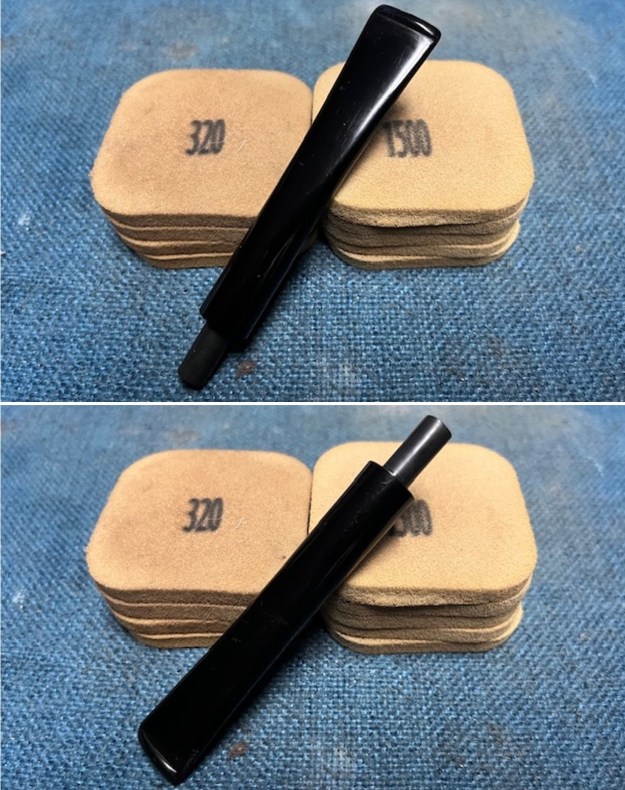
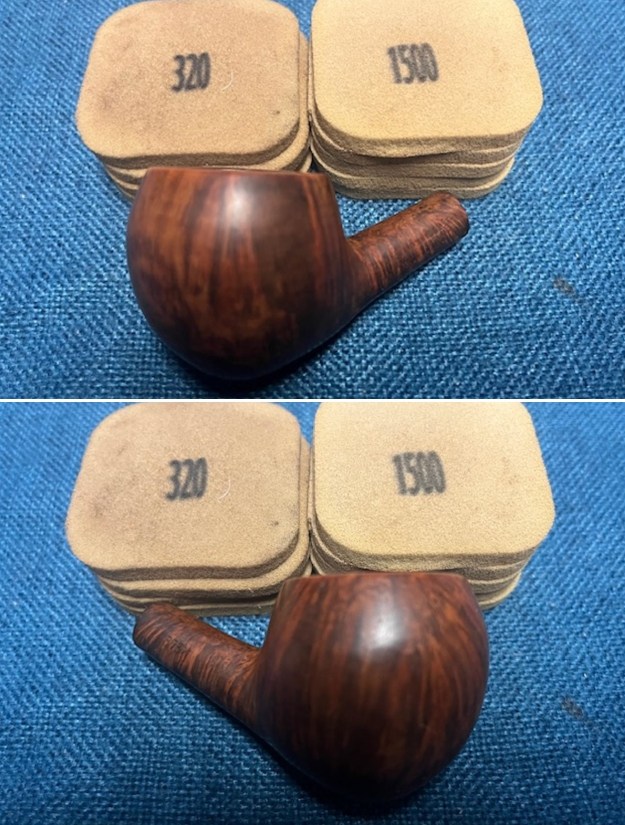
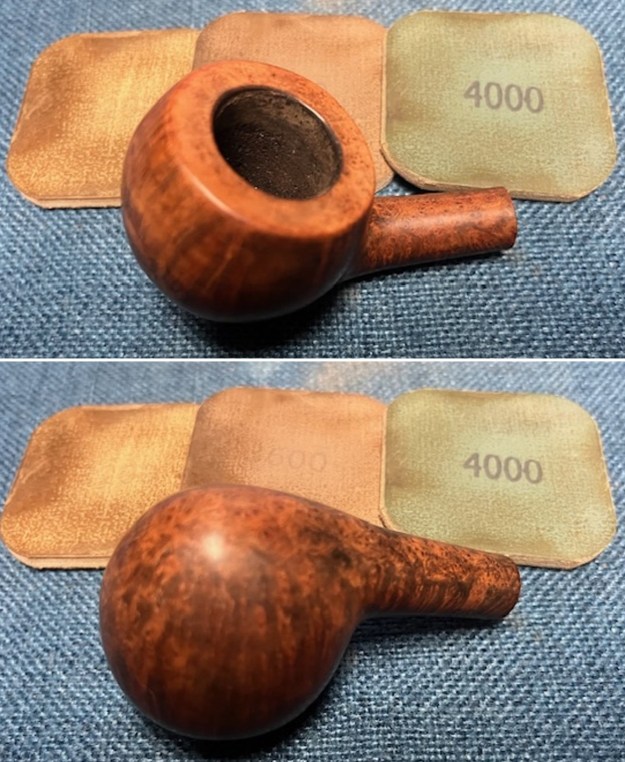
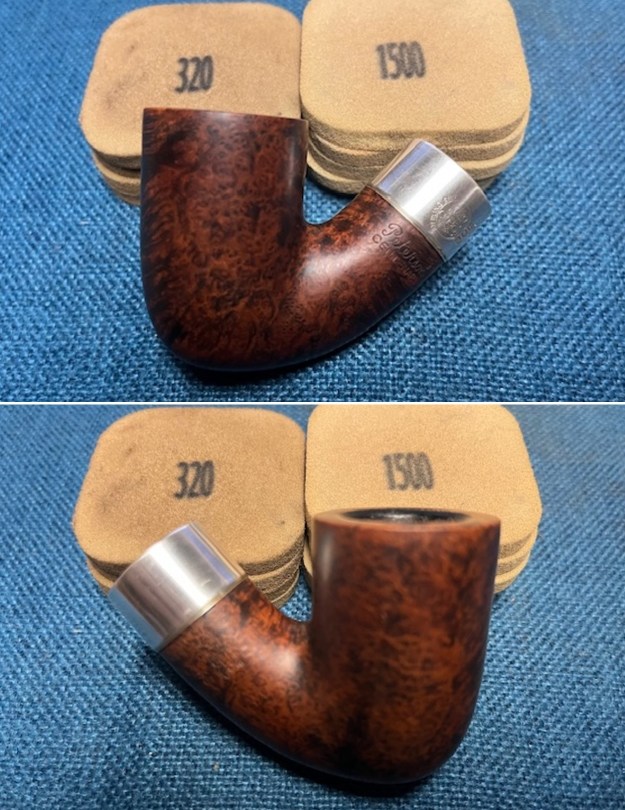
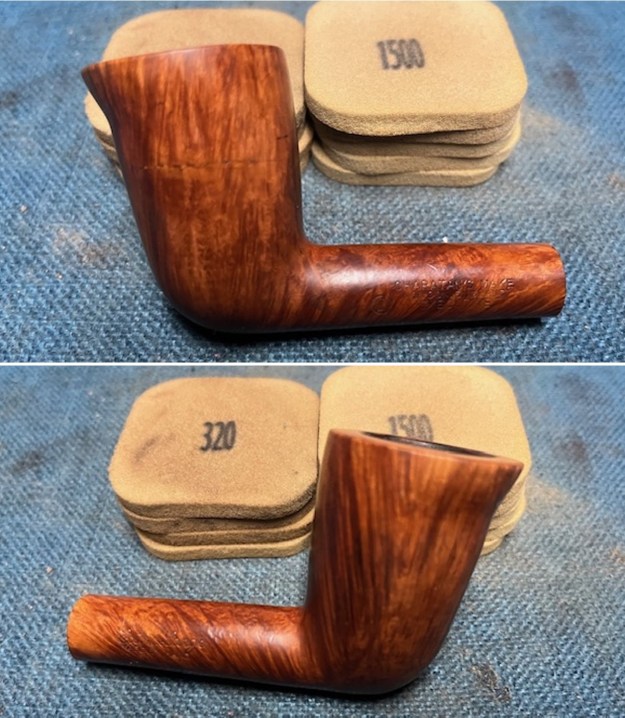
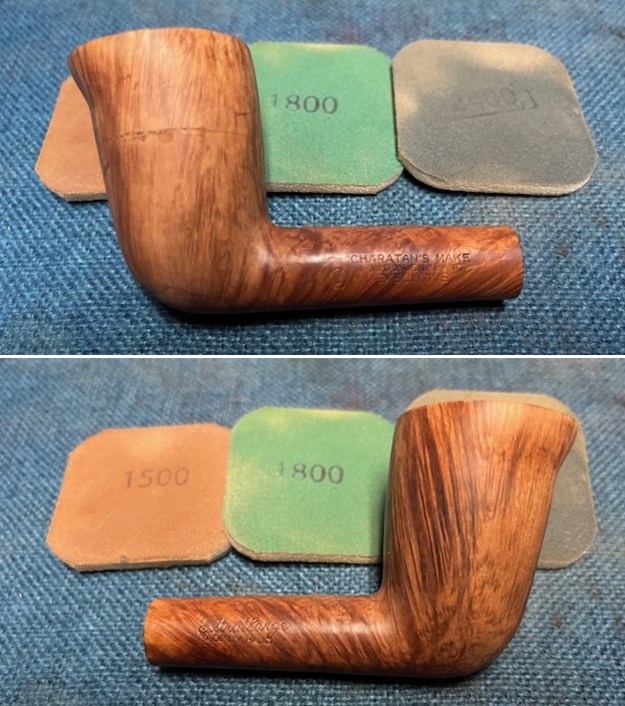
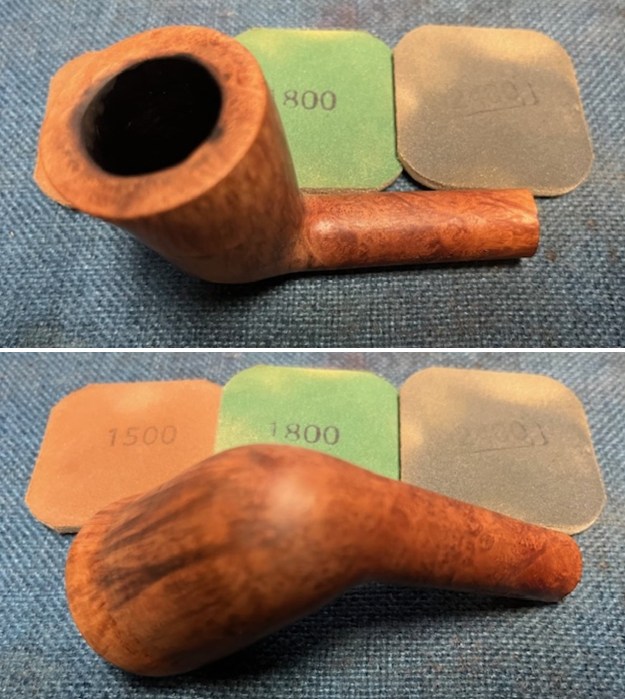
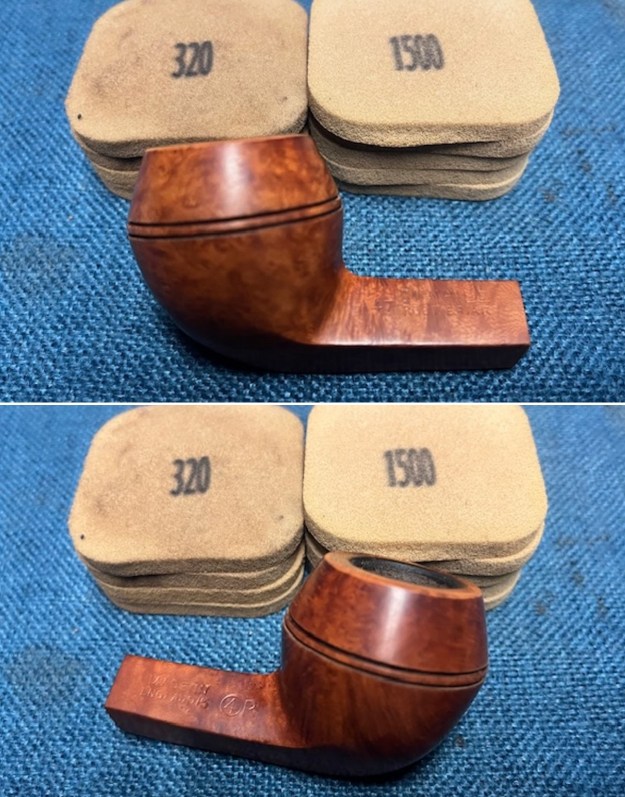
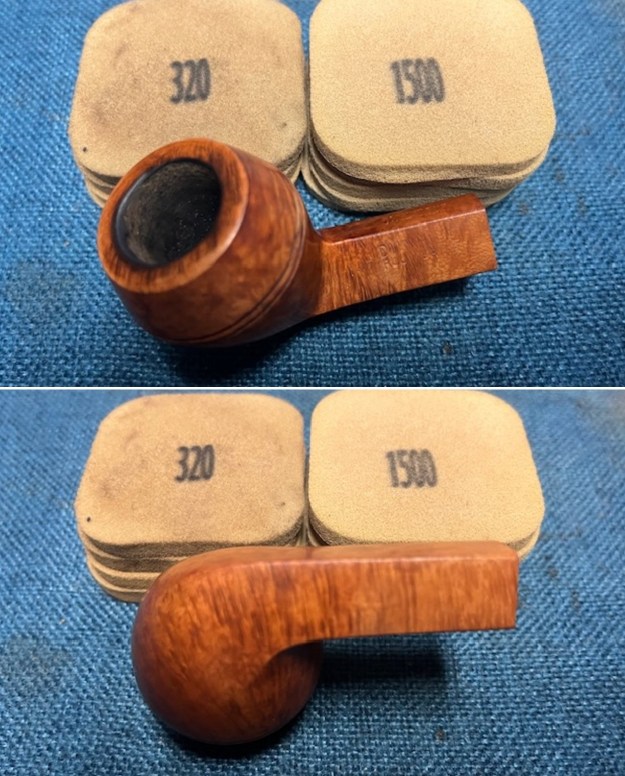
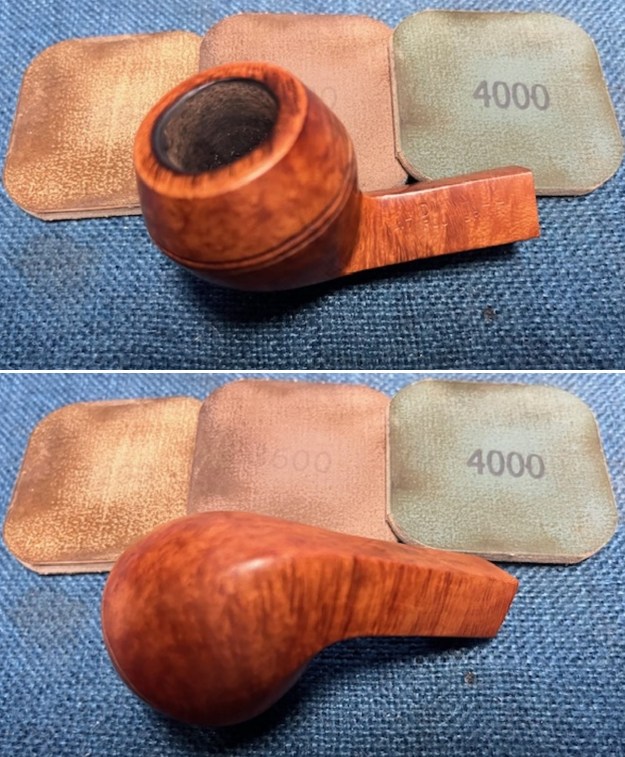
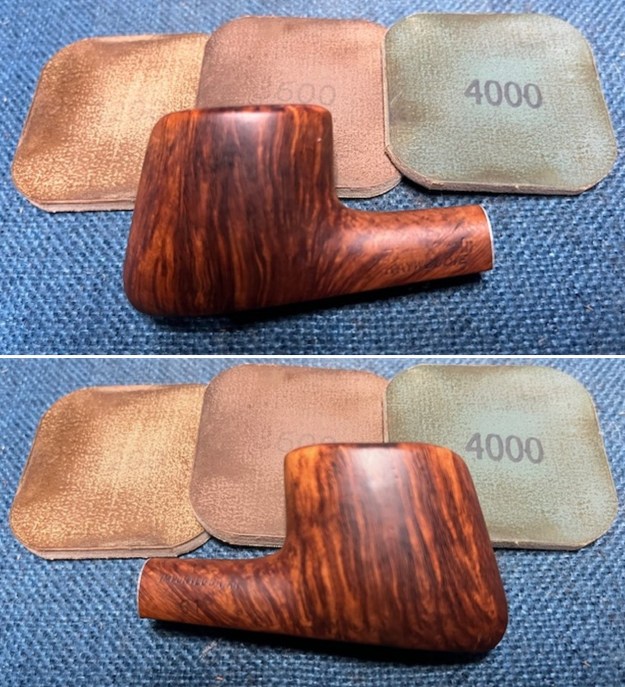
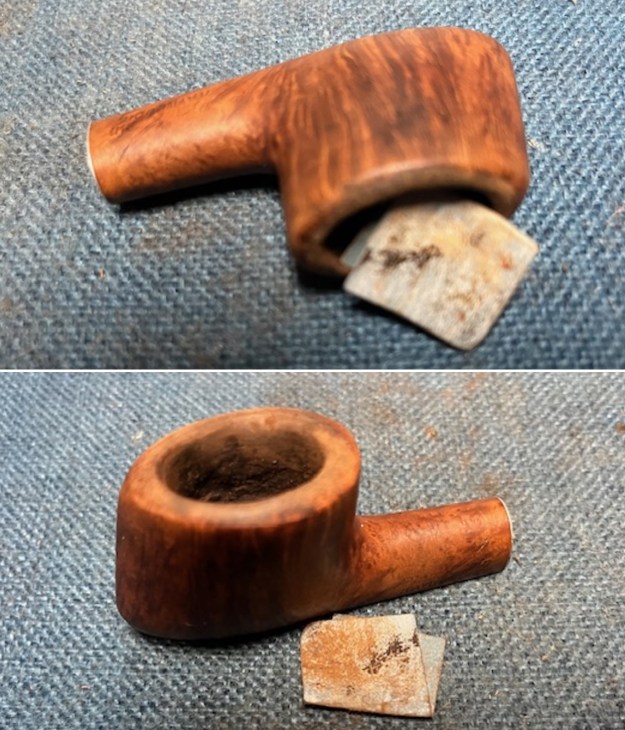
I carefully, gently sanded the surface of the bowl and the shank with 320-3500 grit 2×2 inch sanding pads to remove the scratches in the surface of the briar. The bowl and shank began to look very good. 
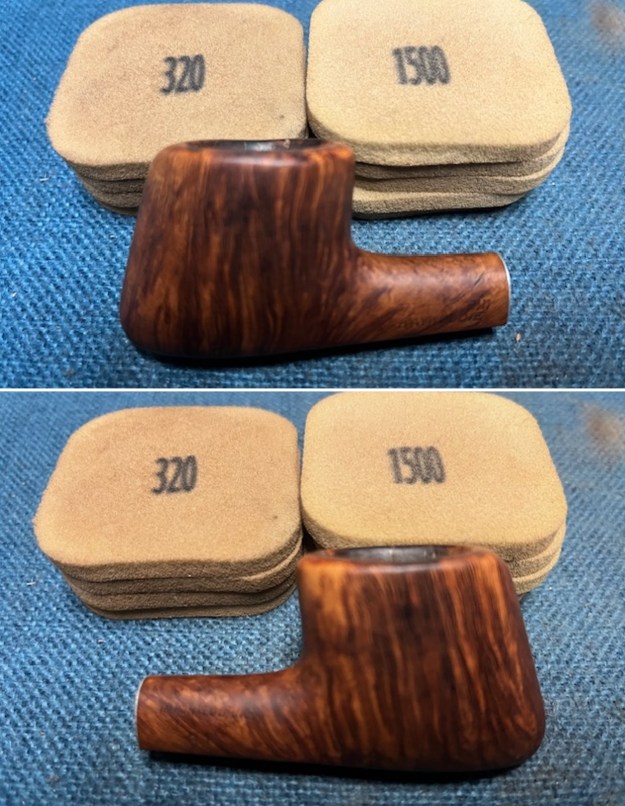
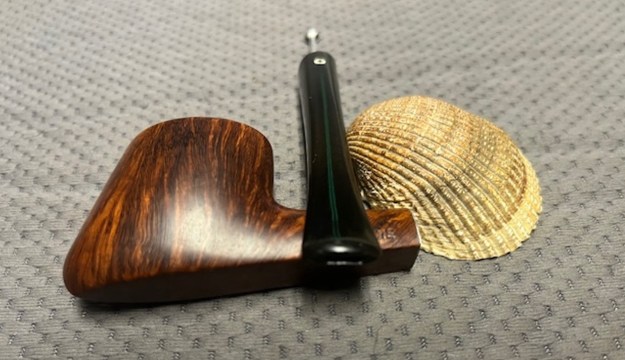
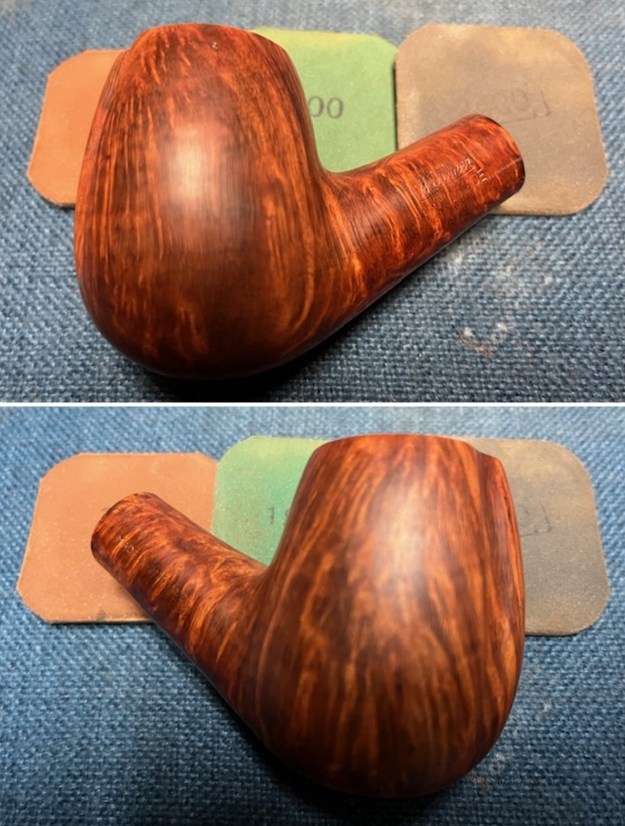
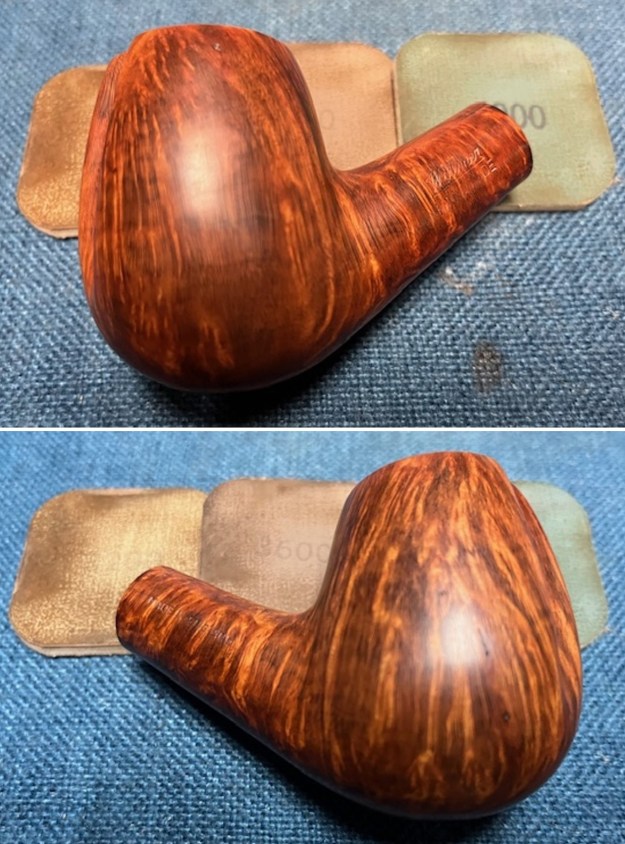
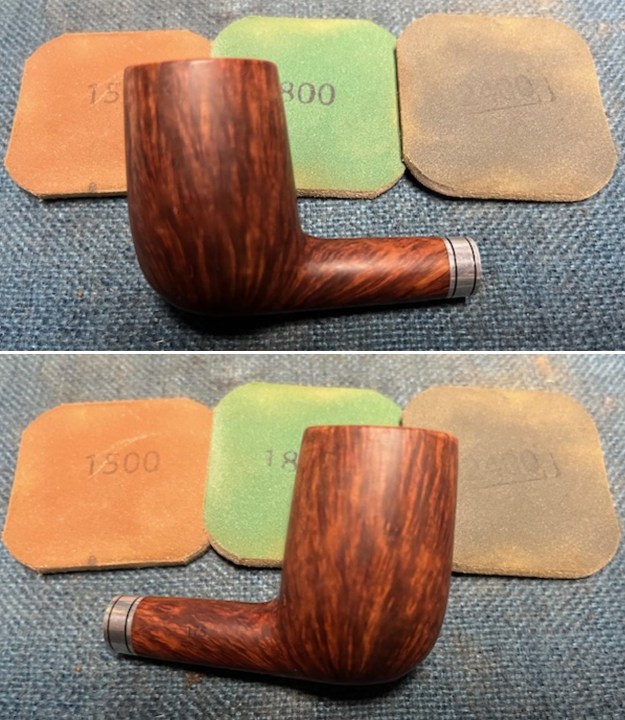
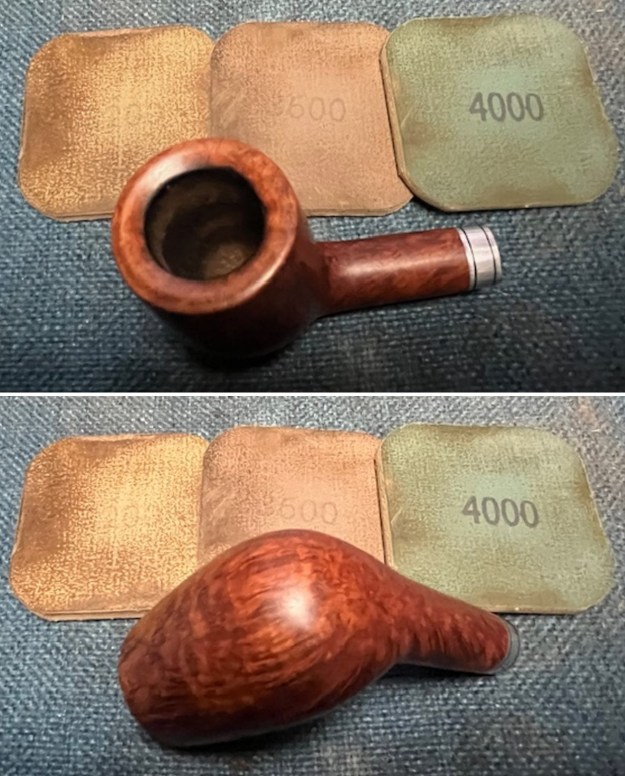
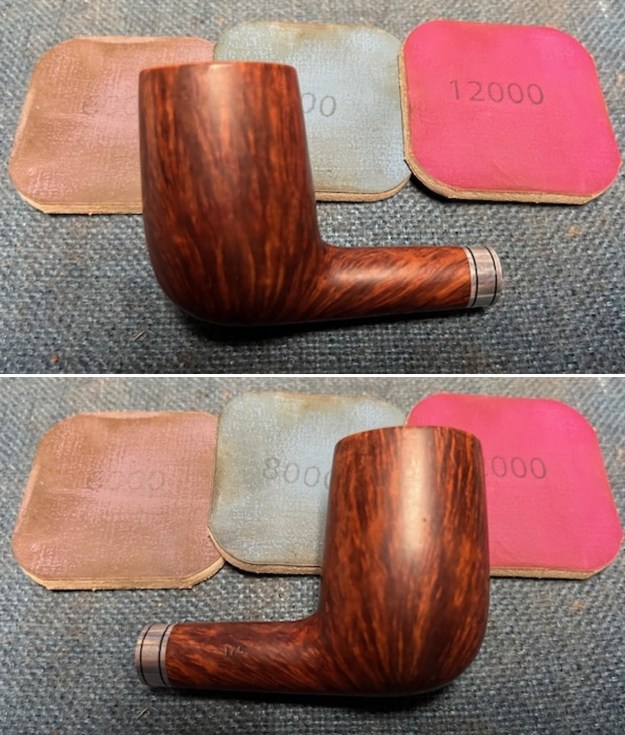
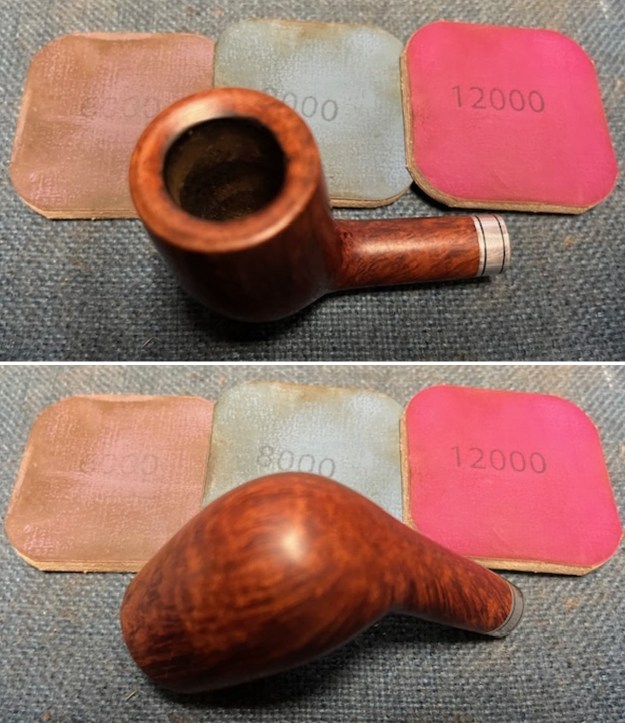
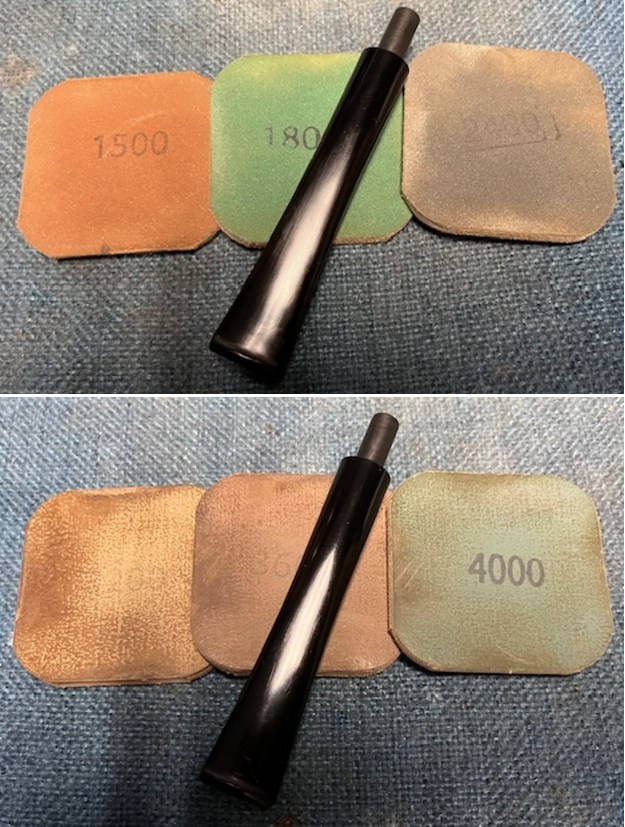
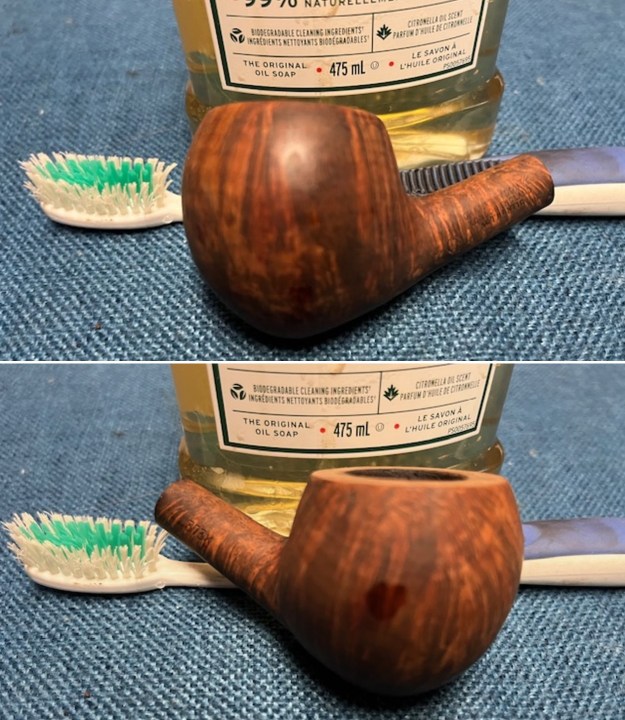
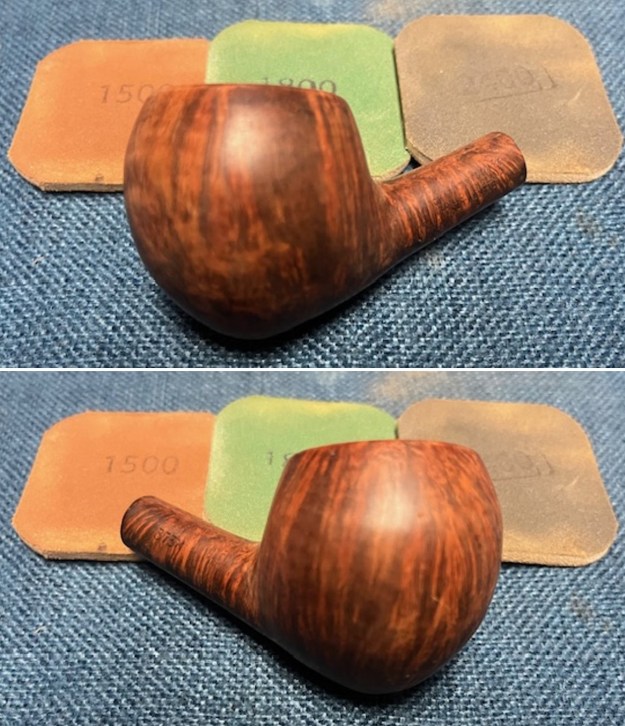
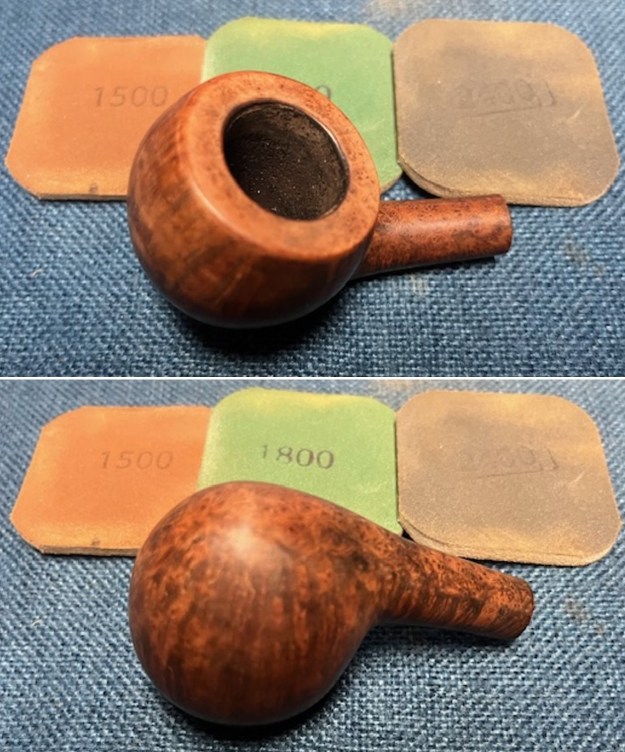
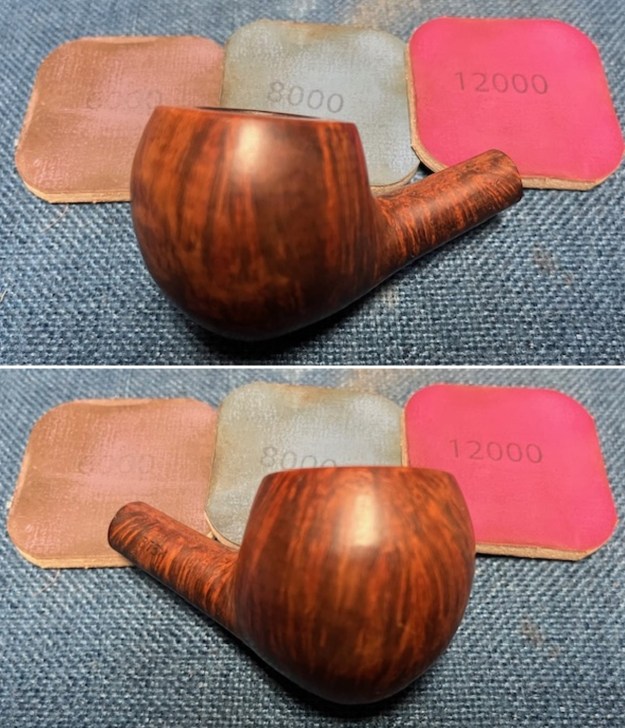
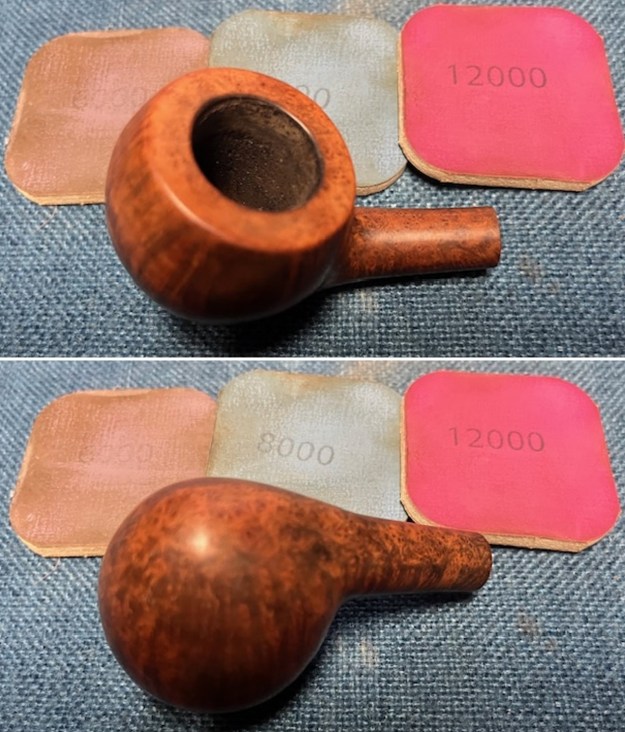
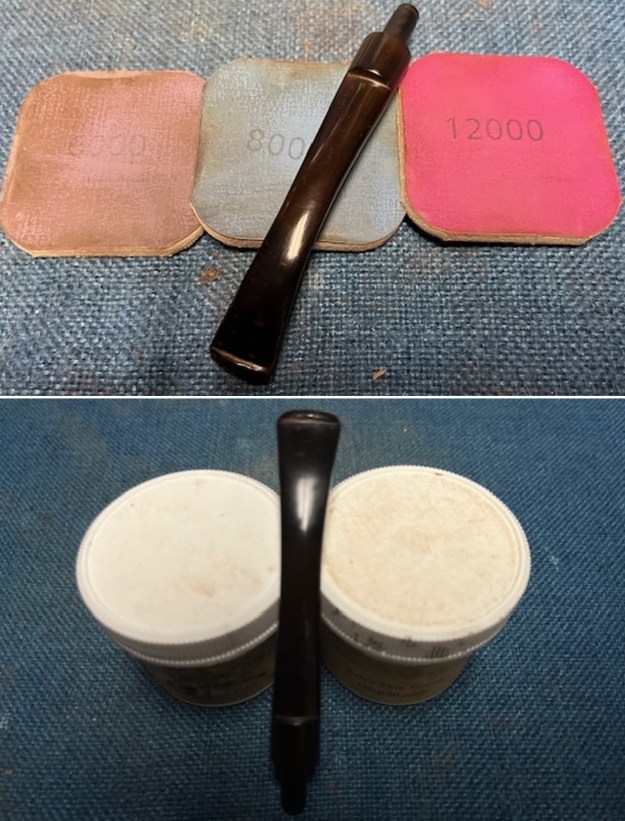
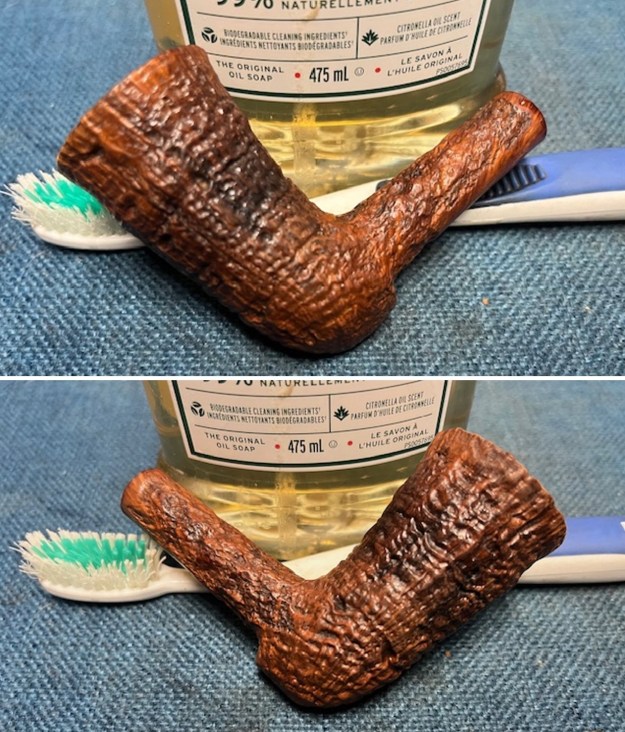
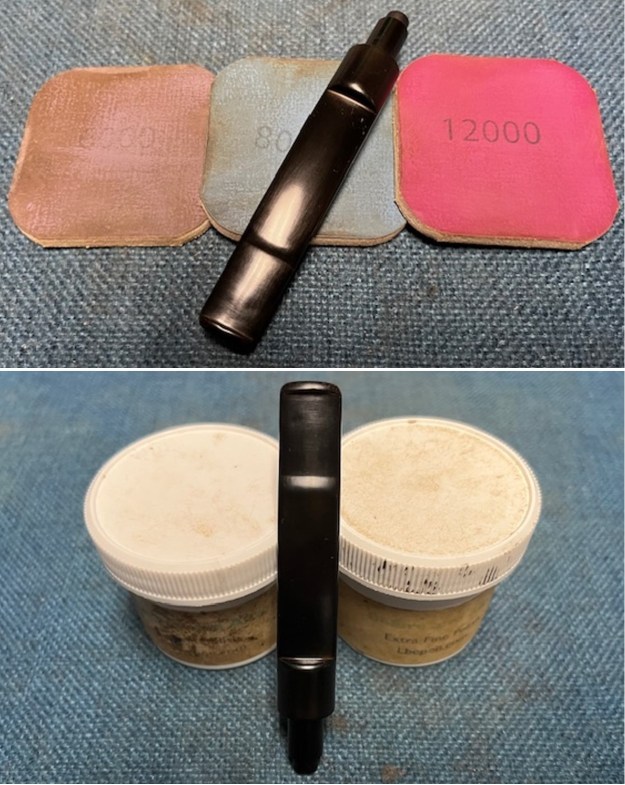
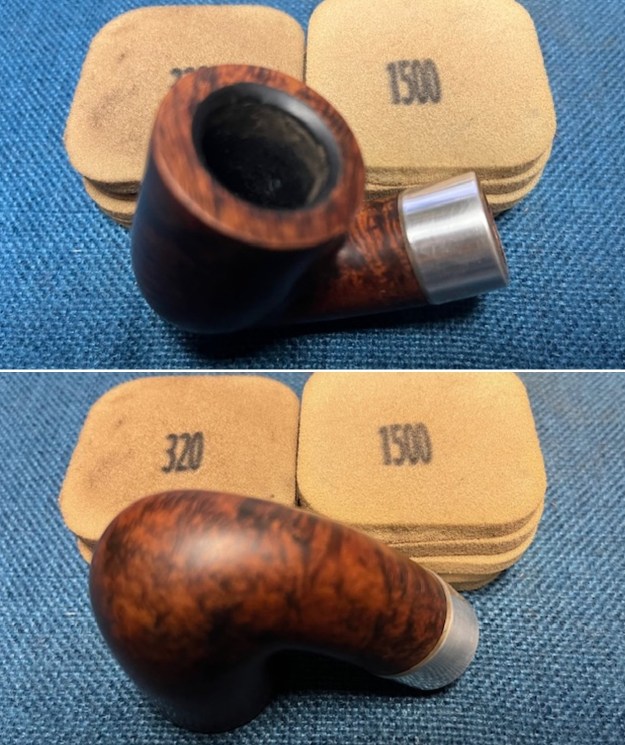
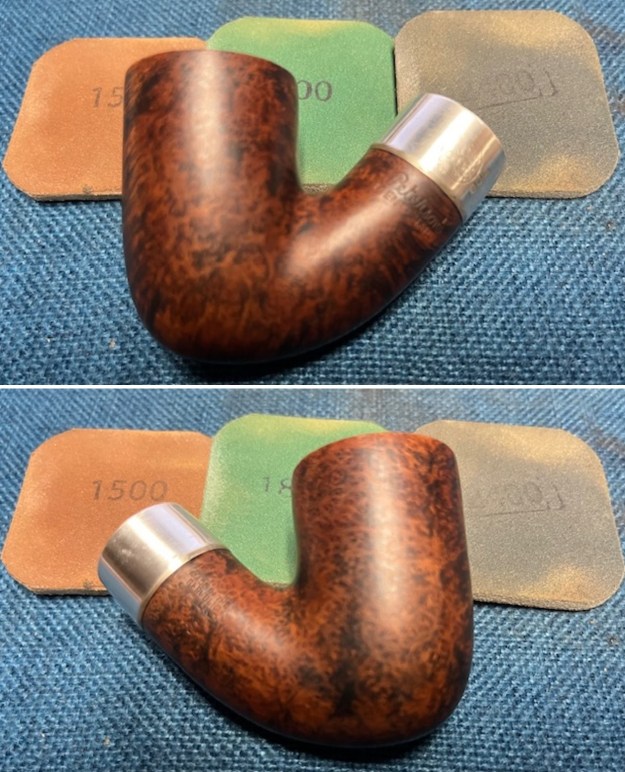
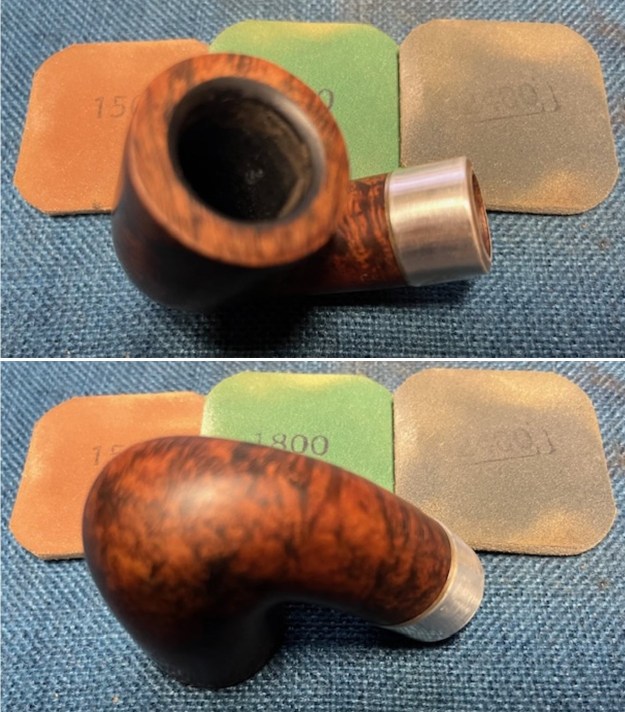
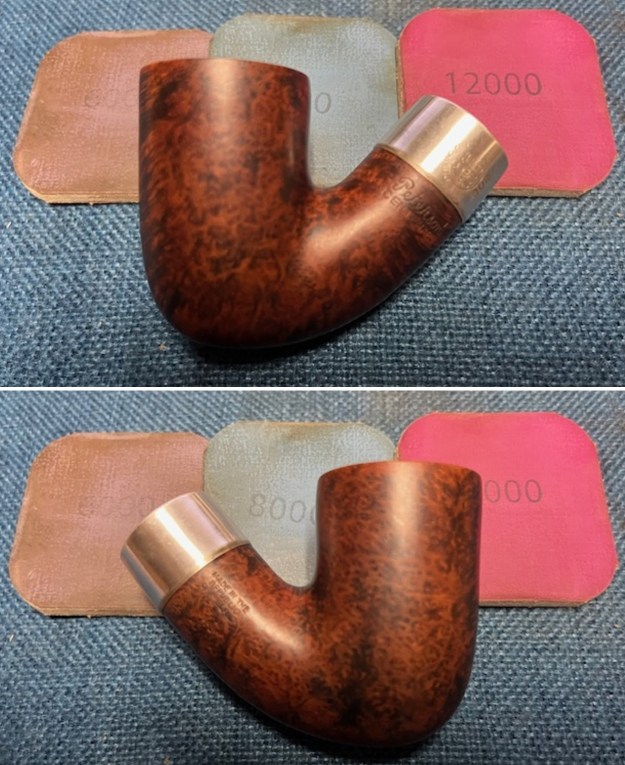
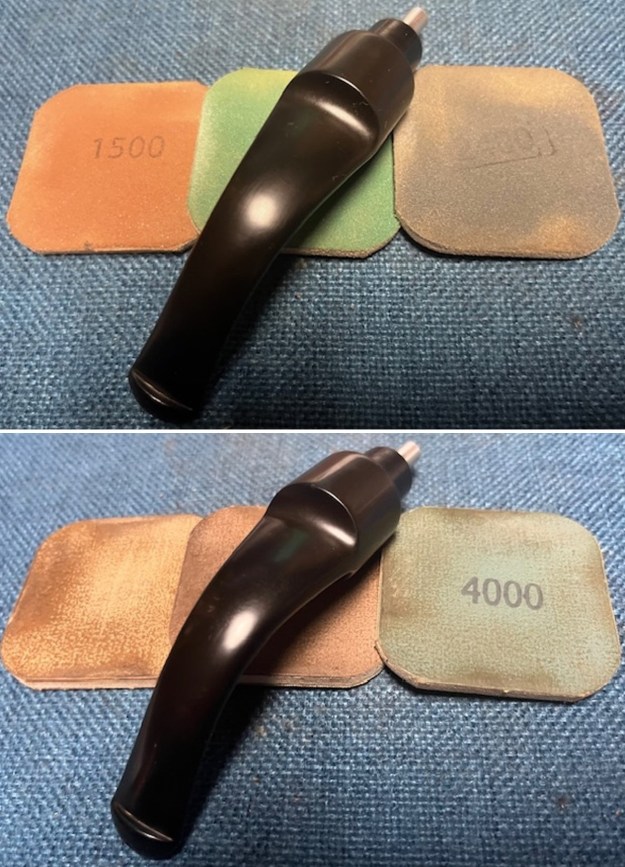
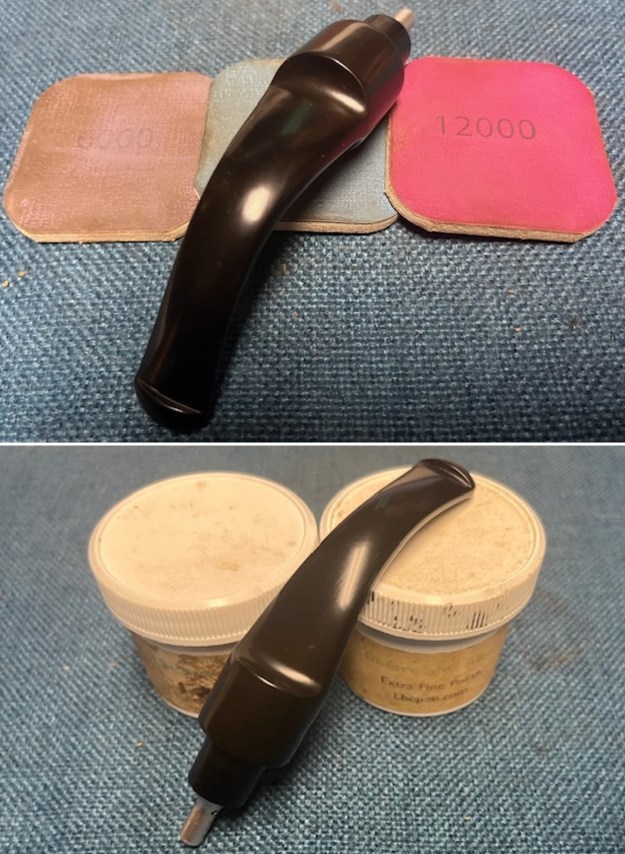
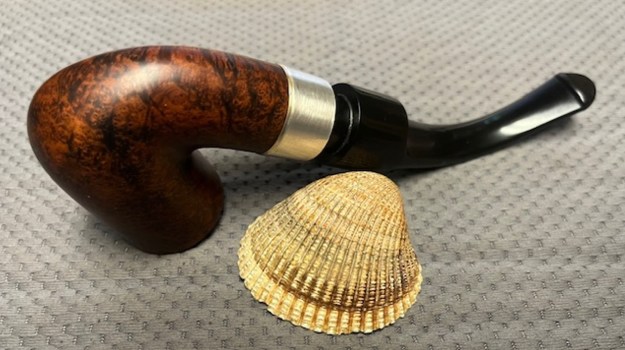
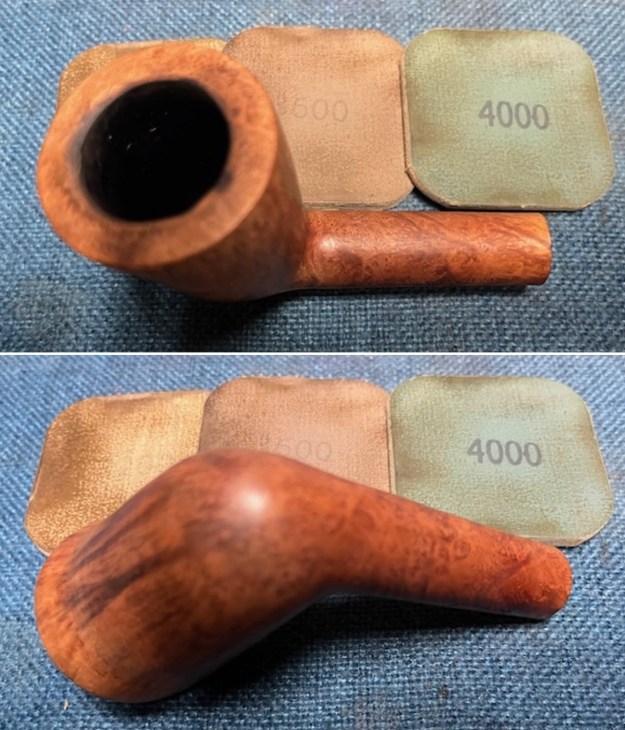
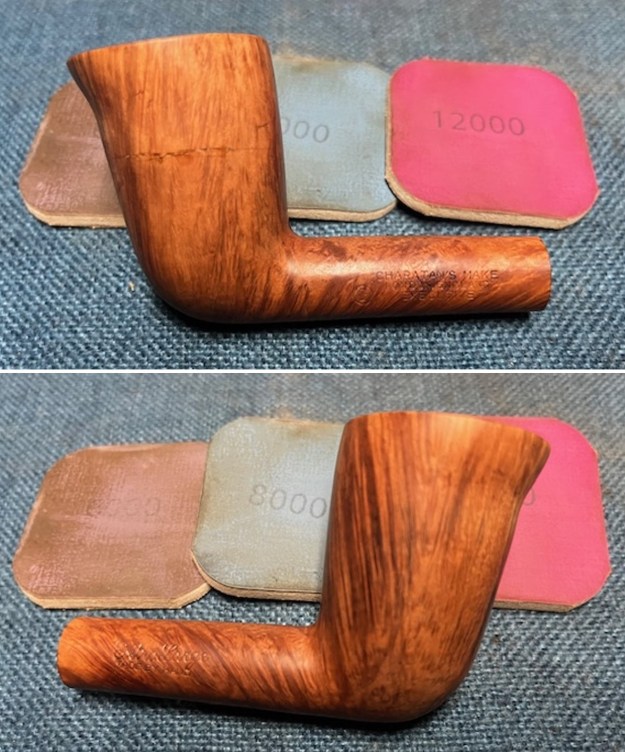
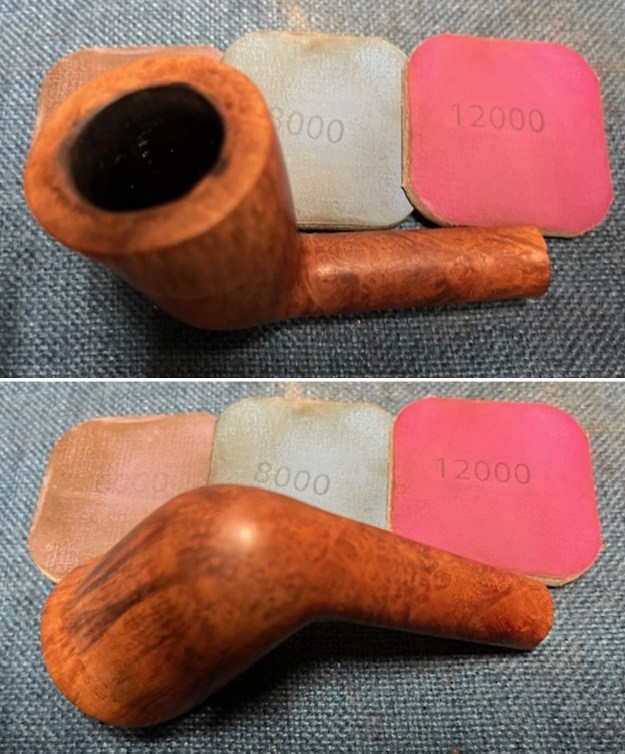
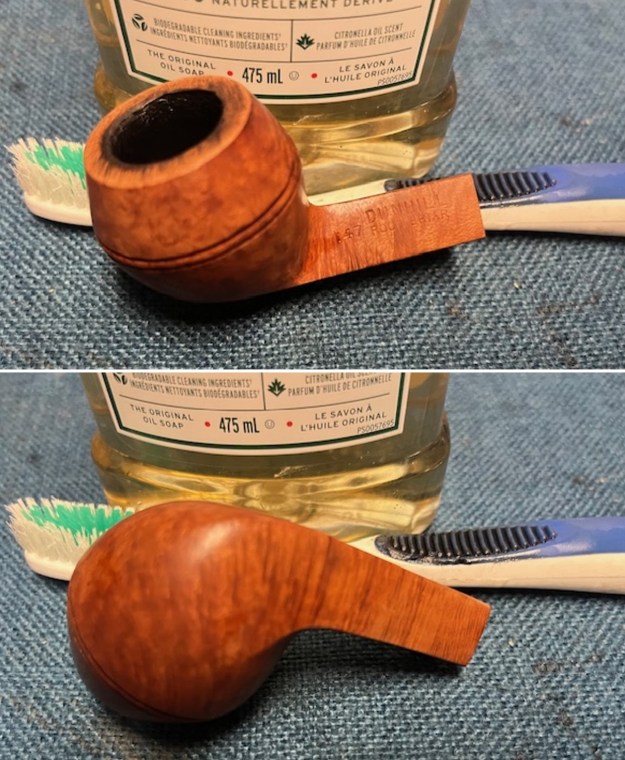
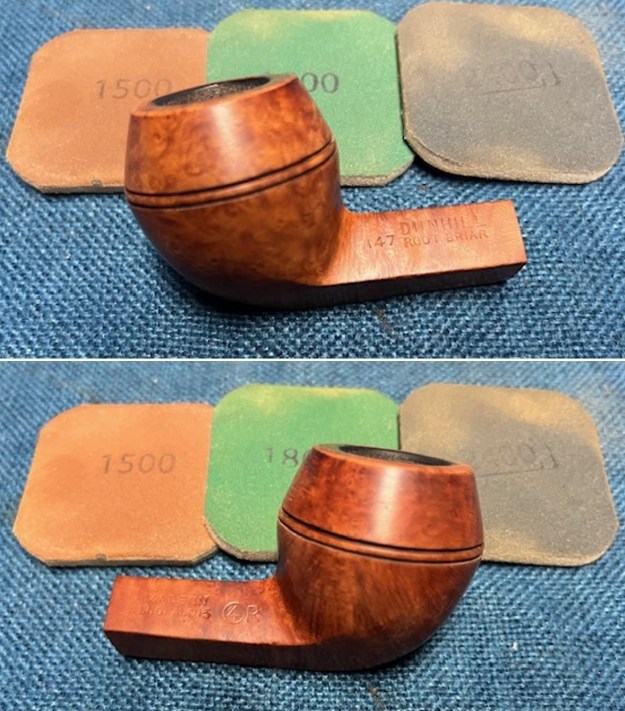
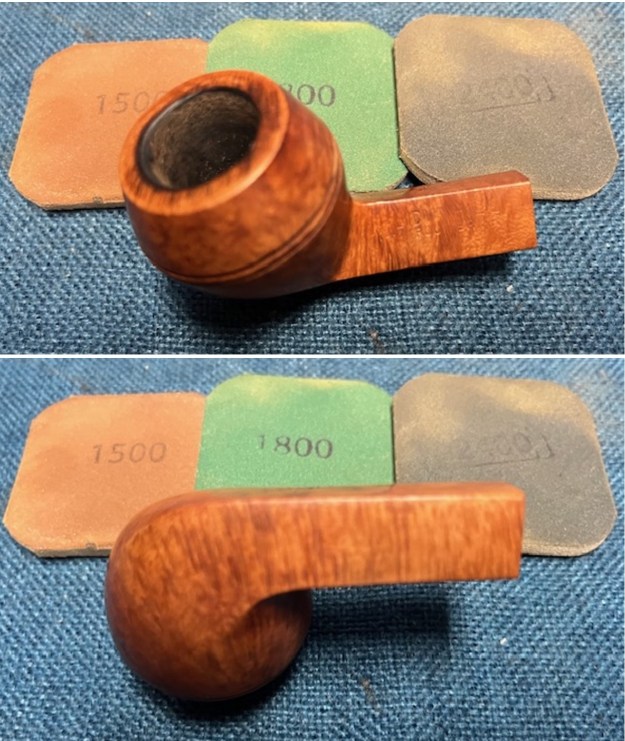
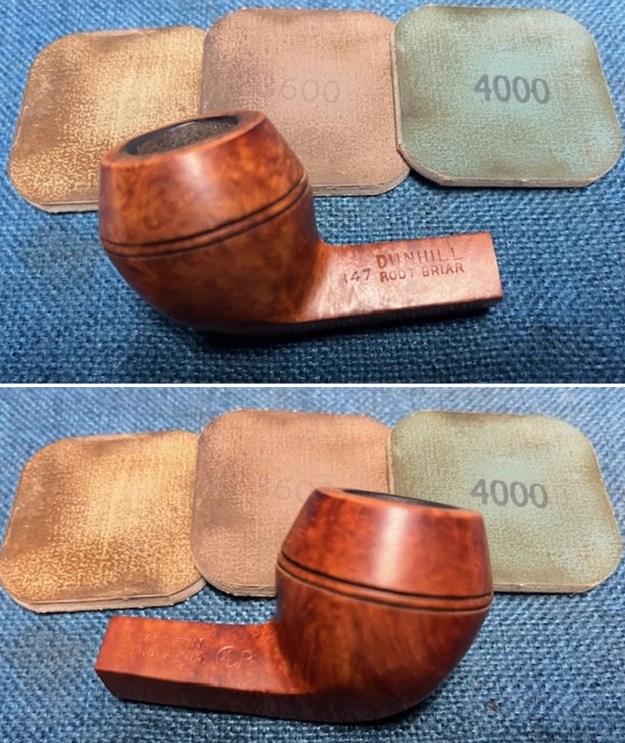
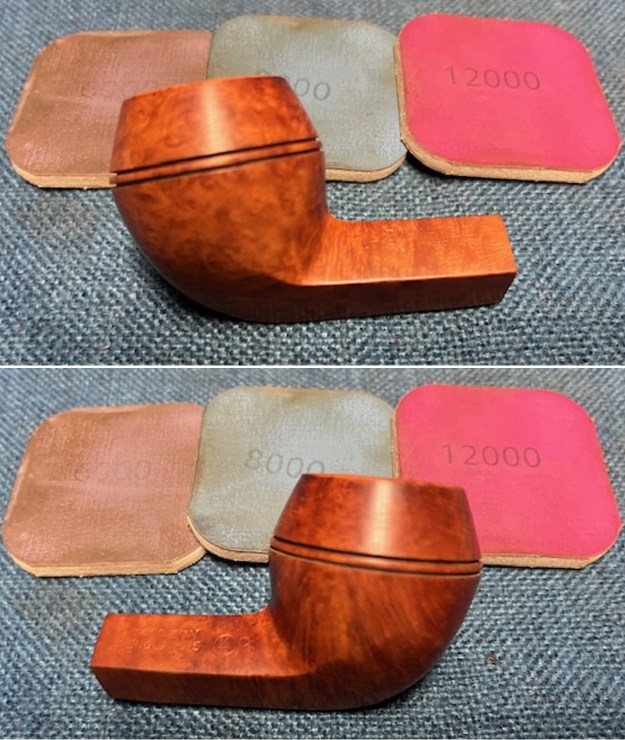
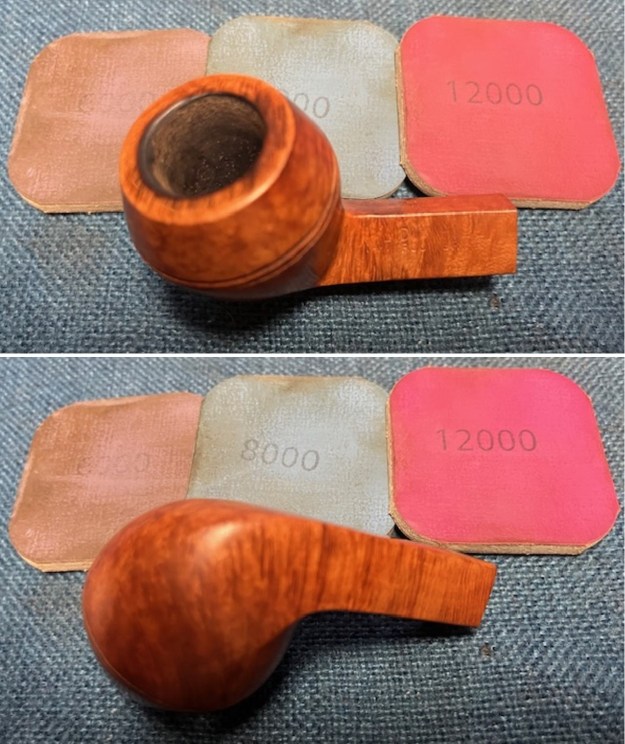
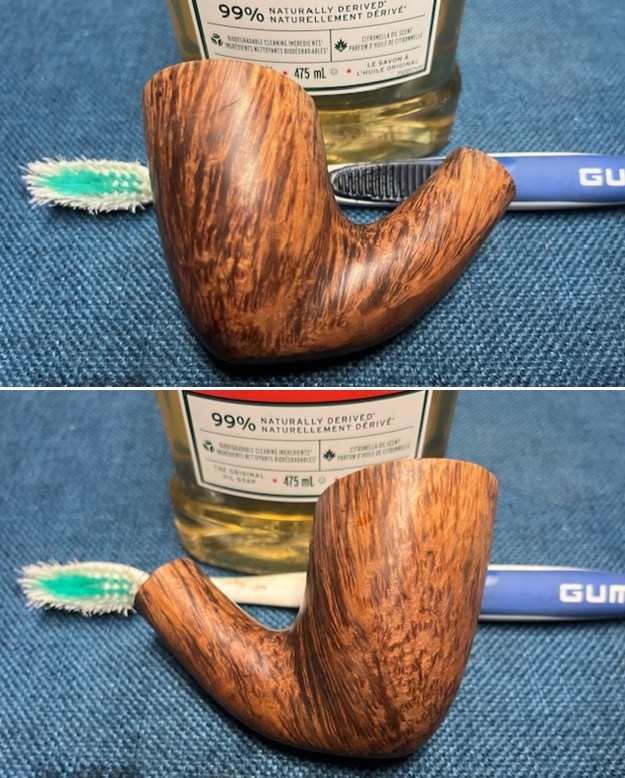
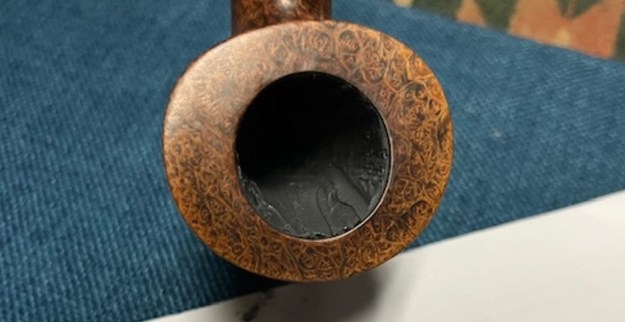
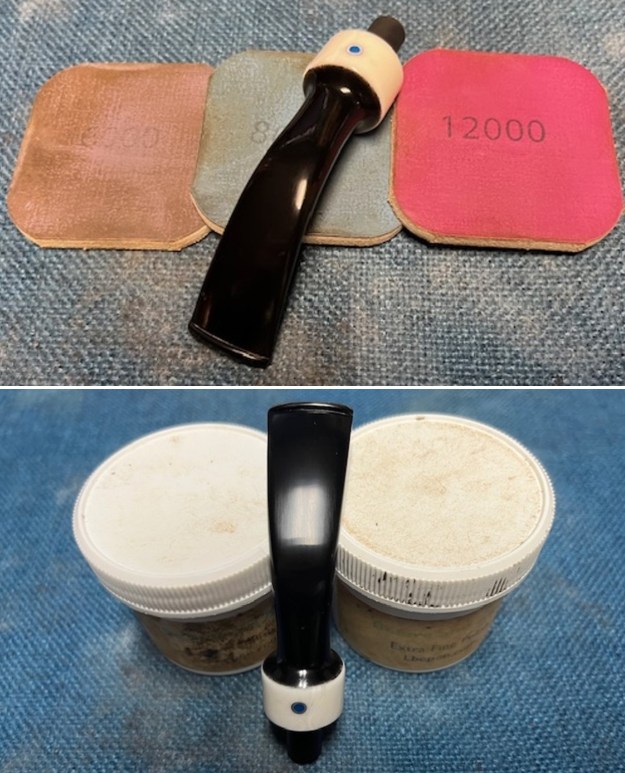
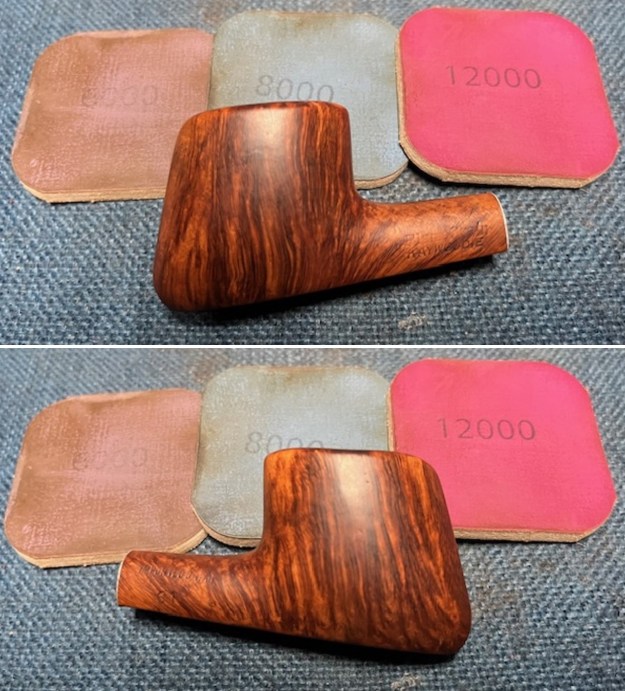
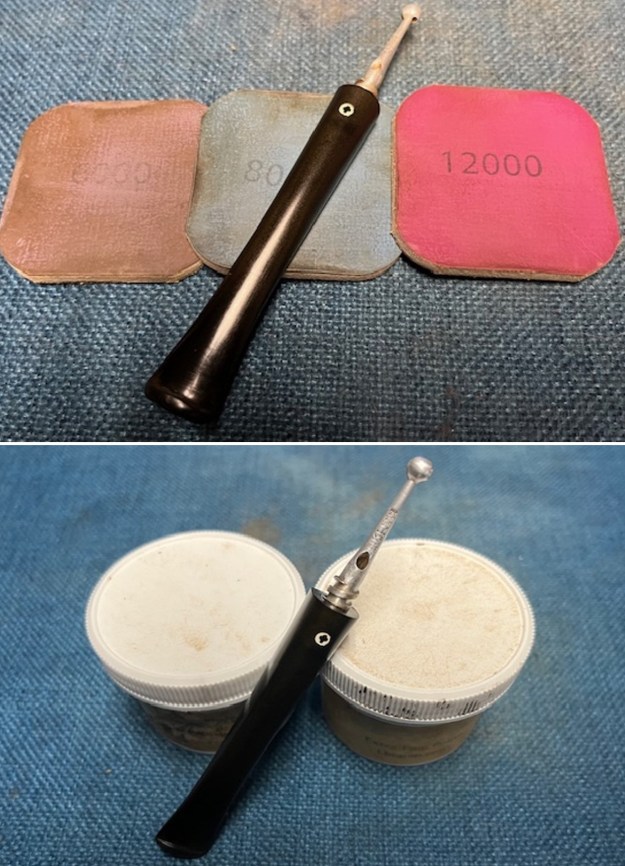
I polished the briar with 1500-12000 grit micromesh sanding pads – dry sanding the briar and wiping down the bowl after each sanding pad. It really began to take on a rich shine and the grain stood out beautifully. 
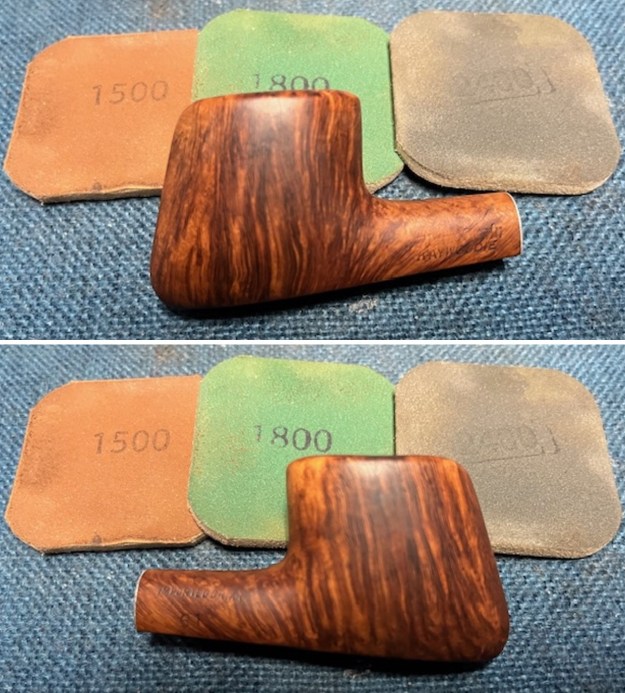
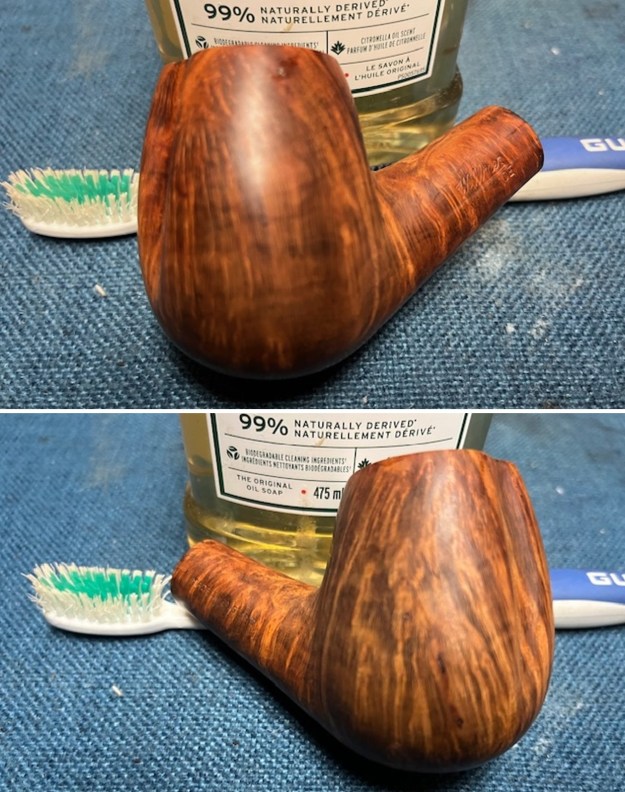
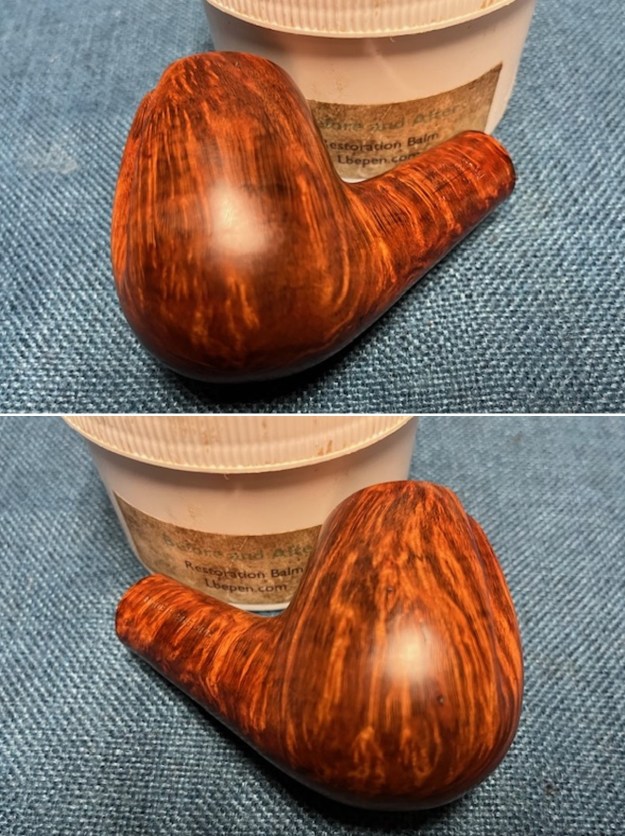
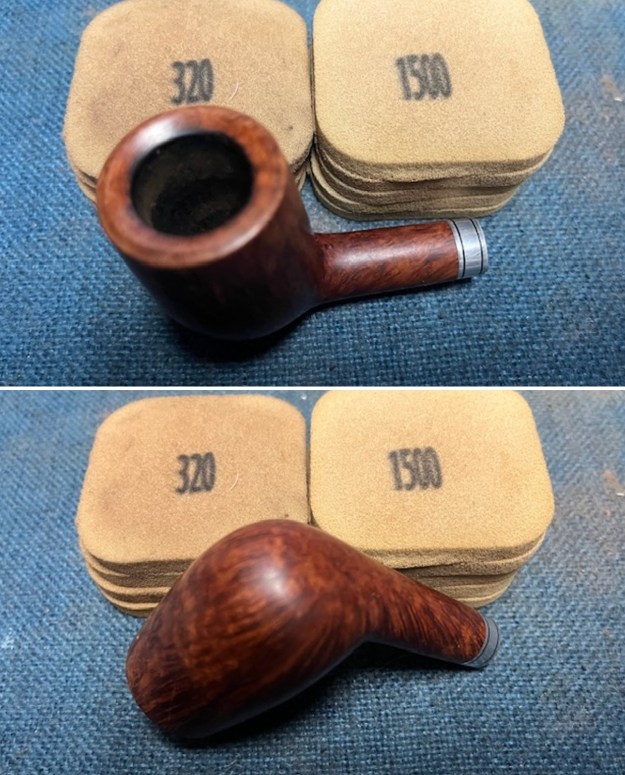
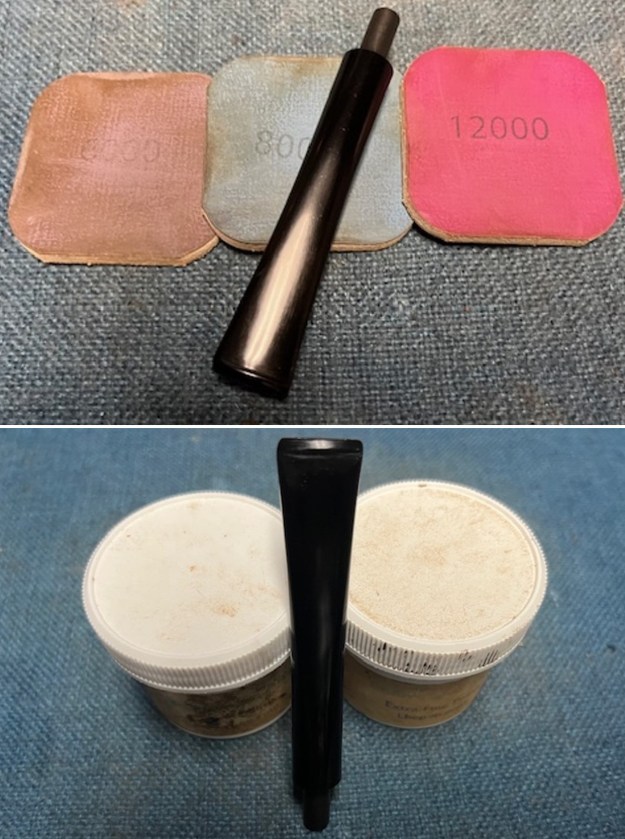
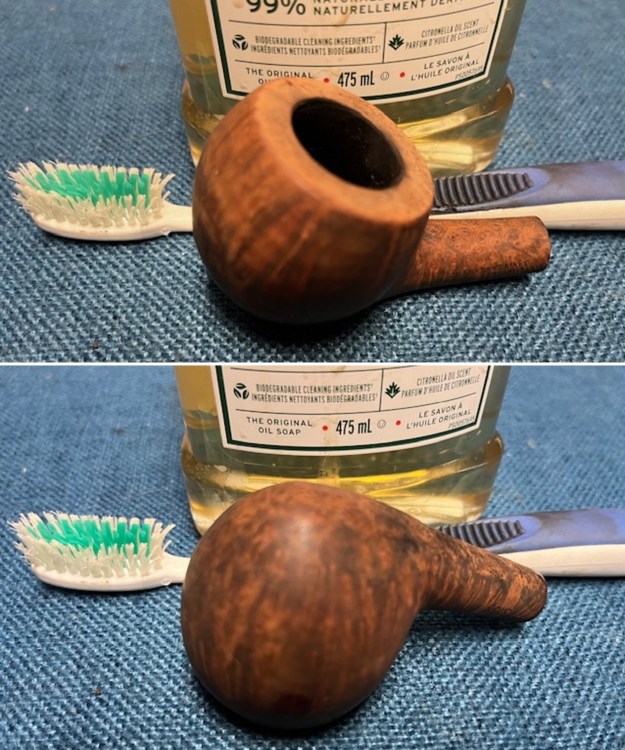
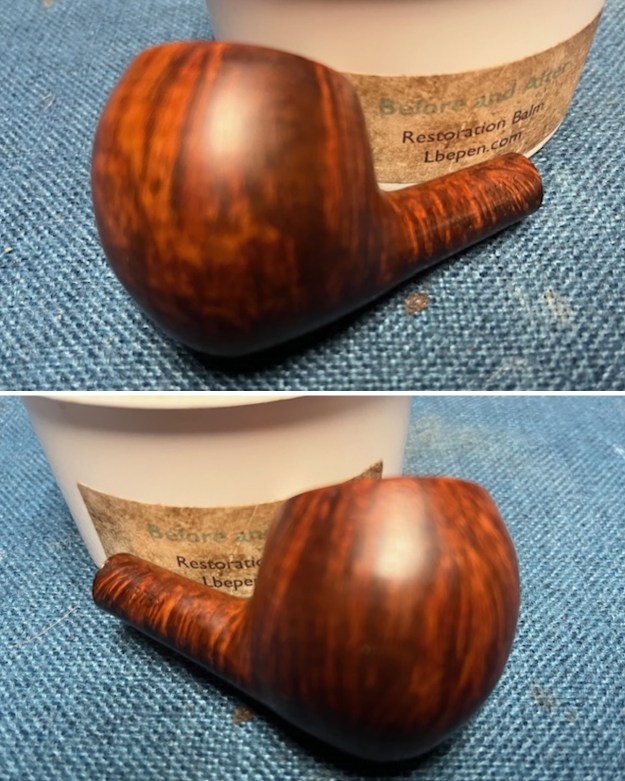
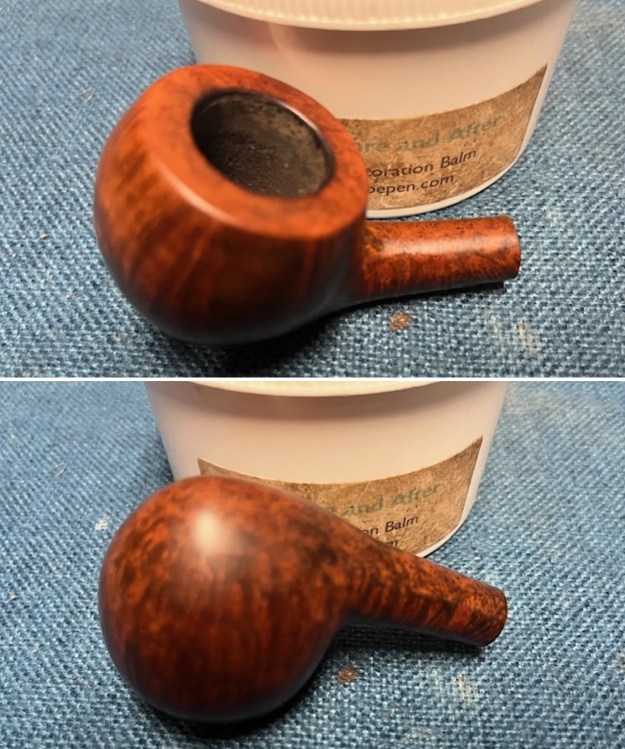
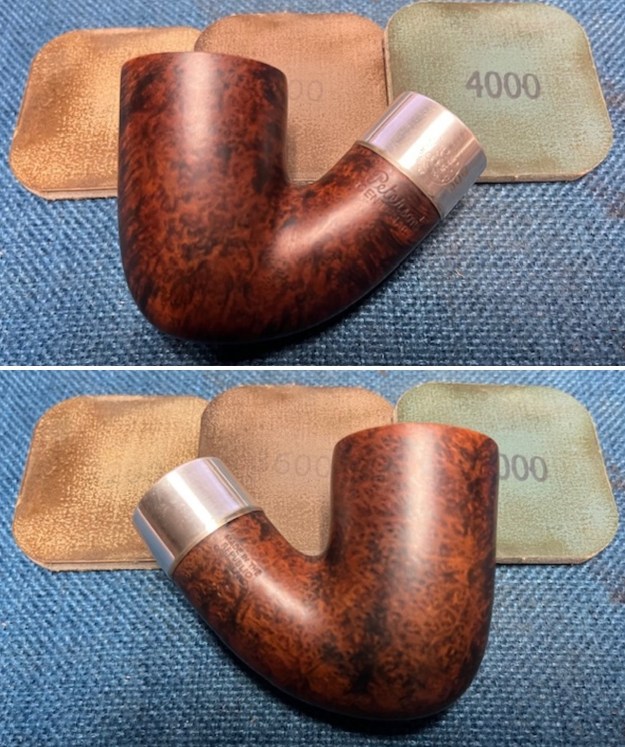
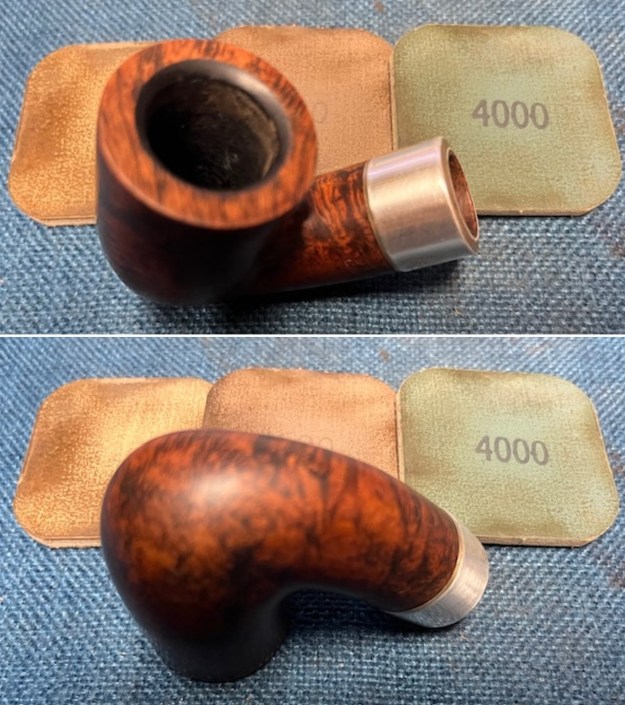
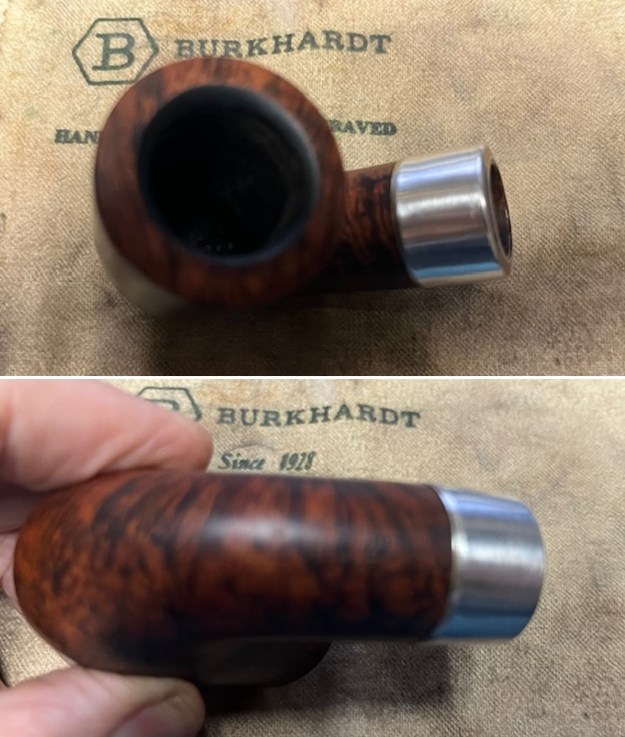
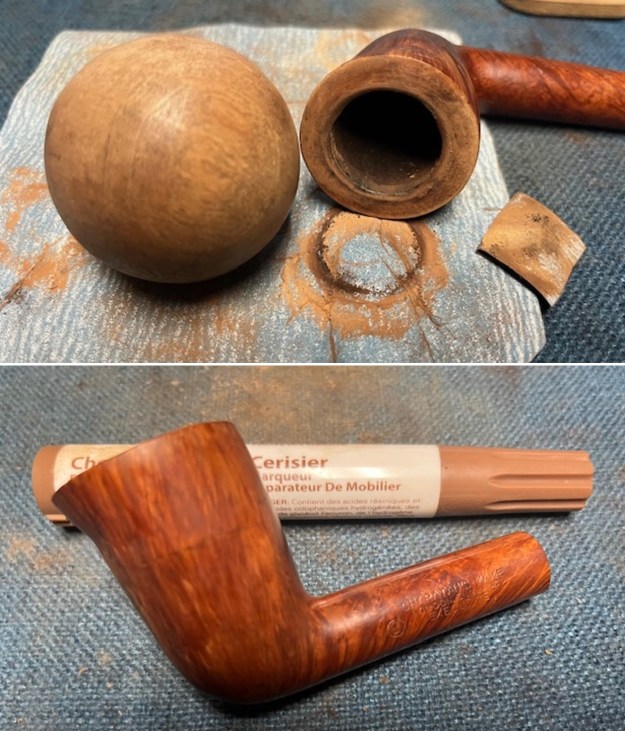
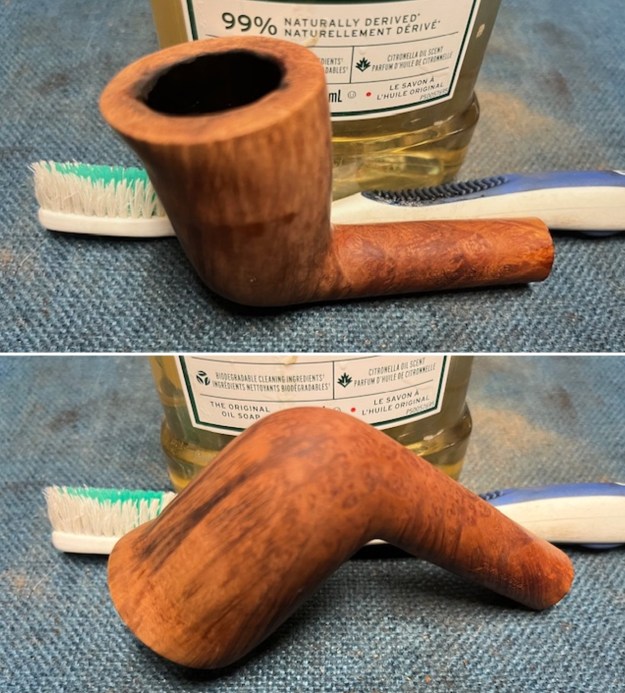
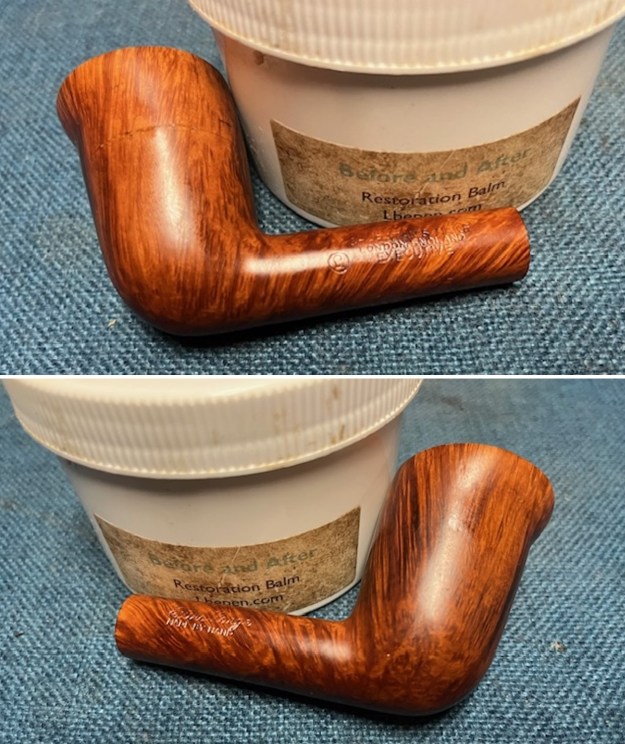
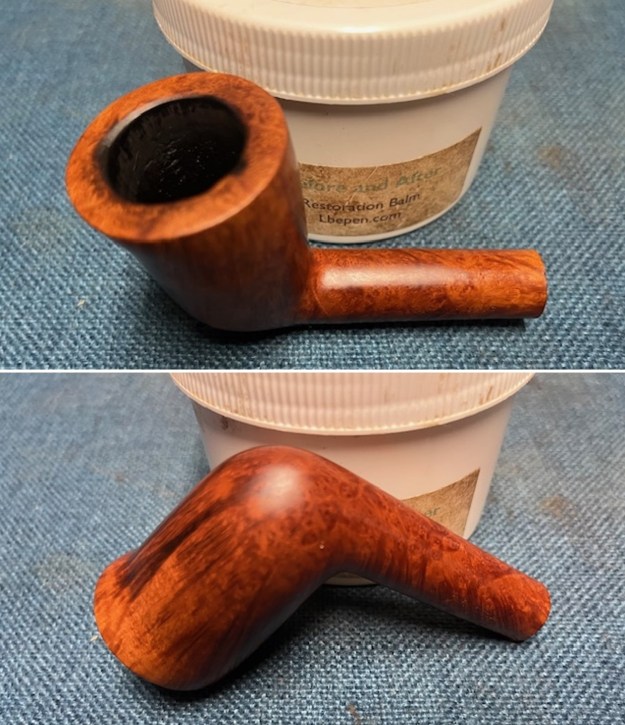
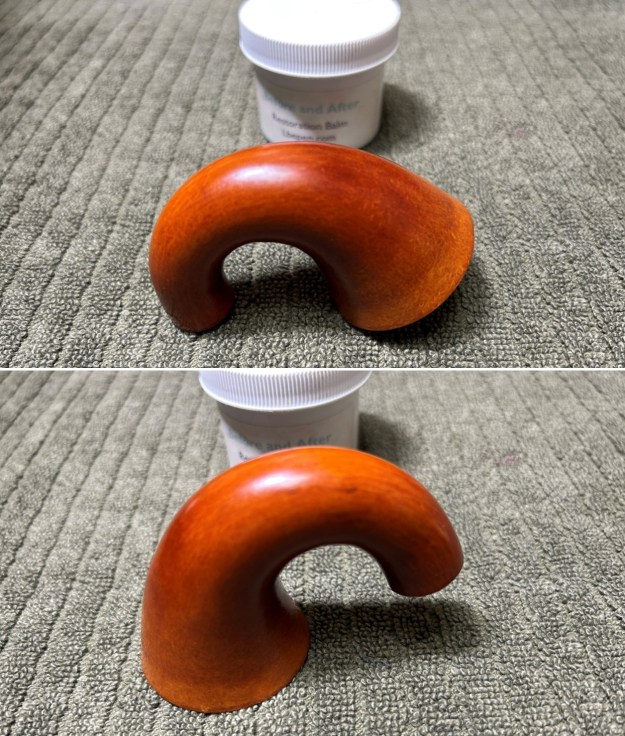
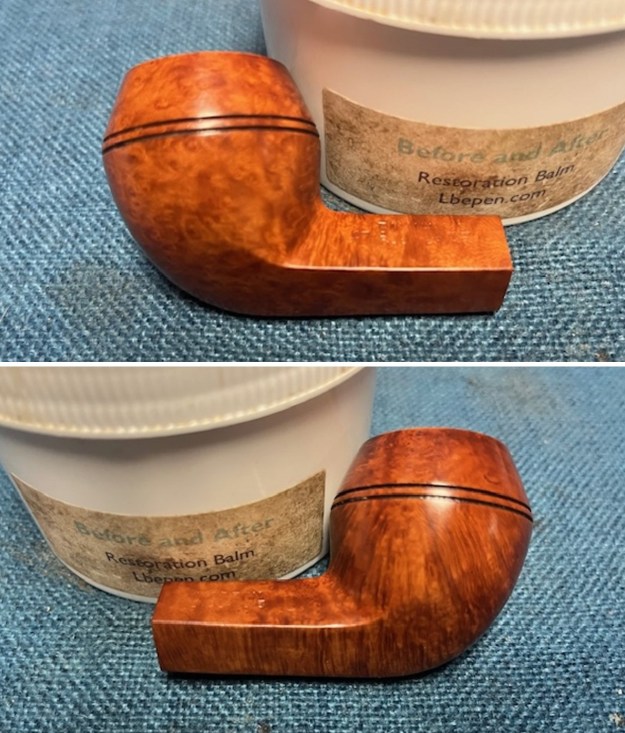
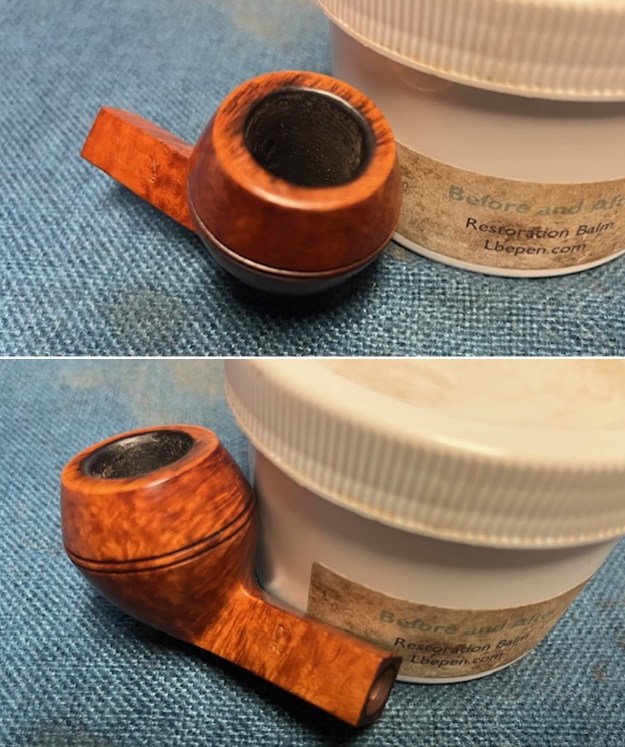
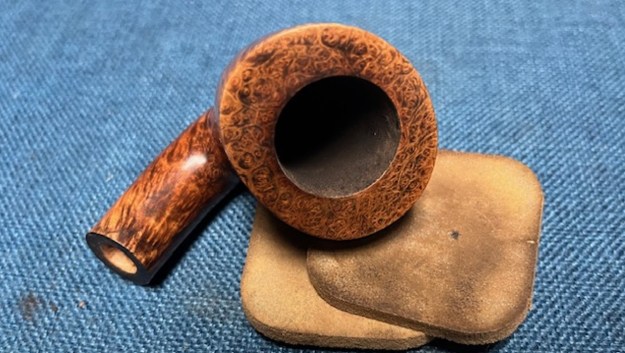
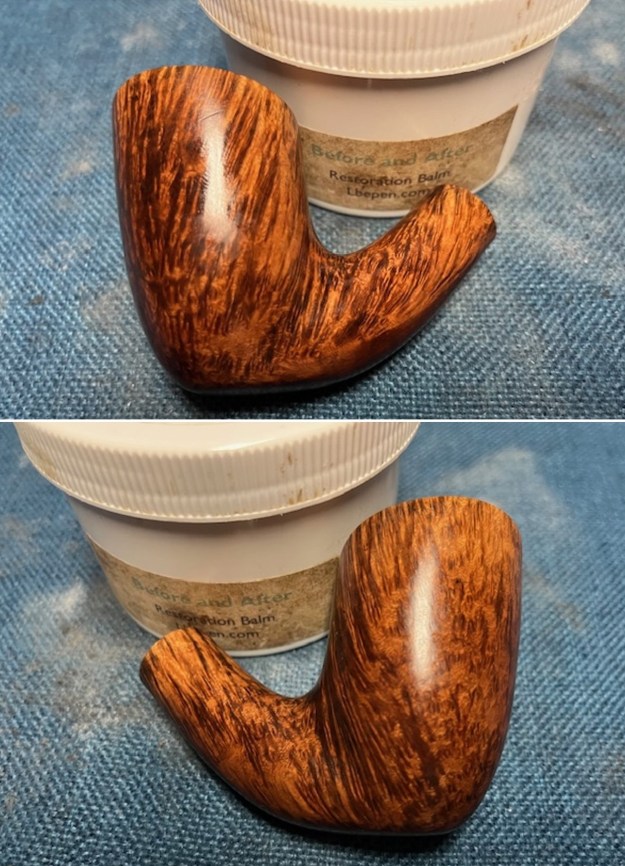
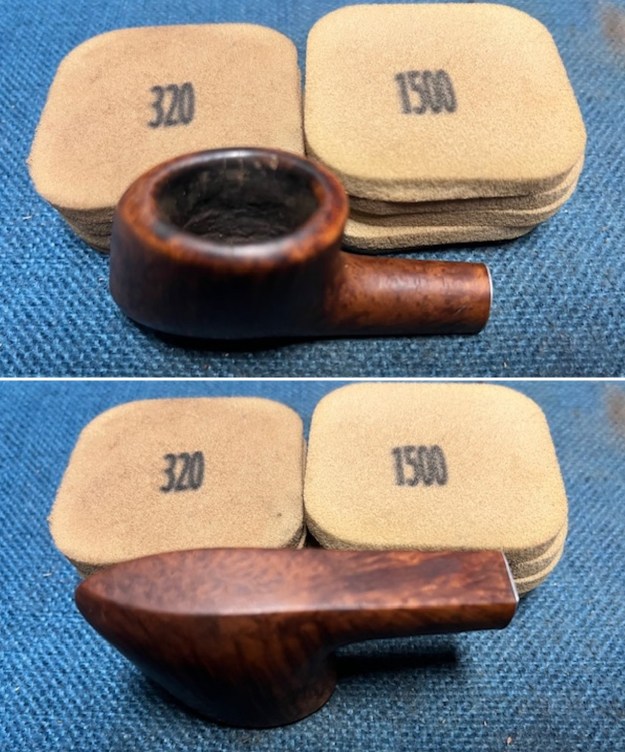
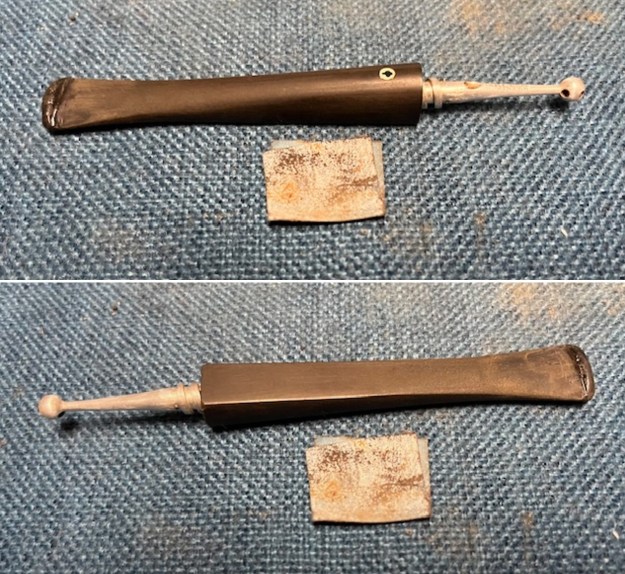
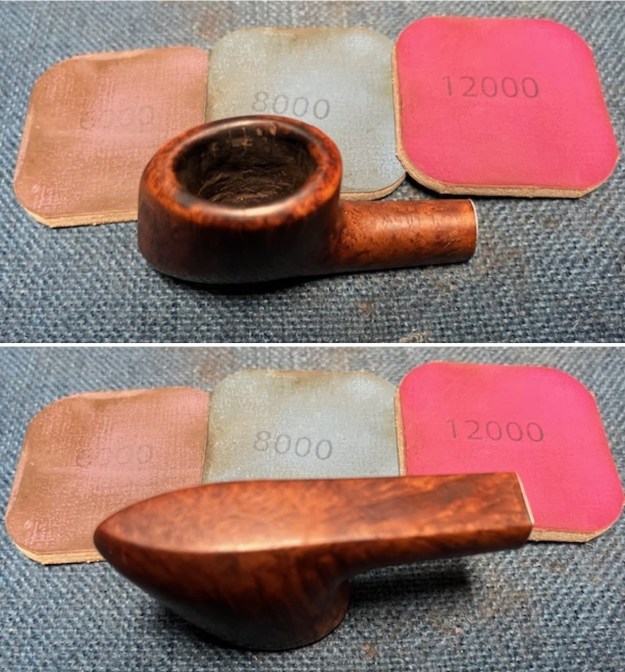
I rubbed the briar down with Before & After Restoration Balm and worked it into the briar and the repaired areas. The product works to clean, enliven and preserve the briar and give it a rich lustre. The briar came alive and the grain really pops. 
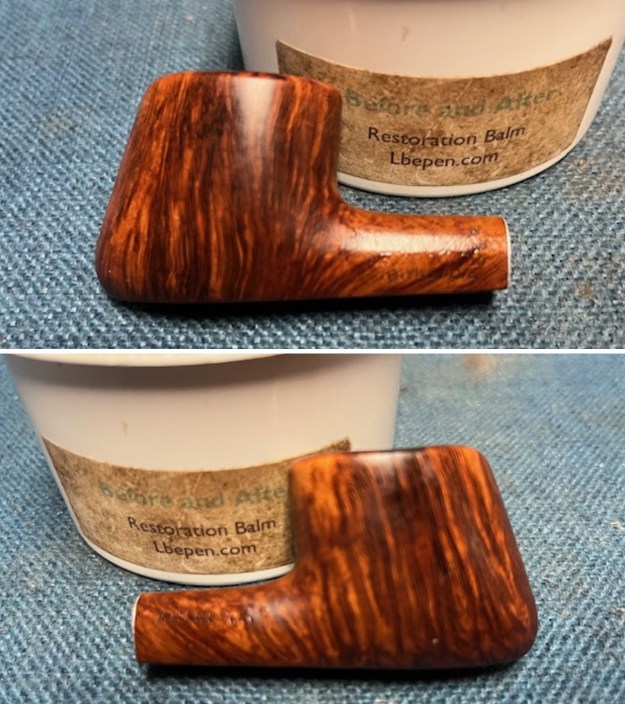
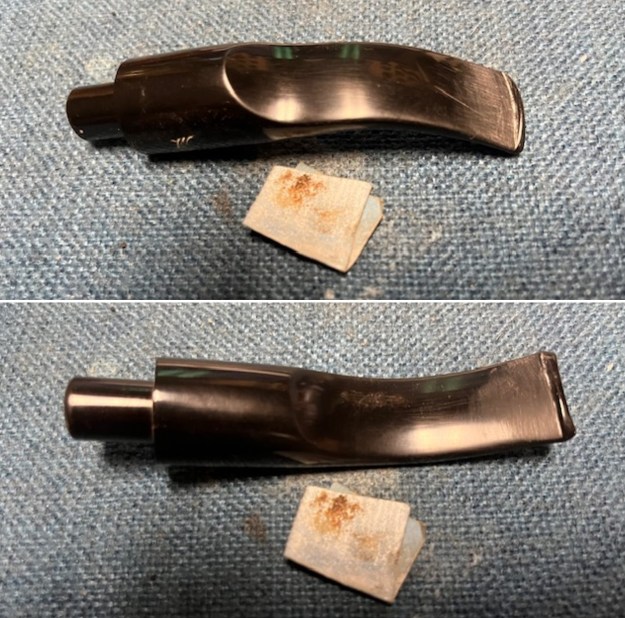
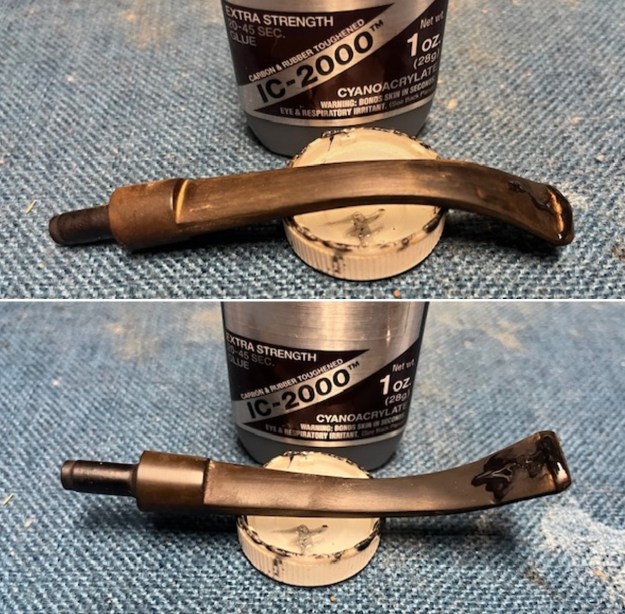
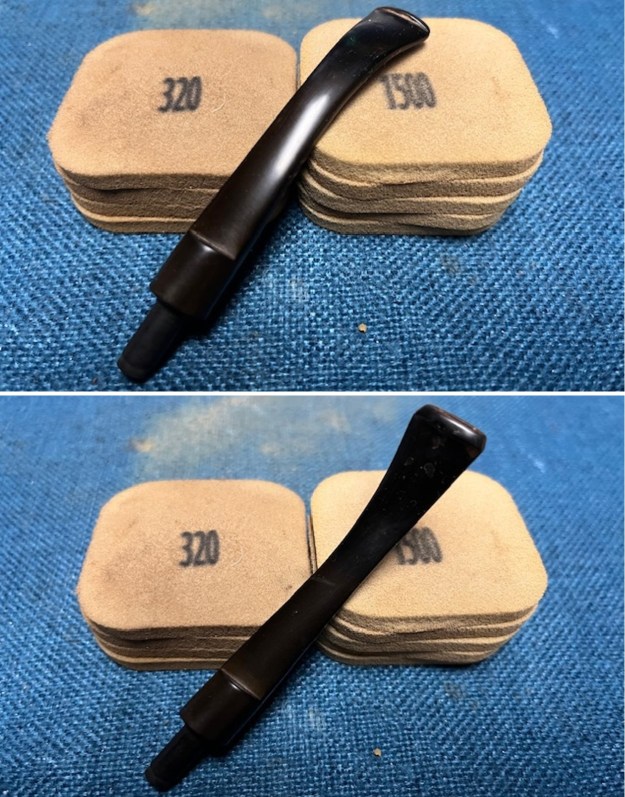
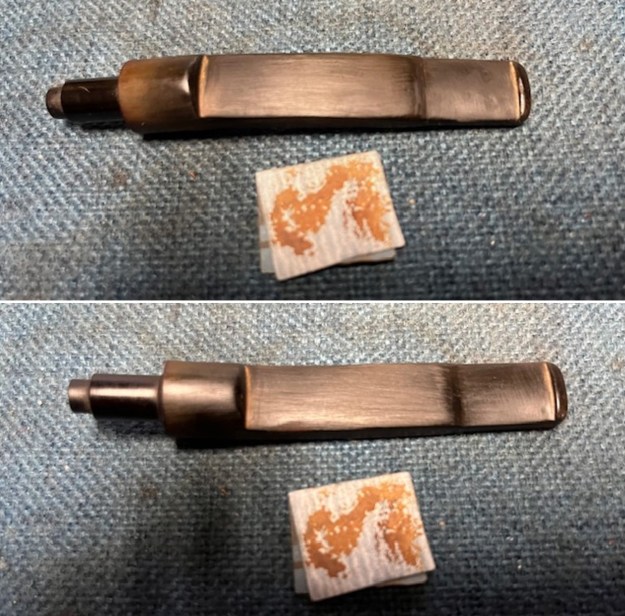
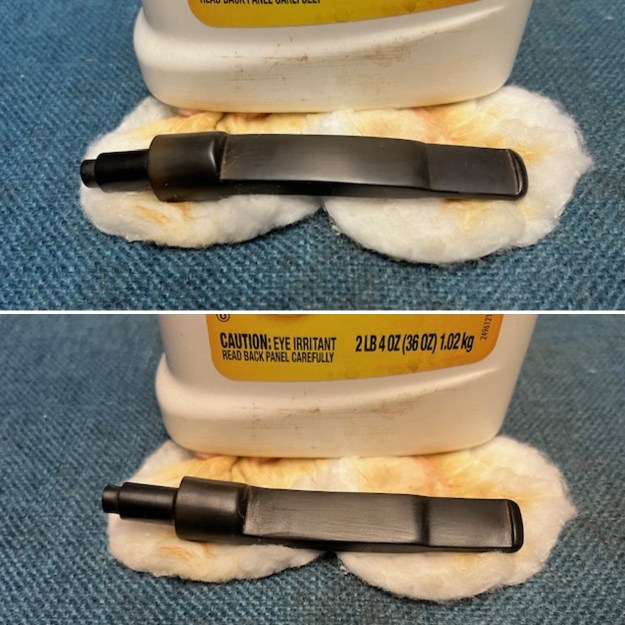
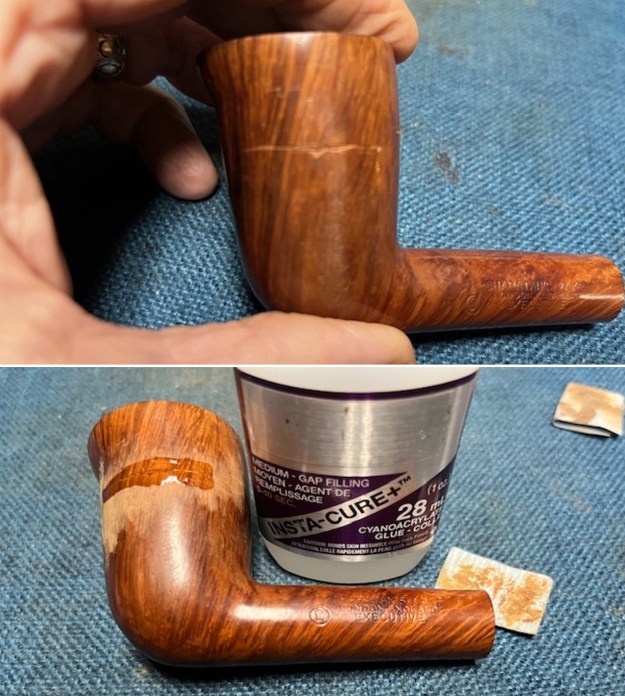
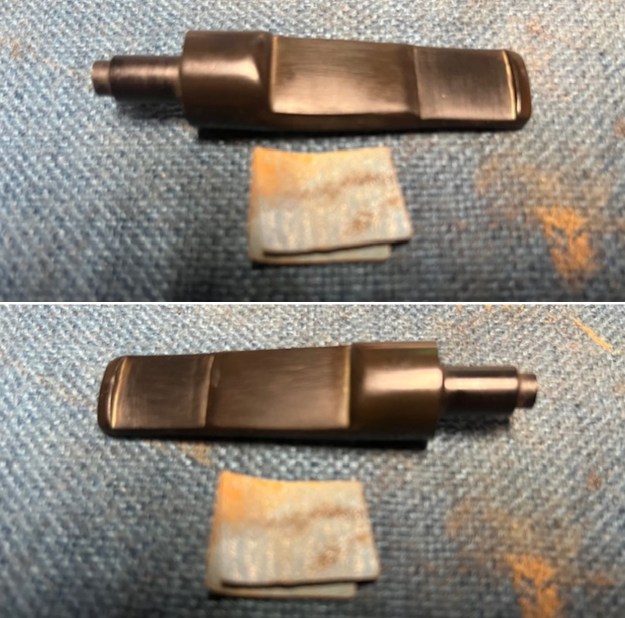
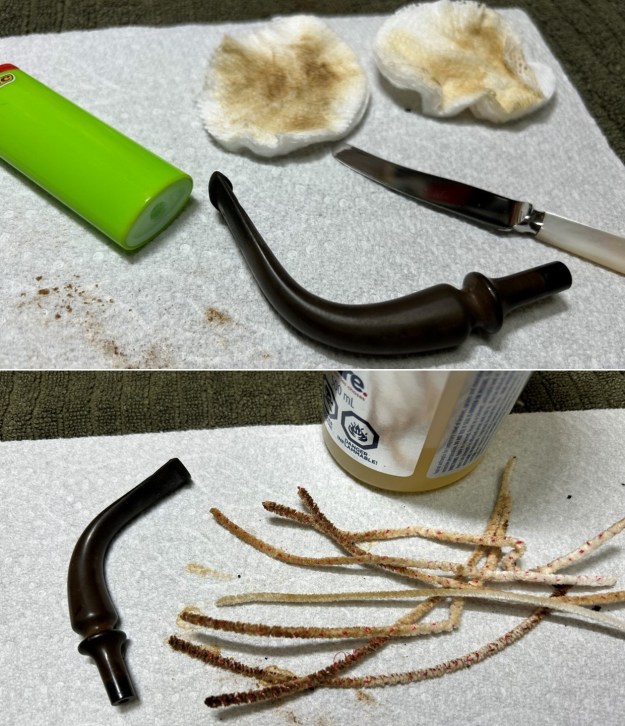
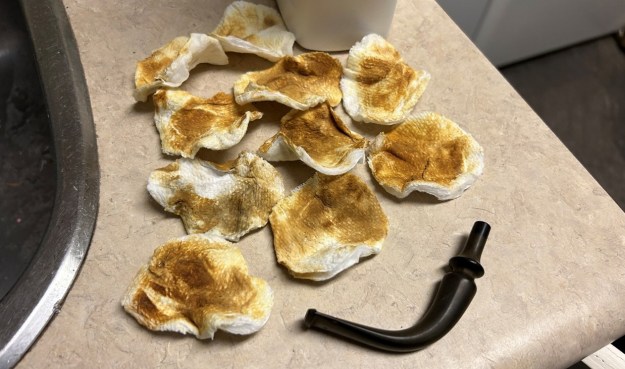
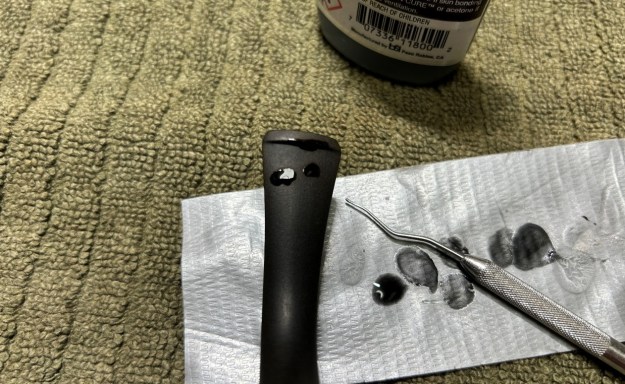
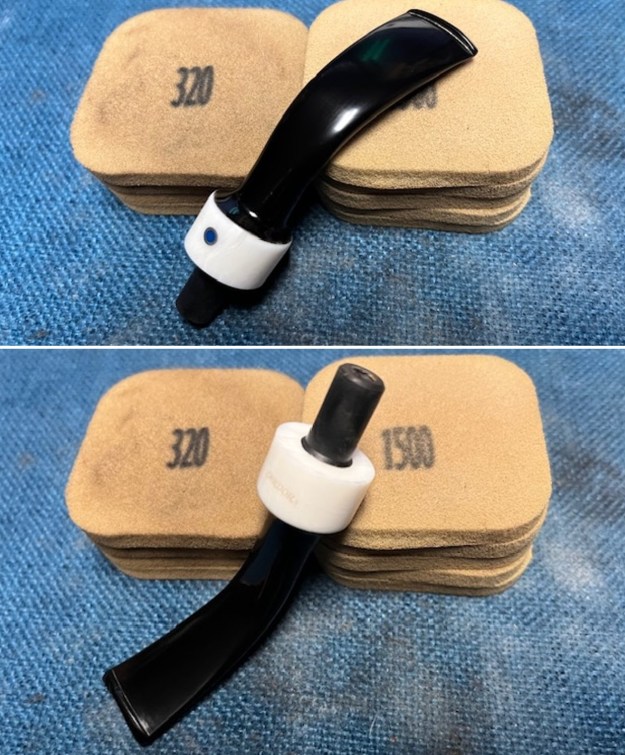
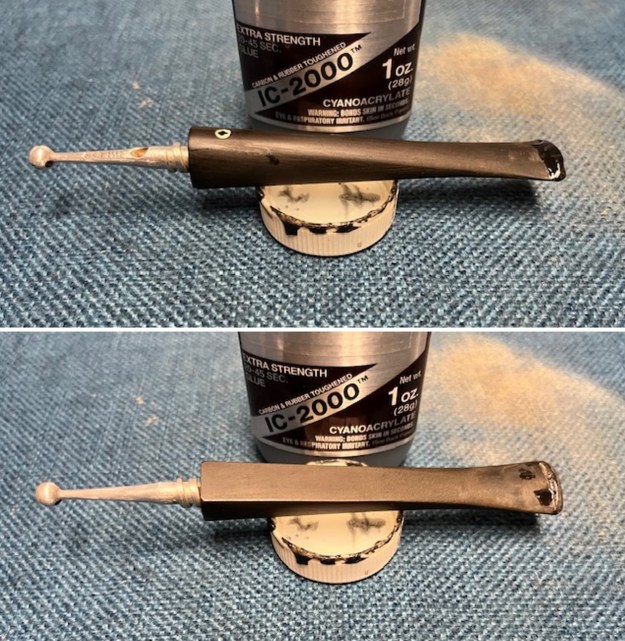
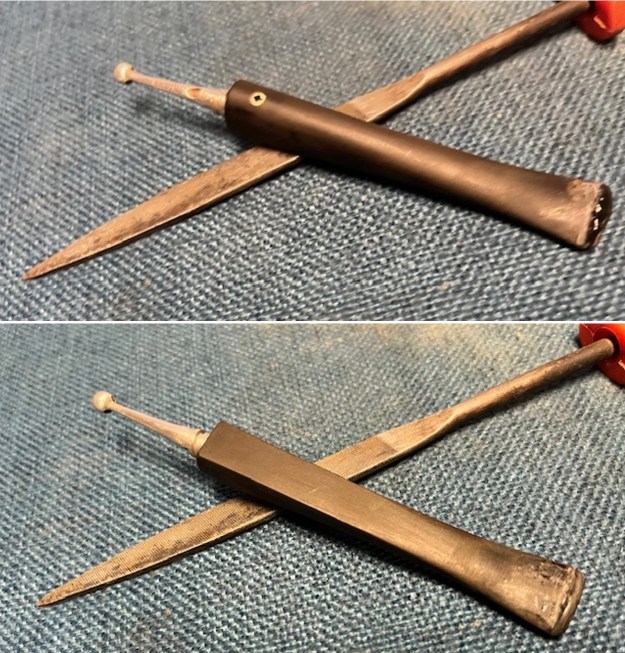
I set the bowl aside and turned my attention to the stem.  I forgot to take photos but I “painted” the vulcanite stem surface with the flame of a Bic lighter to lift the tooth marks. I was able to lift the majority of them with the heat. I filled in the deeper marks on the surface of the button and the edge of the button with a rubberized CA glue. I flattened the repairs on the stem and recut the edge of the button with a small file. I flattened the repairs with a folded piece of 220 grit sandpaper. It is starting to look very good. 
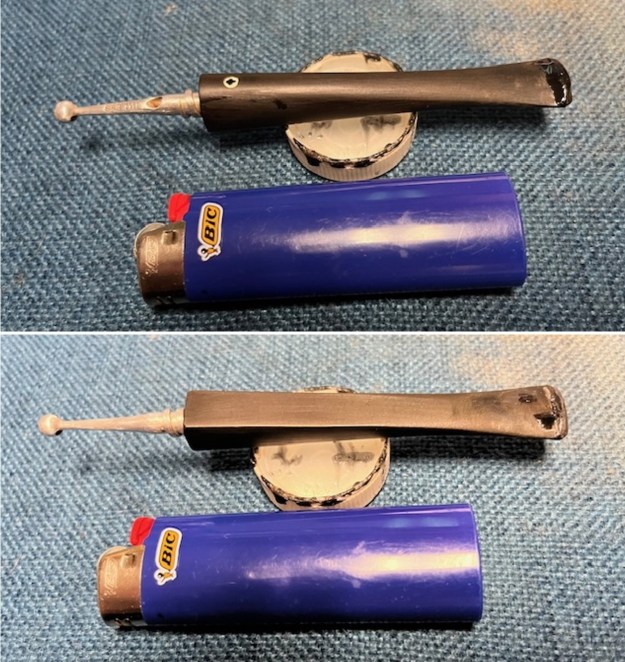
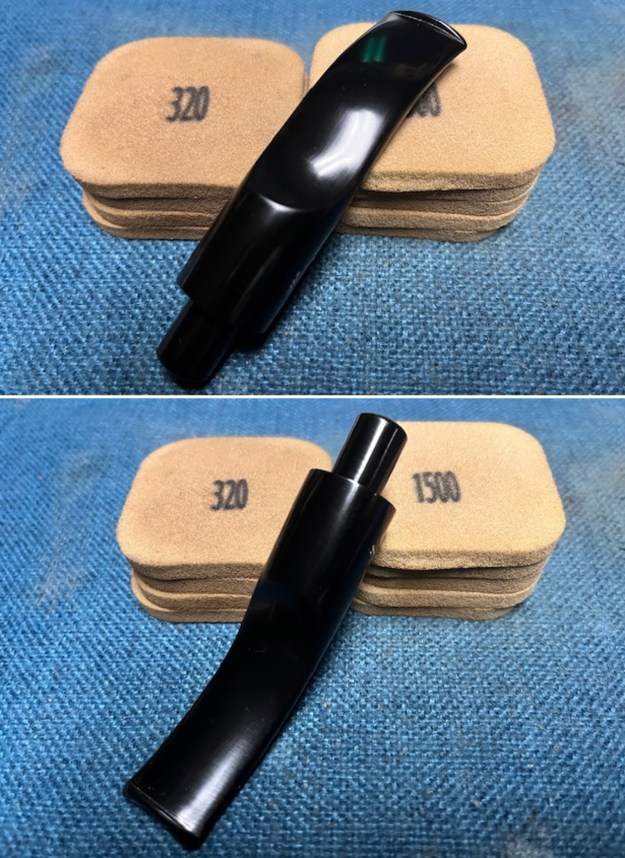
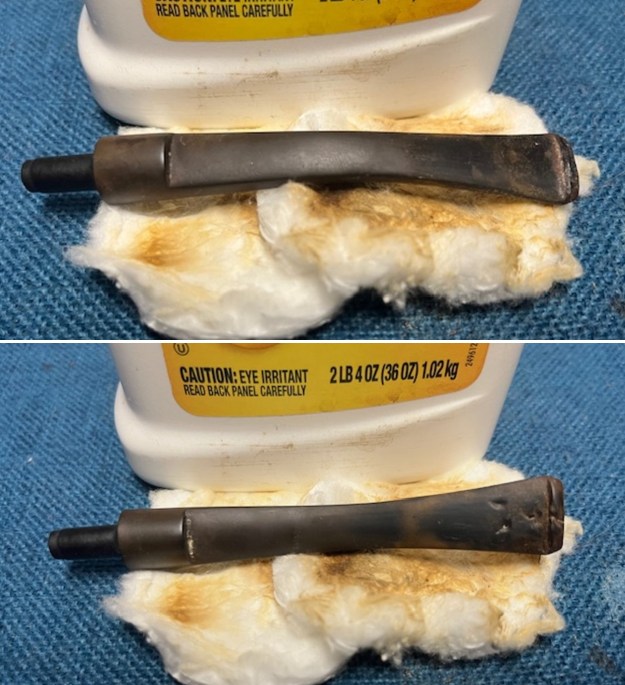
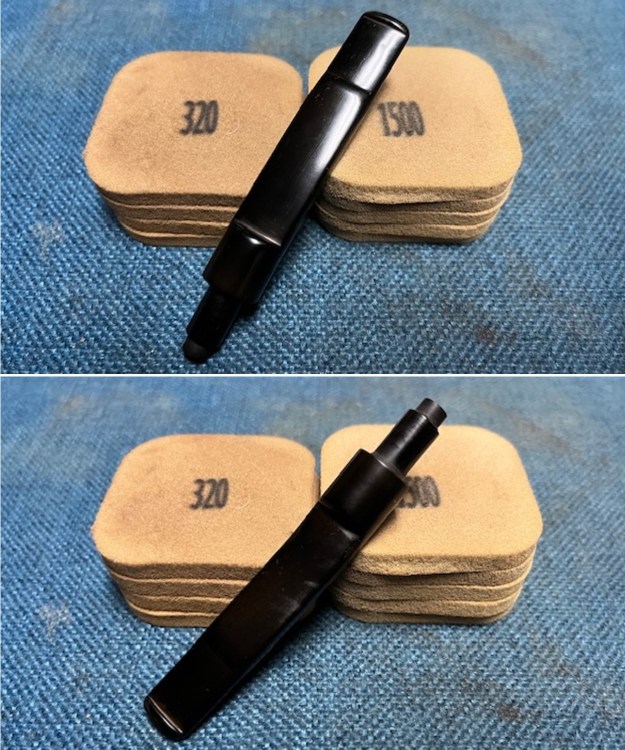
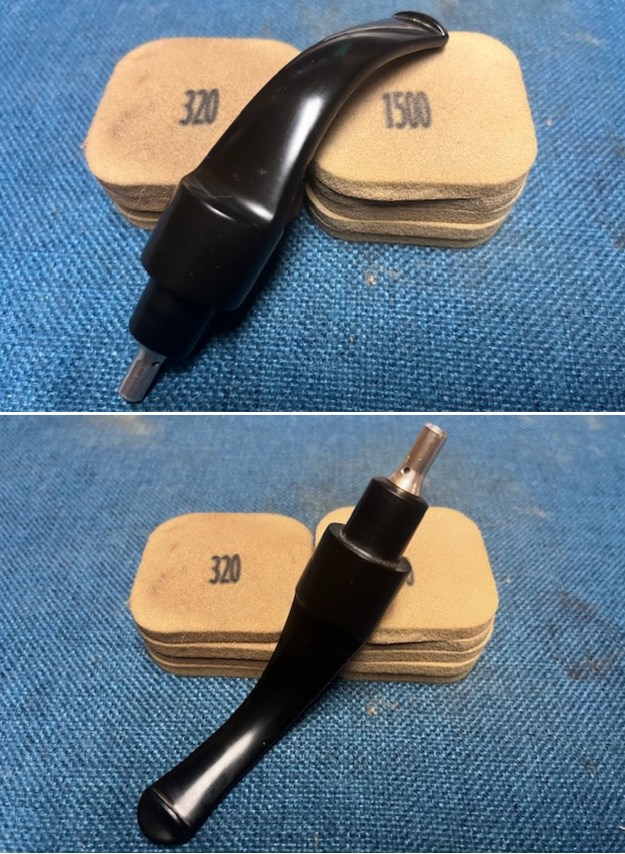
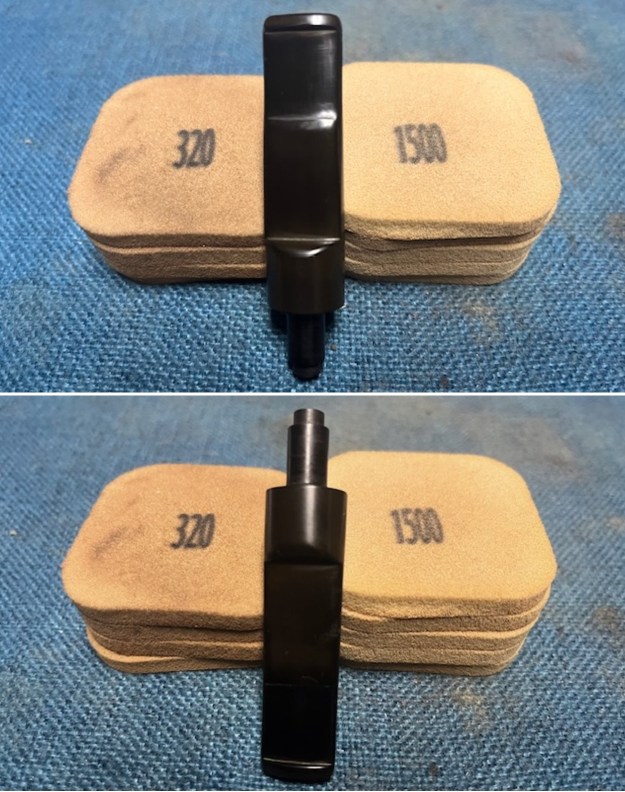
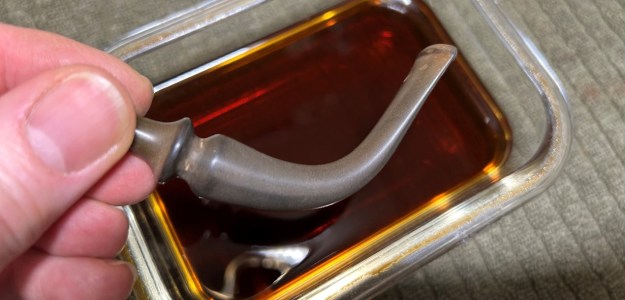
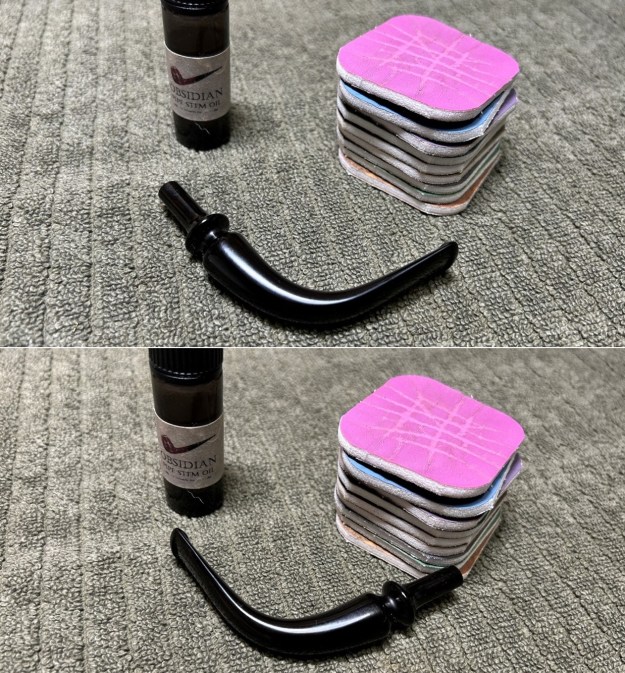
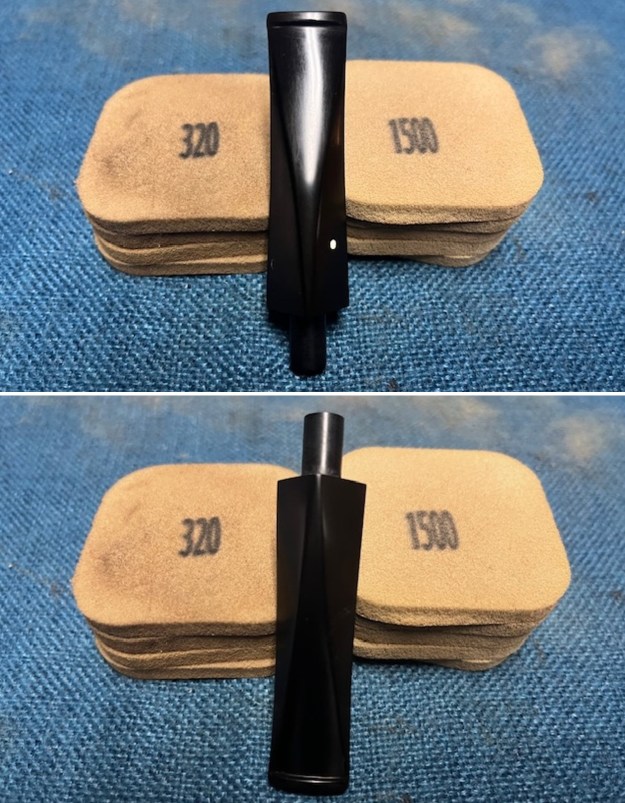
I sanded the stem with 320-3500 grit 2×2 inch sanding pads. The shape and look of the stem looked better and better. The remaining oxidation was gone.
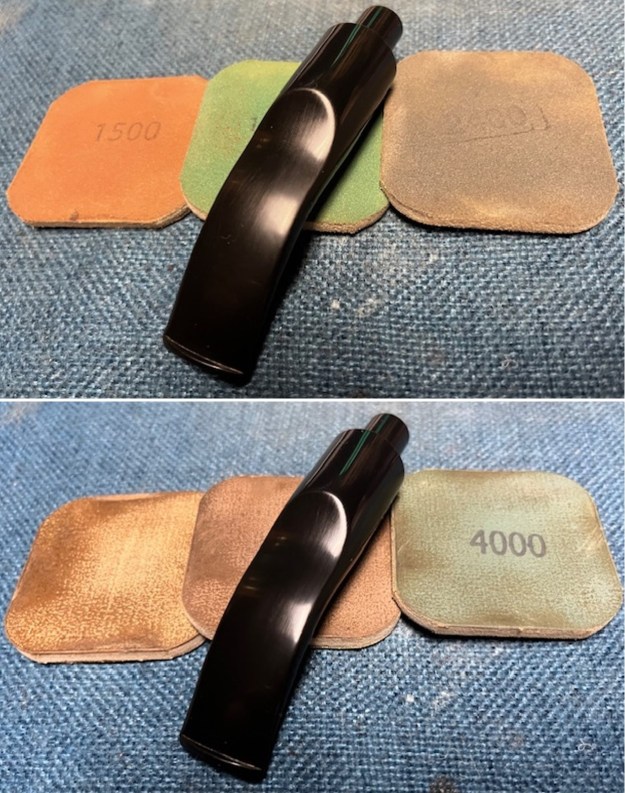
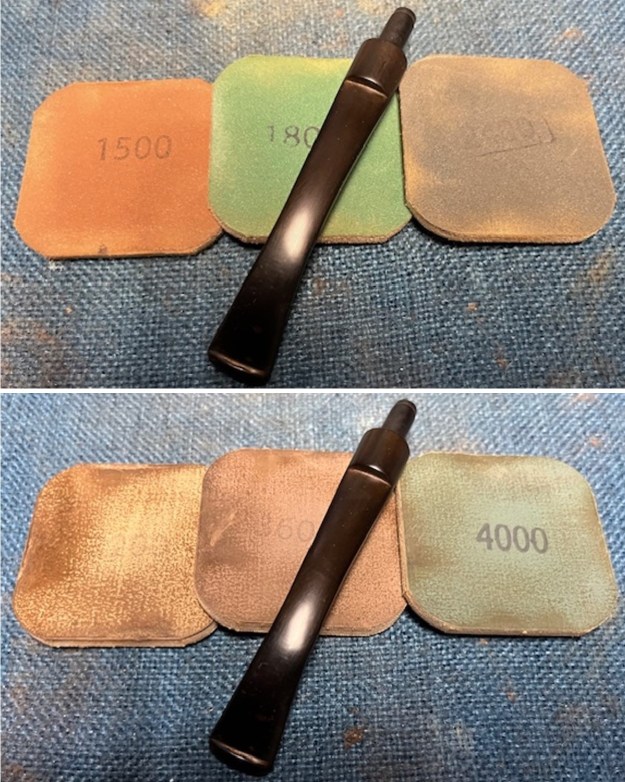
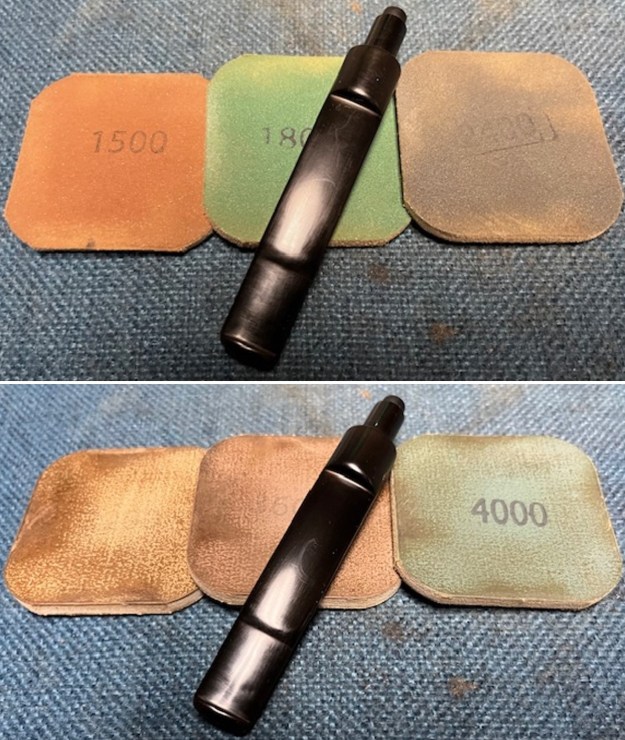
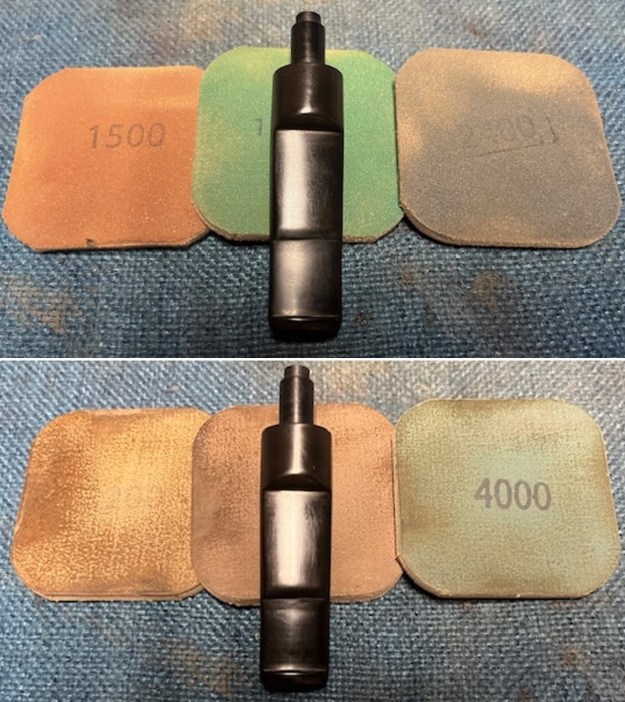
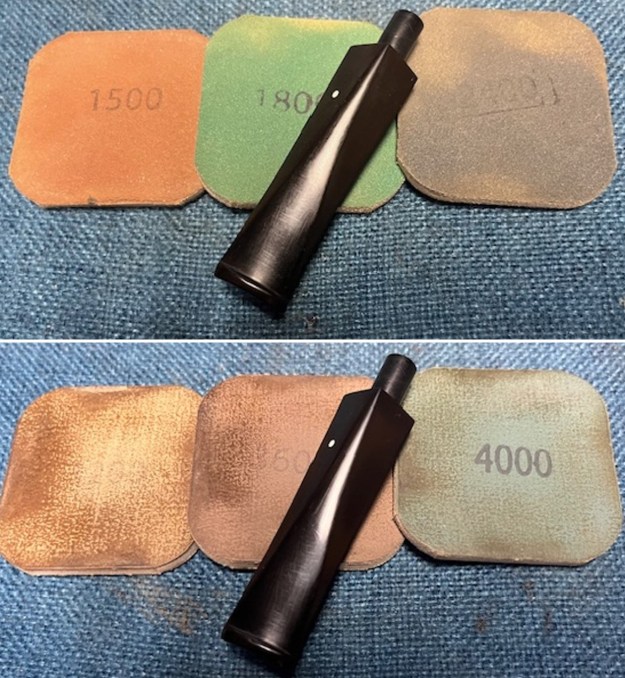
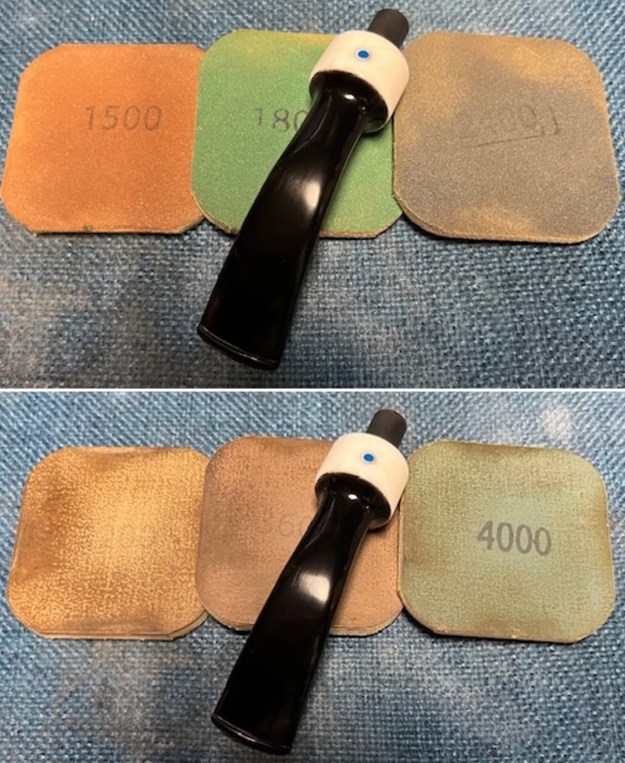
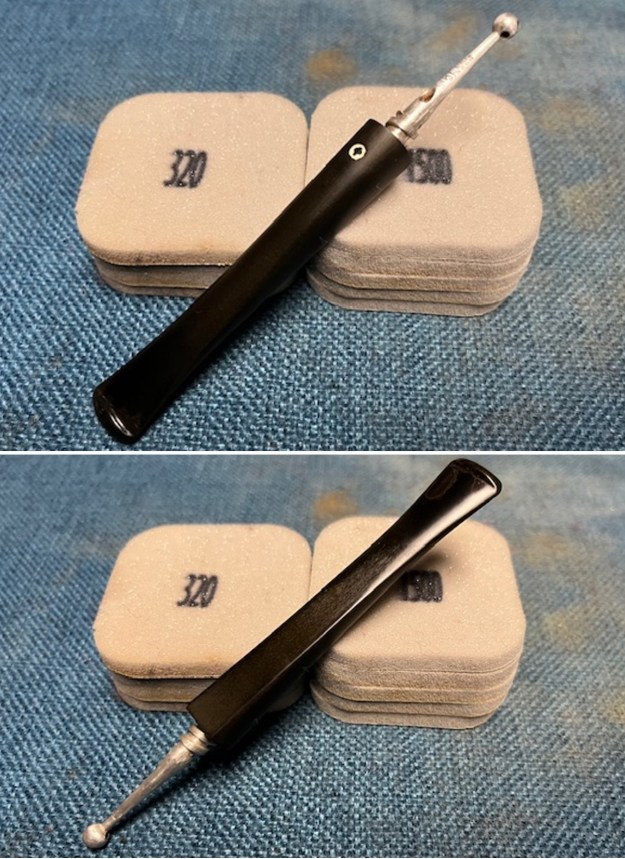
I polished the stem by dry sanding it with 1500-12000 grit micromesh sanding pads. I wiped the stem down after each sanding pad with an Obsidian Oil Cloth. The stem looked very good. 
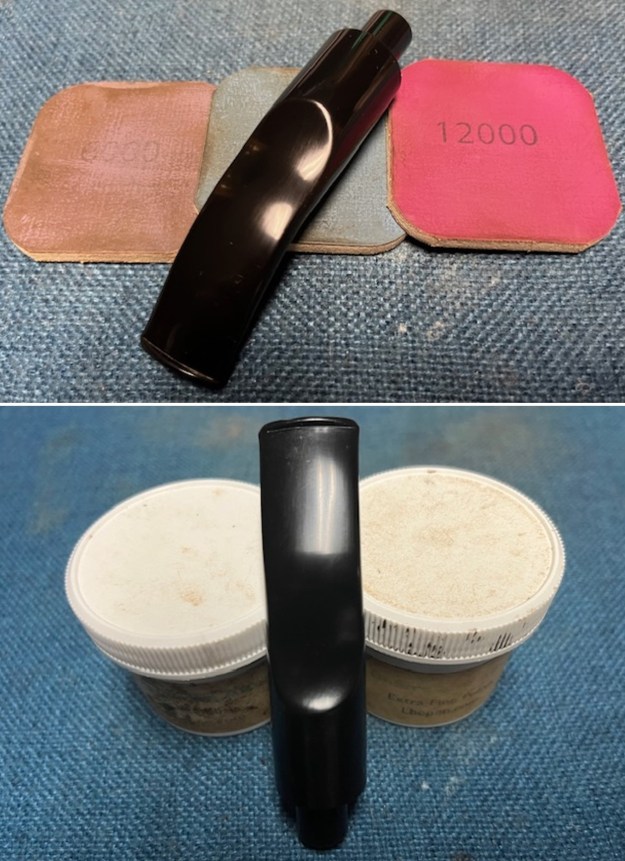
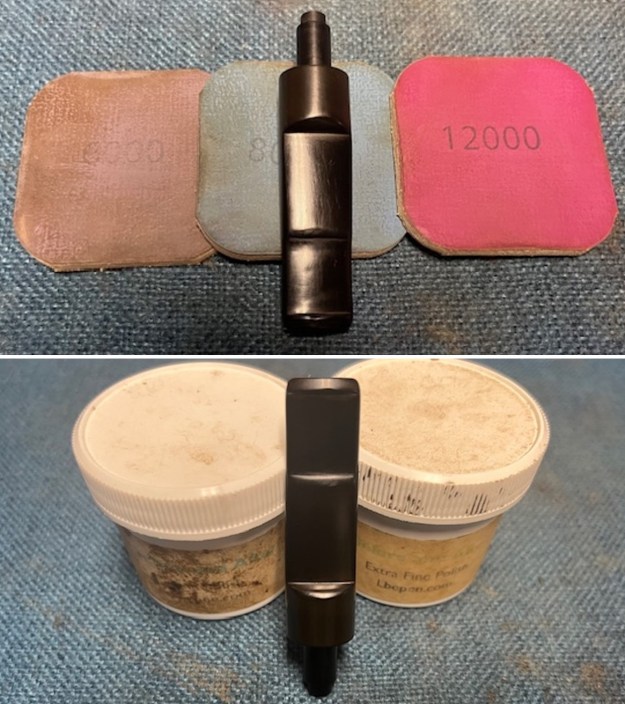
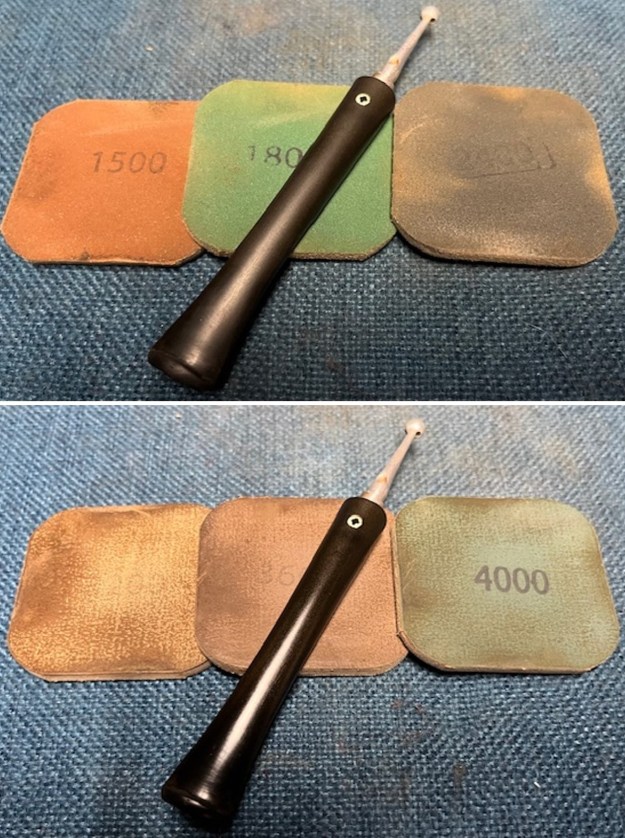
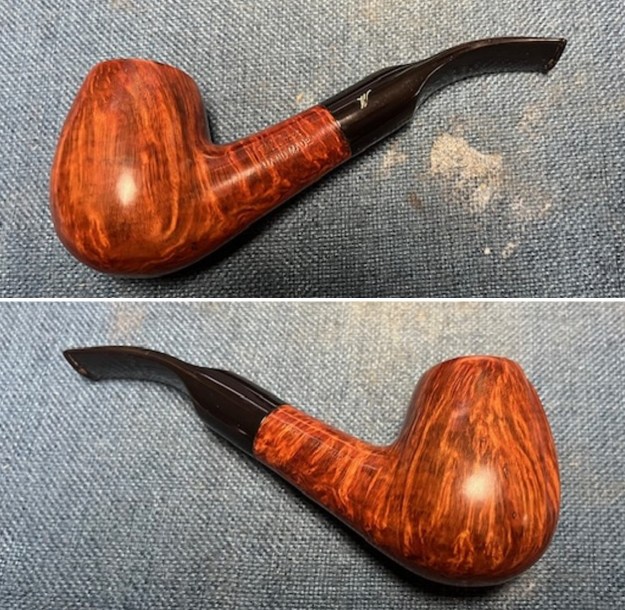
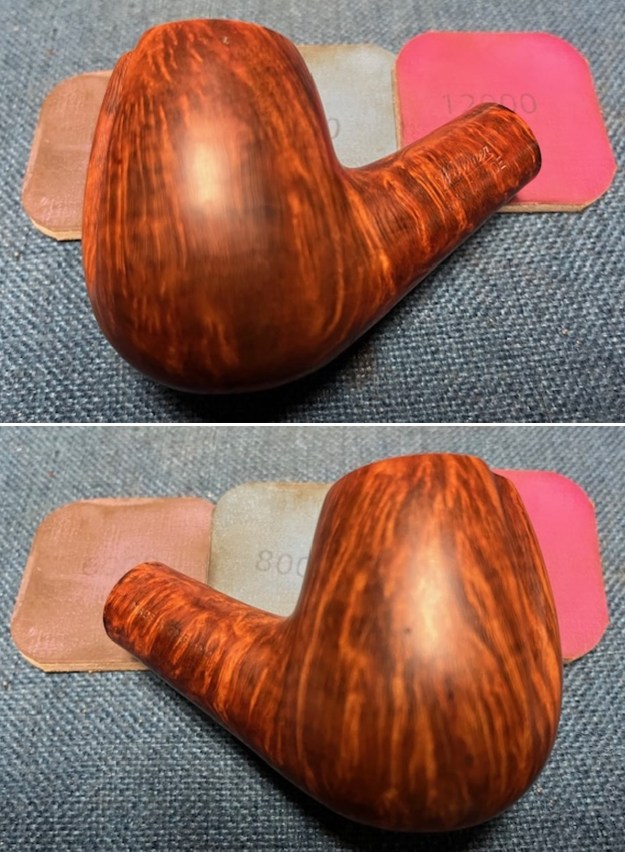
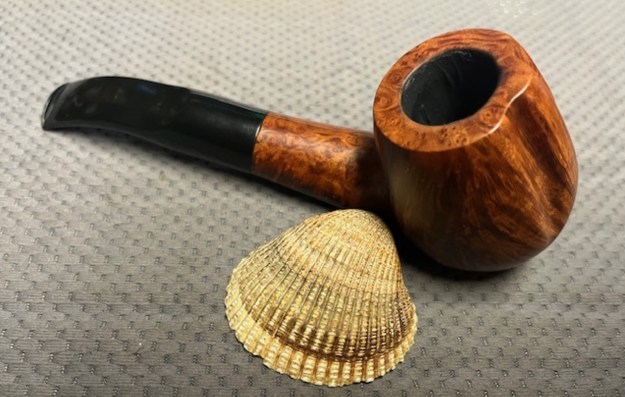
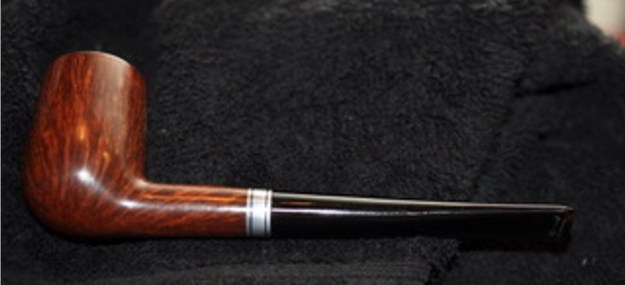
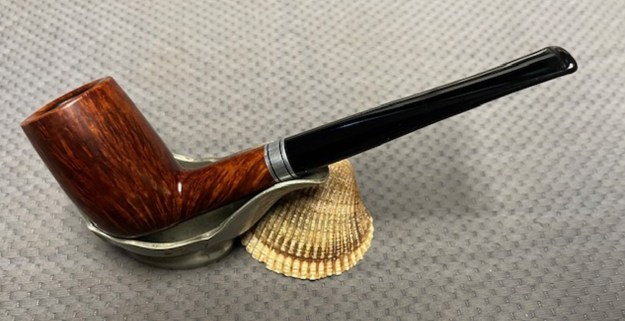
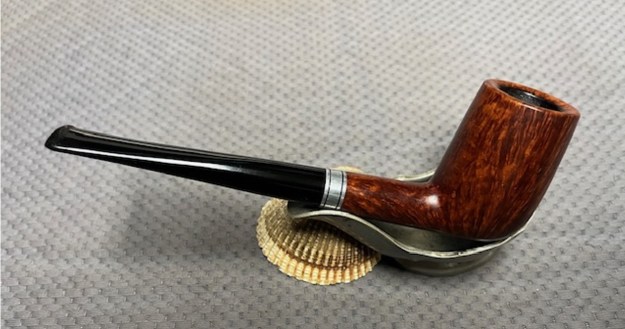
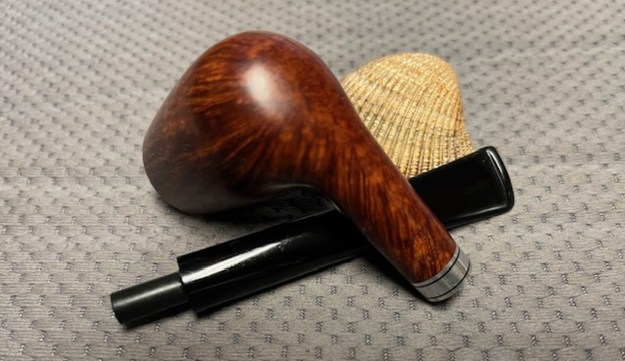
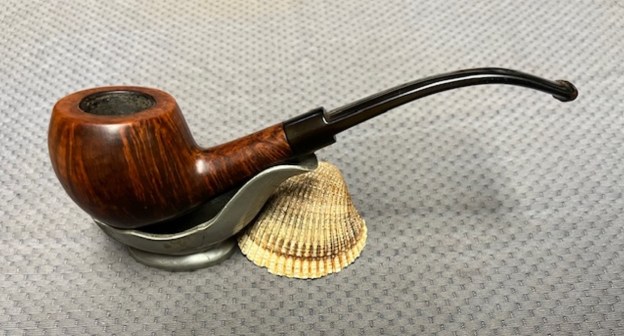
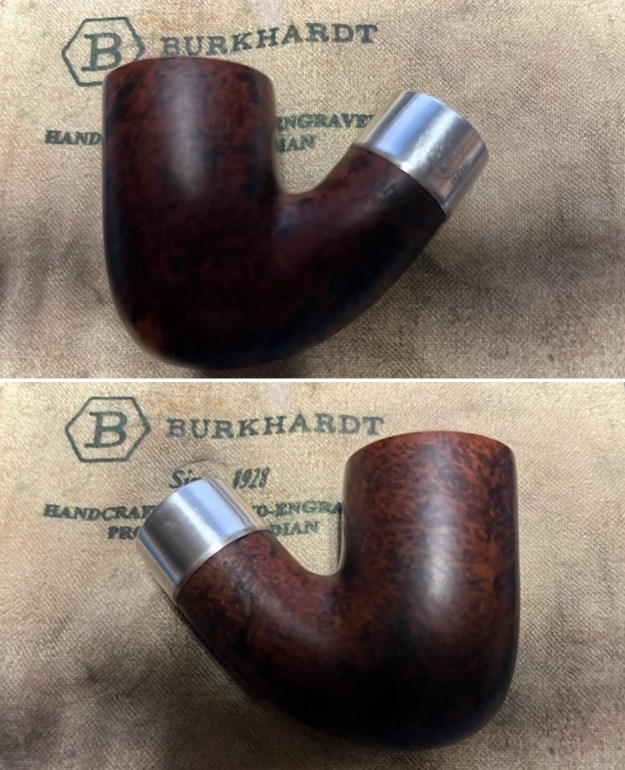
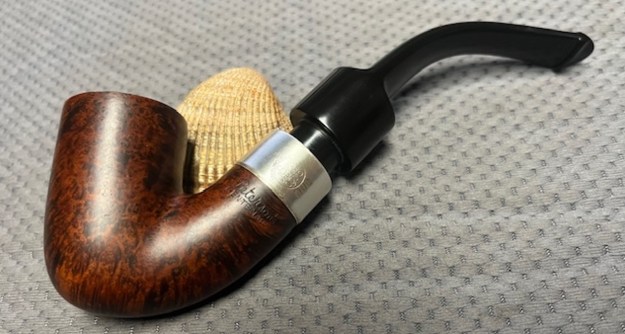
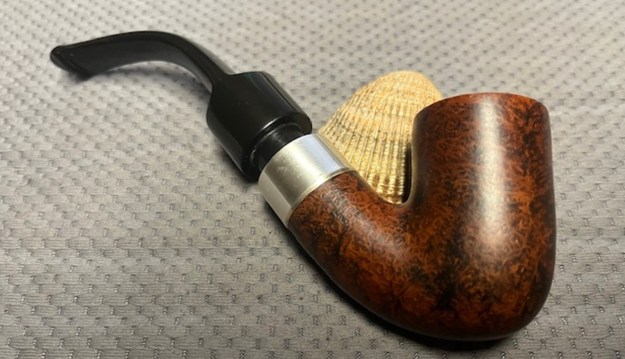
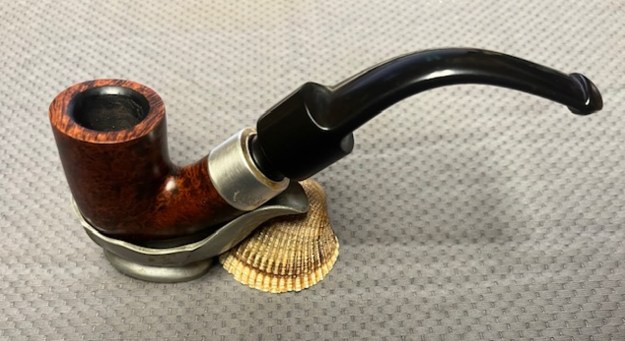
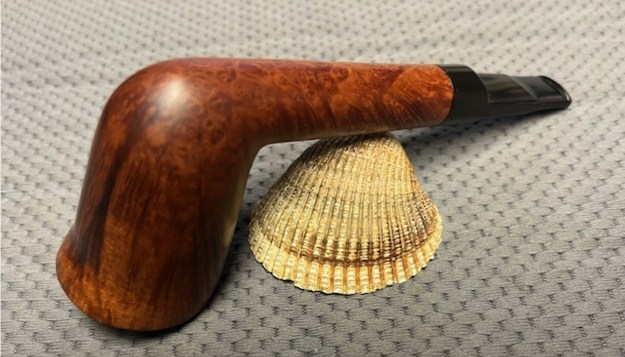
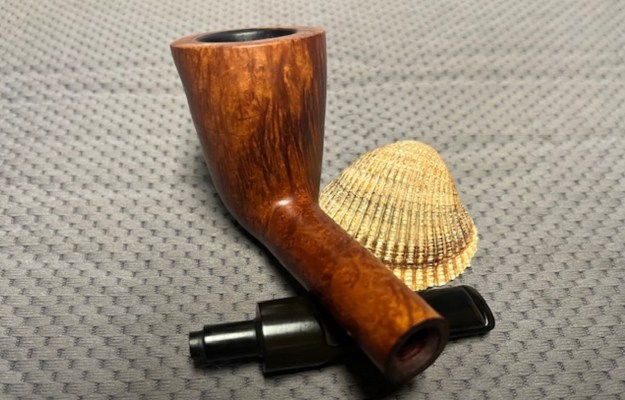
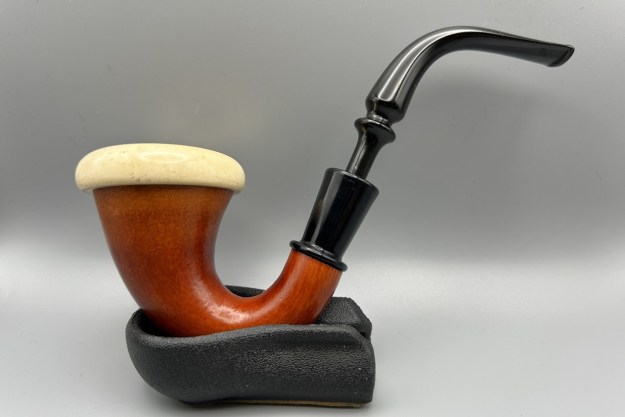
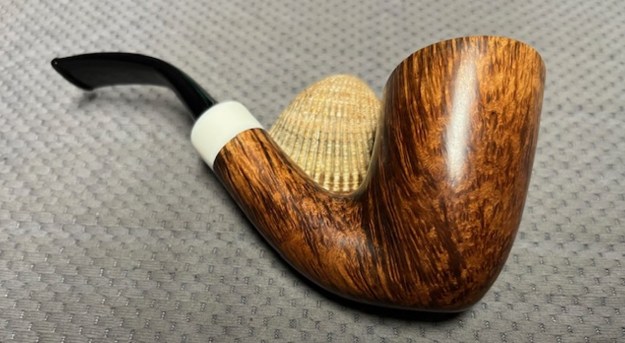
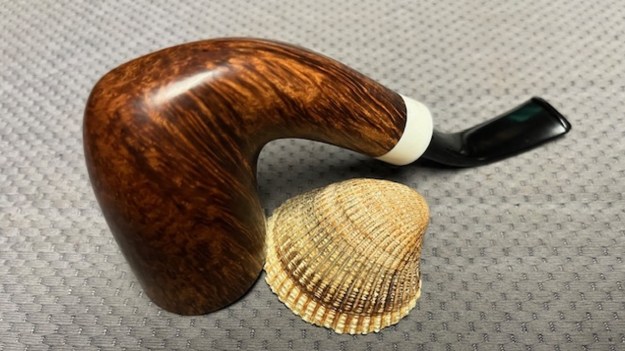
I put the Kaywoodie Flame Grain Imported Briar 61 President back together and buffed it on the buffing wheel with Blue Diamond. It raised a shine on the briar and the stem and gave some depth to the grain. I gave both the bowl and the stem multiple coats of carnauba wax on the wheel and buffed the pipe with a clean buffing pad to raise the shine. I hand buffed it with a microfiber cloth to deepen the shine. The pipe turned out to be a unique beauty in its own way. I really like the grain and the shape of this Kaywoodie Flame Grain 61 President. The dimensions of the pipe are Length: 6 inches, Height: 1 ½ inches, Outer diameter of the bowl: 1 ¼ inches, Chamber diameter: ¾ of an inch. The weight of the pipe is 1.41 ounces/39 grams. It is a uniquely beautiful pipe. It will join the Marxman Apple on its journey back to Devin early in the week ahead. Thanks for walking through the restoration with me.

Another Pipe with a Potential Burn Out Issue from Michael


by Steve Laug

I finished repairing and restoring the four pipes that Michael sent to me for work on impending burnout and damage to the bowl walls on all four. I sent them back to him and gave him a call to let him know they were on their way back to him. On January 13 I received an email from Michael about another pipe that he sent to me. I have included the email below.

Hi Steve! I mailed a pipe to you today; the tracking (Customs)# is LH264469865US. I enclosed a note with it which mentions that I collect Willmer pipes and this one came to me with a sizable burnout. Willmers are somewhat difficult to find; I’ve got 16 of them and I probably won’t be getting any more. Their “high grades” were always smooth and a bit on the large size. This one is stamped “Hand Made”, which was the lowest of their high grade line. But- all Willmers were made of super good quality briar and are excellent smokers. Even though this one has a number of fills to cover up small, cosmetic deficiencies in the grain, it’s a great pipe and in this day and age it’s a fairly rare Willmer to find. When you look at it please let me know if you can fix it or not. Thank you! — As ever, Michael

Yesterday, January 26, 2926 I received a package from Michael. I opened it to examine a beautifully grained Willmer. It is a Willmer Hand Made Egg with two fluted valleys on the front of the bowl. It has an acrylic saddle stem. It is in good condition as can be seen in the photos below. It is stamped on the left side of the shank and reads Willmer [over] Hand Made. On the right side it is stamped Made in England. The stamping is clear and readable. The pipe has rich finish with a blend of brown stains on a richly grained smooth finish that the shape follows well. The finish was quite clean and shiny. The bowl had a moderate cake and there appeared to be some damaged areas midbowl on the back, left side and the front. The rim top had some lava coat on the rim top and inner edge. The original saddle stem with the Willmer, “W” logo on the left side has some light tooth marks and chatter on both sides. I took photos of the pipe to show what it looked like before I started working on it. I took photos of the bowl and rim top to show the thickness of the cake and the lava coat on the rim top. The inner edge of the bowl has some lava and potential damage under the coat. It is hard to know until I clean it up. You can see the fluted troughs on the front of the bowl. The stem photos show the condition of the saddle stem ahead of the button.The stamping on the sides of the shank are clear and readable as noted above. I took a photo of the pipe with the stem removed to give a sense of the proportions of the pipe. Under the grime it is a real beauty. I turned to Pipephil to get a quick review of the Willmer Company before I started my work on this pipe (http://www.pipephil.eu/logos/en/logo-w3.html). I quote the side bar from the site below.

Willmer is a brand of H. Willmer & Son Ltd. The factory closed down about 2006-07 after more then 60 years activity and two generations of makers. Gradings until the 1980s (ascending): BA, A, AA, and AAA. After this date Willmer introduced the AAAA and AAAA PRESENTATION as top grades. The pipe I was working on no letter stamping on it which has stamping similar to the photo in the top photo.

I turned to Pipedia to get more information on the brand (https://pipedia.org/wiki/Willmer). The first paragraph dispelled of the belief that Willmer had been a carver for Charatan in his own words. I quote a portion of the article to give a sense of the history of the brand.

Willmer was founded in London. According to the website, which doesn’t exist anymore because the Willmer factory has been closed in 2006/07, the firm was in business “for more than 60 years” by 2003. Willmer was homed then in Southend-on-Sea, Essex, so not far from the Cadogan plant.

When Willmer first started, they definitely strived to compete with brands in the high-end market. Due to the excellent quality of the pipes Willmer was frequently asked to produce private label pipes for England’s best renowned pipe retailers. So many pipes are not easily recognized as Willmers for stamped under the name of the respective shop. Willmer’s own pipes were stamped “Willmer – Made in England” and showed a sweeping “W” in white or gold on top or left side of the stem. The earlier grading had AAA as top grade followed by AA, A, AB etc.

Sometime in the 1980’s, Willmer went through some major changes. The move to Essex was already mentioned above. They continued making highly respectable freehands – often copying some of the stunning Charatan shapes of days gone by. The grading was altered. What used to be an AAA now became the additional name “Presentation” and was stamped with AAAA. Funny enough, the fourth A was often larger than the three before. The other grades were changed accordingly.

Now I knew that I was working on a Willmer Hand Made Egg with an acrylic Saddle Stem.

I turned to work on the pipe itself. I reamed the bowl with a PipNet pipe reamer using the cutting heads 2 and 3. I finished the reaming with a Savinelli Fitsall Pipe Knife. I sanded the walls of the bowl with 220 grit sandpaper wrapped around a piece of dowel. I cleaned out the inside of the shank and the airway in the stem with alcohol, cotton swabs and both bristle and regular pipe cleaners. I scrubbed the bowl and shank with a tooth brush and some undiluted Murphy’s Oil Soap. I rinsed it off with warm water to remove the dust and soap from the finish. I dried it off with a soft cloth and it looked much better. I sanded the exterior of the bowl with 320-3500 grit 2×2 inch sanding pads to remove the scratching in the finish. I wiped the bowl down with a damp cloth after each sanding pad. It really began to look much better. I polished the briar with 1500-12000 grit micromesh sanding pads to develop the shine. It began to look very good. It had a rich shine in the finish. To address the checking and the divot on the inner wall around the middle of the bowl. I wiped it clean with a cotton pad and alcohol to remove any debris on the surface. I mixed a batch of JB Weld to repair the divot and checking on the bowl walls. I pressed it into the damaged areas with a dental spatula. I set the bowl aside for the repair to cure. Once it cured I sanded it smooth with a piece of 220 grit sandpaper wrapped around a piece of dowel to smooth out the repair. I wiped it down with a damp pad to remove the sanding debris. I mixed a batch of bowl coating composed of sour cream and activated charcoal powder to give the bowl a thin coat of the mixture. I used a folded pipe cleaner to paint the walls and heel of the bowl with the mixture. I set it aside to cure. I rubbed the briar down with Before & After Restoration Balm. I worked it into the briar with my fingertips to work it into the finish. The product works to clean, enliven and preserve the briar. I let it sit for 10 minutes then I buffed it with a cotton cloth to deepen the shine. The briar really comes alive with the balm. I sanded the tooth marks and chatter on the top and underside of the stem with a folded piece of 220 grit sandpaper. I continued sanding it with 320-3500 grit 2×2 inch pads. I wiped the stem down with an Obsidian Oil cloth after each sanding pad.I polished the acrylic with micromesh sanding pads – 1500-12000 grit pads. I wiped it down with Obsidian Oil after each sanding pad. I used Before & After Pipe Polish – both Fine and Extra Fine to further polish the stem. This is a unique Willmer Hand Made Egg with a saddle stem I have worked. It is a beauty. I put the bowl and stem back together again and buffed the bowl and the stem with Blue Diamond on the buffing wheel. I gave the bowl and the stem several coats of carnauba wax. I carefully buffed the entire pipe with a clean buffing pad to raise the shine. I finished buffing with a microfiber cloth to deepen the shine. The finished pipe looks very good. The grain is quite beautiful a mix of straight and flame around the bowl sides and birdseye on the rim top and heel. The pipe feels great in the hand. The two fluted valleys on the front of the bowl makes this interesting shape fit well in either the right or left hand. The finished Willmer Hand Made Egg is shown in the photos below. The dimensions of the pipe are Length: 6 inches, Height: 1 ¾ inches, Outside diameter of the bowl: 1 ½ inches, Chamber diameter: ¾ of an inch. The weight of the pipe is 1.20 ounces/35grams. This great looking Briar turned out very well. It should be a great pipe Thanks for walking through the restoration with me as I worked this beautiful Willmer Egg. This one will soon be heading back to Michael. Thanks for reading this blog and my reflections on the pipe while I worked on it.

Breathing New Life into a Stanwell Dorado 175 Stack


by Steve Laug

It is a beautiful chilly day in Vancouver without rain so I decided to go to the basement and work on another pipe that was purchased on 02/16/2023 in a lot of pipes that came to us from a seller in Copenhagen, Denmark. It included a group of Danish Made Stanwell pipes that are quite beautiful. The grain around the bowl and shank of this Stack has a mix of birdseye, straight and flame grain. The pipe is stamped on the underside of the shank and reads STANWELL [over] Made in Denmark [over] Dorado. On the right side of the shank it is stamped with the shape number 175. The pipe was dirty when Jeff received it. There was dust and grime ground into the finish. It is finished in the warm stain that highlights some nice grain around the bowl and shank. The bowl was heavily caked and there was some darkening and lava on the rim top. The inner edge shows some damage and darkening around the bowl. There was a ferrule on the end of the shank with two think black lines around the band. The stem is acrylic and is dirty with light tooth marks and chatter on both sides ahead of the button and on the button itself. There is no logo on the sides or top of the taper stem. Jeff took photos of the pipe before he started his clean up work on it. Jeff took photos of the bowl and rim top to show what they looked like before the clean up. You can see the thick cake in the bowl and the darkening and lava on the inner edge and top of the rim. The acrylic stem was in decent condition with tooth marks that are visible in the photos below. The photos of the sides and heel of the bowl show the grain around the bowl and shank. The stain adds depth finish on the pipe. Even under the grime it is a real beauty. The stamping on the sides of the shank are shown in the photos below. It is clear and readable as noted above. I turned to Pipephil’s site to see if I could find any information on the Diplomat line of Stanwell pipes (http://www.pipephil.eu/logos/en/logo-stanwell.html). There was nothing specific on the line but the summary of Stanwell History is quite helpful. I quote it below.

Brand & factory were established in 1942 by Poul Nielsen. The company has been owned since 2000 by Nordisk Tobaks Kompagni A/S.

The factory in Borup crafted all Stanwell pipes from 1965 until 2009. From 2010 on the pipes are crafted by Barontini (Italy) exept for the limited editions.

Production (2007): 115 000 Pipes/year – Denmark

I turned to Pipedia to an article that originally was posted here on rebornpipes and written by my late friend Bas Stevens (https://pipedia.org/wiki/Stanwell_Shape_Numbers_and_Designers). The list did not clarify who designed the shape so that was still a bit of a mystery. Whoever did so, created a beauty. I now knew that the shape 175 was a Tall Billiard or Chimney with tapered stem. There was no other information. Now it was time to work on the pipe.

Jeff had cleaned up the pipe with his usual penchant for thoroughness. He reamed the pipe with a PipNet Pipe Reamer and cleaned up the remnants with a Savinelli Fitsall Pipe Knife.  He scrubbed the bowl with undiluted Murphy’s Oil Soap with a tooth brush. He rinsed it under running warm water to remove the soap and grime. He cleaned out the inside of the shank and the airway in the stem with alcohol, cotton swabs and pipe cleaners. He soaked the stem in Before & After Deoxidizer and rinsed it off with warm water. It came in Stanwell Box with Pipe Sock. I removed it from the sock and took photos of the pipe once I received it. I took close up photos of both the rim top and the stem. Jeff had been able to get the grime and lava off of the rim top and it looked pretty incredible. Even the darkening and marks on the rim top on the right side and the back of the bowl are very obvious now that it is clean. The stem looked very clean. The tooth marks and chatter were minimal and should be easy to remove.The stamping on the shank side was readable as noted above. I also took a photo with the stem removed to give an idea of the perspective and design of the pipe.I started my work on the pipe by addressing the damage on the inner edge of the bowl with a piece of 220 grit sandpaper and a sphere to remove the damage. I then used a half sphere to further shape the rim top to bring the edge back into round and it looked much better. Over all the rim top and edges looked much better.I sanded the outside of the bowl and rim with 320-3500 grit sanding pads to remove the scratching and marks on the briar. I wiped the bowl down between pads with a damp cloth to remove the sanding debris. I stained the sanded and polished rim top with a Maple stain pen and it matched the colour of the rest of the pipe. I polished the smooth bowl and rim top with micromesh sanding pads using 1500-12000 grit sanding pads and wiping it down after each sanding pad with a damp cloth to remove the sanding dust and debris. I worked some Before & After Restoration Balm into the finish of the bowl and shank with my fingers. I want the product to go deep into the finish because it works to clean, enliven and protect the briar. Once I was confident that it was deeply worked into the finish I wiped it off and buffed it with a soft cloth to polish it. The pipe really began to have a rich shine. I took some photos of the bowl at this point to mark the progress in the restoration. The grain really stands out on the pipe in the photos below. I set the bowl aside and turned my attention to the acrylic stem. I tried to raise the tooth marks on the acrylic stem. I “painted” the stem surface with the flame of a Bic lighter and was not able to lift any of the marks. I filled in the tooth marks with black CA glue (I forgot to take photos of the repairs once I glued them). Once the repairs cured, I used a small flat file to smooth out the repairs. I then sanded the areas with 220 grit sandpaper to smooth them out and blend them in. I wiped it down with an Obsidian cloth to remove the debris. I sanded the stem with 320-1500 grit sanding pads to further blend the sanding marks into the surface of the acrylic. I wiped the stem down after each sanding pad with an Obsidian cloth to remove the debris from the sanding.I polished the acrylic stem with micromesh sanding pads – wet sanding it with 1500-12000 grit pads. I wiped it down with Obsidian Oil after each sanding pad. I polished it with Before & After Pipe Polish – both the Fine and Extra Fine polishes. I gave it a final coat of oil and set it aside to dry. This Stanwell Made in Denmark Dorado 175 Stack with an acrylic taper stem is a great looking pipe now that it has been restored. The beautiful finish really highlights the straight grain and the polished finish is stunning. I put the stem back on the bowl and carefully buffed the pipe with Blue Diamond on the buffing wheel. I gave the bowl and the stem multiple coats of carnauba wax on the buffing wheel and followed that by buffing the entire pipe with a clean buffing pad. I hand buffed the pipe with a microfiber cloth to deepen the shine. The finished Stanwell Dorado 175 Stack fits nicely in the hand and feels great. Give the finished pipe a look in the photos below. The dimensions of the pipe are Length: 6 inches, Height: 1 ¾ inches, Outside diameter of the bowl: 1 inch, Chamber diameter: ¾ of an inch. The weight of the pipe is 38 grams /1.34 ounces. I will be adding the pipe to the Danish Pipe Makers Section of the rebornpipes store. If you are interested in purchasing this pipe send me a message or an email.

As always, I encourage your questions and comments as you read the blog. Thanks to each of you who are reading this blog. Remember we are not pipe owners; we are pipe men and women who hold our pipes in trust until they pass on into the trust of those who follow us.

What an Elegant Charatan’s Make London England Authentic 373X Acorn


by Steve Laug

The next pipe on the table is another one that came to us from the seller in Caldwell, Idaho, USA on 07/12/2025. It has an Acorn shaped smooth bowl. It is in dirty but in good condition other than that as can be seen in the photos below. The sides of the shank are clearly stamped, faint in spots but still readable. The left side is stamped Charatan’s Make [over] London.England [over] Authentic. To the left of the stamping it had a cursive L in a circle that tells me that the pipe is a Lane era pipe. On the right side it is stamped with the shape number 373X. That helps to date this to the time after the patent was filed in 1970. The shape works very well with the great grain around the bowl. The finish was dusty and dirty with grime deep in the finish but grain really stands out. The bowl had a thick cake and there was tobacco debris in the bowl. The rim top had a thick lava coat on the rim top and edges. The fish tail vulcanite stem is calcified, oxidized and has tooth marks and dents on the top and underside of the stem and button. There is no stamping on the stem. I took photos of the pipe to show what it looked like before I started working on it. I took a closer photo of the rim top and bowl to show the condition of the bowl and rim. You can see the cake in the bowl and the darkening and lava on the top and inner edge. The stamping on the sides of the shank is faint in spots but still readable as noted above. I took a photo of the pipe with the stem removed to give a sense of the proportions of the pipe. To try and figure out the era of the Charatan’s pipe I was working on I turned to the pipephil website on Logos and Stampings. There is some really helpful information on each of the lines of Charatan’s Make pipes that entered the market. Here is the link to the section of the site that I turned to, http://www.pipephil.eu/logos/en/logo-charatan.html. The Authentic line is not shown on the site but it does give a short history of the brand. I quote the portion that is most pertinent. The brand was founded in 1863 by Frederik Charatan. When his father retired in 1910, Reuben Charatan took over the family business. All the pipes were handmade until 1973. The brand name has been overtaken by Dunhill in 1978 and sold in 1988 to James B. Russell Inc. (NJ, USA). During the period 1988-2002 Charatans were crafted by Butz Choquin in St Claude (France). Dunhill re-purchased Charatan brand name in 2002 and Colin Fromm (Invicta Briars, Castleford) followed up on freehand production.

I turned to Pipedia to see if I could find more information on the brand and possibly a link to the Executive line (https://pipedia.org/wiki/Charatan) but once again in the general article it was not listed.  It did give a little more historical information and is worth reading. I am including a few sections from the site.

In 1863 Frederick Charatan, a Russian/Jewish immigrant, opened a shop in Mansell Street, located in the borough of Tower Hamlets, London E1, where he began to carve Meerschaum pipes. These pipes got very popular soon, and thus Charatan moved to a bigger workshop in Prescot Street, just around the corner. Here he began to make briar pipes which should make the name famous the world over. Charatan was the first brand to make entirely hand-made briars from the rough block to the finished pipe including the stems. The nomenclature “Charatan’s Make” refers to this method of production and was meant to differ Charatan from other brands who “assembled” pipes from pre-drilled bowls and delivered mouthpieces.

Being the undisputed No. 1 in English pipemaking, Charatan was approached by Alfred Dunhill who was unsatisfied with the quality of the pipes he imported from France. During 1908 – 1910 Dunhill bought pipes from Charatan paying exorbitant prices to ensure he had some of the very best pipes for sale in England. In 1910 he lured away Joel Sasieni, one of Charatan’s best carvers, and opened his own small pipe workshop on 28 Duke Street. On the retirement of his father in 1910 Reuben Charatan took over the family business…

…The pre-Lane period (prior to 1955) and the Lane era pipes (1955 to until sometime between 1979 – 1984) are of primary interest the collector. The Lane era is often quoted as beginning about 1950… Charatan records are almost non-existent before Lane due to a factory fire, making it difficult to date pre-Lane pipes. Charatan used 4 basic grades prior to 1950: Supreme, Selected, Executive, and Belvedere. After 1950 Herman Lane’s influence began, and the grades started to expand. In 1955 Lane took over sole distributorship of Charatan in the US. In 1957 he introduced the Supreme S. Most of his other introductions were from the 60’s and early 70’s…

The section called Miscellaneous Notes had some interesting information.

Charatan records indicate the DC (Double Comfort) bit was introduced in the 50’s, but some report seeing them in earlier production. Still others indicate they were introduced by Lane in 1960. Regardless, the DC bit is not an accurate way to date a pipe because many Charatan’s were made with regular and saddle type bits throughout the “Lane Era”…

…The Lane Trademark serif and circled L indicates the pipe is from the “Lane Era” (approx. 1955 to 1979 -1984?), however it appears that both the English factory or Lane themselves sometimes, or perhaps even often forget to stamp the L on a pipe. The Charatan factory was known for inconsistencies, especially in stampings. Therefore, although an L on the pipe definitely defines it as a Lane Era pipe, the lack of it could simply mean the pipe missed receiving the stamp from the factory. The lack of the trademark could also mean the pipe was destined for the European market.

…The total script nomenclature “Made by Hand in City of London” evolved over this period of time, so many pipes had variants, such as Made By Hand in block letters and City of London in script, or some other variation of the terms or stampings. The Charatan Logo (CP) on the pipe bit was changed over the years.

From all of the historical data I could work through this Charatan’s Make Authentic was a bit of a mystery pipe from the mid 1970’s Lane era. I continued digging further into the dating of the pipe, but what I had found was a good start for me. If some of you would like to try your hand at dating it more accurately as to the time period it came out you might want to check out the article on Pipedia on Dating Charatans (https://pipedia.org/wiki/Dating_of_Charatans). I had enough for me to start working on the pipe itself and see what lay beneath the heavy tars and oils.

I reamed the bowl with a PipNet reamer. I used the third and fourth cutting heads to clean out the cake. I cleaned up what remained in the bowl with a Savinelli Fitsall Pipe Knife and scraped it back to bare briar. I finished by sanding the inside of the bowl with a dowel wrapped in sandpaper. The inside walls are free of burn damage or checking. I scraped the lava on the rim top with a Savinelli Pipe Knife. I worked over the inner edge and rim top with a folded piece of 220 grit sandpaper.I cleaned out the inside of the shank and the airway in the stem with alcohol, cotton swabs and both bristle and regular pipe cleaners.I scrubbed the bowl and shank with a tooth brush and some undiluted Murphy’s Oil Soap. I rinsed it off with warm water to remove the dust and soap from the finish. I dried it off with a soft cloth and it looked much better. I sanded the bowl with 320 – 3500 grit 2×2 inch sanding pads and wiped it down after each sanding pad with a damp cloth to remove the sanding debris. I polished the bowl with 1500-12000 grit micromesh sanding pads. I wiped the bowl down with a damp cloth to remove the dust and debris. The pipe began to look very good. The gouge in the bowl was repaired and looked better. I rubbed the briar down with Before & After Restoration Balm. I worked it into the briar with my fingertips to work it into the finish. The product works to clean, enliven and preserve the briar. I let it sit for 10 minutes then I buffed it with a cotton cloth to deepen the shine. The briar really comes alive with the balm. I set the bowl aside and turned my attention to the stem. I scrubbed the vulcanite stem with some Soft Scrub and cotton pads to remove as much of the oxidation as I could, especially around the tooth marks. I wiped the tooth marks down with isopropyl alcohol and a cotton swab and then filled in the tooth marks with black CA glue. Once the repairs cured I used a small flat needle to smooth out the repaired areas on both sides of the stem. I sanded them with a folded piece of 220 grit sandpaper to blend them into the surface of the vulcanite. I sanded the stem with 320-3500 grit 2×2 inch pads to further adjust the fit of the stem to the shank. I wiped the stem down with an Obsidian Oil cloth after each sanding pad.I polished the vulcanite with micromesh sanding pads – 1500-12000 grit pads. I wiped it down with Obsidian Oil after each sanding pad. I used Before & After Pipe Polish – both Fine and Extra Fine to further polish the stem. With the stem polished I put it back on the Charatan’s Make London England Authentic 373X Acorn and lightly buffed the bowl with Blue Diamond. I buffed the stem with a more aggressive buff of Blue Diamond. I gave the bowl several coats of Conservator’s Wax and the stem several coats of carnauba wax and buffed the pipe with a clean buffing pad to raise the shine. I hand buffed it with a microfiber cloth to deepen the shine. The pipe polished up pretty nicely. The finished pipe is shown in the photos below. This Charatan’s Make Authentic Acorn 373X will soon be on the rebornpipes store in the British Pipe Makers Section if you want to add it to your rack. The dimensions are Length: 6 inches, Height: 1 ¾ inches, Outside diameter of the bowl: 1 ½ inches, Chamber diameter: ¾ of an inch. The weight of the pipe is 1.52 ounces/44 grams. Thanks for walking through the restoration with me as I worked over this Charatan’s Make.

Restoring a Charatan’s Make Freehand Relief Extra Large Sandblast Dublin


by Steve Laug

The next pipe on the table is another one that came to us from the seller in Caldwell, Idaho, USA on 07/12/2025. It is a large, tall Dublin bowl with a sandblast finish. It is in dirty but in good condition other than that as can be seen in the photos below. The underside of the shank is stamped and readable. It reads Charatan’s Make [over] London.England [over] Freehand Relief [over] Extra Large in script. There is also a cursive L in a circle that connects it to the Lane Era. It has rugged sandblast finish that is very tactile on both the shank and the bowl. The shape works very well with the sandblast grain. The finish was dusty and dirty with grime deep in the finish that is darkened heavily mid bowl from hand oils. However, the grain really stands out. The bowl had a moderate cake and there was tobacco debris in the bowl. The rim top had a lava coat on the top and edges. The Double Comfort vulcanite stem is oxidized and has tooth marks and dents on the top and underside of the stem. There is a faint and damaged CP stamping on the left side of the stem. I took photos of the pipe to show what it looked like before I started working on it. I took a closer photo of the rim top and bowl to show the condition of the bowl and rim. You can see the light cake in the bowl and the darkening and lava on the top and the inner edge.The stamping on the smooth panel of the underside of the shank is clear and readable as noted above. I took a photo of the pipe with the stem removed to give a sense of the proportions of the pipe. To try and figure out the era of the Charatan’s pipe I was working on I turned to the pipephil website on Logos and Stampings. There is some really helpful information on each of the lines of Charatan’s Make pipes that entered the market. Here is the link to the section of the site that I turned to, http://www.pipephil.eu/logos/en/logo-charatan.html. There is an alphabetical listing of the lines but nothing on the Freehand Relief Line. The site did give a short history of the brand. I quote the portion that is most pertinent.

The brand was founded in 1863 by Frederik Charatan. When his father retired in 1910, Reuben Charatan took over the family business. All the pipes were handmade until 1973. The brand name has been overtaken by Dunhill in 1978 and sold in 1988 to James B. Russell Inc. (NJ, USA). During the period 1988-2002 Charatans were crafted by Butz Choquin in St Claude (France). Dunhill re-purchased Charatan brand name in 2002 and Colin Fromm (Invicta Briars, Castleford) followed up on freehand production.

I turned to Pipedia to see if I could find more information on the brand and possibly a link to the Freehand Relief line (https://pipedia.org/wiki/Charatan) but once again in the general article it was not listed.  It did give a little more historical information and is worth reading. I am including a few sections from the site.

In 1863 Frederick Charatan, a Russian/Jewish immigrant, opened a shop in Mansell Street, located in the borough of Tower Hamlets, London E1, where he began to carve Meerschaum pipes. These pipes got very popular soon, and thus Charatan moved to a bigger workshop in Prescot Street, just around the corner. Here he began to make briar pipes which should make the name famous the world over. Charatan was the first brand to make entirely hand-made briars from the rough block to the finished pipe including the stems. The nomenclature “Charatan’s Make” refers to this method of production and was meant to differ Charatan from other brands who “assembled” pipes from pre-drilled bowls and delivered mouthpieces.

Being the undisputed No. 1 in English pipemaking, Charatan was approached by Alfred Dunhill who was unsatisfied with the quality of the pipes he imported from France. During 1908 – 1910 Dunhill bought pipes from Charatan paying exorbitant prices to ensure he had some of the very best pipes for sale in England. In 1910 he lured away Joel Sasieni, one of Charatan’s best carvers, and opened his own small pipe workshop on 28 Duke Street. On the retirement of his father in 1910 Reuben Charatan took over the family business…

…The pre-Lane period (prior to 1955) and the Lane era pipes (1955 to until sometime between 1979 – 1984) are of primary interest the collector. The Lane era is often quoted as beginning about 1950… Charatan records are almost non-existent before Lane due to a factory fire, making it difficult to date pre-Lane pipes. Charatan used 4 basic grades prior to 1950: Supreme, Selected, Executive, and Belvedere. After 1950 Herman Lane’s influence began, and the grades started to expand. In 1955 Lane took over sole distributorship of Charatan in the US. In 1957 he introduced the Supreme S. Most of his other introductions were from the 60’s and early 70’s…

The section called Miscellaneous Notes had some interesting information.

Charatan records indicate the DC (Double Comfort) bit was introduced in the 50’s, but some report seeing them in earlier production. Still others indicate they were introduced by Lane in 1960. Regardless, the DC bit is not an accurate way to date a pipe because many Charatan’s were made with regular and saddle type bits throughout the “Lane Era”…

…The Lane Trademark serif and circled L indicates the pipe is from the “Lane Era” (approx. 1955 to 1979 -1984?), however it appears that both the English factory or Lane themselves sometimes, or perhaps even often forget to stamp the L on a pipe. The Charatan factory was known for inconsistencies, especially in stampings. Therefore, although an L on the pipe definitely defines it as a Lane Era pipe, the lack of it could simply mean the pipe missed receiving the stamp from the factory. The lack of the trademark could also mean the pipe was destined for the European market.

Generally, block letters “MADE BY HAND” and some of the other nomenclature in script (i.e. City of London or Extra Large next to the MADE BY HAND) means the pipe was made sometime between 1965 and the mid 1970’s. The total script nomenclature “Made by Hand in City of London” evolved over this period of time, so many pipes had variants, such as Made By Hand in block letters and City of London in script, or some other variation of the terms or stampings. The Charatan Logo (CP) on the pipe bit was changed over the years.

From all of the historical data I could work through this Charatan’s Make Relief Grain was a sand blast finished pipe from the mid 1970’s Lane era. I continued digging further into the dating of the pipe, but what I had found was a good start for me. If some of you would like to try your hand at dating it more accurately as to the time period it came out you might want to check out the article on Pipedia on Dating Charatans (https://pipedia.org/wiki/Dating_of_Charatans). I had enough for me to start working on the pipe itself and see what lay beneath the heavy tars and oils.

I began working on the pipe by reaming the bowl with a PipNet reamer. I used the third and fourth cutting heads to clean out the cake. I cleaned up what remained in the bowl with a Savinelli Fitsall Pipe Knife and scraped it back to bare briar. I finished by sanding the inside of the bowl with a dowel wrapped in sandpaper. The inside walls are free of burn damage or checking so the gouge does not go all the way through. I cleaned out the inside of the shank and the airway in the stem with alcohol, cotton swabs and both bristle and regular pipe cleaners.I worked the sandblast rim top with a brass bristle wire brush to remove the debris in the finish. While there was some darkening it looked much better,I scrubbed the bowl and shank with a tooth brush and some undiluted Murphy’s Oil Soap. I rinsed it off with warm water to remove the dust and soap from the finish. I dried it off with a soft cloth and it looked much better. I rubbed the briar down with Before & After Restoration Balm. I worked it into the briar with my fingertips to work it into the finish. The product works to clean, enliven and preserve the briar. I let it sit for 10 minutes then I buffed it with a cotton cloth to deepen the shine. The briar really comes alive with the balm. I set the bowl aside and turned my attention to the stem. I ‘painted’ the surface of the stem with the flame of a lighter to lift the tooth marks. I was able to lift almost all of them. What was left I sanded the surface of the stem with a folded piece of 220 grit sandpaper to clean up the oxidation and tooth chatter on both sides. I scrubbed the stem surface with some Soft Scrub cleanser on cotton pads to remove more of the oxidation. It worked quite well.I sanded the stem with 320-3500 grit 2×2 inch pads to further adjust the fit of the stem to the shank. I wiped the stem down with an Obsidian Oil cloth after each sanding pad.I polished the vulcanite with micromesh sanding pads – 1500-12000 grit pads. I wiped it down with Obsidian Oil after each sanding pad. I used Before & After Pipe Polish – both Fine and Extra Fine to further polish the stem. With the stem polished I put it back on the Charatan’s Make Freehand Relief Extra Large Lane Era Dublin and lightly buffed the bowl with Blue Diamond. I buffed the stem with a more aggressive buff of Blue Diamond. I gave the bowl several coats of Conservator’s Wax and the stem several coats of carnauba wax and buffed the pipe with a clean buffing pad to raise the shine. I hand buffed it with a microfiber cloth to deepen the shine. The pipe polished up pretty nicely. The finished pipe is shown in the photos below. This Charatan’s Make Relief Freehand Extra Large Dublin will soon be on the rebornpipes store in the British Pipe Makers Section if you want to add it to your rack. The dimensions are Length: 6 inches, Height: 2 ½ inches, Outside diameter of the bowl: 1 ¼ inches, Chamber diameter: ¾ of an inch. The weight of the pipe is 1.16 ounces/34 grams. Thanks for walking through the restoration with me as I worked over this Charatan’s Make.

Reconditioning and Restoring a 1975 Republic Era Peterson’s Centenary 4S Bent Billiard


by Steve Laug

The next pipe on the table is another one that came to us from the seller in Caldwell, Idaho, USA on 07/12/2025. It is a Peterson’s Deluxe Style pipe with a silver band and a saddle stem. I would call the shape a Bent Billiard but others may have other ideas. It is in dirty but in good condition as can be seen in the photos below. It is stamped on the left side of the shank and reads Peterson’s in script [over] a block printed Centenary. On the right side of the shank it is stamped Made in the Republic of Ireland in three lines and underneath it is stamped with the shape number 4S. On the underside of the shank it is stamped 0/20. The stamping is clear and readable. The silver ferrule/band is stamped Sterling Silver arched over a circle that bears the stamping 1875 [over] Peterson [over] 1975. Underneath it is stamped with three silver hallmarks. The first was Hibernia seated, arm on a harp for the country of manufacture. The second was a Crowned Harp designating sterling quality. The third mark was a date stamp and, in this case, a lower-case cursive “h” which dated the pipe as a 1975. The finish was dusty and dirty with grime ground into the finish. The bowl had a moderate cake and there was tobacco debris in the bowl. The rim top had a thick lava coat on the top and inner and back edges. The stem was quite dirty and lightly oxidized. It has light tooth marks and chatter on both sides. I took photos of the pipe to show what it looked like before I started working on it. I took a photo of the bowl and rim top to show their general condition. You can see the tars on the bevelled inner edge of thick lava coated rim top. The cake in the bowl is quite thick and there is tobacco debris on the walls of the bowl. The finish on the bowl is very dirty with grime and oils ground into the bowl, but still very stunning. This pipe has a classic Peterson’s P-lip stem that has some light oxidation, calcification on the surface of the vulcanite. There is chatter and tooth marks on the top and underside.The stamping on the sides of the shank is faint in spots but readable as noted above. I took a photo of the pipe with the stem removed to give a sense of the proportions of the pipe. You can also see the aluminum chimney in the tenon end. The pipe is a real beauty. I did a bit of work on Google to gather background on the Centenary line of pipes. The first information I found was on the Peterson’sPipenotes.org website that gave a general base of information (https://petersonpipenotes.org/preserving-a-peterson-centenary-commemorative-xl339/). I quote from the description of the line below. I have highlighted several key portions in bold black for emphasis.

On my first visit to the Peterson factory in 2009, I fell into a conversation about the stand-out pipes in Peterson’s long history with then-factory manager Tony Whelan, Sr. and silversmith David Blake, since retired. They began a back-and-forth litany of the pipes they felt were truly important in the time they’d been working there. Their list began with the 1975 Centenary pipes.

1975 was an incredible year for Peterson, a high-water mark not seen since the 1910s: pipe sales were going through the roof, the company had a new factory out in what was then the countryside of Dún Laoghaire (the workers played football in the field behind it for many years), and they were celebrating what they thought of as their 100th Anniversary. As part of that celebration, the company released the first of its true commemorative pipes—the 1875 – 1975 Centenary issues. Unsmoked and with their original boxes and certificates, these will become among the most highly sought-after collectibles in the Peterson world, and they deserve to be for a number of reasons:

  • they were the first true commemoratives of the company;
  • they were among the first forays into the “collectible mindset” that would signal a sea change in the pipe-collecting world at the end of the 1970s and beginning of the 1980s;
  • the bowls were high grades;
  • they were individually, serially stamped by bowl shape – that is, “x” out of so many—it could be 1/11 or 22/83, depending on the bowls Peterson was able to source in that particular shape;
  • they all featured the complete P-Lip: button, graduated bore, aluminum tenon;
  • the bent shapes featured a System reservoir.

Issued in smooth bowls, they were uniformly given a deep undercoat of black – you’ll notice the striking black grain pattern popping through – followed by a rich dark mahogany top coat. The sterling bands were stamped with the 1875 – 1975 Centenary logo, hallmarked “h.”

I turned to Pipedia to see what I could find. Buried in a paragraph in the Republic Era section was a note on the Centennial Limited Edition (https://pipedia.org/wiki/Peterson). I quote below:

In 1975 Peterson issued the Centennial Limited Edition 1875 – 1975. The Peterson Centennial pipes, were released in celebration of 100 years of the company’s pipe making. Two pipes were issued, 100 of each shape, a sterling silver banded straight and a bent shape 69, both were offered for sale individually.

The quote above spells out something that is a bit different from the pipe I have in hand. The above talks about two pipes in lots of 100 pipes – a sterling silver banded straight and bent 69. However, the pipe I have is a Deluxe 4S shape.

From that information I knew how the DeLuxe fit in the hierarchy of Peterson’s pipes. It was always the highest tier of the System pipes. It also was made with the gap in the fit of the stem to the shank on purpose with the idea that the distance would decrease over time with prolonged use. The attachment of a aluminum chimney at the end of the tenon to maximize System performance.

From there I also turned to Pipedia to read an article by Jim Lilley – take time to read it at the link below. (https://pipedia.org/wiki/A_Closer_Look_at_The_Peterson_Deluxe_System_Pipe).

I turned to work on the pipe itself. I reamed the bowl with a PipNet pipe reamer using the cutting heads 2 and 3. I finished the reaming with a Savinelli Fitsall Pipe Knife. I sanded the walls of the bowl with 220 grit sandpaper wrapped around a piece of dowel. I scraped the rim top and bevel with the edge of the pipe knife to remove the buildup of lava. I sanded it carefully with a folded piece of 220 grit sandpaper to further remove the lava. I cleaned out the inside of the shank, the airway in the stem as well as the inside of the chimney and the seat in the tenon with alcohol, cotton swabs and both bristle and regular pipe cleaners. I scrubbed the bowl and shank with a tooth brush and some undiluted Murphy’s Oil Soap. I rinsed it off with warm water to remove the dust and soap from the finish. I dried it off with a soft cloth and it looked much better. I sanded out the scratches in the bowl with 320-3500 grit 2×2 inch sanding pads. I worked on the Sterling Band to remove the dark scratches at the same time. I carefully used the pads on it. I wiped the bowl and band down between sanding pads with a damp cloth to remove the debris from the sanding. I started my polishing regimen on the bowl. I used nine micromesh sanding pads and dry sanded the bowl with 1500-12000 grit pads. I wiped the bowl down with a damp cloth after each pad. The bowl really shines by the final three pads. I polished the Sterling Silver ferrule with a jewellers polishing cloth to remove the tarnish and protect it from further tarnishing. I rubbed the briar down with Before & After Restoration Balm. I worked it into the briar with my fingertips to work it into the finish. The product works to clean, enliven and preserve the briar. I let it sit for 10 minutes then I buffed it with a cotton cloth to deepen the shine. The briar really comes alive with the balm. I set the bowl aside and worked on the stem. I sanded the surface of the stem with a folded piece of 220 grit sandpaper to remove the oxidation and clean up the tooth marks and chatter on both sides of the stem ahead of the button. Once finished I put the chimney back in the tenon. I sanded the stem with 320-3500 grit 2×2 inch pads. I wiped the stem down with an Obsidian Oil cloth after each sanding pad.I polished the vulcanite with micromesh sanding pads – 1500-12000 grit pads. I wiped it down with Obsidian Oil after each sanding pad. I used Before & After Pipe Polish – both Fine and Extra Fine to further polish the stem. I don’t know how many times I have said this but I love it when I come to the end of a restoration and all of the parts come together and the pipe looks better than when we started the cleanup process. I put the stem back on the Peterson’s 1875-1975 Centenary 4S System Bent Billiard and buffed the pipe with Blue Diamond on the buffing wheel. I carefully avoided the stamping on the shank sides during the process. I gave the bowl and stem multiple coats of carnauba wax on the buffing wheel and followed that by buffing it with a clean buffing pad on the buffer. I hand buffed the pipe with a microfiber cloth to deepen the shine. The finished pipe is a real stunning example of a Republic Era Peterson’s Centenary 4S Bent Billiard. Once again, the grain and the way the shape follows the grain is amazing. Give the finish pipe a look in the photos below. I can only tell you that it is much prettier in person than the photos capture. The dimensions of the pipe are Length: 6 inches, Height: 2 inches, Outside diameter of the bowl: 1 ¼ inches, Chamber diameter: ¾ of an inch. The weight of the pipe is 2.80 ounces/59 grams. This Peterson’s Centenary 4S is a great piece of pipe history that is in exceptional condition. Thanks for walking through the restoration with me as I worked over another beautiful pipe. I will be putting this one on the rebornpipes store in the Irish Pipemakers Section. Let me know if you are interested in adding it to your collection. Thanks for your time.

As always, I encourage your questions and comments as you read the blog. Thanks to each of you who are reading this blog. Remember we are not pipe owners; we are pipe men and women who hold our pipes in trust until they pass on into the trust of those who follow us.

Repairing and Restoring a Charatan’s Make Executive Extra Large Dublin


by Steve Laug

The next pipe on the table is another one that came to us from the seller in Caldwell, Idaho, USA on 07/12/2025. It is a large Dublin bowl with a lip on the front. There is a large scar on the left side of the bowl. I would need to examine it and see the details of the problem. It is in dirty but in good condition other than that as can be seen in the photos below. The sides of the shank are clearly stamped and readable. The left side is stamped Charatan’s Make [over] London.England [over] Executive. To the left of the stamping it had a cursive L in a circle that tells me that the pipe is a Lane era pipe. On the right side it is stamped Extra Large in script [over] Made by Hand. That helps to date this to the time after the patent was filed in 1970.The stamping is clear and readable. It has rugged rusticated finish that is very tactile on both the shank and the bowl. The shape works very well with the grain. The finish was dusty and dirty with grime deep in the finish but grain really stands out. The bowl had a moderate cake and there was tobacco debris in the bowl. The rim top had a lava coat on the rim top and edges. The Double Comfort vulcanite stem is lightly oxidized and has tooth marks and dents on the top and underside of the stem. There is a faint CP stamping on the left side of the stem and on the right is stamped REG.NO. 203573. I took photos of the pipe to show what it looked like before I started working on it. I took a closer photo of the rim top and bowl to show the condition of the bowl and rim. You can see the light cake in the bowl and the darkening and lava on the top and damage to the inner edge.The stamping on the sides of the shank is clear and readable as noted above. I took a photo of the pipe with the stem removed to give a sense of the proportions of the pipe. Even with the deep gouge in the left side of the bowl it is a real beauty. To try and figure out the era of the Charatan’s pipe I was working on I turned to the pipephil website on Logos and Stampings. There is some really helpful information on each of the lines of Charatan’s Make pipes that entered the market. Here is the link to the section of the site that I turned to, http://www.pipephil.eu/logos/en/logo-charatan.html. There is an alphabetical listing of the lines including the Executive. The site did give a short history of the brand. I quote the portion that is most pertinent.The brand was founded in 1863 by Frederik Charatan. When his father retired in 1910, Reuben Charatan took over the family business. All the pipes were handmade until 1973. The brand name has been overtaken by Dunhill in 1978 and sold in 1988 to James B. Russell Inc. (NJ, USA). During the period 1988-2002 Charatans were crafted by Butz Choquin in St Claude (France). Dunhill re-purchased Charatan brand name in 2002 and Colin Fromm (Invicta Briars, Castleford) followed up on freehand production.

I turned to Pipedia to see if I could find more information on the brand and possibly a link to the Executive line (https://pipedia.org/wiki/Charatan) but once again in the general article it was not listed.  It did give a little more historical information and is worth reading. I am including a few sections from the site.

In 1863 Frederick Charatan, a Russian/Jewish immigrant, opened a shop in Mansell Street, located in the borough of Tower Hamlets, London E1, where he began to carve Meerschaum pipes. These pipes got very popular soon, and thus Charatan moved to a bigger workshop in Prescot Street, just around the corner. Here he began to make briar pipes which should make the name famous the world over. Charatan was the first brand to make entirely hand-made briars from the rough block to the finished pipe including the stems. The nomenclature “Charatan’s Make” refers to this method of production and was meant to differ Charatan from other brands who “assembled” pipes from pre-drilled bowls and delivered mouthpieces.

Being the undisputed No. 1 in English pipemaking, Charatan was approached by Alfred Dunhill who was unsatisfied with the quality of the pipes he imported from France. During 1908 – 1910 Dunhill bought pipes from Charatan paying exorbitant prices to ensure he had some of the very best pipes for sale in England. In 1910 he lured away Joel Sasieni, one of Charatan’s best carvers, and opened his own small pipe workshop on 28 Duke Street. On the retirement of his father in 1910 Reuben Charatan took over the family business…

…The pre-Lane period (prior to 1955) and the Lane era pipes (1955 to until sometime between 1979 – 1984) are of primary interest the collector. The Lane era is often quoted as beginning about 1950… Charatan records are almost non-existent before Lane due to a factory fire, making it difficult to date pre-Lane pipes. Charatan used 4 basic grades prior to 1950: Supreme, Selected, Executive, and Belvedere. After 1950 Herman Lane’s influence began, and the grades started to expand. In 1955 Lane took over sole distributorship of Charatan in the US. In 1957 he introduced the Supreme S. Most of his other introductions were from the 60’s and early 70’s…

The section called Miscellaneous Notes had some interesting information.

Charatan records indicate the DC (Double Comfort) bit was introduced in the 50’s, but some report seeing them in earlier production. Still others indicate they were introduced by Lane in 1960. Regardless, the DC bit is not an accurate way to date a pipe because many Charatan’s were made with regular and saddle type bits throughout the “Lane Era”…

…The Lane Trademark serif and circled L indicates the pipe is from the “Lane Era” (approx. 1955 to 1979 -1984?), however it appears that both the English factory or Lane themselves sometimes, or perhaps even often forget to stamp the L on a pipe. The Charatan factory was known for inconsistencies, especially in stampings. Therefore, although an L on the pipe definitely defines it as a Lane Era pipe, the lack of it could simply mean the pipe missed receiving the stamp from the factory. The lack of the trademark could also mean the pipe was destined for the European market.

…Generally, when the pipe is stamped with the BLOCK letters “MADE BY HAND” it means the pipe was probably made between 1958 and 1965”

Generally, block letters “MADE BY HAND” and some of the other nomenclature in script (i.e. City of London or Extra Large next to the MADE BY HAND) means the pipe was made sometime between 1965 and the mid 1970’s. The total script nomenclature “Made by Hand in City of London” evolved over this period of time, so many pipes had variants, such as Made By Hand in block letters and City of London in script, or some other variation of the terms or stampings. The Charatan Logo (CP) on the pipe bit was changed over the years.

From all of the historical data I could work through this Charatan’s Make Executive was one of the higher grade pipe from the mid 1970’s Lane era. I continued digging further into the dating of the pipe, but what I had found was a good start for me. If some of you would like to try your hand at dating it more accurately as to the time period it came out you might want to check out the article on Pipedia on Dating Charatans (https://pipedia.org/wiki/Dating_of_Charatans). I had enough for me to start working on the pipe itself and see what lay beneath the heavy tars and oils.

I began working on the pipe by addressing the deep gouge in the left side of the bowl. The first picture shows the gouge in the bowl side. It is quite deep and could easily be hiding a crack in the bowl side. I wiped the damaged area down with alcohol on a cotton pad. I filled in the gouge with clear CA glue. I pressed briar dust into the super glue and let it dry. I used a wooden sphere and 220 grit sandpaper to clean up the inner edge of the bowl and the rim top. I used a folded piece of 220 grit sandpaper to remove the darkening on the inner edge of the bowl. I sanded the repaired side of the bowl with 220 grit sandpaper to smooth out the repair. I used a Cherry Stain Pen to restain the sanded area of the bowl side. I reamed the bowl with a PipNet reamer. I used the third and fourth cutting heads to clean out the cake. I cleaned up what remained in the bowl with a Savinelli Fitsall Pipe Knife and scraped it back to bare briar. I finished by sanding the inside of the bowl with a dowel wrapped in sandpaper. The inside walls are free of burn damage or checking so the gouge does not go all the way through. I cleaned out the inside of the shank and the airway in the stem with alcohol, cotton swabs and both bristle and regular pipe cleaners.I scrubbed the bowl and shank with a tooth brush and some undiluted Murphy’s Oil Soap. I rinsed it off with warm water to remove the dust and soap from the finish. I dried it off with a soft cloth and it looked much better. I sanded the bowl with 320 – 3500 grit 2×2 inch sanding pads and wiped it down after each sanding pad with a damp cloth to remove the sanding debris. I polished the bowl with 1500-12000 grit micromesh sanding pads. I wiped the bowl down with a damp cloth to remove the dust and debris. The pipe began to look very good. The gouge in the bowl was repaired and looked better. I rubbed the briar down with Before & After Restoration Balm. I worked it into the briar with my fingertips to work it into the finish. The product works to clean, enliven and preserve the briar. I let it sit for 10 minutes then I buffed it with a cotton cloth to deepen the shine. The briar really comes alive with the balm. I set the bowl aside and turned my attention to the stem. I ‘painted’ the surface of the stem with the flame of a lighter to lift the tooth marks. I was able to lift almost all of them. I sanded the surface of the stem with a folded piece of 220 grit sandpaper to clean up the oxidation and tooth chatter on both sides. I sanded the stem with 320-3500 grit 2×2 inch pads to further adjust the fit of the stem to the shank. I wiped the stem down with an Obsidian Oil cloth after each sanding pad.I polished the vulcanite with micromesh sanding pads – 1500-12000 grit pads. I wiped it down with Obsidian Oil after each sanding pad. I used Before & After Pipe Polish – both Fine and Extra Fine to further polish the stem. With the stem polished I put it back on the Charatan’s Make Executive Extra Large Made by Hand Lane Era Dublin and lightly buffed the bowl with Blue Diamond. I buffed the stem with a more aggressive buff of Blue Diamond. I gave the bowl several coats of Conservator’s Wax and the stem several coats of carnauba wax and buffed the pipe with a clean buffing pad to raise the shine. I hand buffed it with a microfiber cloth to deepen the shine. The repaired gouge looked better but now looks like a fine line across the bowl side. The pipe polished up pretty nicely. The finished pipe is shown in the photos below. This Charatan’s Make Executive Extra Large Dublin will soon be on the rebornpipes store in the British Pipe Makers Section if you want to add it to your rack. The dimensions are Length: 6 inches, Height: 2 inches, Outside diameter of the bowl: 1 ½ inches, Chamber diameter: 1 inch. Thanks for walking through the restoration with me as I worked over this Charatan’s Make.

Cracking the Mystery of an Alluring Gourd Calabash


by Kenneth Lieblich

This is a wonderful gourd calabash with a long history, and I hope that one of you will fall in love with it. There is an elegance to the lines of this pipe, with its swan-like curves. It is a classic, and looks (and feels) satisfying in one’s hand. It had been well-loved by its previous owner, and understandably so. This calabash hid a big secret and it was my job to uncover and repair it. Sometimes I bite off more than I can chew and this might be one of those times. Maybe this should have been called Kenneth’s Krazy Kalabash Kure. No markings at all on this pipe, but no matter. Let’s take a closer look at it. The gourd has a deep, rich colour that I really like. The size is really pleasing too. It is more modestly sized than most calabashes – and that’s a positive. I bought this pipe in an auction and, because the auction was away from my home, I didn’t get to inspect the pipe closely beforehand. Boy, was I in for a surprise! The pipe was in dirty but decent condition. The vulcanite stem had quite a bit of wear: lots of tooth marks, oxidation, calcification, etc. The acrylic shank extension was dirty, but otherwise fine. The gourd, similarly, was dirty, but in good shape. BUT, as soon as I removed the meerschaum bowl from the gourd, I saw the problem. At some point in the past, the bowl had cracked in half: northern and southern hemispheres, if you like. That’s a big deal! This was a tough repair, but I am pleased with the results and the pipe is good to go now.As the photo above shows, the bottom part of the bowl was embedded into the gourd. I gave a preliminary and somewhat half-hearted attempt to pry it out with a dental tool. That didn’t work and it’s probably just as well. In attempting to pry it out, I was quite concerned about either cracking the gourd or cracking the bowl further – or both. I ended up heating the gourd and bowl with my heat gun – hoping that ancient tars were holding it in place. And that did the trick: I was able to extract the bottom bowl chunk (plus a few fragments) safely from the gourd without causing further damage to either. You can see the results below.At this point, I figured that I would restore the stem while I thought about what to do with the bowl. I used a disposable lighter and ‘painted’ the stem with its flame. The gentle heat of the flame can cause the dents in the vulcanite of the stem to expand back into shape. In this case, some improvement occurred – but not a lot. The stem’s calcification was quite substantial. I used an old butter knife and gently scraped some of the thicker accretion off. Doing this now helps later in removing the oxidation. I used isopropyl alcohol on a few cotton rounds and wiped down the stem to provide an initial cleaning of filth before moving on to the next steps. The primary cleaning came next. I disinfected the inside of the stem with both pipe cleaners and cotton swabs dipped in lemon-infused 99% isopropyl alcohol. I scrubbed thoroughly to make sure the interior was very clean. The goal of the next step is the removal (or minimization) of oxidation. Going to my sink, I used cream cleanser, cotton rounds, and a toothbrush, and scoured the stem to remove as much surface oxidation as possible. As the photos show, the result was a hideous, ochre-coloured mess – but better off the stem than on it.Once the stem was reasonably clean, I soaked it overnight in some Briarville Stem Oxidation Remover. This solution works to draw oxidation in the stem to the surface of the vulcanite. This is a major aid and an important step in ensuring a clean stem. The following day, I drew out the stem from its bath and scrubbed the lingering fluid with a toothbrush. Due to the severity of the oxidation, I then repeated the scrubbing with the cream cleanser for maximum effect.While the stem was soaking, I also cleaned the acrylic shank extension. I followed the same cleaning procedure as with the stem. It took a while, but I got it clean.As the stem was now clean and dry, I set about fixing the marks and dents in the vulcanite. This was done by filling those divots with black cyanoacrylate adhesive, impregnated with carbon and rubber. I left this to cure and moved on.The penultimate step for the stem is sanding. First, with my set of needle files, I reduced the bulk of the cyanoacrylate repairs. I removed the excess adhesive as near to the surface as possible, without cutting into the vulcanite. Following that, I used all nine of the micromesh sanding pads (1,500 through 12,000 grit) to sand out flaws, even out the vulcanite, and provide gentle polishing of the finished surface. I also applied pipe-stem oil while using the last five micromesh pads. There was a wonderful, deep black shine to the stem when I was done. I did the same with the shank extension. I moved on to the gourd. I cleaned the exterior of the gourd with some pH-neutral detergent and some distilled water, on a few cotton rounds. I cleaned inside of the gourd gently by scraping with my reaming knife, tube brushes, and some other tools. I was pleased with the results. I gave the gourd a thorough going-over with some beeswax polish and let that sit. I buffed it with a microfibre cloth and then, much later, I rubbed some LBE Before & After Restoration Balm into the gourd and let it sit for 30 minutes or so. I then buffed the gourd again with a microfibre cloth. On to the bowl. Meerschaum is too fragile for a proper reamer, so I used 220-grit sandpaper on the end of a wooden dowel to clean out the bowl and it turned out well. One of the frustrations of cleaning meerschaum is that once smoked, the stains never go away – and this pipe was heavily smoked. However, I did what I could and it definitely improved.Now with the stem, shank extension, gourd, and meerschaum cleaning done, it was time to put Humpty Dumpty back together again. Before repairing the separated chunks of the bowl, I needed to secure the two hemispheres together. This was not intended to be the critical attachment point, but just a solid method of marrying the two pieces. I used an adhesive for ceramics and clay – not because meerschaum is ceramic or clay (it isn’t) – but it does mimic certain characteristics of those insofar as it is very porous. This adhesive worked perfectly – it did exactly what I wanted it to. I was also able to attach the small shards of meerschaum that were left over (as seen in photos above).Now to go ‘all in’ on the repair of those missing chunks. I taped off the areas of the bowl that I didn’t want affected by the repair medium. This was a long and challenging repair and went through several failed attempts (which I won’t bore you with). Some failures included plaster of Paris, amalgams involving primarily calcium carbonate, and other ingredients (like leather dye). In the end, I came up with a good solution that maintains the integrity of the bowl shape, gives an incredibly resilient (and hard) repair, is resistant to high temperatures, and is completely inert when cured. After much trial and error, I settled on a particular type of epoxy mixed with a combination of the aforementioned calcium carbonate and briar dust. You might reasonably ask, ‘Why calcium carbonate?’ Good question. It is a material that best acts as a repair medium for meerschaum and I encourage you to read an important article I wrote about the issue here. You may also ask, ‘Why briar dust?’ Also a good question. This provided a slight brownish tint to the epoxy and CaCO3 mixture. Matching the surrounding colour was always going to be an impossibility, but I wanted to do the best I could.

I mixed my concoction and applied it liberally to the affected areas. During this process, the epoxy mix was much less viscous than I had hoped it to be. This was a big problem as it was oozing in ways that I didn’t want it to! However, like the trooper I am, I fiddled and fixed and floundered until I got it just right. It needed a full 24-hour cure and I was only too happy to leave the frustrating thing alone for a while!In the meantime, I glued the shank extension back into place in the gourd. Looks great.On the morrow – no surprise – the bowl was pretty darn ugly, but I can fix ugly. I donned a tight-fitting dust mask and went to work. My goal, of course, was to sand down excess epoxy and bring it to the level of the surrounding meerschaum, while simultaneously not reducing the bulk of the meerschaum. This took a lot of hard and careful work (plus a few touch ups), but we got there in the end. I am satisfied with the results, since the repair was never going to look invisible. The benefit of this pipe is that the repair is hidden from view, below the rim of the gourd. I then sanded down the entire piece of meerschaum with my Micromesh pads. I also rubbed two different beeswax polishes into the meerschaum. Then I let it sit for 20 minutes, buffed it with a microfiber cloth and then repeated the beeswax process. Worked like a charm! Before I went off to the buffer, I gave the meer and the gourd another going over with Clapham’s beeswax rub. This really worked well. I only took the stem to the buffer, as meerschaum and gourds don’t tolerate those high speeds very well!

This gourd calabash was a delightful can of worms right from the start and its beauty only increased through the restoration process. I am pleased to announce that this pipe is for sale! If you are interested in acquiring it for your collection, please have a look in the ‘Calabash’ pipe section of the store here on Steve’s website. You can also email me directly at kenneth@knightsofthepipe.com. The approximate dimensions of the pipe are as follows: length 6½ in. (165 mm); height 4½ in. (115 mm); bowl diameter 2⅛ in. (54 mm); chamber diameter ⅞ in. (21 mm). The weight of the pipe is 2⅜ oz. (68 g). I hope you enjoyed reading the story of this pipe’s restoration as much as I enjoyed restoring it. If you are interested in more of my work, please follow me here on Steve’s website or send me an email. Thank you very much for reading and, as always, I welcome and encourage your comments.

New Life for a 1975 Dunhill Root Briar147 Diamond Shank Bulldog with a Taper Stem


by Steve Laug

The next pipe on the table is another one that came to us from the seller in Caldwell, Idaho, USA on 07/12/2025. It is a Dunhill Root Briar Small Straight Bulldog with a vulcanite taper stem. It is in dirty but in good condition as can be seen in the photos below. It is stamped on the left side of the shank and reads 147 [followed by] Dunhill [over] Root Briar. On the right side it is stamped Made in [over] England15. That is followed by a stamping Circle 4R. The stamping is clear and readable. The pipe has rich Root Briar Finish with a blend of brown stains on a richly grained smooth finish that the shape follows well. The finish was dusty and lightly dirty with grime ground into the finish. The bowl had a moderate cake and there was tobacco debris in the bowl. The rim top had a thick lava coat on the rim top and edges. The original white spot taper stem is dirty and oxidized with light tooth marks and chatter on both sides. I took photos of the pipe to show what it looked like before I started working on it. I took photos of the bowl and rim top to show the thickness of the cake and the lava coat on the rim top. There was some tobacco debris in the bottom of the bowl. The stem photos show the condition of the saddle stem ahead of the button.The stamping on the sides of the shank are clear and readable as noted above. I took a photo of the pipe with the stem removed to give a sense of the proportions of the pipe. It is a real beauty. One of the first things I like to do is to unpack the stamping and understand each element in it. I turned to Pipephil’s helpful site (http://pipephil.eu/logos/en/dunhill/shell-briar1.html). The stamping is interpreted as follows: The 147 is the shape of the pipe which I assume is a Bulldog. The Dunhill Root Briar is the finish. Following the Made In England15 gives the year that the pipe was made.  The circle 4R is the stamp for a Group 4 in a Root Briar finish.

From there I wanted to pin down the date stamp 15. I have included Page 2 of the Dunhill Dating Key (http://www.pipephil.eu/logos/en/dunhill/cledat-en1a.html). Following that it takes me to the box with 1960+suffix. That tells me that the pipe is a 1975 pipe.    I wanted to know more about the Root Briar finish and when it was introduced by Dunhill. I turned to a listing on Pipedia that gave me the information I was looking for (https://pipedia.org/wiki/Dunhill).

Root Briar

Dunhill introduced its third major pipe finish, the Root Briar, in 1931. The new line was developed specifically to showcase briar with a particularly beautiful and pronounced grain. To this end, it was made exclusively from Corsican mountain briar, a wood characteristically prized for its fine grain, a practice that continued into the 1960s.

The pipe was finished with a light, natural stain to allow the beauty of the wood to show through. A particularly distinctive feature of the early Root Briar was its unique mouthpiece — a marble-grained, brown vulcanite bit — that became known to collectors as the ‘bowling ball’ bit. This style, however, was discontinued with the onset of the Second World War.

Because the Root Briar finish requires a perfectly clean bowl with exceptional graining, it has always been one of Dunhill’s rarer and more expensive lines, typically available only at the company’s own stores or through its principal dealers. Its nomenclature was identical to that of the Bruyère, except for the use of an ‘R’ stamp instead of an ‘A’. Straight-grained versions were graded on various scales over the years, evolving into the modern ‘DR’ one-to-six-star system.[122][123]

Now I knew that I was working on a Dunhill Root Briar 147 Bulldog with a Taper Stem that was made in 1975.

I turned to work on the pipe itself. I reamed the bowl with a PipNet pipe reamer using the cutting heads 2 and 3. I finished the reaming with a Savinelli Fitsall Pipe Knife. I sanded the walls of the bowl with 220 grit sandpaper wrapped around a piece of dowel. I scraped the rim top with the Fitsall Pipe Knife to remove as much of the lava coat as I could. I followed that up with a 320 grit sanding pad. It was beginning to look much better.I cleaned out the inside of the shank and the airway in the stem with alcohol, cotton swabs and both bristle and regular pipe cleaners. I scrubbed the bowl and shank with a tooth brush and some undiluted Murphy’s Oil Soap. I rinsed it off with warm water to remove the dust and soap from the finish. I dried it off with a soft cloth and it looked much better. I sanded the exterior of the bowl with 320-3500 grit 2×2 inch sanding pads to remove the scratching in the finish. I wiped the bowl down with a damp cloth after each sanding pad. It really began to look much better. I polished the briar with 1500-12000 grit micromesh sanding pads to develop the shine. It began to look very good. It had a rich shine in the finish. I rubbed the briar down with Before & After Restoration Balm. I worked it into the briar with my fingertips to work it into the finish. The product works to clean, enliven and preserve the briar. I let it sit for 10 minutes then I buffed it with a cotton cloth to deepen the shine. The briar really comes alive with the balm. I set the bowl aside and worked on the stem. I sanded the surface of the stem with a folded piece of 220 grit sandpaper to remove the oxidation and clean up the tooth marks and chatter on both sides of the stem ahead of the button. I sanded the stem with 320-3500 grit 2×2 inch pads. I wiped the stem down with an Obsidian Oil cloth after each sanding pad.I polished the vulcanite with micromesh sanding pads – 1500-12000 grit pads. I wiped it down with Obsidian Oil after each sanding pad. I used Before & After Pipe Polish – both Fine and Extra Fine to further polish the stem. I the polished vulcanite saddle stem and the 1975 Dunhill Root Briar 147 Taper Stem Bulldog bowl with Blue Diamond to polish out the remaining small scratches and raise the shine. I gave the bowl and the stem several coats of carnauba wax then buffed the pipe with a clean buffing pad to raise the shine. I hand buffed it with a microfiber cloth to deepen the shine. The pipe polished up pretty nicely. This turned out to be a beautiful Dunhill Root Briar147 Bulldog with a Taper Stem. The finished pipe is shown in the photos below. The dimensions are Length: 5 ½ inches, Height: 1 ¾ inches, Outside diameter of the bowl: 1 ¼ inches, Chamber diameter: ¾ of an inch. The weight of the pipe is 1.16 ounces/33 grams. Thanks for walking through the restoration with me as I worked this beautiful little Dunhill Root Briar. I will be adding it to the rebornpipes store in the British Pipe Makers Section if you would like to add it to your collection. Thanks for looking.

The fourth of a foursome of Beautiful pipes sent to me with Potential Burn Out Issues


by Steve Laug

On November 29 I received an email from a fellow regarding a Moretti that came to him from a dear friend. He stated that it had a burnout and that he had someone ream it for him. I have included his first email below.

Steve, I have a Moretti pipe that belonged to a dear friend. It had a burnout and I had the bowl reamed, but I’m afraid to smoke it. Can you offer a suggestion of how the inside of the bowl can be treated against possible future burnout, or can you fit the bowl with either a meerschaum or graphite liner? – Michael

We talked back and forth regarding the pipe and various options for repair. I agreed to work on them and told him to mail it to me. Once he packed it he added another three pipes to the box that he was sure had the same issues. He mailed them to me on December 8 and sent me another email.

You have convinced me that you’re the person who can help restore my pipes! I shipped 4 pipes to you today by USPS, and declared their value at $5 each for a total of $20 as you requested. I’m embarrassed to admit it, but all four have had burnout issues and I’m hoping that you can clean them out and coat the inside of the bowls as you described. If you feel that more effort is needed, please let me know.

On December 28th I received the package from Michael. I opened the box and inside there were four beautiful Italian Made pipes. I have listed them below and included photos of the pipes.

Savinelli Autograph Sandblast Bent Cherrywood
2008 Ardor DR bent Dublin
Mastro Beraldi 2 Bent Dublin
2005 Moretti 1 Bent Rhodesian

The fourth and final pipe I brought to the table is an Ardor Scoop. Overall it looks very good. It is stamped on underside of the shank and reads DR [over] Ardor [over] Marte [over] Italy [over] Fatta a Mano [over] 2008. The stamping is clear and very readable. The pipe has a mix of black and brown stains on a smooth finish and amazing grain that the shape follows well. The oval rim cap is smooth and there is some darkening around the inner edge of the bowl. The rest of the finish was very clean and the bowl had a light cake on the walls but the rim top was clean other than the edge darkening. I inspected the walls of the bowl and could not find any issues or divots in the walls. I spoke with Michael and he mentioned that it looked like it had some small checking/cracking on the walls of the bowl. Initial inspection reveals that the light cracking in the cake on the bowl walls. The other issue Michael spoke of is that the front wall of the bowl was particularly thin and when smoked was very hot. I would need to examine it further once it had been reamed and cleaned. The acrylic black original taper stem had a white saddle portion on the end of the stem ahead of the tenon. There was a blue dot encircled in a silver circle on the top of the white saddle portion. The stem showed light tooth marks or chatter on both sides. I took photos of the pipe to show what it looked like before I started working on it. I took photos of the bowl and rim top to show the clean finish on the bowl. The photos show a moderate cake in the bowl and a very clean rim top. The stem photos show the condition of the taper stem ahead of the button. I took photos of the stamping on the left and underside of the shank. It is clear and readable as noted above. I removed the stem and took a photo of the pipe to give a sense of the proportions of the pipe.I did a quick review of the history of the brand by turning to Pipedia. The link there led to an article that came from Italian Pipemakers.com. Here is the link – https://pipedia.org/wiki/Ardor. I quote part of the article that gives a quick view of the brands

Ardor Courtesy of italianpipemakers.com

In 1974 Dorelio Rovera, with his father Angelo, established the Ardor Pipe, name which comes from the “AR” (Angelo Rovera) and “DOR” (Dorelio Rovera), changing a medium quality level production into a completely handcrafted product, with a very high level of design and finishing.

[Editor’s Note: Angelo Rovera is the son of Francesco Rovera, who along with his brothers comprised Sociedade Rovera, a pipe company they founded in 1911.]

Dorelio personally chooses the briar which is left seasoning for at least 4 to 5 years before it is worked. It is stocked in particular baskets which leave the wood always visible and airy. The pieces chosen to become a pipe are cut with a circular saw to identify the model. Then each piece is rough hewn by hand with special files, definitely “dangerous” but very efficacious to give the shape to the wood.

Like most artisans, Ardor couples a classical style and a very original style with definite but free and fanciful lines, to offer and meet the largest number of requests, from the simple to the most complex. Ardor is a pipe company which is always looking for innovations, indispensable to collectors, but trying to offer a very high level product in the smoking aspect and performance of the briar, always dried and light for a higher comfort of the smoker.

With Damiano, Dorelio’s son, Ardor introduced the coloured methacrylate (acrylic) stems, really appreciated in the international markets. Damiano has been able to condition the Ardor style with new shapes and with a new mouthpieces style, having a modern point of view. His target is to keep up the interest of new generations, surely more variable in a shorter period.

The Ardor Marte that I have was marked DR which told me it was made by Dorelio Rovera. The stem on this Scoop adds a definite flair to the pipe that is unique.

I turned to work on the pipe itself. I reamed the bowl with a PipNet pipe reamer using the cutting heads 2 and 3. I finished the reaming with a Savinelli Fitsall Pipe Knife. I sanded the walls of the bowl with 220 grit sandpaper wrapped around a piece of dowel. I turned to work on the pipe itself. I reamed the bowl with a PipNet pipe reamer using the cutting heads 2 and 3. I finished the reaming with a Savinelli Fitsall Pipe Knife. I sanded the walls of the bowl with 220 grit sandpaper wrapped around a piece of dowel. I thoroughly cleaned the bowl walls, shank and the airway in the stem. I used cotton swabs, pipe cleaners (both bristle and regular) and Isopropyl alcohol.I used a worn 320-400 grit sanding pad to work on the rim top and inner edge and remove the darkening in those areas before I scrubbed the briar.I scrubbed the bowl and shank with a tooth brush and some undiluted Murphy’s Oil Soap. I rinsed it off with warm water to remove the dust and soap from the finish. I dried it off with a soft cloth and it looked much better. I examined the cleaned walls of the bowl and found some small divots around the sides of the bowl half way down across the sides. I could feel it with my fingers. I wiped the bowl clean with a cotton pad and alcohol to remove any debris on the surface. I mixed a batch of JB Weld to repair the divots around the bowl wall. I pressed it into the damaged areas with a dental spatula. I set the bowl aside for the repair to cure. Once it cured I sanded it smooth with a piece of 220 grit sandpaper wrapped around a piece of dowel to smooth out the repair. I wiped it down with a damp pad to remove the sanding debris. I mixed a bowl coating of sour cream and activated charcoal powder. I inserted a pipe cleaner in the airway entrance to the bowl to keep it open. I applied it to the walls of the pipe with a folded pipe cleaner and repeated it until I had the walls thoroughly covered. I rubbed the briar down with Before & After Restoration Balm. I worked it into the briar with my fingertips to work it into the finish. The product works to clean, enliven and preserve the briar. I let it sit for 10 minutes then I buffed it with a cotton cloth to deepen the shine. The briar really comes alive with the balm. I set the bowl aside and worked on the stem. I sanded the stem with 320-3500 grit 2×2 inch pads. I wiped the stem down with an Obsidian Oil cloth after each sanding pad. I polished the acrylic with micromesh sanding pads – 1500-12000 grit pads. I wiped it down with Obsidian Oil after each sanding pad. I used Before & After Pipe Polish – both Fine and Extra Fine to further polish the stem. I the polished black acrylic taper stem with a white ring and the DR Ardor Marte 2008 Scoop bowl with Blue Diamond to polish out the remaining small scratches and raise the shine. I gave the stem and the bowl several coats of Carnauba Wax then buffed the pipe with a clean buffing pad to raise the shine. I hand buffed it with a microfiber cloth to deepen the shine. The pipe polished up pretty nicely. This turned out to be a beautiful DR Ardor Marte 2008 Scoop and black acrylic stem with white ring. The finished pipe is shown in the photos below. The dimensions are Length: ?? inches, Height: 1 ¾ inches, Outside diameter of the bowl: 1 ½ inches wide x 1 ¾ inches long, Chamber diameter: ¾ of an inch. The weight of the pipe is 2.08 ounces/58 grams. Thanks for walking through the restoration with me as I worked this beautiful Bent Dublin. This one will join the first one I restored both will await my completion of the work on the other two pipes Michael sent me. Thanks for looking.