Blog by Dal Stanton
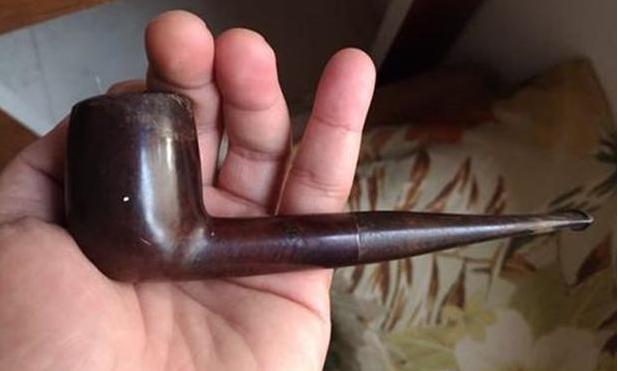
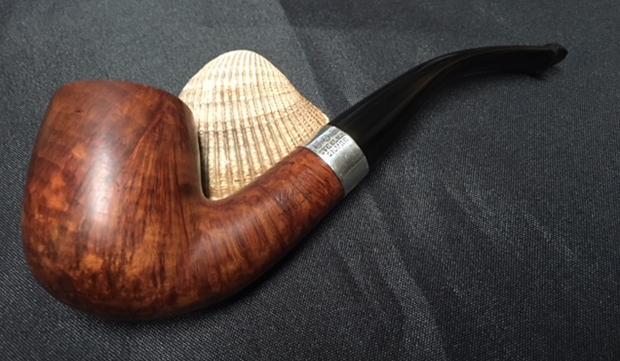
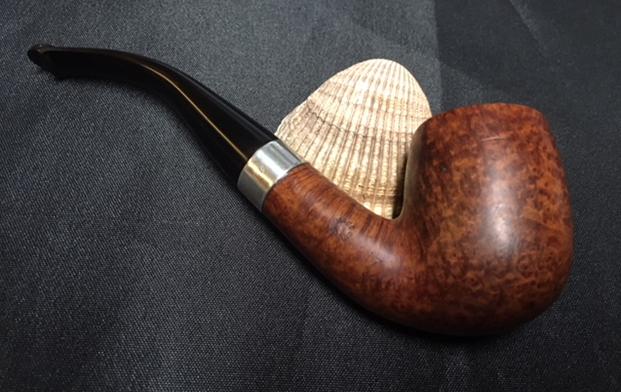
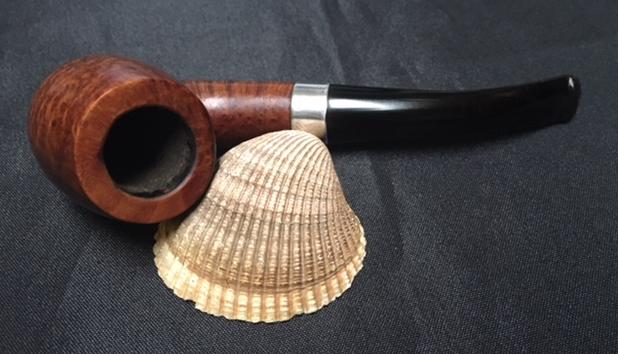
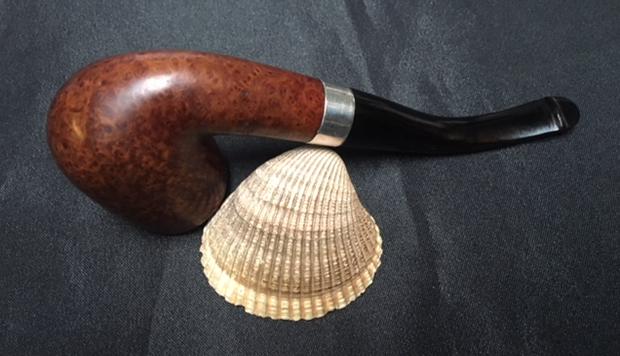
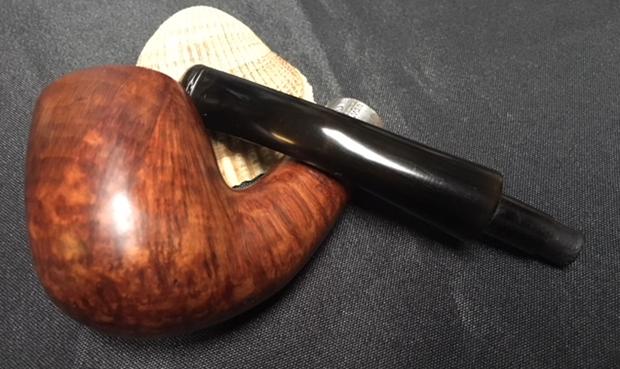
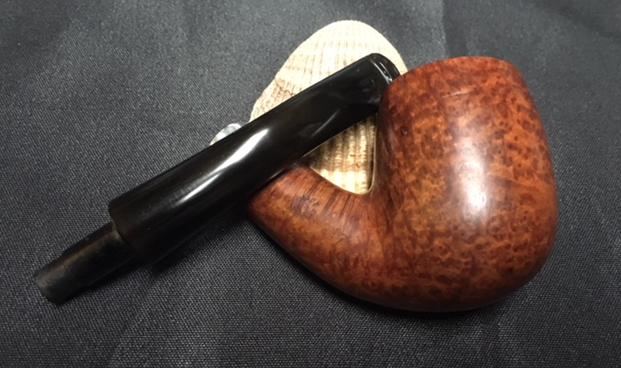
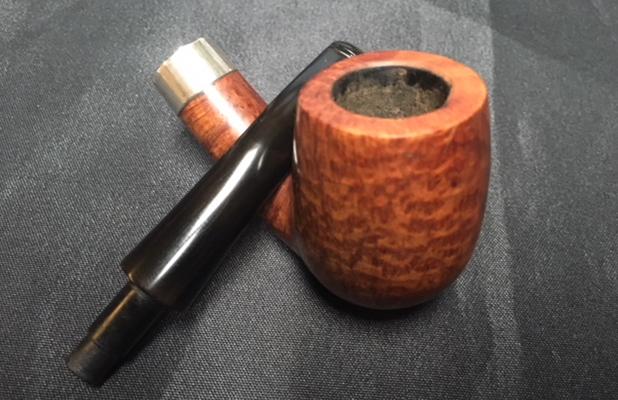
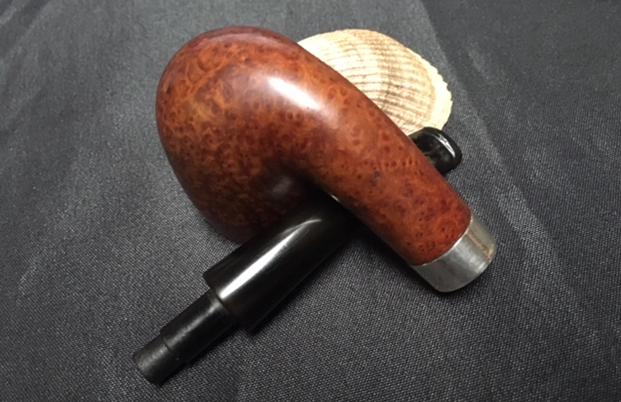
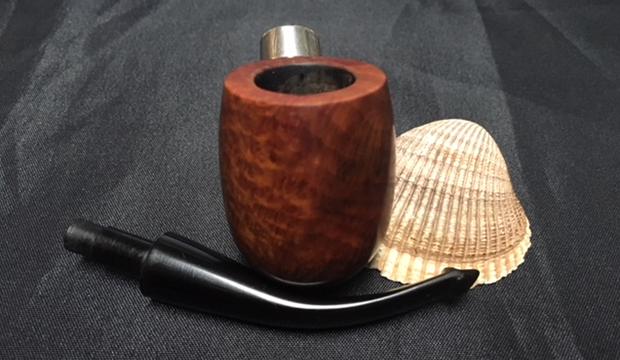
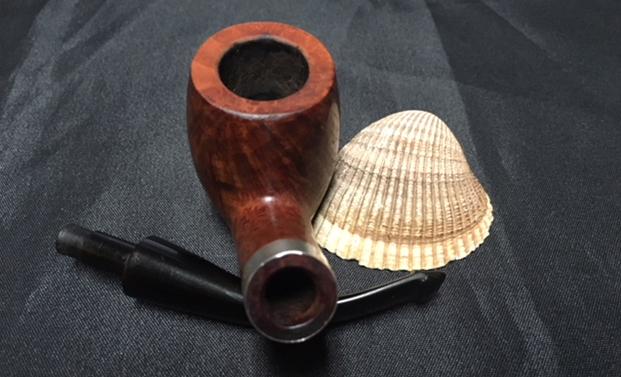
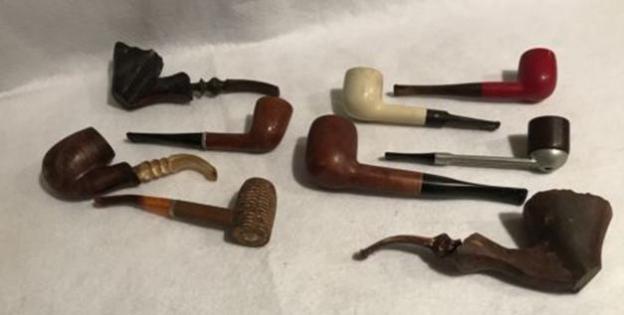
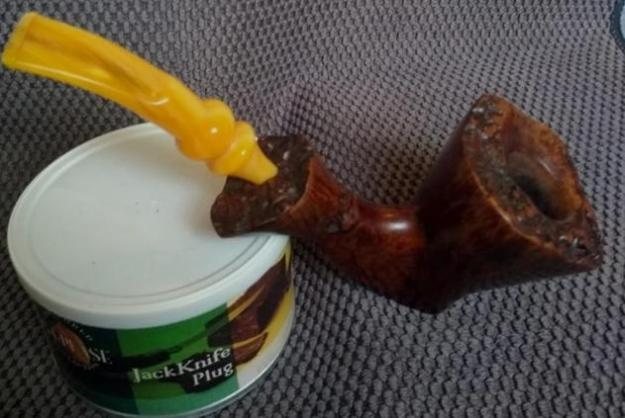
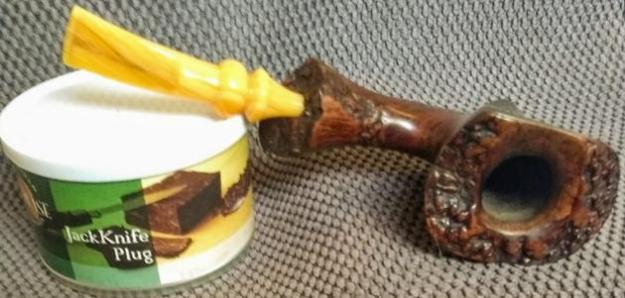
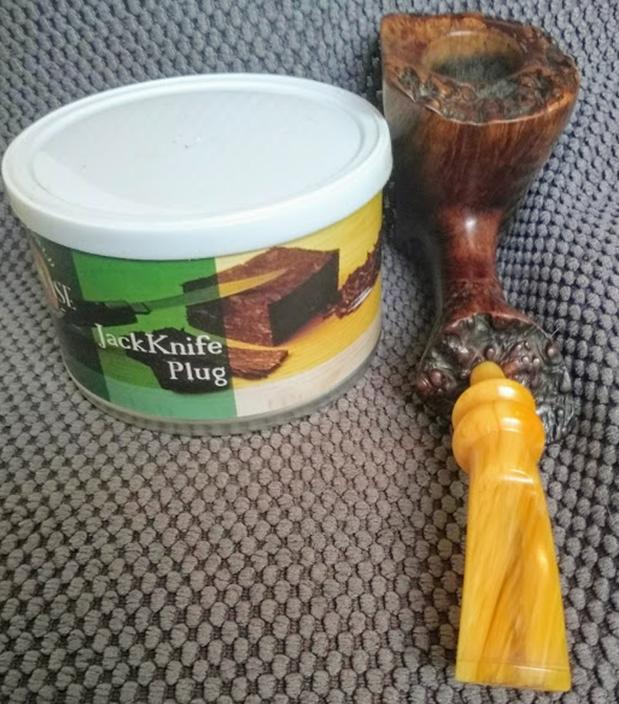
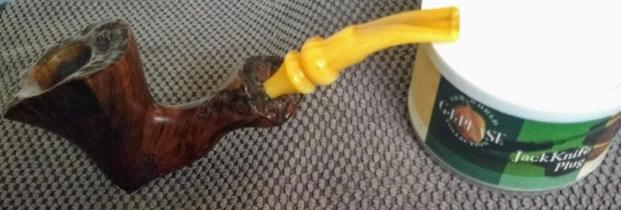
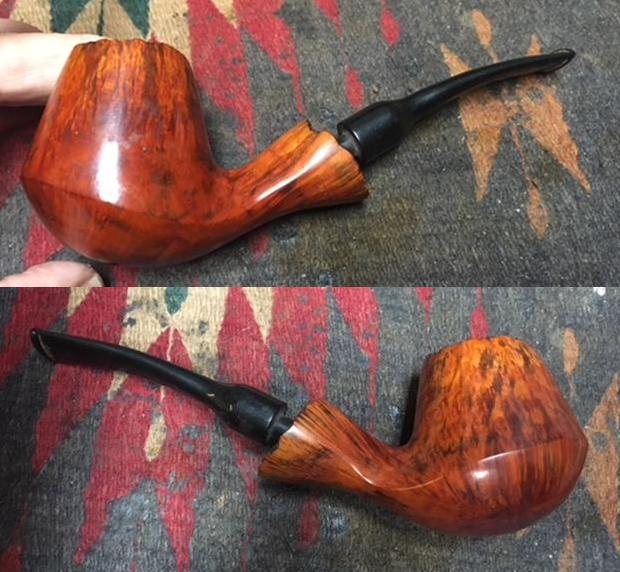
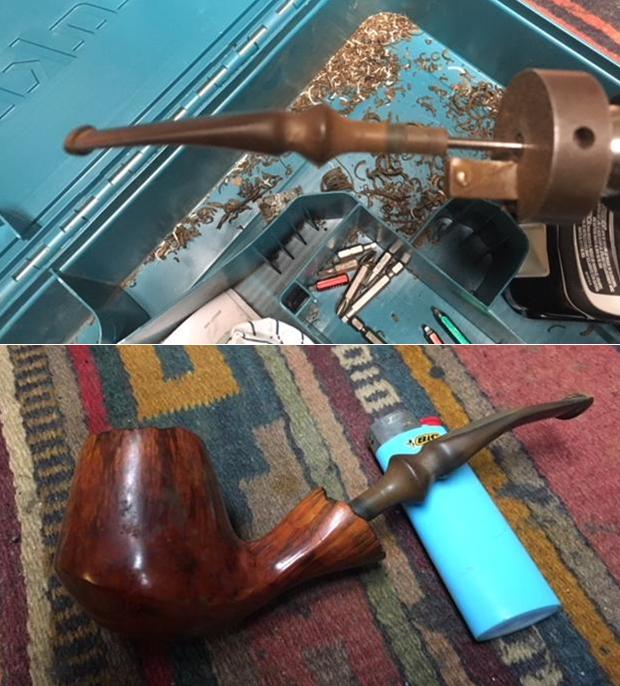
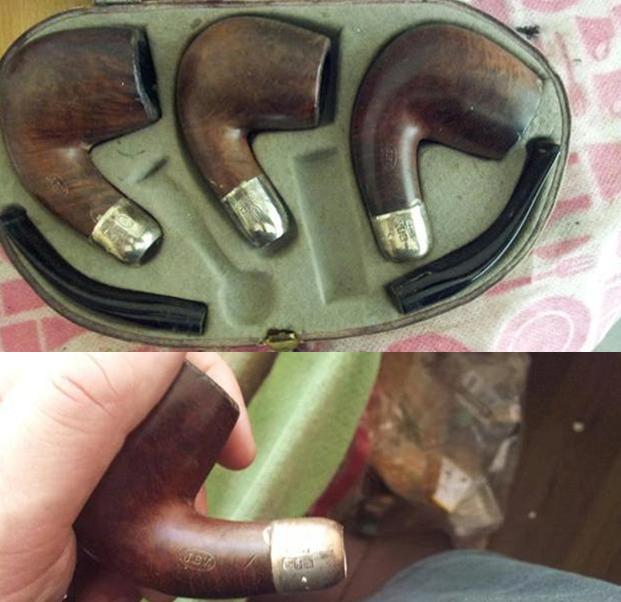
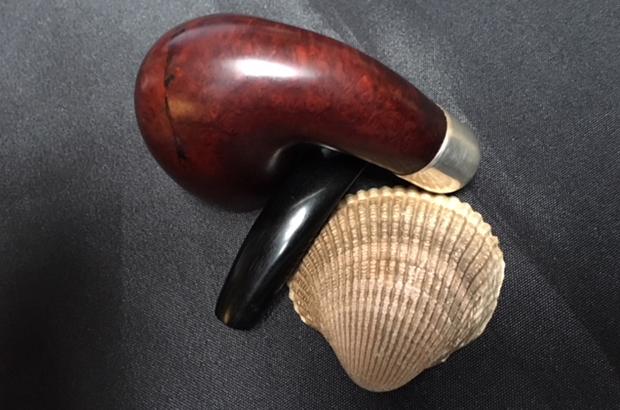
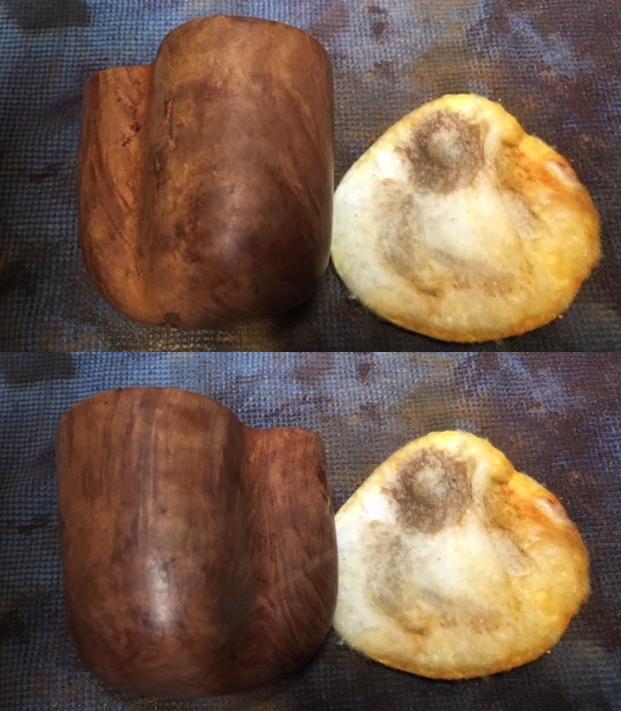
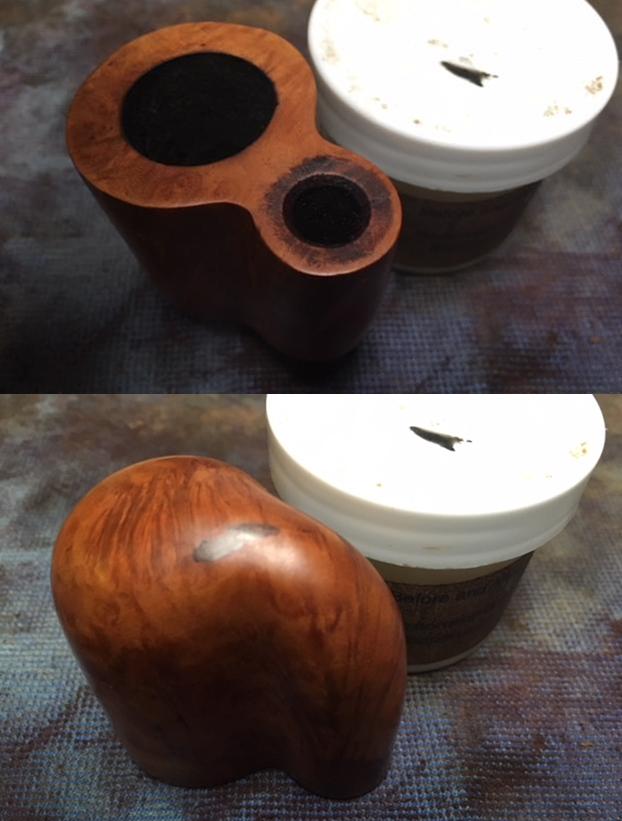
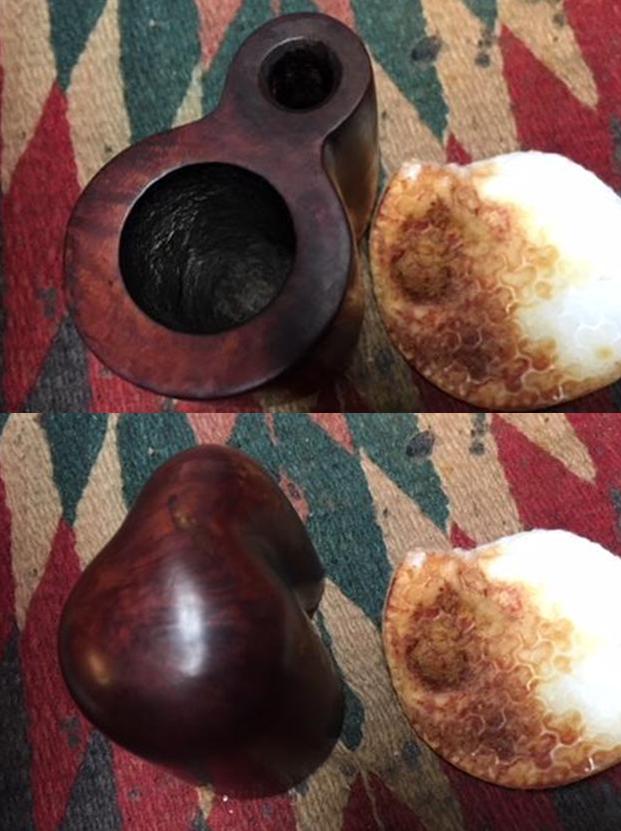
I’ve enjoyed restoring a Lot of 10 Peretti pipes and recommissioning them for new stewards. All the Oom Pauls in the picture below, except for one which I added to my collection, are in the hands of new stewards except for the one on my worktable now. I have been pleased to hear back from stewards who have these Oom Pauls and often I’ve heard that they have become favorites in their rotation lineups! I like Perettis myself and have a healthy collection of them. They are great smokers in my experience and my Peretti Oom Paul is a favorite for me too – he hangs on the chin perfectly, like a good lap dog! When I began my research on the L J Peretti name, I was surprised to discover that it is not an Italian pipe as one might expect with such a name! In fact, I discovered the genesis of a significant story of Americana pipe history with the establishment of the L. J. Peretti Company of Boston in 1870 (Pipedia citing: Pipes, Artisans and Trademarks, by José Manuel Lopes), the second oldest tobacco shop in the US, second only to Iwan Ries & Co. of Chicago established in 1857 (See: Link). The Peretti family originally comes from Switzerland, but the Italian name is explained by the fact that they originated from the southern slopes of the Swiss Alps which flows south toward Italy more easily than to the north – the heart of Switzerland. The Calabash (upper left) and the Goliath Billiard (bottom) are waiting to be restored to be added to my collection of Perettis. The hefty Egg in the middle is already in my lineup! Brian commissioned two pipes (See: For ‘Pipe Dreamers’ Only), a nice looking Jobey Hand Rubbed Dublin (next on the worktable) and the Oom Paul Sitter before me – both pipes benefit the Daughters of Bulgaria – helping women and girls who have been trafficked and sexually exploited. Thanks Brian! For a close-up look at the Oom Paul Sitter, I take several pictures on my worktable.
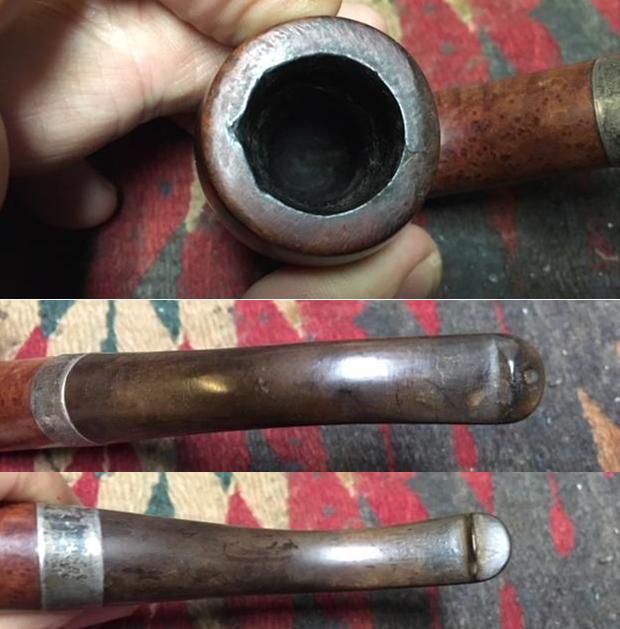
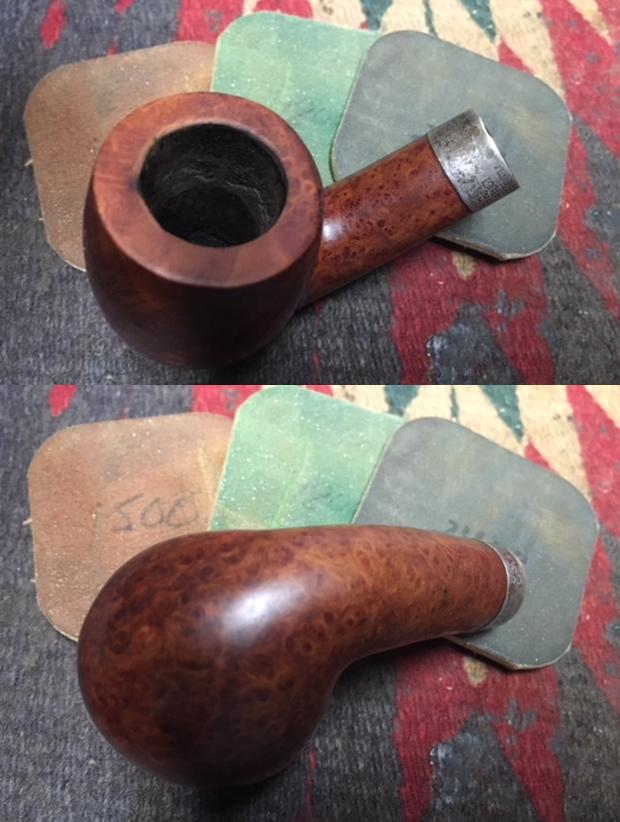
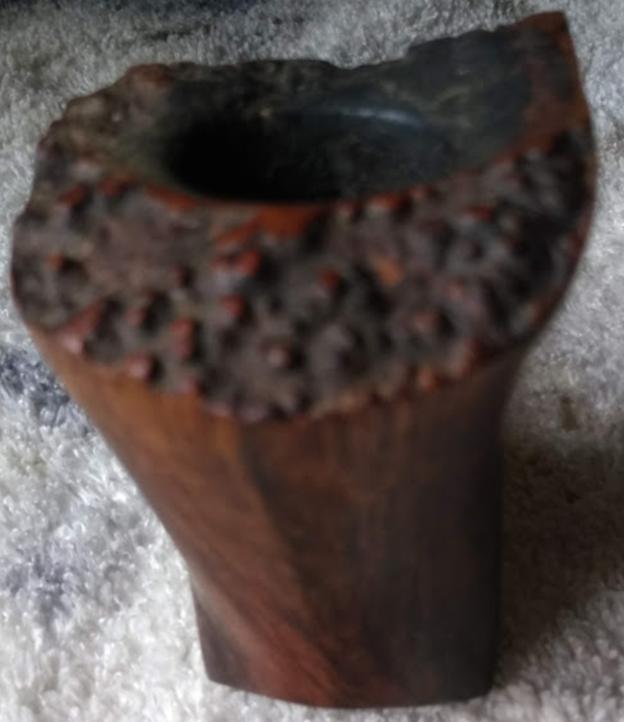
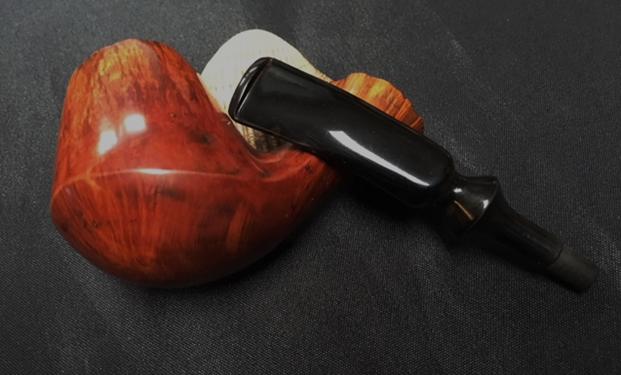
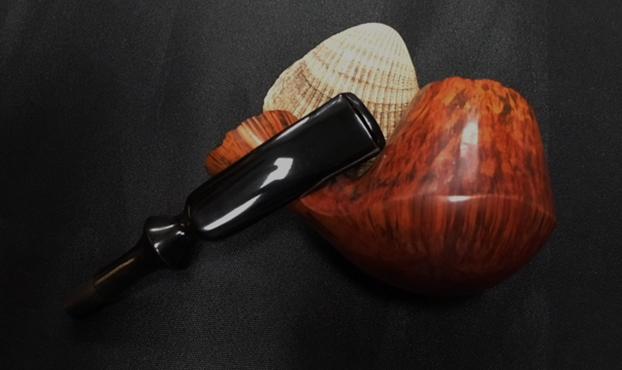
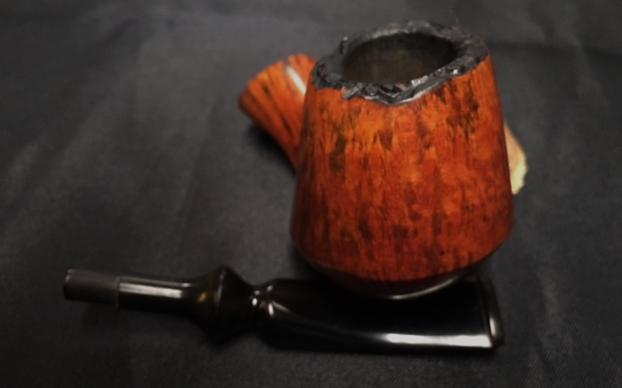
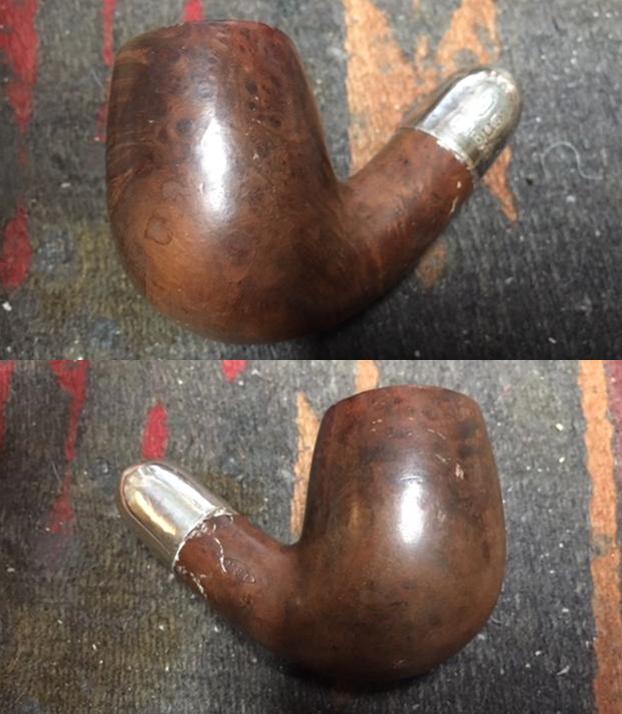
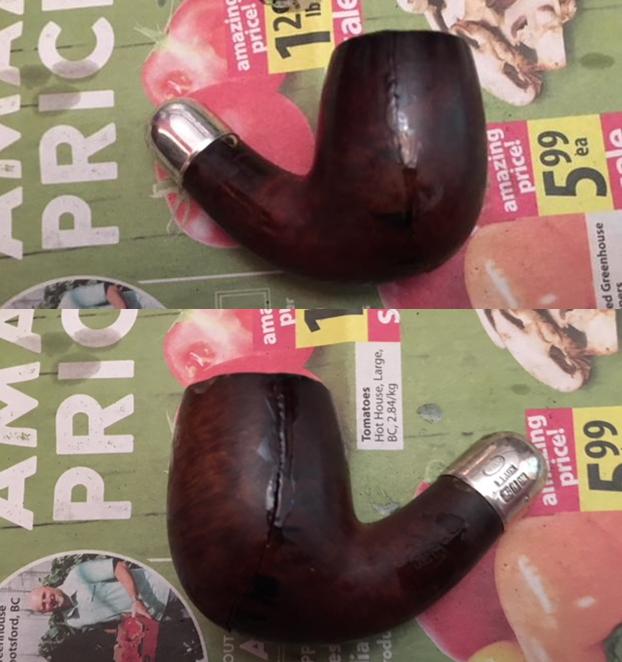
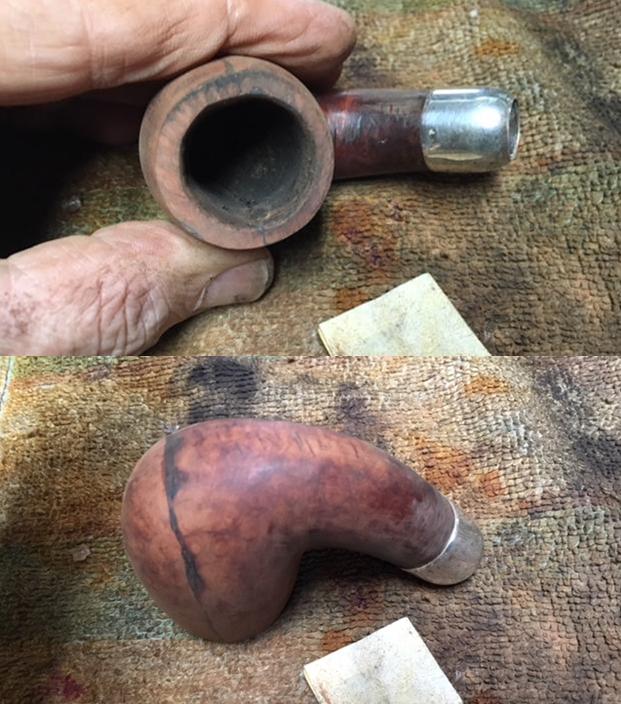
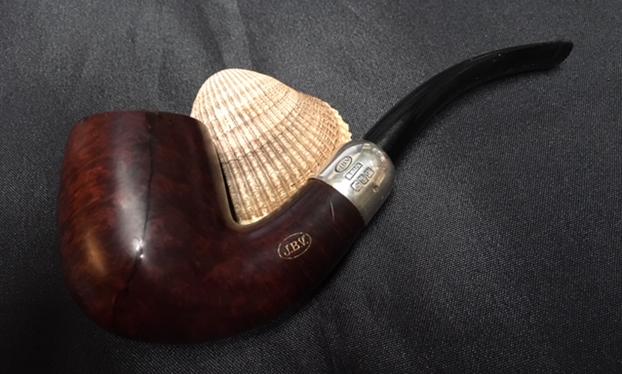
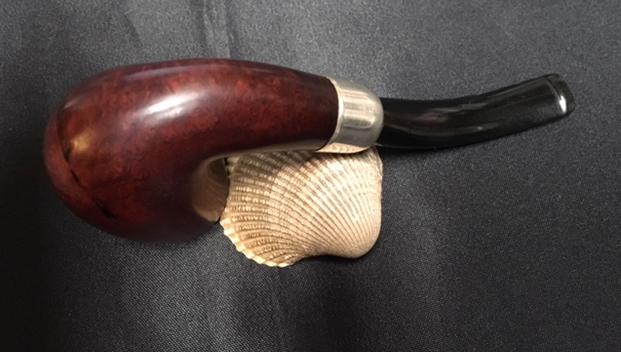
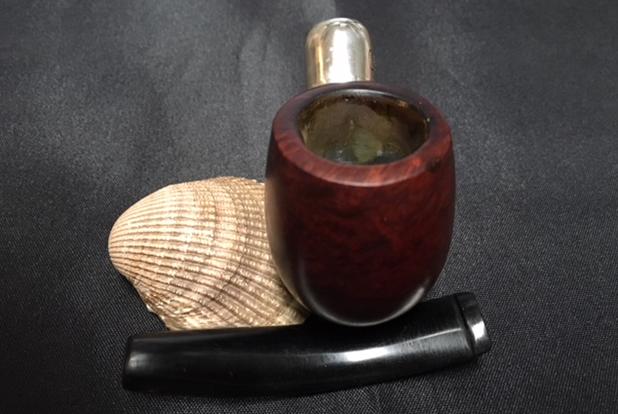
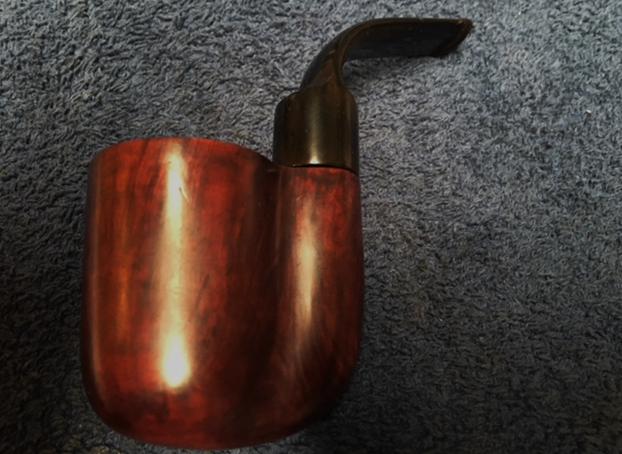
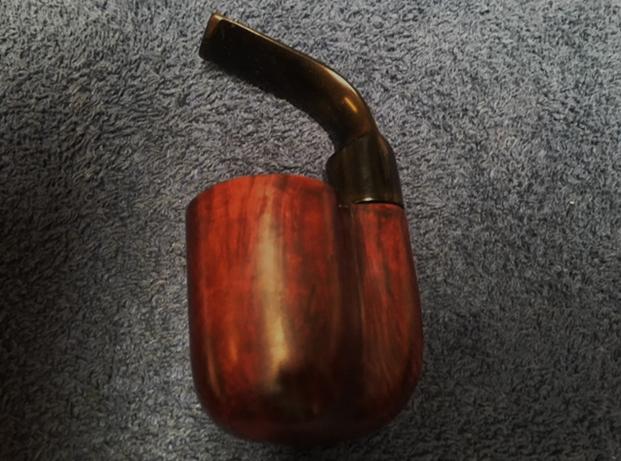
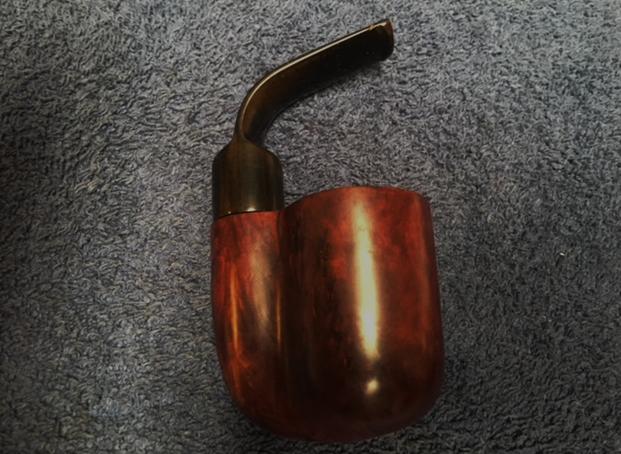
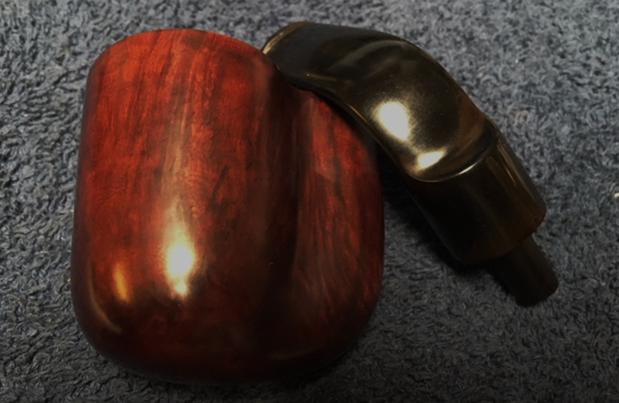
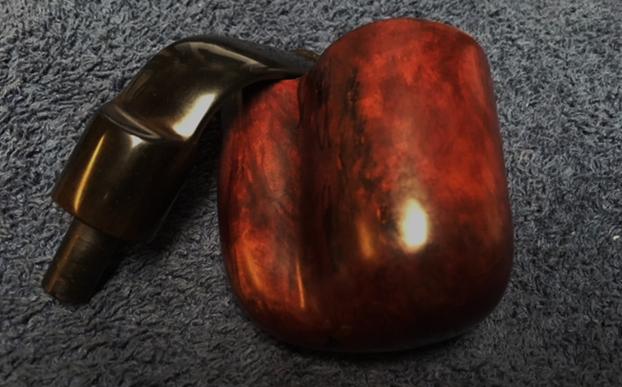
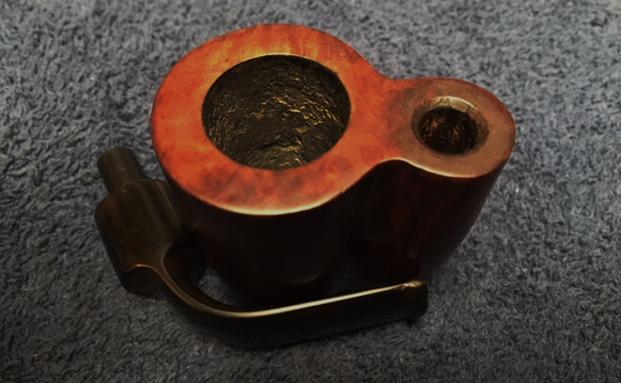


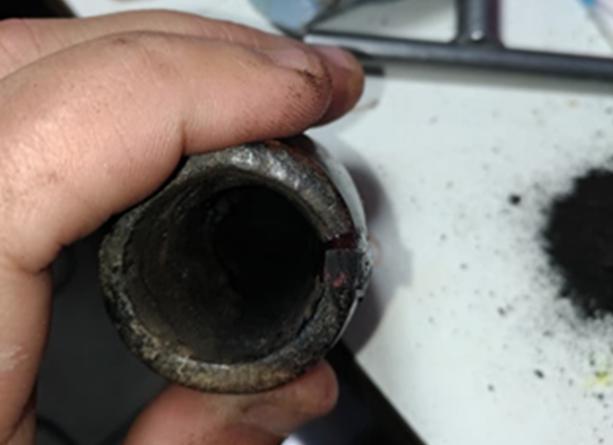
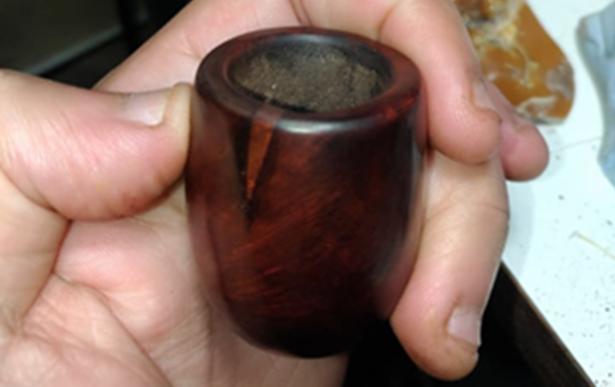
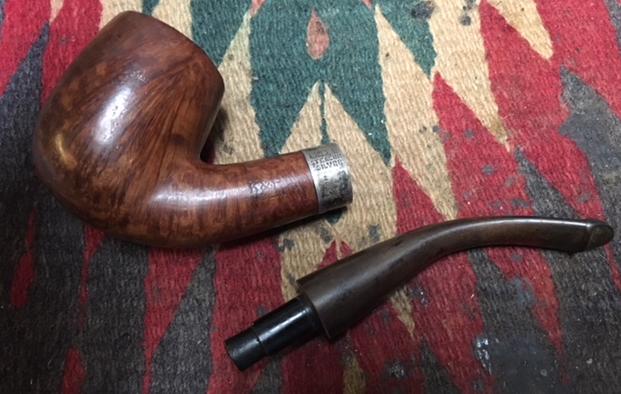
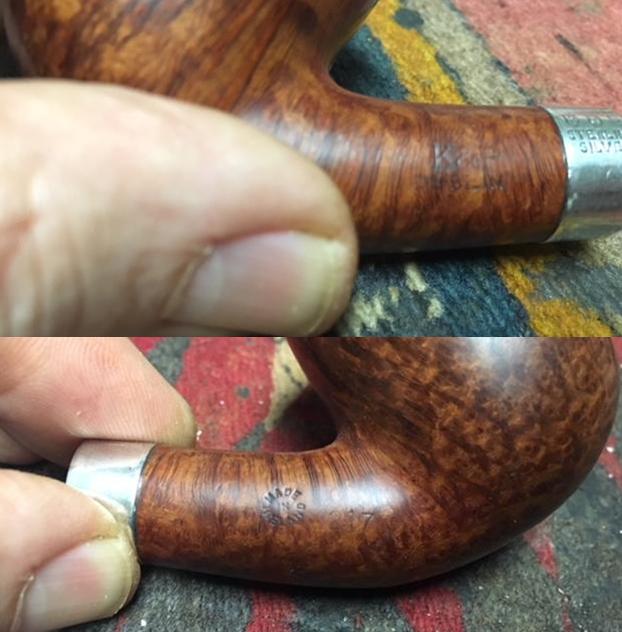
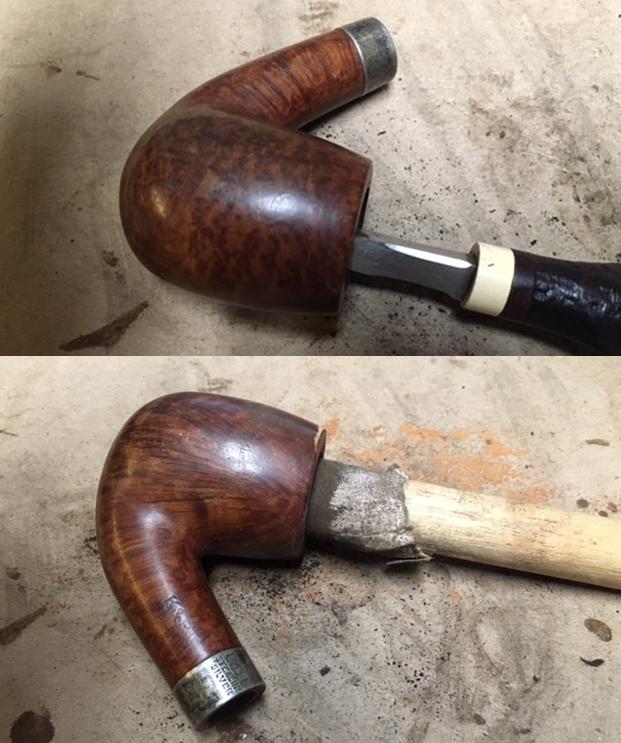
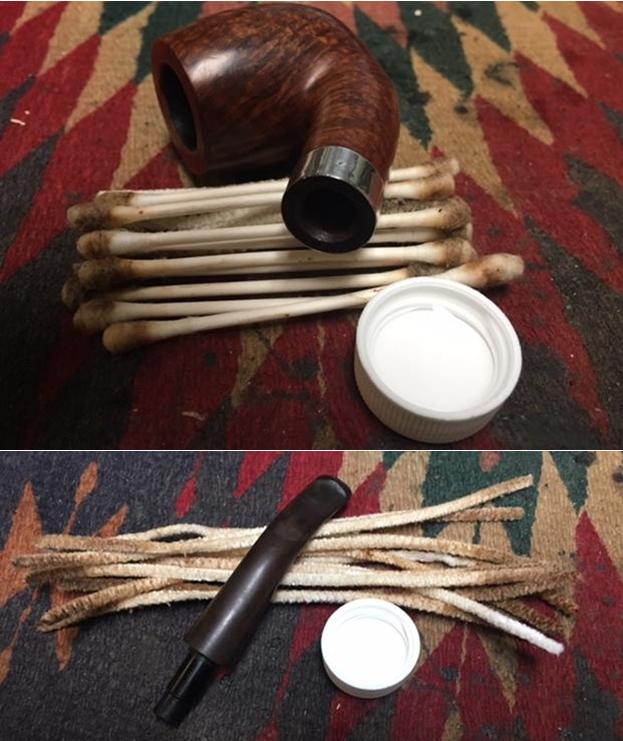
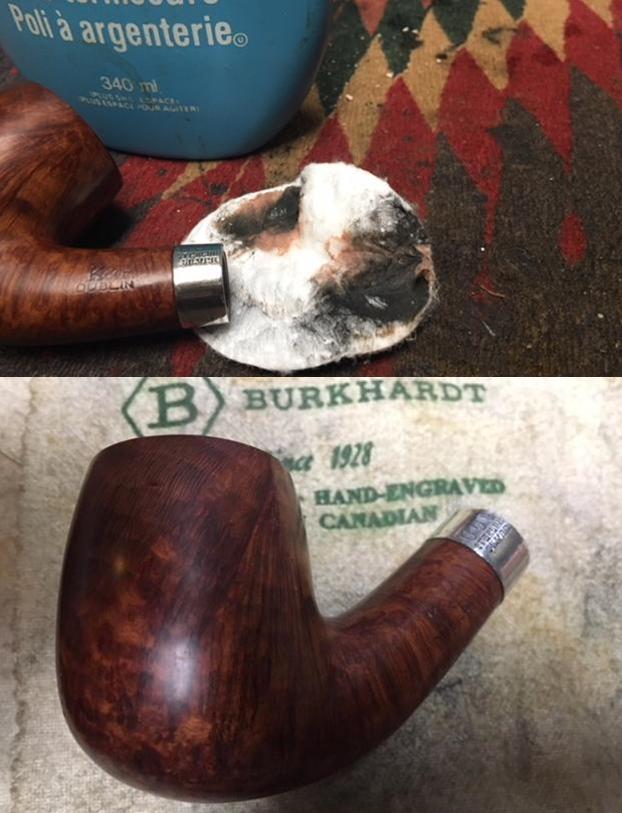
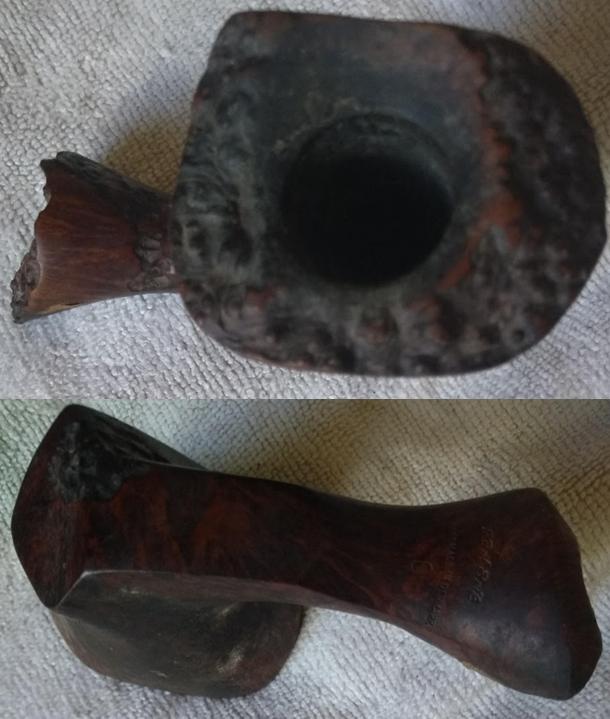
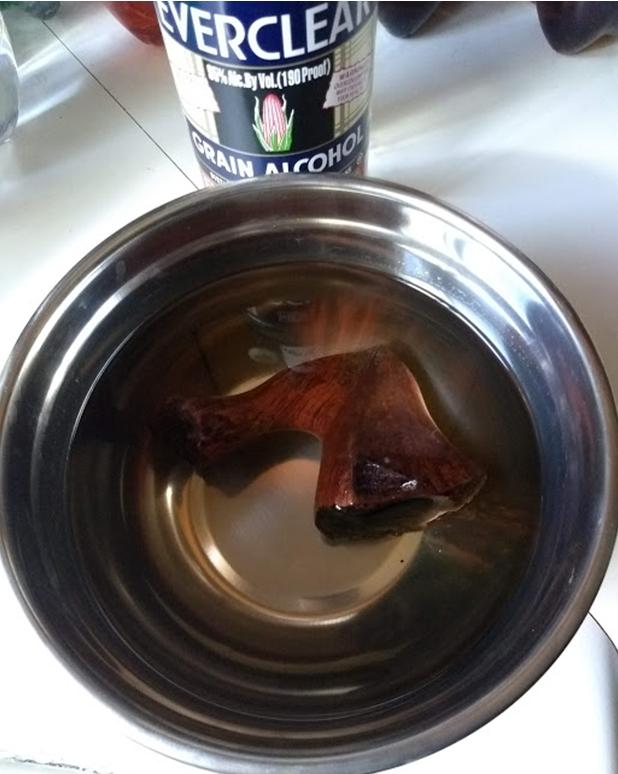
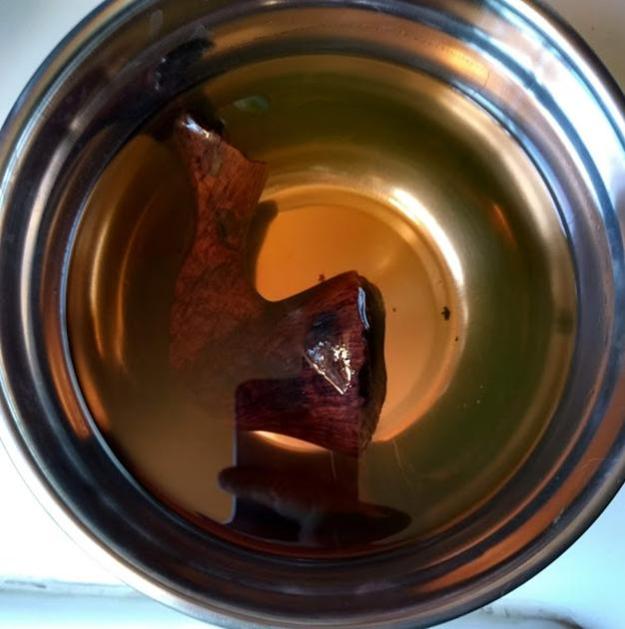
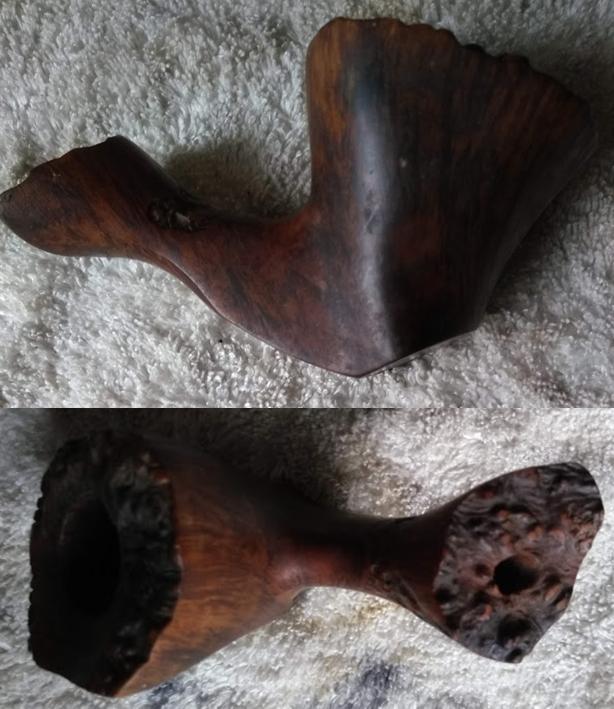
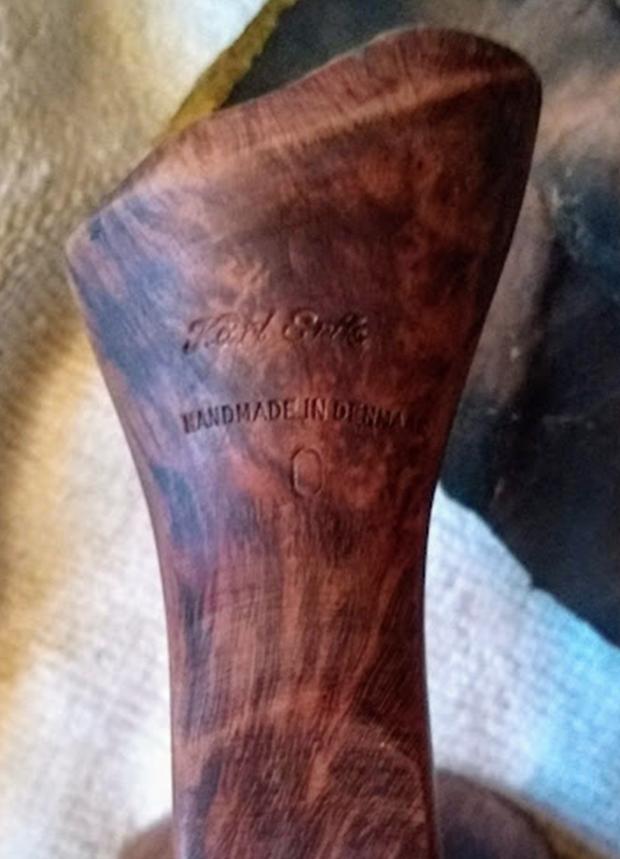
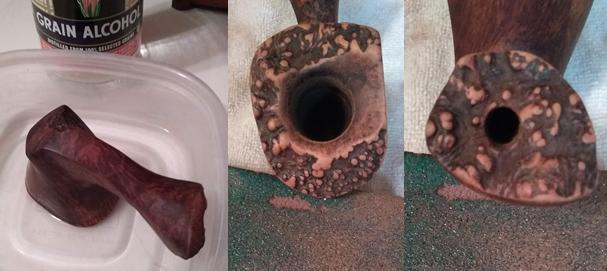
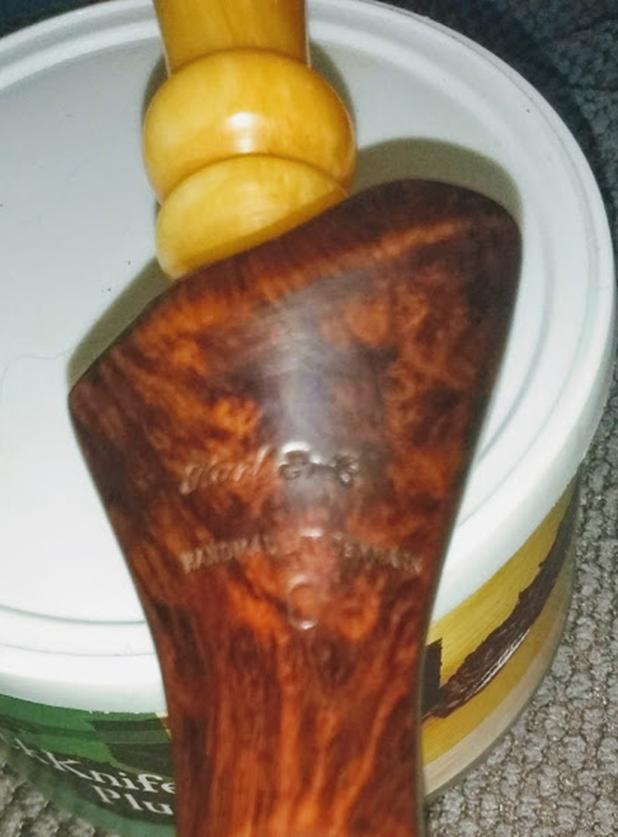
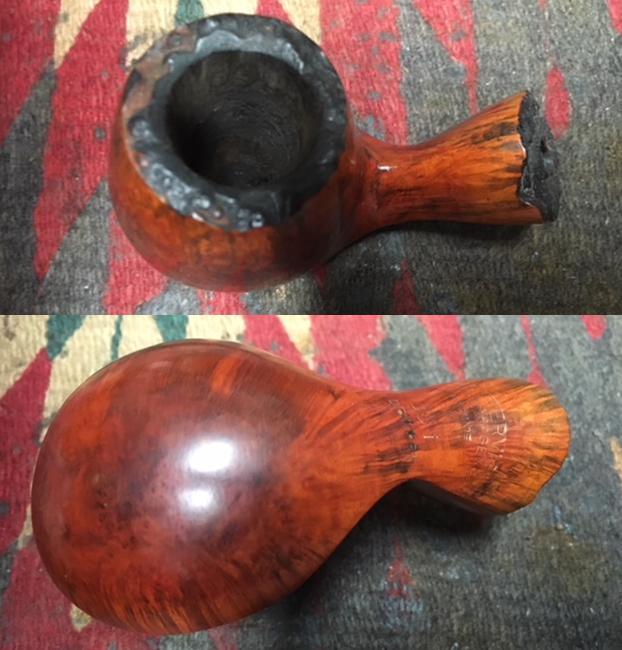
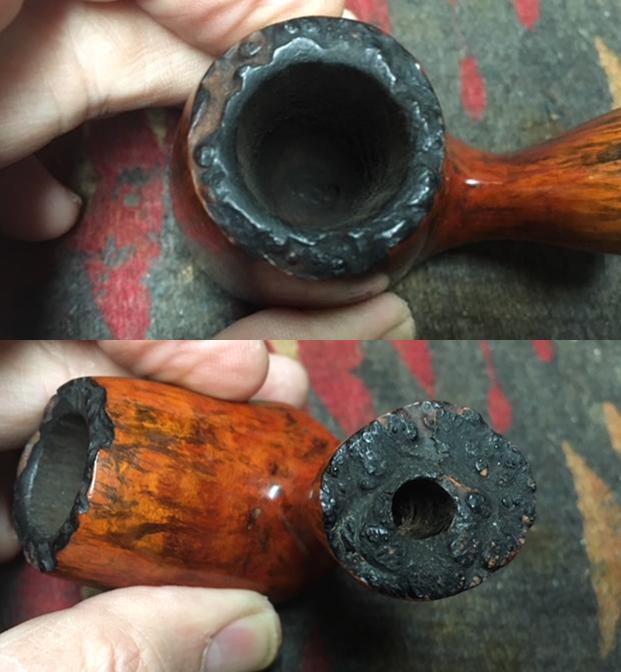
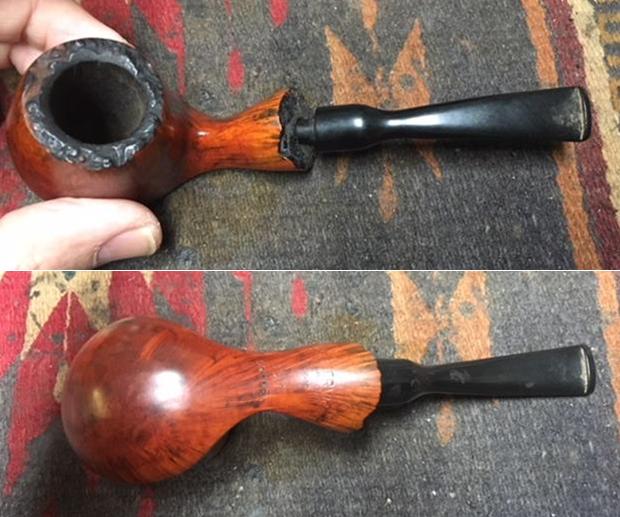
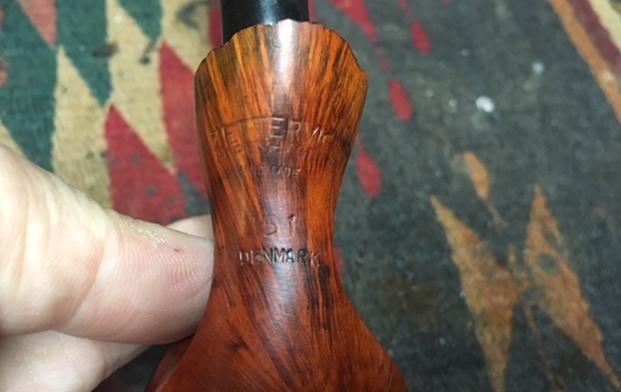
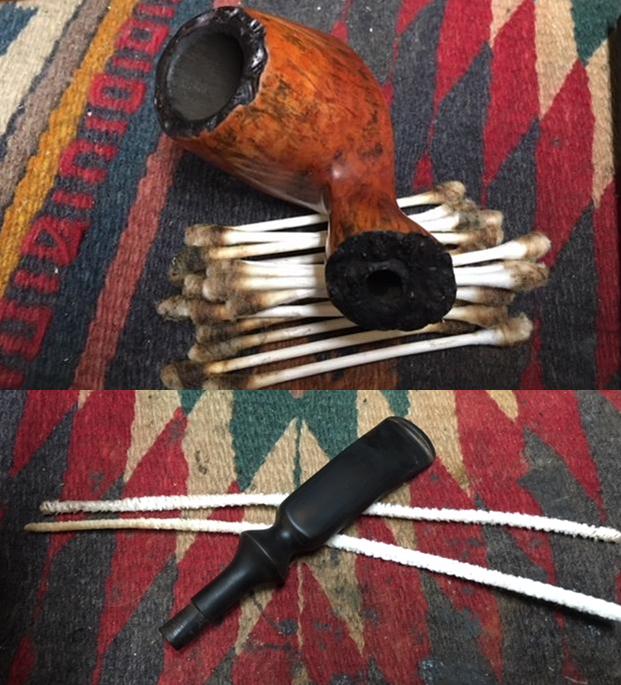
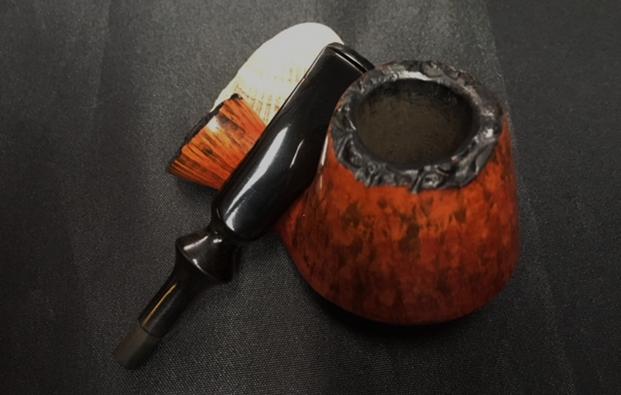
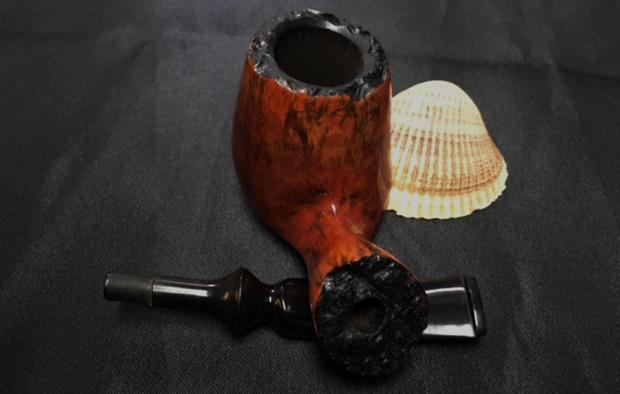
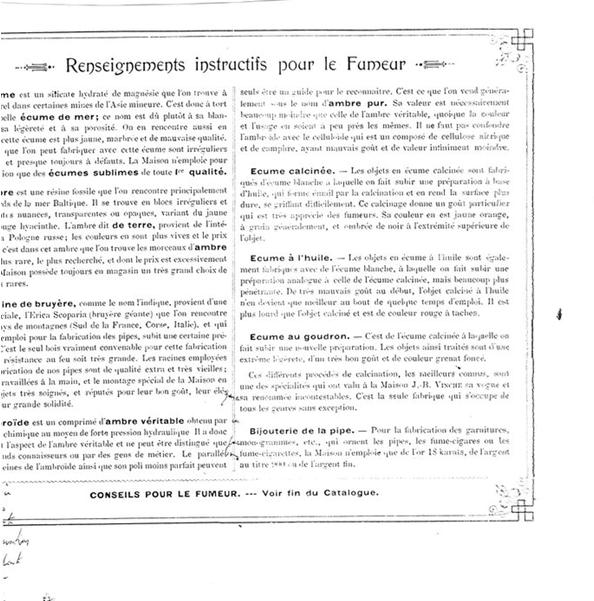
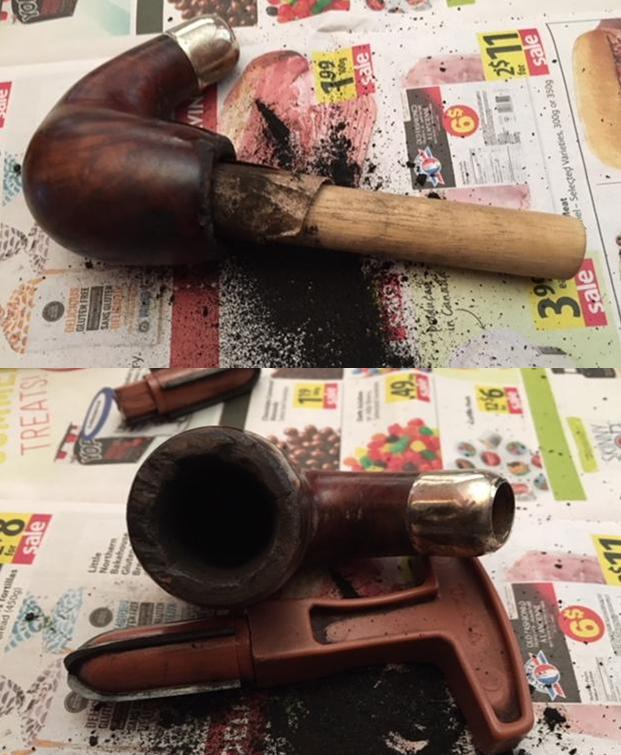
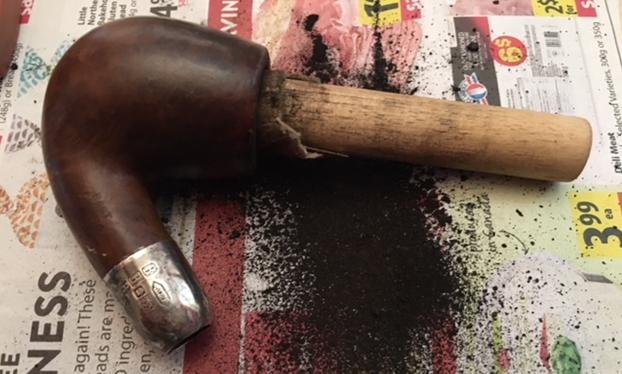
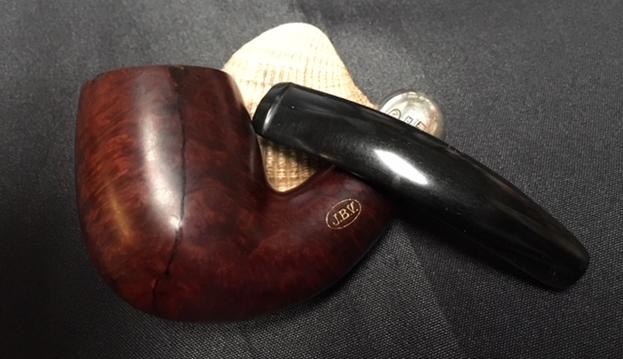
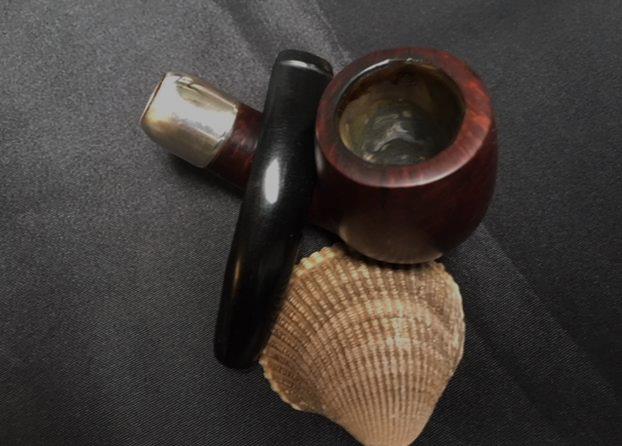
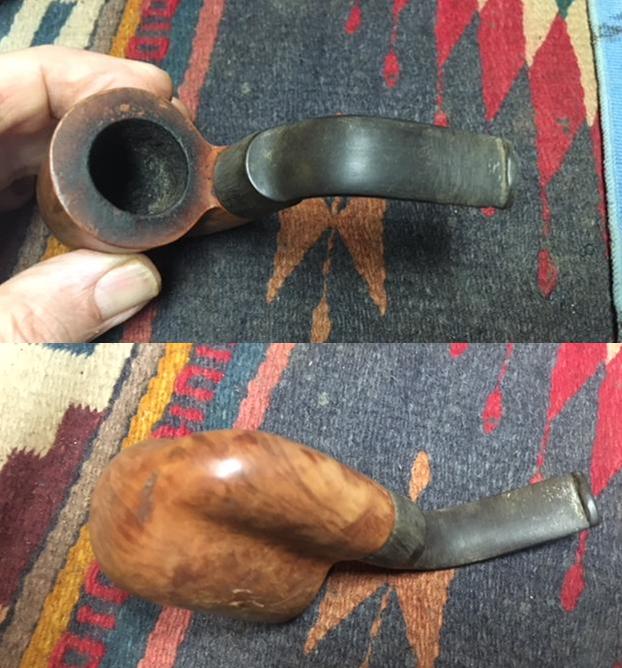
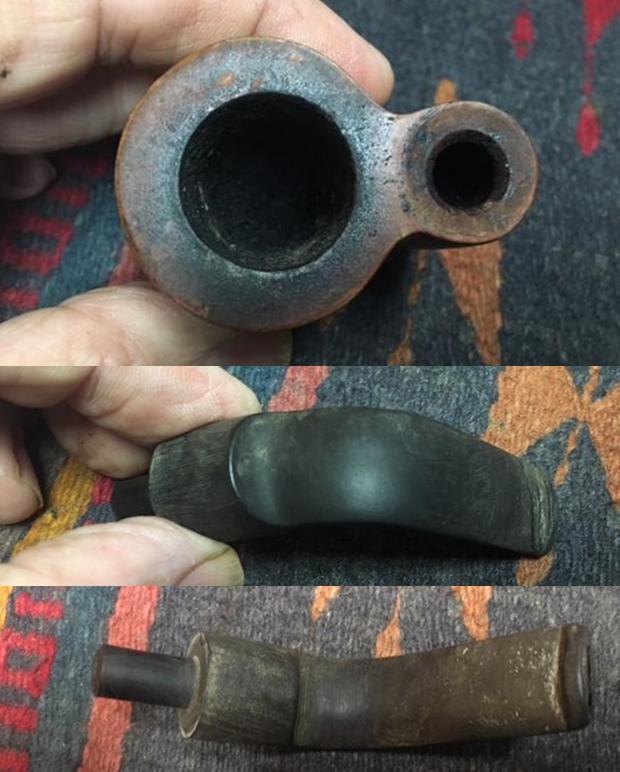
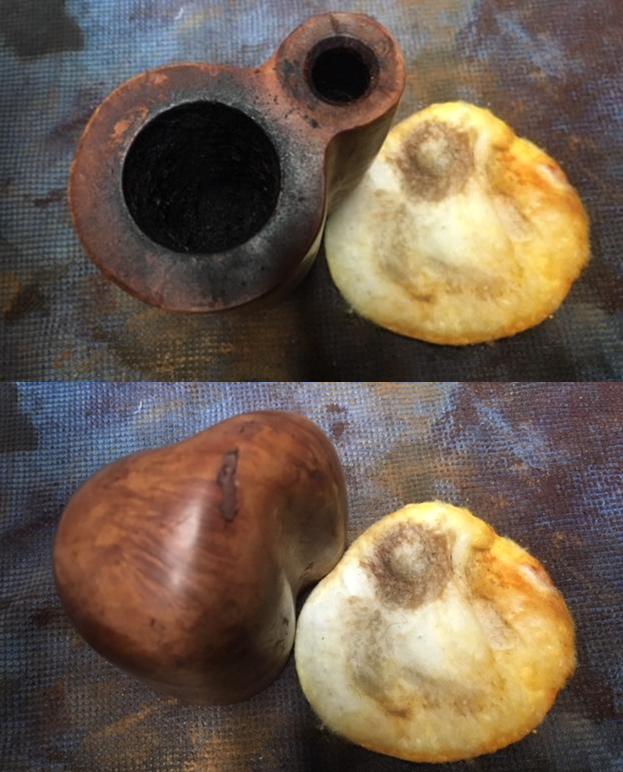
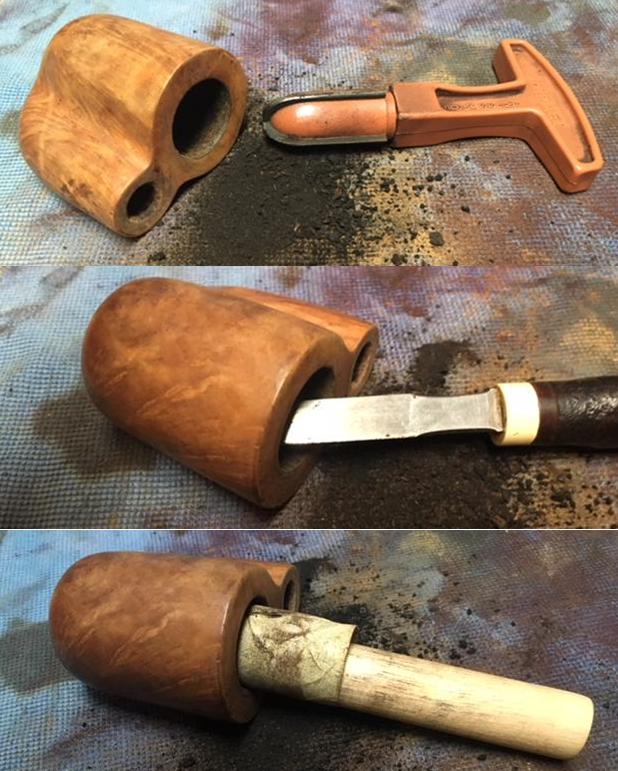
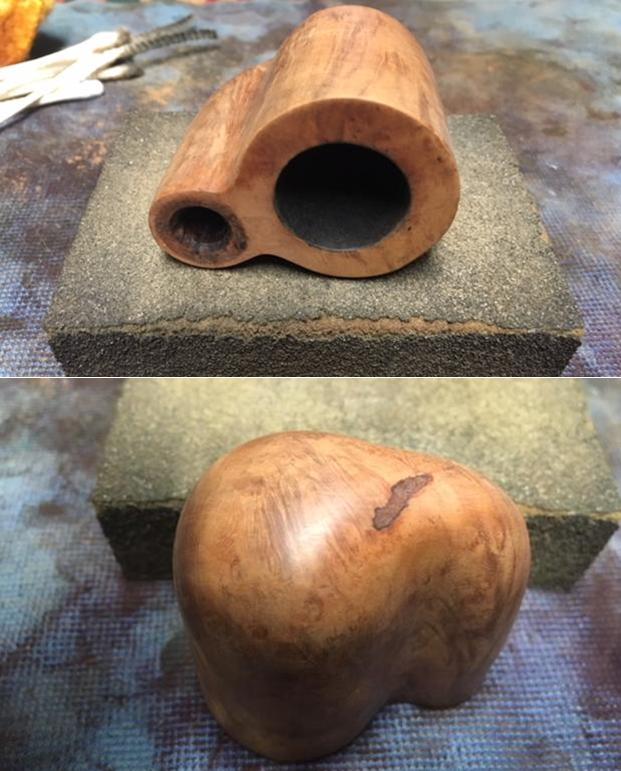
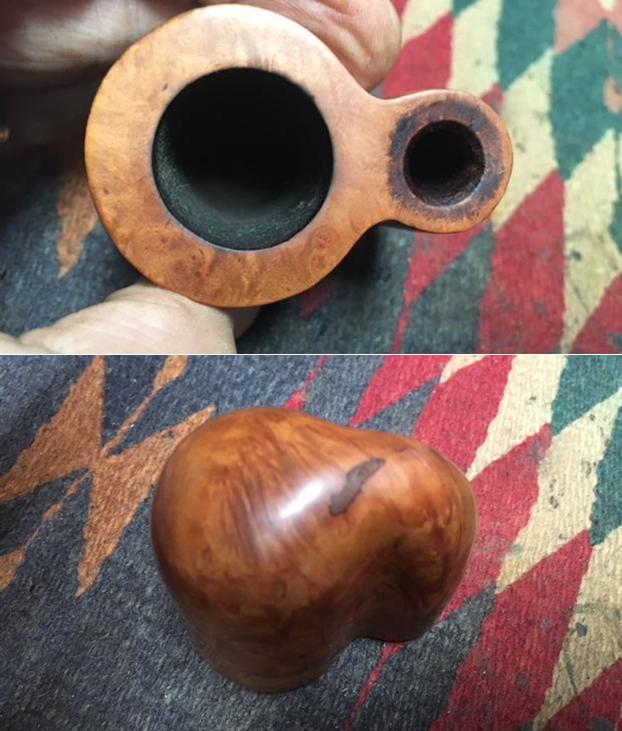
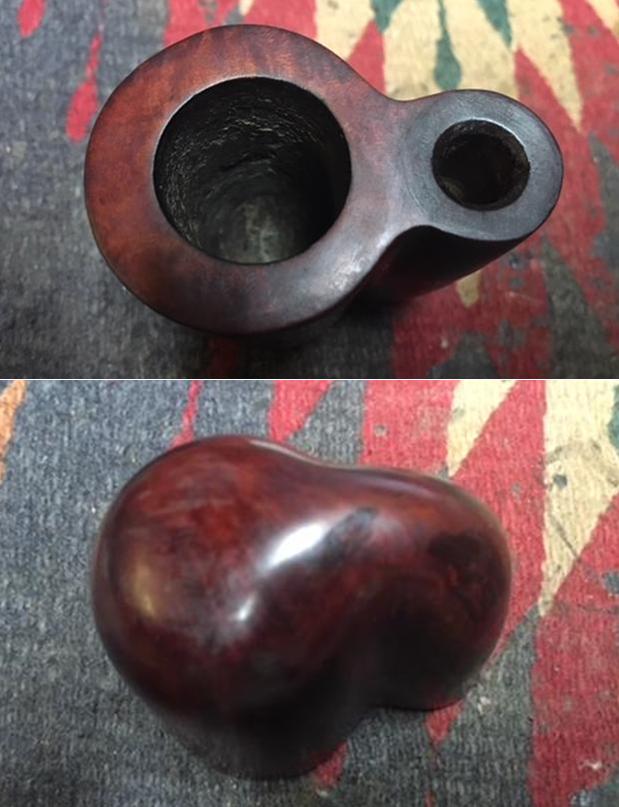
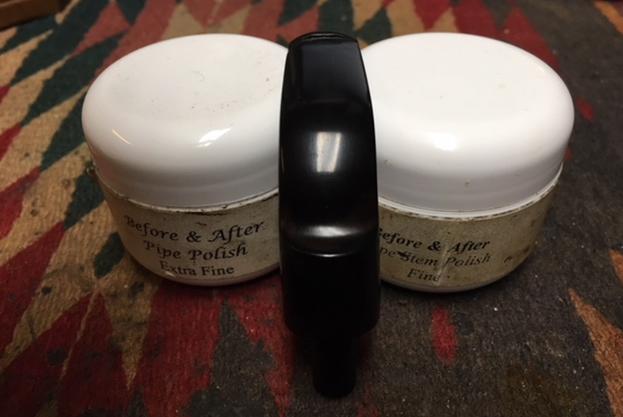
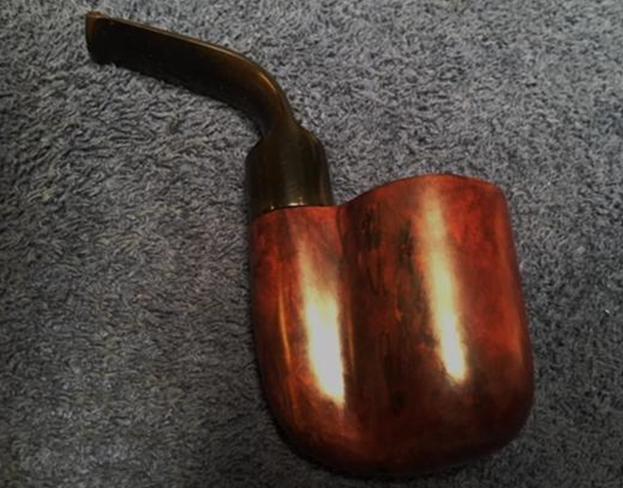
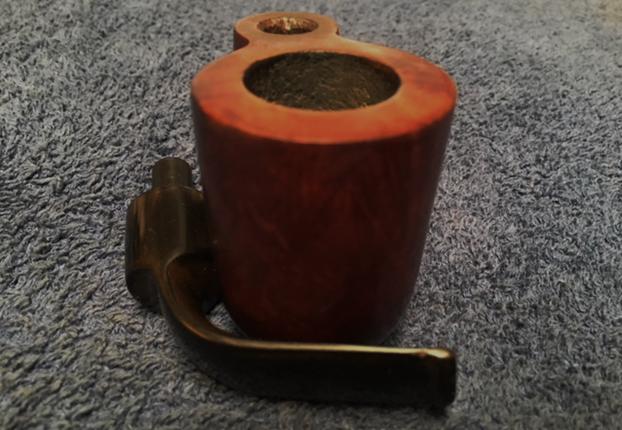
 The nomenclature is the simple L.J. PERETTI stamp on the left shank. This Oom Paul shares every single challenge that his former brothers had – the former steward seemed to have a scorched earth policy. The chamber is heavily caked, and the rim scorched. The rim challenges are the most daunting for this restoration. The stummel has a build up of grime and minor nicks from usual wear. The stem has significant oxidation and bit clenching and chewing which needs addressing. To begin the restoration of this, the last Peretti Oom Paul Sitter in need of a new steward, after cleaning the internal airway with a pipe cleaner dipped in isopropyl 95%, I put the stem in a soak with Before & After Deoxidizer along with 5 other stems. After some hours soaking, I fish out the Peretti stem and wipe off the raised oxidation with a cotton pad wetted with light paraffin oil (mineral oil in Bulgaria). The Deoxidizer seems to have done an adequate job.
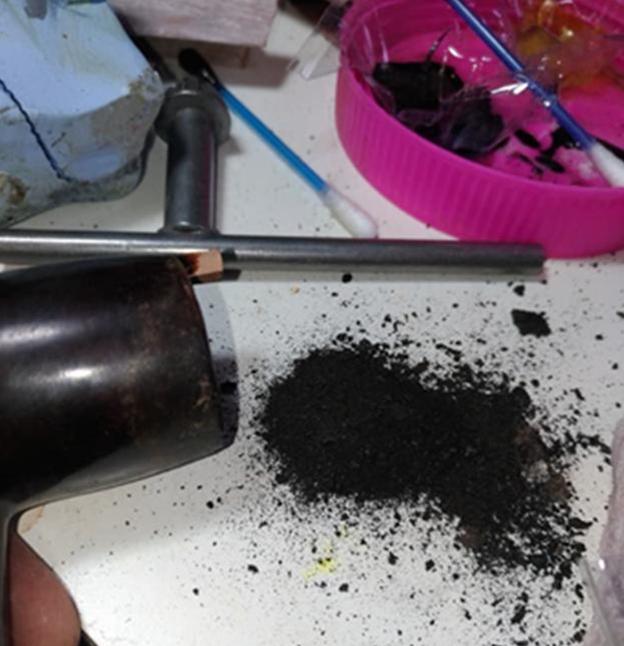
  Next, I attack the chamber carbon cake build up using the Pipnet Reaming Tool. Putting paper towel down to minimize clean up, starting with the smallest blade head, I use 3 of the 4 blades available to me. I follow the blade heads by using the Savinelli Fitsall Tool to reach down into the chamber to scrape more carbon off the wall. Then, to clean the chamber and to bring out fresher briar, I sand the chamber using a piece of 240 grit paper wrapped around a Sharpie Pen. To remove the thick carbon dust left behind, I wipe the chamber with cotton pads wetted with alcohol. After clearing the cake away, a look into the chamber reveals no problems – no heat cracks or fissures. Good!

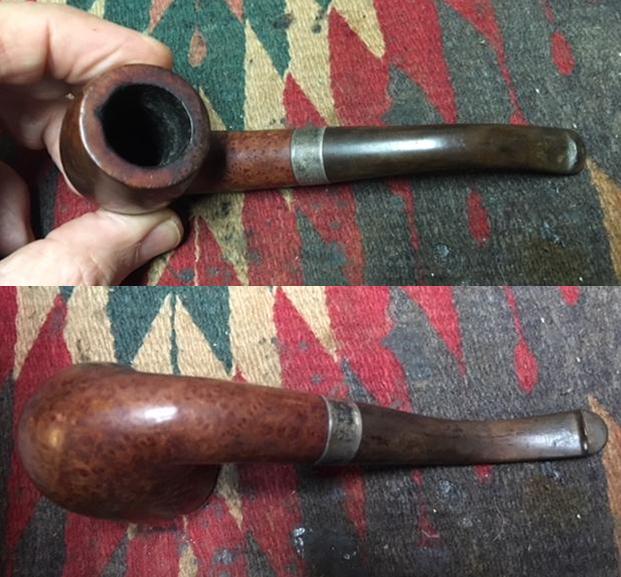
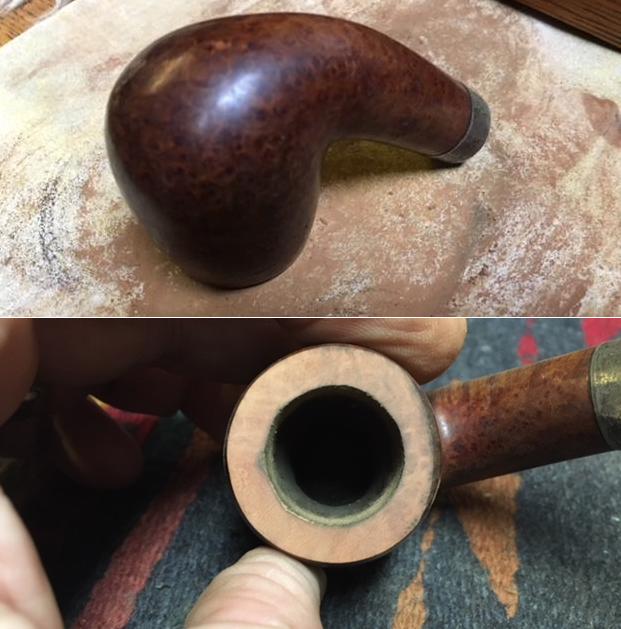
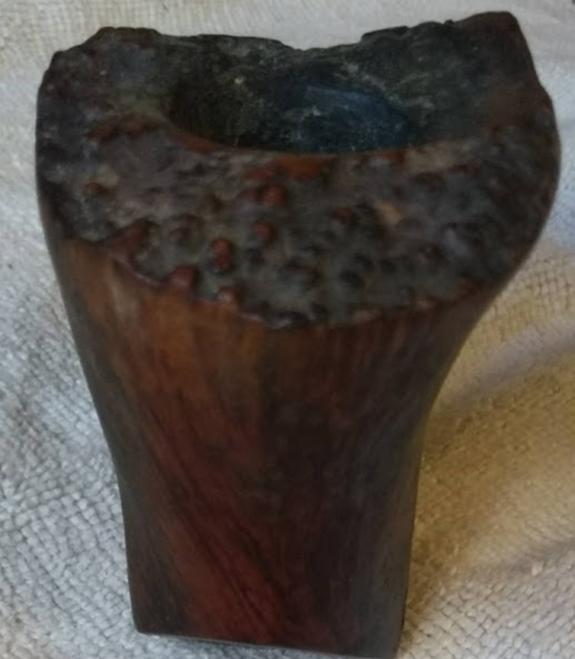
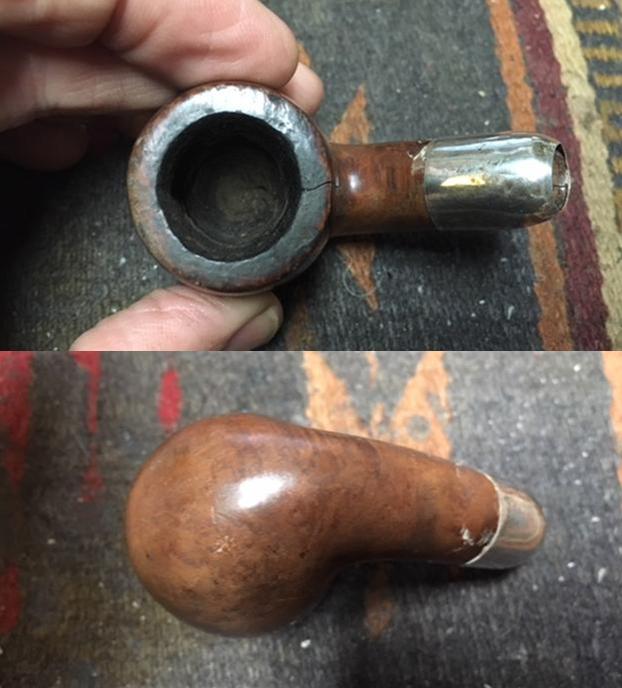
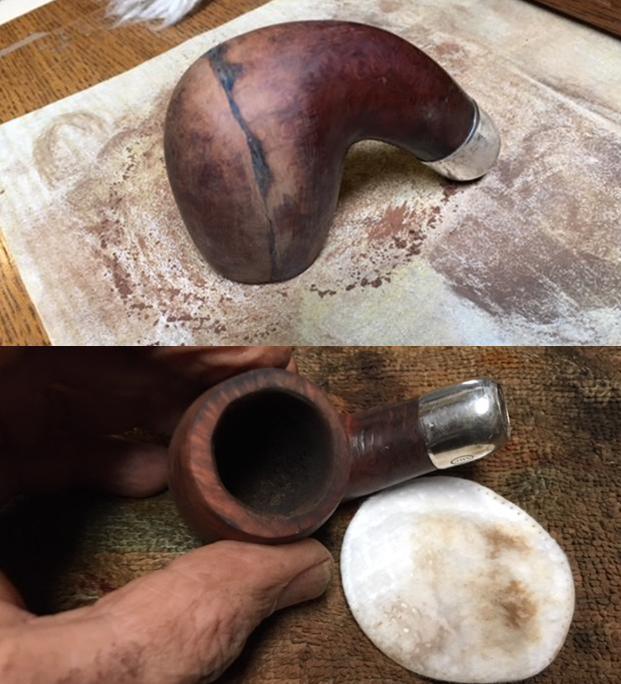
 Now to scrub the stummel surface and the rim with its thick lava I start with undiluted Murphy’s Oil Soap and cotton pads. I also use a brass brush on the rim to break up the lava crust. To scrape the rim, I use a pin knife as well as the straight edge of the Savinelli Fitsall tool. As I scrape the crust off, I also remove the scorched charcoal that is on the inside of the rim mainly on the left side of the stummel – the area where the former steward damaged all his pipes. The result is that the left side of the rim is narrower after the cleaning. The stummel is in great condition – the rim is the challenge.
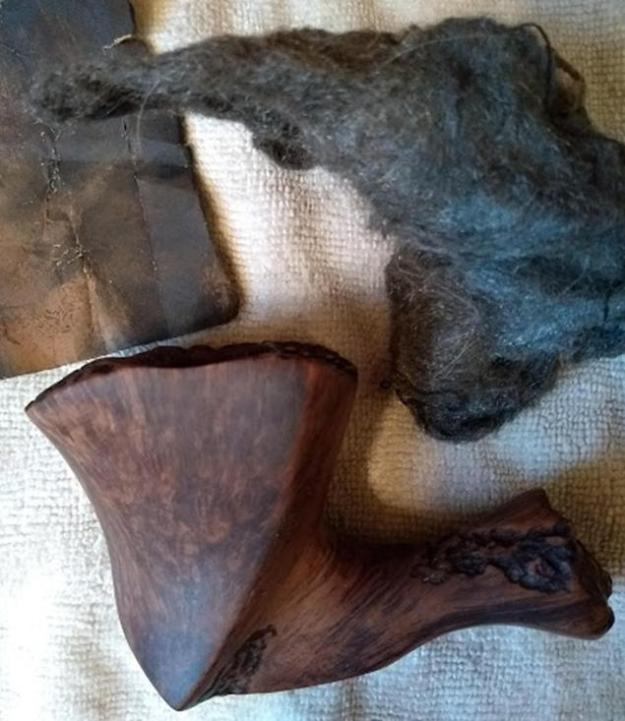
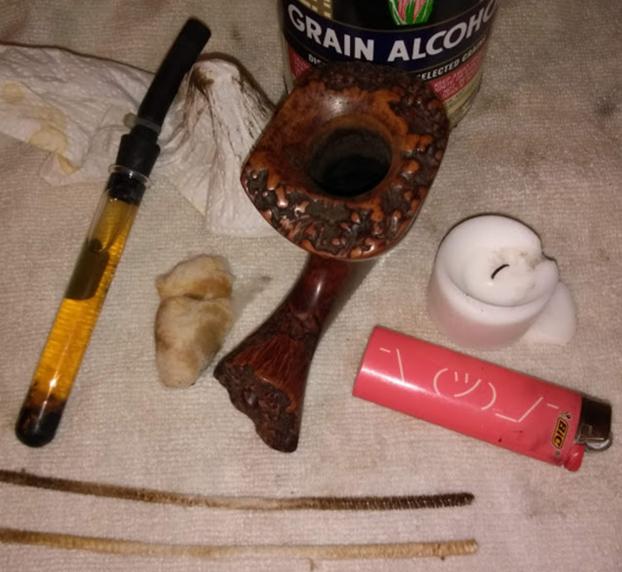
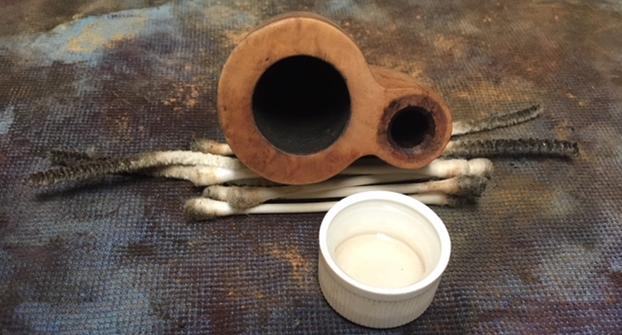
 Before moving on with the rim repairs I continue with the internal cleaning of the stummel. Using pipe cleaners and cotton buds dipped in isopropyl 95% I go to work. I also employ a dental scalpel to scrape the internal wall. I’m pleased that there wasn’t too much resistance. At the end of my work day I’ll continue the cleaning process by giving the stummel a kosher salt and alcohol soak.
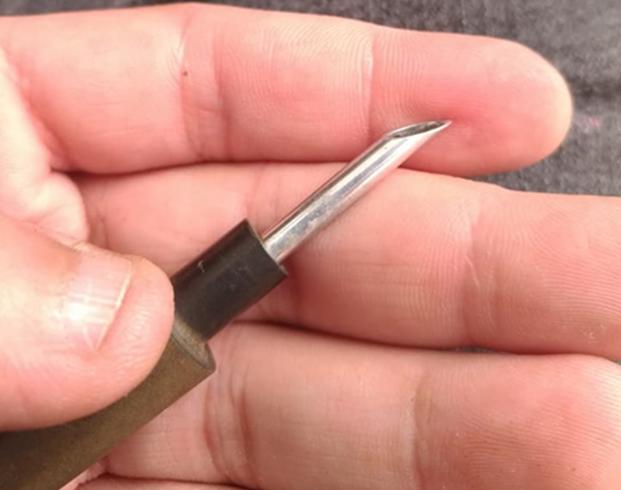
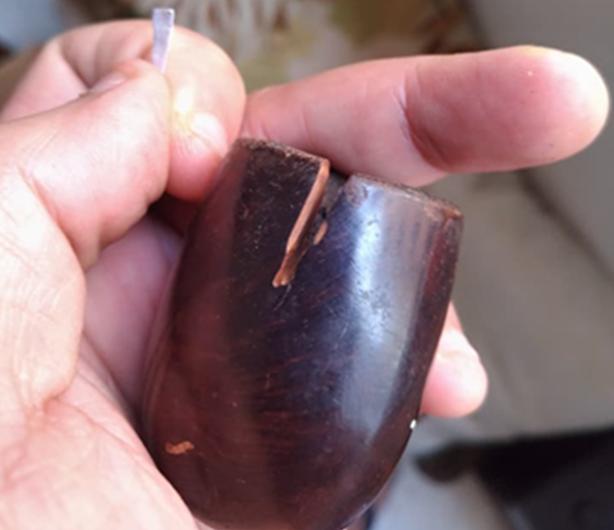
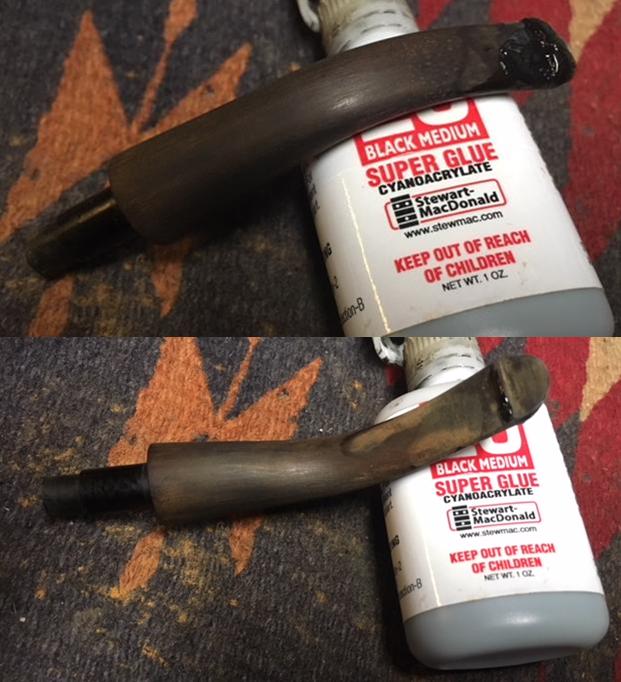
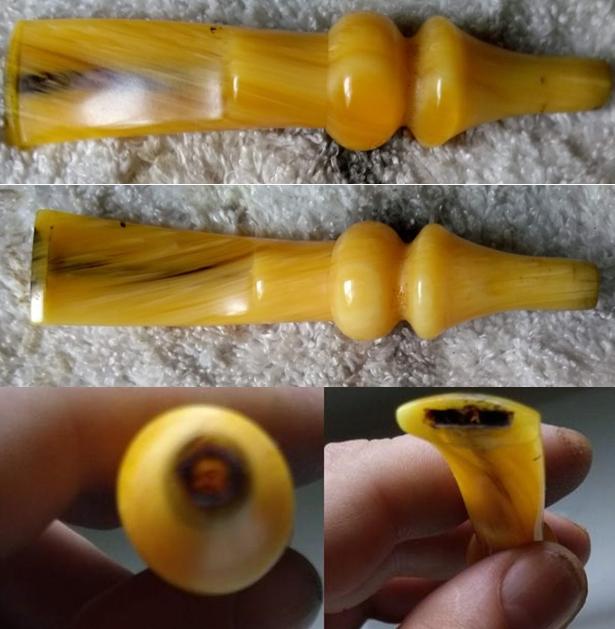
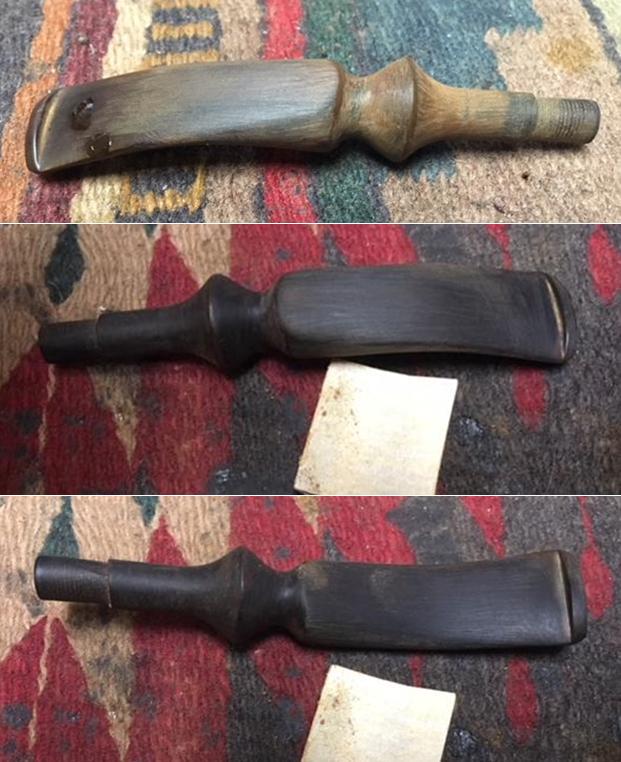
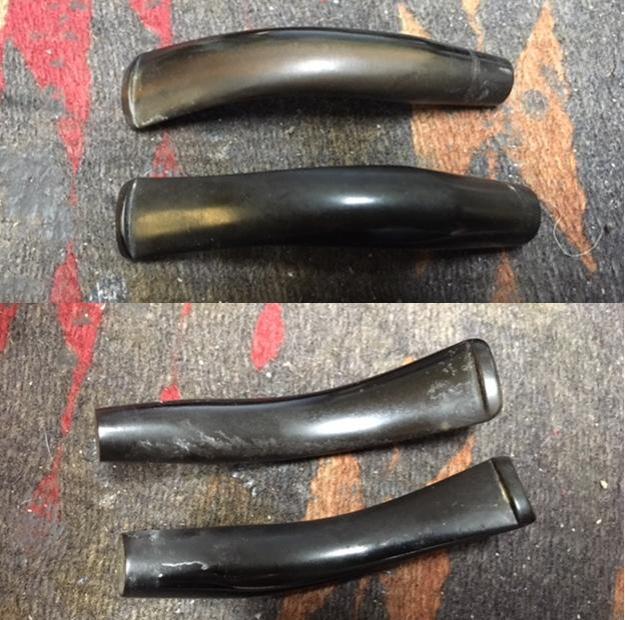
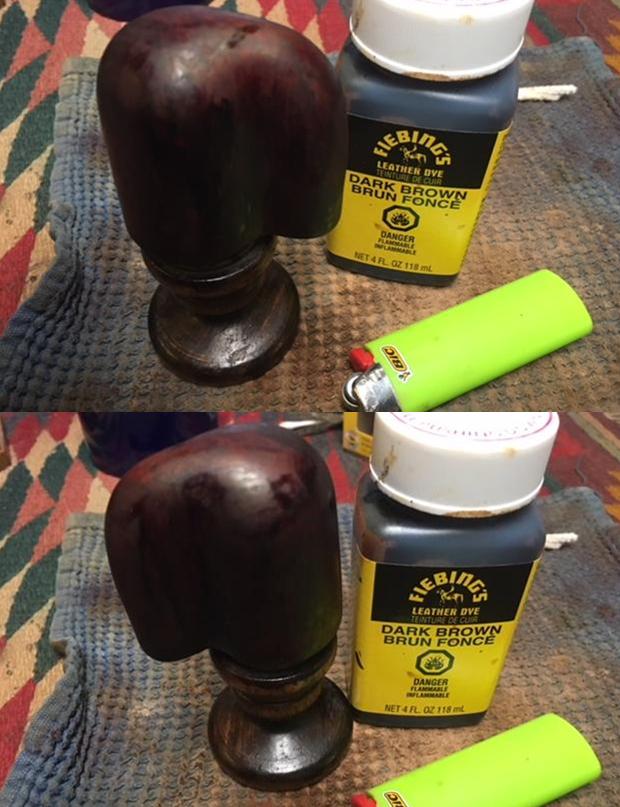
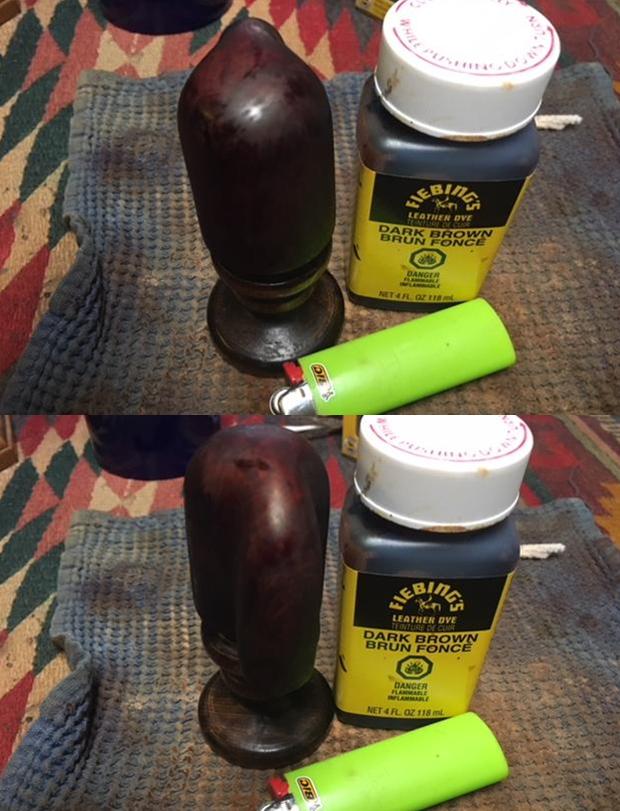
 Turning now to the stem, I begin addressing the tooth dents and chatter on the bit. With his brother Oom Pauls, there usually was some button damage too, but this guy’s in better shape in that regard. I first use the heat method to raise the vulcanite dents to make them less severe. By heating the vulcanite, it expands, and the dented vulcanite naturally seeks its original positioning. I use a Bic lighter and paint the upper and lower bit and after heating several passes, I do see a lessening of the severity of the dents as the vulcanite expands. As a result, I can sand the remaining dents out with both the upper and lower bit. Before the heating:
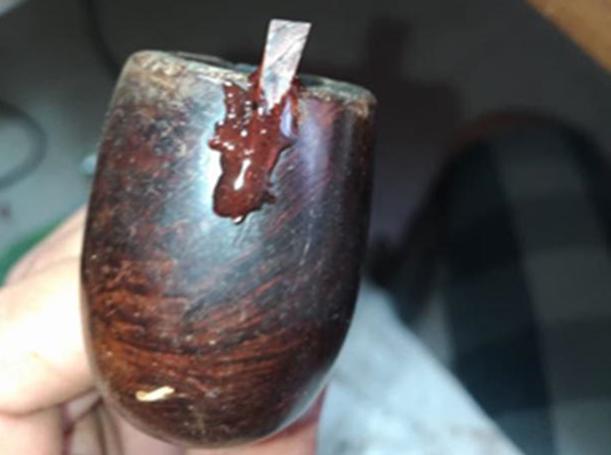
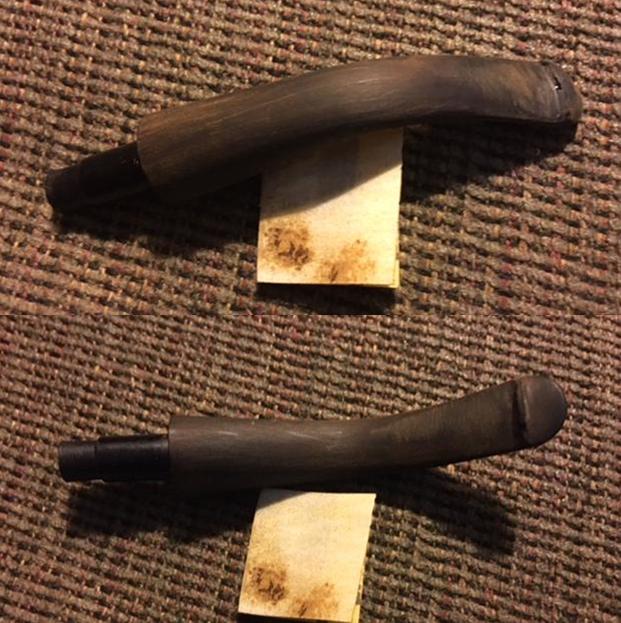
 After the heating:
 I sand out the damage using 240 grit paper.
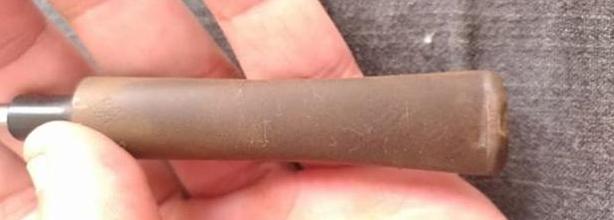
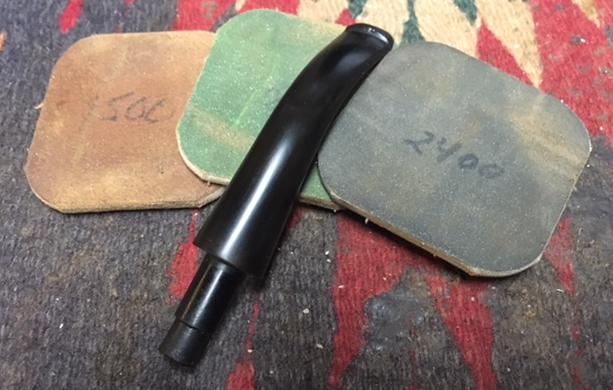
 I move on to using 600 grit paper by wet sanding the entire stem. I follow this with 0000 steel wool sanding/buffing the entire stem.
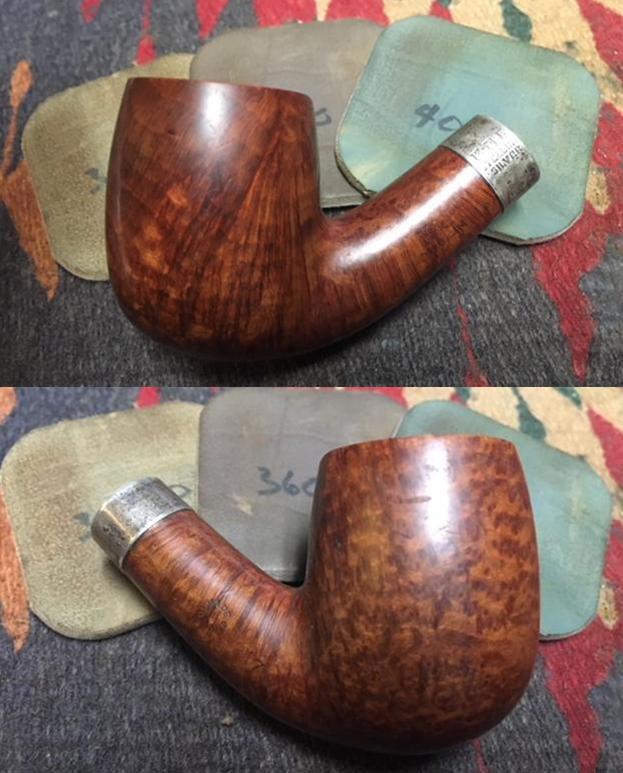
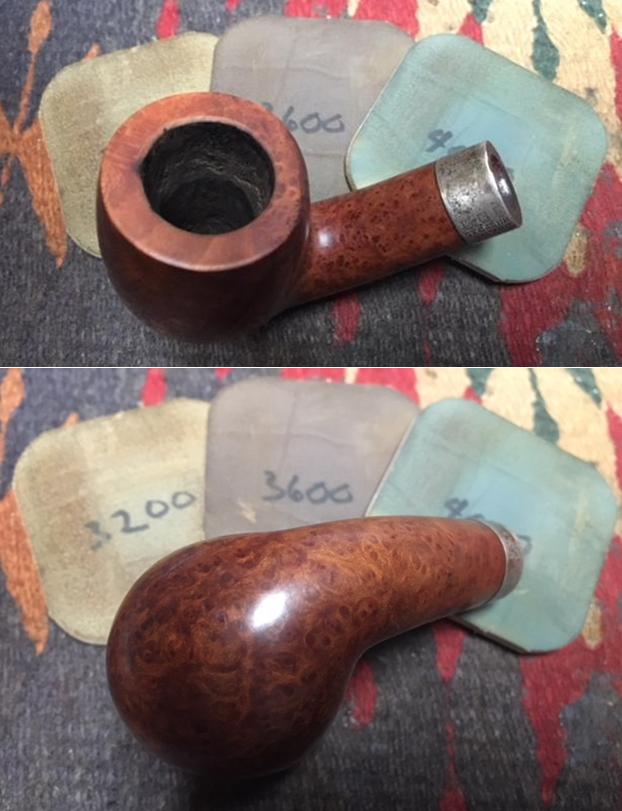
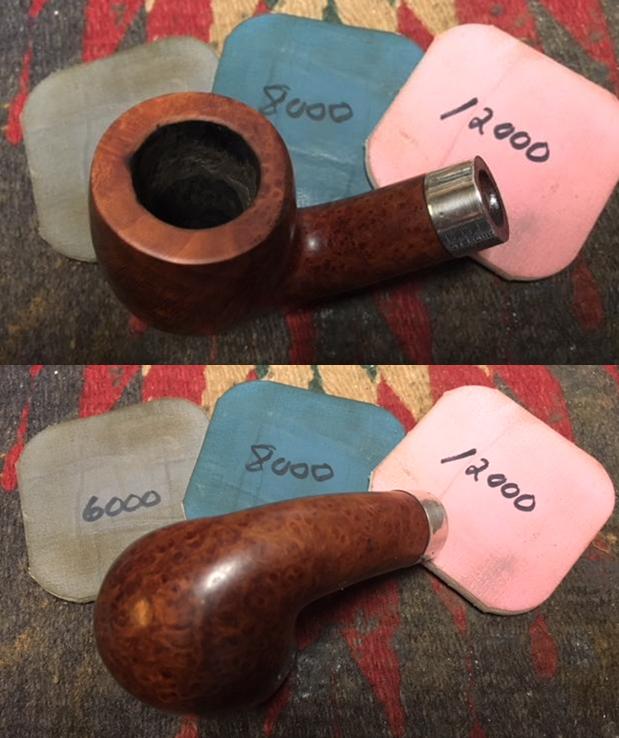
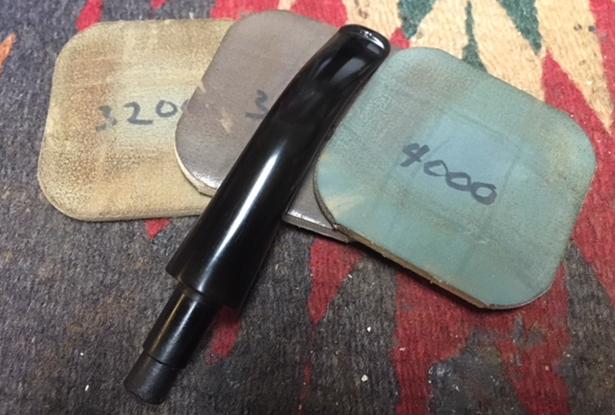
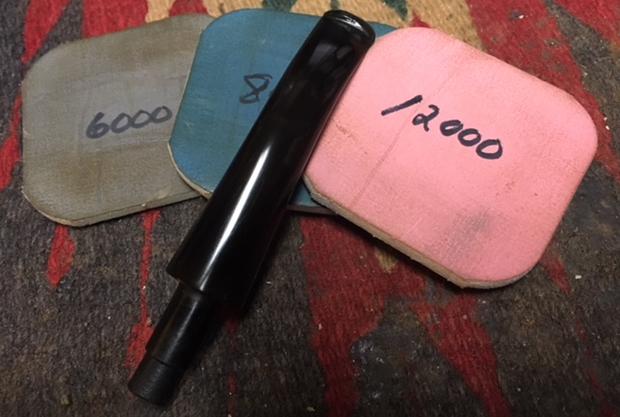
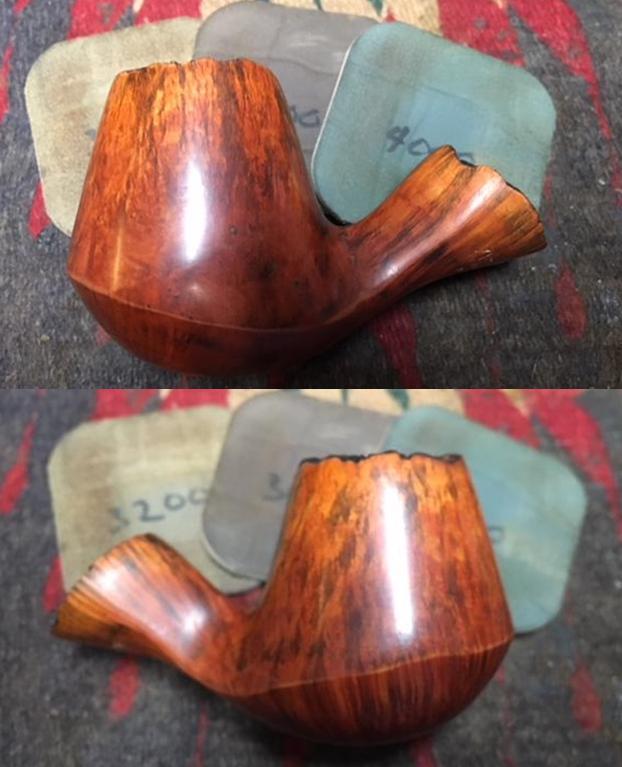
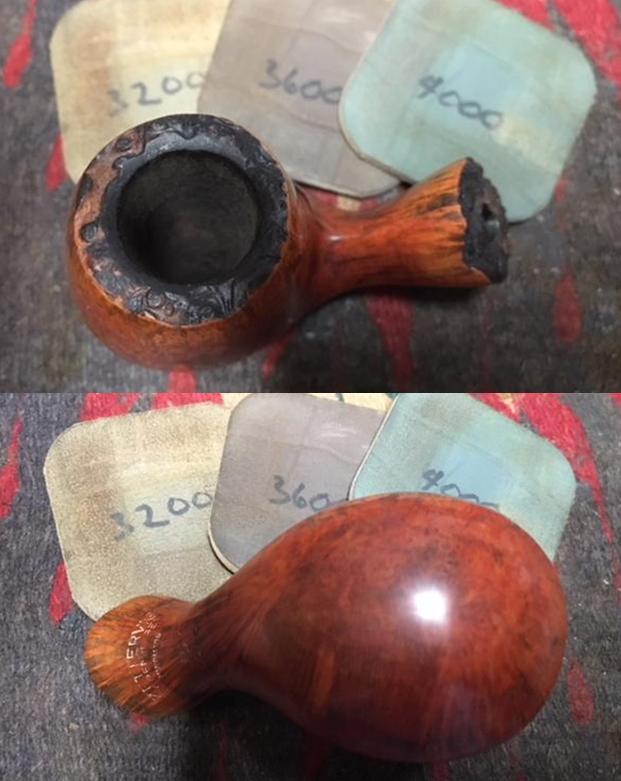
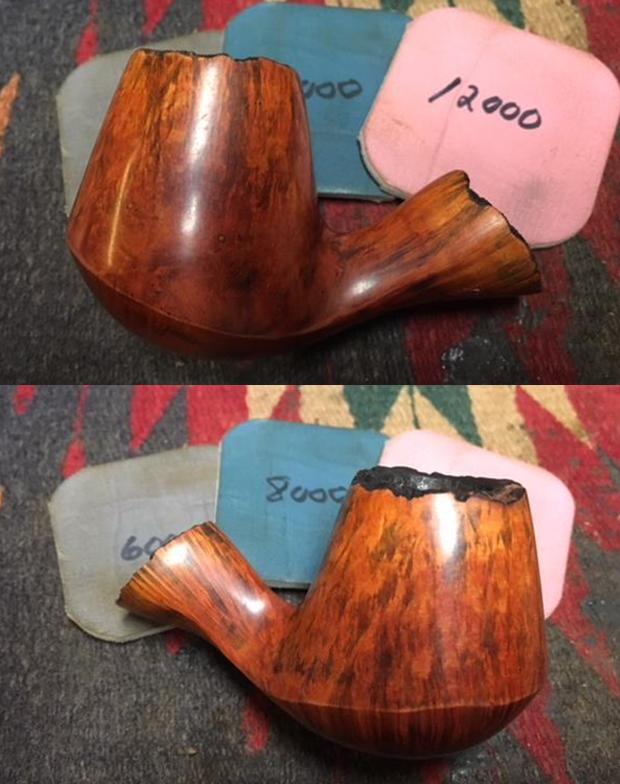
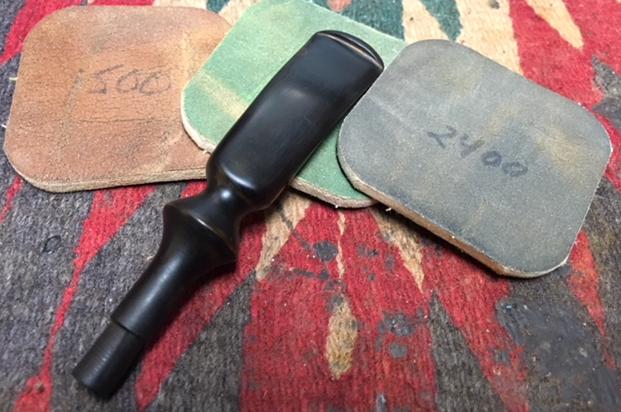
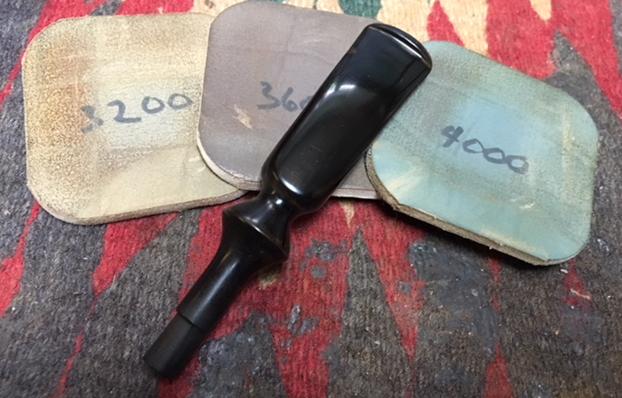
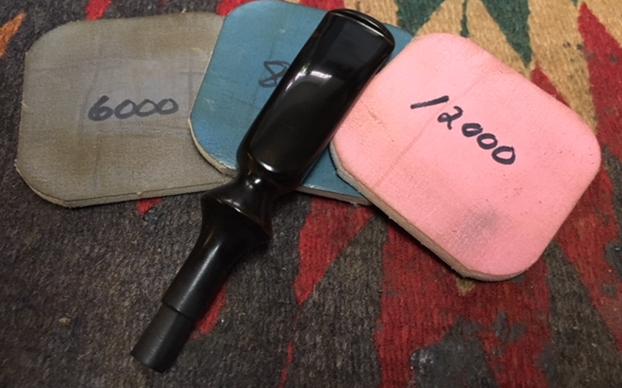
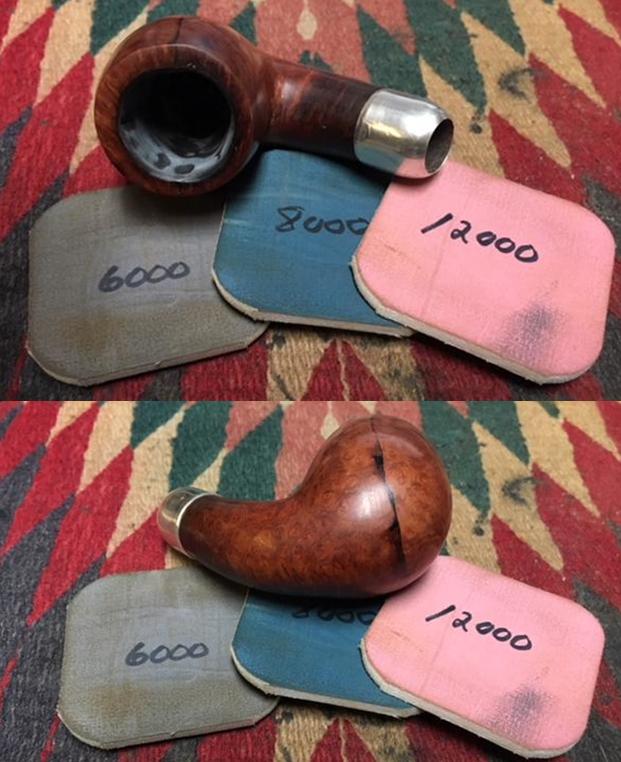
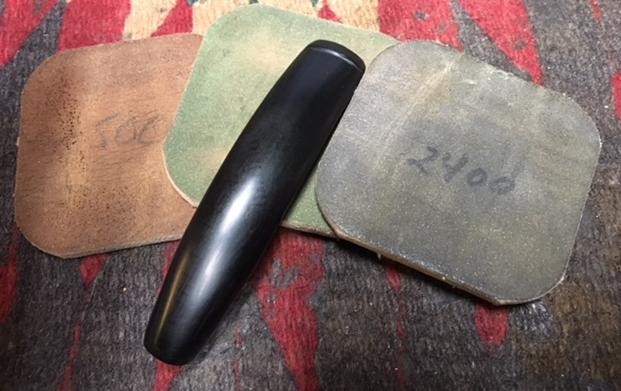
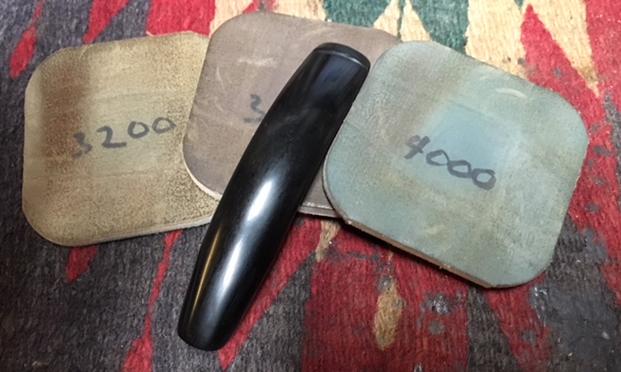
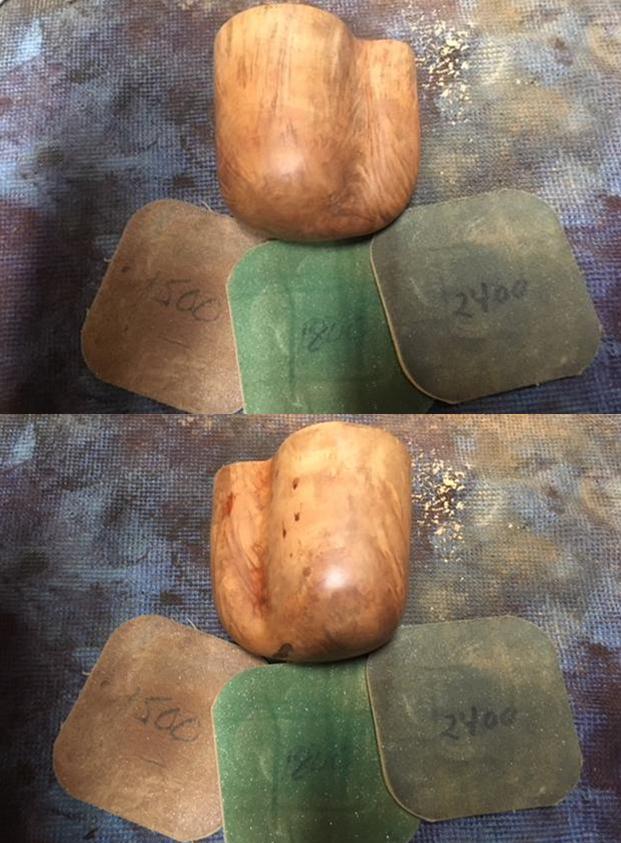
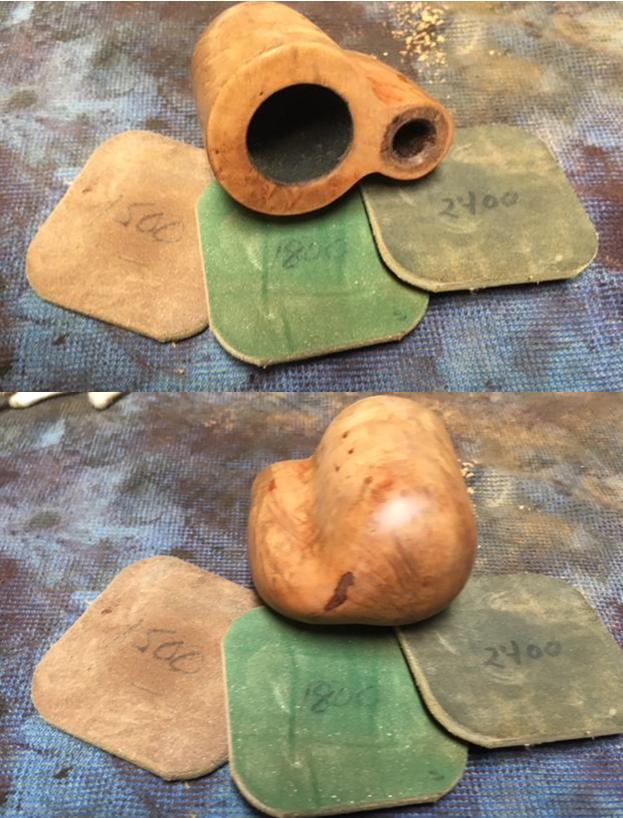
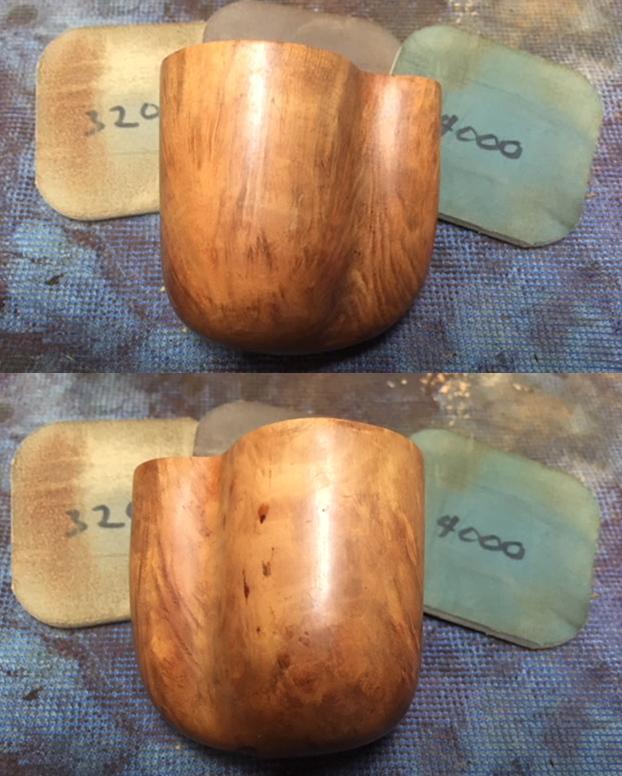
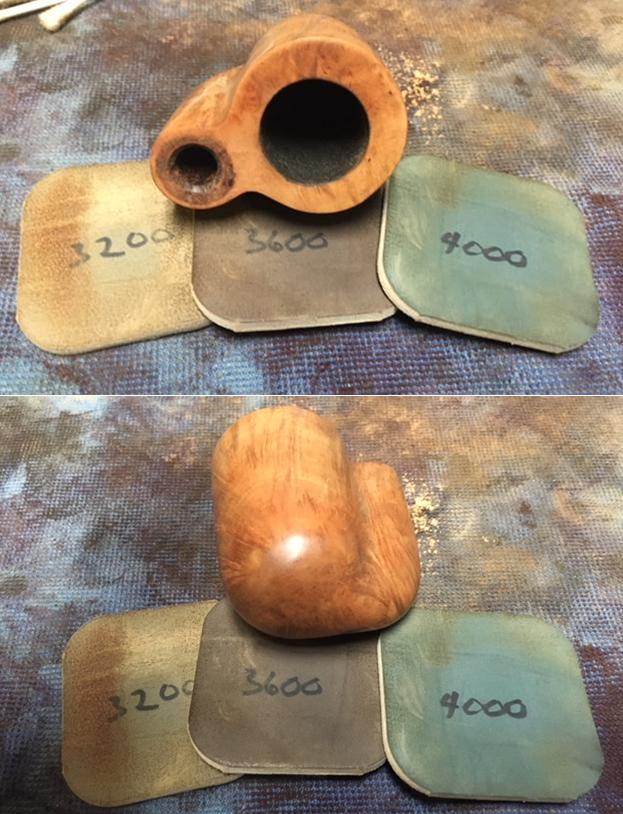
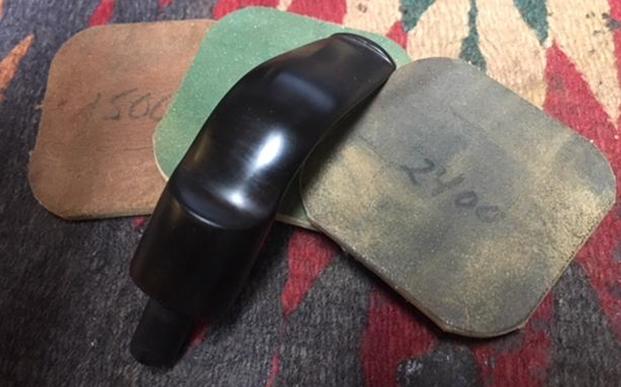
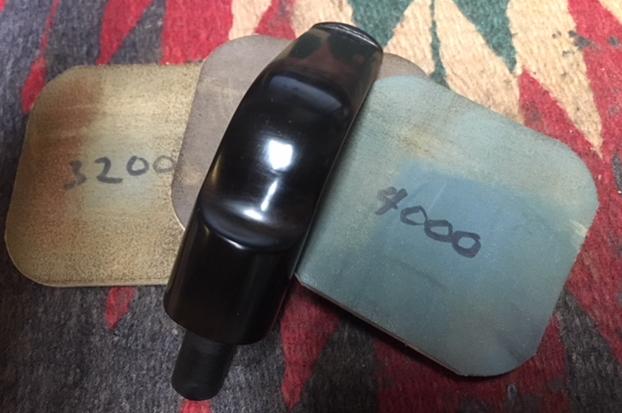
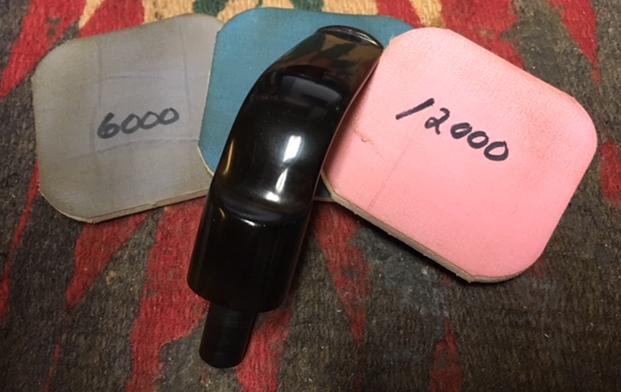
 Moving forward with the stem, I wet sand using micromesh pads 1500 to 2400 followed by dry sanding with pads 3200 to 4000 and 6000 to 12000. To revitalize the vulcanite, I apply a coat of Obsidian Oil after each set of 3 pads. I love the glossy pop!
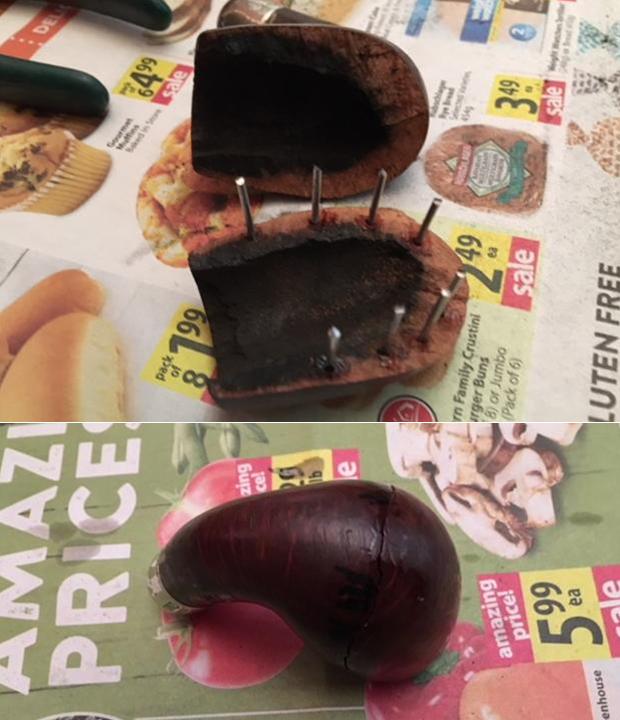
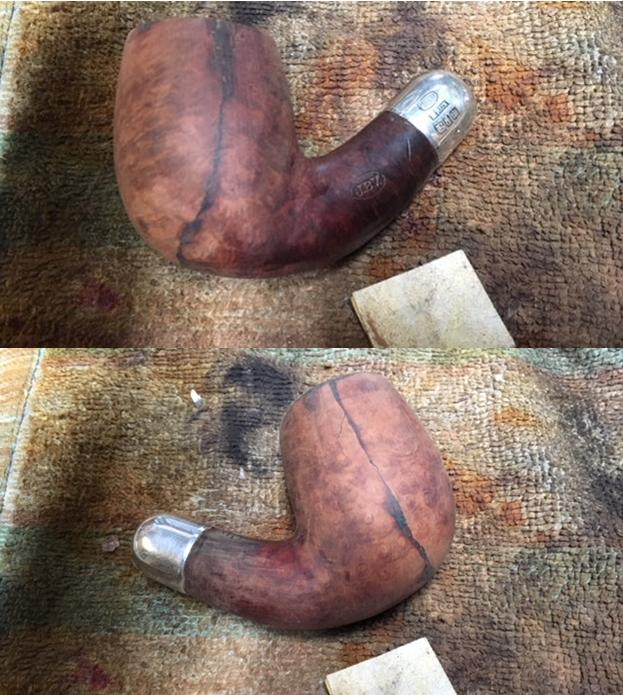
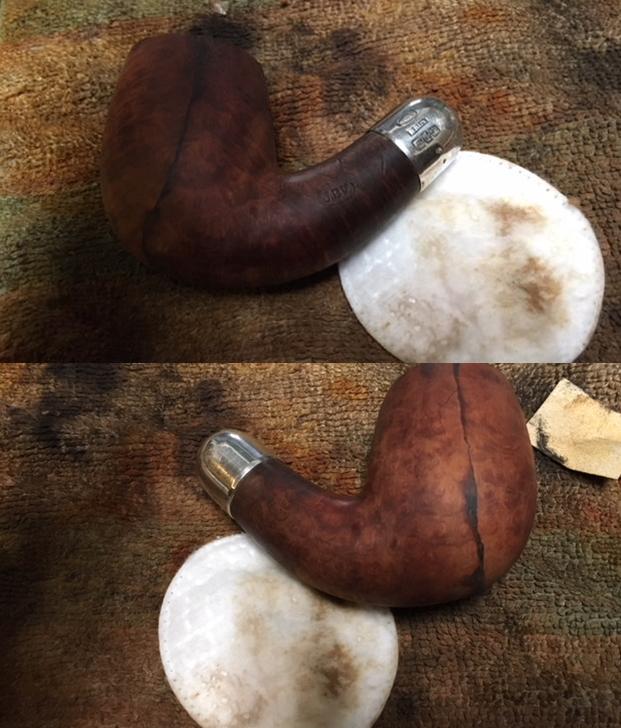
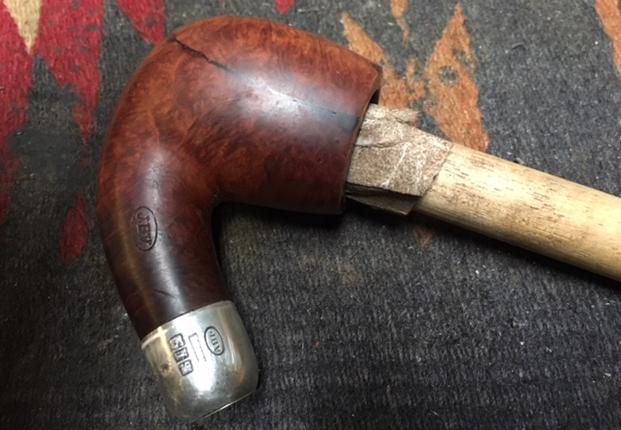
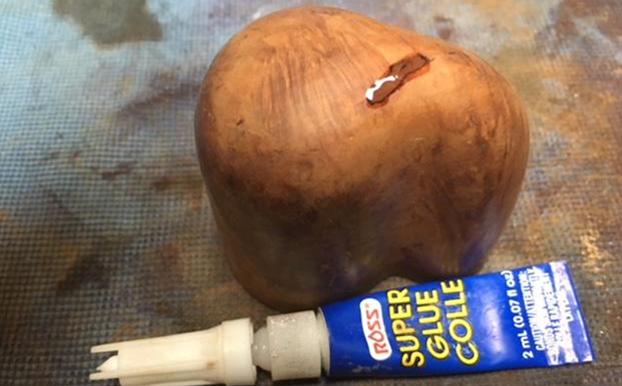
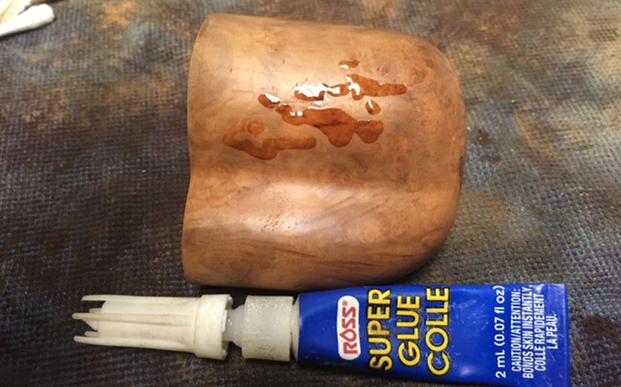
 Looking now to the stummel, I see a few very small, nicely camouflaged fills which are in good shape, but I see one significant cut into the briar that needs attention. To address it, using a toothpick, I lay a line of thick CA glue over the cut. I set the stummel aside to allow the patch to cure.
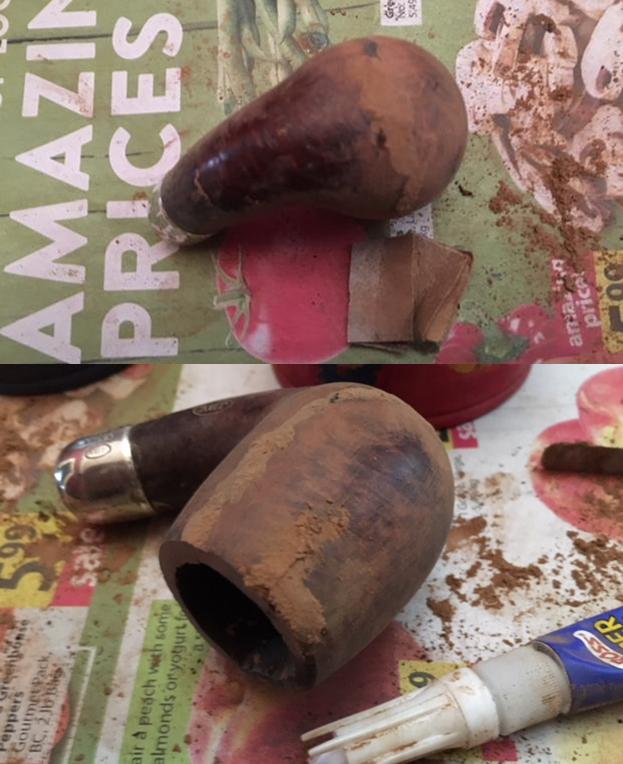
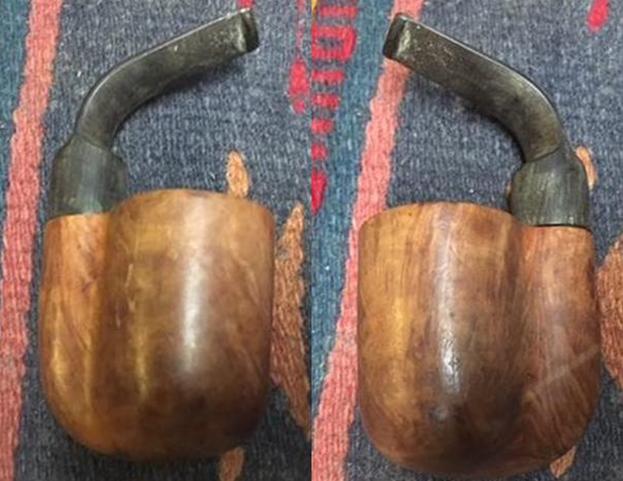
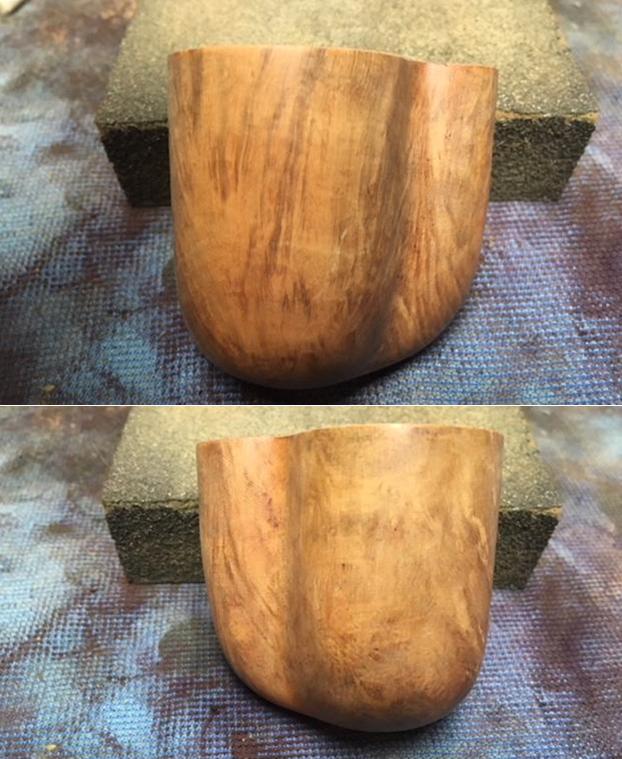
 After a while, the patch has set enough for me to work on the rim. The bad news is that the loss of briar on the left side of the internal rim from scorching is gone – it can’t be replaced. The good news is that the aesthetic imbalance of the rim as a result can be mitigated somewhat by creating a bevel around the entire rim. The bad news – there is additional loss of briar. In restoring a pipe there’s always this tension between loss and gain. With this Peretti, as with all his Oom Paul brothers, I did the same thing and they turned out well. I start the process by taking the stummel to the topping board to remove the damaged wood on the top. Topping an Oom Paul can be a challenge because the shank extends beyond the plane of the rim. So, to top the rim, the shank needs to hang off the side, so it isn’t unintentionally topped! I take a picture to mark the start. I turn some rotations on the board and check out the progress.
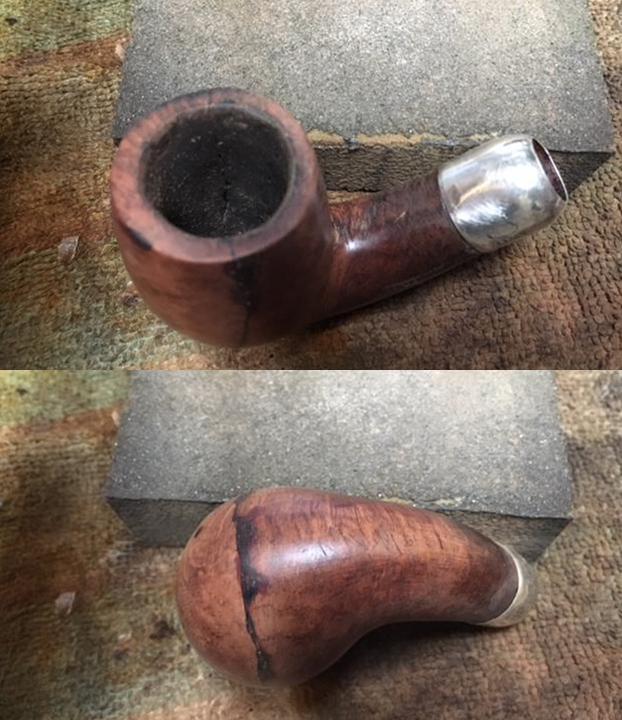
 I also utilize a small sanding block which allow me to focus on a certain area of the rim. After the 240 paper, I put 600 grit paper on the board and do a few more rotations. The pictures show this progress.
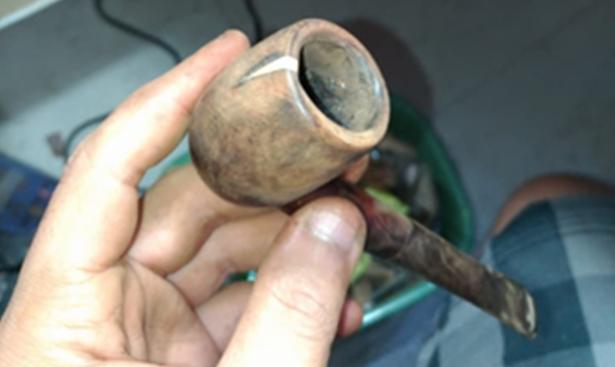
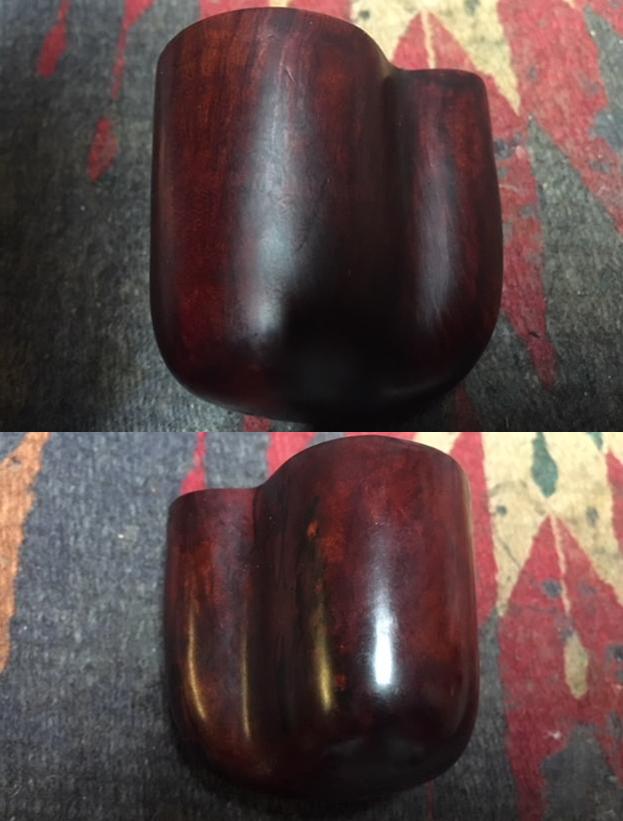
 Now, using a tightly rolled piece of coarse 120 grit paper, I begin beveling the internal rim edge – hoping to bring more balance to it. I take a bird’s eye picture first to mark the progress. I pinch the paper under my thumb as I move it in the areas of the rim to be reduced. While I work on equalizing the rim diameter, I’m also sanding down the chamber to taper the walls as they move downwardly. I’m looking for greater aesthetic balance. I come to the point where I’ve done all I can do. I think it looks much better. I do another bird’s eye shot for comparison.
 I take the stummel one more time to the topping board using 600 grade paper. I do this simply to reestablish the lines after the sanding.
 One more thing I want to do with the rim. I’ve worked on the inside balance, now I also introduce a very gentle bevel on the outside of the rim. I do this to soften the edge which is sharp after the topping. I use 120 grit paper then 240 and finish with 600 – each rolled tightly.
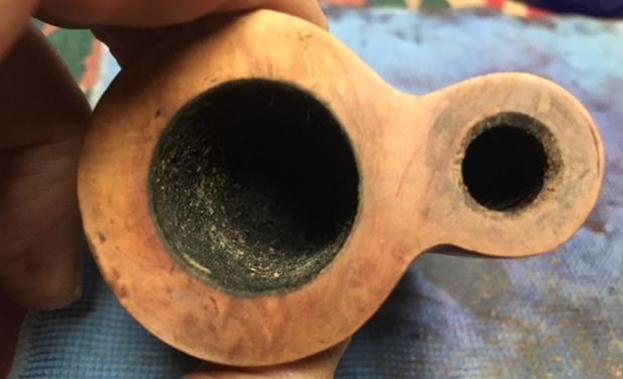
 With the rim repair done, I take the flat needle file and begin to file down the patch on the side of the stummel. When I bring the patch down close to the surface, I switch to using 240 grit paper to remove the excess patch to the briar surface, making the patch area flush with the surface. I then finish the sanding with 600 grit paper. The patch will blend well later.
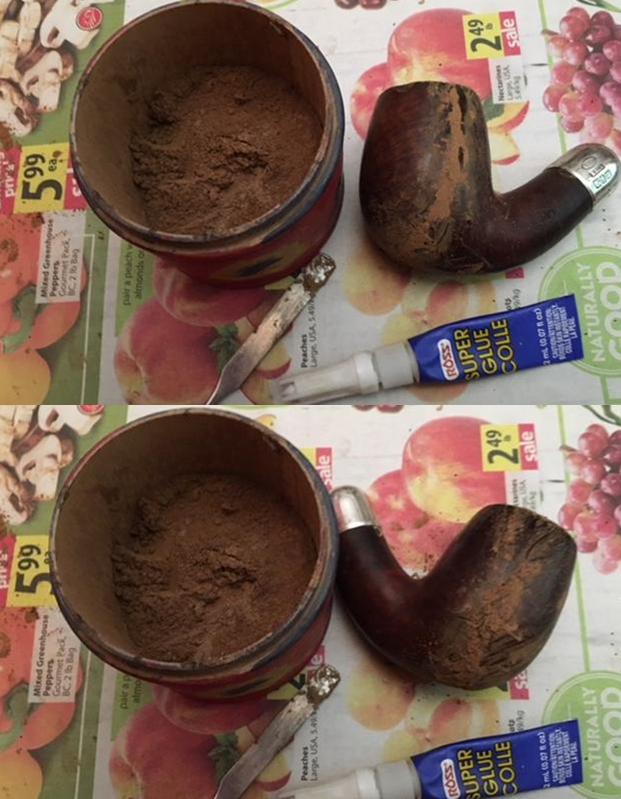
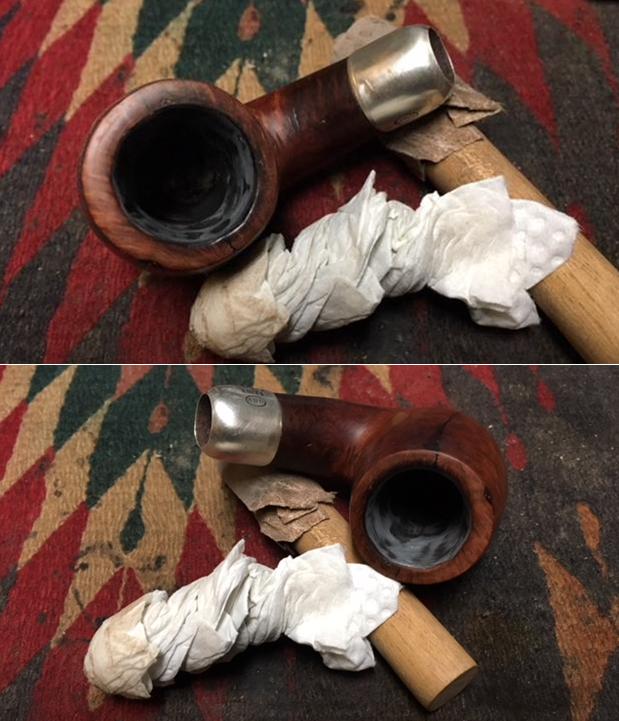
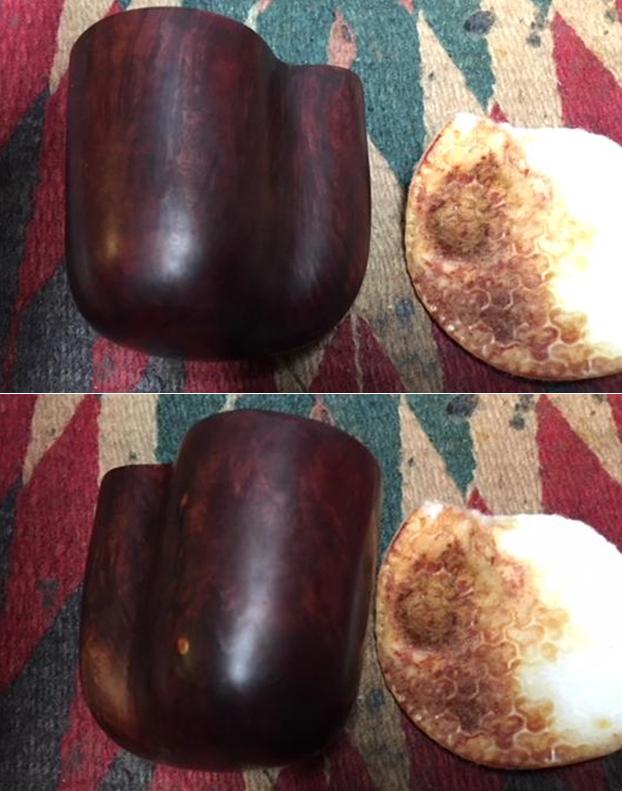
 My day has ended and I will continue the cleaning process of the stummel with a kosher salt and alcohol soak. This freshens the briar and draws out more latent tars and oils from the briar. I fashion a wick from a cotton ball by pulling and twisting it. I insert it down the mortise and airway. I then fill the bowl with kosher salt, which has no aftertaste, and then put isopropyl 95% into the bowl until it surfaces over the salt. I wait a few minutes and top off the alcohol and turn out the lights.
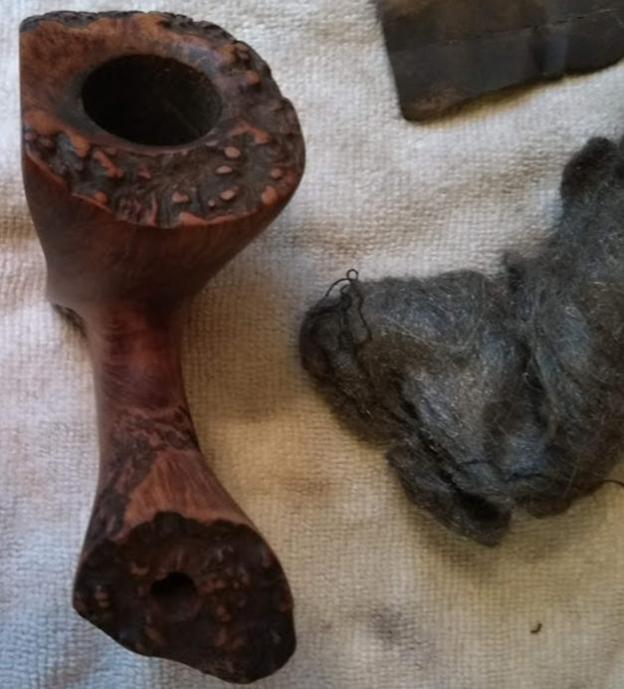
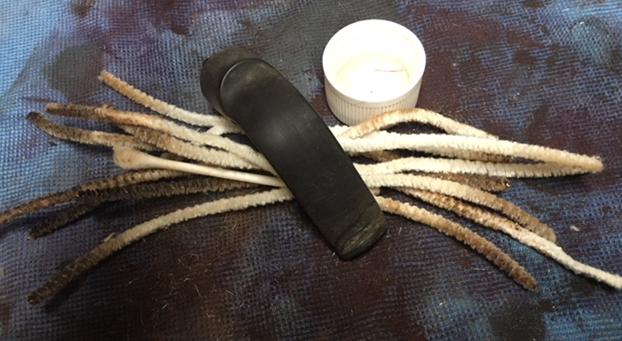
  The next morning the soak has done the job through the night. The salt and wick show soiling from the tars and oils. I clean the stummel of residue salt with paper towel, blowing through the stummel, and to be on the safe side, I run a cotton bud with alcohol through the mortise to clean up any leftover remnants – after a couple of cotton buds I move on.
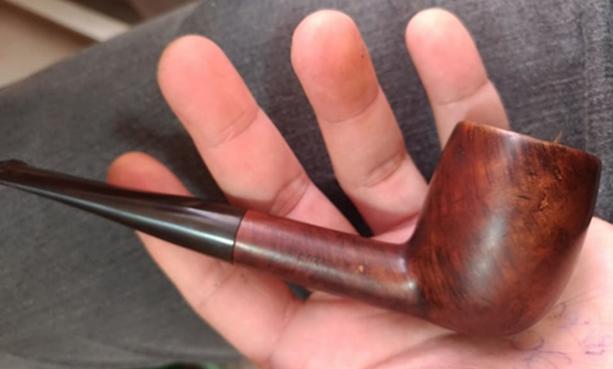
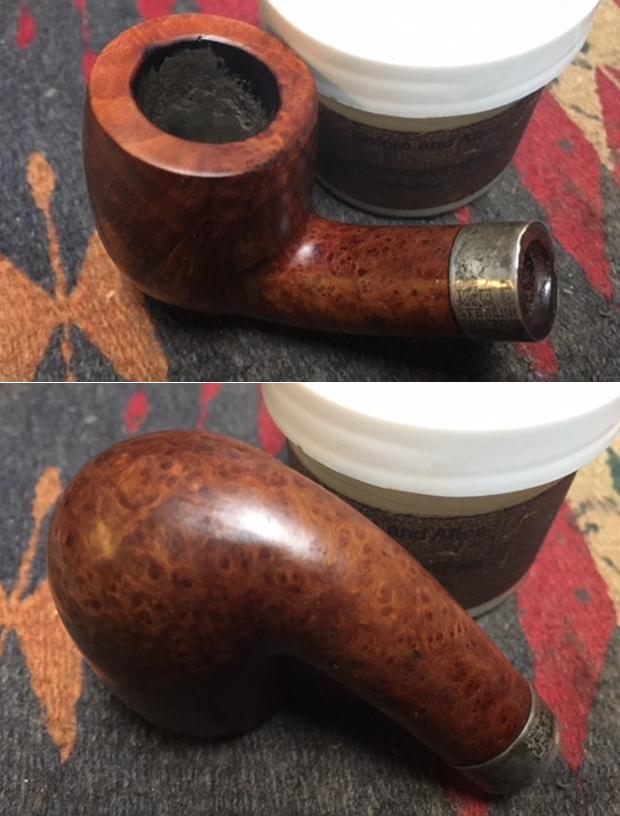
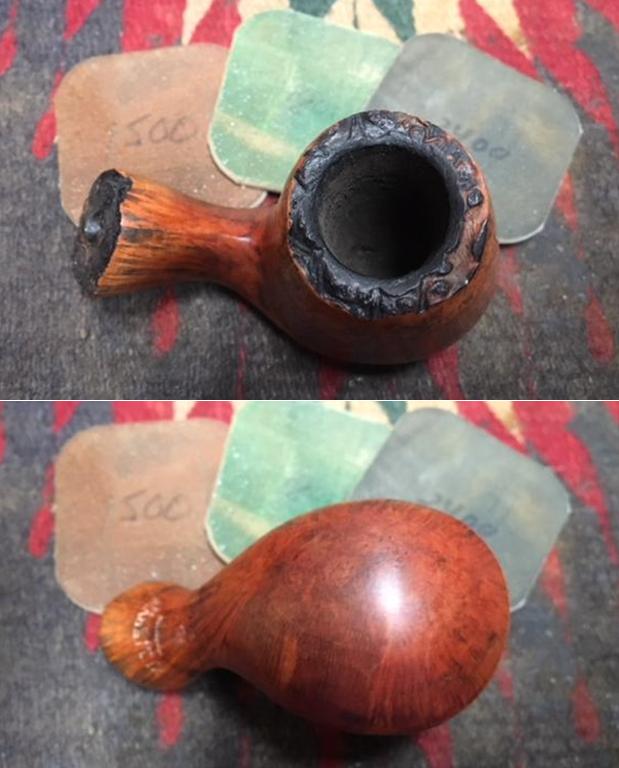
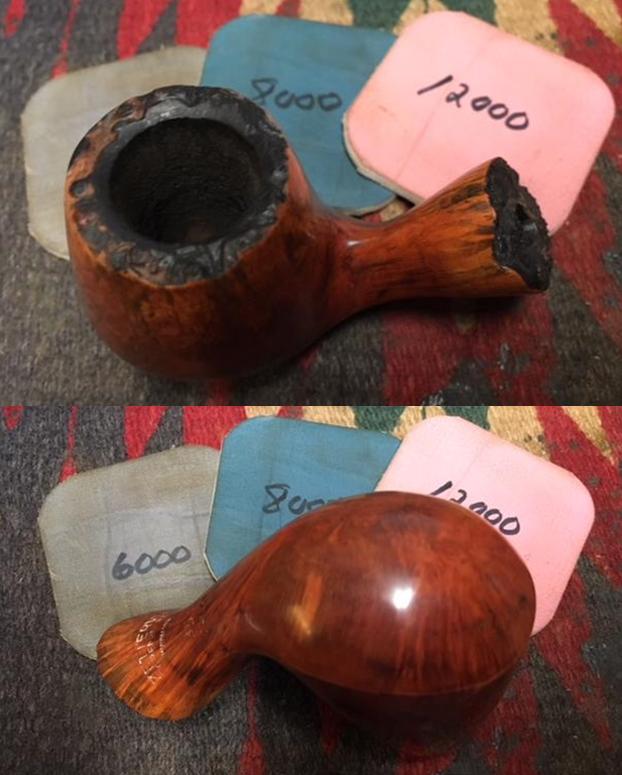
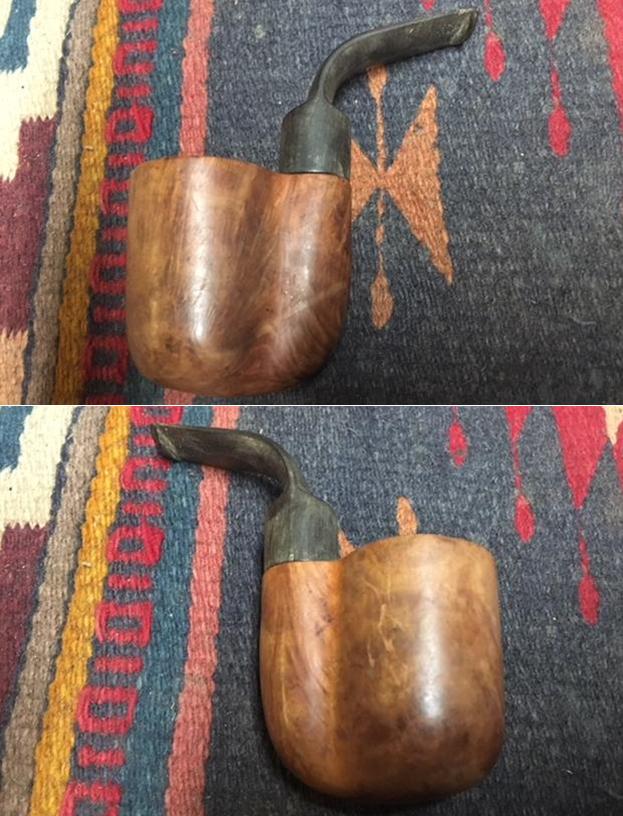
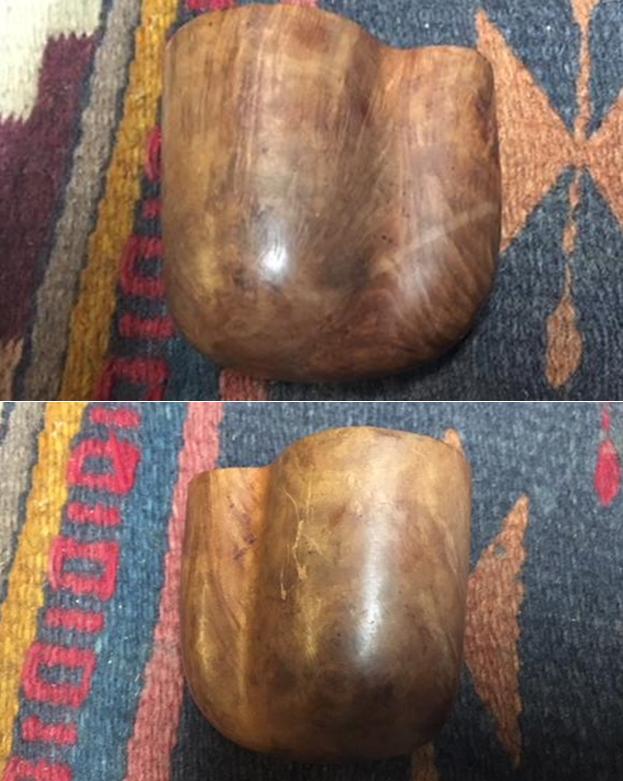
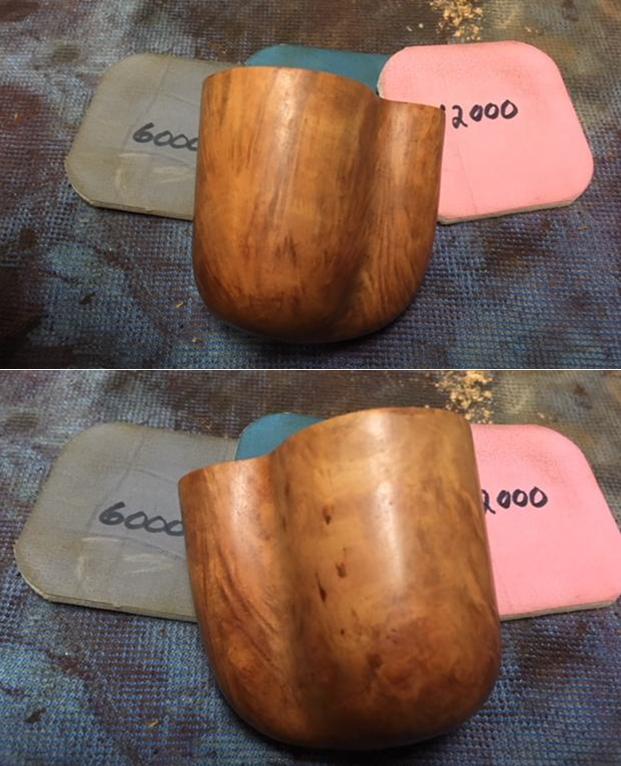
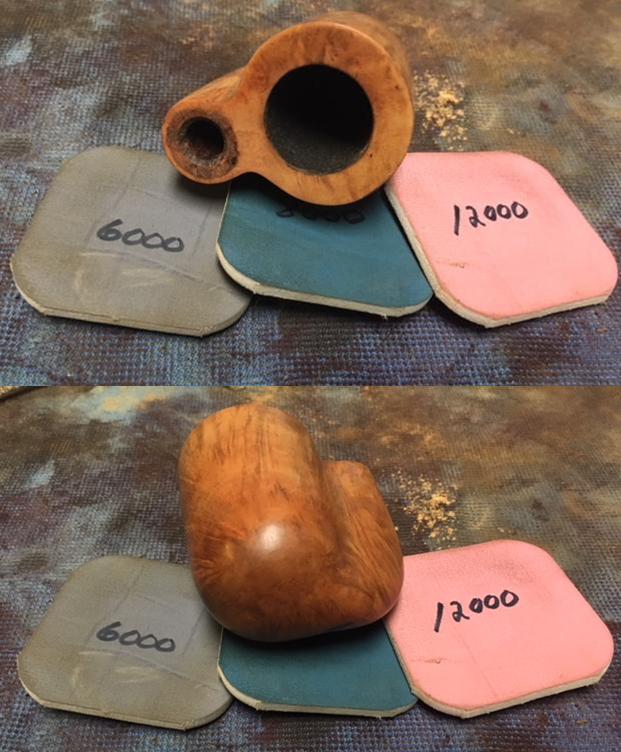
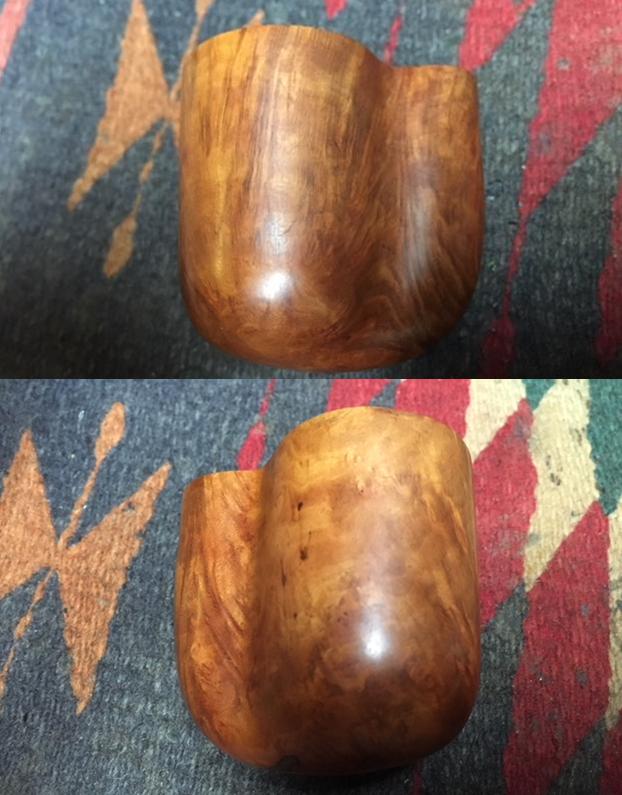
 The next step is to address the external briar surface of the Peretti Oom Paul Sitter. I filled the one cut I saw on the surface that stood out. There are other nicks and scratches that are normal from use. To address these, I use micromesh pads. I first wet sand using pads 1500 to 2400, then dry sanding 3200 to 4000 and 6000 to 12000. The grain looks good as the micromesh pads coaxed it out. The one bummer is the darkened wood from the scorching damage around the inner edge of the rim. That will not go away because it would sacrifice too much briar to accomplish it.
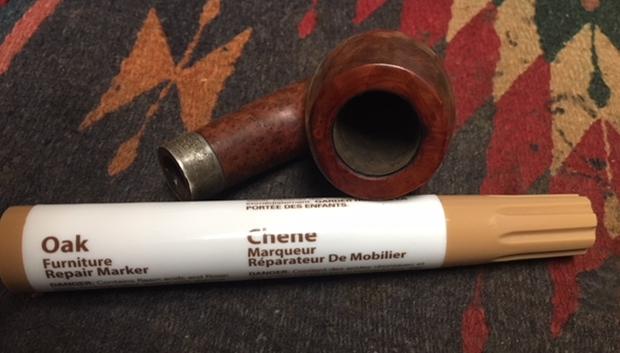
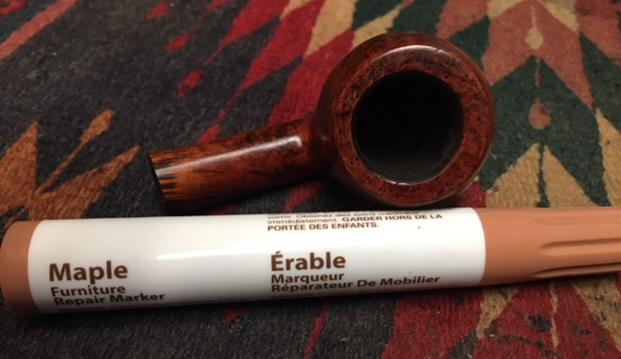
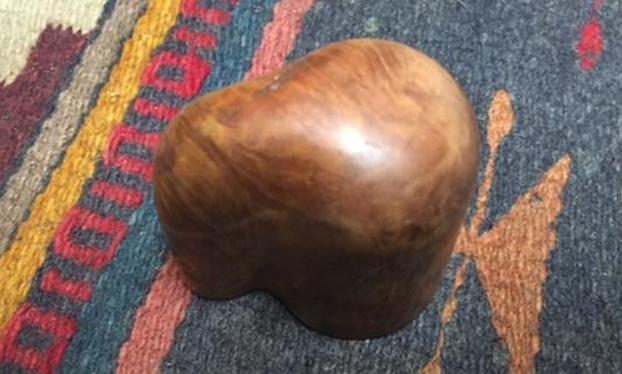
 Since the rim had been topped and sanded, it is a shade lighter than the rest of the stummel. To remedy this, I apply a maple color dye stick around the rim. I forgot to take a starting picture for comparison but here is the aftermath. It looks good and matches well.
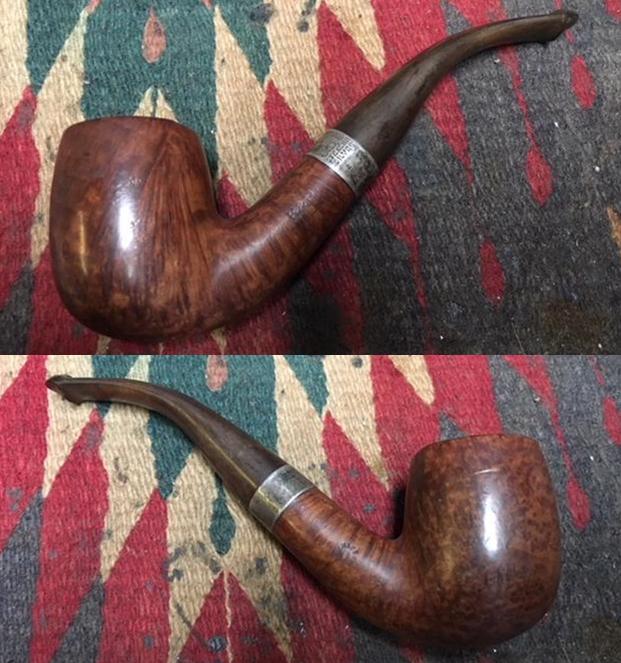
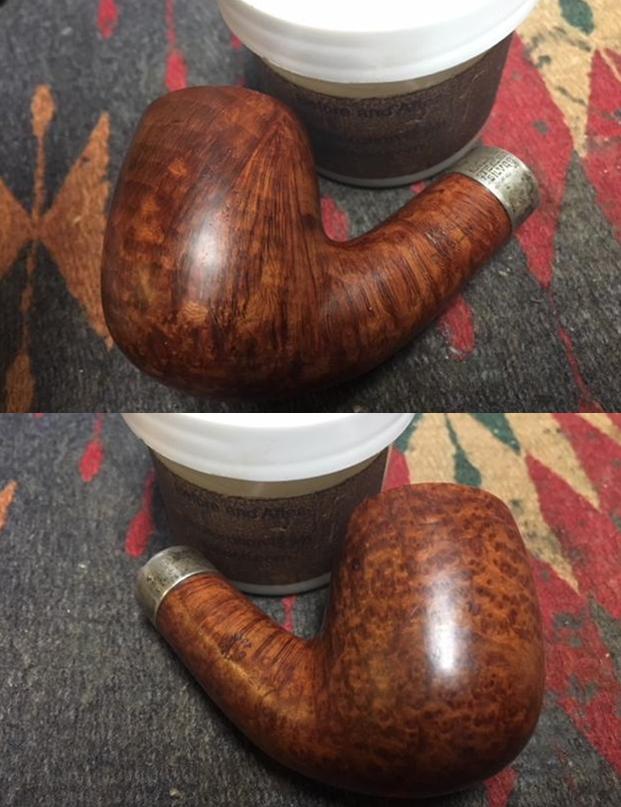
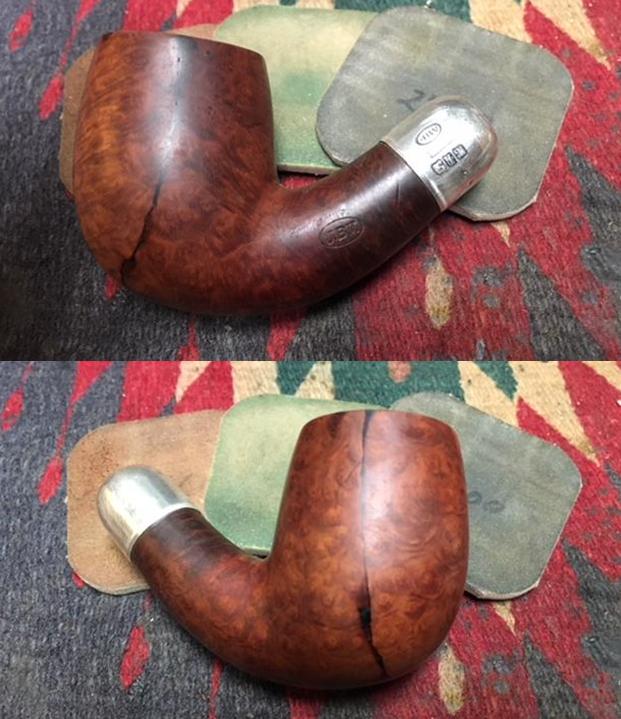
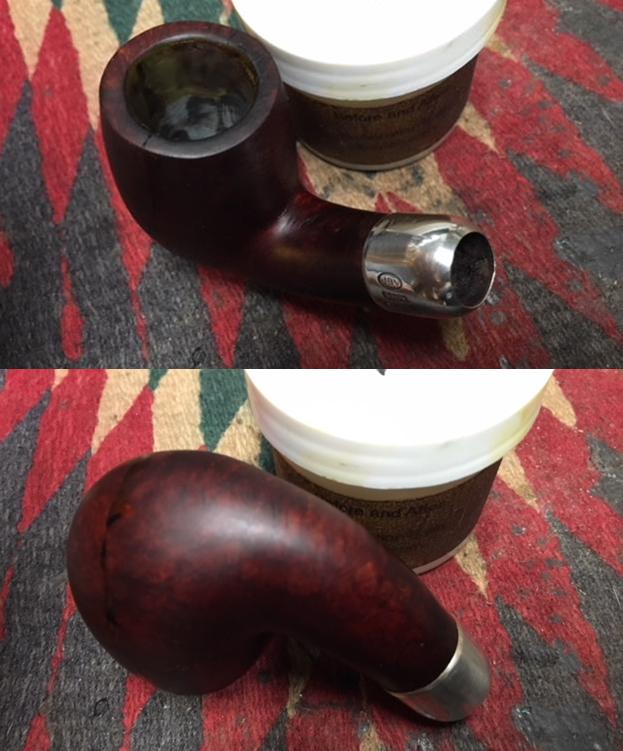
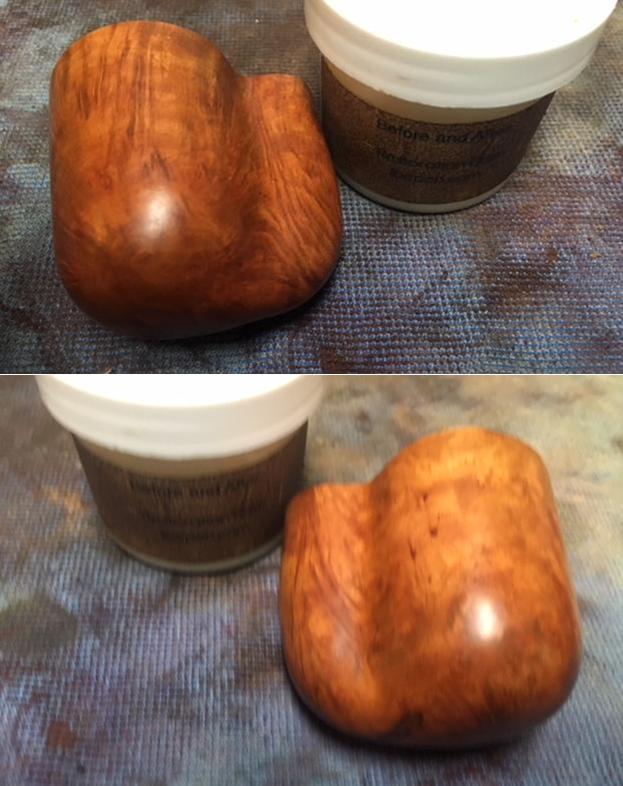
 As I’ve done with all the other Peretti Oom Pauls (and one Bent Billiard!) I restored, I kept the color true to the original as much as possible. To do this I used Before & After Restoration Balm on the briar and it does a great job deepening and enriching the color already there. I do the same with this Sitter. I squeeze some of the Balm on my fingers and work it into the surface. The Balm starts with the consistency of light oil but as it is worked into the briar it gradually thickens to a wax-like feel. After applying it fully and working it in, I set the stummel aside for a while, about 30 minutes to allow the Balm to do its thing and take a picture.
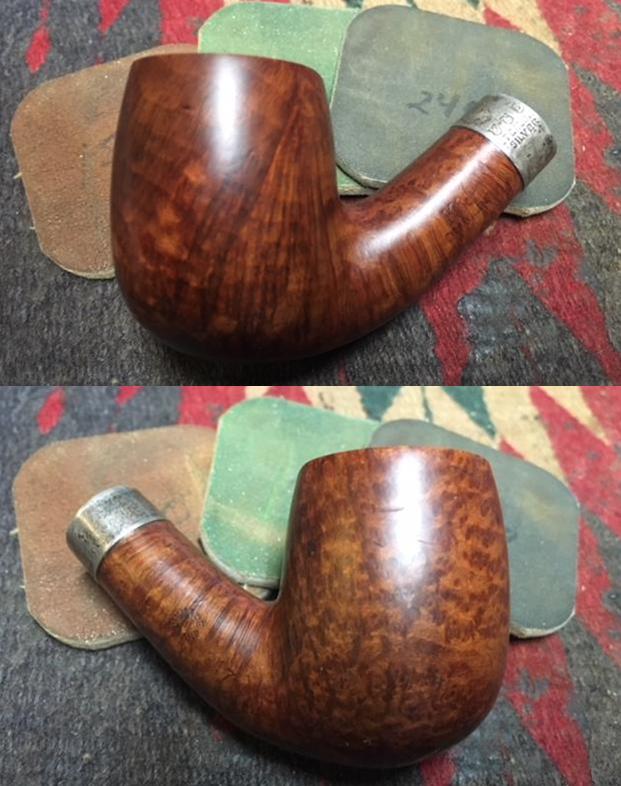
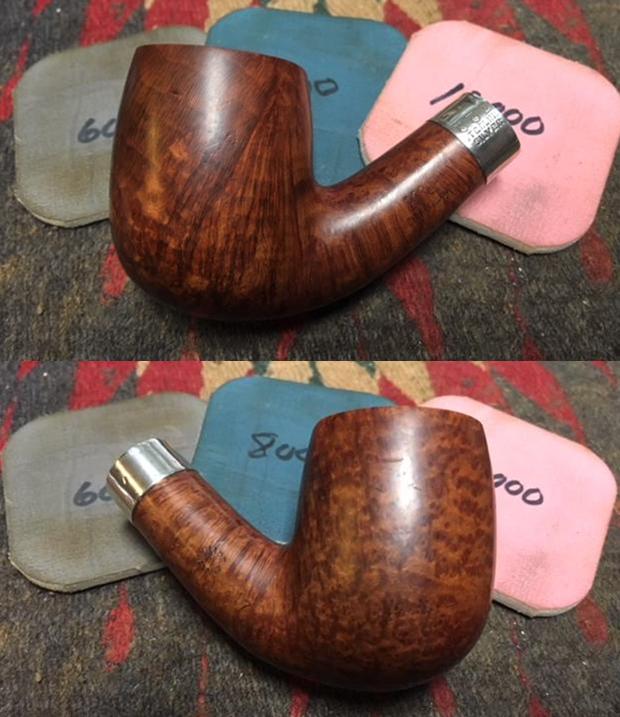
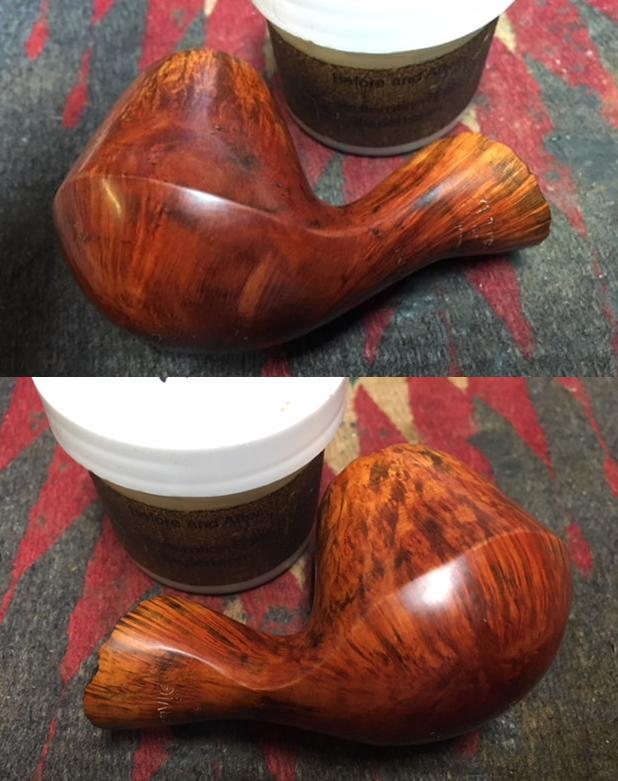
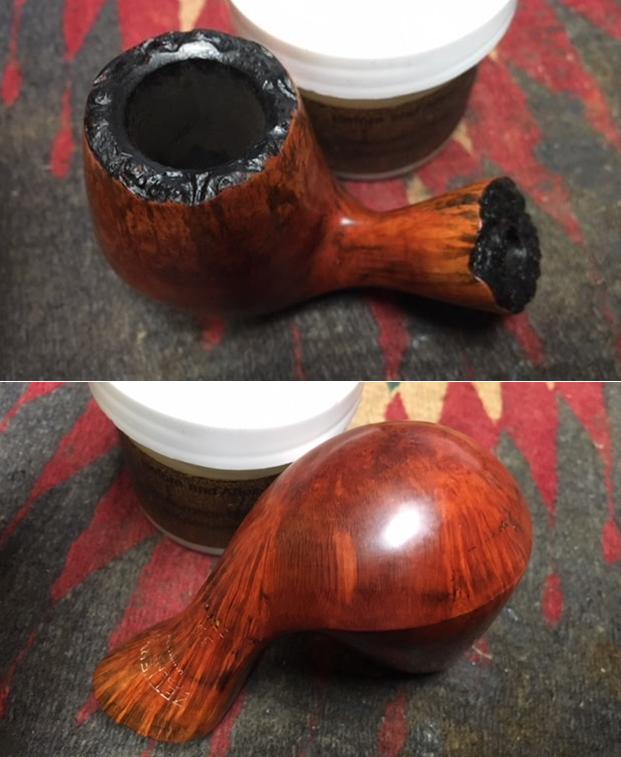
 After about 30 minutes I use a clean cloth to wipe and buff off the Balm. I’m pleased with the results. Turning now to the application of Blue Diamond compound, I rejoin stem and stummel, mount a cotton cloth wheel onto the Dremel, set the speed at 40%, and methodically apply the compound. After finished, I wipe the pipe with a felt cloth to remove compound dust in preparation for the wax. I mount a different cotton cloth wheel to the Dremel dedicated to applying carnauba wax, leave the speed at 40% and again, methodically apply a few coats of wax to stem and stummel. I finish the restoration of the Oom Paul Sitter by giving the pipe a rigorous hand buffing with a microfiber cloth to raise the shine.
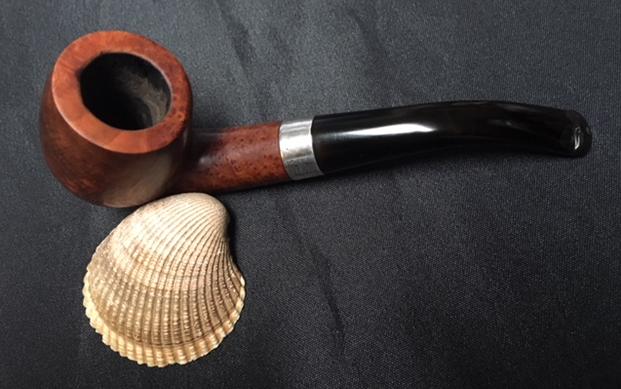
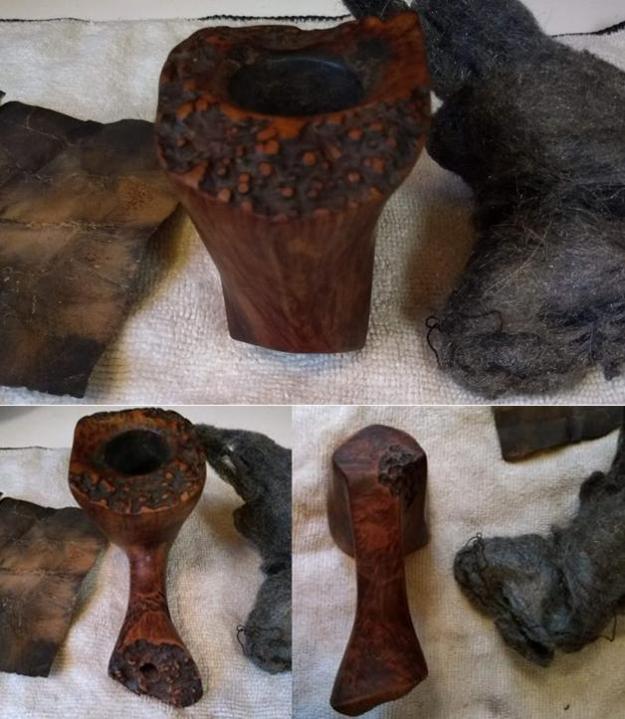
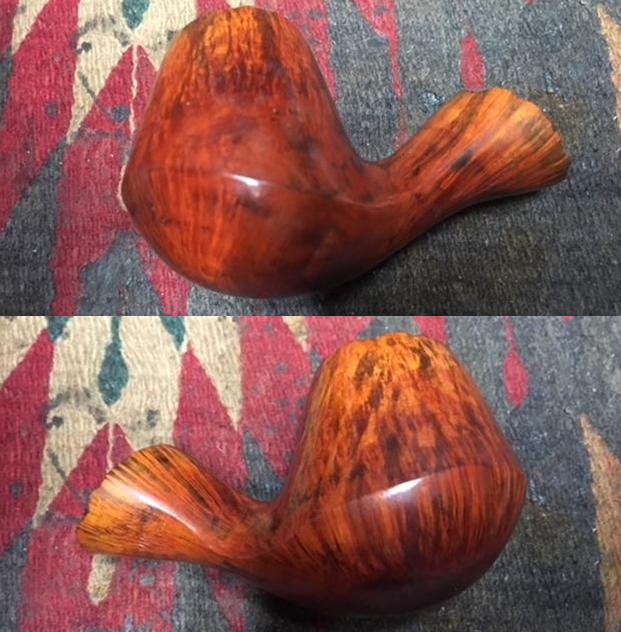
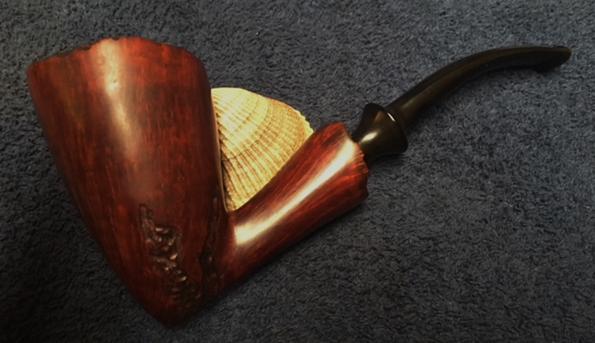
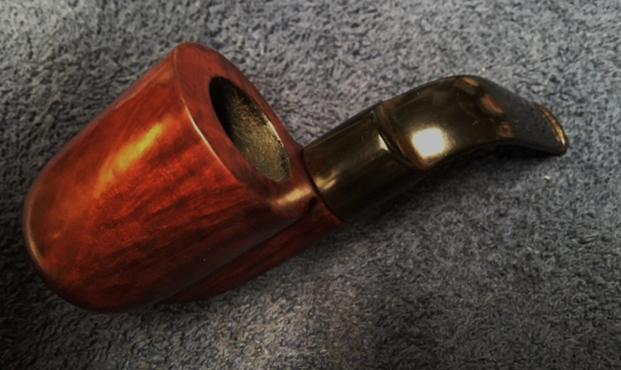
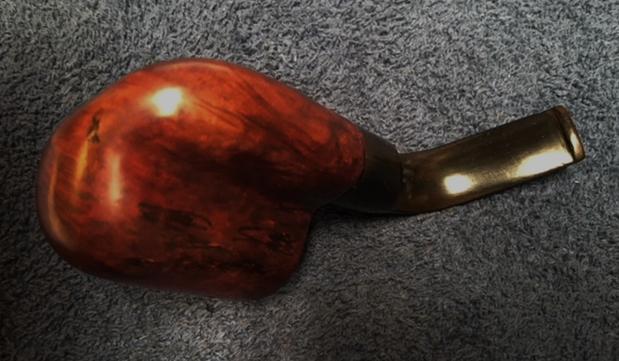
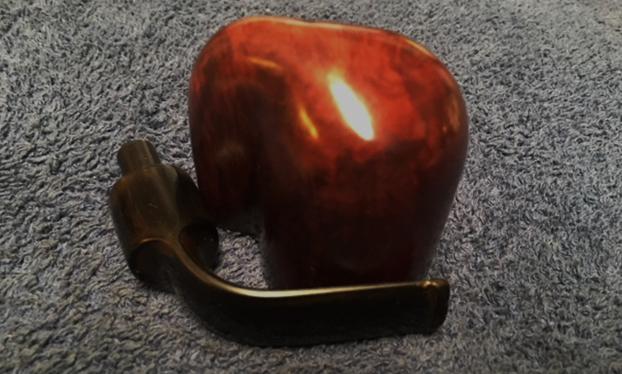
I am very pleased with the restoration of this, my last for now, Peretti Oom Paul Sitter. The grain is rich on the huge, ample bowl which is the reason many pipe men and women desire an Oom Paul in their collections. The added benefit to this Oom Paul is that it is a Sitter. He can comfortably join his steward at a table playing cards or board games! Brian commissioned (see For ‘Pipe Dreamers’ Only) this Peretti Oom Paul Sitter and will have the first opportunity to acquire it in The Pipe Steward Store. This pipe benefits the Daughters of Bulgaria – women and girls who have been trafficked and sexually exploited. Thanks for joining me!