Blog by Steve Laug
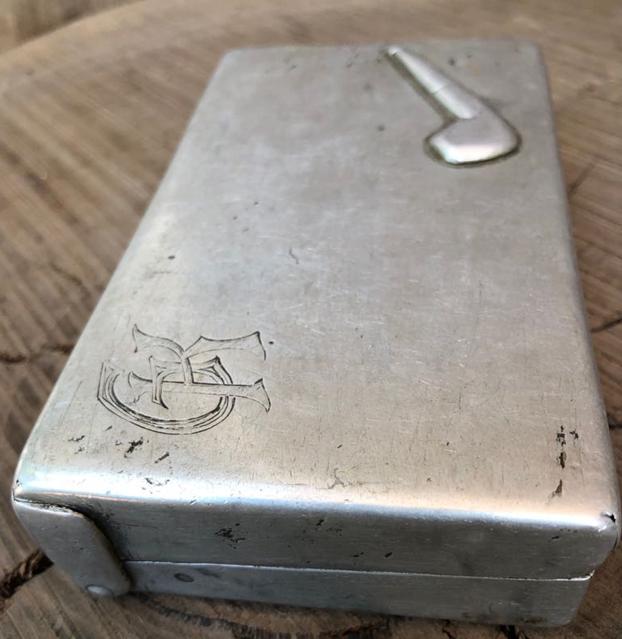
I was on Facetime recently with Paresh and Abha in India, talking about pipe restoration and what they were currently working on together. Paresh showed me some of the pipes that they were working on as well as several that he wanted to send to me to work on. One of them was a pipe that had come to him from a family friend who told him it came from WW2 and had belonged to a German soldier. He was not sure what to do with this one and almost felt that it was not worth working on. A piece with that kind of story attached is always interesting to me and I wanted to see it and also work on restoring it. Paresh brought the metal box that the pipe came to him in and the assortment of pieces that made up the pipe to the table to show me what was there. It had what looked like two stem options with it. The one that looked right was a Perspex stem. He was able to remove the brass shank extension from the bowl while were talking and thought he had broken it. I did not think so but underneath the brass there was a broken shank. The brass had been slipped over the broken shank as an extension. The pieces could all be combined to make a functional pipe. I was excited to get this pipe and work on it. Here are some photos of the pipe box. It bears the initials CK and a raise pipe on the cover. 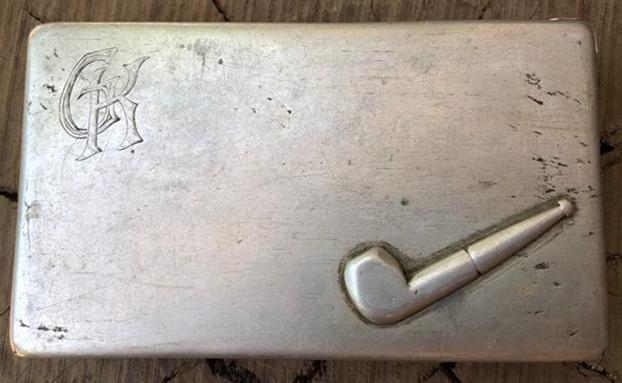
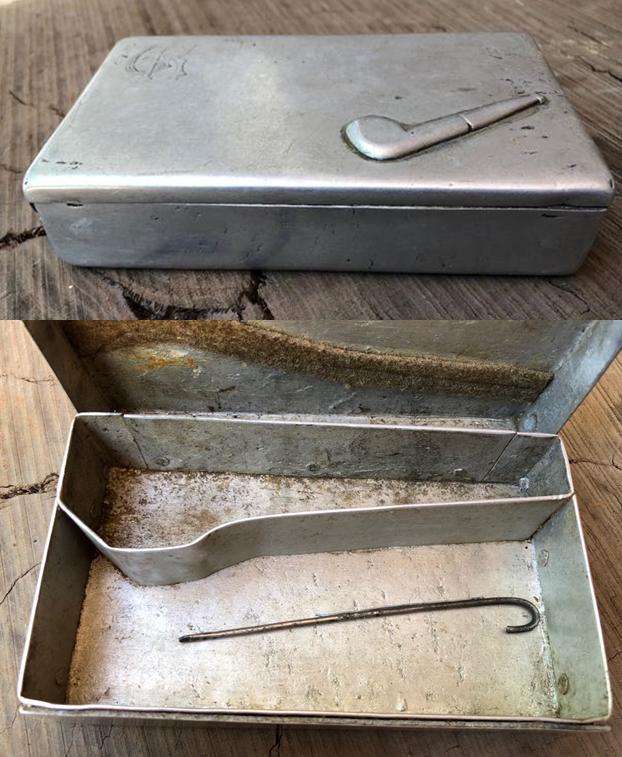 When the box was opened the pipe parts were scattered in the larger compartment. There was a bent wire in the box as well. I have a theory how that was used and will talk about it shortly. It is obvious that the box was made to fit a pipe in the upper compartment and tobacco and lighting material in the lower portion. There is a fabric piece fixed to the lid that keeps the pipe from moving around the box.
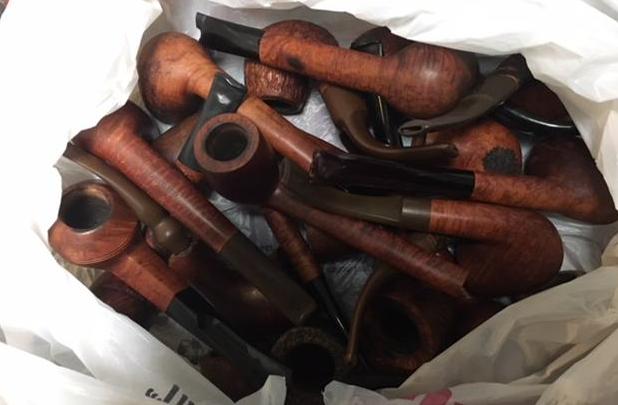
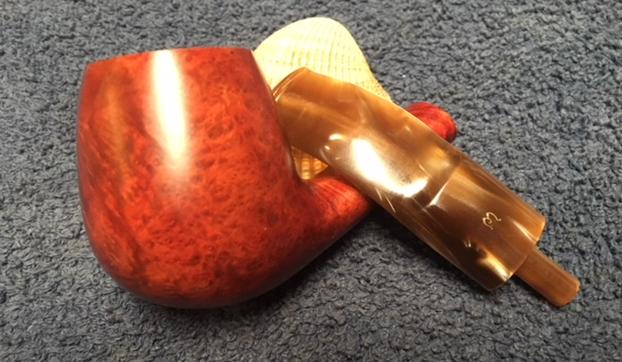
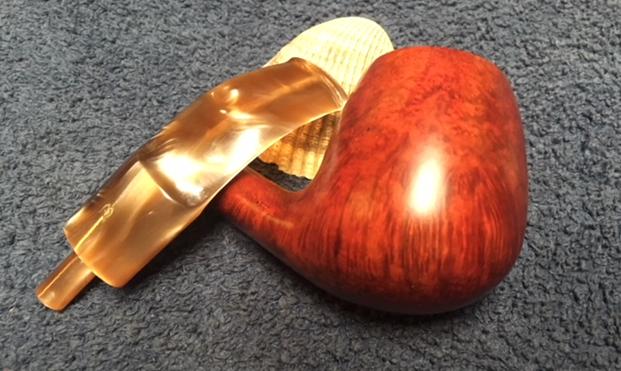
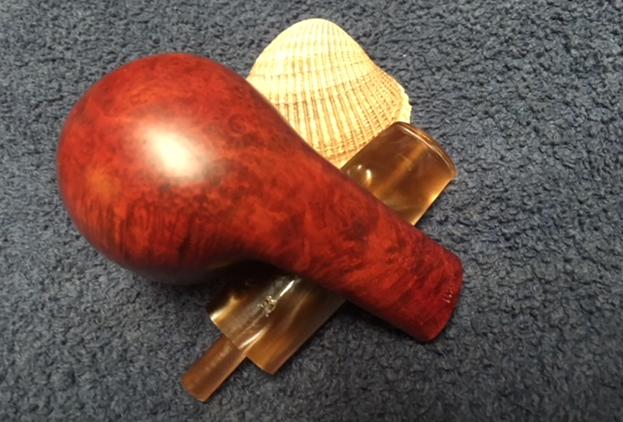
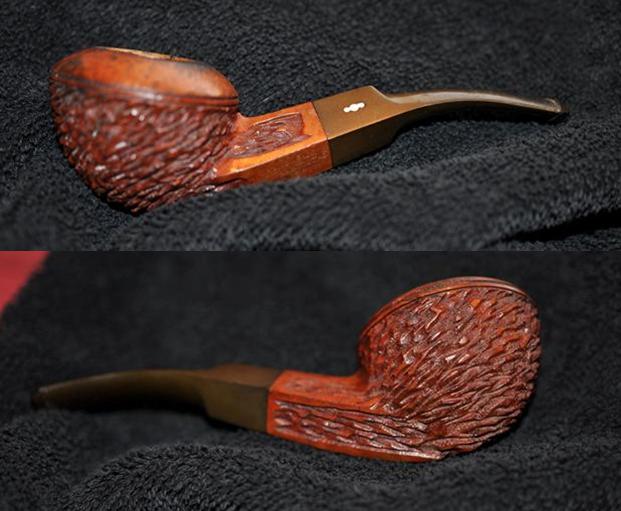
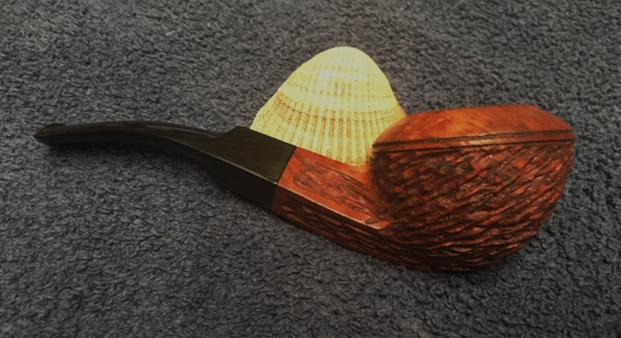
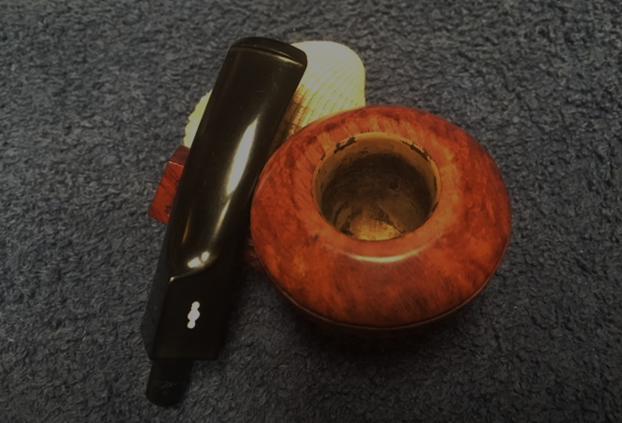
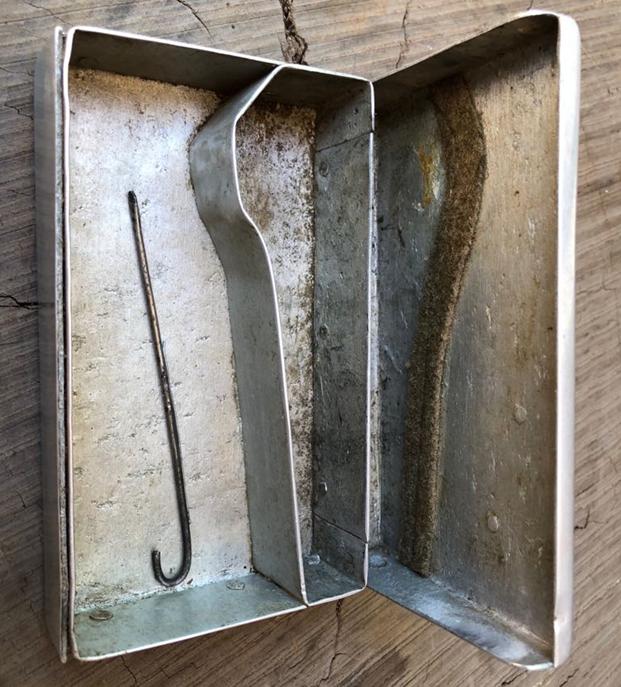 Paresh kept the box in India and mailed the pipe parts to me to see what I could do with them. It took a long time for the pipe to arrive in Vancouver from India. I would have forgotten about it if Paresh had not sent me WhatsApp messages to see if it had made it here. Finally there was a parcel notice hanging on my door when I came home from work. The postie had written that a package was at the post office and I could pick it up the next day after 1pm. I picked it up the next day after work and brought it home. I carefully unwrapped the plastic sleeve that enclosed the box. I cut the tape that held the box closed. Inside were the pipes that Paresh wanted me to work on. The “War” pipe was in a plastic bag and wrapped in bubble wrap. I carefully took it out of the wrappings and put it on the desk. I took the following photos to show the condition of all the parts before I started the cleanup and restoration.
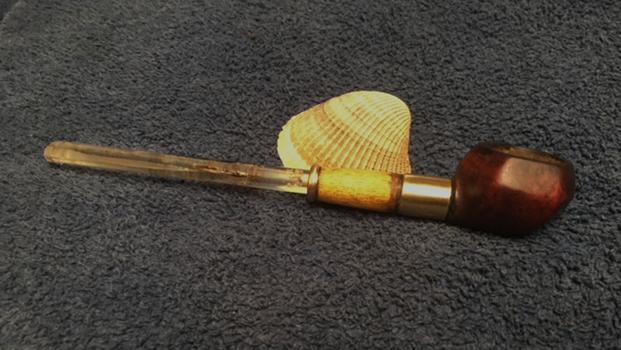
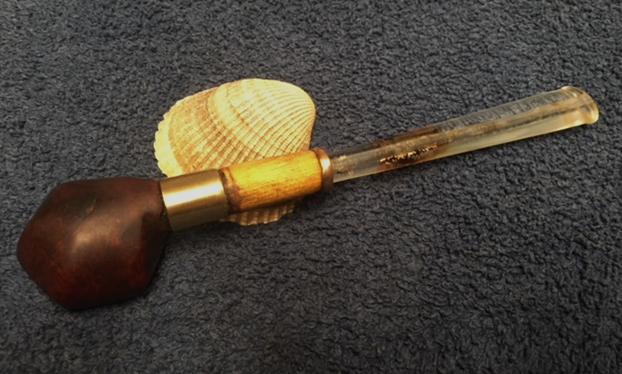
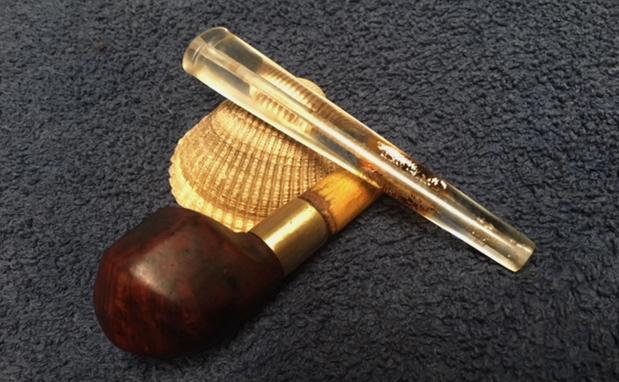
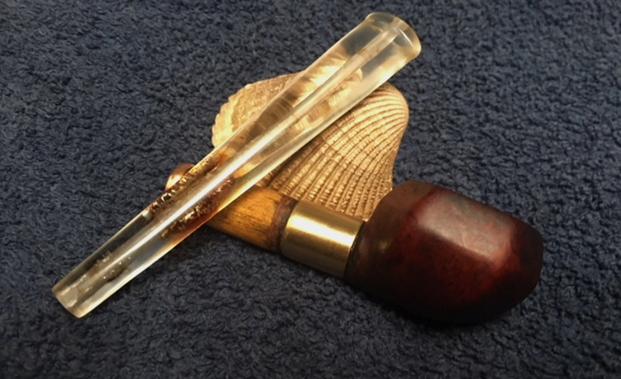
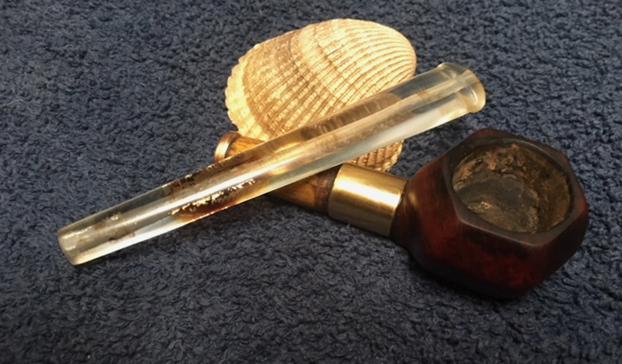
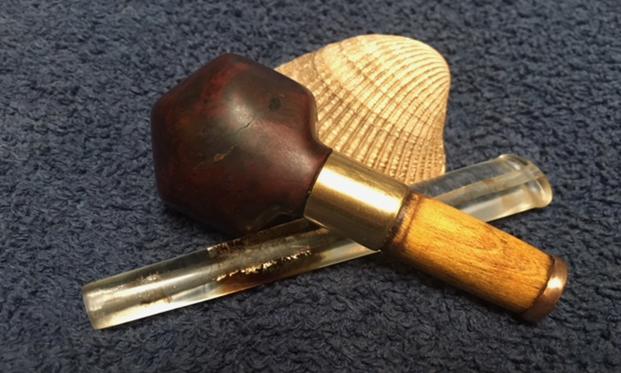
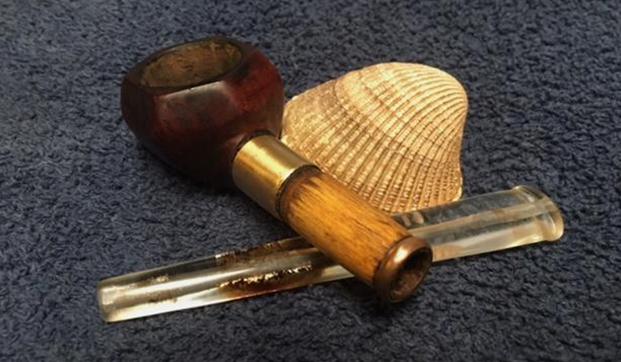
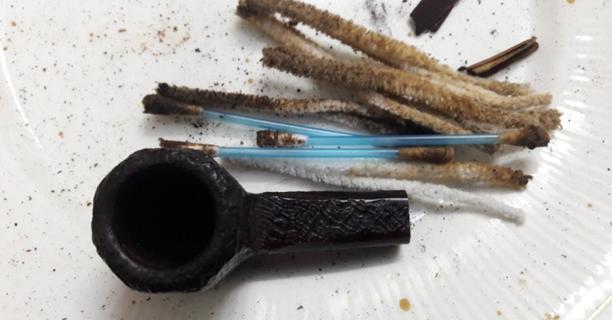
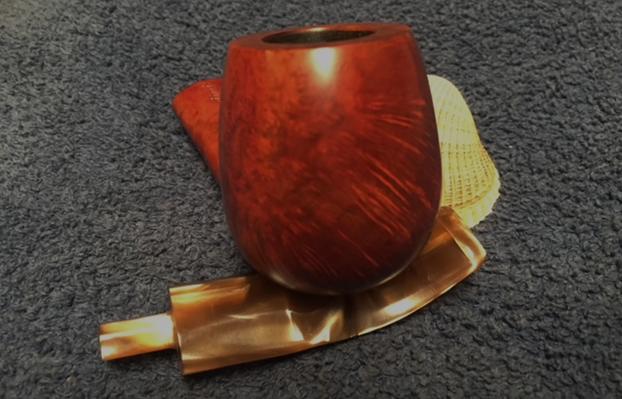
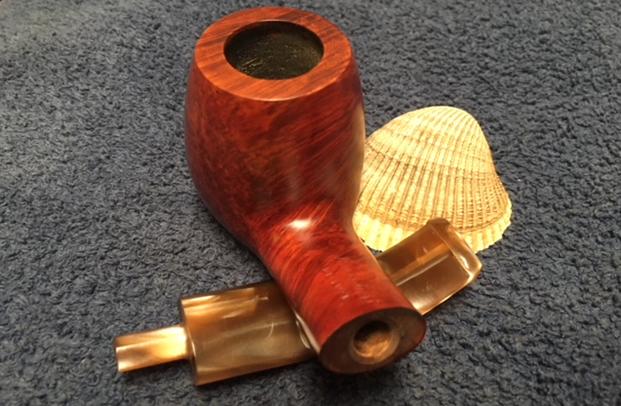
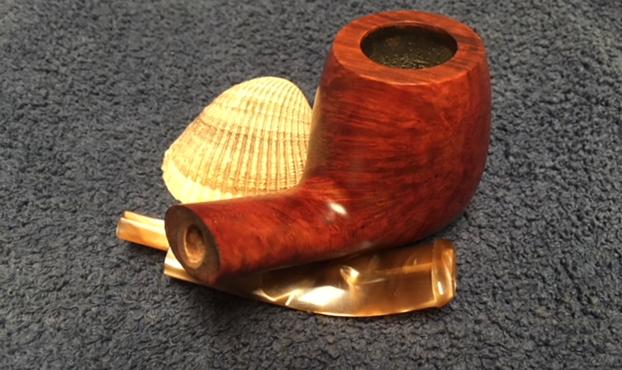
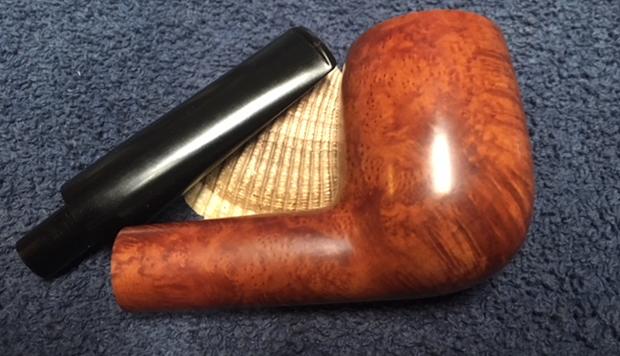
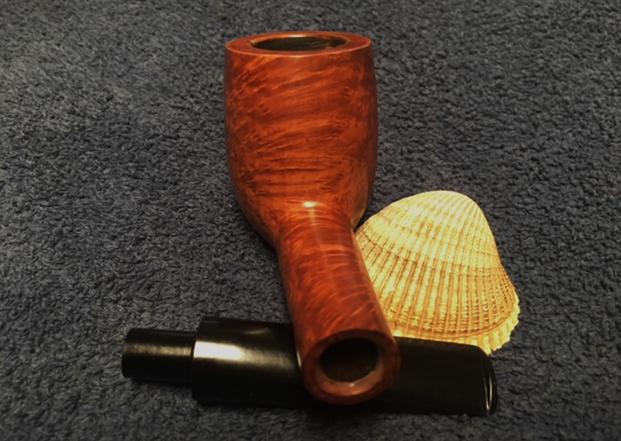
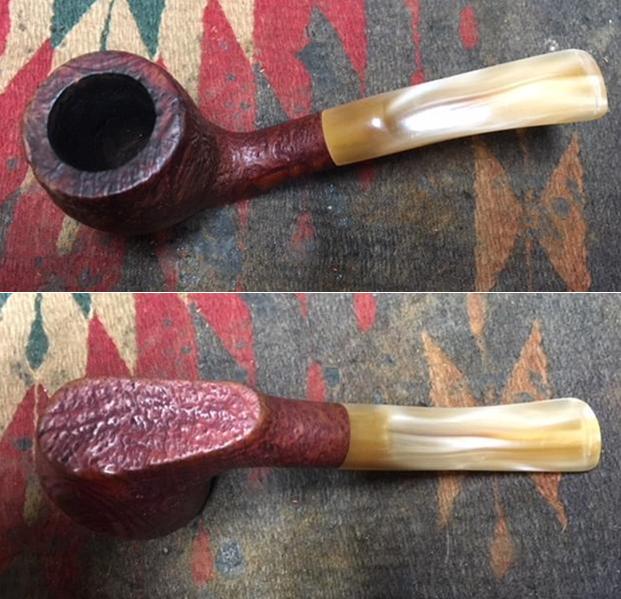
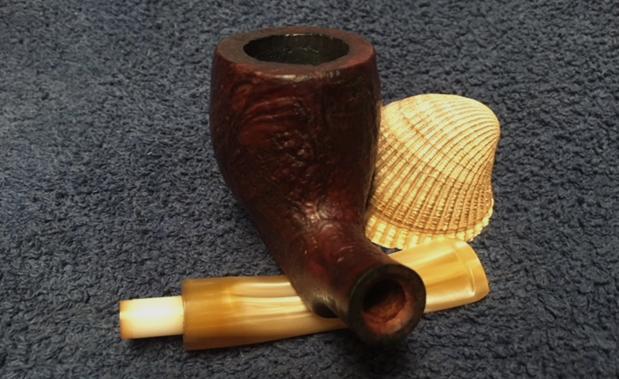
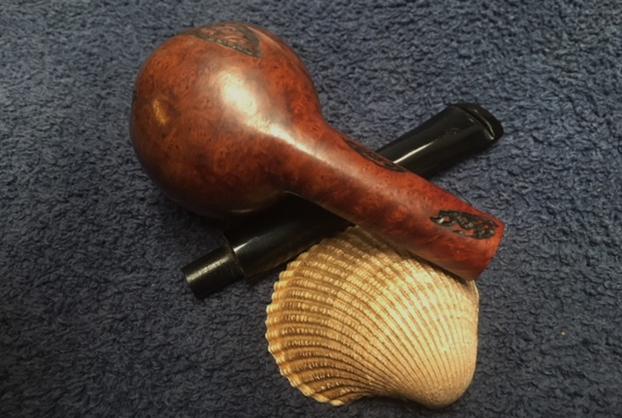
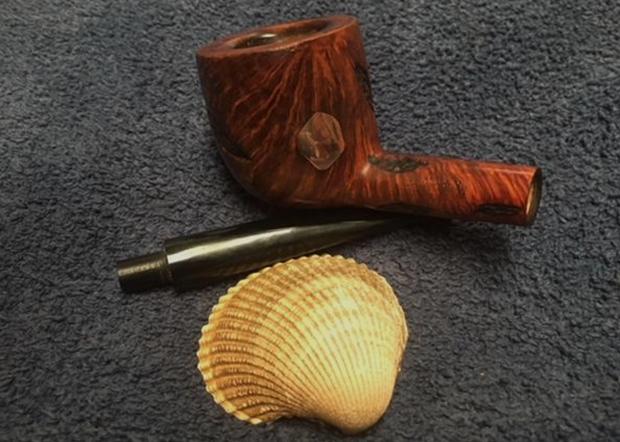
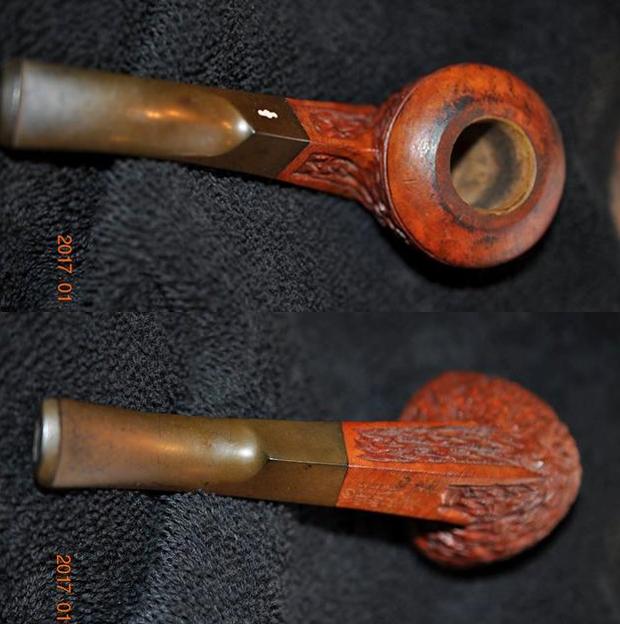
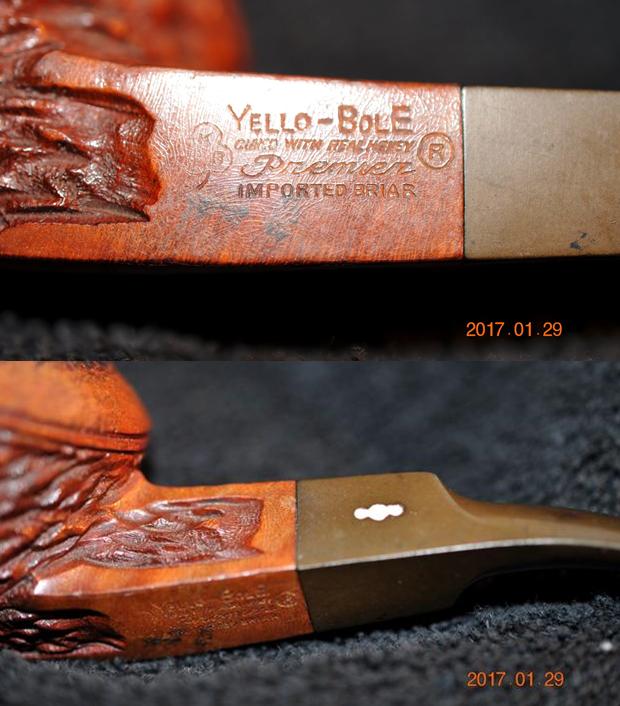
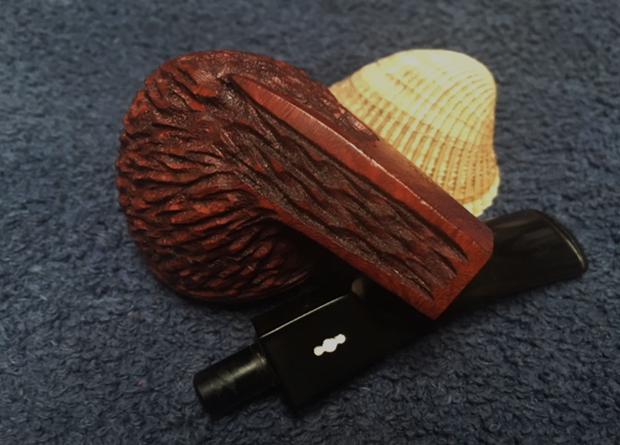
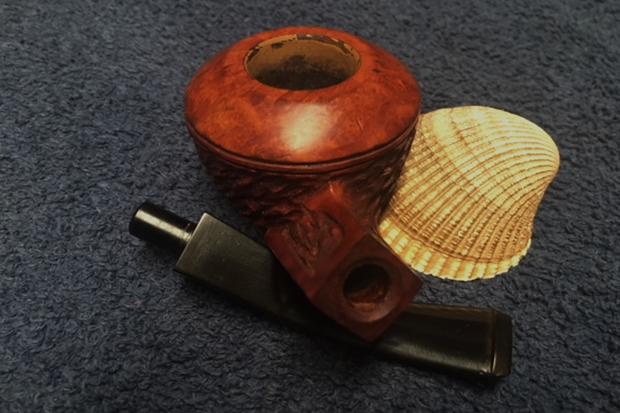
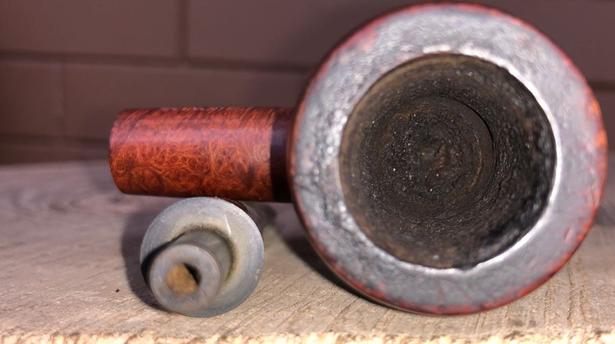
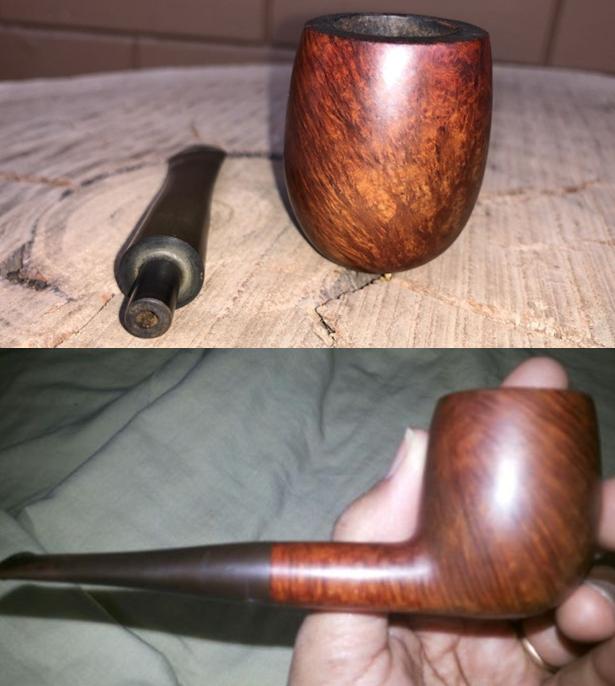
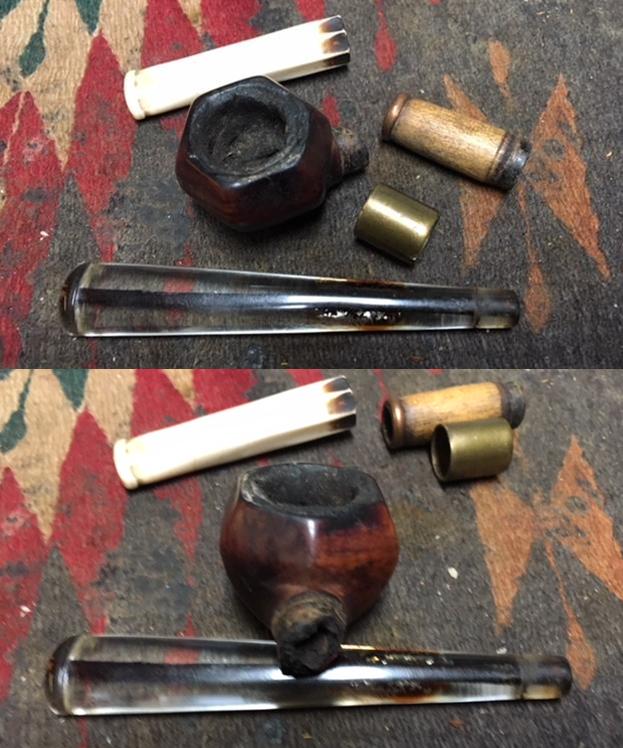 I examined the pieces carefully to see if I could come to any conclusions about the provenance of the pipe as it now stood. The bowl was in rough condition but I thought it could be cleaned up to at least carry on the trust of a pipeman from the past. The brass was very interesting and had been cut off on one end. Each end had a different diameter. One end was the size to fit on the broken shank and the other fit the wooden extension. The wooden extension appeared to be oak or a like hard wood. The inside appeared to have been burned and was darkened on each end. It had a copper ring around the end where the stem went. The ring had been hammered smooth and worked onto the shank end to keep it from splitting when the stem was inserted. The two stems were interesting. The white one looked like a cigarillo holder to me and probably was the first stem to be used on the pipe. It could possibly fit over the wooden extension prior to the addition of the copper ring. That leaves me to assume that the clear stem was a later addition and the ring was added to make sure that it did not split the wood when inserted. All parts were very dirty but I could see how they went together to make a smokeable pipe.
  We talked about the background of the pipe on Facetime and also on WhatsApp several other times and he told me the story that had been passed on to him by the friend of his family. I wrote to Paresh and asked if he could give me a summary about the pipe – write down some of what he had told me in our conversations. This is what he wrote to me.
This WWII pipe was handed over to me by one of my best buddies who has a family tradition of serving in the Army. This pipe once belonged to his eldest maternal Uncle who had participated in WW II as a Sepoy (an Indian soldier serving under British or other European orders) and later during the war rose to become a Junior Commissioned Officer. He had participated in the Operations in North Africa as part of a British Indian Division. It was during one of the battles at El Agheila during November – December 1941 that he had picked this up this pipe with its case from one of the overrun German trenches as a souvenir and had been with him since…. – Regards, Paresh
That was the information that I was looking for about this pipe. It is one thing to assume that the pipe was a War Memorabilia but another thing to get the history behind it. Thanks Paresh. Now I knew that I was dealing with a German soldier’s pipe and pipe case that had been left behind either when he was killed or when he abandoned German trenches in haste fleeing the British Indian Division. His friend’s uncle had picked up the case from the trench as a souvenir. It had remained in the family in the case in parts since that time.
This is where my imagination took over and tried to figure out how the pipe had come to its current state. I wonder what was in the mind of the pipeman who put the pieces together. So I took what I could see and imagined the following scenario from the parts.
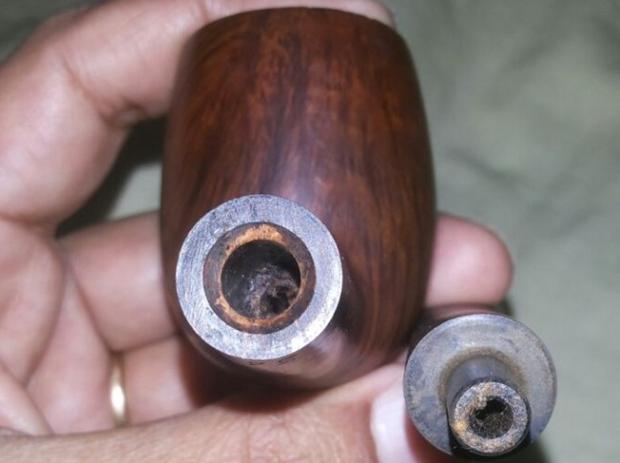
Somewhere along the journey of the soldier CK and his pipe he had broken the shank on what must have been his only pipe. It was broken and either could be thrown away as garbage along the way or perhaps he could rebuild it. The broken shank was the impetus for repairing the pipe and the way it was done was highly creative.
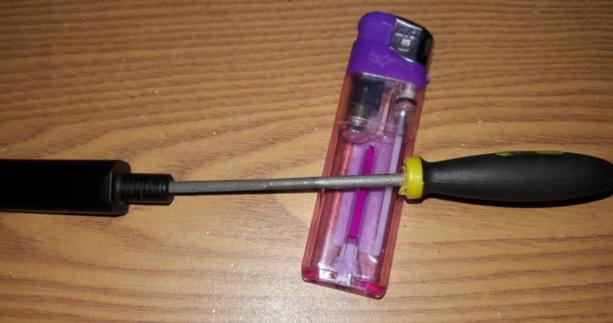
The remnant of the shank was carefully modified with a knife judging from the way the broken shank end was carved. The pipe man had used his knife to create a ledge around the broken part where it connected to the bowl. A brass shell casing was cut and modified to fit on the shelf that had been carved thus repairing and lengthening the shank. The shell casing was pressed onto the carved shank until it was almost flush with the back side of the bowl. A piece of wood – branch or an oak stick was “drilled out” by heating the bent wire in the box until it was red hot and then inserting it repeatedly down the middle of the wood branch until there was an airway burned into the center. You can still see the burn marks on the inside.
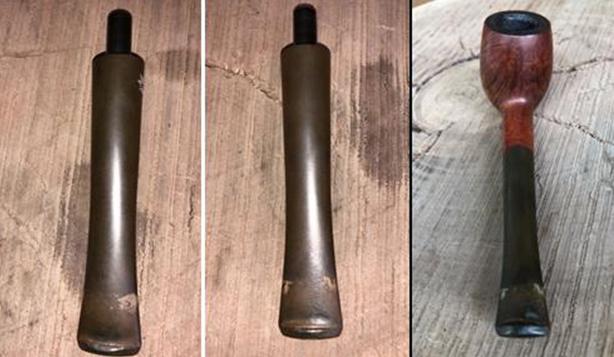
The one end of the shank was drilled out and inserted into the small diameter end of the shell casing. The other end, the shank end of the piece of was carved out with a knife to receive a stem. There was a hammered copper ring that had been crafted and pressed onto the stem end of the shank. The box contained two different stems with the pipe. The first was a cigarette or cigarillo holder that could have been fit over the top of the dowel. Not very pretty and not very functional as it did not fit well. The second stem was a Perspex stem that was quite long. It obviously was the one used with the pipe as the airway was very dirty. There was also some internal burning in the stem itself that is odd. I wonder if the soldier who fashioned the pipe did not put a burning wire up the stem to open it as well and damage the internals of the stem.
I probably will never know the story behind the pipe for sure but what I have imagined is certainly a very real possibility. Whatever the story is the pipe is a fascinating piece of WWII memorabilia.
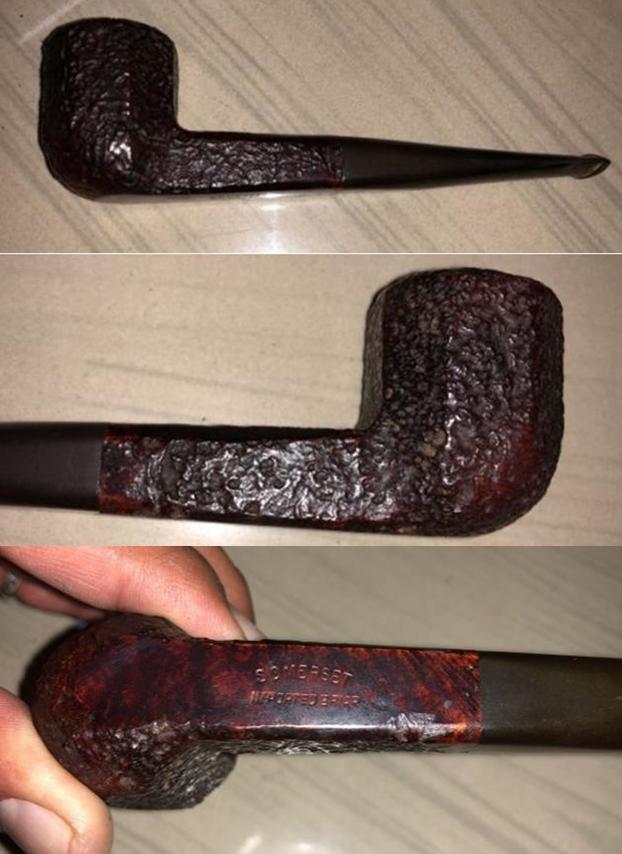
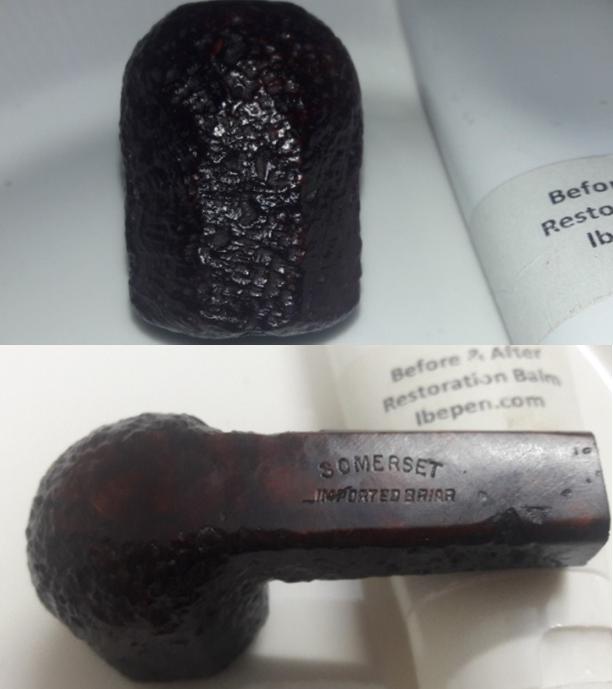
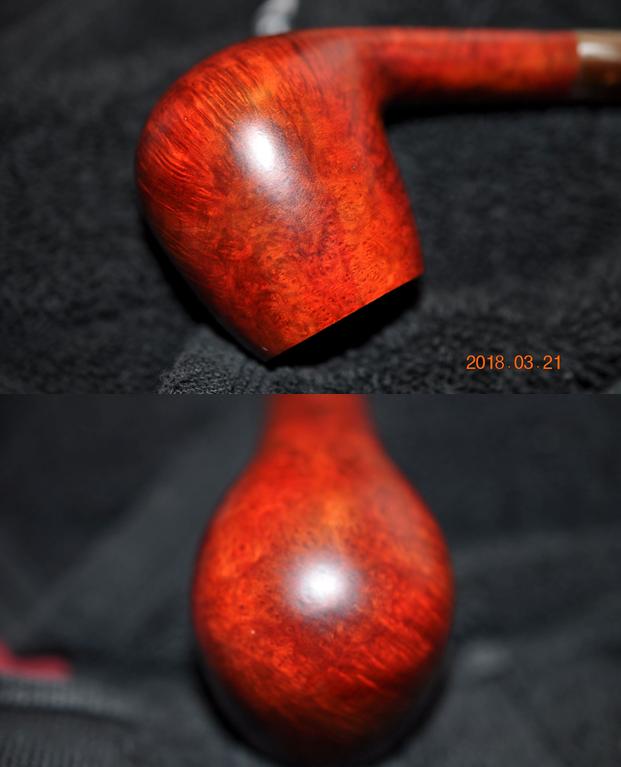
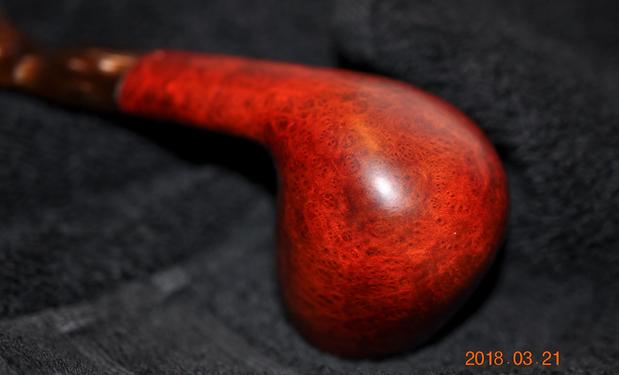
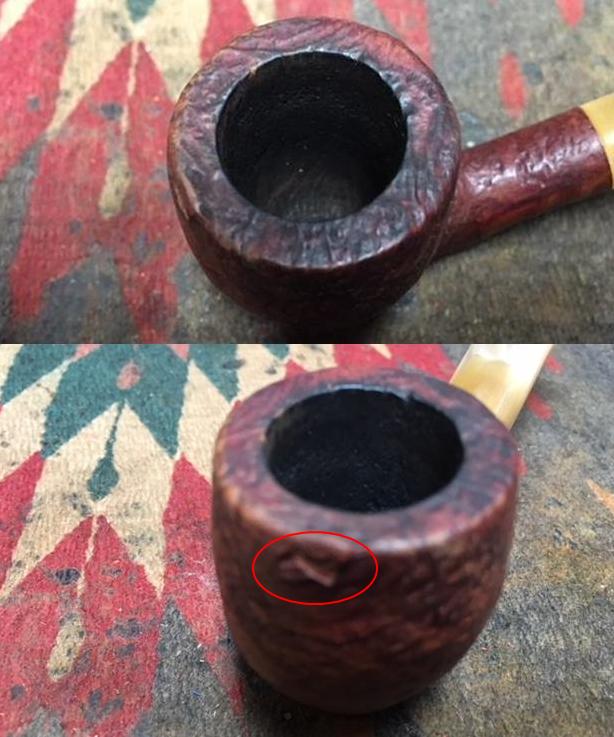
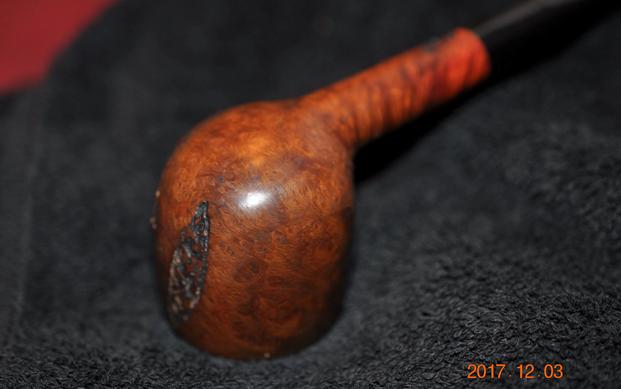
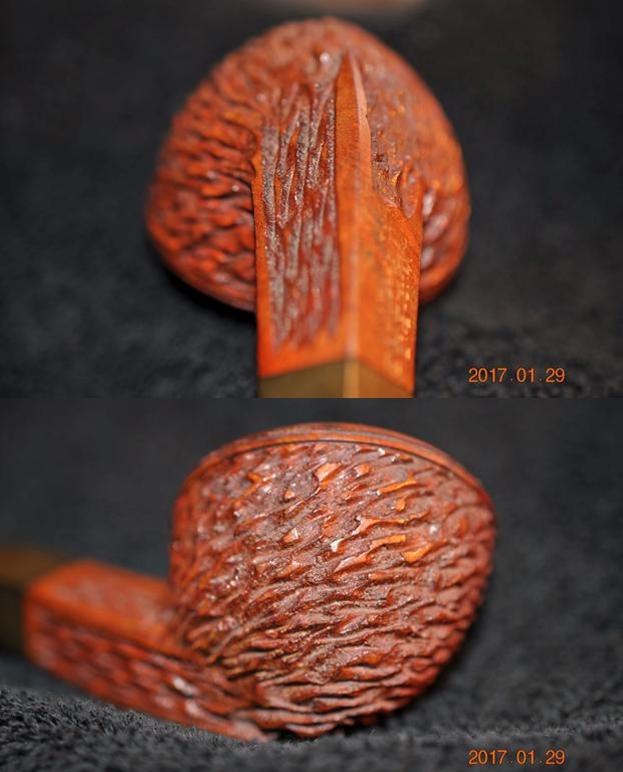
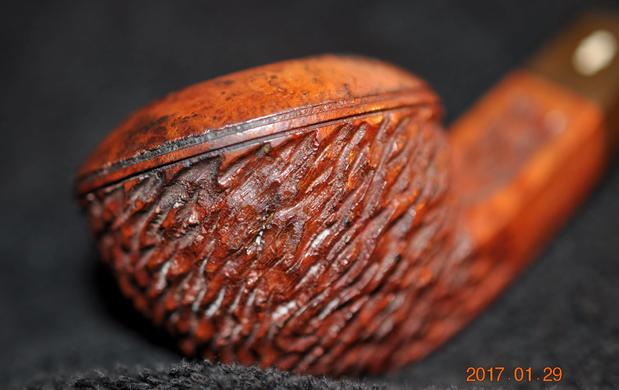
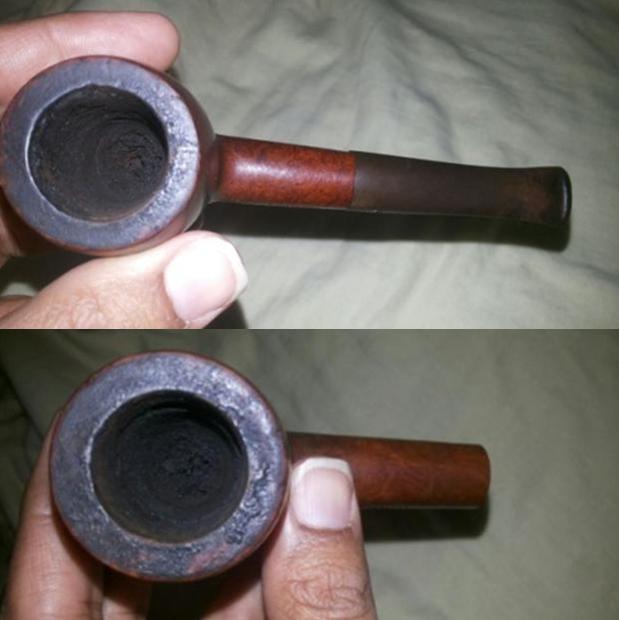
With the imagination satisfied and combined with the story that came with the pipe I examined the pipe parts to see what I was dealing with. It was obvious that the pipe was smoked a lot. It was probably the soldier’s only pipe and it rarely sat unlit by the looks of it. The bowl was thickly caked and damaged the externals were worn. It appeared that the pipe had been dropped a few times as there were deep gouges in the briar on the heel of the pipe. The finish on the briar was worn out and dark but underneath there were remnants of what looked like nice grain. The rim top was damaged and the inner edge of the bowl was rough. The bowl appeared to have been repeatedly reamed with a knife. The airway entering the bottom of the bowl was also worn from the piece of wire in the pipe case. I would clean up the pipe and leave the character intact. Many would have left the pipe as it was but to me the work that the original pipeman did to keep the pipe useable made me want to carry on his legacy and give Paresh a chance to at least smoke it.
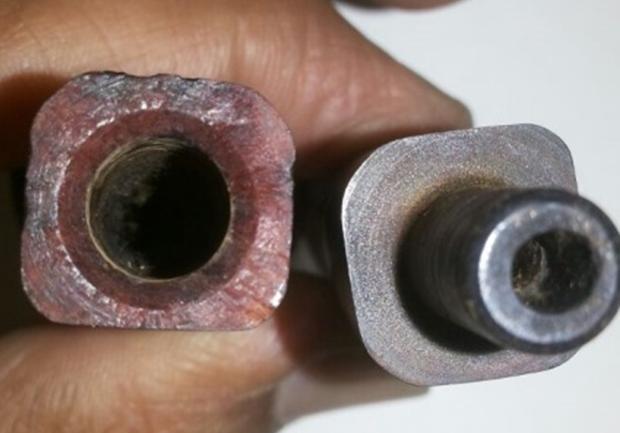
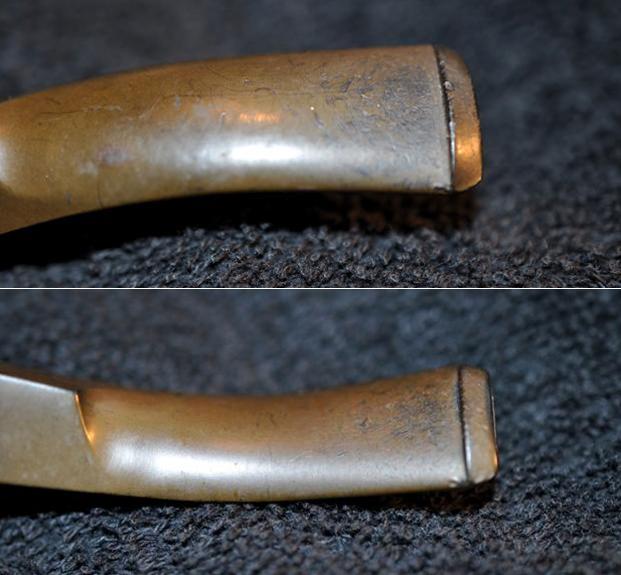
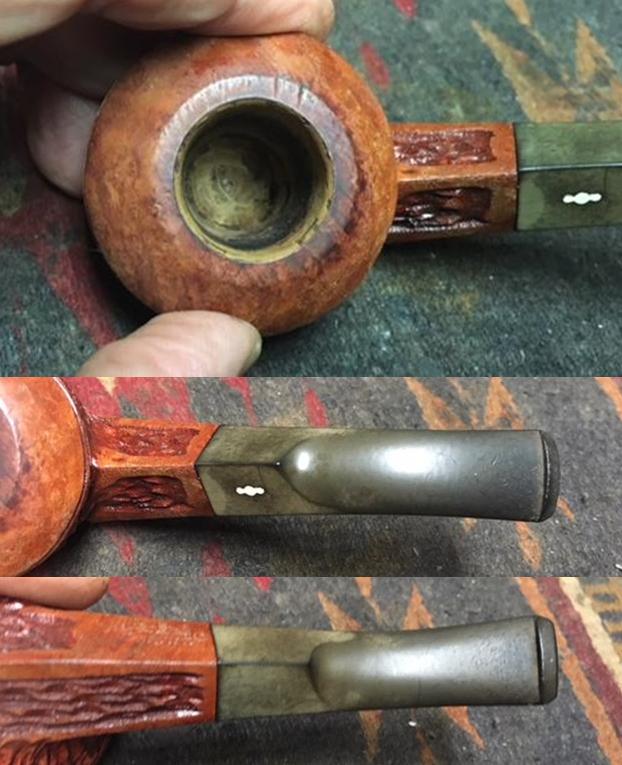
I decided to clean up all of the parts individually. I scraped out the brass shell casing with a small pen knife and then scrubbed the inside with cotton swabs and isopropyl alcohol until the inside was as clean as the shiny brass exterior. The first photo shows the cut edge that the wooden extension inserted into. The second photo shows smooth edge that sat on the carved ledge against the bowl and the other edge was the cut edge. I cleaned the wooden extension next, scraping the grit and tars that had built up on the inside. The end that fit toward the bowl had an airway drilled through from the other end. It looked to me that the airway had been burned through with a hot wire. It was darkened from being inserted into the brass and as it had oxidized it had coloured the wood. The end that held the stem was carved to receive the tenon. It had been banded with a copper ring to stabilize the wood. I used a pen knife to scrape the grime out of the extension and then cleaned it with pipe cleaners, cotton swabs and alcohol. I used the topping board and 220 grit sandpaper to smooth out the insert end and remove some of the damage to the wood.
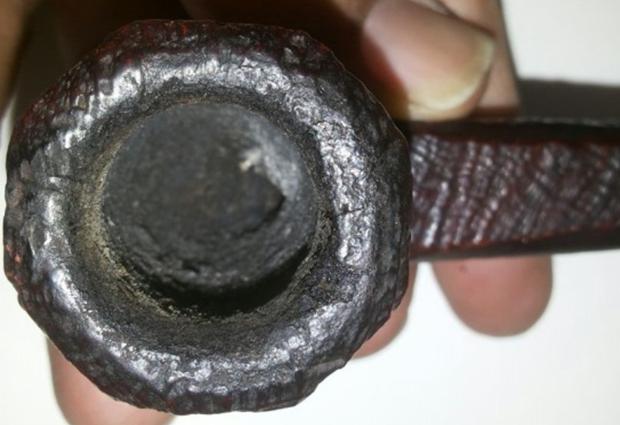
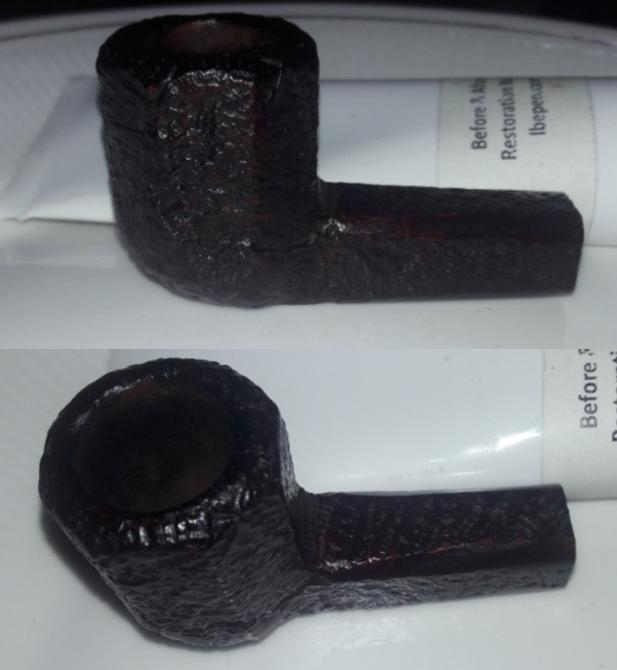
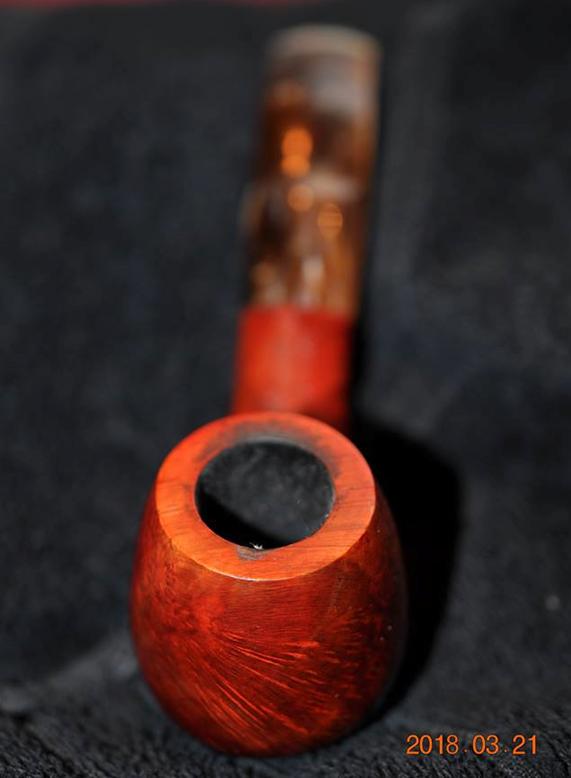
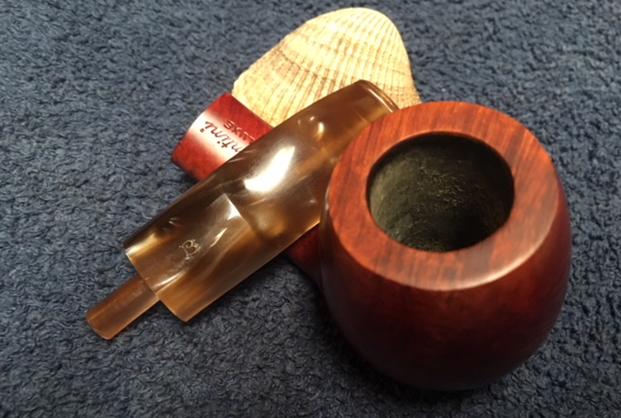
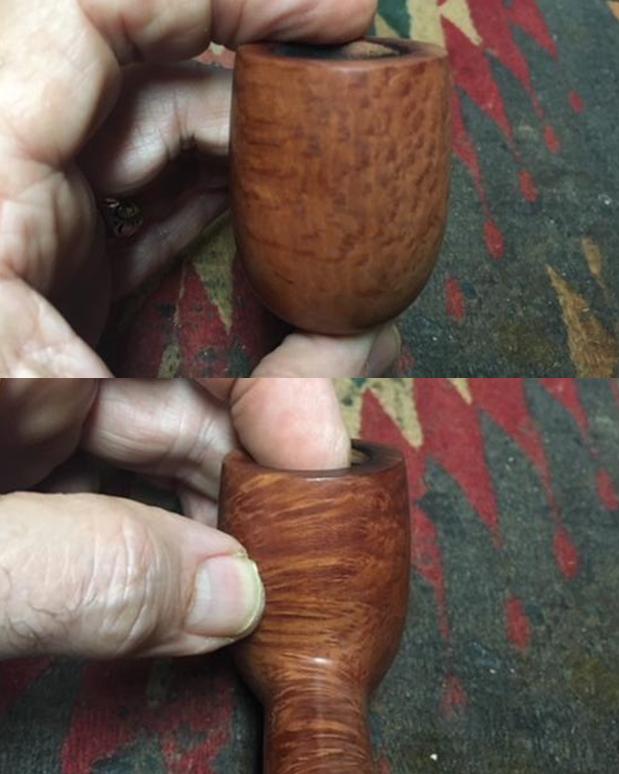
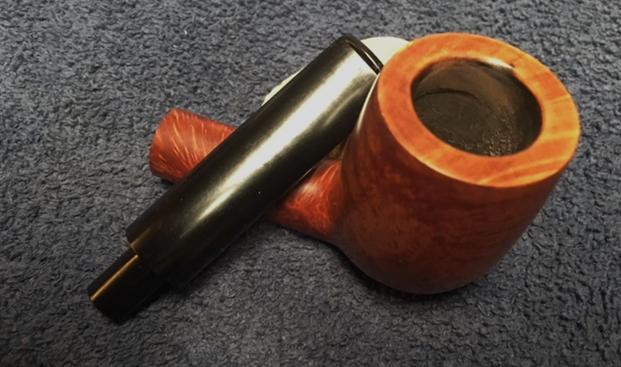
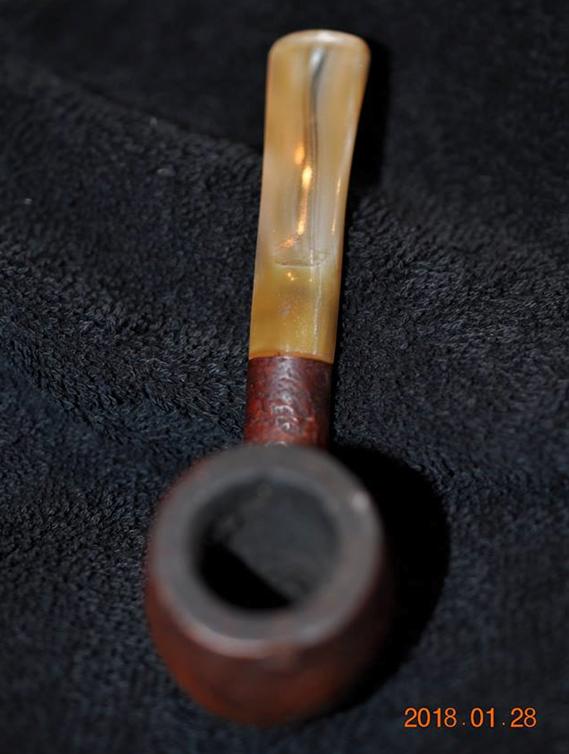
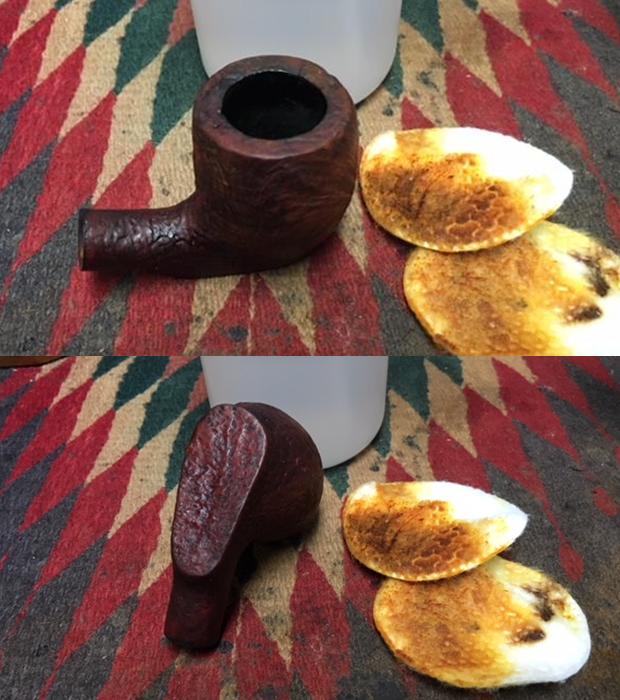
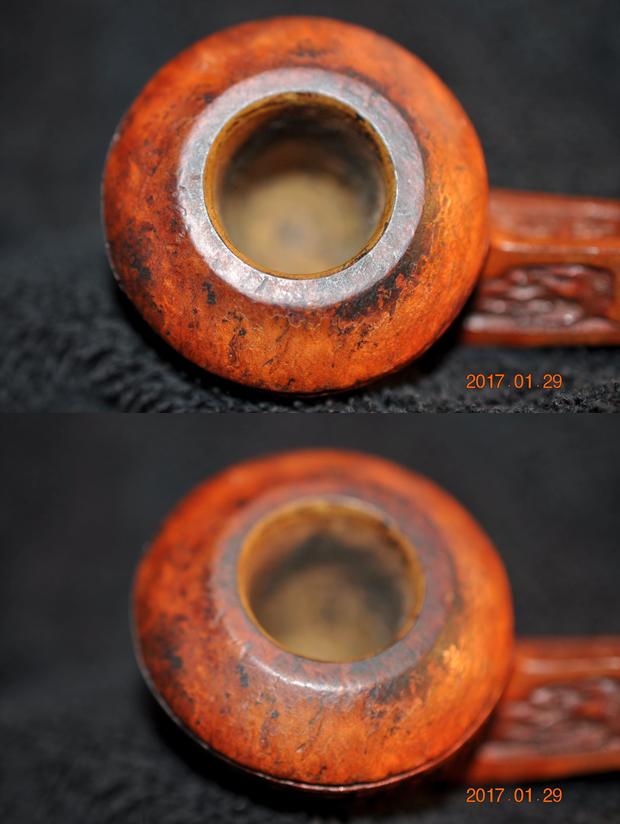
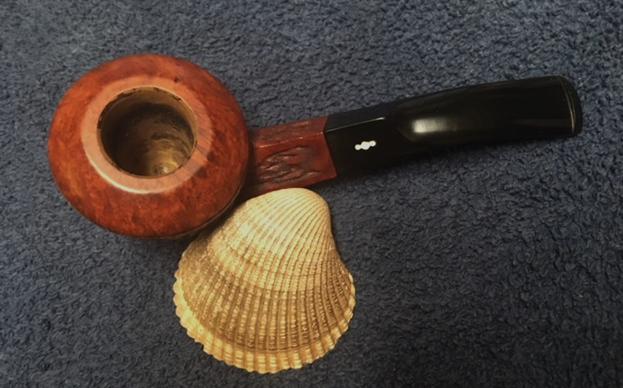
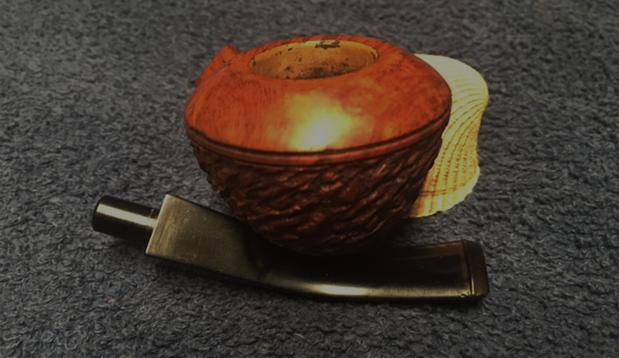
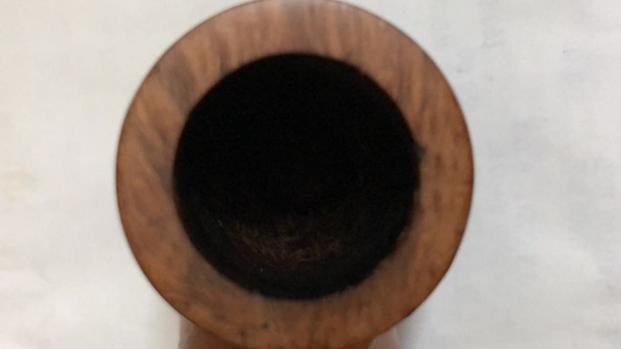
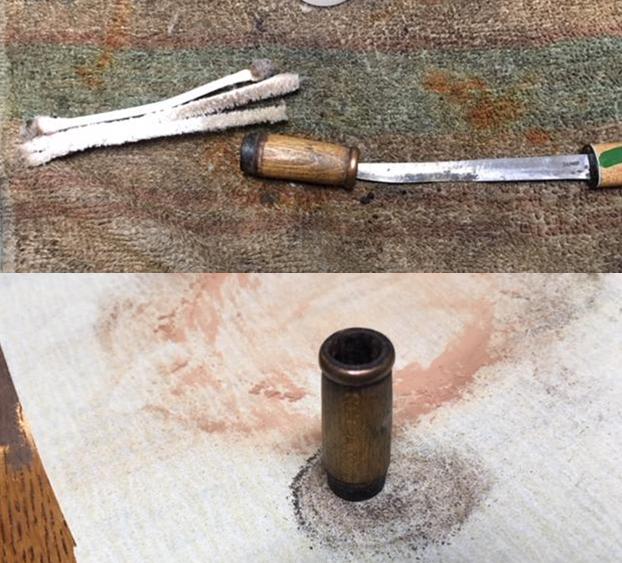 With the brass and wooden shank extensions cleaned it was time to clean the bowl. I took a photo of the bowl to show the thickness of the cake on the walls and the trough that had been carved in the bottom of the bowl to the airway leaving the bowl. It looks to me that the trough has been gouged out over time by cleaning the pipe with the wire that was in the box. The cake on bowl walls was thick and uneven all the way around. It was also quite crumbly and soft. The pipe smelled musty from the years that it had been sitting since the war. Once it was removed there would be work to be done to smooth out the walls of the bowl. There are spots that appear quite thin and there will need to be at least a bowl coating done to protect the bowl.
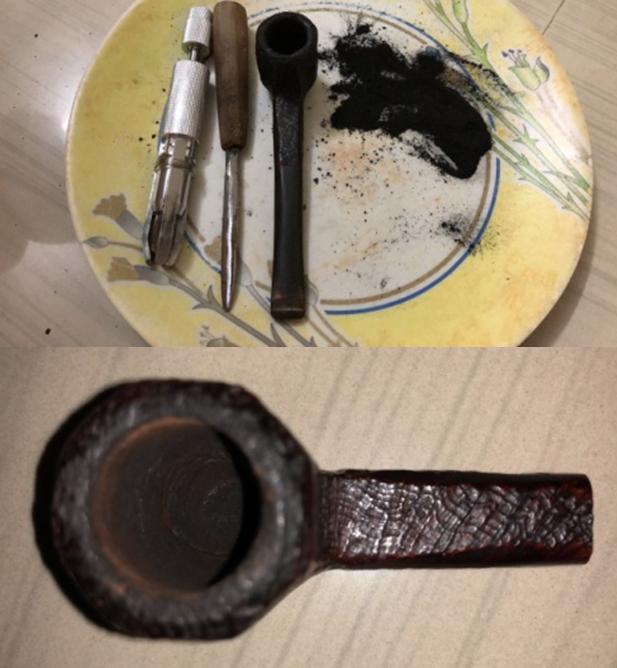
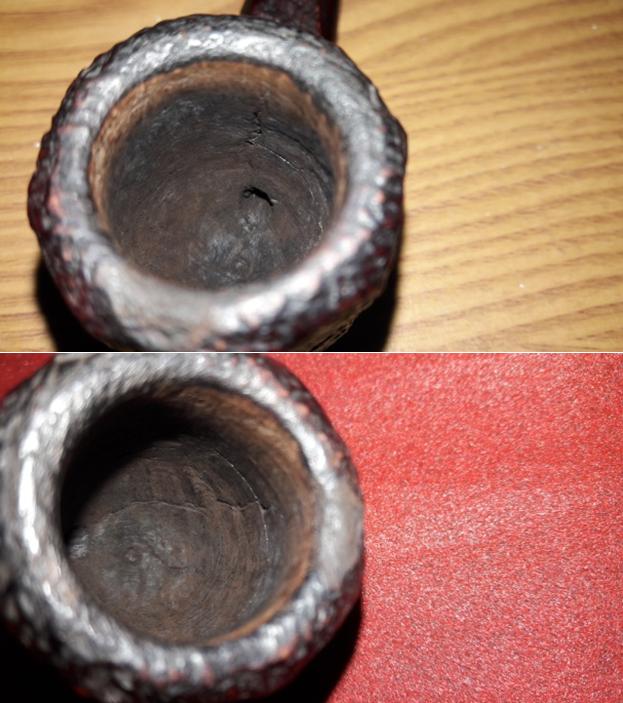
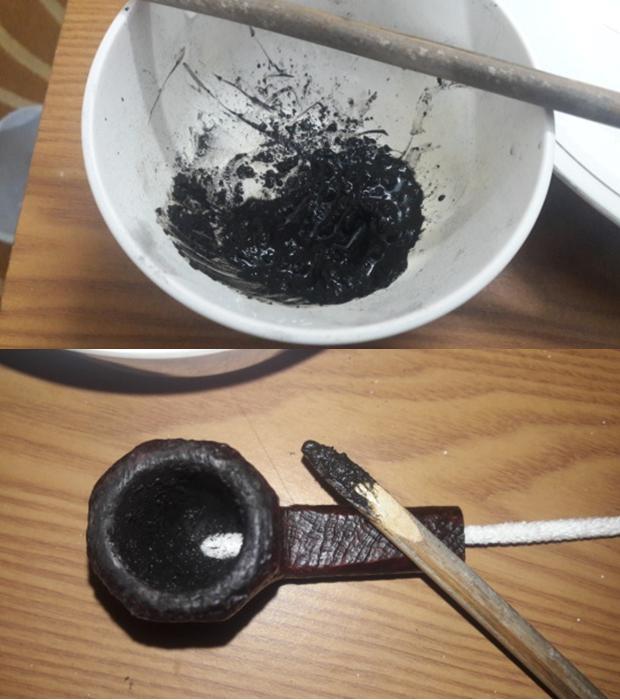
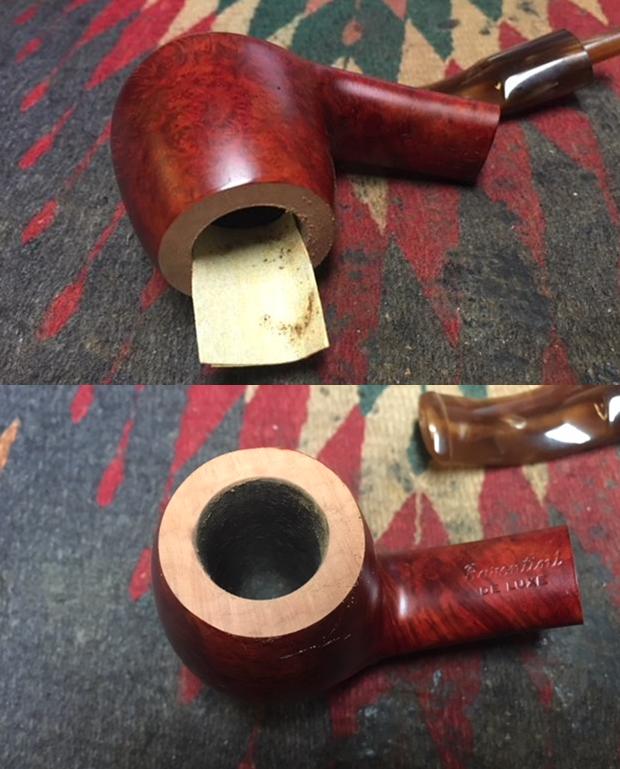
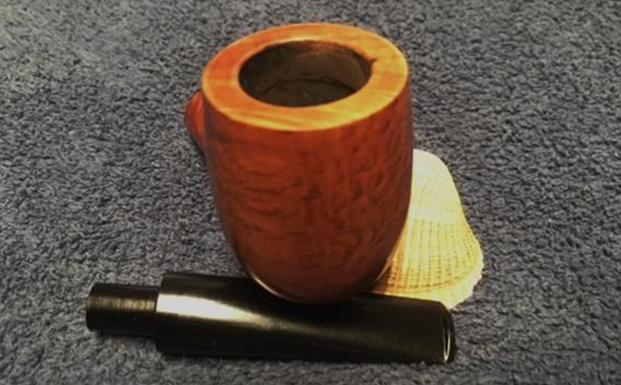
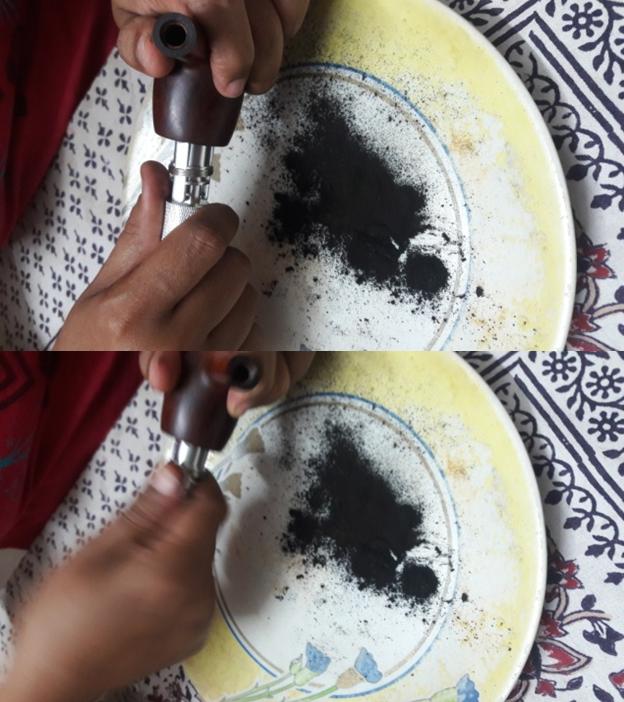
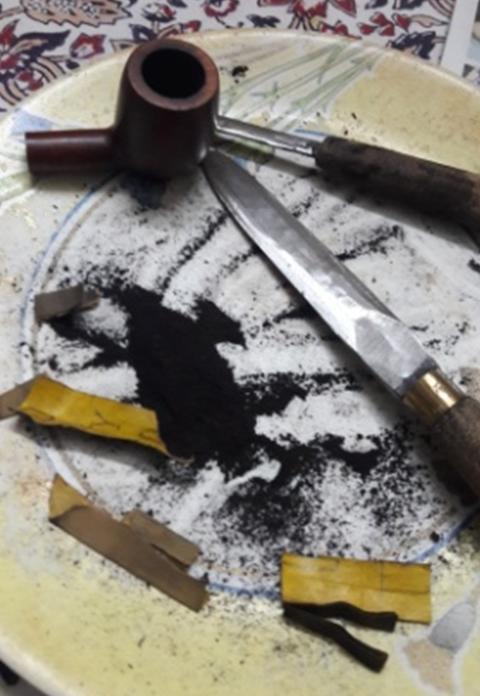
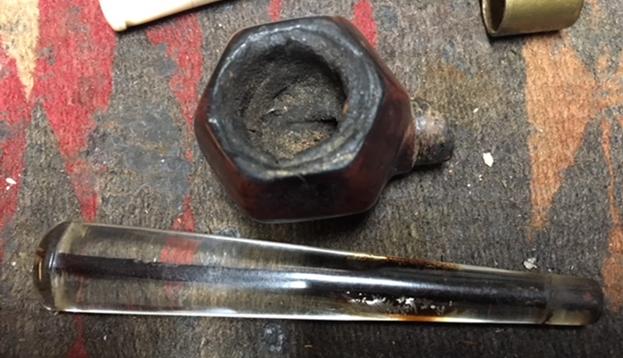 I carefully removed the cake from the bowl with a Savinelli Fitsall Pipe Knife, scraping it from the walls. You can see from the photos how crumbly and soft the carbon chunks were. I wrapped some 220 grit sandpaper around a piece of dowel and sanded the walls to remove the remaining cake.
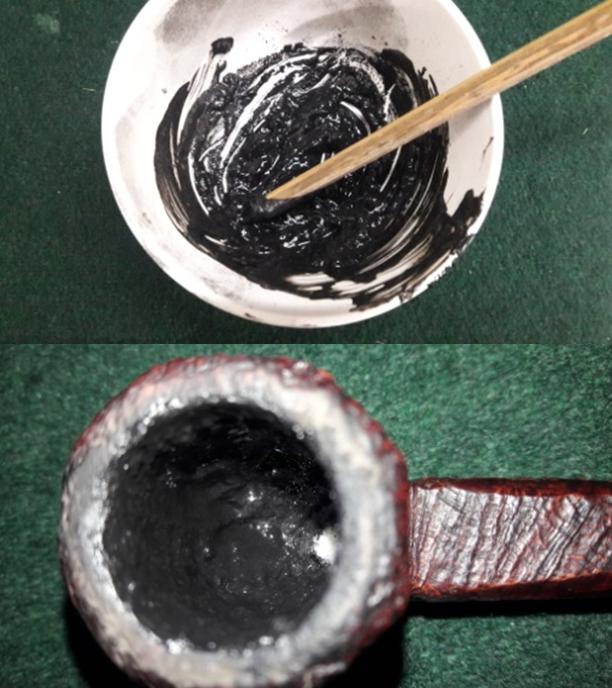
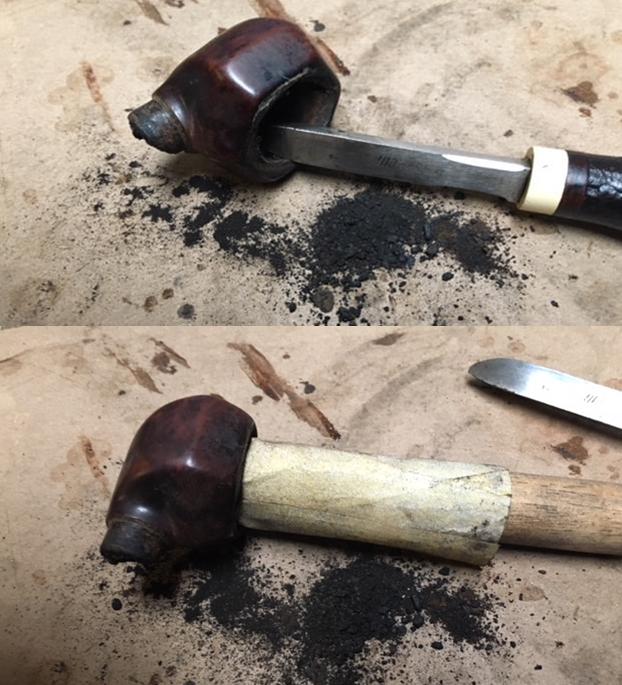 I used a dental spatula to rebuild the inside back edge of the bowl rim with clear super glue and briar dust. This was just the first step in the process that would take a lot more work to bring it back to a useable condition.
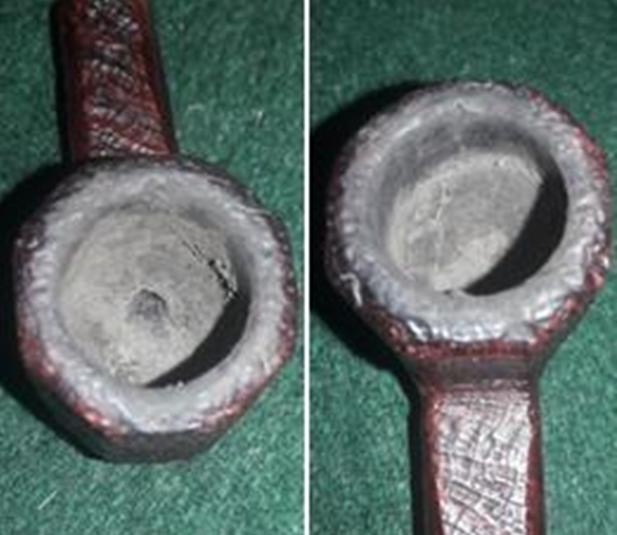
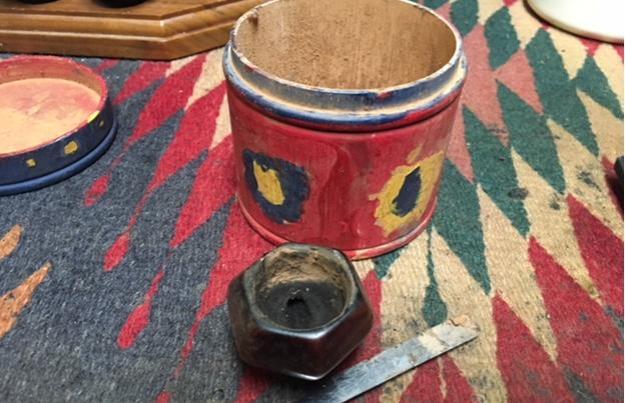 I lightly topped the bowl on a topping board with a piece of 220 grit sandpaper. I did not want to remove much of the briar, just smooth out the damage. The first photo shows the topping and the second the rim after topping.
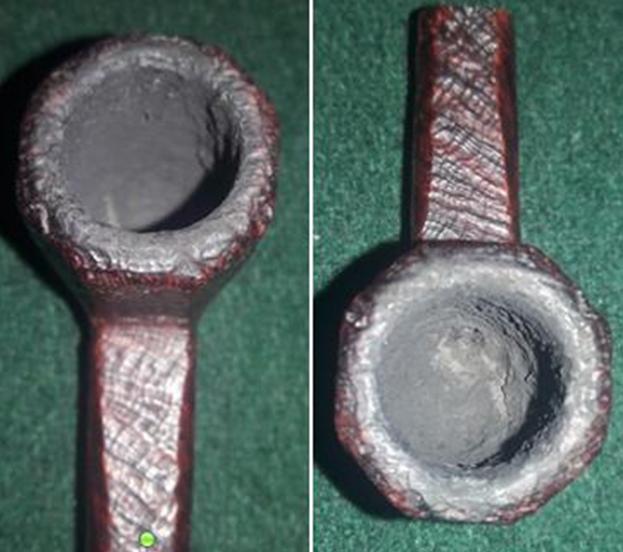
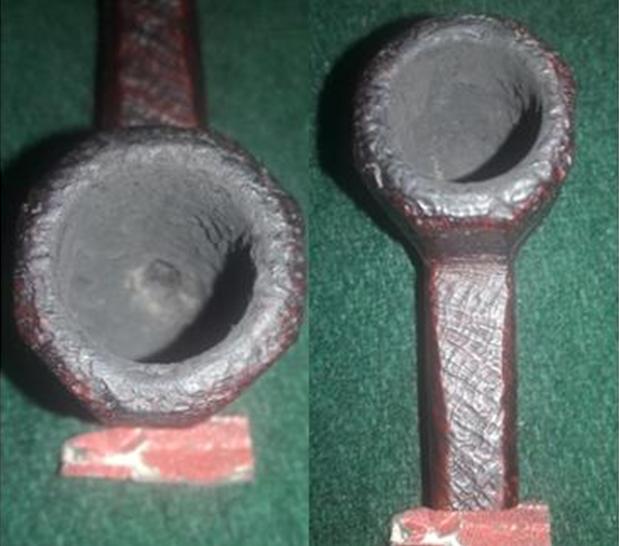
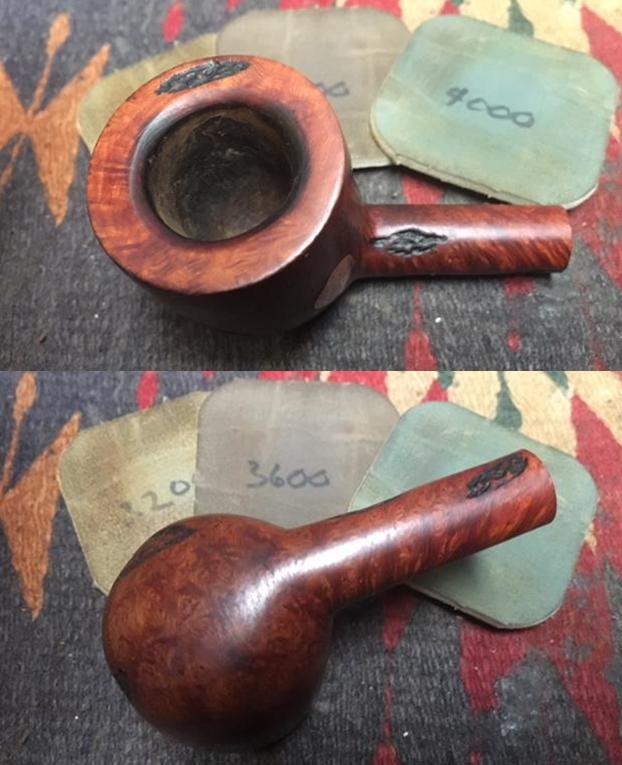
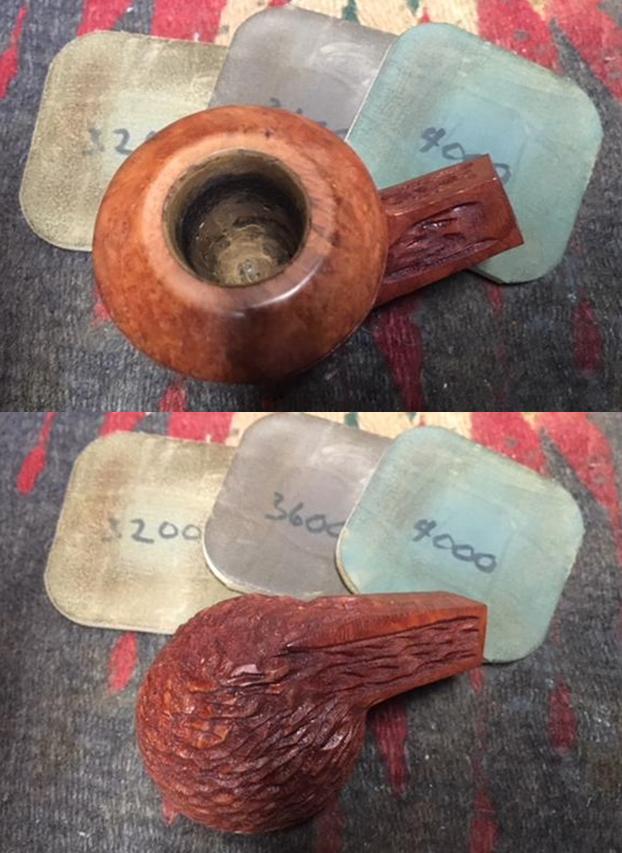
 I filled in the divots in the bottom of the bowl and carefully repaired what looked like a crack in the briar with clear super glue and briar dust. Once the repair had cured I sanded the repair smooth with 220 grit sandpaper to blend it into the surface of the briar. I carefully sanded the bowl and rim with micromesh sanding pads.
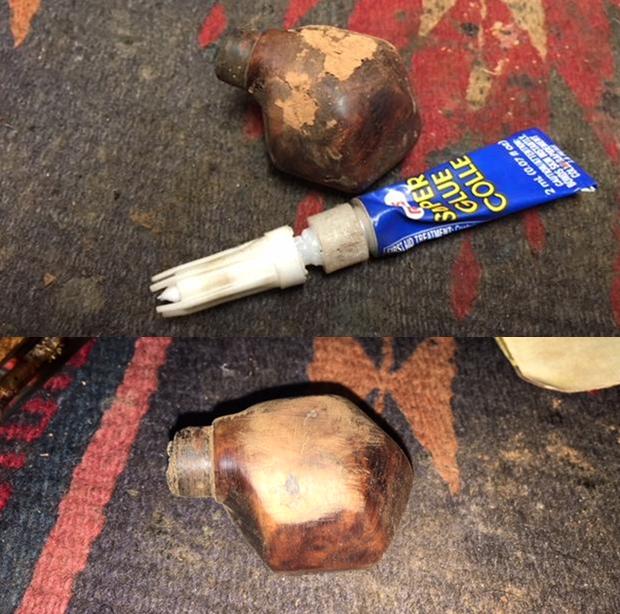
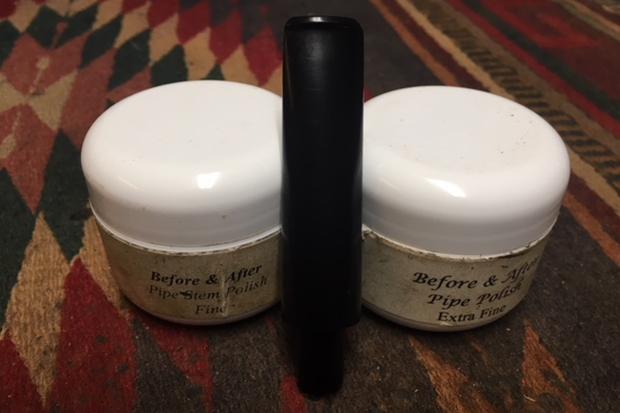
 I set the bowl aside and worked on putting the parts of the shank extension back together. I heated the brass shell casing with a Bic lighter to expand it enough to be pressed on to the wooden shank tube. I scrubbed the tube with Before & After Pipe Balm and lightly sanded the extension with 220 grit sandpaper. I polished the brass and copper band with micromesh sanding pads.
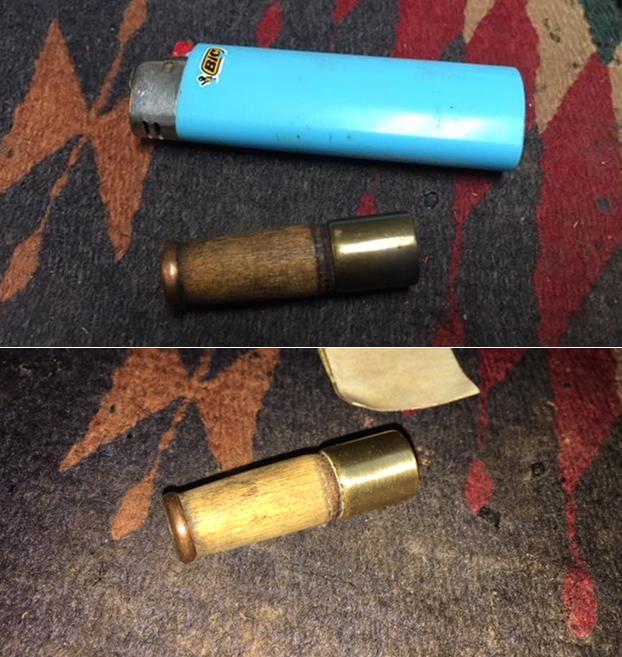 I cleaned out the inside of the newly reassembled shank with alcohol, pipe cleaners and cotton swabs. I cleaned out both ends of the new shank.
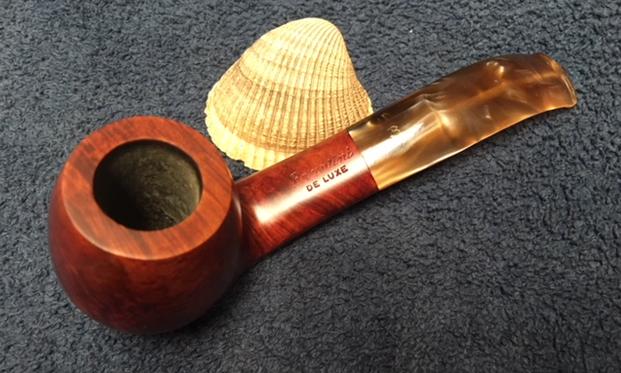
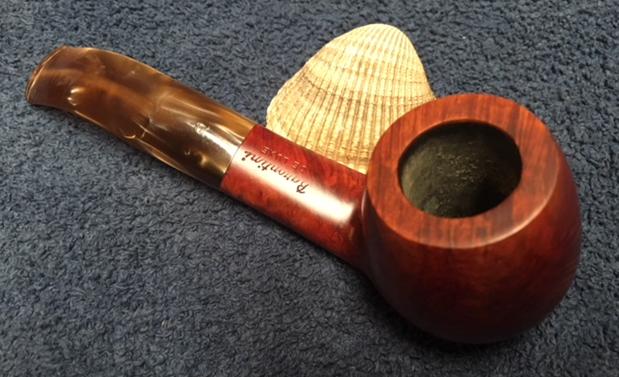
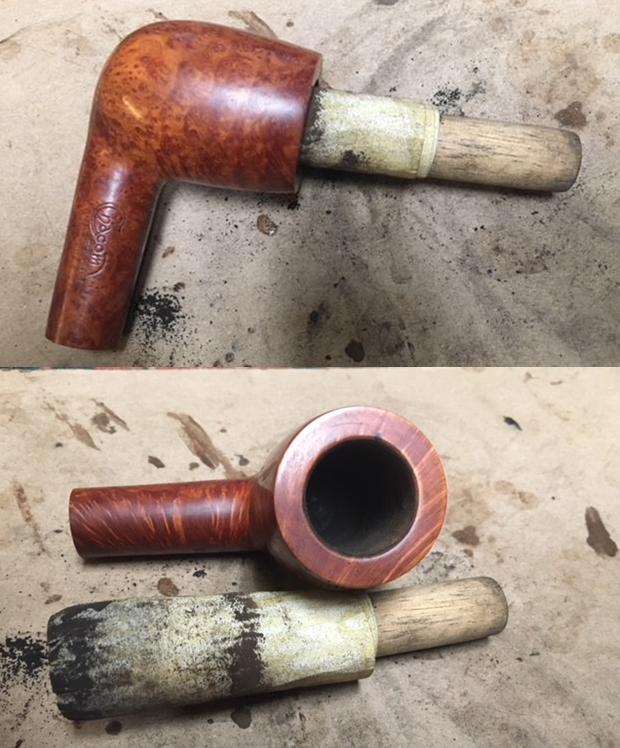
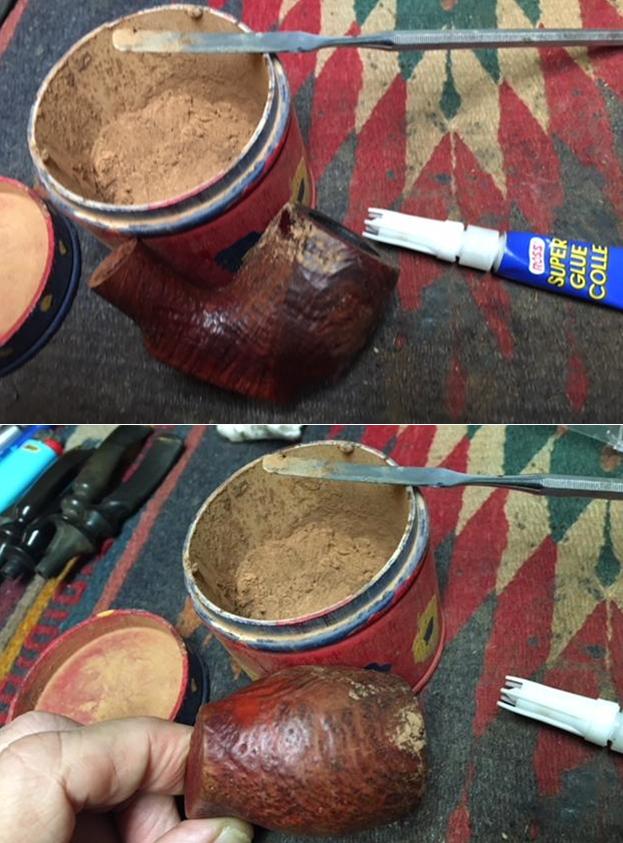
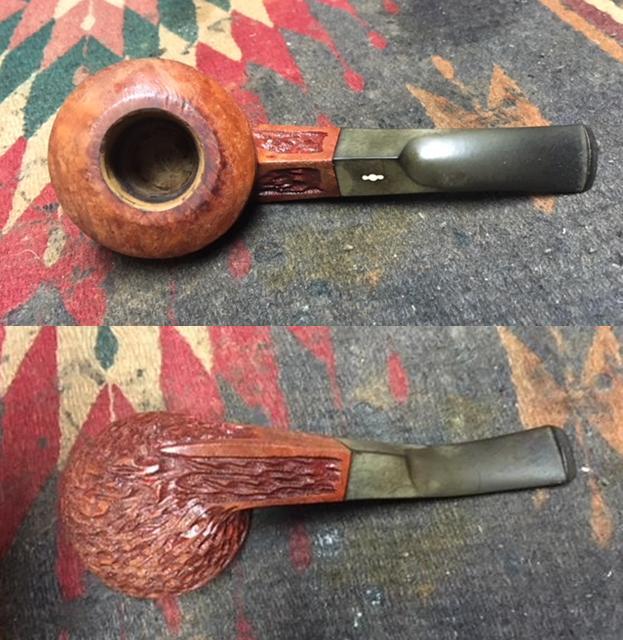
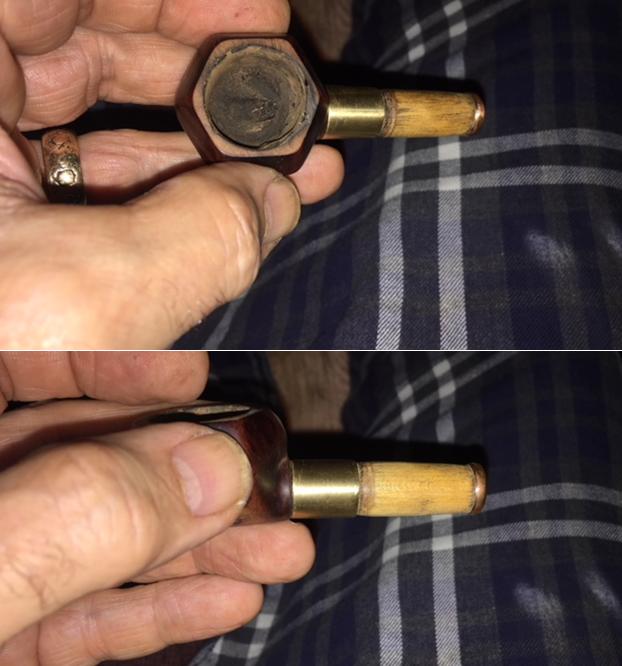
 I cleaned out the broken shank on the bowl with pipe cleaners, cotton swabs and alcohol in preparation for gluing on the shank extension. I dried it out and coated the shelf with white all-purpose glue. Once the glue was in place I pressed the shank extension onto the bowl. I wiped away the excess glue. Once the glue had set I took pictures of the pipe at this point in the process.
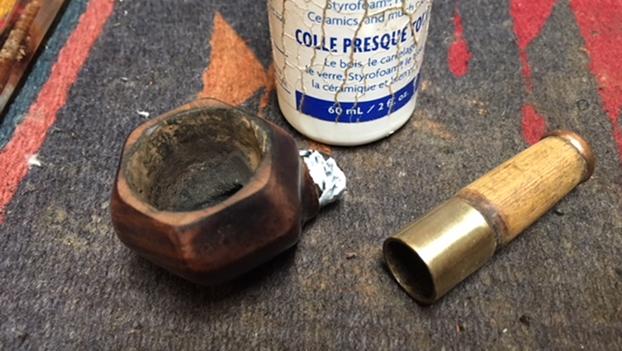
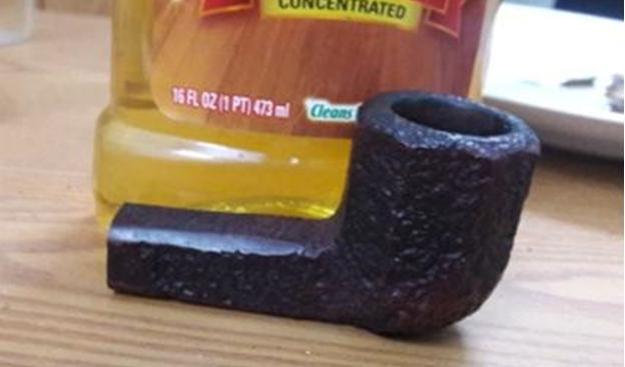
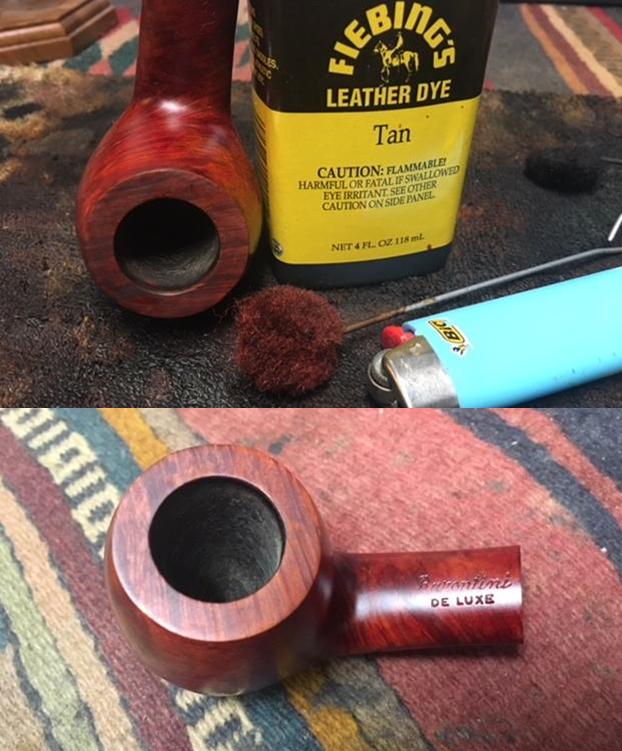
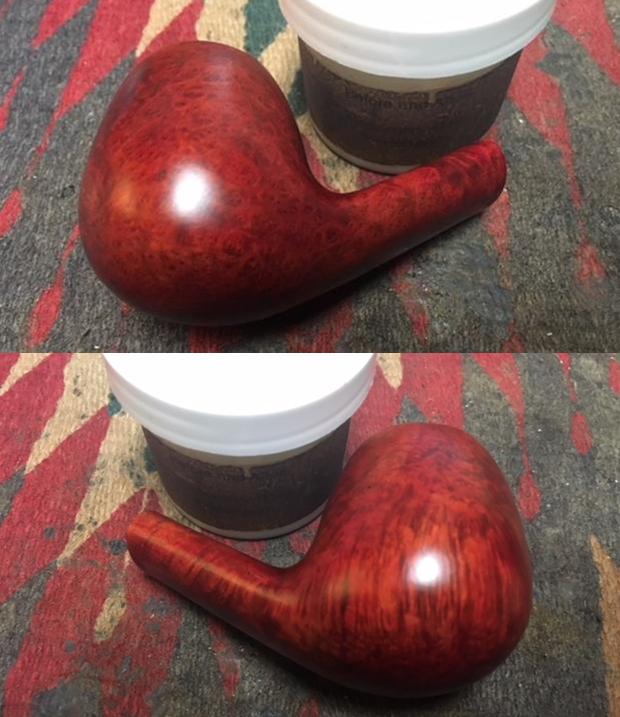
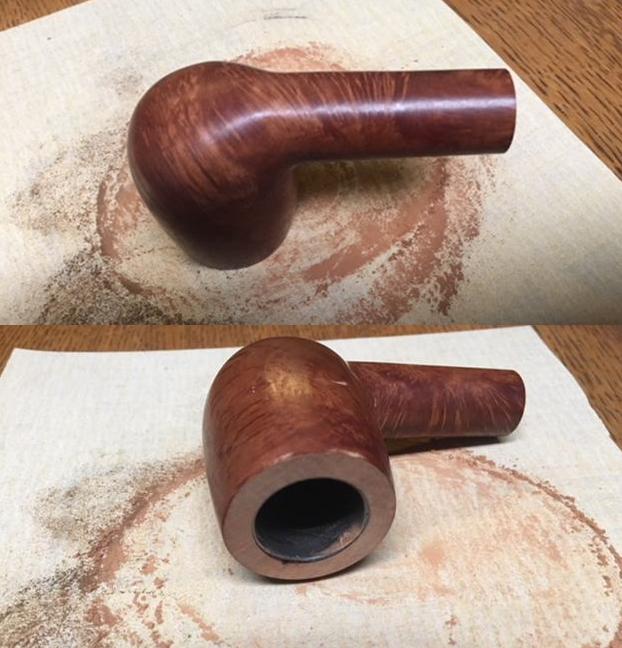
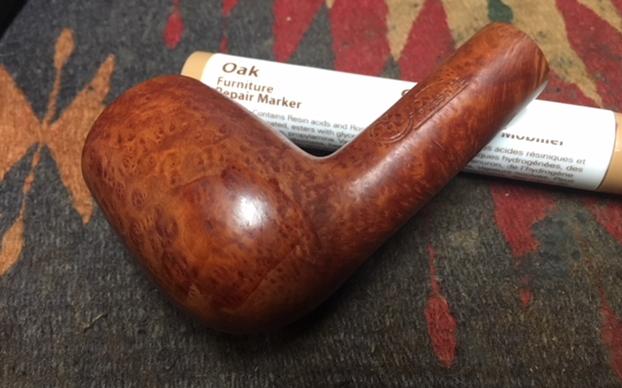
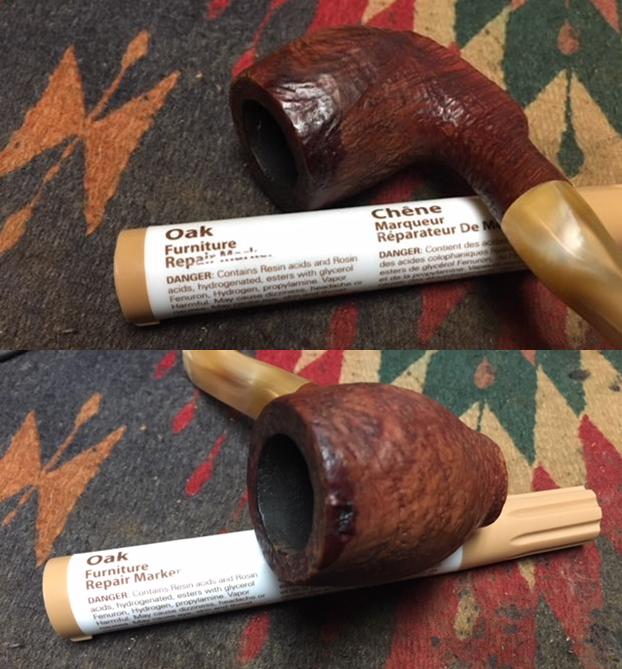
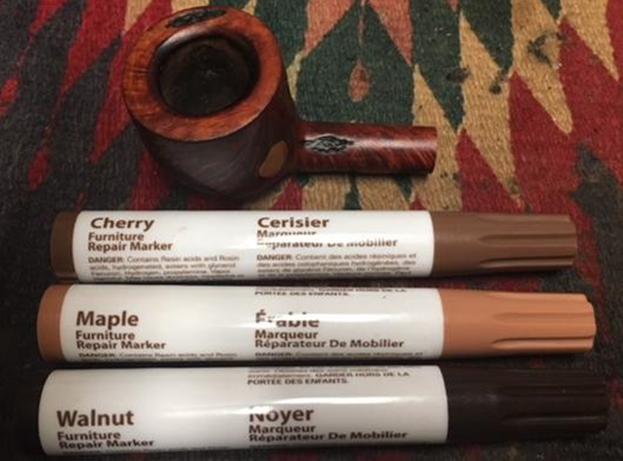
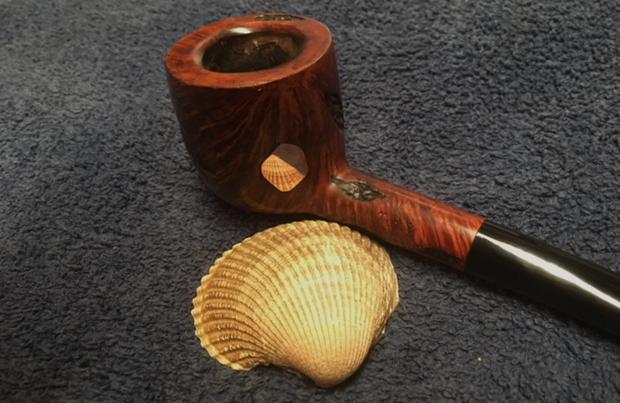
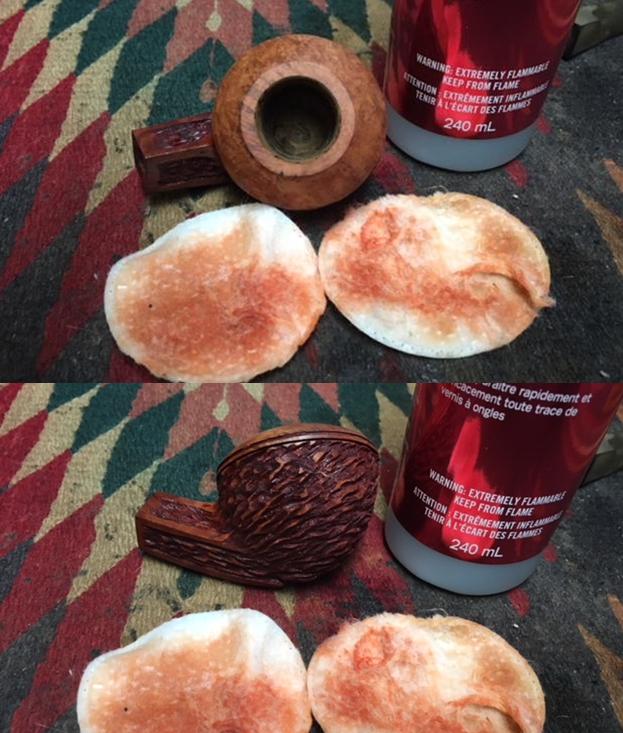
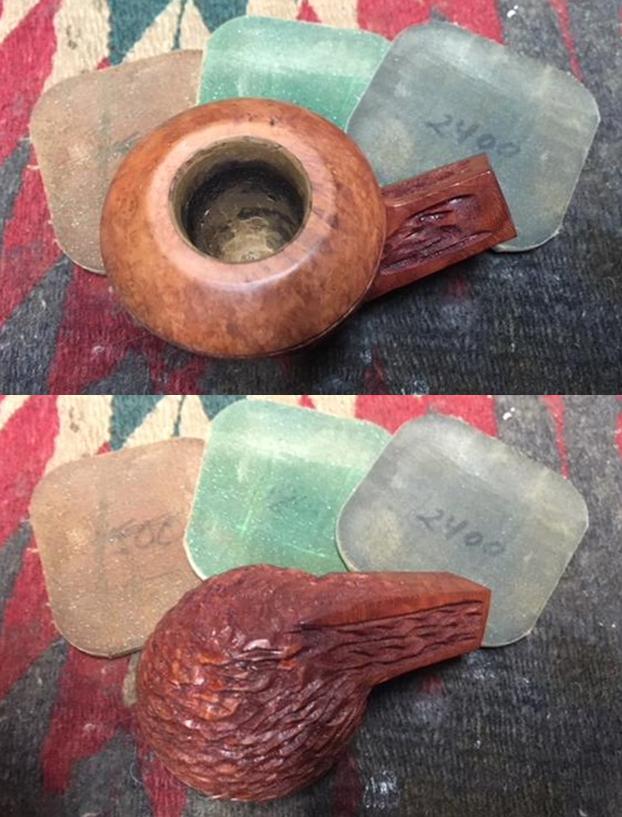
 To match the stain remaining on the bowl I used the mislabeled tan aniline stain. It is a reddish-brown almost cordovan coloured. I figured it would match the existing colour very well. I applied the stain with a dauber and flamed it with a lighter to set it in the grain. I repeated the process until the coverage on the bowl was even.
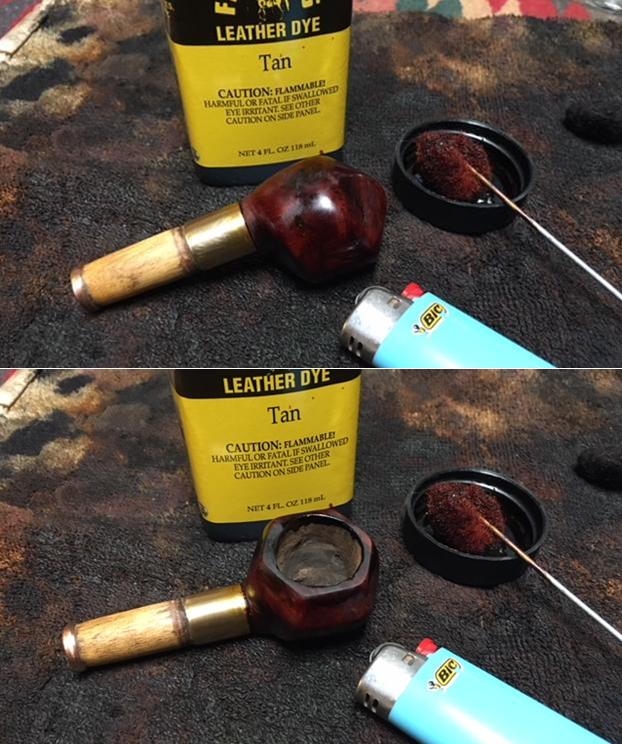 I wiped the bowl down with alcohol on a cotton pad to even out the coverage and make the stain more transparent. I wanted the grain to show through the finish.
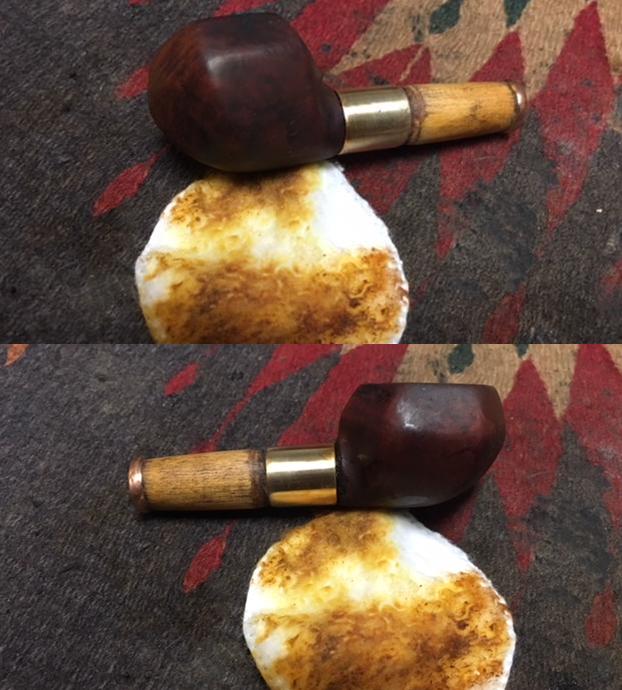
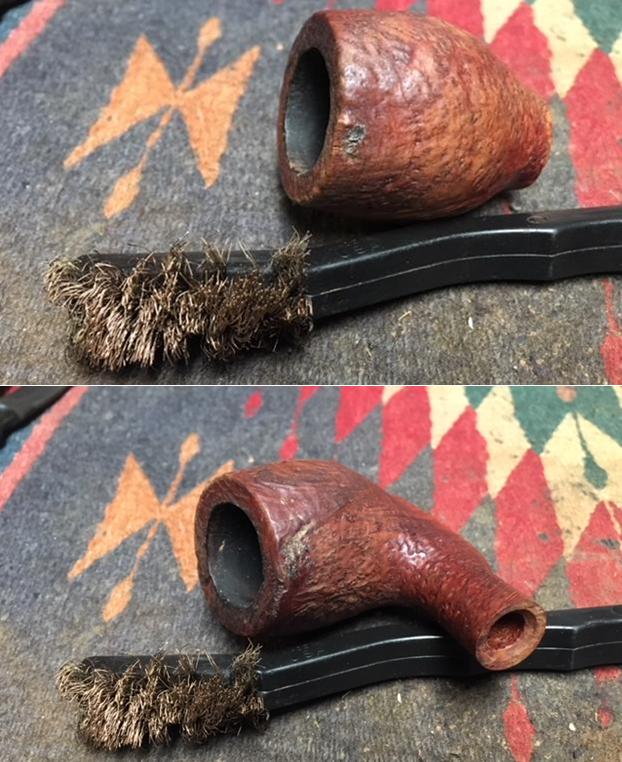
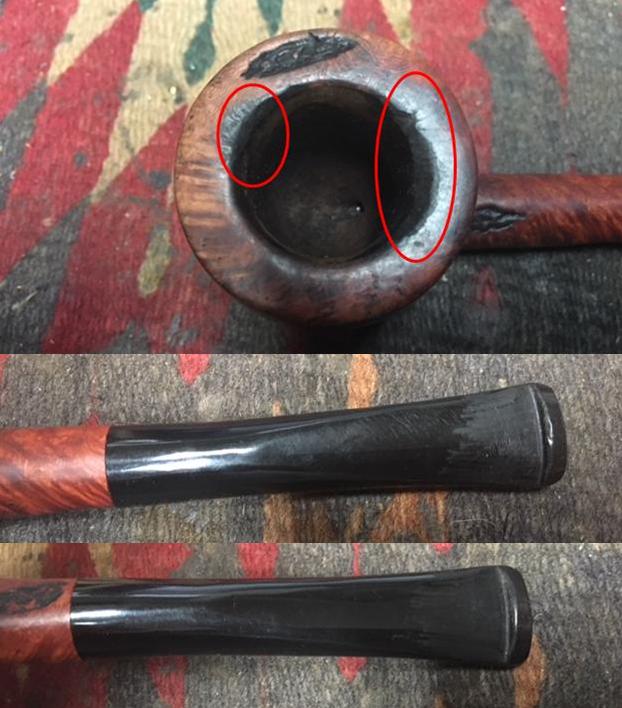
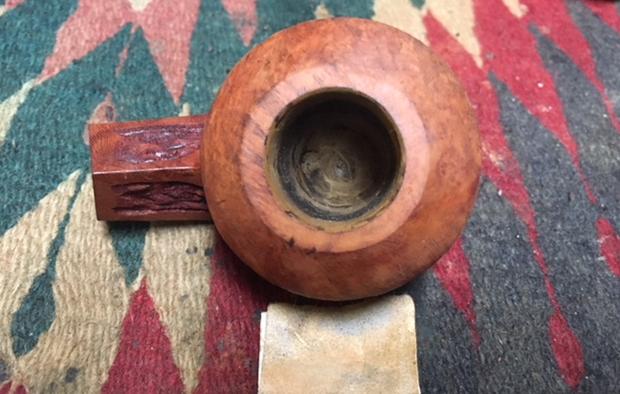
 I used a folded piece of 220 grit sandpaper to smooth out the inner edge of the rim and the inside of the bowl.
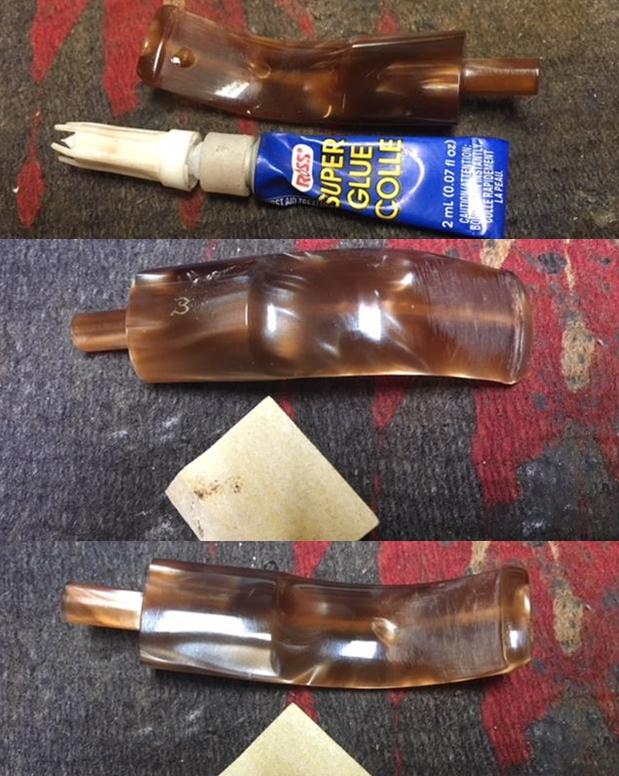
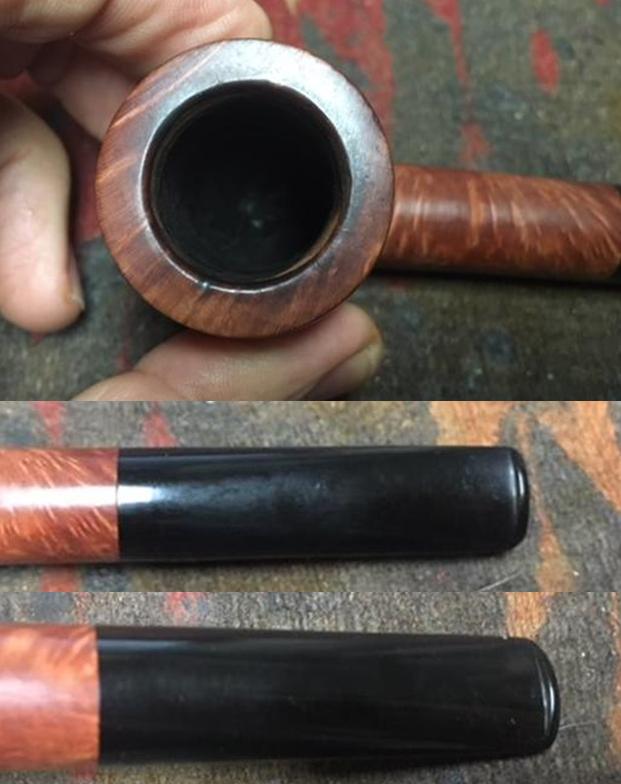
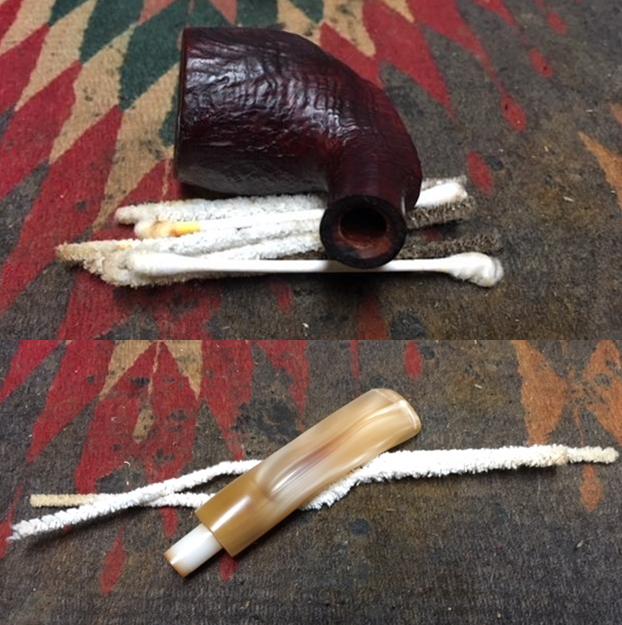
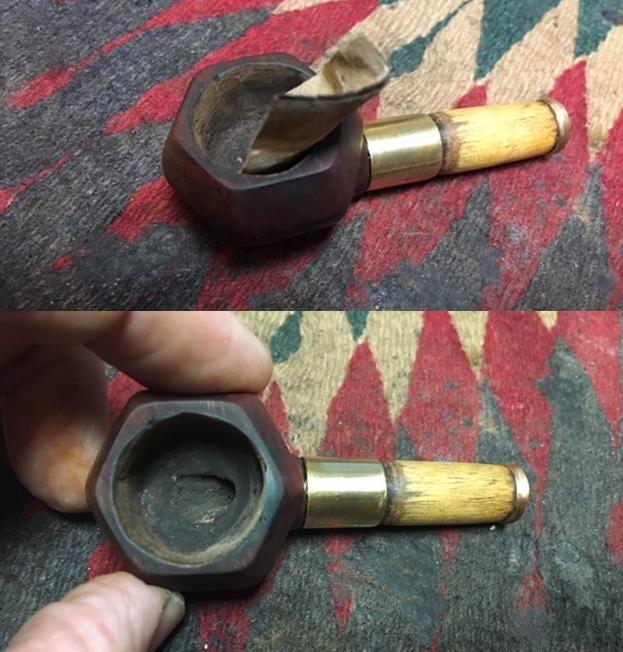 I set the bowl aside and turned my attention to the stem at this point in the process. It was truly a mess. There were tars and oils lining the airway making it almost black and there was damage to the interior of the stem material around the airway. I started the cleaning process using liquid cleanser and pipe cleaners to remove some of the tars. I was able to get a lot of the stuff out of the airway.
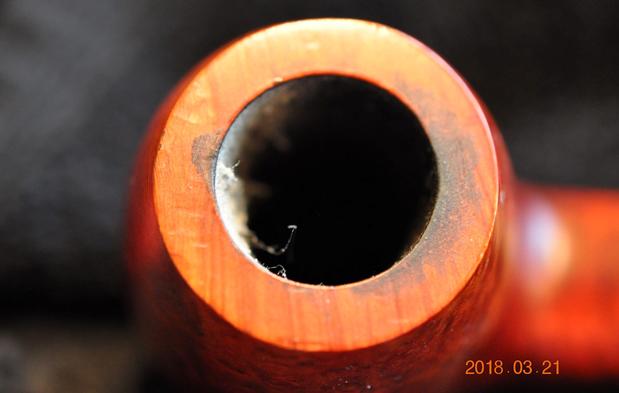
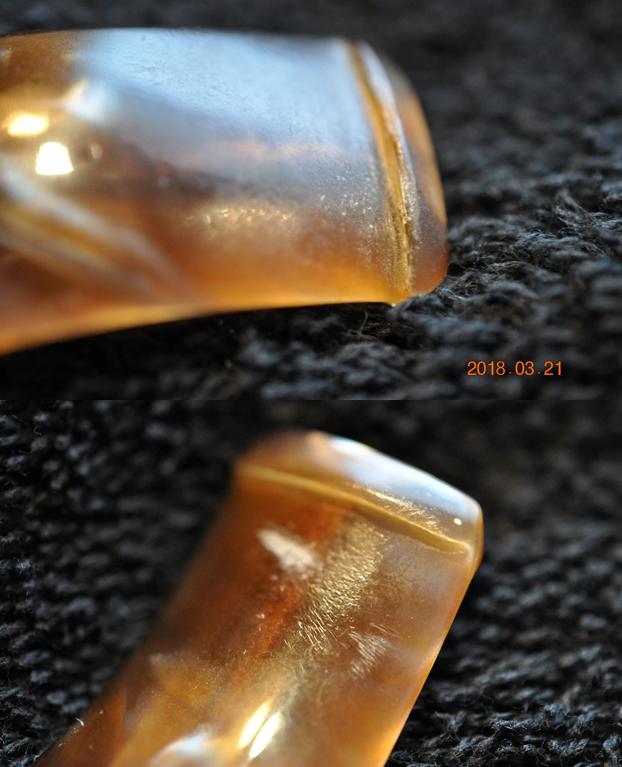
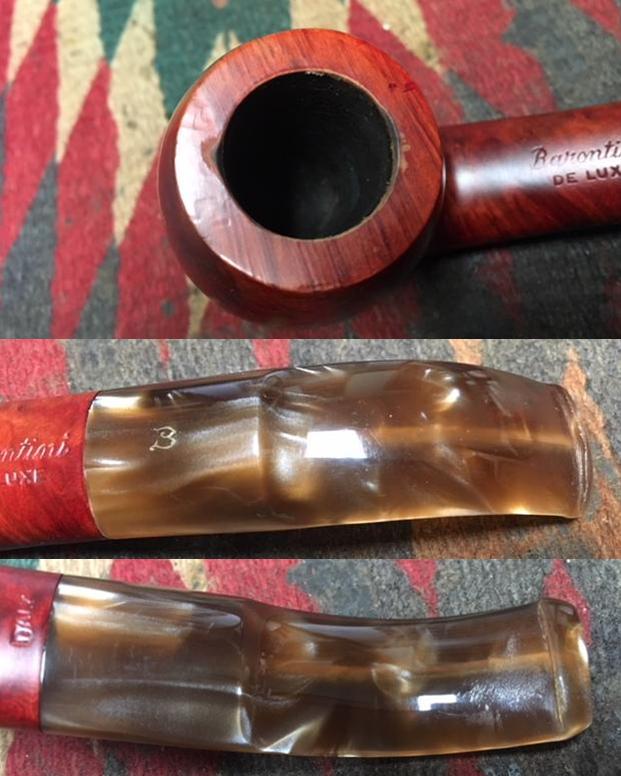
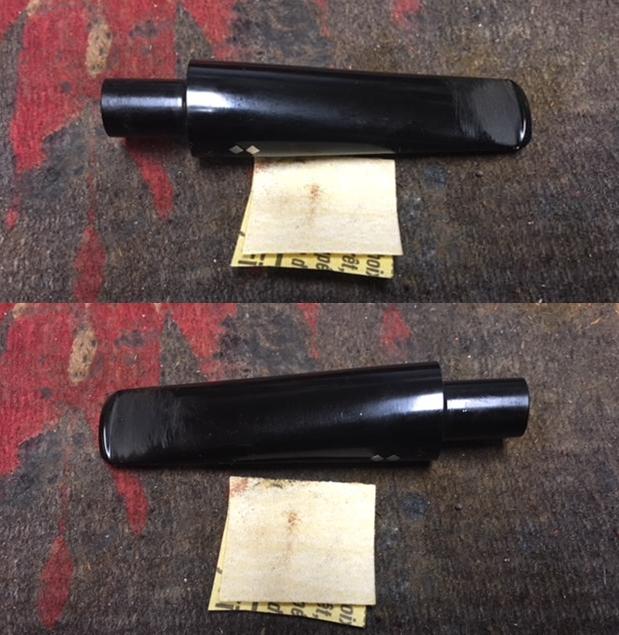
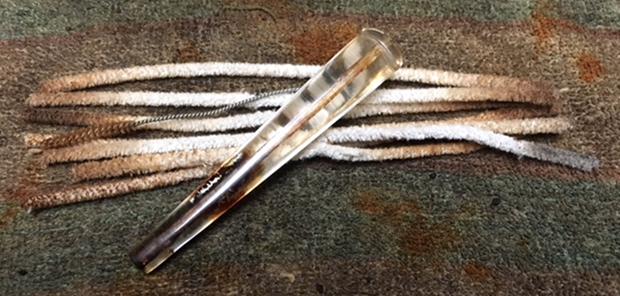 I used a small round needle file to further clean out the airway. I sanded the interior of the airway to smooth out the surface of the drilled area. I ran alcohol dampened pipe cleaners through after the files to clean out the dust. The stem was finally getting clean. I took some close up photos of the stem to show the airway after filing. The photos also show the internal damage to the stem from what looks like fire.
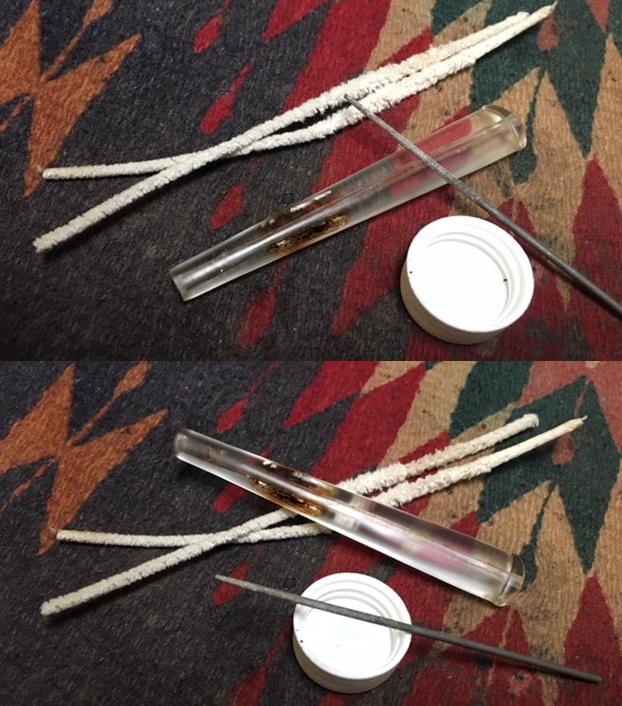
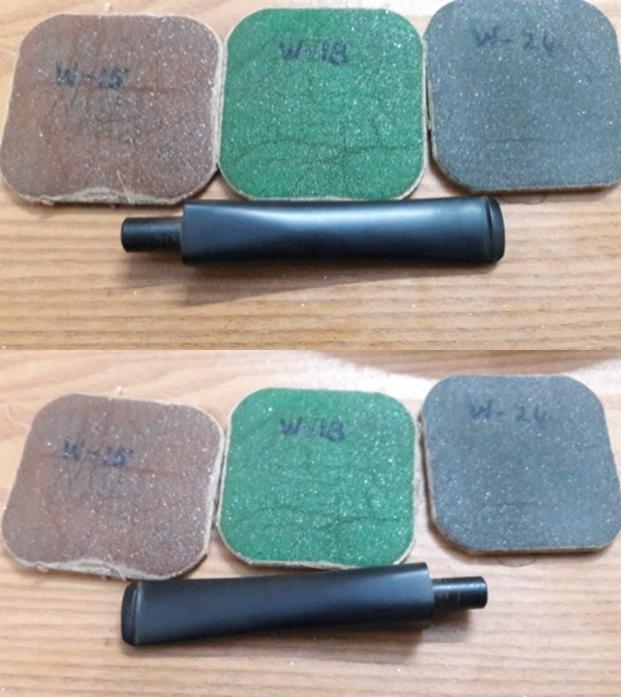
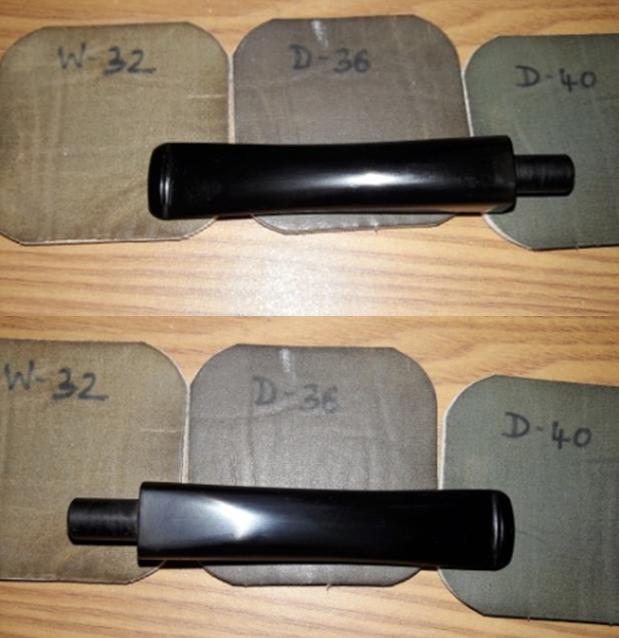
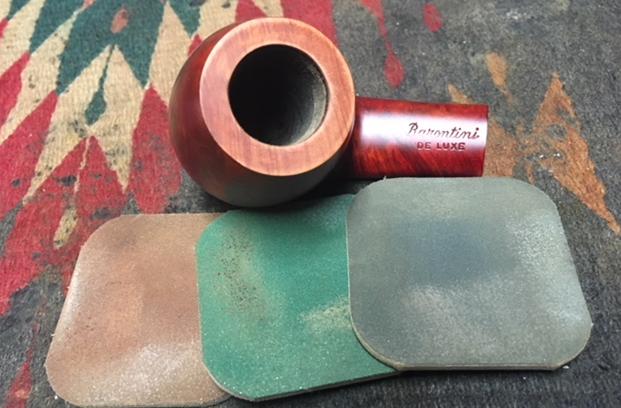
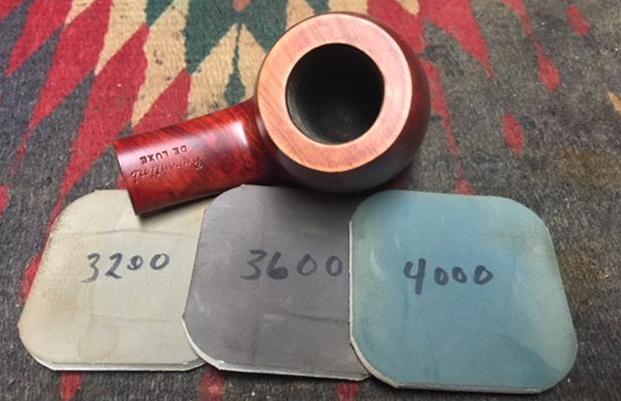
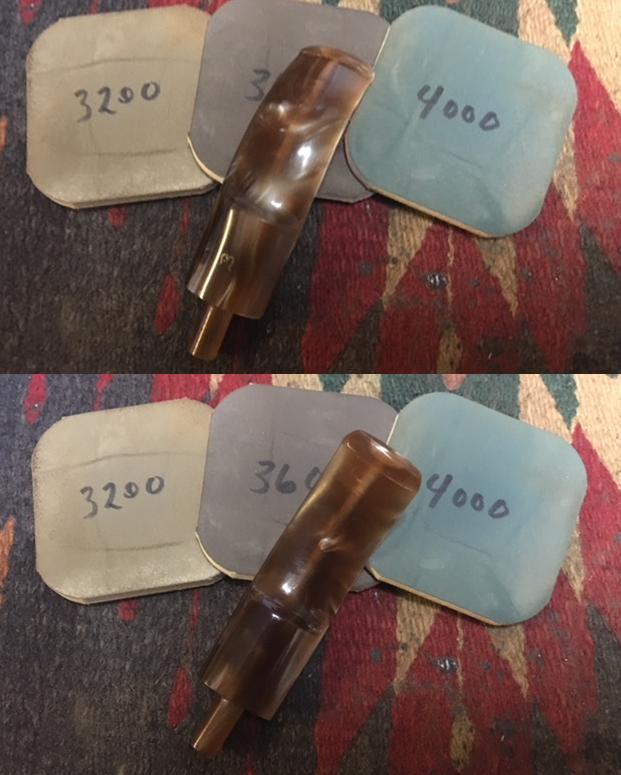
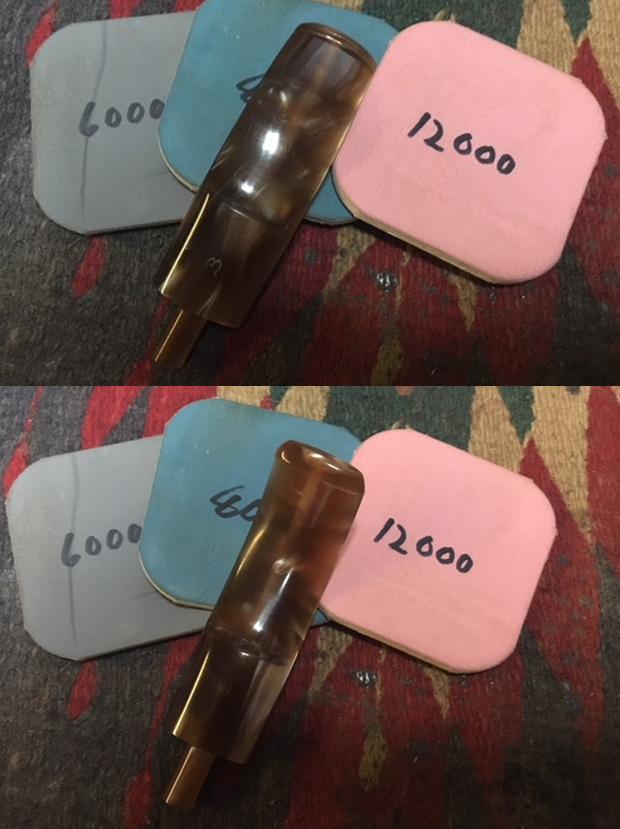
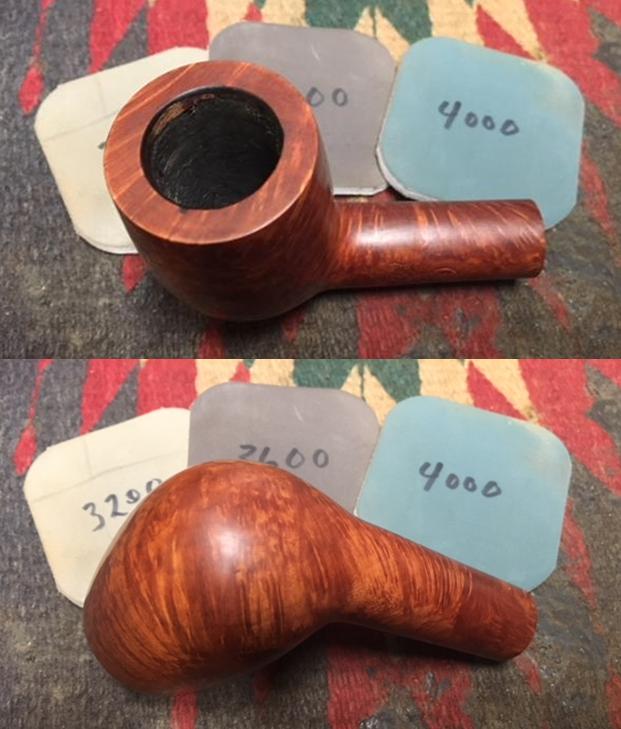
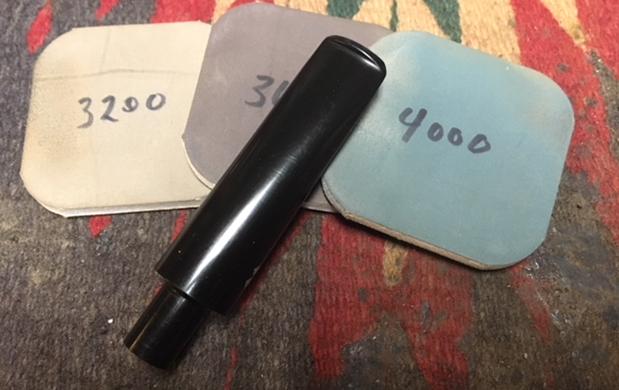
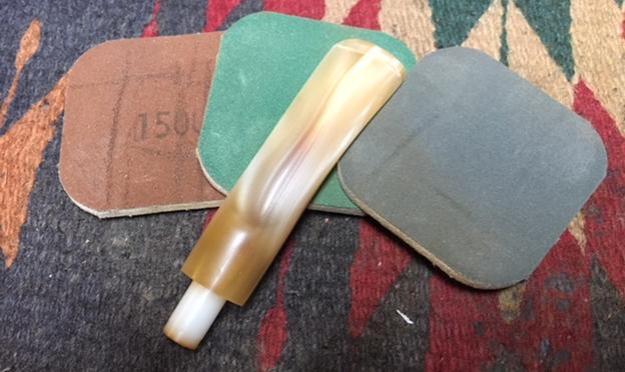
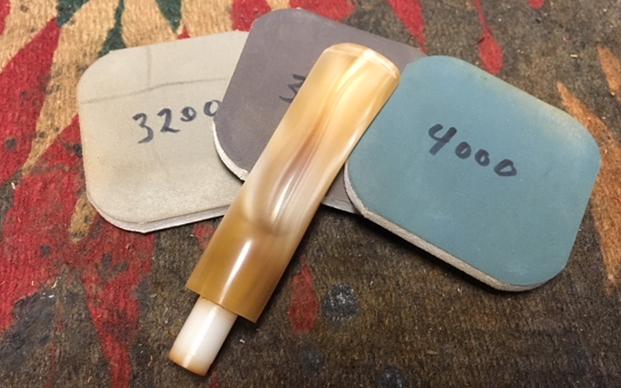
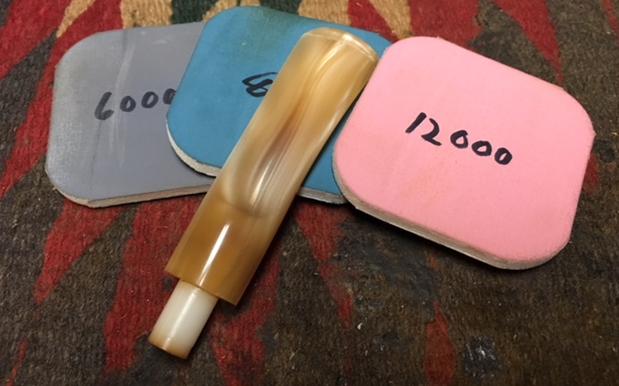
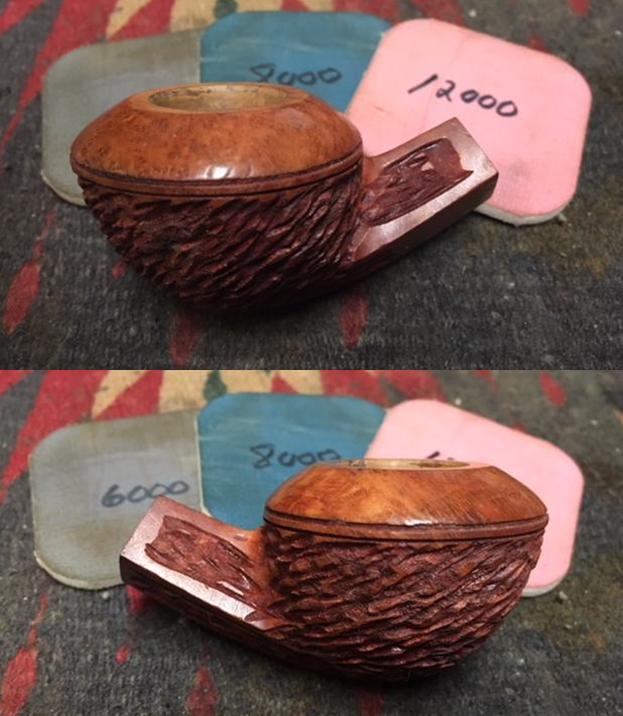
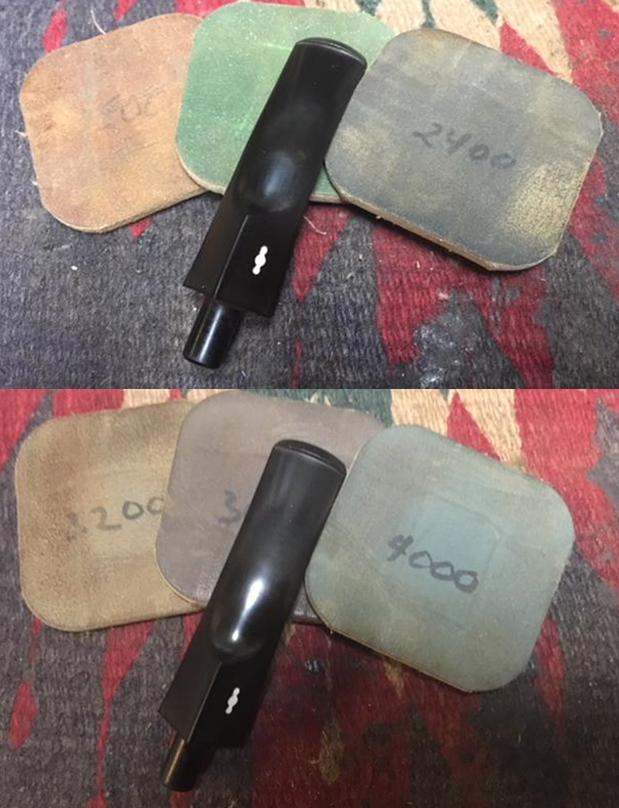
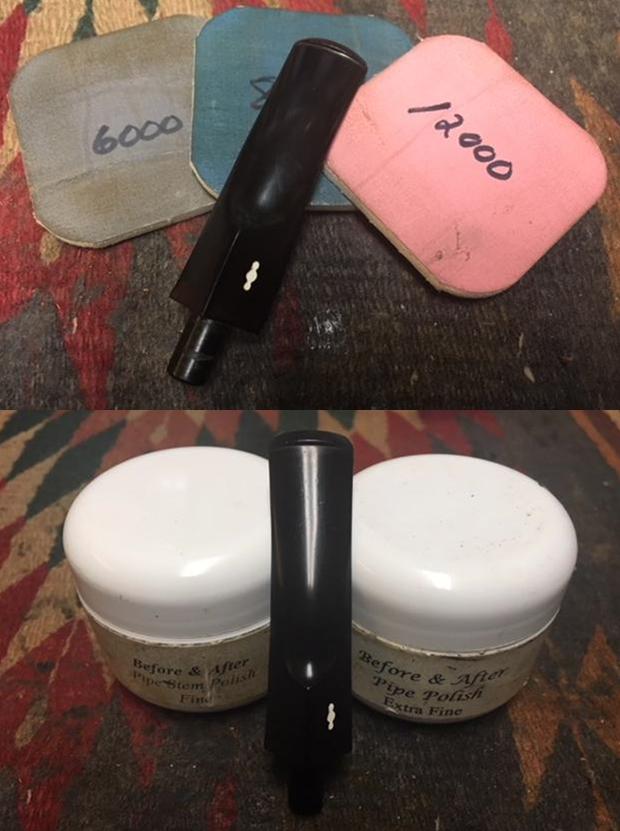
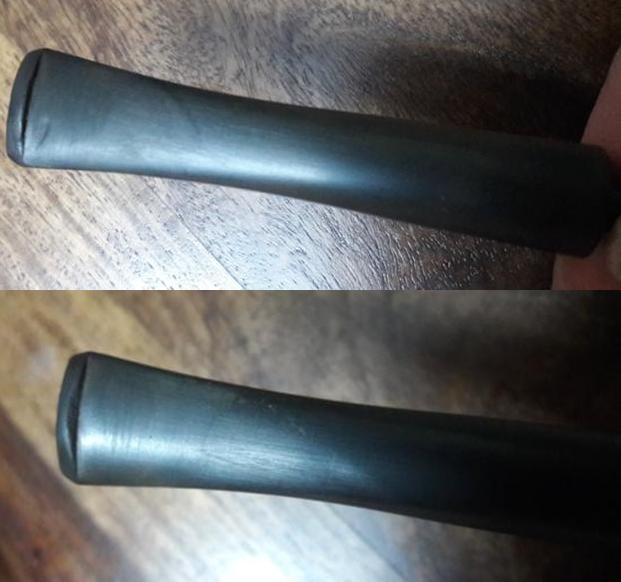
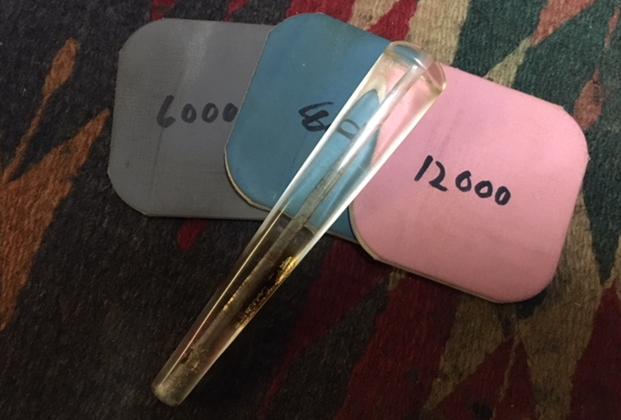
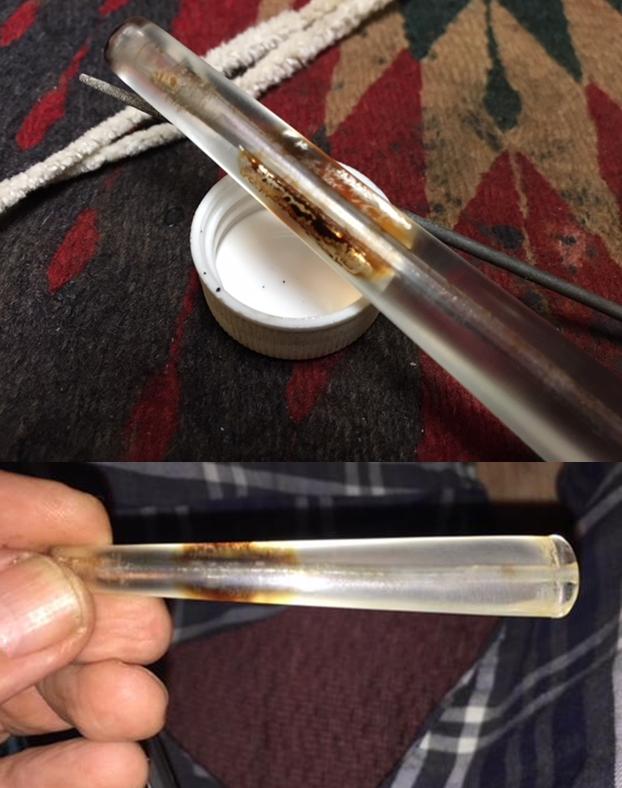 I polished the stem with micromesh sanding pads – wet sanding with 1500-2400 grit pads and dry sanding with 3200-12000 grit pads. I wiped the stem down after each pad with Obsidian Oil.

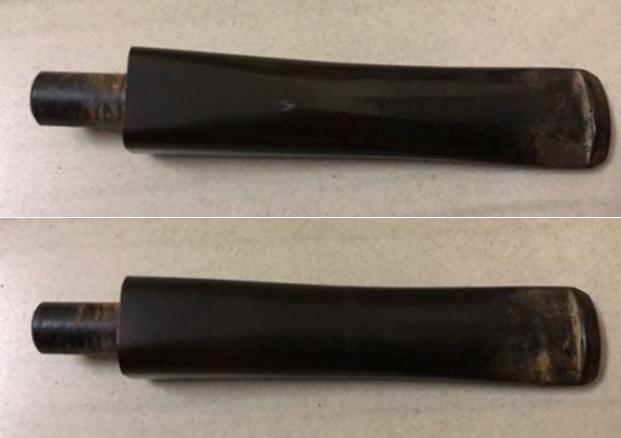
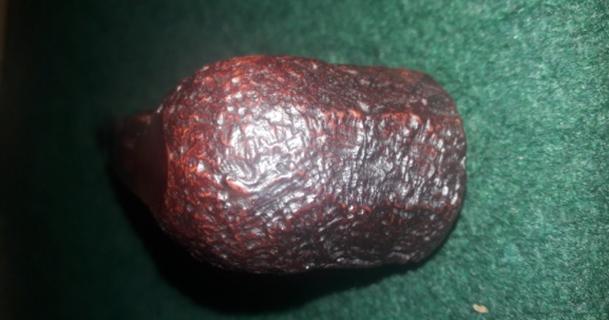
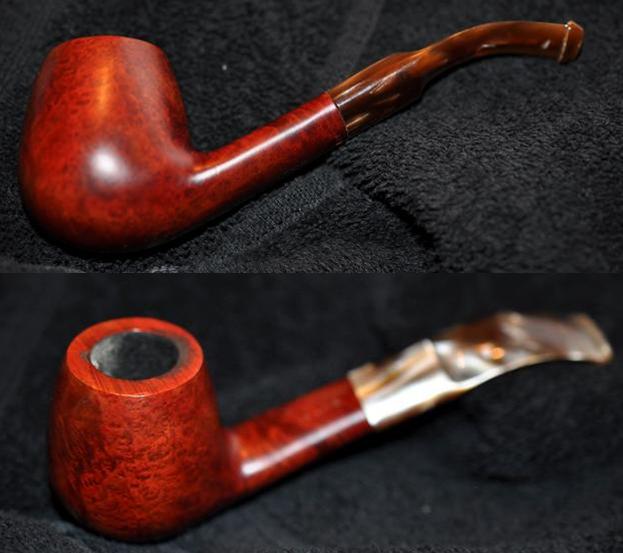
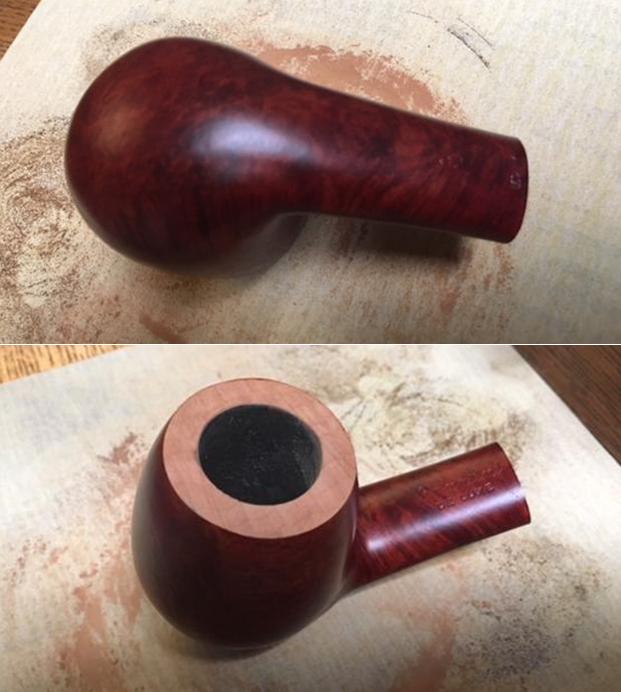
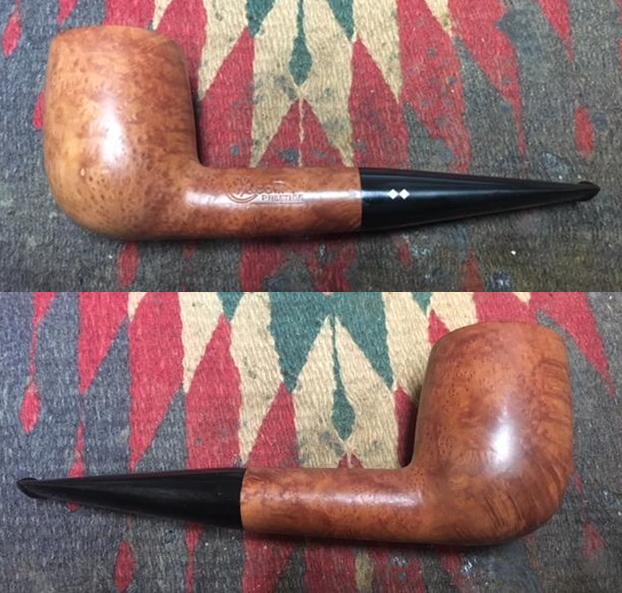
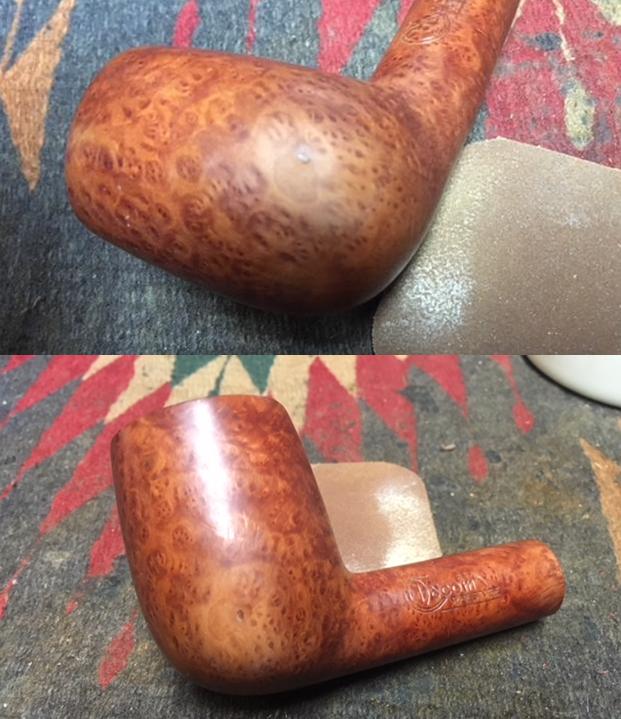
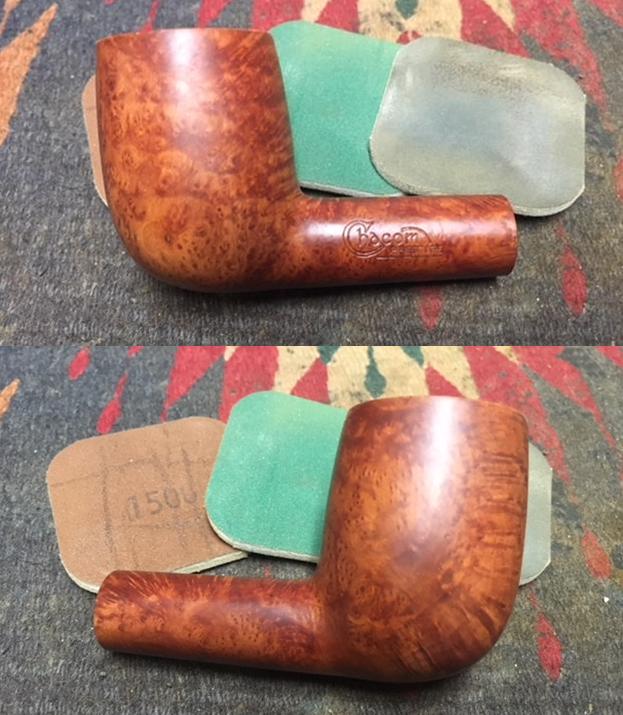
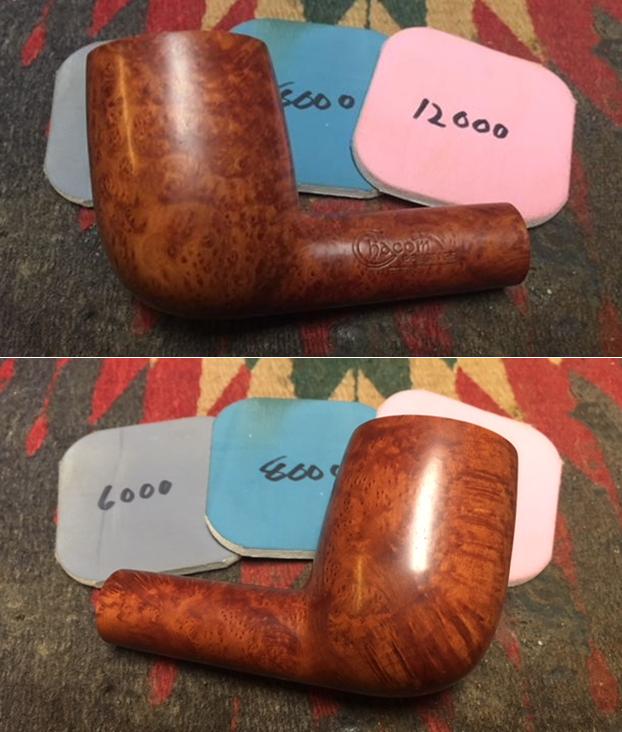
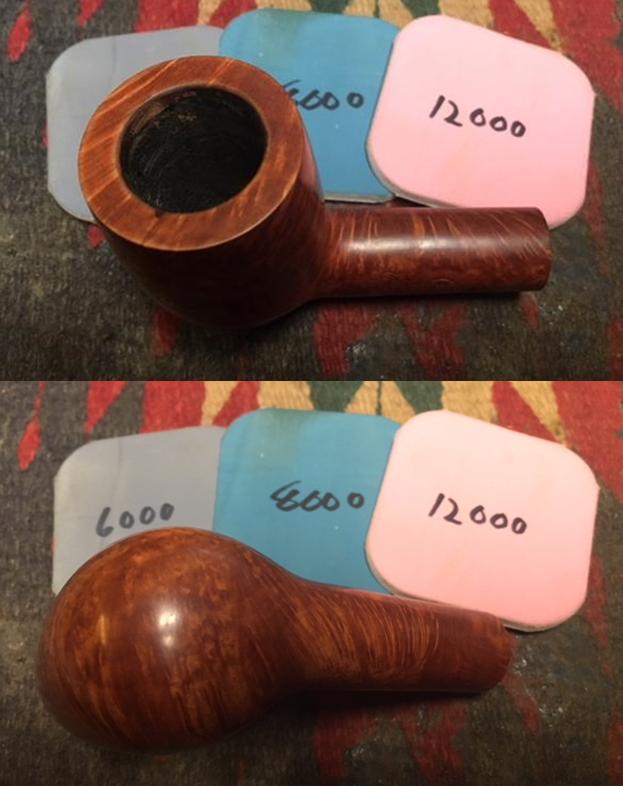
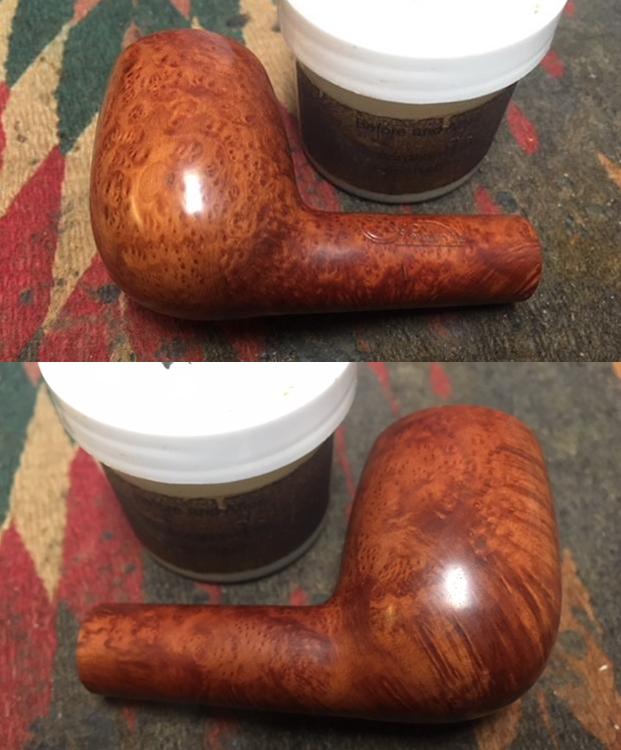
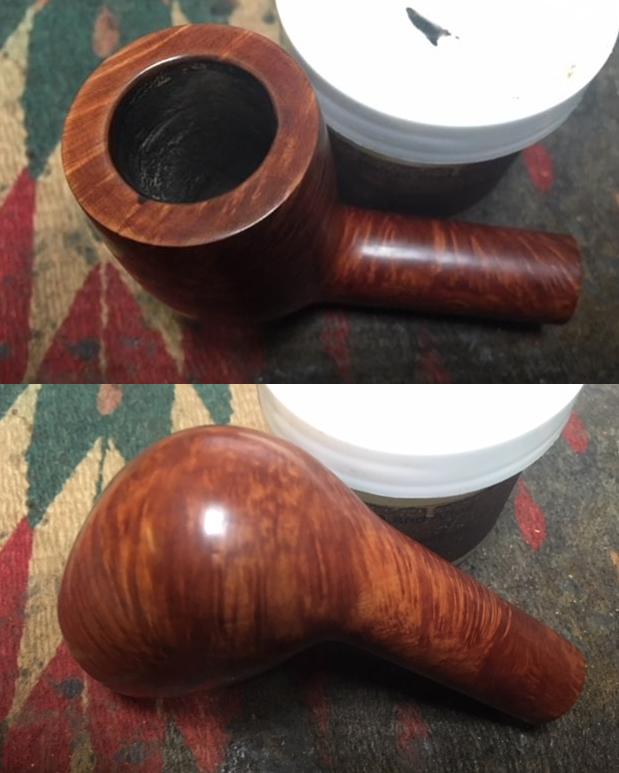
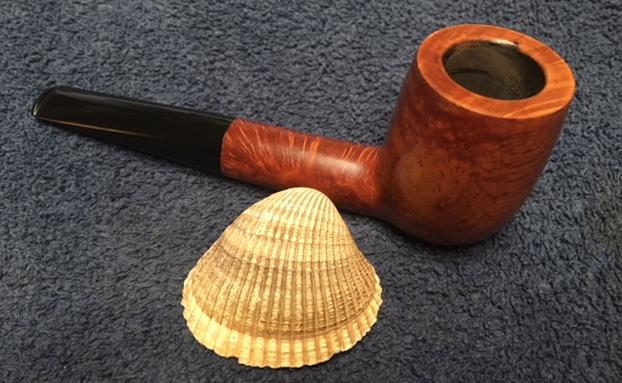
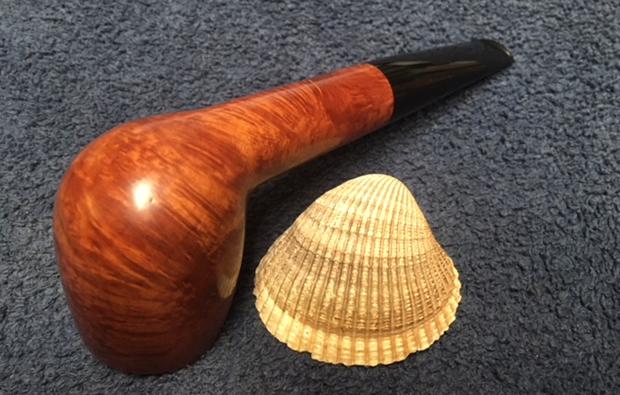
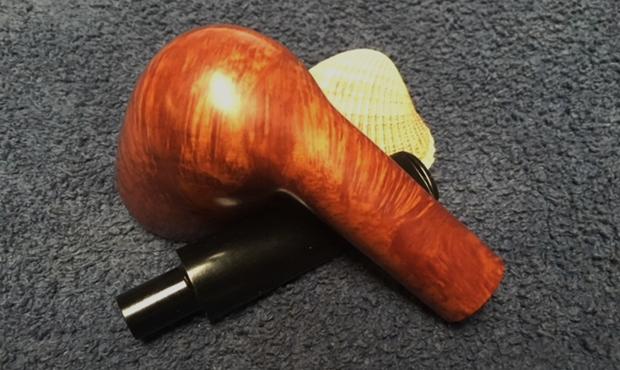
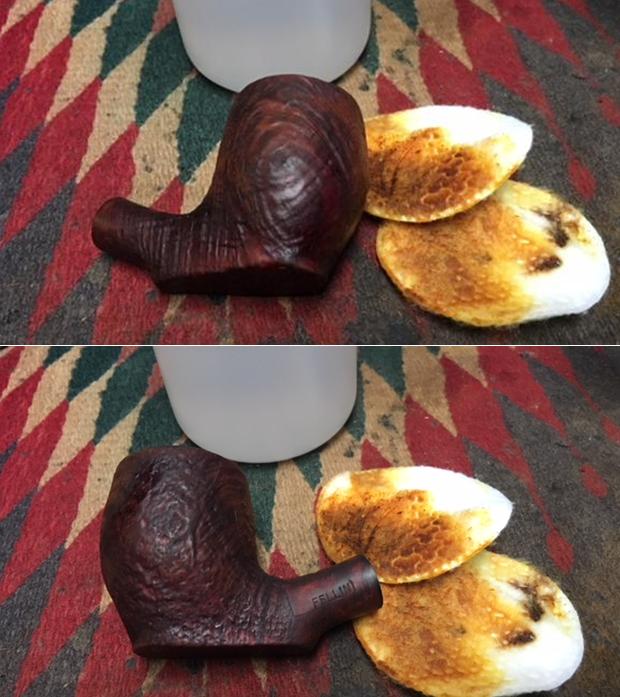
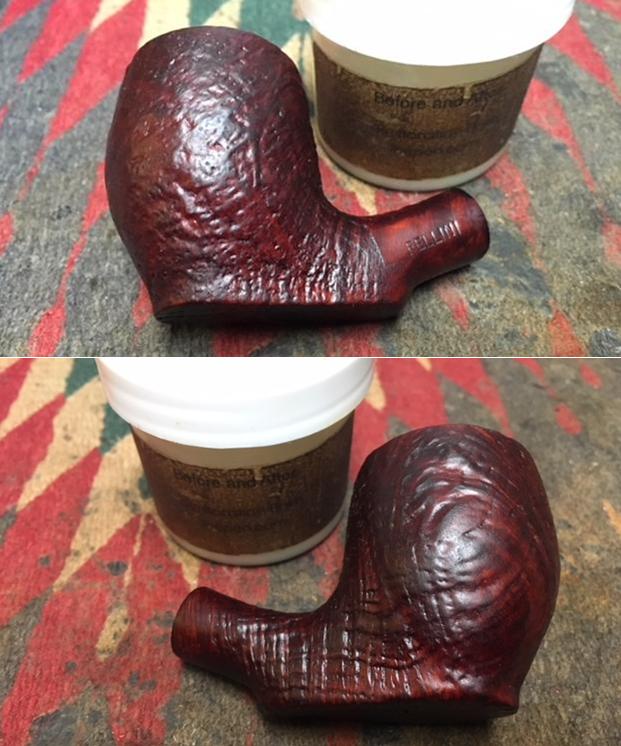
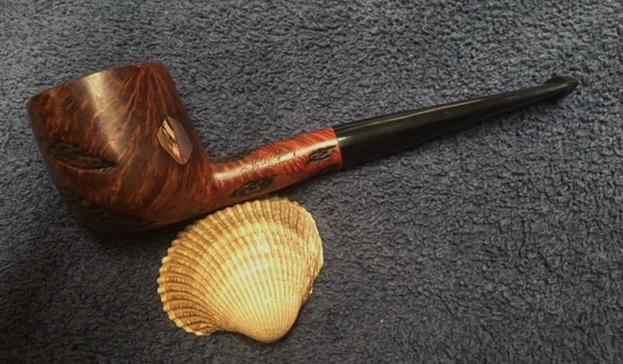
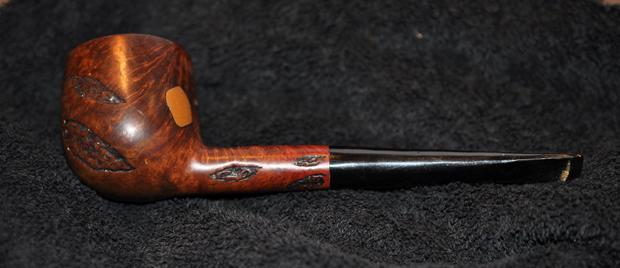
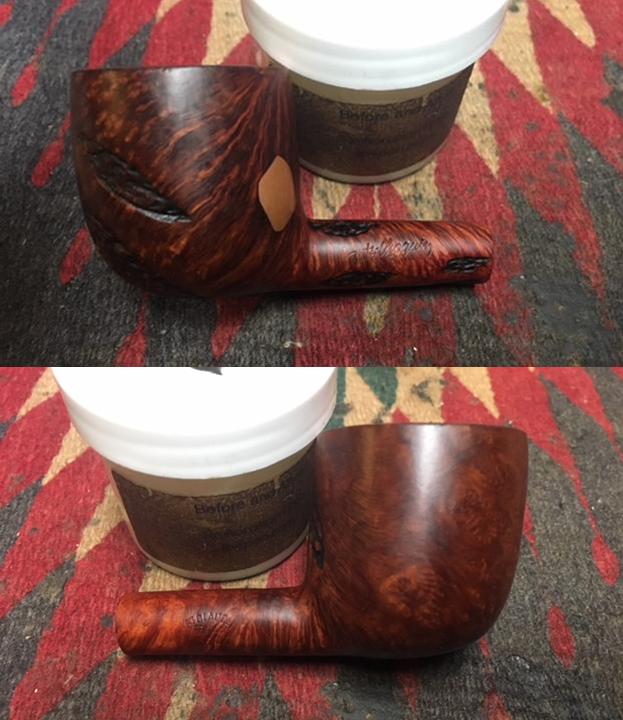
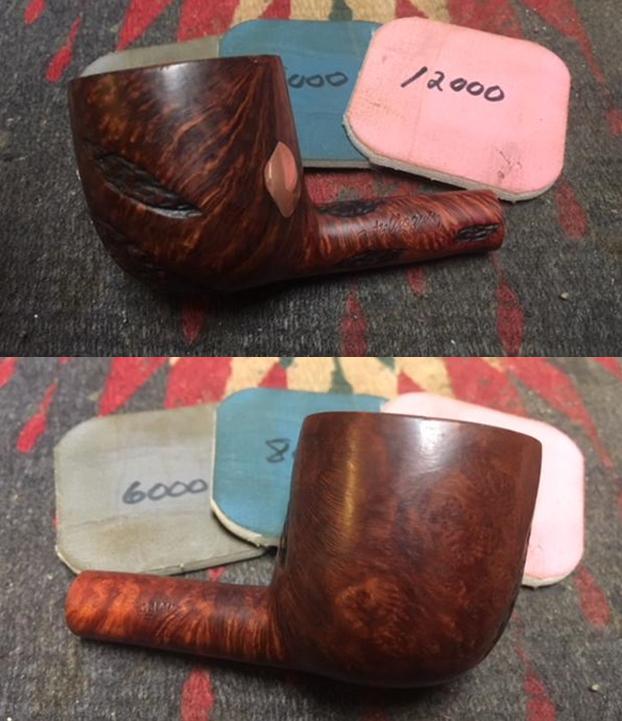
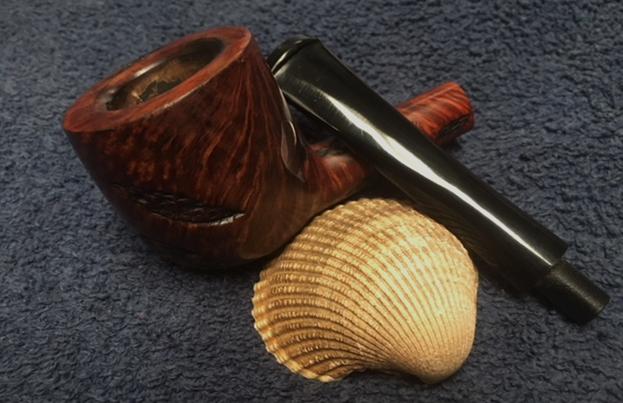
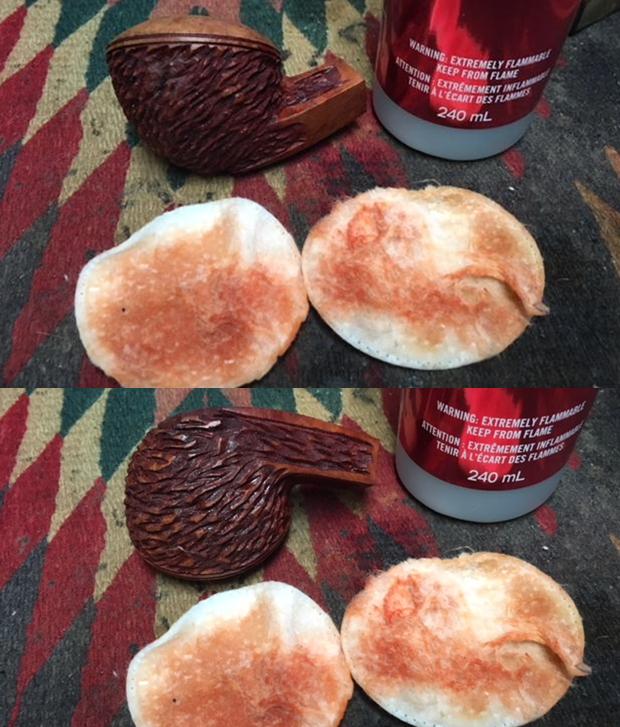
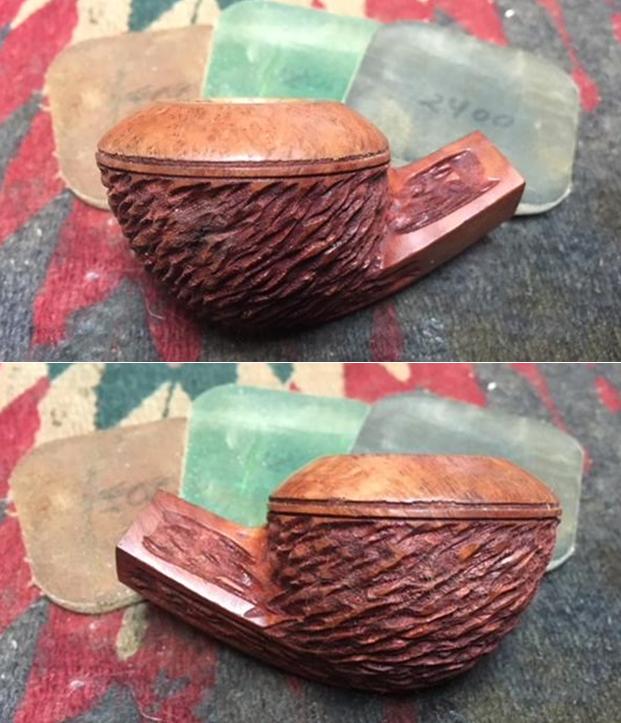
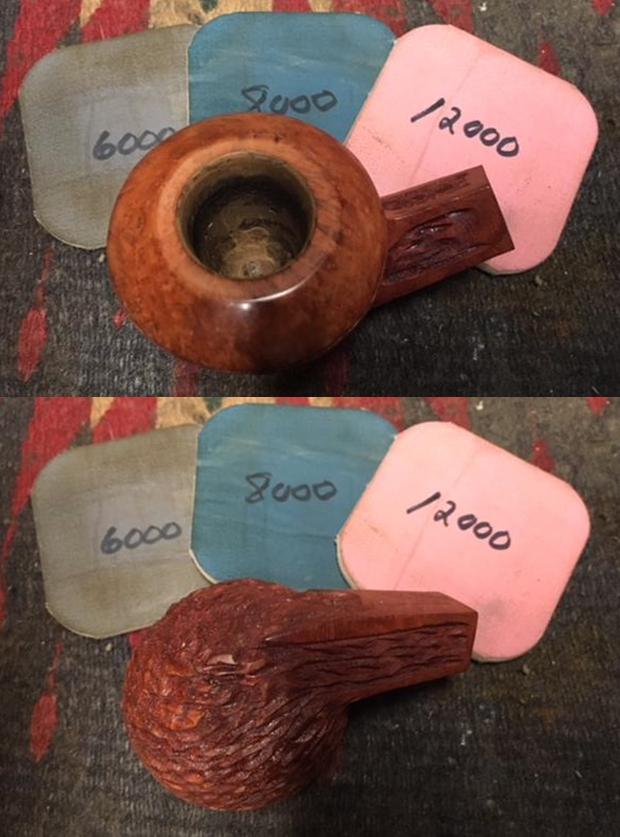
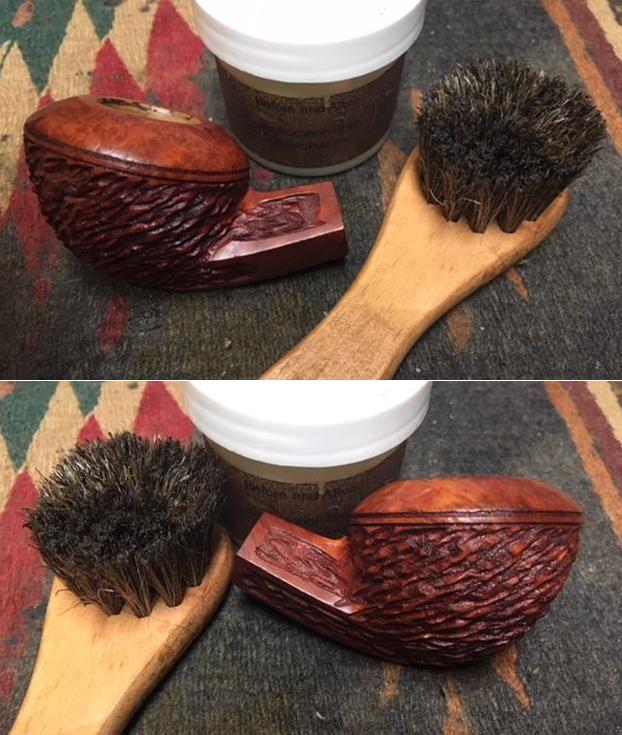
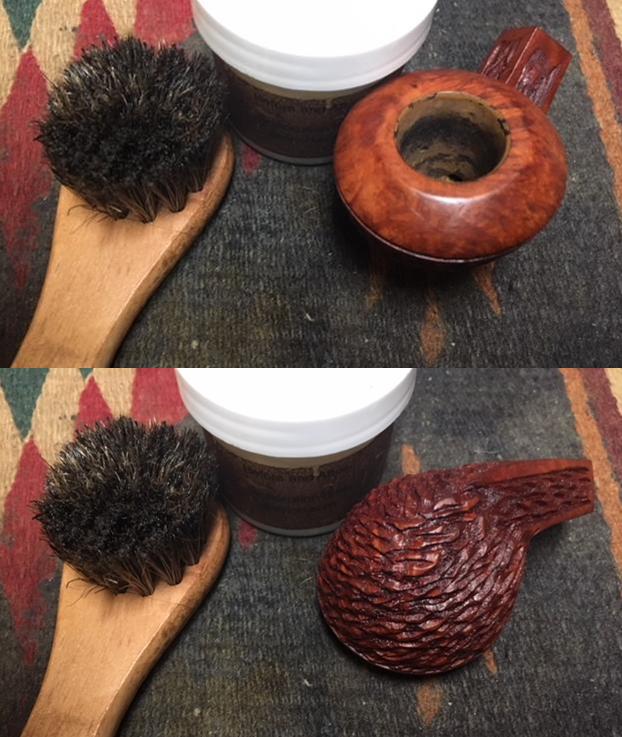
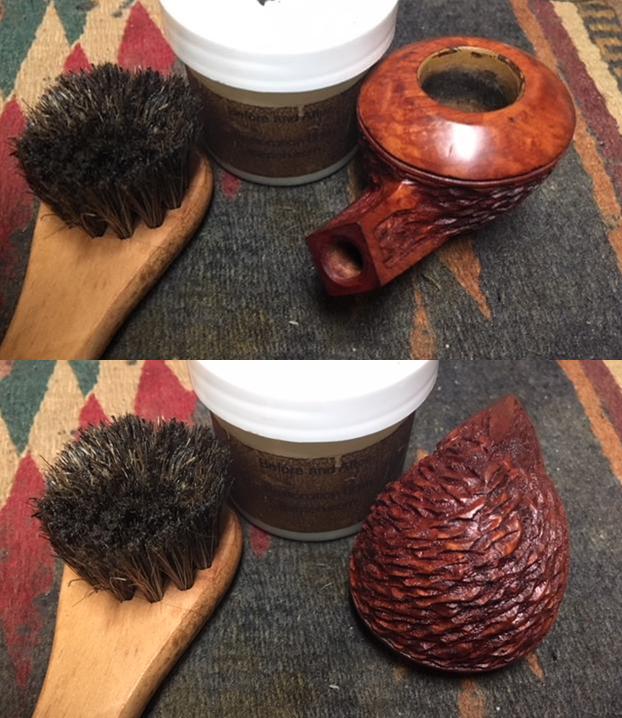
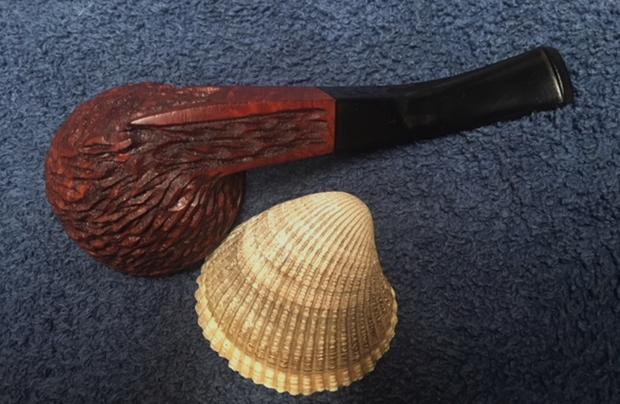
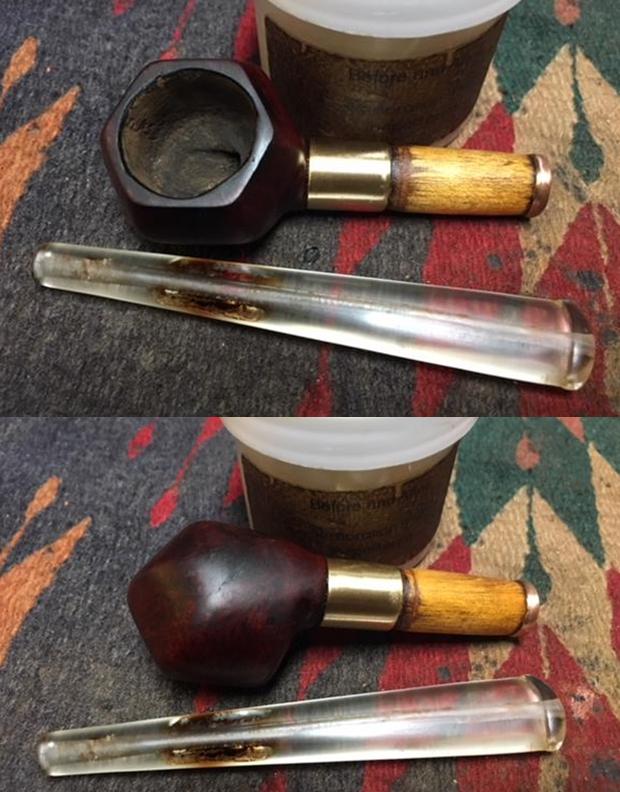
 I rubbed down the briar and the oak shank extension with Before & After Restoration Balm. I worked it into the smooth surface of the briar and oak with my fingertips to clean, enliven and protect it. I let the balm sit for a little while and then buffed the bowl with a cotton cloth to raise the shine. The following photos show the bowl at this point in the restoration process. The grain is really starting to stand out.
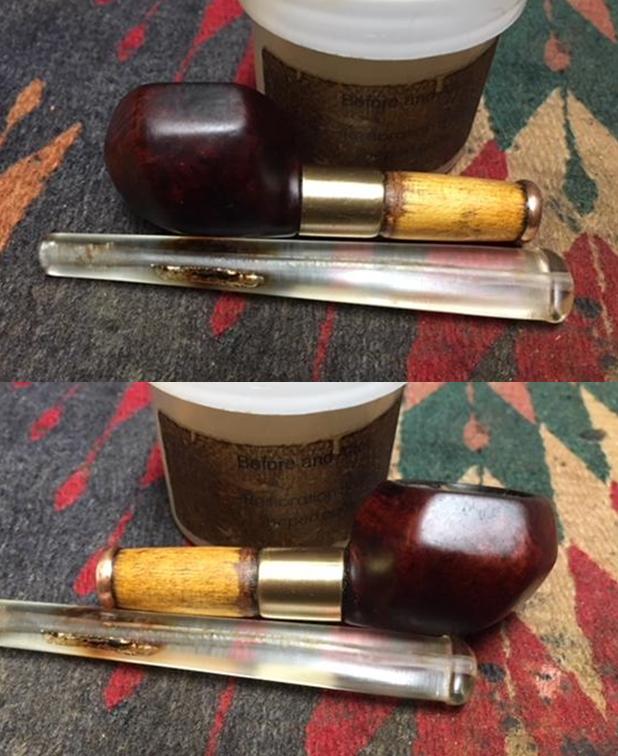
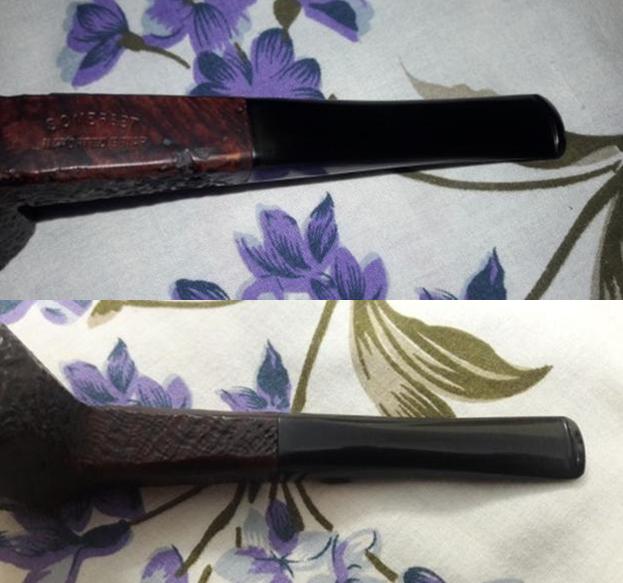
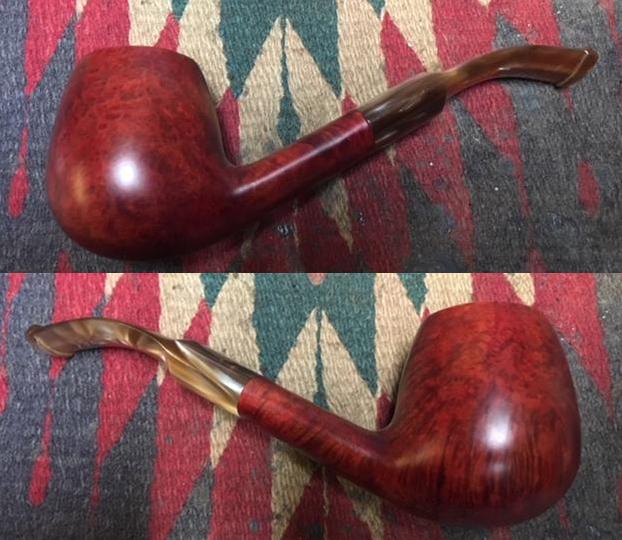
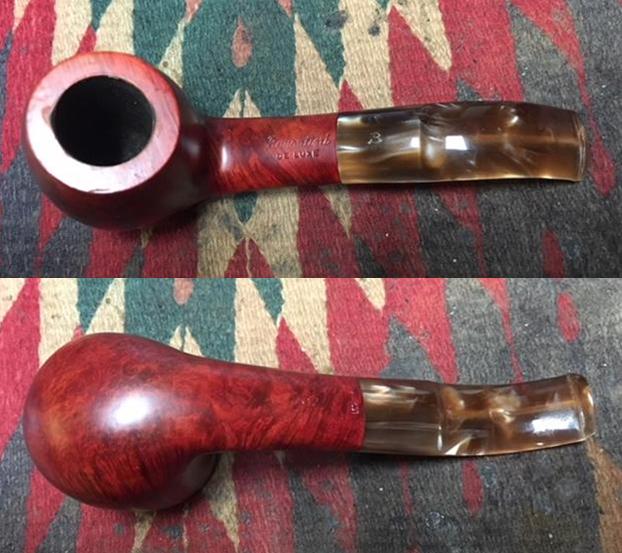
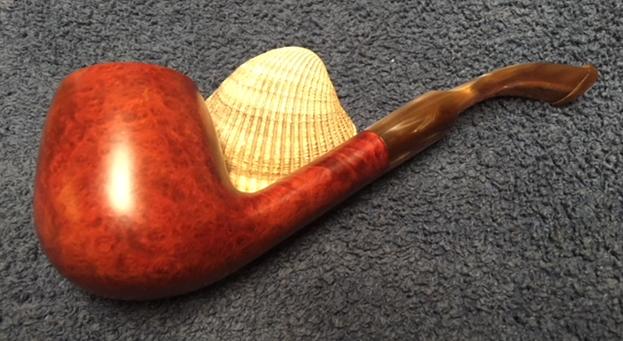
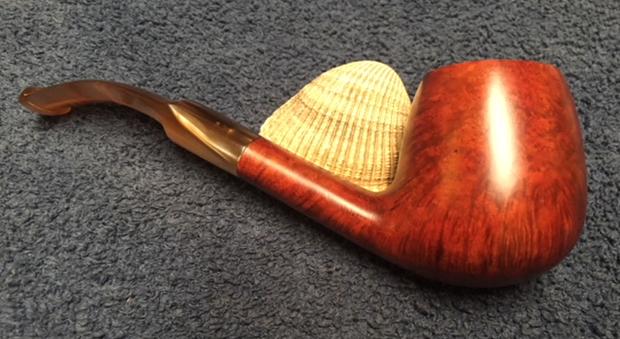
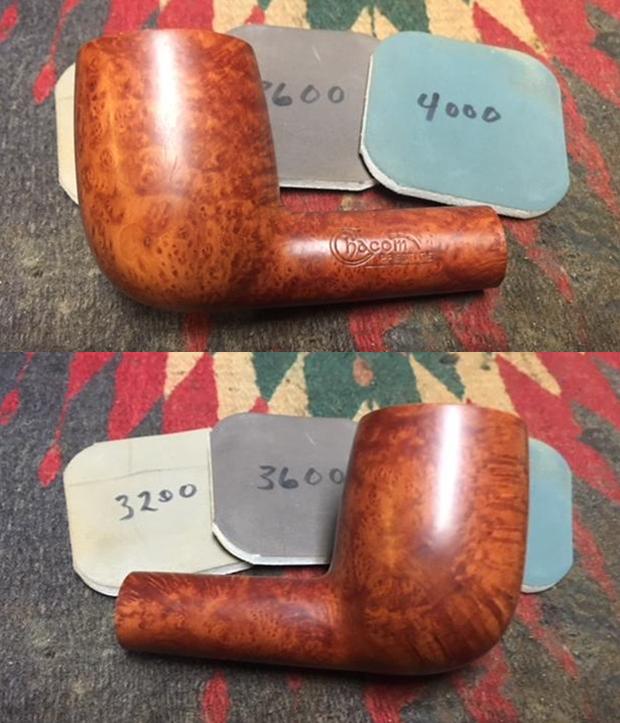
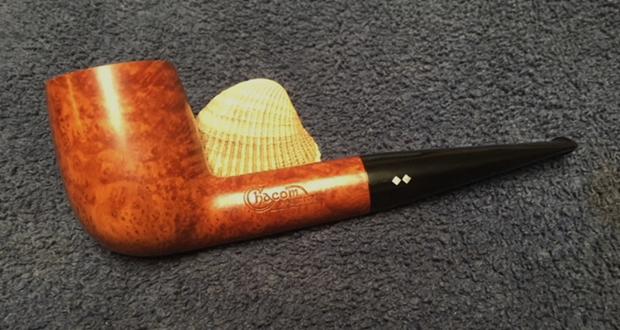
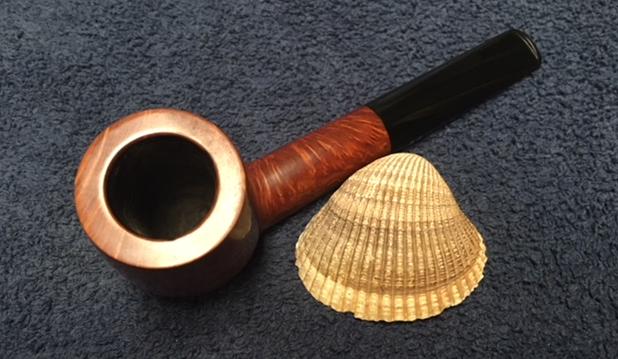
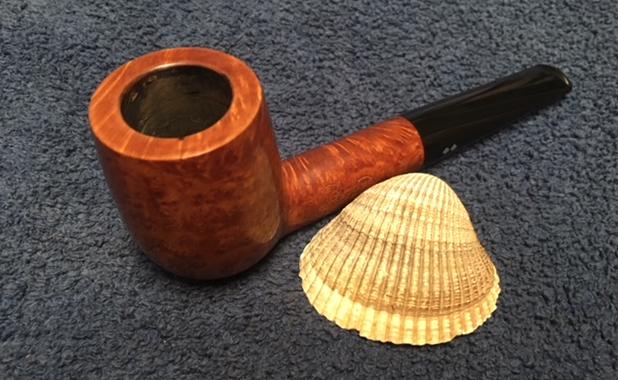
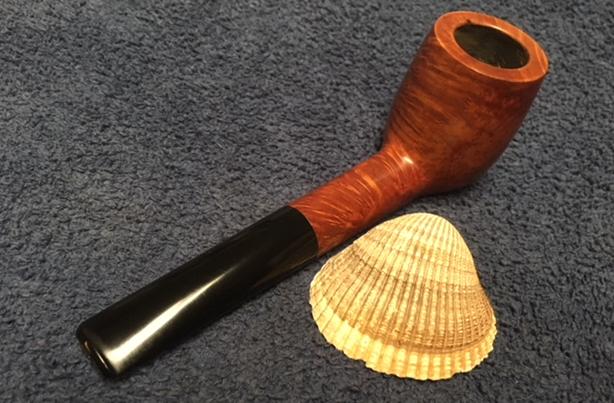
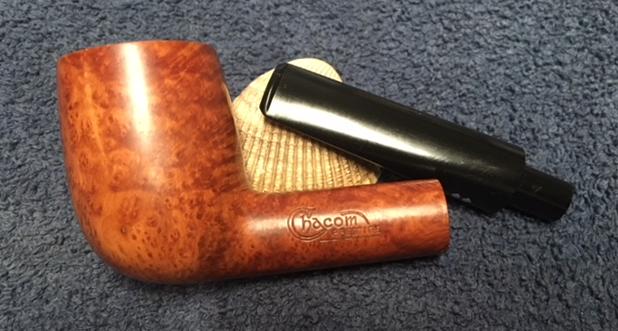
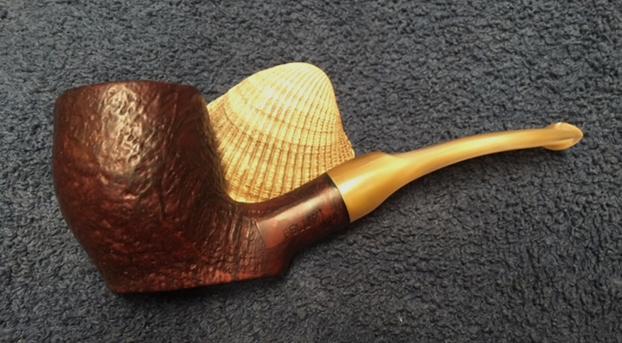
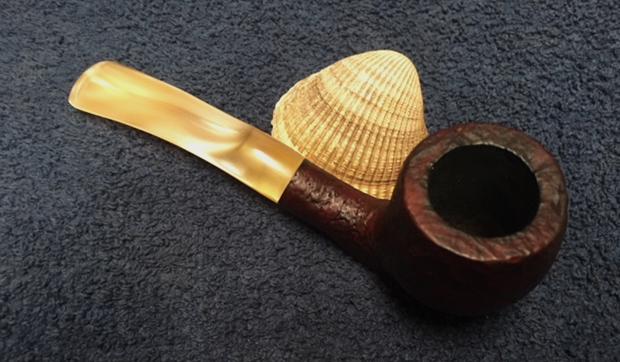
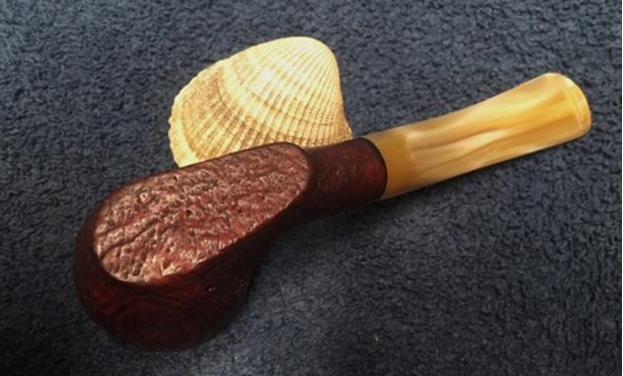
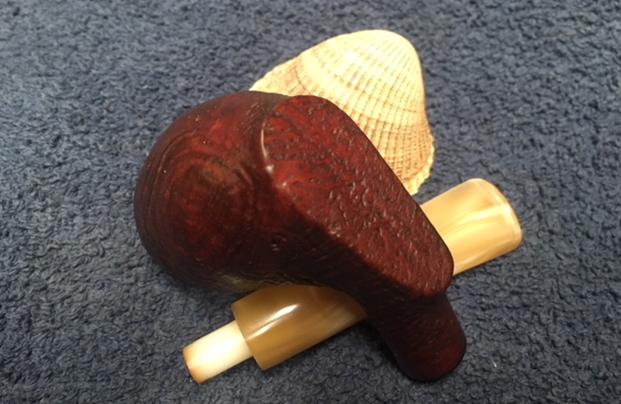
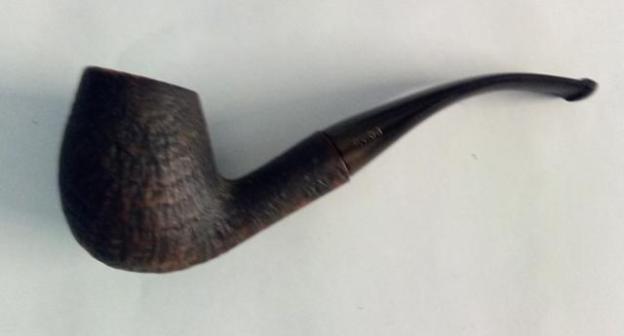
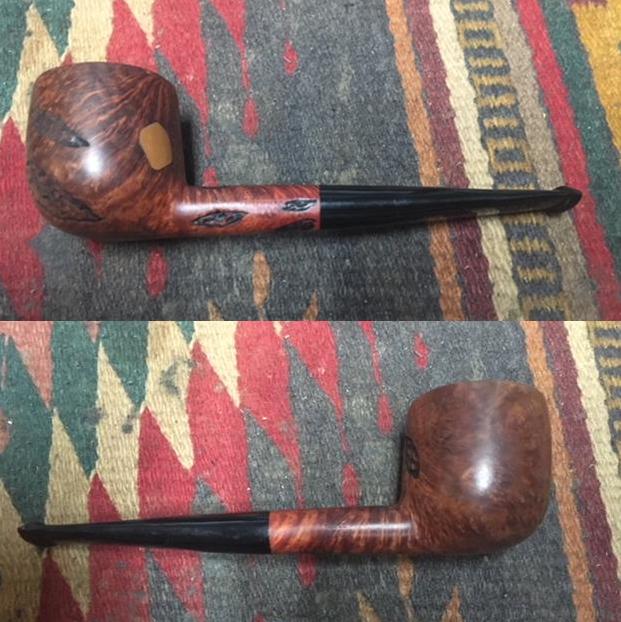
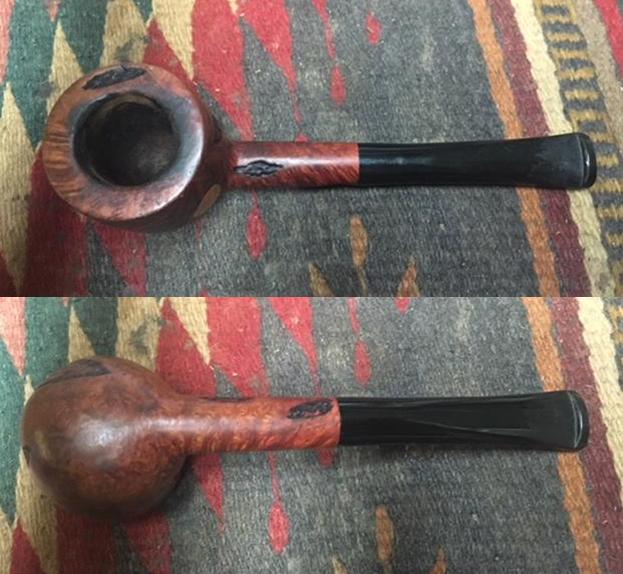
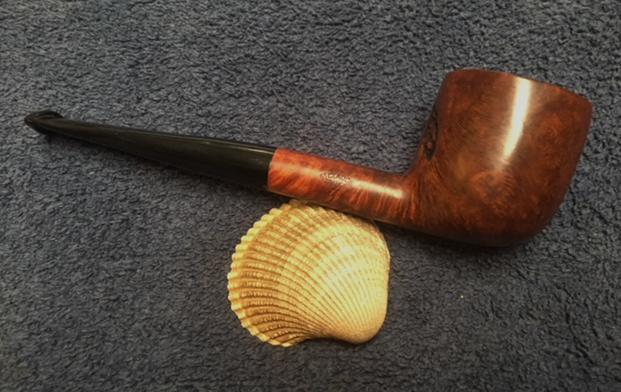
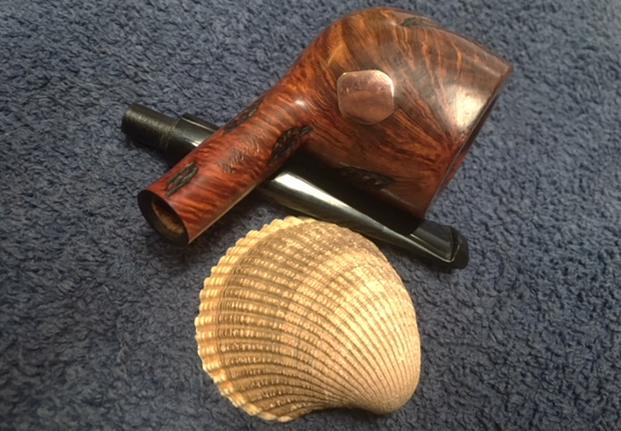
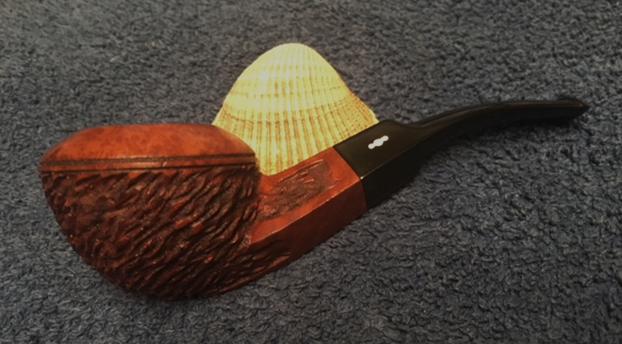
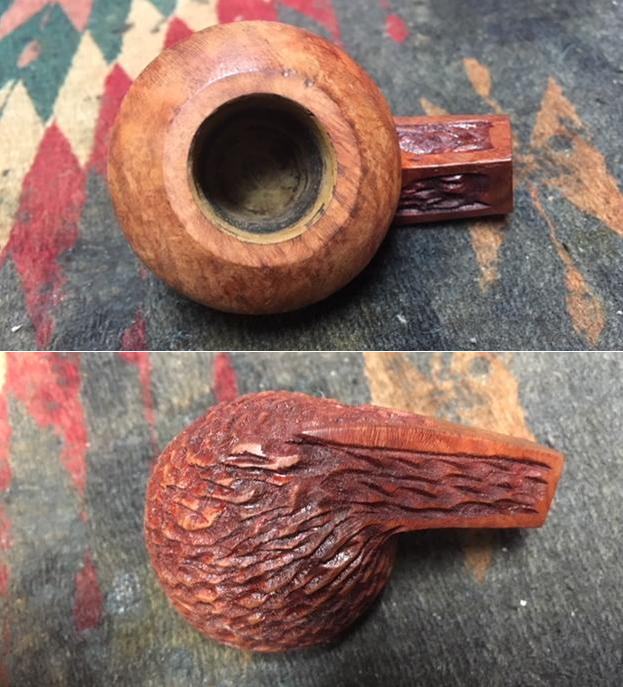
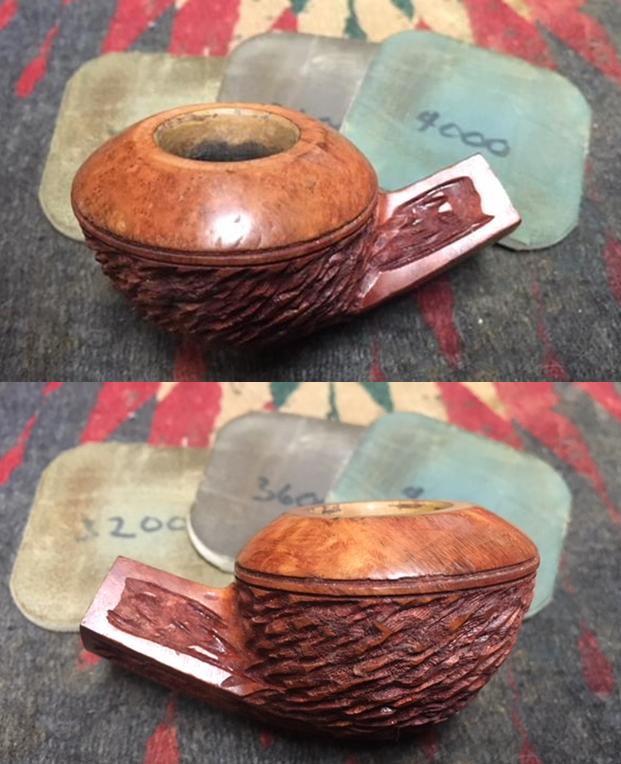
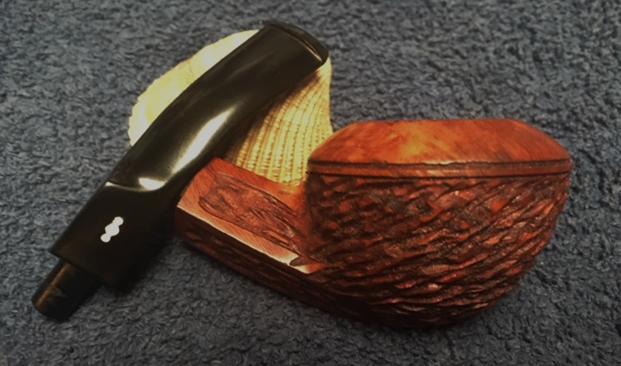
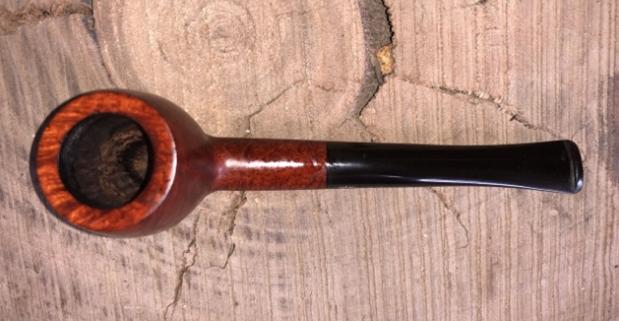
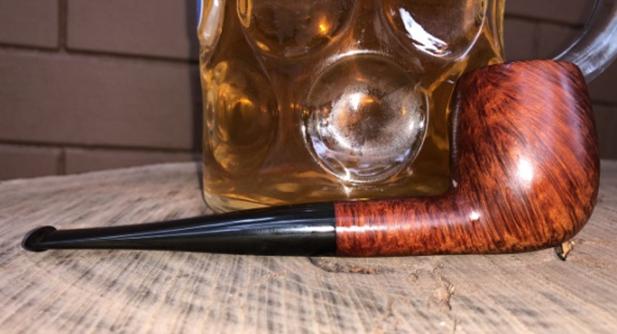
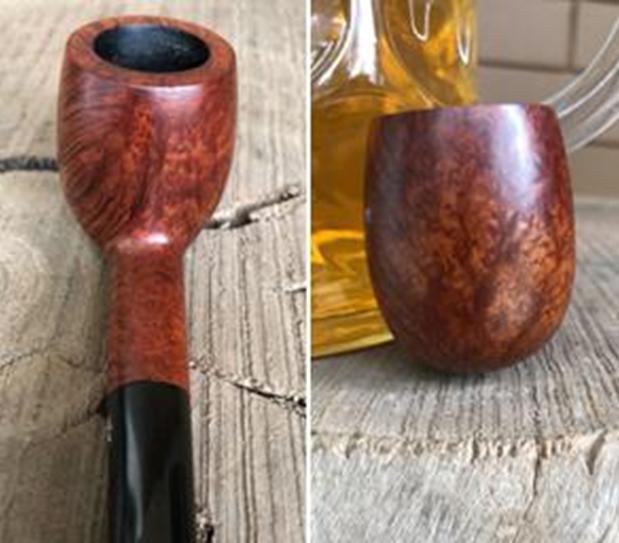
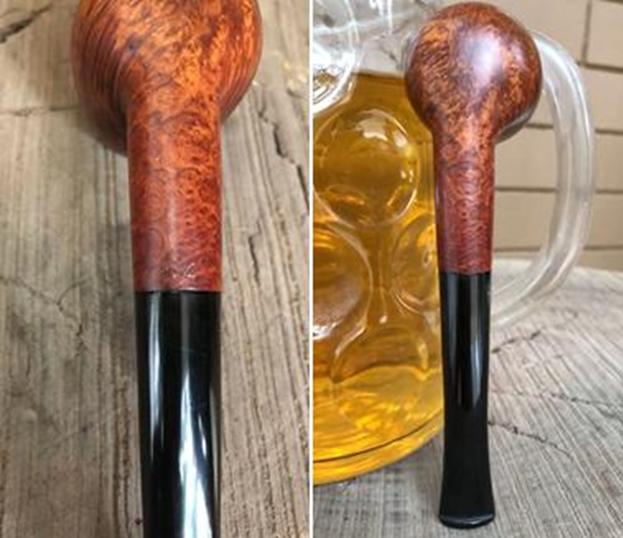
 I polished stem and bowl with Blue Diamond to polish out the remaining small scratches. I gave the bowl and the stem multiple coats of carnauba wax. I carefully buffed the pipe with a clean buffing pad to raise the shine. I hand buffed it with a microfiber cloth to deepen the shine. The pipe polished up pretty nicely. The newly stained finish works well when polished to really highlight the variety of grains and mask the damage around the bowl and shank. The polished Perspex stem works together with the beautiful grain in the briar and the brass and oak shank extension to give the pipe a rich look. The finished pipe is shown in the photos below. The shape, finish and flow of the pipe and stem demonstrate the creativity of the German soldier CK who left it in the trenches of North Africa. The dimensions are Length: 7 inches, Height: 1 inch, Outside diameter of the bowl: 1 1/4 inches, Chamber diameter: 3/4 inches. The pipe is ready to head back to Paresh in India once I finish the other ones he sent to me. This pipe has really travelled – from Germany to North Africa to India to Canada and back to India. I wish it could tell its own story. Thanks for walking through the restoration with me as I worked over this interesting piece of memorabilia.