Tag Archives: restemming

Fashioning a Churchwarden from a Forlorn, Throw away Billiard – a story of the Phoenix


Blog by Dal Stanton

The Greek mythological Phoenix is a long-lived bird that cyclically regenerates or is otherwise born again, according to Wikipedia.  It is regenerated out of its own demise, from its own ashes.  The images that come to mind are Harry Potter-esque – the Phoenix’s name is Fawkes and “as stated by Dumbledore, they are extremely loyal creatures, and are capable of arriving to the aid of beings who share a similar devotion. This was how Fawkes arrived to assist Harry in slaying the Basilisk in the Chamber of Secrets during his second year at Hogwarts” (LINK).  The tear of the Phoenix could also bring healing and recovery from near death.

What does the Phoenix have to do with pipes and Billiards?  True confession: I enjoy immensely working on vintage pipes with well-known and sought names like Dunhill, Savinelli, Comoy’s, Stanwell, GBD, Jeantet and BBB.  But truth be known, I LOVE taking the throwaways, the discarded, the ‘only good for the waste heap’ pipes – that make most people cringe and reach for latex gloves – to take these pipes and see what I can do to help.  There is a satisfaction at the end of such projects that translates into, ‘Wow! Who could have imagined…!”  The discovery of hidden beauty that was always there, but no one took the time to help it emerge.   I guess, at the core of it is the sense that sometimes people are treated in such a way or may view themselves in such a way that does not reflect the often hidden value that people intrinsically have.  Helping is seeking to bring new life out of the ashes of the past.

I want you to meet my forlorn Billiard stummel.  I’m sure that one past day he enjoyed the attention of a steward.  He proudly was settled on the rack with other proud pipes of The Rotation.  One day something happened, and he lost that favored position, and everything changed.  I found him in a bag of a second-hand/antique vendor in Sofia, Bulgaria’s ‘Antique Market’ in the city-center.  The bag was full of broken and discarded stems, stummels and other things unrecognizable.  He had no stem.  I plucked him out of the bag along with a few other pieces, paid the vendor a very small sum for what had no value to the vendor or to anyone else.  The small Billiard stummel was marked with the most generic of all markings, ‘Real Briar’.  Absolutely nothing special.  Here are pictures of the redeemed Billiard on my worktable. I just completed the restoration of a Monarch Pat. 1989069 – 1074H Bent Ball  for Andy, a pipe man living in Maryland, who attends the church where I was formerly the pastor on the Eastern Shore – the peninsula created by the Chesapeake Bay and Atlantic Ocean east of Washington DC.  Andy commissioned the Monarch from the ‘For Pipe Dreamers Only!’ section on my blog.  He told me he was also hoping to land a Peretti Oom Paul and a Churchwarden someday.  He had seen several of the Peretti Lot of Oom Pauls that I had already restored and recommissioned for new stewards and was hopeful.  I had no more Perettis to share, but I proposed that I could fashion a Churchwarden from repurposed stummels.  I also had one 8-inch Warden stem left in my stores.  Not long ago, I completed a fun restoration I called ‘A Tale of 3 Church Wardens’ – where I fashioned 3 Churchwardens that all found new stewards in Germany.  I directed Andy to check out the post to decide what he wanted to do.  It didn’t take long and he decided to add a Churchwarden to his Monarch Bent Ball – each of these pipes benefit the work we do here in Bulgaria with the Daughters of Bulgaria – helping women and girls who have been trafficked and sexually exploited to find a new life and hope.  The next question for Andy was what stummel would mast the Warden stem and rise from the ashes like the Phoenix?  Here were the options I sent to Andy with a warning not to be distracted by the color or condition – to look only at the shape.  Here’s what he saw.From the top, his choices were a Rhodesian, a Panel, a carved Apple and the forlorn Billiard.  Andy chose the classic Billiard shape, influenced mainly by the longer shank which will add a bit of flow to the Churchwarden he would become when transformed.  The interesting factoid that I reported before, in my writeup of the 3 Churchwardens, was from Bill Burney’s Pipedia Pipe Chart. It provides the framework for forlorn bowls to rise as the Phoenixes.  What brings this power?  A Churchwarden stem:As you would expect, our Billiard that Andy chose has many challenges.  The worst of his obvious problems is the rim which has been chewed and gnarled! It has a large divot on the internal lip over the shank.  Also, on the shank side, the rim slopes away having endured a ‘skinned knee’ experience.   The old finish is totally old and the stummel has some small fills that need checking.  Yet, underneath the grime and tired finish – where there is finish, is briar grain with potential.  I begin the story of this Billiard hoping to rise as a Phoenix by doing the basic cleaning of the stummel before fashioning the precast Churchwarden stem.  To mark the beginning of the restoration, I take a picture of the Billiard stummel with the Warden stem – the place where Pipe Dreamers begin!I take a picture of the chamber and see that there is very little cake build up, but I also see that it appears someone took a pocket knife to the chamber in the past – with little care.  I take the Savinelli Fitsall Tool and I ream the bowl of residue carbon.  Following this, I sand the chamber with 240 grit paper by wrapping the paper around a Sharpie Pen seeking to clean it but also to smooth the top of the chamber where knife marks were.  I then clean the chamber with a cotton pad wetted with isopropyl to rid it of carbon dust.  The chamber wall seems to be in good shape – no cracks or heat fissures are visible, but I will need to do a bit more sanding – I’ll wait to do this along with the rim repair. Now I turn to internal cleaning of the stummel.  Using cotton buds dipped in isopropyl 95%, I realize very quickly that the grunge in this mortise and airway was thick.  I put the cotton buds down for a time and start scraping the mortise walls with dental spatulas.  I also insert a drill bit the size of the airway and hand turn it to excavate the tar and oil buildup.  In time the cotton buds started coming out less soiled.  I plan to give the stummel a kosher salt and alcohol soak through the night to clean the internals further and freshen the stummel for the new steward.  The pictures show the grunge warfare!With the stummel cleaned, I now turn to the precast Churchwarden stem.  I begin by pulling out my new electronic caliper that I acquired when I fashioned the 3 Churchwarden stems before.  I take an internal measurement of the Billiard’s mortise, which is the target.  The reading is 8.13 mm.  For a conservative target in shaping the new tenon on the precast Warden stem, I add .40 mm to the 8.13 which gives me a conservative target of 8.53 mm.  I now mount the drill bit to drill the tenon’s airway enlarging it to receive the guide pin for the Pimo Tenon Turning Tool, which I also just added to my tools.  I mount the Pimp Tenon Turning Tool into the drill chuck and cut a conservative practice cut on the tenon to get an initial measurement.  The practice cut measurement is 8.96 mm which means I need to remove around .43 mm to arrive at the conservative target of 8.53 mm.  The purpose of the conservative target is to get close to the exact size of the mortise, but not quite.  This leaves room to sand the tenon to fashion the custom size because every mortise is different.  The fit between the newly fashioned tenon and the mortise must be snug but not too tight. I crank down the blade on the Tenon Turning Tool a bit and make another practice cut and remeasure.  Now, I have a perfect example of why doing practice cuts is a good idea!  The next measurement was 8.23 – only .10 mm off the actual mortise size – too close for comfort.  I don’t want to risk taking off too much.  I back the blade off a little and recut.  I come to an 8.49 mm which is good.  Using a flat needle file, 120 and 240 grit papers I gradually bring the size of the tenon down.  After MANY filings/sanding and testing the fit in the mortise, I can seat the tenon snugly into the mortise.  The shank is slightly larger than the diameter of the stem when the stem is inserted into the mortise.  The picture below shows how the briar is extending at this point, but as I look around the shank, the amount of overhand is not the same.  I use the flat needle file to start bringing the briar overhang flush with the Warden stem. The picture below shows the shank having that ‘stuff pants look’ as the taper of the shank to the stem is not gradual.  To address this, I file and sand around the shank to create a more gradual tapering from the bowl through the shank to the Warden stem.  Most of the briar bulging was on the shank sides not on the upper and lower areas which look pretty good. After a lot of sanding with a flat needle file, 120 and 240 papers, I arrive at a nicer tapering from shank to stem.  I sacrificed the ‘Real Briar’ stamping on the left side of the shank for the more balanced look on both sides of the shank.  I thought about it for a few minutes, and sanded away in favor of a reborn Phoenix!  The shank overhang has been sanded out and the shank/stem junction is flush.  I like the flow from bowl, through the shank, and into the stem.  Before bending the stem, while still in the same customized position, I also file and sand down the sides of the precast stem to remove the seams created by the casting halves.  I aim for rounding the stem. With the Billiard’s straight shank, the bend will be very small and subtle.  Last time I fashioned Churchwarden stems I found that I was consistently overbending the stem and then I would need to back off the bend for the best look.  I place pipe cleaners in the stem at both ends to maintain the integrity of the airway during the heating and bending process.  I use a hot air gun and warm the vulcanite in the area where I make the bend.  As it warms, the vulcanite, a rubber compound, becomes supple and is fashioned easily.  After making the bend, by simply eyeballing it, I take the heated stem to the sink and cool it with tap water to set the bend.  I remount the bent stem and I like it.  It has a gentle bend, not too much.  The Phoenix is coming to life!Looking now to the stummel, I use a sharp dental probe to test the very small fills on the stummel.  They seem to be solid.  I then look at the gnarly rim.  The next step is to remove the damage by utilizing the topping board.  Using a chopping block, I place a sheet of 240 grade paper on it.  After inverting the stummel on the board, I begin to rotate the stummel over the paper.  I’m thankful for the fact that Churchwardens typically have smaller bowls.  That’s good news because I’m taking a bit of briar off the top.  After a while, there is still a divot on the inside of the rim over the shank which I will address by creating a bevel.  After the 240 grade rotation, I then use 600 for a bit and finish the topping. Using 120 grit paper, I start carving a bevel on the inside lip of the rim.  I follow by moving to the outside edge of the rim.  I create the bevel by pinching the rolled piece of sanding paper under my thumb and then methodically move it around the rim putting pressure on the paper.  The continuous movement is what keeps the bevel consistent.  I then follow with 240 paper for both the inside and outside edges of the rim.  I think it looks good – what an improvement!To address the stummel surface to remove the top surface and scratches and old finish, I start by using a coarse sanding sponge on the entire stummel.  I follow the coarse sponge with medium and then light sanding sponges.I decide now to continue working on the stem.  Using a flat needle file and 240 grit sanding paper I continue smoothing and shaping the stem.  I work on the rough button with the file to shape it with the file.  I sand the entire stem with 240 grit because, even though the stem is new, the vulcanite contains ripples and ribs from the casting process.  I work the stem with sand paper so that it’s smooth and the stem is rounded.  From filing and 240 grit, I sand the entire stem with 600 grade paper.  I finish this sanding phase by sanding/buffing the stem with 0000 grade steel wool.  The pictures show the progress. My day is ending and I finish at the worktable with a kosher salt and alcohol soak to further clean and refresh the stummel.  I create a wick from a cotton ball by stretching and twisting the cotton.  I then insert/stuff the wick in the mortise and airway.  I then put the stummel in an egg crate to stabilize it and fill the bowl with kosher salt which leaves no after taste as does iodized salt.  I then use a large eye dropper to fill the bowl with alcohol until it surfaces over the salt.  After a few minutes I top off the alcohol.  I set the stummel aside and turn out the lights.The next morning the kosher salt and alcohol soak did the job – the salt and wick are soiled by drawing out more tars and oils from the mortise and airway.  After dumping the expended salt, I wipe the chamber with paper towel to remove the old salt.  I blow through the stummel as well to clear out the left overs. To make sure all is clean, I run a few more cotton buds dipped in isopropyl 95% through mortise.  Moving on.Time to micromesh the Churchwarden stem.  Using pads 1500 to 2400 I wet sand the stem.  Following this, I dry sand using pads 3200 to 4000 and then, 6000 to 12000.  After each set of 3 pads, I apply Obsidian Oil to the stem to enrich the new precast Warden stem.  I take only one picture at the end because it’s difficult enough to see the detail of black vulcanite with regular sized stems, with the Churchwarden stem, the picture is from orbit!With the stem drying, it’s time to begin the micromesh sanding of the stummel.  Using micromesh pads 1500 to 2400 I wet sand the stummel.  As has happened on previous restorations, the wetting of the stummel during the wet sanding process spelled the end of the once solid fills that I saw before.  The fill material must be made of a water-soluble material – not sure what it is, but it isn’t anymore! The fills fully disintegrated.The detour means that I need to apply patches to the pits – I mix briar dust and thick CA glue to form a putty that I apply to the holes.  I first use a sharp dental probe to make sure the pits are free of debris.  I use an index card to do the mixing by placing some dust in a pile. I then place some of the CA glue next to the briar dust.  Using a toothpick, I gradually draw a bit of the dust into the glue while mixing it with the toothpick.  I continue to do this until the putty reaches a molasses-like consistency. I then apply the putty to the places needed – there are a few. After applying the briar dust putty, I spray the patches with an accelerator to cure the patches more rapidly.  Then, using a flat needle file, I begin filing down the patches to near the briar surface.  Then I use 240 grit paper to remove the remaining excess patch material bringing the fill flush with the briar surface.  Following the 240 paper, I use 600 grit paper on each of the patch areas.  Finally, I return to the initial micromesh pads and sand the patches with 1500 to 2400 grade pads.  The detour is complete, back on track.  The pictures show the patch repairs.  These patches will blend very well. I pick up again by dry sanding using pads 3200 to 4000 and then 6000 to 12000.  The pictures show the finished result.  I enjoy so much watching the grain emerge during the micromesh process.  This lonely stummel just may be a Phoenix after all!At this point, aiming for the color preferences Andy described when he commissioned the Billiard, I will stain the stummel using the base as Fiebing’s Saddle Tan Pro Dye but add to it just a bit of Fiebing’s Dark Brown Leather Dye to darken it a bit.  I believe this will add more depth to the grain contrast – or I hope!  After mixing the dyes in a shot glass, and inserting a cork into the shank to act as a handle, I then warm the stummel using a hot air gun.  This expands the briar making the wood more receptive to the dye.  After warmed I apply the stain using a folded pipe cleaner.  After the stummel is completely covered, I flame the aniline stain using a candle.  The alcohol in the dye immediately combusts leaving the dye set in the grain.  After a few minutes, I repeat the same regimen including flaming.  I then set the stummel aside to rest and settle through the night.  The next morning, after an early 5AM trip to the Sofia Airport to drop off a summer intern who was returning to the US, I returned to the worktable ready to ‘unwrap’ the Billiard that had been dyed the night before.  I enjoy this a lot!  I mount a felt wheel on the Dremel, set to the lowest speed, and begin removing the flamed crust encasing the stummel.  I use the coarser Tripoli compound to do this.  As I work the buffing wheel methodically over the surface, I avoid applying too much downward pressure but allow the felt wheel, speed and compound to do the work. During the process, I purge the wheel often to clean it and keep it soft. After finishing with the felt wheel, I switch to a cotton cloth wheel and apply Tripoli to the crook between shank and stummel which the felt wheel is unable to reach.  After the Tripoli, I wet a cotton pad with alcohol and wipe down the stummel to blend the new stain and to lighten it a bit.In the same manner as the Tripoli compound, I apply Blue Diamond, a finer compound.  I mount another cotton cloth wheel on the Dremel, increase the speed to about 40% of full power.  I apply the compound to both stem and stummel.  After I finish, I wipe down both stem and stummel with a felt cloth to remove compound dust in preparation for applying the carnauba wax.  Before applying the wax, I want to add a special touch to this reborn Phoenix Billiard Churchwarden.  I decide to band the shank – always a nice touch.  I pull out my collection nickel bands and find one that fits over the shank but leaves about a 1/4 inch slack between the end of the shank and the end of the band.  To slide the band safely up the shank I heat the band with a hot air gun while on the shank at the tension point.  As the band heats, it will expand microscopically.  After a time of heating, I turn the shank downward and gently but firmly press down against a thick cloth on the hard wood surface.  This pressure moves the band up the shank a few millimeters and the cloth cushions the end of the band so it doesn’t bend with the pressure.  If one presses too hard and tries to expand the band too quickly, the nickel can rip – that is not good.  I got through the heating and pressing cycle a few times and the band is seated well.  I remount the stem and eyeball the band placement.  It looks good and I think the new steward will like this touch of class a lot for this Phoenix Billiard Churchwarden. Before I wax the pipe, I mount a cotton cloth buffing wheel on the Dremel that I use exclusively on nickel.  I want to shine the band up before applying wax.  I set the speed at 40% and apply White Diamond compound to the band.  I’m careful not to run the buffing wheel over the band to the briar as it can discolor the wood. I learned this the hard way in the past.  I’m not sure what the chemical process is, but when polished at high speed, a dark residue is produced.  You can see it on the White Diamond bar as well as on the wheel.  This is another reason why each compound and use have a dedicated wheel.  After finishing with the White Diamond buffing, I buff the band with a microfiber cloth and, oh my!  How it shines!Now, the home stretch.  Time to wax the pipe.  Again, I change to another cotton cloth wheel dedicated to carnauba, maintain a 40% speed on the Dremel, and apply a few applications of the wax to the stem and stummel.  I finish the polishing by hand buffing the Churchwarden with a microfiber cloth to raise the shine.

Few words describe the transformation of this lonely Billiard into a Phoenix.  Again, I’m amazed at the beauty in what God has created, even that which we often pass by with the shrug of the shoulders.  The gain revealed in the Billiard is beautiful.  The rim, gnarled as it was, looks great and is not diminished by the briar I was forced to take off.  As I look at it, the slightly squatter bowl works very well as the mast of the long, flowing Churchwarden stem.  The band mounted on the shank simply rocks, what can I say.  Andy commissioned this Billiard now Phoenix Churchwarden and he will have the first opportunity to acquire it in The Pipe Steward Store.  This pipe benefits the Daughters of Bulgaria – women and girls trafficked and sexually exploited.  Thank you for joining me in the telling of the story of the Phoenix!

Breathing New Life into a Kriswill “Chief” # 20


Blog by Paresh Deshpande

I had completed the refurbishing of LANE ERA CHARATAN’S MAKE “SPECIAL” and thoroughly enjoyed the process. Apart from preserving memories, the thing that I enjoy the most while refurbishing/ restoring my inherited (and some purchased) pipe collection, is the transformation of the pipe that unfolds before your eyes as you progress. It is something akin to a flower bud that gradually blooms and opens itself in all its beauty for you to feast your eyes upon. This is what I love when I work on a pipe.

While rummaging through the large box with an equally large number of my inherited pipes with my younger 10 year old daughter, she laid her hands on a pair of pipes with “SHINING SUN”, as she liked to call it, on its stem. With the selection of next two projects decided by her, I had a closer look at these pipes. These were a pair of KRISWILLS, one stamped as “CHIEF” and the other as “GOLDEN CLIPPER”. The first thing that struck me was that there was something amiss with the way the stems sat into the shank of each pipe. The “CHIEF” did not have its stem sitting flush with the shank. Also, the shank’s outer diameter appeared larger than that of the stem. The “GOLDEN CLIPPER” had its stem flush with the shank; however the diameter of the stem was larger than that of the shank. The following picture will clarify what exactly I was faced with……

CLIPPER

CHIEF

As I was wondering what could be done to address this issue and surfing the net for buying new/ used original stems for these pipes, Abha, my wife who was having a closer look at both these pipes simply interchanged the stems and surprise of all surprises, the stem that was on the “CHIEF”, sat flushed and perfectly matching with the shank of the “CLIPPER”. However after considerable effort, though the stem that was on the “CLIPPER” sat flushed with the shank of the “CHIEF”, the diameter of the shank was larger than that of the stem. So now what we have is a KRISWILL “GOLDEN CLIPPER” with a perfectly matching and fitting original stem and a KRISWILL “CHIEF” with a fitting, but mismatched stem diameter.

KRISWILL “CHIEF”

KRISWILL “GOLDEN CLIPPER”

I discussed with Abha and it was decided that since the “CLIPPER” has a perfect stem match, I would work on the “CHIEF” and make the shank match the stem. With this decision made, I kept the CLIPPER aside and took the “CHIEF” into my hands.

The CHIEF has a nice, deep bowl and nicely fills the hand. The size, weight and heft of the pipe is just beautiful. Beautiful cross grains adorn the sides and the back of the bowl while the front of the bowl boasts lovely mixed grains of swirls, flame and Birdseye. It is stamped “KRISWILL” over “CHIEF” over “HANDMADE IN DENMARK”. At the bottom of the shank where it meets the stem, is the numeral “20” and yes…. this positioning of the number did cause me a great deal of grief during the process of sanding!!! All the stamps are crisp and clear.I was curious to know about the history, geography and carvers for Kriswill while attempting to date this pipe. While referring to “Pipephil” I came across this information which I have reproduced below verbatim (http://www.pipephil.eu/logos/en/logo-k3.html)

“Kriswill is a brand of Kriswork Briar Trading, in Kolding (Denmark) established about 1955. Some of Kriswill pipes were designed by Sigvard Bernadotte, Swedish prince and brother to the late Queen Ingrid of Denmark. He collaborated with his Danish partner Acton Bjørn. When the company went bankrupt in the late 1970s it was on a level with Stanwell. Dan Pipe Cigar & Company (Hafenstrasse 30 D-21481 Lauenburg/Elbe, Ge) bought the rights to use the name and it is Holmer Knudsen and/or Poul Winsløw who make the Kriswill line. Nørding, on its side, bought the plant and introduced a Kriswell line”.

Prior to 1970 the stampings are in script letters on the shank and on the mouthpiece. The star on the stem and block letters on the shank were introduced from that date on.

While researching for more information on Kriswill pipes on “Pipedia”, I came across this additional information which is reproduced below:

Kriswill was one of the large pipe manufacturers in Denmark during the 1960s and 1970s, and I believe closed around 20 years ago. Their catalog cover read “By Appointment to the Royal Danish Court, KRISWILL, Kriswork Briar Trading, Briar Pipes Hand Made in Denmark.”

Thus, from the above information, it is safe to assume that this pipe is post 1970.

INITIAL VISUAL INSPECTION
As with all other pipes, the CHIEF, too is covered in dust, oils and grime of all past years, though comparatively to a lesser extent. The chamber is heavily caked with lava overflowing on to the top of the rim. A few small dents and dings, though minor, are visible on the outer edge of the bowl. The condition of the inner edge and that of the inner surface of the chamber will be ascertained once the bowl has been reamed and the lava removed from the rim top.The airway in the shank is blocked and air does not flow through the shank. Close observation of the shank revealed presence of debris in the mortise. This needs to be cleared and cleaned. Maybe this will also help in a smooth and snug fit of the stem into the mortise.The stem shows calcification near the button and deep oxidation all along the stem. There are bite marks near the button and some deep tooth chatter. The button has been bitten and will need to be reconstructed.THE PROCESS
Since this would be the first time I would be attempting to undertake the process of adjusting the fit of the tenon and matching the diameter of the shank with that of the stem, I Face timed with Mr. Steve who advised me to, firstly, be very careful during the sanding of the shank so as not to lose too much briar making the shank diameter too small, secondly, he told me to ensure that the entire shank should be sanded such that the taper at the shank end is not abrupt and blends well into the overall shape of the pipe. Thirdly, it is most important to exercise a lot of patience and diligence while working and check very frequently the fit, finish and shape of the shank and the stem.

I started with cleaning the shank of all debris using a dental spatula, pipe cleaners, cue tips and isopropyl alcohol. I was surprised to see the amount of gunk that was removed from the shank. I tried to fit the stem on to the shank. Though the tenon has inched further in to the mortise, a prominent gap is clearly visible between the shank end and the stem.Using a 220 grit sand paper, I very carefully began the process of sanding down the tenon, checking ever so frequently for the fit of the tenon into the mortise. Finally I was able to achieve a perfect fit of the stem and the shank with all the right noises!!!!Now that the issue of fit of the stem into the shank has been addressed, I turned my attention to match the size of the diameter of the shank with that of the stem by sanding down the shank. I started this sanding using a 220 grit sand paper. This process was made difficult and uneven at the bottom of the shank due to the stamped number “20” being very close to the shank end.I took care so as not to sand off the stampings on the shank and stem by masking them. Once I was satisfied with the results of sanding with 220 grit paper, I switched to sanding with a 440 grit sand paper to further blend the shank and stem. Mr. Steve’s advice of being very diligent and frequent checking was always ringing in my ears as I progressed towards the goal of matching the shank with that of the stem. A word of caution for first timers like!!!!!!!! During the process of sanding you may notice a considerable dip at the shank end.This signifies that the sanding of the shank end is excessive and thus sanding needs to be done from further up the shank and a bit over the stem too. This will ensure a seamless joint between the shank and the stem.

Using a 220 grit sand paper, I sanded the shank to match the dip at the shank end and also a little of the stem end, all through taking care of the stampings on the shank and stem. I further evened out the shank and the joint with 600 and 800 grit sand paper. Once I was satisfied with the seamlessness of the joint, I showed it to Abha, my wife and she too approved of the job done. Thereafter, I further blended and merged the entire shank and the stem through the joint using micromesh pads, wet sanding with 1500 to 2400 pads and dry sanding with 3200 through to 12000 pads. I wiped the sanded area with alcohol after each pad to remove the sanding dust. Boy!! Was I pleased with the results, hell YEAH!!!! I shared pictures of the end result with Mr. Steve on What’sApp and he too approved of the seamless joint. Next I turned my attention to the stem and painted the surface of the stem with the flame of a Bic lighter to raise the tooth chatter and minor bite marks. The deeper tooth bites with a mixture of activated charcoal and clear CA superglue and let it cure for 24 hours. Using a flat head file needle, these fills were blended into the surface of the stem. For a better blending of the fill, I further sanded the entire stem with 220 followed by 400 and 800 grit sand paper. This helps to reduce the sanding marks left behind by the more abrasive 220 grit paper. To bring a deep shine to the vulcanite stem, I went through the complete set of micromesh pads, wet sanding with 1500 to 2400 grit pads and dry sanding with 3200 to 12000 grit pads. I wiped the stem with alcohol after each pad and rubbed it down with Extra Virgin Olive oil. The internals of the stem was cleaned out using alcohol and pipe cleaners. The finished stem is shown below.With the stem taken care of, I once again turned my attention to the stummel. The sanded shank was lighter hued as compared to the rest of the stummel. Since I was still awaiting my stain pens, which have been held back in custom clearance for the last 50 odd days and also since I have not yet graduated to use of aniline stains/ dyes, I was contemplating what could be done to blend the finish of the shank with that of the stummel. Being the intelligent of the two, Abha suggested that the bowl could be sanded using micromesh pads to match the finish of the shank.  That decided, Abha reamed the chamber using Kleen Reem pipe tool and with the fabricated pipe, she removed the remaining cake from the chamber.With the same knife, she gently removed all the overflow of lava, oils and tars from the rim surface. She further sanded the interiors of the chamber with a 220 grit sand paper to get rid of the last traces of the remaining cake. She also topped the rim on 220 grit sand paper and evened out all the remaining lava and minor dings and dents that were revealed after the lava was removed.  Using isopropyl alcohol, hard bristle and normal pipe cleaners, she completely cleaned out the internals of the shank.I cleaned the external surface of the bowl with undiluted Murphy’s Oil soap and tooth brush to remove all the grime and dirt and rinsed it under running water. I took care that no water enters the chamber and the shank. Using paper napkins and soft cotton cloth, I completely dried the surface. Thereafter began the entire process of sanding down with micromesh pads as enumerated while working on the shank. I also worked on the rim top to match it with the rest of the bowl. The bowl has some interesting grains and patterns.   I rubbed in some Before and After Restoration balm in to the briar to bring out the shine and enliven the briar. After a few minutes, I rubbed and polished the bowl with a soft cloth. Finally, I finished the pipe by rubbing a small quantity of Paragon wax and polishing it using raw and undiluted muscle power and a microfiber cloth. I am very pleased and happy with the way the complete project has turned out. It was an exhilarating experience to be able to appreciate the transformation and a sense of accomplishment that accompanied it. I must thank Abha and Mr. Steve for walking with me through this project. Here are the pictures of the finished pipe.

Converting a Brigham Voyageur 109 into a Churchwarden


Blog by Steve Laug

This is the last pipe I am working on from the fellow here in Vancouver that he dropped off. There were 8 pipes in the lot – I have all eight of them now. This one is a Brigham bowl without the stem or other parts. The pipe is an apple shaped bowl that is stamped on the left side of the shank and reads Brigham over Voyageur over 109 Italy in a smooth panel on the rusticated bowl. The shank end had nicks and chips but was in fair condition. There was no stem with the bowl. The stem would have had the lighter weight nylon system tenon since the pipe is one of the Italian made Brighams. It was another one of his pipe finds on a recent pipe hunt in Vancouver. The rusticated finish had almost a scale like rustication pattern with flecks of paint in the finish. The rim top was damaged and was darkened toward the back of the bowl. The finish was very dirty and there was a thick cake in the bowl.  When we had first spoken about this pipe we had talked about replacing the stem with a Brigham stem. I talked with Charles Lemon and he sent me a stem blank and an aluminum system shank for the Brigham. When it arrived I talked with the Vancouver fellow about that and together we came to the conclusion that a churchwarden stem might look good on it. I ordered some from JH Lowe and found that they only have one diameter size stem. I ordered it and when it arrived it was significantly smaller in diameter than the shank. I had an interesting copper ferrule that I thought might work to provide a different look to the pipe and provide a way of using the smaller diameter churchwarden stem. I slipped the ferrule on the shank and put the stem partially in place in the mortise and took the following photos to send to the fellow to see what he thought. He liked it so I moved forward.I slipped the ferrule off the shank and took a photo of the stamping on the left side of the shank. It is very clear and readable. I sanded the outside of the shank to provide a smooth seat for the ferrule. I cleaned out the inside of the shank with a dental spatula to remove the heavy tar buildup on the shank walls. I heated the metal ferrule with a heat gun and pressed it onto the shank against a solid board.I heated the copper ferrule over a heat gun and pressed the ferrule onto the shank end. I repeated the process until it was set on the shank as far as I wanted it to be. To remove the paint flecks on the rusticated finish on the bowl I scrubbed it with a brass bristle wire brush and used a dental pick to remove the flecks. I wiped down the bowl with alcohol on a cotton pad to remove the dust and debris from the finish. I reamed the bowl with a PipNet Piper Reamer using the first two cutting heads to remove the majority of the cake. I cleaned up the remnants on the walls of the bowl with a Savinelli Fitsall Pipe Knife. I used a dowel wrapped with sandpaper to sand down the walls on the bowl. I cleaned out the airway in both the bowl and stem with alcohol (99% isopropyl), pipe cleaners and cotton swabs until they were clean on the inside. I rubbed down the briar with Before & After Restoration Balm. I worked it into the finish with my fingertips and finished working it in with a shoe brush. The balm worked to clean, preserve and enliven the surface of the finish on the small bowl. The briar was coming alive so I took some photos of the pipe at this point. I polished the rim top with micromesh sanding pads – wet sanding with 1500-2400 grit pads and dry sanding with 3200-12000 grit pads. I also polished the smooth portions of the rustication with the micromesh pads at the same time. I wiped the rim top down after each sanding pad with a damp cloth. I gave the bowl multiple coats of Conservator’s Wax and buffed the bowl with a shoe brush. I buffed it with a clean buffing pad and took the photos that follow. I set the bowl aside and worked on the stem. I turned the tenon down on the churchwarden stem with a PIMO tenon turning tool. I took it down to about the diameter it needed to be for the shank. I used a Dremel and sanding drum to round down the edges of the stem above the tenon and also the casting marks on the stem. I wanted to make the stem more like a military mount stem.  I heated the vulcanite with a votive candle until it was flexible and put a slight bend in it that fit the look I was going for with the pipe.  I sanded the Dremel marks out of the tapered end of the stem and shaped the tenon some more with 220 grit sandpaper. I worked on the casting marks on the stem sides and around the button. I worked over the end of the stem to smooth out the area around the slot.I polished the stem with micromesh sanding pads – wet sanding with 1500-2400 grit pads and dry sanding with 3200-12000 grit pads. I wiped the stem down with Obsidian Oil after each sanding pad. After the final pad I gave it a final coat of Obsidian Oil and set the stem aside to dry. I put the stem back on the bowl and buffed the pipe with Blue Diamond polish on the buffing wheel. I used a light touch to keep the polishing compound from filling in the grooves in the rustication. I carefully avoided the stamping on the left side of the shank. I gave both the bowl multiple coats of Conservator’s Wax and the stem multiple coats of carnauba wax and buffed the pipe with a clean buffing pad to raise the shine. I hand buffed it with a microfiber cloth to deepen the shine. The finished pipe is shown in the photos below. This is the last of his pipes that I have to work on. This has been a fun bunch of pipes to work on. Thanks for looking. 

A THREE-CARD DRAW FOR AN INSIDE STRAIGHT WITH AN OLD KARL ERIK HAND MADE GRADE O FREEHAND


Blog by Robert M. Boughton

Copyright © Reborn Pipes and the Author except as cited

https://www.facebook.com/roadrunnerpipes/

You’ve got to sing like you don’t need the money
Love like you’ll never get hurt
You’ve got to dance like nobody’s watchin’
It’s gotta come from the heart if you want it to work.

— In “Come from the Heart” (1987), a country music song by Susanna Clark and Richard Leigh

INTRODUCTION
The free-spirited quote I chose for today’s blog is a chorus of sorts to the darker, harder to control song of myself I change a little at a time, but concerning Danish freehands, at least, it shouts out.  In regular prose as opposed to verse, the words have been attributed to many folks, the most famous of whom are Leroy “Satchel” Paige and Mark Twain.

Really?  Satchel Paige and Mark Twain?  Can anyone even summon to the mind an image of Satchel, showman though he was, hurling three evanescent fast balls for a strikeout and then sauntering off the mound, doffing his cap as for the National Anthem, to spout what would have been considered insane gibbering in his day and gotten him run out of town on a rail or worse?  Or the wry and often hilarious Great American Writer – who can still leave readers today ROFL from his literary accounts of the myriad outrageous frays he entered with zeal and turn wickedly acerbic in his social commentary – wearing his famous white Southern suit and taking the cigar out of his mouth as he steps onto a gazebo to pronounce such life-affirming, feel good modern sentiments?  I think not.

But I like the way Kathy Mattea sings those four lines, although I can’t recall any of the others, and the lively, high-strung electric fiddle plucking of an unsung but talented musician.

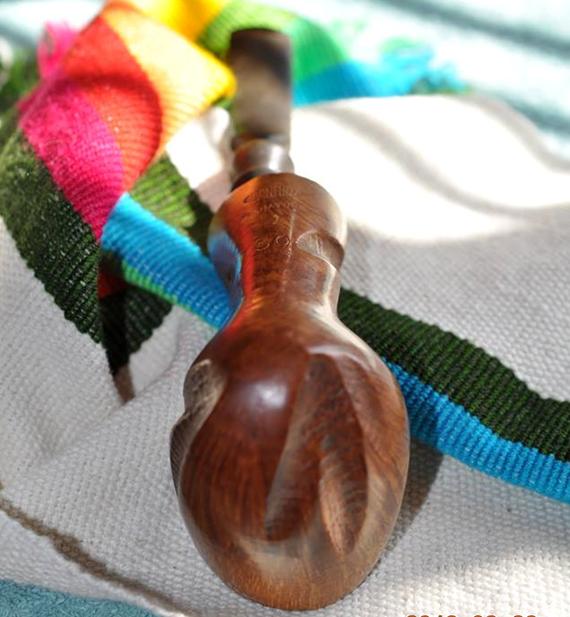
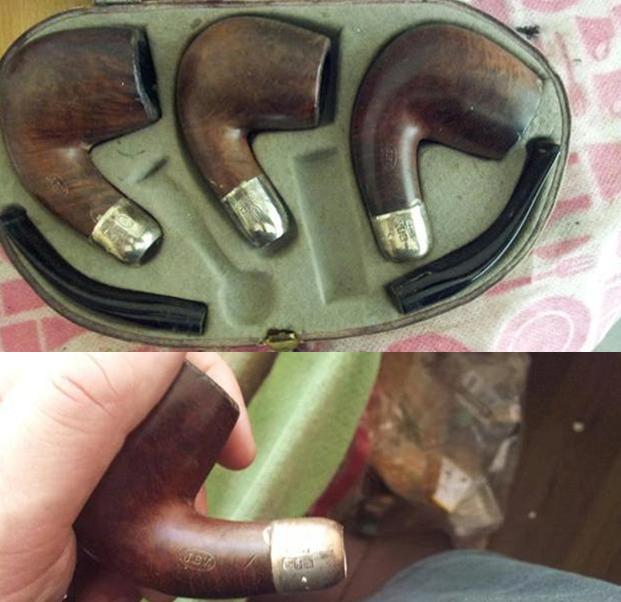
To the point, the pictures of a nine-pipe lot I bought at the beginning of the month, before the package arrived, had a magnetic pull on me.  The main attraction was a pair of Danish freehands, and the other was the presence of at least two and maybe three other nice finds, about which the seller might have been oblivious.  With no order whatsoever to the description and only three brands identifiable (Kaywoodie, Falcon and Missouri Meerschaum), the seller did reveal that one of the freehands was a Knute of Denmark and the other a Karl Erik.  I had heard of Knute and was unfamiliar with the brand, but I’ve owned several Karl Eriks and was pretty sure the behemoth in the lower right side of the following photo was it.  I was correct.

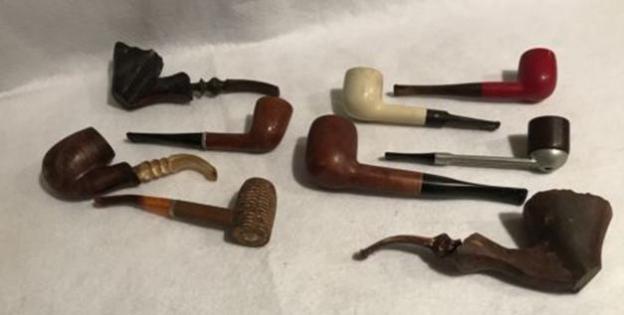
9-pipe eBay lot courtesy stwok74075

I restored the freehands from the lot first.  Of those, I decided to start with the Knute for two reasons, the lesser being my inexperience with the brand and the more significant that, although both were large pipes, the Karl Erik was enormous and therefore had much more area to repair.  Had I any idea there was something greater about the KE than its massive potential for beautiful geometric symmetry and fine example of chasing the grain, I might have chosen the opposite order.  KE, by the way, is my abbreviation for convenience, not to be confused with the maker’s earliest pipe mark)

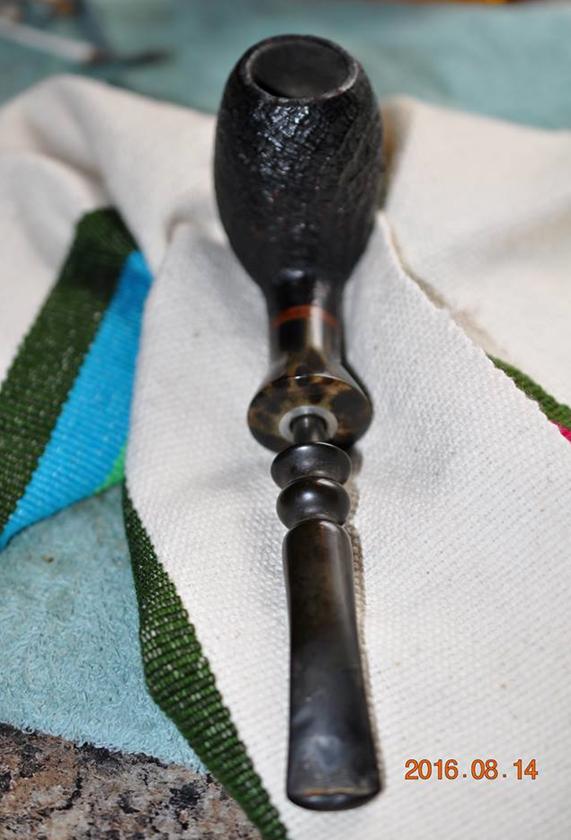
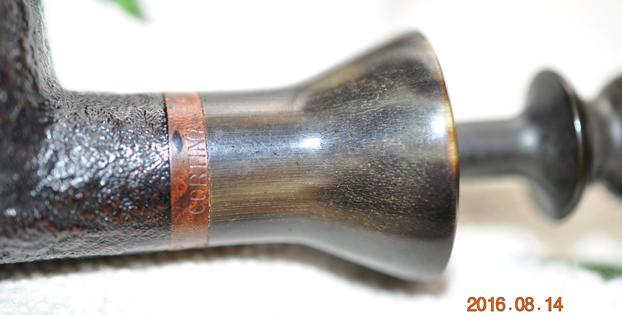
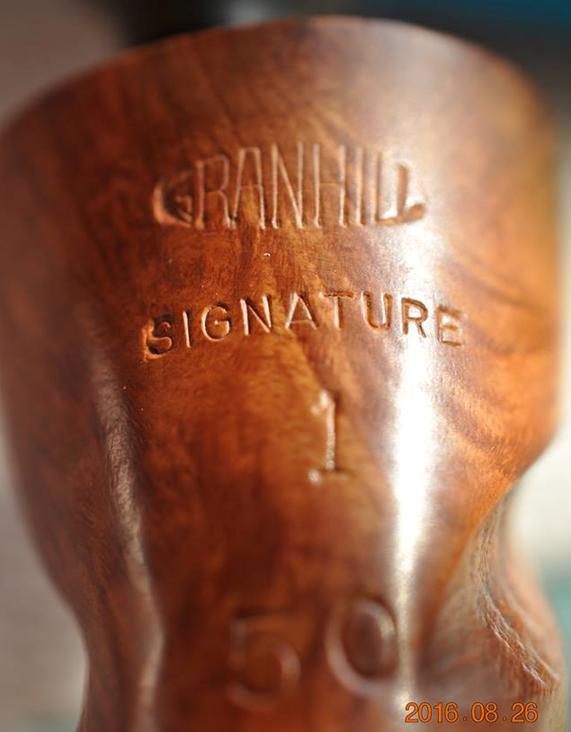
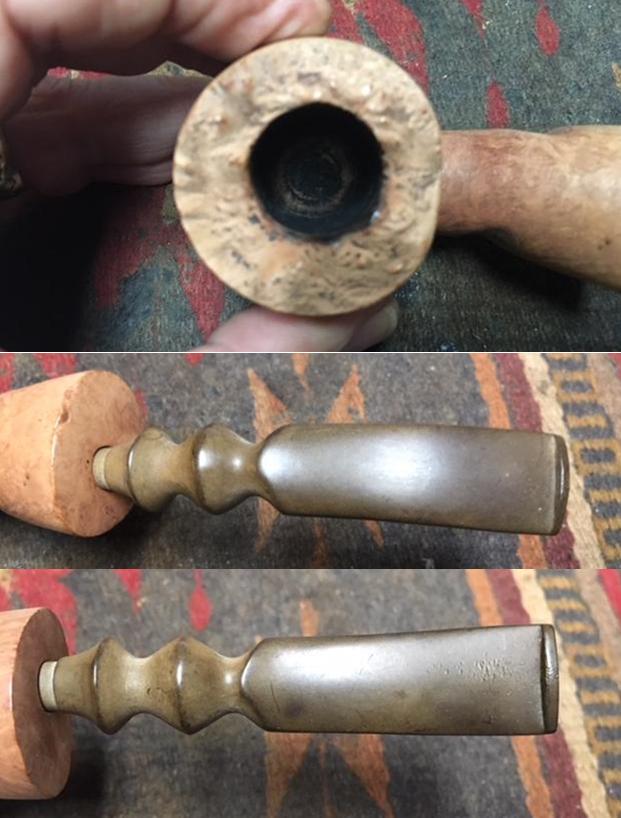
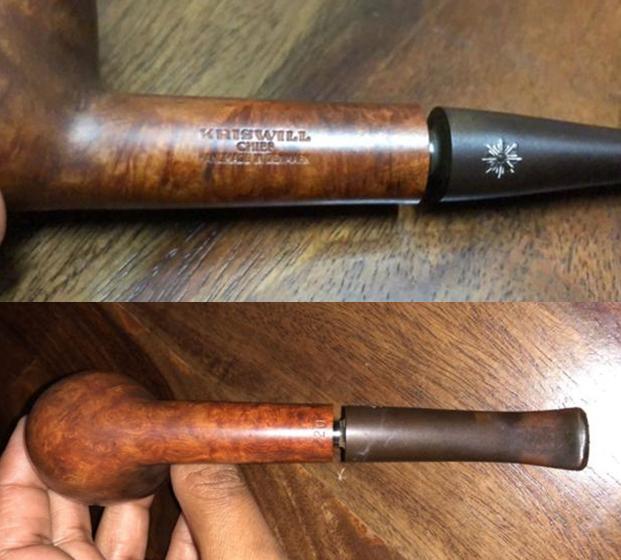
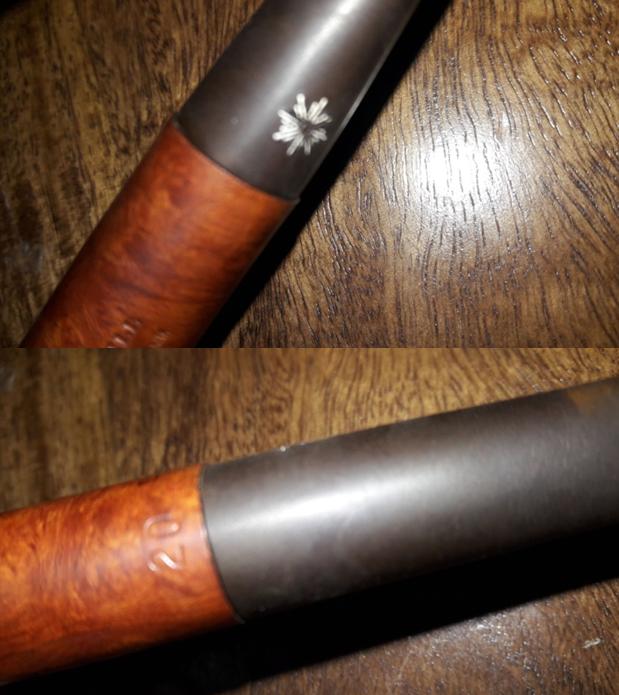
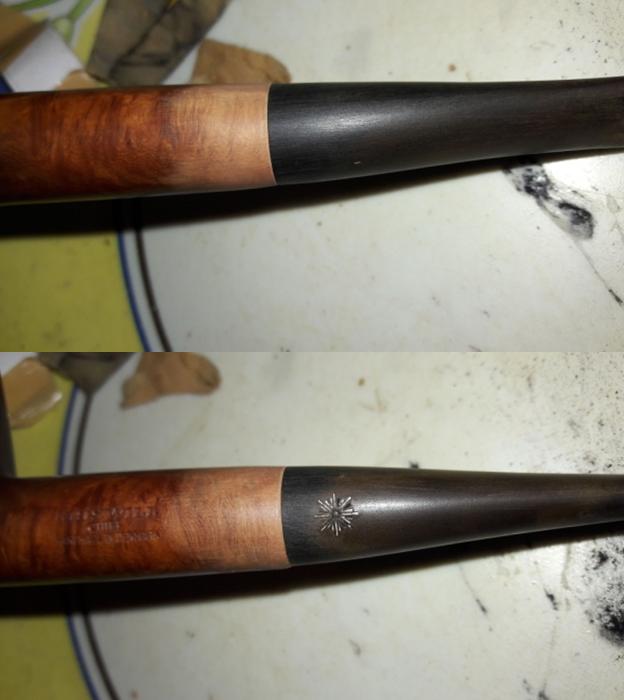
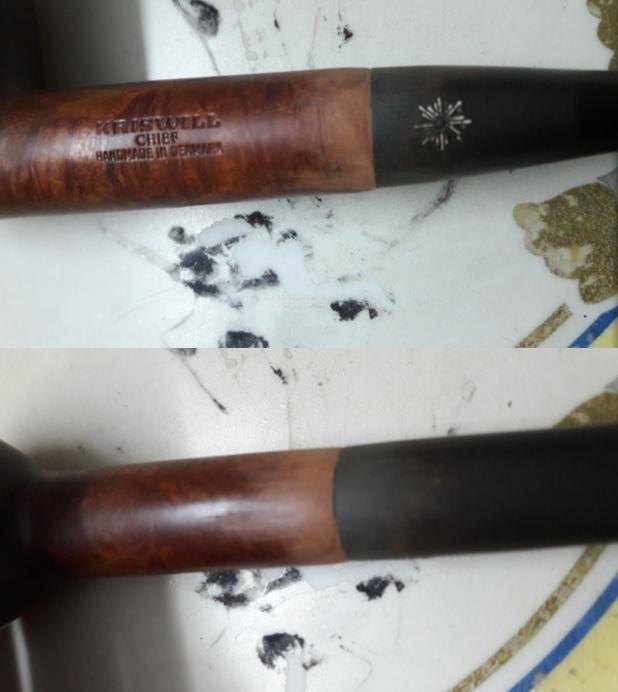
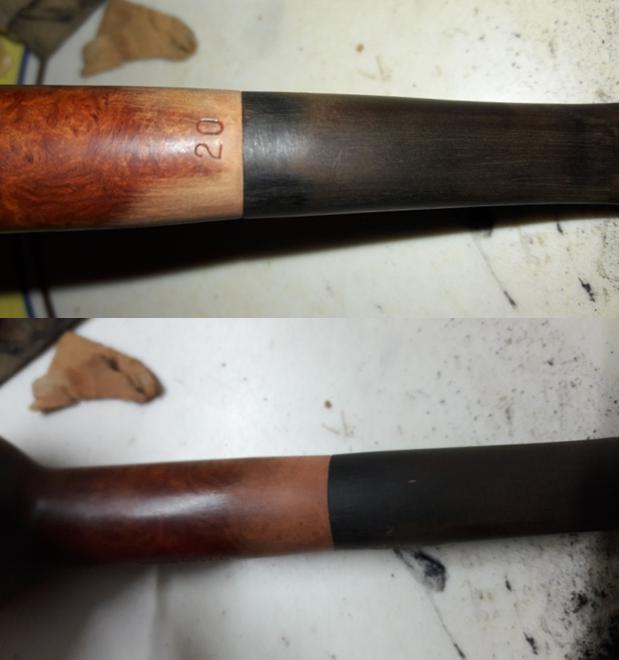
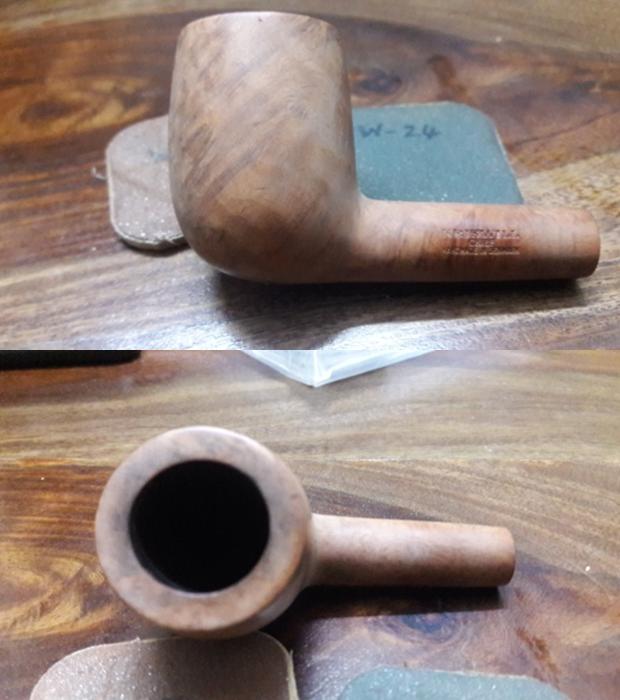
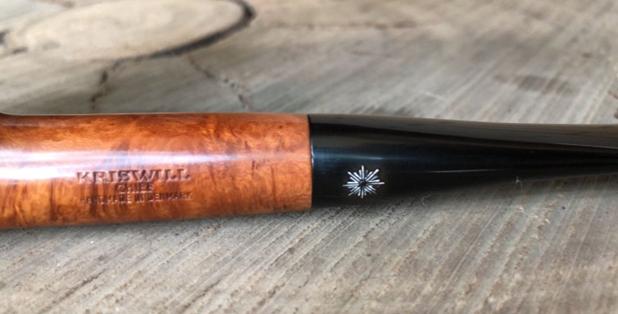
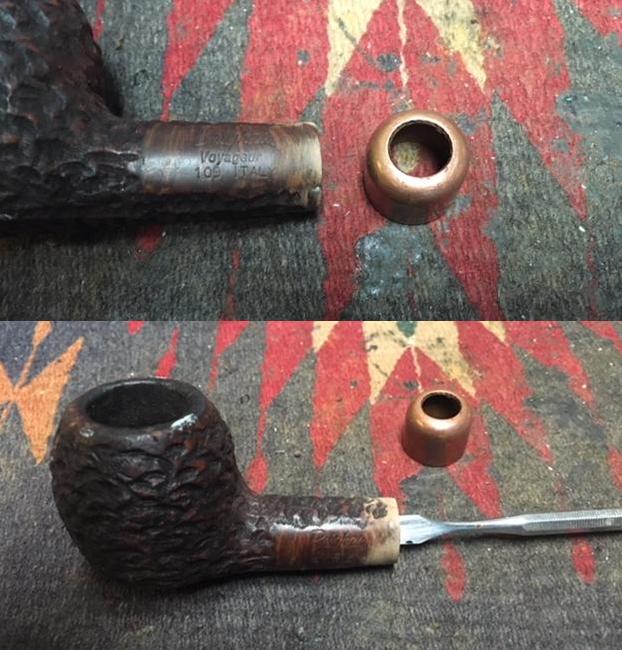
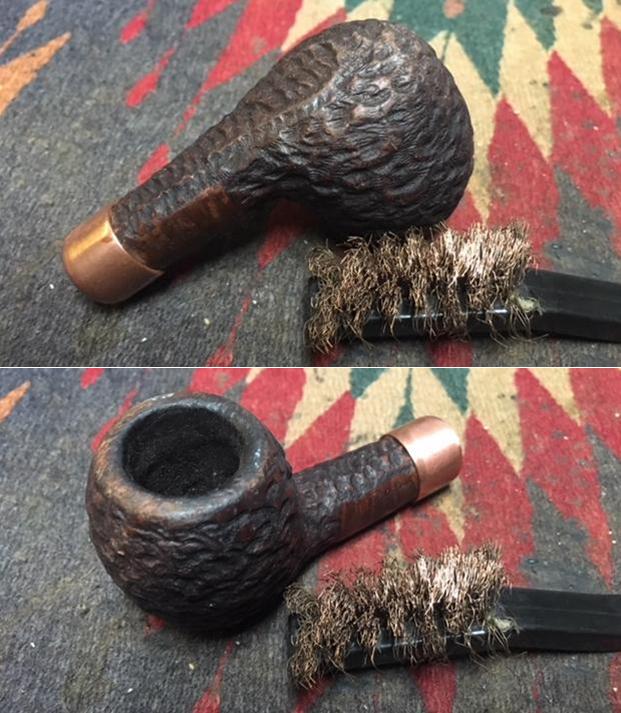
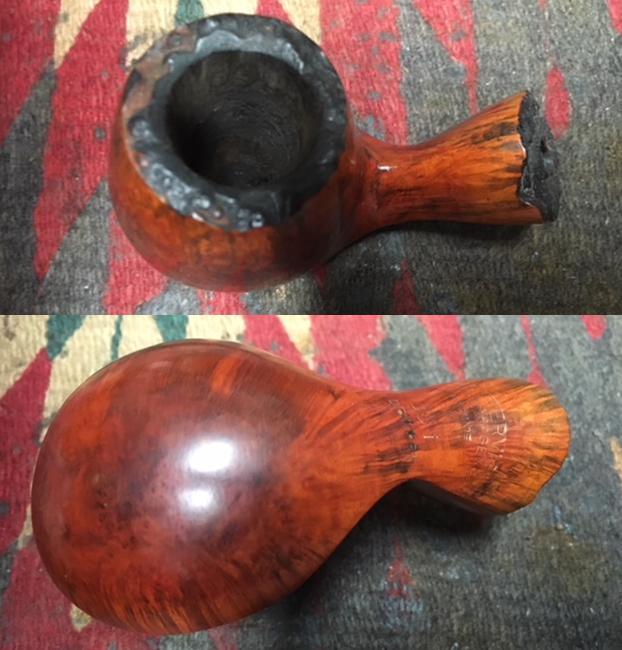
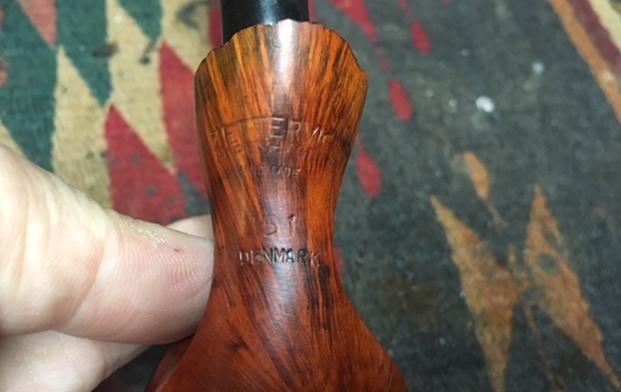
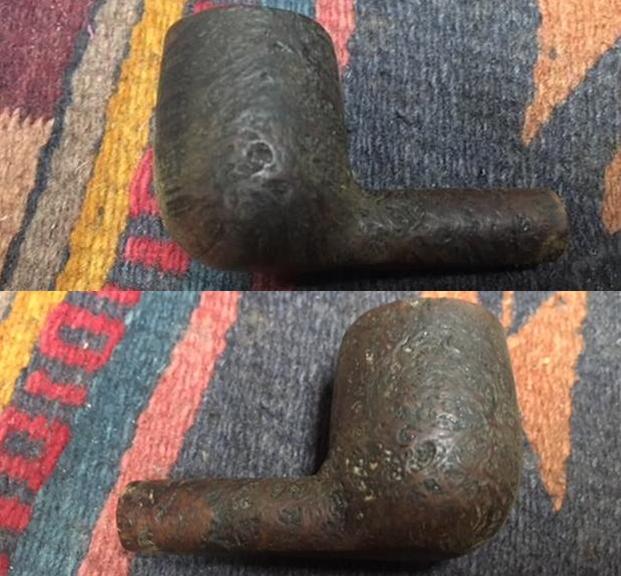
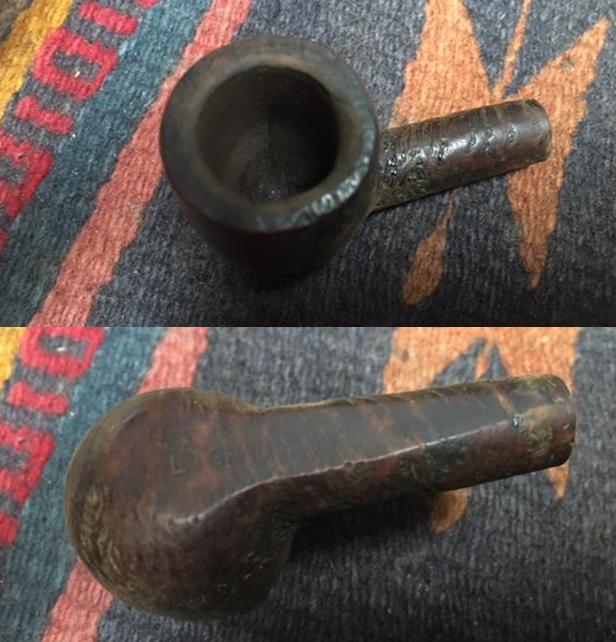
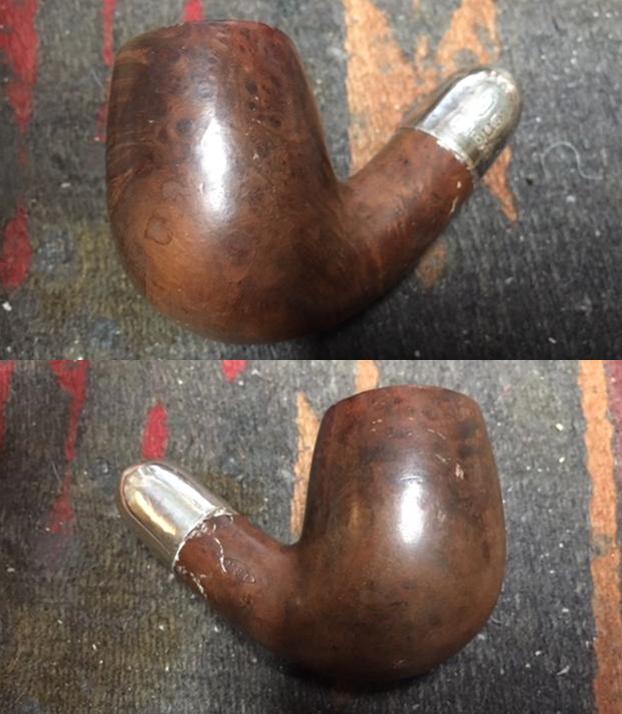
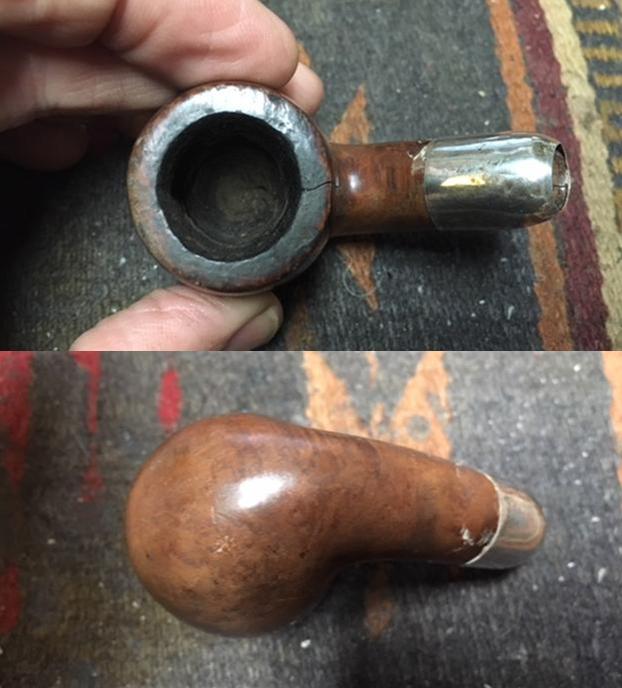
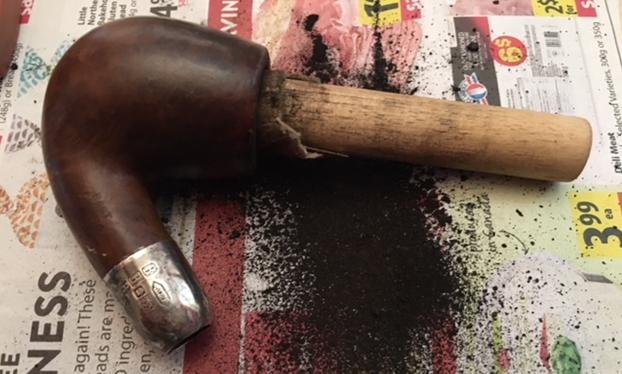
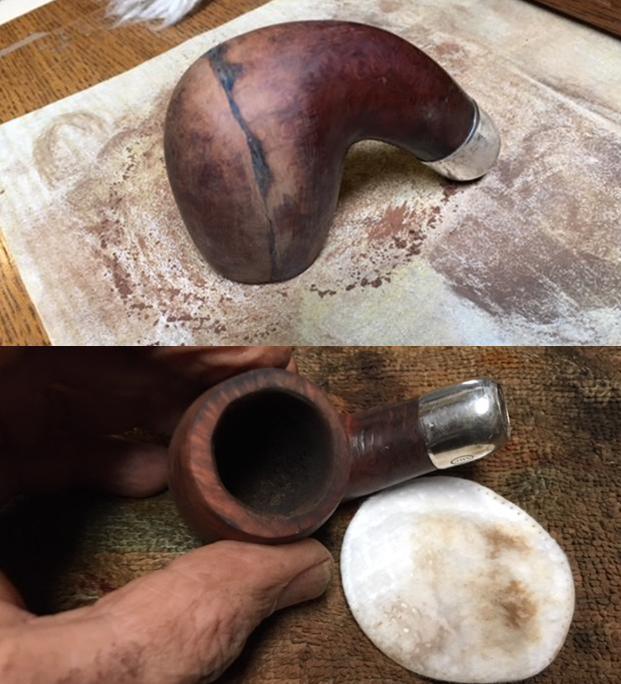
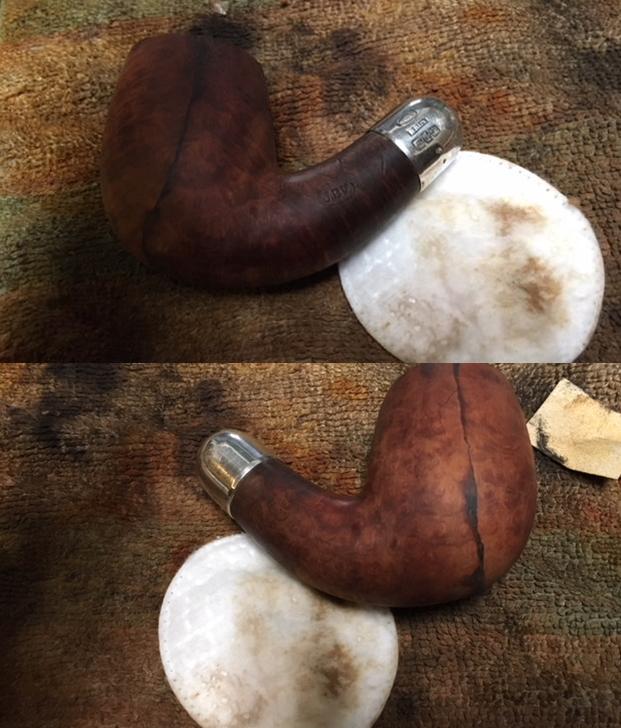
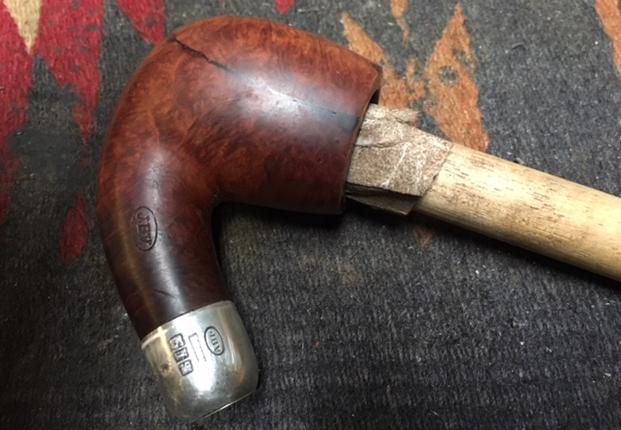
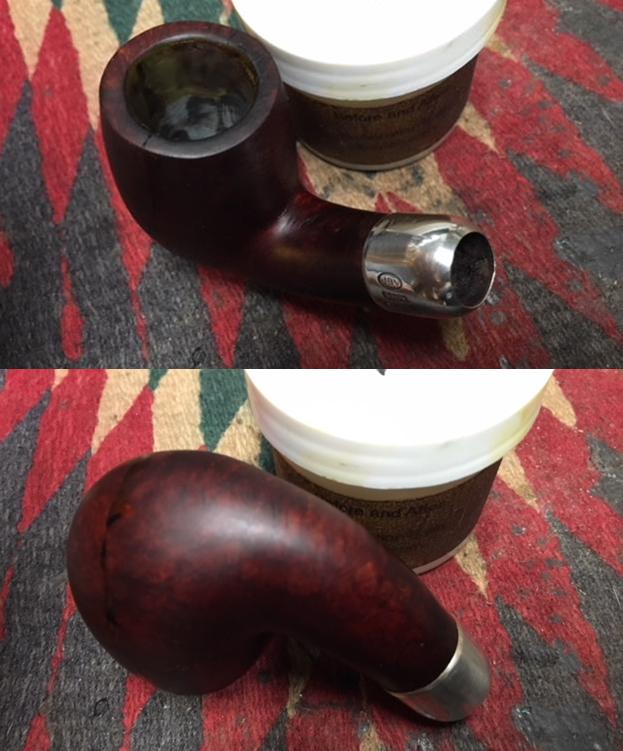
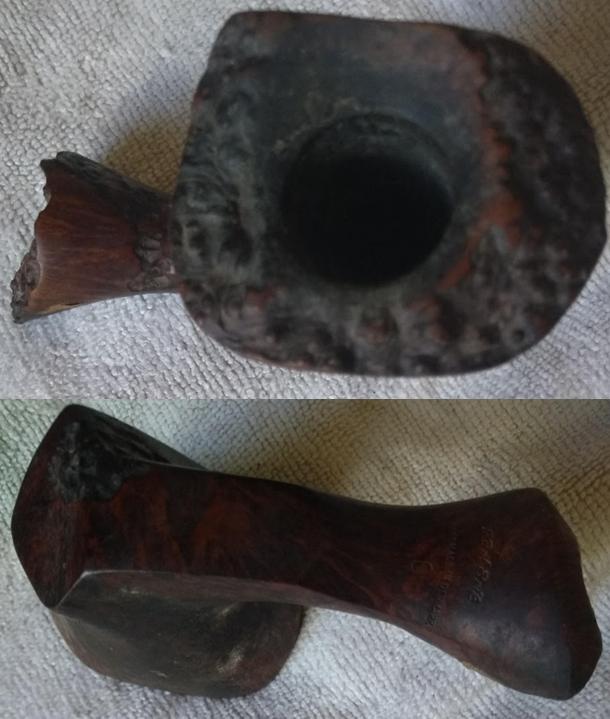
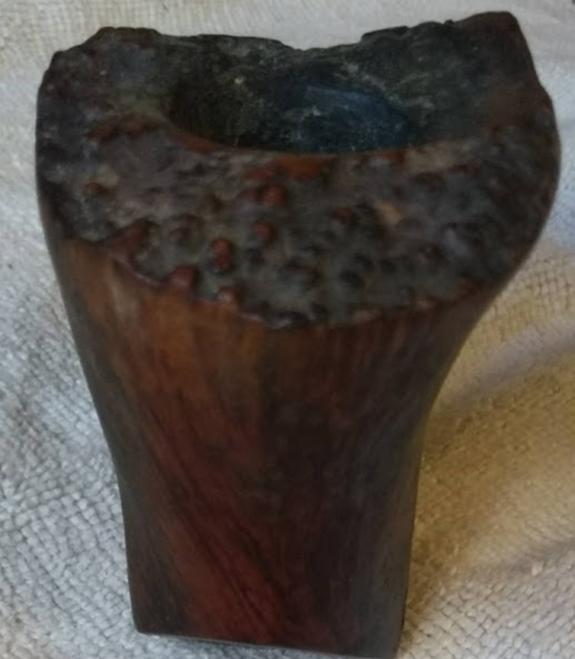
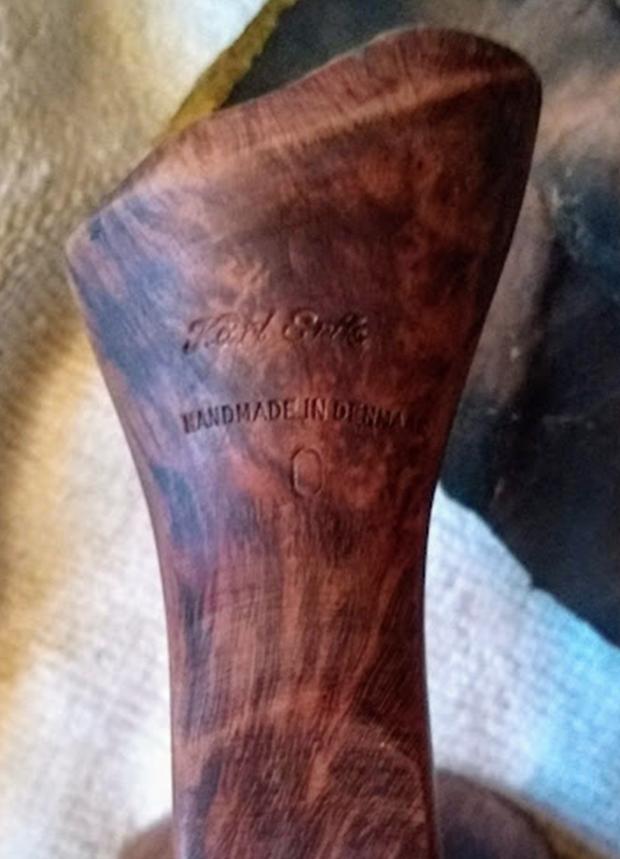
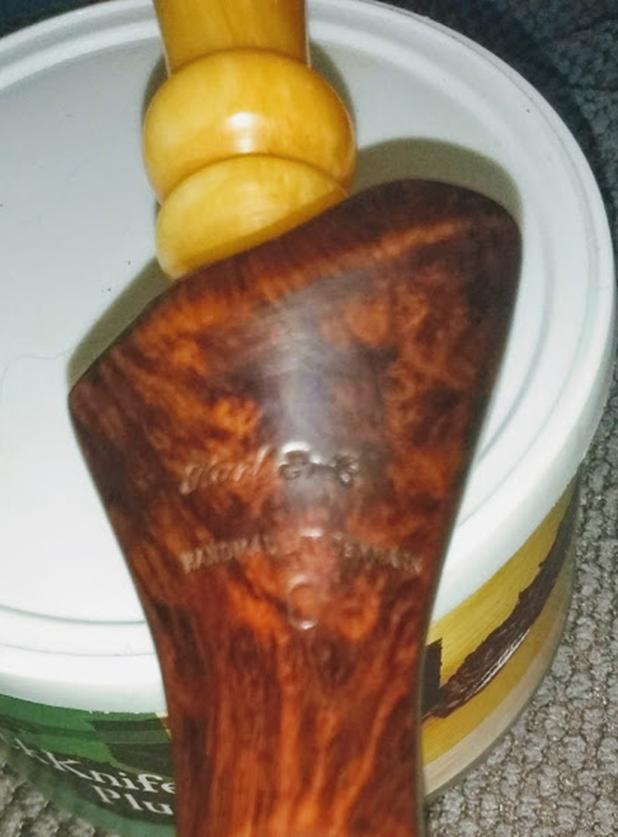
The pipe’s bleak façade of thick gunk at first hid the small block of nomenclature on the stem end of the shank.  Before I would have taken photos of the pipe as it arrived, I used a thick cotton rag and more than a little force to wipe away the muck that at one point I thought might require alcohol.  I stopped breathing a moment when I saw the mark.  Instead of the regular two lines of imprint, there were three: KARL ERIK/HANDMADE IN DENMARK/O.

The grade mark, of course, was the part that surprised me.  I’ve owned four KE pipes not counting my latest addition, two of which were far more striking at a glance than this one even after I finished its restoration, but none of them was graded.

As fast as I could, I browsed to Pipephil and found a mention of “previous grading” from 4-1 ascending, meaning1 would be the highest, not counting the Ekstravagant releases that were entirely handmade.  Well, that was no help, and so I searched further, finding multiple sites that gave both the previous grades and the newer ones from D-A, again ascending.  Some of the latter sources, including Pipedia, expanded on the Ekstravagant grade, noting that it in fact was divided into degrees, C, B, A, AA and AAA.  I found no official mention of letter grading beyond D, but I did track down a Worthpoint auction that describes O as “[t]he highest grade in the old Karl Erik grading system.”  Needless to say, my breath was taken away again.  I’m calling on any readers with information on the maker’s early grading system to fill me in on it!

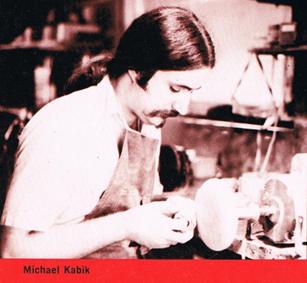
Speaking of the maker, his name was Karl Erik Ottendahl (1942-2004), and he was a lithographer struggling to make ends meet from his apprenticeship starting when he was 16 into his mid-20s when he took up carving pipes as a day job.  Young Ottendahl had made pipes as a hobby since he was 16 and gave most of them to friends and senior co-workers.  Never forgetting his “roots,” Ottendahl remained perhaps the most generous pipe maker in the history of the craft and trade.  He was devoted to the proposition that fine pipes should be affordable to the average smoker, and to that end he priced his works of art far below the going rate.  Likely for that reason, his brilliant work was underestimated and likewise valued during and after his lifetime, and it is only in recent years that the market has begun to appreciate their worth more.  I’m sure that fact makes Karl Erik roll over in his grave.

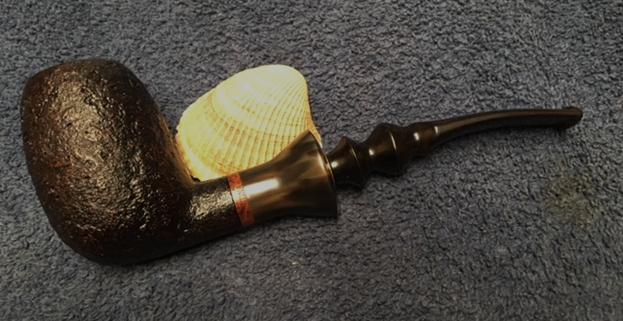
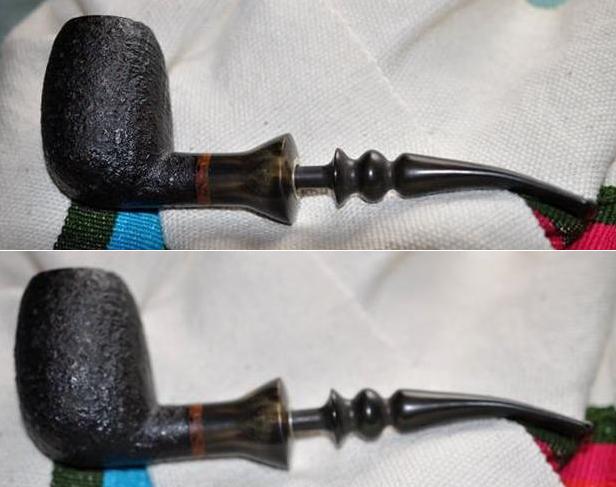
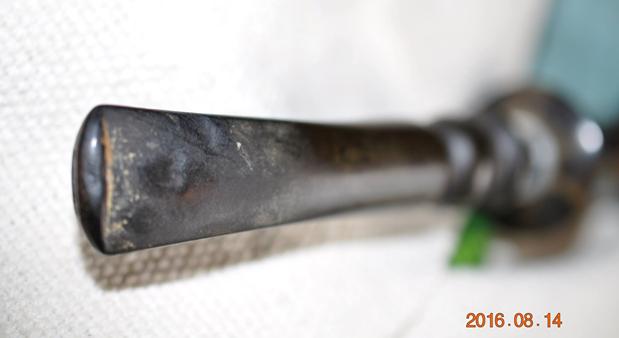
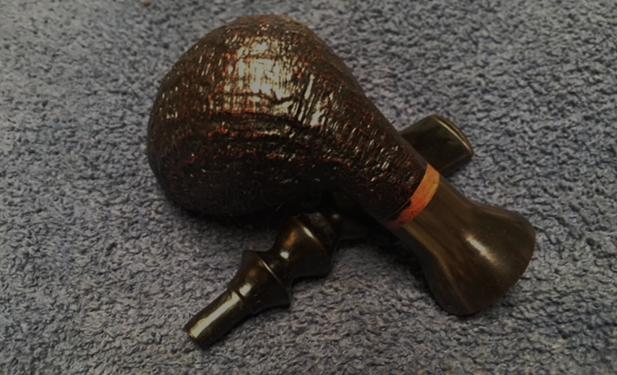
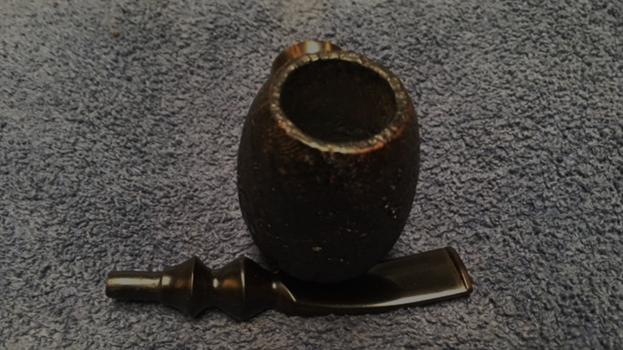
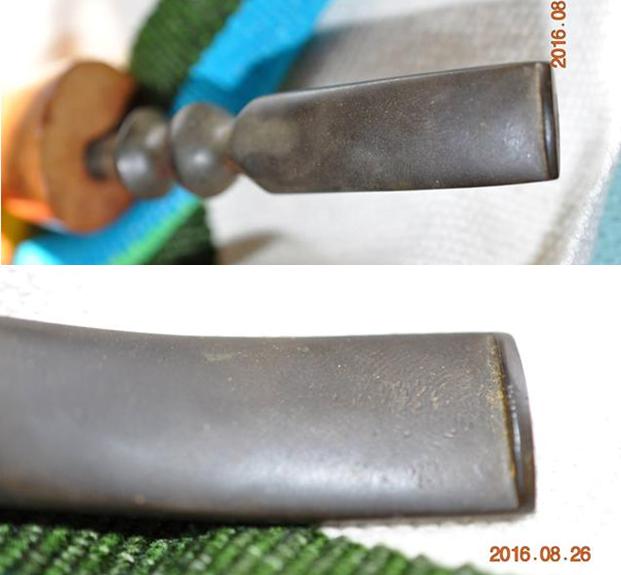
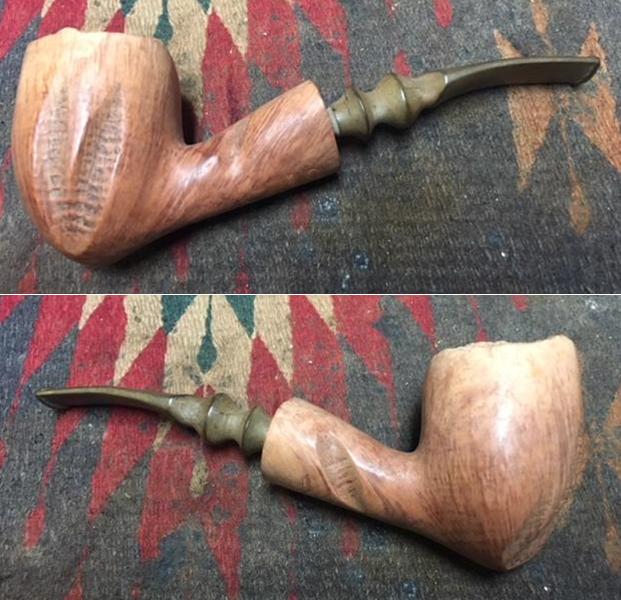
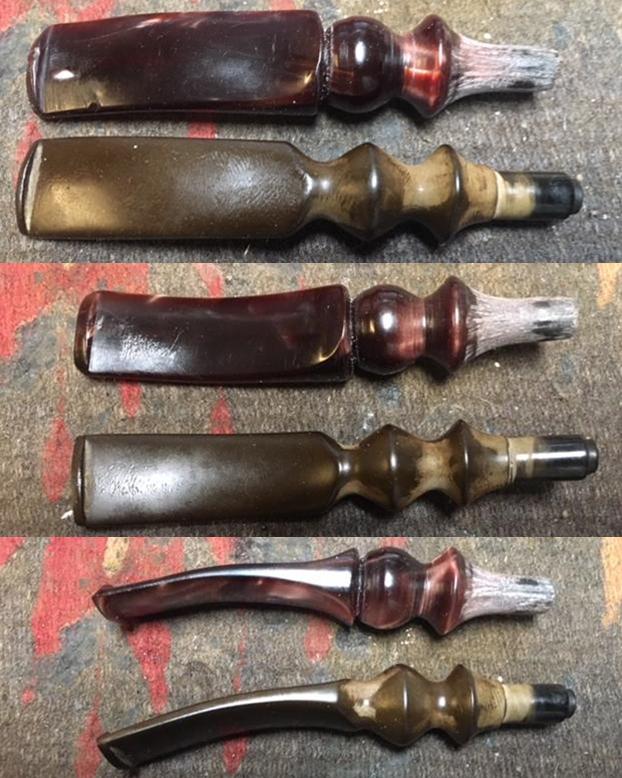
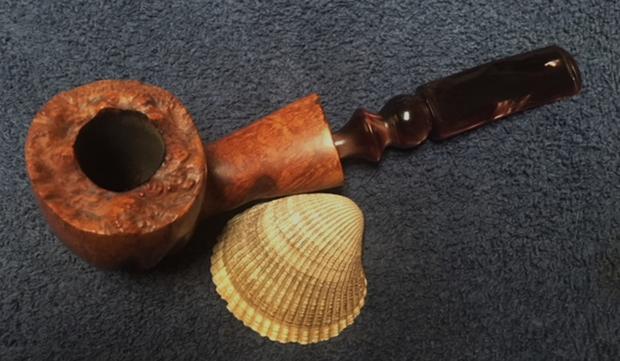
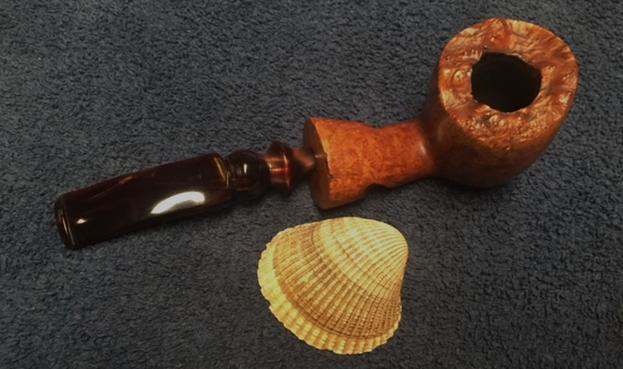
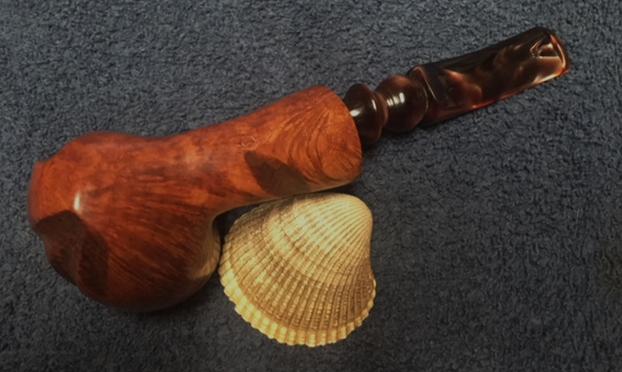
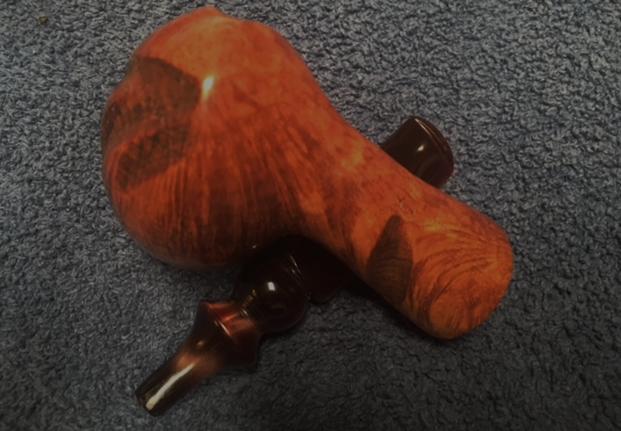
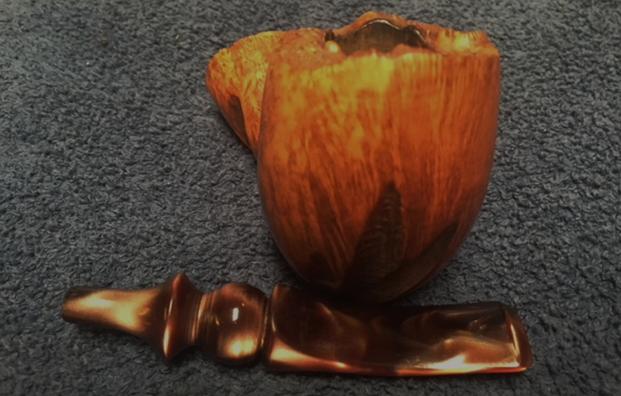
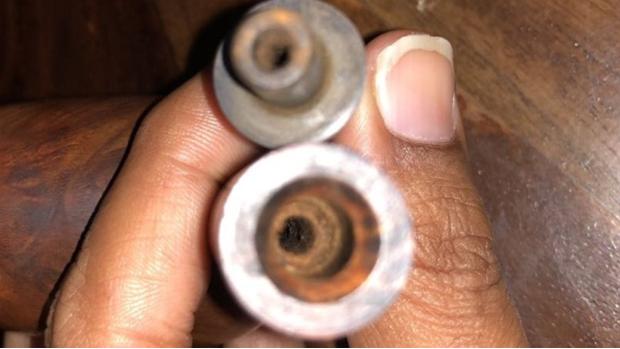
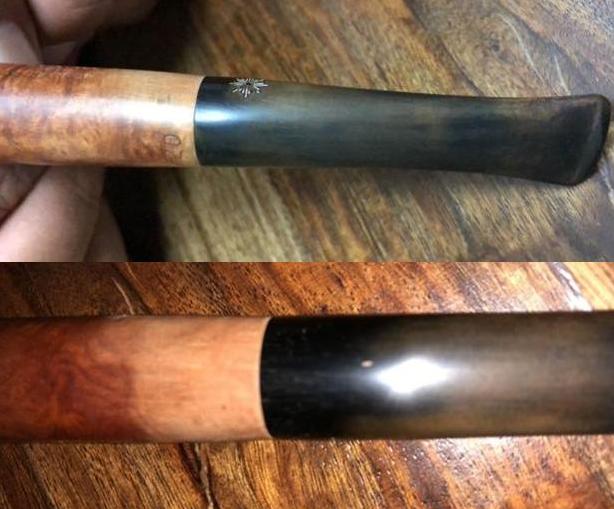
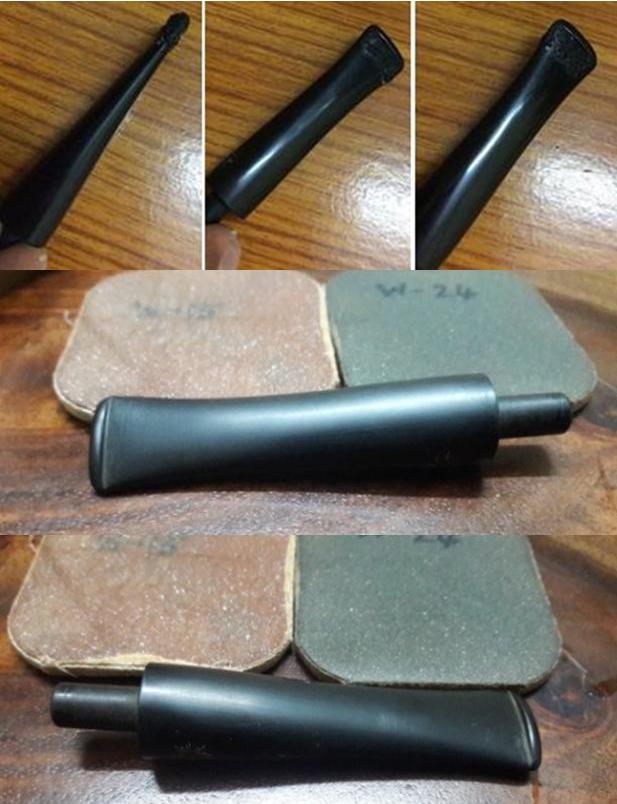
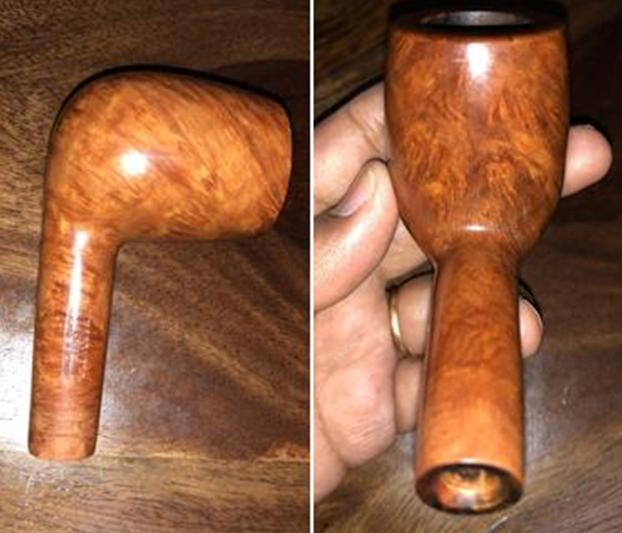
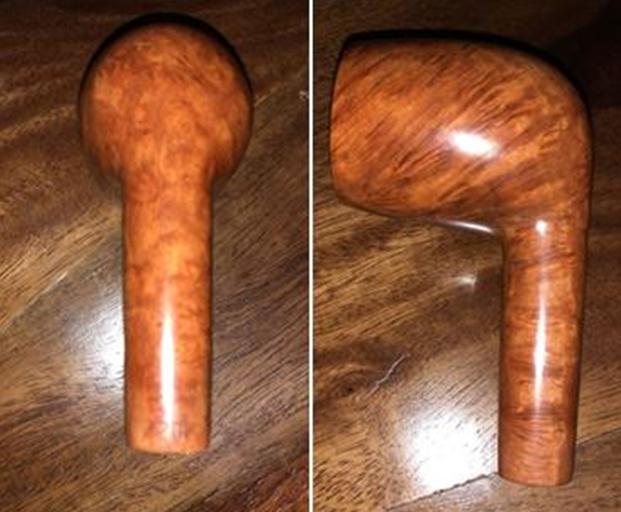
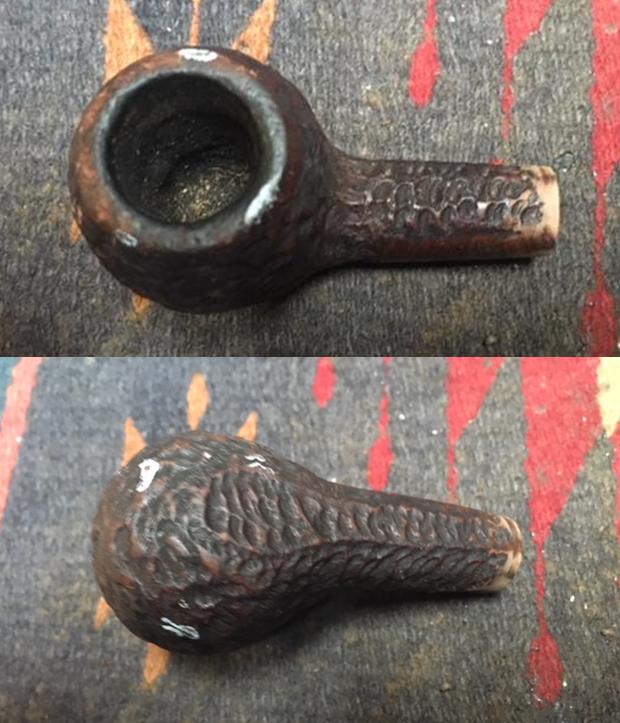
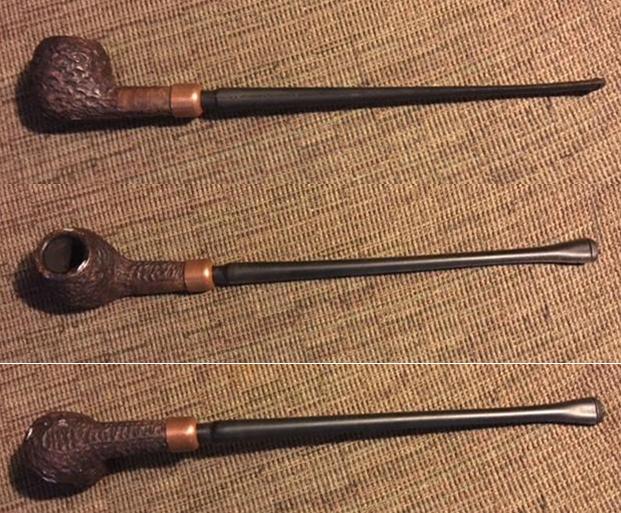
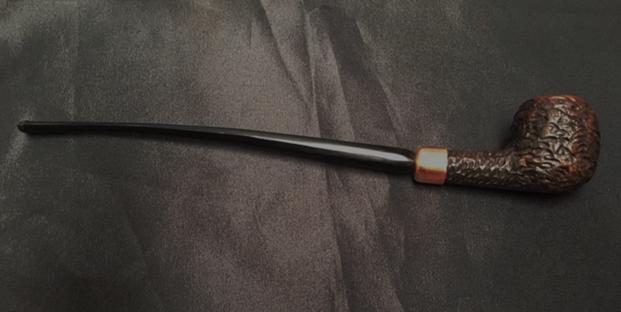
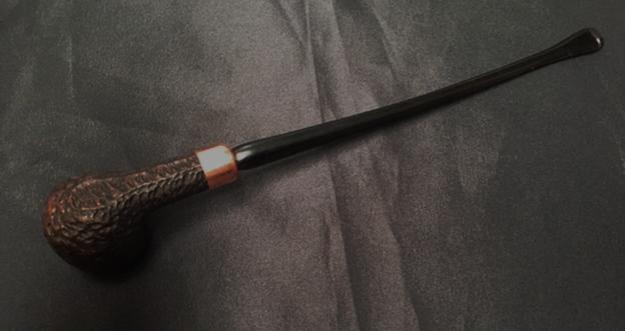
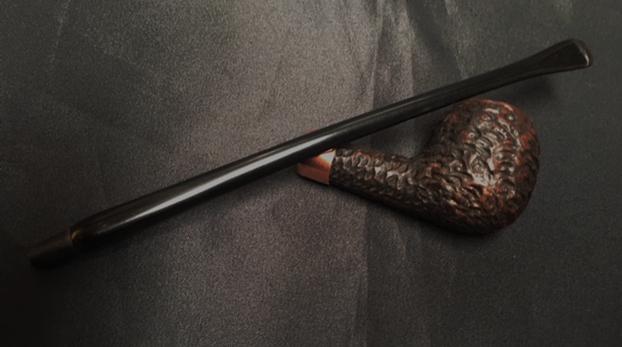
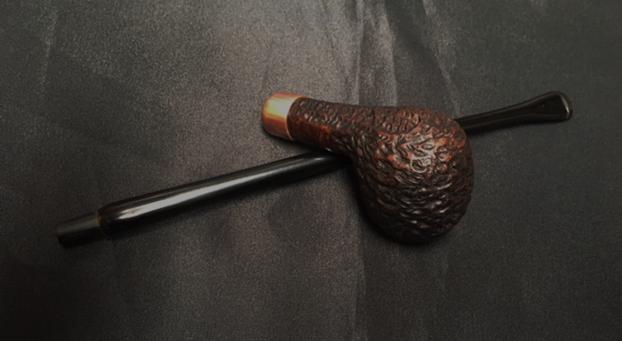
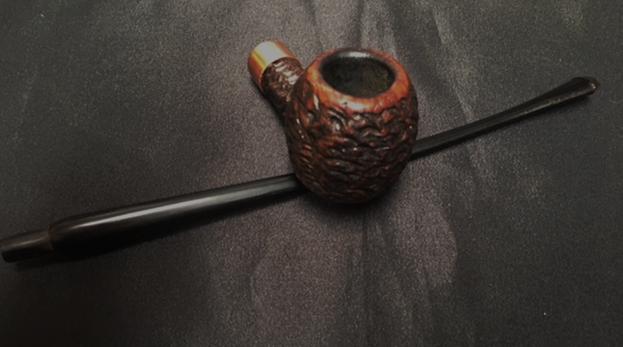
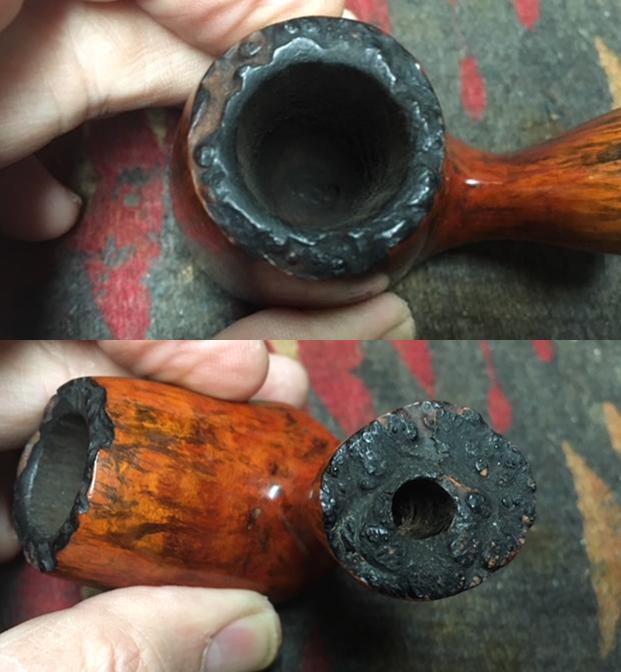
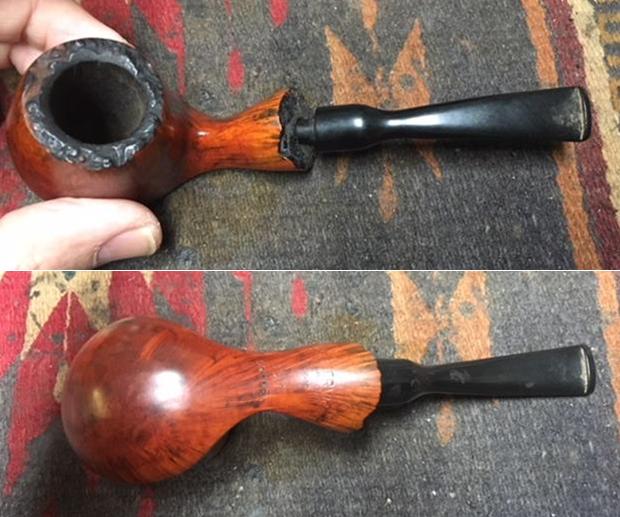
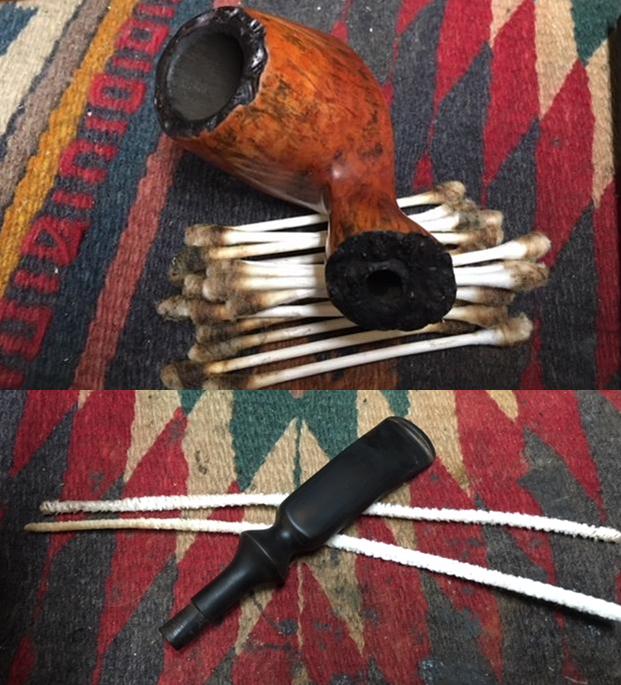
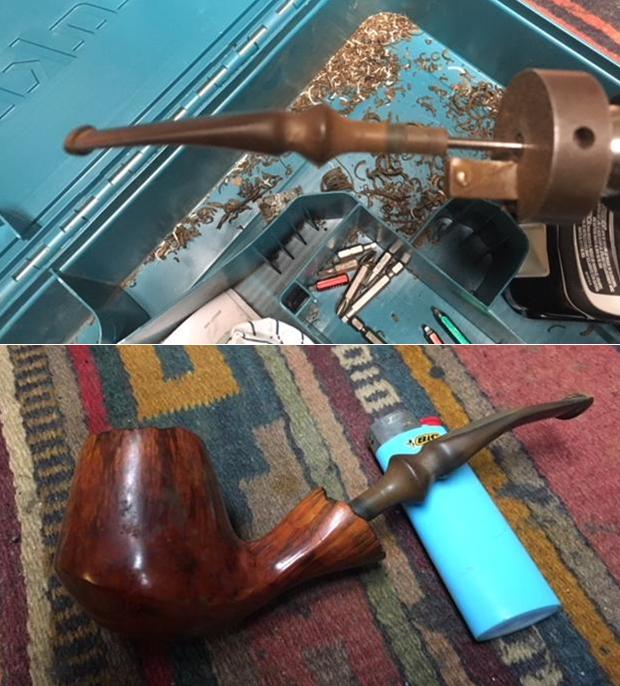
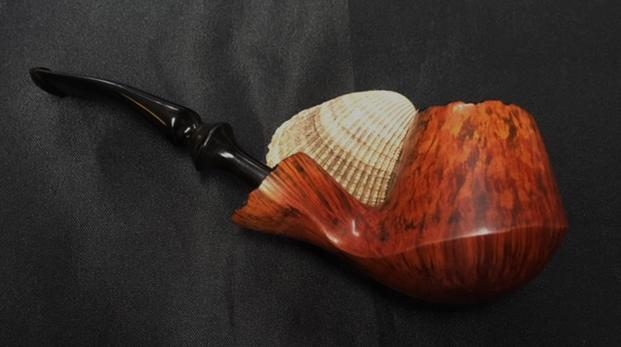
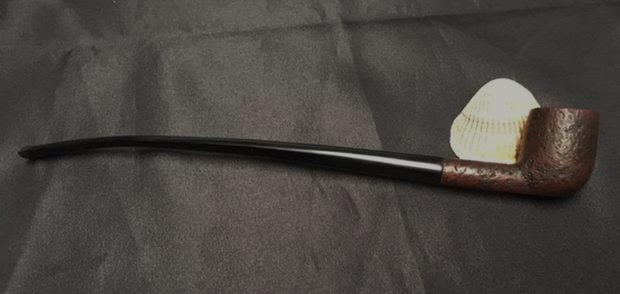
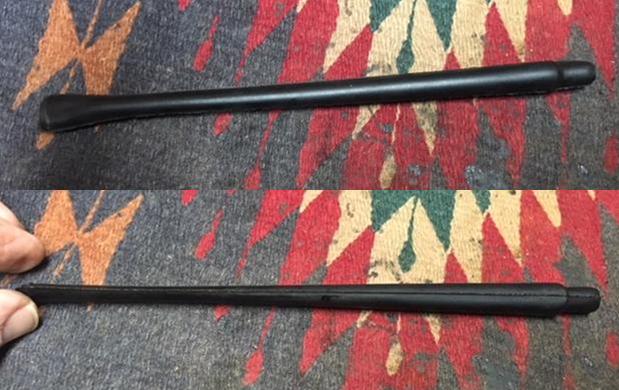
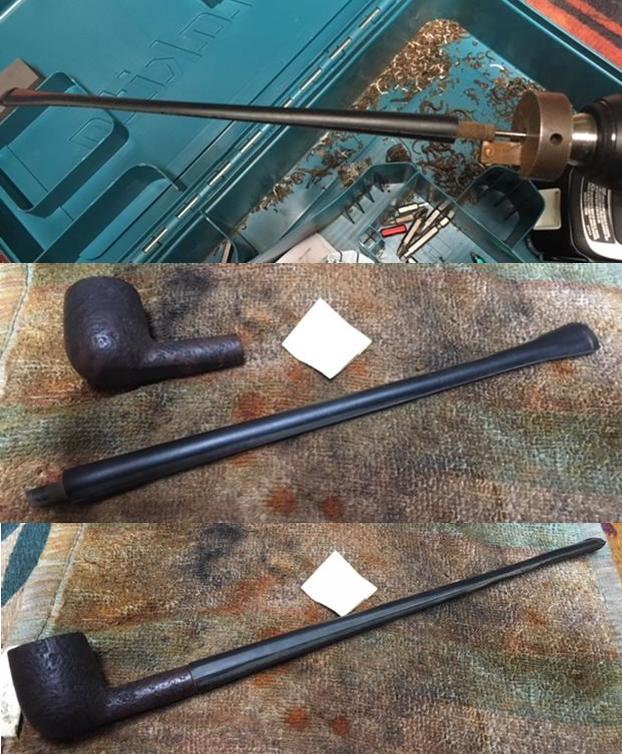
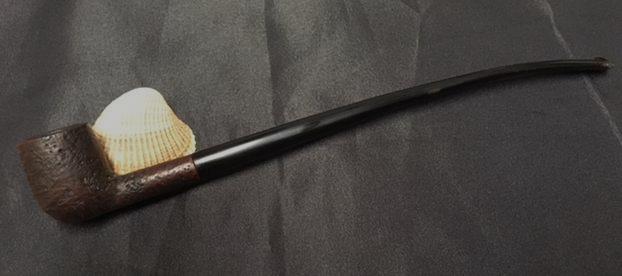
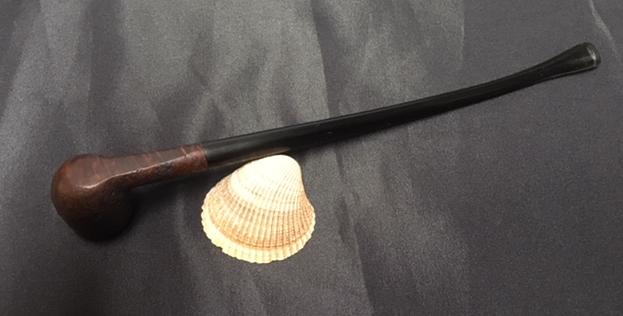
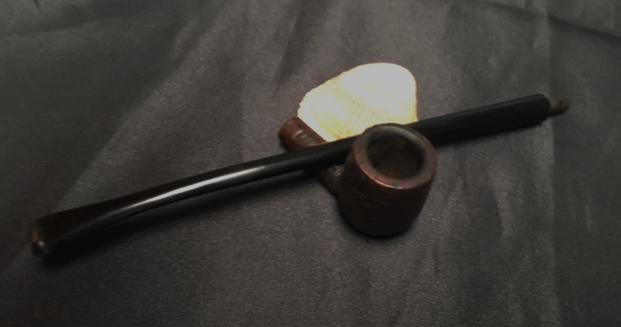
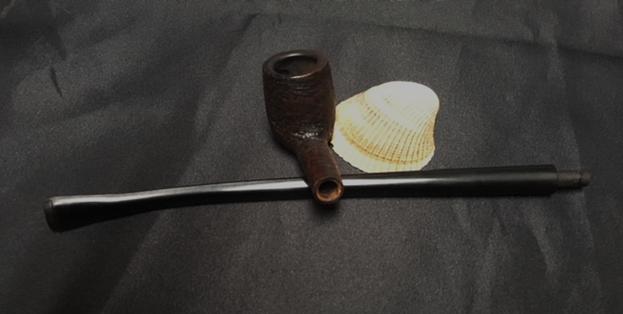
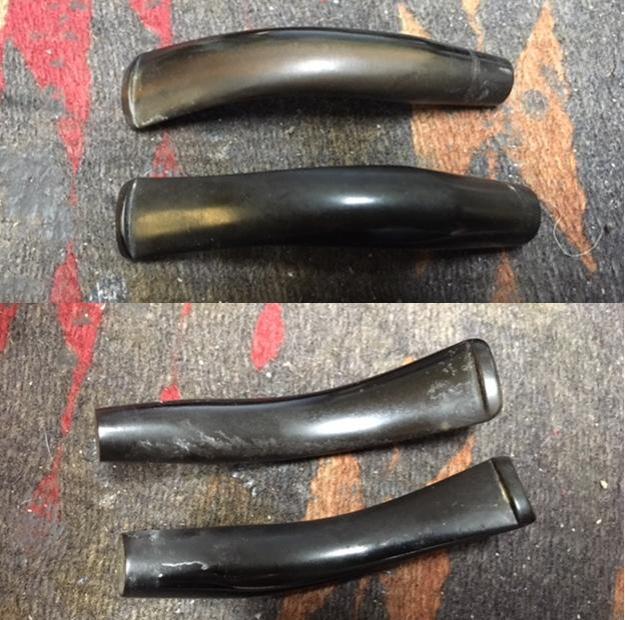
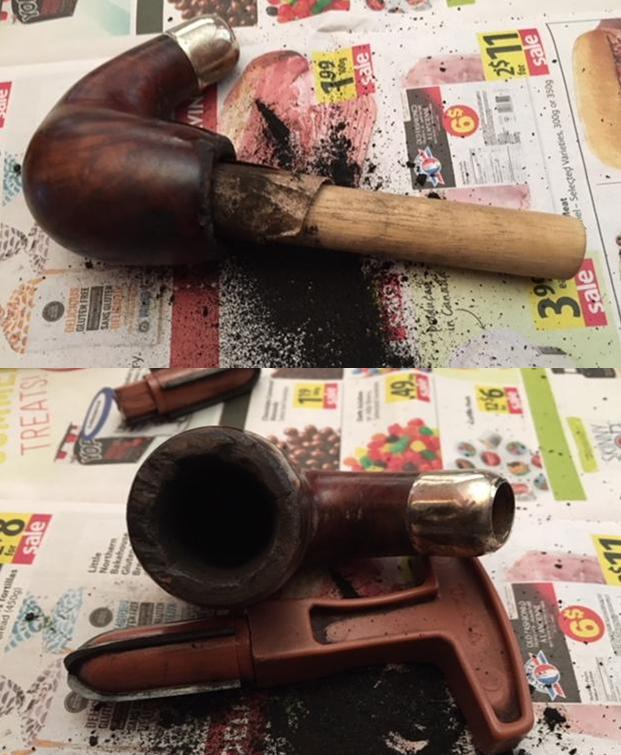
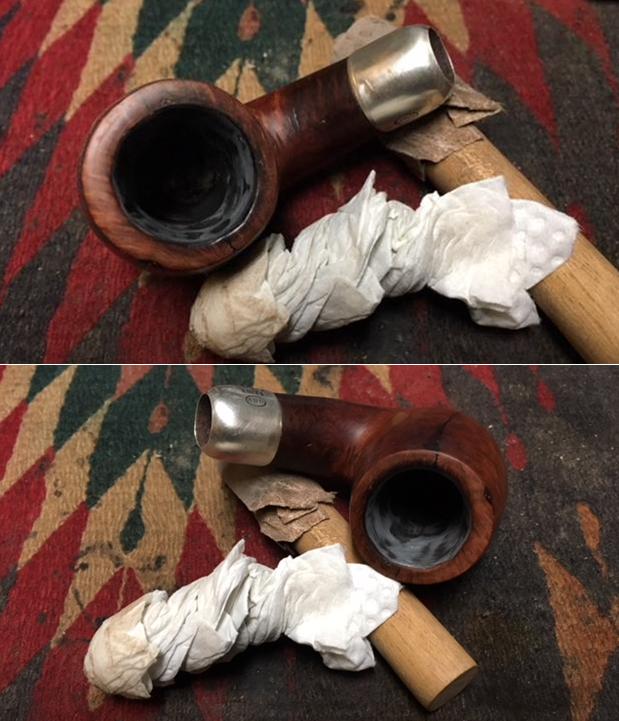
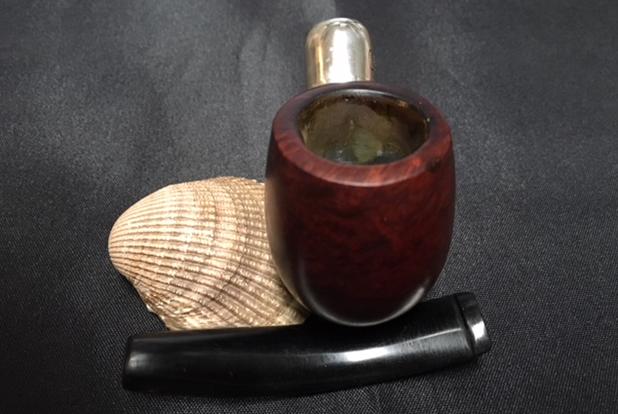
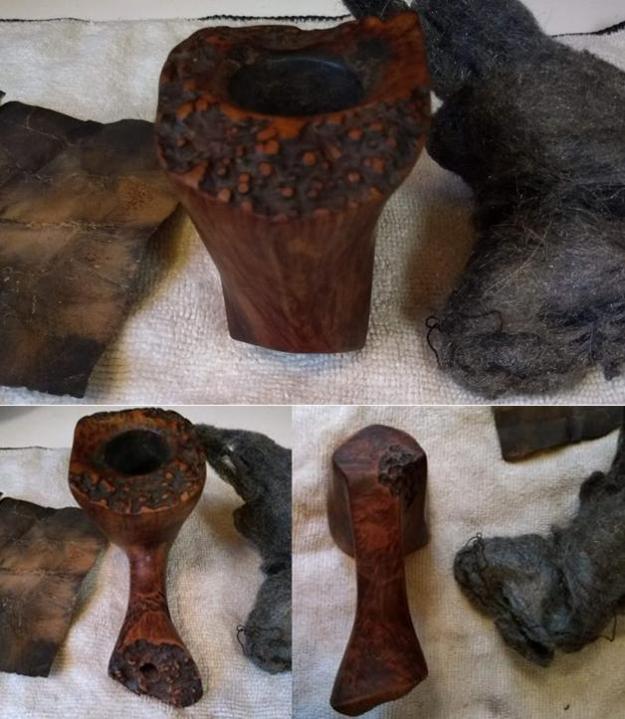
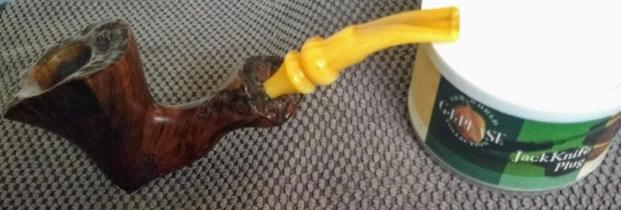
The poor, big lunk of fine Danish stock in this blog had fallen on hard times and was in a sorry state.  The following triple stem swap gets a little crazy, so try to follow this.  The KE came with a nice dark brown swirled acrylic fancy stem that was just way too short to support its gigantic stummel but was perfect for a Knute of Denmark from the same lot that I already restored, blogged and sold – with the KE stem.  The Knute, by the way, had a Vulcanite stem that was chomped, with a hole in the bottom below the button I fixed well but the absence of a full lip I knew I could mend enough for my own use but would never pass off to a customer.  So that was a no-brainer.  I decided on a temporary substitution of a bright orange Lucite stem from a Ben Wade by Preben Holm freehand I have.  For now, the half-eaten but semi-repaired Vulcanite stem from the Knute is on the BW.  I’ll just add that I’m anxiously awaiting replacements for both of them.

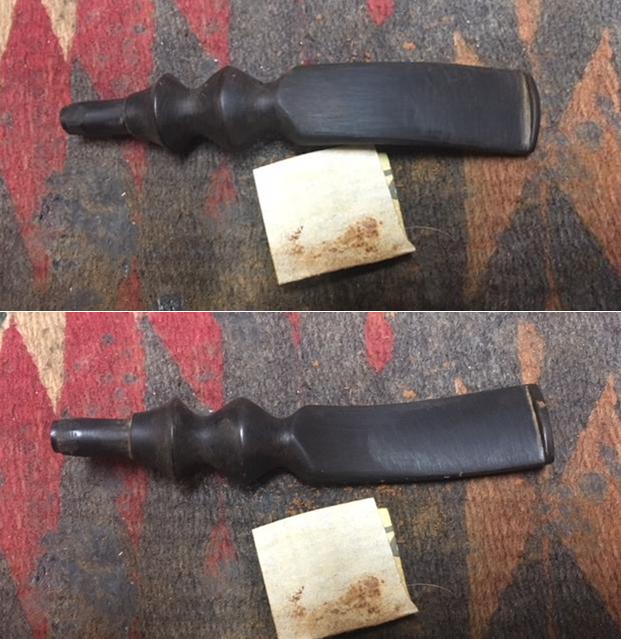
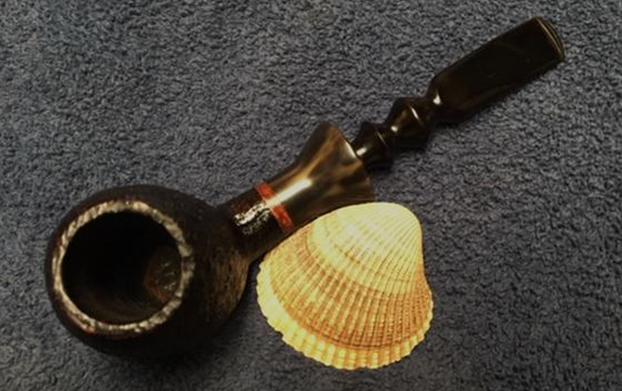
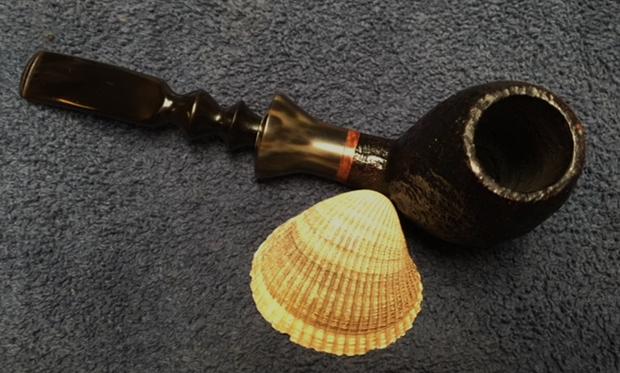
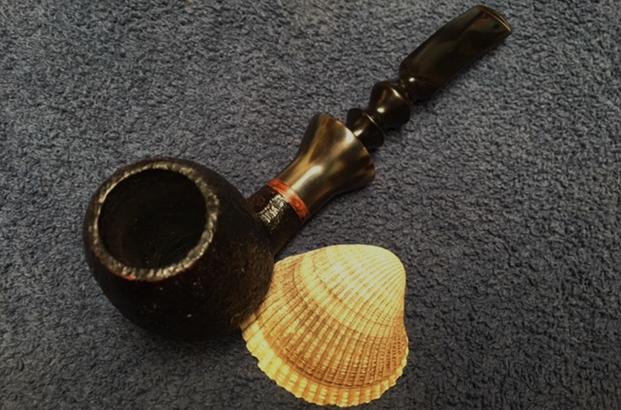
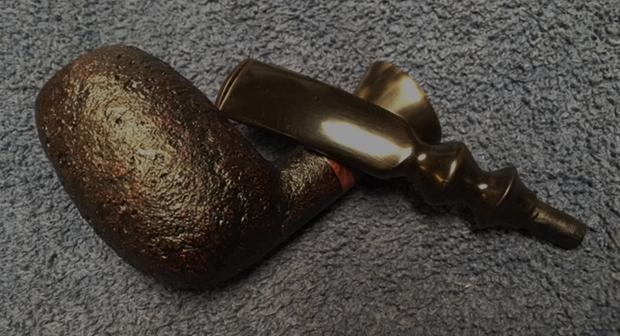
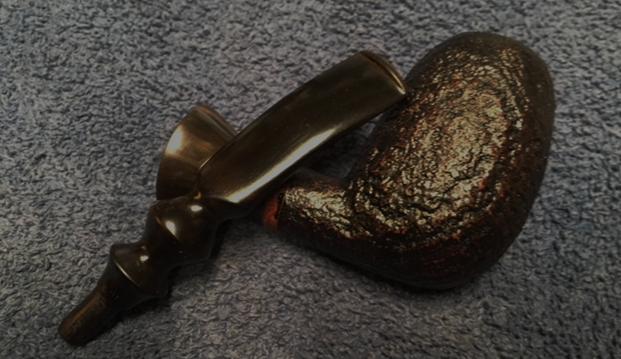
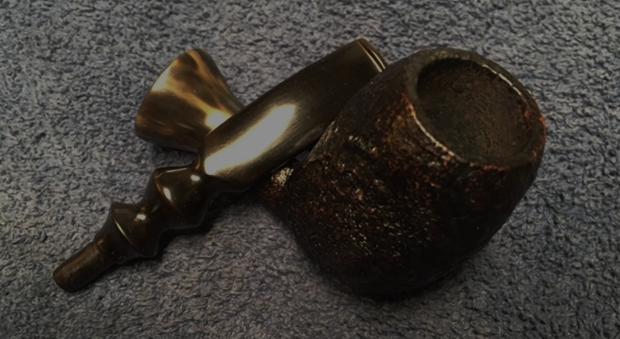
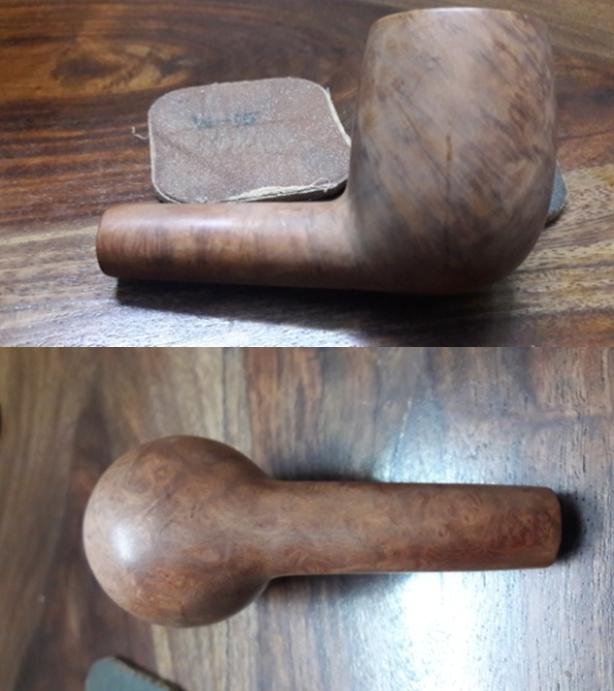
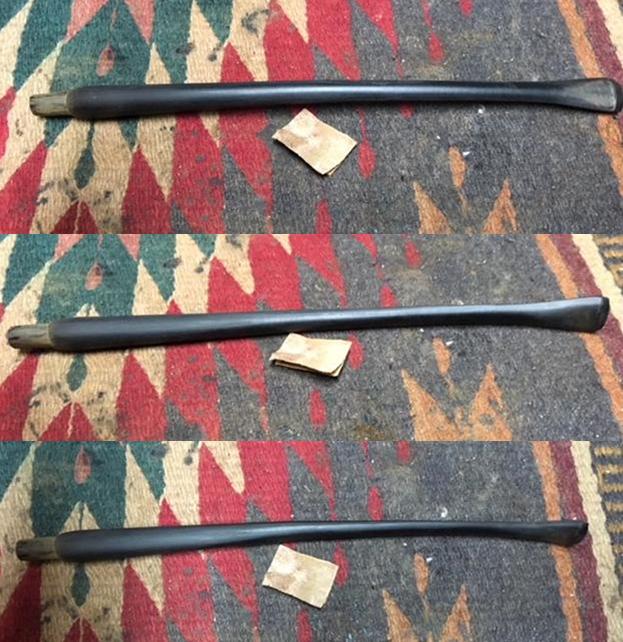
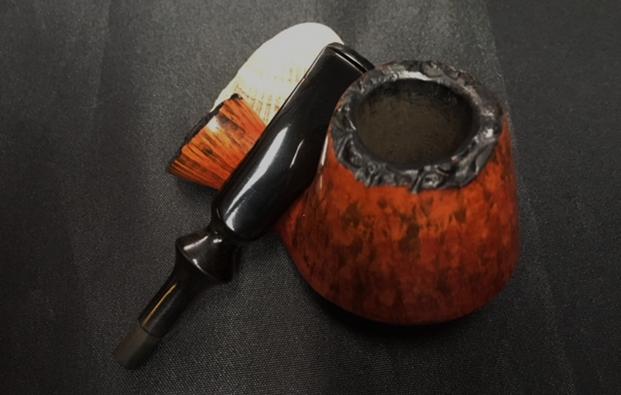
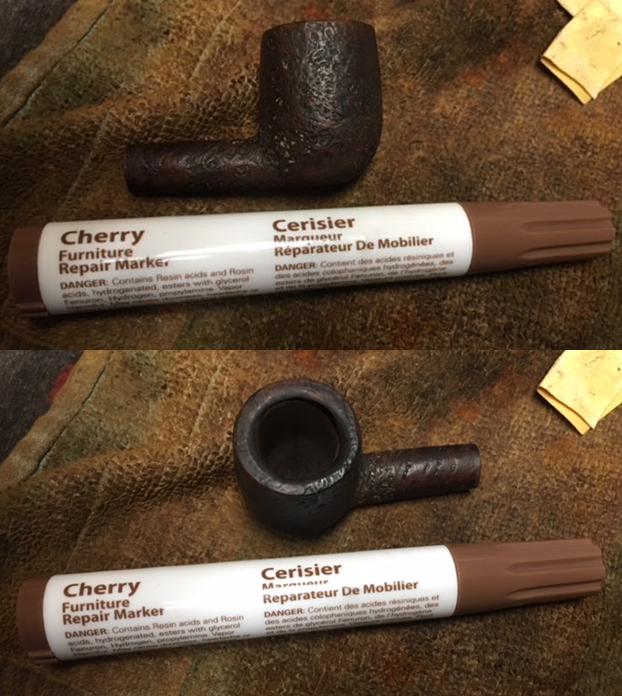
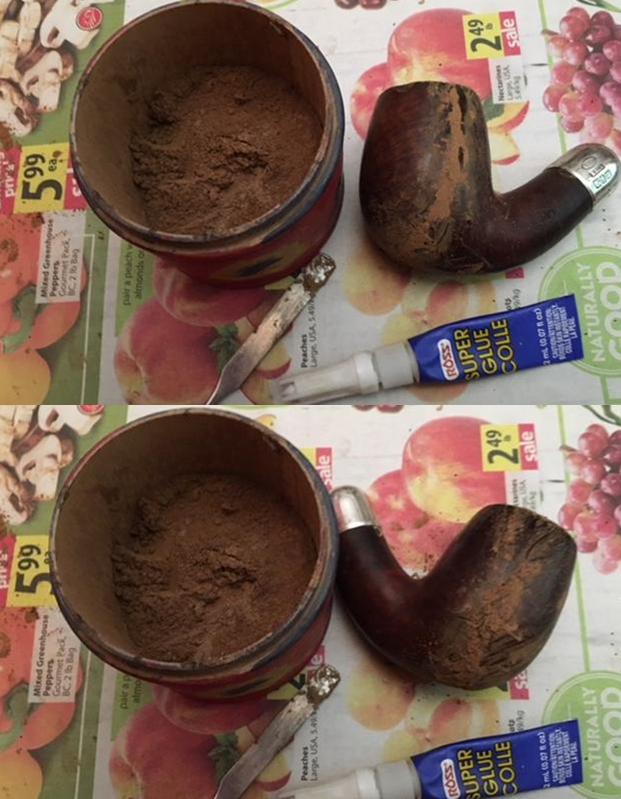
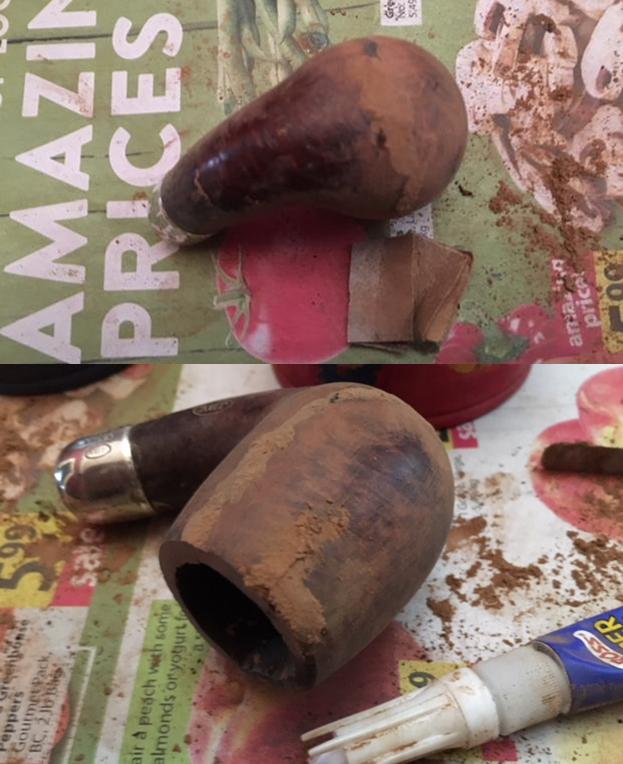
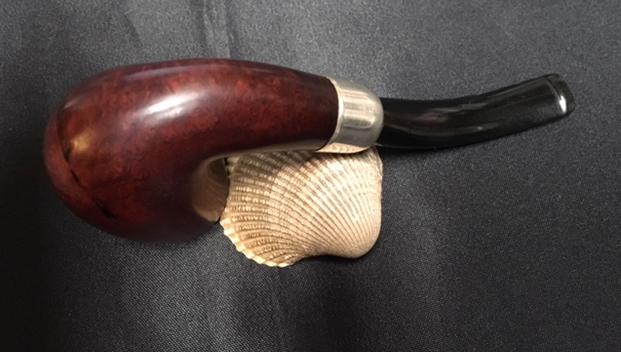
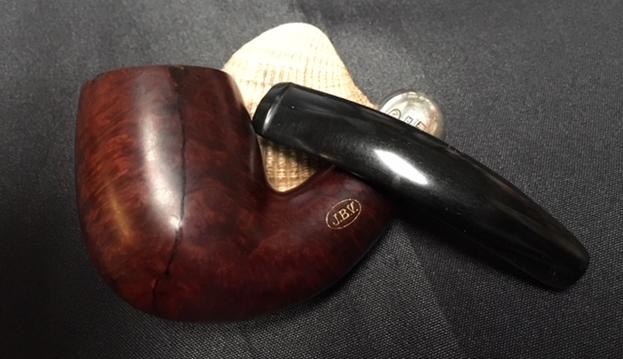
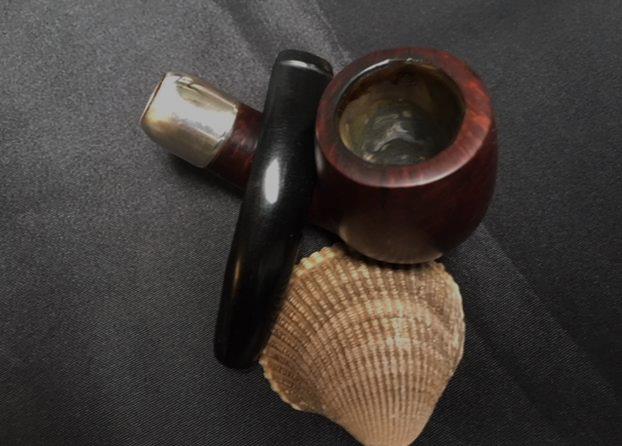
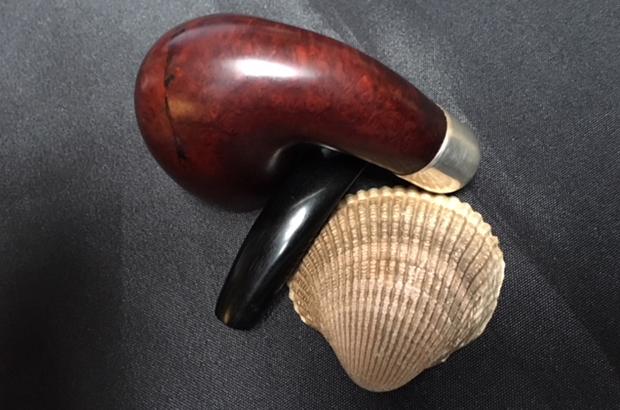
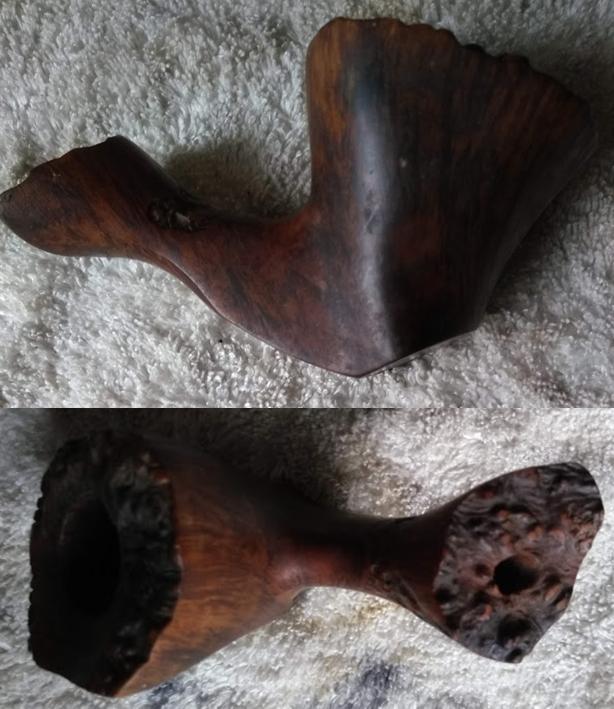
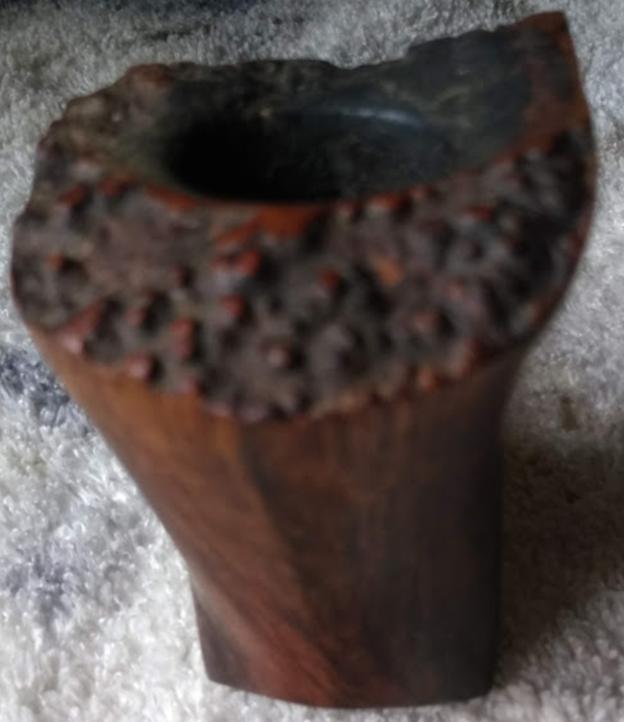
Here are photos of the KE as I received it minus the stem, and the Knute Vulcanite bollix I mended as far as I’m going to do for now, with no signs of the hole that was on the underside but a bit of a double lip there now and the pre-existing half lip topside.
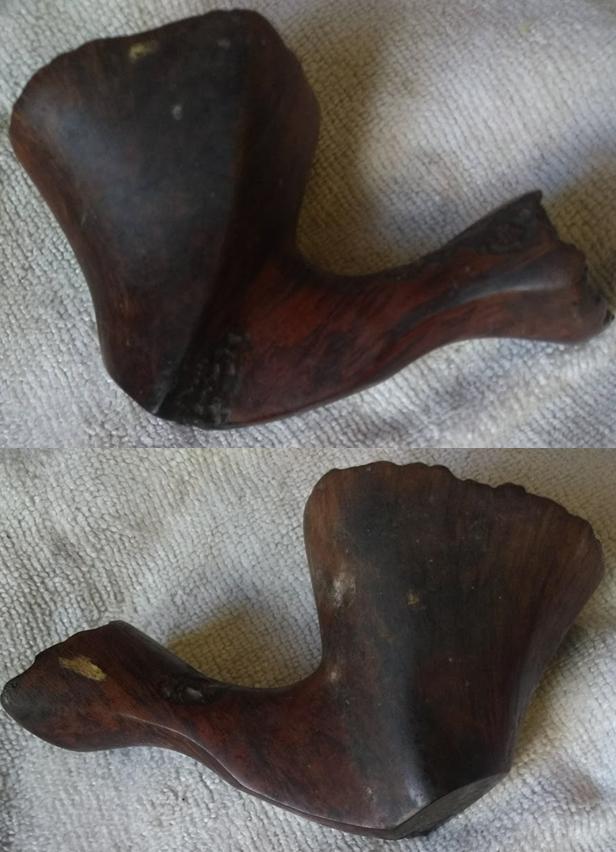
 RESTORATION
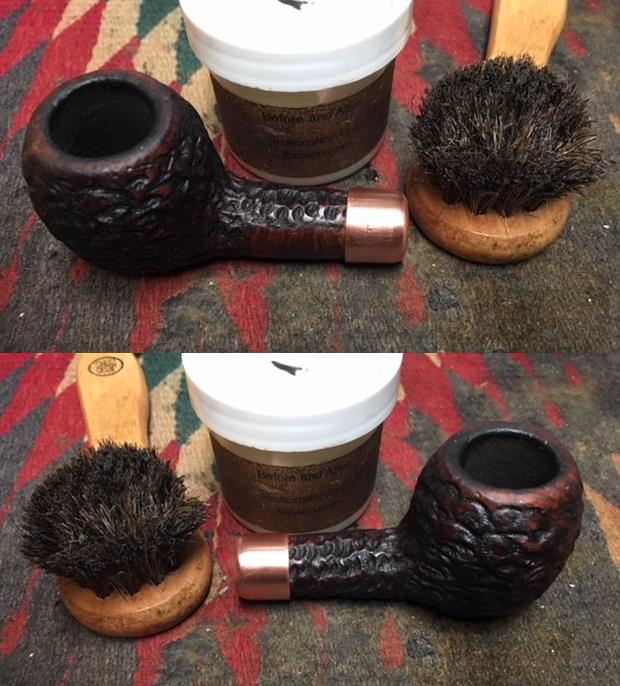
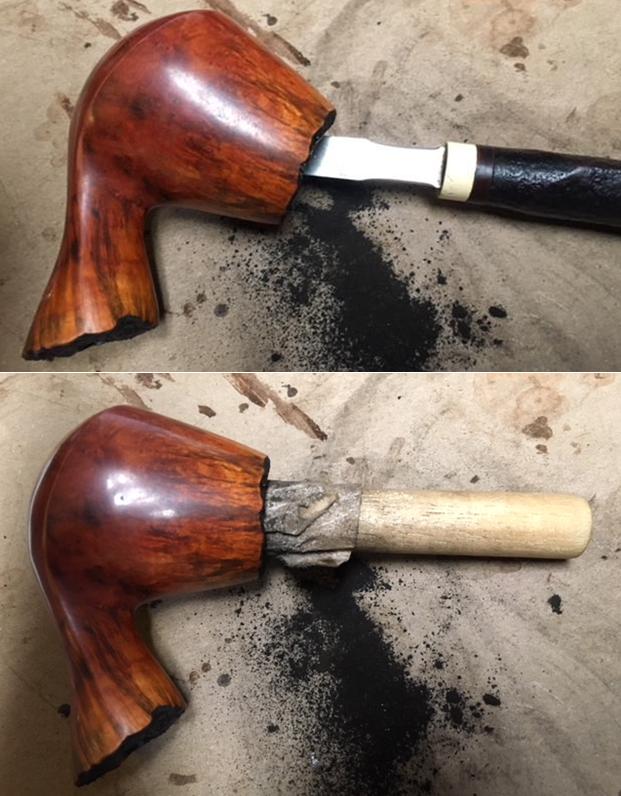
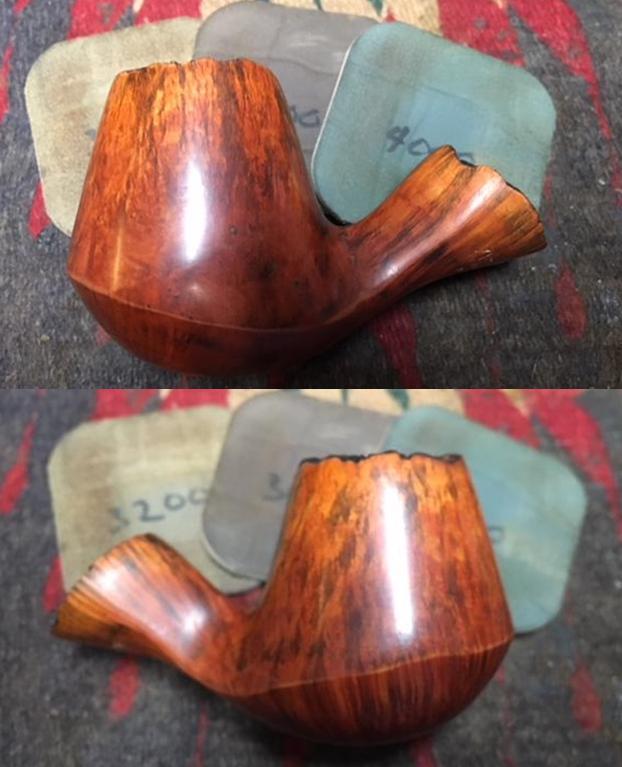
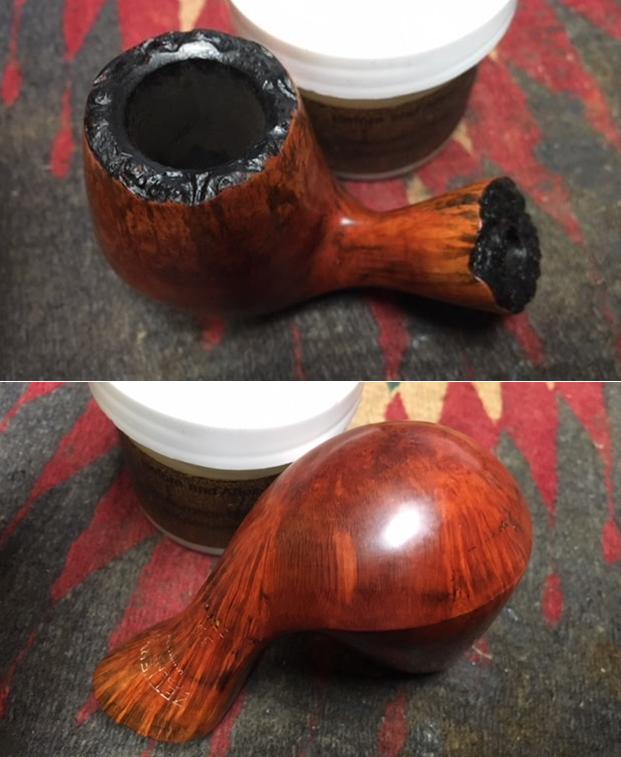
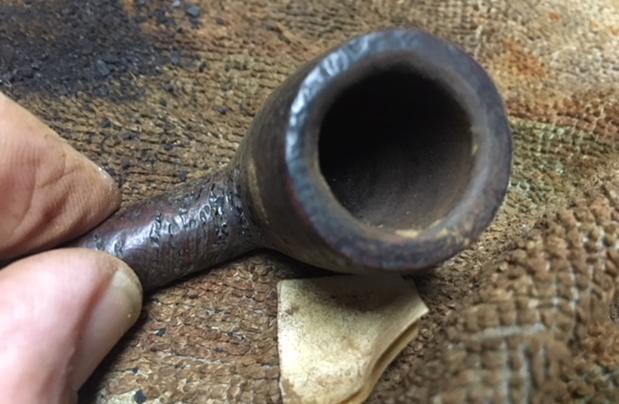
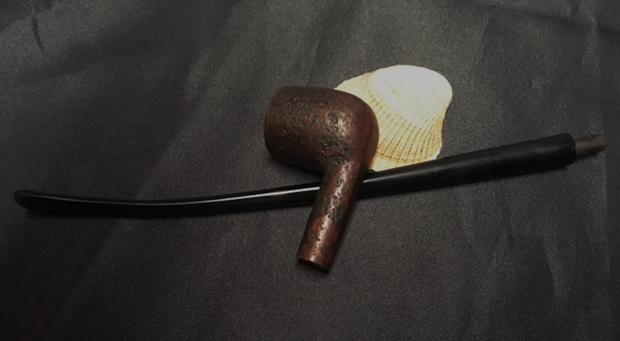
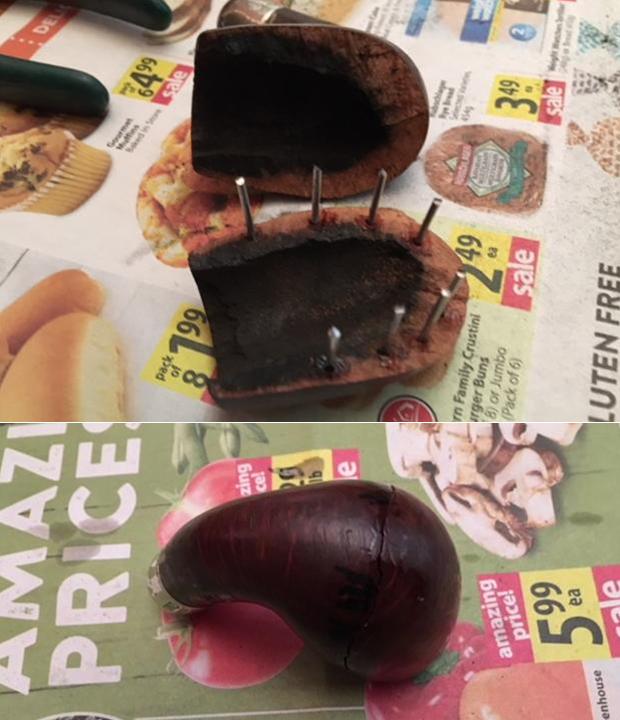
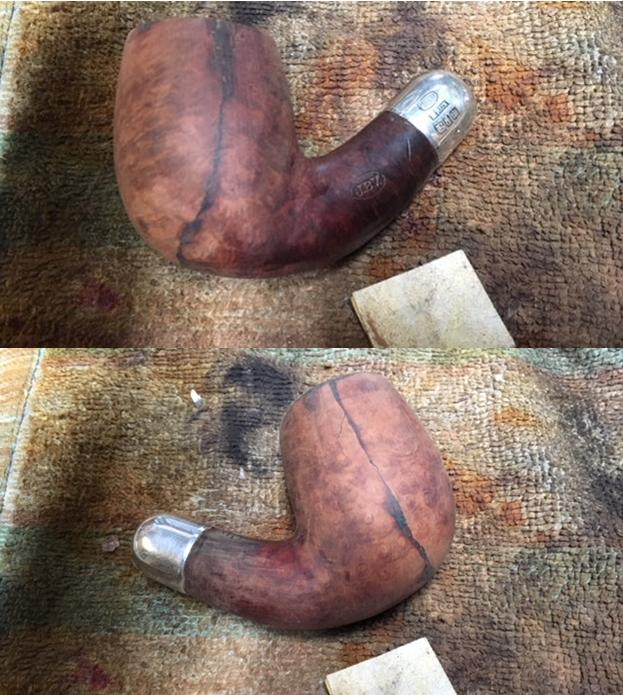
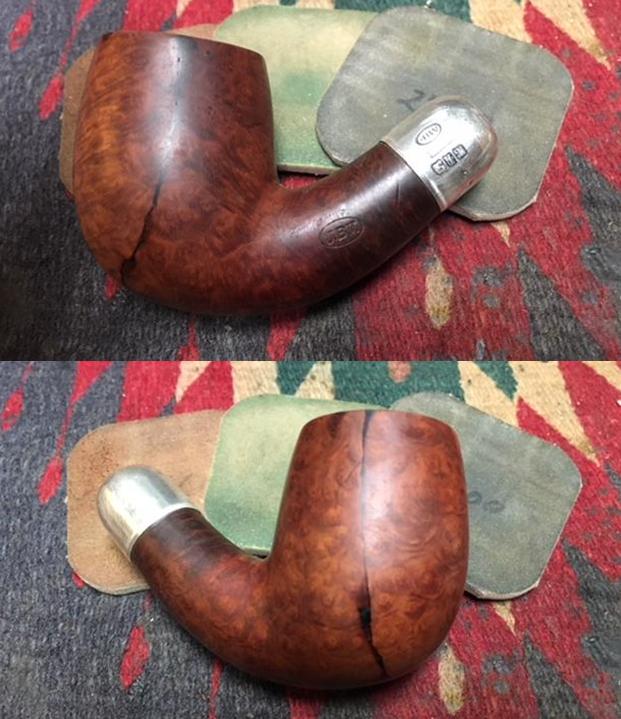
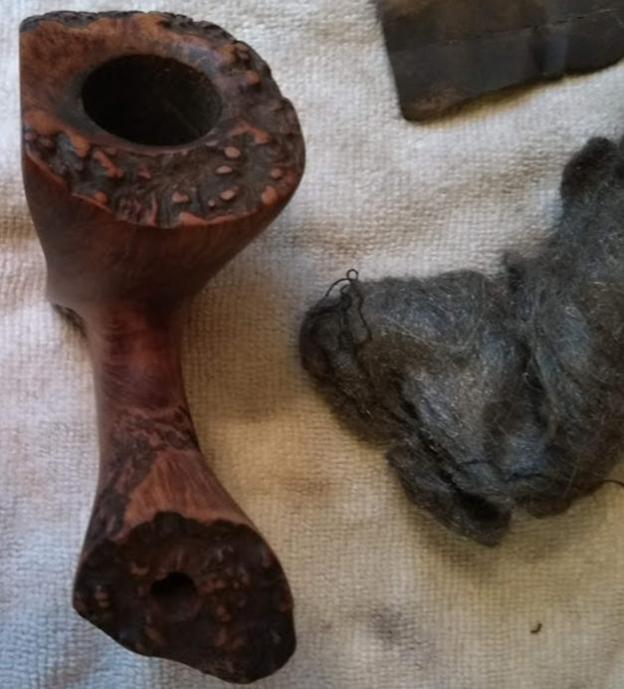
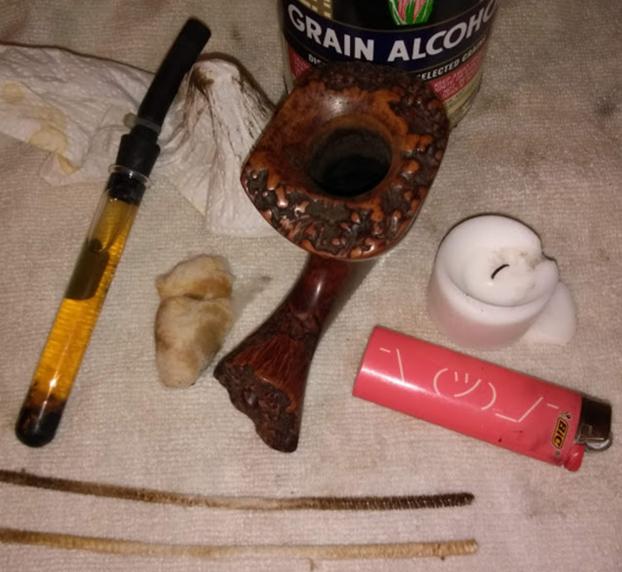
Part of me knew, from the rich, dark briar grain that glowed through the long bottom of the shank after I vanquished the grime that had overcast its natural, smooth brilliance, that the rest of the wood could only be better.  But the Devil’s Advocate in me gave rise to the tomfool but nevertheless undeniable apprehension that nothing good could come from stripping away the sedimentary layers of anomalous substances.  I decided to be done with the majority of the business using an Everclear soak.

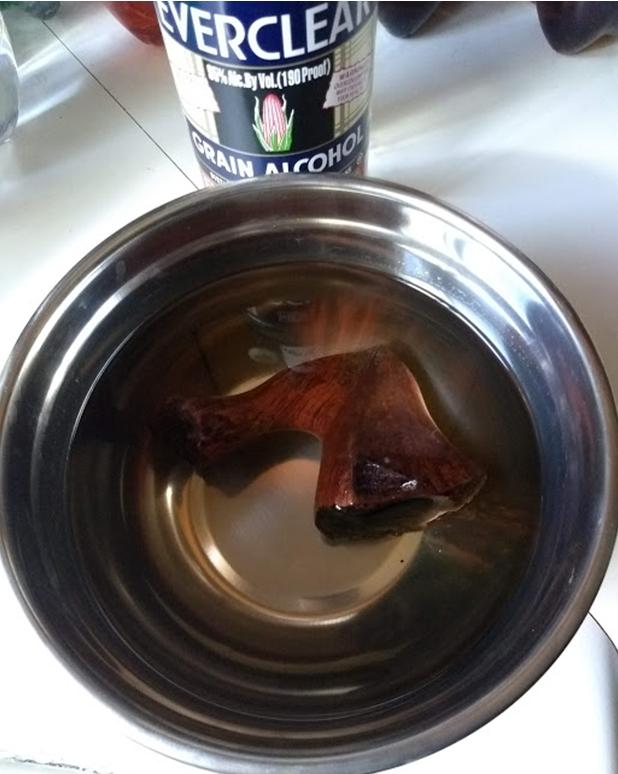
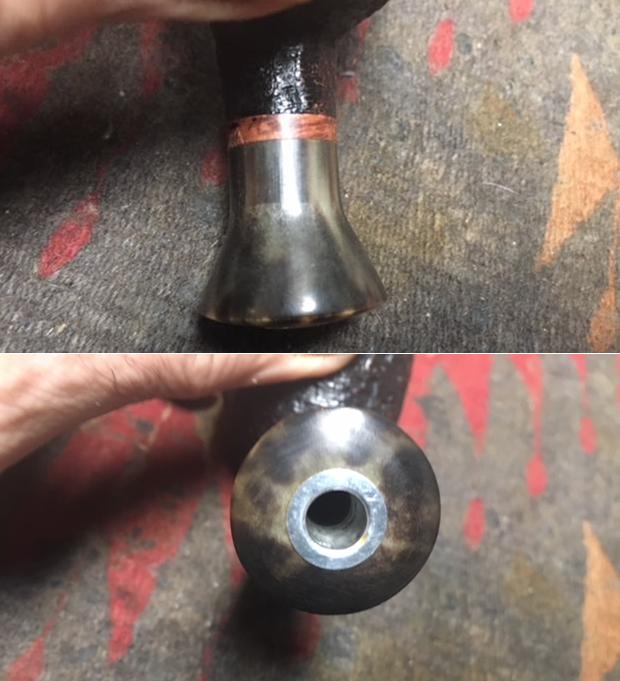
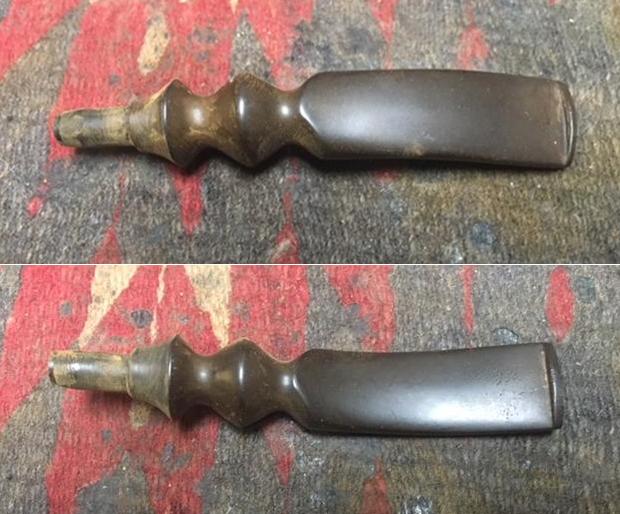
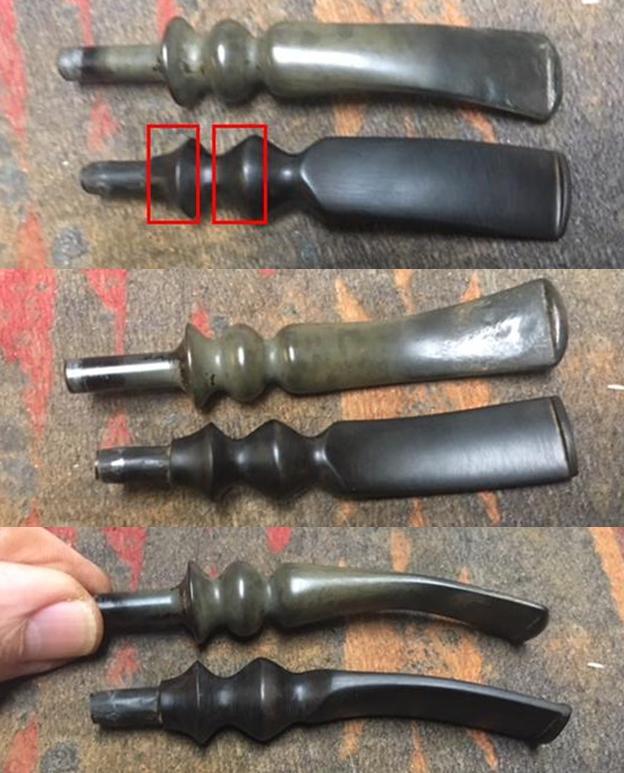
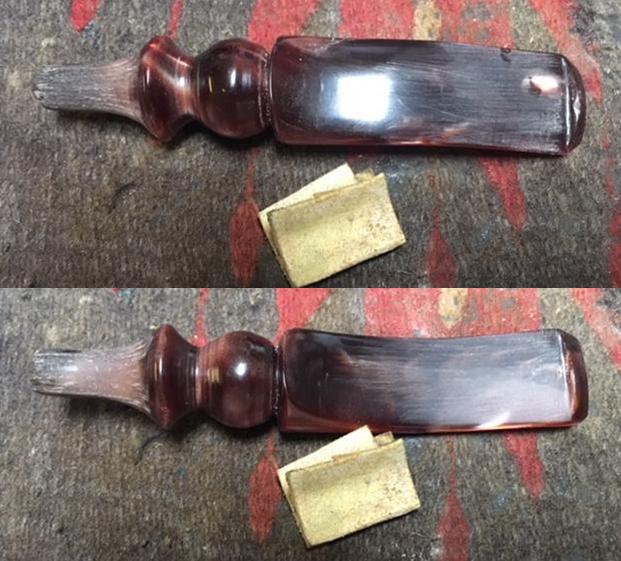
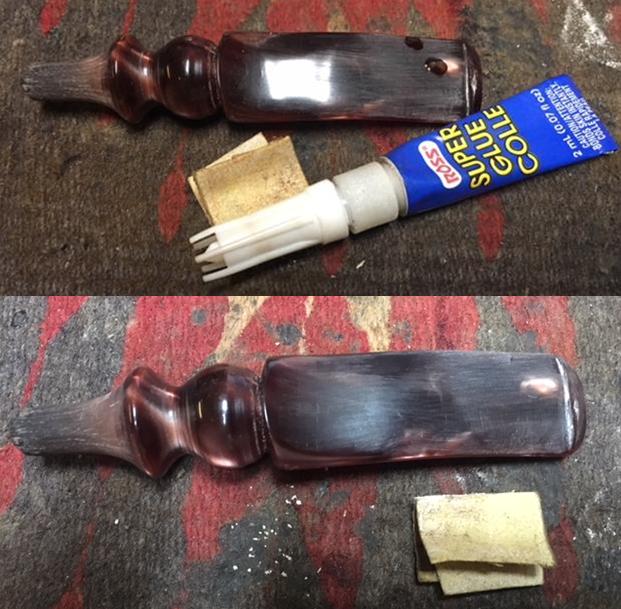
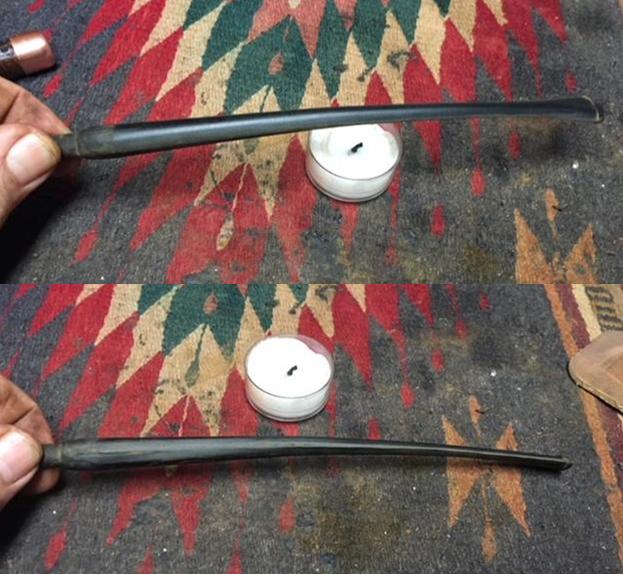
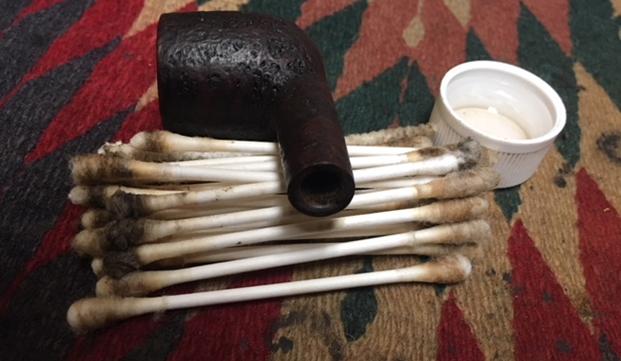
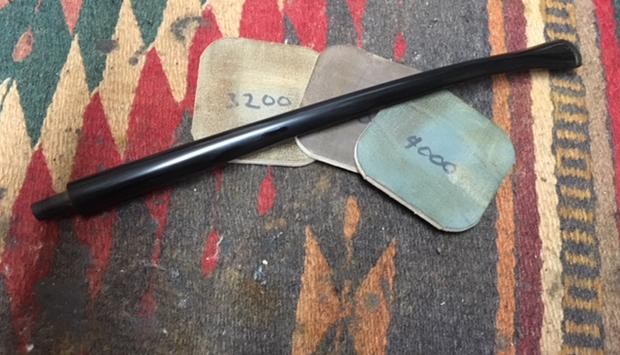
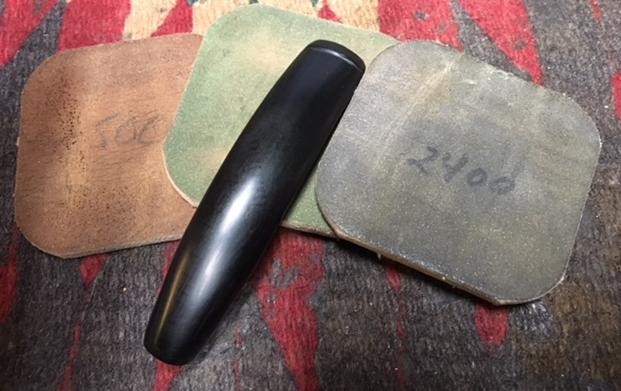
To keep my mind from its pointless and counterproductive negative preoccupation with the state of the stummel, I turned my attention to the Lucite stem that was taken off the BW to use in place of the lovely and too petite stem with which the pipe came.  Note the dark stains inside the stem’s airhole and the bore and tenon opening. 
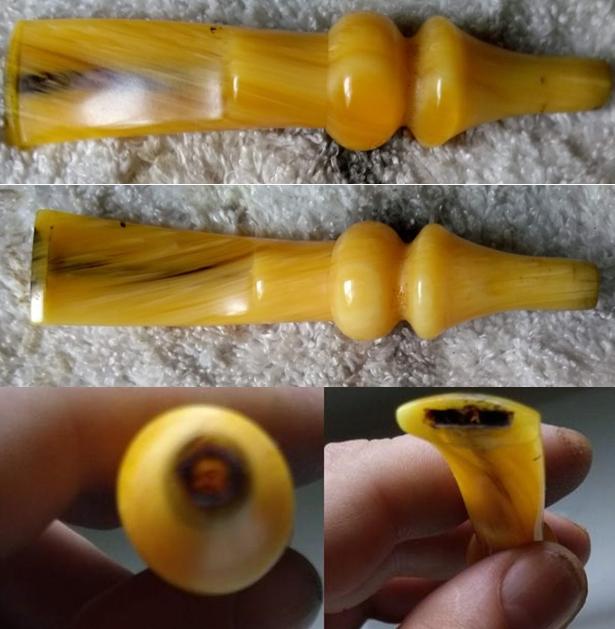
Most of the inner stain came out with alcohol soaked bristly cleaners, and the rest of that later with the retort.  The bore and shank end, on the other hand, needed more wheedling.  At first when I tried the small end of a bristly cleaner dipped in alcohol, I had minimal results.  Switching to something more pointed, sharp and focused – an unwound paper clip – I scraped away the accreted blackness on both ends and used a 180 grit sanding pad on the tip of the shank end.  Either I forgot to snap shots of the results or misplaced them, i.e., tapped Save As on the computer and didn’t look where I did it, but I don’t have the proof of cleaning to display.  Later pictures will show all but the shank opening of the stem.

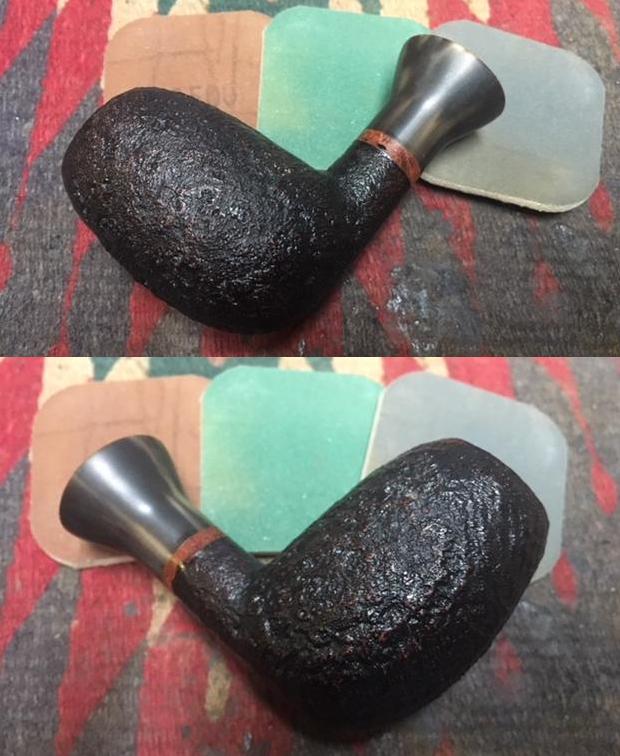
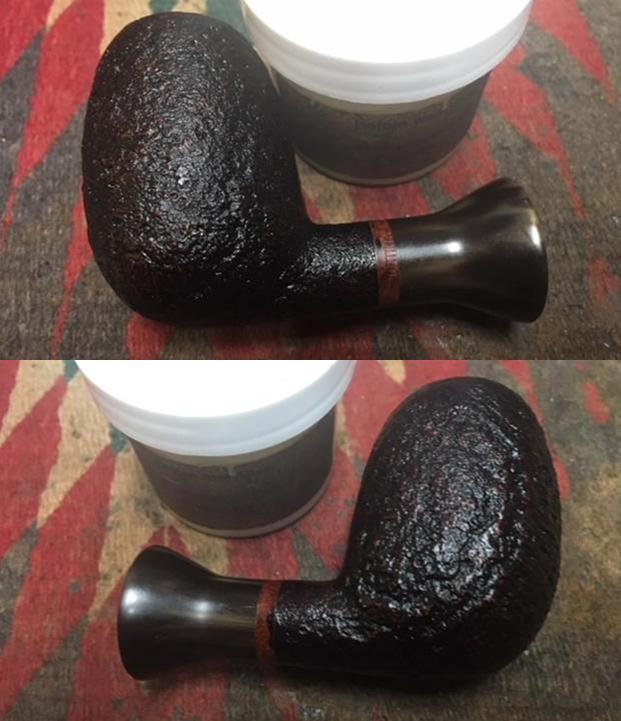
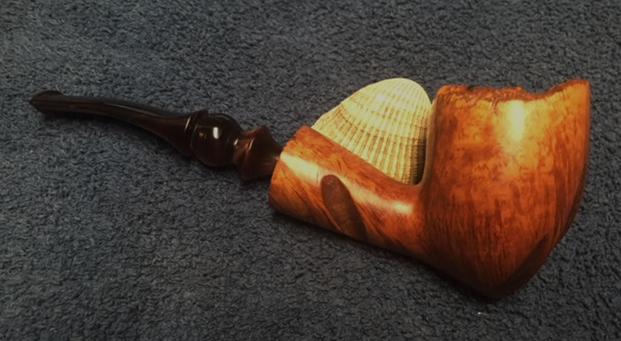
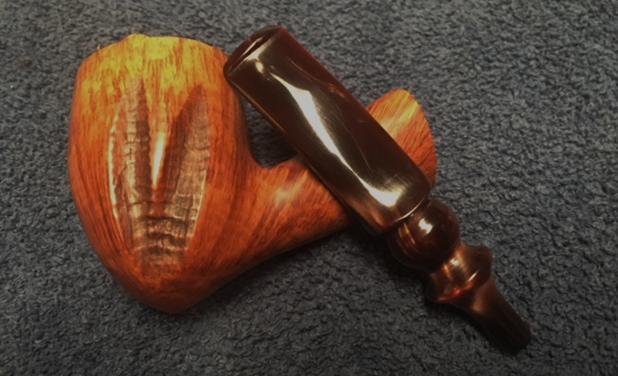
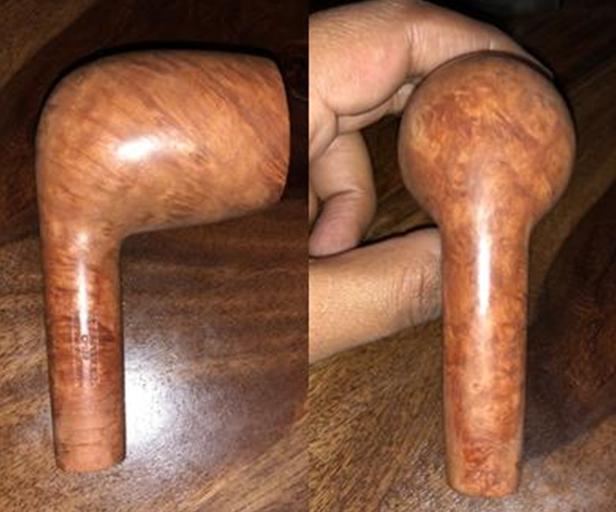
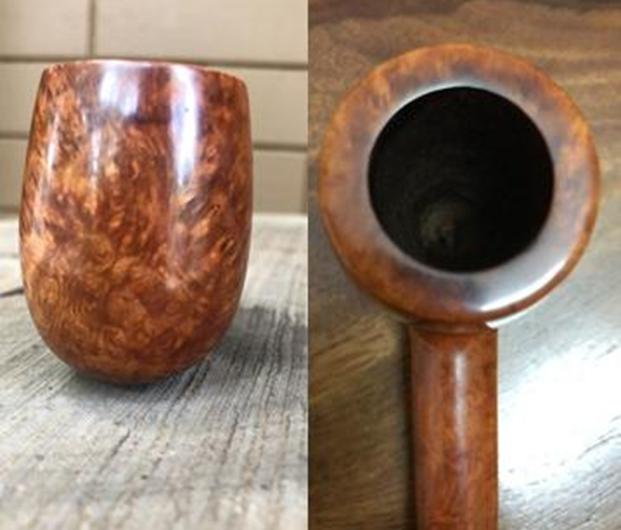
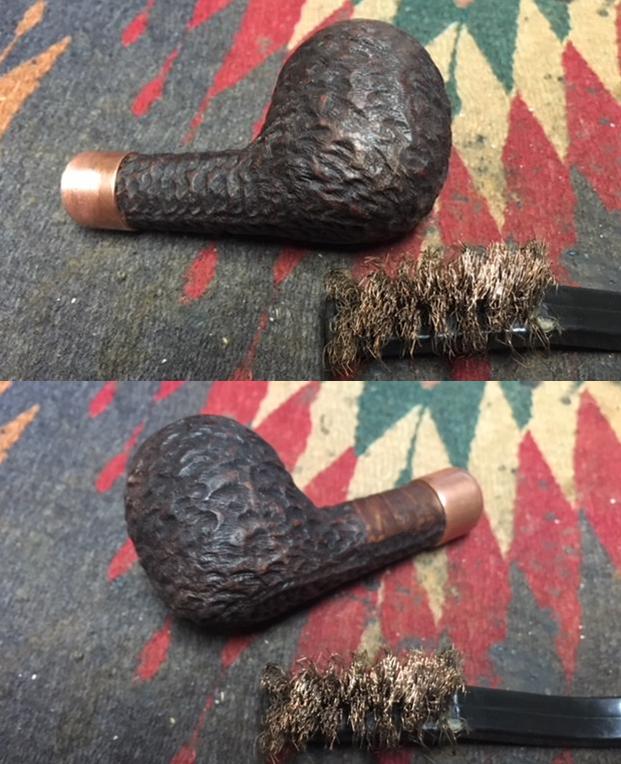
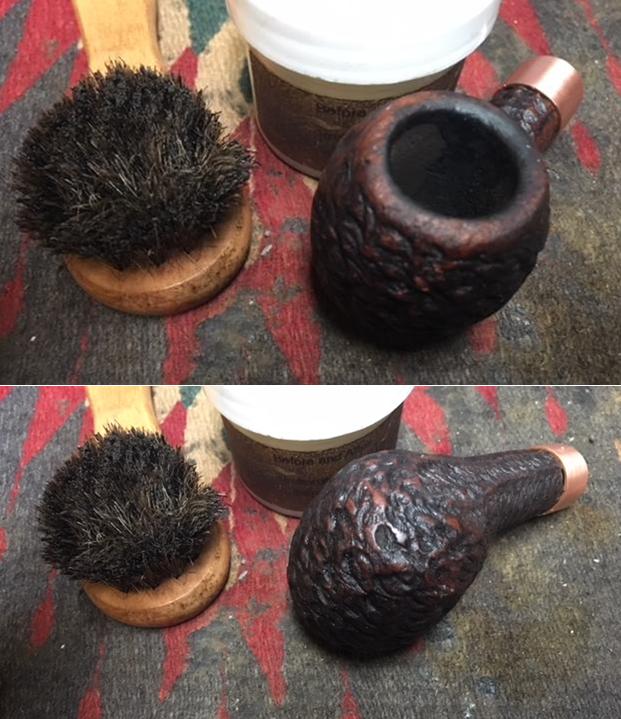
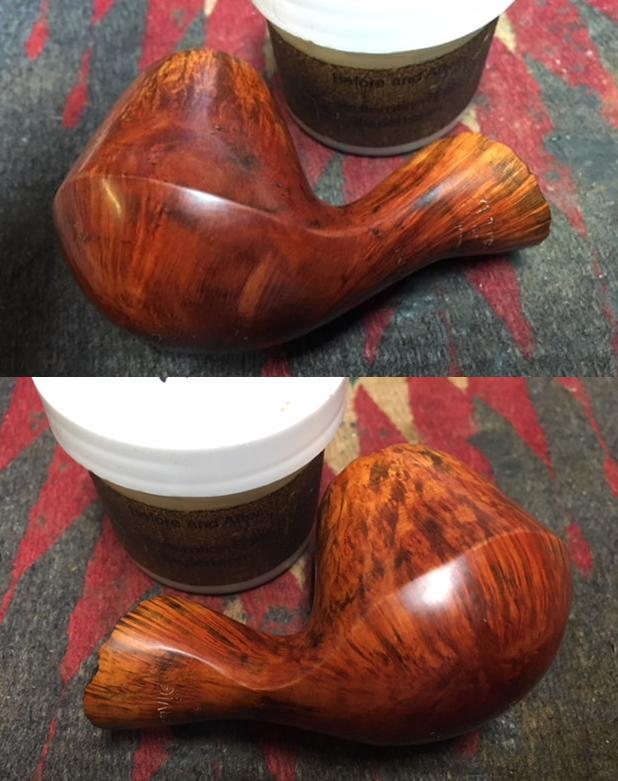
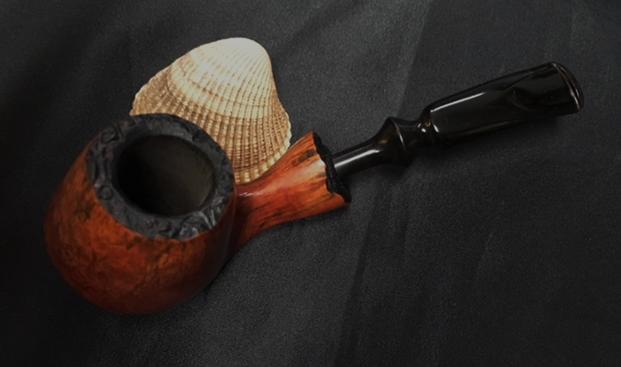
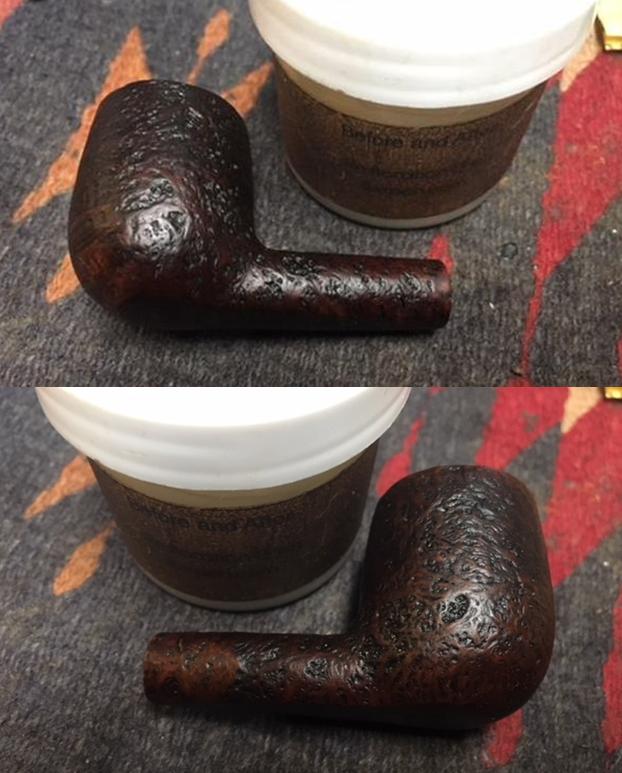
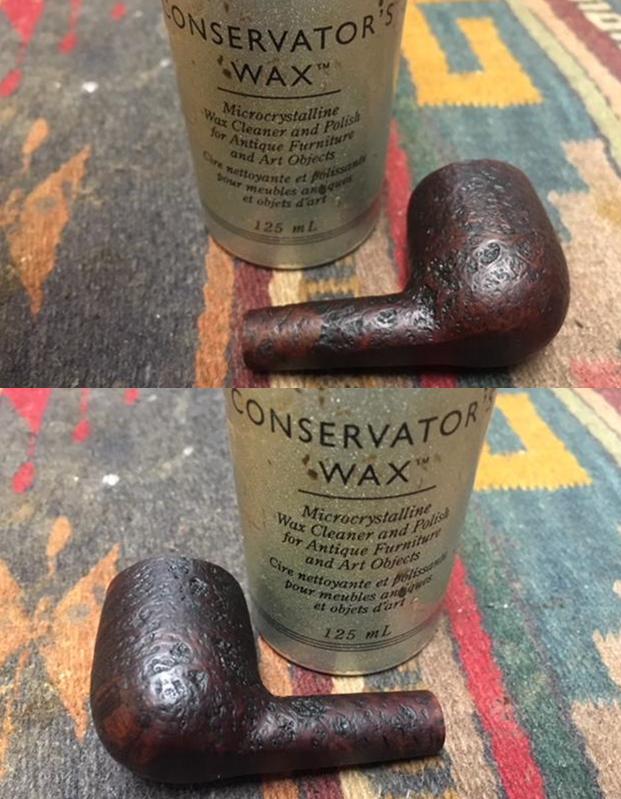
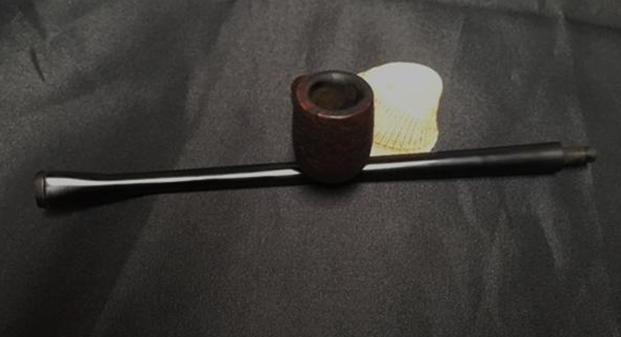
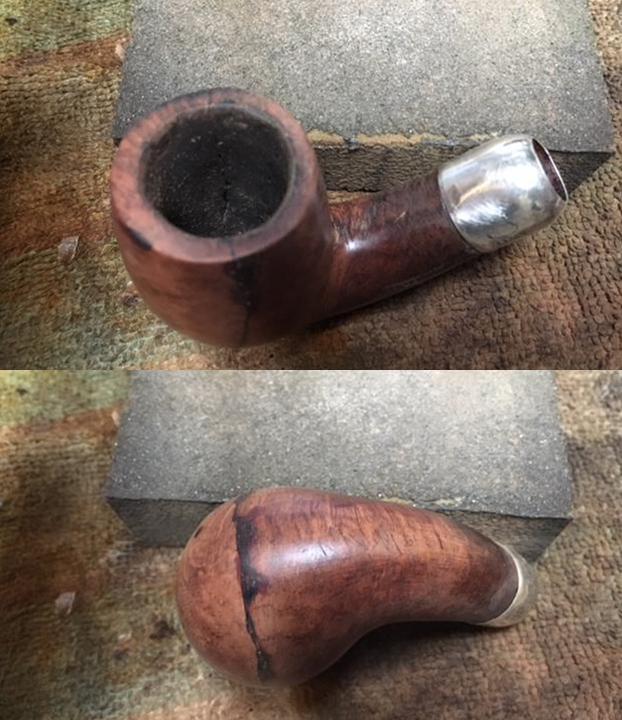
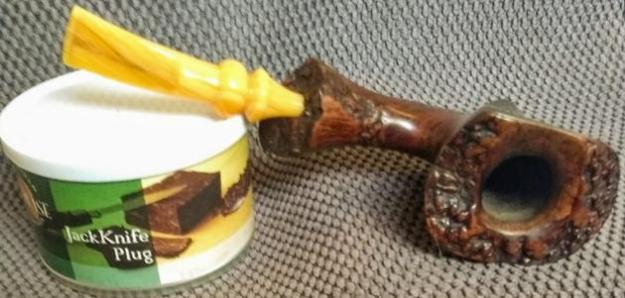
But there’s good news!  The Everclear soak was finished!  The color and grain I wanted to see were there.
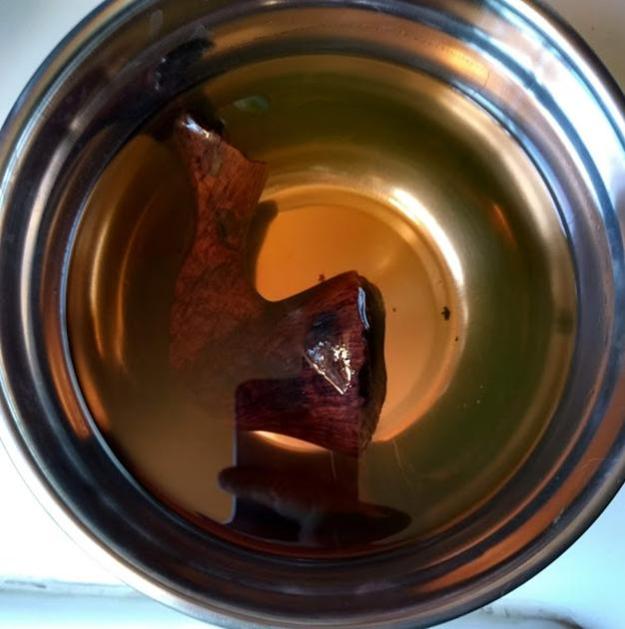
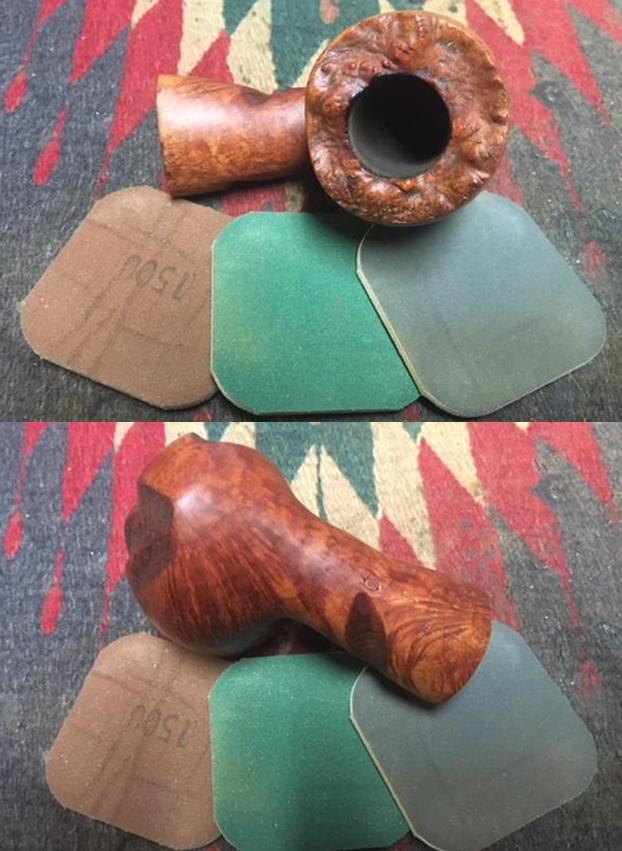
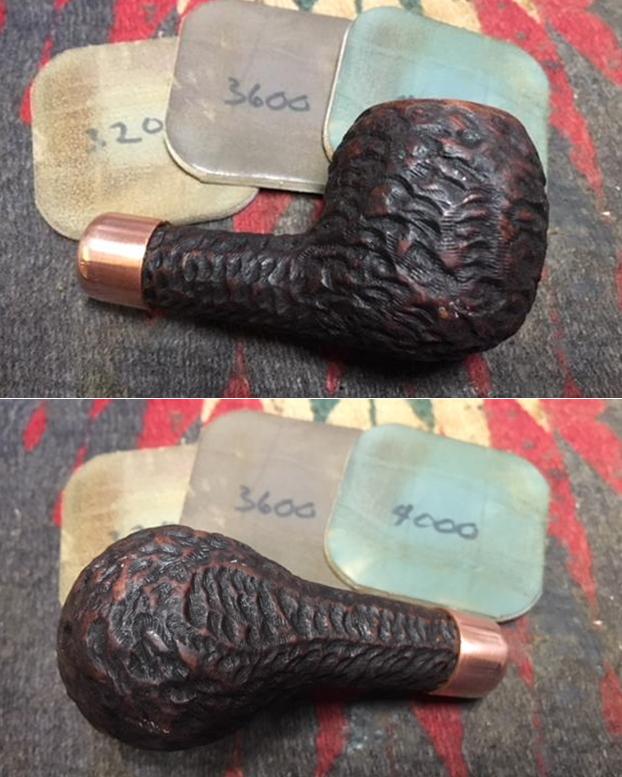
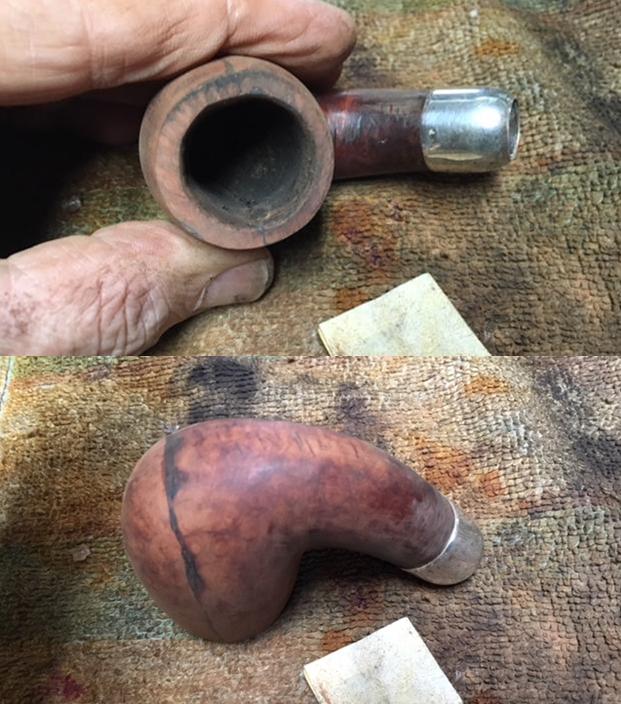
To remove the remaining odd caliginosity obscuring the fine wood, I gave the bowl and shank a quick rub with 600-grit paper and the rim with super fine “0000” steel wool.  The difference was marked. 
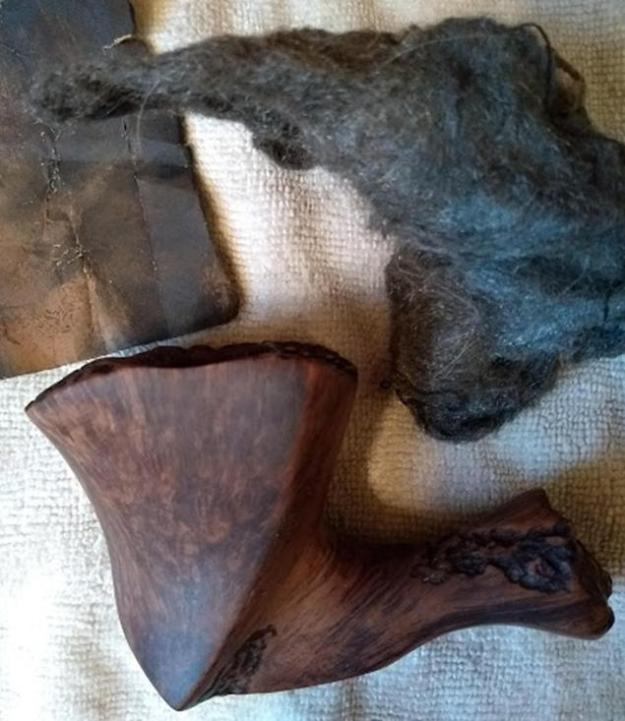
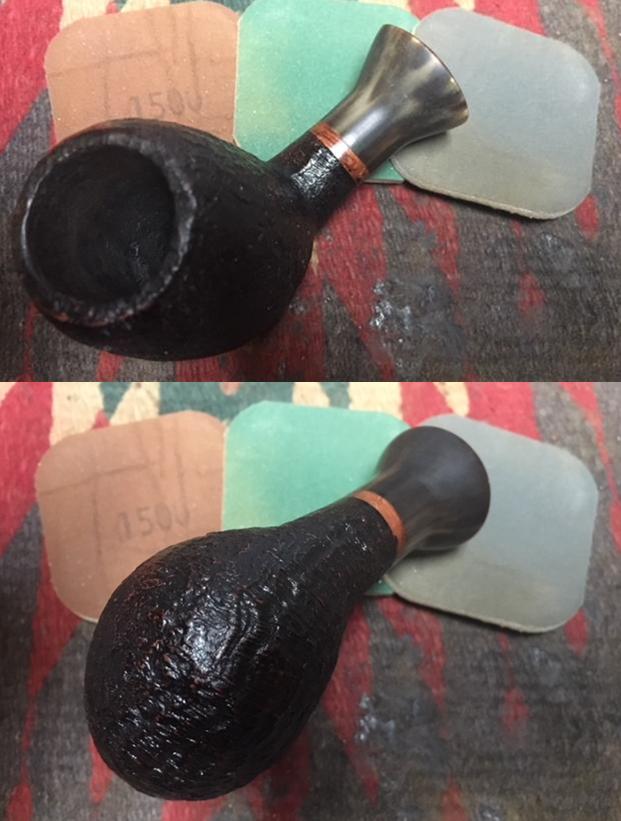
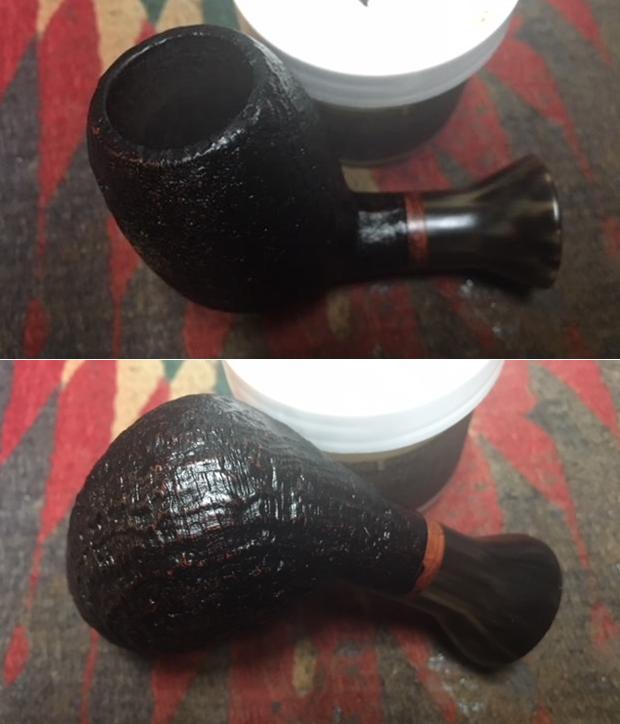
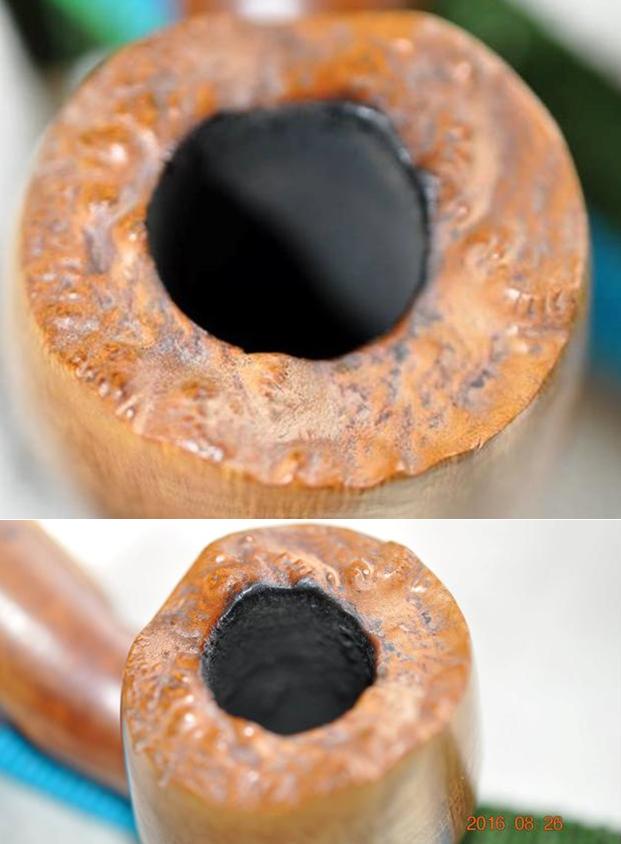
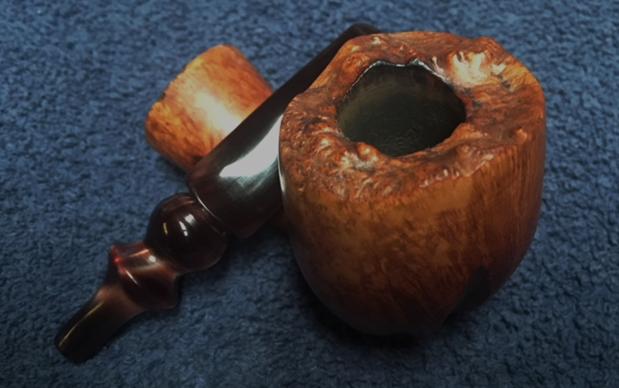
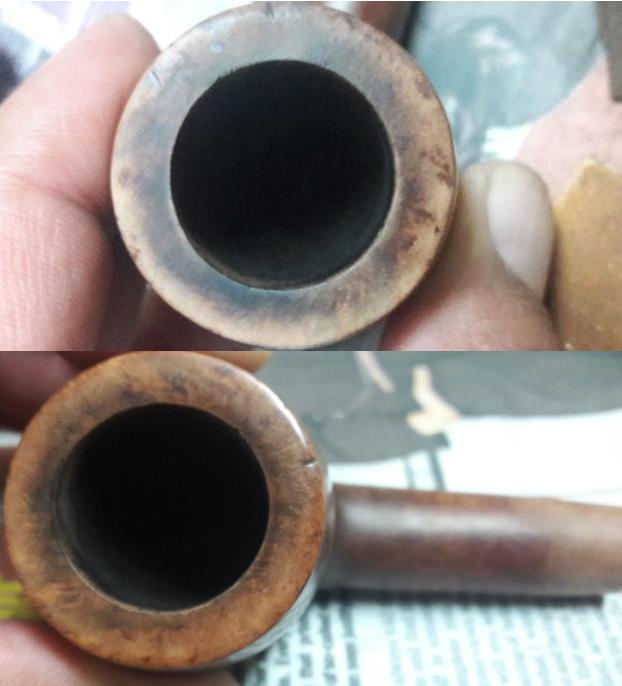
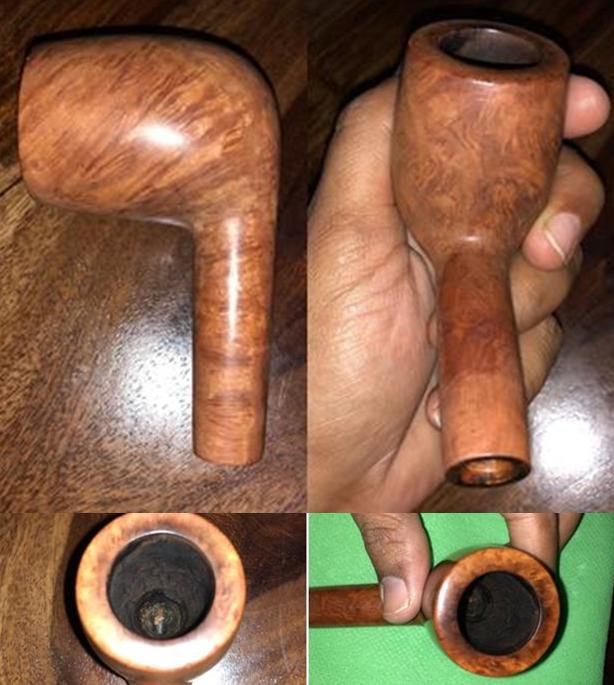
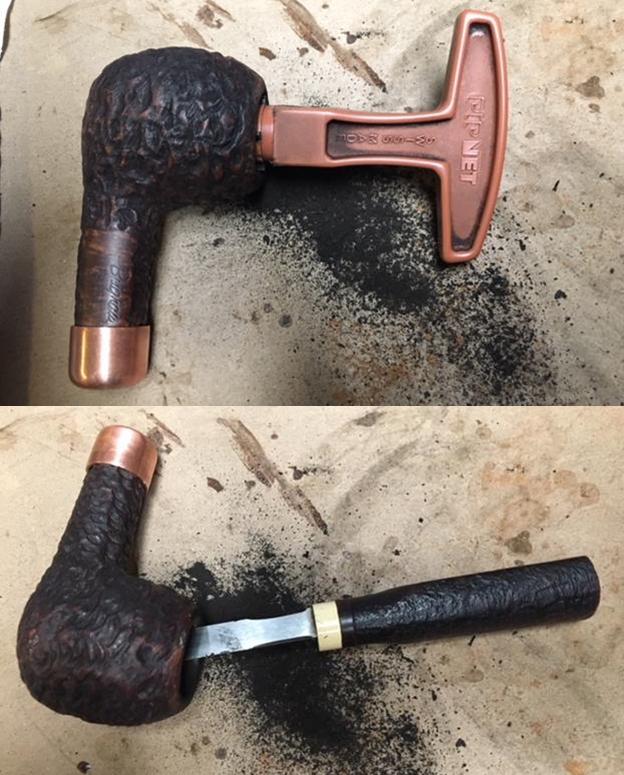
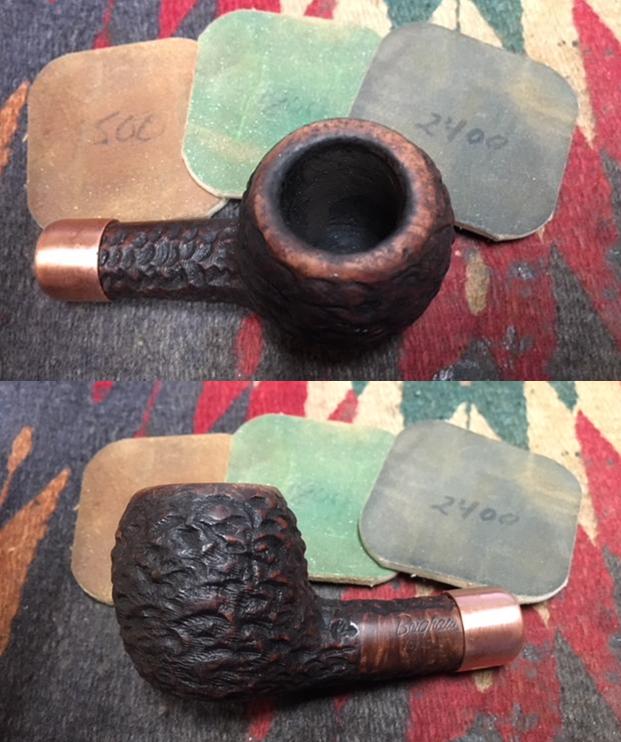
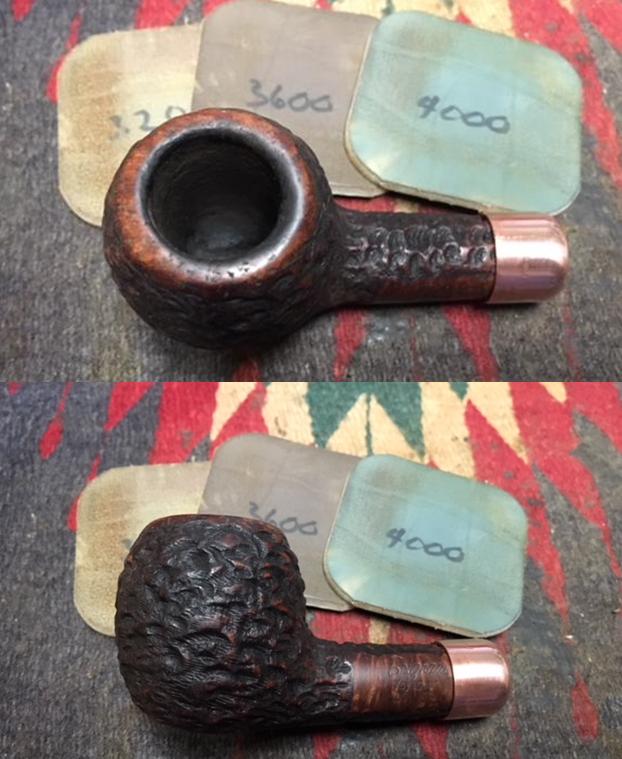
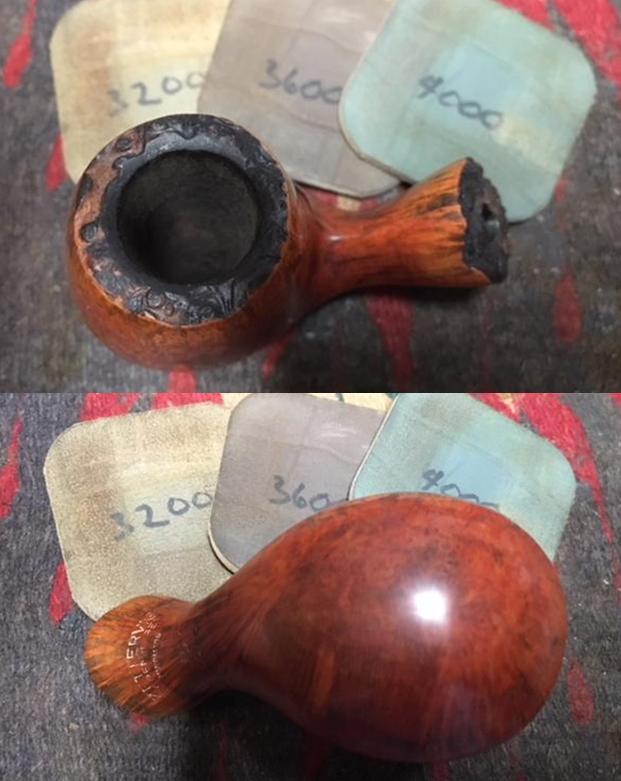
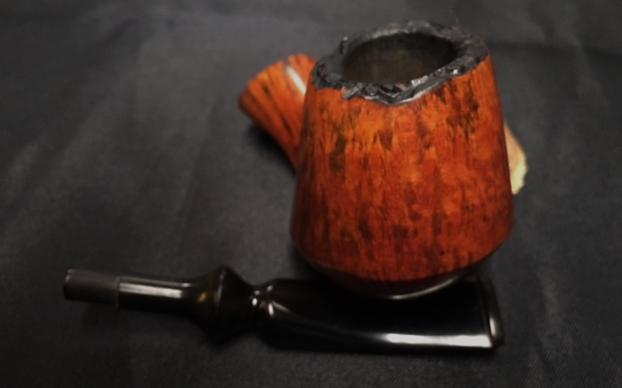
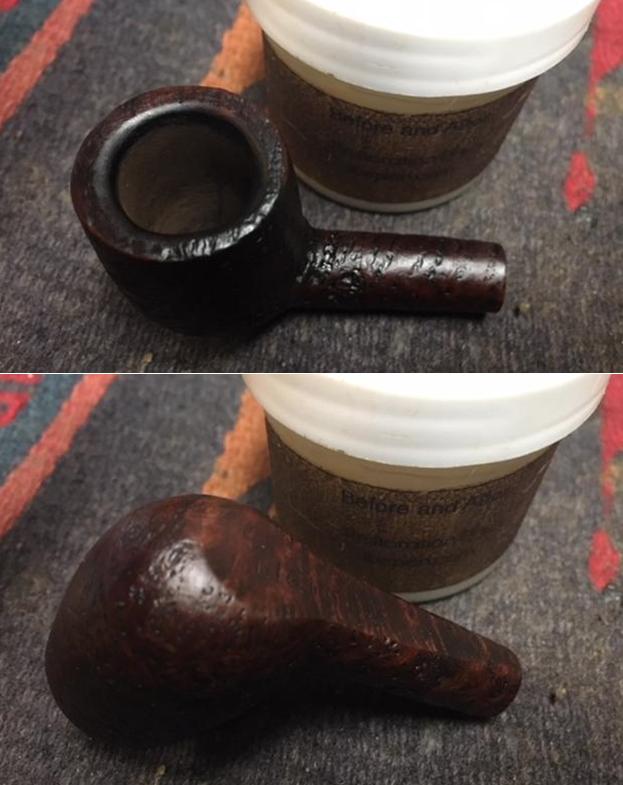
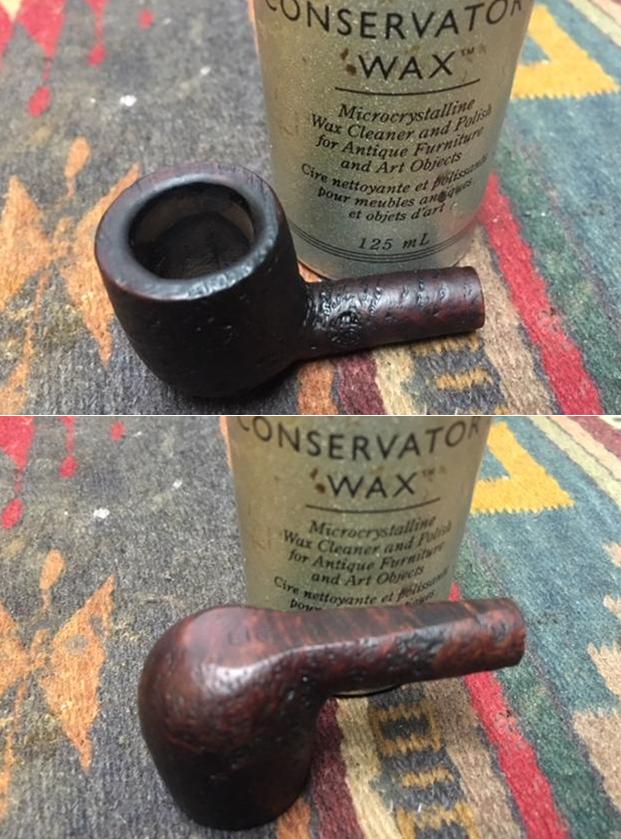
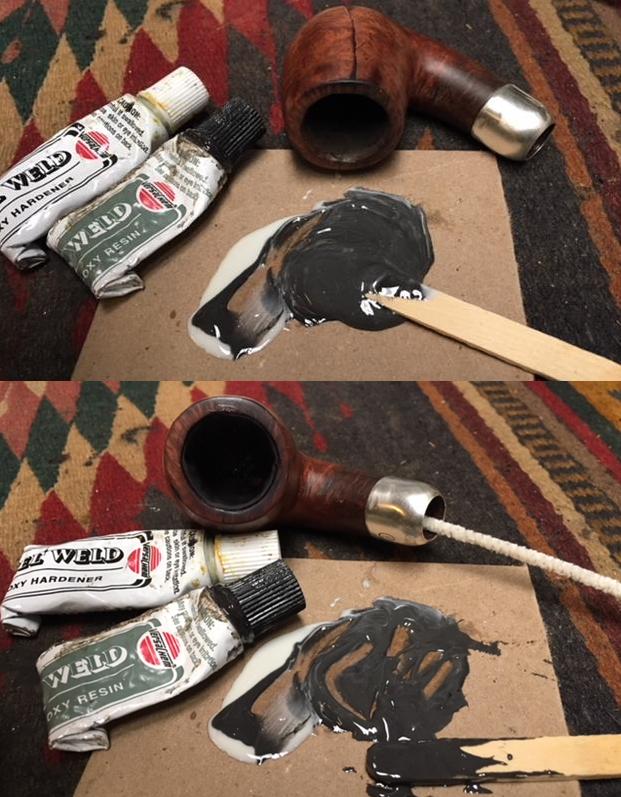
The plateaux rim and shank opening needed a little more Everclear soaking.  That done, I grabbed my handy sanding pad again and spot-scrubbed those places. 
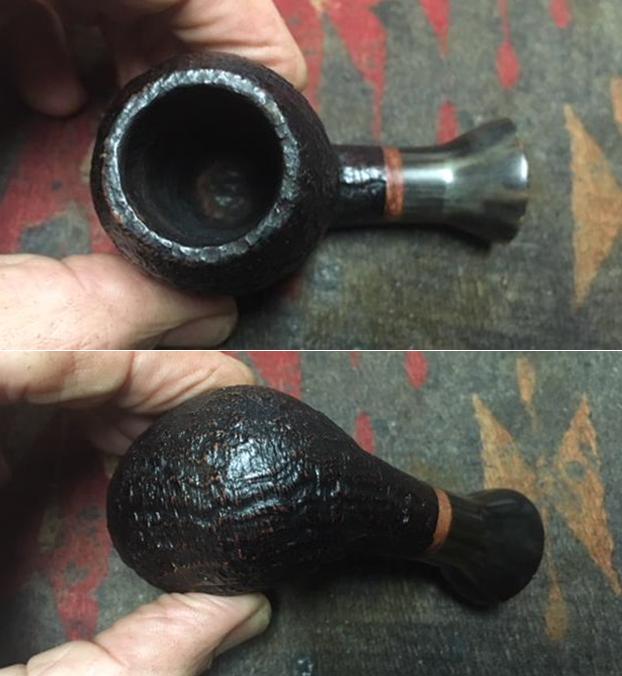
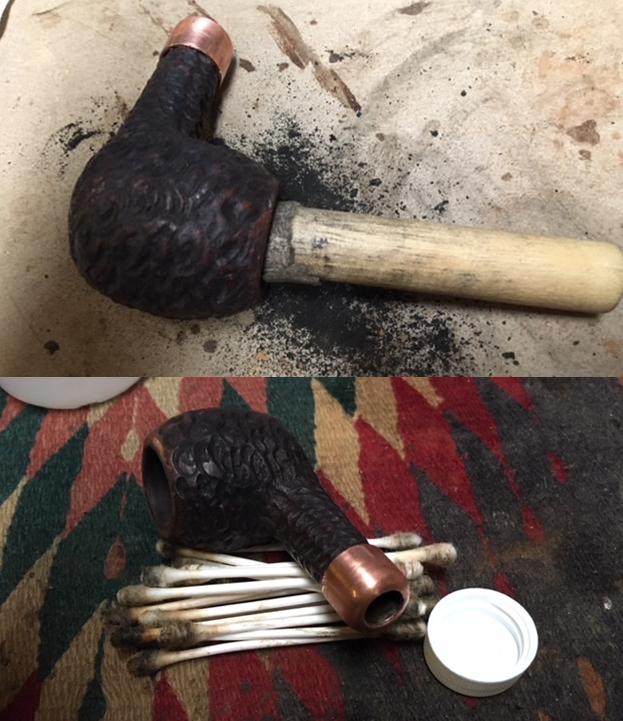
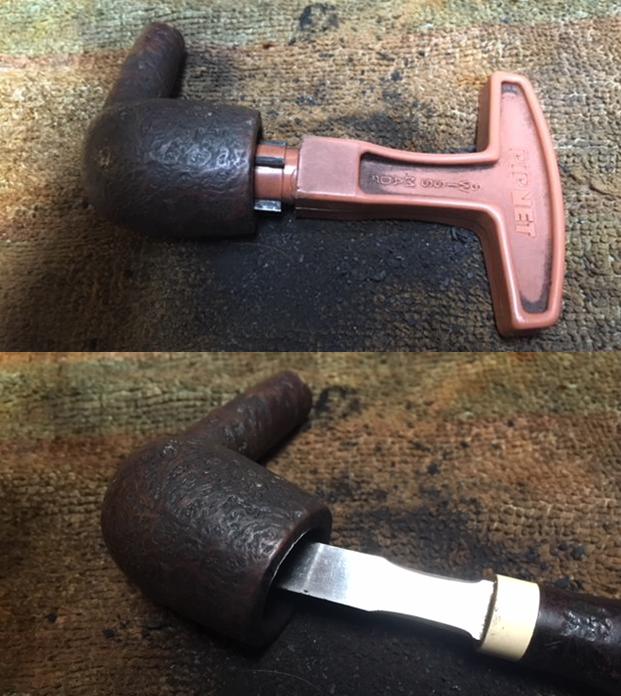
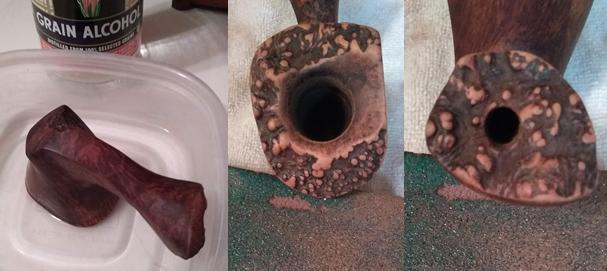
I reamed and sanded the chamber with 150, 220-, 320- and 600-grit paper that took the char far enough down to the wood for the retort to handle what remained. 
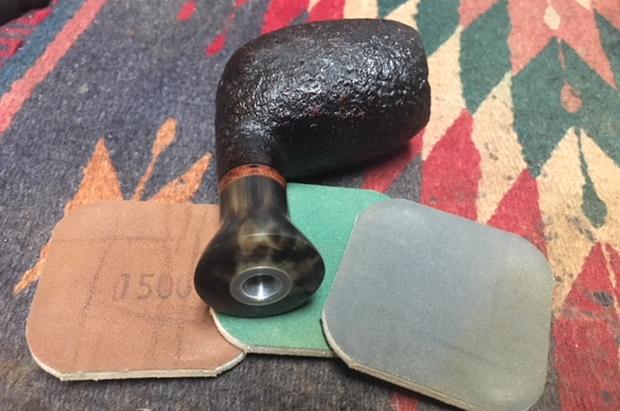
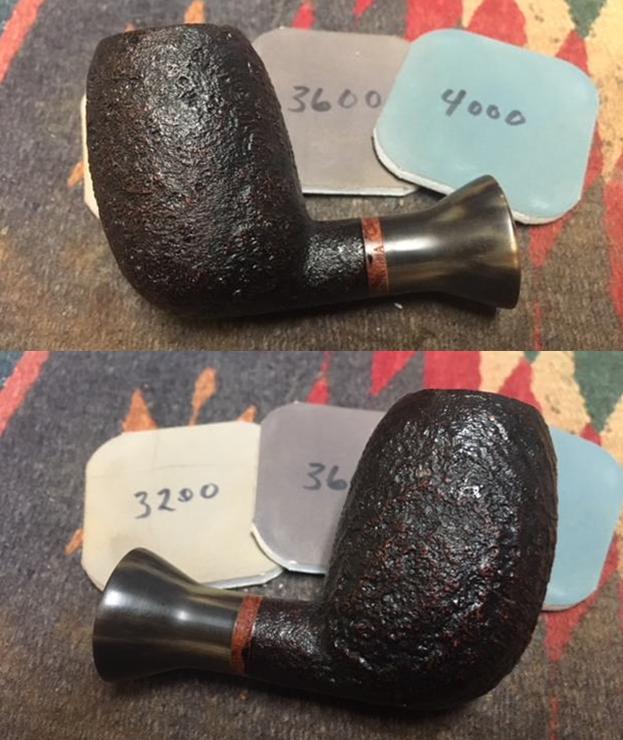
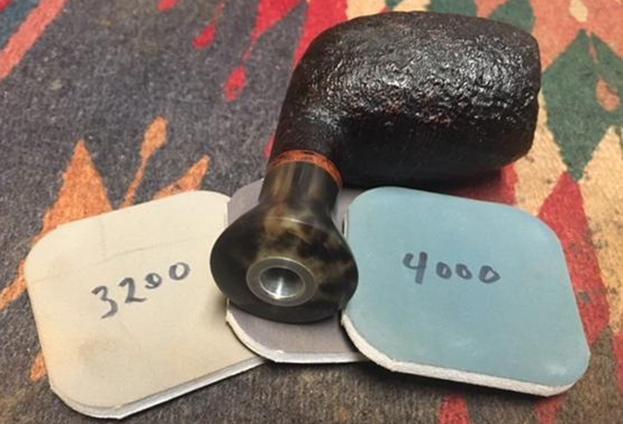
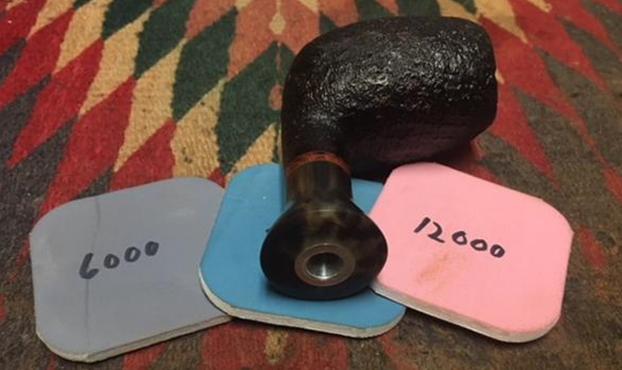
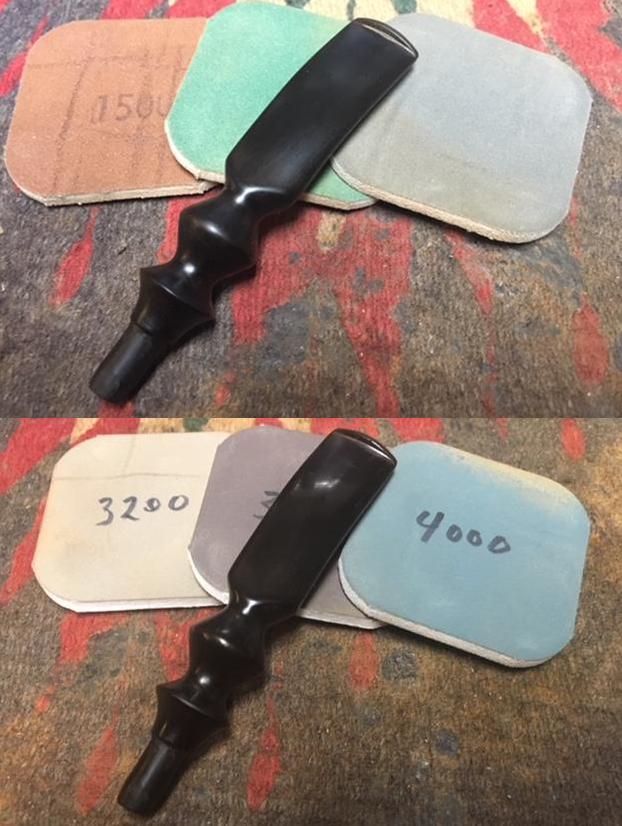
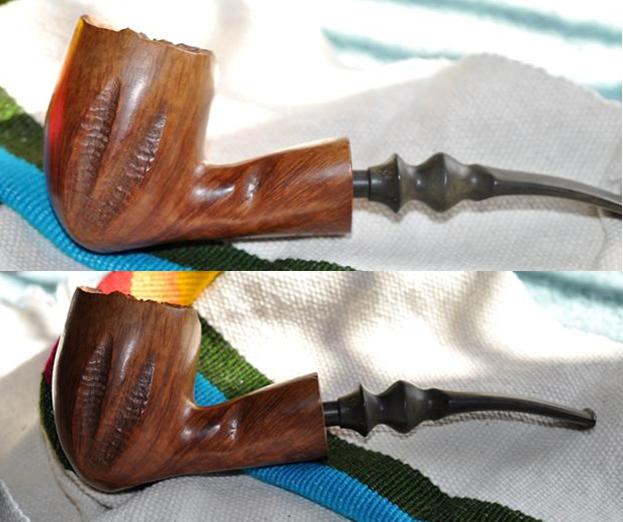
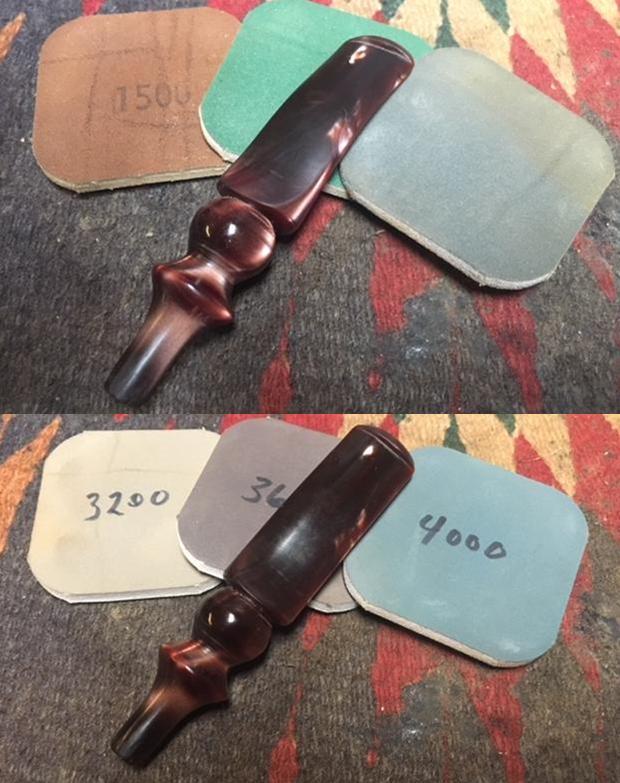
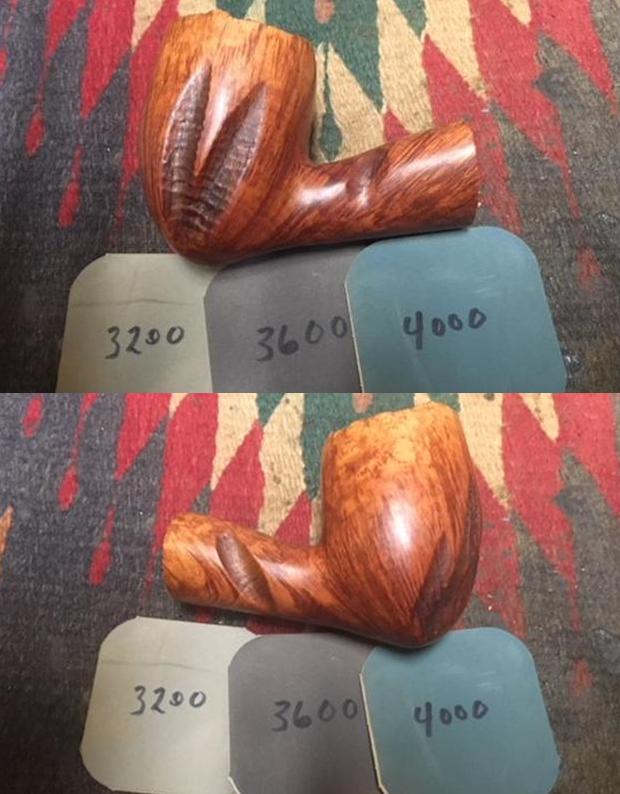
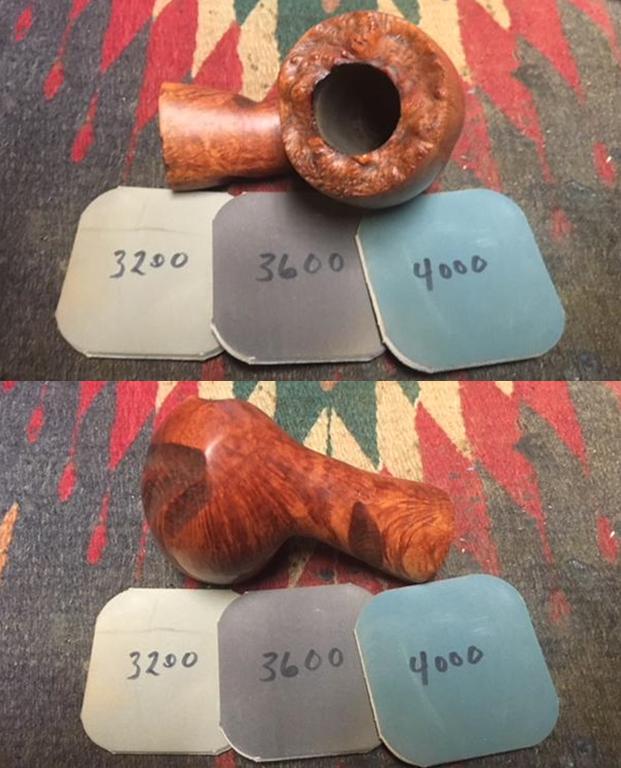
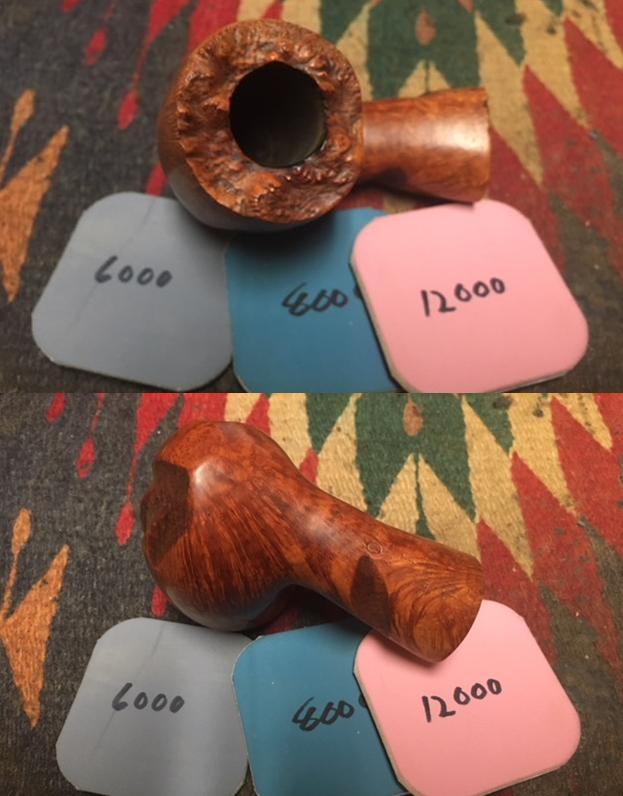
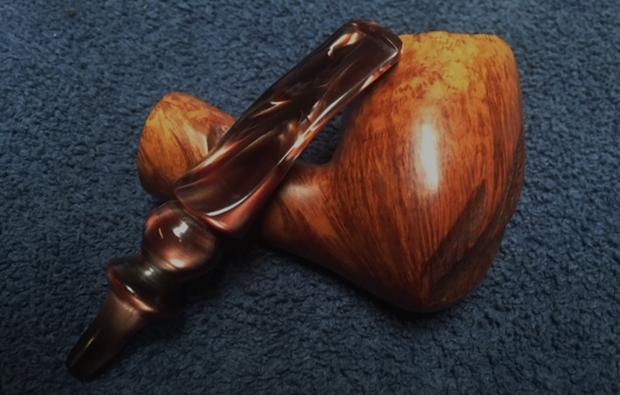
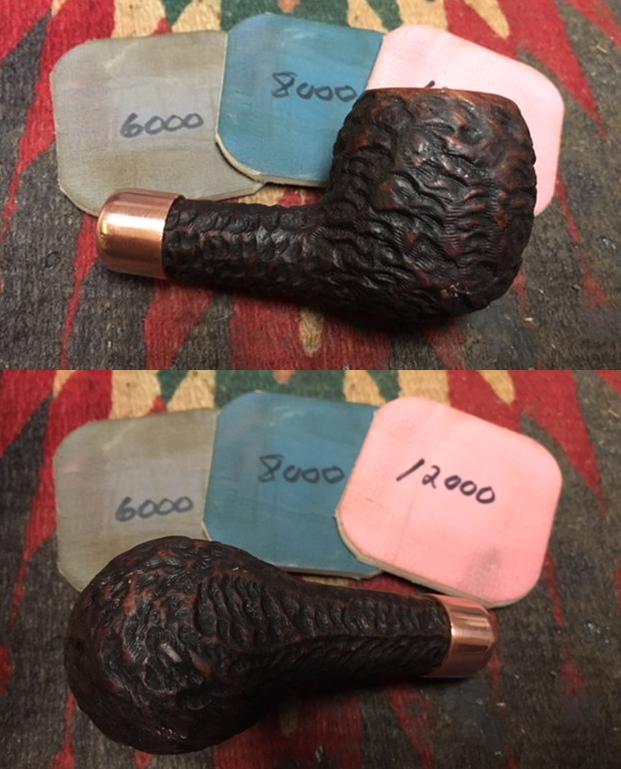
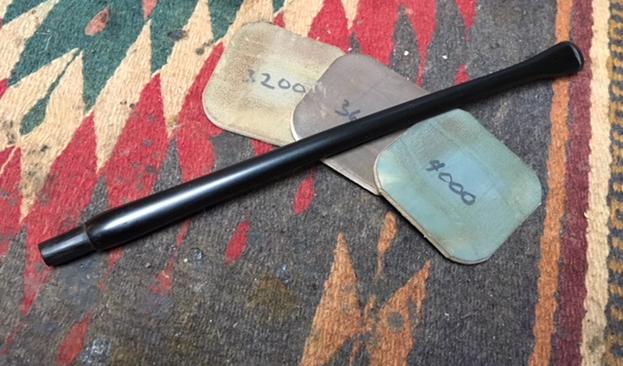
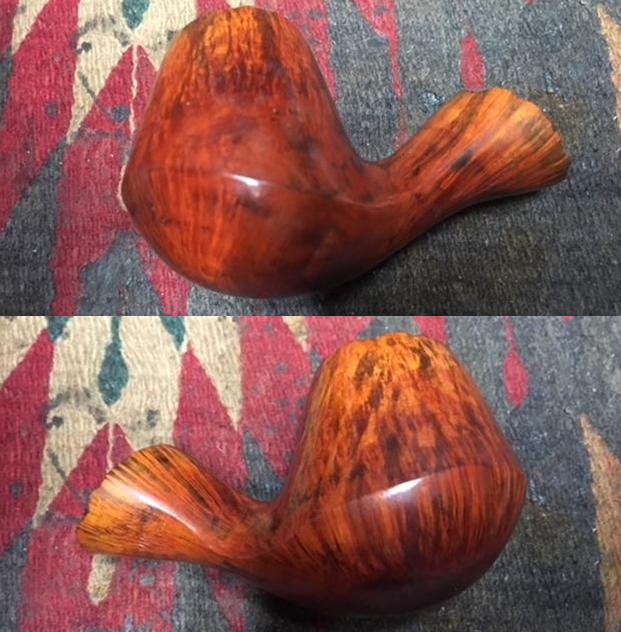
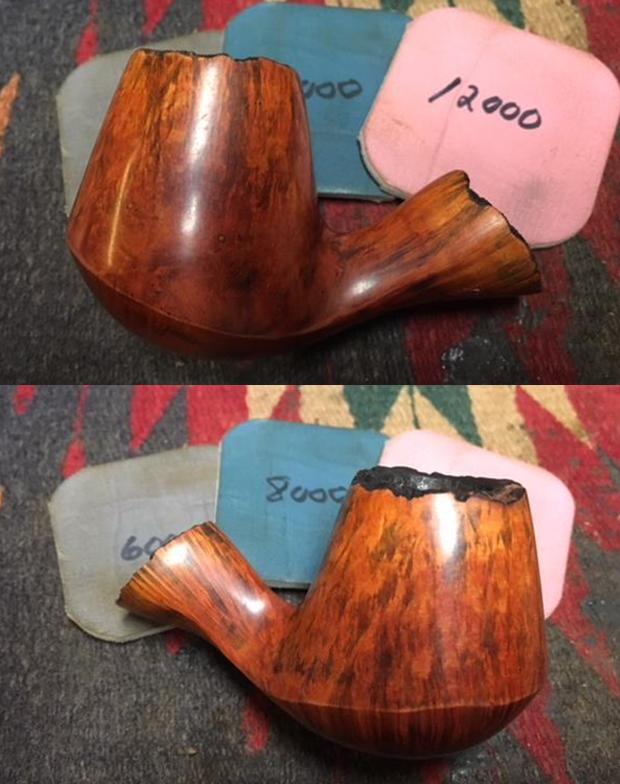
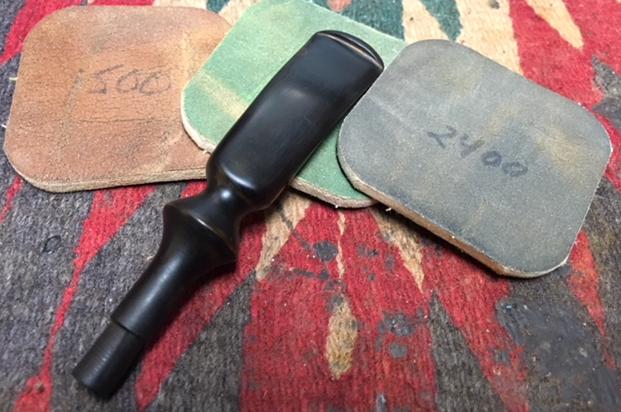
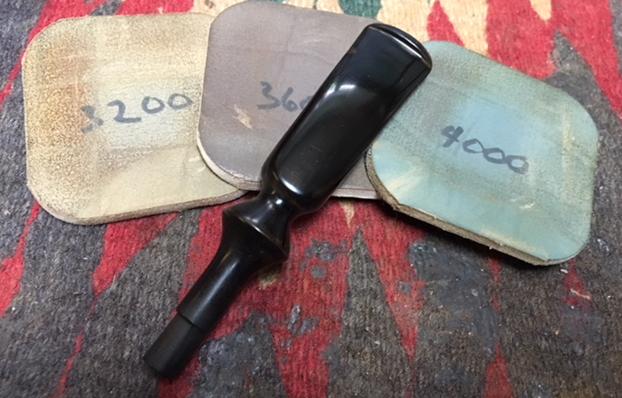
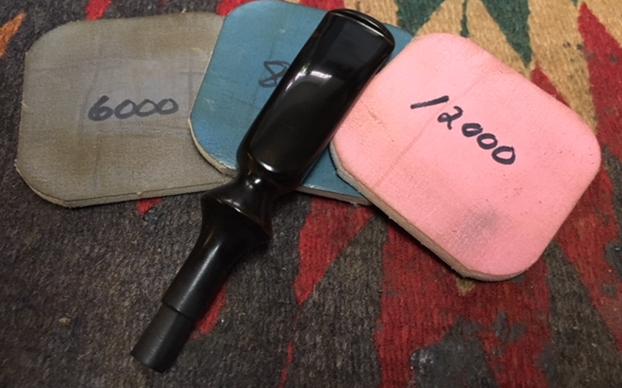
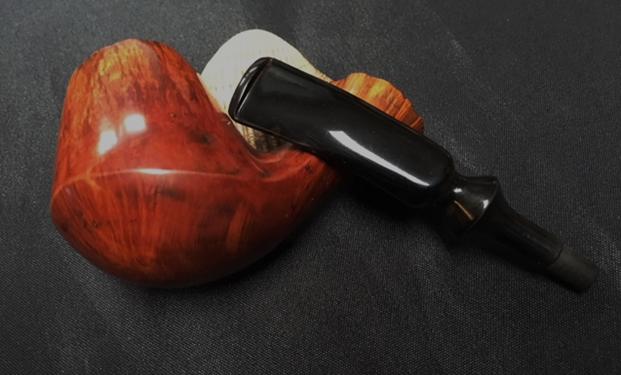
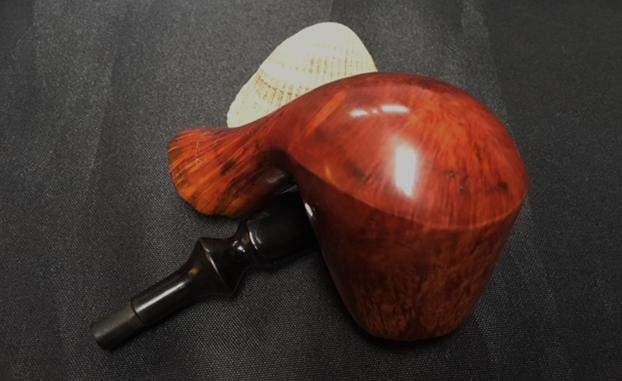
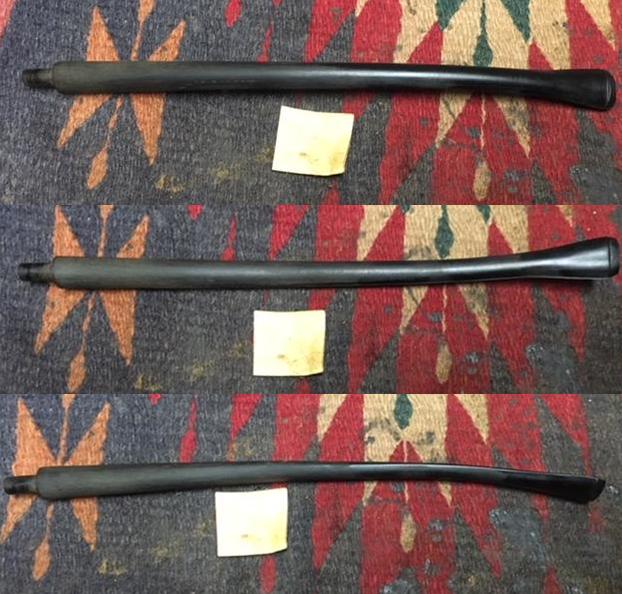
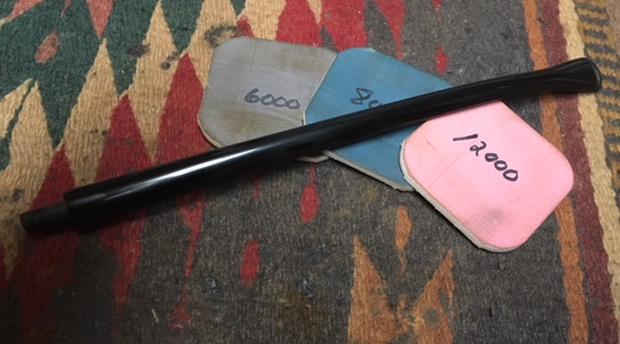
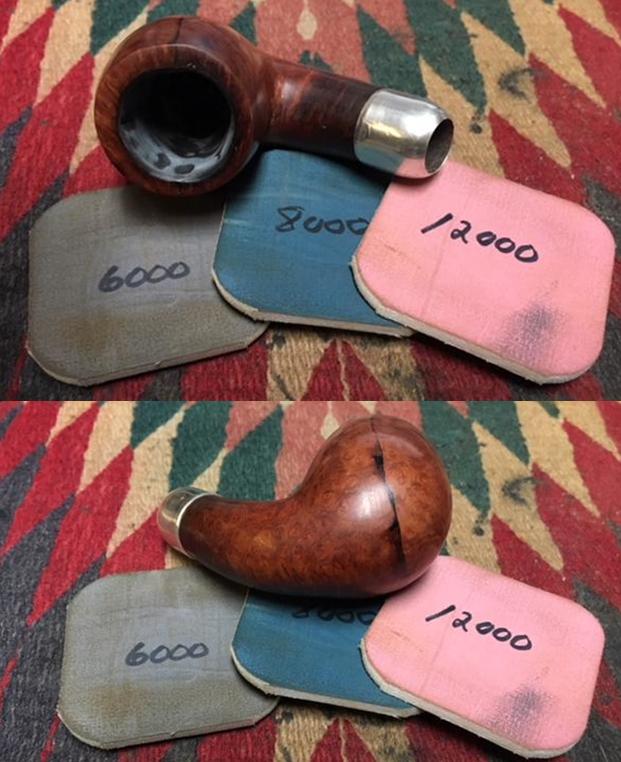
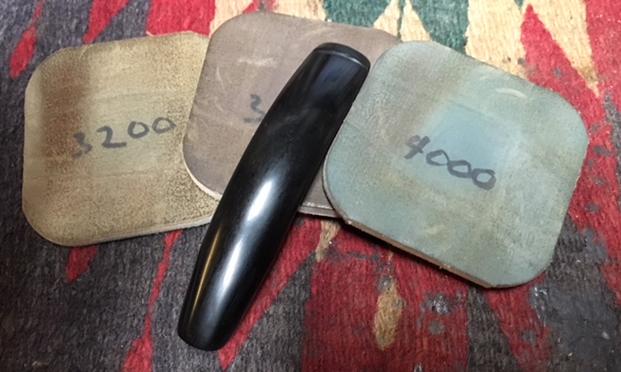
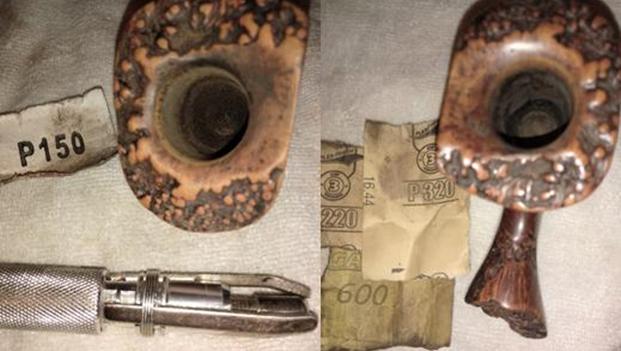
For me, the most gratifying part of a pipe restore, if the wood has been prepped properly beforehand, is micro meshing from 1500-12000, for this is where the mettle of the pipe is revealed.  The deep, shiny, shimmer that should result is something to behold with wonder.  And the grain on the block of wood chosen for this pipe is spectacular.  I also ran four Pyrex tubes of Everclear through the pipe afterward for the retort. 
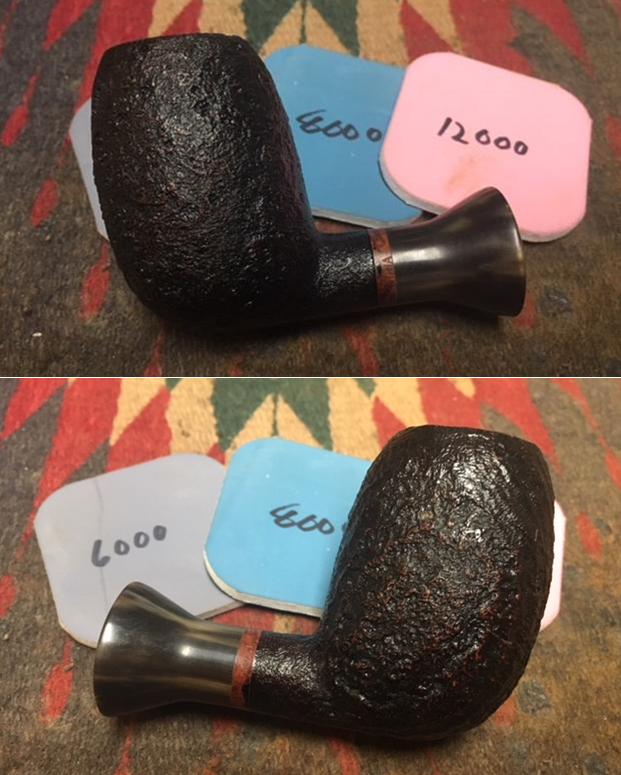
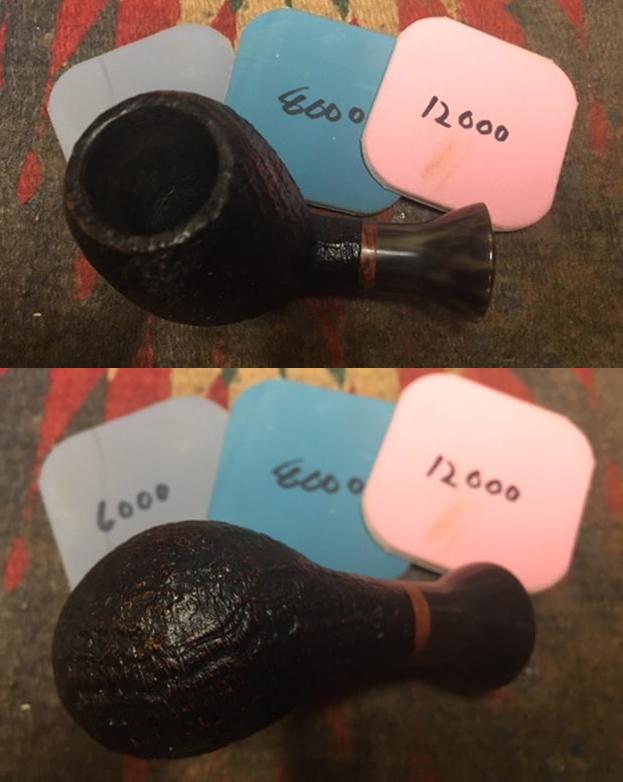
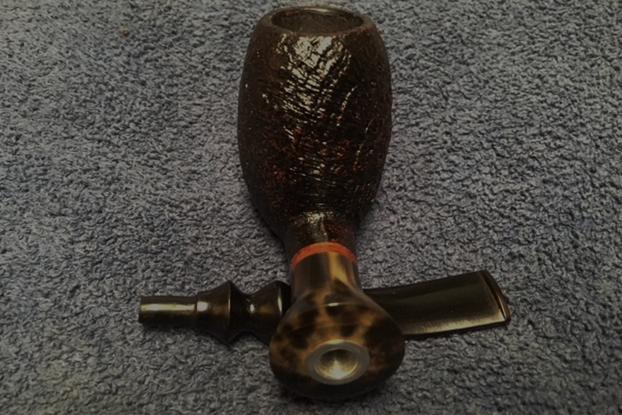
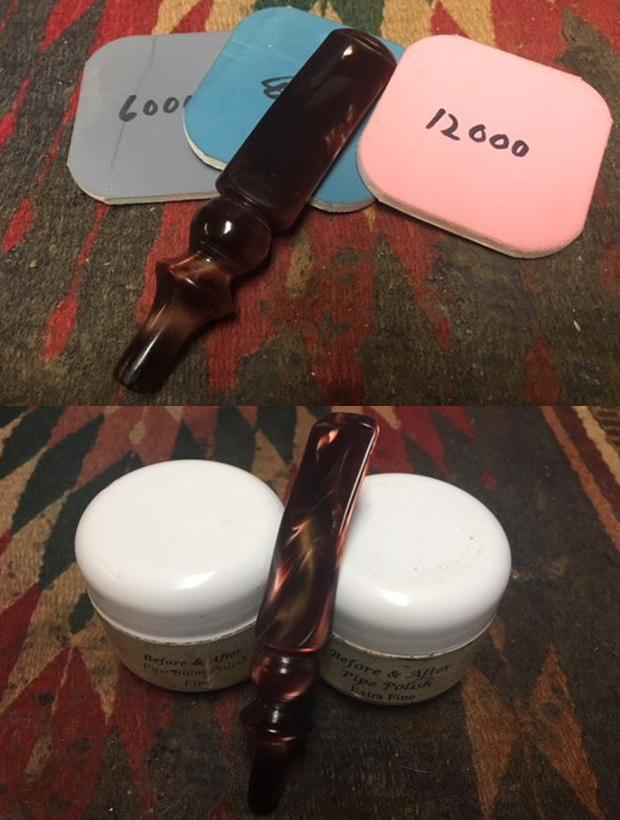
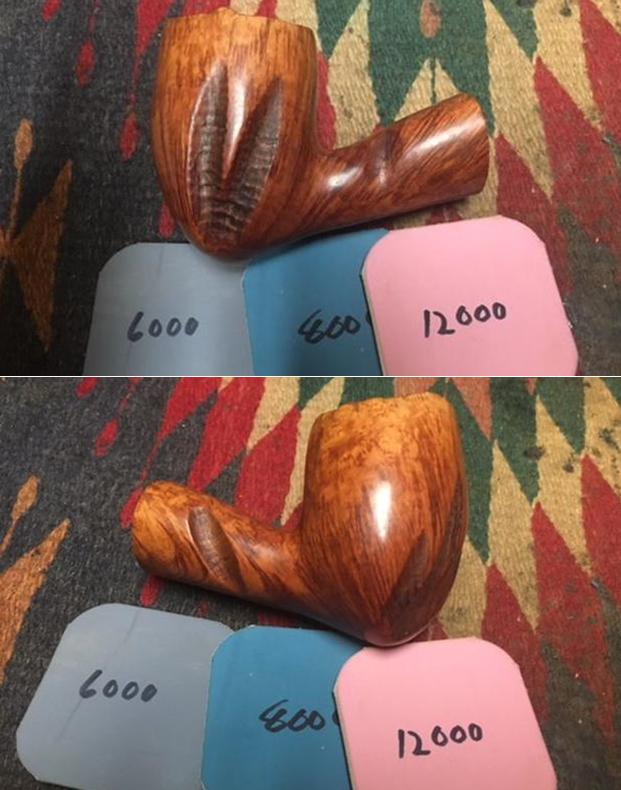
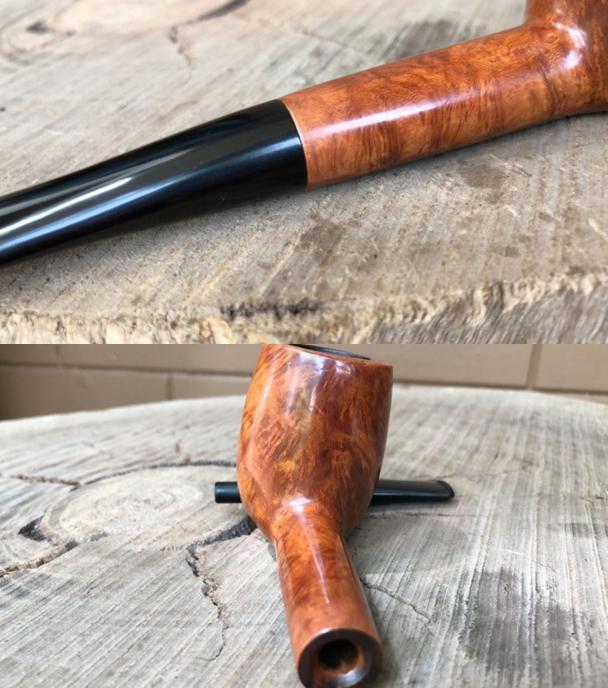
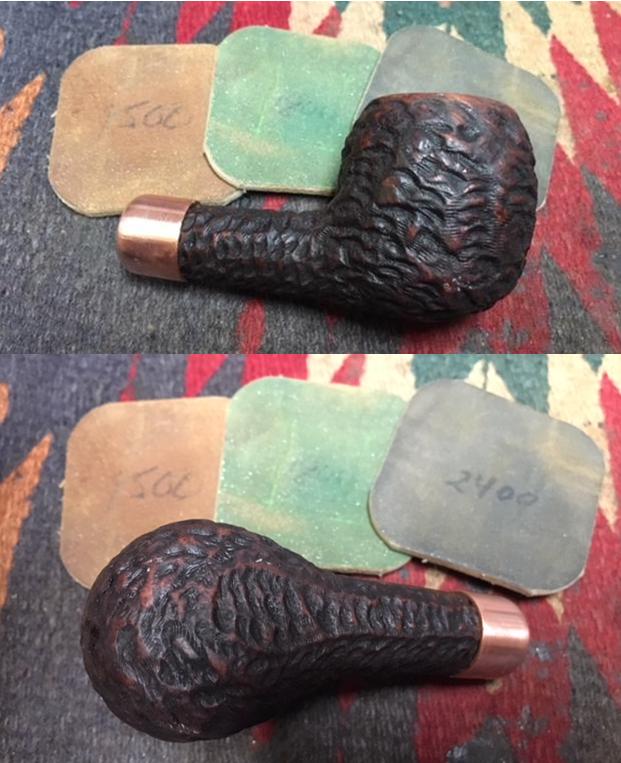
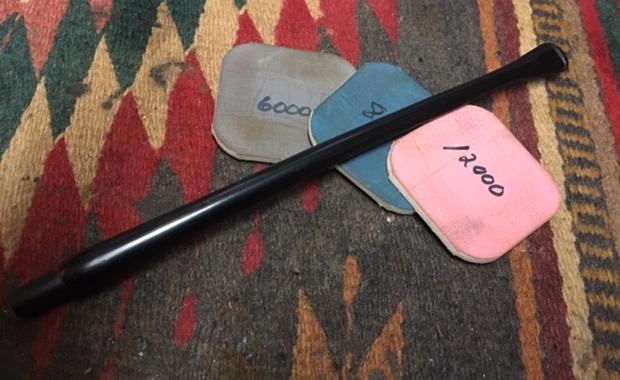
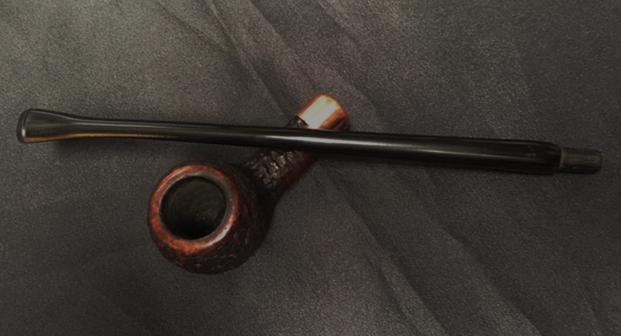
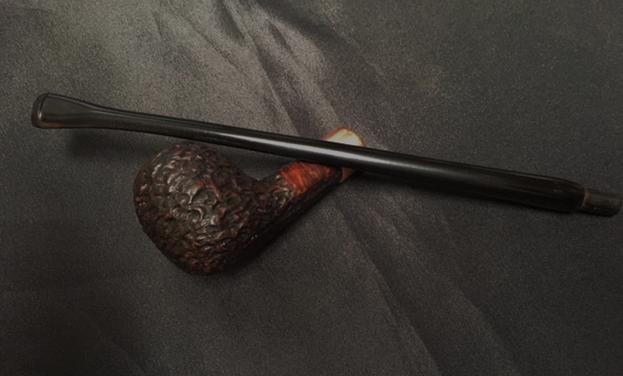
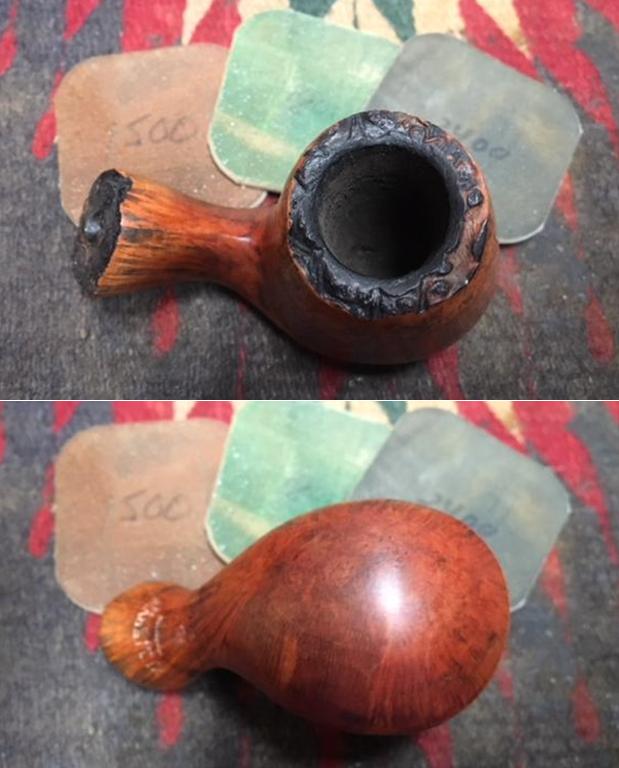
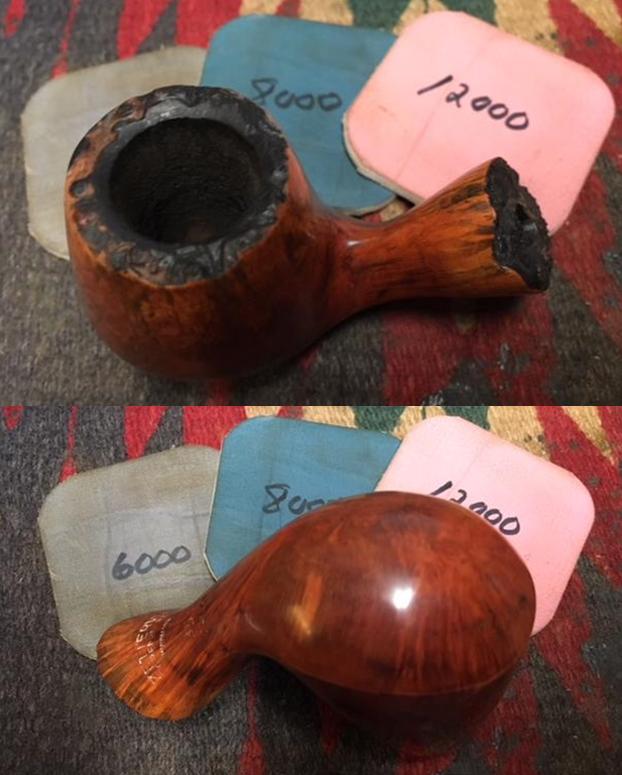
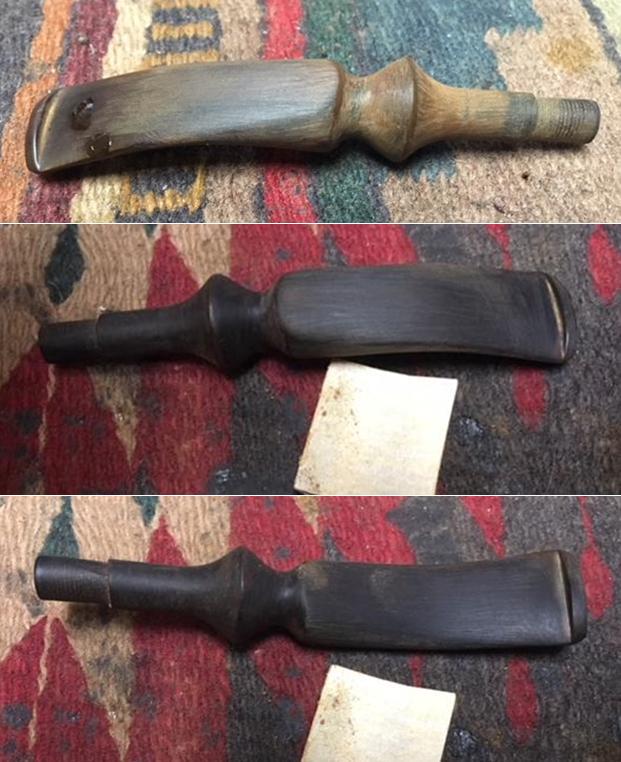
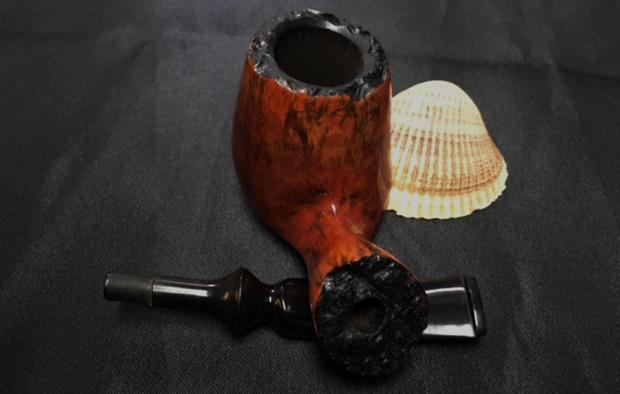
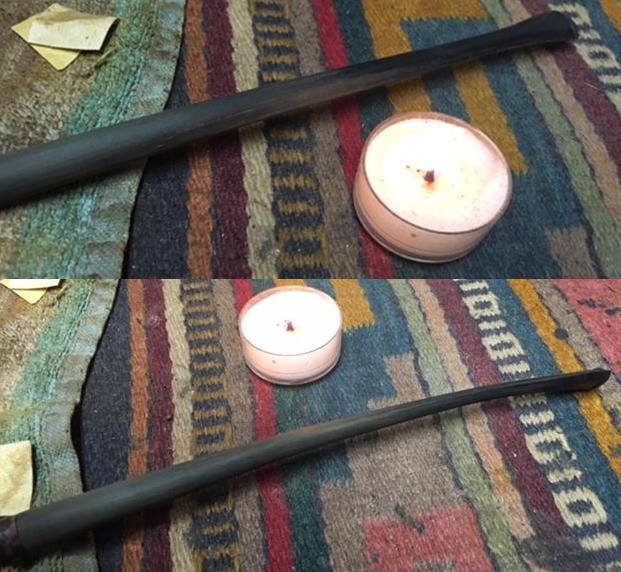
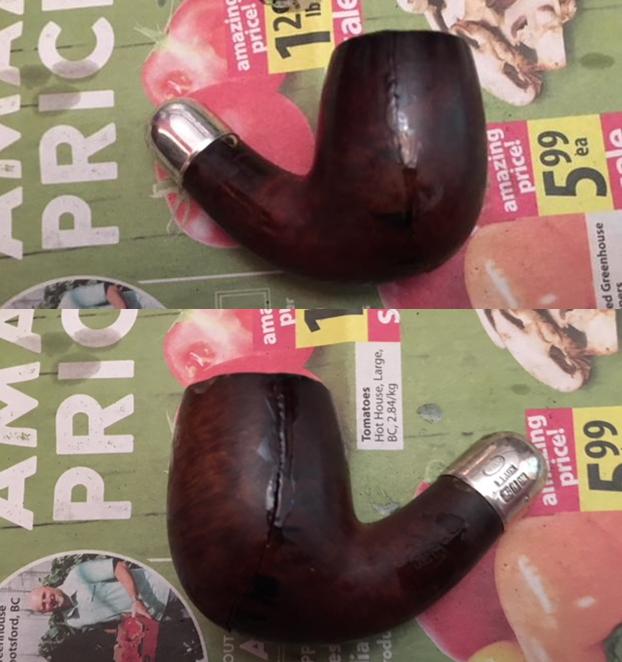
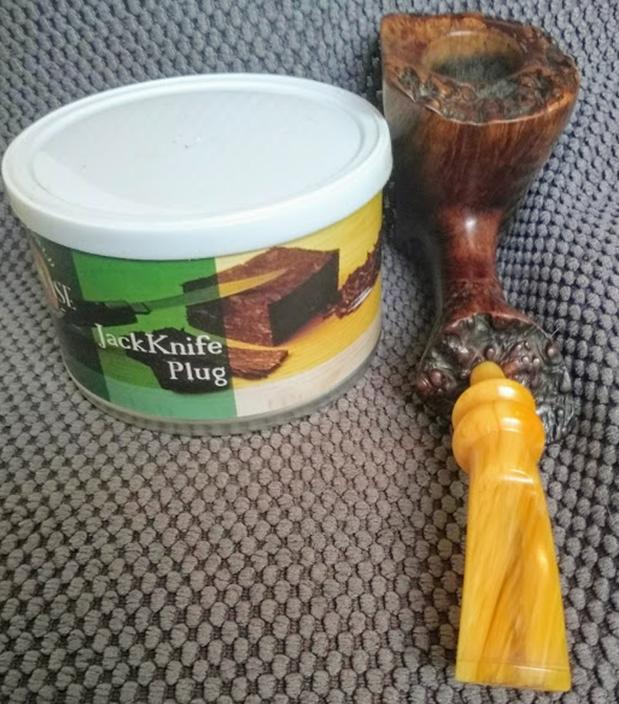
Staining the rough rim and shank opening with Lincoln Medium Brown boot stain before flaming them, I took off the char with 8000 and 12000 micro mesh.  The second of the next two pics shows before I finished it with a light touch of steel wool.
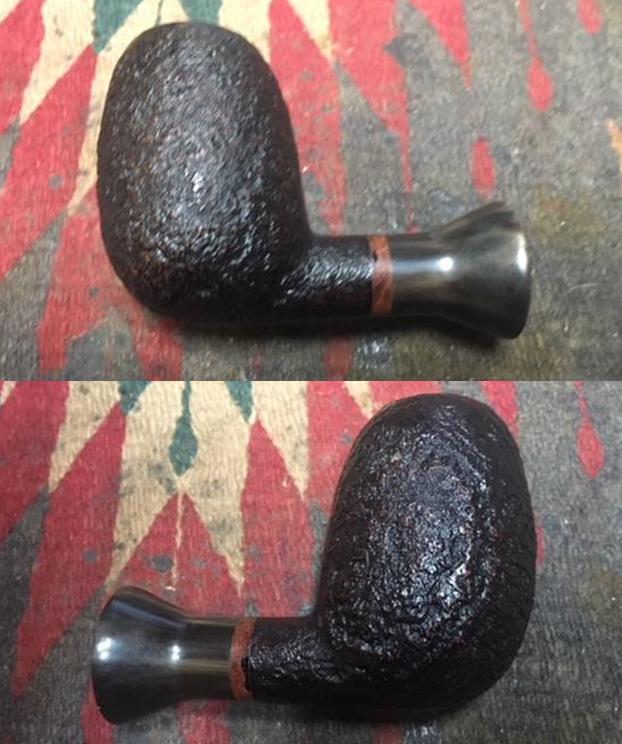
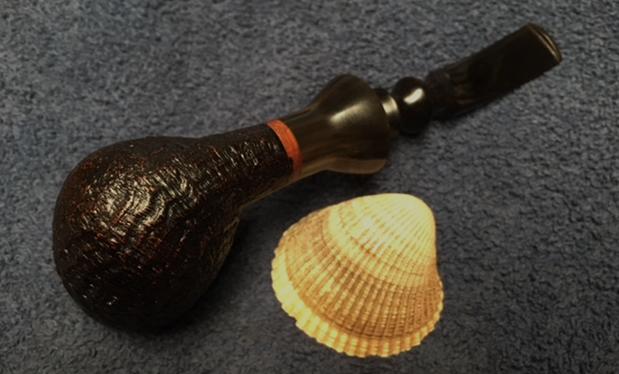
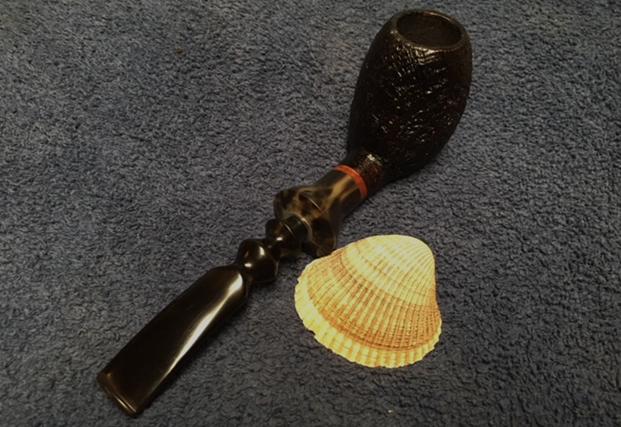
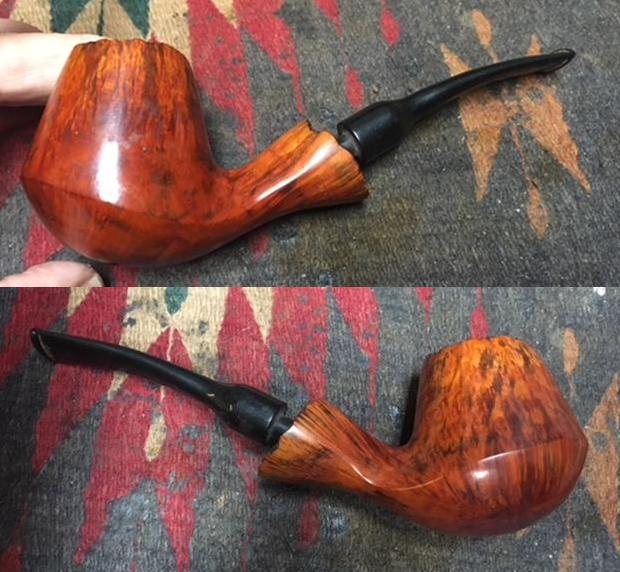
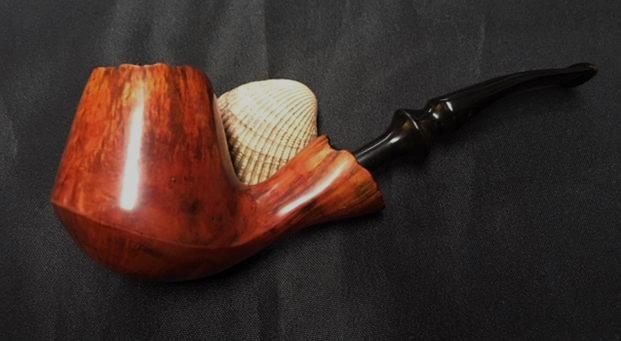
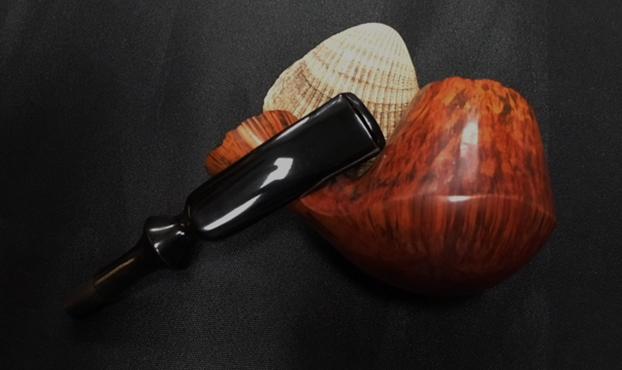
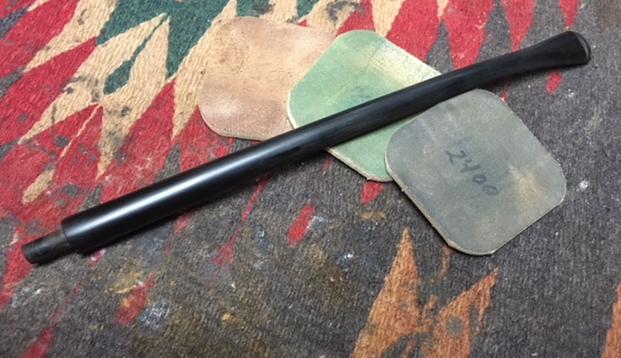
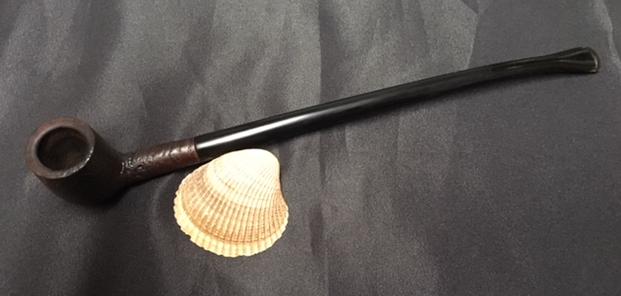
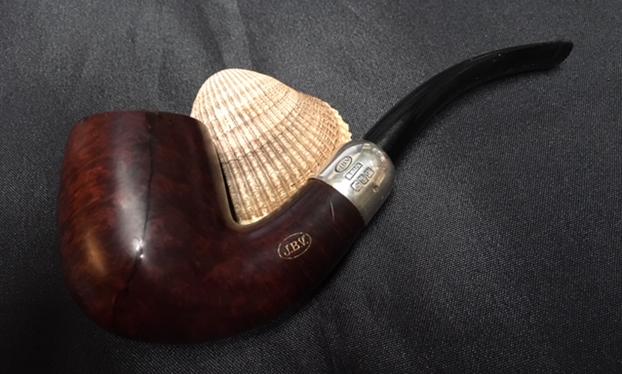
With that, the pipe was finished except for buffing the stummel and stem with red rouge and carnauba wax.  I’m out of Halcyon II and therefore could not use it on the plateau areas.
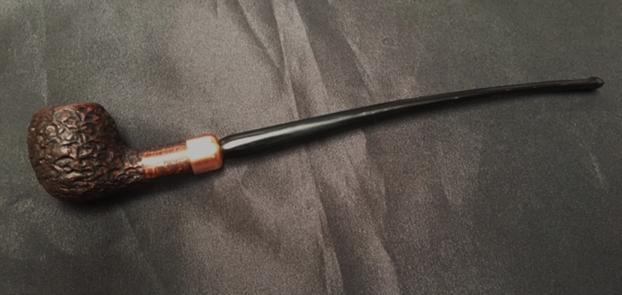
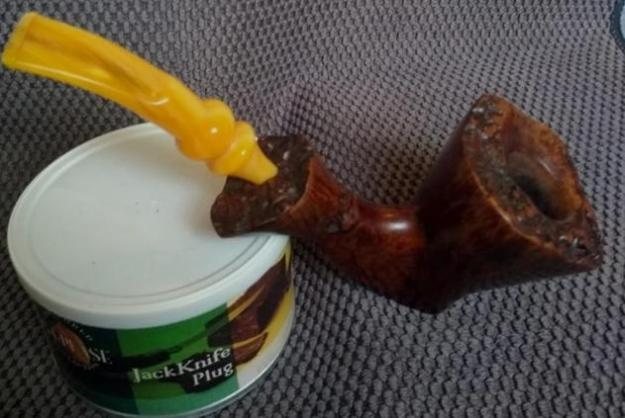
 CONCLUSION
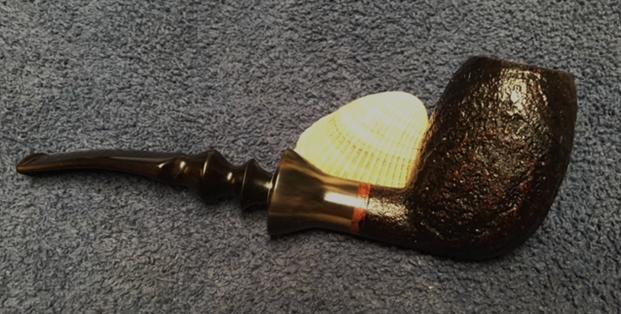
One look at this pipe out of the box the lot came in and I fully intended to offer it for sale.  The gentleman from one of my pipe smokers’ forums who bought the Knute was also more than eager, to put it lightly, to get his hands on the Karl Erik I told him I had.  But all that was before I started unearthing – in a sense that may be literal given the fact that the pipe looked to have been buried for some time – the way Ottendahl chased the grain on this splendid example of one of his earlier works, when he graded them on an as yet undocumented scale.  For all I know, O being the fifteenth letter of the English alphabet, my newest freehand may not be near the top end, but it’s still graded.  That means it meant something to its maker, and I’m certain he would remember it if he could be reached where he is now.  Besides, as his newer scales are ascending, meaning from “best” to “worst,” and I being more of a glass half-full kind of guy, I like to think it’s two grades closer to the sidewalk than the middle if the road.

SOURCES
http://www.pipephil.eu/logos/en/logo-k1.html
https://pipedia.org/wiki/Karl_Erik
https://www.worthpoint.com/worthopedia/karl-erik-freehand-estate-pipe-521847614
https://rebornpipes.com/2016/07/06/a-stellar-find-a-gbd-prestige-1451-oval-shank-billiard/
https://rebornpipes.com/2018/07/17/finding-the-natural-beauty-of-a-knute-of-denmark-freehand/
https://pipedia.org/wiki/Knute

Restoring & Restemming a Zettervig Handmade 351 Freehand


Blog by Steve Laug

This is another pipe from the fellow here in Vancouver that he dropped off for me to work on. There were 8 pipes in the lot – I have finished five and this is the sixth. It is a Brandy shaped freehand bowl stamped on the underside of the shank and reads Zettervig over Copenhagen over Handmade over the shape number 351 over Denmark. The pipe came with a stem that was obviously not the original. It was another one of his pipe finds on a recent pipe hunt in Vancouver. The smooth finish had a burnt orange colour over a black undercoat. The plateau on the rim top and shank end were also black. The briar had been covered with a lacquer that had gone cloudy. The finish was very dirty and there was a thick cake in the bowl. The pipe needed to be cleaned thoroughly and a new stem fit to the shank that was more of a freehand style stem. I took close up photos of the rim top and the shank end. I believe that the plateau “style” top of the rim was carved rather than natural. The shank end has a combination of carved finish and genuine plateau. The inside of the bowl has a thick cake around the bowl and some tar and oil on the top of the rim filling in the finish. Some of the original black finish was also worn off.I took photos of the pipe with the stem it had on the bowl when it had been found. It is a saddle stem made to fit flush against a rounded shank. It was not made for plateau style freehand shank ends. I took a photo of the stamping on the underside of the shank. It is very clear and readable. The stamping is clearer than the photo shows.I decided that I would look up some information on the Zettervig brand before I started the clean up on the pipe. I looked up information on two of my favourite sites. The first was Pipedia. Here is the link: https://pipedia.org/wiki/Zettervig. I quote in full:

In the 1960’s and into the early 1970’s Ole Zettervig had a shop in Copenhagen, Denmark where he was carving high quality pipes equal to Stanwell, Larsen, Anne Julie, Thurmann, Bang and others. These early pipes were marked “Copenhagen” and are very collectible. He sold his shop at some point in the 70’s and moved to Kolding and continued to produce pipes as a hobby, but the quality of briar and workmanship is said to not equal the early production. The later pipes he now marked as Kobenhaven rather than Copenhagen, and these were sold by Ole at flea markets throughout Europe.

http://www.pipephil.eu/logos/en/logo-z.html

I started my clean up on the bowl with reaming and then cleaning out the airway to the bowl and the inside of the mortise. I reamed the bowl with a Savinelli Fitsall Pipe Knife to remove the cake on the walls. I used a dowel wrapped with sandpaper to sand down the walls on the bowl. I cleaned out the airway with alcohol (99% isopropyl), pipe cleaners and cotton swabs until they were clean on the inside. I tried to wipe down the bowl with acetone to remove the shiny coat. It did not even begin to permeate the surface. I scrubbed the surface hard to try to break through the finish. It did not work. I sanded the finish with micromesh sanding pads to break the topcoat on the finish down. I wet sanded with 1500-2400 grit micromesh pads. I dry sanded it with 3200-12000 grit pads. I wiped it down after each pad with a cotton pad and acetone. That combination of sanding pads and acetone worked to break down the finish. I used a black Sharpie Pen to restain the rim top and the shank end. It was originally black and I have found over the years that the black pen matches the colour of the original stain.I rubbed down the briar with Before & After Restoration Balm. I worked it into the finish and the plateau style rim and shank end with my fingertips and finished working it in with a shoe brush. The balm worked to clean, preserve and enliven the surface of the finish on the small bowl. The briar was coming alive so I took some photos of the pipe at this point. I buffed the plateau style rim top and shank end with a horsehair shoe brush to give it a shine. I went through my can of stems and found one that would work well on the freehand style Zettervig bowl. I had one was from a freehand pipe. I turned the end of the tenon down with the PIMO tenon turning tool. I did not need to remove too much material from the tenon so it did not take too long. Once I had turned it I sanded it smooth with a piece of sandpaper then tried it in the pipe for the fit and the look. It looked good but needed to be bent a little to follow the low of the bowl. I heated it with a Bic lighter until the vulcanite softened then bent it slightly to match the flow of the bowl.The stem had two dents in the top surface. There was also some heavy oxidation in the vulcanite. I cleaned the areas around the button and filled in the dents with clear super glue. When the repair cured I sanded the repairs and the oxidation with 220 grit sandpaper. I folded the paper and worked in the grooves turned areas of the stem.I polished the stem with micromesh sanding pads – wet sanding with 1500-2400 grit pads and dry sanding with 3200-12000 grit pads. I wiped the stem down with Obsidian Oil between each sanding pad. I put the stem back on the bowl and buffed the pipe with Blue Diamond polish on the buffing wheel. I lightly buffed the bowl so as not to fill in the sandblast finish. I also carefully avoided the stamping on the underside of the shank. I gave both the bowl and the stem multiple coats of carnauba wax and buffed the pipe with a clean buffing pad to raise the shine. I hand buffed it with a microfiber cloth to deepen the shine. The finished pipe is shown in the photos below. I have two more pipes to finish for him – both of them that are finds he made while pipe hunting. This is a fun bunch of pipes to work on. I look forward to moving through the rest of them. Thanks for looking. 

Creating a Churchwarden from a Billiard Bowl stamped LIGHT


Blog by Steve Laug

I finished up some pipes for a guy here in Vancouver and when he came to pick them up he brought more for me to work on. I have finished four of the pipes this is the fifth one. It is a small Billiard bowl that is stamped on the underside of the shank LIGHT. The pipe came without a stem and was one of his pipe finds on a recent pipe hunt in Vancouver.  It is a small billiard with a light sandblast finish. The colour is a mix of dark and medium brown stains. The finish was very dirty and there was a thick bake in the bowl. There was some damage on the inside edge of the rim toward the back of the bowl on the left side. Together we decided to make a churchwarden out of it. I thought he had a great idea so I ordered some stems from JH Lowe online. They arrived last week so I decided to fit a stem to the bowl today. I reamed the bowl with a PipNet pipe reamer with the smallest cutting head and took the cake back to bare walls. I cleaned up the remnants of cake with a Savinelli Fitsall Pipe Knife. I used a dowel wrapped with sandpaper to sand down the walls on the bowl. I cleaned up the inside rim edge with a folded piece of sandpaper and gave the rim a slight bevel. I took a photo of the inside of the bowl once it was cleaned. I touched up the stain on the bowl sides and rim with a Cherry Stain pen. I buffed it with a shoe brush.I rubbed down the briar with Before & After Restoration Balm. I worked it into the sandblast finish with my fingertips and finished working it in with a shoe brush. The balm worked to clean, preserve and enliven the surface of the finish on the small bowl. The briar was coming alive so I took some photos of the pipe at this point. I cleaned out the airway from the shank to the bowl and the mortise area with pipe cleaners, cotton swabs and alcohol. I use 99% isopropyl because it evaporates quickly and cleans the briar very well.I gave the bowl several coats of Conservator’s Wax and buffed it with a soft cloth. I would buff it later on the buffing wheel but I wanted to get a feel for the look at this point in the process. The stems I ordered arrived. They are approximately 9 inches long. The tenon was unturned and the casting excess was along both sides of the stem and the slot end. I used a drill bit to open the airway in the tenon end of the stem. It needed to be the same size as the guide pin on the PIMO tenon turning tool. I measured the diameter of the shank and adjusted the tenon turning tool to cut the new tenon. I used it on a cordless drill and turned the tenon on the stem. I turned it until it was a close fit and sanded it down until it fit snugly in the shank.I heated the stem over the flame of a candle until the vulcanite was soft. I bent it slightly over a small bottle.I sanded out the casting marks on the sides of the stem and the button end with 220 grit sandpaper. I sanded the rest of the stem smooth to remove all of the sanding marks on the diameter near the shank stem junction.I polished the stem with micromesh sanding pads – wet sanding with 1500-2400 grit pads and dry sanding with 3200-12000 grit pads. I wiped the stem down with Obsidian Oil between each sanding pad. I put the stem back on the bowl and buffed the pipe with Blue Diamond polish on the buffing wheel. I lightly buffed the bowl so as not to fill in the sandblast finish. I also carefully avoided the stamping on the underside of the shank. I gave both the bowl several coats of Conservator’s Wax and the stem multiple coats of carnauba wax and buffed the pipe with a clean buffing pad to raise the shine. I hand buffed it with a microfiber cloth to deepen the shine. The finished pipe is shown in the photos below. I have three more pipes to finish for him – all of them that are finds he made while pipe hunting. This is a fun bunch of pipes to work on. I look forward to moving through the rest of them. Thanks for looking. 


Restoring a Cased Set – 2 JBV & 1 M&T Bent Billiards – Part 1


Blog by Steve Laug

I was chatting with Chris van Hilst from Tobacco Pipe Restorers one day using Messenger and he was selling this old set of pipes. Two of them were stamped JBV in an oval and one was a M&T Best Briar & Bands. The set was missing the third JBV pipe and one of the stems was for the M&T. The silver was dirty and the bowls caked but there was something about the pipes that really attracted me. We talked prices and made a deal. I had him send the pipes to Jeff in Idaho as it was easier to deal with than sending them to Canada. I had him send me a couple of photos of the set that are shown below. The first is the pipes sitting in the case. It shows that there is some kind of cigarette holder and a tamper missing from the set. The second photo shows the JBV in an oval stamp on the left side of the shank of one of the pipes. I could also see hallmarks in the silver but was not able to clearly read them. Jeff received them pretty quickly and put them aside. My daughters went down for my Dad’s 90th birthday so he took the opportunity to send them north with them on their return trip. He had not had a chance to clean them so I was left to my own devices on this set of three. When they arrived, I took a photo of the case before I opened it and of the case open showing the pipes. It is covered in leather and is kidney shaped. It is lightly stained but other than a few nicks it is in great condition.There was some gold leters on the front edge of the case that reads FOURNISSEUR DE SM LEROI DES BELGES. It translates from Belgian French to read PROVIDER HM KING OF BELGIAN. Or the Provider for His Majesty King of Belgium.I opened the case and took a photo of the pipes on the inside and the stamping on the inside of the lid. It reads J.B. Vinche over “Au Nabab” over Bruxelles. That is what it reads as best as I can make out. It is pretty blurry.I took photos of each of the pipes before I started to work on them. I started with the pipe on the left side of the photo above and worked my way across for the photos. The first pipe below is the one on the left. It is stamped JBV in an oval on the left side of the shank. The silver ferrule is also stamped JBV in an oval over BRUX over three hallmarks that are hard to read. The first appears to be a flower, the second a person and the third is ARG over 900. The pipe is in rough shape. The finish is shot; there is silver polish on the shank ahead of the ferrule. There are some gouges in the top and underside of the shank. The JBV Oval was originally gold leaf. There is a thick cake in the bowl and the rim top is beat up. There are big chunks of briar missing around the outer edge of the rim. The rim top is chipped and damaged and the inner edge is in rough condition. The pipe is very dirty. The second pipe is shown below and is the one in the center position in the case. It is stamped BEST BRIAR & BANDS  with each word over the next on the left side of the shank. One the right side it is stamped M&T in a football shaped oval. The silver ferrule is also stamped with a BBB vertically on the side of the band next to the shank. Next to that is the same M&T stamp in an oval over three hallmarks that are hard to read. The first appears to be a flower, the second is 933 and the third is a crescent moon. The pipe is in rough shape. Once again the finish is shot; there is silver polish on the shank ahead of the ferrule. There are some gouges in the top and underside of the shank. There is a thick cake in the bowl and the rim top is beat up. There is a crack running down the back side from the rim halfway to the shank. The rim top is dented and damaged and the inner edge is in better condition than the first pipe. The pipe is very dirty. The third pipe is shown below and is the one on the right side of the case. It is stamped JBV in an oval on the left side of the shank. The silver ferrule is also stamped JBV in an oval over BRUX over three hallmarks that are hard to read. The first appears to be a flower, the second a person and the third is ARG over 900. The pipe is in rough shape. The finish is on this one is also shot; there is silver polish on the shank ahead of the ferrule. There are some gouges in the top and underside of the shank. The JBV Oval was originally gold leaf. There is a thick cake in the bowl and the rim top is beat up. There are big chunks of briar missing around the outer edge of the rim. The rim top is chipped and damaged and the inner edge is in rough condition. There looked like there could be a crack in the bowl down the left side. Like the rest of the pipes in this set the pipe is very dirty. There were two stems in the set. You can see from the photos below that they were different sizes. In the first photo the top stem is more delicate. It is narrower at the tenon end. It is for the M&T pipe while the bottom one is for the JBV pipes. The stems both are in decent condition with a little oxidation and minimal tooth chatter. There are no deep tooth marks so that is something to be thankful for. I knew that the set was older but I was unfamiliar with the brands. I had not heard of JBV so I did a bit of research on the brand and found an interesting link to an old catalogue. It turns out that the JBV is short for J.B. Vinche Company in Brussels. I have included the information on the brand that I found in the link as well as the link below.

This company maintained a factory in Brussels, Belgium, but records indicate that it also operated a retail establishment at 34, Rue Notre Dame des Victoires, in Paris under the name “Au Nabab” where, no doubt, it offered its product line for sale to the public.

https://www.facebook.com/tobaccopipeartistory/photos/a.111646685586370.24977.101191206631918/111646972253008/?type=3&theater

I also included some photos of a J.B. Vinche Catalogue from 1875. I checked on the Pipephil website to see what I could find there. Generally I find the site one of the most helpful in quickly confirming information on a brand. In this case it came through with a great bit of information. I did a screen capture of the pertinent section of the link. You can check it out further on the following link. http://www.pipephil.eu/logos/en/logo-v2.html.

The information included in the capture reads:

The brand has been created in Bruxelles in 1864 by Jean Baptiste Vinche and run after him by his son Victor. Marcel and Rene Vinche (3rd generation) managed the corporation from 1927 on. The brand is famous for its meerschaum pipes but briar pipes were also produced after 1938. In 1965 Jacques Vinche (4th generation) entered the family firm. Jeff and Mia Koopmans from Hilson Pipes joined in 1977. Today (2009) Ben and Wim Koopmans manage the business.Pipedia confirms this information at the following link: https://pipedia.org/wiki/Vinche.

I could not find out any information on the third pipe – the M&T Best Briar Band pipe. I checked in all of my usual sources and came up empty. Does anyone know anything about the brand? Let me know.

Armed with the background information, I decided to start on these pipes by reaming all three of them. The cake in each was quite thick and the damage to the rim and bowl made me proceed with caution. I was concerned about the cracked bowl in the M&T pipe as well as the potential crack in the second JBV pipe. I started with the first JBV pipe and reamed it with a PipNet pipe reamer starting with the first cutting head and working my way up to the second and lightly working on it with the third one. I took the cake back to bare briar to check out the interior of the bowl. I followed up by reaming it with a Savinelli Fitsall Pipe knife and finally sanding the bowl with 180 grit sandpaper wrapped around a piece of dowel. I moved on to the M&T Best Briar Band pipe and reamed it with a PipNet pipe reamer starting with the first cutting head and working my way up to the second and lightly working on it with the third one. I took the cake back to bare briar to check out the interior of the bowl. I followed up by reaming it with a Savinelli Fitsall Pipe knife and finally sanding the bowl with 180 grit sandpaper wrapped around a piece of dowel. I moved on to the second JBV pipe (the one that I thought had a possible crack). I started with the smallest cutting head on the PipNet pipe reamer and turned it gently in the bowl one twist and the bowl split in half in my hands. I was sick when I felt it break. I have never had that happen in all these years of working on pipes. It really was unbelievable. I held the pieces together and took the cake back to bare briar to check out the interior of the bowl. I used a Savinelli Fitsall Pipe knife to scrape away the remnants of cake. The photo below shows the bowl in half with the reamer next to it.This is not what I wanted to do next! I had planned to work through each of the pipes and have a nice set! Now I had to deal with this one and because it was part of an old set I felt obligated to try to put it back together. I was just sickening to have the second original bowl break in my hands. Why couldn’t it have been the cracked M&T bowl? But since it was the other JBV bowl I needed to repair it. At this point this blog also took a turn. I would do the rest of the first part of the blog on the bowl repair of this particular JBV pipe. I would have to follow up with at least one more part on the other two pipes in the set.

I turned to repair the bowl. I decided to pin the two halves together and then fill it and line the bowl with JB Weld. It would be a process. I drilled 8 small pin holes in the front half of the bowl and put stainless pins in the holes. I matched the two halves together and marked the holes on the other side of the bowl. I drilled matching holes. Once I had the holes aligned I painted each half with gel super glue and pressed the halves together and held them in place until the glue set. I filled in the cracks around the sides and bottom of the bowl with briar dust and super glue. I used a dental spatula to apply the patch all around the bowl. I pressed the mixture into the crevices that remained in the sides and bottom.When the repair hardened I sanded it with 180 grit sandpaper to blend it into the surface of the bowl. I also repaired the chips out of the edges of the bowl with super glue and briar dust. I sanded the bowl with 220 grit sandpaper and smoothed out the repaired areas and sanded the rest of the bowl at the same time. I carefully avoided the stamping on the shank so as not to damage that area. I topped the bowl to remove the damage to the rim top. I had hand sanded it with sandpaper to start the process and filled in the damaged areas with super glue and briar dust. Now it was time to top it. Once I had it topped I wiped the bowl down with alcohol to remove the dust and the remainder of the finish on the shank and bowl. I cleaned out the inside of the mortise and shank as well as the airway into the bowl with alcohol, pipe cleaners and cotton swabs. The airway was clogged so I pushed a pipe cleaner through into the bowl. The mortise was like a Peterson’s sump and it was filthy. It took a lot of work to clean it out.I sanded the exterior of the bowl with a medium and a fine grit sanding sponge. At this point I paused in sanding the exterior and turned my attention to repairing the inside of the bowl. I mixed a batch of JB Weld and put a pipe cleaner in the airway into the bowl to keep the airway from being covered with the mixture. I applied the mix to the inside of the bowl with a popsicle stick. I pressed it into the cracks and build up the damaged areas to protect it from further damage. With that I called it a night, set the bowl aside to dry and turned out the lights.  In the morning I sanded out the excess JB Weld with 180 grit sandpaper wrapped around a dowel. I wiped the bowl down with a damp paper towel to remove the dust. The photos below show the bowl at this point. I polished the briar with micromesh sanding pads – wet sanding with 1500-2400 grit pads and dry sanding with 3200-12000 grit pads. I wiped it down with a damp cloth after each sanding pad to remove the dust. I stained the bowl with a Tan aniline stain. I had found that the stain was probably mislabeled as it had a definite red cast to it. I applied it with the dauber and flamed it with a lighter to set the stain in the finish.Once the stain cured I rubbed the bowl down with Before & After Restoration Balm. It cleans, enlivens and protects the briar. In this case I also found that it blended the stain well on the surface of the briar. I polished the silver with a jeweler’s cloth to polish and remove the tarnish. I reapplied the gold to the stamping on the shank using Rub’n Buff Antique Gold. I applied it in the stamping using the tip of a sanding stick. I let the stamping sit for a few minutes then buffed off the excess product.I set the bowl aside and turned my attention to making a stem for this pipe. Remember I mentioned that the second stem in the case was for the M&T pipe and was too small in diameter for the shank of the second JBV pipe. I found a Bakelite stem in my box of stems that only needed to be shaped to fit the shank of the pipe. I tapered the end of the stem with a Dremel and sanding drum to match the taper of the other stem. I sanded it with 180 grit sandpaper to smooth out the Dremel marks and further taper it.I sanded out the tooth chatter and reshaped the edges of the button with 220 grit sandpaper. I also smoothed out the flow of the stem.I polished the stem with micromesh sanding pads – wet sanding with 1500-2400 grit pads and dry sanding with 3200-12000 grit pads. I wiped the stem down after each pad with Obsidian Oil to wipe away the sanding dust and bring some life to the Bakelite. With the stem and bowl done it the first installment of this blog is complete. It is time to reconnect things and take some final photos. I buffed the bowl and stem with Blue Diamond on the buffing wheel. I gave the entire pipe multiple coats of carnauba wax to protect. I buffed it with a clean buffing pad to raise the shine. I hand buffed it with a microfibre cloth to deepen the shine. This frustrating old pipe that split in half had been brought back to functional life and it does not look to bad to my eye. This is a long one. For some of you I am sure you are wondering what is wrong with me to take time to fix this one. To you I say it was worth the lessons that I learned and it is still a smokable pipe. Thanks for reading.

FINDING THE NATURAL BEAUTY OF A KNUTE OF DENMARK FREEHAND


Blog by Robert M. Boughton
Copyright © Reborn Pipes and the Author except as cited
https://www.facebook.com/roadrunnerpipes/

For after all, the best thing one can do
When it is raining, is to let it rain.

— Henry Wadsworth Longfellow, in “The Poet’s Tale: The Birds of Killingworth,” in Tales of a Wayside Inn (1863)

INTRODUCTION
Longfellow’s powerful poem is about man’s intolerant bent for all things natural based on ignorance of the indispensability of even the smallest part in an ecosystem.  It speaks to acceptance and “gentleness, and mercy to the weak, and reverence for Life.”  The work is sad and satirical and, in the end, surprising in its song of survival, but, alas, will never be required reading in any public school.

Knute of Denmark is a second of Karl Erik, which Karl Erik Ottendahl (1942-2004) made his main brand.  Ottendahl, an underrated and generous pipe maker who was a low-paid lithographer before he took up pipe carving as a hobby until it became his full-time vocation, understood the average smoker who made far less money than those fortunate enough to afford expensive varieties of the Danish freehand style of which he was an early crafter.  He therefore dedicated his life and work to pipes of great natural beauty at bargain prices.  Here is one that very much resembles the pipe in this blog, suggesting Ottendahl may have had a hand in making this Knute of Denmark.I suspect, or at least like to think, that Ottendahl read Longfellow’s magnificent poem, a couplet of which I quoted above, and if he didn’t, he would have enjoyed it.  And it was raining in the Isotopes City while I restored this pipe.

RESTORATION The stem was savagely damaged, with the top lip all but gone and a small hole below it and the bottom having two gouges.  Such long-term acts of mayhem must have been inflicted by someone with clear and severe anger issues who masticated the mouthpiece the way some people chomp on gum to stop smoking coffin nails.  I gave it an OxiClean bath to start.  At the same time, I stripped whatever dirt and stain (the latter of which I could see no signs) were present with an Everclear soak.  The immediate appearance of dark reddish swirls in the alcohol surprised me. The OxiClean soak, which was complete first, shows in the pic below how filthy the stem was.  Afterward, all I can say is it was clean. Figuring I had at least an hour before the stummel would be stripped, I filed off fine shavings from an old otherwise useless stem and made a nice little pile.  The ironic part of that task was that the stem was once a fancy type similar to the one I was fixing and would have been a perfect replacement had it not been toasted!  Then I added a few drops of black Super Glue, mixed it together with the shavings and quickly and liberally applied it to the stem after dipping a cleaner in petroleum jelly and inserting in the mouthpiece past the hole.  WARNING: I forgot my usual process of lubricating a small sliver of card stock paper also and inserting it inside the stem in front of the cleaner, but it all worked out later – with some extreme difficulty. That done, I had 12-24 hours before it would be dried, way more than enough time to finish the stummel that was ready to come out of the Everclear.  Checking out the progress of the alcohol soak, I was amazed by the almost blood red color of the 190-proof grain alcohol and guessed it was from residual maroon stain.For the first time after an Everclear soak, I wiped the still drying wood with a cotton rag saturated with purified water.  The water took longer to dry, but the result was stunning.  Despite the sandblasting, I believe what I beheld was the finest piece of briar I’ve ever seen.  Its natural beauty shone through the crisp dullness. I reamed the chamber, used a small sharp pocket knife to cut away some excess buildup and sanded with 150-, 220, 320- and 600-grit papers, then retorted the pipe. The following shots show the tremendous improvement of the wood’s potential color and glow.  I used the super fine “0000” steel wool in two of the photos only on the rim and shank opening.  But look at the difference. Late that night, with the stem patch dry, I took out one of my files, a narrow triangle with medium-grit flat sides to remove the thick, uneven mess on the top of the stem that is a necessary by-product of the black Super Glue method of hole-filling.  I was also able to remove most of the deep chasms on the bottom of the stem.  I began the smoothing process with a dual 150- and 160-grit sanding pad and regular, rougher 150-grit paper.The effort to salvage the ruined old stem was worthwhile and a good start on a plan of total rehabilitation for personal use, but this pipe is for sale, and I know the more difficult work of re-building the bottom lip will take longer and not, in the end, be suitable to pass off to a buyer.

But as it happened, I had two other freehands with good fancy stems with which I could play musical chairs, a Ben Wade by Preben Holm I re-stemmed before and an estate Karl Erik I’m working on now that’s far too huge to support the smaller stem it came with.  For now, I’m enjoying the BW with the damaged Vulcanite stem as the yellow Lucite one fits the Karl Erik.  I liked the dark brown swirled Lucite stem that was on the Karl Erik better, and since the tenon of the BW by PH was too thin, the issue was settled.  I sanded down the elegant brown Lucite fancy stem’s tenon and smoothed it with steel wool before micro meshing it. A thorough buffing on the wheel with red and white rouge on the stem and stummel, and it was done. CONCLUSION
In the spirit of nature, I used no stain restoring this freehand that needed no artificial help to reveal its innate beauty.

SOURCES
http://www.pipephil.eu/logos/en/logo-k3.html
https://pipedia.org/wiki/Karl_Erik
http://www.hwlongfellow.org/poems_poem.php?pid=2047

Adding some length to a Chimera Blowfish


Blog by Steve Laug

I received a call from a fellow who lives nearby my house about working on some pipes for him. He happened to be packing them up to send to the US for repairs when he stumbled on the rebornpipes.com website. He stopped by with a box of pipes that he wanted to know if I could work on for him. Two were pretty straight forward – 1910 Calabash that needed a cleanup and a freehand that belonged to his dad that he wanted cleaned up so that he could send it back to him. The freehand was simple – buffing, touching up stain, cleaning the bowl and shank and removing tooth chatter and oxidation from the stem. I finished that one first and then moved on to this calabash. I have written about the calabash on a previous blog that can be found at the following link: (https://rebornpipes.com/2018/07/01/a-simple-restoration-of-a-1910-gourd-calabash/). The third pipe that he wanted me to work on was a different proposition – it was a Blowfish shaped pipe with the name Chimera etched on the underside of the shank. He did not like the stem and the way it looked on the shank. He was wondering if I could add some length to the shank and fit a different looking stem on it that better fit the shape and look of the pipe. I took photos of the pipe before I started working on it. I took a close up photo of the stamping on the shank. It is a brand that I don’t know much about. It is not listed on Pipedia or Pipephils site. I wrote an email to the owner to see what he could tell me about the pipe. He wrote back as follows:

The blowfish “Vincent” was made by Tedd Weitzman in Atlanta around 2010. He started making pipes out of the shop of a local amateur maker and this was his first sellable one… “Chimera” would have been his marque, but he hadn’t made a stamp yet, but as far as I know he never made another.The pipe had an interesting shape and worked with the grain very well. It seemed to have a clean and open draw. I took a few photos of the bowl from various angles to show the grain. Some of you may note that the shank end is not square and require that the saddle of the stem be cut at an angle. This will need to be addressed when I add the shank extension. I had an interesting faux horn (Lucite) shank extension here that I thought make an interesting contrast with the shape of the bowl. I also had a four sided, square vulcanite tapered stem that I thought would look good with the pipe. I laid out the pieces and took a photo of the proposed look of the pipe. I sent the photos to the owner and his response was to go with what I thought would look good. I was good to go on this one.I took the pipe apart and worked on the shank extension. I glued a threaded Delrin tenon in the shank end of the stem to join it to the shank of the pipe. The taper on the shank extension was not quite enough to make a smooth transition with the briar shank. I took it down with a Dremel and sanding drum and got it close. The rest of the fitting would have to be done by hand with files and sandpaper. The tenon would need to be cleaned up a bit but it was going to work nicely. I put the stem back together with the extension and took some photos. I put the stem and shank extension in place on the bowl and took some photos. You can see that the transition is getting close. I think the faux horn shank extension and new stem are going to look really good. It is        quite unique looking as a whole. I like the longer shank and stem with the large blowfish shaped bowl. Once I had the transition sanded smooth with 220 grit sandpaper I polished it and the extension with micromesh sanding pads – wet sanding with 1500-2400 grit pads and dry sanding with 3200-4000 grit pads. I wiped the extension down after each pad with a damp cloth. Before I polished it with the 6000-12000 grit pads I stained the connection with an oak coloured stain pen to match the colour of the rest of the bowl. I finished by polishing the junction and the extension with the last three grits (6000-12000) of micromesh pads. I really like the look of the longer shank. The faux horn extension looks good with the rest of the pipe. I worked Before & After Restoration Balm deep into the briar on the smooth finish to clean, enliven and protect it. I wiped it off with a soft cloth. I buffed the bowl with a cotton cloth to polish it. It really began to have a deep shine in the briar. I took some photos of the bowl at this point to mark the progress in the restoration. The grain on the bowl is really beginning to stand out and will only do so more as the pipe is waxed. I set the bowl aside and began to work on the stem that I had chosen. It was an interesting four sided taper stem with a flare at the bottom where it joined the shank. The tenon was rough so it would need to be worked on. I funneled the airway in the stem to give it a good open flow. I sanded out the tooth chatter on the top and underside near the button. I sanded out the scratches in the tenon and the underside of the disk between the tenon and the stem. I used a folded piece of 220 grit sandpaper to do the shaping and smoothing work on the stem.I polished the stem with micromesh sanding pads – wet sanding with 1500-2400 grit pads and dry sanding with 3200-12000 grit pads. I wiped the stem down after each pad with Obsidian Oil  and rubbed it into the surface. To finish the polishing I used Before & After Pipe Polish – both Fine and Extra Fine polishes. I gave it a final coat of Obsidian Oil and hand buffed it to a shine. This Chimera Blowfish has some really beautiful grain all around the bowl and shank. The grain really is quite stunning. The asymmetrical nature of the bowl and shank give it a really unique look. I can see why the original stem was a hard fit. The shank extension that has the look of faux horn looks really good in contrast between the briar and the stem. The panelled vulcanite stem is high quality and shined up well. I buffed the bowl and the stem with Blue Diamond polish to raise the shine on the briar and the vulcanite. I was careful to not buff the stamping and damage it. I gave the bowl and stem multiple coats of carnauba wax. I buffed the entire pipe with a clean buffing pad to raise the shine. I hand buffed it with a microfiber cloth to deepen the shine. The finished pipe is shown in the photos below. The dimensions of the pipe are: Length: 6 1/2 inches, Height: 2 inches, Outside Diameter: 1 3/4 inches, Diameter of the chamber: 3/4 inch. This blowfish feels great in the hand and its light weight give it the potential of being a clencher. I have one more repair to do for this pipeman and I will give him a call soon and I know that he is looking forward smoking these pipes. Thanks for walking through the restoration with me.

A Harcourt Hand Carved Freehand – #7 of Anthony’s Dad’s Pipes


Blog by Steve Laug

This is a continuation of the work that began with an email from Anthony, a reader of rebornpipes asking if I would be willing to help him clean up his Dad’s pipes. He wrote; “I have a few pipes (8 or so) that haven’t been smoked in 15 years. They were my dad’s. I would like to get someone to restore them”. We chatted back and forth via email and the long and short of the story is that I have eight of his Dad’s pipes in my shop now to work on. The photo below shows the mixture of pipes that he sent me. There are some interesting shapes and most are very dirty and have very little if any of the original finish left on the briar. All have an overflow of carbon on the rim top and all have chewed, damaged stems and buttons. Anthony remembers his Dad smoking them throughout the years he was growing up so they went from regular use to being boxed and stored. They will need a lot of TLC to bring life back to them but it should be fun to give it a go. I went through the pipes and assessed their condition and contacted him and got the go ahead to proceed on the lot.I have completed the restoration of six of the pipes. The next pipe I chose to work on was the tall freehand with plateau on the rim and the shank end. It too had a replacement vulcanite stem – it is the second pipe down on the left hand column in the above photo. I have circled it in red. It is a tall freehand with a 1/4 bent stem. It is a really pretty straight grain with patterns of rustication on the bottom portion of the bowl. It has plateau on the top and on the end of the shank. The plateau finish has what looks like mold or at least water damage on both the top and end of the shank. There is also water damage around the end of the shank. The stem that is on it is again a replacement twin bore/bite proof stem that is chewed and for all intents and purposes destroyed. The fact that most of these pipes have a replacement twin bore bite proof stem tells me a lot about Anthony’s Dad’s habitual gnawing on his pipes. The stem is ruined with large pieces tooth marks and holes on both the top and underside extending from the chewed button into the surface of the stem. I will need to find a different stem. The pipe is stamped on the underside of the shank with the number 0 and under that Harcourt over Hand Carved in Denmark. The bowl had a thick cake, and some lava overflow under the water damage. The finish was gone and very washed out looking. Even the dirt and grime were anemic. I took photos of the pipe to show its overall condition when it arrived at my work table. I took some close up photos of the bowl, rim top and the stem to show what I was going to be dealing with on this pipe. The plateau rim top was in rough condition – mold filled in the grooves and valleys of the plateau. There was also some lava overflowing from the bowl that had filled in the grooves. The plateau on the shank end was worse than the rim top (if possible). The finish worn off and there was water staining all around the shank end.The water damage around the end of the shank was darker than the rest of the finish. It was water stained and those are hard to remove. I took a photo of the stamping on the underside of the shank. It reads 0 over Harcourt. Underneath that are two lines reading Hand Carved over In Denmark.The stem was ruined you can see from the second and third photos below. The “bite proof” stem evidently was not bite proof. Anthony’s Dad had gnawed through the twin bore and left holes in the deep tooth marks on the stem. It would need to be replaced.I had some vague memory about the Harcourt brand that had a connection to Preben Holm and the stamping seemed a lot like the way that he stamped his pipes. I did a bit of research on the brand to see the connection. The first place I looked was on Pipedia at the following link: https://pipedia.org/wiki/Harcourt. There I found the following information which I quote in full.

The brand Harcourt was produced by Preben Holm (†) for Dunhill to secure a share of the Danish fancy boom for Dunhill’s principal pipe dealers. Later Erik Nørding made Harcourt pipes for a shorter period. These pipe are sometimes (partially) rusticated.

It had been reported that the second generation of Harcourt pipes were sold exclusively through Dunhill stores, but we now know through Rich Mervin that the Brick Church Pipe Shop, a chain of 3 stores in NJ sold Danish freehands in the 1970s and 80s including Knute, Ben Wade, and Harcourt. They were also an authorized Charatan and Dunhill retailer. So, apparently Harcourt freehands were sold through at least some Dunhill dealers as well as the Dunhill stores.

I then turned to the pipephil site at this link and found out some more information on the brand. http://www.pipephil.eu/logos/en/infos/harcourt1.html. I followed the links there to some photos of a boxed pipe and the stamping on the shank.

This box contains a pipe carved for Dunhill in the 1970s. Harcourt pipes were Dunhill’s answer to the passion Danish style raised during this period.There was also a photo of the stamping on Preben Holm’s designed Harcourt that is recognizable by the characteristic shape of the pipe as well as by the stampings on its shank. The stampings in the photo are identical to the pipe I am working on. It is stamped with an 0 over HARCOURT and underneath that it reads  HAND CARVED over IN DENMARK.

From the two sites I was able to make the connection between the pipe I am working on and the Harcourt pipes that were made by Preben Holm. The connection between Preben Holm and Dunhill’s desire to tap into the Danish Freehand market in the US was also helpful as it gave me a potential date for the pipe. It was made in the 1970s – the height of the Danish period in the US.

So now I knew that Anthony’s Dad had purchased this pipe during the 1970s from a shop probably somewhere in California. Possibly even the pipe shop that Anthony’s Mom had written about called “Andre’s,” around 1969 or ’70. She said it was a unique shop, originally located in Los Gatos, or Campbell, California she thought. She said that it later moved to the Alameda area in San Jose. Anthony’s Dad also bought his favorite tobacco blends there so it makes sense to me that he may have also purchased the pipe there. Perhaps Anthony will let us know when he reads this.

Once again I am including the tribute that I asked Anthony to write about his Dad and his pipe smoking once again in case some of you missed that and wanted to have some background. Here is what Anthony sent: When my dad died 6 years ago, my mom asked if I wanted my dad’s old pipes. He was a long time pipe smoker, ever since I was a kid I can remember him sitting on the couch smoking his pipe inside. He worked at IBM and used to smoke his pipe in his office before they changed the laws in California. So you can imagine he had quite the collection over the years.

I took his pipes and put them in storage for a few years, I myself recently quit smoking cigarettes and decided to take up pipe smoking as it was easier on the wallet. I asked in /r/pipetobacco if anyone could recommend a pipe restoration service and someone told me about rebornpipes.com. I was hesitant but after looking at the blog I knew it would be a good place to send my dad’s pipes.

My dad loved smoking his pipes, sitting out by the pool in the sun taking a nap or in the garage wood working. The house was my mom’s area and the garage was my dad’s area. I spent hours sitting out in the garage as a kid watching the niners or a’s and giants on tv while doing woodworking projects. I hope to do the same with my kids these days.

I’m not sure if my dad smoked other tobacco but I remember Captain Black was the kind he smoked regularly. He had tins of it in the garage, full and empty and would turn the old tin jars into storage for odds and ends, like screws or washers or miscellaneous stuff.

I remember when I played little league my dad would sit in the stands and smoke his pipes. One of my teammates asked “What is that smell?” and I ashamedly said “Oh that’s my dad’s pipe…I’ll go tell him to put it out” and my teammate said “No man, it smells good!”.  It’s funny how the little conversations over the years you remember.

Another time when I was in 3rd grade or so we learned how smoking was bad for you (this was back in the 80s). I remember I asked my teacher if smoking a pipe was bad for you too….and she hesitated and said “Not as bad as cigarettes, since you don’t inhale it”. After that I was no longer worried about my dad smoking.

Knowing my mom I have no idea how my dad pulled this off but he managed to smoke his pipe in the house. I guess she liked the smell of it. Recently when I was waiting for my girls to get out of school I was sitting on a side street smoking my pipe and someone walked by and thanked me for bringing the pipe back. He said his dad used to smoke a pipe and he loved the smell. As did mine. The only difference is my daughters complain constantly about the smell of my car, but that is mostly because I smoke cigars too.

Anyway, grab some fine tobacco, light up a bowl and sit back and relax. I don’t have a pool like my dad did but you can catch me working on my laptop sitting in my driveway smoking a nice pipe, especially one of these restored pipes from reborn pipes….I can’t wait to smoke them.

Thanks Anthony, that gives me a sense of who your Dad was and how he enjoyed his pipes. I was ready to turn my attention to this seventh pipe. I went through my can of stems and found a stem that I really like the looks of. There was something classic about it and simple that looked right with the pipe. It was about ½ inch longer than the replacement stem. The tenon was the right length for the shank and once it was cleaned up it would look good. I would need to put a slight bend in the stem to fit the flow of the shank and pipe. It was lightly oxidized but otherwise a pretty clean saddle stem. I took photos of the two stems together to show how they compared.I heated the new stem with a heat gun to soften the vulcanite enough to bend it. When it was flexible I bent it over the end of the buffing wheel to get the proper bend on the shank. I put the stem in the shank and took photos of the newly bent stem. The fit was good. I liked the look of the bend and the flow of the pipe. I sanded down the circumference of the tenon with 150 and 220 grit sandpaper. It did not take too much work to get the stem to fit well in the shank  the way I wanted. I sanded the oxidation off the surface of the stem and sanded out the tooth chatter and light tooth marks on the top and underside of the stem at the button. I polished the stem with micromesh sanding pads – wet sanding with 1500-2400 grit pads and dry sanding with 3200-12000 grit pads. I wiped the stem down with Obsidian Oil after each sanding pad. I polished the stem with Before & After Pipe Stem Polish – both Fine and Extra Fine to finish removing the light scratches that remained. I gave stem another coat of the oil after that and set it aside to let the oil dry. I set the stem aside and worked on the bowl. I reamed it back to bare briar using a PipNet pipe reamer to remove as much of the cake as I could. I finished with a Savinelli Fitsall pipe knife and then sanded it with 220 grit sandpaper wrapped around a dowel. There were some deep gouges and flaws in the briar on the left side toward the bottom half of the bowl. I cleaned the area and filled them in with drops of clear superglue. When the glue cured I sanded them back to blend into the surrounding bowl side.I worked some Before & After Restoration Balm into the nooks and crannies of the sandblast finish on the rim top, bowl and shank. I worked it deeper into the grooves with a horsehair shoe brush. The balm works to clean, enliven and protect the briar. I really like the way it brings life to the briar. When I wipe it off with a soft cloth it not only adds a shine but takes away the grime that is in the finish.    I needed to stain the bowl to get some coverage on the water damaged areas. Even after sanding they were darker than the rest of the briar. I stained the pipe with Fiebing’s Tan stain. It seems the tan stain may be improperly labelled because everything seems to come out like it has been stained with oxblood or cordovan stain. It brought the red out of the briar. I applied the stain and flamed it with a lighter. I repeated the process until the coverage was even around the bowl. Once the stain had cured I buffed the bowl with Blue Diamond on thebuffing wheel to polish the stain and smooth out the finish. The pipe is looking good. The finish is a little too opaque for me so I will need to address that shortly. I decided to make the finish less opaque by polishing it with micromesh sanding pads. I sanded with 1500-12000 grit sanding pads to make the finish more transparent. The photos below show the process. I put the pipe back together and polished the bowl with multiple coats of Conservator’s Wax and the stem with multiple coats of carnauba wax. I buffed it with a clean buffing pad to raise the shine. I hand buffed it with a microfiber cloth to deepen the shine. The pipe polished up pretty nicely. The finished pipe is shown in the photos below. This is seventh of eight pipes that I am restoring from Anthony’s Dad’s collection. I am looking forward to hearing what Anthony thinks once he sees the finished pipe on the blog. Once I have the remaining pipe finished I will pack them up and send them back to him. It will give him opportunity to carrying on the trust from his Dad. The dimensions are Length: 7 inches, Height: 3 1/8 inches, Outside diameter of the bowl: 2 inches, Chamber diameter: 7/8 inches. Thanks for walking through the restoration with me as I worked over this pipe from Anthony’s Dad’s collection. One more freehand pipe remains and will soon follow in the days ahead keep an eye out for it.