Blog by Steve Laug
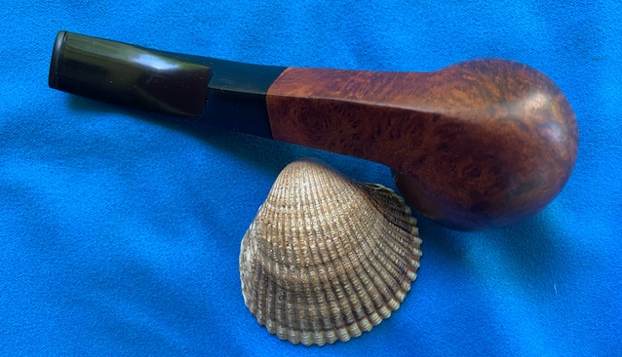
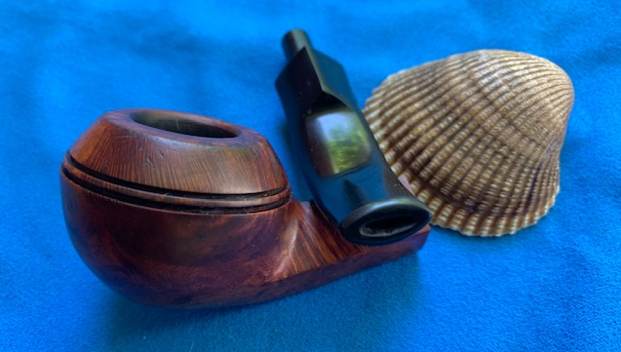
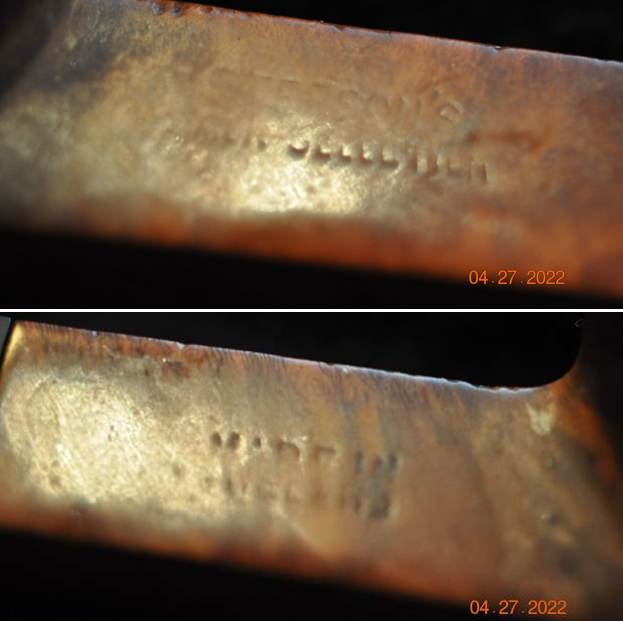
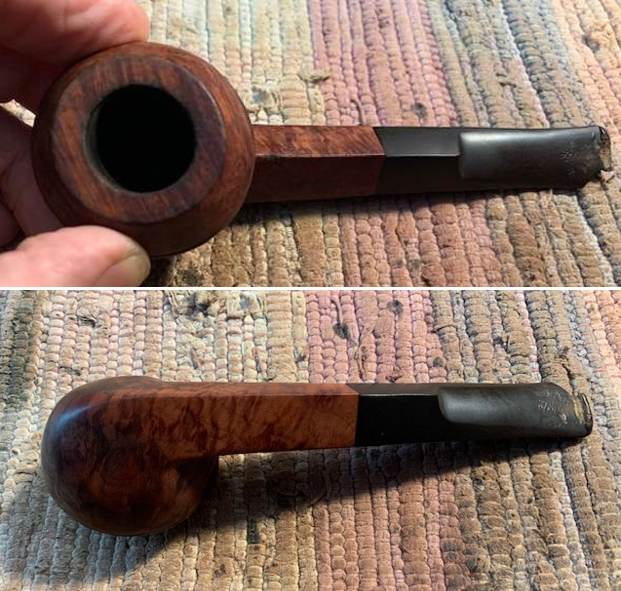
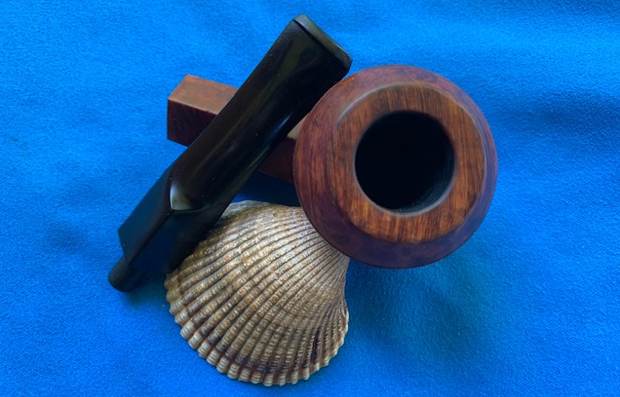
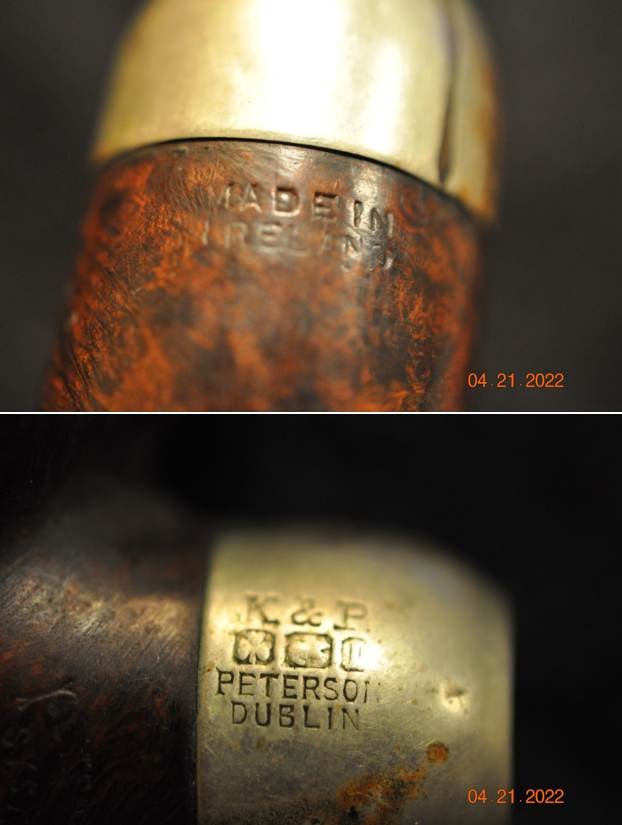
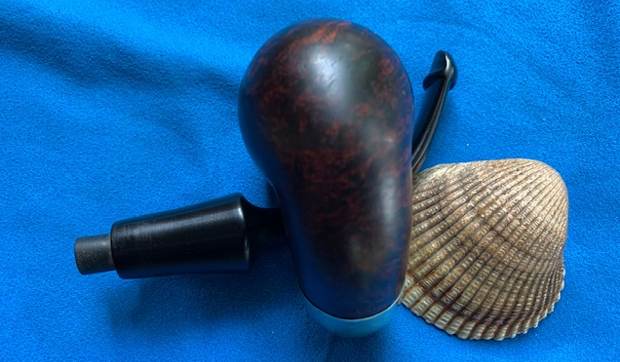
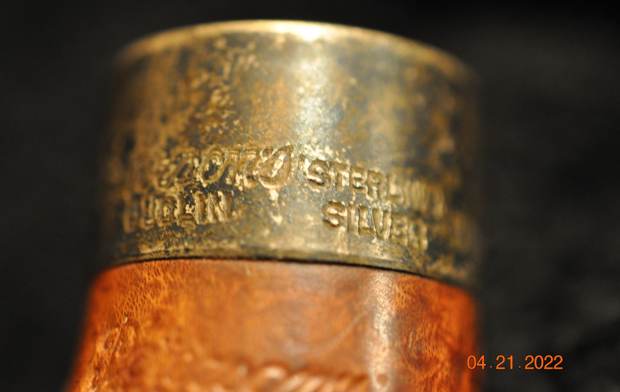
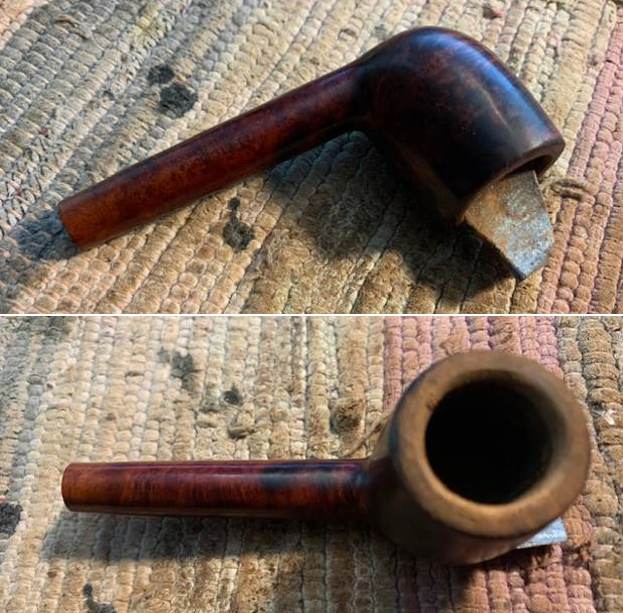
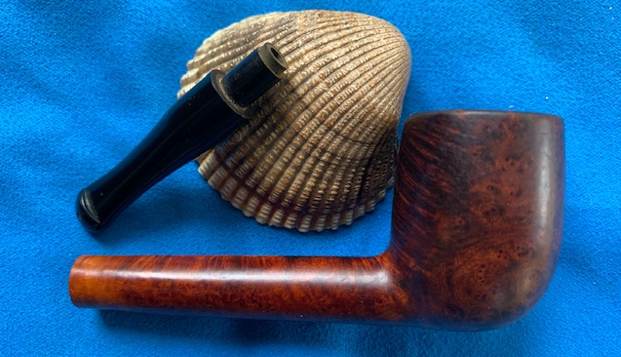
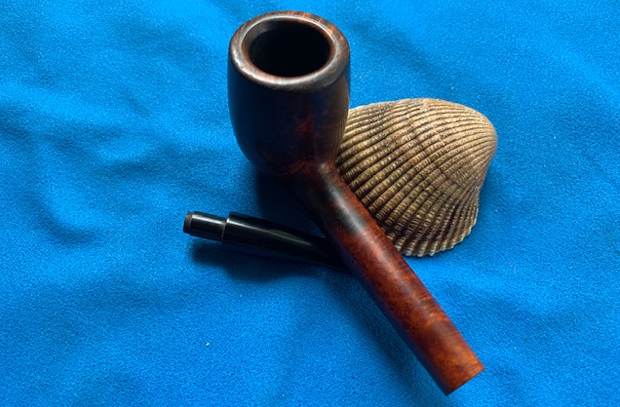
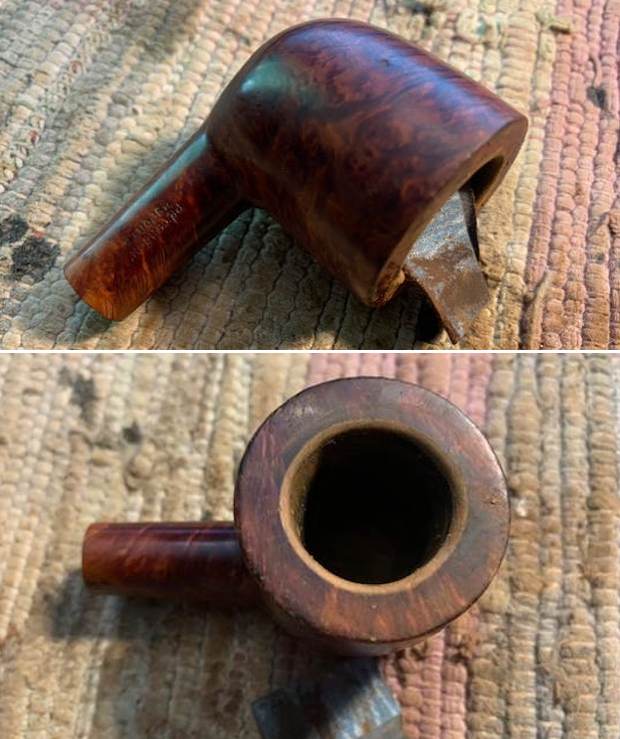
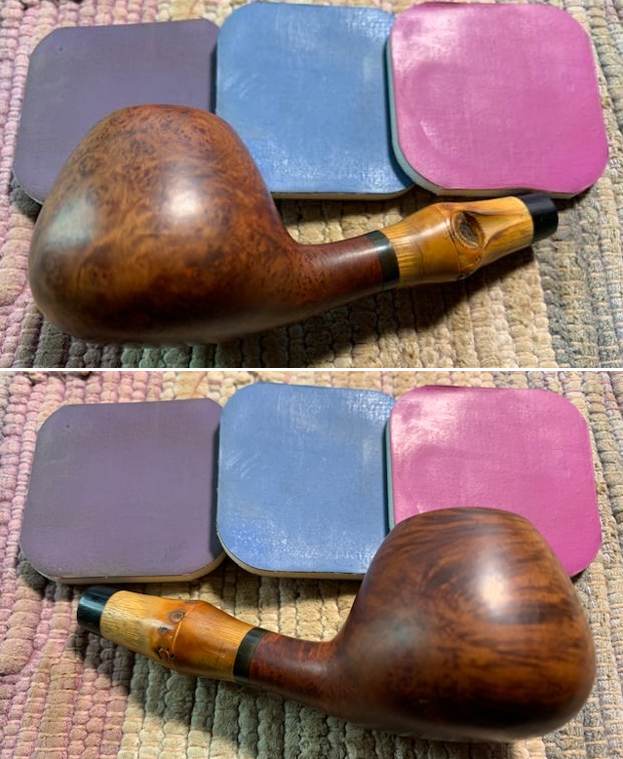
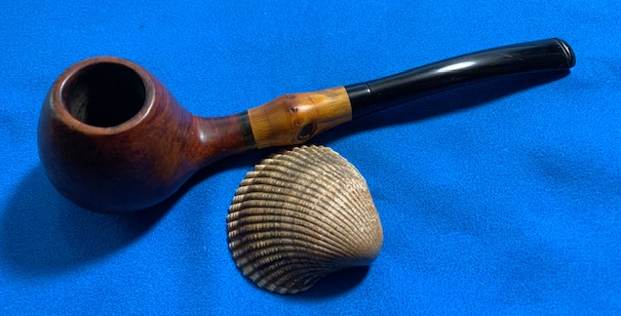
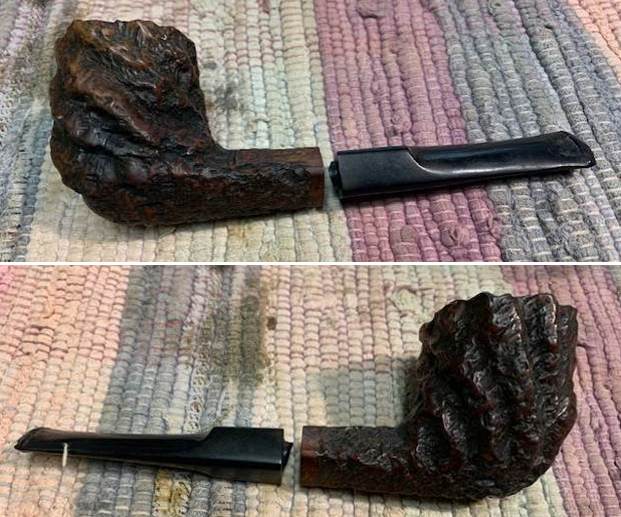
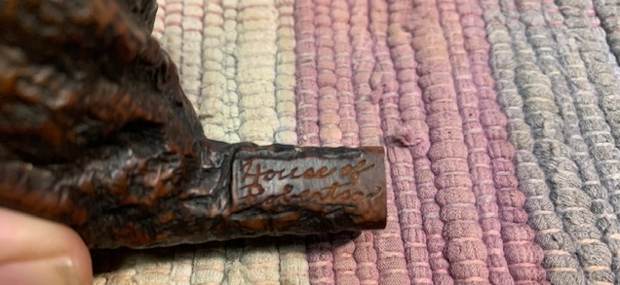
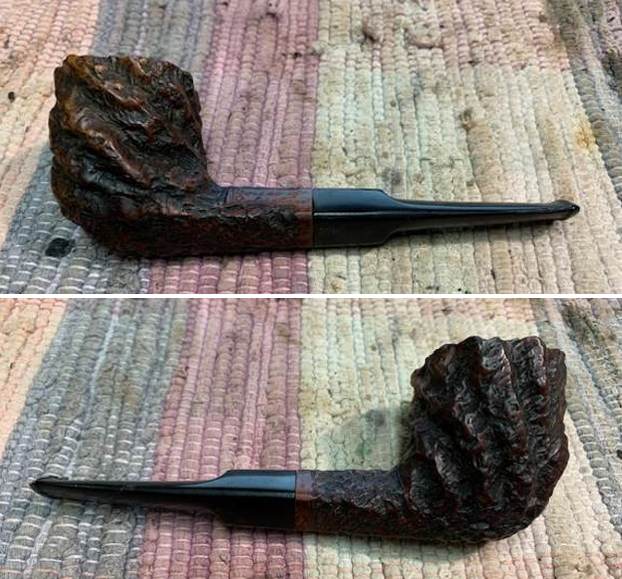
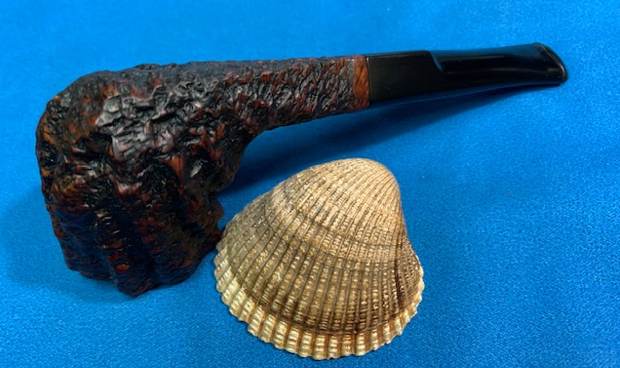
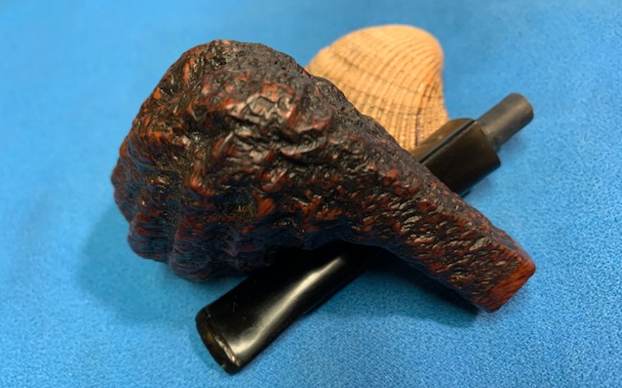
The next pipe was a mess and one that obviously had been “ridden hard and put away wet”. The finish and condition was abysmal. It was definitely a stranger to any cleaning! This one is a smooth Bent Rhodesian that has a rich coloured finish around the bowl sides and shank under the grit and grime of years. This pipe was purchased off Facebook Marketplace on 05/22/21 from Fruitland, Idaho, USA. The finish is almost bland looking it is so dirty it was hard to know what to expect once it was cleaned. It was stamped on the left side of the shank and read Peterson’s [over] Kapet. It was stamped to the right of the shank and reads MADE IN IRELAND with the shape number 595 next to the bowl. It was filthy when Jeff brought it to the table. There was a thick cake in the bowl and lava on the back of the rim top and the inner edge of the bowl. The outer edge looked good. The vulcanite stem did not fit well and was straight rather than bent. It was oxidized and dirty. There was also tooth marks and chatter on the top and underside on the rest of the stem. Jeff took photos of the pipe before his cleanup work. 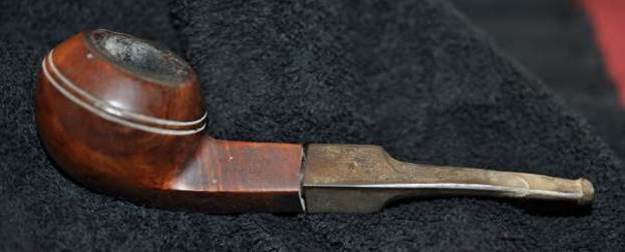
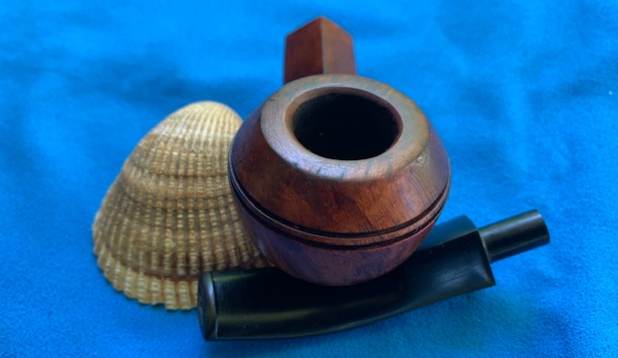
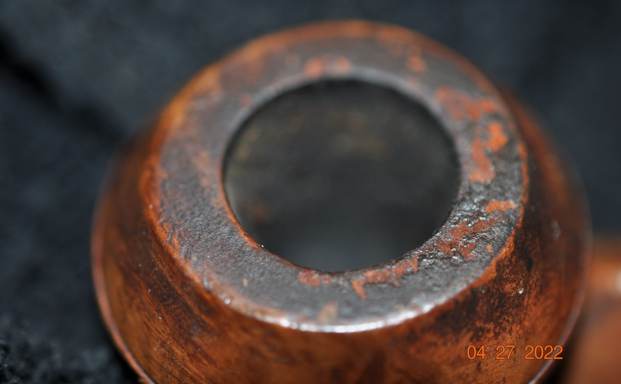
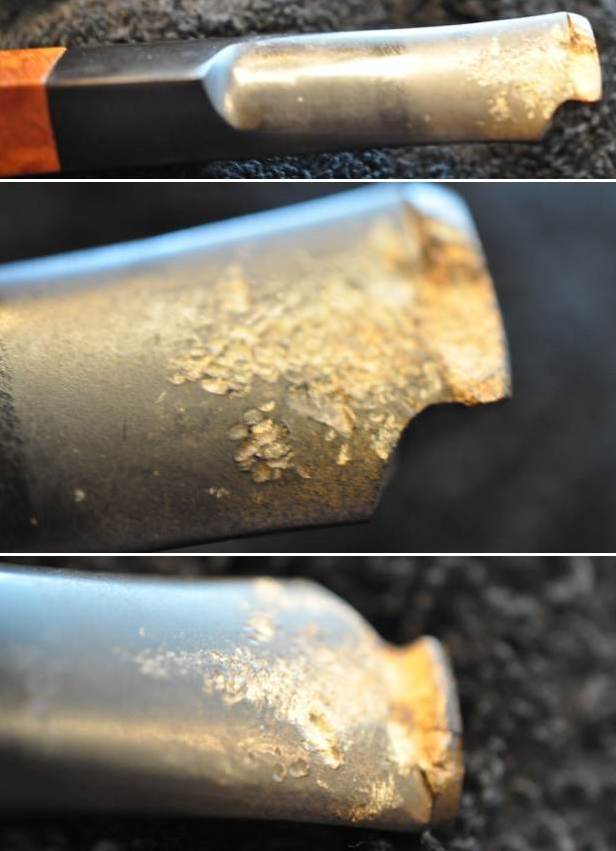
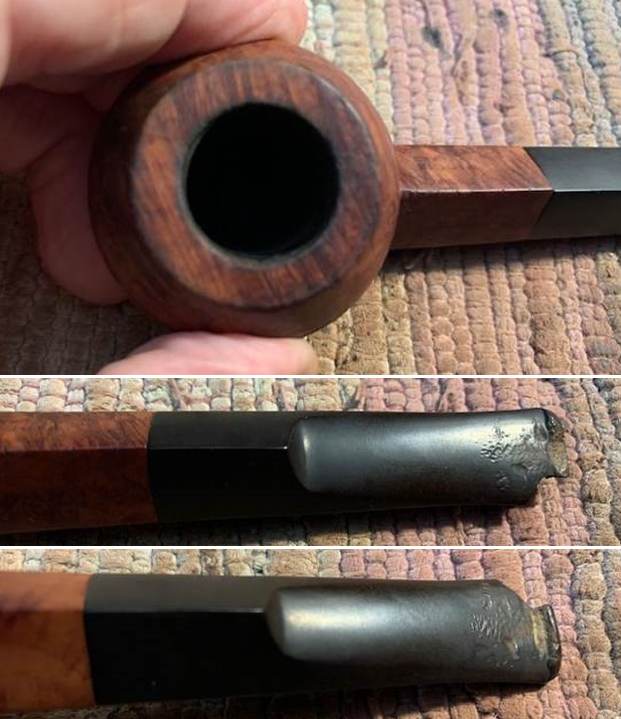
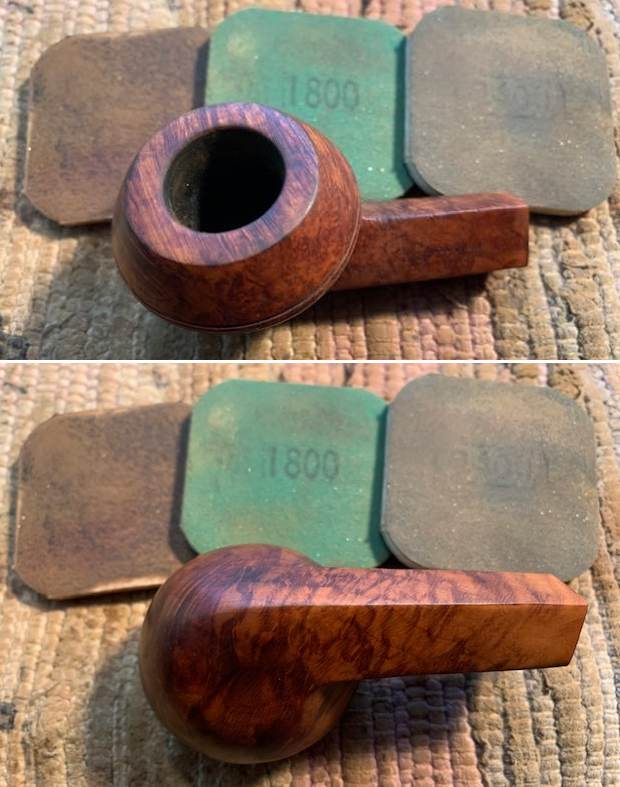
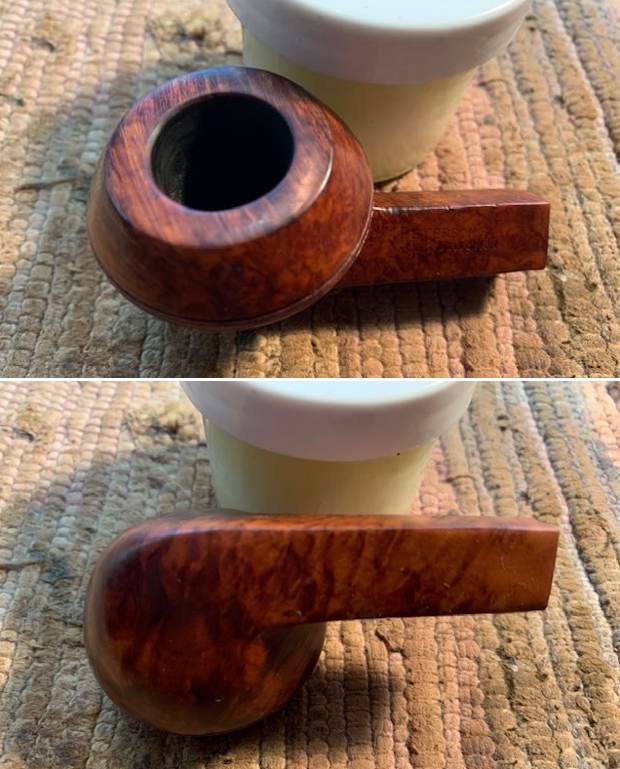
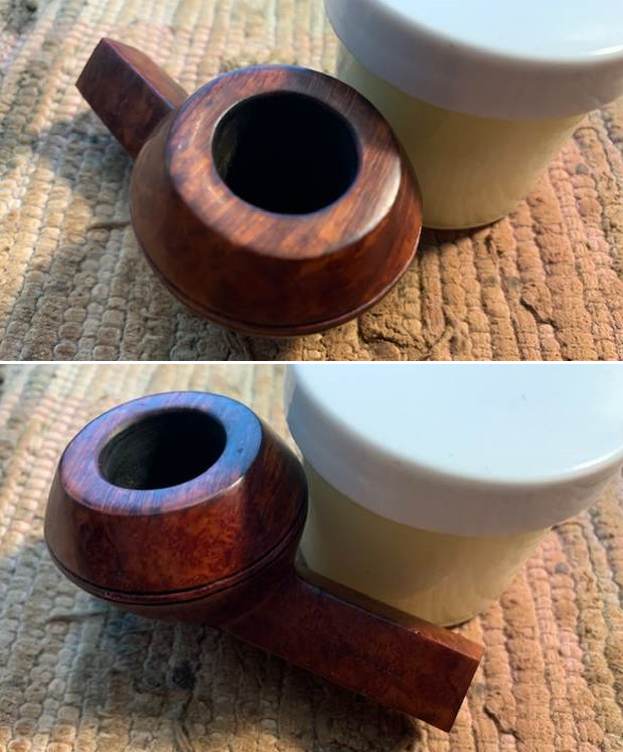
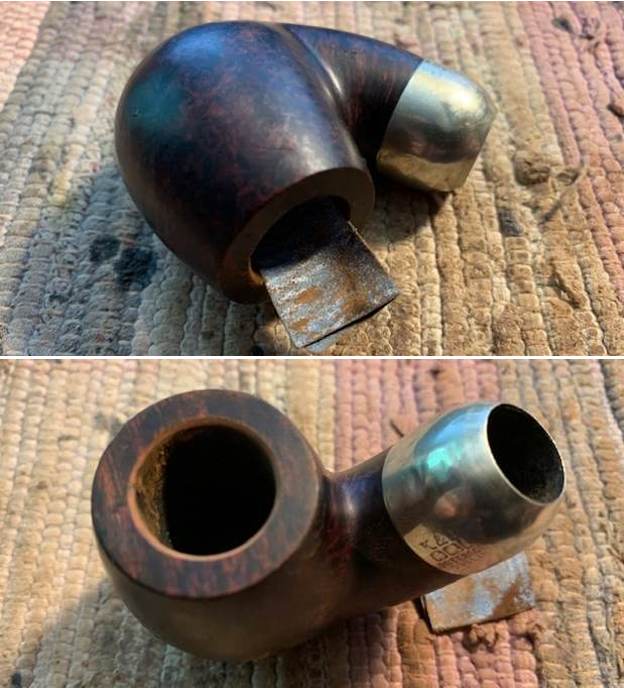
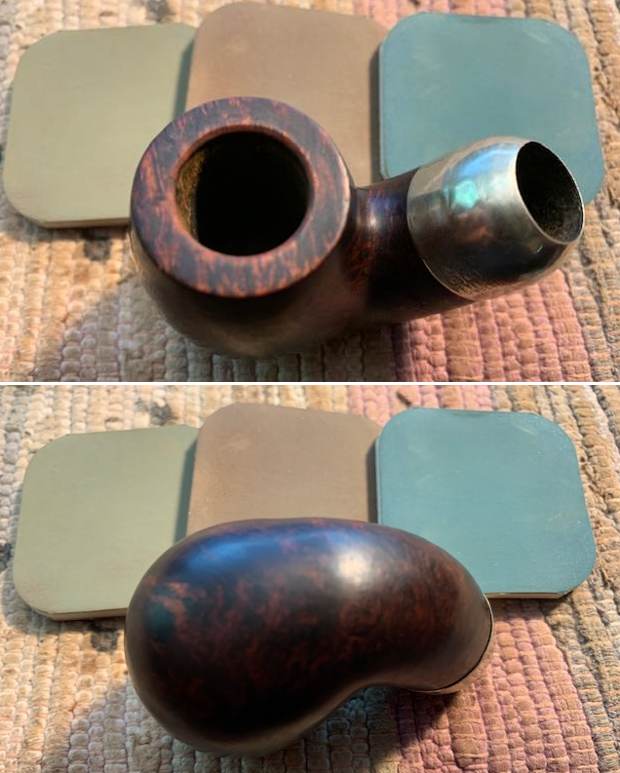
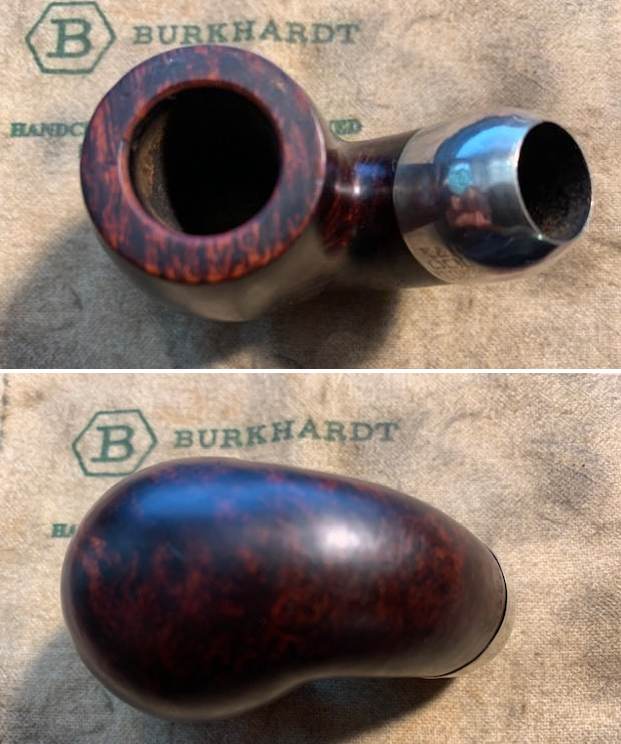
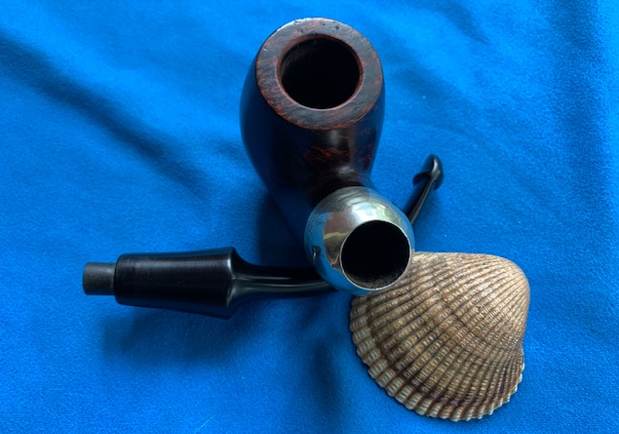
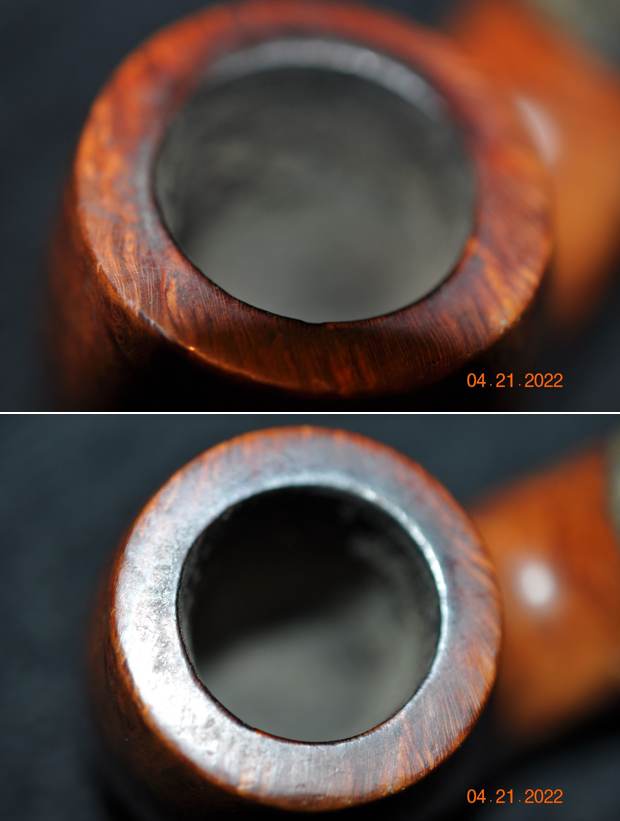
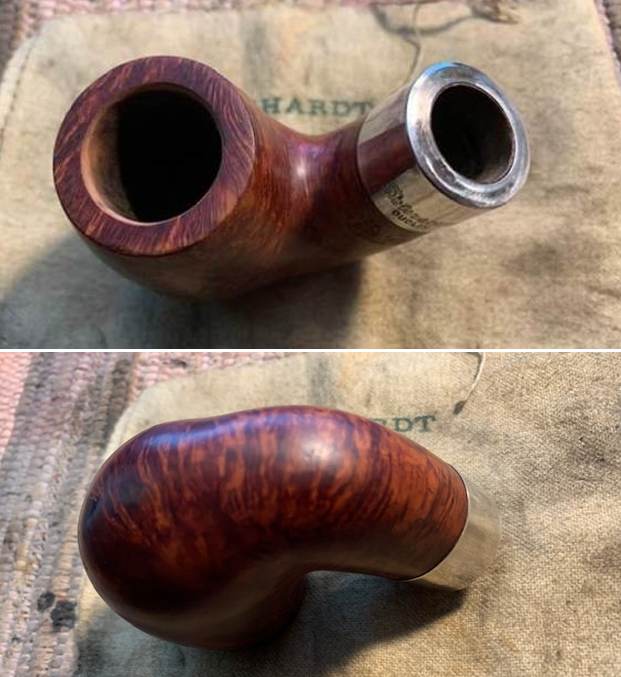
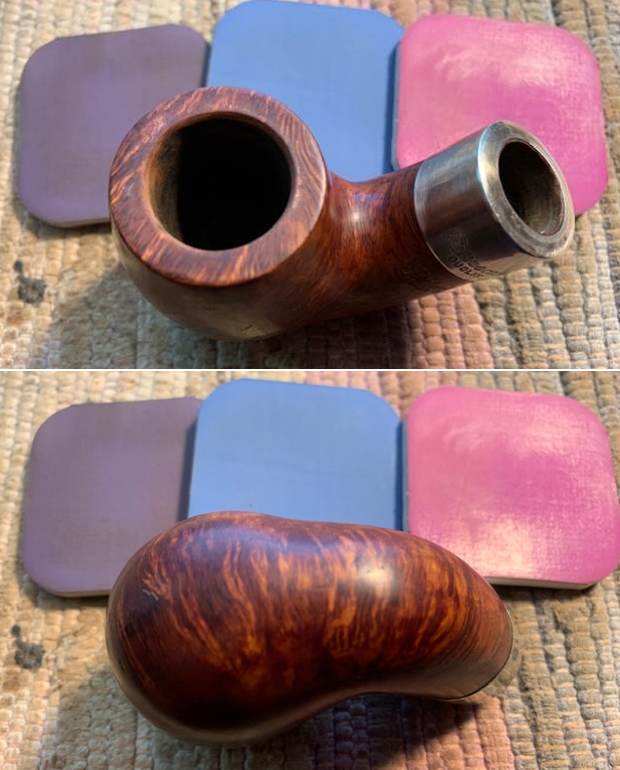
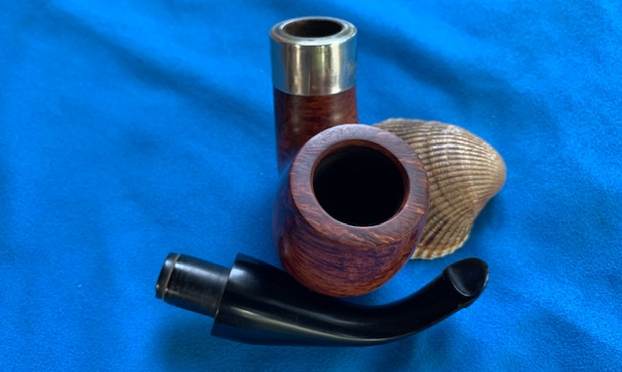
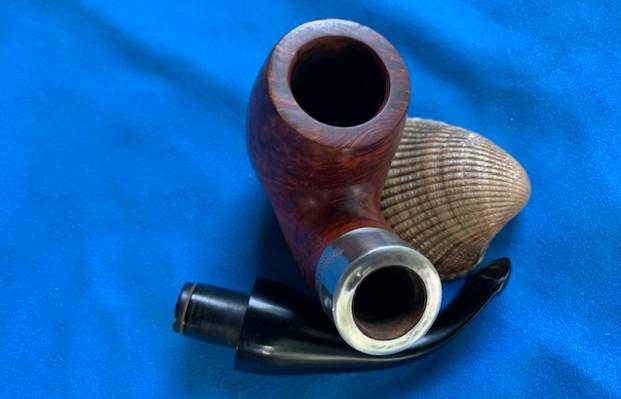
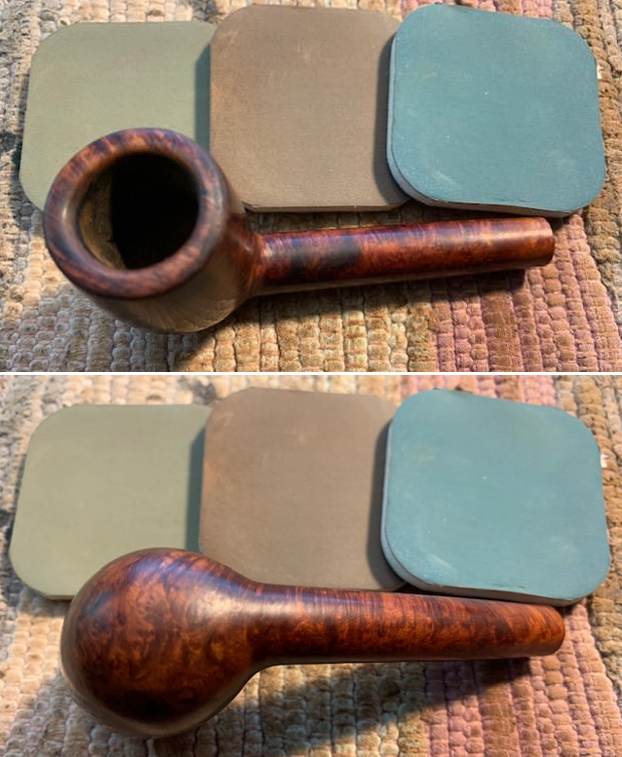
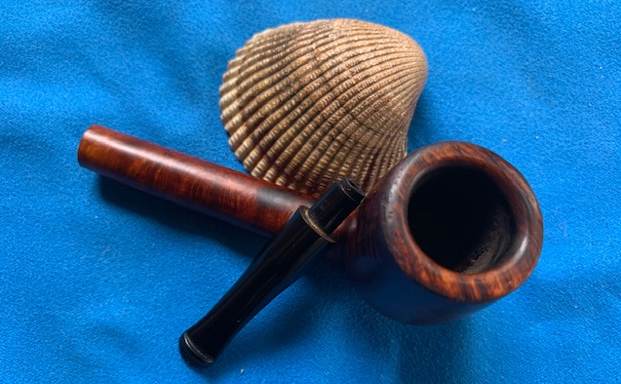
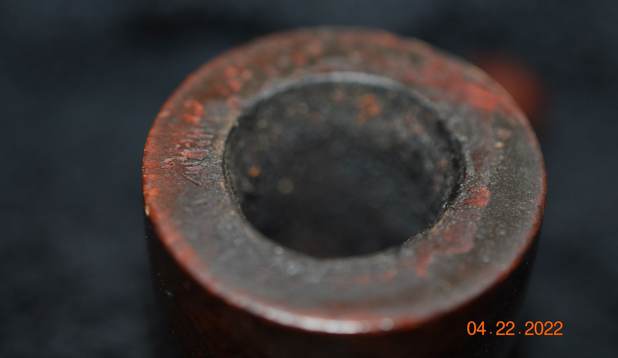
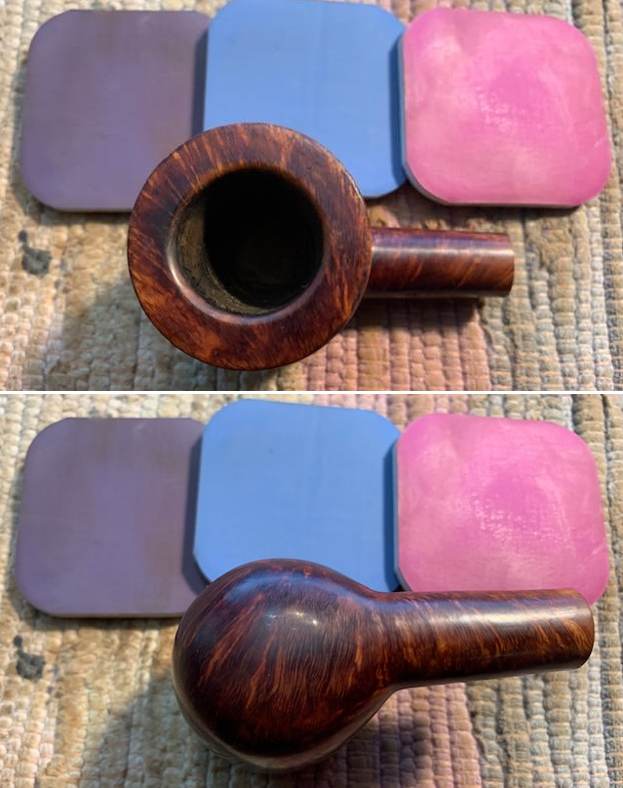
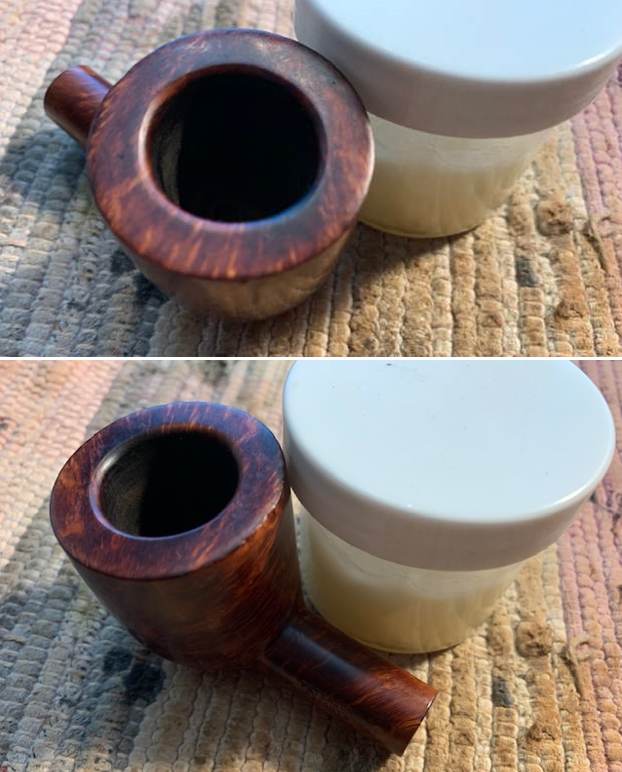
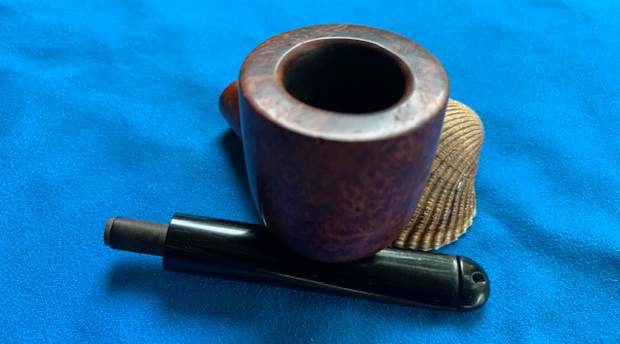
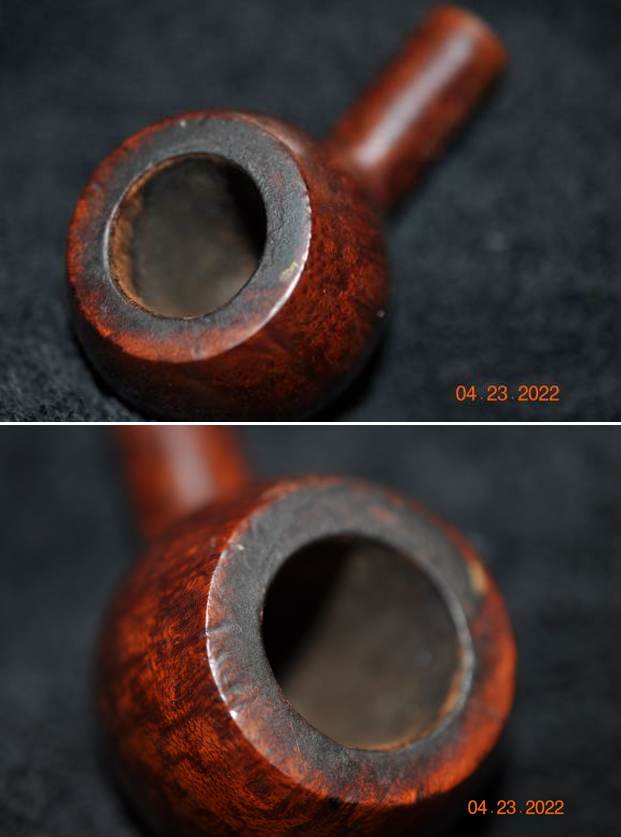
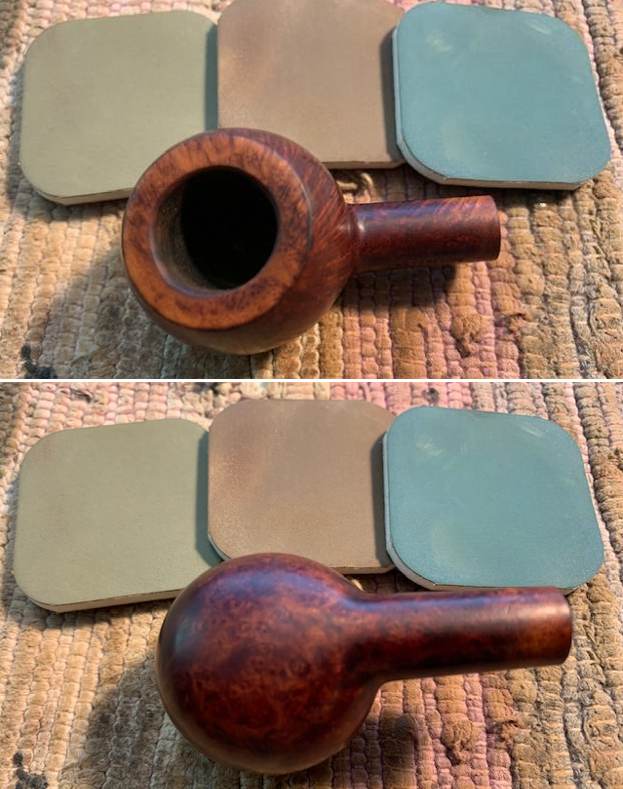
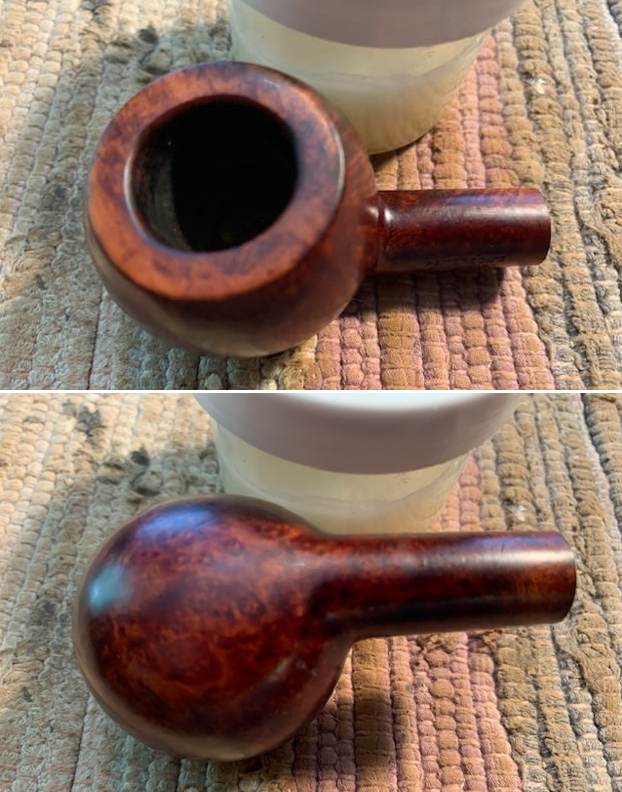
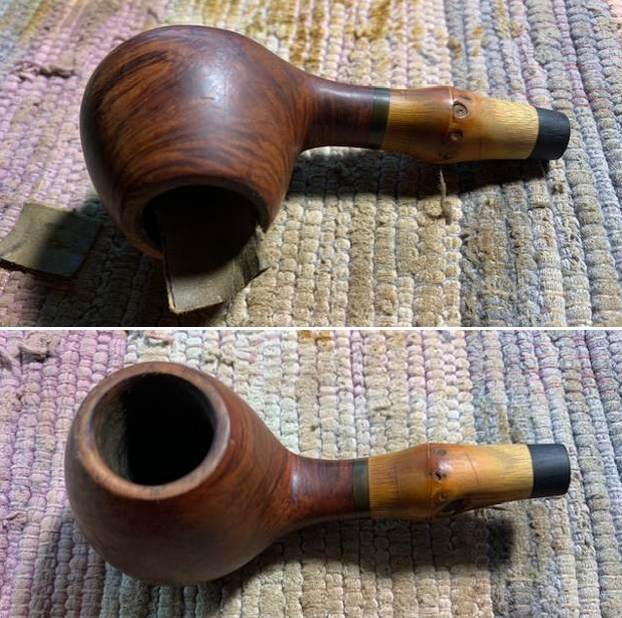
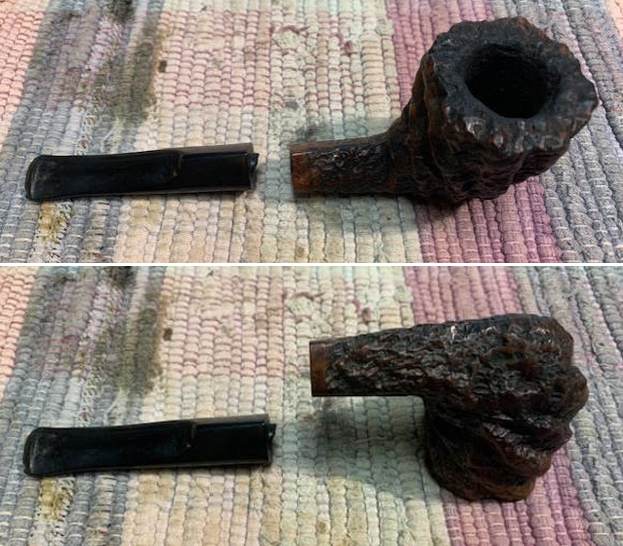
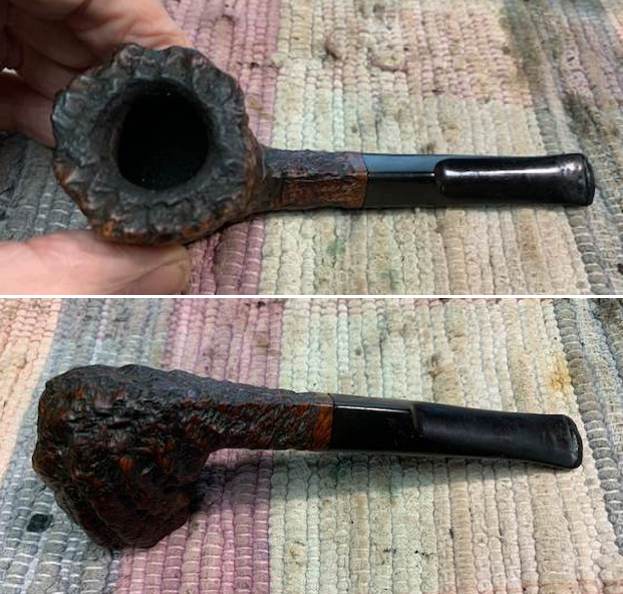
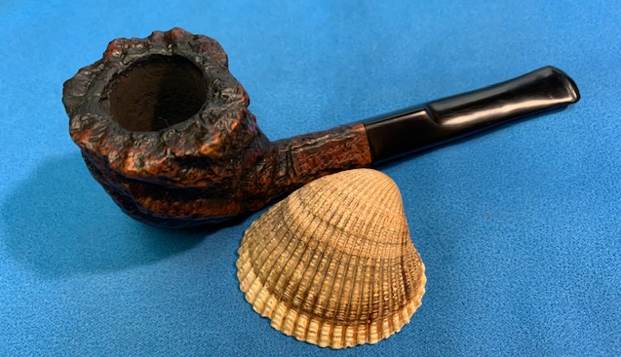
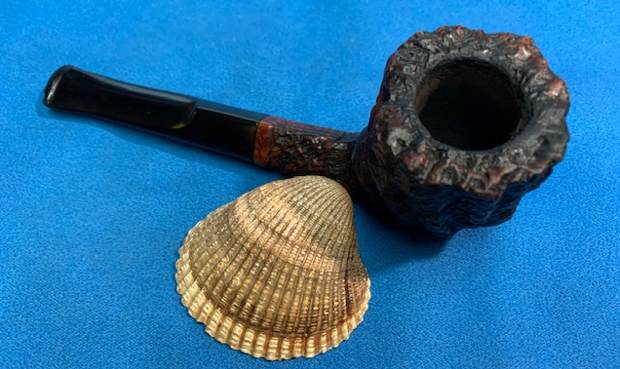
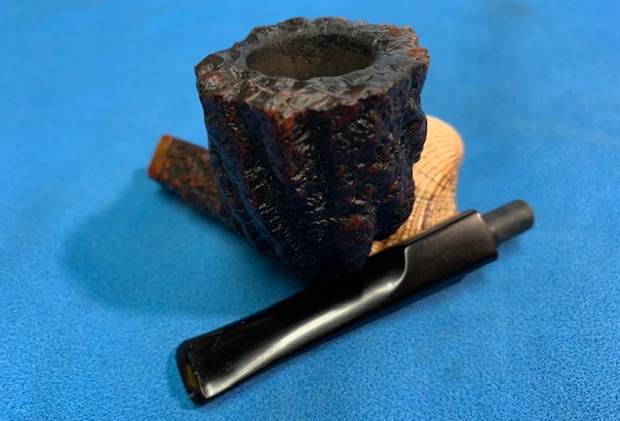
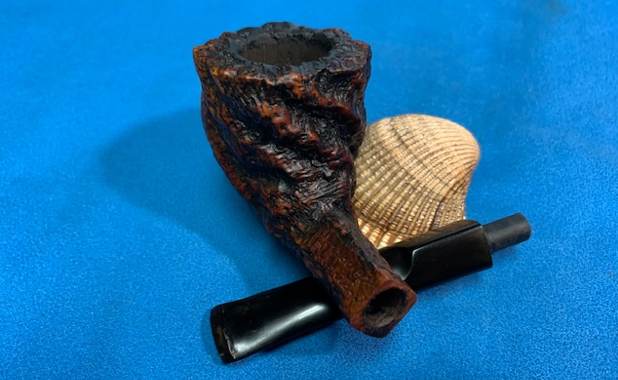
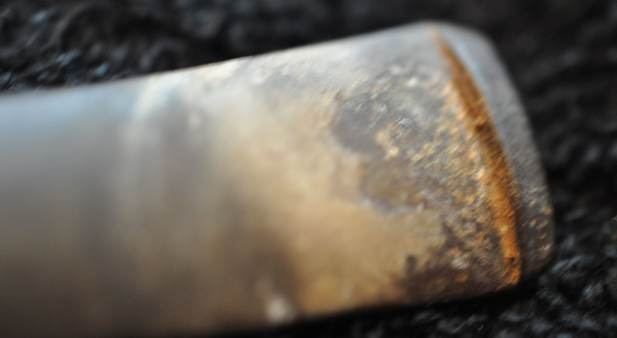
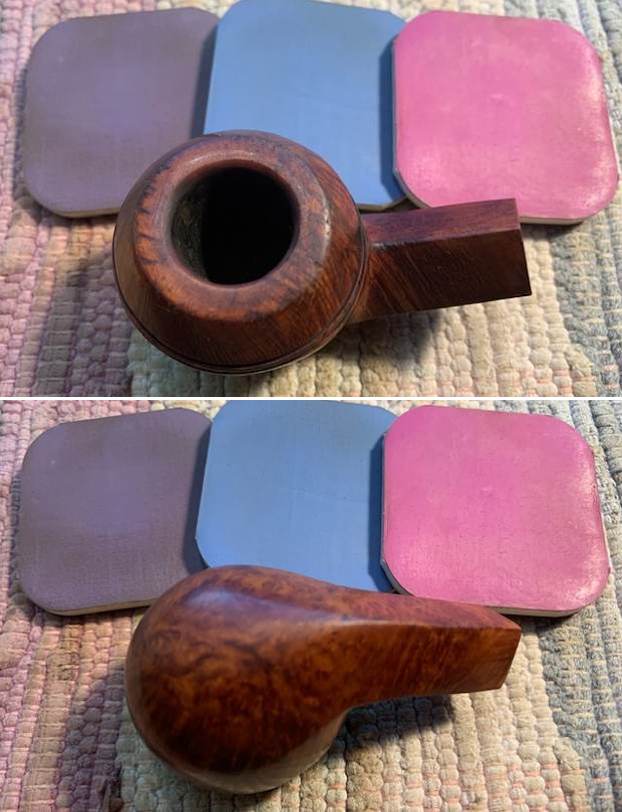
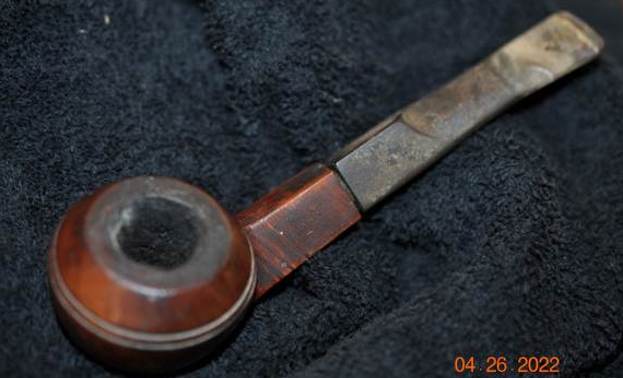 Jeff took photos of the rim top and stem to show the general condition of the pipe. The bowl is heavily caked and there was a heavy lava overflow on the rim top and the inner edge. The stem is oxidized, calcified and grimy. It was a mess and it was not the correct stem. I would need to replace it.
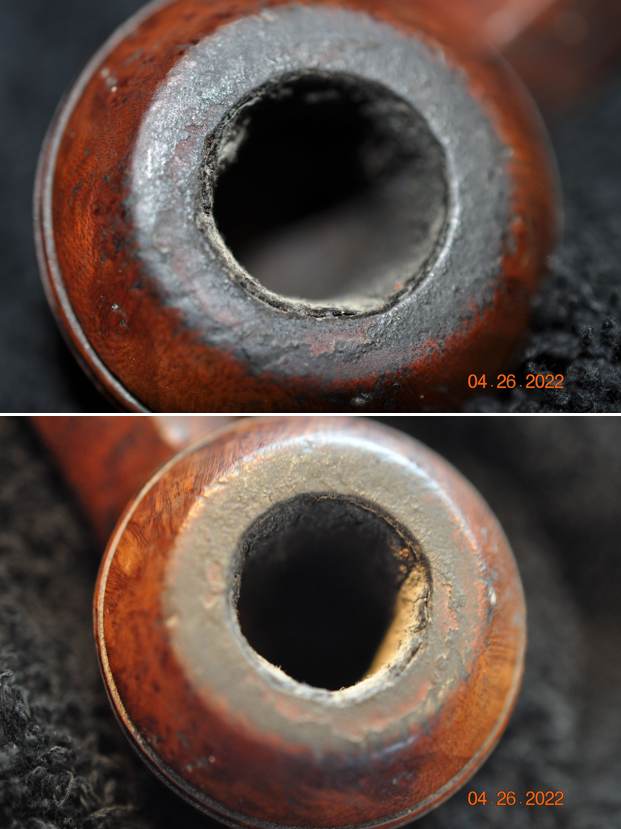
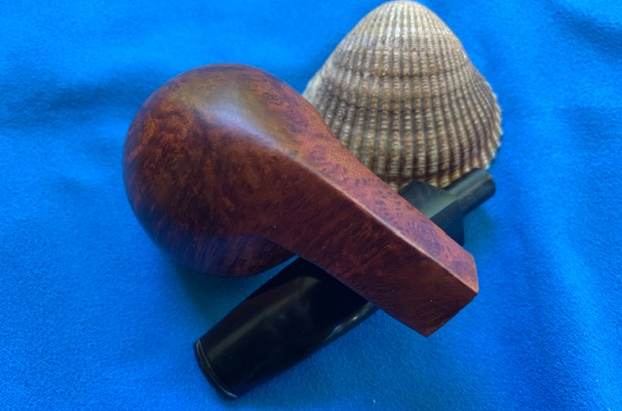
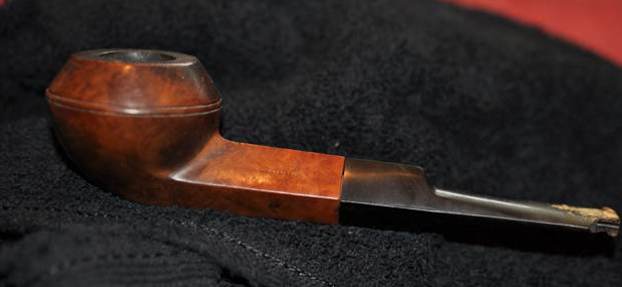
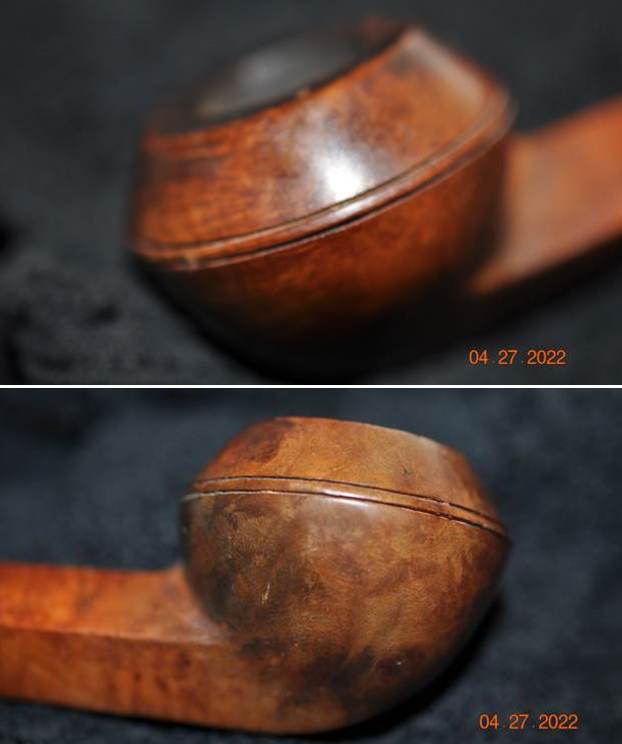
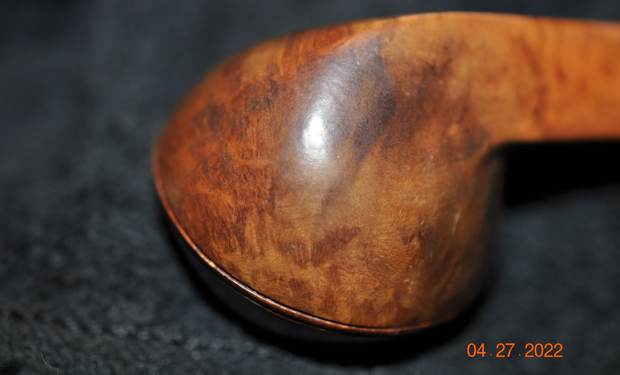
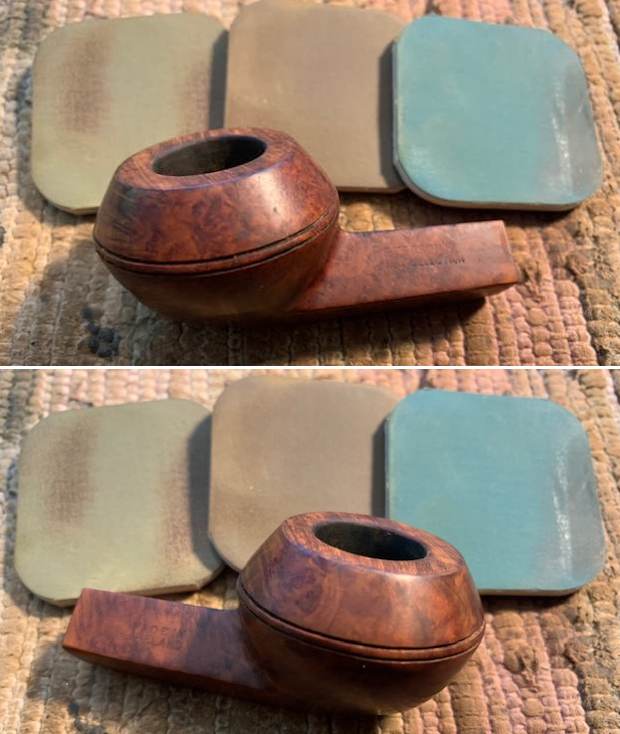
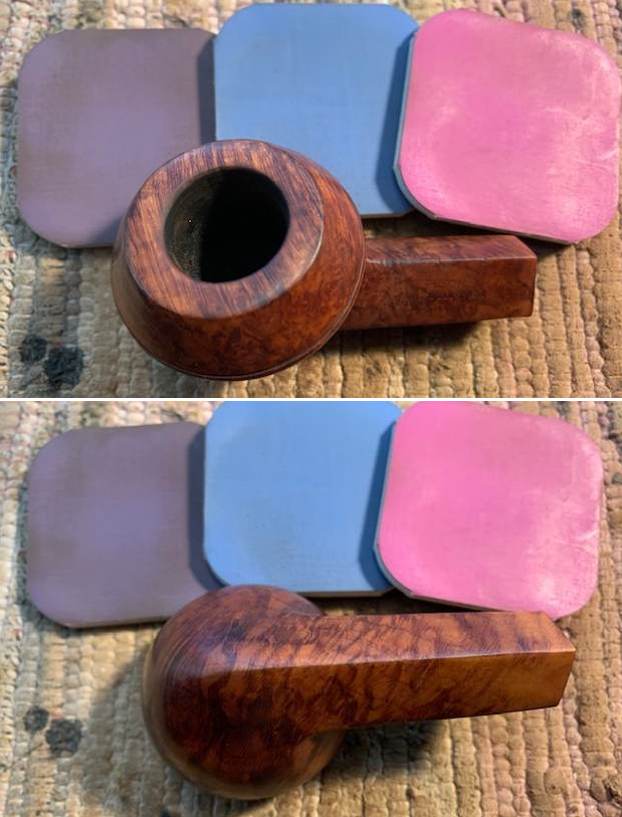
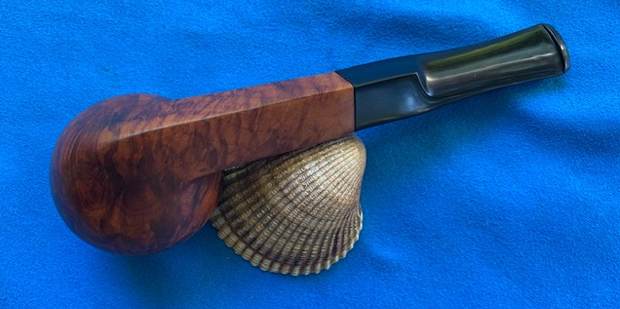
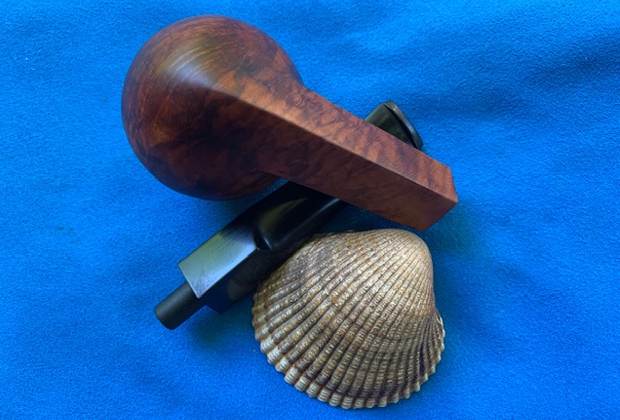
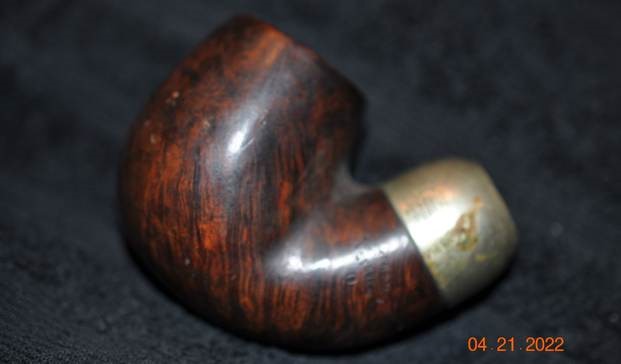
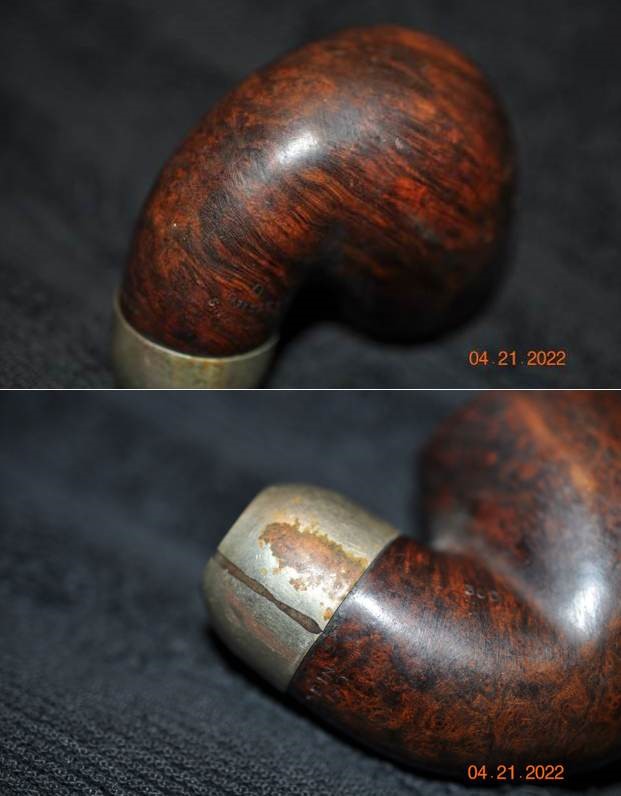
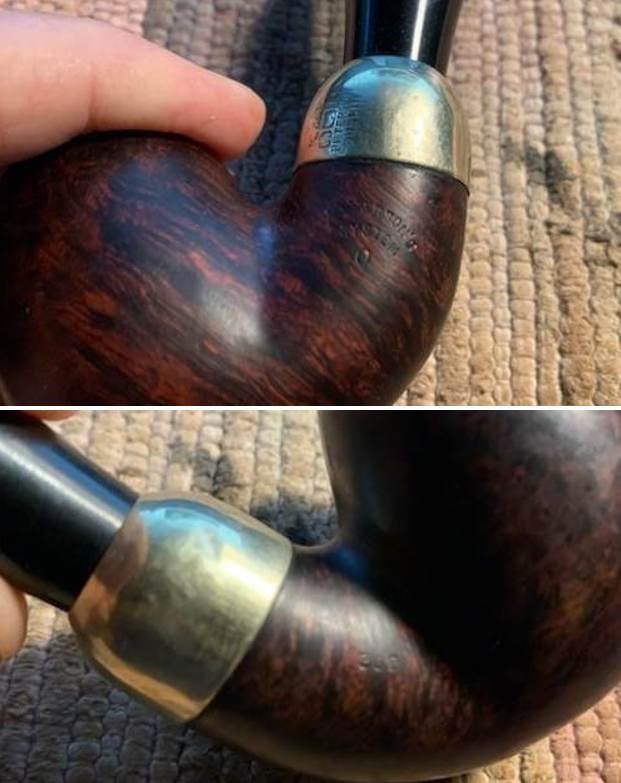
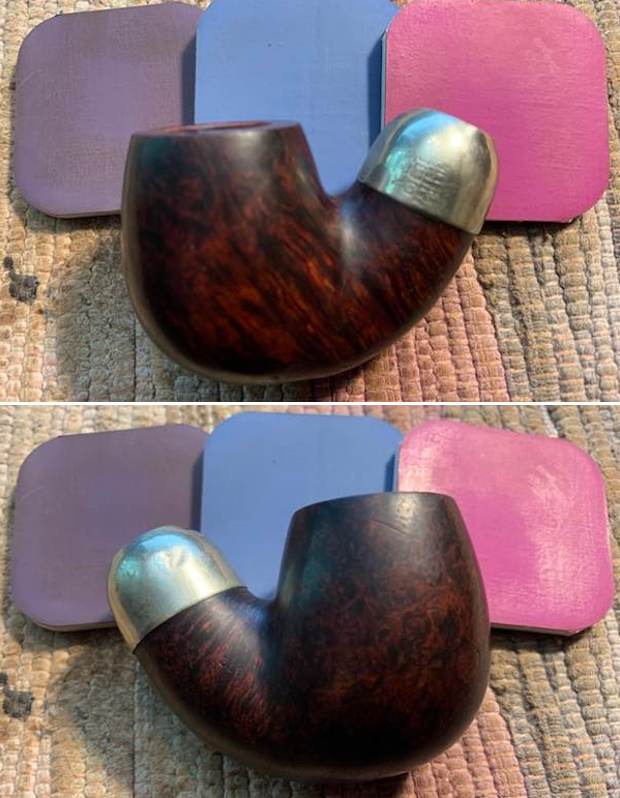
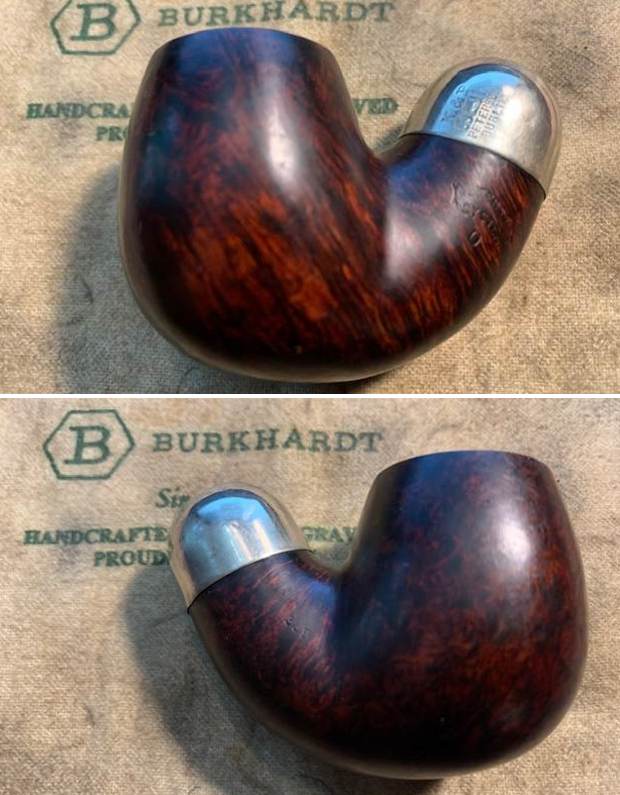
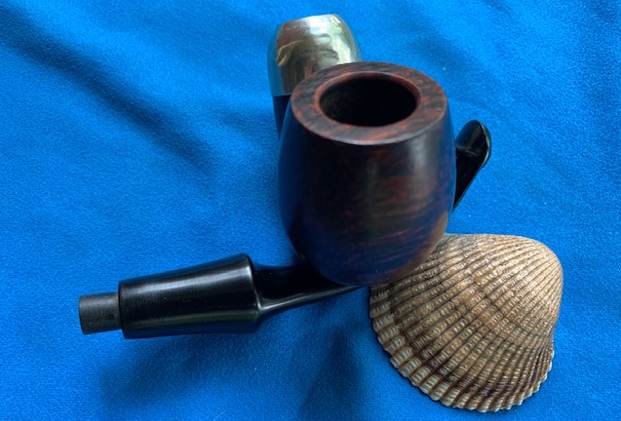
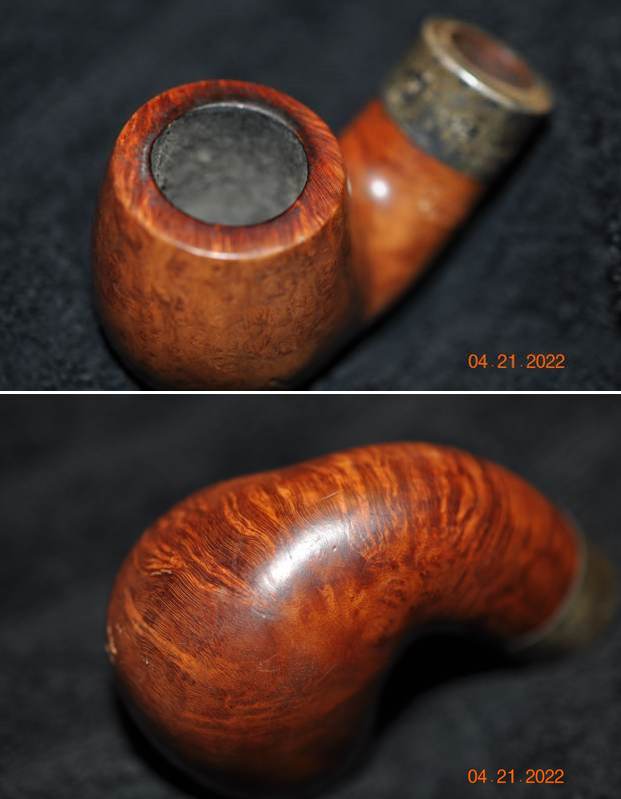
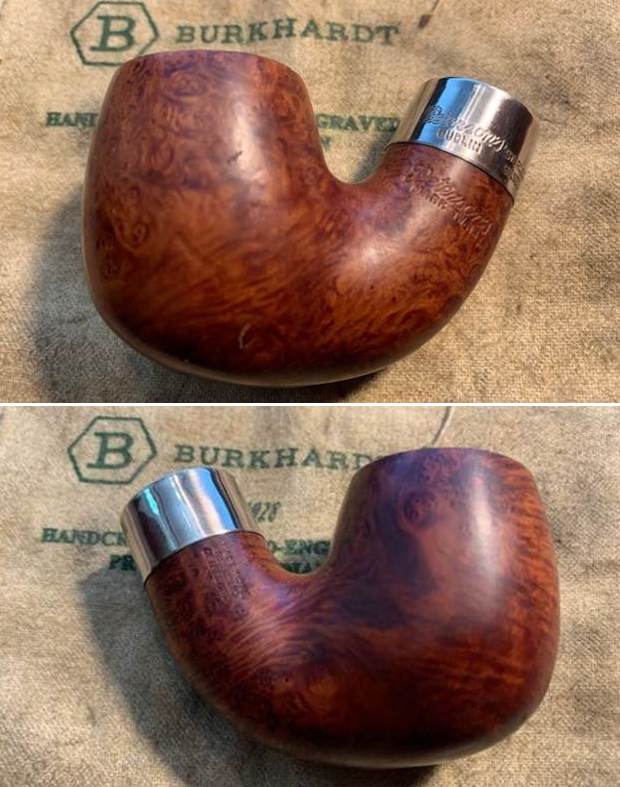
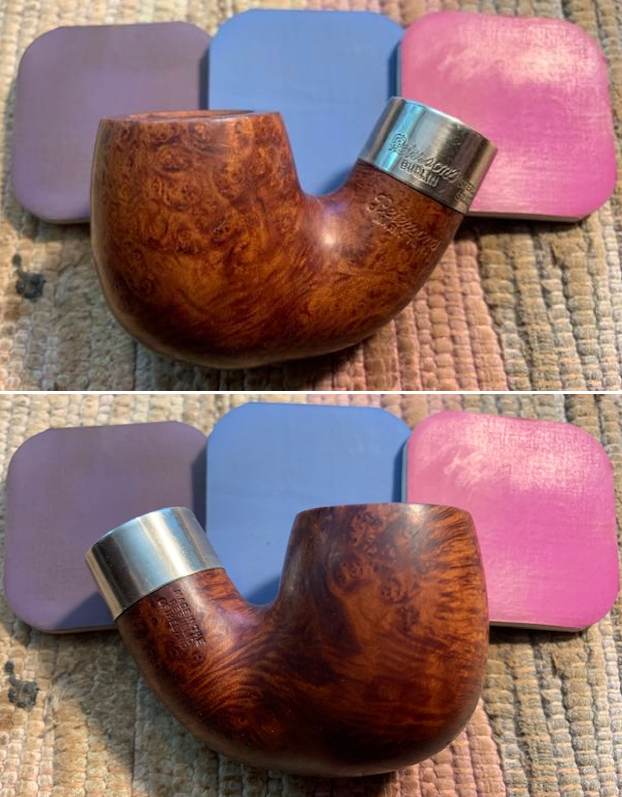
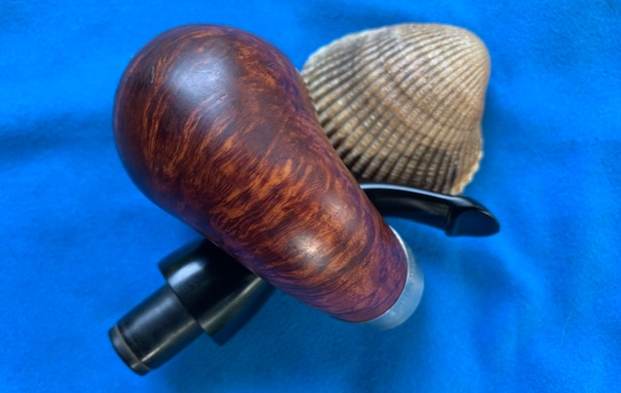
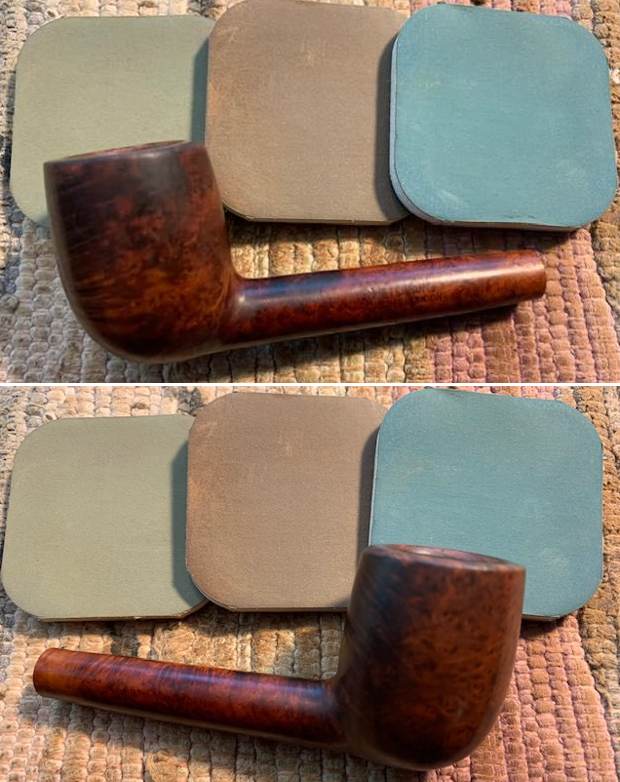
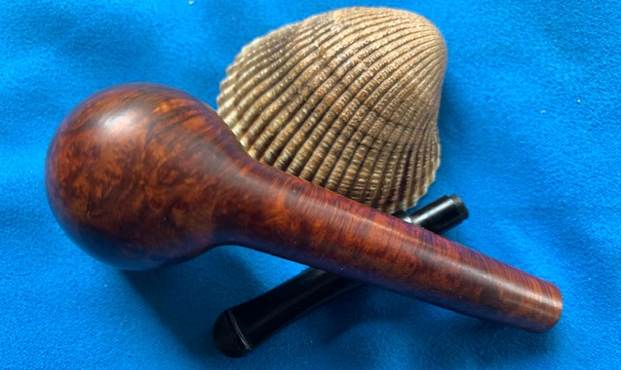
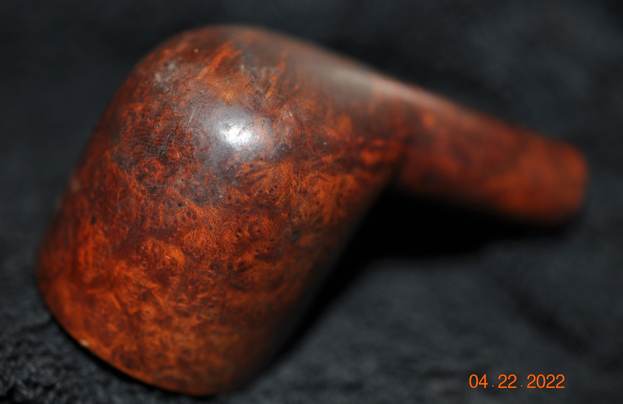
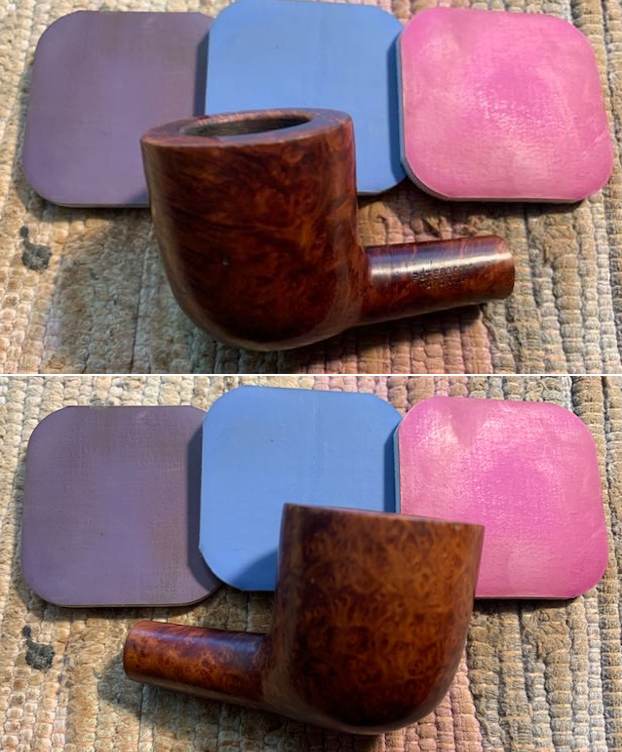
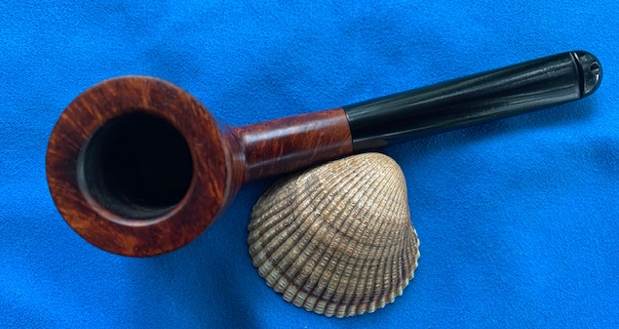
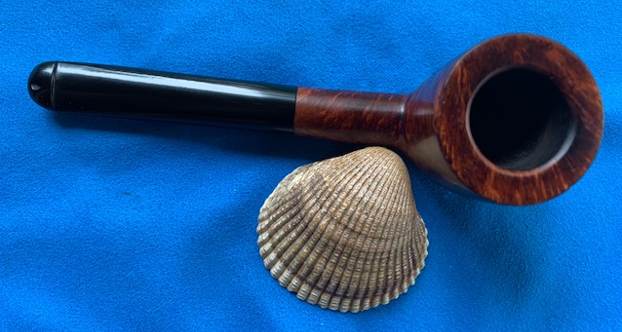
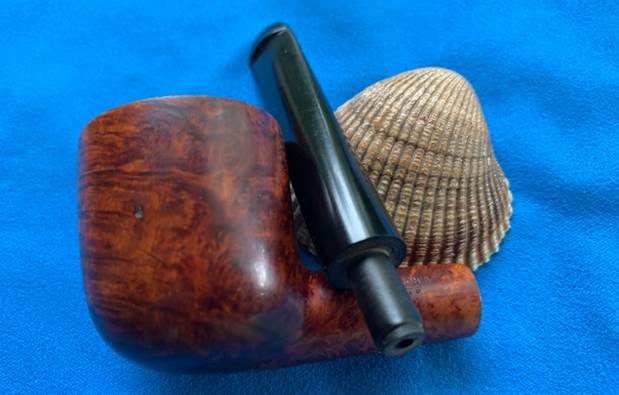
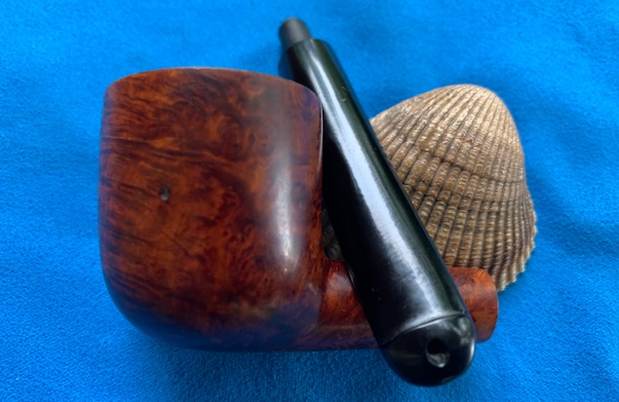
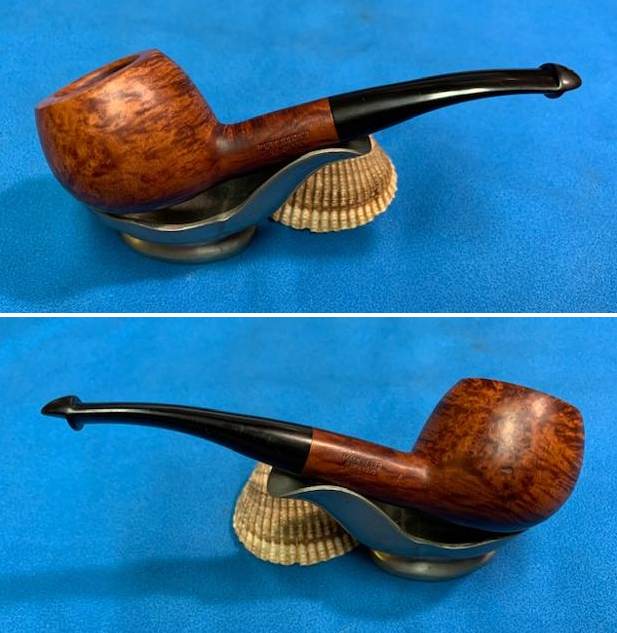
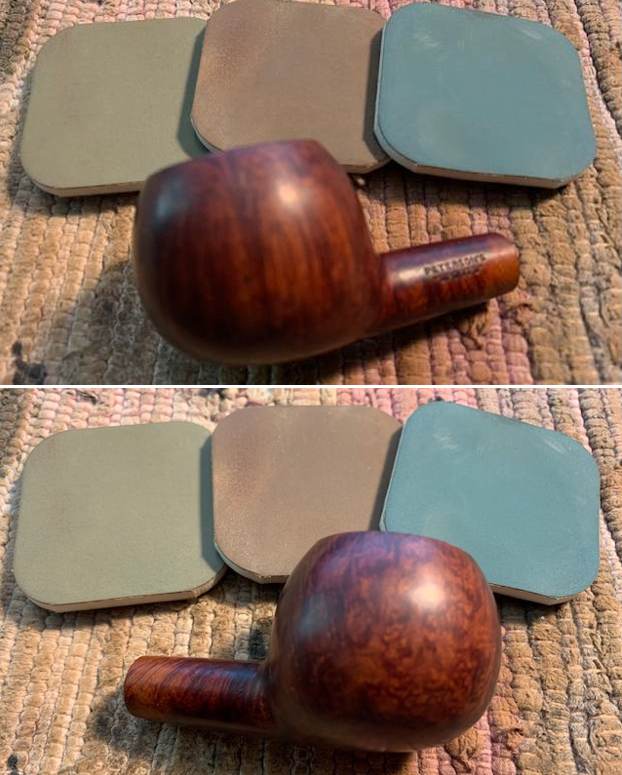
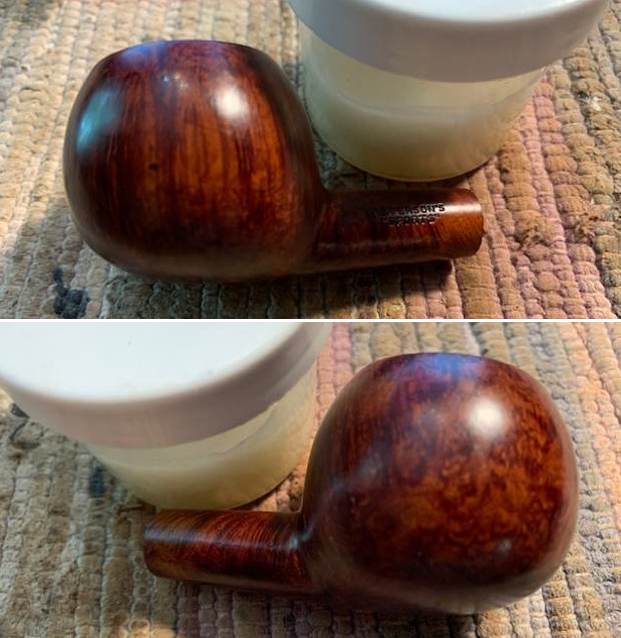
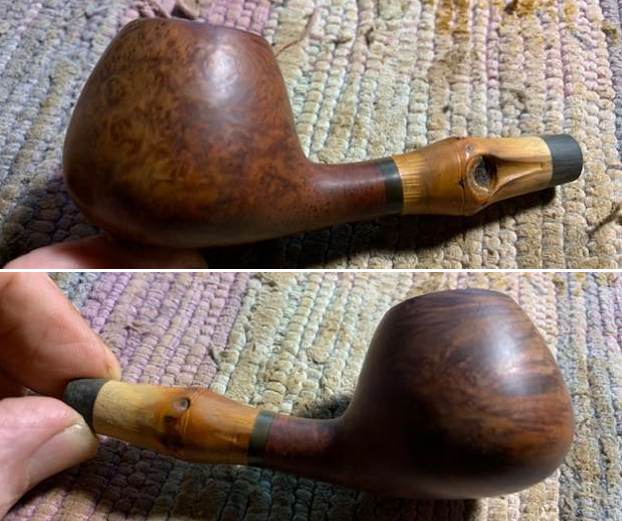
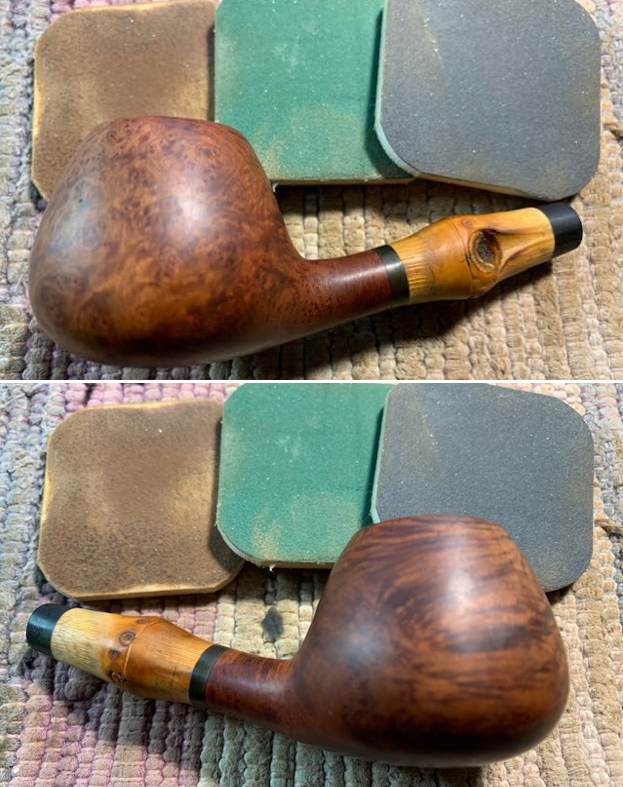
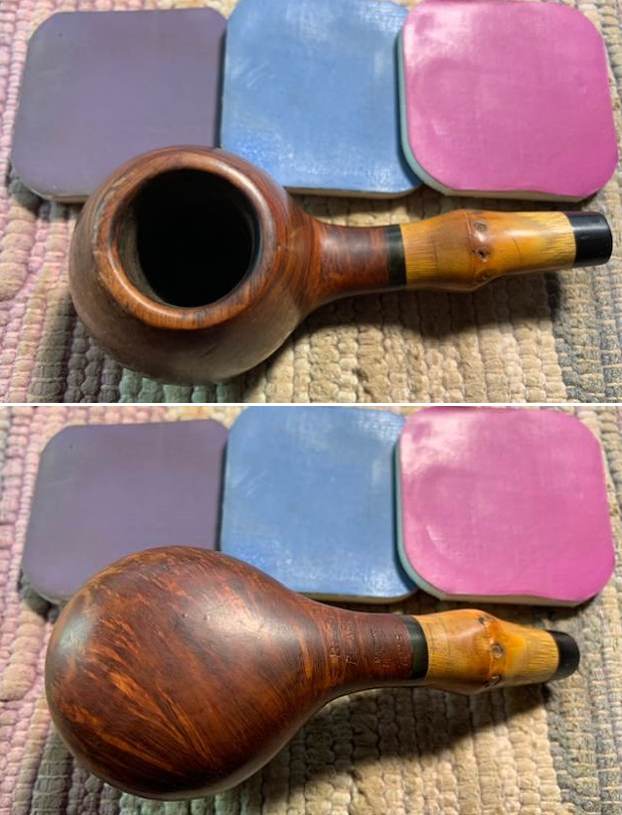
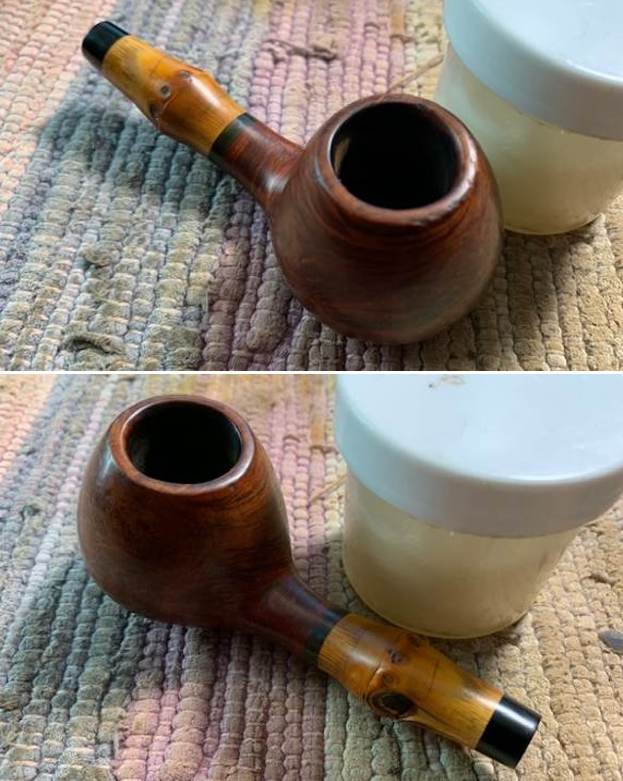
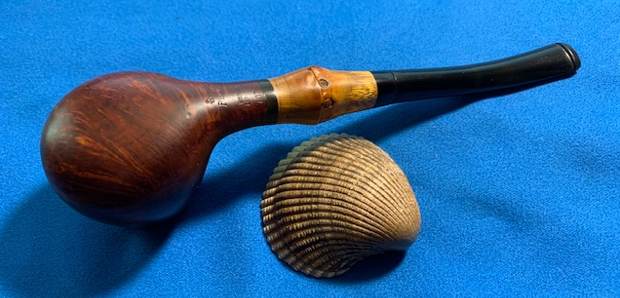
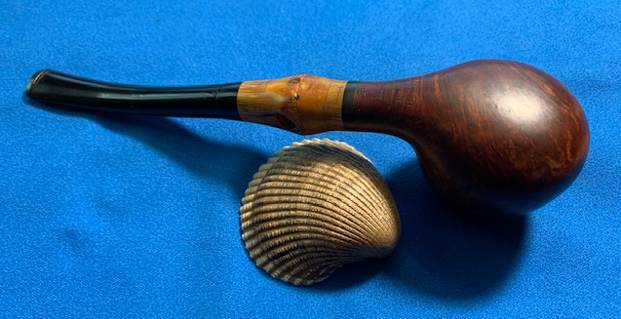
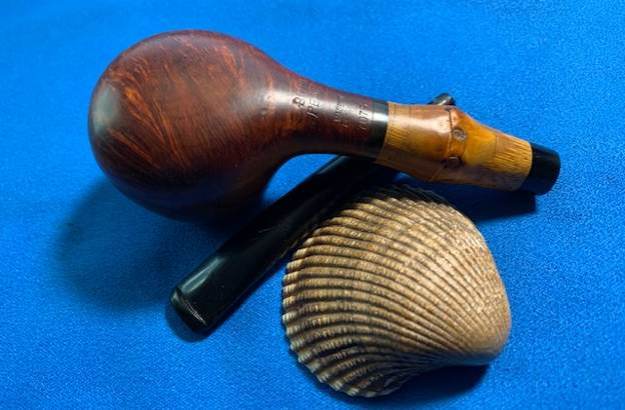
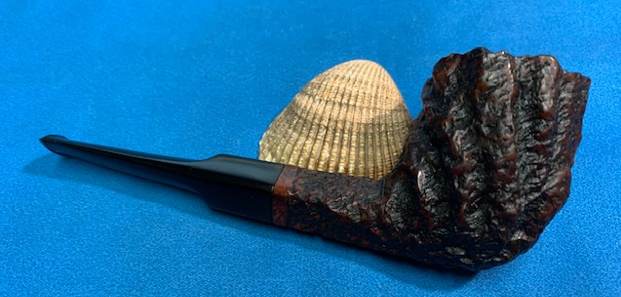
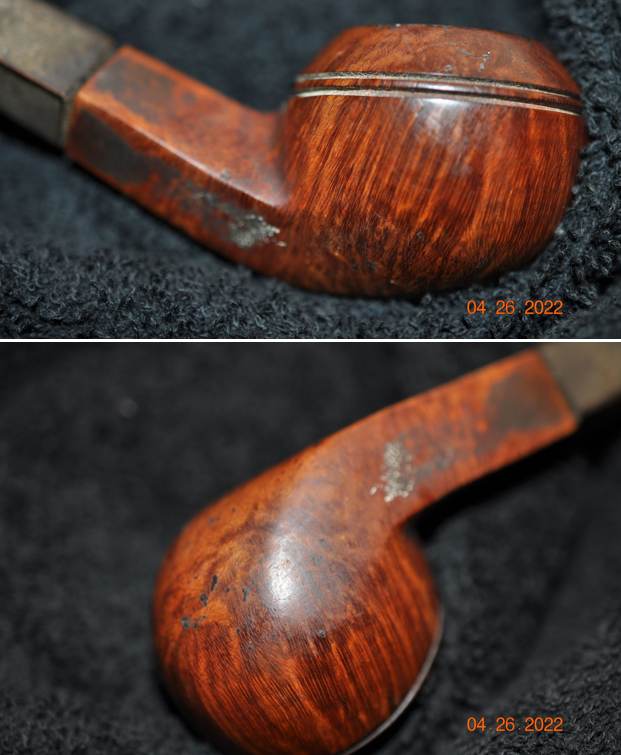
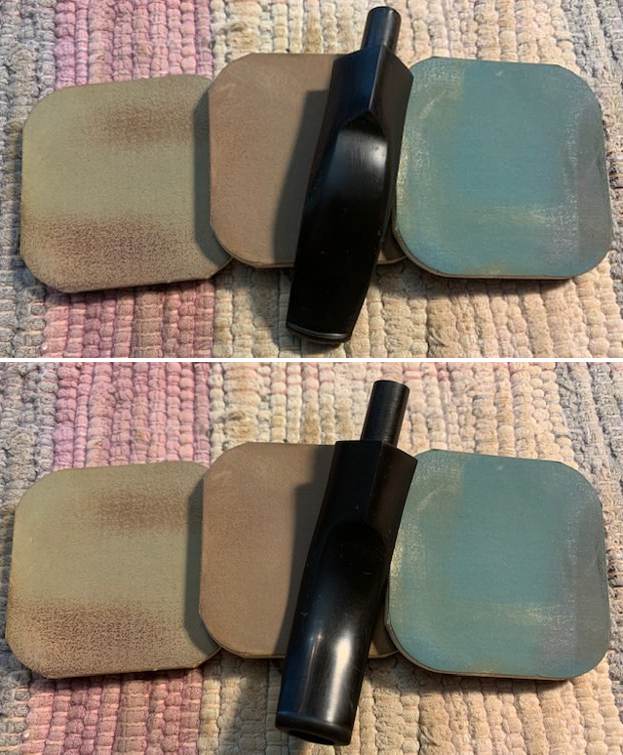
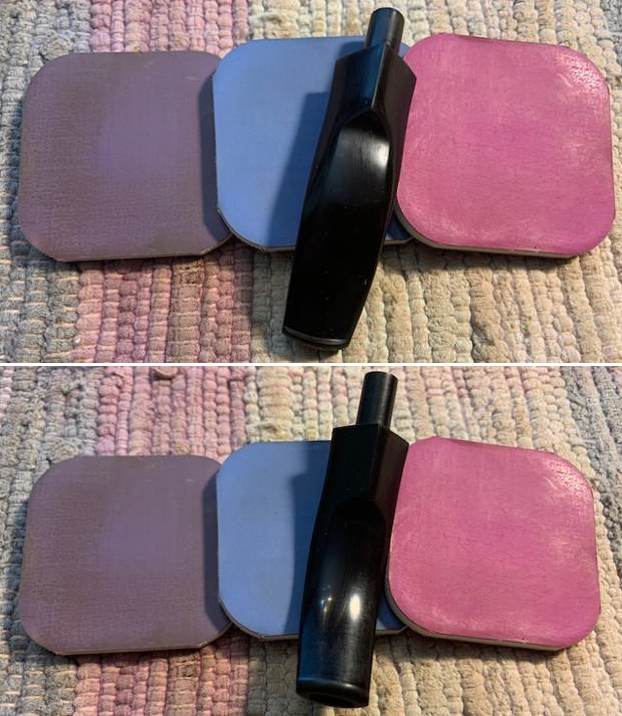
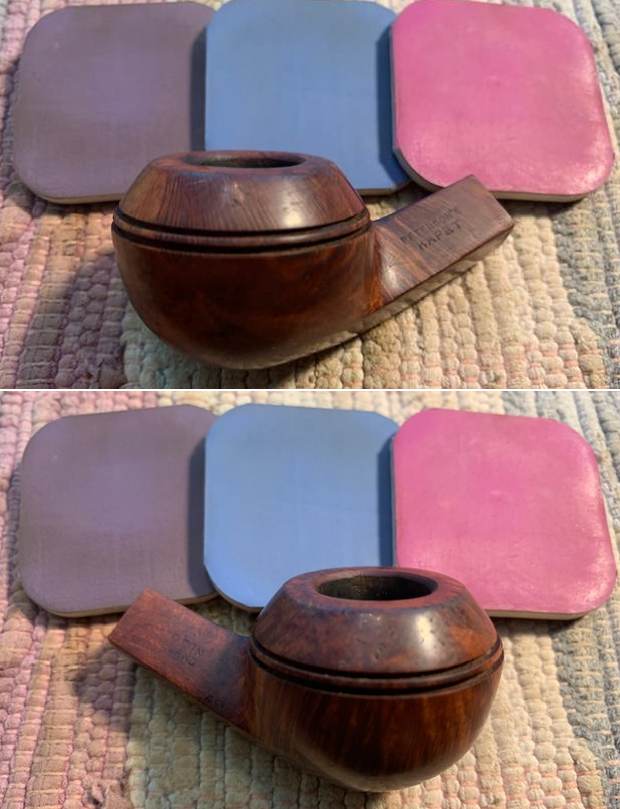
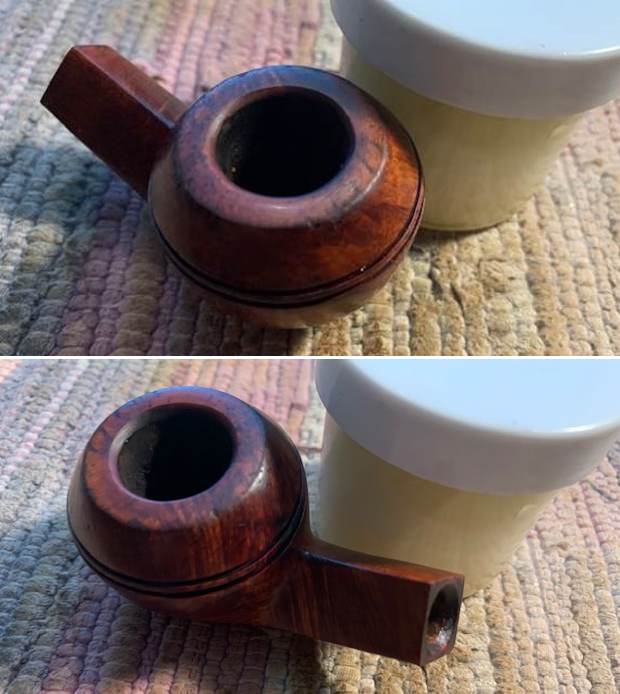
 Jeff took photos of the bowl sides and heel to show the grain that was around this bowl. The grain is quite beautiful around the sides of the bowl and shank. It is a nice looking pipe.
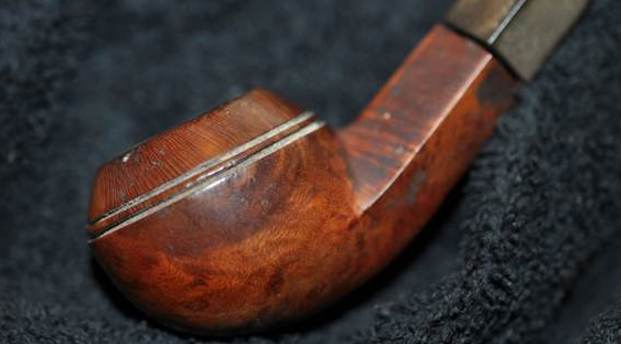
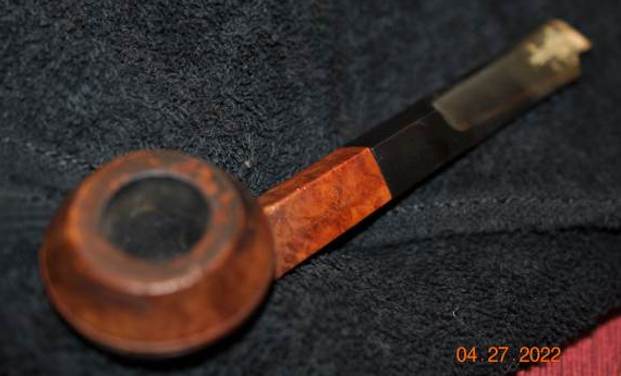
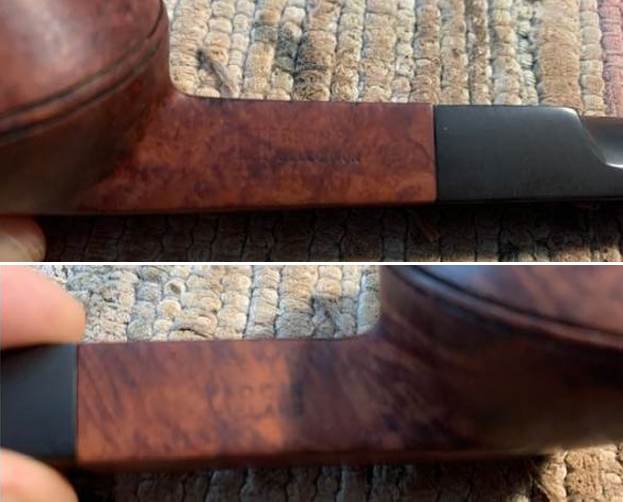
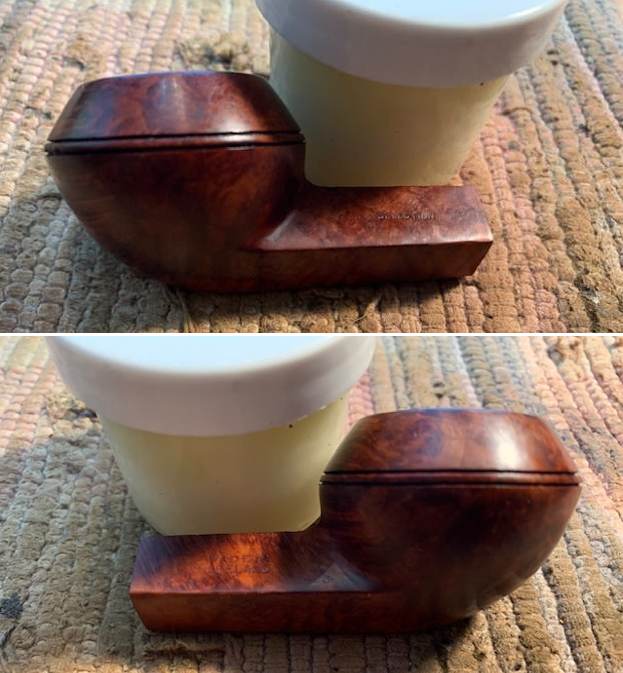
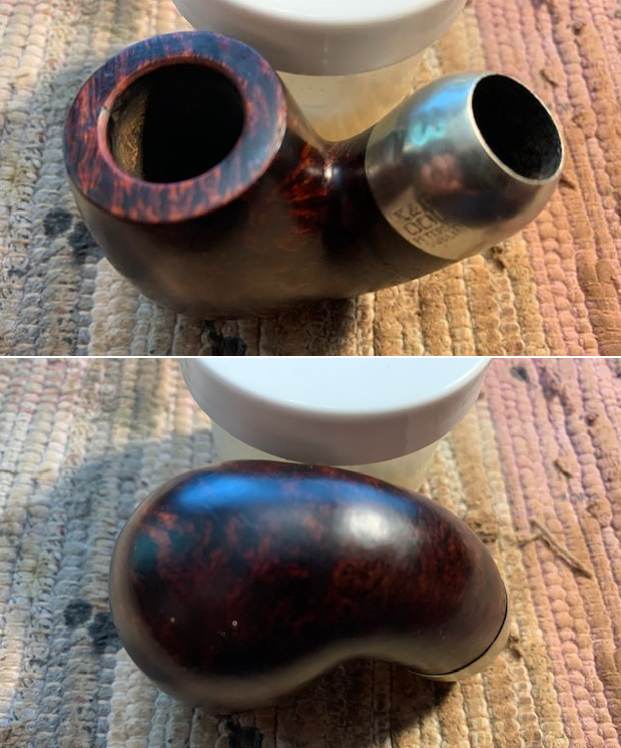
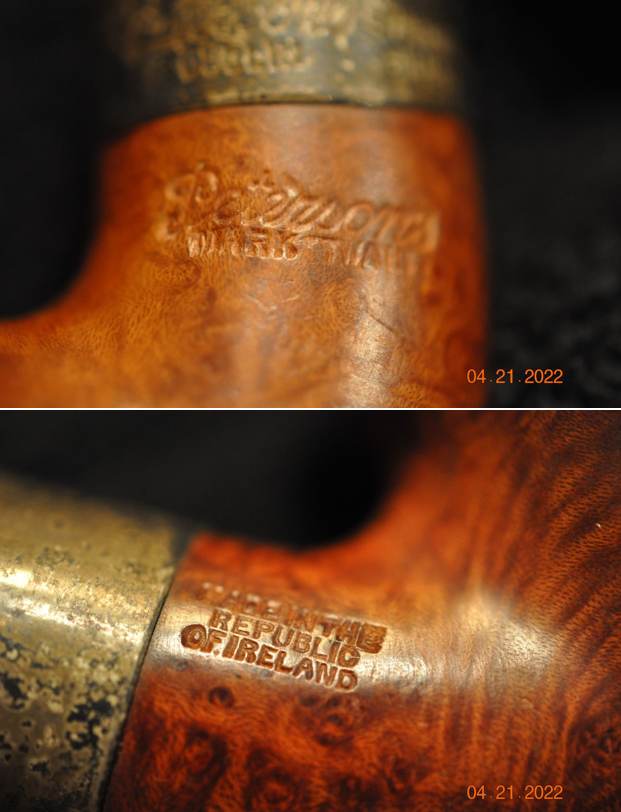
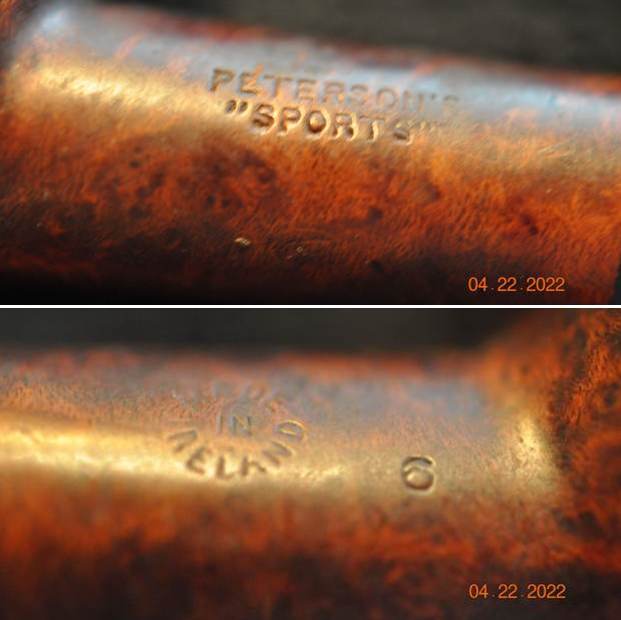
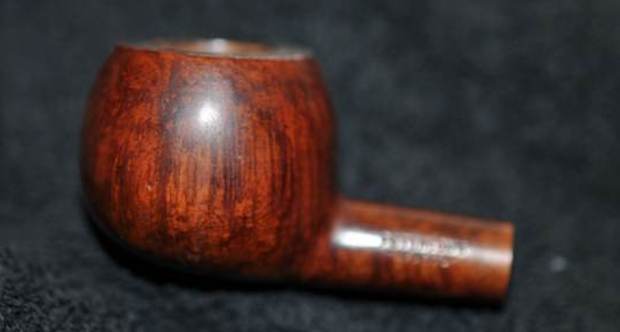
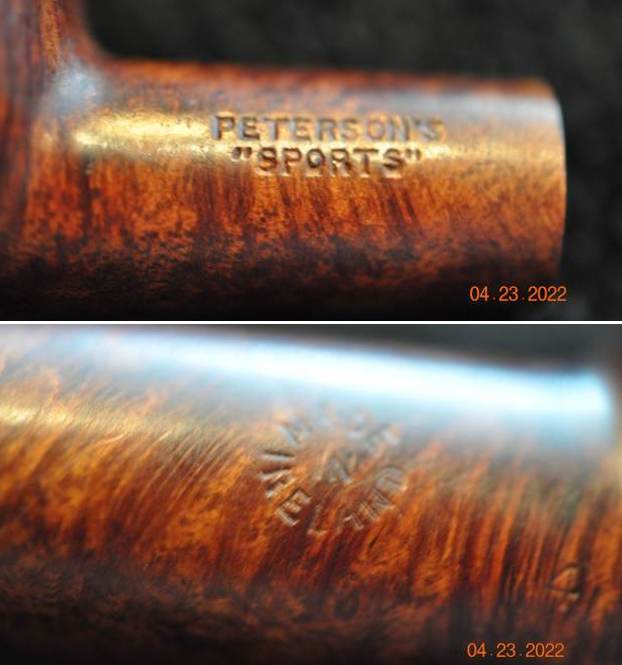
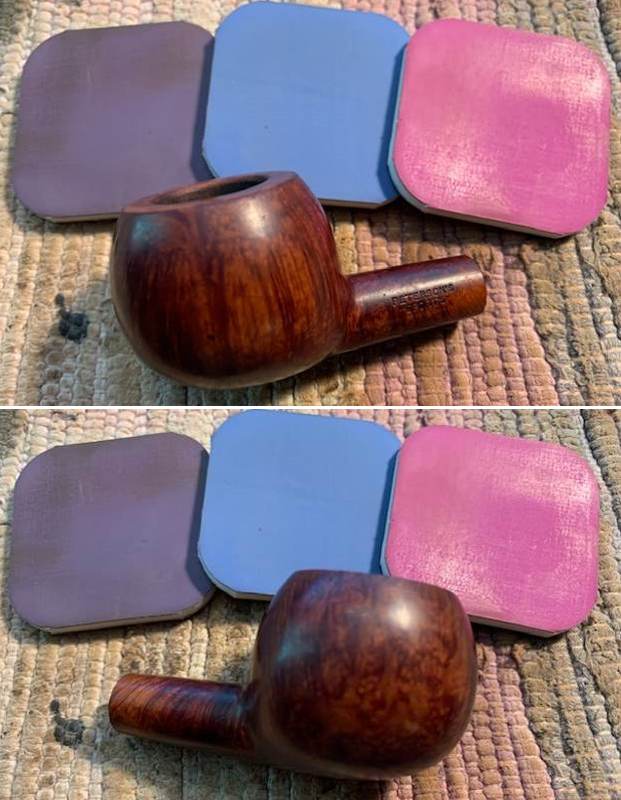
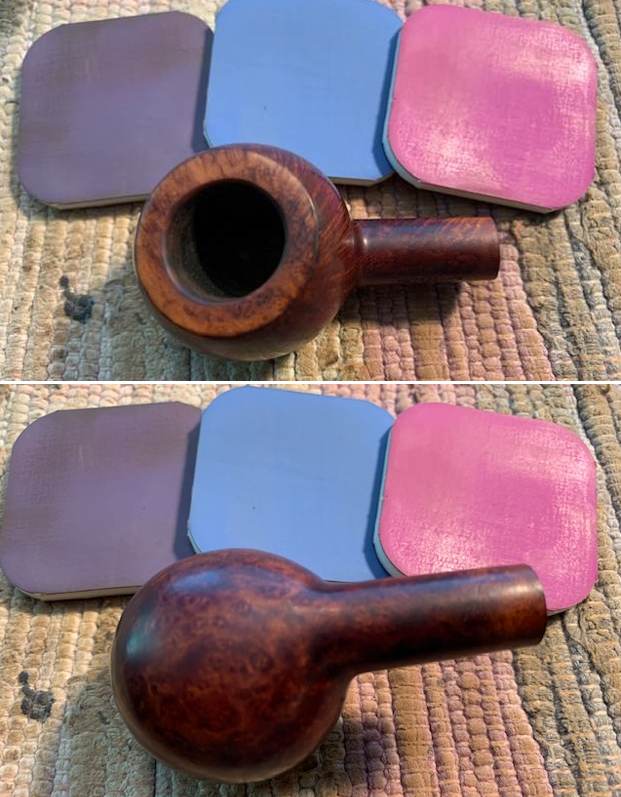
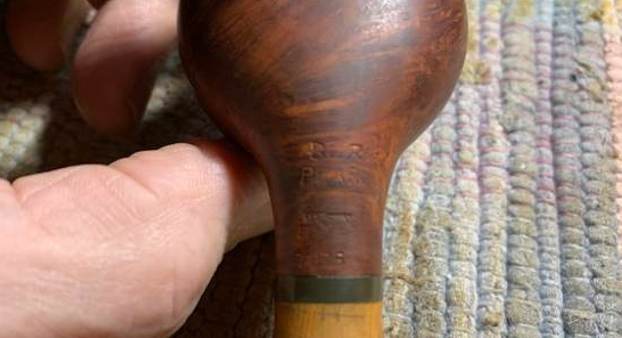
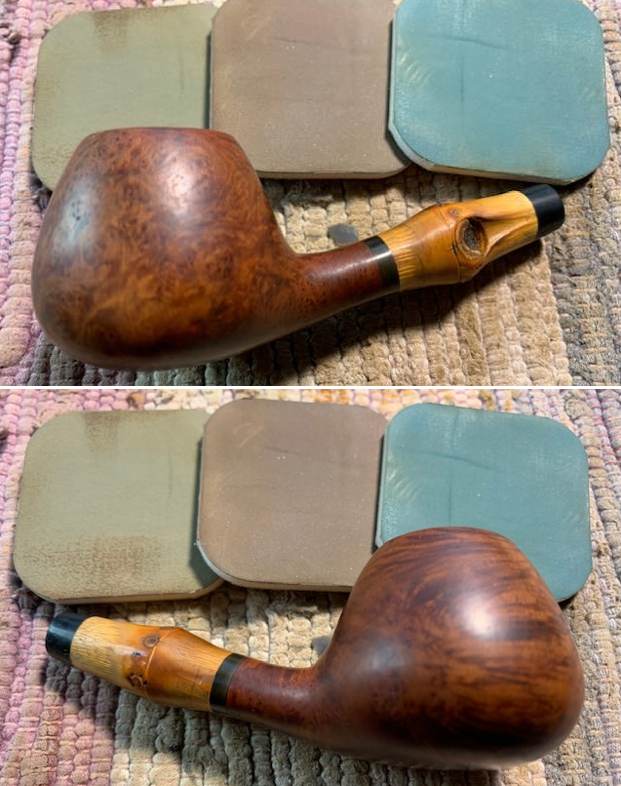
 He took photos of the sides of the shank to show the stamping. The stamping is faint but still is readable in the photos below and is as noted above.
 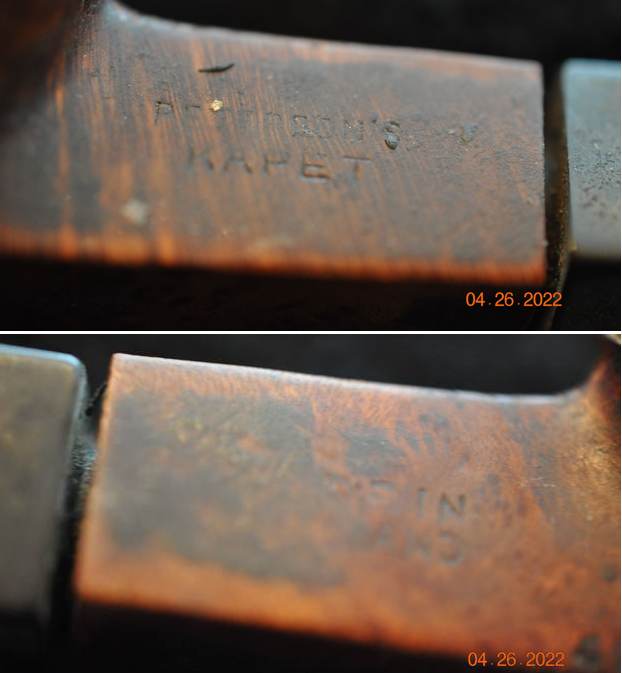 I am including the link to the Pipedia’s article on Peterson pipes. It is a great read in terms of the history of the brand (https://pipedia.org/wiki/Peterson). There was a short note toward the bottom of the page about the series. It is definitely referring to the newer line that came out later. I quote:
I turned to Pipedia (https://pipedia.org/wiki/Peterson) to first pin down a date that the pipe was made. I knew that the Made in Ireland stamp would give me that. I quote:
As usual when trying to get accurate facts in regard to Peterson history, something will jump up and get in the way. They are missing many of their records. The following is the best that we can do for a guide to the myriad markings during the period 1922 – 1949. Prior to 1920 it was rare for a country of origin to be stamped on the pipe, just Peterson’s Dublin on the band. After 1921/22, if it is stamped “MADE IN IRELAND” and the “Made in” is stacked over “Ireland” or “MADE IN EIRE” or several other forms, it was made between 1922 and 1938. A considerable number of Peterson pipes were stamped “Irish Free State”. From about 1930 to 1949, most of the pipes (those which were stamped) were stamped “Made in Ireland”.” If the stamp reads “MADE IN IRELAND” in a circle, the pipe was made between 1939 and 1948. These are all “Pre-Republic” pipes. I can tell you that the mark “Irish Free State” was adopted in 1922; and replaced by “Eire” in 1937 and then by “Republic of Ireland” in 1949.
That gave me a date for the pipe – it was made between 1922 and 1938 as can be proved by the Made in Ireland stamp on the right side of the shank.
I turned to “The Peterson Pipe” by Mark Irwin and Gary Malmberg to get some background on the Peterson’s Kapet Line. On page 305 it had the following information.
Kapet (1925-87) Line first described in 1925 brochure and featured in occasional catalogs through 1987. Early specimens will be stamped IRISH over FREE STATE. Described in 1937 catalog as available in dark plum or natural finish. Featured an aluminum “inner tube” or stinger until 1945. Mid-century specimens may be stamped Made In over Ireland. Specimens from 1970 on may have mounts with hallmarks.
Judging from the Made in Ireland stamp, the pipe I am working on is probably made between 1922-38. Those dates work also for the Kapet information above. The stem is missing the original P-lip stem and the P emblem on the stem side as well as the inner tube.
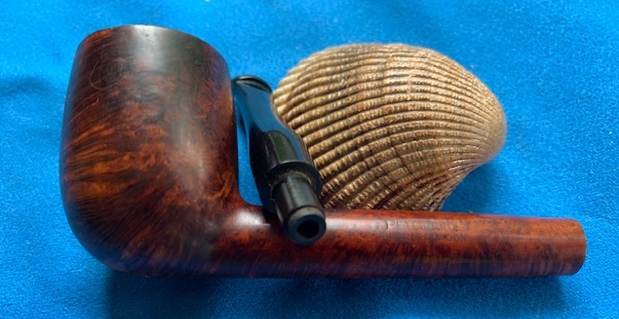
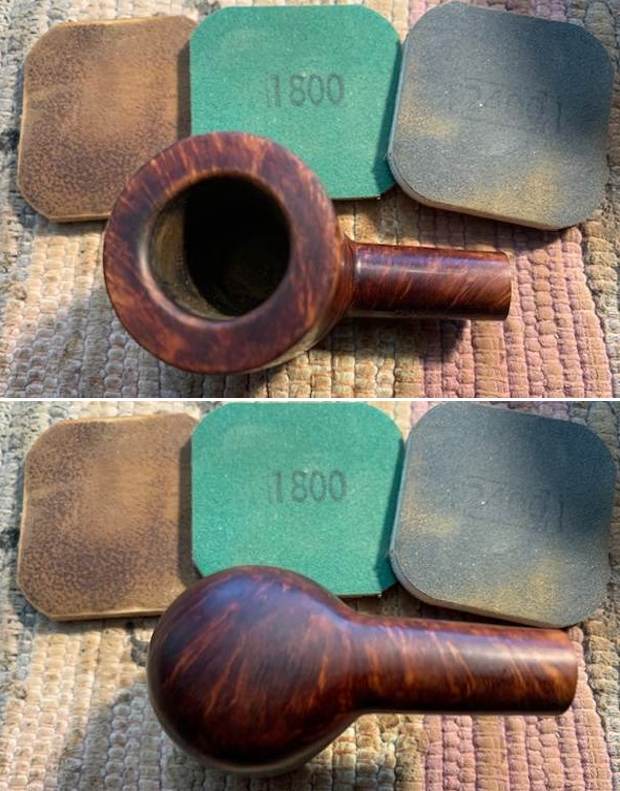
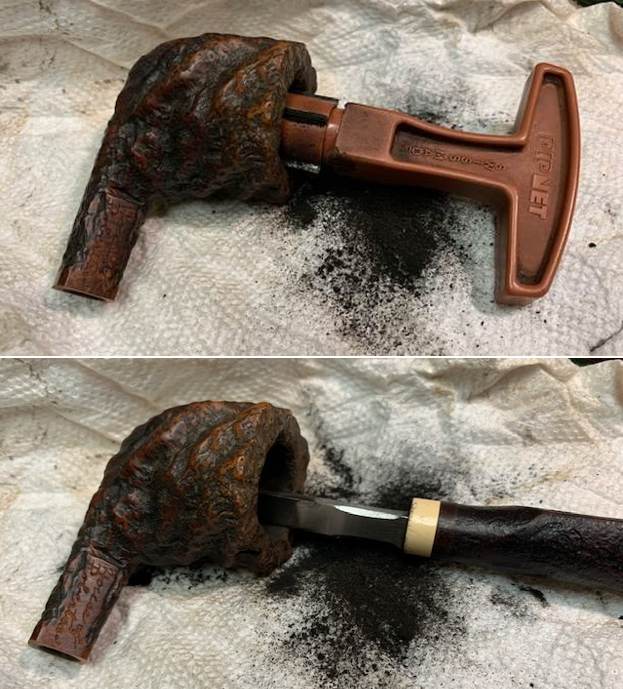
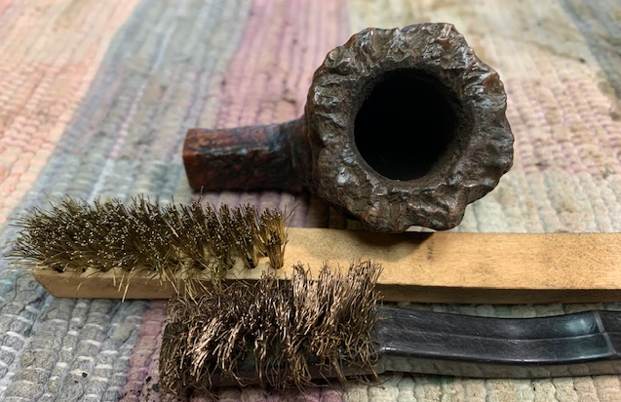
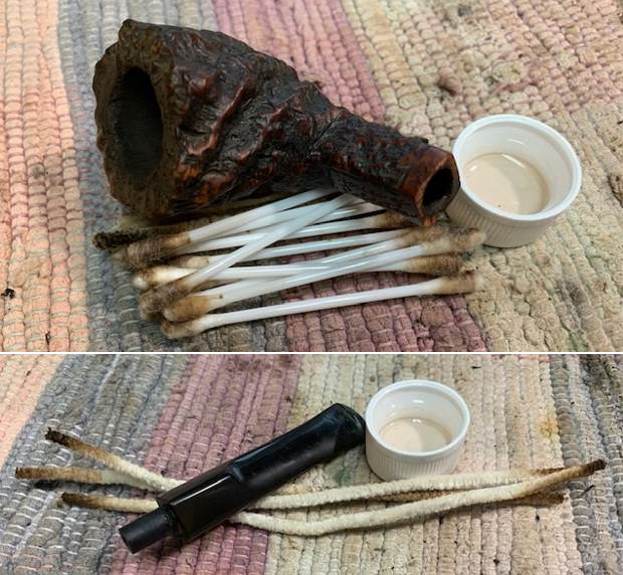
To help clarify the stamping on the shank my daughter did some digging and found a shape chart on Mark Irwin’s site that had the 595 shape and it did indeed have a saddle stem (https://petersonpipenotes.wordpress.com/?fbclid=IwAR2VQVQbIXKn90Y9DK56WQVIknkz7UVkfbivxdAjdNqslt9297JIUMvpyjc). The chart identified the 595 as a Medium Rhodesian with a fish tail stem so I was excited to see that the stem I had would be correct! I was utterly surprised when I took this pipe out of the box and compared it to the before photos. Jeff had done a great job cleaning up the pipe as usual. He reamed the pipe with a PipNet reamer and cut back the cake back to the bare briar. He cleaned up the walls with a Savinelli Fitsall Pipe Knife. Surprisingly the walls looked unscathed from the heavy cake. He scrubbed the interior of the bowl and shank with pipe cleaners, cotton swabs and alcohol to remove the tars and oils. He scrubbed the exterior of the pipe with Murphy’s Oil Soap and a tooth brush to remove the grime from the finish. He worked on the rim top lava and darkening with the soap and tooth brush. There was some scratching, dents and wear on the top and the inner edge of the rim. He scrubbed the inside of the stem with alcohol and pipe cleaners. He scrubbed the exterior of the stem with Soft Scrub and then soaked it in Briarville’s Deoxidizer. He washed it off with warm water to remove the Deoxidizer. He sent the stem along so that I could use it to fit another stem. I took photos of the pipe when it arrived.
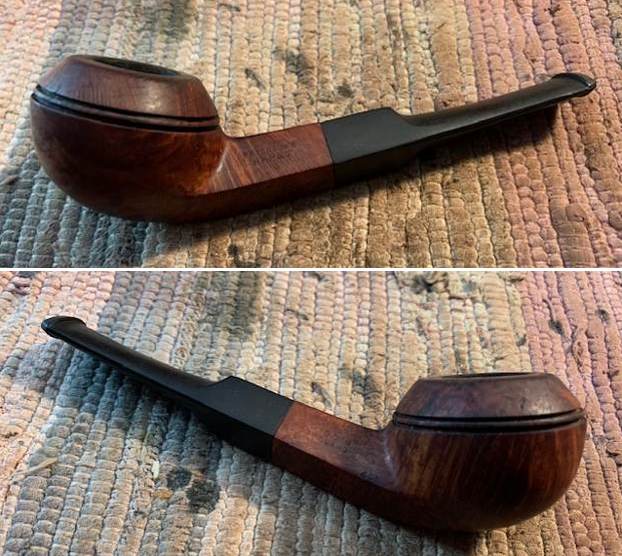
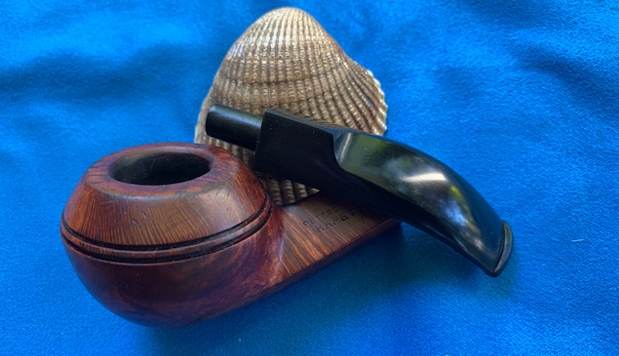
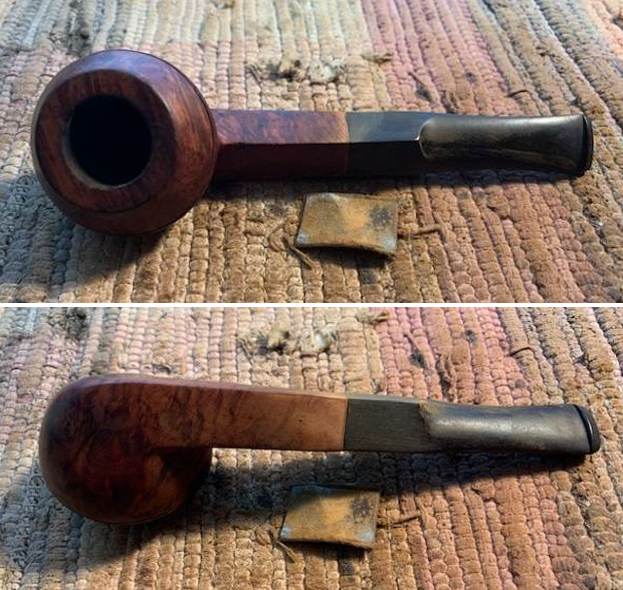
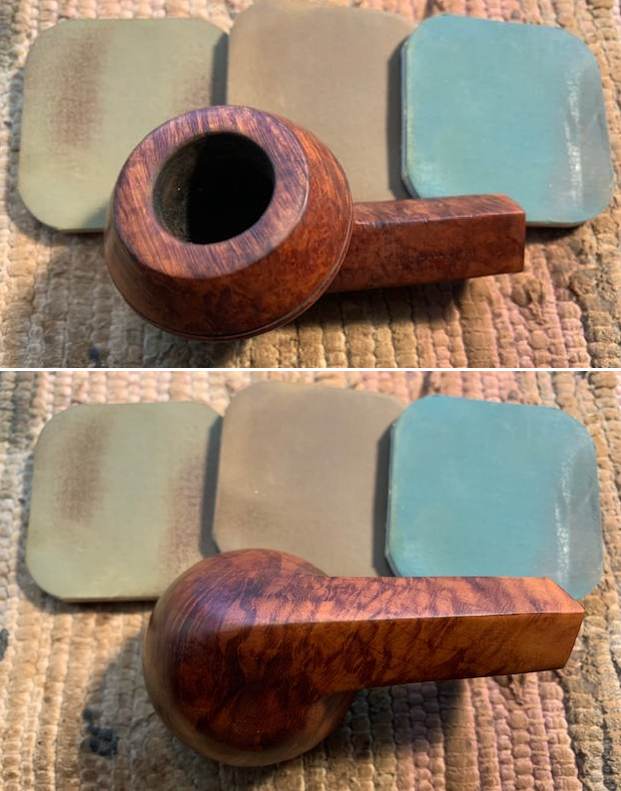
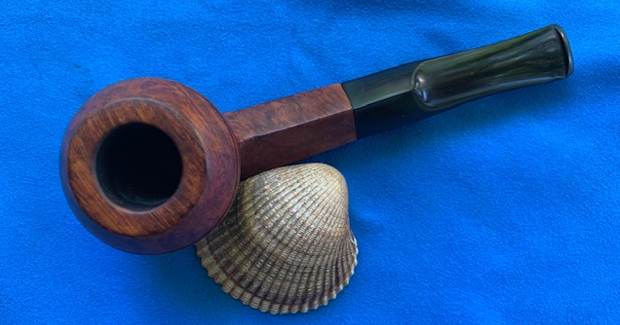
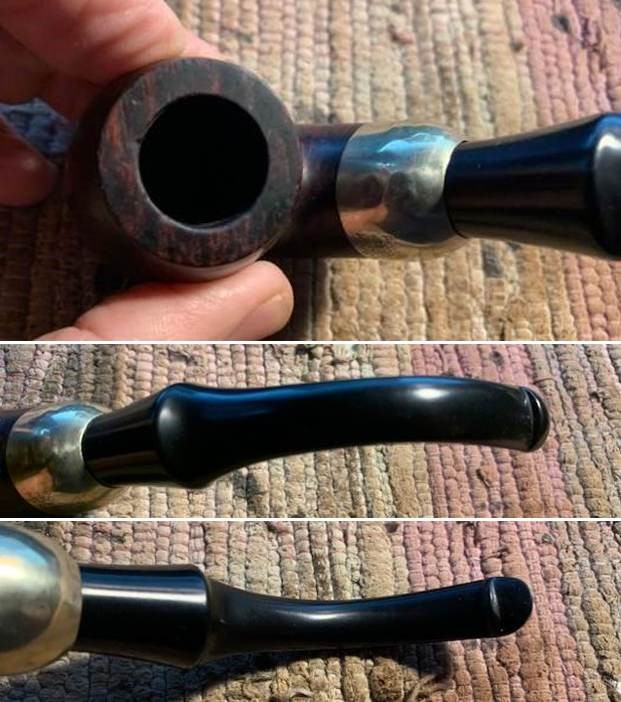
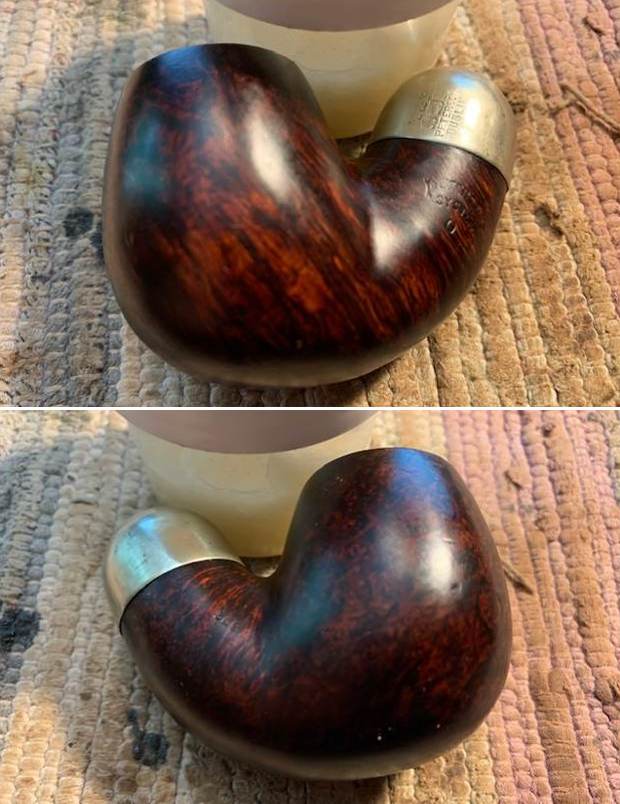
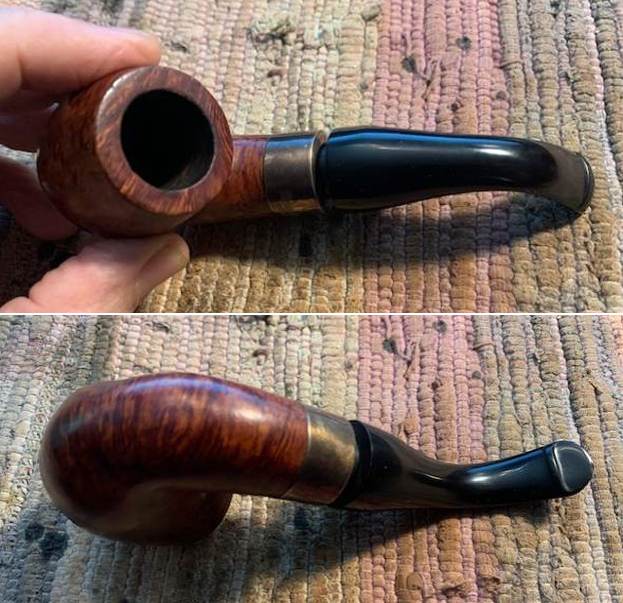
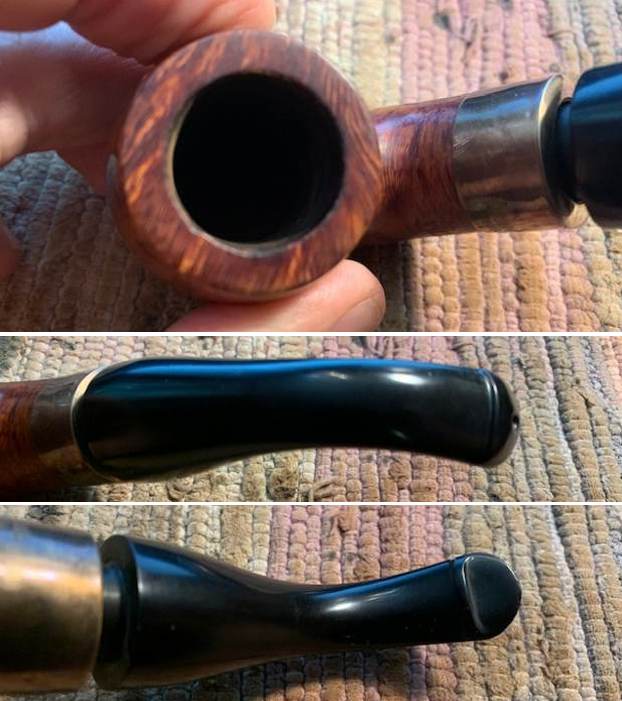
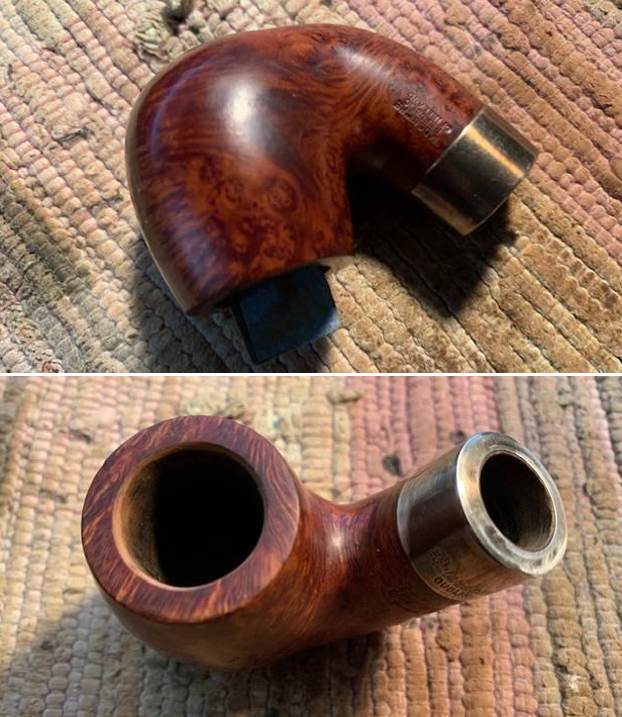
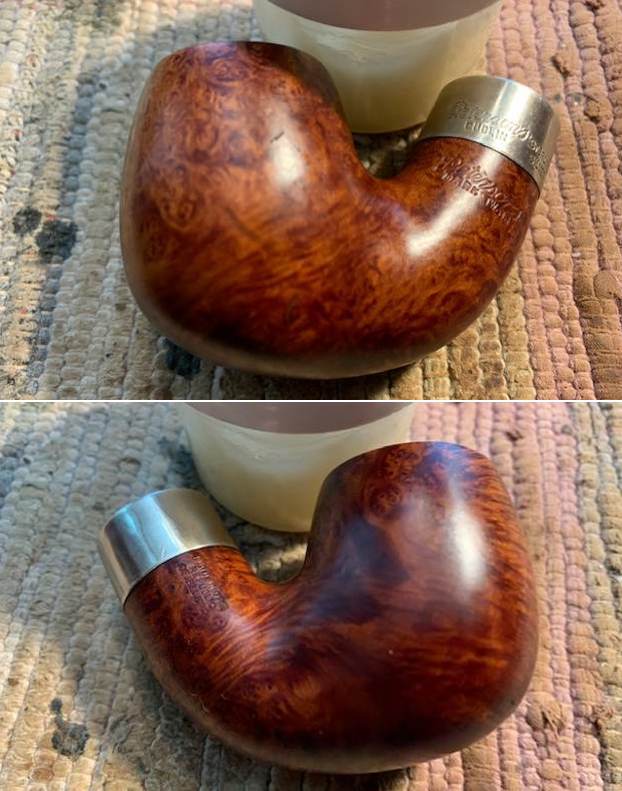
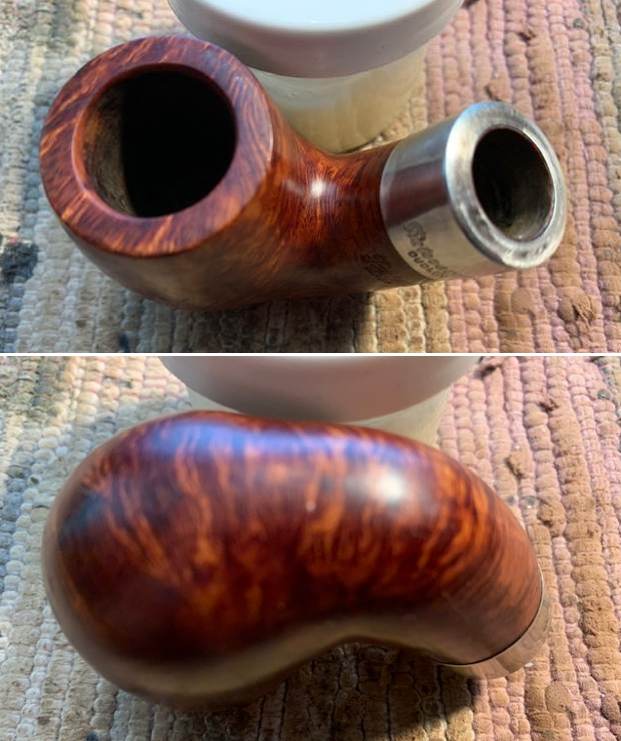
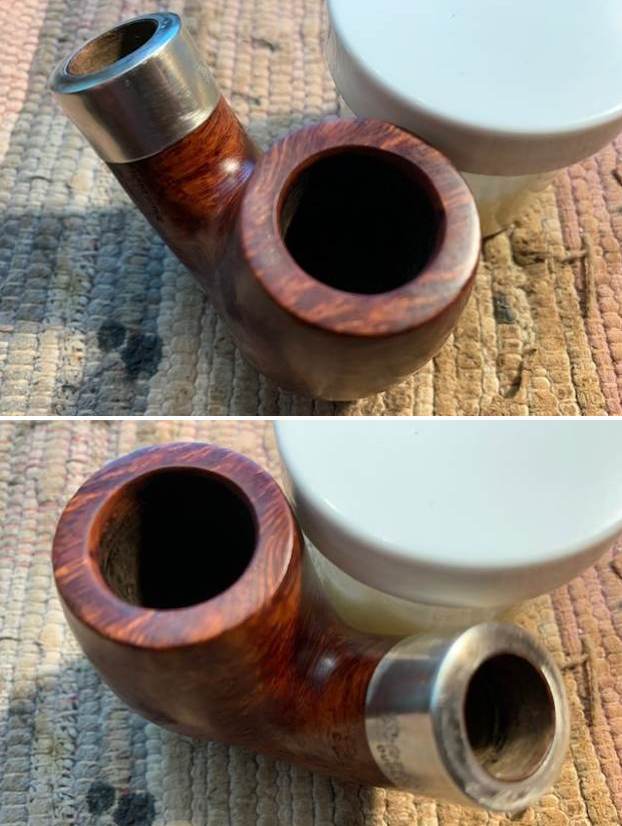
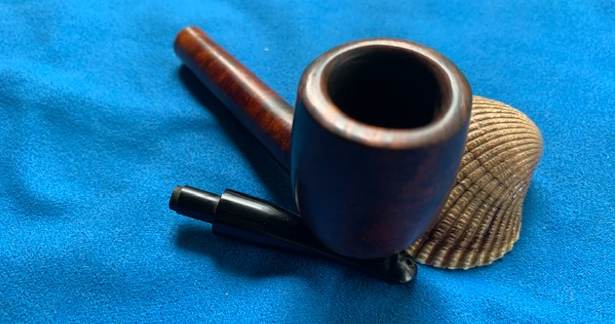
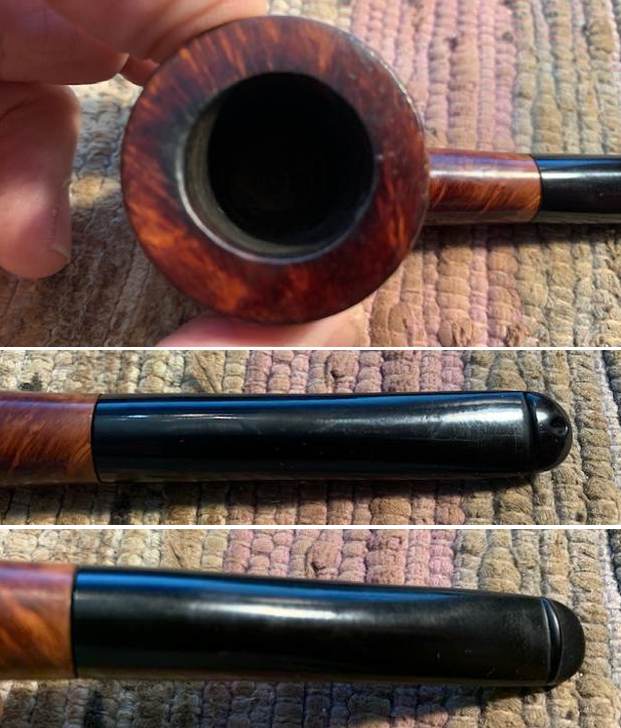
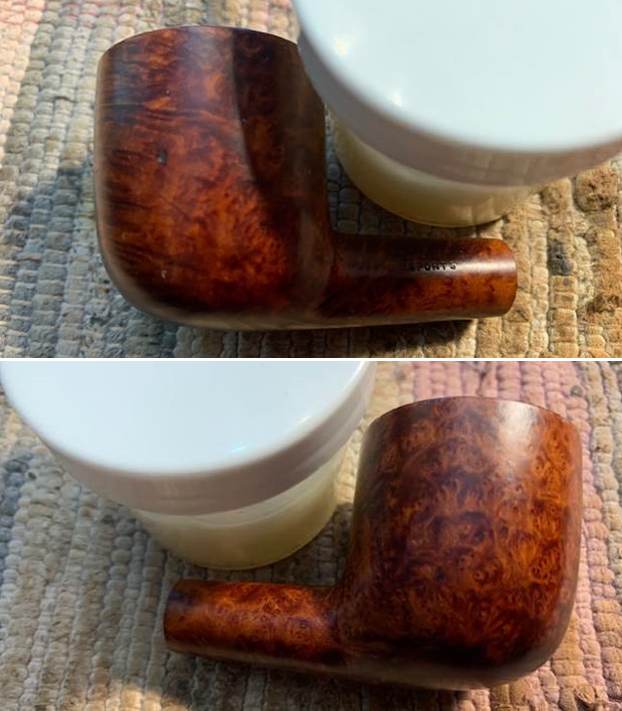
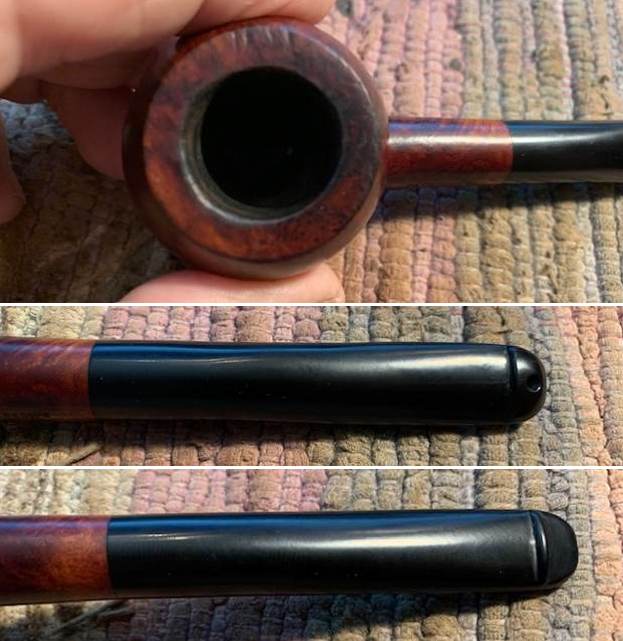
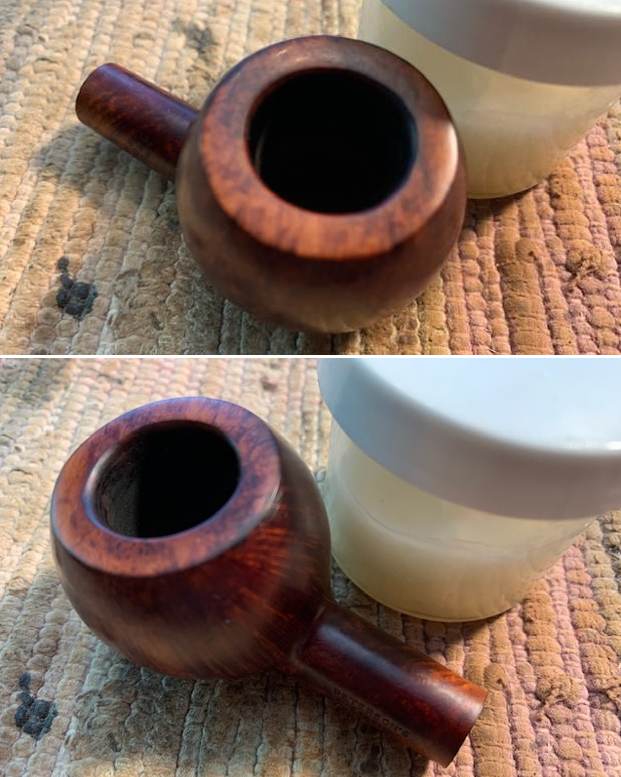
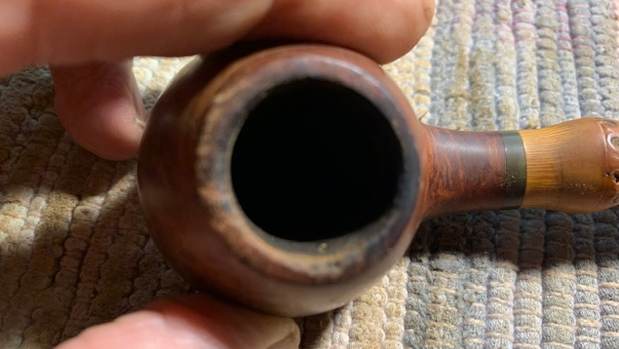
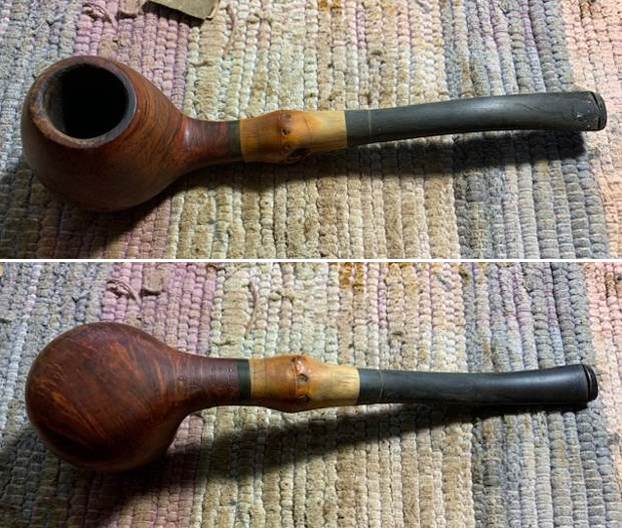
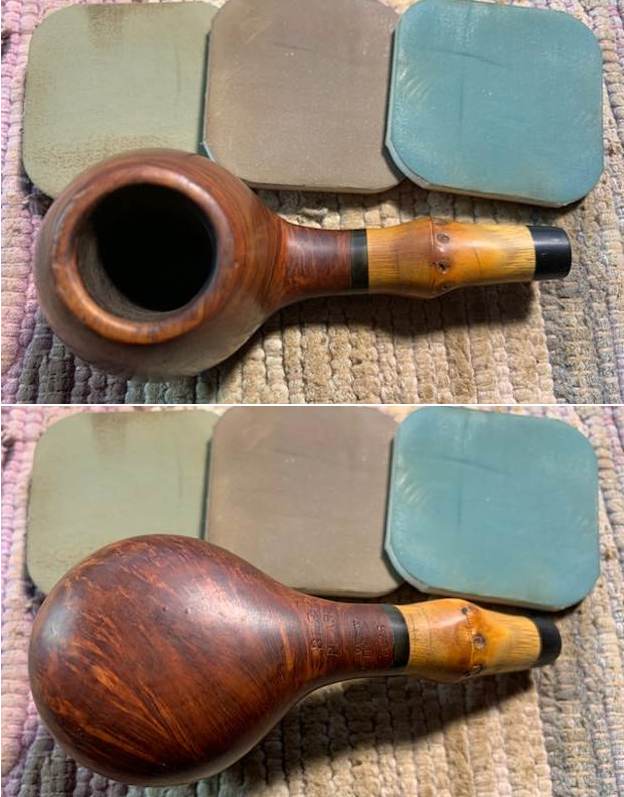
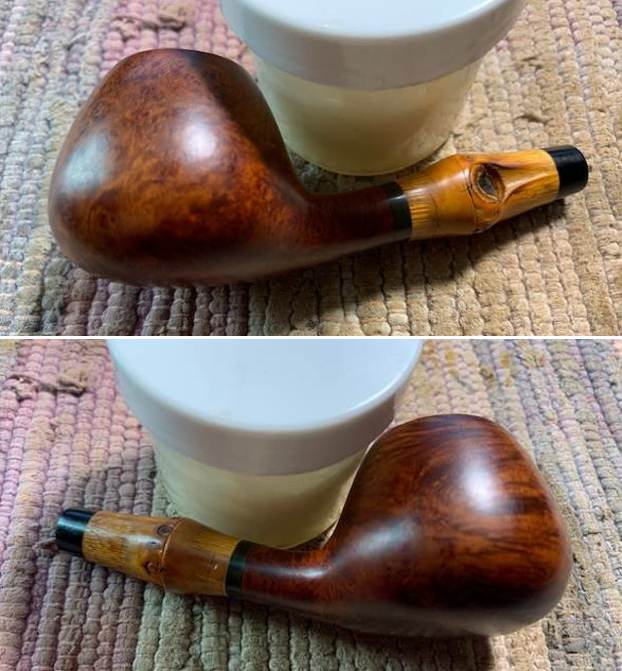
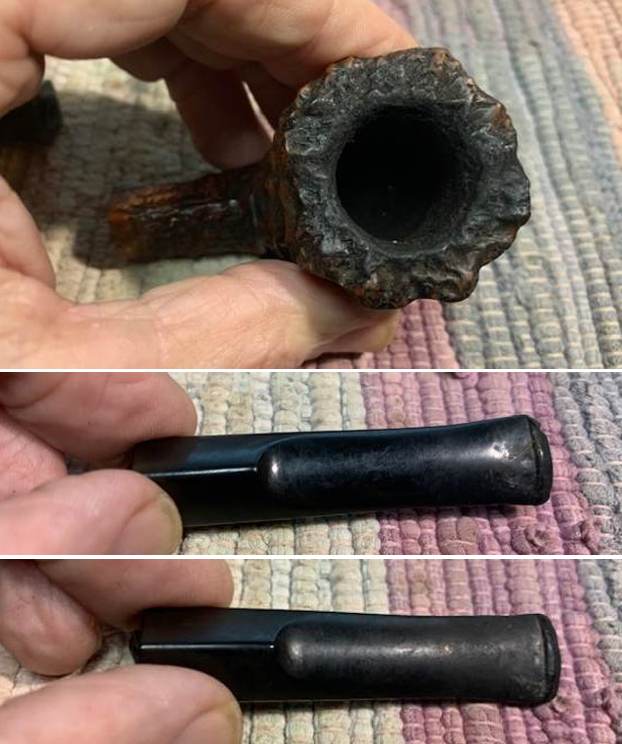
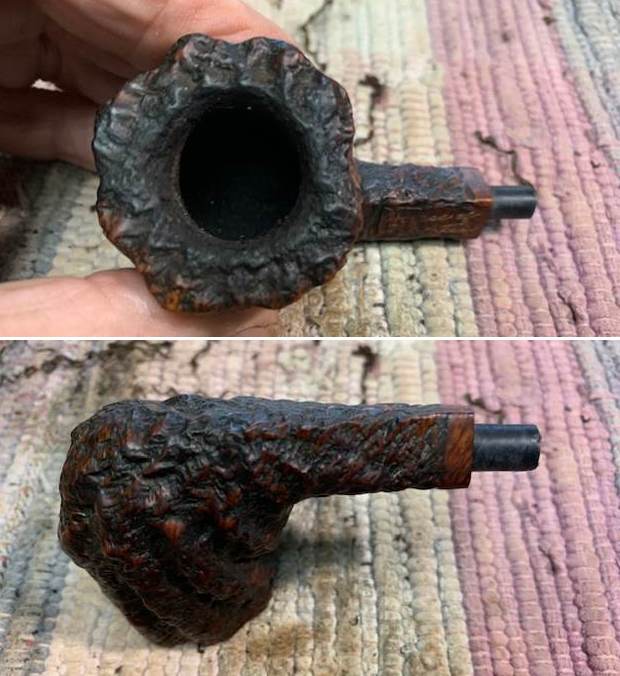
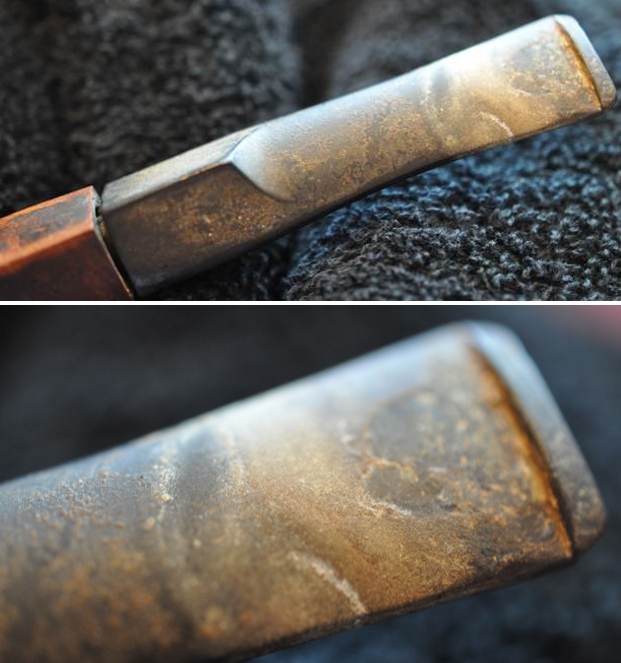
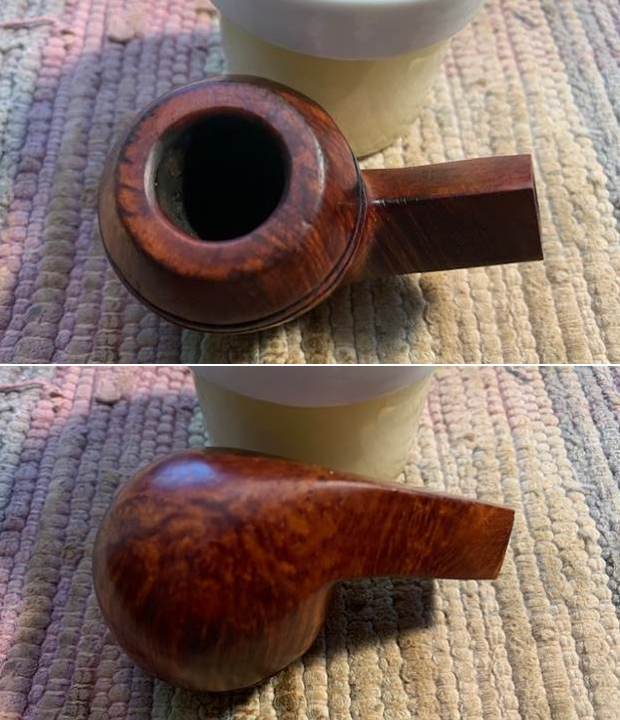
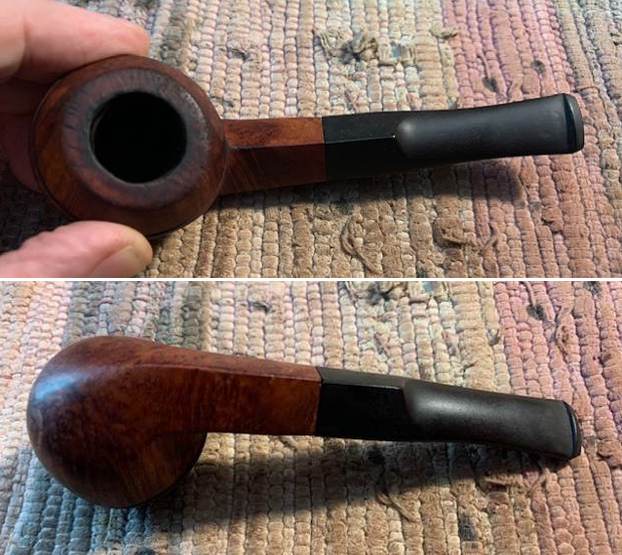 The cleaned up rim top looked clean but there were dents and marks on the top and some damage and burn marks on the inner edge of the bowl. I took some close up photos of the rim top and edges to show how well it had cleaned up. I also took close up photos of the stem to show the condition on both sides.
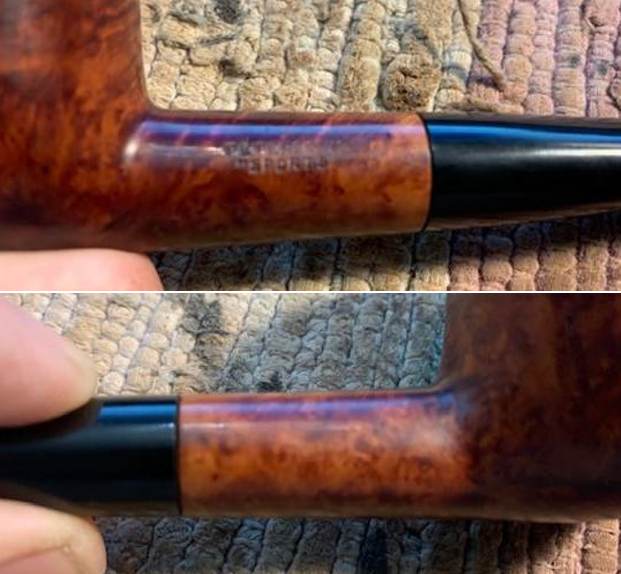
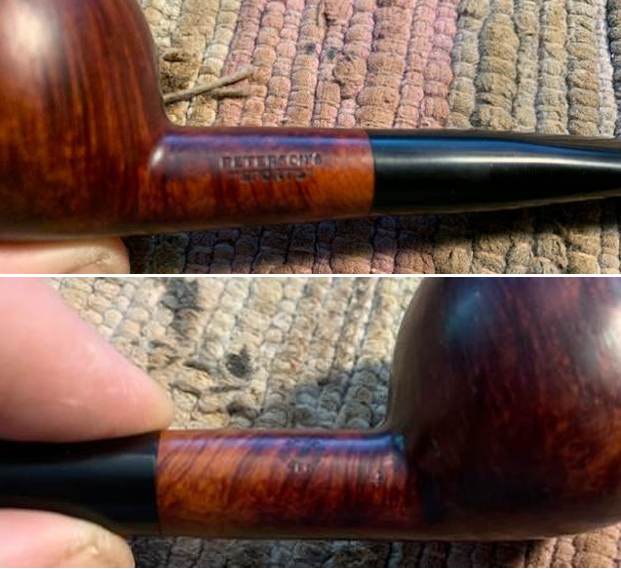
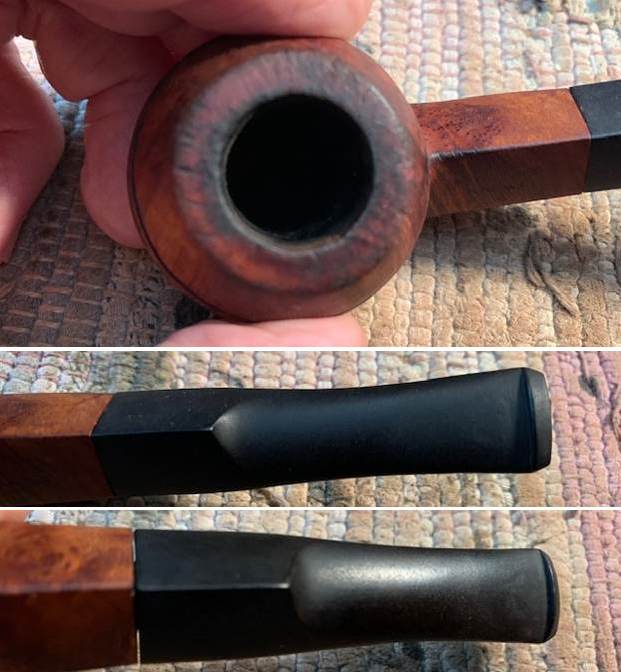 I took photos of the stamping on the sides of the shank. It is faint but reads as noted above.
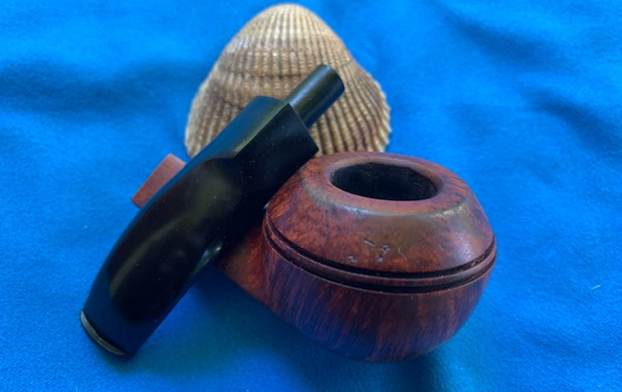
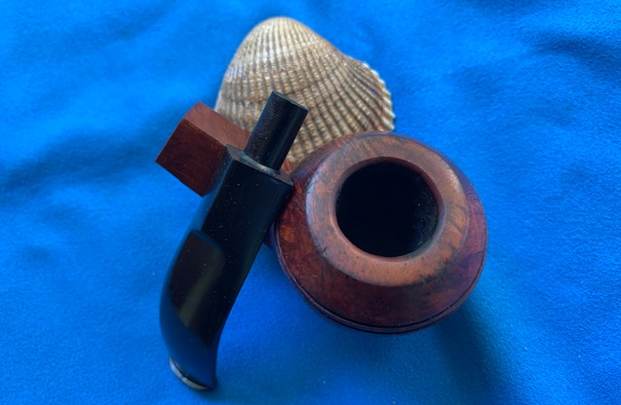
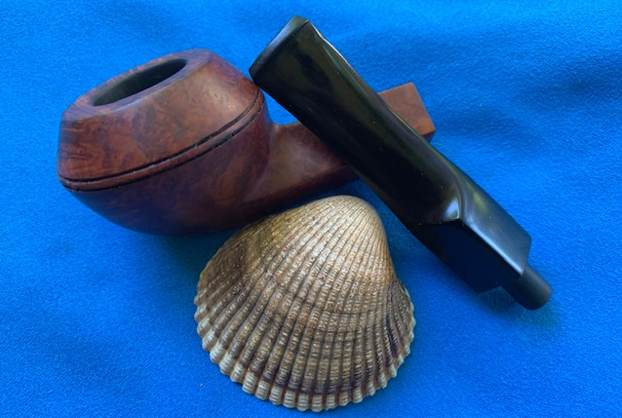
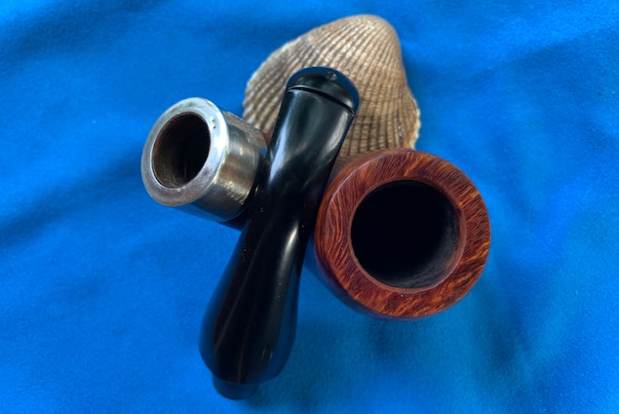
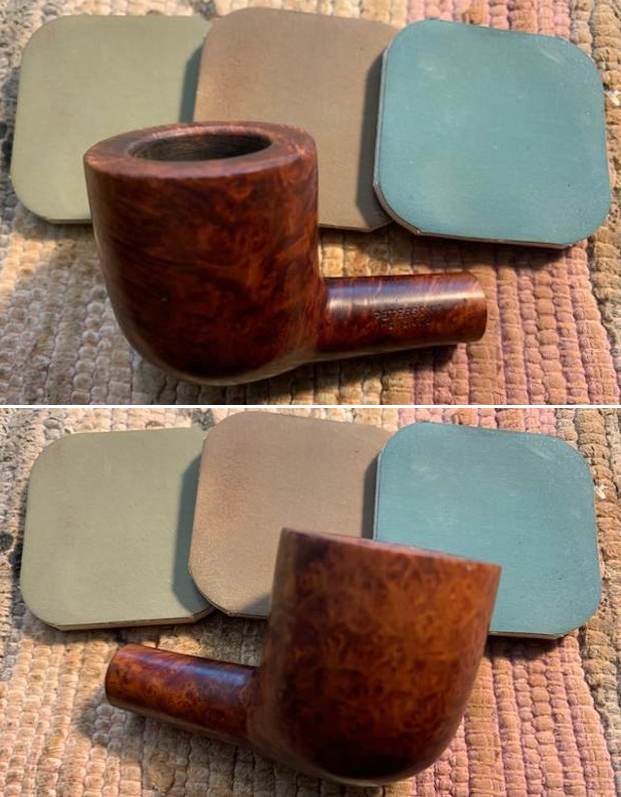
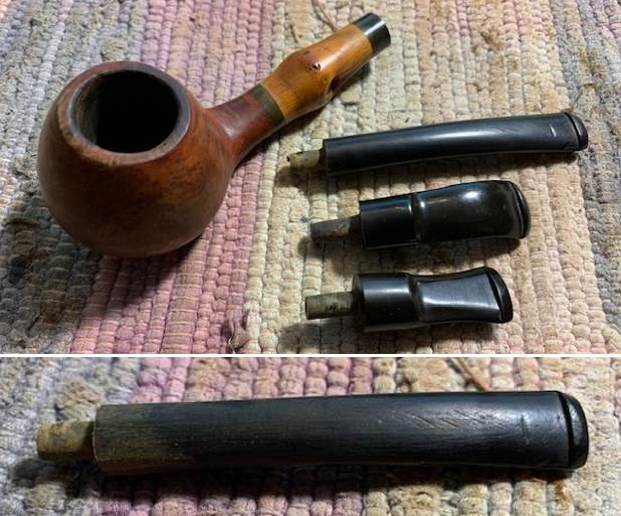
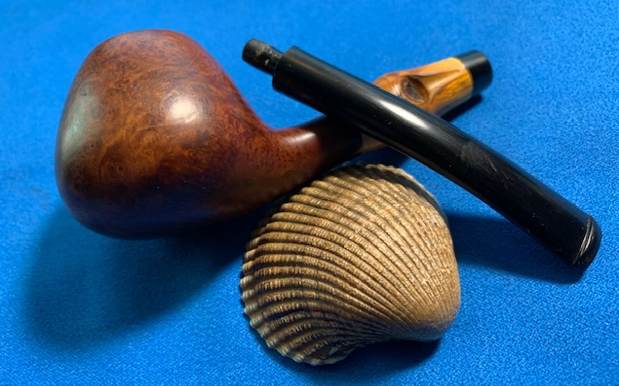
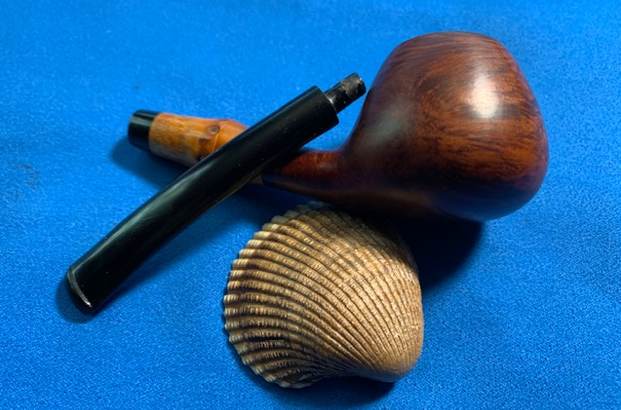
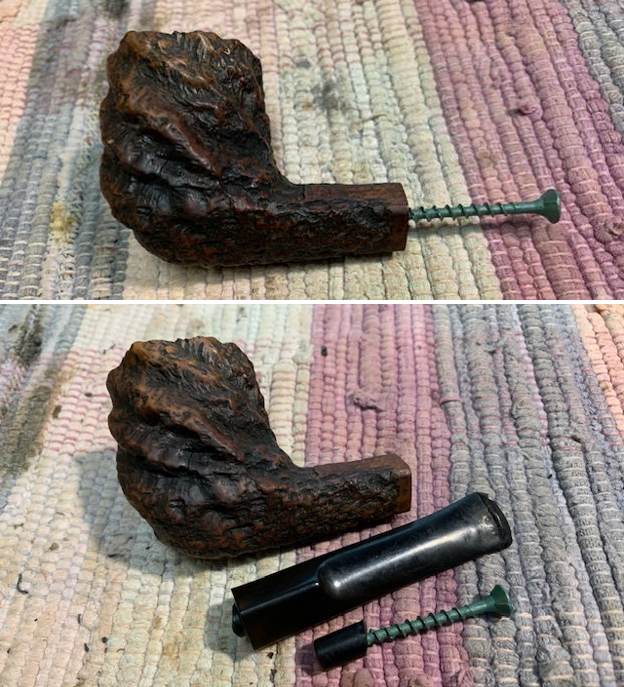
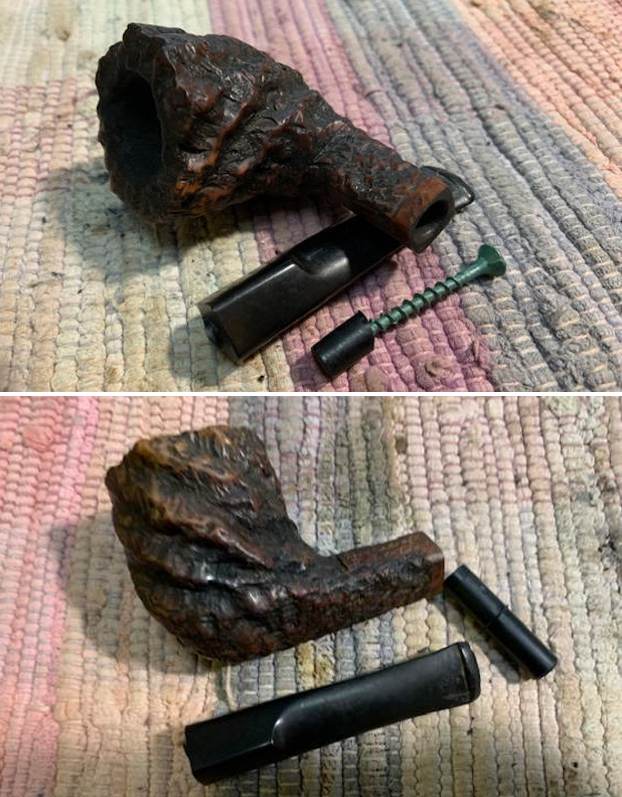
 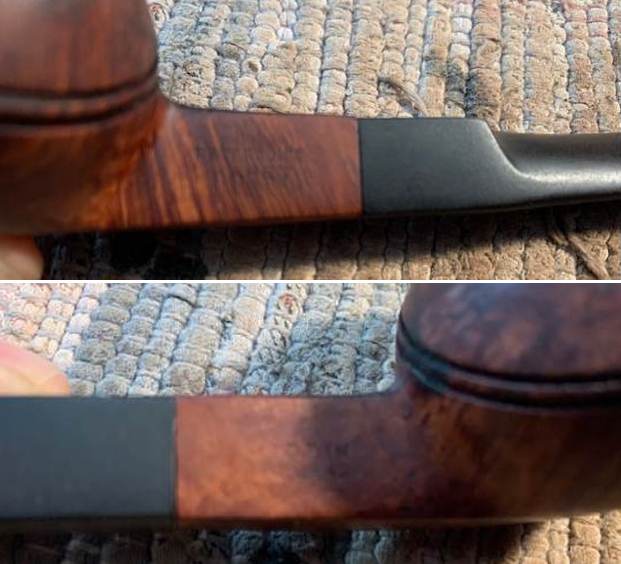 I removed the stem and went through my stems and found one that matched the shank well. I would need to reduce the sides of the diamond saddle and then I would work the stem to fit correctly. The stem had originally been a P-lip style but someone along the way had cut it off. I would need to clean up that work and reshape it to be a fish tail stem like the one in the chart above. There was a faint P on the left side of the saddle that would probably disappear with the shaping.
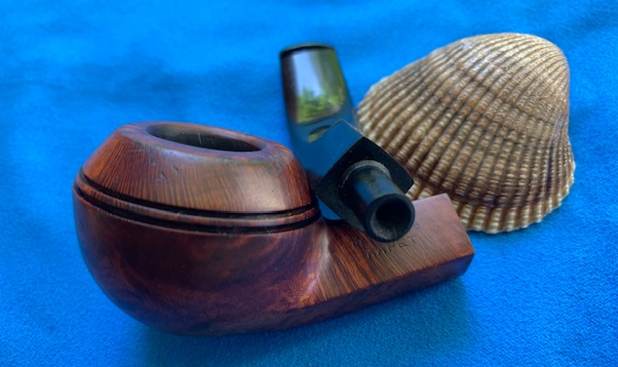
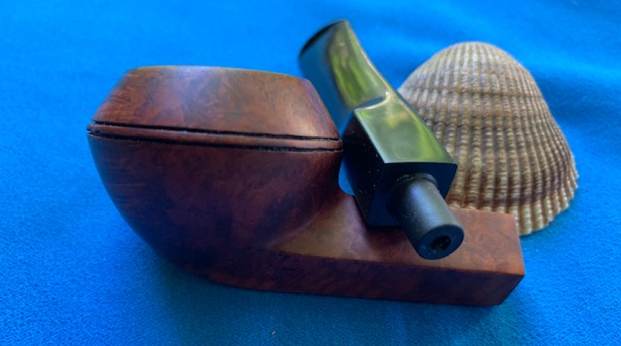
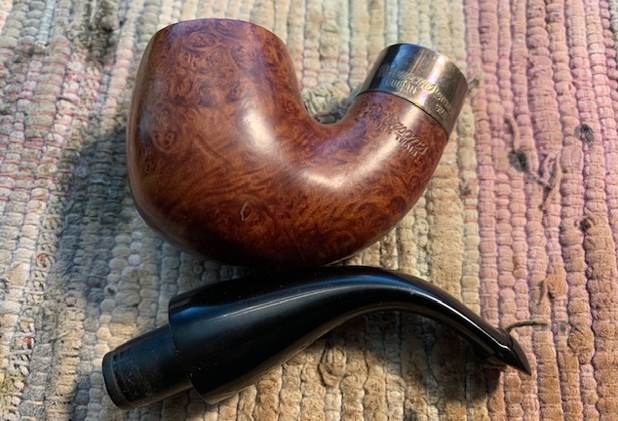
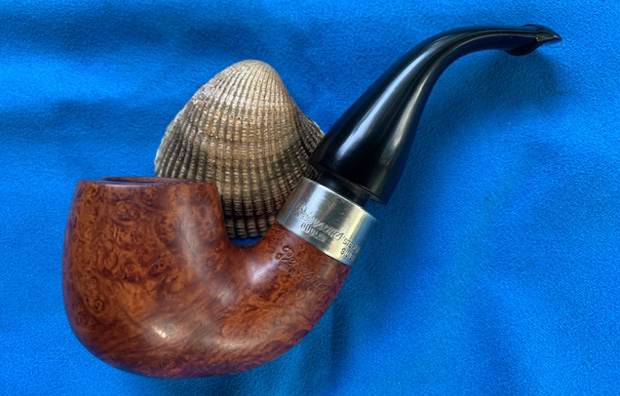
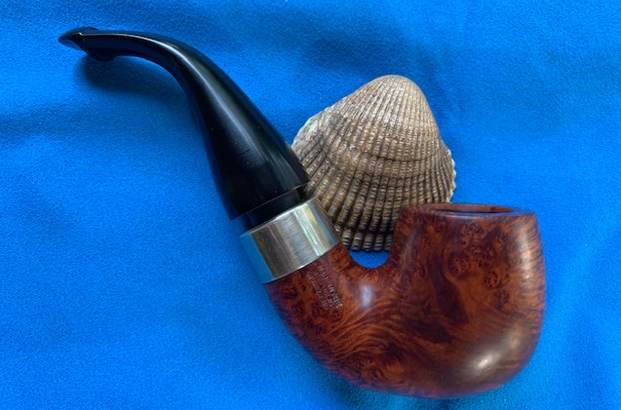
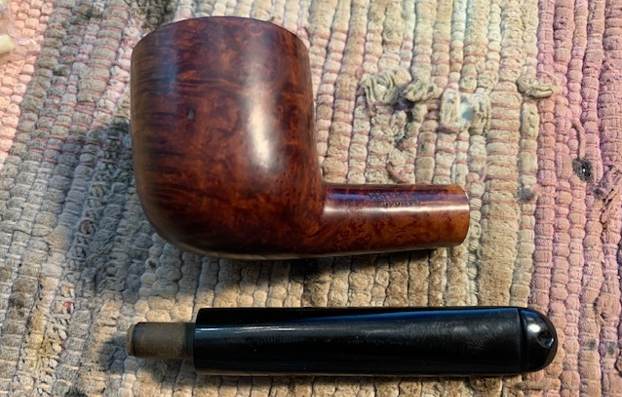
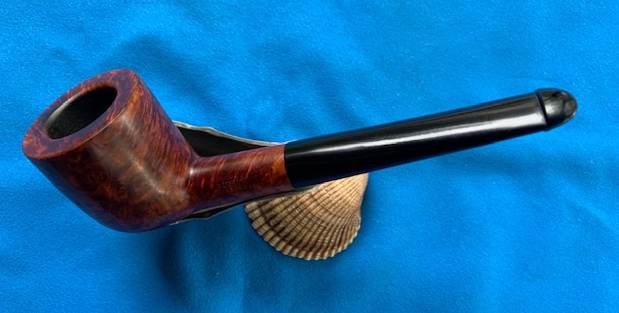
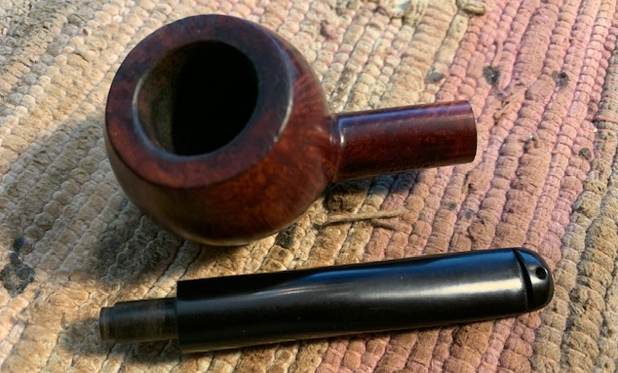
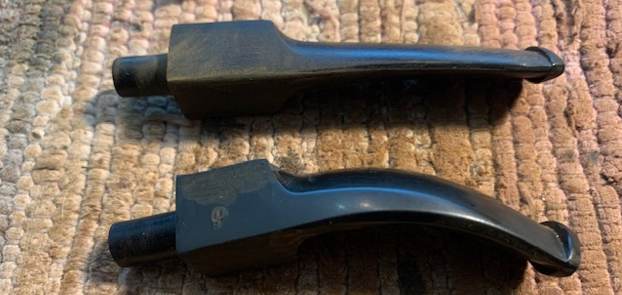 I put the stem in the shank and took a photo of the bowl with the stem first to have a look at the pipe with this stem. It looked very good and I think with the adjustments it was going to look like the original.
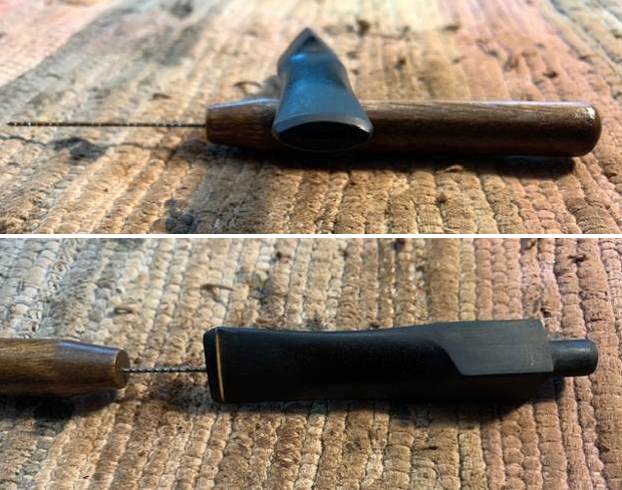
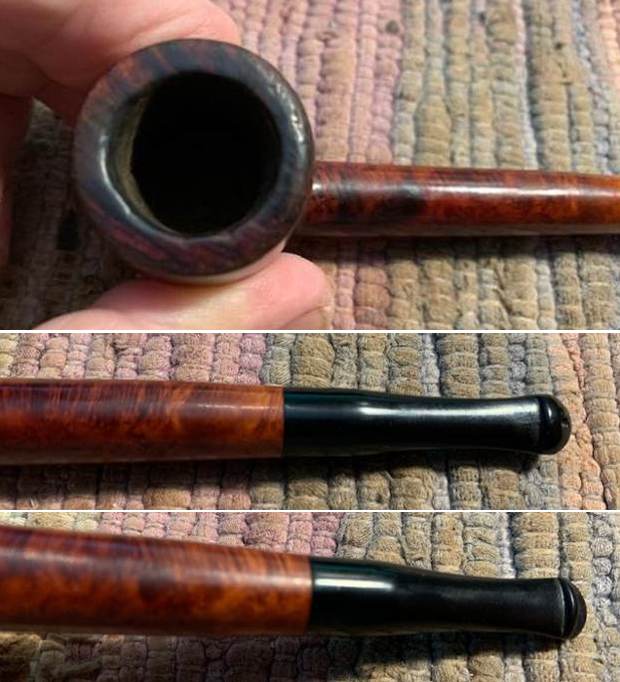
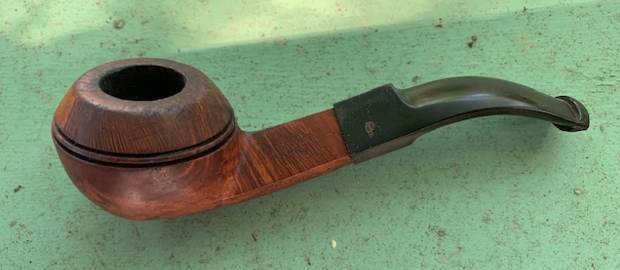 I took photos of the stem to show the shape of the bent and also the modification that had been done to remove the P-lip and convert it to what was an attempt at a fish tail. The work on it was a bit of a hack job so it was a mess. I would need to do some reshaping and opening of the button.
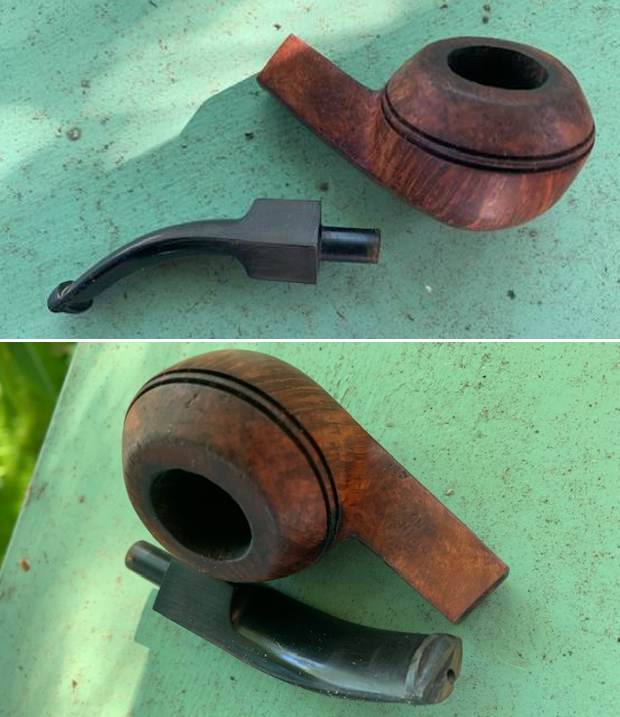
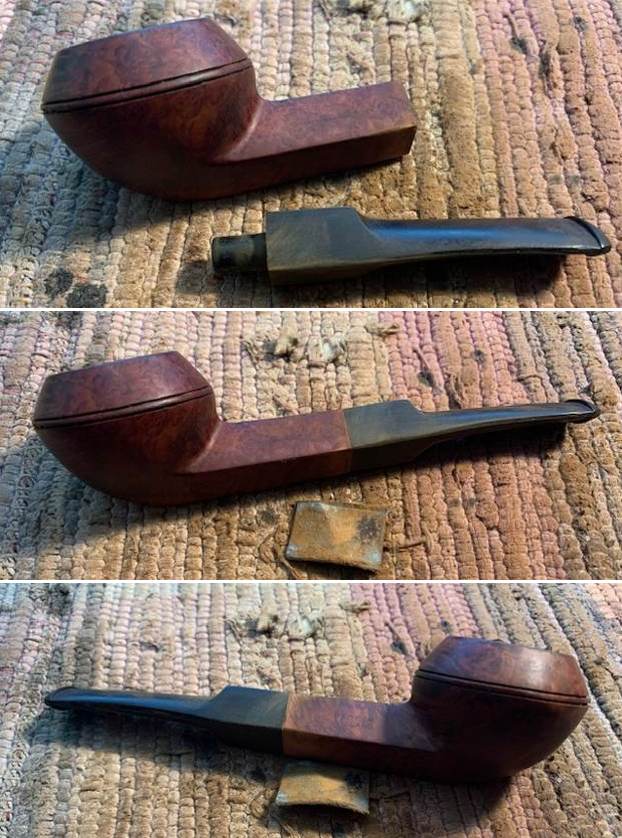
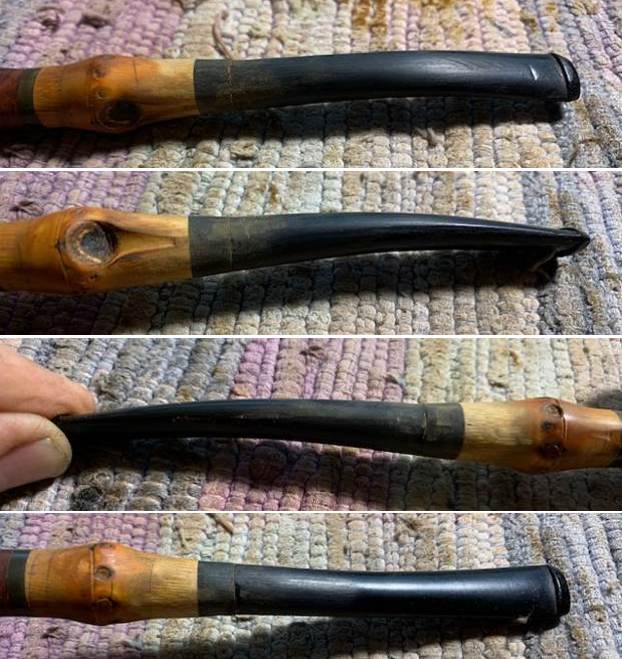
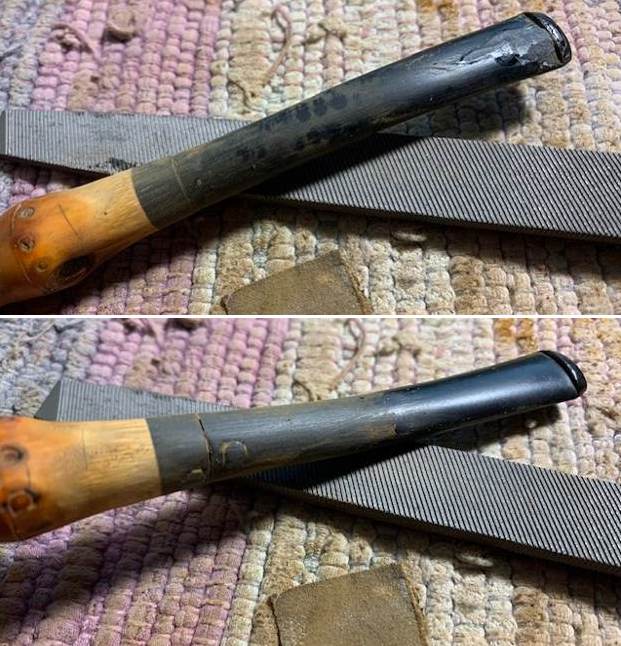
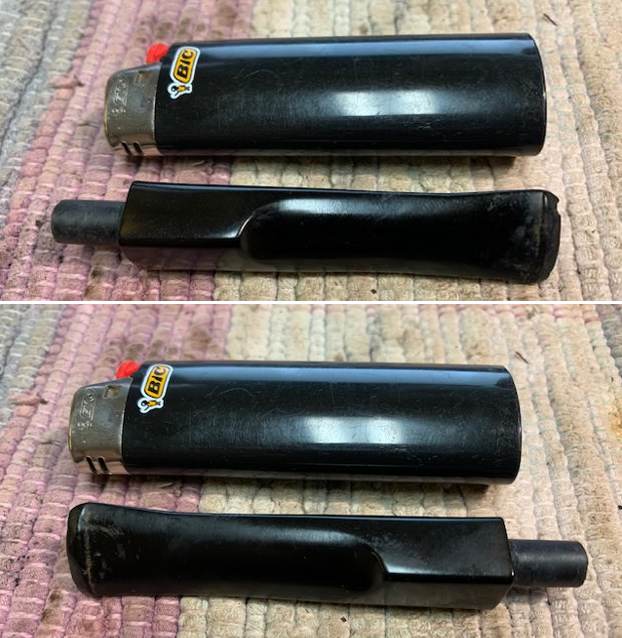
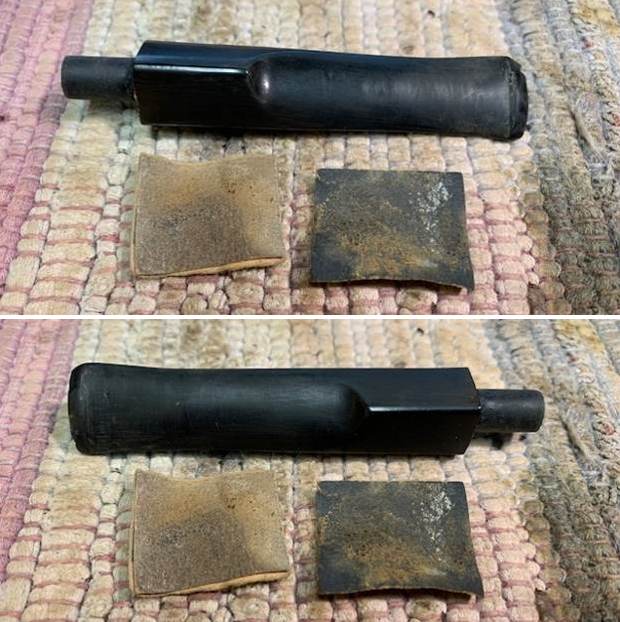
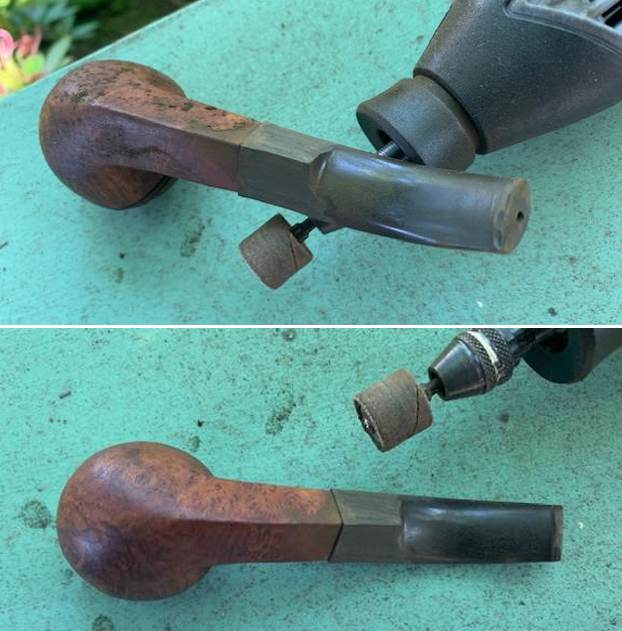
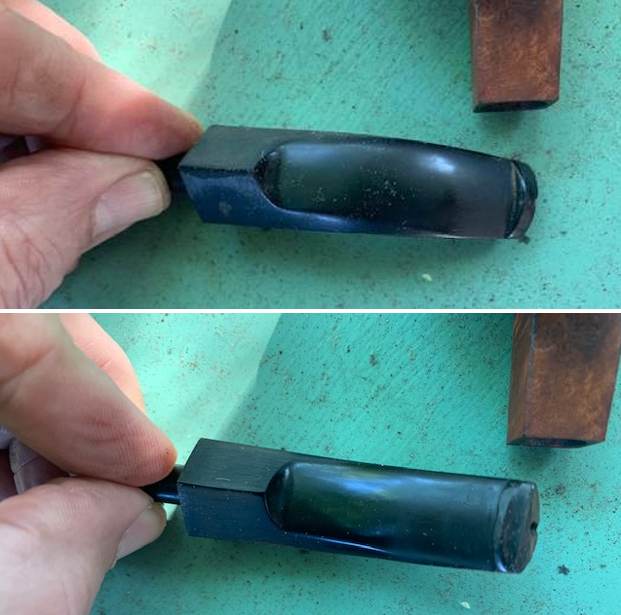 I started my work on this pipe by fitting the new stem to the shank. I had to reduce the sides of the diamond saddle with my Dremel and sanding drum. As with all diamond shank pipes, the sides were not equal in measurement so I had to shave off some of the vulcanite on each side to get a proper fit to the shank. I also used it on the button end to flatten it out and give it some initial shape. There is more work to do but it is getting there.
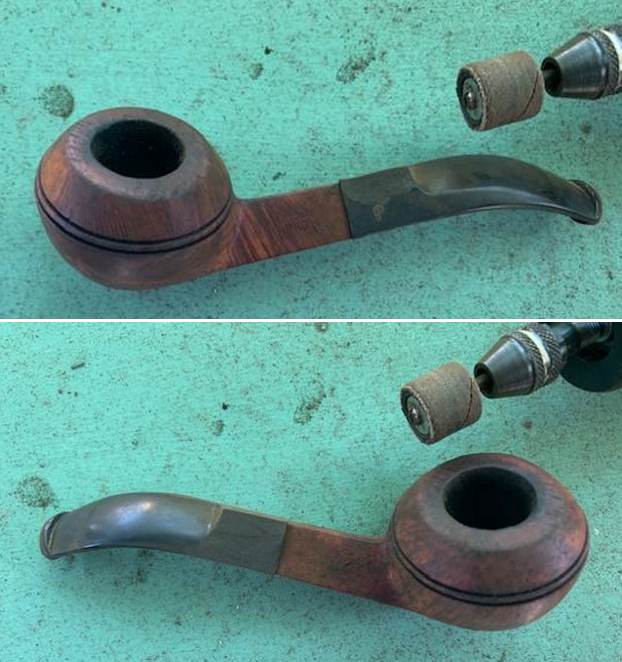
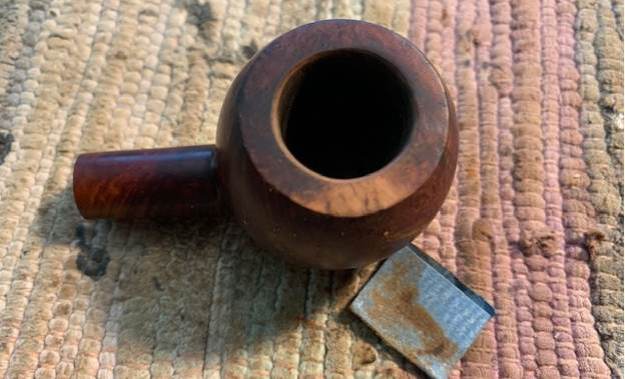
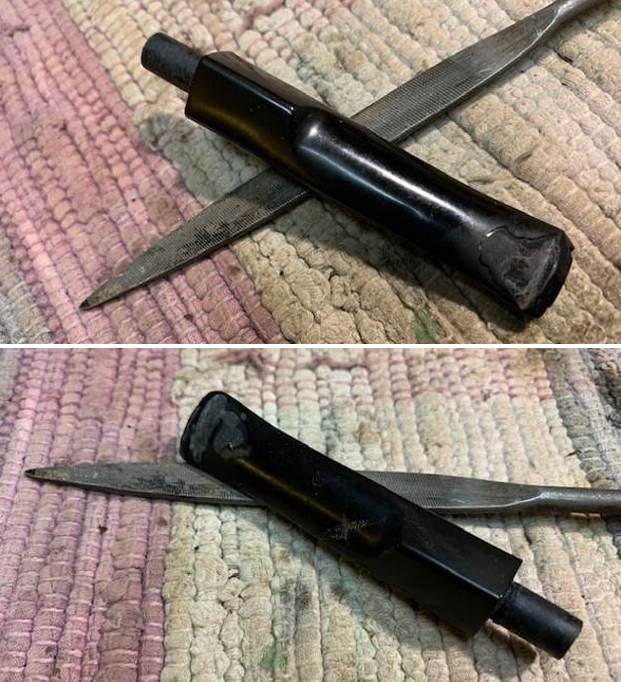
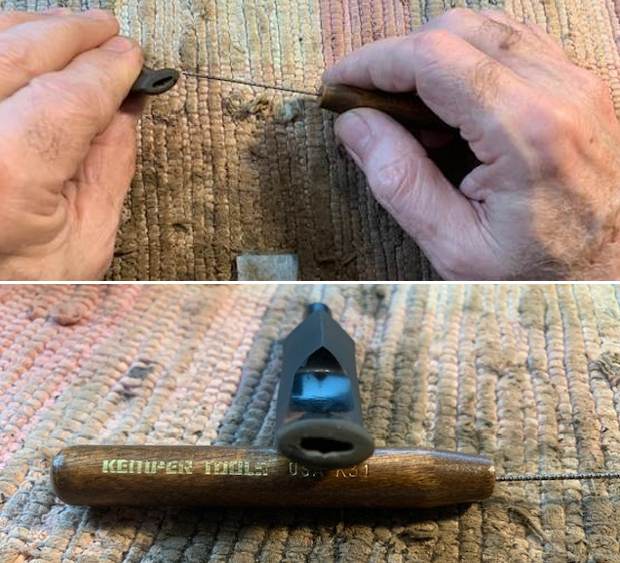
 I used a flat file to get the fit close to a smooth fit. Care had to be taken not to damage the briar. I then worked on it with a folded piece of 220 sandpaper. I wanted the transition between the shank and stem to be smooth.
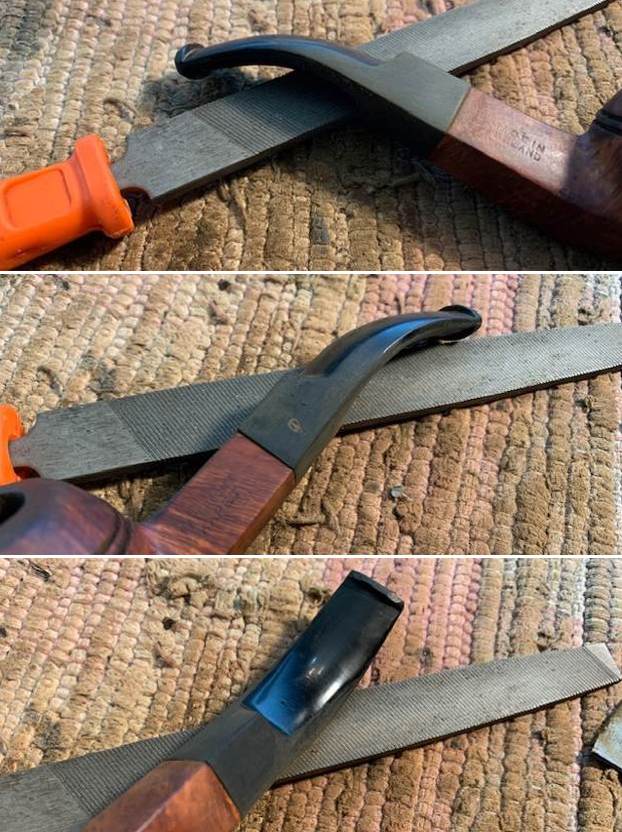

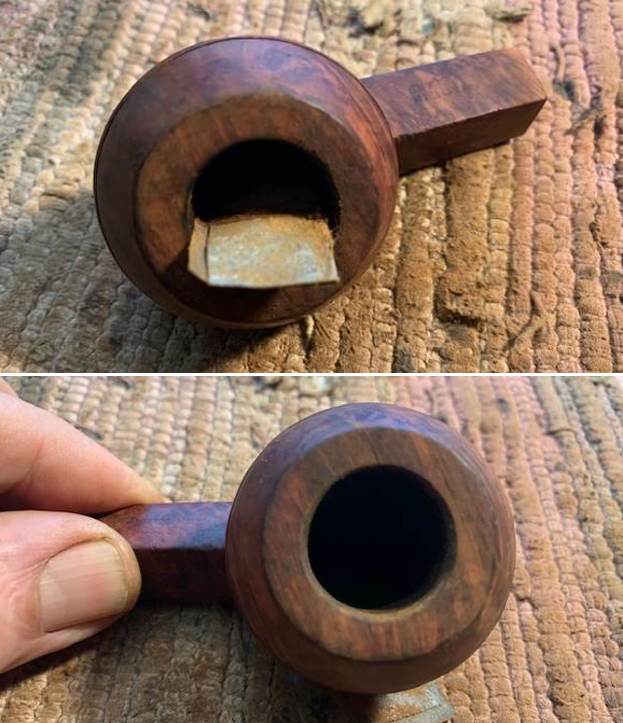
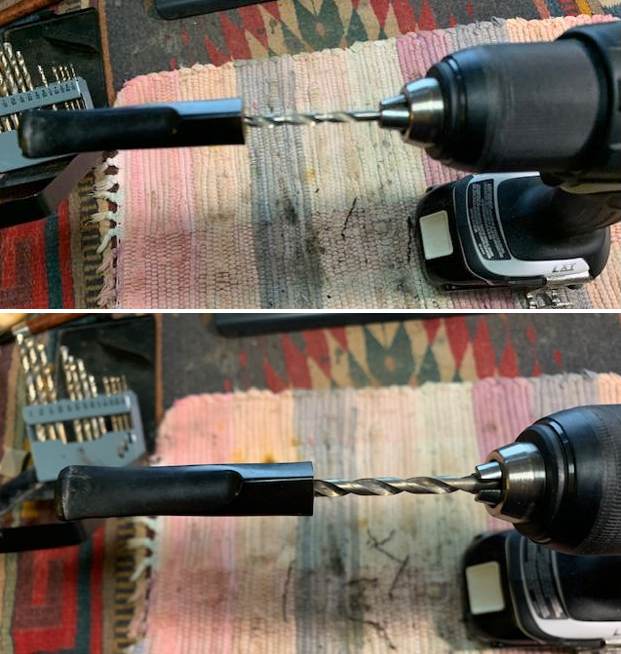
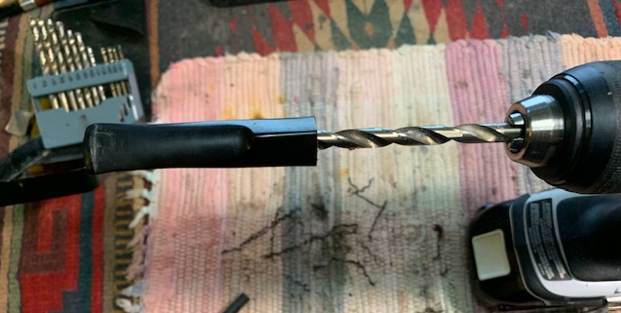
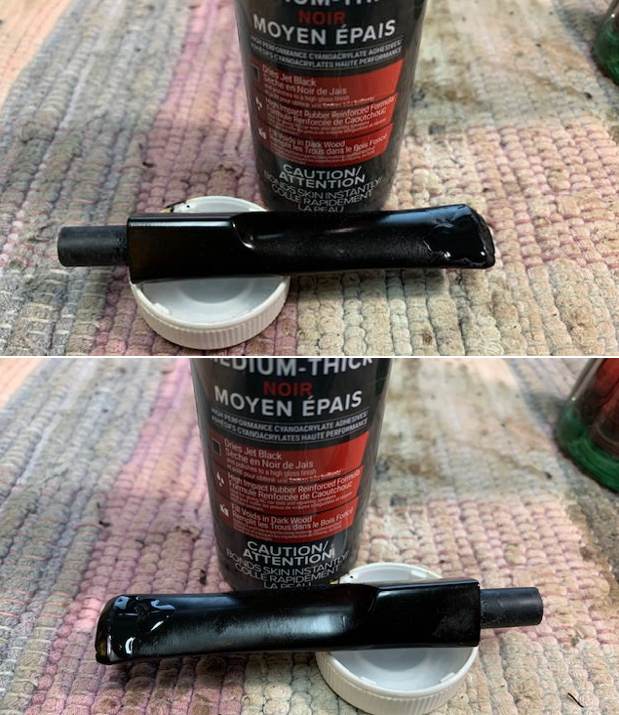
 I converted the single hole in the button end to a slot using a hole saw (a pottery trimming saw). I worked on it to shape it as an oval. Once that was done I shaped the button to remove some of the thickness and give it a comfortable shape.
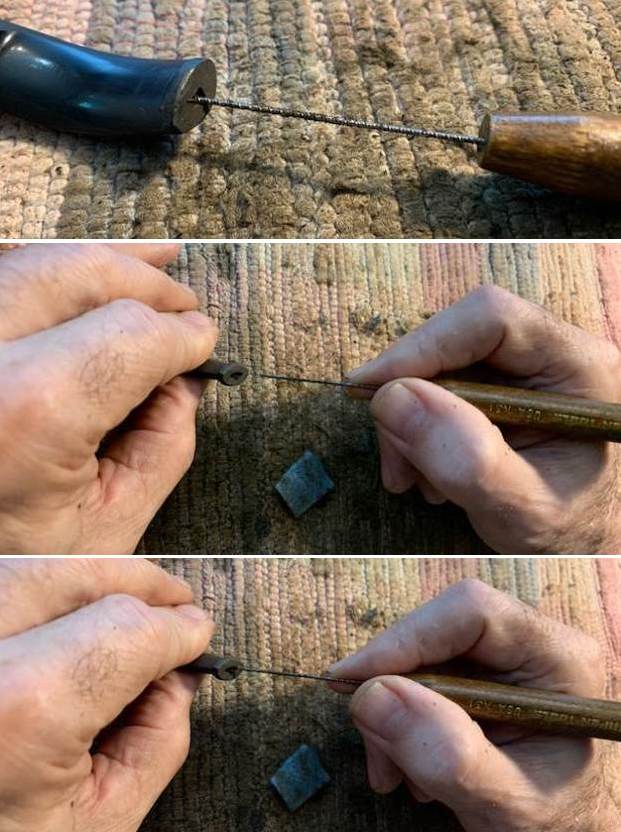
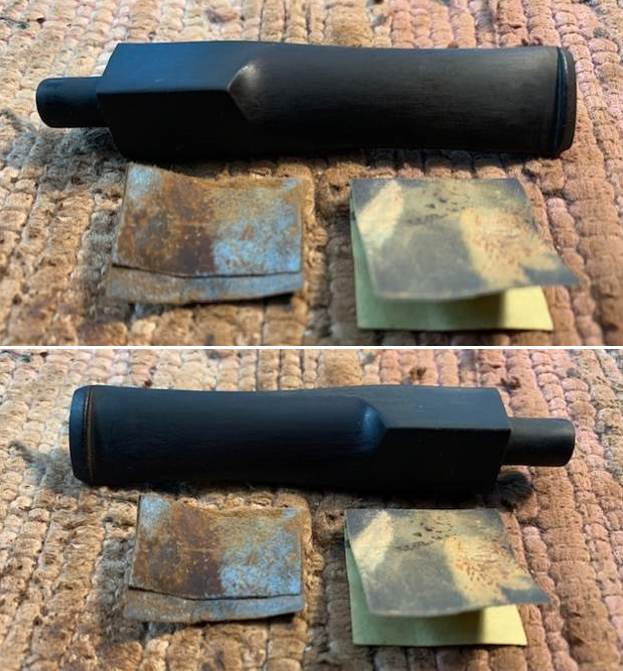
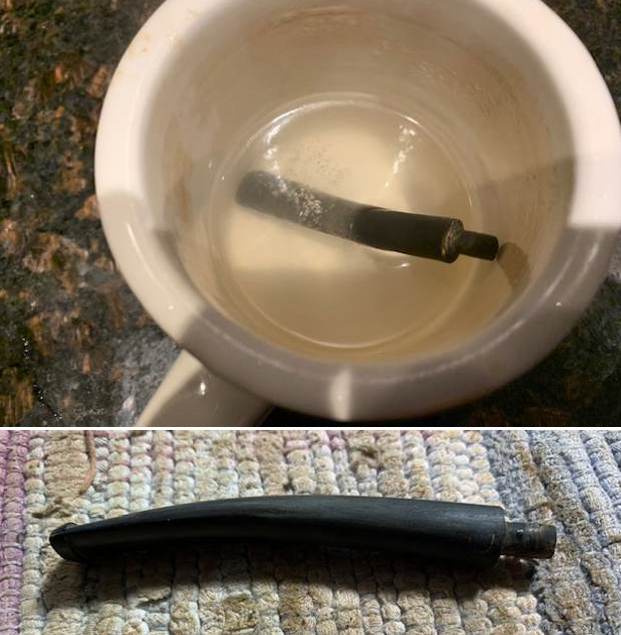
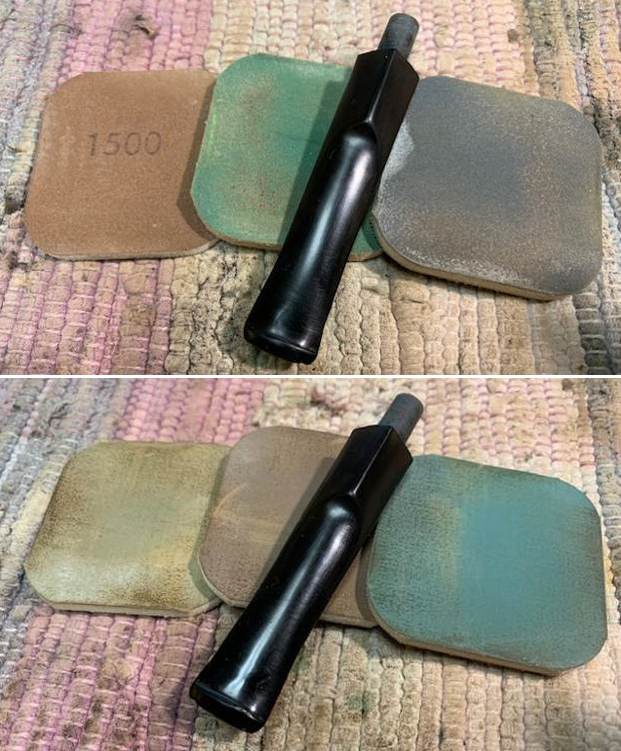
 I sanded the stem with 220 grit sandpaper and started the polishing it with 400 grit wet dry sandpaper. I sanded the inside of the slot with 220 and 400 grit sandpaper to smooth out the airway in the button.
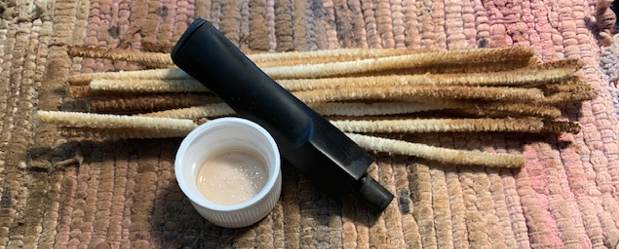
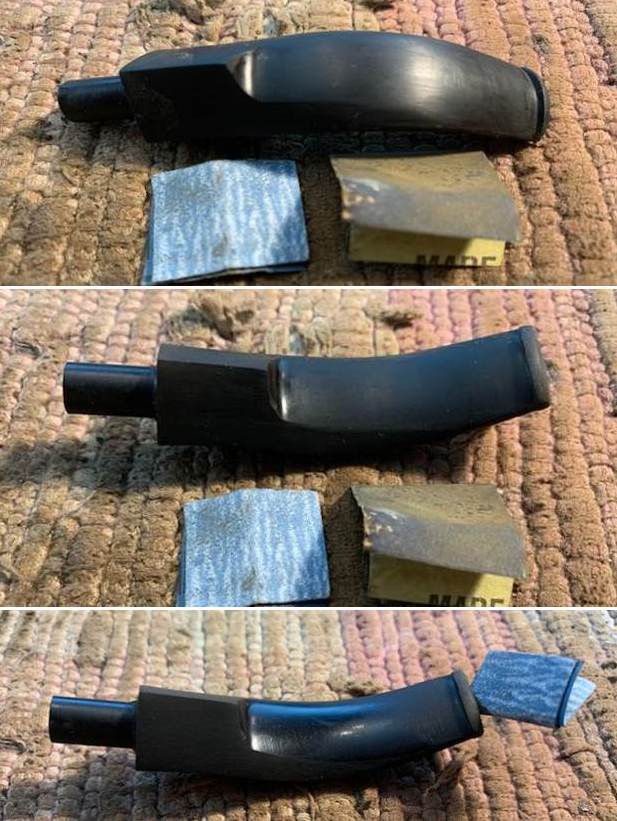 I cleaned the inside of the stem with alcohol and pipe cleaners. The stem was very dirty so it took a bit of work to get the oils and tars out of it. Once it was cleaned it smelled very good.
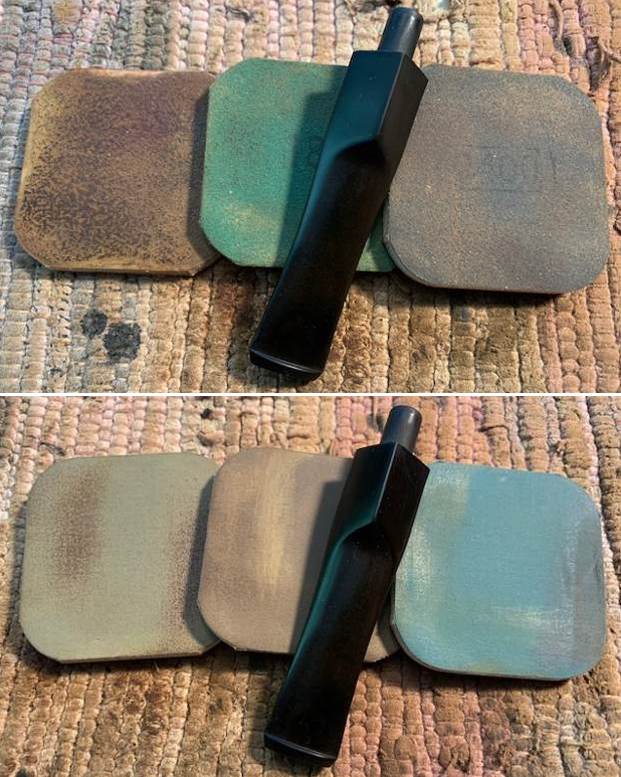
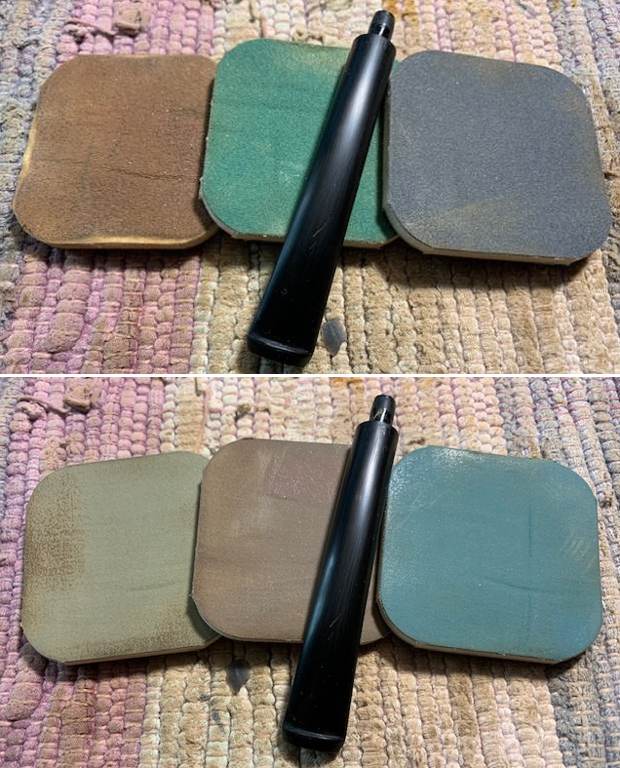
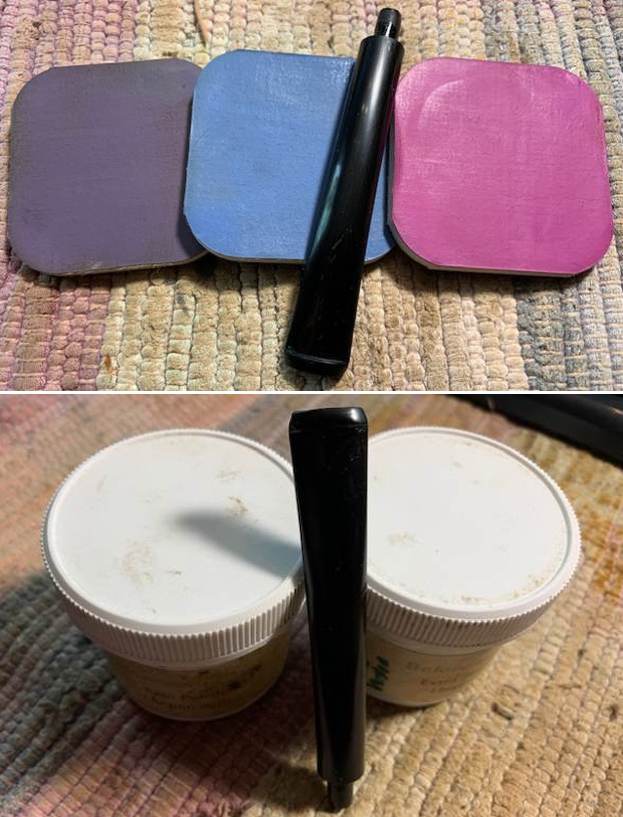
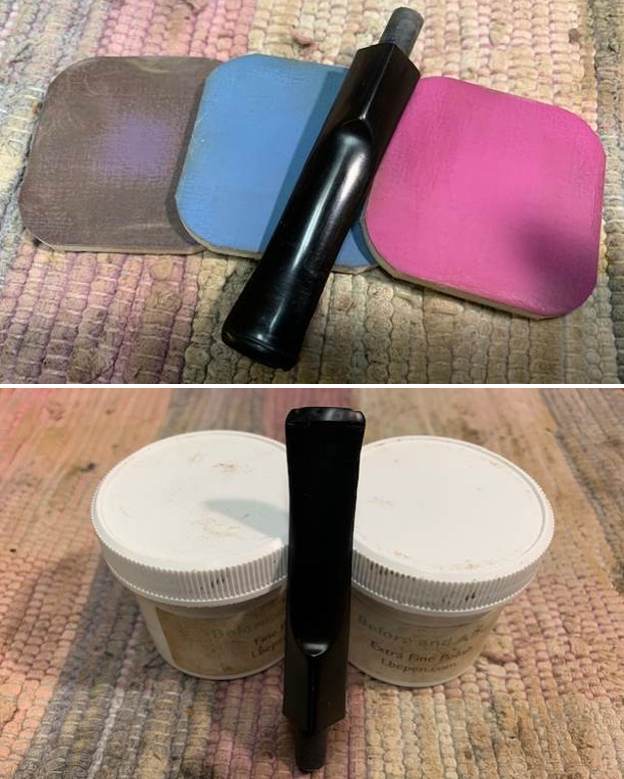
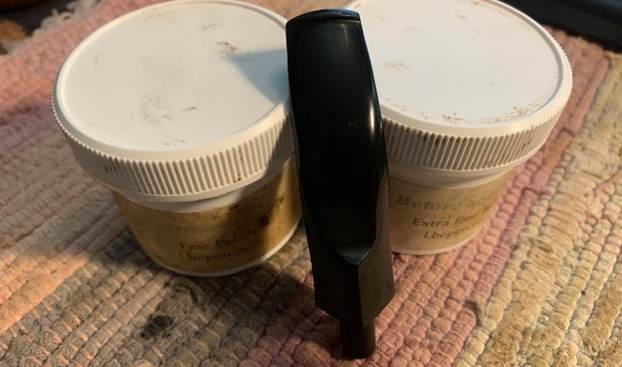
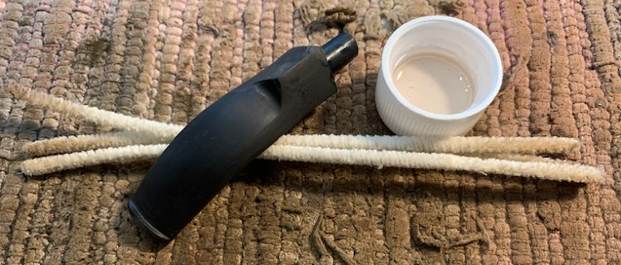 I polished the stem with micromesh sanding pads – wet sanding with 1500-12000 grit sanding pads. I wiped it down after each sanding pad with Obsidian Oil. I polished it with Before & After Pipe Stem Polish – both Fine and Extra Fine.
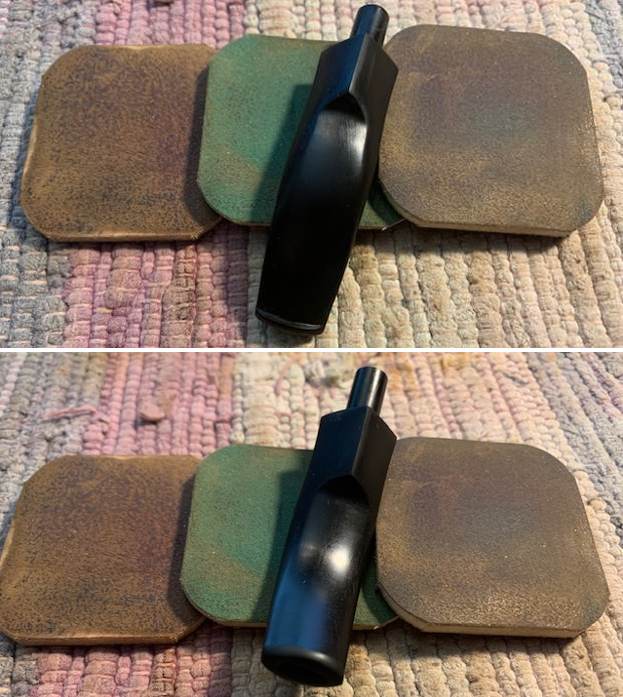
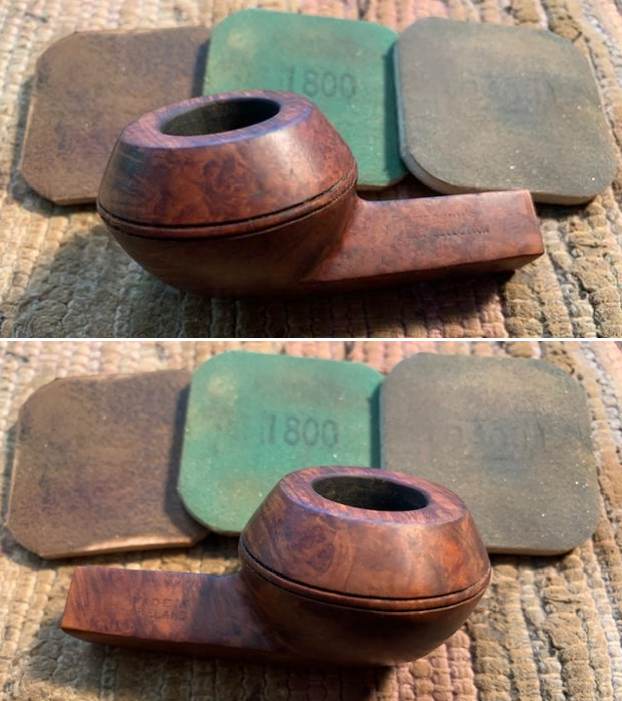
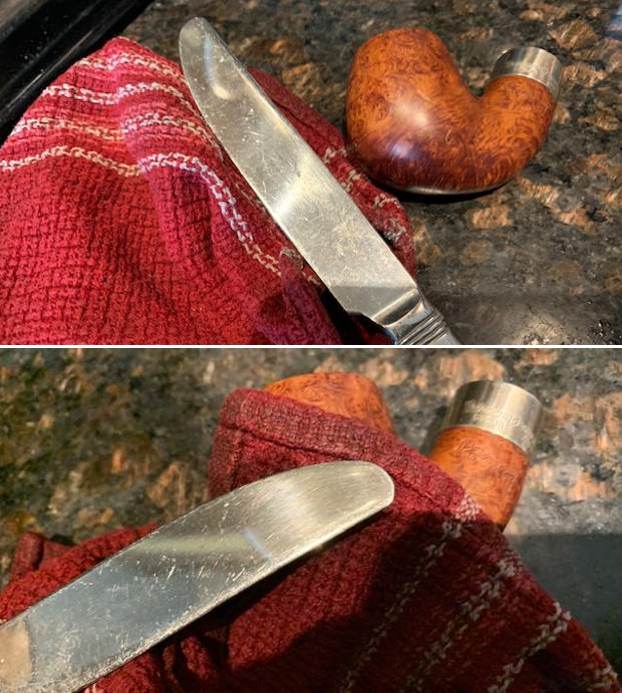
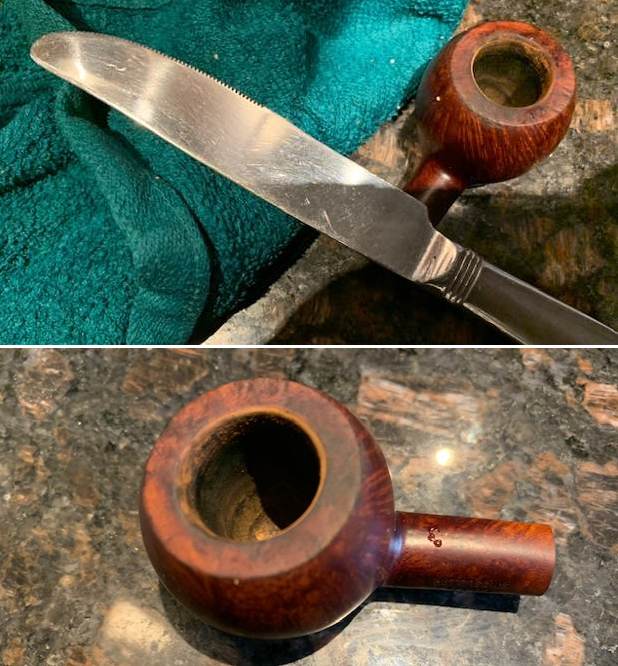
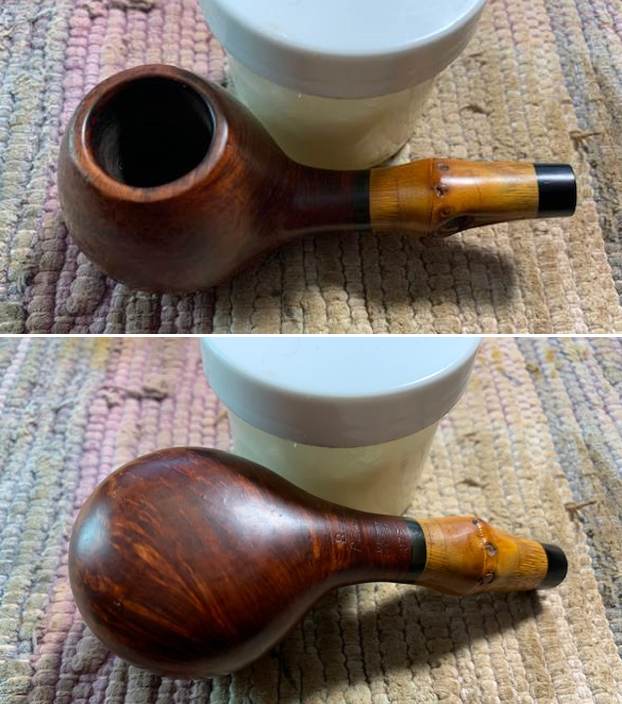
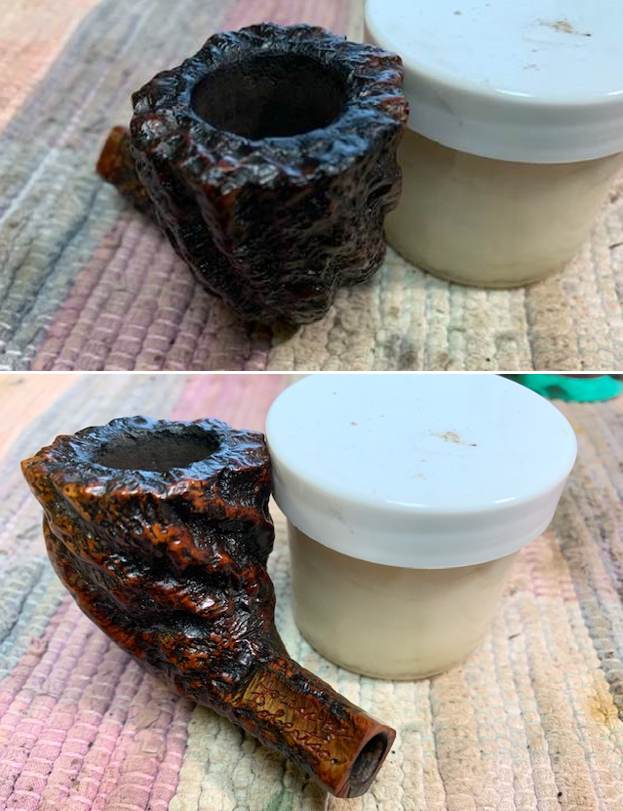
 With the stem finished, I removed it and turned my attention to the bowl. I know some of you would have kept working on the stem but I needed a change of pace so I went to the bowl for awhile to address this darkening on the rim top and edges. I used a folded piece of 220 grit sandpaper to smooth out the inner edge and work on the darkening on the top.
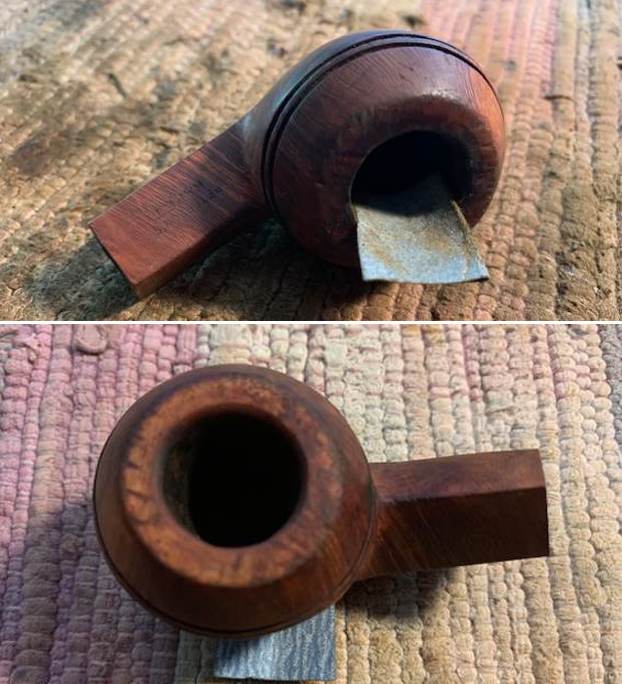 I used an oak stain pen to touch up the sanded areas on the rim top and edges as well as the shank end. The pen was a good match to the rest of the briar around the bowl and shank. It would blend in very well once it was buffed and waxed.
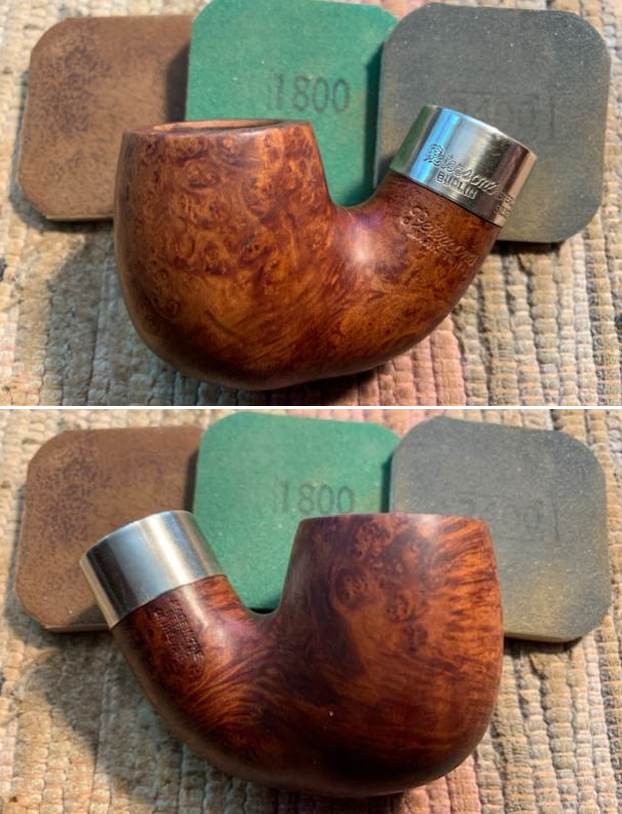
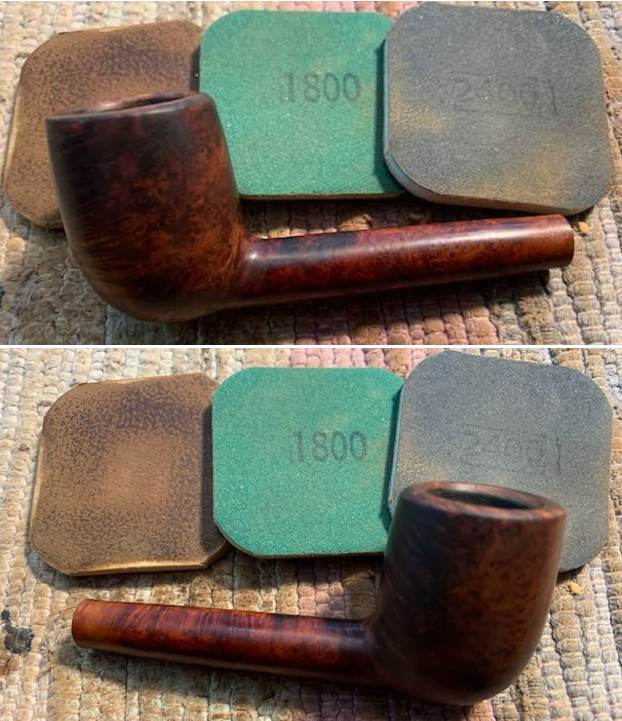
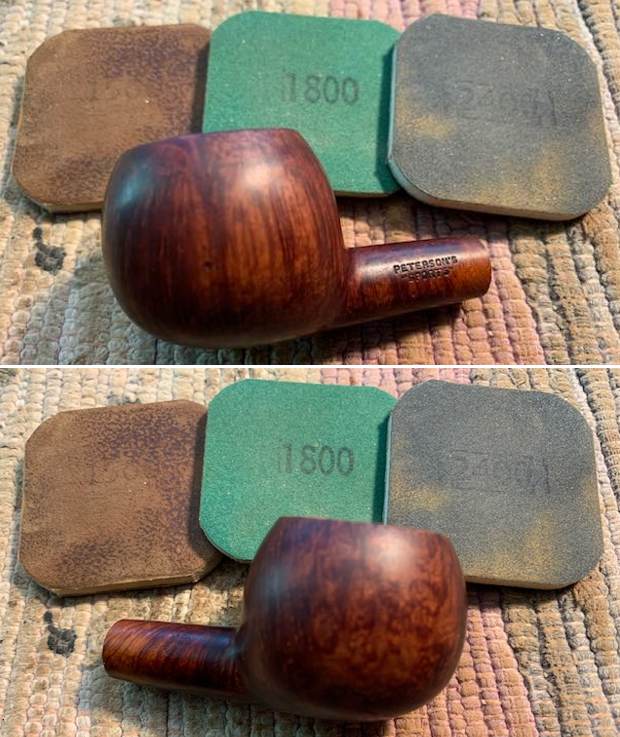
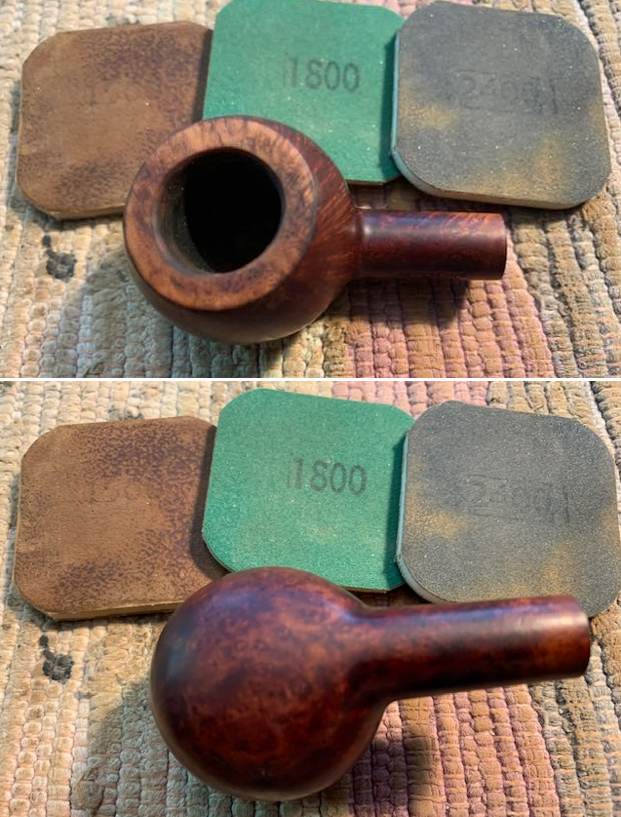
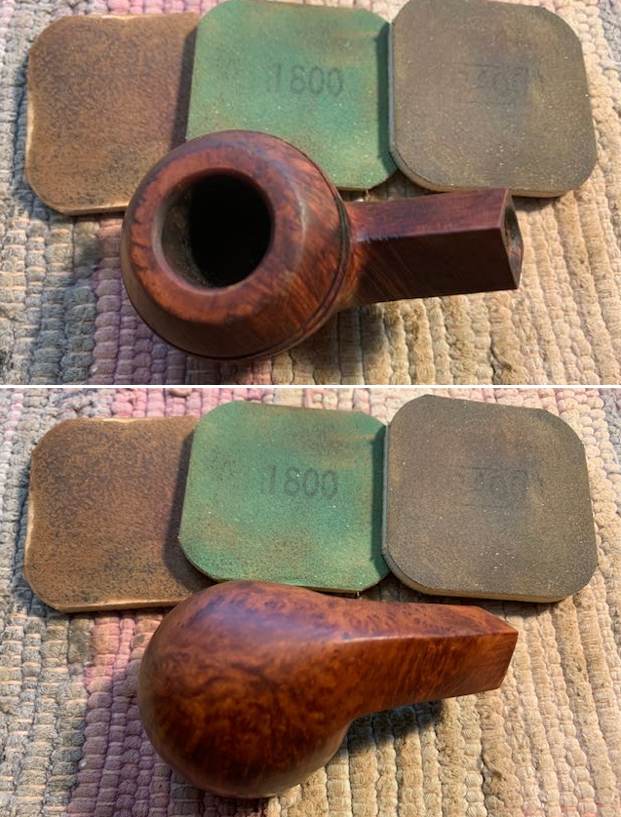
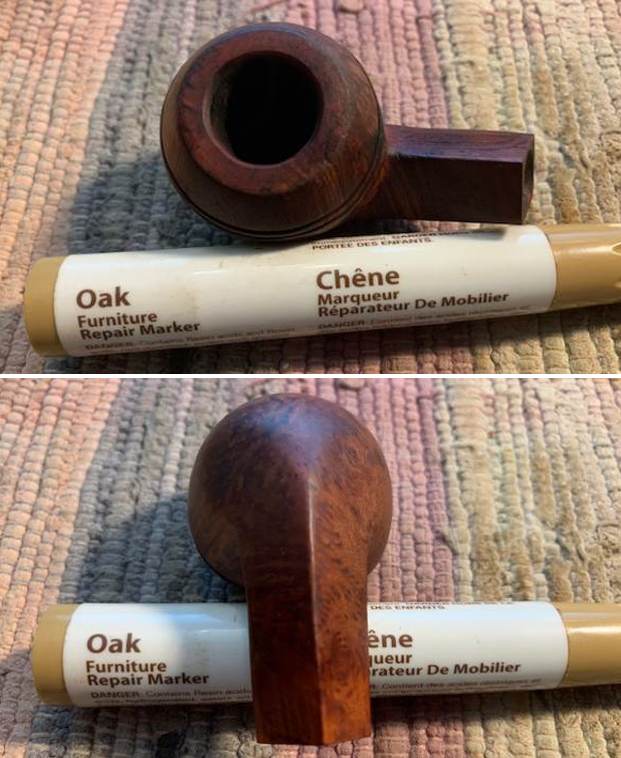 I polished the briar and worked to blend in the sanded areas on the rim top and shank end with the surrounding briar with micromesh sanding pads. I dry sanded with 1500-12000 grit pads. I wiped the briar down after each pad with a damp cloth to remove the dust and assess progress.

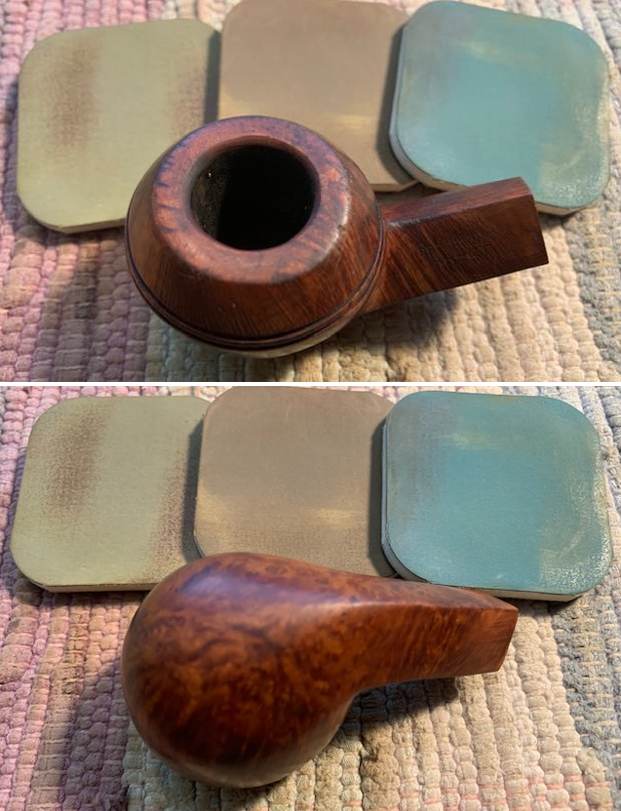
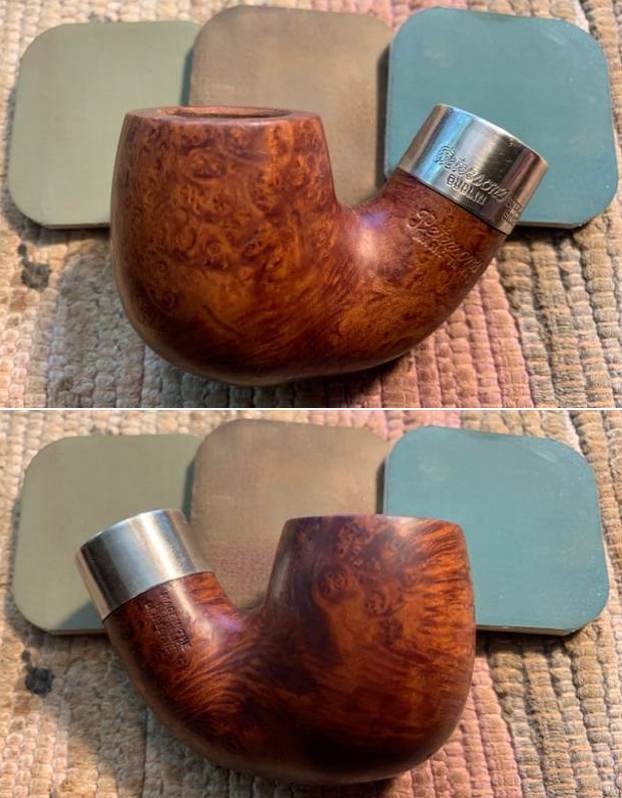
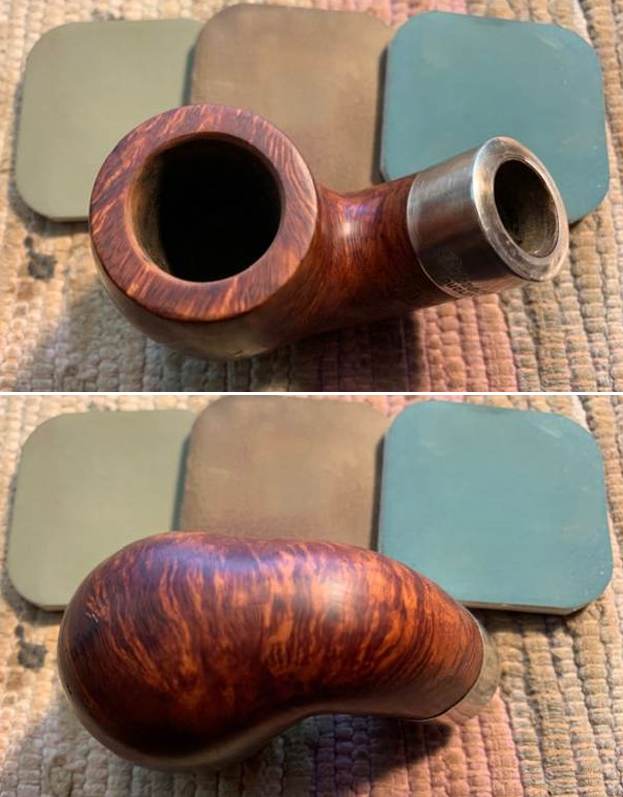
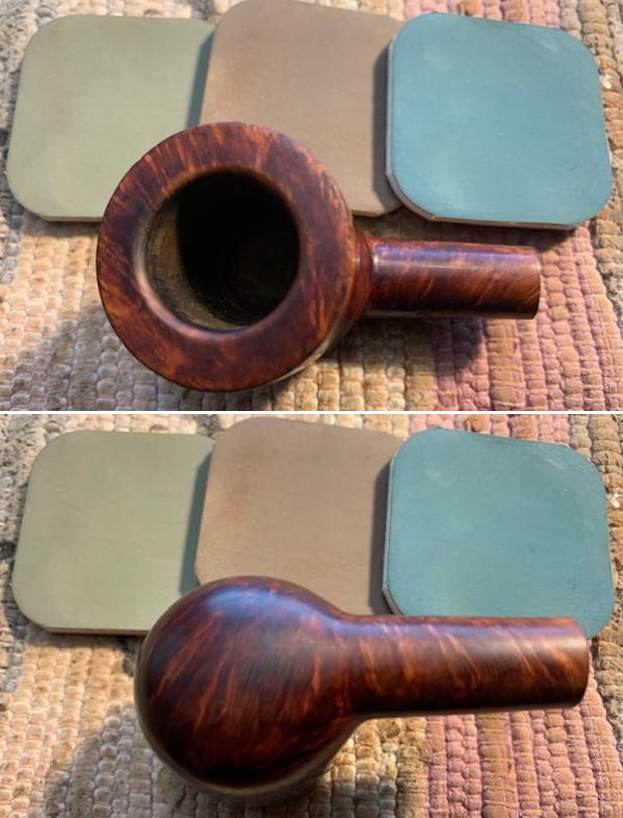
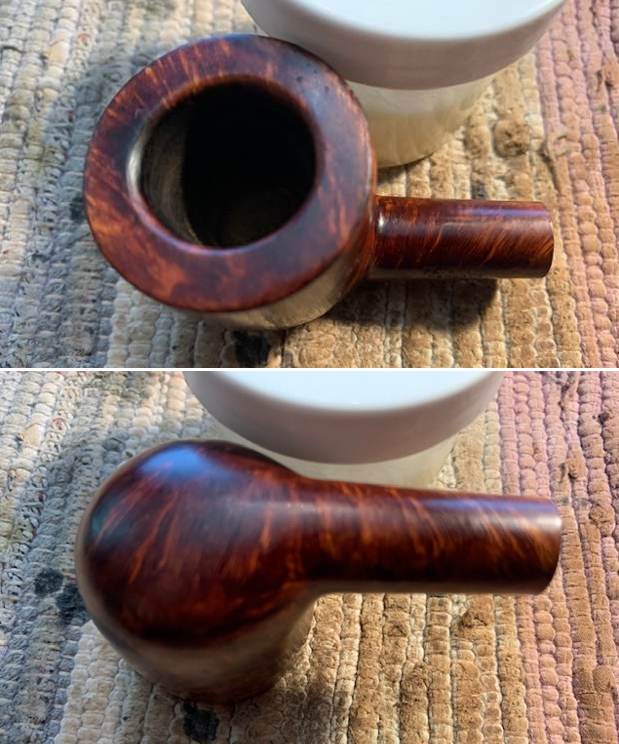
 I worked some Before & After Restoration Balm into the surface of the briar with my fingertips to clean, enliven and protect the briar. I worked it into the twin rings around the cap with a shoe brush. I let the balm sit for 15 minutes and then buffed with a cotton cloth to raise the shine. The photos show the bowl at this point in the restoration process.
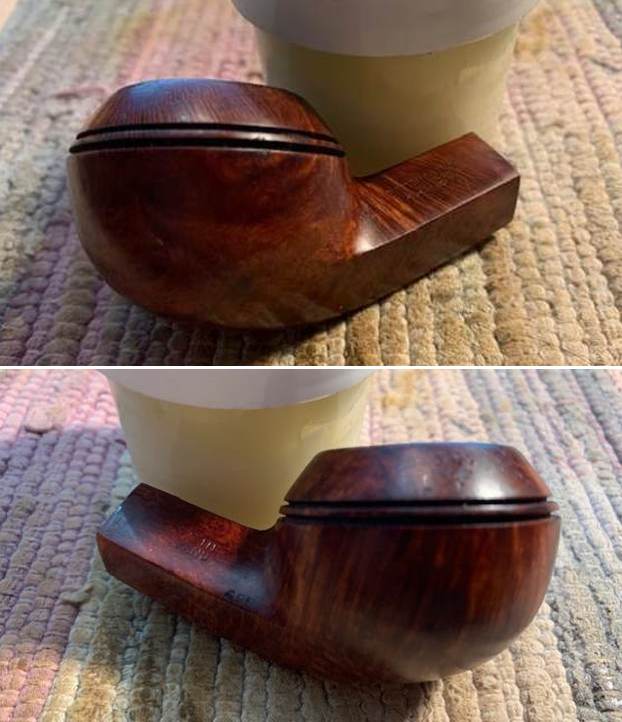
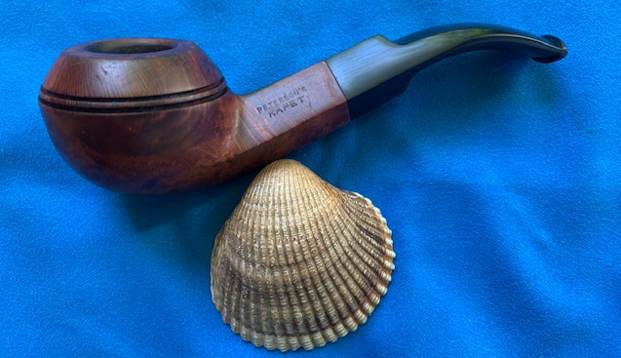
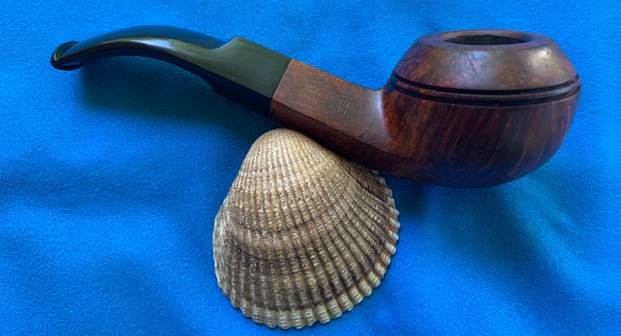
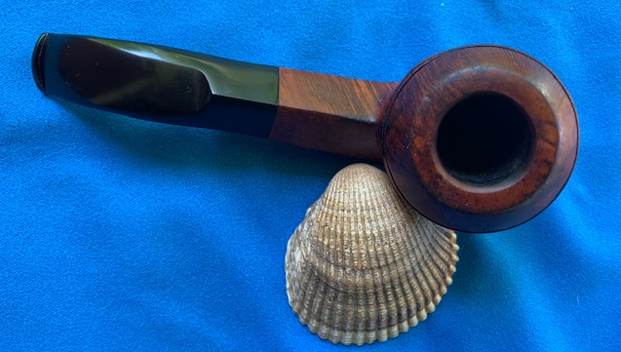
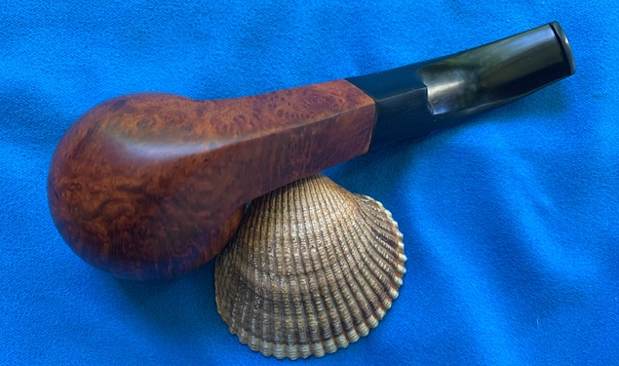
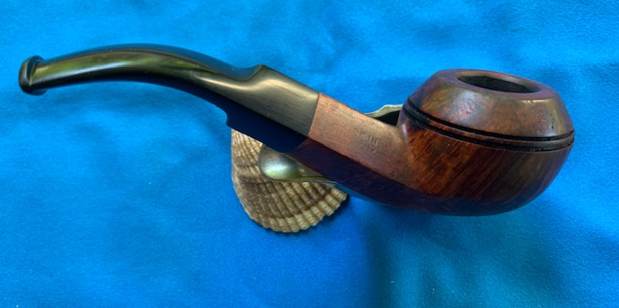
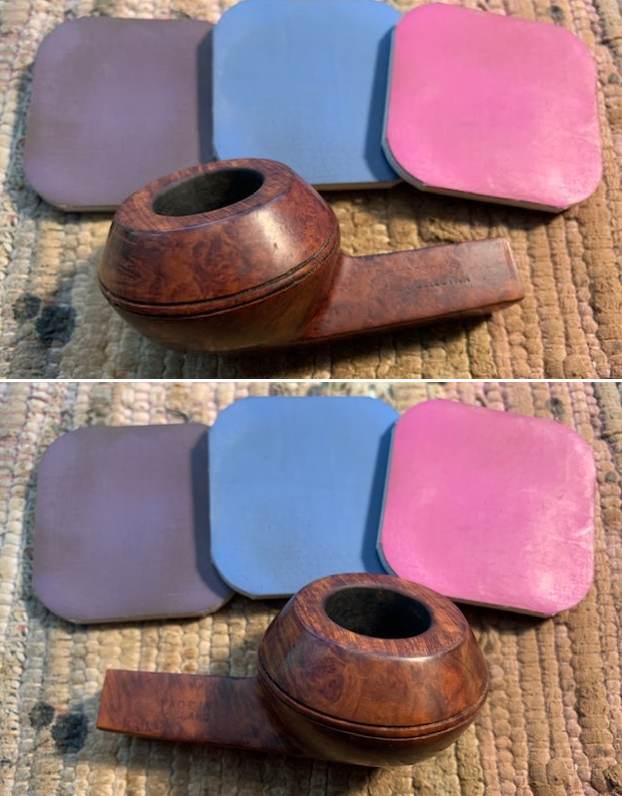
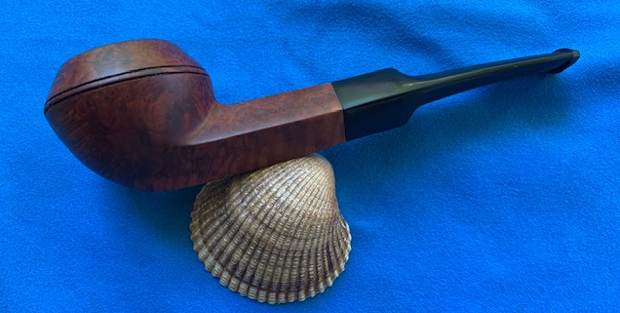
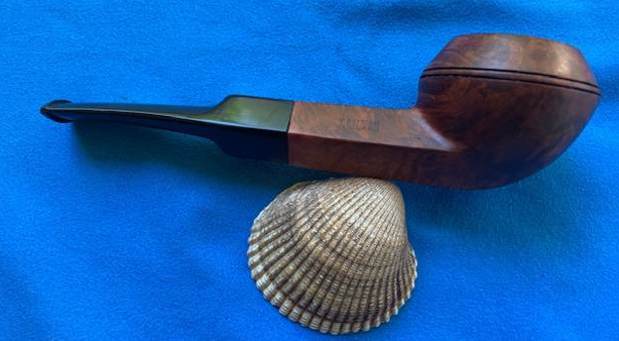
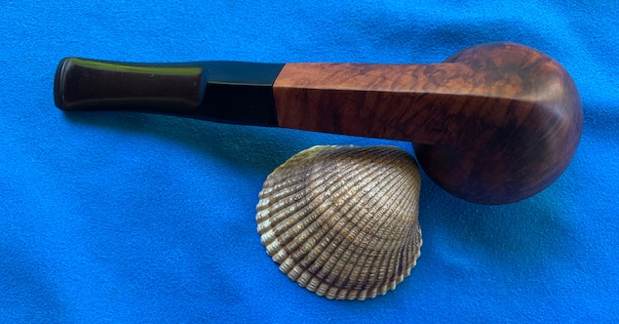
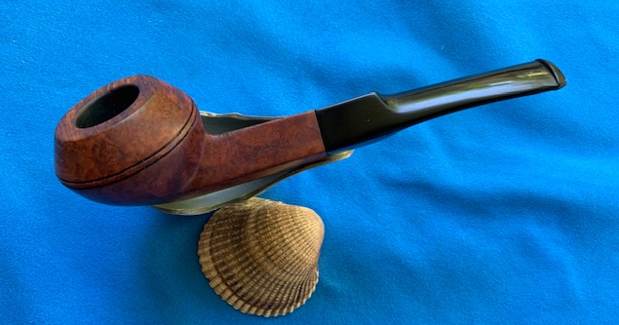
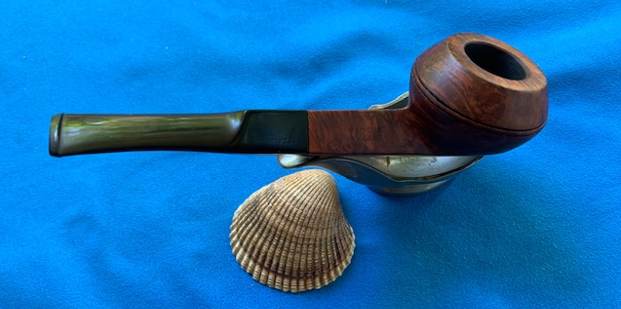
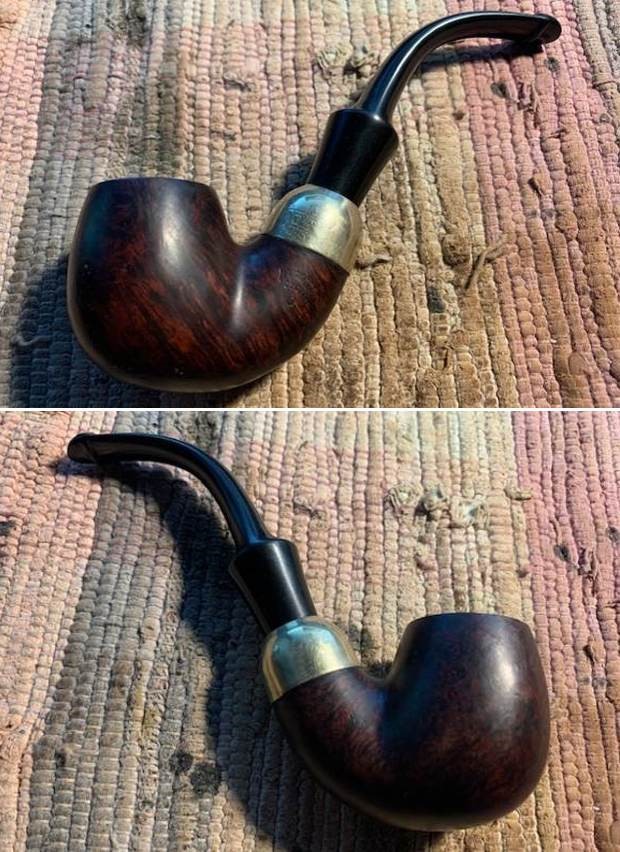
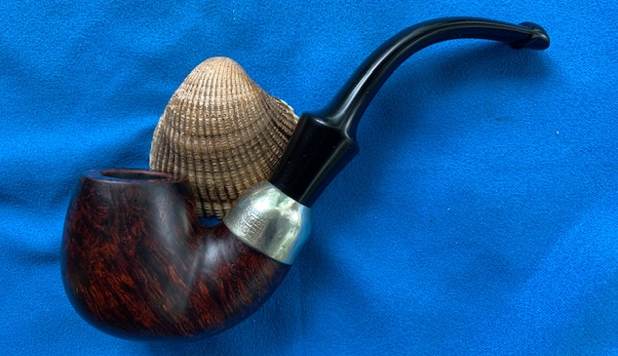
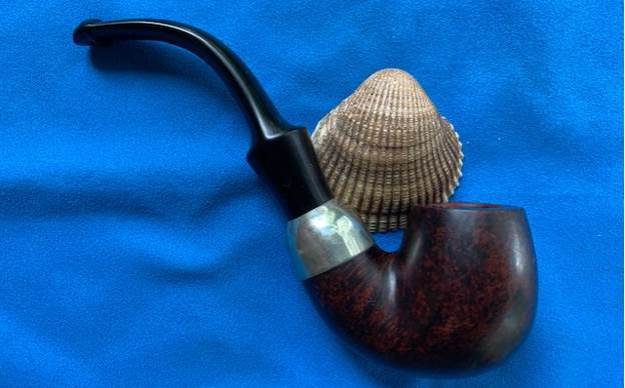
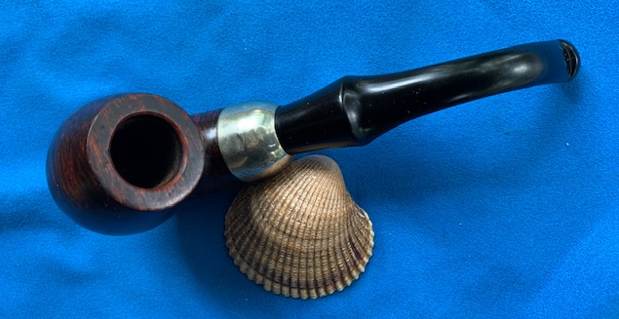
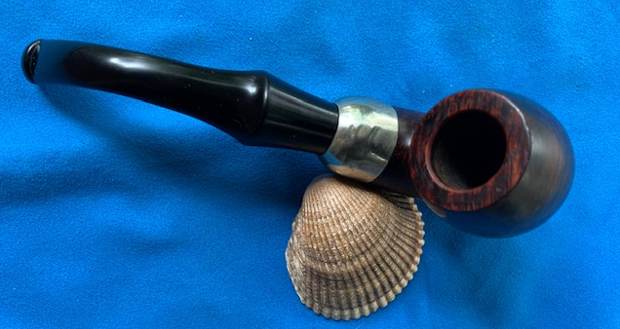
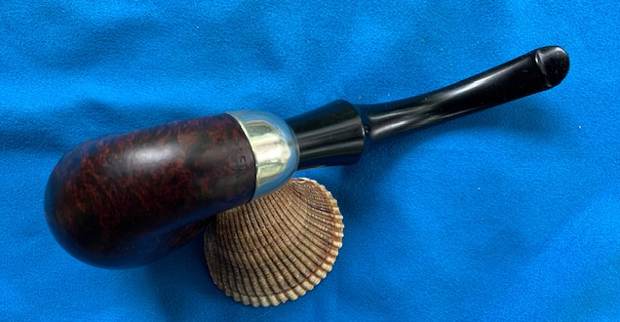
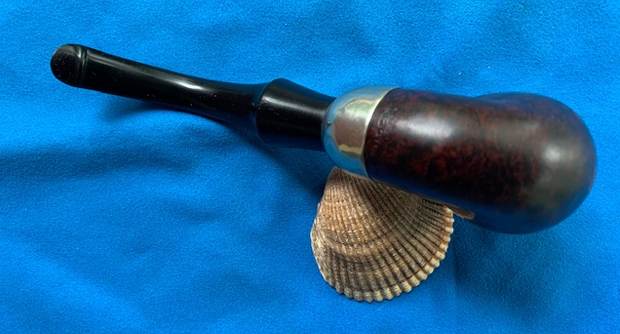
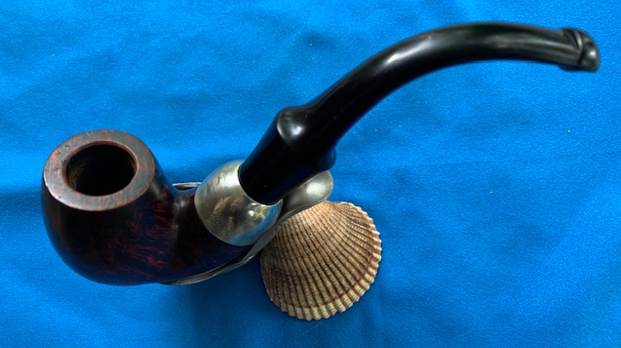
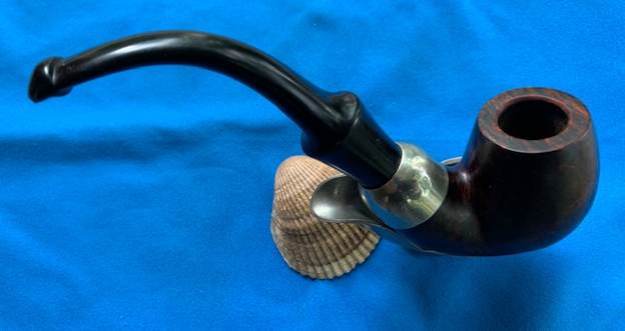
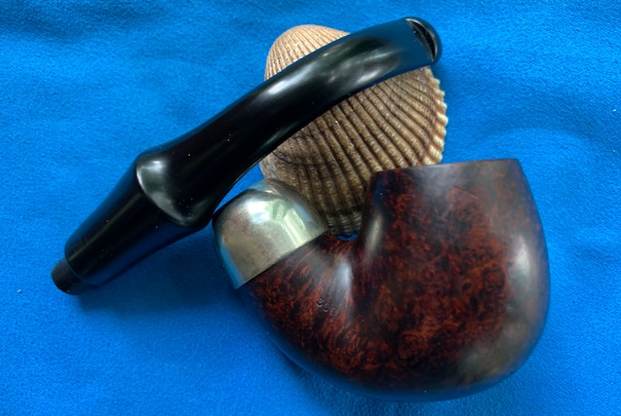
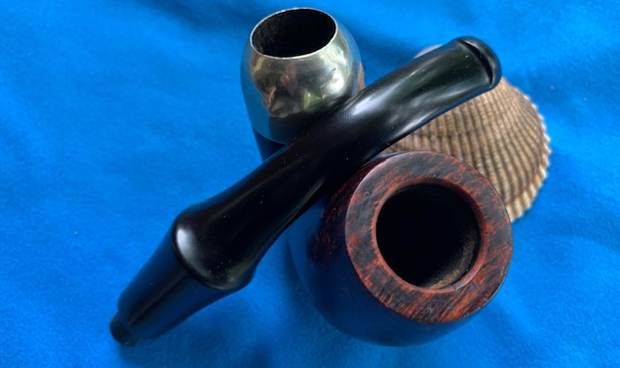
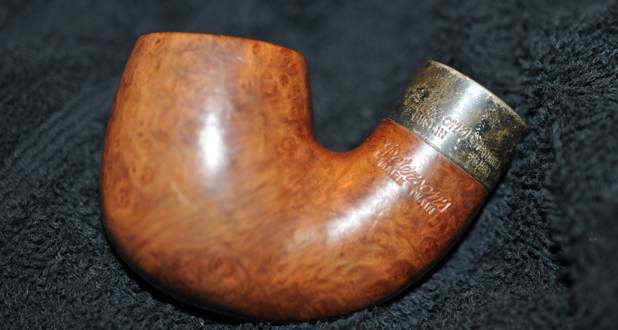
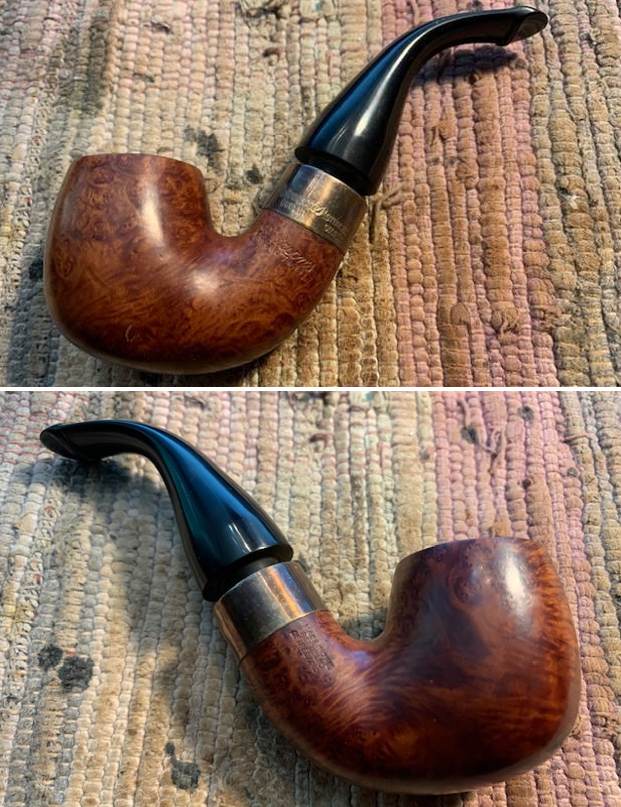
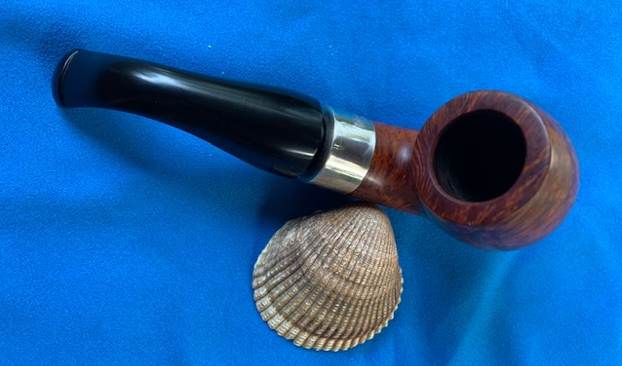
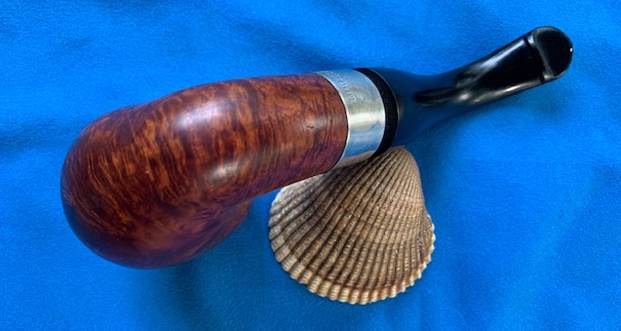
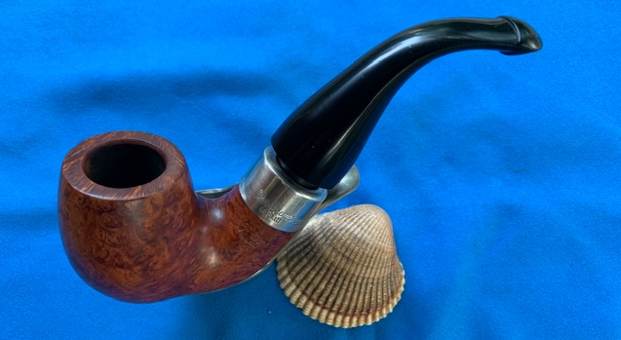
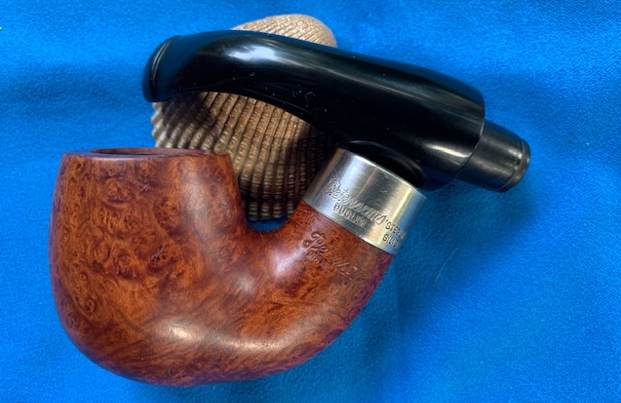
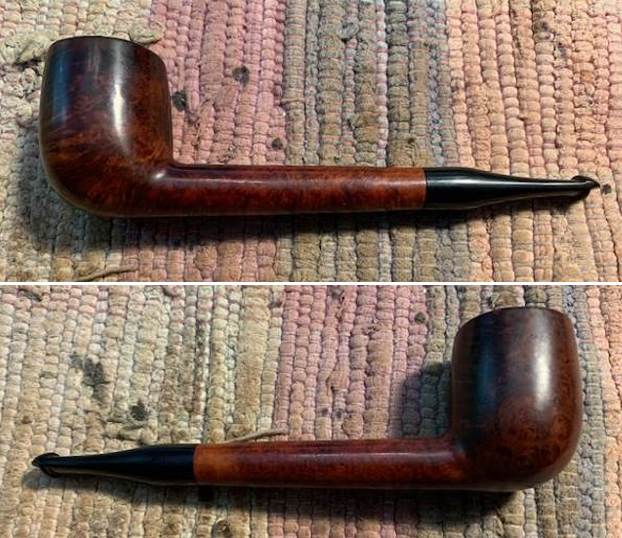
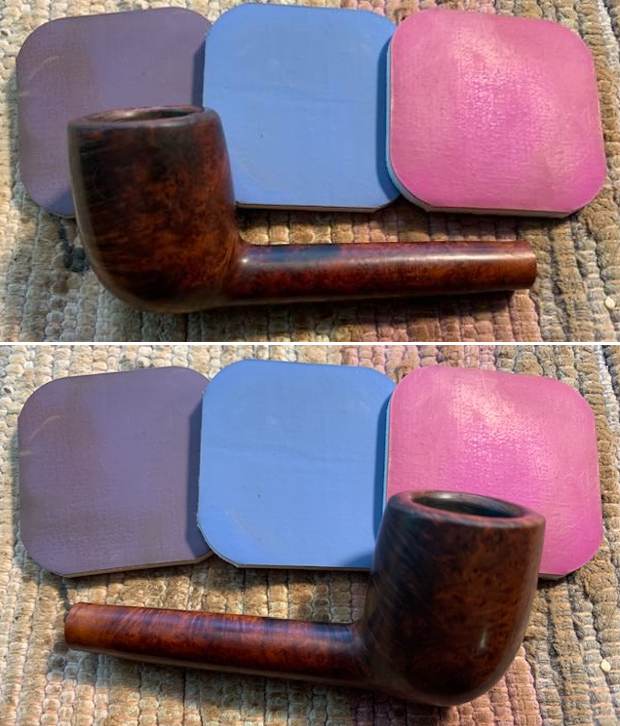
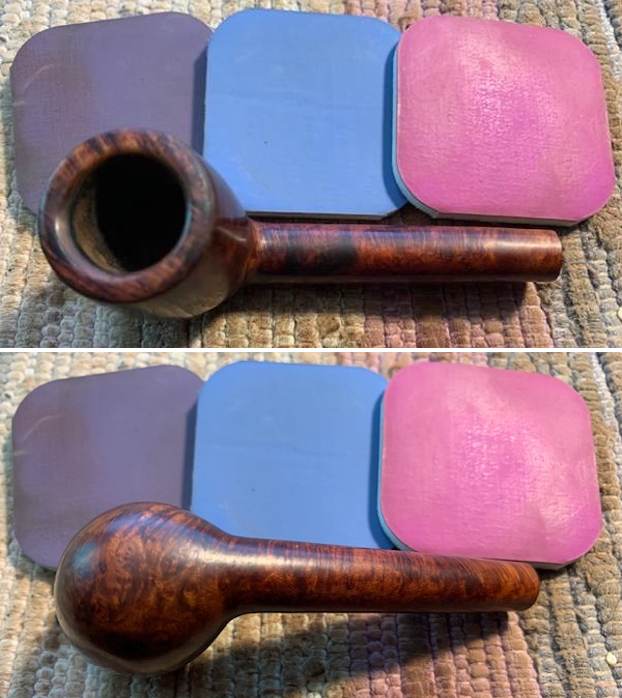
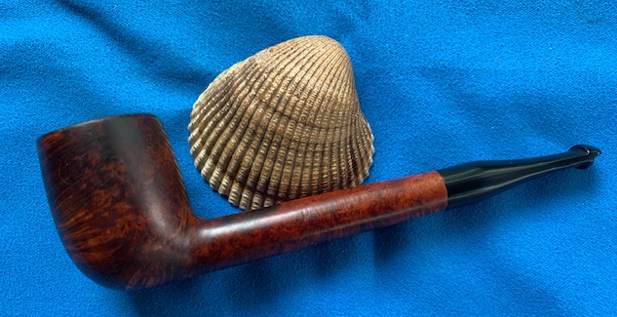
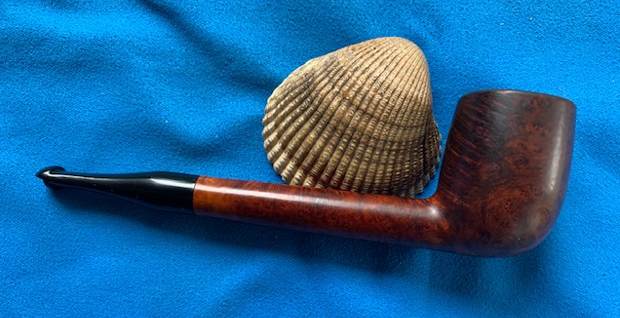
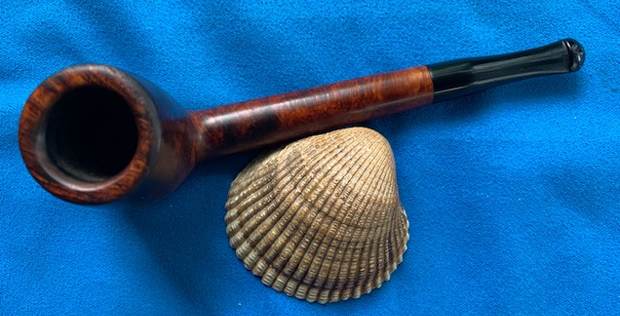
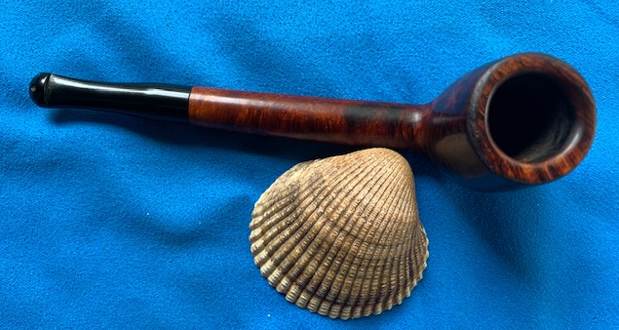
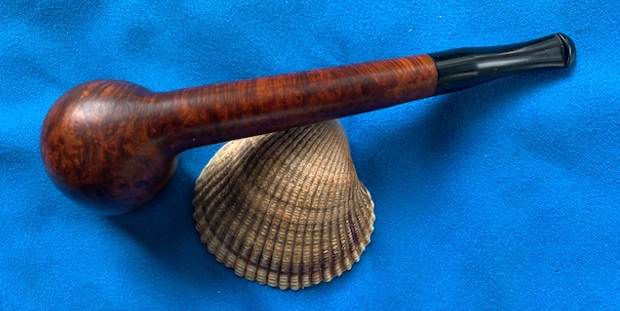
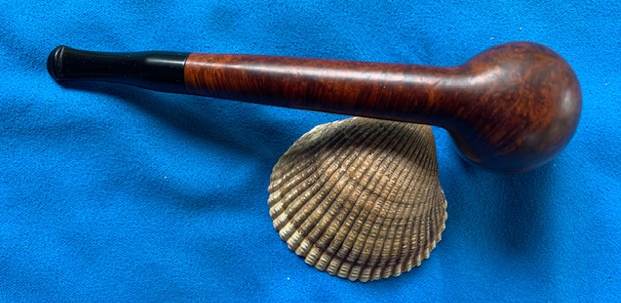
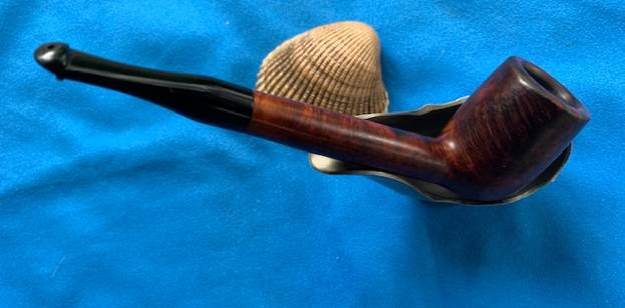
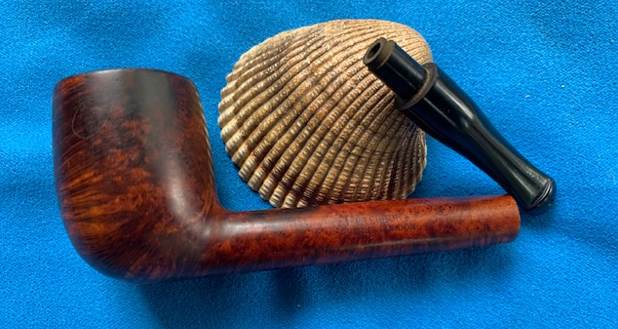
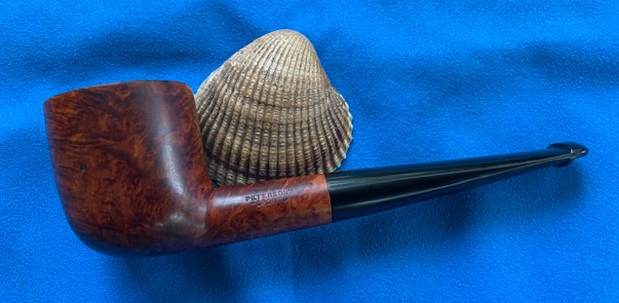
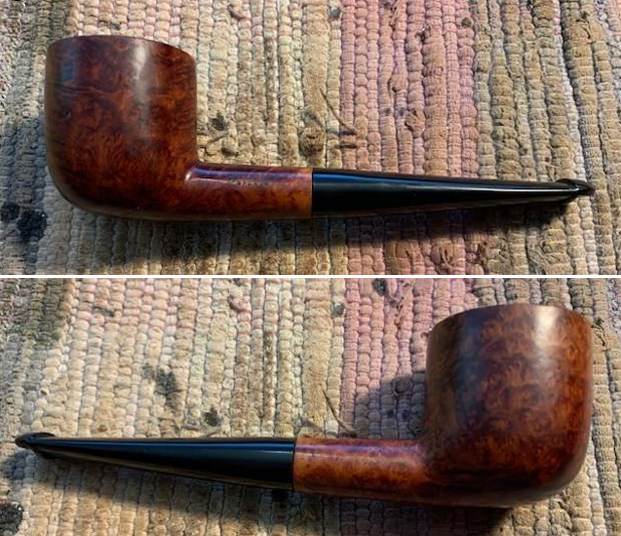
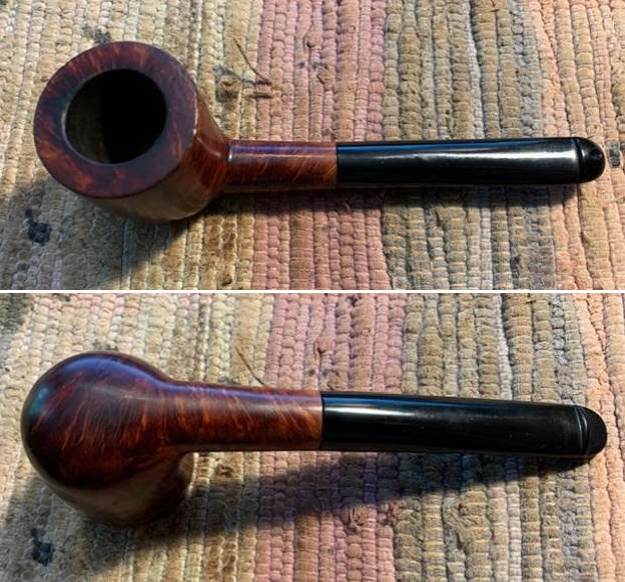
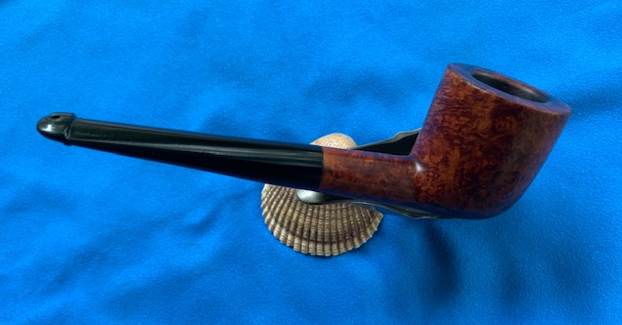
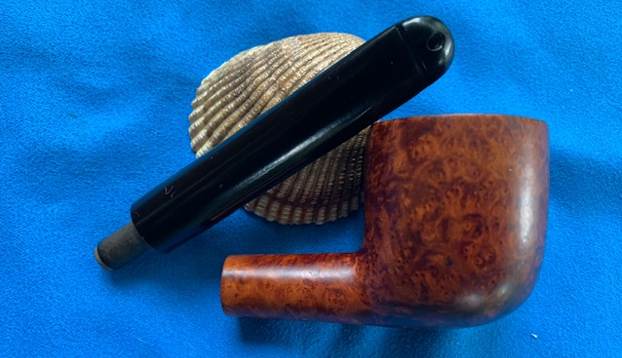
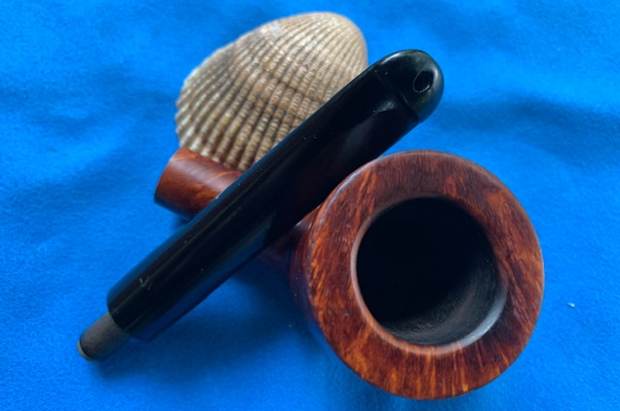
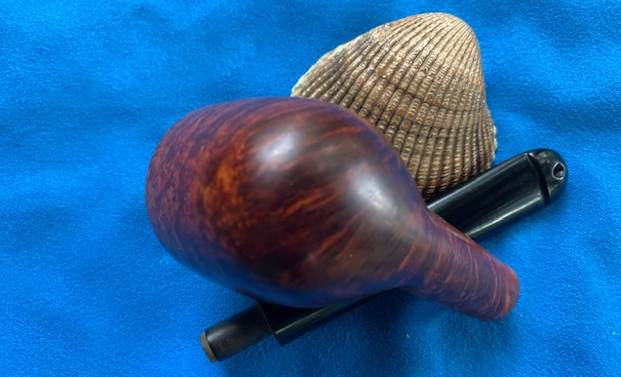
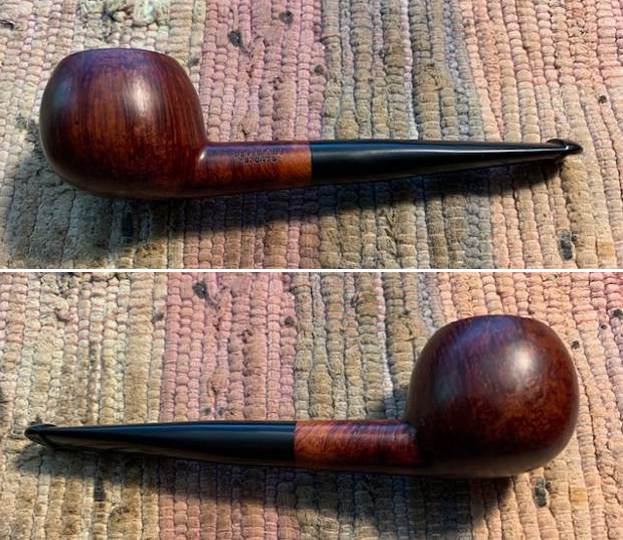
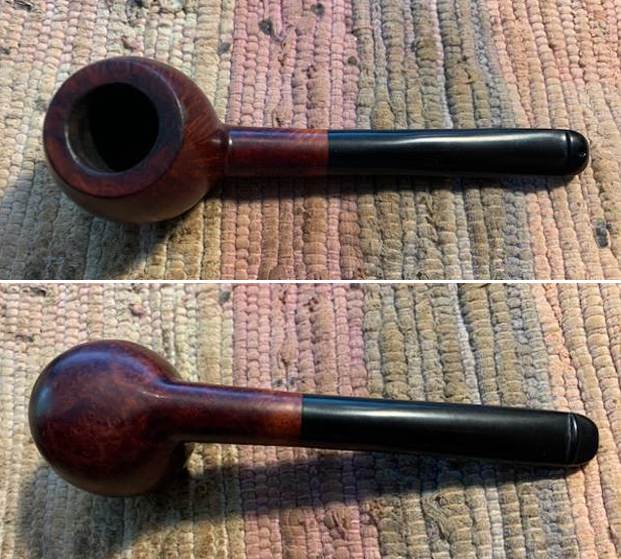
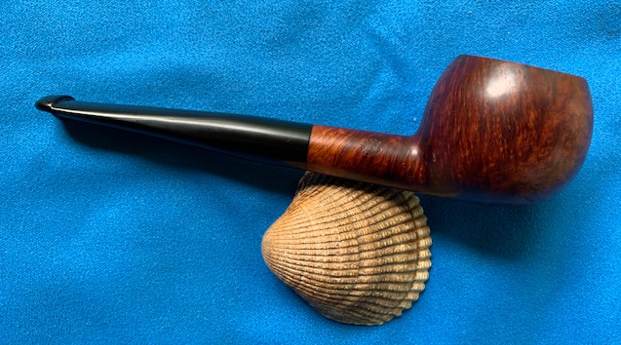
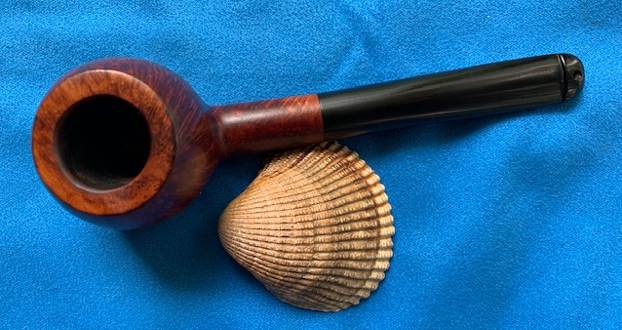
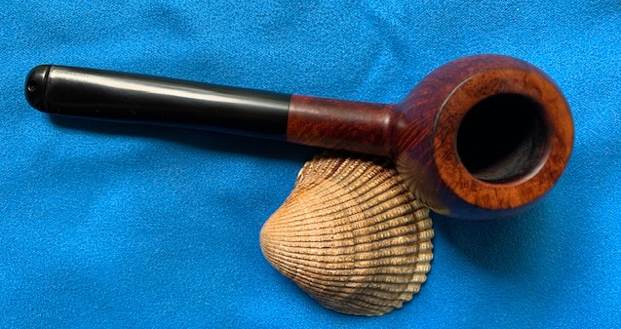
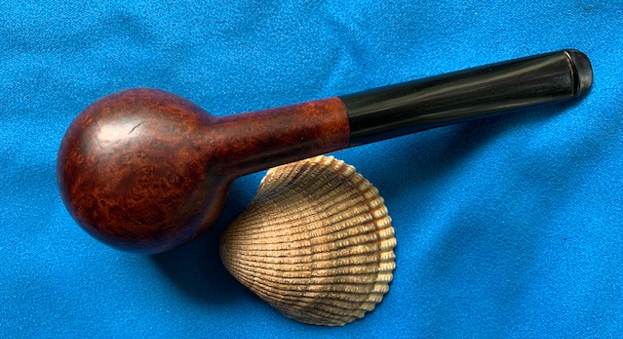
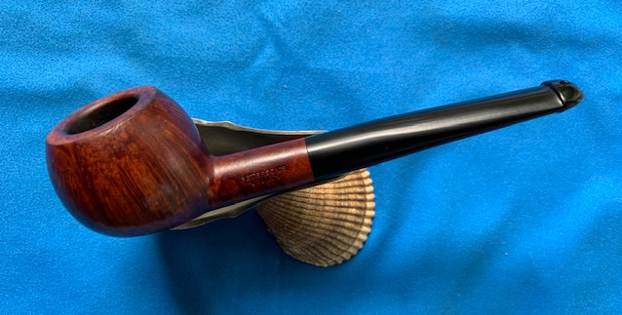
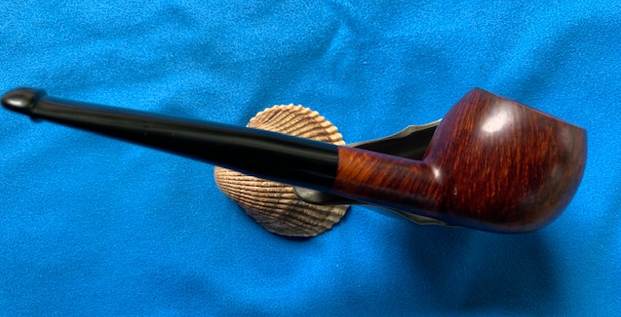
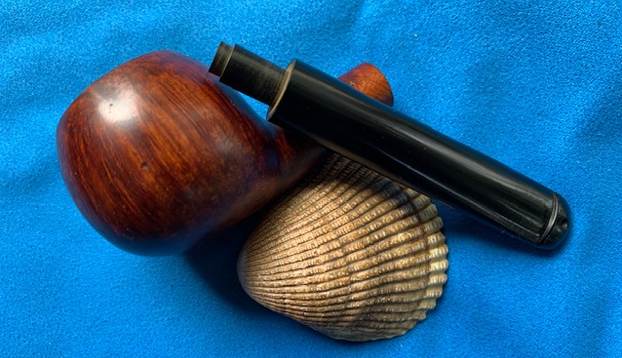
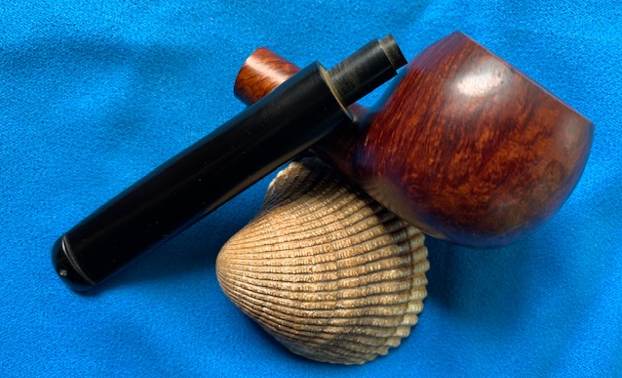
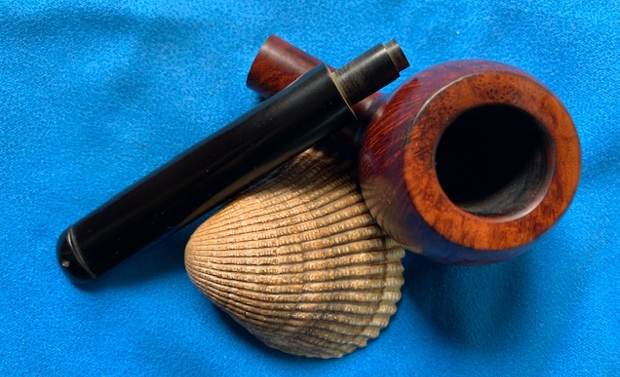
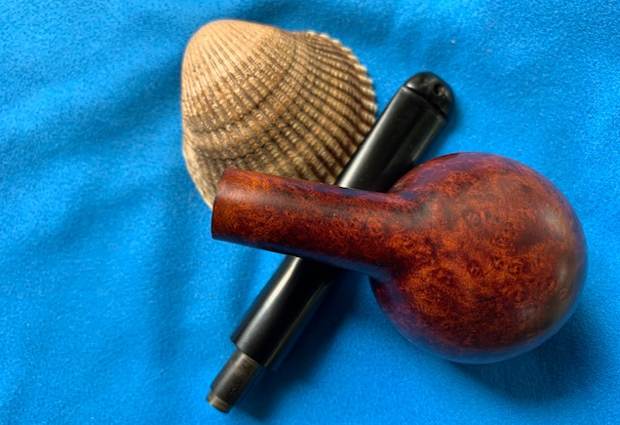
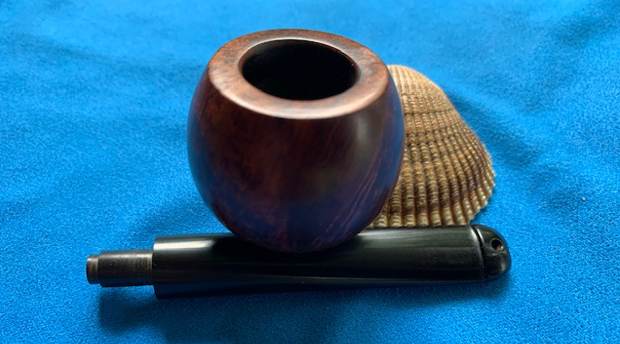
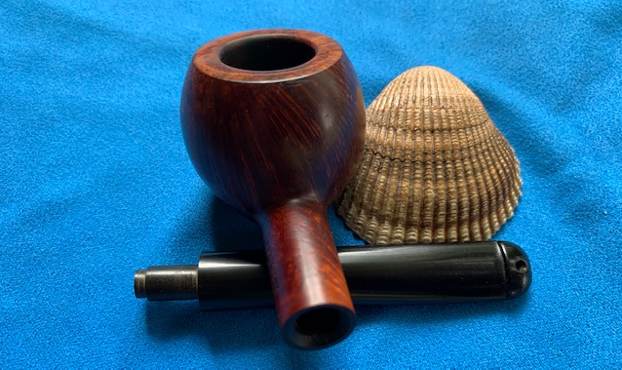
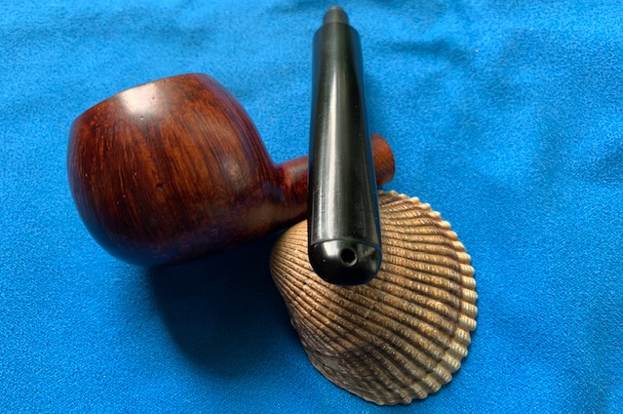
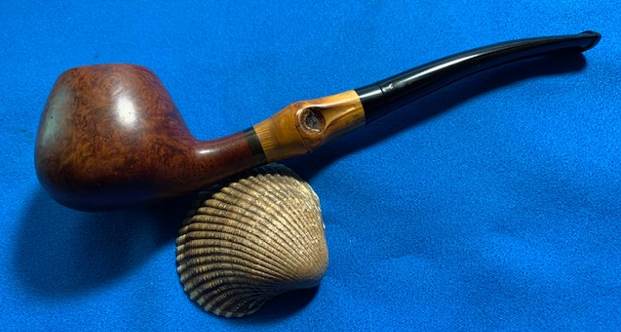
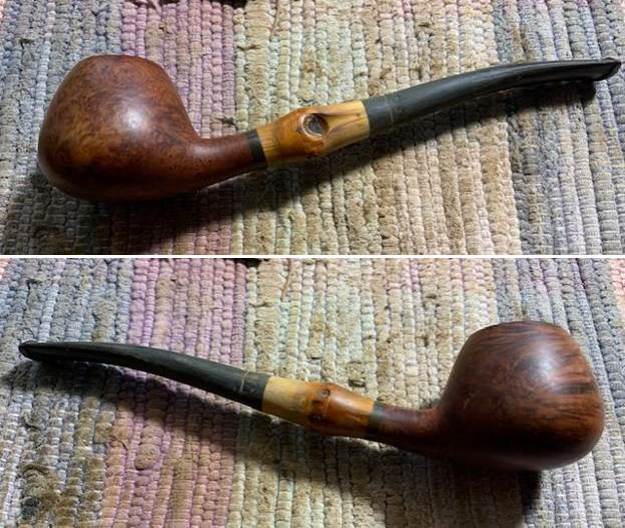
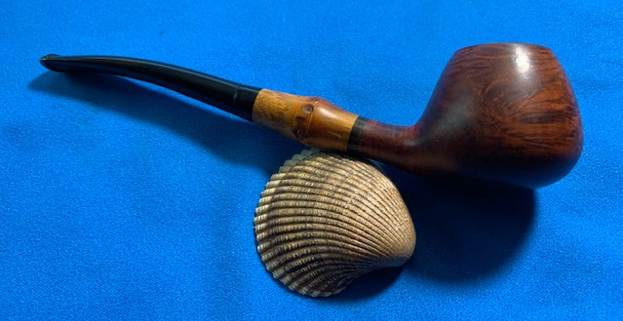
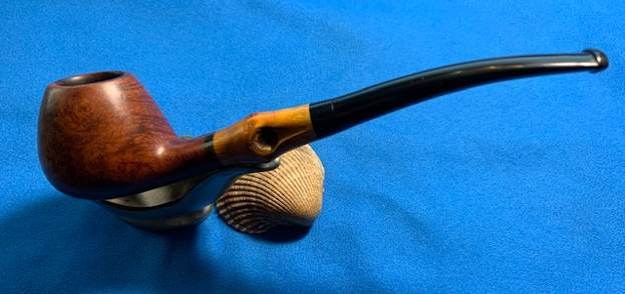
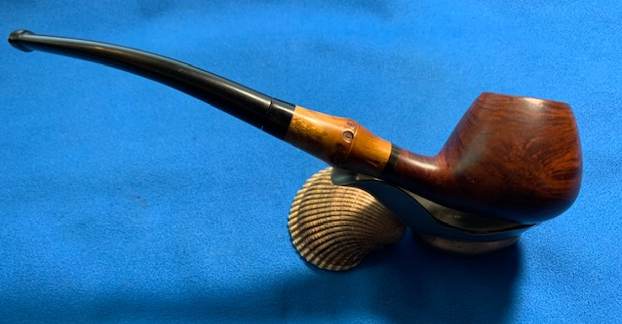
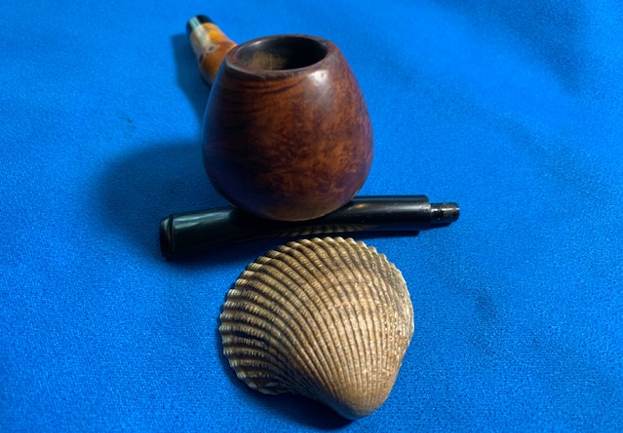
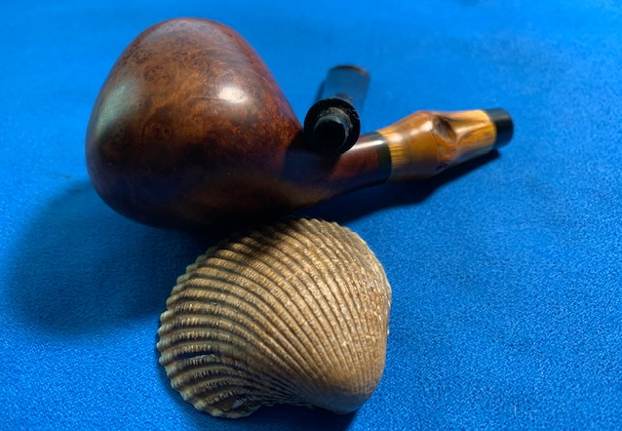
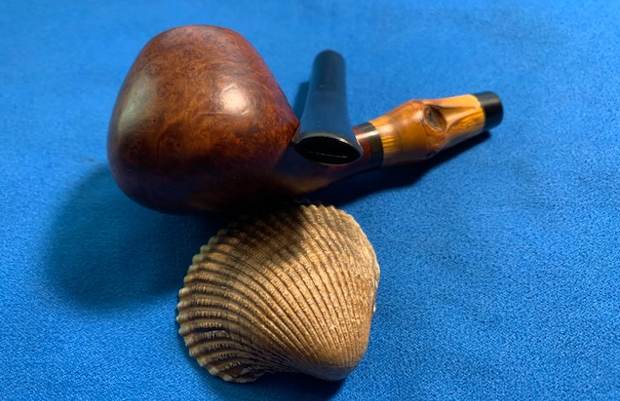
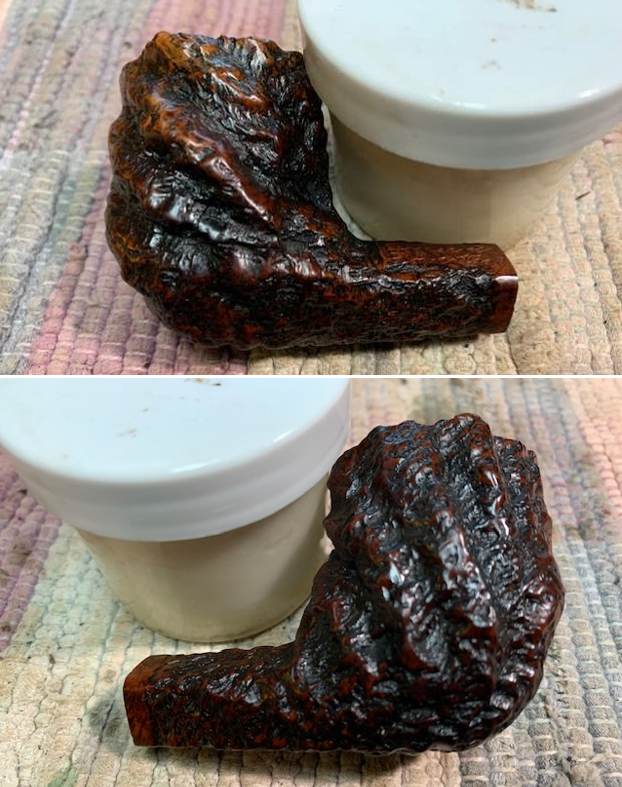
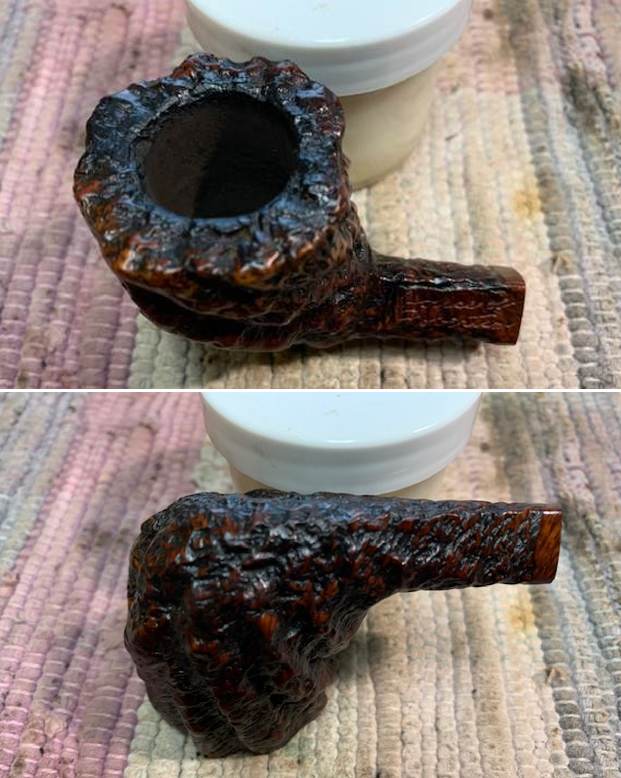
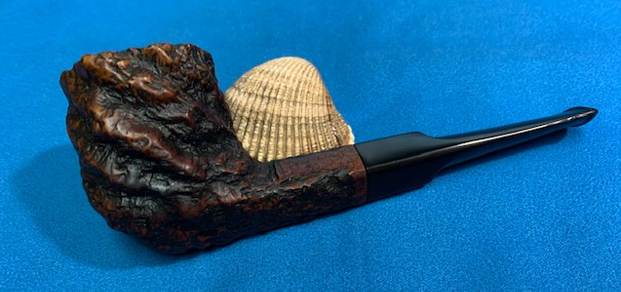
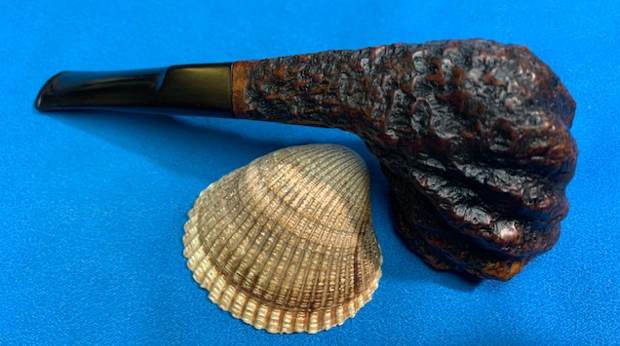
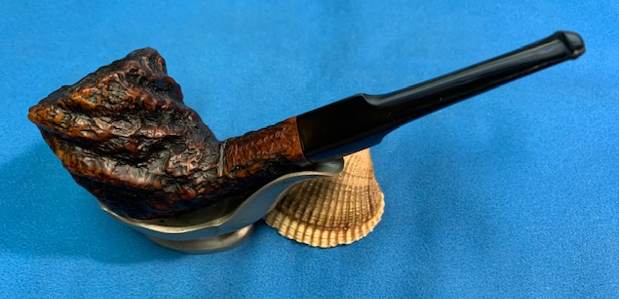
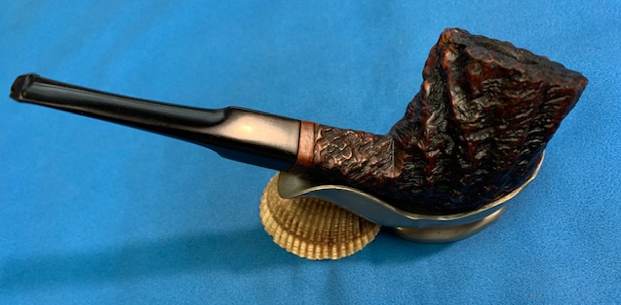
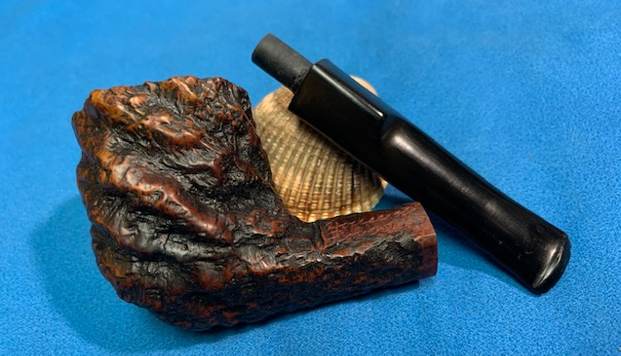
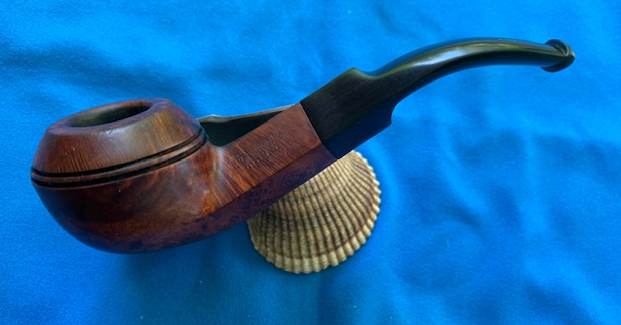
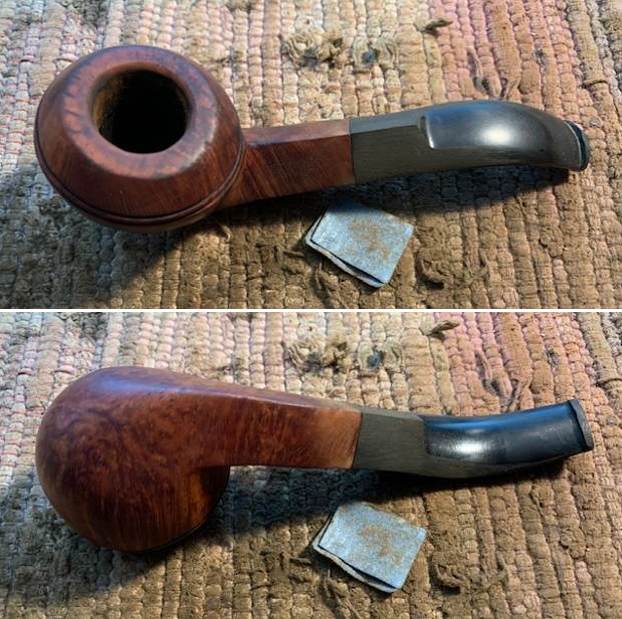
 I am excited to finish this beautifully grained, restemmed Peterson’s Kapet 595 Bent Rhodesian. I put the pipe back together and buffed it with Blue Diamond on the buffing wheel. I gave the bowl and the stem multiple coats of carnauba wax. I hand buffed the pipe with a clean buffing pad to raise the shine. It is fun to see what the polished bowl looks like with beautiful mixed grain all around it. The Bent Rhodesian looks great with the new replacement black vulcanite stem. This smooth Classic Peterson’s Kapet Bent Rhodesian is great looking and the pipe feels great in my hand. It is light and well balanced. Have a look at it with the photos below. The dimensions are Length: 5 inches, Height: 1 ½ inches, Outside diameter of the bowl: 1 ¼ inches, Chamber diameter: ¾ of an inch. The weight of the pipe is 40 grams/1.41 ounces. It turned out to be a beautiful pipe. I will be putting on the rebornpipes store in the Irish Pipe Makers Section. Thanks for your time and as Paresh says each time – Stay Safe.