Blog by Steve Laug
I decided to change things up a bit and work on a few more of Jennifer’s Dad’s pipes. I just posted the finished Sasieni Four Dot Walnut “Appleby” M apple on the blog. For the next pipe from the estate of George Rex Leghorn I have chosen a nicely shaped Champ of Denmark Freehand. You may not have read about this estate before, so I will retell the story. I received an email from Jennifer who is a little older than my 64+ years about whether I would be interested in her Dad’s pipes. My brother Jeff and I have been picking up a few estates here and there, so I was interested. Here is the catch – she did not want to sell them to me but to give them to me to clean up, restore and resell. The only requirement she had was that we give a portion of the sales of the pipes to a charity serving women and children. We talked about the organization I work for that deals with trafficking and sexual exploitation of women and their children and she decided that would be a great way to carry on the charitable aspect of her Dad’s character. With some great conversation back and forth she sent the pipes to Jeff and he started the cleanup process on them. Once he had finished cleaning them all he sent them to me to do my work on them.
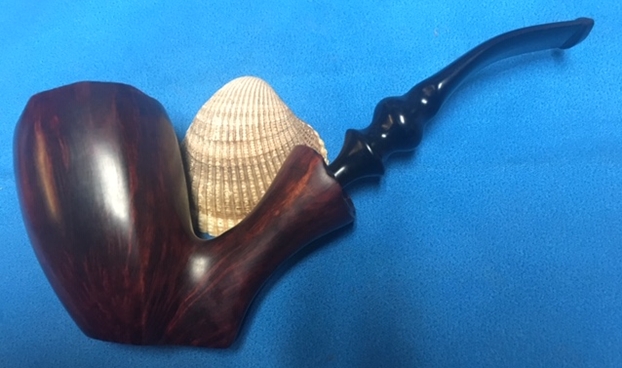
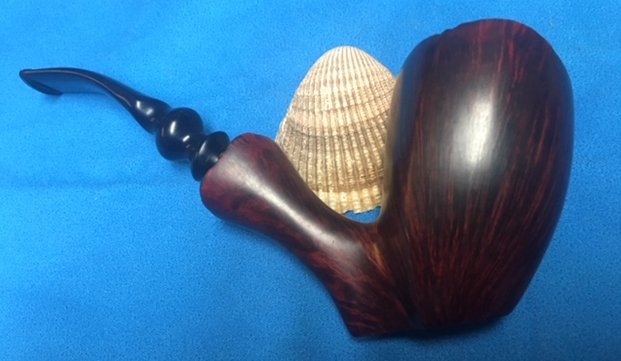
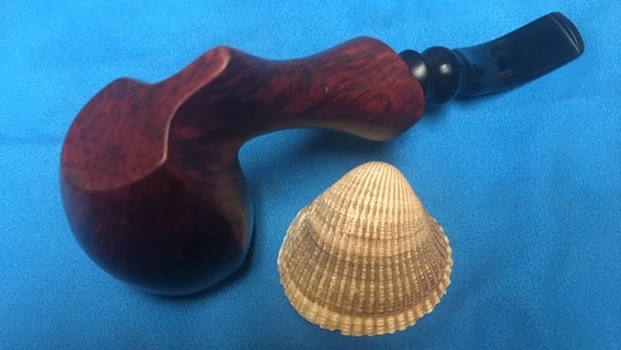
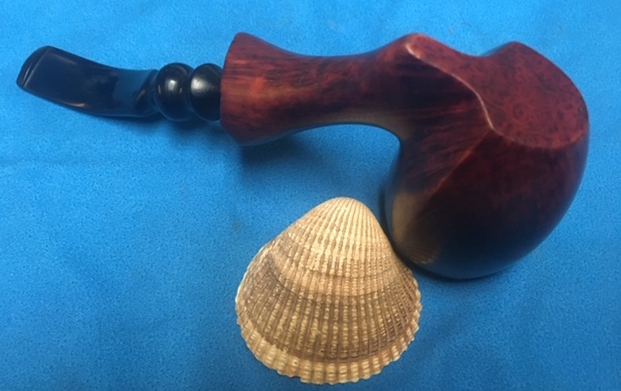
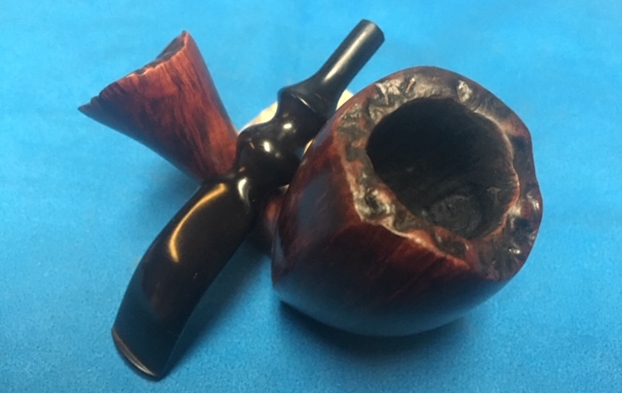
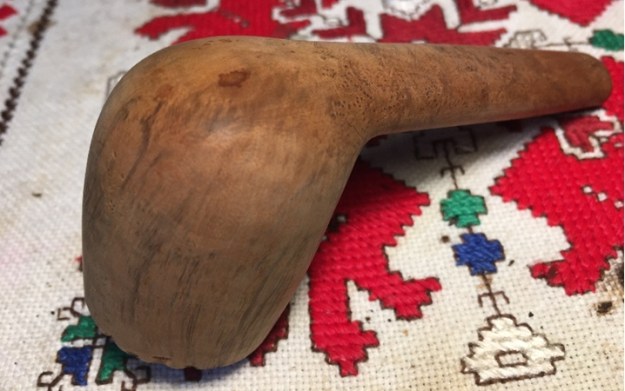
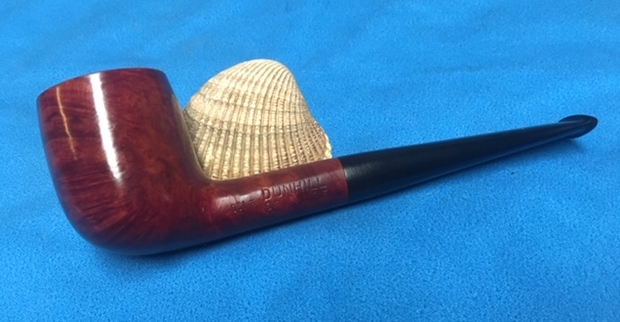
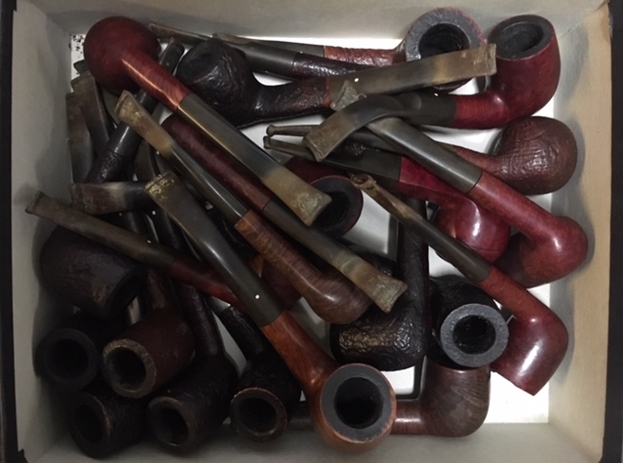
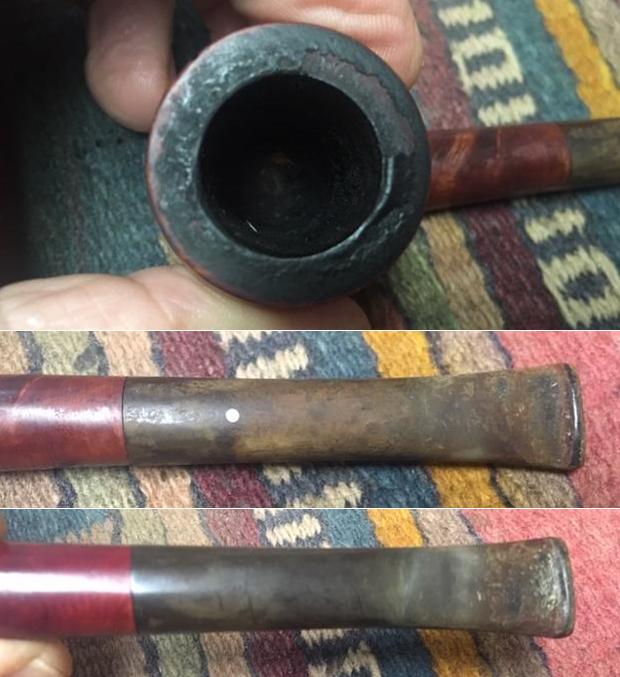
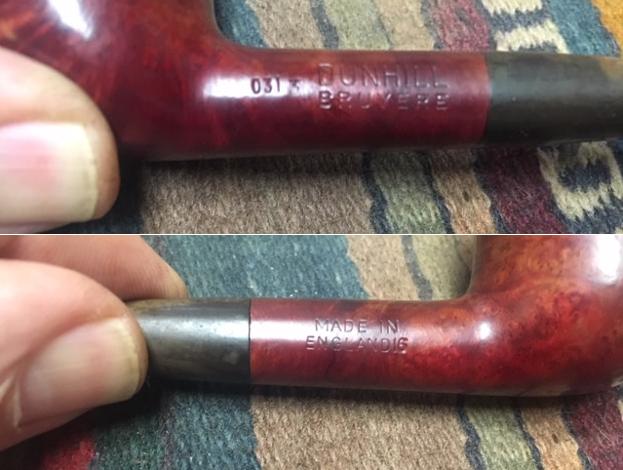
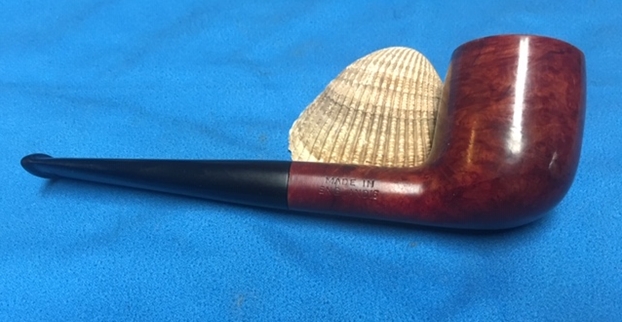
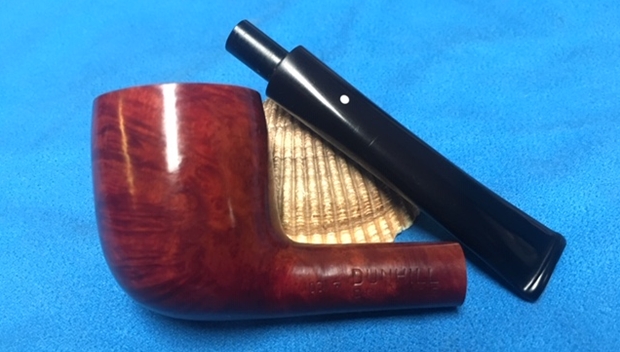
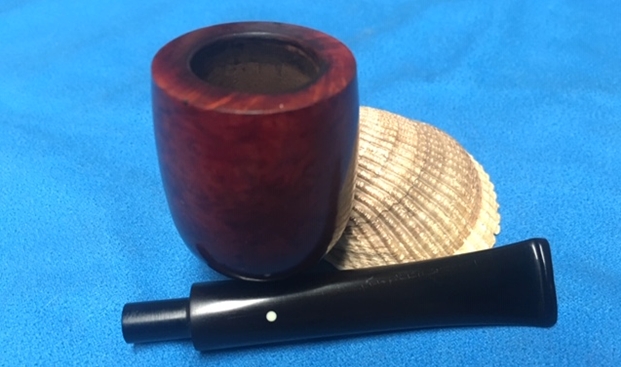
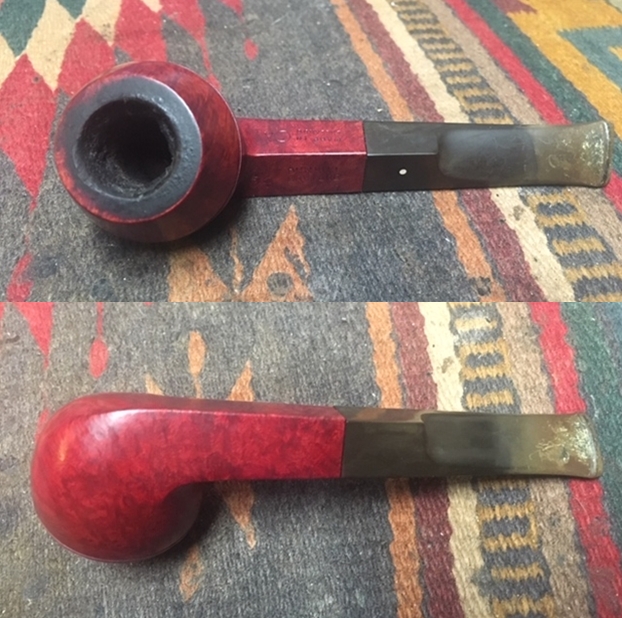
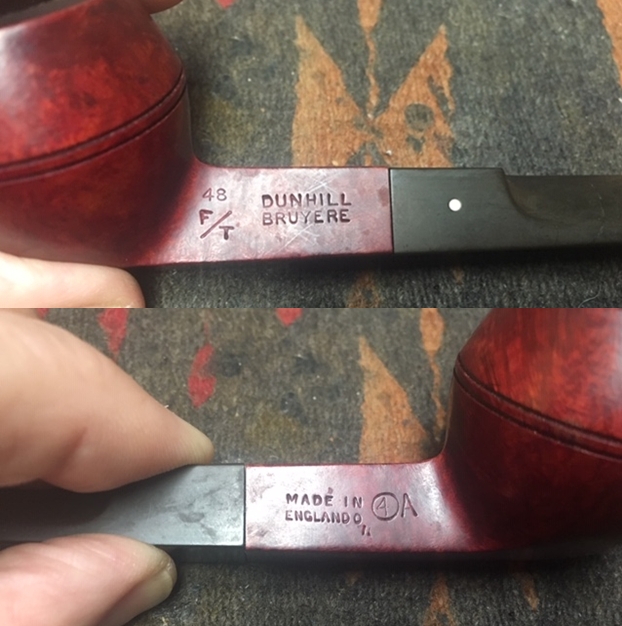
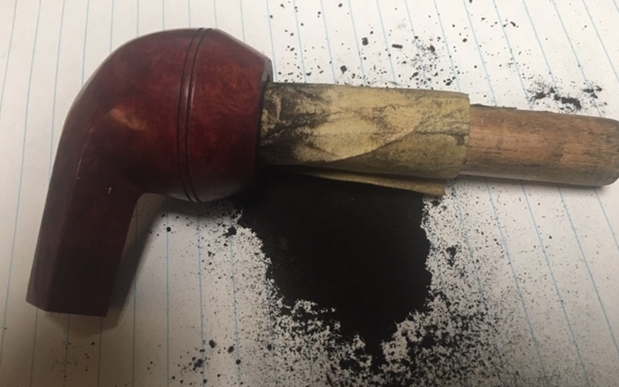
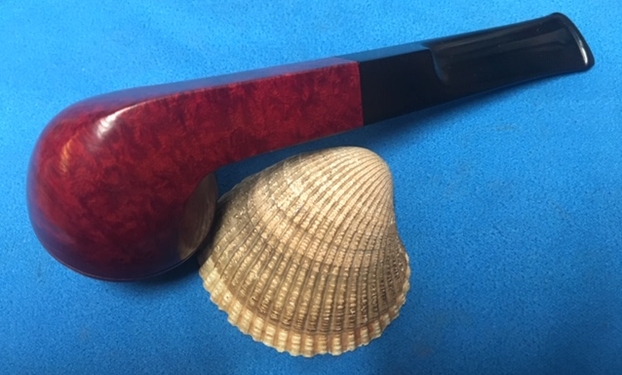
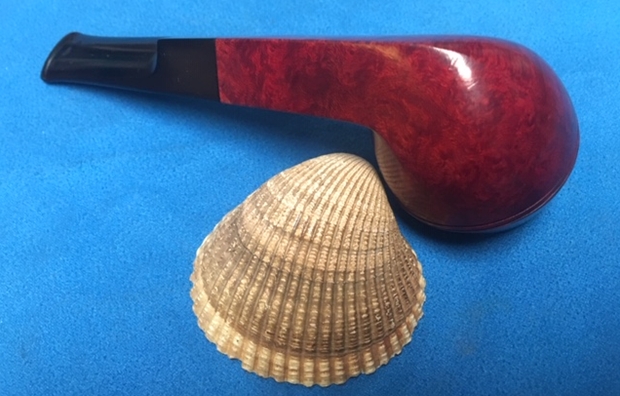
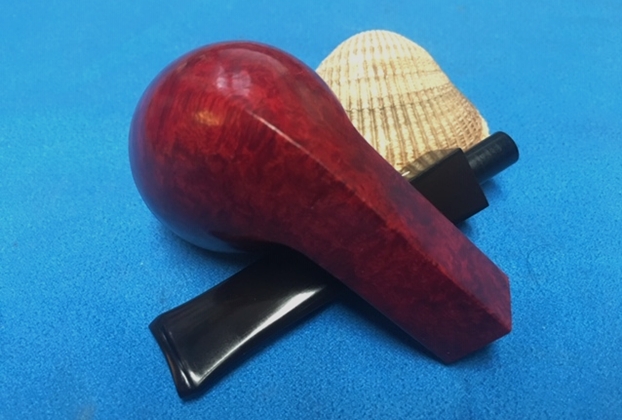
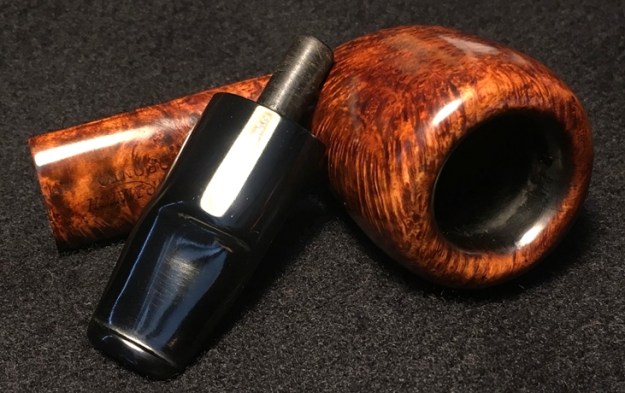
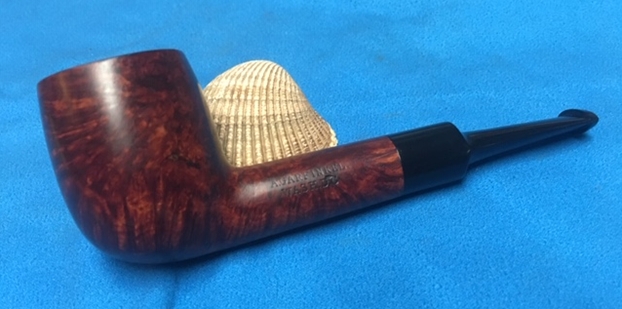
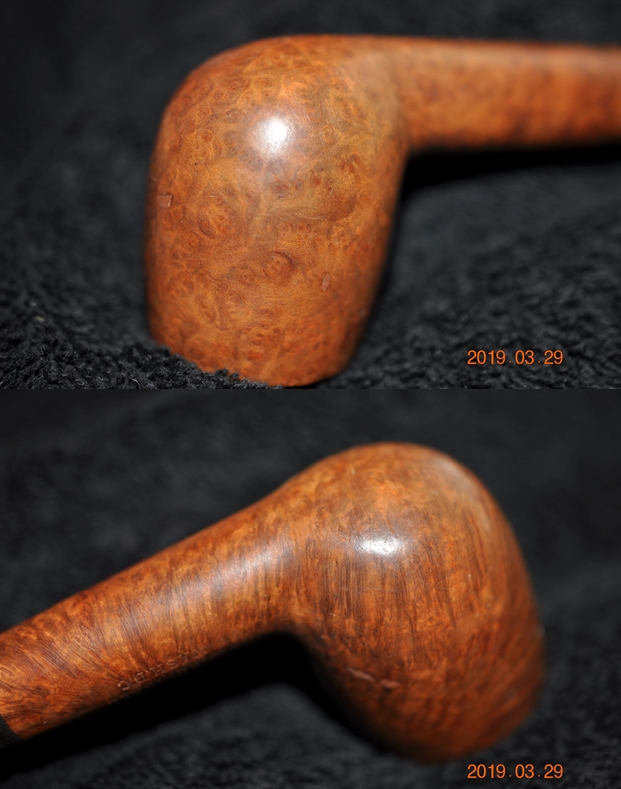
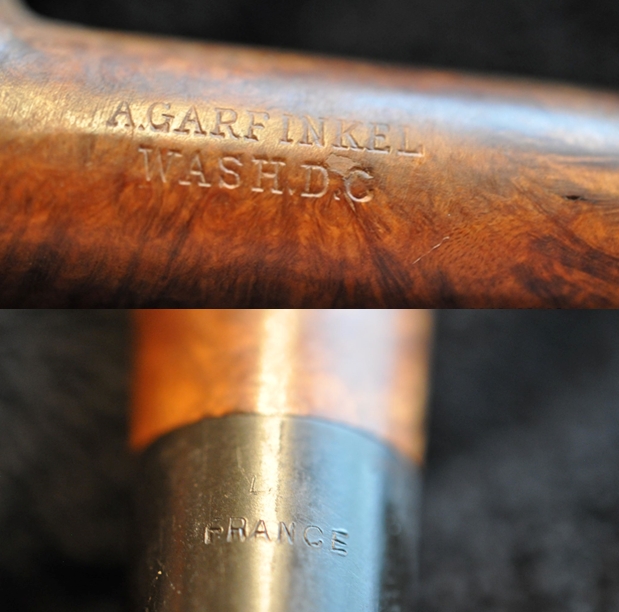
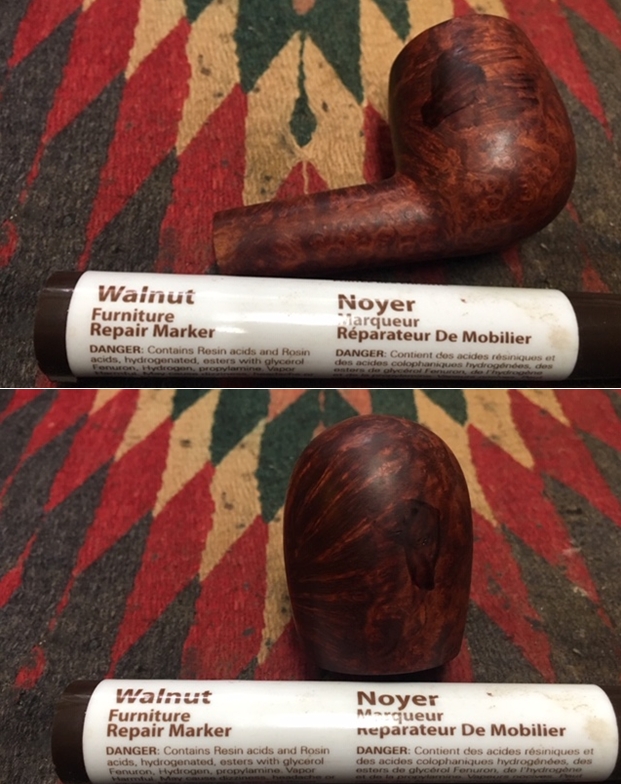
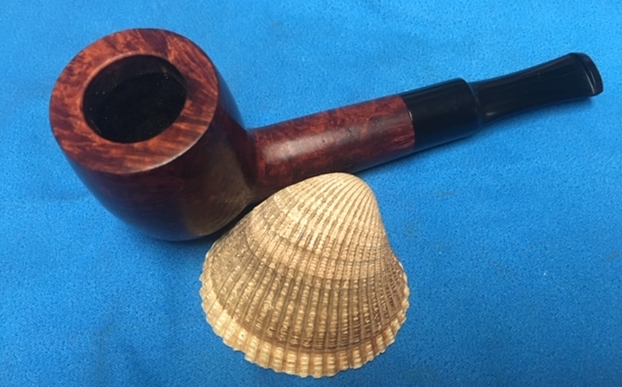
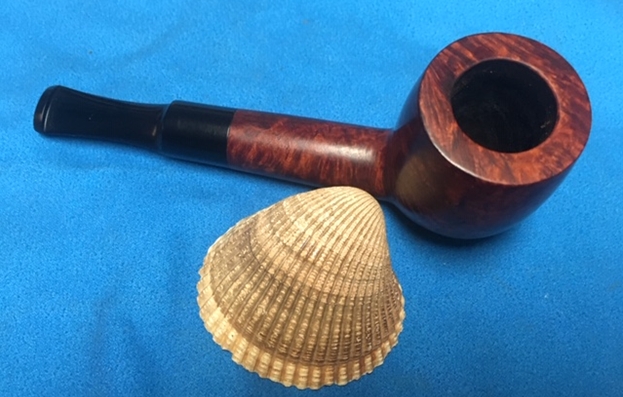
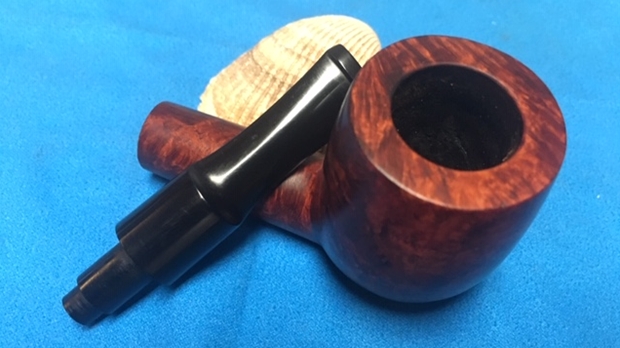
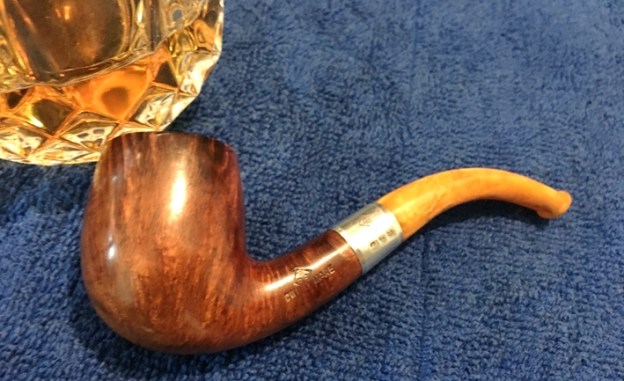
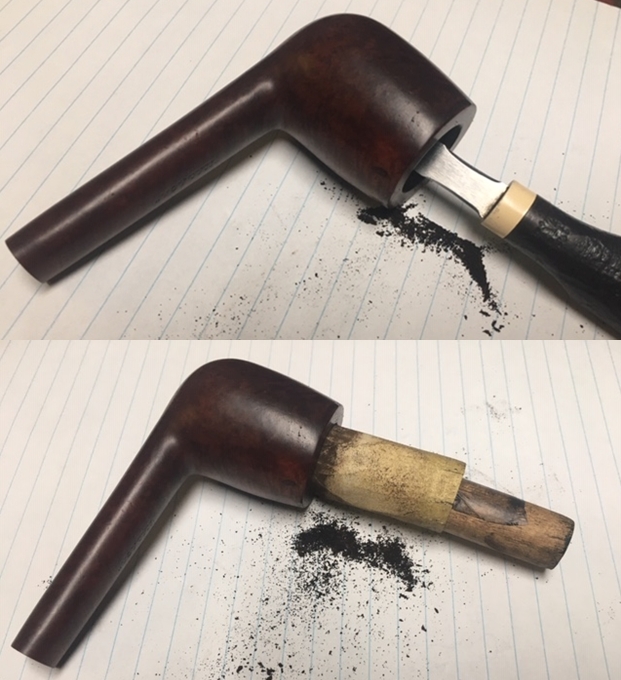
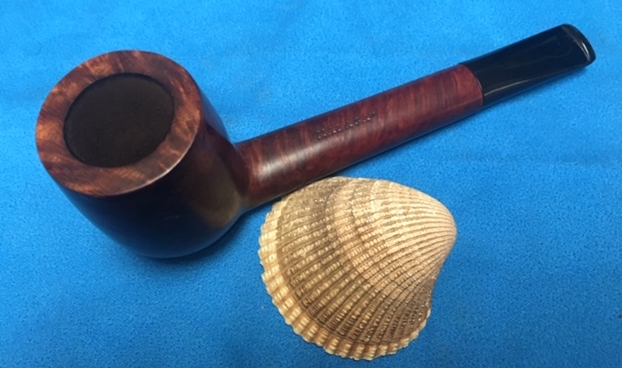
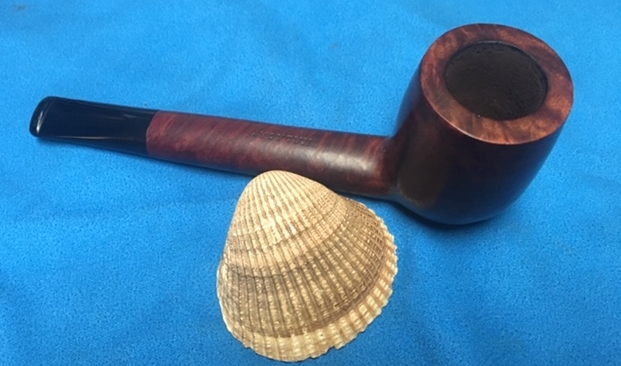
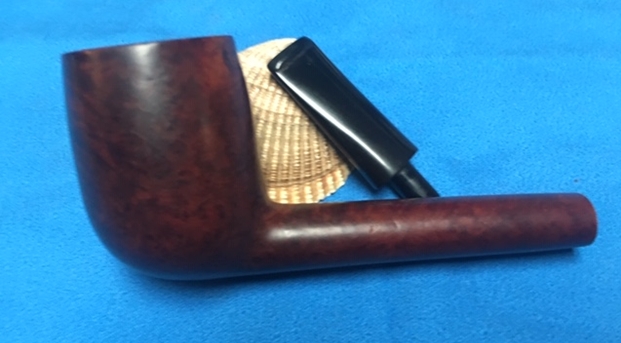
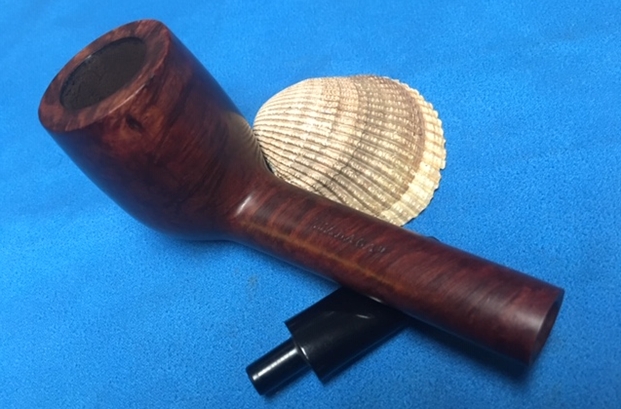
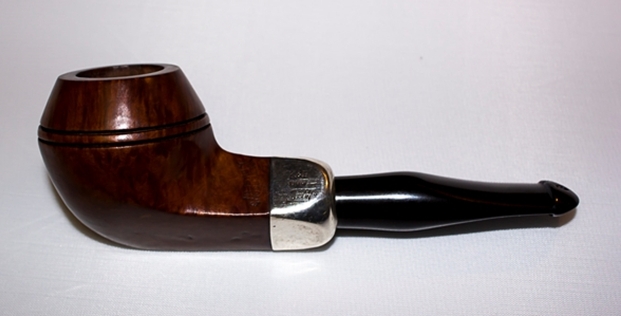
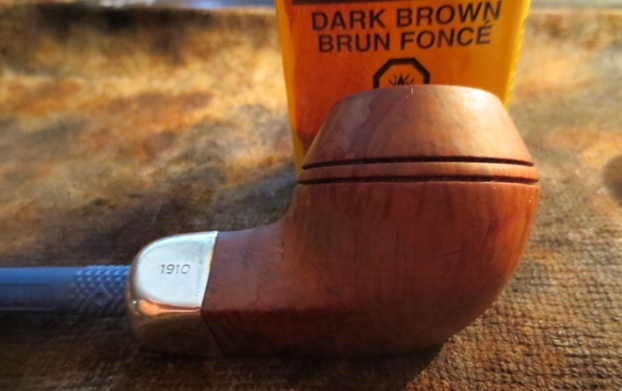
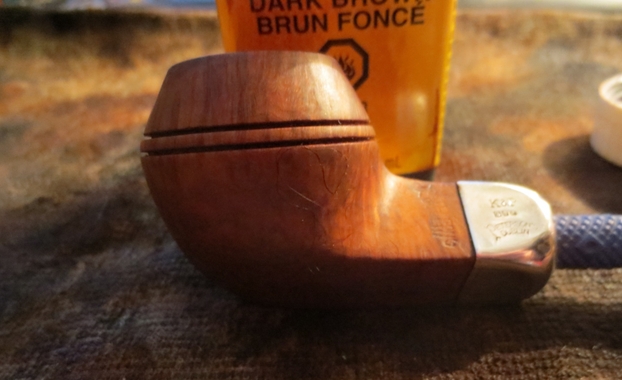
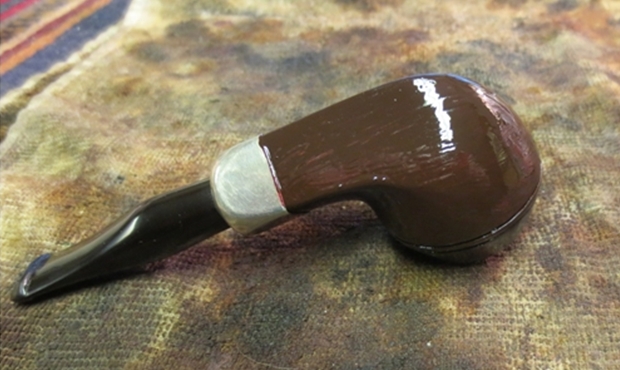
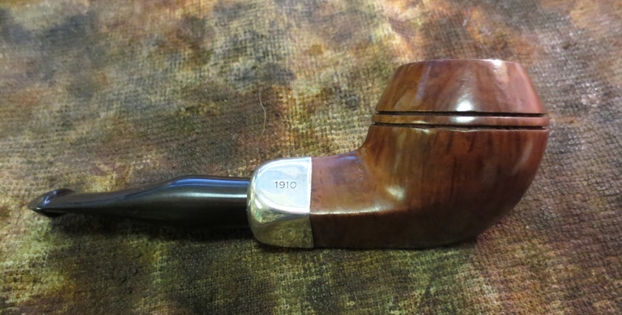
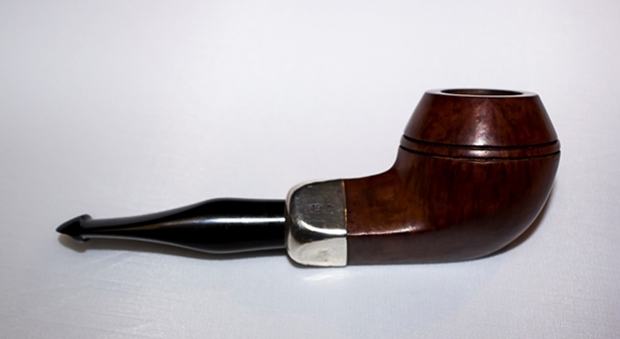
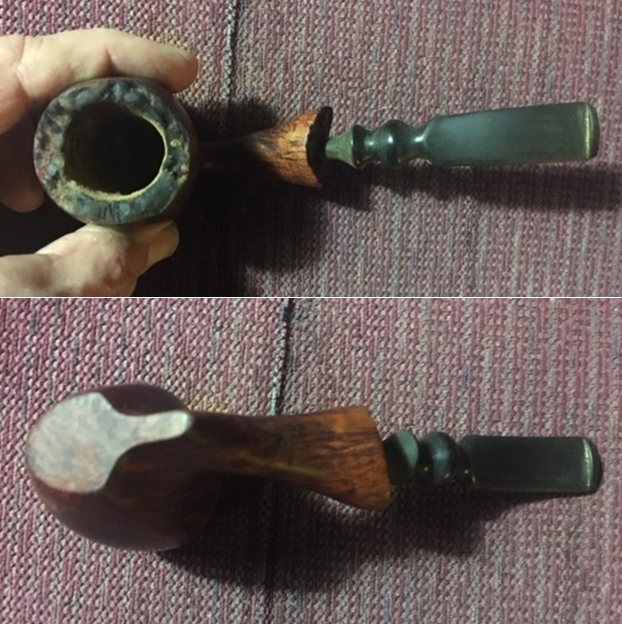
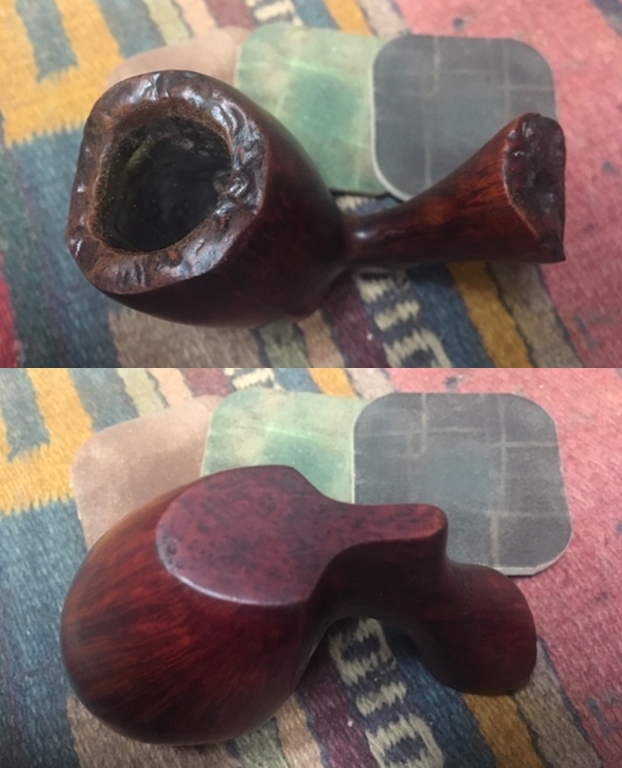
The Champ of Denmark pipe is stamped on the underside of the shank CHAMP over of Denmark and below that is the number 4. It came to us with a broken stem and the tenon stuck in the shank. The beautiful straight and flame grain around the bowl and up the shank is visible through the very thick coat of grime. It seemed like it had a dark stain but hard to tell. There were oil stains from George’s hands on both sides of the bowl obscuring the grain. It was so dirty that it was hard to see the colour well. There was a thick cake in the bowl and it had overflowed with lava into the plateau on the bowl top and shank end. It was a dirty and tired looking old pipe. The stem was badly oxidized with deep gouges and tooth marks both sides from the button up about 1 inch onto the stem surface. The button was cracked on the topside and tooth marks made it an unlikely candidate for a repair. It had been sitting in boxes for a lot of years and it was time to move ahead with the restoration. Jennifer took photos of the pipes she was sending. I have included two she included from this pipe.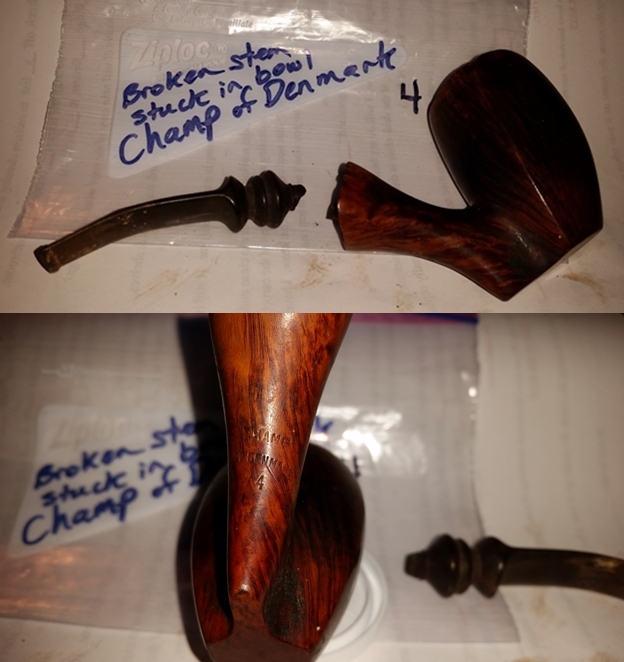 When the box arrived from Jennifer, Jeff opened it and took photos of each pipe before he started his cleanup work on them. There were two Champ of Denmark Freehands in the box – both were in bags and both had broken tenons and stems. There is something about classic Danish Freehands that is intriguing and I like working on them. The shapes seem to really capture the flow of the grain on the briar and this is no exception. The briar appeared to be in good condition underneath the grime. The finish looked intact under the grime. The bowl had a thick cake that had hardened with time. The lava overflow on the rim but it could very well have protected the rim from damage. We won’t know what is under it until Jeff had cleaned it off. The stem was irreparably damaged and would need to be replaced. The broken tenon was only one of the problems that led me to the decision that this stem would need to be replaced. (Jeff quickly pulled the broken tenon before he even cleaned the pipe.)
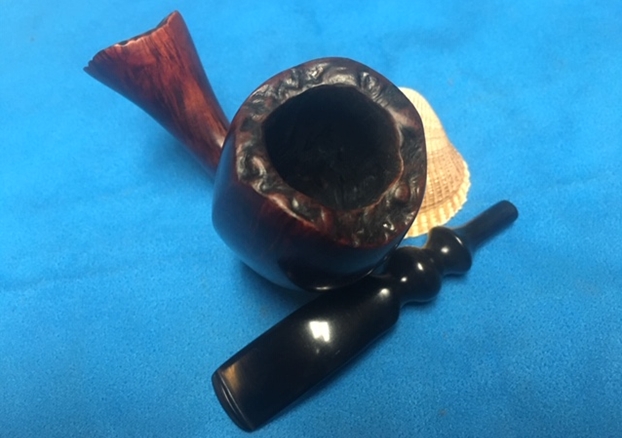
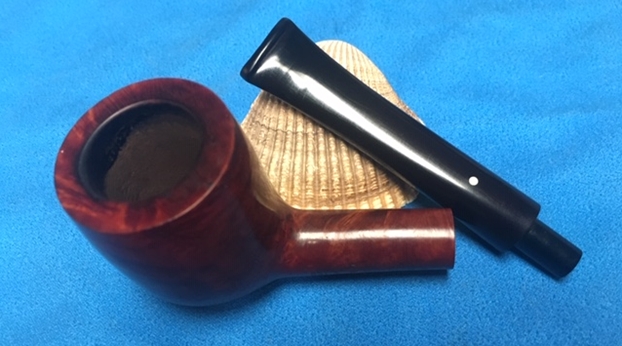
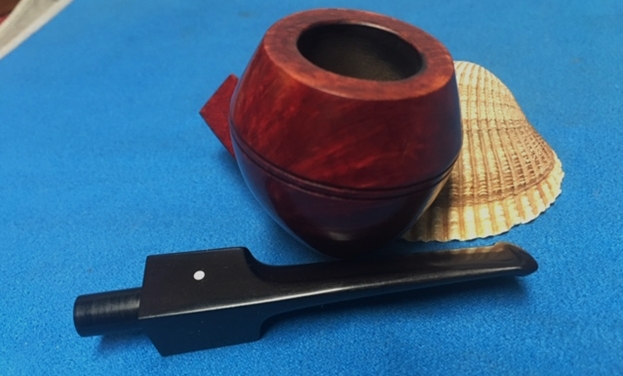
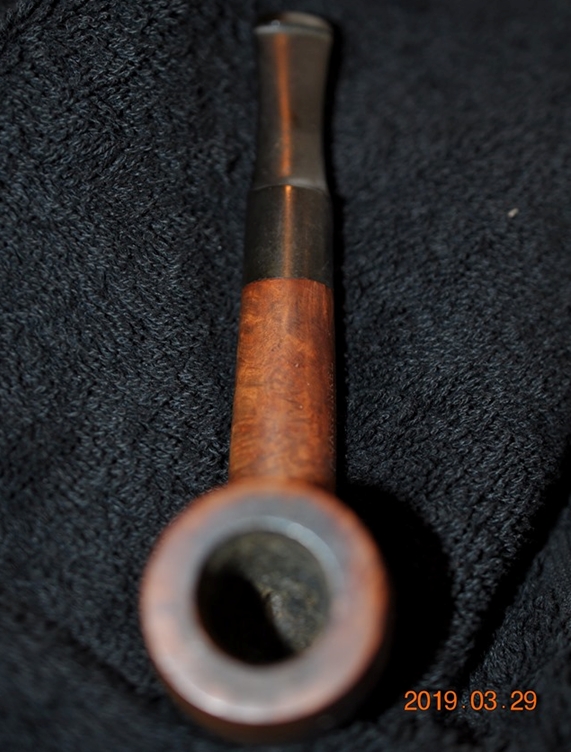
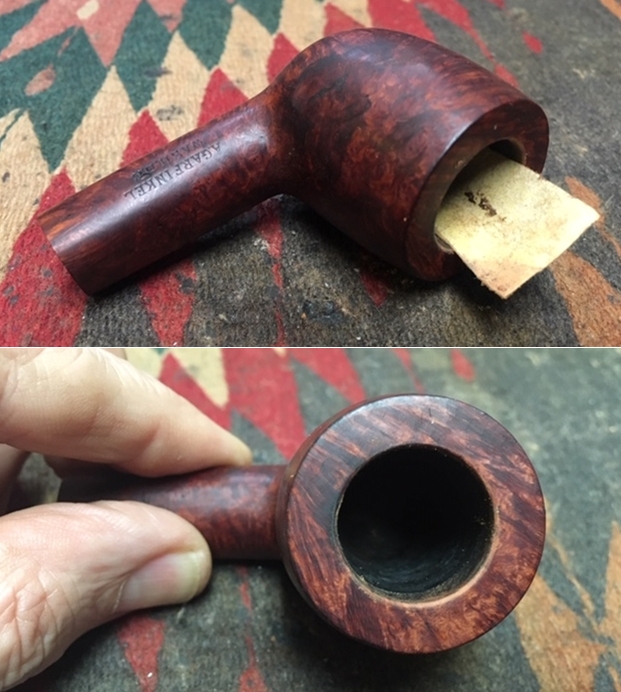
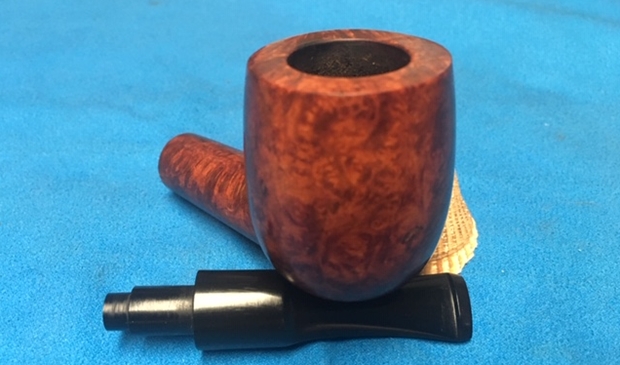
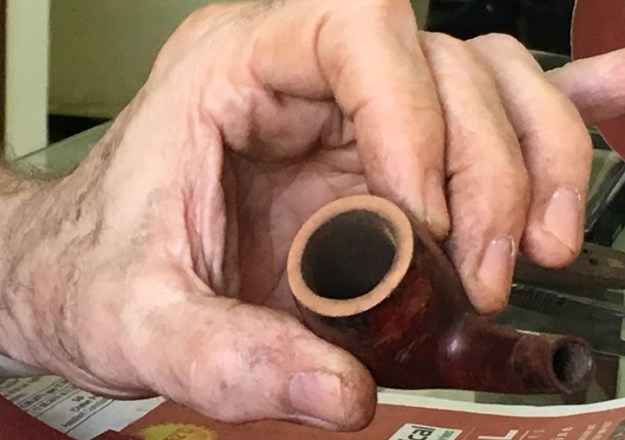
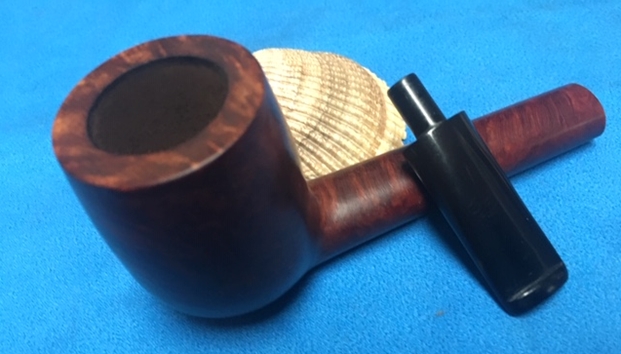
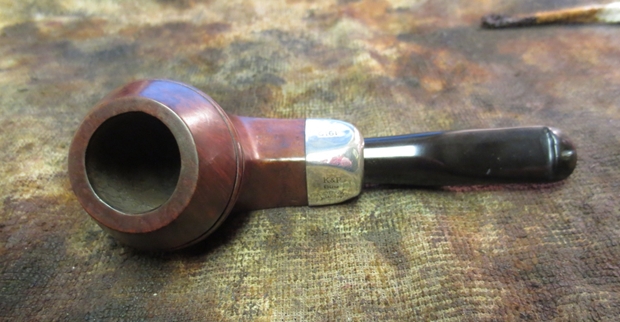
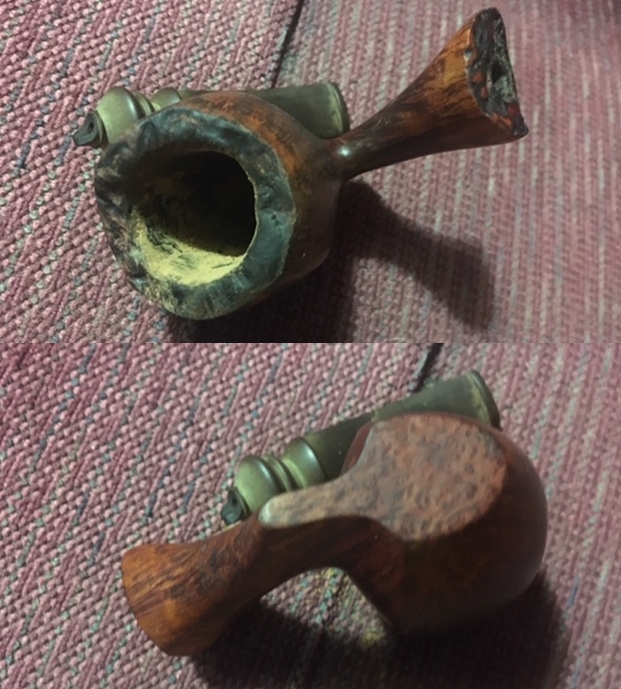
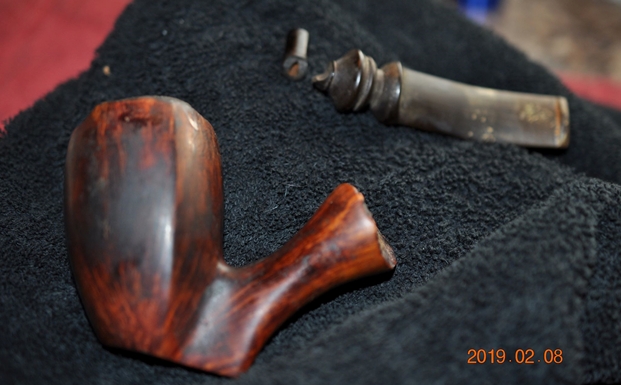 Jeff took photos of the bowl and rim top to show the cake in the bowl and the lava build up on the plateau rim top and on the shank end as well. It was thick and hard but hopefully it had protected the rim and edges from damage. The lava coat looks horrible but it points to a well-used, favourite smoking pipe. George must have enjoyed this old timer and when the tenon broke he must have been frustrated.
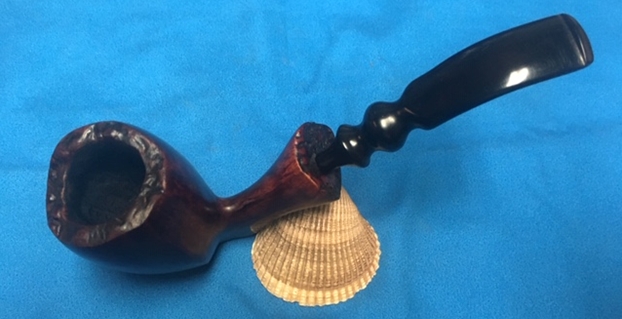
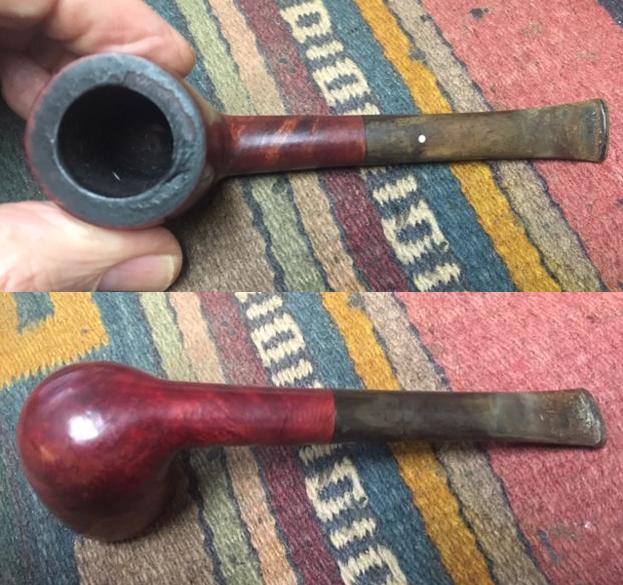
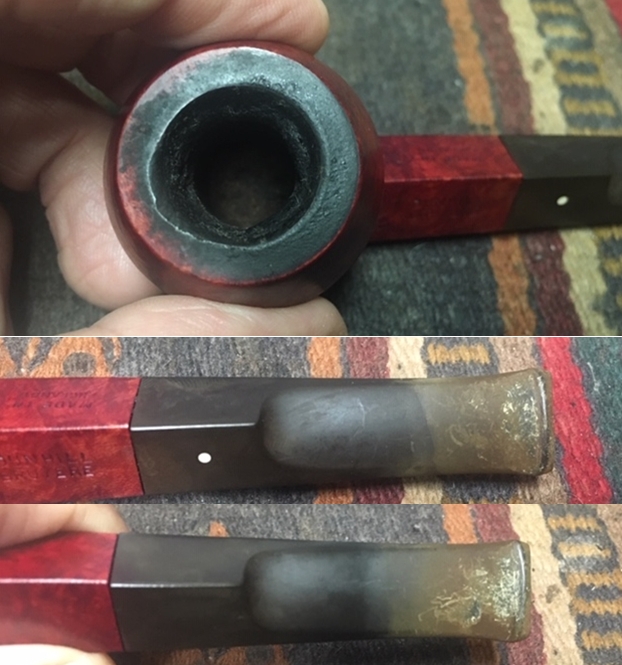
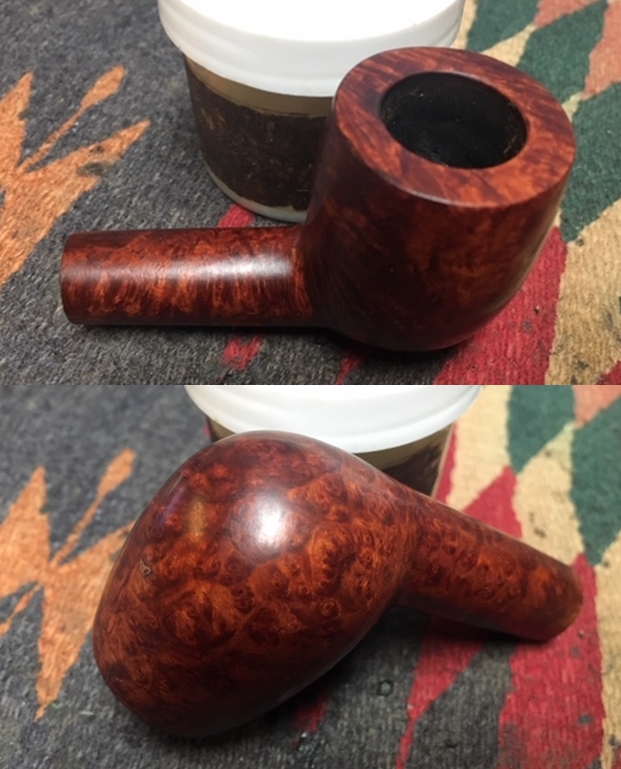
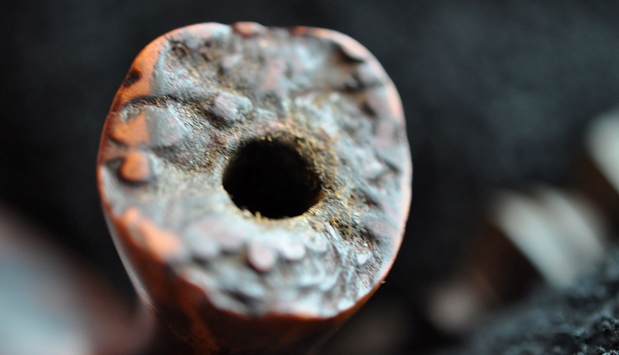
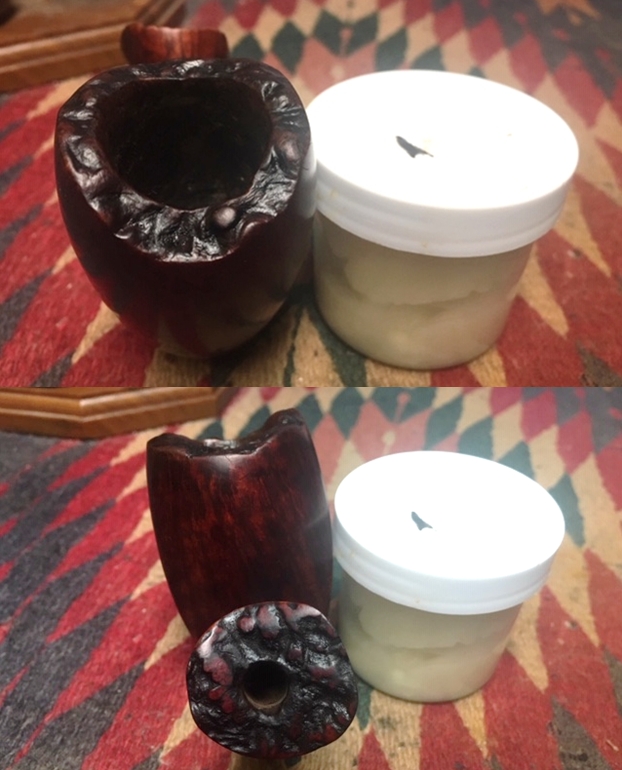
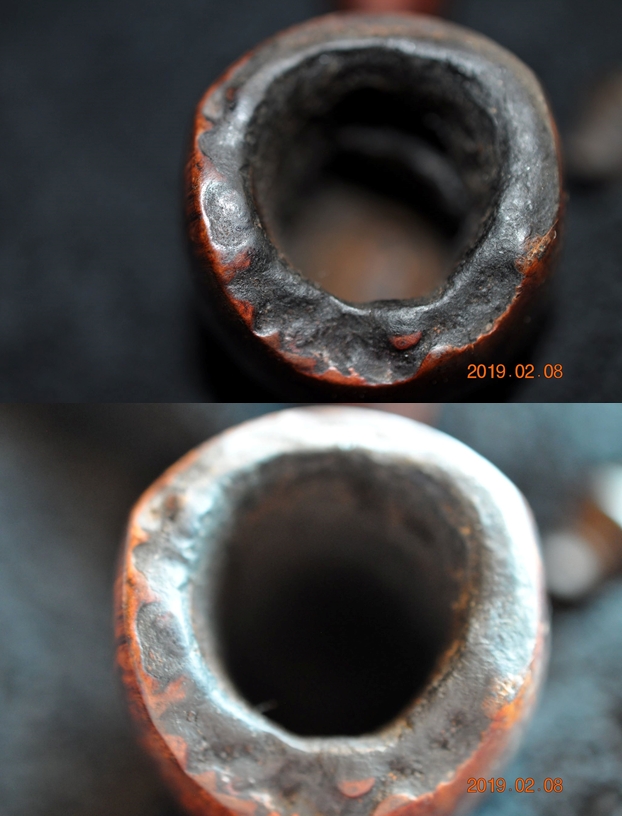
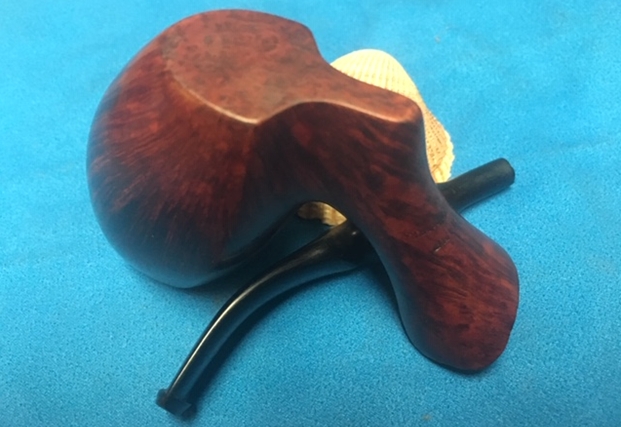
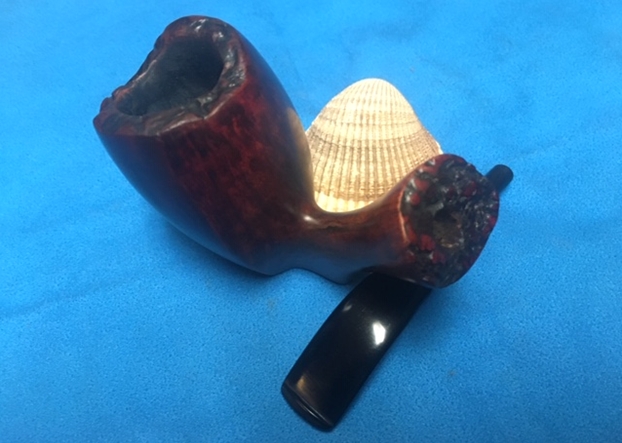
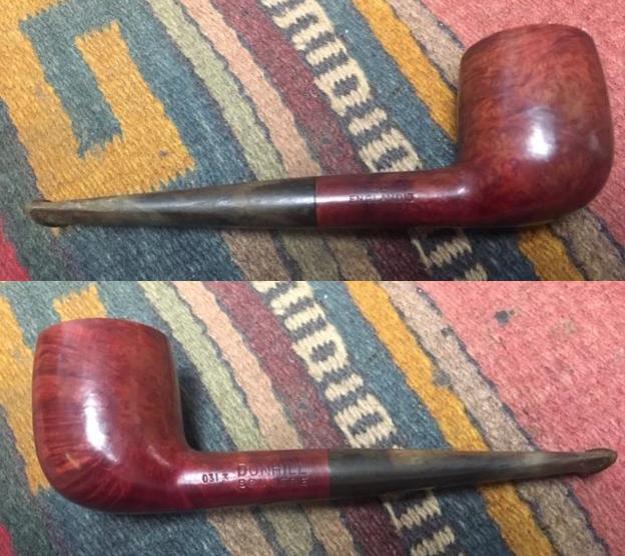
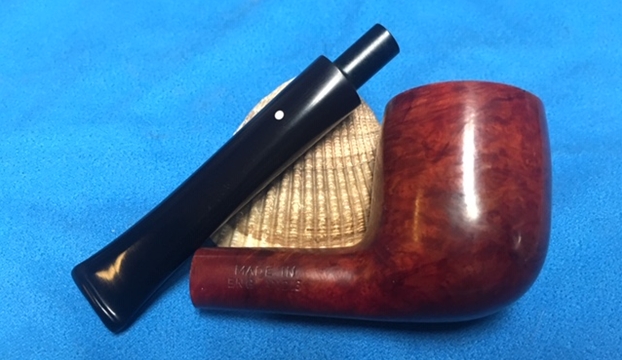
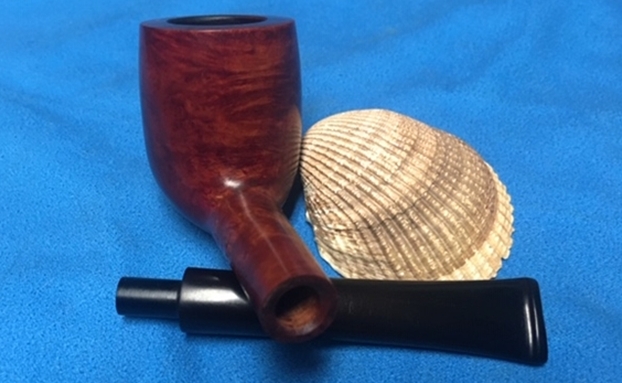
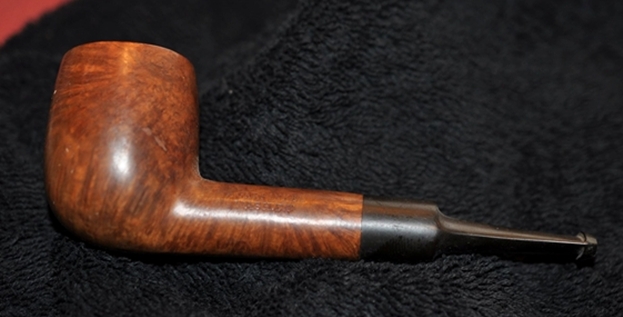
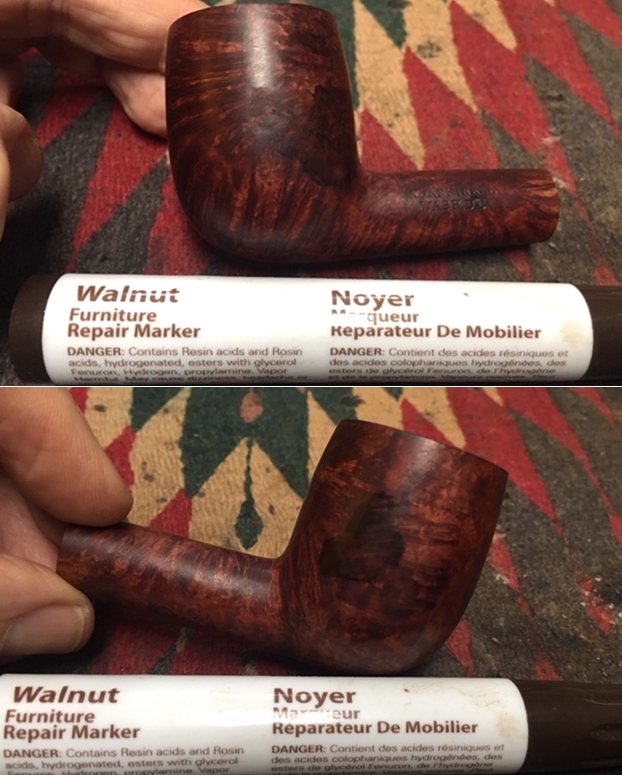
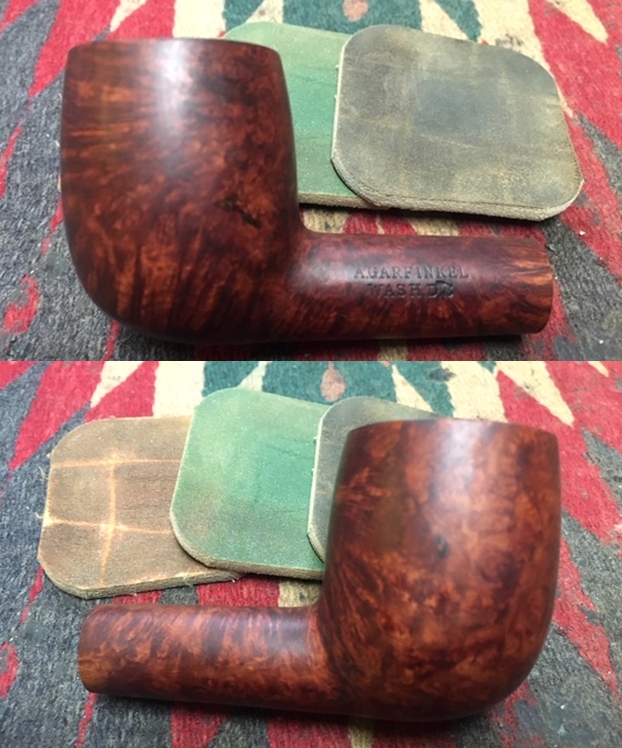
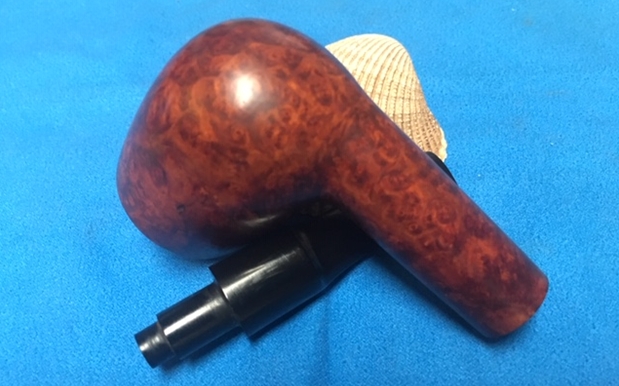
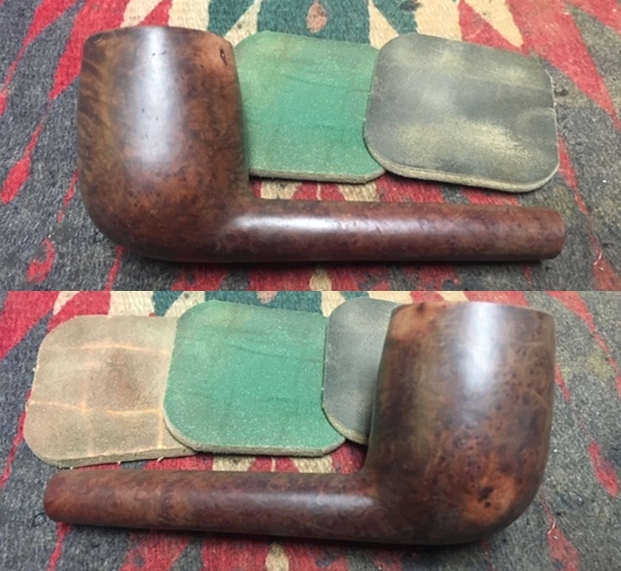
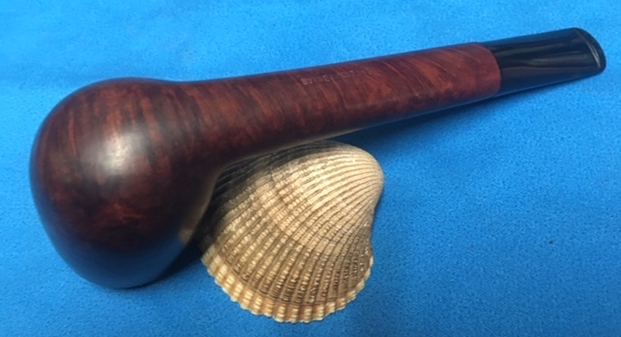
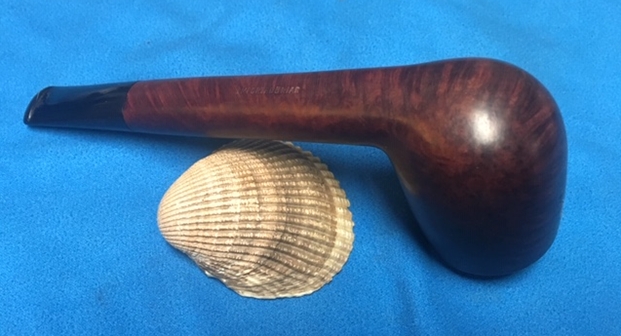
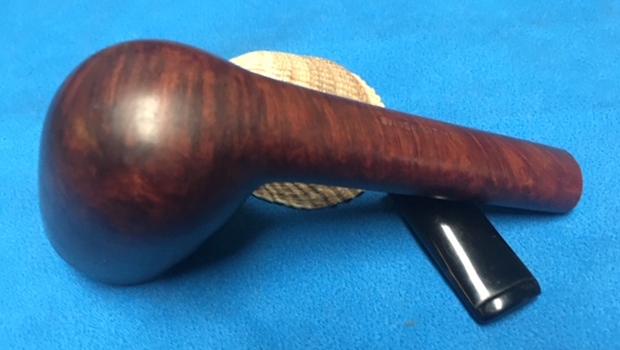
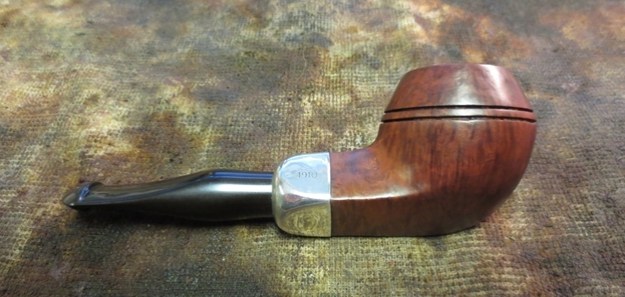
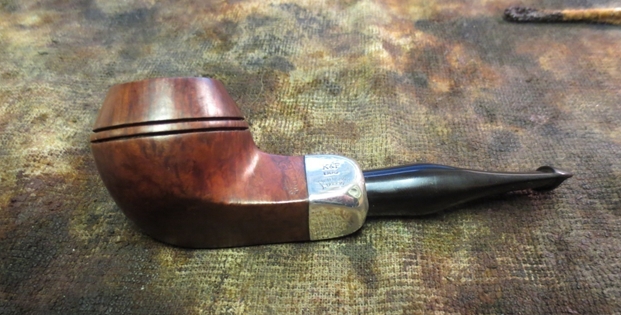
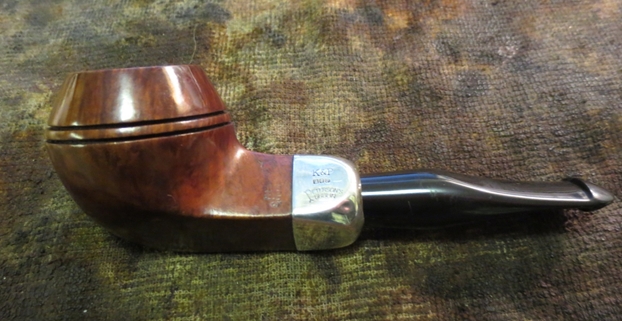
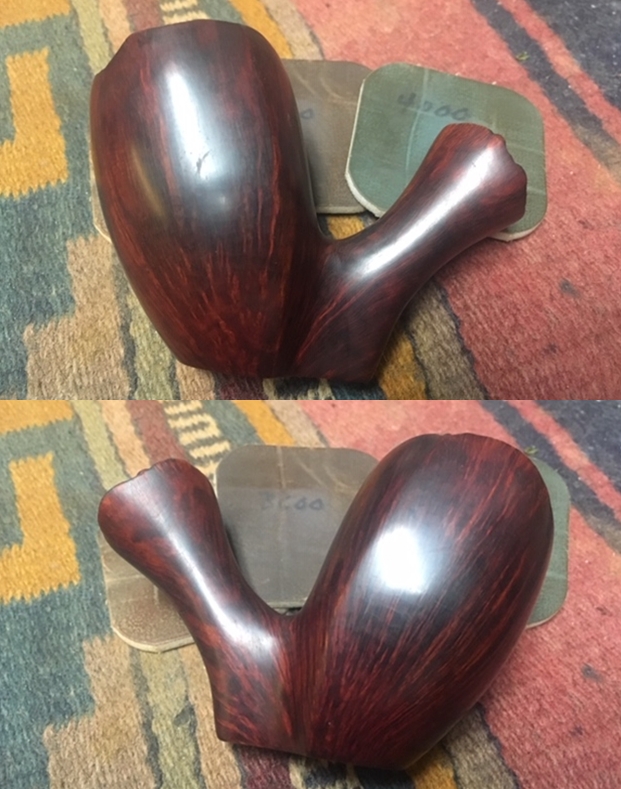
 Jeff took photos of the sides and heel of the bowl to show the condition of the finish – the grime and grit all over the sides and flat bottom of the bowl. It is a dirty pipe.
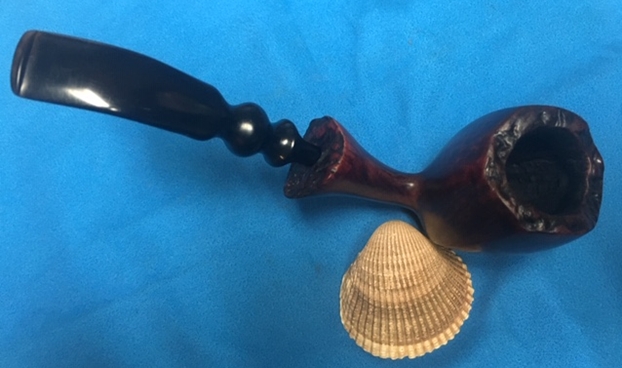
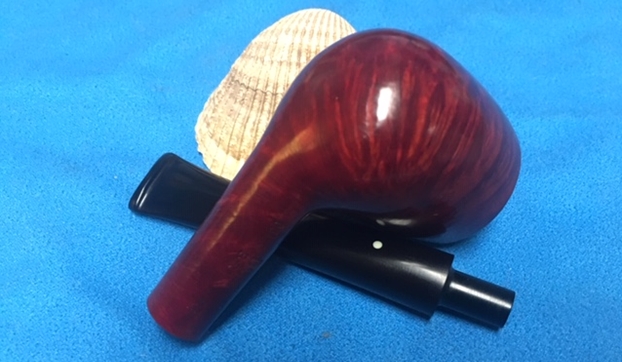
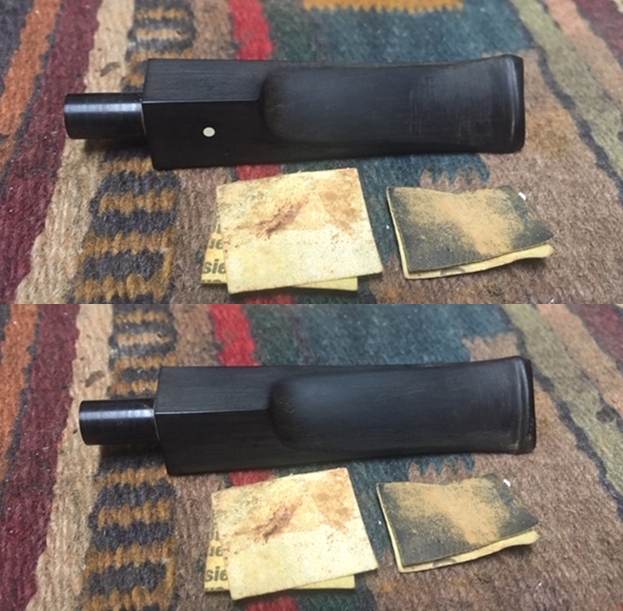
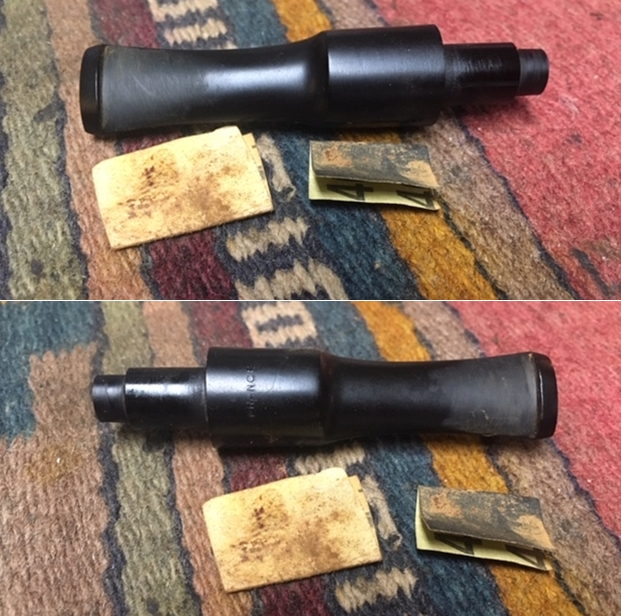
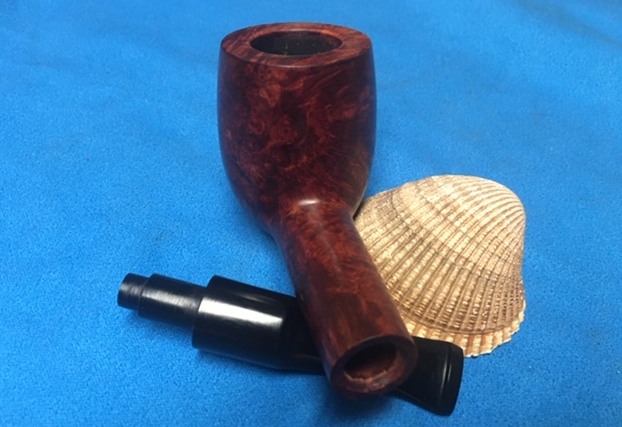
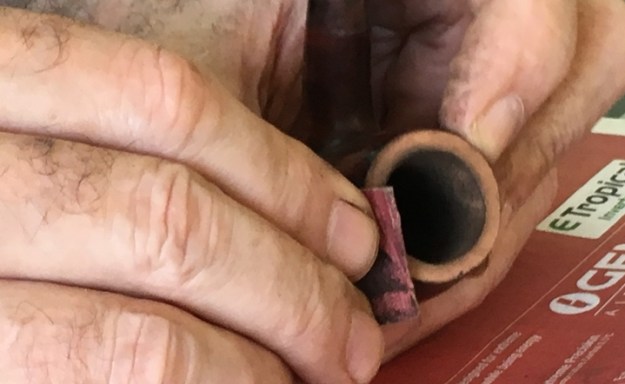
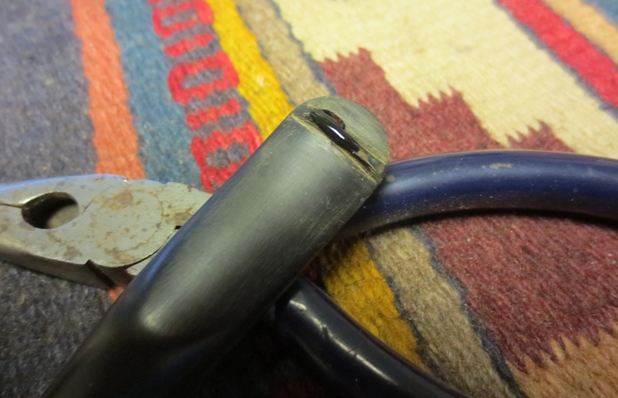
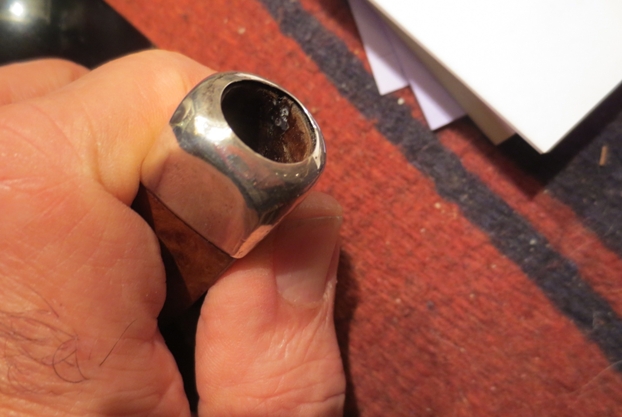
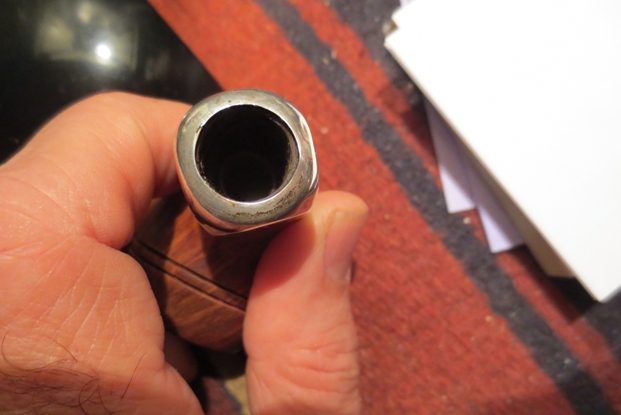
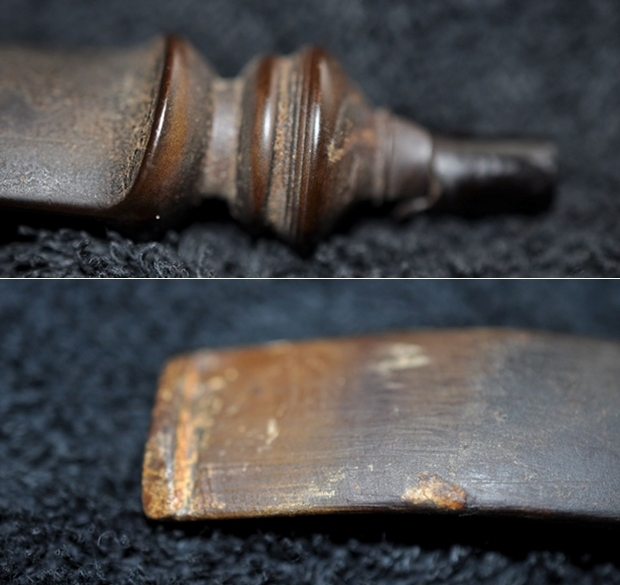
 Jeff took photos of the top and underside of the broken stem showing the scratching, oxidation and deep tooth damage to the stem surface. You can also see the broken tenon (totally fixable by with the other damage I don’t think it is worth it).
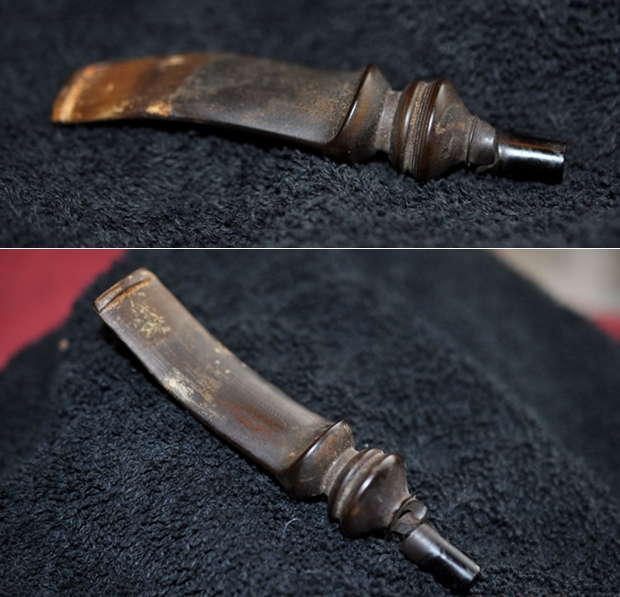
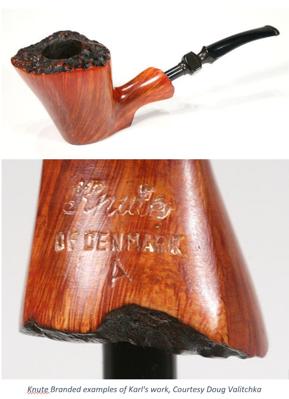
 I looked on the Pipephil site to get a quick overview of the brand. In the back of my mind I remembered a connection to Karl Erik. I could not remember the details of the connection (http://www.pipephil.eu/logos/en/logo-c4.html). I did a screen capture of the section on the brand that was shown on the site. I have included it below.
 In summary it says that the brand was distributed by Larsen & Stigart a tobacconist in Copenhagen, Denmark. The warehouse had a workshop that had such famous carvers as Soren Eric Andersen, Karl Erik Ottendahl and others.
I turned then to Pipedia (https://pipedia.org/wiki/Champ_of_Denmark) to see if I could get a bit more information. I quote in full from that site:
“Champ of Denmark” were made for and distributed by Larsen & Stigart by Karl Erik Ottendahl. Larsen & Stigart had some indoor carvers at certain times, too (e.g. Søren Eric Andersen) and among other things they managed to supply Dunhill with wild Danish fancy pipes.
In an endnote under the article on Karl Erik (https://pipedia.org/wiki/Karl_Erik) I found someo more information. I quote the endnote in full.
¹ It is almost impossible to draw a sharp line between some of these brands… Larsen & Stigart – once a famous Copenhagen pipe shop, now almost forgotten – offered pipes produced by KE stamped “Larsen & Stigart” as well as pipes stamped “Larsen & Stigart” + “Champ of Denmark” or “Larsen & Stigart” + “Shelburne”. Almost needless to say, there are pipes stamped “Champ of Denmark” or “Shelburne” only. And the only reason is inconsistent stamping??? (BTW Larsen & Stigart employed own indoor carvers for approximately one decade – e.g. Søren Eric Andersen. They even managed to supply Dunhill with wild Danish fancy pipes.)
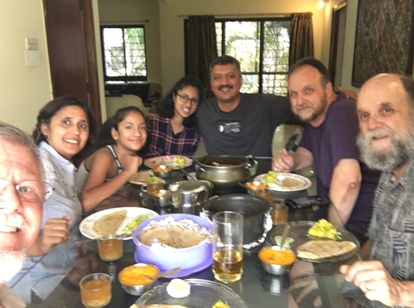
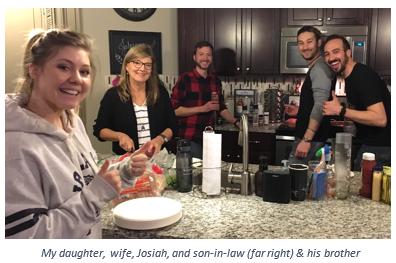
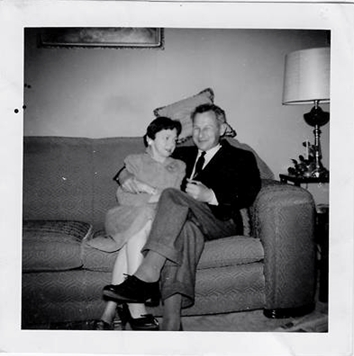
Now I had the verification of the link to Karl Erik Ottendahl. The pipe was most probably made by him for the pipe shop in Copenhagen. Before I get on to cleaning up the pipe I thought I would once again include the tribute that Jennifer wrote to her Dad for the blog. She also sent some photos and an article that her Dad wrote for Jeff and me to be able to get a feel for him. I have included those below. Note in each of them that he is holding a pipe in his left hand. I asked her to also send me an email with a brief tribute to her Dad. Here is her tribute from an email to me.
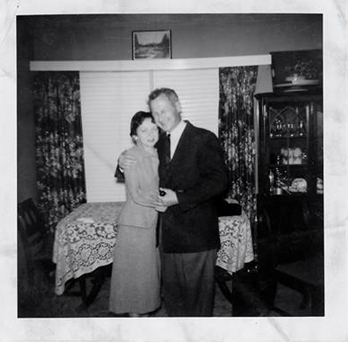 Steve, I want to thank you again for accepting my dad’s pipes. They were so much a part of my dad’s life that I could not simply discard them. But as his daughter, I was not about to take up smoking them either. *laughing* I think my dad would like knowing that they will bring pleasure to others. I know that I do.
I’m not sure what to say about his pipes. I always remember Daddy smoking pipes and cigars.
First a bit about my dad. Though my father, George Rex Leghorn, was American (growing up in Alaska), he managed to join the Canadian Army at the beginning of WWII, but in doing so lost his American citizenship. He was fortunate to meet a Canadian recruiting officer who told him the alphabet began with “A” and ended with “Zed” not “Zee”, and also told him to say that he was born in a specific town that had all its records destroyed in a fire. When the US joined the war my dad, and thousands of other Americans who had made the same choice*(see the link below for the article), were given the opportunity to transfer to the US military, and regain their citizenship.
After WWII, my dad, earned his degree at the University of California Berkeley and became a metallurgist. There is even a bit about him on the internet.
He loved taking the family out for a drive, and he smoked his cigars on those trips. (As a child, those were troubling times for my stomach.)
I most remember my father relaxing in his favorite chair with a science fiction book in one hand and a pipe in the other… Sir Walter Raleigh being his favorite tobacco… and the pipes themselves remind me of him in that contented way. If I interrupted his repose, he’d look up, with a smile on his face, to answer me.
It seemed he smoked his Briarwood pipes the most, though he had others. At the time, it was only the Briarwood I knew by name because of its distinctive rough shaped bowl. And it was the Anderson Free Hand Burl Briar, made in Israel, which I chose for his birthday one year, because I thought he might like that particular texture in his hand.
At least two of his pipes, he inherited from his son-in-law, Joe Marino, a retired medical laboratory researcher (my sister Lesley’s late husband)… the long stemmed Jarl (made in Denmark), and the large, white-bowled, Sherlock Holmes style pipe. I believe Joe had others that went to my dad, but Lesley was only sure about those two.
 The Buescher, corncob pipe my older sister Lesley bought for Daddy while on one of her travels around the States.
A note on the spelling of my sister’s name…
My dad met my mother, Regina, during WWII and they married in Omagh, Ireland. My mother was English and in the military herself. The English spelling of Lesley is feminine, and Leslie masculine, in the UK… just the opposite of here in the United States. I guess my mom won out when it came to the spelling of the name.
I’ll send you photos of my dad soon, along with his WWII experience story.
Jennifer
*https://www.thestar.com/news/world/2013/10/22/the_americans_who_died_for_canada_in_wwii.html
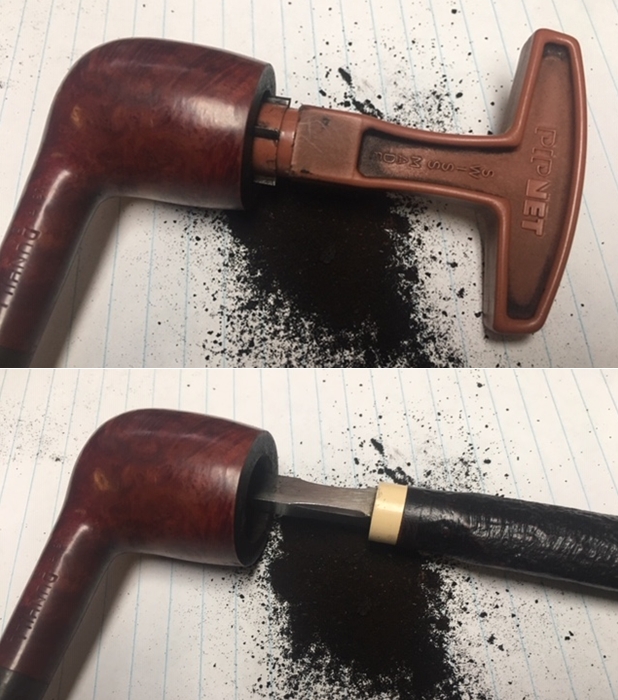
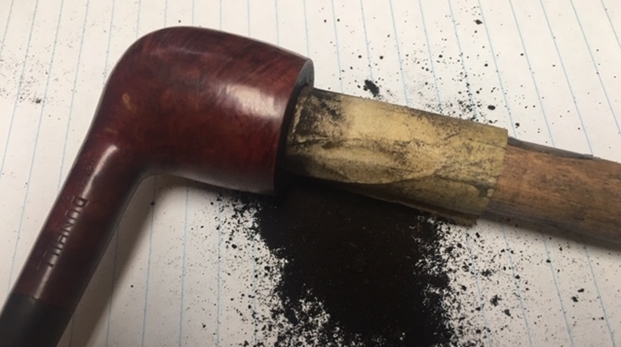
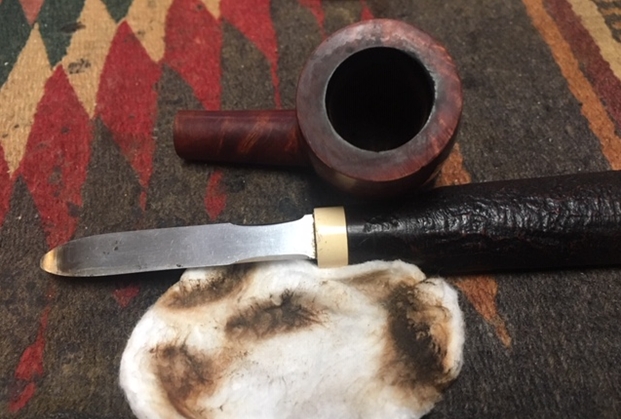
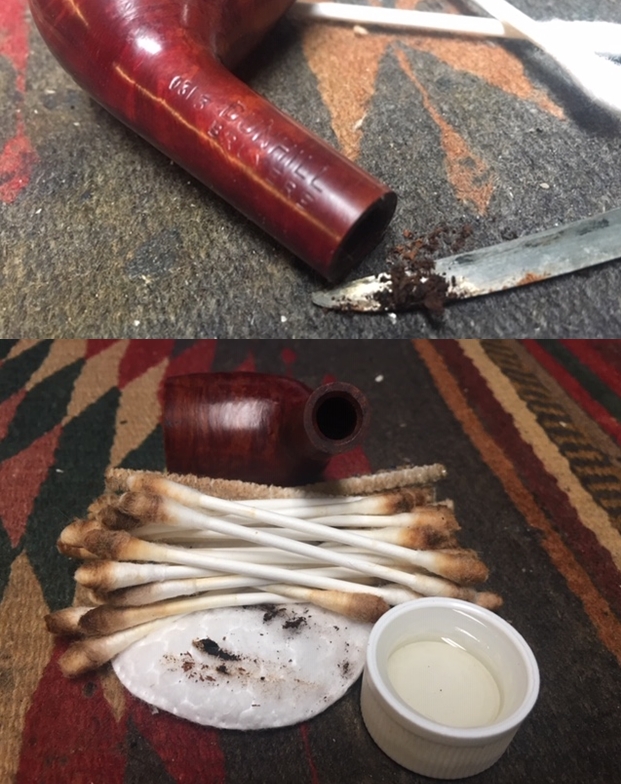
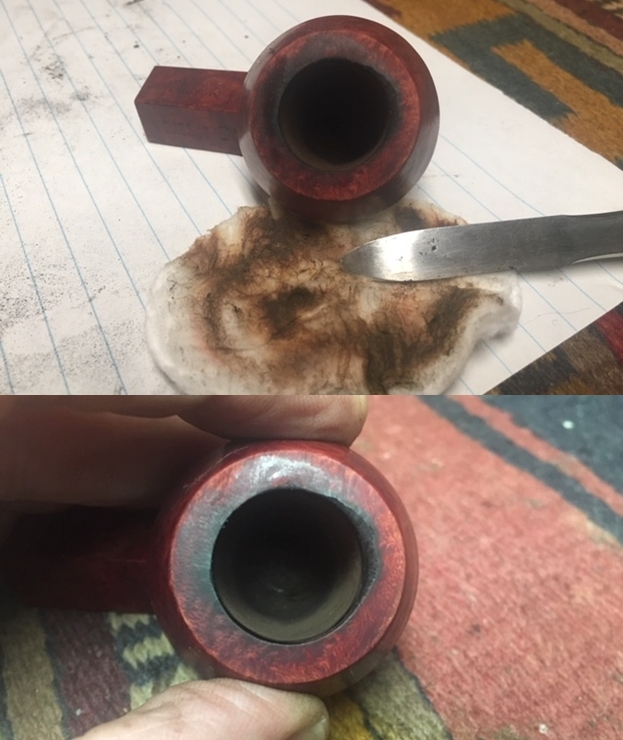
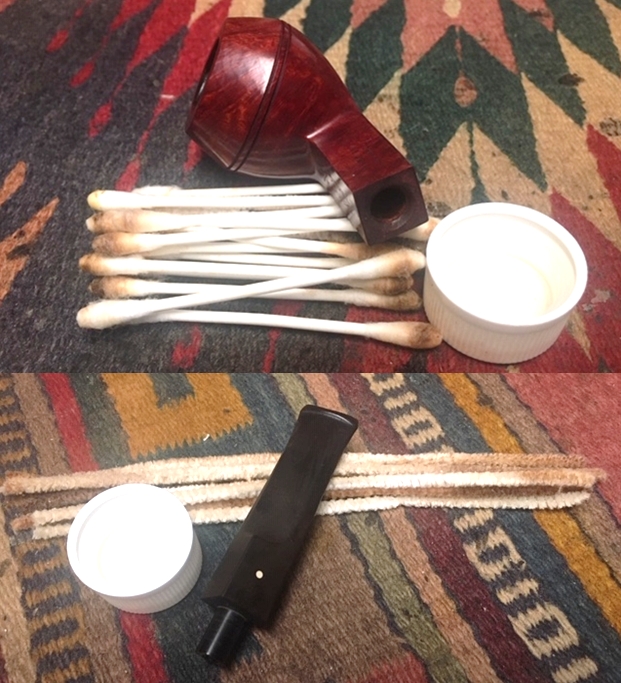
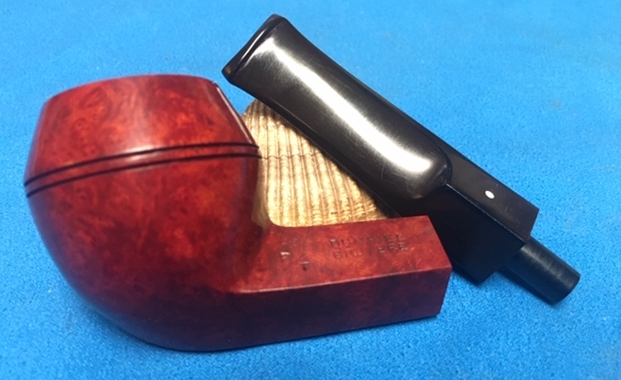
I am getting more and more used to Jeff cleaning up the pipes before I work on them. So much so that when I have to clean them it is a real chore! This pipe was a real mess just like the other ones in the collection. I did not know what to expect when I unwrapped it from his box. He reamed it with a PipNet pipe reamer and cleaned up the reaming with a Savinelli Fitsall Pipe Knife. He scrubbed out the internals with alcohol, pipe cleaners and cotton swabs until the pipe was clean. He scrubbed the exterior of the bowl with Murphy’s Oil Soap and a tooth brush to remove the grime and grit on the briar and the lava on the rim top. The finish was in rough condition with some darkening from oils on both sides of the bowl. The rim top and shank end plateau looked lifeless. Since I was going to replace the stem he cleaned the internals and scrubbed the exterior to keep the box from smelling. When the pipe arrived here in Vancouver for the second stop of its restoration tour it looked very good. I took photos before I started my part of the work. It is still darkly stained on both sides. I started sanding the bowl before I took photos so the top view shows the sanding dust… I quickly did some photos.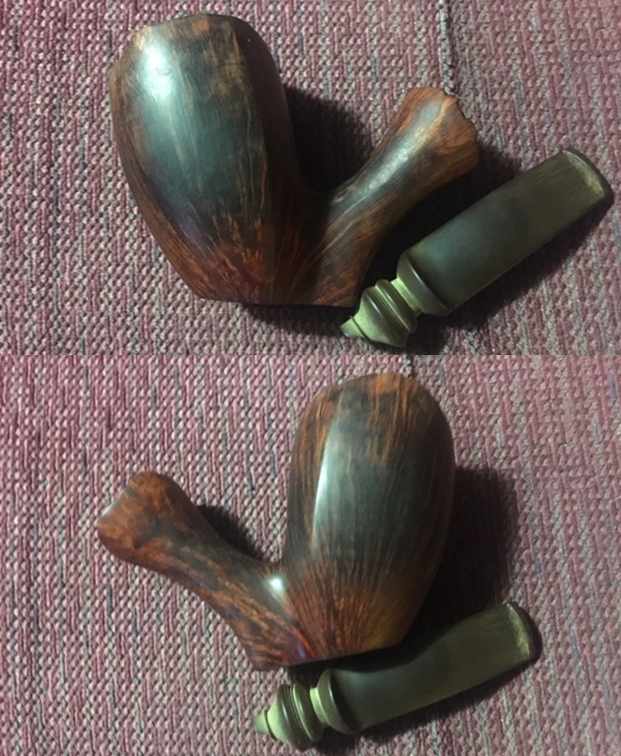
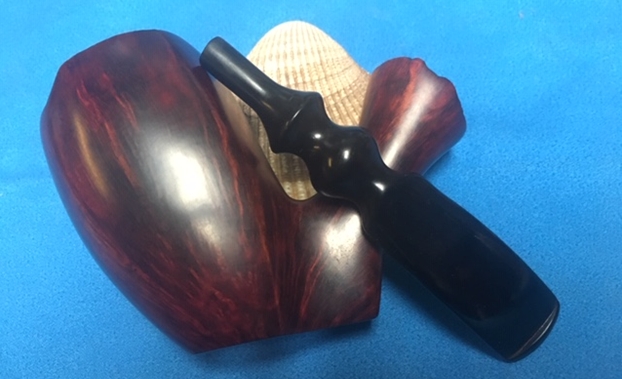
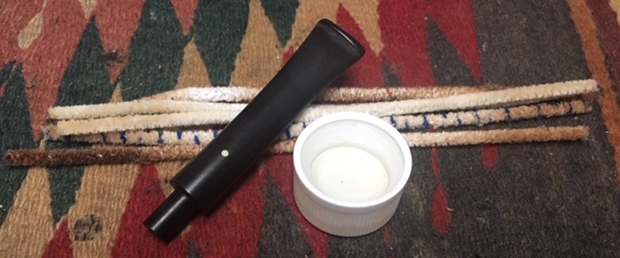
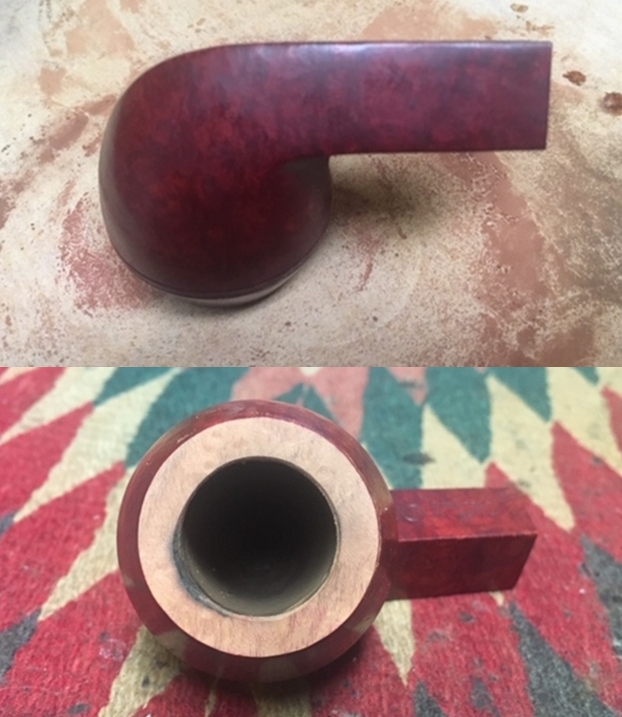
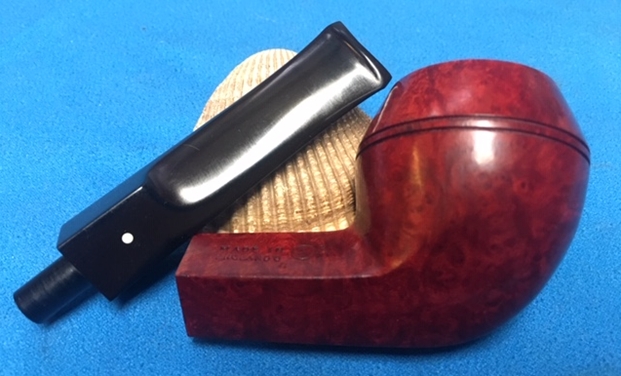
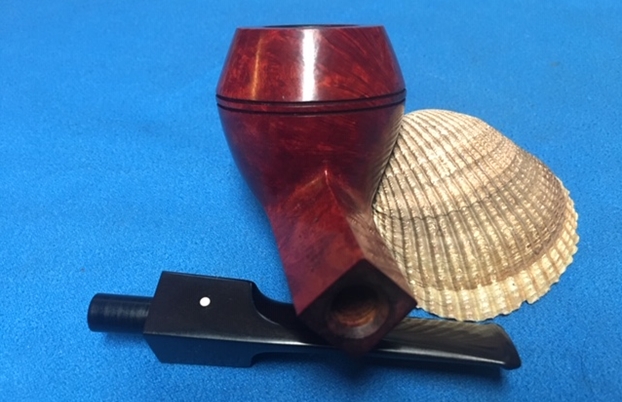
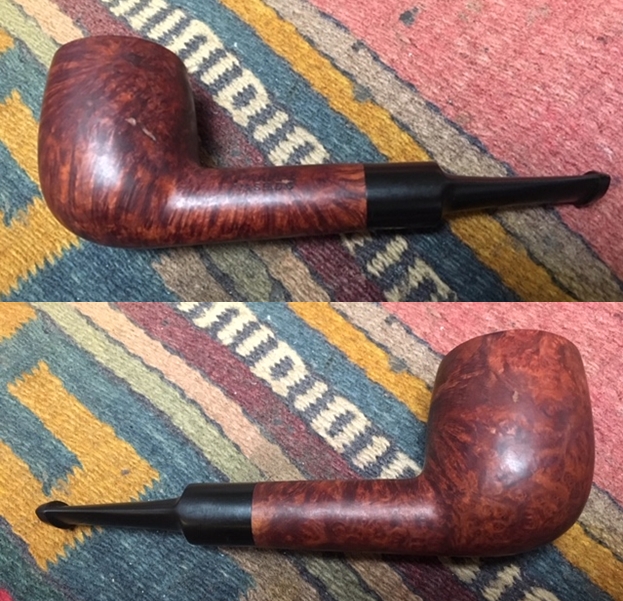
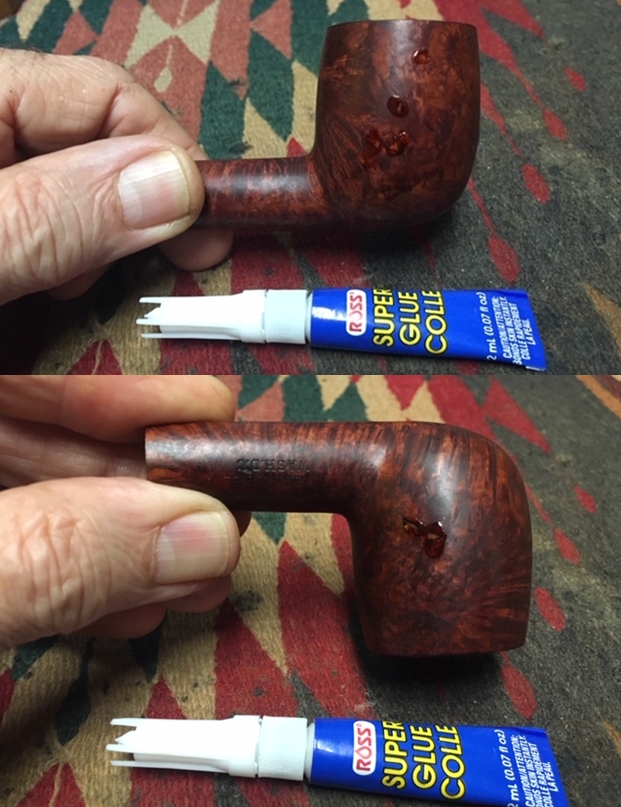
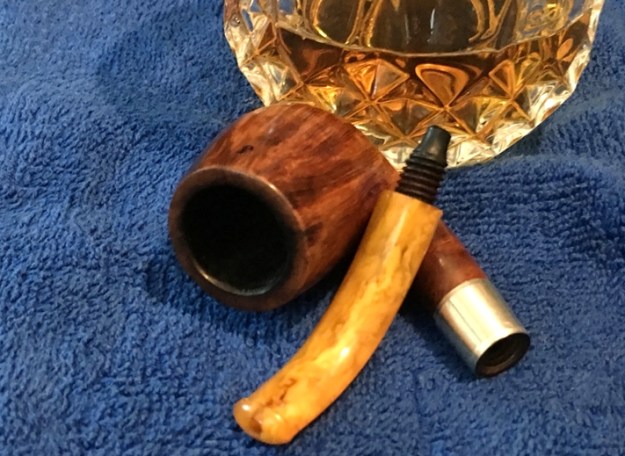
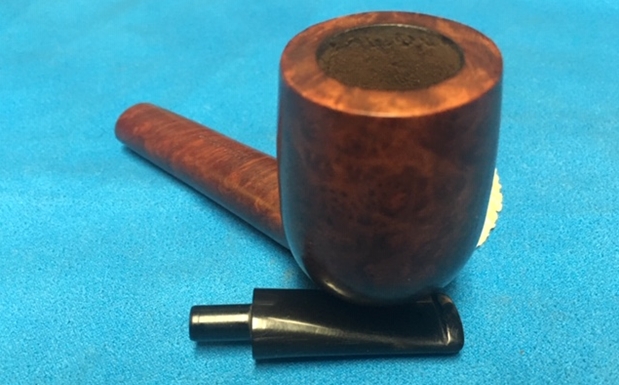
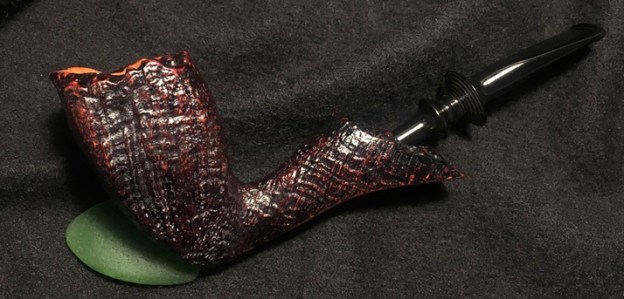
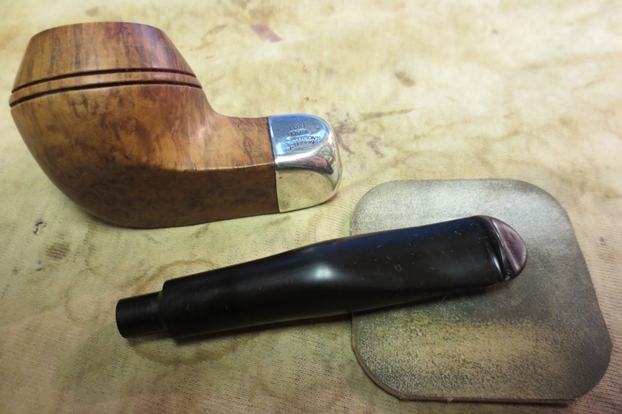
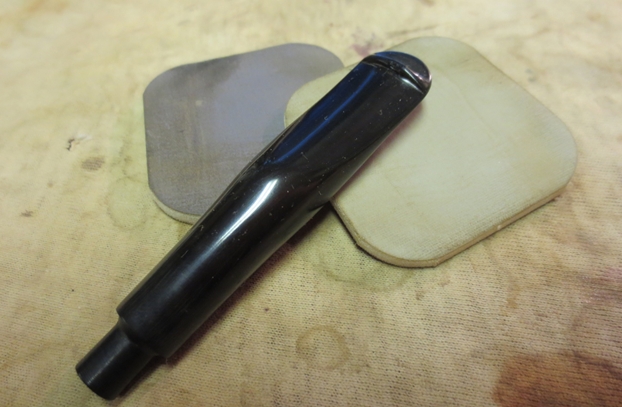
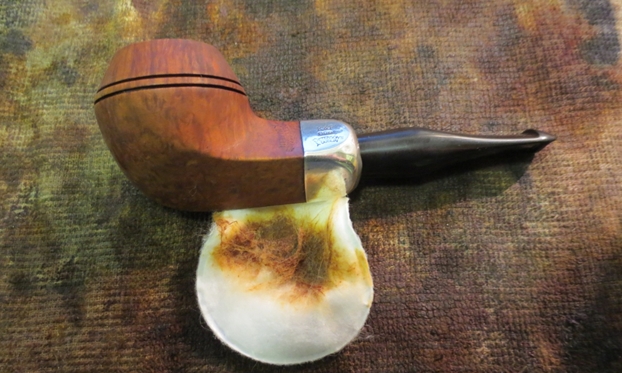
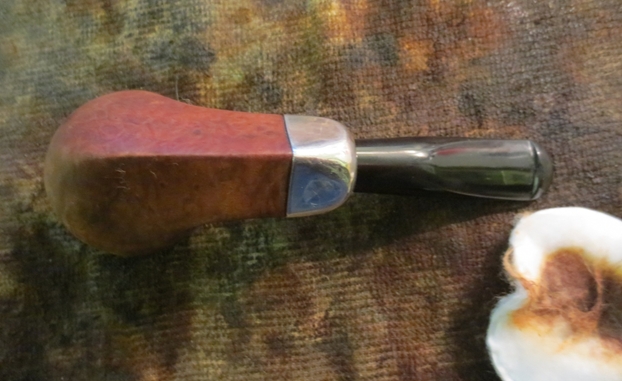
 At this point I decided to see what I had in terms of a freehand stem that would work with this bowl. I went through my options here and chose one with the approximate shape. It is a little less ornate but I think it will work well when it is cleaned up.
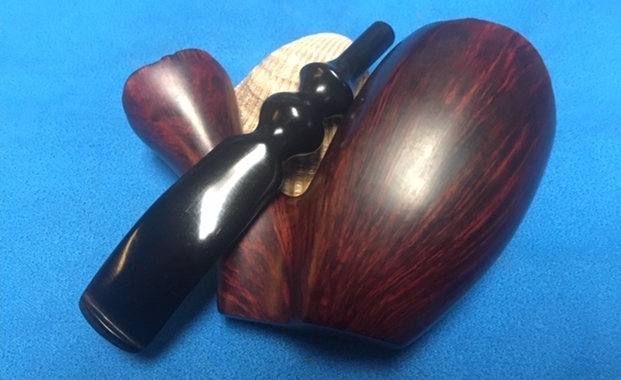
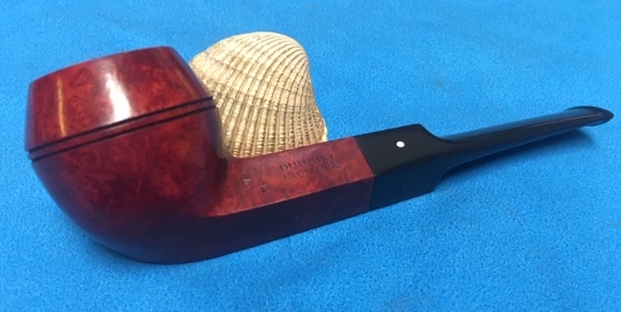
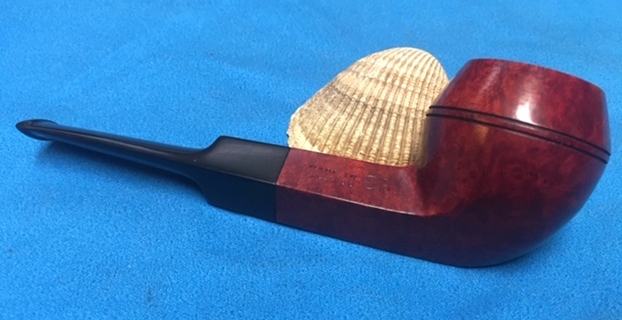
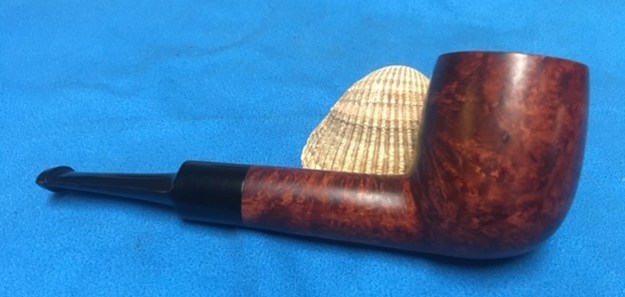
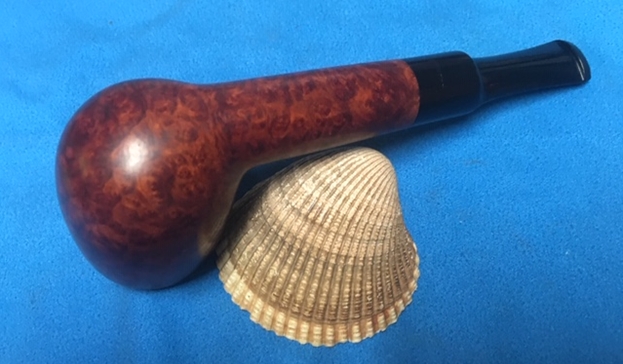
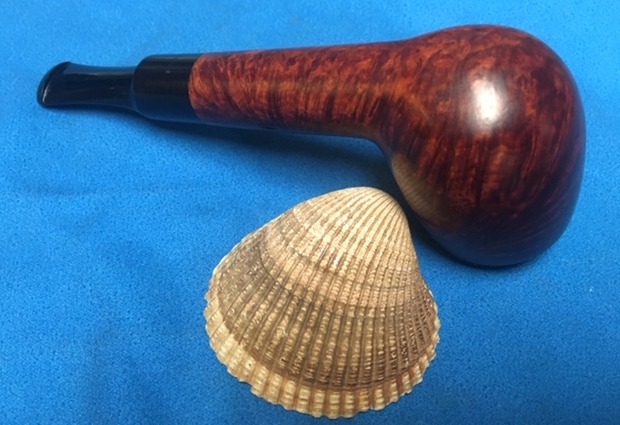
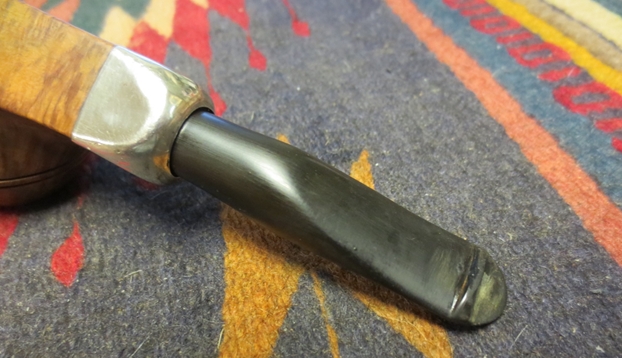
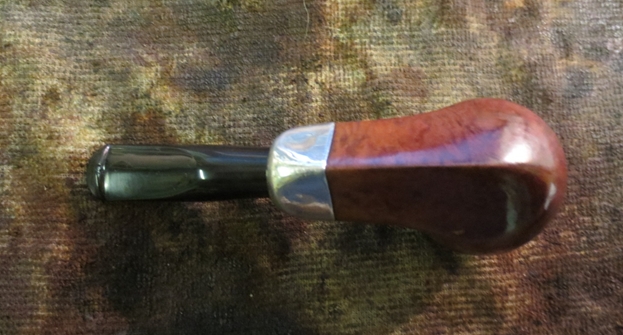
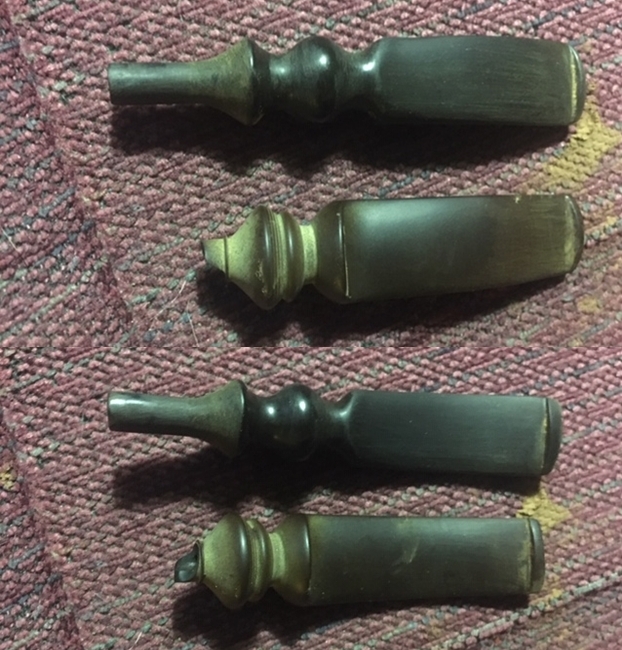 I put the stem in the shank and took some photos to get an idea of the look of the pipe with the new stem. I will likely bend it slightly more to match the bowl angles but at the moment it is the same bend as the broken on. I like it!
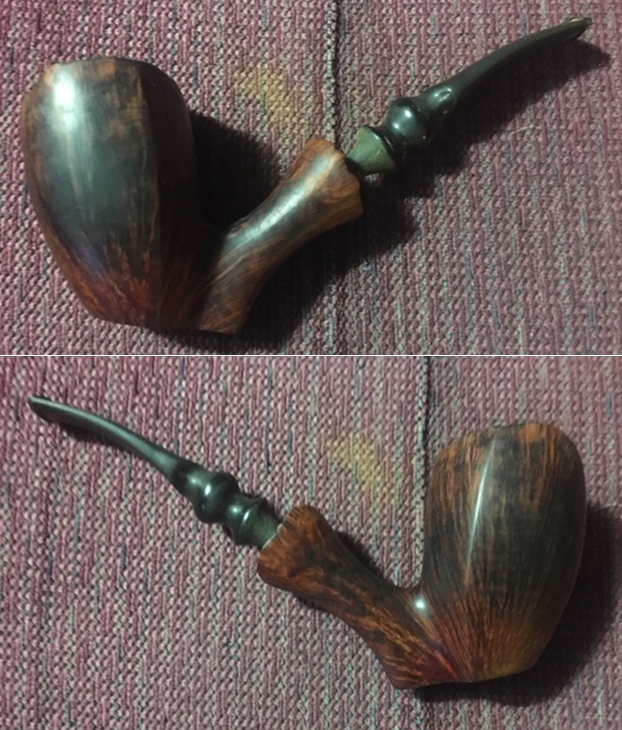
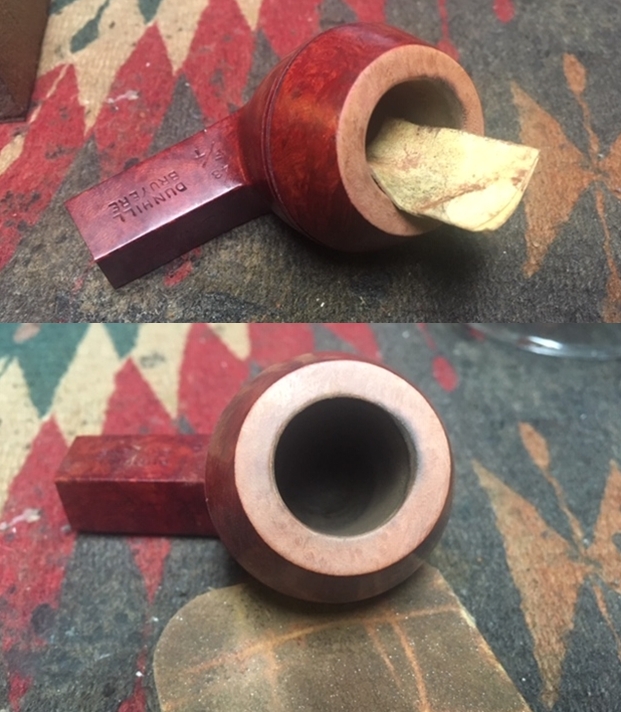
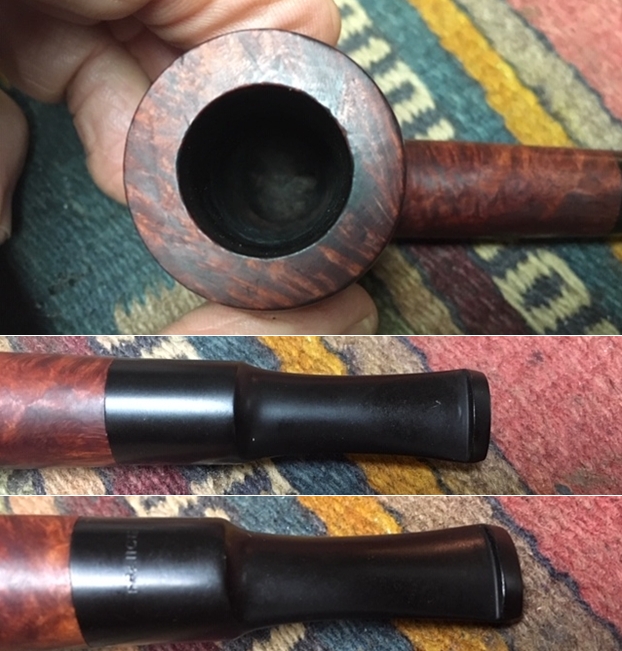
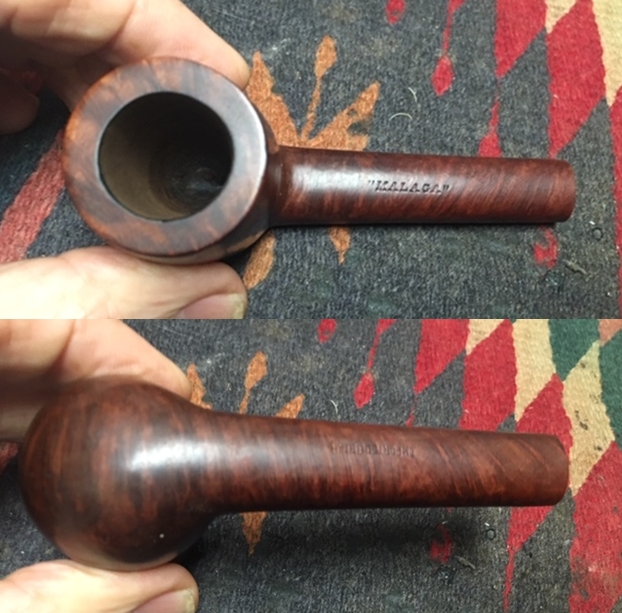
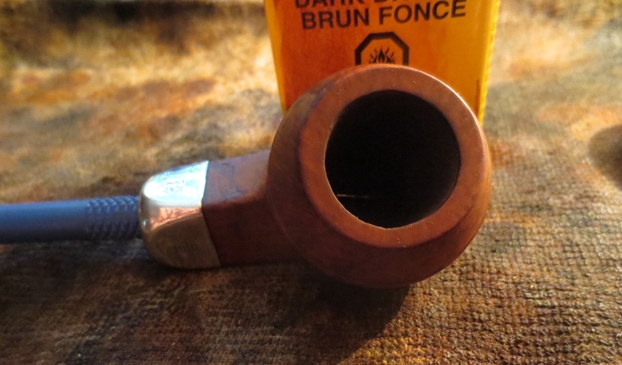
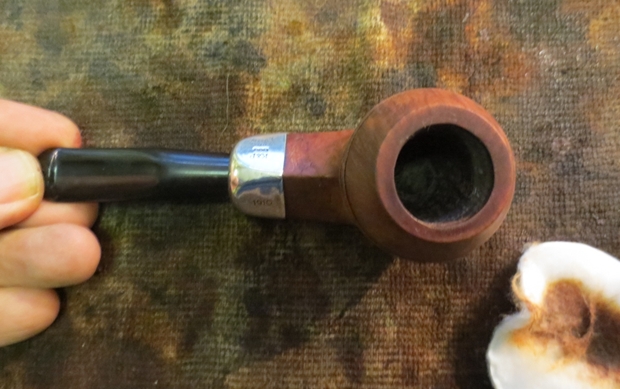
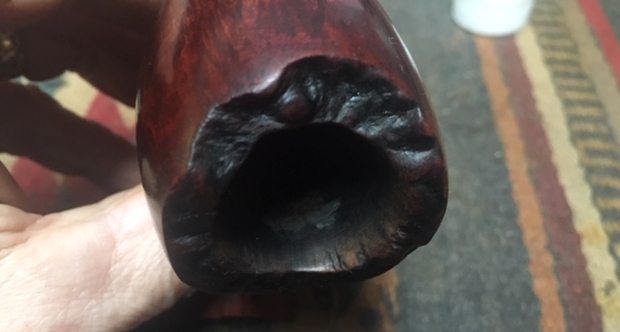
 I took some close up photos of the rim top and also of the stem surface. I wanted to show what an amazing job Jeff did in the cleanup of the rim top. Even with the work there was still some hard lava in the plateau area I also took close up photos of the new stem to show condition it was in. It would not take a lot of work – just sanding out the scratches and polishing with micromesh sanding pads.
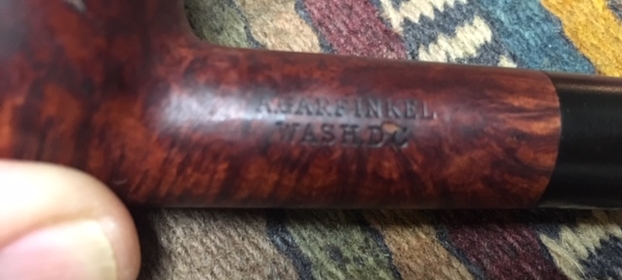
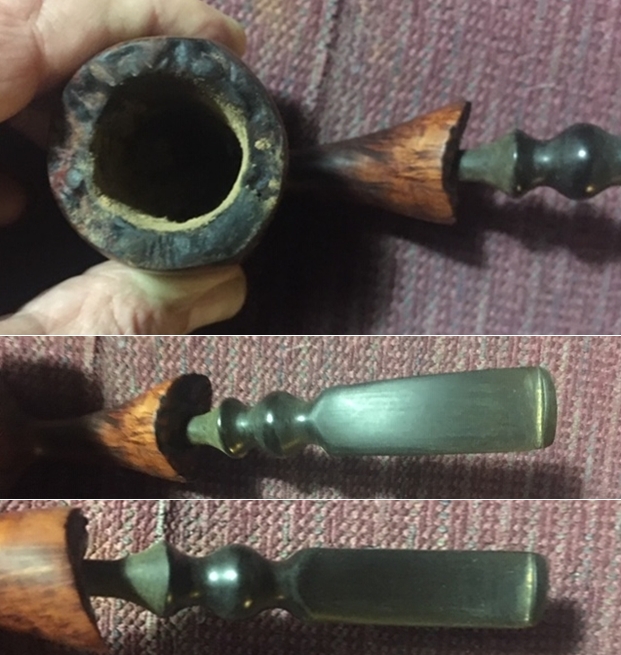 I wiped the underside of the shank down with a cotton pad and alcohol so I could more easily see the stamping. It read as noted above.
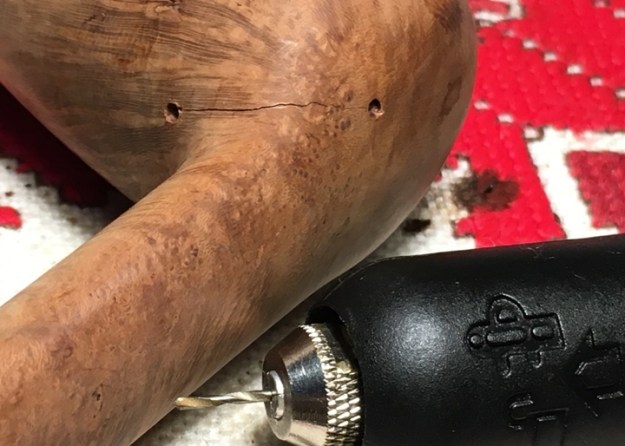
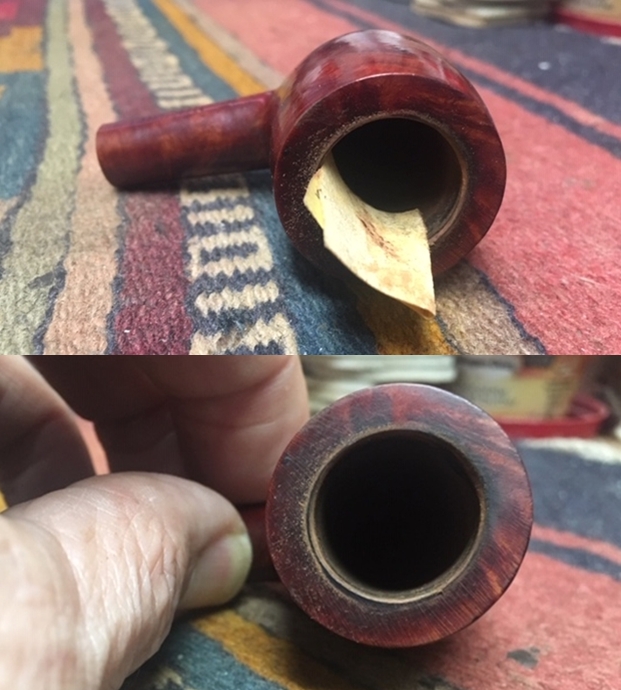
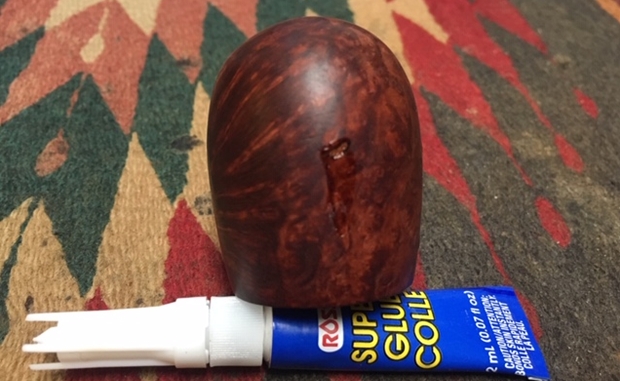
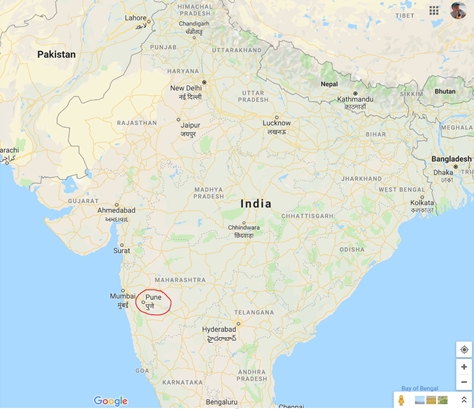
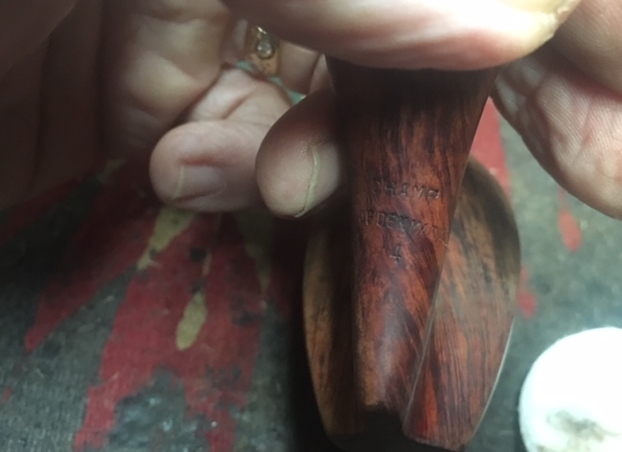 I started to sand out the inside of the bowl as noted above – a lesson learned from Paresh’s daughter Pavni while I was in India. It soon became apparent that there were some heat fissures in the briar. Fortunately they were not too deep but they were significant on the front and backside of the inner walls of the bowl. I mixed a small batch of JB Weld and used a folded pipe cleaner to fill in the fissures in those areas. I did not coat the entire bowl. Once it had cured I would sand the areas smooth leaving the fill only in the fissures themselves.
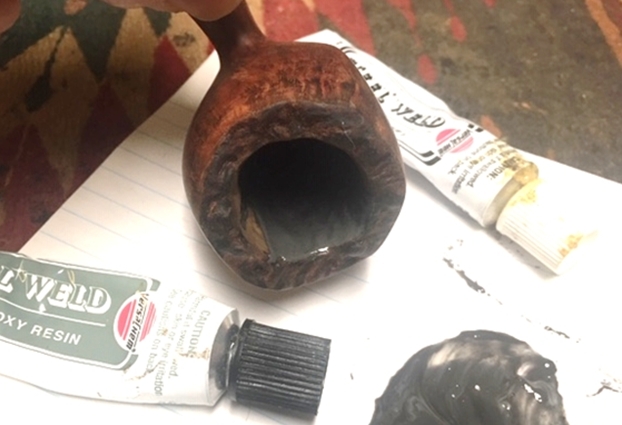 Once the repair had hardened to touch it was time to continue my work on the bowl. I wanted to scrub the briar with alcohol and see if I could remove some of the oils in the briar on both sides. I also worked over the front and rear of the bowl and the shank. I was able to remove a lot of the darkening oils with the alcohol.
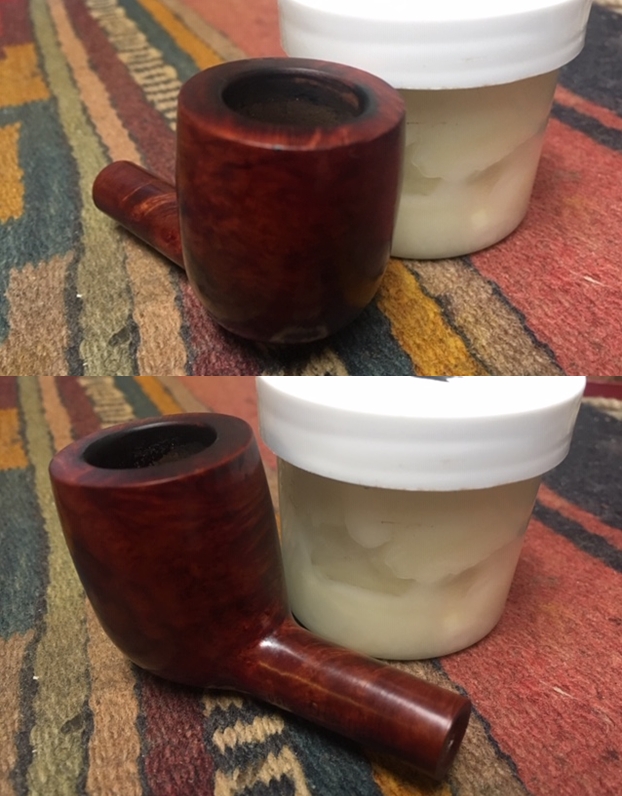
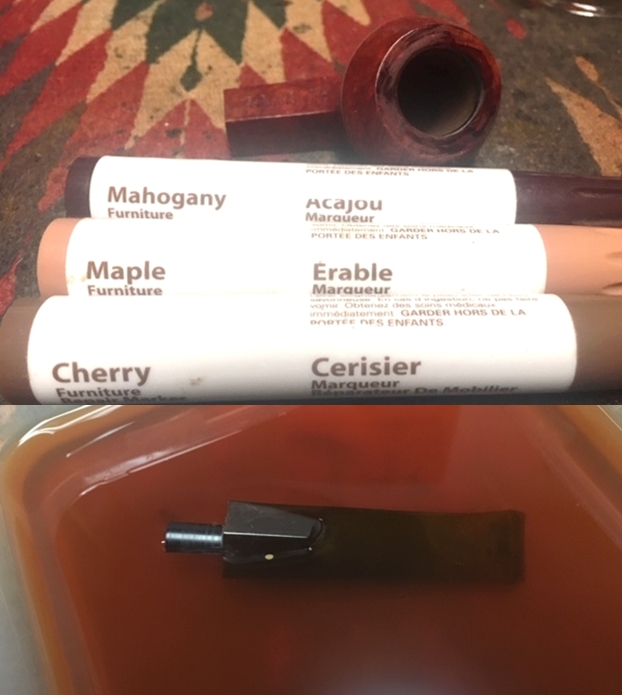
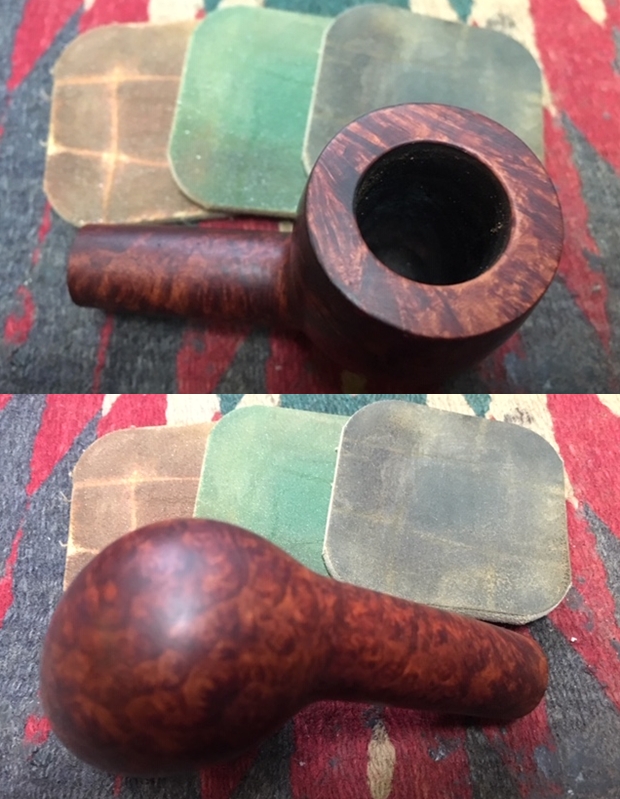
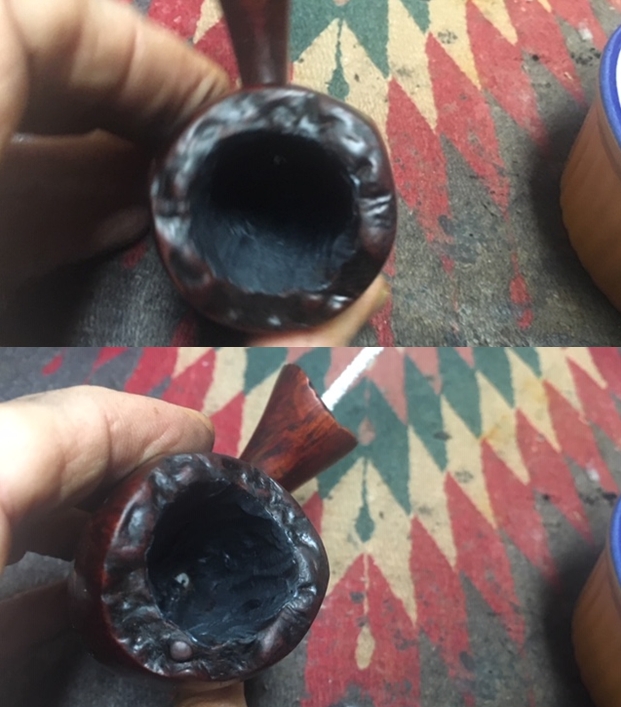
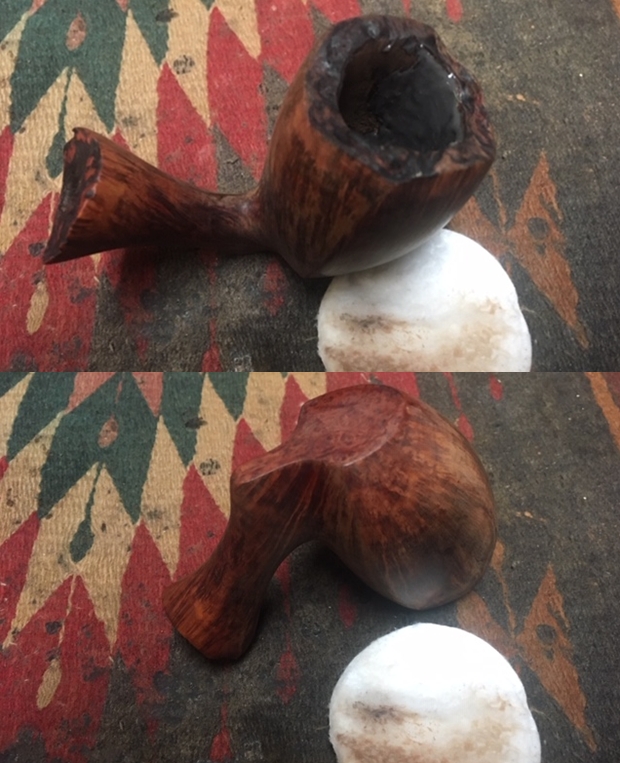 I used a dental pick and a brass bristle wire brush to work over the rim top plateau. I was able to clean out the remaining lava and set the rest of the definition of the plateau free. It is a nice looking rim top. I wiped it down with alcohol and then touched up the valleys in the plateau with a black Sharpie pen.
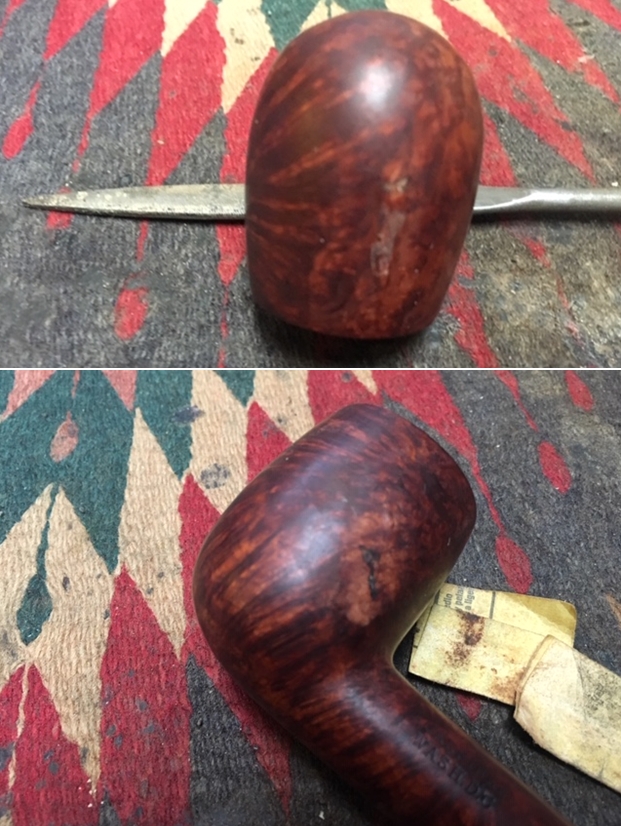
 I polished the bowl with 1500-2400 grit micromesh to see what the sides looked like. I was not happy with the finished look on the sides of the bowl as it seemed to highlight the darkening on both sides. I was going to have to stain the bowl to try to blend in the darkening on the sides.
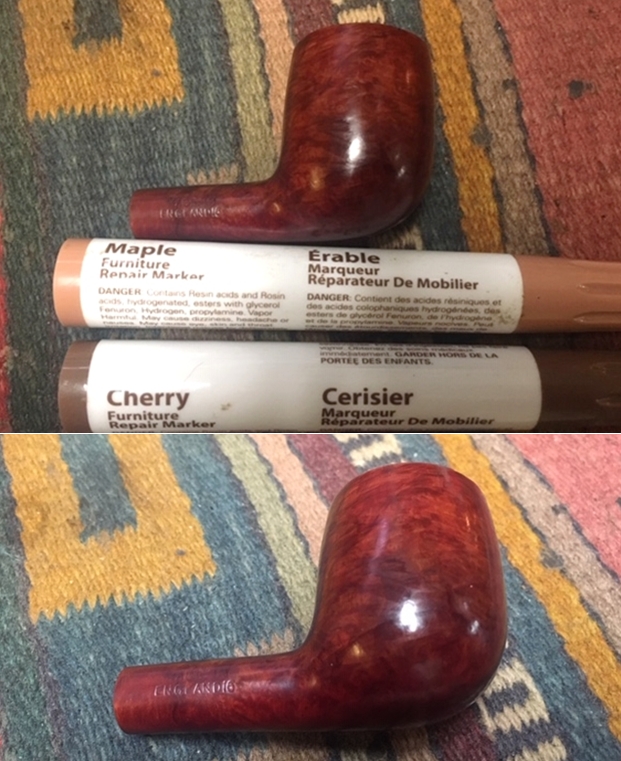
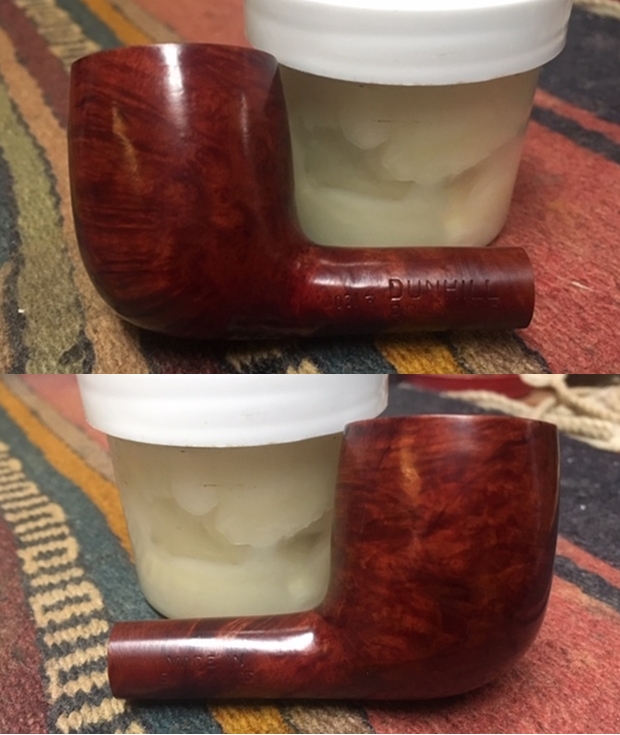
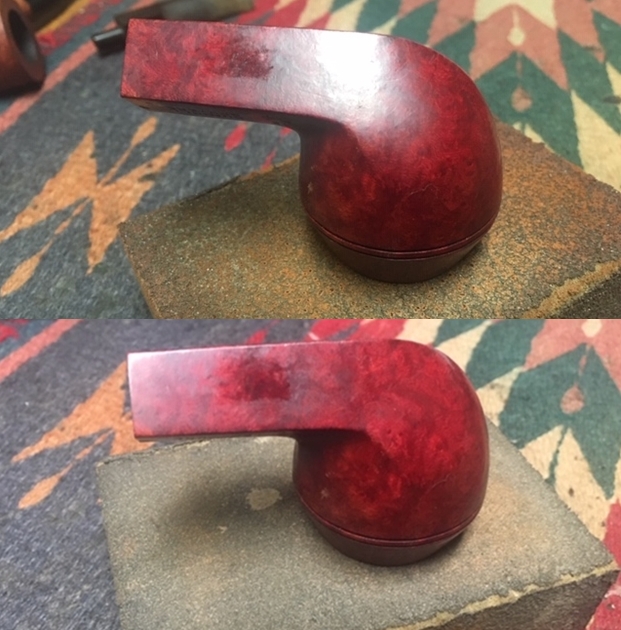
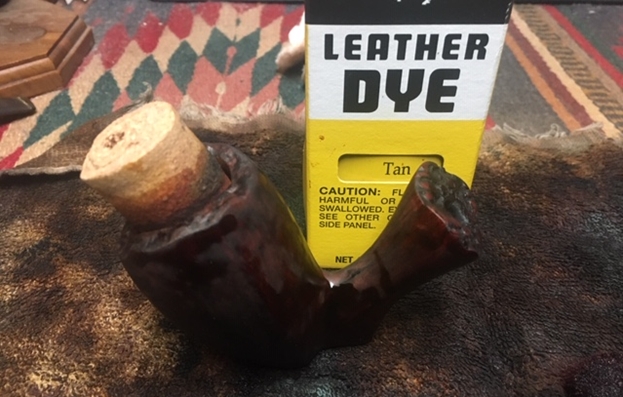
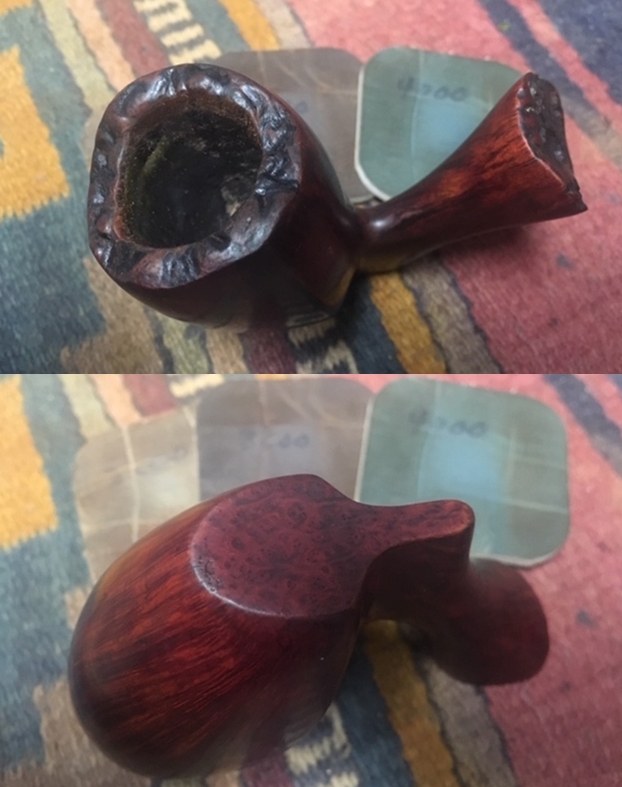
 I decided to use a Tan stain to see what I could do with it. I applied it and flamed it to set it in the grain. I repeated the process until I was happy with the coverage on the bowl.
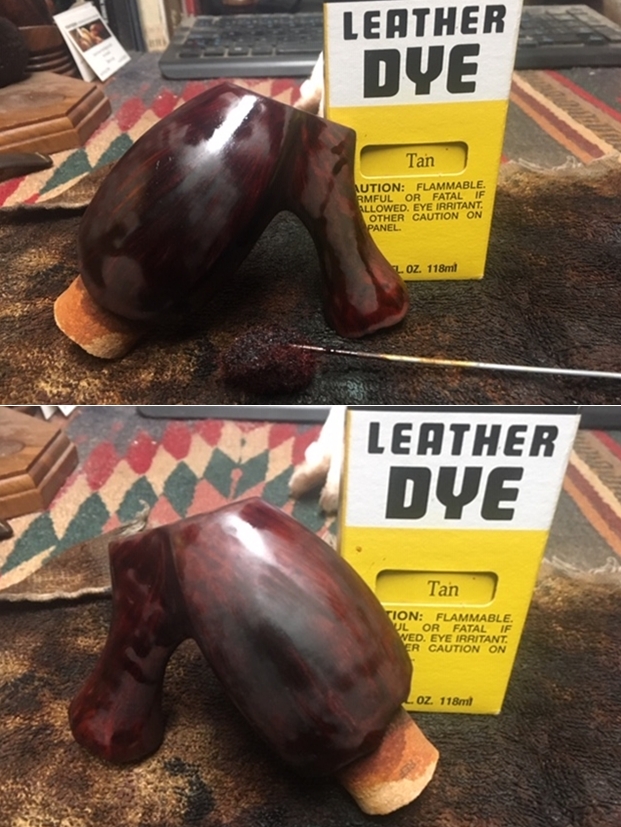
 Once the stain had set and the alcohol evaporated I wiped it down with alcohol on cotton pads to make the colour more transparent. I wanted the grain to stand out but still hide the darkening on the sides of the bowl. I was happy with the results so far. Once I polished it with micromesh sanding pads and buffed it with Blue Diamond it would be even more transparent.
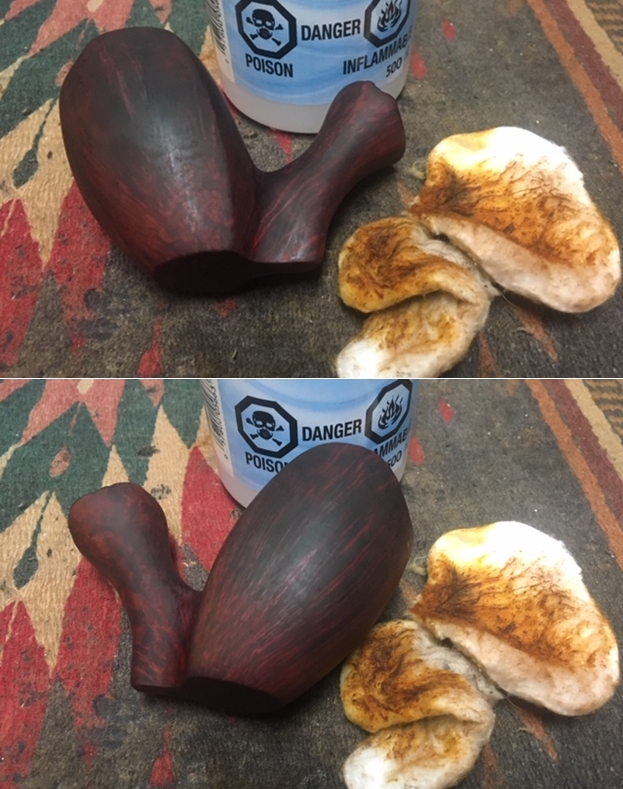
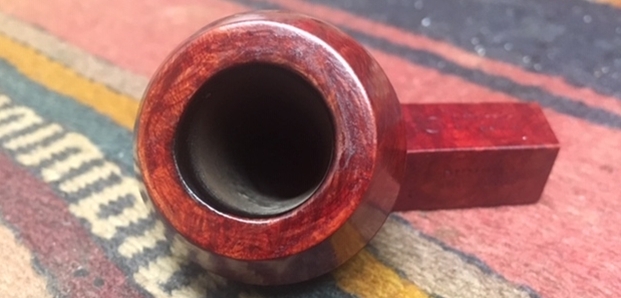
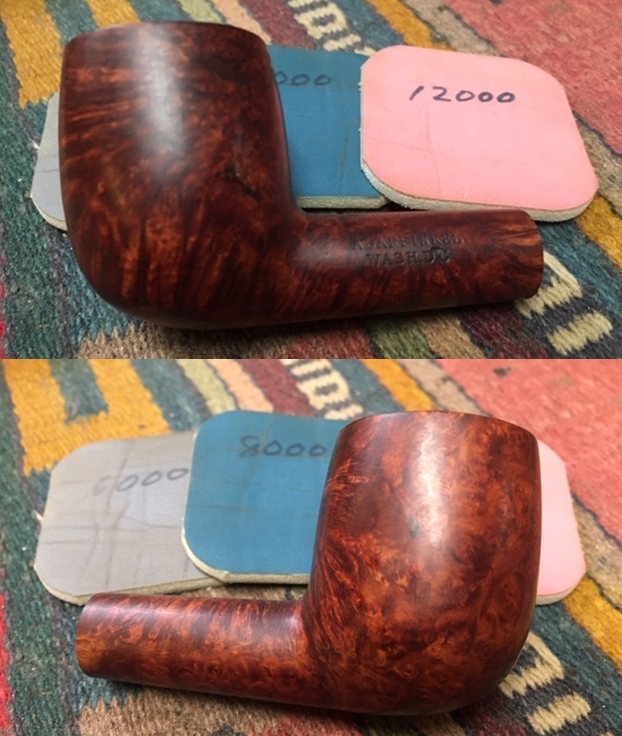
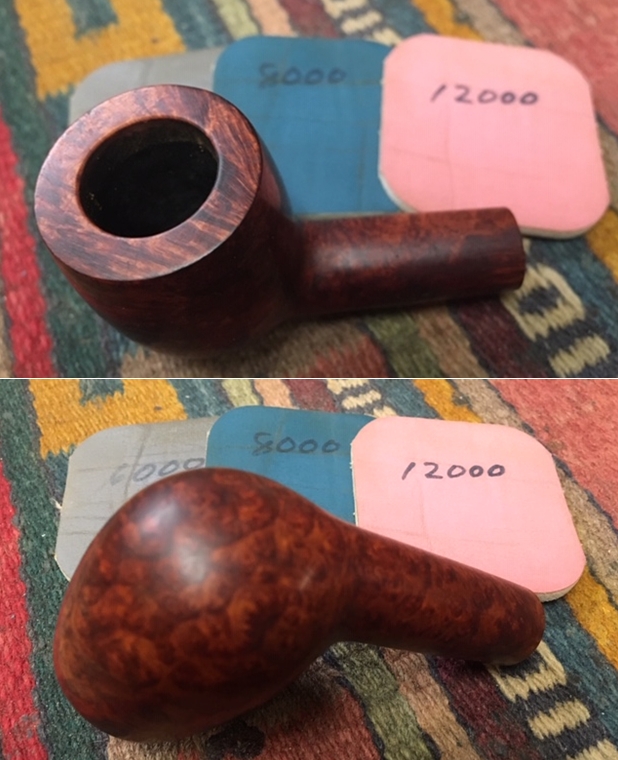
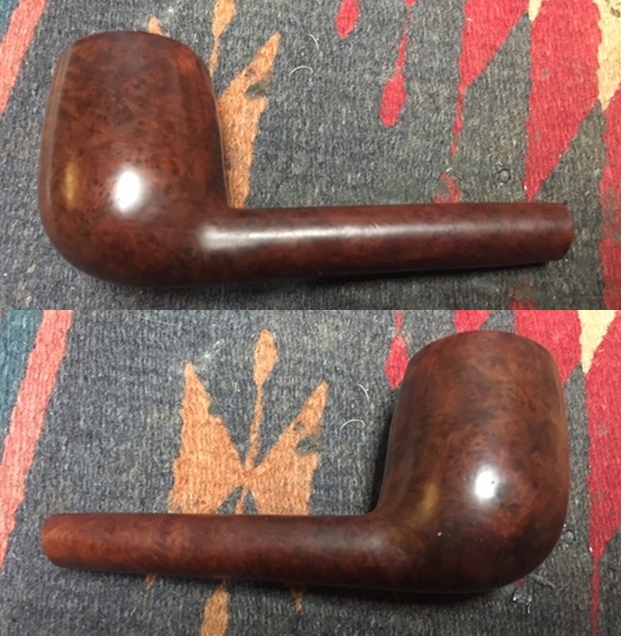
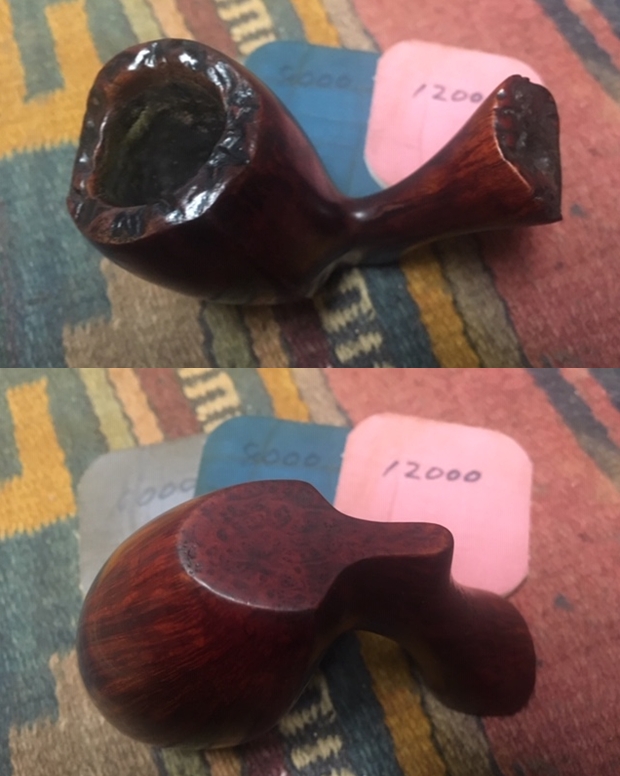
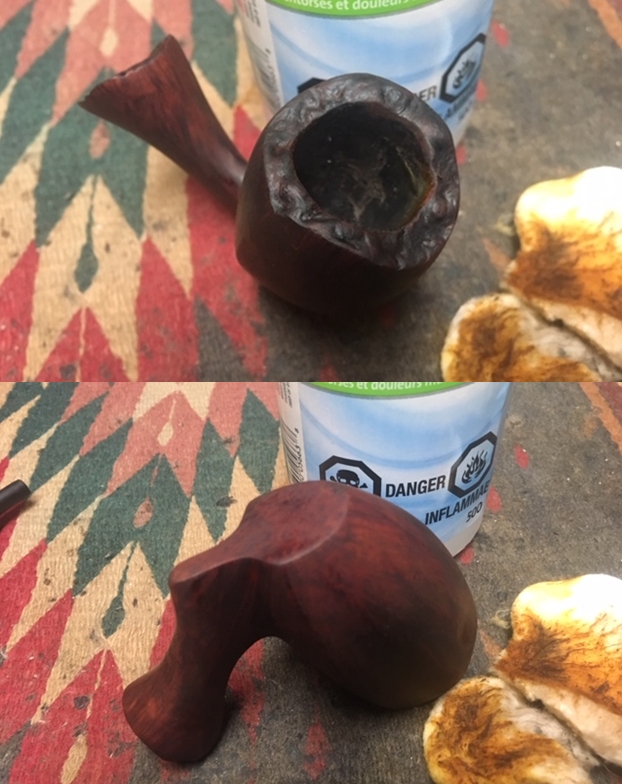 I polished the bowl and rim with micromesh sanding pads. I wet sanded it with 1500-12000 grit pads and wiped it down between pads with a soft cotton cloth. You can see the progress in the shine as you go through the photos.
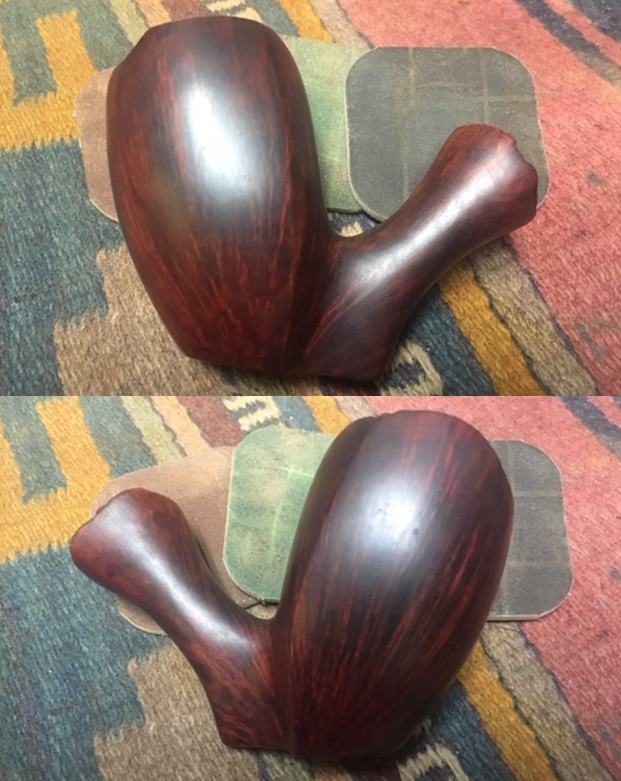
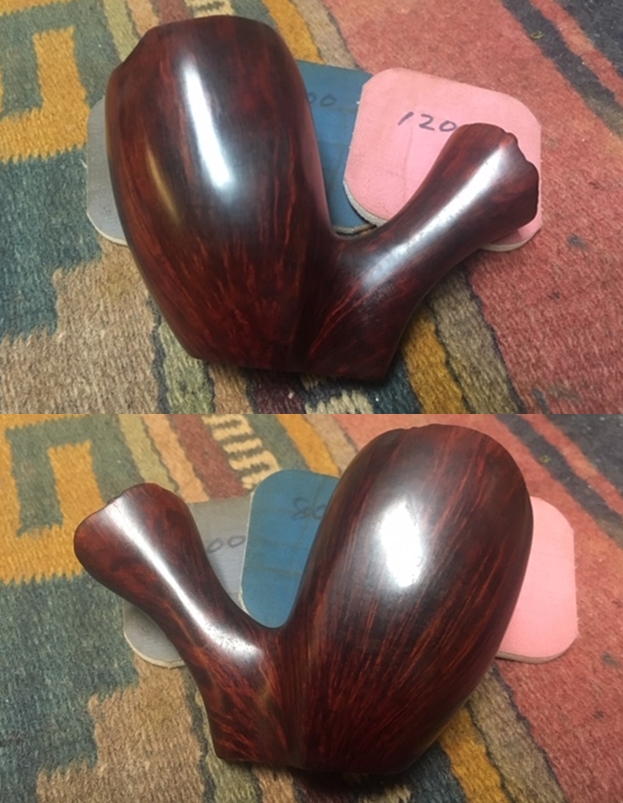
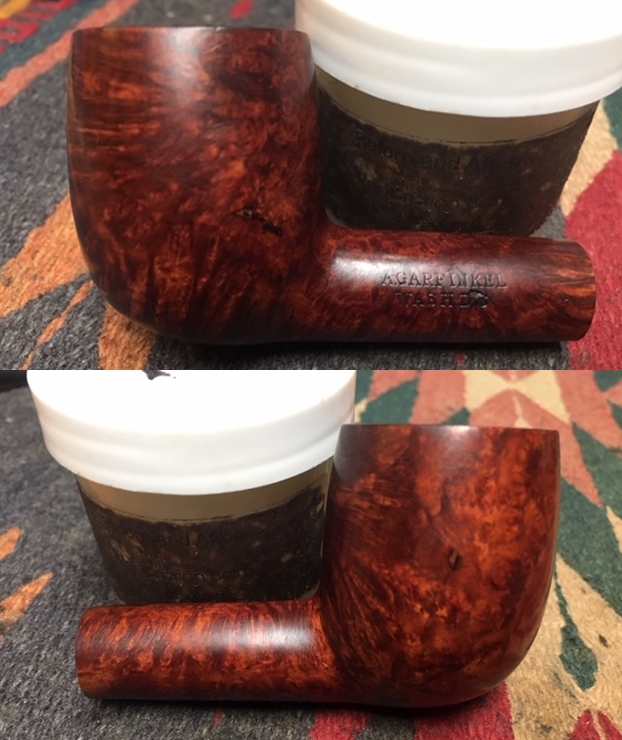
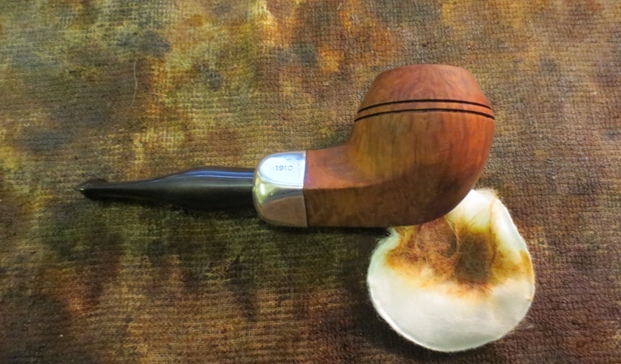
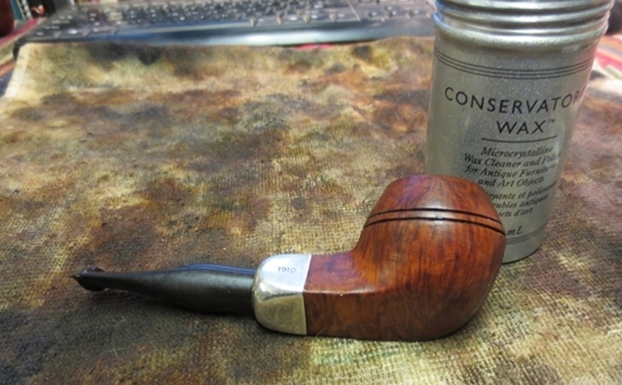
 I worked some Before & After Restoration Balm into the finish of the bowl and the plateau on the rim top and shank end with my fingertips to clean, enliven and protect it. I find that the balm really makes the briar come alive again. The contrasts in the layers of stain really made the grain stand out. I let the balm sit for a little while and then buffed with a cotton cloth to raise the shine. The pipe really looks good at this point. I am very happy with the way the pipe is looking at this point in the process.
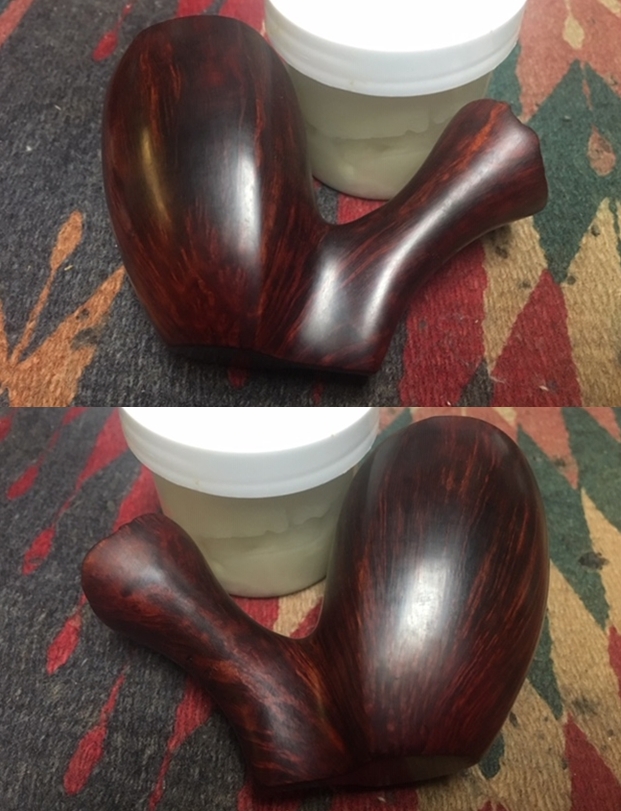
 With the outside of the bowl finished and the repairs on the inside hardened and cured it was time to smooth out the interior of the bowl. I sanded it with a piece of dowel wrapped with 220 grit sandpaper. I was able to remove the material around the repairs by sanding. I wiped the bowl down with alcohol on a cotton pad to clean up the dust.
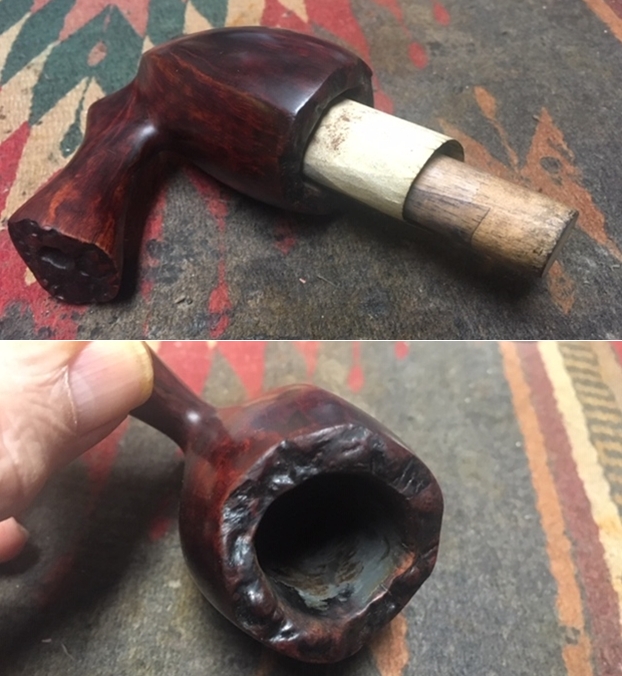
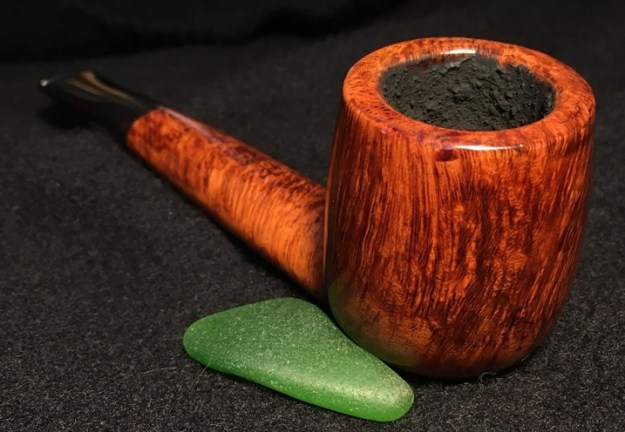
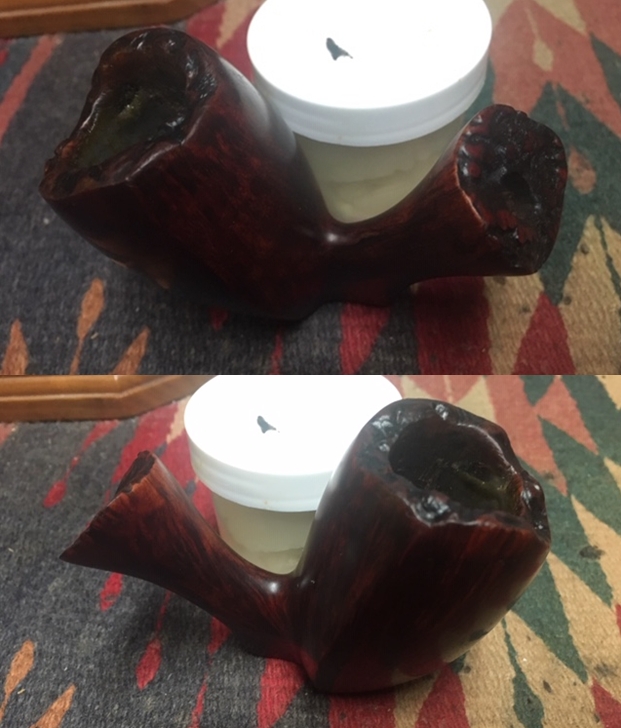
 I mixed up a batch of bowl coating – sour cream and charcoal powder blended together. The mixture dries hard and does not have any residual taste. I put a pipe cleaner in the airway to keep the coating out of it. I coated the bowl with the mixture by painting it on the briar with a folded pipe cleaner. Once the bowl was coated, I set it aside to dry. I will need to wipe off the rim top and externals before waxing the bowl but it is looking very good at this point.
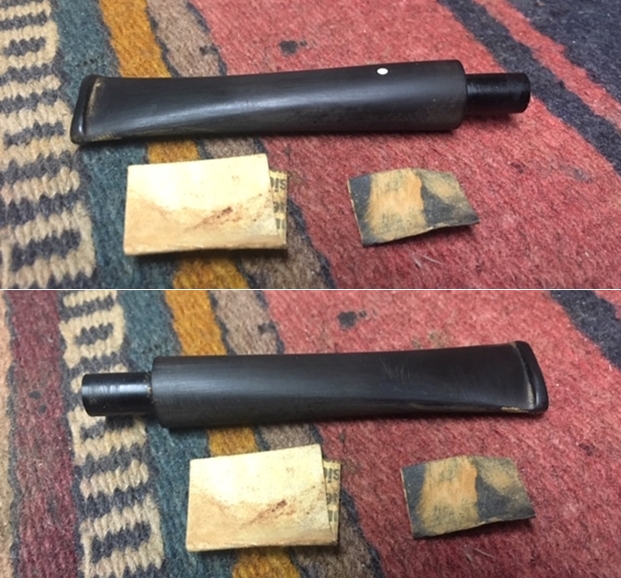
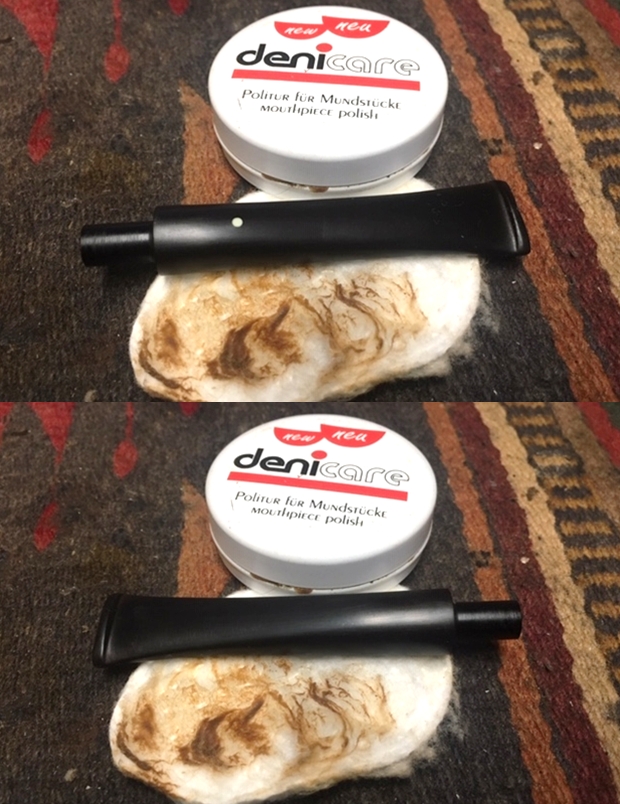
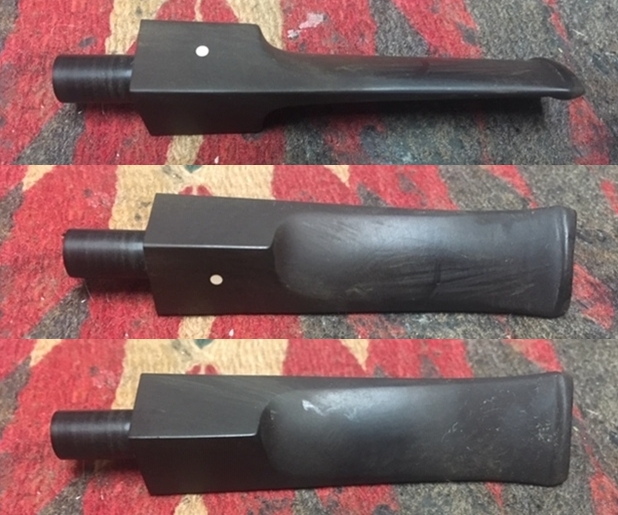
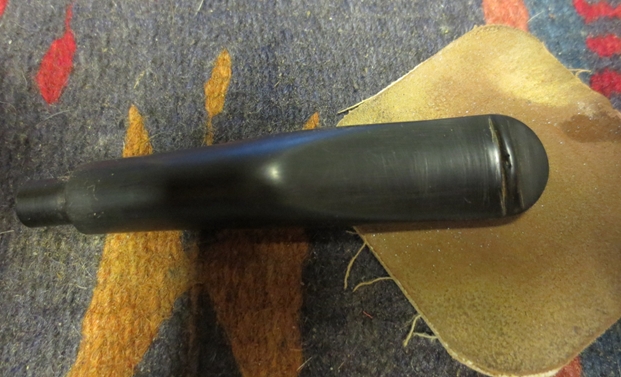
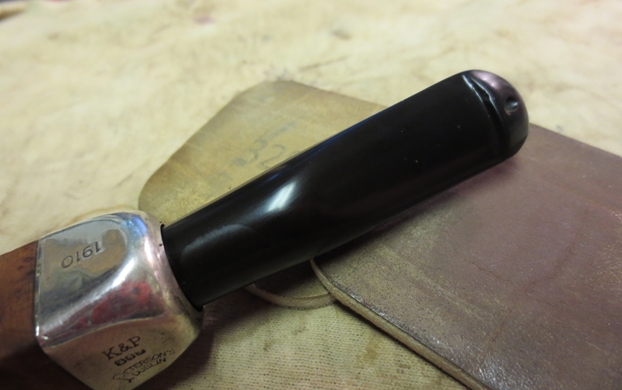
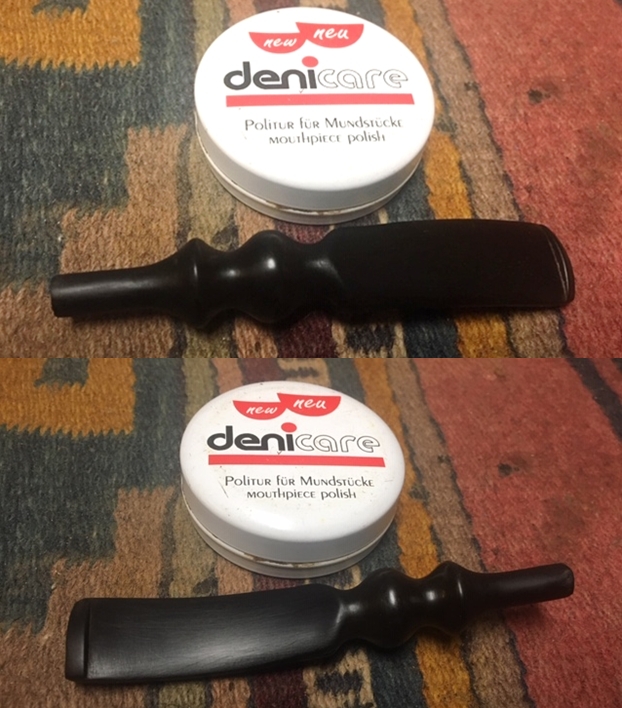
 I set the bowl aside to allow the bowl coating to cure and turned my attention to the “new” stem. I sanded the stem with 220 grit sandpaper to remove the oxidation followed by 400 grit wet dry sandpaper. I rubbed the stem down with Denicare Mouthpiece Polish and a cotton pad to remove remnants of oxidation and to further blend in the sanding. The stem was showing some promise at this point in the process.
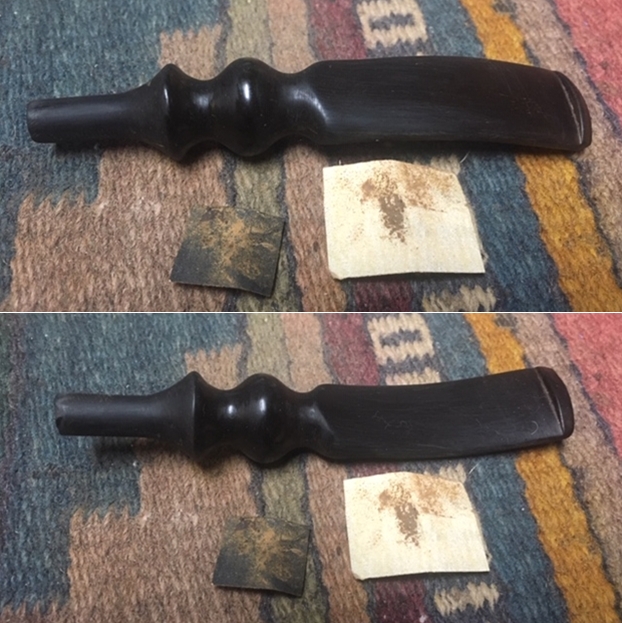
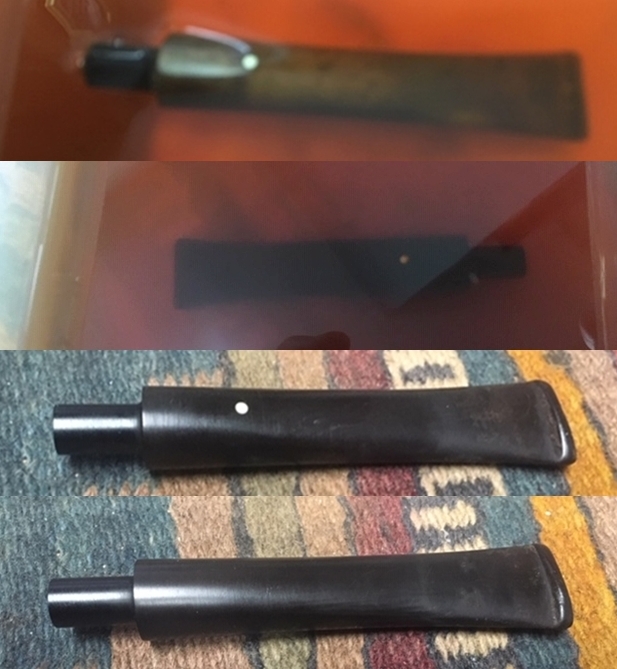
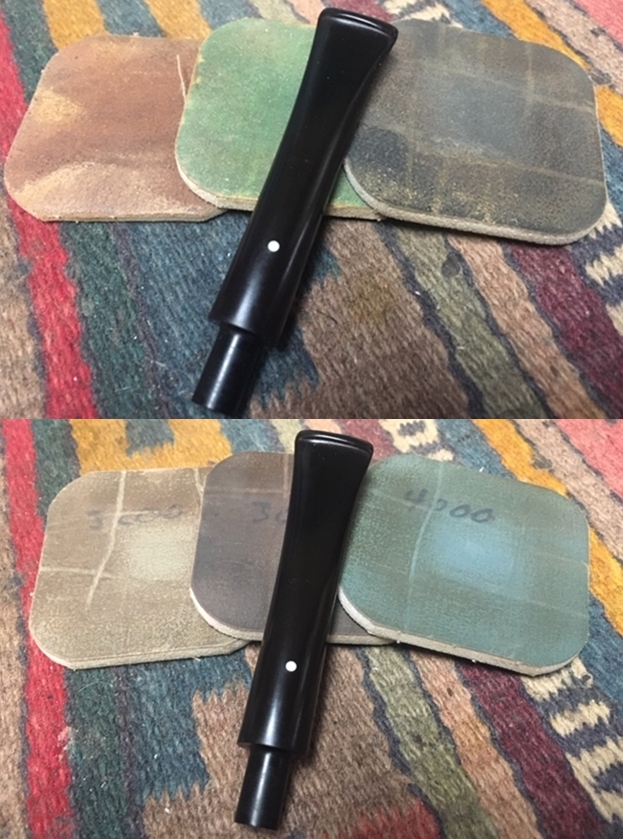
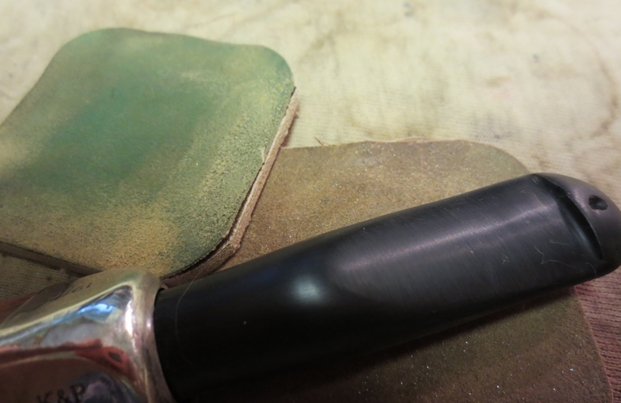
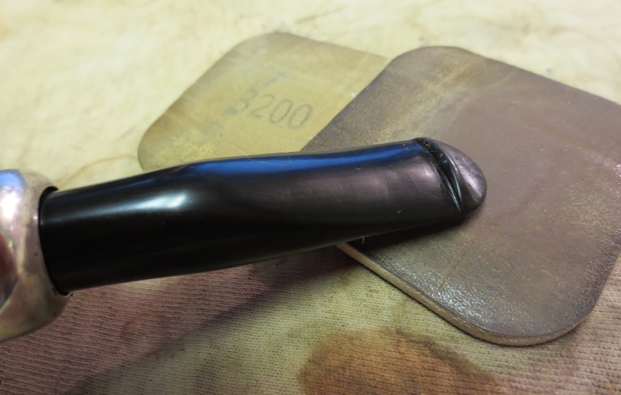
 I heated the stem over a candle to soften the vulcanite. When it was softened I bent it over a jar to match the angle that would match the top of the bowl.
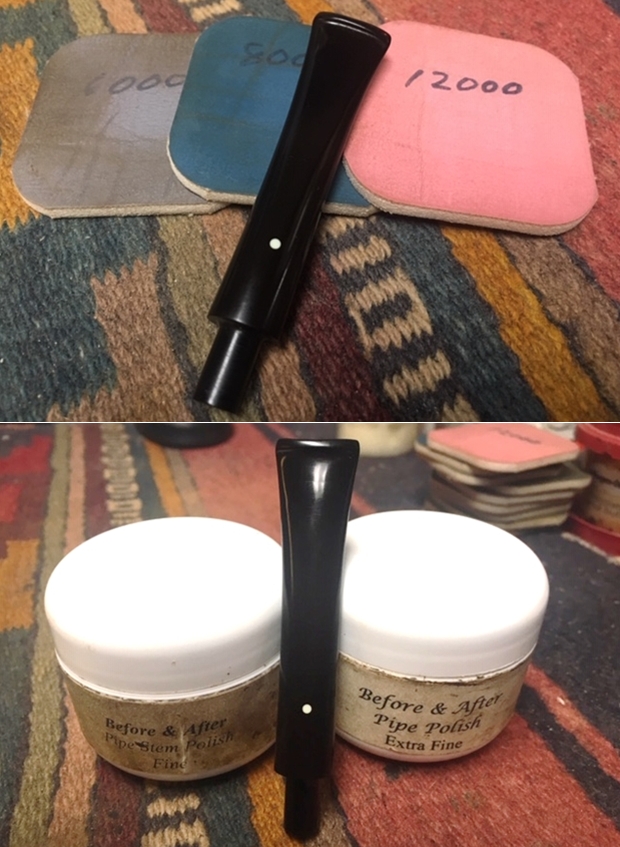
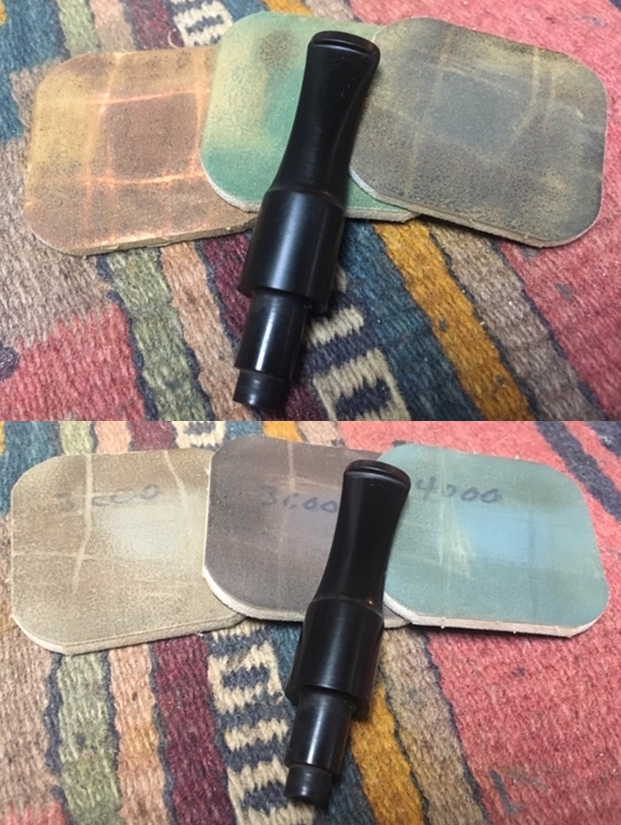
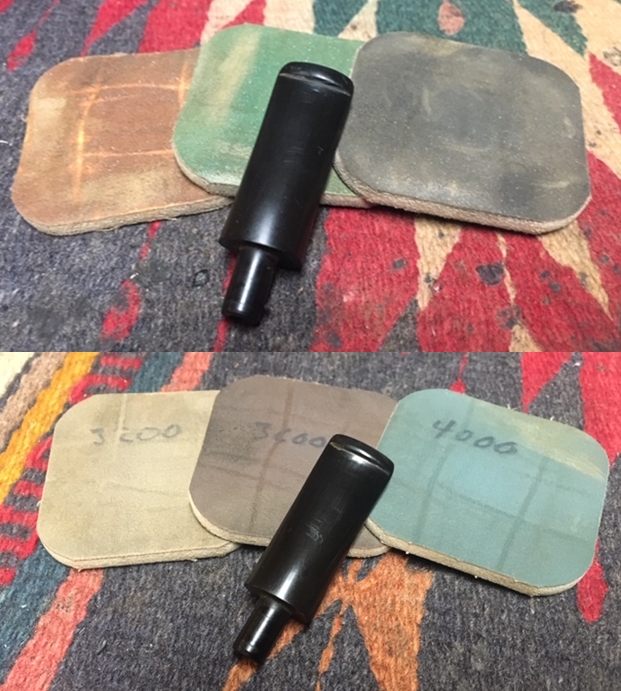
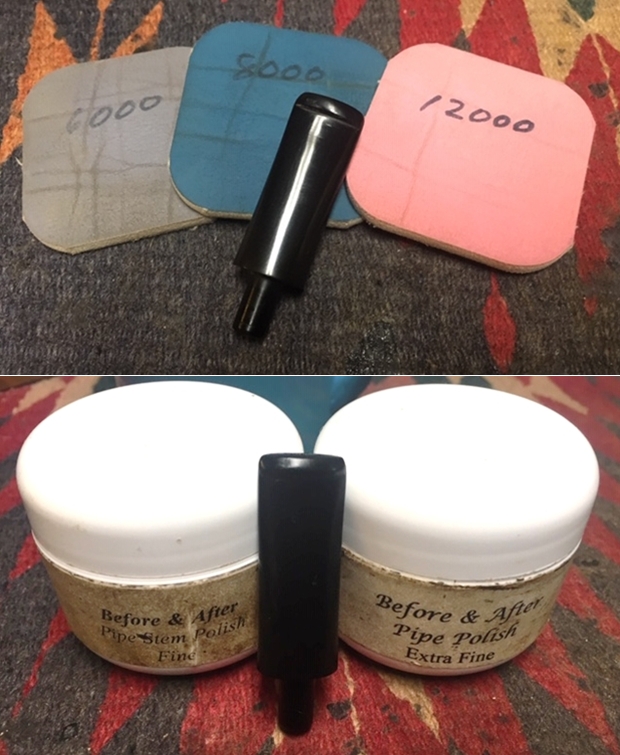
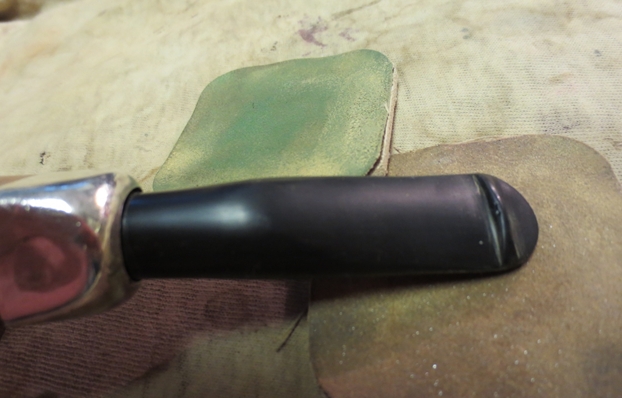
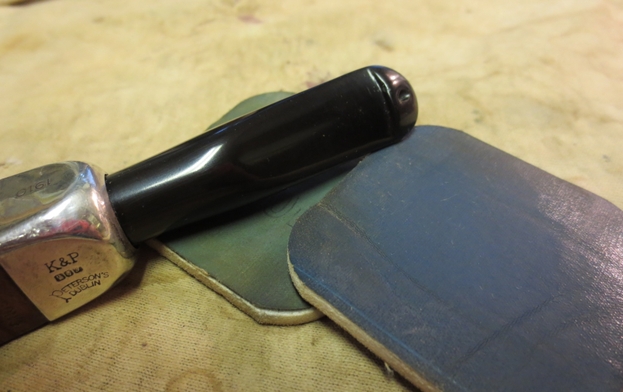
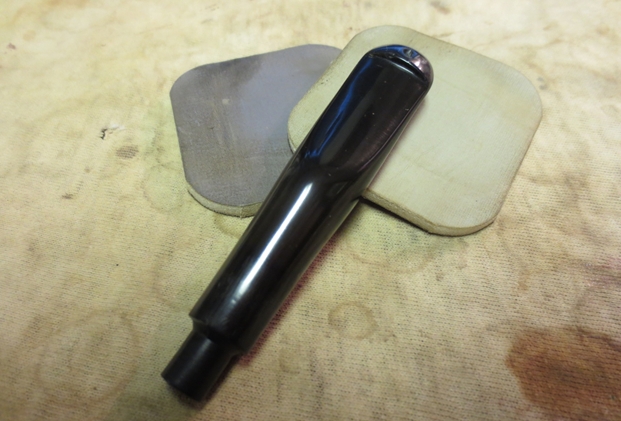
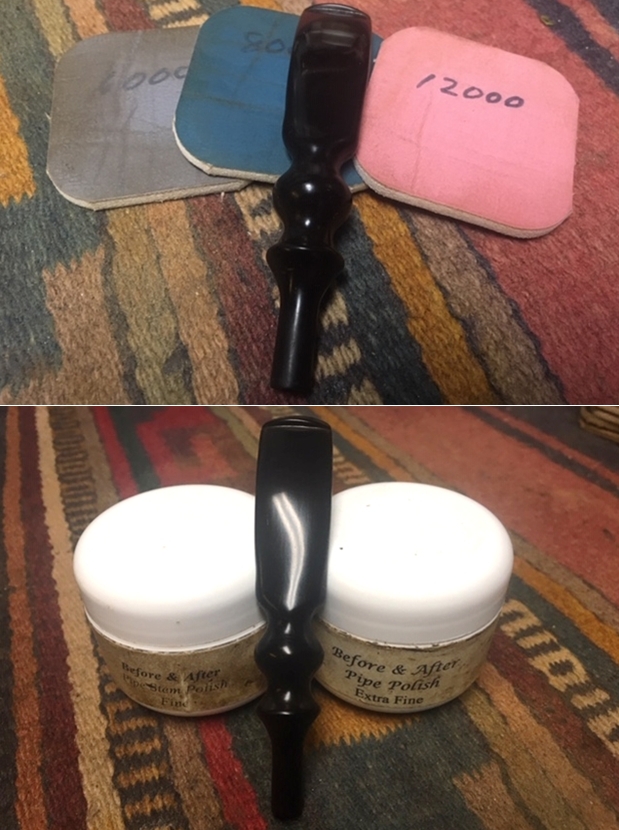
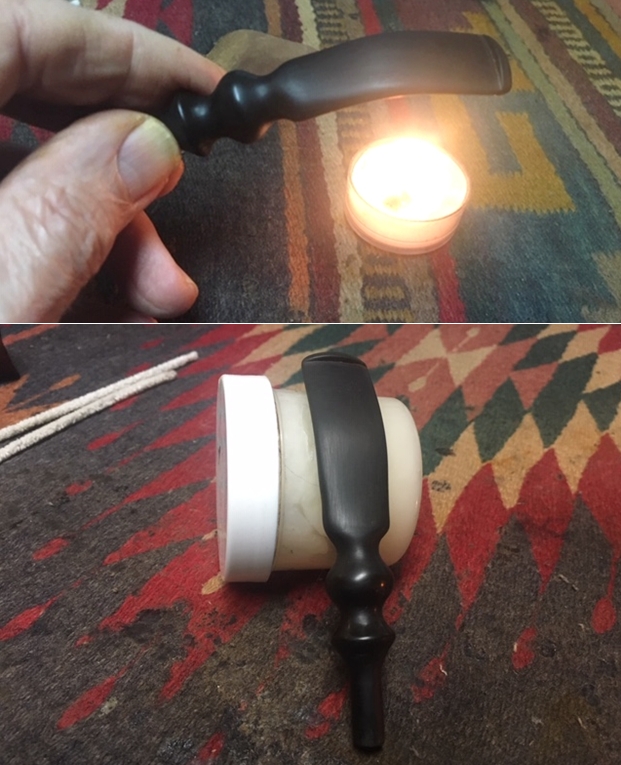 I polished the stem with micromesh sanding pads – wet sanding it with 1500-12000 grit pads. I polished it further with Before & After Pipe Stem Polish – both fine and extra fine. I finished by wiping it down with Obsidian Oil after each pad and set it aside to dry.
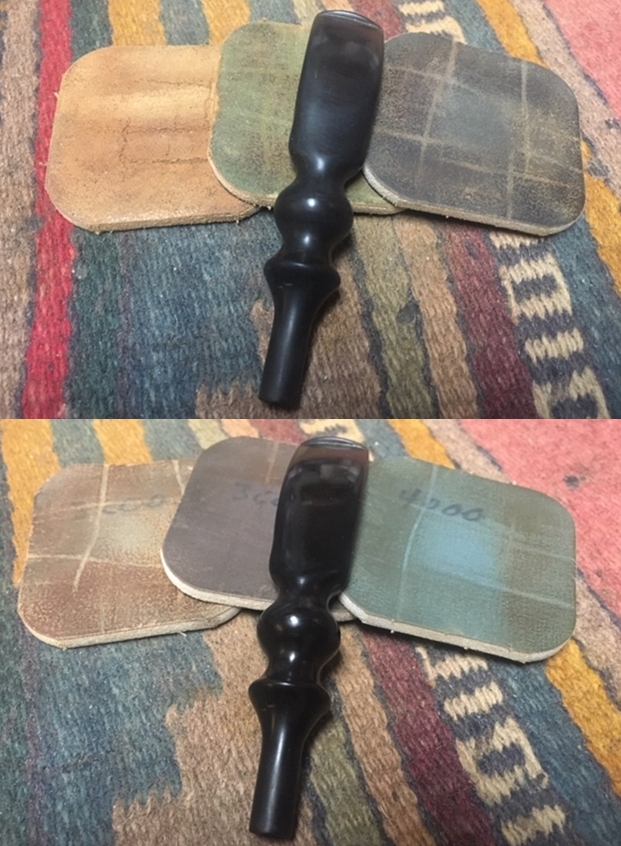
 Once the bowl coating had cured I wiped the bowl down with a microfiber cloth and hand wiped off any residual bowl coating on the outside with a damp cotton pad. I put the stem back
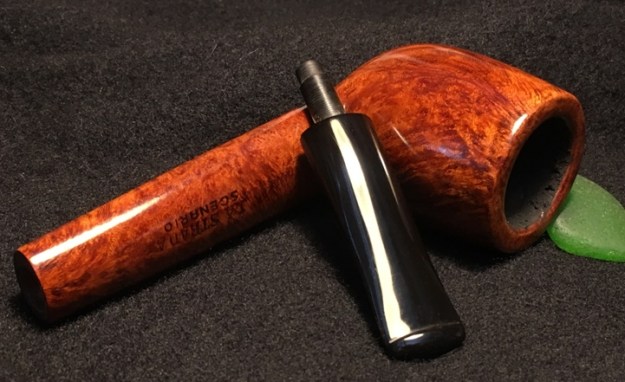
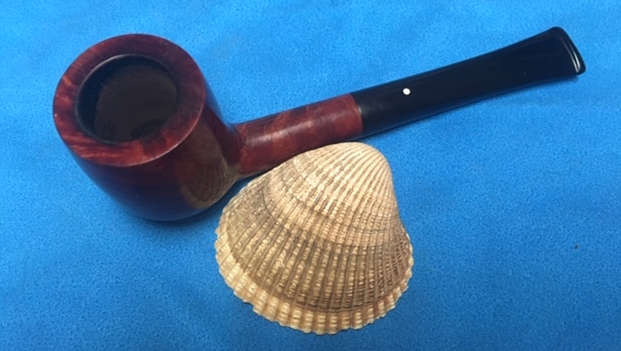
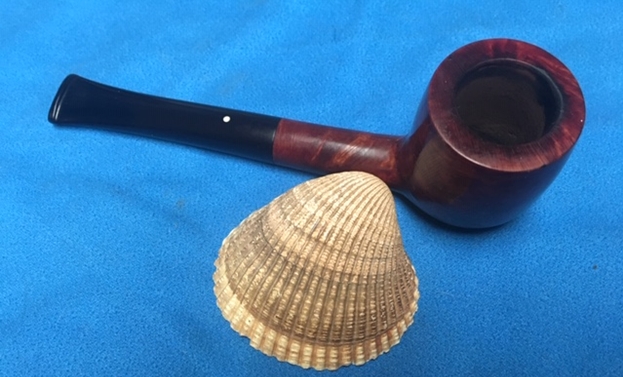
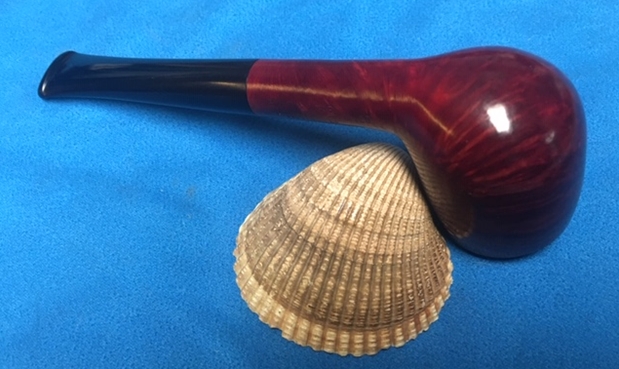
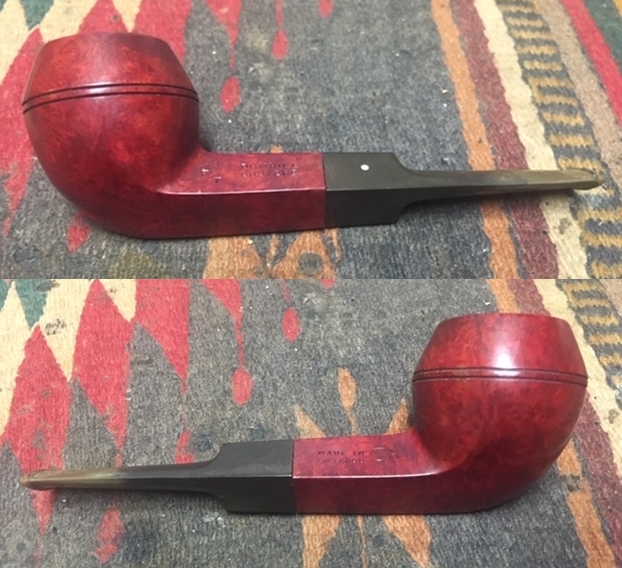
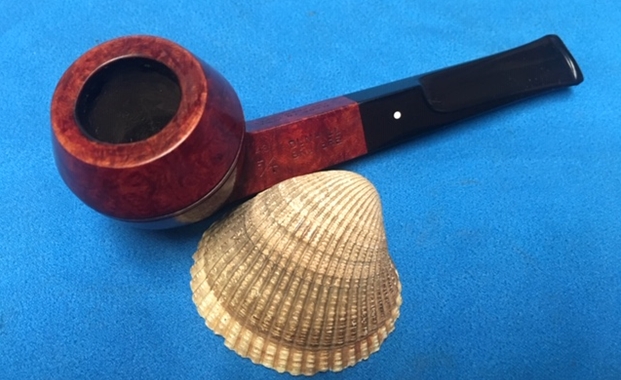
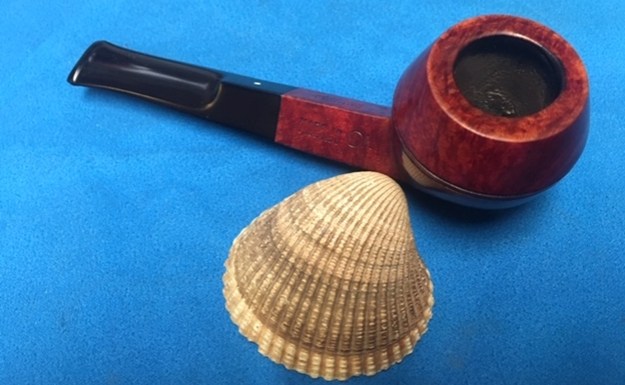
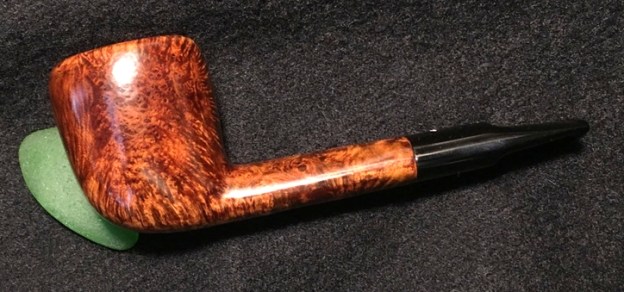
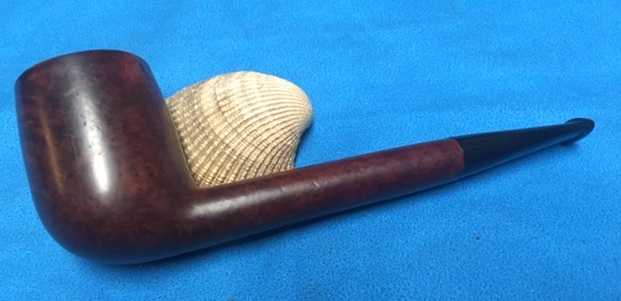
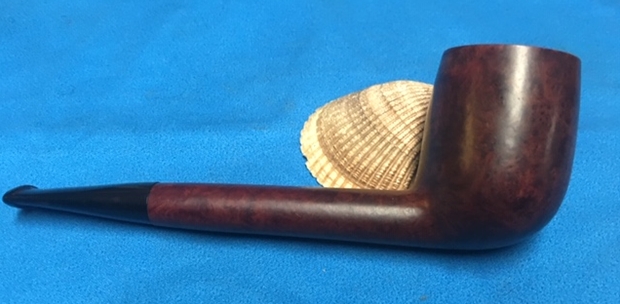
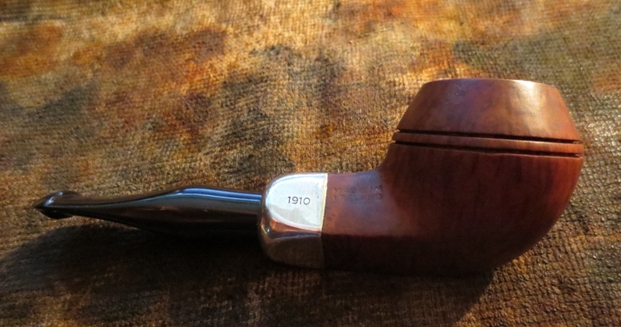
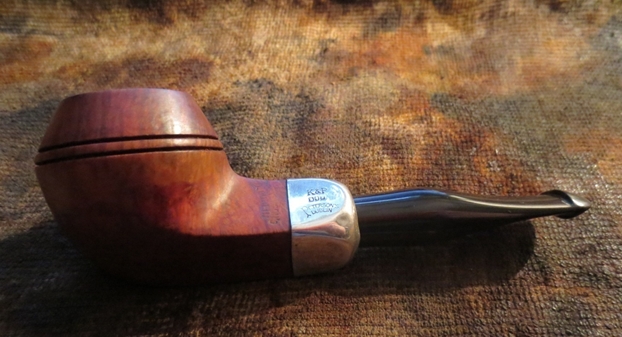
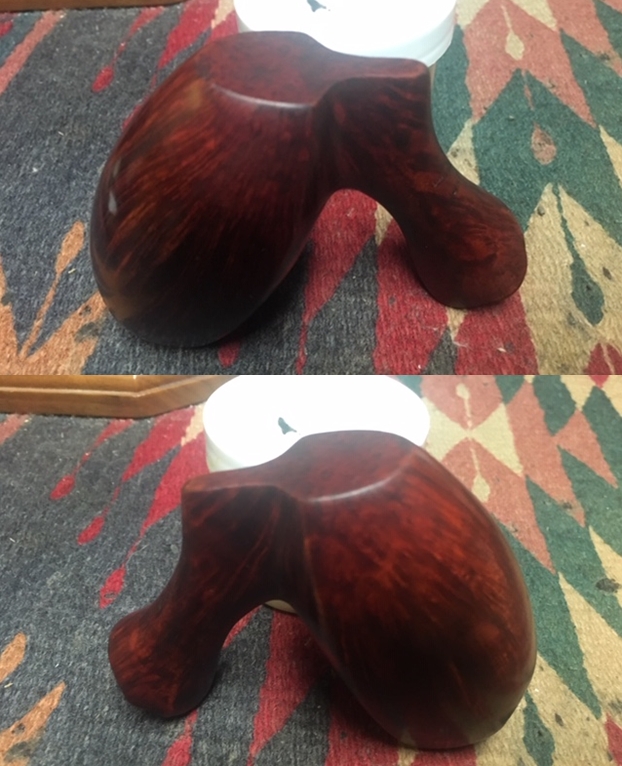
 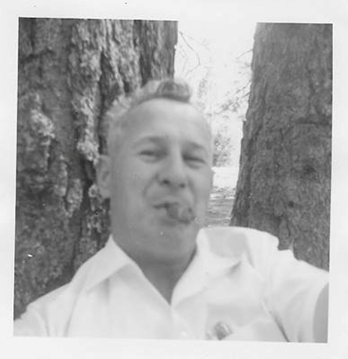 on the bowl and polished the bowl and stem with Blue Diamond polish on the buffing wheel. I gave the bowl and the stem multiple coats of carnauba wax. I buffed the pipe with a clean buffing pad to raise the shine. I hand buffed it with a microfiber cloth to deepen the shine. The new darker stain works well to mask the darkening and make the grain really pop. The pipe polished up really well. The polished black vulcanite bit seemed to truly come alive with the buffing. This Freehand feels great in my hand and it is a sitter as well. It must have been a fine smoking pipe judging from the condition it was when we received it from Jennifer. There should be a lot of life left in this Champ of Denmark by Karl Erik. Have a look at it with the photos below. The dimensions are Length: 6 ½ inches, Height: 2 3/4 inches, Outside diameter of the bowl: 1 1/2 inches, Chamber diameter: 7/8 of an inch. This is one that will go on the rebornpipes online store shortly. If you want to carry on the pipe trust of George Leghorn let me know. Thank you Jennifer for trusting us with his pipes. Thanks to each of you who are reading this blog. Remember we are not pipe owners, we are pipemen and women who hold our pipes in trust until they pass on into the trust of the next pipeman or woman.