Blog by Steve Laug
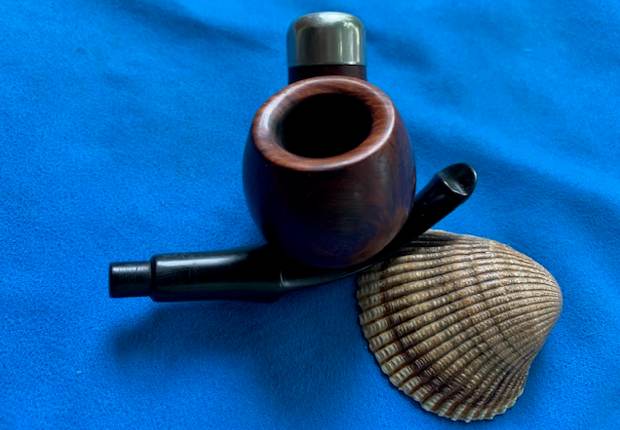
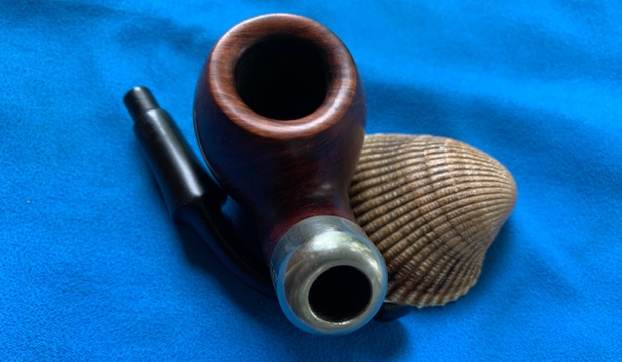
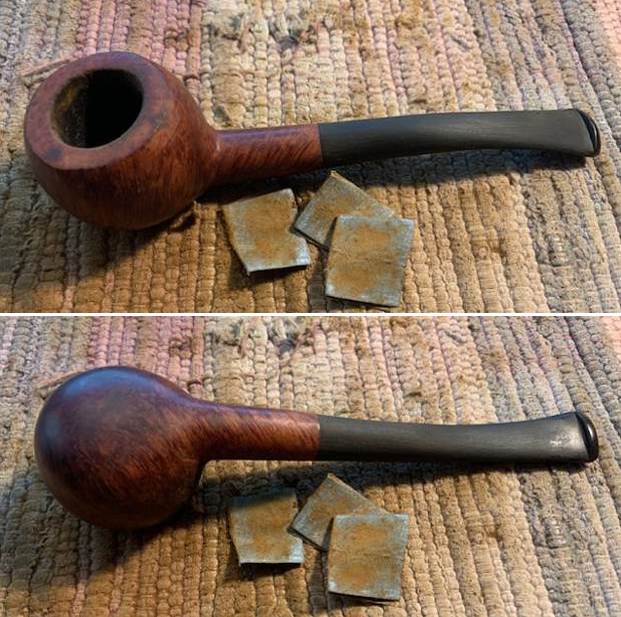
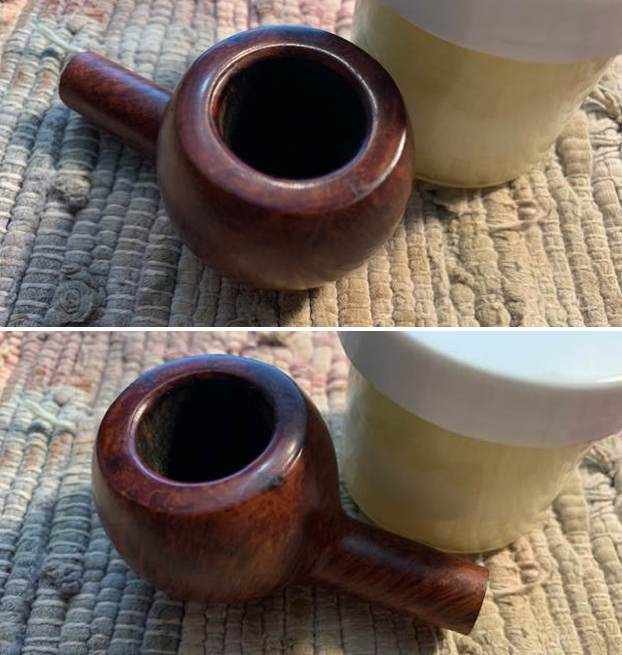
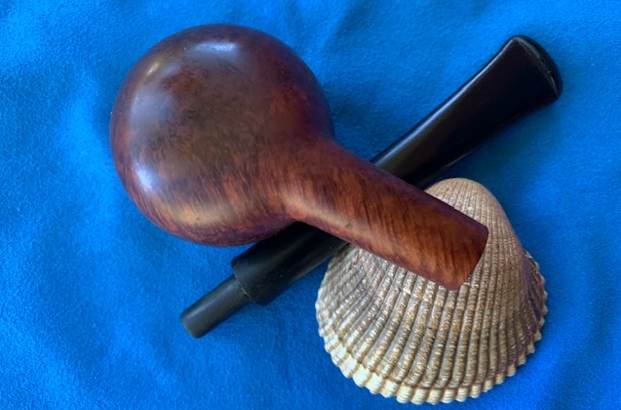
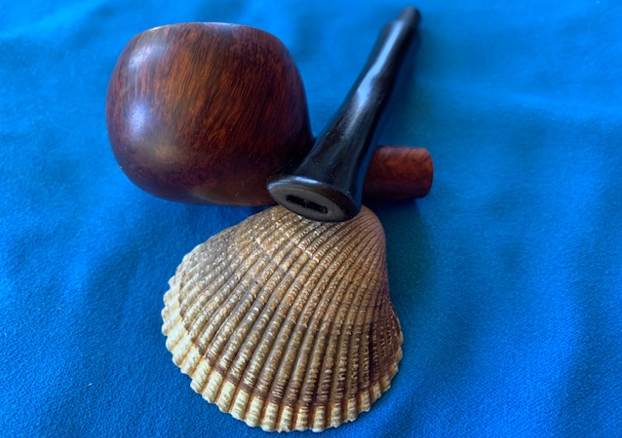
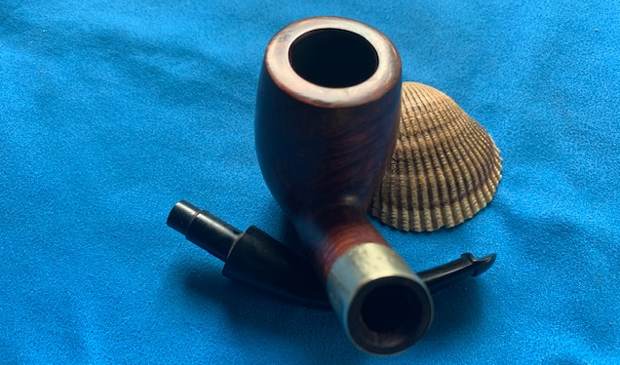
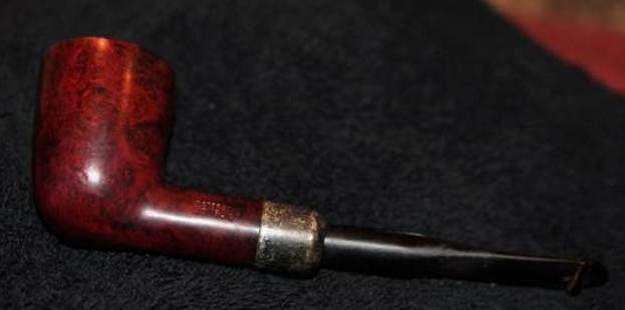
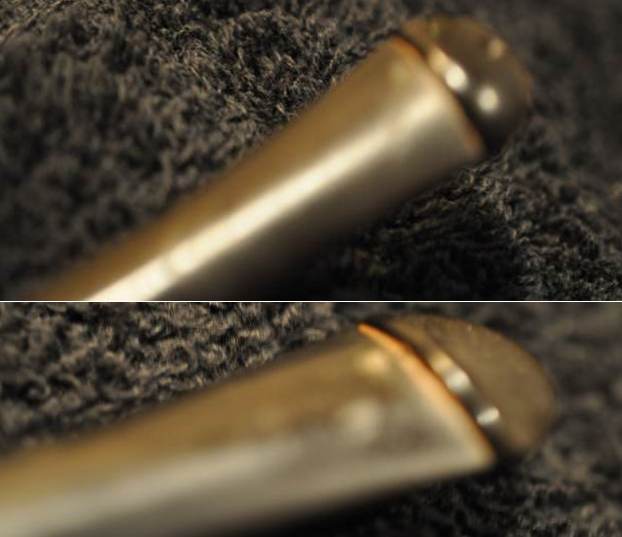
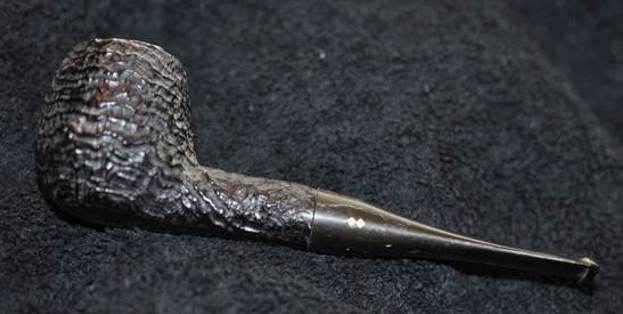
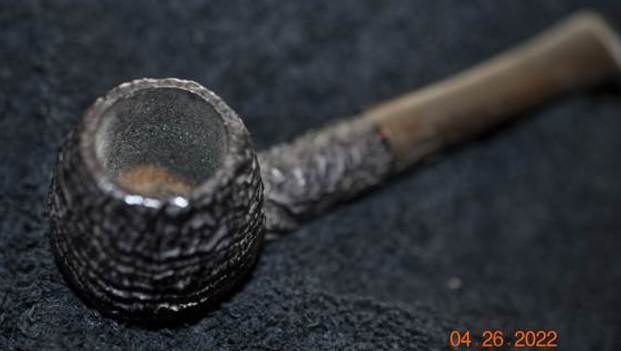
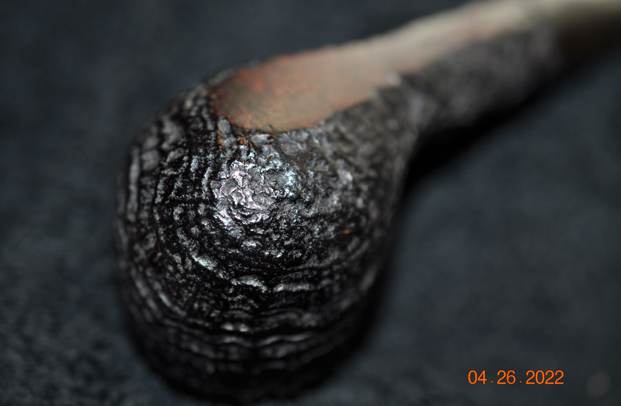
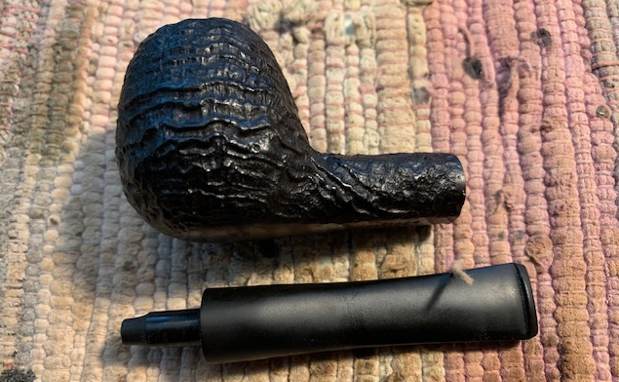
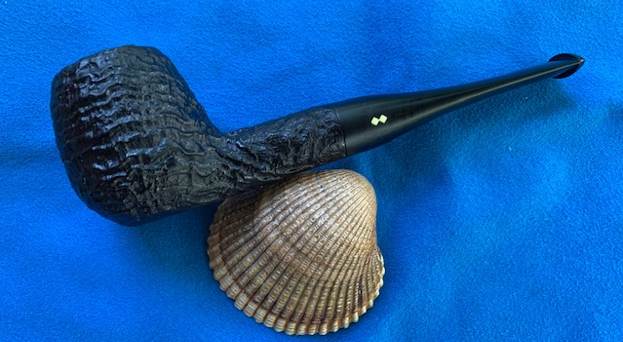
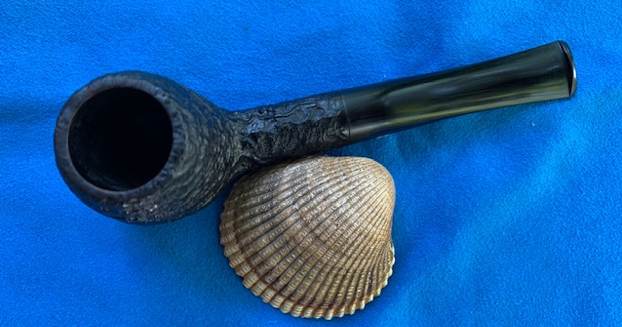
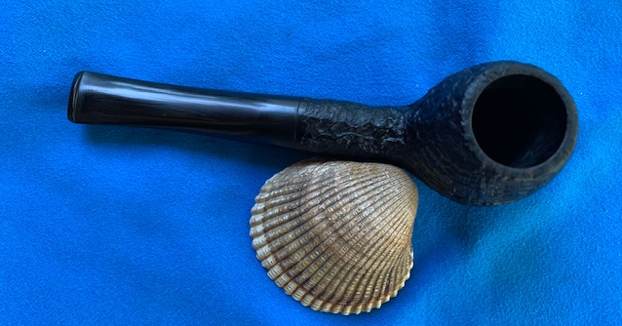
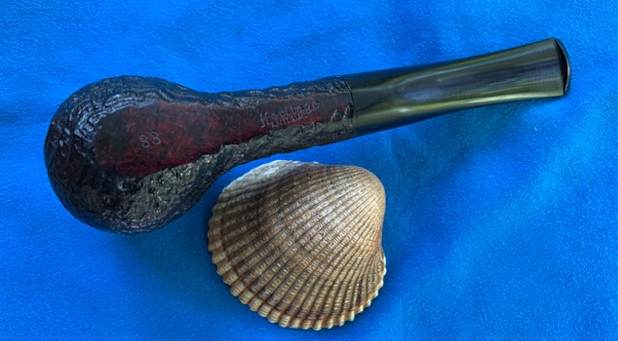
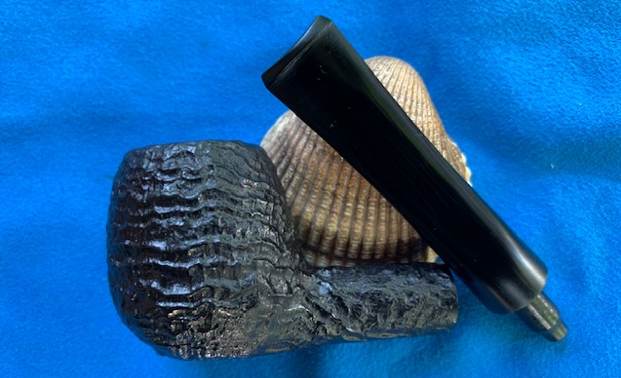
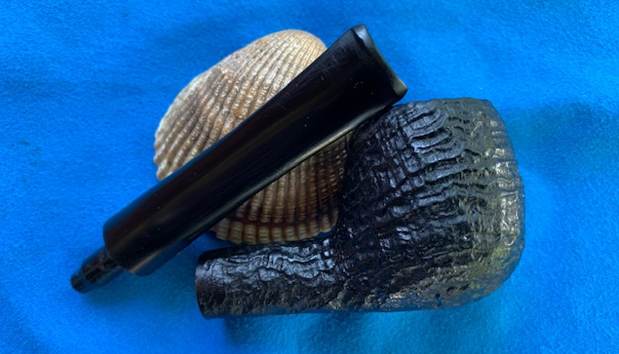
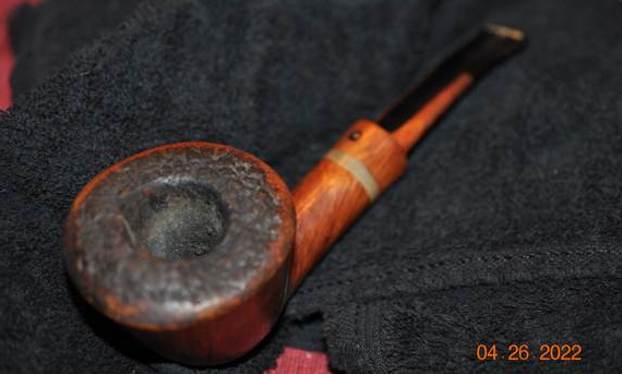
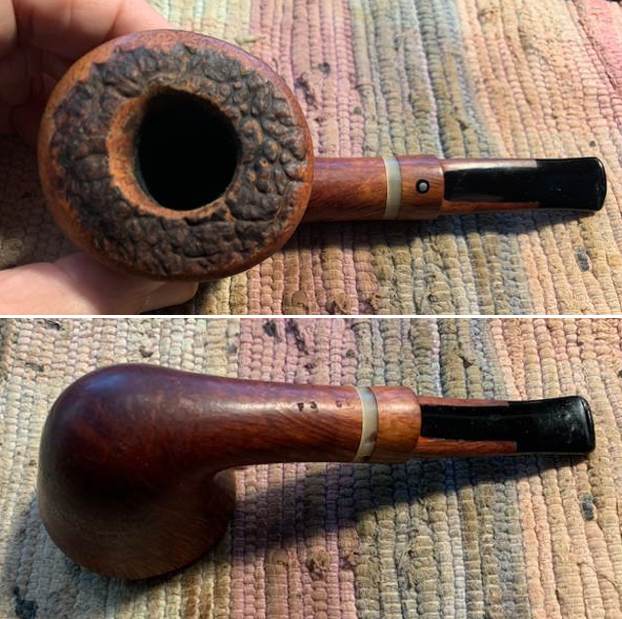
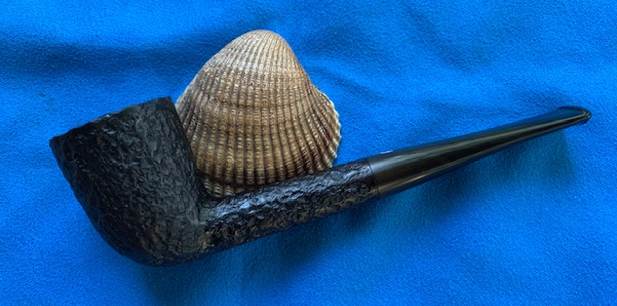
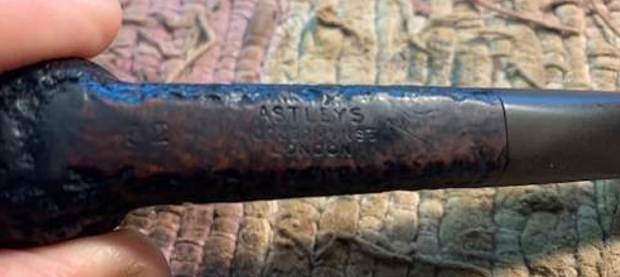
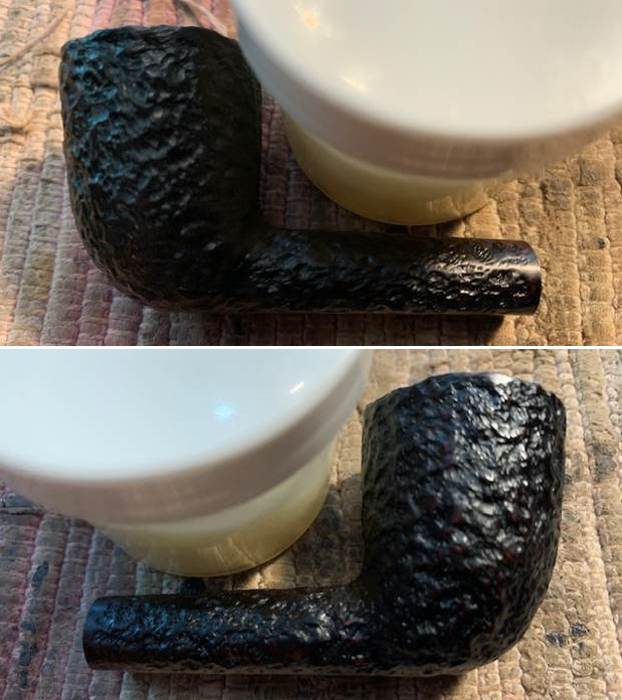
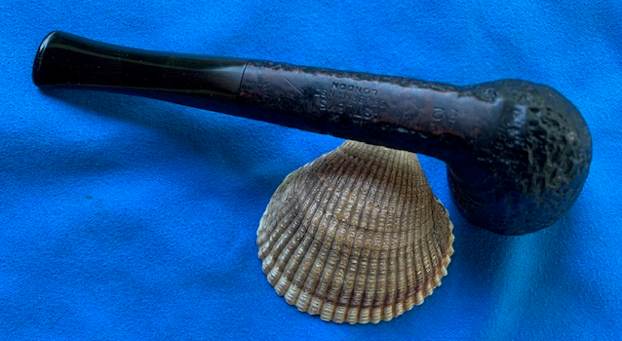
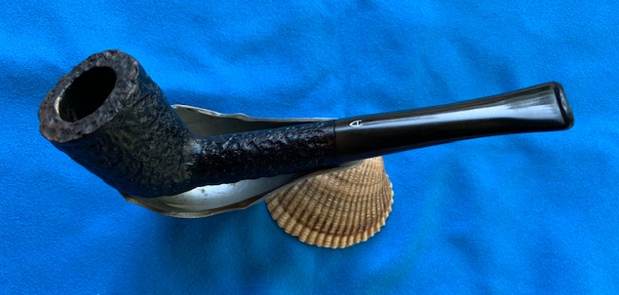
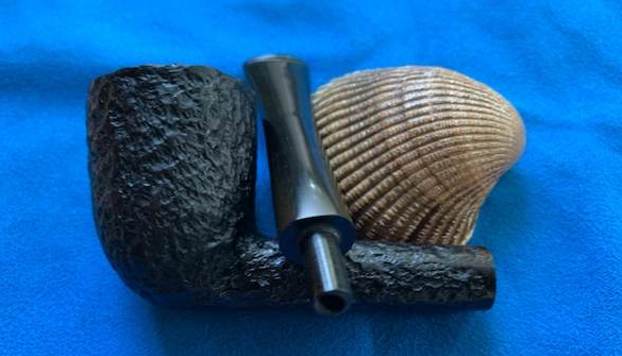
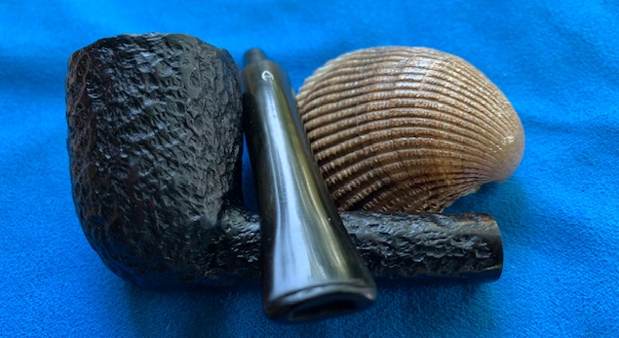
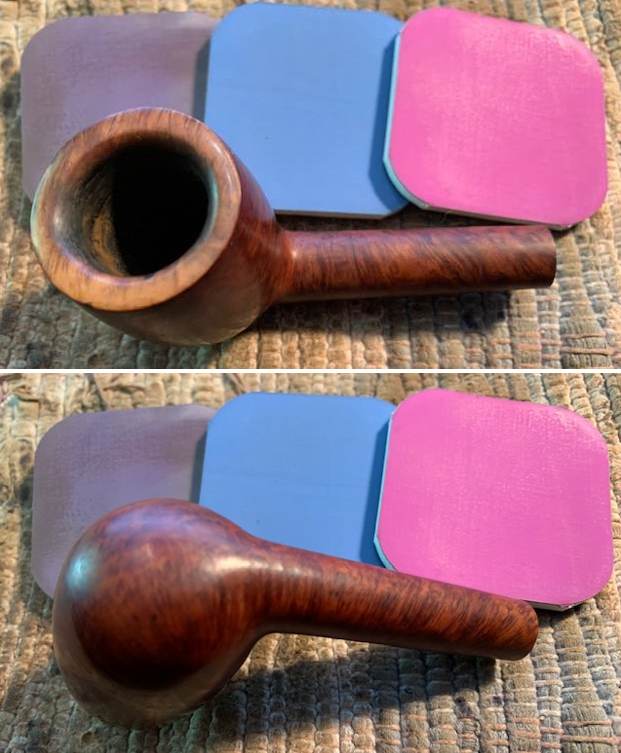
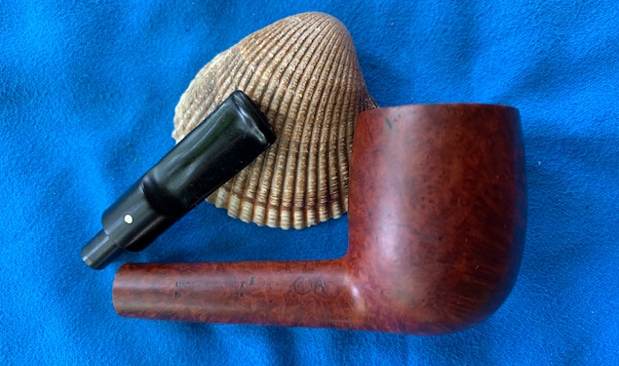
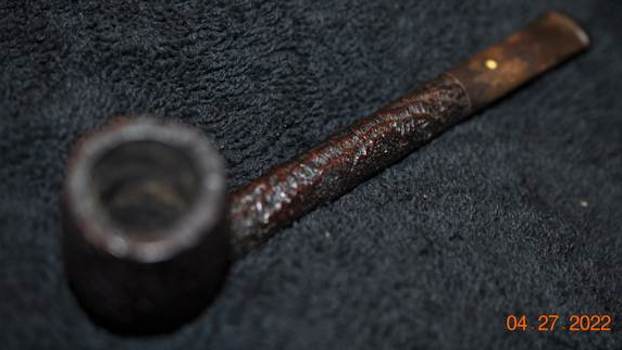
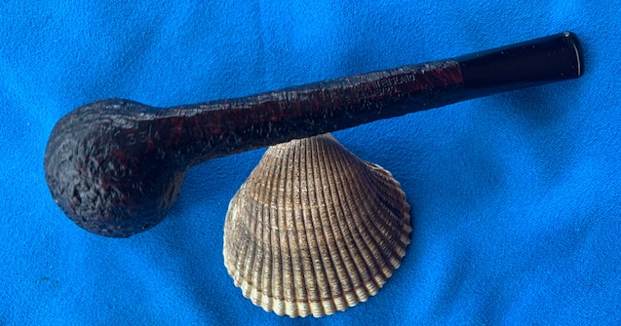
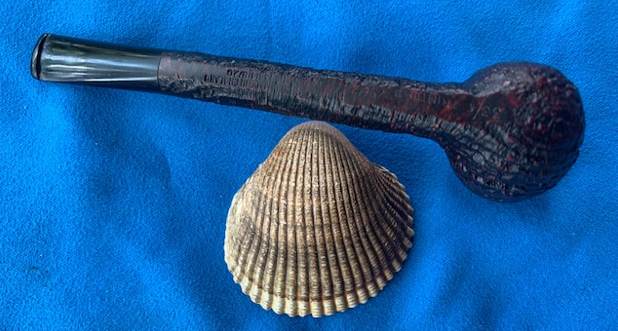
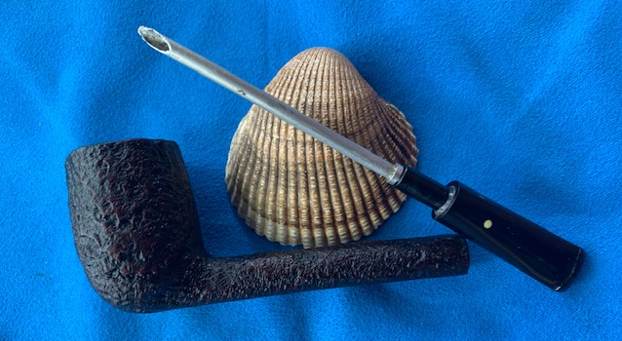
We picked this older Peterson’s System Standard on a Facebook auction on 02/02/22 from Cottage Grove, Minnesota, USA. It was stamped on the left side of the shank and read Peterson’s [over] System [over] Standard. On the right side it is stamped and reads Made in the Republic of Ireland (three lines) with the shape number 303 underneath. The pipe was a tired old workhorse with lots of grime ground into the finish and a thick cake in the bowl. There was a heavy lava over flow on the rim top and some serious burn damage on the right front of the top and edges from repeated burning with a flame lighter. The nickel ferrule was tired but undamaged and stamped K&P [over] Peterson. The sump and mortise were black with tars and oils. The stem was a mess with oxidation and a lot of heavy calcification build up on the P-lip button and underside. There were some light tooth marks and chatter on both sides just ahead of the button. Jeff took these photos before he did his clean up work to give an idea of the condition of the pipe.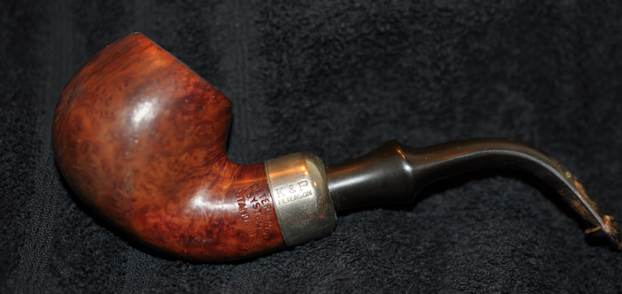
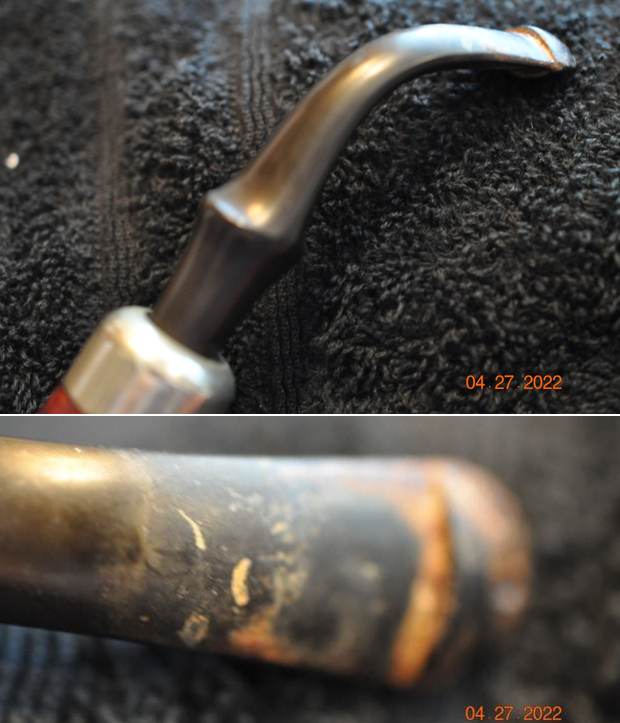
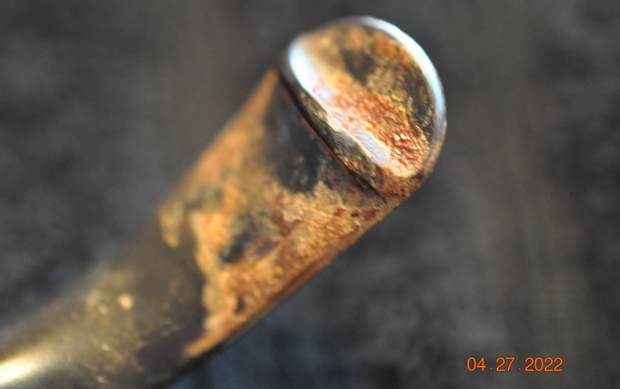
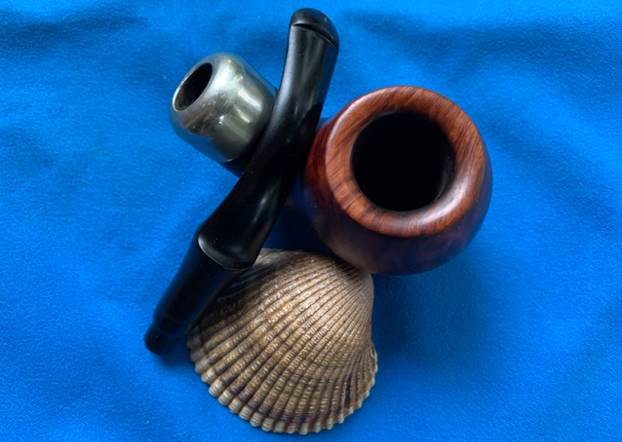
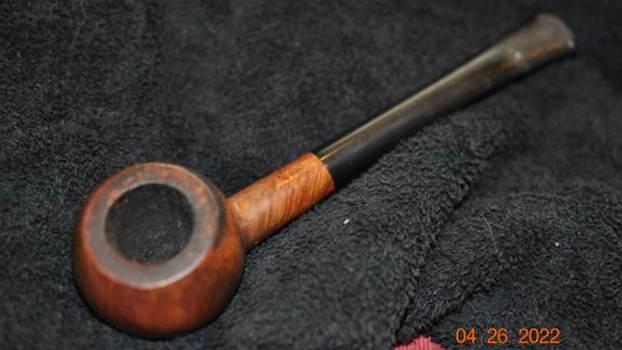
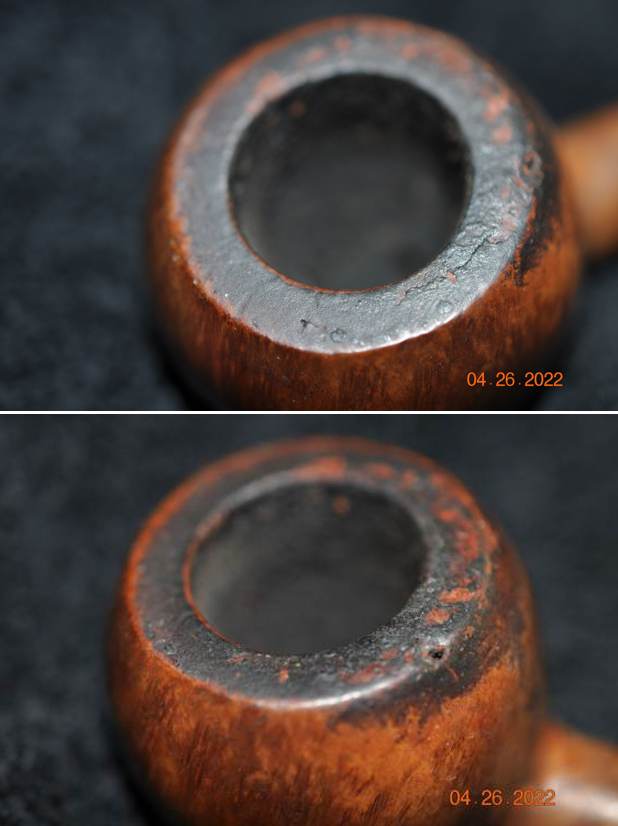
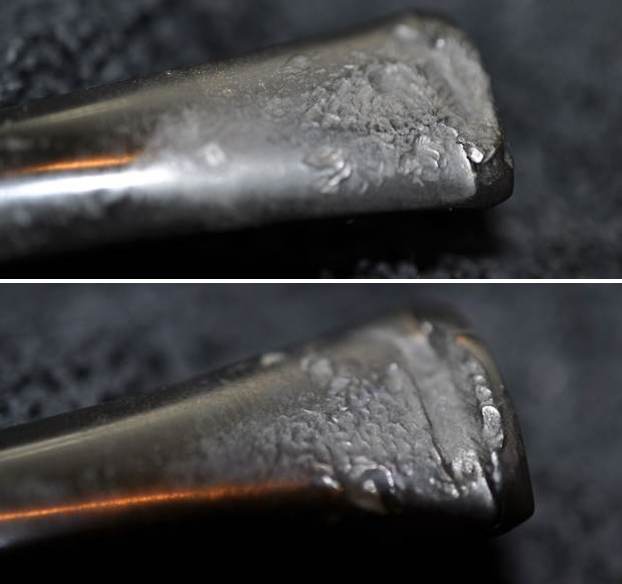
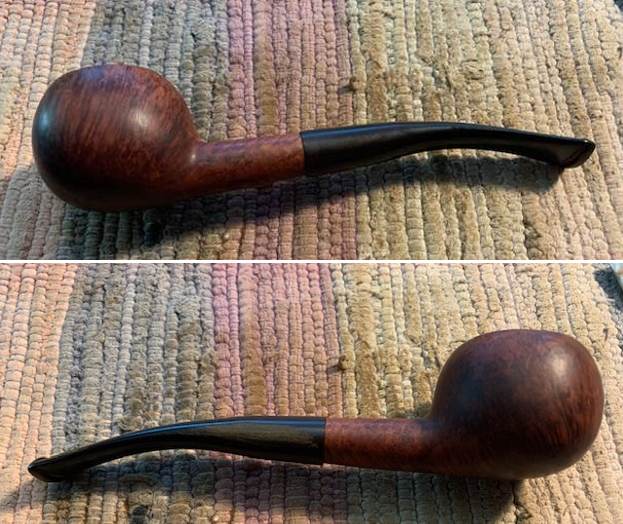
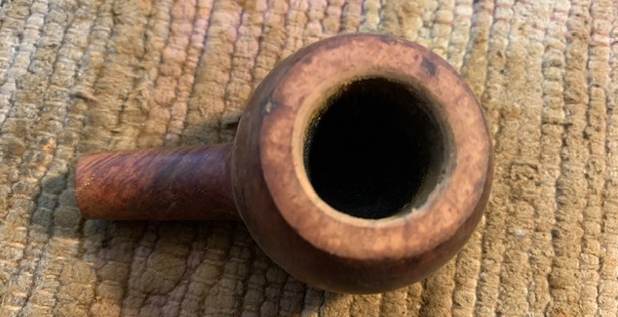
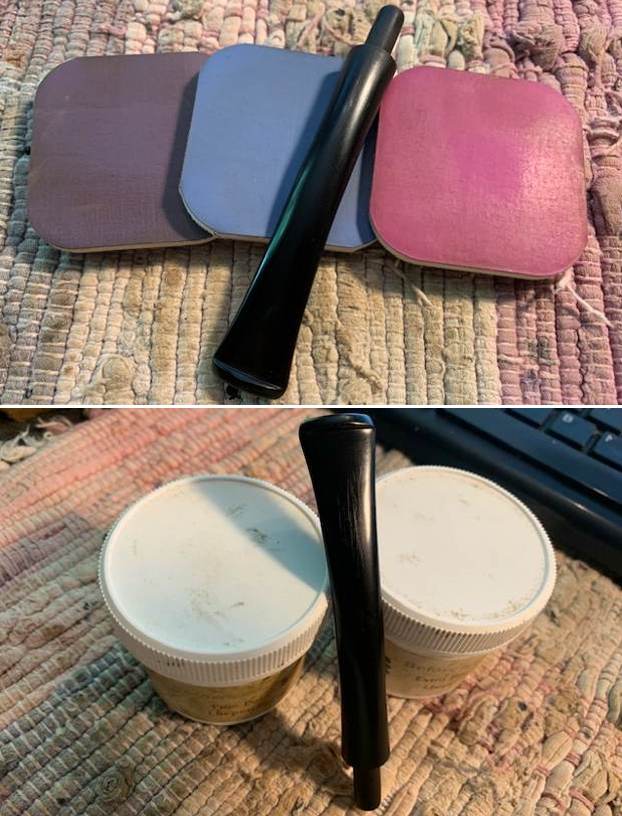
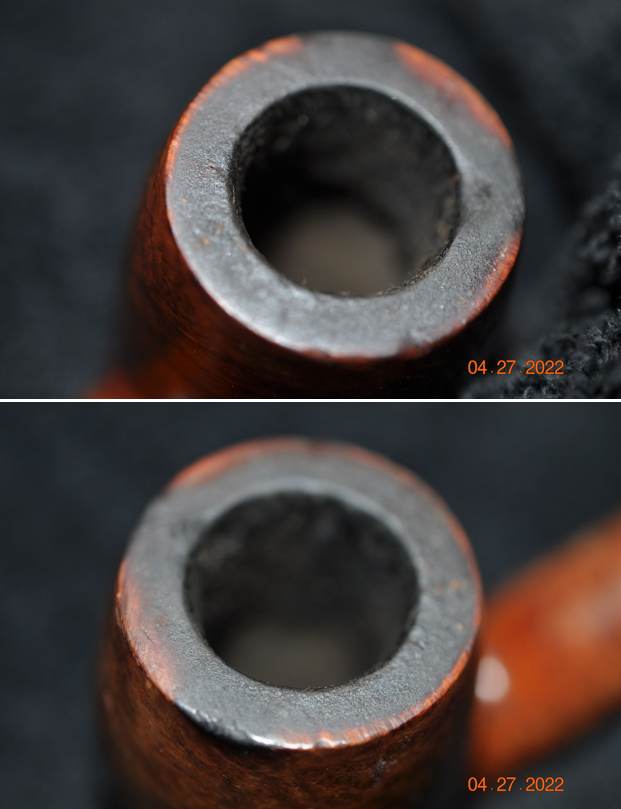
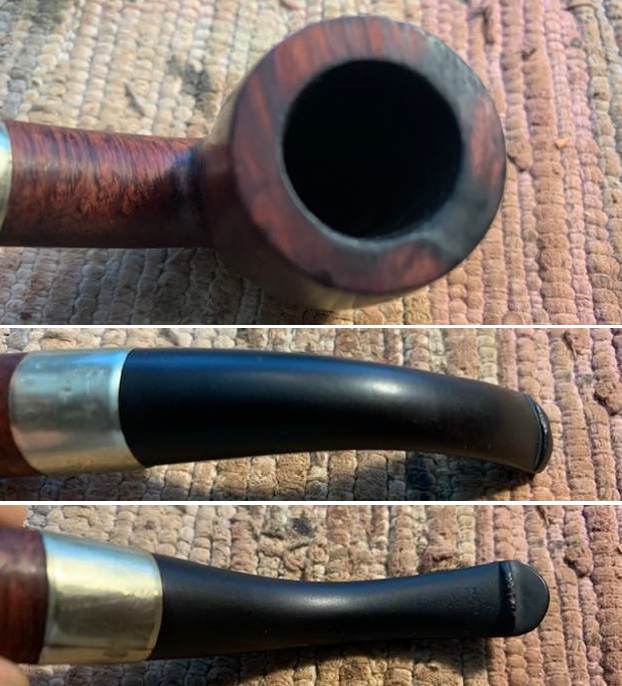
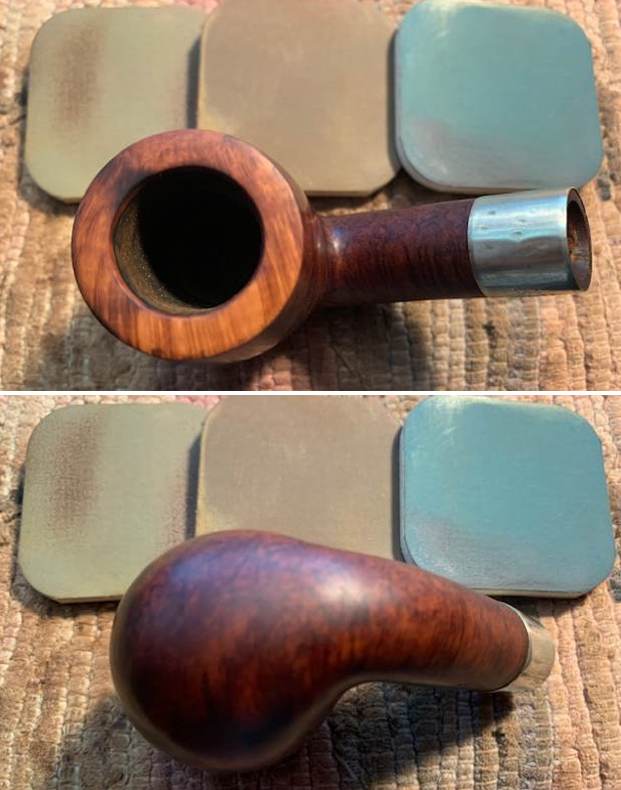
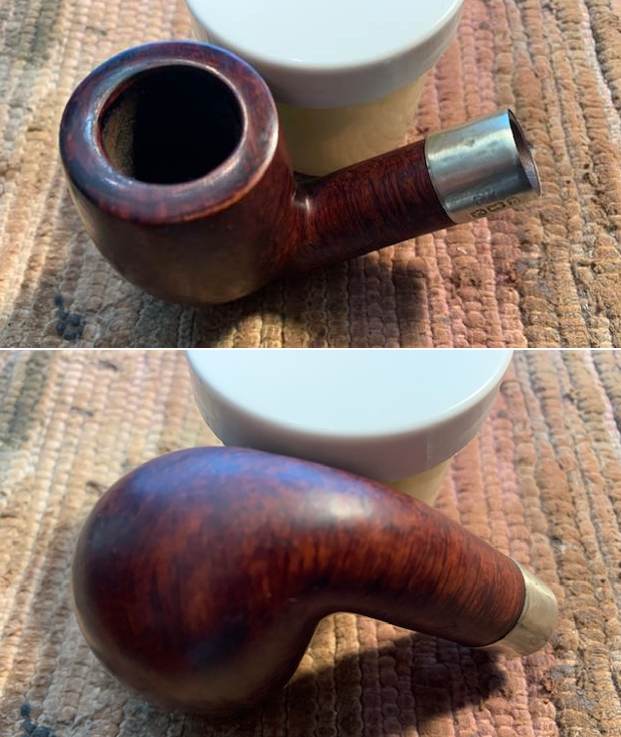
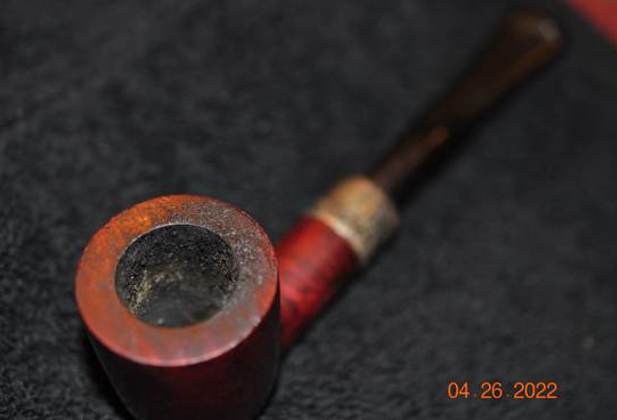
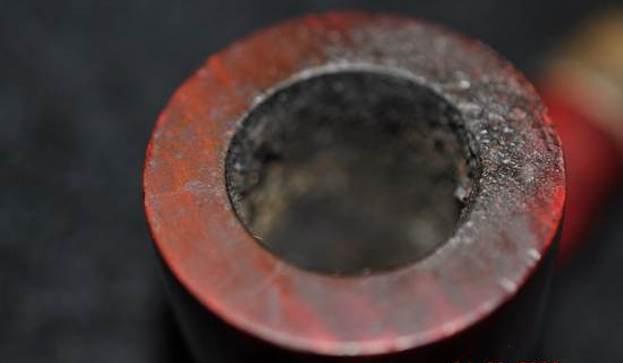
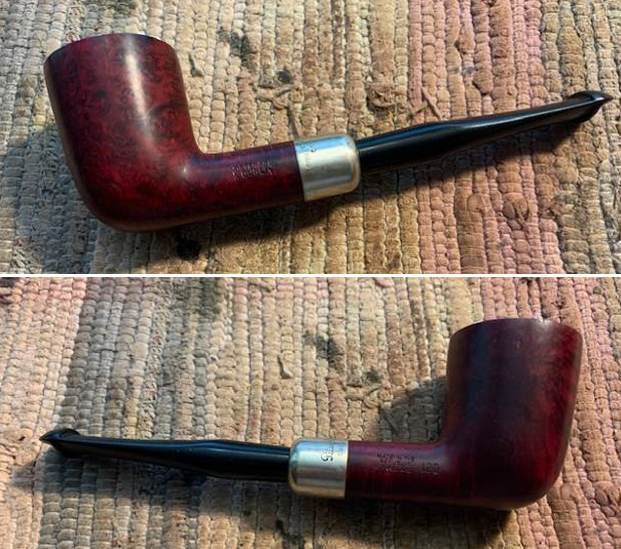
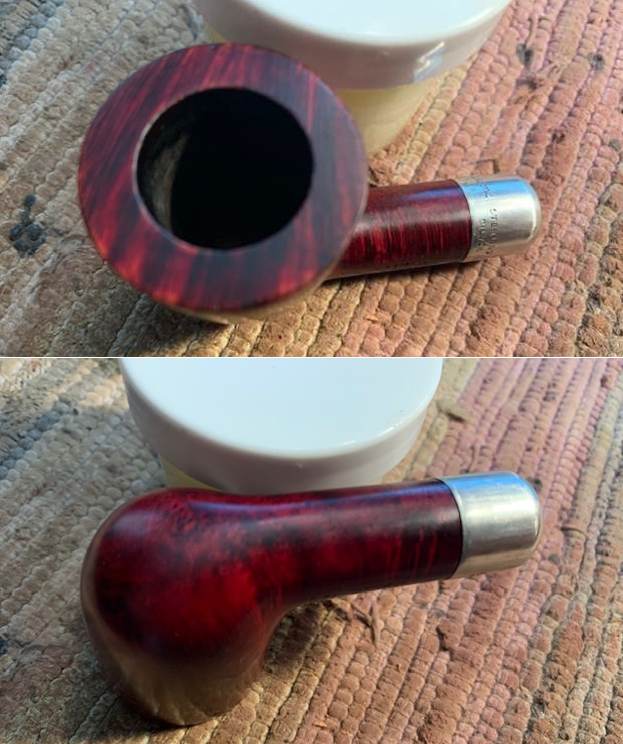
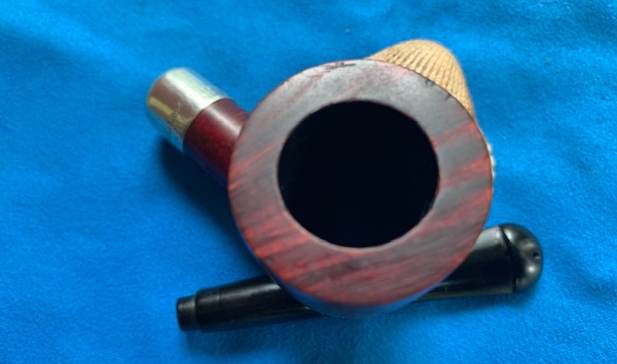
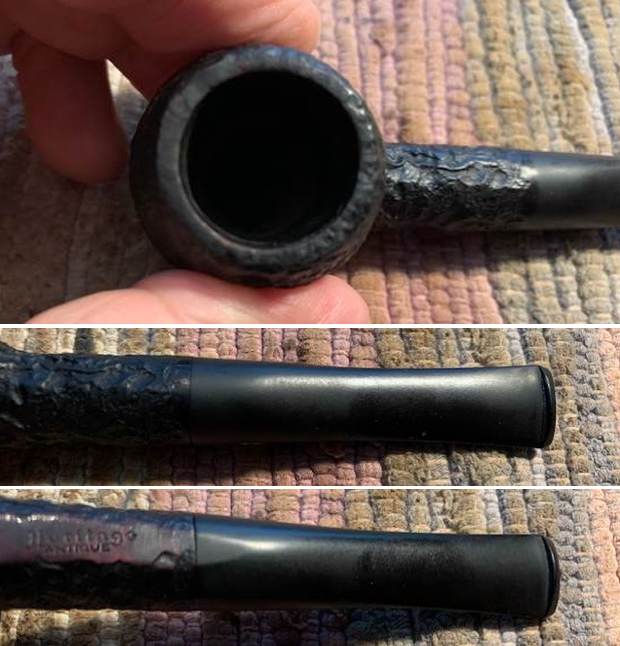
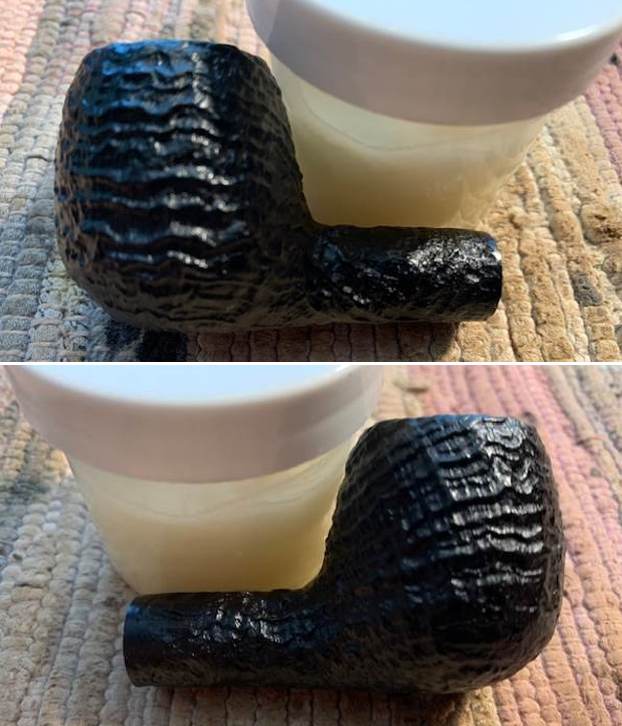
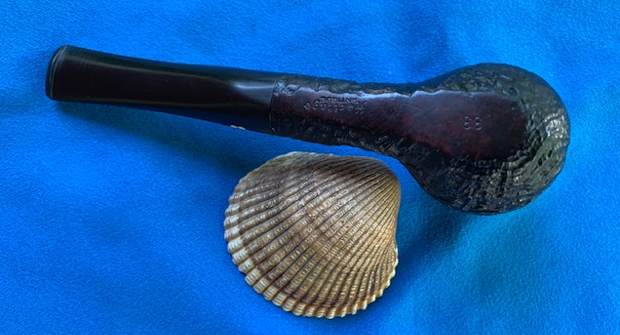
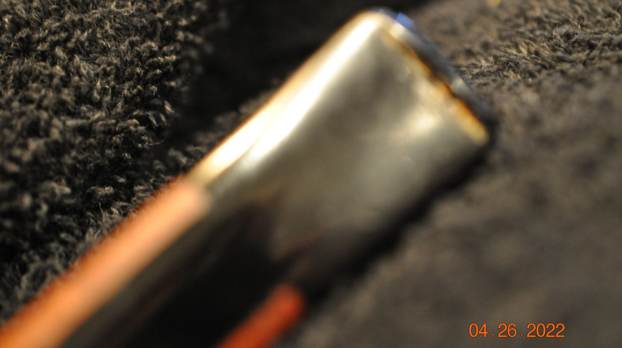
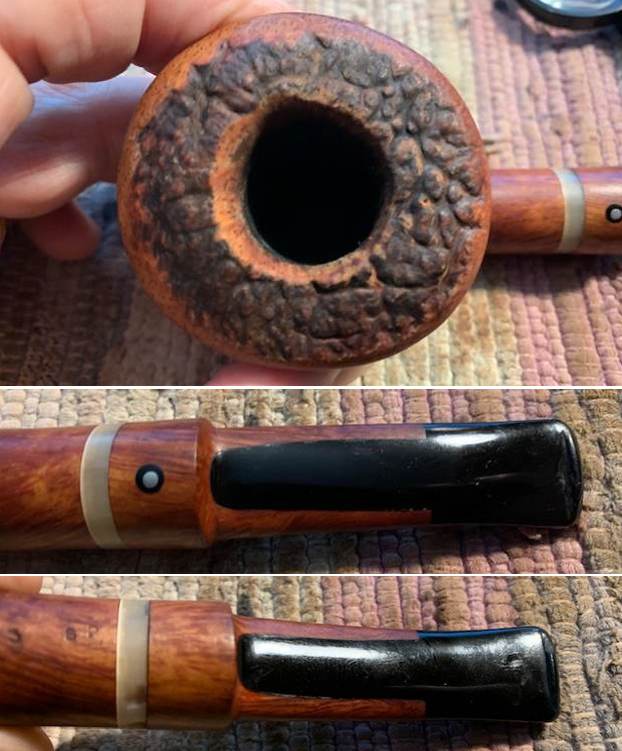
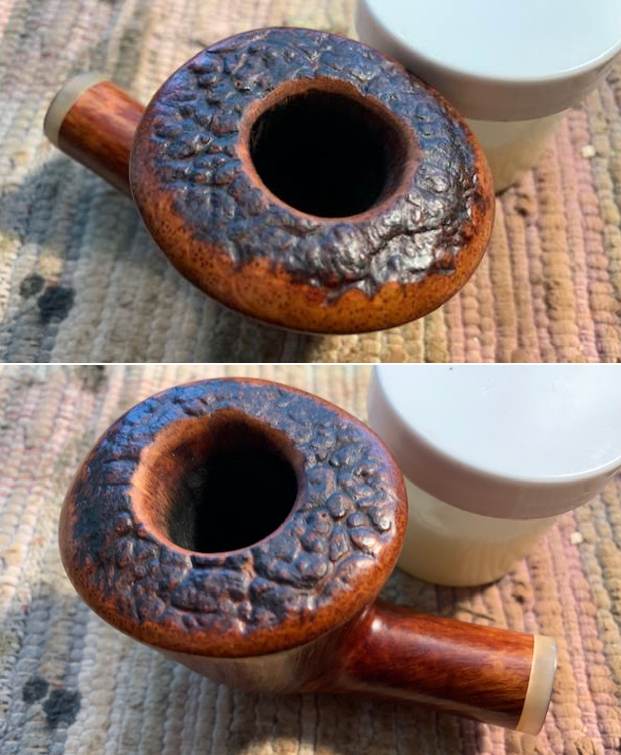
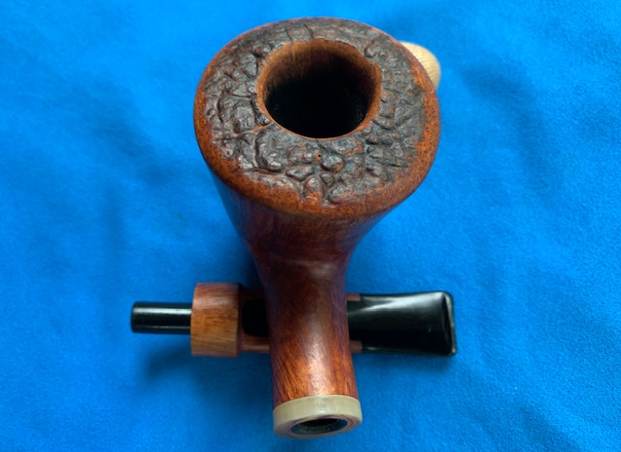
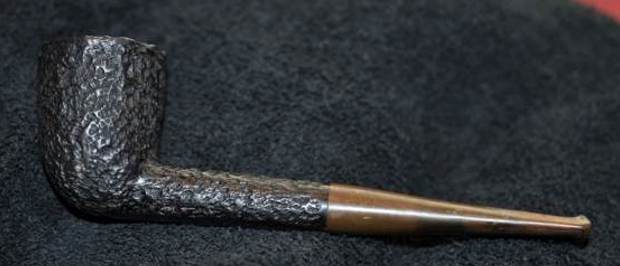
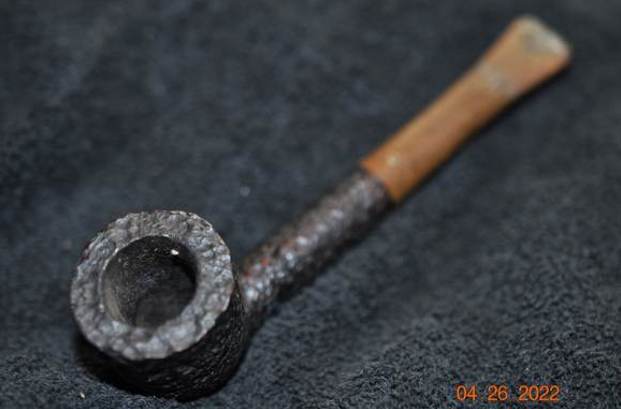
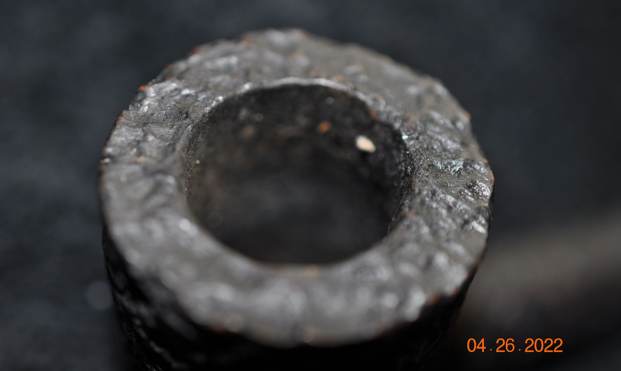
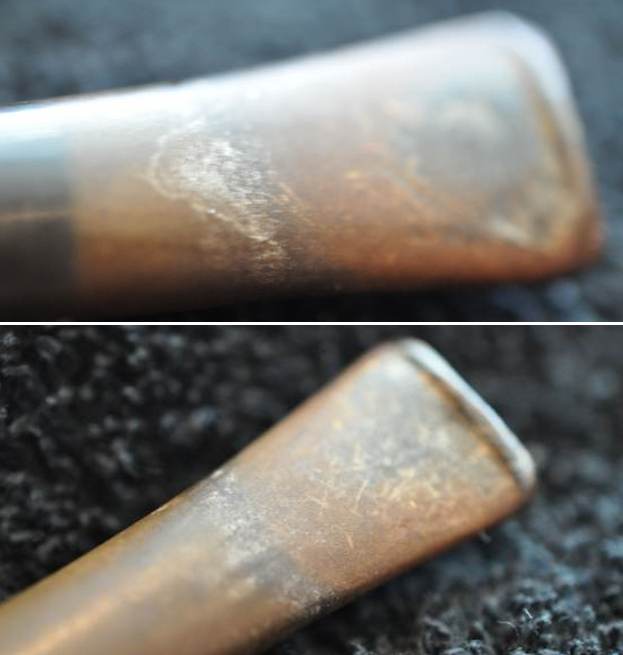
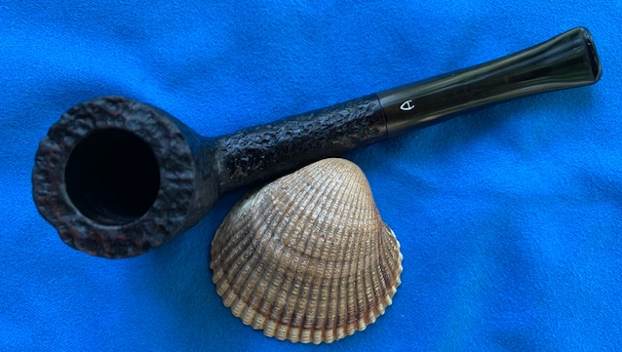
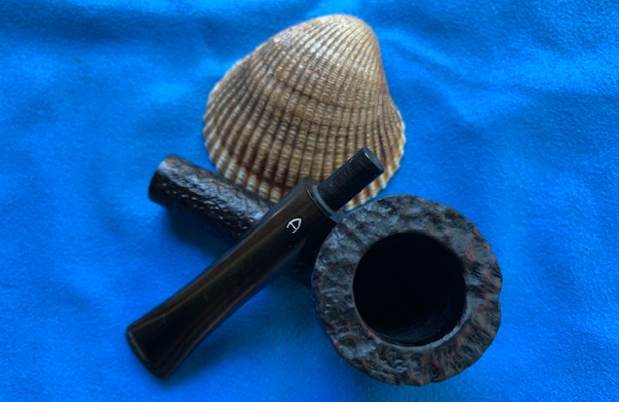
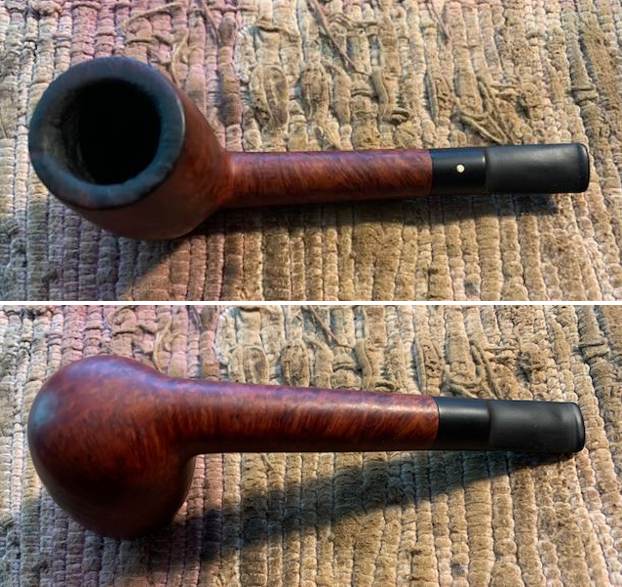
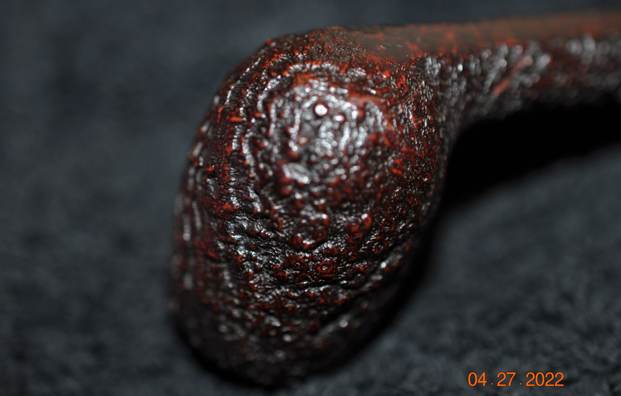
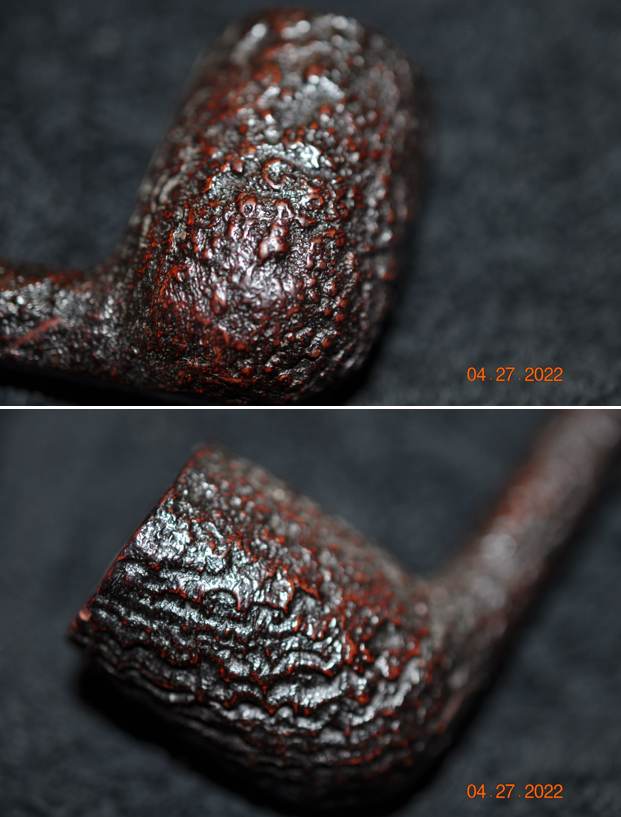
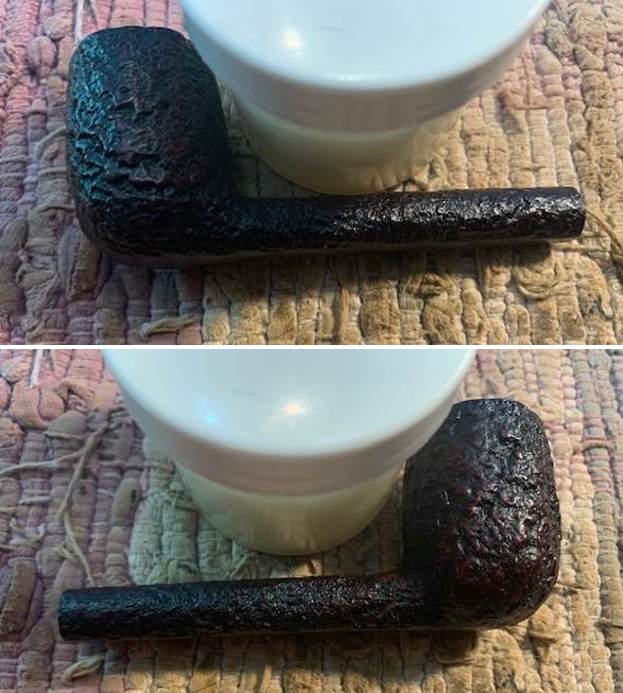
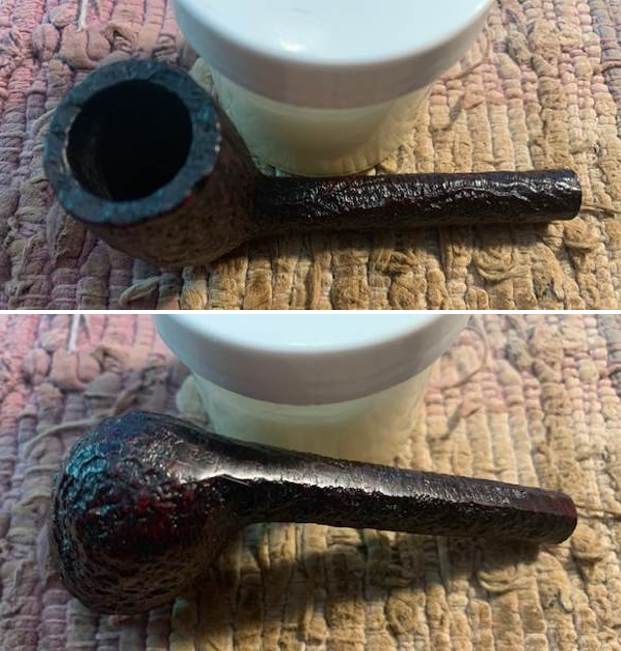
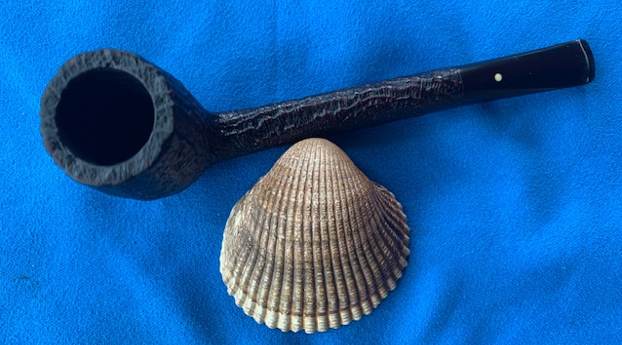
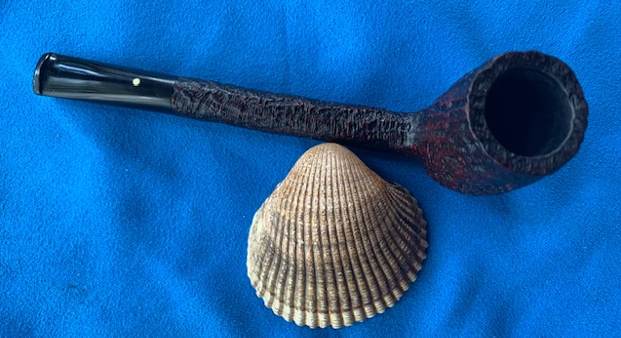
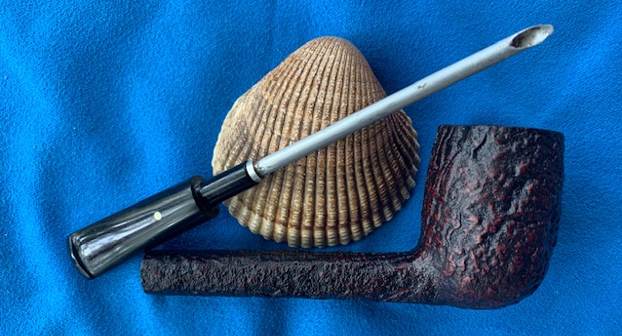
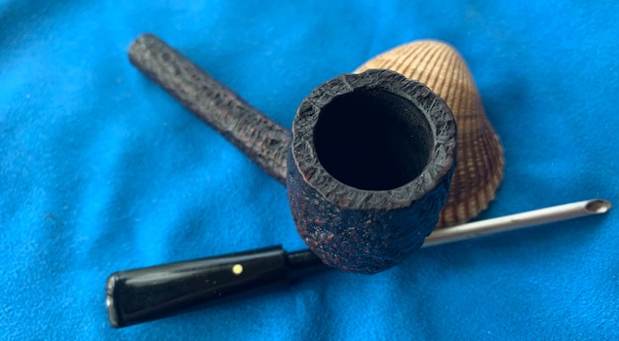
 Jeff captured the thick cake in the bowl and the heavy lava overflow onto the rim top in his photos. It looks like there is some damage to the inner edge on the right front of the bowl. There really was no way of knowing for sure what the edges looked like under the thick cake. You can also see the lava flowing down the sides of the bowl in the photos. The stem surface appears to have a lot of tooth chatter and marks but perhaps the calcification and grime on the bowl protected it a bit. There is also some oxidation.
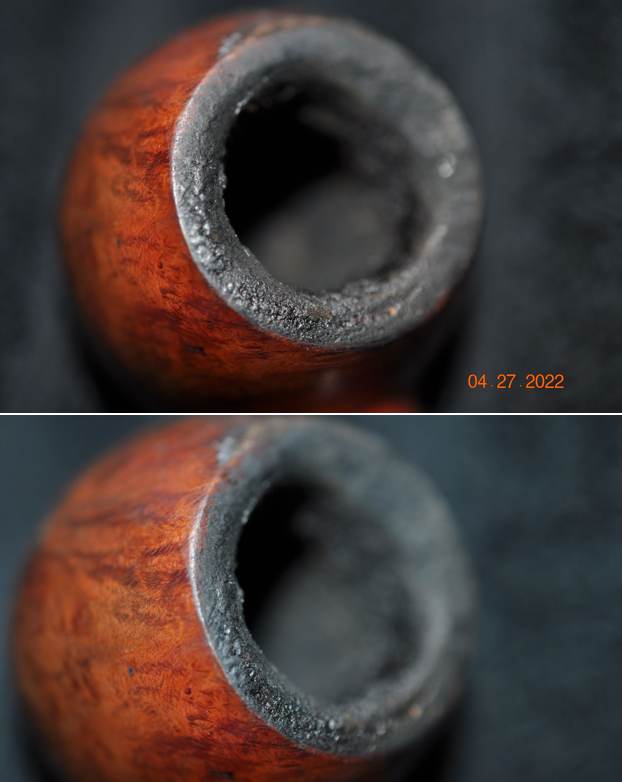
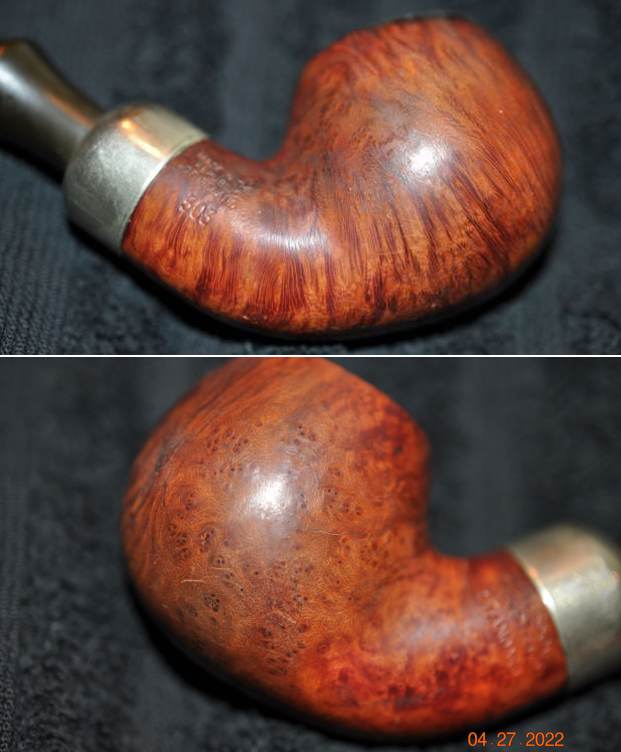
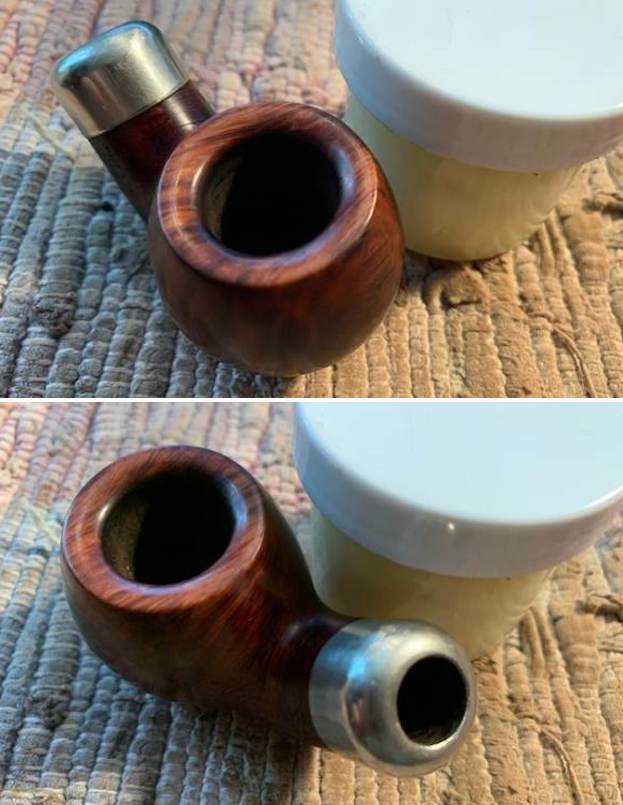
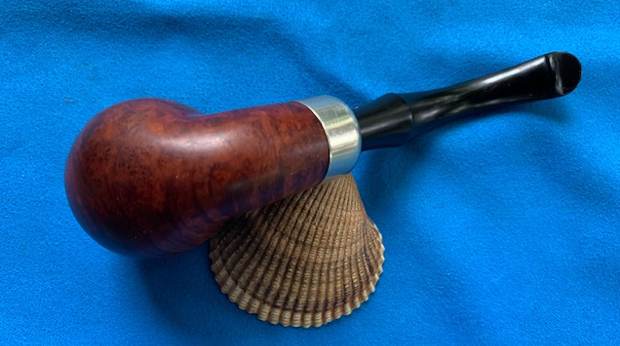
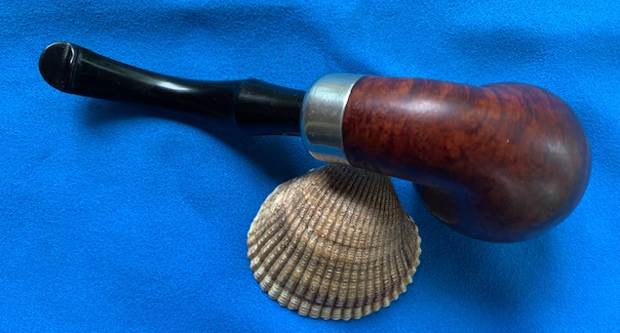
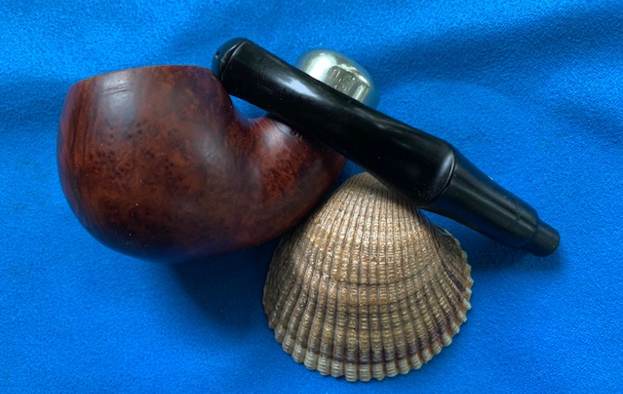
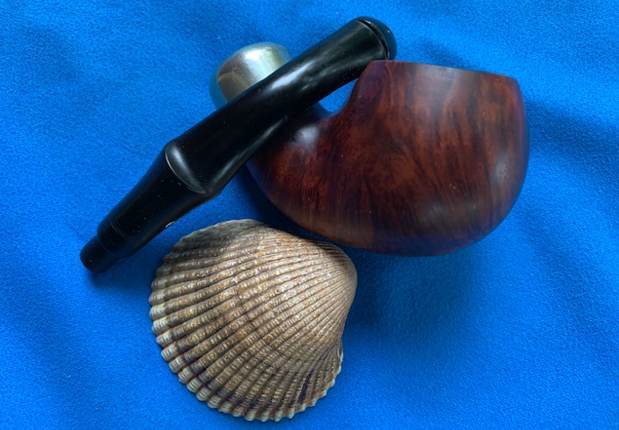
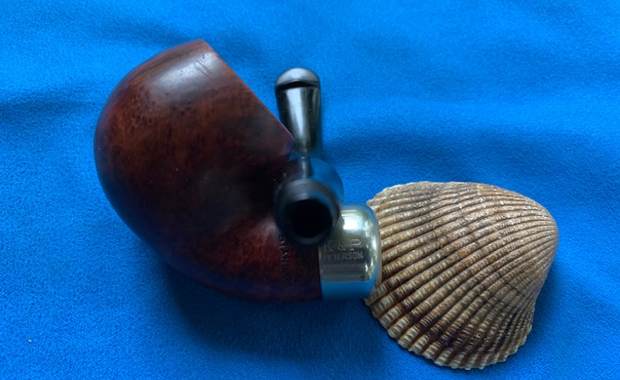
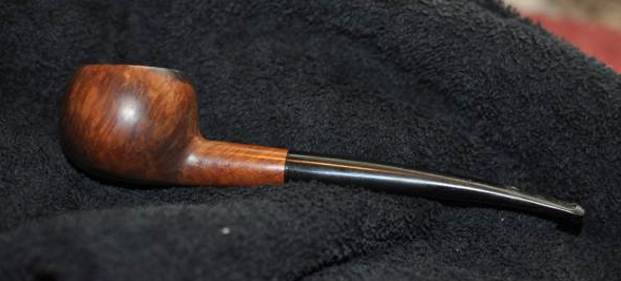
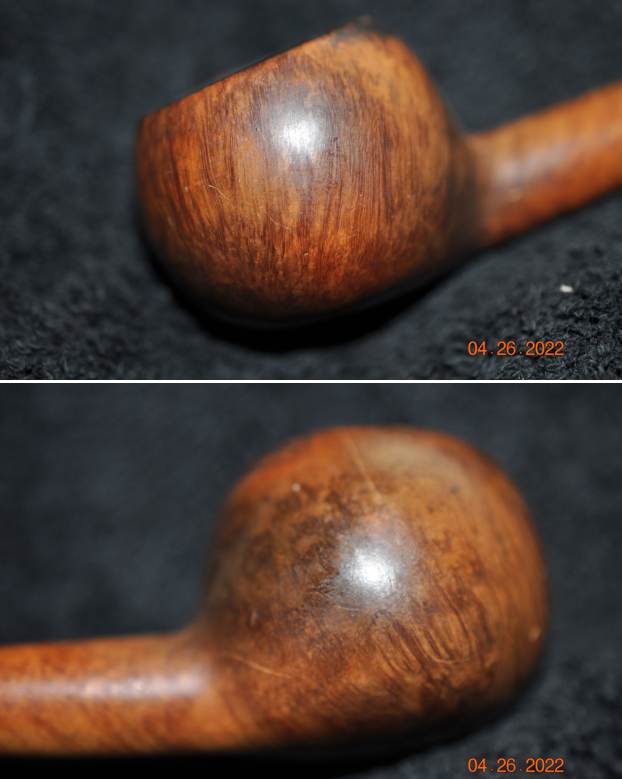
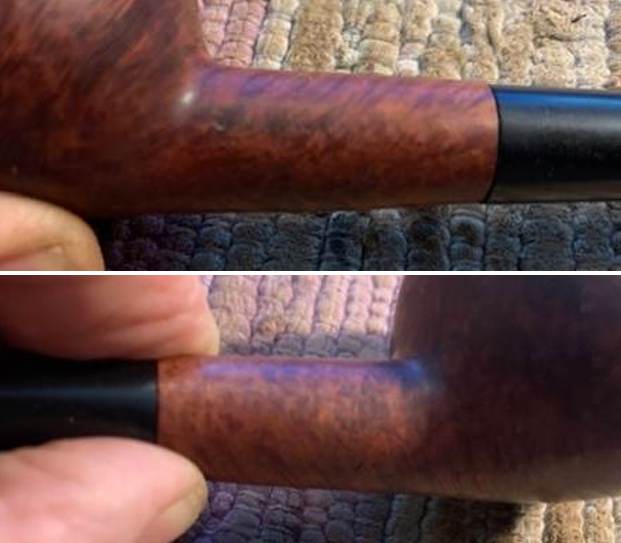
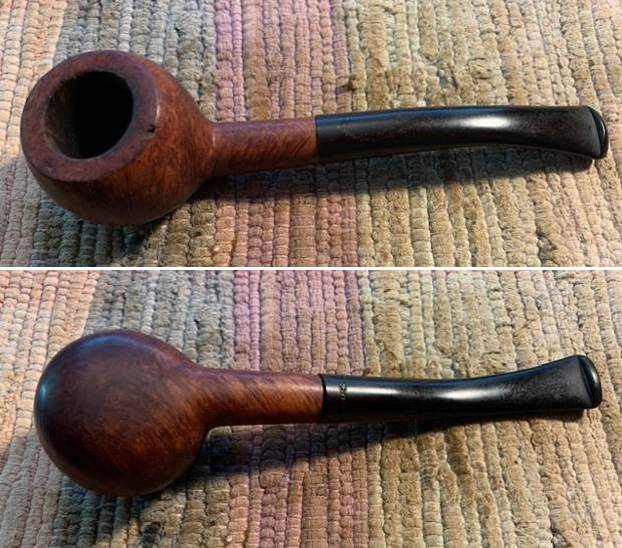
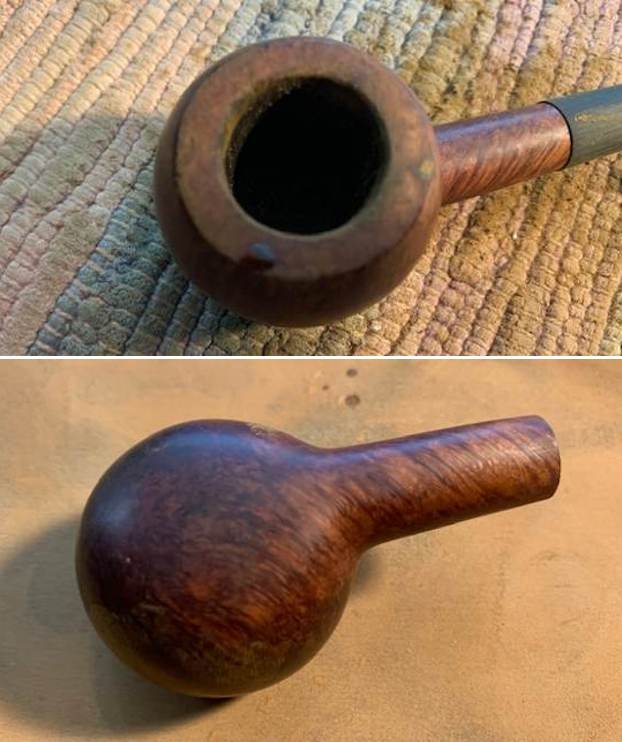
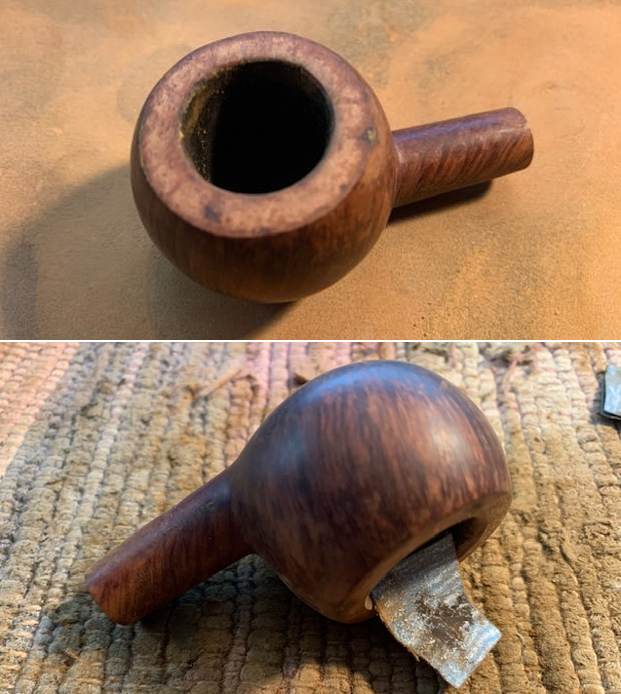
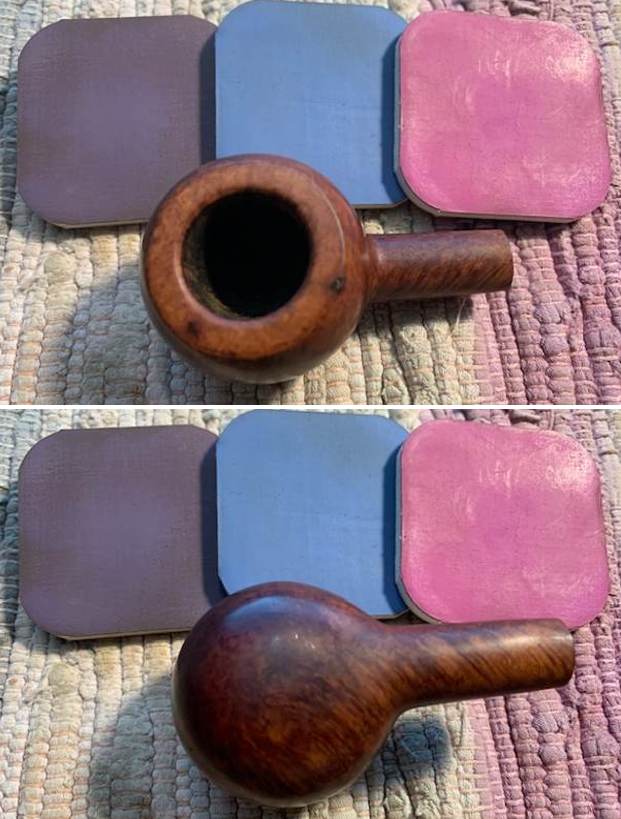
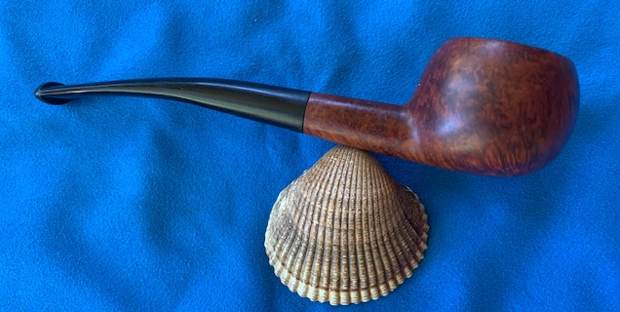
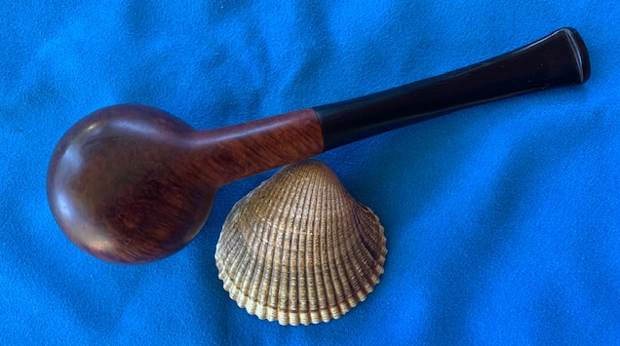
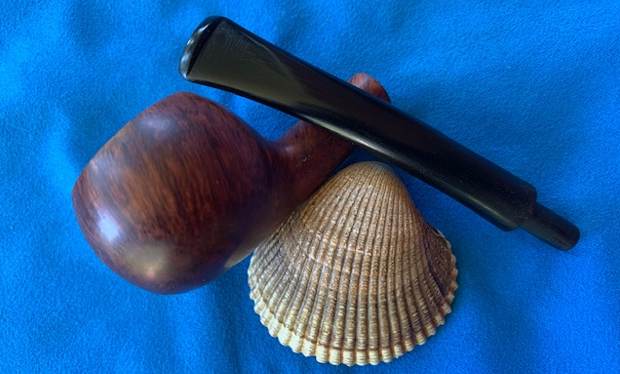
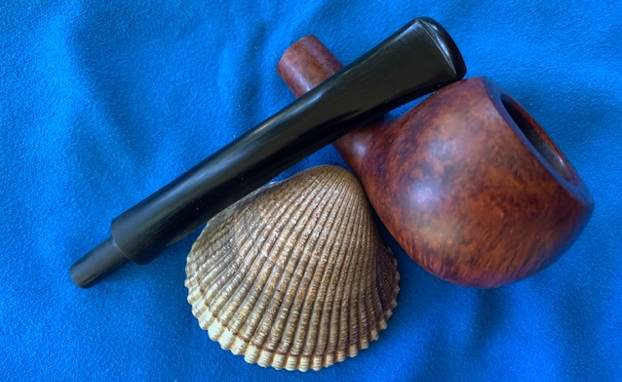
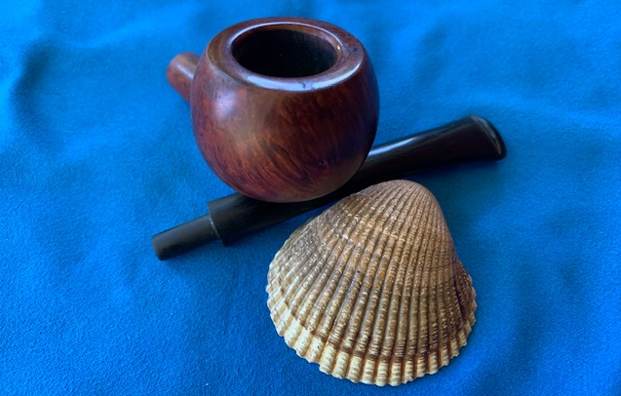
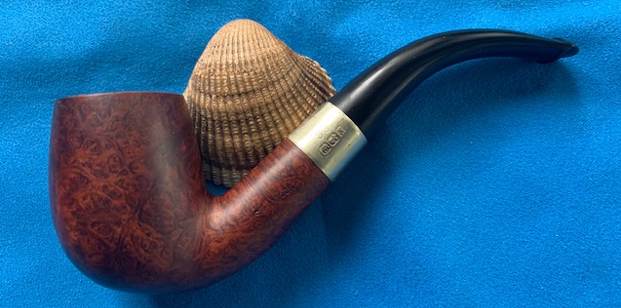
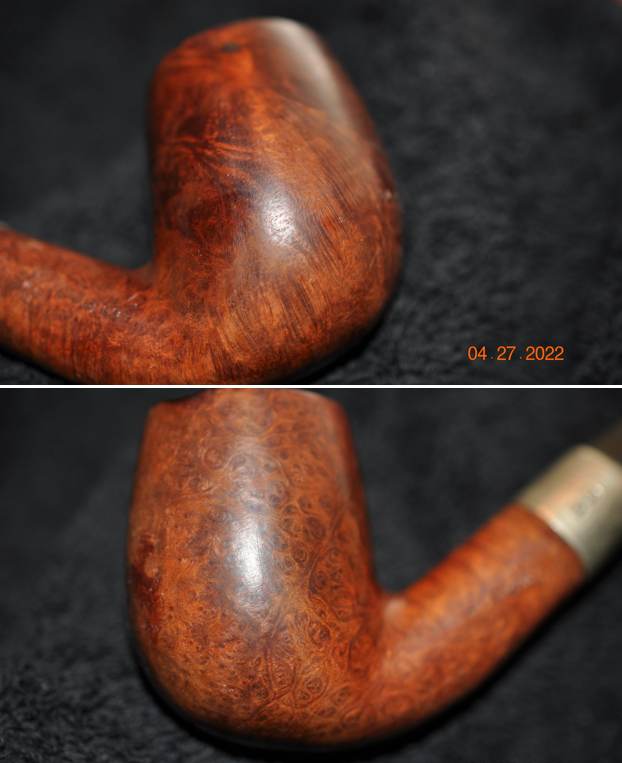
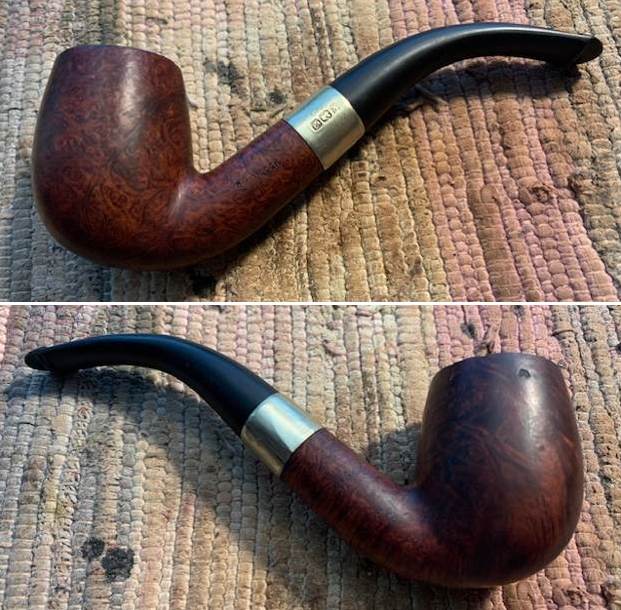
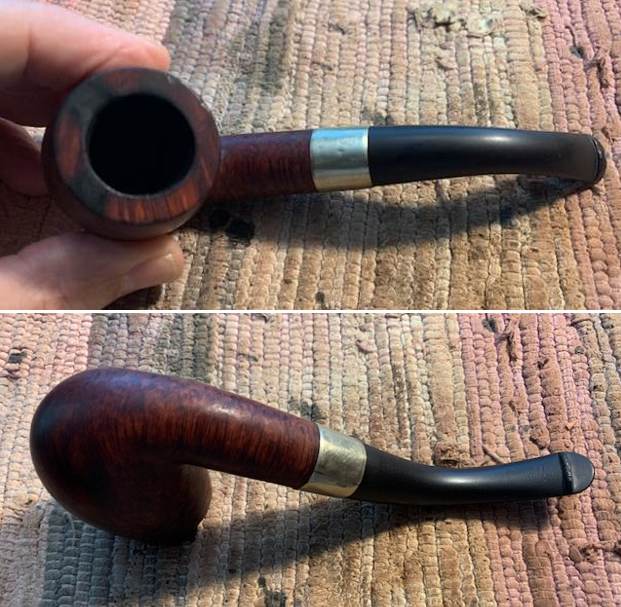
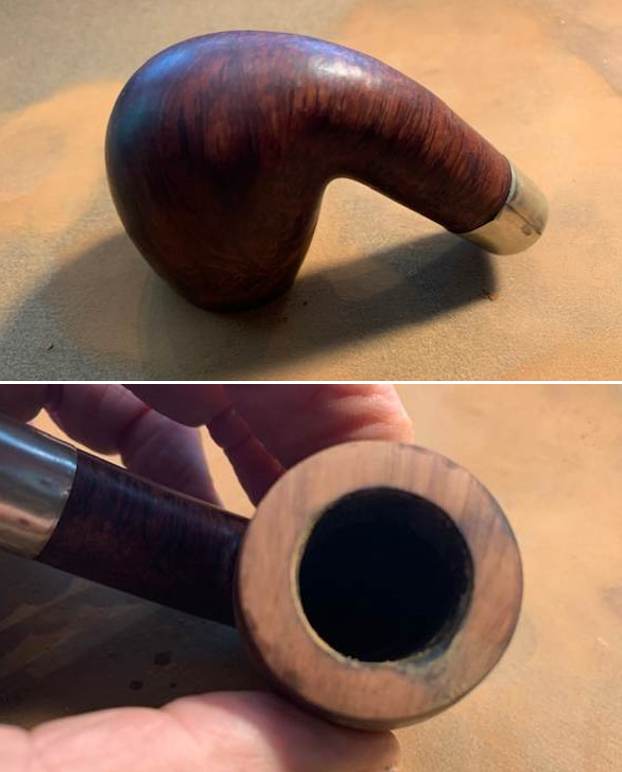
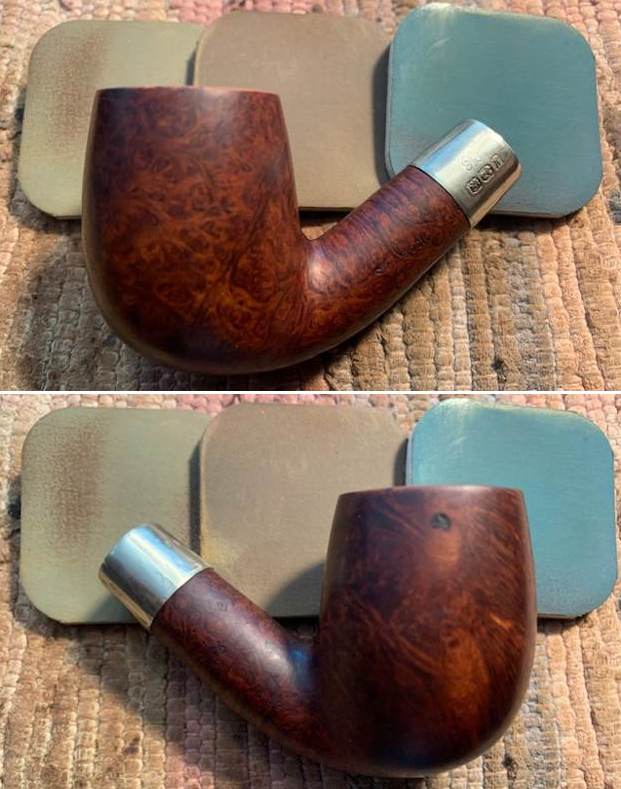
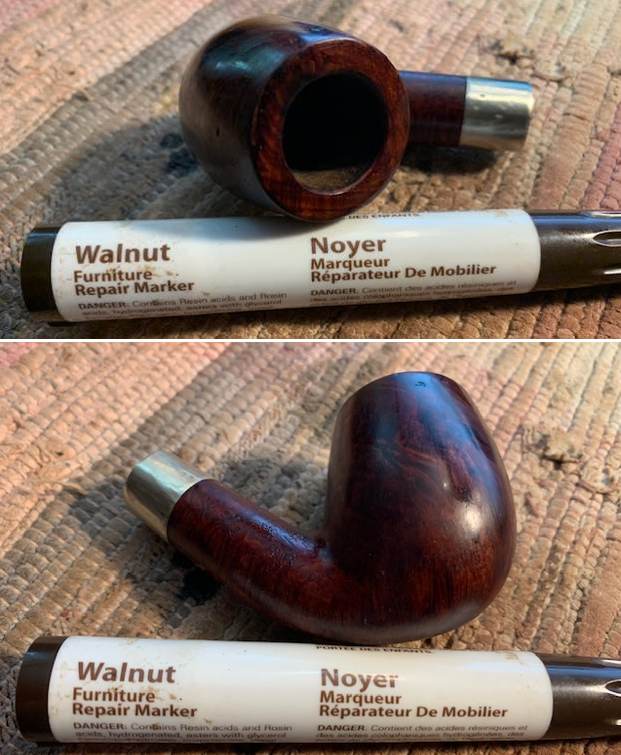
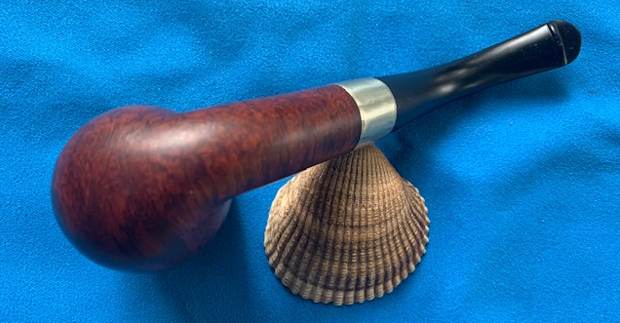
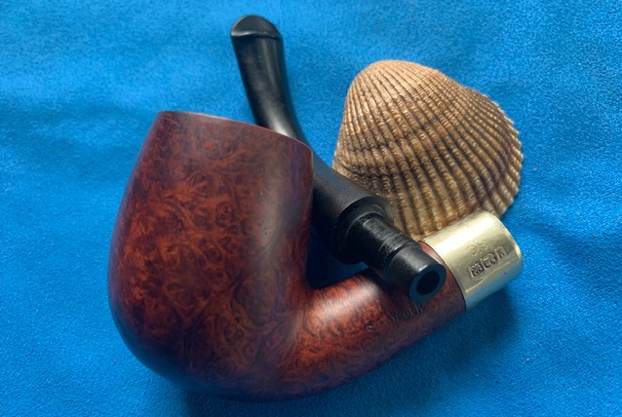
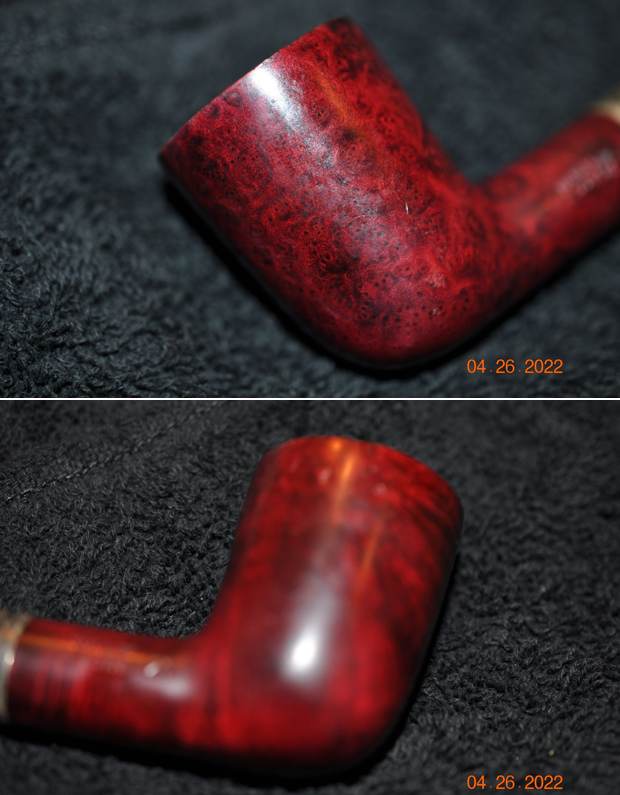
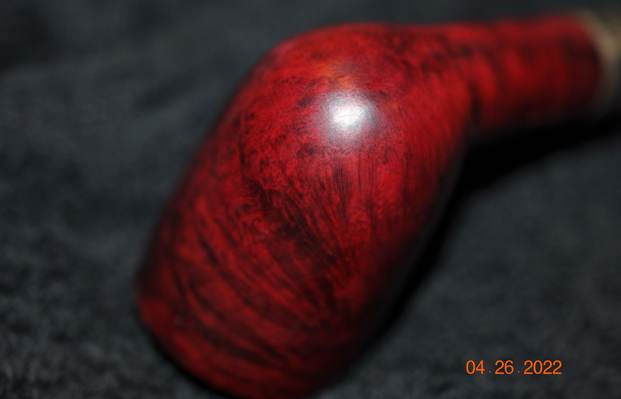
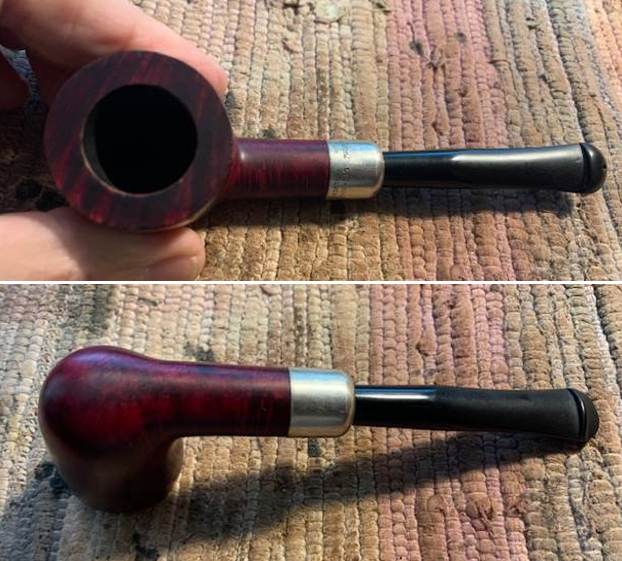
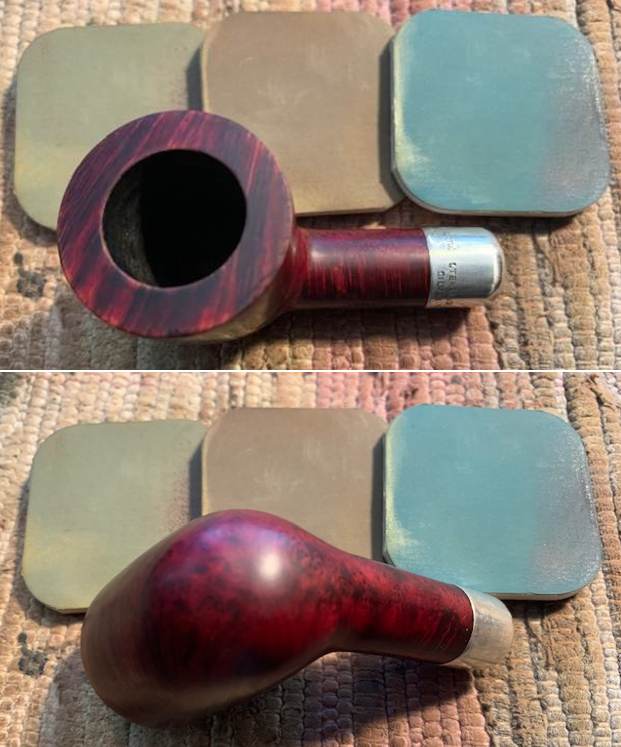
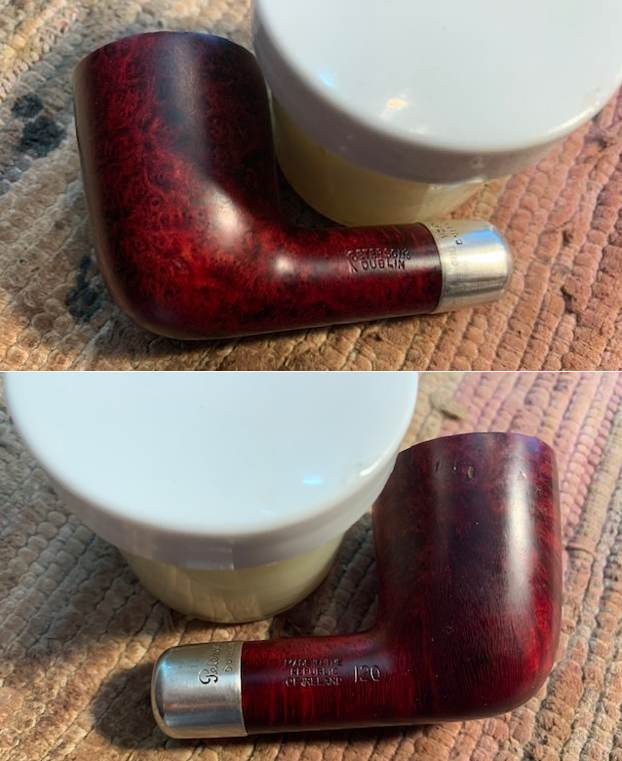
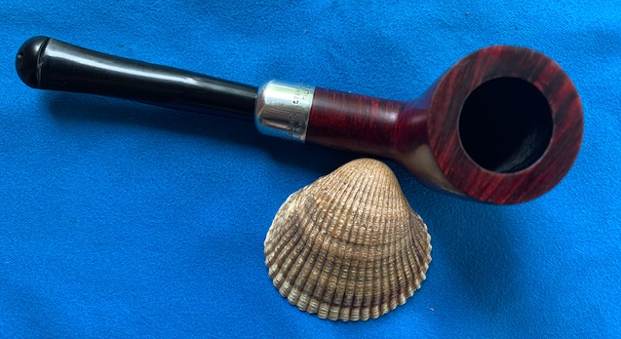
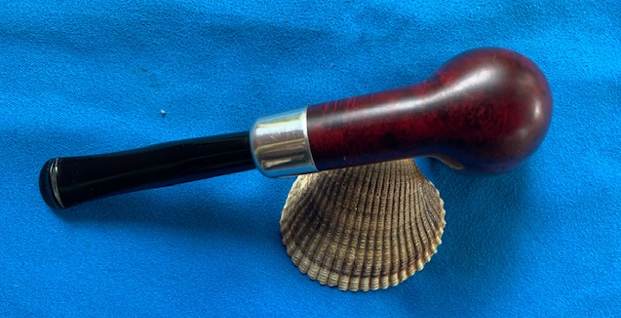
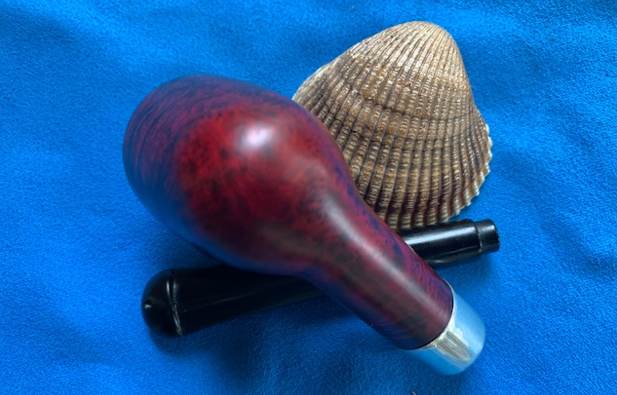
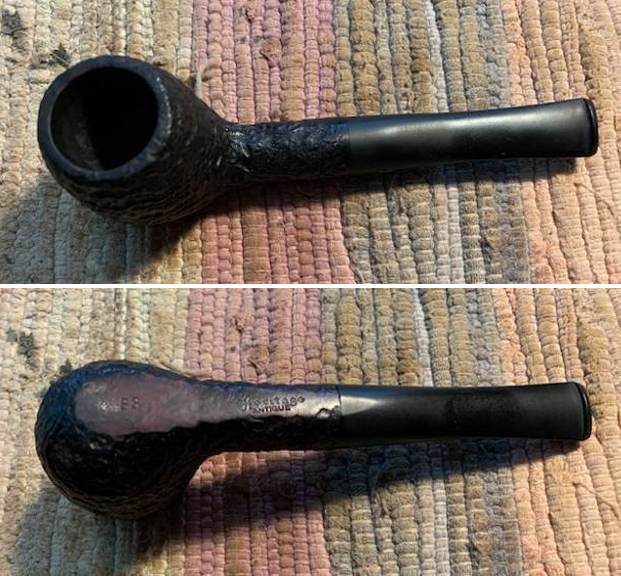
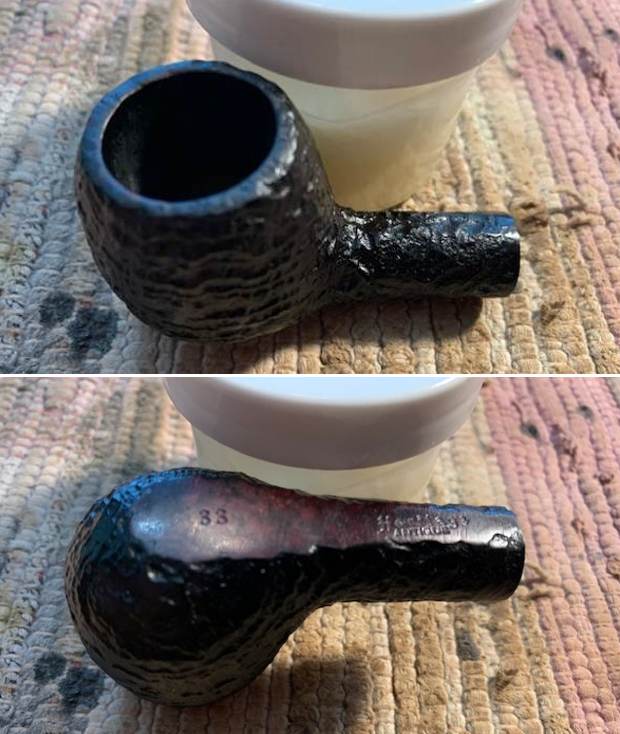
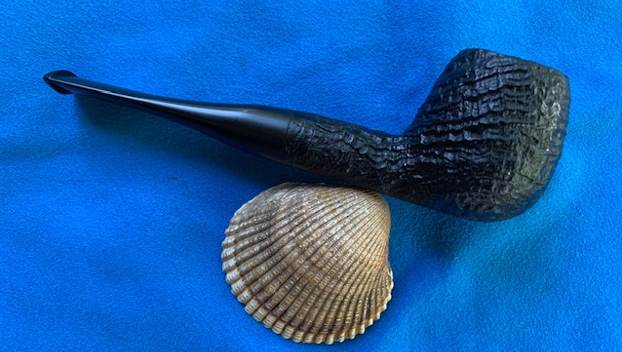
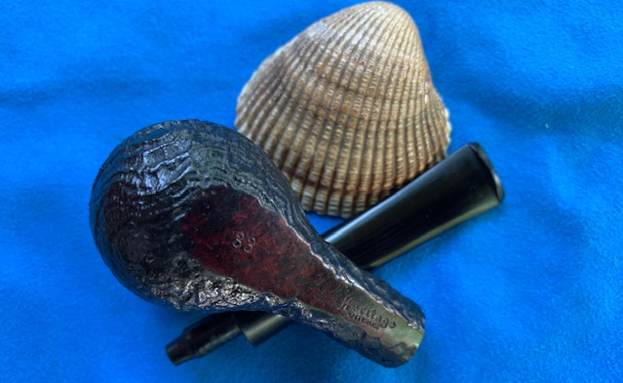
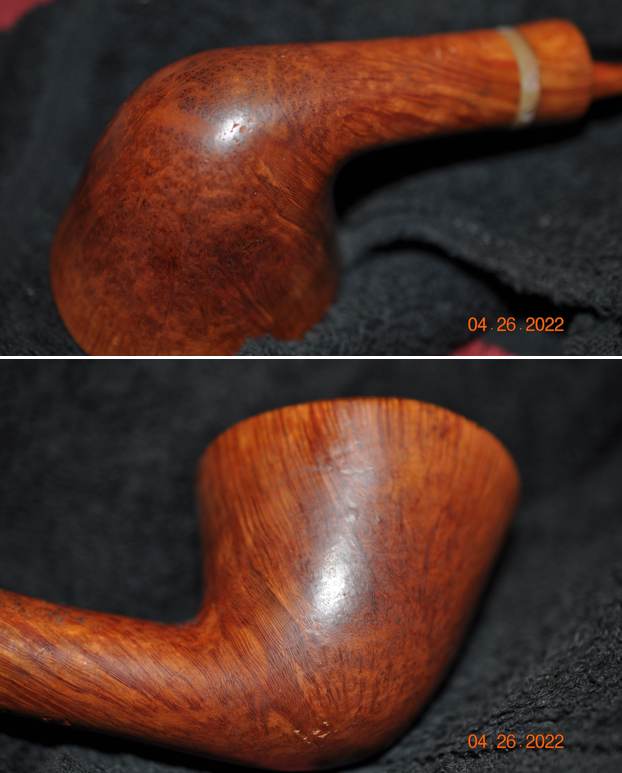
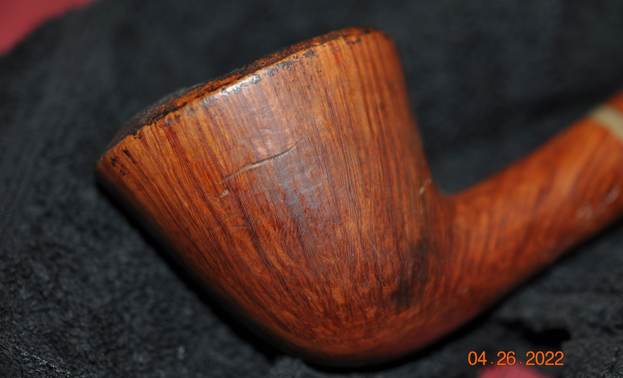
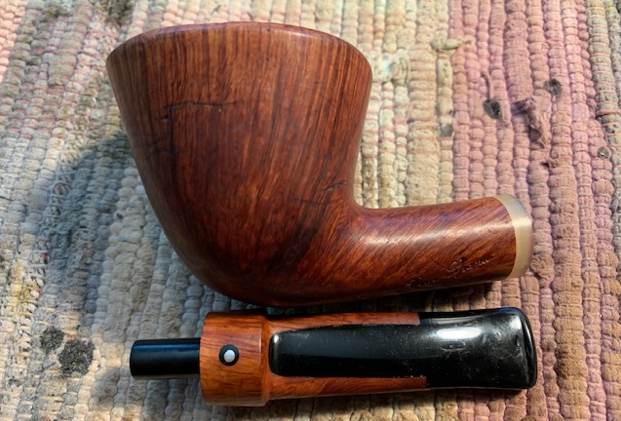
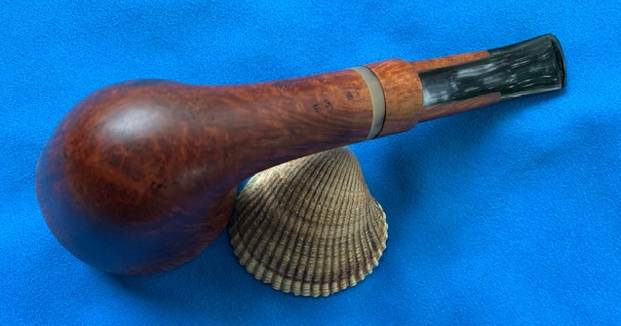
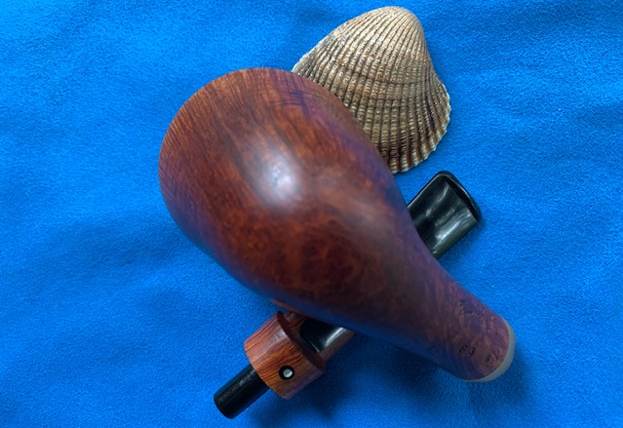
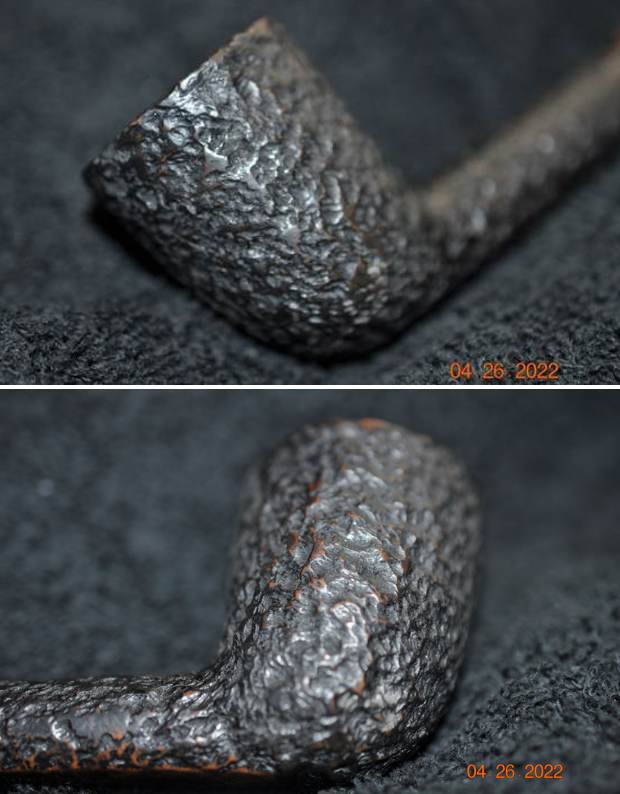
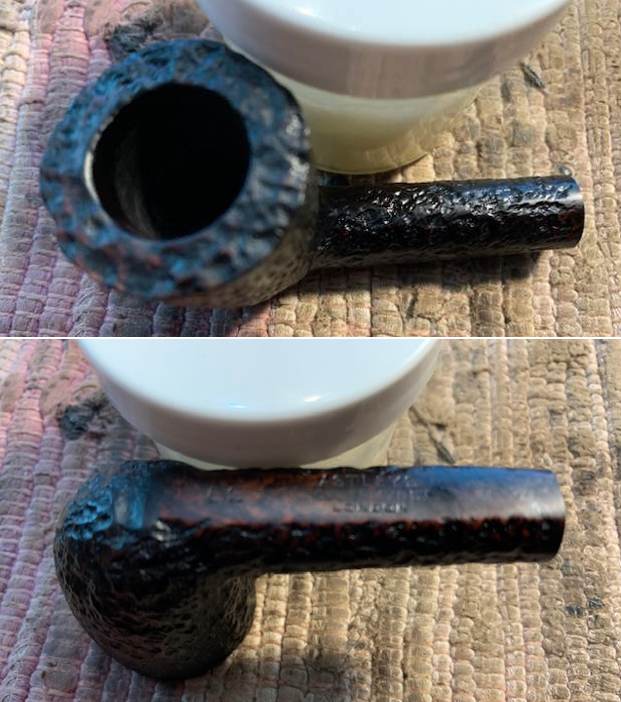
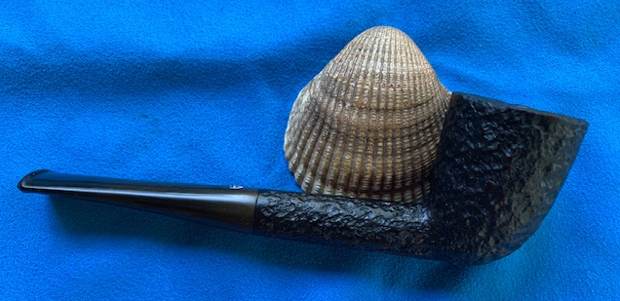
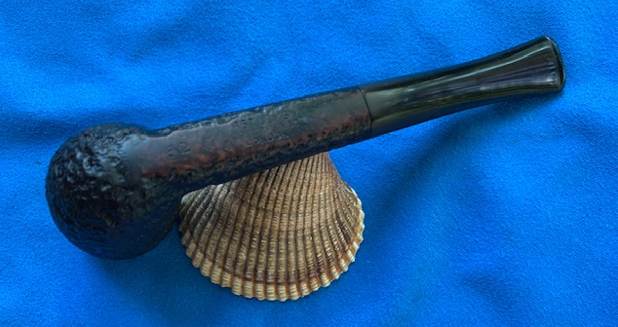
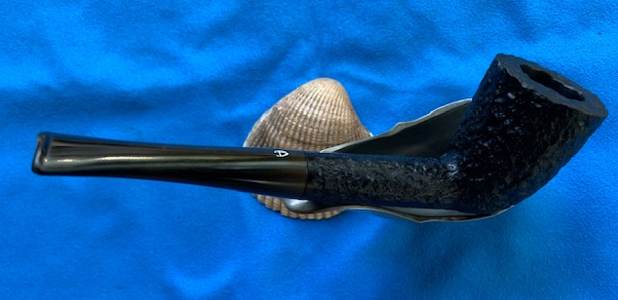
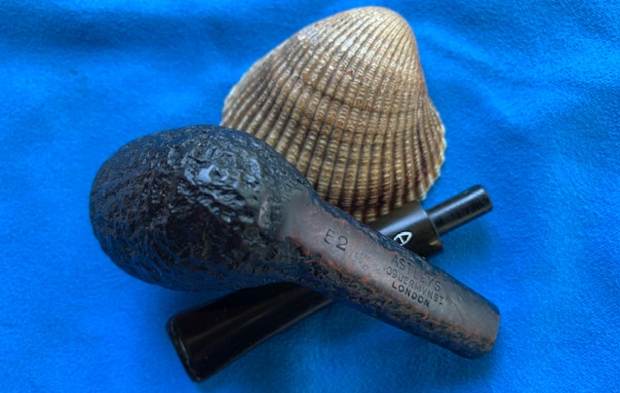
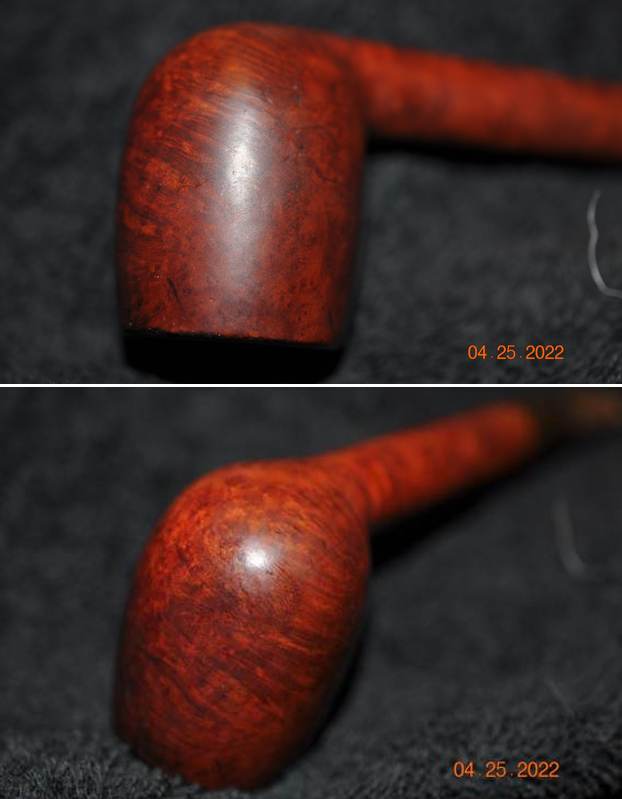
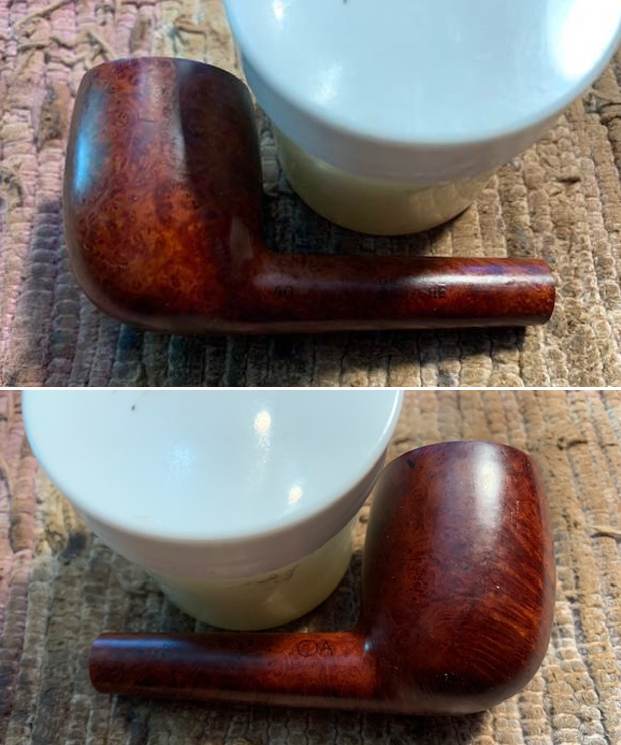
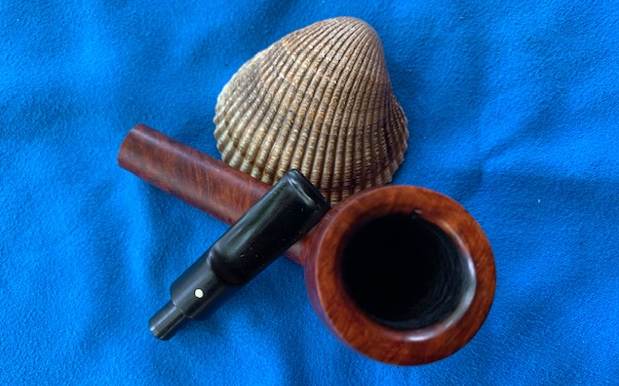
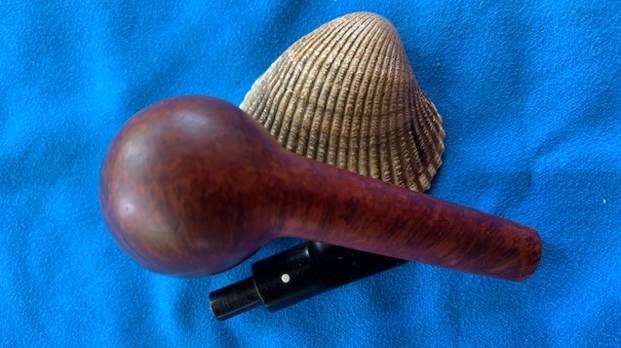
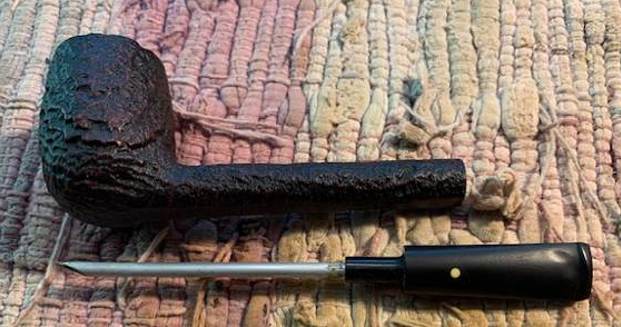
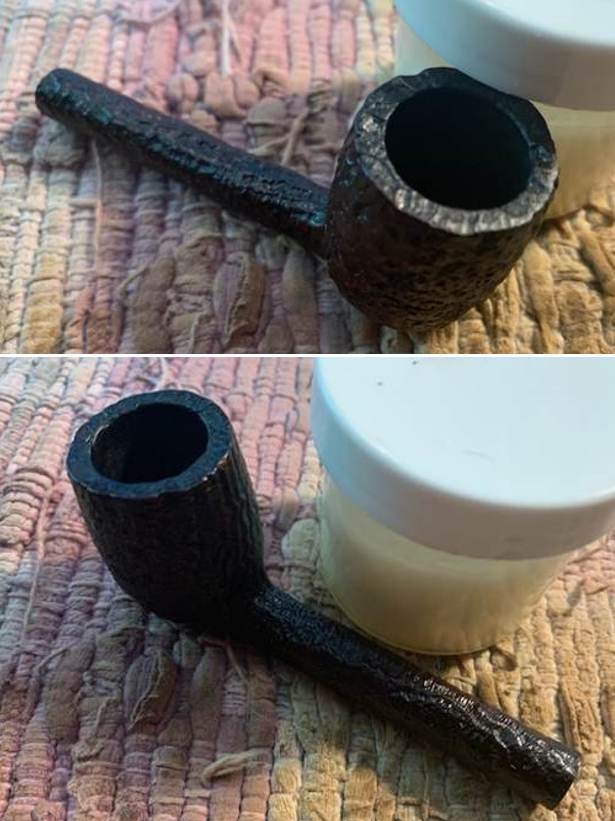
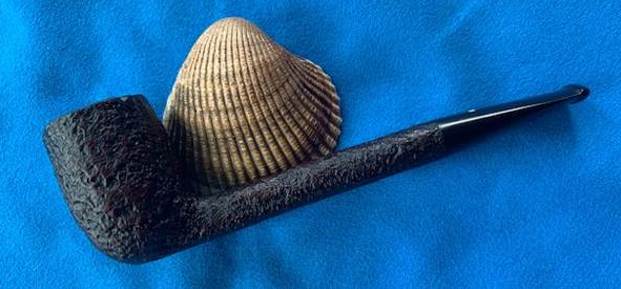
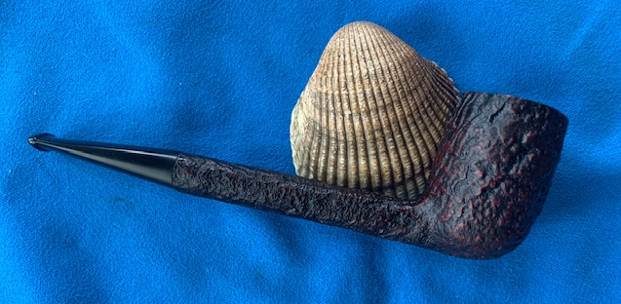
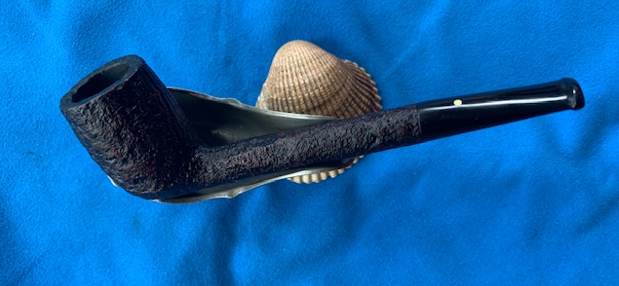
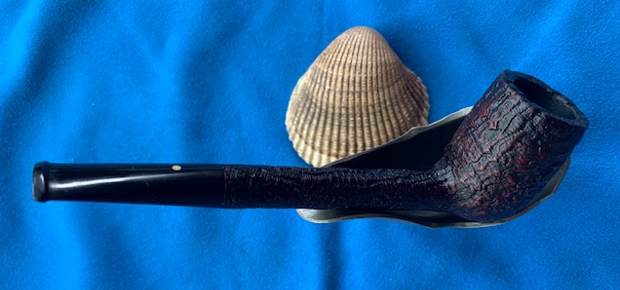
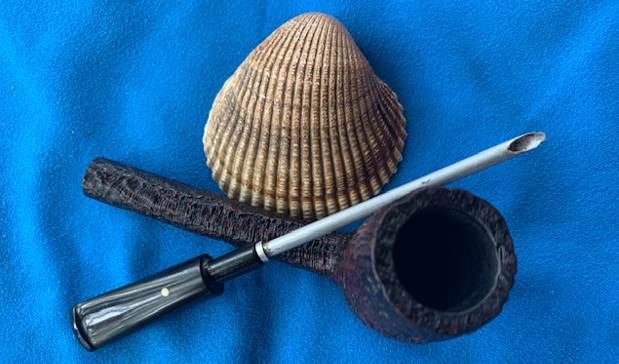
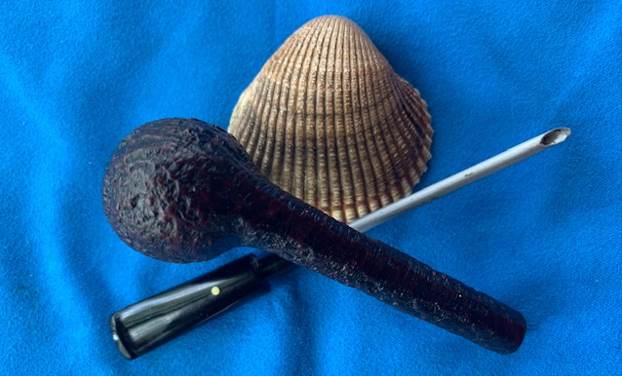
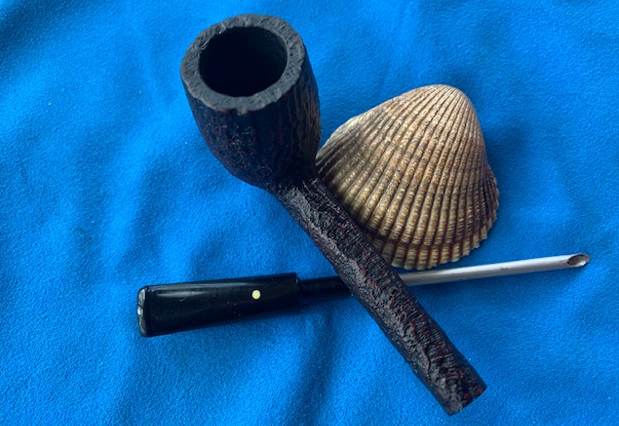
 He took photos of the sides and the heel of the bowl to show the interesting grain patterns in the briar. It was quite beautiful.
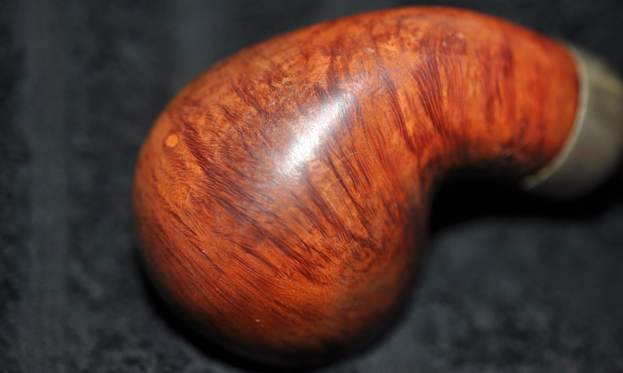
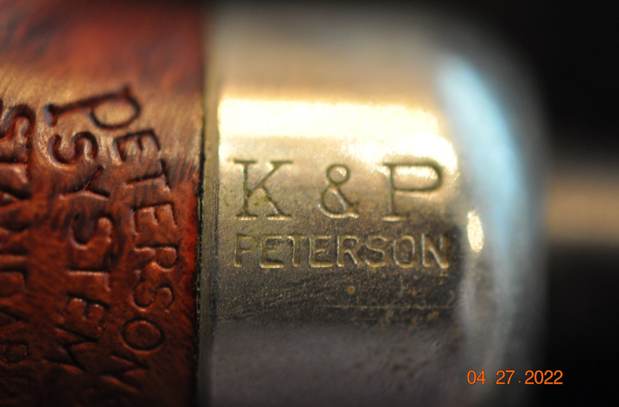
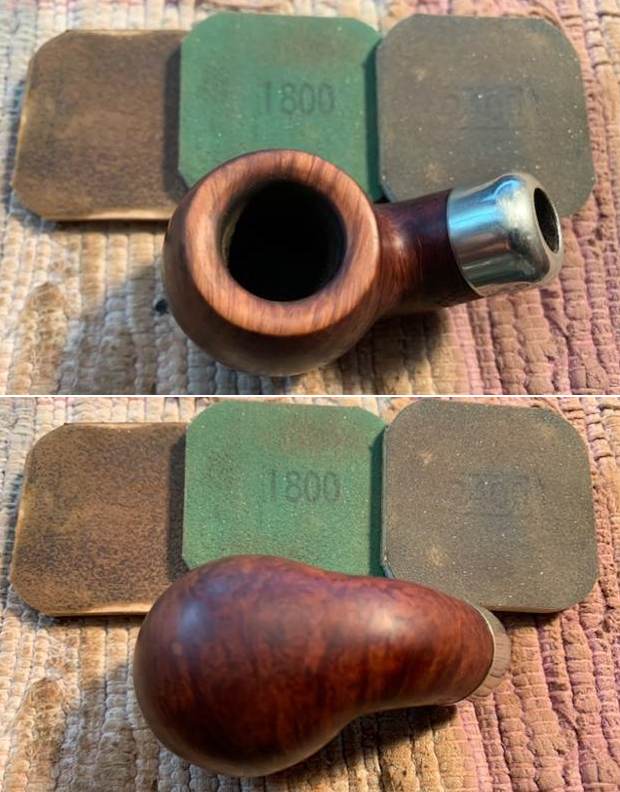
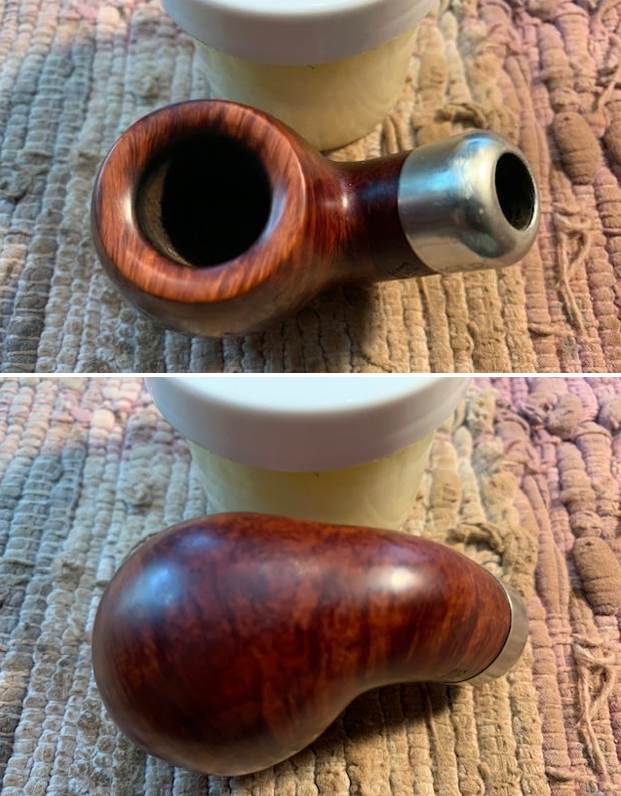
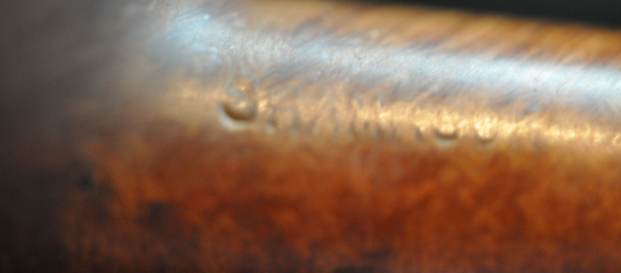
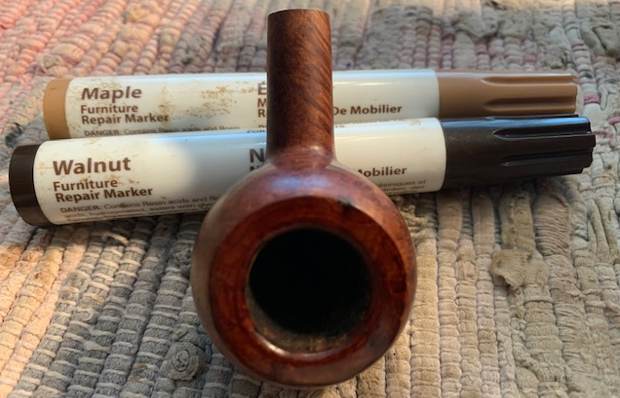
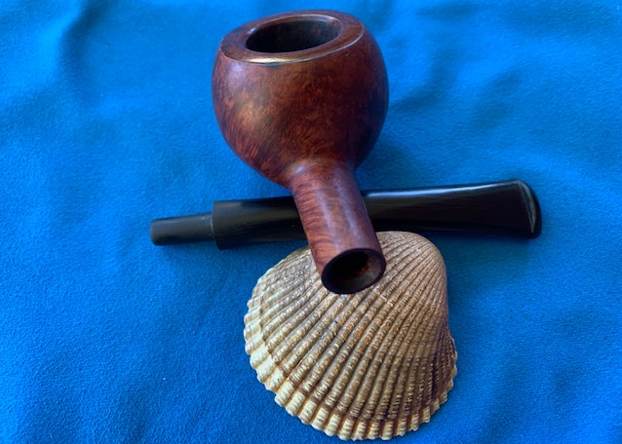
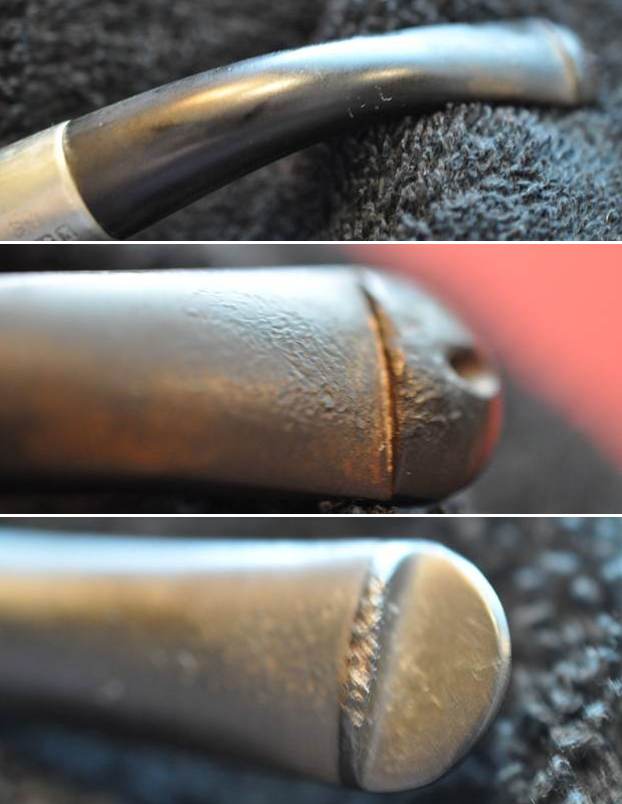
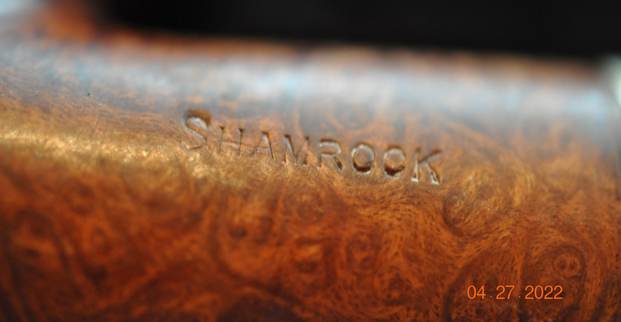
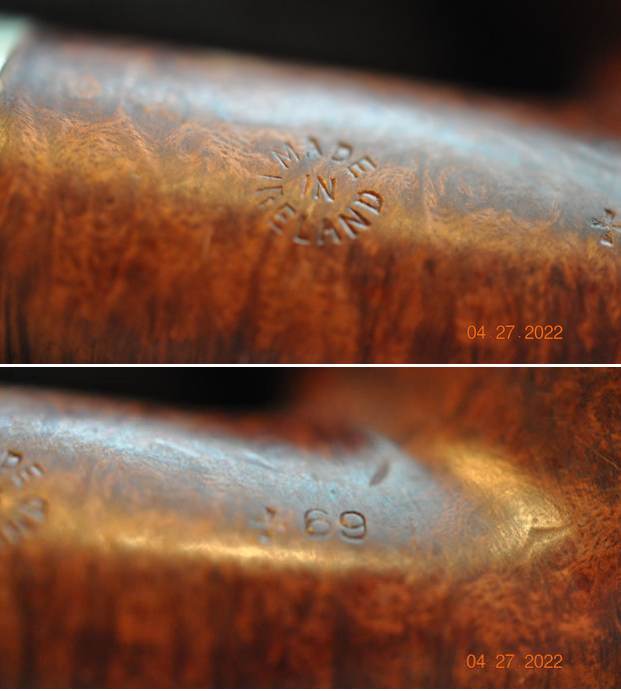
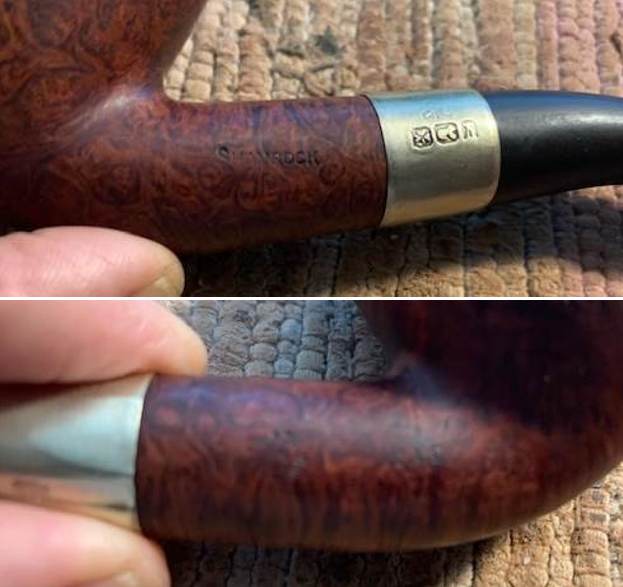
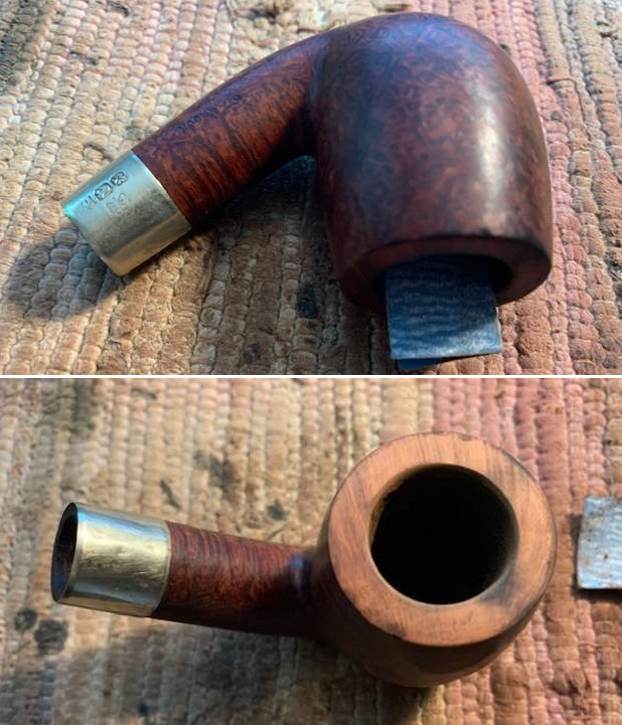
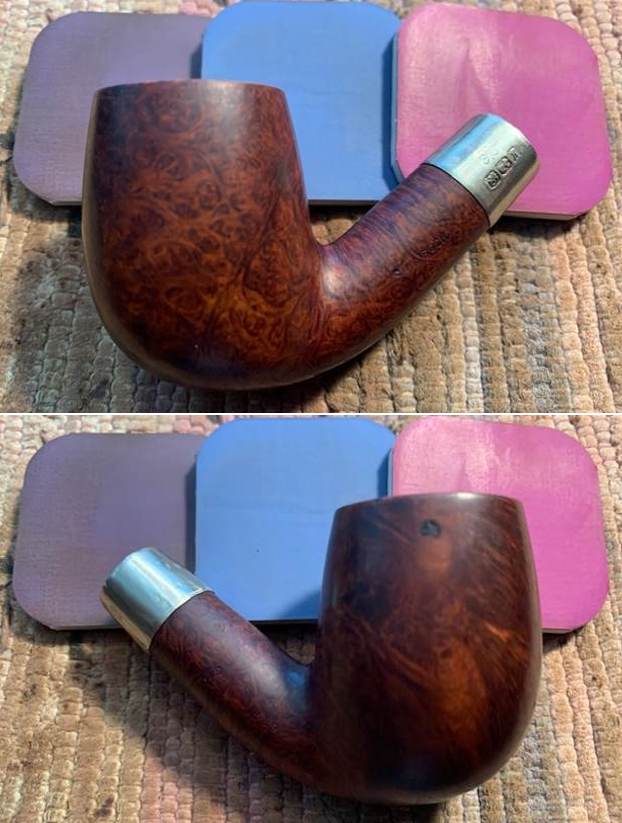
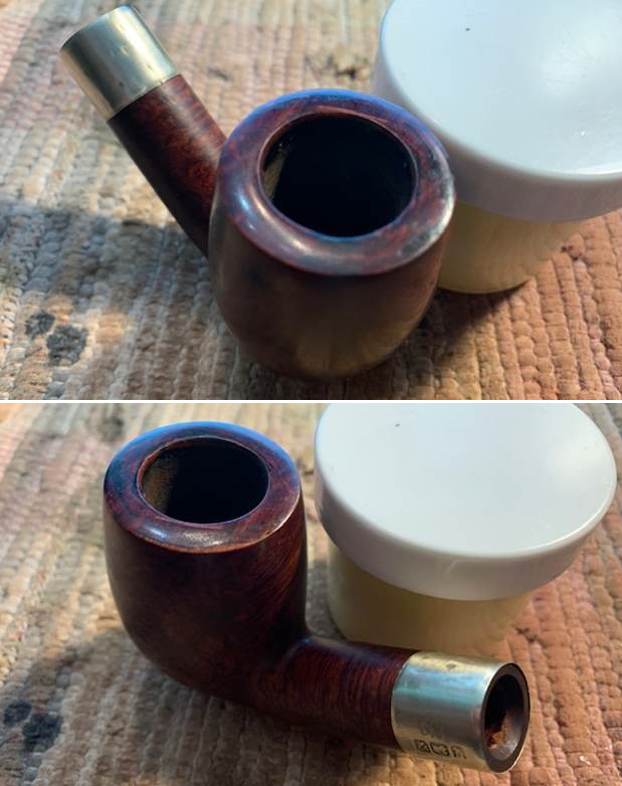
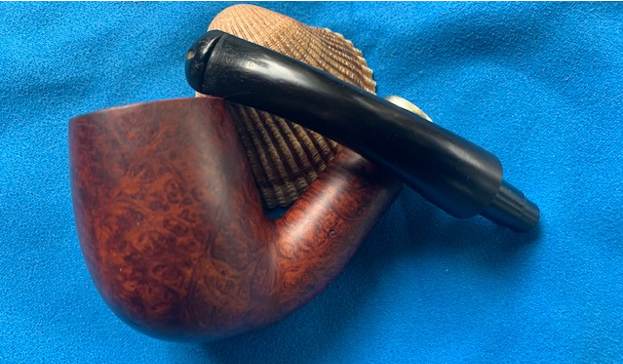
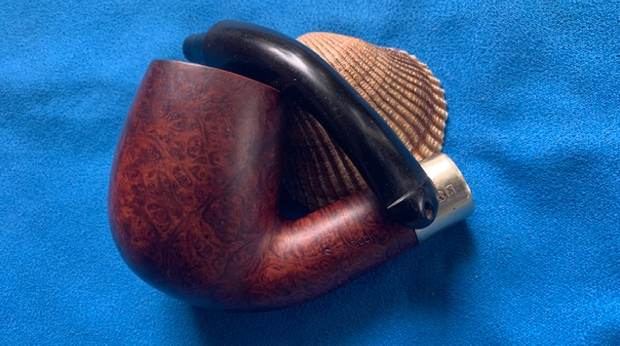
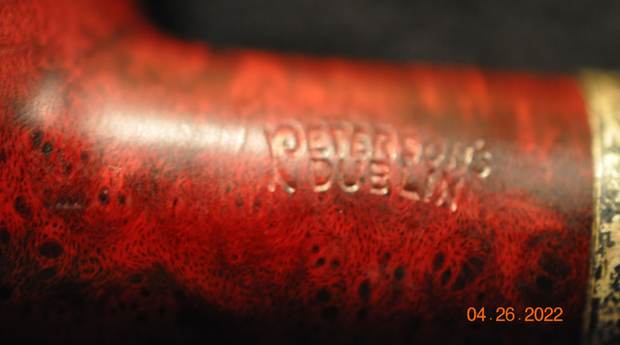
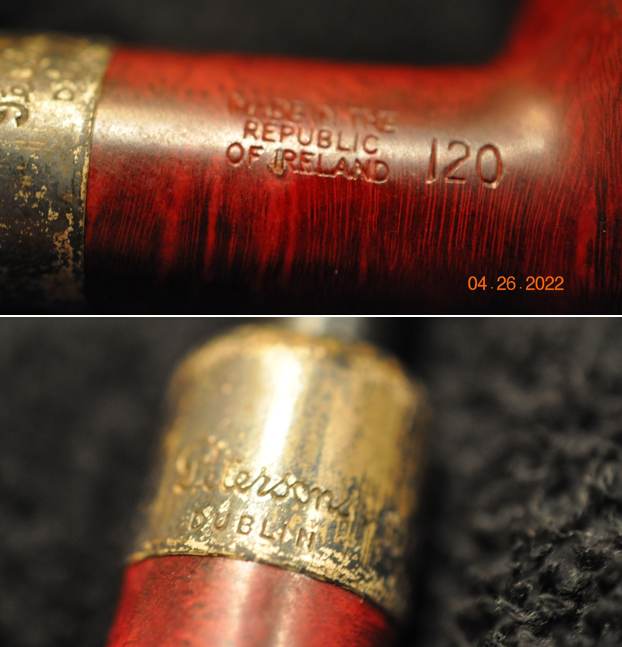
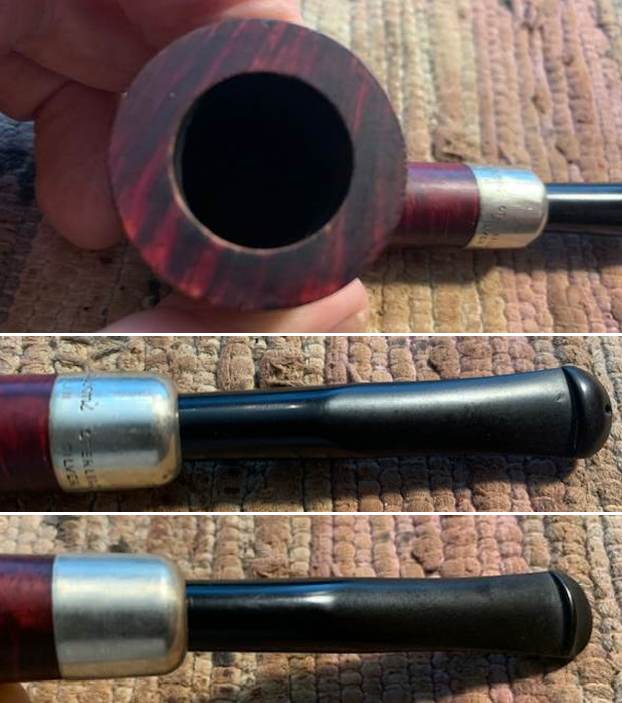
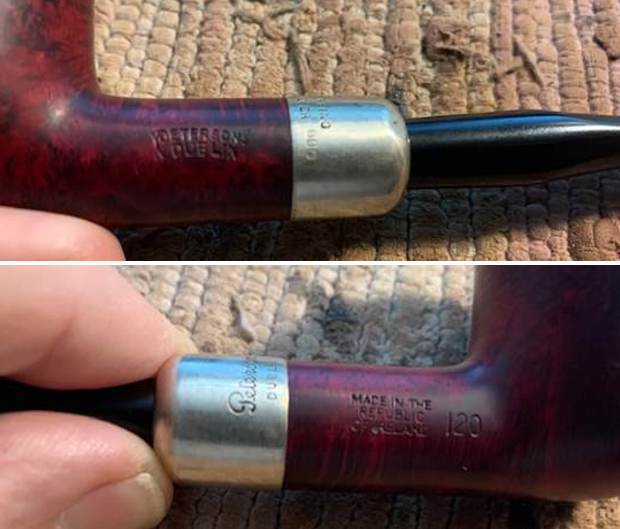
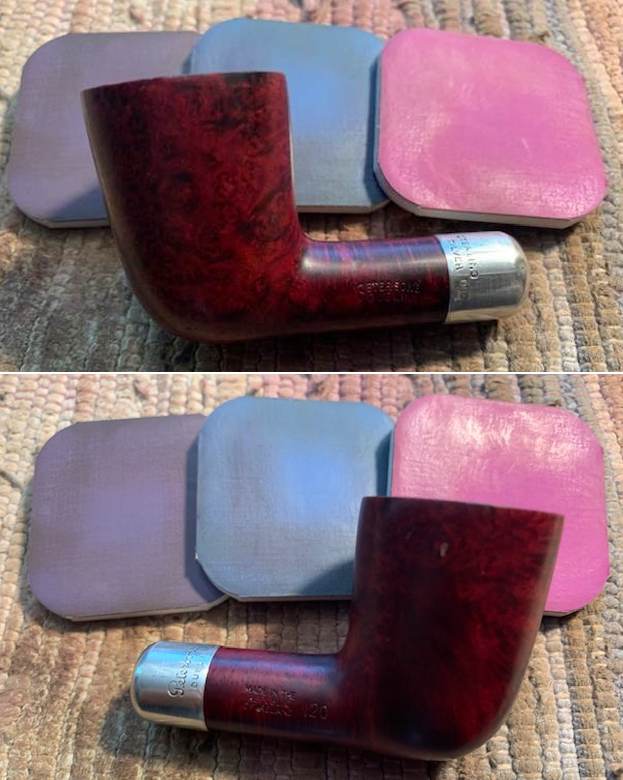
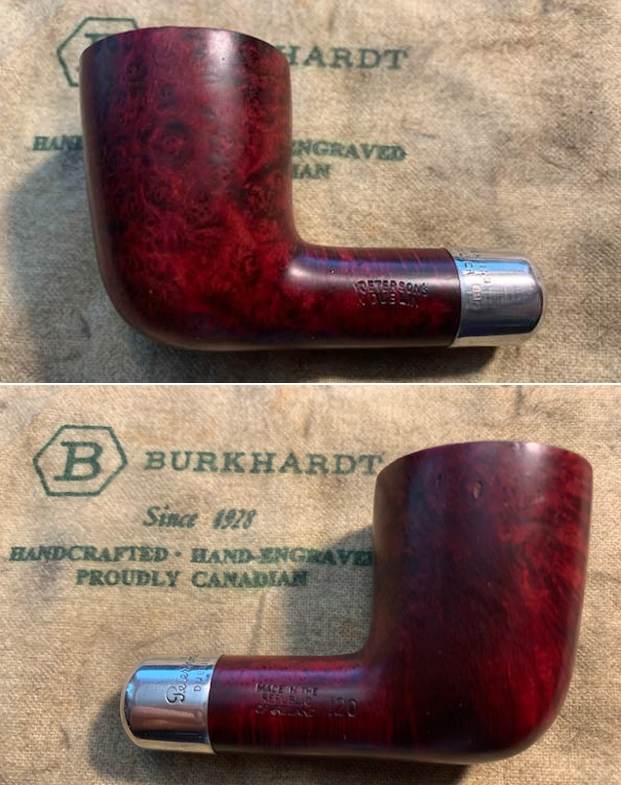
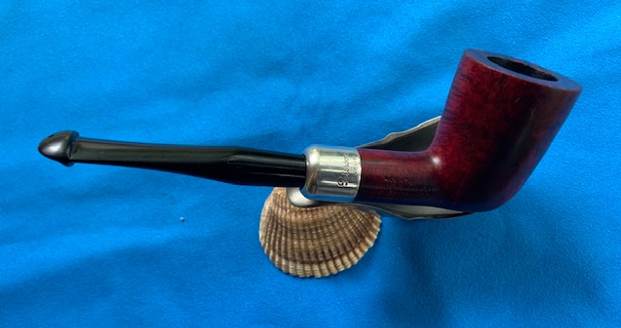
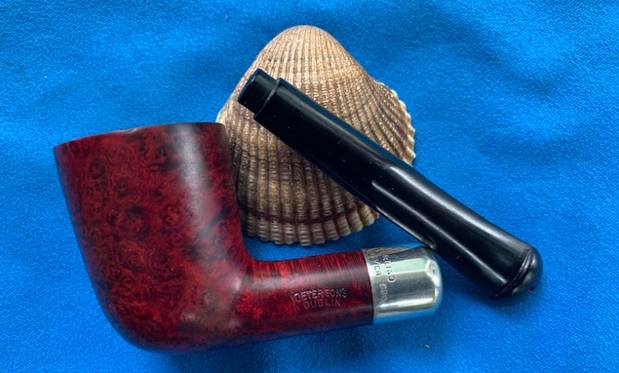
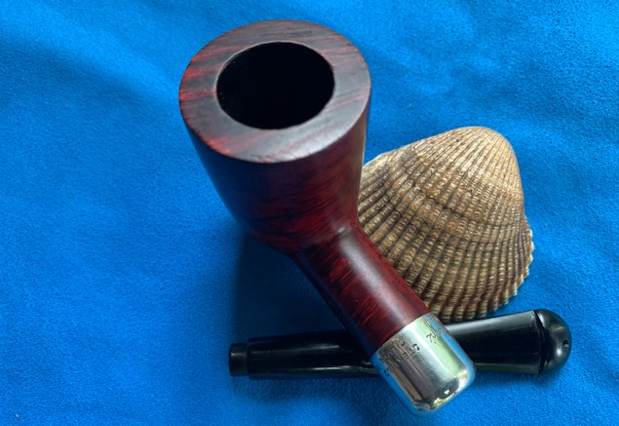
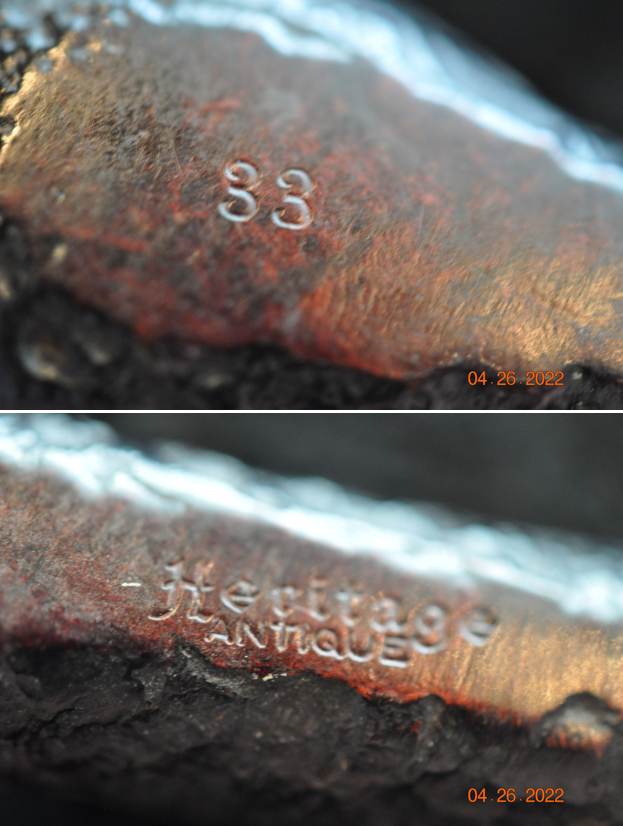
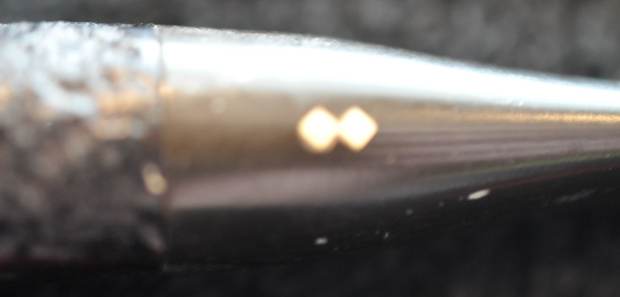
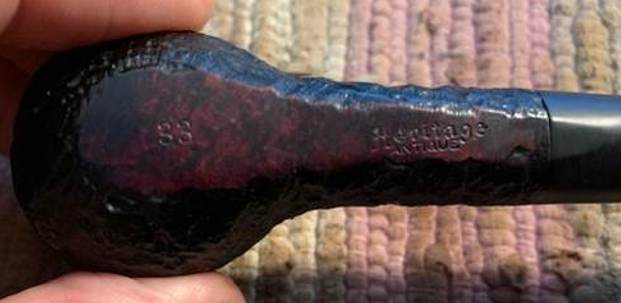
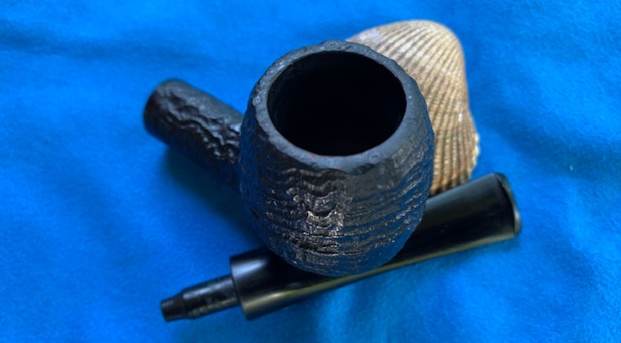
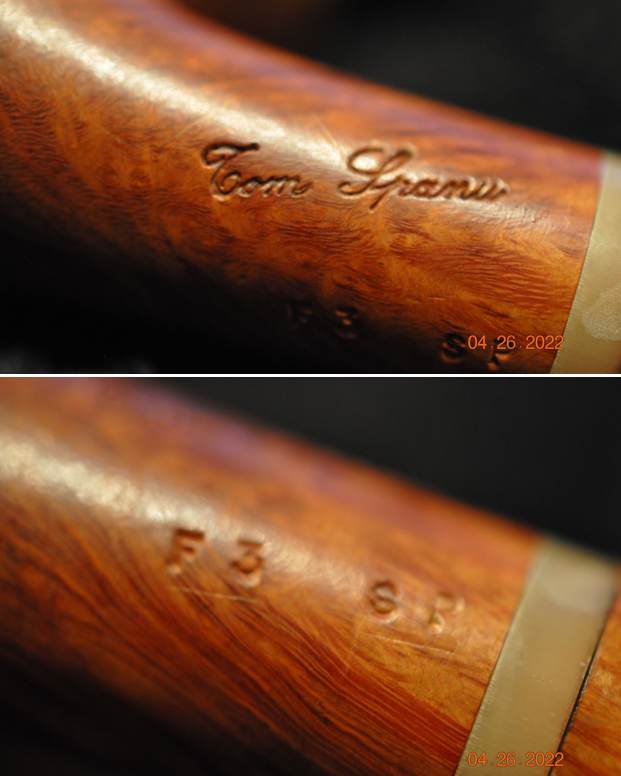
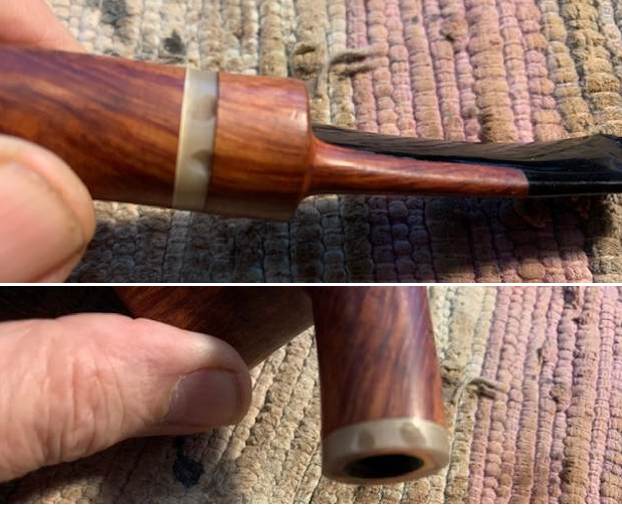
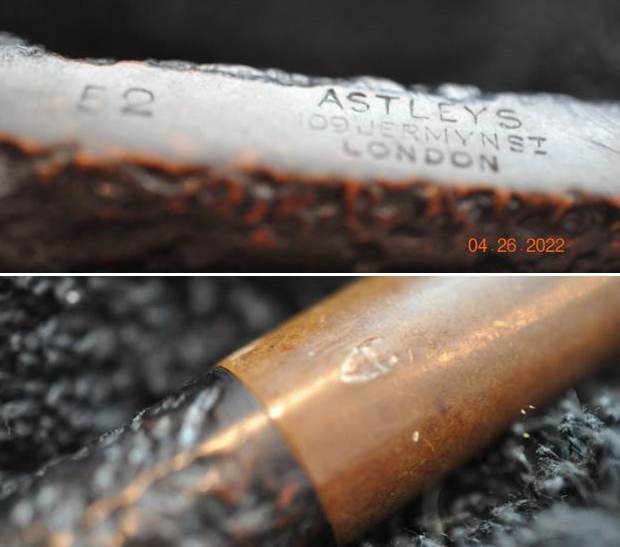
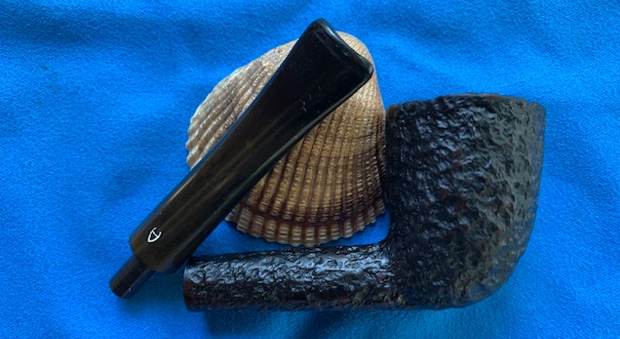
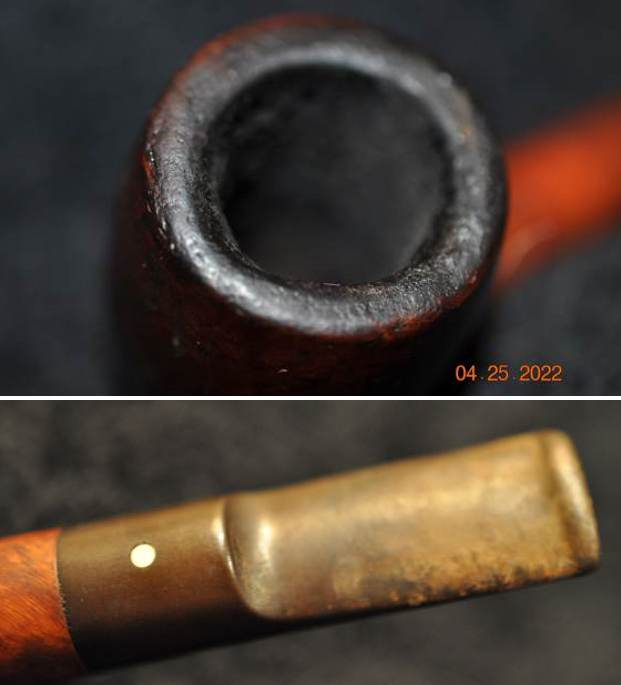
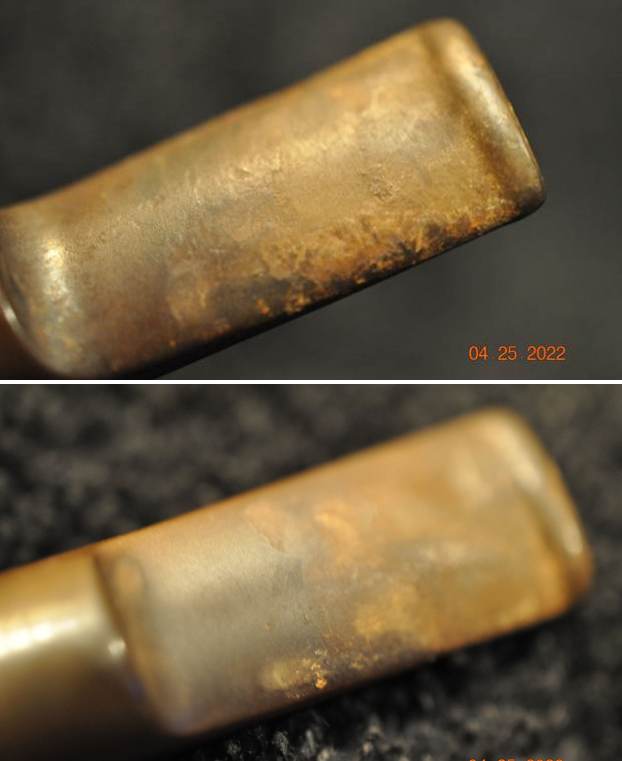
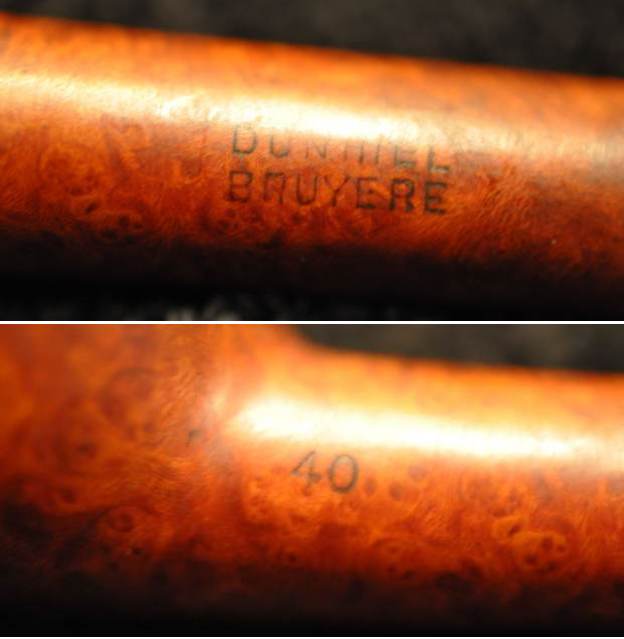
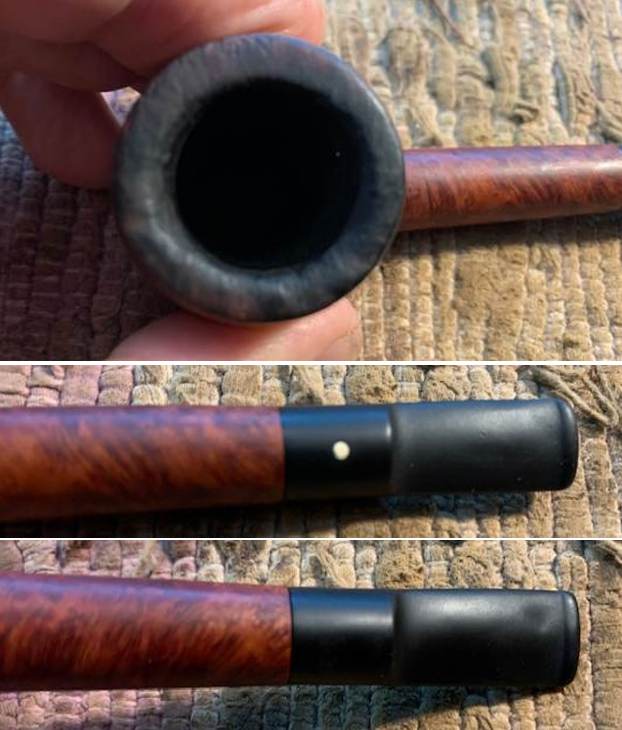
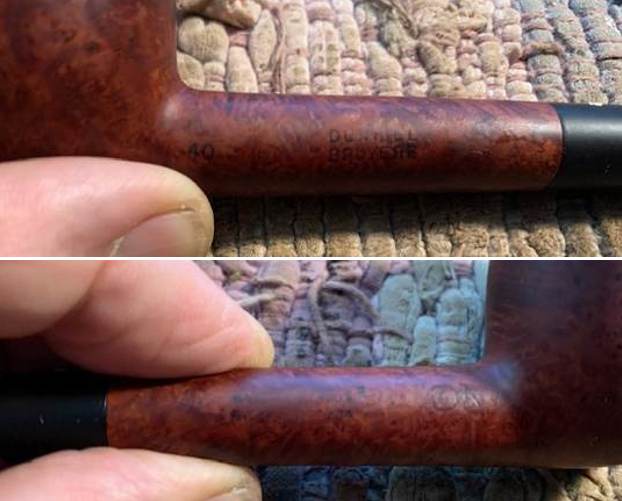
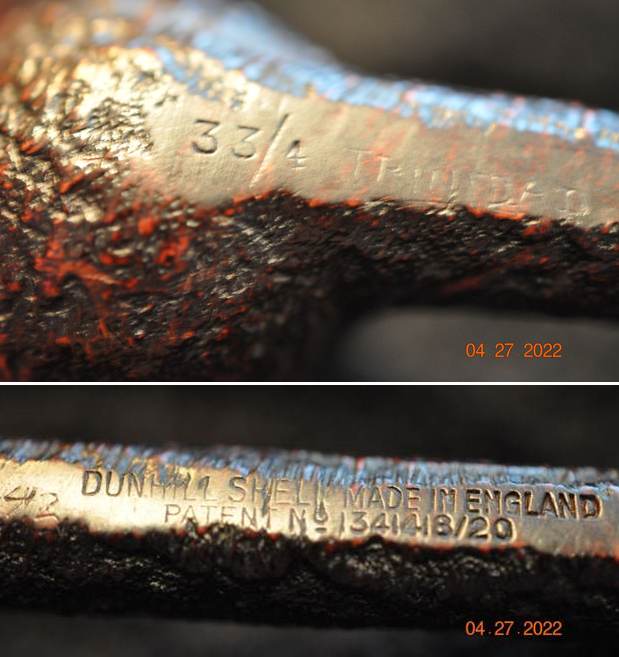
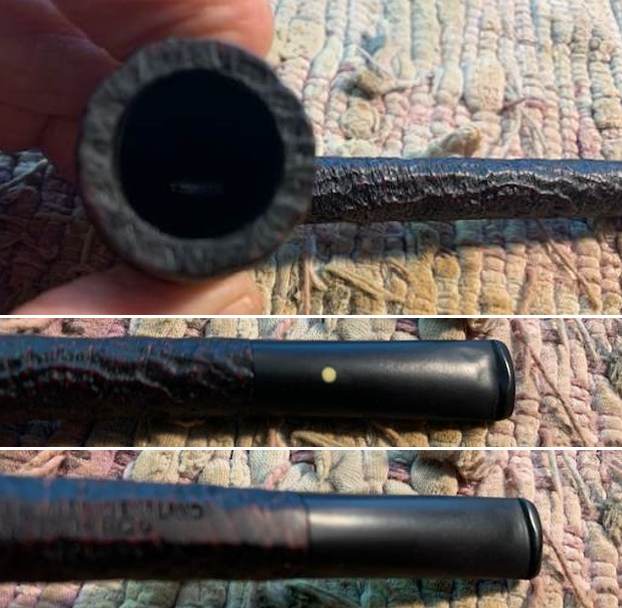
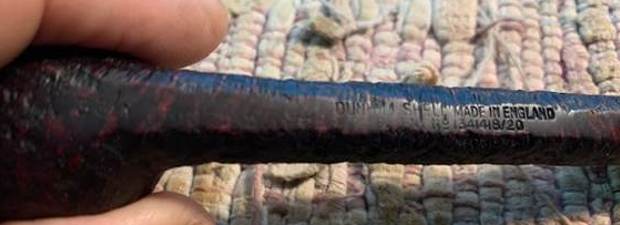
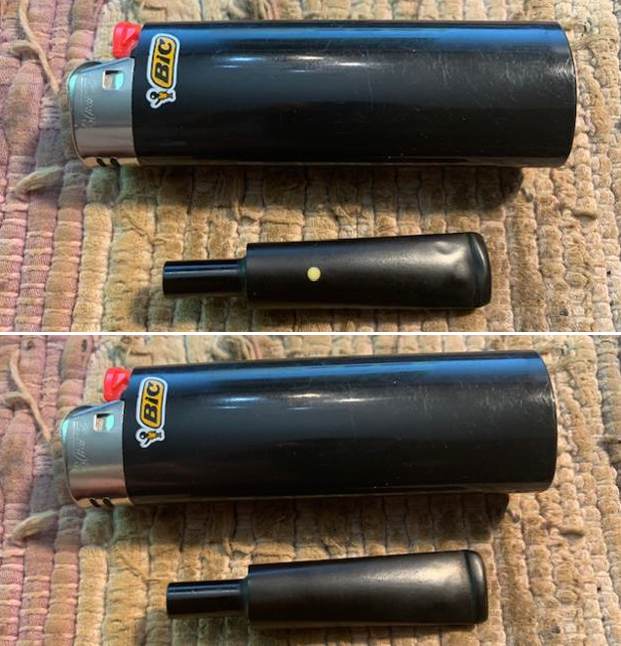
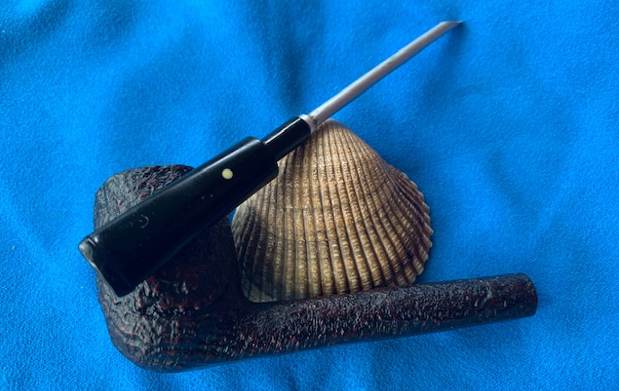
 He took photos of the stamping on the sides of the shank and on the ferrule and stem. It is readable but faint in places.
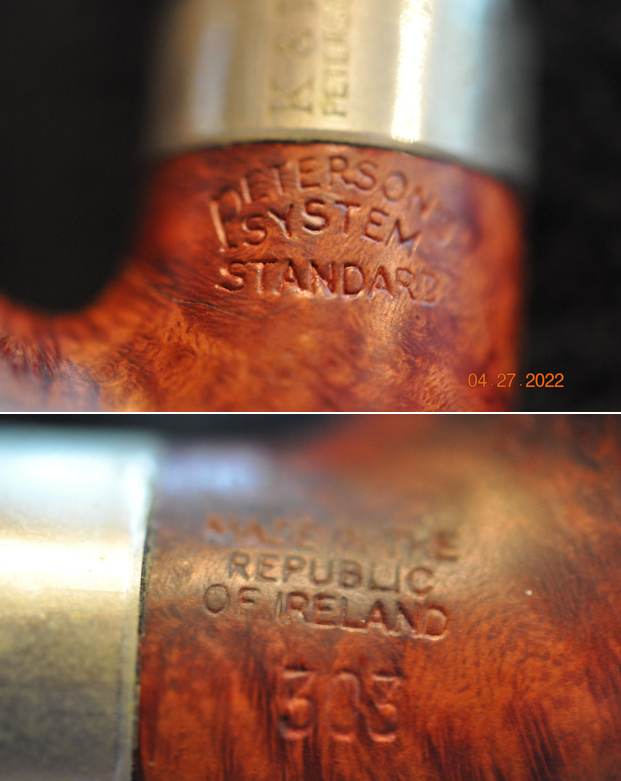
 I remembered that Paresh had restored a Peterson’s System Standard (his was a 314) earlier this year and as usual had done good work on the research. I turned to his blog and read through his work on the pipe (https://rebornpipes.com/2021/07/24/helping-a-fellow-piper-with-his-dream-pipea-petersons-system-pipe/). I quote below from the section on his blog regarding the dating of the pipe.
While dating a Peterson’s pipe, I always fall back to my under mentioned favorite site; http://thepetersonpipeproject.blogspot.com/2007/07/dating-peterons-pipes.html
I quote from the above site.
Stamping of Bowl:
During the years of Kapp and Peterson’s business operations, the country of Ireland has undergone several name changes and K&P’s stamping on their pipes reflects these changes. Knowing these changes, a Peterson pipe can be roughly dated and placed in “eras.”
- The Republic Era is from 1949 until the present. The Republic of Ireland was formed on 17 April 1949. From 1949 to present the stamp for this era is “Made in the Republic of Ireland” in a block format generally in three lines but two lines have been used with or without Republic being abbreviated.
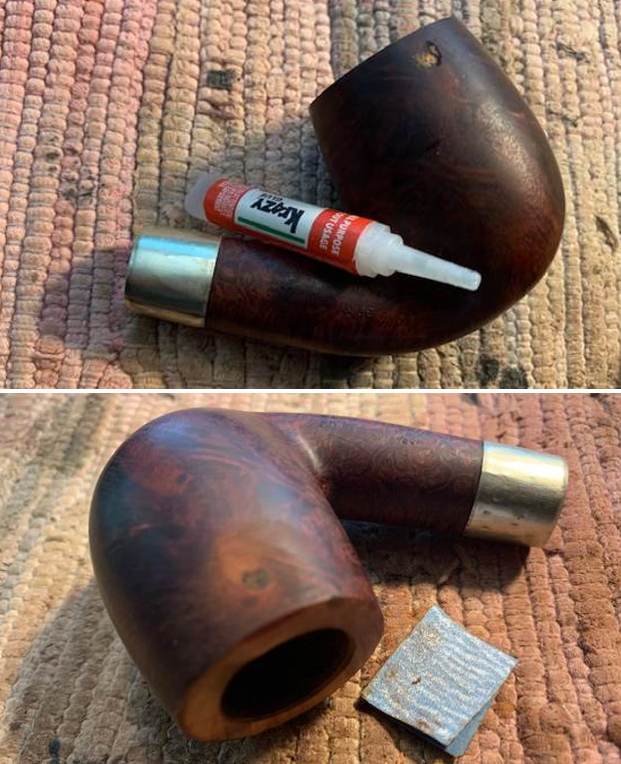
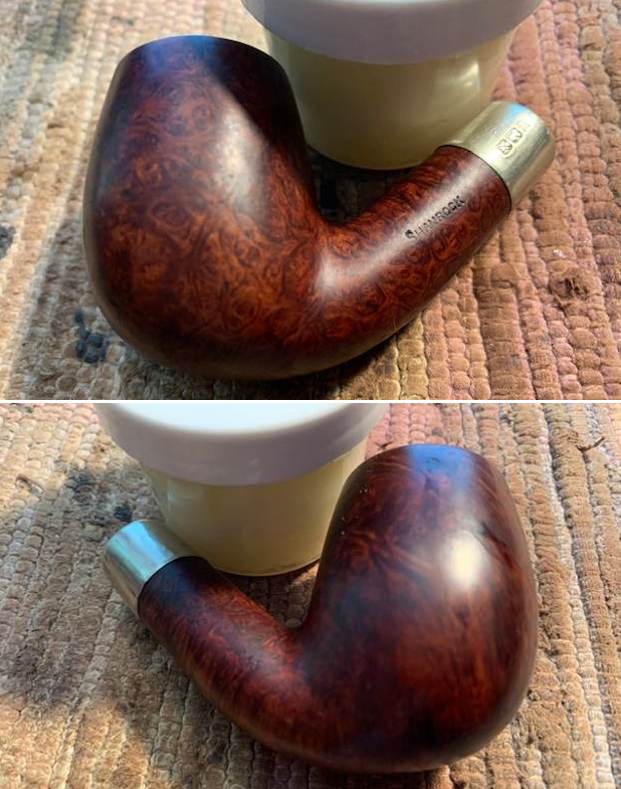
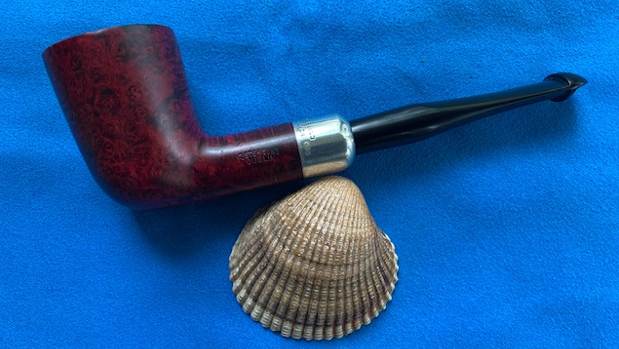
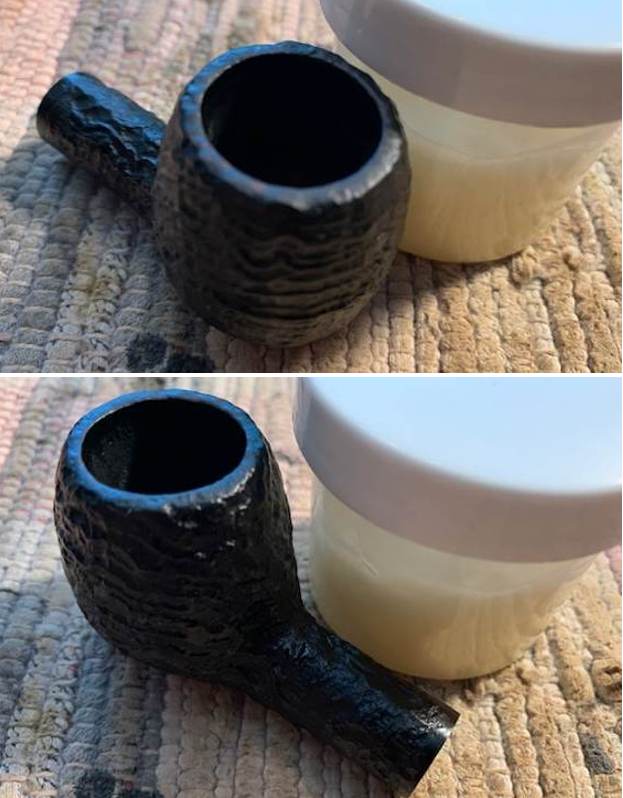
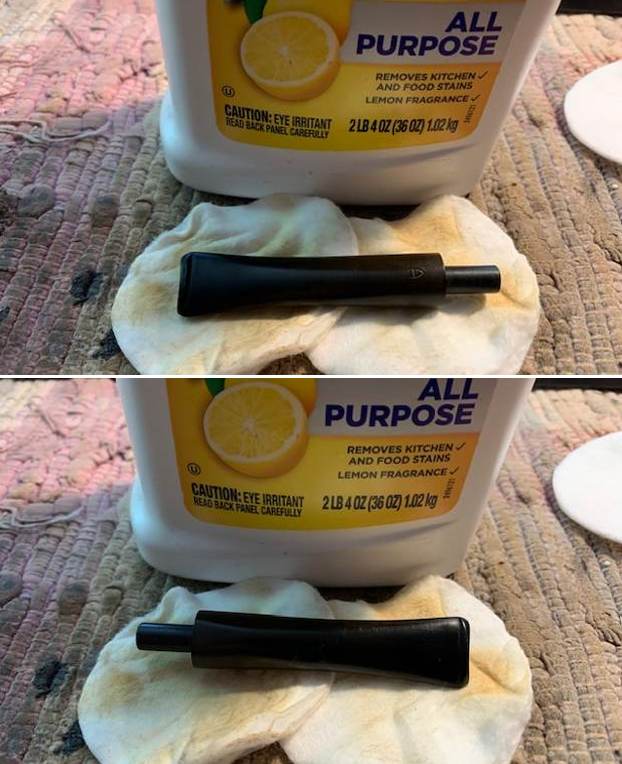
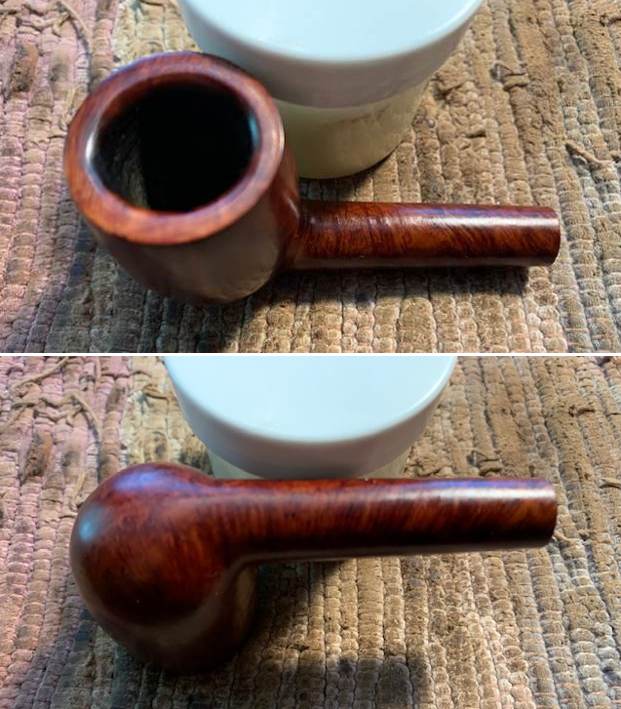
With that information at hand I turned to work on the pipe itself. Jeff had thoroughly cleaned up the pipe. He reamed the pipe with a PipNet Pipe Reamer and cleaned up the remnants with a Savinelli Fitsall Pipe Knife. He scrubbed the bowl with undiluted Murphy’s Oil Soap with a tooth brush. He rinsed it under running warm water to remove the soap and grime. He cleaned out the inside of the shank and the airway in the stem with alcohol, cotton swabs and pipe cleaners. He scrubbed the exterior of the stem with Soft Scrubb to remove as much of the oxidation as possible. He soaked the stem in Before & After Deoxidizer and rinsed it off with warm water. I took photos of the pipe before I started my work on it. (You can see the burn damage on the right top edge of the bowl.)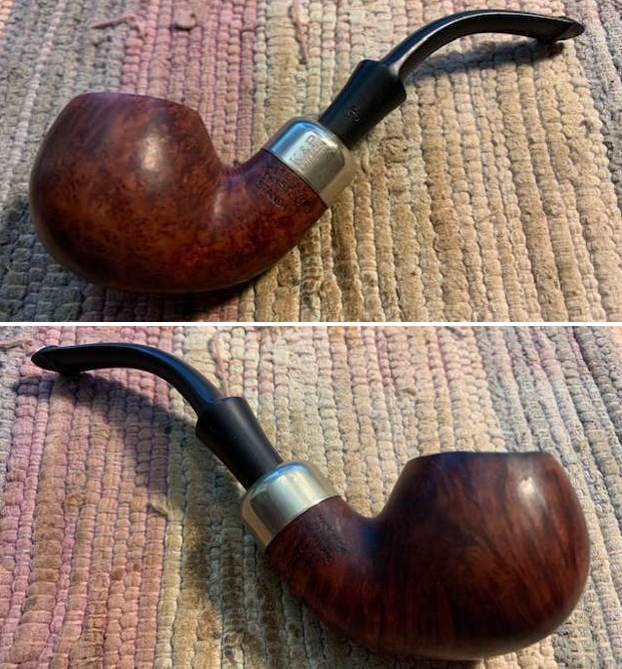
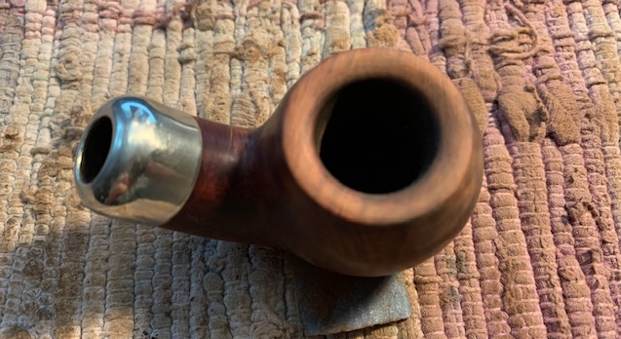
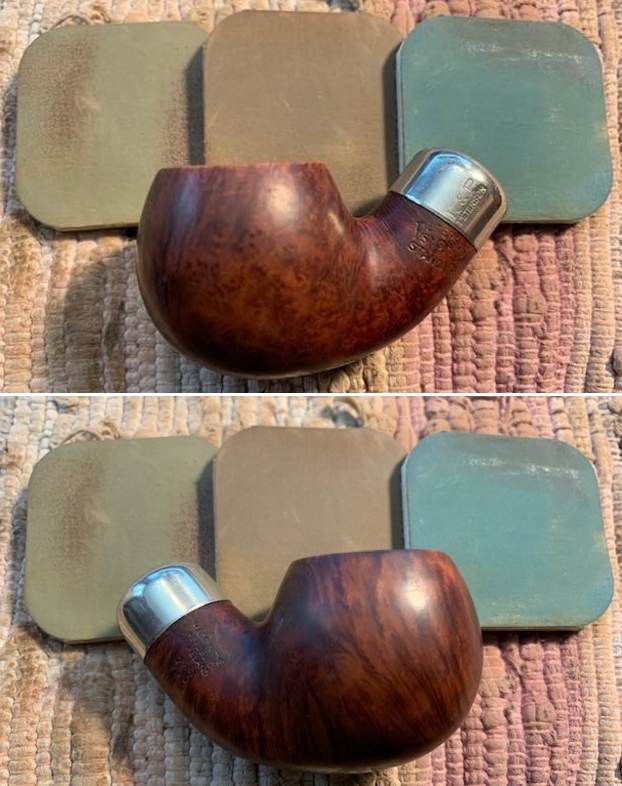
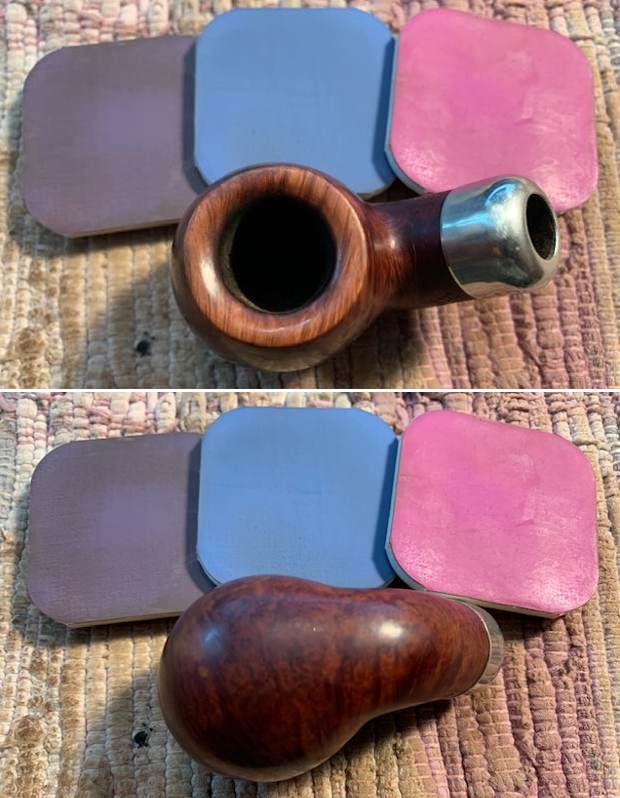
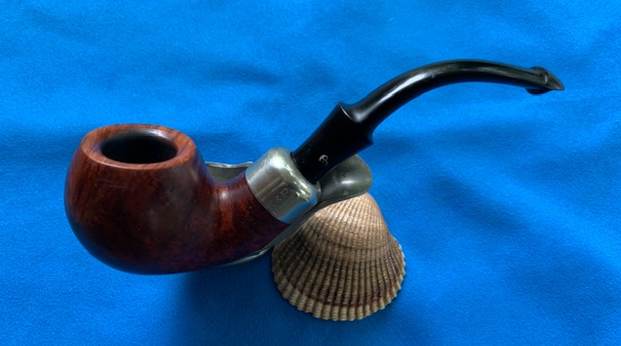
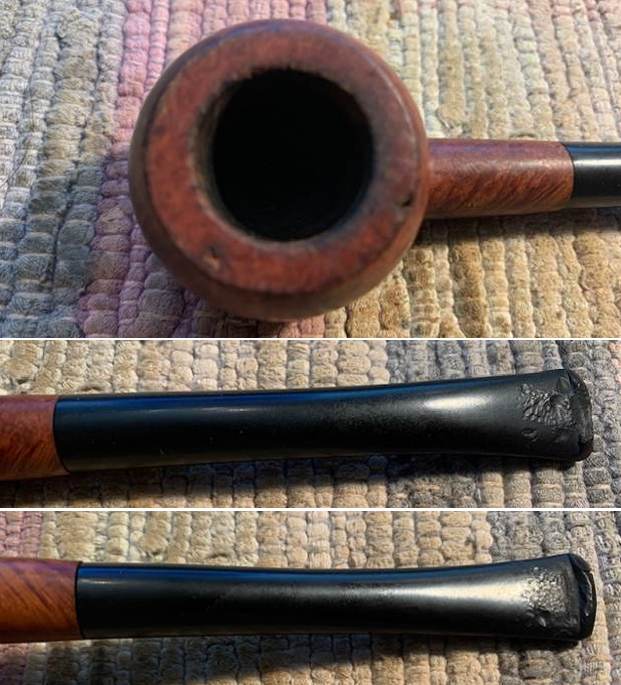
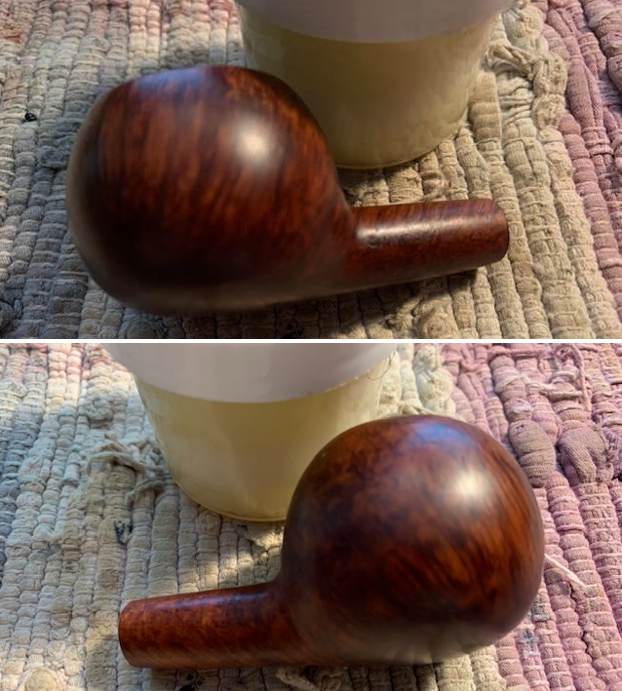
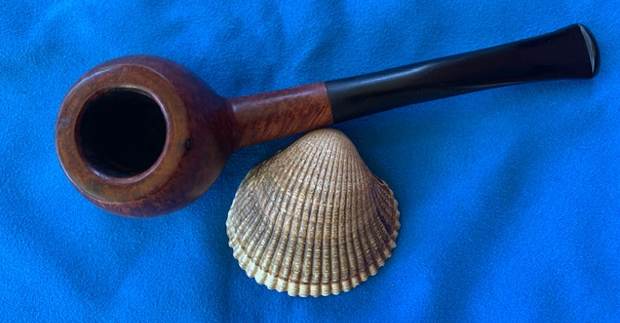
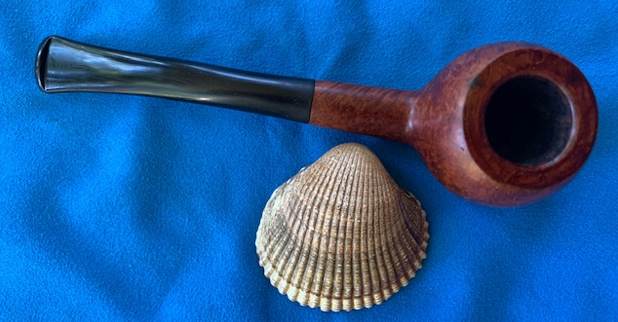
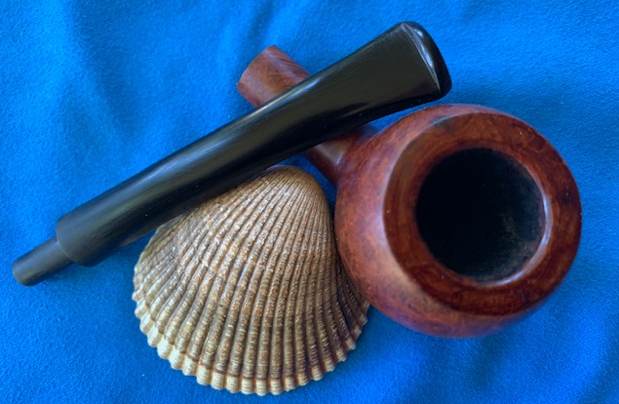
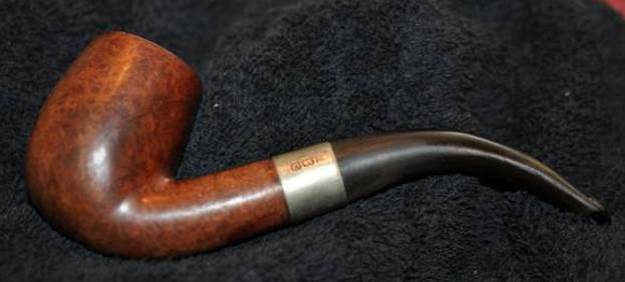
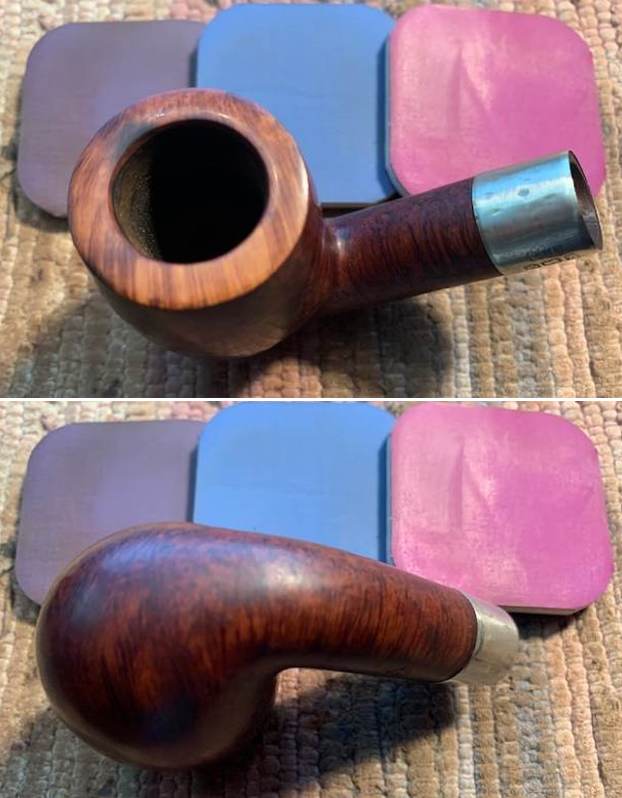
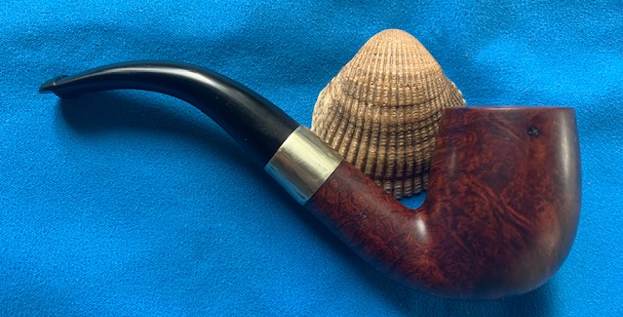
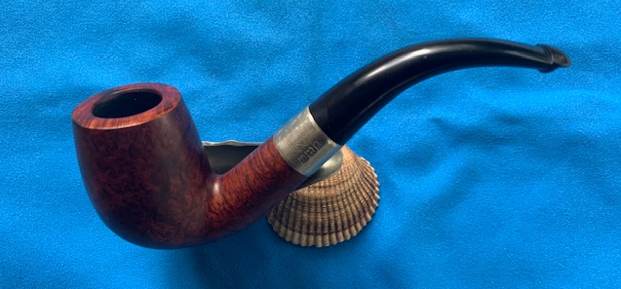
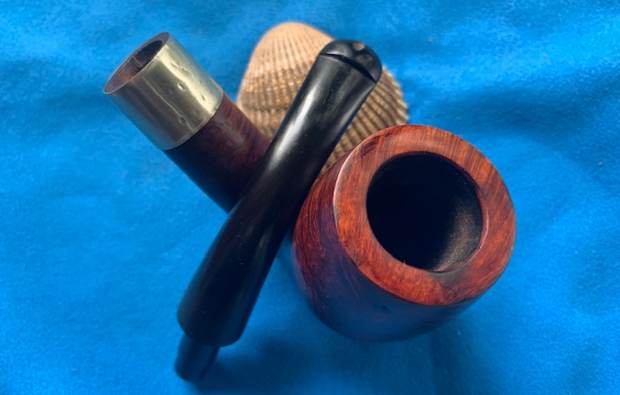
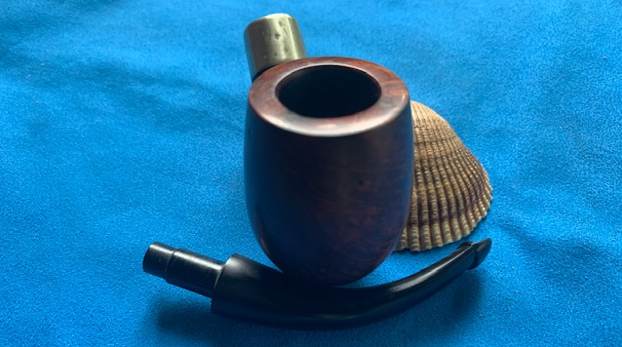
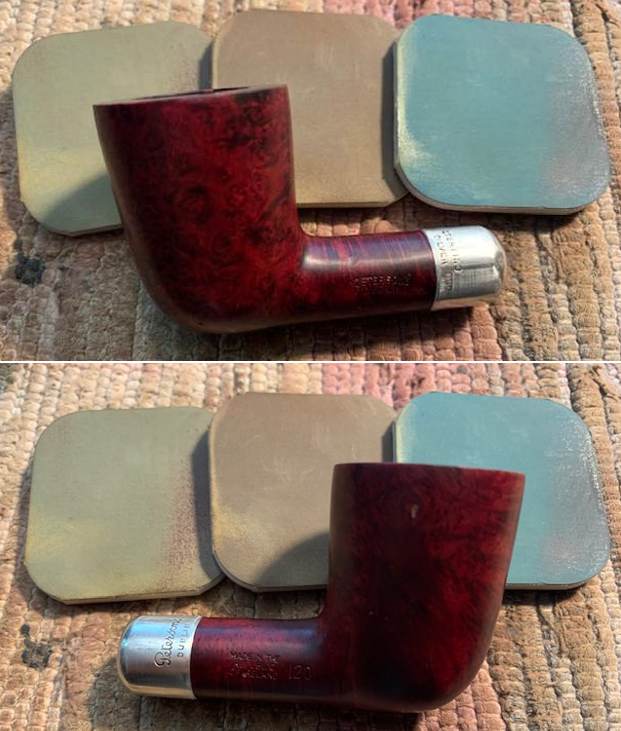
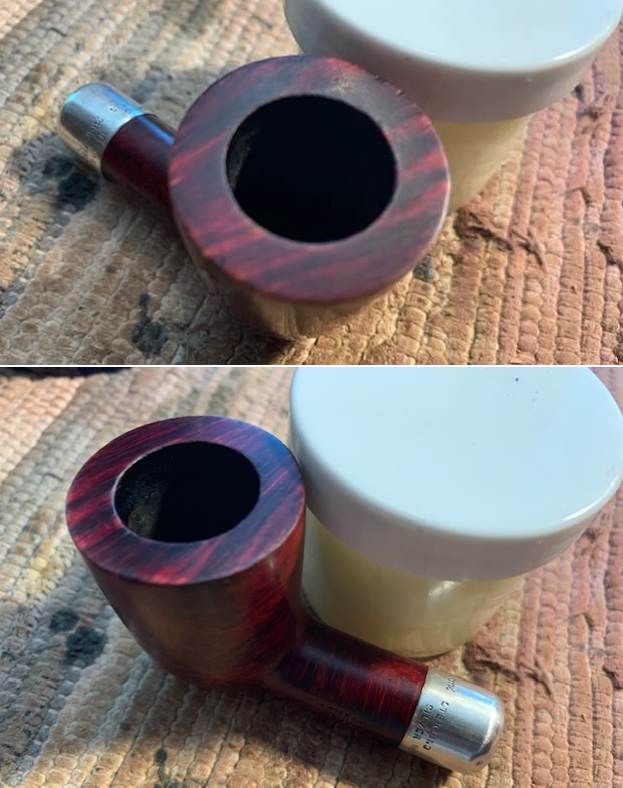
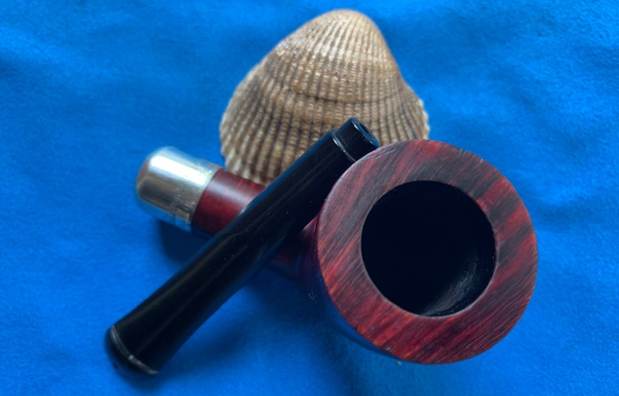
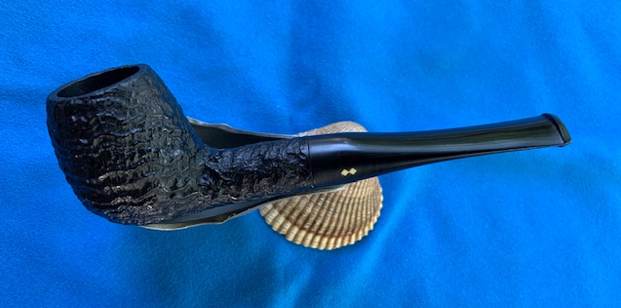
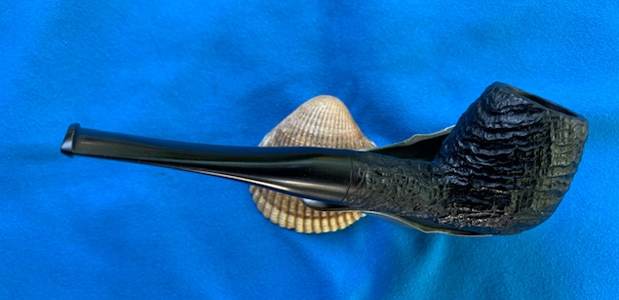
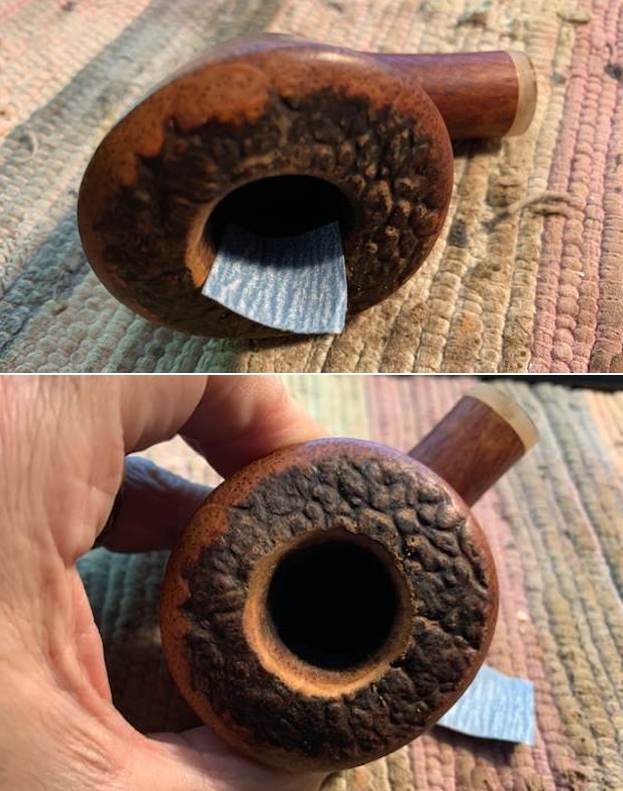
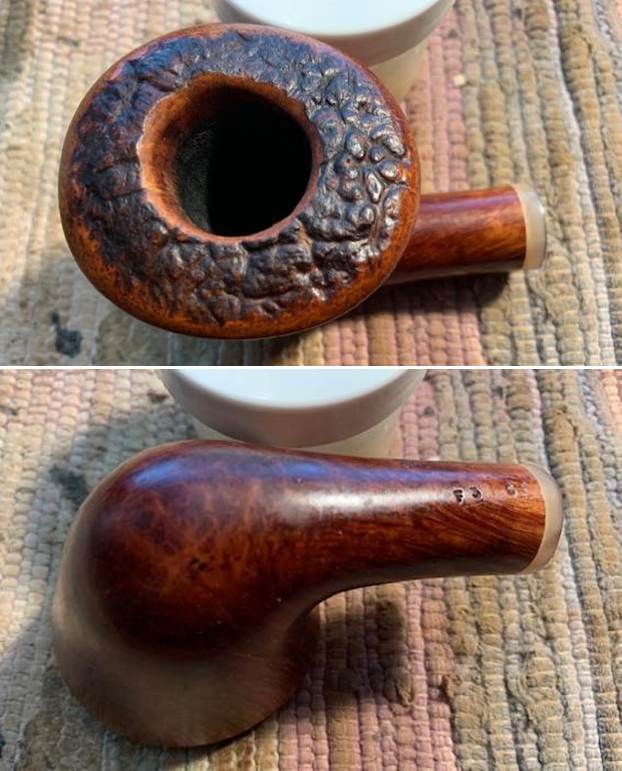
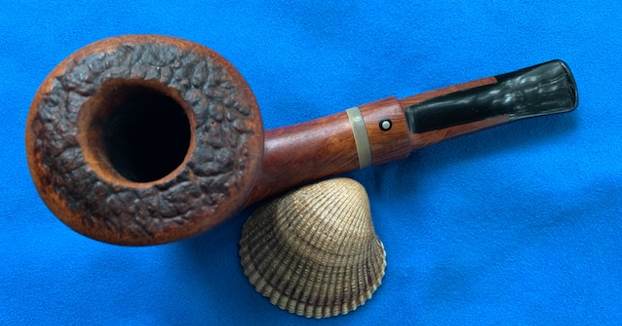
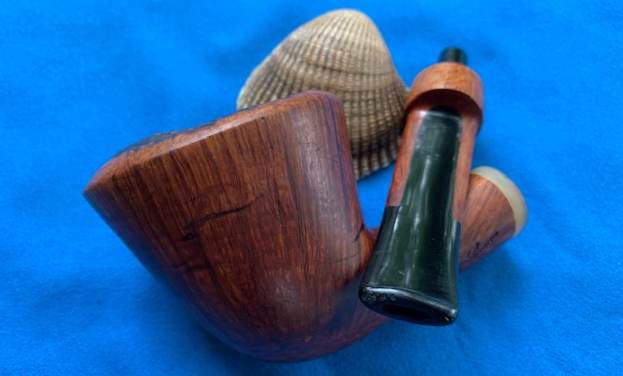
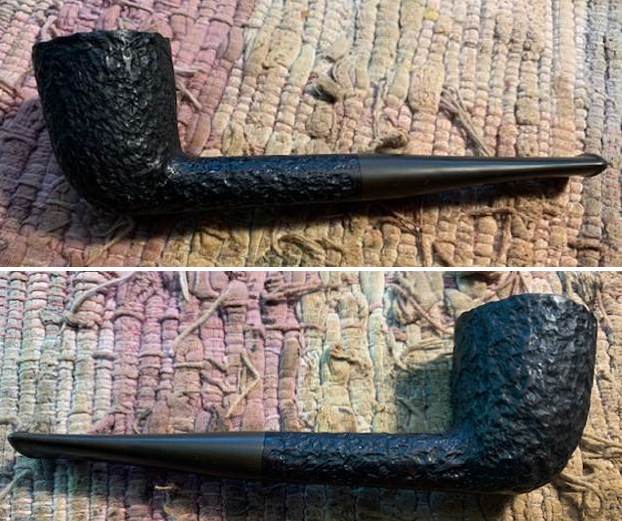
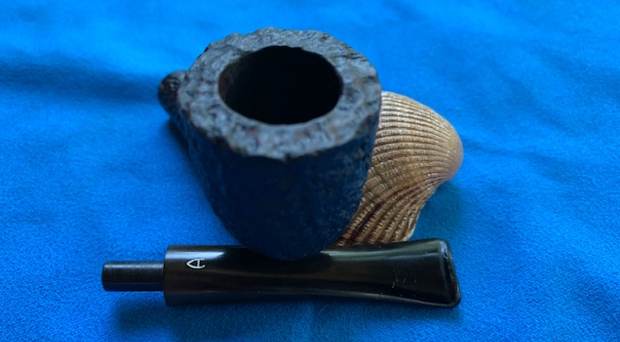
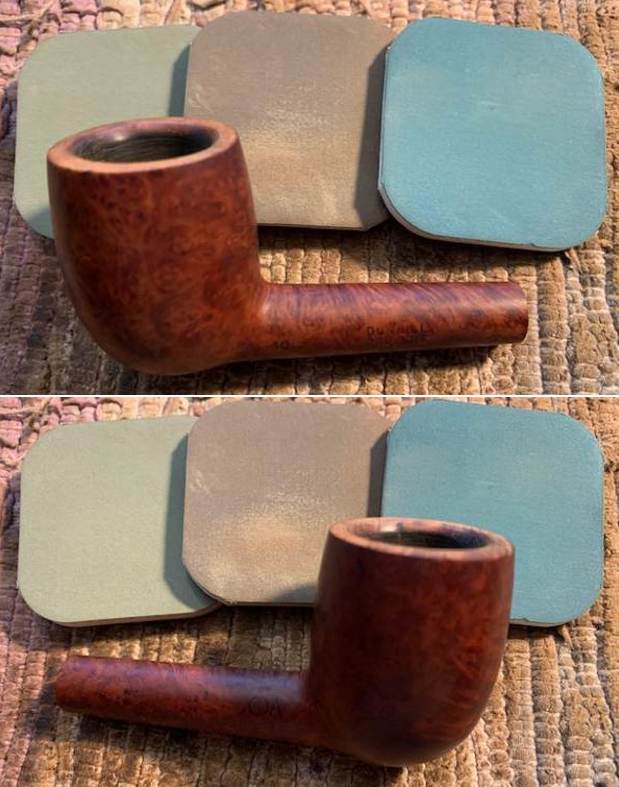
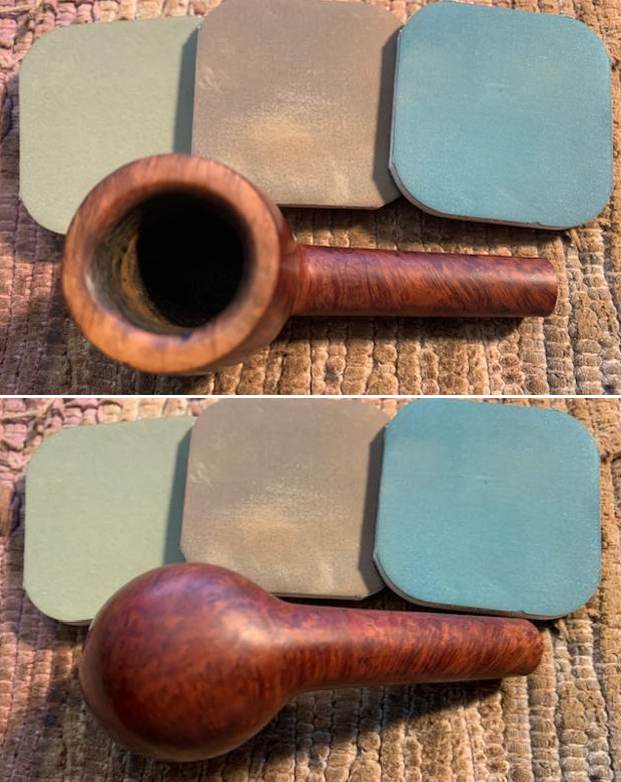
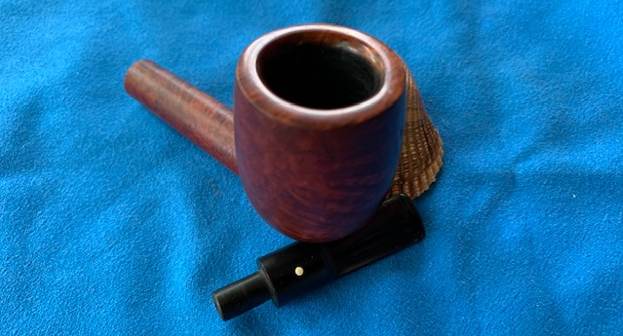
 I took photos of the rim top and bowl as well as the stem to give a sense of the condition of both. The rim top had some scratching on the top and damage to the inner edge and rim top on the right front as I had guessed when I saw the photos before the cleanup. The stem cleaned up well and the tooth marks on the top and underside ahead of the button are light and should clean up easily.
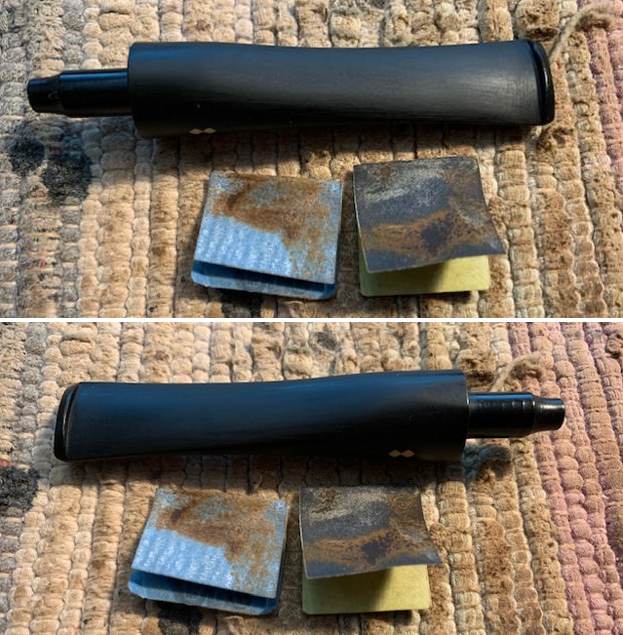
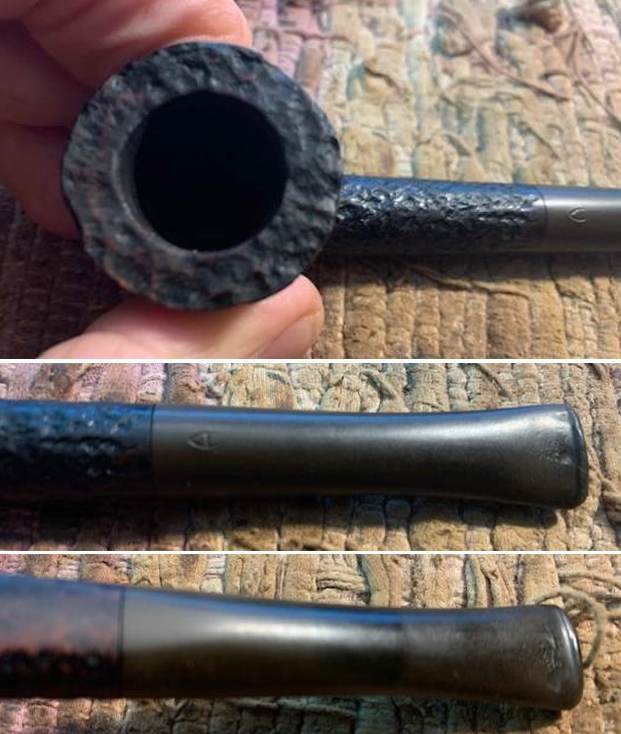
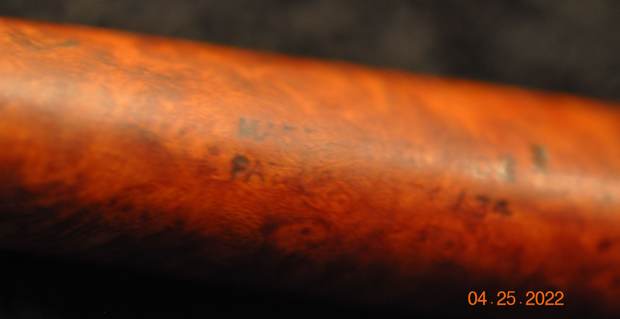
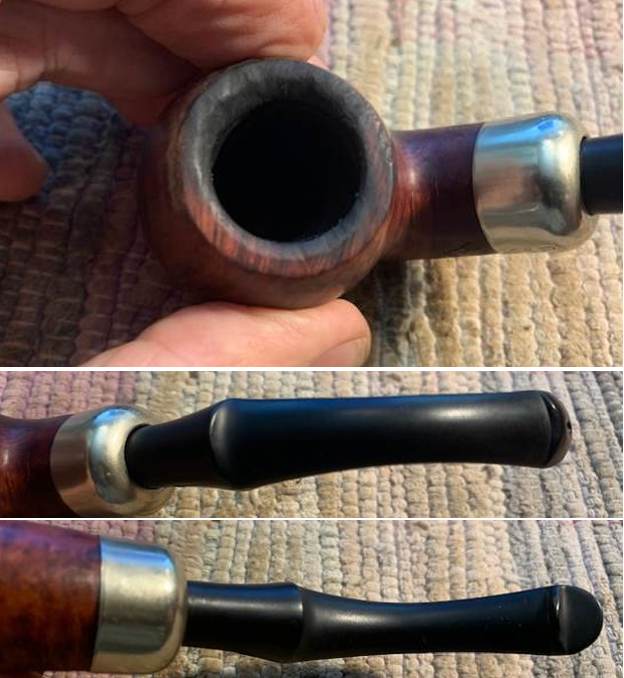 I took photos of the stamping on the shank sides. The are clear and readable as noted above. There is some faintness on parts of the stamping but it is still readable.
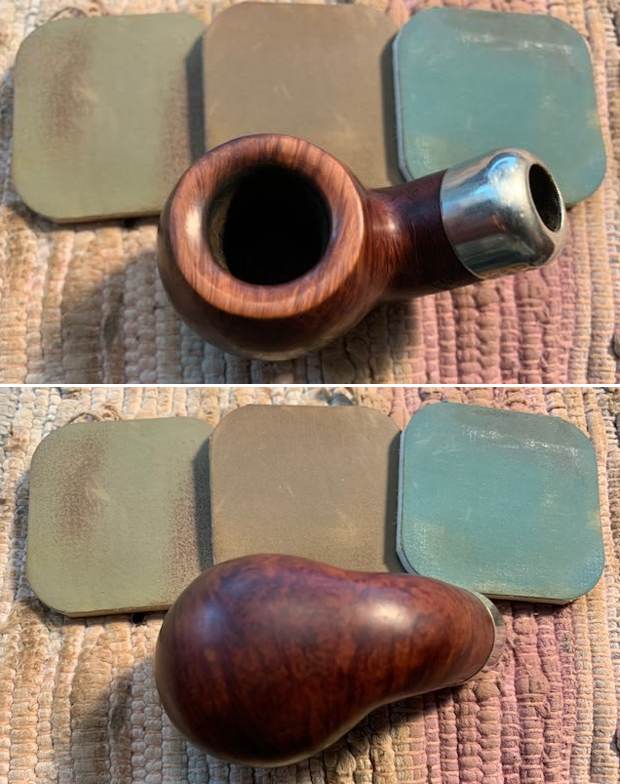
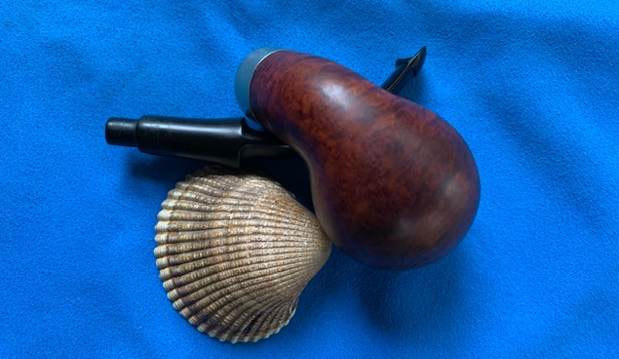
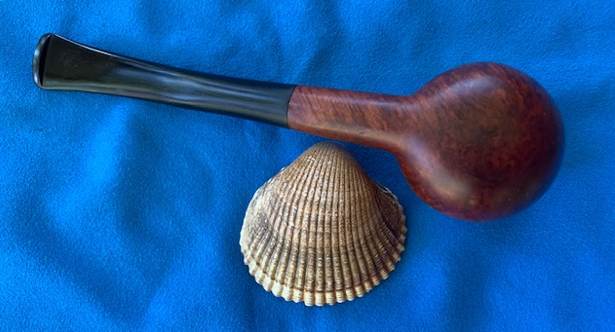
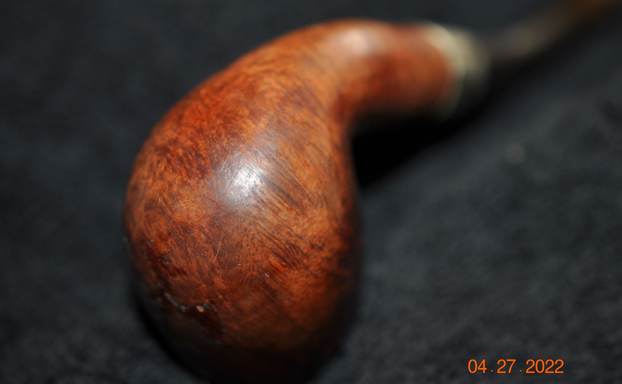
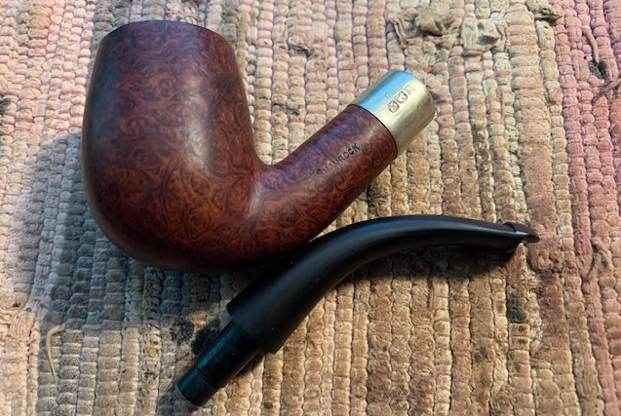
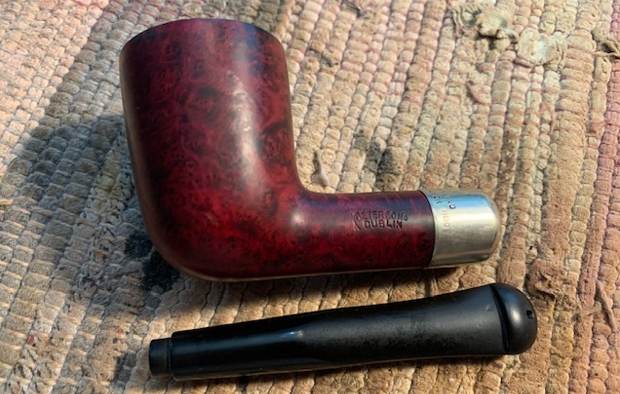
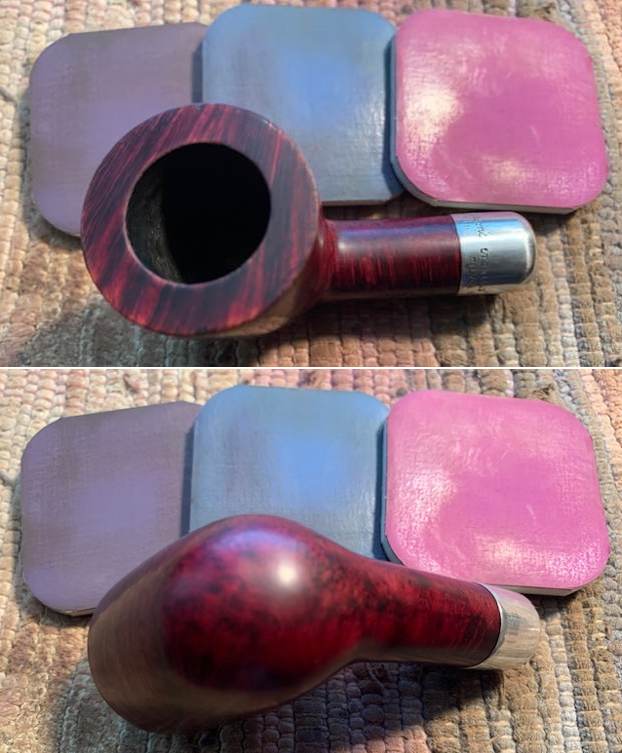
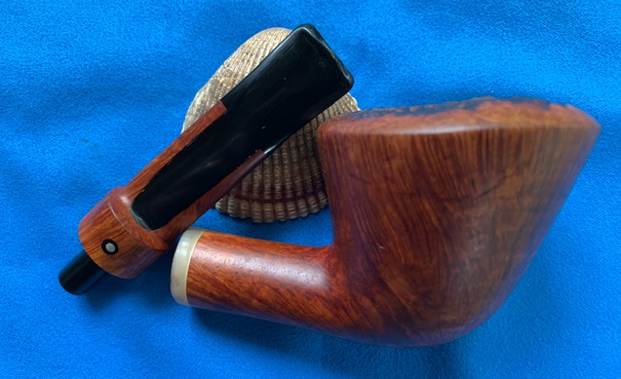
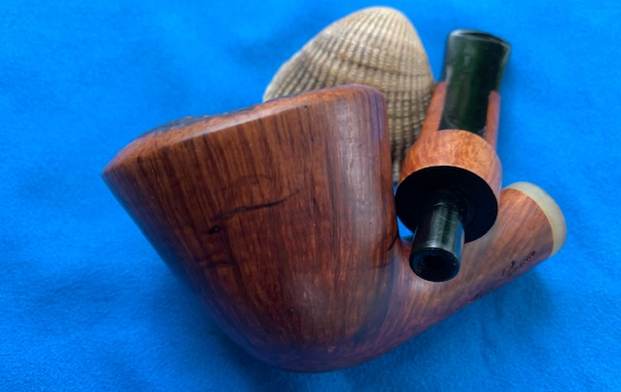
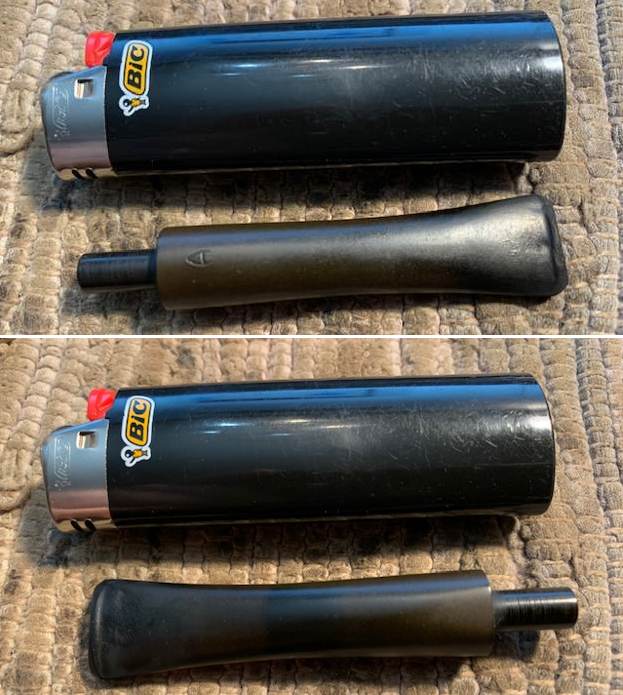
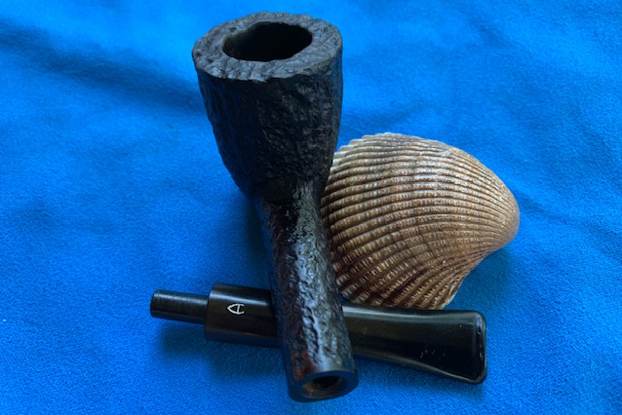
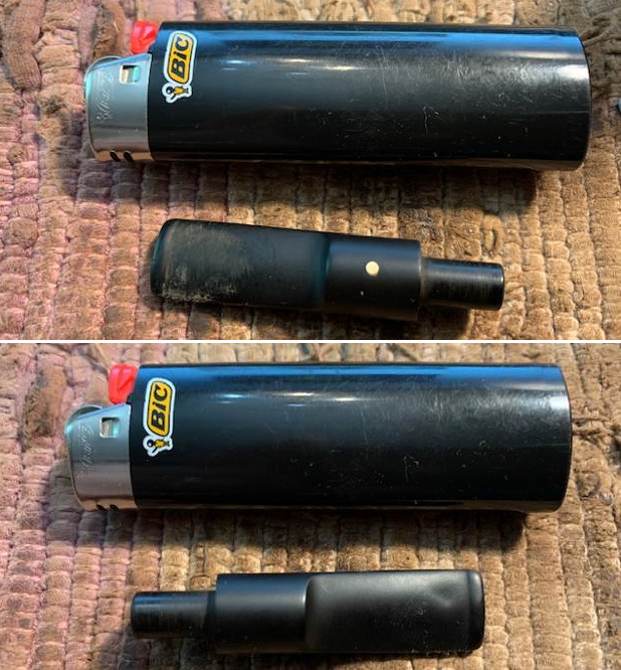
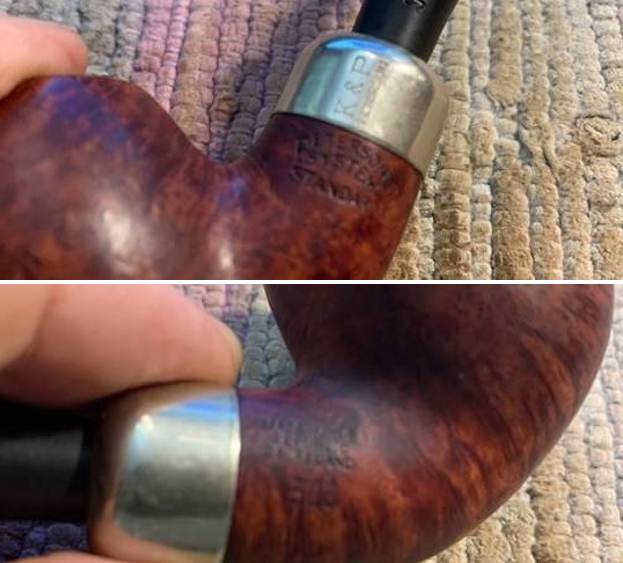 I took the stem out of the shank and took a photo of the overall look of the pipe.
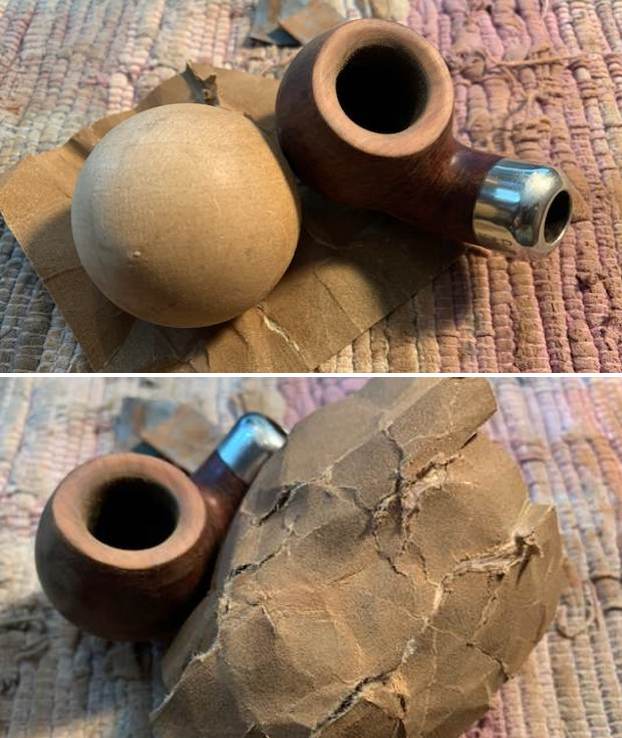
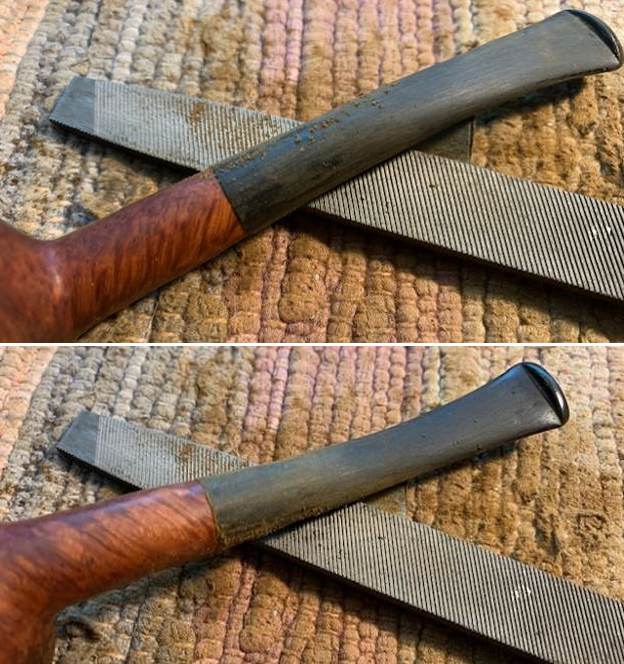
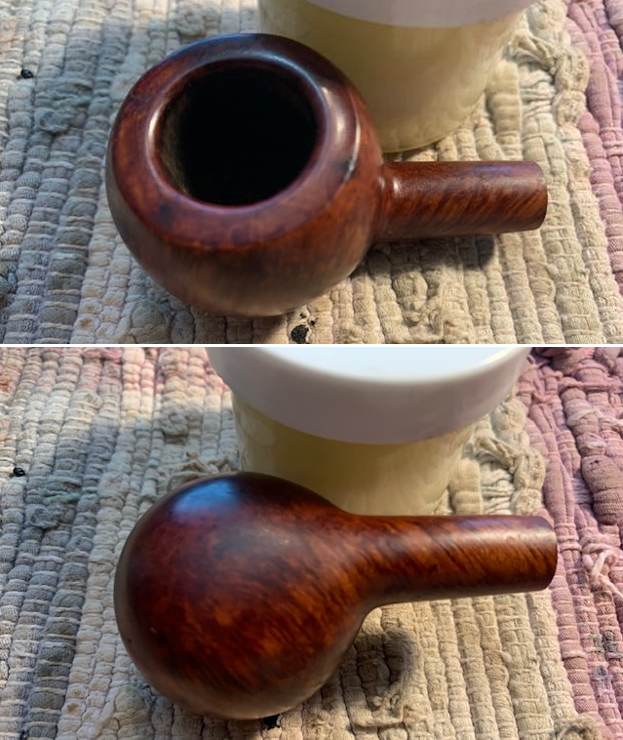
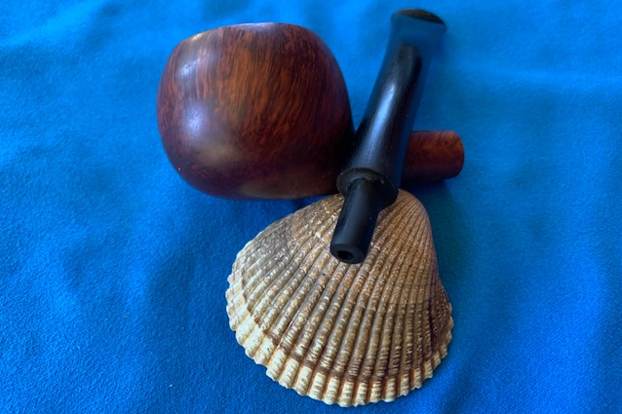
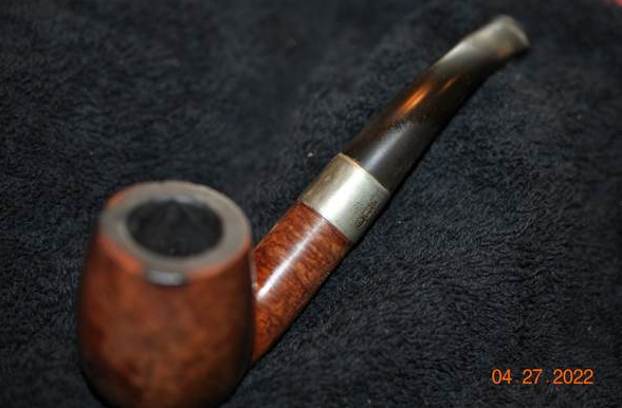
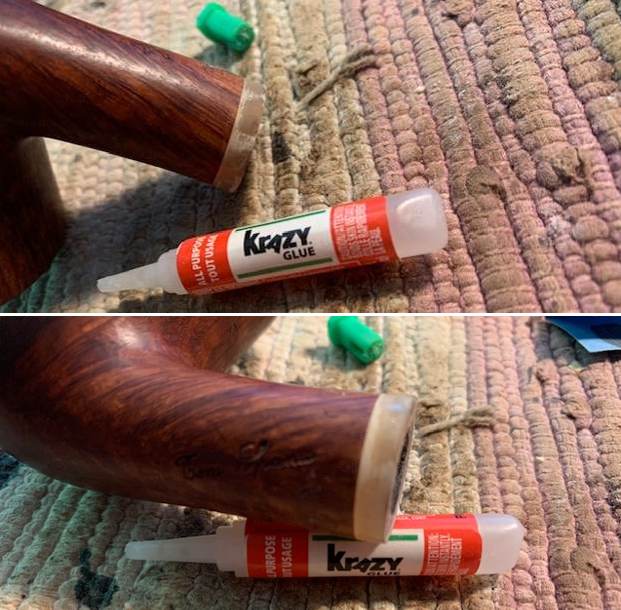
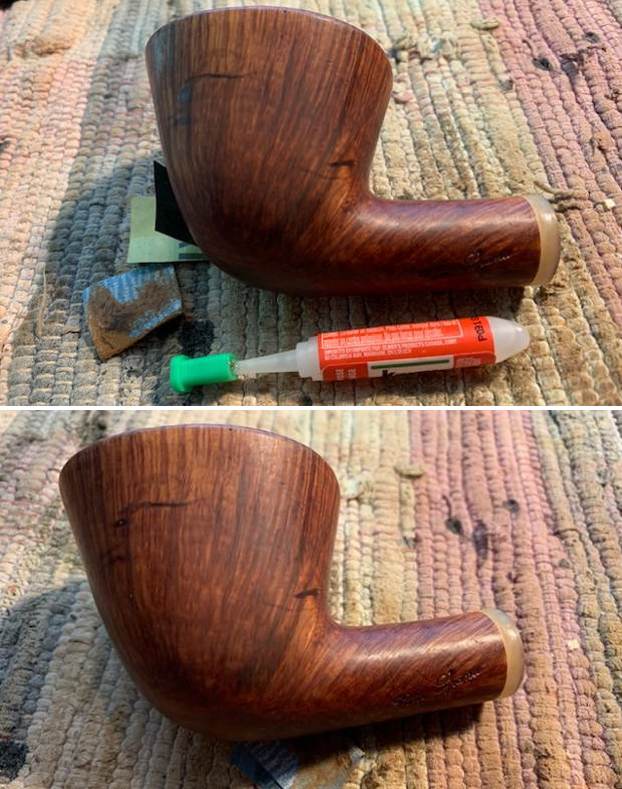
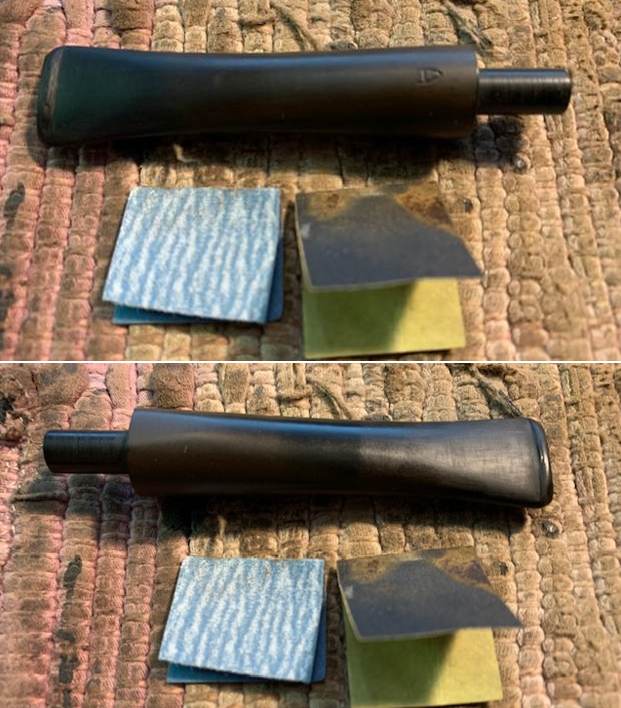
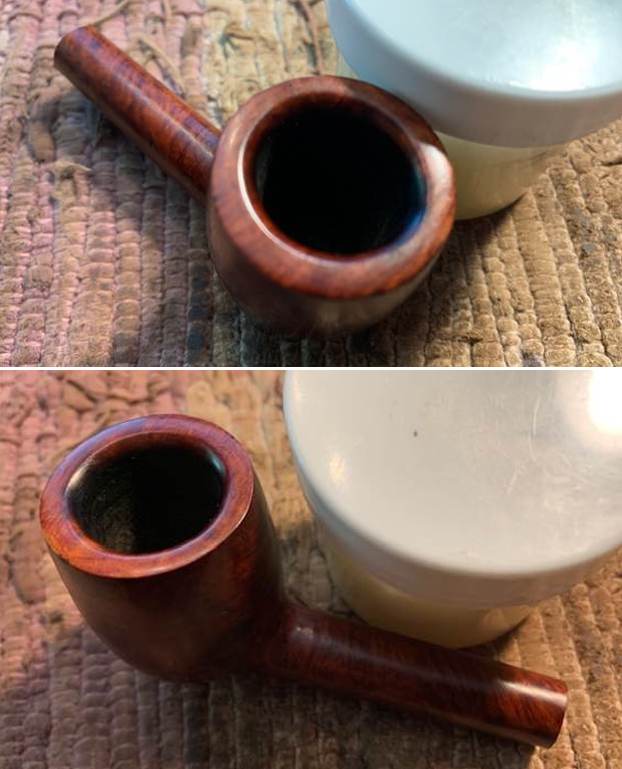
 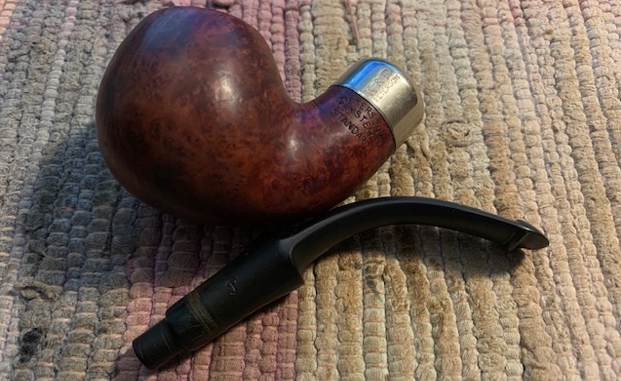 I decided to start my work on the pipe by addressing the damage on the inside edge of the bowl and the rim top. I topped the bowl with 220 grit sandpaper on a topping board. I then used a wooden ball and 220 grit sandpaper to give the inner edge a slight bevel to remove the burn damage on the right front. I wiped the top and edges down with a damp cloth and the rim top damage and burn marks on the outer edges were gone.
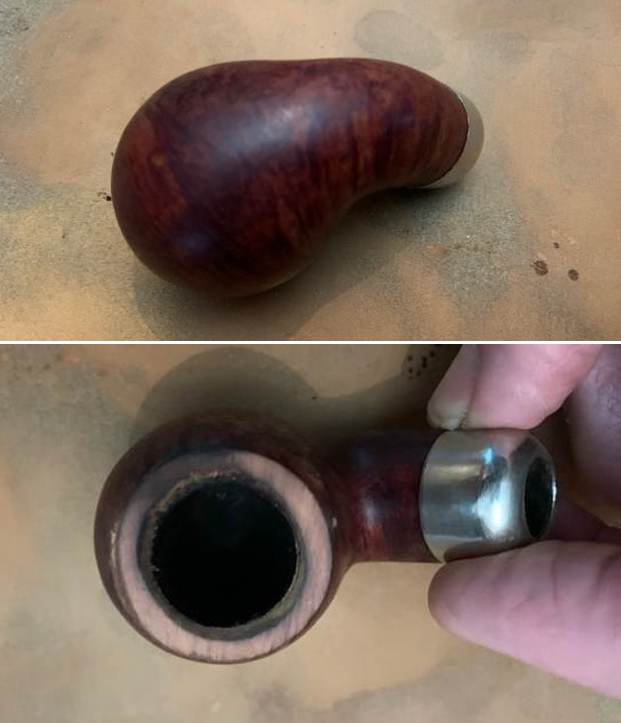
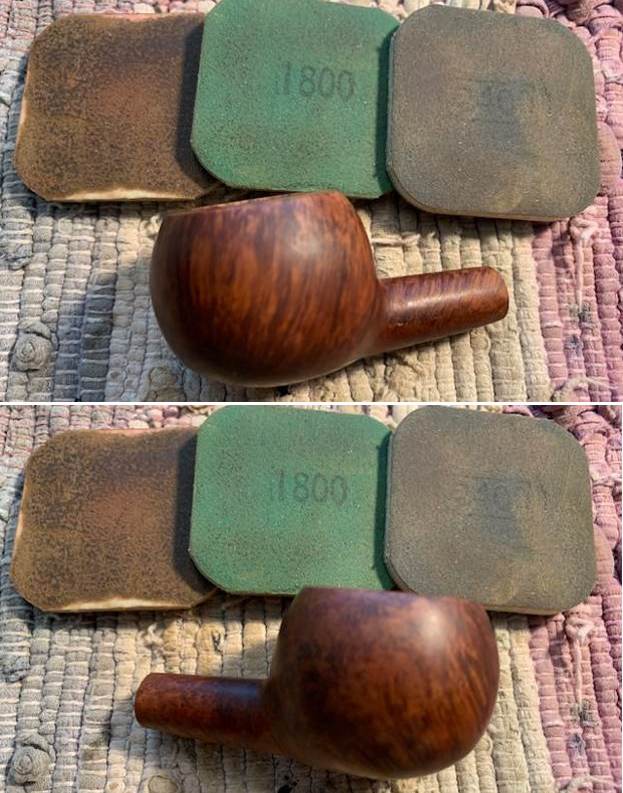
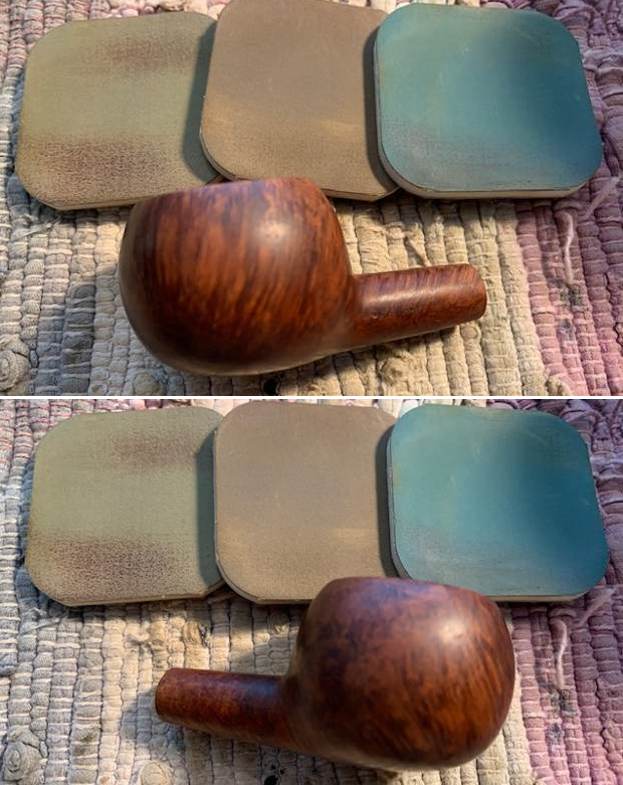
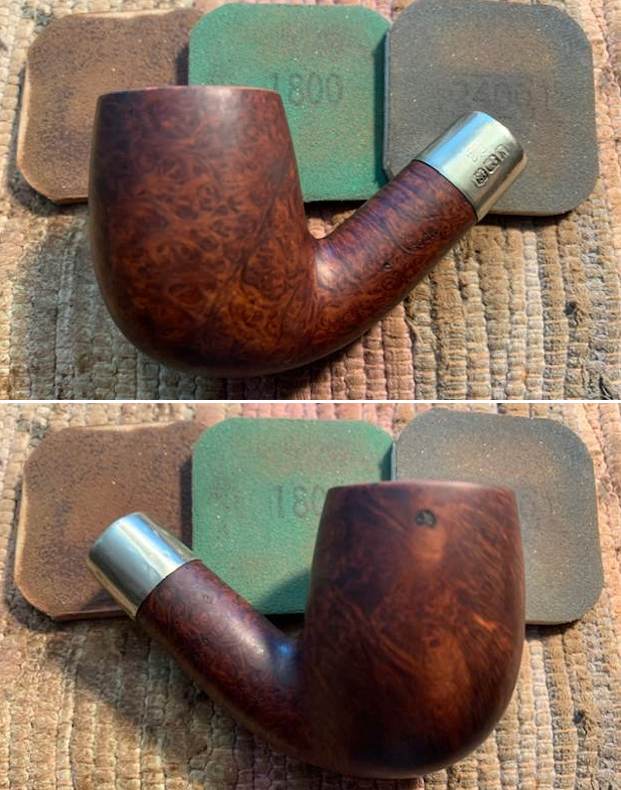
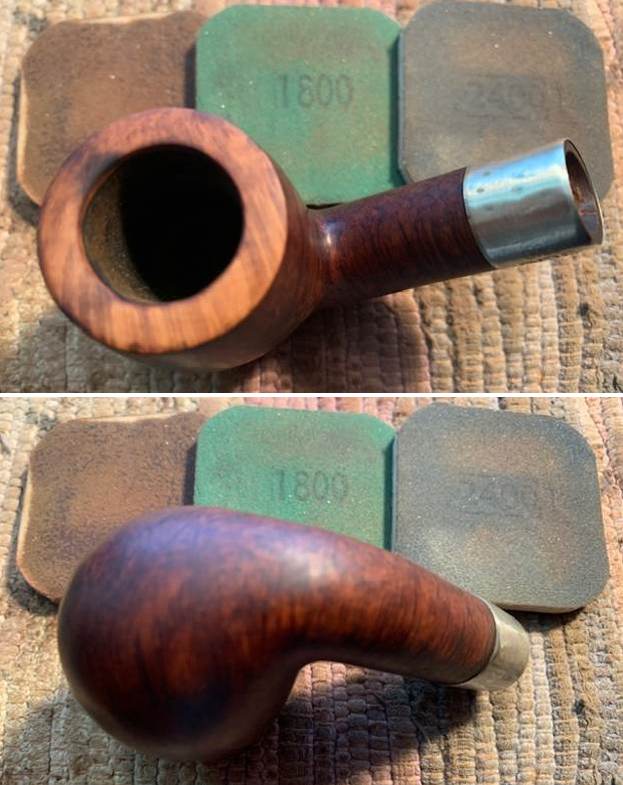
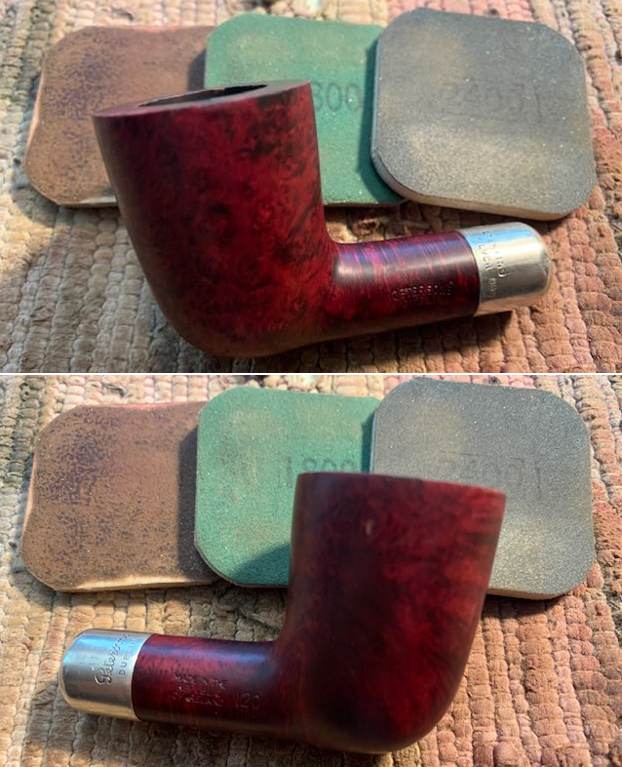
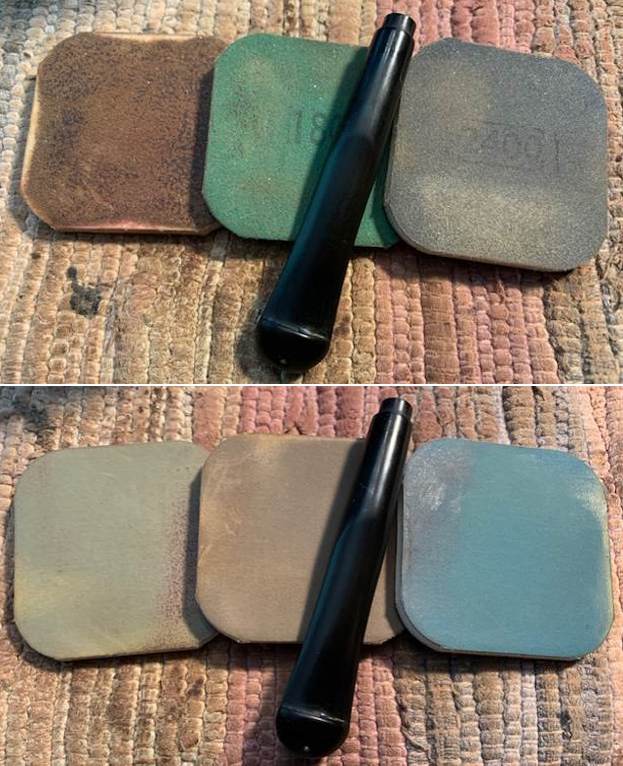
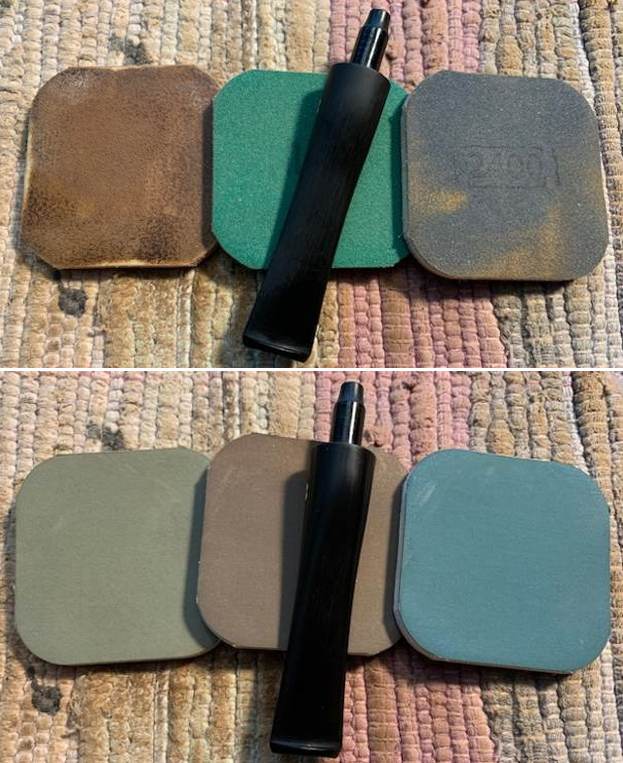
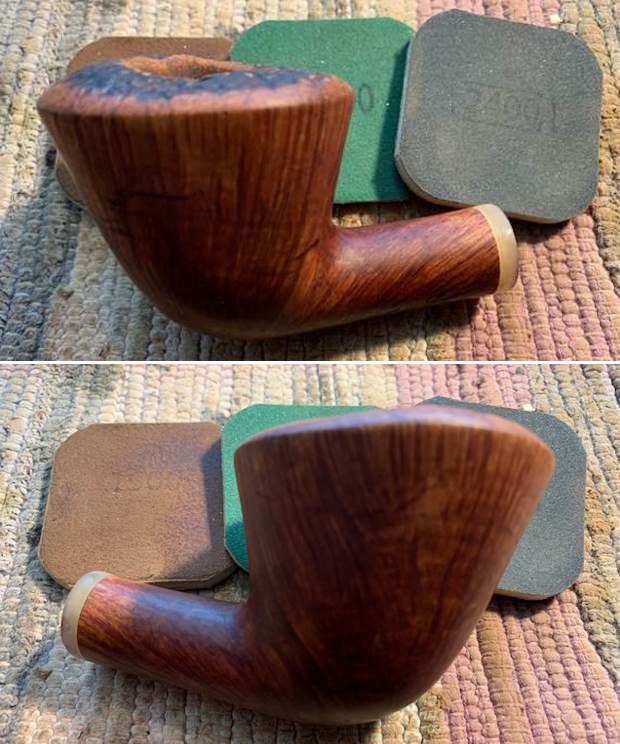
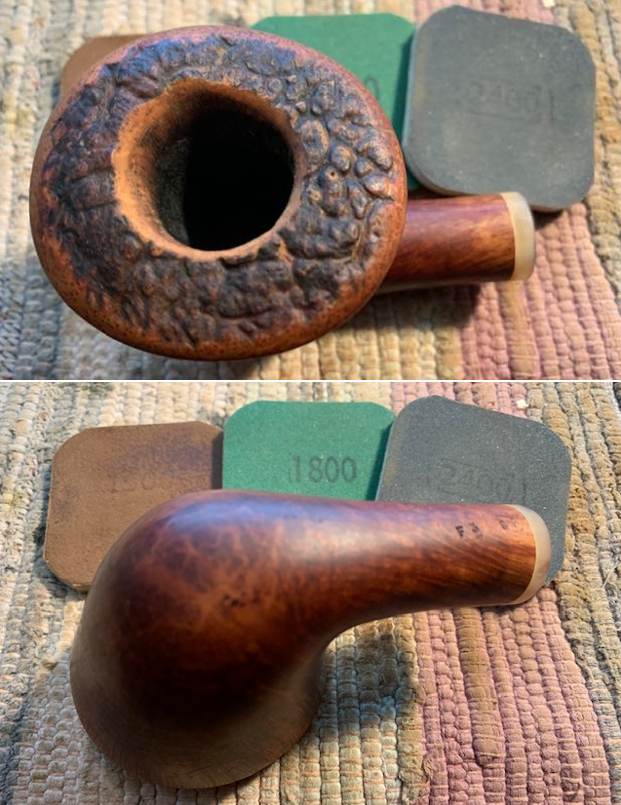
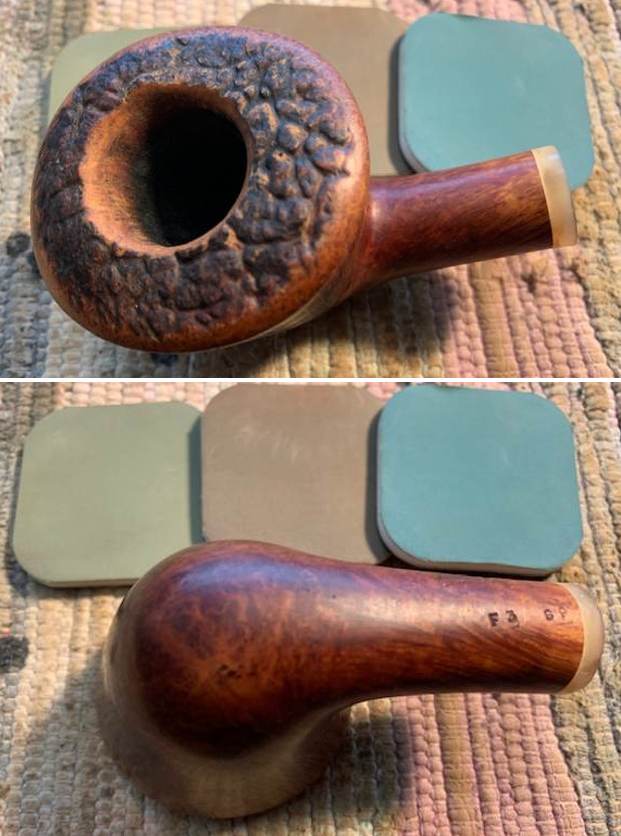
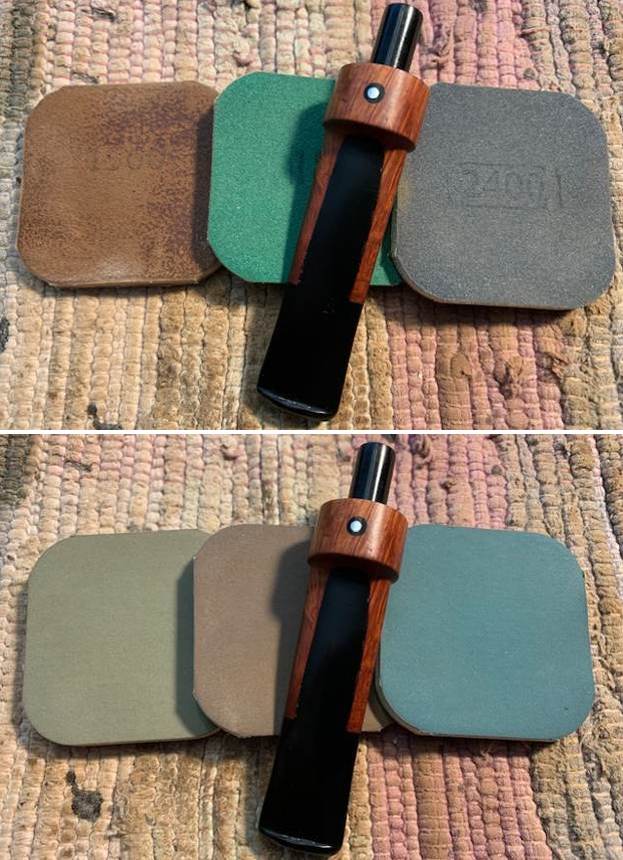
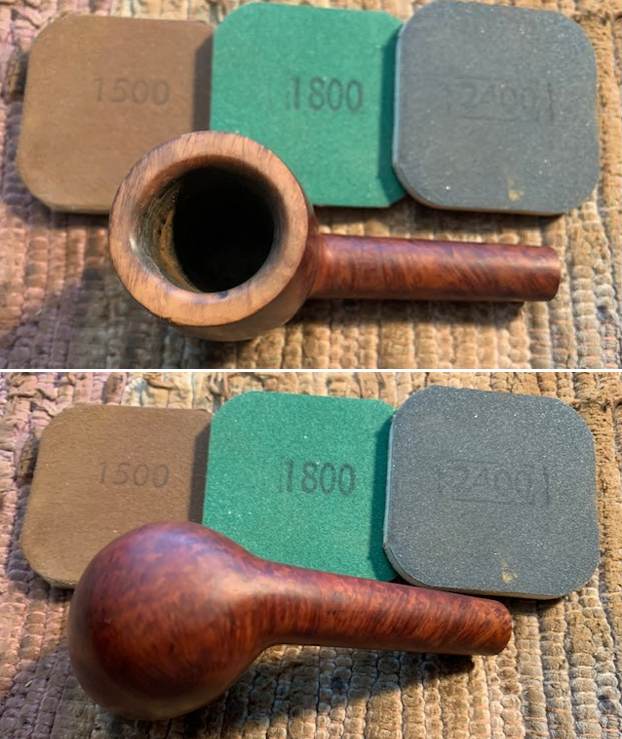
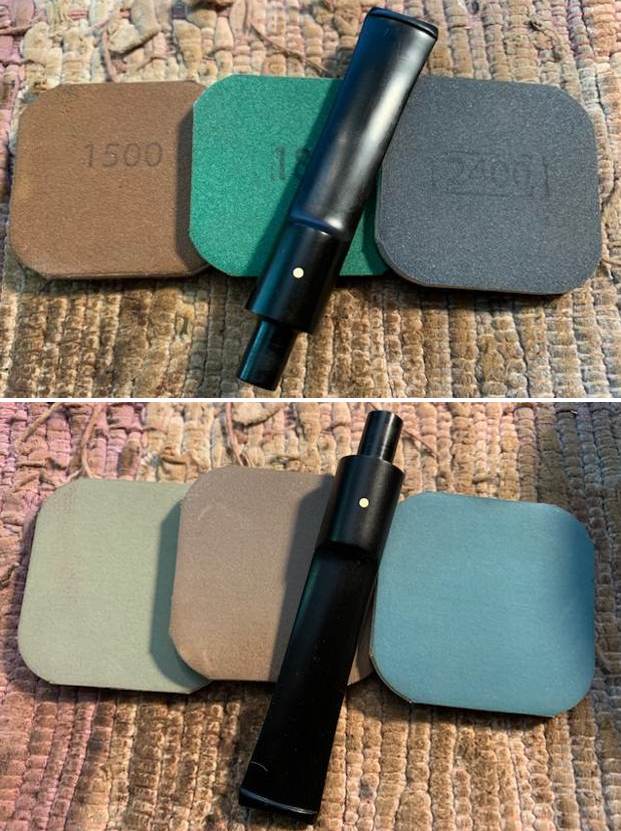
 I polished the briar with micromesh sanding pads – dry sanding with 1500-12000 grit pads. I wiped the bowl down after each pad with a damp cloth.
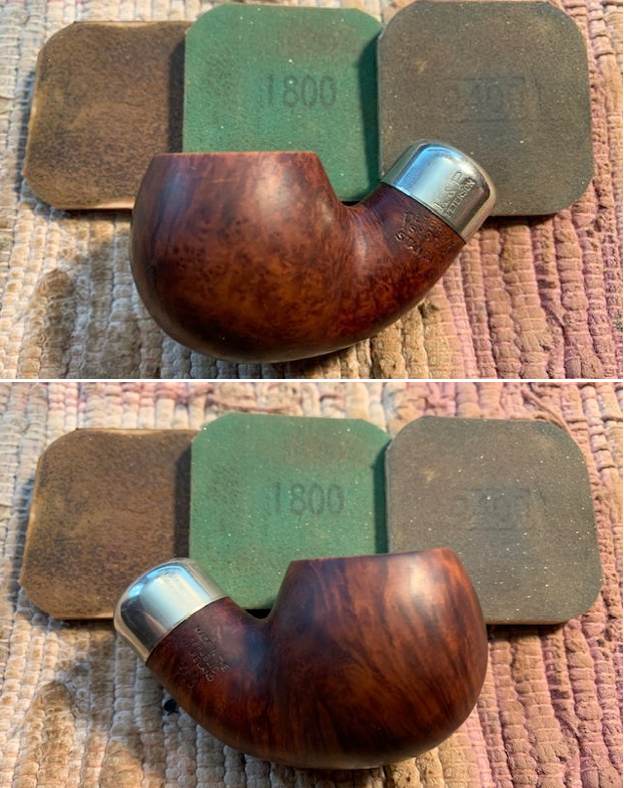
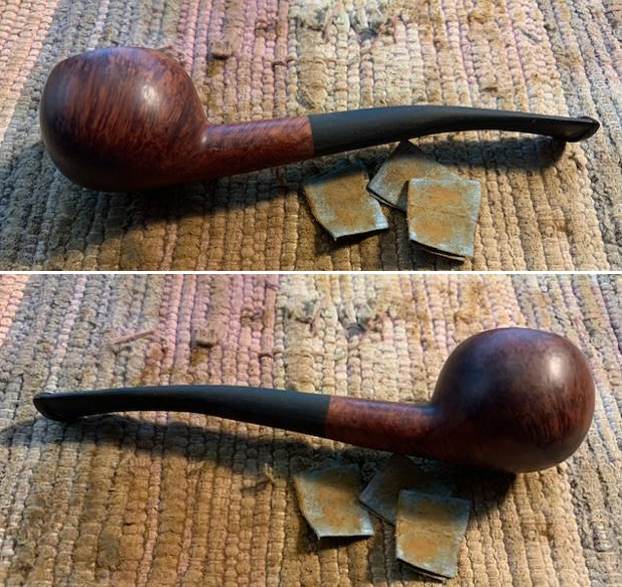
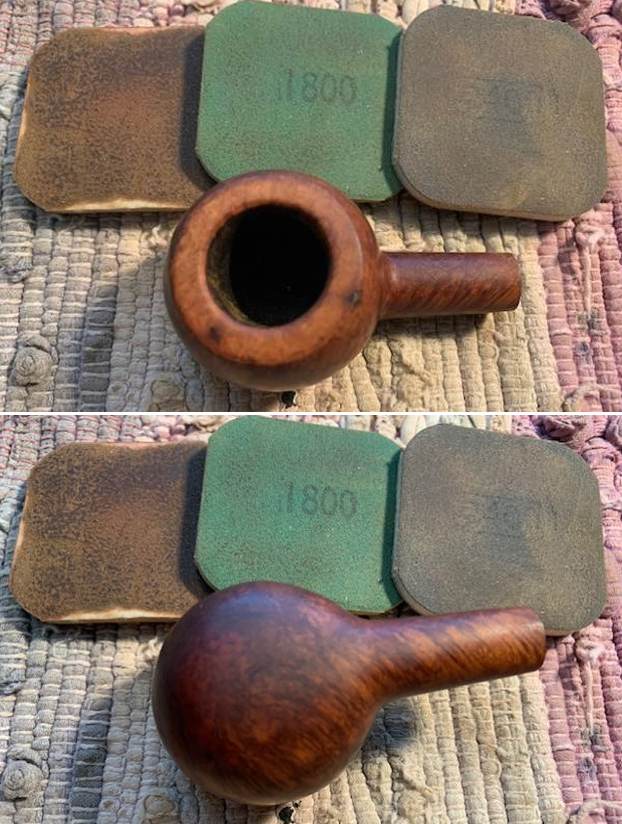
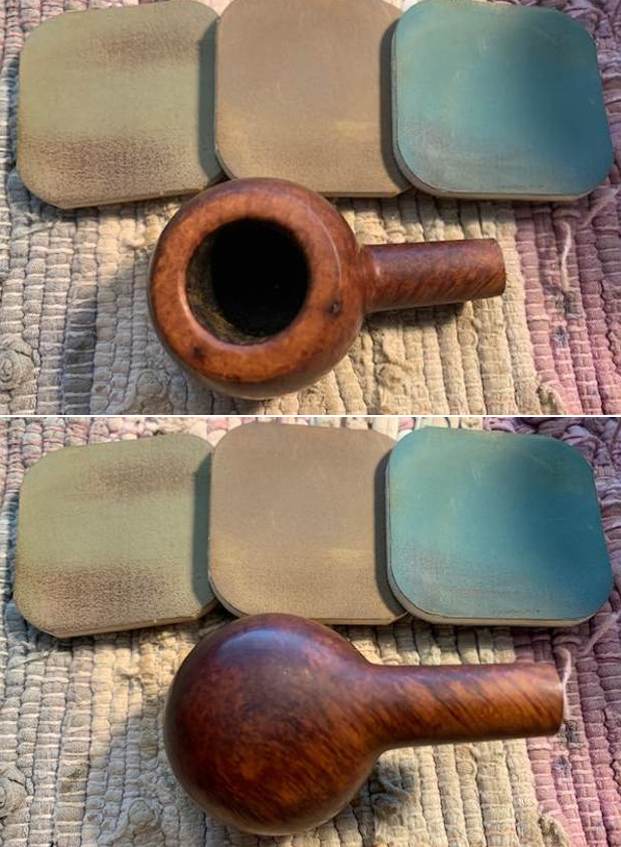
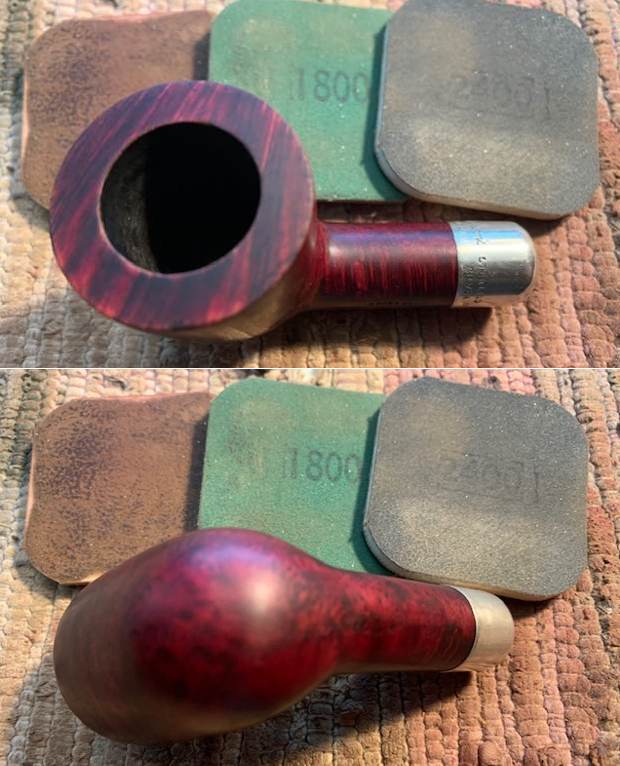
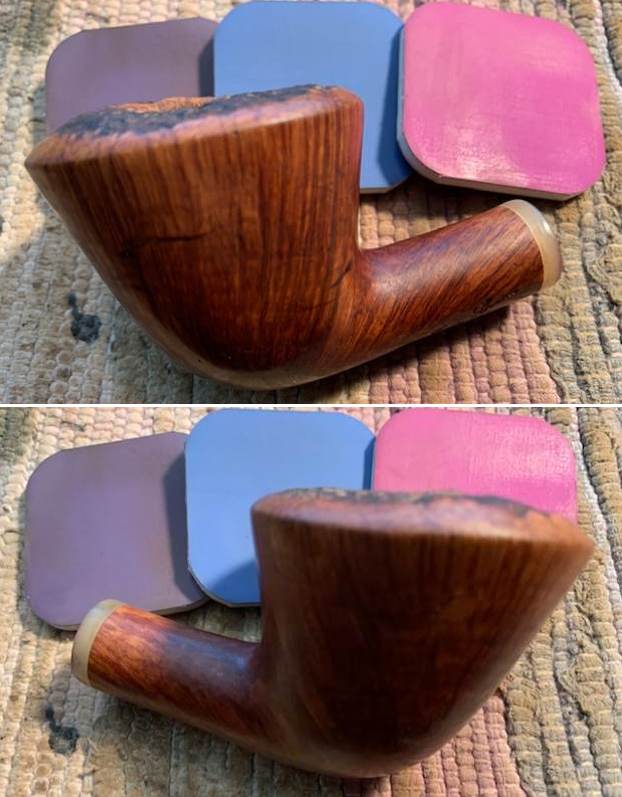
 I did not need to restain the rim top and edge because with polishing the match is very good. I rubbed the bowl down with Before & After Restoration Balm. I worked it into the surface of the bowl sides and shank with my fingertips. The product works to clean, enliven and protect the briar. I let the balm sit for a little while and then buffed with a cotton cloth to raise the shine.
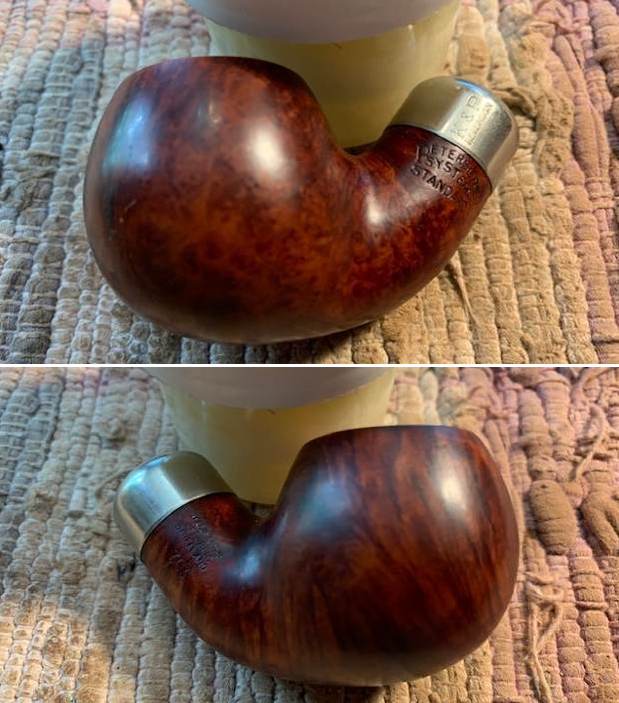
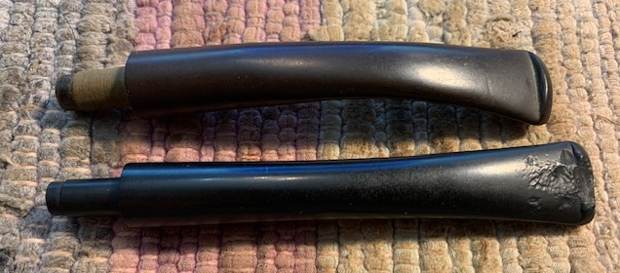
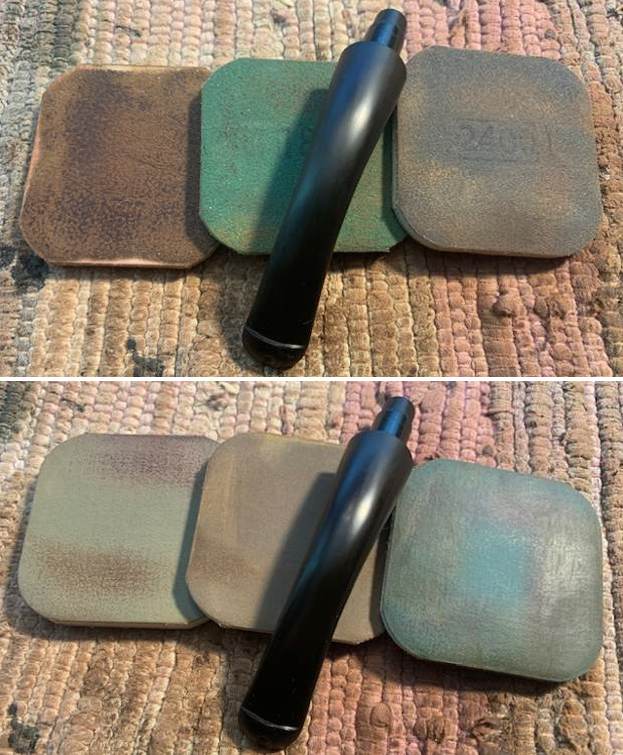
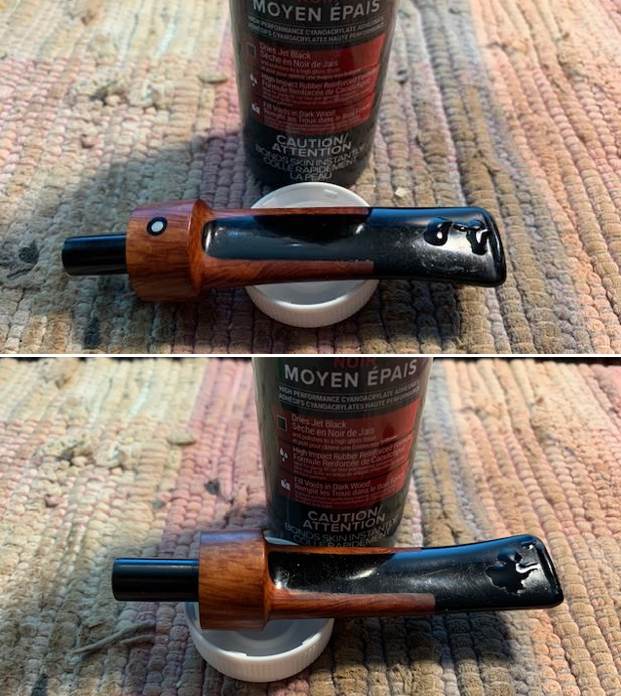
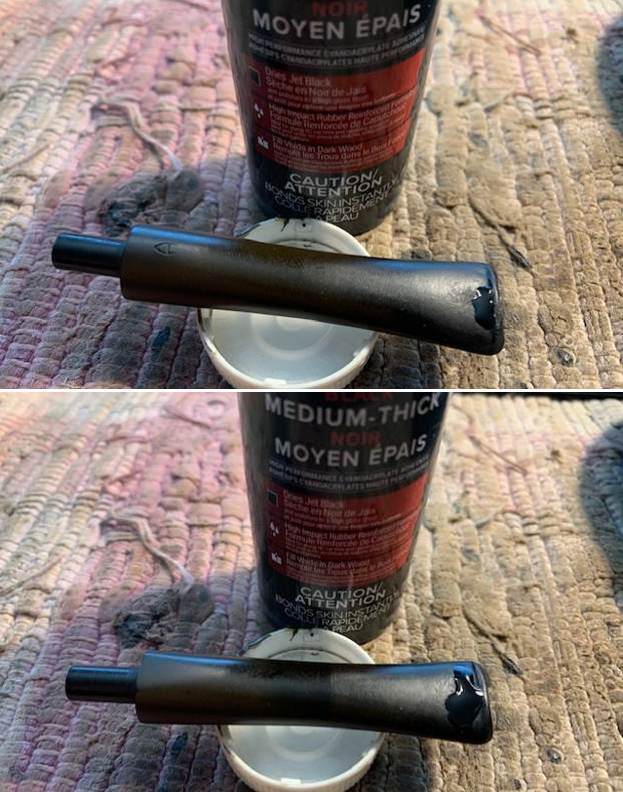
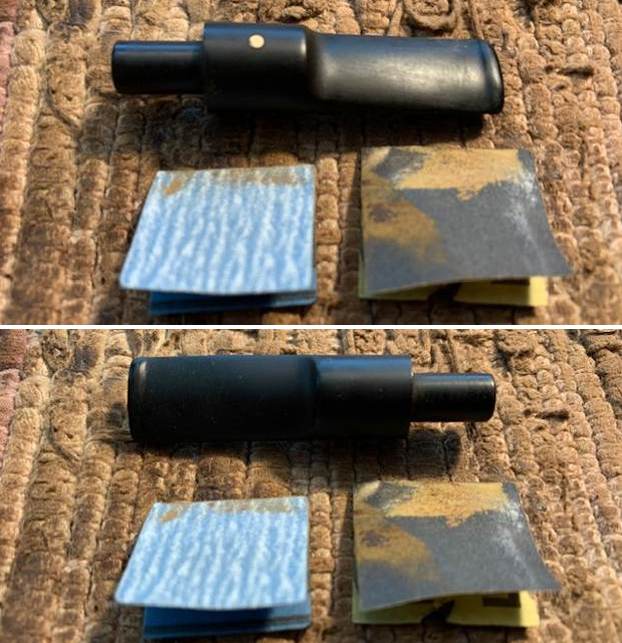
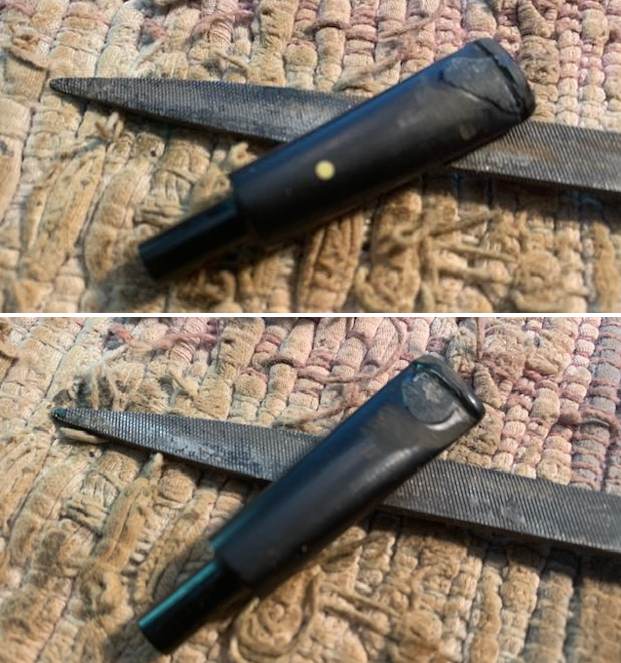
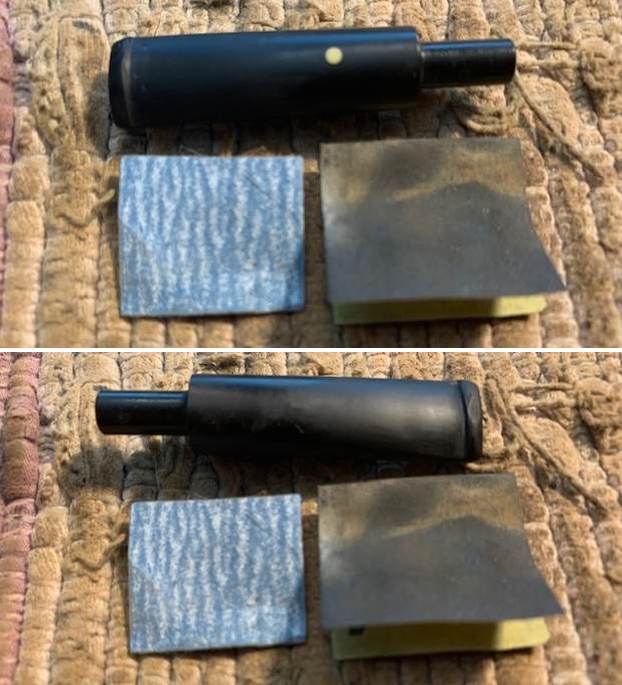
 I sanded the repairs smooth with a folded piece of 220 grit sandpaper to begin blending them into the stem surface. I started the polishing with some 400 grit wet dry sandpaper.
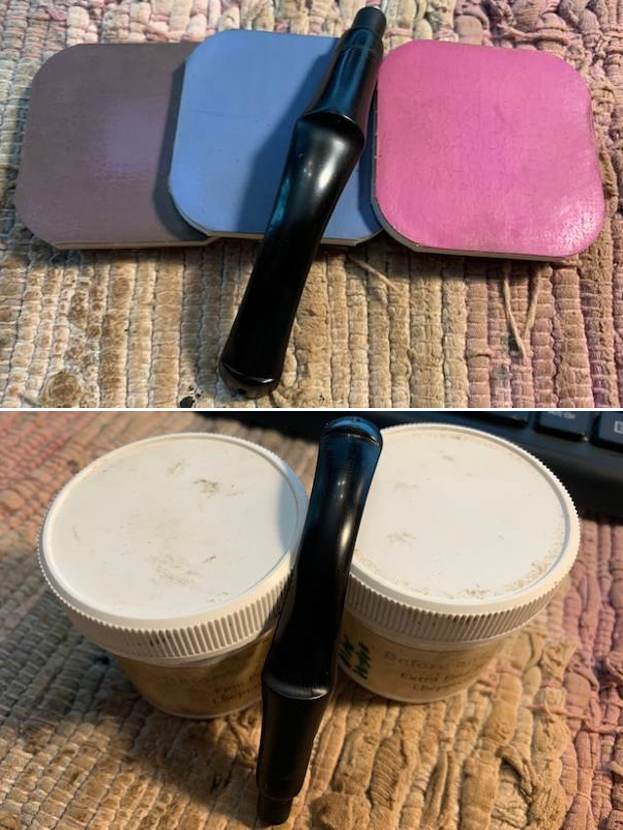
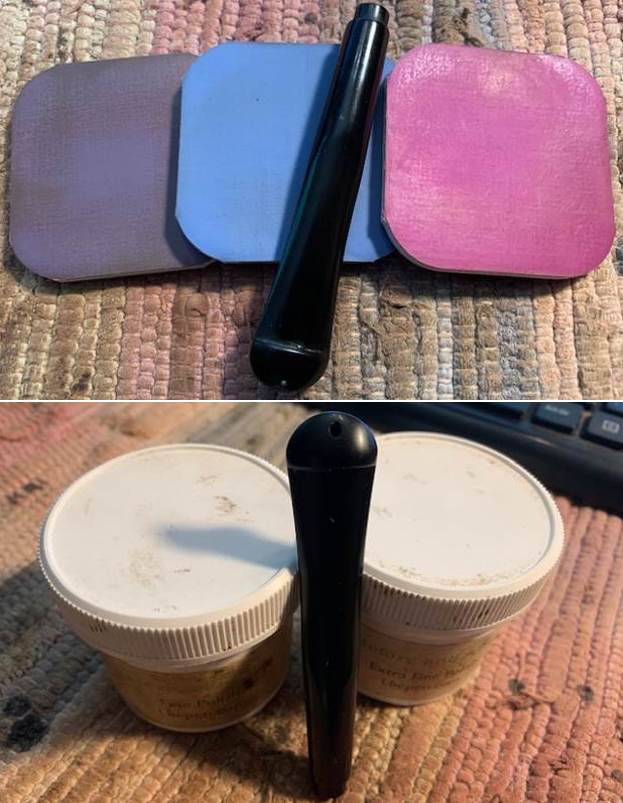
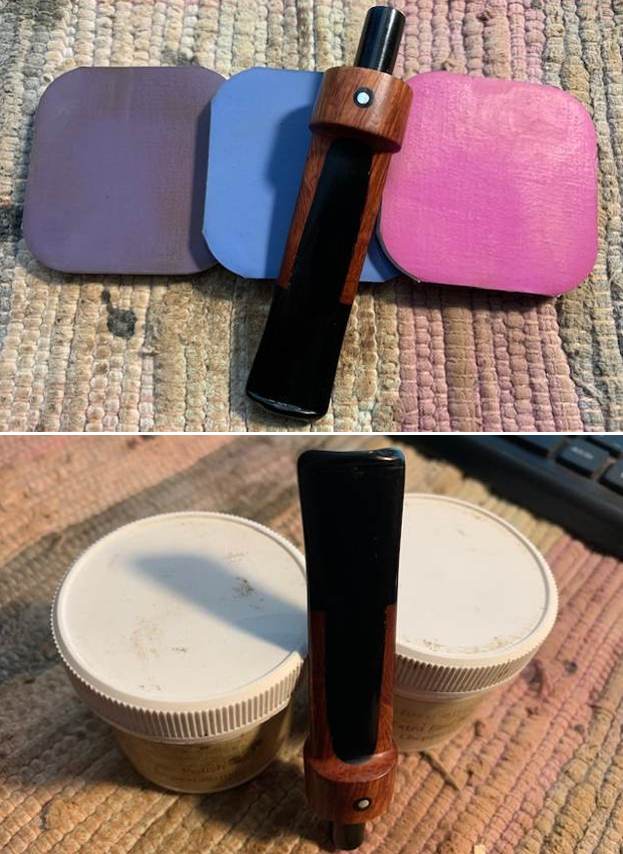
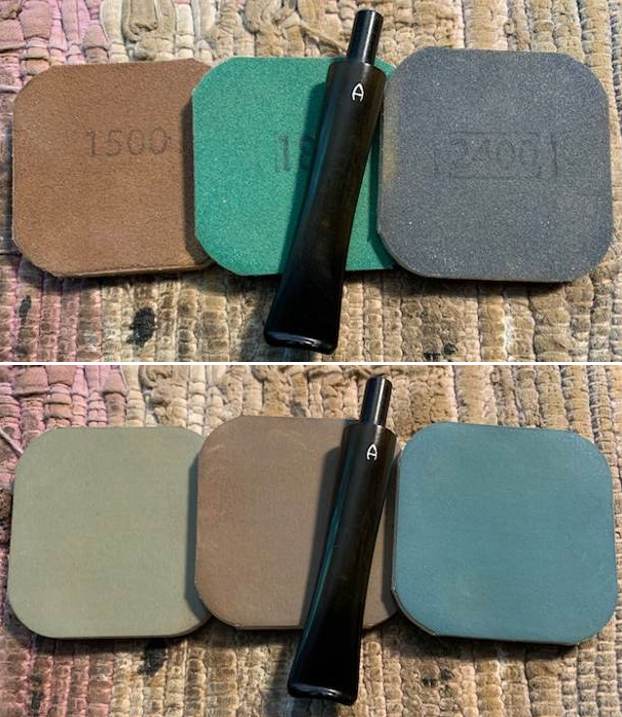
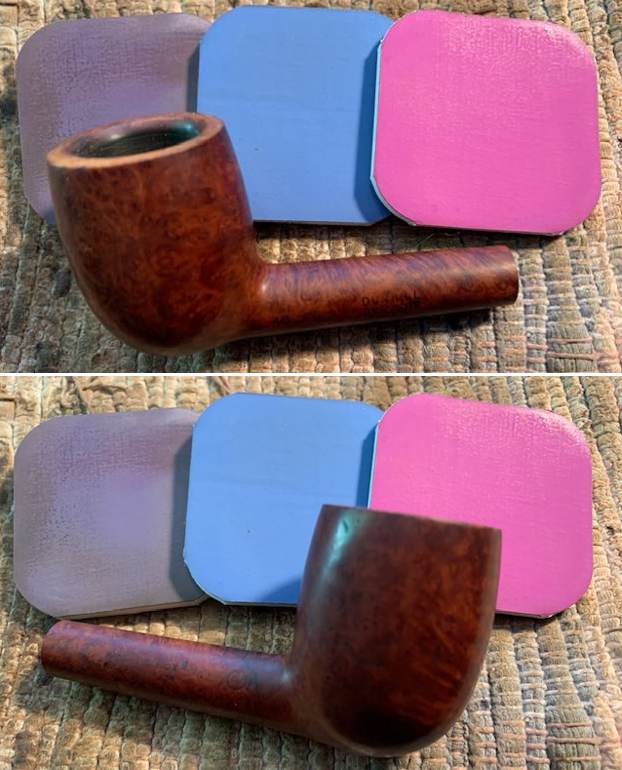
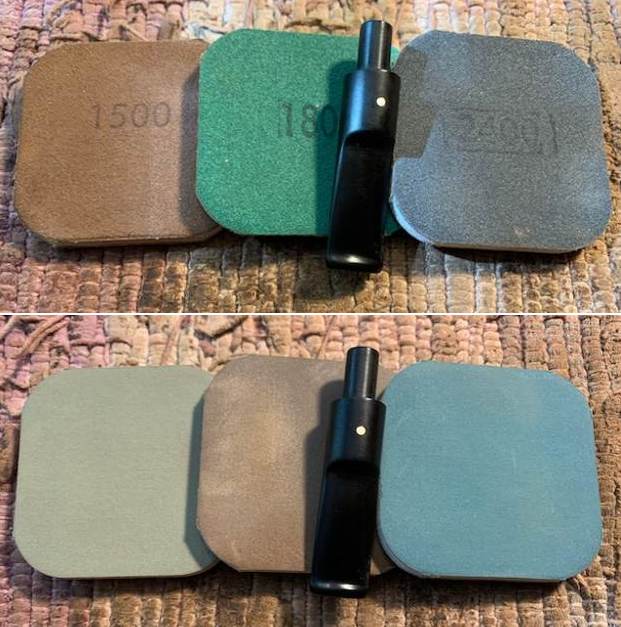
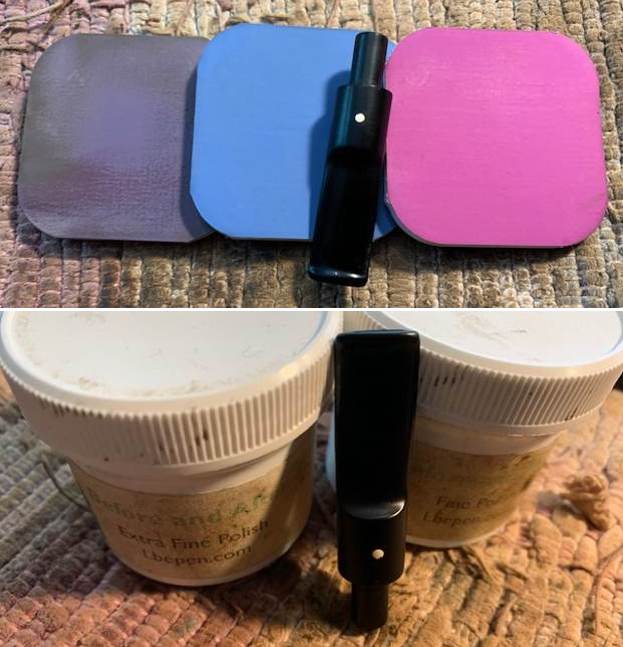
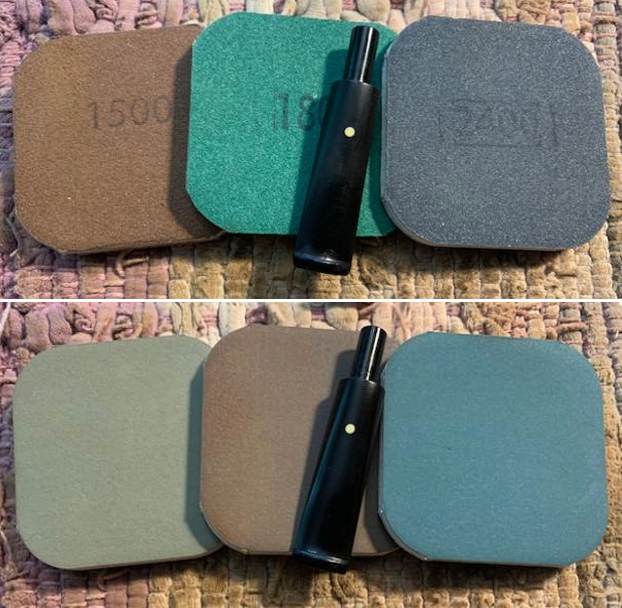
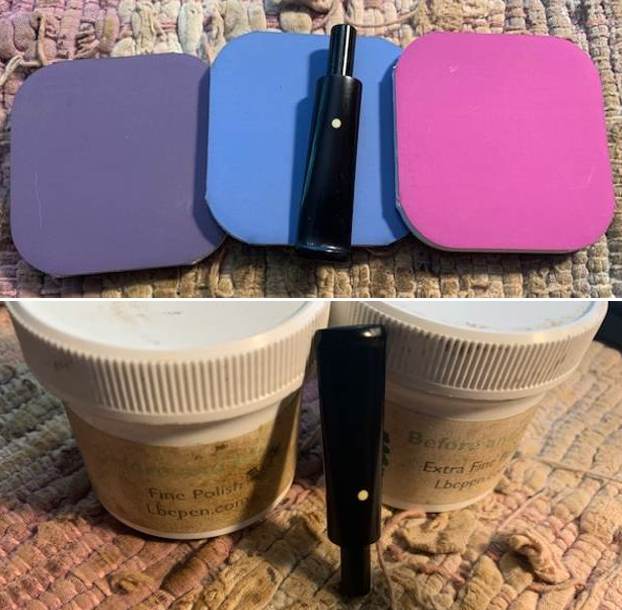
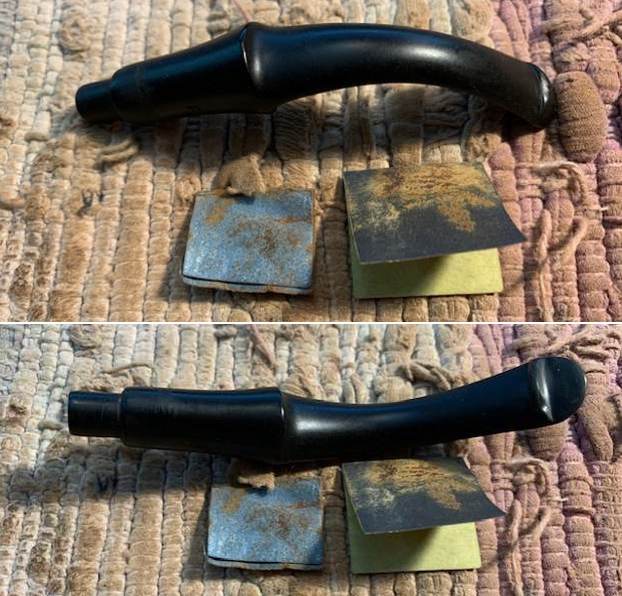 I set the bowl aside and turned to work on the stem. I polished the stem with micromesh sanding pads – 1500-12000 grit pads. I wiped it down with Obsidian Oil after each sanding pad. I used Before & After Pipe Polish – both Fine and Extra Fine to further polish the stem.
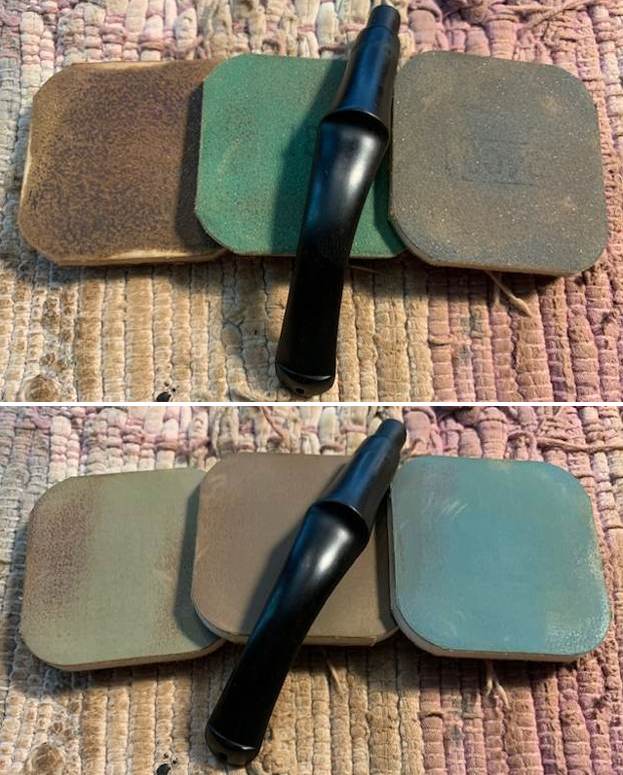
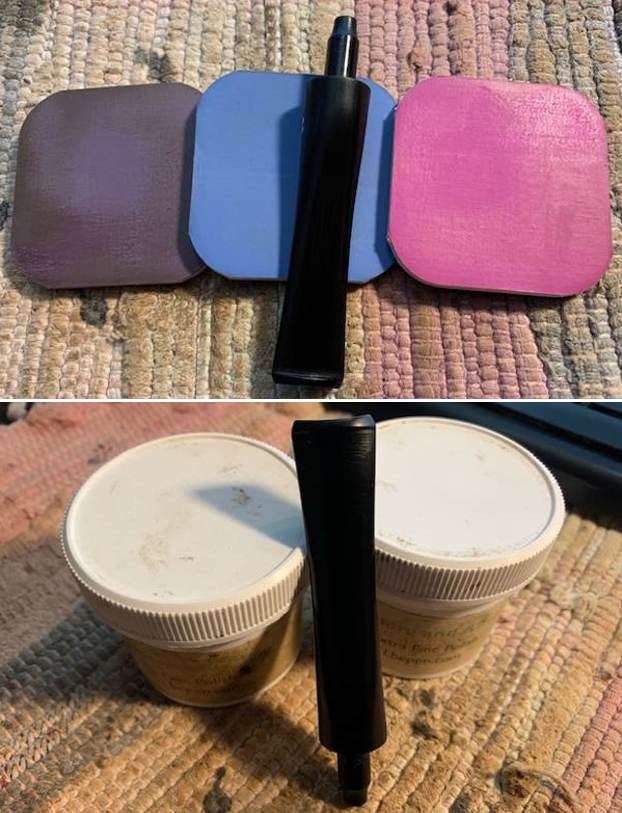
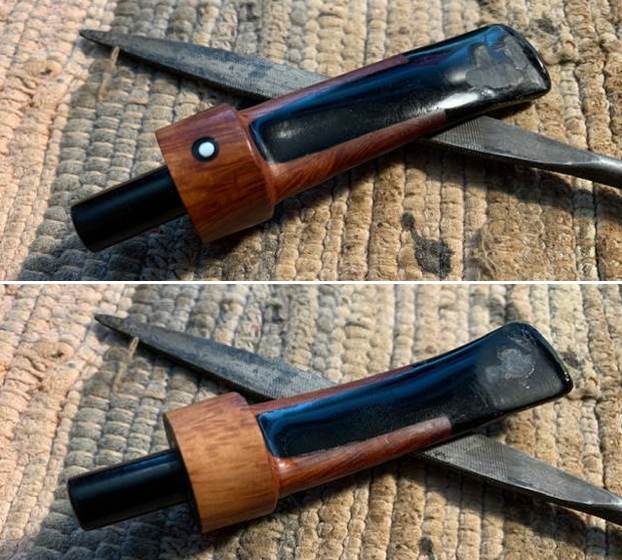
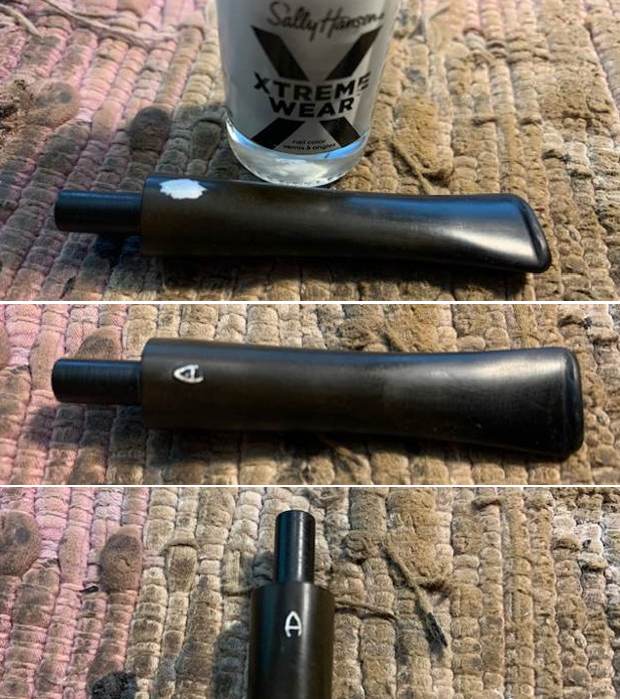
 I touched up the “P” logo on the stem with white acrylic fingernail polish. I worked it into the tails on the “P” with a tooth pick and scraped off the excess with my fingernail. I used a worn piece of 1500 and 1800 grit micromesh to polish off the excess, then buffed it with a soft cloth.
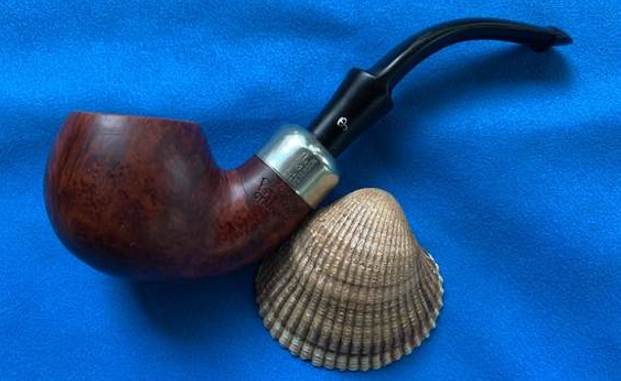
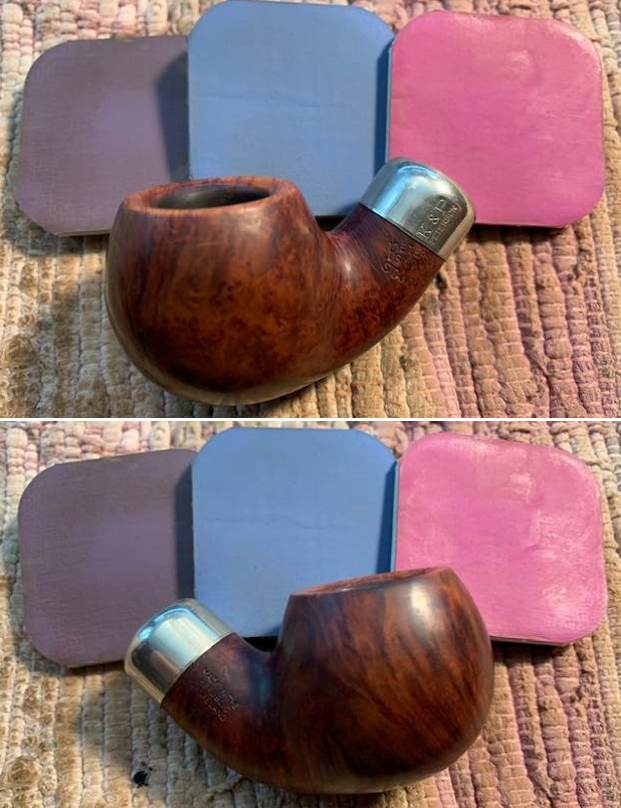
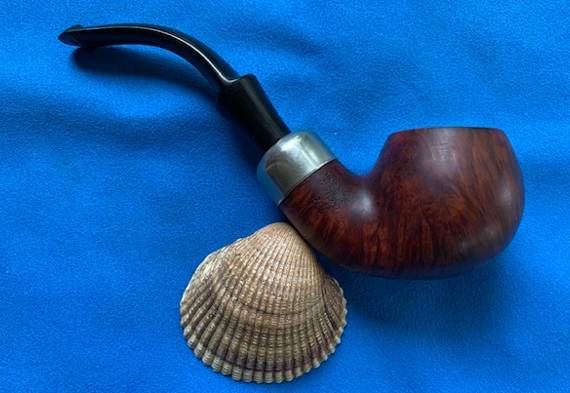
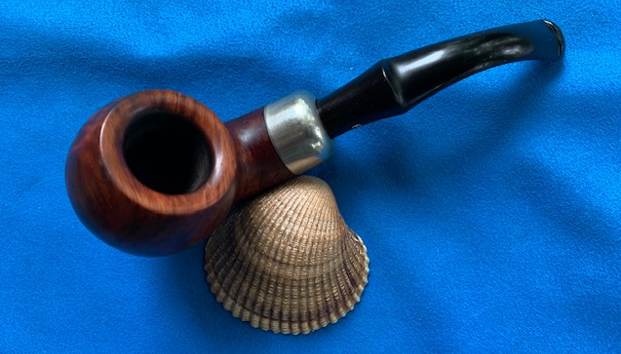
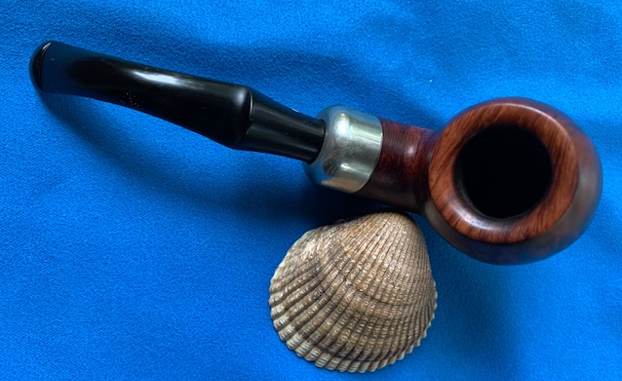
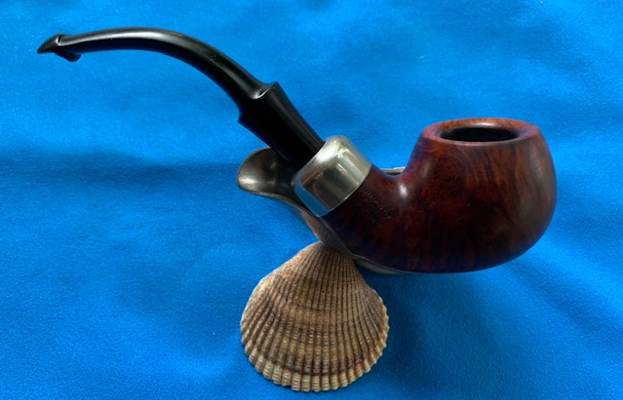
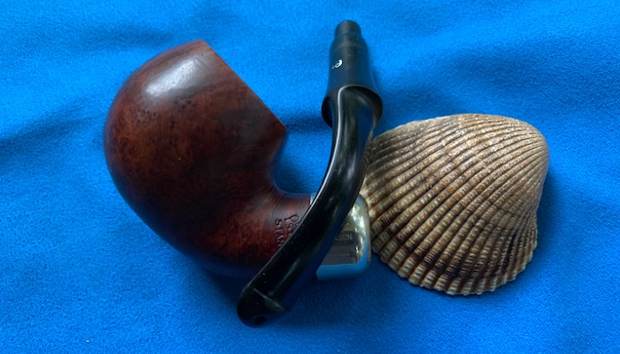
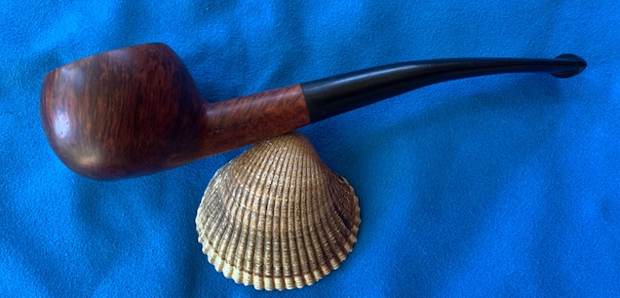
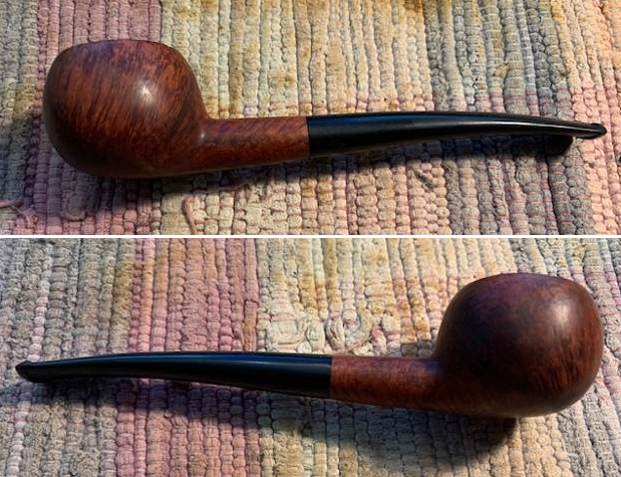
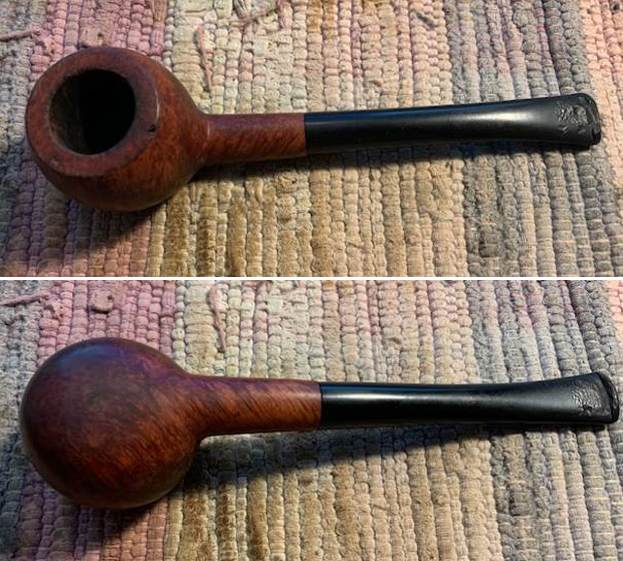
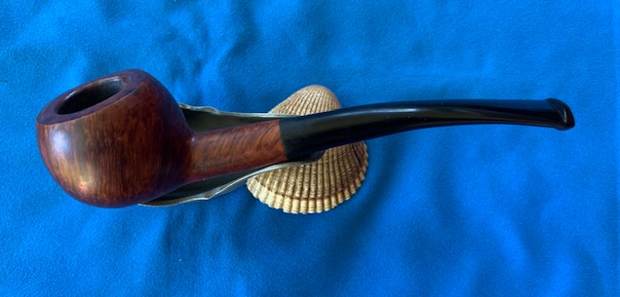
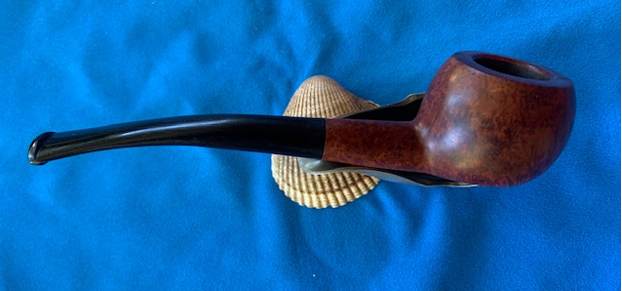
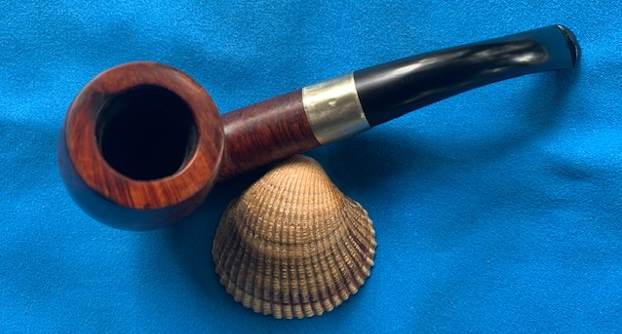
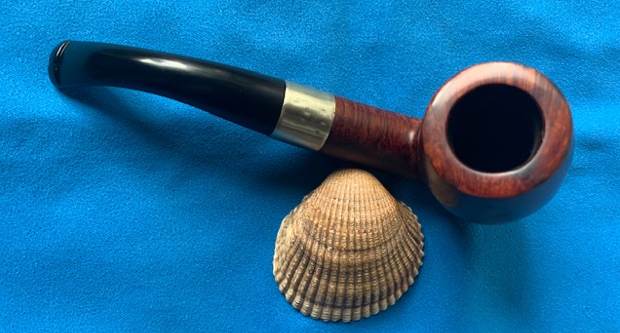
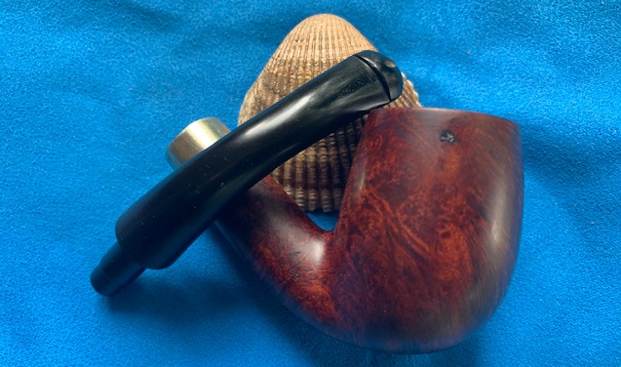
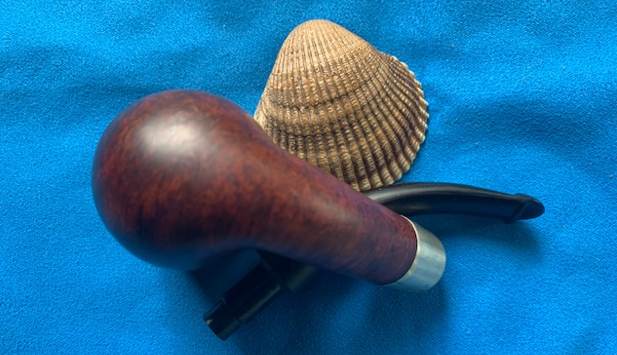
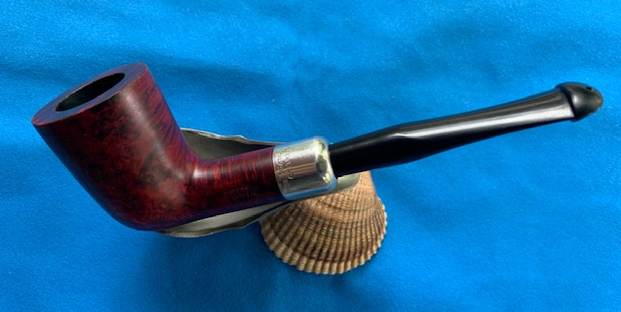
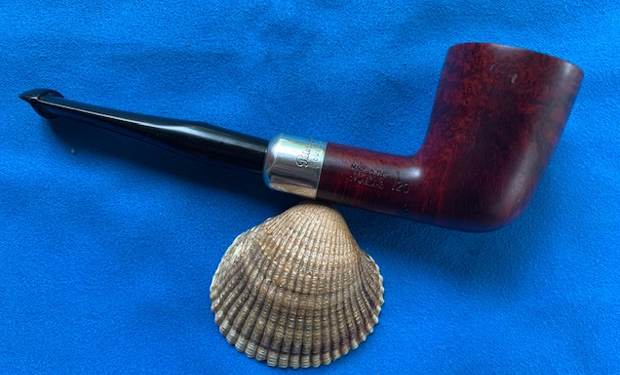
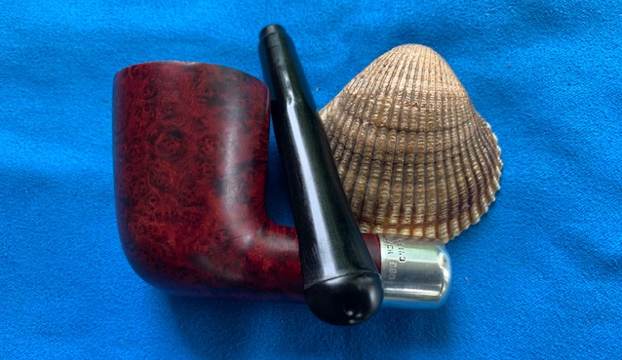
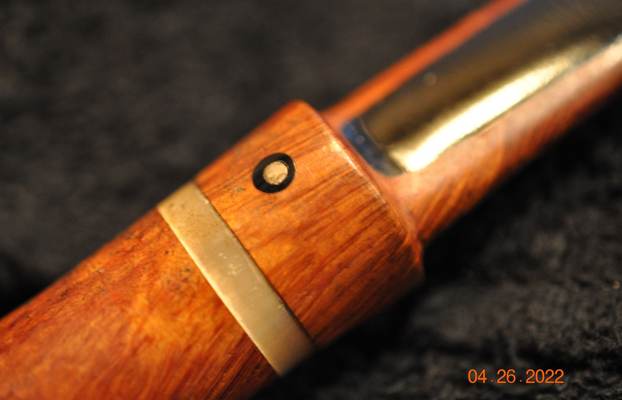
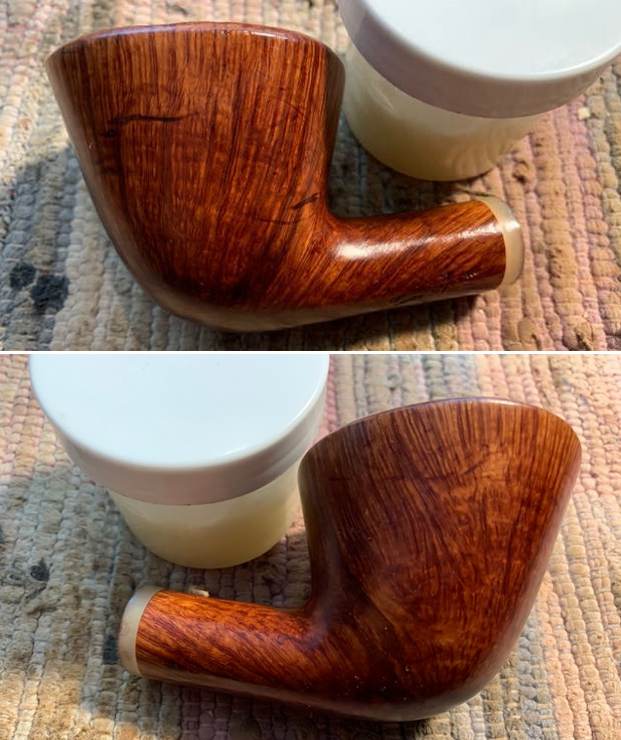
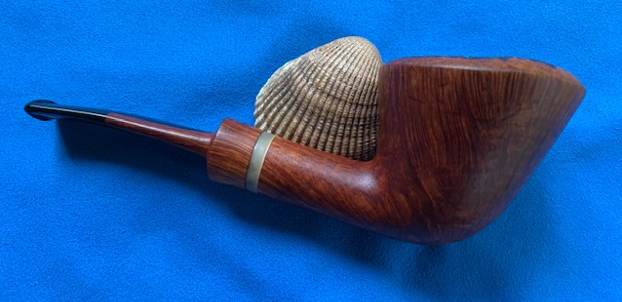
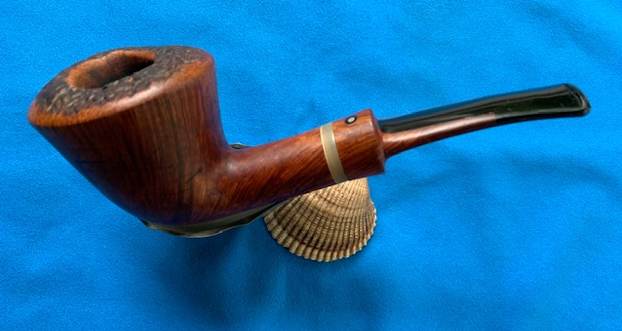
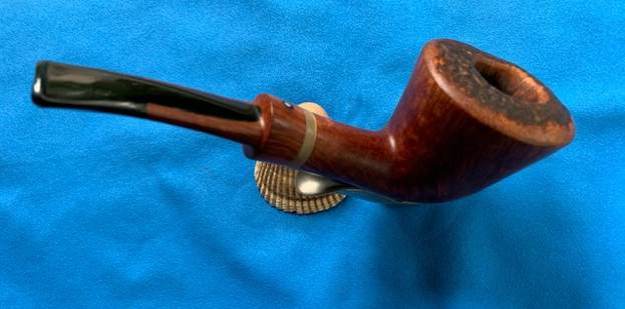
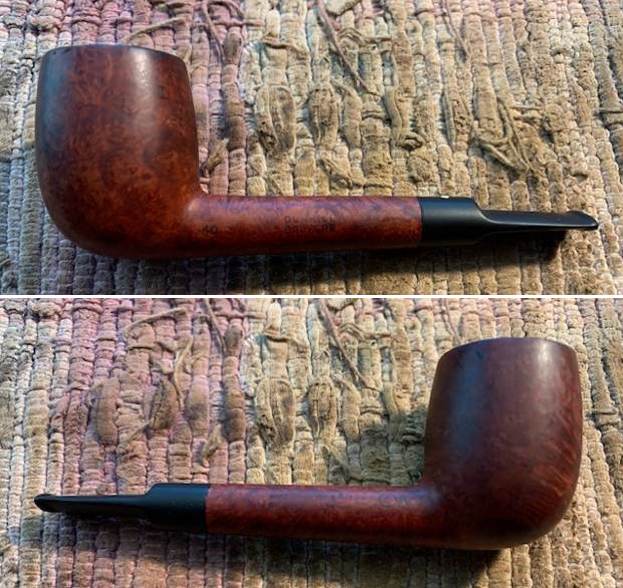
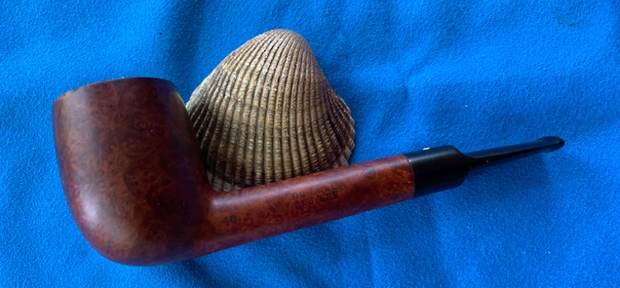
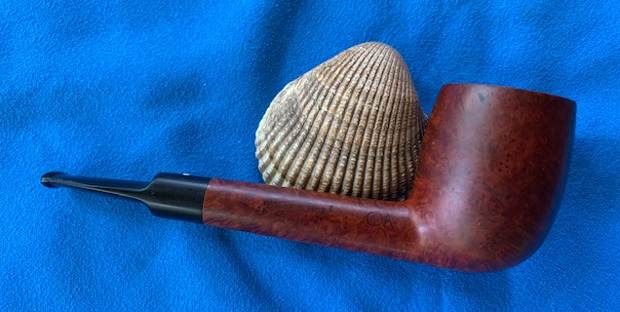
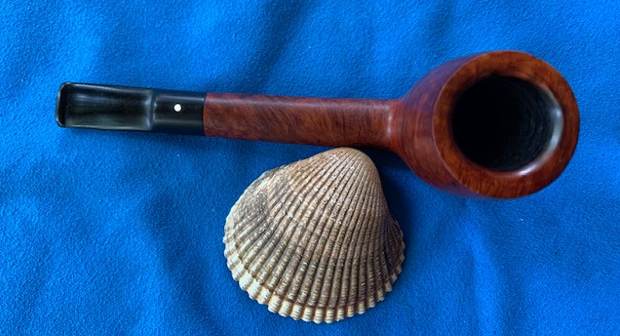
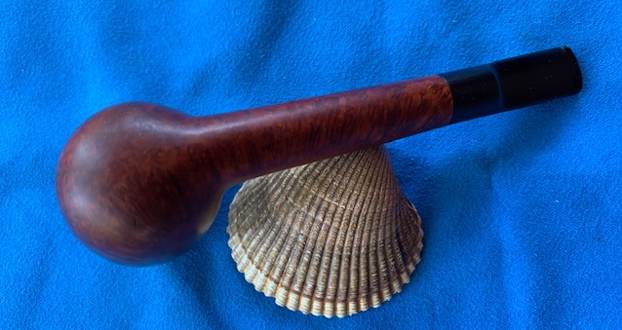
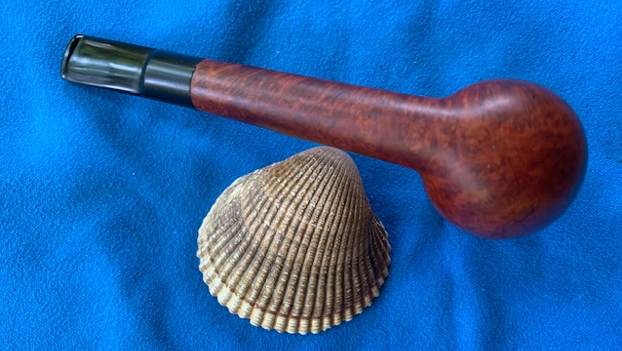
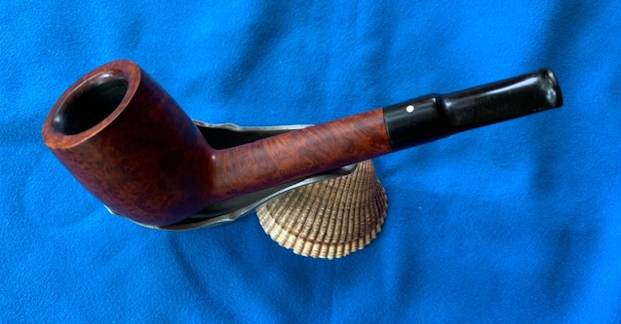
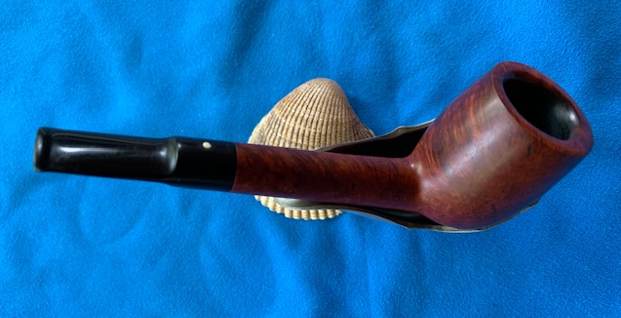
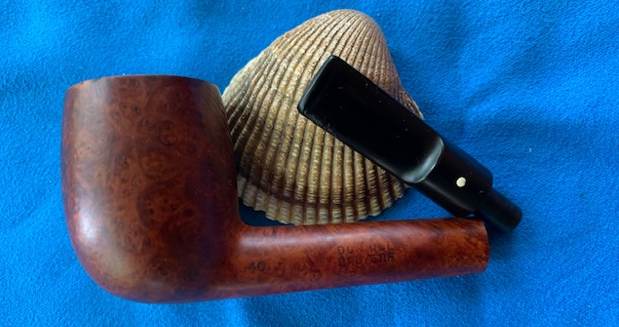
 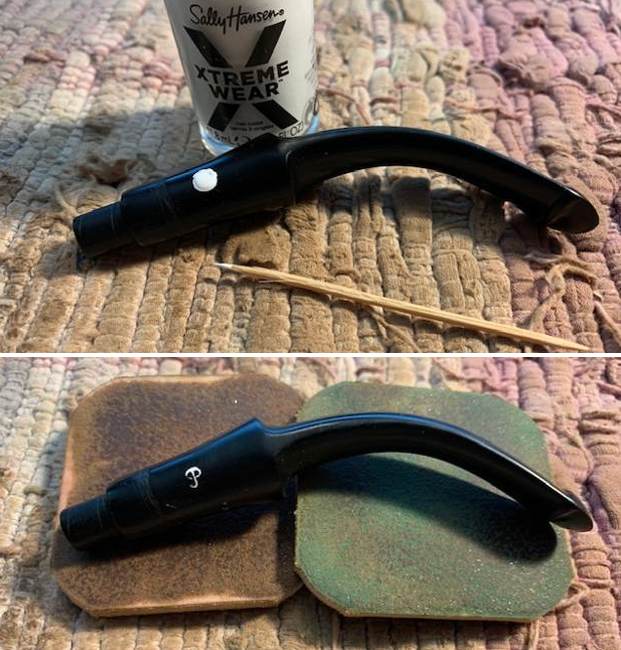 This Republic Era Peterson’s System Standard 303 Bent Apple with a vulcanite stem is a great looking pipe now that it has been restored. The beautiful grain that shines through the polished finish is stunning. As the pipe is smoked the patina should darken and look even better. I put the stem back on the bowl and carefully buffed the pipe with Blue Diamond on the buffing wheel. I gave the bowl and the stem multiple coats of carnauba wax on the buffing wheel and followed that by buffing the entire pipe with a clean buffing pad. I hand buffed the pipe with a microfiber cloth to deepen the shine. The finished Peterson’s System Standard 303 Apple fits nicely in the hand and feels great. Give the finished pipe a look in the photos below. The dimensions of the pipe are Length: 5 ½ inches, Height: 1 ½ inches, Outside diameter of the bowl: 1 ¼ inches, Chamber diameter: ¾ of an inch. The weight of the pipe is 49 grams/1.73 ounces. I will soon be adding it to the rebornpipe store in the Irish Pipe Makers Section. If you are interested in this pipe send me a message or an email. Thanks for reading this blog and my reflections on the pipe while I worked on it. There are many more to come!


