
Blog by Steve Laug
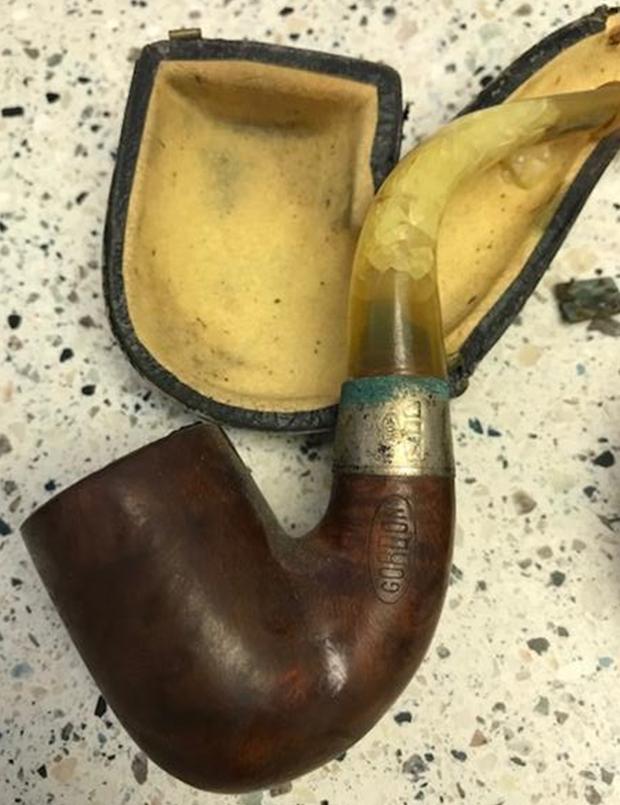
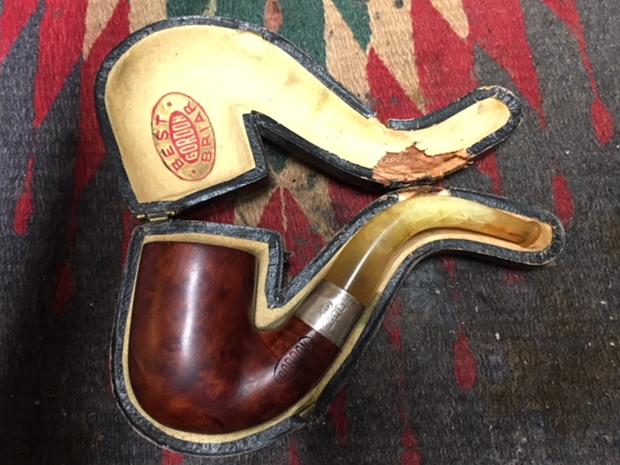
I was chatting with Chris van Hilst from Tobacco Pipe Restorers one day using Messenger and he was selling this old set of pipes. Two of them were stamped JBV in an oval and one was a M&T Best Briar & Bands. The set was missing the third JBV pipe and one of the stems was for the M&T. The silver was dirty and the bowls caked but there was something about the pipes that really attracted me. We talked prices and made a deal. I had him send the pipes to Jeff in Idaho as it was easier to deal with than sending them to Canada. I had him send me a couple of photos of the set that are shown below. The first is the pipes sitting in the case. It shows that there is some kind of cigarette holder and a tamper missing from the set. The second photo shows the JBV in an oval stamp on the left side of the shank of one of the pipes. I could also see hallmarks in the silver but was not able to clearly read them. 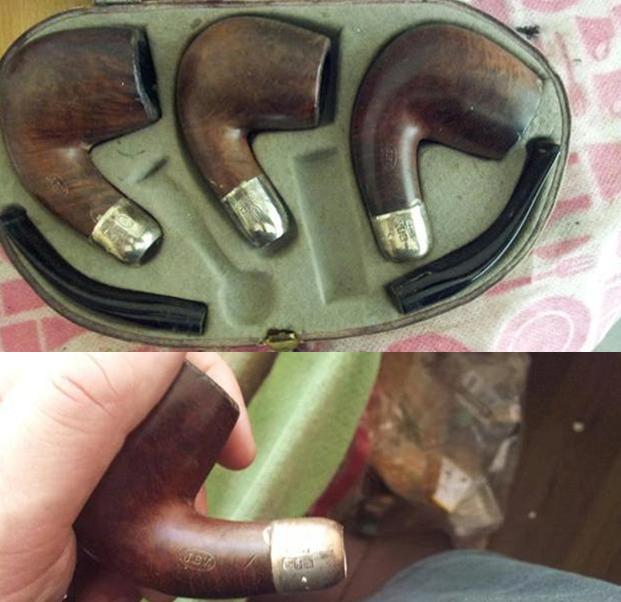 Jeff received them pretty quickly and put them aside. My daughters went down for my Dad’s 90th birthday so he took the opportunity to send them north with them on their return trip. He had not had a chance to clean them so I was left to my own devices on this set of three. When they arrived, I took a photo of the case before I opened it and of the case open showing the pipes. It is covered in leather and is kidney shaped. It is lightly stained but other than a few nicks it is in great condition.
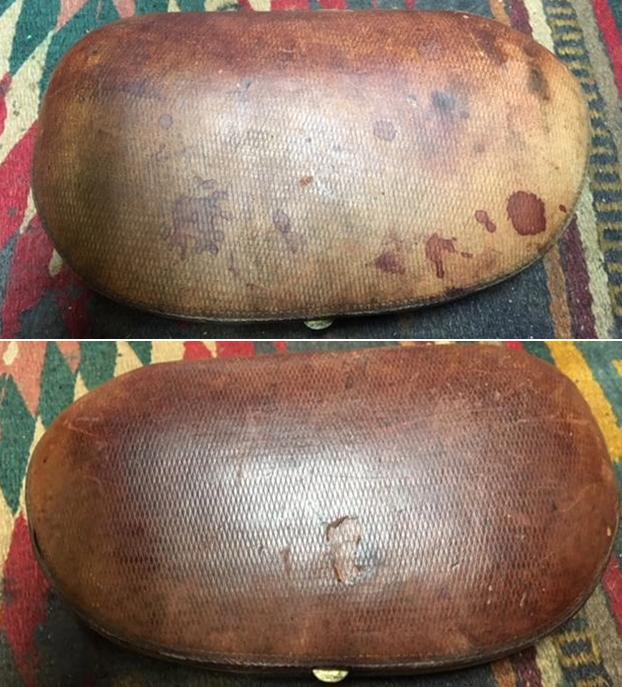 There was some gold leters on the front edge of the case that reads FOURNISSEUR DE SM LEROI DES BELGES. It translates from Belgian French to read PROVIDER HM KING OF BELGIAN. Or the Provider for His Majesty King of Belgium.
 I opened the case and took a photo of the pipes on the inside and the stamping on the inside of the lid. It reads J.B. Vinche over “Au Nabab” over Bruxelles. That is what it reads as best as I can make out. It is pretty blurry.
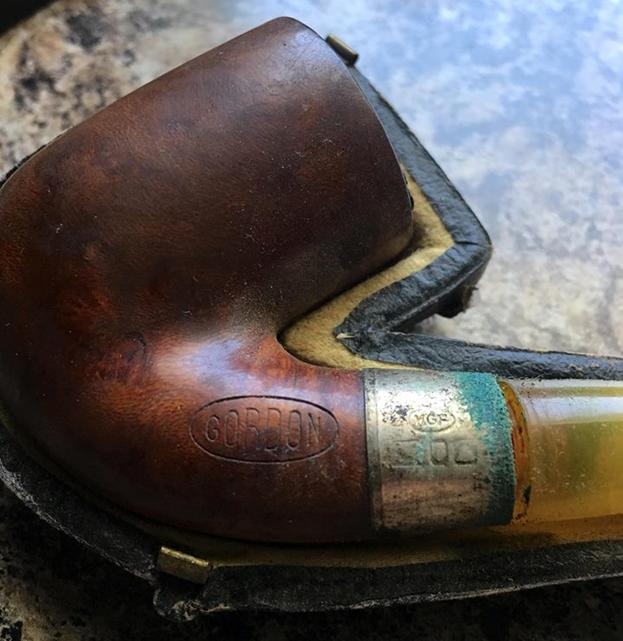
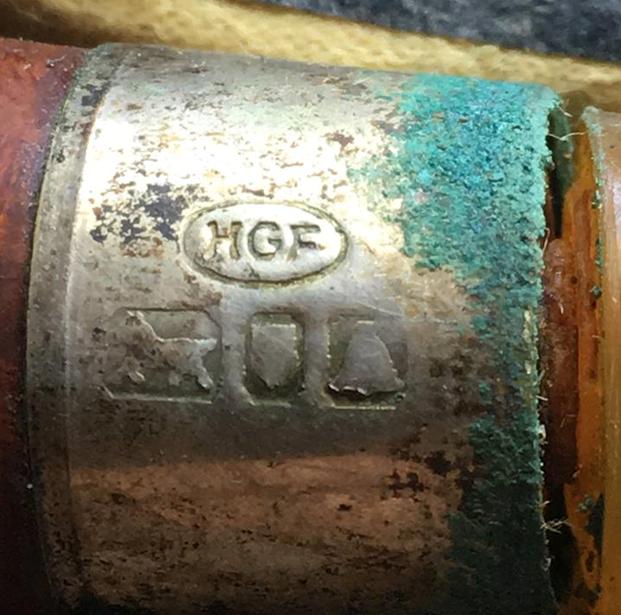
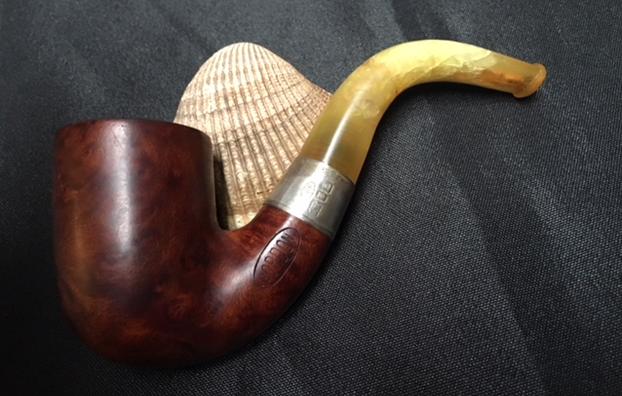
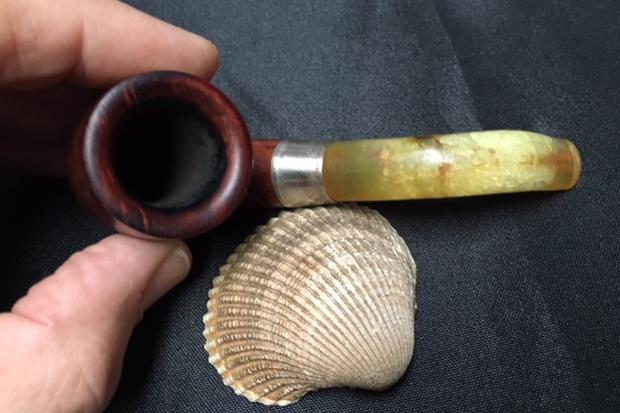
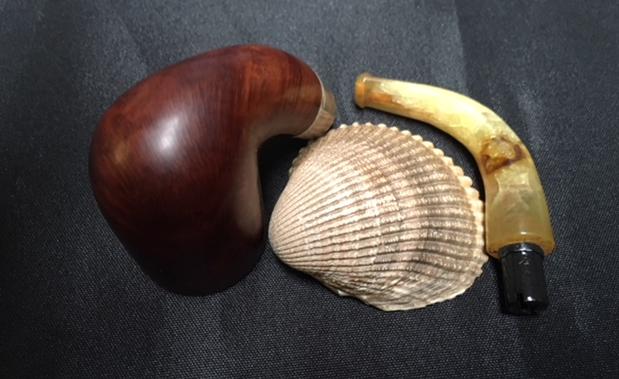
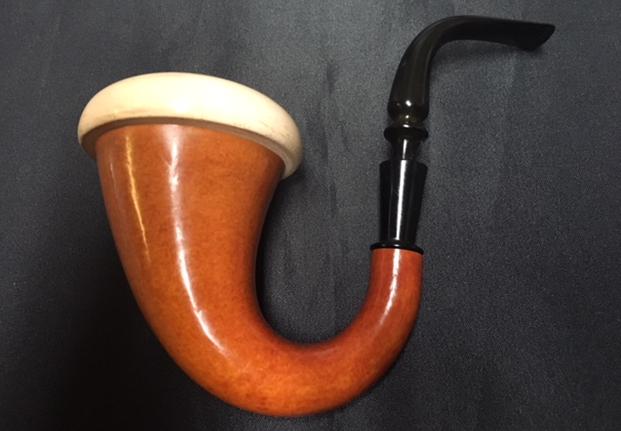
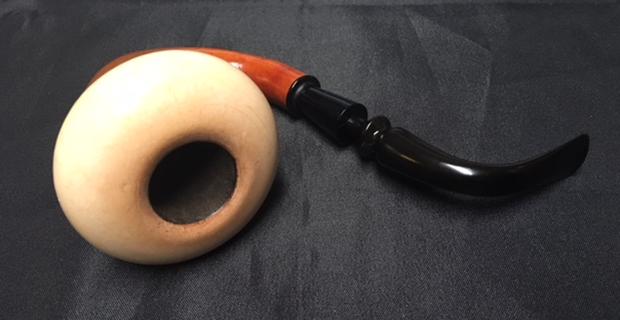
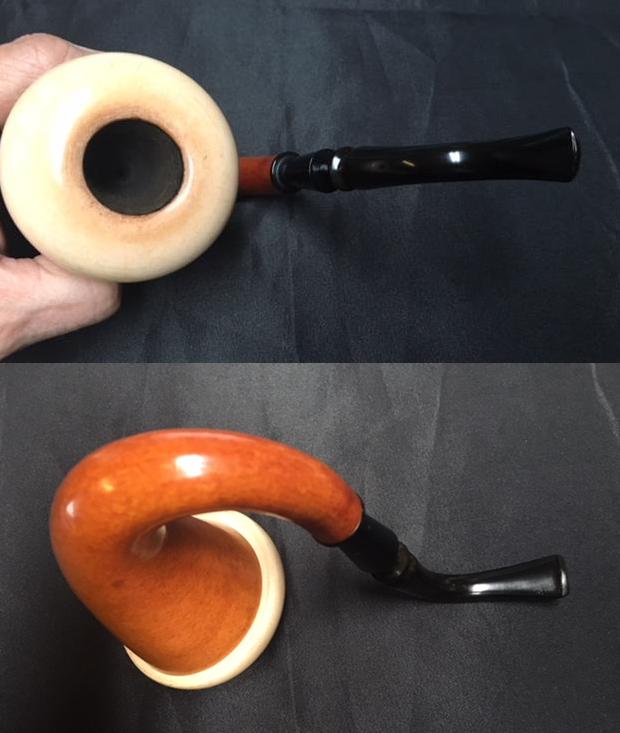
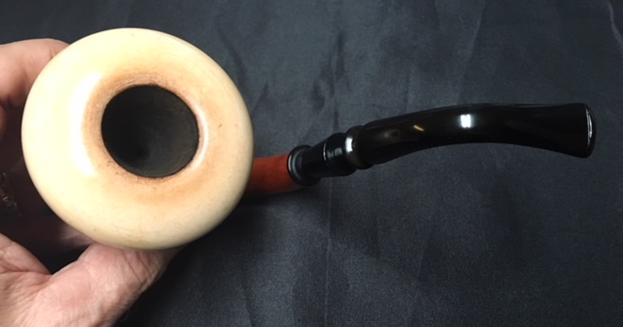
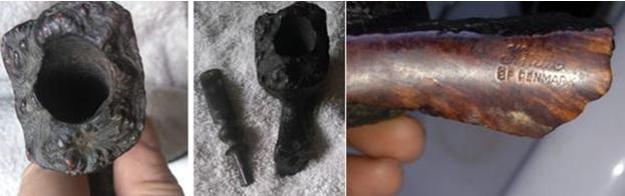
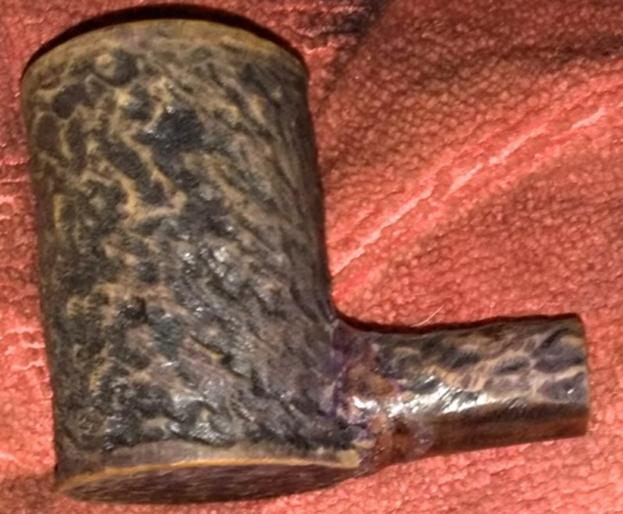
 I took photos of each of the pipes before I started to work on them. I started with the pipe on the left side of the photo above and worked my way across for the photos. The first pipe below is the one on the left. It is stamped JBV in an oval on the left side of the shank. The silver ferrule is also stamped JBV in an oval over BRUX over three hallmarks that are hard to read. The first appears to be a flower, the second a person and the third is ARG over 900. The pipe is in rough shape. The finish is shot; there is silver polish on the shank ahead of the ferrule. There are some gouges in the top and underside of the shank. The JBV Oval was originally gold leaf. There is a thick cake in the bowl and the rim top is beat up. There are big chunks of briar missing around the outer edge of the rim. The rim top is chipped and damaged and the inner edge is in rough condition. The pipe is very dirty.
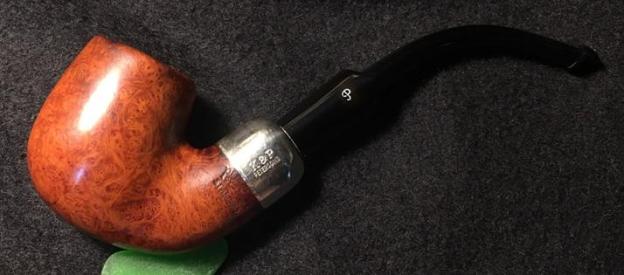
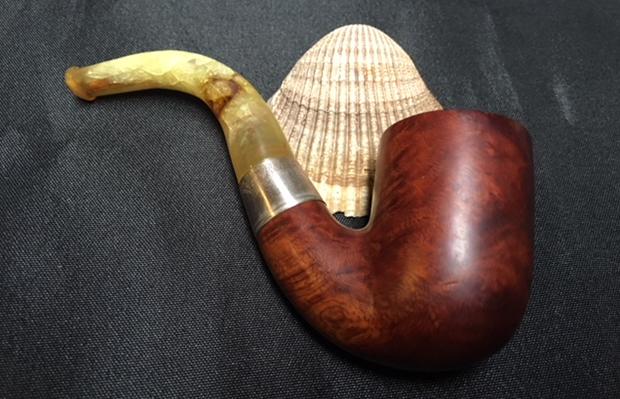
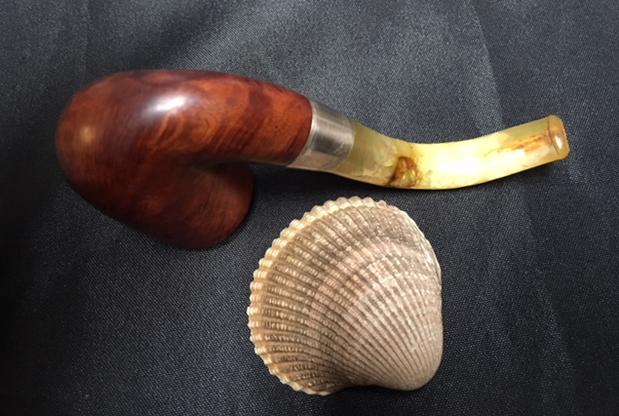
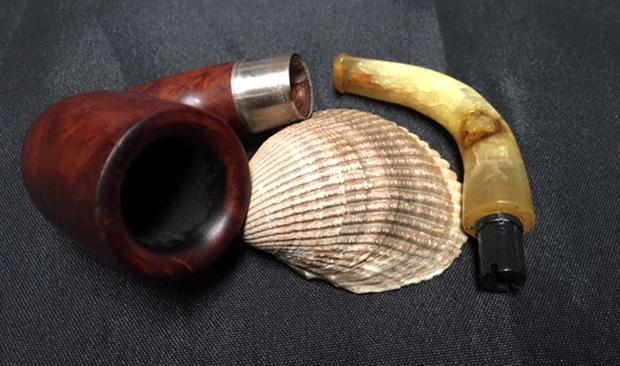
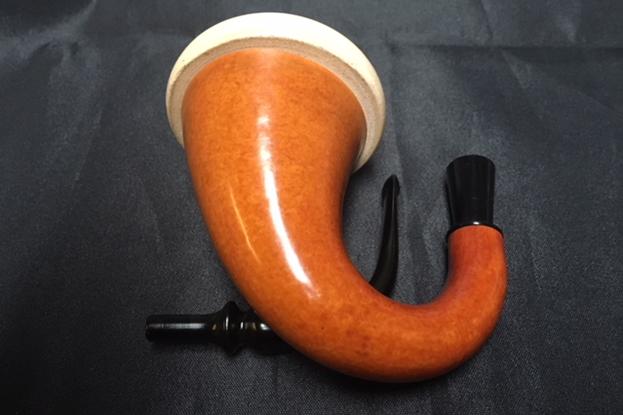
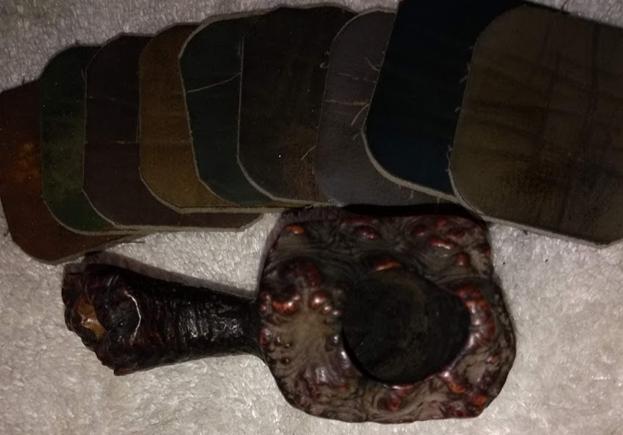
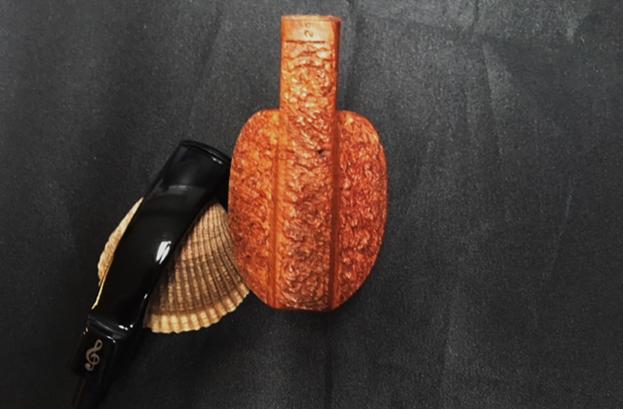
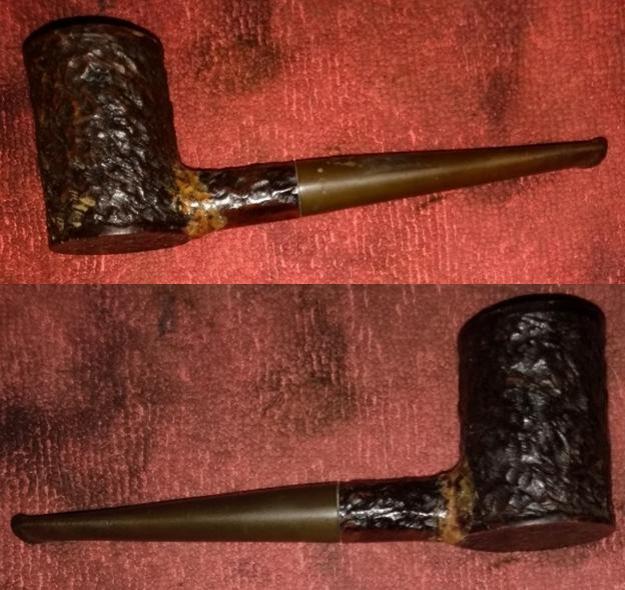
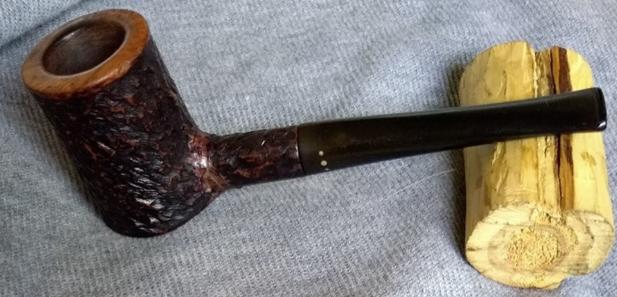
 The second pipe is shown below and is the one in the center position in the case. It is stamped BEST BRIAR & BANDS with each word over the next on the left side of the shank. One the right side it is stamped M&T in a football shaped oval. The silver ferrule is also stamped with a BBB vertically on the side of the band next to the shank. Next to that is the same M&T stamp in an oval over three hallmarks that are hard to read. The first appears to be a flower, the second is 933 and the third is a crescent moon. The pipe is in rough shape. Once again the finish is shot; there is silver polish on the shank ahead of the ferrule. There are some gouges in the top and underside of the shank. There is a thick cake in the bowl and the rim top is beat up. There is a crack running down the back side from the rim halfway to the shank. The rim top is dented and damaged and the inner edge is in better condition than the first pipe. The pipe is very dirty.
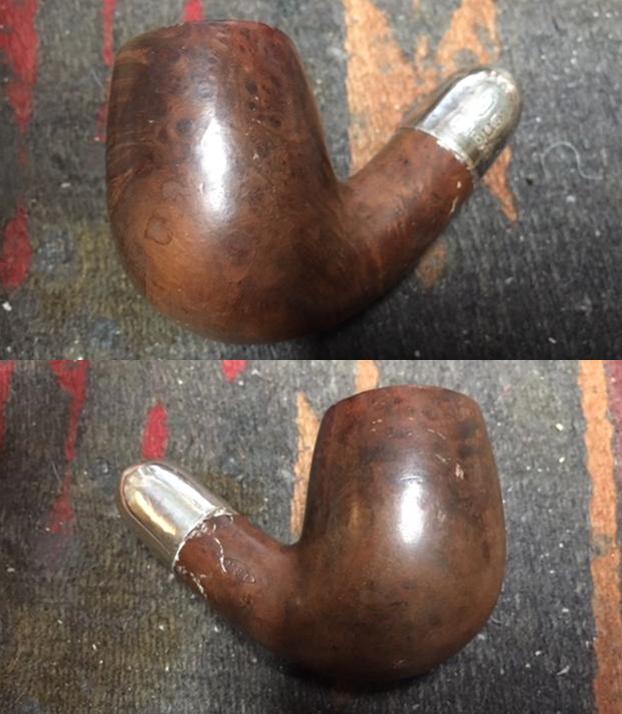
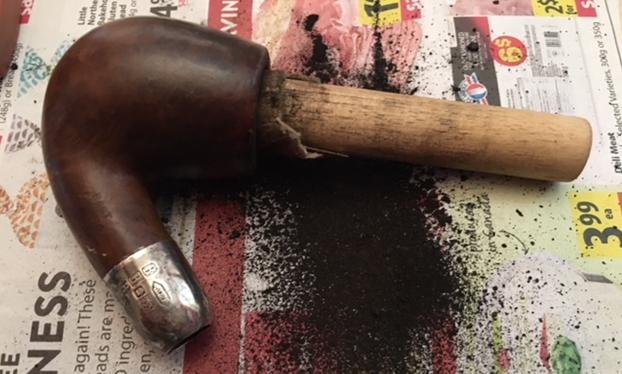
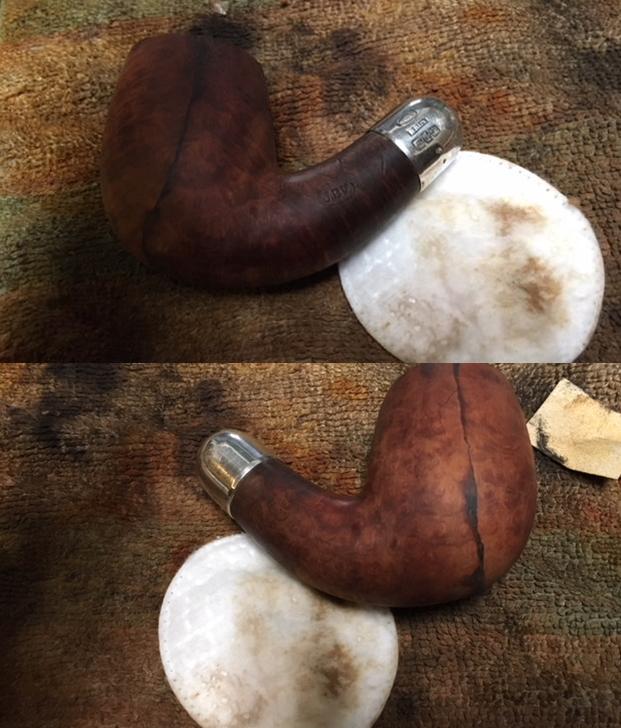
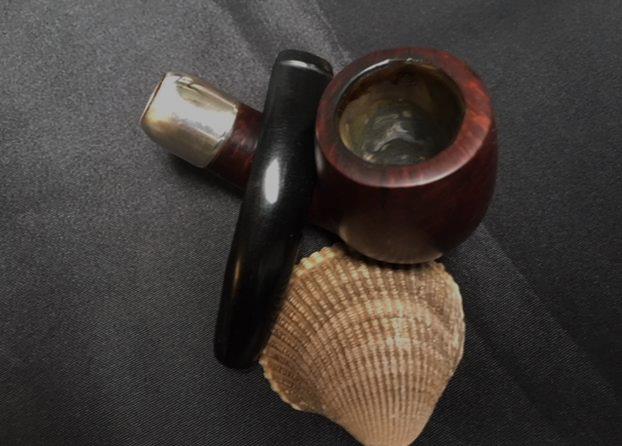
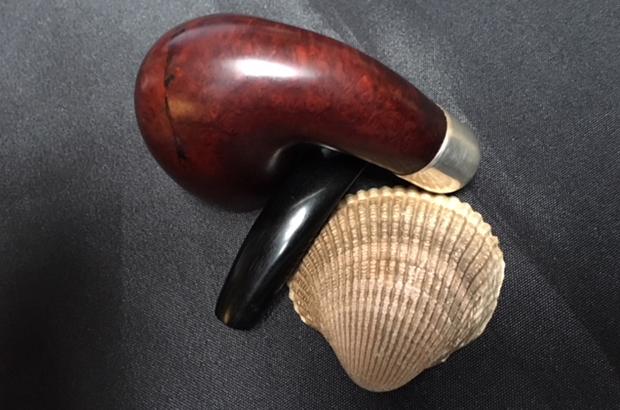
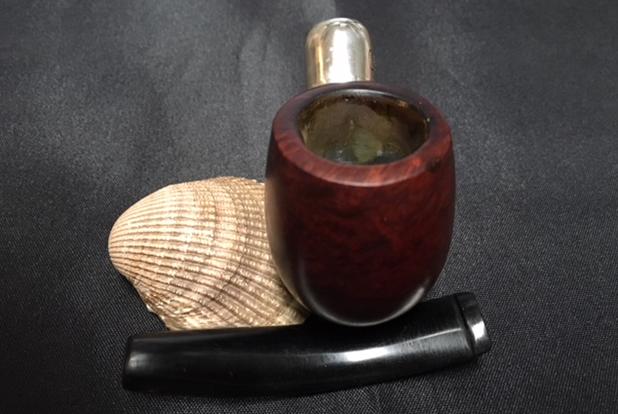
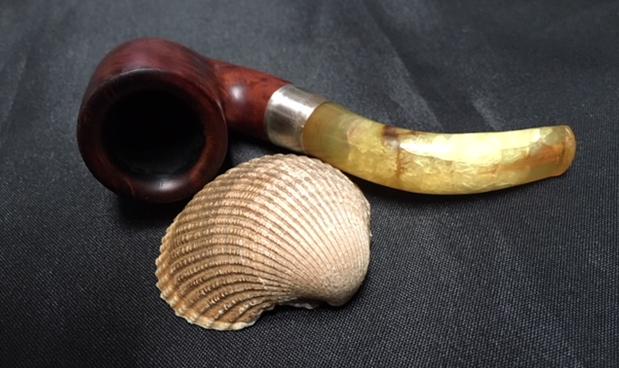
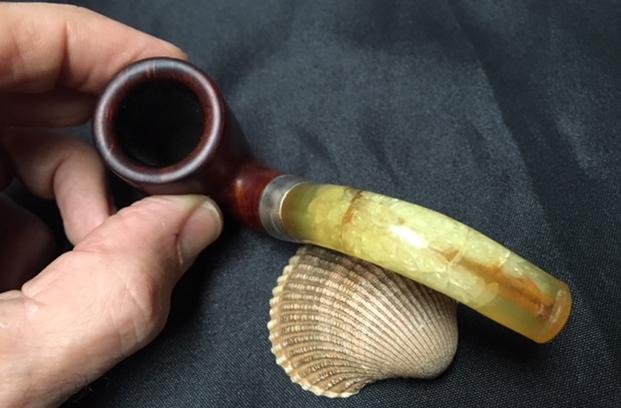
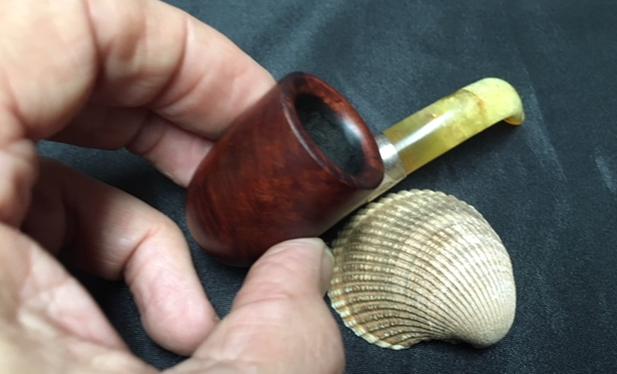
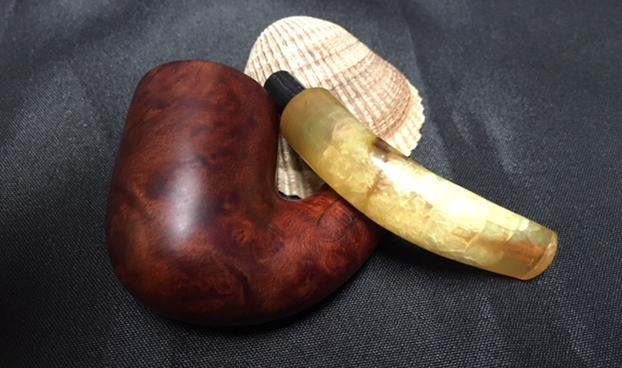
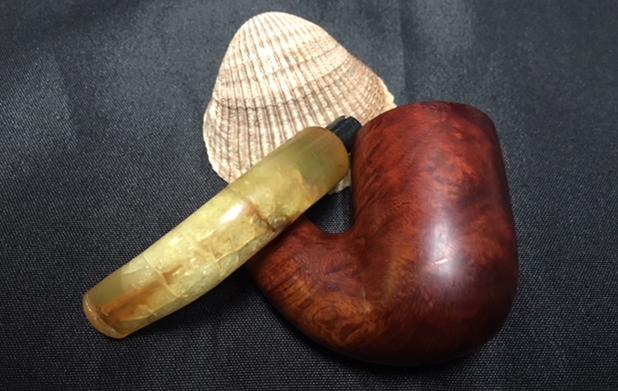
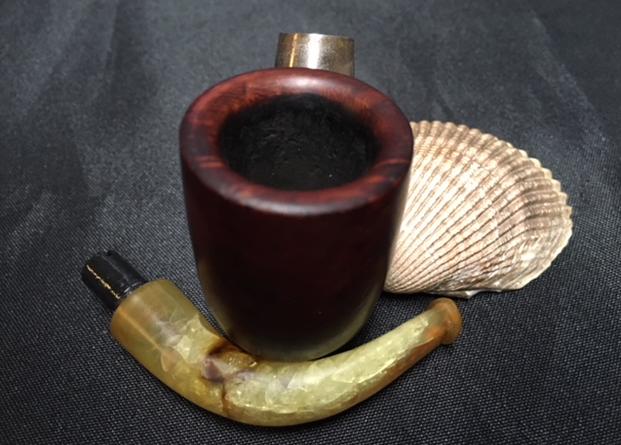
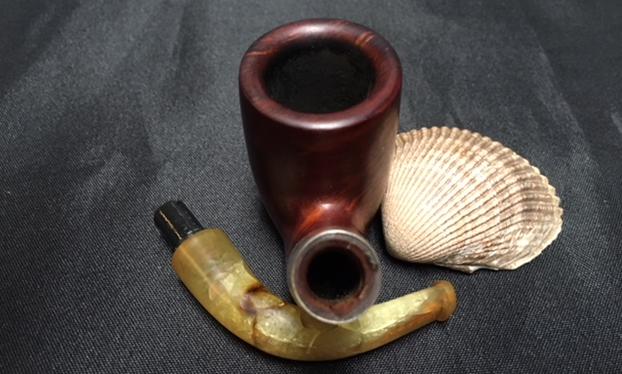
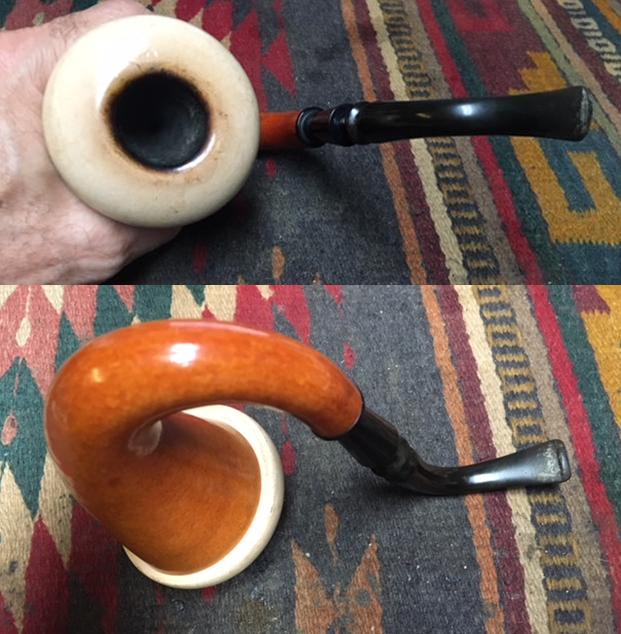
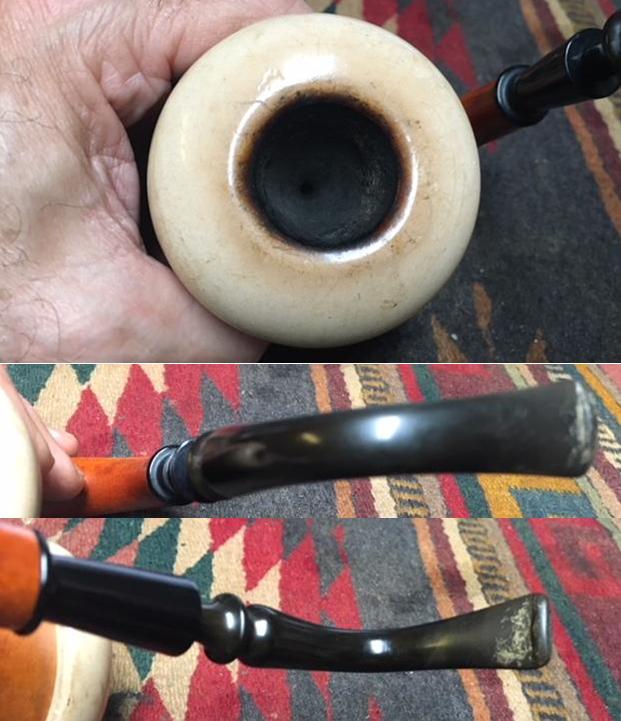
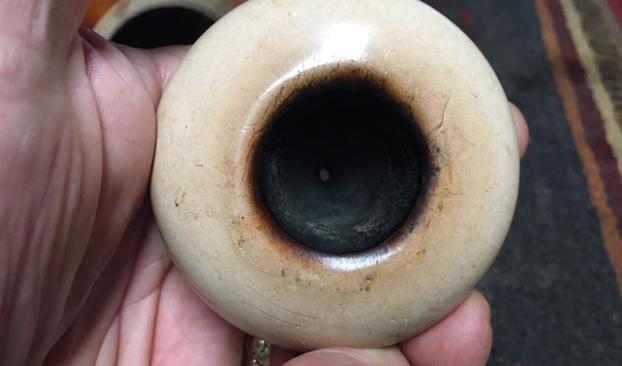
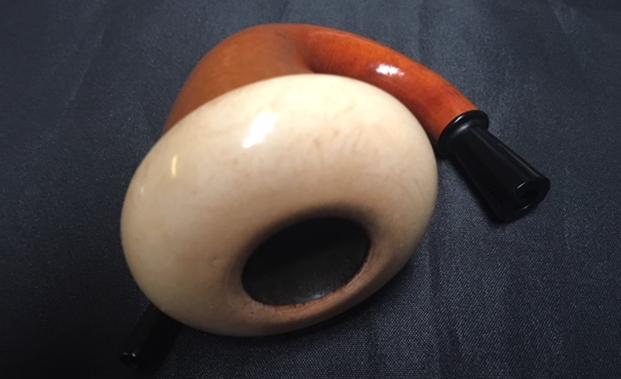
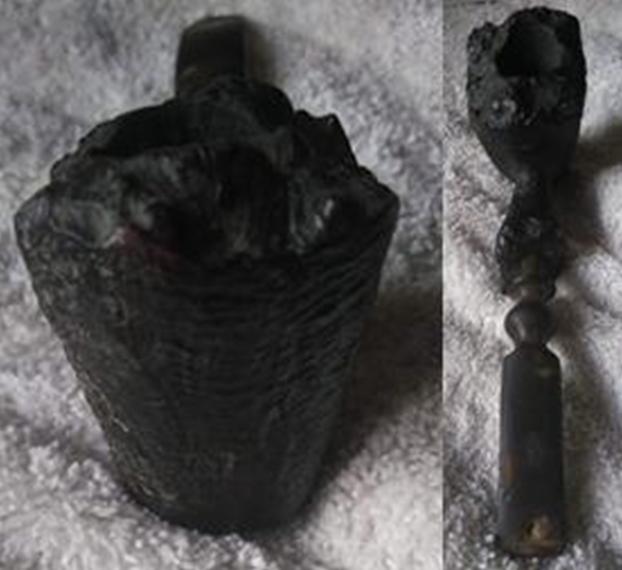
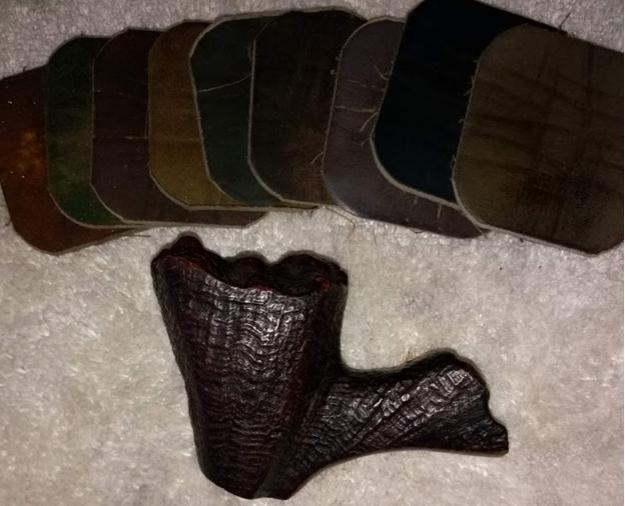
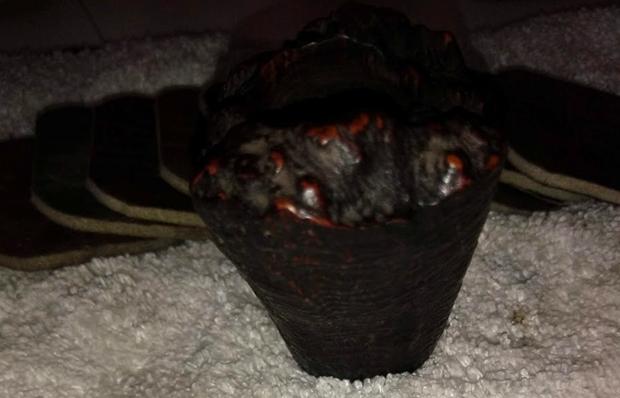
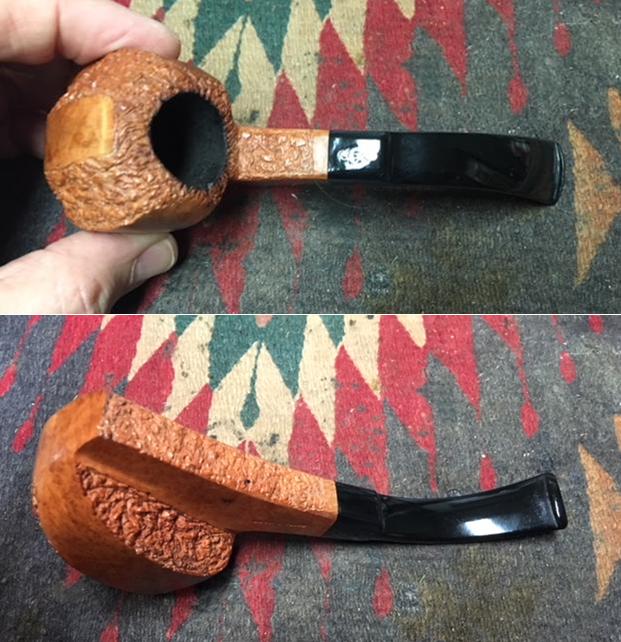
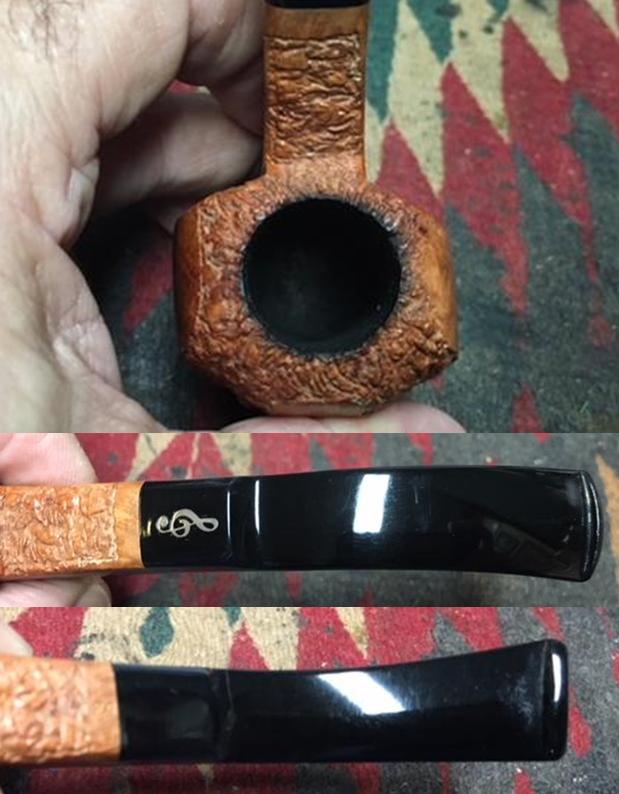
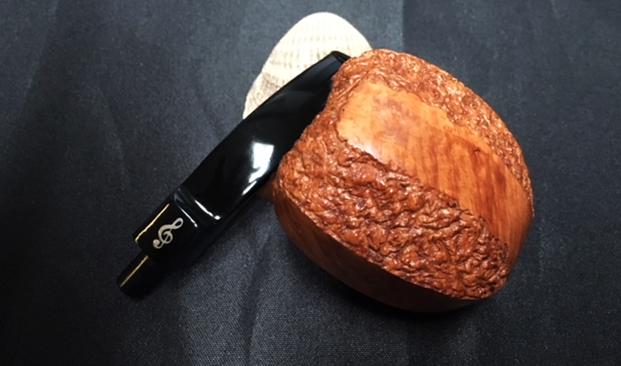
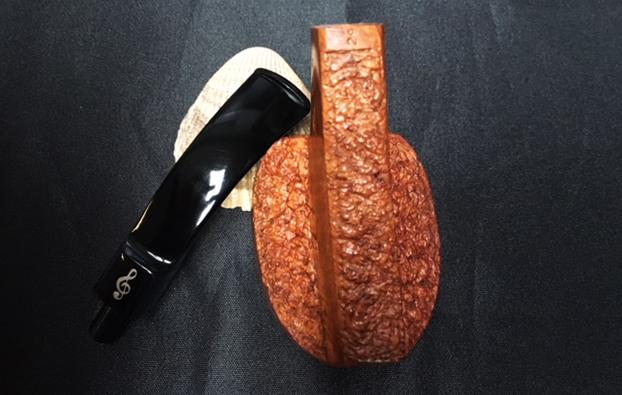
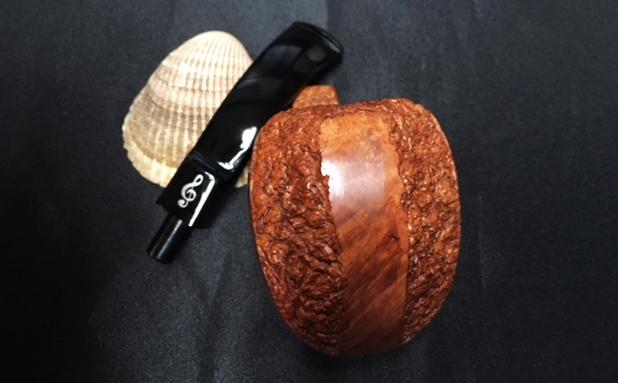
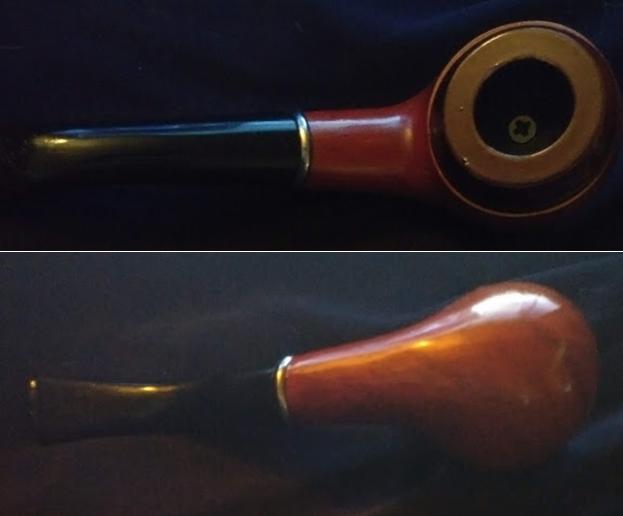
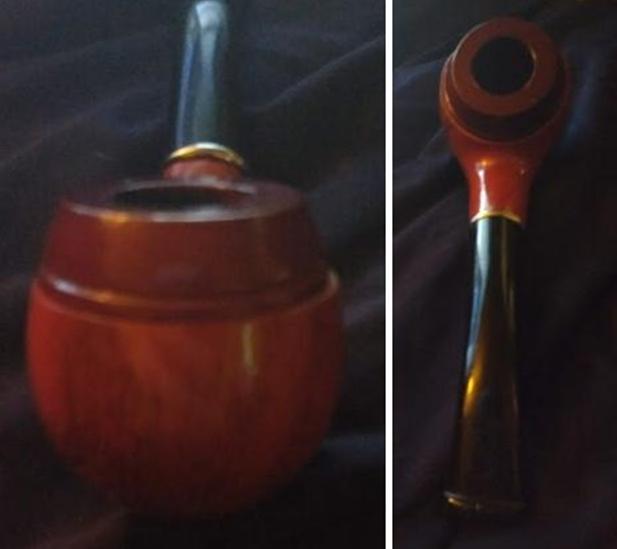
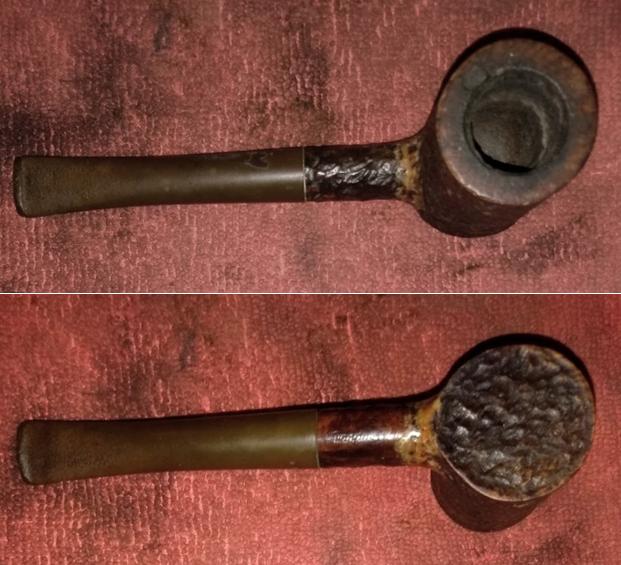
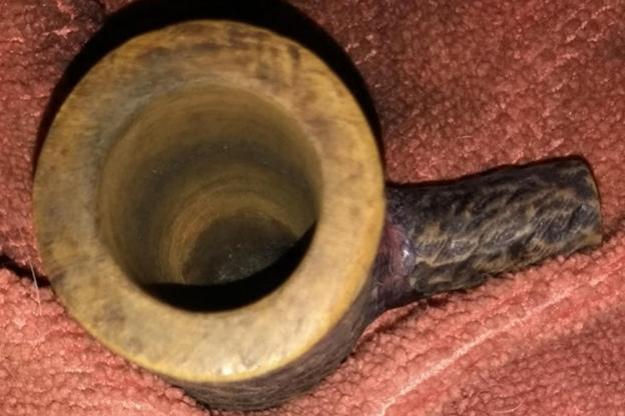
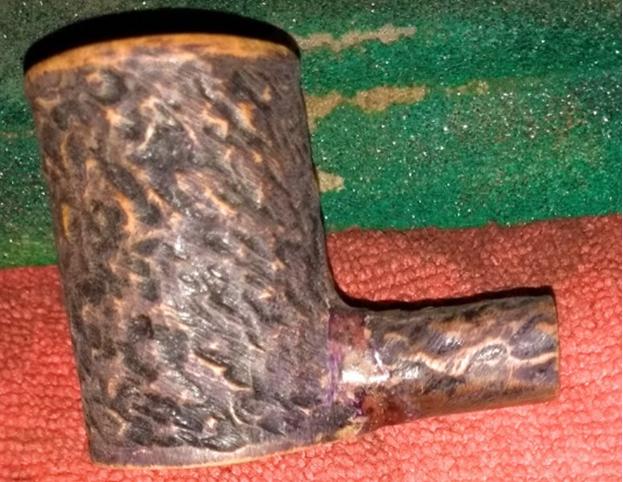
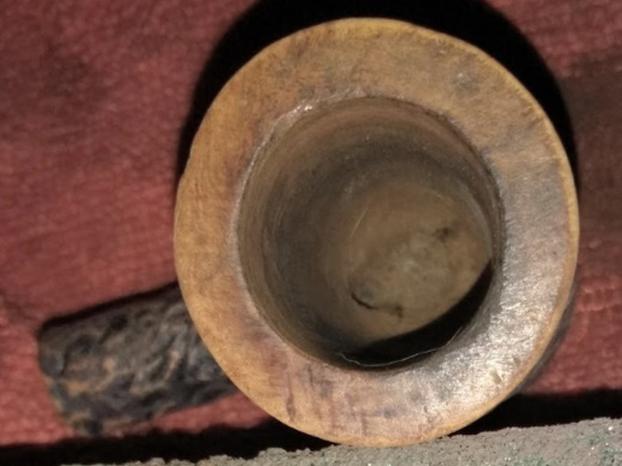
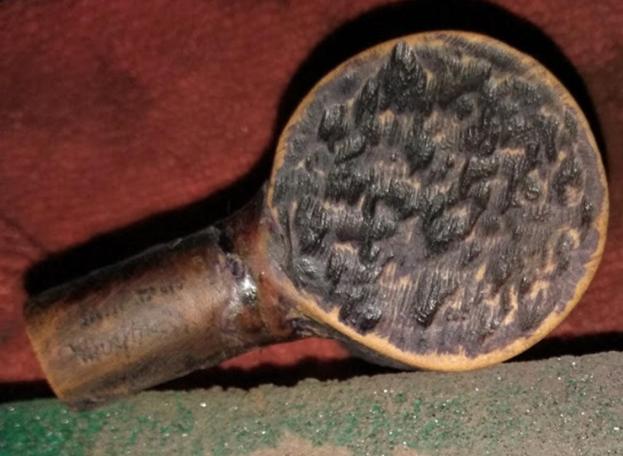
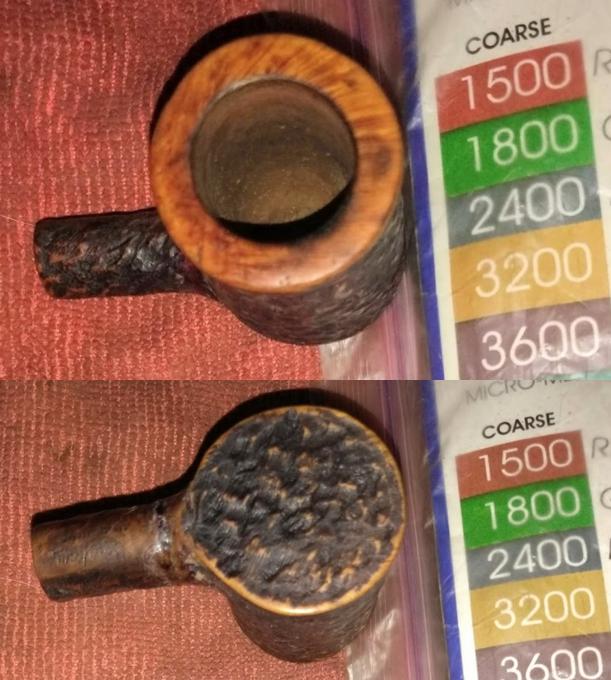
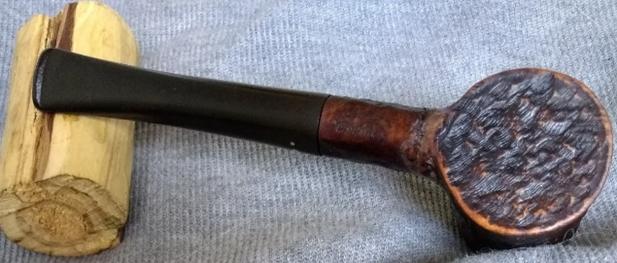
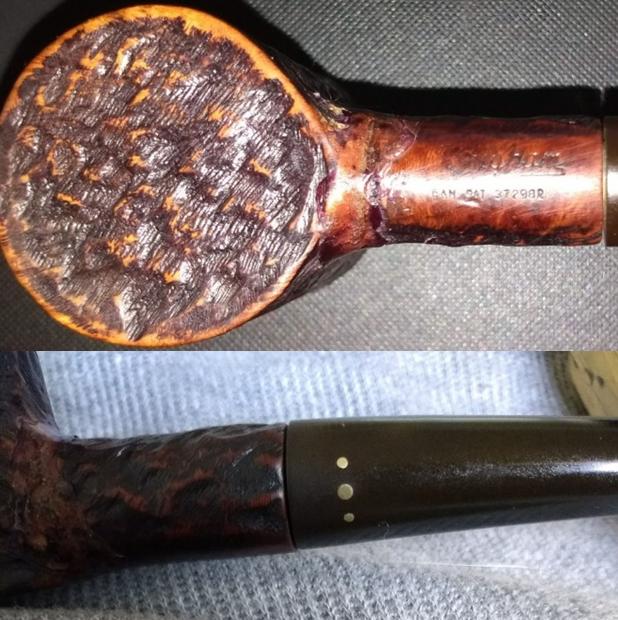
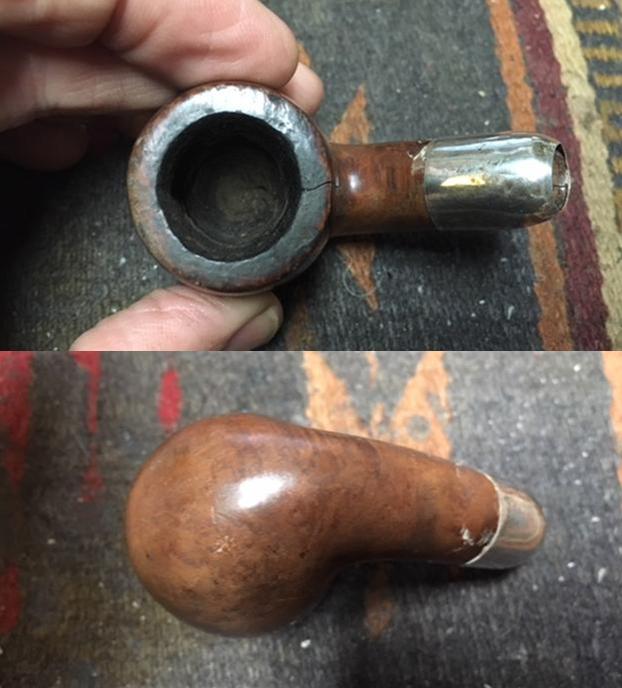 The third pipe is shown below and is the one on the right side of the case. It is stamped JBV in an oval on the left side of the shank. The silver ferrule is also stamped JBV in an oval over BRUX over three hallmarks that are hard to read. The first appears to be a flower, the second a person and the third is ARG over 900. The pipe is in rough shape. The finish is on this one is also shot; there is silver polish on the shank ahead of the ferrule. There are some gouges in the top and underside of the shank. The JBV Oval was originally gold leaf. There is a thick cake in the bowl and the rim top is beat up. There are big chunks of briar missing around the outer edge of the rim. The rim top is chipped and damaged and the inner edge is in rough condition. There looked like there could be a crack in the bowl down the left side. Like the rest of the pipes in this set the pipe is very dirty.
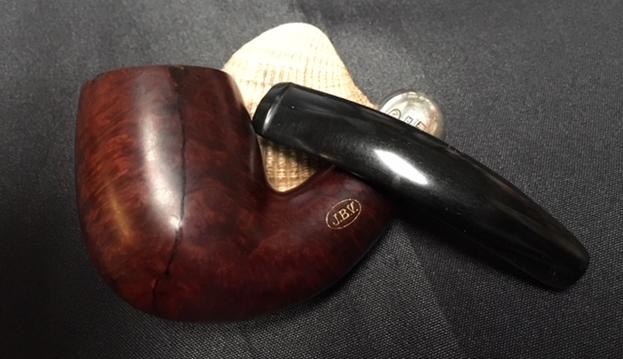
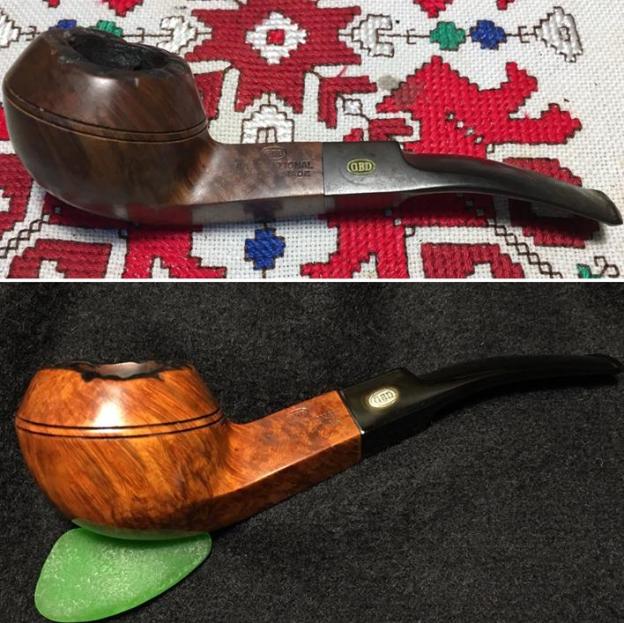
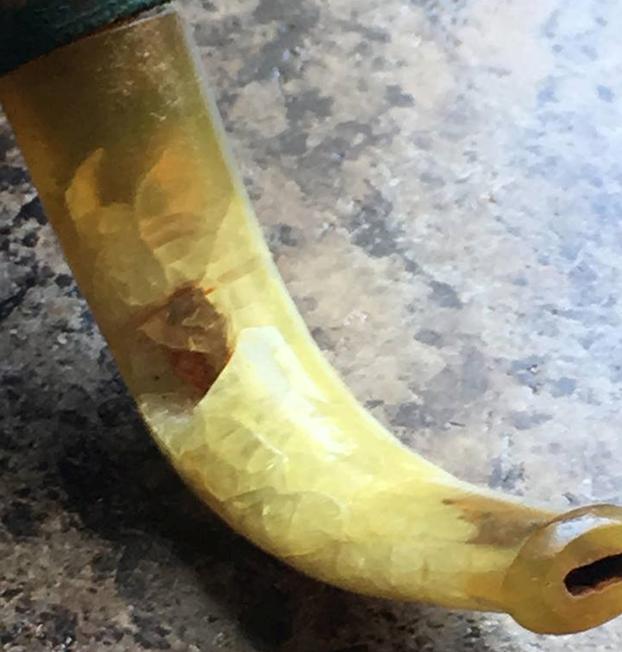
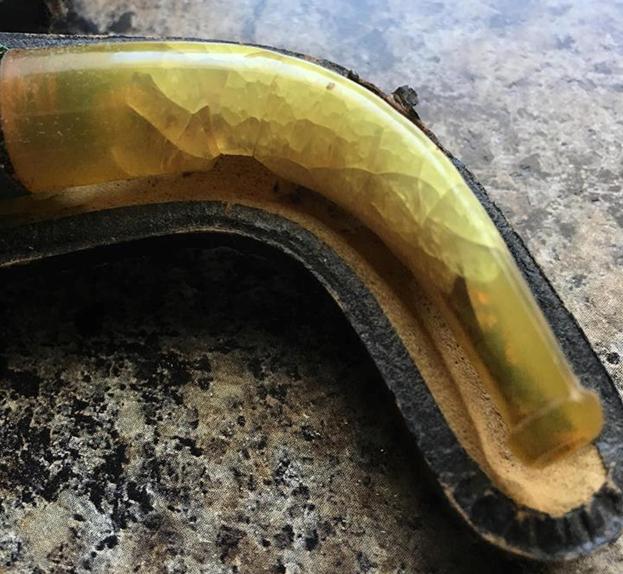
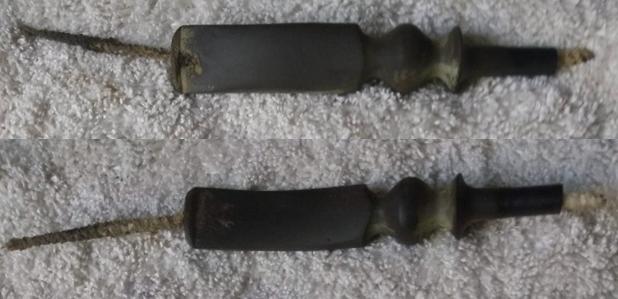
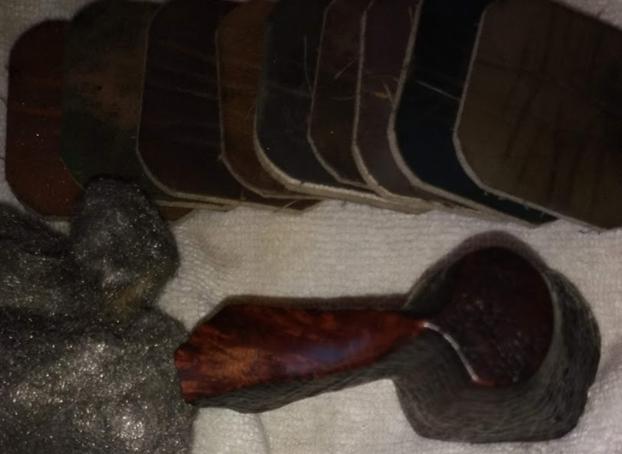
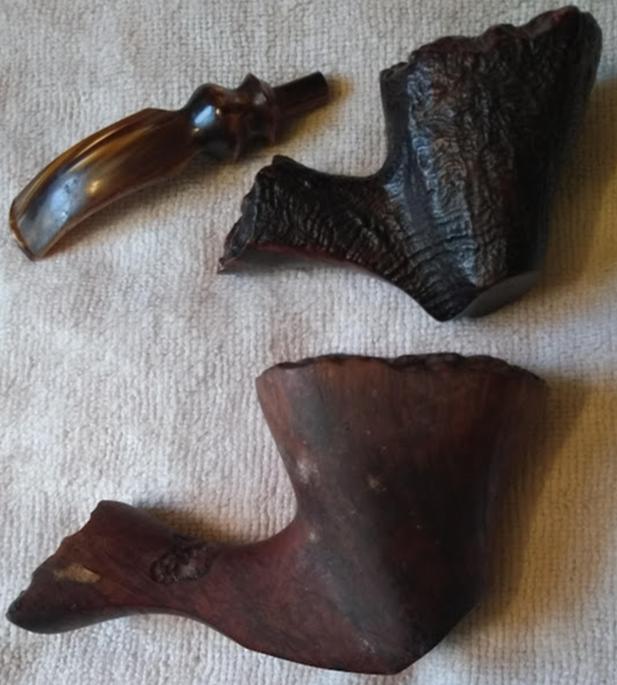
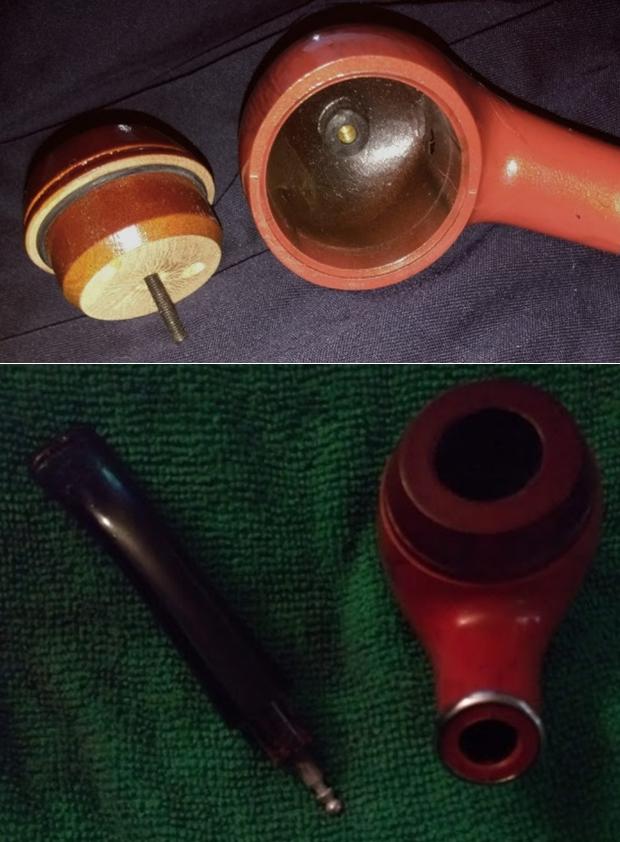
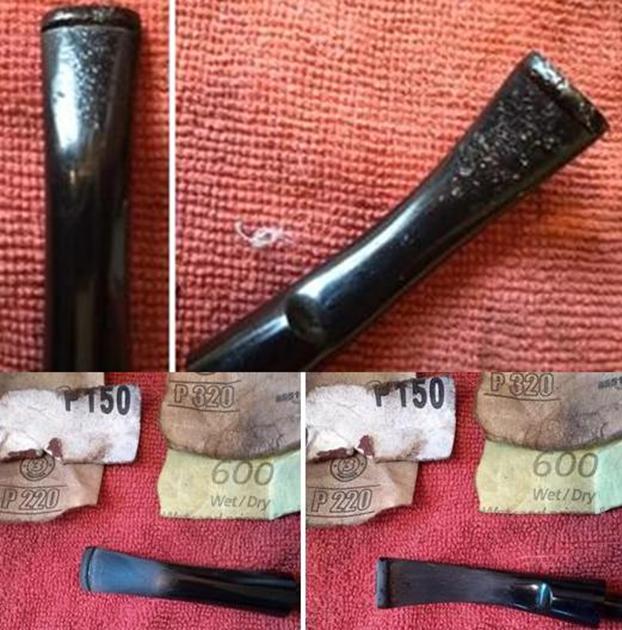
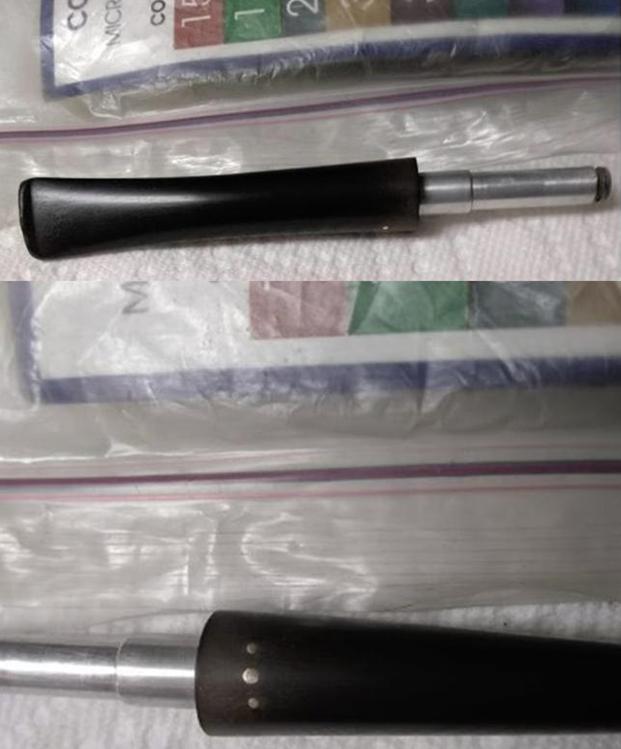
 There were two stems in the set. You can see from the photos below that they were different sizes. In the first photo the top stem is more delicate. It is narrower at the tenon end. It is for the M&T pipe while the bottom one is for the JBV pipes. The stems both are in decent condition with a little oxidation and minimal tooth chatter. There are no deep tooth marks so that is something to be thankful for.
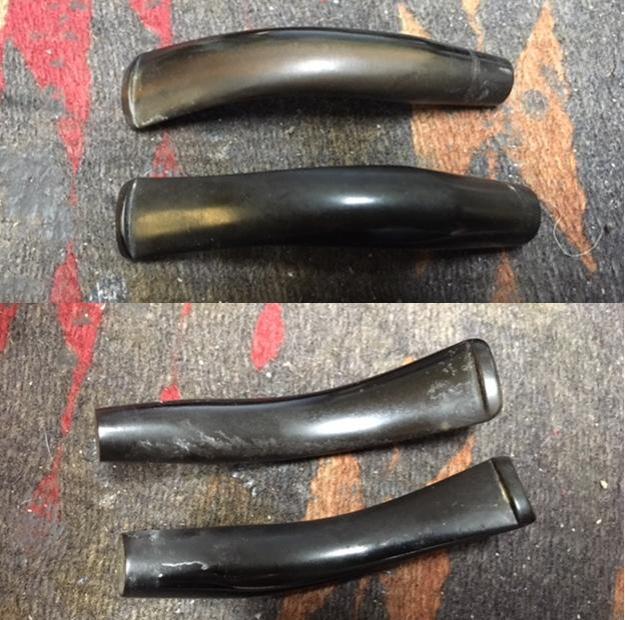
 I knew that the set was older but I was unfamiliar with the brands. I had not heard of JBV so I did a bit of research on the brand and found an interesting link to an old catalogue. It turns out that the JBV is short for J.B. Vinche Company in Brussels. I have included the information on the brand that I found in the link as well as the link below.
This company maintained a factory in Brussels, Belgium, but records indicate that it also operated a retail establishment at 34, Rue Notre Dame des Victoires, in Paris under the name “Au Nabab” where, no doubt, it offered its product line for sale to the public.
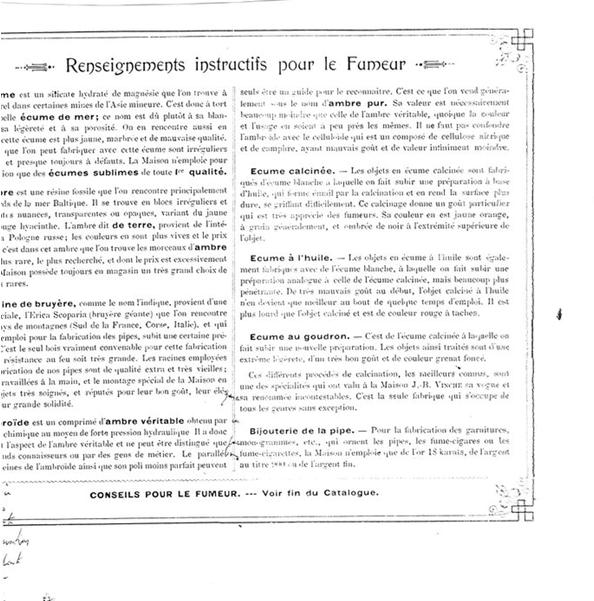
I also included some photos of a J.B. Vinche Catalogue from 1875.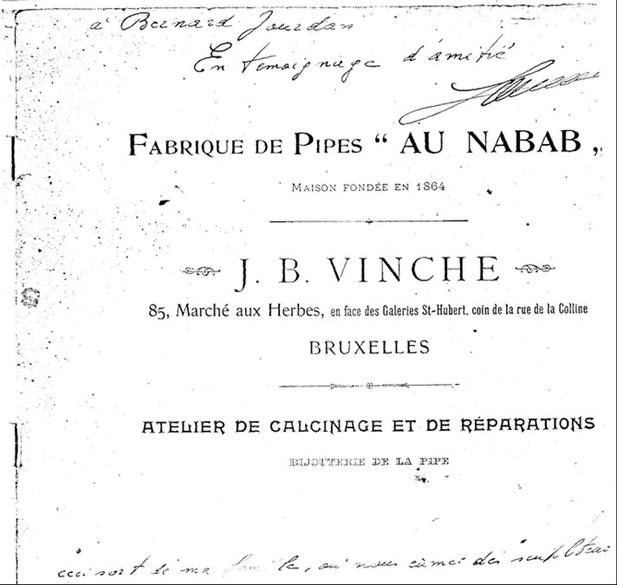


 I checked on the Pipephil website to see what I could find there. Generally I find the site one of the most helpful in quickly confirming information on a brand. In this case it came through with a great bit of information. I did a screen capture of the pertinent section of the link. You can check it out further on the following link. http://www.pipephil.eu/logos/en/logo-v2.html.
The information included in the capture reads:
The brand has been created in Bruxelles in 1864 by Jean Baptiste Vinche and run after him by his son Victor. Marcel and Rene Vinche (3rd generation) managed the corporation from 1927 on. The brand is famous for its meerschaum pipes but briar pipes were also produced after 1938. In 1965 Jacques Vinche (4th generation) entered the family firm. Jeff and Mia Koopmans from Hilson Pipes joined in 1977. Today (2009) Ben and Wim Koopmans manage the business. Pipedia confirms this information at the following link: https://pipedia.org/wiki/Vinche.
I could not find out any information on the third pipe – the M&T Best Briar Band pipe. I checked in all of my usual sources and came up empty. Does anyone know anything about the brand? Let me know.
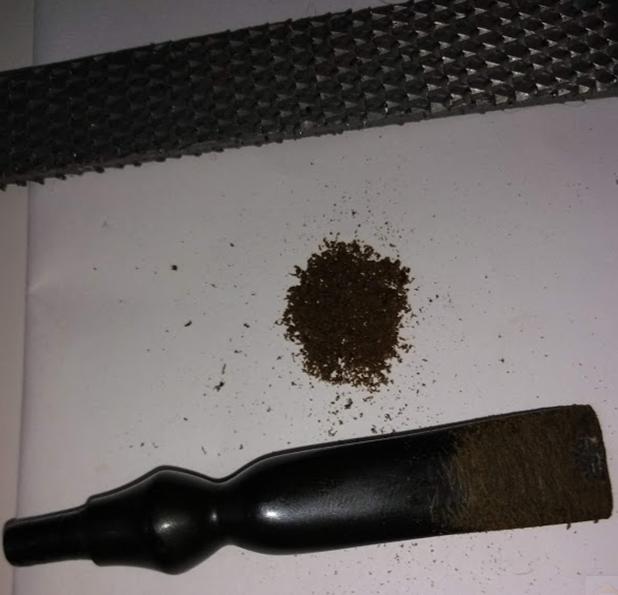
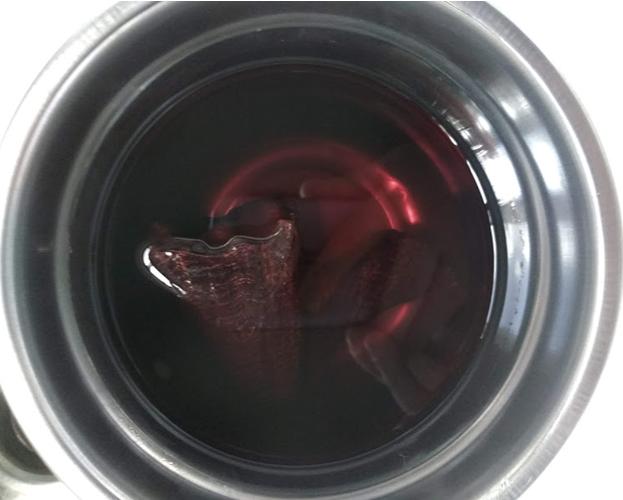
Armed with the background information, I decided to start on these pipes by reaming all three of them. The cake in each was quite thick and the damage to the rim and bowl made me proceed with caution. I was concerned about the cracked bowl in the M&T pipe as well as the potential crack in the second JBV pipe. I started with the first JBV pipe and reamed it with a PipNet pipe reamer starting with the first cutting head and working my way up to the second and lightly working on it with the third one. I took the cake back to bare briar to check out the interior of the bowl. I followed up by reaming it with a Savinelli Fitsall Pipe knife and finally sanding the bowl with 180 grit sandpaper wrapped around a piece of dowel.
 I moved on to the M&T Best Briar Band pipe and reamed it with a PipNet pipe reamer starting with the first cutting head and working my way up to the second and lightly working on it with the third one. I took the cake back to bare briar to check out the interior of the bowl. I followed up by reaming it with a Savinelli Fitsall Pipe knife and finally sanding the bowl with 180 grit sandpaper wrapped around a piece of dowel.
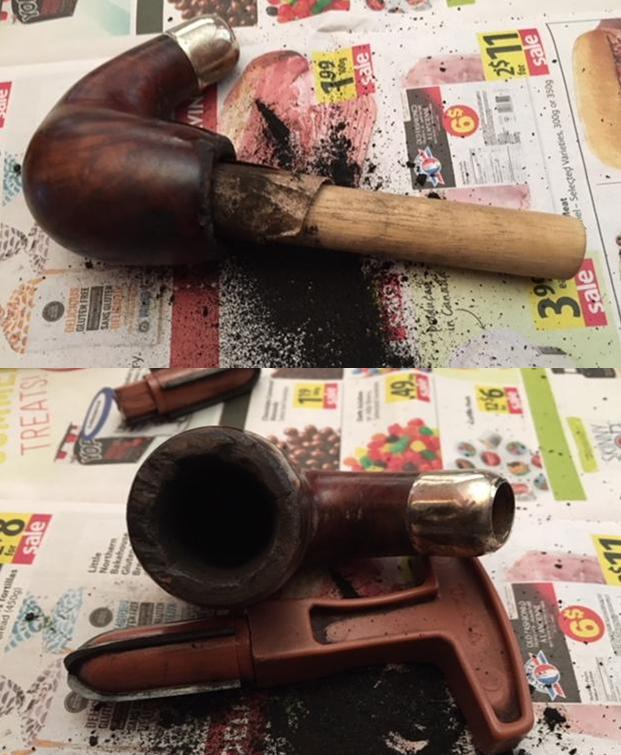
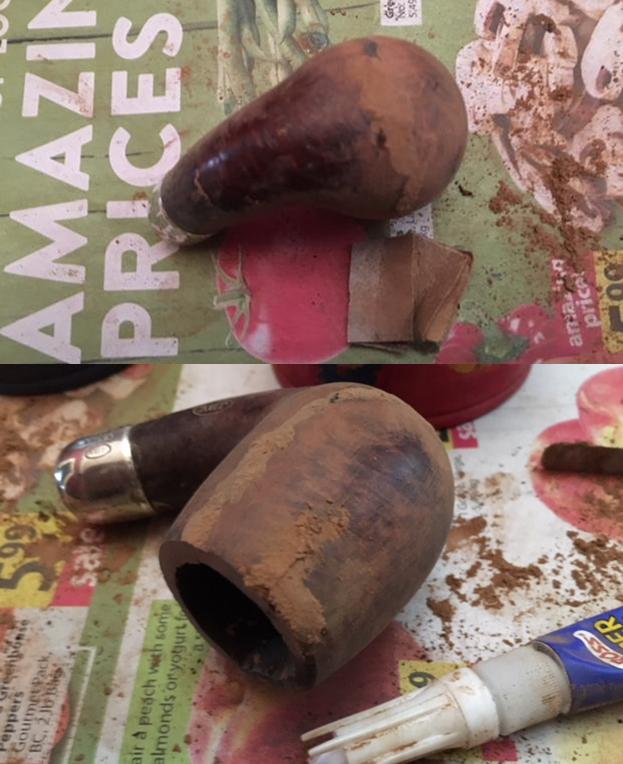
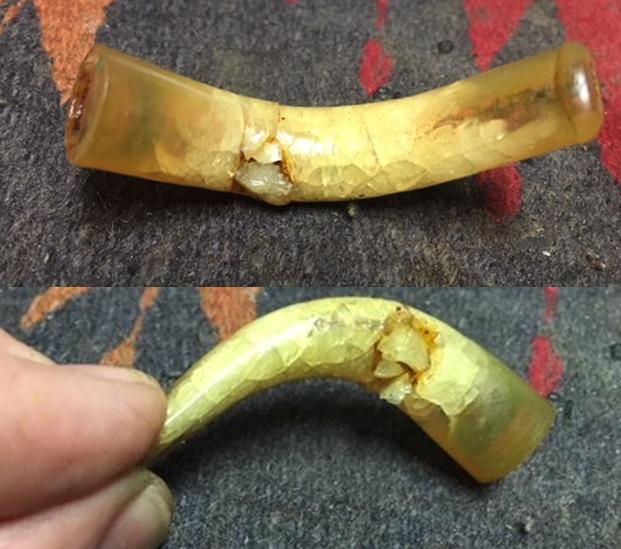
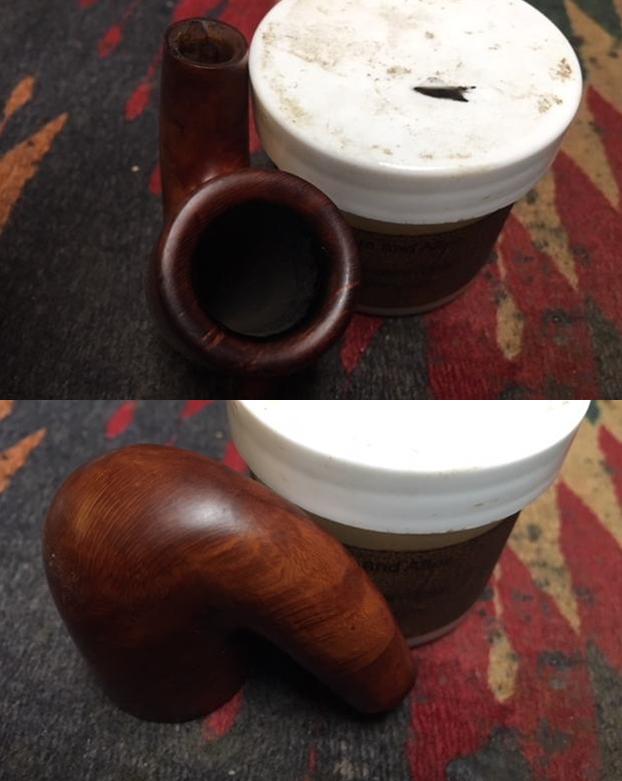
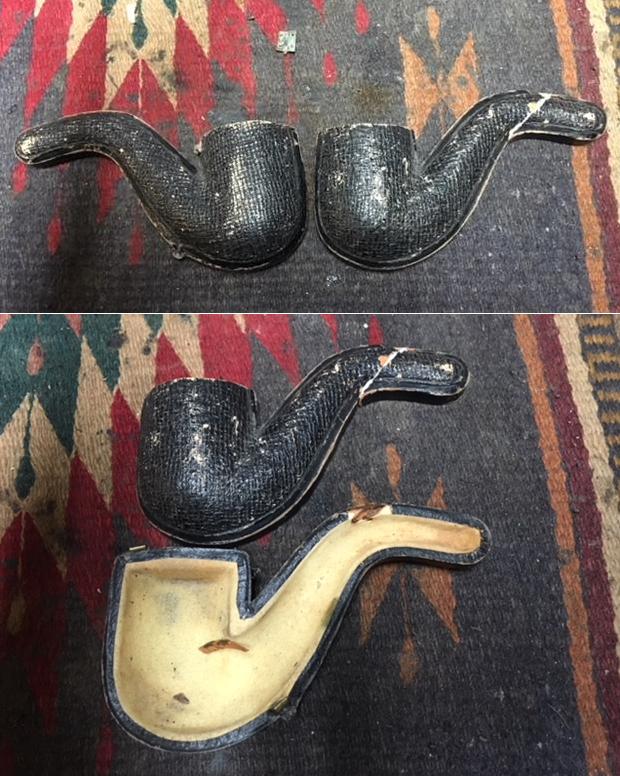
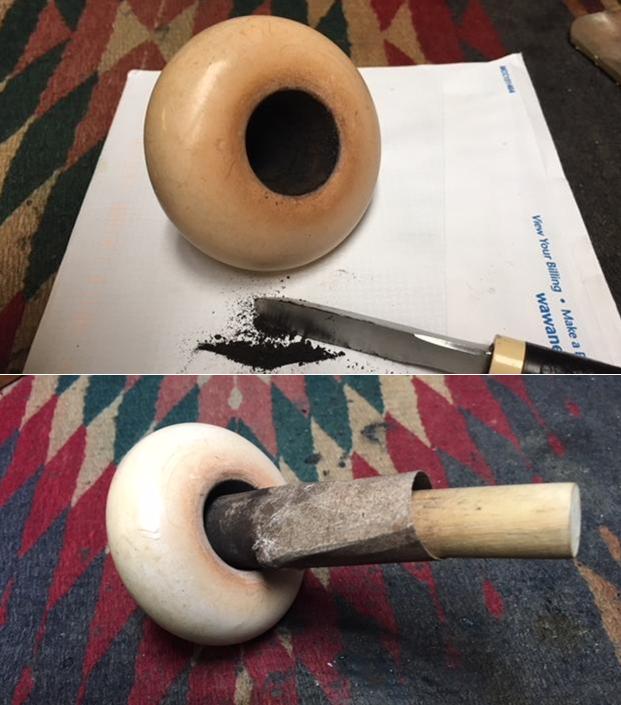
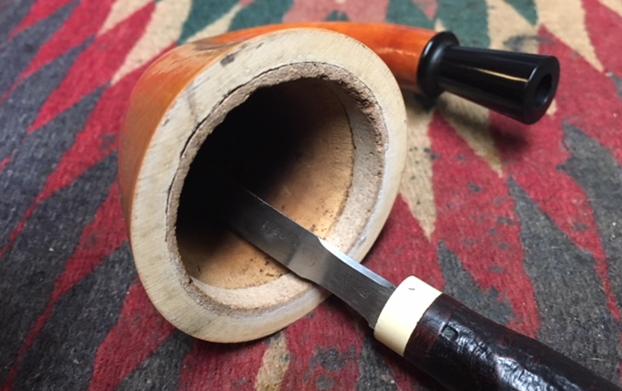
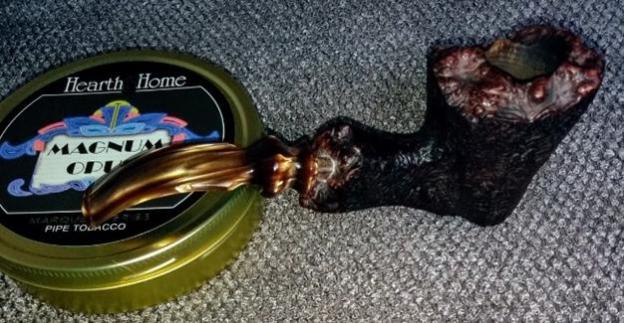
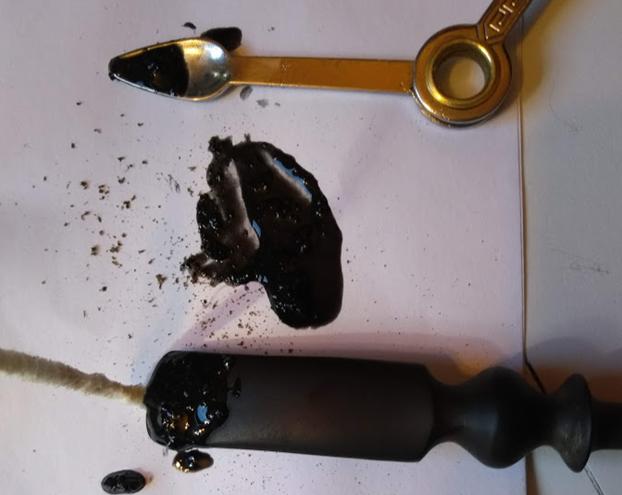
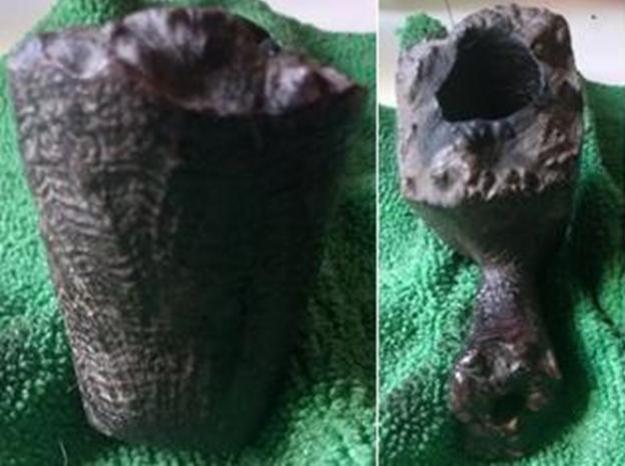
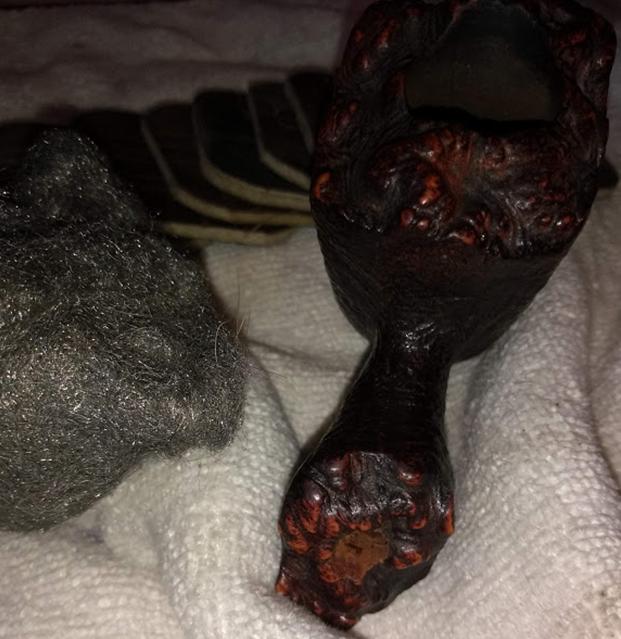
 I moved on to the second JBV pipe (the one that I thought had a possible crack). I started with the smallest cutting head on the PipNet pipe reamer and turned it gently in the bowl one twist and the bowl split in half in my hands. I was sick when I felt it break. I have never had that happen in all these years of working on pipes. It really was unbelievable. I held the pieces together and took the cake back to bare briar to check out the interior of the bowl. I used a Savinelli Fitsall Pipe knife to scrape away the remnants of cake. The photo below shows the bowl in half with the reamer next to it.
 This is not what I wanted to do next! I had planned to work through each of the pipes and have a nice set! Now I had to deal with this one and because it was part of an old set I felt obligated to try to put it back together. I was just sickening to have the second original bowl break in my hands. Why couldn’t it have been the cracked M&T bowl? But since it was the other JBV bowl I needed to repair it. At this point this blog also took a turn. I would do the rest of the first part of the blog on the bowl repair of this particular JBV pipe. I would have to follow up with at least one more part on the other two pipes in the set.
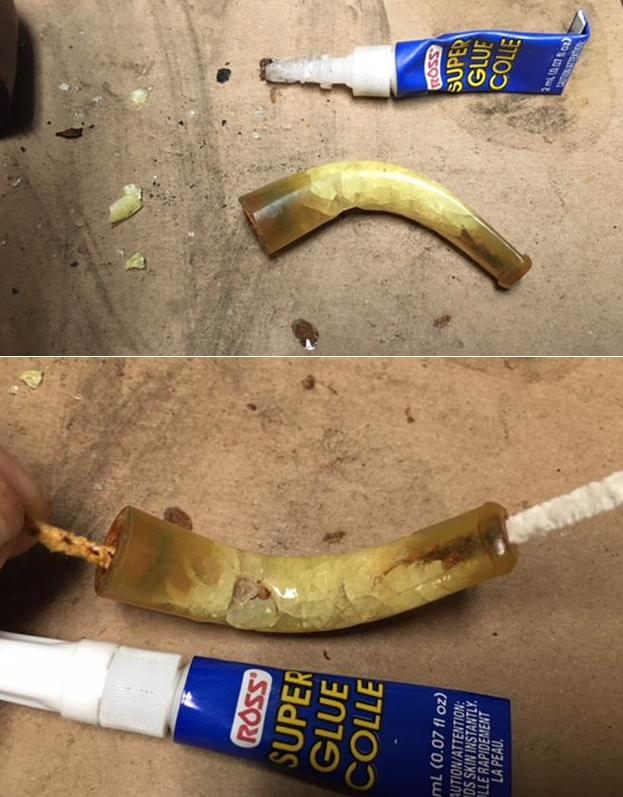
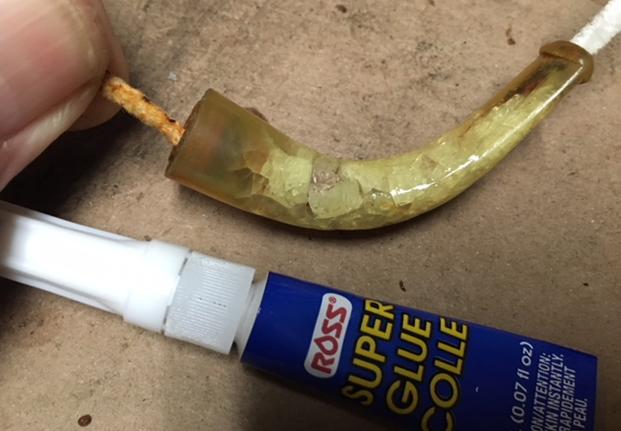
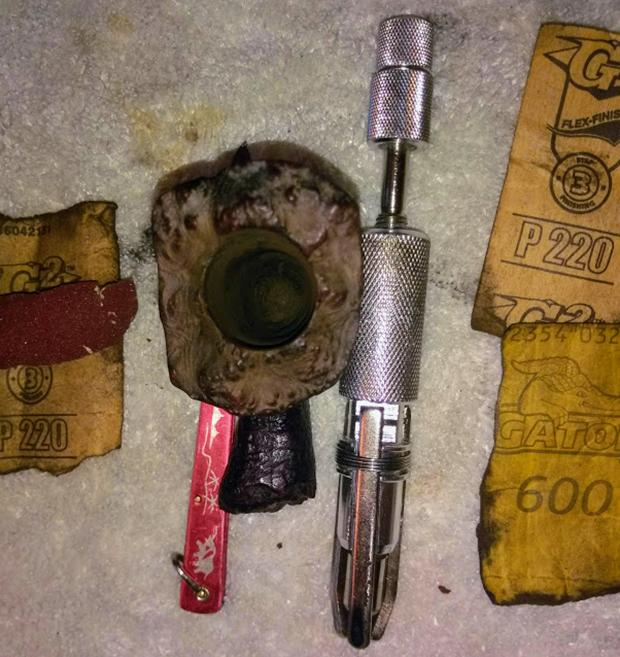
I turned to repair the bowl. I decided to pin the two halves together and then fill it and line the bowl with JB Weld. It would be a process. I drilled 8 small pin holes in the front half of the bowl and put stainless pins in the holes. I matched the two halves together and marked the holes on the other side of the bowl. I drilled matching holes. Once I had the holes aligned I painted each half with gel super glue and pressed the halves together and held them in place until the glue set.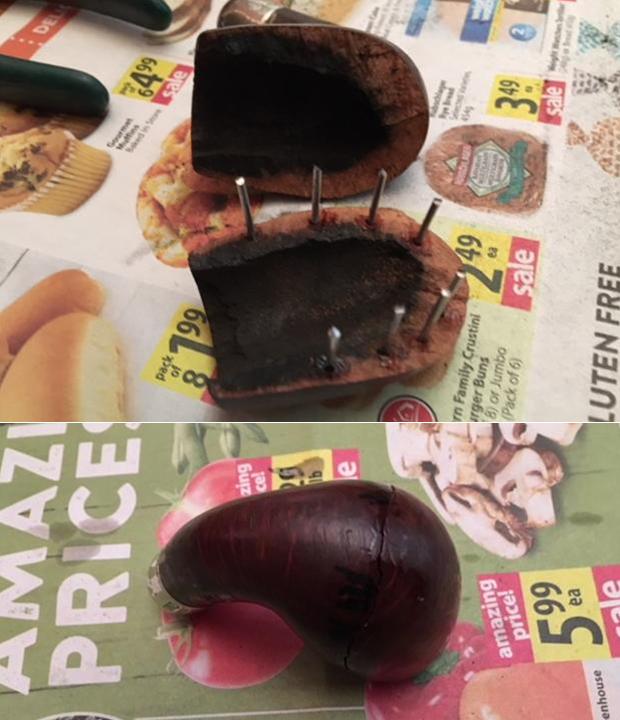
 I filled in the cracks around the sides and bottom of the bowl with briar dust and super glue. I used a dental spatula to apply the patch all around the bowl. I pressed the mixture into the crevices that remained in the sides and bottom.
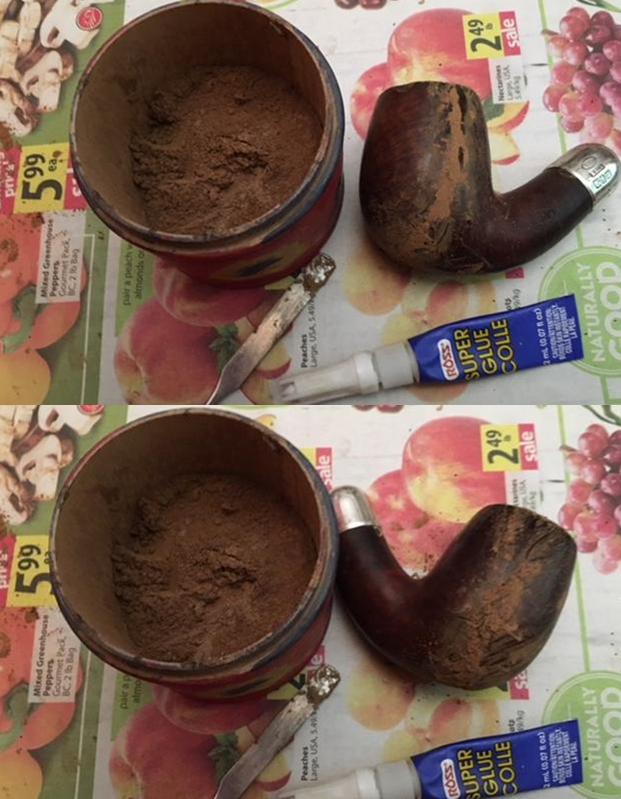 When the repair hardened I sanded it with 180 grit sandpaper to blend it into the surface of the bowl. I also repaired the chips out of the edges of the bowl with super glue and briar dust.
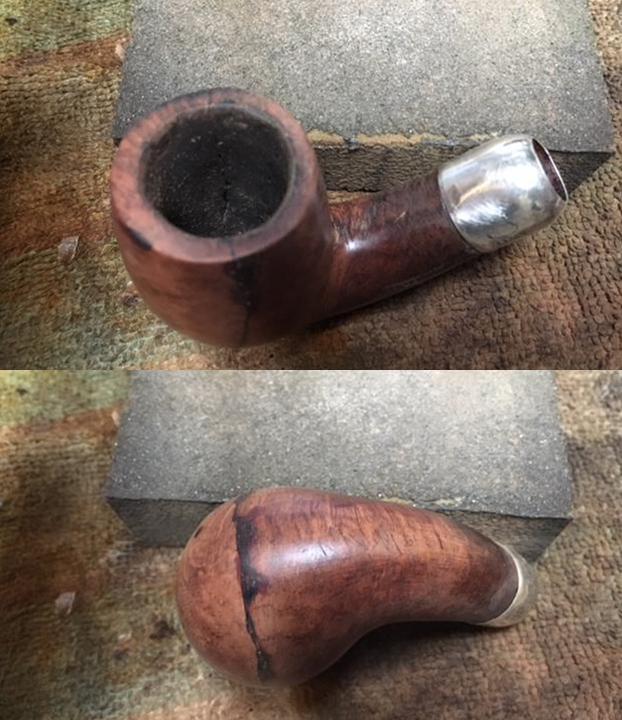
 I sanded the bowl with 220 grit sandpaper and smoothed out the repaired areas and sanded the rest of the bowl at the same time. I carefully avoided the stamping on the shank so as not to damage that area.
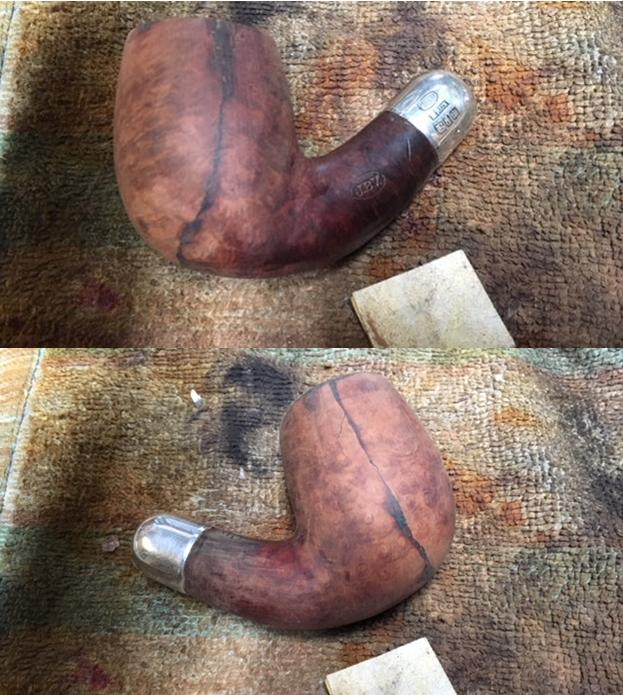
 I topped the bowl to remove the damage to the rim top. I had hand sanded it with sandpaper to start the process and filled in the damaged areas with super glue and briar dust. Now it was time to top it. Once I had it topped I wiped the bowl down with alcohol to remove the dust and the remainder of the finish on the shank and bowl.
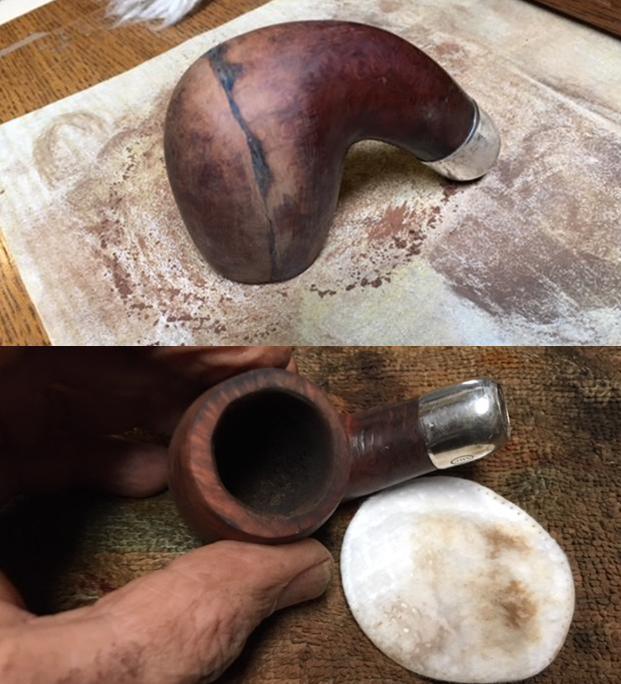
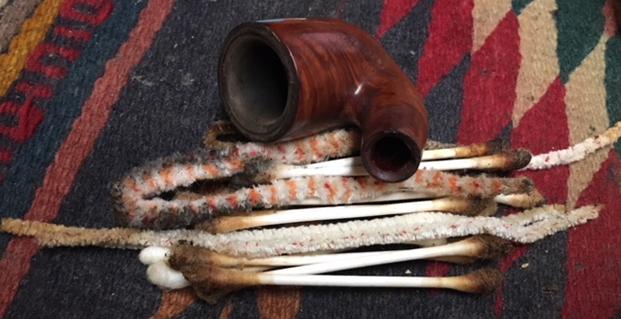
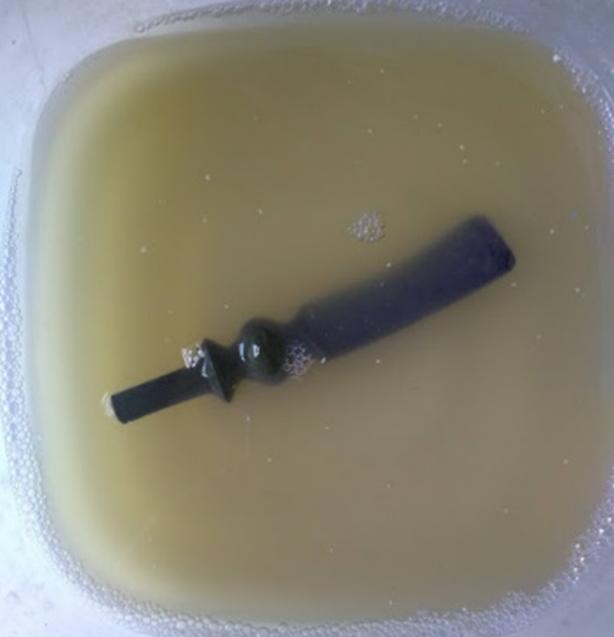
 I cleaned out the inside of the mortise and shank as well as the airway into the bowl with alcohol, pipe cleaners and cotton swabs. The airway was clogged so I pushed a pipe cleaner through into the bowl. The mortise was like a Peterson’s sump and it was filthy. It took a lot of work to clean it out.
 I sanded the exterior of the bowl with a medium and a fine grit sanding sponge.
 At this point I paused in sanding the exterior and turned my attention to repairing the inside of the bowl. I mixed a batch of JB Weld and put a pipe cleaner in the airway into the bowl to keep the airway from being covered with the mixture. I applied the mix to the inside of the bowl with a popsicle stick. I pressed it into the cracks and build up the damaged areas to protect it from further damage.
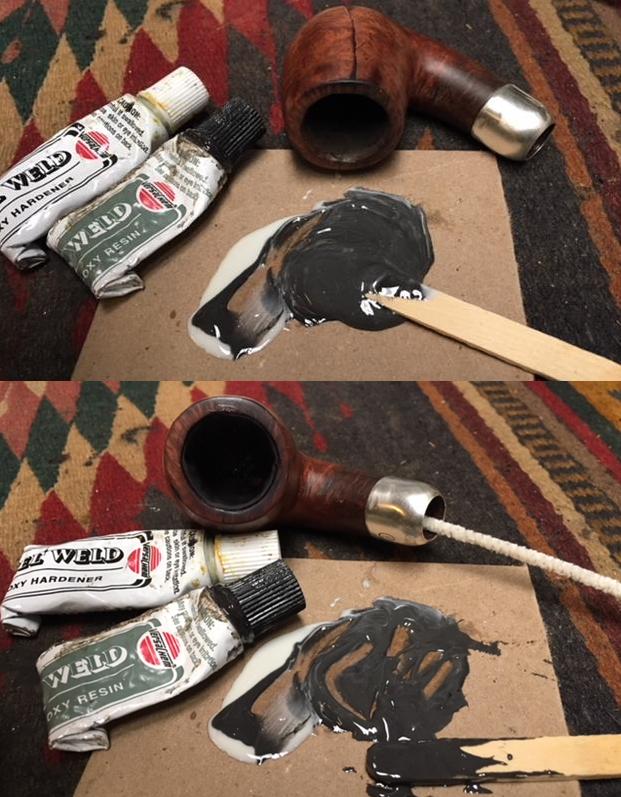
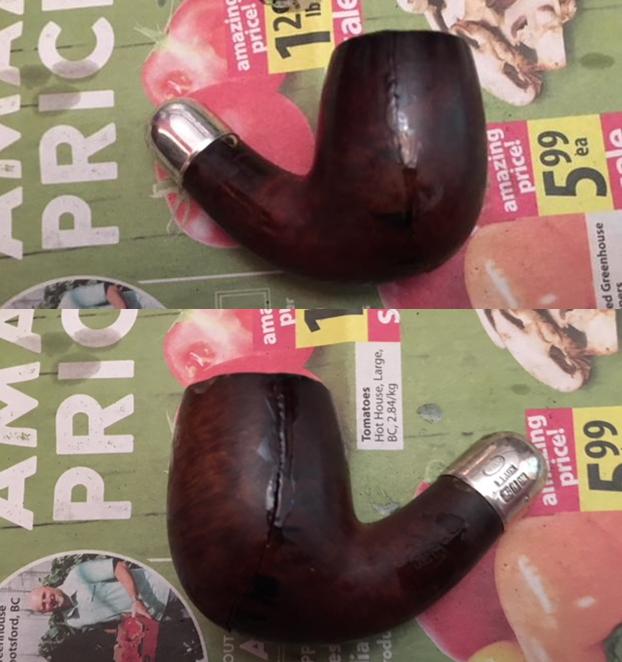
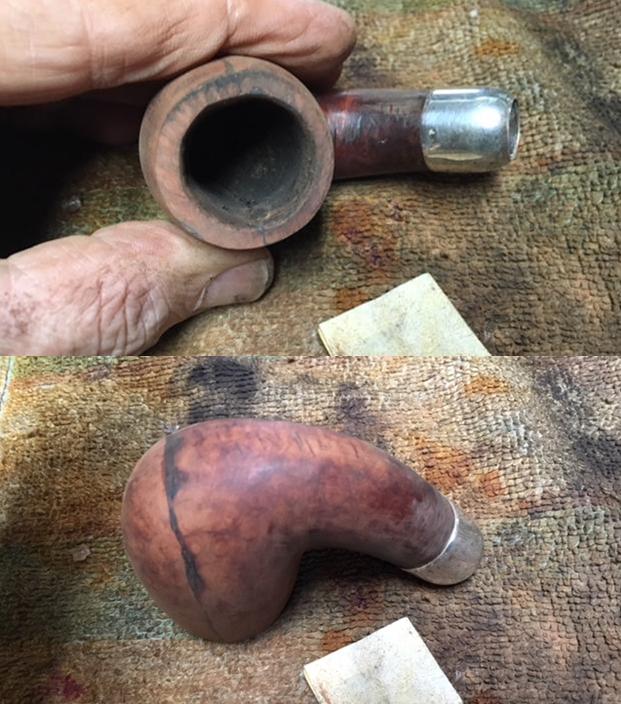
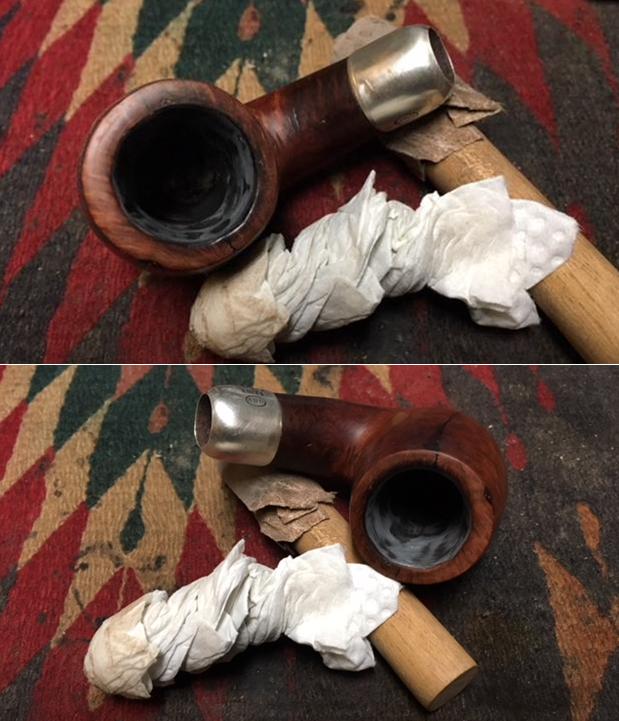
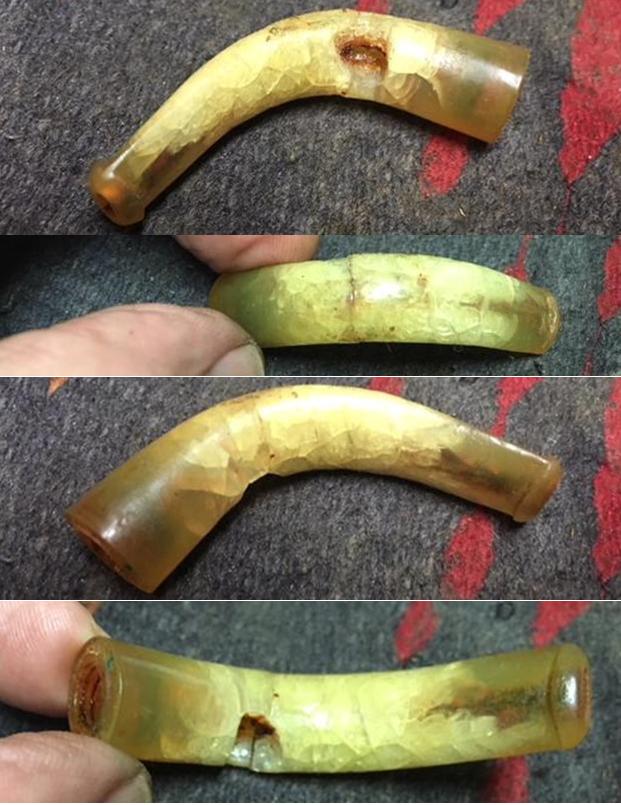
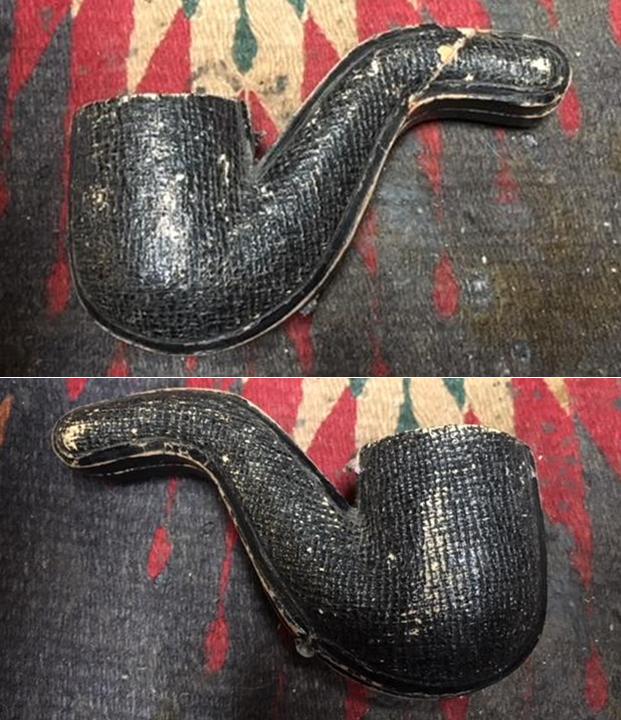
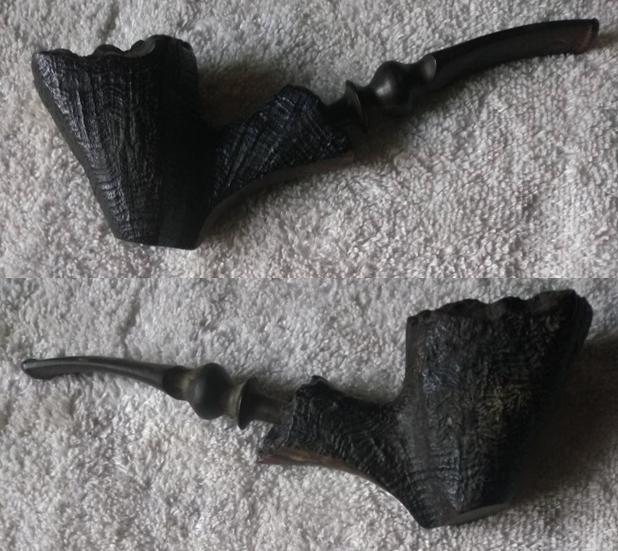
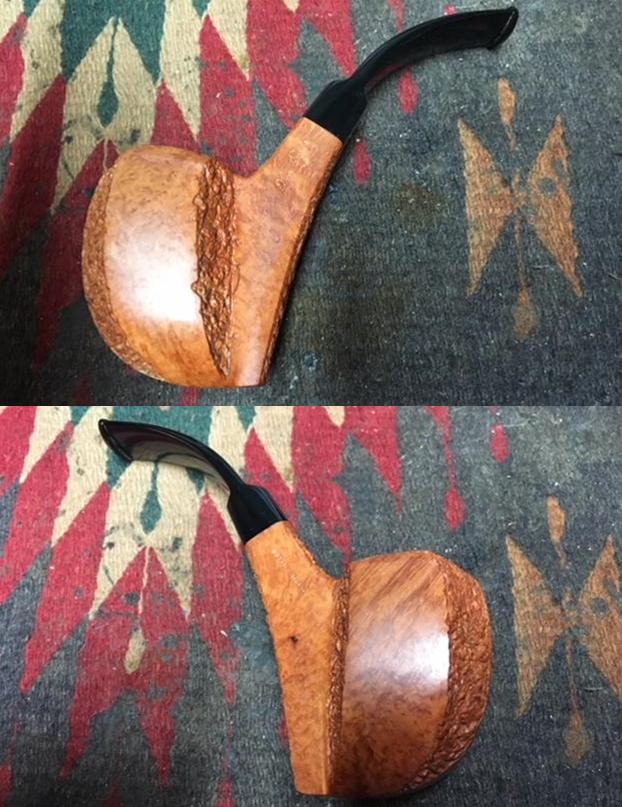
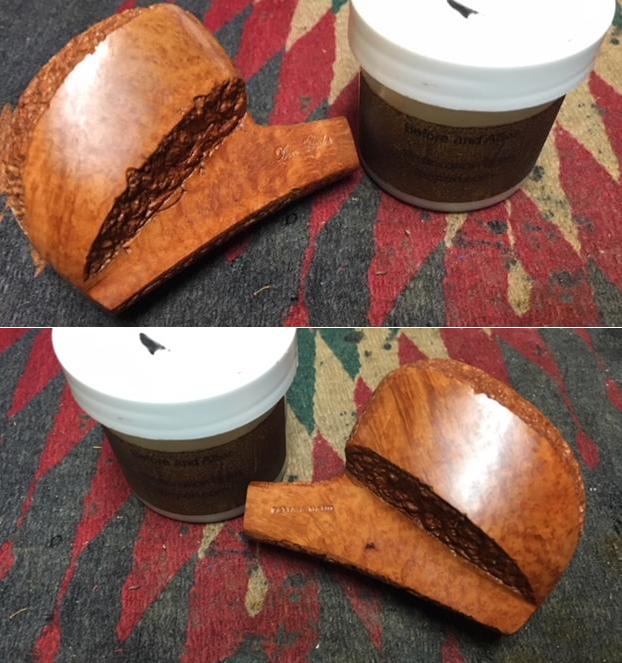
 With that I called it a night, set the bowl aside to dry and turned out the lights. In the morning I sanded out the excess JB Weld with 180 grit sandpaper wrapped around a dowel. I wiped the bowl down with a damp paper towel to remove the dust. The photos below show the bowl at this point.
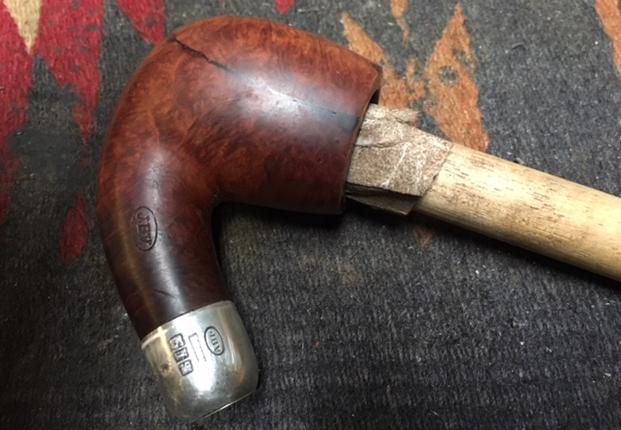
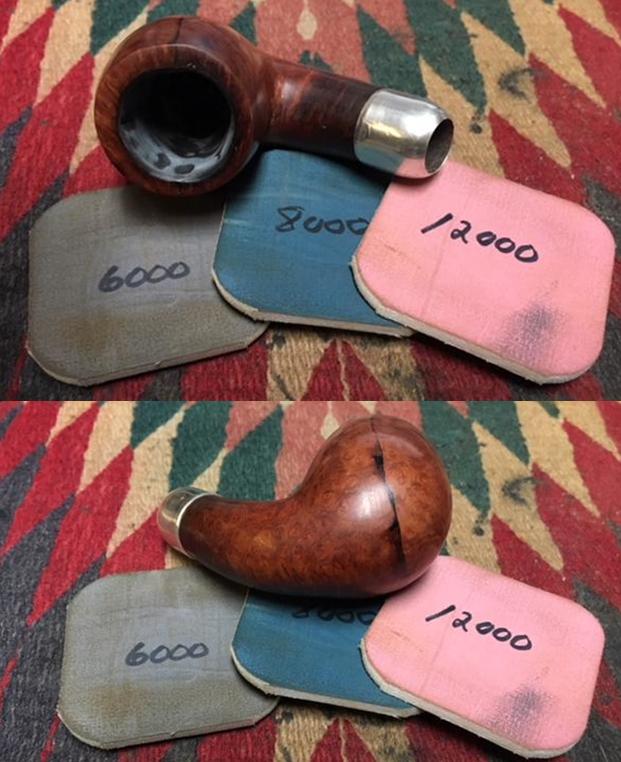
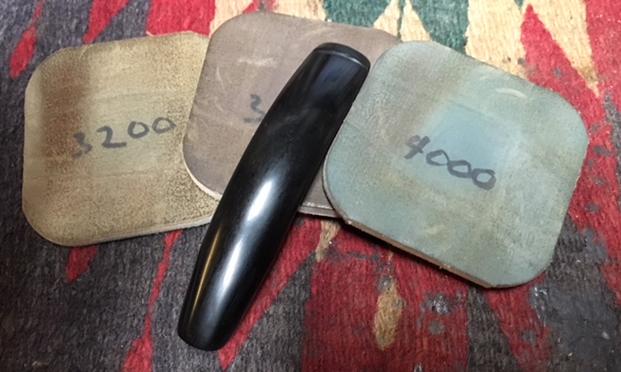
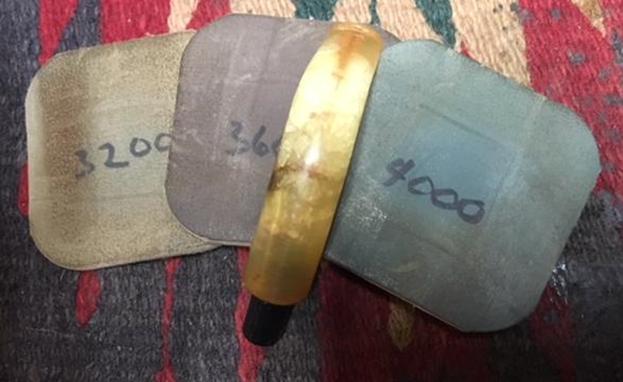
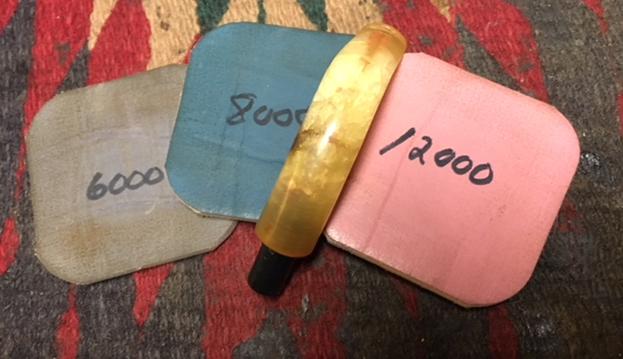
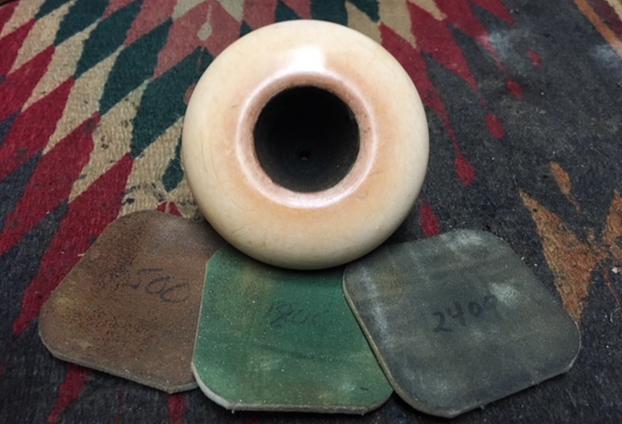
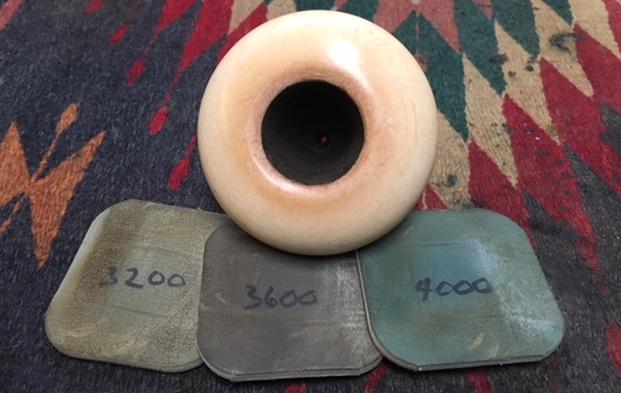
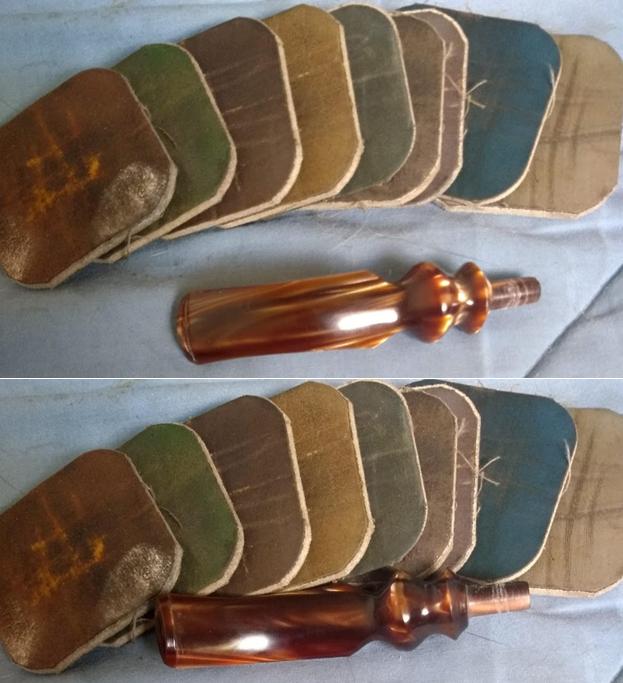
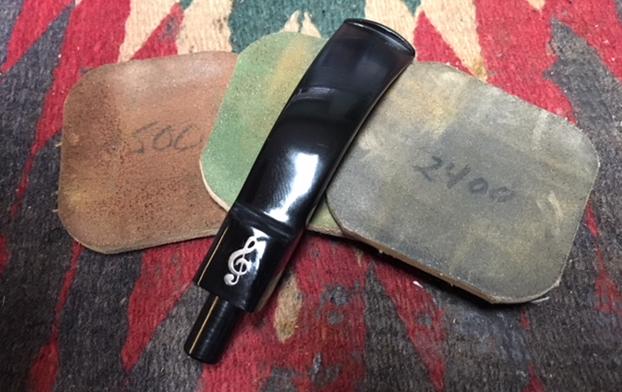
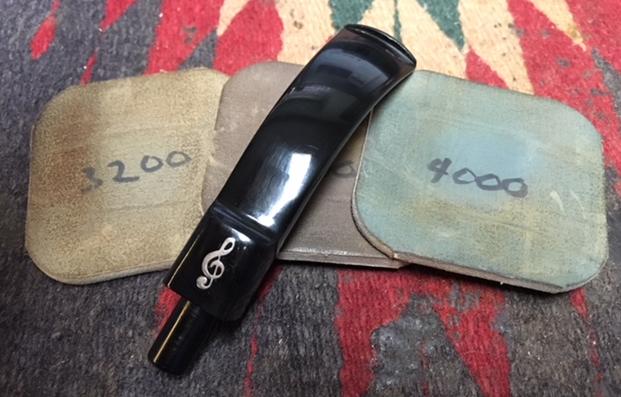
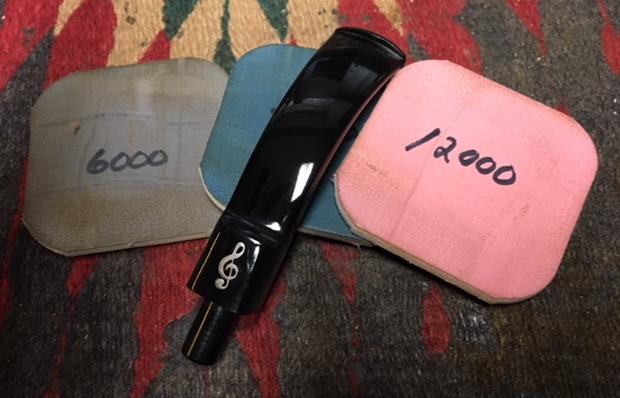
 I polished the briar with micromesh sanding pads – wet sanding with 1500-2400 grit pads and dry sanding with 3200-12000 grit pads. I wiped it down with a damp cloth after each sanding pad to remove the dust.
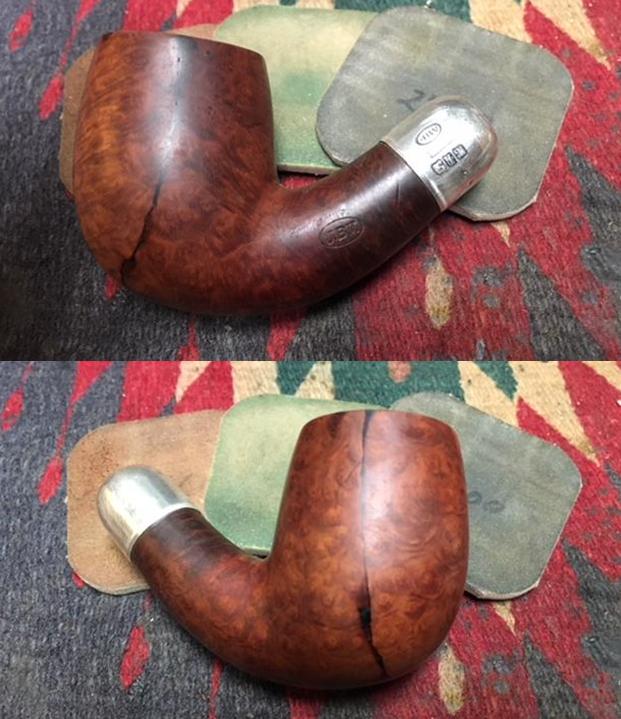


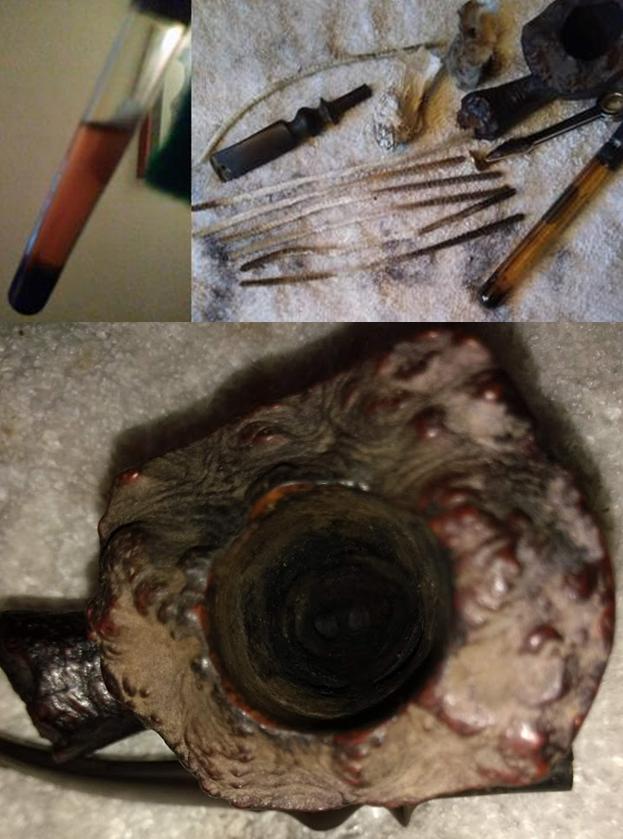
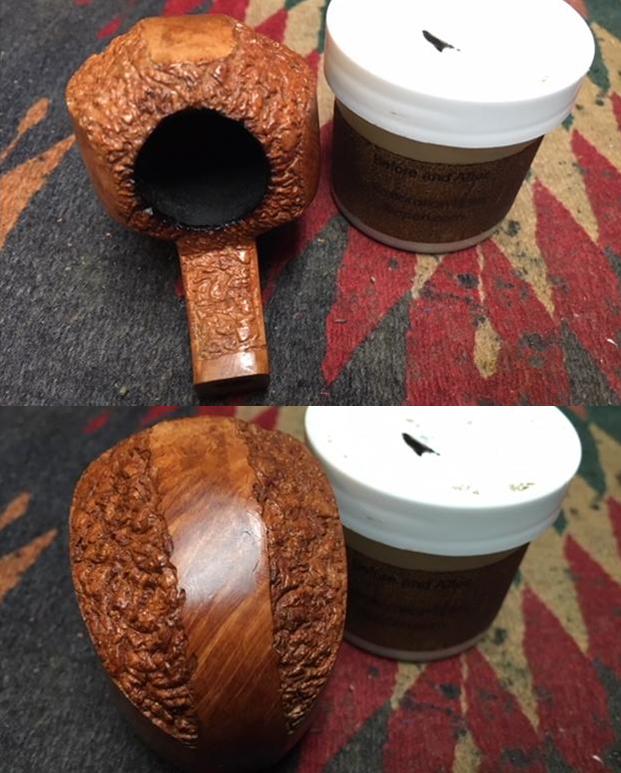
 I stained the bowl with a Tan aniline stain. I had found that the stain was probably mislabeled as it had a definite red cast to it. I applied it with the dauber and flamed it with a lighter to set the stain in the finish.
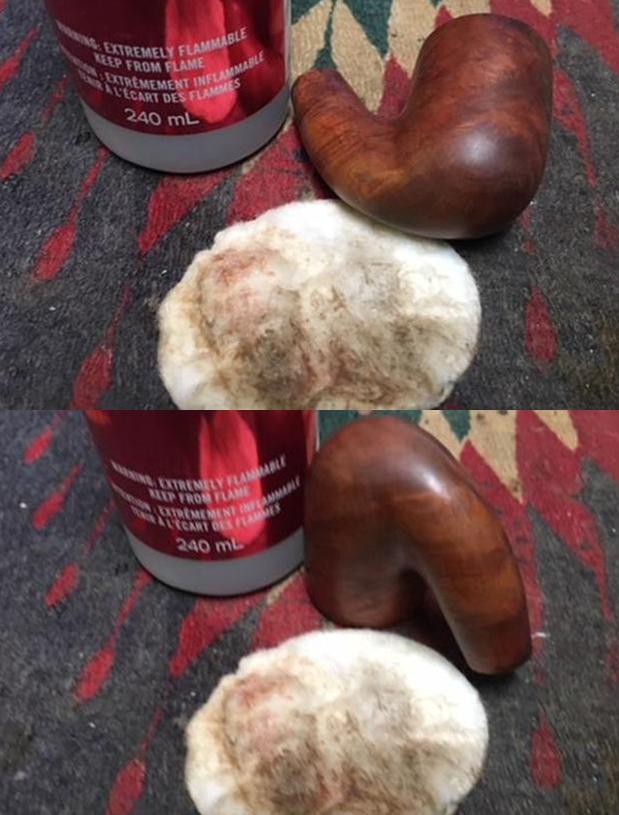
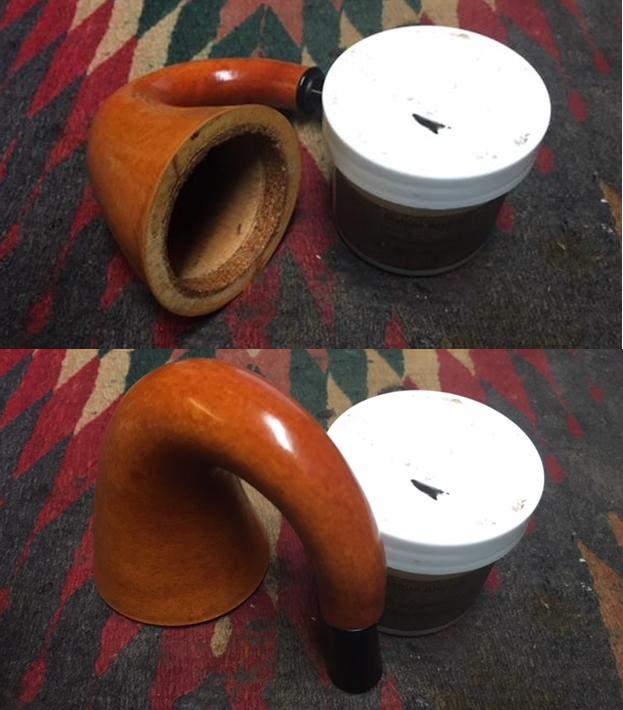
 Once the stain cured I rubbed the bowl down with Before & After Restoration Balm. It cleans, enlivens and protects the briar. In this case I also found that it blended the stain well on the surface of the briar. I polished the silver with a jeweler’s cloth to polish and remove the tarnish.
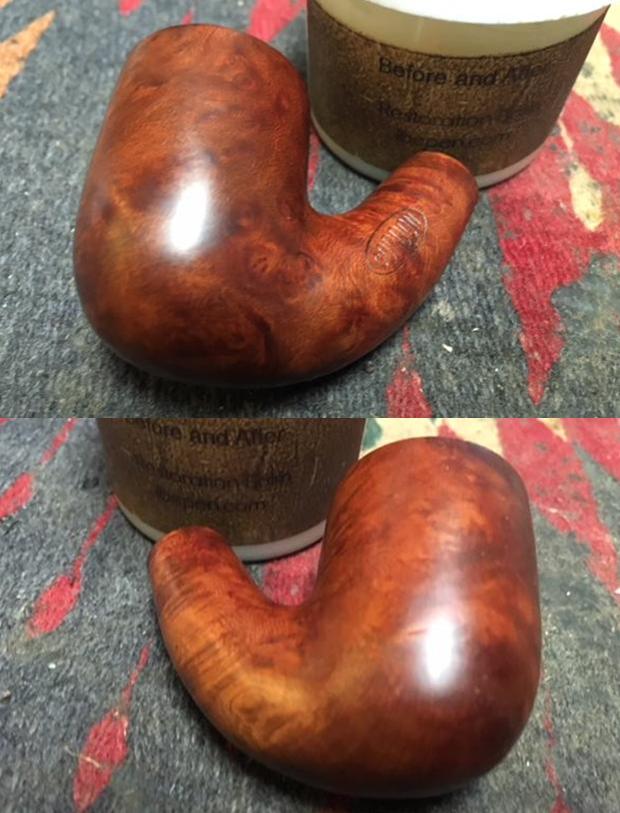
 I reapplied the gold to the stamping on the shank using Rub’n Buff Antique Gold. I applied it in the stamping using the tip of a sanding stick. I let the stamping sit for a few minutes then buffed off the excess product.
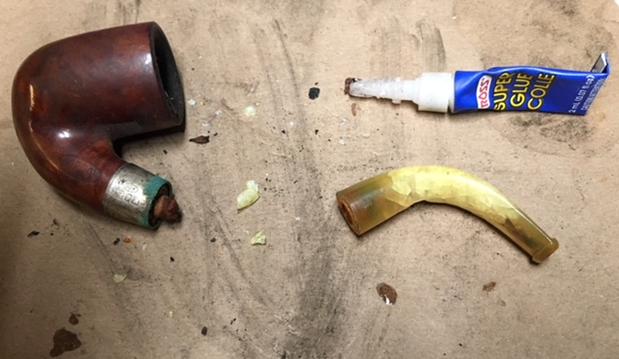
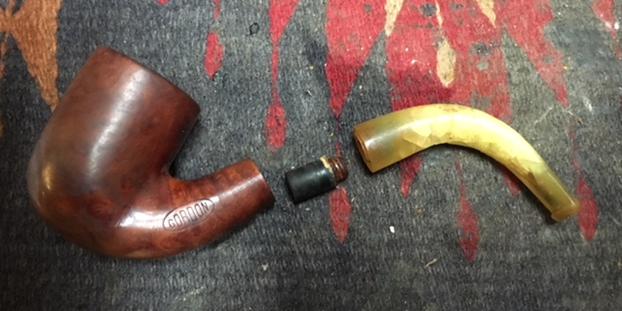
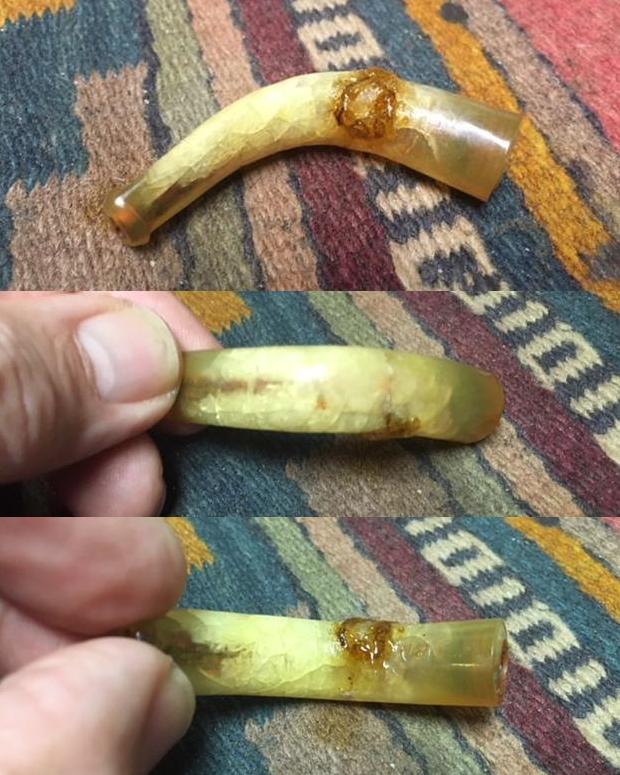
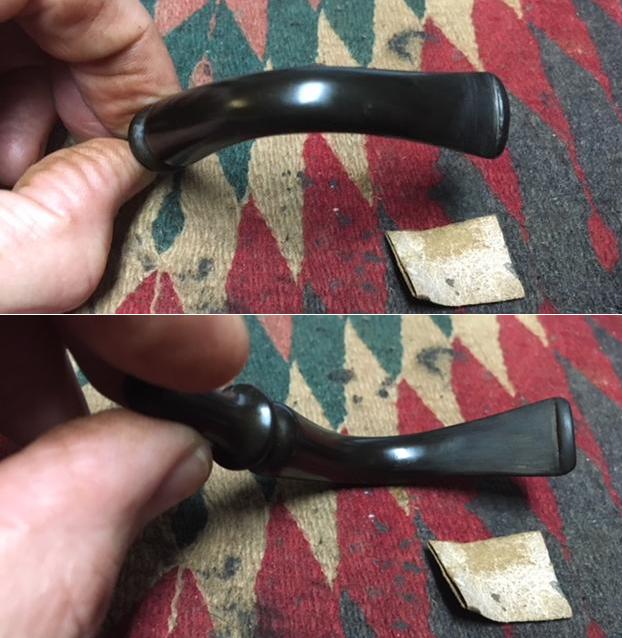
 I set the bowl aside and turned my attention to making a stem for this pipe. Remember I mentioned that the second stem in the case was for the M&T pipe and was too small in diameter for the shank of the second JBV pipe. I found a Bakelite stem in my box of stems that only needed to be shaped to fit the shank of the pipe. I tapered the end of the stem with a Dremel and sanding drum to match the taper of the other stem. I sanded it with 180 grit sandpaper to smooth out the Dremel marks and further taper it.
 I sanded out the tooth chatter and reshaped the edges of the button with 220 grit sandpaper. I also smoothed out the flow of the stem.
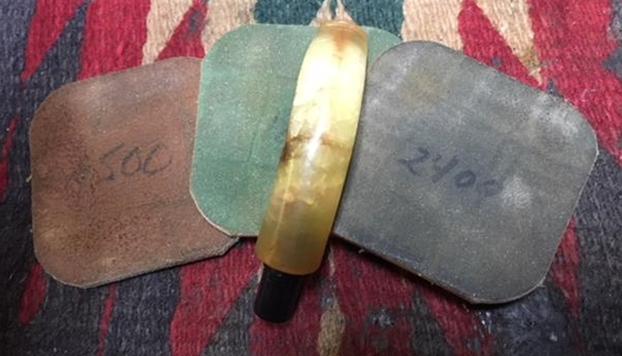
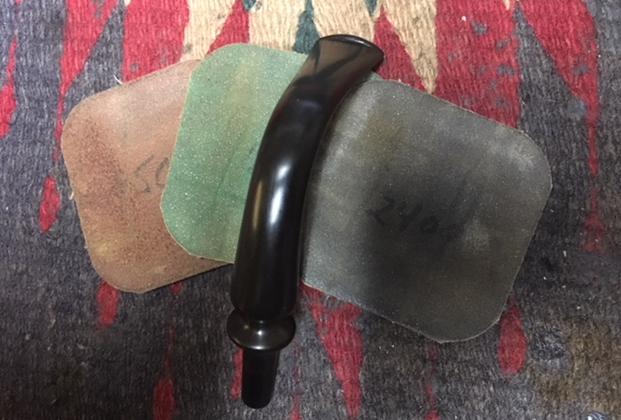
 I polished the stem with micromesh sanding pads – wet sanding with 1500-2400 grit pads and dry sanding with 3200-12000 grit pads. I wiped the stem down after each pad with Obsidian Oil to wipe away the sanding dust and bring some life to the Bakelite.
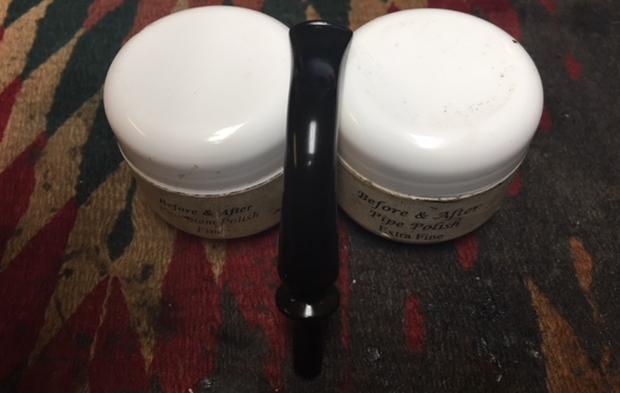
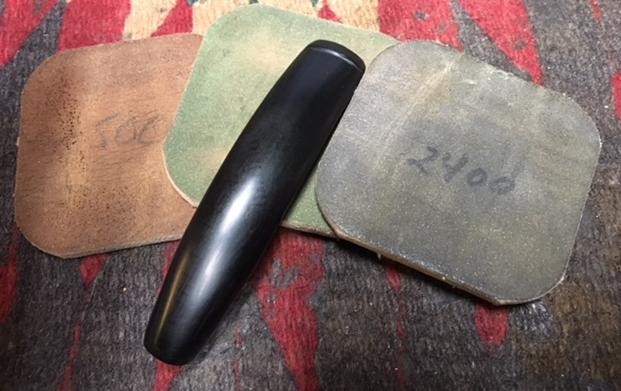
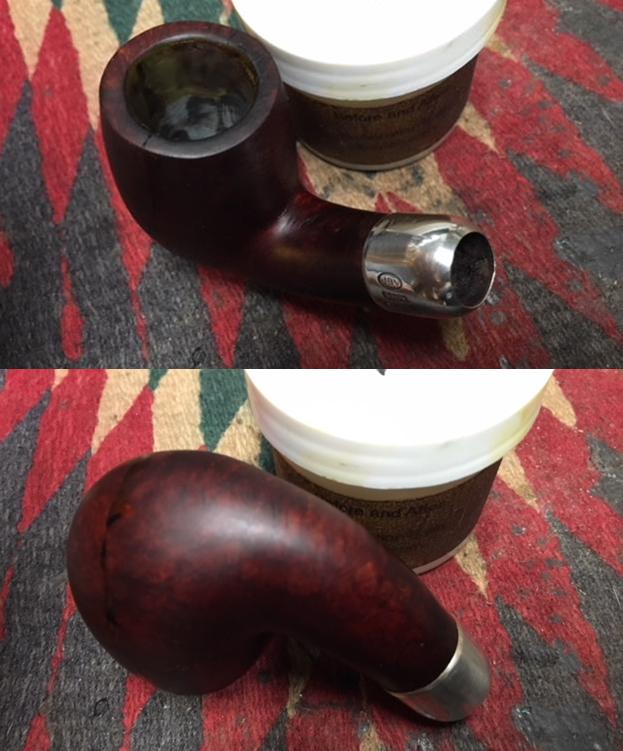
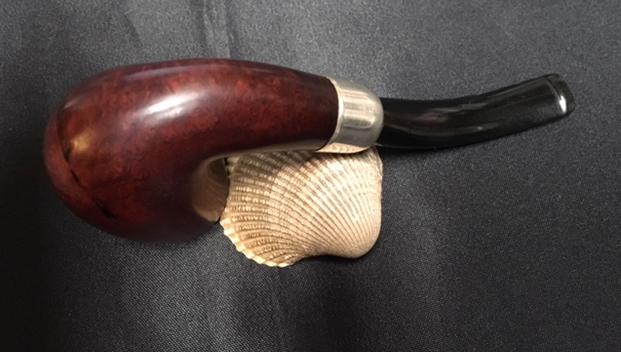
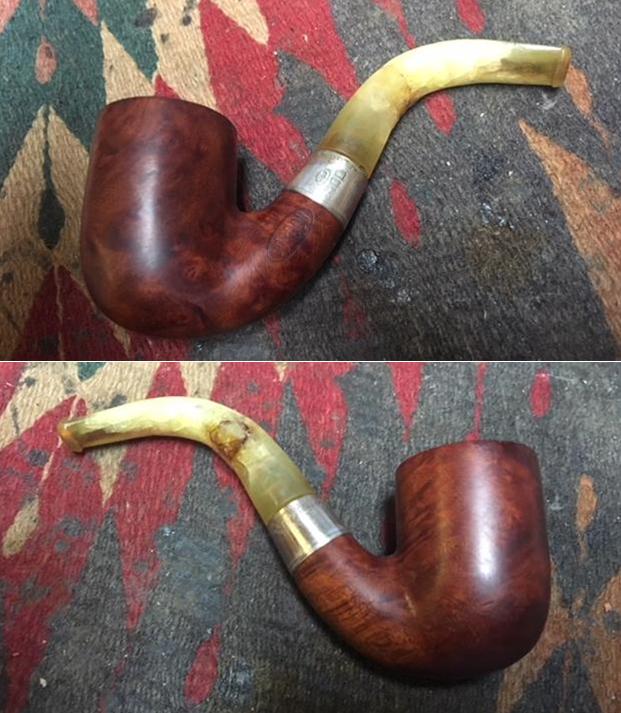
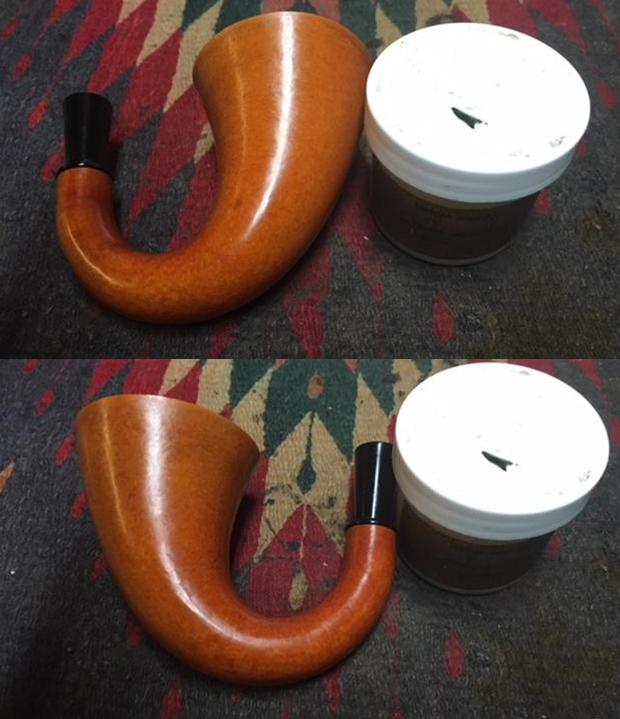
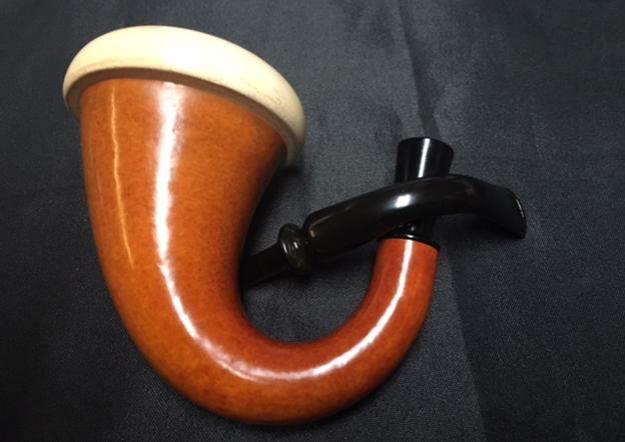
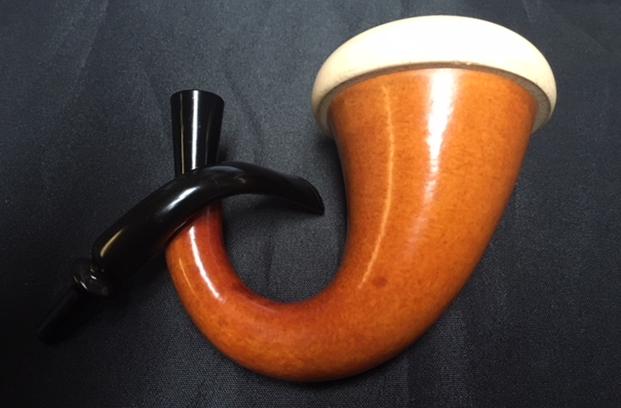
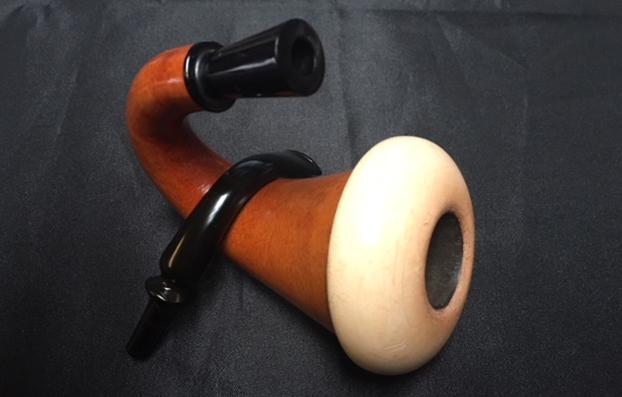
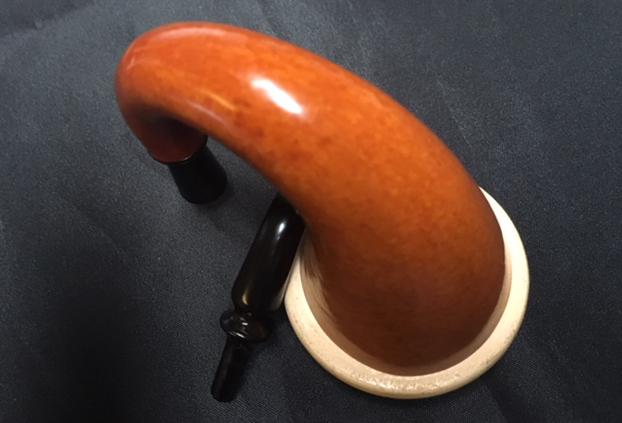
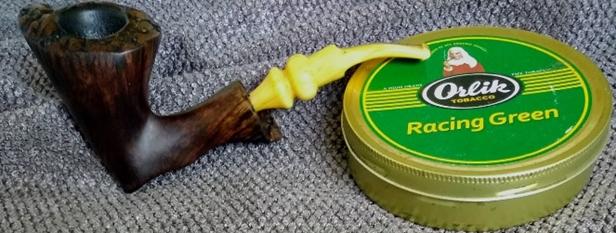
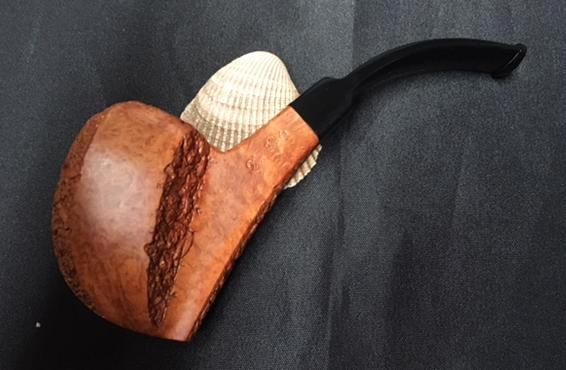
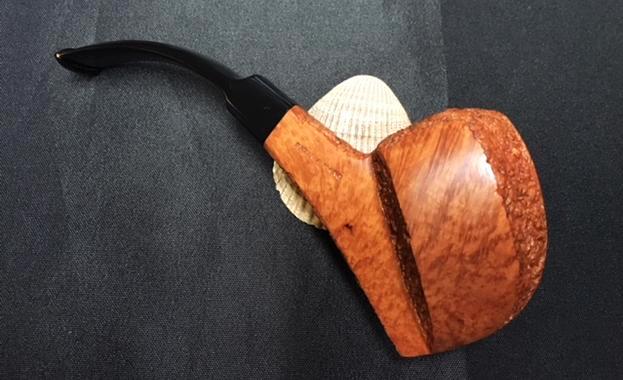
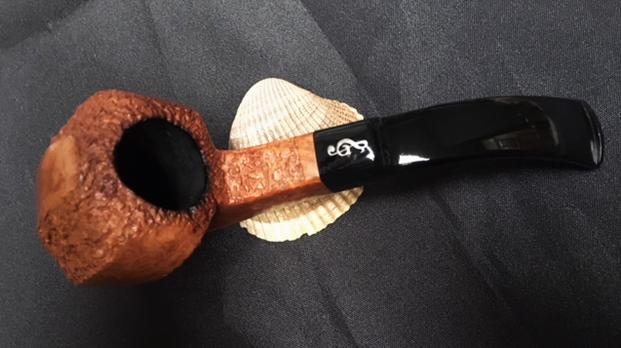
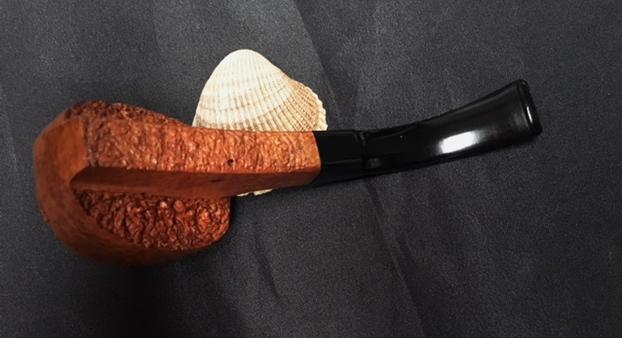
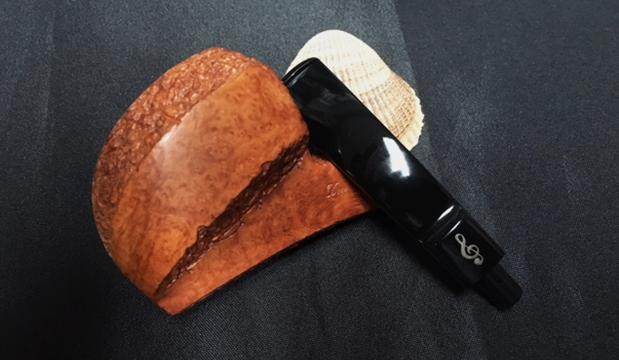
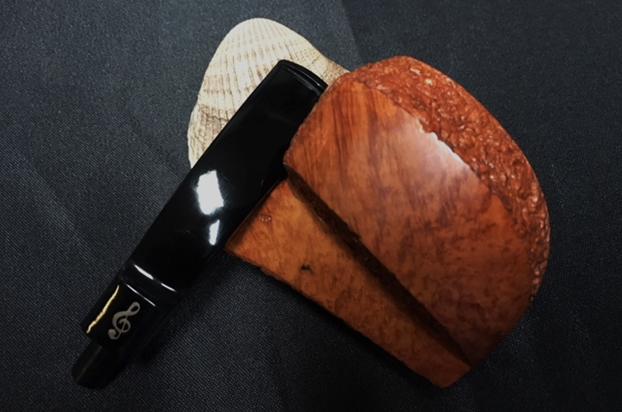
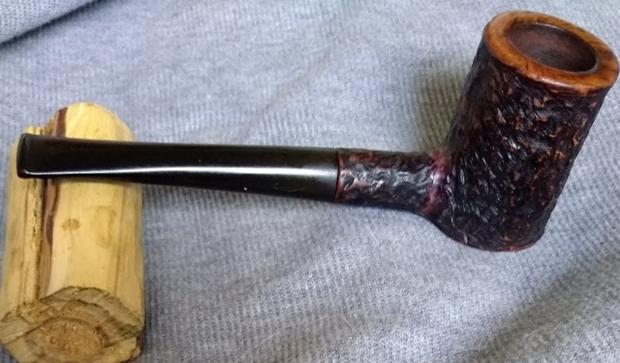
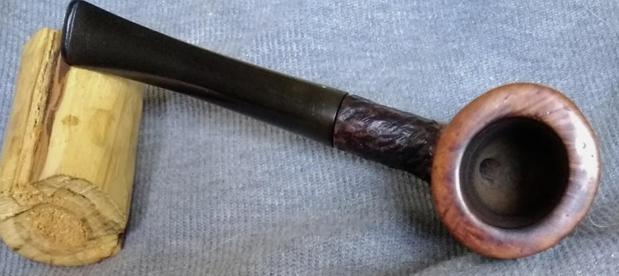
 With the stem and bowl done it the first installment of this blog is complete. It is time to reconnect things and take some final photos. I buffed the bowl and stem with Blue Diamond on the buffing wheel. I gave the entire pipe multiple coats of carnauba wax to protect. I buffed it with a clean buffing pad to raise the shine. I hand buffed it with a microfibre cloth to deepen the shine. This frustrating old pipe that split in half had been brought back to functional life and it does not look to bad to my eye. This is a long one. For some of you I am sure you are wondering what is wrong with me to take time to fix this one. To you I say it was worth the lessons that I learned and it is still a smokable pipe. Thanks for reading.
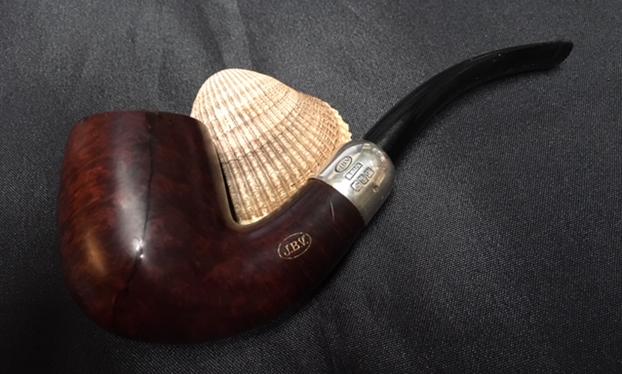


