Tag Archives: removing oxidation

The Everyman Pipe from the 1920’s Era


Blog by Steve Laug

This featherweight cutty shaped pipe came from the 1920’s or earlier. I bought it in a lot of that era pipes on EBay and it arrived as pictured below. It is stamped The Everyman Pipe on the left side of the shank and Made in England in a Circle and shape number 195 on the right. When this arrived in the package of the other old timers it was pretty grimy. The bowl needed serious cleaning and the rim was dented and had rough spots. It needed to be topped as steaming it would not raise the broken spots that came from tapping it out. When the surface of the wood is actually broken and not just dented steaming will not raise the grain significantly and the only repair I know is to sand it off and make it smooth and crisp again. The challenge then is to match the stain so the bowl and rim blend.

I reamed and cleaned the bowl and the airway in the shank. The pipe cleaners came out very dark and tarry at the beginning. I decided to use a drill bit the same size as the airway to clean out the gunk before going back to the pipe cleaners. I use a T handle to turn the bit into the shank by hand to remove the tars and open the airway again. I finished cleaning the shank with fluffy pipe cleaners and isopropyl alcohol until they came out clean. I wiped down the bowl with acetone to remove the old wax and the grime from the bowl and then used my topping method – a hard, flat board and an anchored piece of 240 grit sandpaper – and topped the rim. (I have since learned from someone that a good way of doing it is to anchor the sandpaper on a Masonite clipboard and sand the rim that way. It works great.)

Image

The stem needed the most work as it was a round tube of vulcanite. I wonder if it was not made to be like a clay tavern pipe. The previous owner had notched the top of the stem to make it easier to hold with his teeth and keep it from rolling. The notch was a fairly deep V cut that was only on the top of the stem. I used needle files to cut a new button on it and then my Dremel with a sanding drum to taper the stem back to the button. The original had a slight bend in the stem so I left that. The button I shaped for the stem is rounded and crowned to fit the orific airhole like those found on pipes of a similar age. After cutting the button and shaping it, the stem needed a lot of sanding to remove the scratches and oxidation. I used 240 grit sandpaper on the entirety to clean up the deeper scratches and remove the oxidation. I then progressed through the wet dry sandpapers and the micromesh pads until I had a good smooth finish on the stem and a good clean button.

Image

I set the stem aside and restained the rim and bowl to match what appeared to be the original colour of the pipe. I used an oxblood undercoat and a dark brown top coat to get the richness of the original finish. I coated the stem with Obsidian Oil and then inserted it in the shank. Once it was dry I took the pipe to the buffer and used the White Diamond to give it a final buff before giving it several coats of carnauba wax.

The pictures below show the finished pipe with its newly shaped and polished stem:

ImageImageImageImage

A Tiny Pair – Refurbishing and repairing an old couple


Blog by Steve Laug

This morning I decided to work on these two old timers – a little mini bulldog and a mini bent billiard. Both are old as is clear from the orific button on the stems and the shape of button on both (the round hole in a crowned surface of the button – see the photo below).

Image

The first is a no name bulldog with a gold band on it. It has EP on the band which I believe means Electro Plated. The stem was in pretty fair shape though the previous owner had cut a small groove in the stem about a 1/8 inch ahead of the button on the top and the bottom. The bowl was in pretty good shape though it was darkened near the band and there was a deep cut on the shank about mid way along toward the bowl and on the bowl side – both on the right side and visible below. The photo with a penny (1 cent piece) gives a good picture of the size of this little dog. The bowl was pretty clean so all I needed to do was wipe it out with a cotton swab and isopropyl alcohol. I did the same with the shank and the stem as well. It was pretty black and tarry on the inside of the stem and shank. I had to use a paper clip to break through the clog that was in the shank about mid way to the bowl and also in the stem.

ImageImageImage

I worked on the bowl and shank exterior with sand paper to remove the finish around the two cuts in that I was going to work on. I washed off the surface after sanding with acetone to clean off the briar dust and the remaining finish. Once it dried I decided to fill the cuts with clear super glue. The process is pretty straight forward – I drip a drop in both holes and lay it aside until it dries. Then I add another drop, lay it aside and repeat until the cut is filled. I find that the clear super glue is a great way to fill the cuts or pits as it allows the briar to show through clearly and once it is stained it virtually disappears. Once the super glue dried I sanded the spots with 240 grit sandpaper and then with 400 and 600 grit wet dry and water to smooth off the spots and remove any of the over flow around the spots. I want the super glue to fill only the spot and not carry over onto the clean briar so I sand it down level with the surface it is filling. I then sanded the entire bowl with micromesh pads from 1500-6000 grit and then wiped the bowl down with isopropyl alcohol on a soft cloth.

I then worked on the stem and sanded down the grooves to make the stem smooth once again. I used the same pattern of sanding – 240, 400, 600 grit sandpaper and micromesh – 1500, 1800, 2400, 3200, 4000 and 6000 grit. Once I had the grooves and the stem clean and pretty polished I took it to the buffer and used White Diamond on both the stem and bowl. I took it back to the work table and gave it a coat of Obsidian Oil and set the stem aside while I stained the bowl. I wanted to keep a lighter look to the bowl so I used some oxblood stain and wiped it on and off before it had time to dry. I gave it two coats and then flamed it. I buffed the bowl with White Diamond and then gave it a coat of carnauba wax. I also polished the band and gave it a coat of wax. Here is the finished pipe. The two cuts or pits have disappeared on the right side of the bowl (top picture).

ImageImageImageImage

I finished it and put it aside to work on the bent billiard. It was in a bit rougher shape than the bulldog. It is also a no name old timer with a gold band – very tarnished. The bowl was very grimy on the outside and the finish was cloudy and dark. The stem was grooved in the same manner as the bulldog – probably same owner making his own comfort bit to enable him to clench these little guys.

ImageImage

I scrubbed the bowl down with acetone on a cotton boll and removed the finish and the grime. The top was a bit dented so I gave it a very light topping and then sanded out the inside of the bowl and worked on the roundness of the inner rim as it was a bit out of round.  I used a small piece of sandpaper to bevel the edge enough to repair the roundness. I cleaned out the shank and the stem. This pipe was also clogged in both the stem and the shank so I use a paper clip in the shank and to open the end of the stem from each end. I then used small pipe cleaners soaked with alcohol until they came out clean. I set the bowl aside to work on the stem.

Image

The stem needed the same treatment as the one on the bulldog to remove the grooves from the previous owner. Fortunately on both pipes they were not very deep so it did not change the profile of the stem. I sanded the entirety of the stem down and used the same pattern of sandpaper and micromesh as above. I buffed this one with Tripoli before finishing with the micromesh. I gave it a coat of Obsidian Oil and set it aside to stain the bowl.

I cleaned the bowl exterior one last time and then stained it with oxblood stain – wipe on and wiped off pretty quickly several times to get good coverage. I polished the gold band with the highest grit micromesh pad (6000) and then gave the bowl and band a coat of wax by hand and once it dried buffed it by hand with a soft cloth. I put the stem back on and took it to the buffer and buffed the entirety with White Diamond followed by carnauba wax.

ImageImageImageImage

Here is a picture of the pair together so their diminutive size is clearly seen. They are incredibly light with group one sized bowls. They are clean and ready to smoke.

Image

Refurb on a Brigham 2 Dot Lovat


Blog by Steve Laug

I just finished refurbishing this Brigham 2 Dot Lovat that I picked up in the estate pipe rack at a local tobacconist. This one was a challenge, but I loved working on it. It has the standard Brigham style rustication. It was in rough shape. The bowl was incredibly grimy and needed a lot of work. The grime had filled in most of the rustication to the point that it looked worn out and smooth. I soaked and scrubbed it for about an hour using a brass white wall tire brush to scrub out the grime caked on the outside of the bowl. The inside of the bowl was so badly caked that I reamed it back to the wood. Once I had it reamed and the scrubbing of the outside finished I dropped it in the alcohol bath overnight and went to work on the stem.

ImageImageImage

The stem was another story. It was given a soak in OxyClean to soften the oxidation. I find that OxyClean does not remove the oxidation at all, but it does soften it and make working on it much simpler. After the Oxy soak I went to work on the inside of the stem. Where normally there was to be a Brigham filter in the long metal tenon this time it was gone and the tars had built up to the point that the stem was totally closed off. I tried to blow through it but could not get any air through. I used an awl or ice pick to open up the stem and the tenon. Then I worked on it with bristle pipe cleaners and a shank brush. It took a lot of pipe cleaners and alcohol to get it clean. Then the outside was sanded with 400 and 600 grit wet dry sandpaper followed by the run of micromesh sanding pads. Once it was clean and shiny I set it aside and turned my attention to the bowl.

I took the pipe bowl out of the alcohol bath and went to work on it. I used the brass brush one last time to clean off the remaining grime and then dried off the pipe. There was no finish left on the pipe so I restained it with a cherry stain. I reinserted the stem in the shank and took it to my buffer and polished the entirety with Tripoli and White Diamond, finishing with a coat of wax.

ImageImageImage

Refurb on an Old BW Dog with Bling


This one is another mystery to me. Because I am always picking up these old timers I have a habit of researching out as much information as I can once they have arrived and I can see the stamping and hallmarks up close. This one bears the hallmarking of the Anchor which tells me it is made or assayed in Birmingham, the Lion which tells me it is Sterling silver and the date letter that though worn looks to be a capital E which would date it as an 1850 pipe. That is as close as I can tell to the date and time frame for this old timer. There is also a Makers Mark in the silver stamped BW and the briar of the pipe is also stamped BW. I cannot find any information on that maker in all of my searching so that is where it stands. If anyone reading this can shed light on the initials and what they may refer to I would deeply appreciate it. Until then I have a nice old bulldog from 1850 that smokes exceptionally well and it is a mystery regarding its maker.

When the pipe arrived it was in rough shape. The silver was very tarnished and dull looking. It was also scratched and much worn in places. The bowl had a very spotty finish with just the remnants of the original stain. The rim was tarred and the bowl heavily tarred and caked. The stem is made of some amberoid substance or may be Bakelite. It seems to be a softer material than the hard Bakelite. It has a bone tenon that was over turned so the stem was off to the side. The button also has an orific hole in the button instead of the newer slotted button.

I reamed the bowl and cleaned it with Isopropyl alcohol and many pipe cleaners and cotton swabs. I sanded the bowl to remove a bit more of the cake and take it back to the wood. I then put the bowl in an alcohol soak to remove the remnants of finish and the grime that was worked into the surface of the pipe. Once I removed it from the alcohol bath I re-stained it with Cherry stain. The stem was crackled a bit – lots of tiny spidering all over the surface so I did not want to chance using alcohol on it as it can cause more spidering and cracking. So I cleaned it with Gojo an all purpose hand cleaner with grit suspended in liquid soap. I ran it through the stem repeatedly to remove the tars and grime inside the airway. When it was clean I rinsed it with warm water to remove any residual soap. I sanded the tooth chatter and used my needle files to recut the button as it was pretty worn. I sanded and polished the stem with micromesh pads 1500-6000 grit as is my usual practice. I also heated the bone tenon with hot water and readjusted the fit to the shank. Upon completion of the refurbishing above the pipe and stem were given a final buff with carnauba wax. I also gave the black leather pipe case a cleaning with leather renewer and a coat of wax as well.

Here is what it looked like when I got it from EBay

ImageImage

Here is what the pipe looks like today

ImageImageImage

GBD 9438 Tapestry Refurb


Blog by Al Jones

I am truly honored that forum owner, Steve, asked me to write a guest article on his wonderful blog. Just a little over one year ago, I made the transition from occasional cigar smoker to an avid pipe smoker/collector. Pretty early on, I discovered that access to better quality pipes could be had through the estate market. It was also about that time I found the SmokersForums.uk forum and quickly made that venue my go-to spot for pipe information. While reading the “Restoration & Maintenance” section, it became apparent to me that even finer estates could be found if I was willing to put in a little elbow-grease and restore them. If one reads the “Stickies” in that section, pipe restoration techniques can be quickly learned thru contributions from professionals and amateurs. I was fascinated and dove in.

My tools evolved from simple sandpaper and some buffing wheels mounted in a hand drill to a bench mounted buffer, micromesh sanding papers, reamers, needle files etc. Making some of the tools to save a few bucks was all part of the fun and learning process. I favor Vulcanite stems, so occasional maintenance will be a part of my pipe smoking experience.

Due to my Welsh heritage, I’m a big fan of anything British, primarily cars and motorcycles. So, it seemed natural to be attracted to the classic shapes produced by the British masters. I’m a fan of GBD brand pipes and those estates can be readily found at reasonable prices thru Ebay, etc. The 9438 Author shape is a particular favorite and I have several models of that shape. The pipe I chose to document in this article is in Tapestry finish. I was intrigued by the turned stem and after a little research, I found it was a “chair-leg” stem used on certain Tapestry models. My joy in finding this pipe quickly evaporated when I opened the box and saw the level of oxidation on the many curves and crevices. I tend to purchase estates with saddle stems, but this one ramped the difficulty notch up significantly. Indeed this stem proved to be the most difficult I’ve encountered.

Some “before” shots of the pipe:

Typically, it takes me about an hour or so to restore a stem. This one took nearly twice that long. Fortunately, the previous owner had left no teeth indention issues to resolve. I soaked the stem in a mild Oxyclean solution as the first step. In badly oxidized stems, I think this step pays off in removing oxidation from the inside of the stem as well. Next up, I used some 1500 and than 2000 grit wet paper until the brown was removed. Getting oxidation from the chairleg creases was frustrating and finger aching. I almost gave up at one point, but sitting the project down for a few hours strengthened my resolve. I’m always eager to smoke an estate I’ve cleaned up, so there is always that pot at the end of the rainbow. I found wrapping the sandpaper around a thin kitchen knife allowed me to get the oxidation from those thin crevices. Next up, was a polish with each of the final four grades of “micromesh” (4000, 6000, 8000 and 12000). Micromesh comes in pads and sheets. I found the larger, 6” x 2” sheets last longer and are easier to fold into creases, etc. Following the micromesh, the stem had a deep, black shine that I enjoy on my mostly Vulcanite stems.

The next step was to buff the stem lightly with some White diamond and then “Blue Magic Plastic Polish”, each product getting it’s own cloth wheel. The Blue Magic product is made for the automotive industry and available at most autoparts stores (Megiuars also makes a similar product). Some folks are adverse to putting an automotive product on their stems, but so far, I’ve found no adverse tastes, etc. I do think the product helps “seal” the Vulcanite as oxidation seems to either not occur or very slowly. James Upshall pipes are noted for their fast oxidation, but so far my restorations using this product has kept my collection shiny. I also gave the pipe a light coat of “Obsidian Stem Oil”.

The bowl wasn’t in bad shape, but had the usual tobacco/tar buildup on the bowl top. I used my Castleford reamer set to remove the thin cake than soaked the bowl with Sea Salt and Everclear for a few hours. This was done while I was working on the stem. Following the soak, the draft hole was thoroughly cleaned with a series of bristle pipe cleaners soaked in Everclear. I’ve had success eliminating ghosts by cleaning this area of the pipe until the cleaners come out nearly white. I gave the bowl a light buff on the wheel with some white diamond, then Carnuba wax. A hand polish with Paragon wax completed the briar clean up. The wood on the bowl top was a little lighter in color, but I knew smoking it would even out and darken that area. (plus I was not looking forward to prepping and staining the mixed “Tapestry” finish..)

The completed pipe:

It may be a combination of the pipe shape and the effort required to refurbish it, but this particular pipe has become a favorite. I swore that I’d never purchase another chairleg stemmed pipe, but won an Ebay auction last night for another GBD Tapestry pipe with a chairleg stem……

Smoke safe!
Al Jones

Refurbed Social by Comoy’s


This afternoon late the postie delivered the Social pipe made by Comoy’s that I picked up off Ebay a few weeks ago. I took it apart and went to work. The bowl was pretty caked and broken up inside… cake falling off the walls. The The top was tarred. I reamed and cleaned it. Interestingly this is an old timer. It has the old orific button as I show in one of the before shots of the stem. It has some kind of reservoir between then end of the stepped tenon and the the airway into the bowl. It is below the airway and the tenon is drilled with the airway high to match up.

I put the bowl in an alcohol bath and cleaned it up. The mess came off really well. I then sanded the bowl with 600, 1800, 2400 and 4000 grit and then restained it with a medium brown stain. The Stem was soaking in Oxyclean and when I removed it I cleaned the grime off of it. It was a bit oxidized so that came off no problem. I then buffed the entirety with white diamond and then Carnuba. Here are the before shots:

ImageImageImageImage

You will note there are some pretty deep dents in the side of the bowl. These came out a bit but they remain as character marks. There were some on the underside of the shank as well. They too remain.

After refurbishing:

ImageImageImageImage

Refurb on a 3 part horn


Just finished up this unique piece. It is three part horn. The bowl screws off the shank and has a briar thread connection. The stem is also a screw on with a metal connection into briar. The stem is also an orific button. There is no stamping on this old timer. I really like the uniqueness of it.

I reamed and clean the bowl. I took apart the three parts and cleaned each on separately. The outside was wiped down with alcohol to get off the grime. The insides were scrubbed with a bristle pipe brush and pipe cleaners and alcohol. The stem was oxidized so it was sanded with 400, 600, wet dry sandpaper and 1800, 2400, 4000 micromesh pads and then hit with red tripoli and white diamond before being given a coat of carnuba. I sanded and restained the bowl with a cherry stain and then buffed and waxed it as well. This one will be a fun one to smoke!

Before shots:

ImageImageImage

and after shots:

ImageImage

Reworked Old Apple


Blog by Steve Laug

I had this old apple with very faint stamping that looked like it could have been stamped Edwards but not clear. I decided yesterday to rework it. The old stem had a split in the button and was shot. I decided to fit a new stem for it. I reamed and cleaned the bowl and fit the stem. While I worked on the stem I dropped the bowl in my alcohol bath for an hour. Once it was done I sanded the bowl and cleaned it some more. There were a couple of spots on it where small fills had fallen out so put some briar dust in them and then a spot of super glue. Once dry I sanded them smooth so that the stain would take around and in them. I put the stem on and stained the bowl with an oxblood stain as I figured that would match what was originally on the pipe. Once it was all polished it reminded me of an old timer that I had seen and been hunting for – a straight shanked BBB apple. Well that got me thinking and I dug through my box of bands and sure enough I had an old BBB silver band hallmarked 1909 that fit perfectly. The stem and pipe look older so the band added some more age to it. I really like the final look of this one.

Before pictures:
ImageImage

And the finished pipe:
ImageImageImageImage

Removing Oxidization on Vulcanite Stems


Blog by Steve Laug

In May 2011 I started a thread on Smoker’s Forums asking people how they dealt with oxidation on vulcanite stems. Many of the members of the Forums responded in the ongoing posts to that thread. Unfortunately that thread and others were lost when the Forums were attacked and decimated. I collected their answers and compiled them into the document that became the basis for this blog post.

For this blog I have rewritten the first document and clarified my explanations. I have followed the same format for reporting the various methods I gathered. I have arranged them according to the main component in the process. As you read them you will note that several of the categories overlap and are combined in the processes. I have found that there is no one method for removing oxidation. I have used one or all of the methods below in combinations to conquer the dreadful browning of the vulcanite stem. Hopefully this document will prove to be a helpful reference to those who venture into the realm of cleaning and polishing stems. Please remember that the methods below are to be used at the risk of the amateur pipe “refurbisher”!

The first step in breaking down the responses to my initial post involved organizing the respondents into two broad categories regarding the use of a presoak or not using a presoak. From there both groups went on to use micro mesh pads or sand paper in their work on the stems. There are two main pre-soaks that are used to begin the process of removing oxidation – Bleach and OxyClean. Interestingly there were also two additional pre-soaks that have been used by the respondents – Goo Gone and Simply Green. All of the methods have adherents that swear by their choice. In each of the categories below I will summarize the methodology and give a basic explanation of the process.

PRESOAKING

Bleach Soak
Mix bleach and water (50/50) to remove the oxidation. Use a pint jar or a bowl that allows you to reach in to remove the stem once it is finished. I insert a pipe cleaner in the stem and bend it into a hook that I can hang on the side of the bowl or jar. I then coat any stamping or logo symbols with Vaseline to protect them from the bleach. The stem is immersed in the mixture and allowed to sit for differing amounts of time until the oxidation is removed.  Note that this mix, no matter the strength, does cause pitting or roughening to the surface of the stem. Sand and buff the stem with Tripoli and White Diamond.

OxyClean Method
Mix a scoop of OxyClean in a pint jar of hot water, put the lid on and shake vigorously to mix the solution. The water should be deep enough to completely cover the stems that are put in the jar. Soak the stems in OxyClean and hot water for 30 minutes to 1 hour and then use micromesh pads to remove softened oxidation. Repeat this as often as necessary in the process. Then it takes a trip to the buffer. Note that the mixture does not remove the oxidation but merely softens it making it easier to remove with the buffer and sanding. I have tried various strengths of mixture and the single scoop seems to be a perfect mixture for how I use it.

Goo Gone Method
Goo Gone is applied to the stem either after soaking in bleach or OxiClean or is used without the prior soaking. Once the Goo Gone is dry the stems are sanded to remove the softened oxidation. Then the stems are taken to the buffer or are sanded to finish removing the oxidation. Once that is done wax is applied to protect the newly cleaned stem.

Simple Green Method                                                                                                         Simple Green is mixed with water and placed in a jar, placed in the jar full strength or wiped onto the stem with a cloth. If the stem is left to soak it usually soaks for an hour or more and then rinsed off and buffed. If wiped on it is wiped on and off until the oxidation is gone. The stem is resoaked or rewiped as often as necessary to complete the project. Once done the stem is buffed with Red Tripoli, White Diamond and then waxed to protect the newly cleaned surface.

NO PRESOAKING – STEM POLISHES

Others do not use presoaks but use a variety of stem polishes or cleaning polishes to remove the oxidization. These include cleaning kits as well as some other non-conventional polishes. I have included Mr. Clean Magic Erasers in this category though some might argue it should go with the Microfiber materials. I find though that it is in essence a polishing product and thus fits well in this category.

Walker Briarworks Stem Restore Kit
The Walker Briar Works Stem Restore Kit can be directly ordered from Walker Briar Works, an online pipe repair service http://www.walkerbriarworks.com/html/stem_restore_kit.html for $20 plus shipping. The kit comes with two jar each containing 1.5 ounces, enough for at least 50 stems. The first is a Deoxidizer and cleaner, the second is the Carnauba Wax/Polish/Sealer. Using a soft cloth, rub the Deoxidizer/Cleaner on a Vulcanite stem until it feels smooth. Then rinse the stem with warm water and let it dry. Once dry, apply the Carnauba Wax/Polish/Sealer by rubbing it on with a soft cloth.  Let it dry for about 10 minutes and then polish the stem.  Many have used it with success. Personally I find that it works well on stems that are less oxidized. Heavily oxidized stems do not seem to be affected by the application of this product.

Other Brand Name Stem Polishes
Other products such as Denicare Mouth piece polish, Outwest Pipe Stem Scrub, Brebbia Pipe and Mouthpiece Polish, Dunhill Mouth piece polish are used with varying degrees of success. All come in small tins or tubes and are applied by hand with a finger or a cloth, left to dry and then buffed off with a soft cloth. In my opinion they work well in maintaining a clean stem but are all less effective in removing the oxidization.

Flitz
Flitz is a polish that is similar in application to the Walker Briar Works Kit, but is a bit more effective according to those who use it regularly. It is said to be readily available in Hardware Stores and other convenience shops in the US, though I have not been able to find it here in Canada. Those who use it say that stems treated with Flitz will remain un-oxidized for approximately 18 months to two years before needing another treatment and buffing.

Toothpaste
Over the years I have read and heard about those who use tooth paste to clean oxidation on their pipe stems. I have tried Crest and Colgate toothpaste applied with a soft tooth brush and scrubbed until the oxidation is gone. The micro abrasives in the tooth paste work to remove the oxidation. Personally I have found that this takes a lot of hard scrubbing to get the kind of results that I am looking for. The plus to this method is that it removes little or no stem material and thus is relatively safe in maintaining the original shape and integrity of the stem. The method has been spelled out in the following step by step procedure:

1) Submerge offending stem into hot water (just off the boil), to bring all the oxidisation to the surface.

2) Apply a thin coating of toothpaste to the surface of the wet stem.

3) Rub vigorously with the rough side of a green plastic scouring sponge, (some use a soft bristle tooth brush instead).

4) Keep rubbing…and then some!! Apply more toothpaste as necessary

5) Finish by waxing the clean surface to protect it from further oxidation.

Magic Eraser: (polishing compound)
Mr. Clean Magic Eraser or generic brand eraser is wetted with water and used to scrub the stems. It removes oxidation without visible loss of material and without scratches. I have used this as a follow up to some of the above methods with good success. The magic eraser needs to be periodically rinsed and wrung out to remove the removed oxidation. It is a melamine micro abrasive and once it has been used and the stem is dried it should be followed by polish as the stem is left smooth but with a matte finish. Regular ebonite polish brings it to a good shine then quickly and easily.

Automobile Polishing Compound                                                                                       Others have used automobile polishing compound and rubbed it vigorously into the stem material to remove oxidation. It is used to remove the same on headlamps and plastic parts on the exterior of the vehicle so the logic is sound in using it on vulcanite stems. However, I have avoided that product as it does not seem like something that I want to put in my mouth.

HAND SANDING

Many who work to remove oxidation skip all the pre-soak, scrubbing and polishing and attack the problem head on with sandpaper and/or micromesh pads. Others use the soaks above and then proceed to the sanding. Many combine the processes and find that in the combination they have a tool that works for them.

Micromesh pads:
Micromesh pads have proven to be my tool of preference in my battle against oxidation in the old estates that I refurbish as well as in maintaining my own pipes. A variety of pads with the following grits – 1500, 1800, 2400, 3200, 3600, 4000, 6000, 8000, 12000 are all used. I find that for the most part I use these various pads up through 6000 and that they work extremely well. I keep a bowl of water next to me while I am sanding with them as they have a far better bit when they are wet. I sand and wet the pad and then sand and clean it in the water. I change the water between grits of the pads. While I keep the pad wet others suggest keeping the stem wet while working on it. It seems to me that both achieve the same purpose. Many people use all 9 grits for badly oxidized stems. Before moving on to the next grit pad be sure to dry the stem to see if it’s ready to move up to the next pad. Look for any vestiges of brown or green oxidation. Stay with the coarse grits until all the brown-tan-green is gone. Those who use the upper grits say that the change that occurs between the 6000 and 8000 with respect to shine is amazing. Each time I have ordered the pads on line the higher grits were out of stock. After finishing with the 12000 the only thing left is the buffer for carnauba or rubbed with a bit polish. Periodic maintenance of the stems can be done using the 2 finest grit pads rather than the buffer with white diamond.

Image

Sandpaper:
You can also remove oxidation with 400, 500 or 600 grit sandpaper, depending on the condition of the oxidization. Continue to sand the stem to remove scratches with consecutive grits up to 2500. These sandpapers are of the wet dry variety and work very well with a bowl of water nearby to keep the stem wet while it is being worked on. The same principle of drying the stem between grits as mentioned above is use with the sandpapers. Finish the process by waxing the stem to protect the newly cleaned surface.

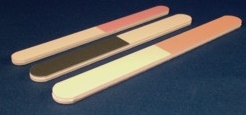
Sanding sticks are available from wood working suppliers and interestingly enough at beauty supply houses. Nail polishing files that have four grades of “sandpaper” on a thin bar of Styrofoam can be purchased there or in the cosmetics department of the local drug store. They can also be used to remove tooth marks and tooth chatter near the button. I have used these for years and always have a set in my refurb kit.

Image

POLISHING WITH POWER TOOLS

After the removal of the oxidation from the surface of the stem, whether by one of the above mentioned methods, one of your own or a combination of several of them, the stems are ready to be polished with power tools – buffers, drills with buffing pads or a Dremel. Some refurbishers do not feel this necessary after the use of the micromesh pads. But many still finish the job on a  buffer.

Dremel:
The variable speed hand held Dremel can be used with a 3 inch fibre wheel or a polishing pad loaded with red Tripoli and White Diamond polishing compound followed by a pad loaded with carnauba wax to give a final sheen to the stem. The drawback with the Dremel is that you must be extremely carefully in applying pressure to the stem surface or you will end up with wavy patterns in the vulcanite.

Buffer:
Personally, I use two bench grinders with two polishing wheels on each one. I removed the grinding stones and the protective shields over each wheel that was standard equipment and mounted 8 inch buffing pads on the spindles. My process is as follows:

– Polish with Tripoli, 8 inch stitched muslin buff
– Polish with White Diamond, 8 inch stitched muslin buff
– Wax with carnauba, 8 inch unstitched flannel/muslin buff
– Finish on a clean 8 inch flannel buff with no wax

Drill:
Buffing pads can also be mounted on a hand drill – cord or cordless. I have used a drill before I got my buffers. I anchored the drill in a bench vise so that I have both hands free to maneuver the pipe while polishing. I used four different 3 or 4 inch buffing pads my drill. I have not used it since picking up the two buffers.

Thanks to the many from Smokers Forums who responded to my initial thread on cleaning oxidized stems. Over the years many have contributed to my methodology on these processes.

A Pipe Refurbishing Journal


I have worked out a process of refurbishing old pipes as a hobbyist that has worked for me with ongoing improvements and learning being added almost every pipe I work on. That is not to say that I am even a wannabe professional because I am not. For me it is a way of doing something that I find relaxing and rewarding as well as something that I can actually finish. With my work I am involved in ongoing dealings with people and issues that seem never to really come to closure so to take a pipe and bring it back to life and enjoy a good smoke in it is something I take great pleasure in. I thought I would write a bit about my process using and old pipe that came in the mail that I picked up off of ebay as an example.

… I got home from Budapest, Hungary last week to find a package of pipes had arrived that I bought on EBay before I left. I opened the box to find a real mess waiting for me. The photos on eBay were not good and I was in no way prepared for what awaited when I opened the box. There were four pipes there – two Dr. Plumbs, a Stanwell with a broken tenon and a White Cliff meer-lined pear. The two Dr. Plumbs were what interested me in the lot and why I had initially bid. Dr. Plumb was an older second’s line of GBD and these two interested me. The first was a 9438 – GBD Rhodesian shape that I find is an all time favourite of mine. The second was a silver spigot Oom Paul – a shape that I have wanted to try for a long time.  I figured the Oom Paul would be one I kept – not sure of the others in the lot. The White Cliff and Stanwell went back in the box and I turned my attention first to the Oom Paul.

I took it out of the crumpled newspaper that wrapped it, being careful not to spill the ash and crumbling cake all over the place. It really was an ugly mess. I wanted to assess what needed to be done with it and whether it would be worth the effort. Sometimes even if it is really not worth it I will still clean it to practice methods and the use of new tools. This one was in desperate shape. The bowl was filled with crumbling cake and torn remnants of tobacco. The top was covered with a sticky and thick tar or lava that was about the thickness of a dime. The outside of the bowl had dark grime deeply embedded in the finish. It was muddy and dark enough that I could not see the grain at all. Now before you think it was an old patina finish – I assure that it was not. There was no way of even seeing the finish. It looked just like one of my dogs when he has been playing in the mud on a rainy day. I know somewhere underneath he has a black coat but it is not visible at all under the dirt and grime. This pipe was just unbelievably dirty.


Working my way back along the shank of the pipe I came to the silver shank cap which was loose and very tarnished. It appeared to be sterling or at least silver plated under the tarnish. It had pulled away from the shank and was turned to one side. It appeared to have something engraved in it at about 1 o’clock but it was not clear under the tarnish and grime. The stem, a faux spigot, no long fit in the shank as it sat among the grime and crumbling build up of tars and a yellowish residue that erupted around the edges of the union of shank and stem. It was solidly embedded in this mess and was immoveable. The stem was an oxidized brown colour at the saddle and the curve. It had a silver cap at the end of the stem before it disappeared into the grime. That union of vulcanite and metal was a mottled edge of tarnish and grime. The button end of the stem was grimy and oxidized but it did not appear to have tooth marks or pits in it. It was merely encircled by that hard, white coloured material that can collect under a rubber bit protector. I moved to the lip of the pipe and looked at the slot. Unbelievable!! The airway was gone. The slot was filled and all that was left was a tiny hole the size of a pencil lead. The tar was erupting out of the slot and was a hard black semi circle that enclosed the button end.

I turned the pipe over in my hands to look at the underside of the bowl. I always like to check and see if I am going to be surprised by a burnout or a blackening spot that could signal an impending burnout. I scraped some of the grime off the bottom of the bowl and found a spot that appeared to be the size of a pencil eraser on the bottom. It was black but did not appear to be burned or soft in anyway. I used saliva to clean away the grime a bit for a better look at this spot. It cleaned up slowly and with a soft cloth and a bit of spit it showed that what I was dealing with was a repair in the bowl bottom – a plug of briar that had been inserted. It was a bit darker than the briar around it but it was a good solid repair and did not appear to be loose or damaged. That was a good sign.

I laid the old pipe down and gave it a good hard look. Would this be worth the effort or would I end up pitching it at some point in the cleaning process? That is always a question I ask before I get everything out to do the cleaning. I picked up and turned it over in my hands again. I checked it over one more time and figured I would start and see what happened in the process. I set up my desk top work bench with newspaper as a base and then laid out the tools of the craft! I put out a variety of reamers and brushes of different sizes. I put out the dental picks that I knew would be needed in the stem and the shank. I put out the pipe cleaners – bristle, thin and fuzzy, the alcohol and the alcohol bath that I keep handy for bowls that need a soak. I drizzled some clean alcohol around the shank stem union and with a bit of wiggling and more dripping the stem came free. I use an ear syringe for that part of the work as it allows me to control the placement of the alcohol.

I set the stem aside and turned my attention to the bowl. I wiped down the outside with a soft cloth and Murphy’s Oil Soap (undiluted) to get the grime off and get some idea of what was underneath the mess. It took several applications and wipes with the cloth to get through the grime. I also wiped it down with an alcohol wipe to get the last of it off. As I was planning on refinishing the pipe anyway I was not concerned with the finish. Underneath the grime the briar was actually quite nice – birdseye on one side and a variety of grains the rest of the way around the bowl. The shank was flame grain. It looked promising. I took a sanding block that is fine grit and sanded the top of the bowl to get the grime off. It was rock hard and since I was refinishing the pipe anyway it was the preferred method of removing the grime. Once that was done I reamed the inside of the bowl and the inside of the shank. I used my Senior Reamer to start with and then the T reamer with the four different cutting heads. The bowl was lined with a crumbling cake that needed to be taken back to the bare wood as it kept letting go and falling apart. Once it had been cleaned out I was able to inspect the bowl for cracks and burned out areas. Fortunately it was clean and uncracked.  The bottom of the bowl was below the airway so once it was cleaned I would need to use some pipe mud to build it up to the proper height.

The shank was really a mess. I could not fit a standard pipe cleaner through it and had to use a dental pick to open it up. Because it is a full bent a drill bit was unworkable past about the middle of the shank. I have a dental pick that have I straightened out a bit and it worked like a champ. The pipe had a sump in it like the Peterson system pipes and it was absolutely jammed packed with tars. The stem would not even fit in the shank it was so full of junk. I used a small brass battery terminal brush to work over the inside of the shank and the sump area once I had opened it up. I blew air through to make sure it was open. I used pipe cleaners and q-tips to clean it up. I kept at it until the airway and shank were clean. Once I finished with the interior of the pipe I put the bowl in an alcohol bath over night. I have found that this takes off all the grime that is rubbed into the finish and any remaining interior grime.

While it soaked I turned my attention to the stem. I opened the airway in the stem with my dental pick from the button end. I was able to remove the stinger apparatus in the tenon and then began to work on the interior of the stem. The stem itself was a mess on the inside – a pipe cleaner would not fit through so again the dental pick did the trick. I opened it up a bit then used over a 100 pipe cleaners and a bunch of q-tips to clean out the gunk. I also used a bristle shank brush to loosen things up. Once I cleaned it with lots of alcohol and many cleaners the inside was clean. The outside needed lots of attention. The Dr. Plumb painted logo (not stamped at all just a surface paint) was sacrificed to cleanliness.  I sanded the stem with 1200 and 1500 grit sandpaper to get the brown out that even the buffer did not remove. After that was done I polished it on the buffer with red Tripoli and White Diamond. The stem was actually in very good shape once the grime and oxidation was removed. I cleaned the silver portion of the stem and the faux military mount with silver cleaner and then polished that and buffed it with a soft cloth. I also used steel wool on the stinger apparatus until the roughness and grime was gone from it and it shone. I inserted it back in the pipe for the first smoke to see if it would remain. The stem was in great shape and ready to be inserted in the shank of the pipe once it was done. It still needed to be buffed with Tripoli and White Diamond before a good coating of Carnuba was applied to keep the oxidation at bay.


I removed the bowl from the alcohol bath and found that bath had done its magic. All the grime was off and the finish as well. What remained was a soft reddish briar that was clean and smooth to the touch. After bowl dried I sanded it with 1500 and 1800 grit sandpaper, being careful of the stamping that showed up on the bottom of the shank once the grime was gone. I finished the sanding with micro mesh pads in 1800, 2400 and 4000 grit. The top had some minor burned areas and the bowl was out of round so I bevelled the bowl top into the bowl to take care of the unevenness. When I finished sanding it I washed the outside down with a damp alcohol soaked rag to remove any dust and show any scratches that needed a bit more attention. Once those were taken care of I filled the bowl with cotton boles and using the ear syringe filled the bowl and shank with clean alcohol to remove any ghosts and residual tars in the bowl. I let it sit over night while the leaching process did its work.


While bowl was undergoing that treatment I took silver polish and a soft cloth and worked on the stem metal work. For the stinger apparatus I used some 0000 steel wool to clean off the staining. I buffed the stem with Tripoli and white Diamond and laid it next to the bowl.

The next day I removed the cotton boles and let the bowl dry out. I opened a can of cherry stain that I use on these old timers that matches the original colour really well. I shook the alcohol based stain until it was well mixed and then using a soft rag and a folded pipe cleaner I applied it to the whole bowl. Once it was well coated in the stain I lit it on fire with a lighter to set the stain. Once that was done I set it aside to dry well.

In the afternoon when the stain was dry I took it to the buffer and lightly buffed the stummel until it was smooth and shining. The finish looked really good. I gave it a good coat of wax and then polished the silver on the shank cap. I was able to turn the cap a slight bit and the initials that were engraved in it became visible – WGW. I took it back to the desk and inserted the mouth piece. It fit snugly into the shank and the look was as it should have been.


(In the last picture on the bottom right the plug in the bottom of the bowl is visible. I re-stained that area of the bowl and the plug is a little less visible.)

I then turned my attention to the inside of the bowl. I needed to raise the bottom of the bowl to meet the bottom of the draught hole and protect the plugged bottom of the bowl. I mixed a batch of pipe mud – cigar ash and water mixed to a pasty thick consistency and painted it with a folded pipe cleaner and packed it in place with a pipe tamper to raise the bottom of the bowl to the bottom of the airway. I let it dry for a day until it was hard and then prepared a bowl coating with activated charcoal and my secret ingredient and painted the inside of the bowl with it. I wanted this old timer to have a chance and with the cake gone I did not want to take a chance on burnout with it. I wanted it to have a fighting chance for a long life ahead. I set it aside to dry for two days and waited for the initial smoke once it was dry.

Two days went by and the bowl coating was dry and the mud was hard in the bottom of the bowl. I had packed the pipe in my brief case and took it to work with me for the ride home that evening. After work I packed the Dr. Plumb Oom Paul with Doc Piedmont and lit it with the Zippo. Wow what a clean, dry smoke. It was smooth and full of flavour. It is a great smoker and did not heat up at all during the smoke. I carefully knocked out the ash and inspected my bowl coating and the bottom of the bowl. It looked undisturbed and solid.

When I got home I removed the stinger that was in it to give it a go without the stinger to see what that does for it…my gut feel is that this pipe will be one of my go to pipes in the future.