Tag Archives: removing oxidation

Restemming and Refurbishing a Planter Opera Pipe


This is the fourth bowl that I chose to work on from the antique mall lot. It had some great potential to clean up well as it was by far one of the least damaged of the bowls. It is stamped Planter over Made in France on the left side of the shank. There is no other stamping on the bowl or shank. There is no shape size or numbering on the shank. The right side is unmarked. I looked it up online and did not find any maker for the pipe. Pipephil did not have in on his logos and stampings pages nor did any of the other sites I frequent when searching for info online. I turned to my books and found out from “Who Made That Pipe” that the brand was made by Comoy’s in France. I checked Lopes book and it was not listed. The bowl itself was pretty clean on the inside and the interior of the shank was also clean. It barely looked to have been smoked. There were a few remnants of unsmoked tobacco on the walls of the bowl. On the exterior, one side of the bowl was clean and the other was covered with a greasy, dirty buildup. There was some nice looking grain under the grit and grime – both birdseye and cross grain. It looked like it would clean up nicely. There was one small fill on the right side of the bowl. The metal band was tarnished and yellow. The bowl did not come with a stem when I bought it at the antique mall.
IMG_6239

IMG_6241

IMG_6242

IMG_6243
I went through my can of stems and found one that would fit with very minimal adjustments. I sanded the tenon with a folded piece of sandpaper and it fit well against the shank. There were some issues on the diameter of the stem. It appeared that it was slightly out of round on the right side. It would need to be sanded on the right side, top and bottom for a perfect fit.
IMG_6244

IMG_6245

IMG_6246

IMG_6247
The band was not totally in place on the shank. It had slid toward the end of the shank over the years so I needed to heat it and press it into place. The benefit to this was that it heated up the yellow buildup on the band and it came off quite easily with some silver polish/metal cleaner. I scrubbed the band with some Hagerty Tarnish Preventative Silver Polish that I bought years ago at a jewelry shop. It removed the tarnish and oxidation and with repeated scrubbing it cleaned out the tarnish in the hallmarks.

I scrubbed the exterior of the bowl with Murphy’s Oil Soap to remove the greasy buildup on the right side of the bowl and shank. I followed that up with a wipe down of isopropyl alcohol to finish removing the grime. I sanded the stem on the right side to remove the excess vulcanite and make it line up with the band. I always look at the end view of the pipe and see if the diameter of the stem matches the edge of the band that it will sit against. I strive to make it the same all the way around as I think it looks better when done that way. I used 220 grit sandpaper and a medium and fine grit sanding sponge to get the fit right. In the photos below the pipe is shown after all the scrubbing and fitting of the stem.
IMG_6248

IMG_6250

IMG_6251
You can see from the few steps taken with the pipe that it was a very simple clean up. It took more time to fit the stem that it did to clean up the bowl and band. I gave it a quick buff with White Diamond before working on the stem. I took it back to the work table and sanded the stem with a medium and fine grit sanding sponge (the pink square pictured above is one of those sponges). I then sanded the bowl and stem with micromesh sanding pads – wet sanding with 1500-2400 grit pads and dry sanding with 3200-12000 grit pads.
IMG_6252

IMG_6254

IMG_6255
I finished by rubbing down the stem with Obsidian Oil and when it had been absorbed into the stem I buffed the stem and bowl with White Diamond. I gave it multiple coats of carnauba wax to protect and give it a shine. I finish with a soft flannel buffing pad on the buffer. The finished pipe is pictured below. Sometime today I will load a bowl and give it a smoke.
IMG_6256

IMG_6258

IMG_6259

IMG_6260

IMG_6261

A “King’s Imperial” Opera Pipe Reborn


Blog by Steve Laug

Looking over my latest box of pipes that I picked up at an antique mall in Edmonton, I chose to work on one that did not need to be restemmed and had a bit of a mystery attached to it. In the photo below it on the right side just above the batch of stems that were included in the purchase. It was hard to read the stamping while I was in the shop as I had forgotten to bring along a loop to examine it but I could read Made in London England stamped on the underside of the shank near the stem. It was priced at $20 which I figured it was worth in this condition so I added it to the lot.
Pipe finds2
When I got home I looked at it more closely under a magnifier and saw that the stamping read “King’s Imperial” Made in London England. The pipe was rusticated in an identifiable manner that I had seen on several pipes before so it looked promising. The finish was actually far rougher than it appears in the photos below. The stain was gone in many of the high spots and the low spots in the rustication were also pretty raw briar. There were two burn marks on the top back side and front side of the bowl that had darkened, though they were not scorched and rough. There was also a rough place on the left side bottom front of the bowl where it looked as if it had been knocked about. These marks would make it unlikely that I would be able to stain the bowl a natural tan colour. The bowl was oval both inside and outside. The rim had some scorching and darkening. It had been reamed in the centre of the oval but both ends were still caked and needed to be cleaned. The stem was oxidized and had a shallow tooth mark on the topside near the button.
IMG_5992

IMG_5993

IMG_5994

IMG_5999
I have a sharp bladed Japanese letter opener that was a gift from my grandfather that worked very well to ream the oval ends of the bowl. I proceeded to slowly scrape away the buildup of carbon and took the cake back to the bare briar.
IMG_6000

IMG_6001
After reaming the bowl I dropped the bowl into an alcohol bath to soak for an hour and then scrubbed it with a brass bristle tire brush to clean up the surface of the bowl and to scrub the burned areas on the bowl. I also put the stem into an Oxyclean bath to soften the oxidation on the vulcanite so that it would clean up more easily when removed.
IMG_6003
After an hour of soaking the alcohol bath I took the bowl out and dried it off with cotton cloths. I scrubbed it with a soft bristle tooth brush to remove any remaining grit in the grooves of the finish and then dried it off again. I wiped the bowl down with acetone on cotton pads to remove stubborn areas of the old finish. I wanted the bowl clean and free of any remnant of the old finish before I was ready to restain the briar. I sanded the rim with a fine grit sanding sponge to clean off the softened tar buildup and wiped it down with the acetone as well. I used a dental pick to pick out grime that was stubbornly remaining in the grooves of the rustication. I finished by cleaning out the inside of the bowl and shank with clean isopropyl alcohol and cotton swabs until they came out clean.
IMG_6004

IMG_6005

IMG_6006
I decided to try and stain the pipe with a light brown stain – almost tan coloured to mimic the original appearance of the bowl. I mixed one part dark brown stain with 3 parts isopropyl alcohol to make a light brown wash. I applied it to the rusticated surface with cotton swabs and flamed it once it was done. I restained it and reflamed it a second and third time to give it an even coverage.
IMG_6007

IMG_6008

IMG_6009

IMG_6010
Once it was dry I buffed it lightly with White Diamond to see where things stood. When I brought it back to the work table I took the following photos to give me a clearer picture of the look of the pipe. The burn marks were not covered and in fact seem to be highlighted by the light stain. I set the bowl aside for a while to think about what I would do with it.
IMG_6012

IMG_6013

IMG_6014

IMG_6015
With the bowl set aside I turned my attention to the stem. I took it out of the Oxyclean bath and dried it off. The next two photos show the top and bottom of the stem. The oxidation is even and soft over the surface of the stem. The Oxy does not remove oxidation on stems but merely serves to soften it. When I dried it off with the cloth that it is pictured on it took a lot of oxidation off the surface.
IMG_6017

IMG_6018
I decided to use Bar Keepers Friend on this stem. I wet the stem with a wet cotton pad and then sprinkled the surface with the powder. I scrubbed it with the wet pad and a dry pad to scour off the oxidation. The next three photos show how well the Bar Keepers Friend work to remove most of the oxidation. There were some stubborn spots around the shank and the button that would take more work, but it was definitely cleaning up well.
IMG_6019

IMG_6020

IMG_6021
My tendency in cleaning up a pipe is to work on the bowl for a bit, set it aside and work on the stem and cogitate about what I plan to do to address issues on the bowl. In this case while I worked on the stem I was thinking about how to address the darkened marks on the bowl. The light stain was not working and a darker brown would not work either. I set aside the stem and wrote a quick post on two of the forums I am part of and asked about the brand. I had not heard of the “King’s Imperial” brand before and decided to ask about it. A friend on one of them did not have information on the brand but posted a couple of photos of a Hardcastle Sandhewn pipe that he had refurbished to show similarities in the finish of my pipe. When I looked at his pipe I saw the solution to taking care of the burn marks and darkening. Here are a couple of photos of the Sandhewn pipe.
sandhewn1

sandhewn2
Hardcastle had used a contrast stain on this pipe that made the grooves of the rustication black and the high spots on the briar were brown. There was my solution staring me in the face. I set up my staining cloth and put the bowl on the cloth. I applied the black aniline stain and flamed it to set it in the grooves. Once it was dry I buffed it with Red Tripoli to highlight the high points on the rustication and remove the black stain from those areas. The photos below show the pipe after the staining and the buffing. The contrast stain worked well on the burned and darkened areas of the bowl.
IMG_6022

IMG_6023

IMG_6024

IMG_6025
The contrast was still not quite what I wanted as it was too dark for my liking. I wiped the bowl down with isopropyl alcohol on cotton pads to remove more of the black from the high spots on the bowl and shank. I also wiped down the smooth rim area as I wanted it to match the high spots on the bowl.
IMG_6026

IMG_6029

IMG_6030

IMG_6031
I took the pipe to the buffer again and buffed the bowl and stem with Tripoli and then with White Diamond to give it a shine. The contrast now was exactly what I was aiming for with the staining so I was pleased with the results.
IMG_6034

IMG_6035

IMG_6036

IMG_6039
I set the bowl aside and worked some more on the stem. I sanded it with a fine grit sanding sponge to remove the stubborn spots of oxidation at the button and the shank end. I then used my usual array of micromesh sanding pads – wet sanding with 1500-2400 grit pads and dry sanding with 3200-12000 grit pads. Each photo below shows the progressive deepening of the shine and the blackness of the vulcanite.
IMG_6041

IMG_6042

IMG_6043
I rubbed the stem down with Obsidian Oil and when it was dry buffed the pipe and the stem with White Diamond. I was careful in my buffing around the stamping on the bottom of the shank as I did not want to further damage the stamping. I applied multiple coats of carnauba wax to the bowl (lightly touching it against the buffing pad so that it would not cake up in the rustication) and the stem. The finished pipe is pictured below.
IMG_6044

IMG_6045

IMG_6046

IMG_6047
This morning while I worked on the pipe, I checked on the forums to see if there was anyone that had information on the brand. Bill, on Pipe Smokers Unleashed forum, had come across a photo online that had the same stamping but one additional line – Blakemar Briars. The stamping can be seen in the photo below. The “King’s Imperial” stamping was identical. My pipe was stamped Made in London England while this one said Made in England. The Blakemar Briars was the addition that gave the first clue.
T2eC16hy4FIZzOrmvBSc3d8PQ60_57
After reading this I sent an email to Mike Billington at Blakemar Briars to ask about the brand. He replied with the following email.

Hi Steve
It is possible that the “King’s Imperial” pipe was made here, it depends on the age to some extent. My Uncle used to make pipes for John Redman Ltd during the 60’s and 70’s and early 80’s and I continued to do so until the early nineties. The King’s Imperial range was one of John Redmans pipe ranges during that time, but Redmans also had them made by other pipe makers; they also did some pipe making “in house”- so while it is possible that the pipe was made here, it is not definite. From around 1992 until 2005 (I think), Redman’s brands were taken over by Gerald Grudgings of Loughborough in Leicestershire and during that time any Kings Imperial produced were definitely made here.

My memories only go back to the early 70’s but if you send a photo, I can tell you if it seems familiar to me

thanks
Mike

I immediately sent him photos of the pipe as it was when I found it, showing the stamping on the bowl. I am waiting to hear back from him. But I found it interesting to learn that John Redman Ltd had Blakemar Briars make pipes for them during the 60’s, 70’s and 80’s and into the early 90’s. To find out that King’s Imperial was a range of Redman pipes during that time was also invaluable. Some of the other historical notes of interest in Mike’s email were that Redman’s had others making pipes for them and that they also did pipe making in house. I am hoping that Mike can remember and give a bit of certainty to the dating on this old opera pipe. I will update this post as I gather new information.

Walt Disney pipe –AJ Verstraten (aka Bananabox-Ninja)


I am happy to see AJ back at his refurbishing work and writing about what he is working on. This pipe is particularly interesting in that it is a Disney Pipe. I have not seen much about these pipes and have enjoyed AJ’s work and write up. Thanks AJ for doing this and allowing us the pleasure of seeing the Disney pipe.

Greetings. When I first joined the PRF, a little over 18 months ago, there was a subject on the forum in which members could share with the other members what they thought was their dream pipe.

I was still rather green behind the ears when it came to brands, shapes and sizes so I didn’t reply in it at first. However, after a few months I found this article on Pipesmagazine.com:
http://pipesmagazine.com/blog/pipe-smokers-of-the-past/walt-disney-american-icon-inventor-of-pop-culture-pipe-smoker/ It was an interview with Brian Levine who explained about the fact that the Walt Disney Company sold pipes and pipe tobacco in the parks up until 1991/93.
This tickled me; the fact that the ‘wholesome WD Company’ sold tobacco and especially pipes with their logo on it was too good to be true. It was then that I decided a Walt Disney pipe would be my dream pipe.

So I shared this with my fellow Dutch pipe smokers on the PRF and explained that since I live in the Netherlands it would be an interesting challenge to try to acquire on for a reasonable price.

Thus my quest started and ended a mere three weeks later when I was not out bid on this eBay lot:
000

A tobacco pot with two pipes, the one on the left being a Disney pipe. The closing bid was $19.53 for the whole lot though my mood was a bit adjusted when I found out the shipping cost would be $42,-. Still, corrected to Euros it was a nice price for something so rare for a European.

When the pipe came it was very well packed and had survived the transit wonderfully. The other pipe was a Kaywoodie which I will write about in the future.

The first thing that struck me was that the pipe seemed to be only smoked a few times. The mouthpiece was oxidized through time and air but on the whole it was in good condition.
001
The inside of the bowl was lined with meerschaum, wetting a finger with spit and pressing it against the meerschaum I concluded it to be pressed – meerschaum instead of block meerschaum.
002
A rule of thumb (no pun intended :-)) is that when your wet finger sticks to the meerschaum it has a higher absorption rate and is thus most likely to be block-meerschaum. The pipe also confirmed the story from Levine that most of these pipes were basket-pipes stamped with the WD logo, though this one was of better quality than I expected.
003
First I cleaned the inside with 96% alcohol and pipe cleaners. They came out rather clean on the first go.
004
The soot and coal on the rim were rubbed off easily with a little spit and an old sock. And with 1500 grit sandpaper I smoothed the bowl a little, I decided to leave the brown spots on the meerschaum as I didn’t want to ruin the look of the pipe should the spots run deeper than I anticipated.
005
Then using the motor and abrasive wheels I removed the oxidation on the mouthpiece.
And with a needle file the hard to get oxidation near the tip. The picture is made just after the abrasive wheels.
006

The pipe before buffing

The pipe before buffing


The buffing was done with brown paste, followed by white, carnauba wax and a buffing on the fluffy wheel.
008

No Name Pot Brought Back to Life from the Brink


This bowl came to me with a batch of bowls needing different degrees of work. This old-timer needed cleaning as the buildup of grime and grit that was ground into the bowl was thick. The surface was coated with a greasy black substance all around the top of the bowl and the sides. The bowl/shank junction was incredibly grimy. The inner rim was out of round and the outer rim and the top of the rim were in rough shape. The outer edge had been hammered around the sides and the top had dents and cuts in the surface. The shank looked to be slightly shorter than I have come to expect on this shape of pipe; though the drilling and the mortise were original. The shank had definitely not been shortened. The bowl was caked and the buildup thickest around mid bowl. There were quite a few small pink fills around the bowl sides. There was no stamping or identifying marks on the pipe. There had been some sanding done around he shank and it had left behind some fairly deep scratches.
IMG_5732

IMG_5733

IMG_5734

IMG_5735
I went through my can of stems and found one that fit quite well. It did not need work on the tenon diameter as the fit was snug. The stem was bent and would need to be straightened to give it a proper fit to the bowl. Once the stem was in place it was clear that the shank was out of round. The bottom edge of the shank was somewhat thicker than the stem at the same spot. I would need to work on the flow of the shank from the bowl to the stem union to insure that the fit was smooth and the transition seamless.
IMG_5736
The stem was badly oxidized so I figured heating it to straighten it would actually soften the oxidation and bring it to the surface. I used a heat gun on the low setting to heat the stem. I generally hold it about 4 or more inches above the heat source and hold so it bends in the correct direction as it softens. In this case it did not take long for the vulcanite to heat and the stem to return to the original straight position. I decided to leave a slight bend in the stem as I like the look of on the pipe.
IMG_5737
The next two photos show the stem after heating and straightening. The variation in the diameter of the shank and the stem is also clearly visible in these two photos.
IMG_5738

IMG_5739
Since the shank had no stamping to preserve I decided to sand the shank and the stem to even things out and to bring the shank into round. I used 220 grit sandpaper to remove the excess briar and to shape the taper on the stem. I sanded the stem as well to remove the softened oxidation and make the cleanup simpler.
IMG_5740

IMG_5741

IMG_5742

IMG_5743
I set up a topping board and anchored a piece of 220 grit sandpaper on the surface to provide a flat straight surface to sand the top on. I twisted the top into the sandpaper in a clockwise motion to remove the tars and rim damage on the bowl.
IMG_5744

IMG_5745
I wiped down the surface of the bowl with acetone on cotton pads to remove the grimy buildup on the finish. The black tarry substance took some elbow grease and hard scrubbing to remove. The inner rim would need some work to bring it back into round but that would wait until after I reamed the pipe.
IMG_5748
I sanded the bowl with 220 grit sandpaper and medium and fine grit sanding sponges to further remove the finish and the grime. I worked on the inner edge of the rim with a folded piece of 220 grit sandpaper to bevel the inner edge into the bowl. This minimizes the appearance of the bowl being out of round. It also removes burn damage and smooths the look of the rim as a whole.
IMG_5749

IMG_5750

IMG_5751

IMG_5752
I decided to try something different on this bowl in terms of stain. It had some great cross grain and some nice birdseye grain that I wanted to highlight. It also had some ugly pink fills that I did not want to pick out and refill. This led me to try a black aniline stain. Before I stained it I used a black permanent marker – a sharpie to line through the pink fills. I blended them into the grain of the wood with the pen. I heated the bowl with the heat gun to open the grain and then applied several coats of black aniline stain, flaming the stain between each application. Once the stain was dry I wiped the bowl down with isopropyl alcohol on cotton pads and then sanded the bowl with a medium grit sanding block. I wanted to remove the black stain from the higher/harder areas of the briar while leaving it in the grain patterns.
IMG_5753

IMG_5754

IMG_5755
I sanded the bowl with a medium grit sanding sponge and then wiped it down with isopropyl alcohol to remove the dust. I remarked the fills with the black Sharpie. In the four photos below the marked fills are visible and the finish has about all the black removed that I wanted to take off.
IMG_5756

IMG_5757

IMG_5758

IMG_5759
I rubbed the bowl down with Olive oil on a paper towel and rubbed it into the finish. I sanded the bowl with micromesh sanding pads – 1500-2400 grit, while the oil was wet as the oil gives the pads a bit more bite. I worked on the marked areas to blend them in with the sanding pads. I also sanded the stem with the micromesh sanding pads and the Olive oil at the same time. The next four photos show the finish after it had dried over night. I then buffed it on my buffer with White Diamond and gave the bowl several coats of carnauba wax. You can see how well the black sharpie blended into the finish. The pink fills have all but disappeared in the finish.
IMG_5760

IMG_5761

IMG_5762

IMG_5763
I sanded the stem with my usual array of micromesh – the difference this time was all pads were used to dry sand the stem – 1500-12,000 grit. In between each grit I rubbed the stem down with Obsidian Oil and rubbed it into the vulcanite before sanding with the next grit pad. Once I had finished with all grits I gave the stem a final rub down with the Obsidian Oil.
IMG_5764

IMG_5765

IMG_5766
I gave the pipe several more coats of carnauba wax on the buffer and then buffed it with a soft flannel buff to bring out the shine. I was aiming for a stem shape similar to what I had seen on the Castello 55 shape and wanted that slight bend downward in the final look. While the pipe is certainly no Castello, I like the final look of the stem and the bowl. It certainly has come a long way from the bowl that came in the lot I received in the mail. This one should make a good addition to someone’s rack once it leaves here. The next four photos show the finished pipe.
IMG_5767

IMG_5768

IMG_5769

IMG_5770

A Hilson Meerlined Tall Dublin Reborn into a Briar Calabash


Blog by Steve Laug

I received this old briar bowl from a friend and decided to see what I could do with it. It was in pretty rough shape. The shank had been damaged and repaired with some kind of epoxy as the gel surface of the crack was hard as rock. The repair was actual the most substantial part of the bowl. The bowl had an amazing deep and craggy blast to it but the finish itself was worn. Fortunately the wear was not deep and the cragginess was not too badly affected. The rim was smooth but the edges were slightly worn. The bottom of the exterior of the bowl showed the most nicks and damage to the finish. There were marks from looked to be a band on the shank. The inside of the bowl was quite clean. Originally it looked as if it had a meerschaum lining and the glue that had held that bowl in place was gone and just a small remnant of the glue was on the interior walls of the bowl. The bottom of the bowl was stained with tobacco so evidently the meerschaum lining must have crack and seepage darkened the bottom of the bowl.
IMG_5393

IMG_5394

IMG_5395

IMG_5396

I cleaned out the inside of the bowl with cotton swabs and isopropyl alcohol. Once I had it clean I worked on the resin on the shank repair. I sanded it until it was flush with the surface of the rest of the shank so that it did not bulge. I continually checked to see if I was weakening the repair but the shank was solid. I used the dental pick and my modified Philips screwdriver rusticator to rusticate the area around the resin repair. I also found a band in my box that fit the shank perfectly and pressed it into place. The band was more for bling than as the shank was not cracked or damaged. I also went through my stem can and found a stem that fit the diameter of the shank, turned it with the PIMO tenon turning tool and fit is in place. It would need to be reduced slightly in diameter to fit well with the band. I wiped down the bowl and shank with isopropyl alcohol on a cotton pad. I did not want to chance acetone as I was worried about it dissolving the resin on the shank repair. As I did not know what was used in the repair I did not want to chance further damage.
IMG_5397

I stained the bowl with a dark brown aniline stain. I applied it, flamed it, applied it again and flamed it again. To get an even coverage on the sandblast finish it would take more than three applications and flamings to make the stain even. The photos below show the bowl after three coats of the stain. It would need to be repeated later in the process to get the rough places stained.
IMG_5398

IMG_5399

IMG_5400

IMG_5401

I sanded the stem with 220 grit sandpaper and with a medium and fine grit sanding sponge to make the fit against the band work well. Once the shape and the fit of the stem were correct I used a heat gun to bend the stem to an angle that worked well with the look of this pipe. For the angle I used the curve of my buffer to press the softened stem over. When I had it bent I held it as it cooled and then set the bend with cool water.
IMG_5402

IMG_5403

IMG_5404

IMG_5406

IMG_5407

After bending I resanded the stem with the sandpaper and sanding sponges. Once the majority of the scratches were gone it would need to be sanded with the micromesh sanding pads but I wanted to do some more work on the bowl and shank before finishing the stem.
IMG_5408

IMG_5409

IMG_5410

IMG_5411

I roughened the shank some more to give it a closer look to the sandblast of the bowl. I heated the bowl with the heat gun to warm up the briar before giving the bowl and shank yet another coat of the aniline stain. I gave it the fourth coat of the stain, flamed it and the coverage was finally what I was looking for on the pipe. The shank and the bowl bottom took the stain this time and matched the rest of the bowl.
IMG_5412

IMG_5413

I hand buffed the bowl with a shoe brush and then gave it a light buff with White Diamond on the buffing wheel. I took it back to the work table and gave it several coats of Halcyon II wax which works well on sandblast and rusticated finishes. I buffed it with the shoe brush to bring up the shine. The next three photos below show the bowl after the final stain and light buff.
IMG_5415

IMG_5416

IMG_5417

At this point in the process I used a cotton swab dipped in stain to touch stain the places on the shank the underside of the bowl that were lighter than the rest of the bowl. I let it dry completely over night and then hand buffed the bowl.

In a phone call with Tim West of J.H. Lowe Pipe Repairs I discussed the possibility of making this pipe a Briar Calabash. I gave Tim the dimensions of the bowl and he happened to have a bowl that was originally made for Pioneer Calabash pipes that was the correct dimensions. He sent along several strips of cork that would be used for making a gasket to give the meerschaum cup a snug fit in the briar bowl.
IMG_5501

I cut a strip of cork and glued it to the bowl with super glue. I used a small piece of the cork to fill the gap between the ends of the strip. Once the glue dried I sanded the cork gasket until it was the proper diameter for the briar bowl.
IMG_5502

IMG_5507

I used some Vaseline and lubricated the cork gasket and then used my finger to coat the inside edge of the briar bowl where the cork would sit. I then pressed the meerschaum cup into place in the briar bowl. The finished Briar Calabash pipe is shown in the photos below. The polished gloss of the white meerschaum bowl looks great against the sandblast dark brown briar bowl. The silver band gives a bit of contrast to the pipe. The draught on the pipe is perfect and the feel of the new Calabash in the hand is great. The pipe is still light in weight and the thin pencil shank and stem work well. Now all that remains is to load it up and have the inaugural smoke.
IMG_5508

IMG_5509

IMG_5510

IMG_5511

An Edwards 7377 Pipe Cleaned & Repaired


I first talked with Morty from Ontario on Pipe Smokers Unlimited online forums (PSU). She had found an old Altesse Briar with an Amber stem and found that I had the same pipe. In fact from what we could find and the responses we got we had the only two around! We exchanged quite a few emails and I did a few repairs and some stems for her. She has caught the refurbishing bug and has posted quite a few pictures of her work on the PSU Pipe Restoration Forum. She has been smoking a pipe off and on most of her adult life. She enjoys buying old estate pipes and cleaning them up and refurbishing them. She says that she has learned much from the blog and from other members on PSU. I have enjoyed seeing her work and have asked her to write-up some of her work and post it on rebornpipes for others to enjoy. Thanks Morty for being willing to do this for us. Enjoy this first post she has provided. I love the lines of this old pipe and the grain. Morty did a great job on restoring it. Without further introduction I give you Morty’s own words regarding this refurb.

I bought this Edward 7377 Long Bent Stem Pipe that was in bad condition and needed quite a bit of TLC.
morty1

I first reamed the bowl, did an alcohol and salt treatment. The bowl shank had a crack that was mostly covered by the silver band. I sanded the bowl with 100 grit, 220 grit sandpaper, and used medium and fine grit sanding sponges. I also topped the bowl as it had some slight char and some nicks that the topping easily dealt with.

I continued sanding the bowl with very fine grit sand paper before I dealt with the crack.
The crack in parts went right through, I wiped down the bowl with acetone to remove any remaining dirt and dust. I super glued the crack. allowing some to soak through to the inside.
I left this to set overnight.
morty2

I soaked the stem in Oxy Clean overnight as well. The next day I first removed most of the raised oxidation by scrubbing it down with a Magic Eraser, I find this makes the next steps easier and go much more quickly. The Magic Eraser removed most of the oxidation, I wet sanded with 1500 – 2400 grit, dry sanding with 3200 – 12,000 grit micromesh pads. Cleaned the inside of the stem with a test tube brush, and with many soft and bristle pipe cleaners, making sure the button is also spotless. Finally when the pipe cleaners come out spotless I will run a soft pipe cleaner through with Rum 151, this not only sanitizes the stem it can also grab any missed gunk.

I cleaned the silver band with fine steel wool. The next day I worked on the crack that was set now with the super glue. I sanded this down carefully and replaced the now clean silver band. The bowl cleaned up well as did the stem. I decided to use Olive Oil to bring out the grain, but also to darken the bowl a bit. Following Coastie’s (John William’s) method, I applied a small amount, rubbed it in with my hands, removed any excess and let it sit overnight. The next day buffed with a micro fiber cloth, and wow. !!! This had really brought the grain out and left a nice rich color to the bowl. I polished the bowl with Paragon Wax. I am pleased with the results on this very nice old Edwards Pipe.
Morty3

morty4

morty5

Sasieni “Viscount Lascelles” XS Restoration


Blog by Al Jones

I picked up this Sasieni Four Dot Natural at the NYC show yesterday. It looked to be in very good condition, requiring only a mild clean-up. I knew from the “Four Dot” “London Made” stamping that it was made between 1946 and 1979. The pipe has the football shaped “Made In London” stamp on the other side and “XS”. Curiously, it was missing the name of a London town. At home, I could see some additional stamping and with a magnifying glass, I could read “Viscount Lascelles”. I googled that name and discovered that according to the Stephen Smith article, the Viscount Lascelles was the model name and a rare model.

http://murderofravens.org/my-sasieni-pipe-article/

The bowl had some build-up on the top which I thought might be some scorching. The stem had the faintest of teeth marks and was in overall excellent shape and only lightly oxidized.

Sasieni_Four_Dot_XS_Before

Sasieni_Four_Dot_XS_Before (1)

Sasieni_Four_Dot_XS_Before (3)

Sasieni_Four_Dot_XS_Before (8)

Sasieni_Four_Dot_XS_Before (2)

I reamed the cake from the bowl and I could see despite the thick cake, the bowl was in very good condition. Most of the build-up on the bowl top rubbed off with some distilled water and a soft cloth. I soaked the bowl with some 91 proof alcohol and sea salt. The shank was cleaned with a bristle brush and alcohol.

Sasieni_Four_Dot_XS_Before (7)

The bowl didn’t need much else and was buffed lightly with White Diamond and then carnuba wax. I stayed away from the nomenclature to preserve it.

The stem was sanded with 1500 and 2000 grit paper, then 8000 and 12,000 grade micromesh sheets. I buffed it lightly with white diamond and then a plastic polish.

I hand waxed the briar with some Paragon wax.

Here is the finished pipe.

Sasieni_Four_Dot_XS_Finished

Sasieni_Four_Dot_XS_Finished (4)

Sasieni_Four_Dot_XS_Finished (7)

Sasieni_Four_Dot_XS_Finished (6)

Sasieni_Four_Dot_XS_Finished (5)

Sasieni_Four_Dot_XS_Finished (3)

Sasieni_Four_Dot_XS_Finished (1)

Restoring a Briarmeer Rhodesian 175 ED that was Made in Canada


Blog by Steve Laug

I received an email from Andrew saying that he had a pipe he wanted to send my way. It was my kind of shape – a Rhodesian. He said that it was an odd pipe in that on the bottom of the bowl it had a slightly inset circular divot. The round inset was almost like a poorly made plug on the bottom of the bowl, or one that had shrunken with time. He thought that it would be a great challenge for me to do a repair on it. The stamping on the pipe shank was Briarmeer 175 ED Canada.
Briarmeer1

The brand was one I had not heard of before. And since I am in Canada I wanted to try to figure out where the pipe was made and what the plug was about. The name seemed to suggest that it was a meerlined pipe or at least included meerschaum in some form or fashion. Yet when I emailed Andrew about it he replied that there was no meerschaum lining present in the bowl. Instead it was just a nice looking briar pipe with the strange, misfit looking round plug on the bottom of the bowl.

This would require some research to see what I could find out. I went online and searched for any information that I could find regarding the brand. I wrote to the trademark attorney who was listed as the representative of the brand and received a very cryptic answer that was not helpful at all. I did learn however that Briarmeer pipes were made by Briarmeer Pipes Limited, 226 Park Street, Brockville, Ontario. The business was no longer present at that address and did not show up in any Brockville Business Directories available online or through the Yellow Pages .I searched the Canadian, American and British patent sites hoping to find a patent registration for the pipe but was not able to find one. I found a trademark registration document from the US patent office that showed that the brand or trademark was registered in the US in 1973. The document pictured below gives that information as well as the Canadian Registration Number 180,805 and that it was registered in Canada on January 21, 1972.
Briarmeer US Trademark patent

Using these registration numbers I searched both the Canadian and US patent records but could find no patent information available. From the public records it appears that the Briarmeer Company went out of business sometime in the late1980’s or early 1990’s and the name became public domain.

I was able to find out through further digging that the pipe is a variation on what Kaywoodiedid with its famous Carburetor.Kaywoodie had drilled a hole in the bottom of the bowl and inserted a metal airhole to introduce air into the bottom of the bowl to enhance burning of the tobacco. In the Briarmeer the drilled out area in the bottom of the bowl was significantly larger.It had been drilled out and a meerschaum disk inserted in the resultant hole. The draw hole was to be perfectly centered at the bottom of the bowl. From what I could find out the idea of using the meerschaum insert came to a Canadian engineer about 30+ years ago. He reasoned that the meerschaum bottom of the bowl would allow for a drier and cooler smoke while the briar would be sturdier than the meerschaum for the walls of the bowl.Now I knew what the inset on the bottom of the bowl was and where the Meer portion of the Briarmeer name came from.

I decided to see if I could hunt down some photos of the pipe. I had not noticed them before and did not figure I would find many available. I was wrong. I found quite a few clear photos online that showed the novel meerschaum insert with clarity. In all of the photos it was clear that the insert sits inset into the bottom of the bowl and there is a variance in the external bowl bottom and the depth of the inset meerschaum disk. I have included four of the photos I found to show the insert in the exterior bowl bottom. Some of the photos show a new and unsmoked pipe and other show an estate pipe. All have the pipes show the same variation in the depth of the bottom of the bowl and the depth of the meerschaum disk.
Briarmeer6

Briarmeer8

Briarmeer3

Briarmeer pipe bottom

I also learned that the American Company, Briarcraft who made the Smokemaster pipe also made a pipe with called the Briarmeer Acadian. The Briarcraft version of the pipe was a meerschaum lined pipe and was stamped with the Briarcraft logo, a B in a diamond on the shank and on the stem.However, the pipe I was gifted was not a meerschaum lined briar and it did not have the B stamp on either the shank or the stem. The stem appears to be original and the stamping on the shank clearly says that the pipe is Canadian made.

The pipe from Andrew arrived and it was indeed one of my favourite shapes. The finish was a little dirty and the rim had some carbon build up. The stem was oxidized and had some tooth marks on the underside of the stem near the button. There was also a darkened spot like a burn mark on the underside of the shank near the insert. There were several fills in the grooves of the rustication but I was fairly certain that when I restained the pipe they would be hidden. The meerschaum insert looked to be in very good shape from the outside of the bowl. Inside was caked with a fair amount of carbon and the insert was not visible looking into the bowl.
IMG_5192

IMG_5193

IMG_5194

IMG_5195
Upon closer examination it was evident that there was a crack in the shank on the right side that ran at an angle from mid-shank toward the back of the bowl shank union. The crack did not start on the bottom of the shank but rather started midway up on the right side of the shank and ended near the top middle of the shank. It was very clear under a lens that it was present. The next two photos, though slightly out of focus show the crack. It runs across the rustication pattern mid-shank.
IMG_5196

IMG_5197

I cleaned out the crack with a dental pick to remove the buildup of grime that filled it. The grime was evident through the lens. Once I had it clean when I viewed it through the lens I used superglue to repair the crack. Fortunately the crack did not go all the way into the airway. I checked the inside of the airway with a penlight and it was smooth and flawless. The repair externally would remove the visible damage.
IMG_5218

IMG_5219

I left the superglue to cure overnight and in the morning used the dental pick to clean out the grooves of the rustication and sanded the smooth portions of the briar surface with 220 grit sandpaper and then medium and fine grit sanding sponges. The photo below shows the repair after sanding and shaping.
IMG_5227

I wiped the surface of the bowl down with acetone on cotton pads to remove the damaged finish and enable me to blend in the patch when I restained the pipe. I scrubbed the rusticated rim of the bowl with the pads as well and was able to remove the carbon build up.
IMG_5228

IMG_5229

IMG_5230

I sanded the darkened area (burn?) on the bottom of the bowl to lighten it in preparation for staining. I wiped that area down with acetone on cotton pads afterward.
IMG_5231

I sanded the stem with 220 grit sandpaper and a medium and fine grit sanding sponge to remove the oxidation. I sanded the tooth marks on the underside of the stem near the button and was able to remove them.
IMG_5233

IMG_5234

IMG_5235

IMG_5236

I wiped the bowl down a final time with acetone, being careful not to scrub the insert with it. Once it was cleaned off I stained it with a dark brown aniline stain applied with a cotton swab. I avoided the meerschaum insert as I did not want to have the stain penetrate the meerschaum. I flamed the stain and reapplied it. I flamed it again and reapplied it again. After the final flaming of the bowl I set it aside to dry.
IMG_5238

IMG_5239

IMG_5240

IMG_5241

IMG_5243

When the stain had dried I buffed it with White Diamond on the buffer to even out the stain and give it a shine. I also applied a coat of Halcyon II wax to the rusticated surface and hand buffed the bowl with a shoe brush. The next four photos show the bowl after the buffing and waxing.
IMG_5244

IMG_5245

IMG_5246

IMG_5247

I worked on the stem with my usual group of micromesh sanding pads – wet sanding with 1500-2400 grit pads. I then buffed the stem with red Tripoli and White Diamond before going back to the work table and dry sanding with 3200-12,000 grit micromesh pads. I rubbed the stem down with Obsidian Oil and let it soak into the vulcanite.
IMG_5248

IMG_5249

IMG_5250

I buffed the finished pipe with White Diamond and then gave it multiple coats of carnauba wax. The finished pipe is shown in the photos below. The meerschaum disk inset into the bottom of the bowl is an interesting touch. I look forward to loading up a bowl and giving it a test run very soon. At the very least this is a great piece of tobacciana that still leaves a bit of mystery unsolved.
IMG_5251

IMG_5252

IMG_5253

IMG_5254

Barling’s Guinea Grain Restoration


A member on the Pipe Smokers Forum recently acquired this Barling’s “Guinea Grain” pipe and I jumped at the opportunity to restore it for him. I don’t currently own a Barling’s pipe, but recent posts by brand authority, Jesse Silver, had piqued my interest. In conversation with Jesse about the pipe, he shared that “Guinea Grains are a higher grade designation and distinctive for several reasons. They’re the only Family Era pipes with a cursive “Barling’s” logo and they’re the only pipes that Barling also used oil in the curing process to bring out the contrast of the grain.” I enjoyed learning more about this fabled British pipe maker as much as working on it. I need to thank Jesse for his input and information. It is really wonderful to have such a brand authority available for comment. Since the pipe is stamped “Barling’s” in the possessive, Jesse dates the pipe to the 1940’s as a pre-Transition piece. The pipe is stamped EXEXEL, a size grade started in 1940. It also has a very faint “Reg” stamp and the letter “E”. Jesse tells me this is most likely the remnant of EB WB (Edward and William Barling), whose initials form the Barling sterling makers stamp and were used as part of the company nomenclature. Their initials were used on 1940’s era Guinea Grain pipes.

The pipe as I received it.

Barlings_Guinea_Before

Barlings_Guinea_Before (7)

Barlings_Guinea_Before (1)

Barlings_Guinea_Before (5)

When the pipe arrived, it had heavy tar build-up on the bowl top and many dings and cuts in the briar. The stem was in relatively good condition with only surface teeth abrasions and no dents. Curiously, there was what appeared to be a pinhole near where the Barling’s Cross stem logo would be placed. There was no remnant left of the logo, even under magnification. At first, I thought the stem might be a replacement, but the button ends appears to have the distinctive ovalized and funneled button.

The bowl had a heavy caked which was reamed and then soaked with alcohol and sea salt. While the bowl was reamed a little out of round, the interior of the bowl was in relatively good condition. The bowl top had a number of scars and dings. I have been using Mike Gluklers method of soaking the tar covered bowl tops in just a millimeter or two of distilled water to soften the build-up. I removed it with a cotton cloth using the distilled water. There is some rim darkening, but I didn’t want to sand the rim and restain and think the patina fits the pipe

Barlings_Guinea_Progess (4)

Using a dinner knife heated by a propane torch and a wet cloth, I went to work on the numerous dents and cuts. Some lifted out completely, others were minimized. I wasn’t able to do much about the chatter around the bowl rim. I suspect the previous owner knocked ash out of the bowl. Staying away from the valuable nomenclature, the bowl and rim was buffed with white diamond and several coats of carnuba wax. I gave the nomenclature area a hand-wax with Halycon pipe wax.

I put a drop of black superglue on the hole in the briar. After it was dry, I sanded off the worst of the oxidation with some 800 grit wet paper. I then moved to 1500 and 2000 grades wet paper and finally 8000 and 12000 grades of micromesh. I used a slim knife blade to hold the paper into the button crease to remove that oxidation. Then the stem was buffed lightly with white diamond and finally a plastic polish. The Barling’s stem has a unique feel to it, unlike my similar era Comoys or Charatan stems. The button air hole shapiong shows a lot of care was shown making the stem. (and also makes me think it is an original Barling’s stem).

And finally, the finished pipe.

Barlings_Guinea_Grain_Finished-1

Barlings_Guinea_Grain_Finished-2

Barlings_Guinea_Grain_Finished-4

Barlings_Guinea_Grain_Finished-5

Barlings_Guinea_Grain_Finished-8

Barlings_Guinea_Grain_Finished-7

Barlings_Guinea_Grain_Finished-9

Barlings_Guinea_Grain_Finished-10

Restoring an Old Hardcastle Dryconomy Shape 69 Bulldog – Chiz Szymanski


Chiz has followed rebornpipes for quite a while now and shown his refurbishing work on Pipesmokers Unlimited. When I saw his step by step work of reclaiming this old bulldog I wrote and asked if he would mind writing up the process for us on the blog. He was happy to do so. His words and photos follow. I hope this is the first of many refurbs he writes about and posts here on the blog. Thanks Chiz.

This project was first documented on pipesmokerunlimited.com where under the member name of Peter Piper, I am an active contributor. A relative newcomer to the hobby of pipe restoring, my ambition is to encourage others: “If a manually challenged clod like me can do it, so can you!”

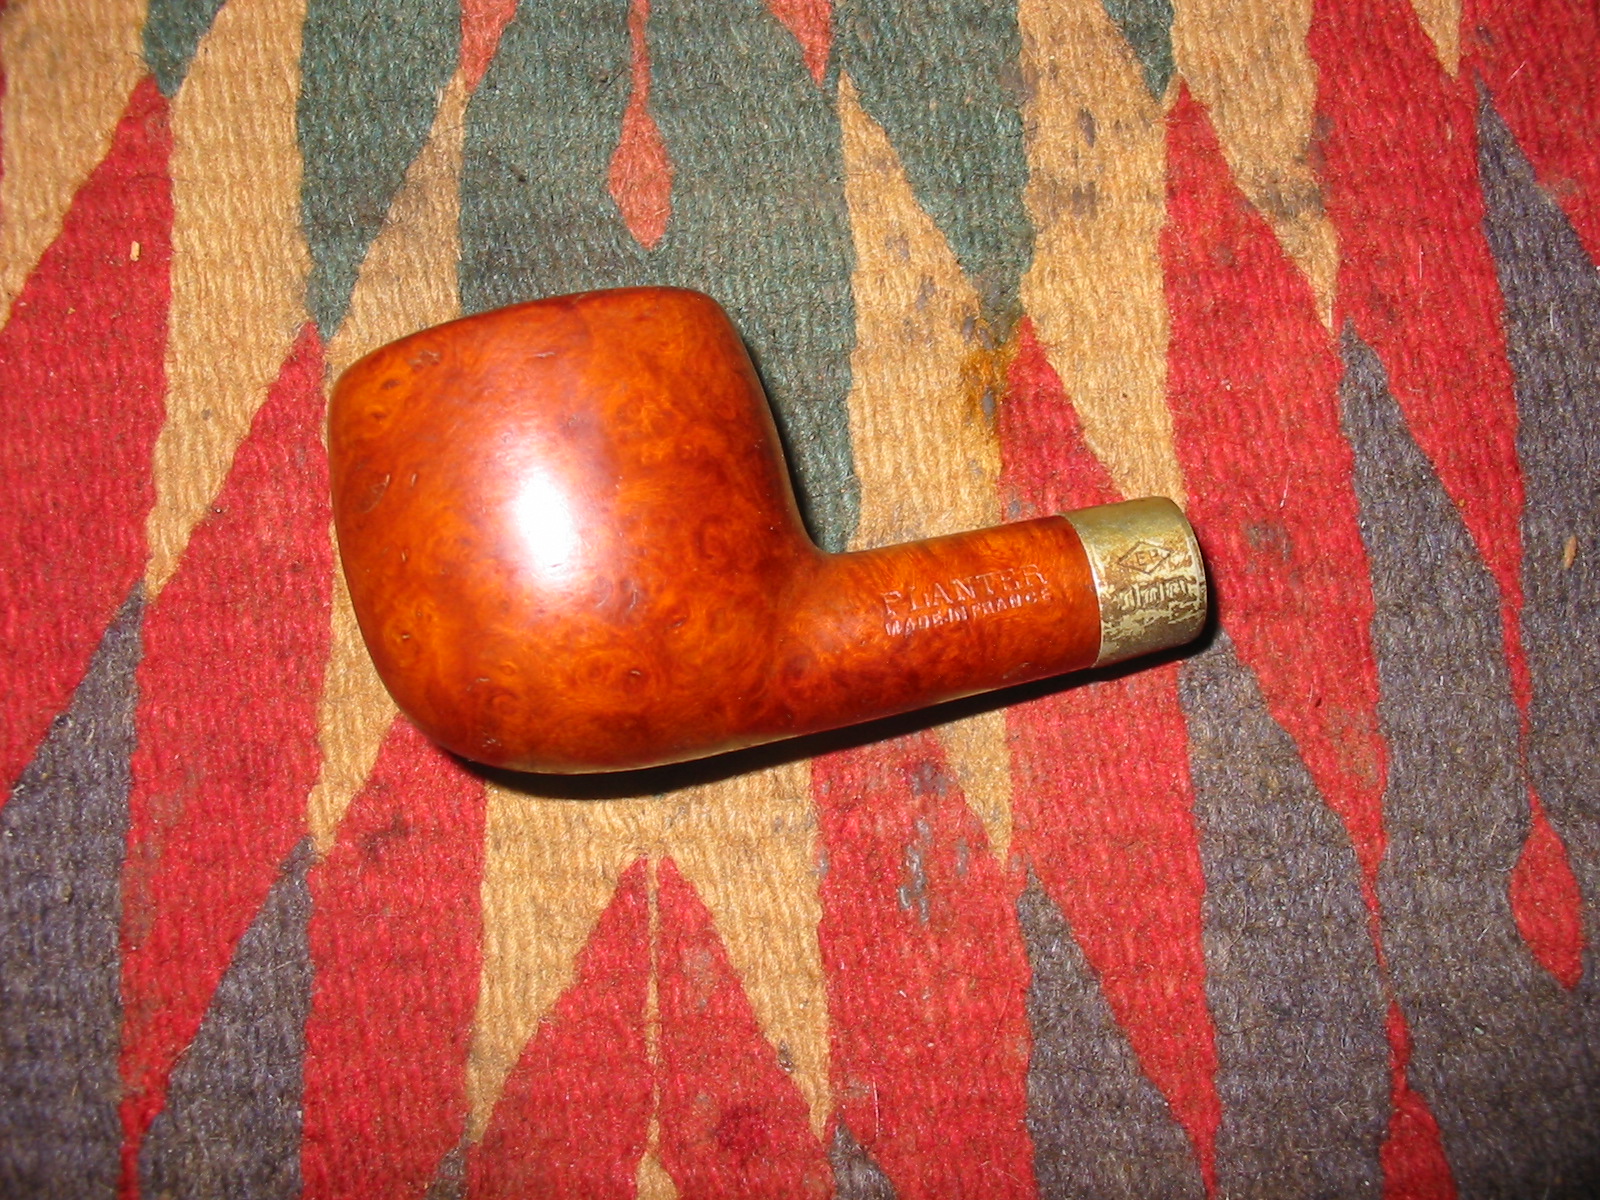
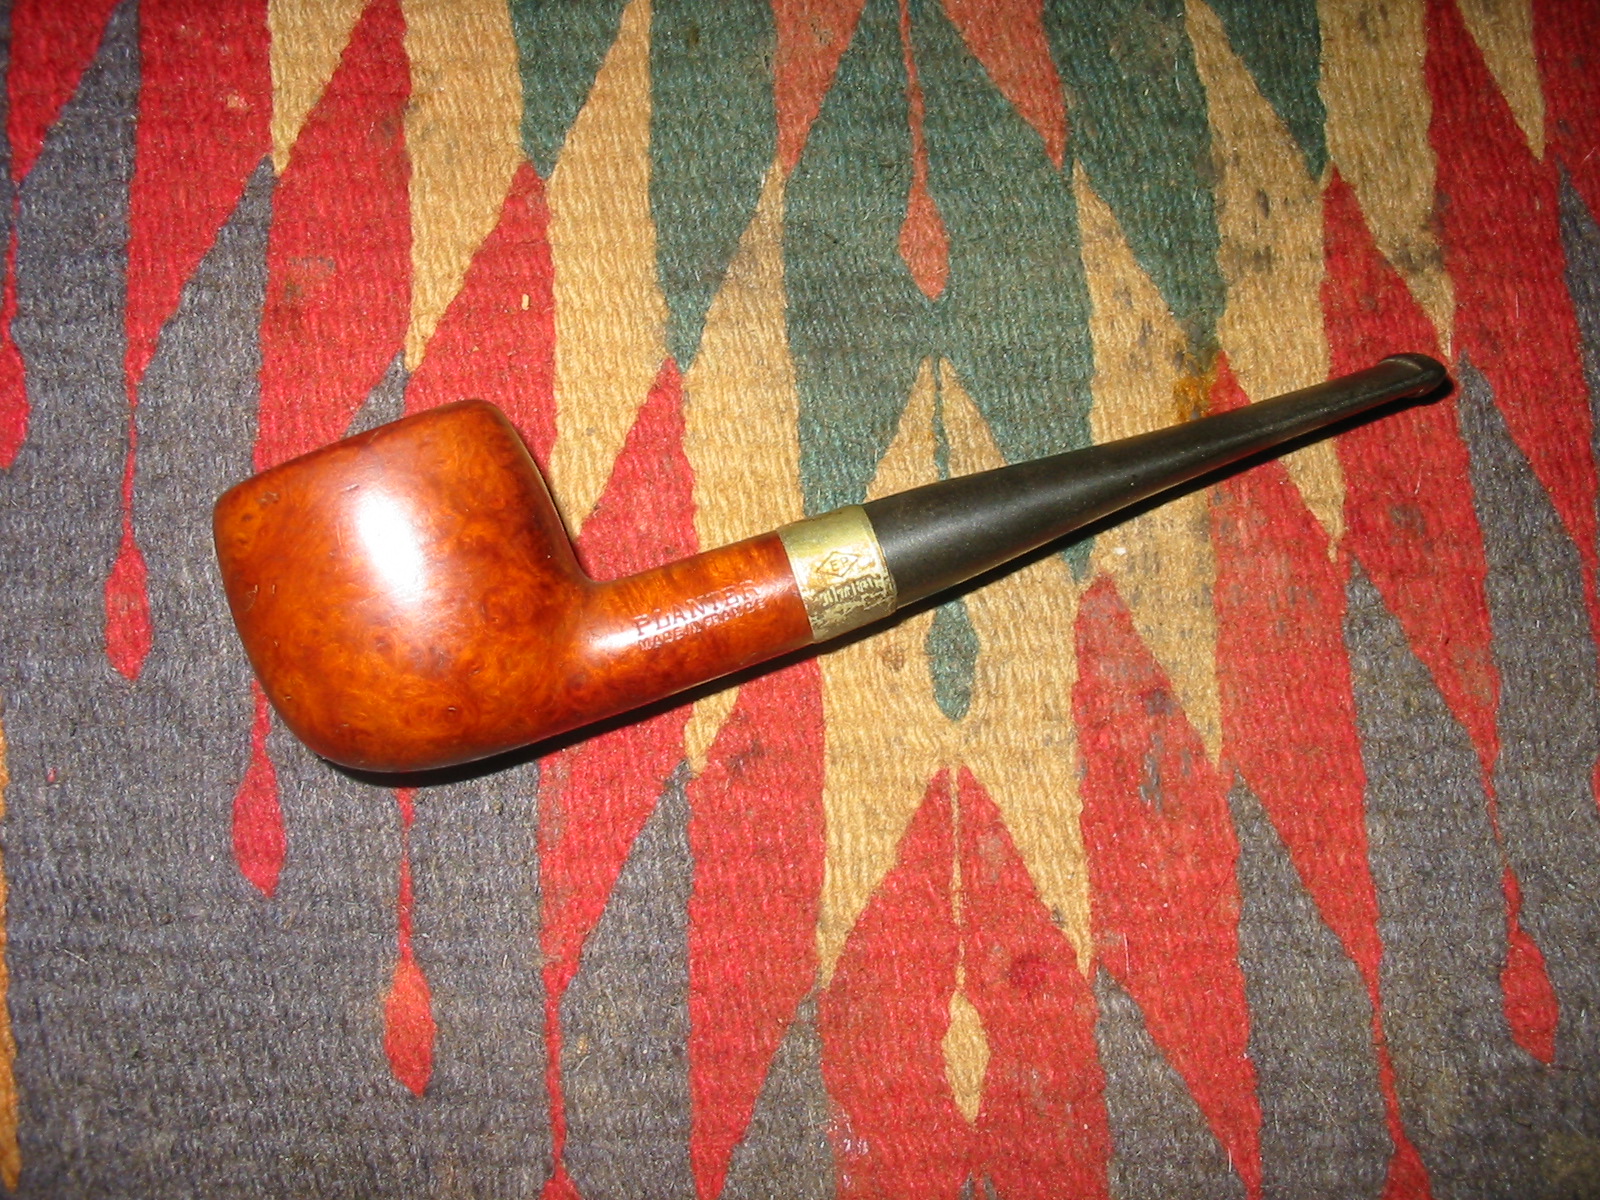
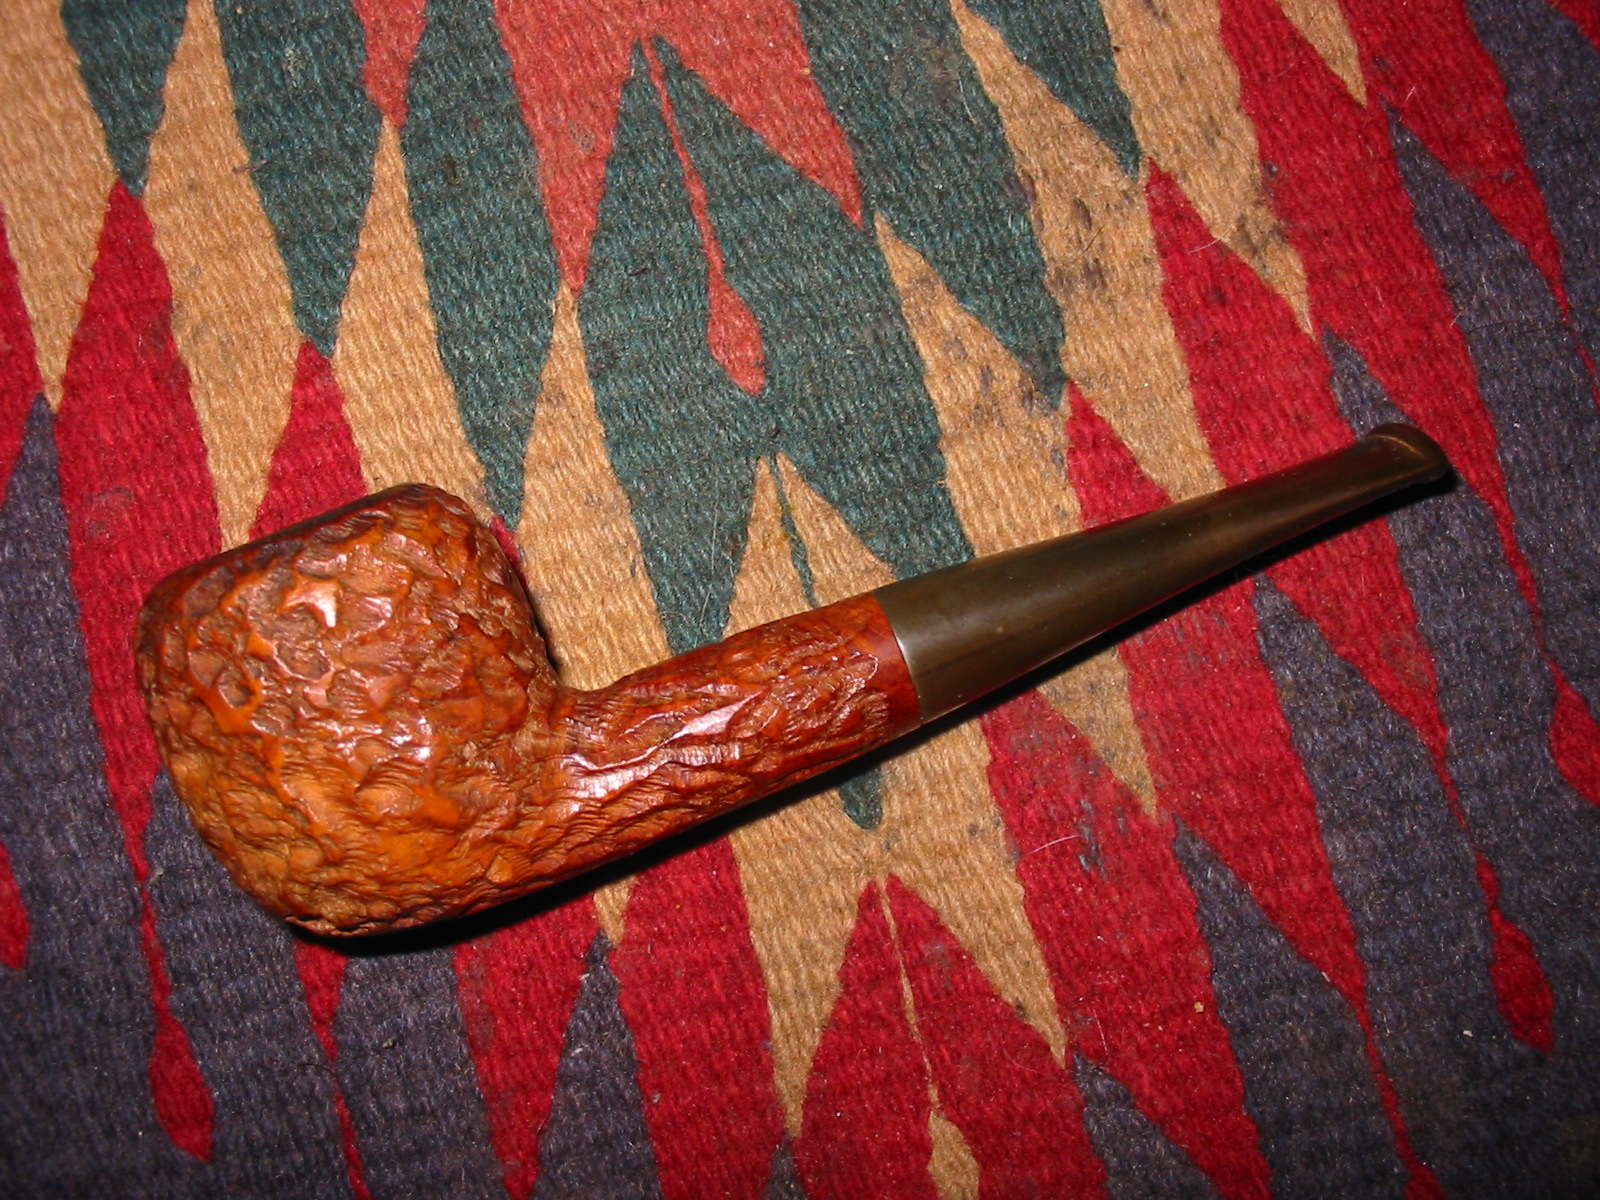
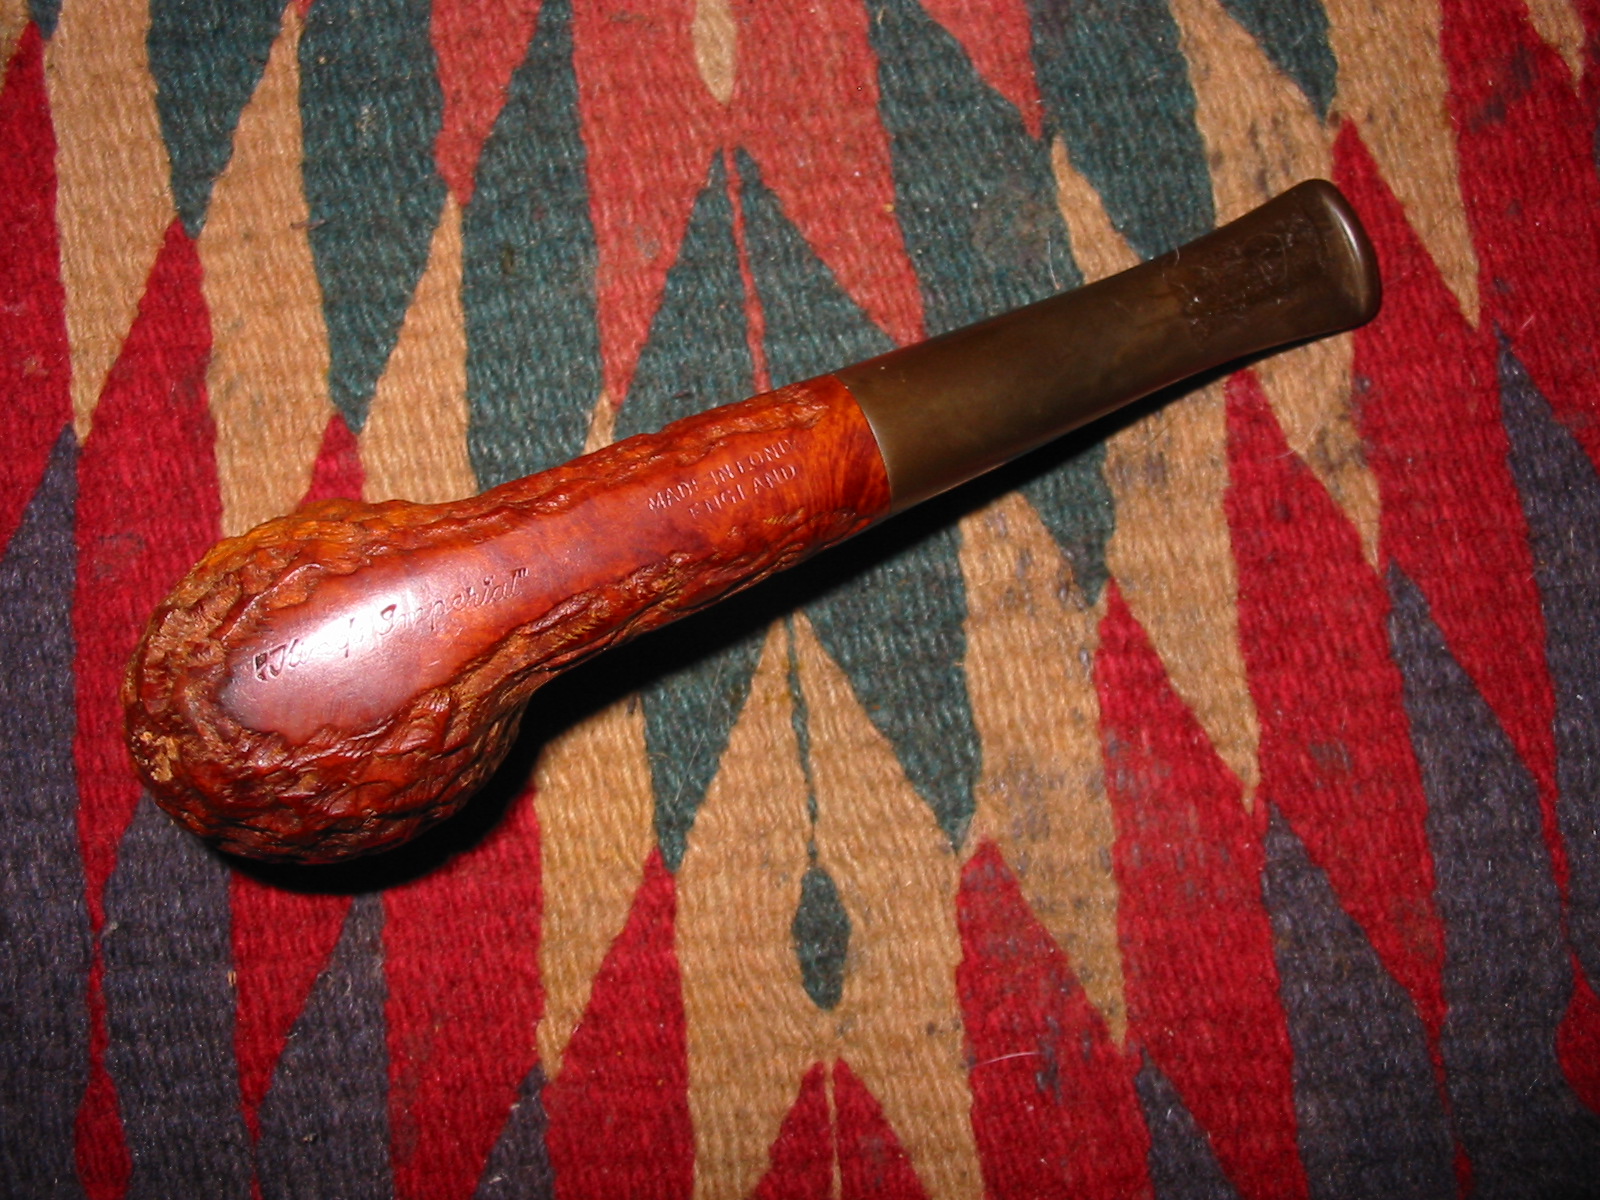
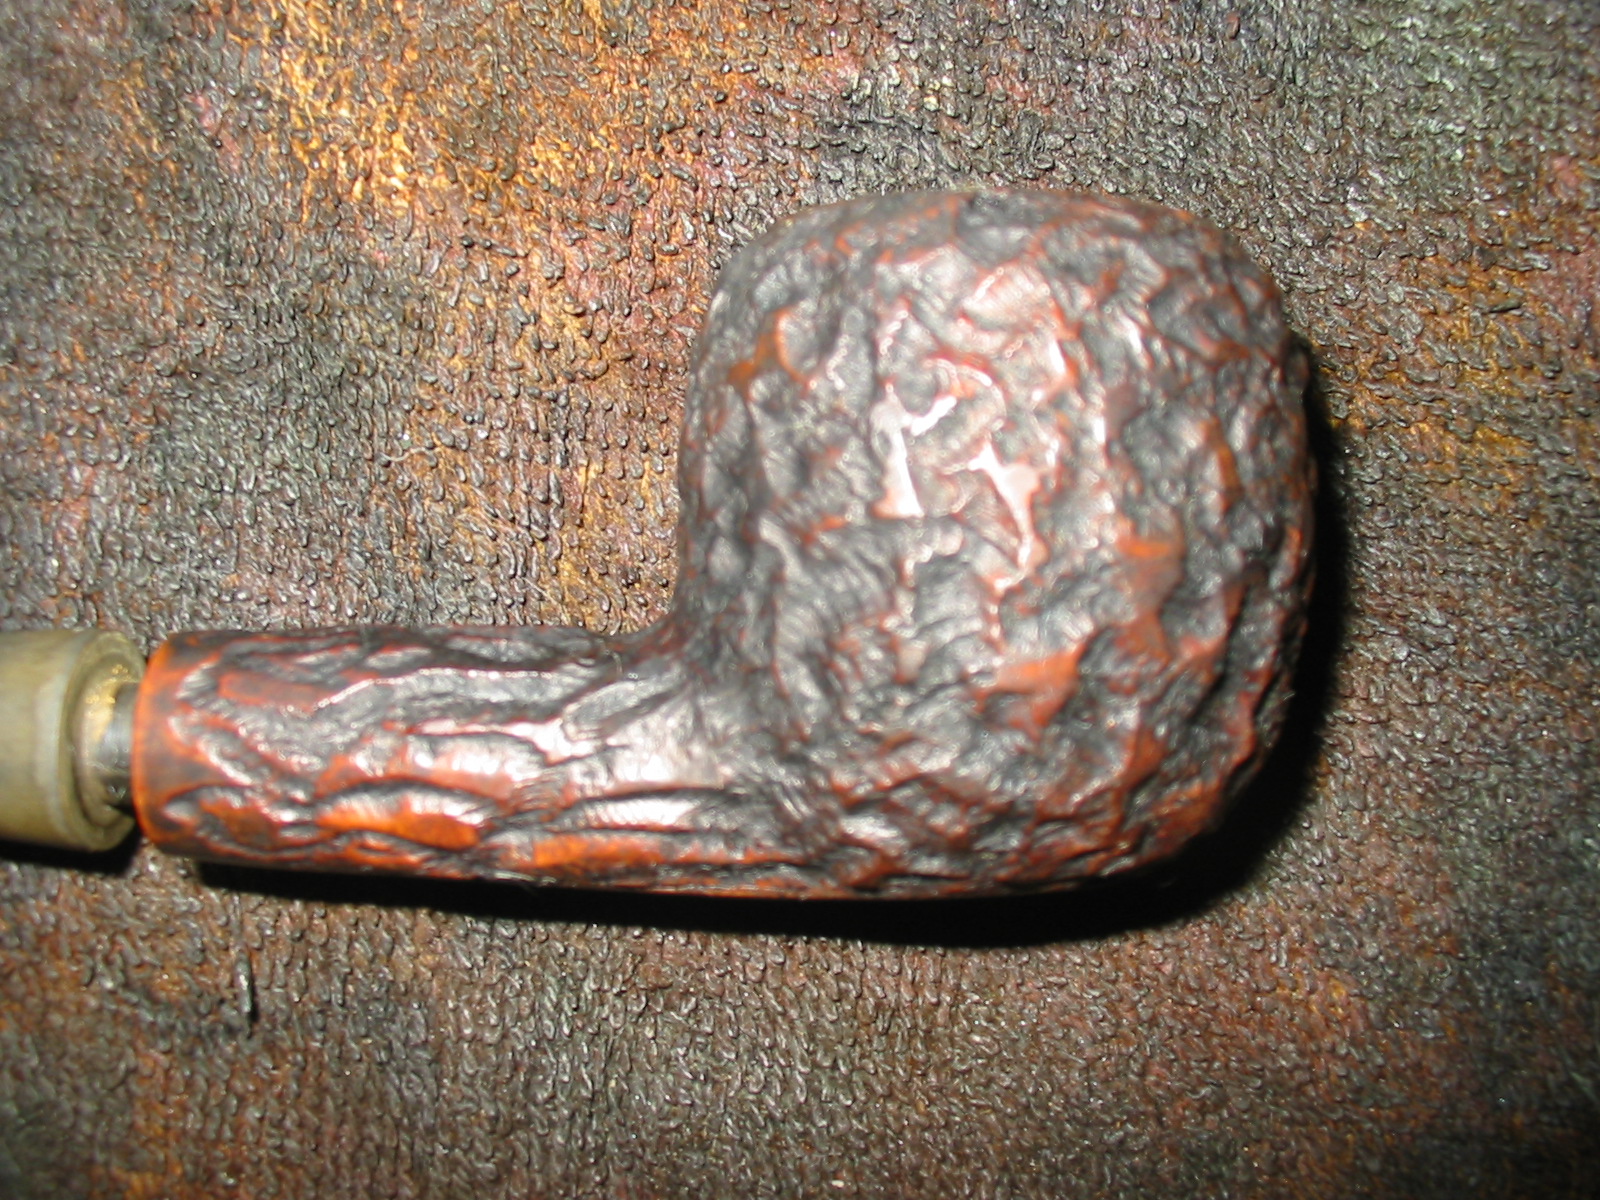
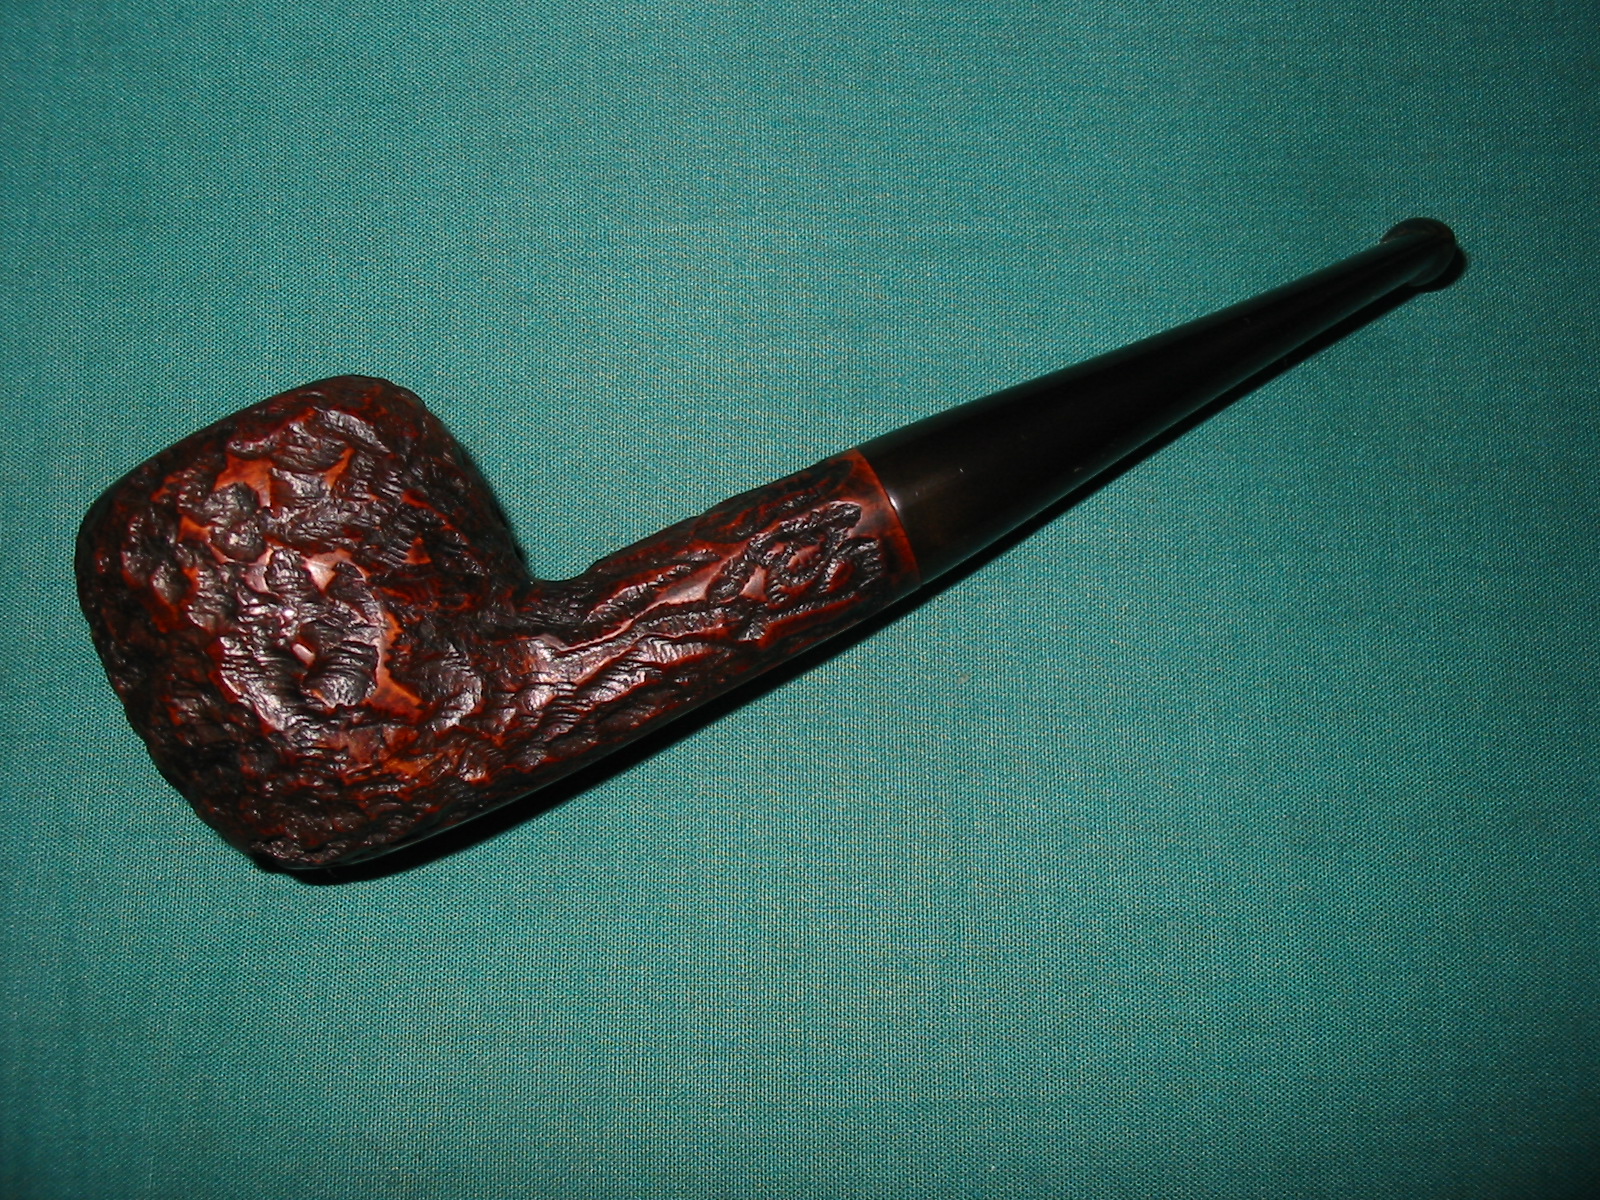
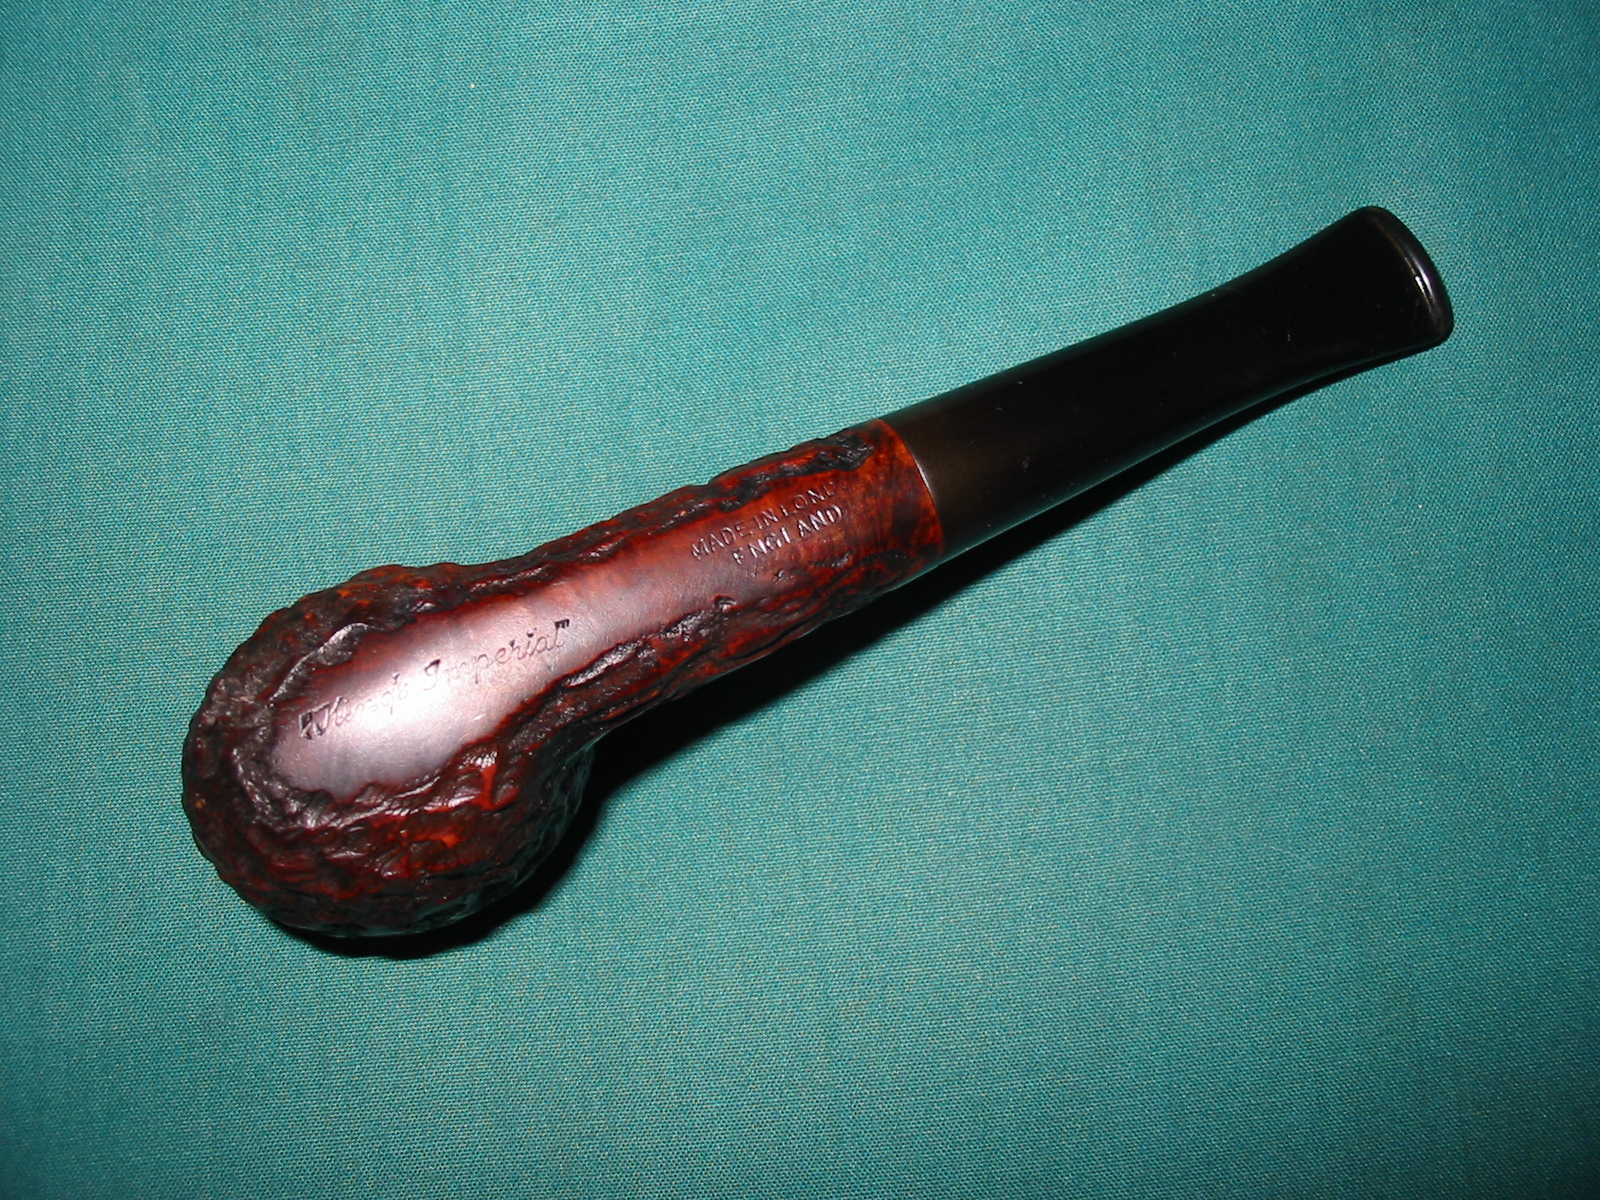
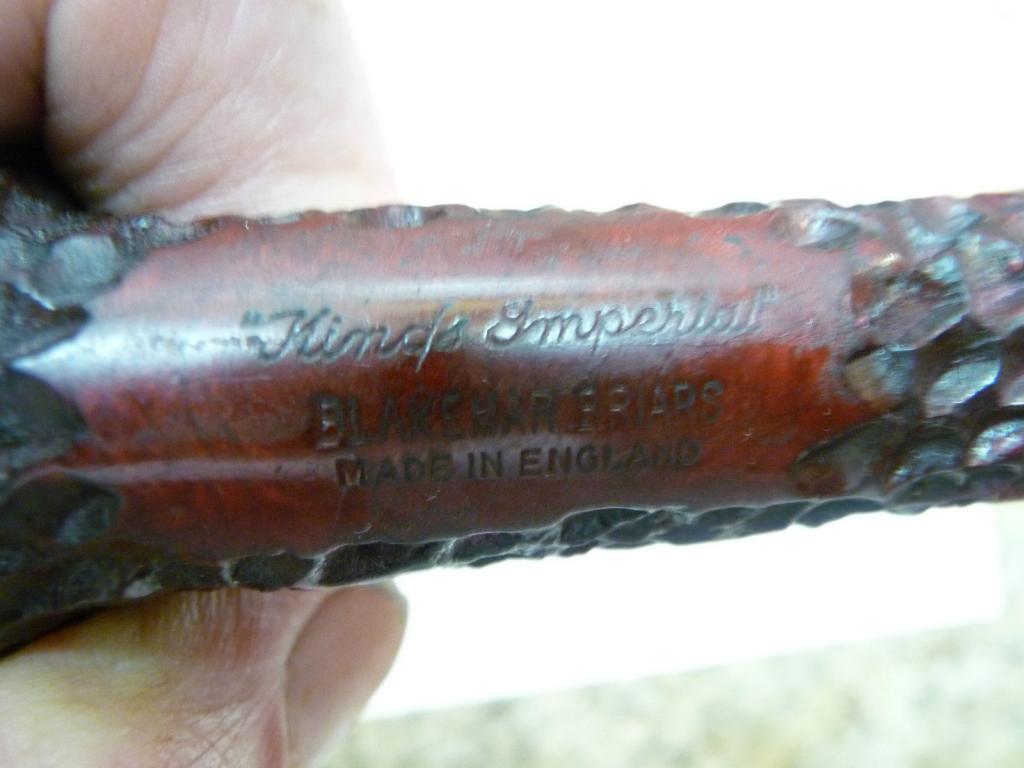
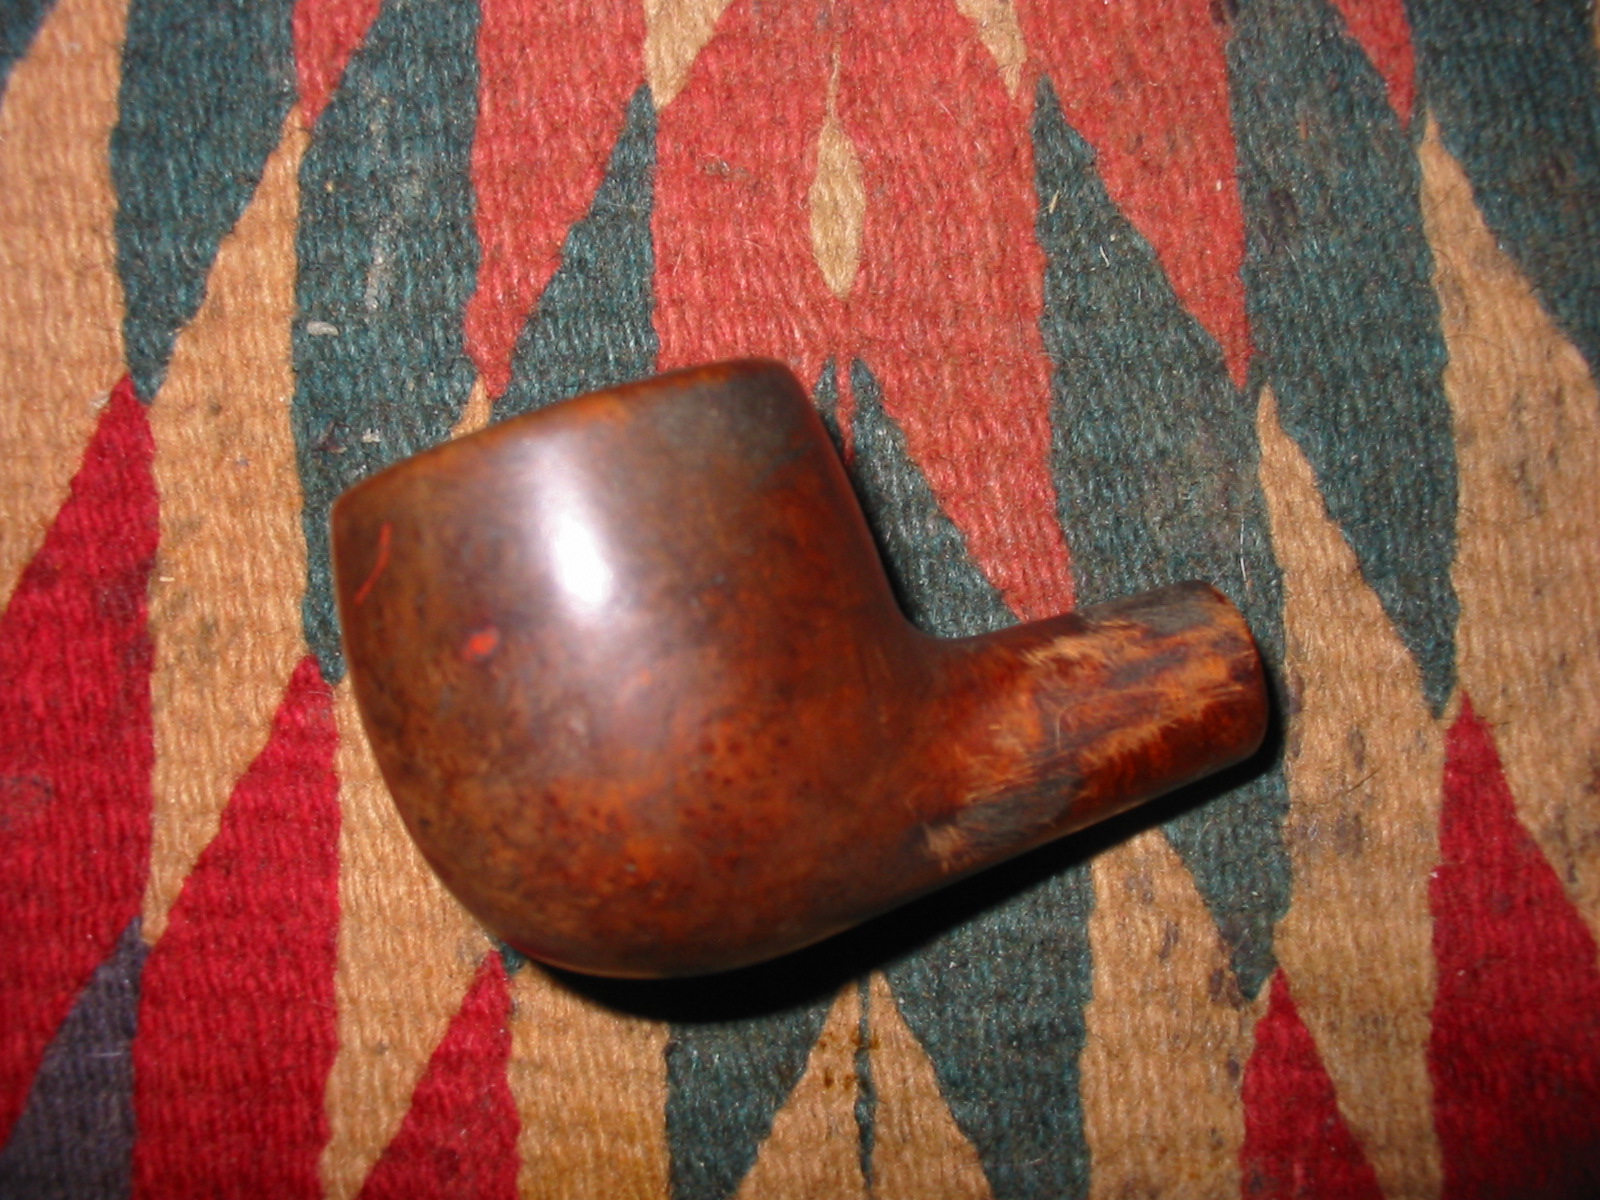
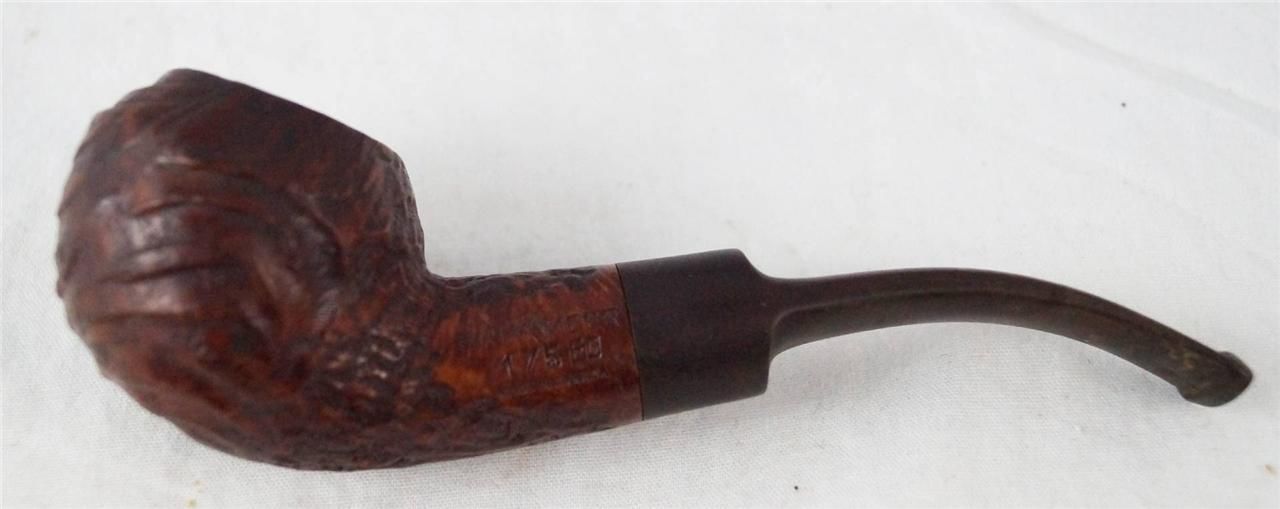
I recently bought a job lot of Hardcastle estate pipes on eBay and decided that I should document the experience of restoring one of them. Which one? Why, the grottiest one of course, “Nothing ventured, nothing gained.”

I am delighted at the opportunity to share my experience here. Steve and this blog have been far and away my biggest influences and sources of help when it has come to learning how to restore a pipe, so I feel honoured to be asked for a contribution.

OK, let’s get down to it.
Chiz1

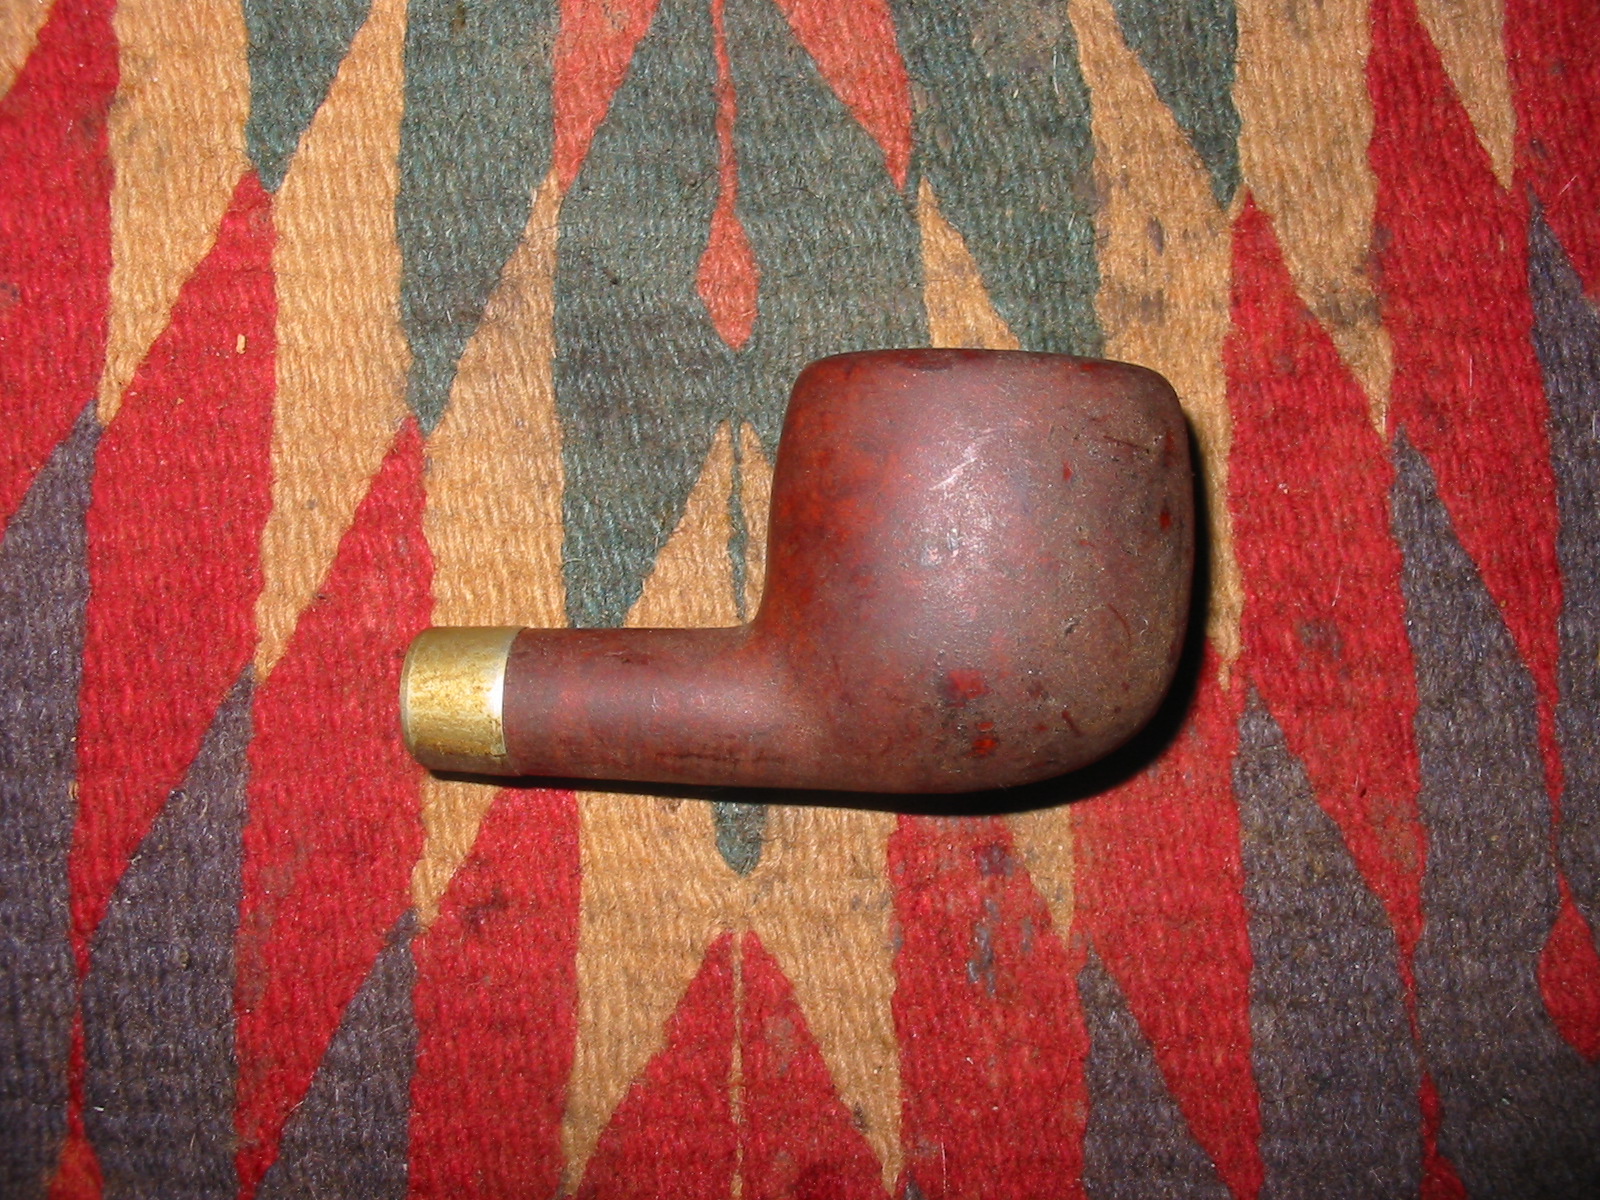
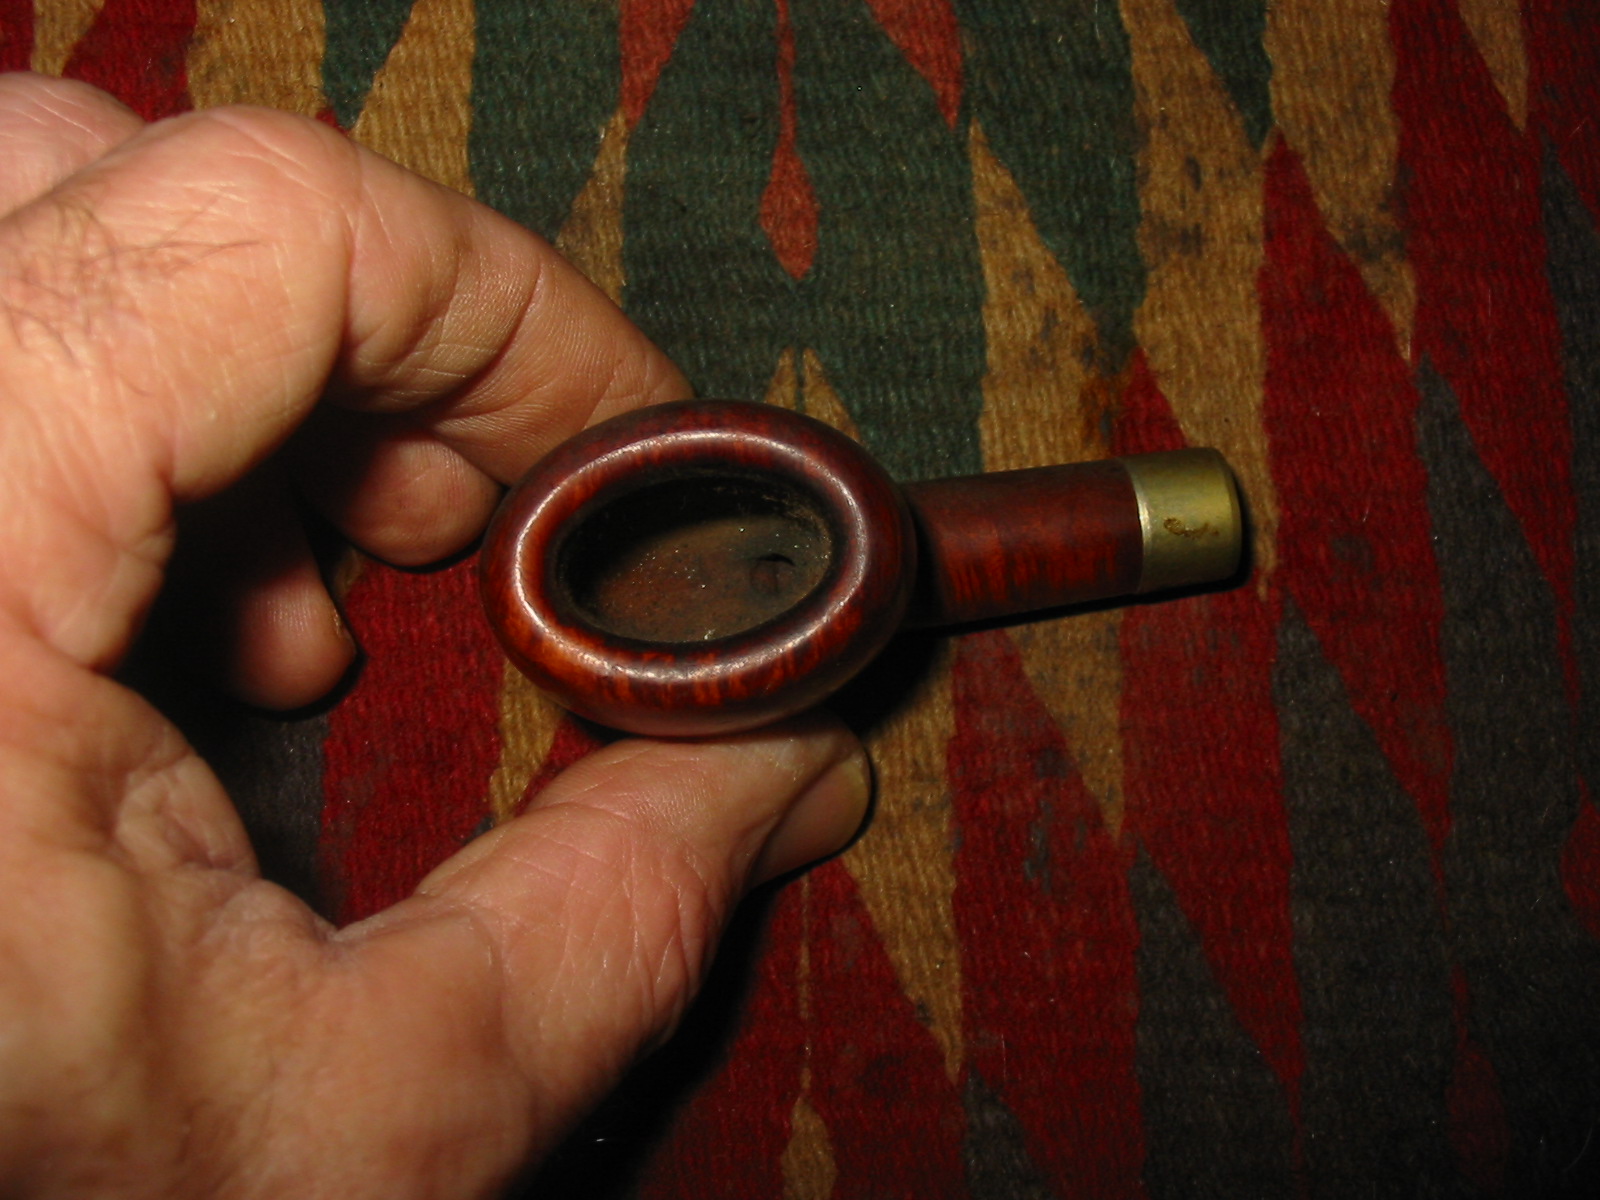
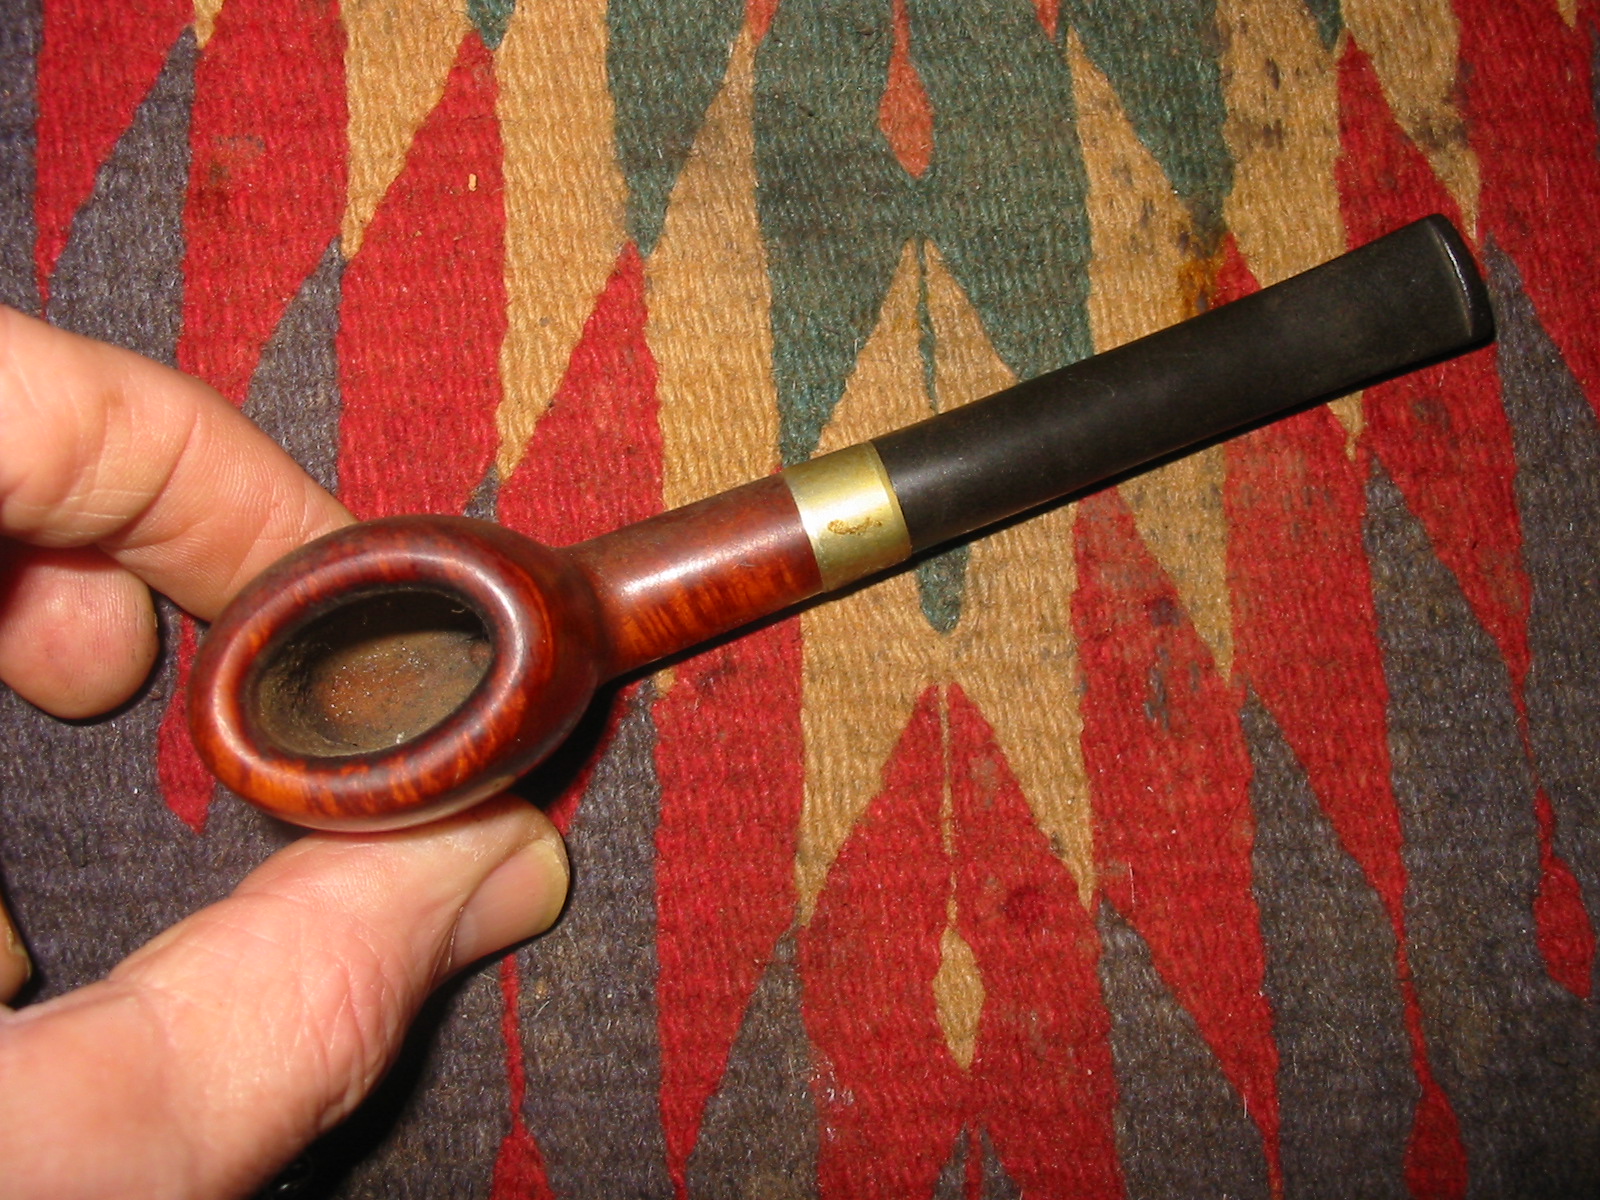
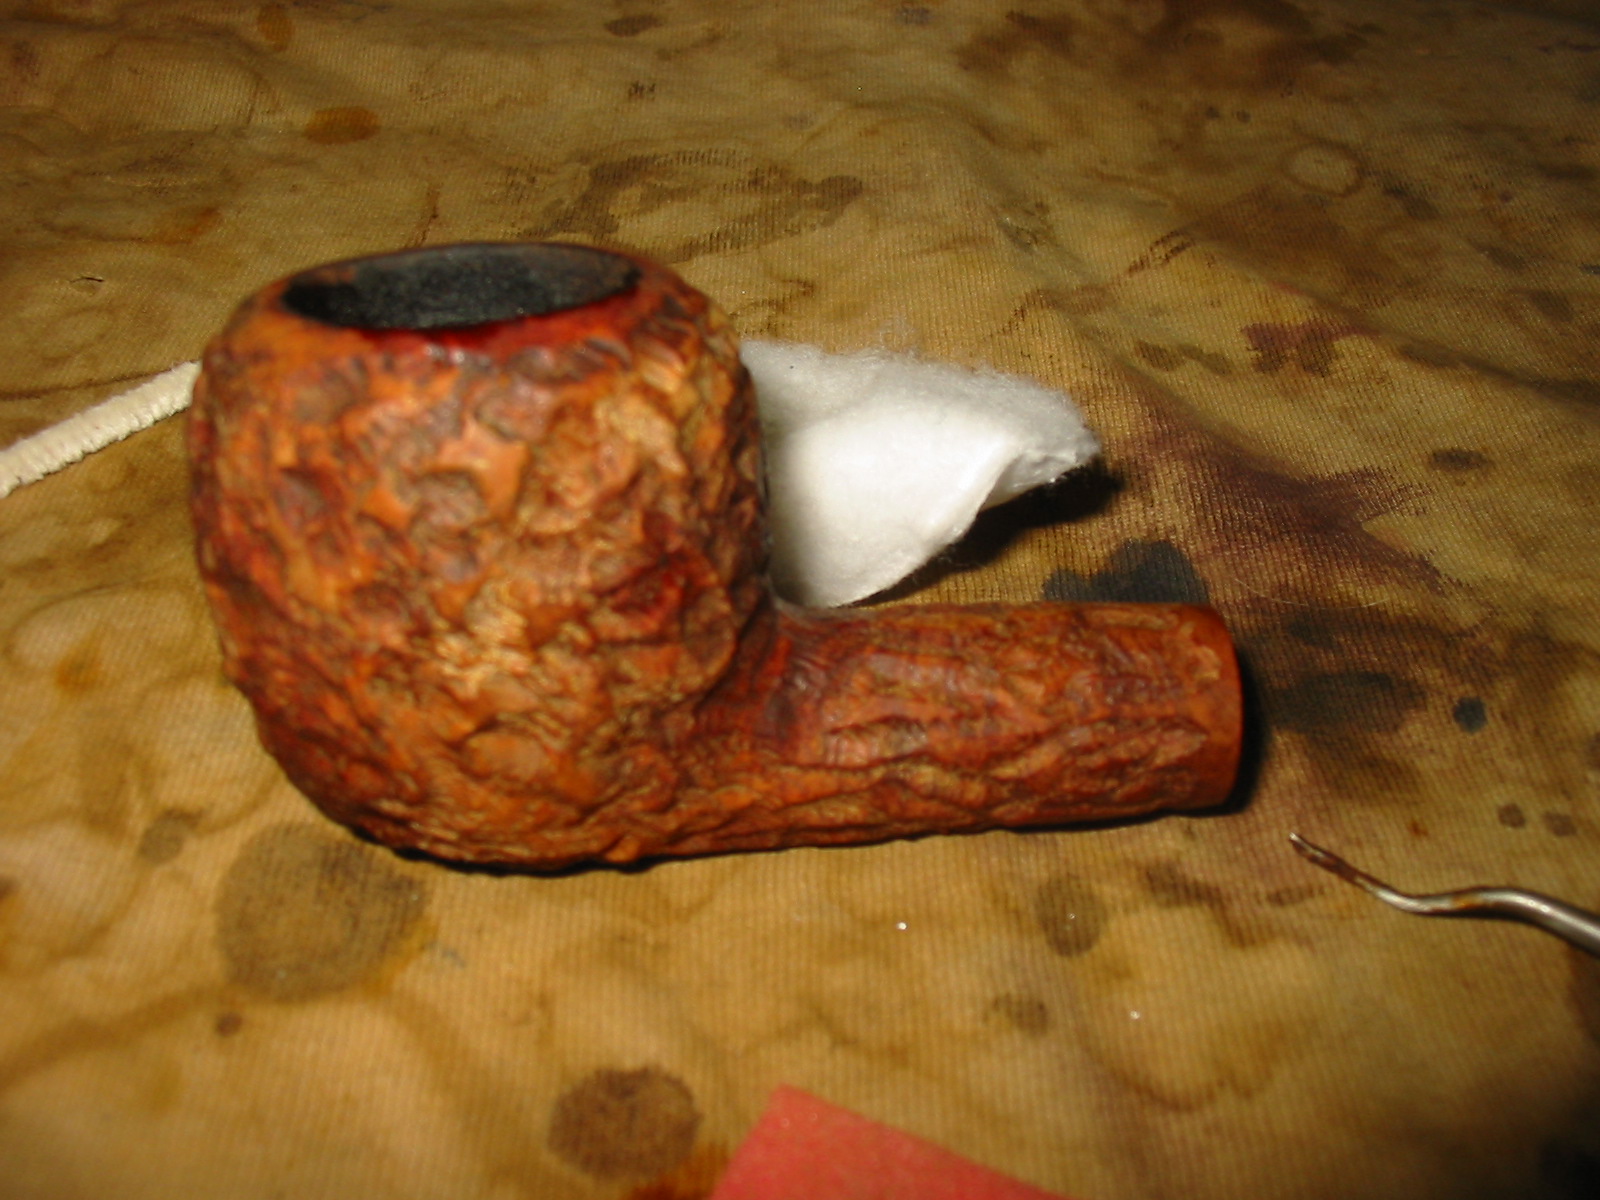
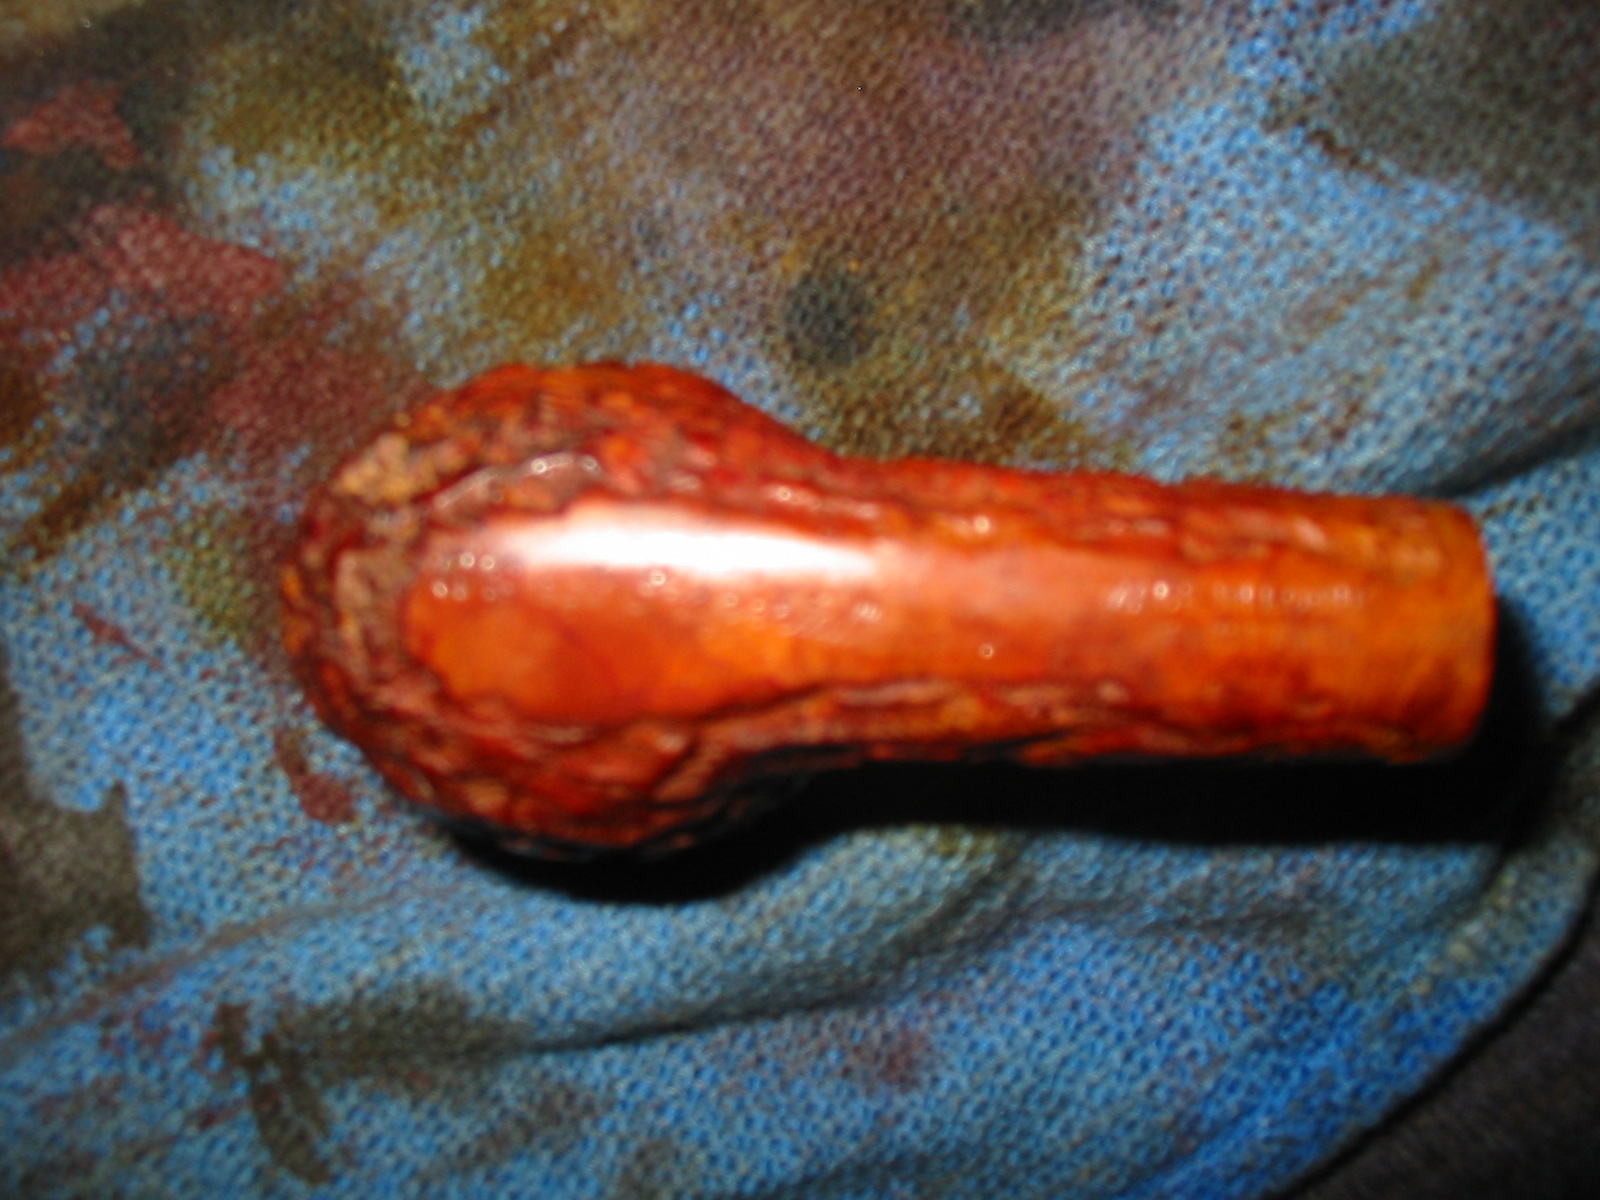
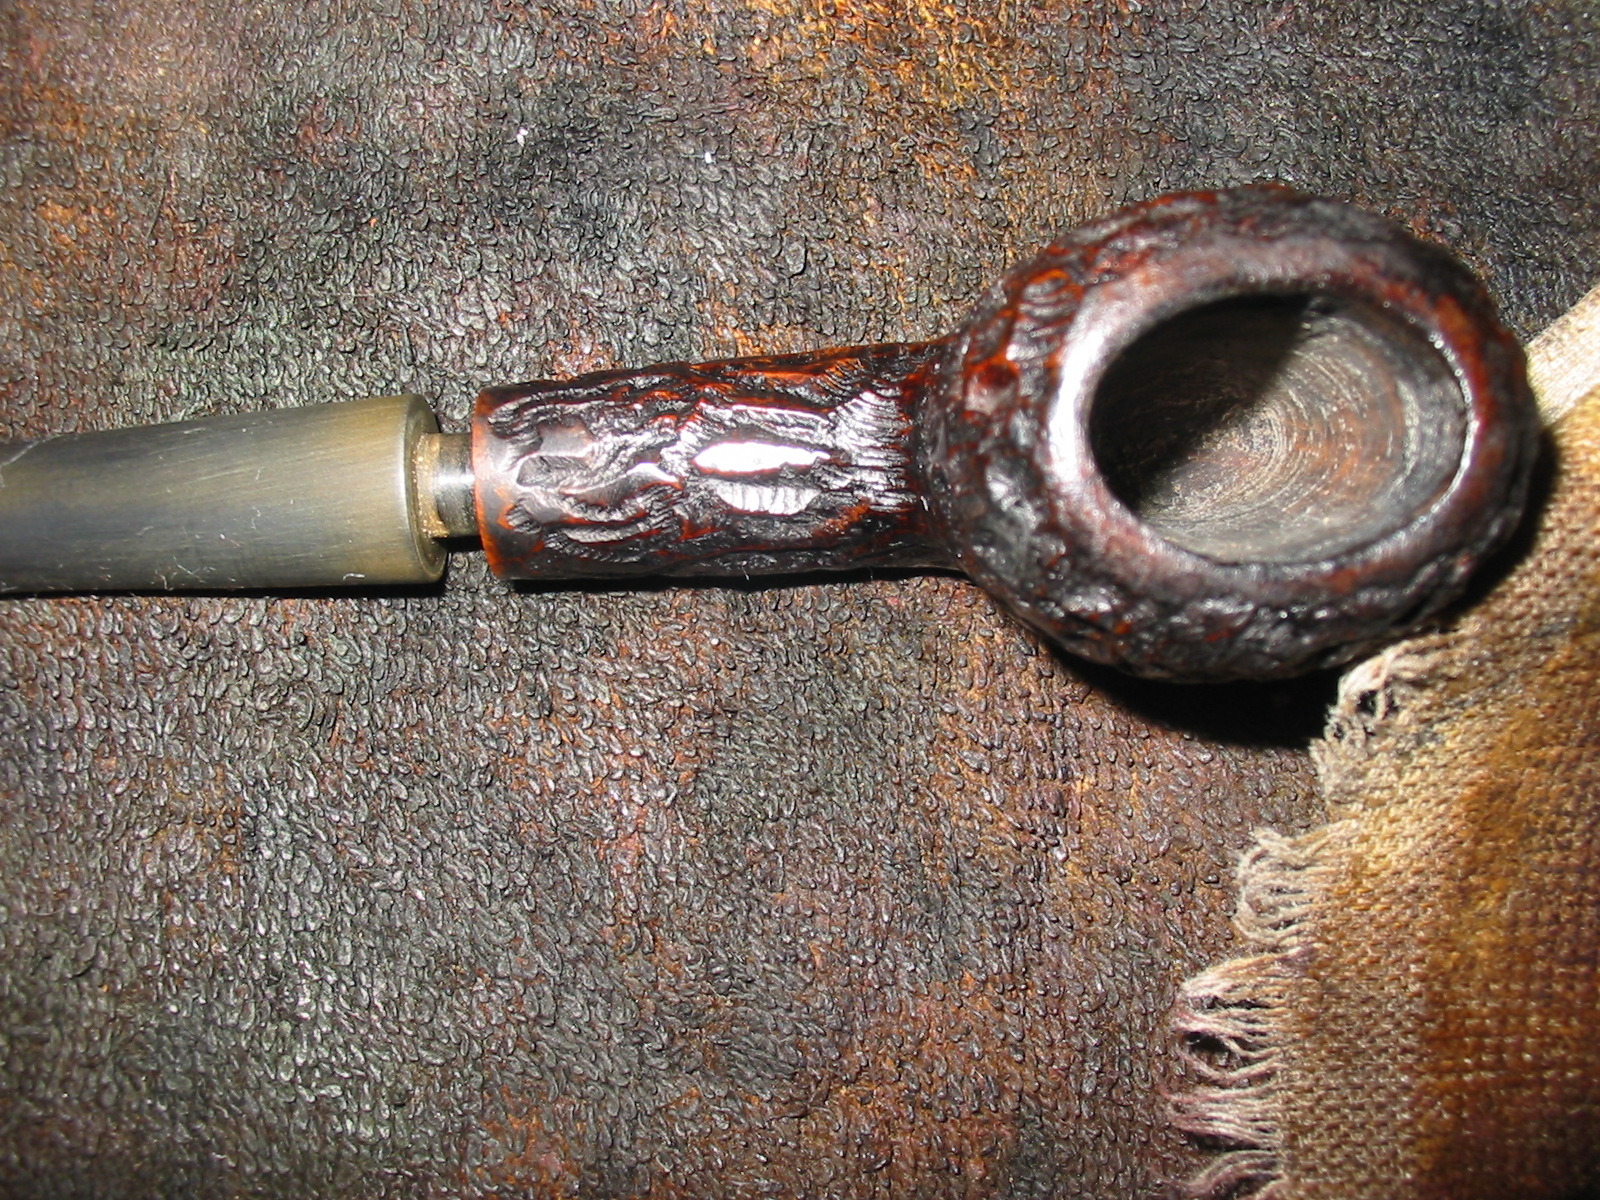
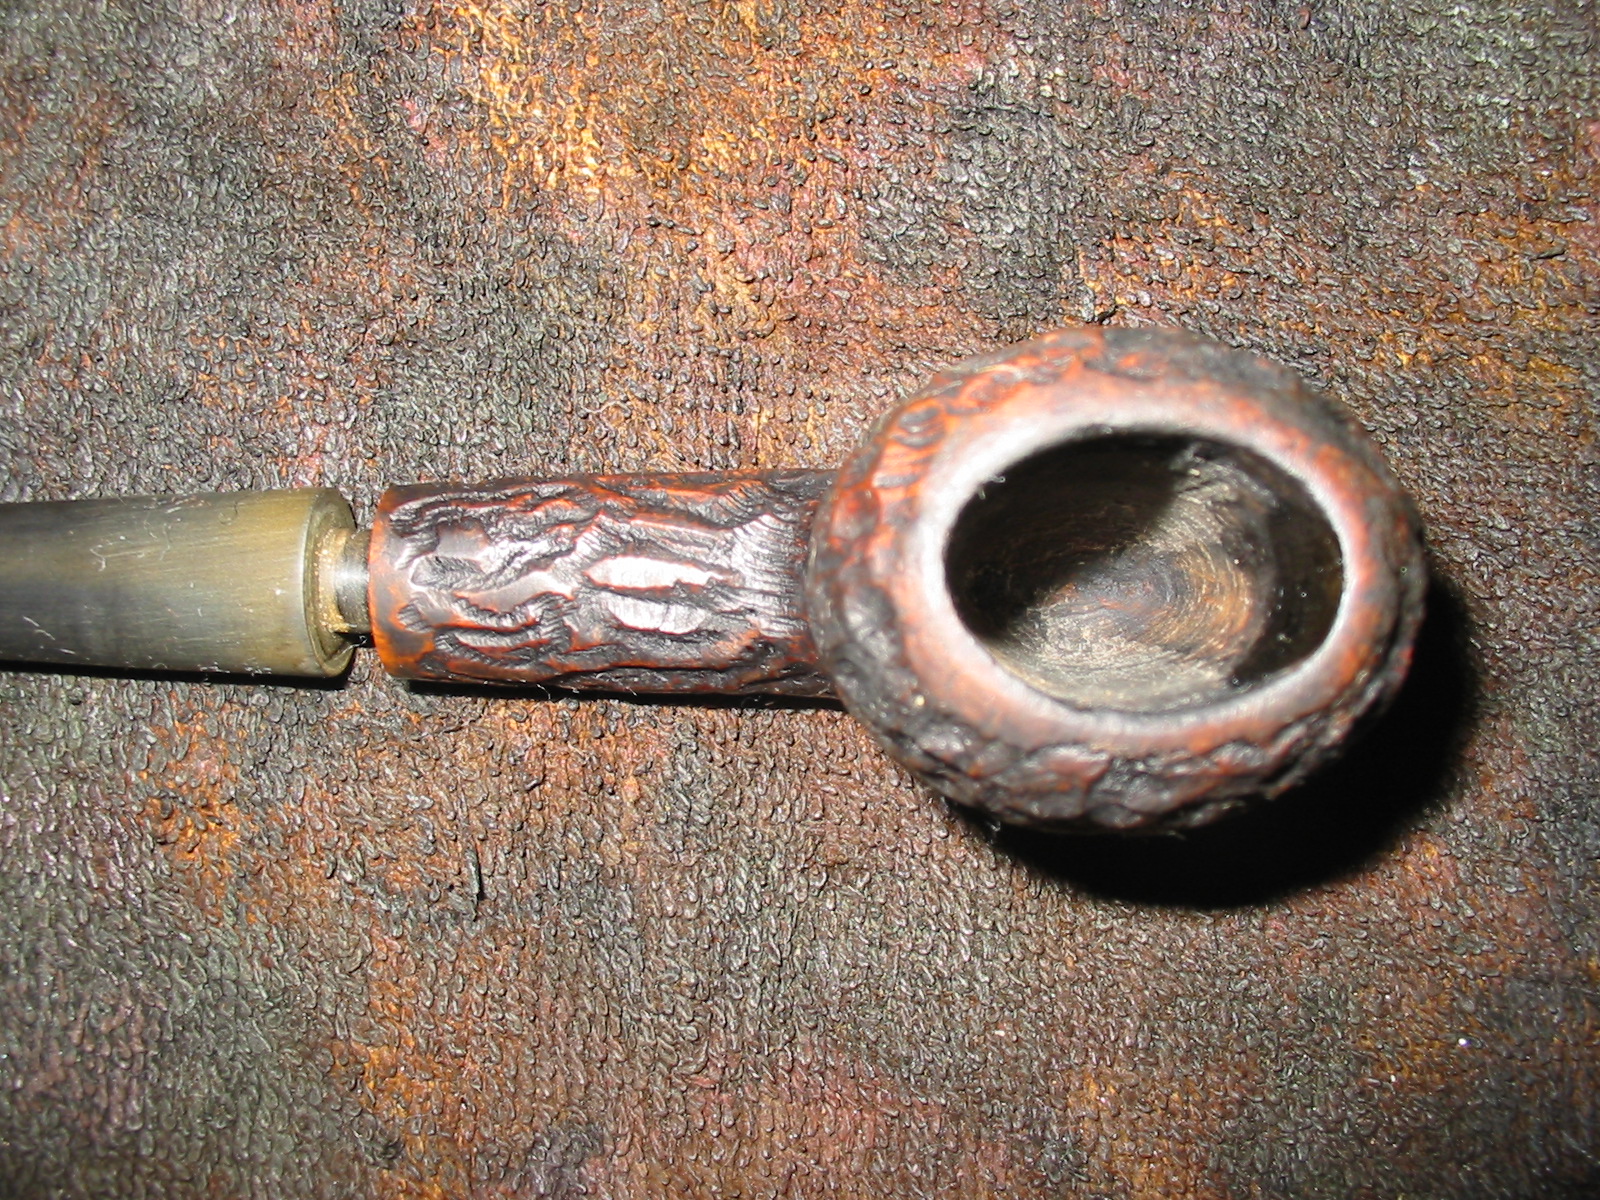
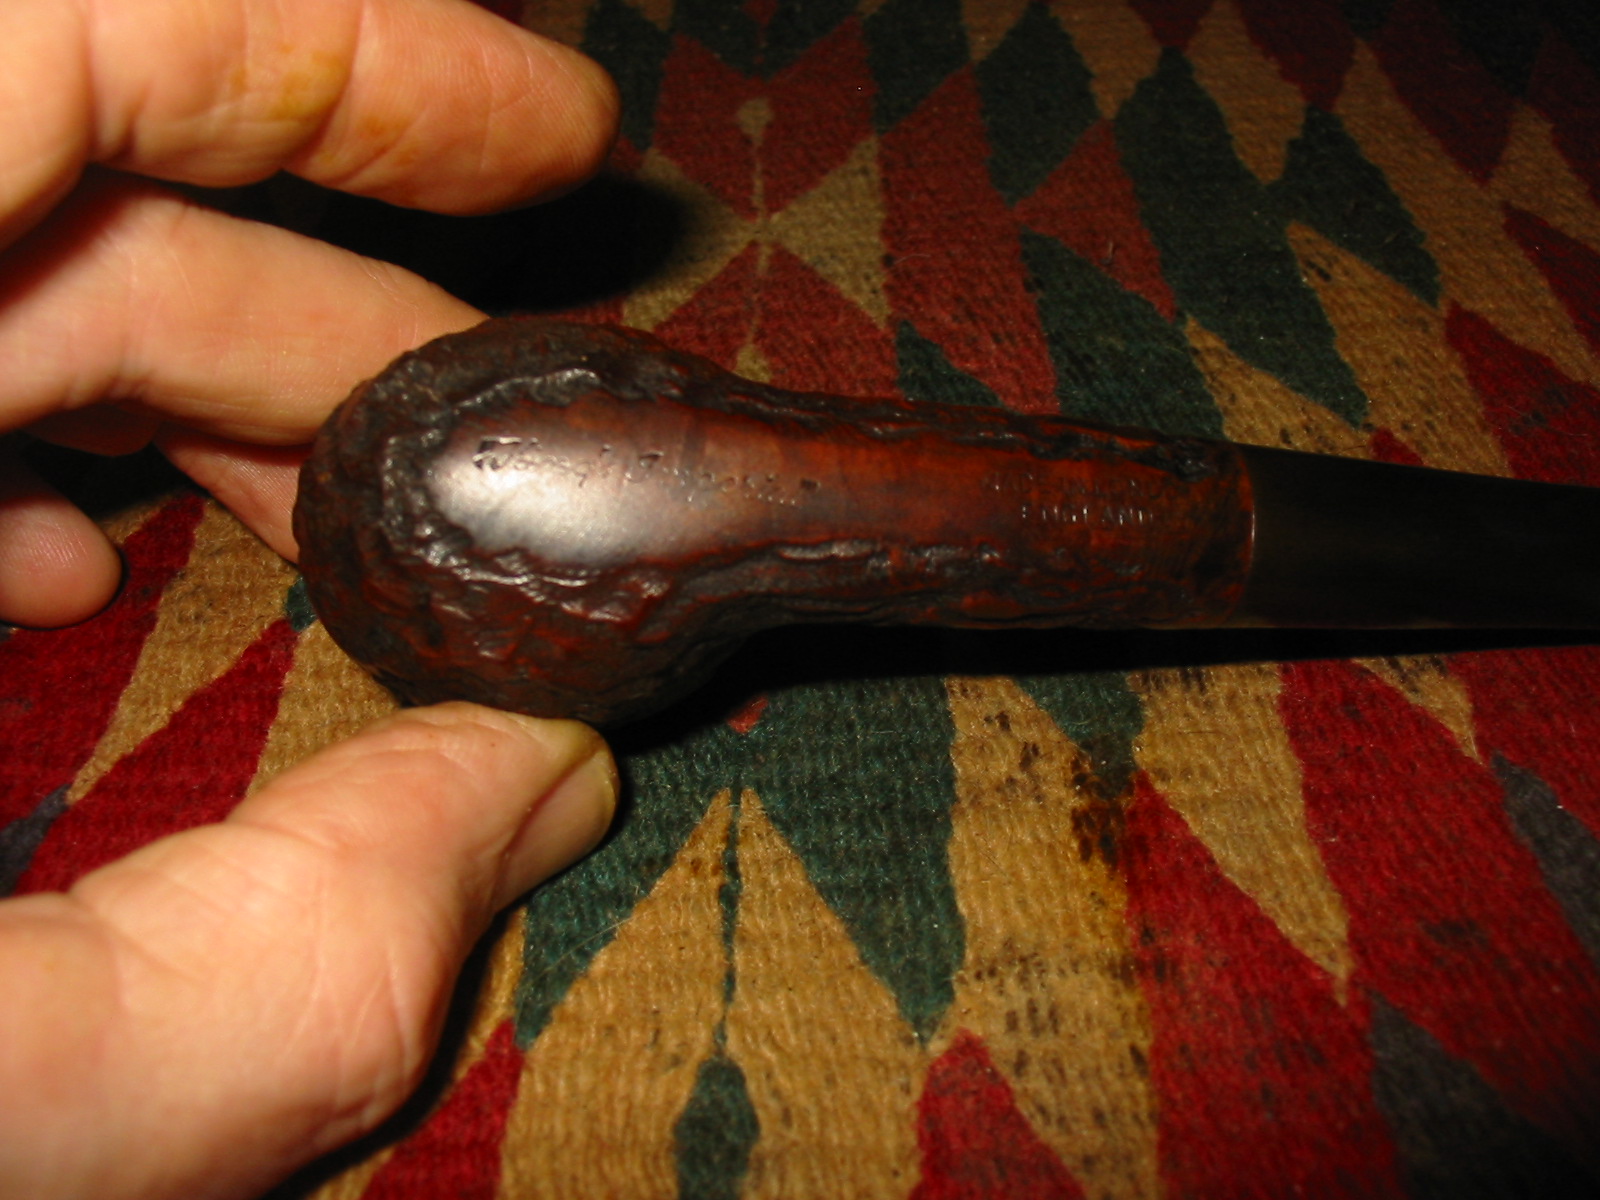
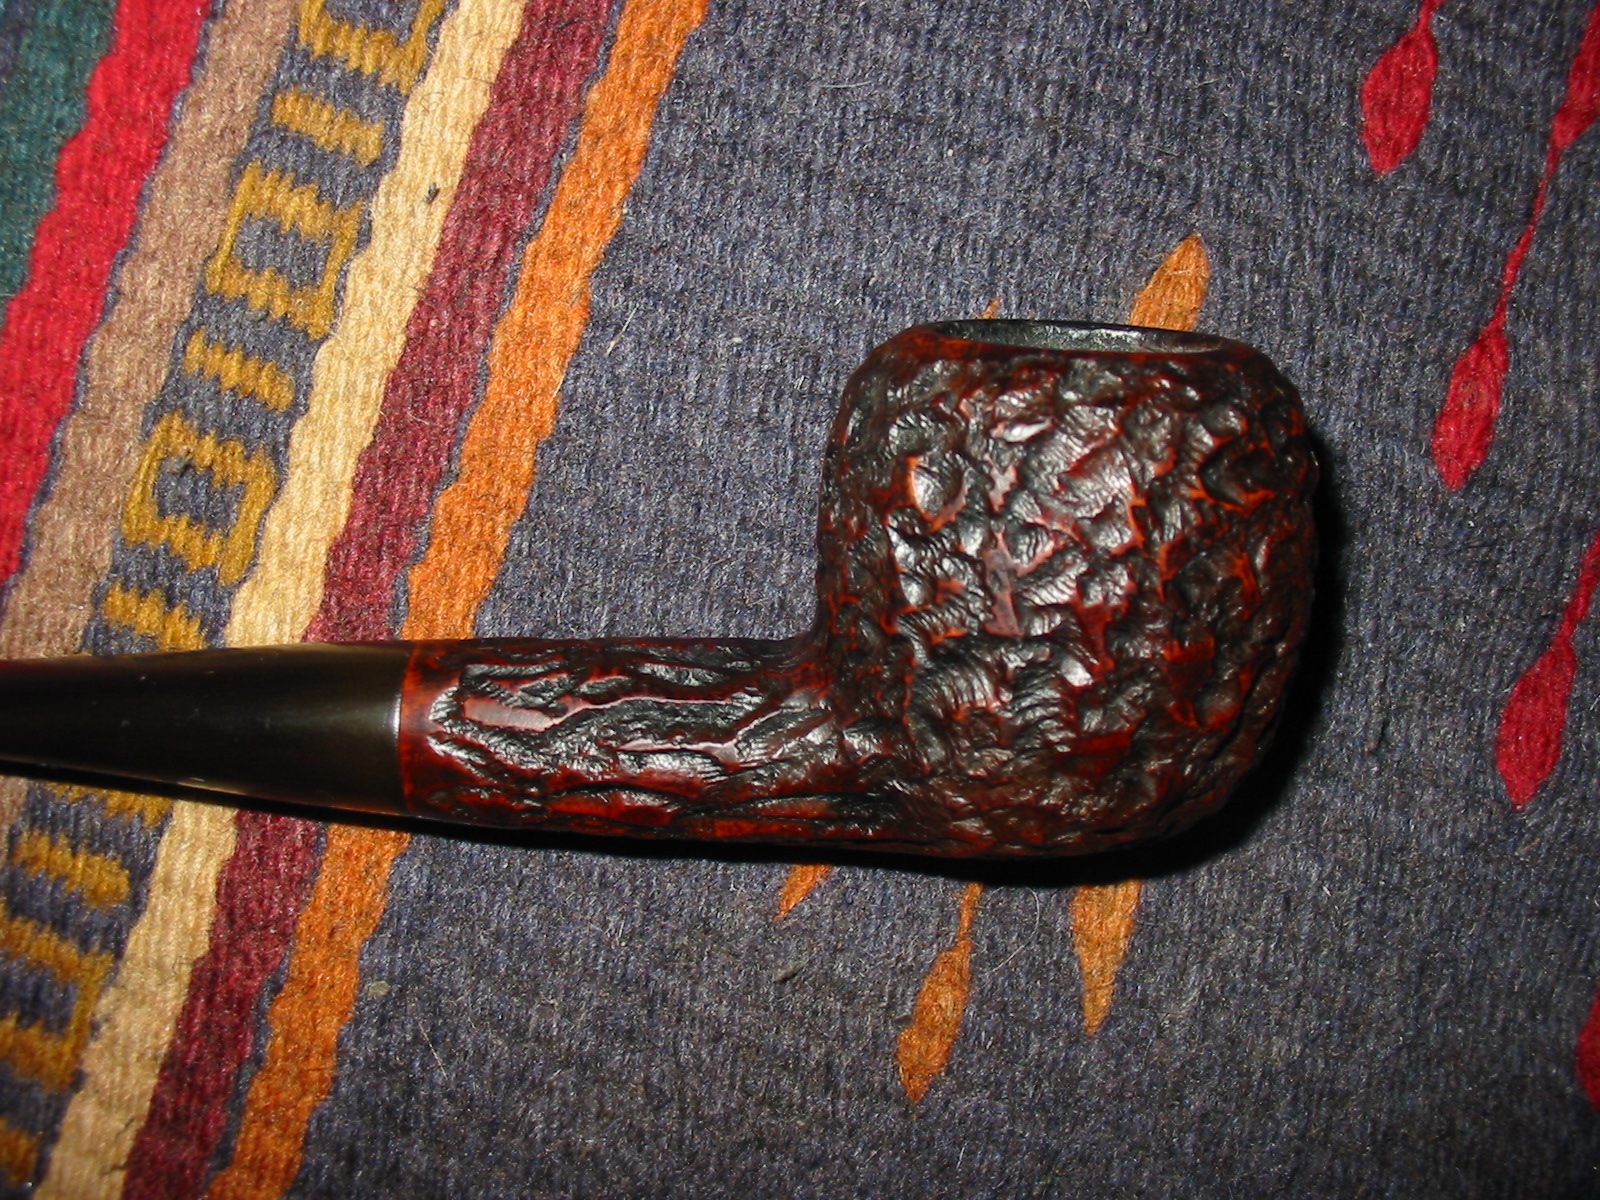
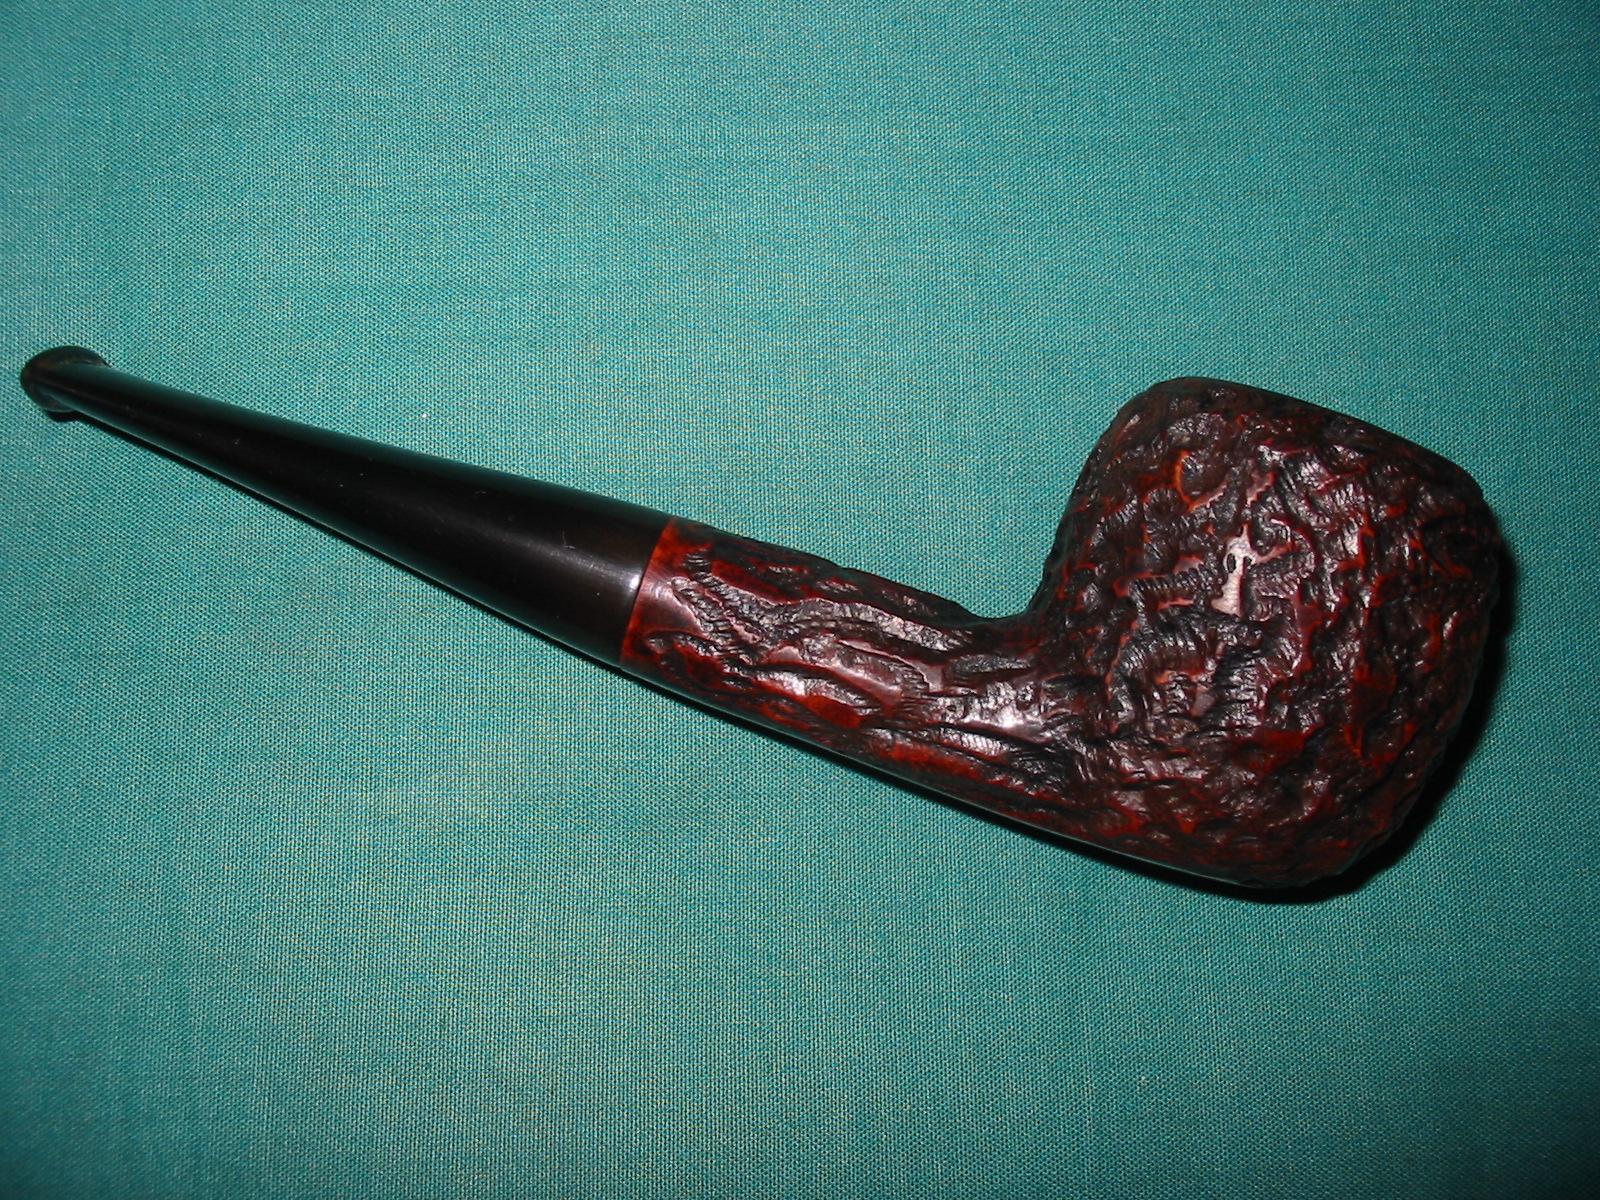
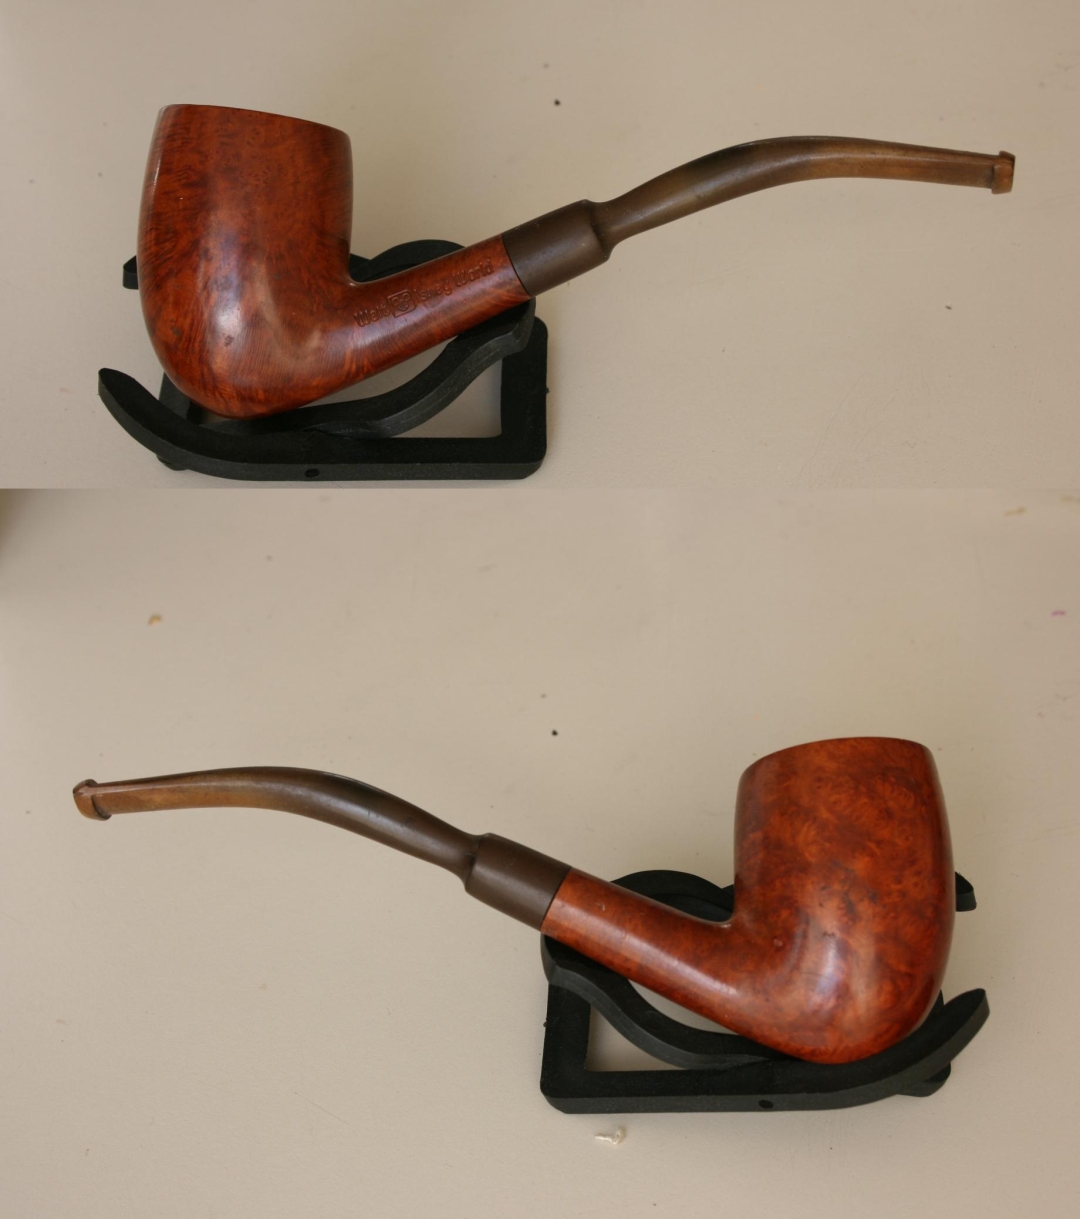
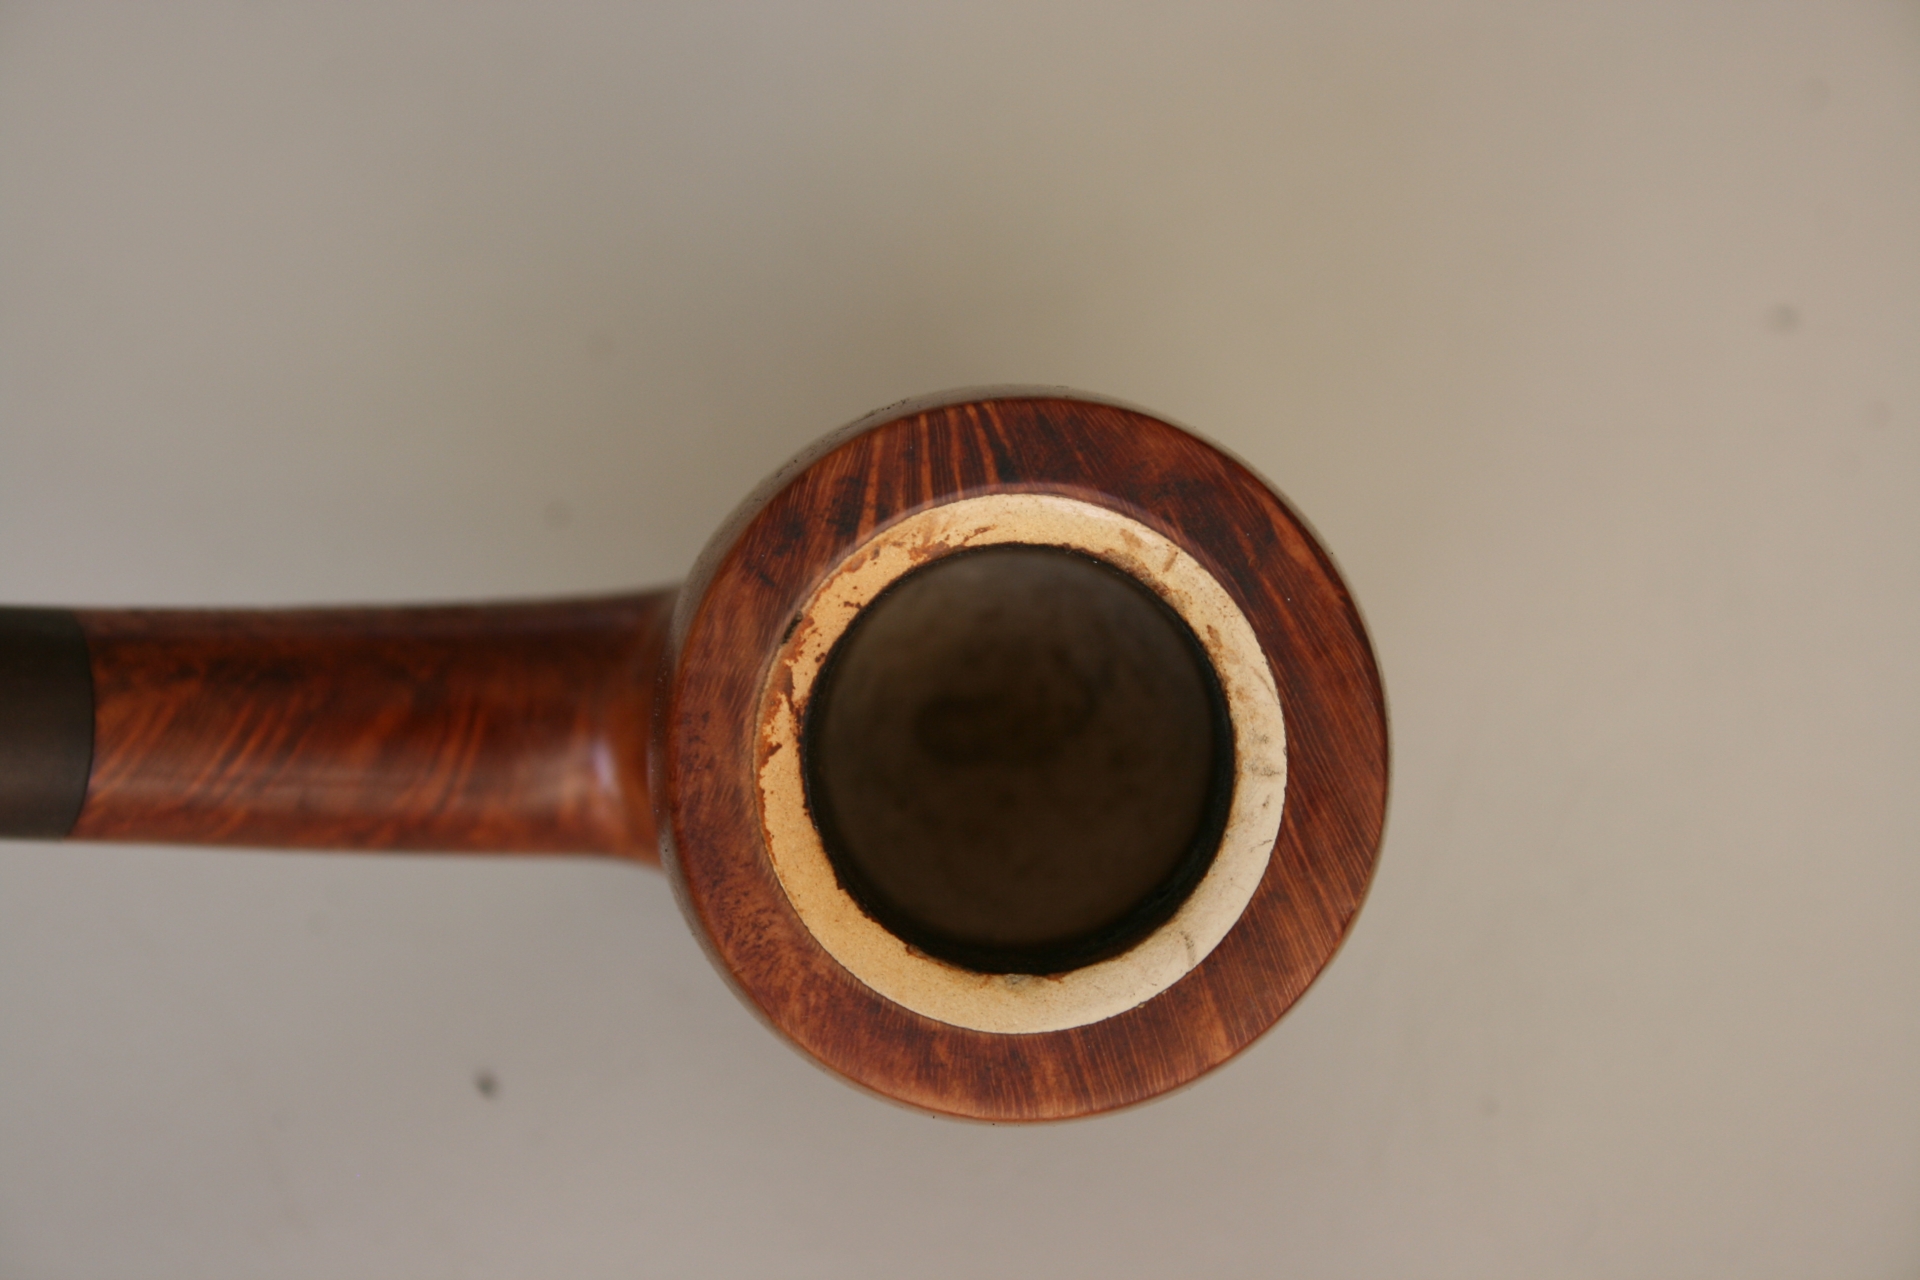
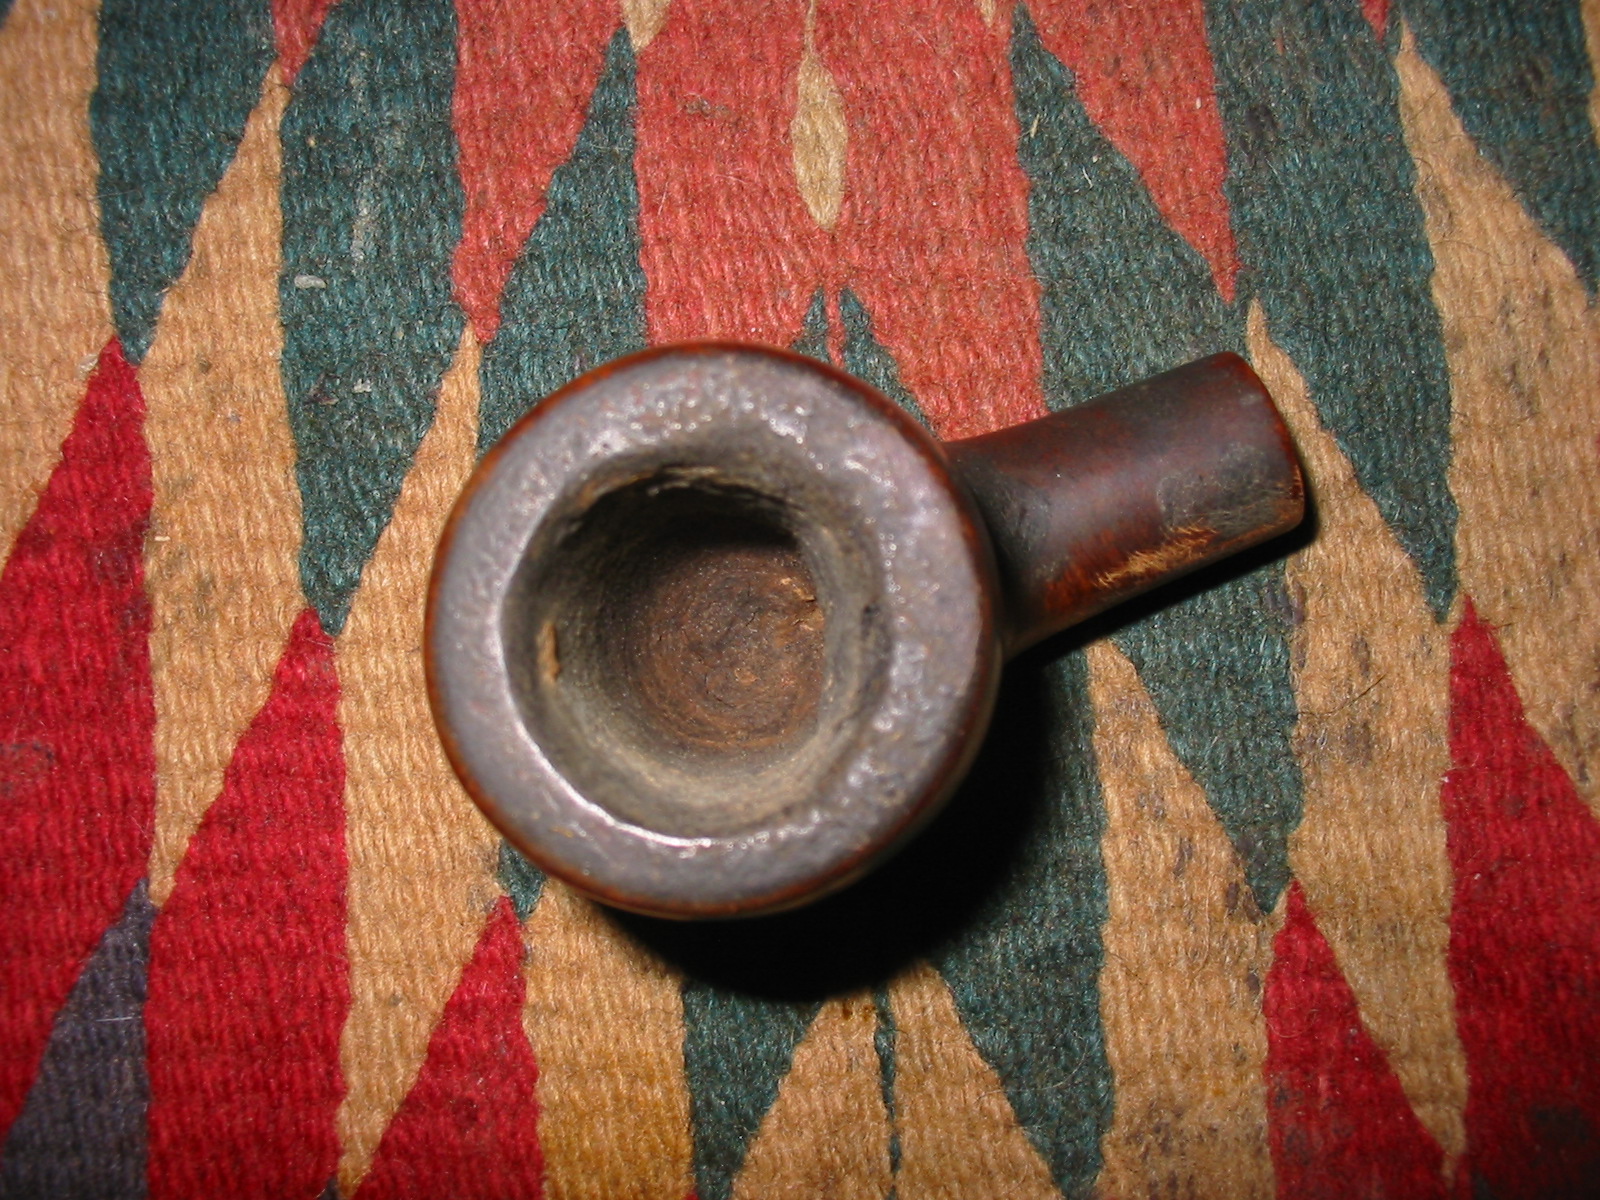
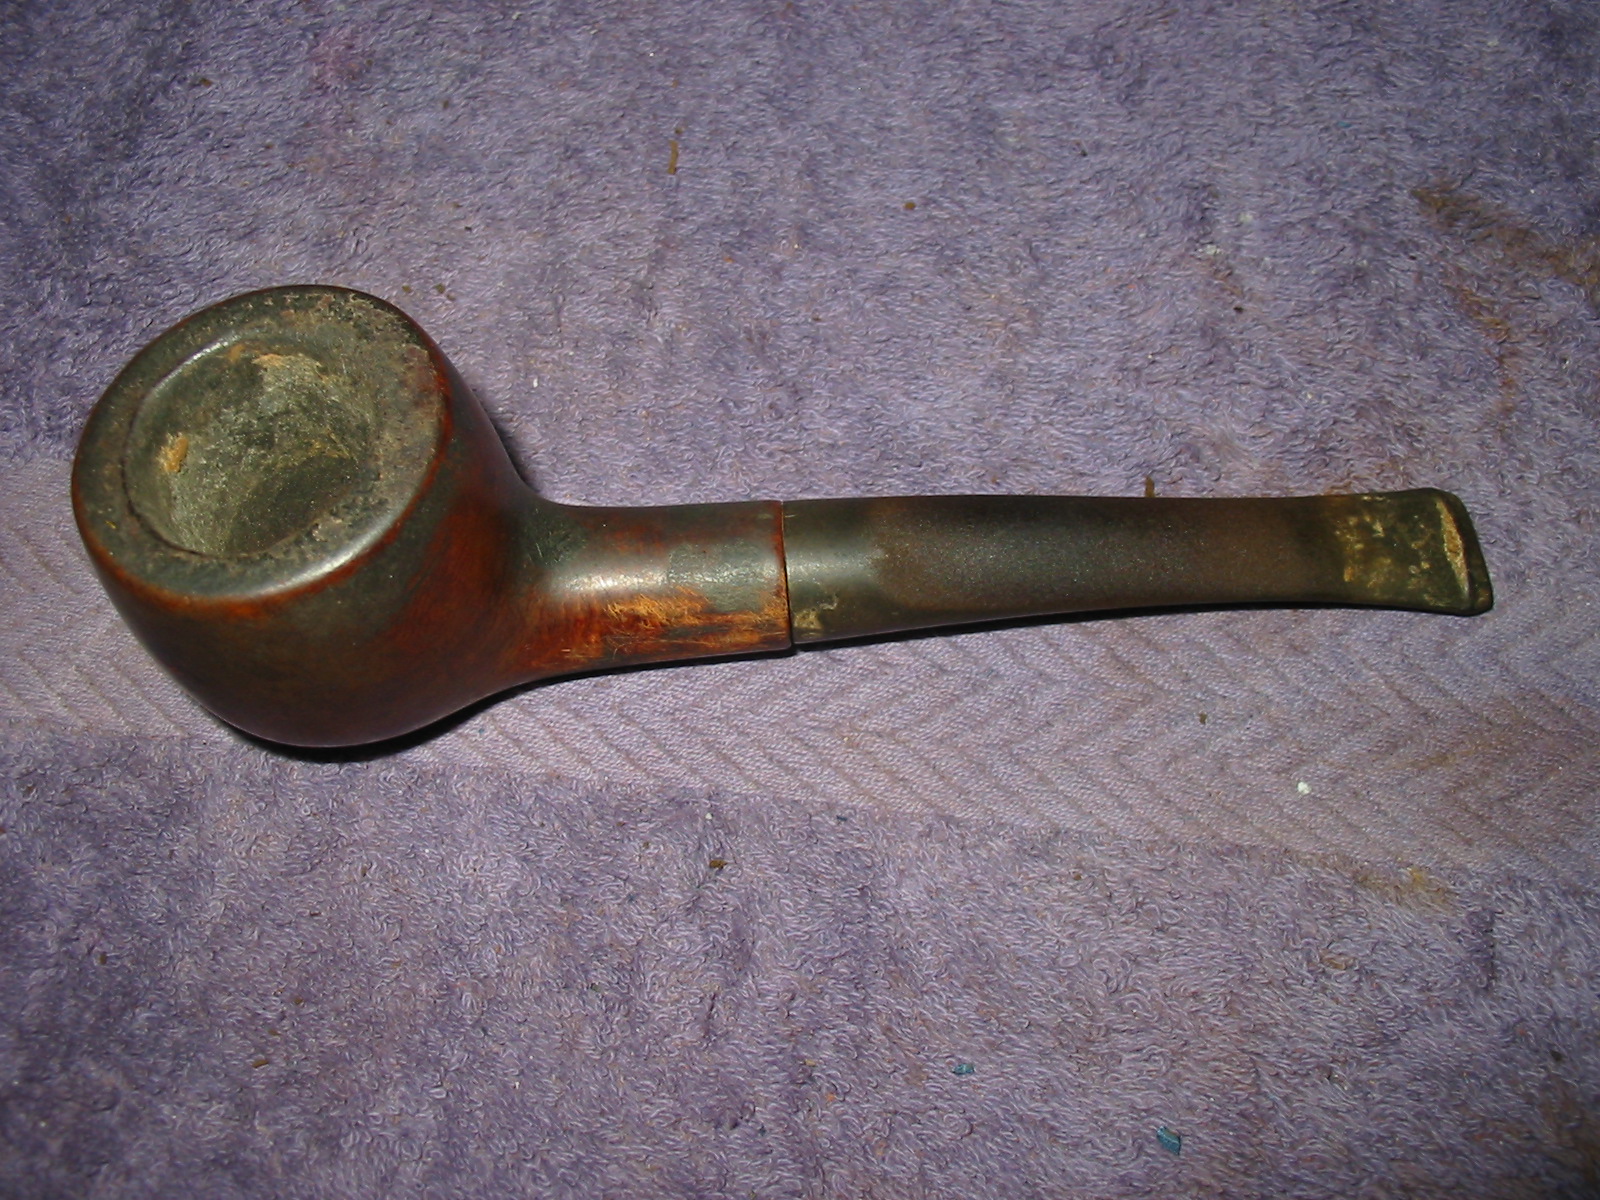
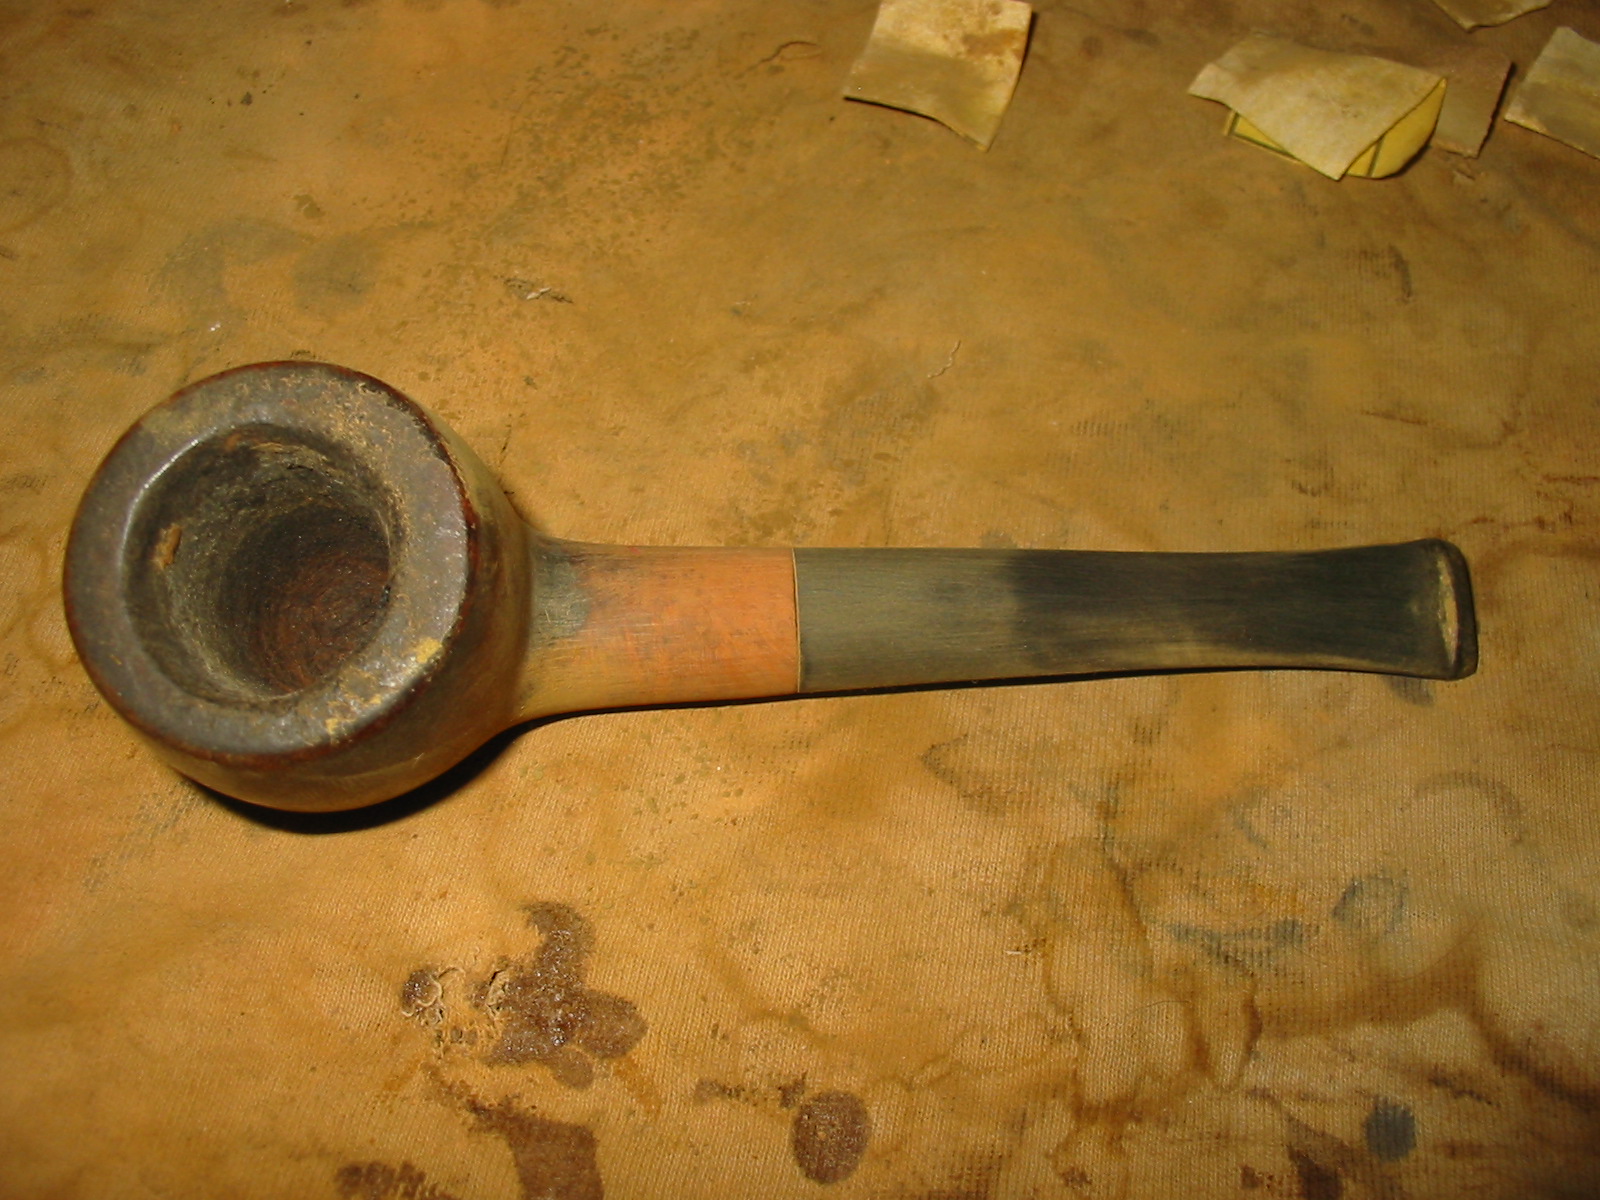
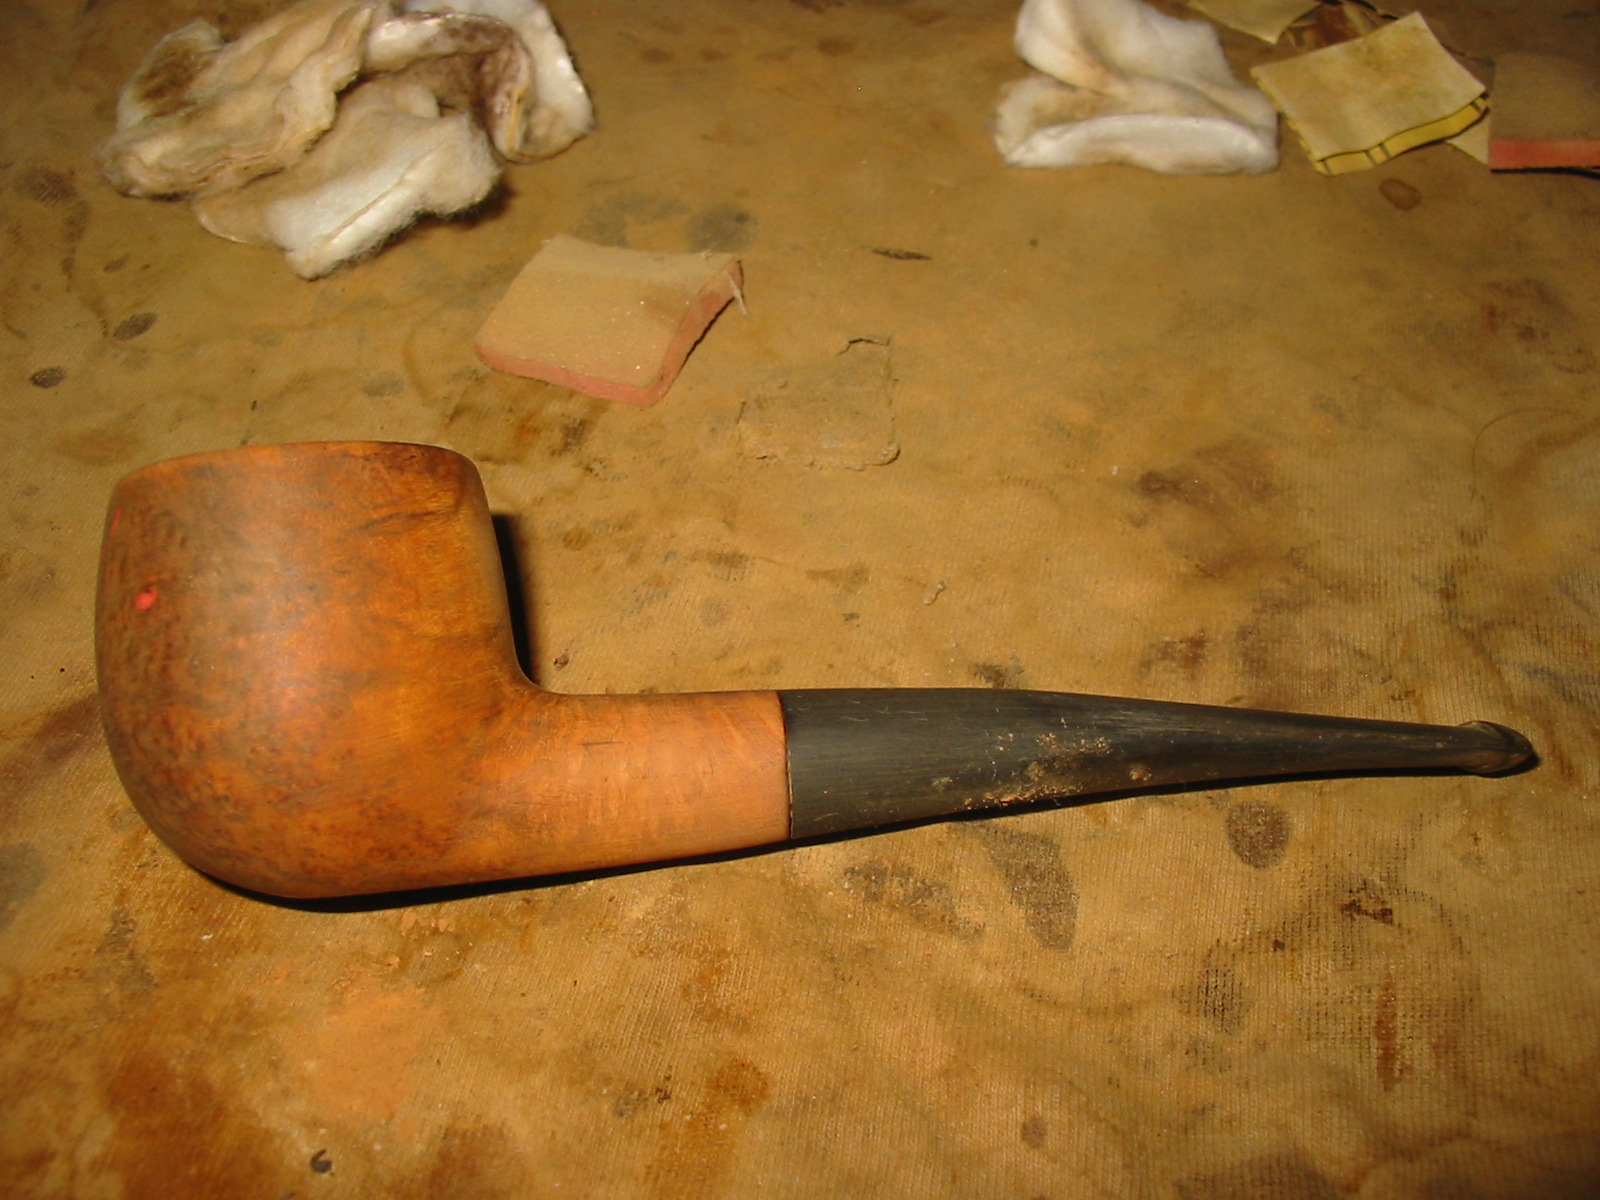
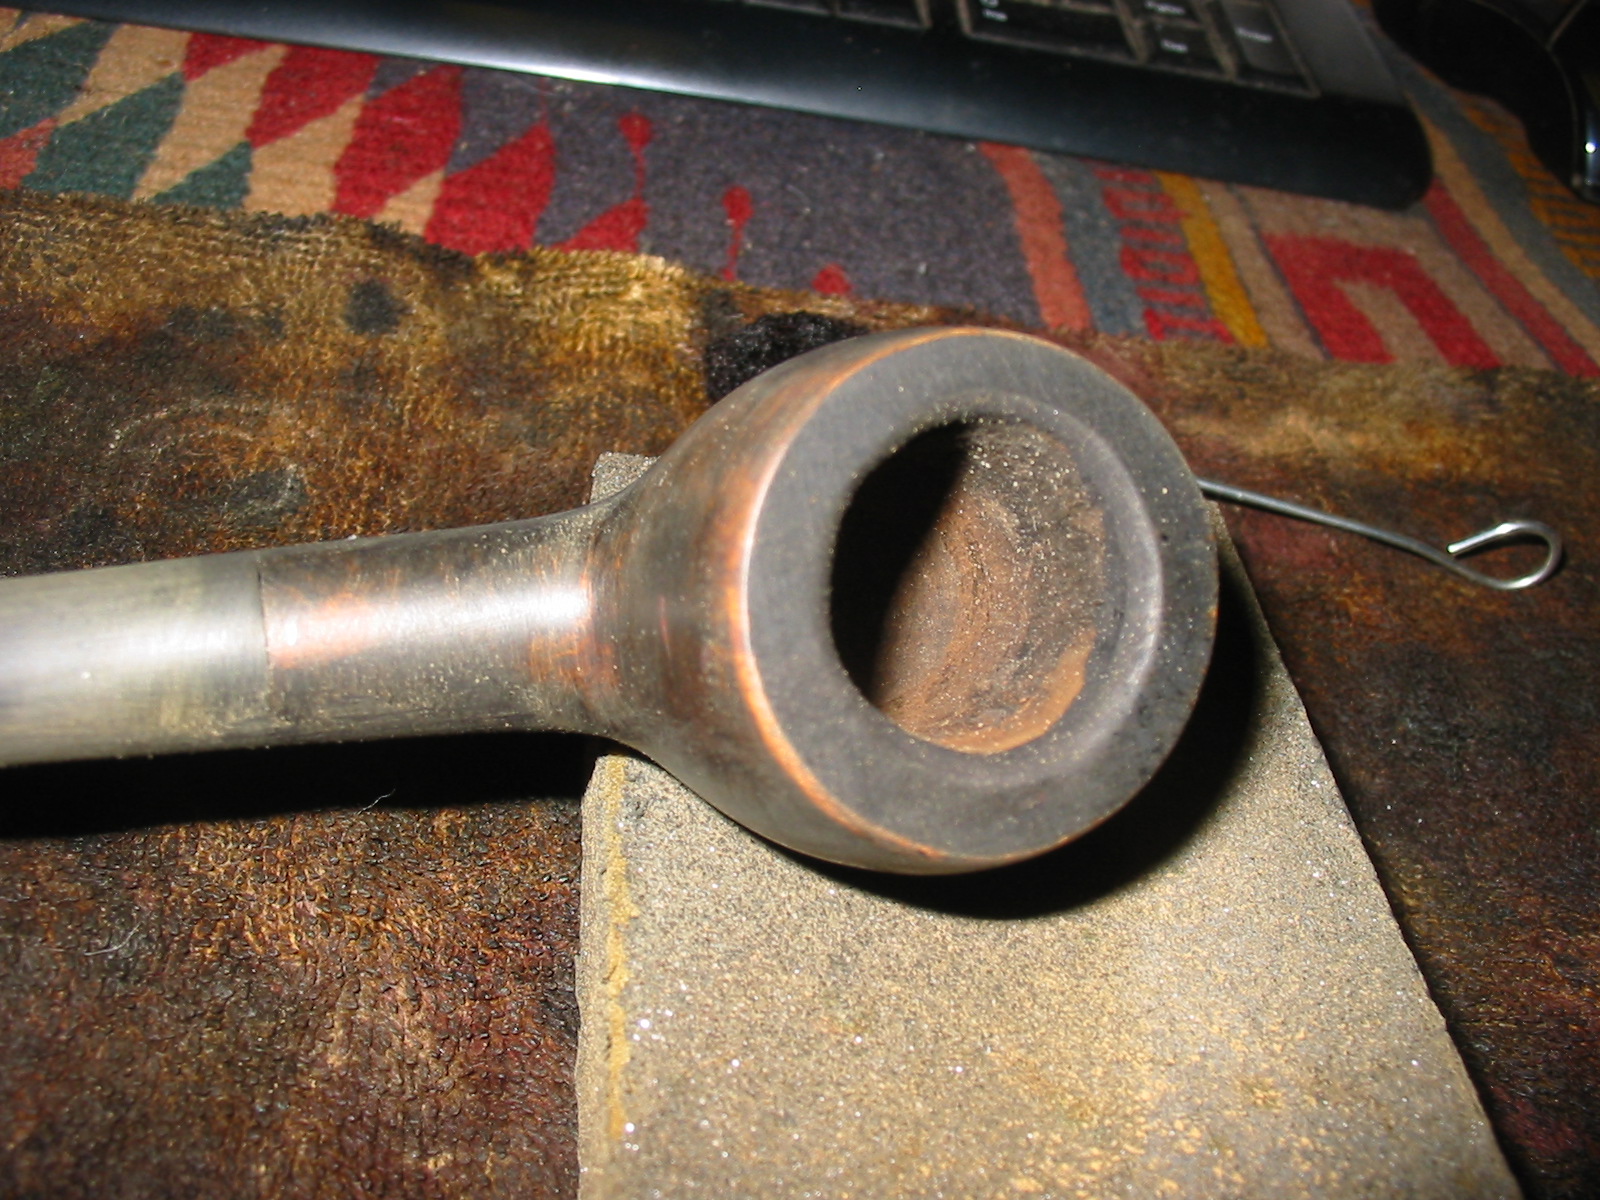
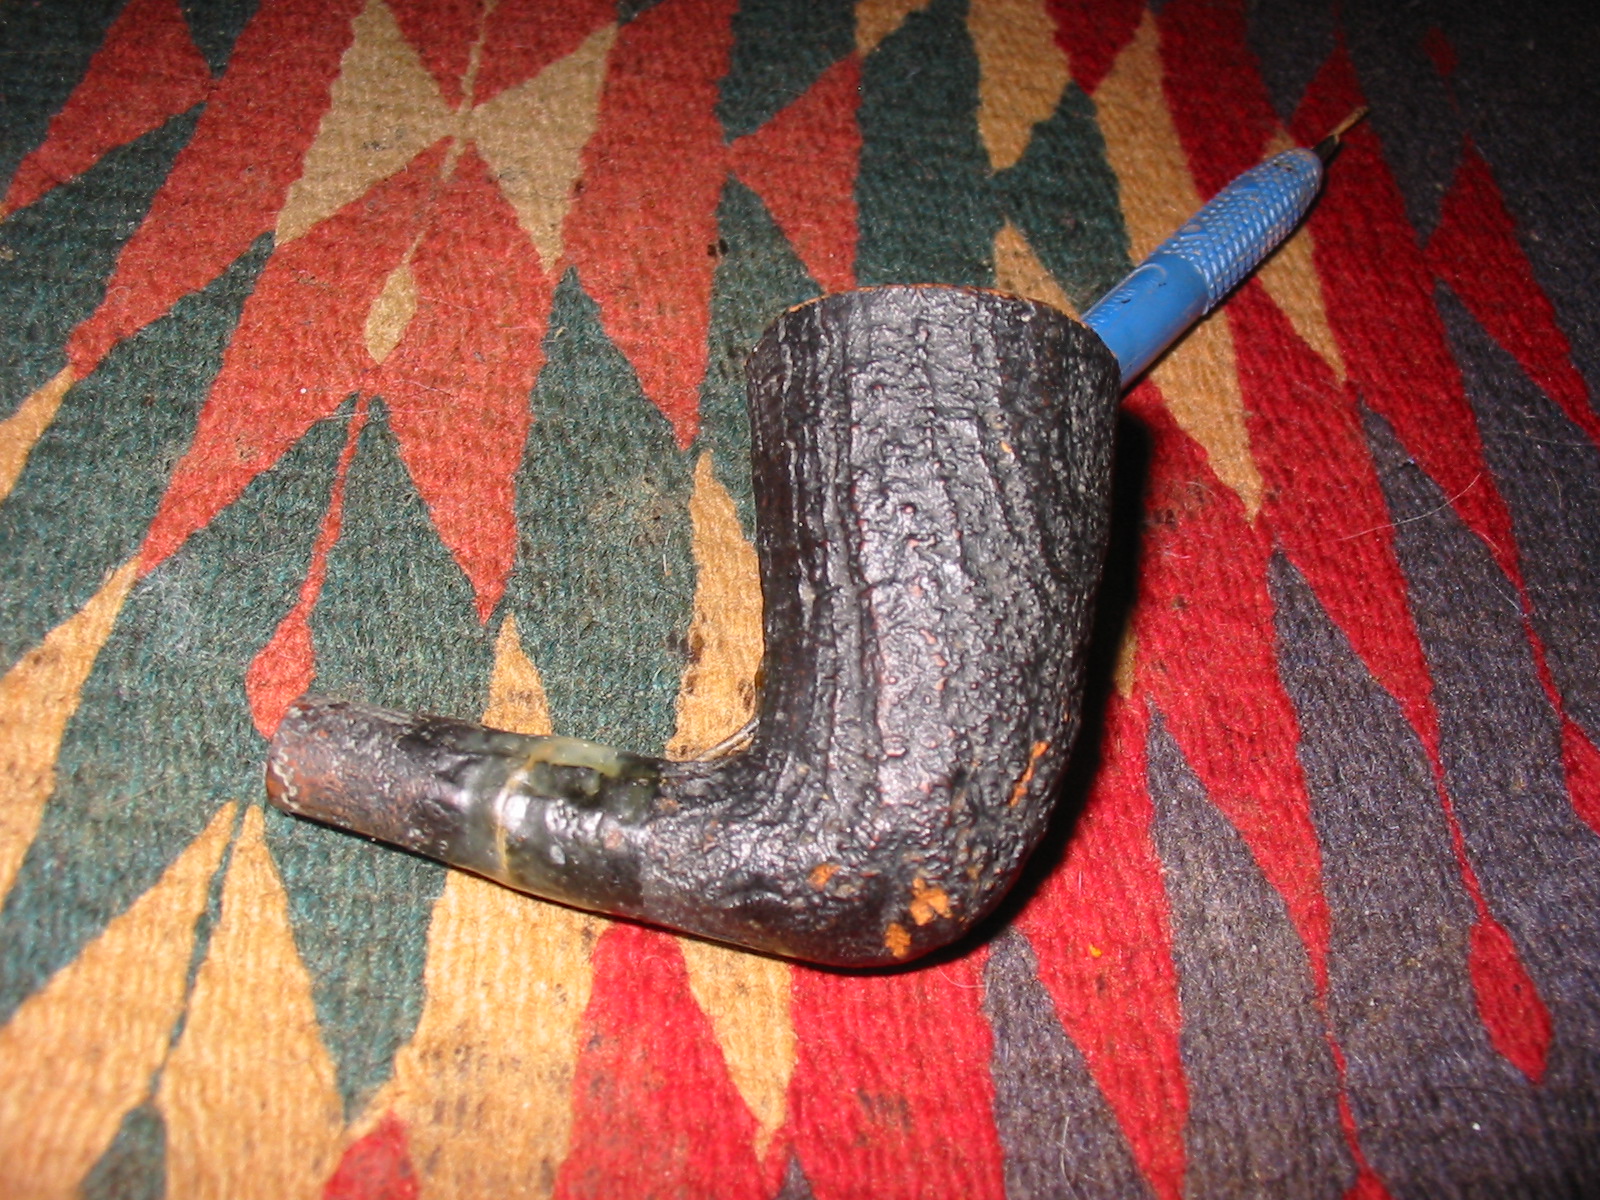
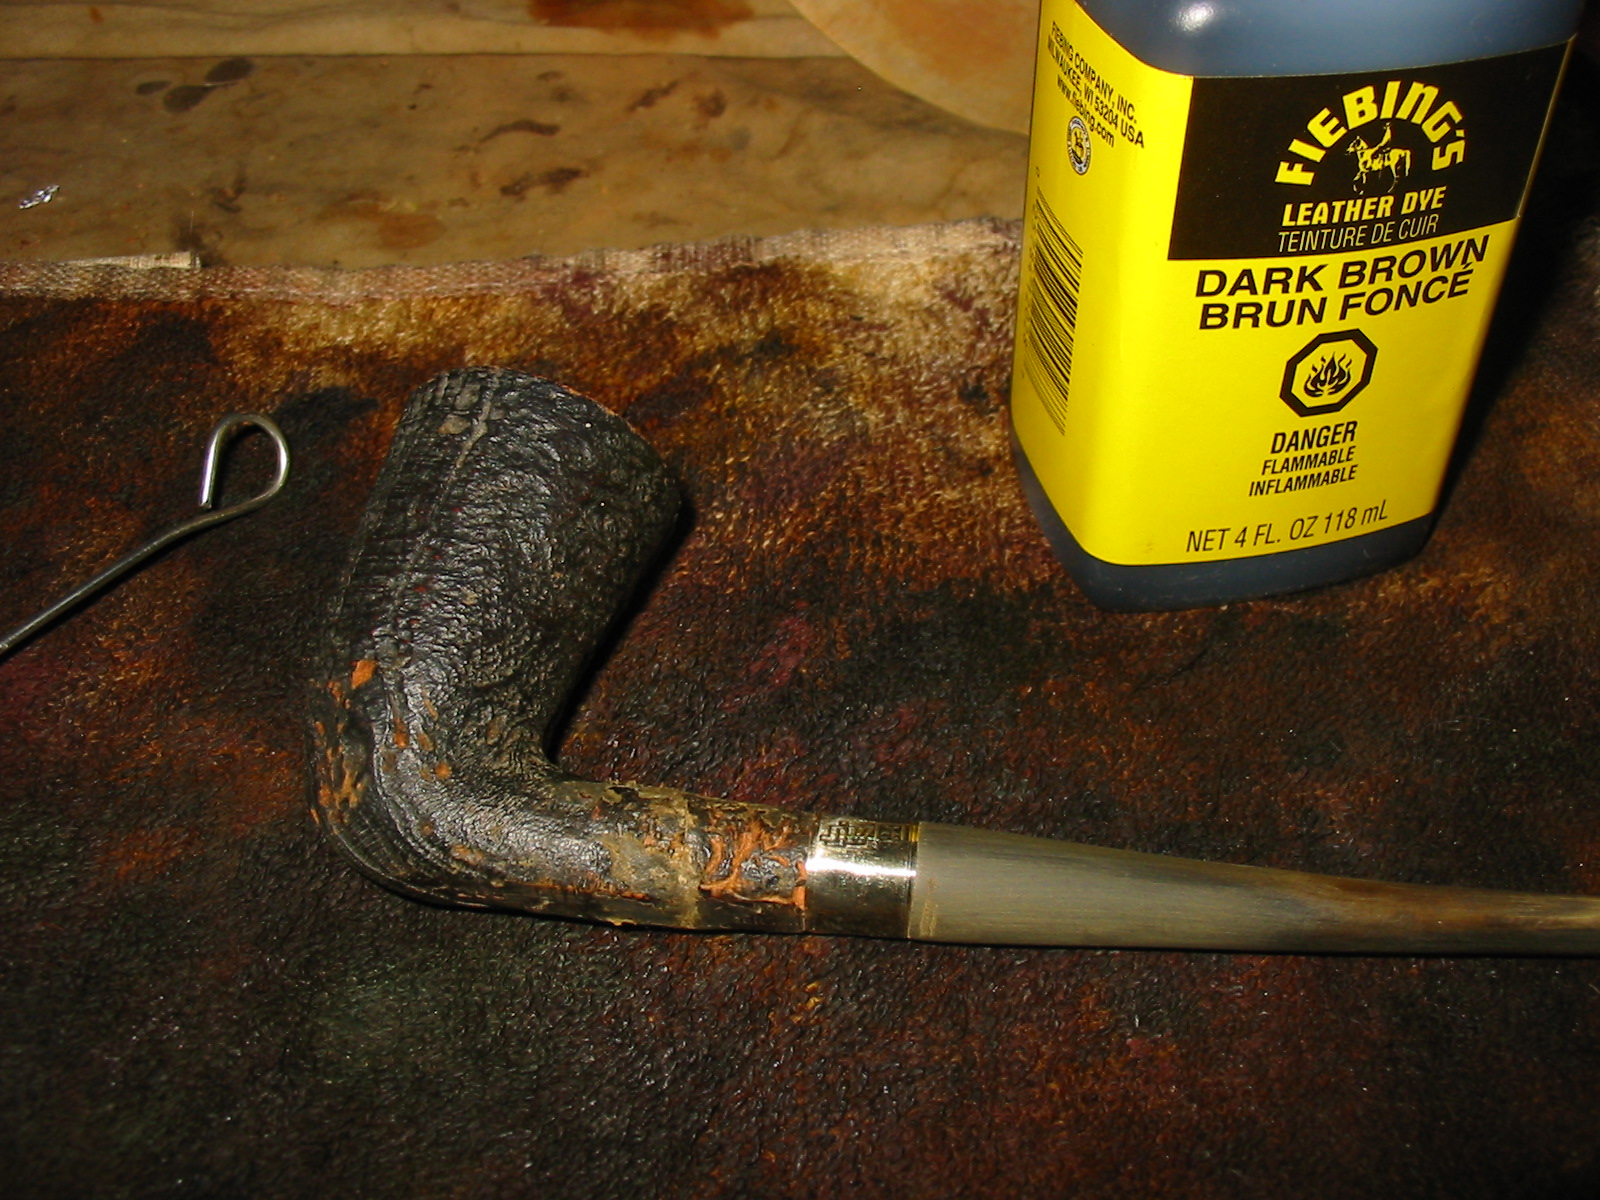
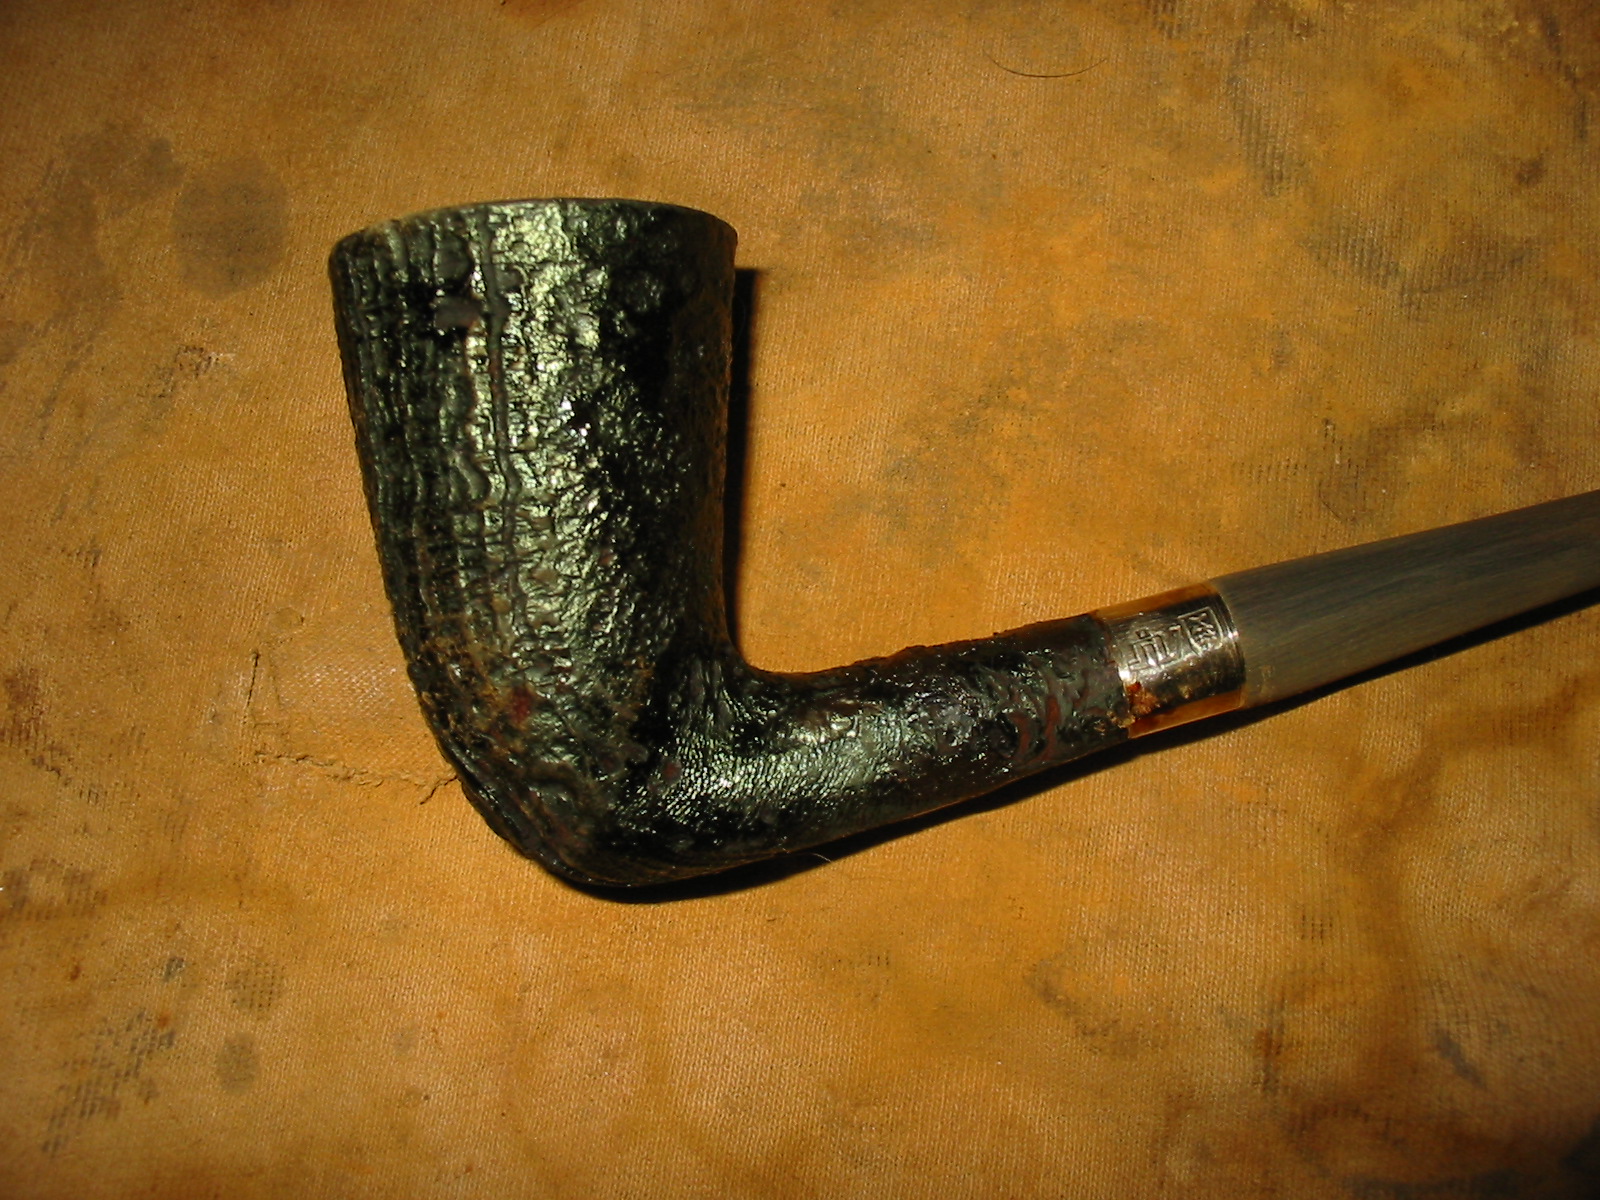
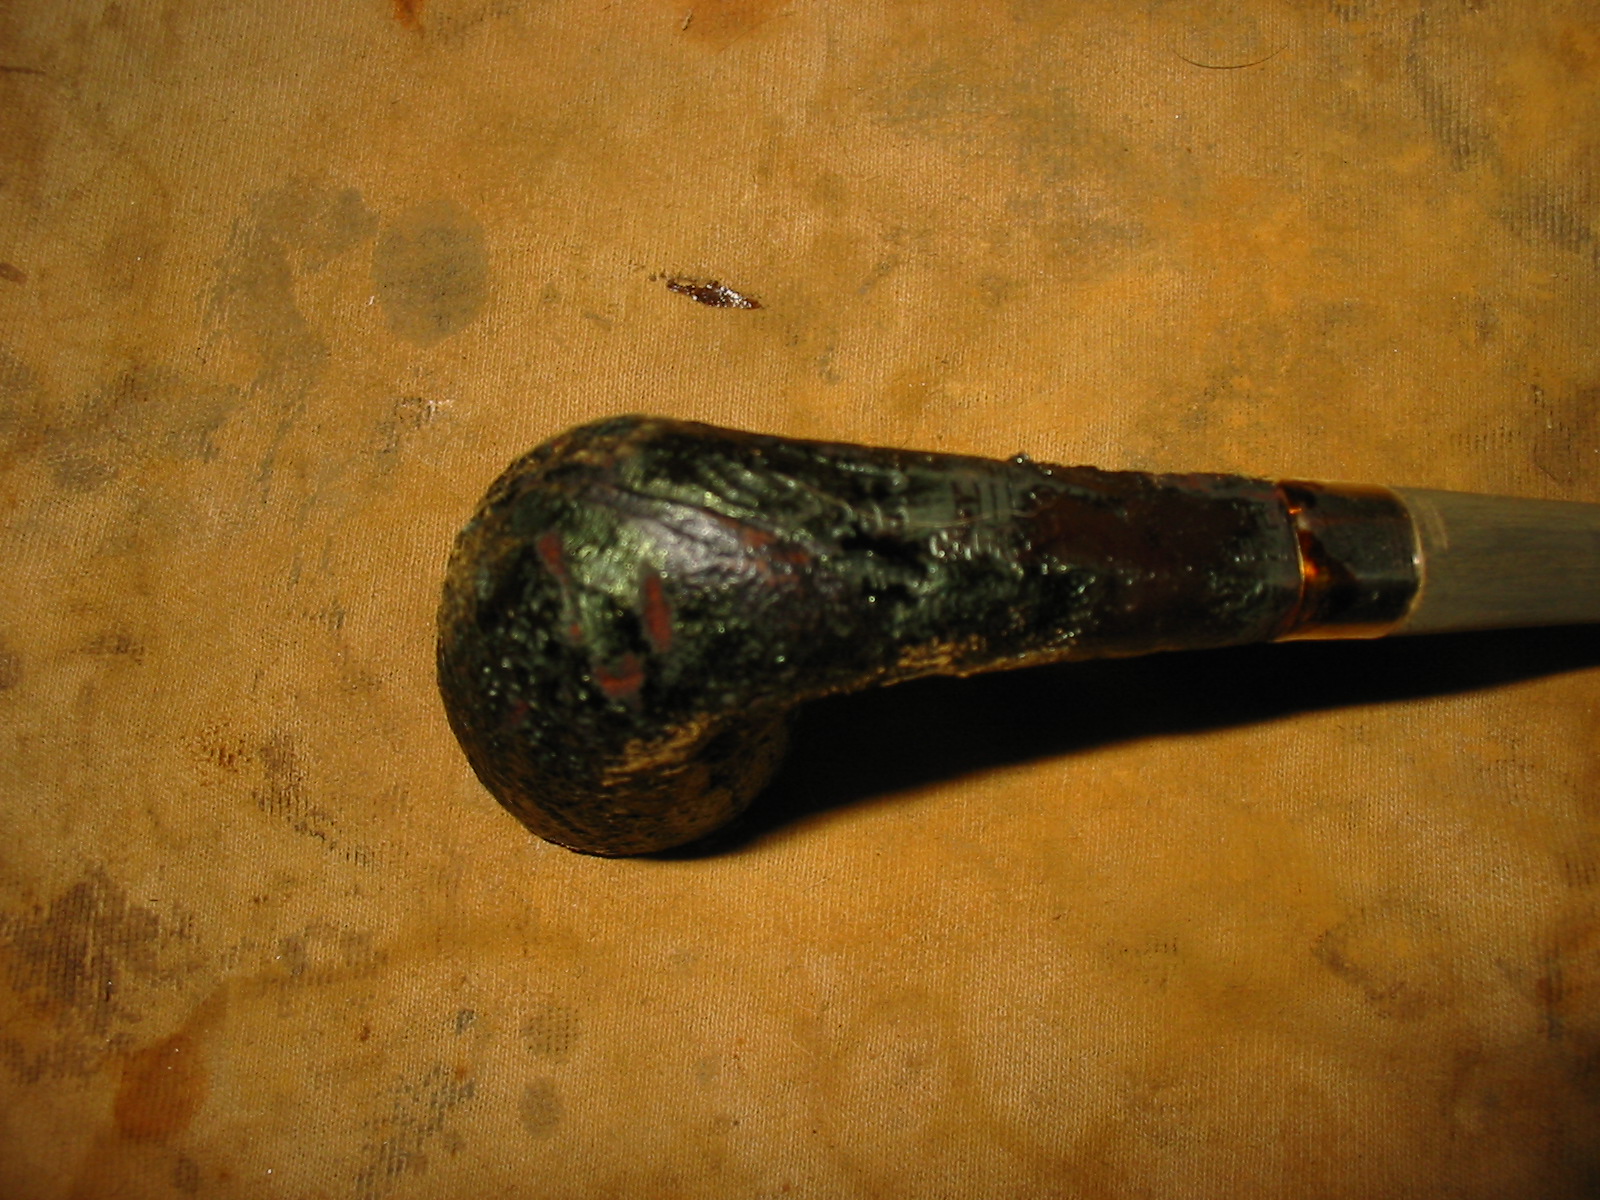
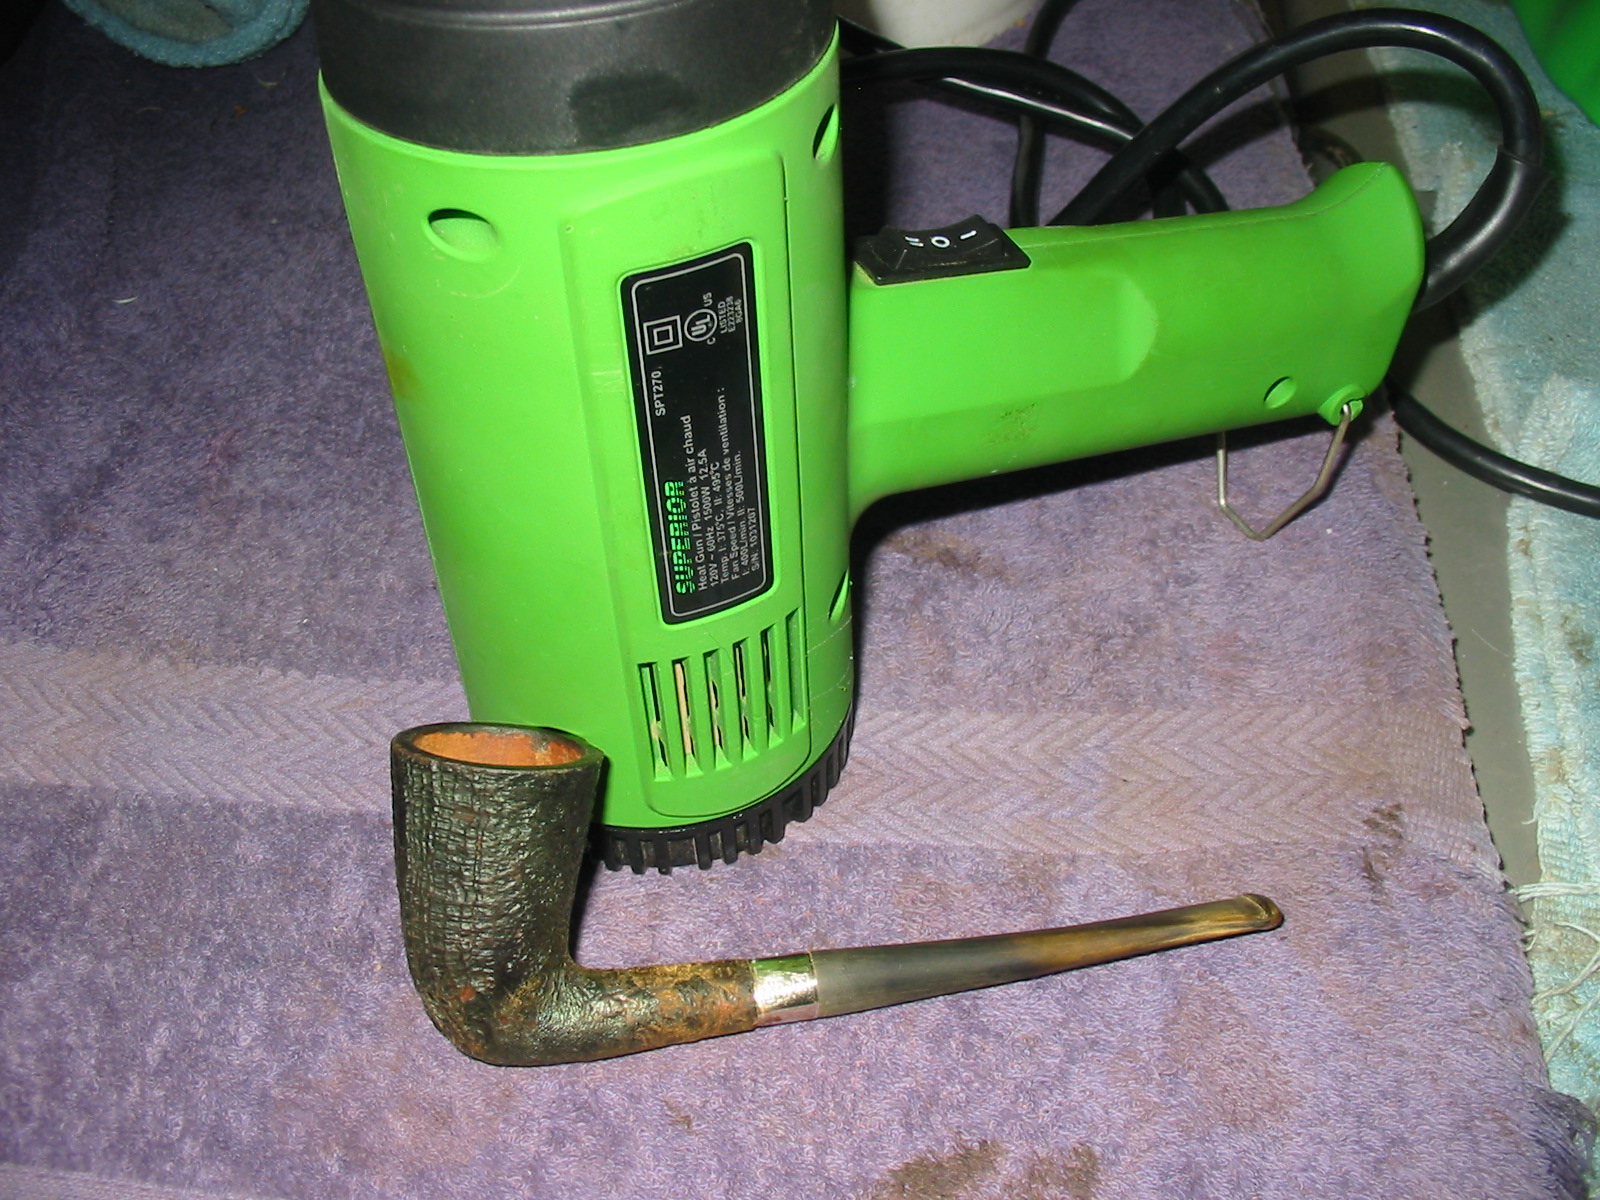
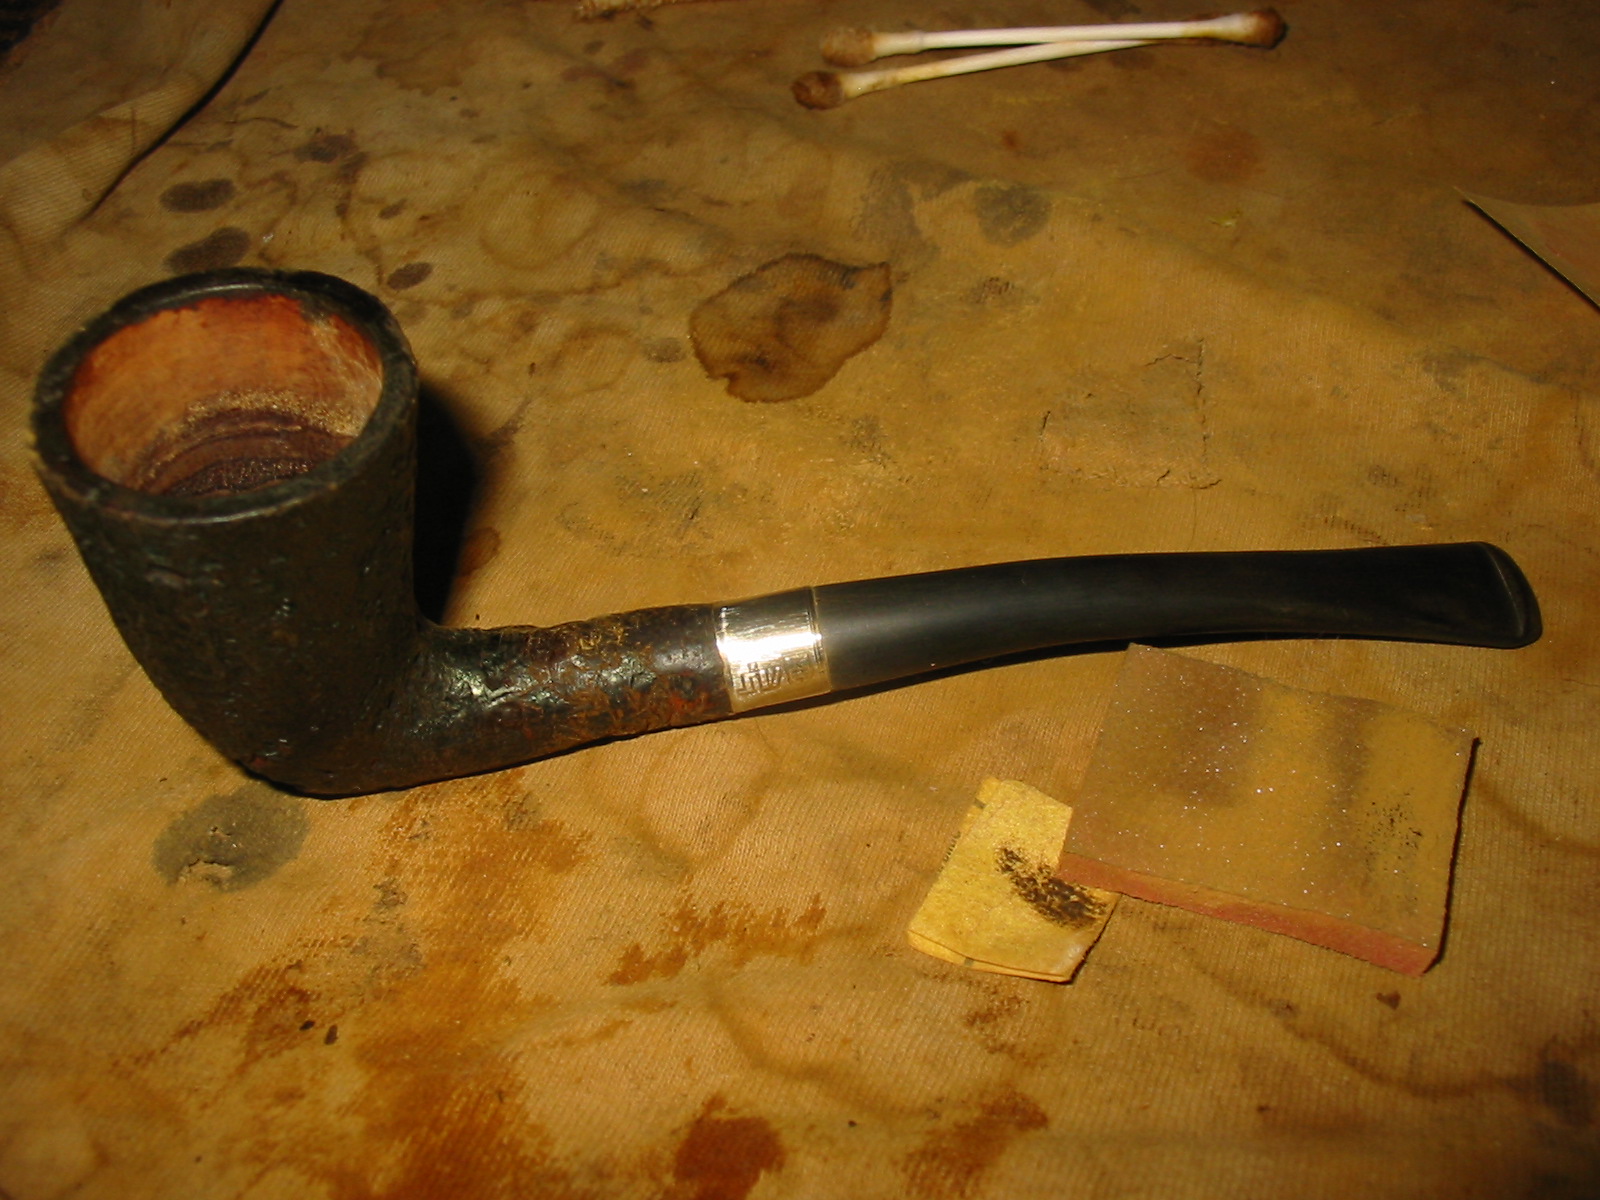
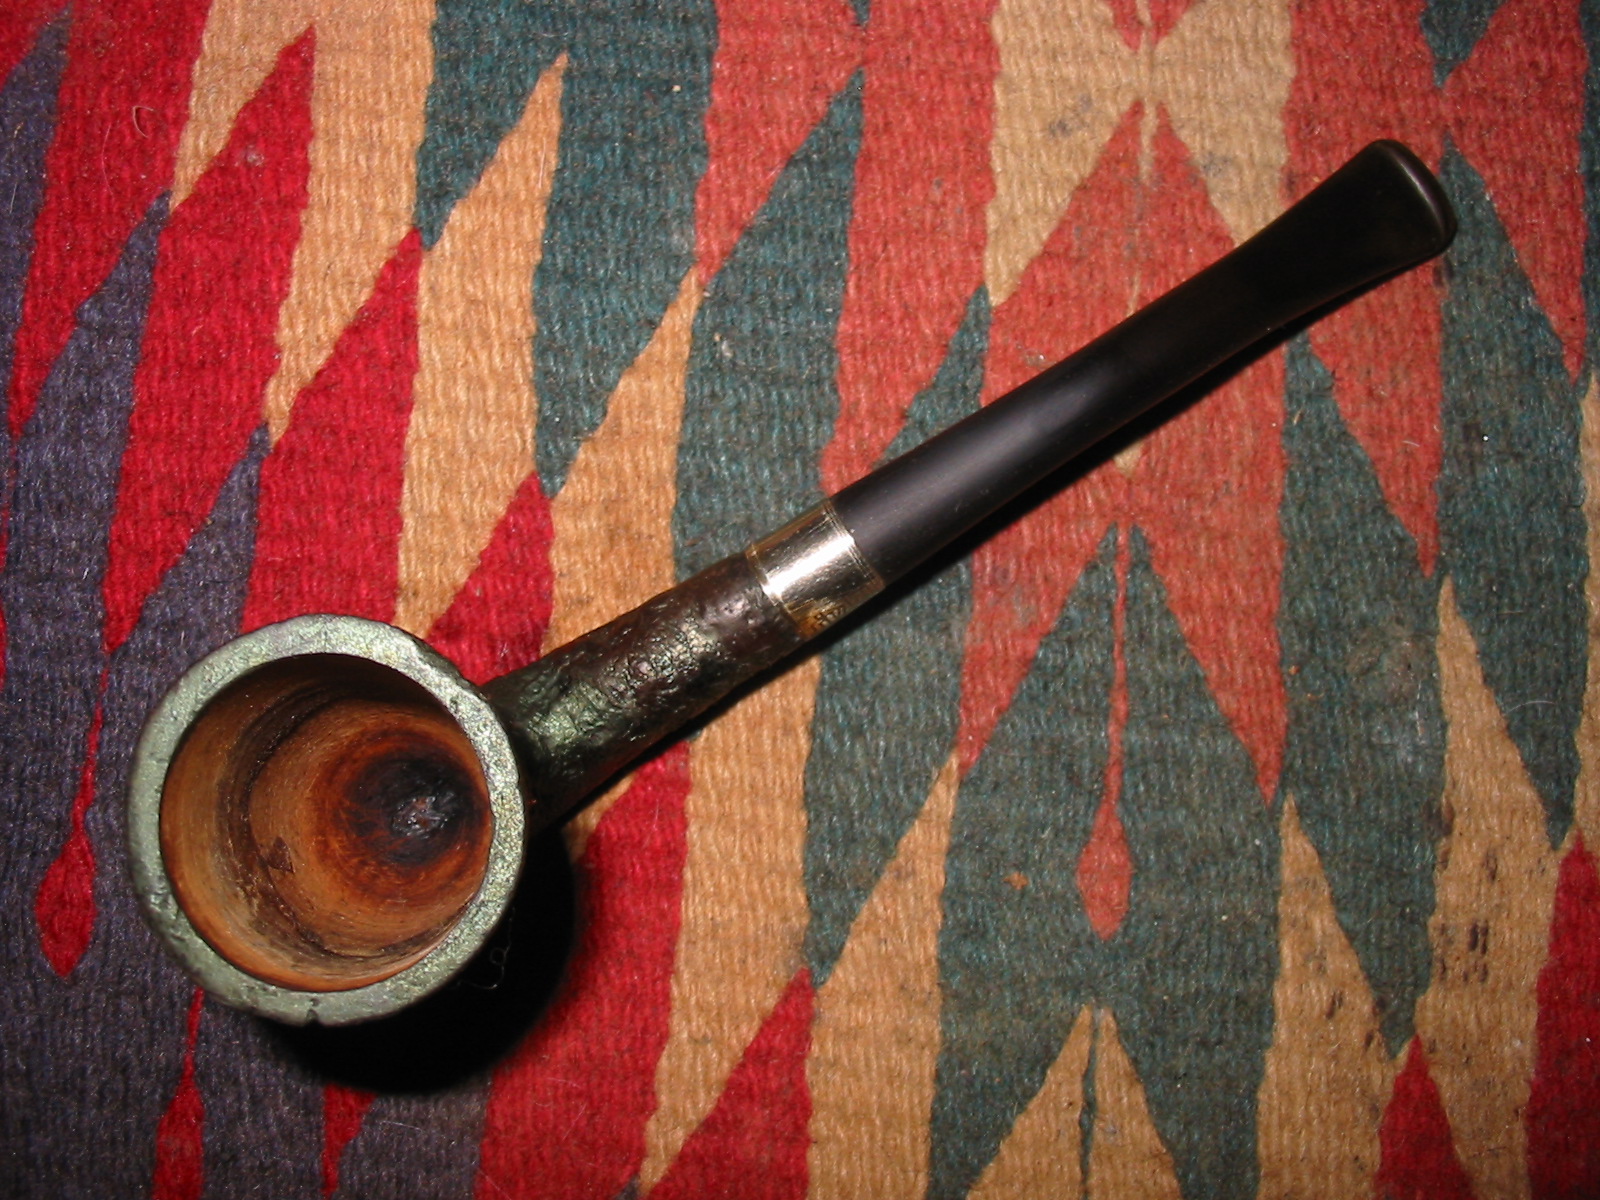
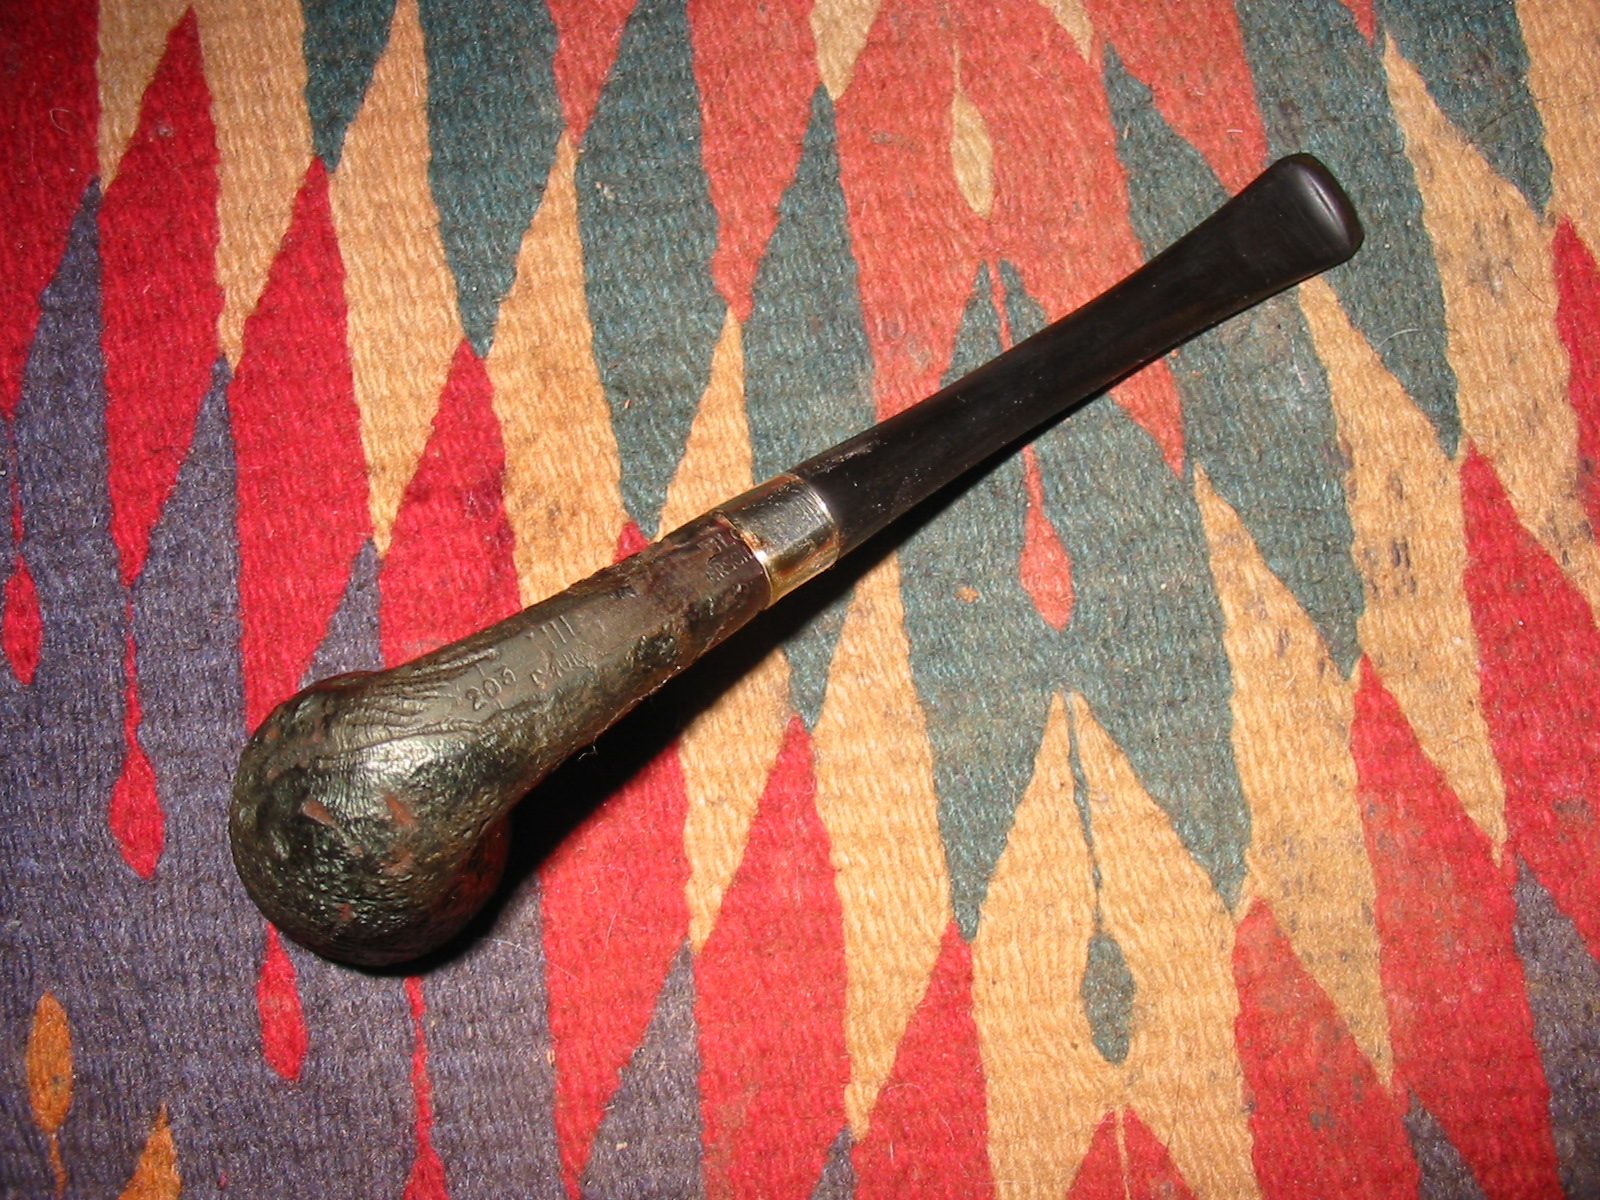
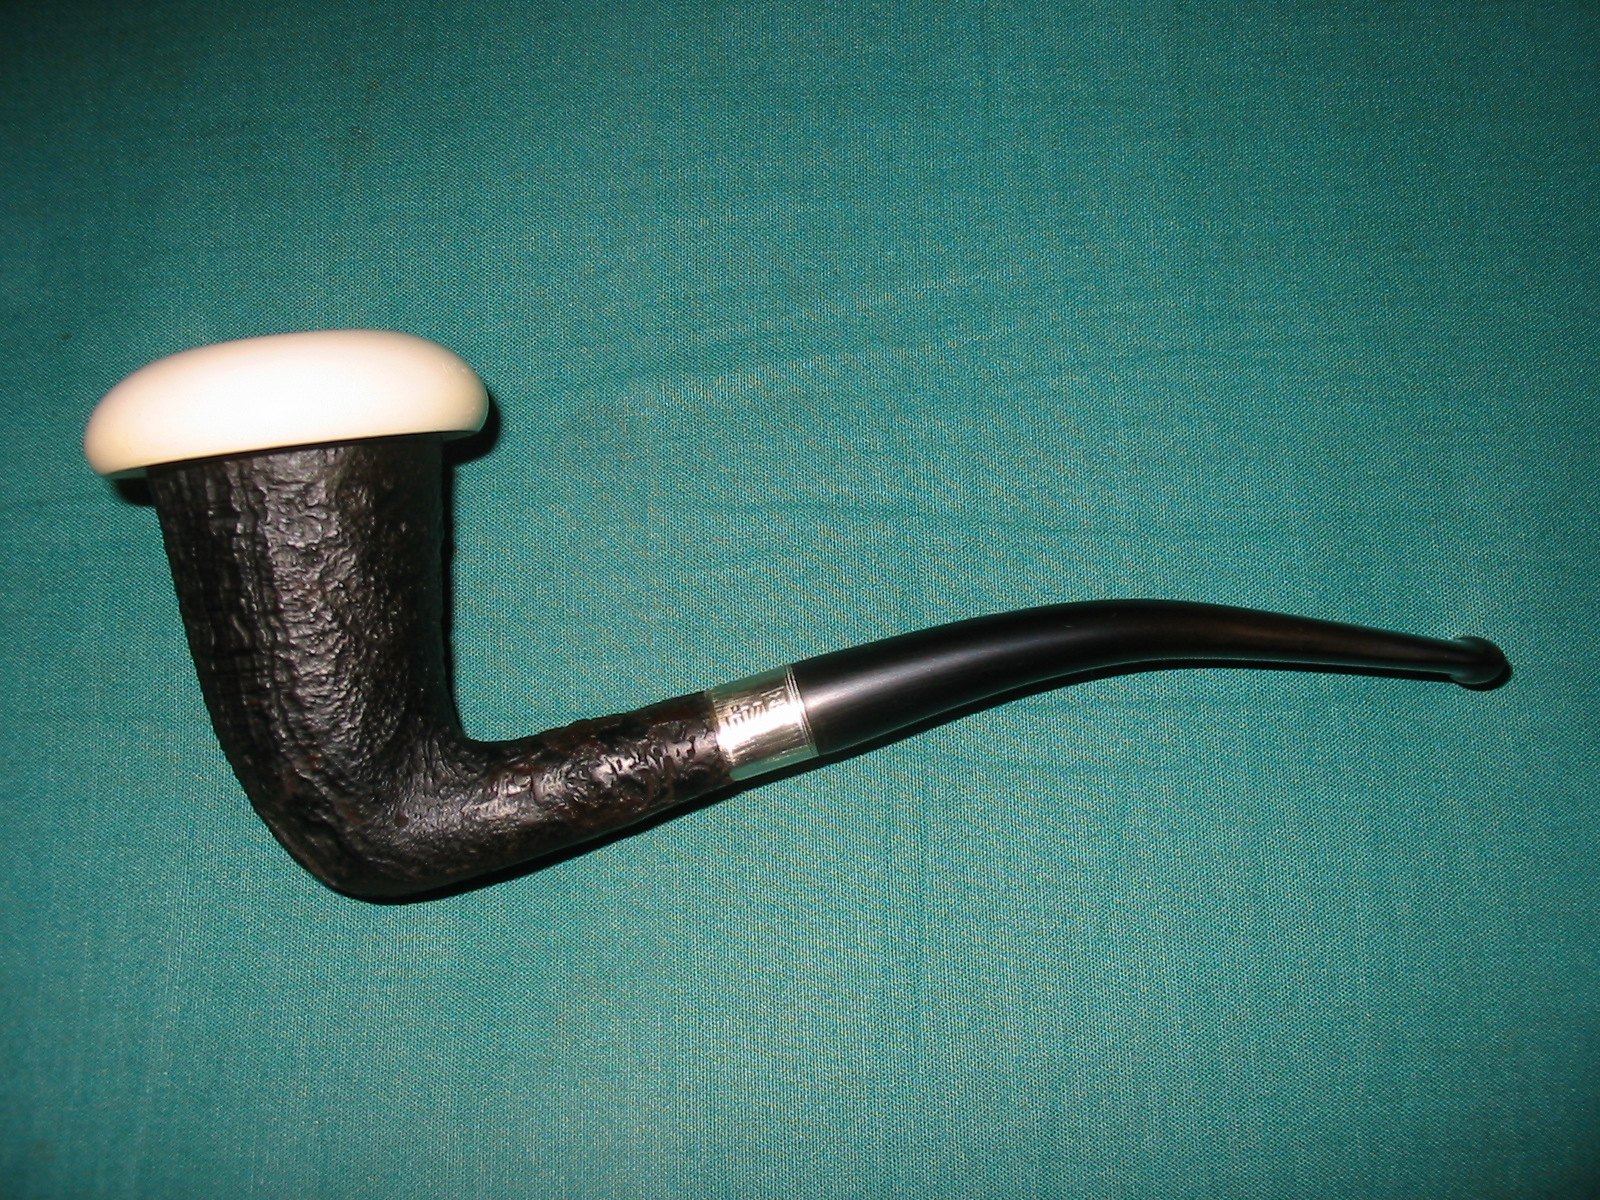
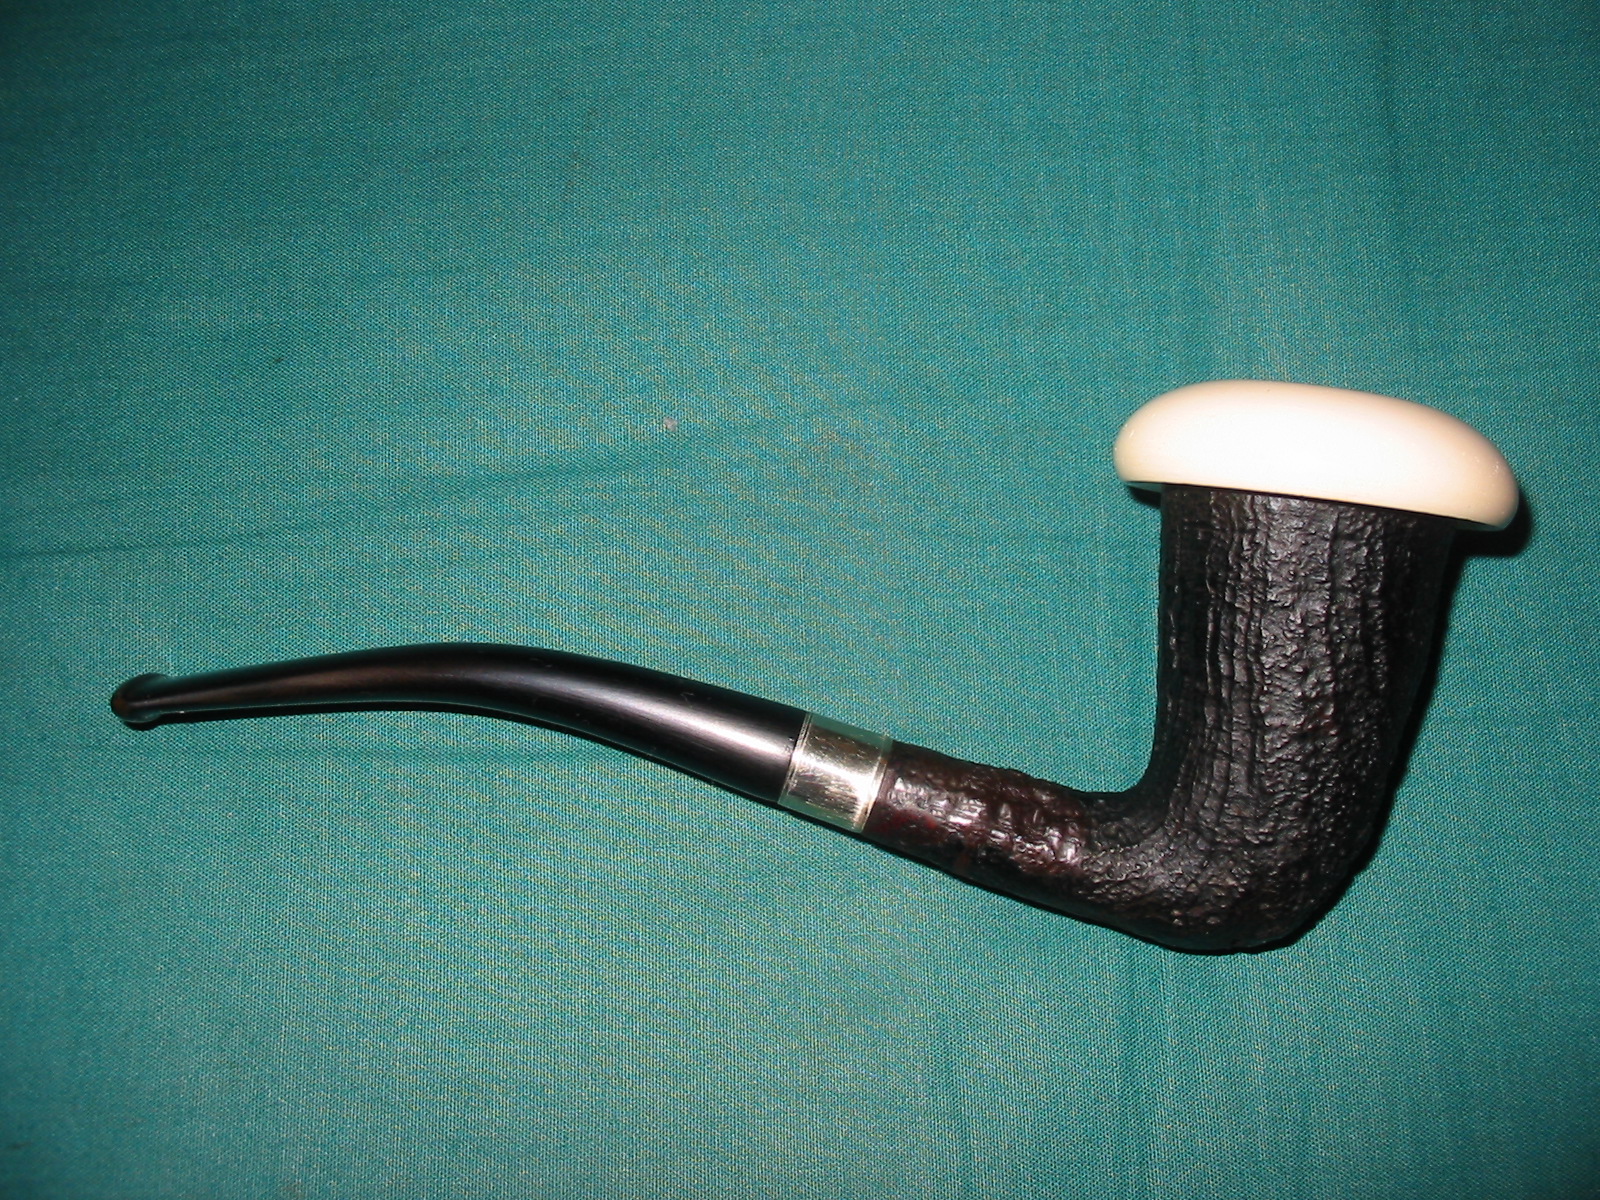
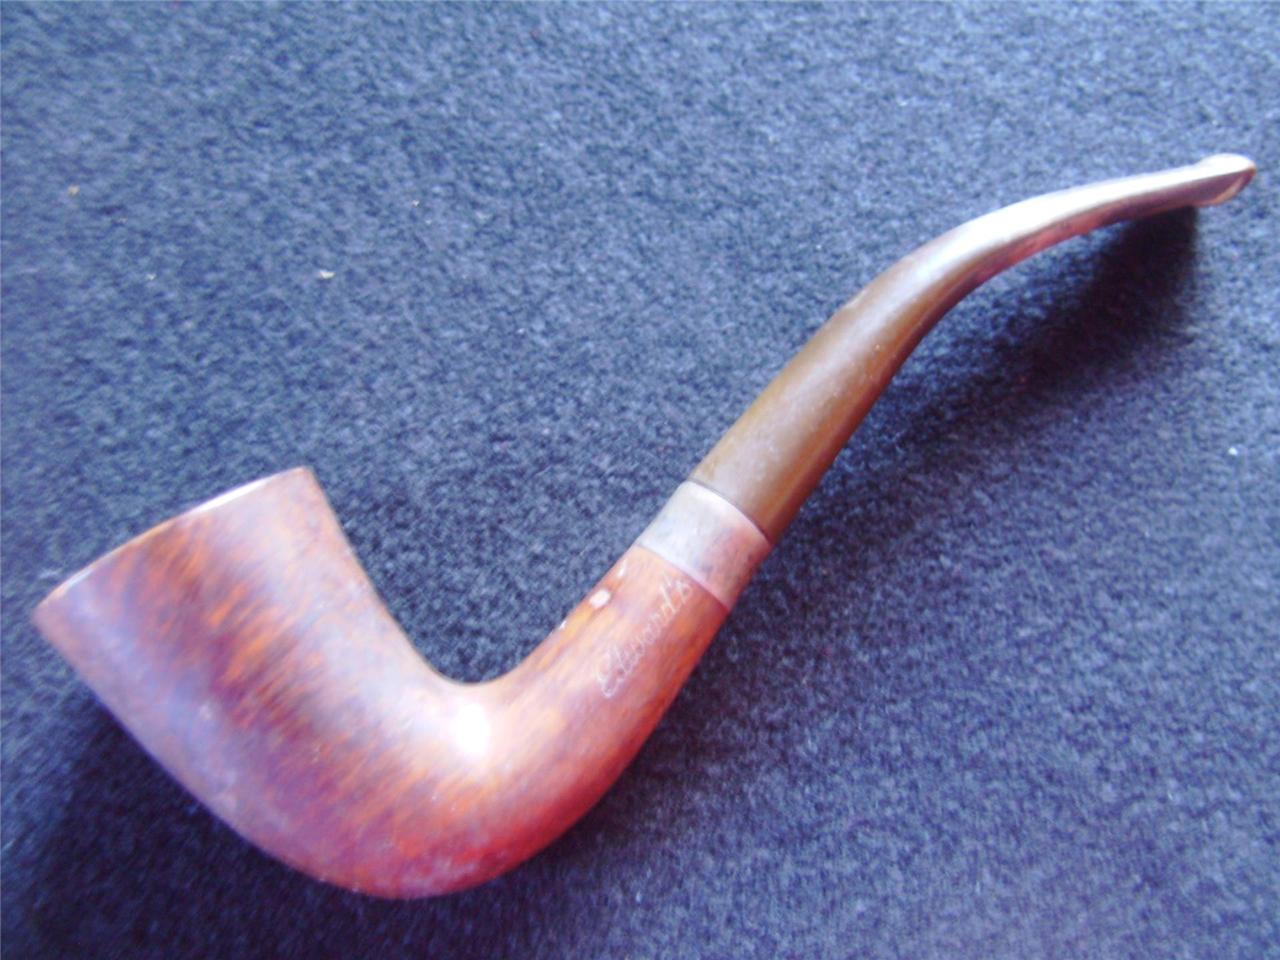
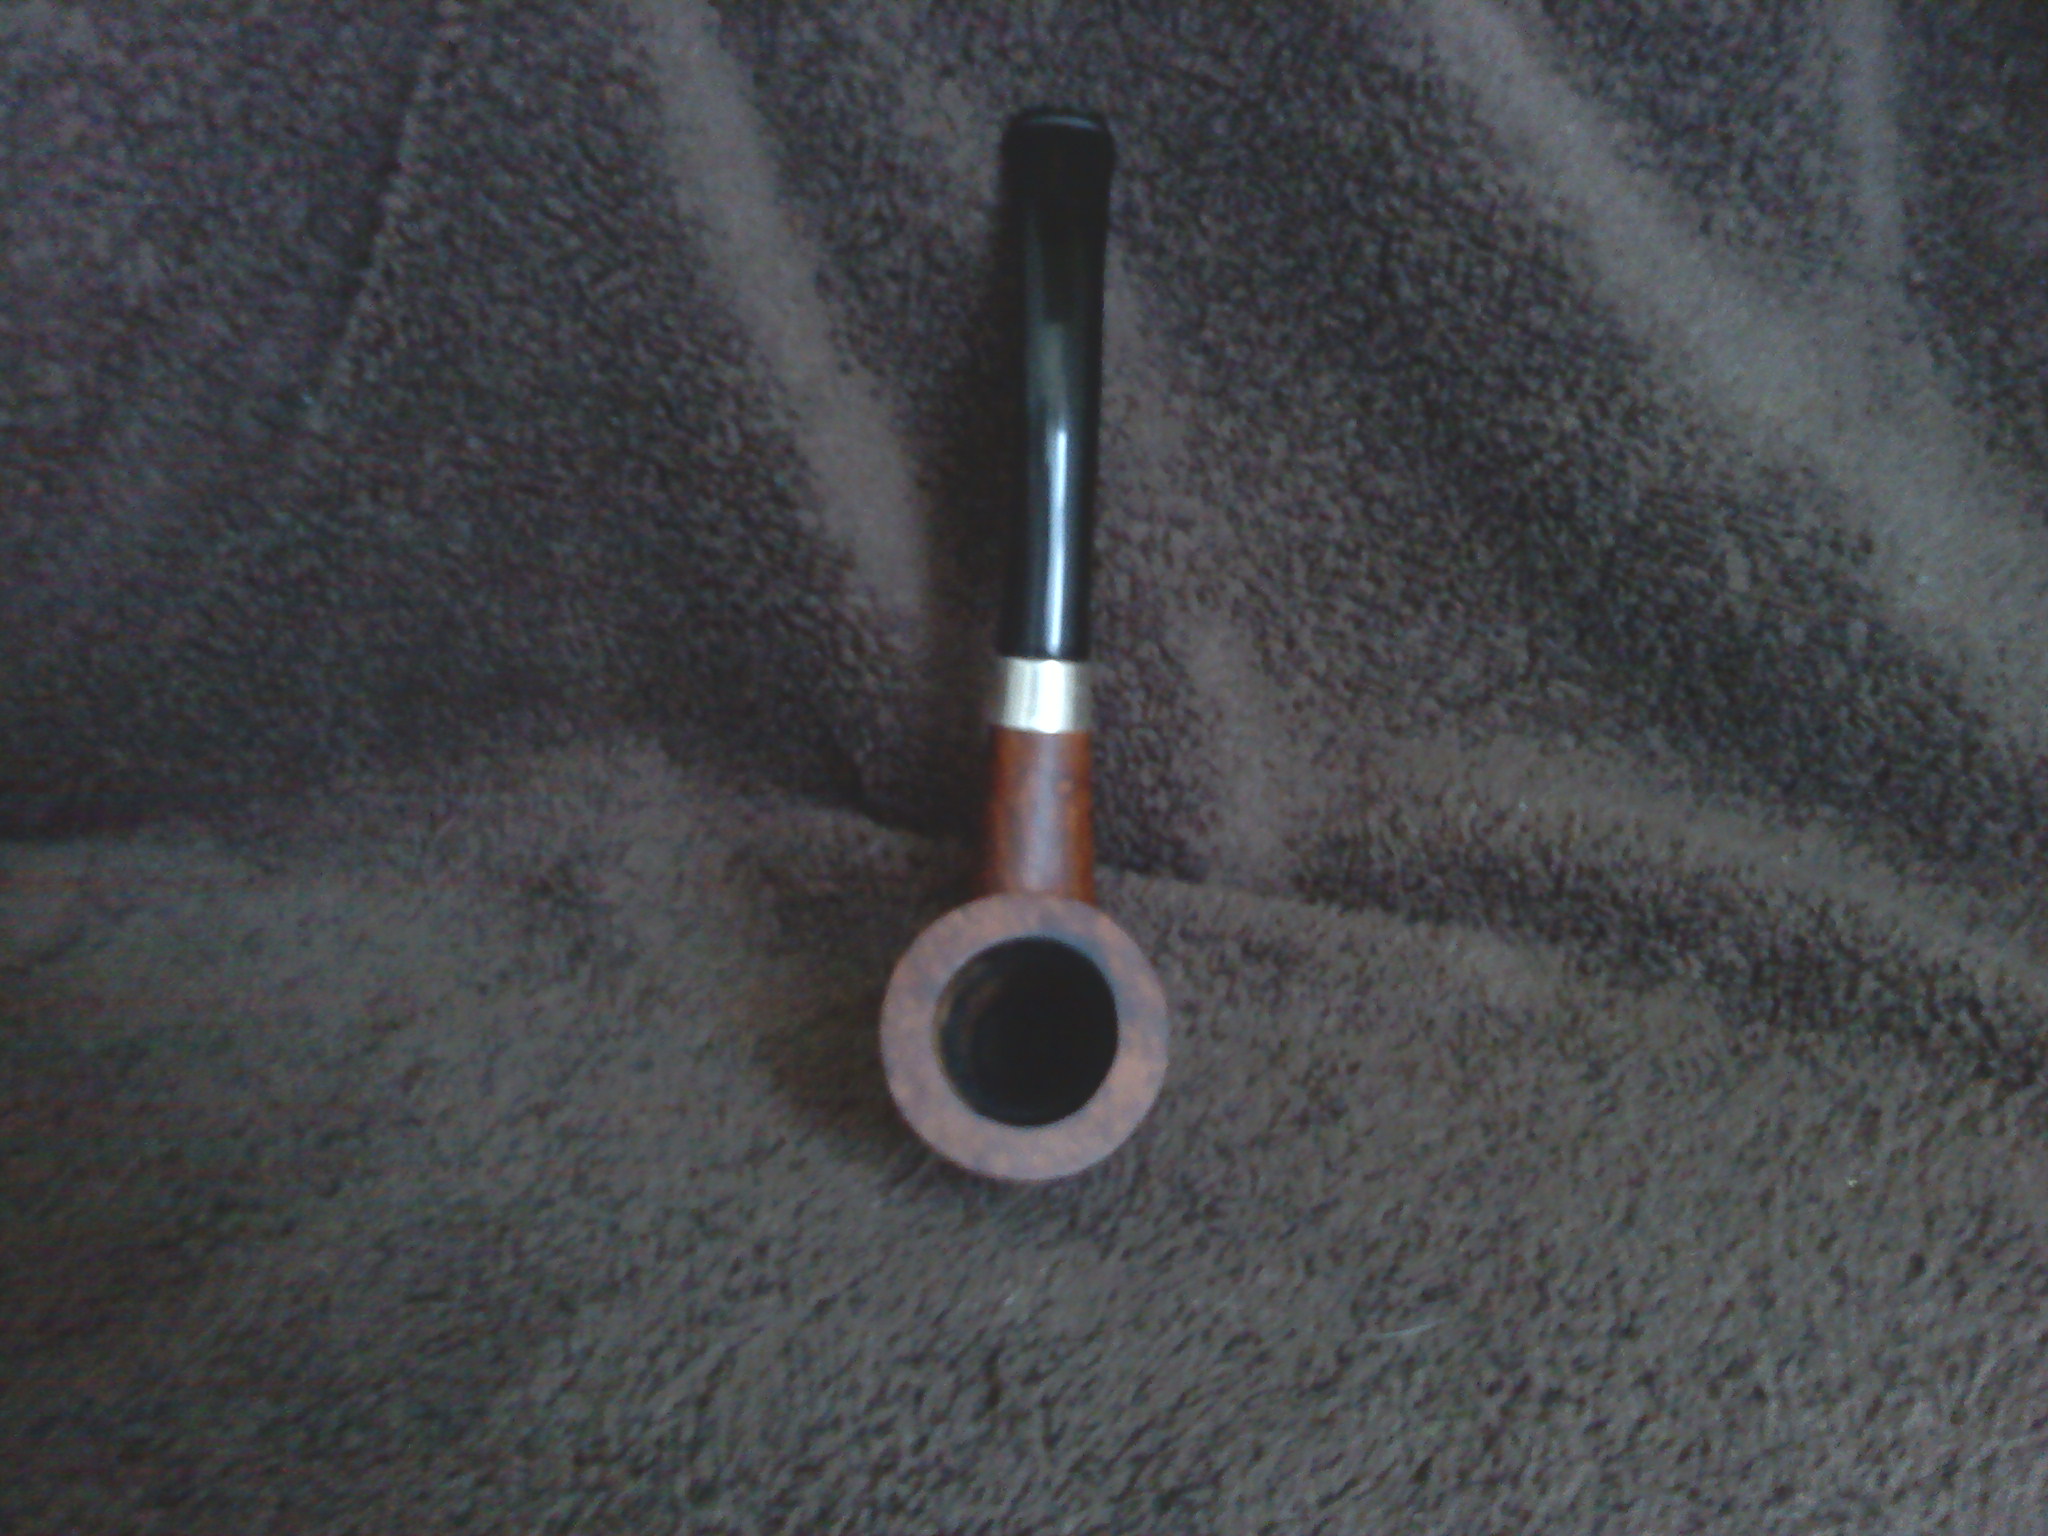
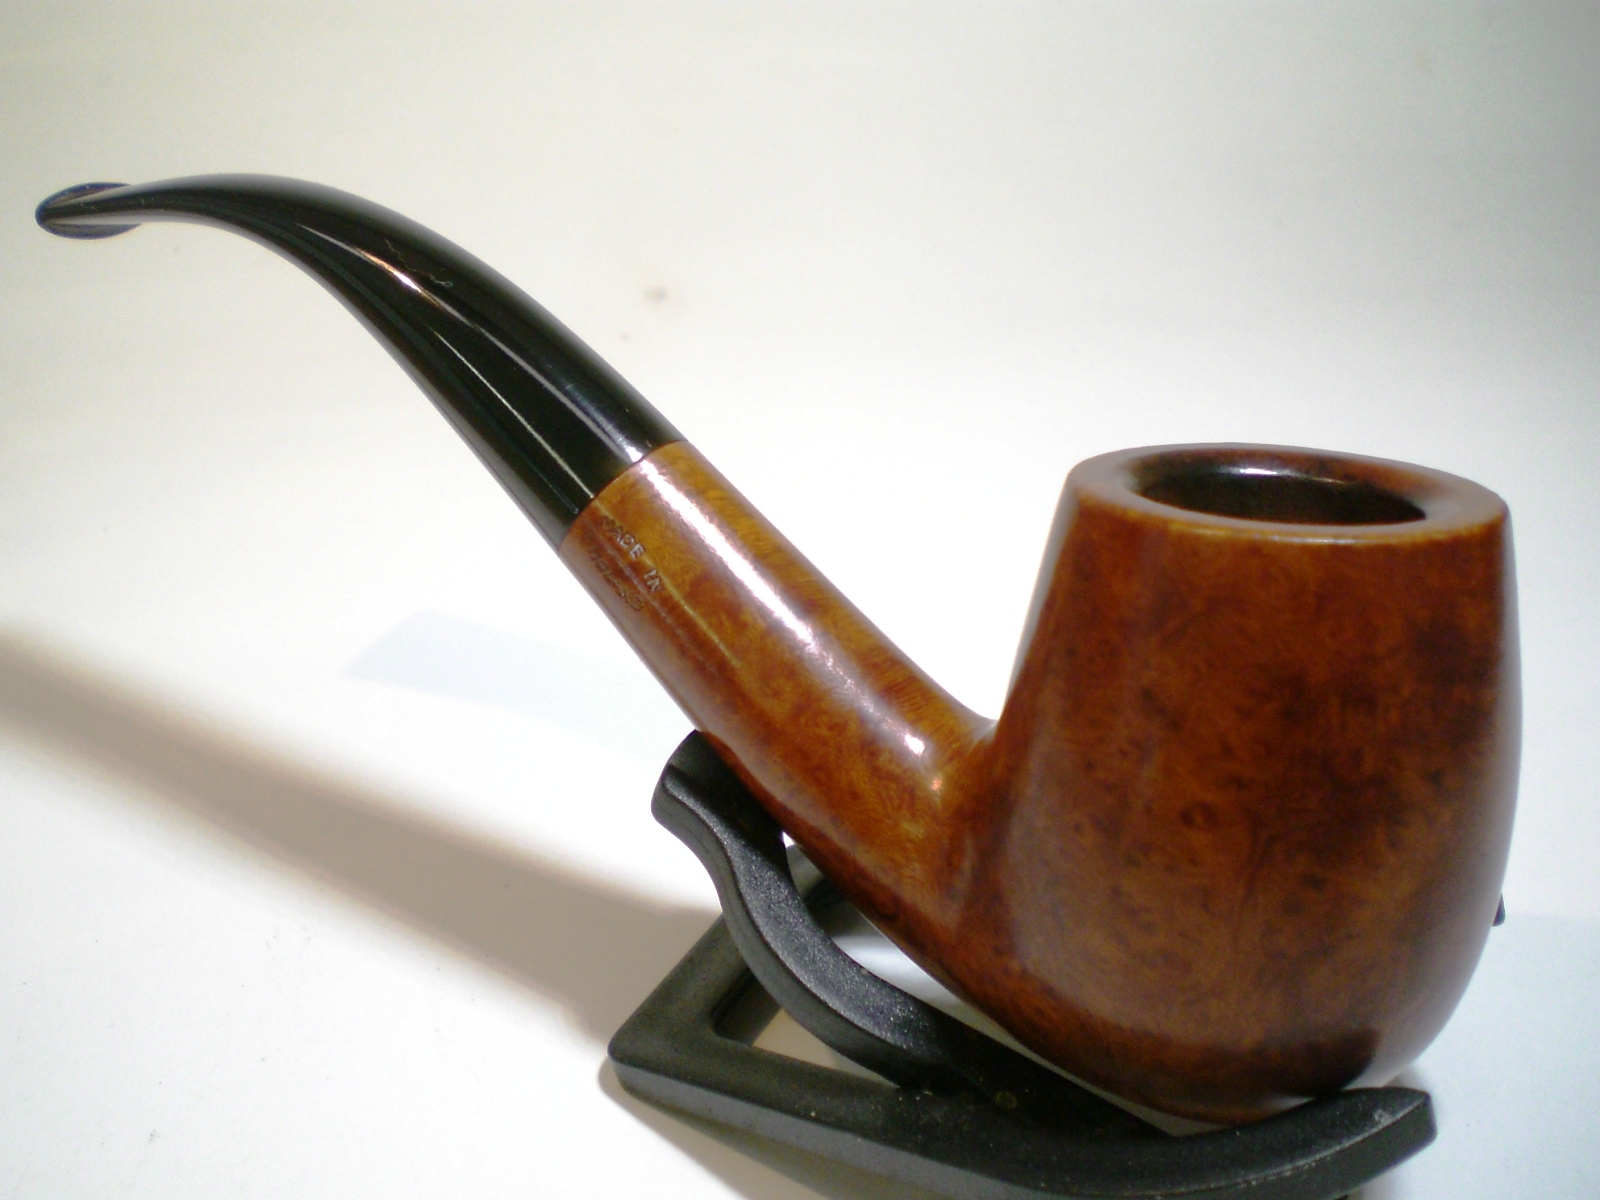
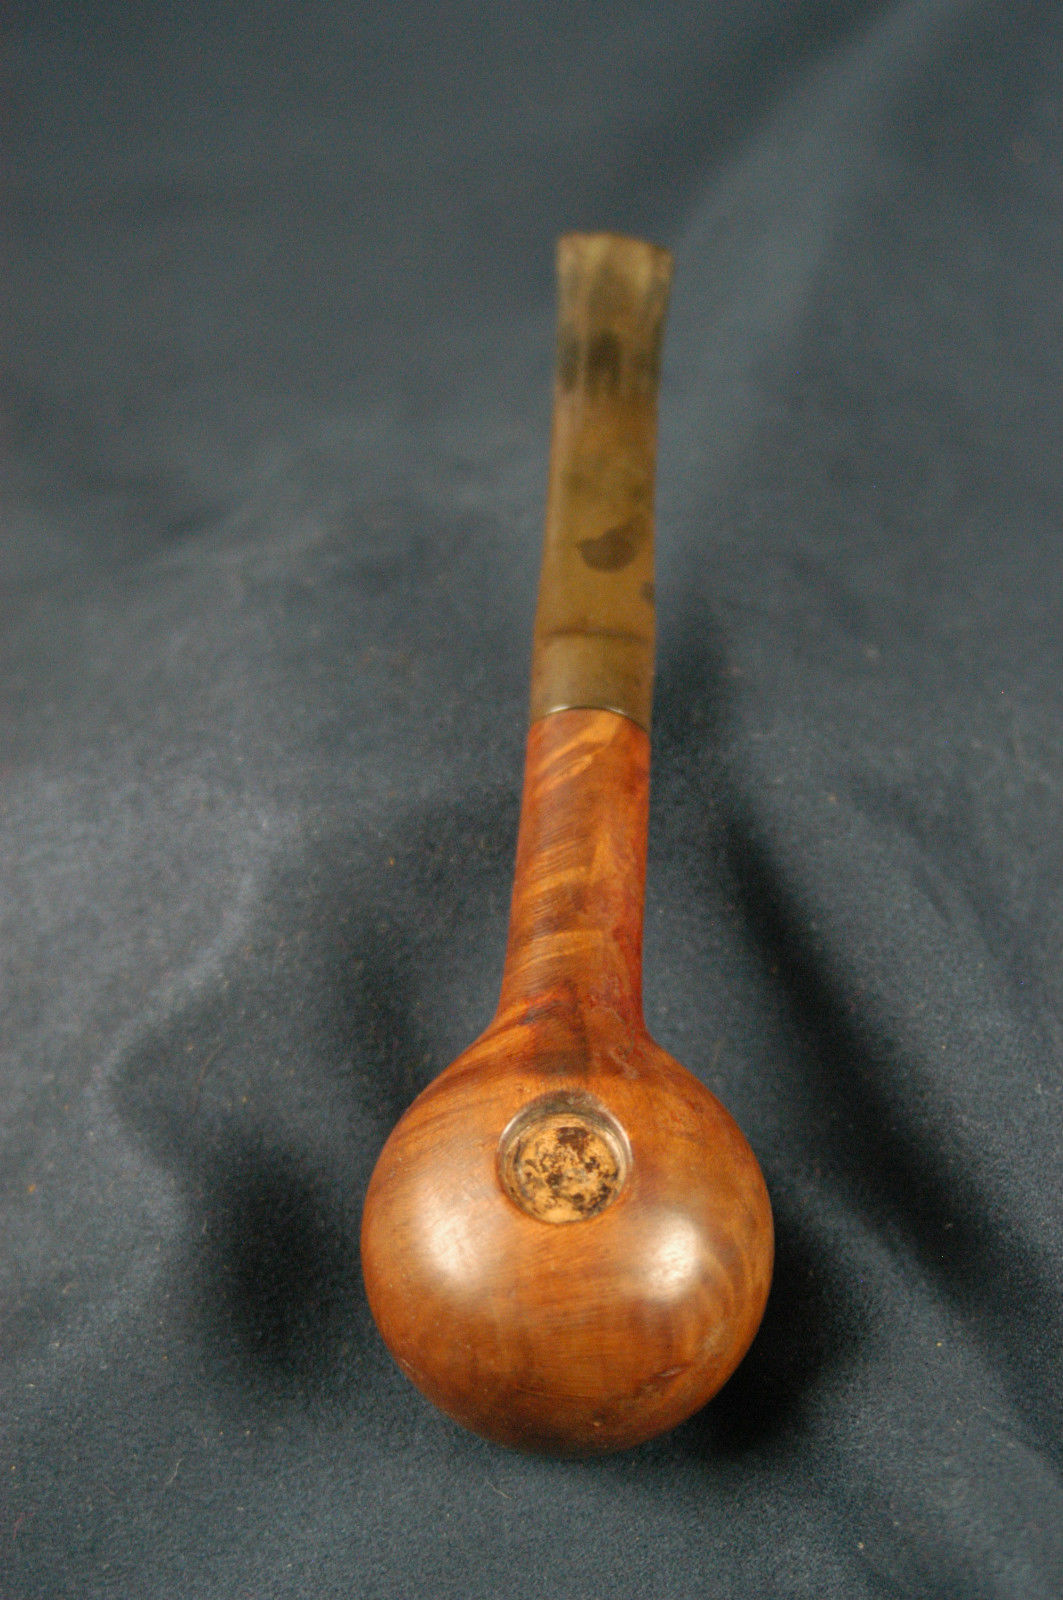
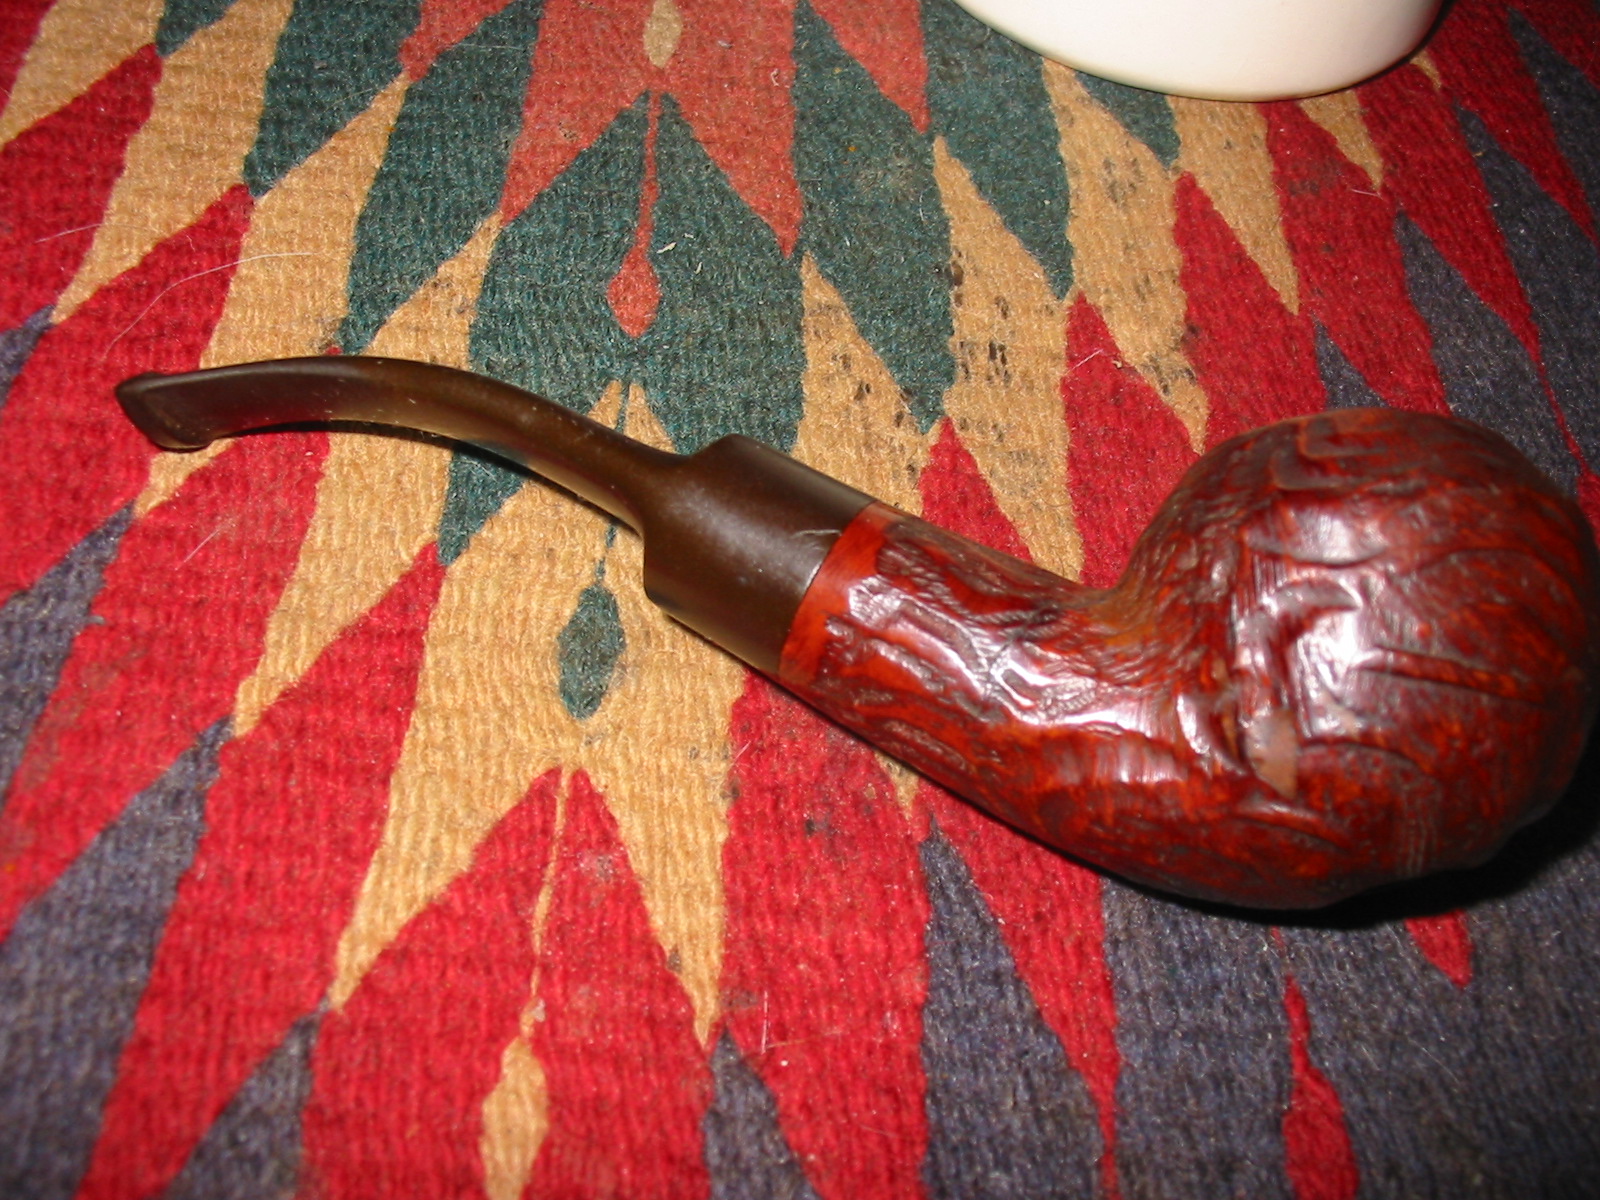
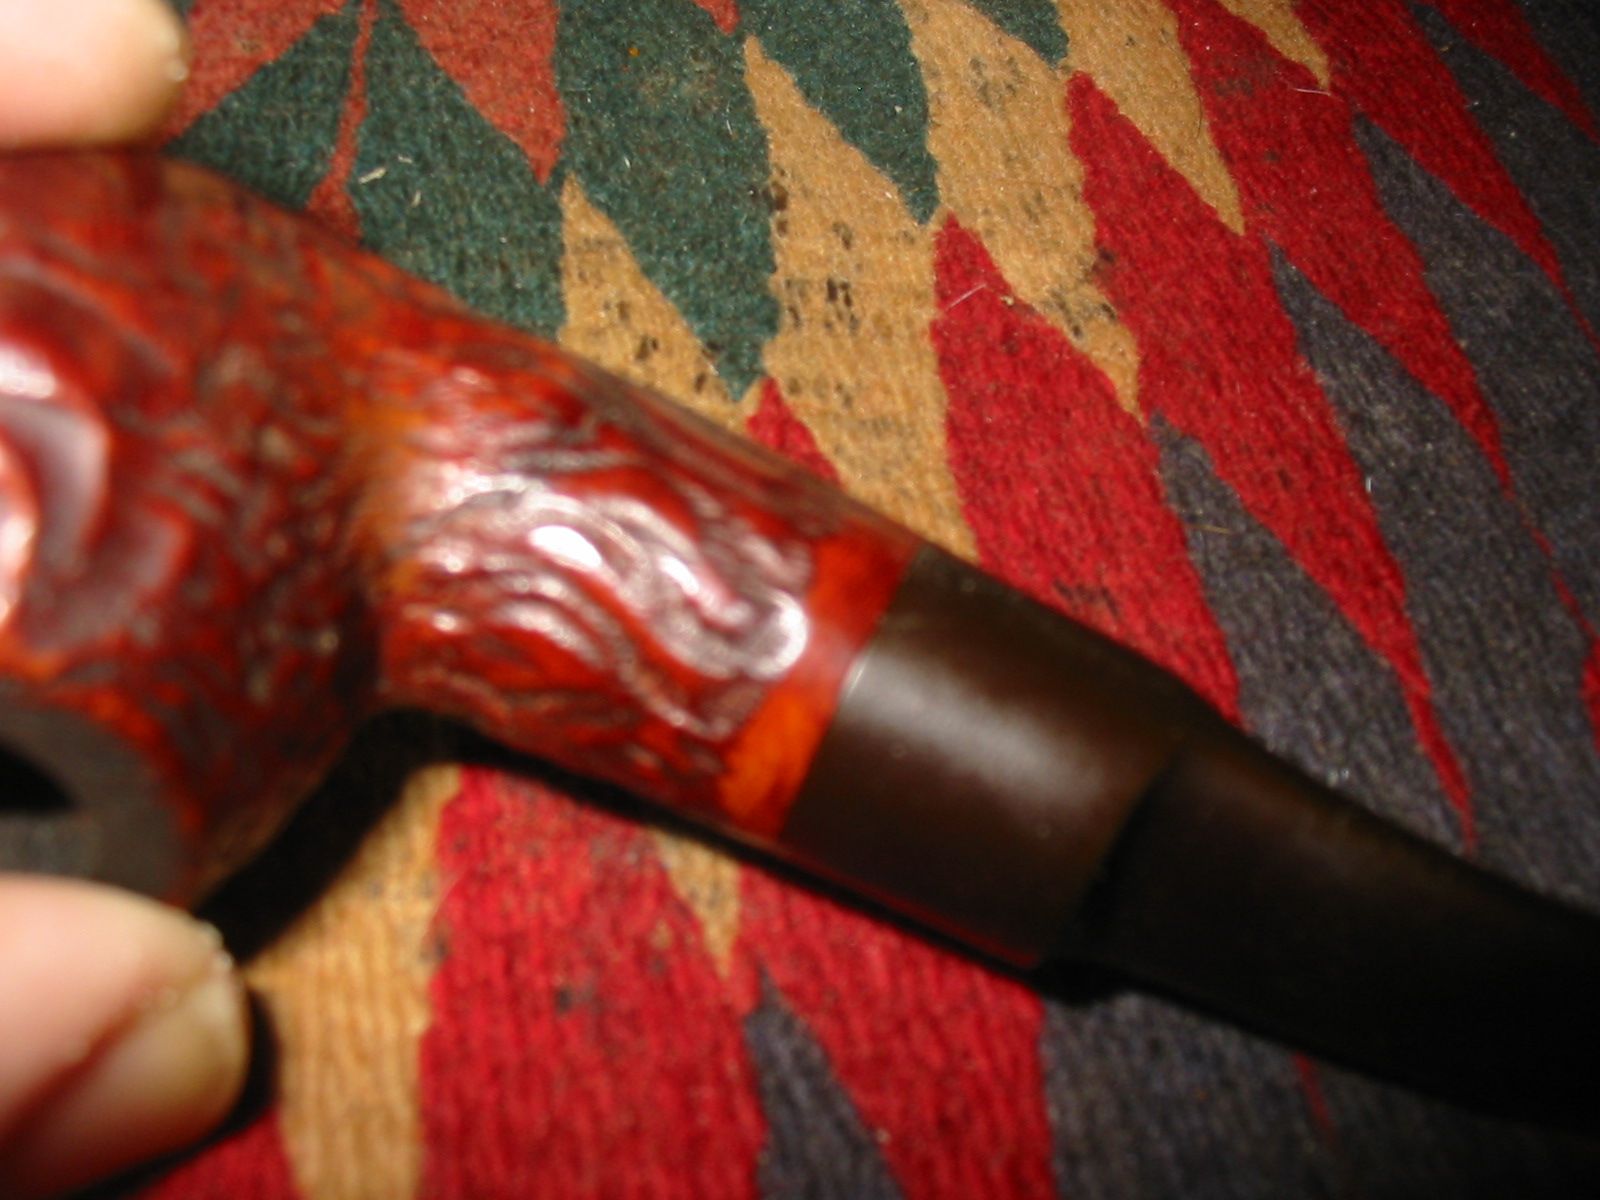
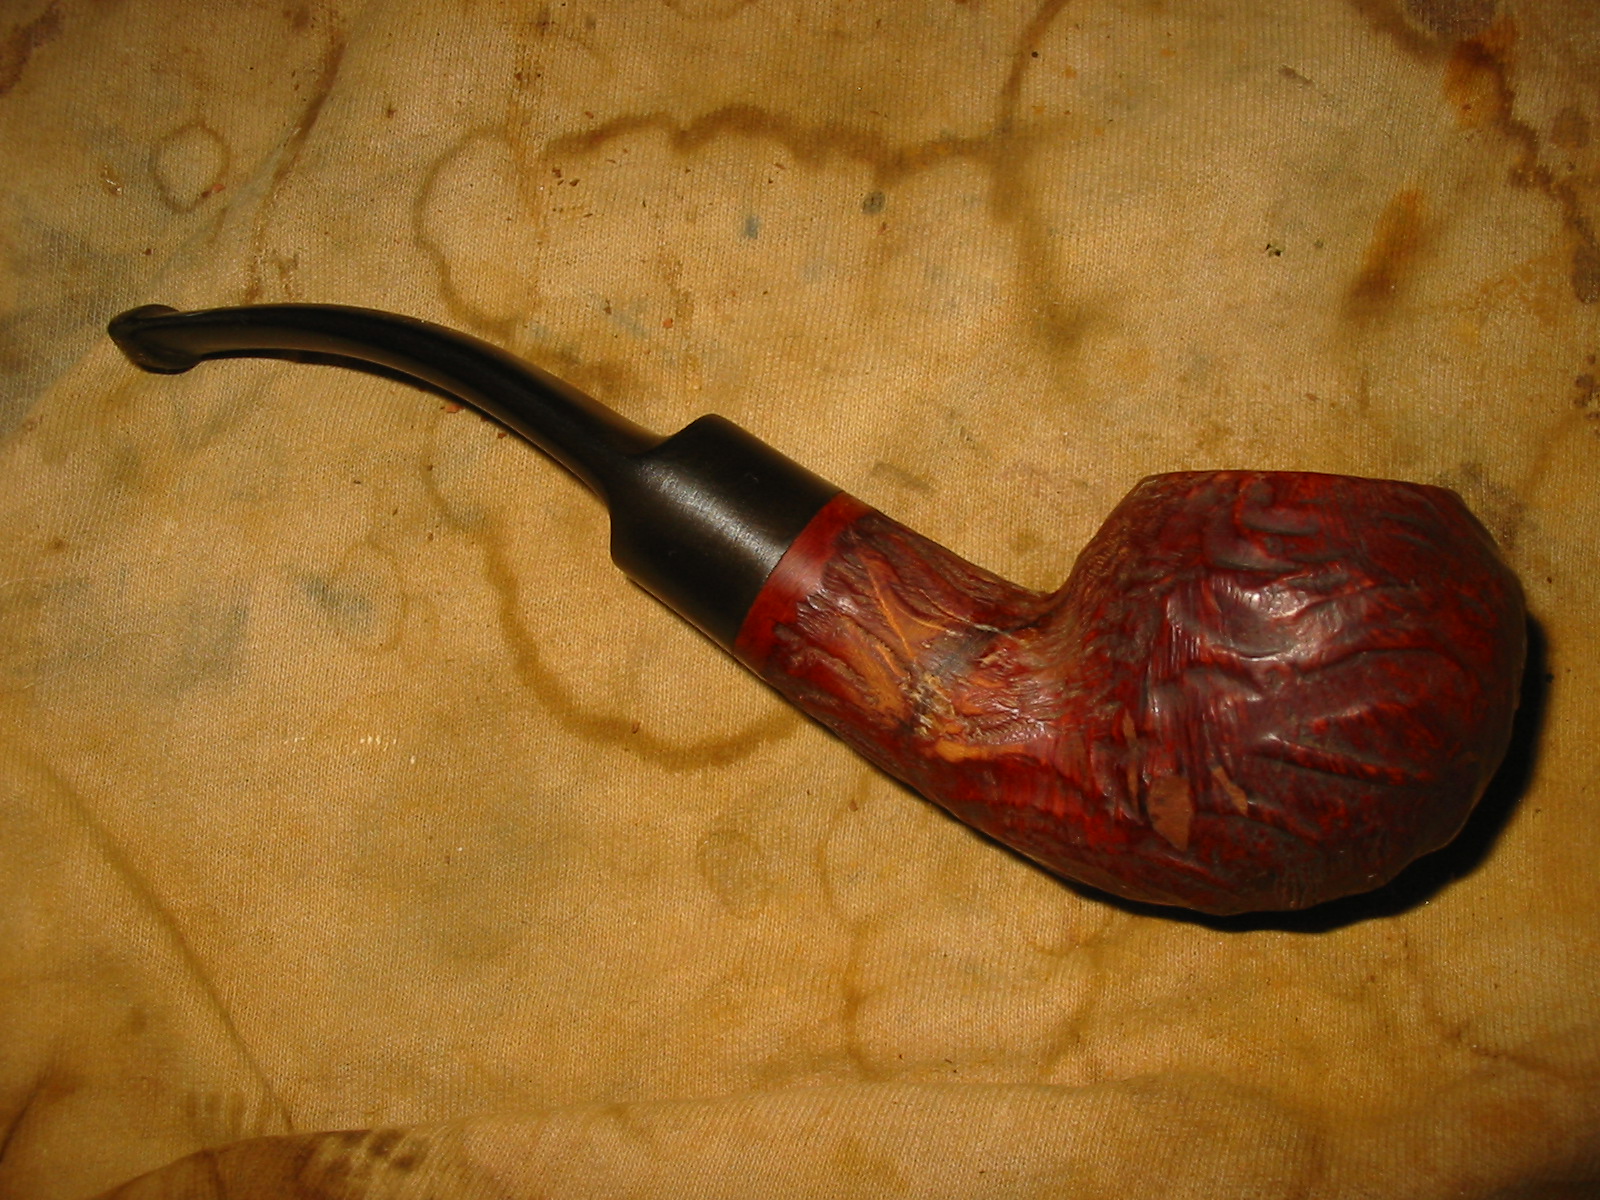
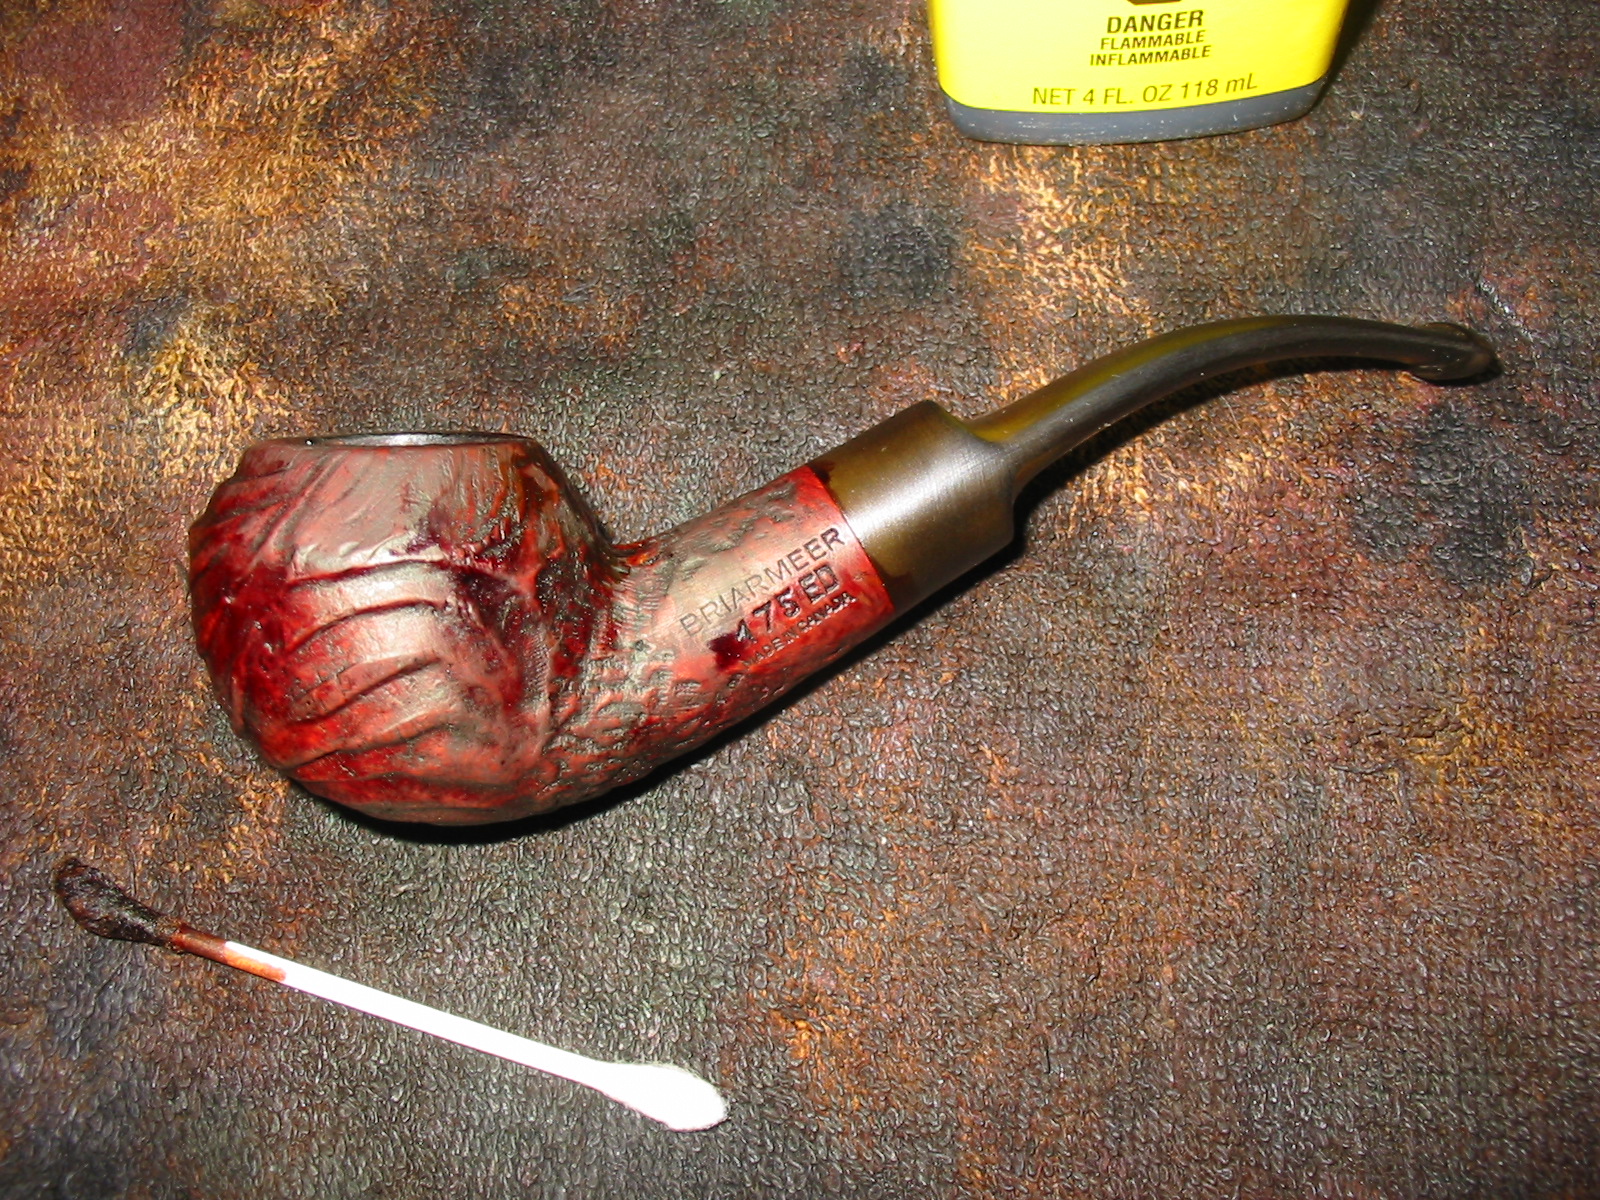
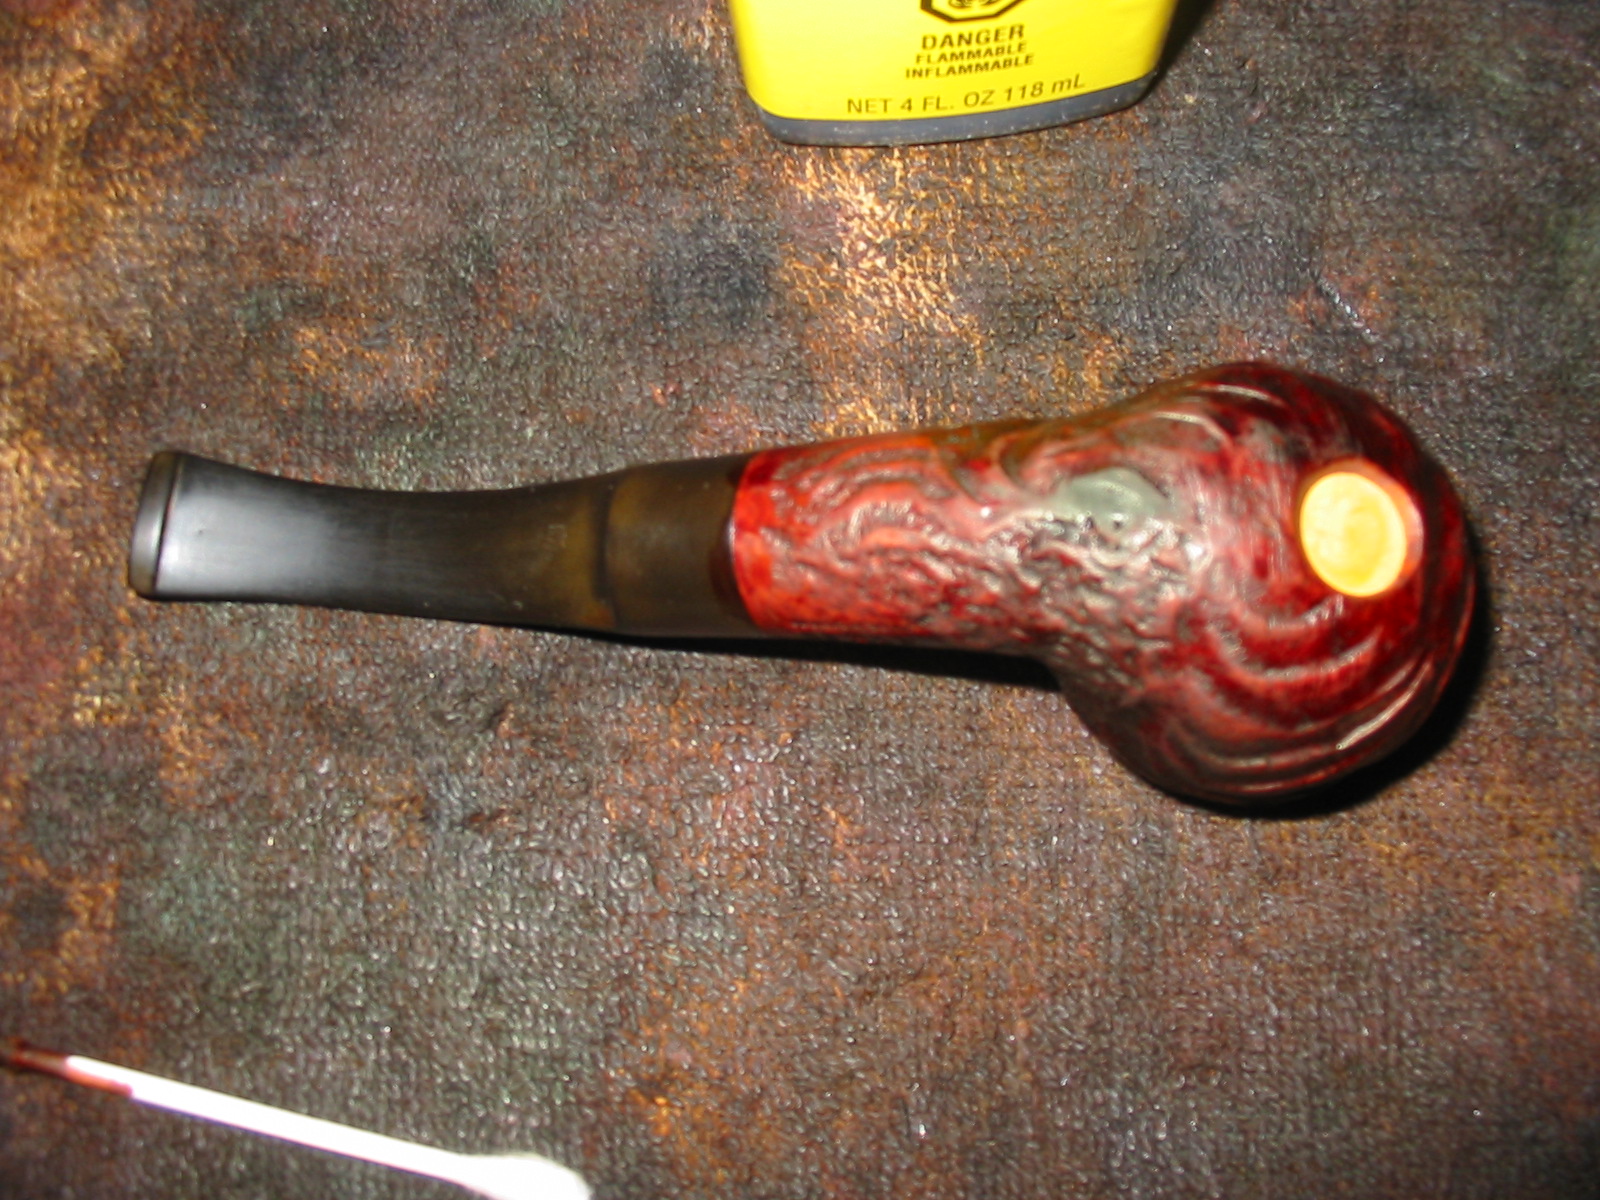
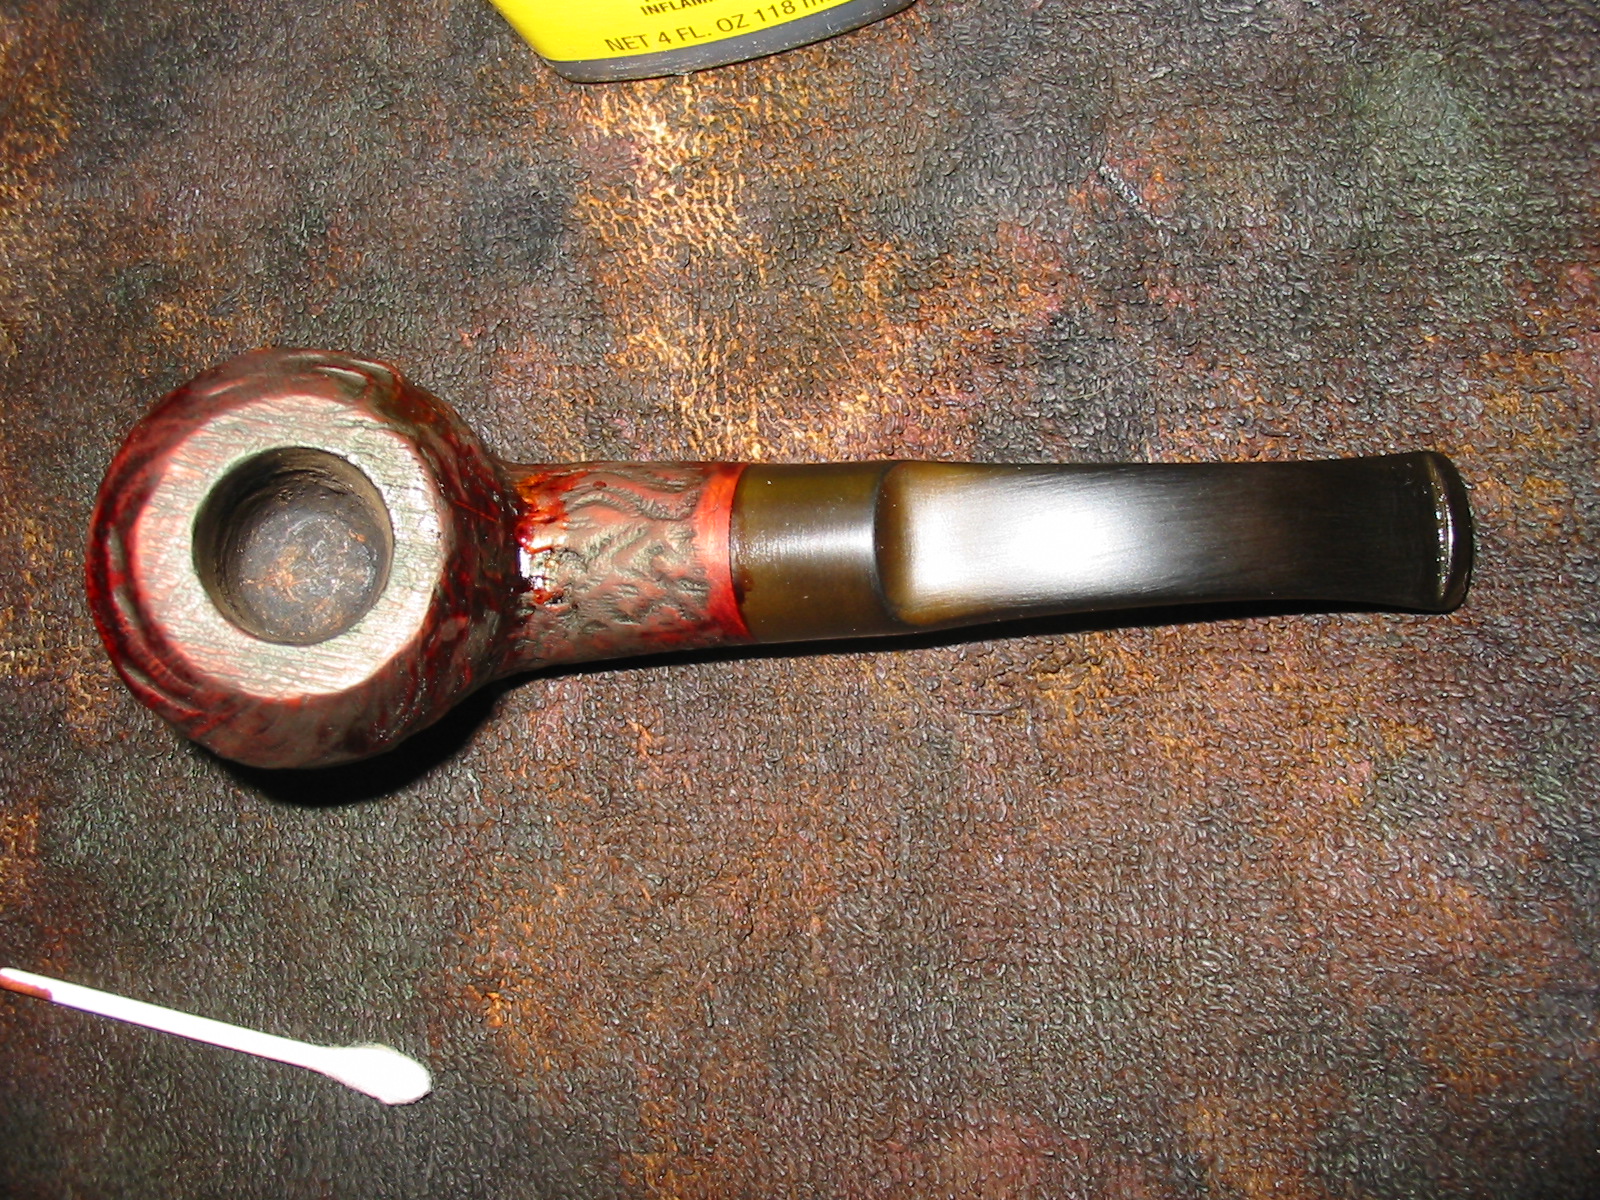
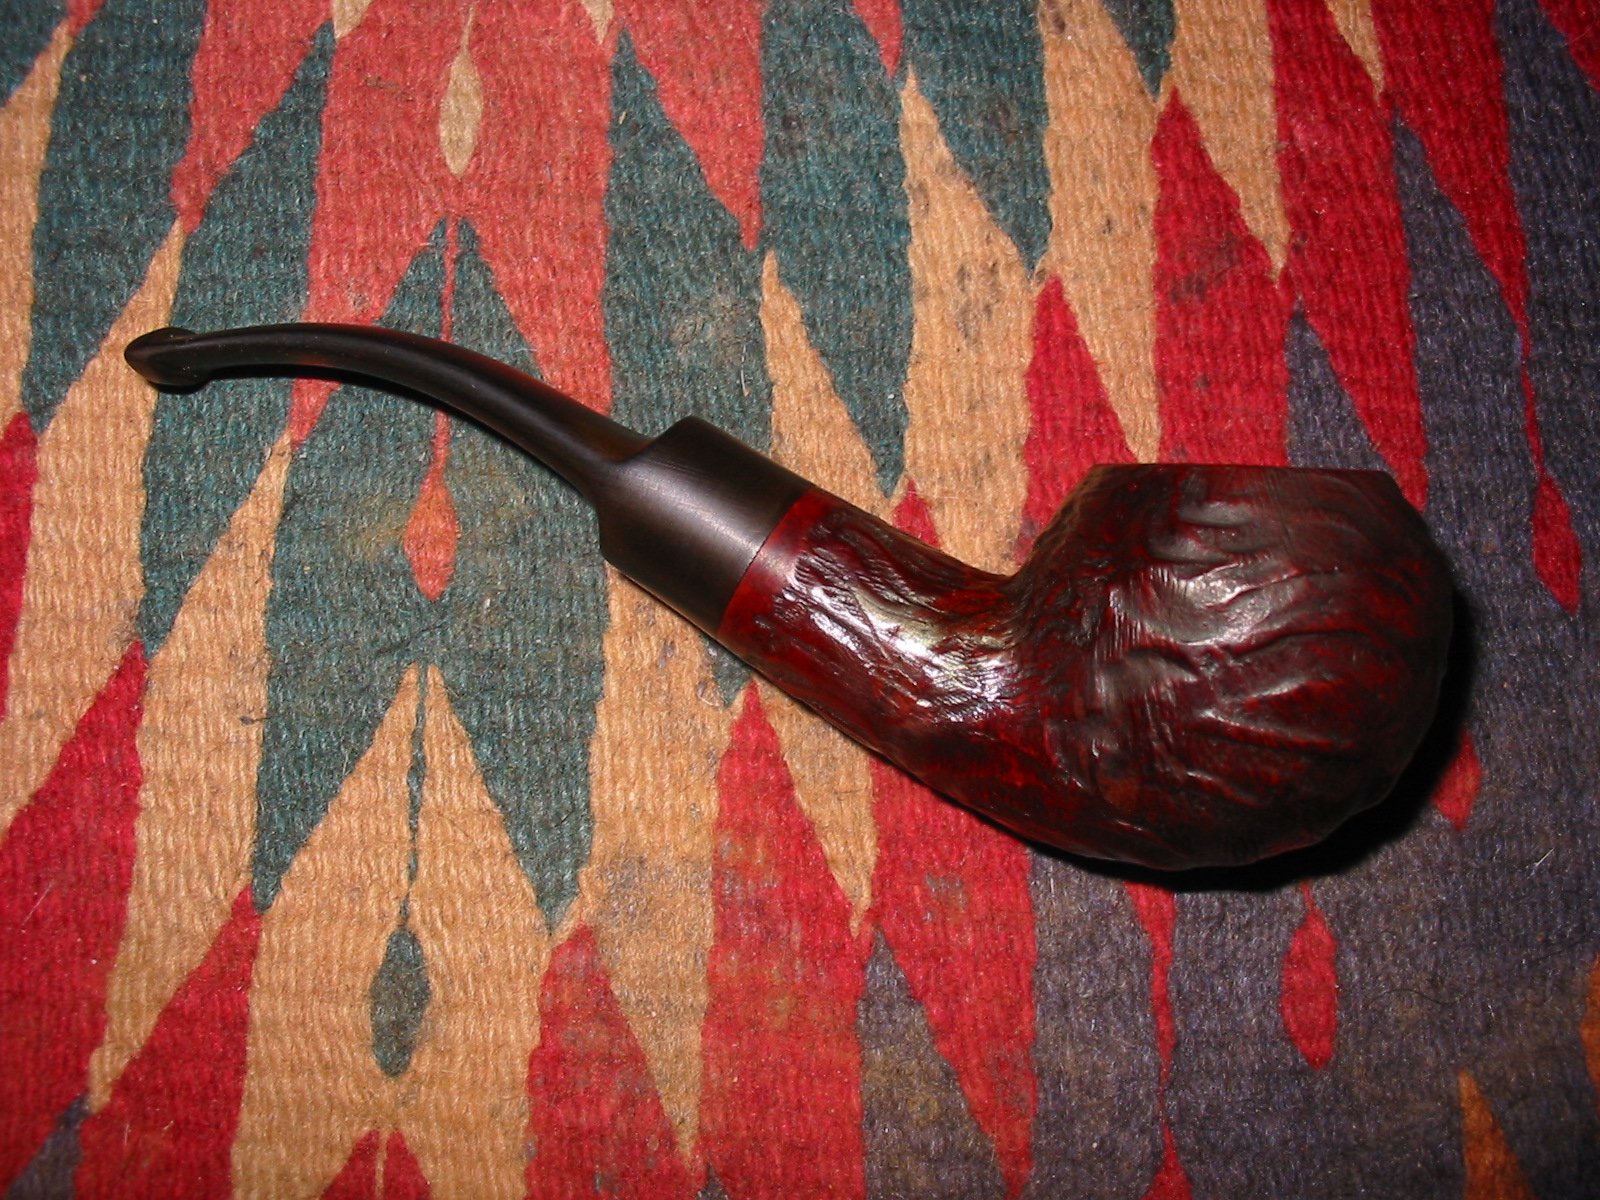
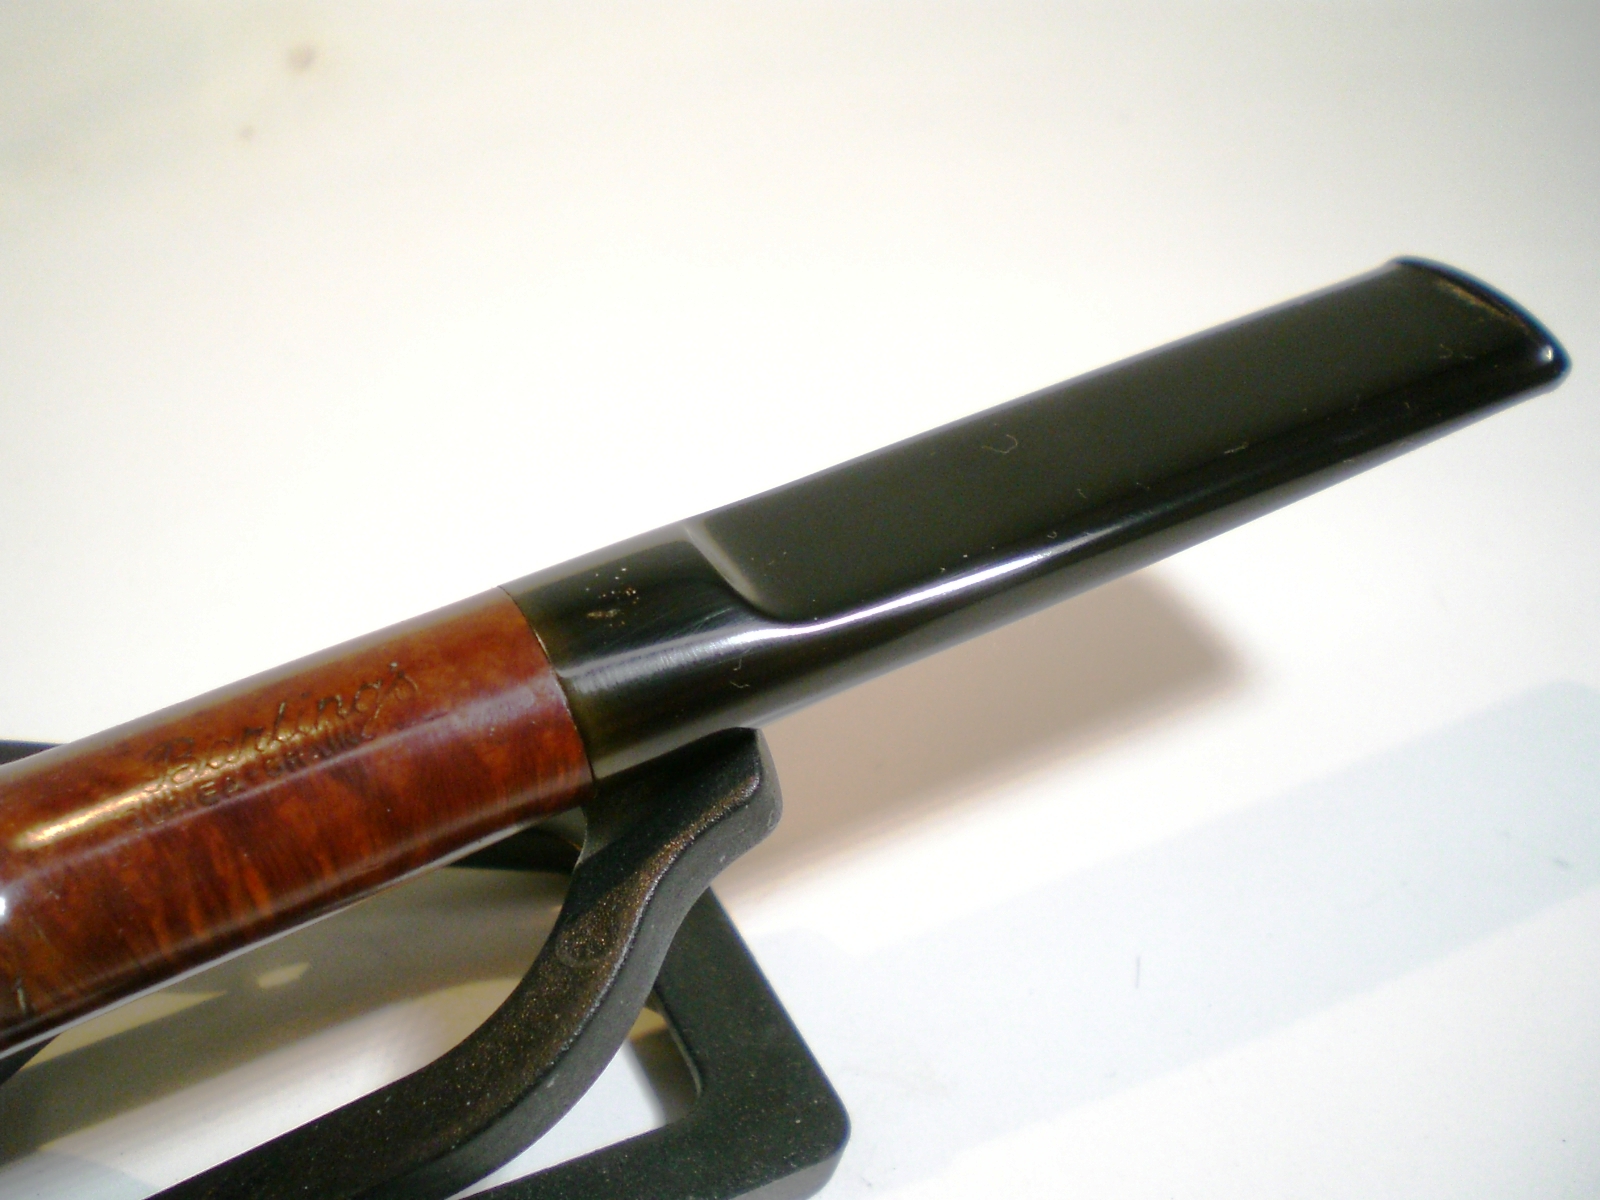
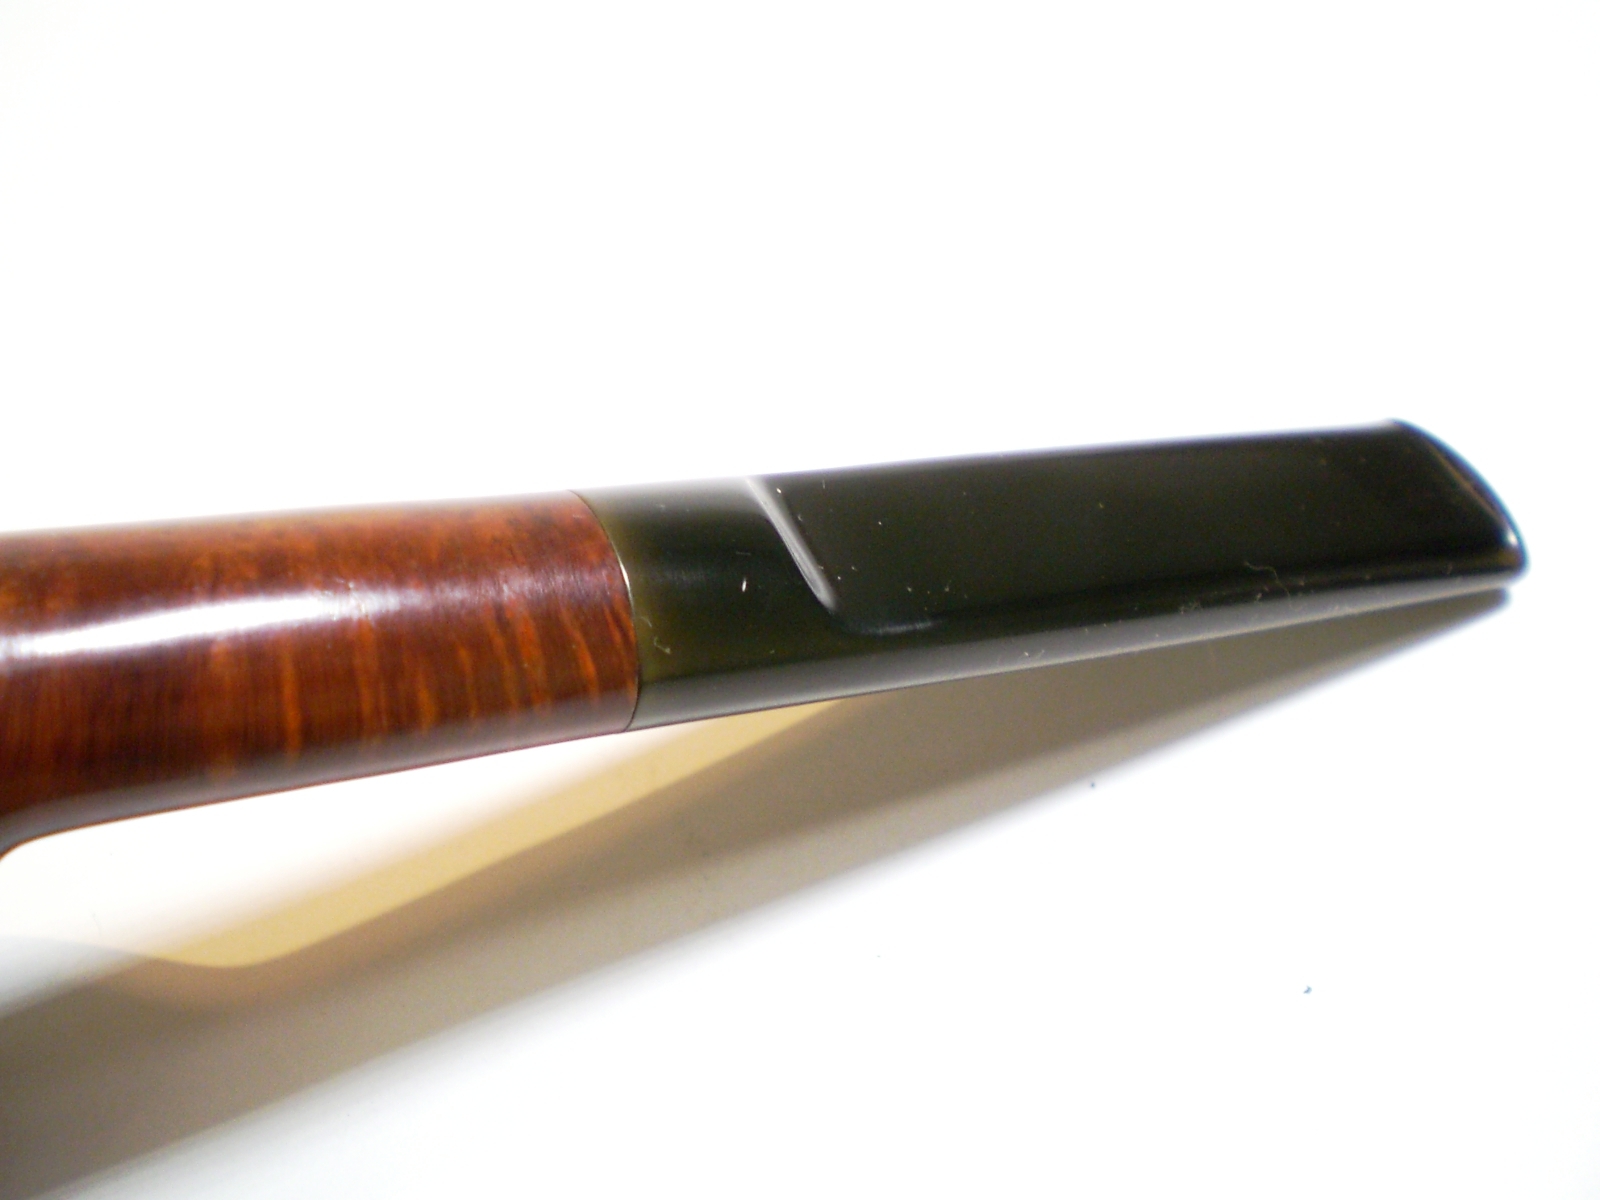
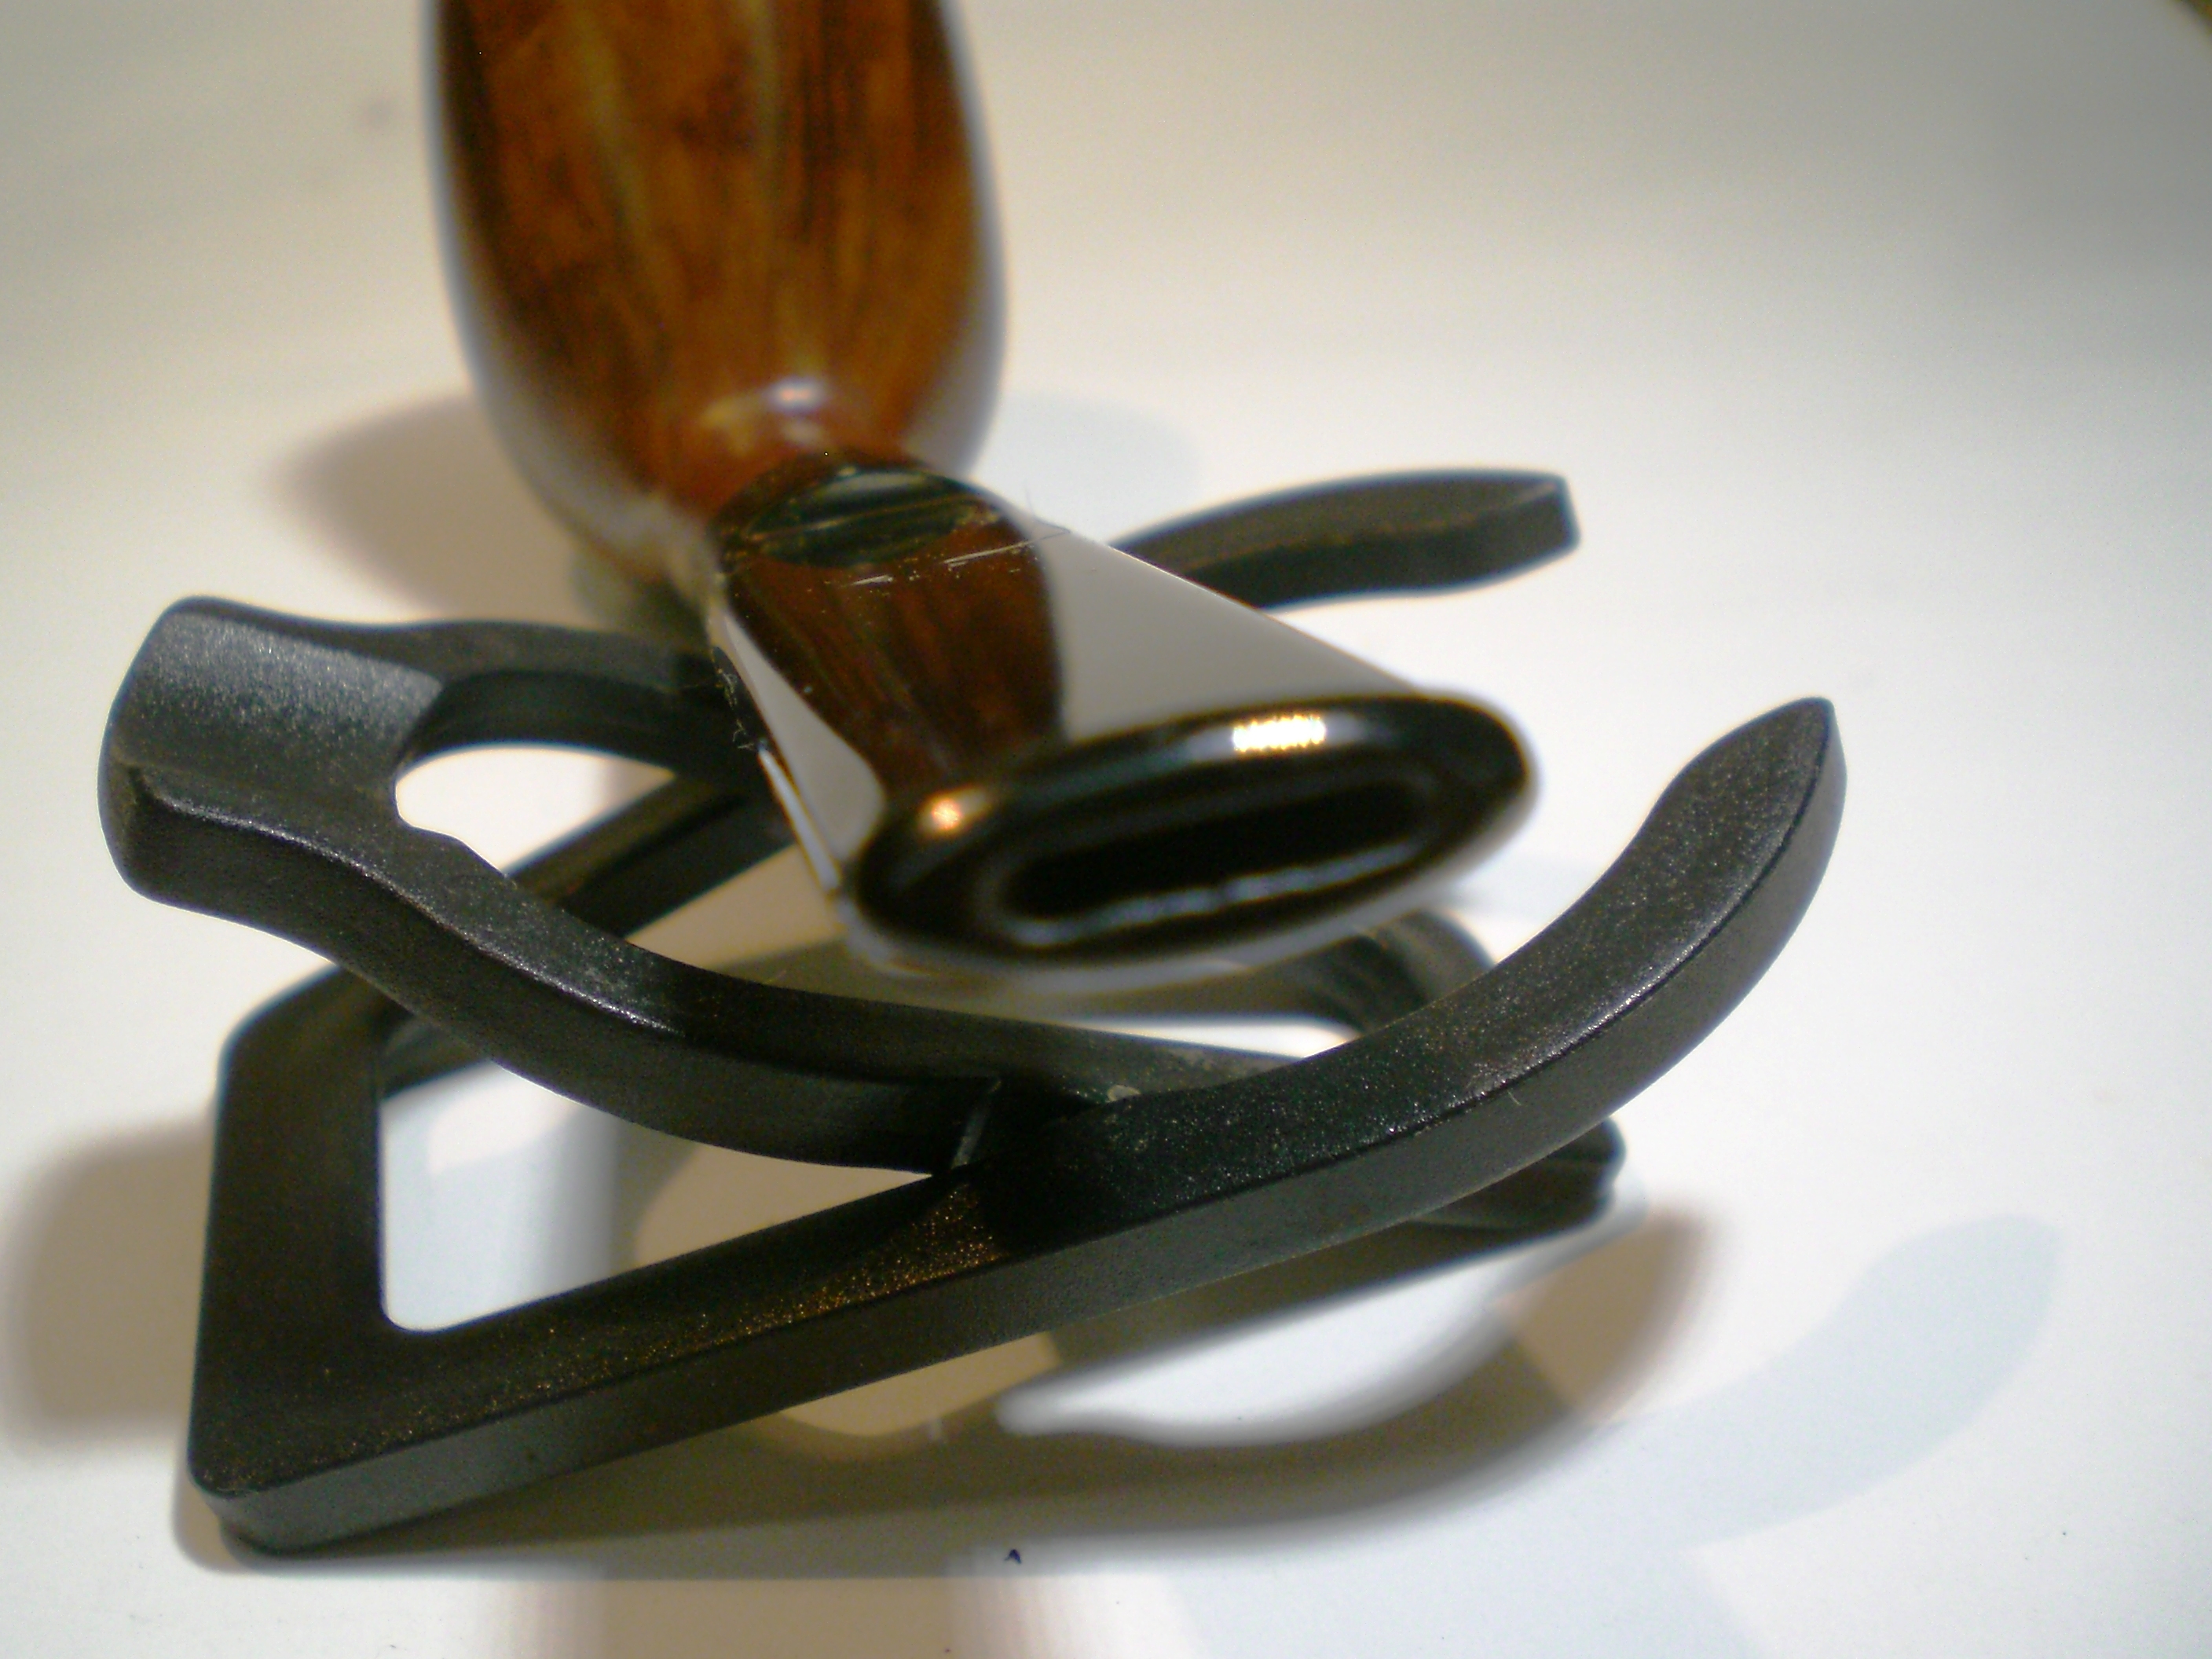
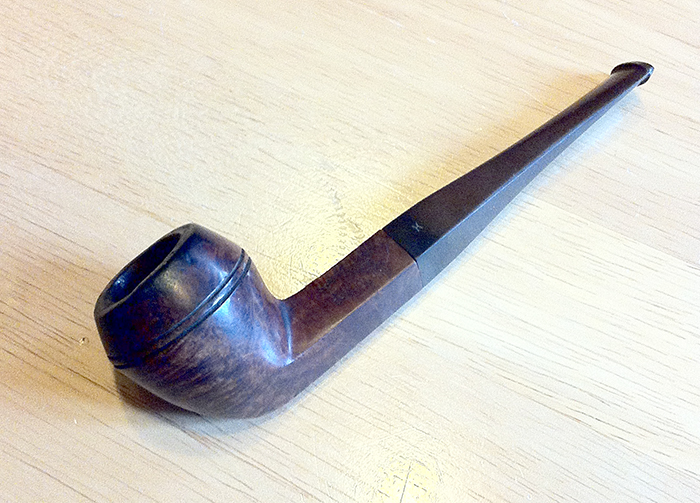
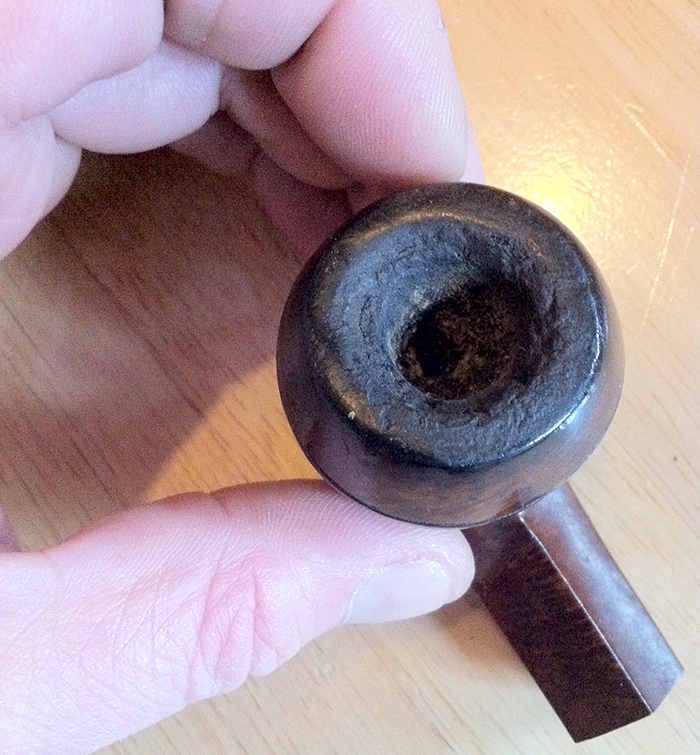
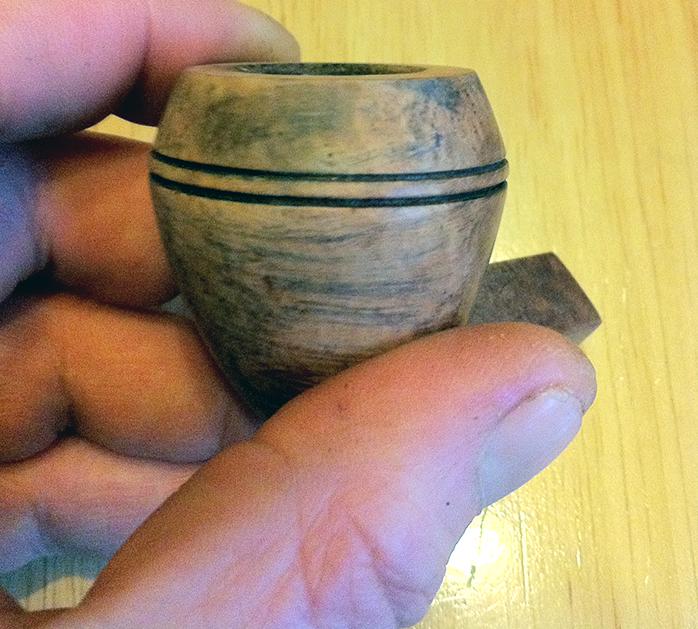
Superficially it doesn’t look too bad, but the rim is badly charred and uneven and I fear I am going to have to risk compromising the shape in order to make the bowl look presentable. The stem/shank fit and alignment has somehow become slightly out of kilter, perhaps it is not the original stem, so that too will need attention.

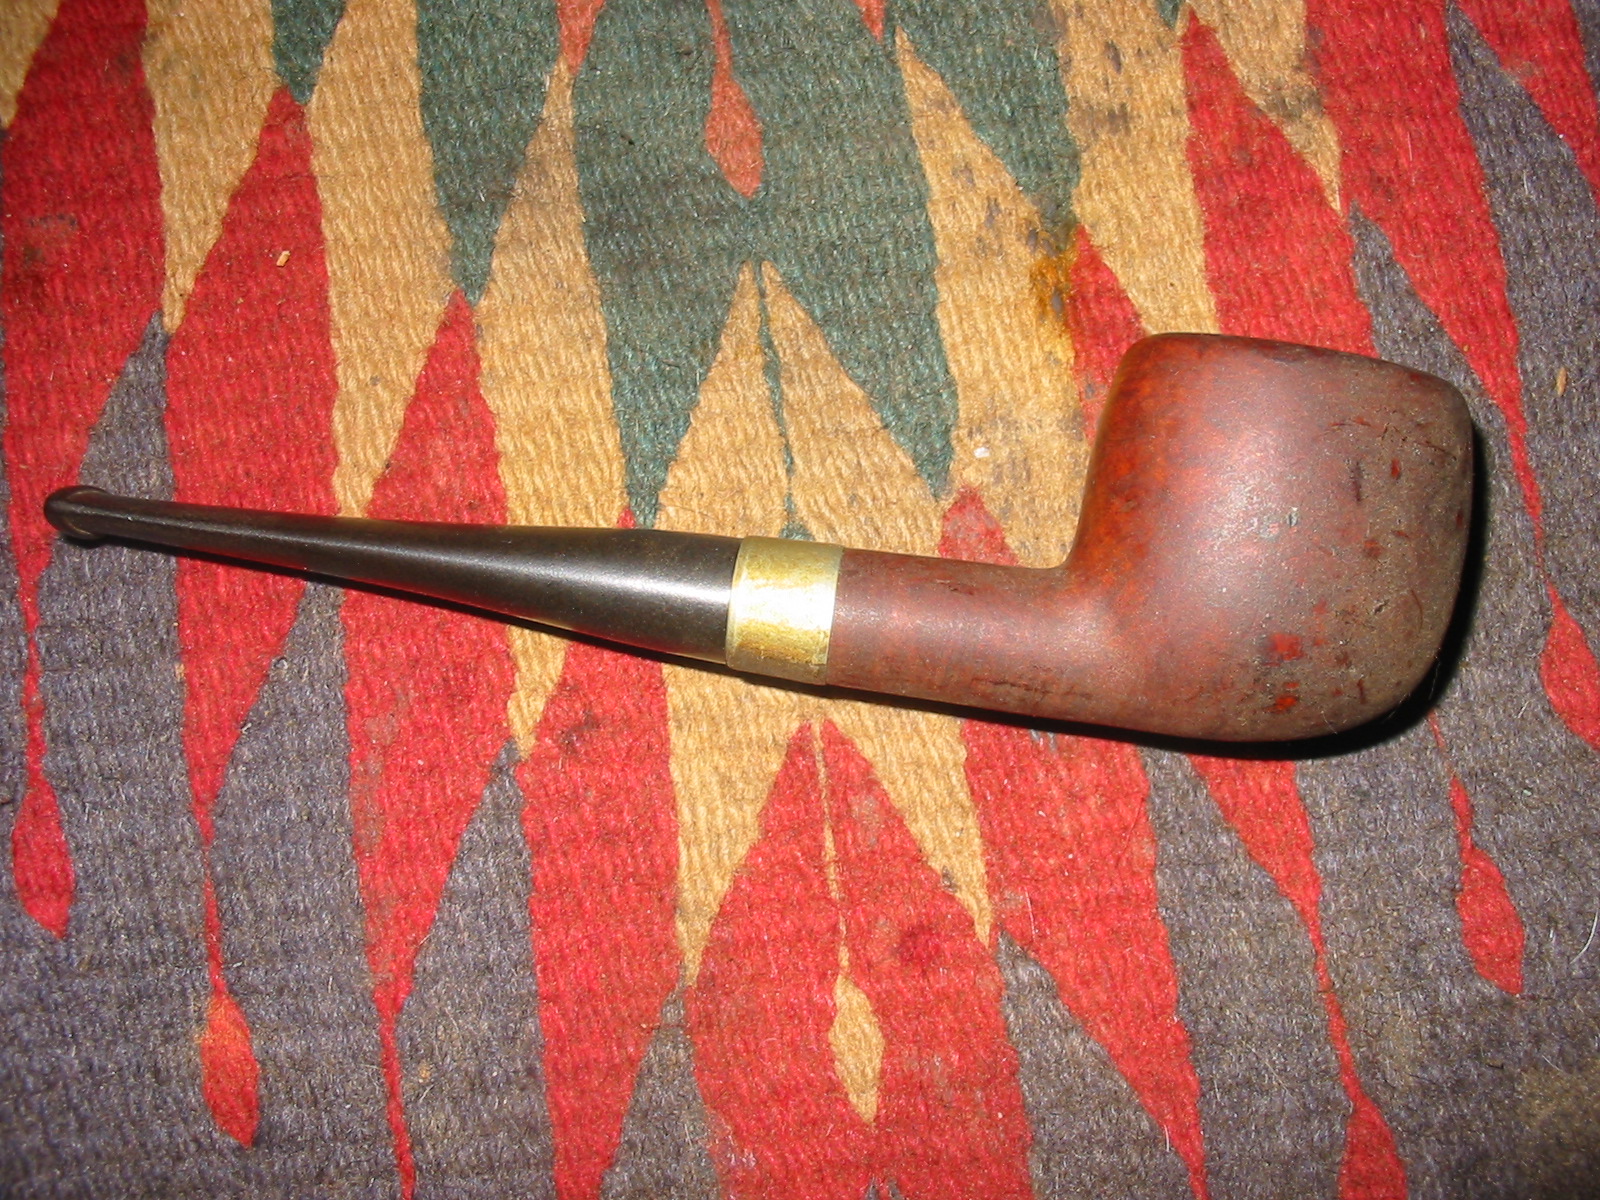
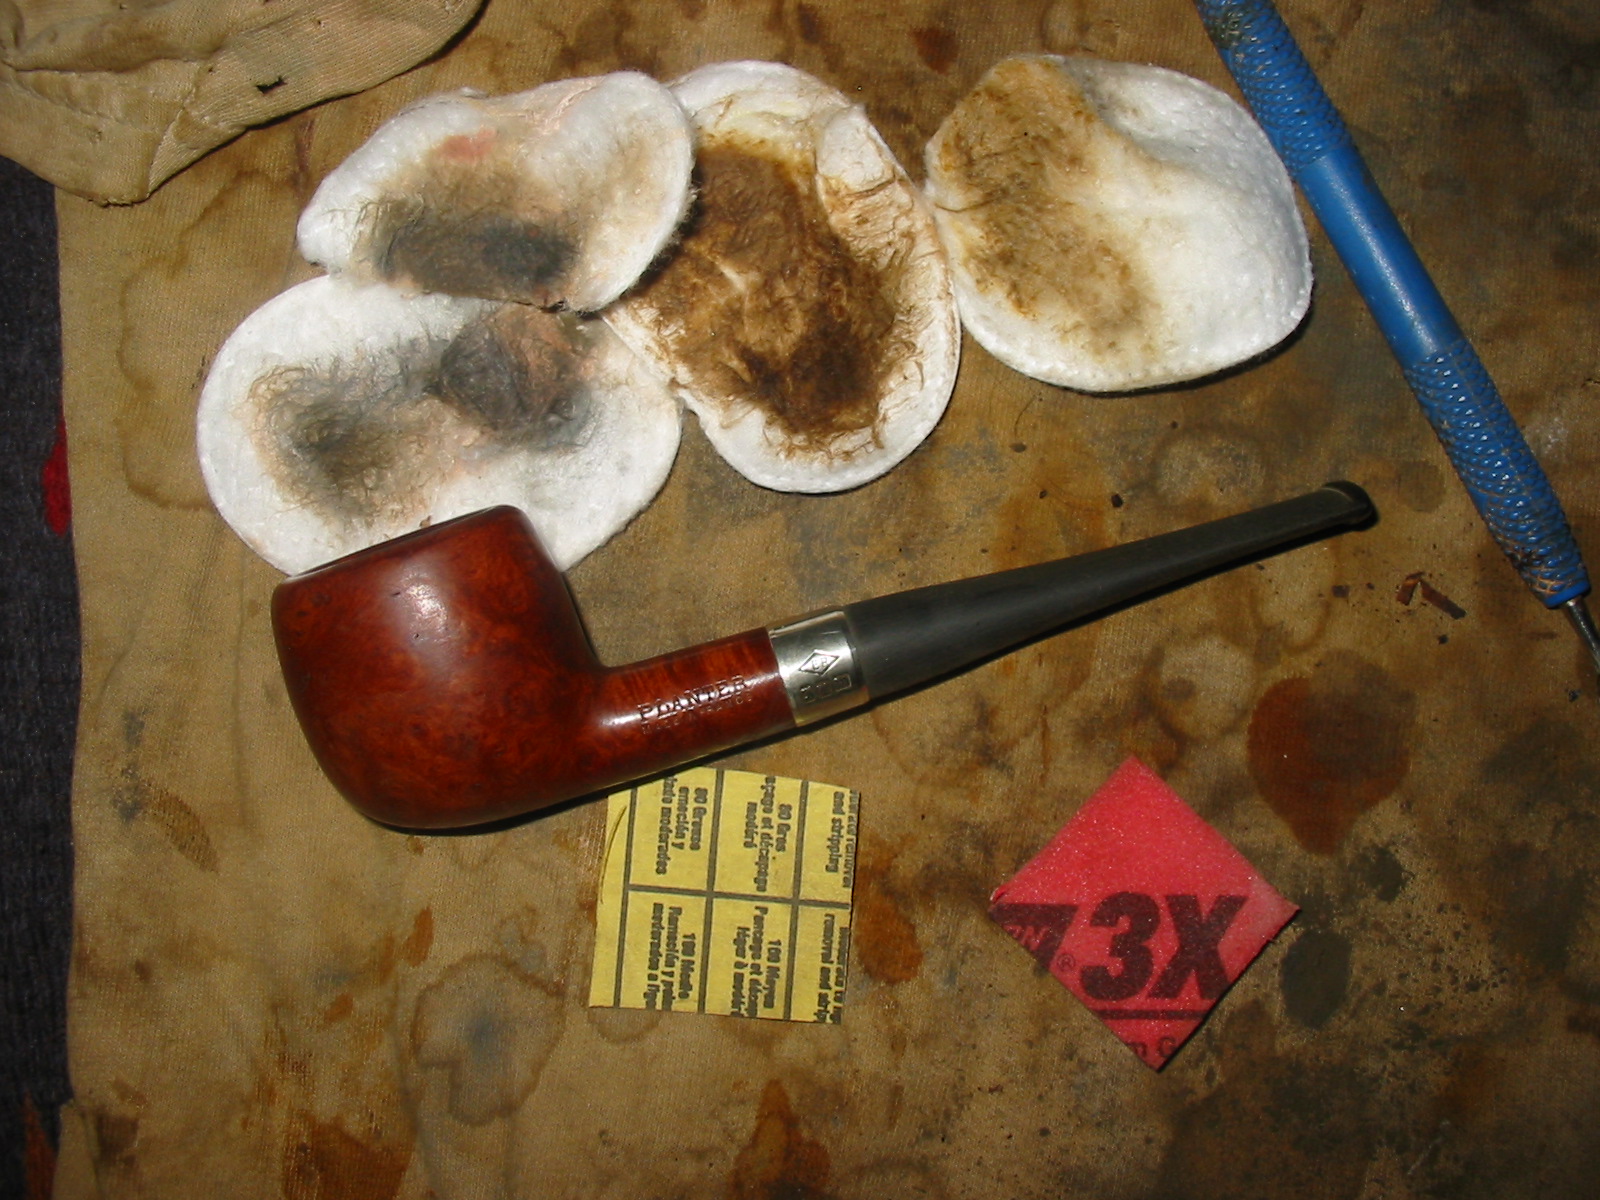
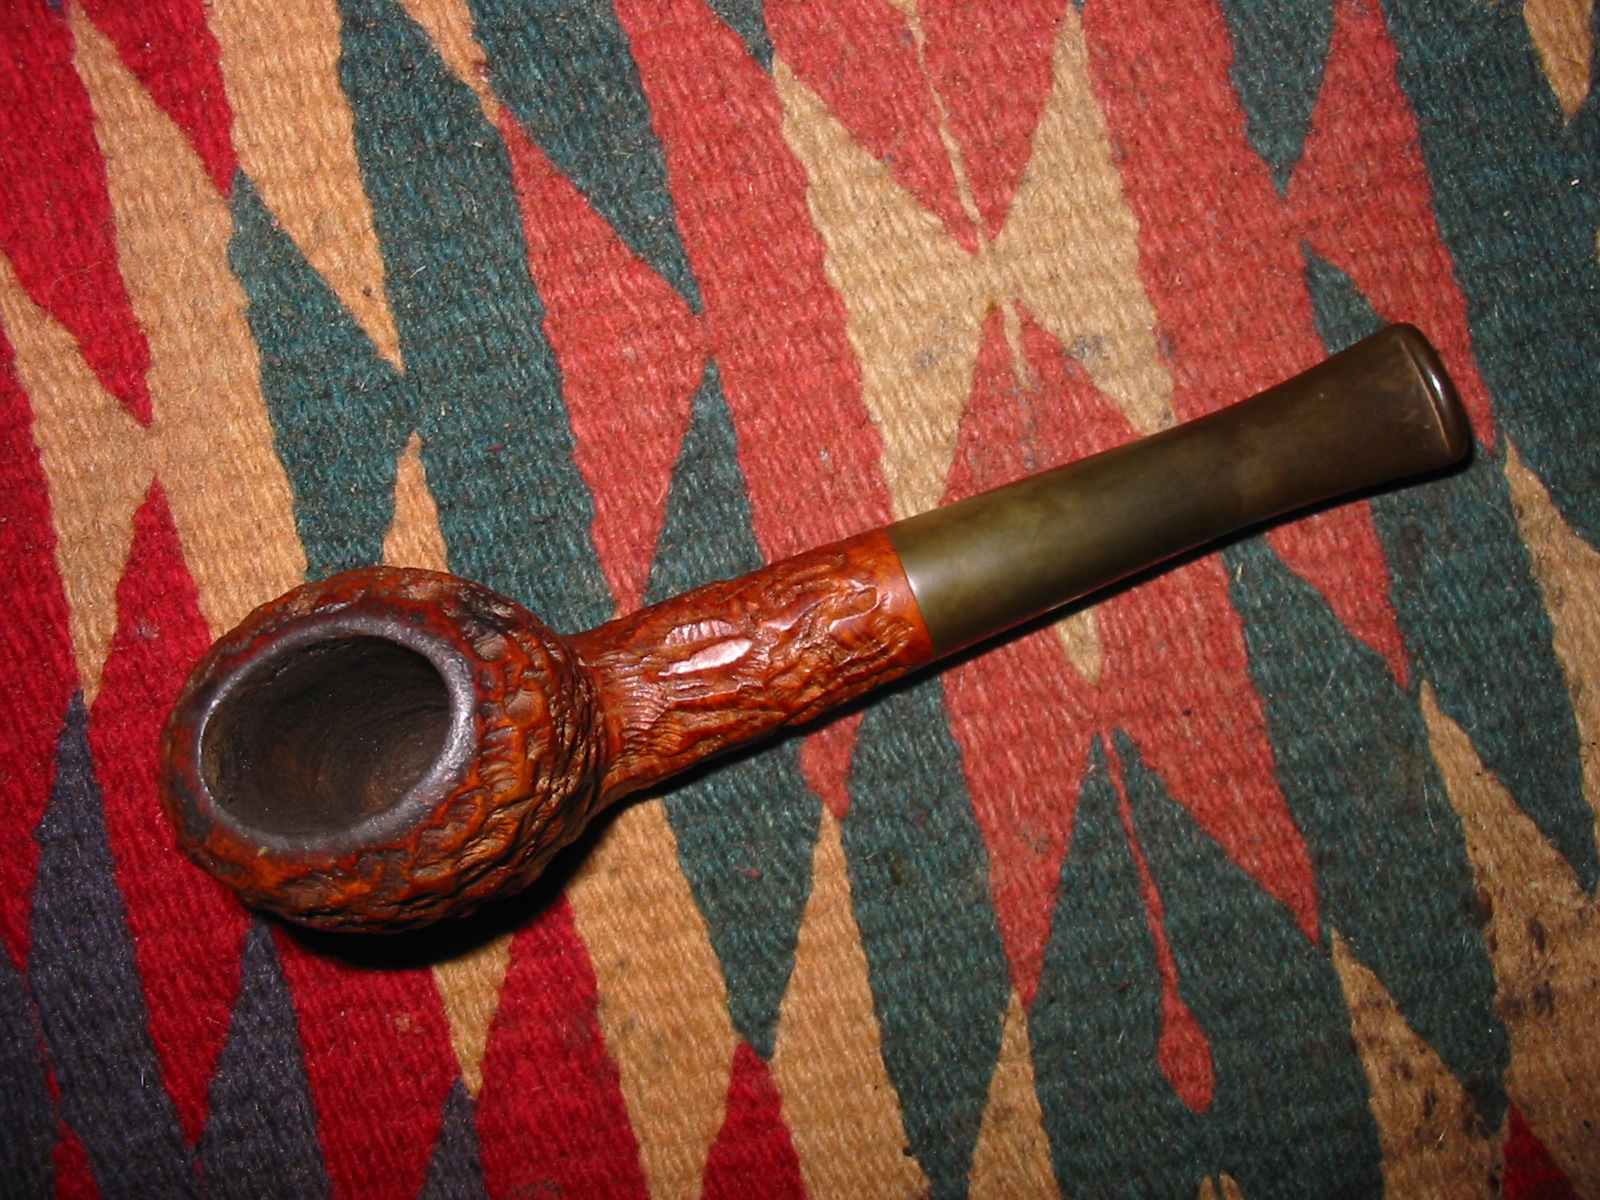
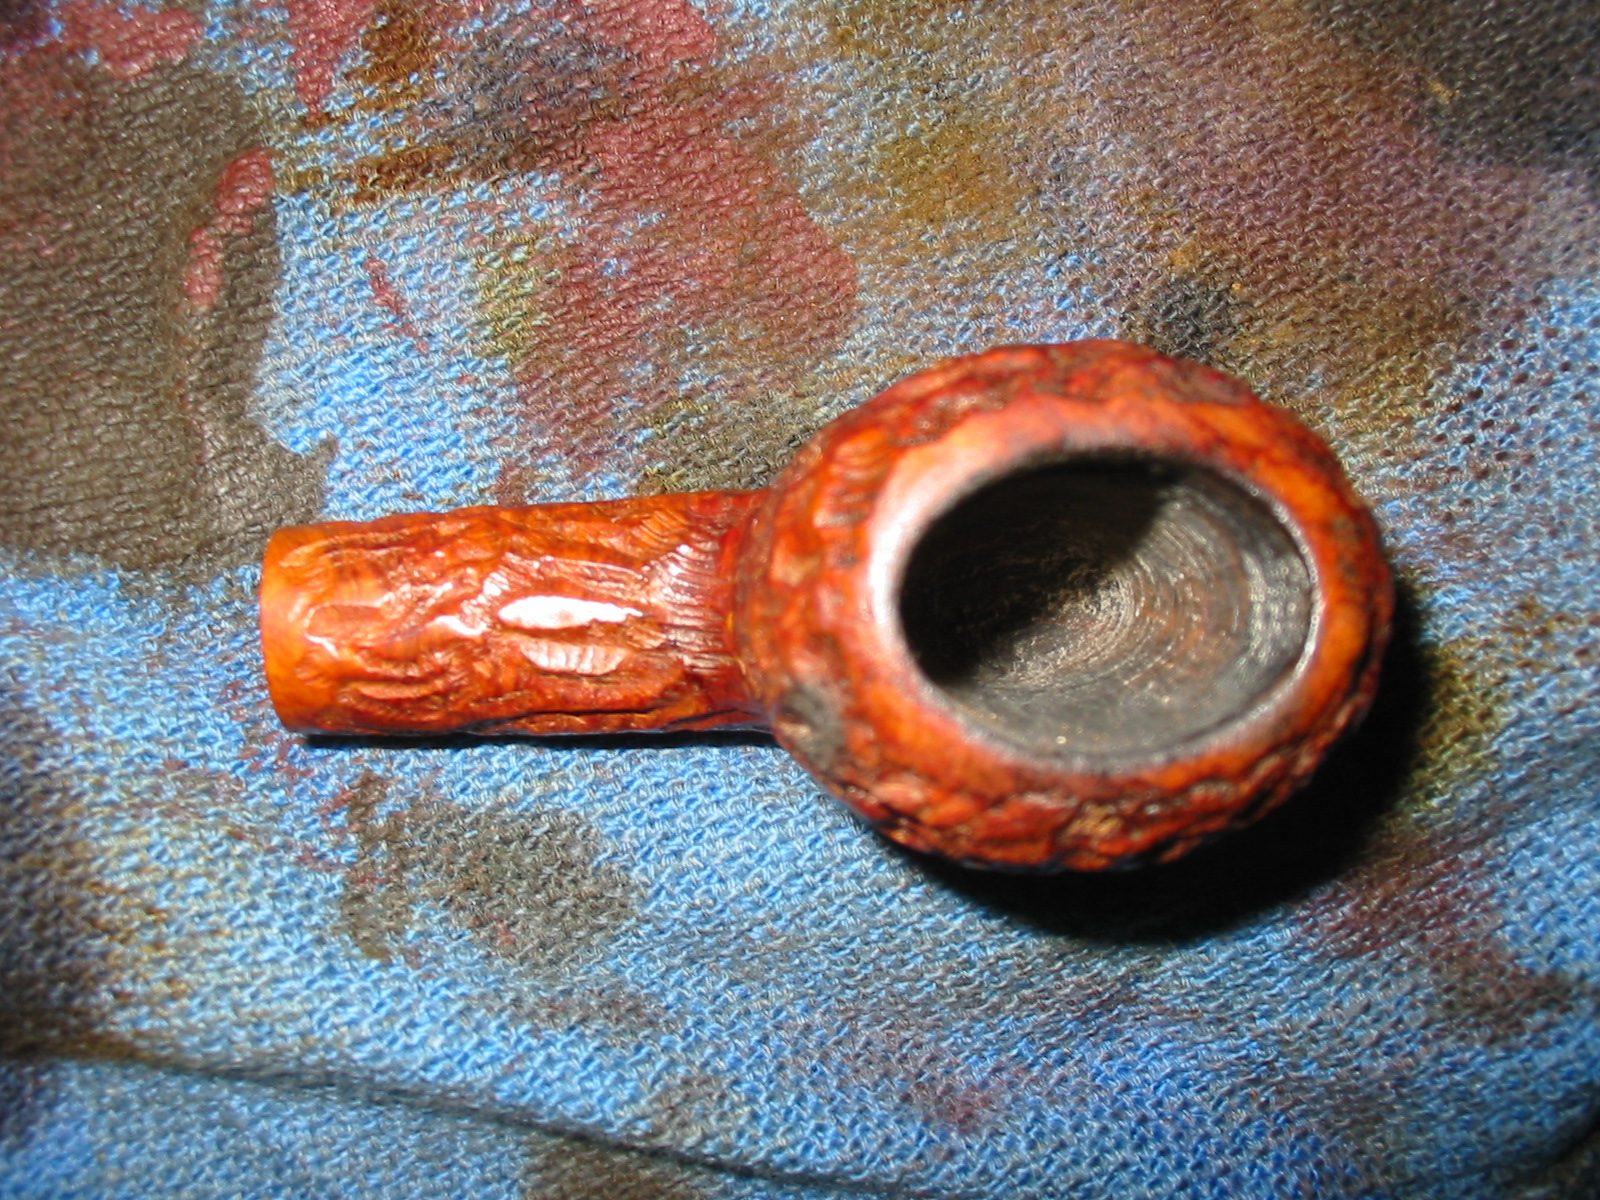
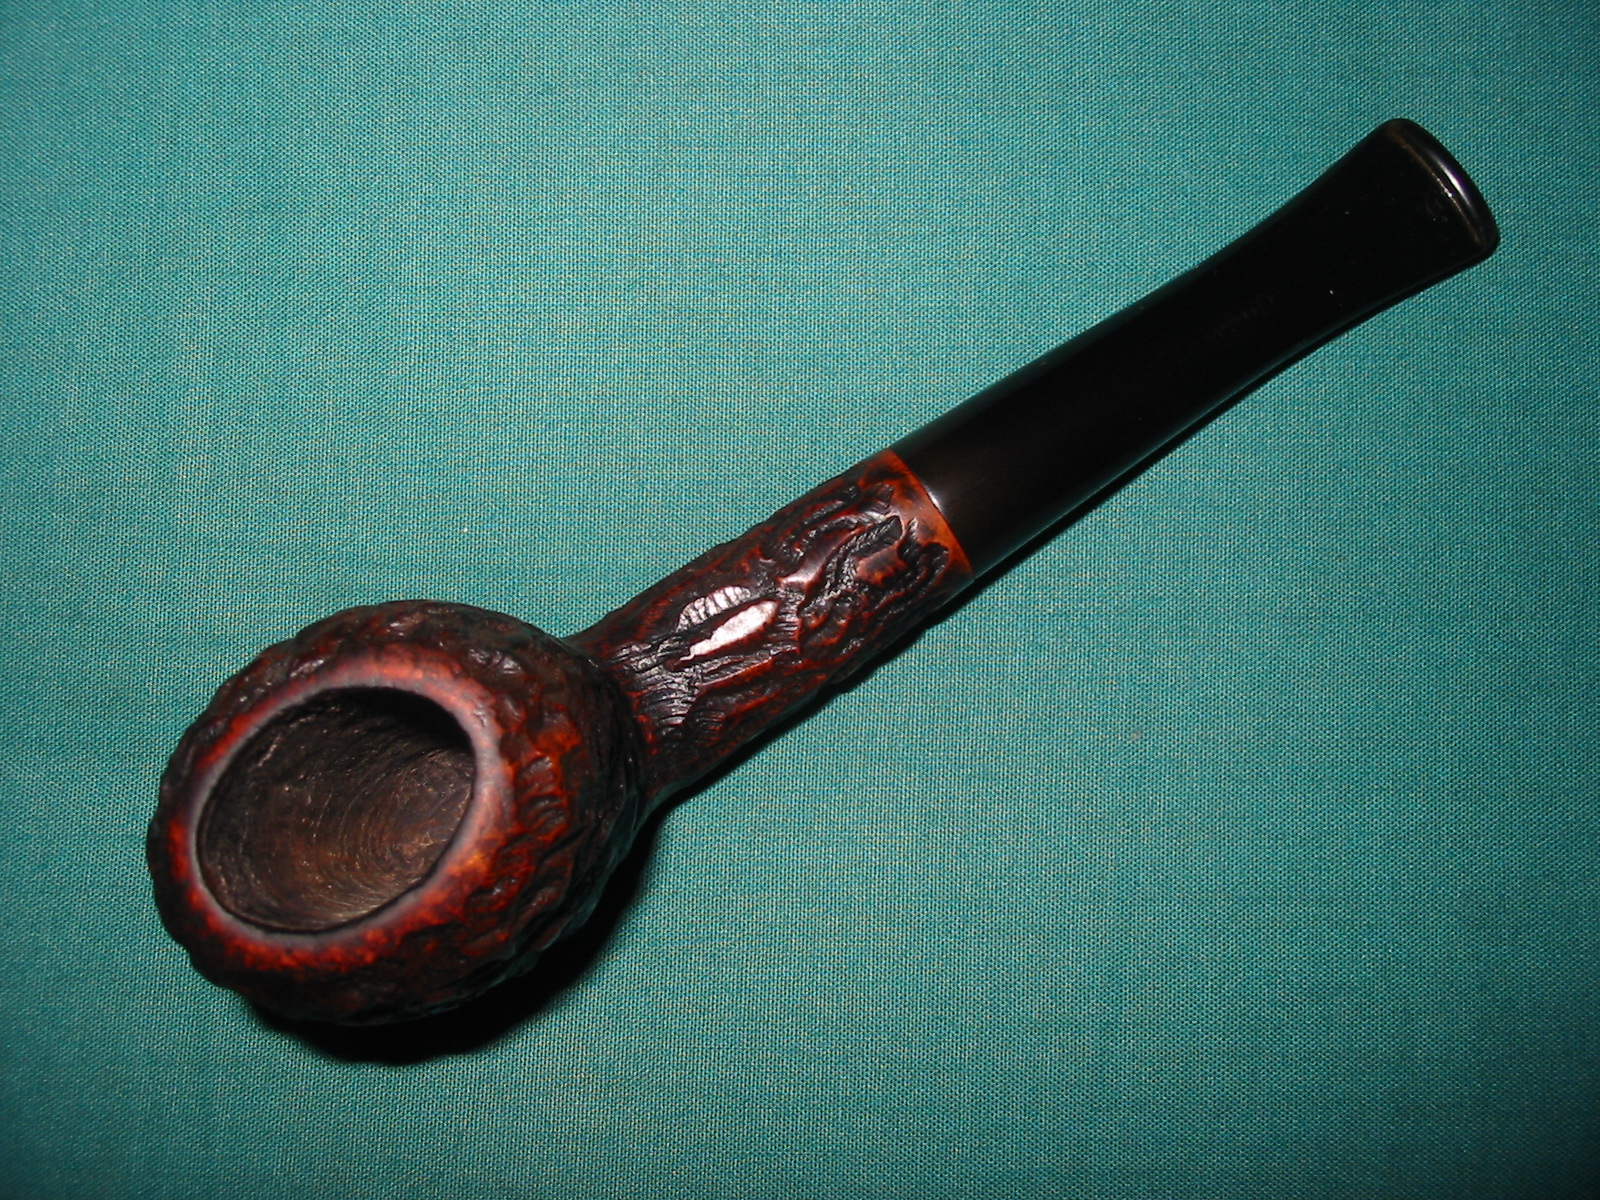
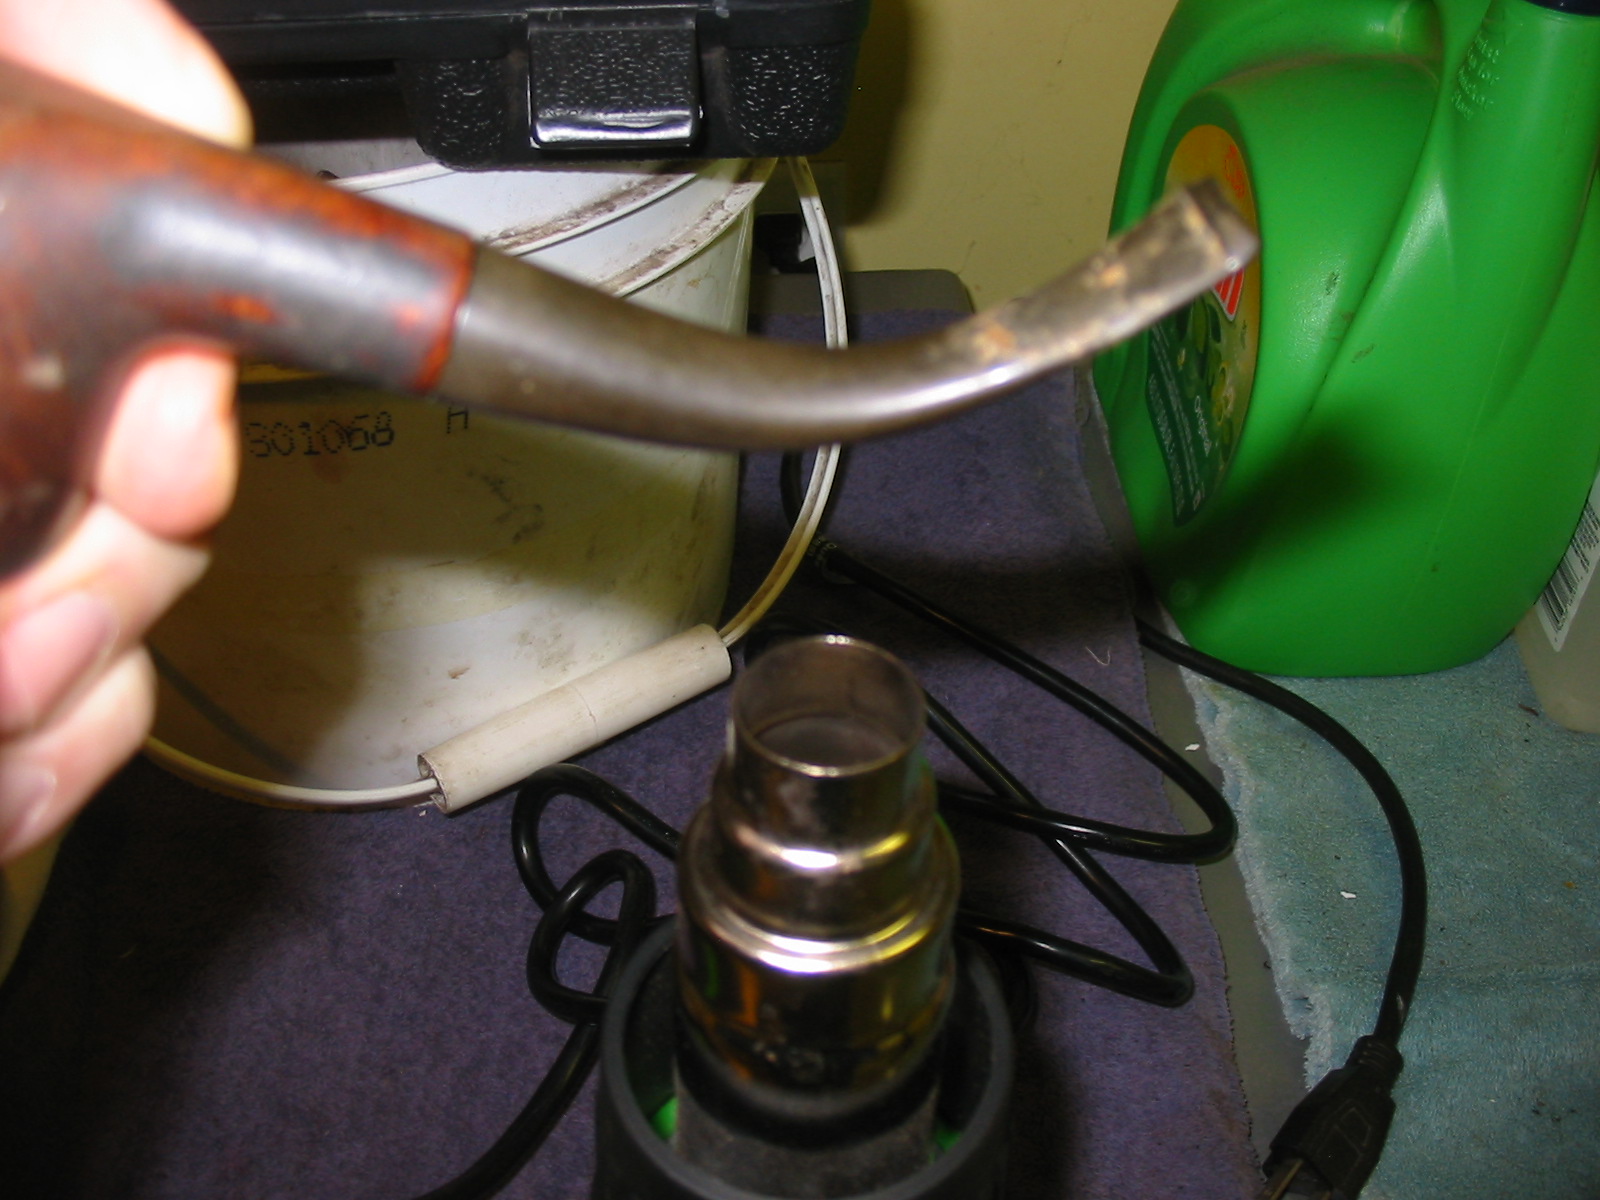
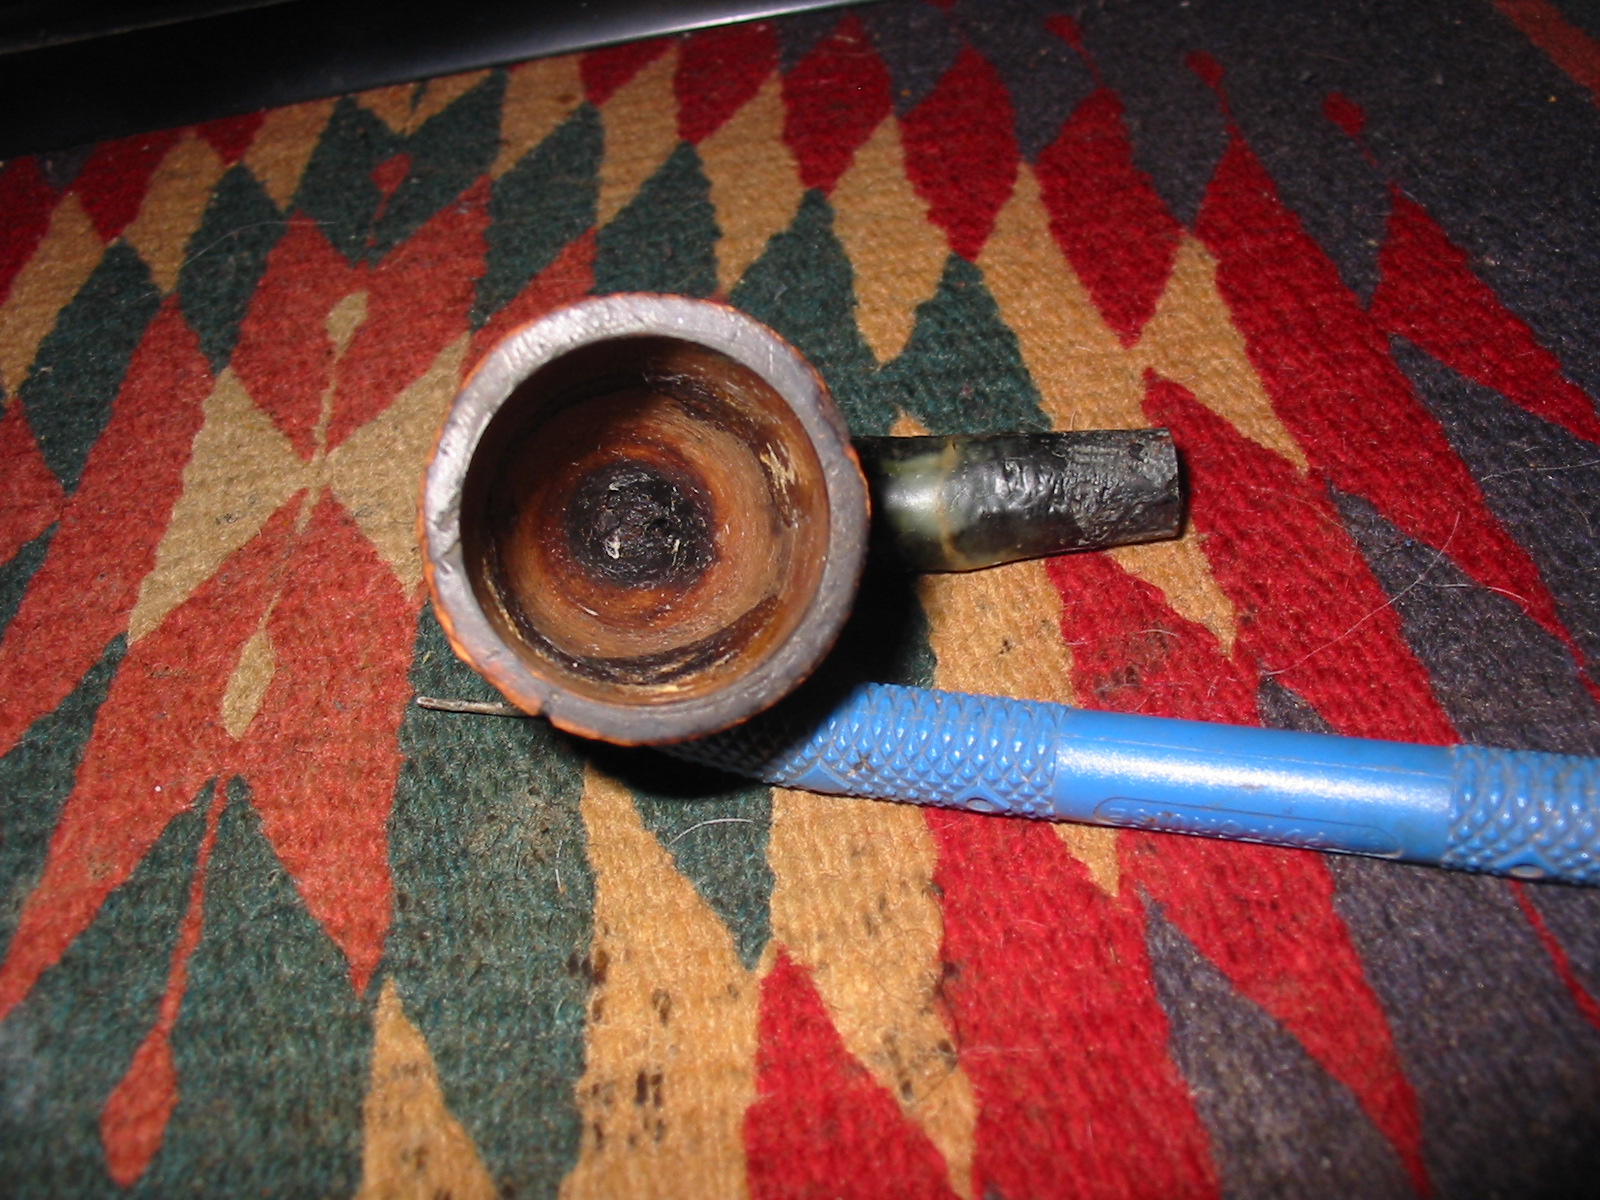
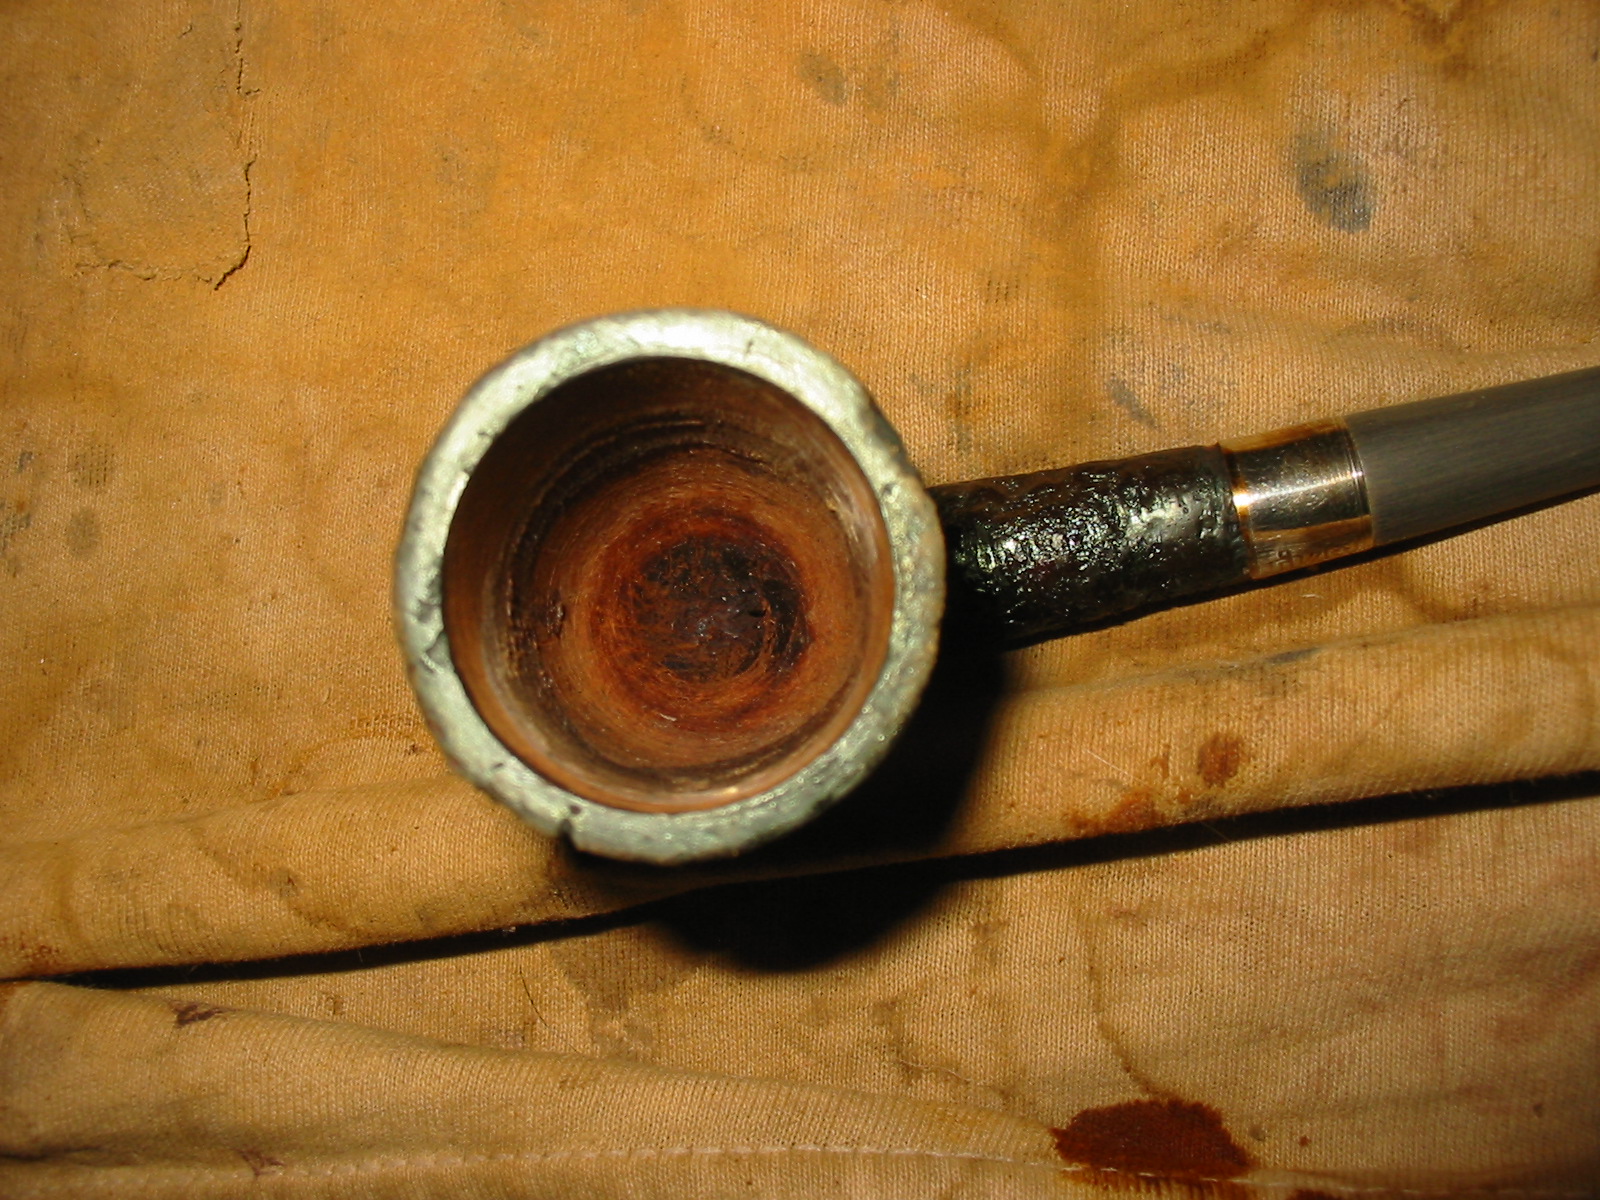
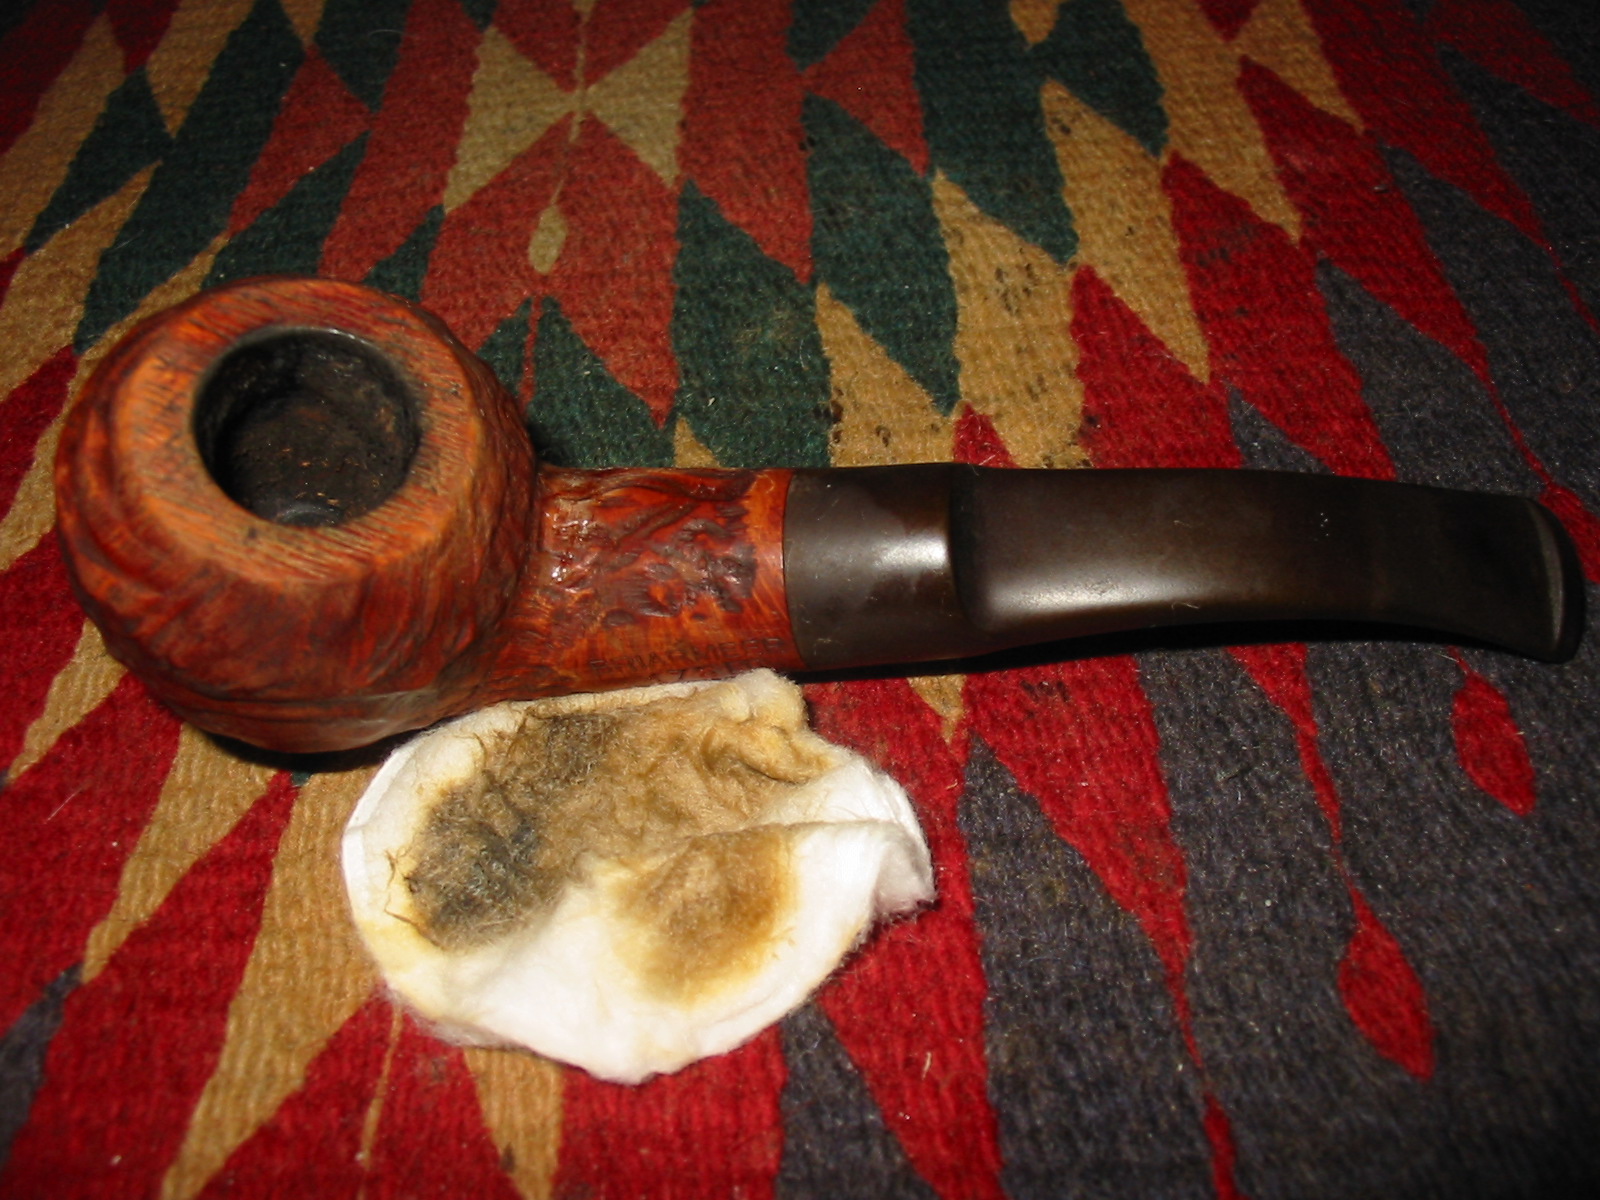
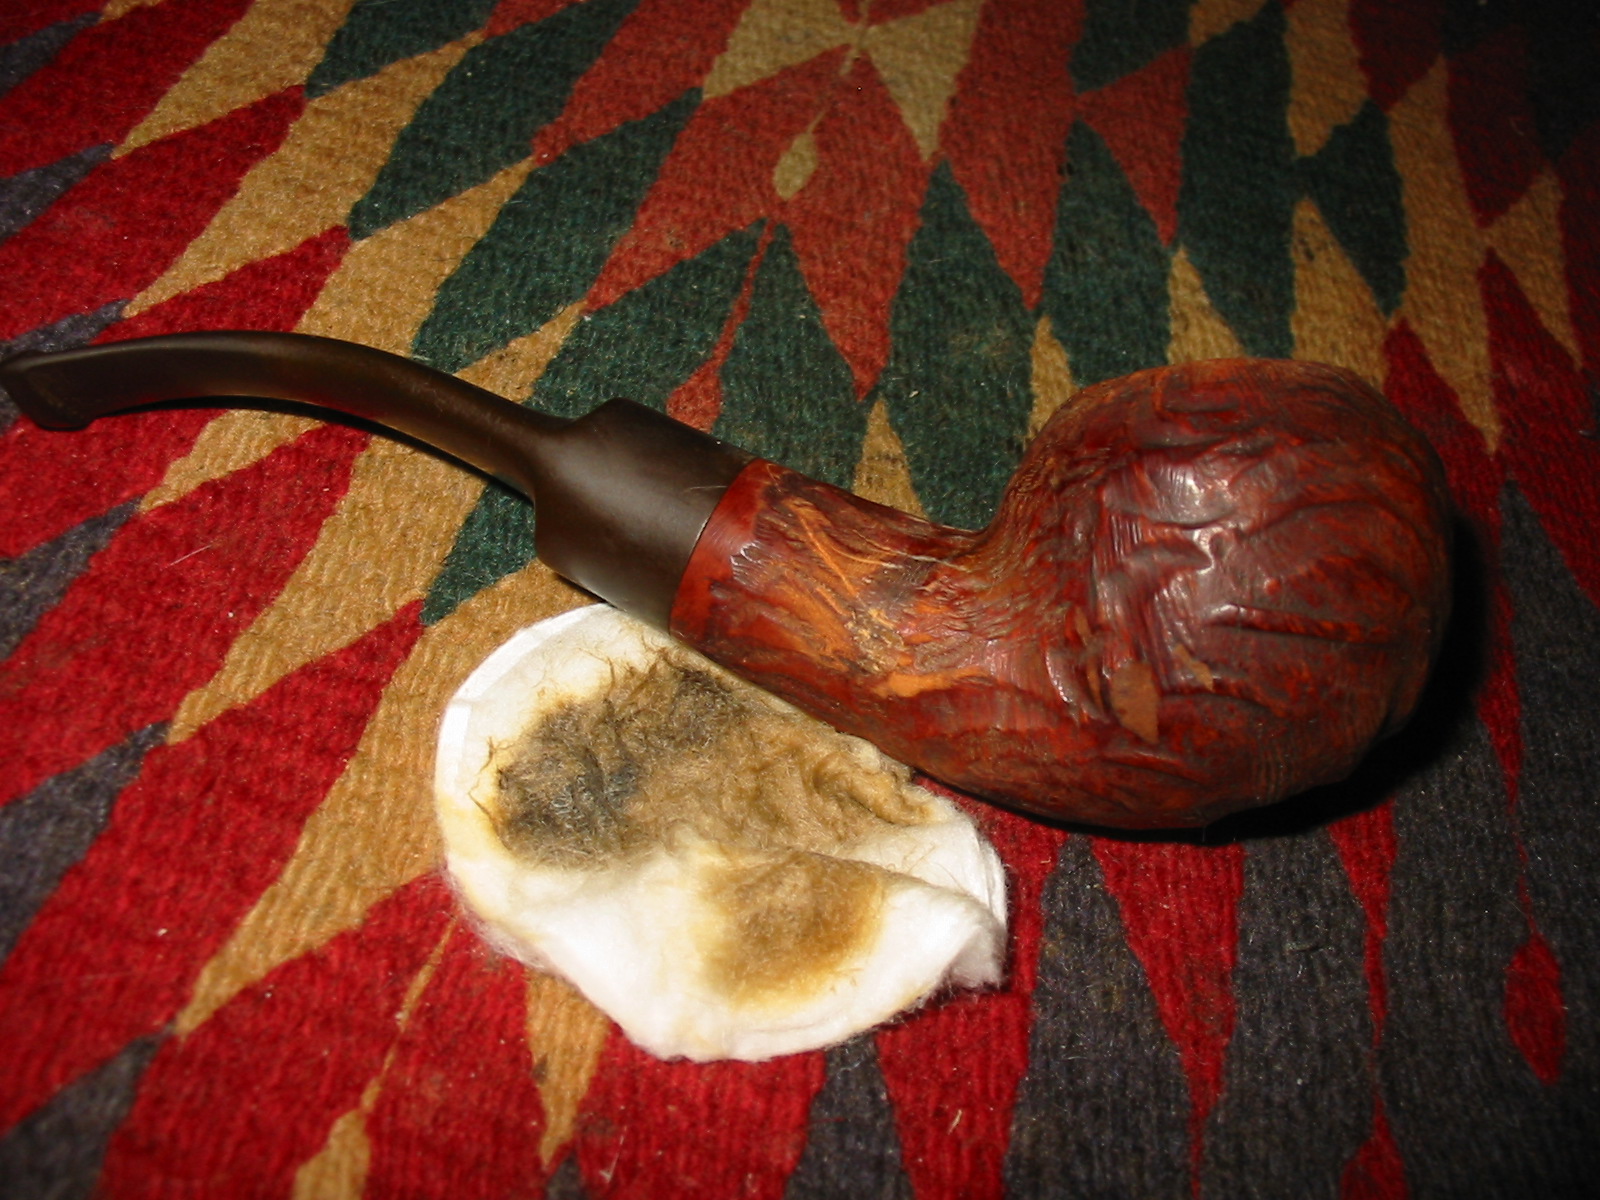
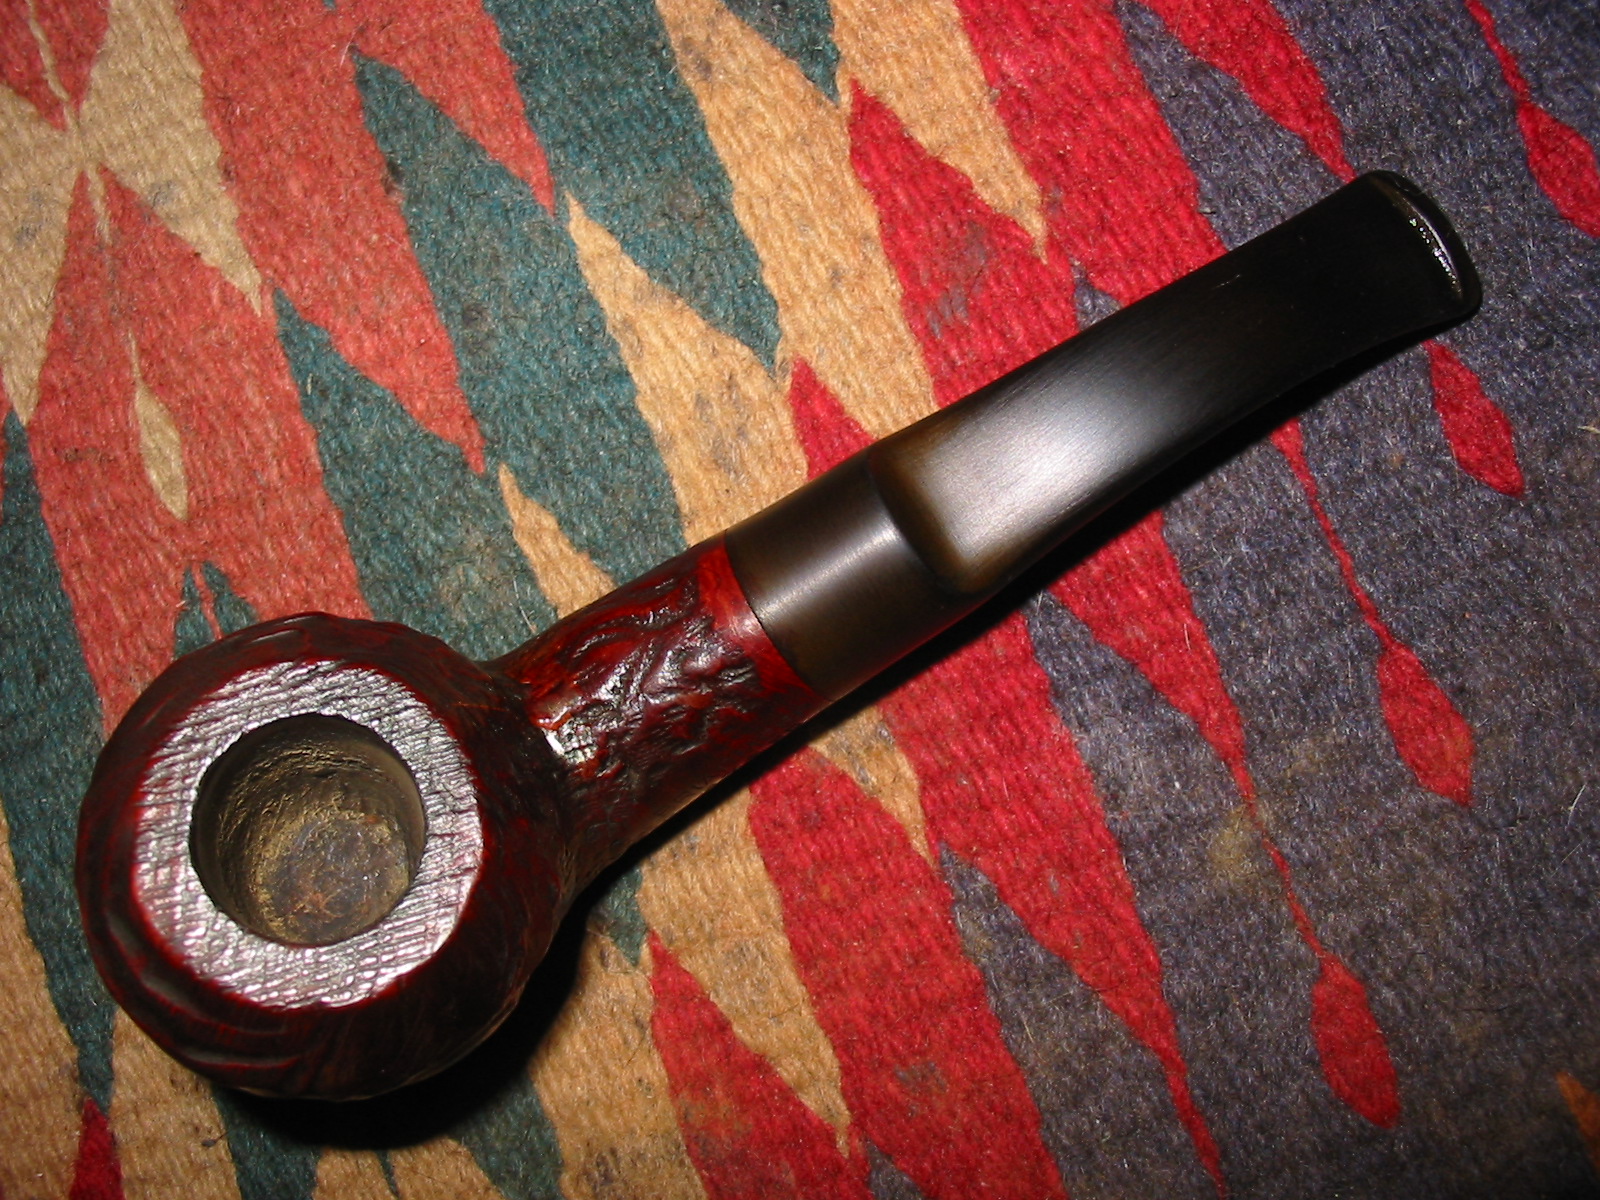
But more pressing problems first, feast your eyes on this cake.
Chiz2

Sleeves rolled up…

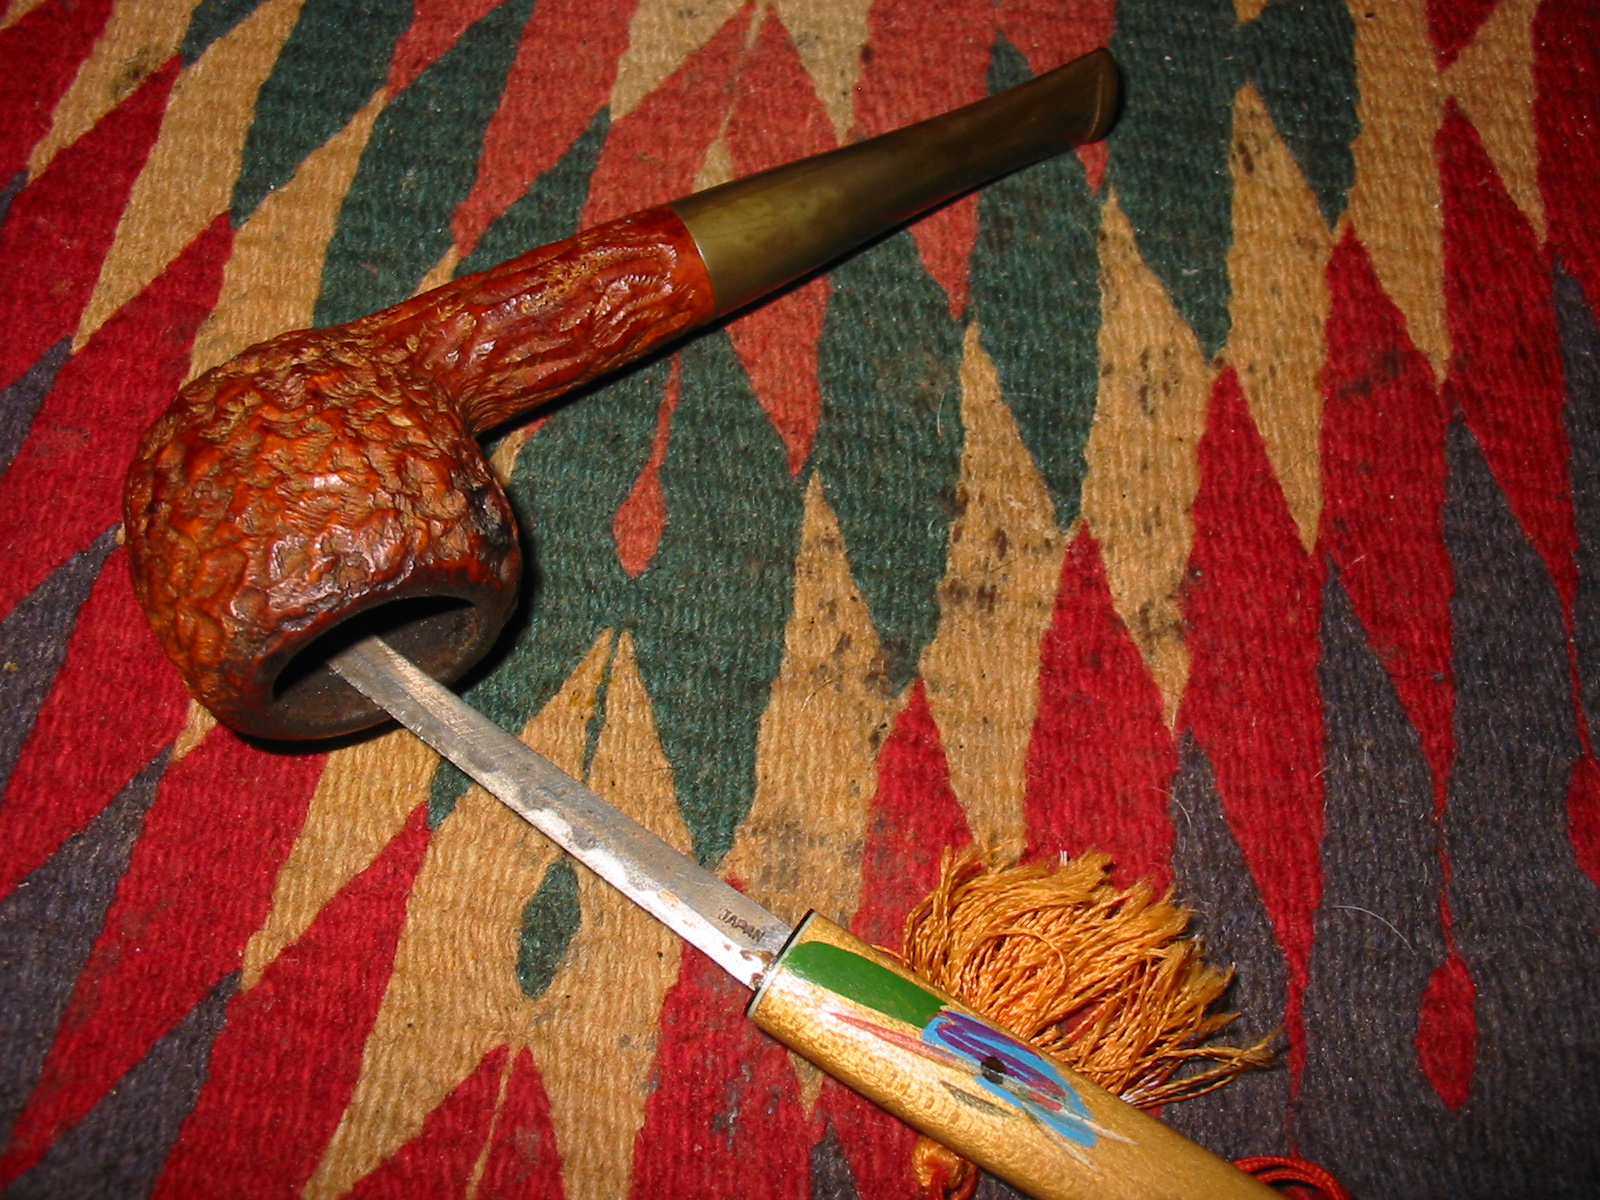
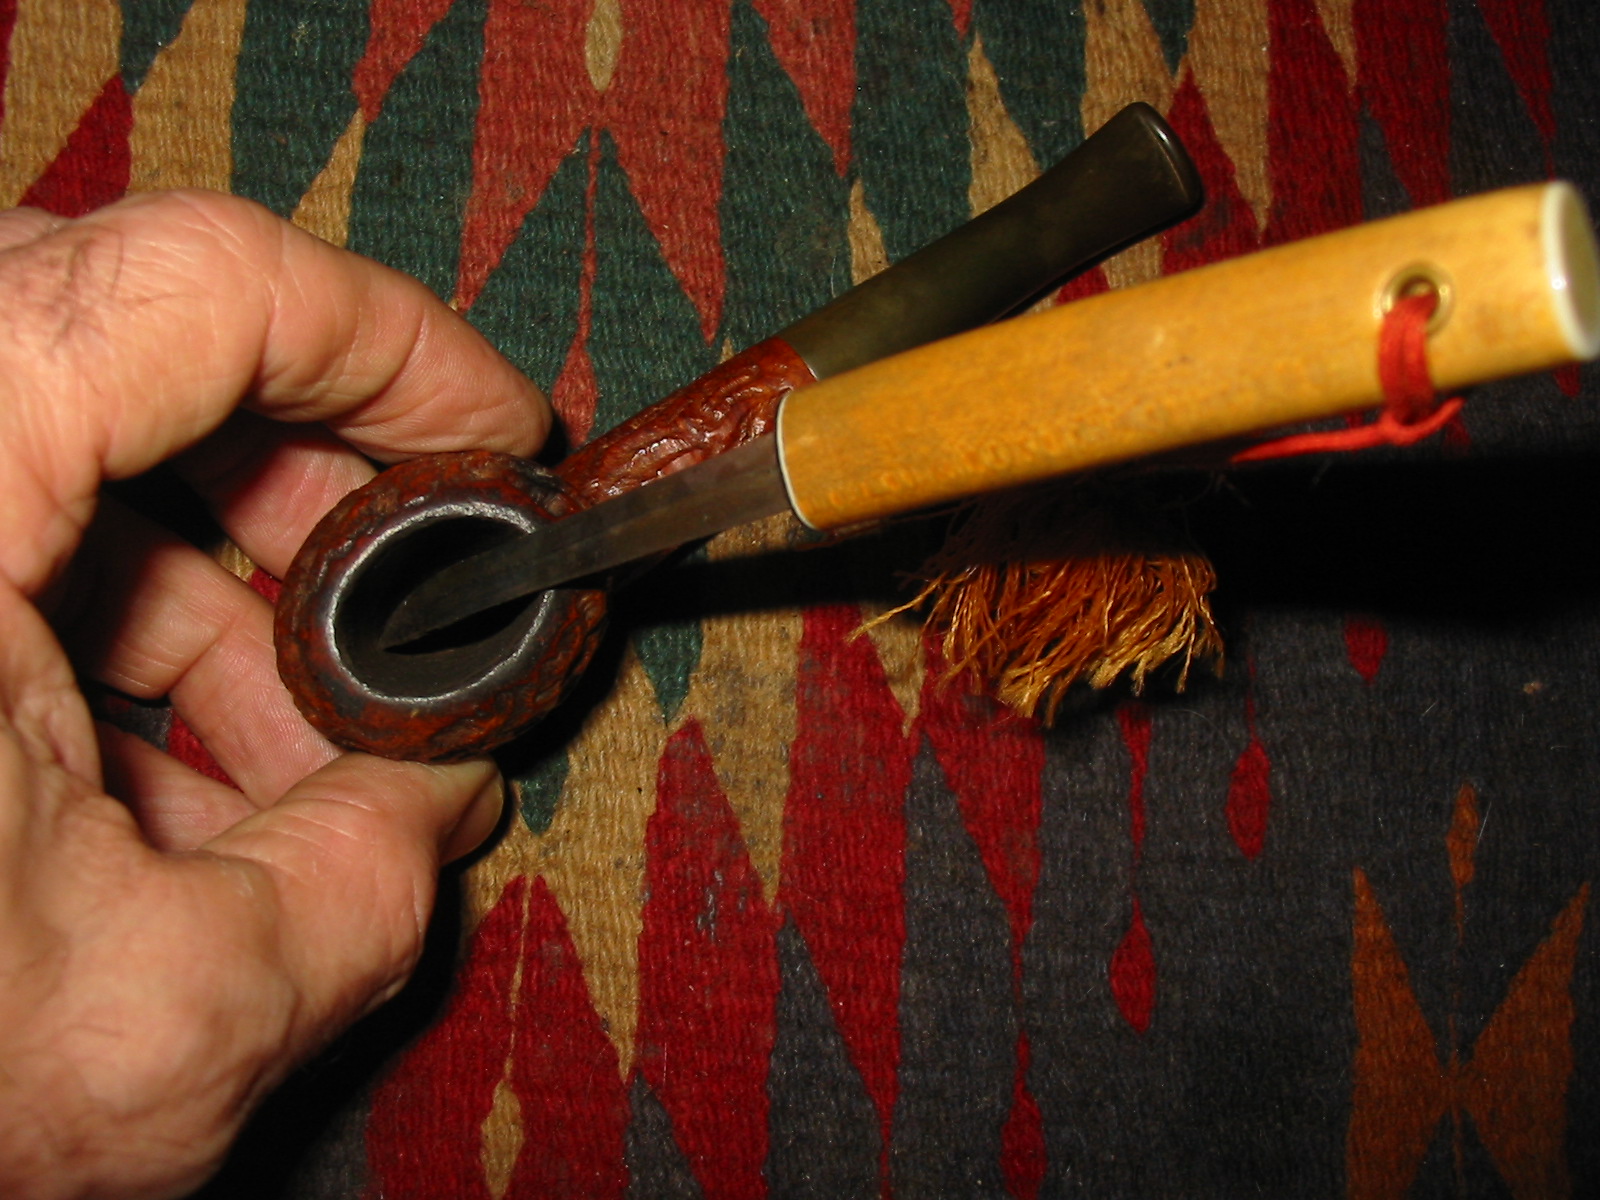
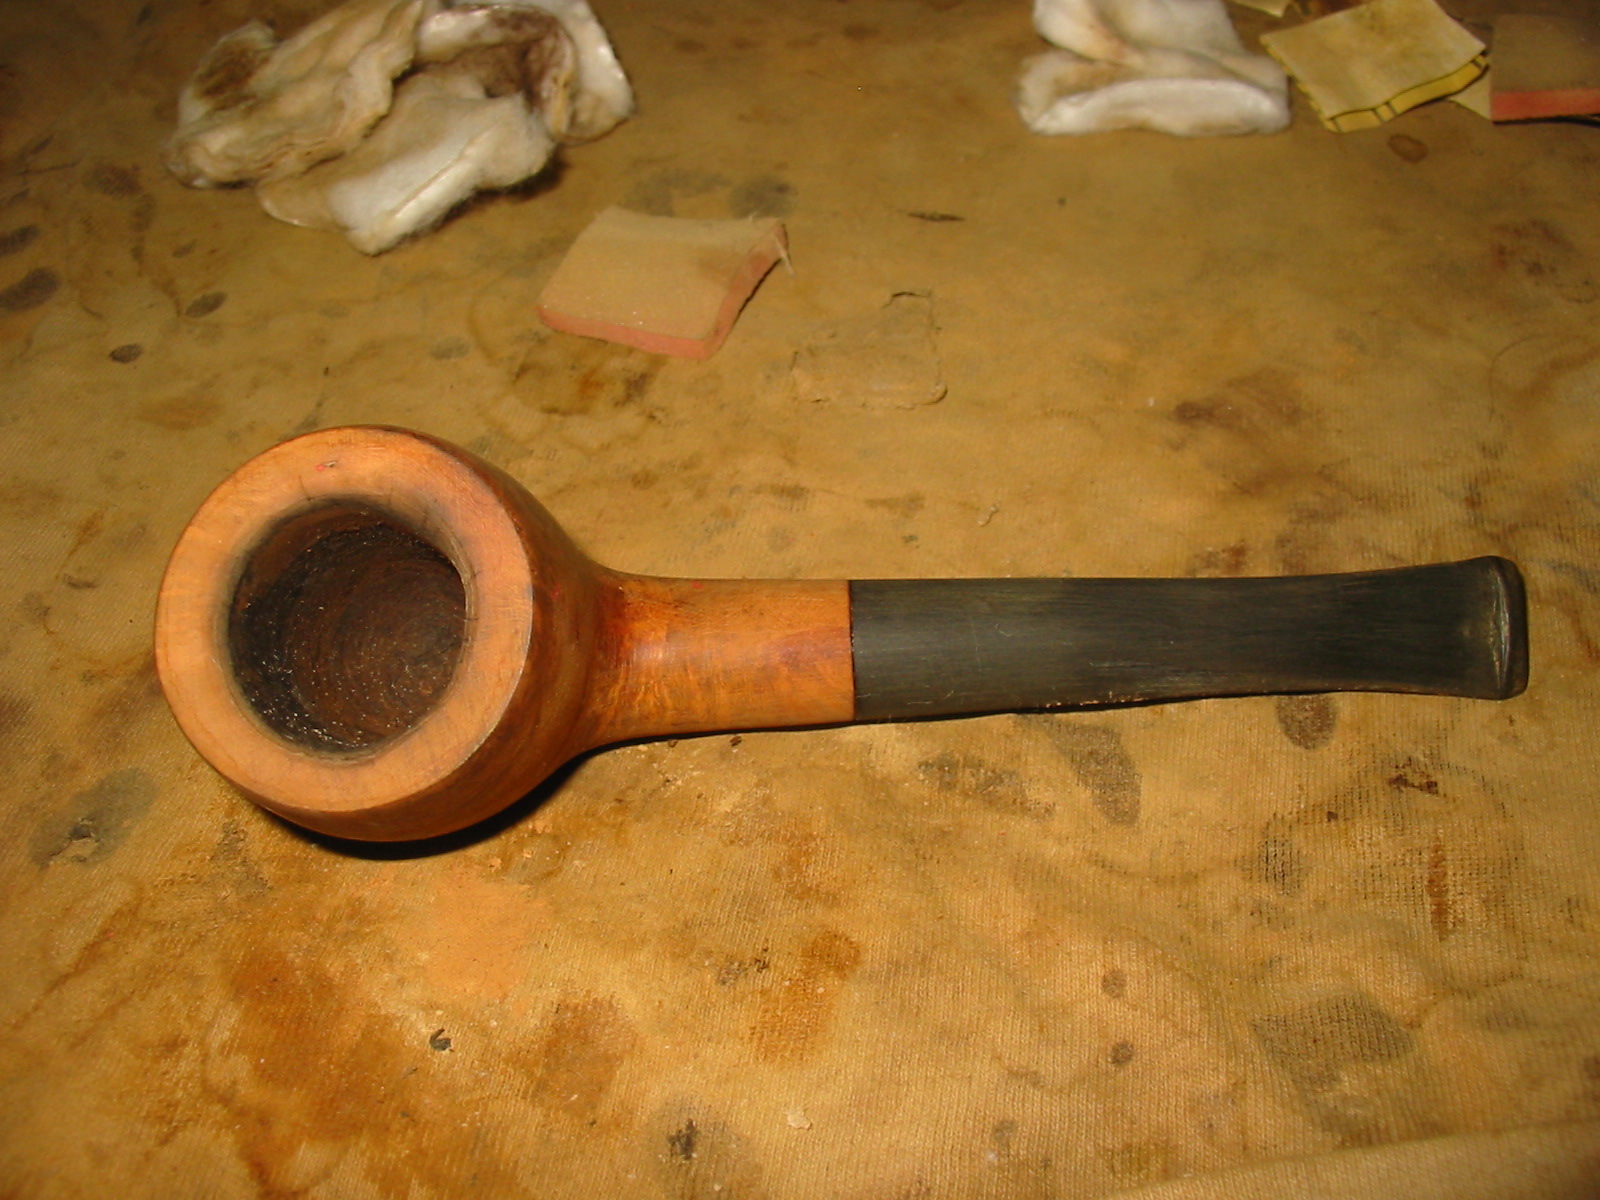
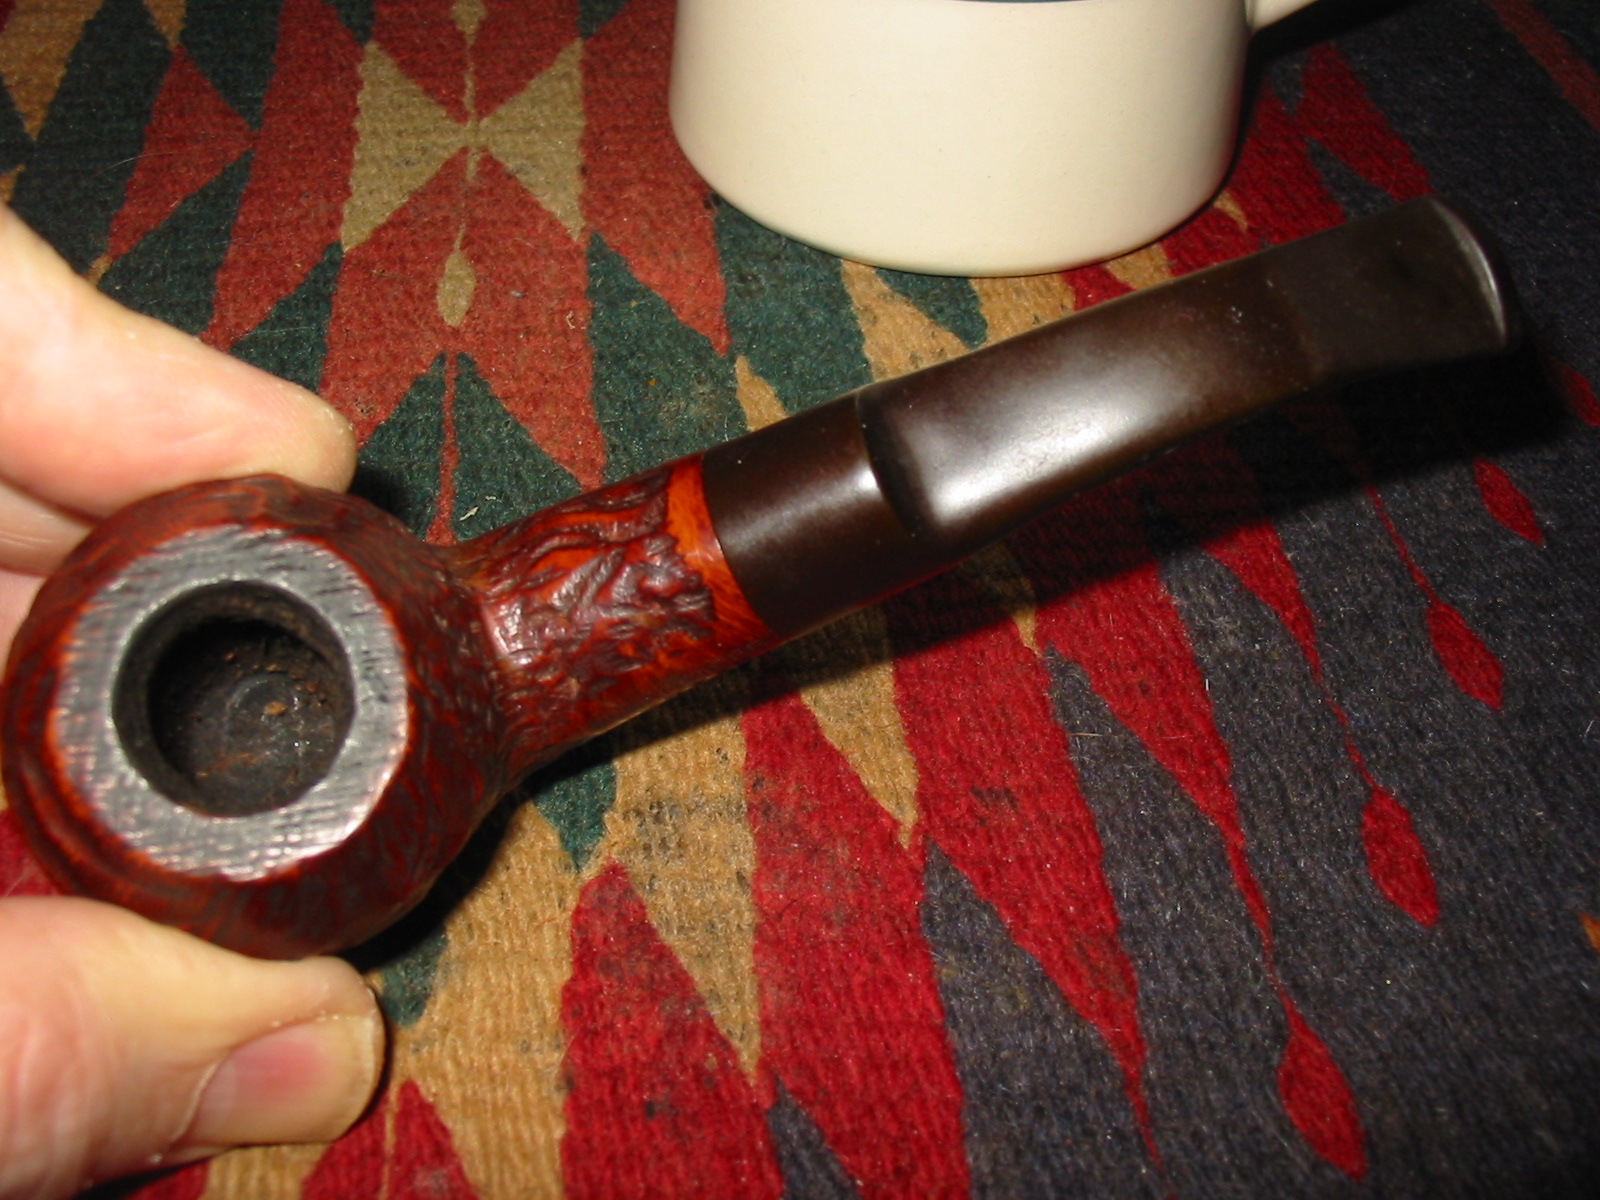
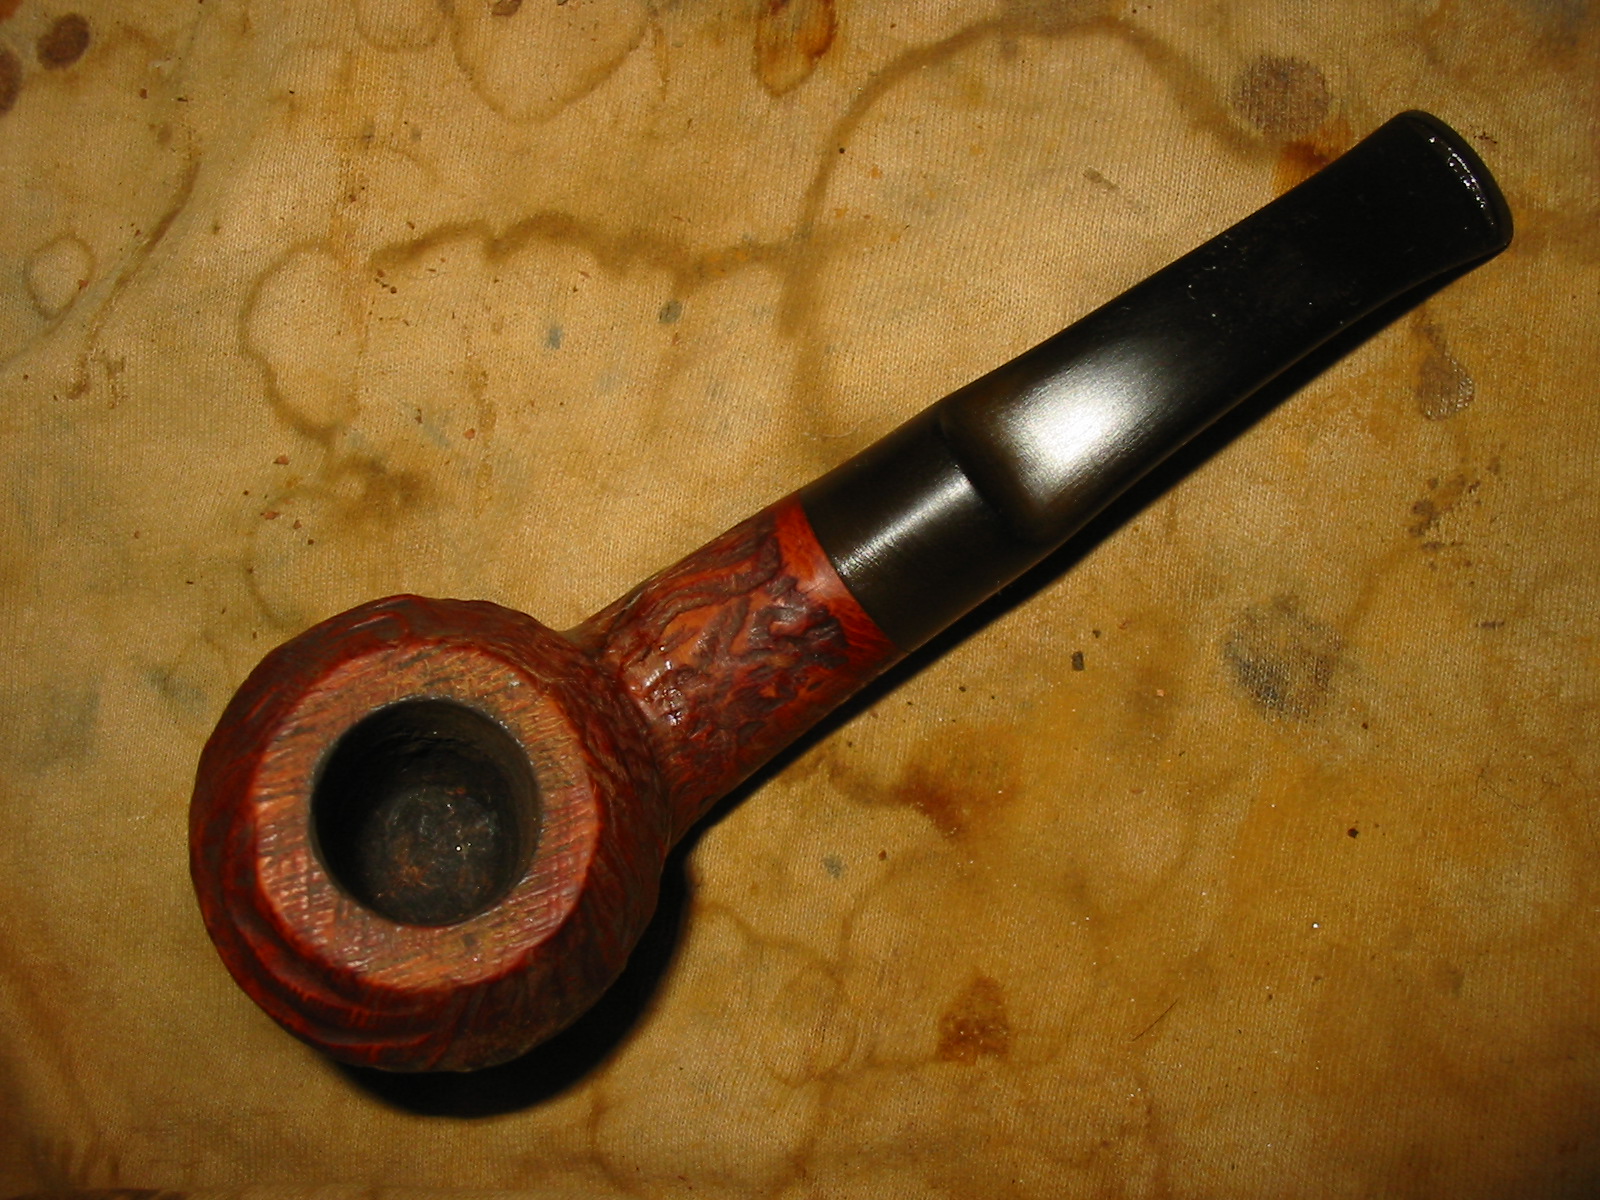
Cleaning the chamber out proved to be quite a job. I had to pick away at it with the nail from a 3 in 1 before I could even get the spoon in there, let alone a reamer. And the smell, ugghh. But at least it looks more like a pipe bowl again now. And happily there was no hidden damage within.
Chiz3

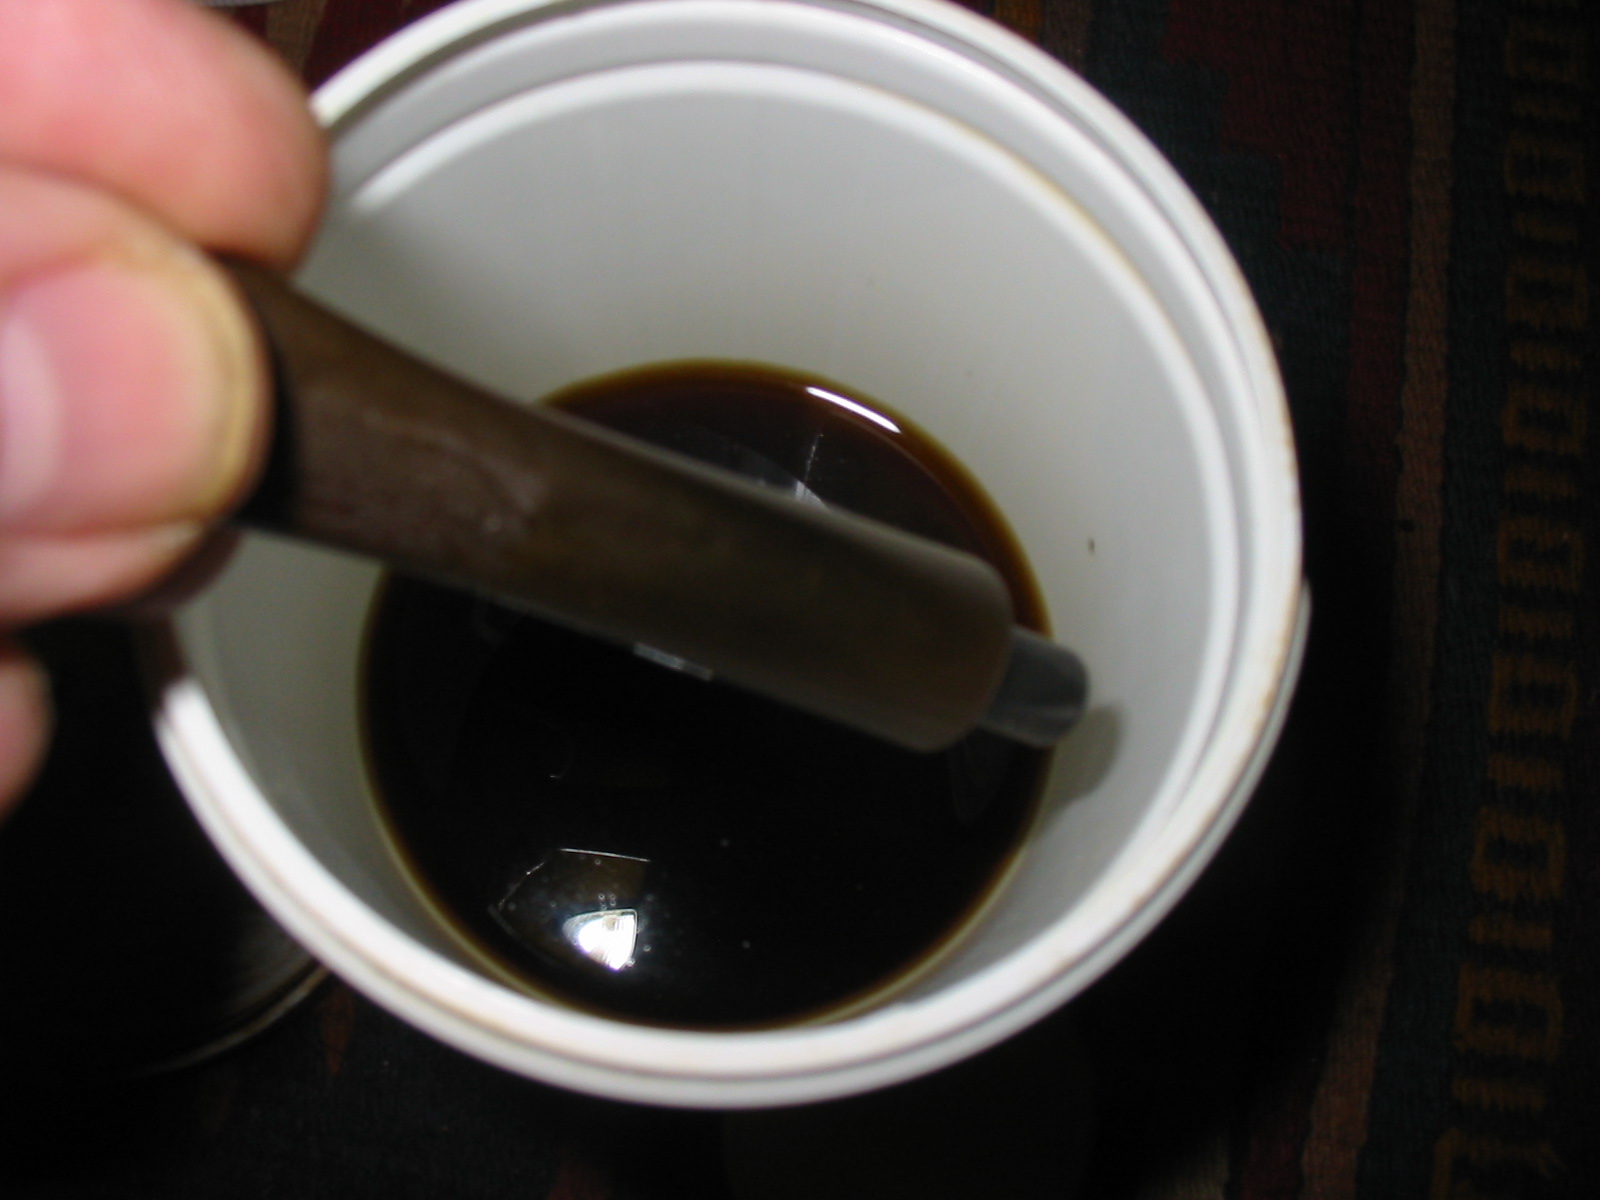
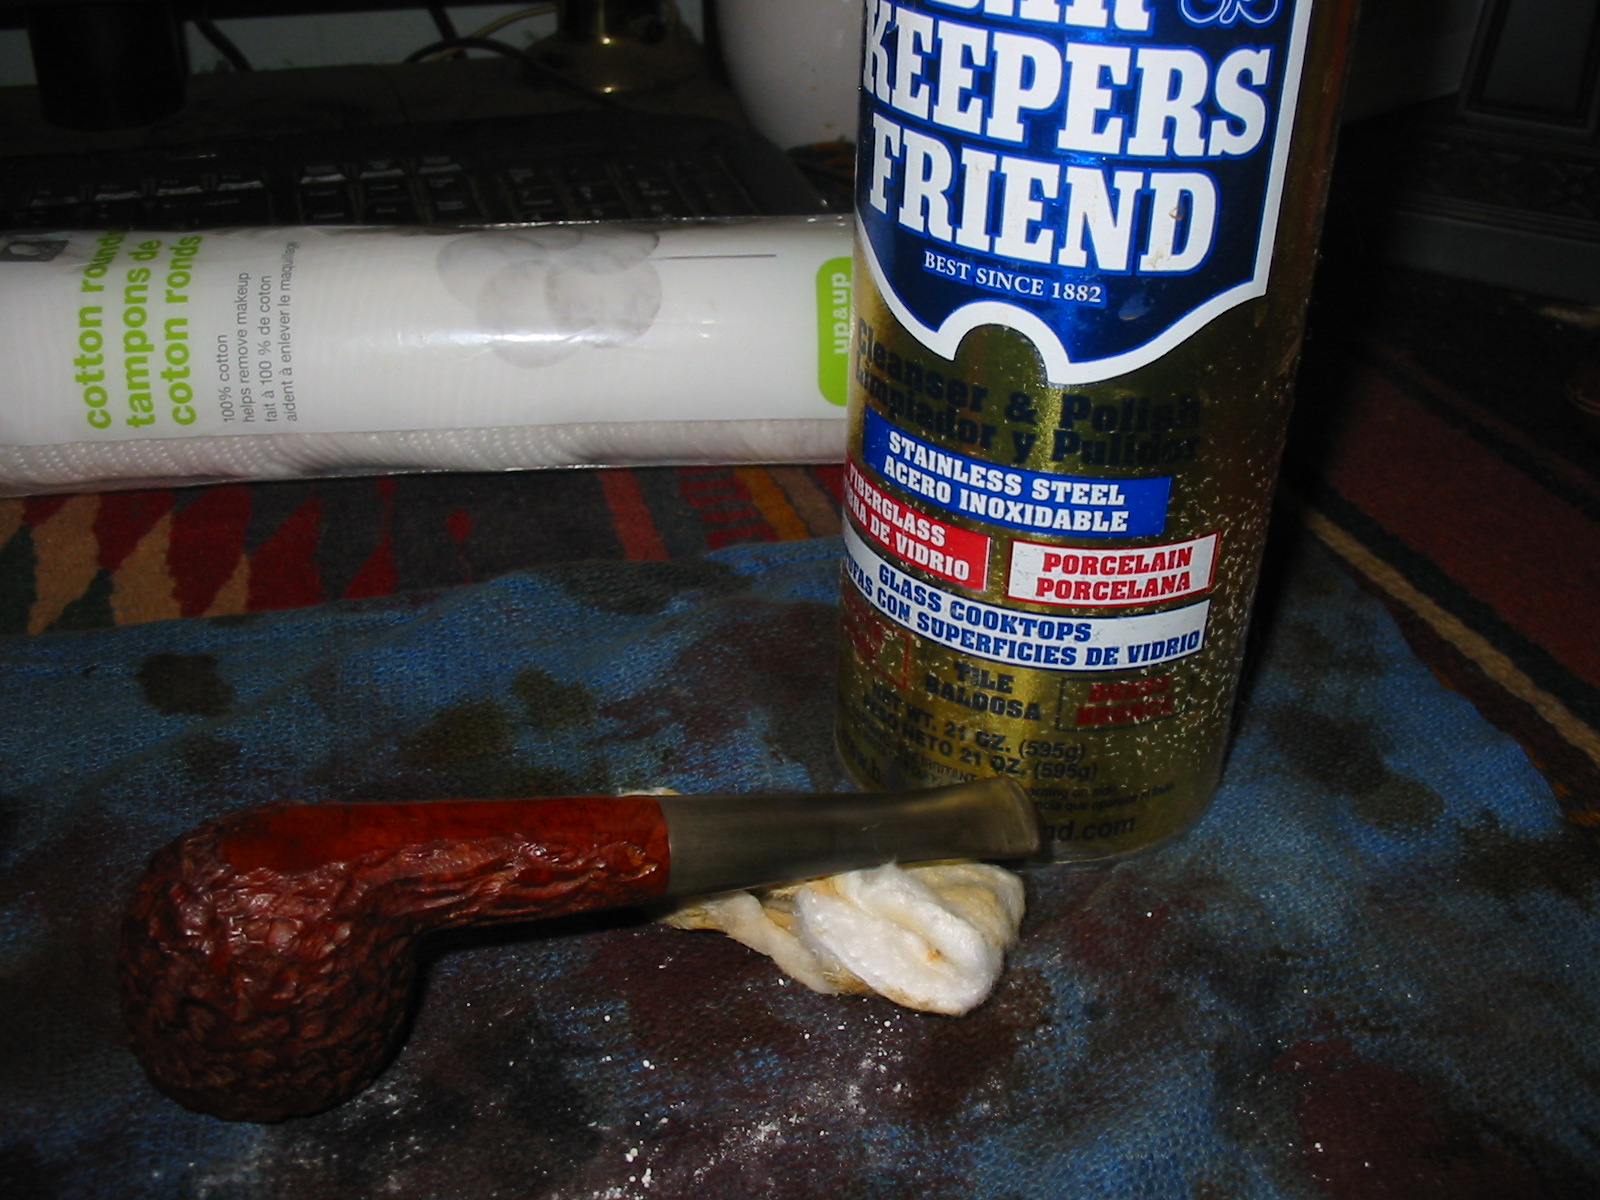
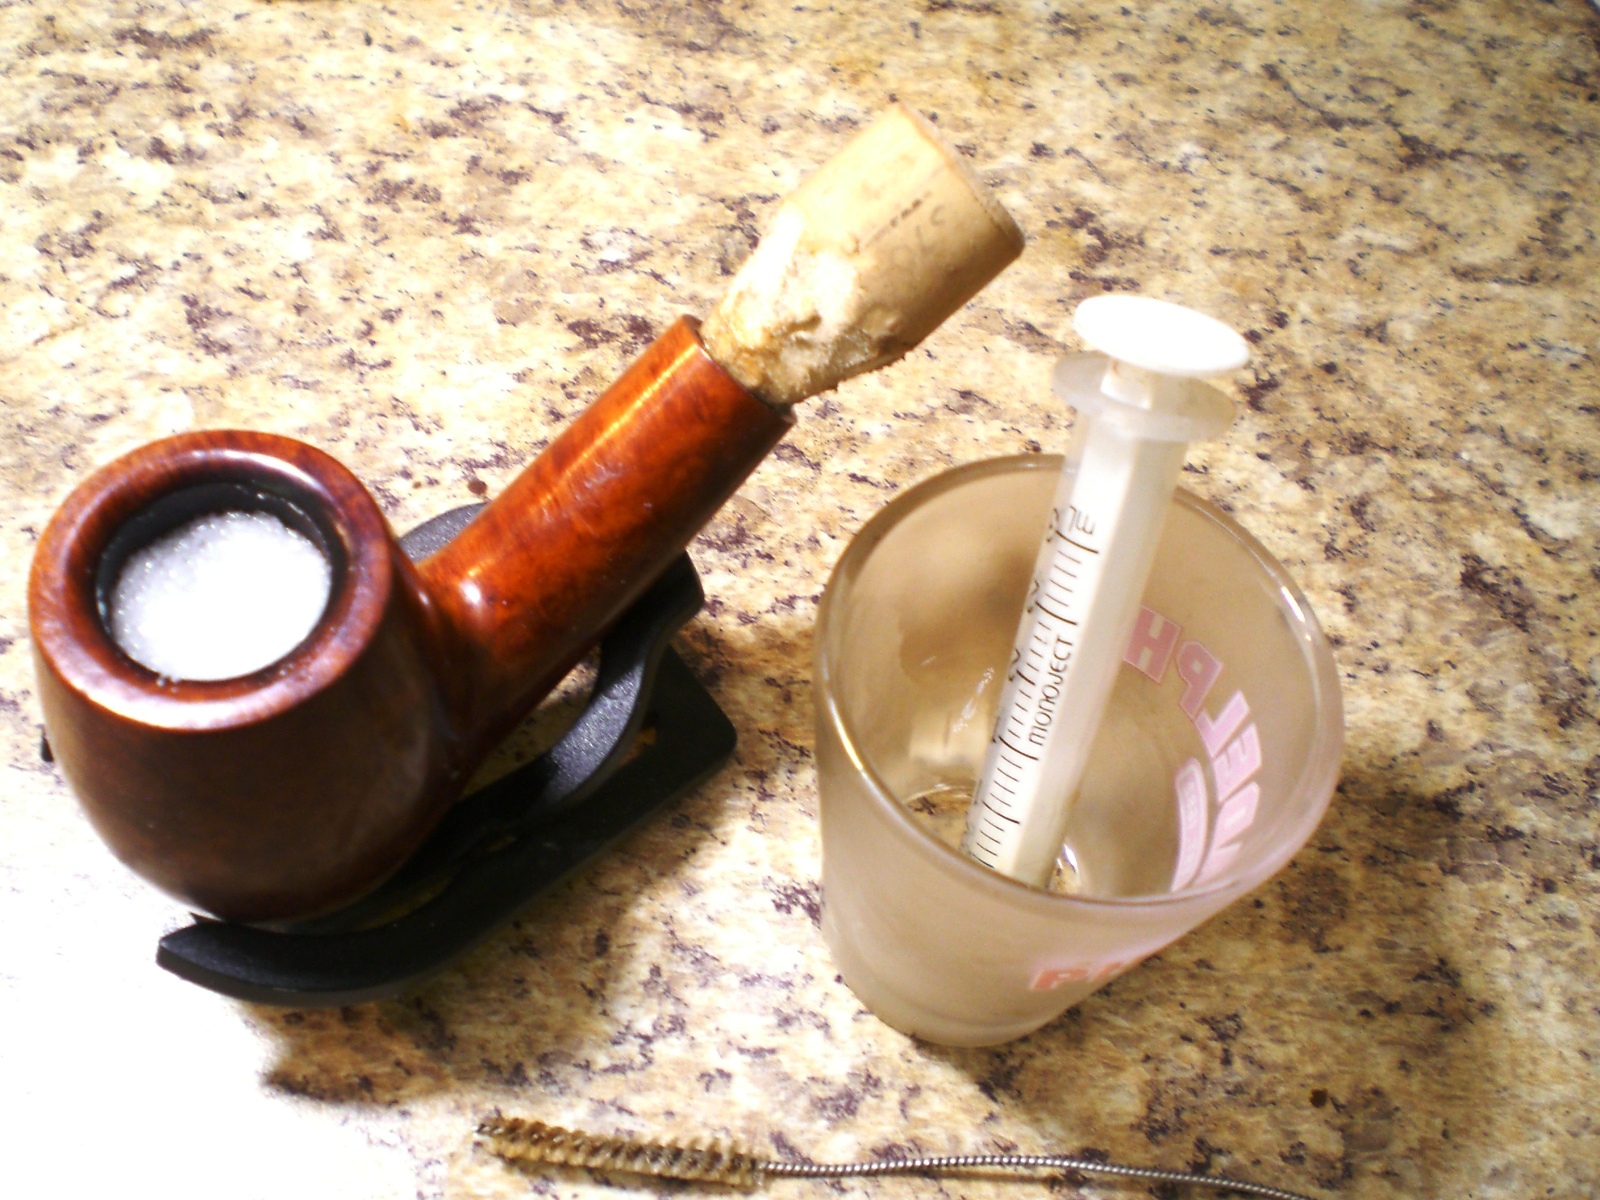
Once the chamber was clear I packed the bowl with salt and saturated it with isopropyl alcohol (99.5%). Additionally, I folded a pipe cleaner in half and twisted that into the shank so that it would soften the gunk in there and wick some of it out. I topped up the alcohol regularly and then left it to do its thing overnight.

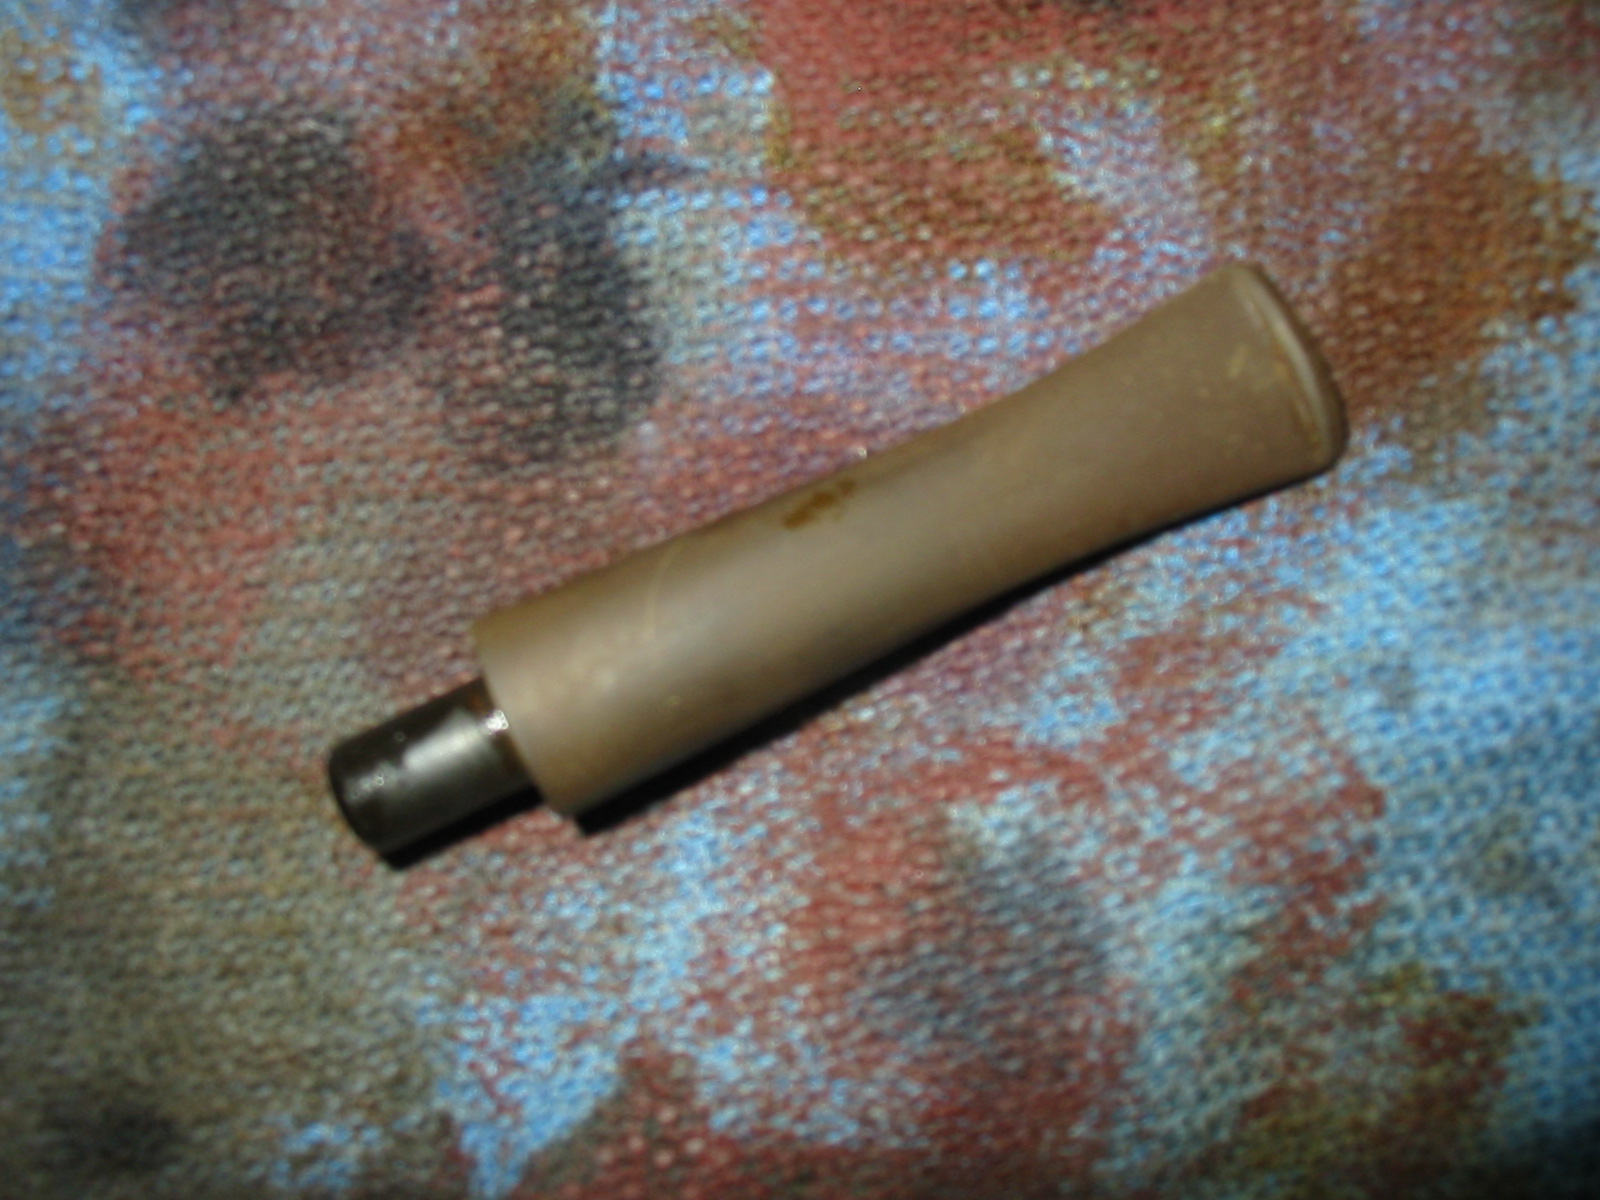
Meanwhile, I gave the stem a soak in a bath of oxy solution to help bring out the discolouring. I also find that this helps soften whatever gunk lurks within and I don’t even attempt to do any cleaning on the airway before then.

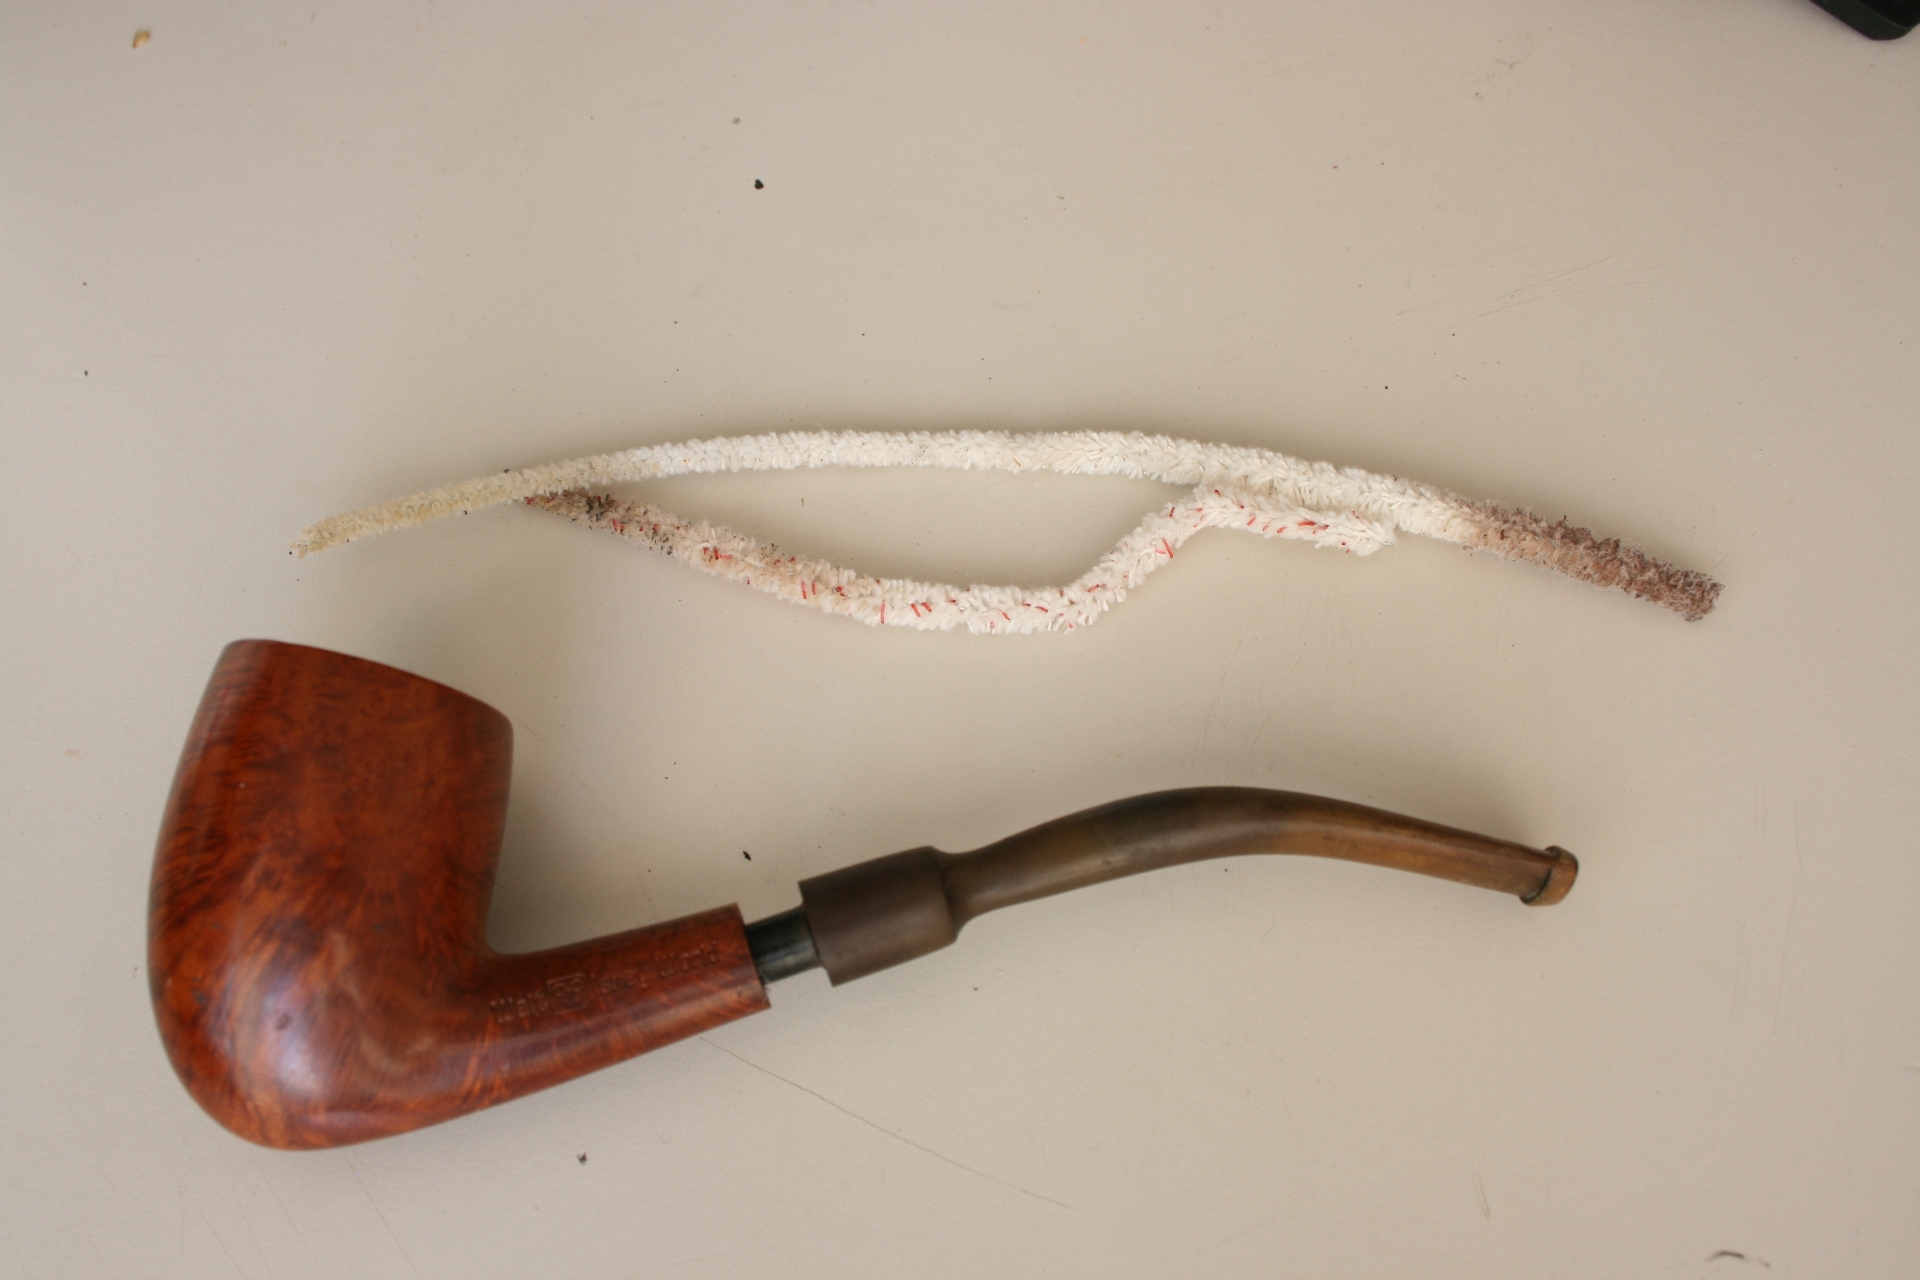
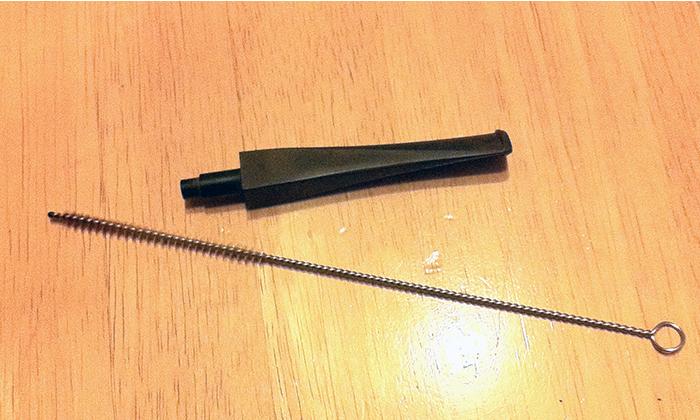
What I have finally managed to get hold of, after failing to find anything suitable locally, are some long, bristled brushes narrow enough to fit inside the stem. What a boon! Whereas in the past I have struggled with countless regular pipe cleaners, this little beauty made short shrift of cleaning out the innards. It took just a couple of pipe cleaners soaked in isopropyl after that and they were coming out clean. Thank you to our friends in China!
Chiz4

Chiz5

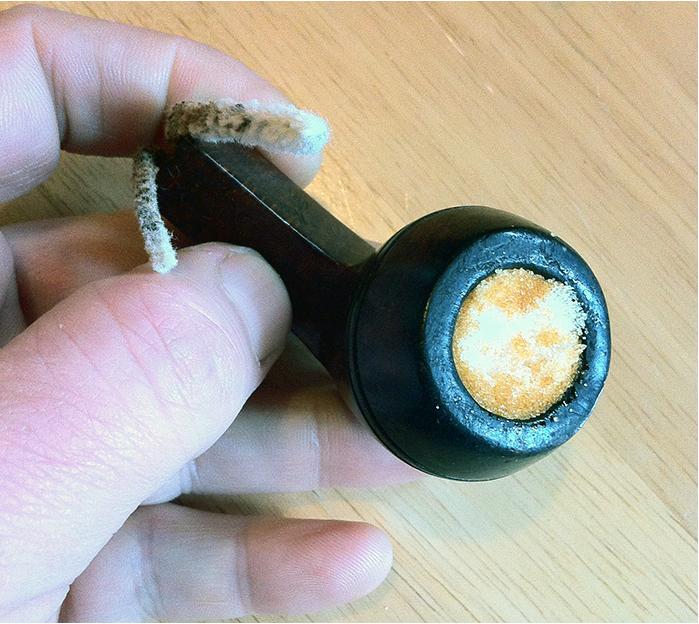
Overnight the salt and alcohol worked their magic, you can see the brown crust as well as the darkened pipe cleaner here:
Chiz6

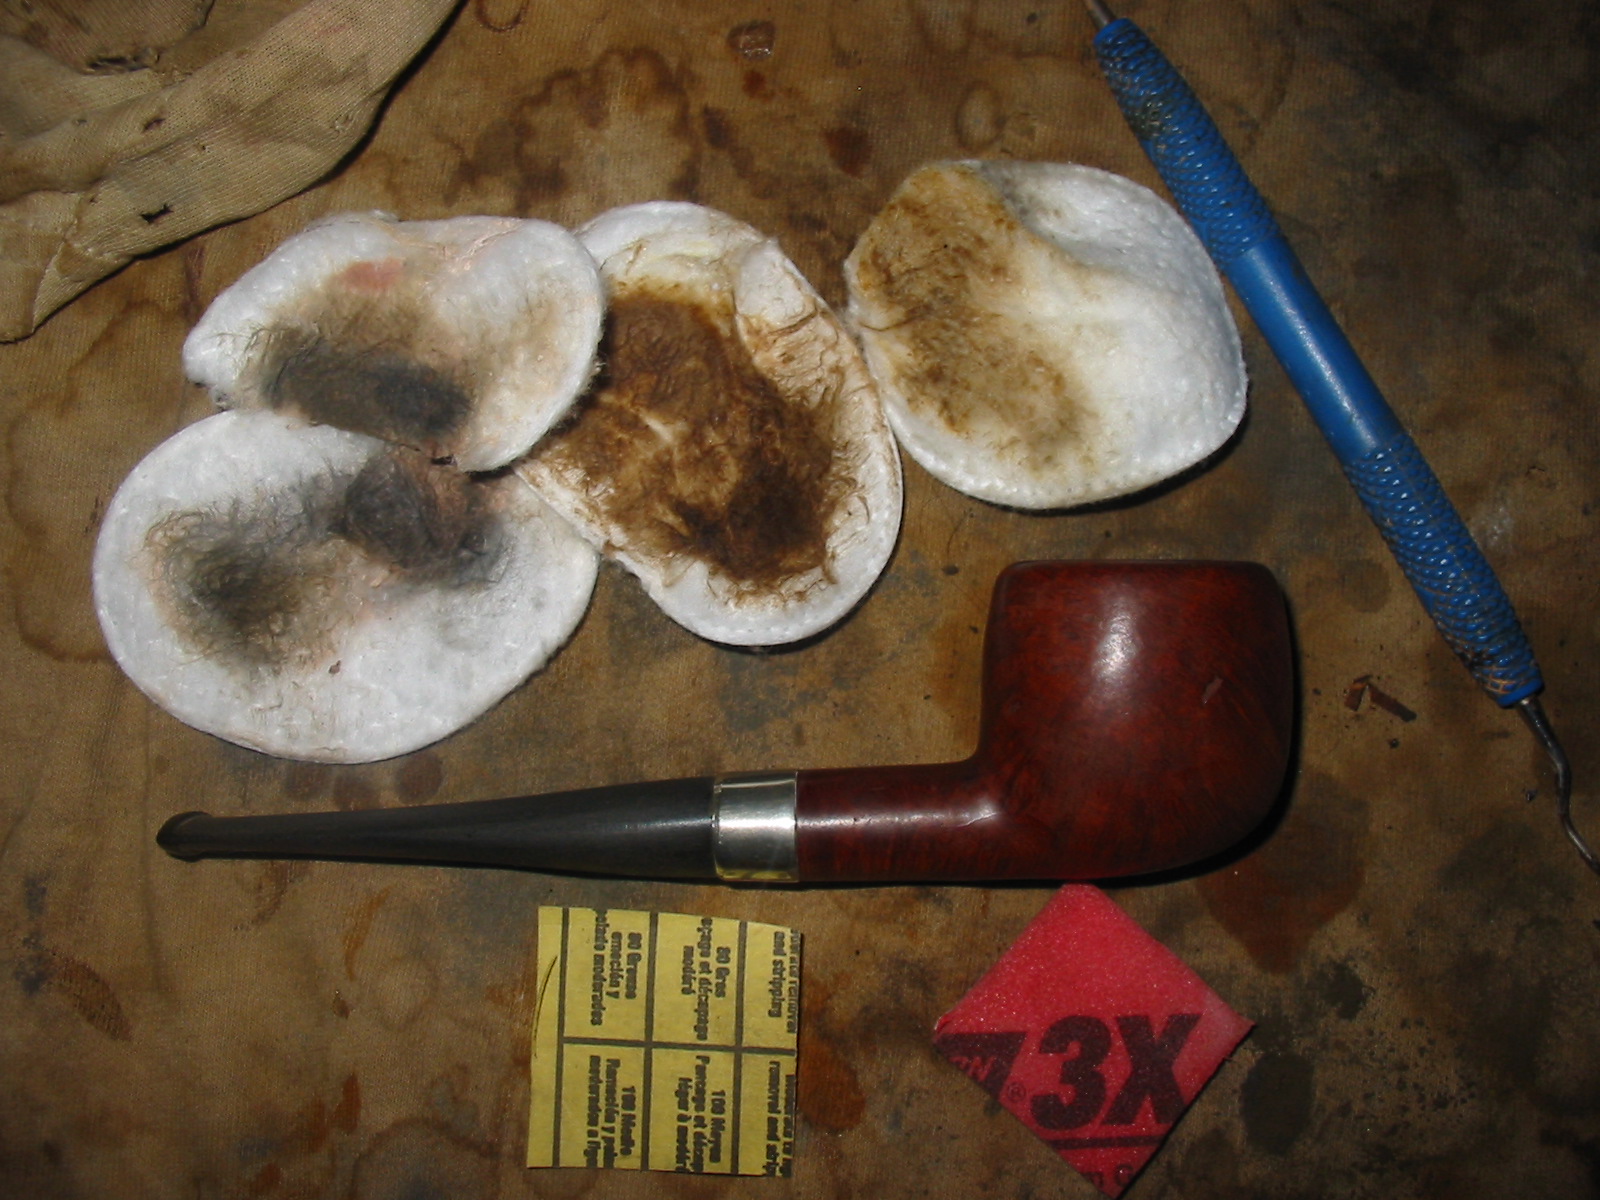
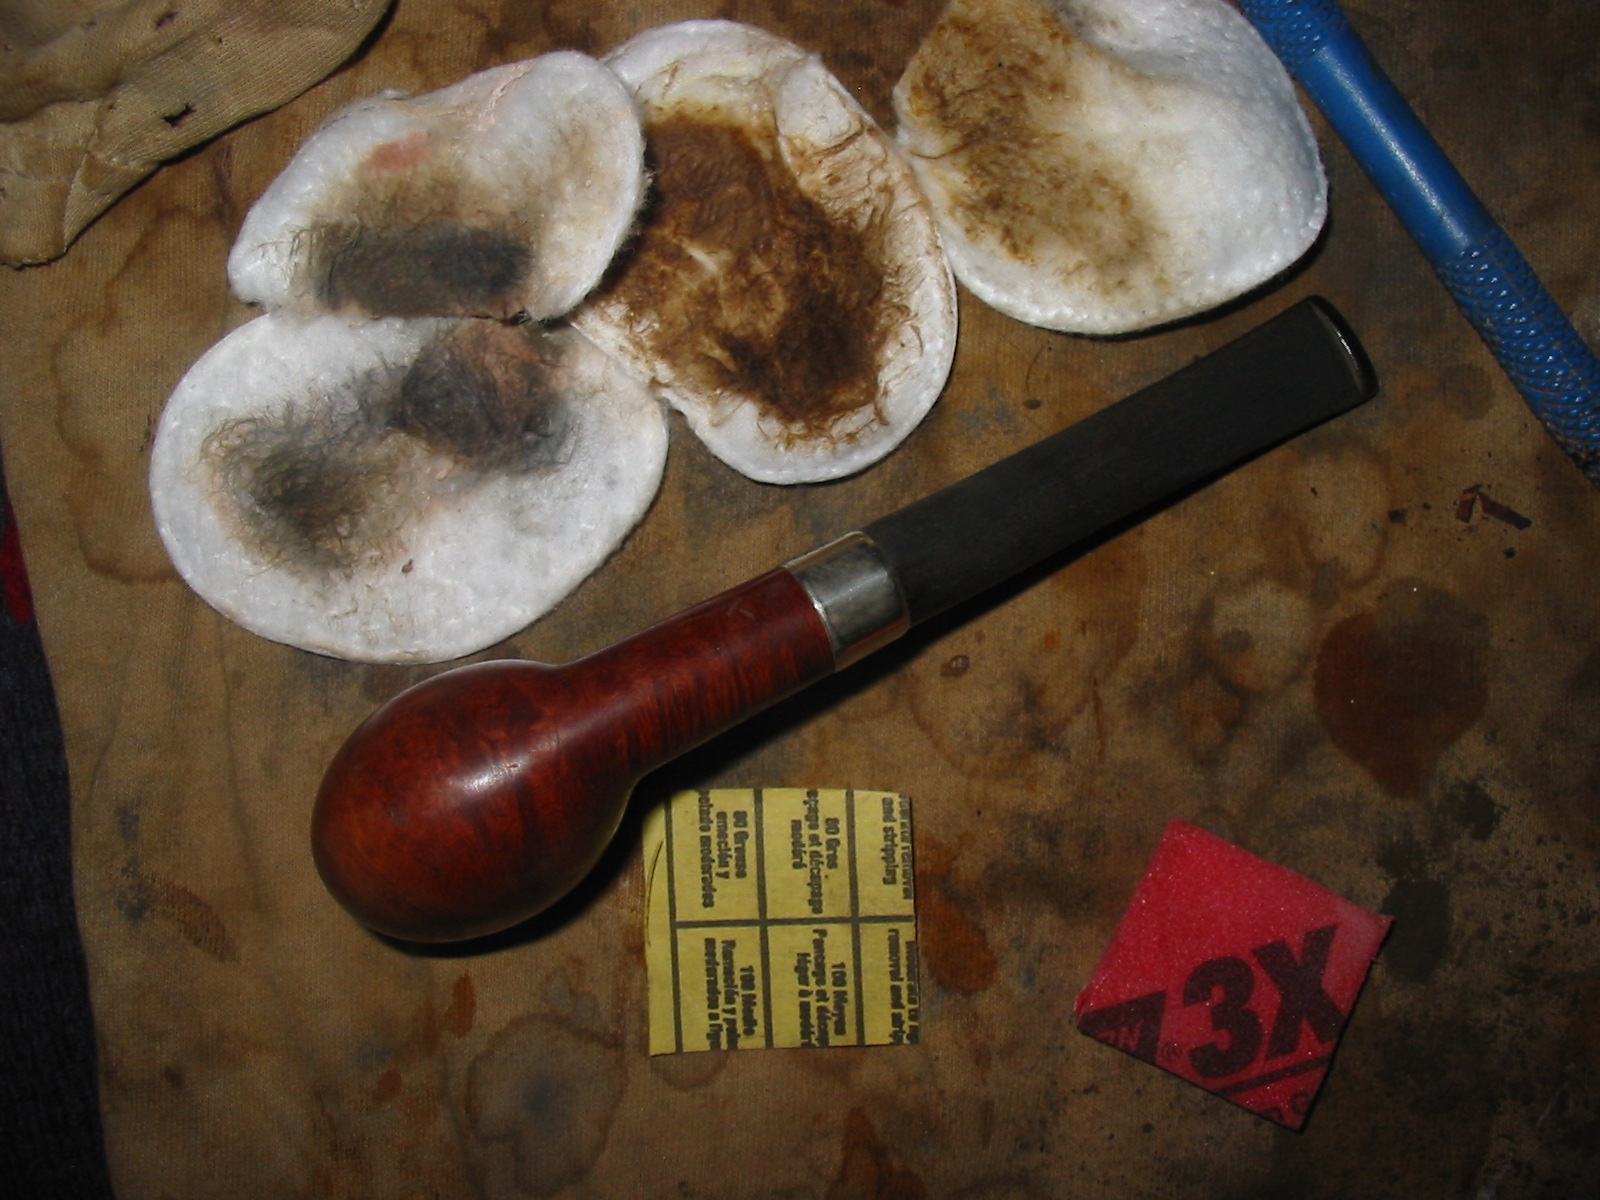
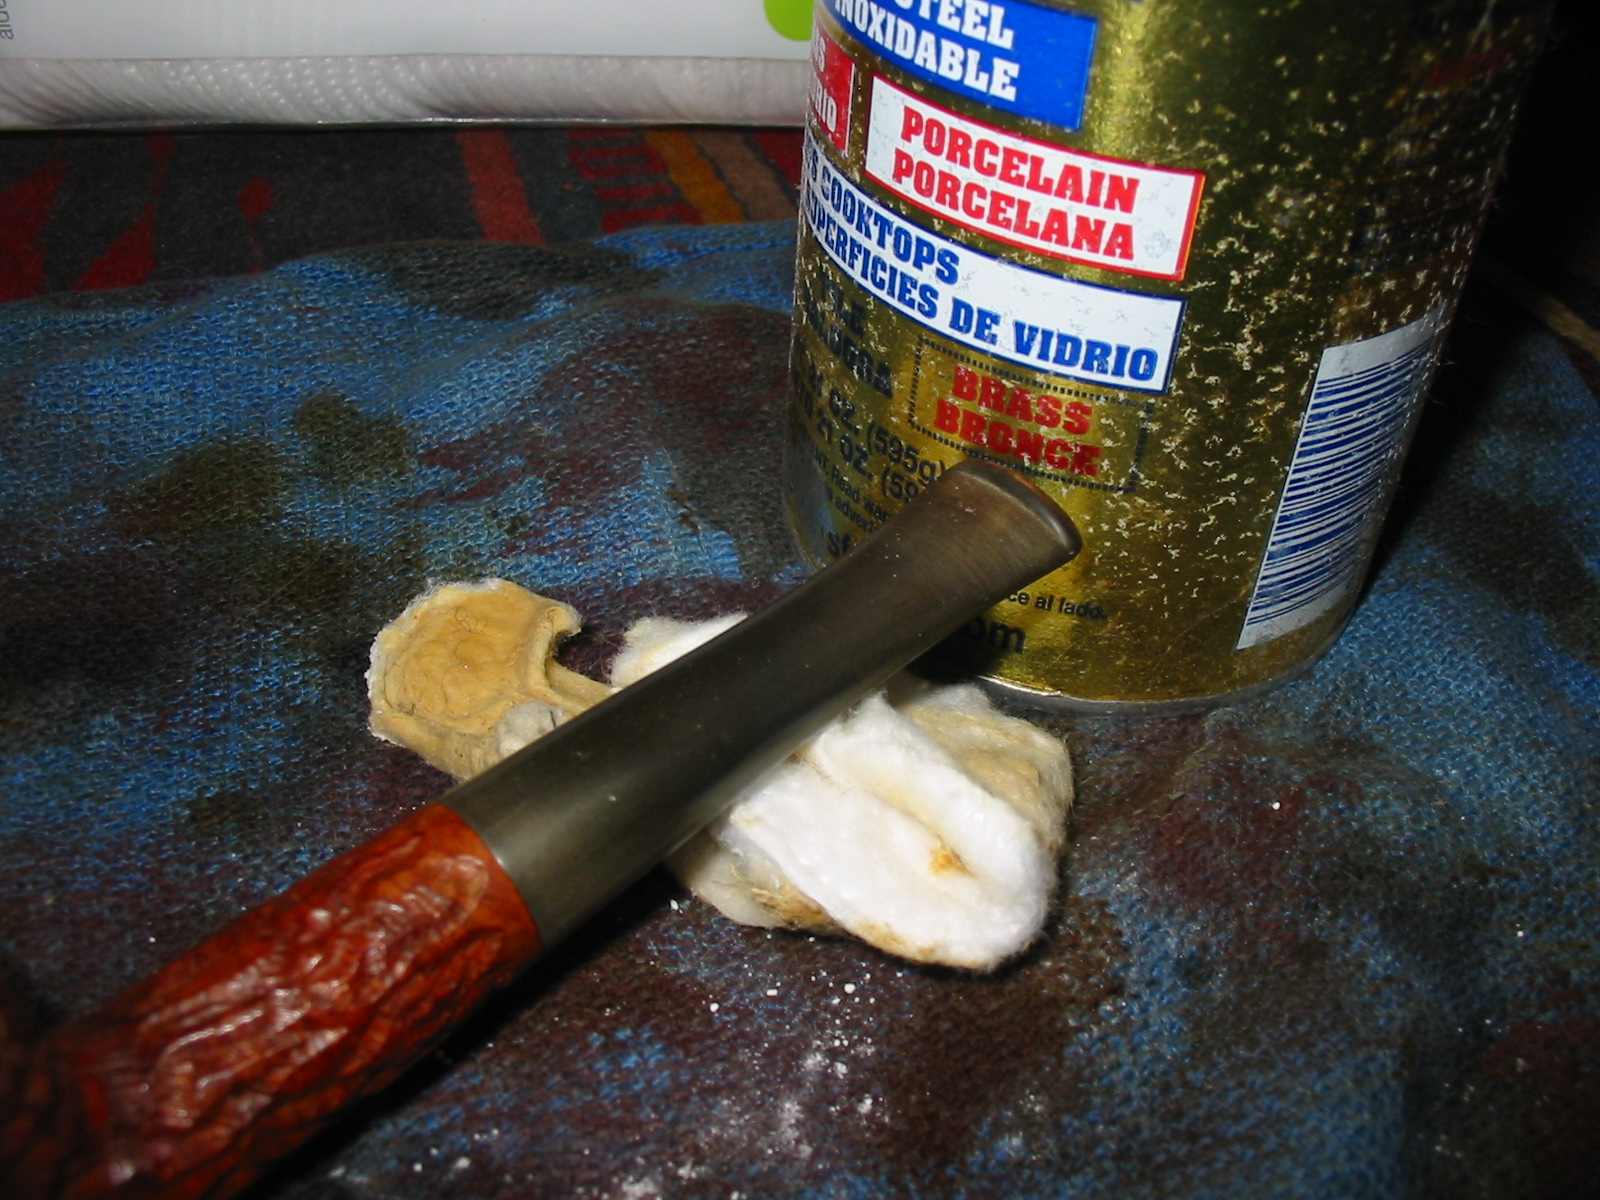
After chiseling out the crusted salt and a quick rinse under warm running water, I set to with my new super brush in the shank. This soon cleaned the conspicuous debris, but the muck of past smoking clearly ran much deeper. It took many, many pipe cleaners dipped in isopropyl before they started to emerge anything other than black, the previous owner had clearly been a recidivist of the worst order. Even when the pipe cleaners began to emerge light, the niff from within the bowl was still rank. So I have resorted to a further treatment only used in extremis: stuff some cotton wool wadding into the bowl and soak it in lemon juice. I have the germ of an idea forming for what to do with this pipe when I have finished with it and that does not include someone sucking on it and going green around the gills.

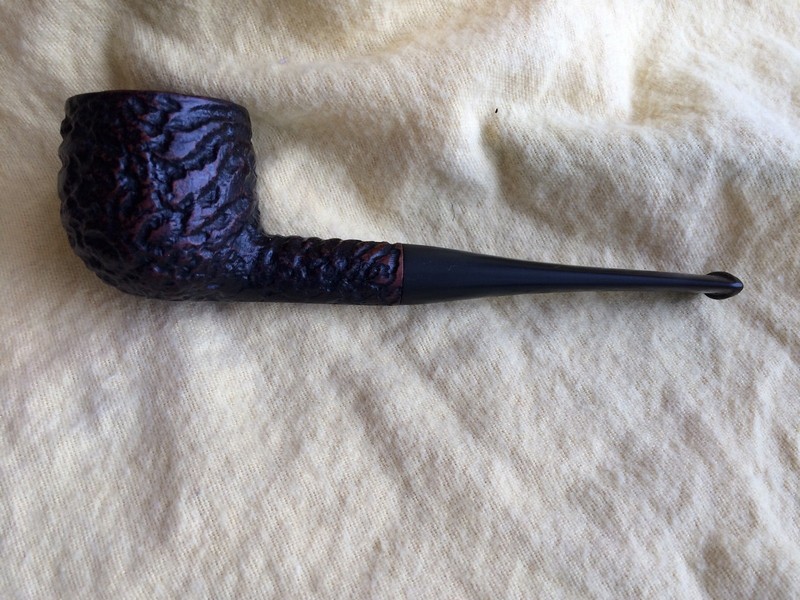
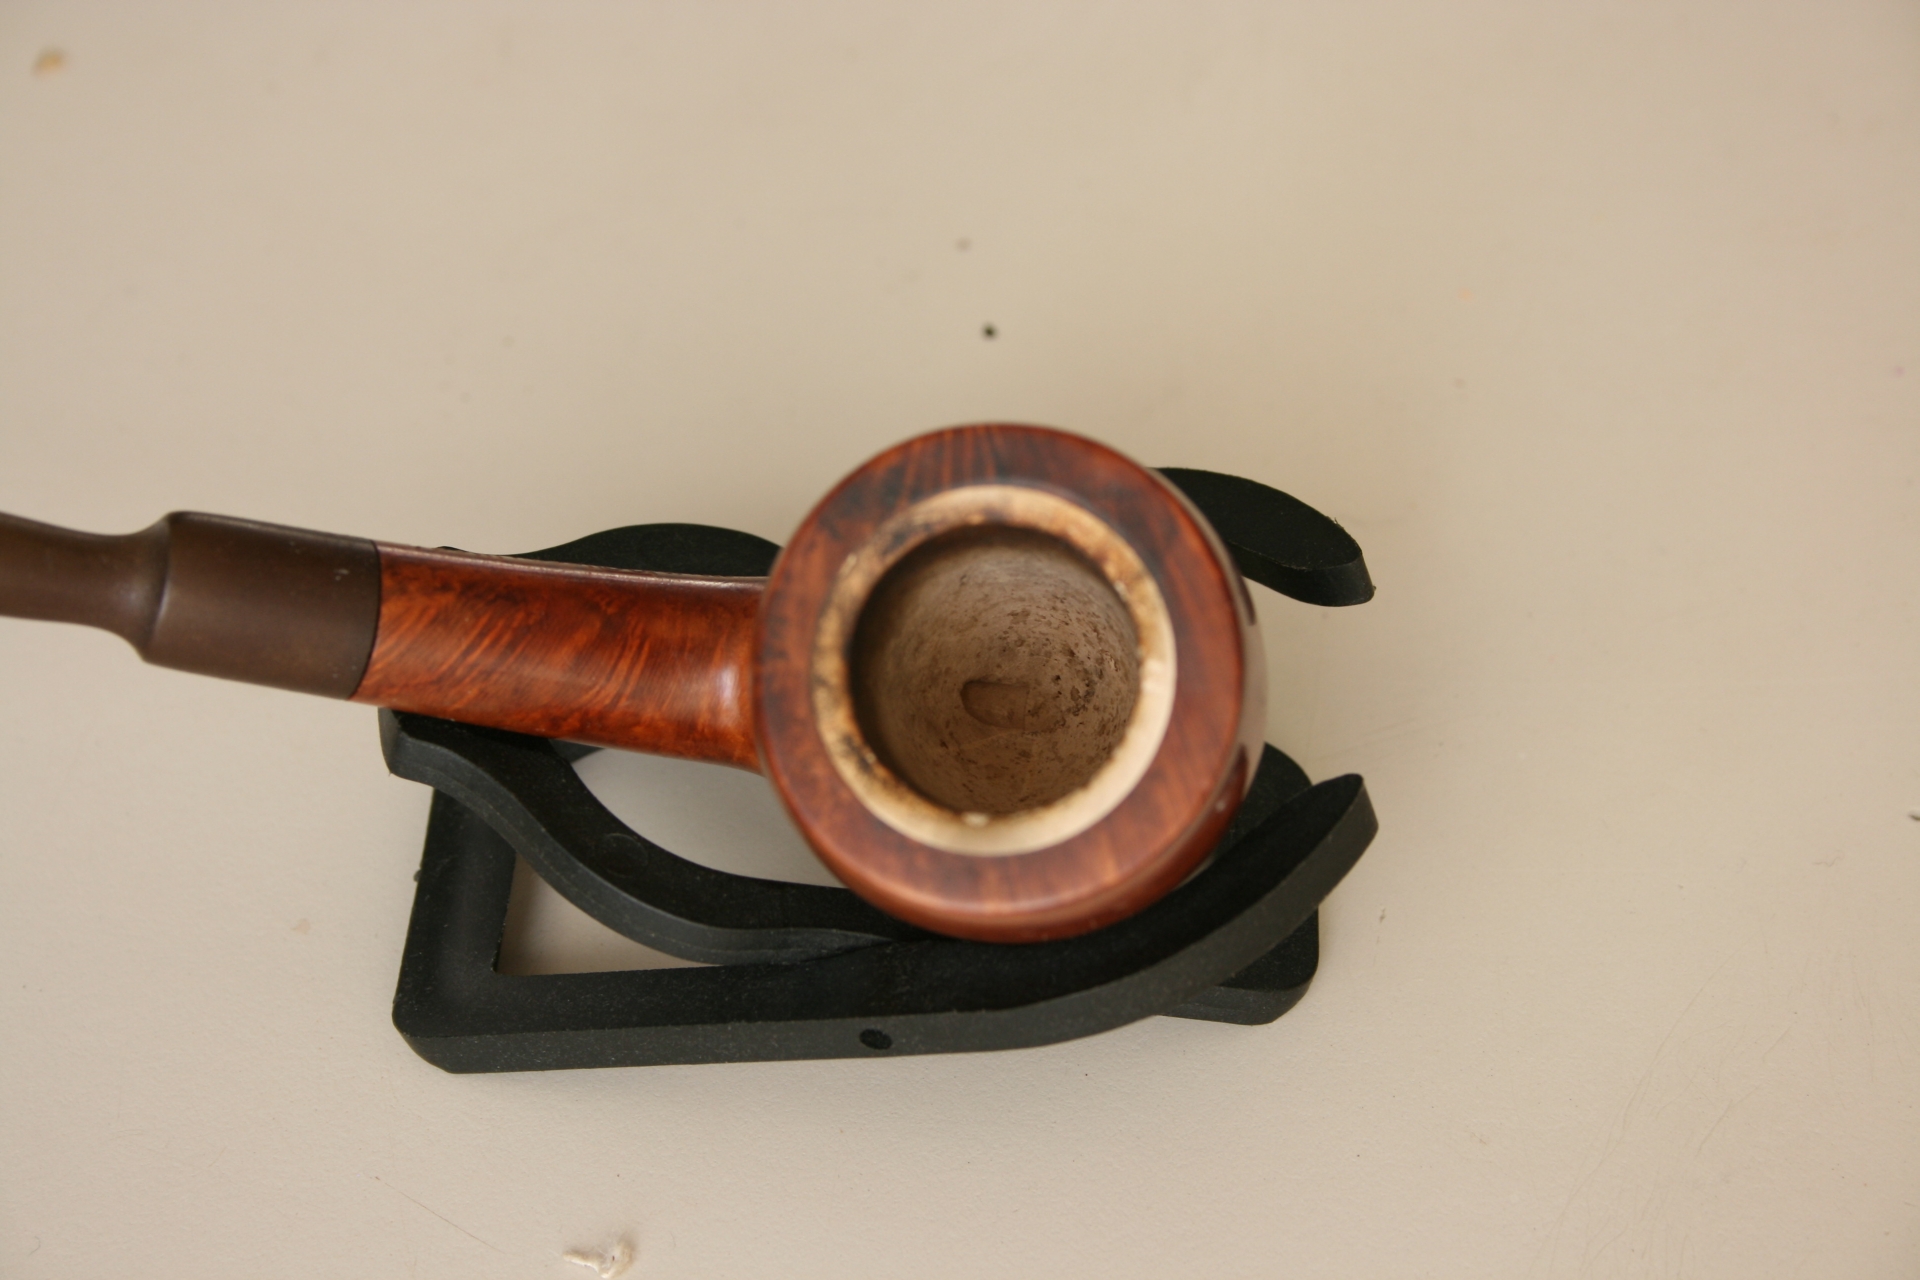
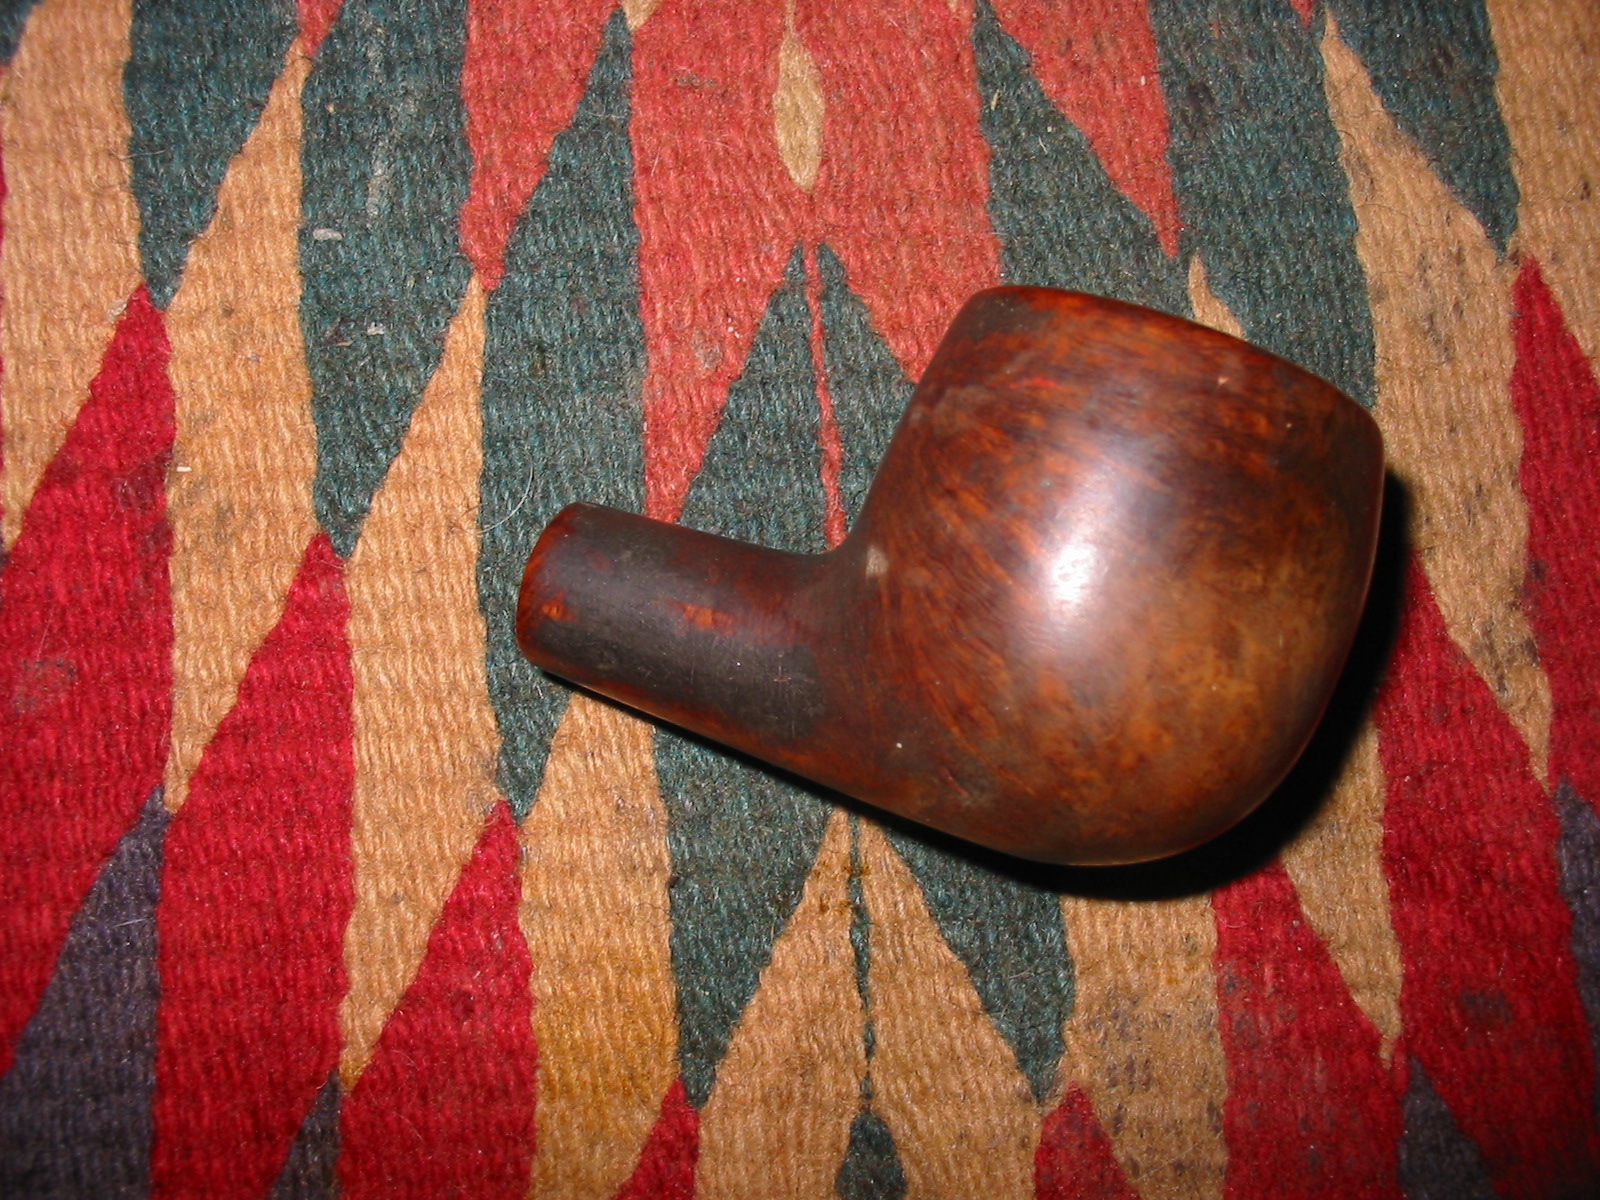
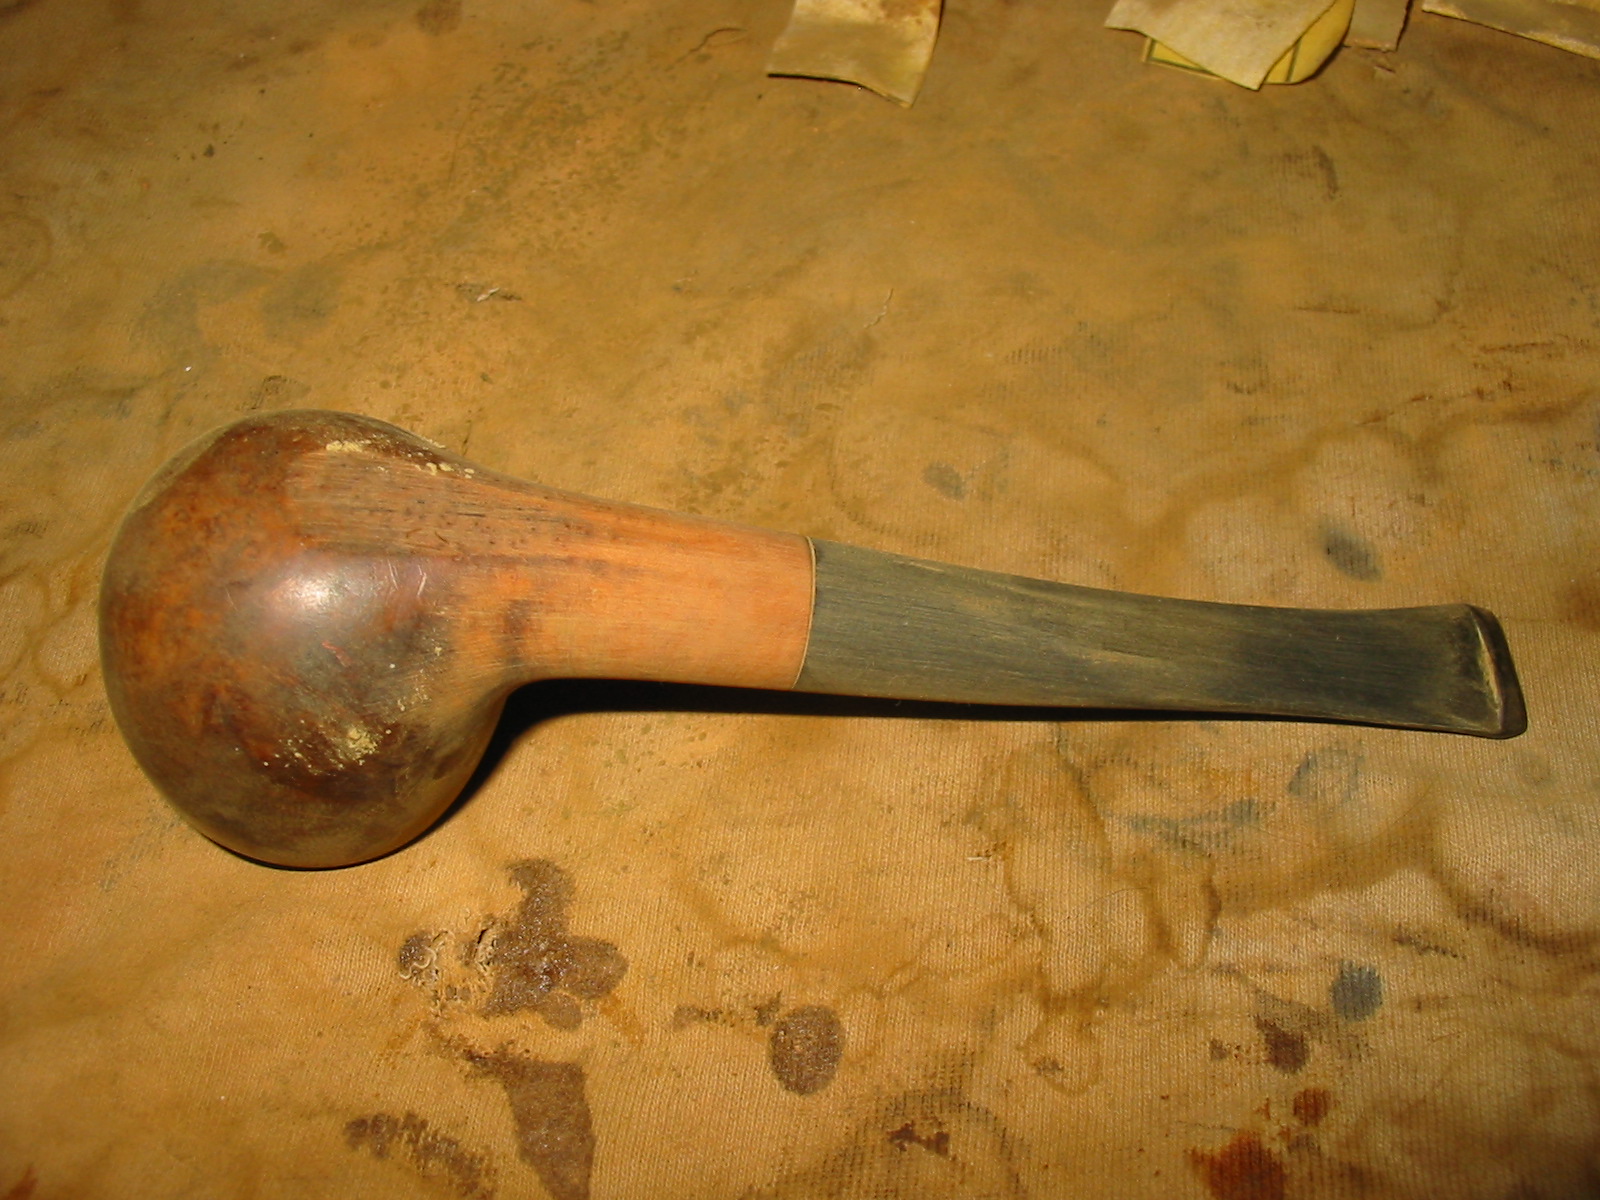
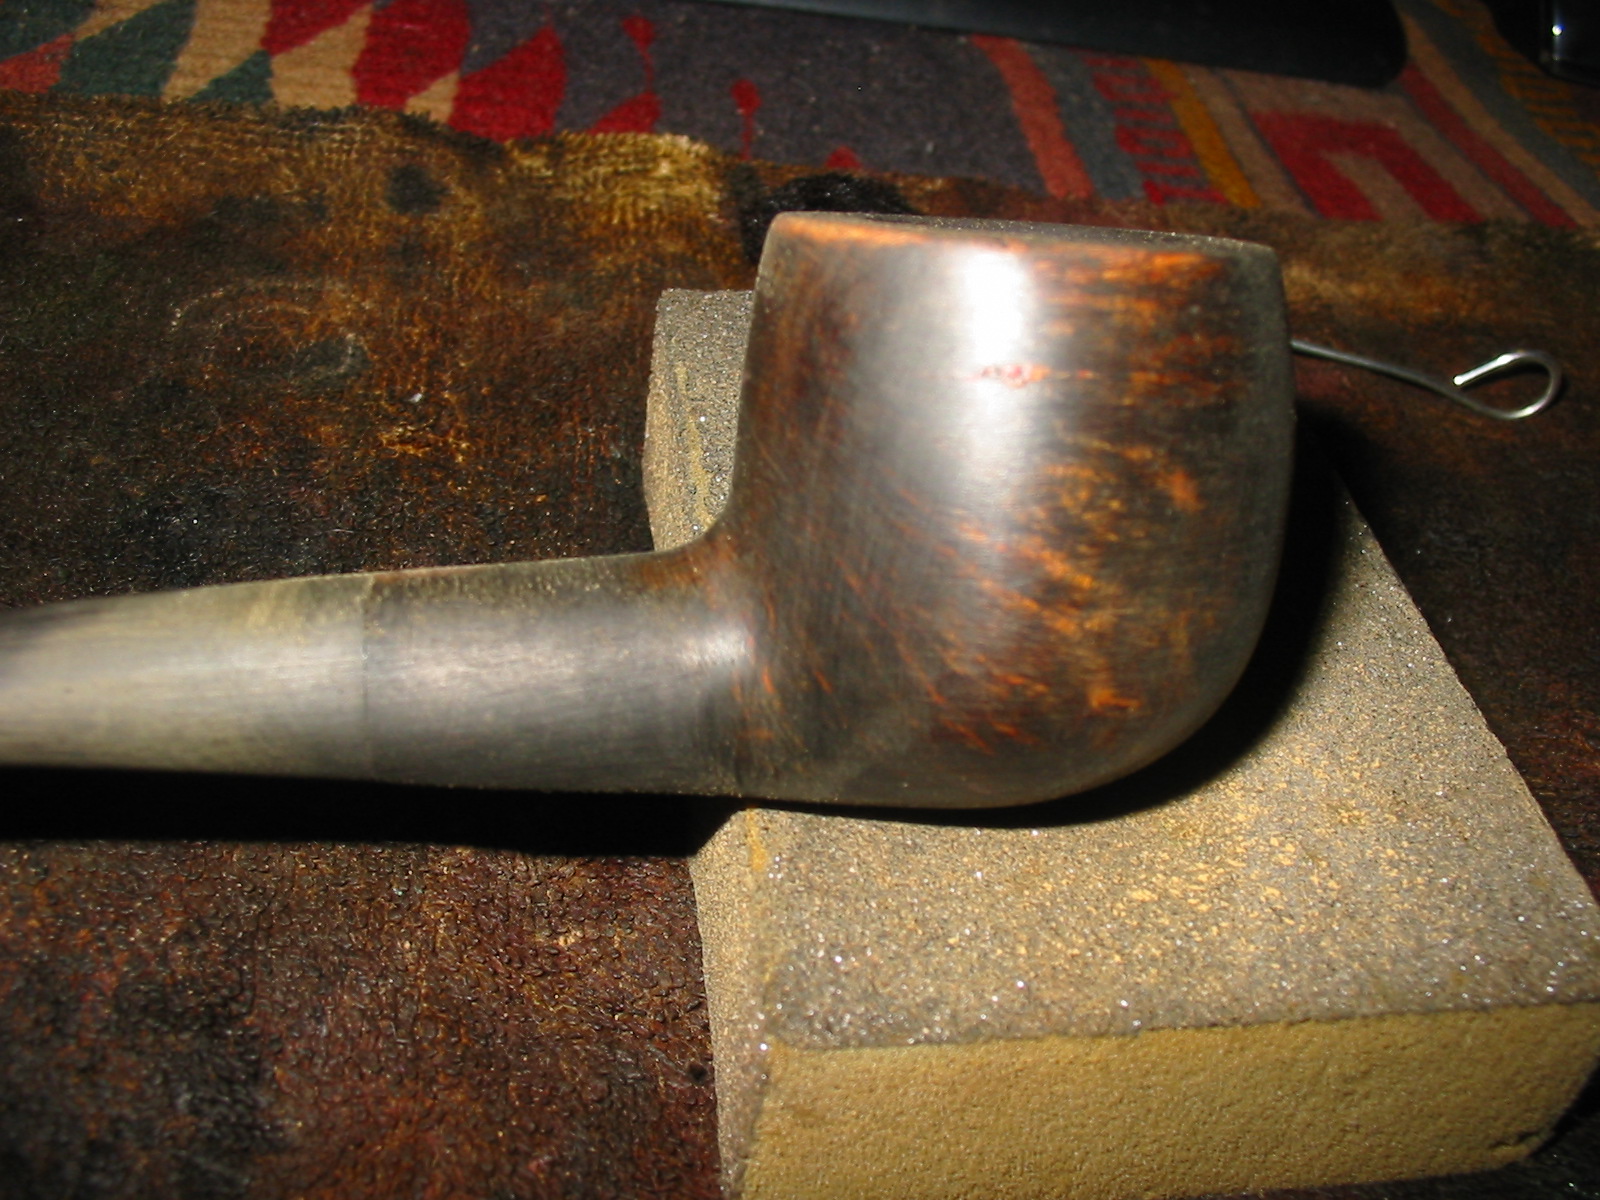
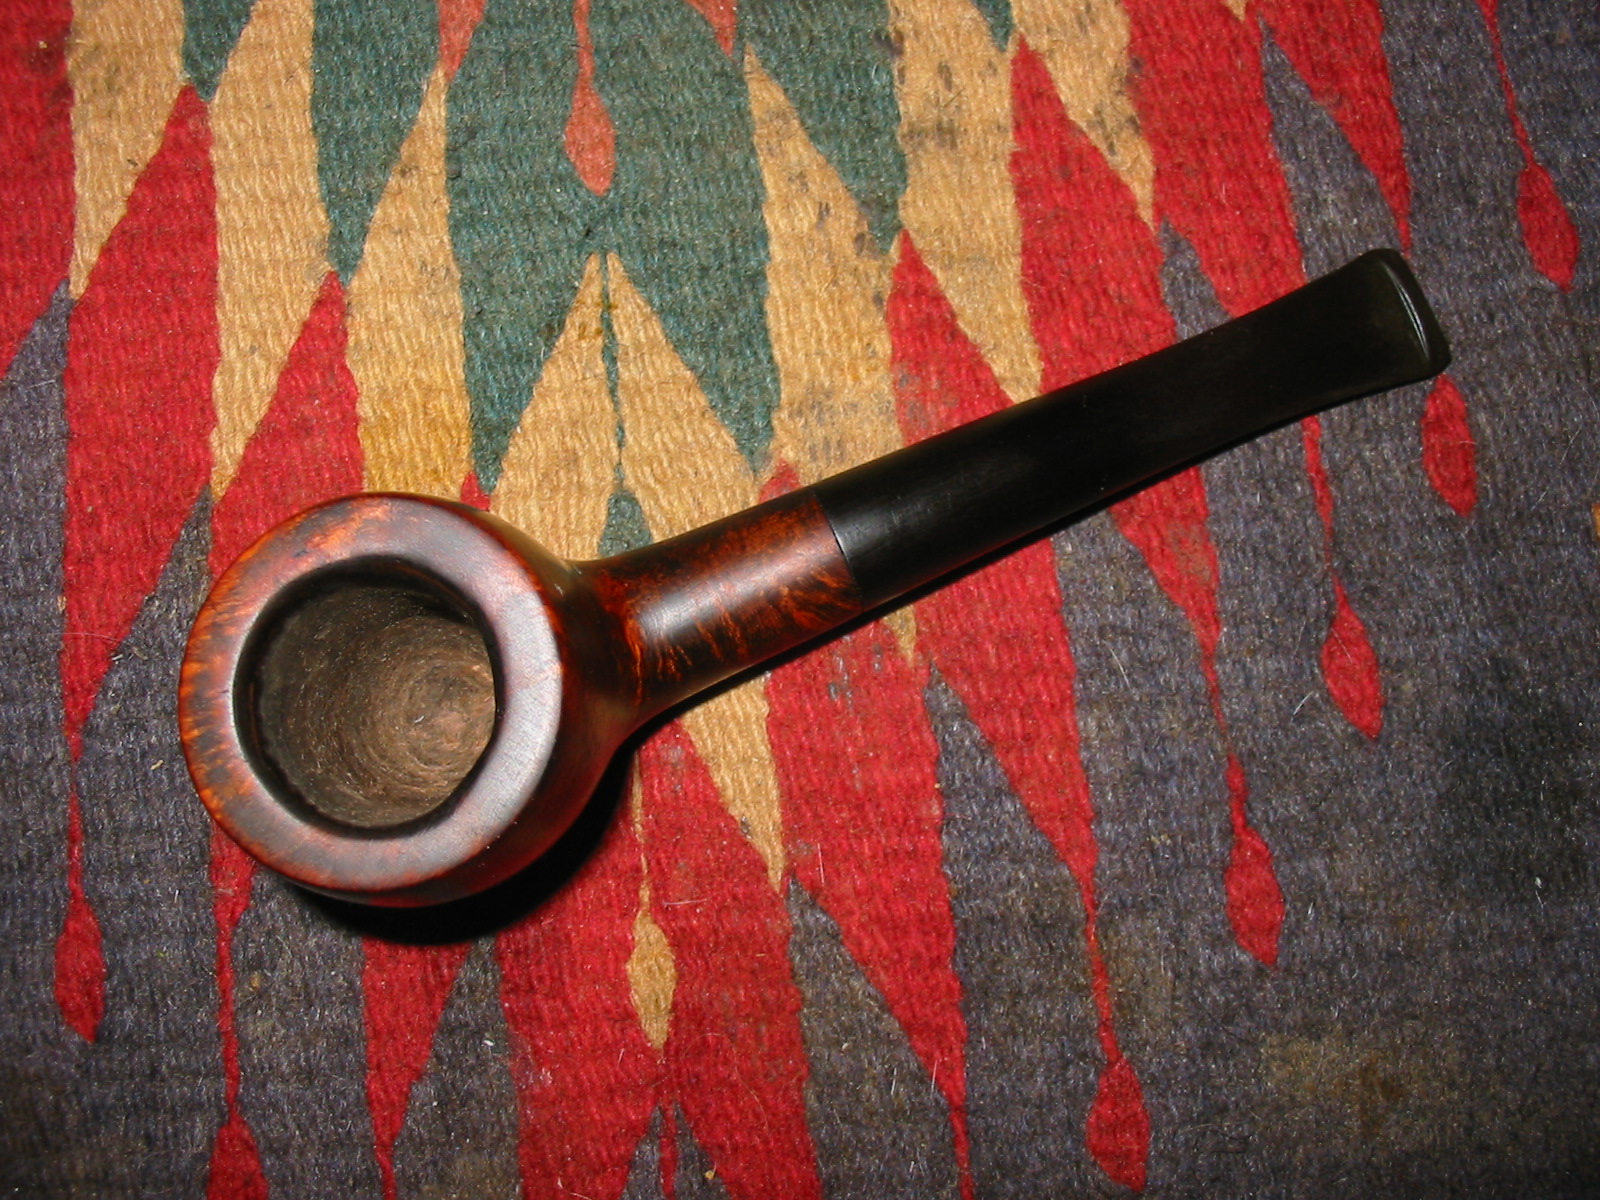
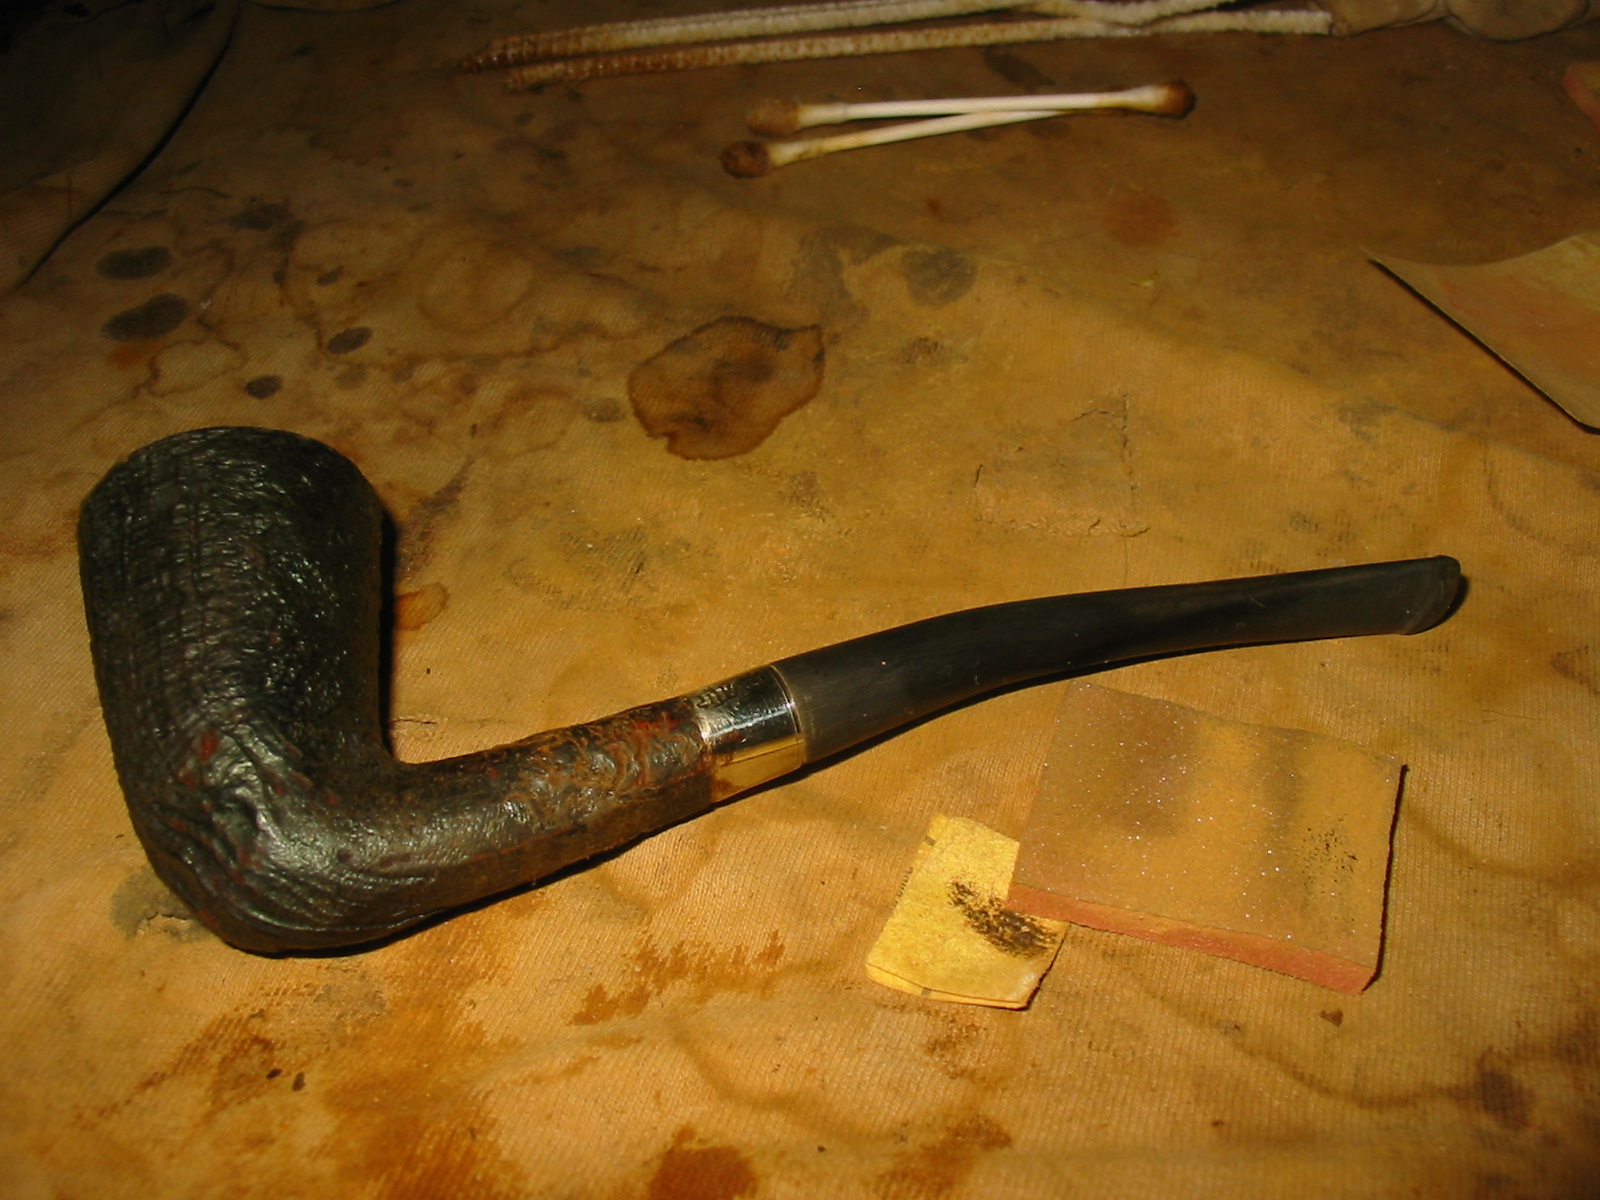
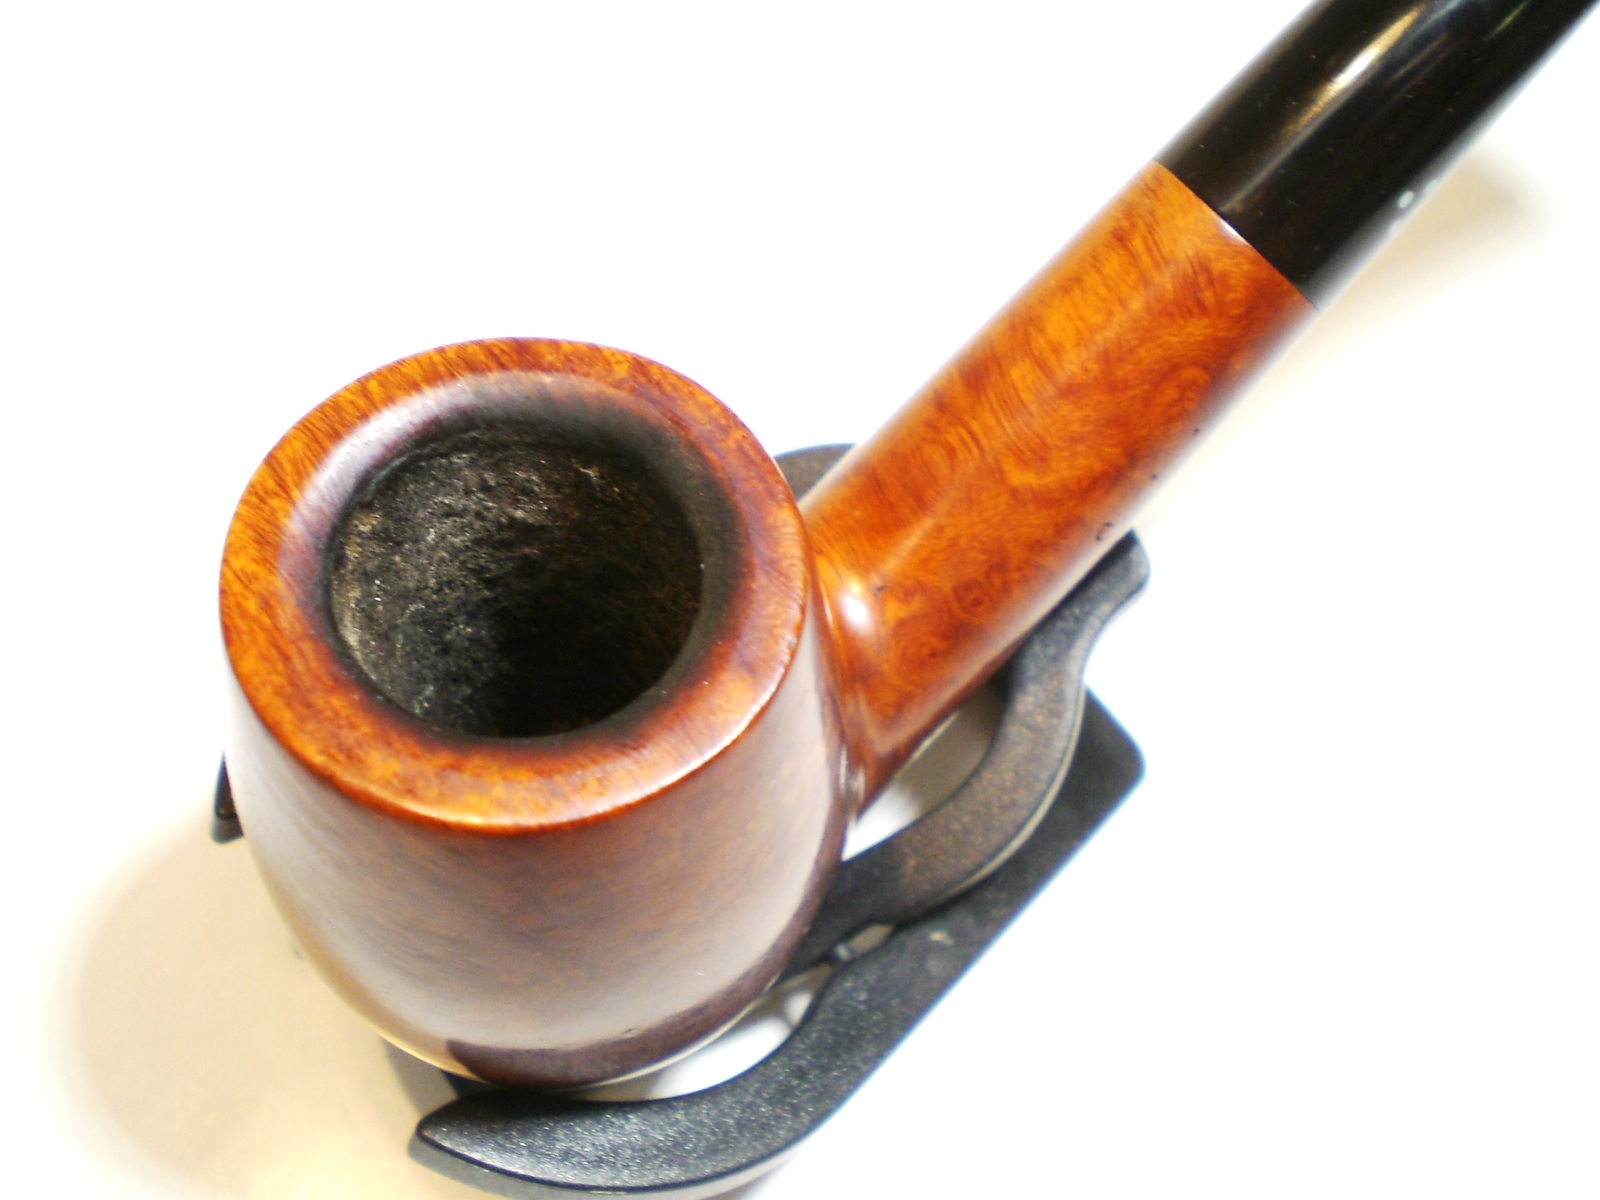
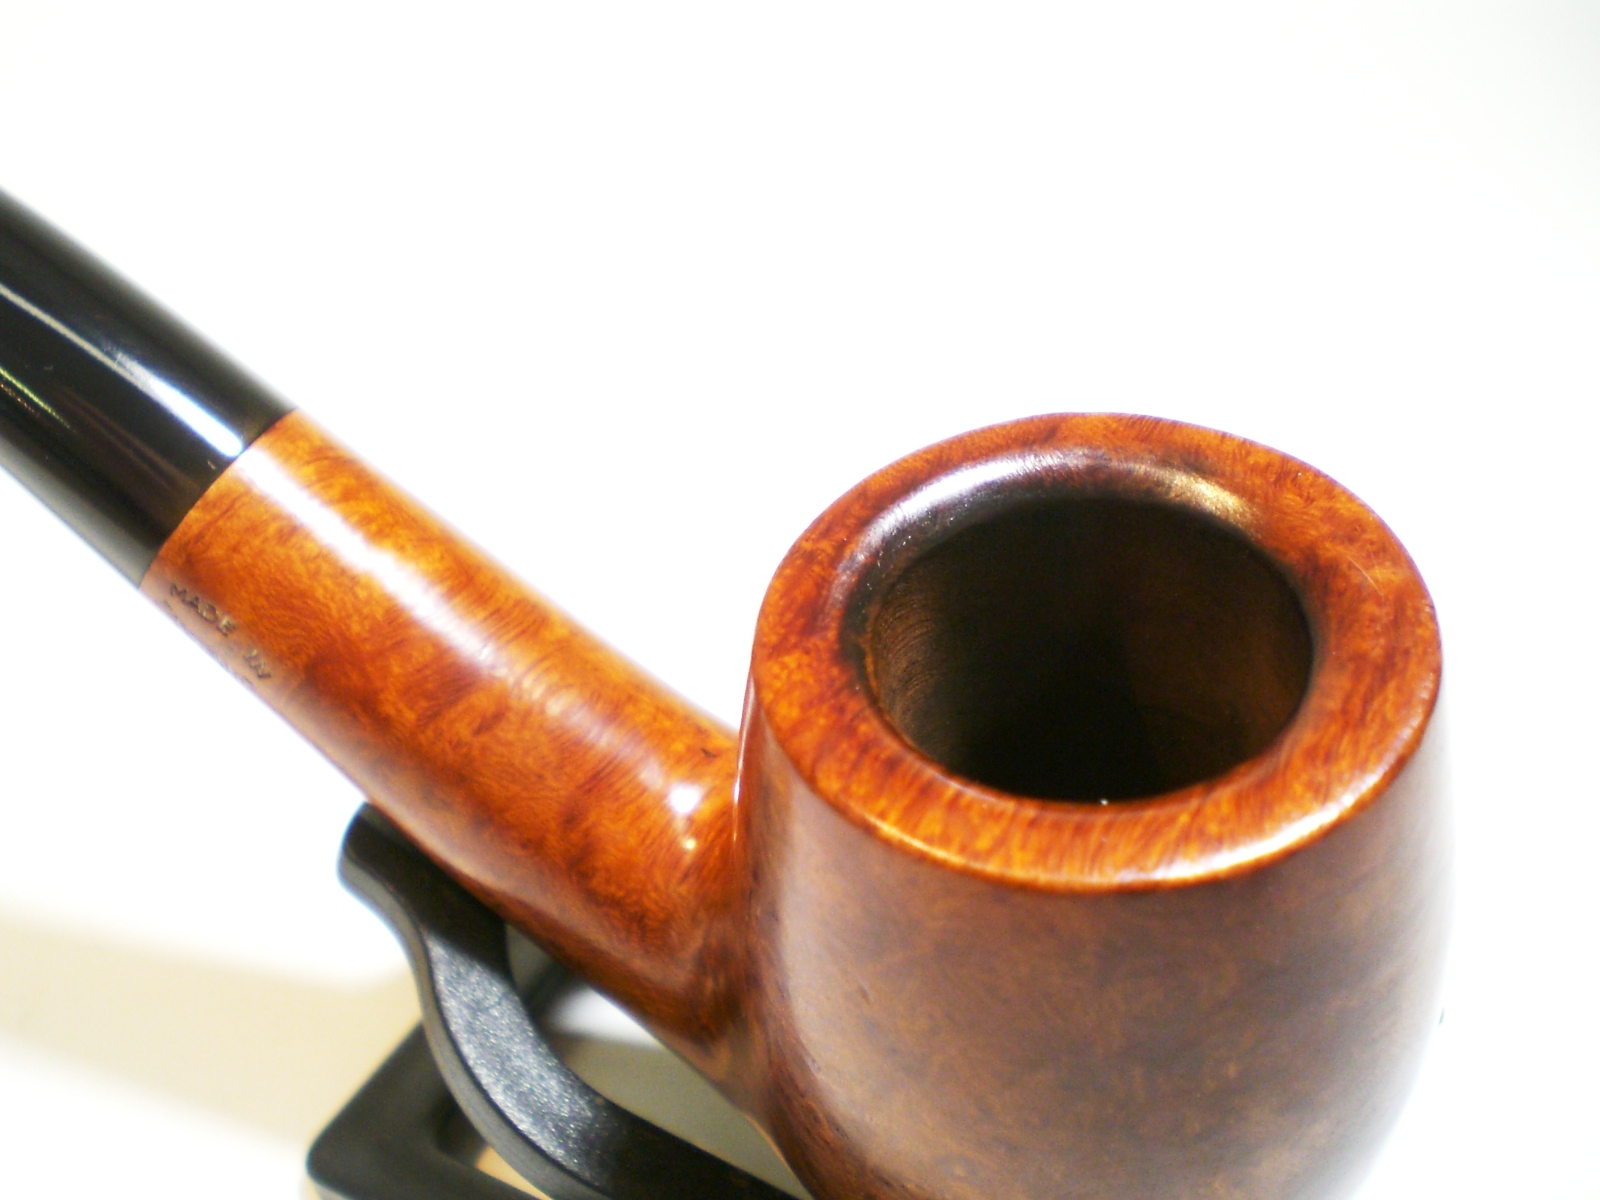
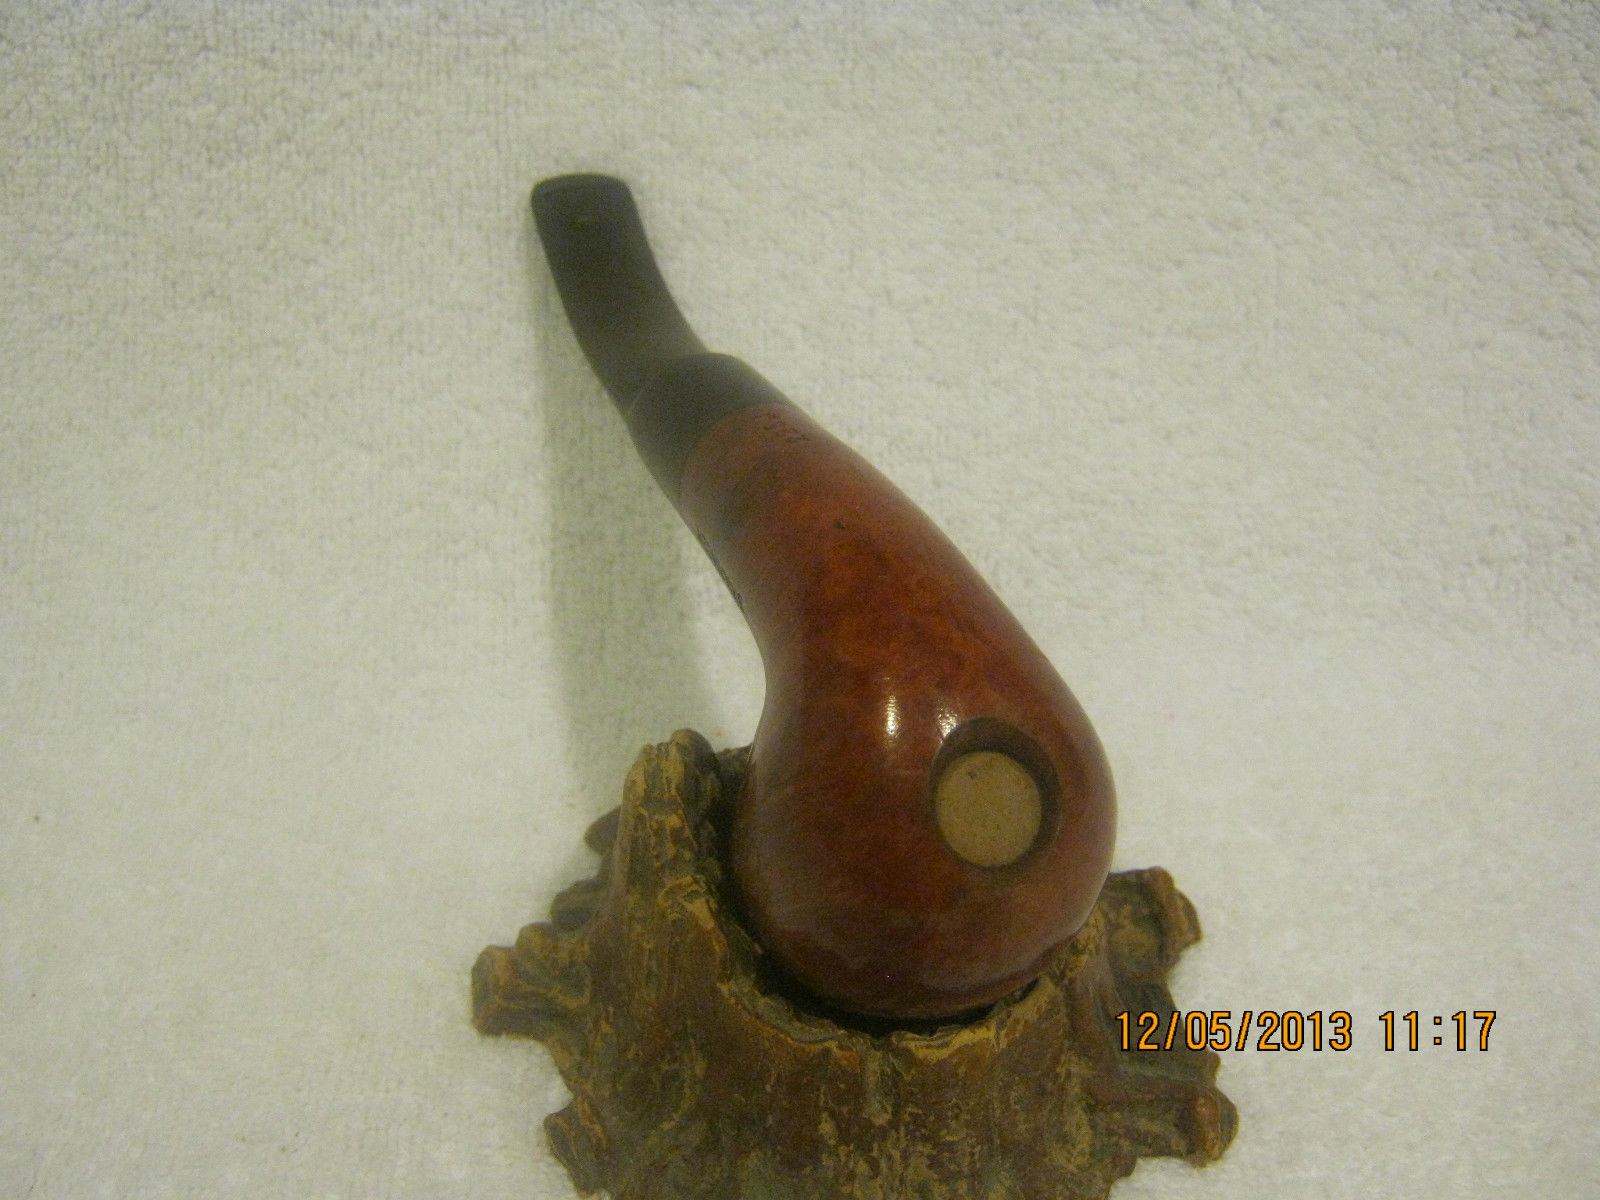
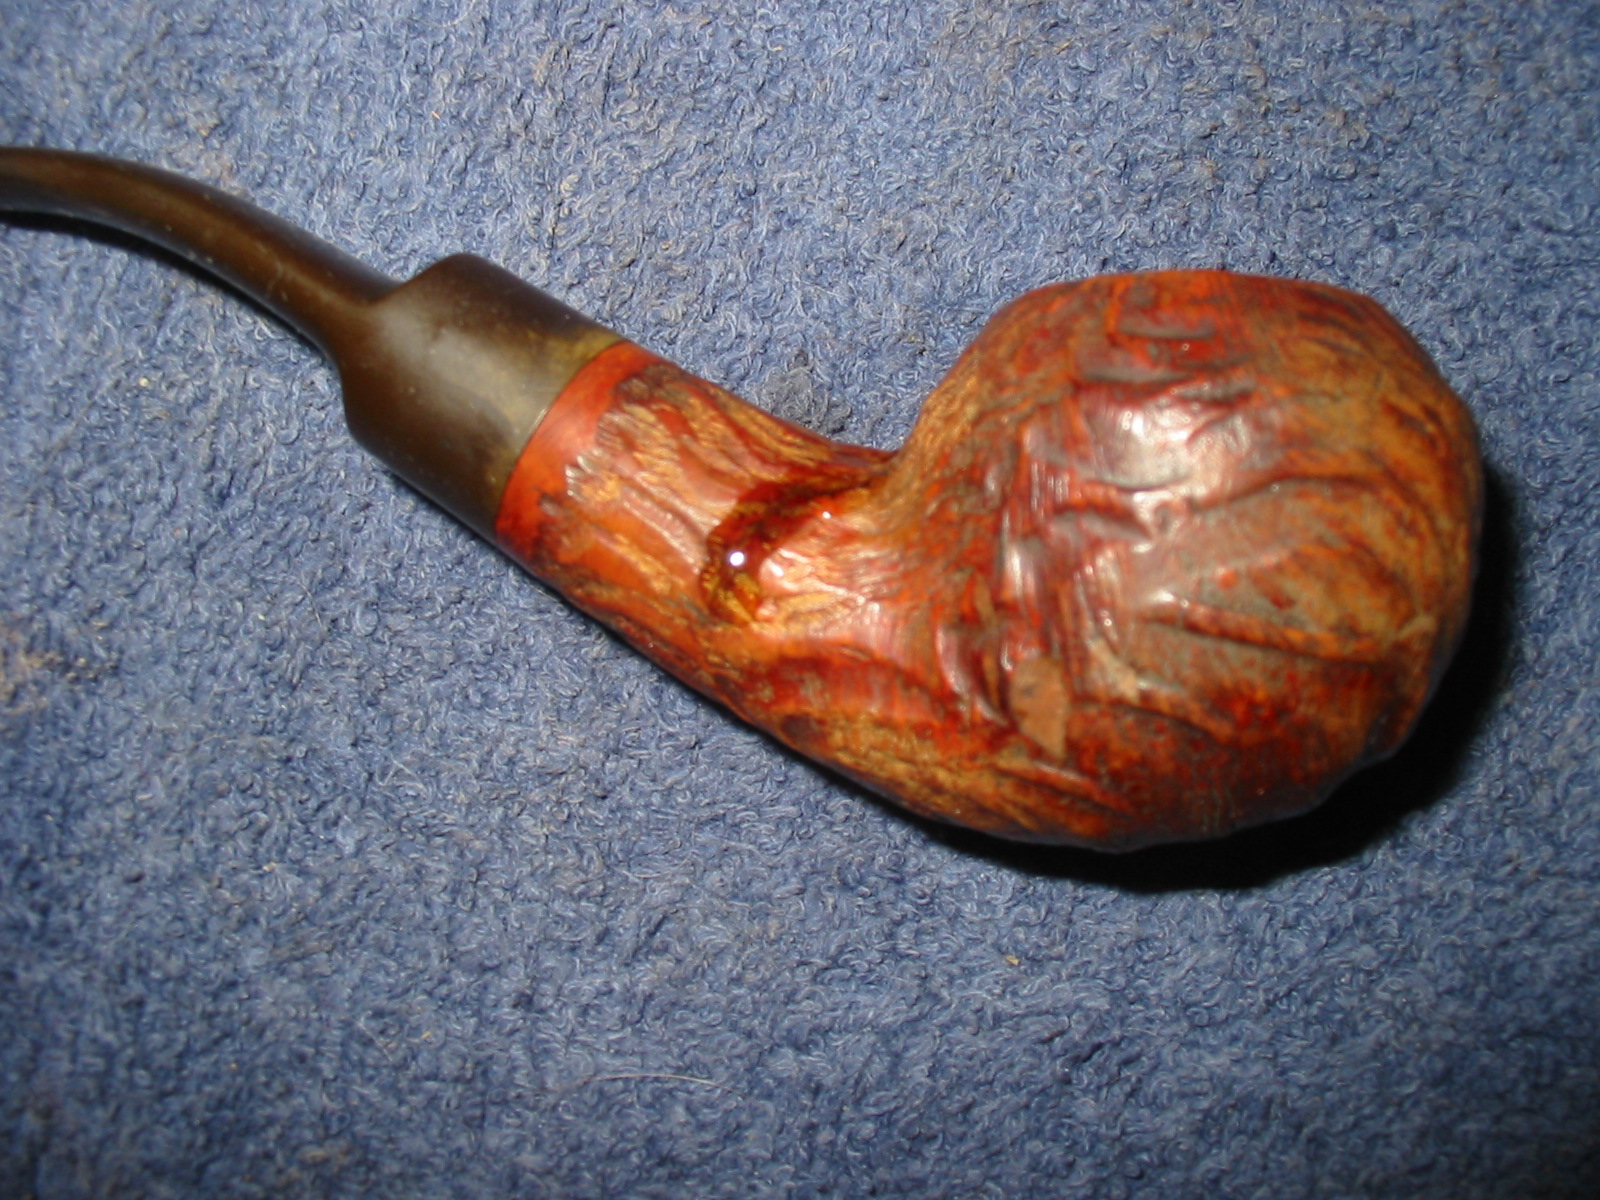
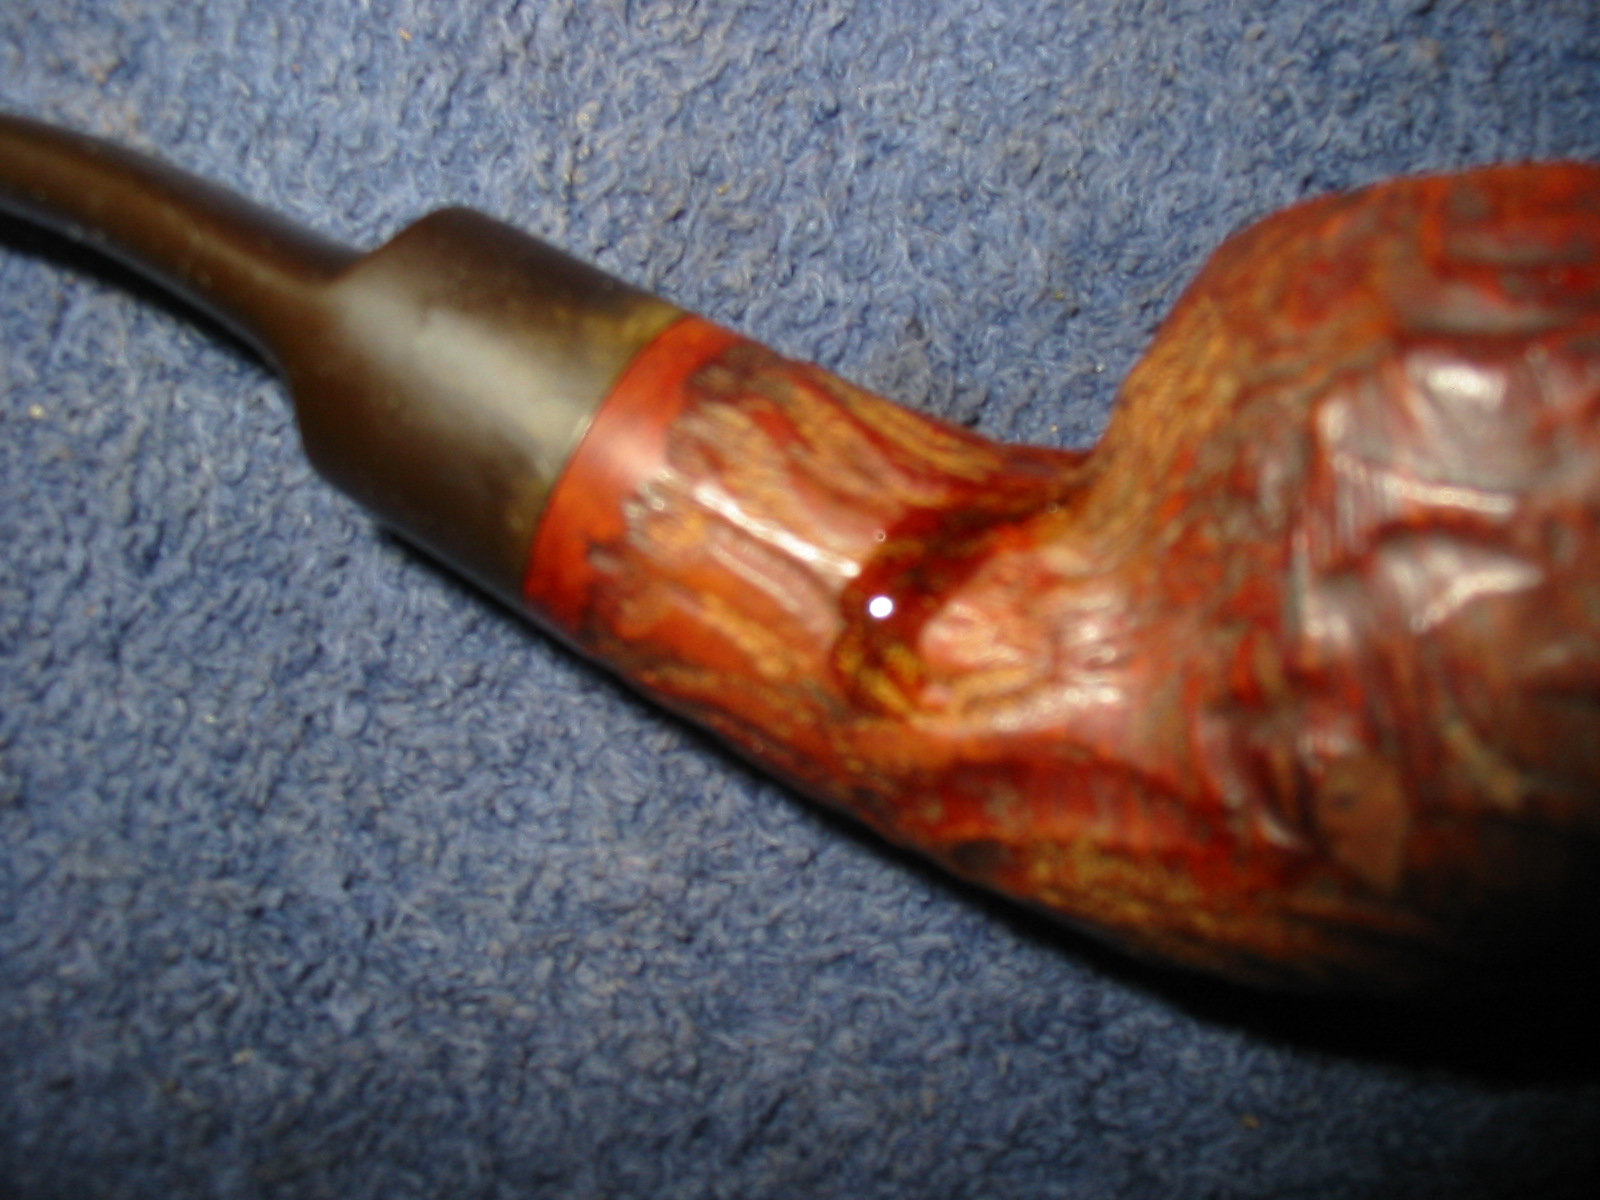
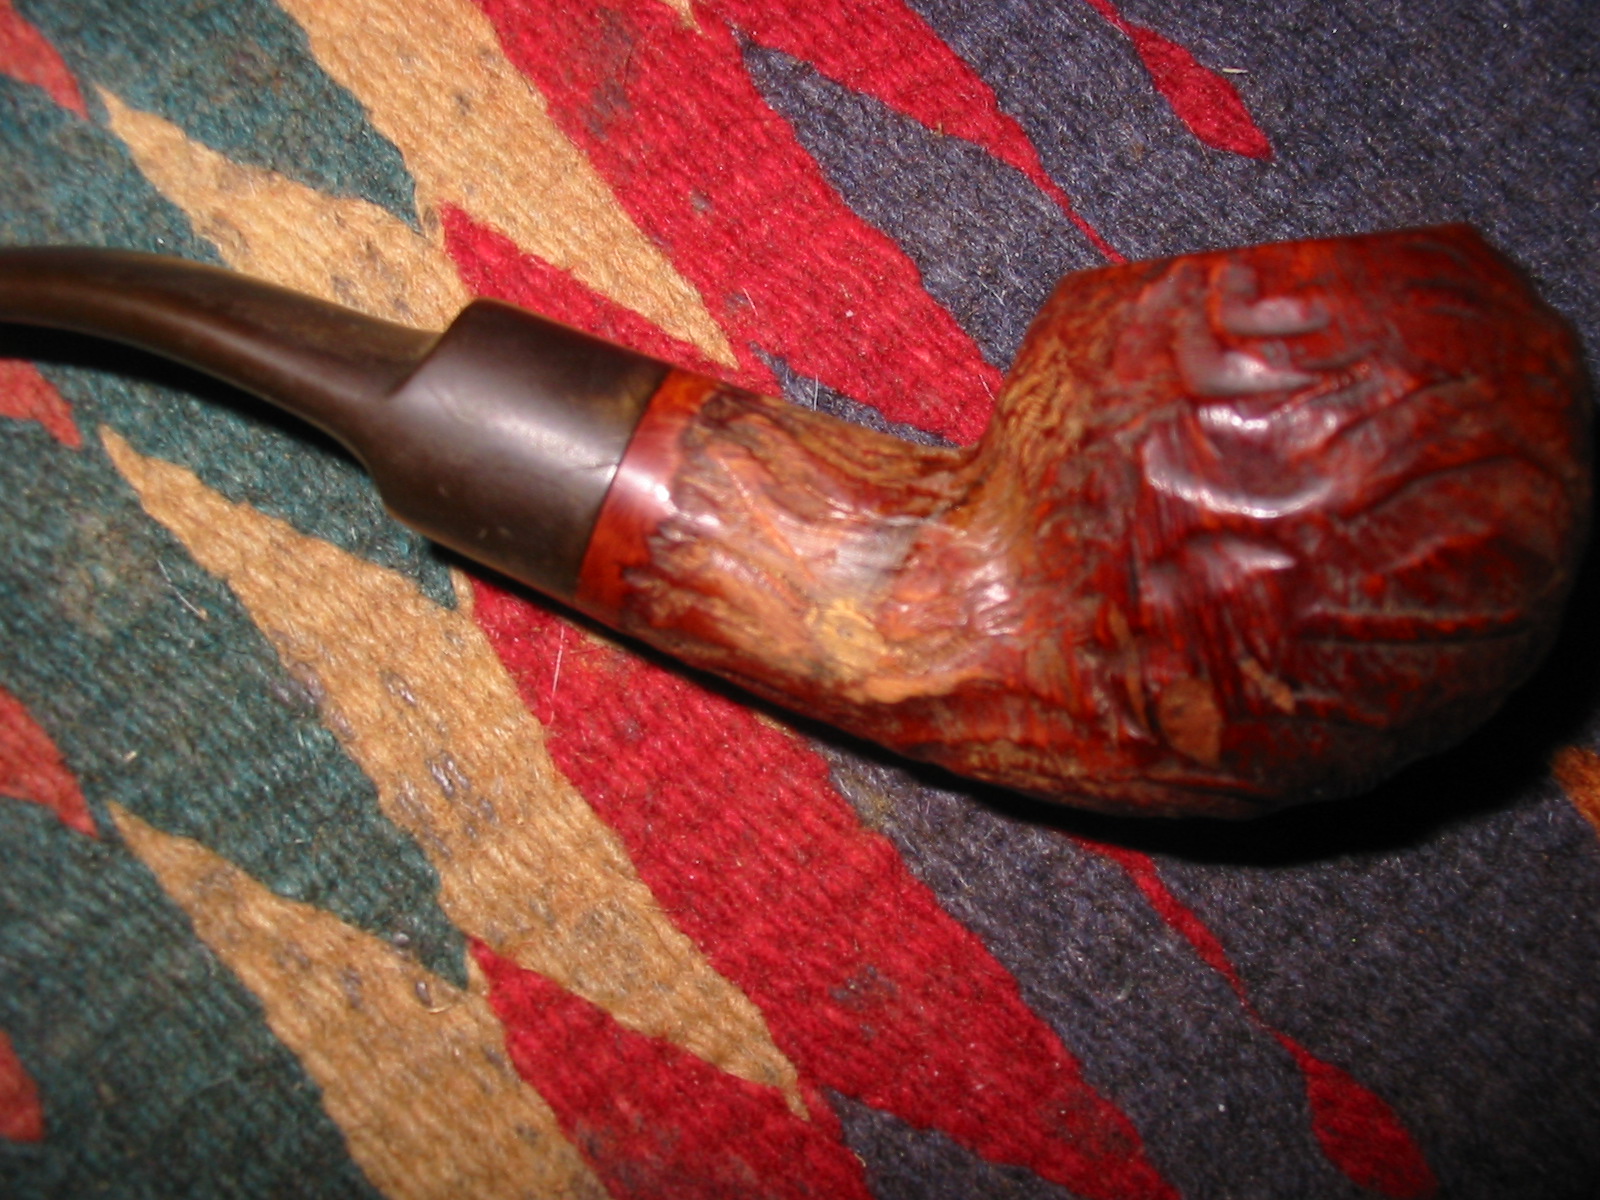
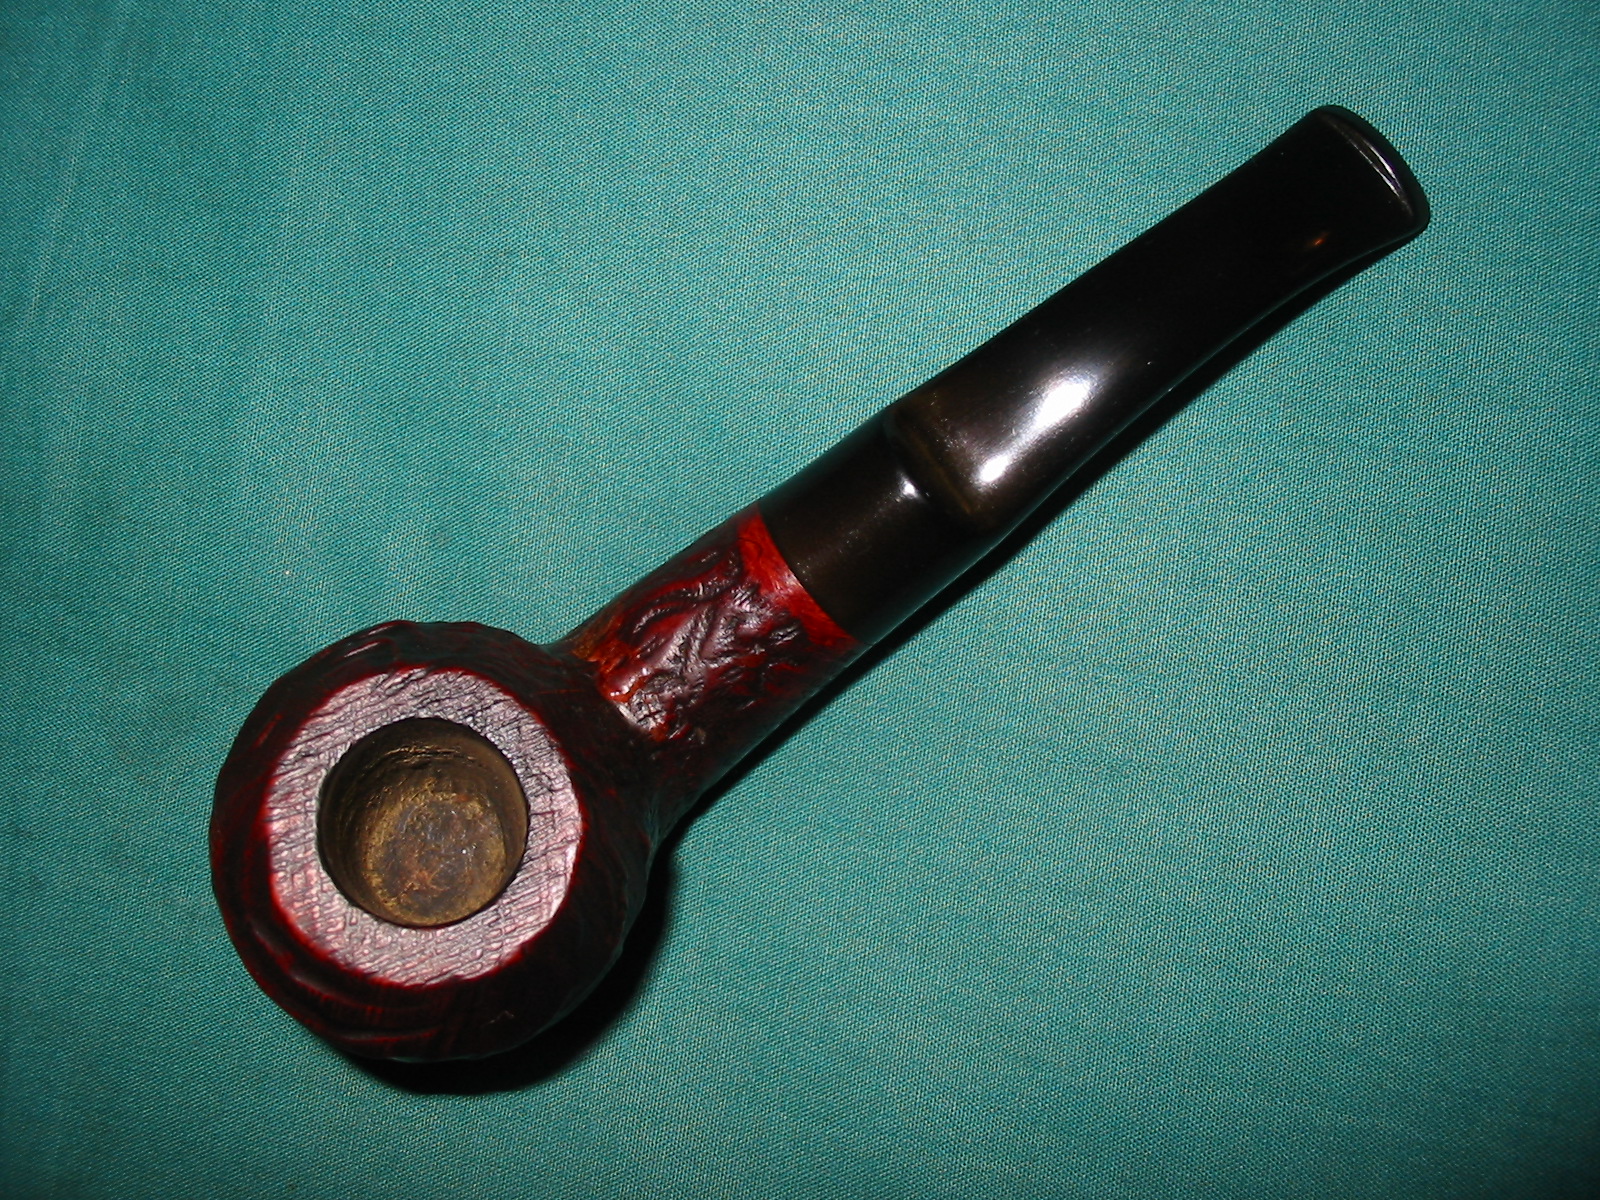
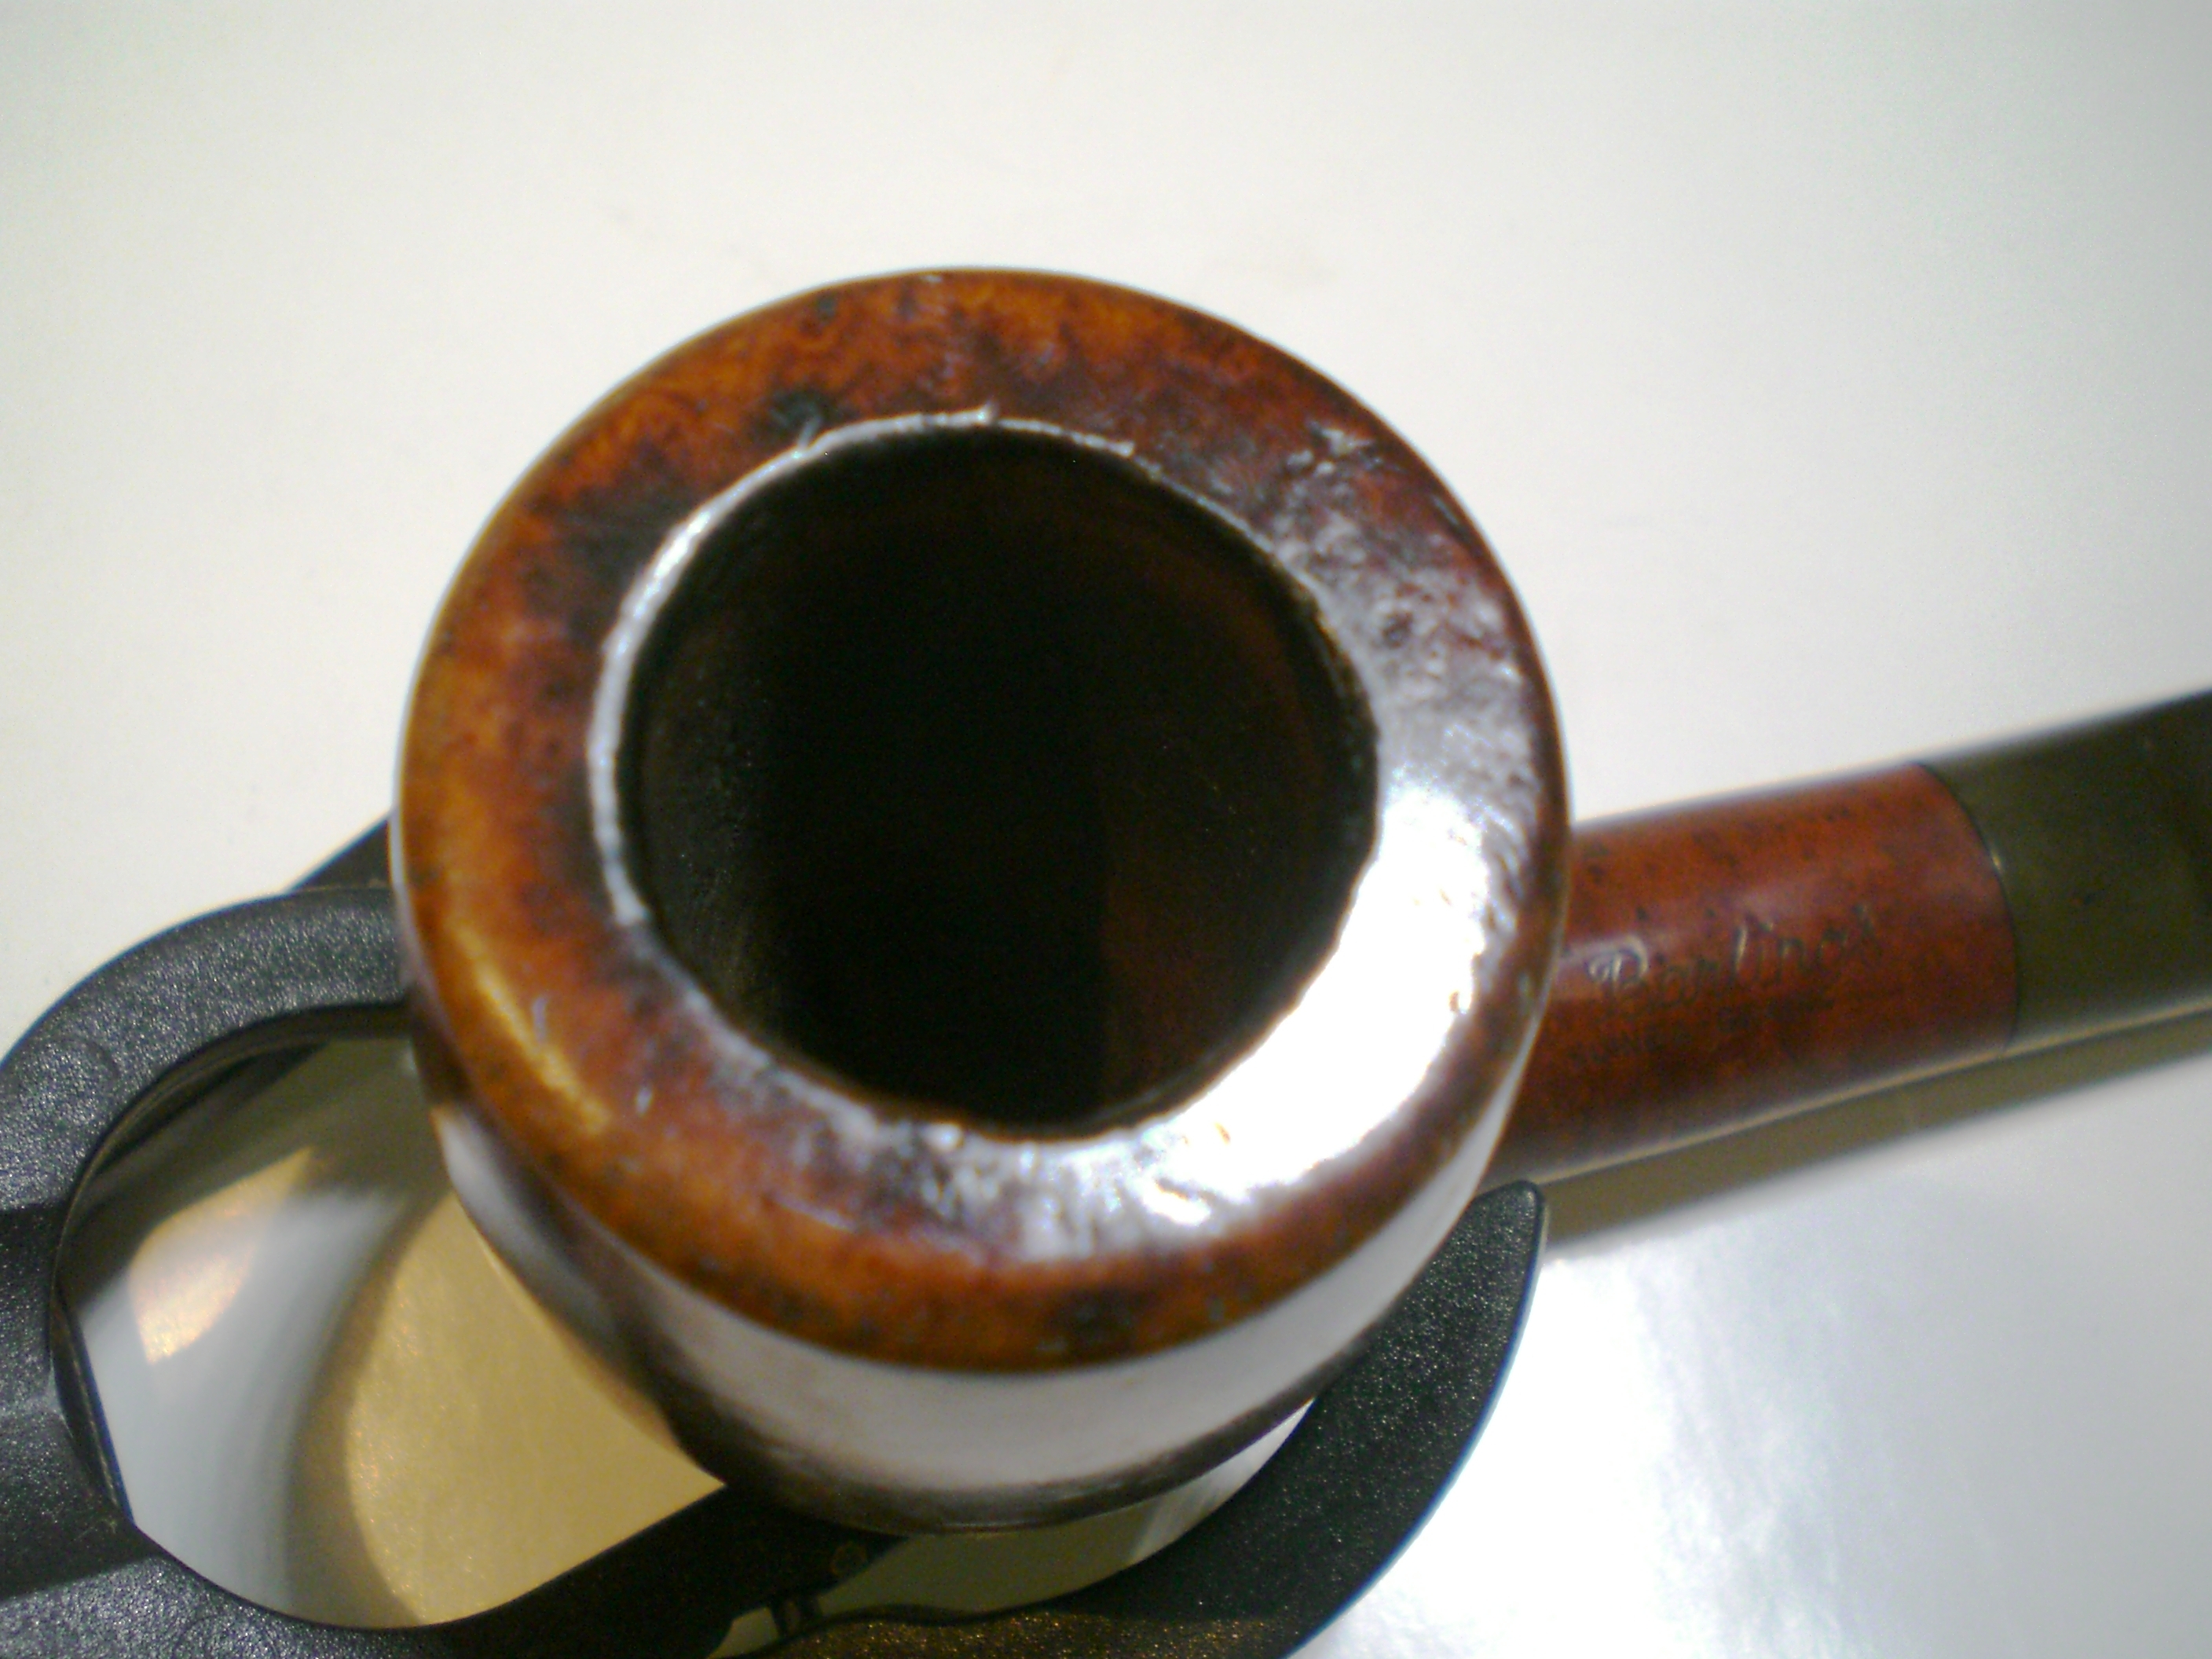
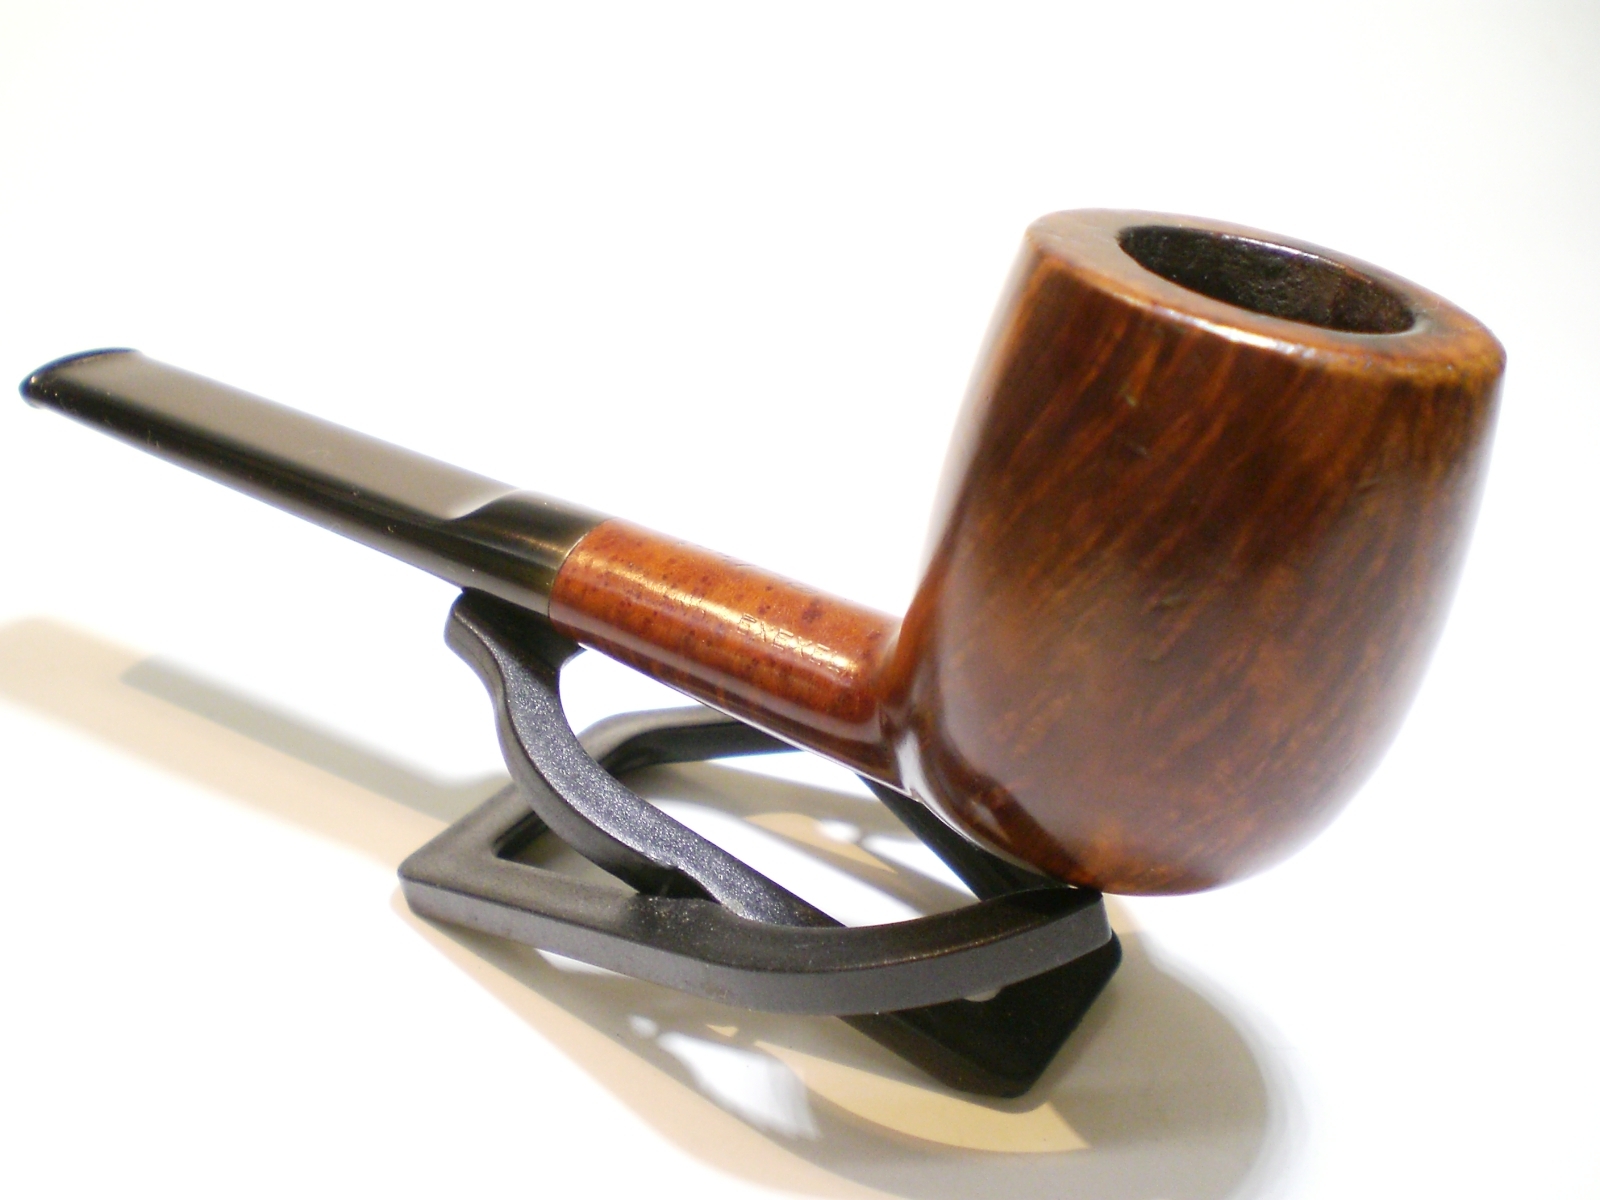
After all that effort the pipe is now sweeter than it must have been for quite some time. The next challenge was the misshapen rim, how on earth it got into this state I honestly cannot imagine.
Chiz7

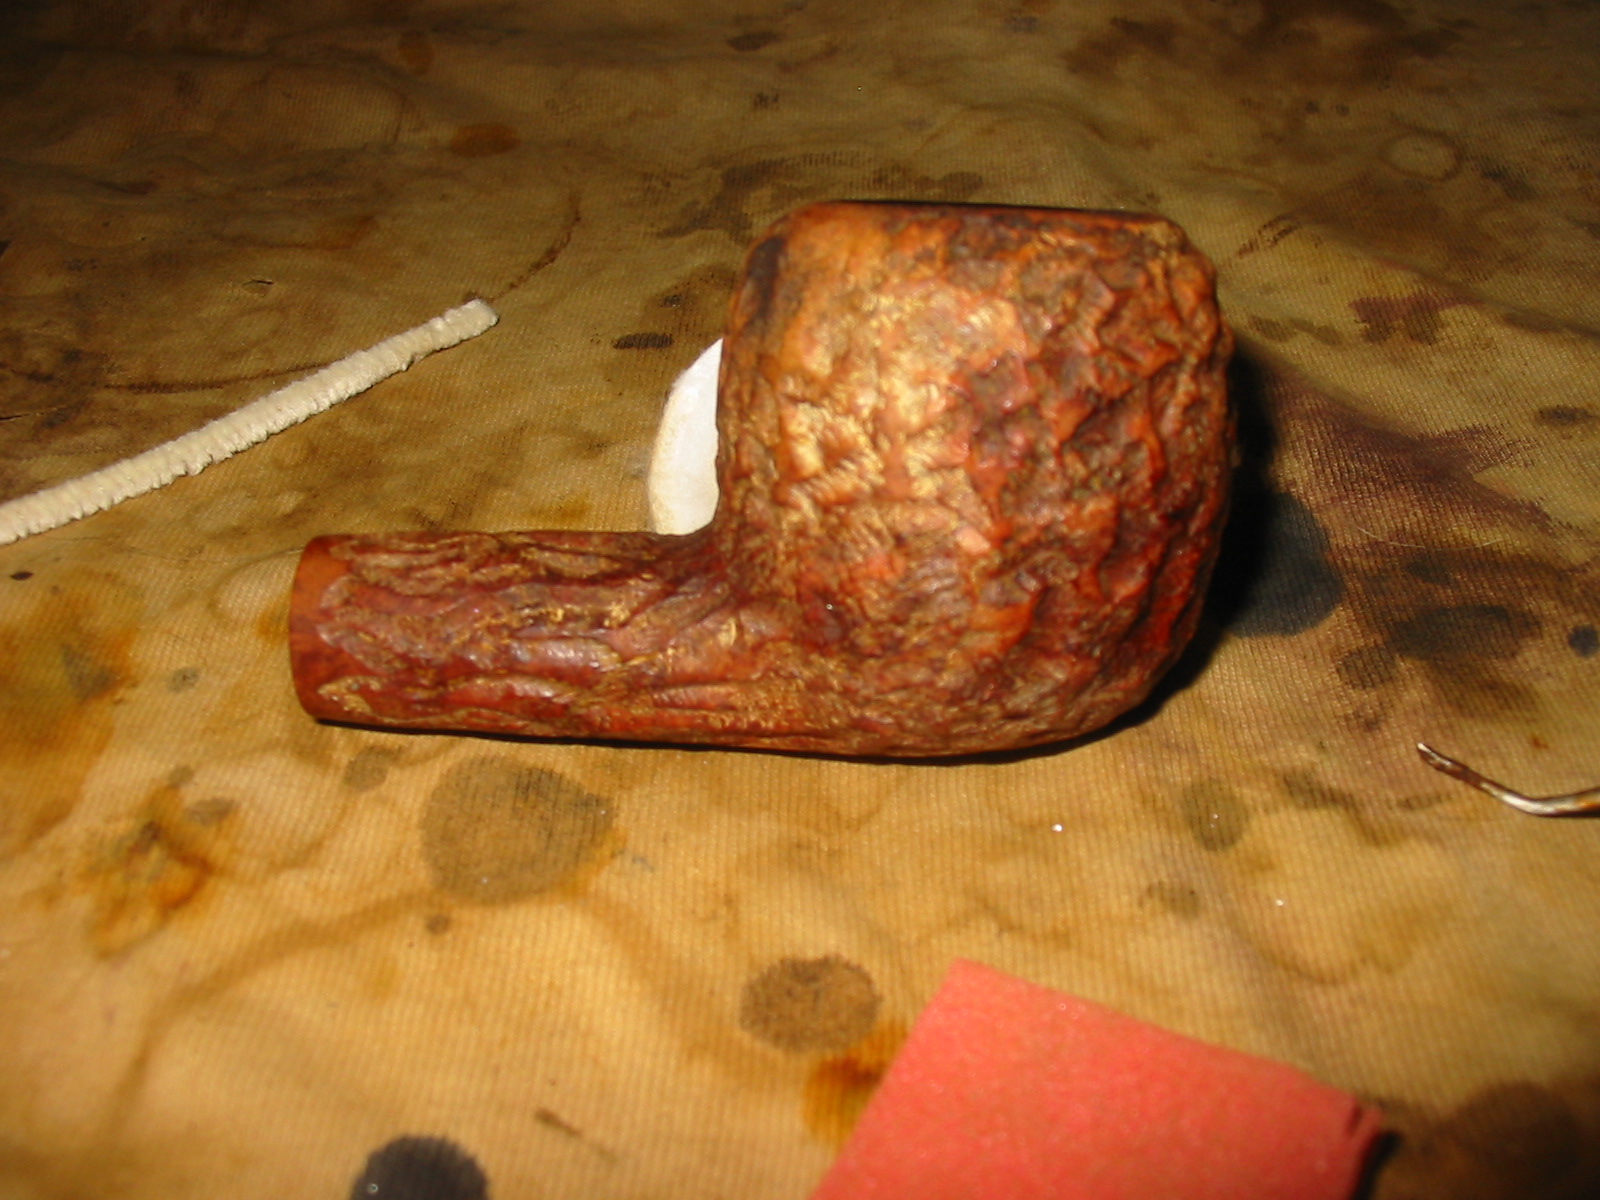
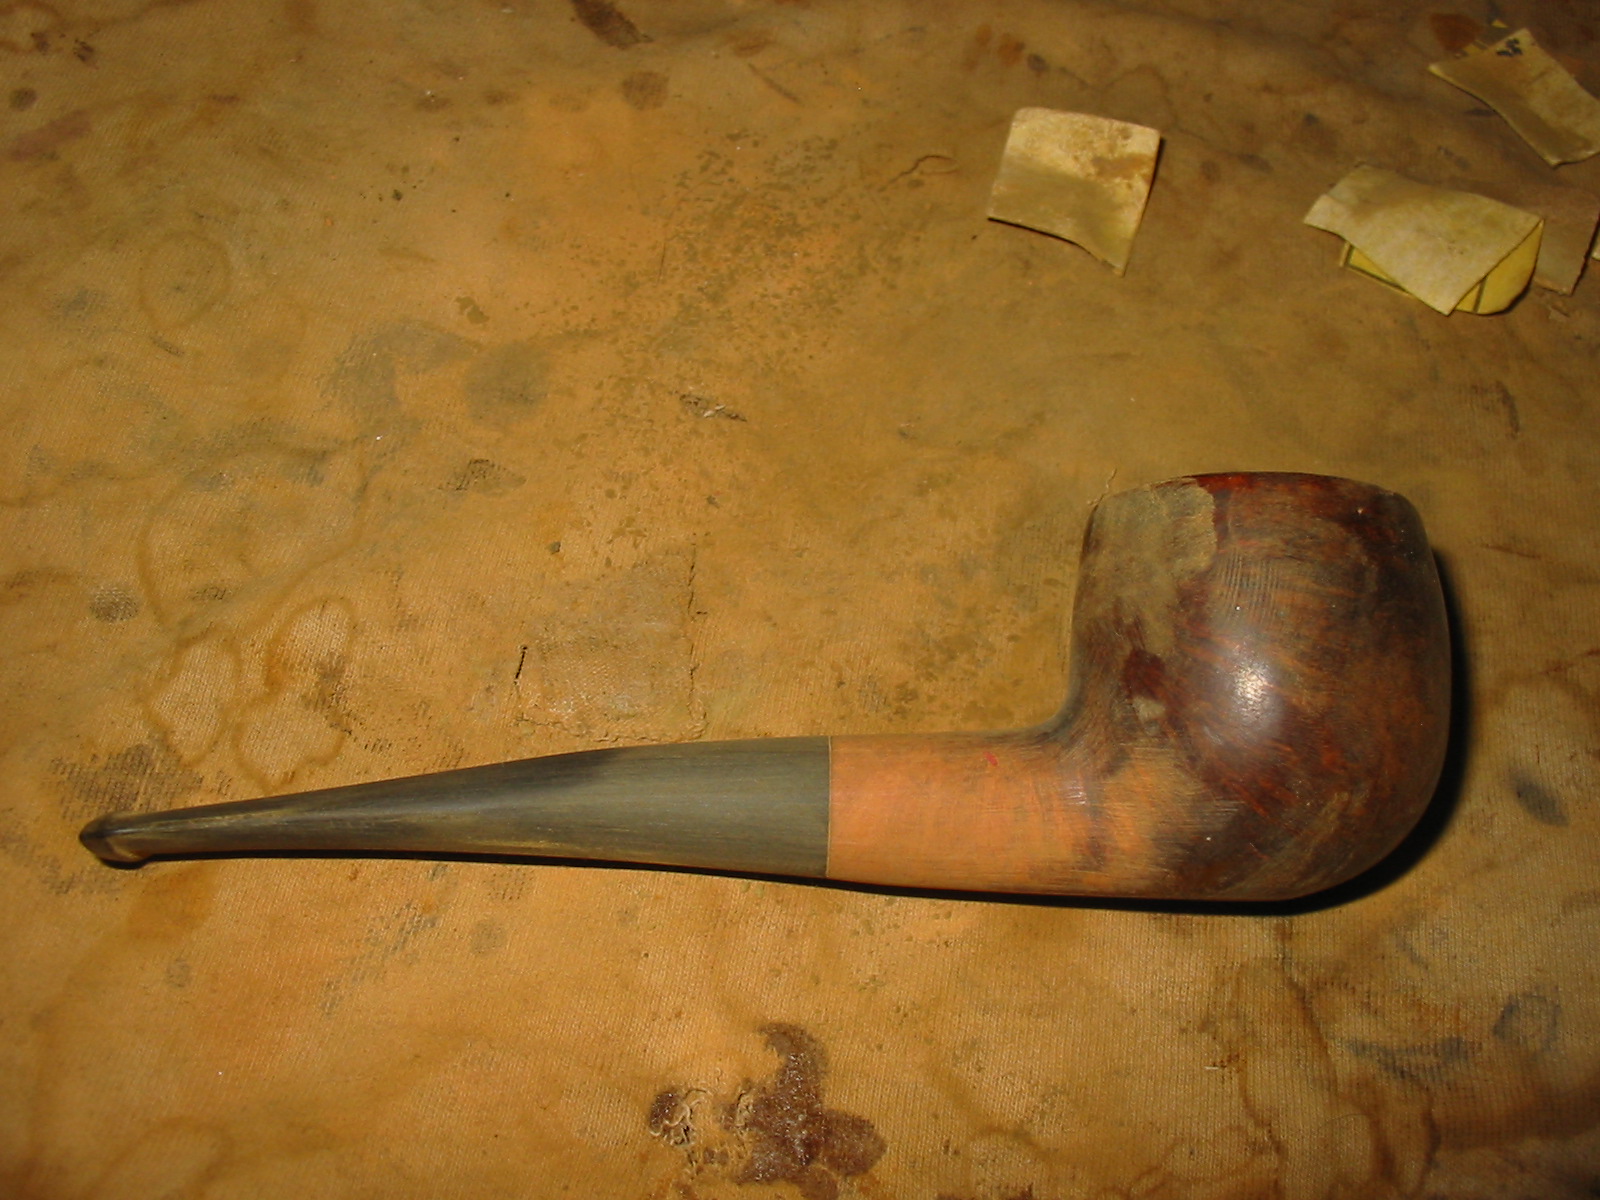
First I roughly flattened the top with a Dremel with sander attachment. I don’t have a workshop with bench grinders and buffers, different kinds of polishing compound etc.just a very basic Dremel – which is of limited use; you really don’t want to go near a pipe with one unless you absolutely have to! – and the rest is all done by hand. So for anybody reading this wondering whether they should have a go at a similar job: if I can do it then anyone can, truly.

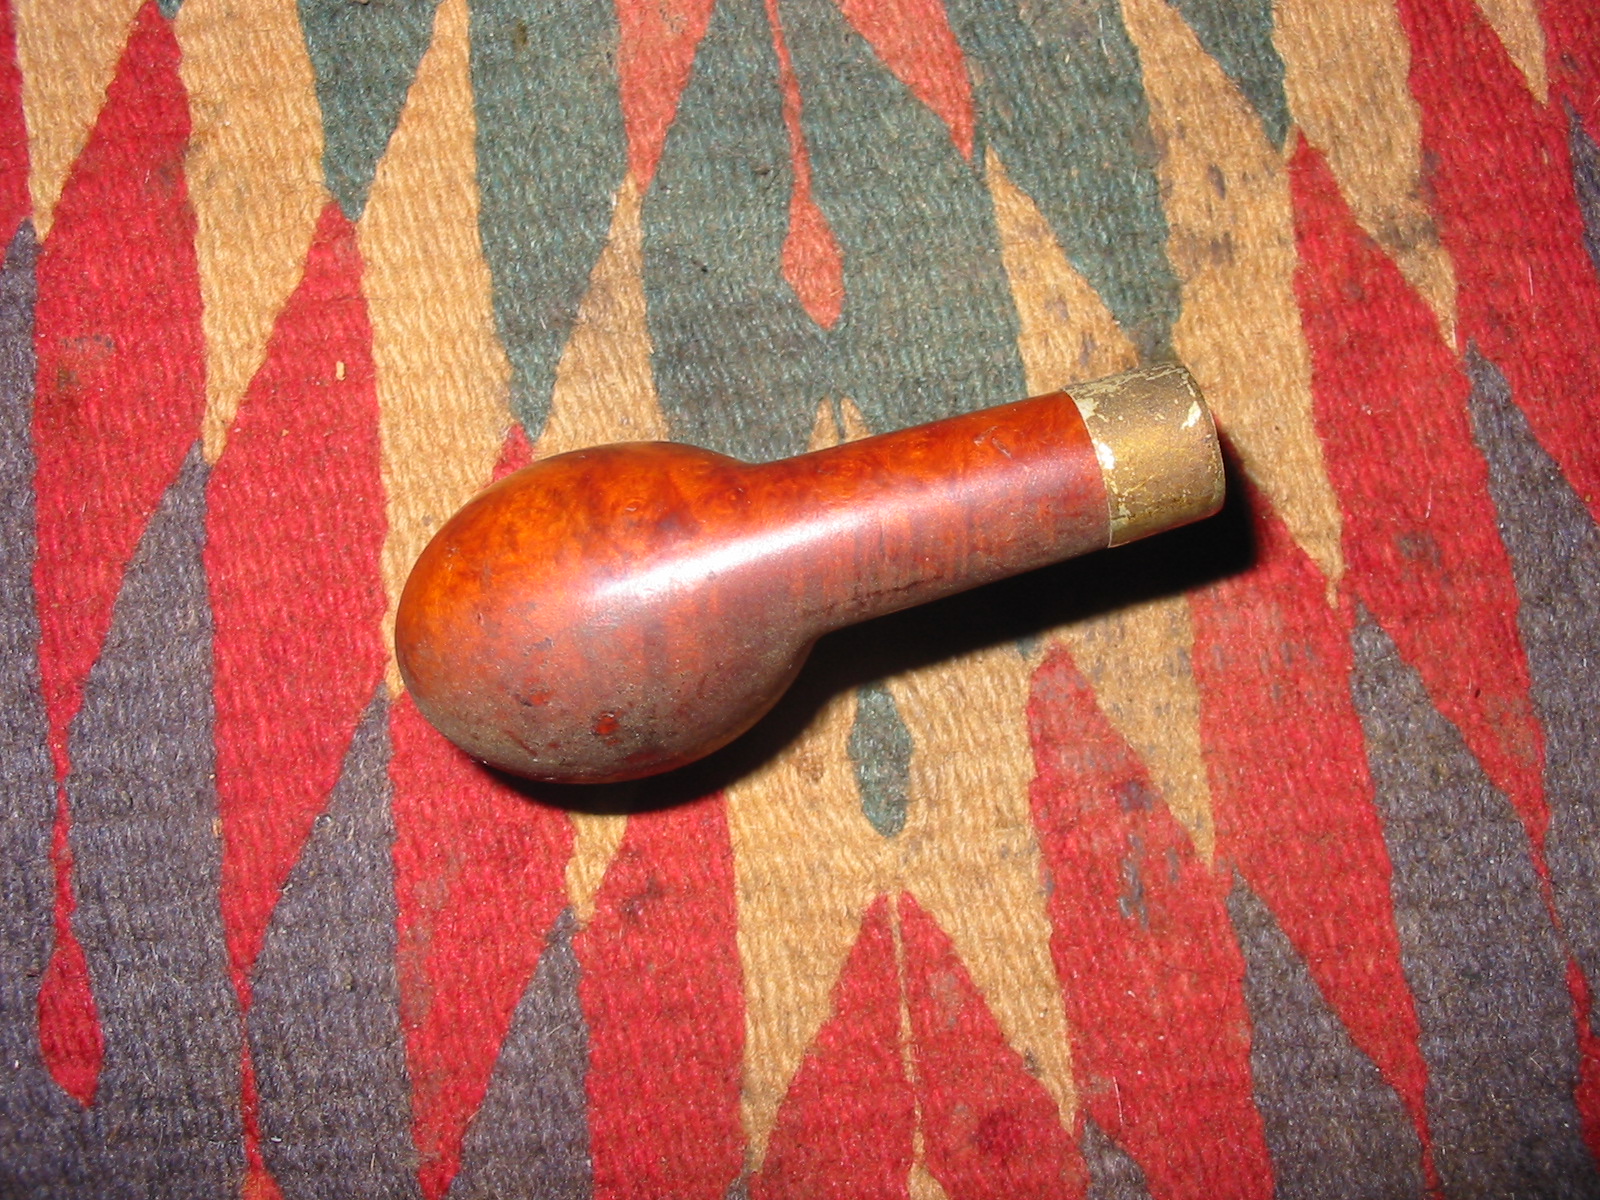
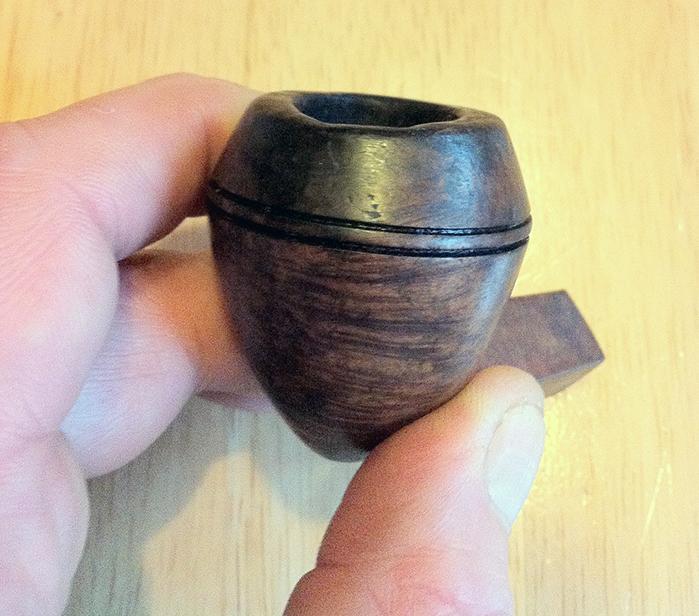
After the brief bit of machine work, I set to with the time-honoured and laborious technique of sanding the rim by hand, inverted on a perfectly flat horizontal surface with mostly circular/twisting motions. I also took the opportunity to give the stummel an overall rub with 800 grade sandpaper and then a quick scrub with a tiny dab of oil soap under running water.

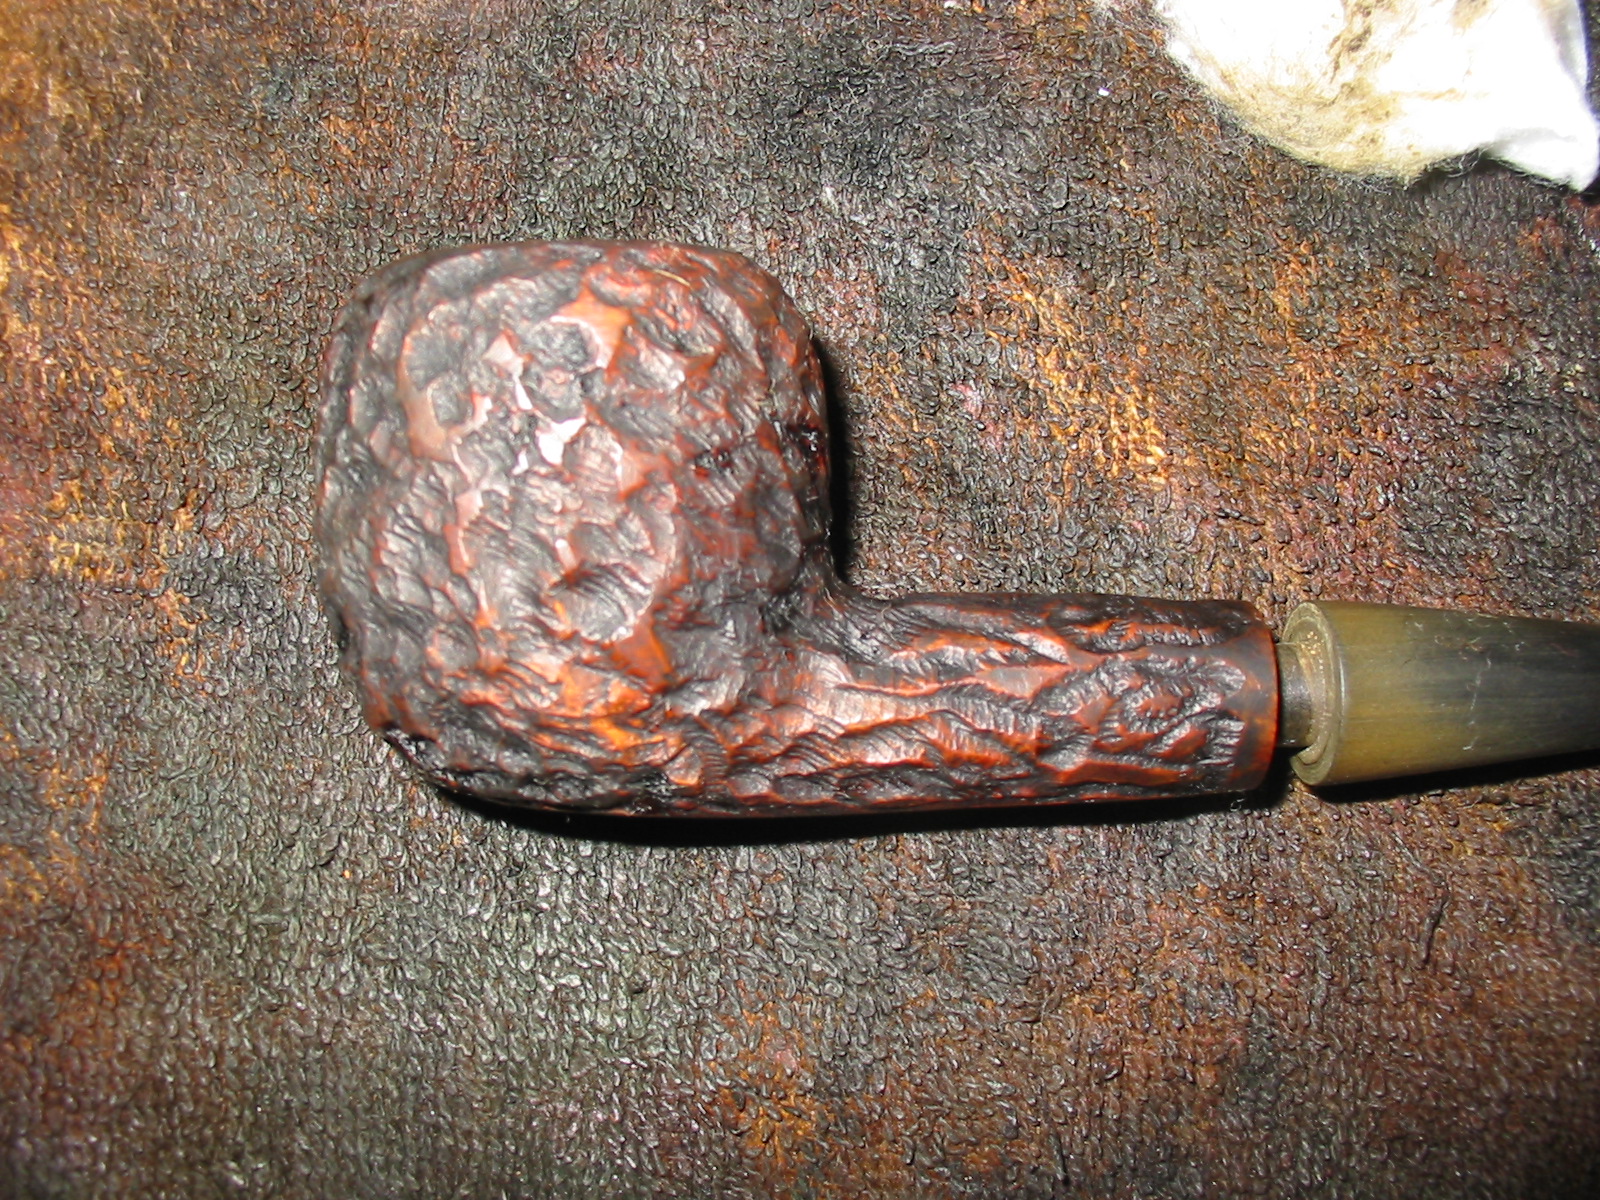
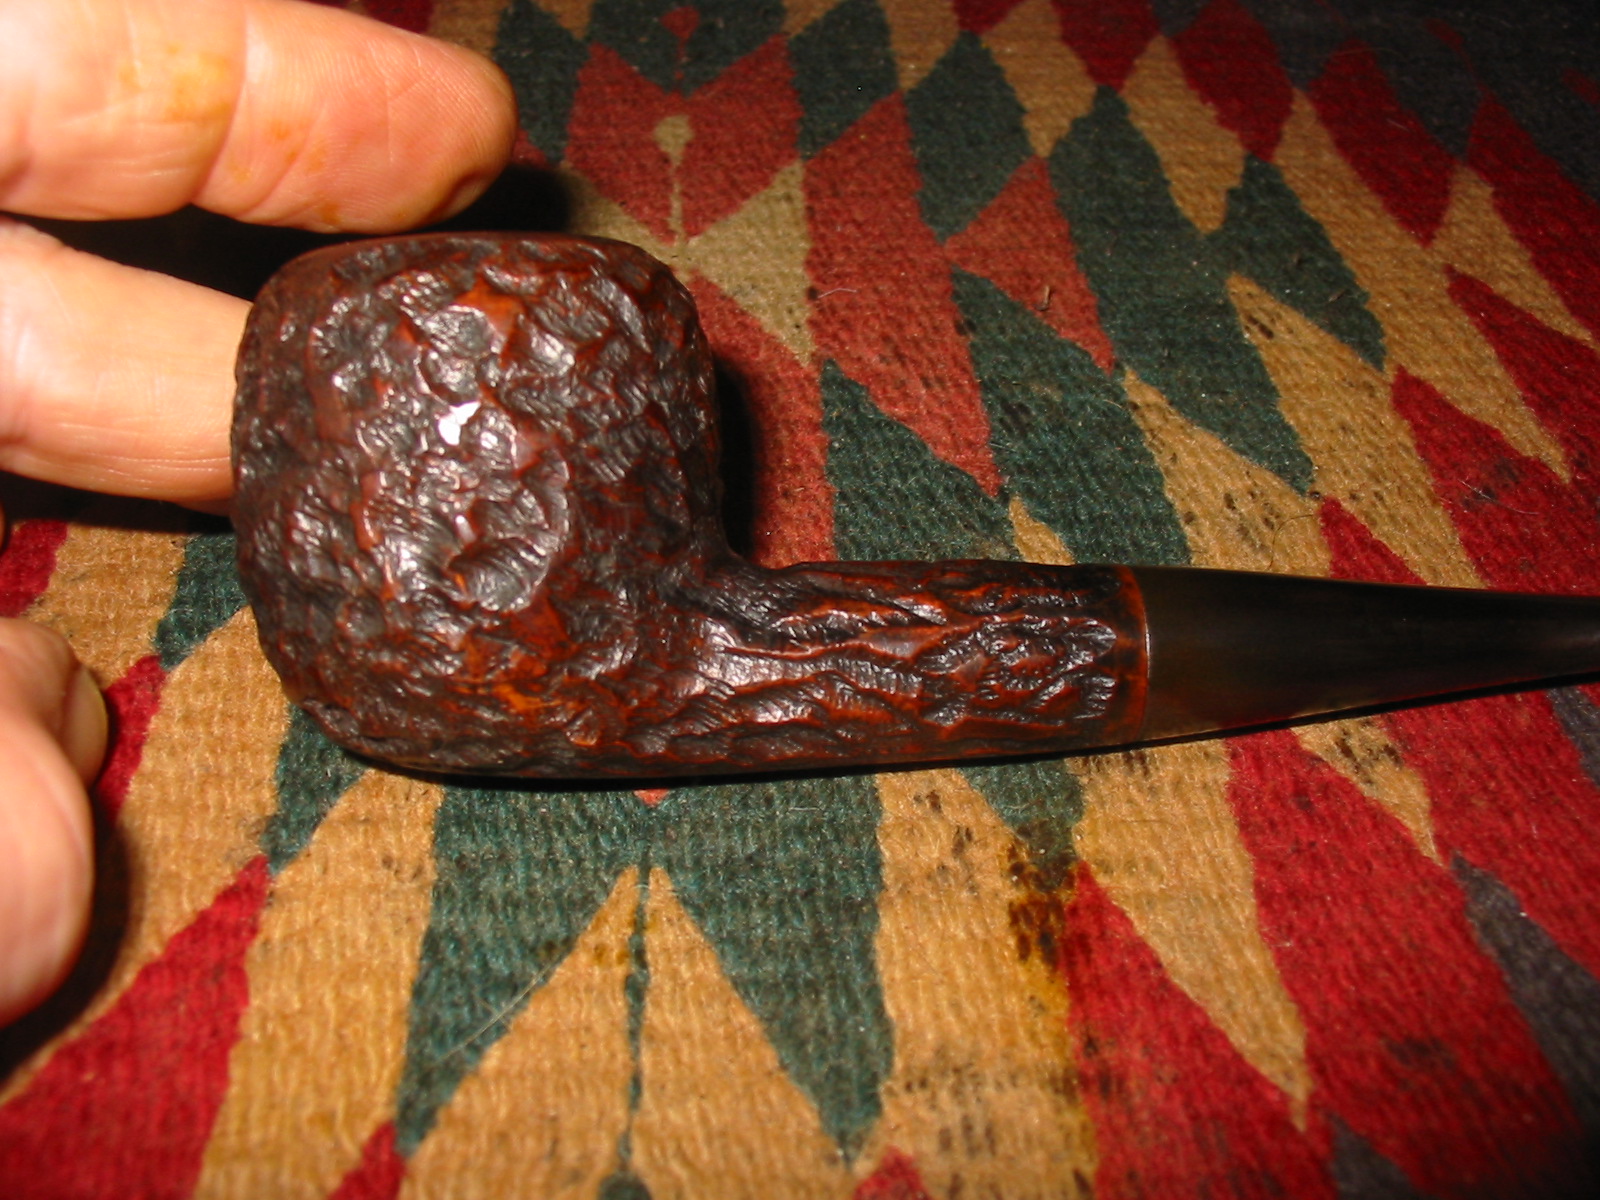
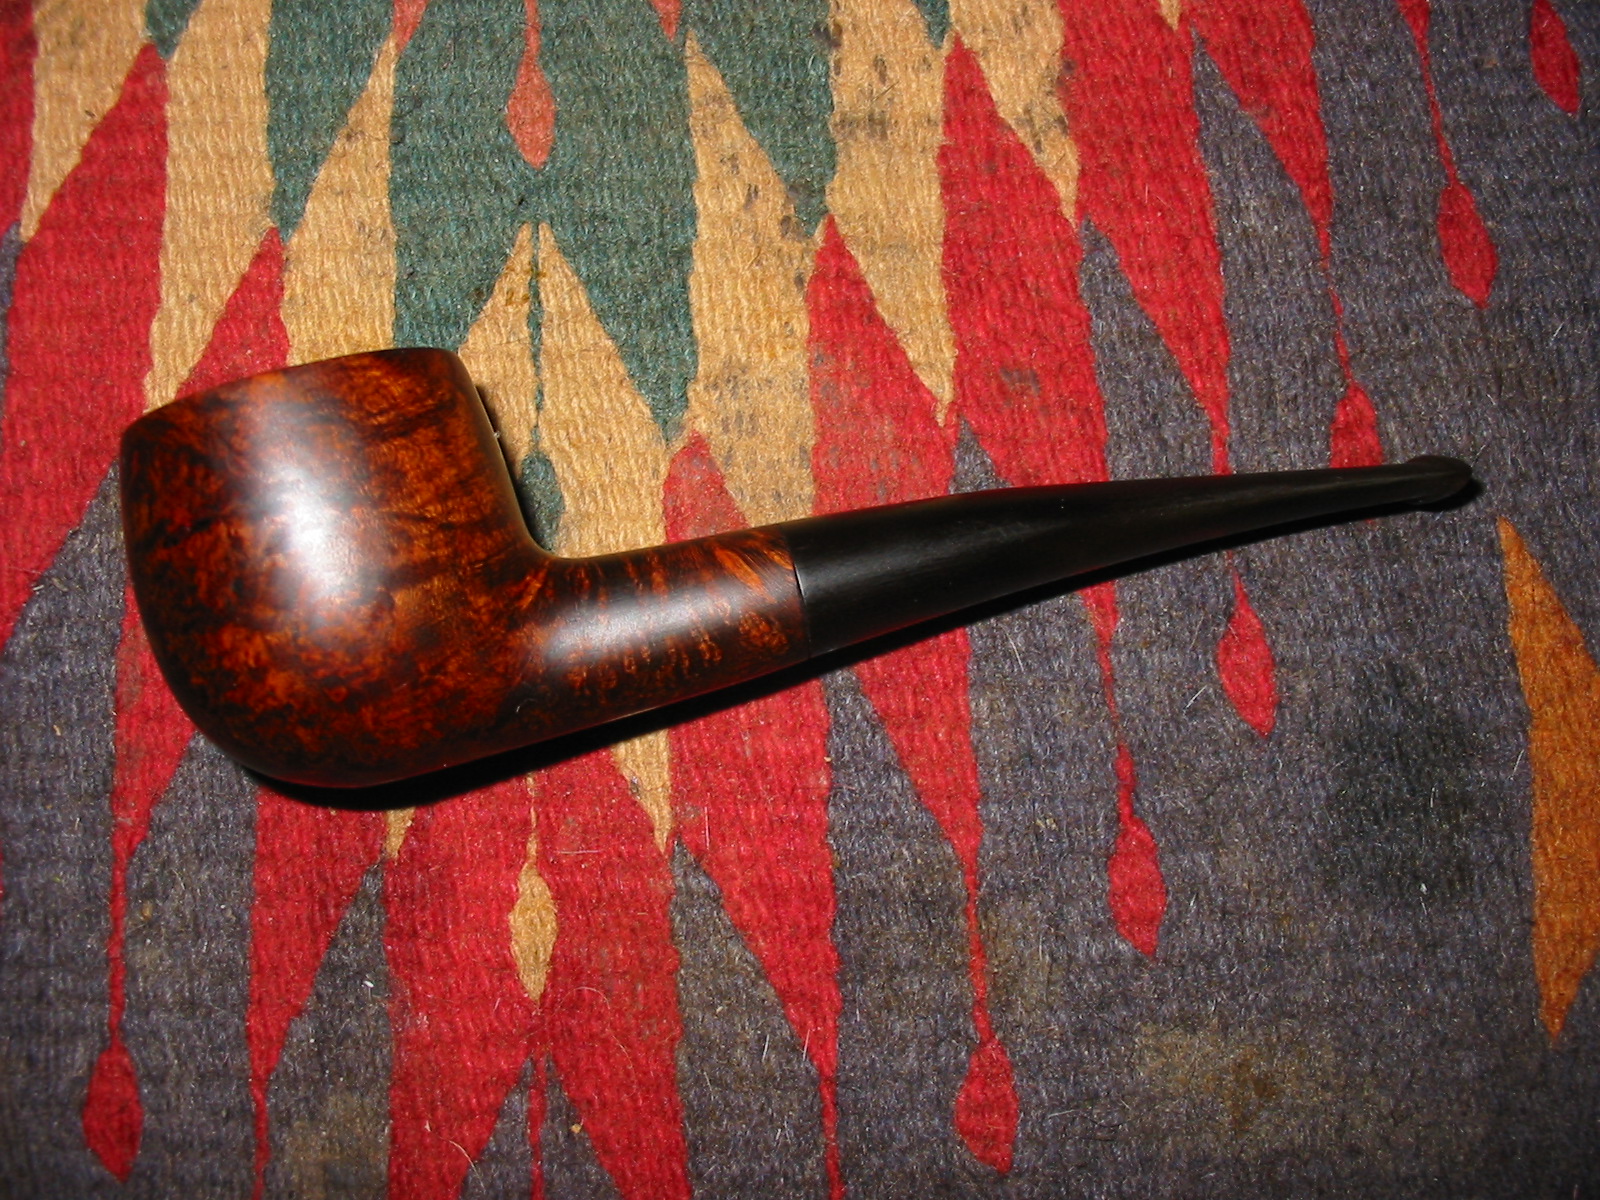
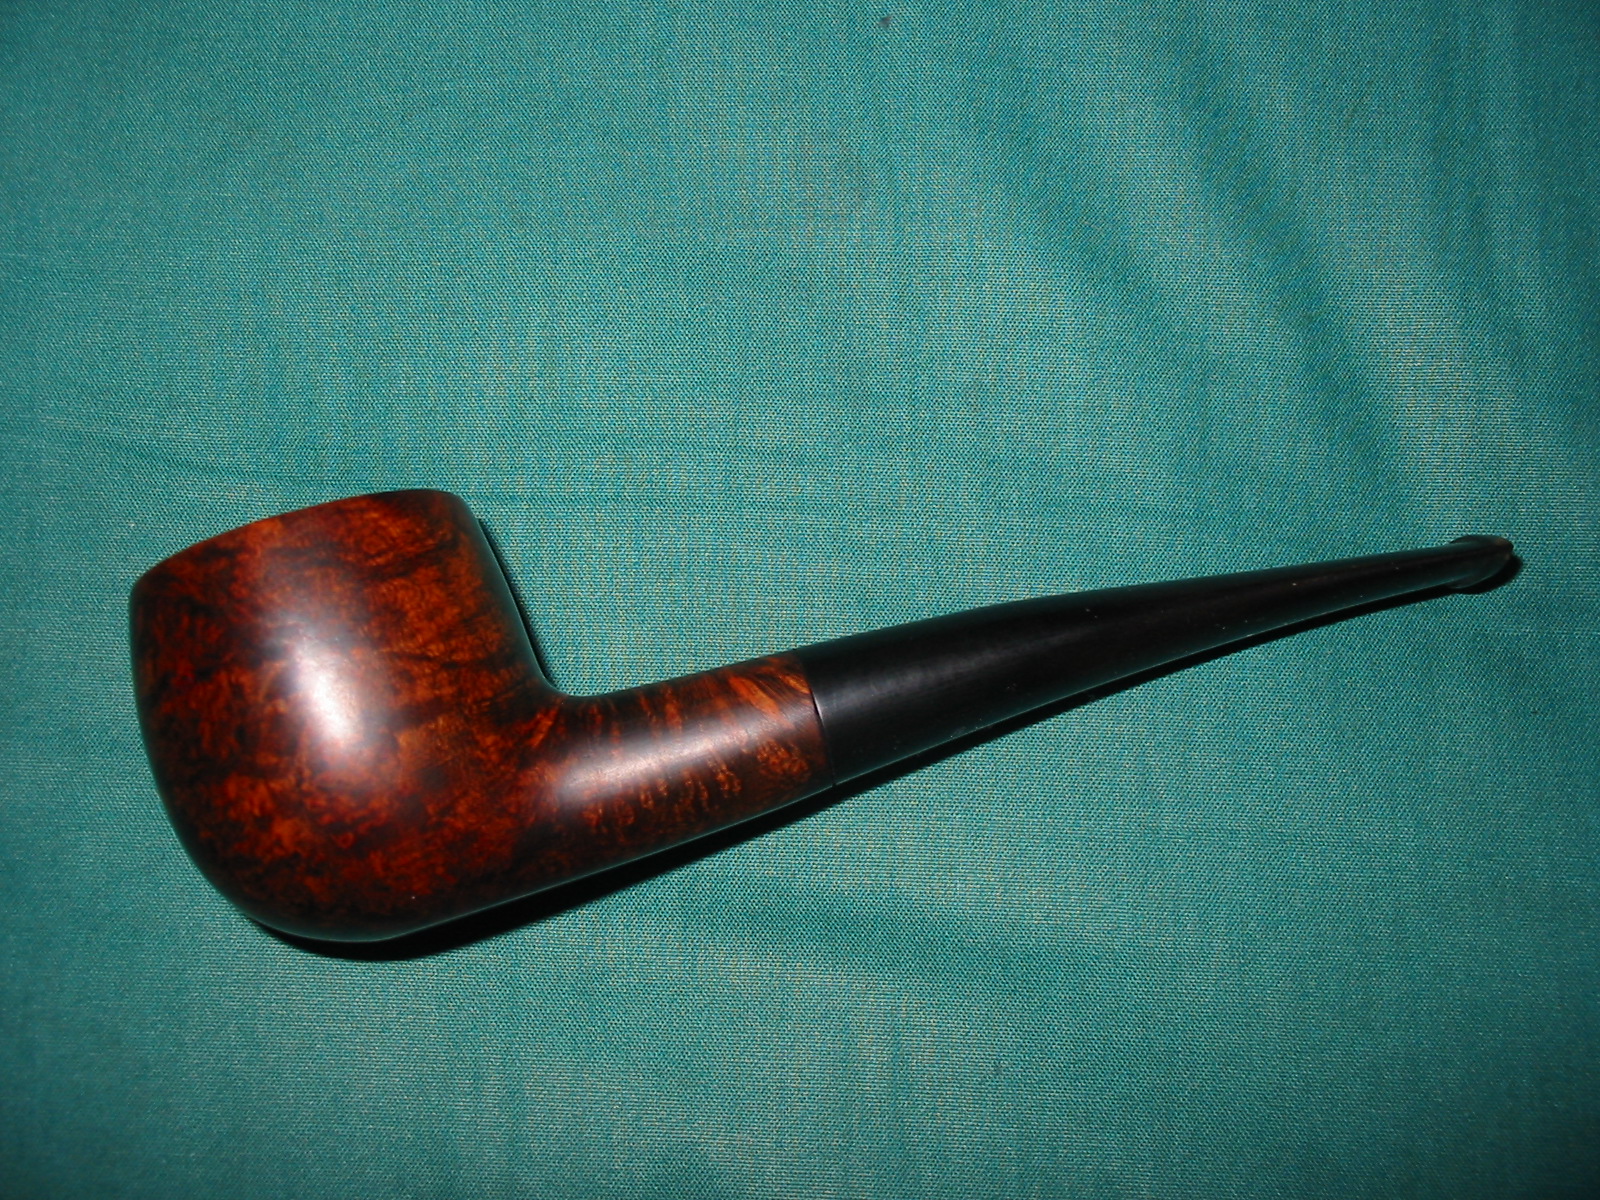
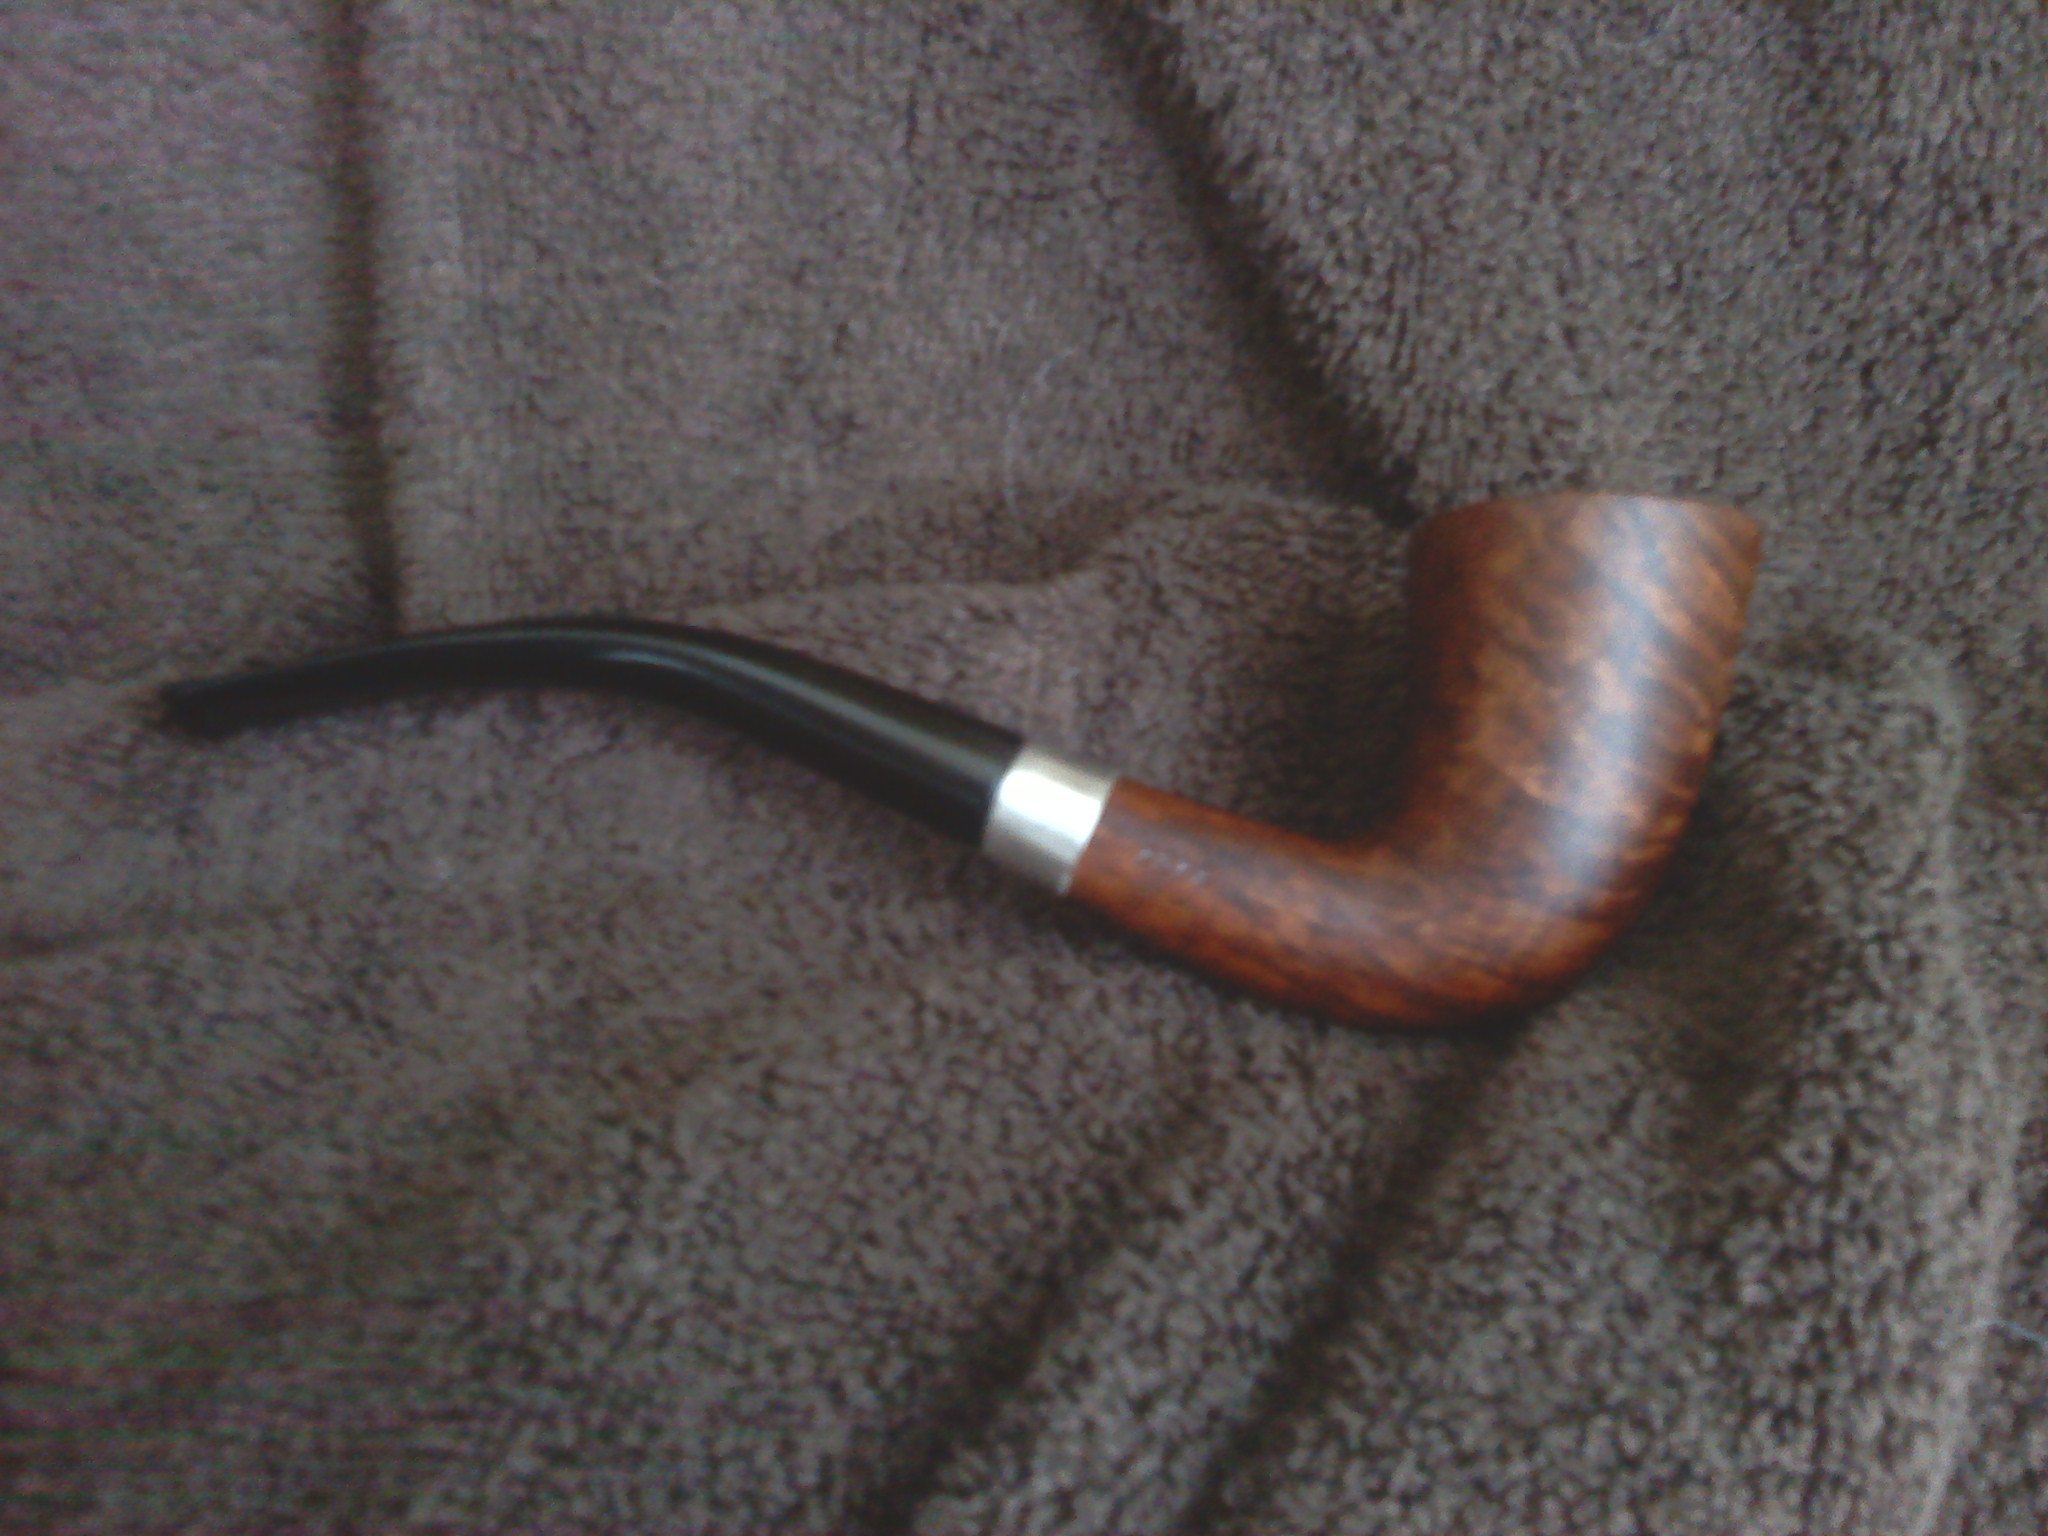
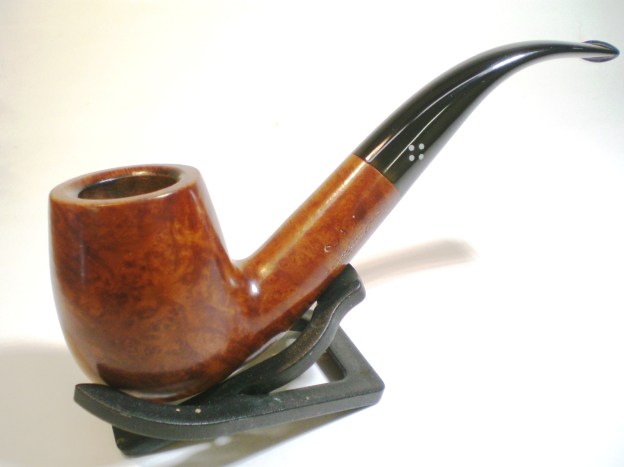
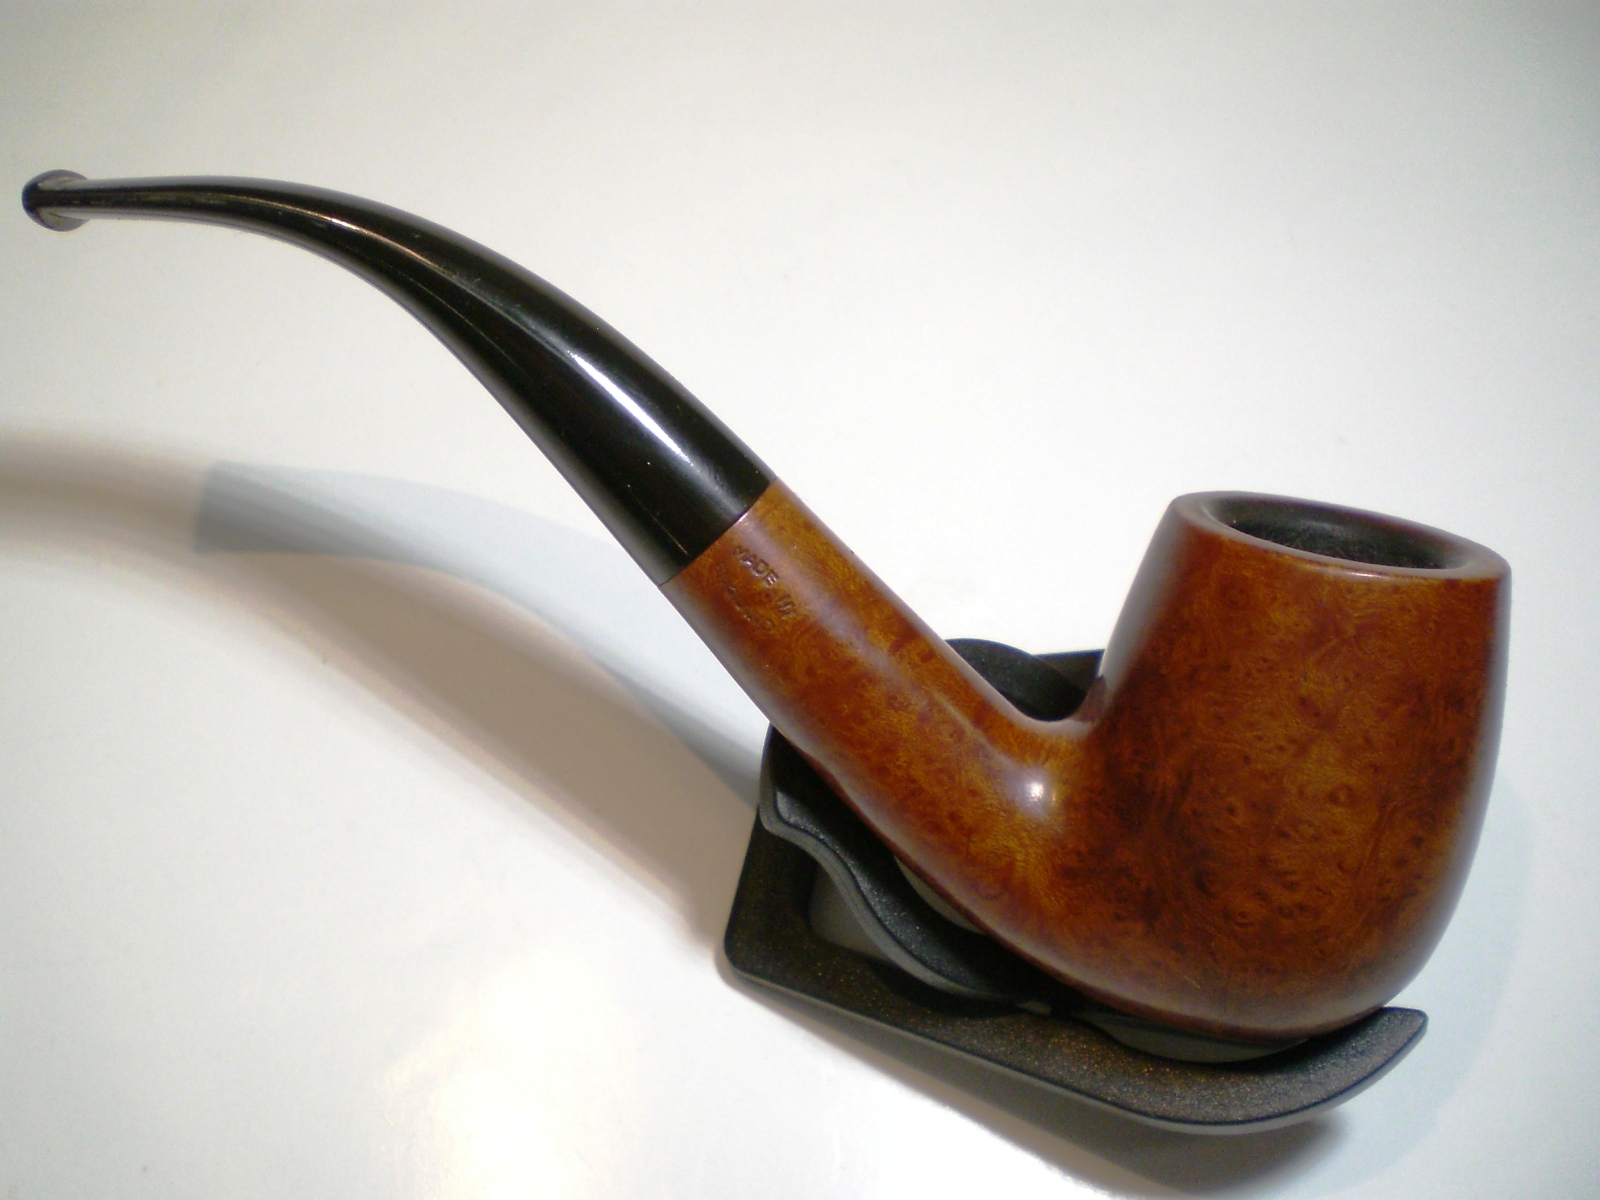
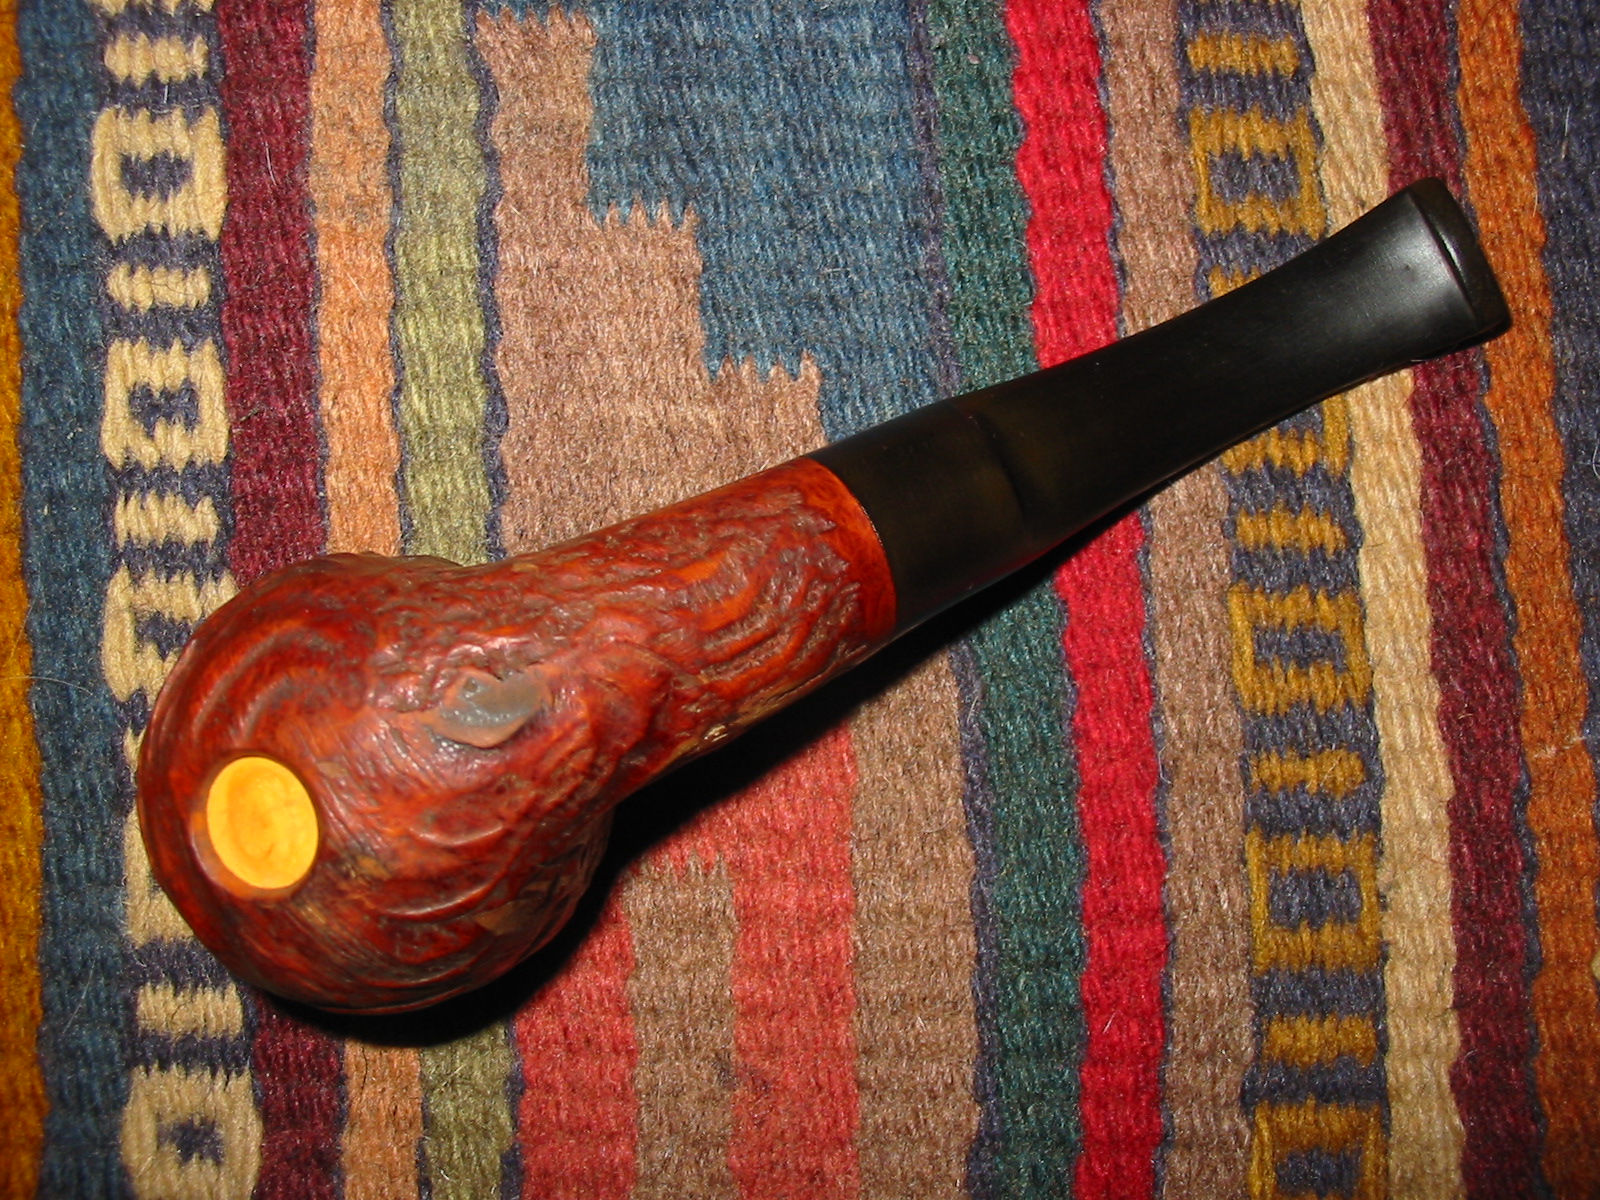
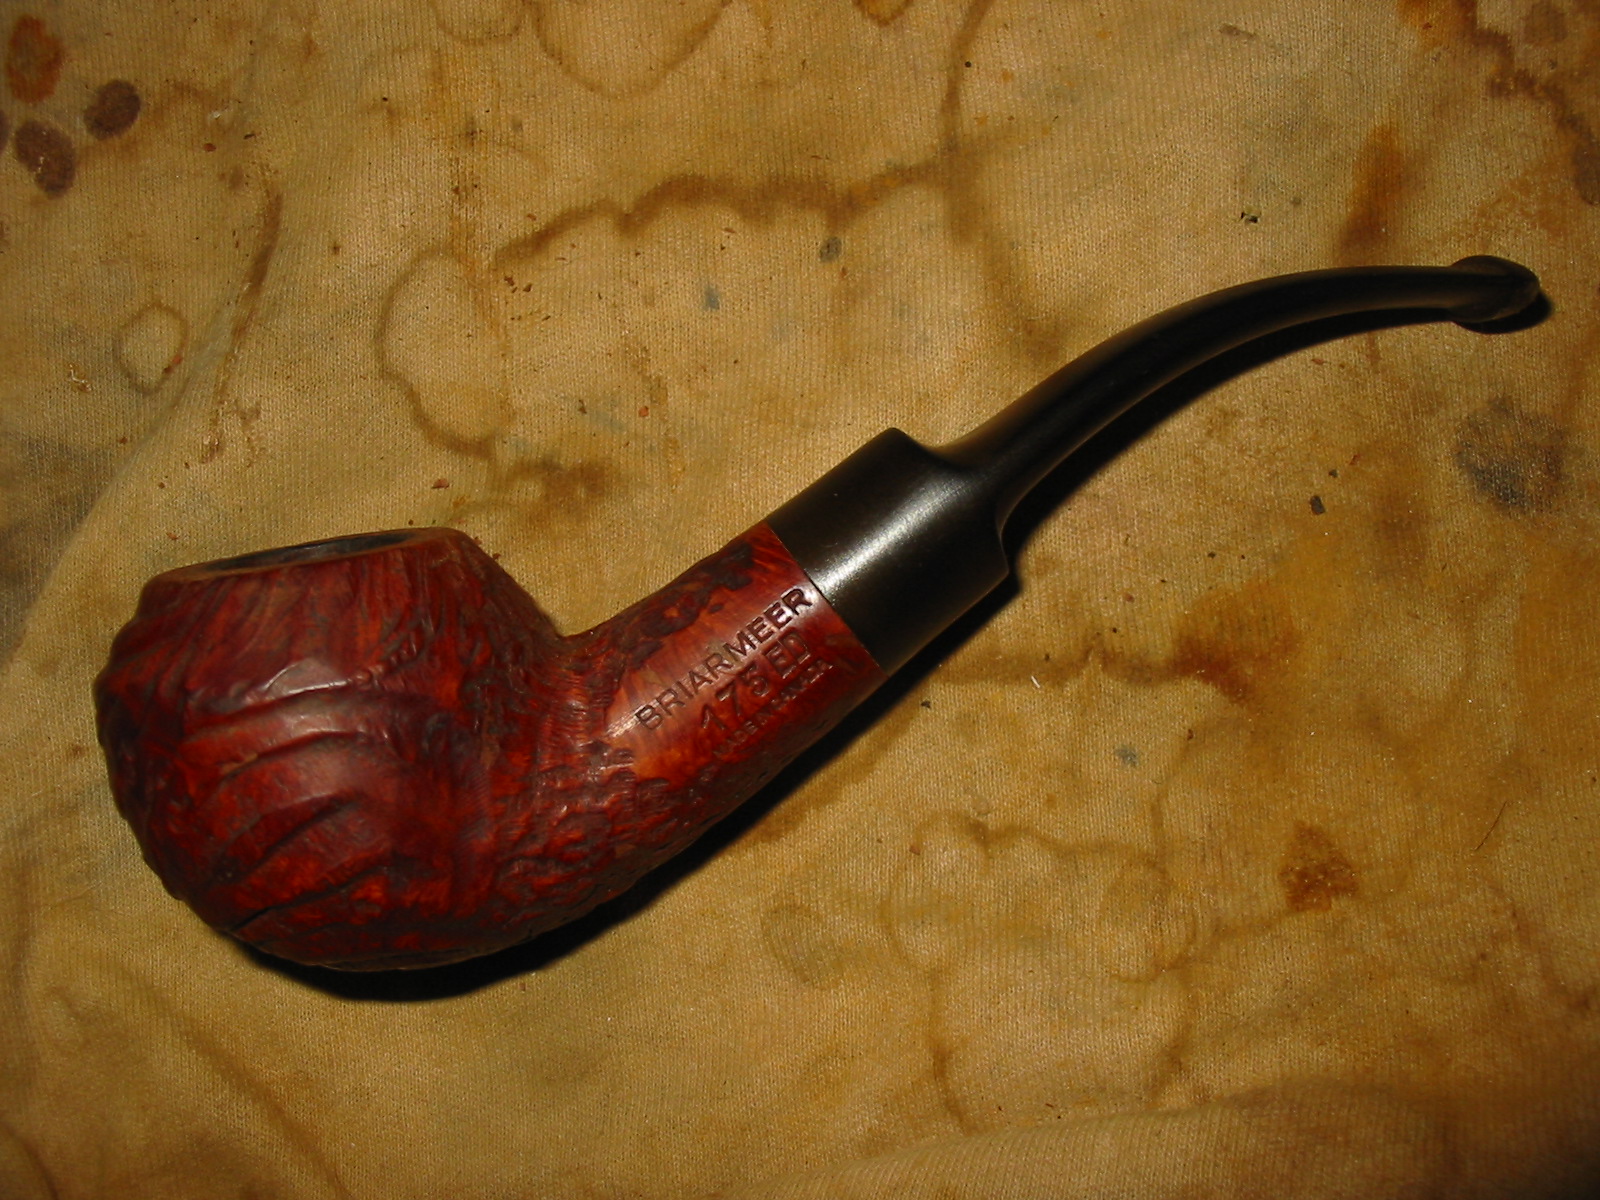
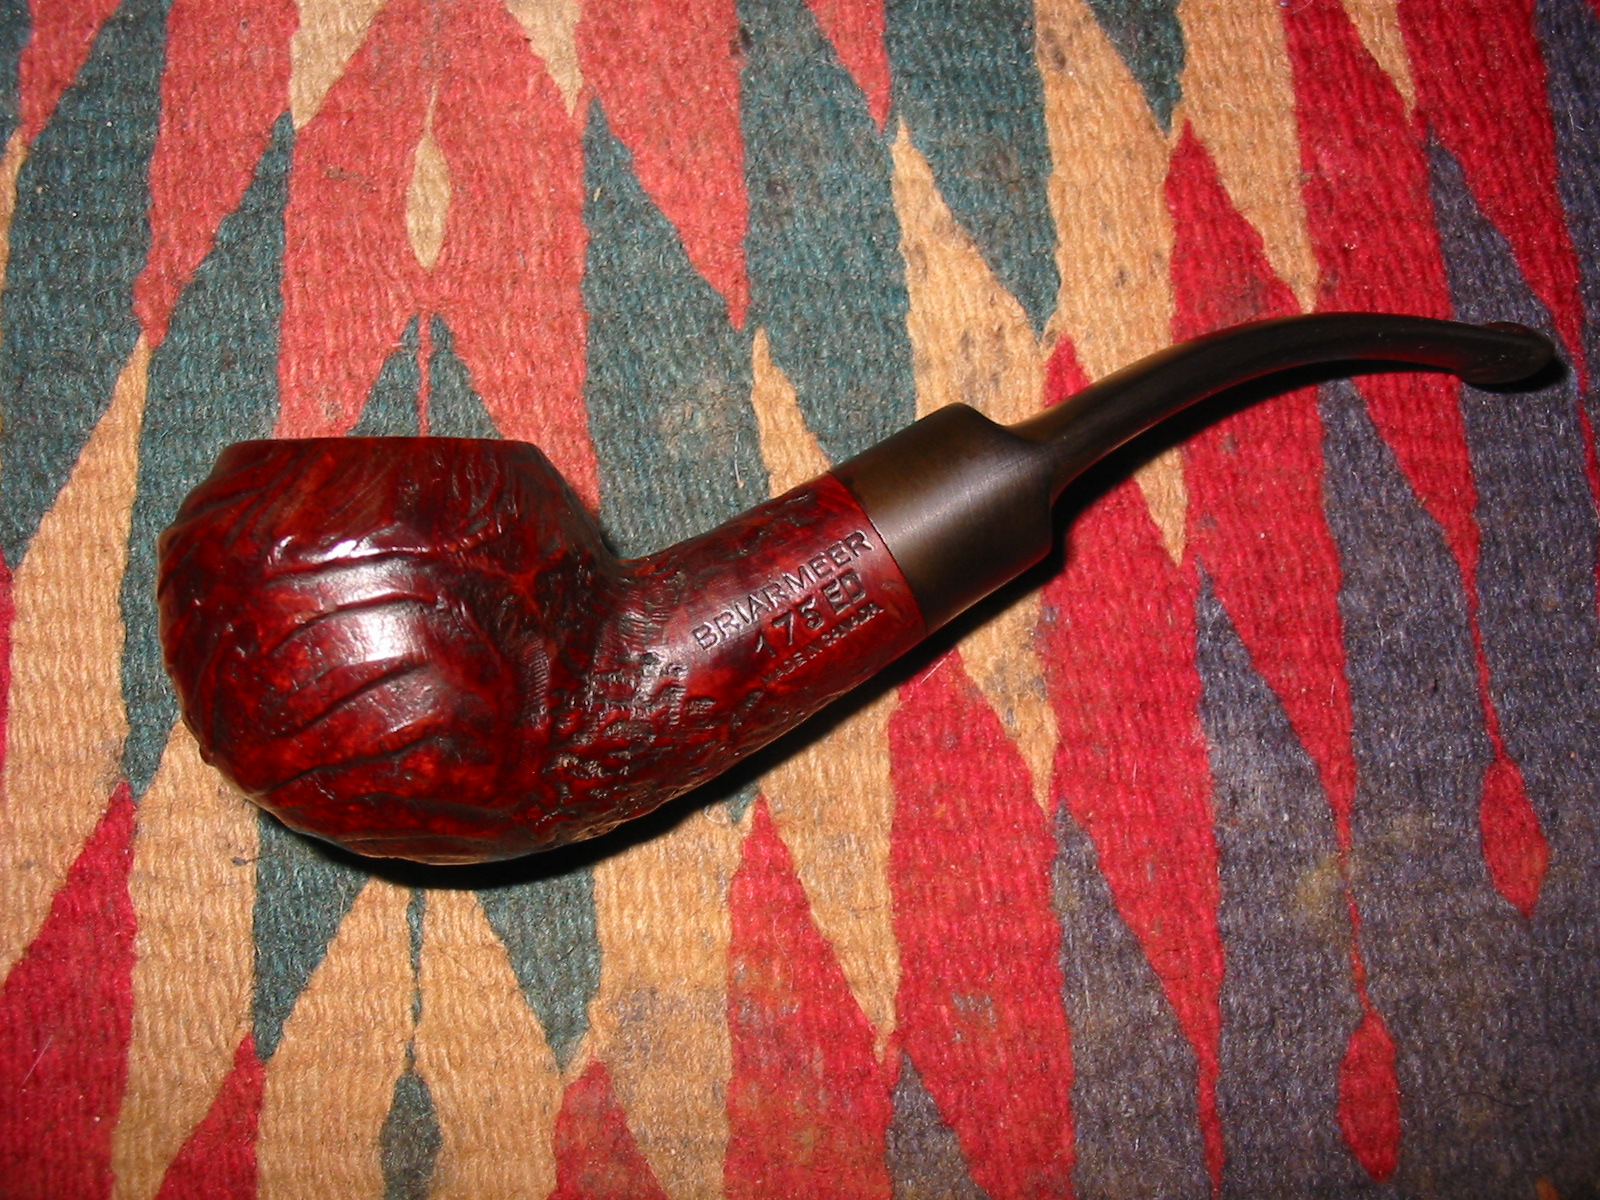
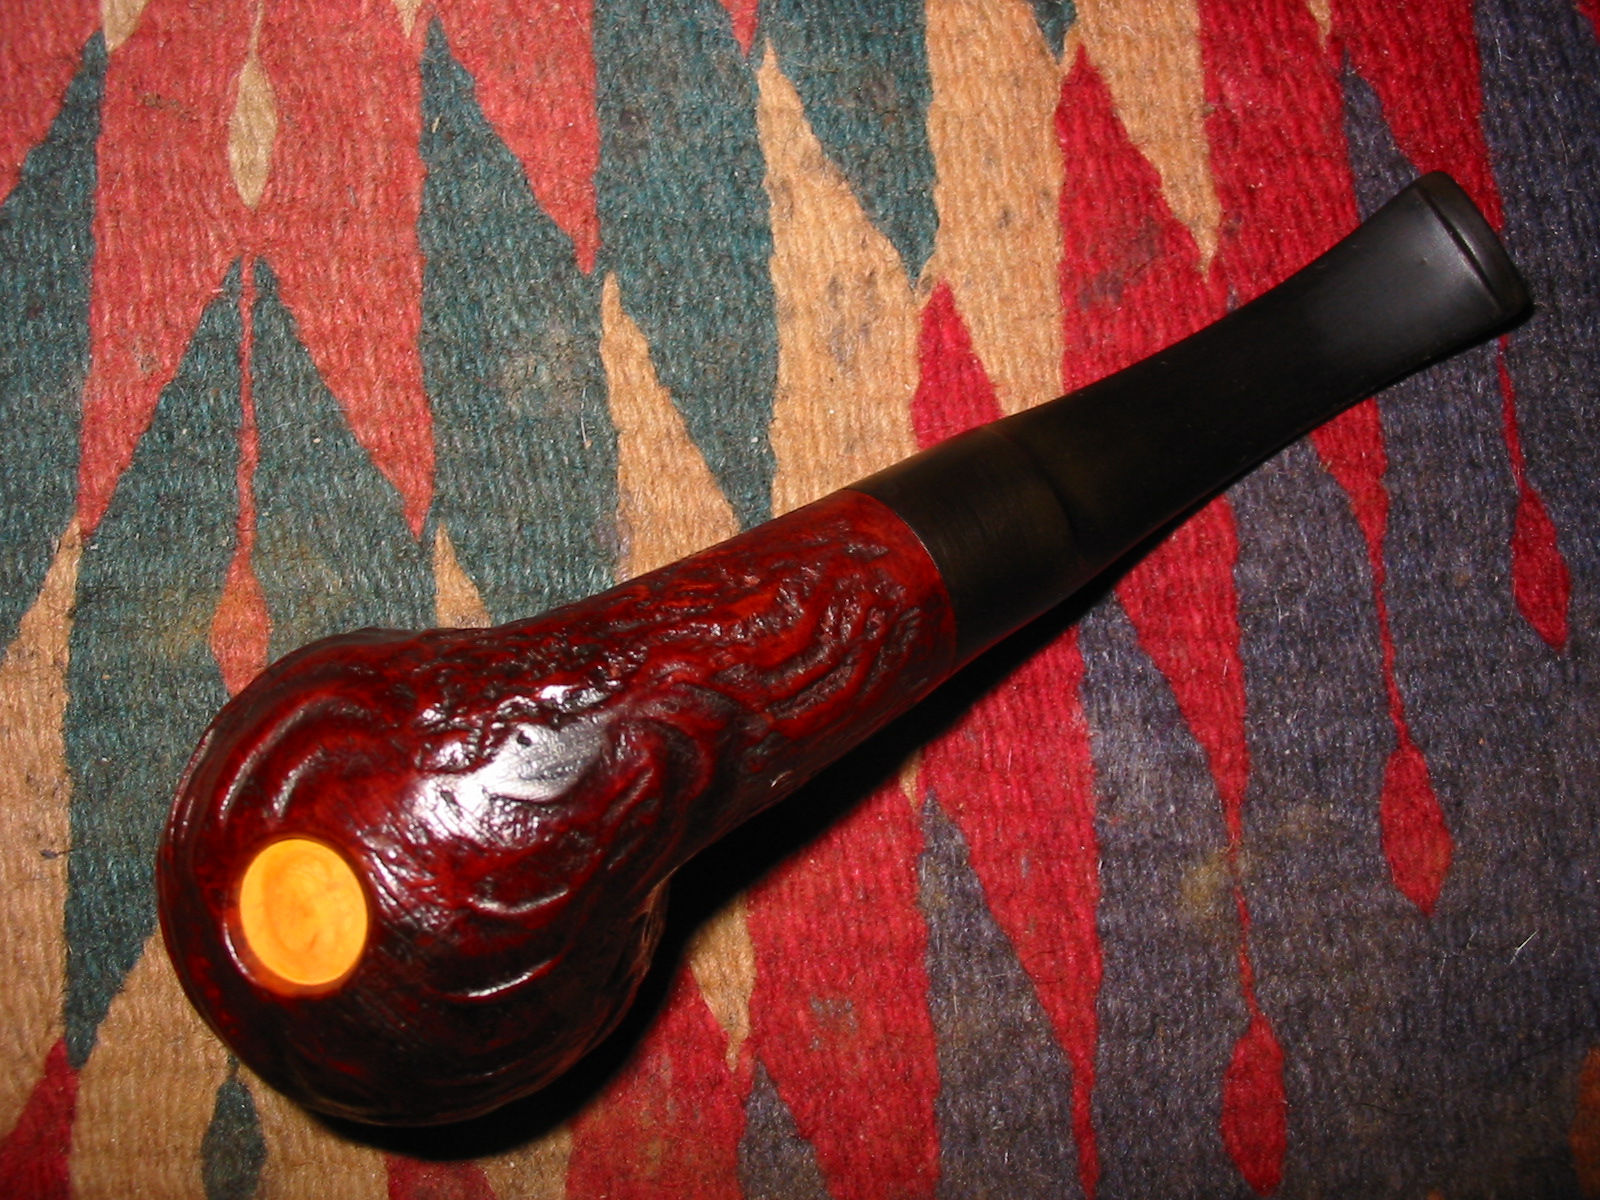
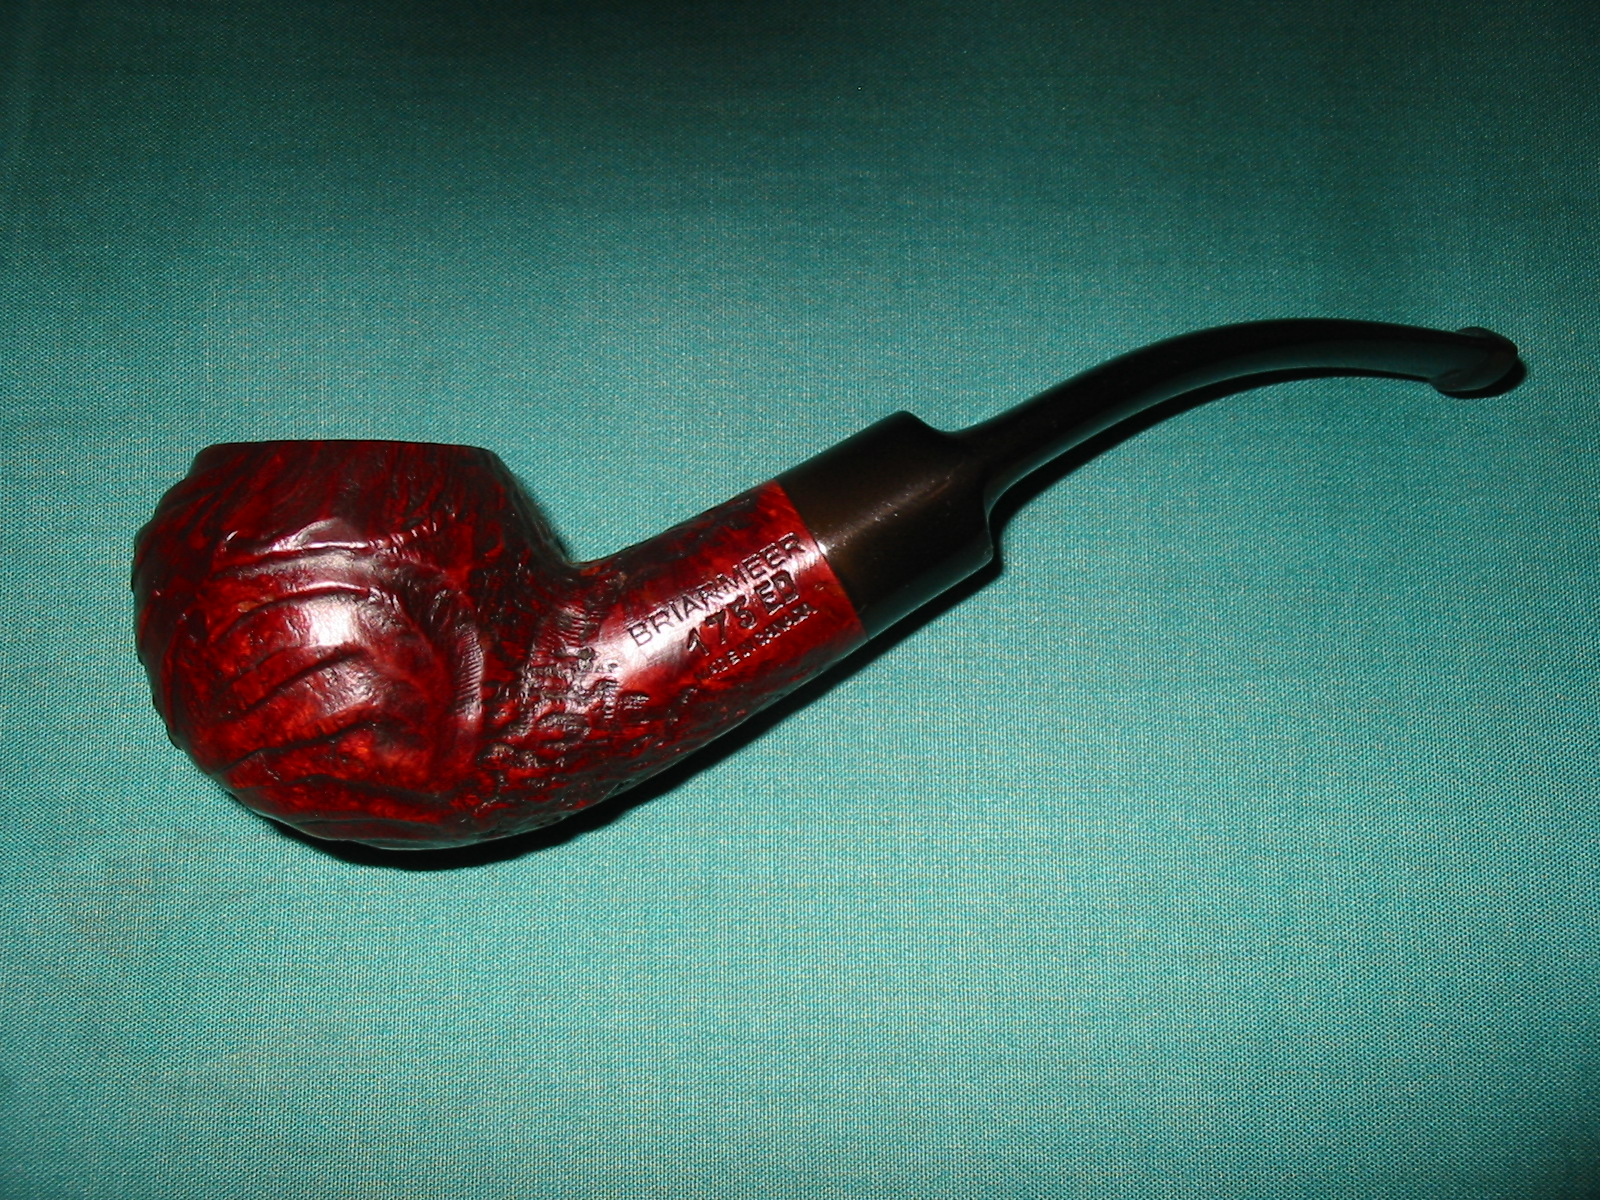
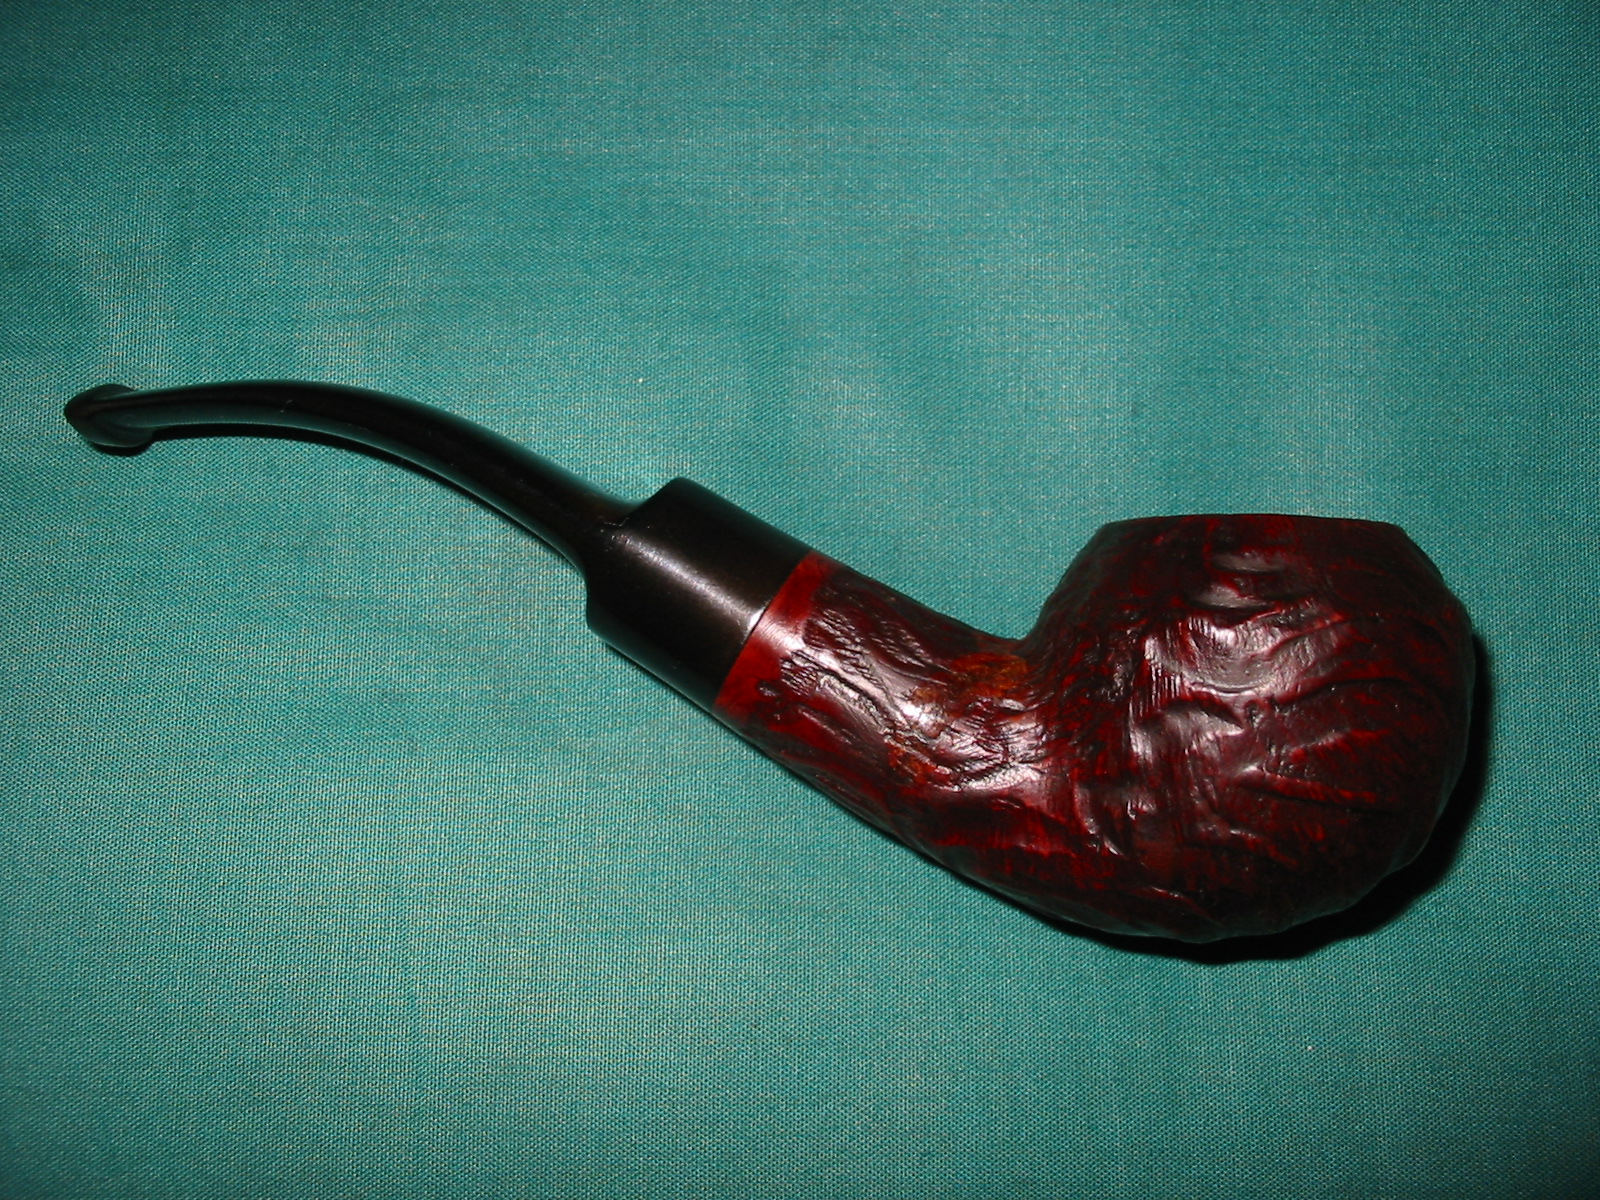
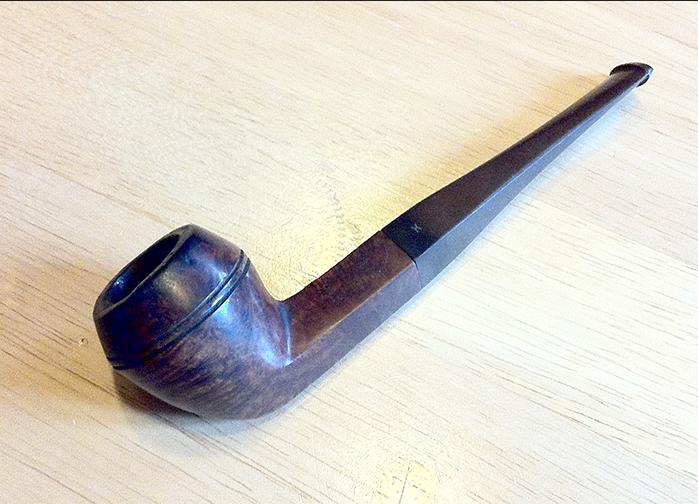
Whilst obviously having to sacrifice a bit of height on the bowl, I am relatively pleased with the result of the “haircut.”
Chiz8

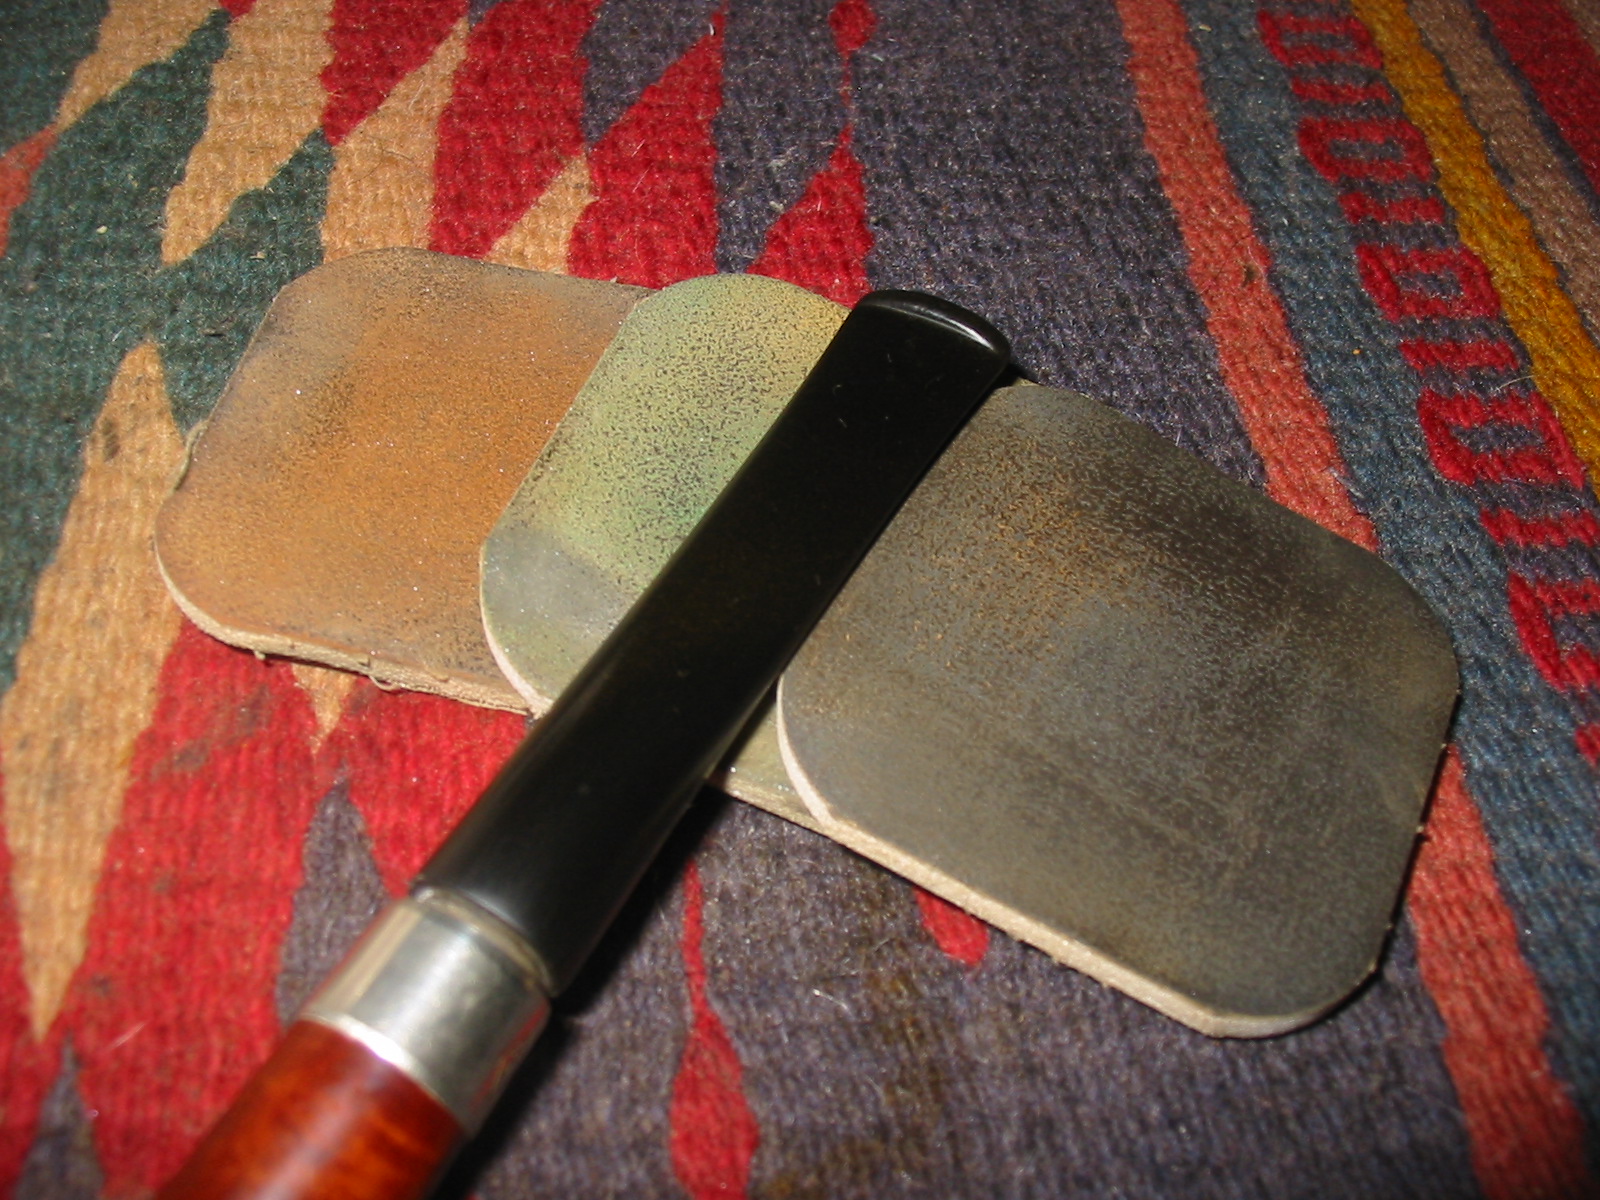
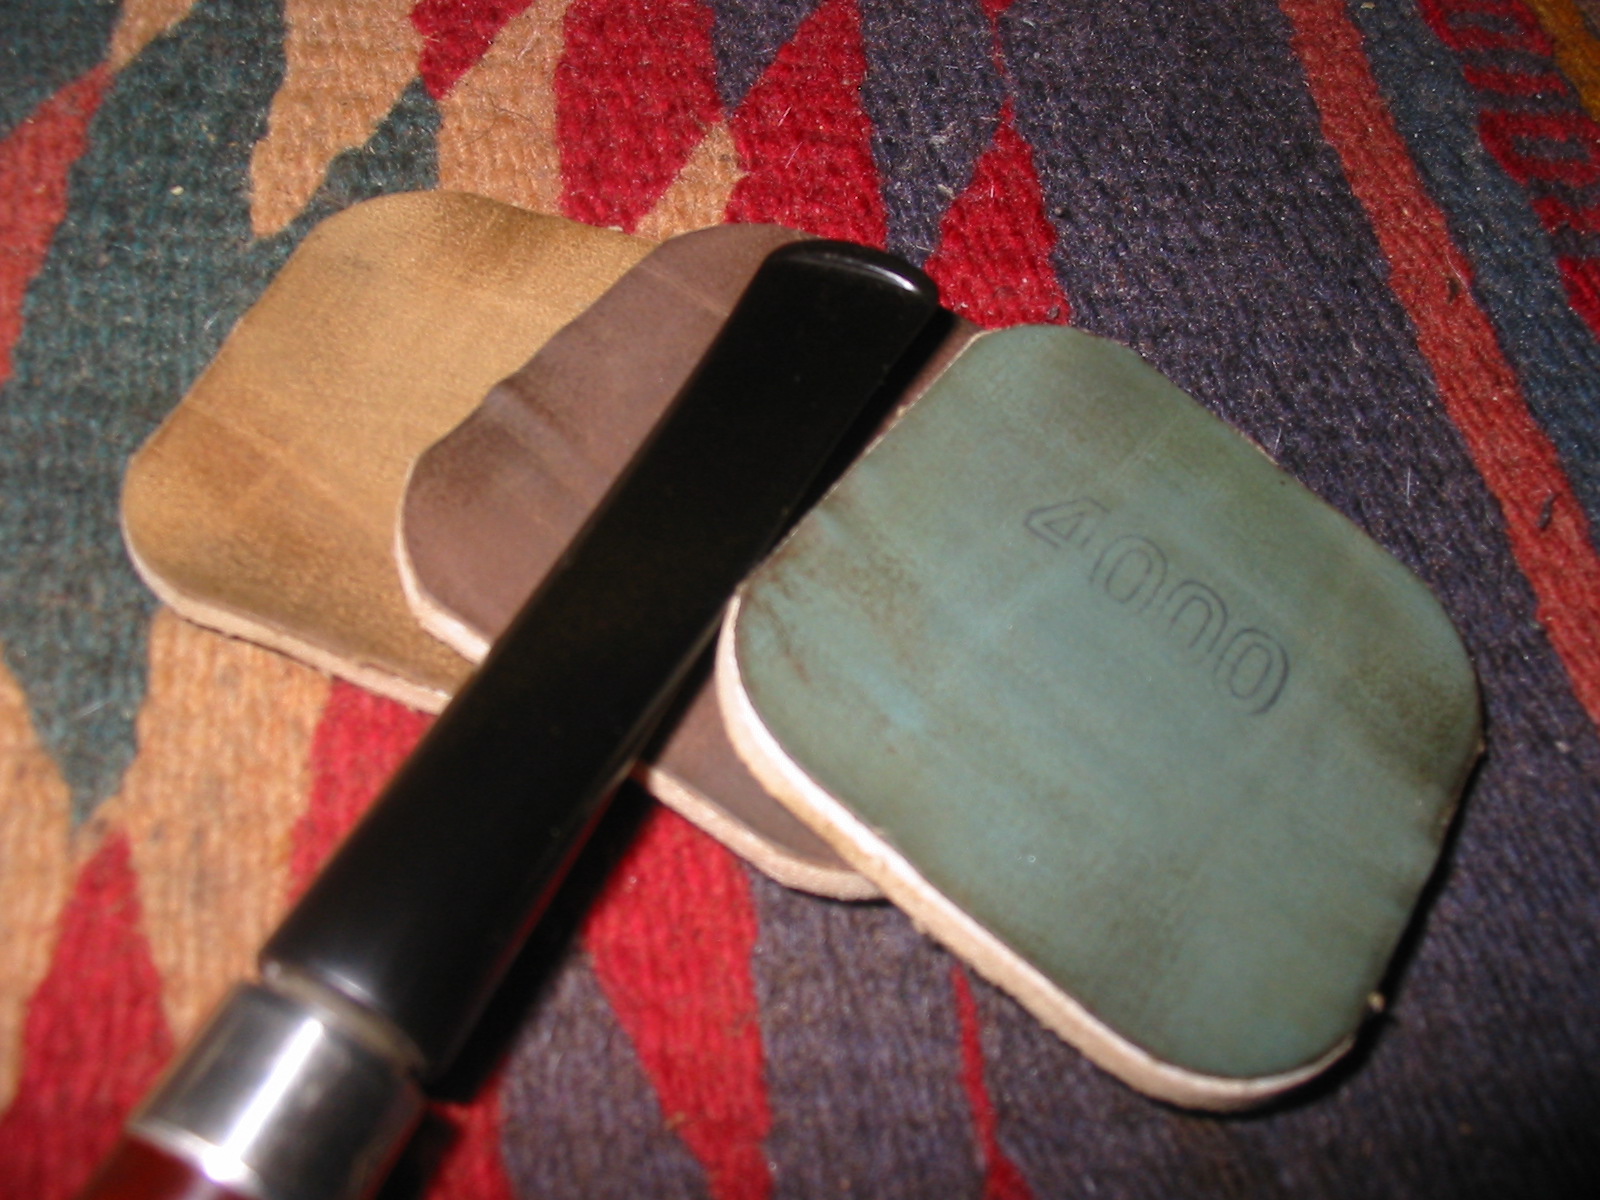
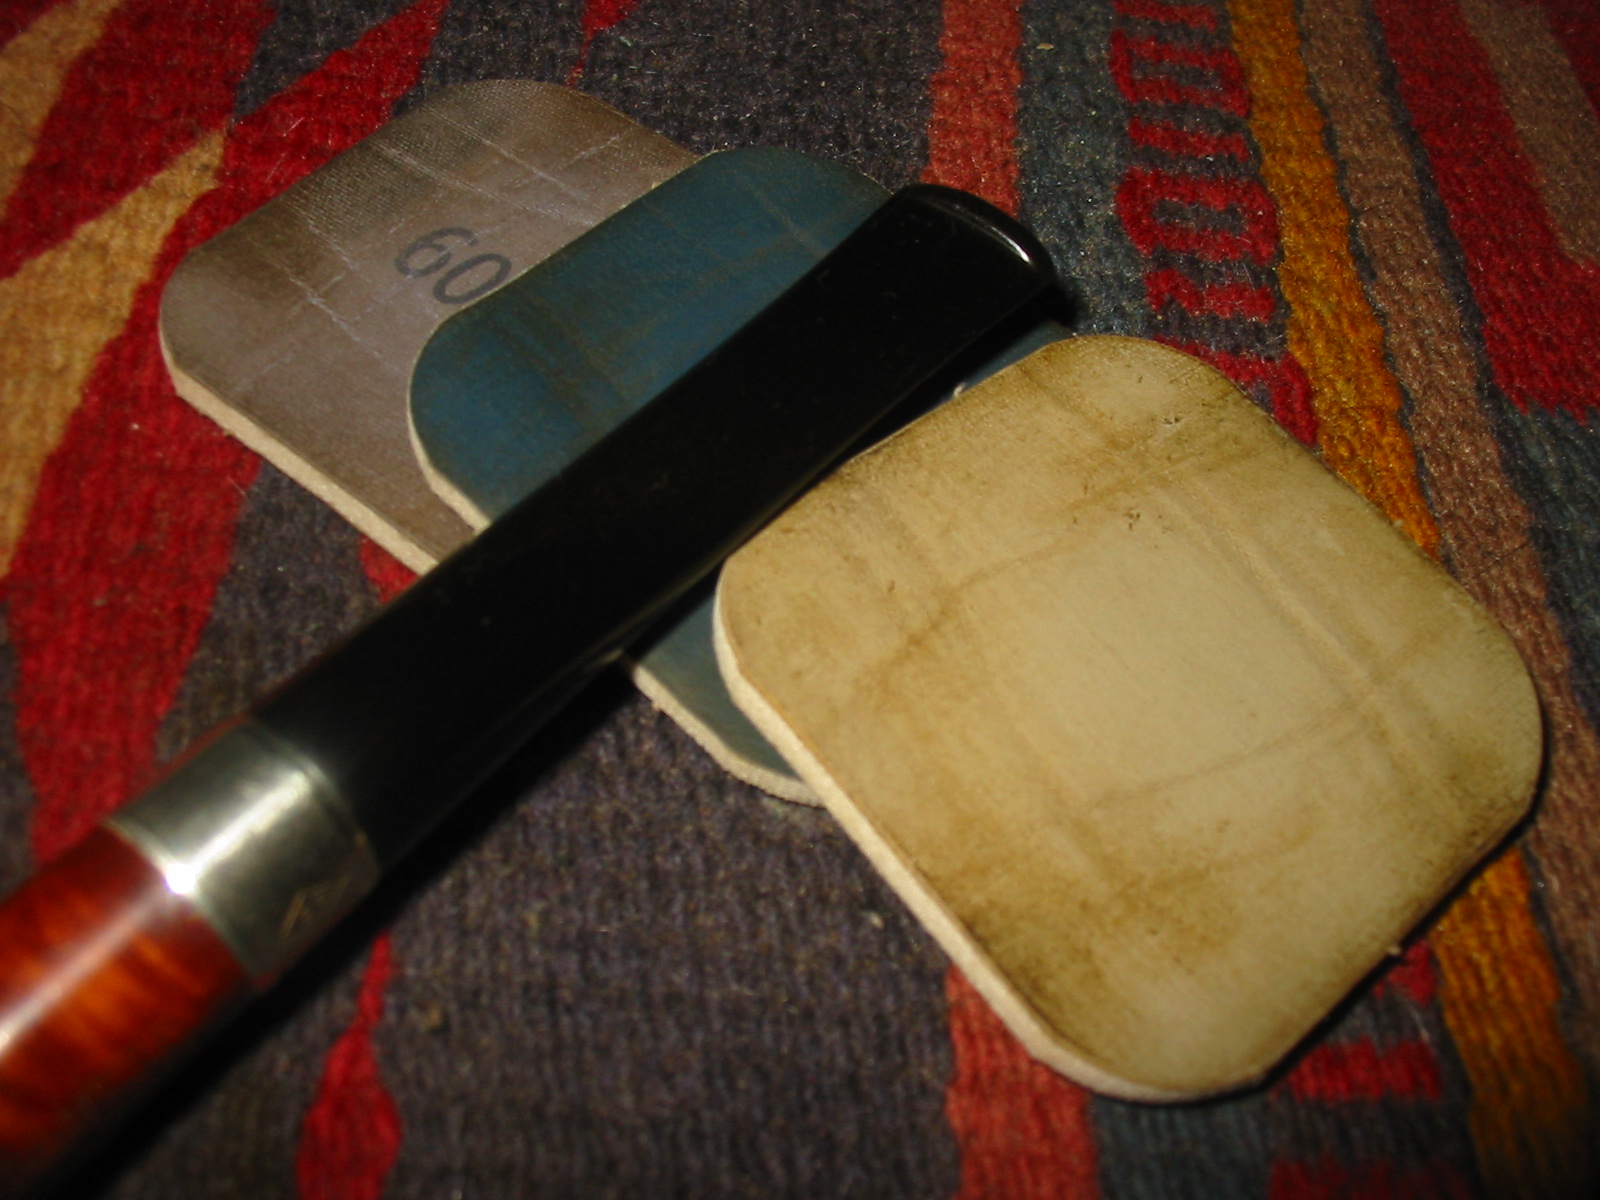
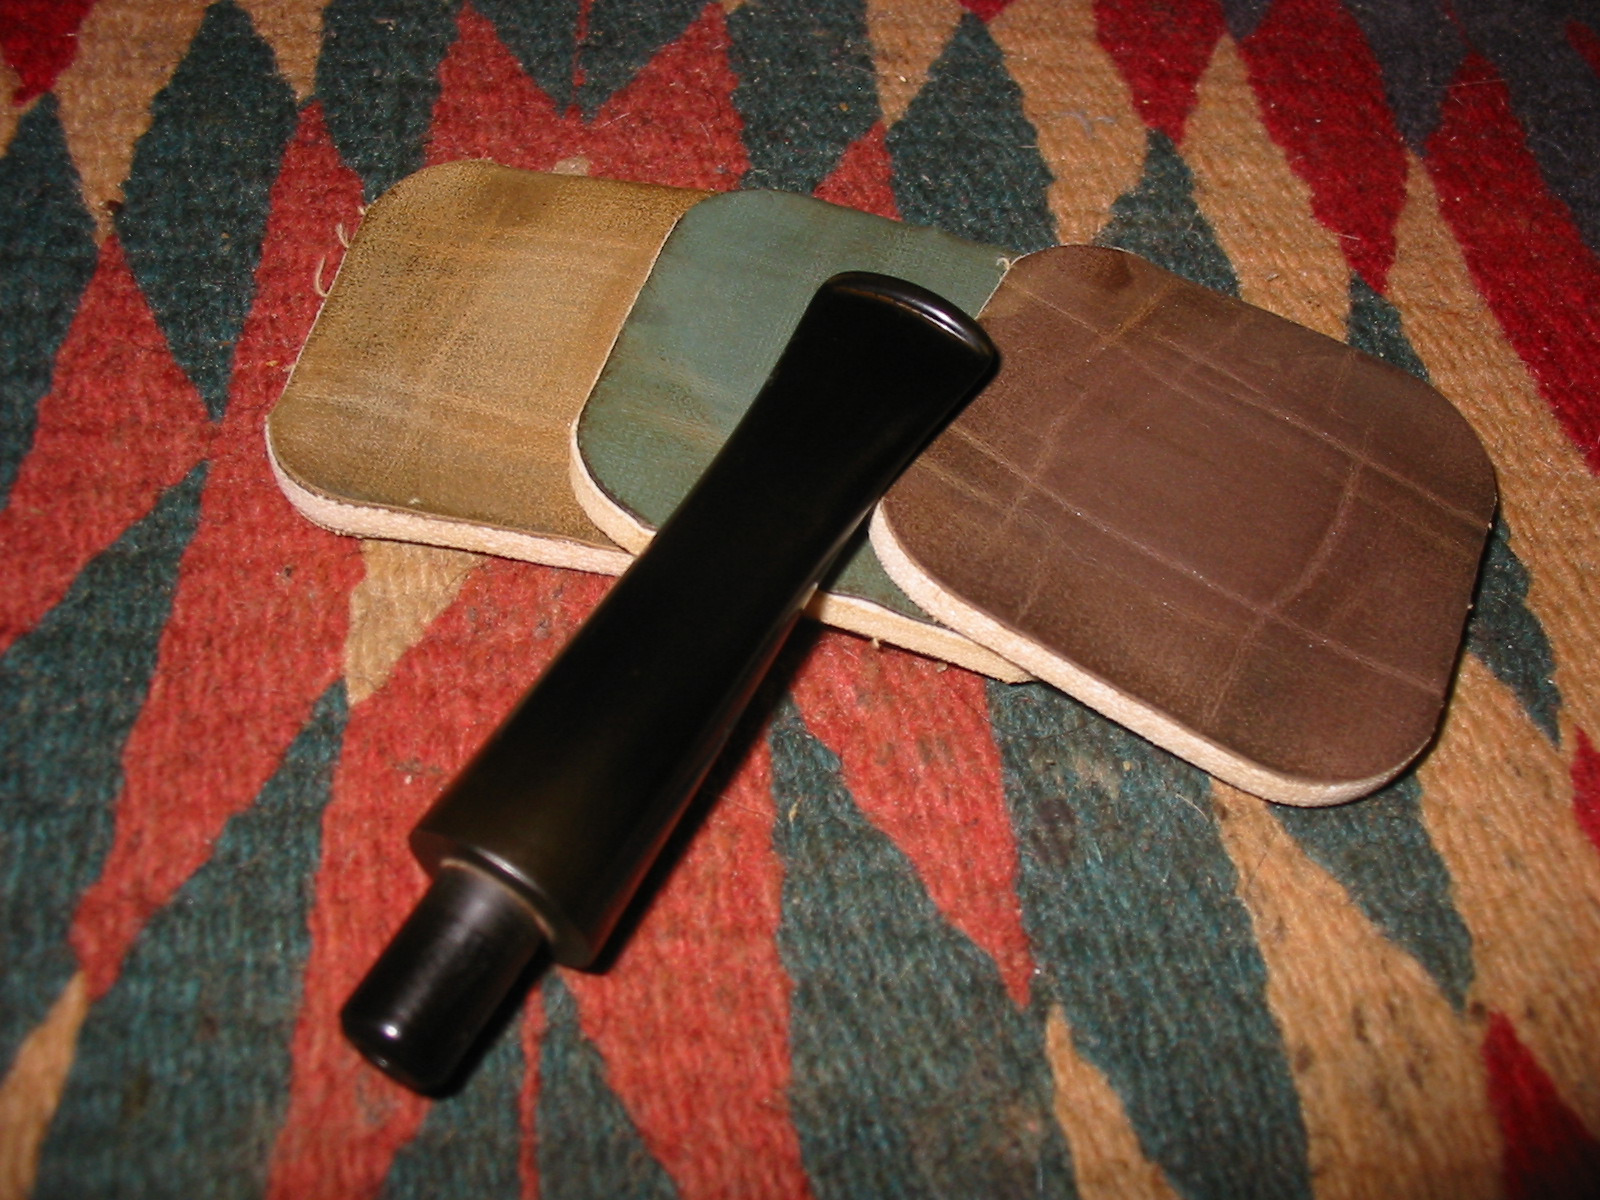
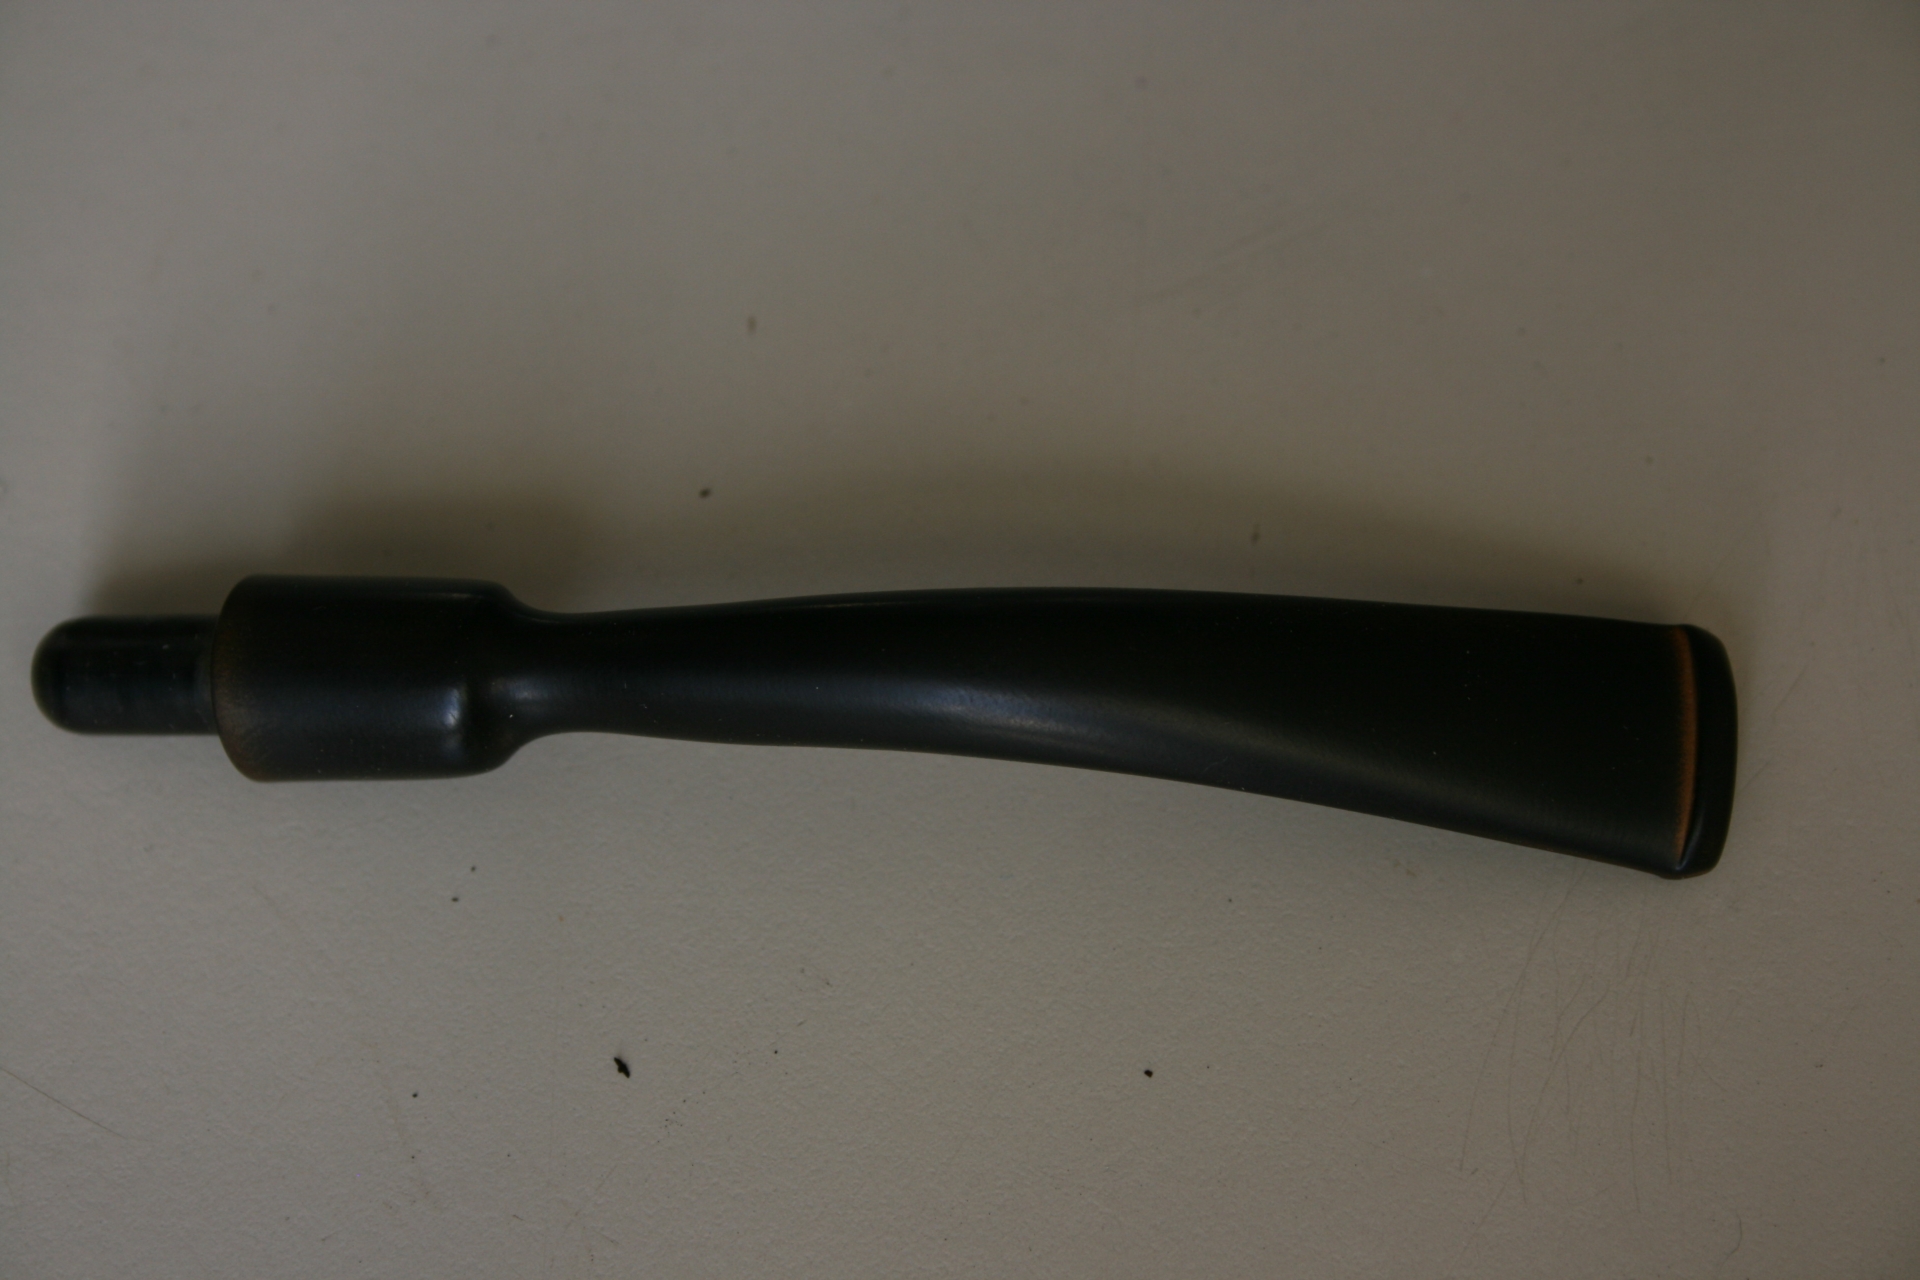
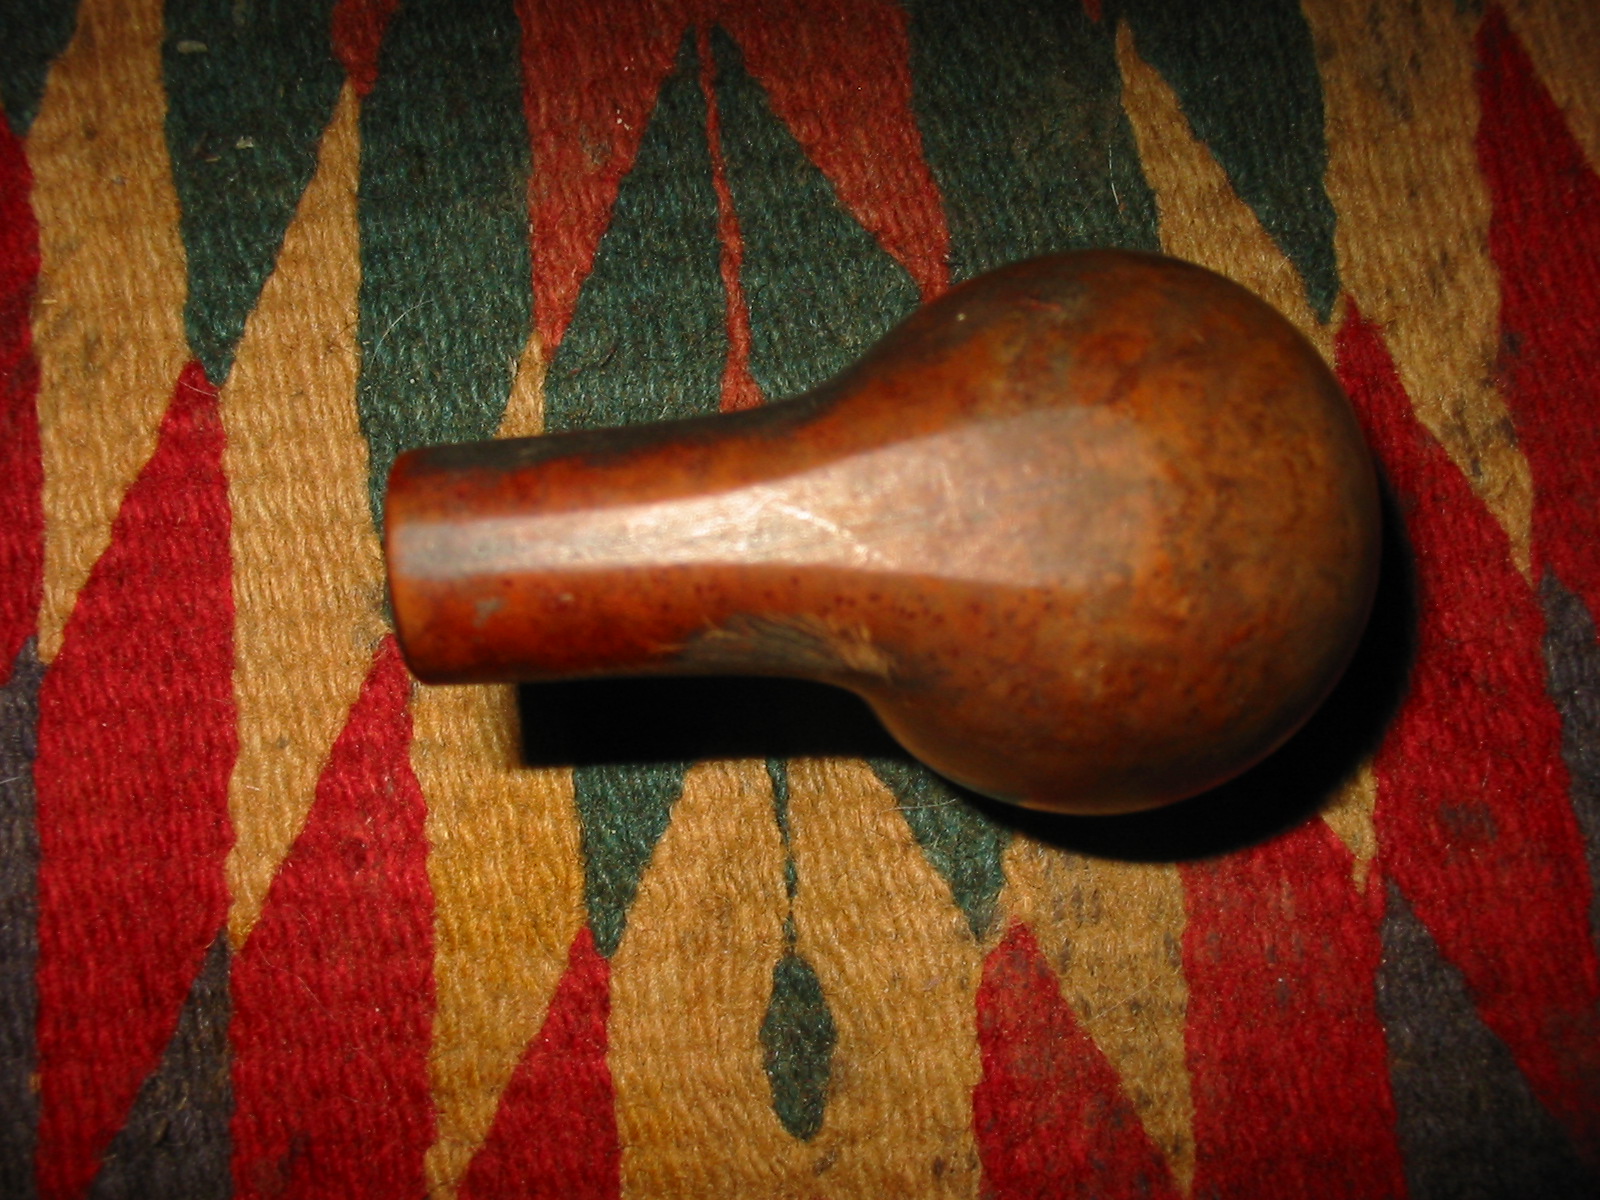
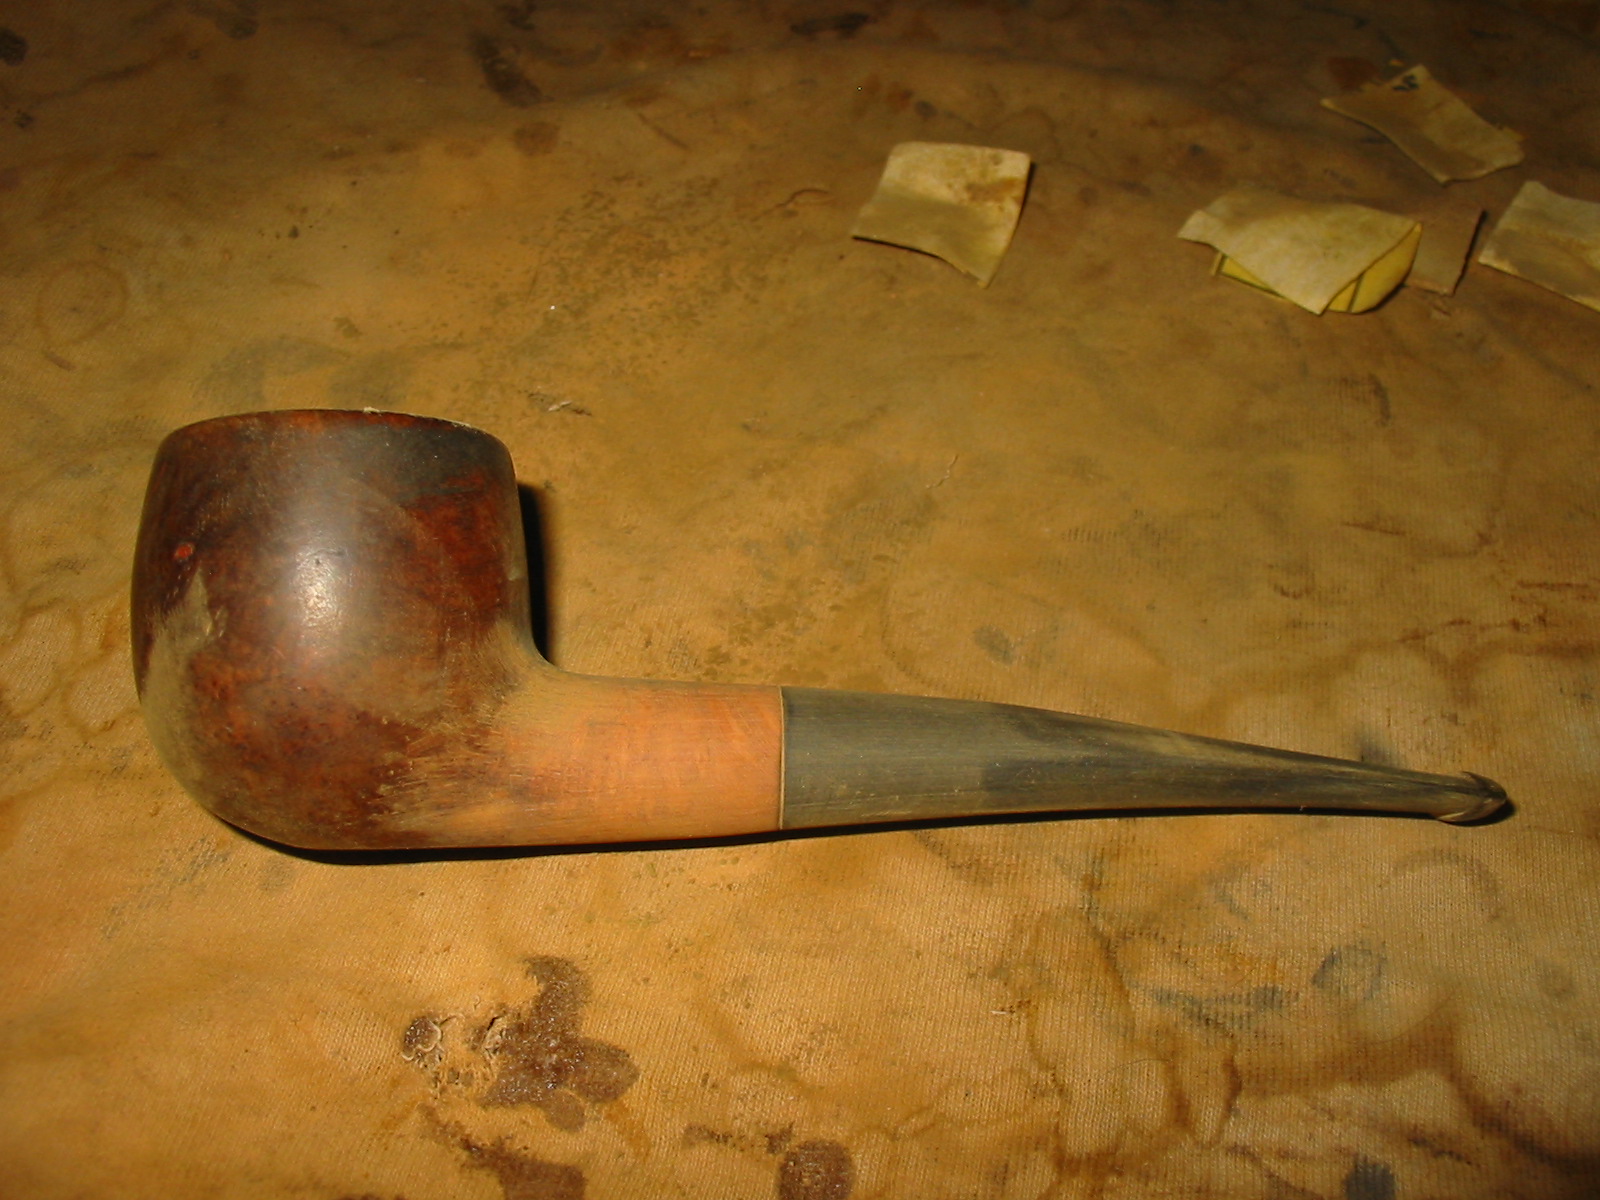
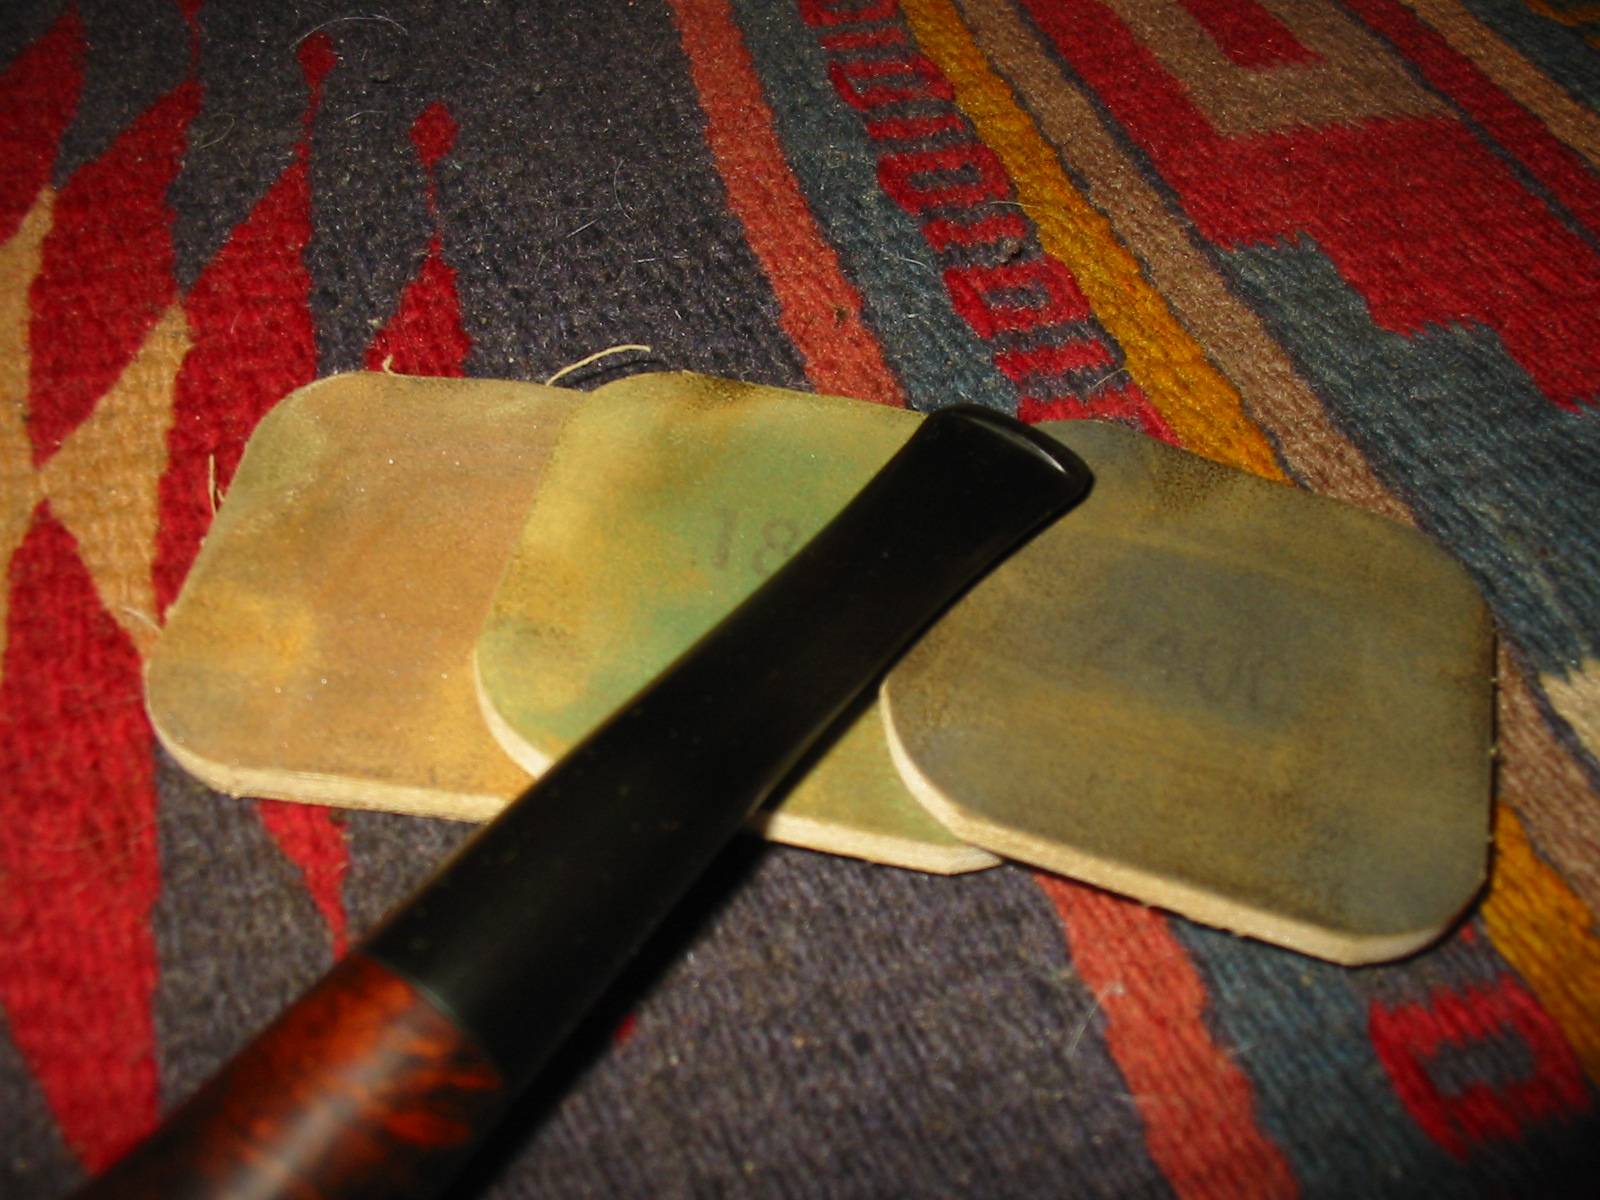
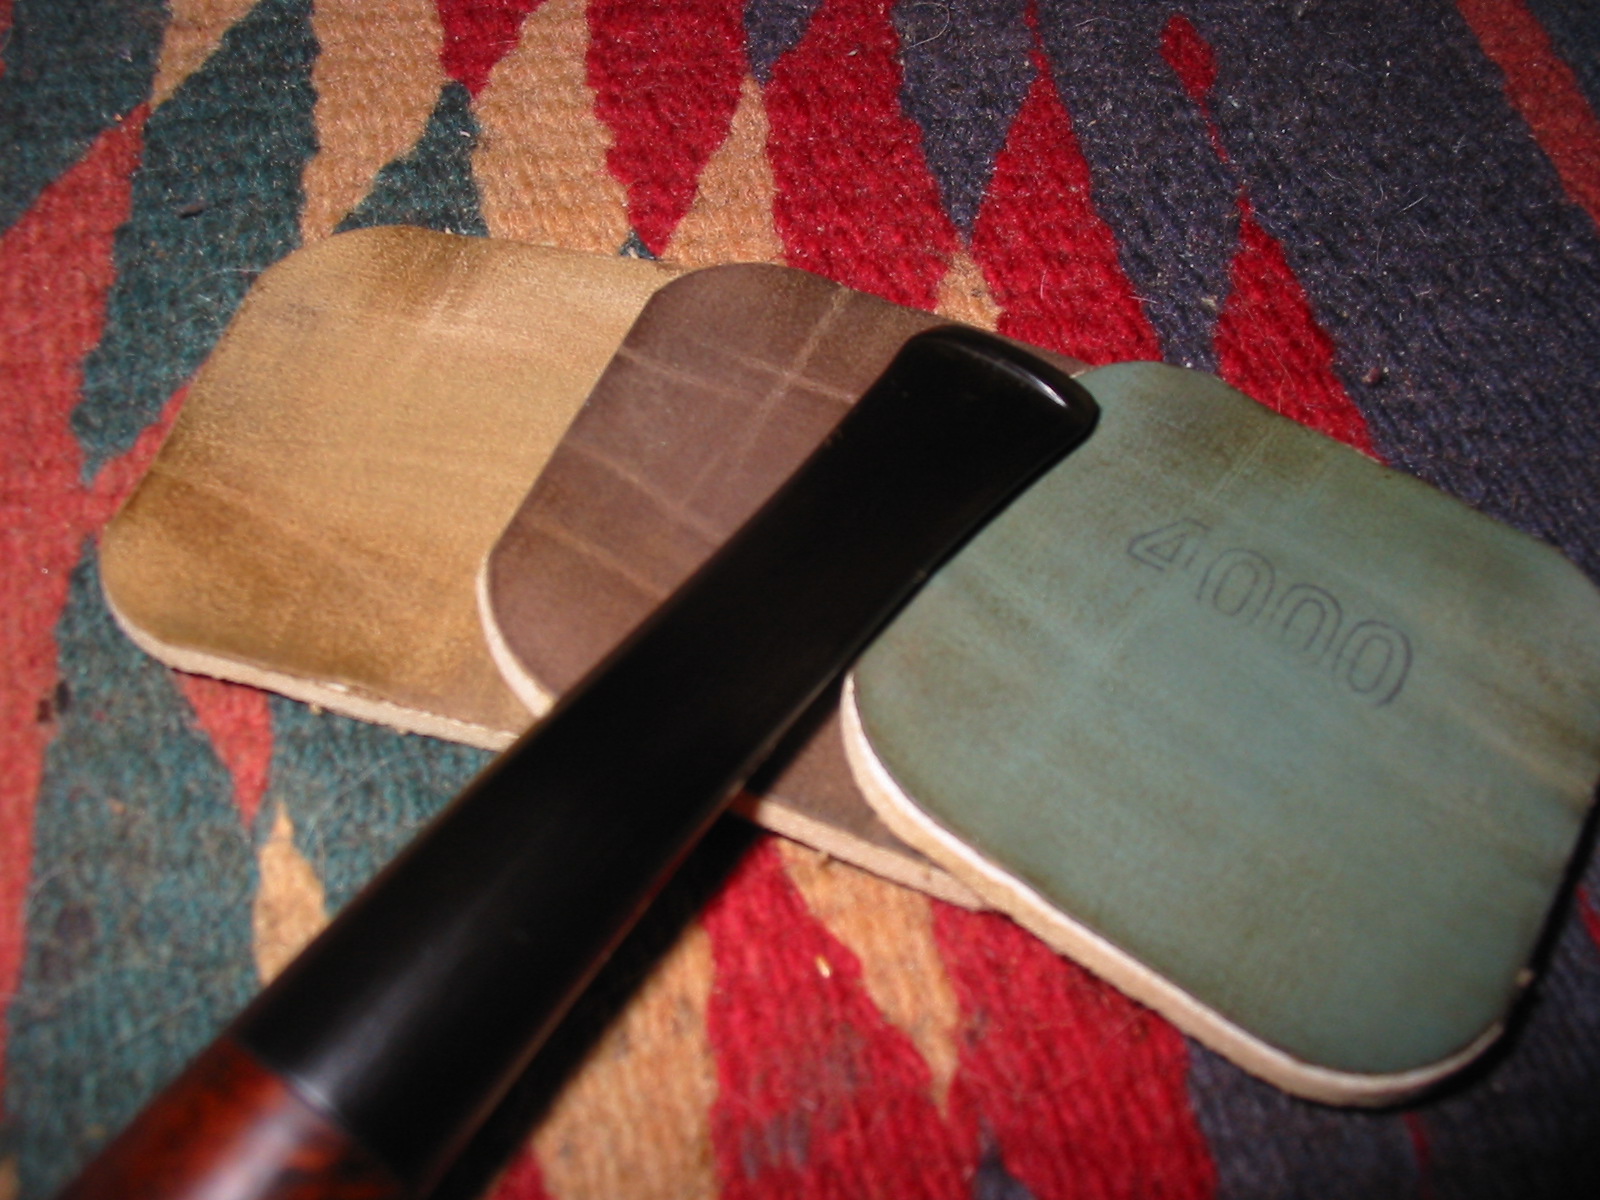
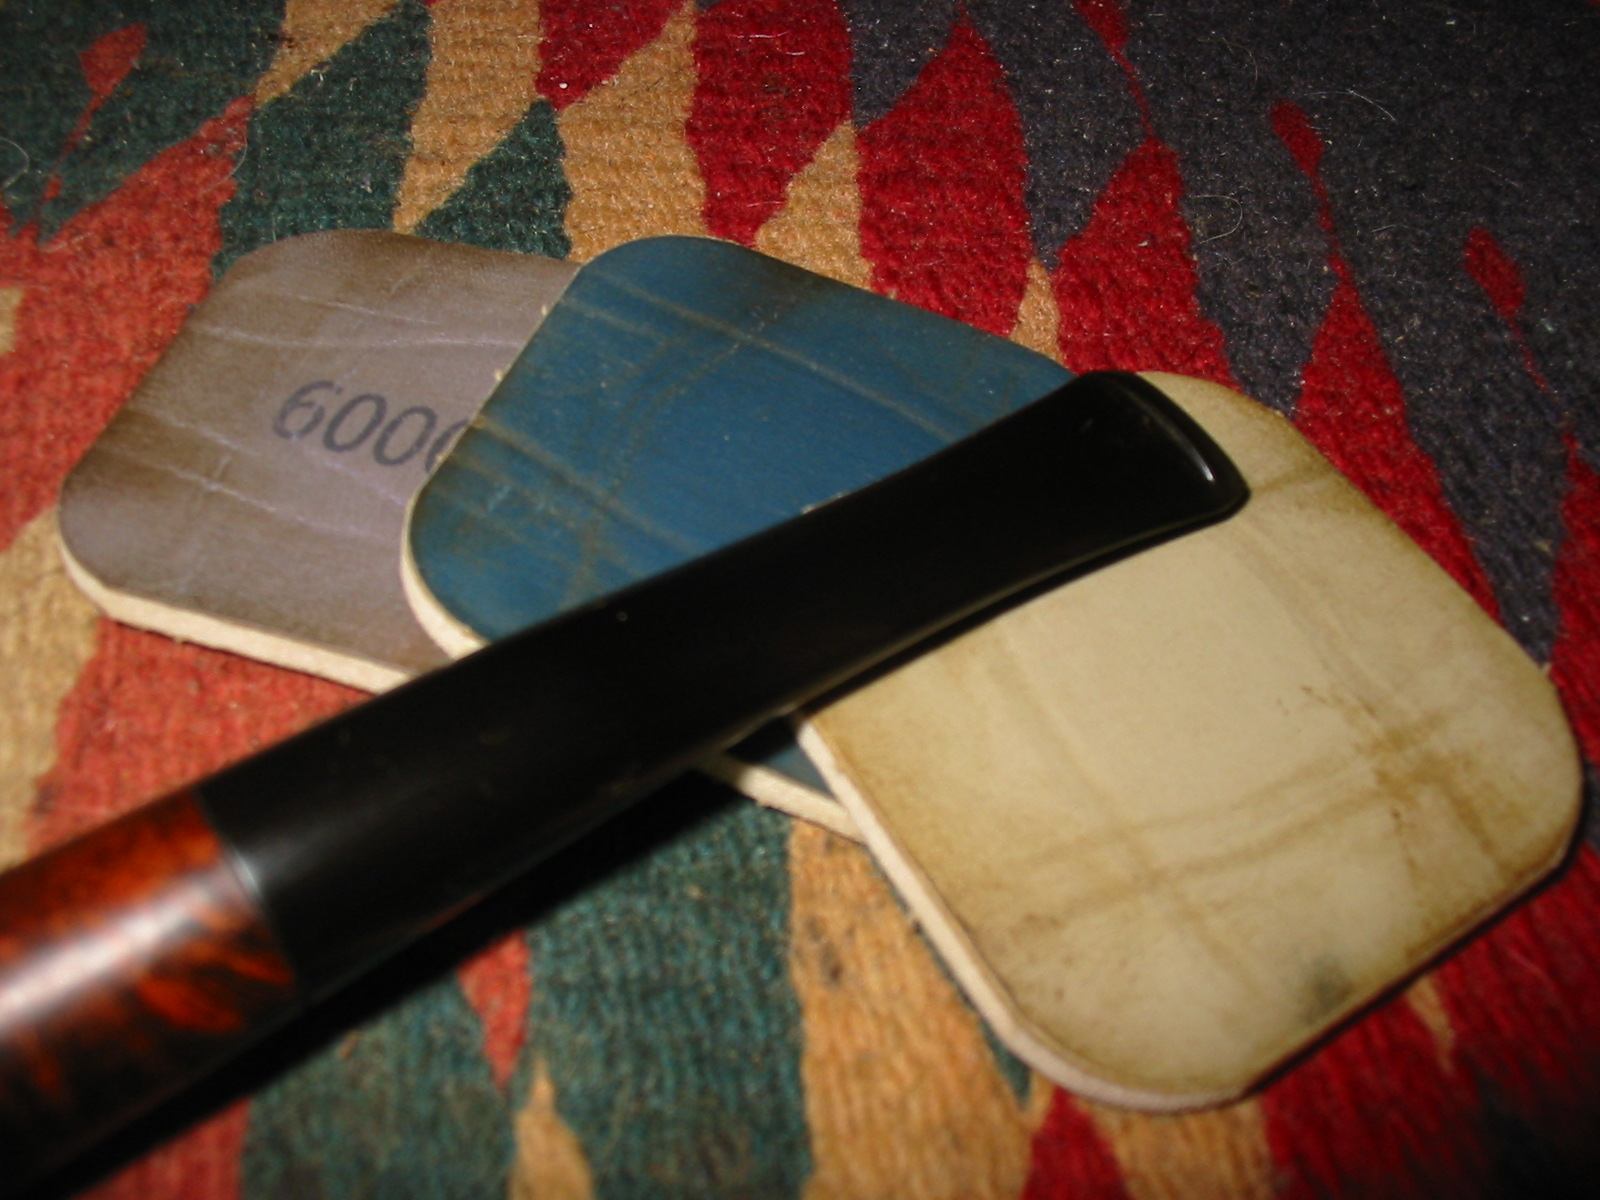
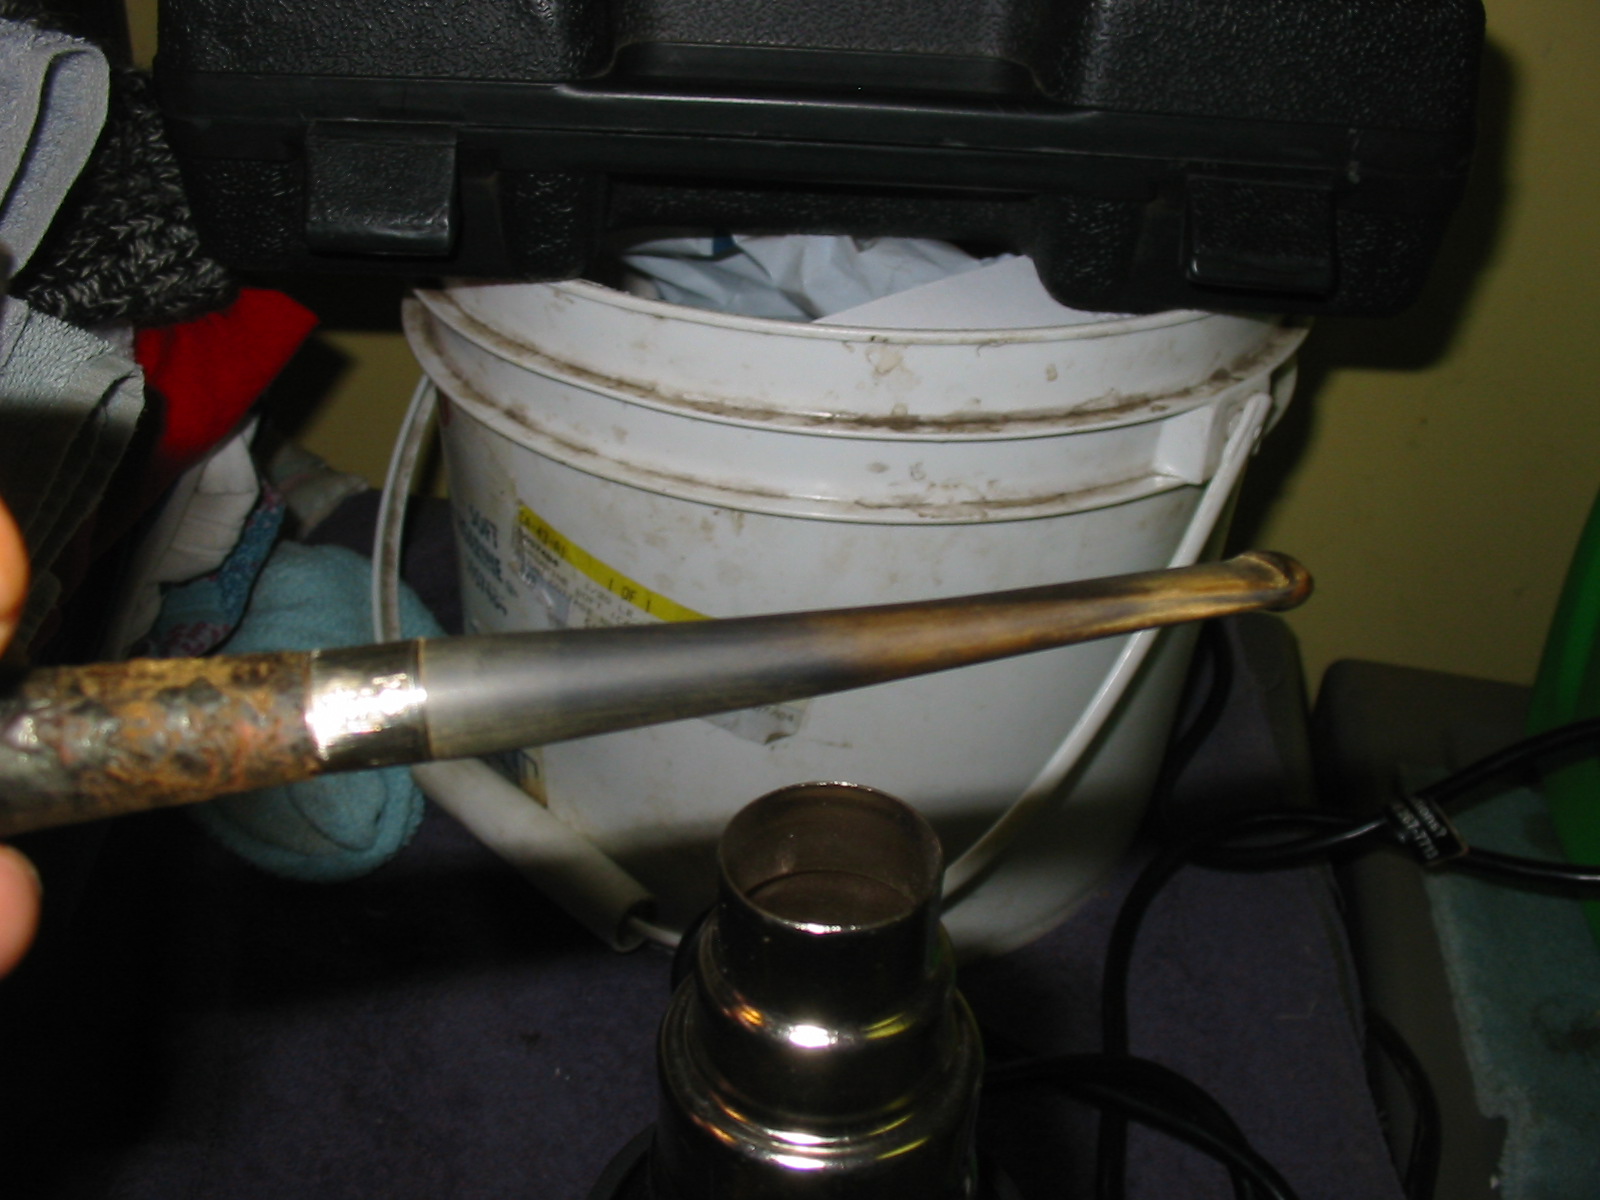
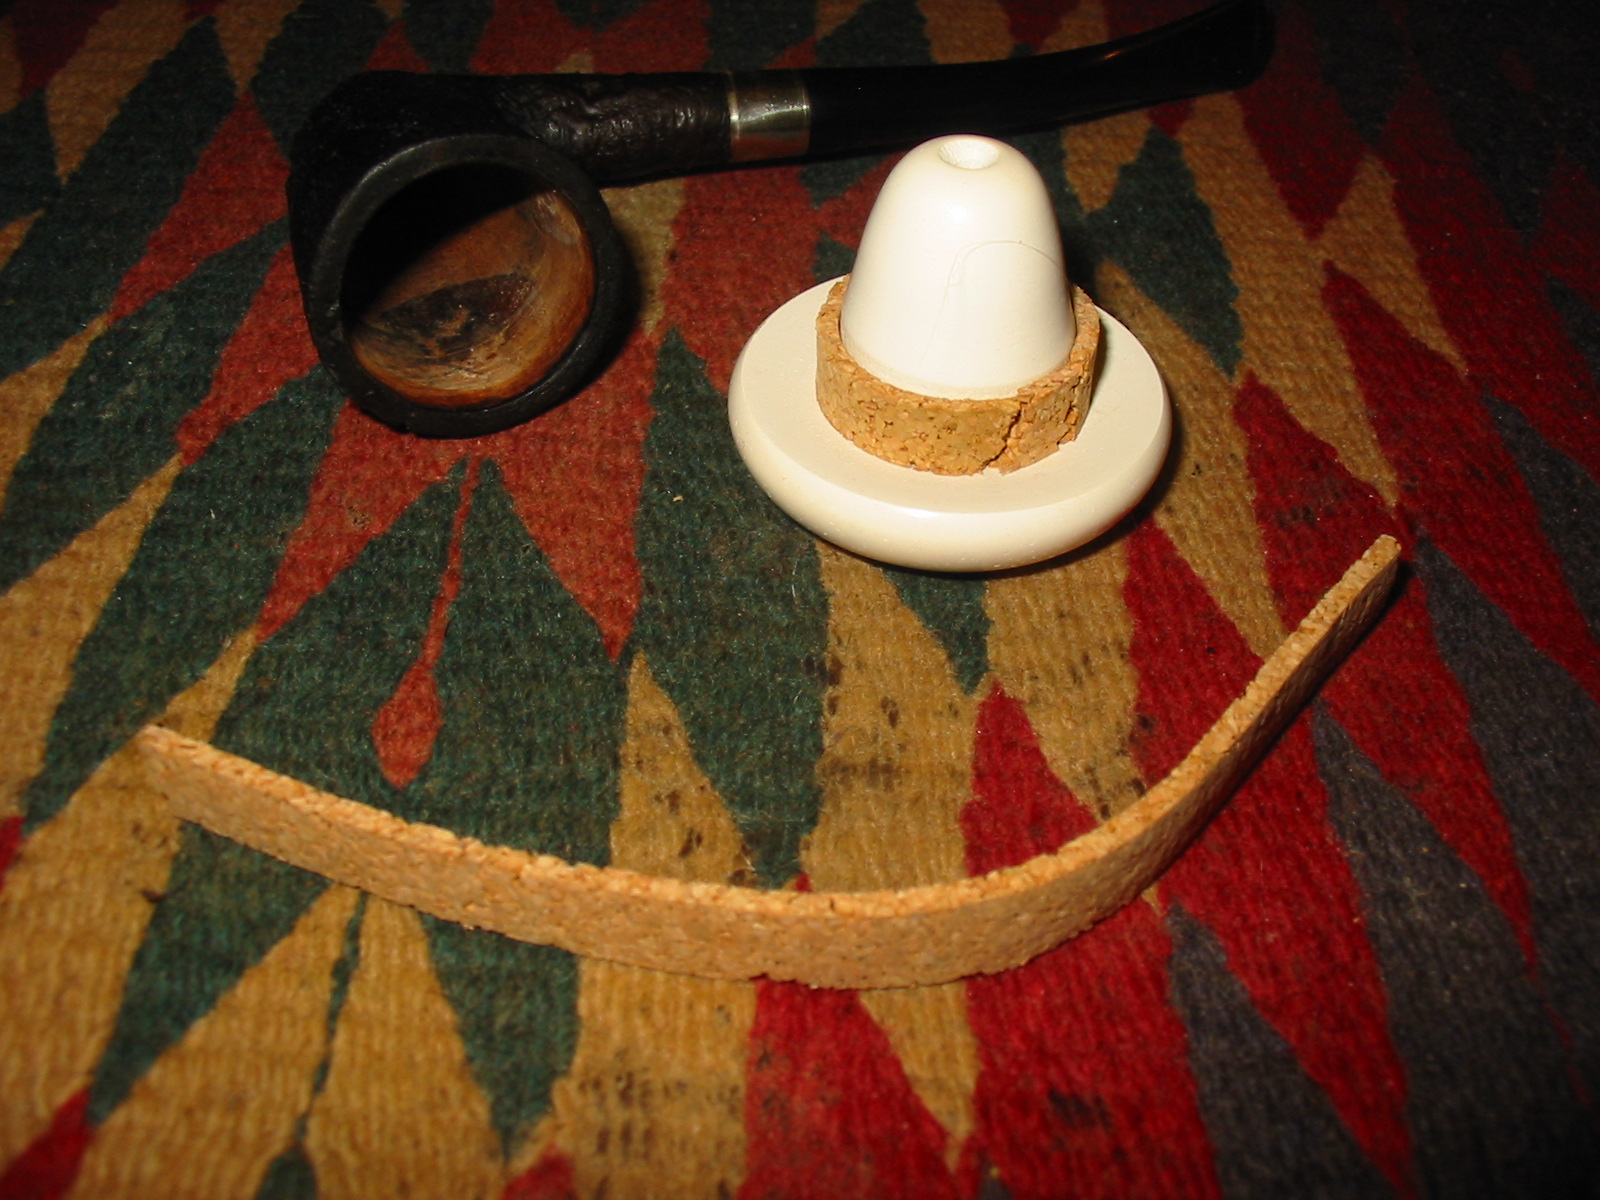
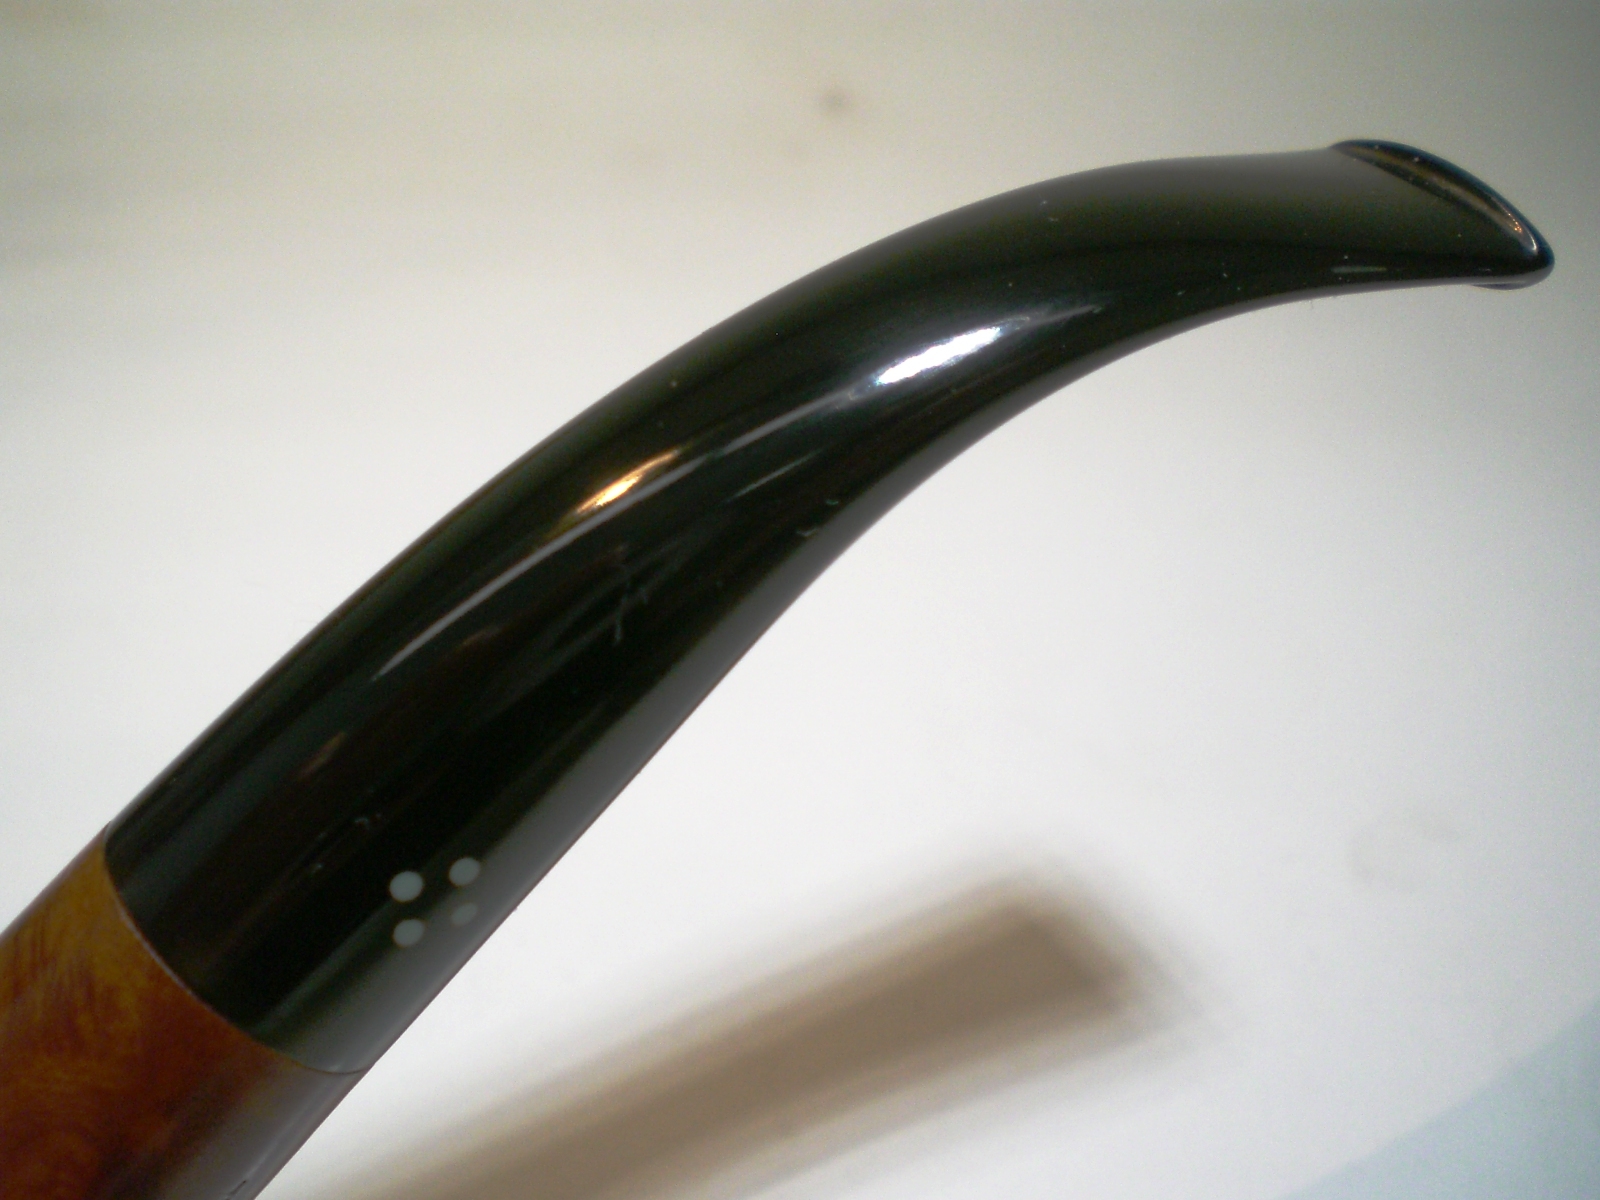
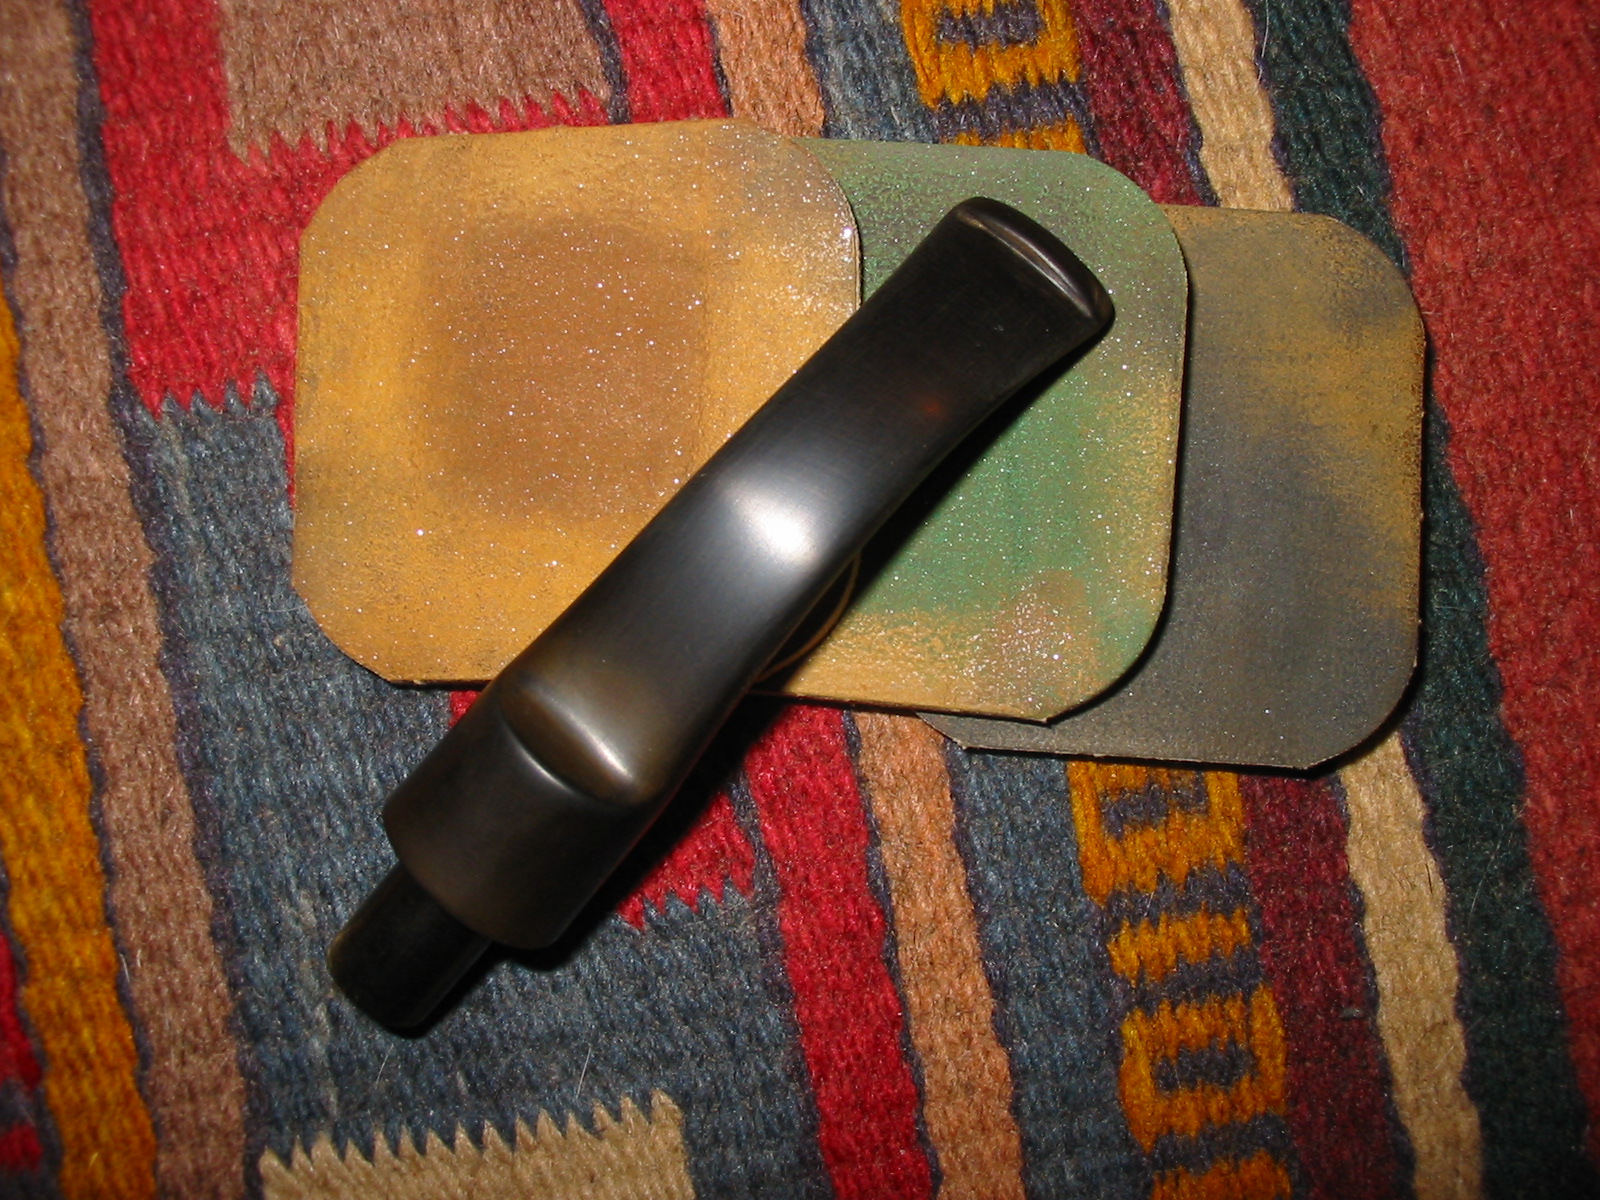
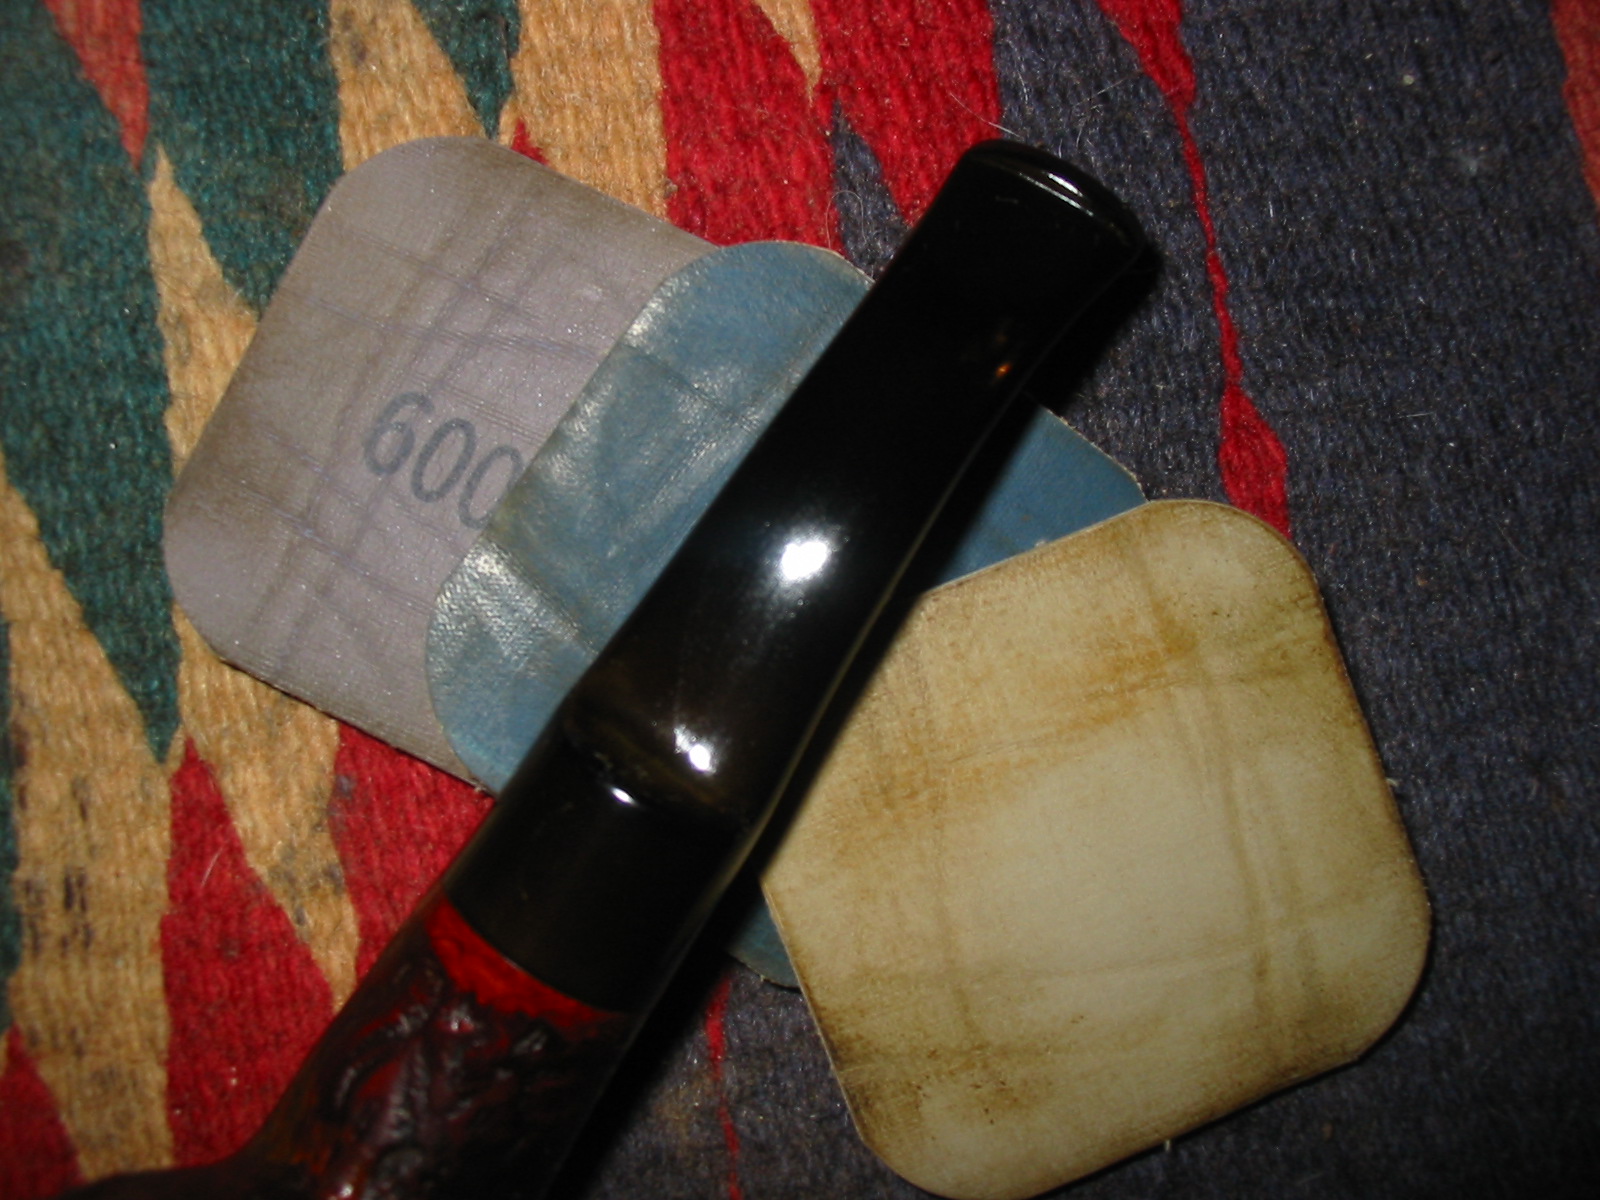
The stem cleaning was a matter of routine i.e. oxy solution to lift the grime and loosen the dirt inside and internal cleaning as mentioned earlier. Finally an application of good old elbow grease with MicroMesh 4 way flexi files, going through the colours in sequence: BLACK 180MX; PINK 2400; WHITE 4000; GREY: 12000, used wet.
Chiz9

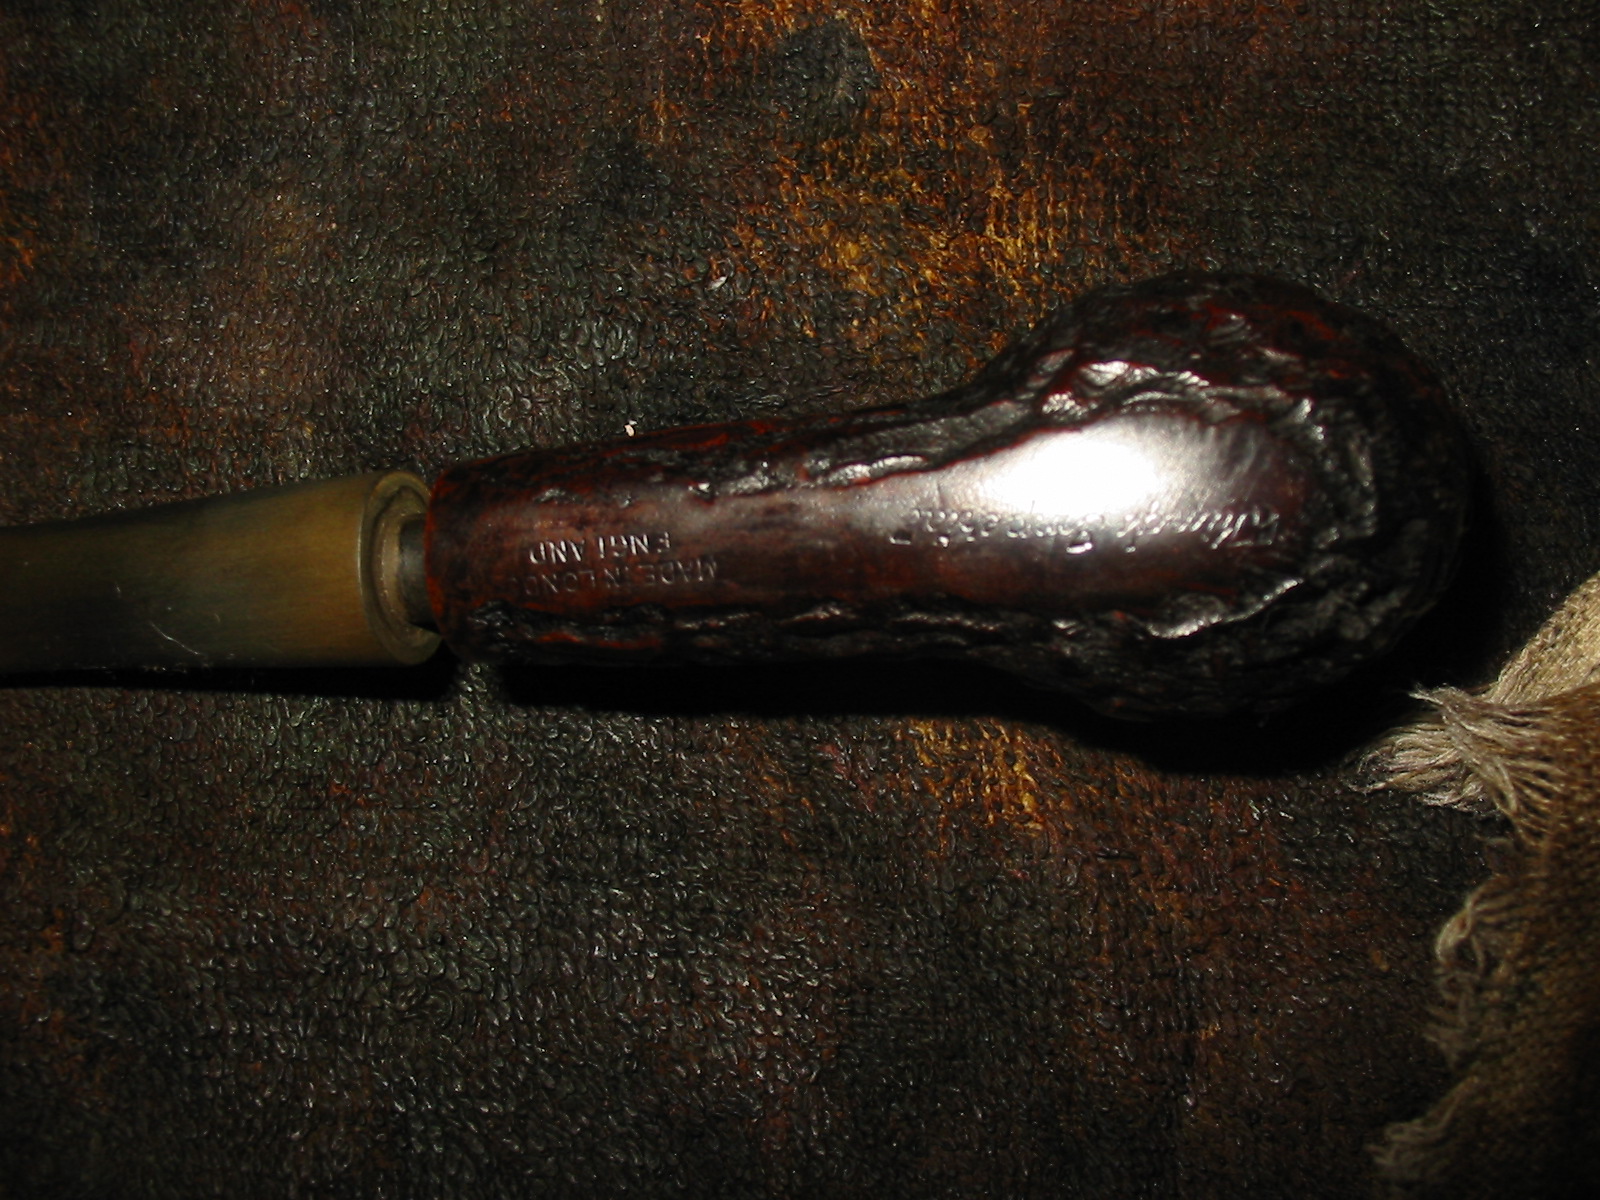
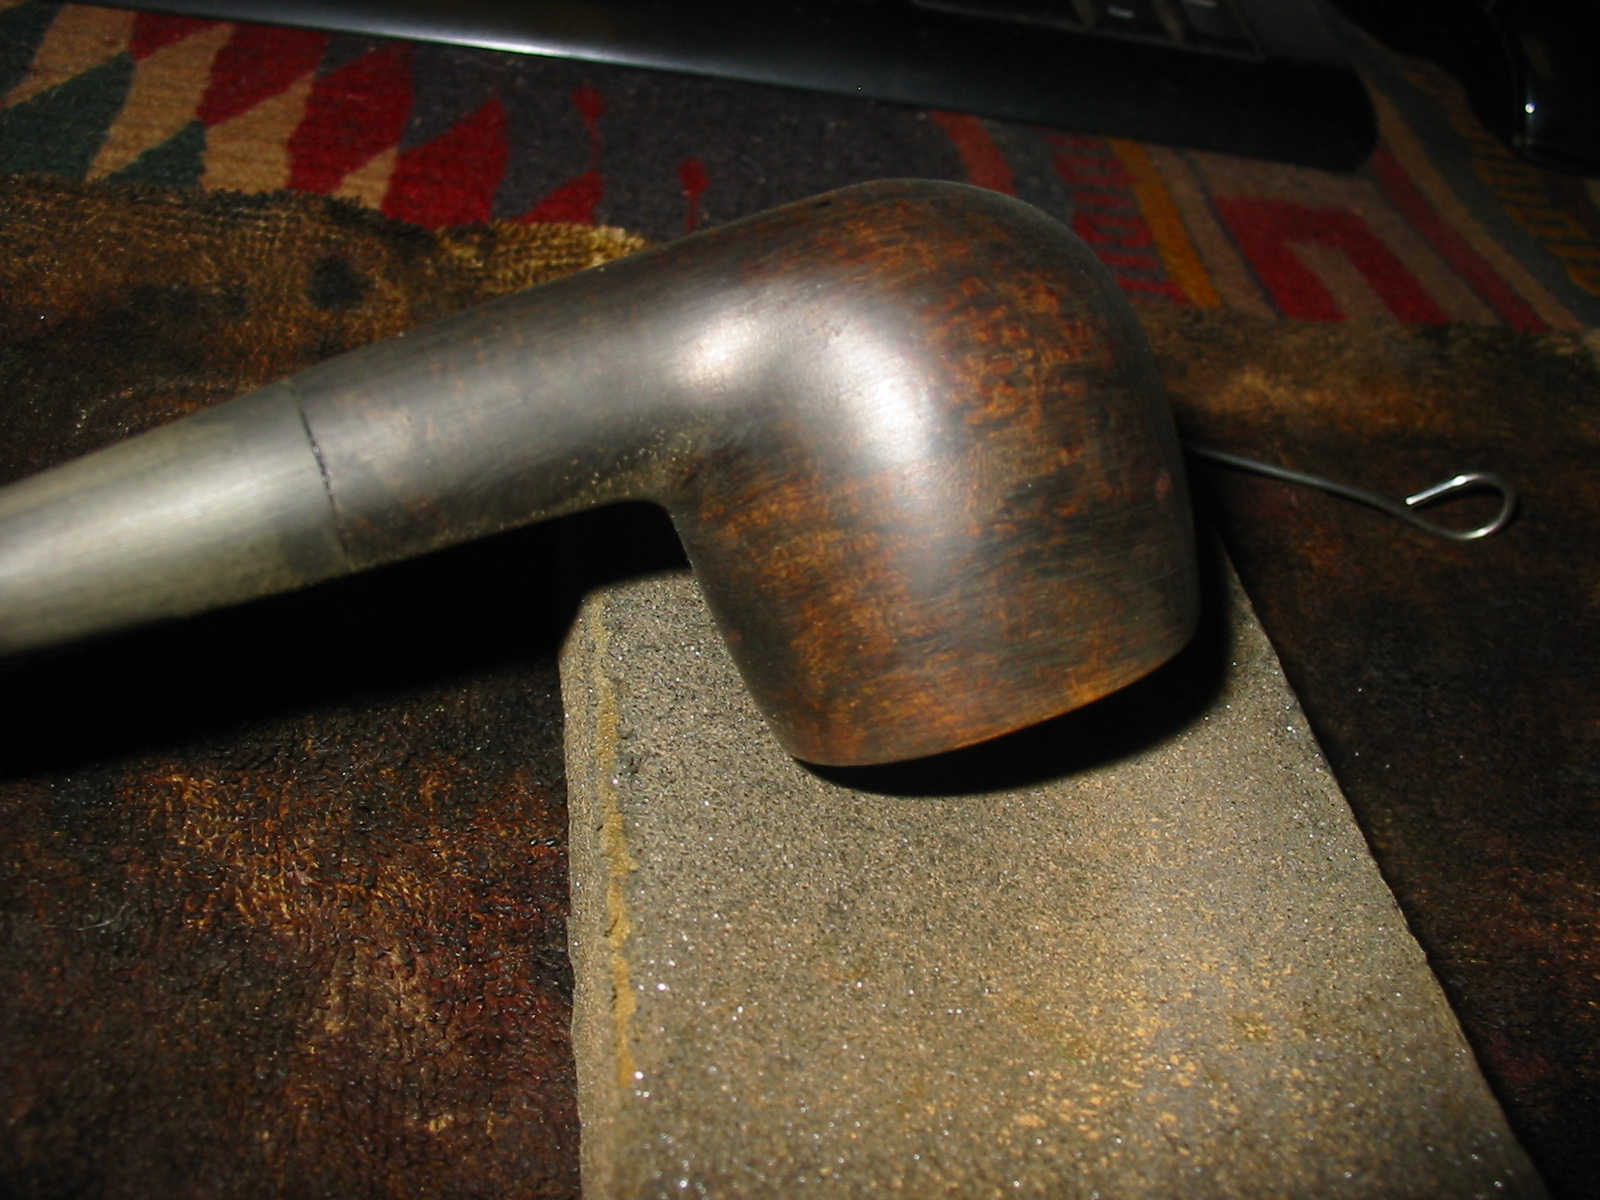
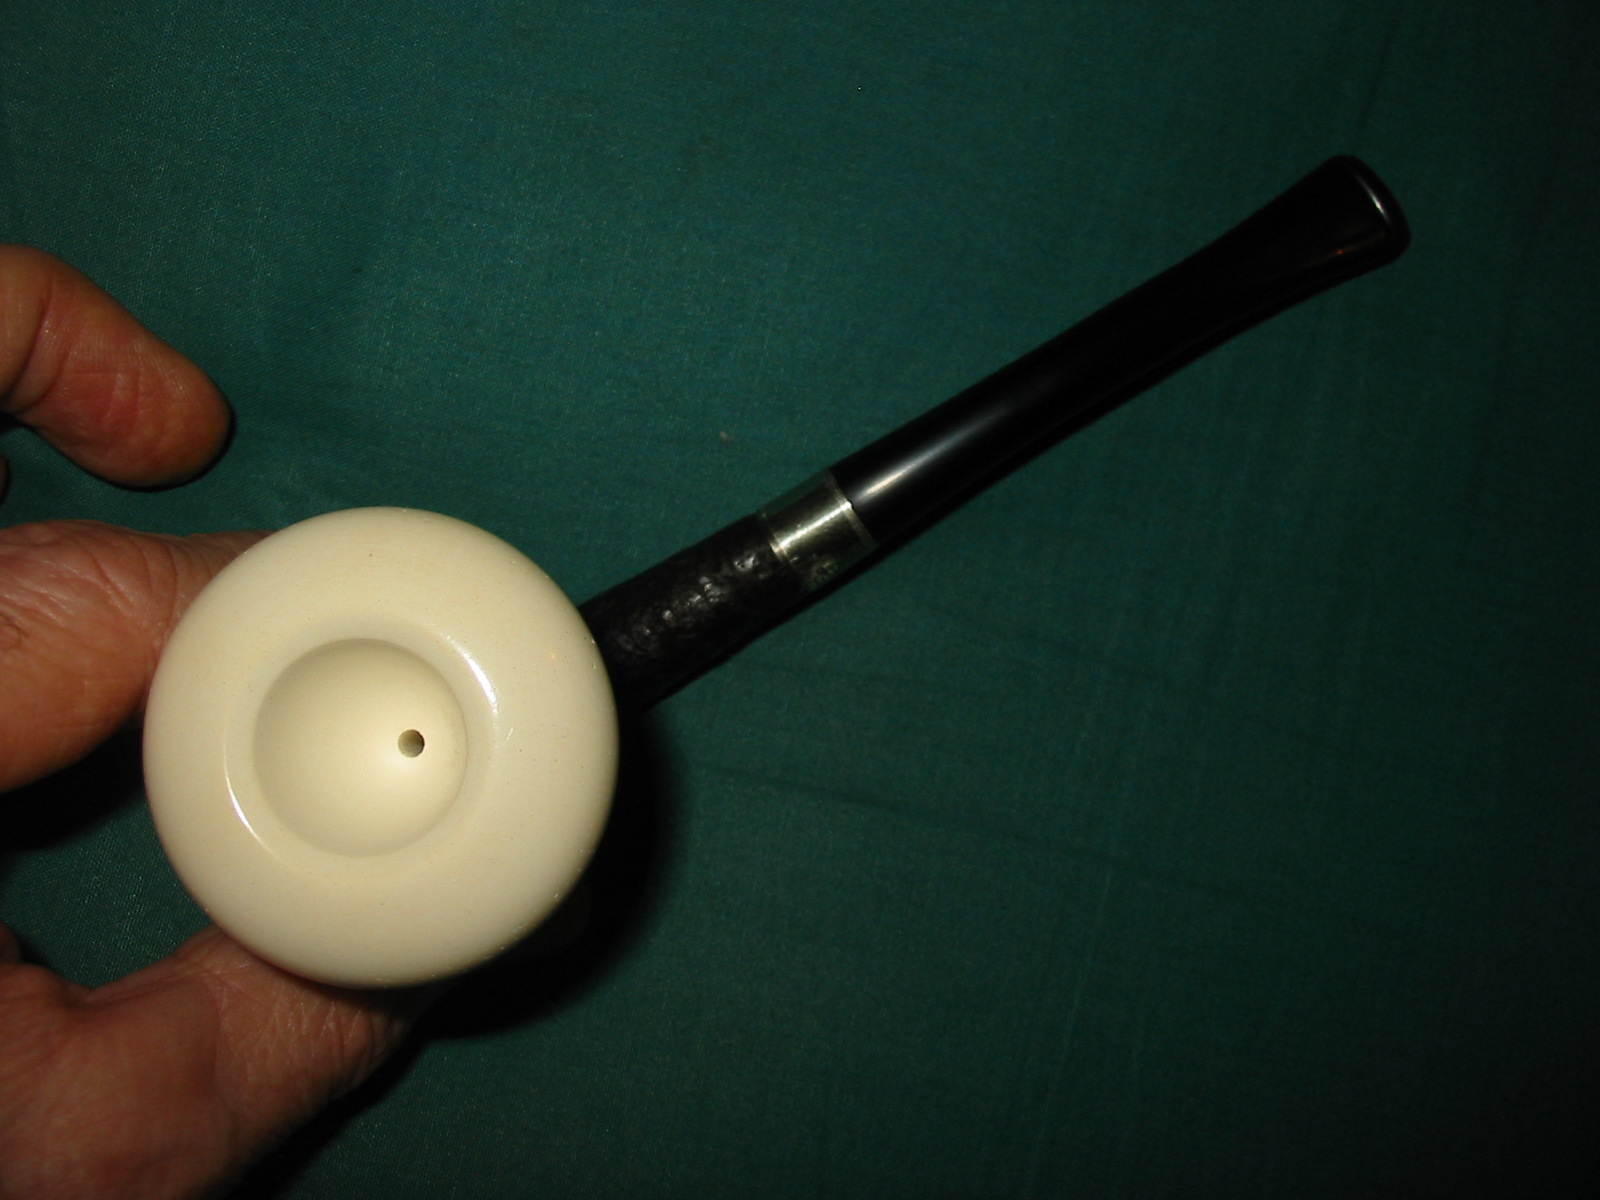
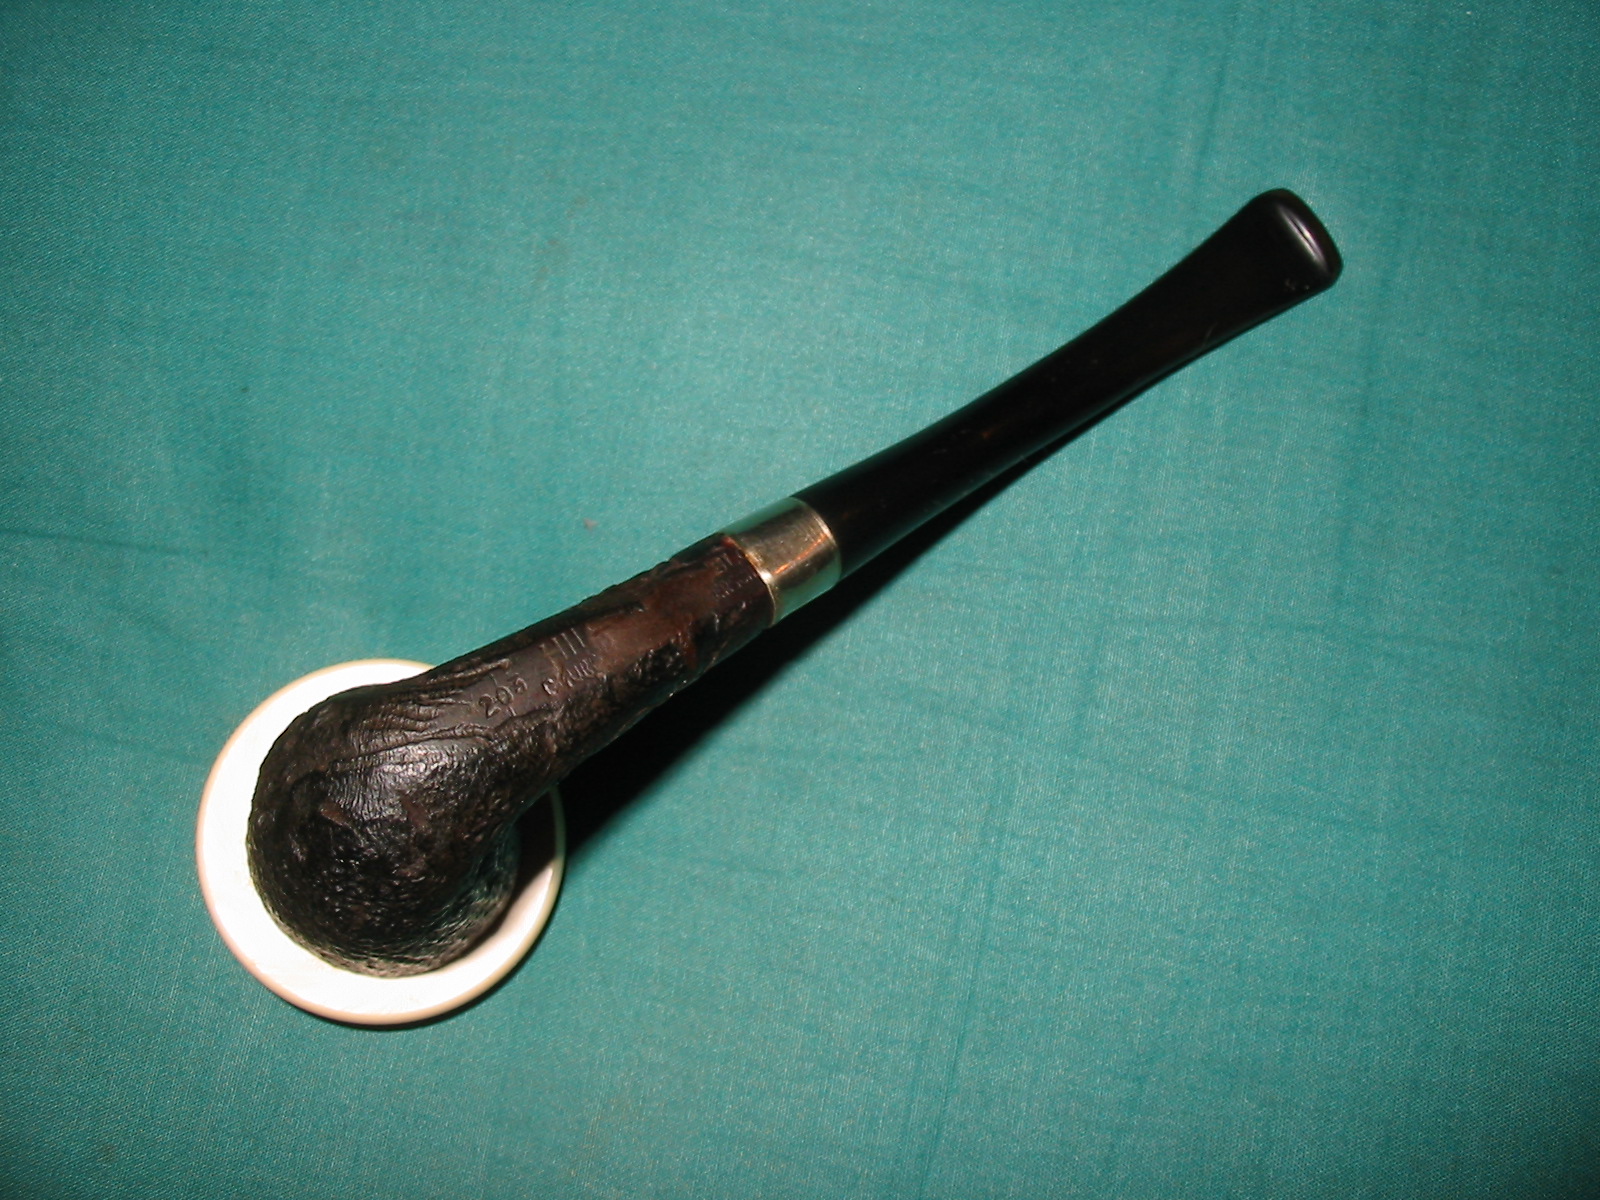
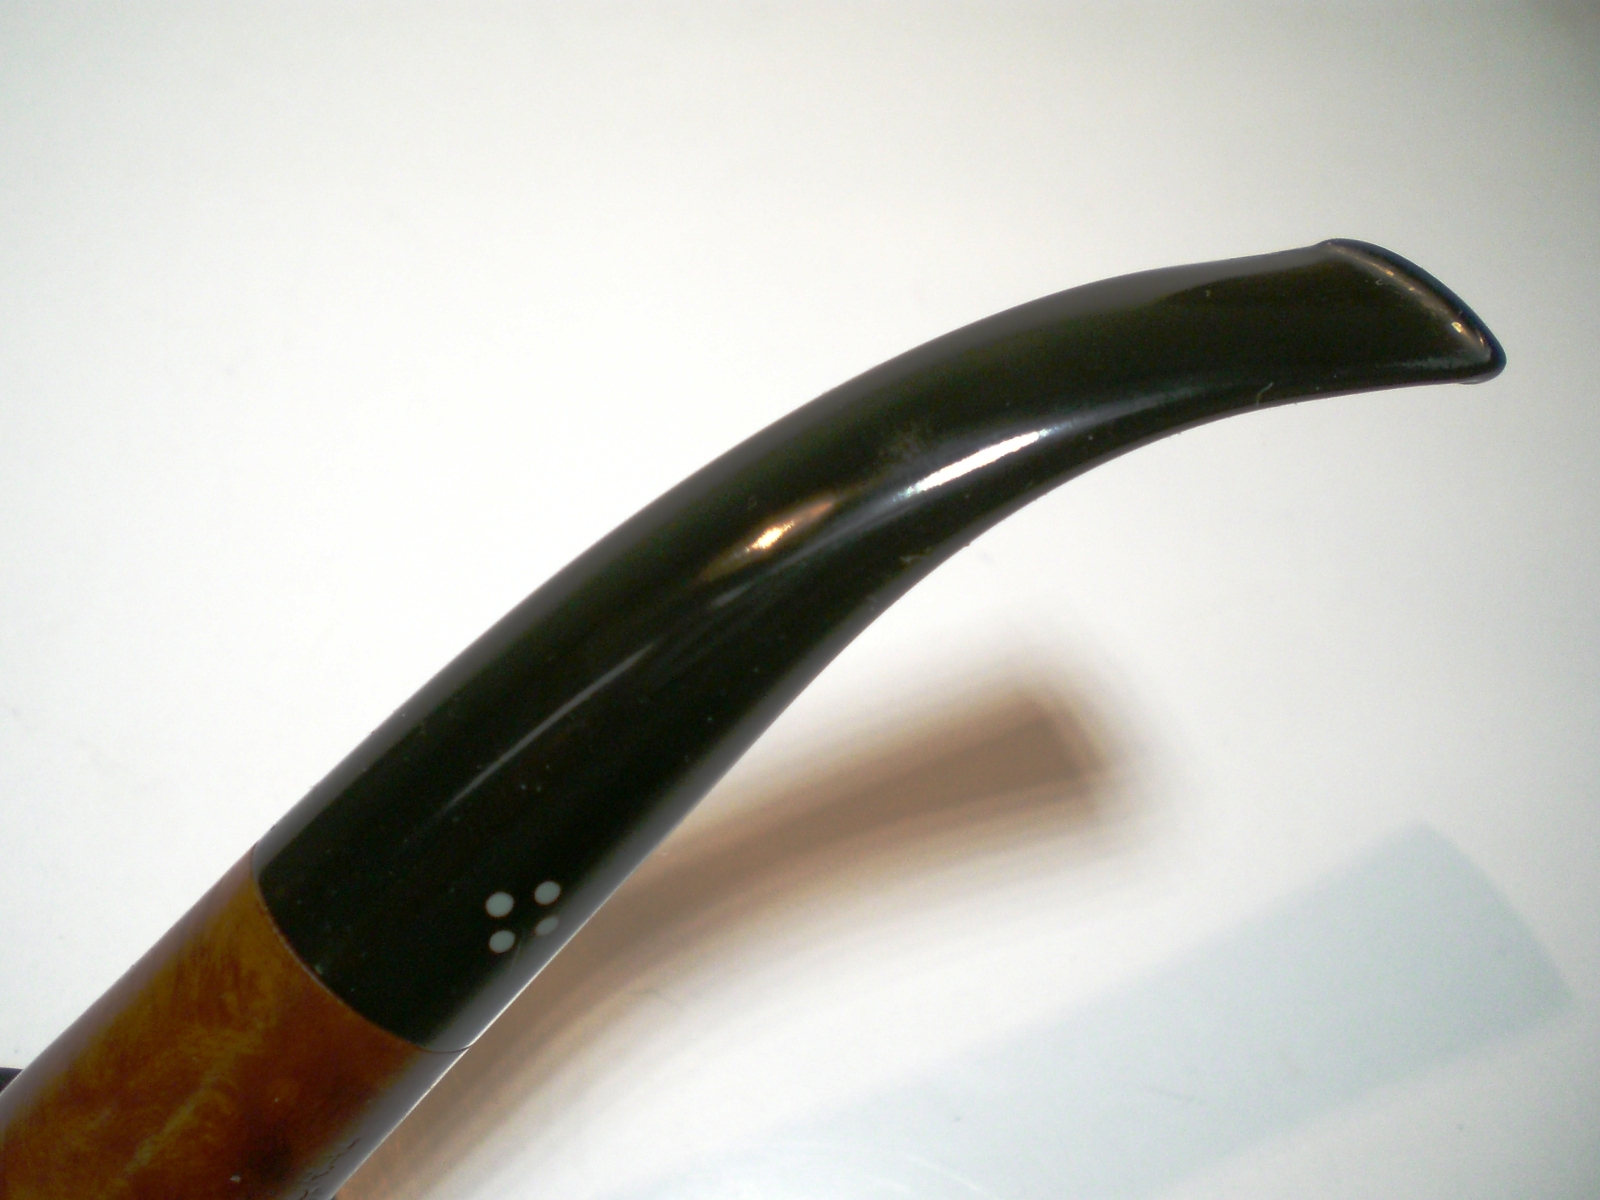
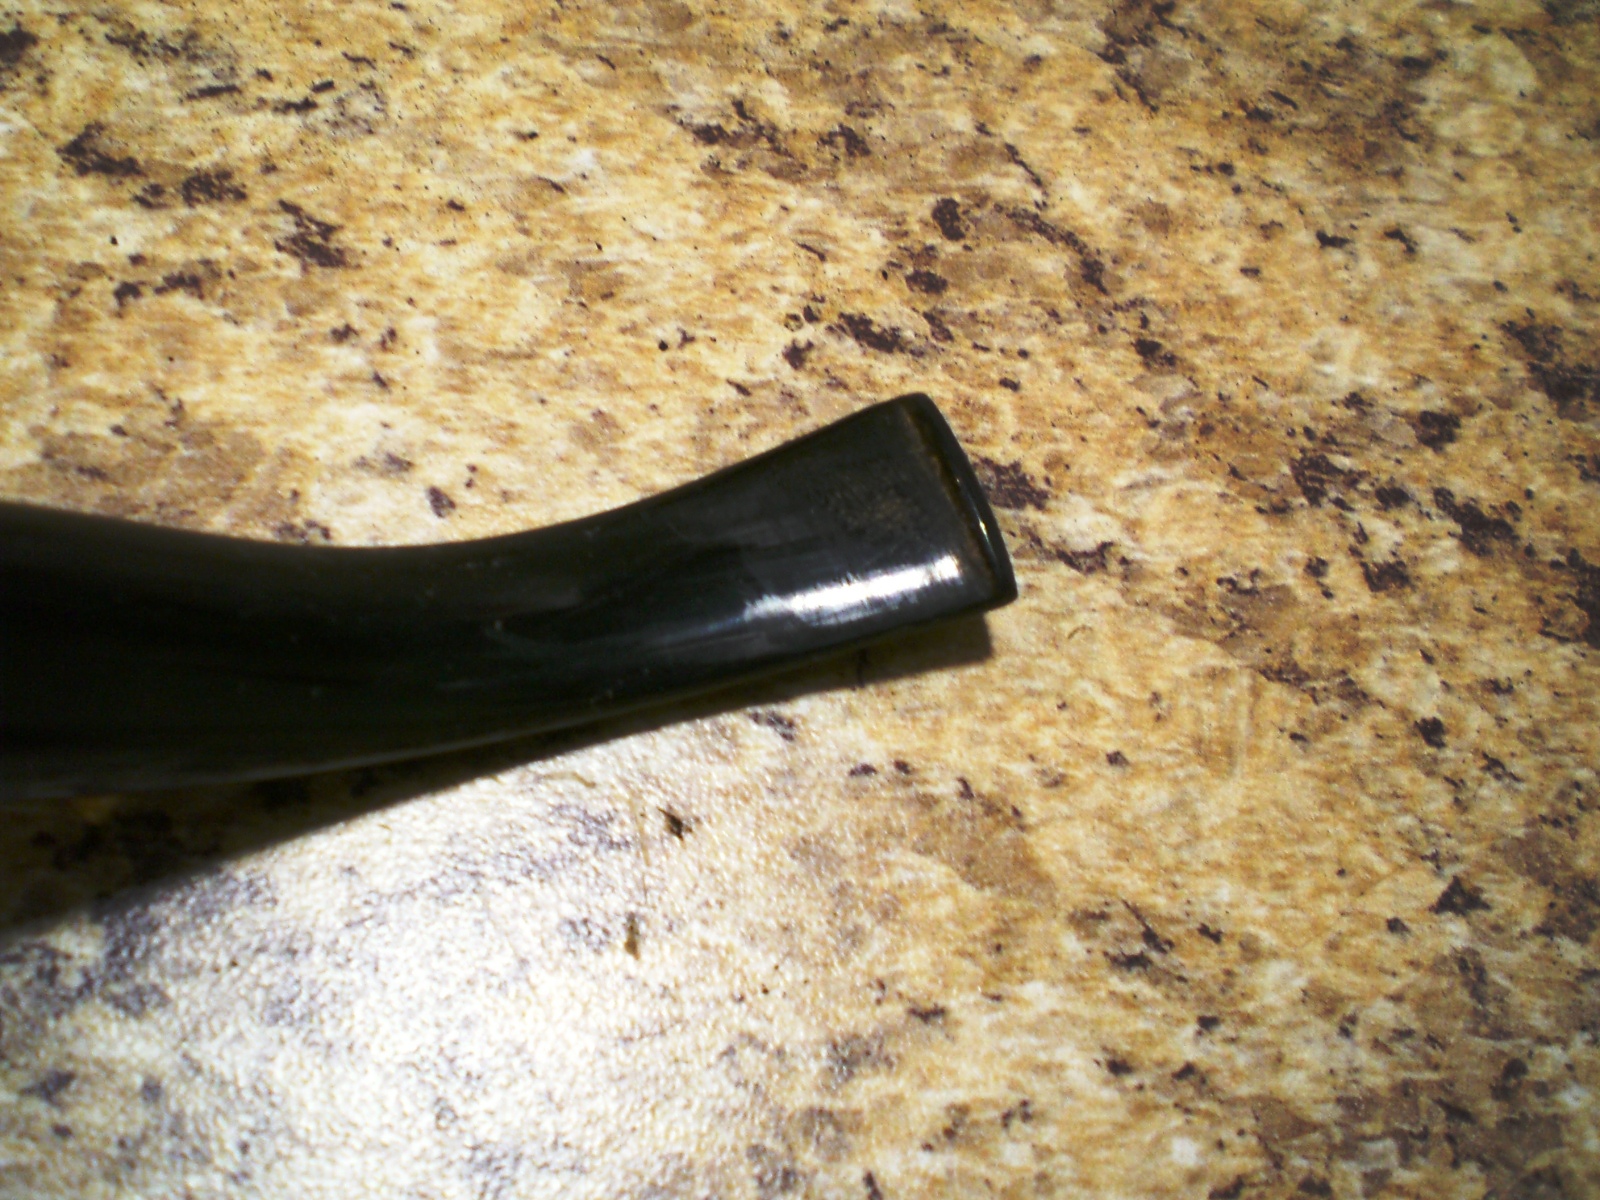
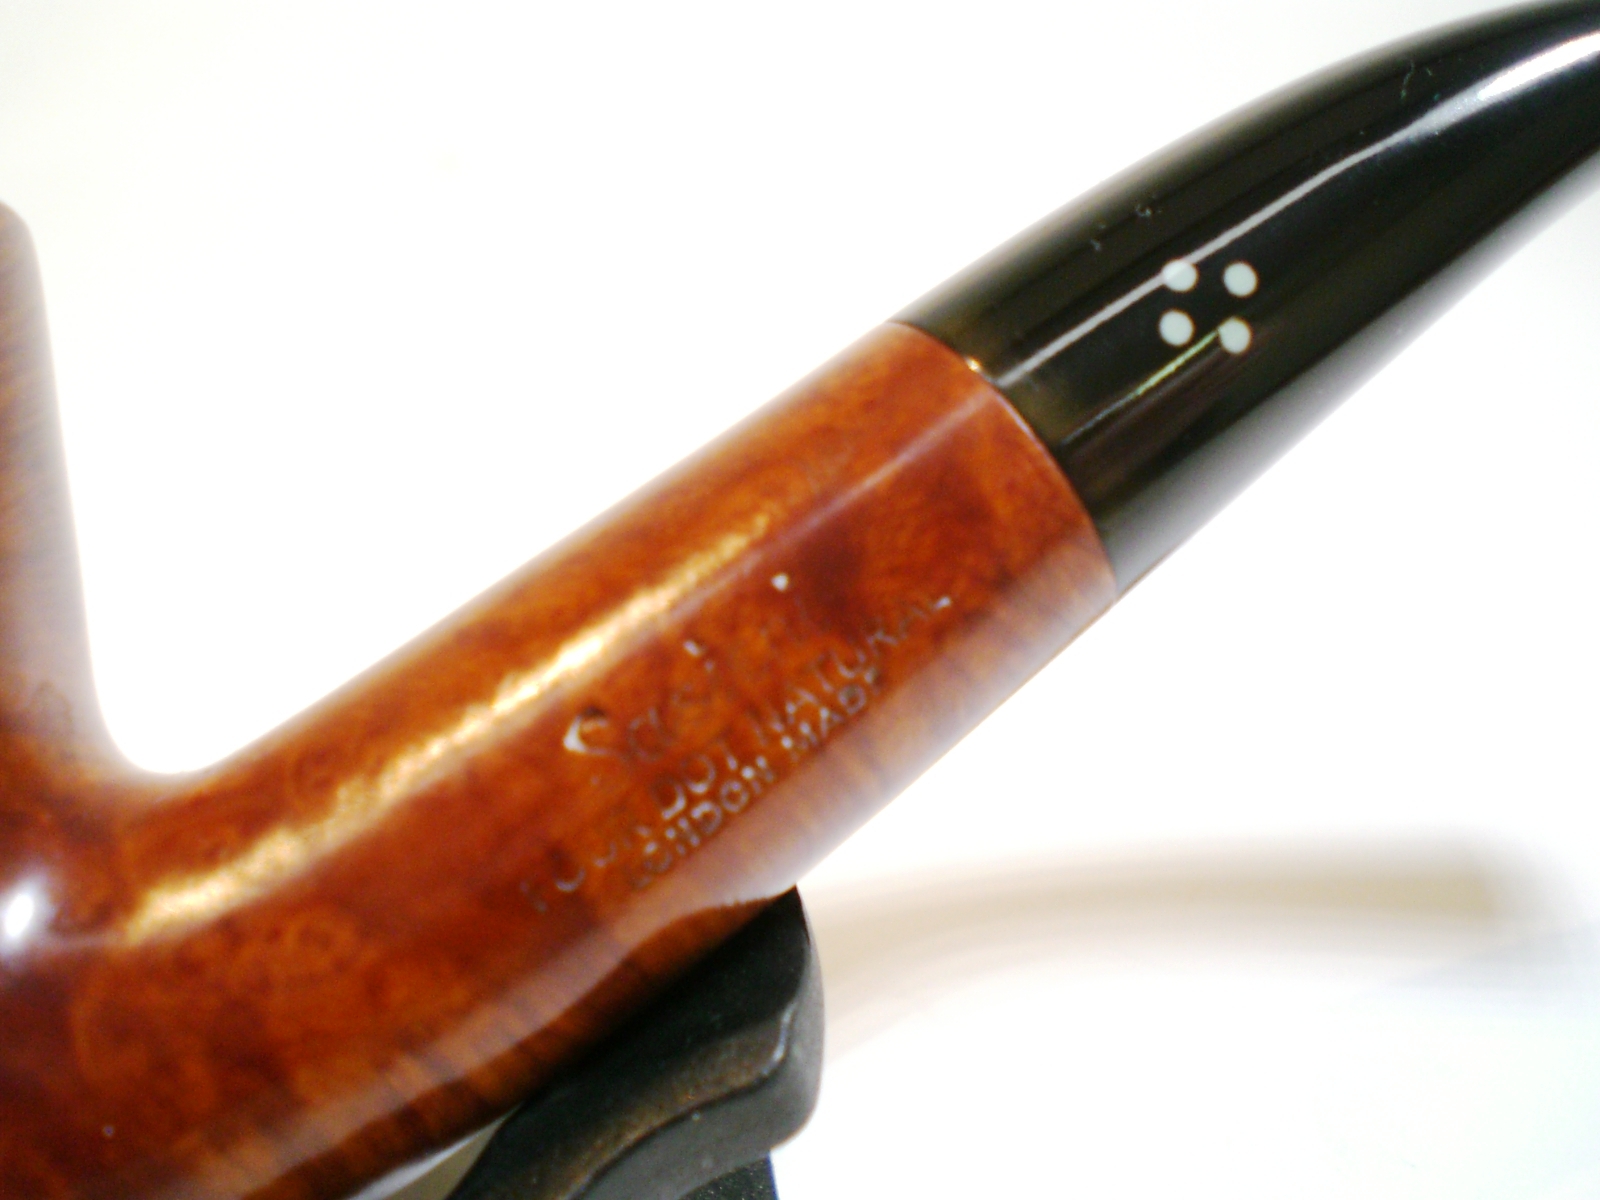
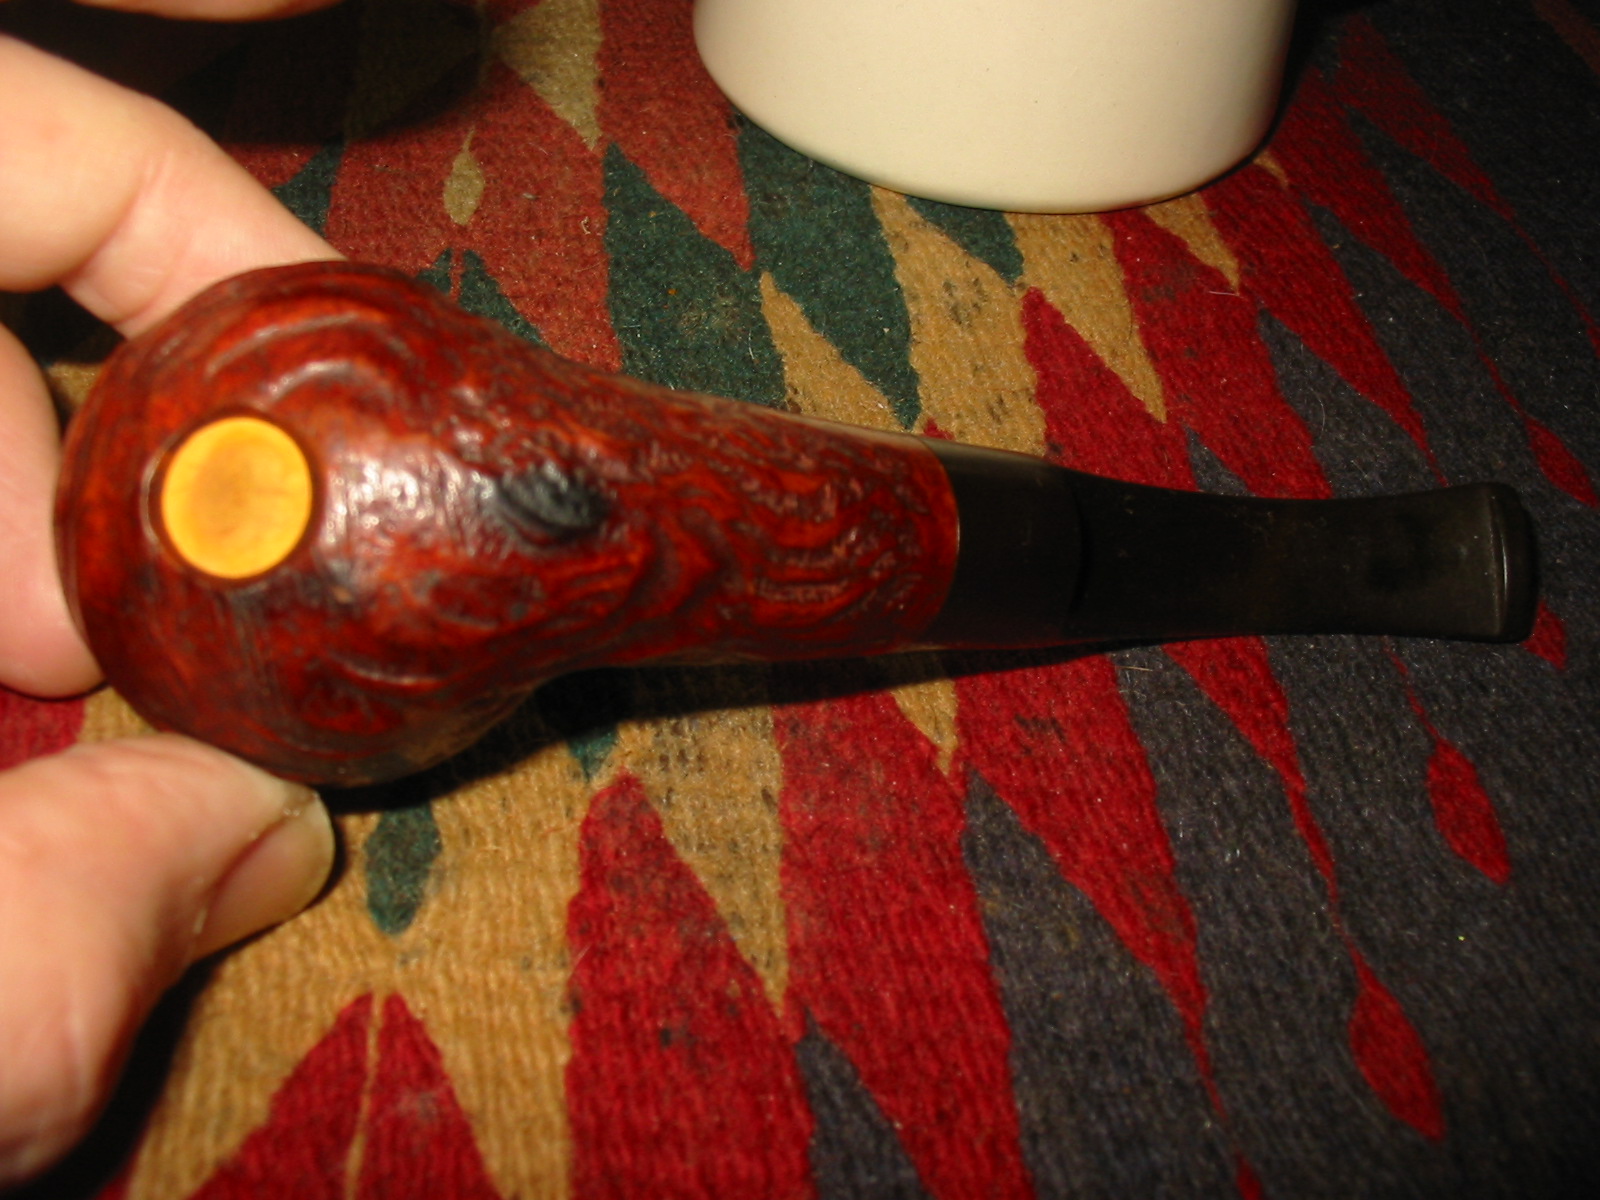
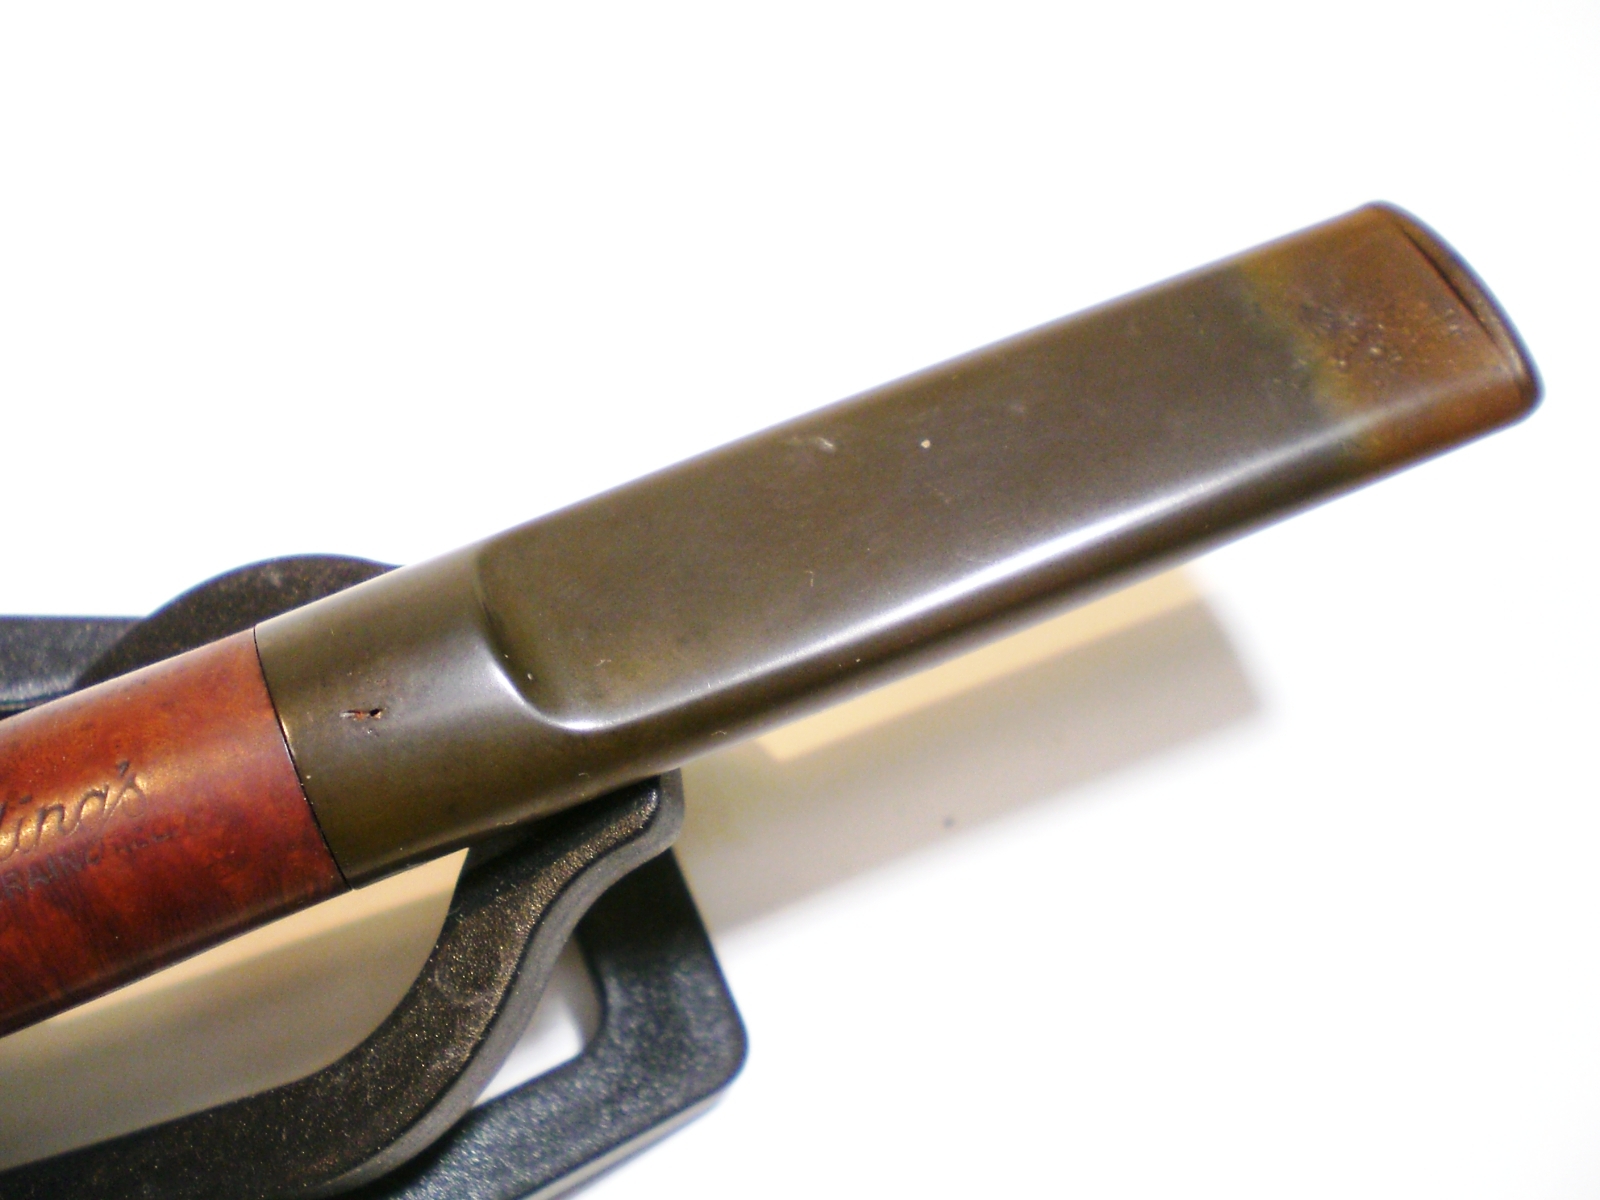
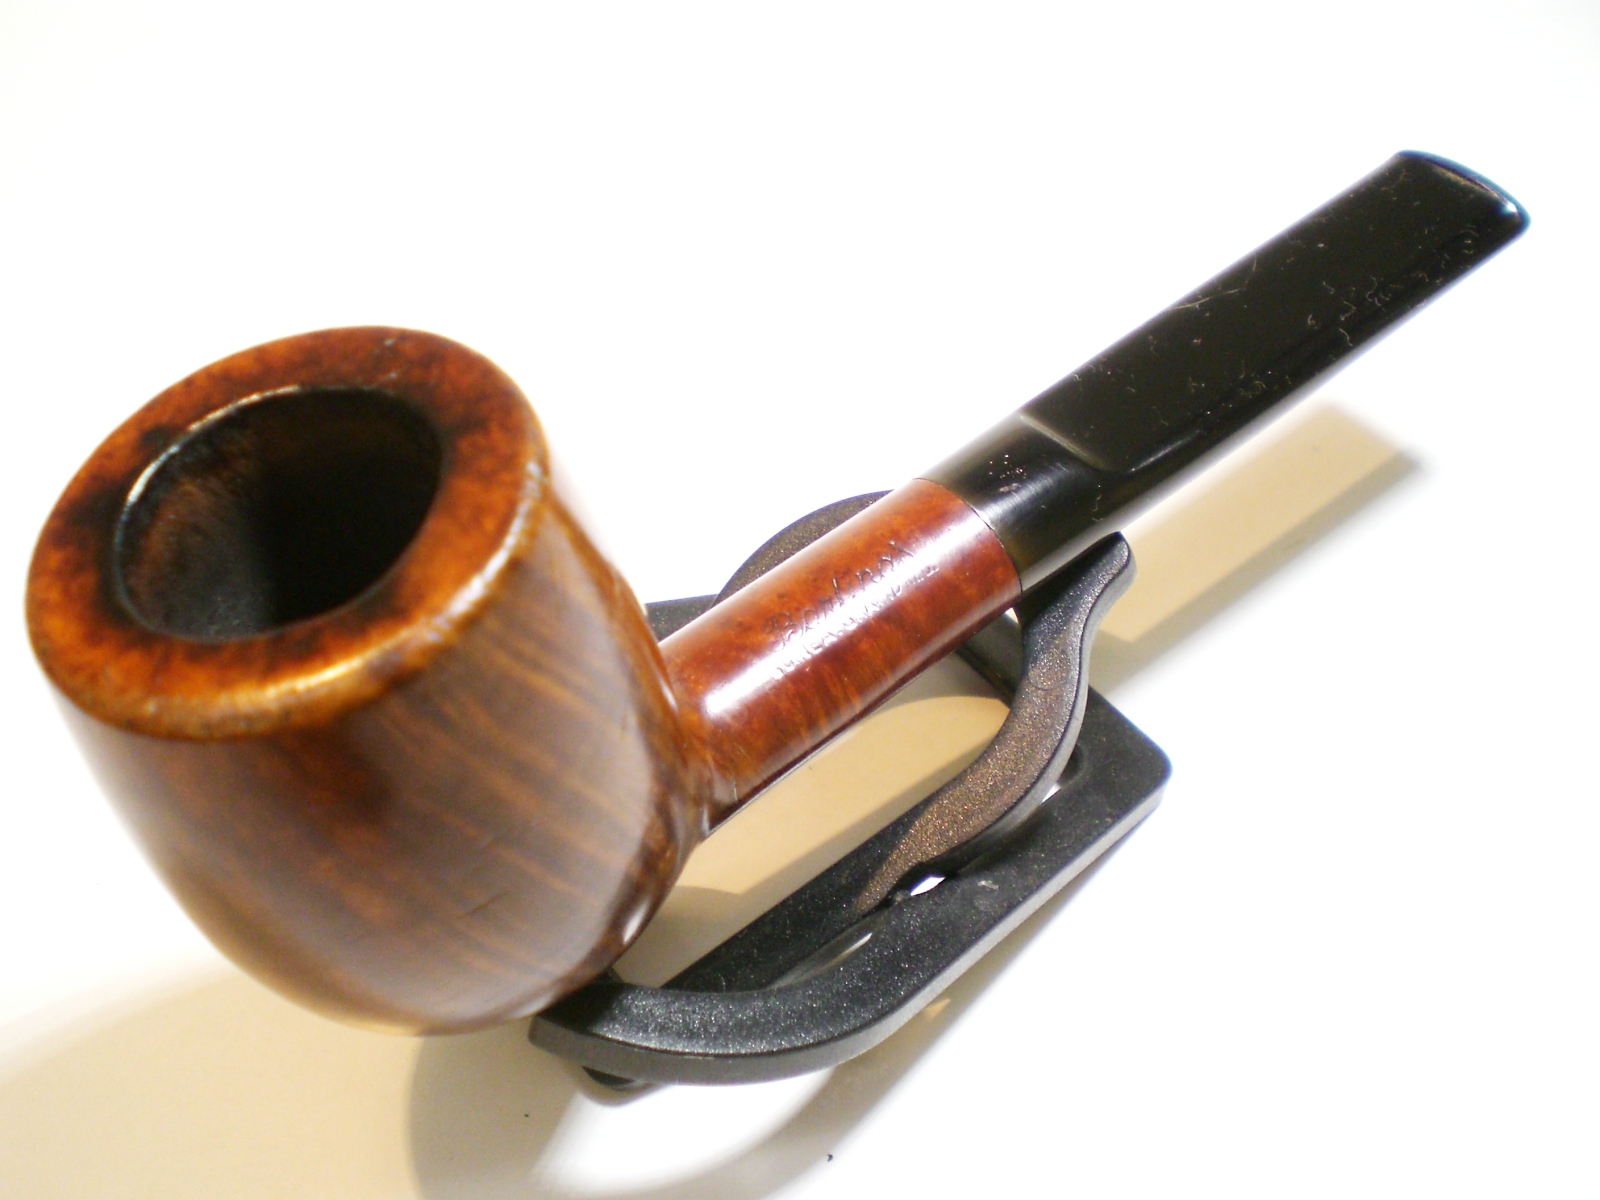
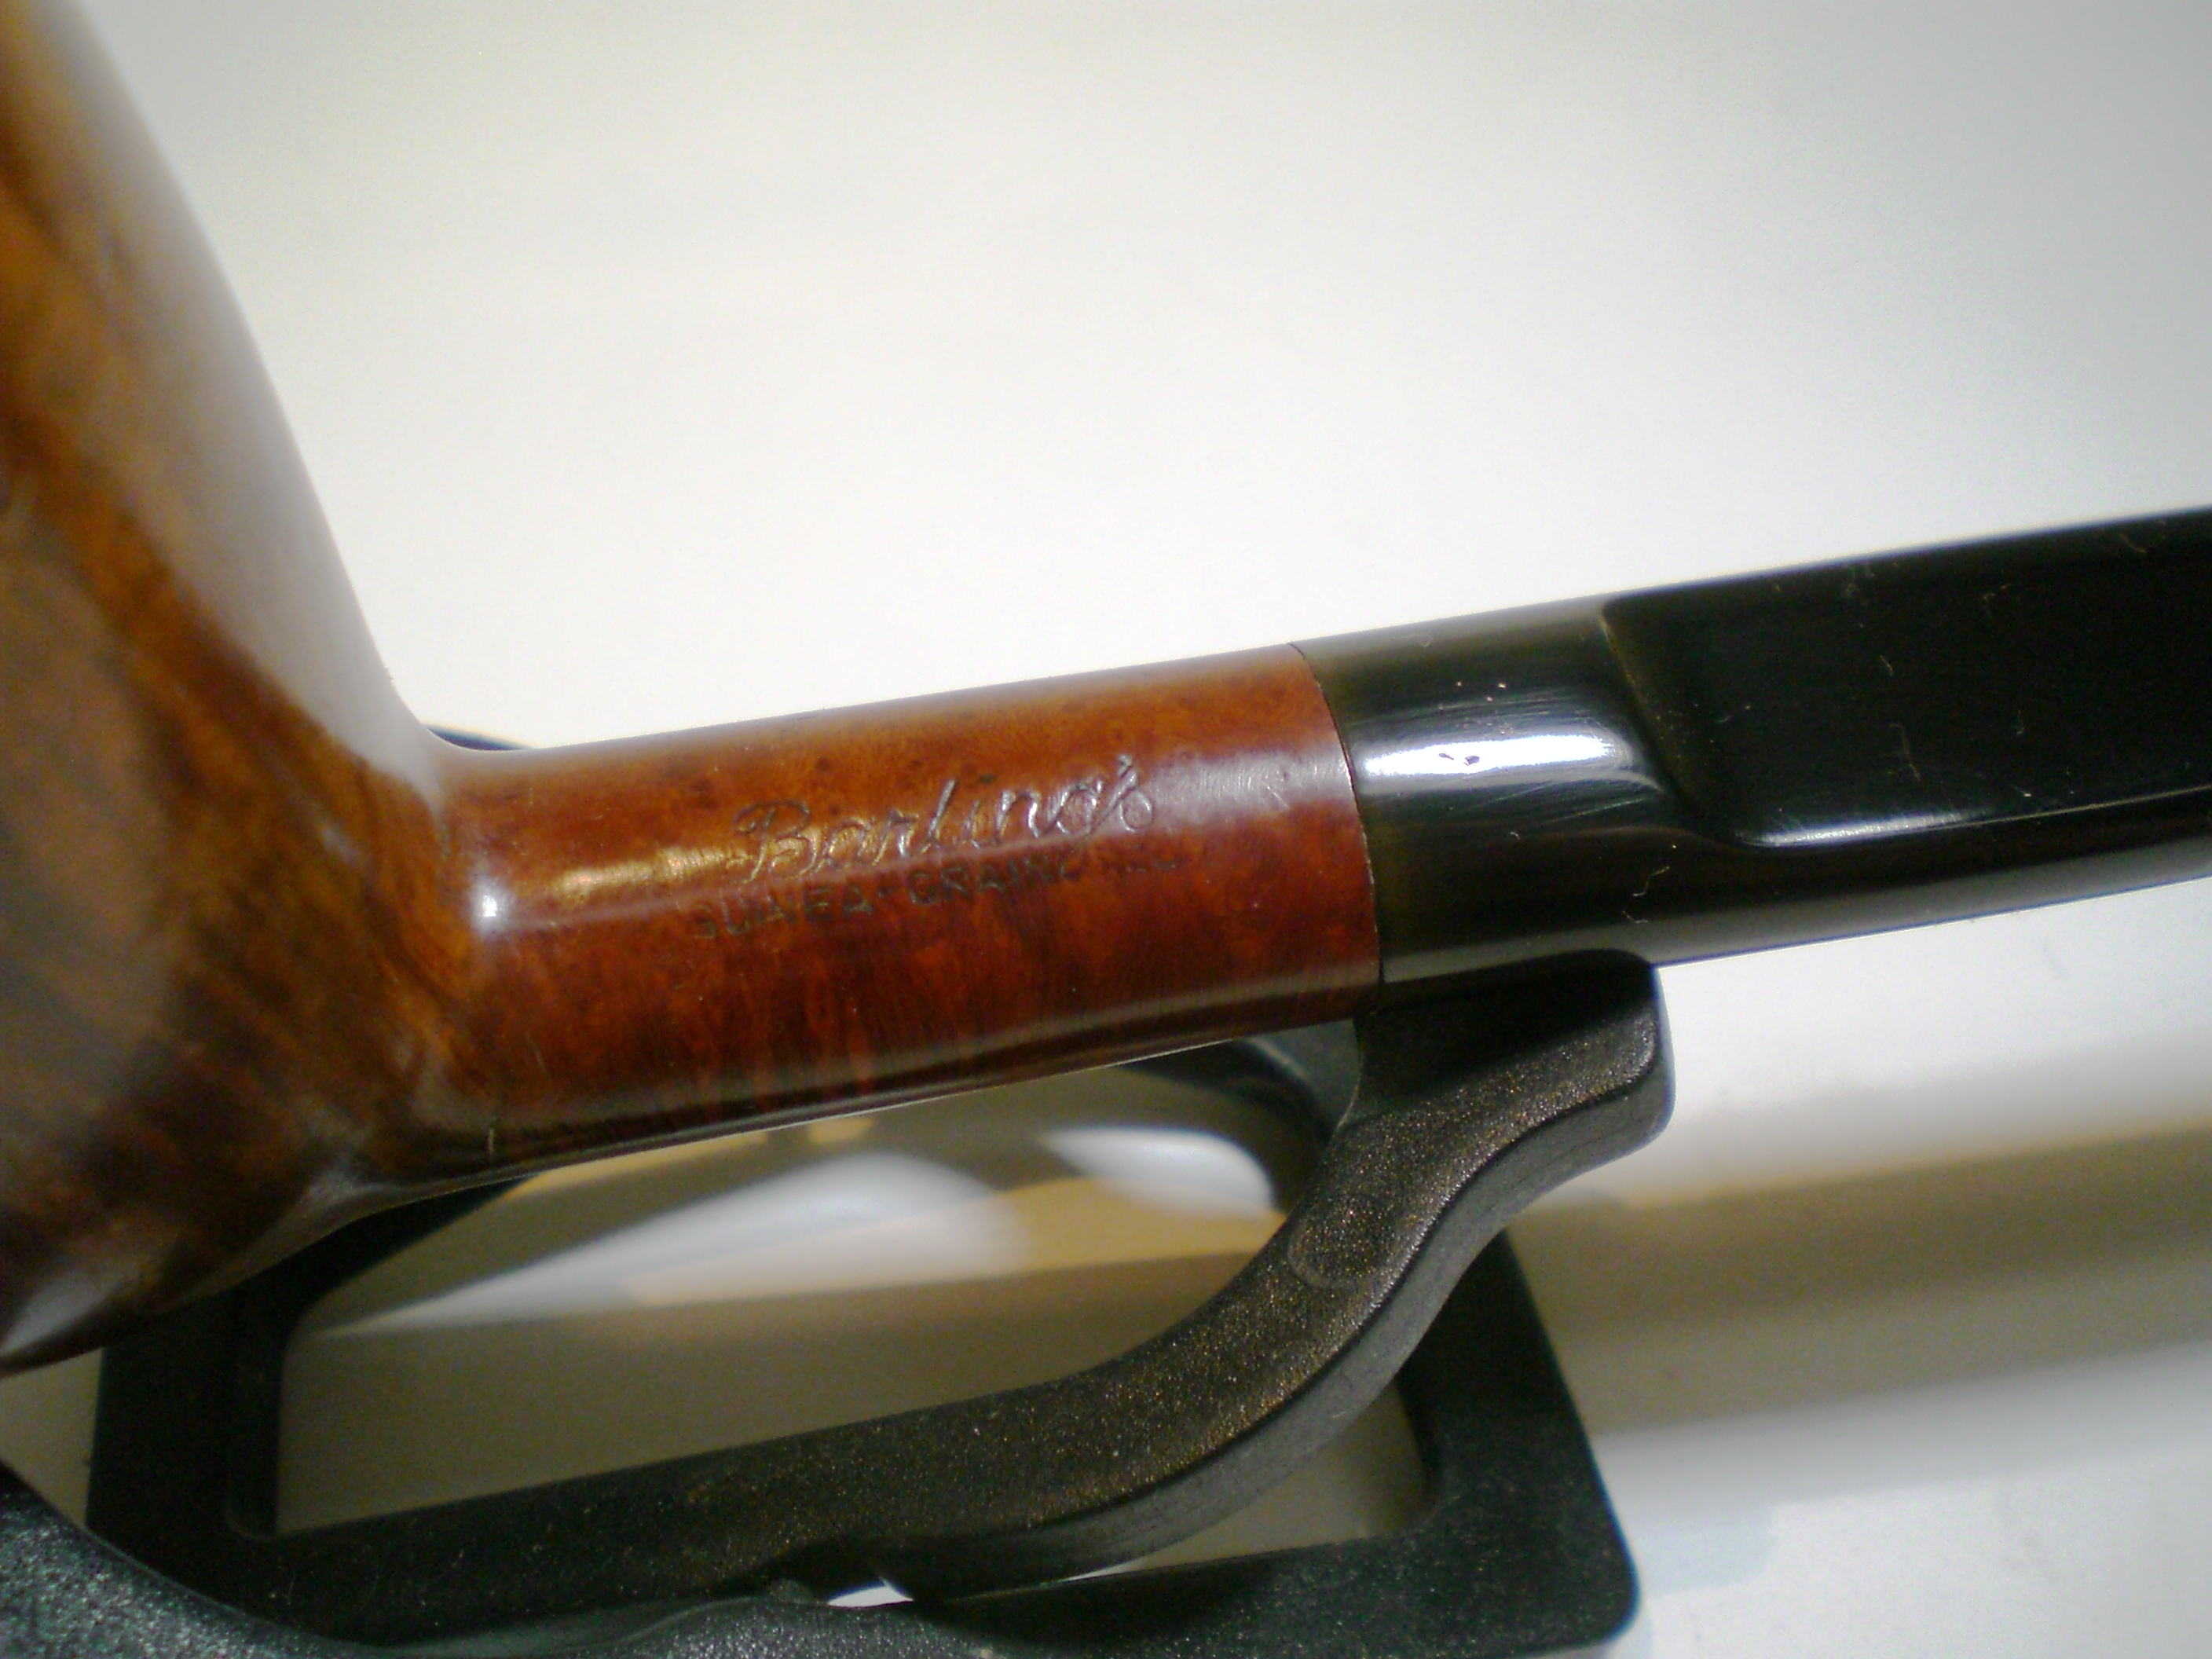
After all this I was still scratching my head about the stem/shank fit, though. There is a just-about-discernible “H” on the stem, so I know it is aligned the right way. Yet it just didn’t seem quite right. It’s a bit loose to boot, so I will have to deal with that as well. I was grateful at this stage, whilst documenting this in “real” time on the forum, to get some reassurance from others regarding tricky diamond shaped stems. Never underestimate the benefit of soothing words from your peers when things look problematic!

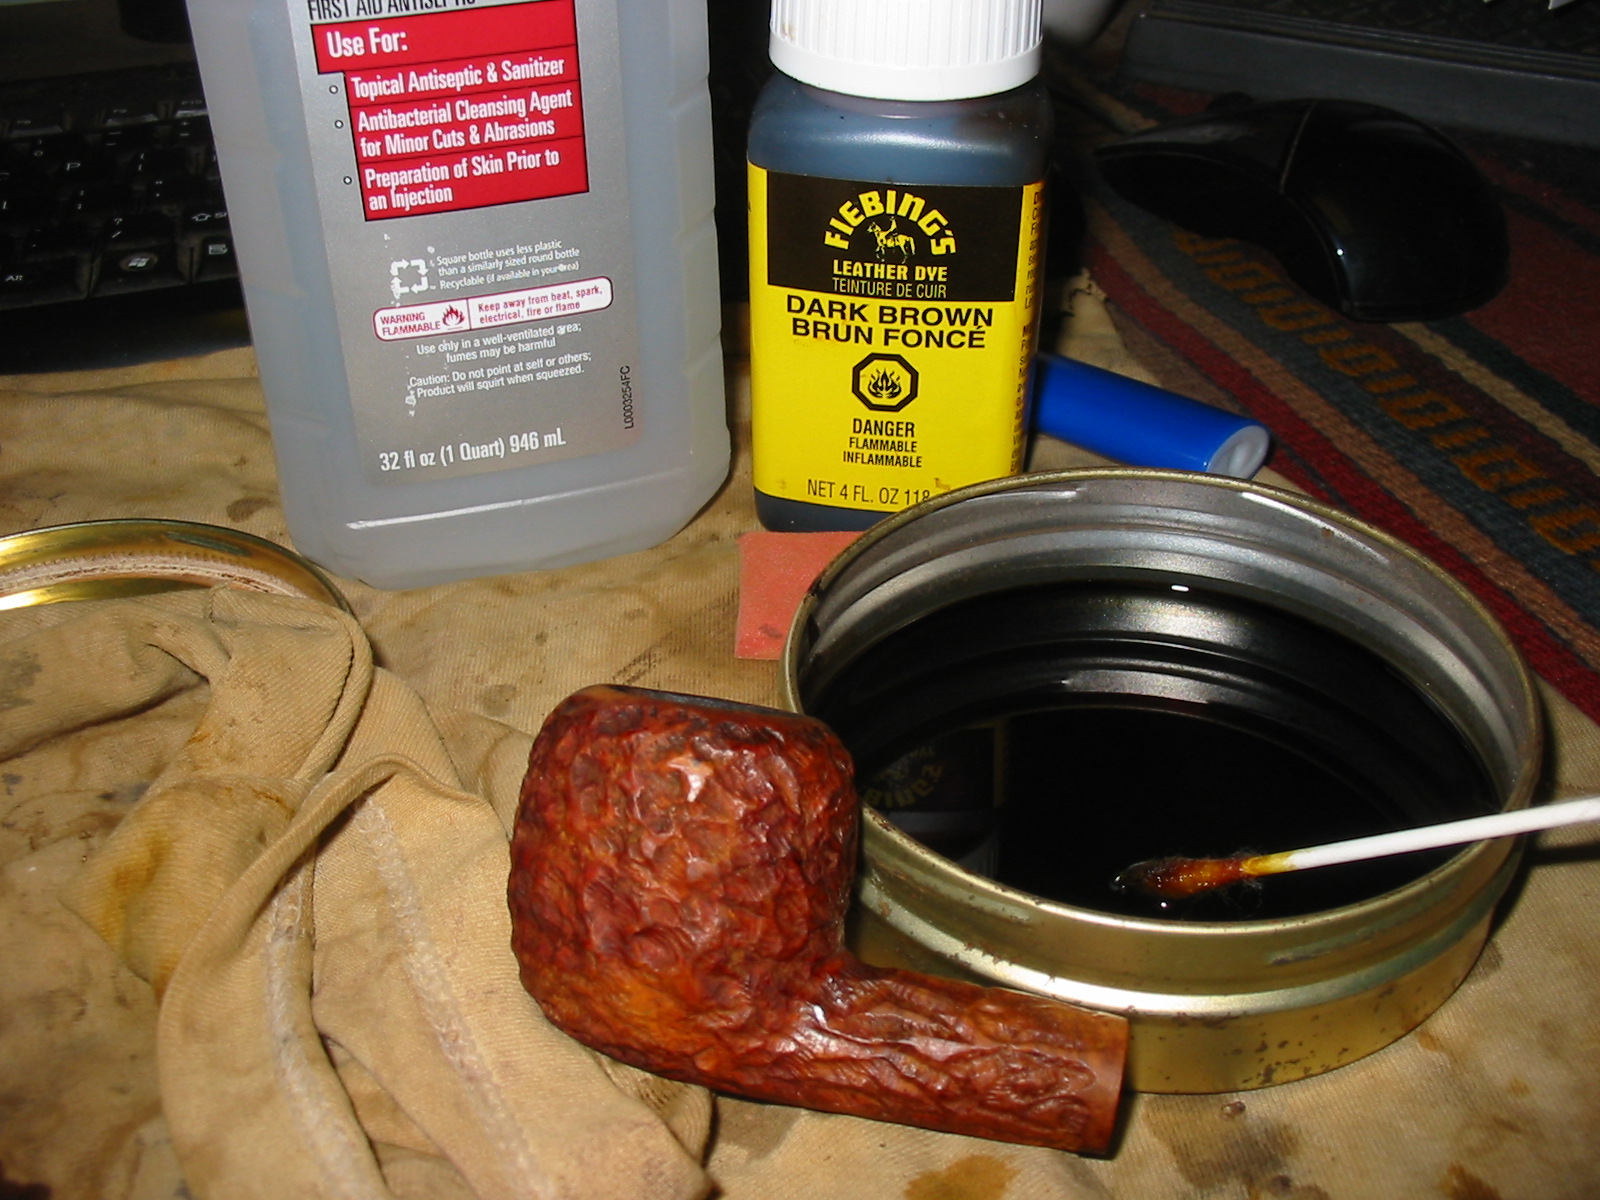
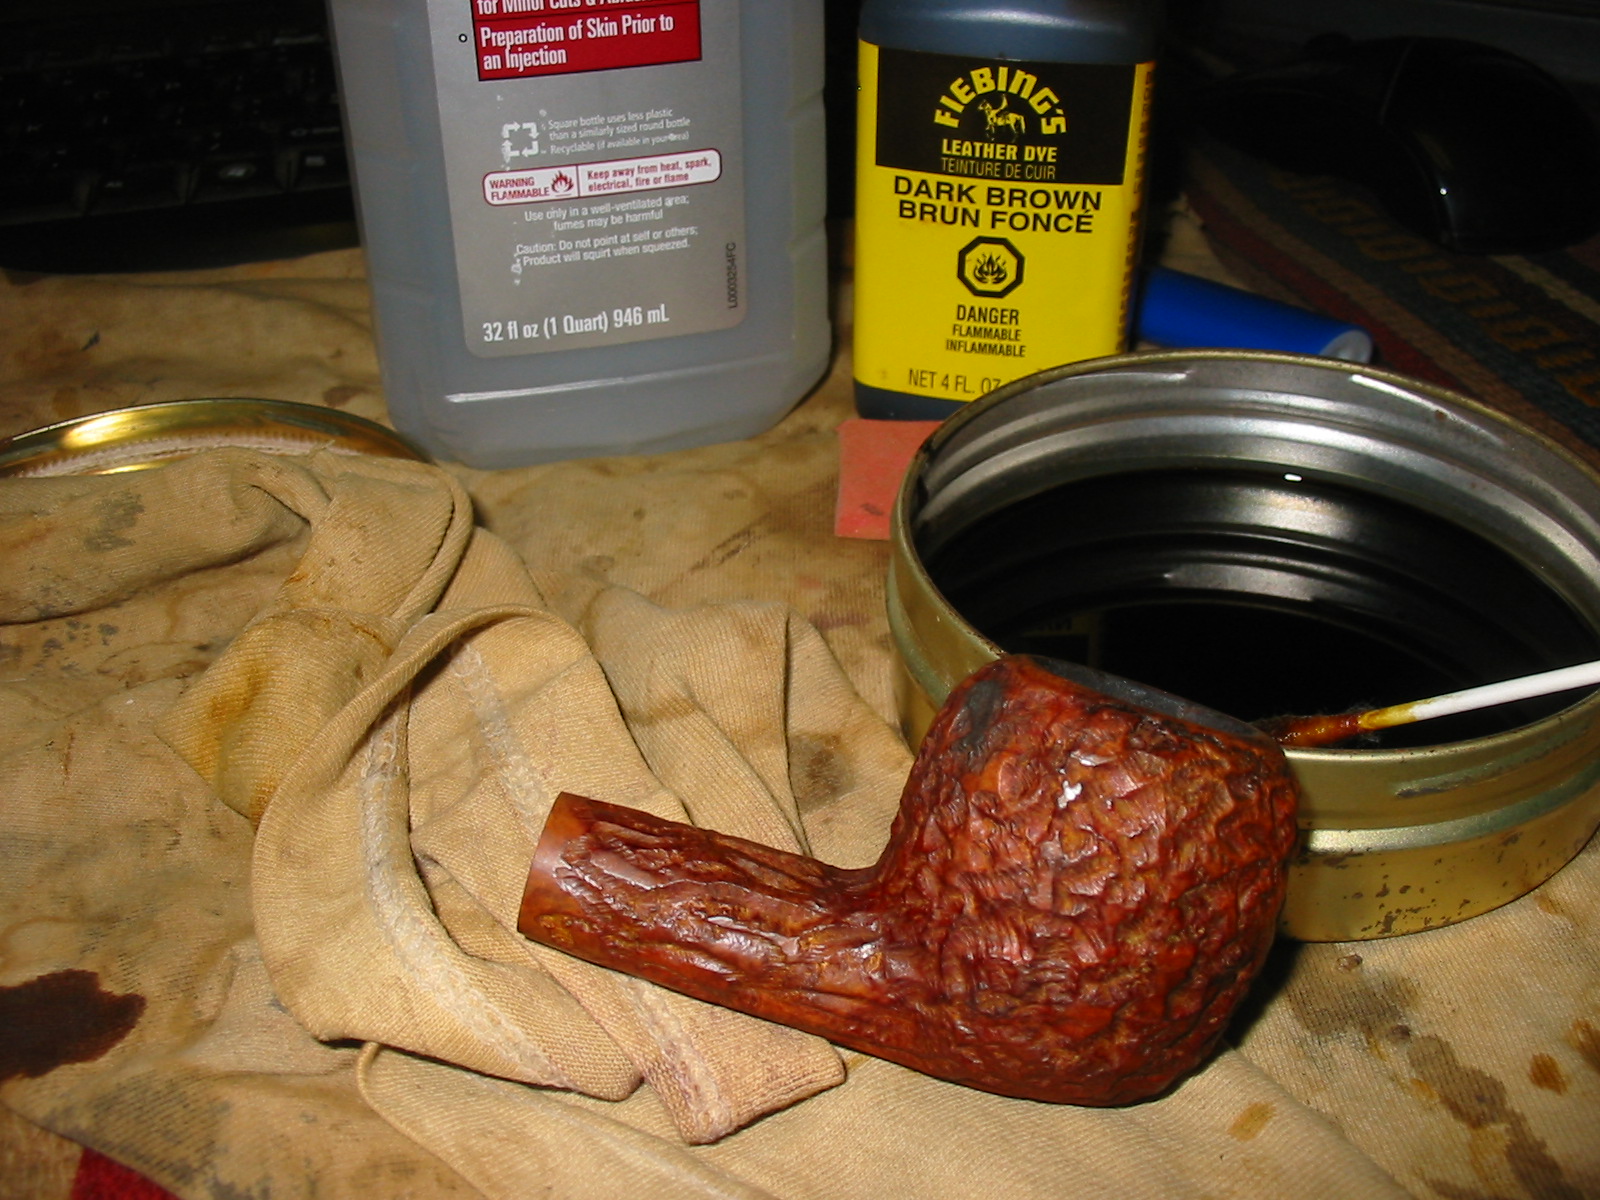
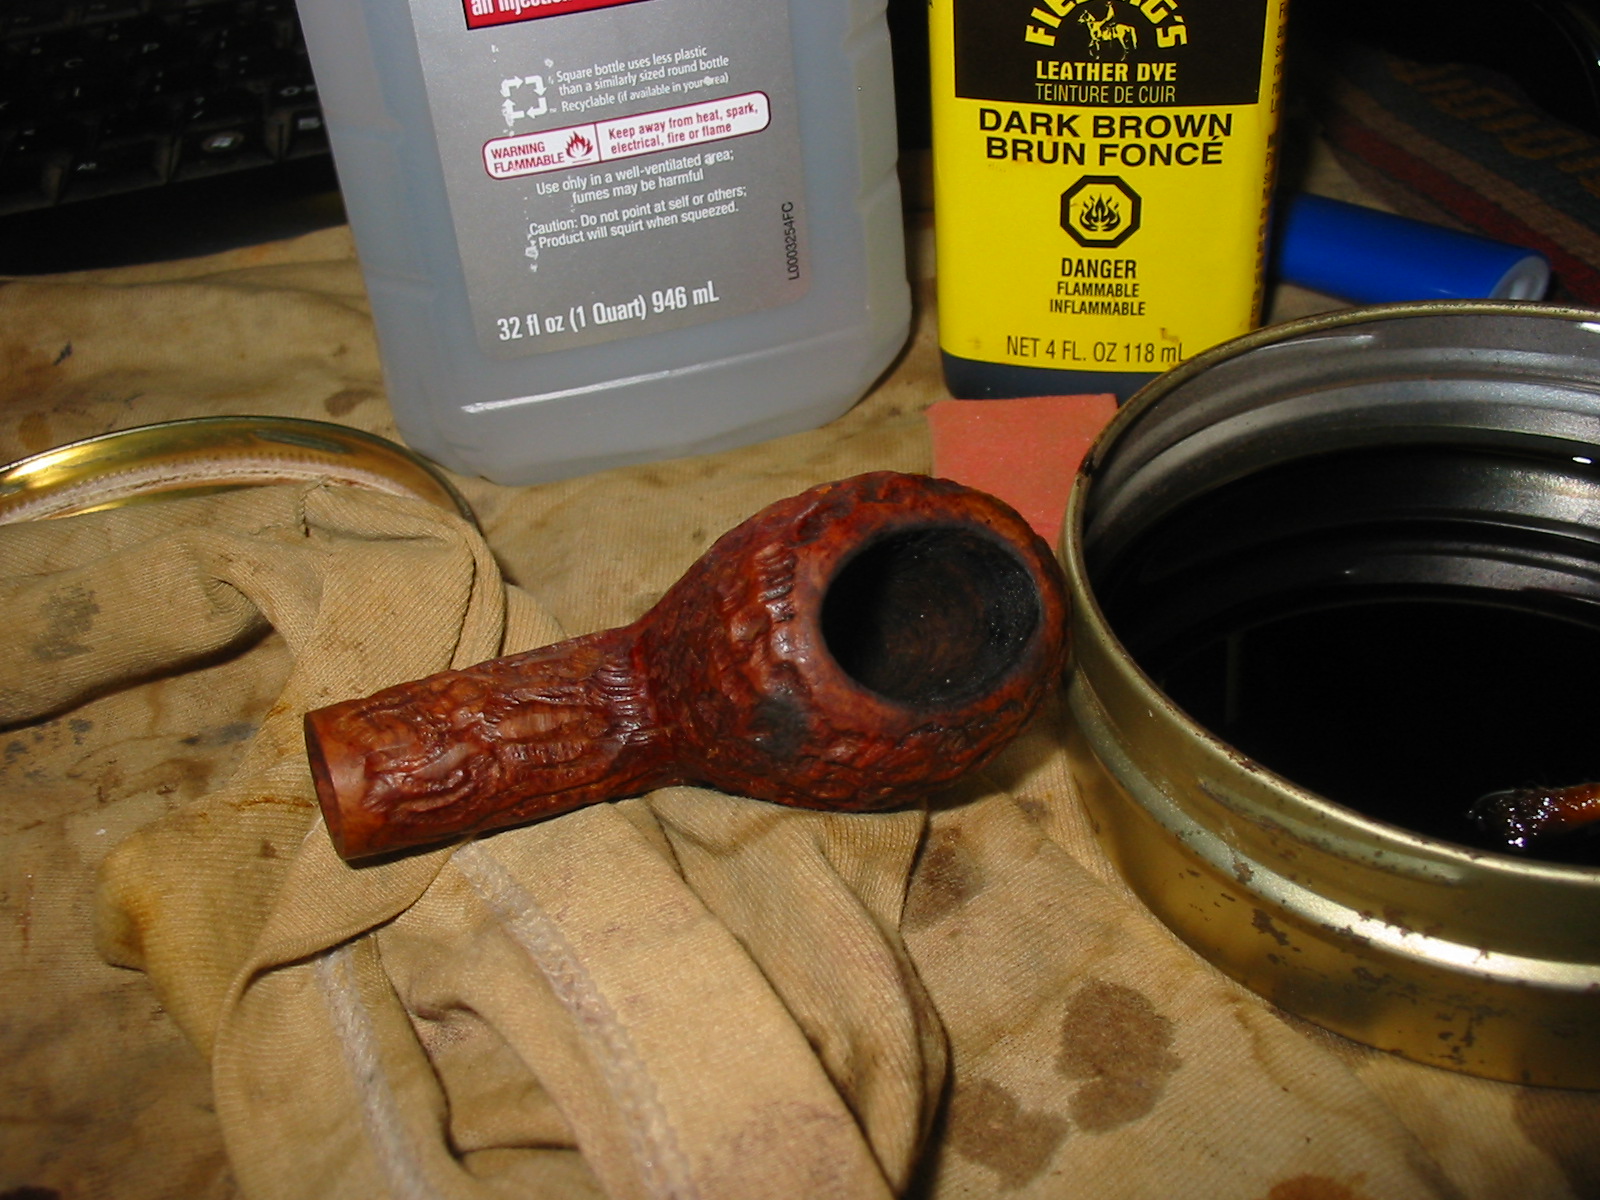
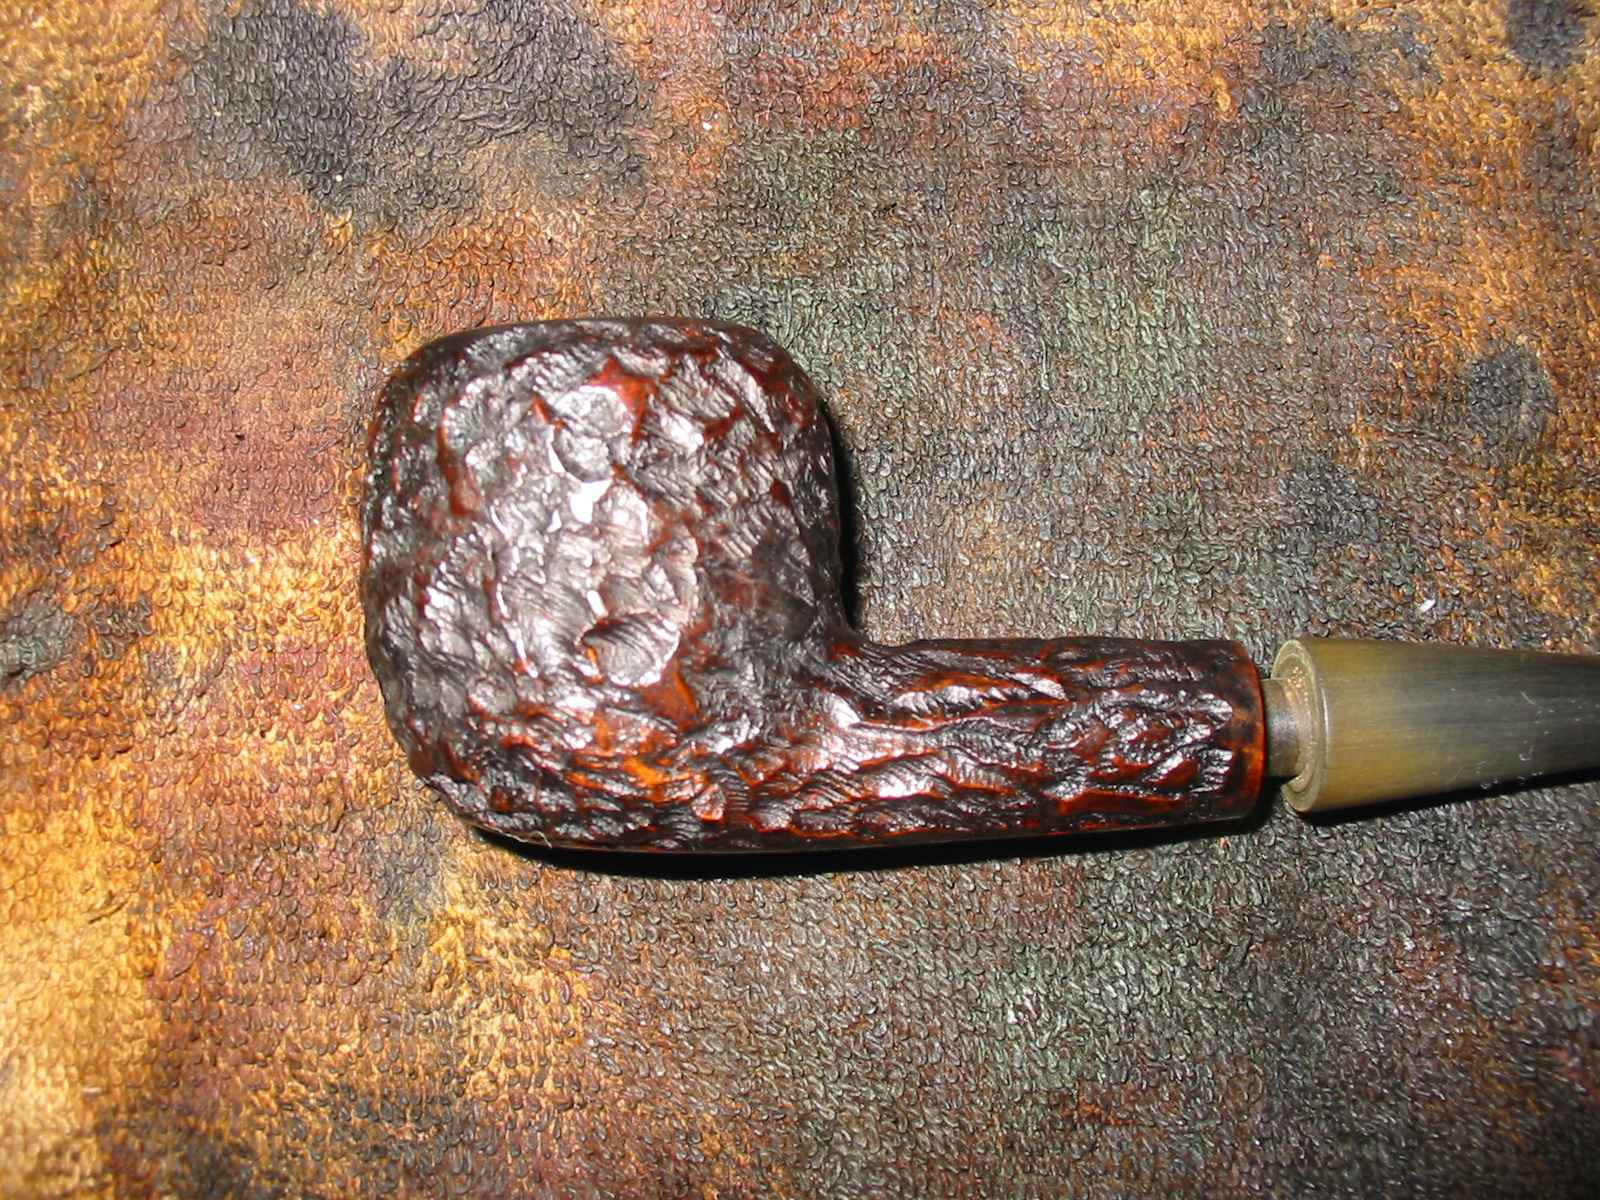
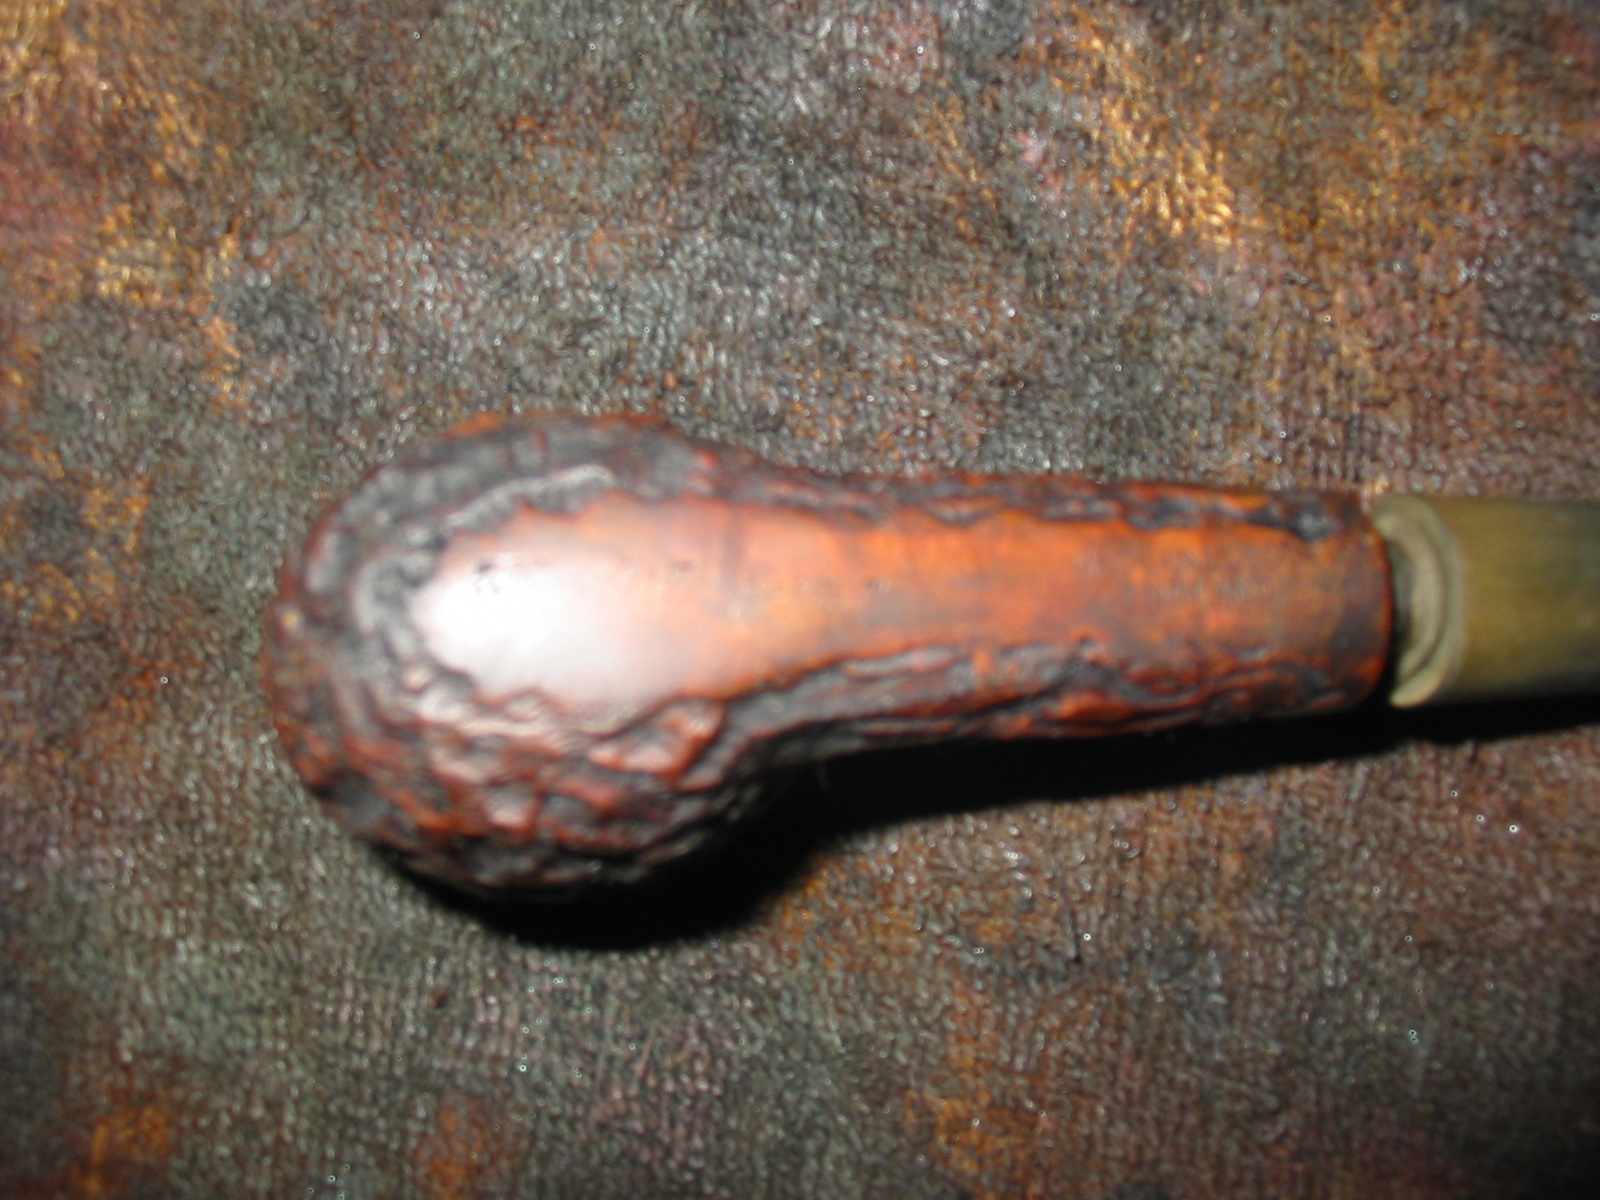
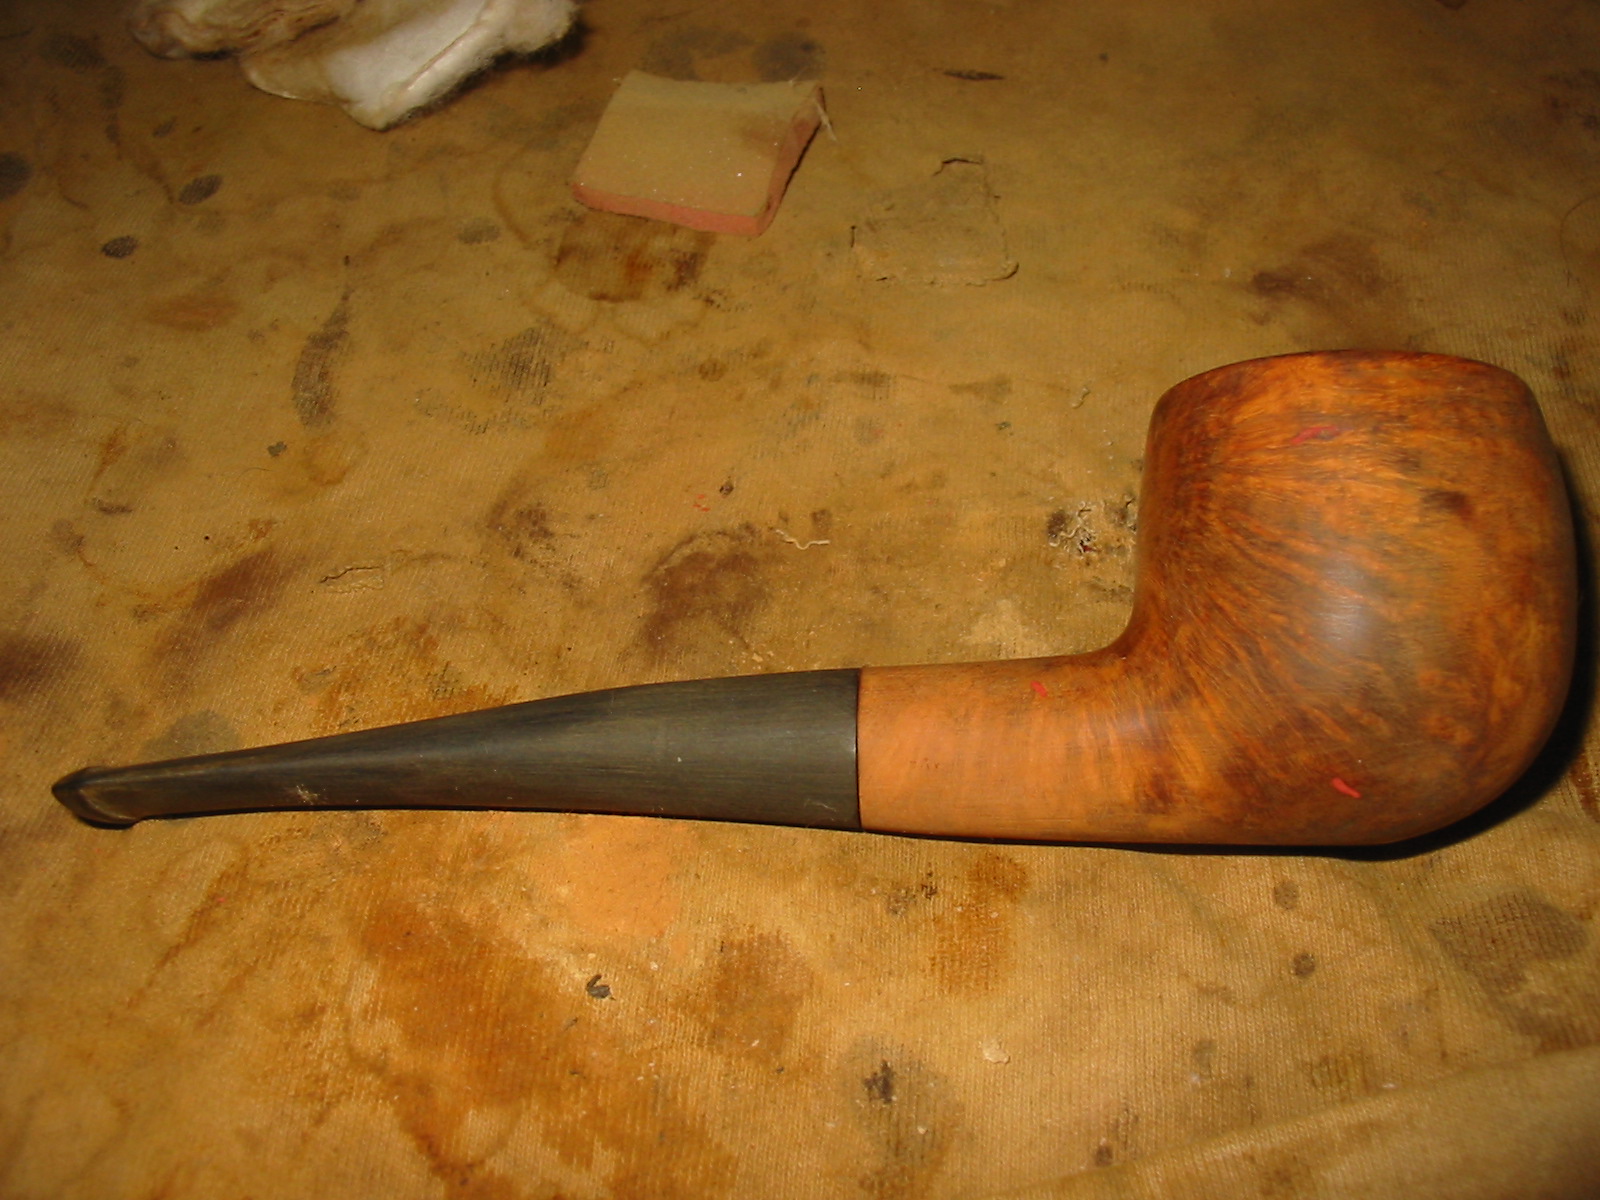
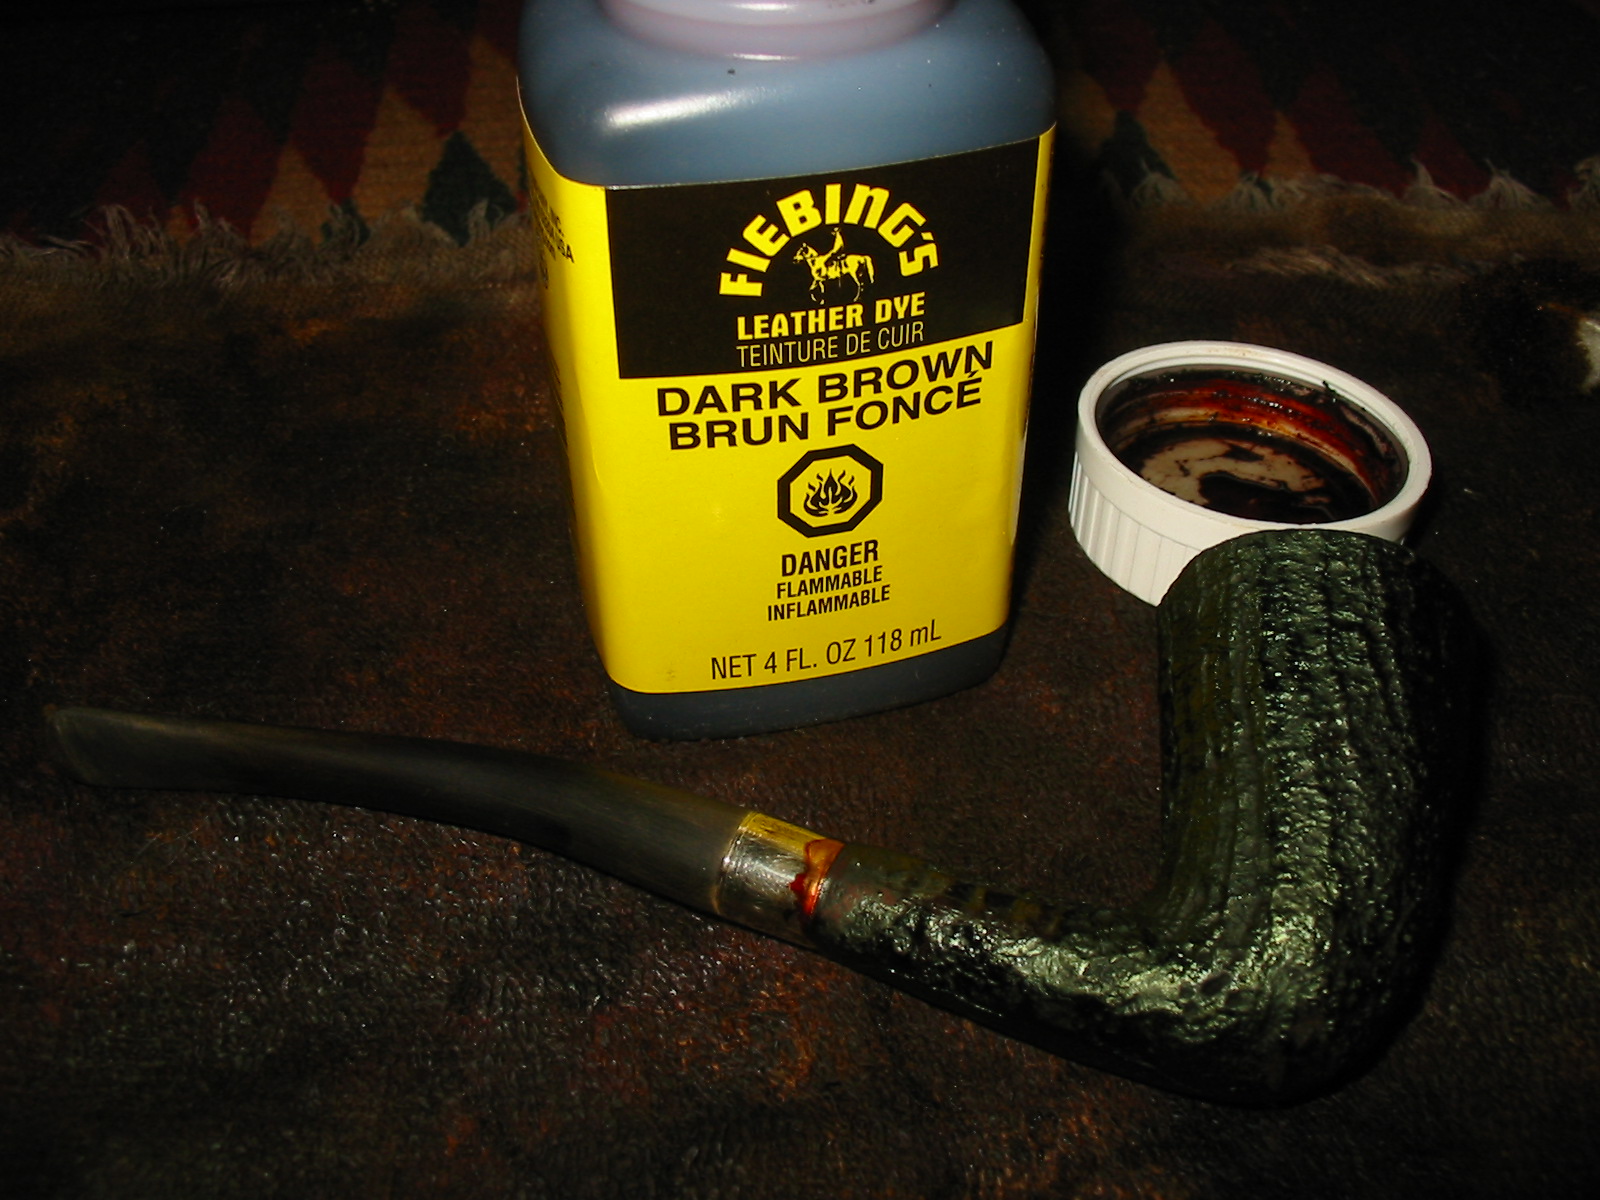
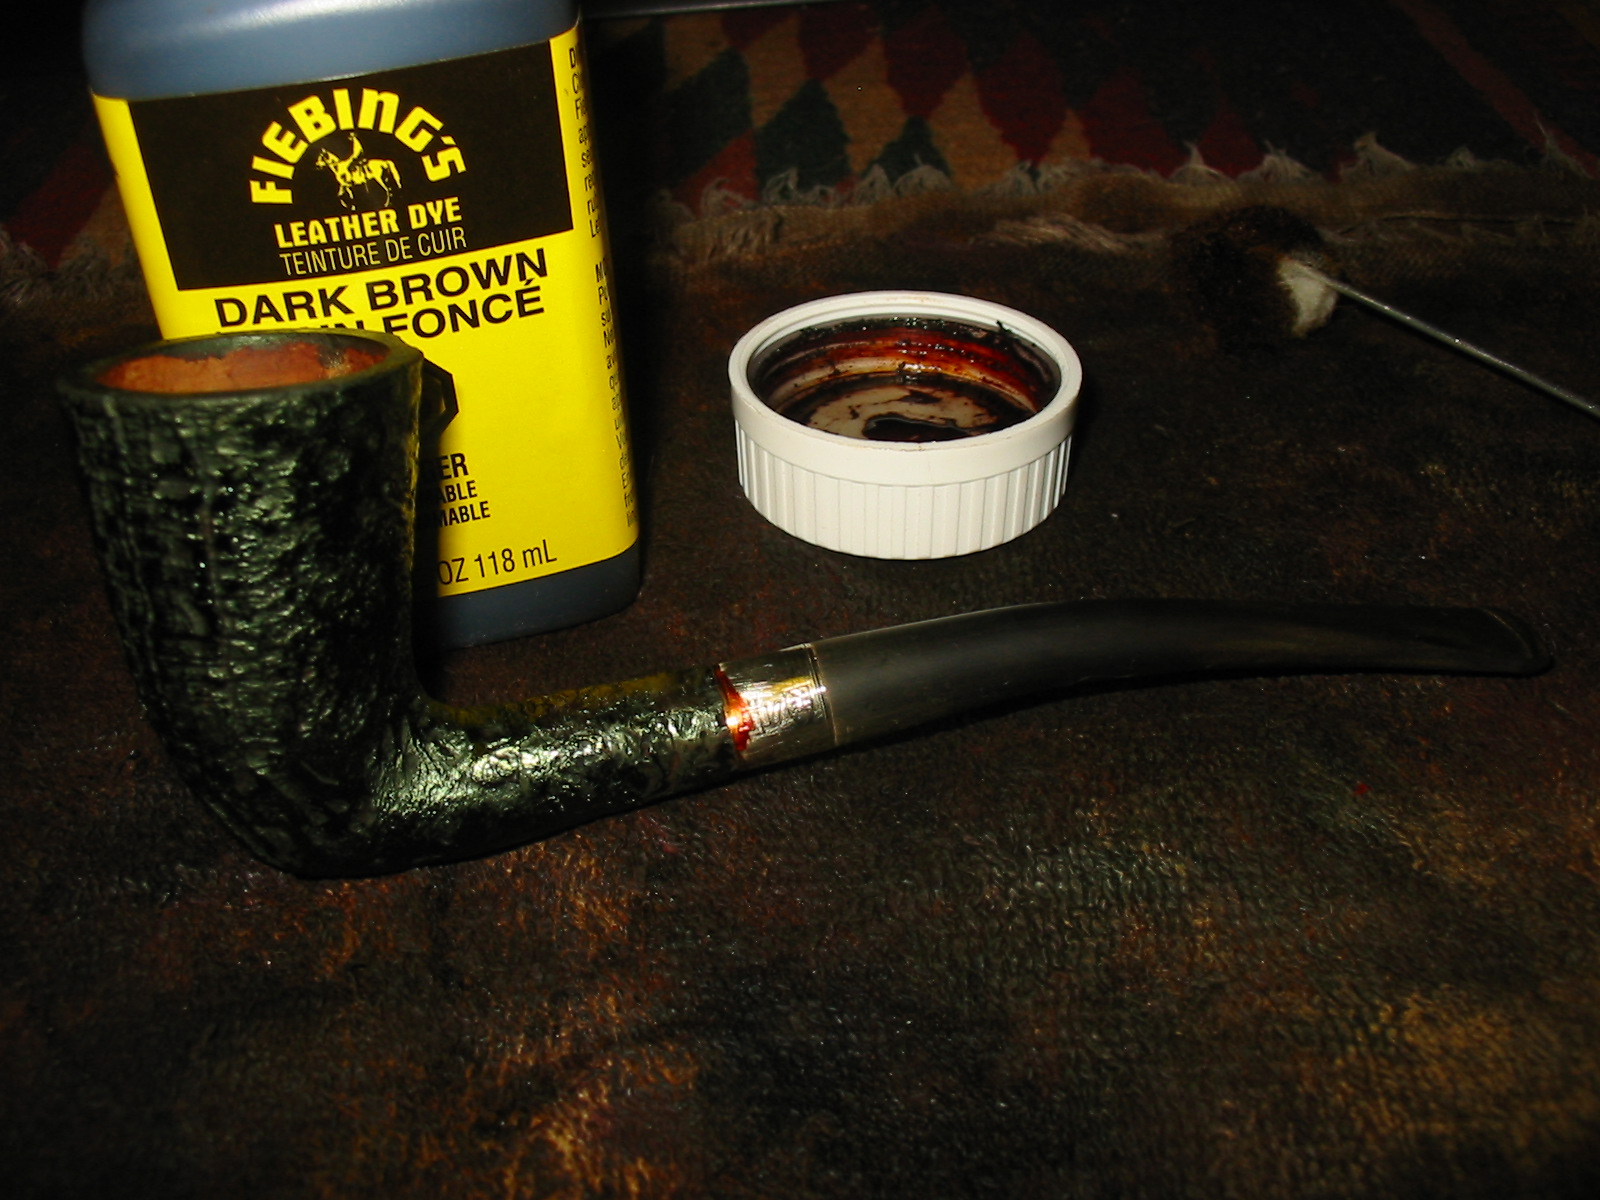
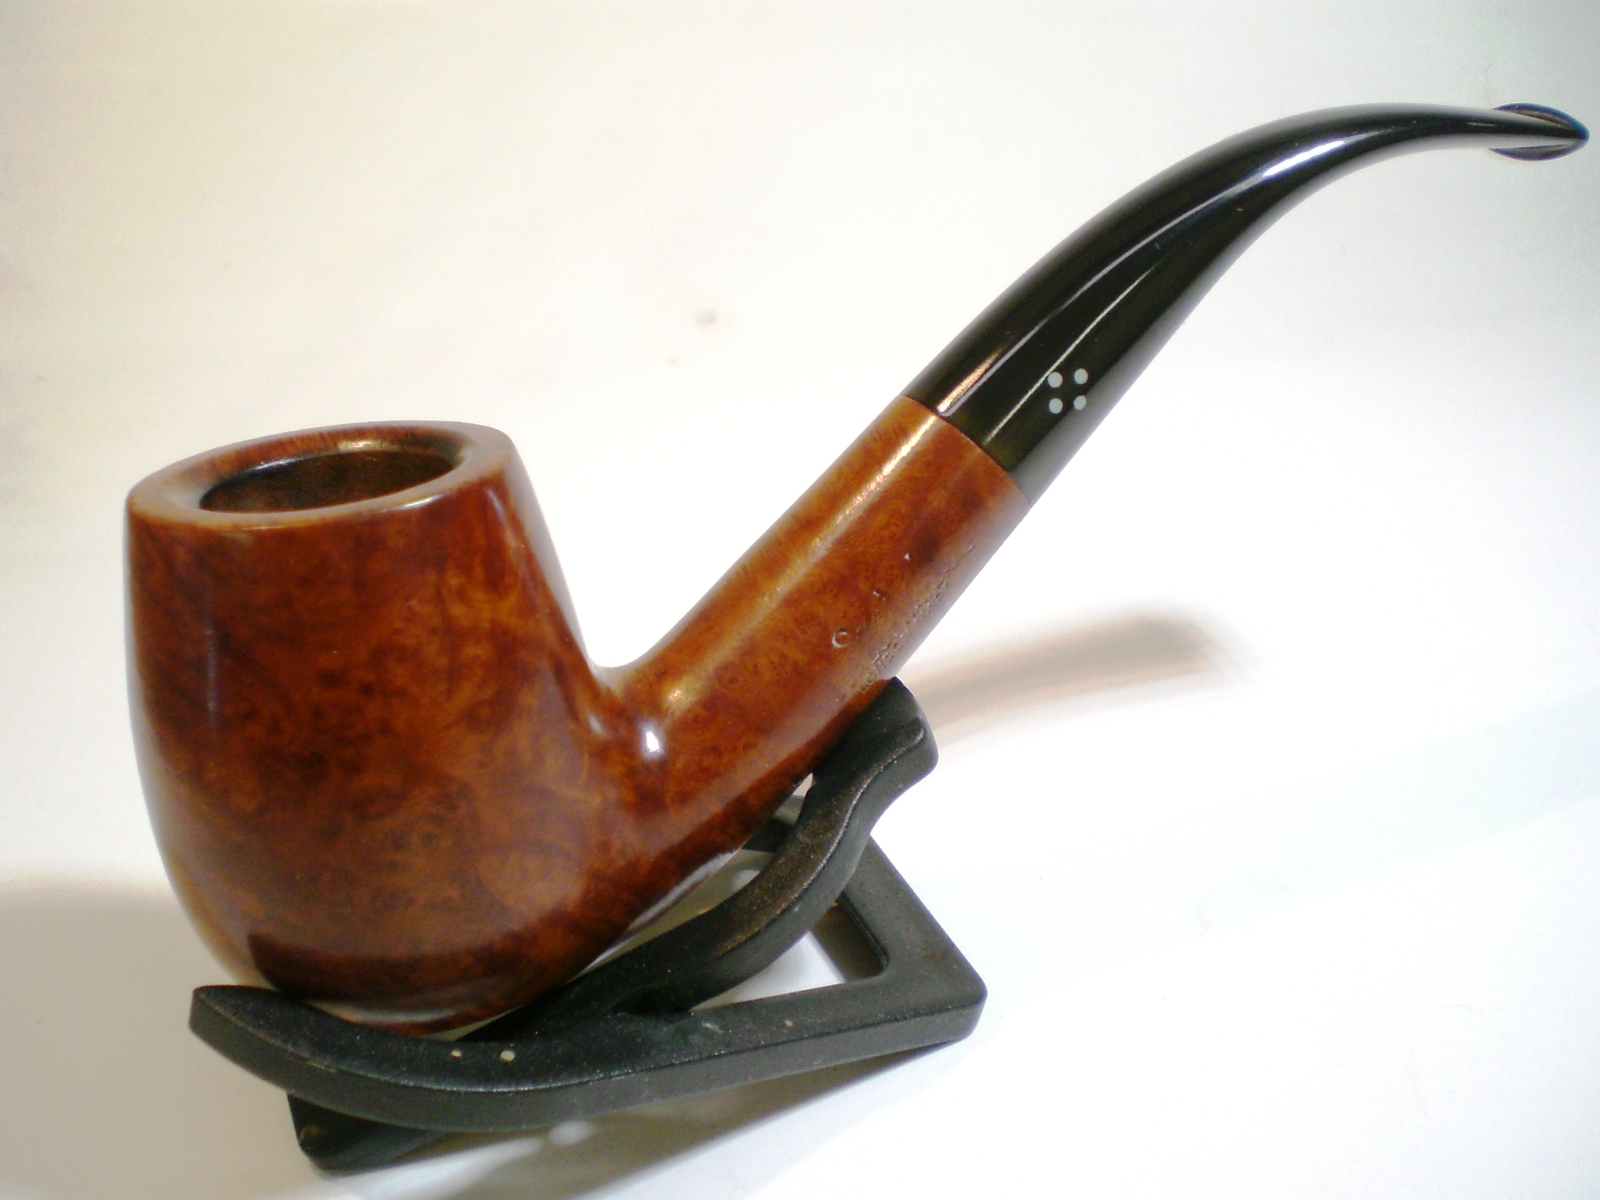
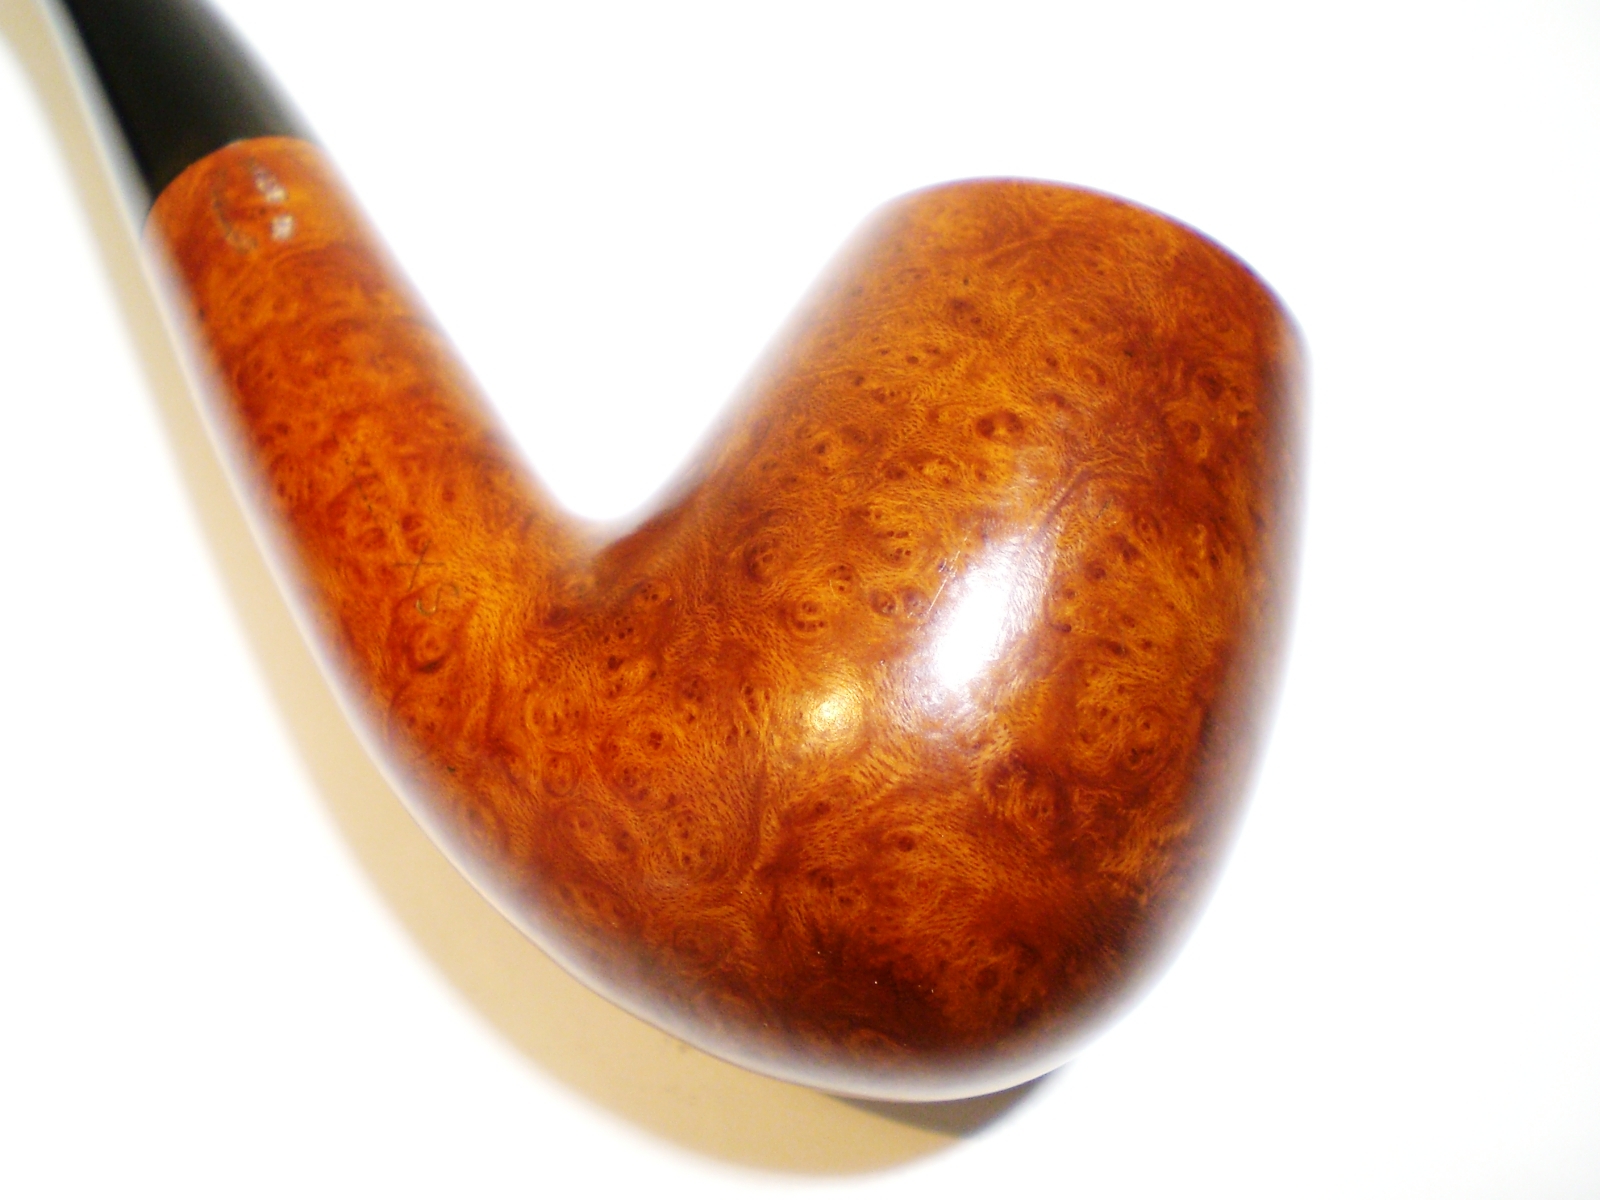
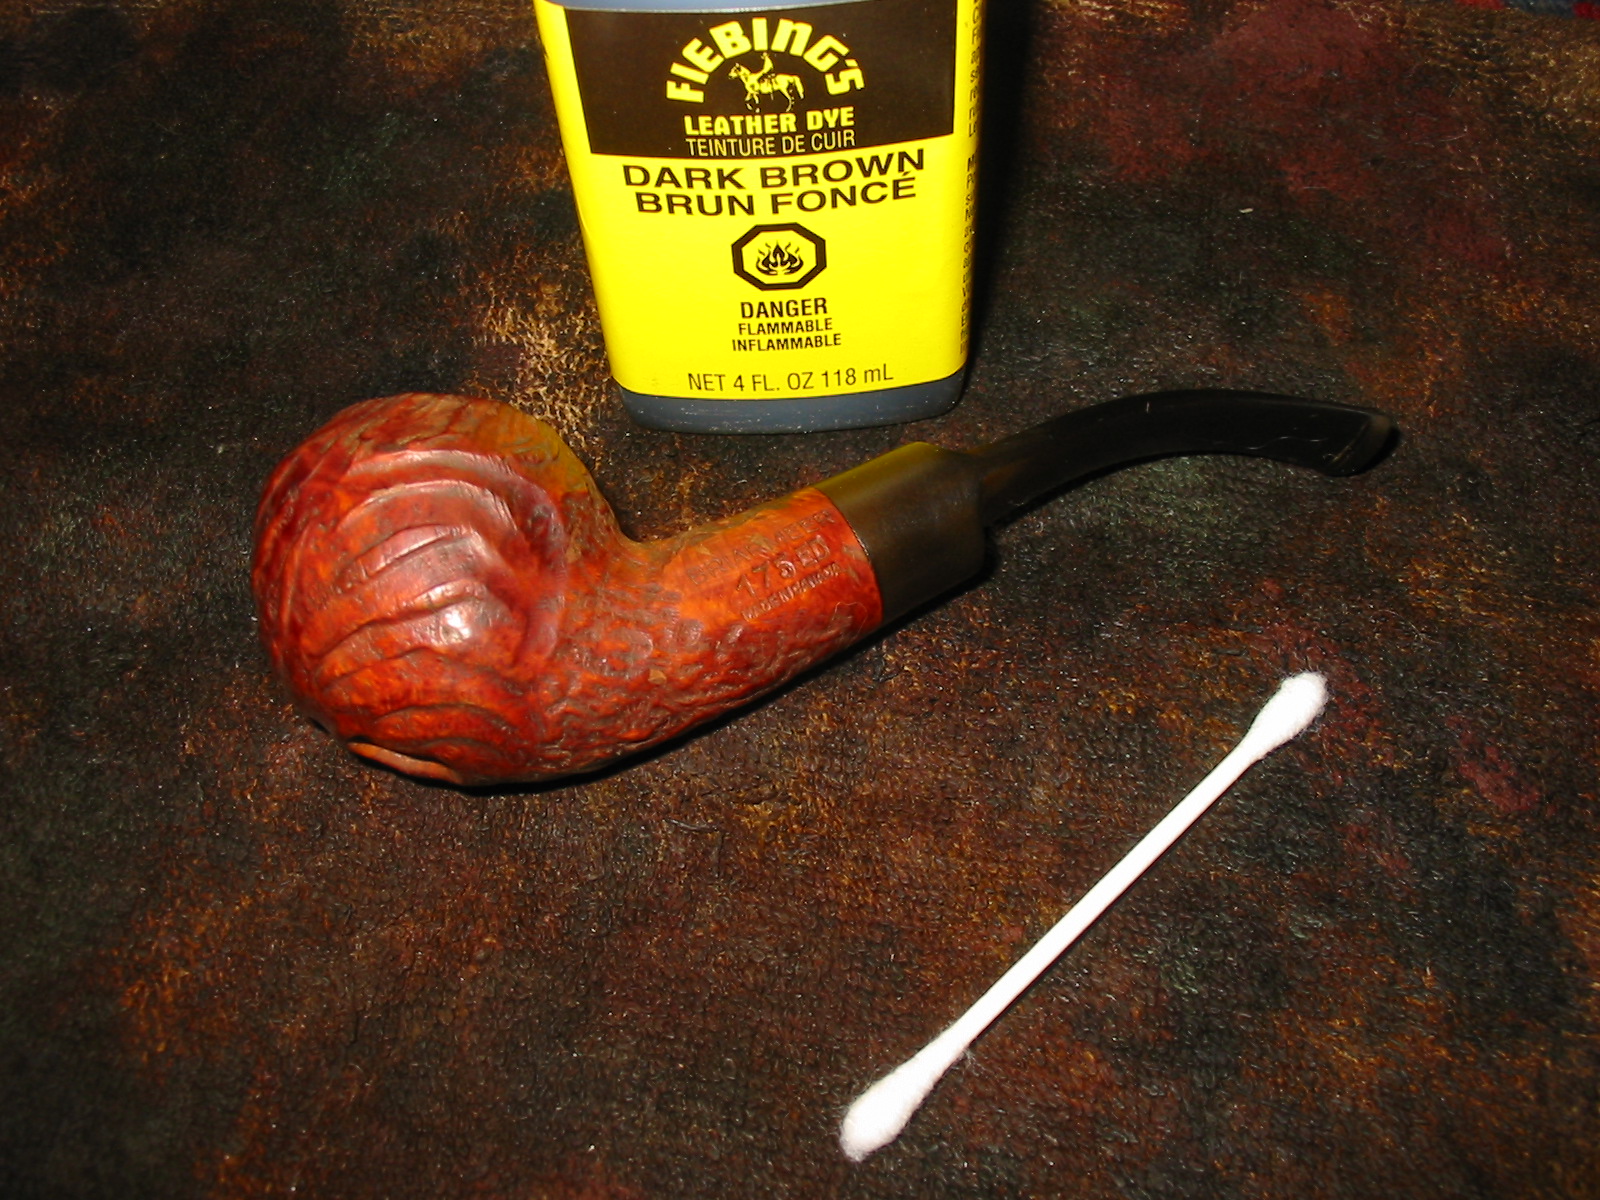
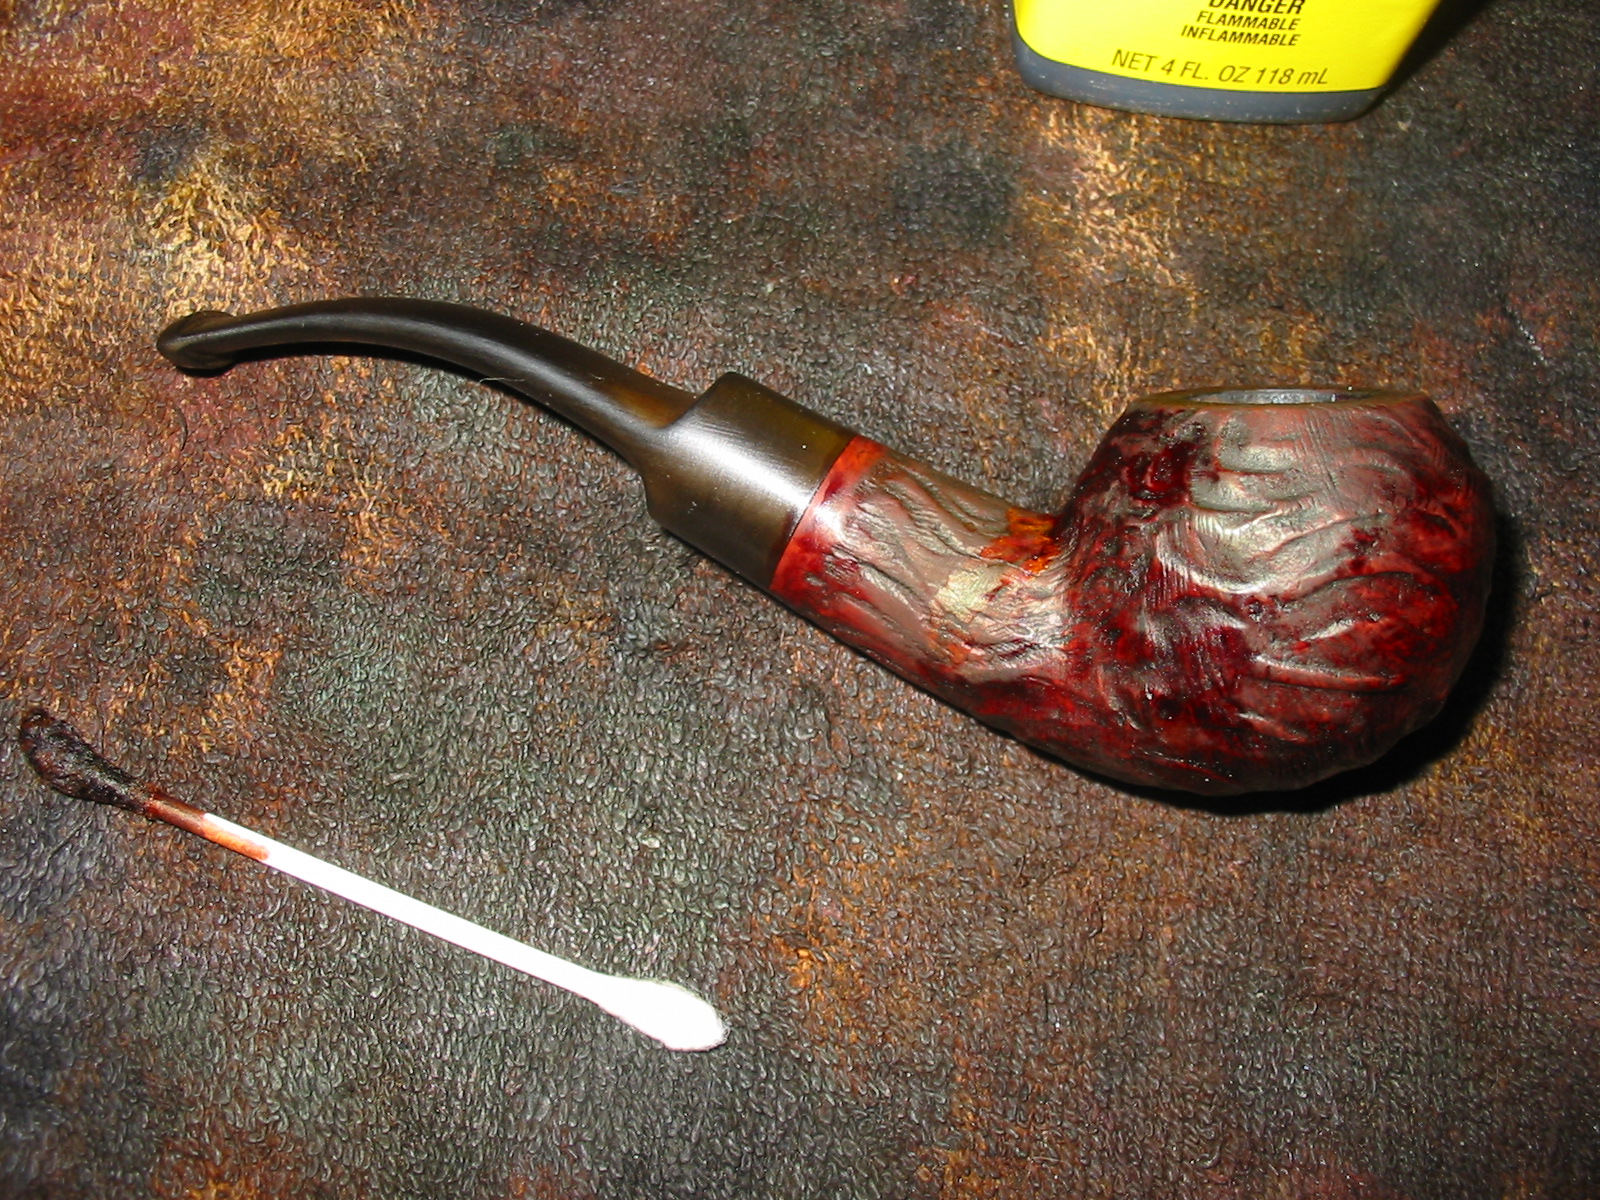
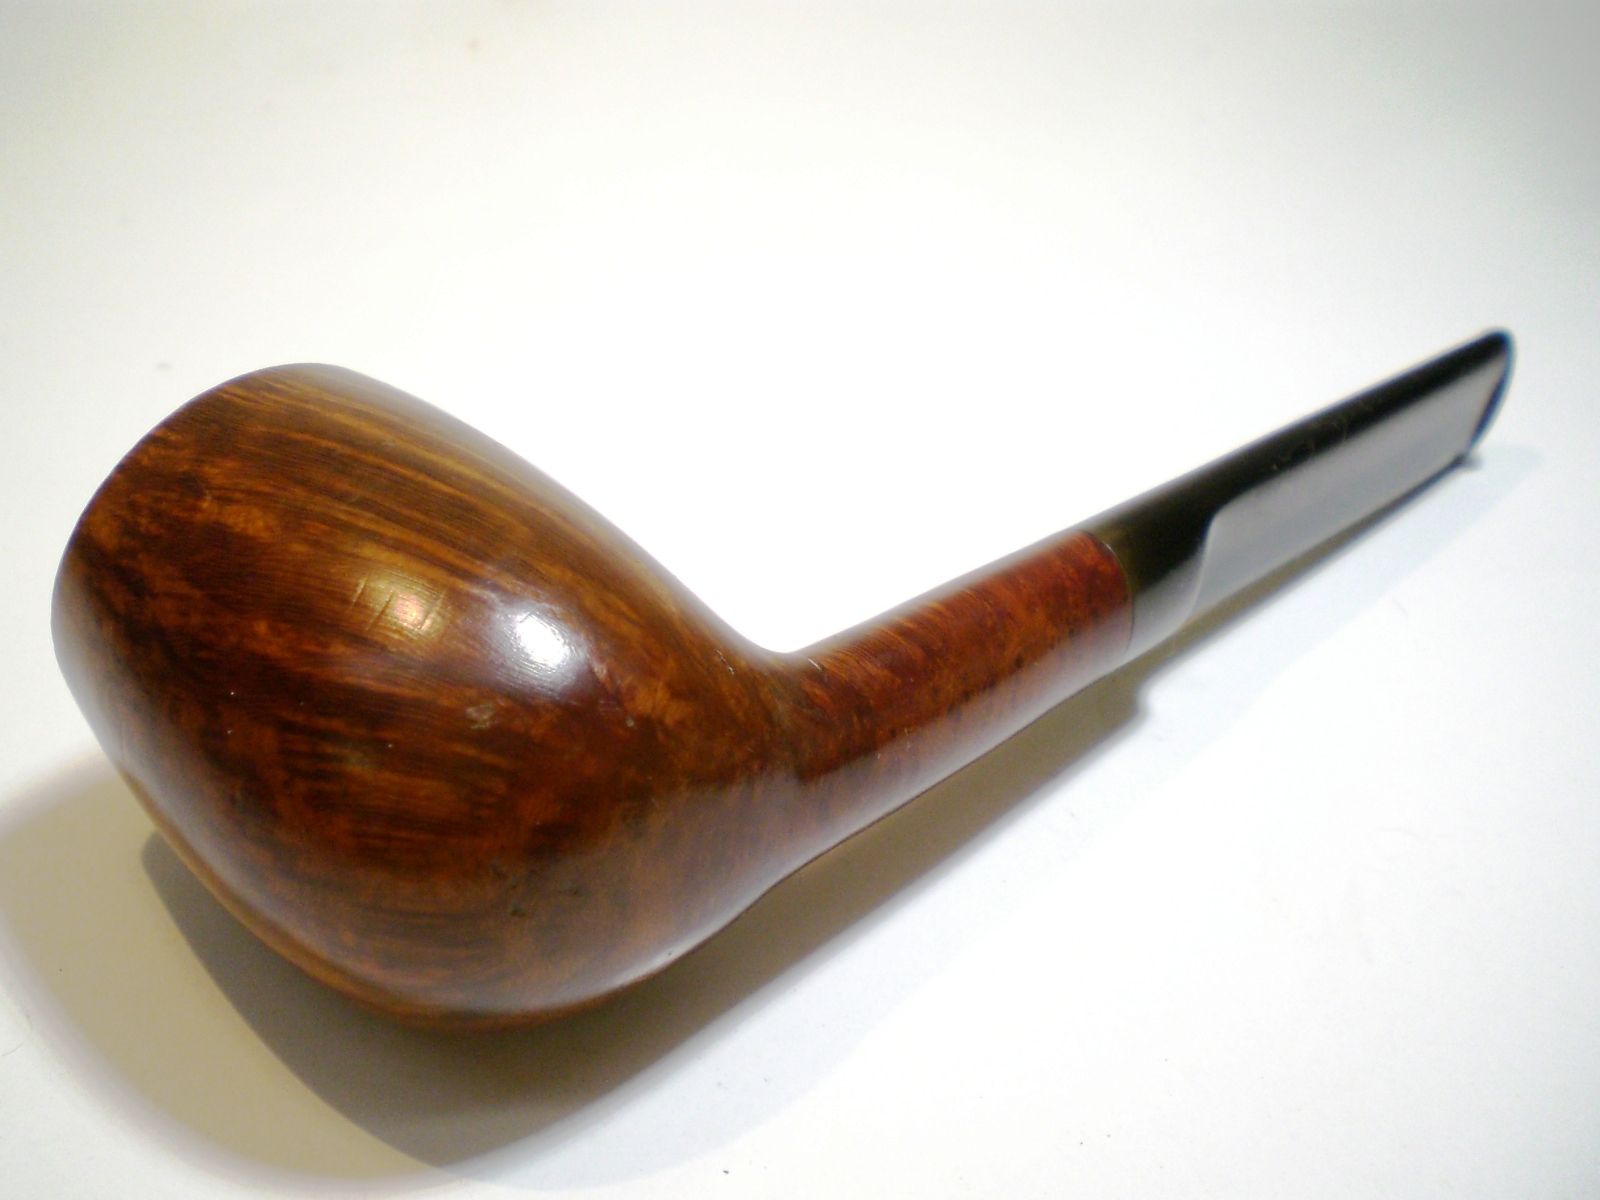
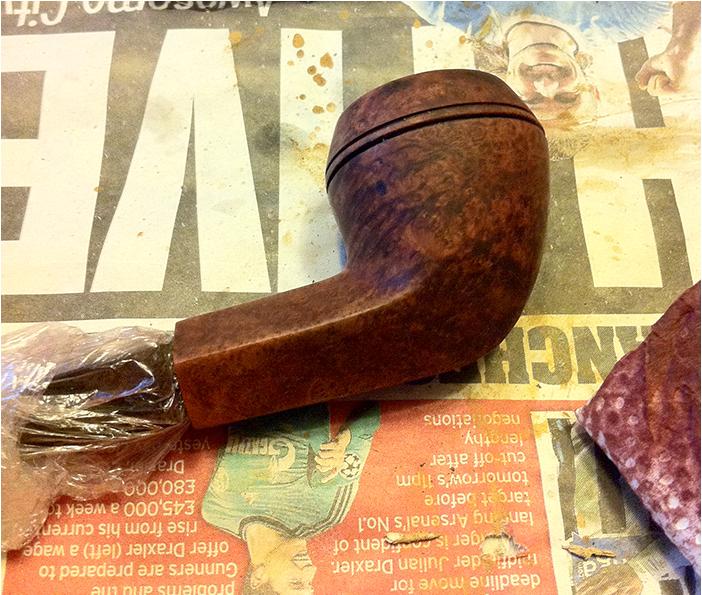
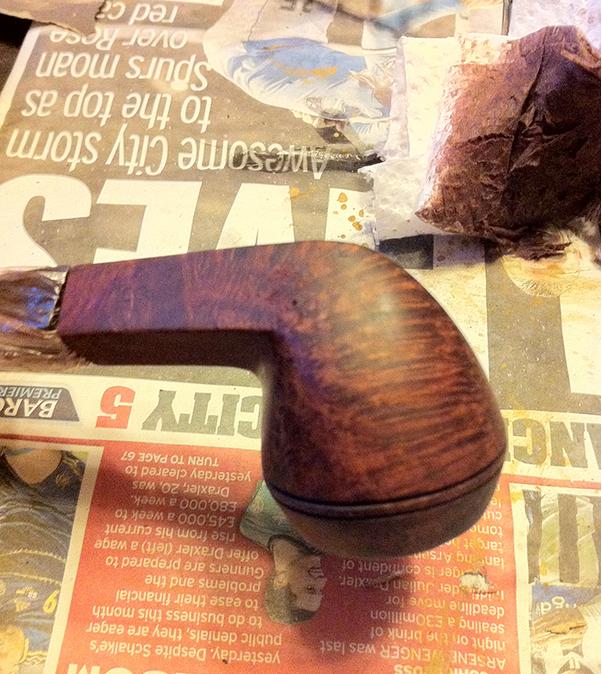
Moving on, here are the first stages of colouring the stummel back up. I use Rustin’s Wood Dyes, which are naphtha based. Whilst you have to exercise some care, the evaporation is almost instant and the drying time is quite short, so two to three coats can be applied in relatively quick succession. I do like it to rest for at least 24 hours until finishing, so that’s it for now.
Chiz10

Chiz11

Oh, nearly forgot, one more tip: I wrap the stem in clingfilm (plastic wrap in the States?) and use that as a handle whilst applying the dye.

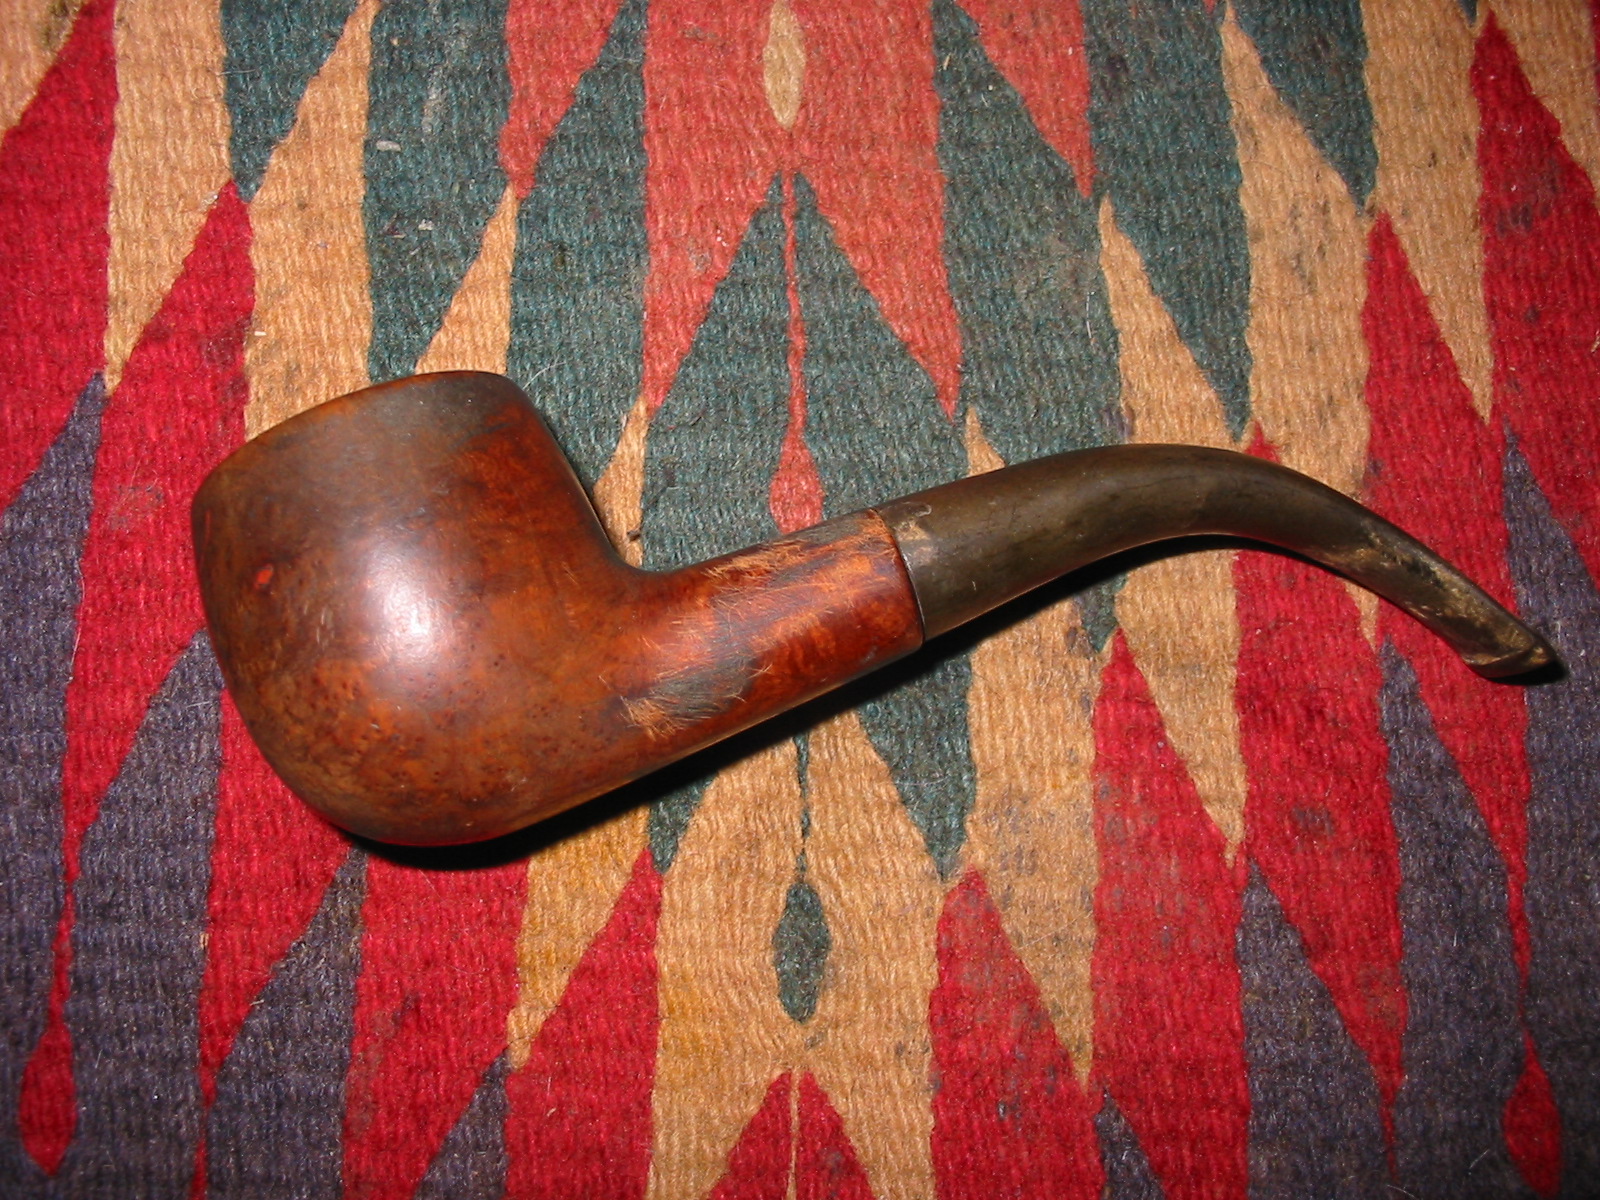
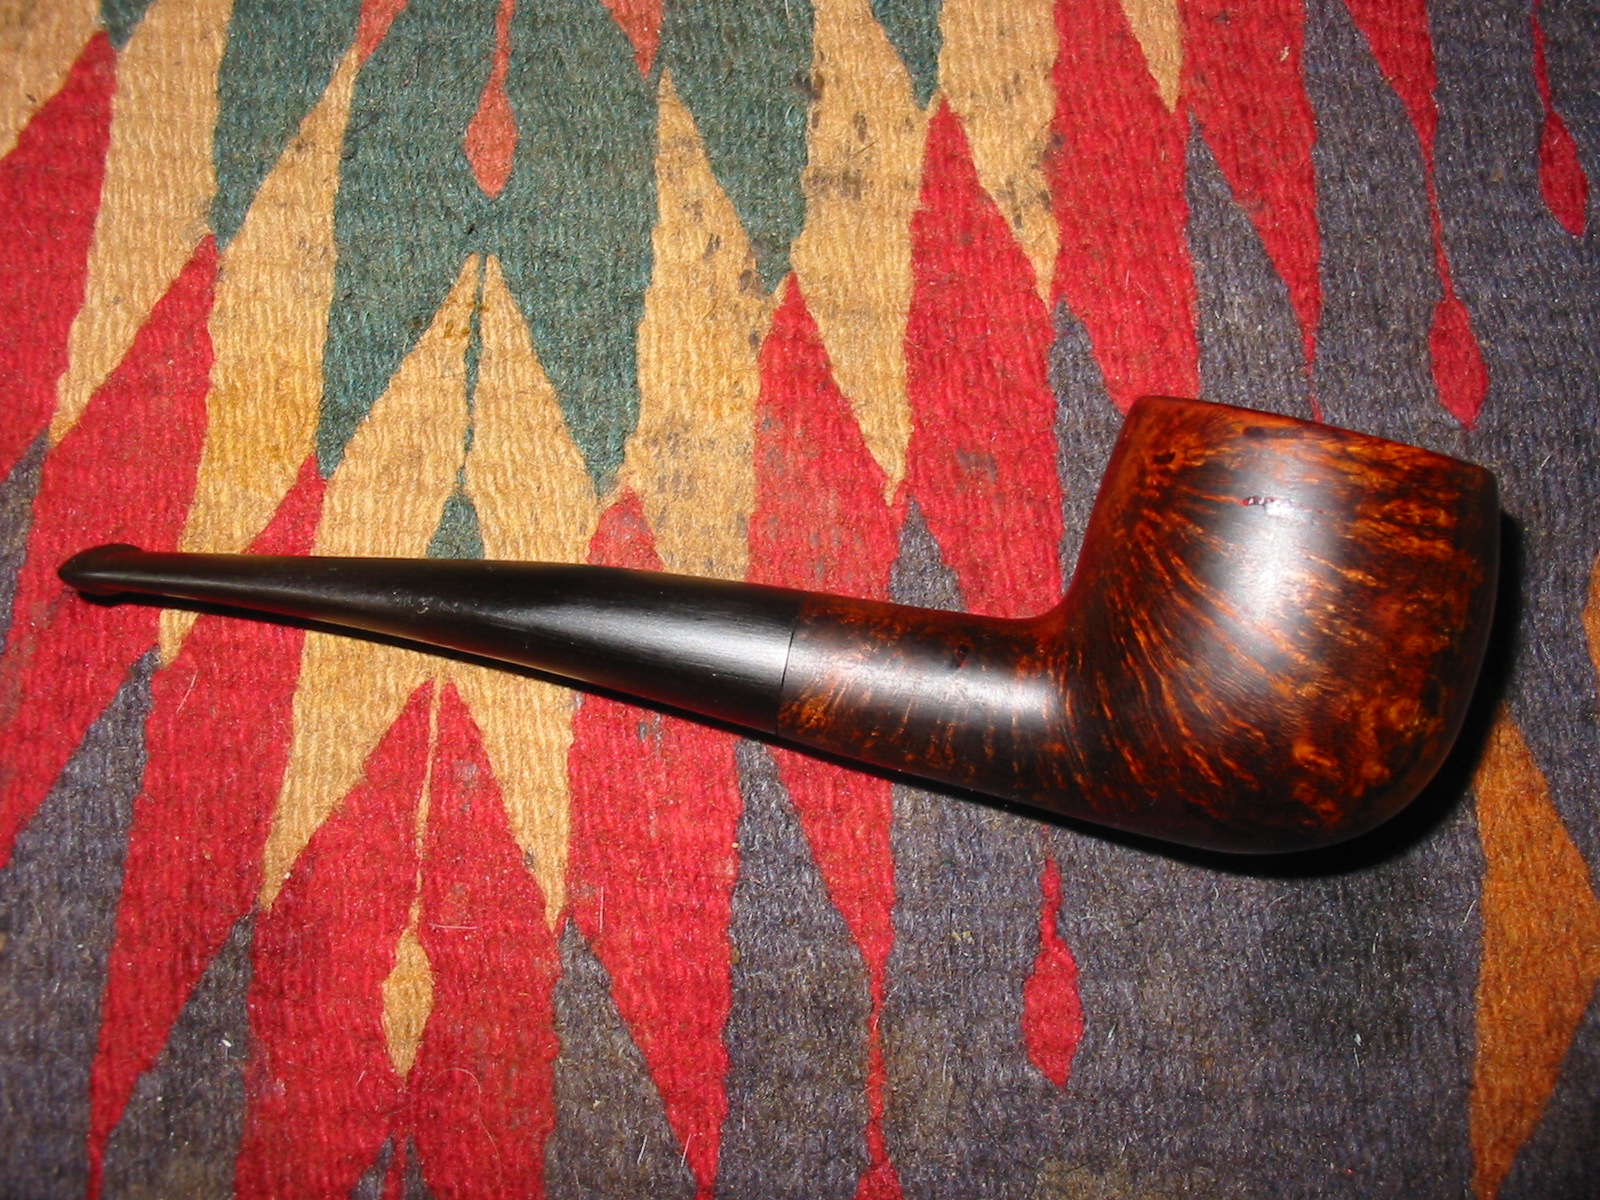
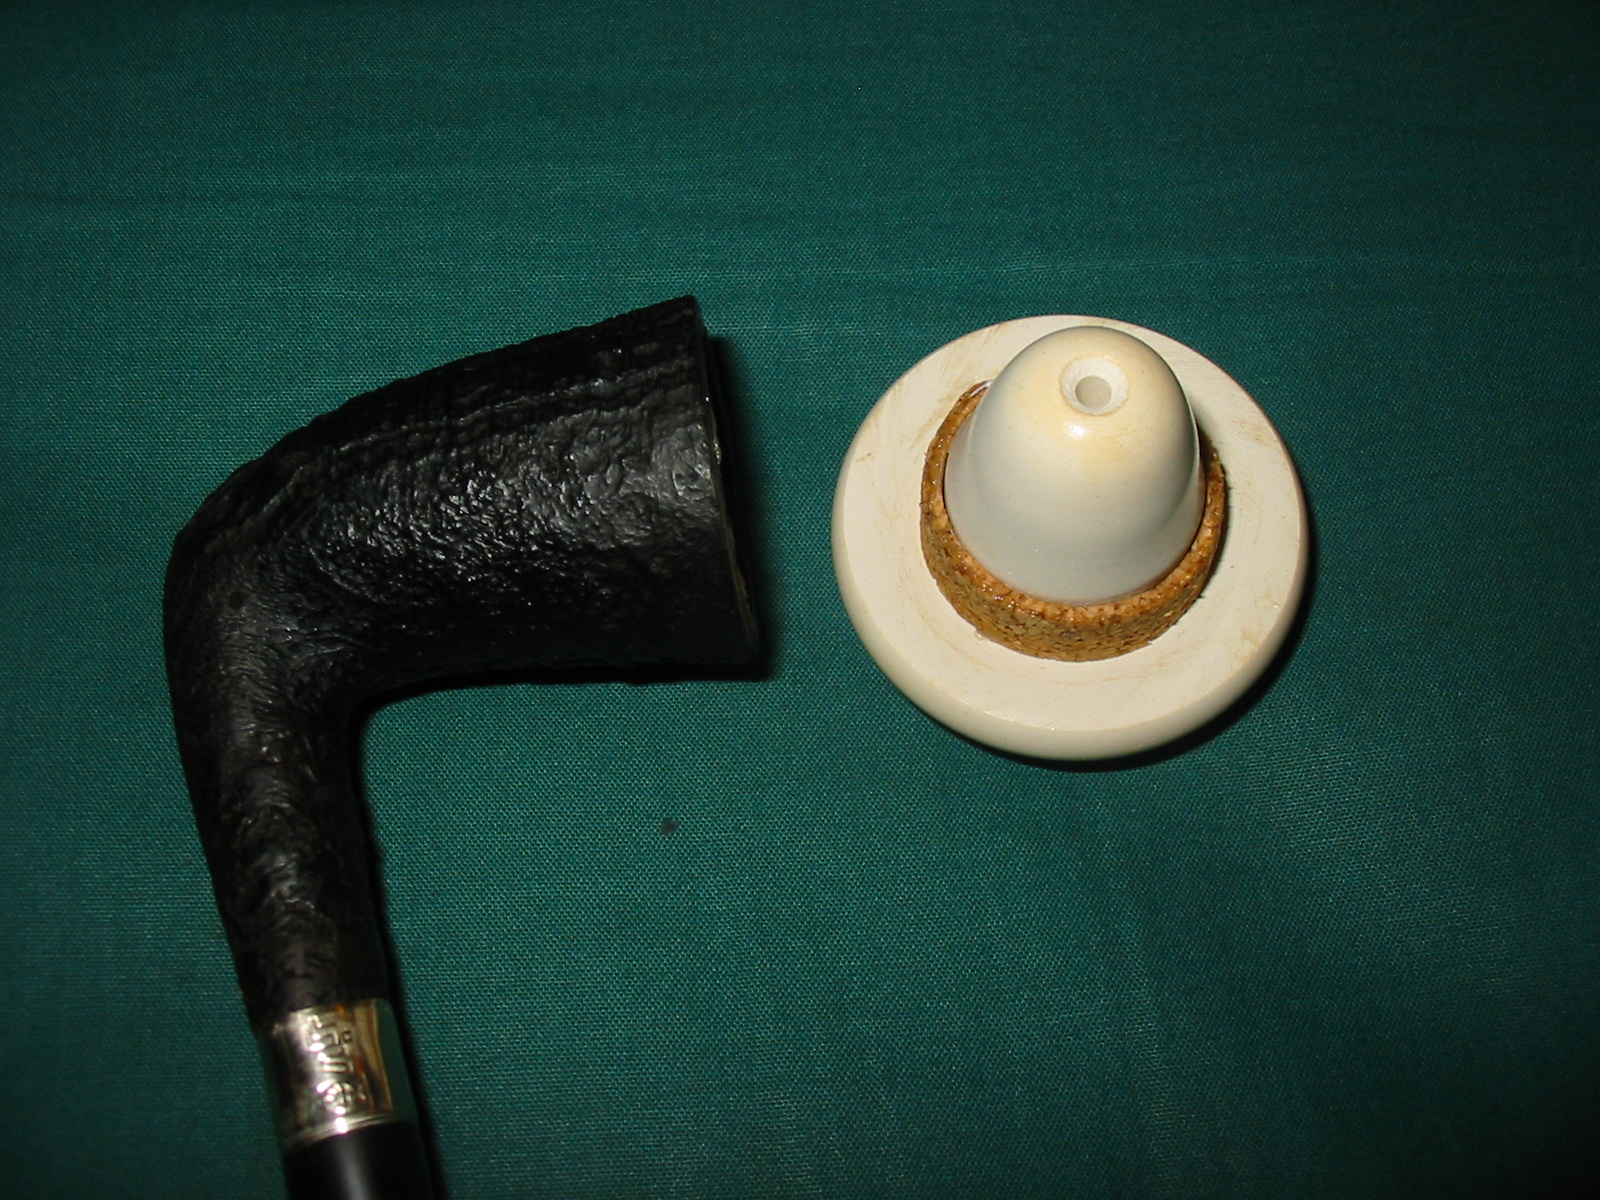
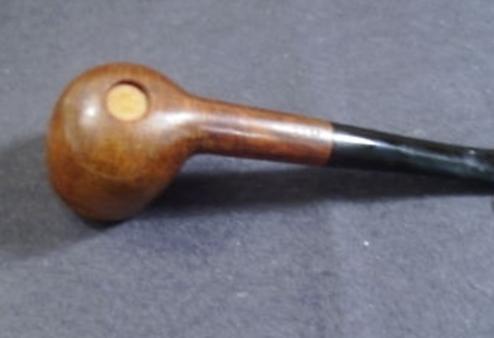
I wasn’t able to resolve the stem/shank problem to my complete satisfaction, I could have tried sanding away, but there is always a risk that one ends up removing too much material with no visible improvement. So I settled for heating the tenon in boiling water, inserting the nail from the 3 in 1 and very gently applying outward rotary pressure. I also applied some beeswax to the tenon, these steps together have at least ensured a more snug fit.

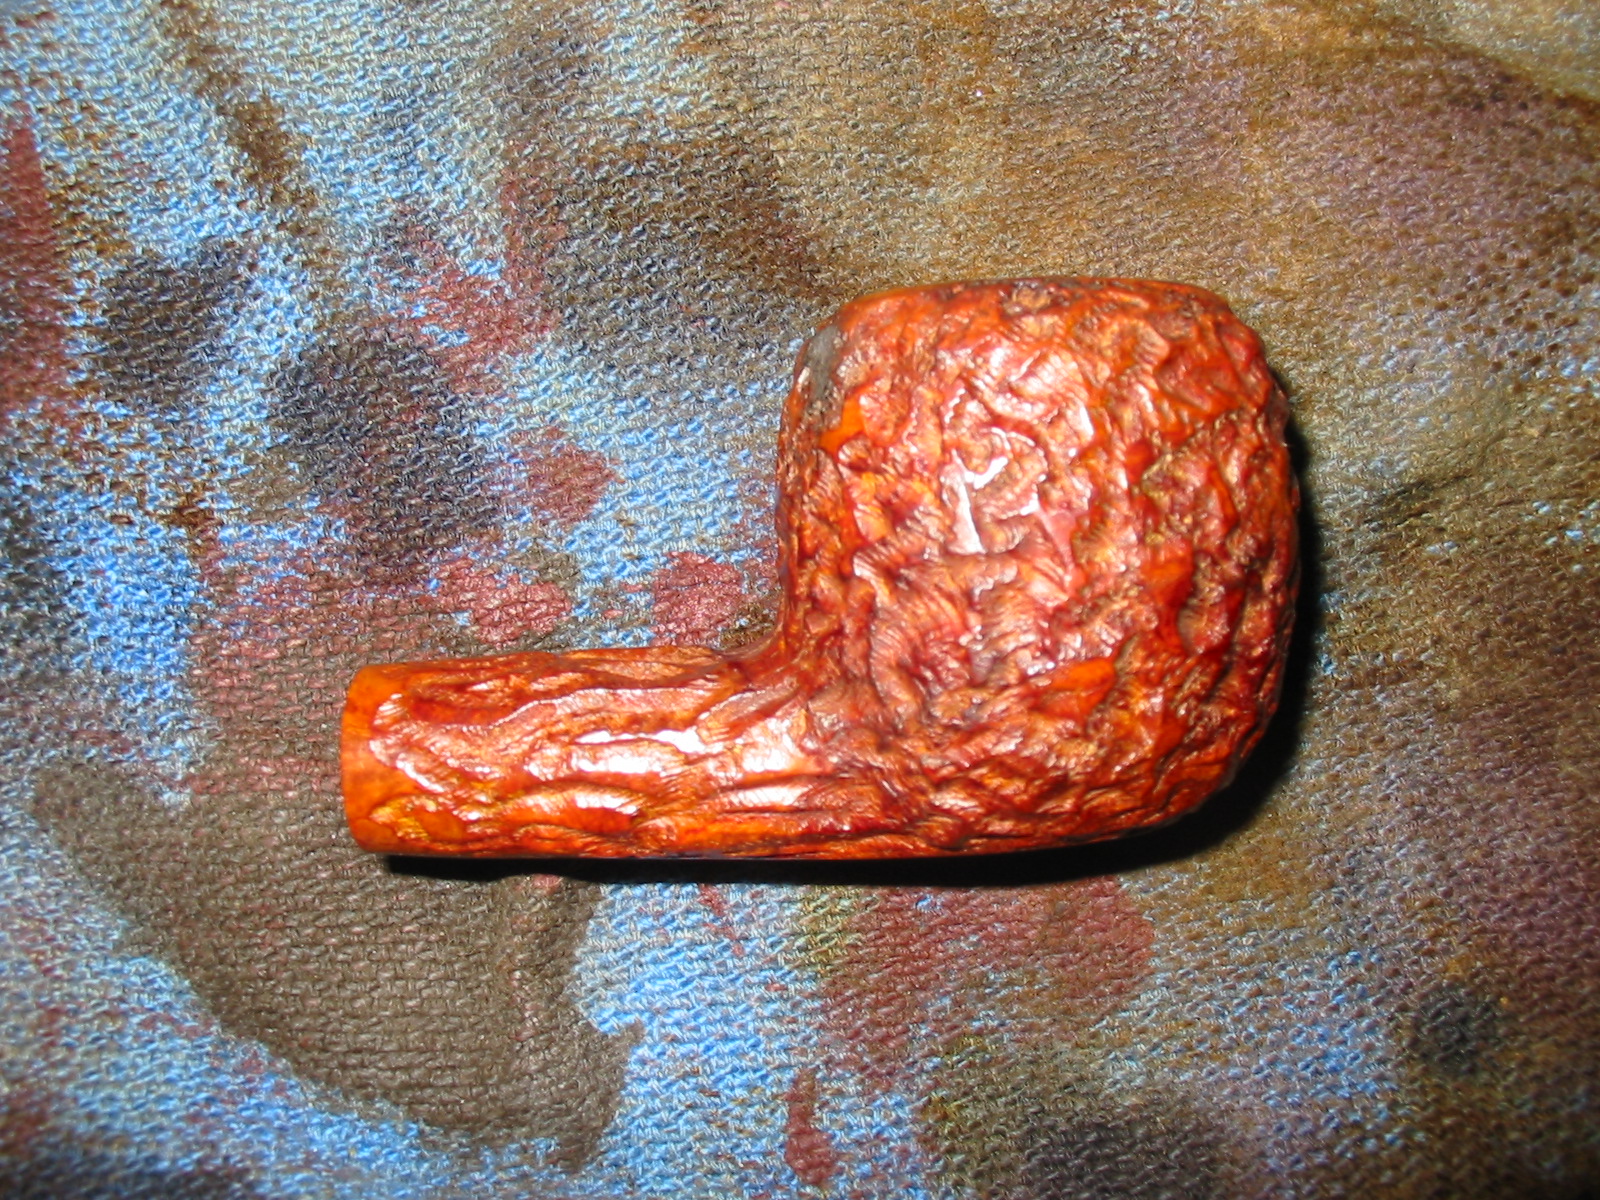
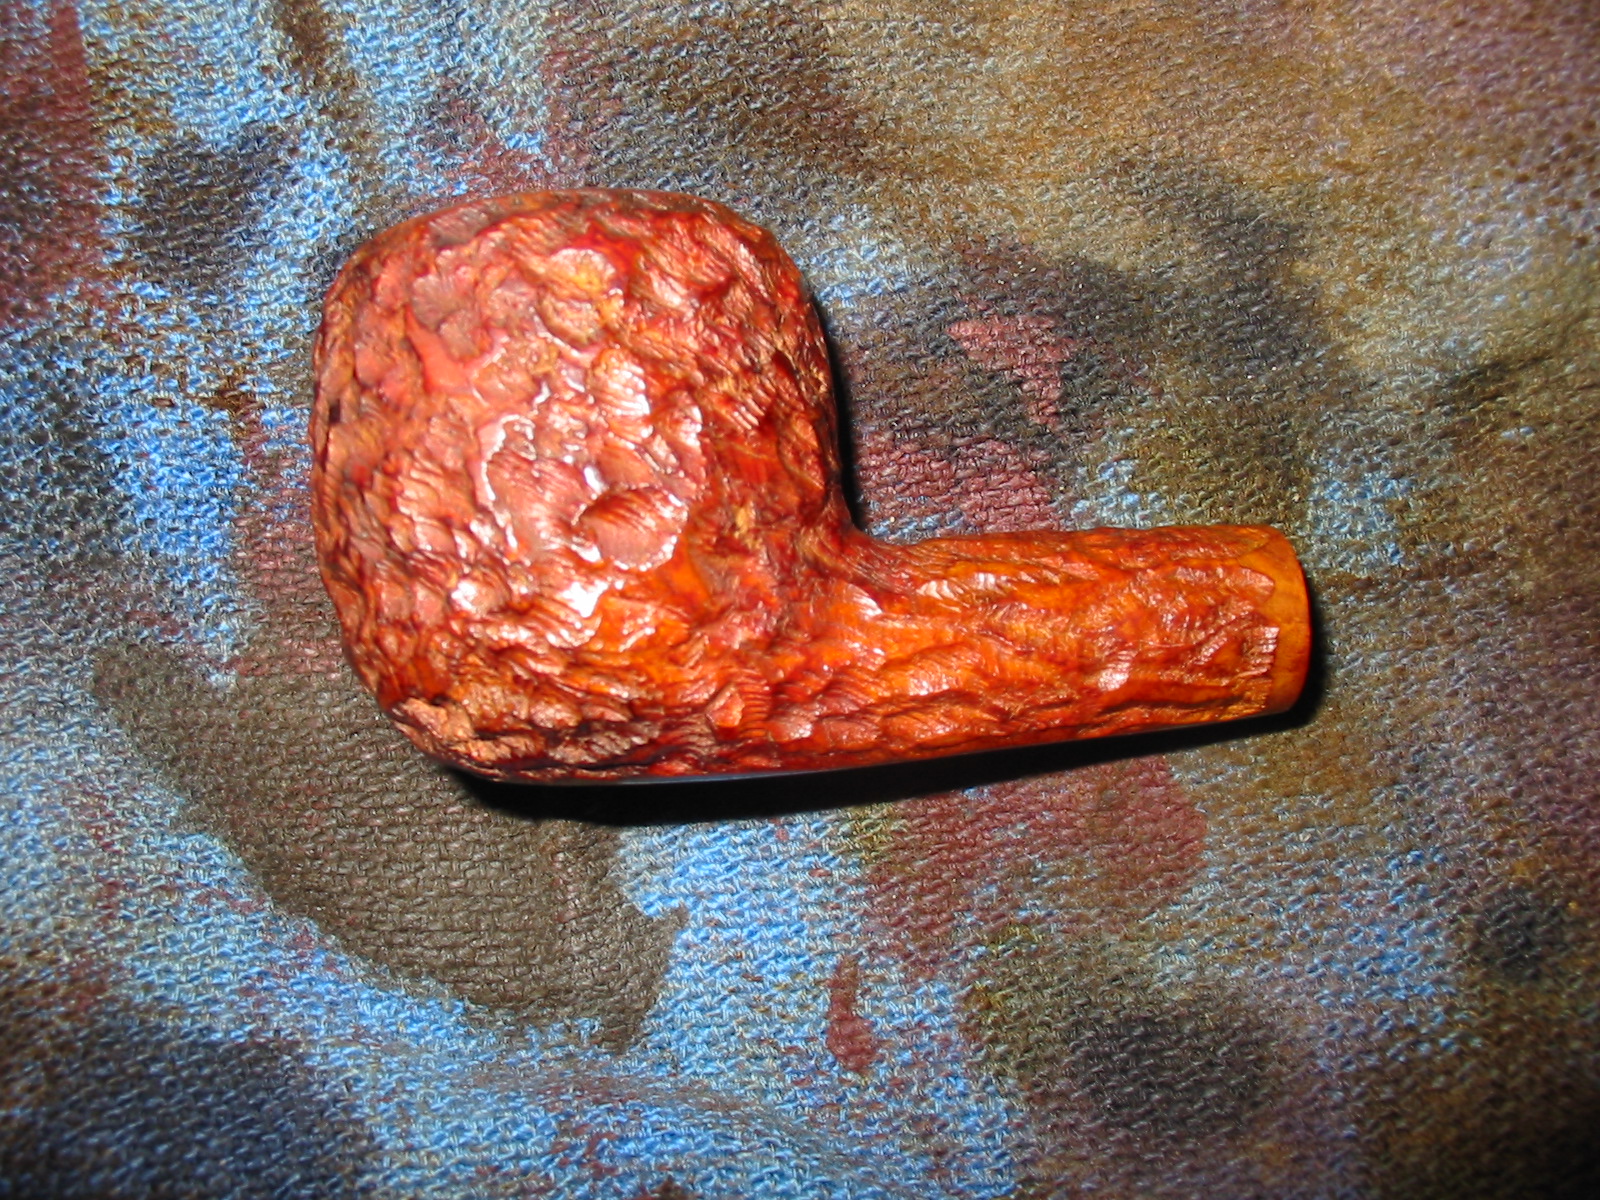
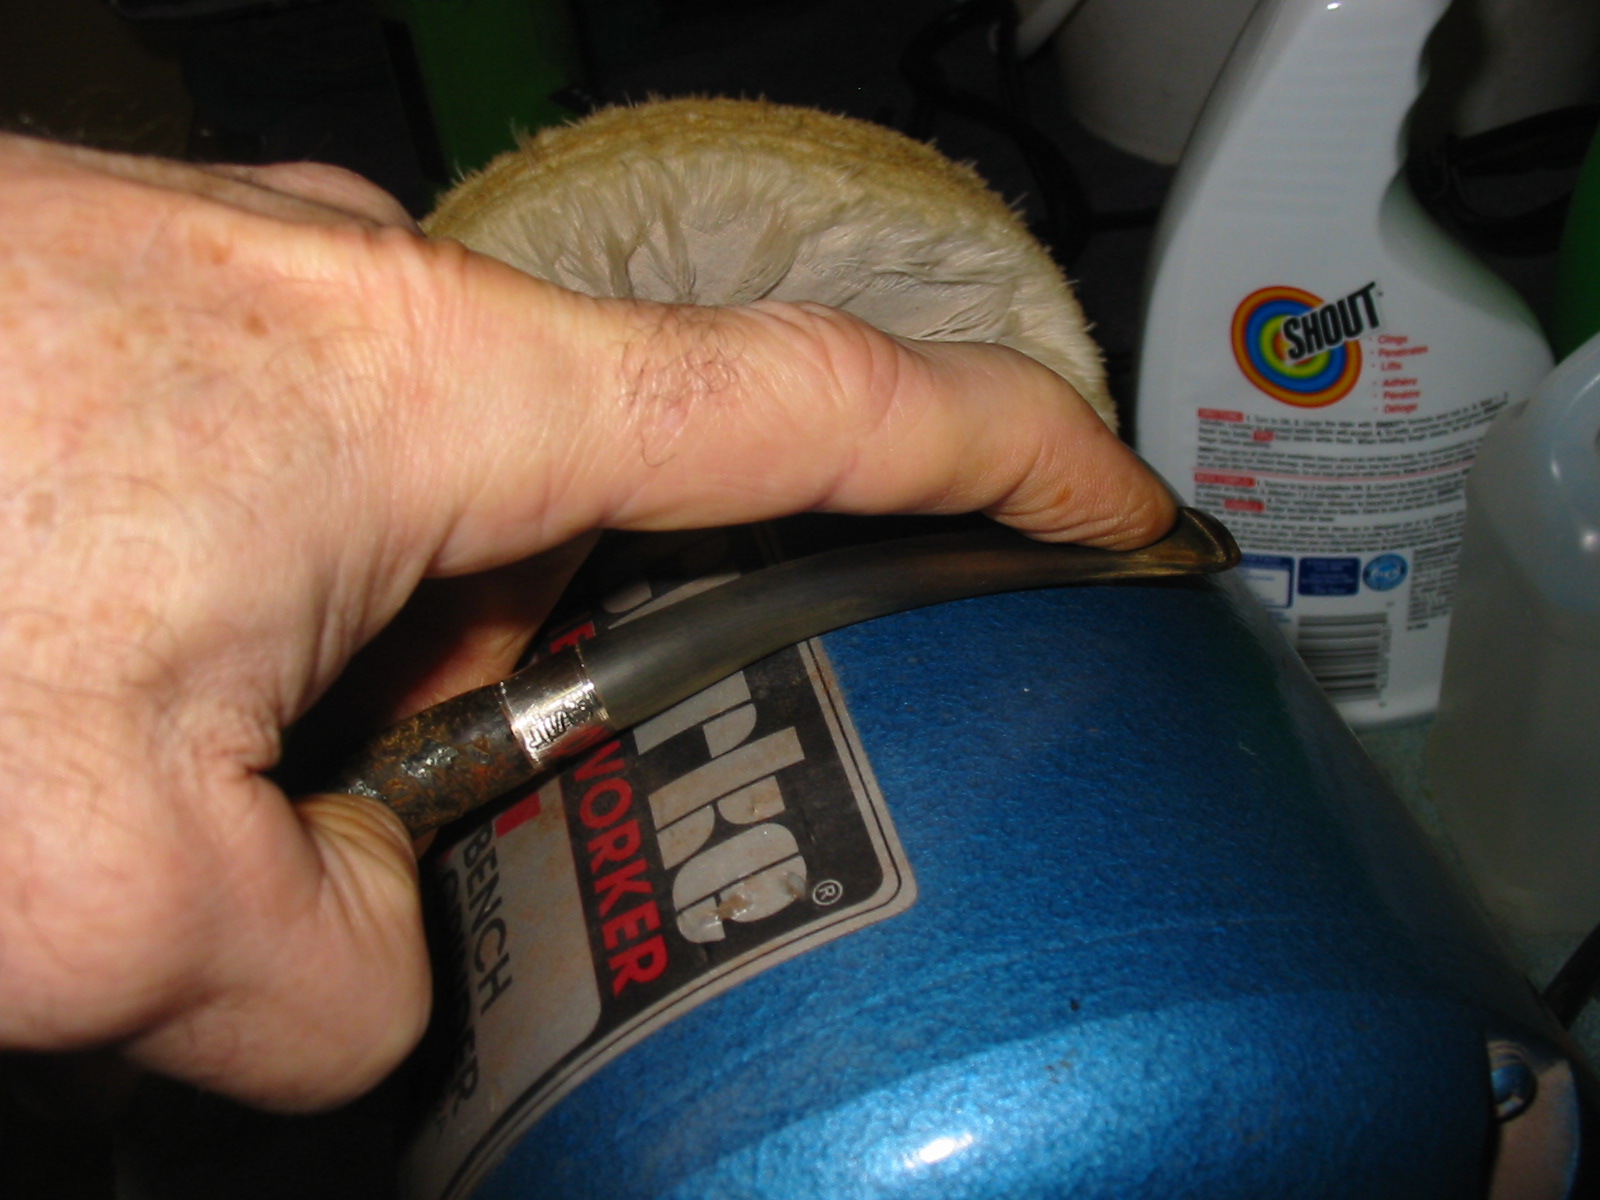
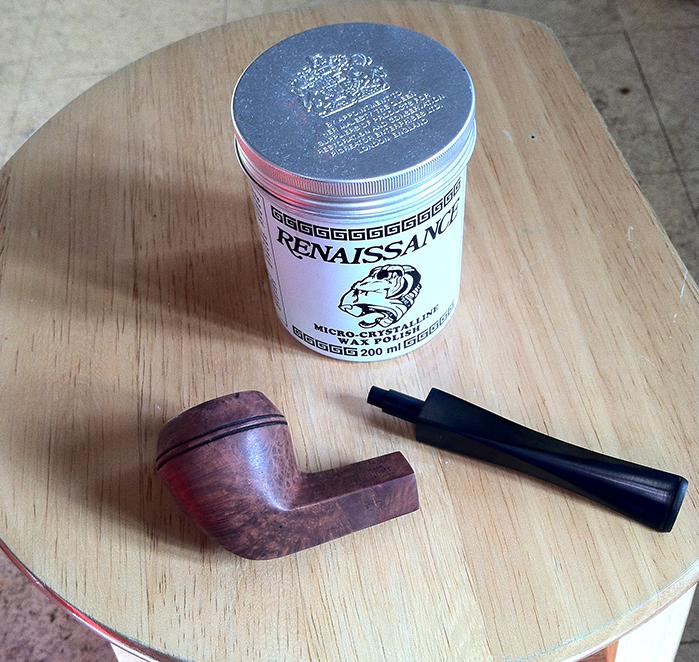
To finish off there is just the matter of giving the pipe a good polish to show off your handiwork at its best. As mentioned earlier, I am not fortunate enough to have an array of spinning buffer wheels and various compounds, so as throughout most of the process I rely on a manual approach: Renaissance Wax, applied by dabbing on and rubbing with finger tip and then buffed off with a lint-free cloth.
Chiz12

This will not, of course, produce the glassy shine so beloved of certain eBay sellers. But bear in mind that such a shine starts to disappear the moment you touch the pipe and I kind of like my less exaggerated finish. That’s my argument anyway and I’m sticking to it!

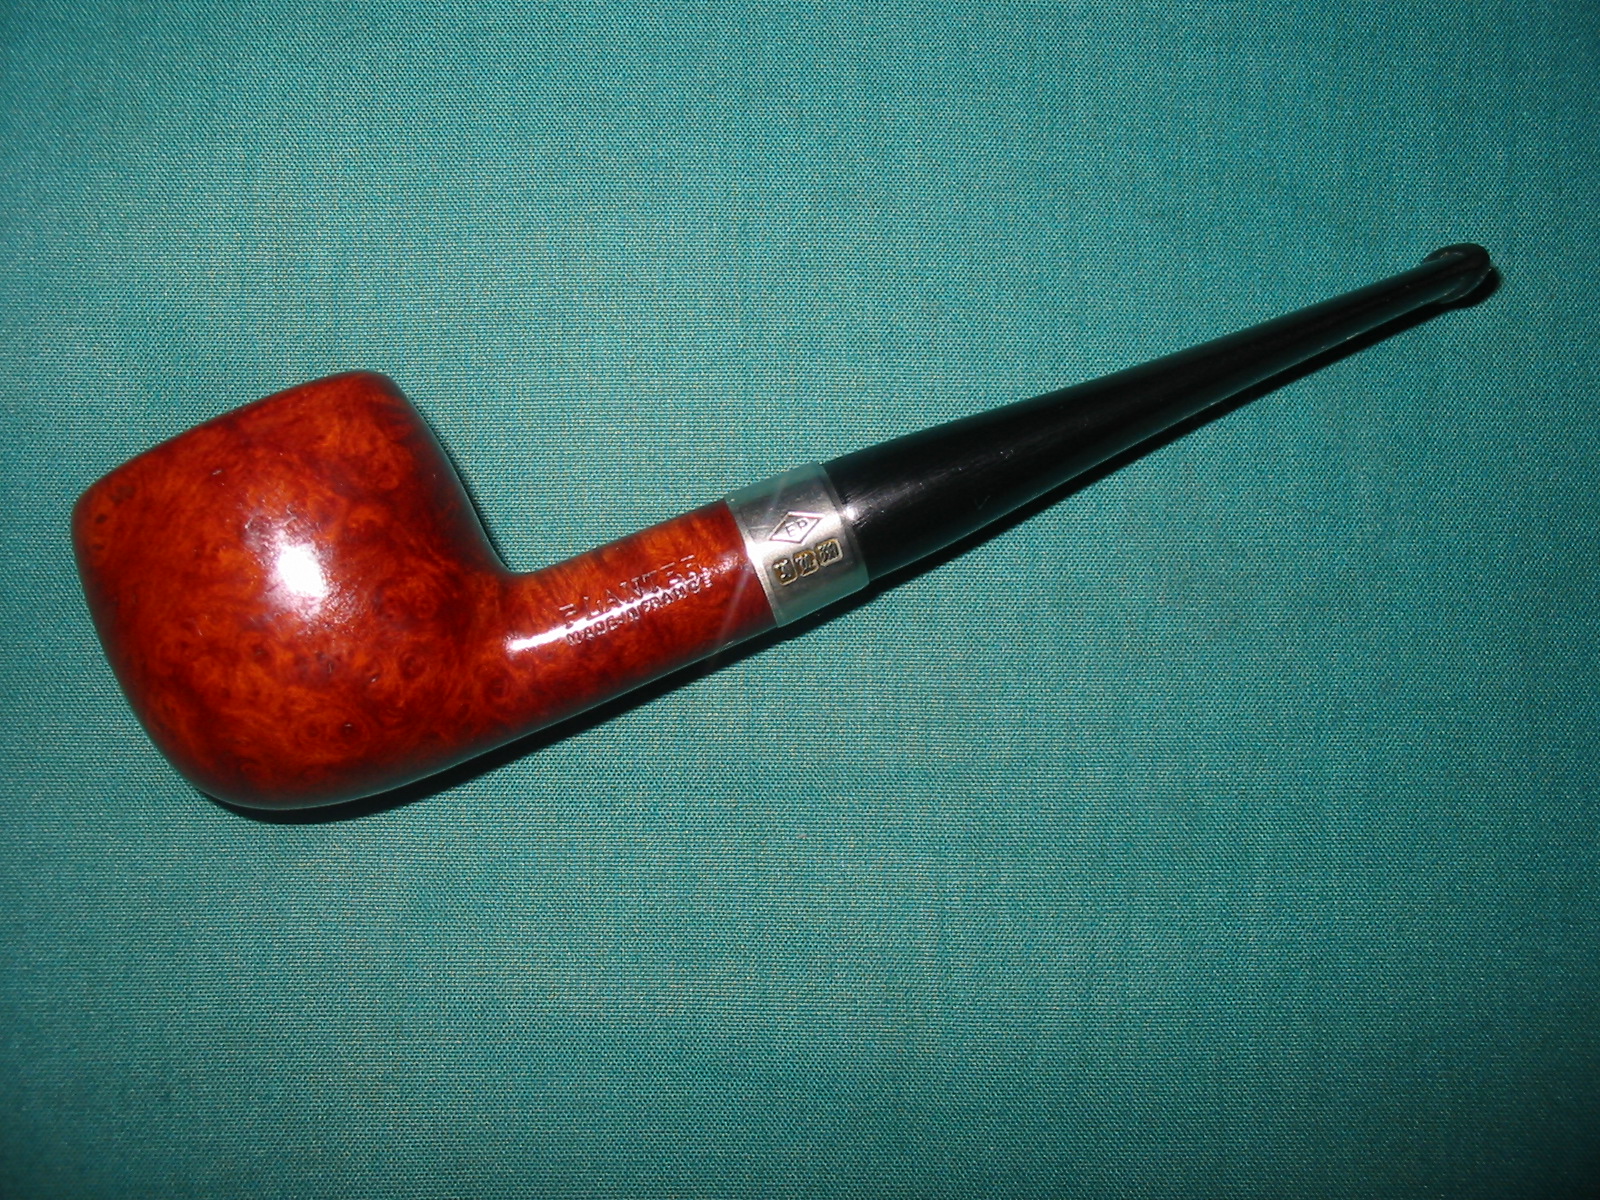
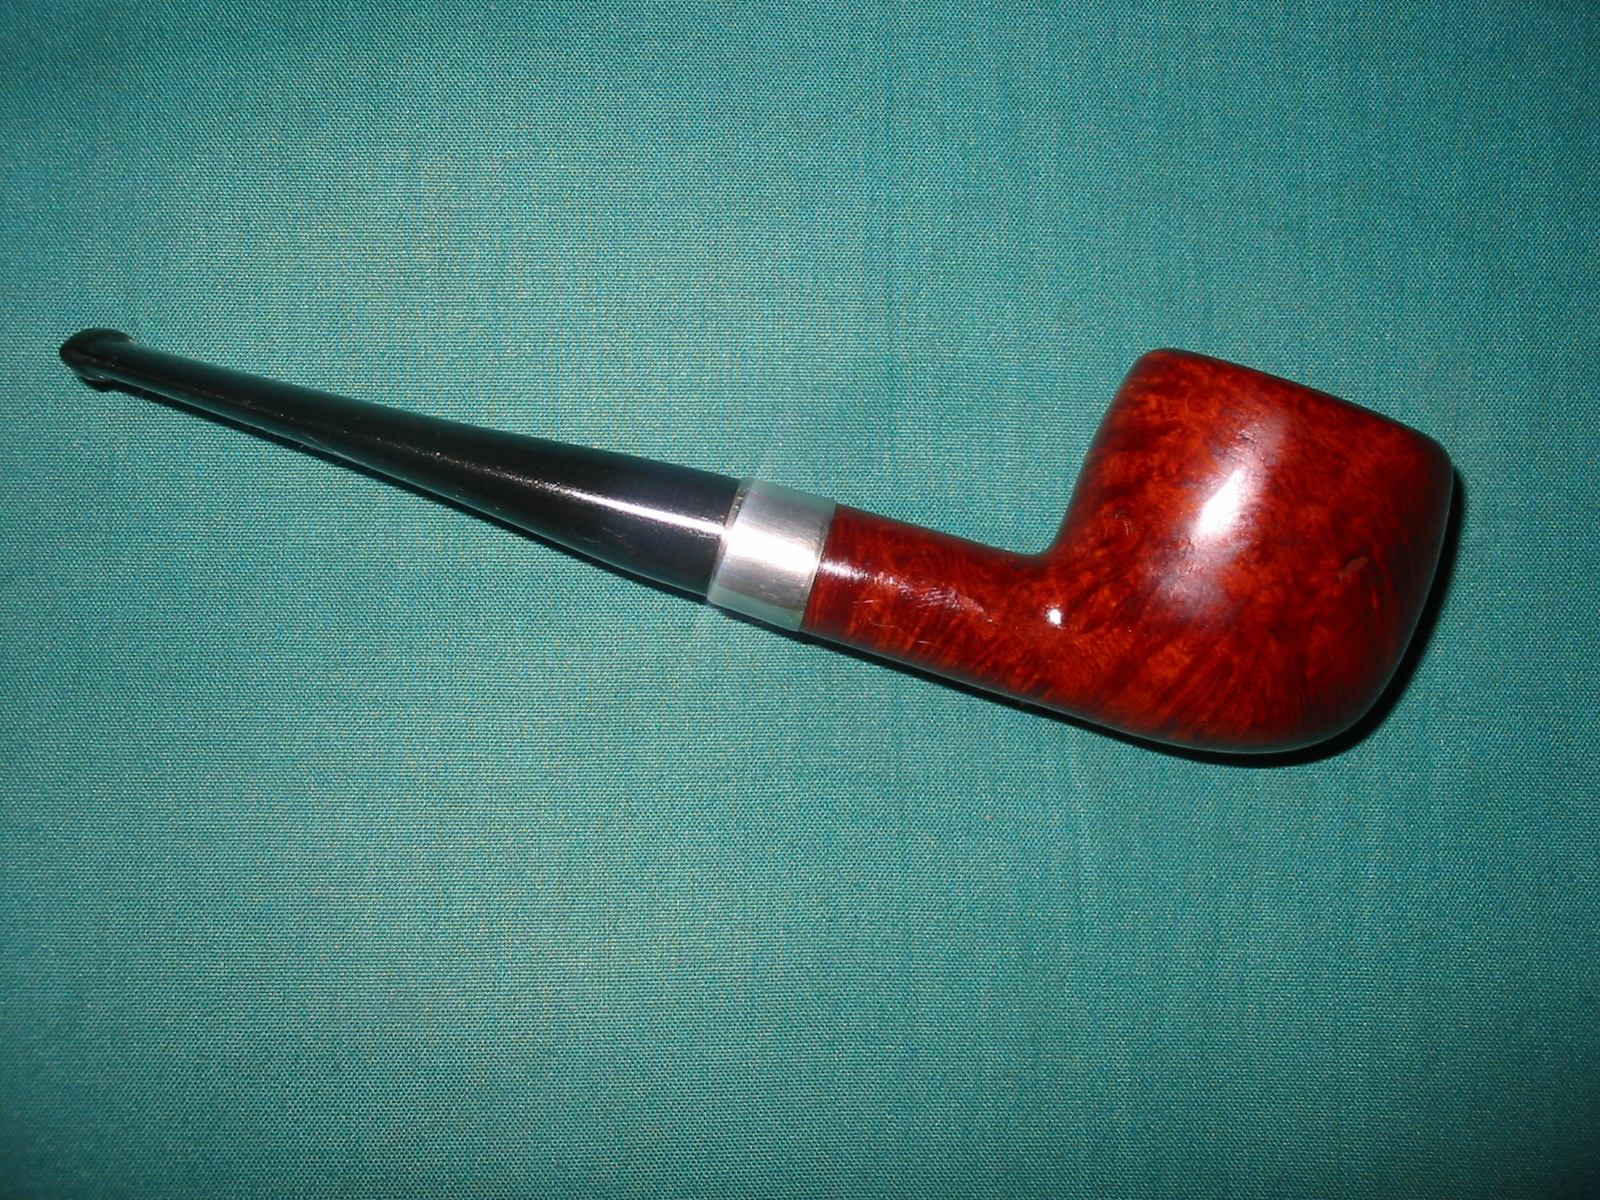
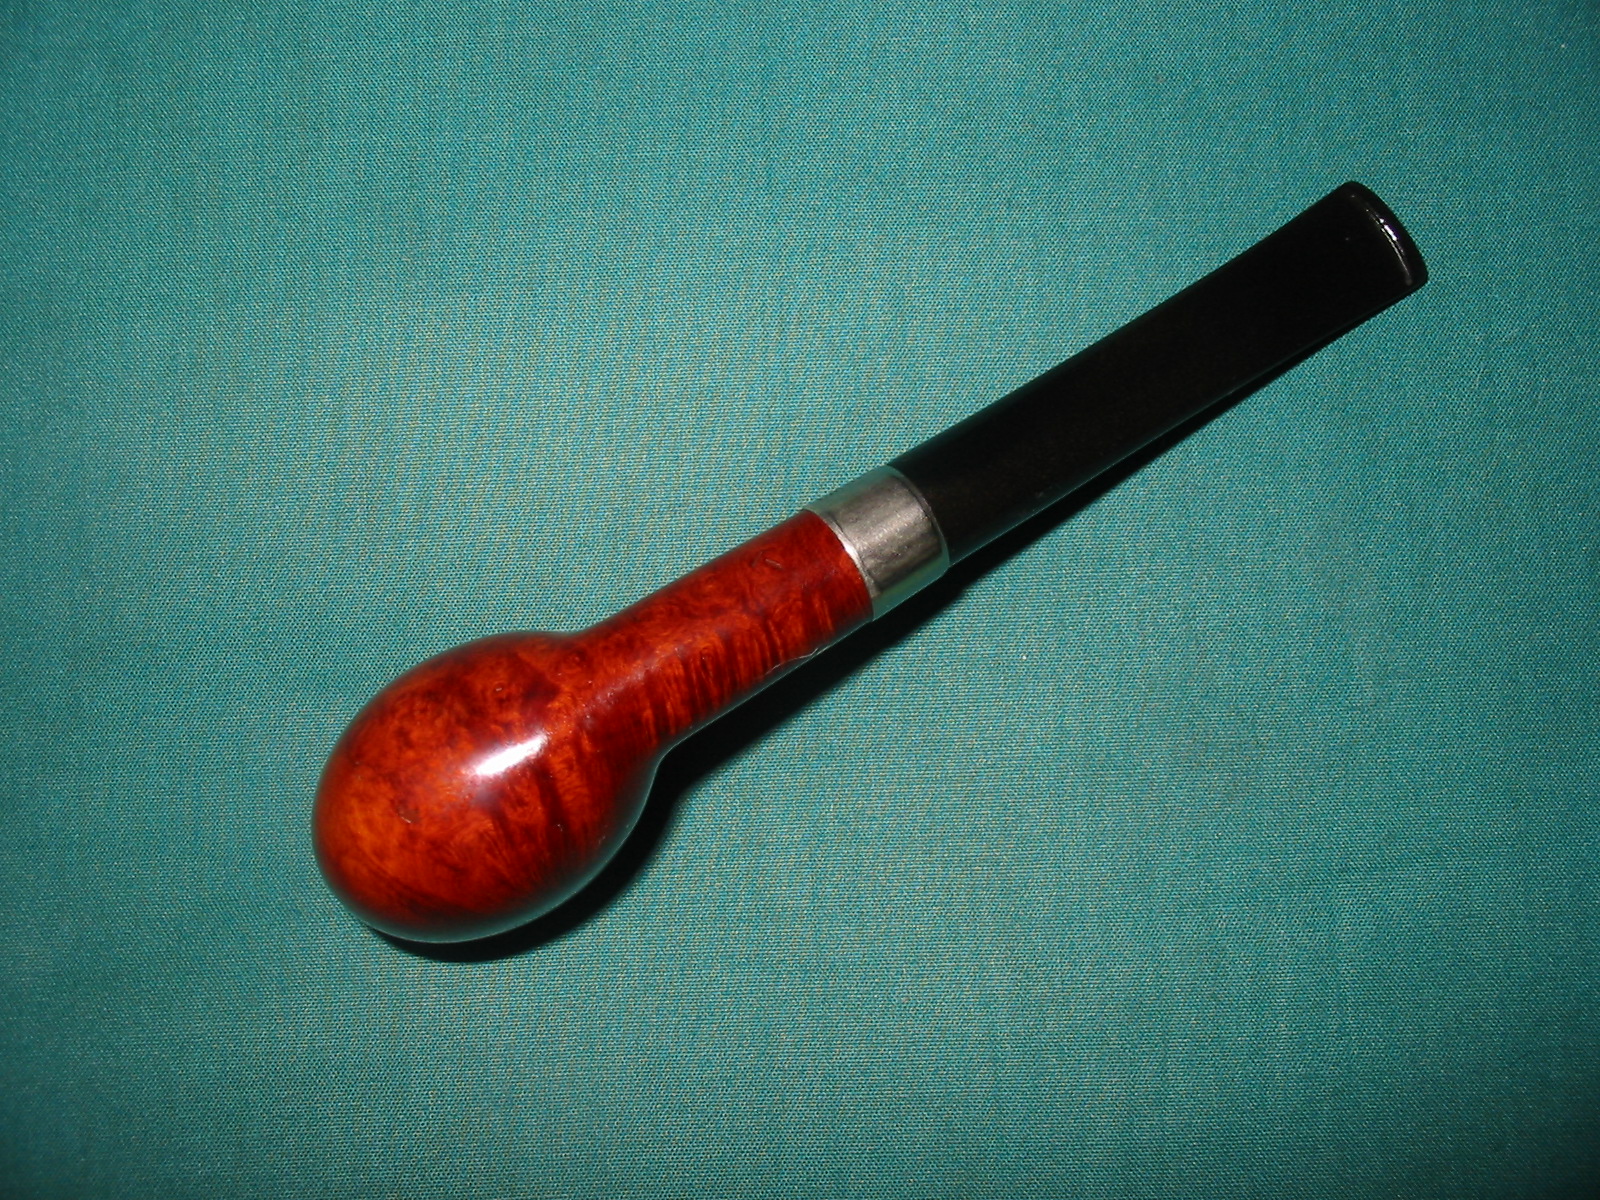
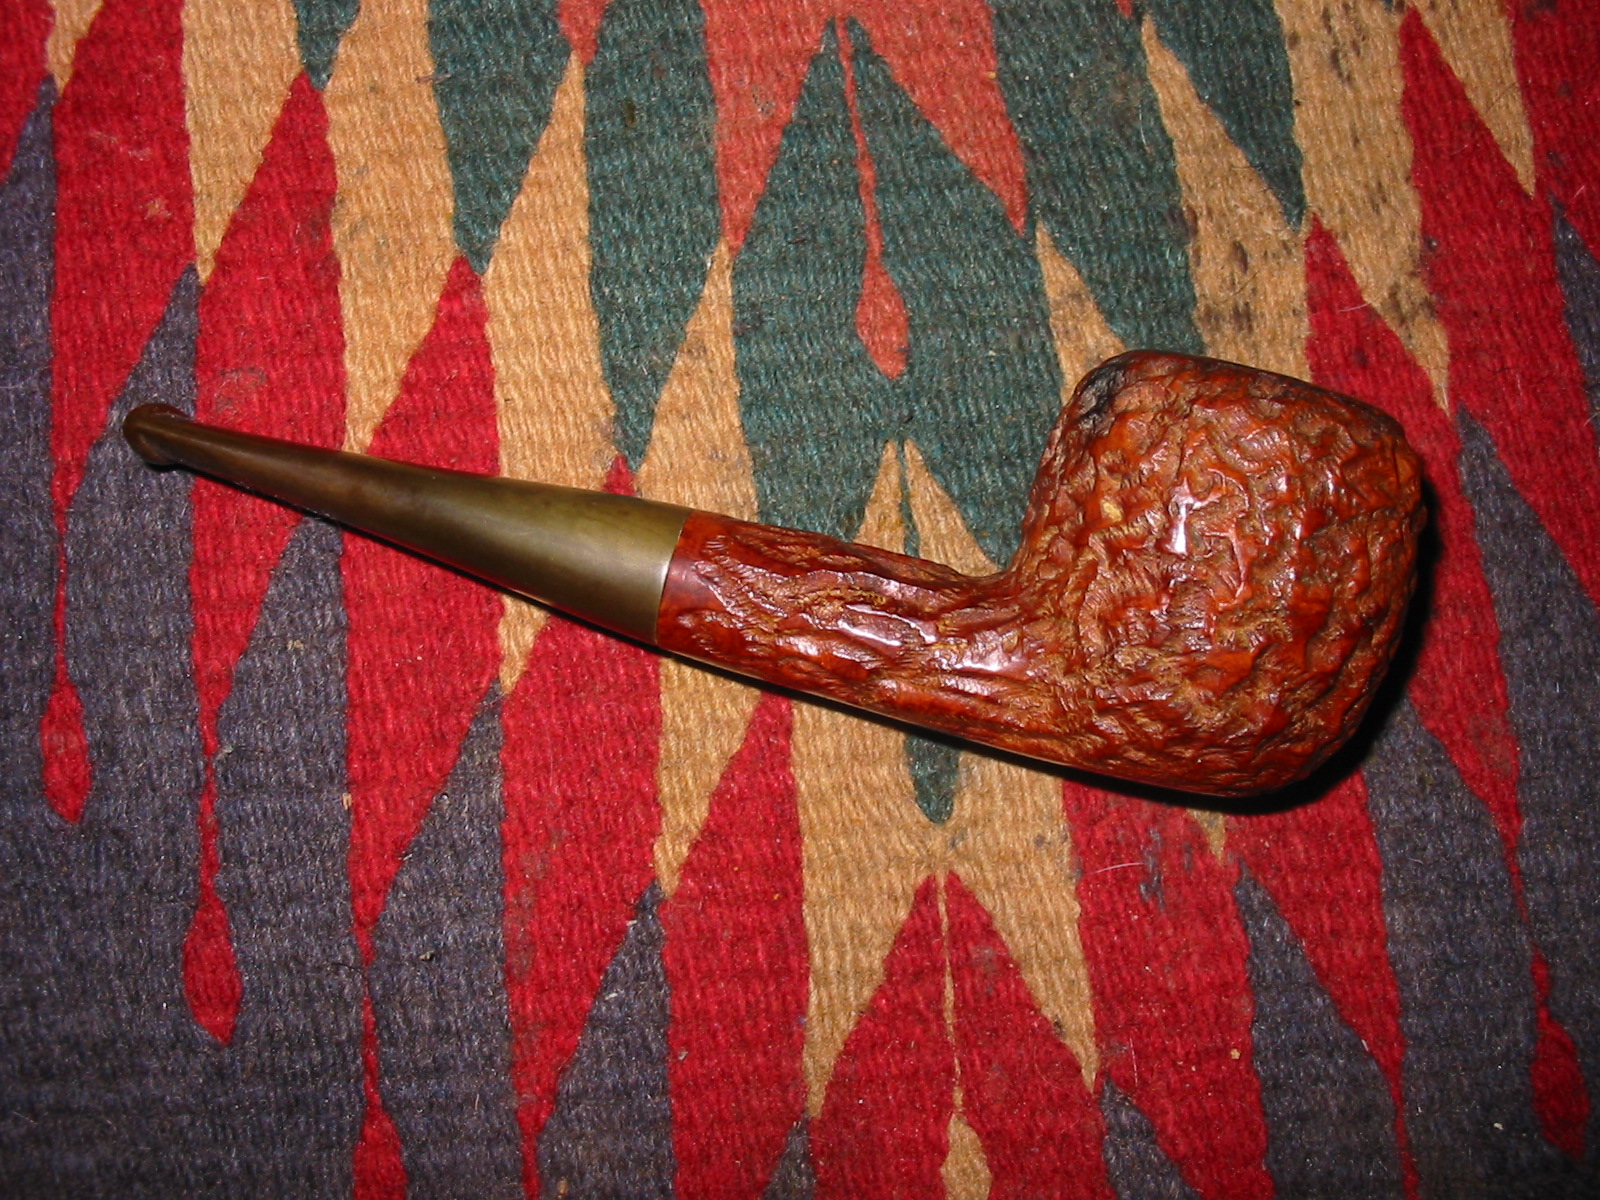
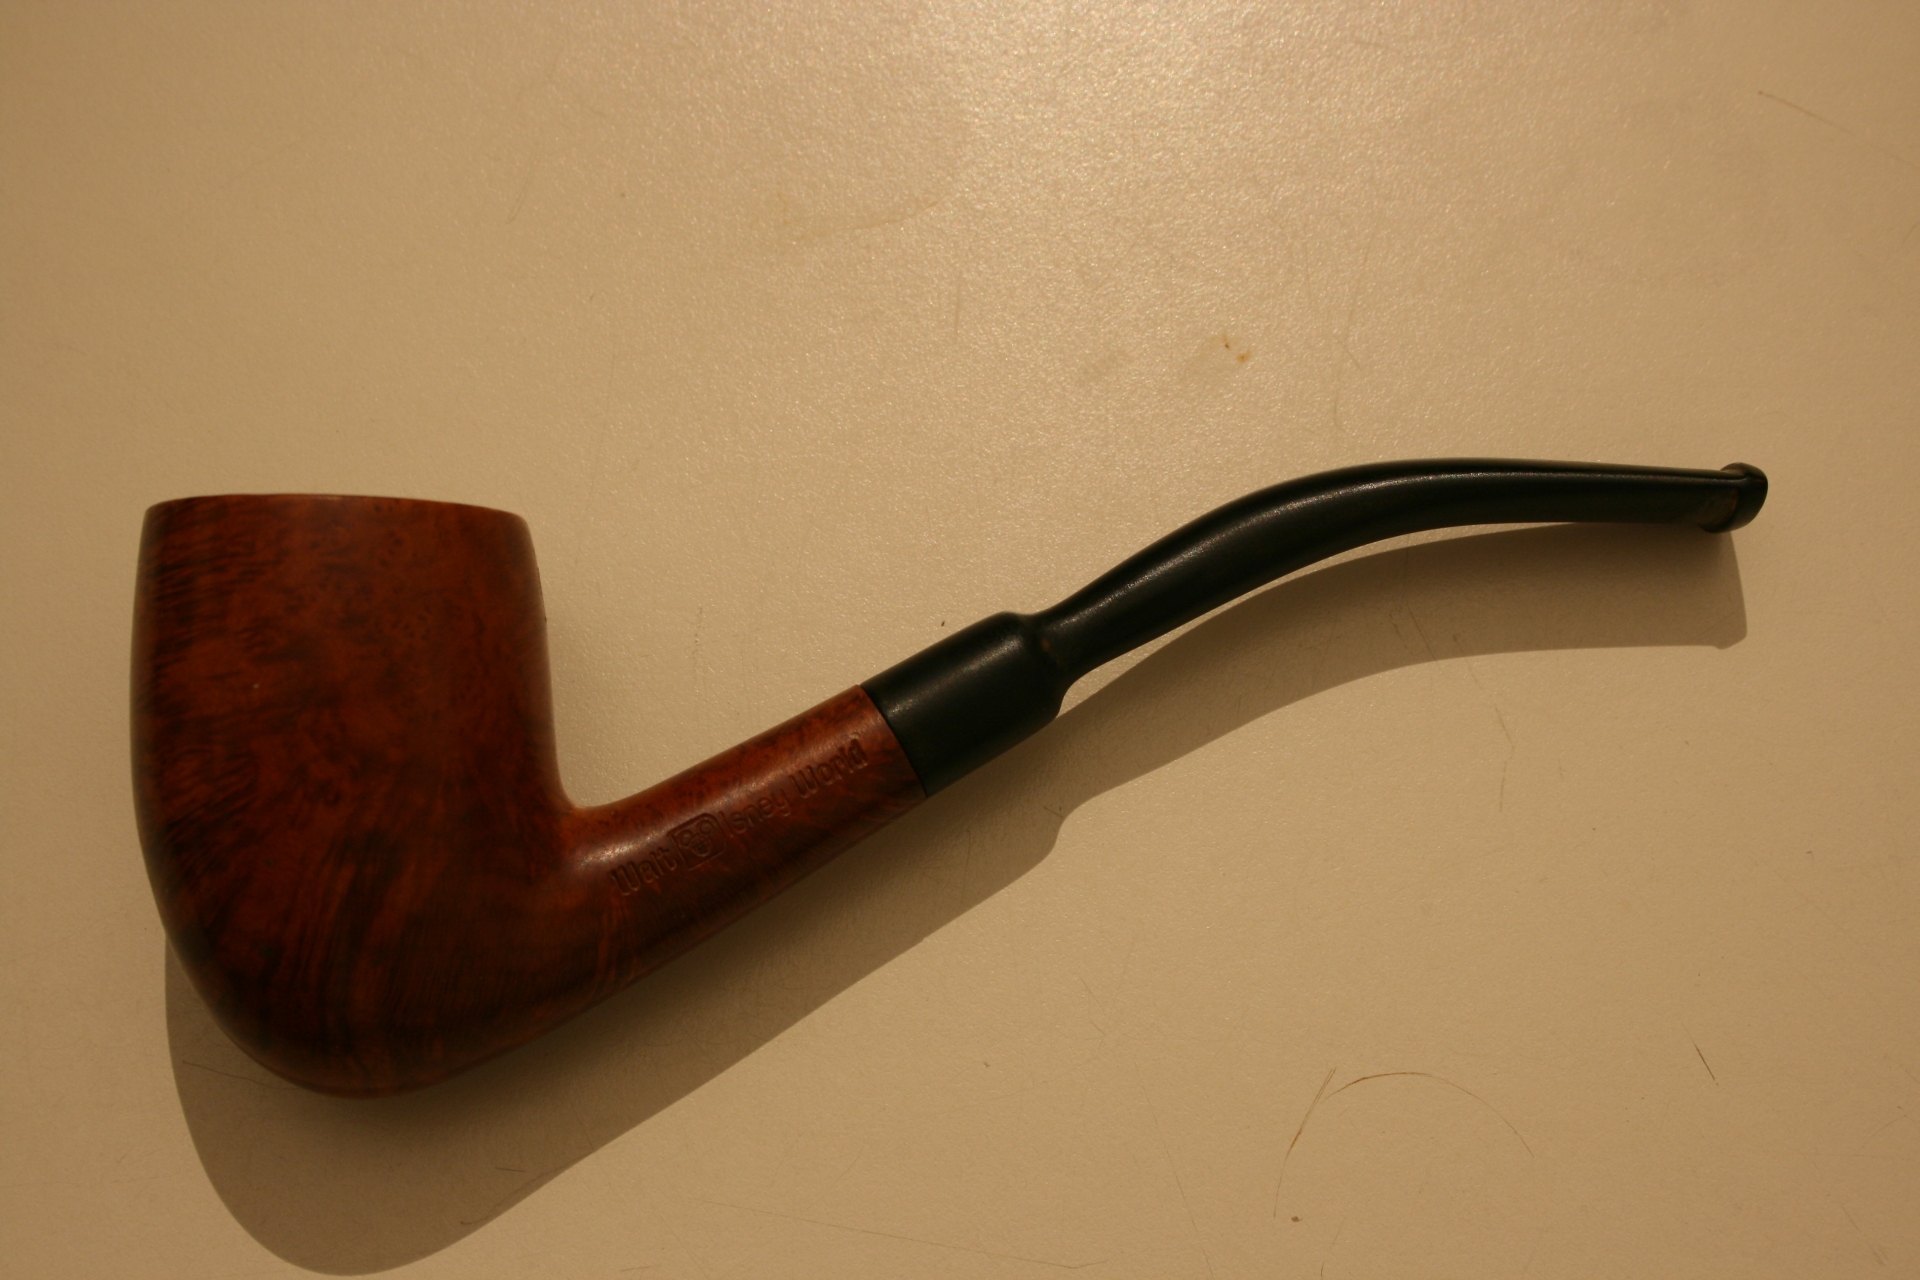
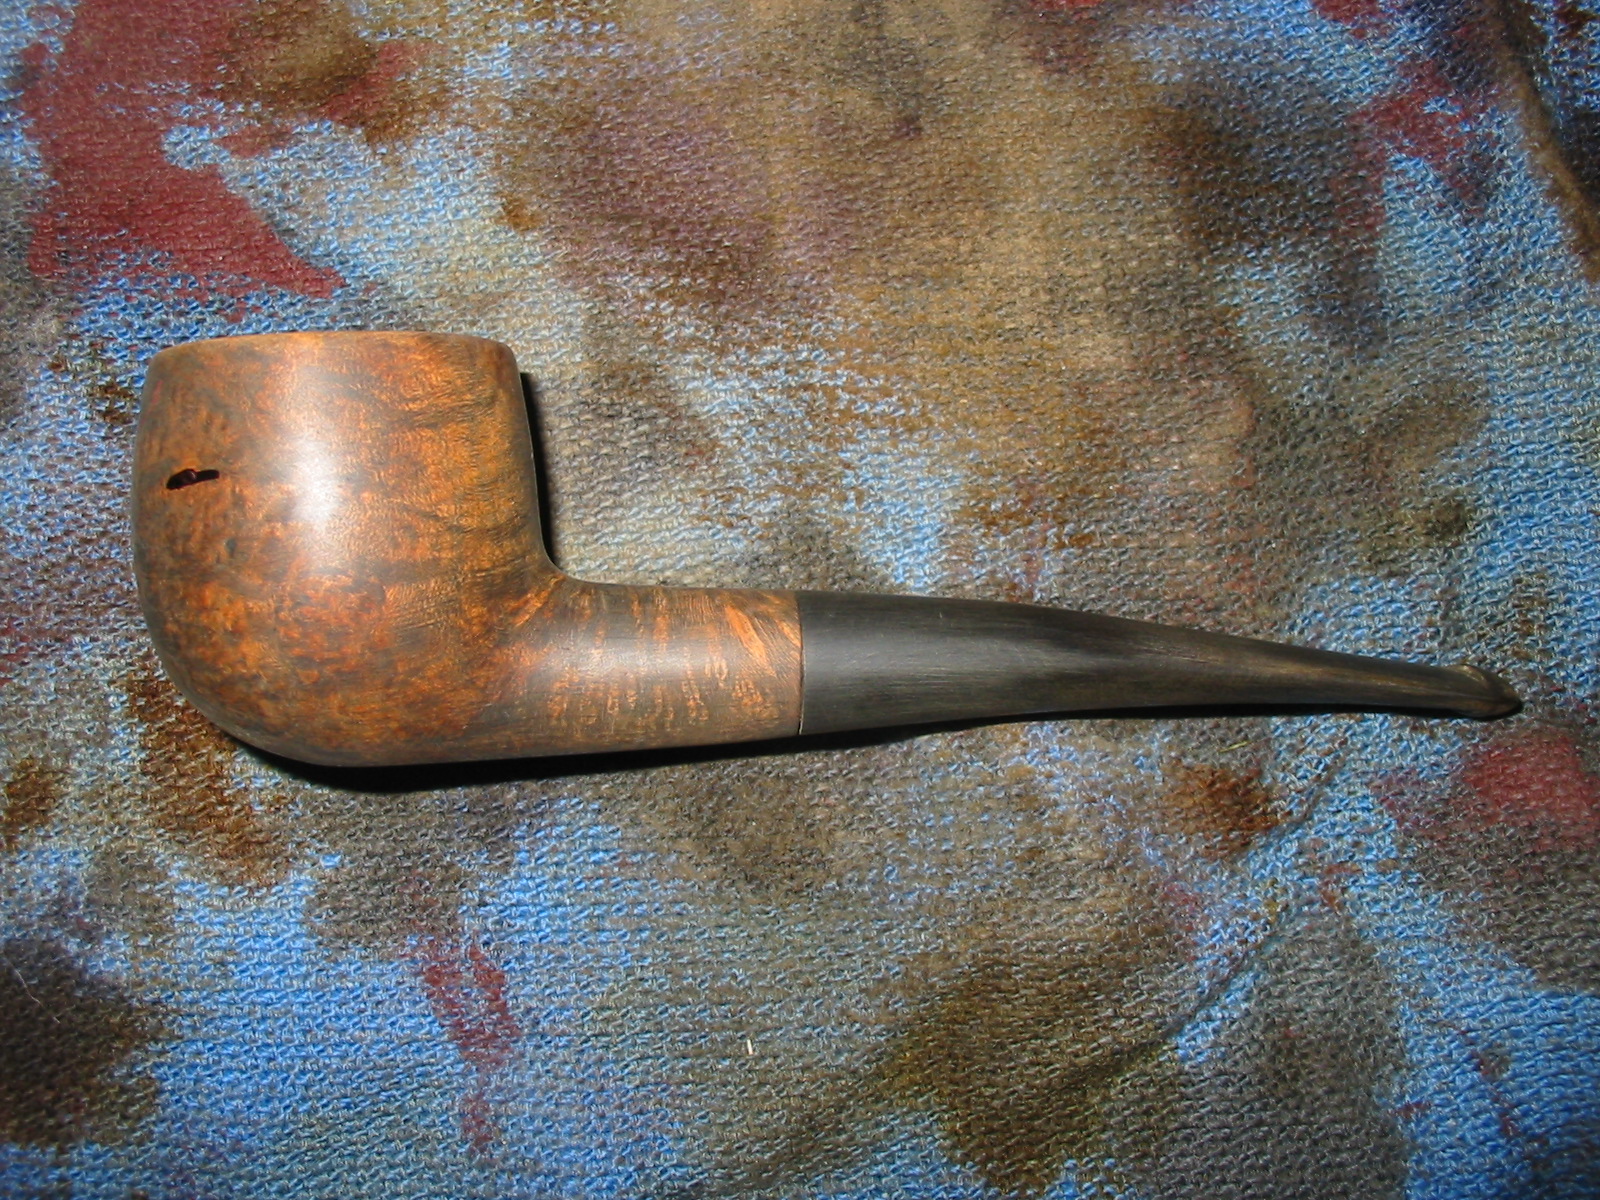
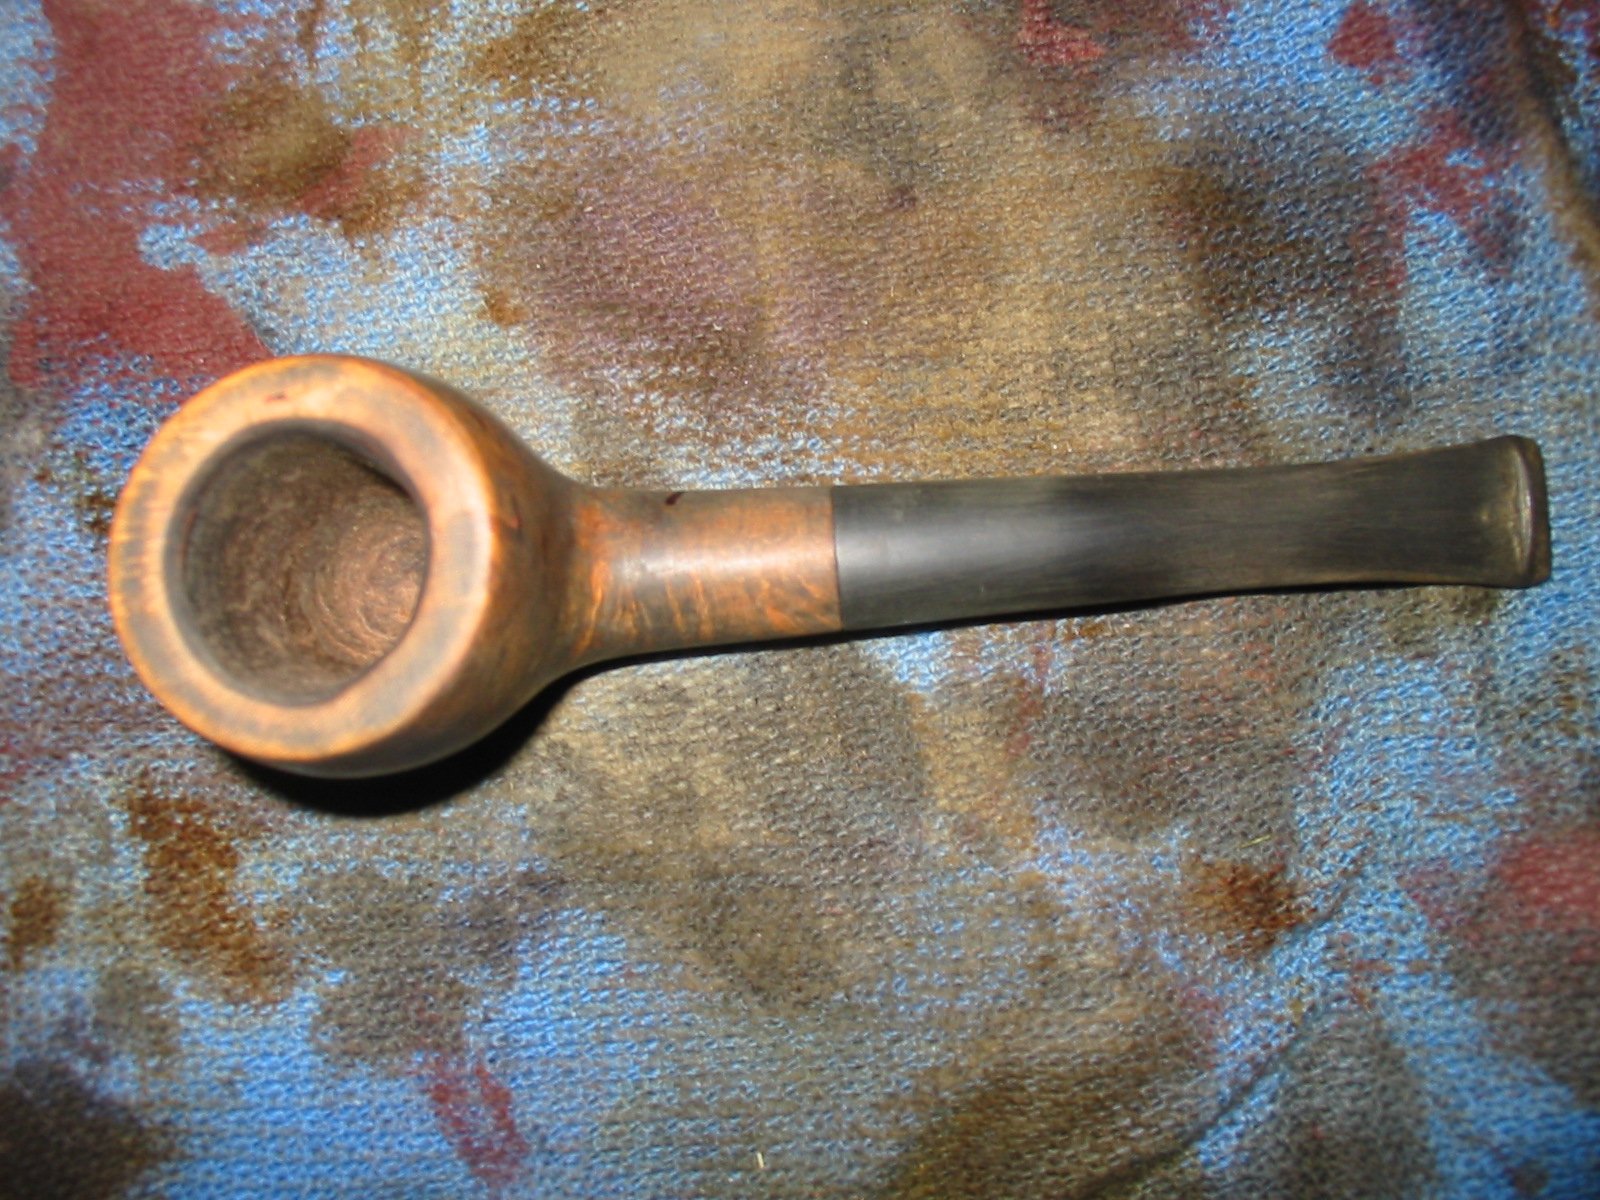
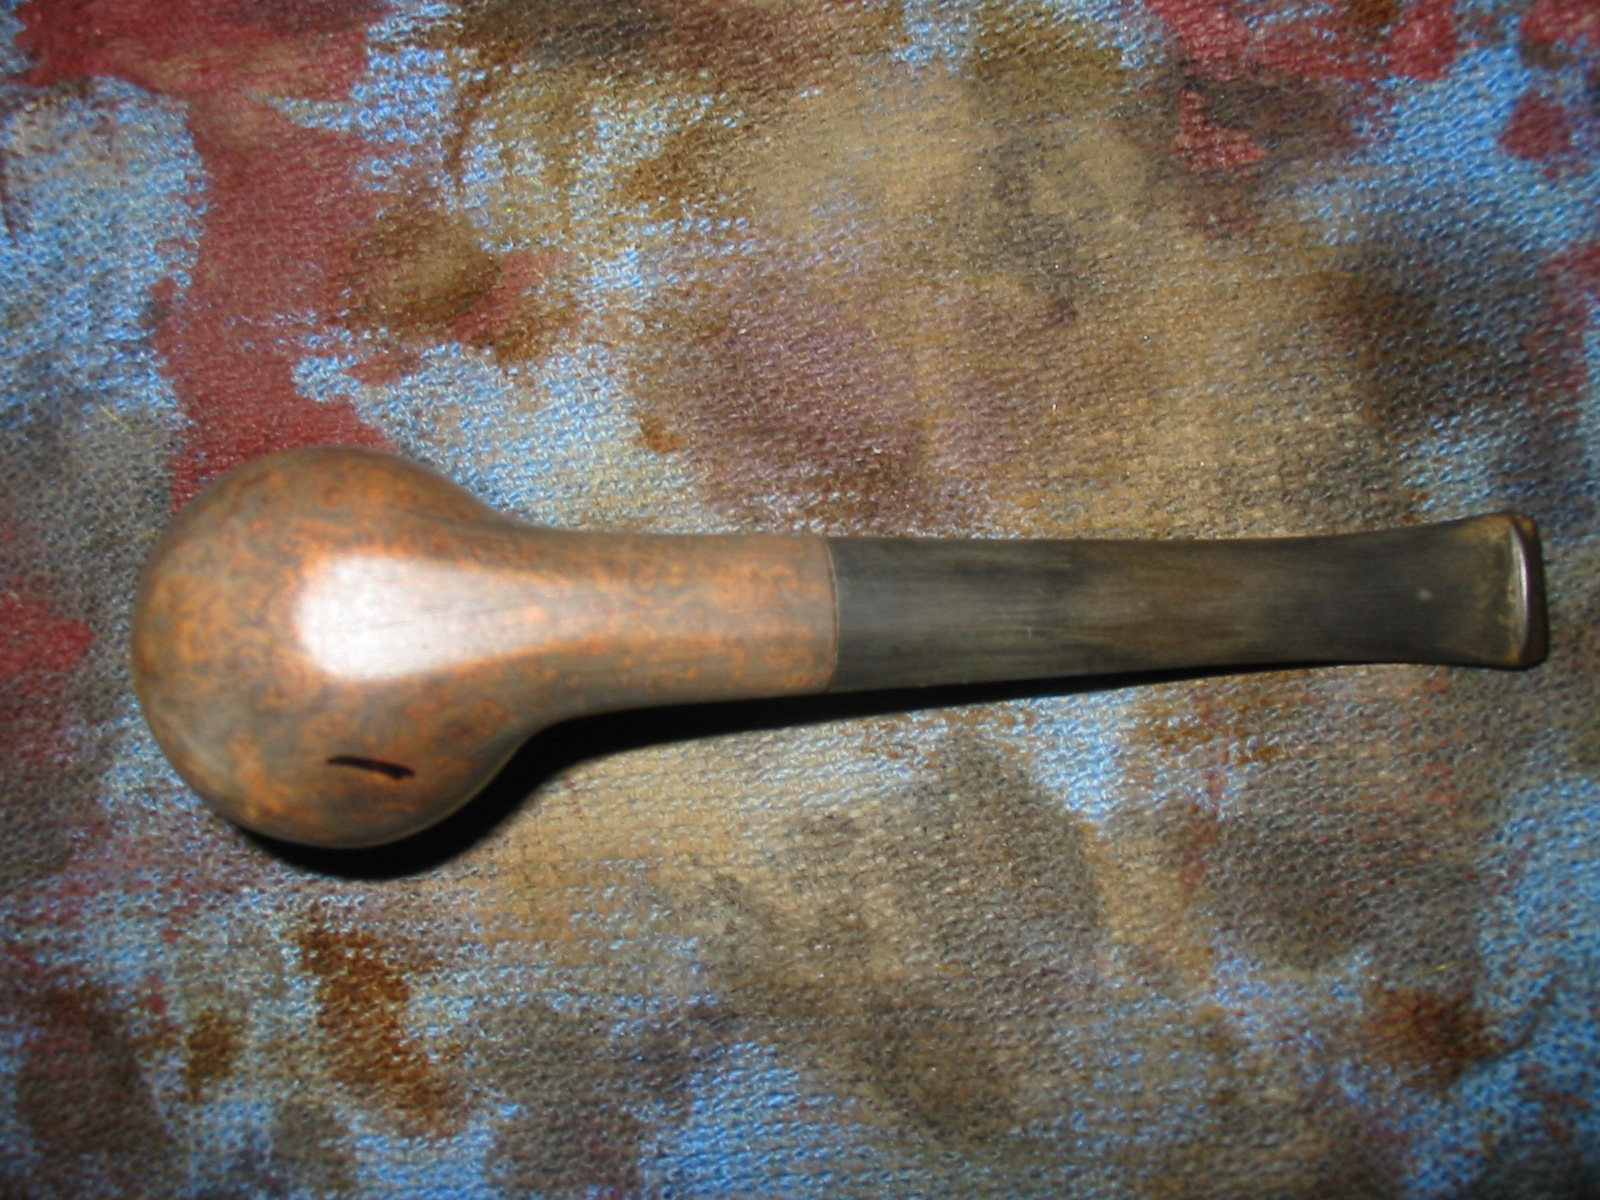
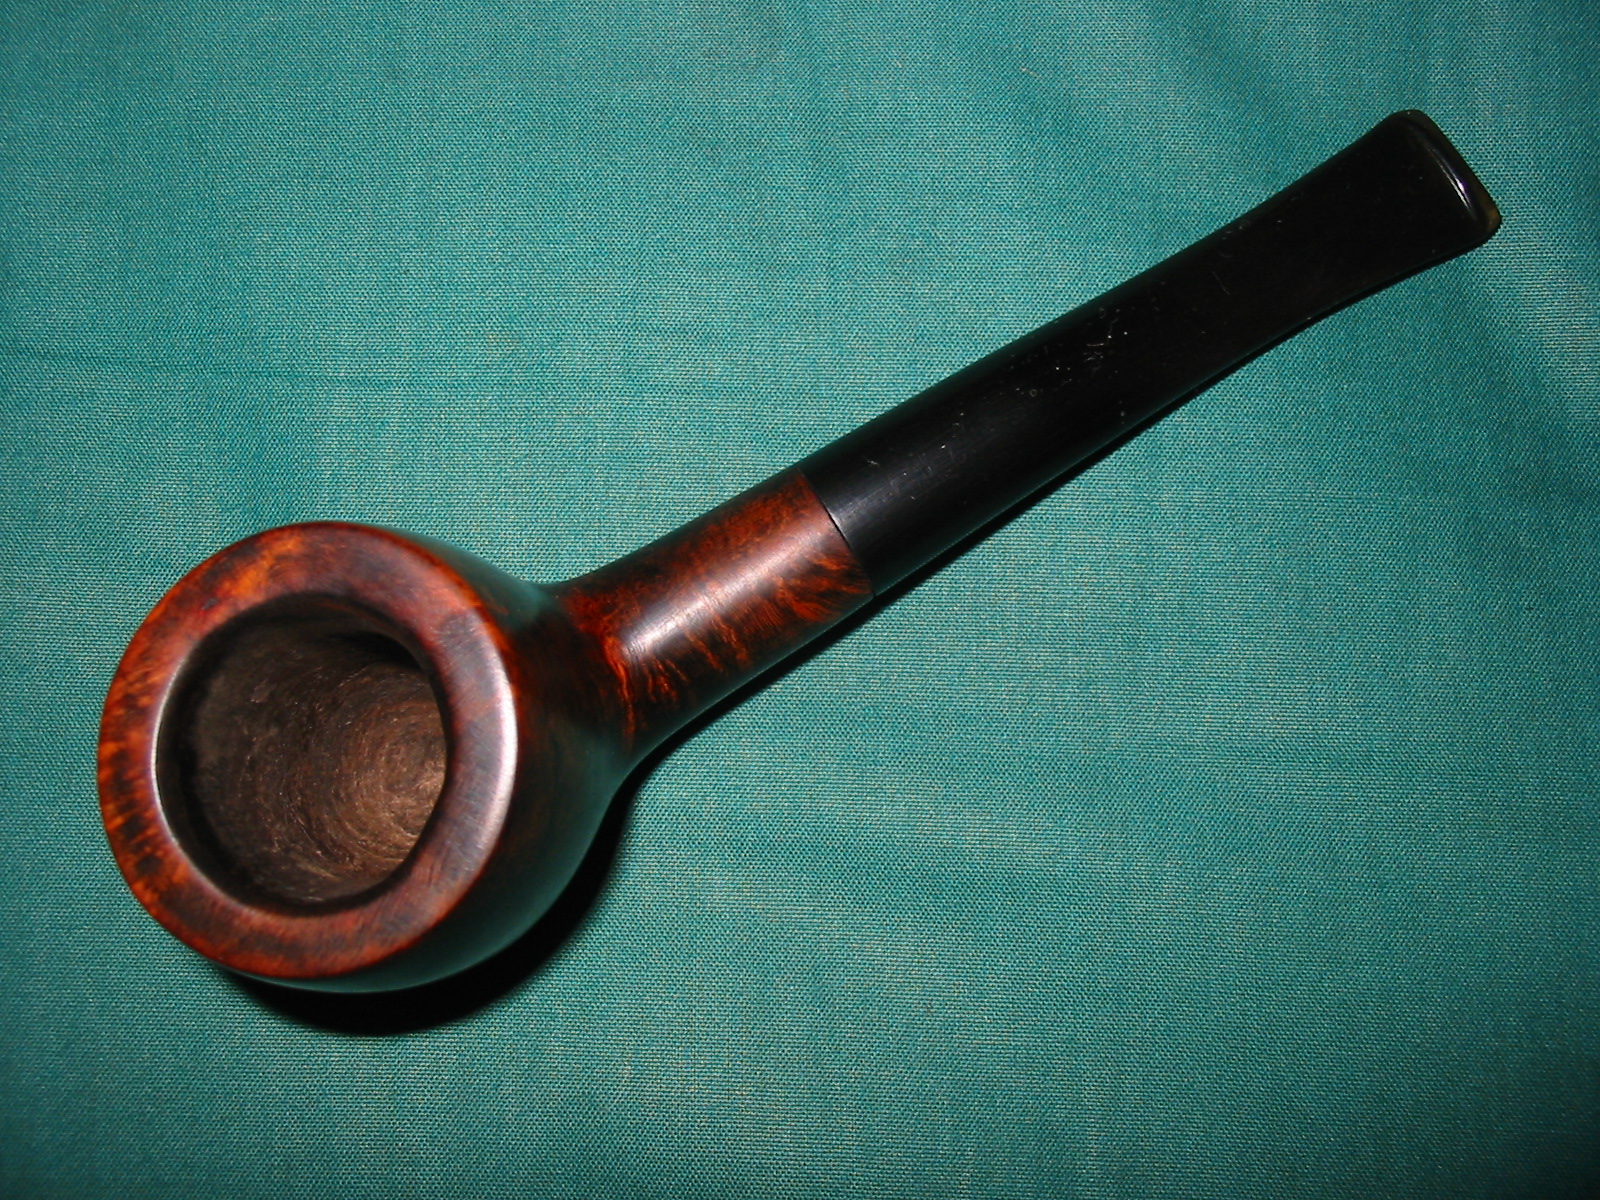
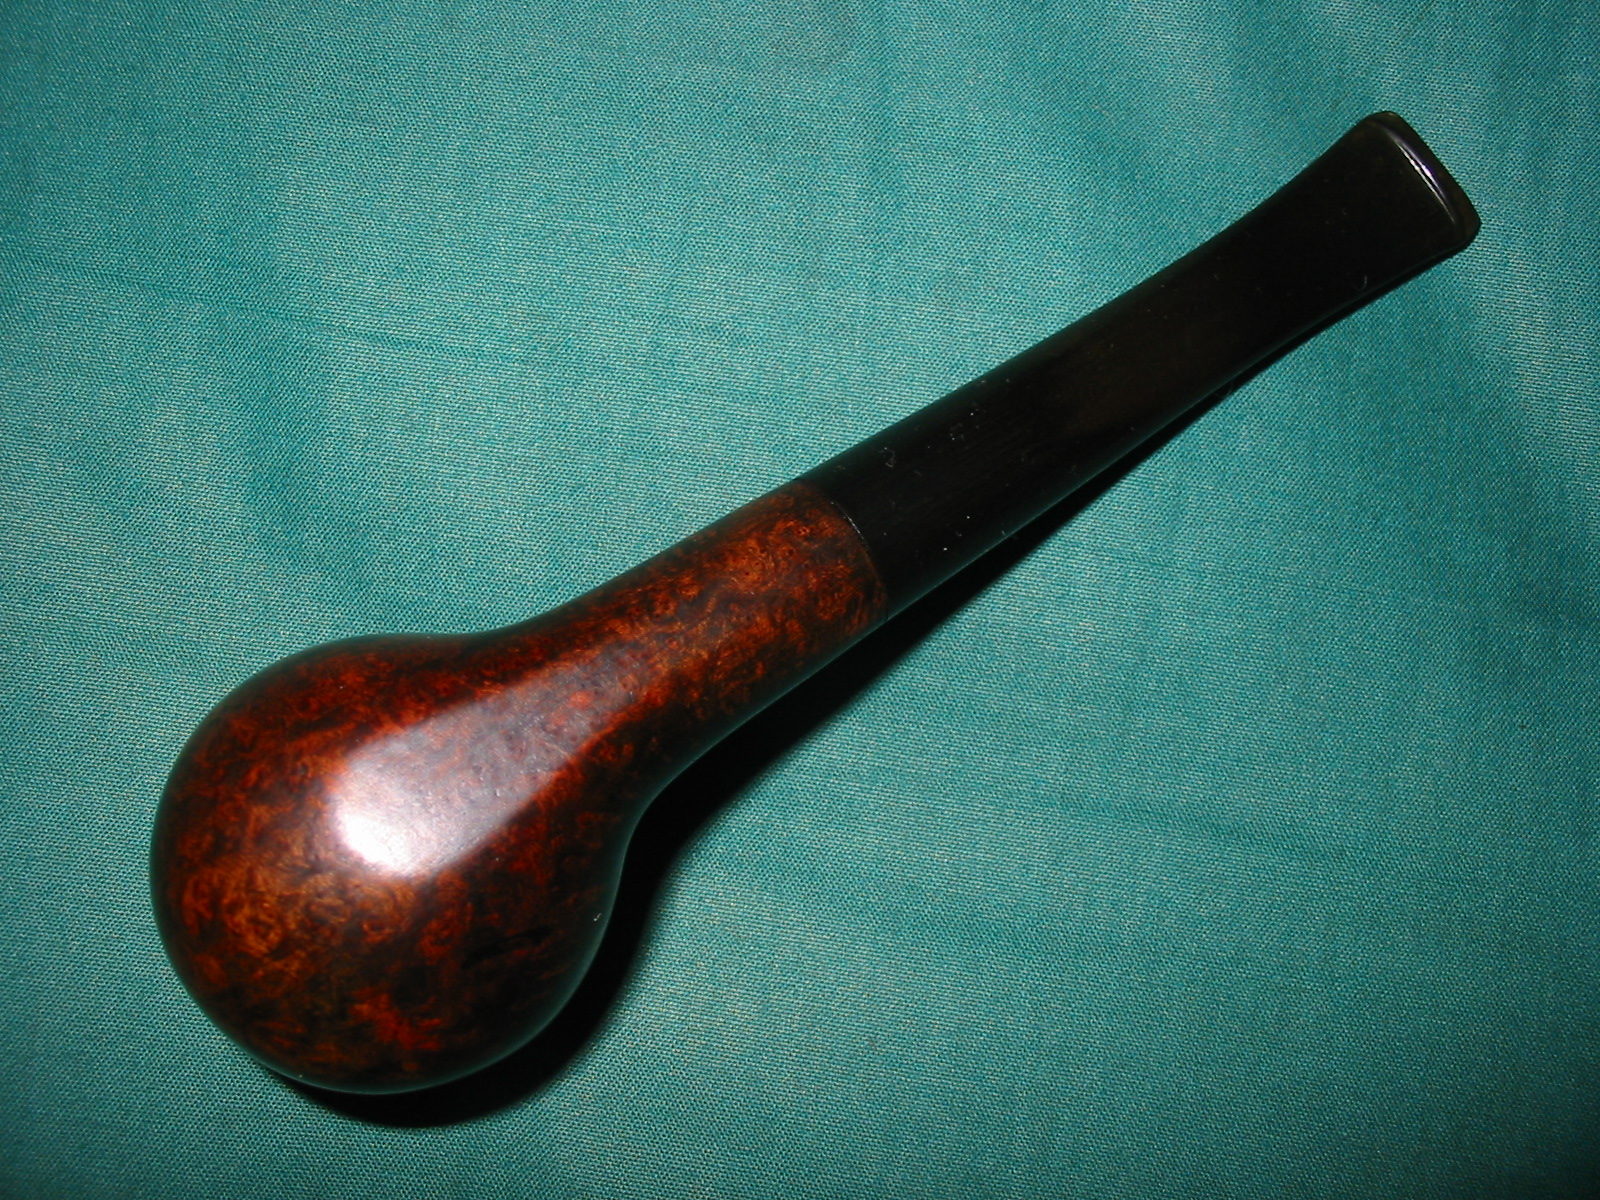
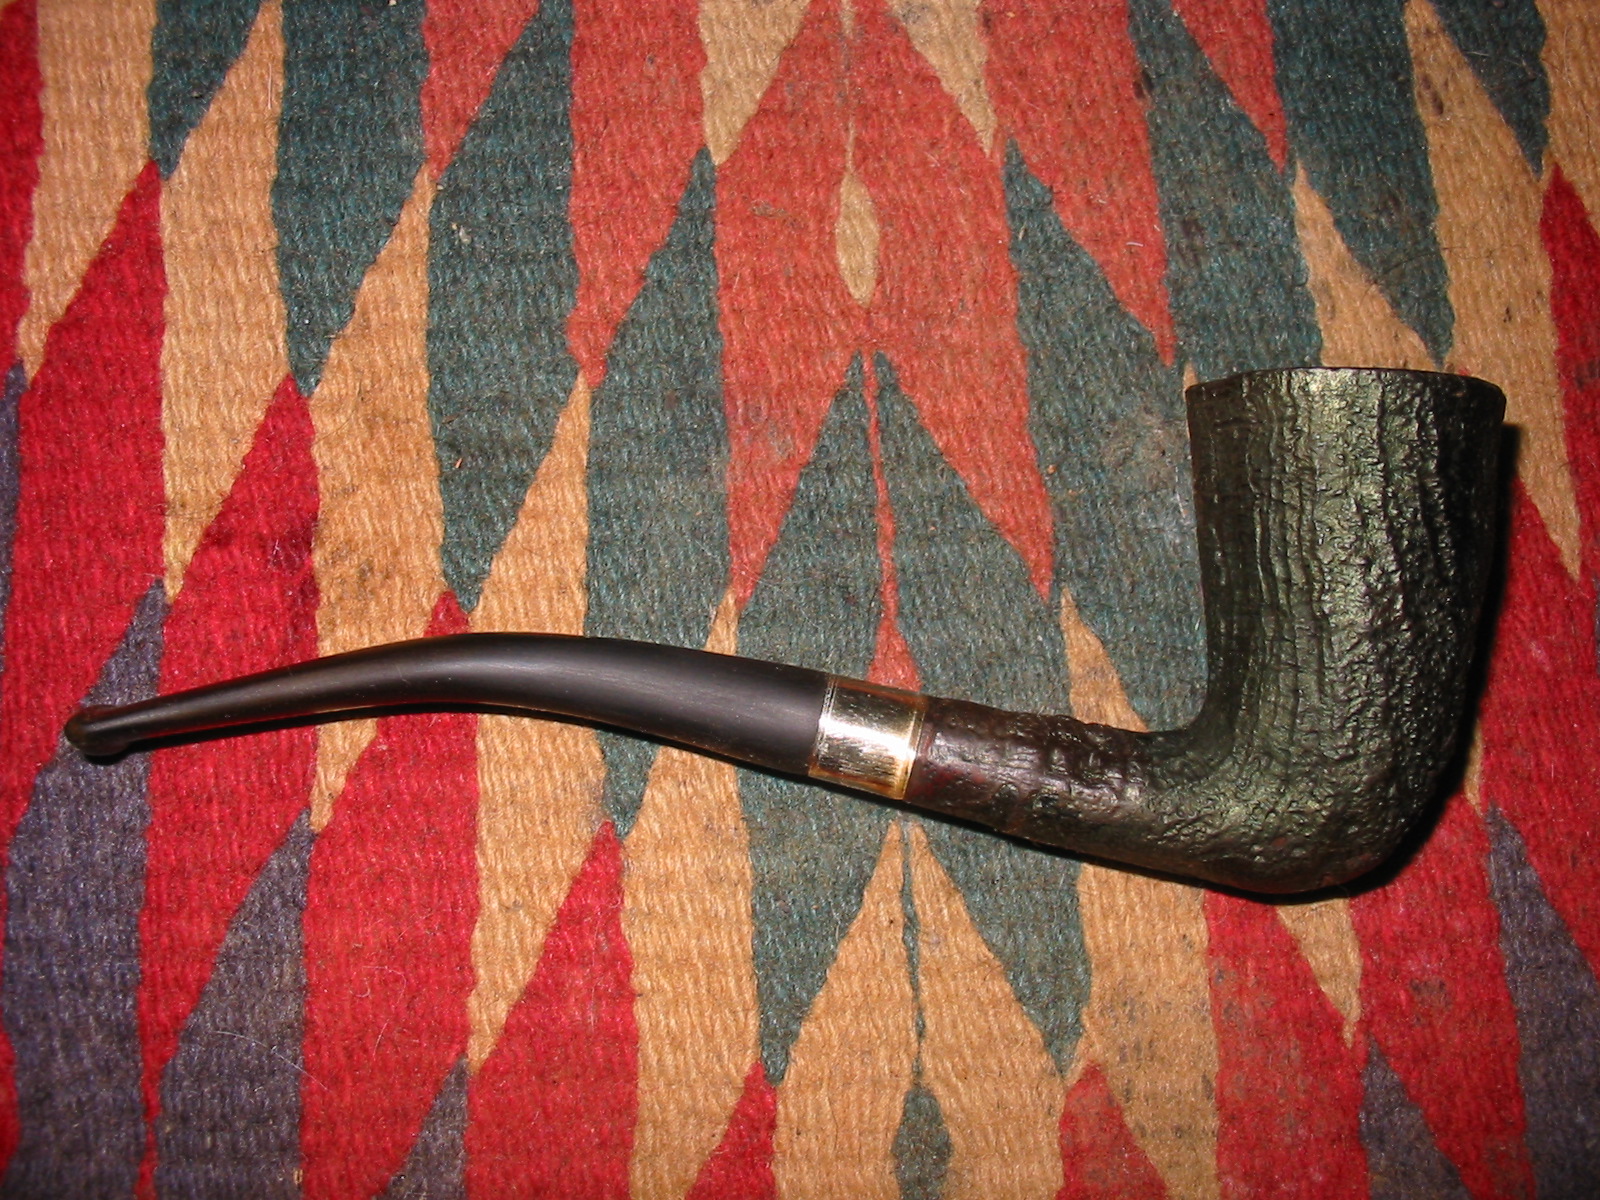
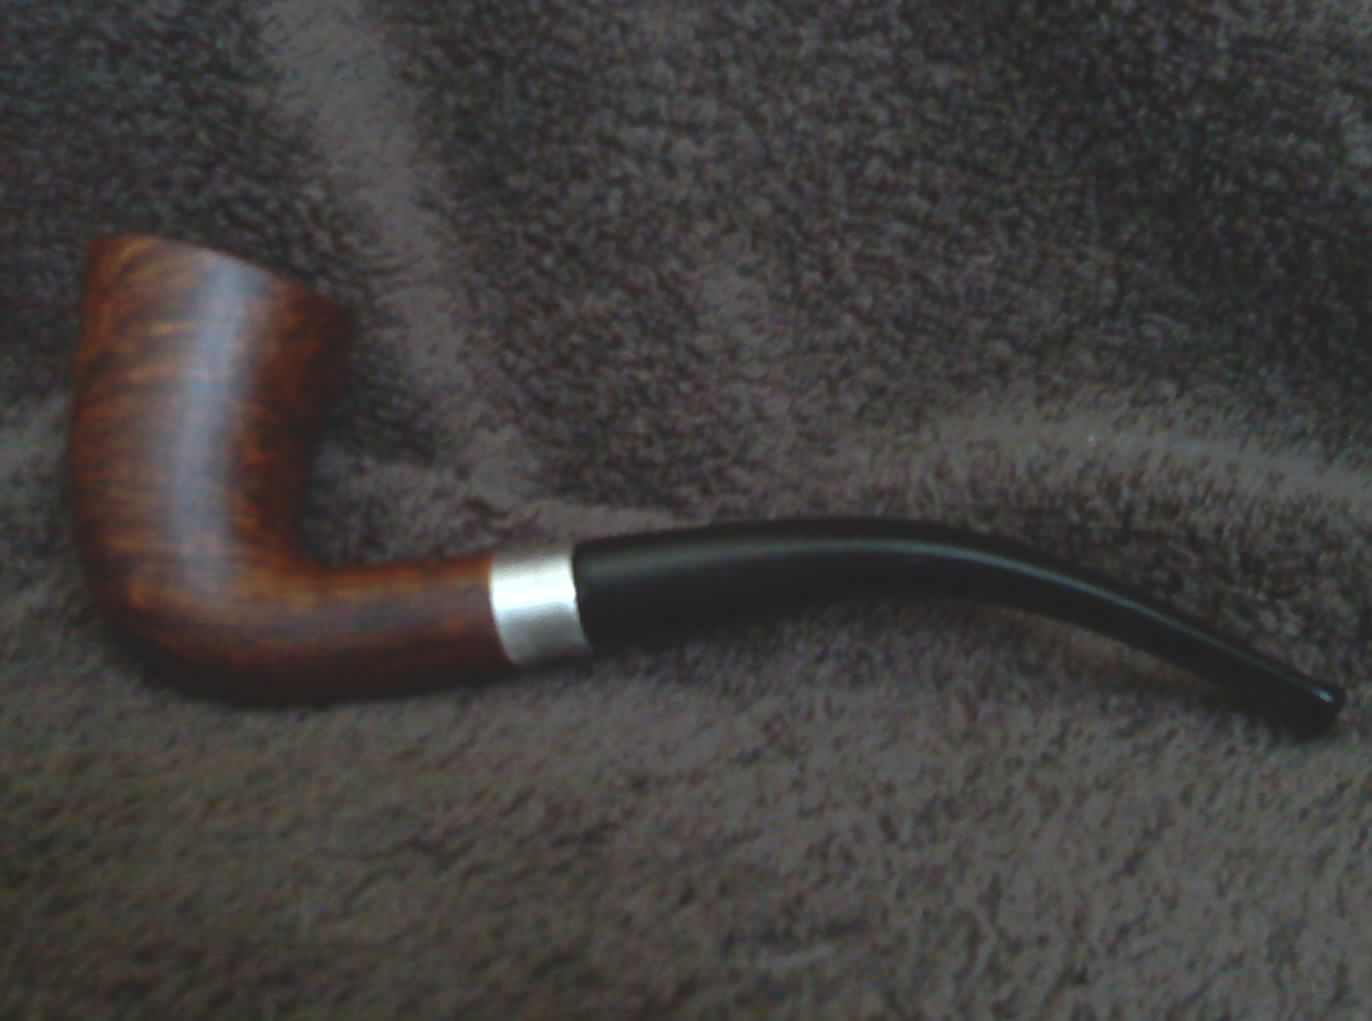
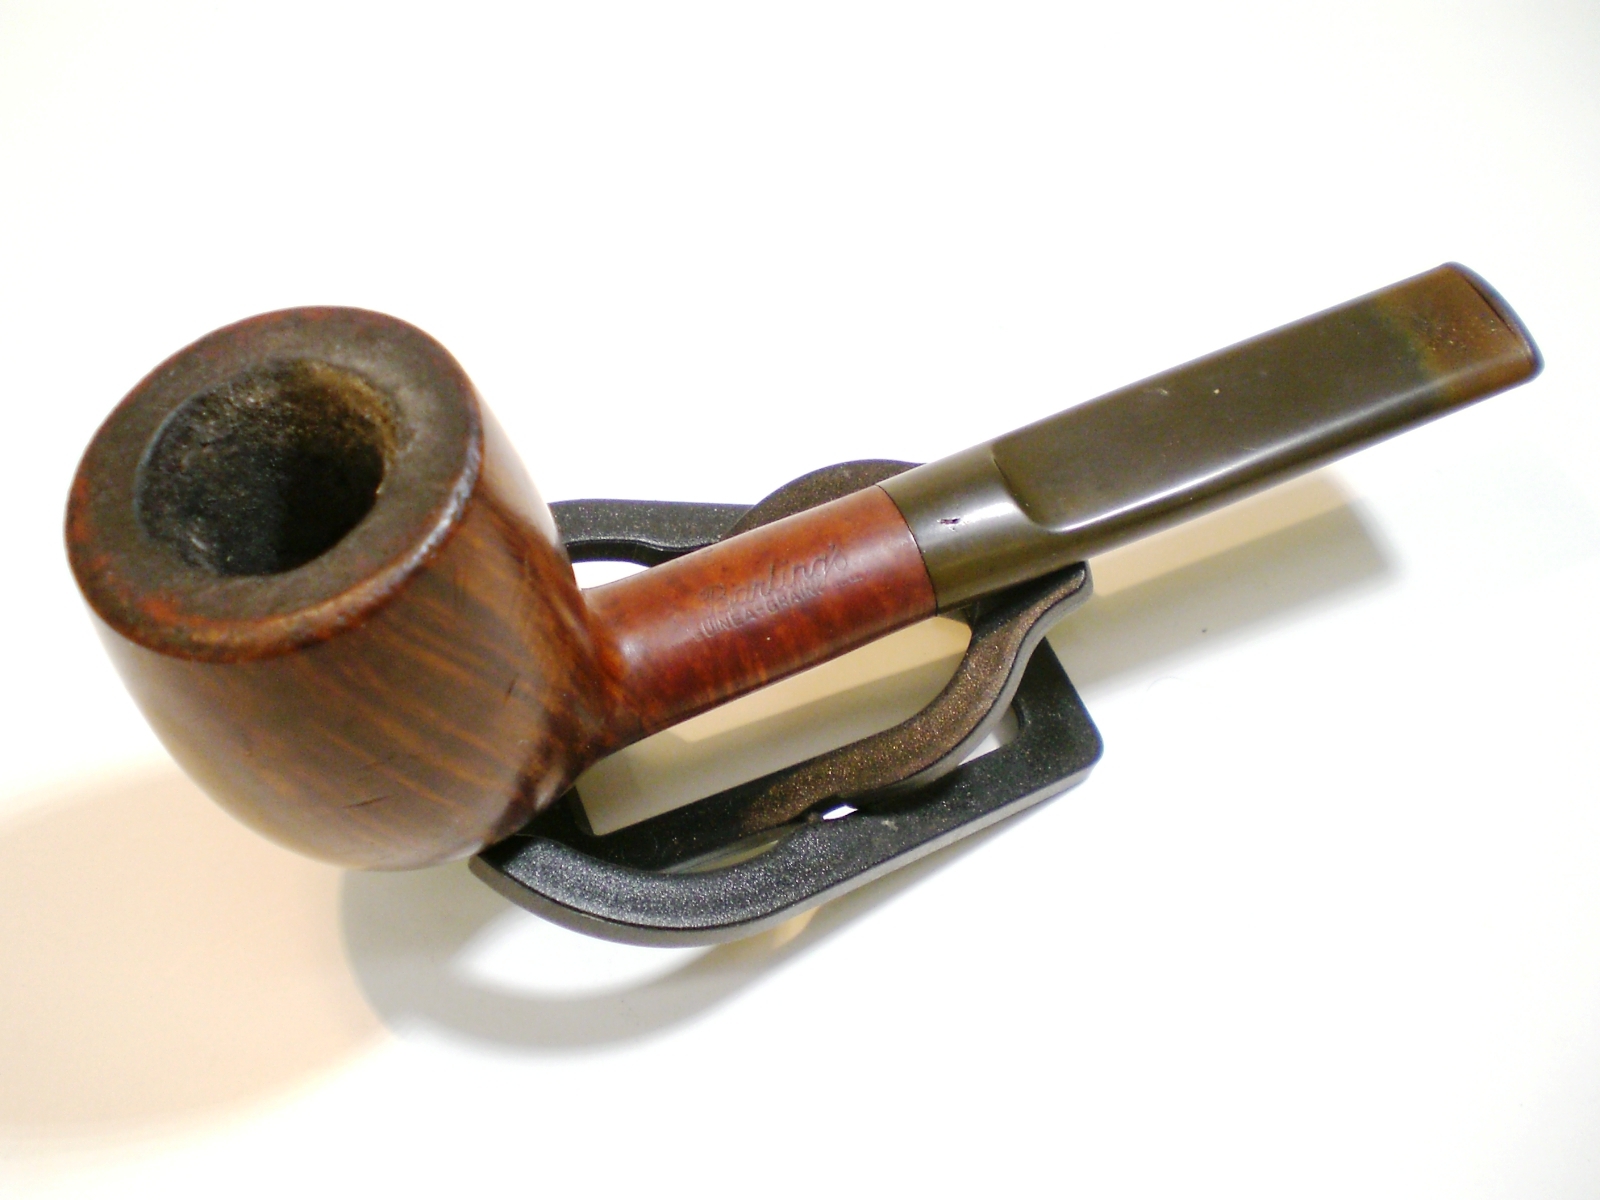
For ease of comparison, I am posting “before” and “after” pictures here next to each other:
Chiz13

Chiz14

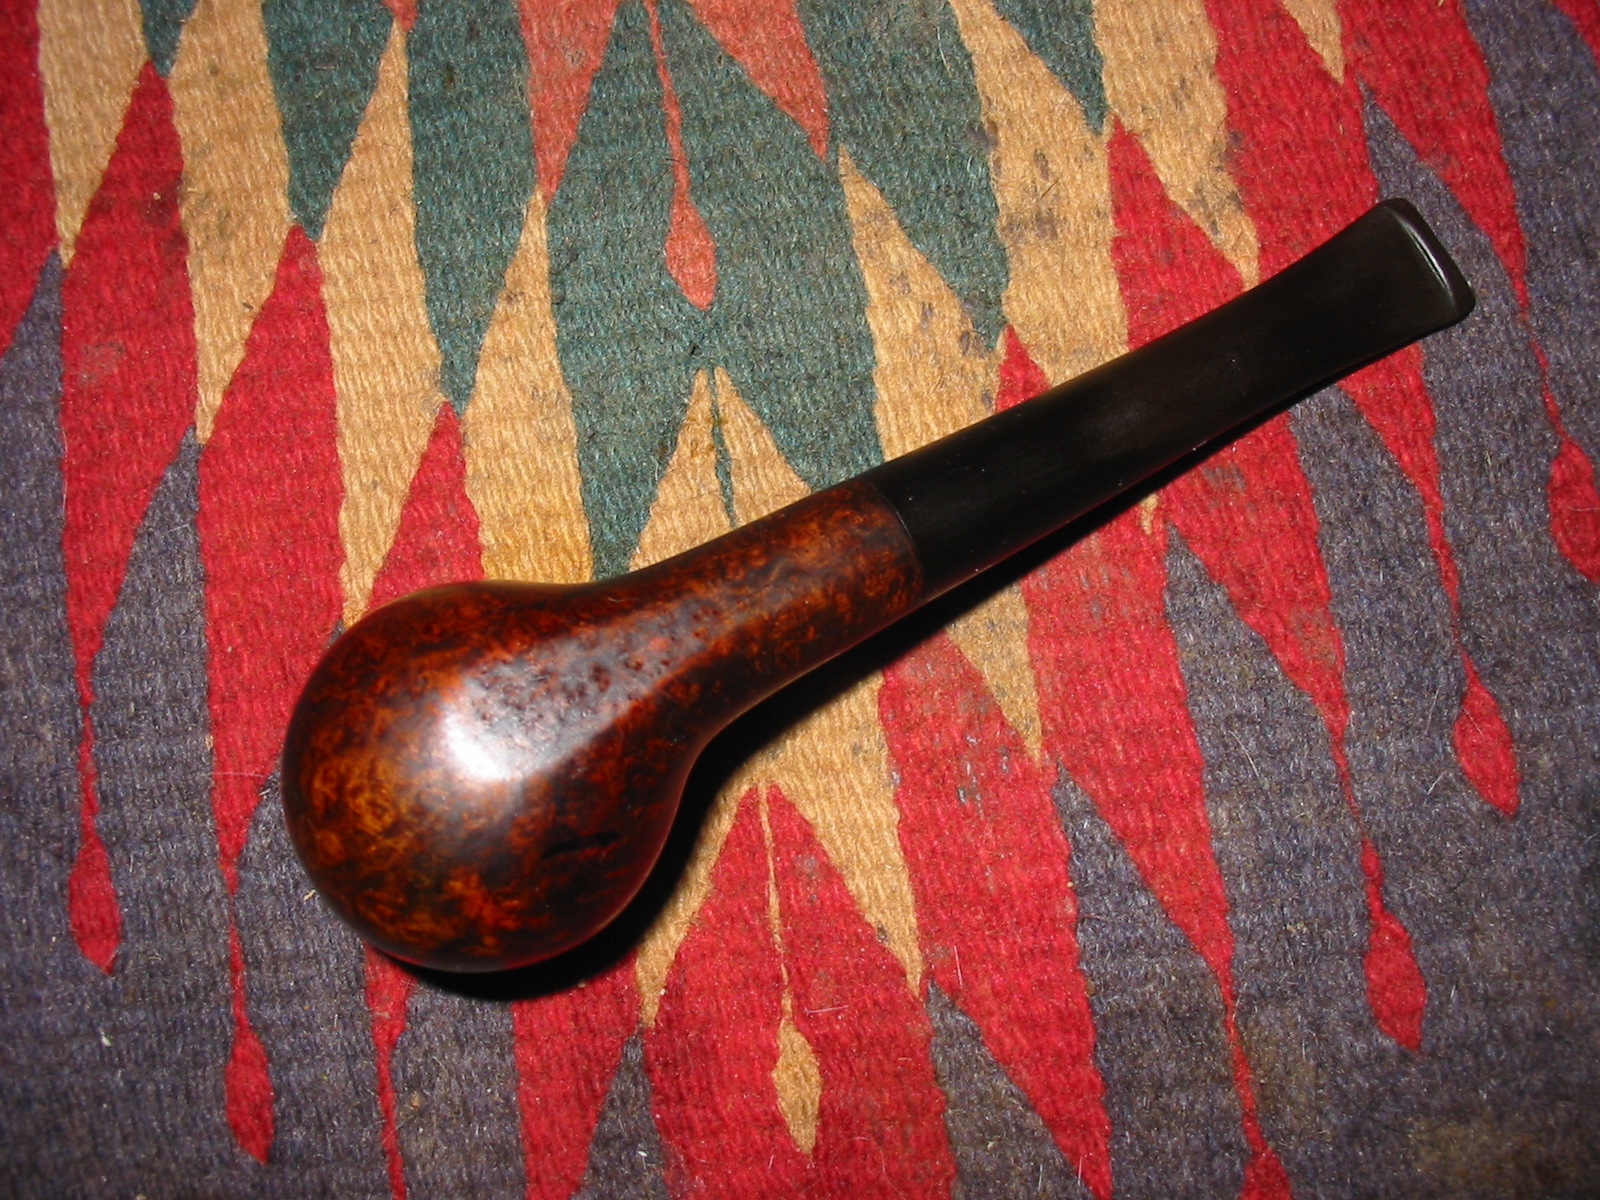
A couple more pics of the finished article followed by some final thoughts:
Chiz15

Chiz16

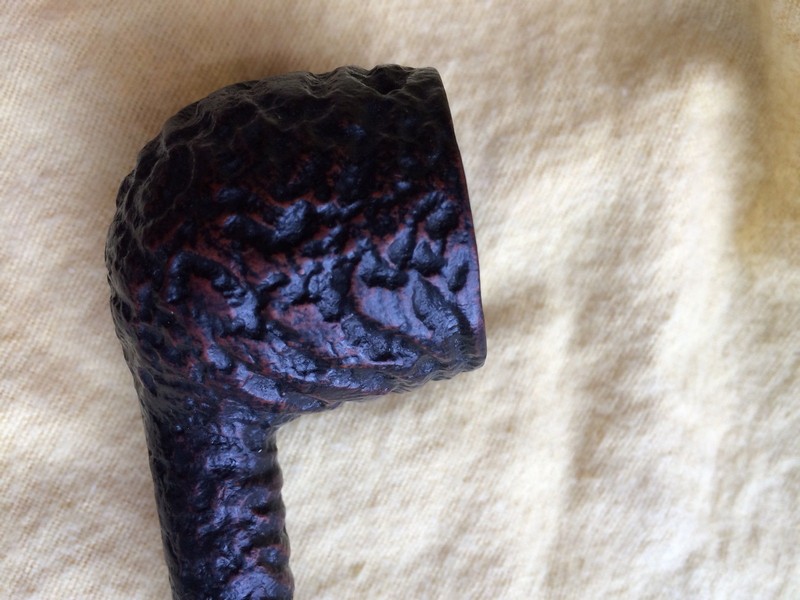
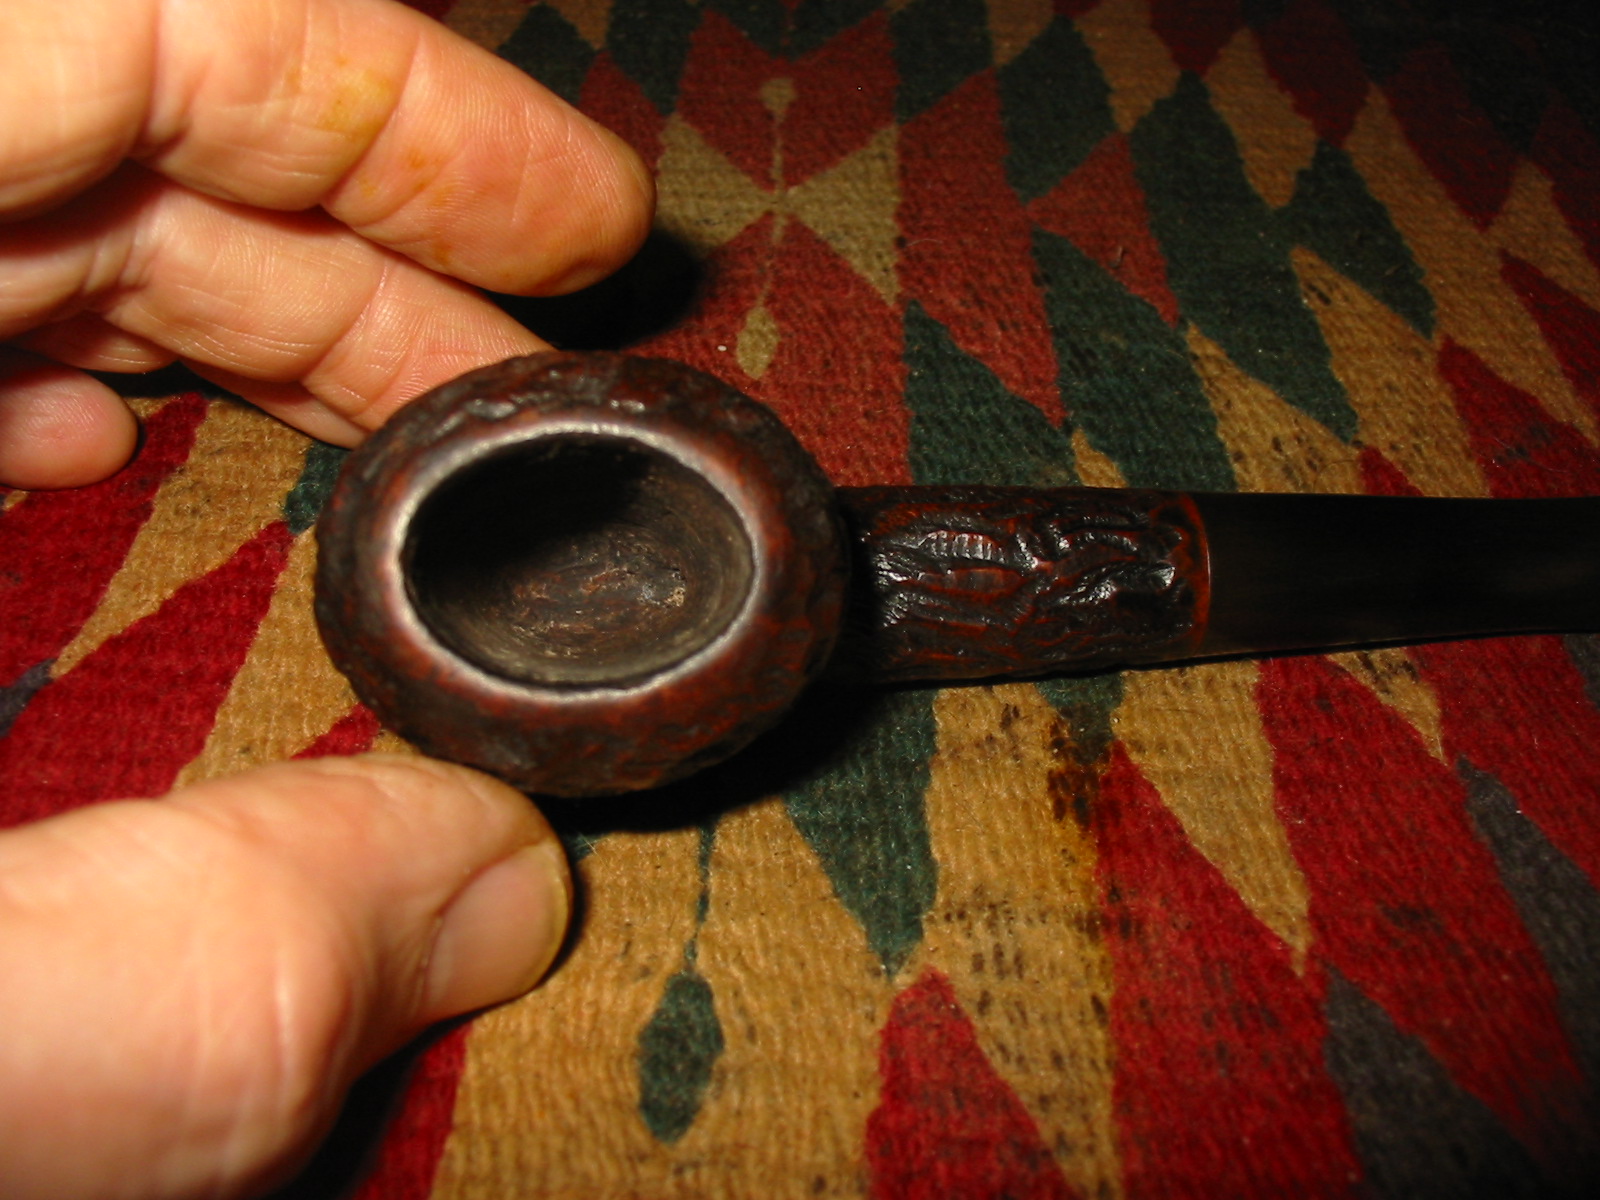
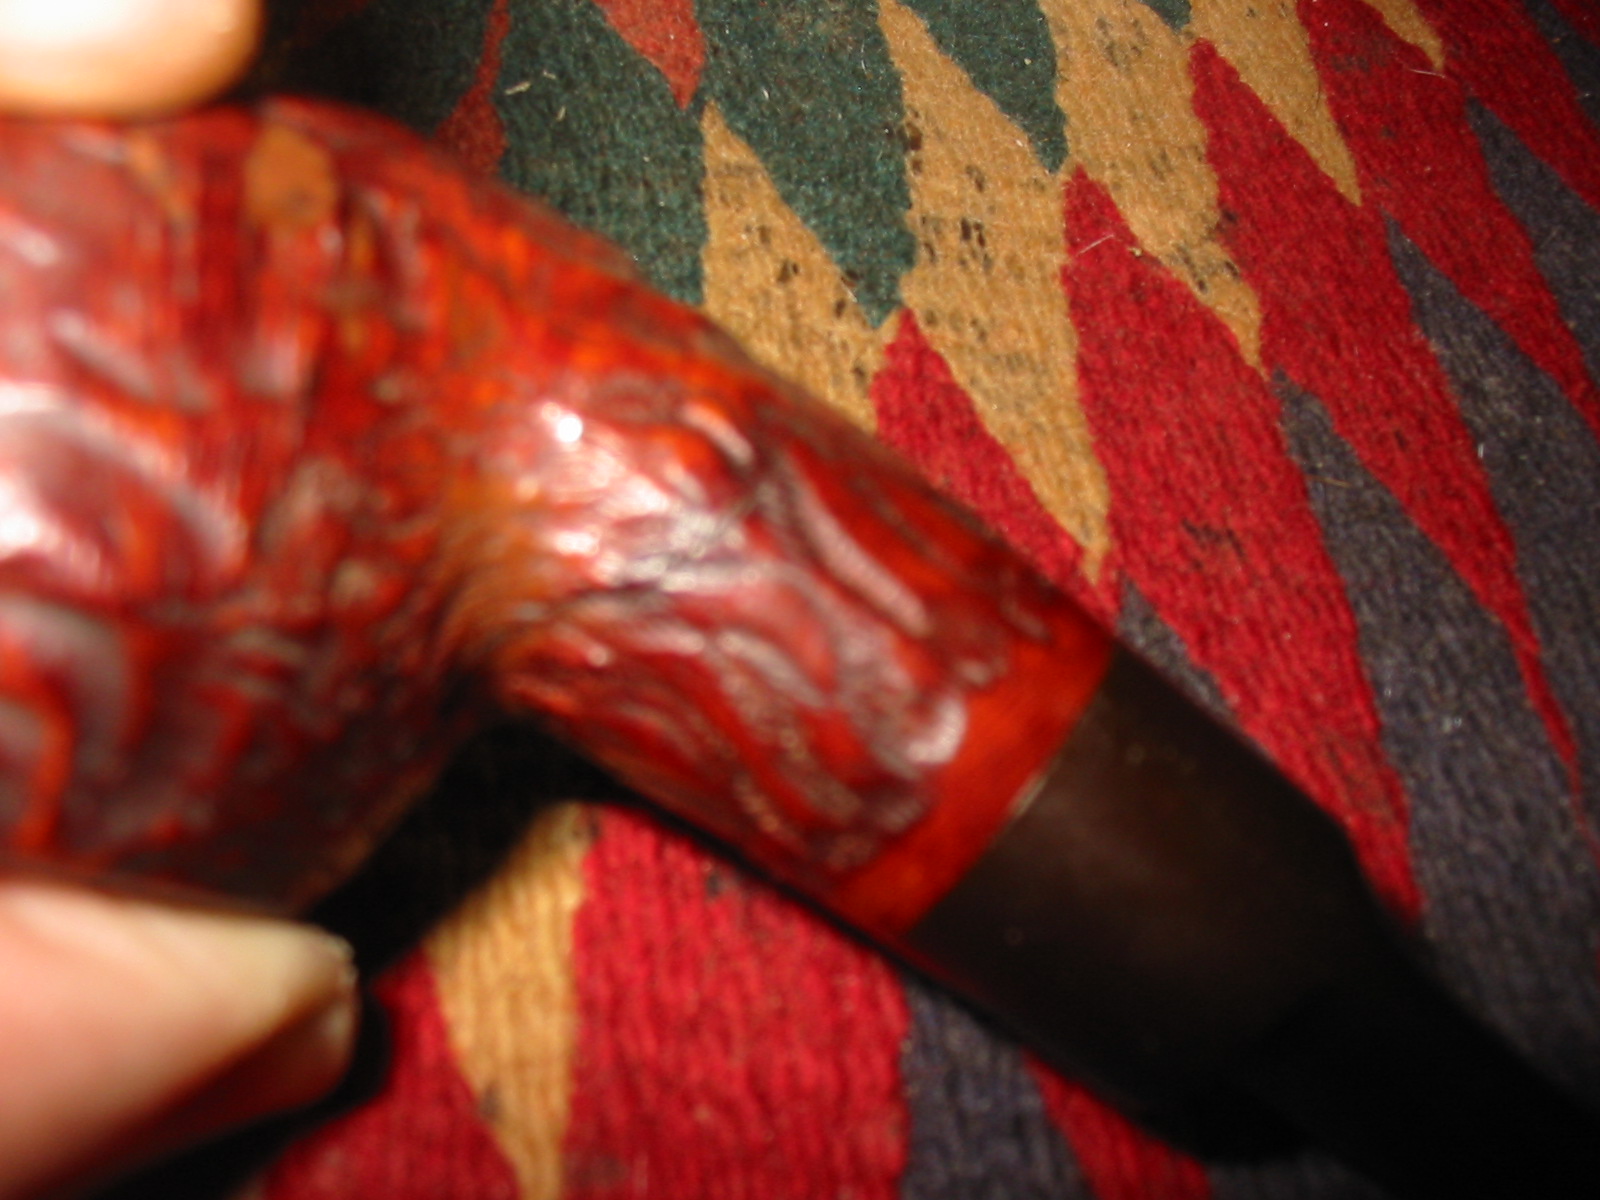
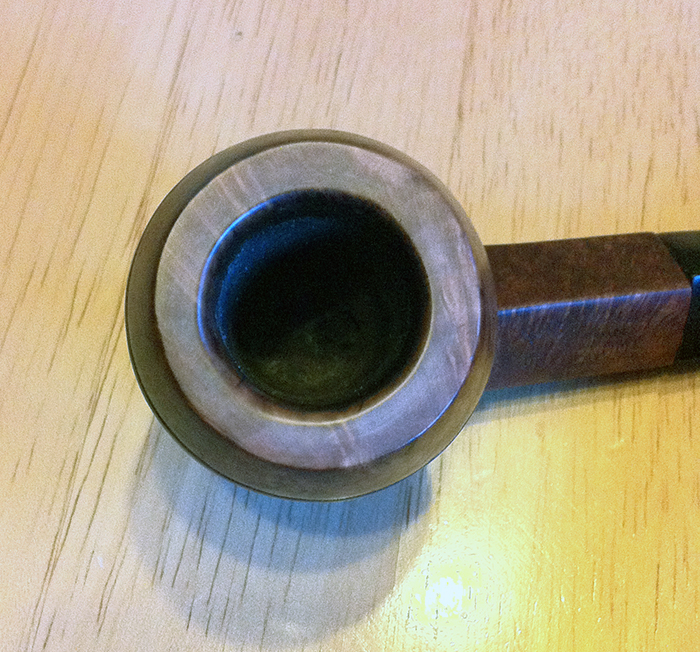
You can see that the rim is out of round at the front edge, this is where the damaged, lowered area was. I was loathe to attempt shaving any more off, but after some input from Steve, I gave the inner edge of the rim a gentle rub with 800 grit paper, it does make it look better.
Chiz17

The shank/stem issue which I have banged on about so much remains clearly visible. At the end of the day, perfection was not in my view possible with this job, certainly with the limited tools at my disposal.

Ultimately one has to ask oneself: what is my aim here? To restore a distinctly banged up specimen to a decent, smokable condition? Well, I hope I have achieved that and, while the pipe still shows signs of age and use, I think that is as it should be. Like an old movie star looking attractive and dignified in a nice set of new threads. But without an OMG facelift.