Tag Archives: removing oxidation

Restoring a Blatter Montreal Billiard


Blog by Steve Laug

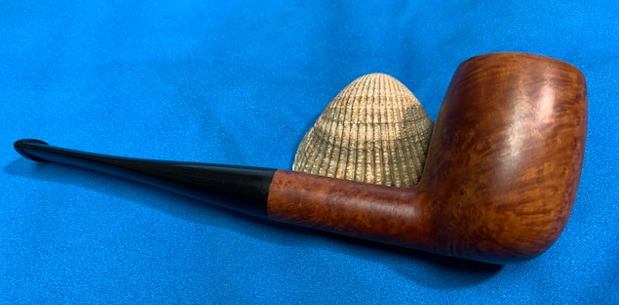
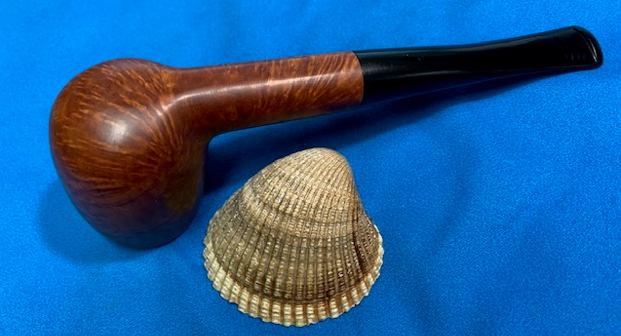
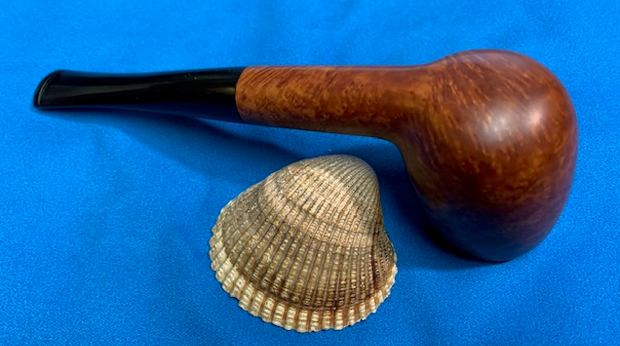
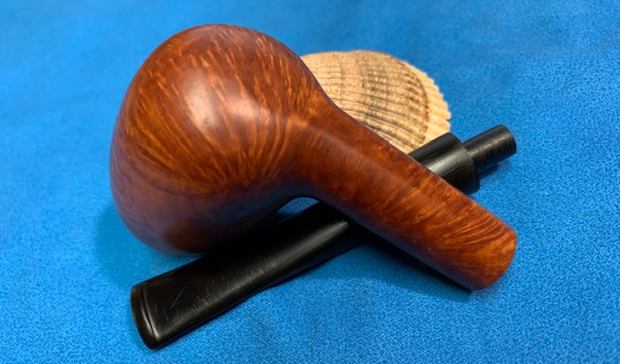
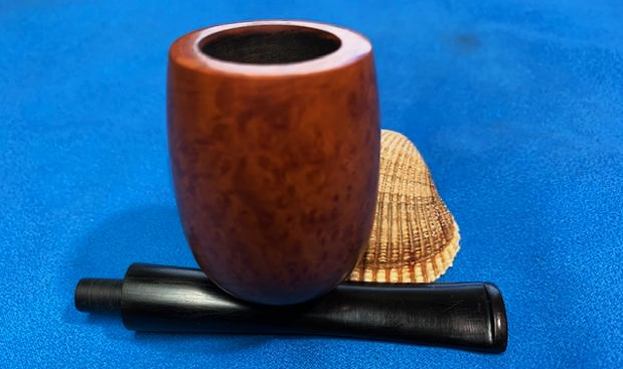
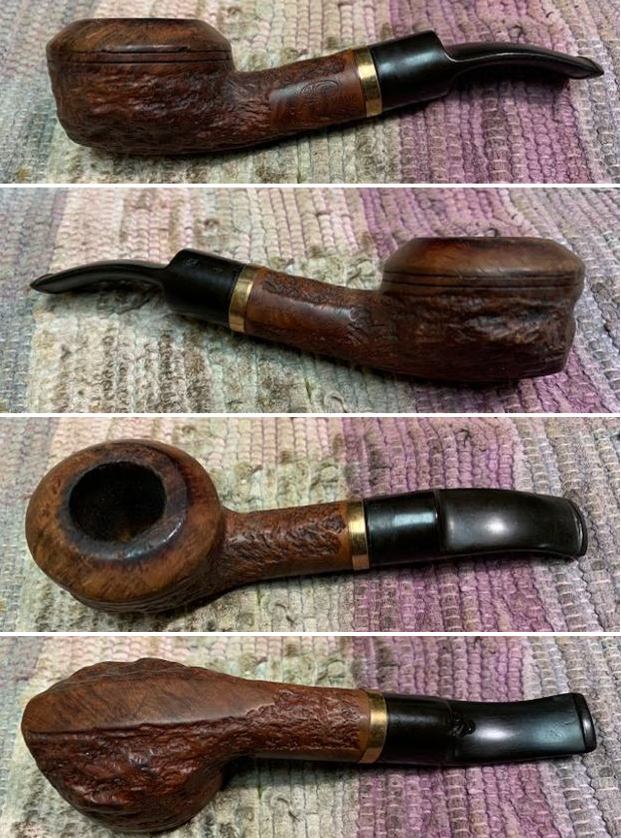
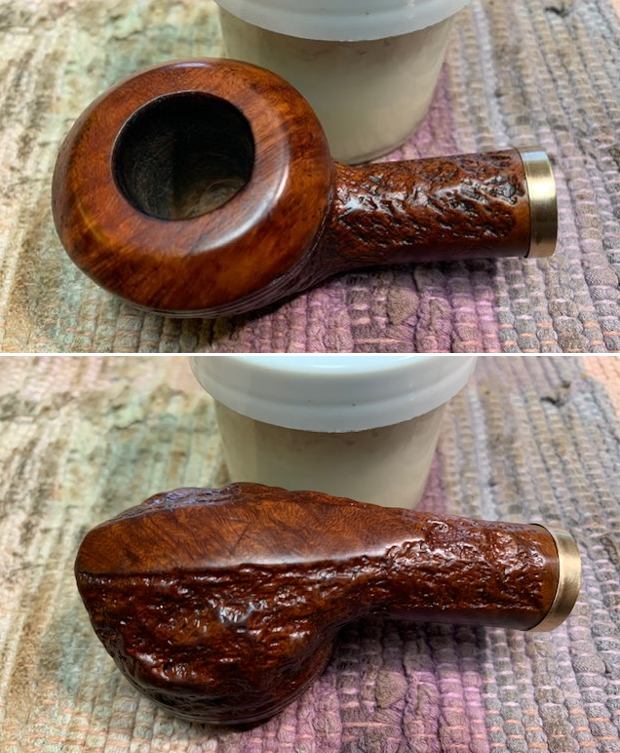
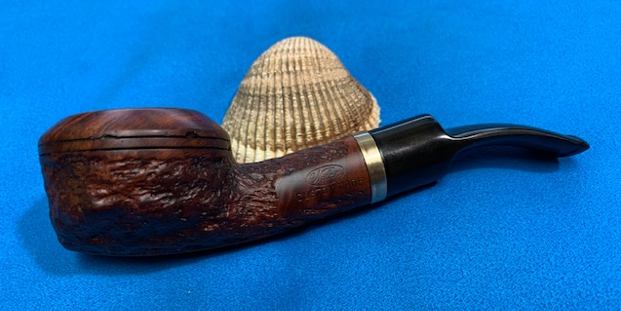
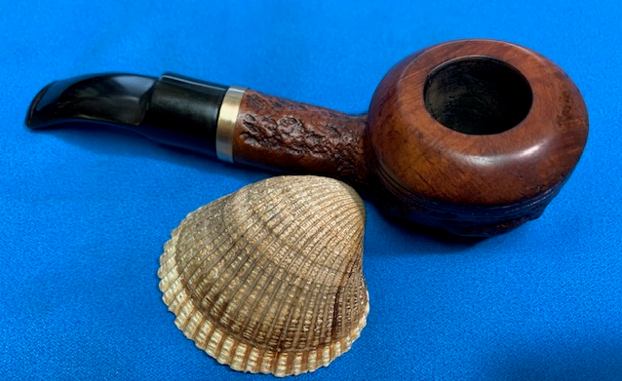
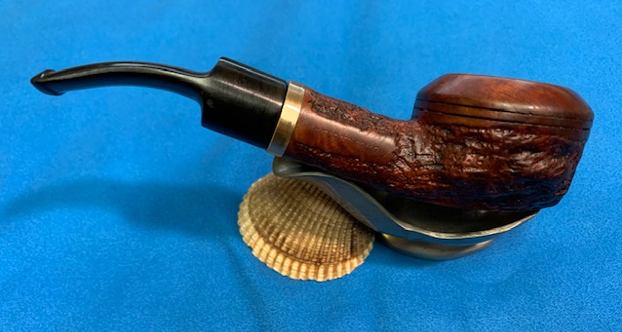
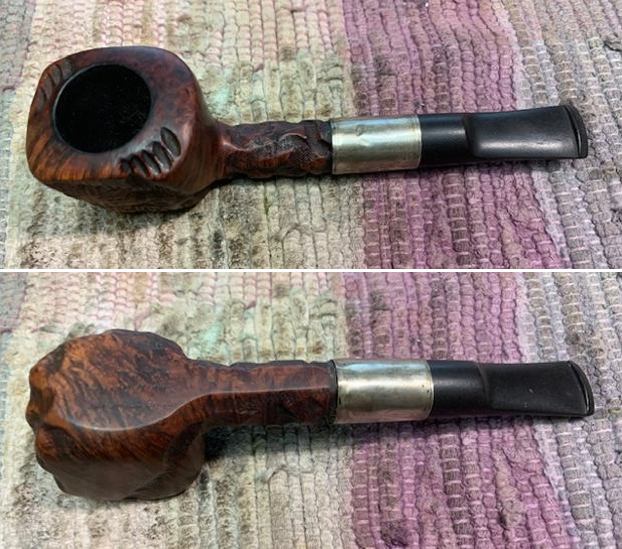
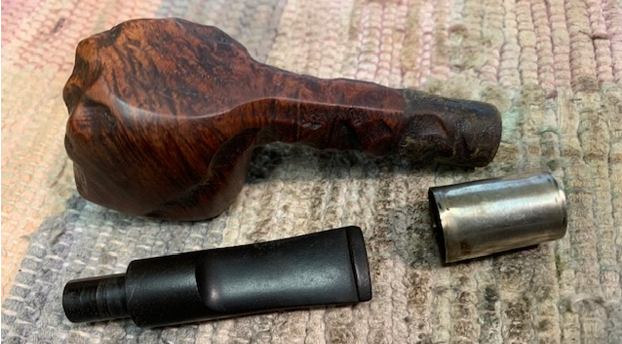
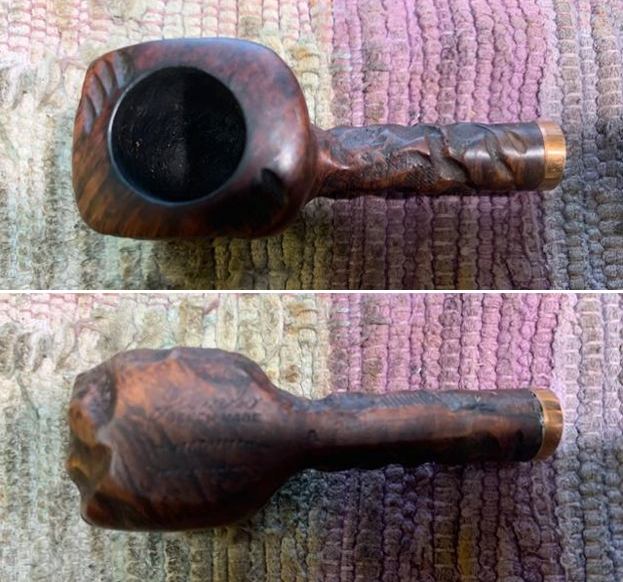
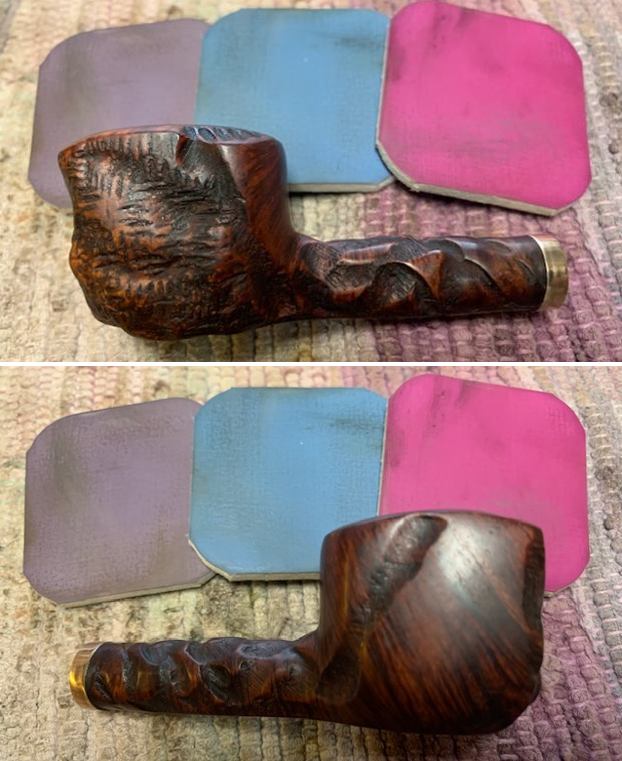
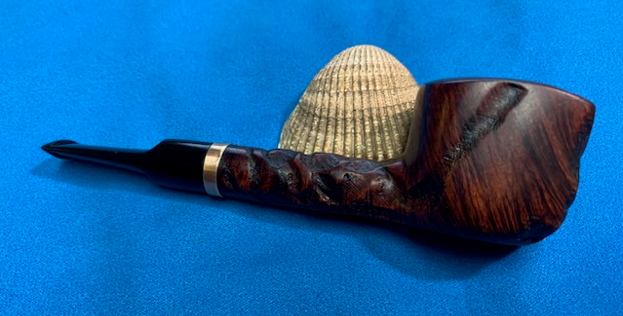
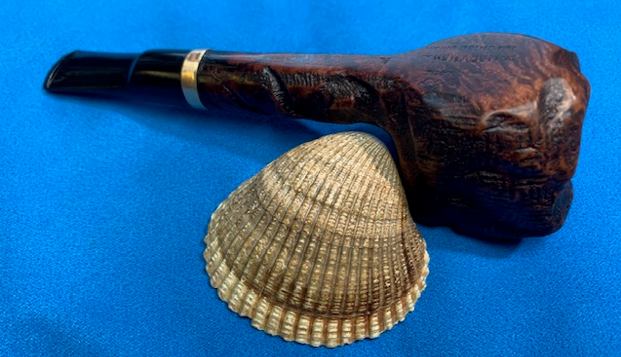
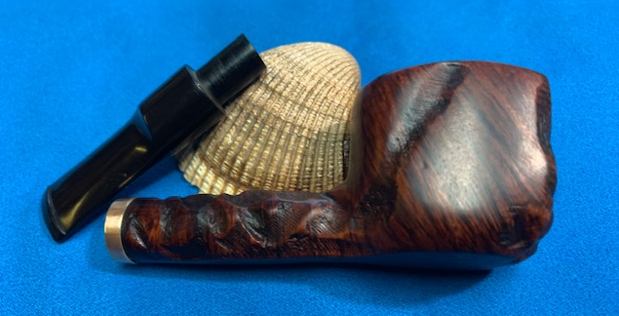
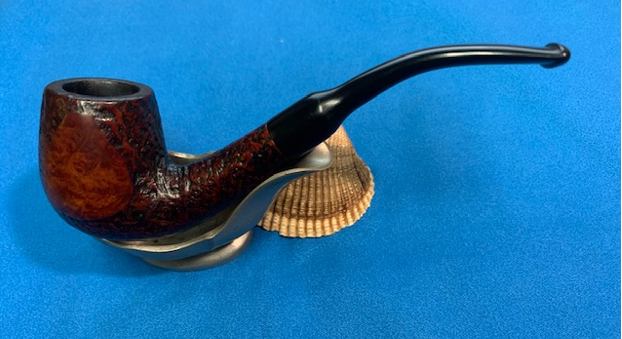
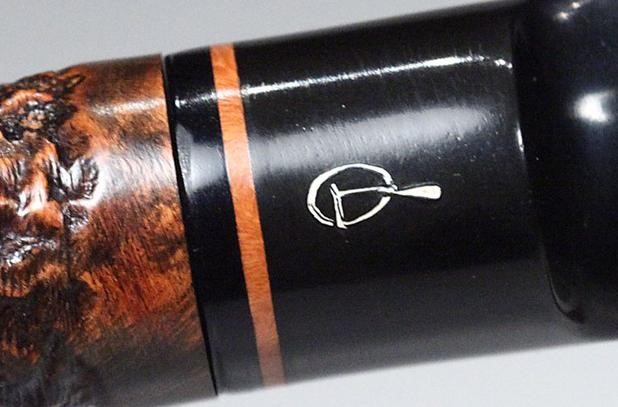
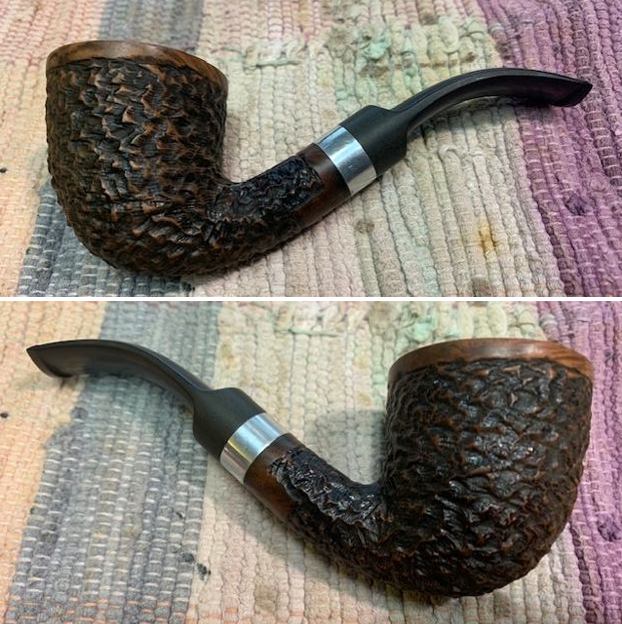
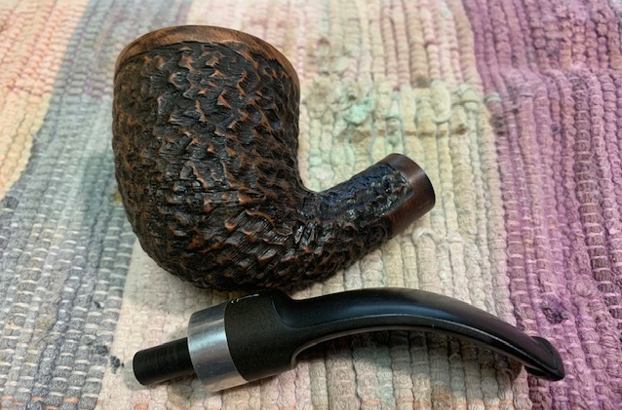
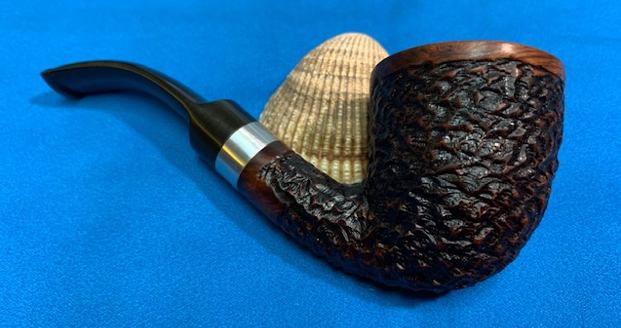
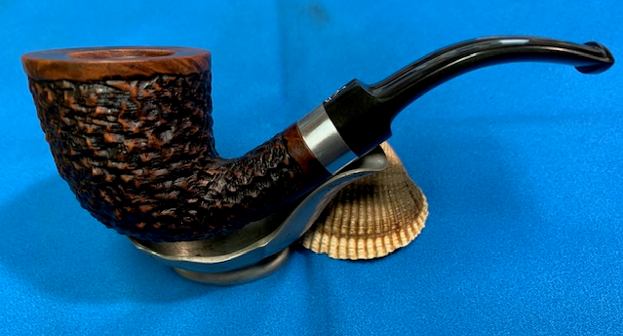
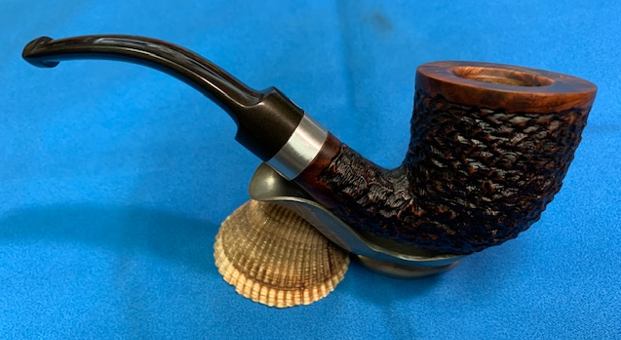
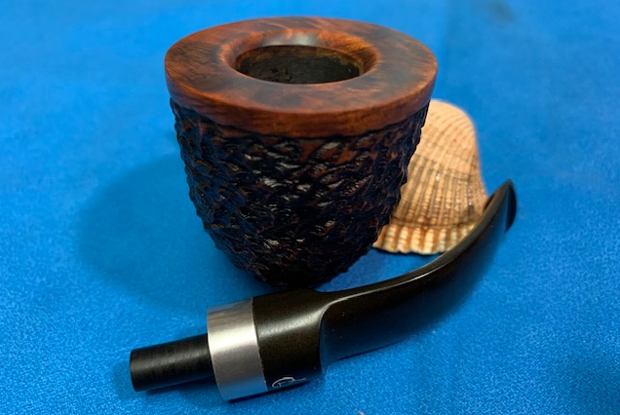
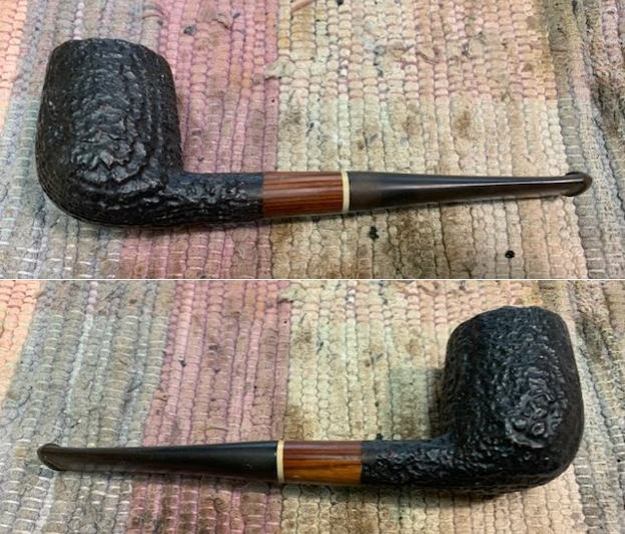
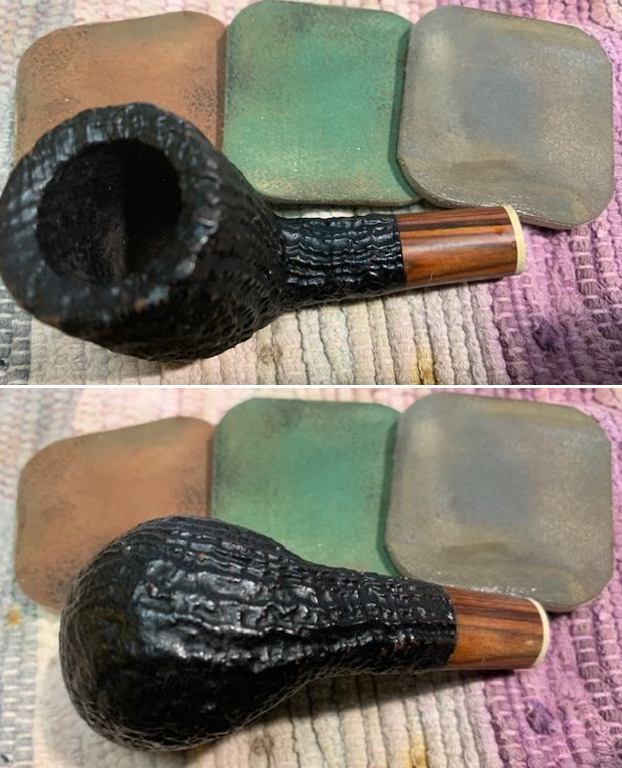
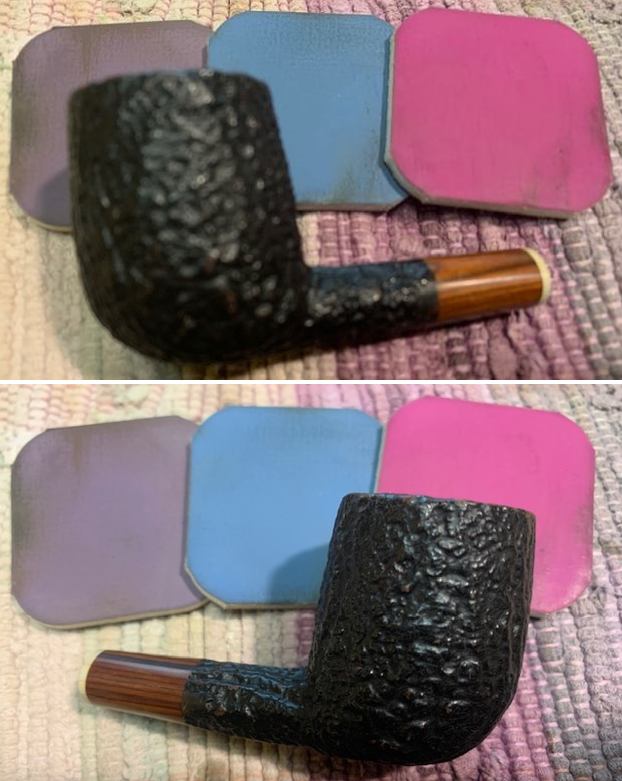
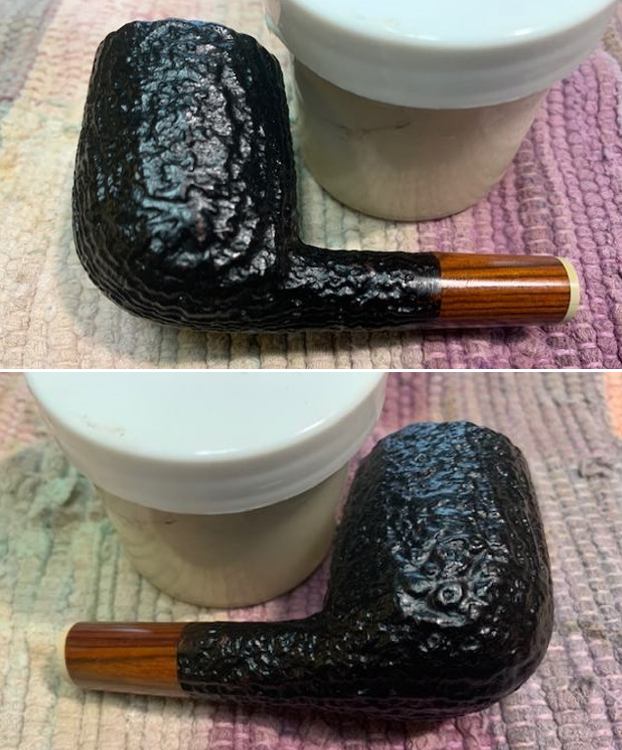
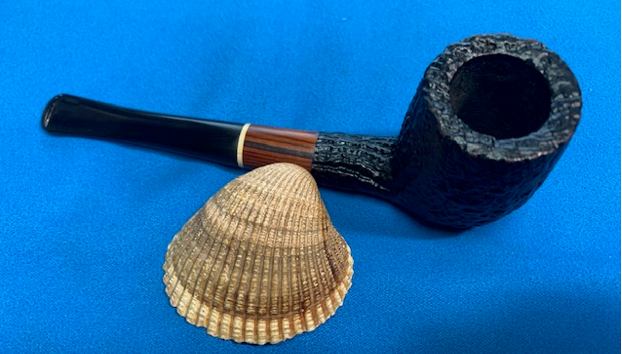
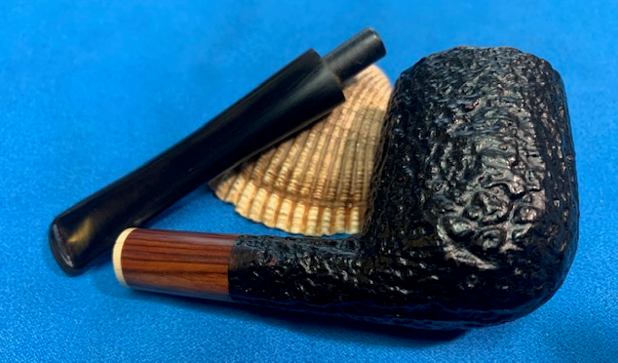
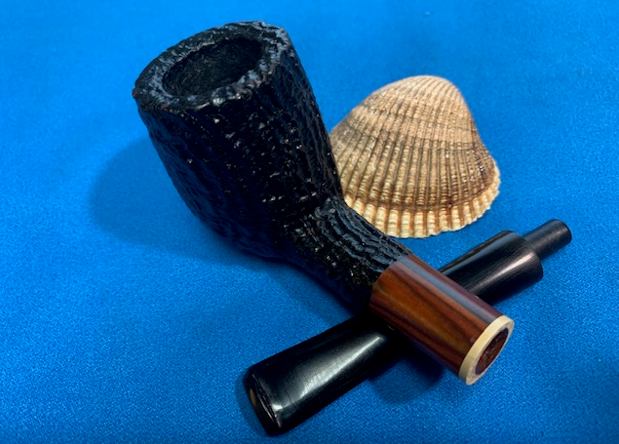
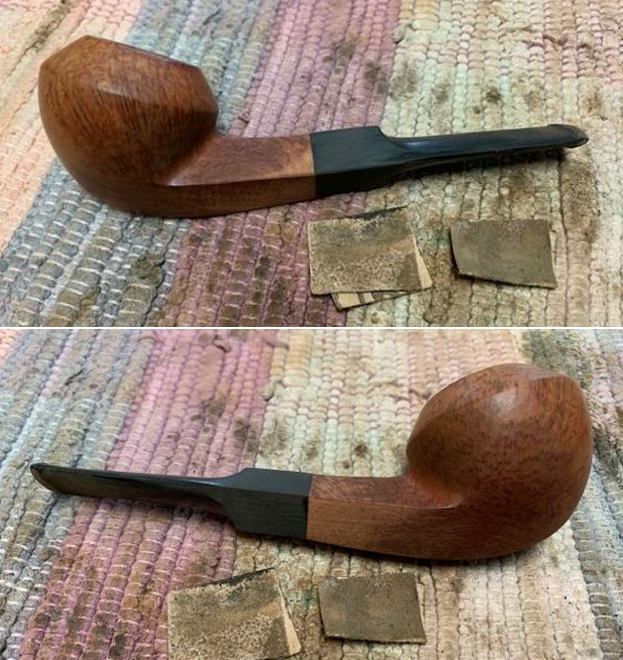
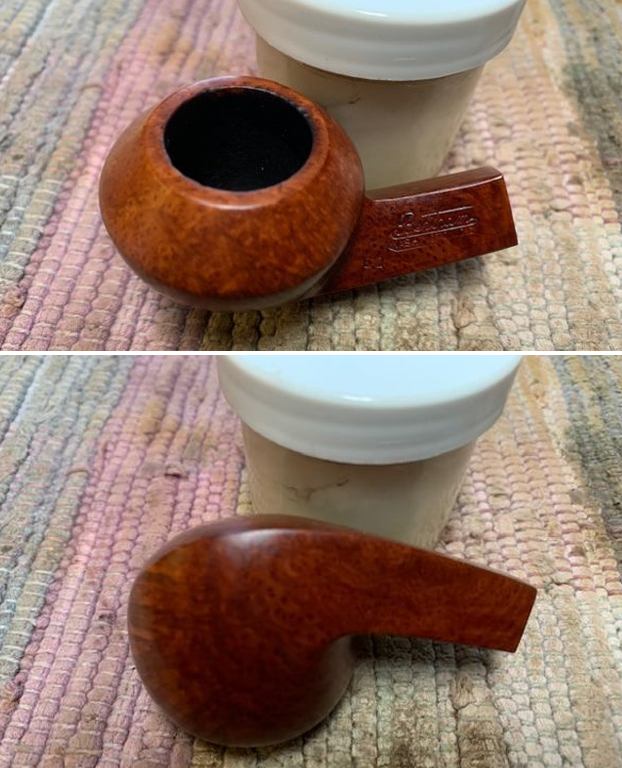
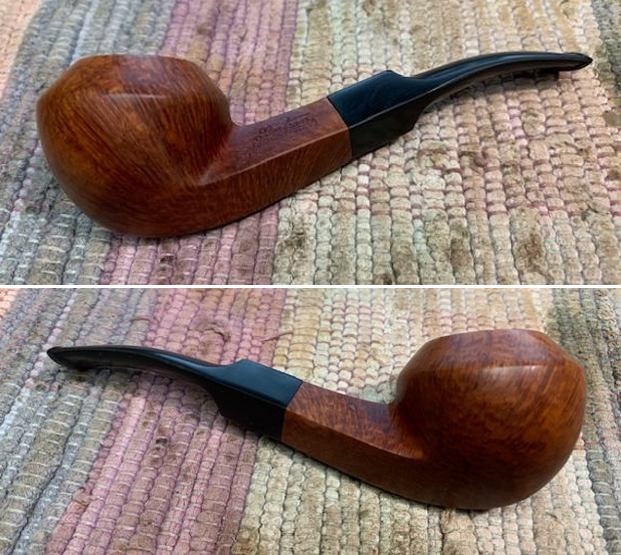
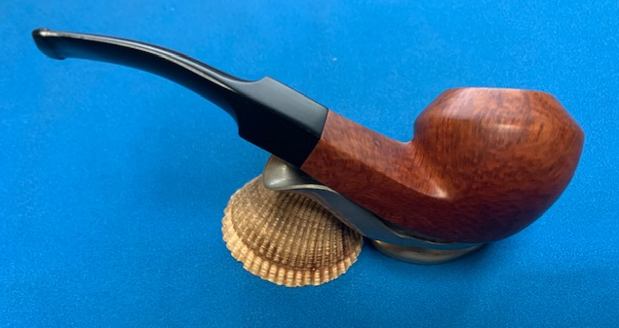
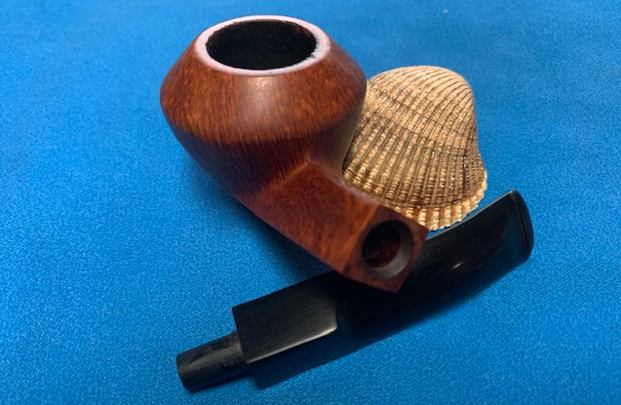
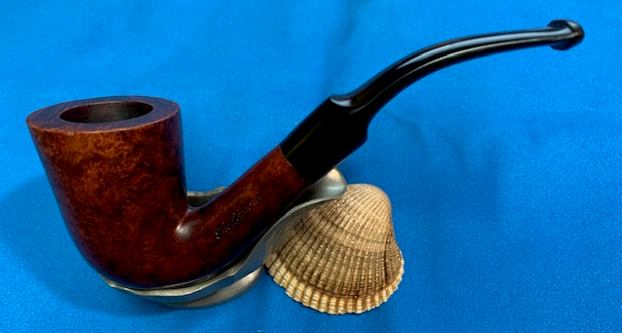
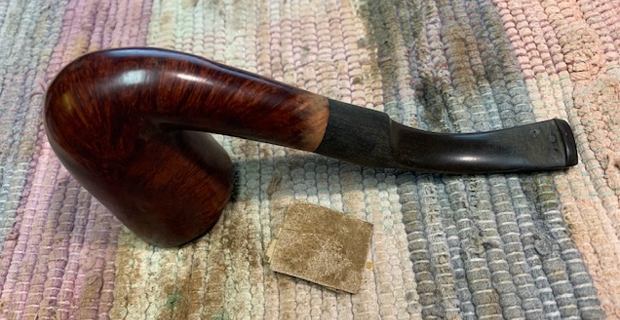
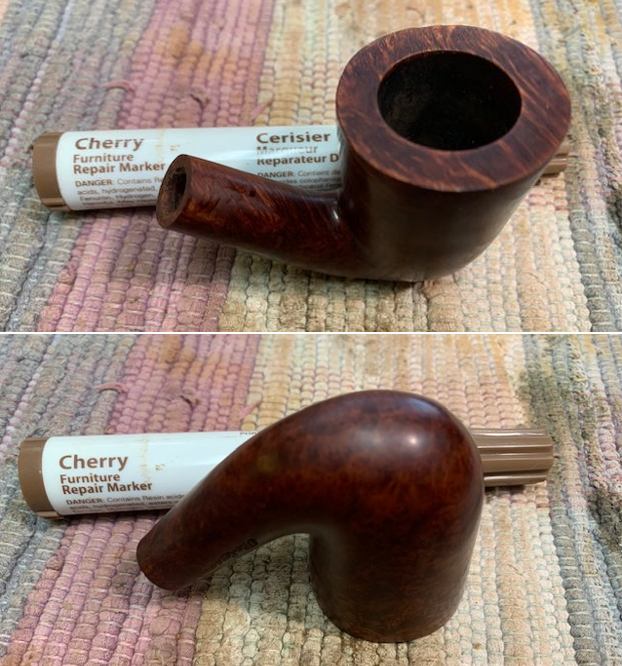
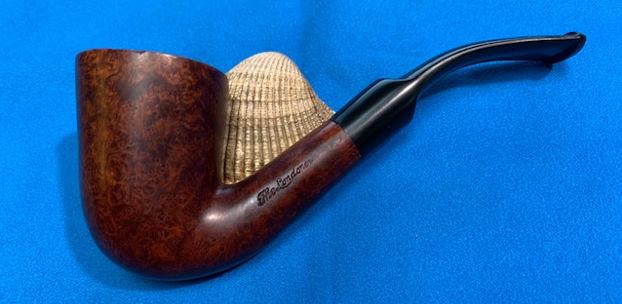
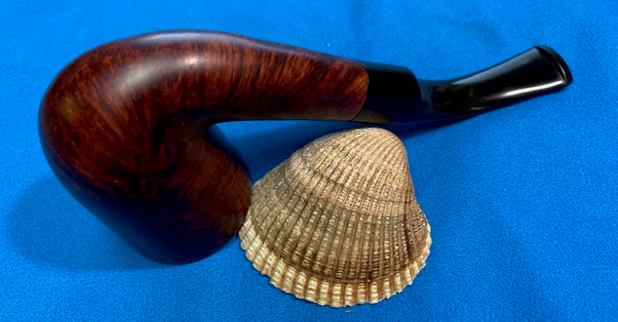
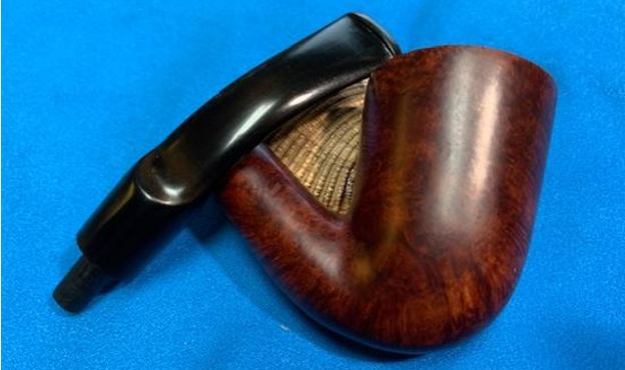
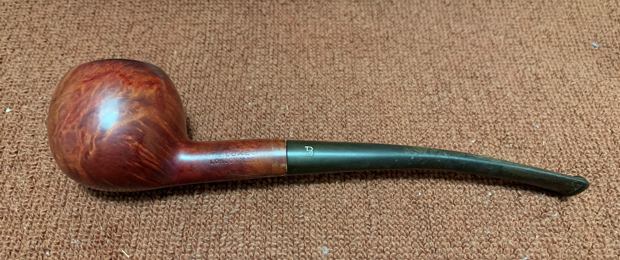
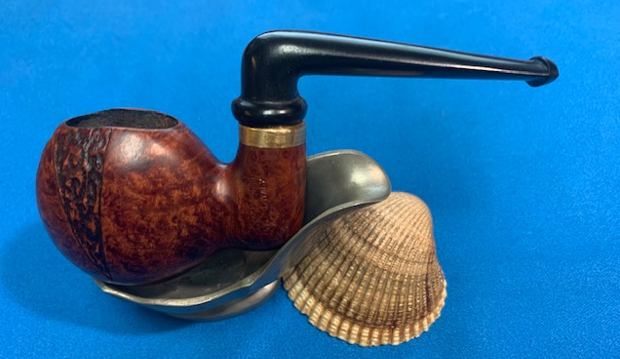
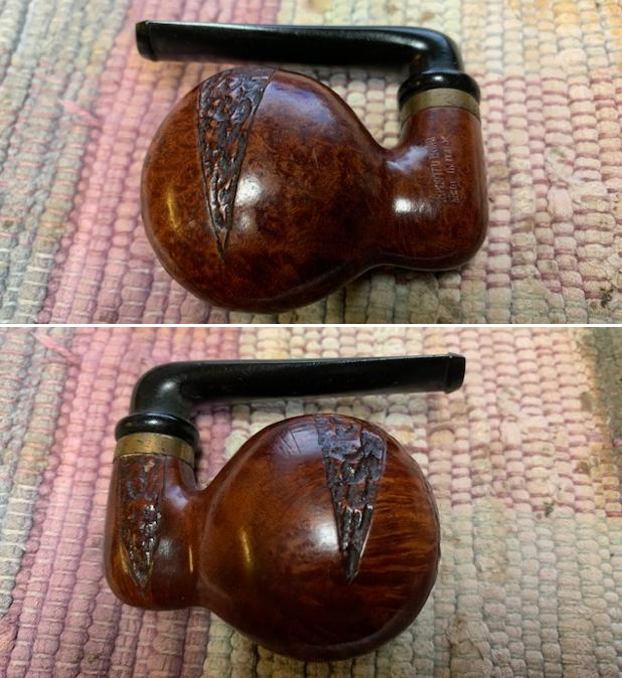
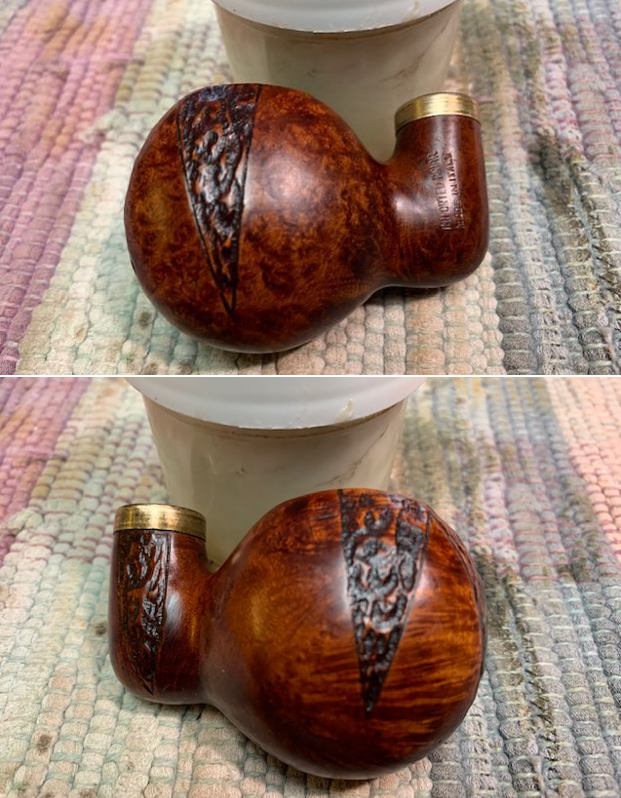
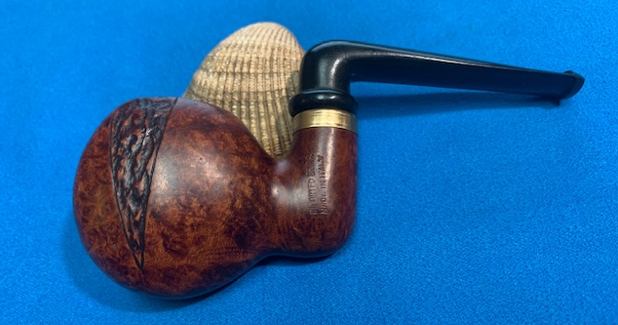
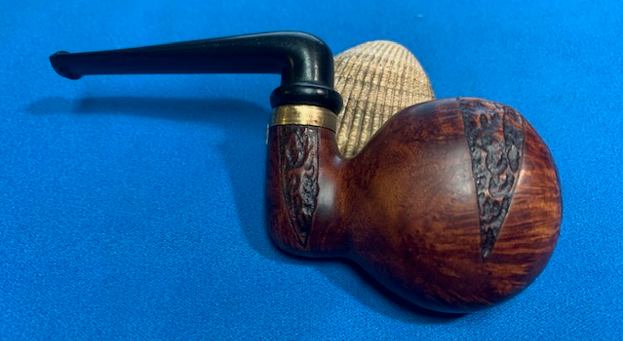
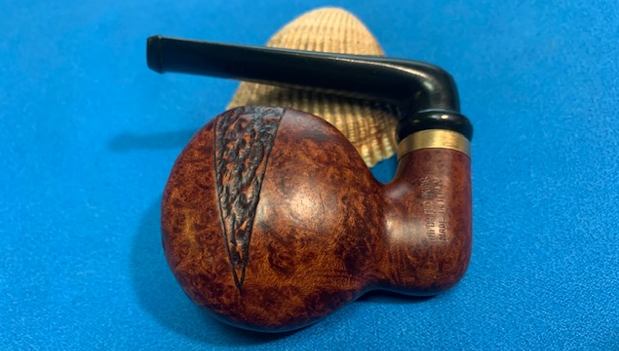
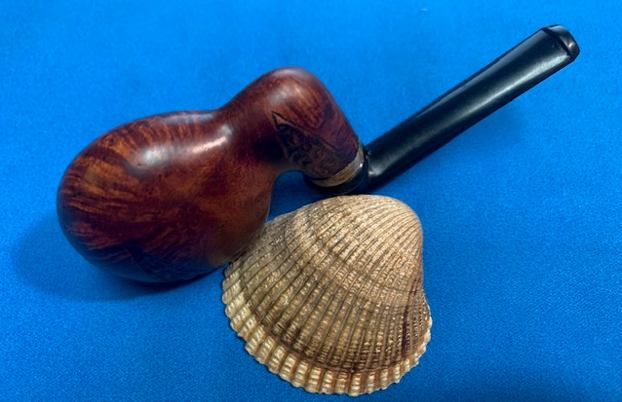
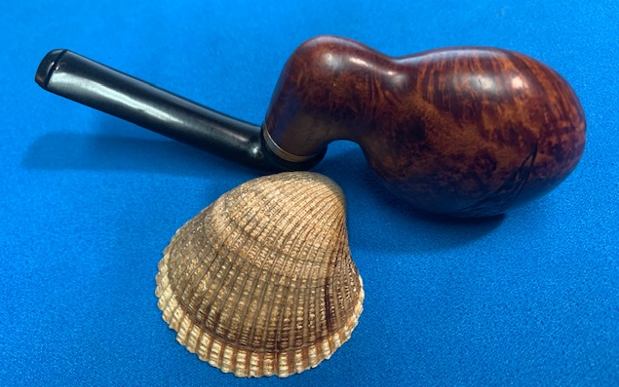
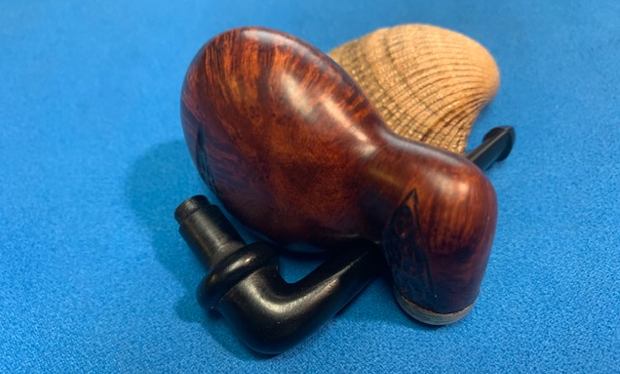
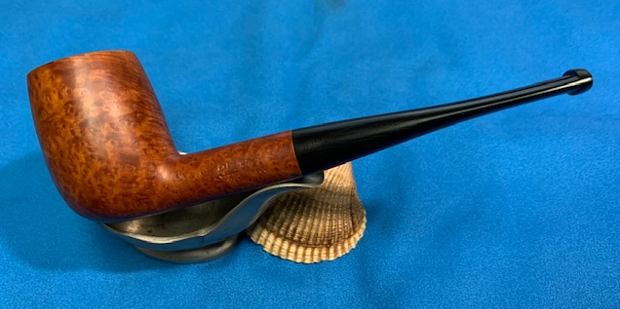
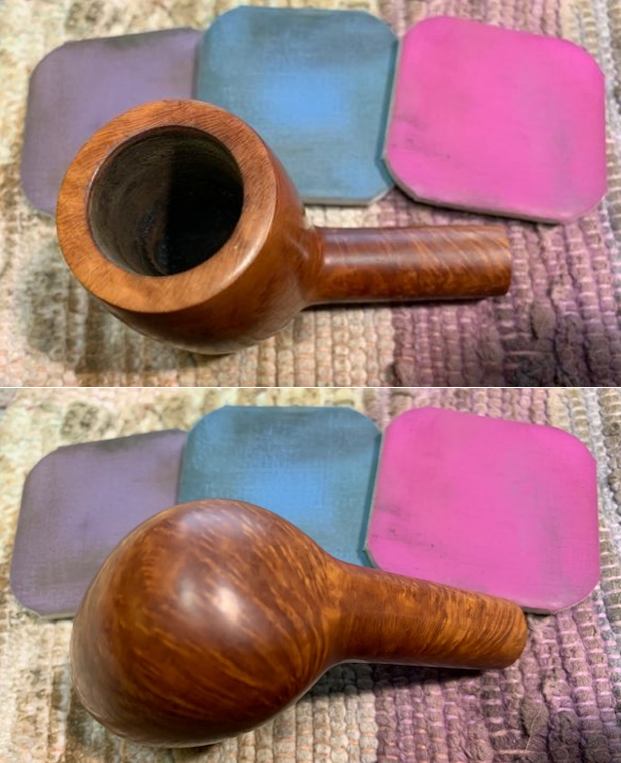
The next pipe on the table is another mystery one. What that typically means is that it has been around here for a long time. Neither Jeff nor I have any recollections of where it came from. I know that he cleaned it before it came north but when that was I have no idea. My guess is that is from one of our hunts in 2014-15. It is a nice looking Blatter Montreal Billiard. It is stamped on the left side of the shank and reads Blatter [over] Montreal. There is no other stamping on the pipe. I suspect that the stem is a replacement as it does not have the characteristic Blatter dot on the top side. The fit is well done however and it is a beauty. The finish is in good condition and will come alive with buffing. There are some small nicks on the rim top but the inner and outer edges look very good. The stem has some light oxidation on the top near the shank. There is light chatter on both sides just ahead of the button. I took some photos of the pipe before I began my work on it. 
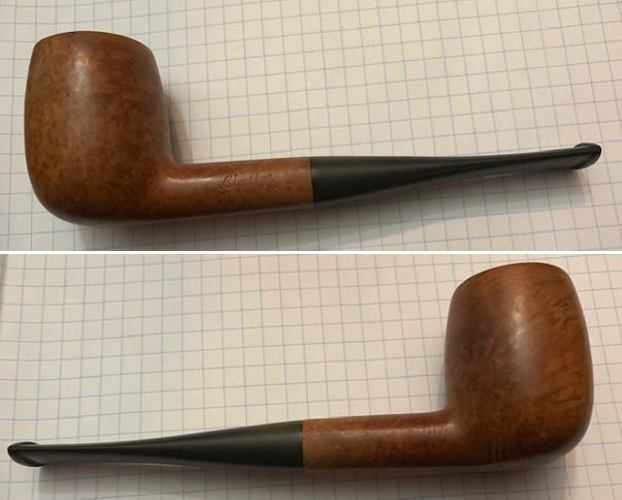
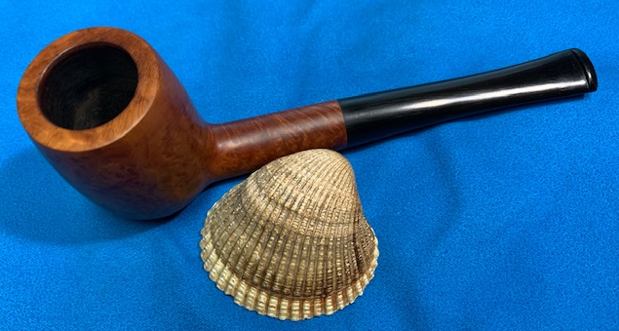
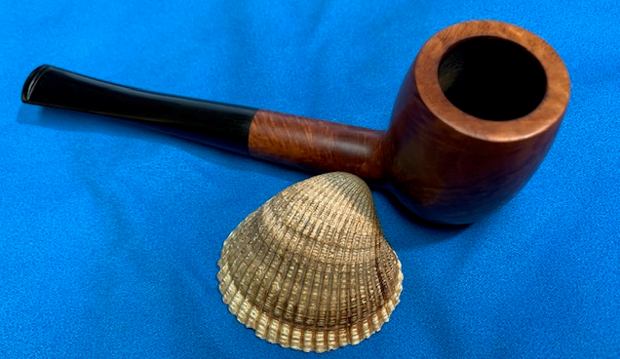
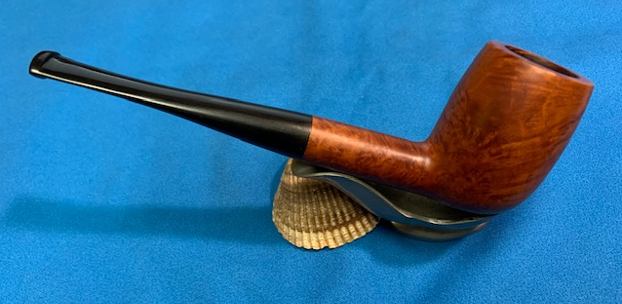
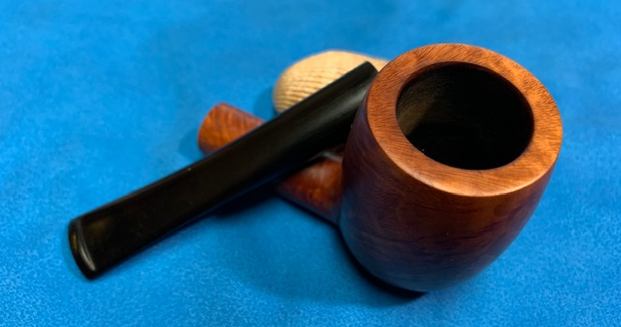
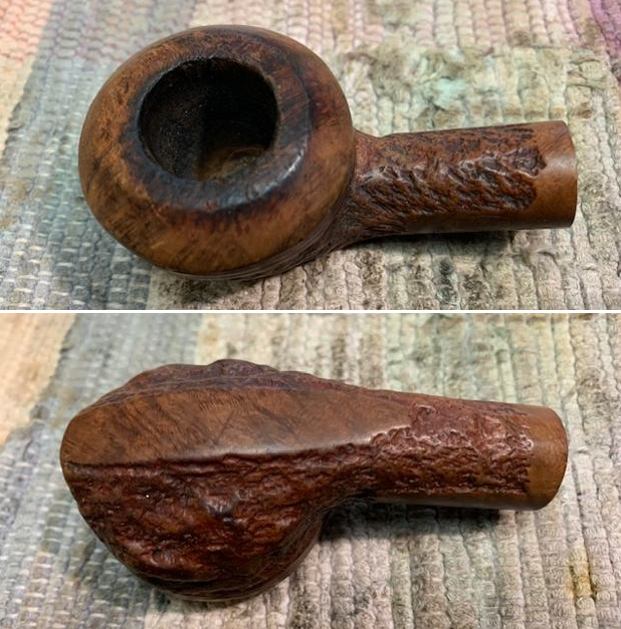
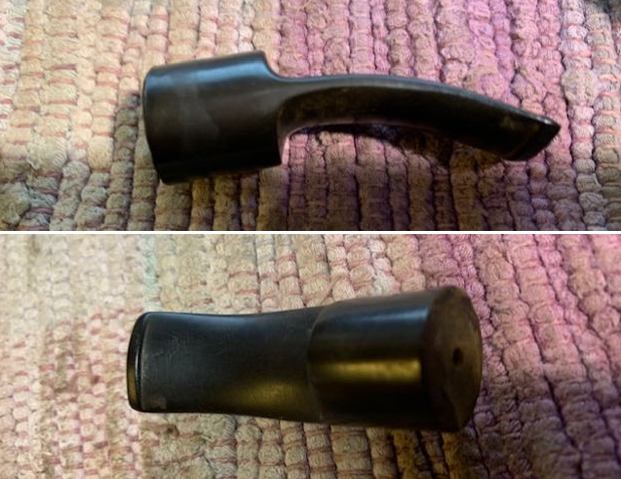
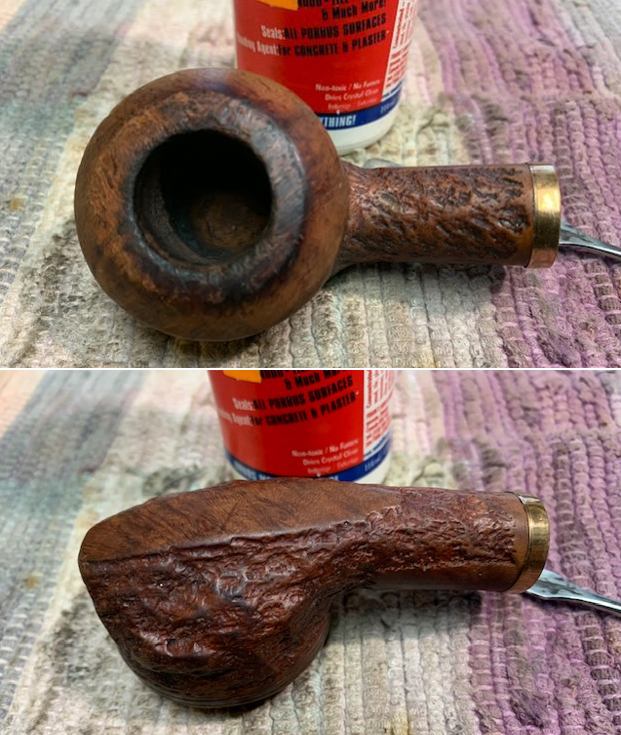
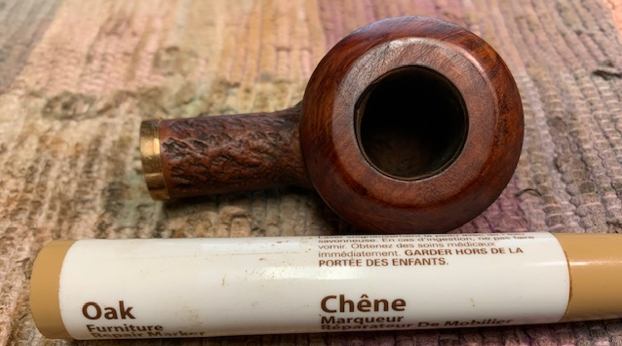
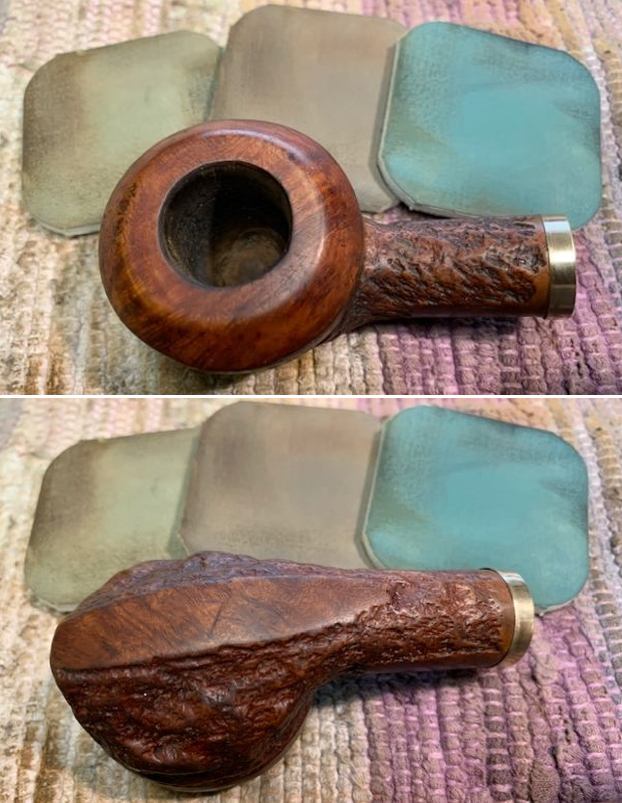
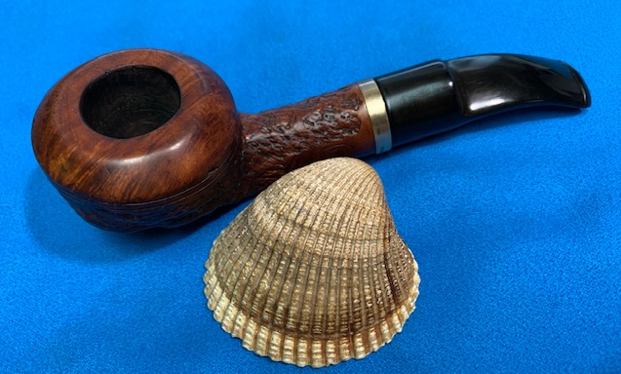
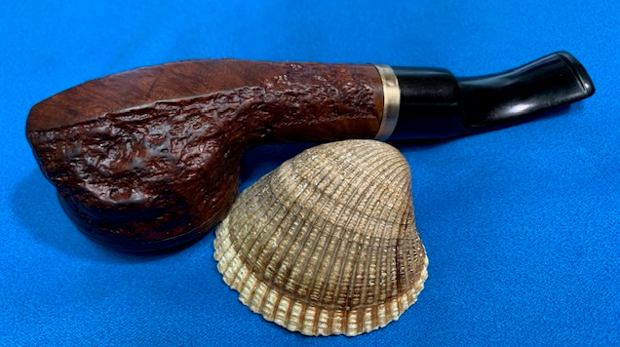
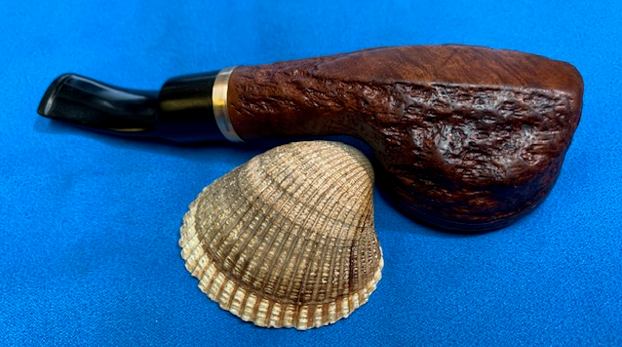
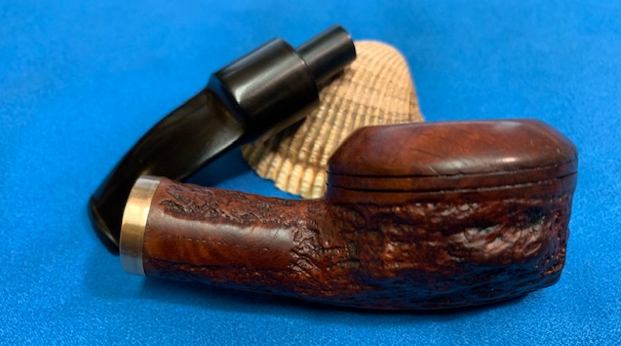
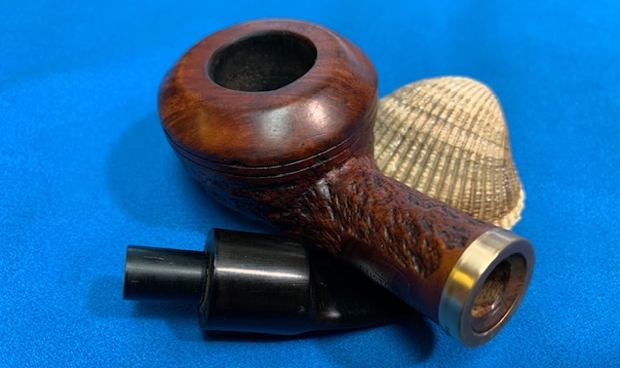
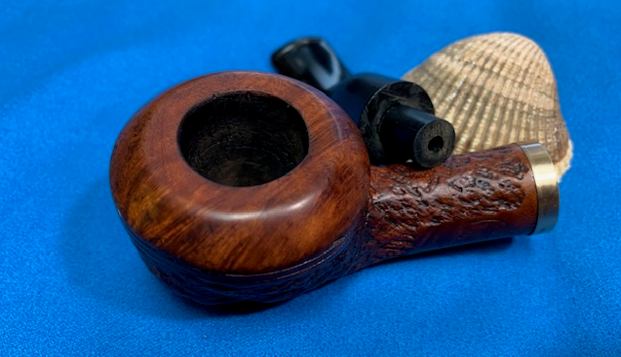
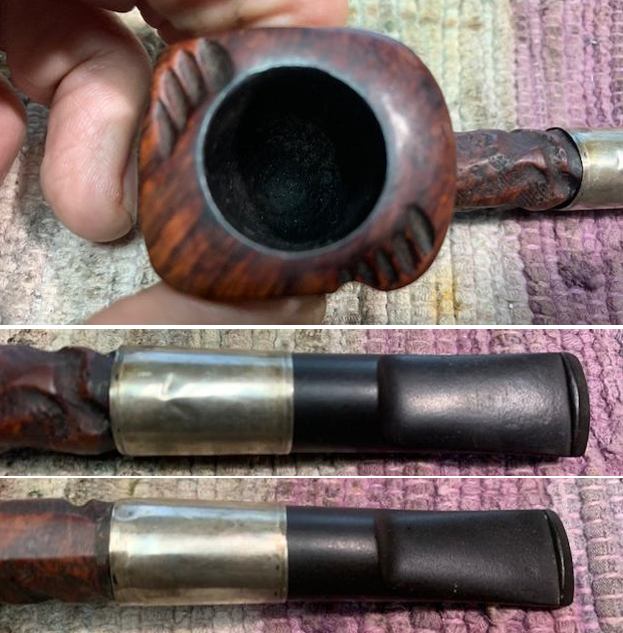
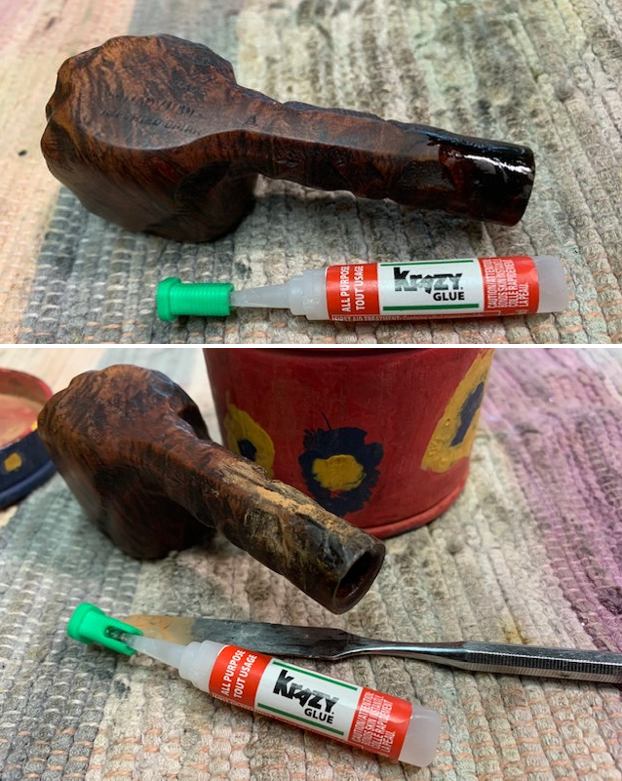
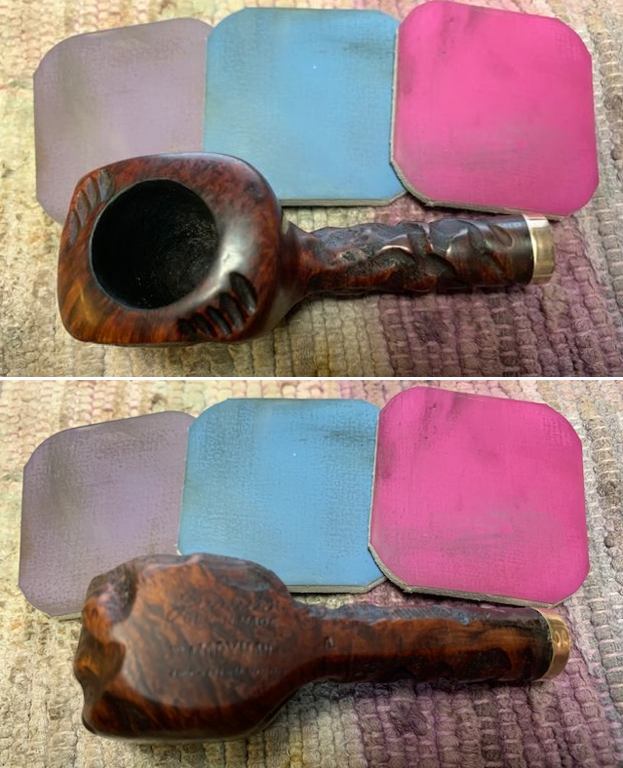
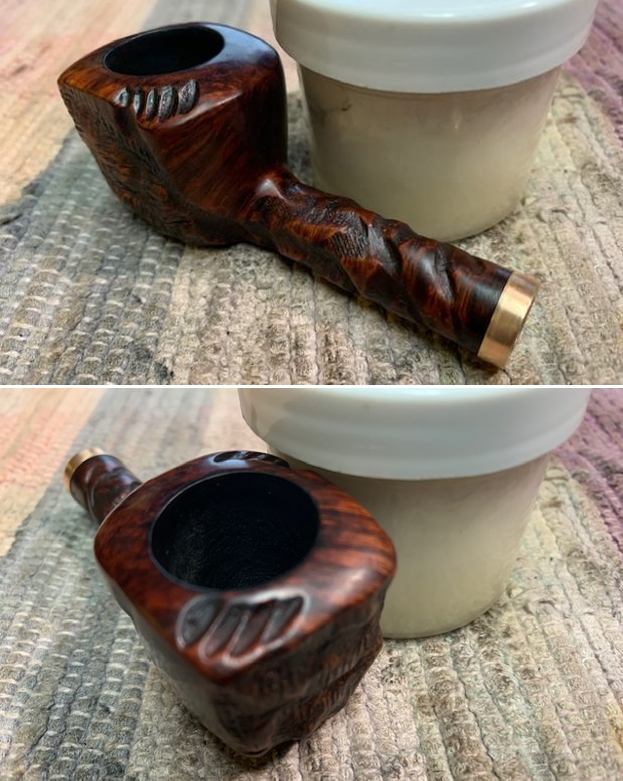
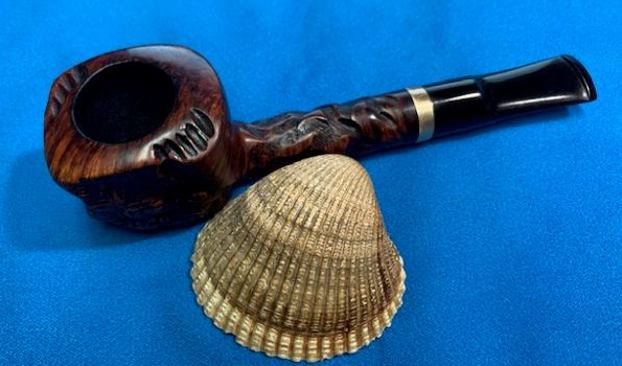
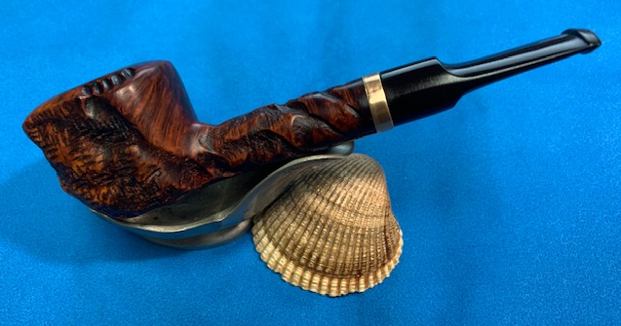
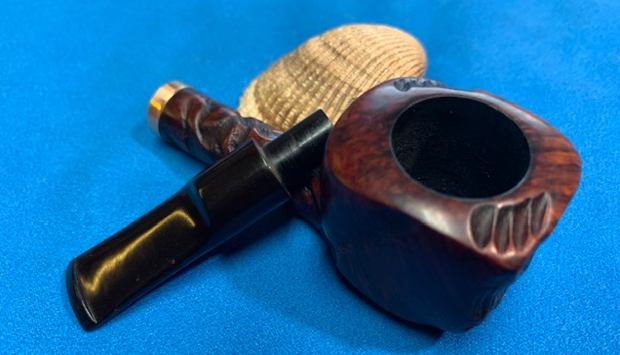
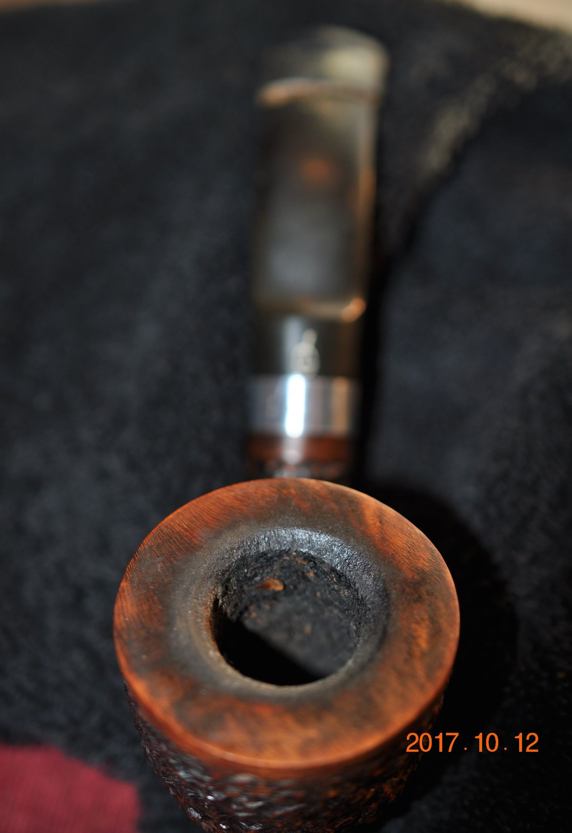
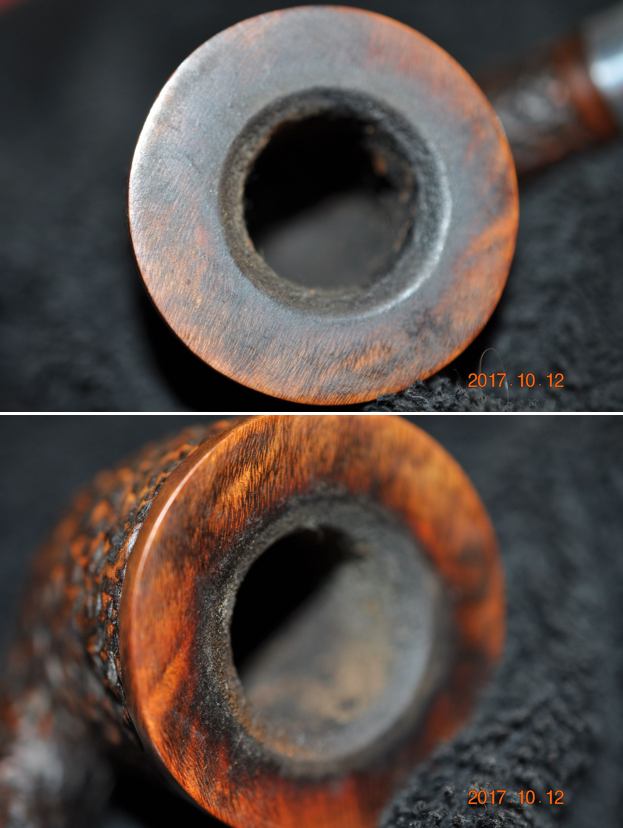
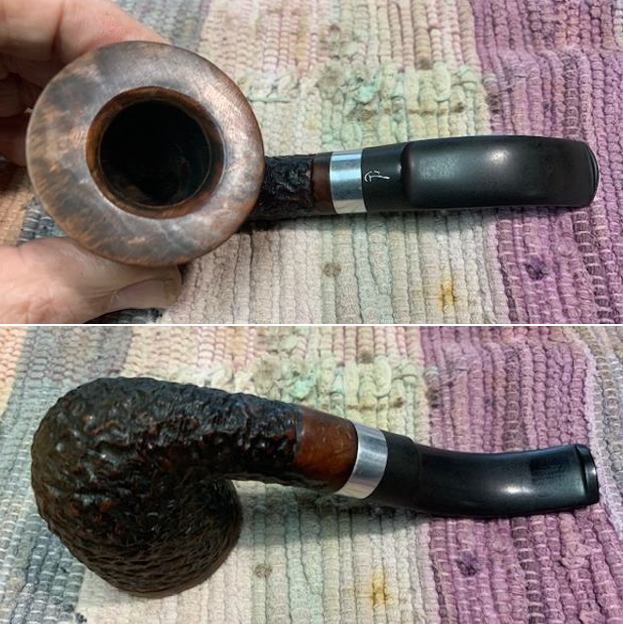
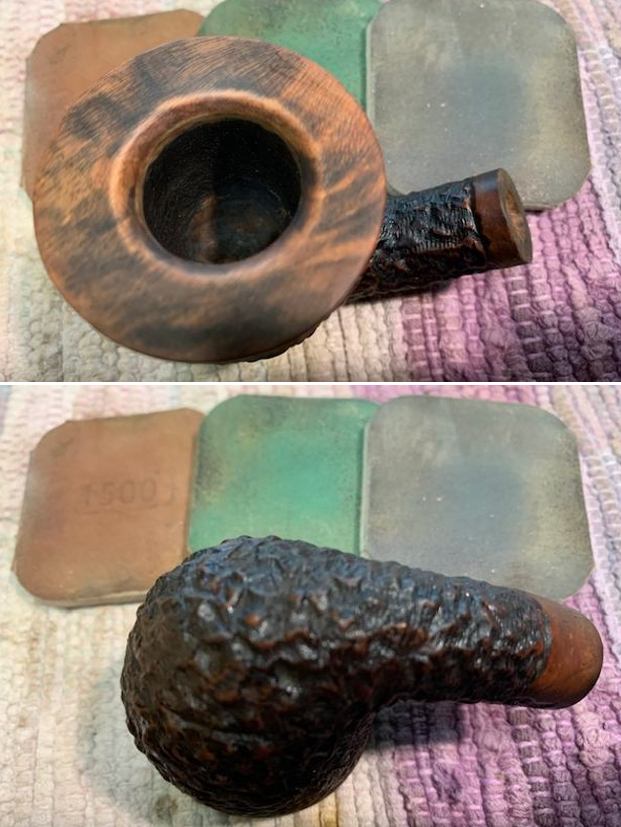
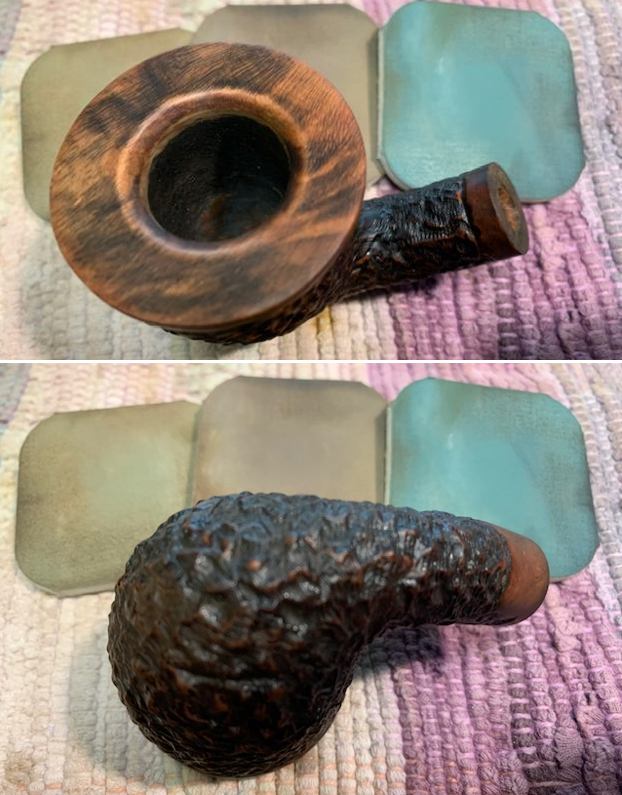
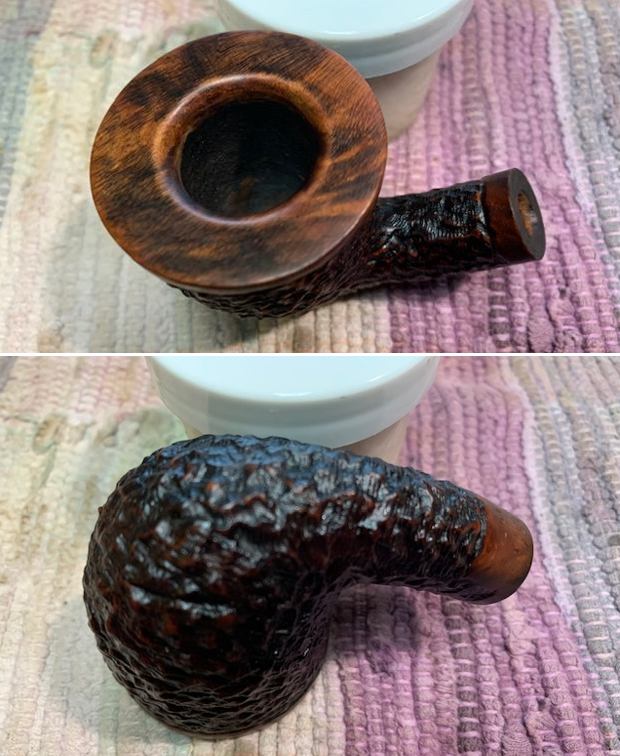
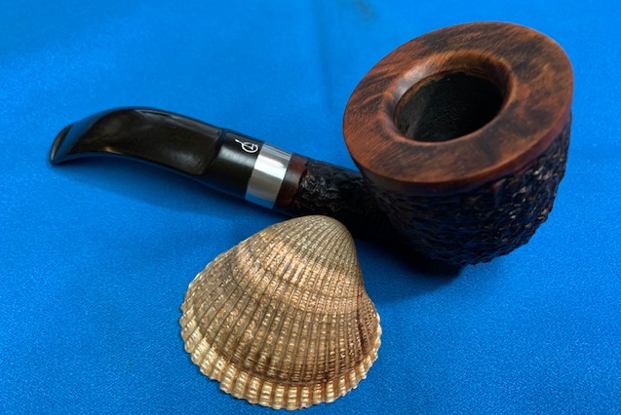
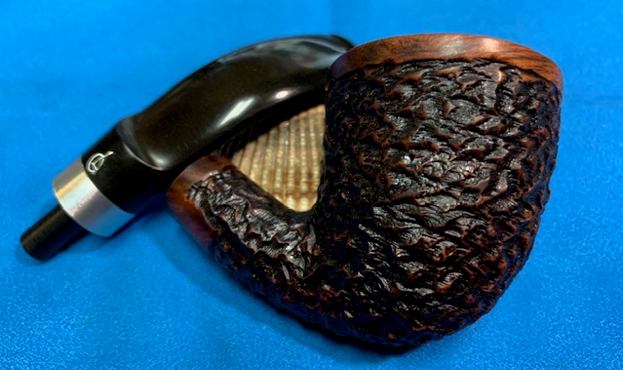
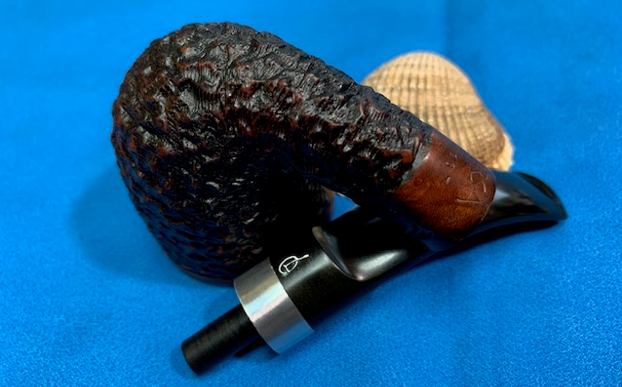
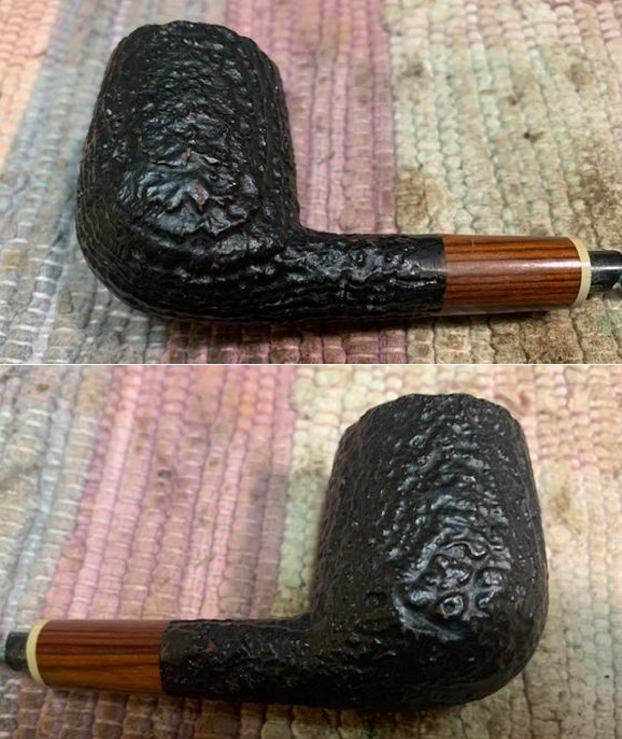
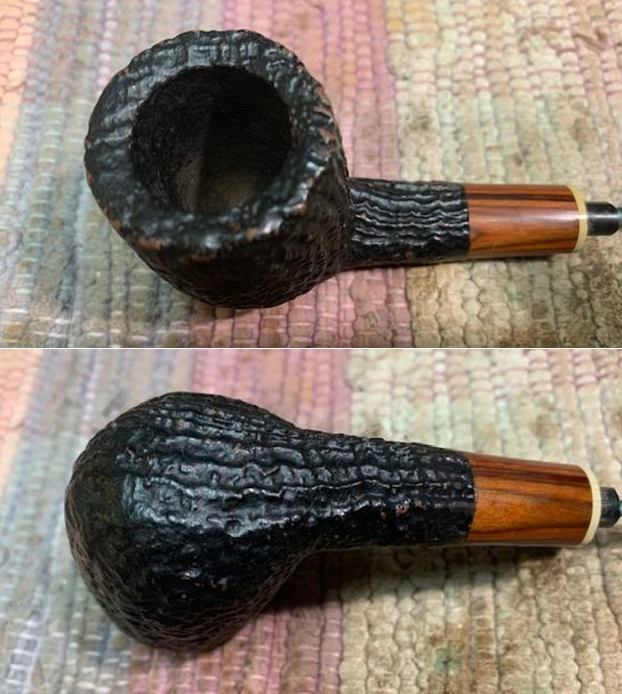
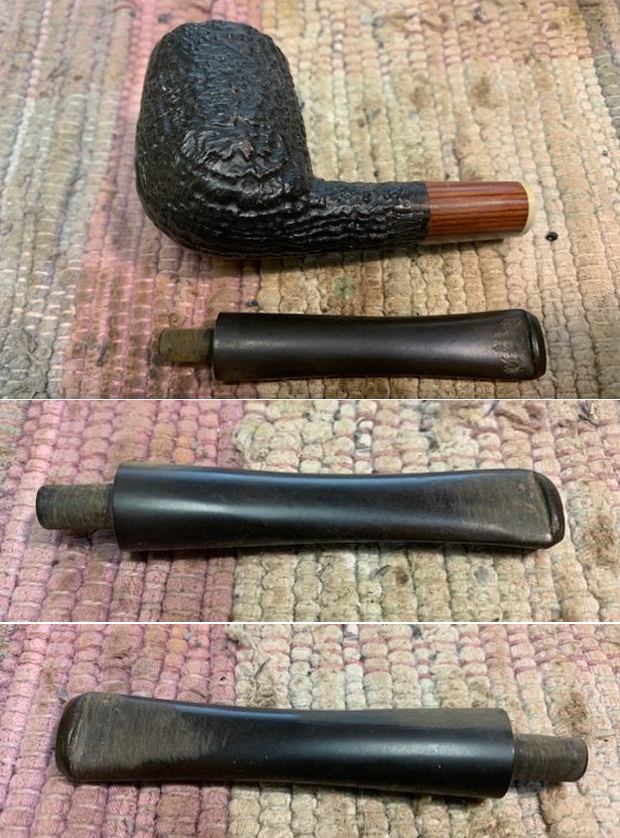
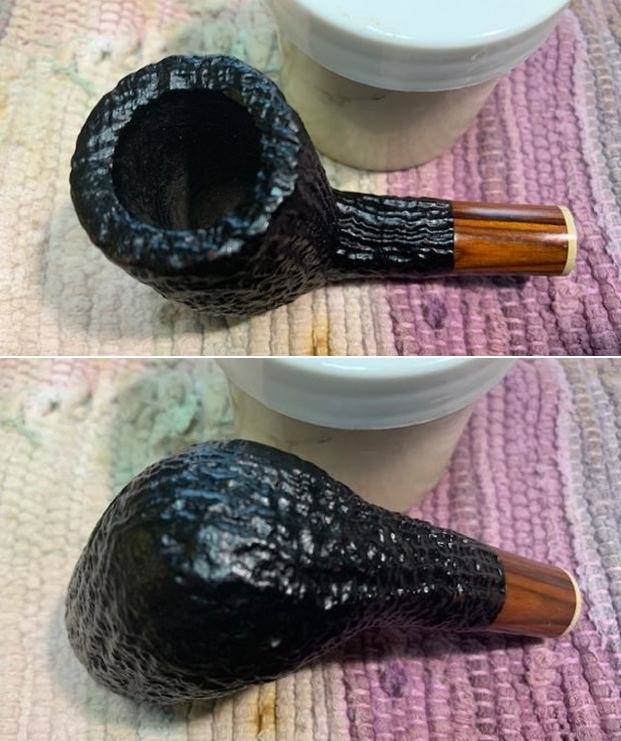
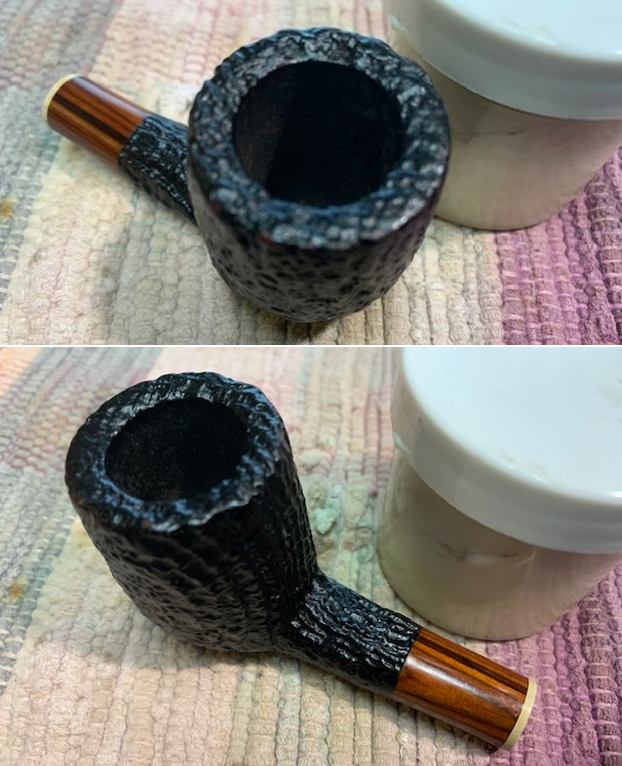
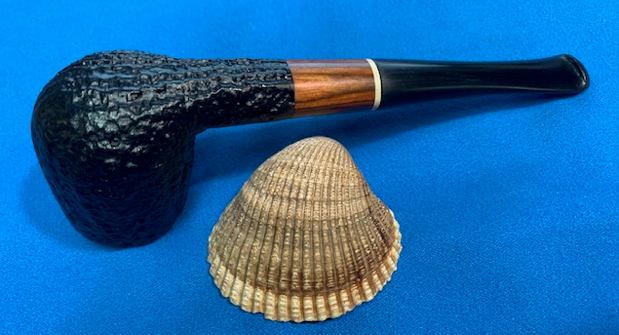
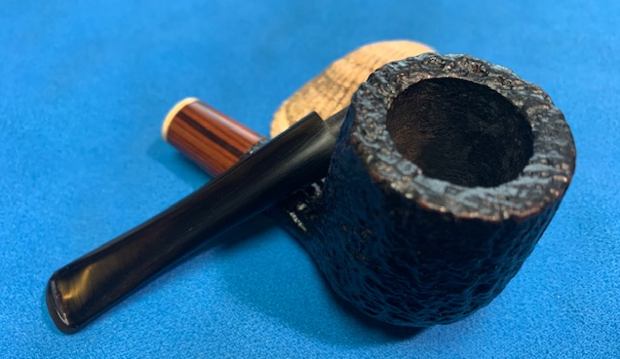
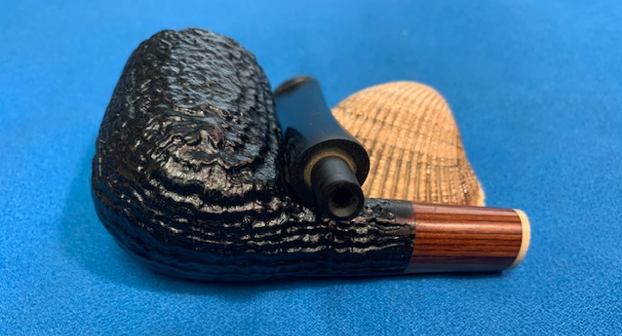
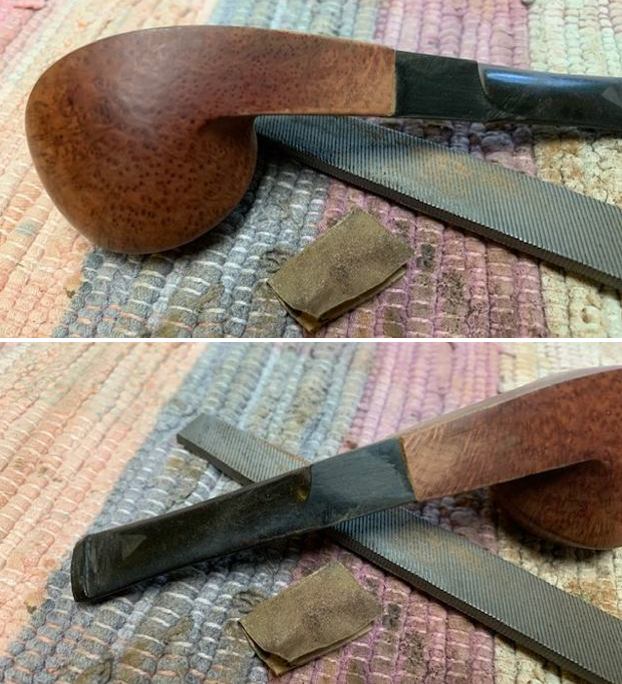
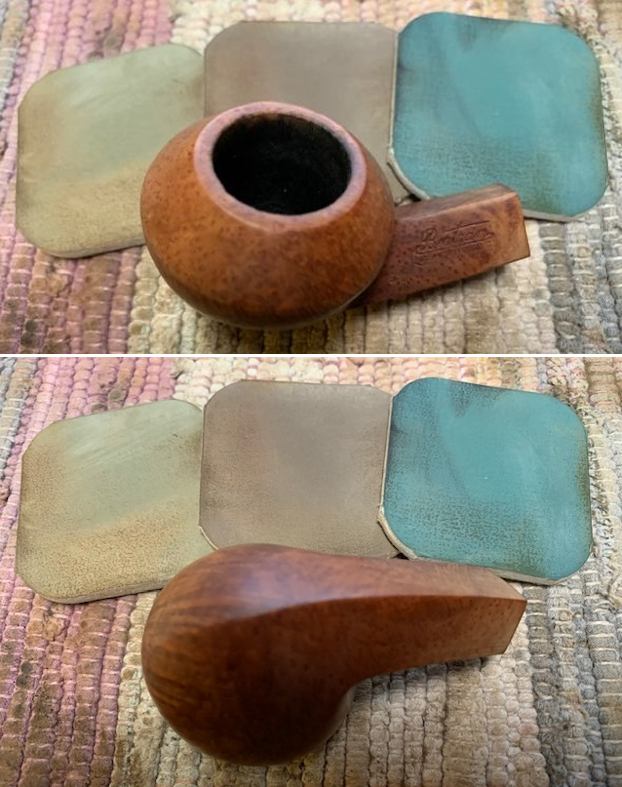
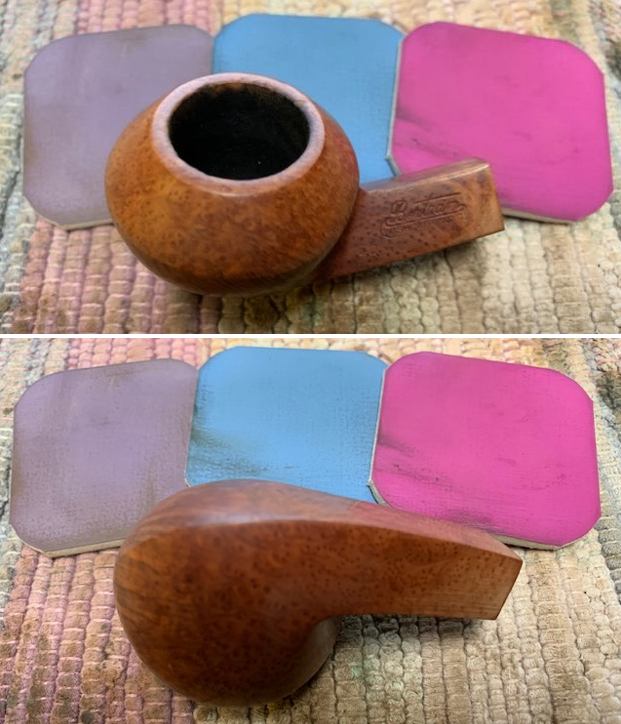
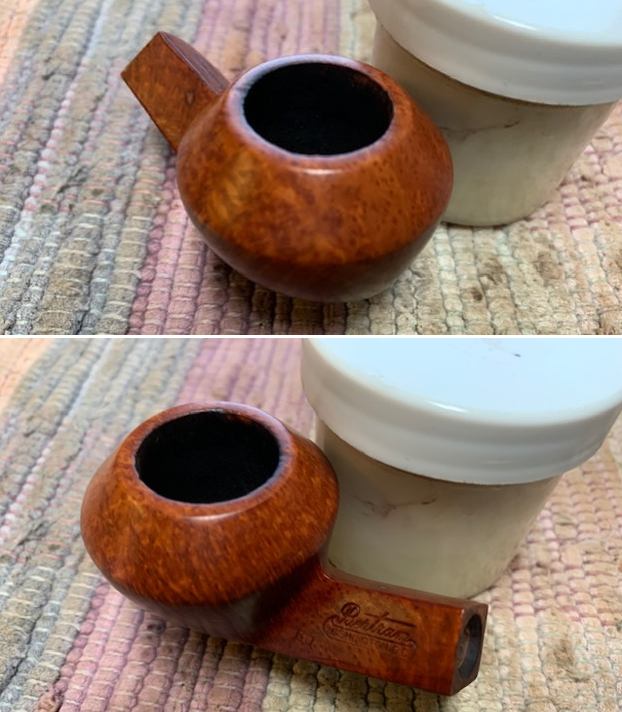
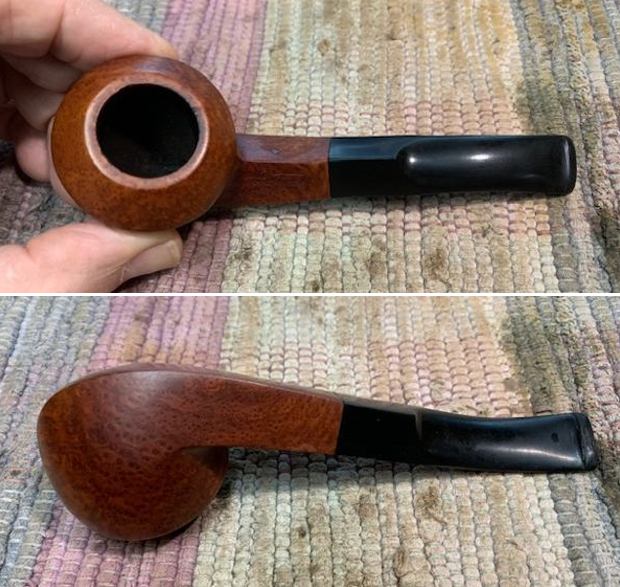
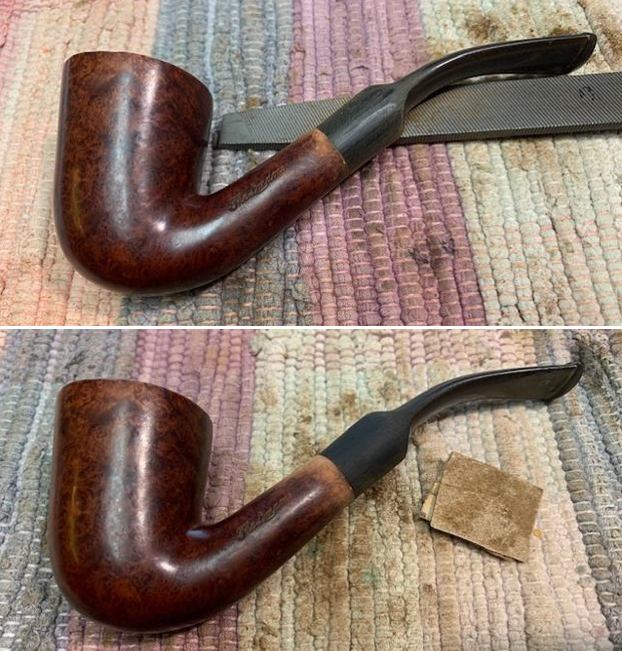
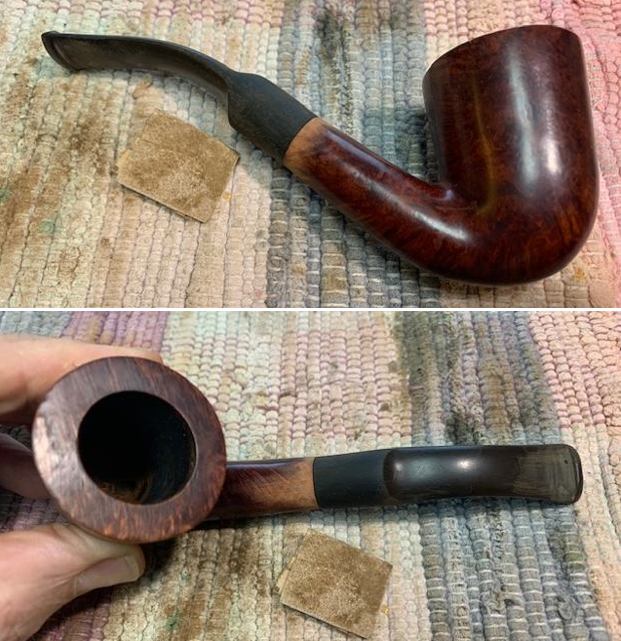
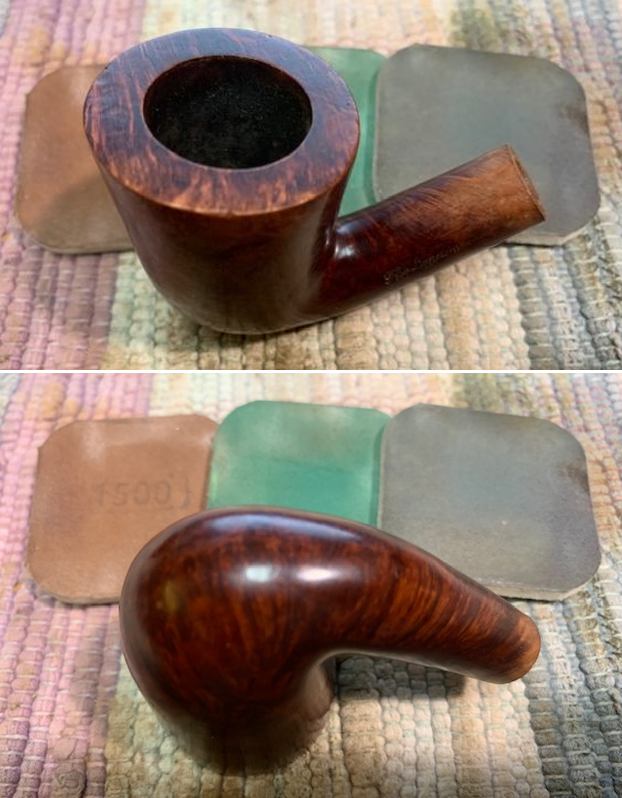
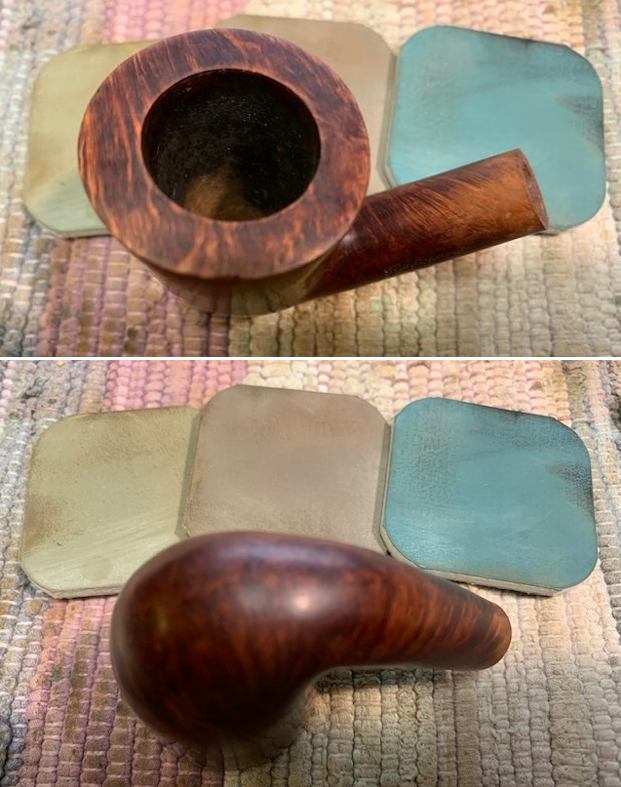
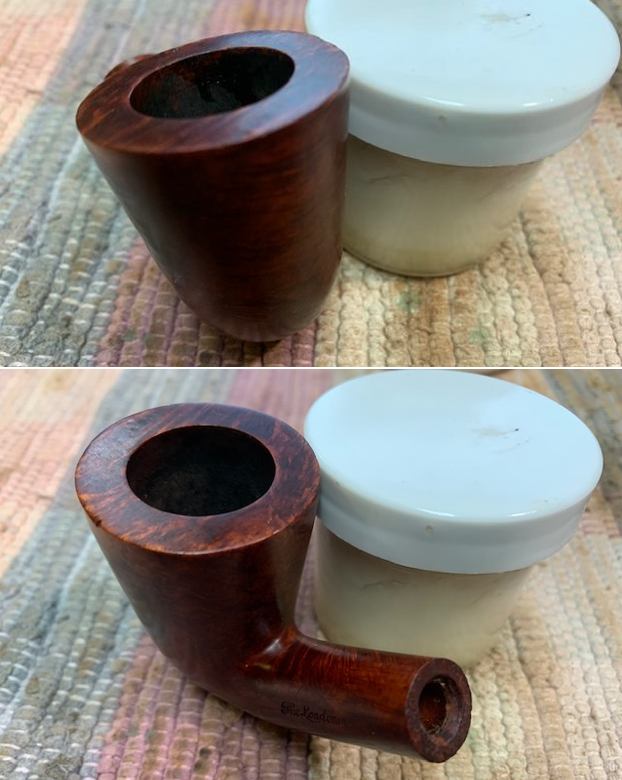
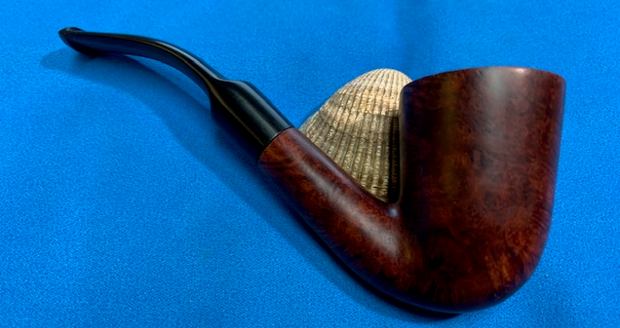
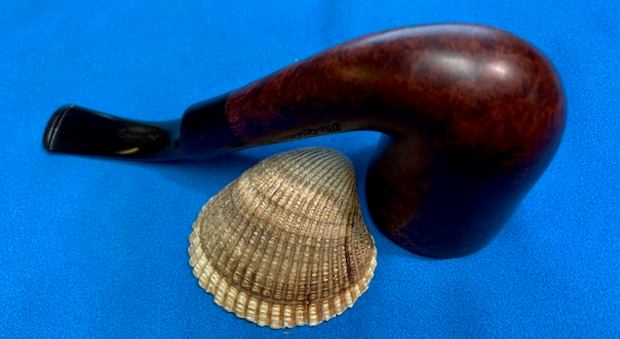
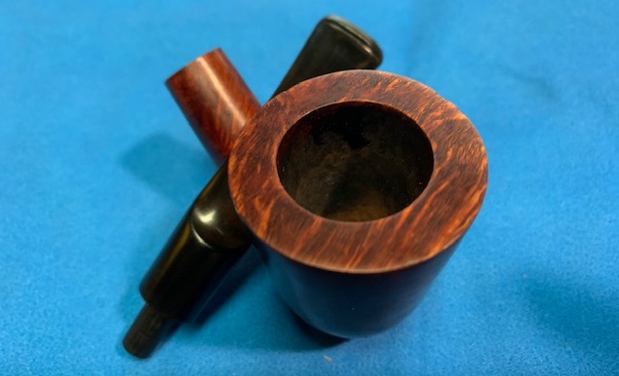
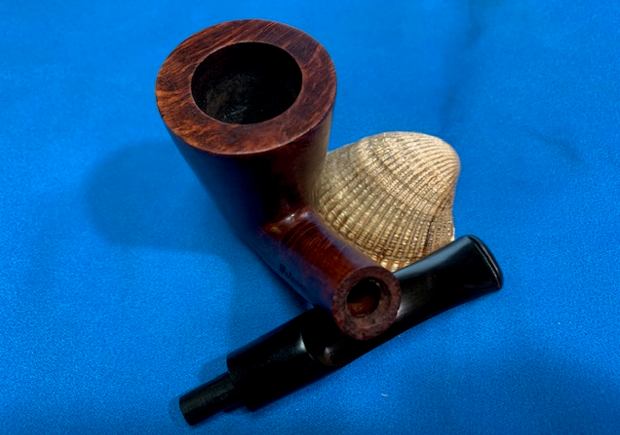
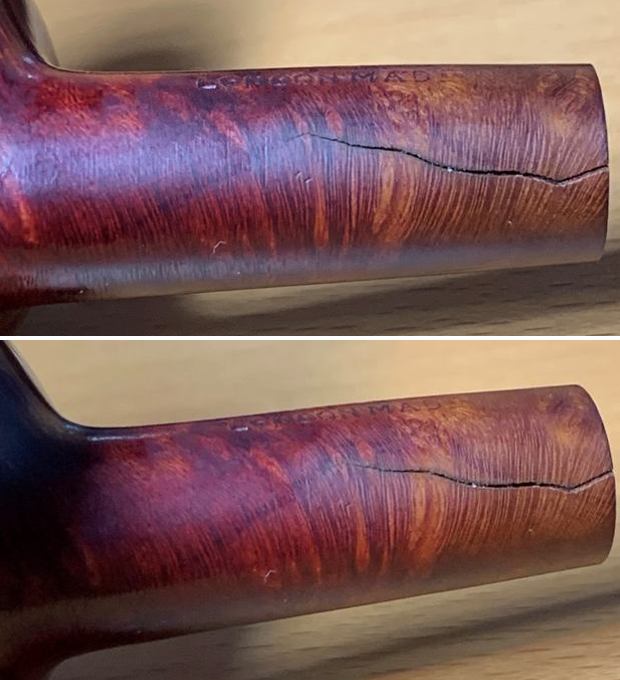
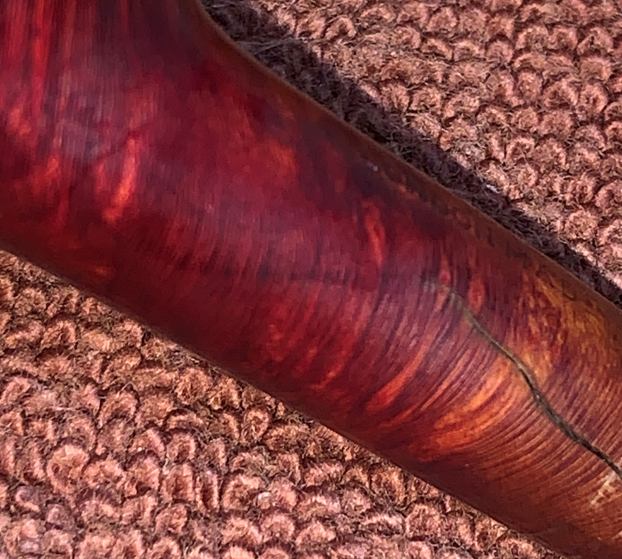
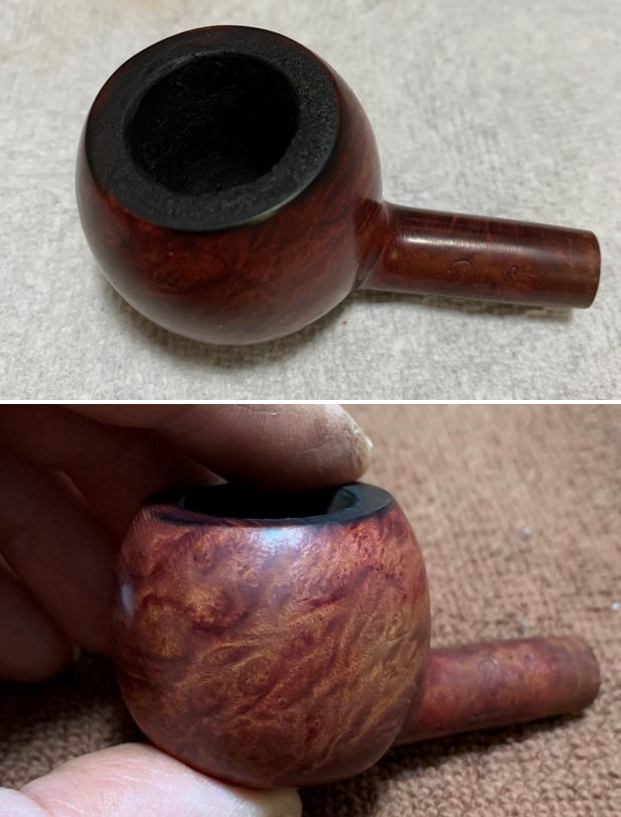
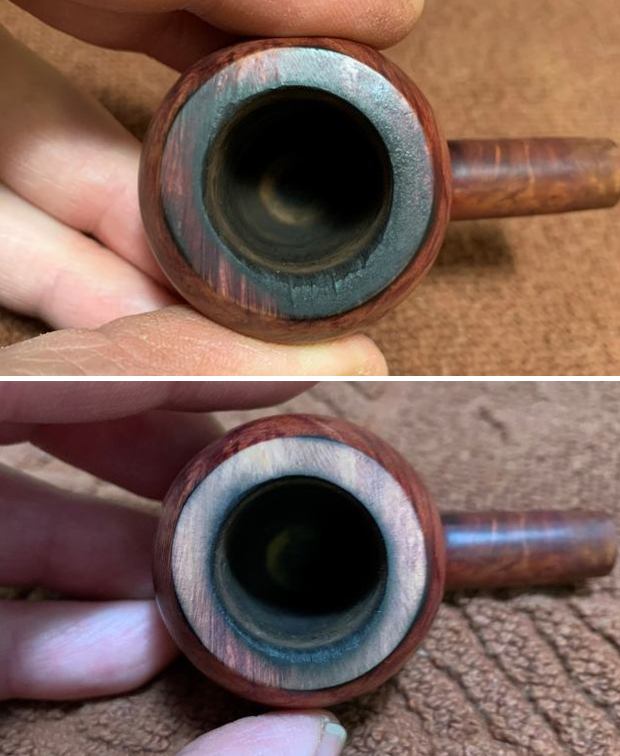
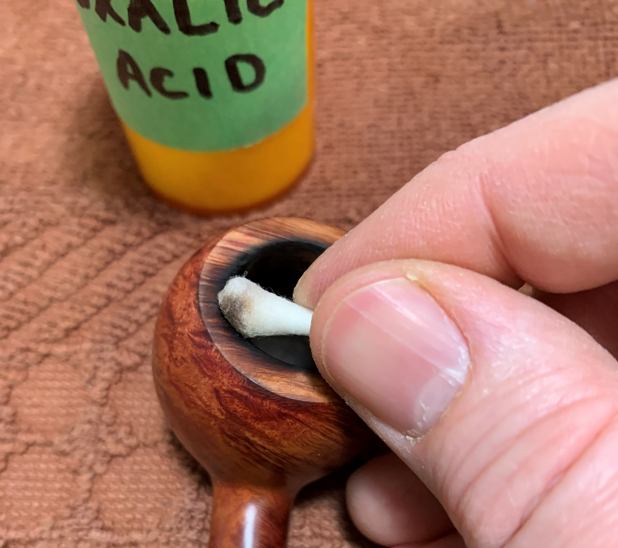
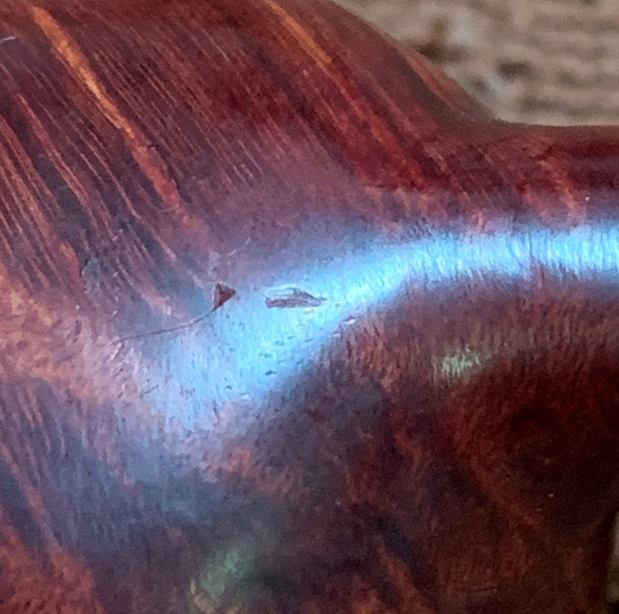
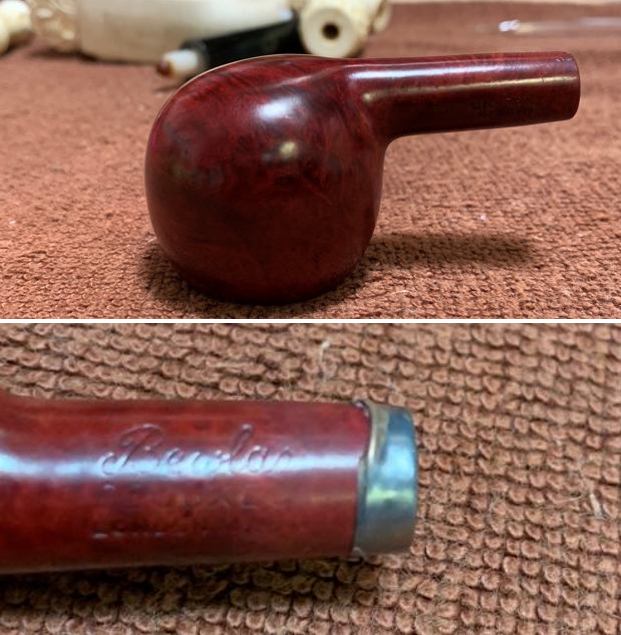
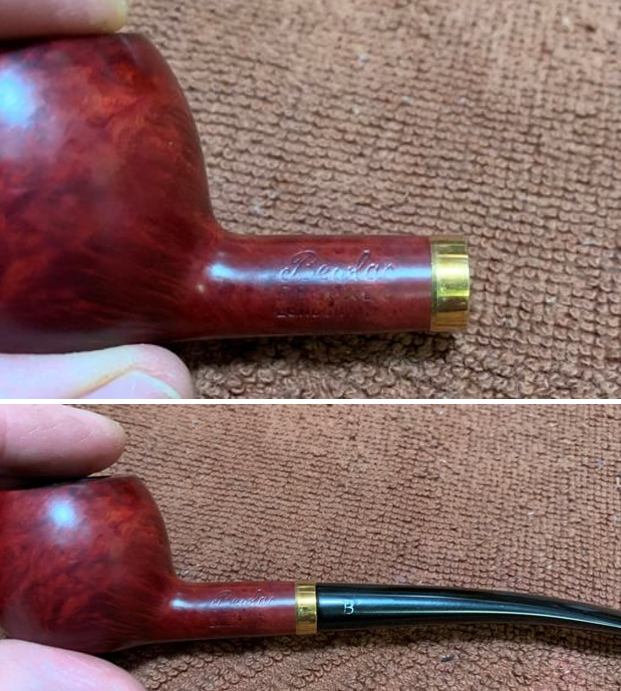
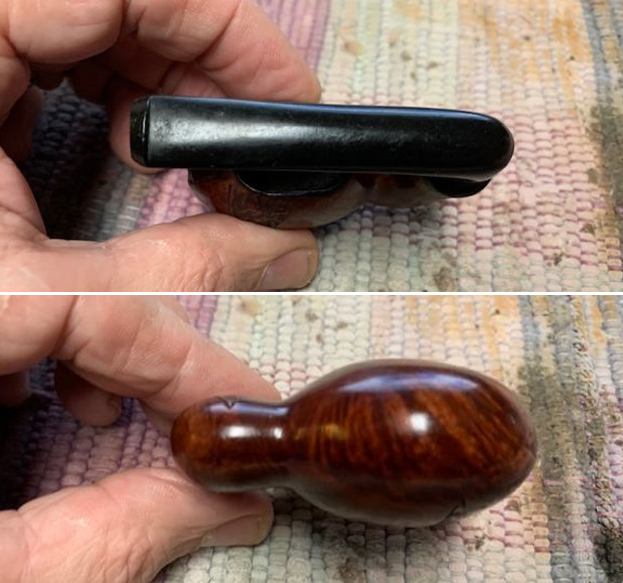
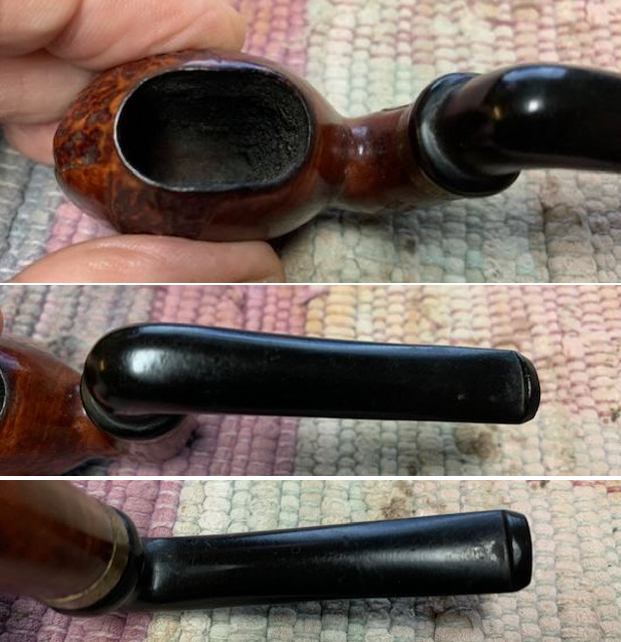
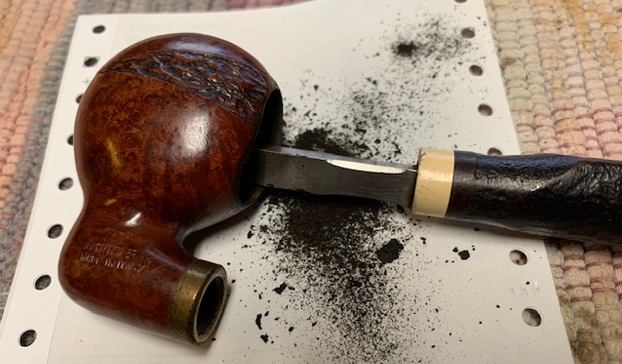
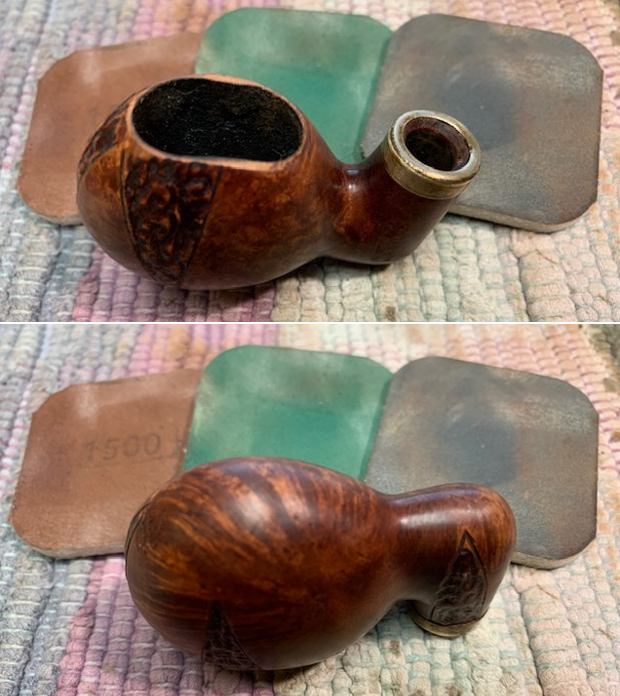
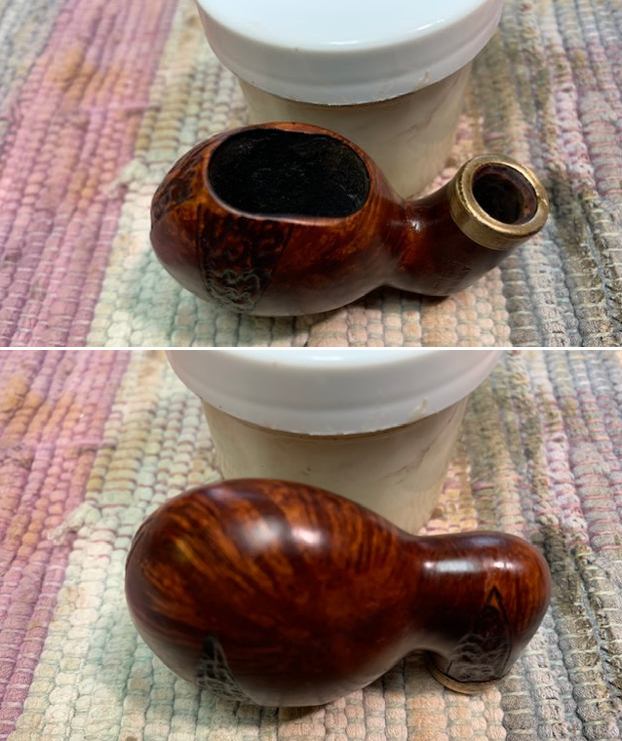
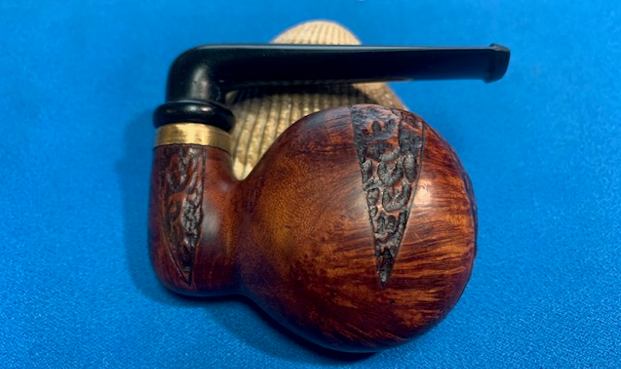
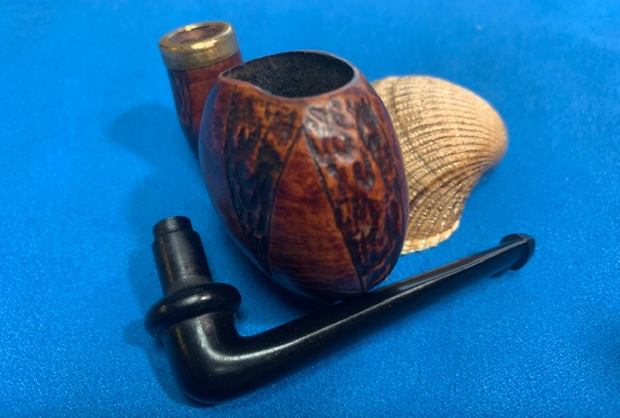
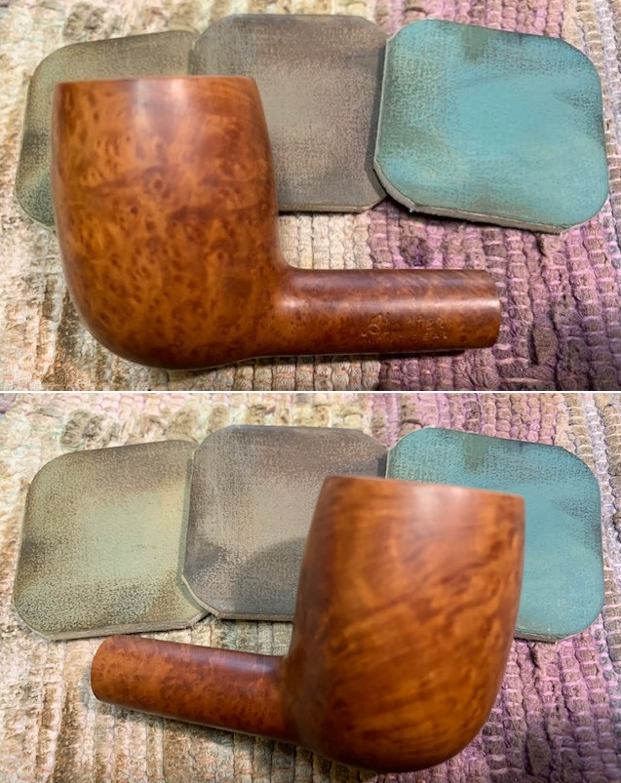
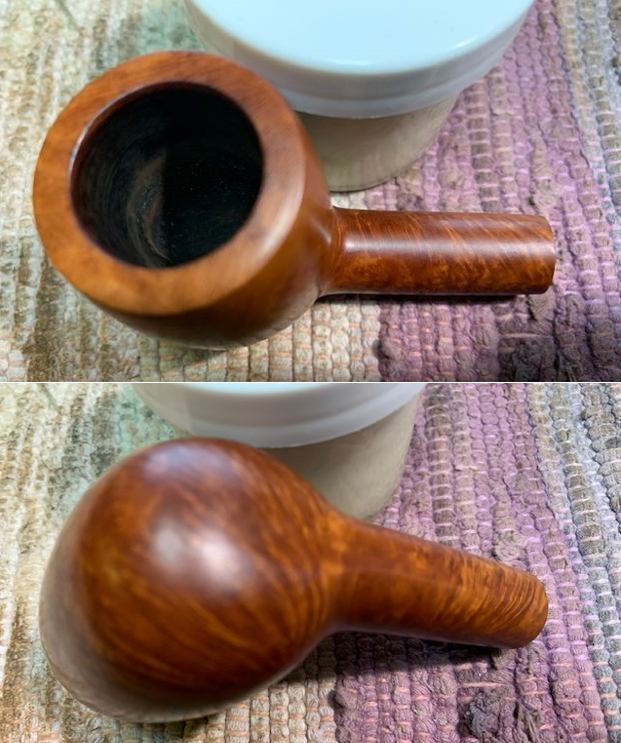
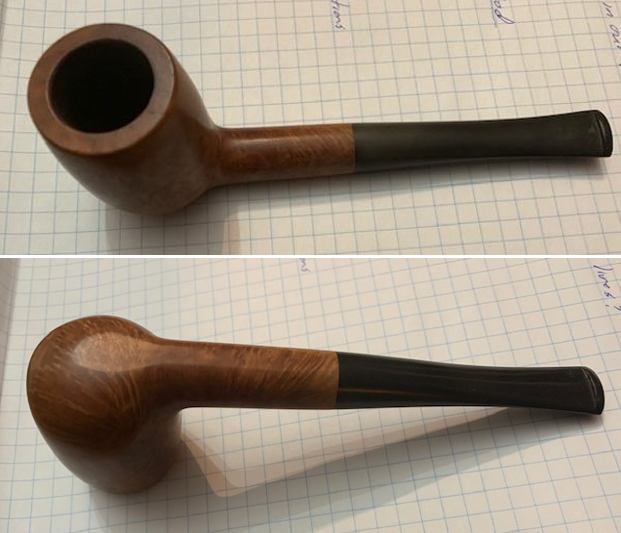
I took photos of the rim top and the stem to give an idea of the condition of the pipe. You can see in the photo of the rim top that there are some nicks and scratches on the surface. The stem looks good other than the light oxidation on the top at the shank and the light tooth chatter on both sides.
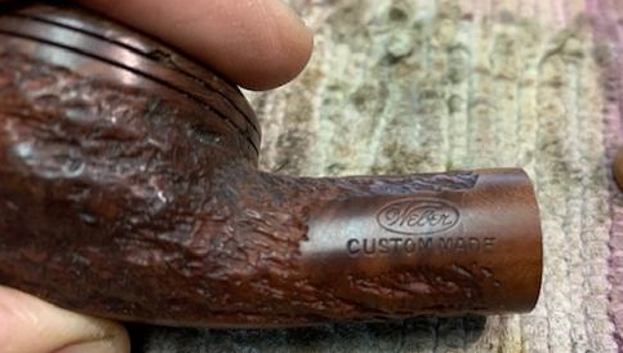
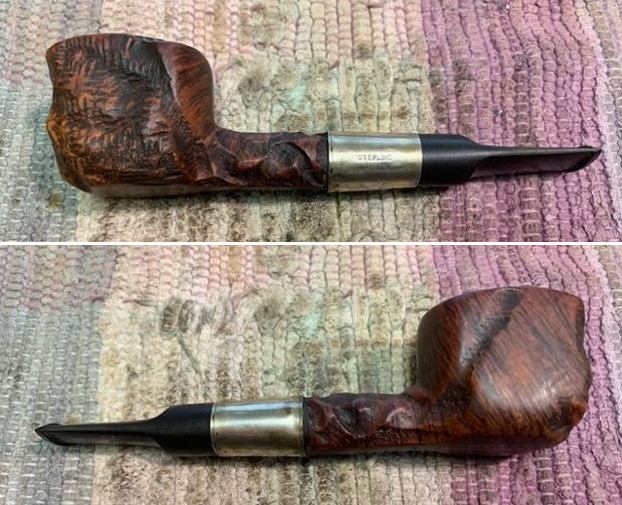
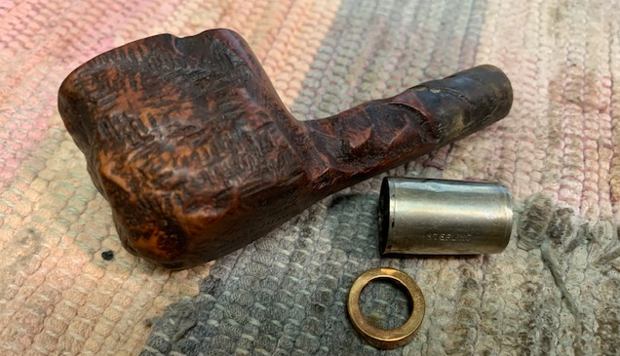
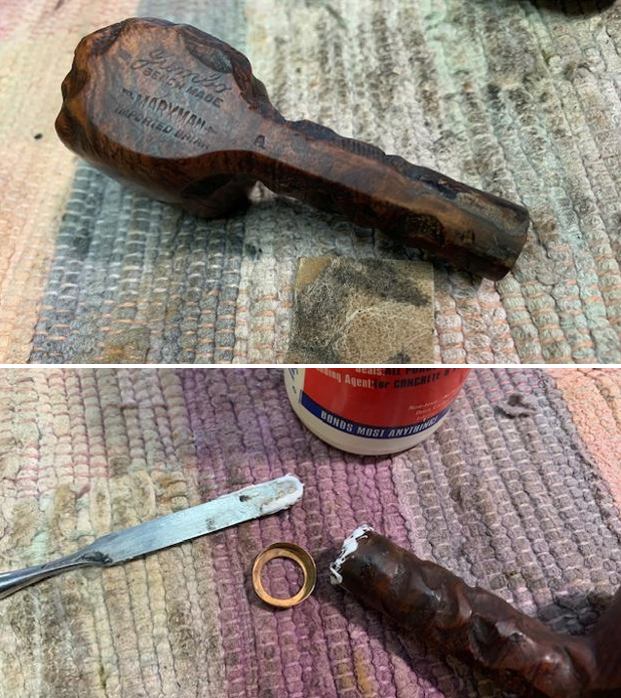
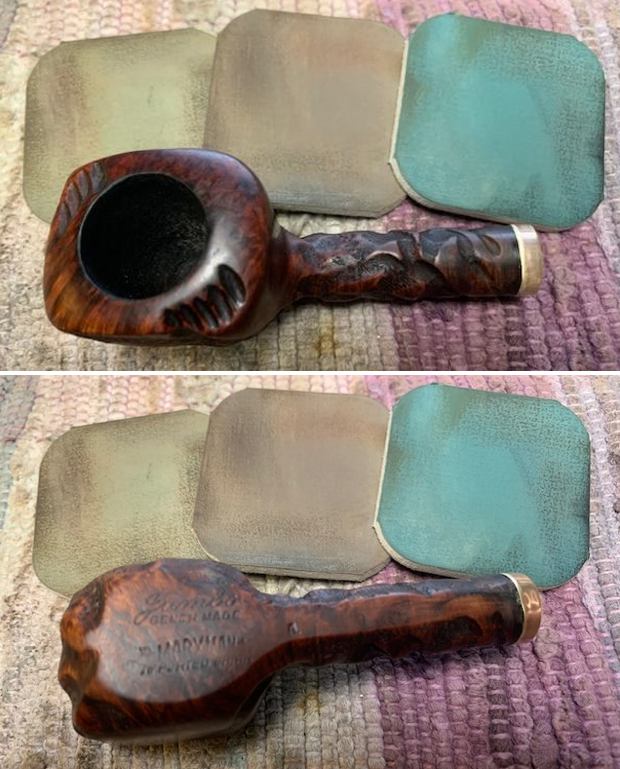
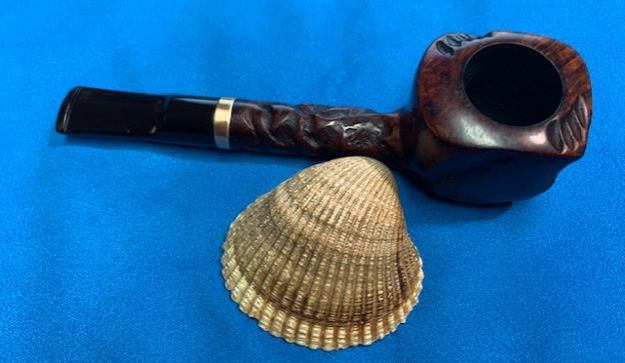
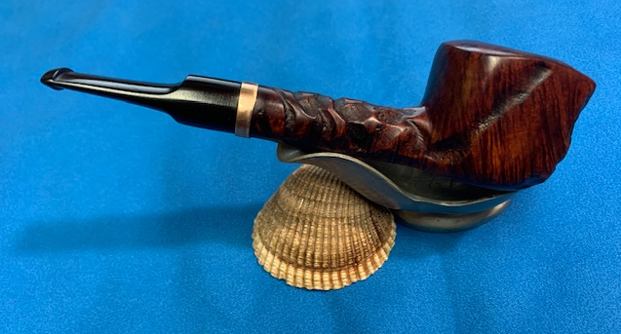
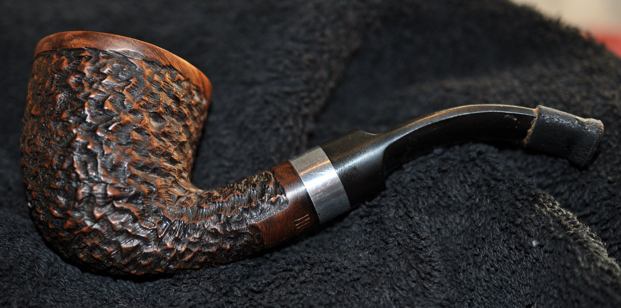
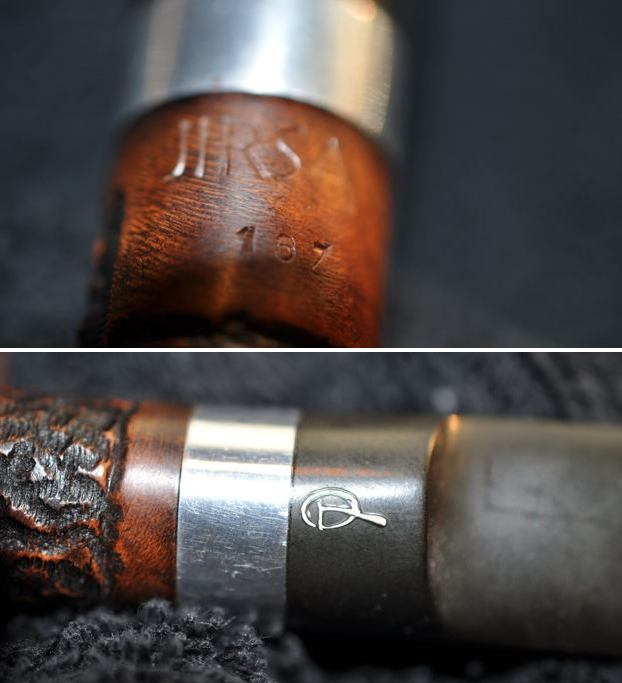
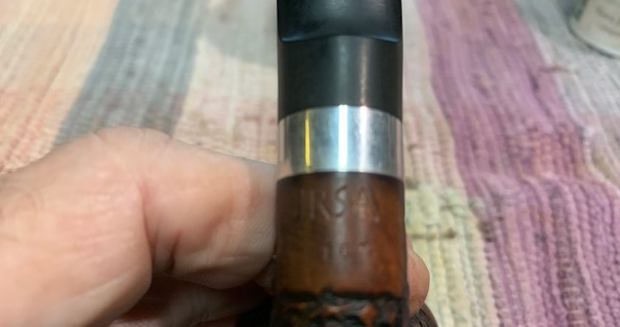
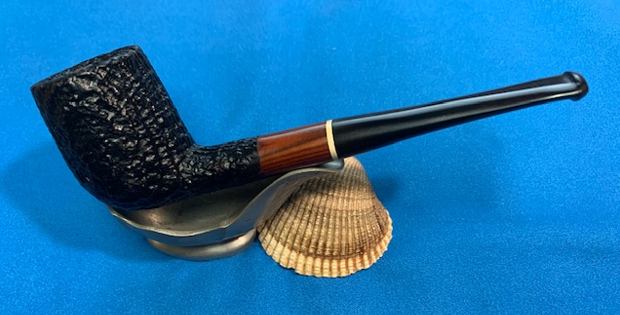
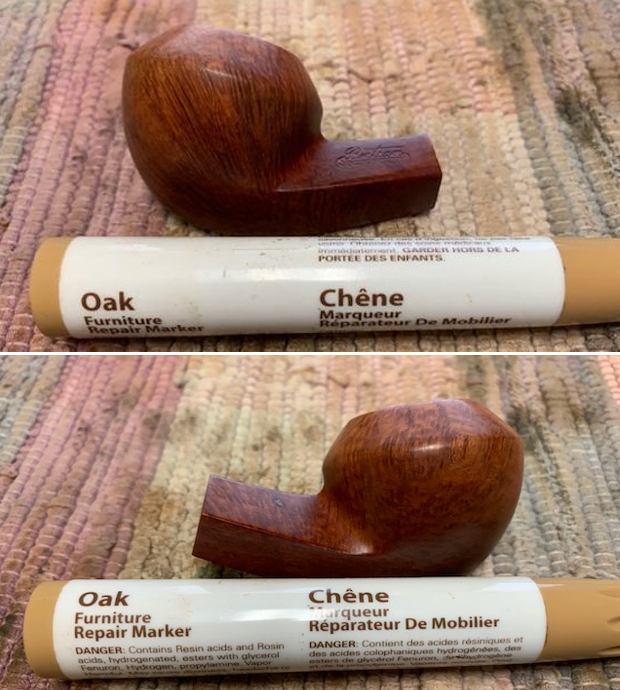
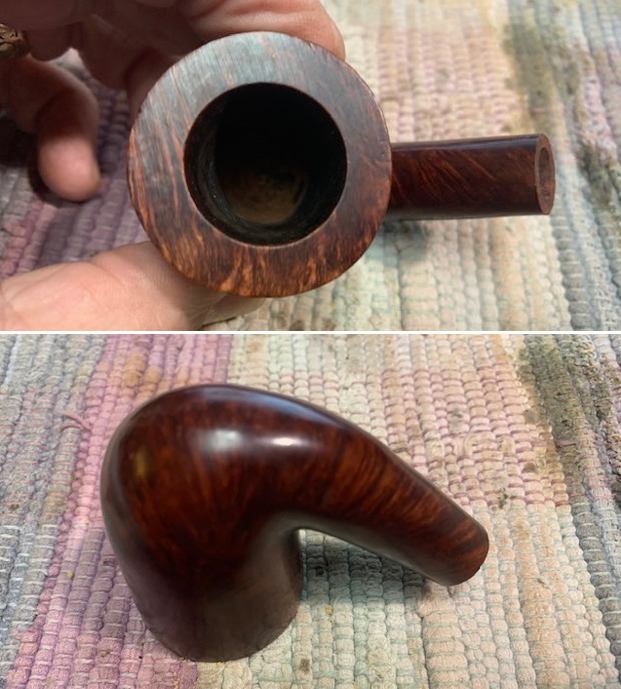
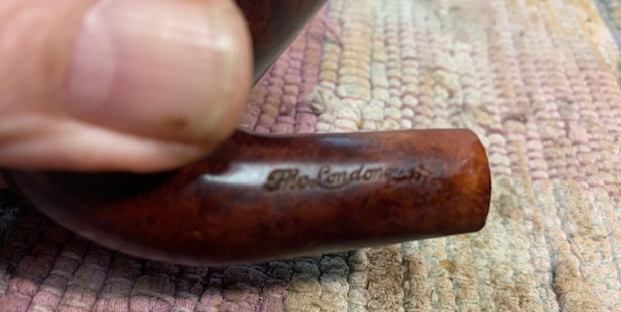
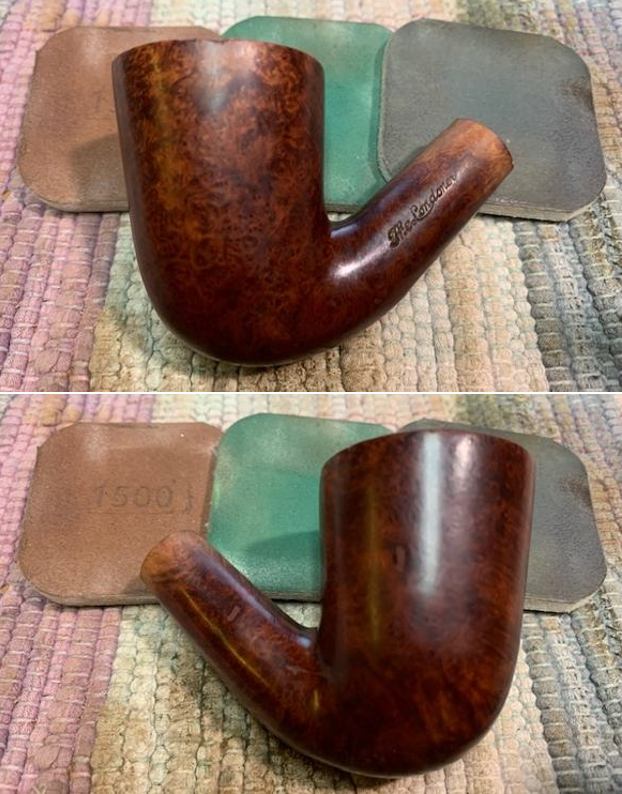
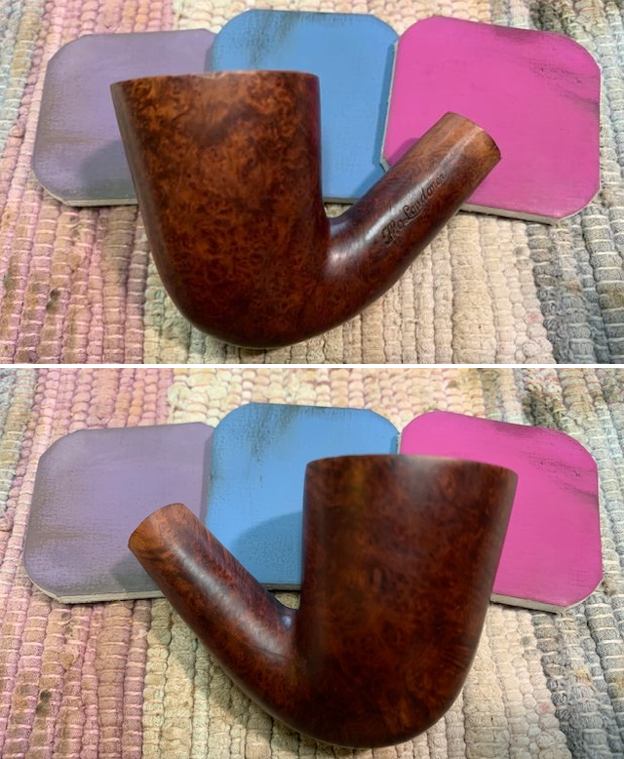
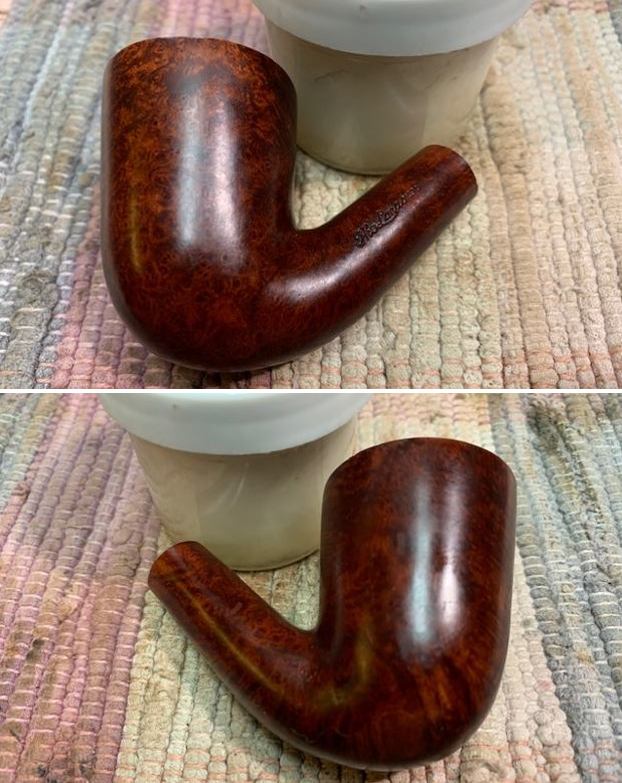
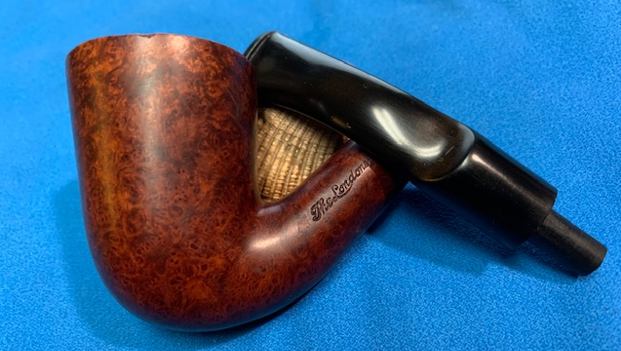
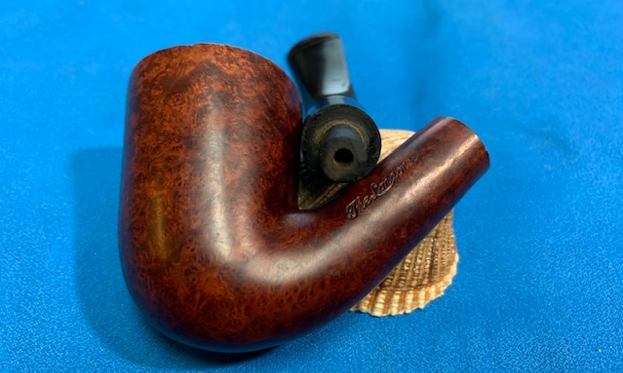
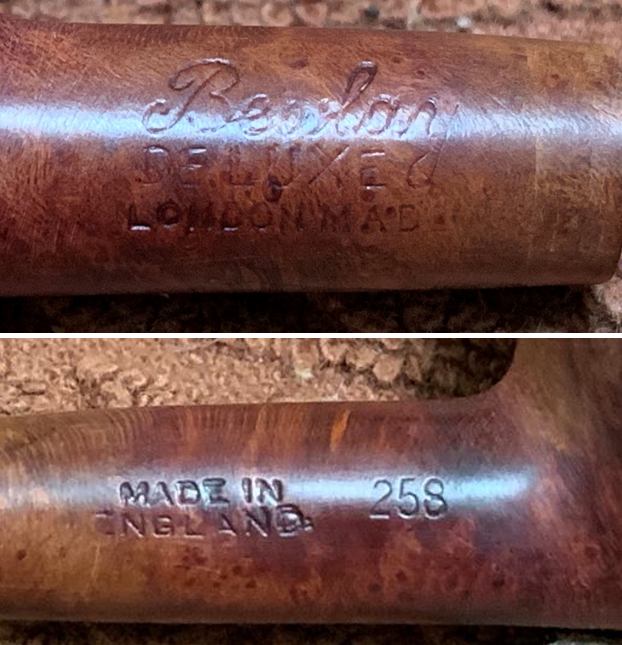
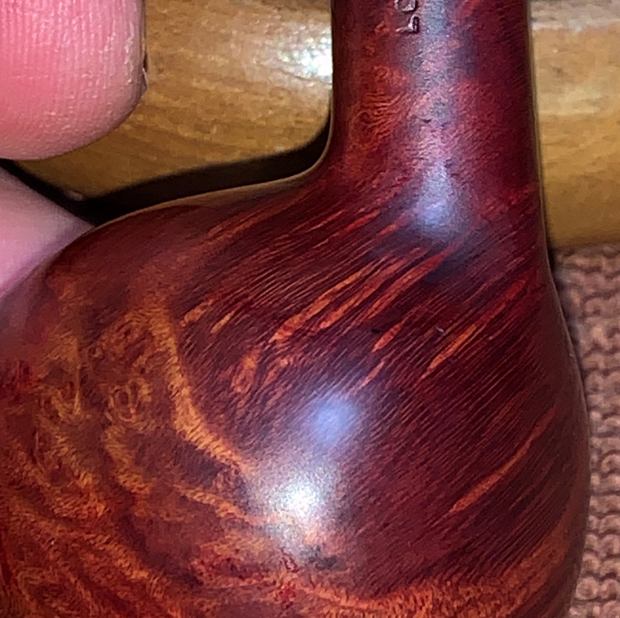
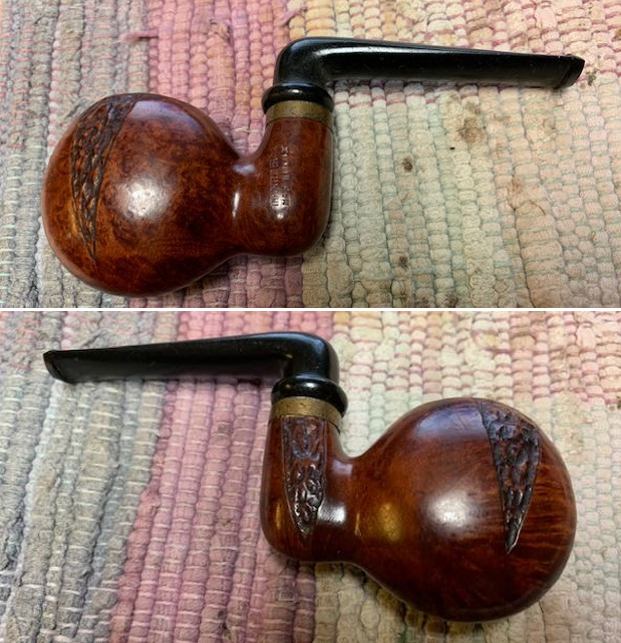
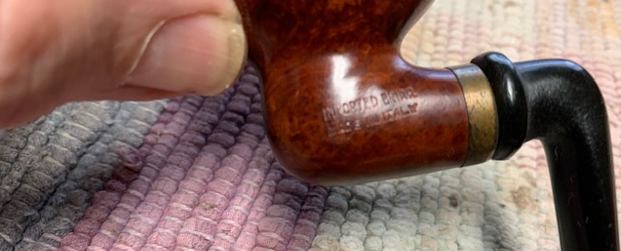
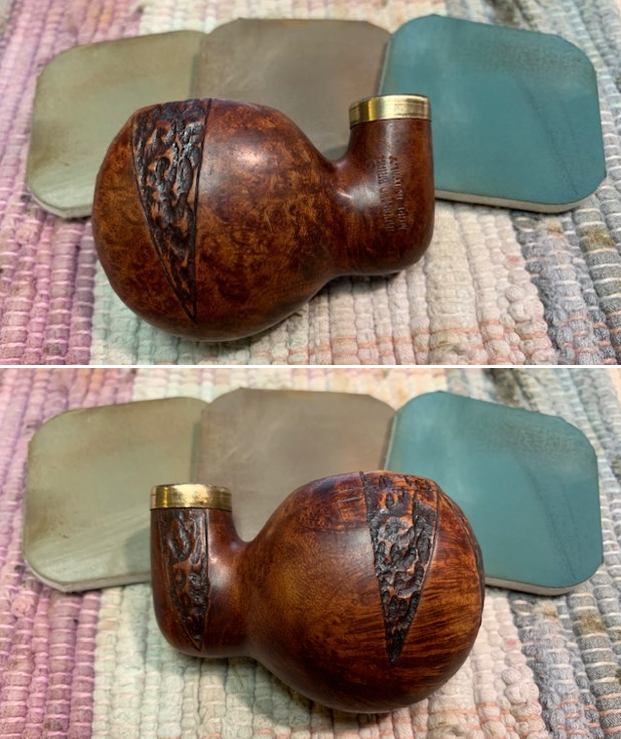
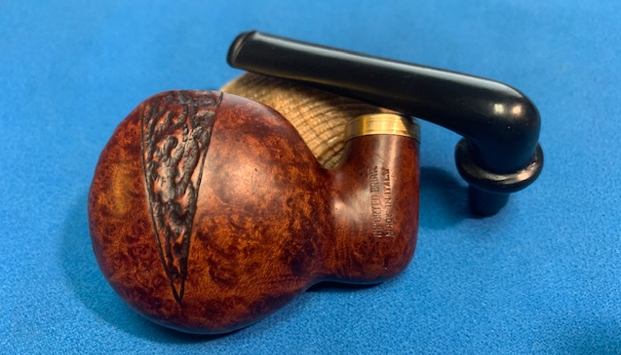
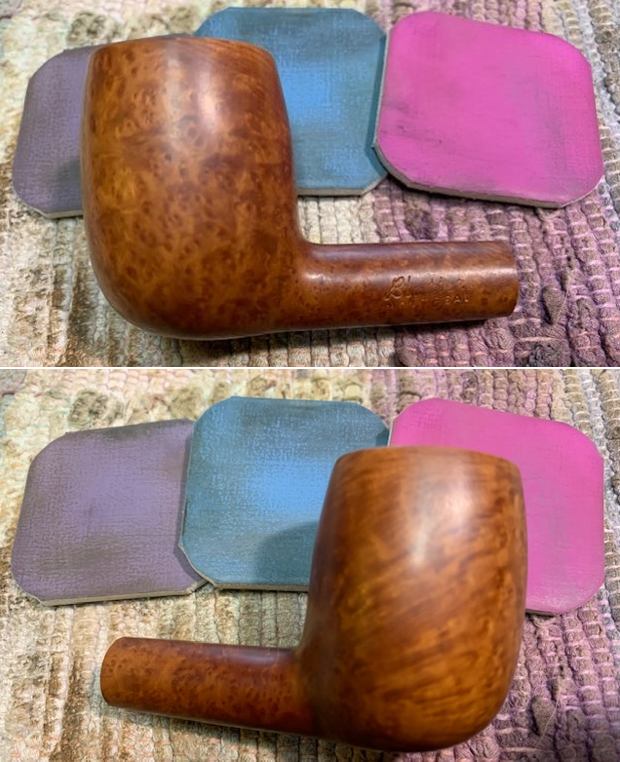
I took a photo of the stamping on the left side of the shank to capture the condition. It is clear and readable and actually better than it appears in the photo below.
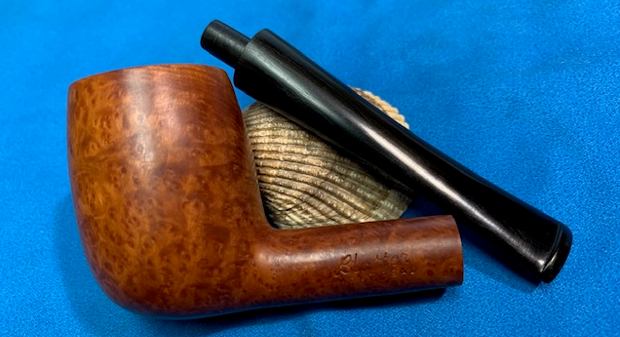
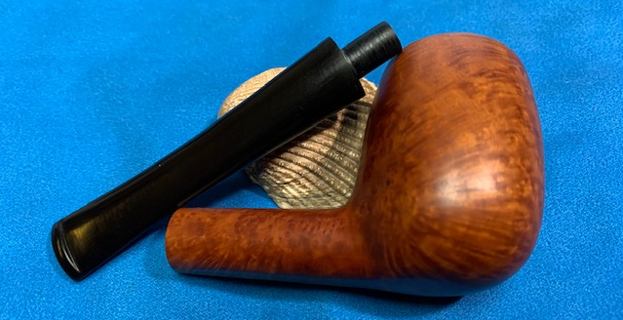
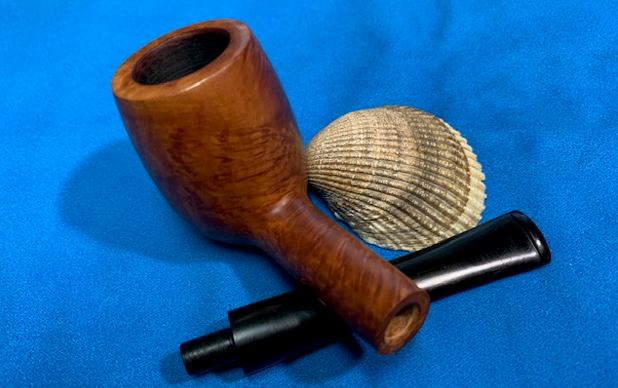
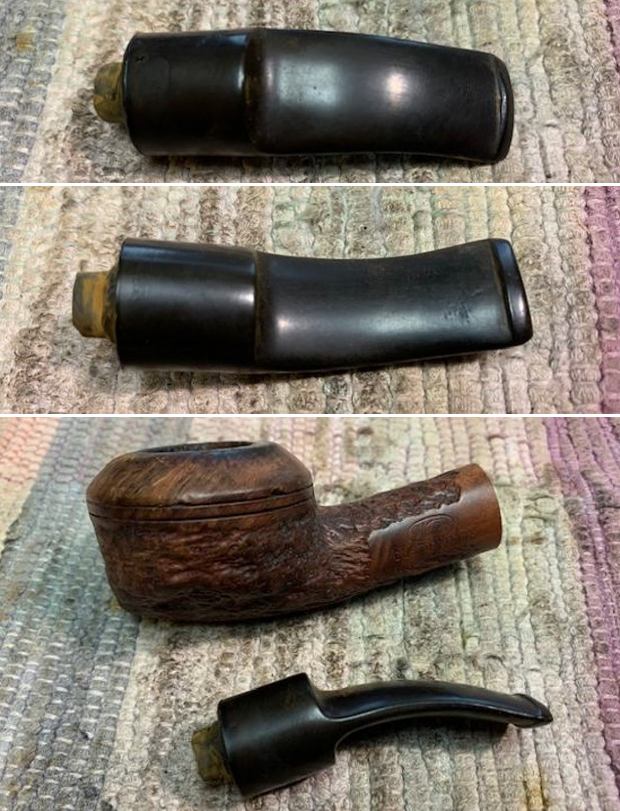
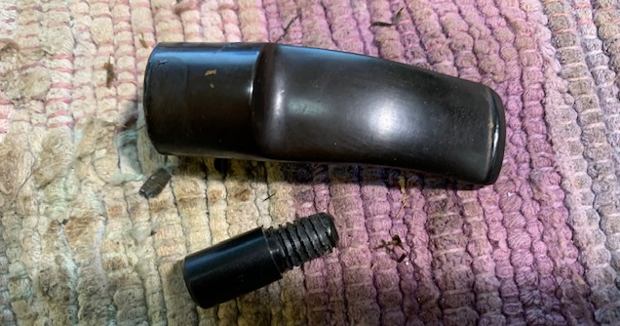
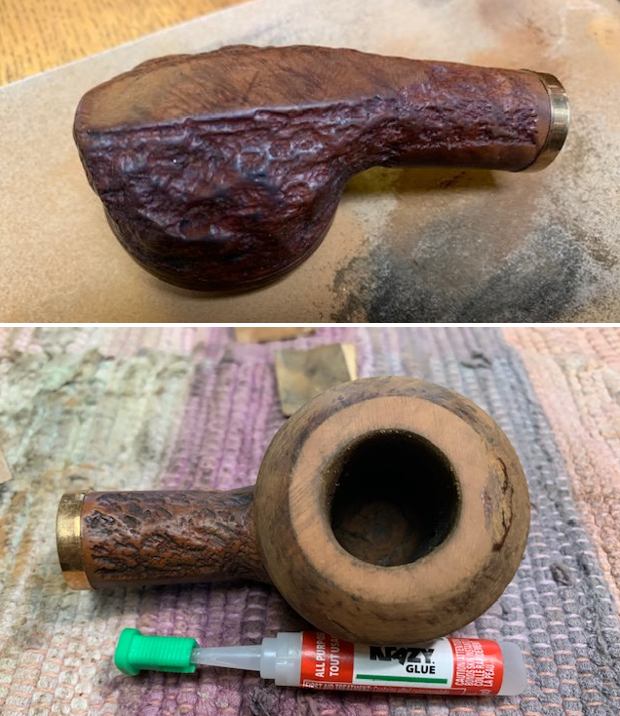
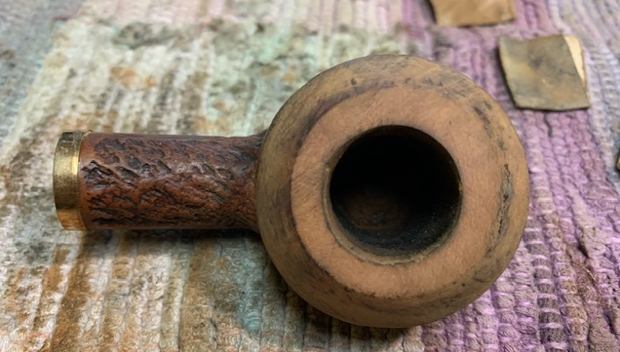
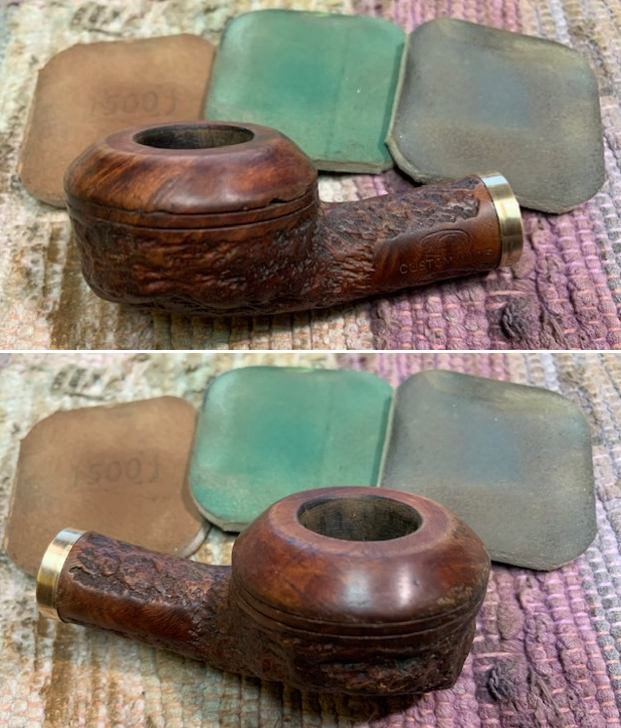
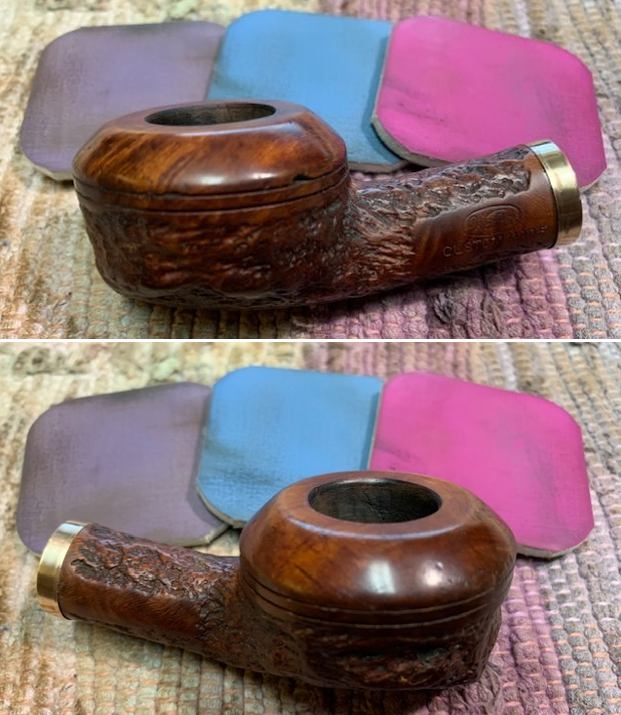
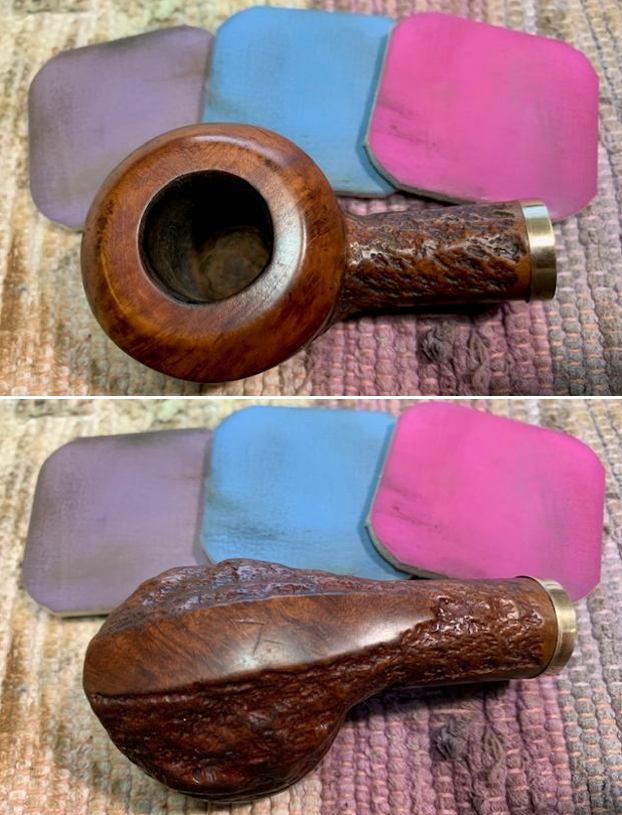
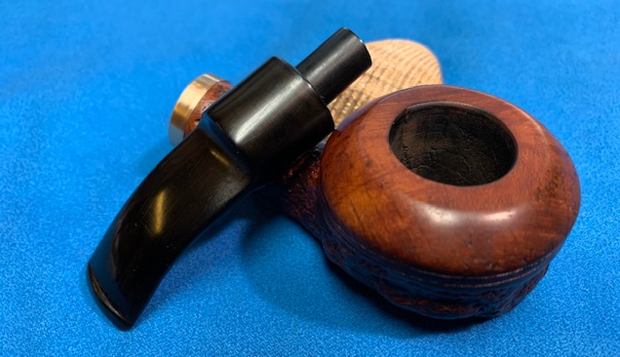
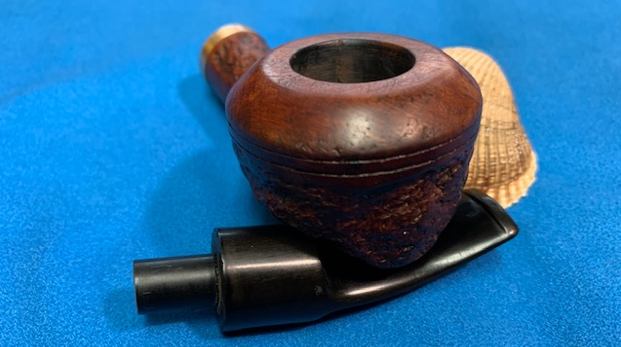
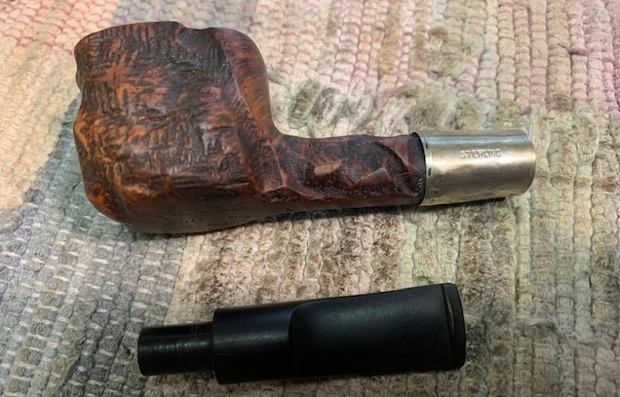
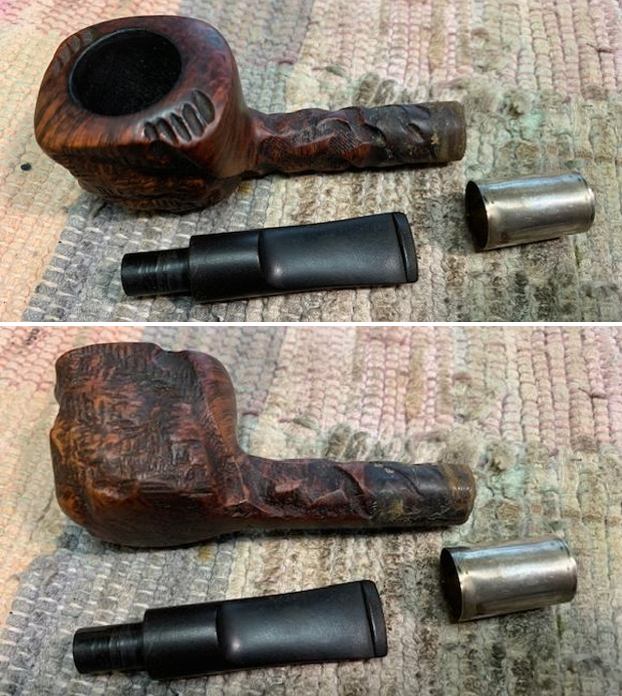
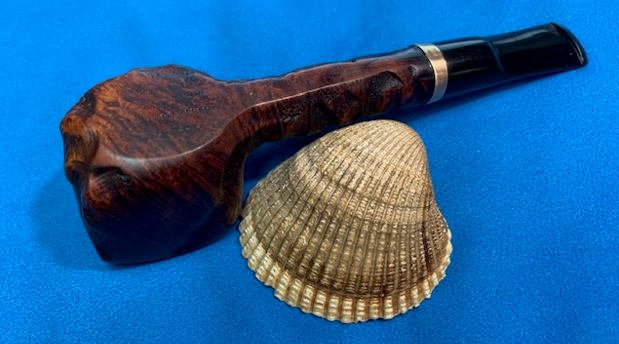
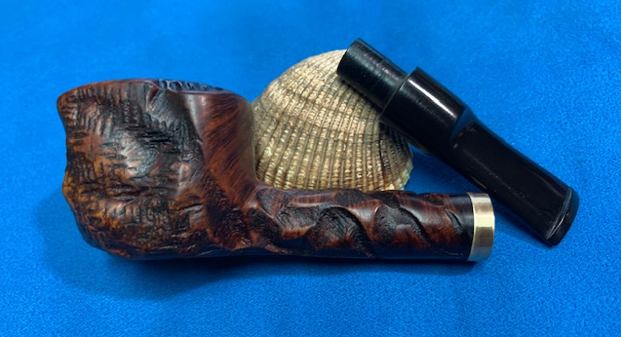
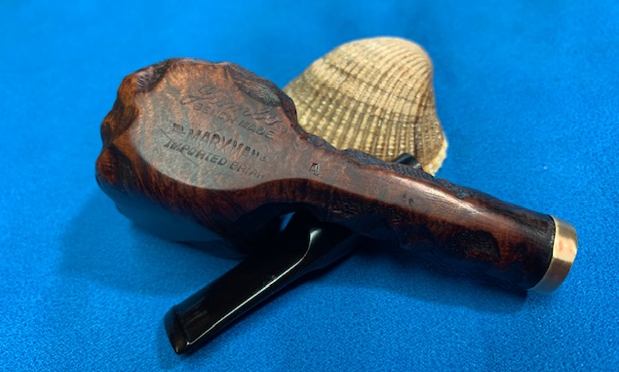
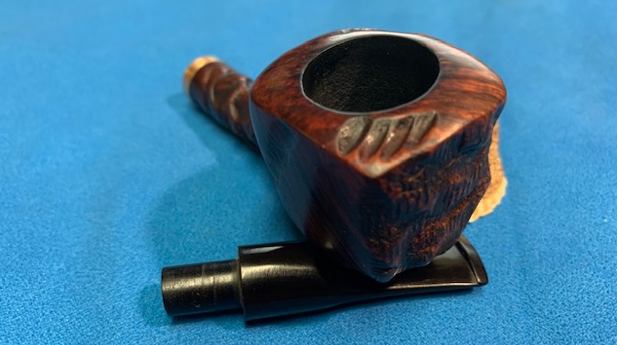
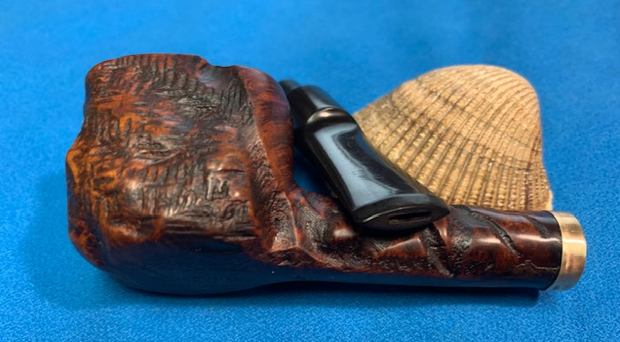
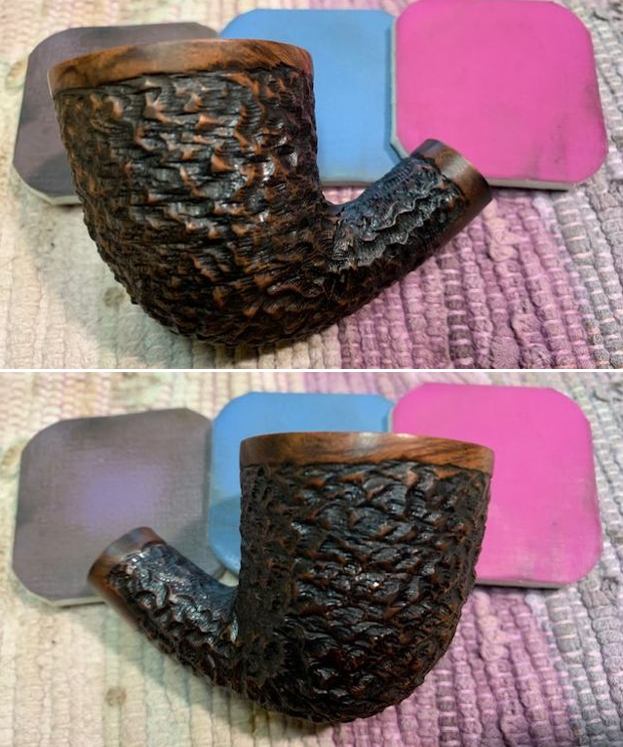
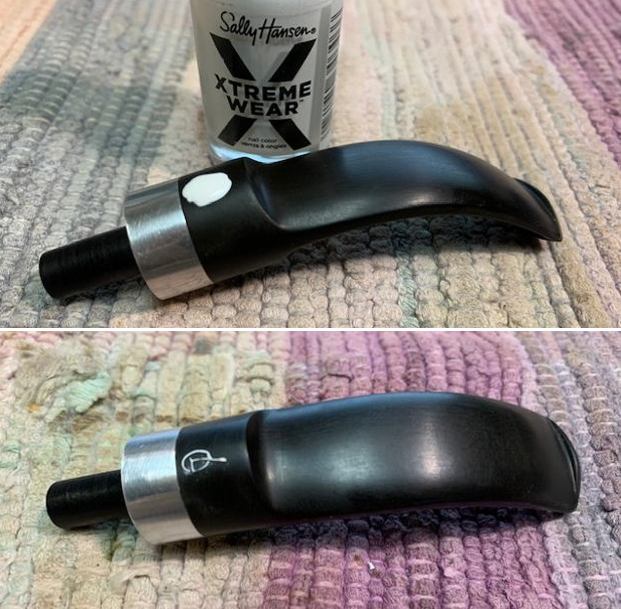
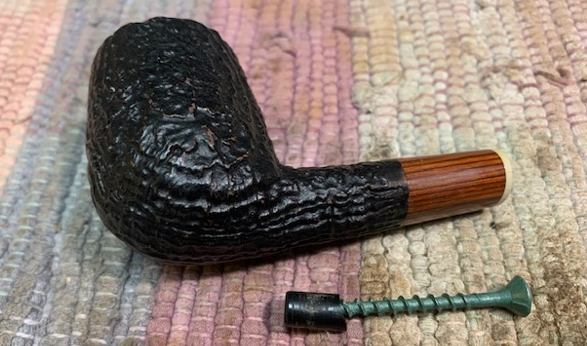
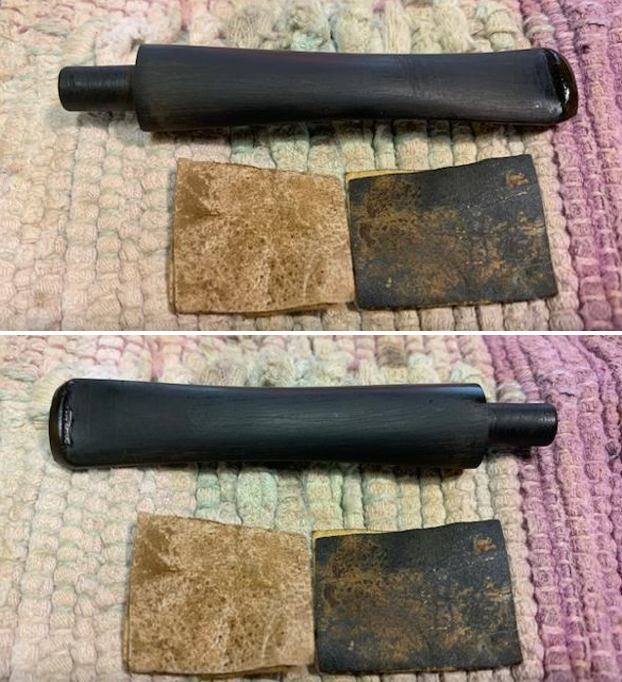
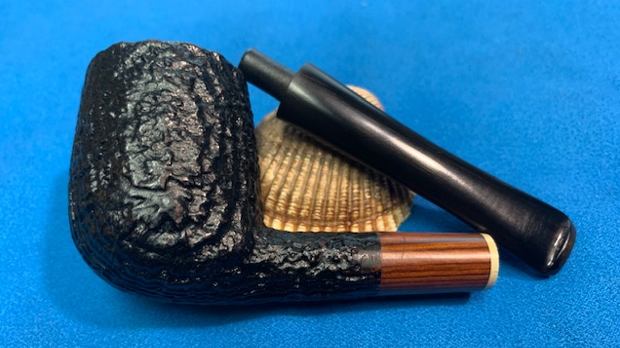
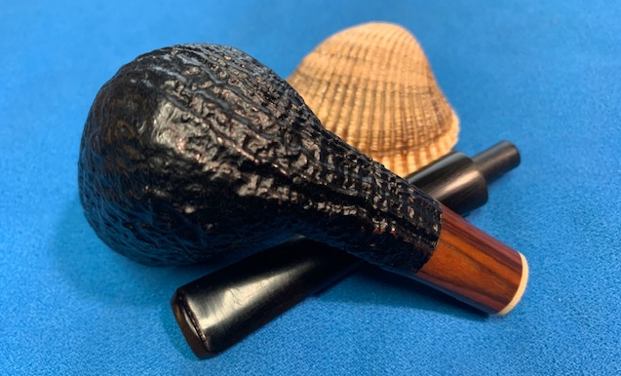
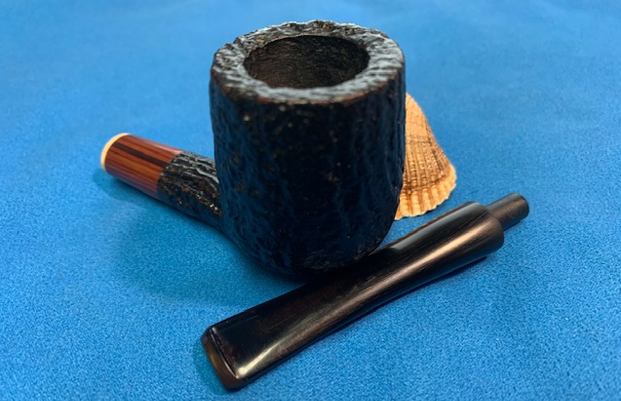
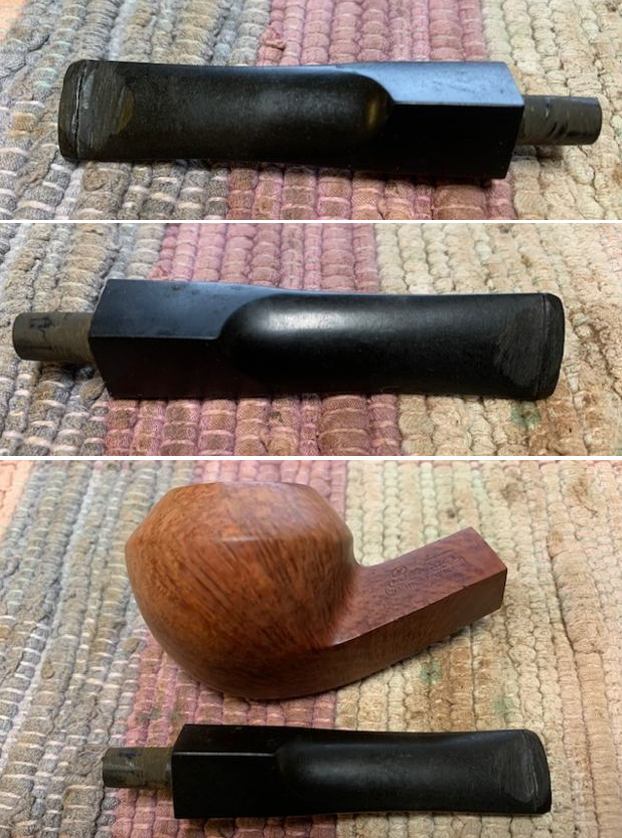
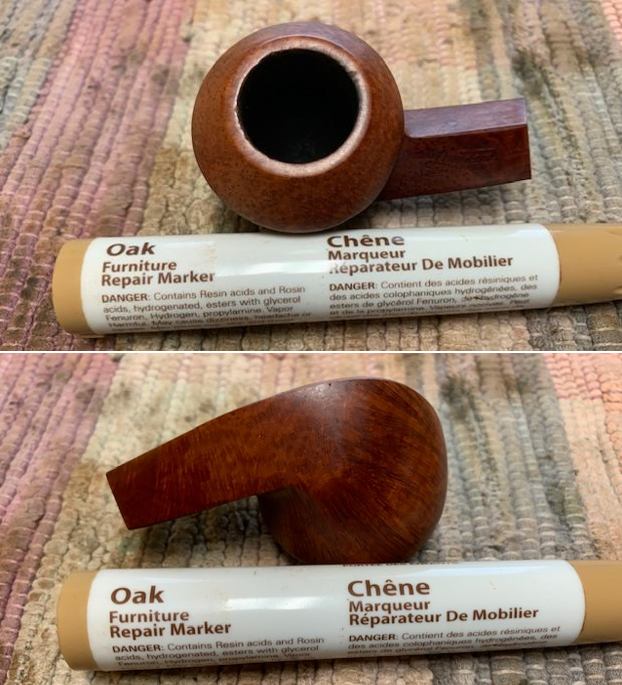
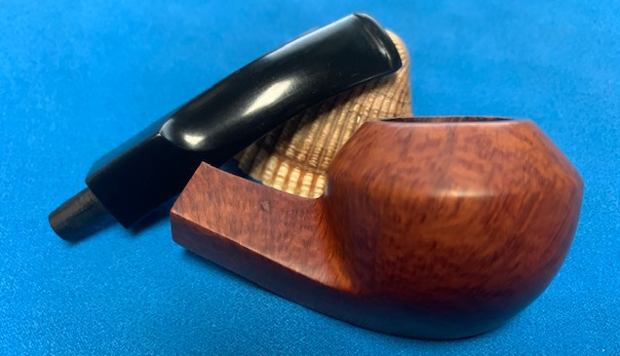
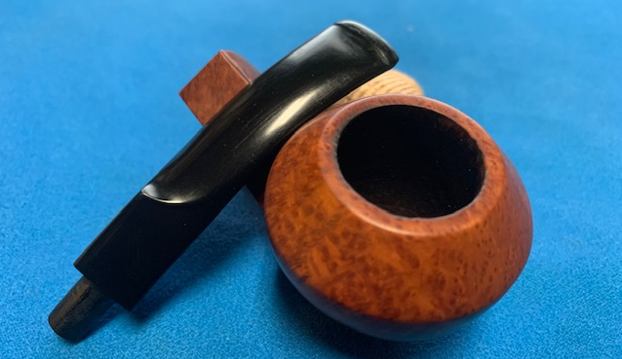
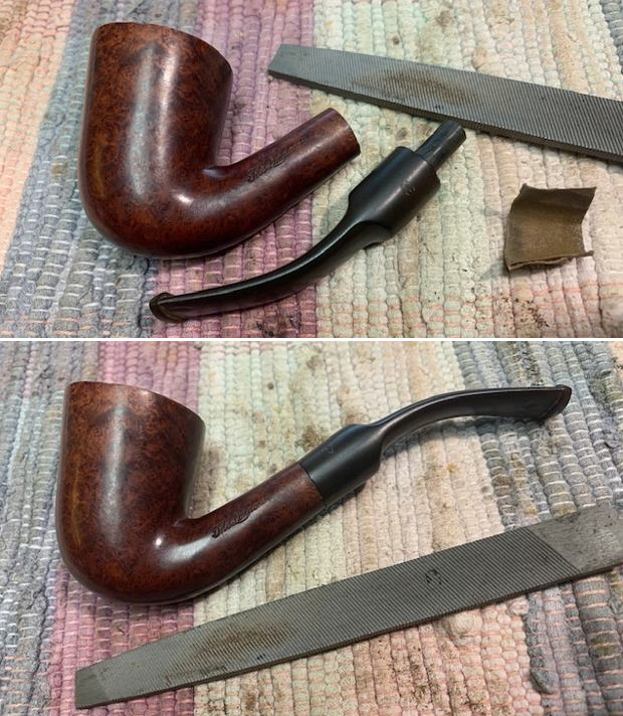
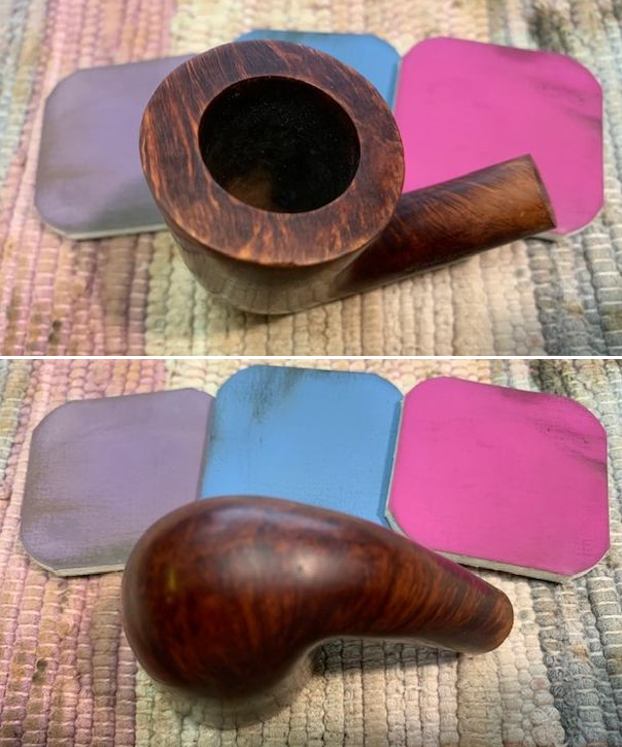
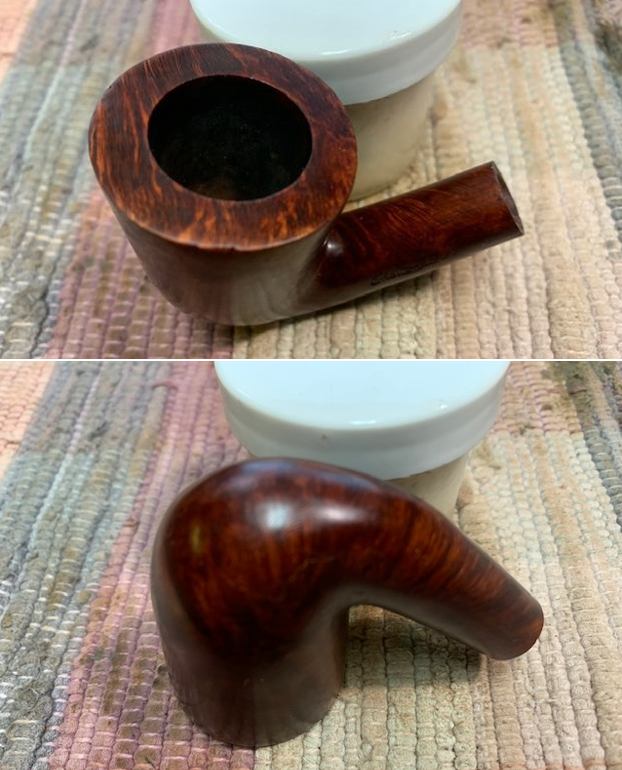
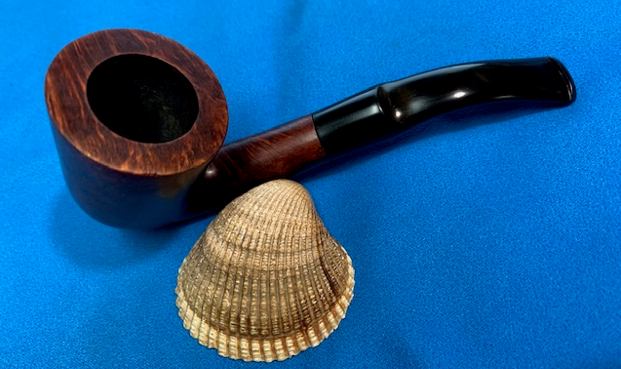
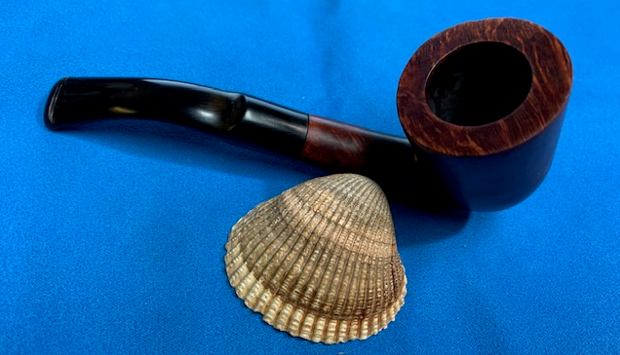
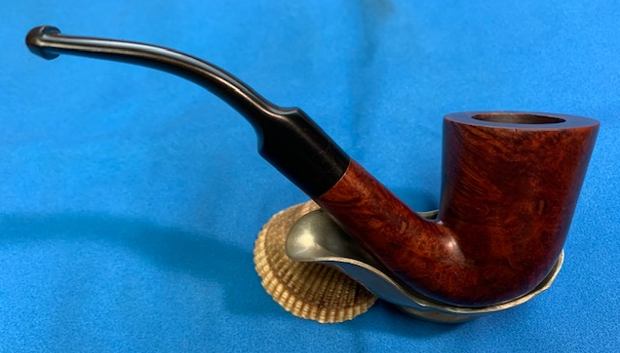
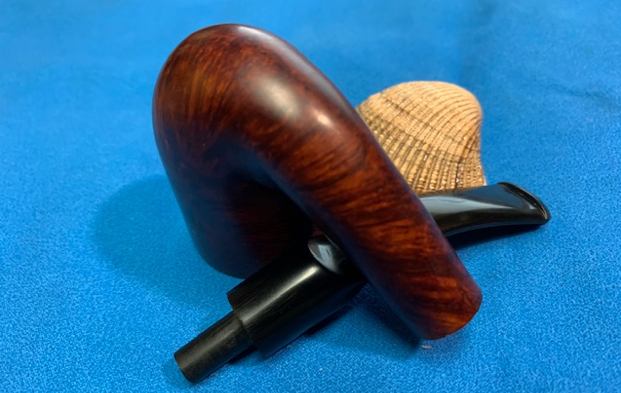
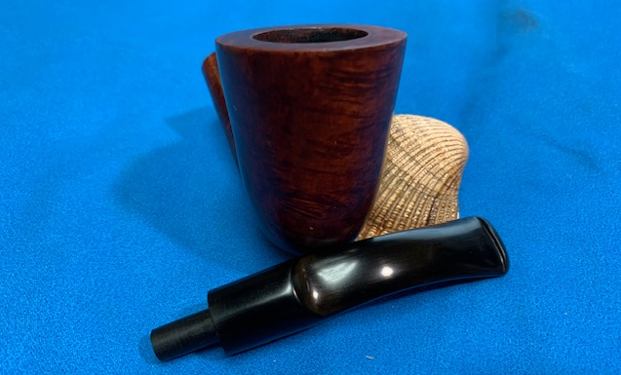
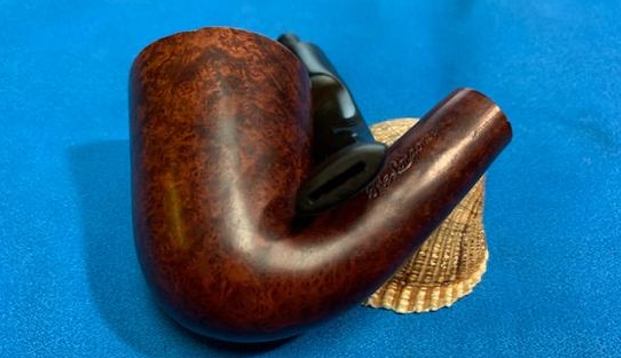
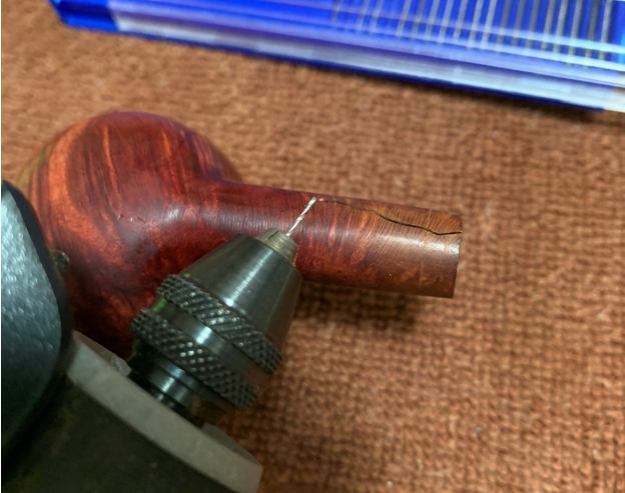
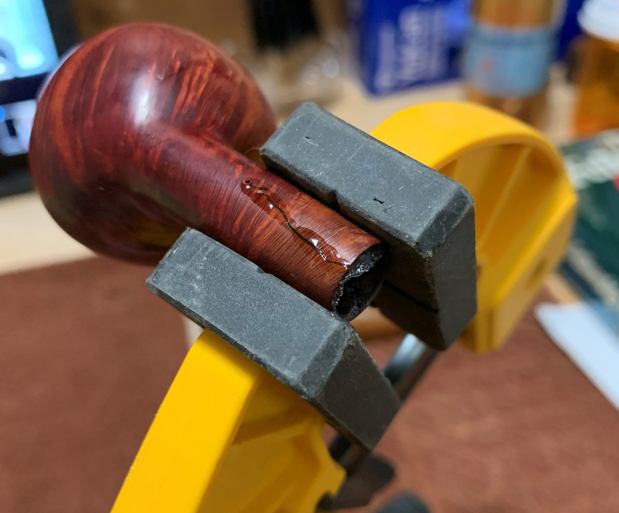
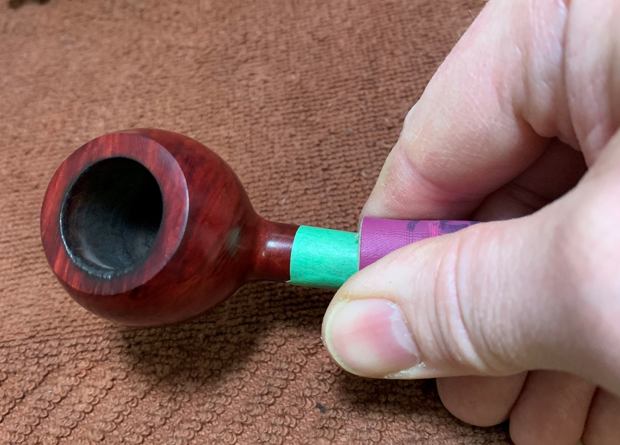
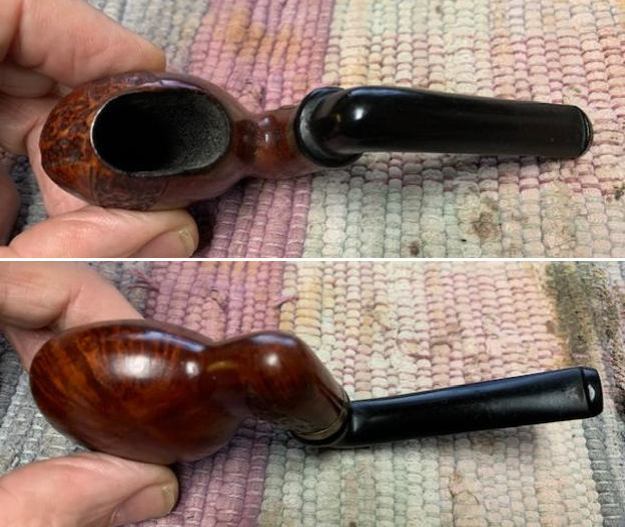
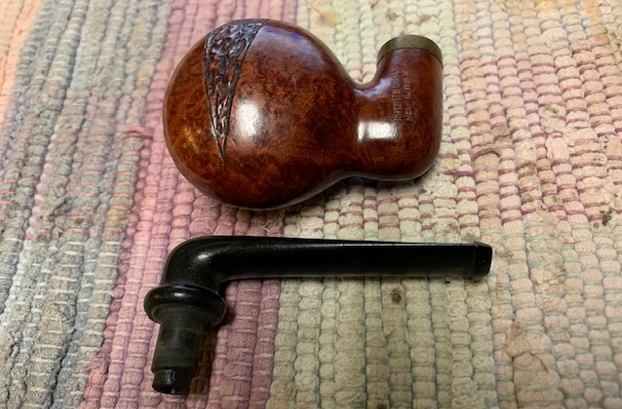
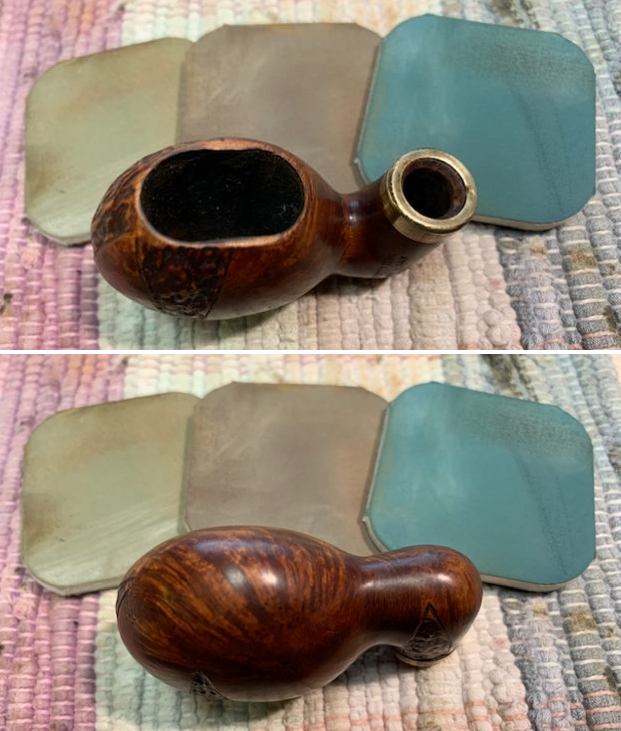
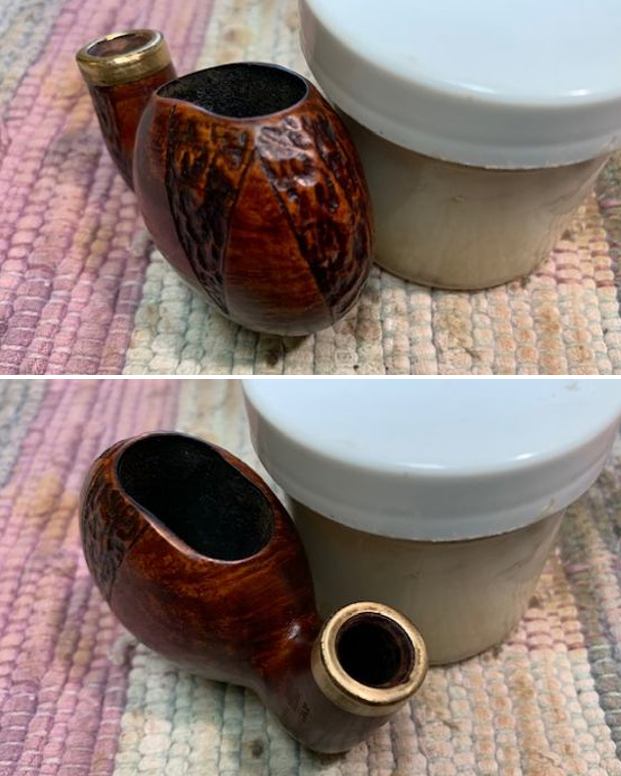
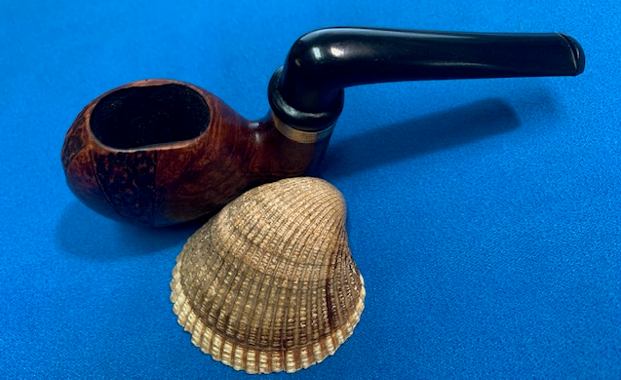
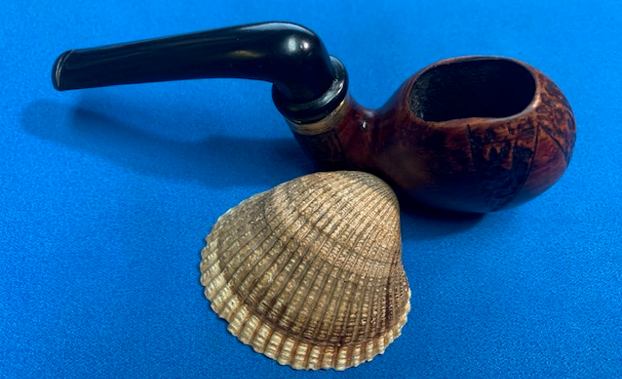
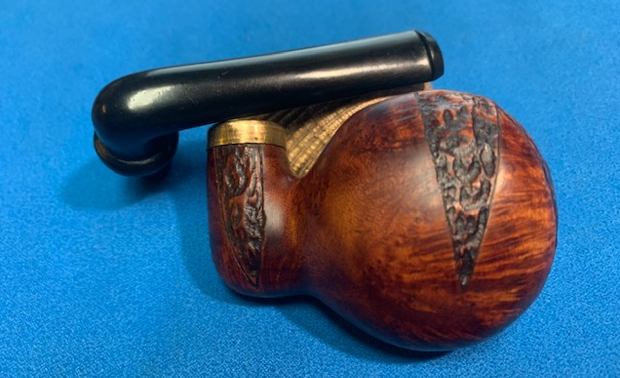
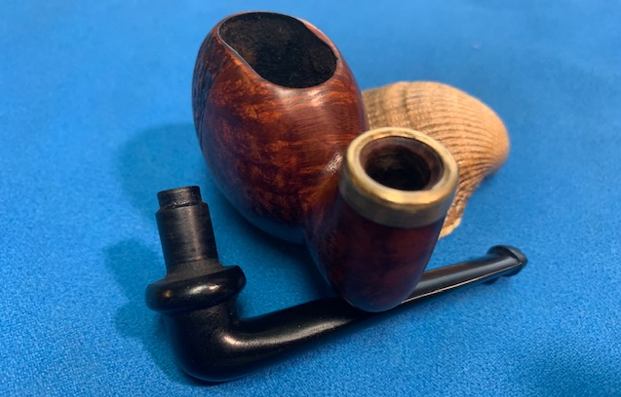
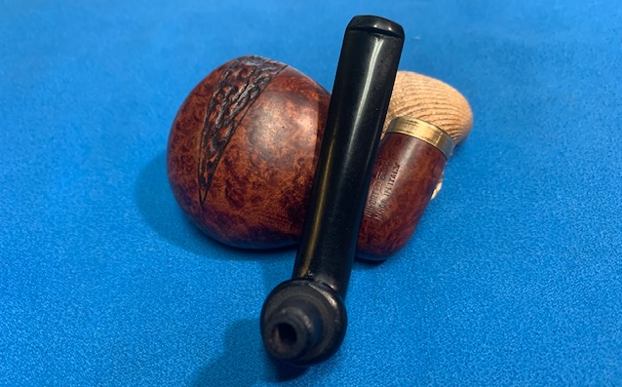
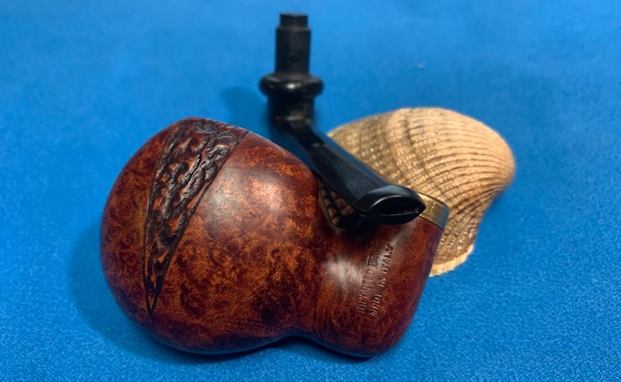
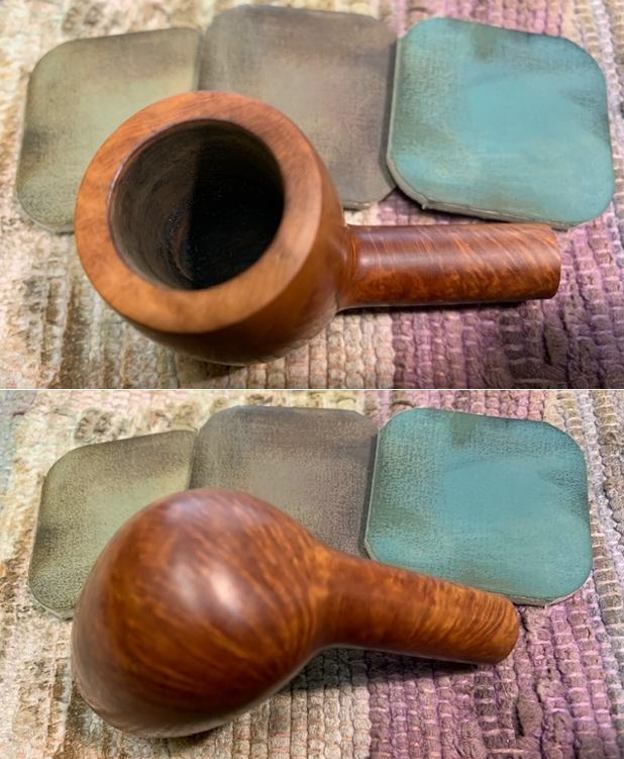
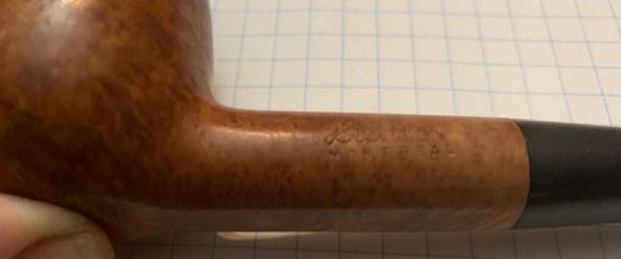
I removed the stem from the shank to show the look of the parts. I am pretty certain the stem is a replacement but it is well done.
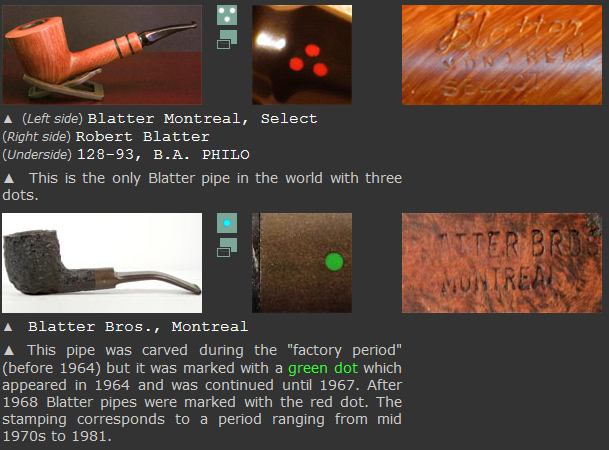
I have worked on a lot of Blatter pipes over the years but always find that a quick read of the information on Pipephil (http://pipephil.eu/logos/en/logo-b5.html) is helpful. It has been awhile since I looked at the information and I do not recall seeing the time line before. It is very helpful information. I have done a screen capture of the information and the time line and included them below. 
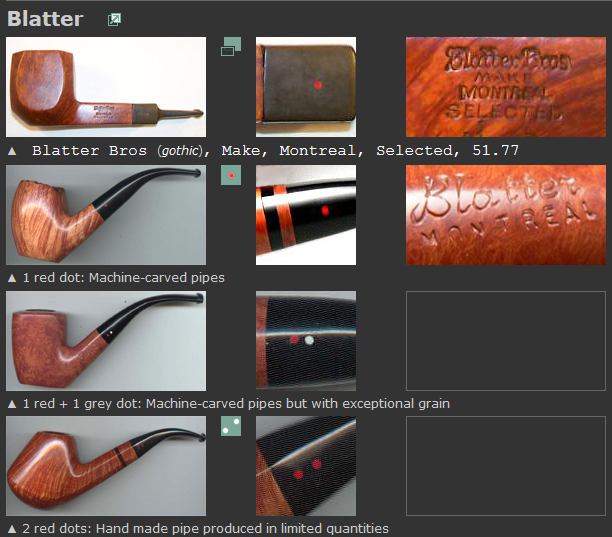
The stamping on the pipes changed in the early 1980s from a Germanic script to more current flowing script. The pipe I am working on has the post 1980s script so it was made at least after that change.

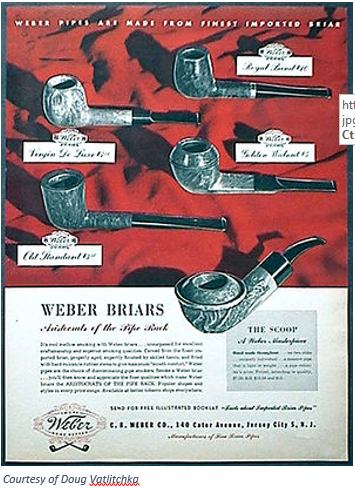
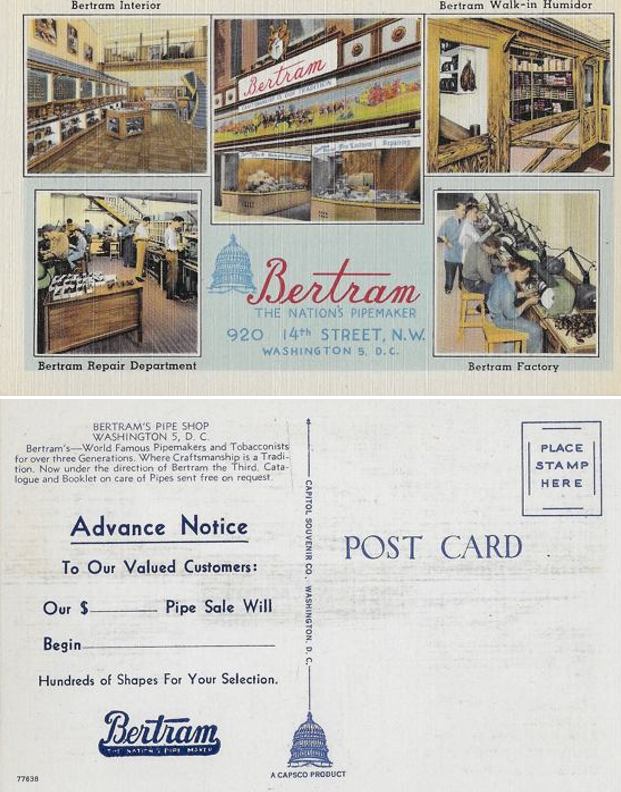
I turned to Pipedia (https://pipedia.org/wiki/Blatter_%26_Blatter) to read a bit more about the brand. They have a great article (in French) that is worth a read. As usual Doug Valitchka has some great photos in the side bars and also a collage of the shop exterior and interior. It never ceases to amaze me the collection of photos (if not) pipes that Doug has at his disposal. Thanks Doug for your contributions.

Photos Courtesy Doug Valitchka

I also have included the link to Blatter of Montreal’s own website for your reference (http://www.blatterpipes.com/English.html). Well worth a visit. Now it was time to work on the pipe itself.

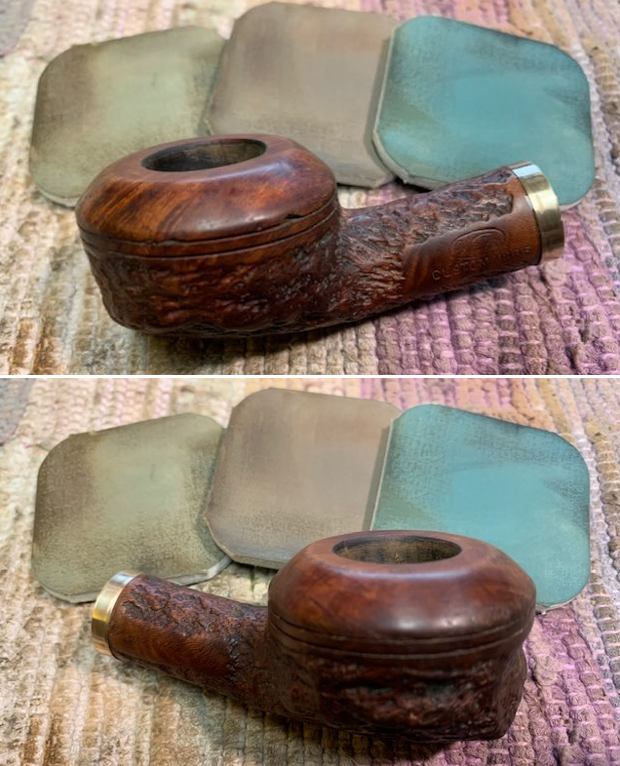
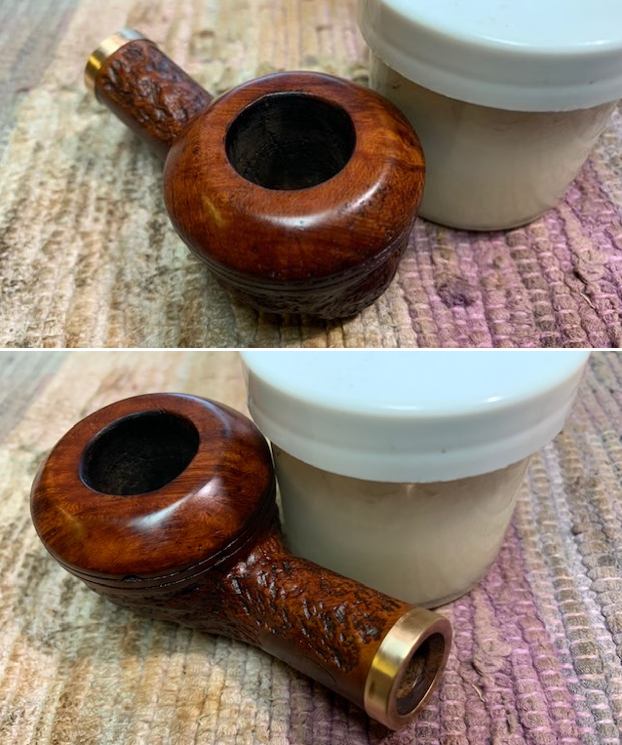
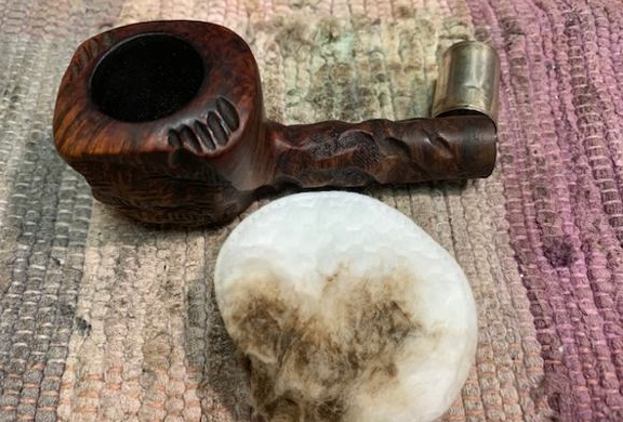
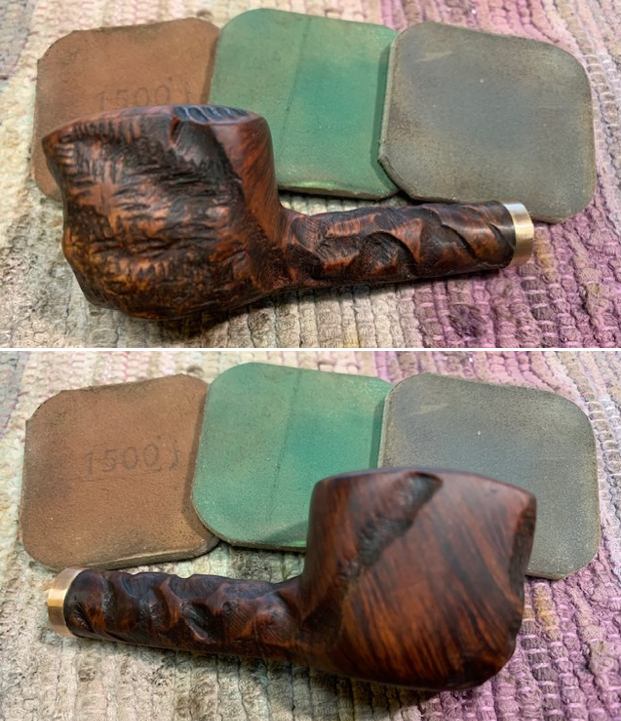
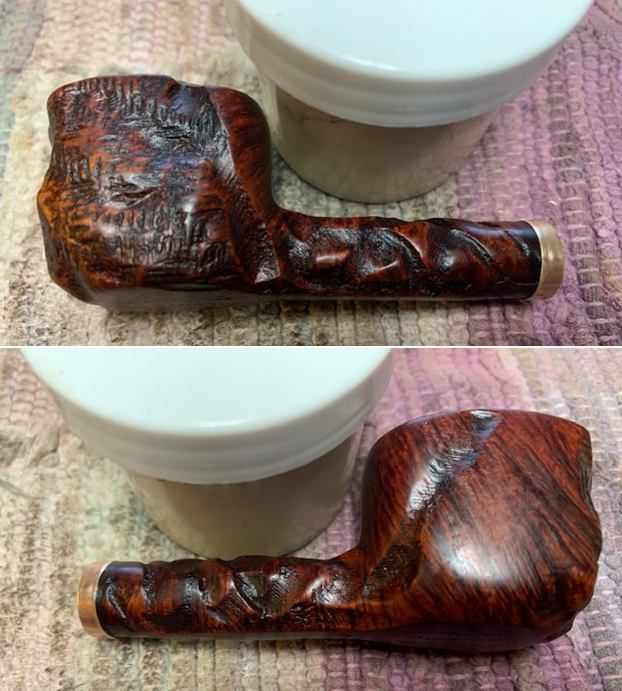
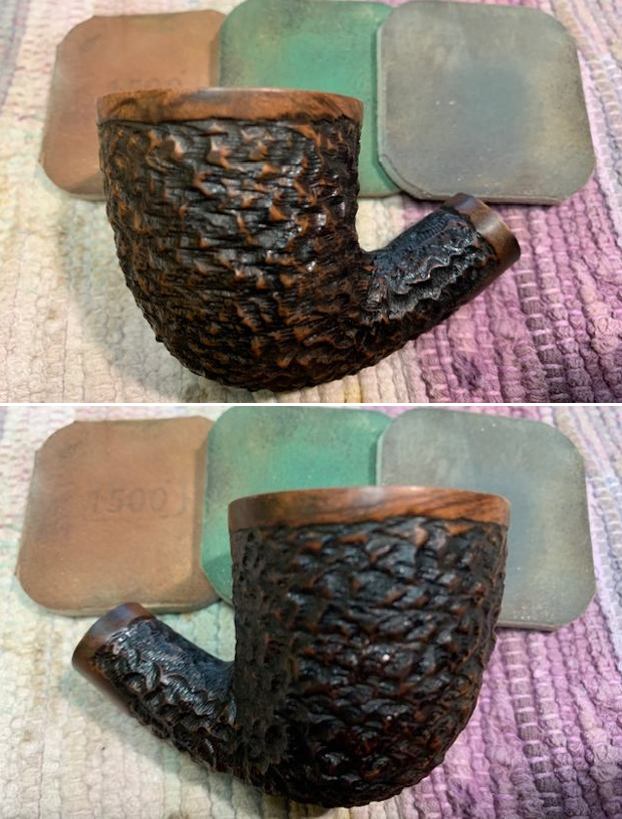
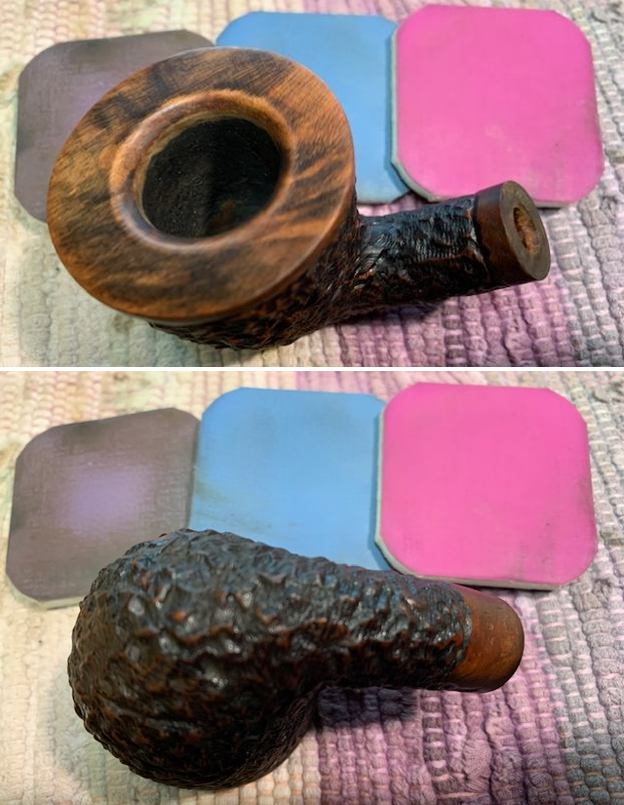
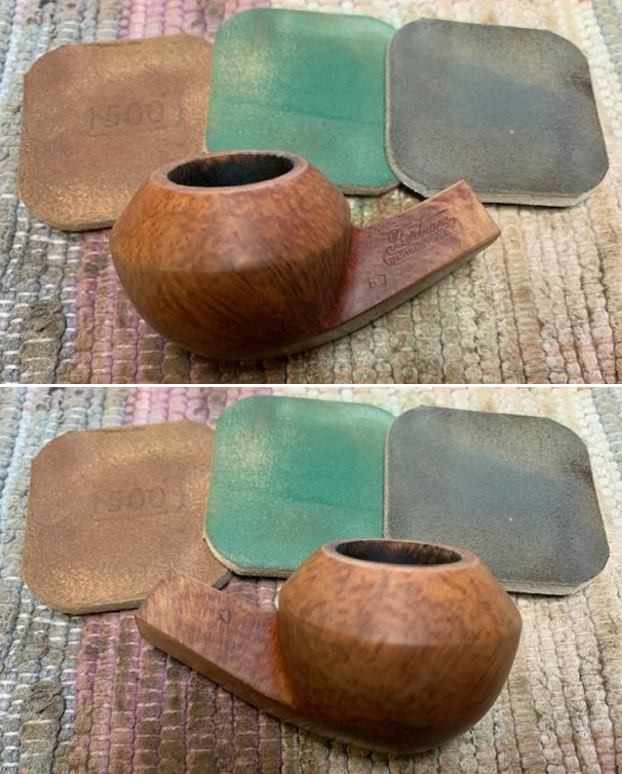
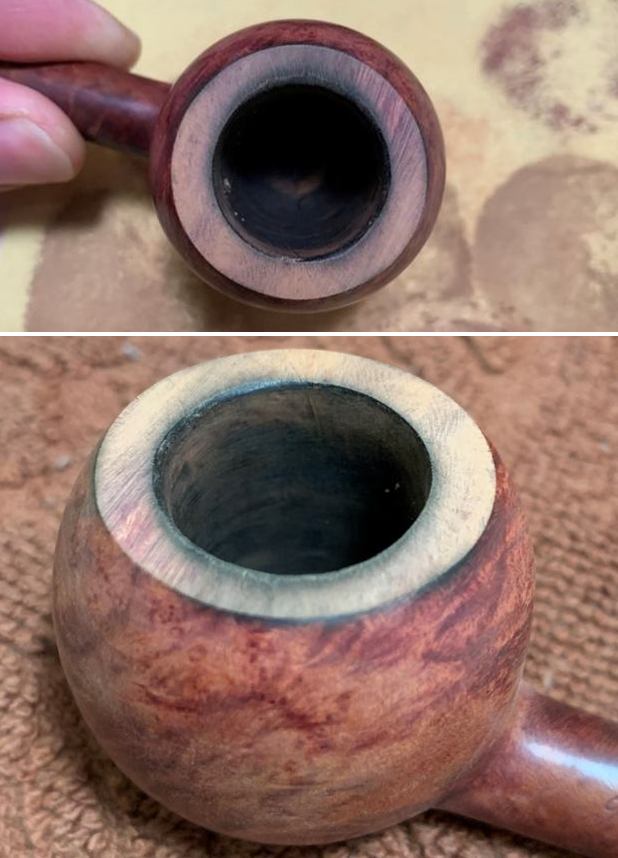
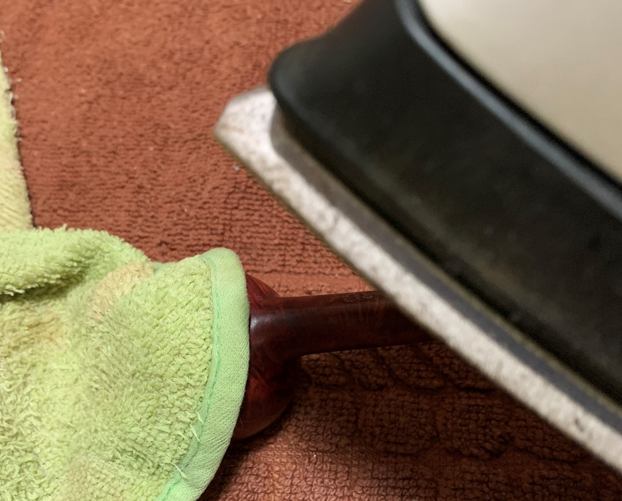
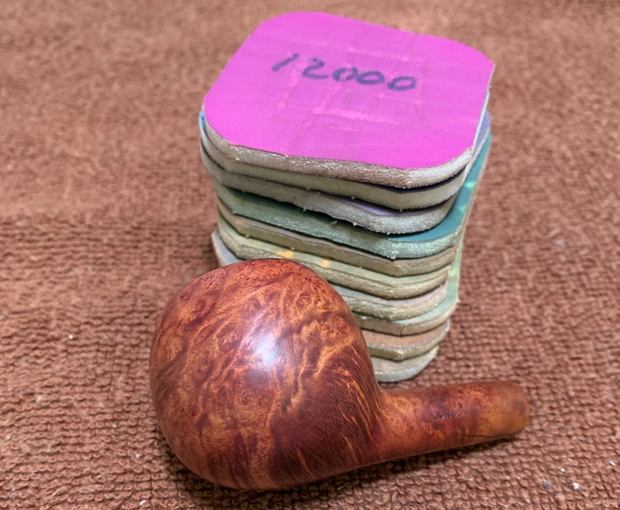
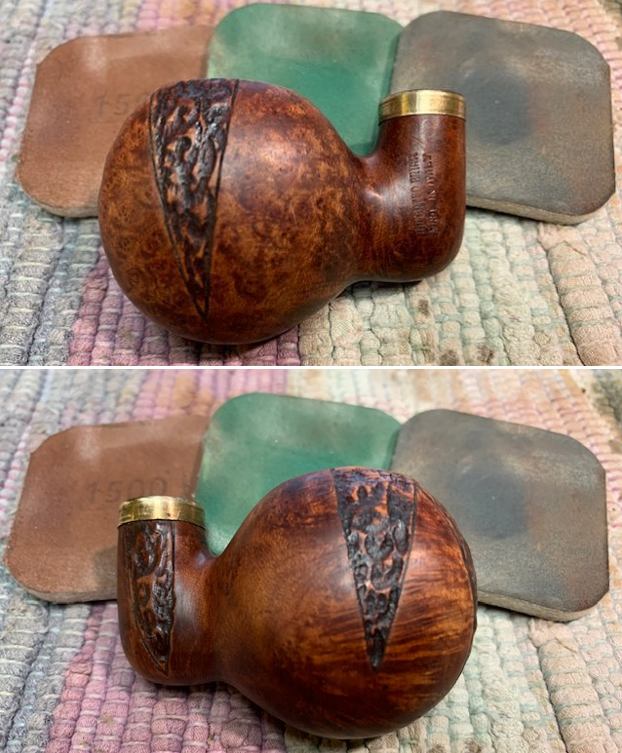
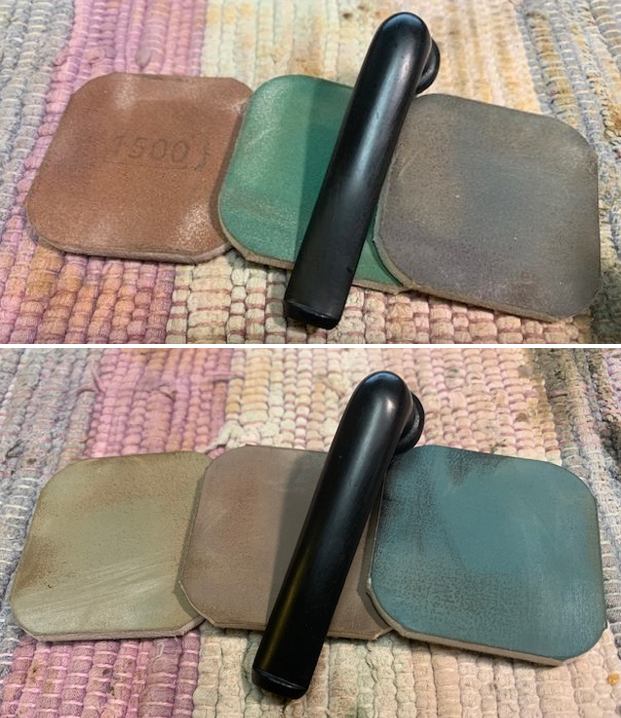
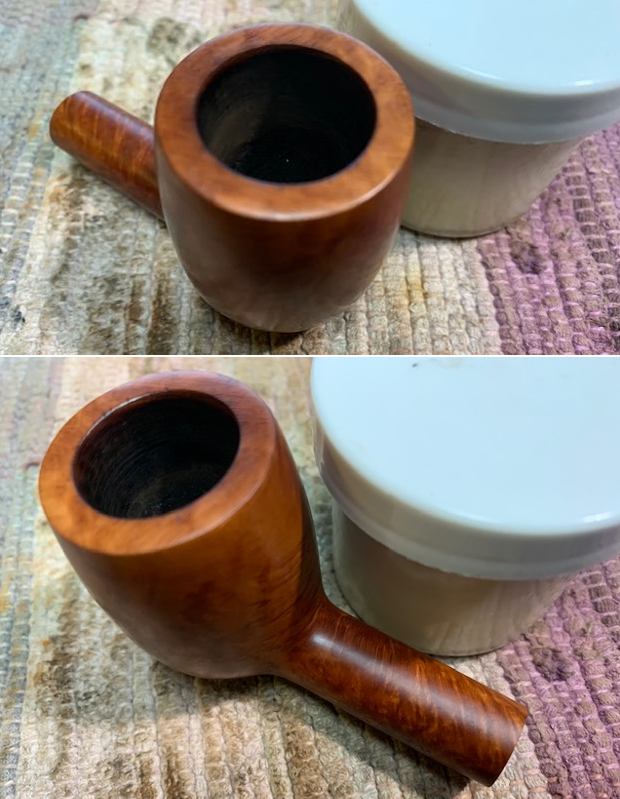
I lightly topped the bowl with 220 grit sandpaper on a topping board to remove the damage on the rim top. It took very little work and the top was clean again. I would need to polish out the scratches but the rim top damage was gone.
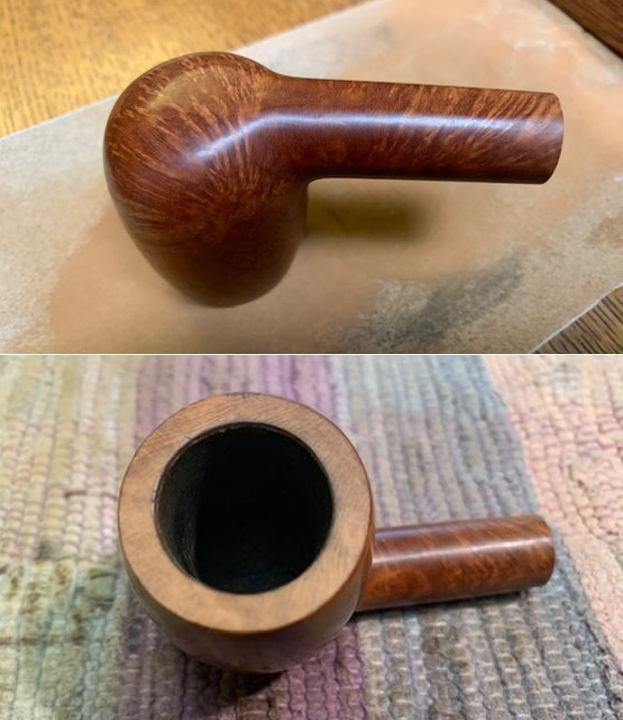
I polished the rim top and the rest of the briar with micromesh sanding pads – dry sanding with 1500-12000 grit pads. I wiped it down with a damp cloth after each sanding pad. As the pipe was polished the rim top began to match the rest of the bowl. By the final sanding pad it blended perfectly. 
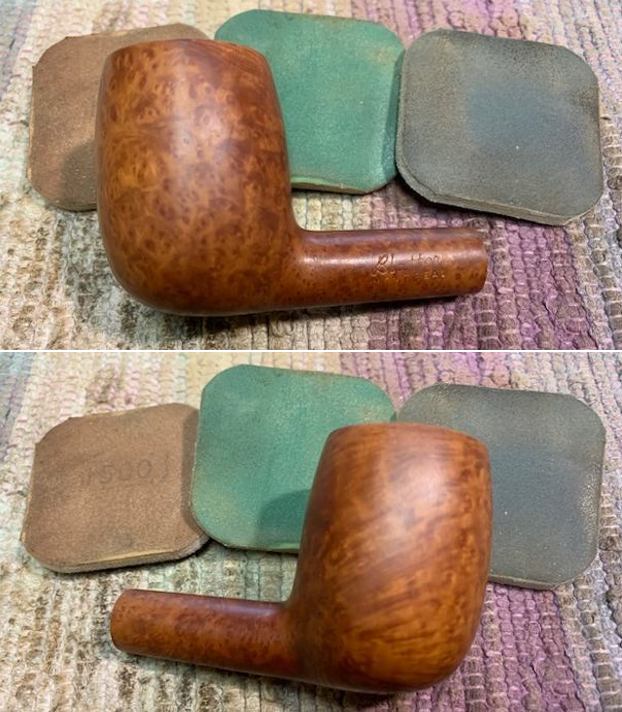
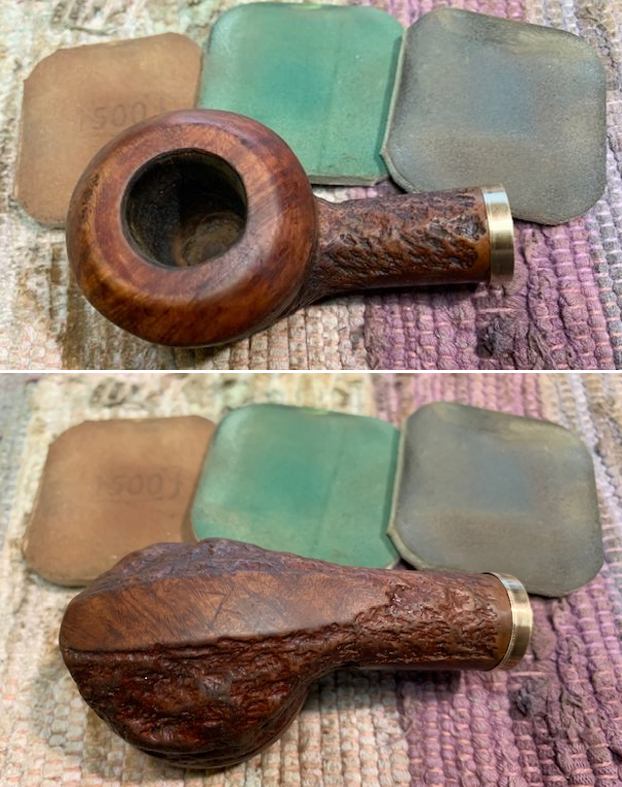
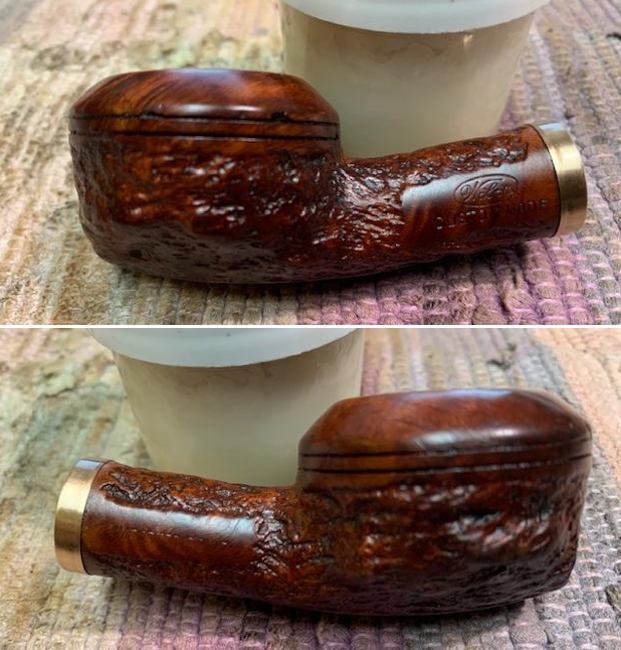
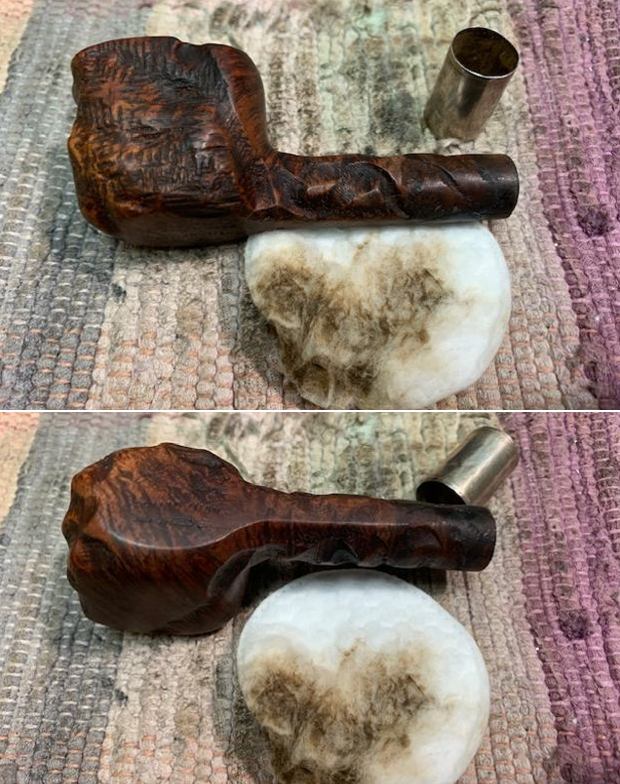
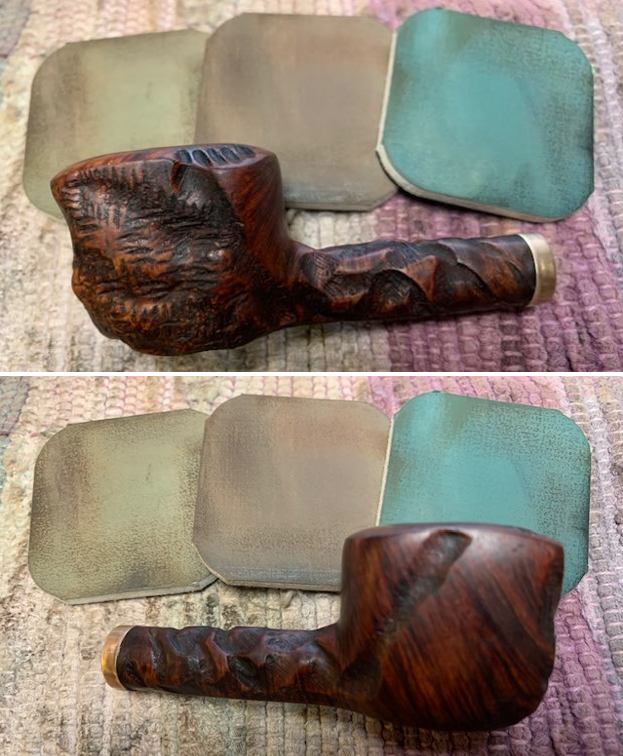
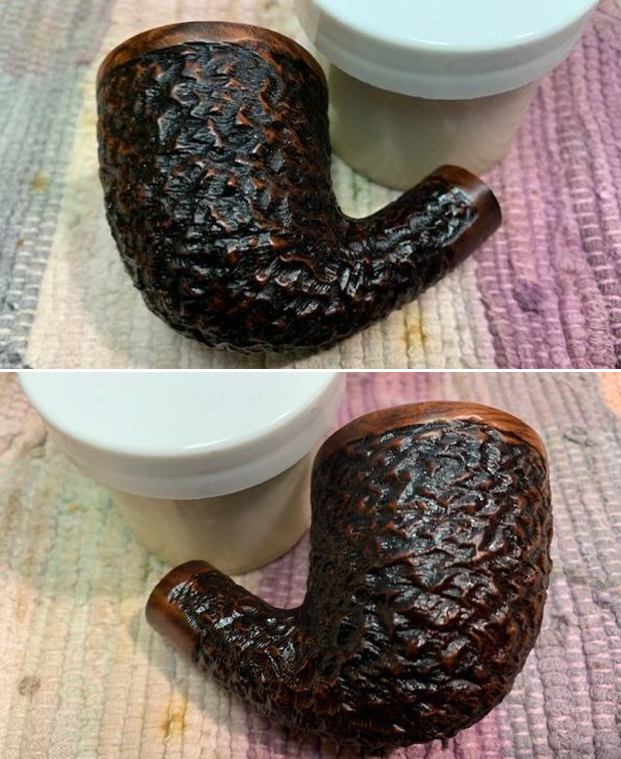
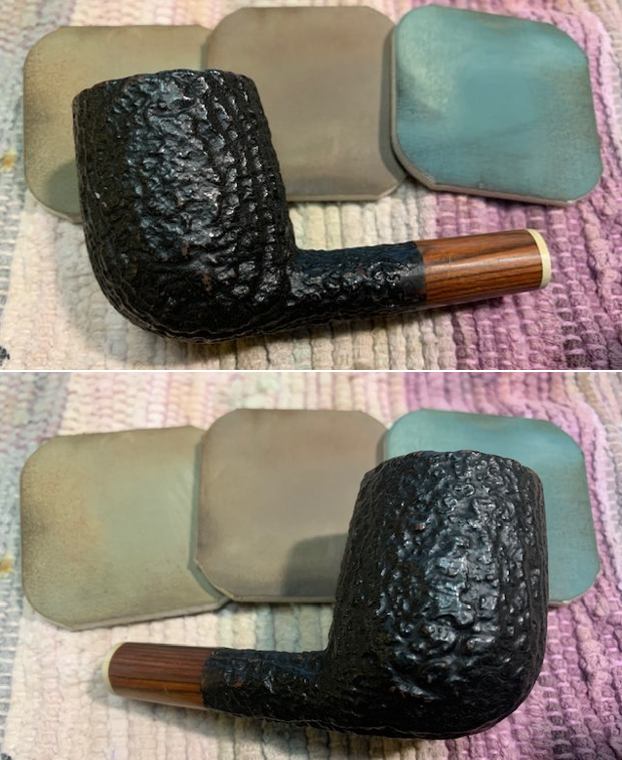
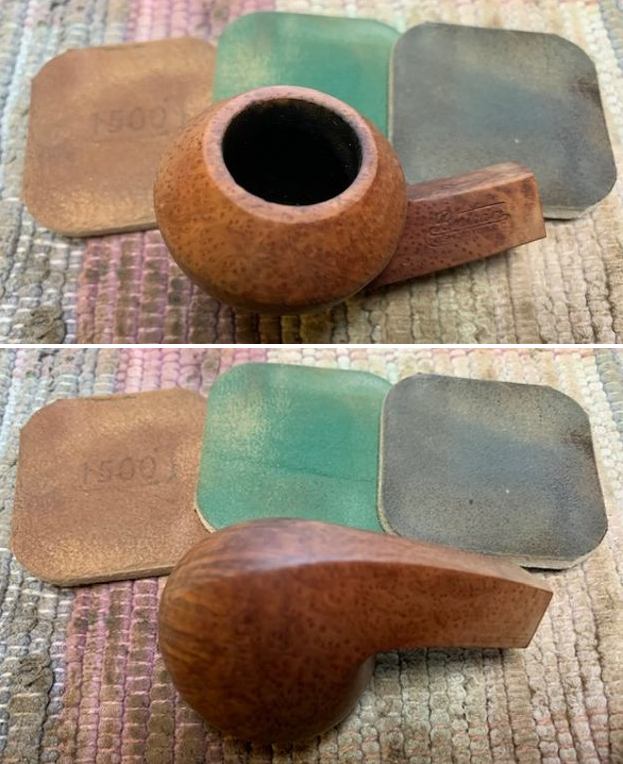
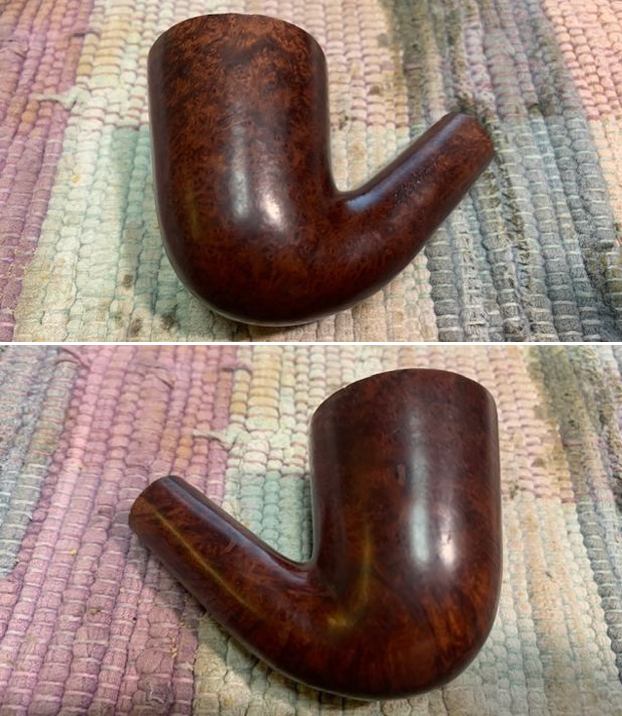
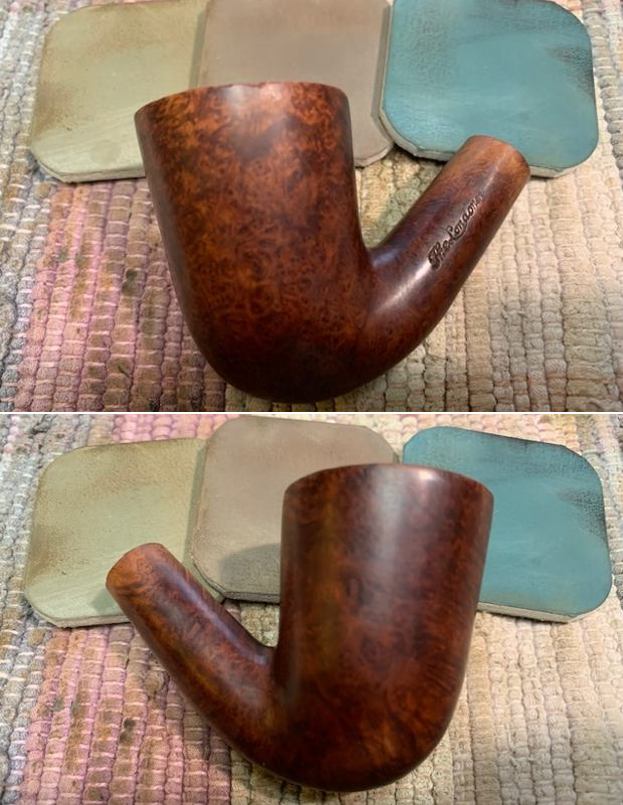
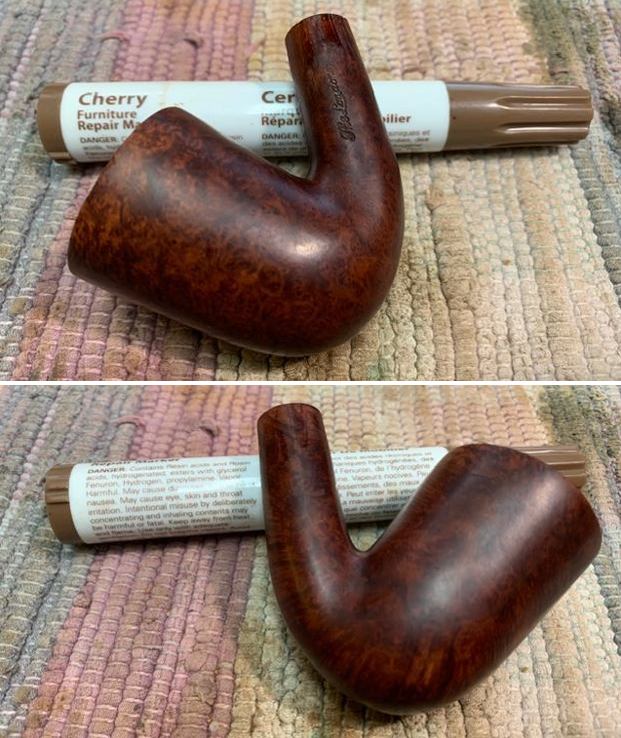
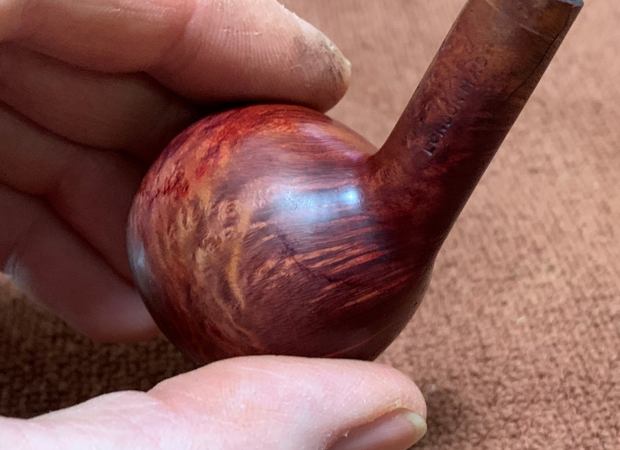
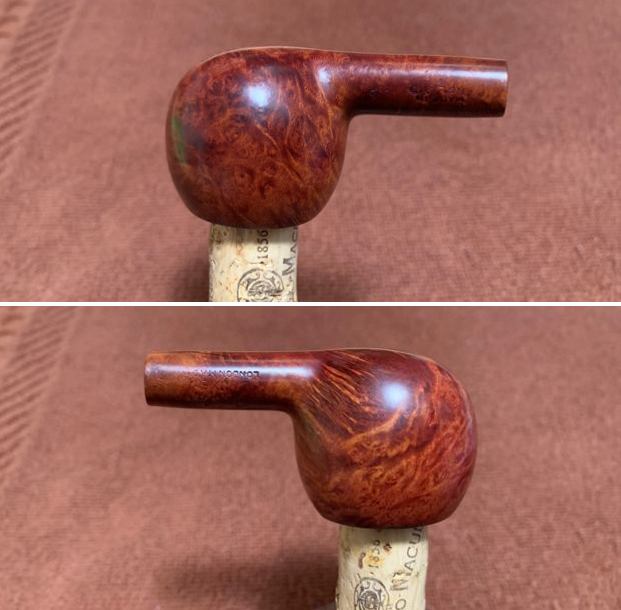
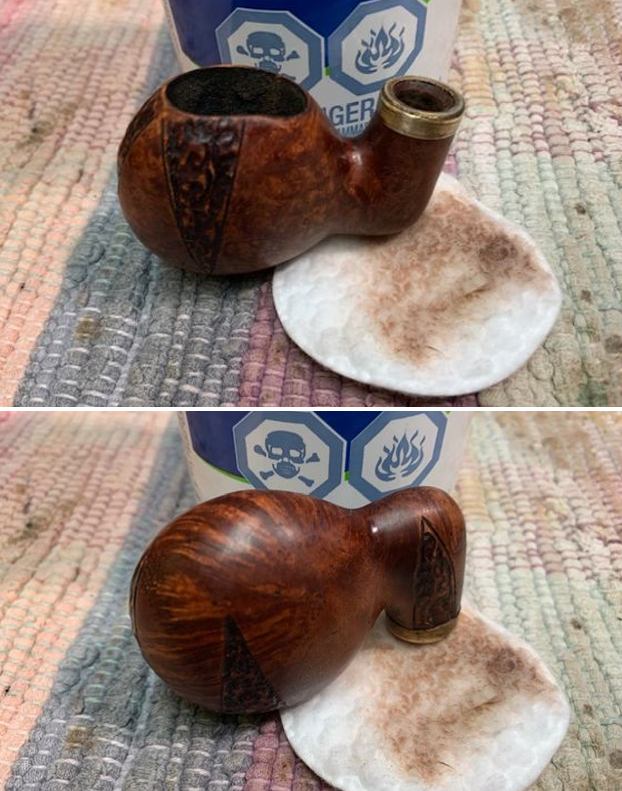
I rubbed some Before & After Restoration Balm into the surface of the briar with my fingertips. The product is remarkable and continues to amaze me with its ability to clean, enliven and protect the briar. I worked it into the surface and let it sit for 10 minutes then buffed it off with a soft cloth. The bowl and rim look amazing! The grain really comes alive. 
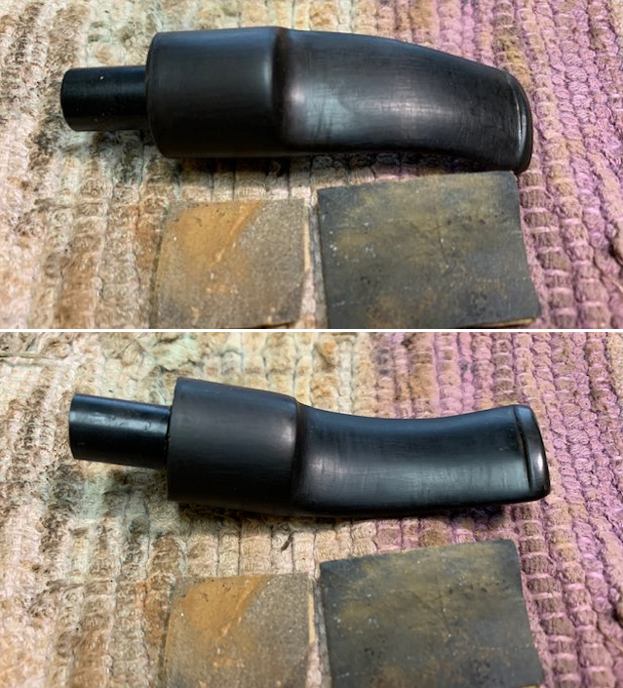
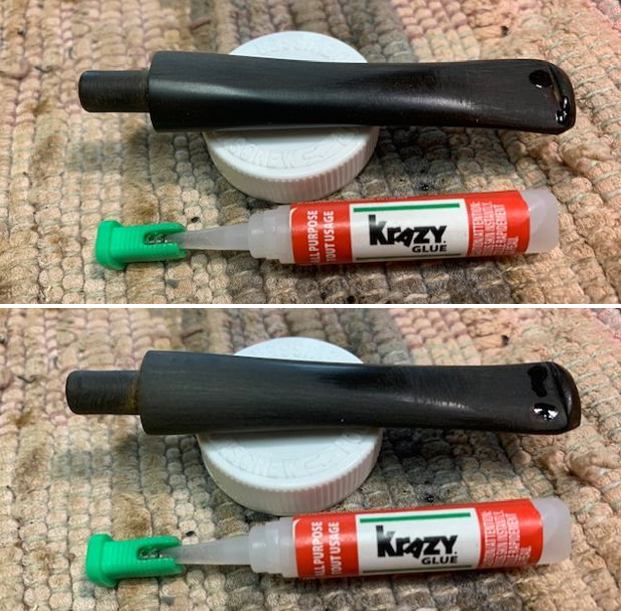
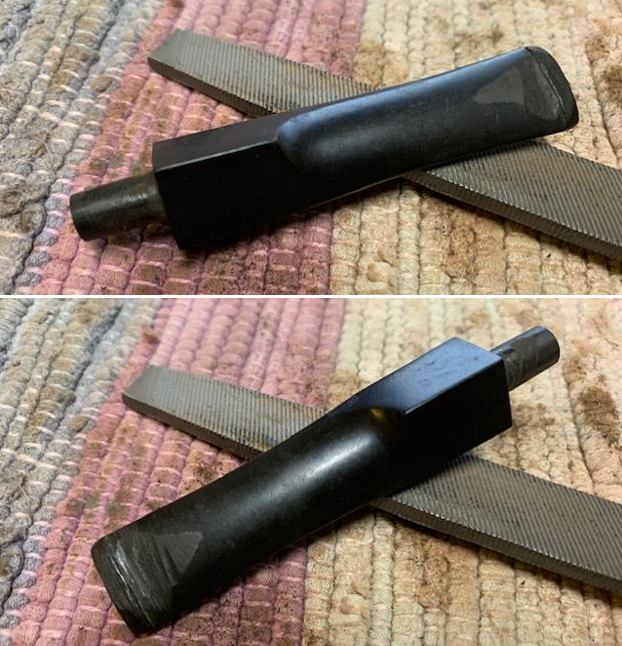
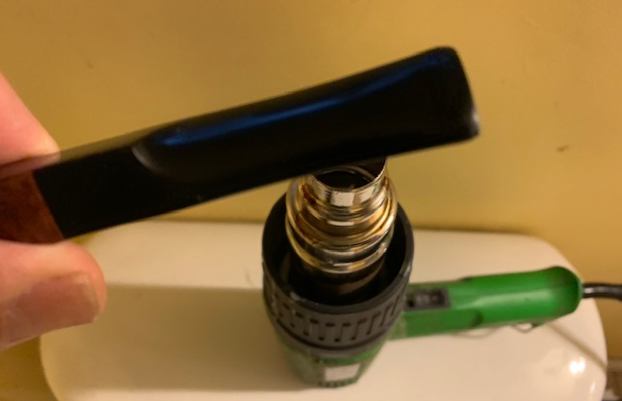
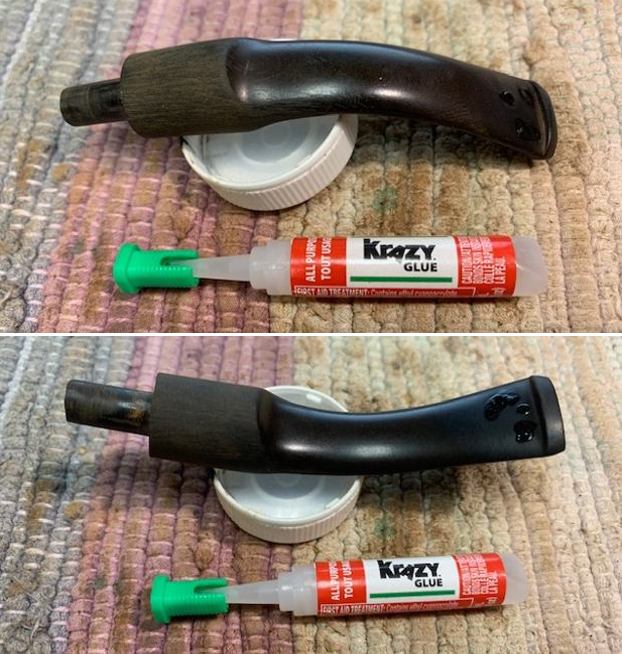
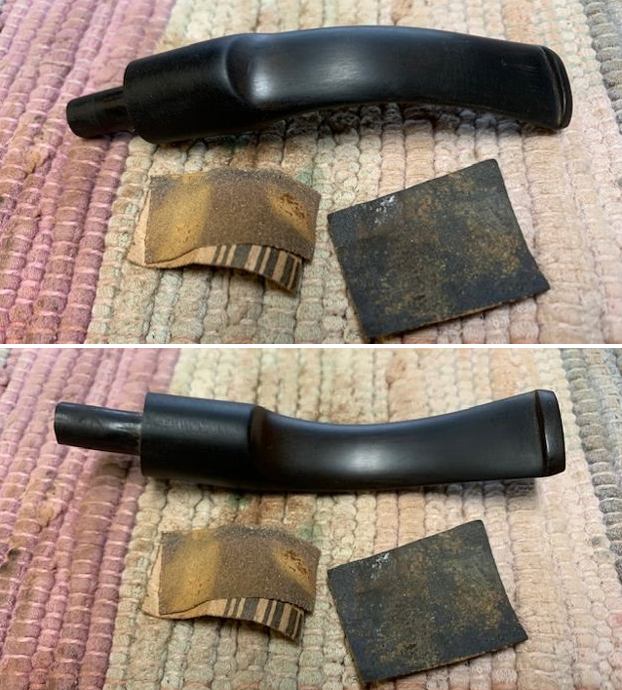
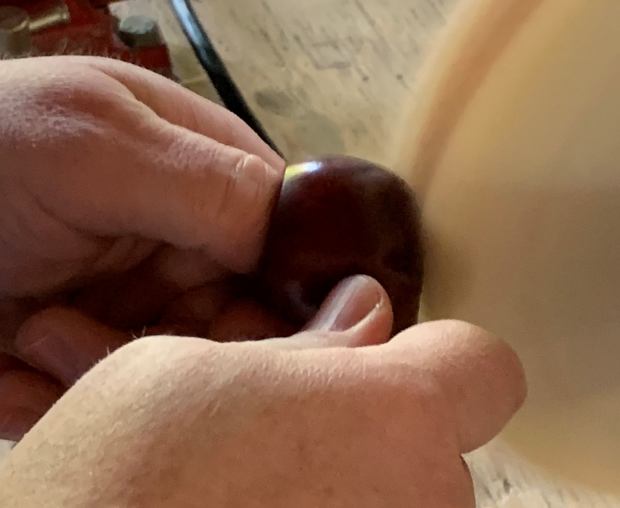
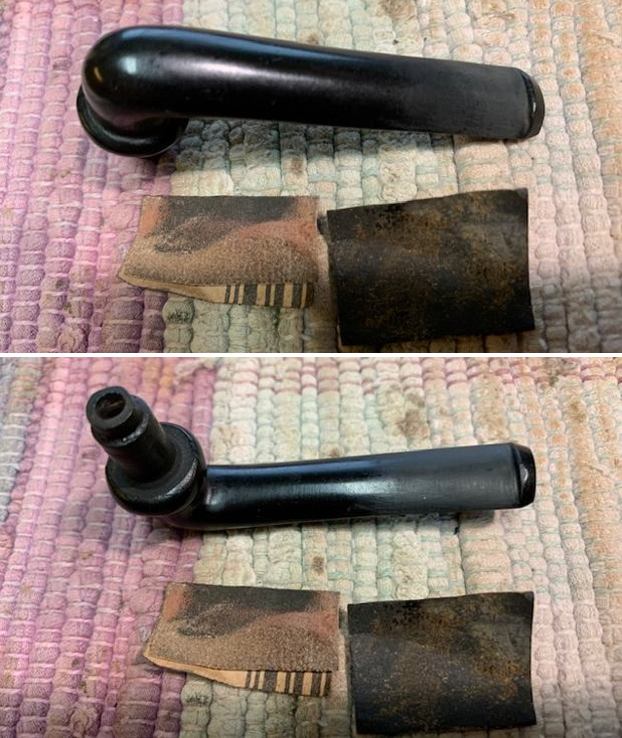
I set the bowl aside and turned my attention to the stem. I “painted” the surface of the vulcanite with the flame of a Bic lighter. I was able to lift the tooth marks almost completely. A little sanding would take care of the rest. I sanded out the remaining marks and the oxidation on the top end of the stem near the shank with 220 grit sandpaper and started the polishing of the stem with 400 grit sandpaper. 
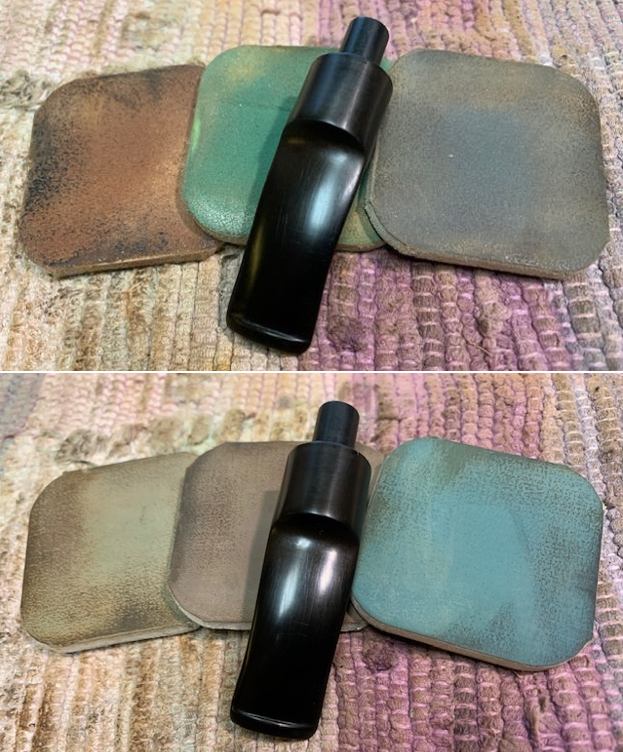
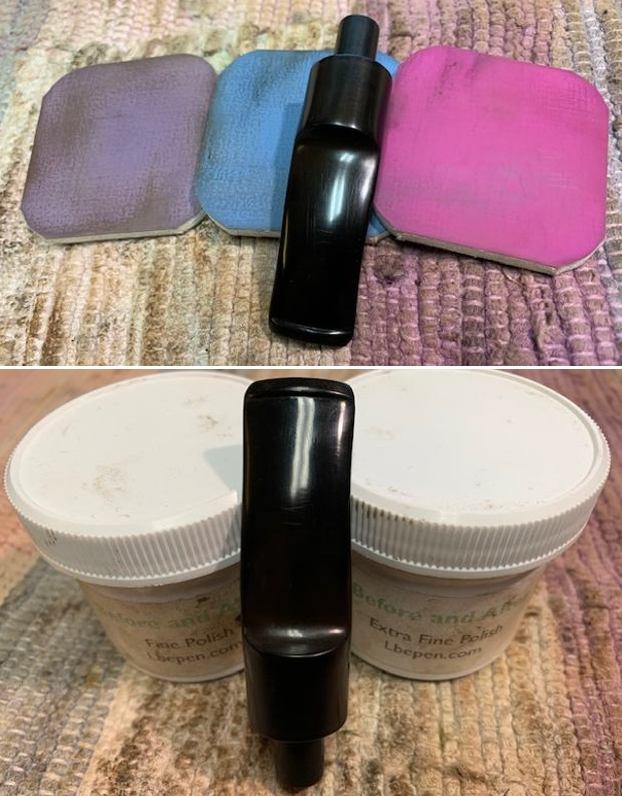
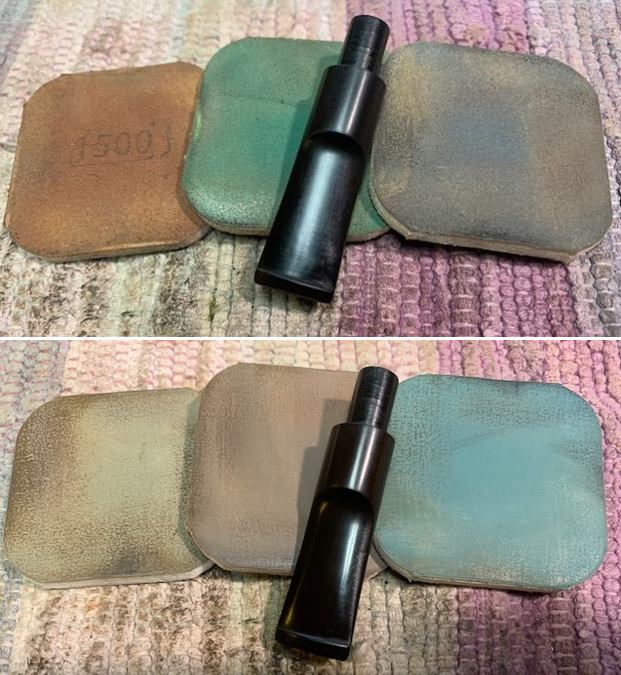
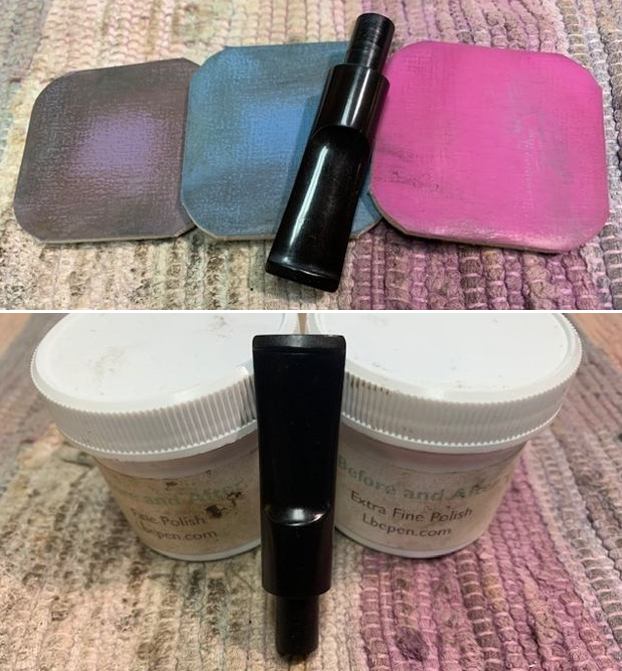
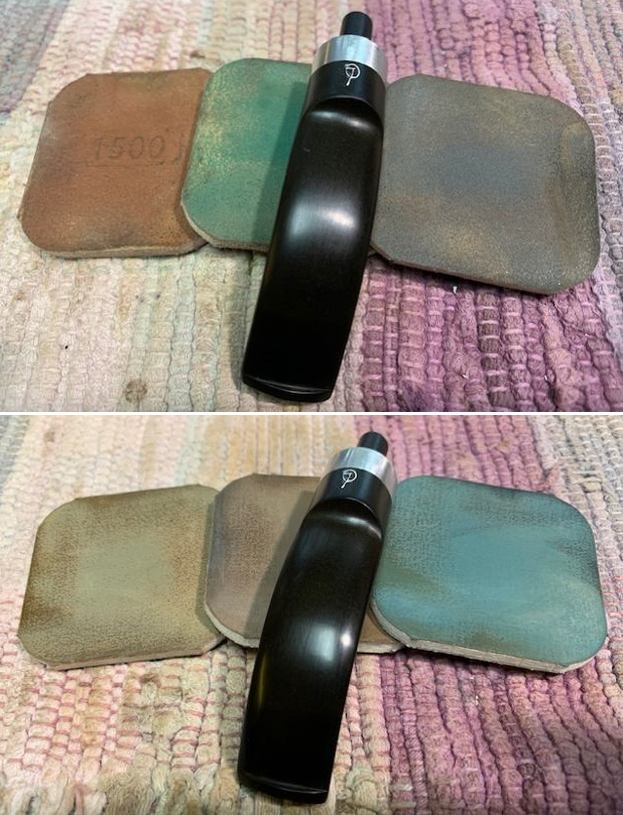
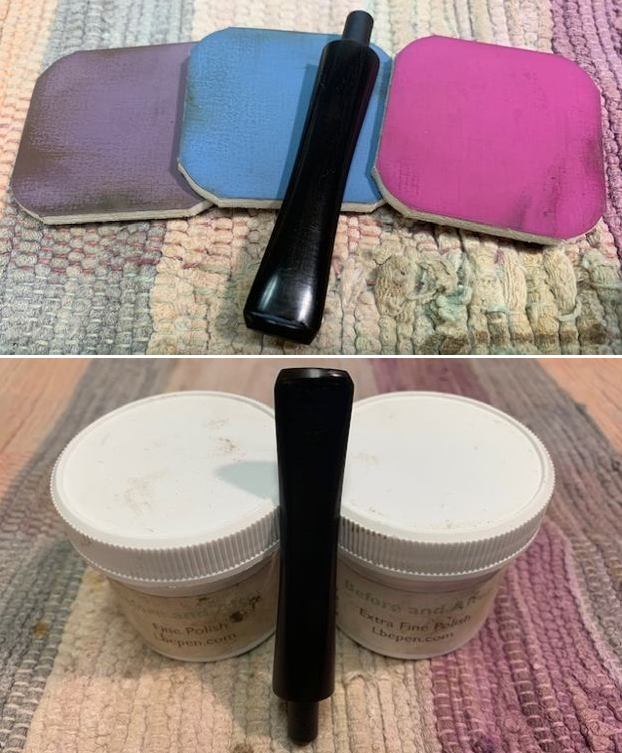
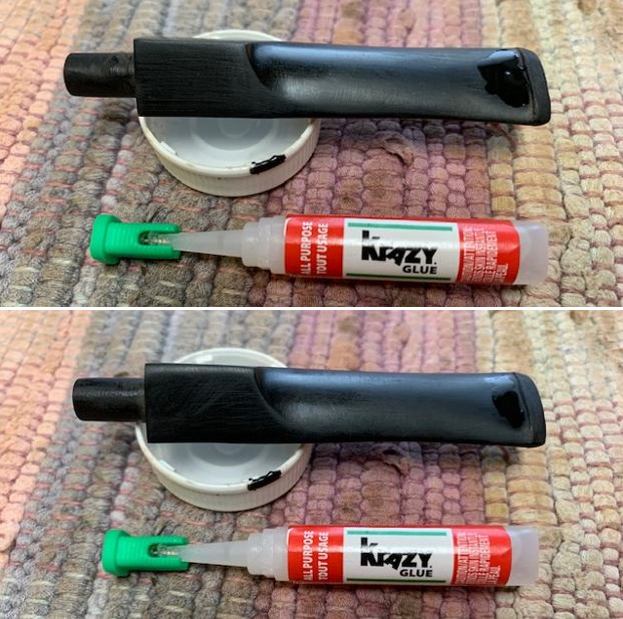
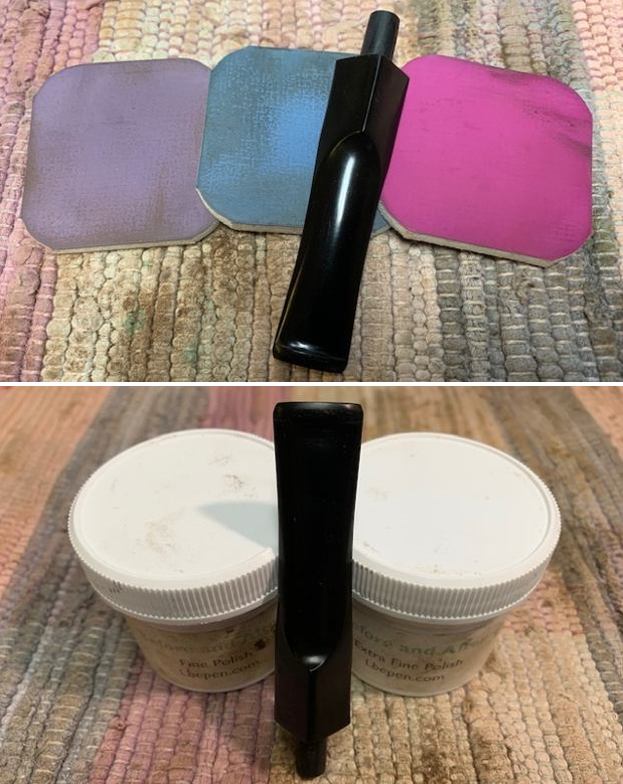
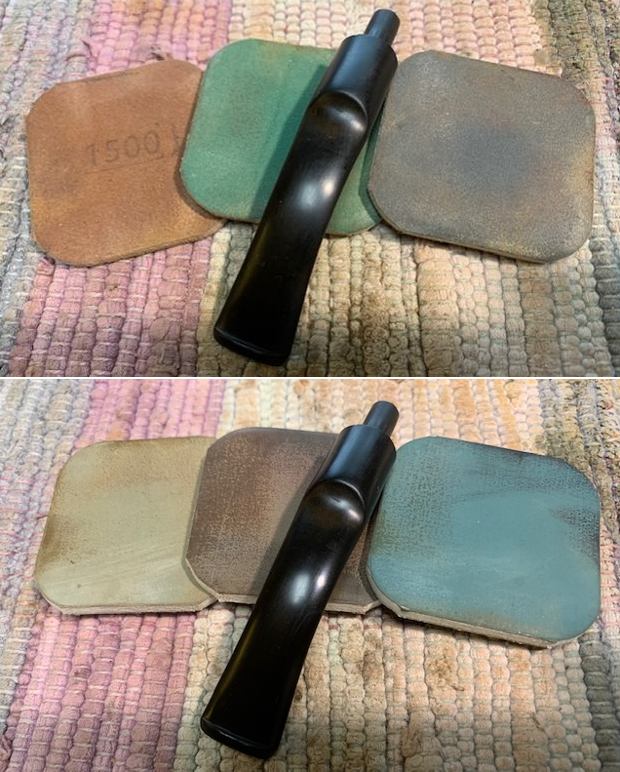
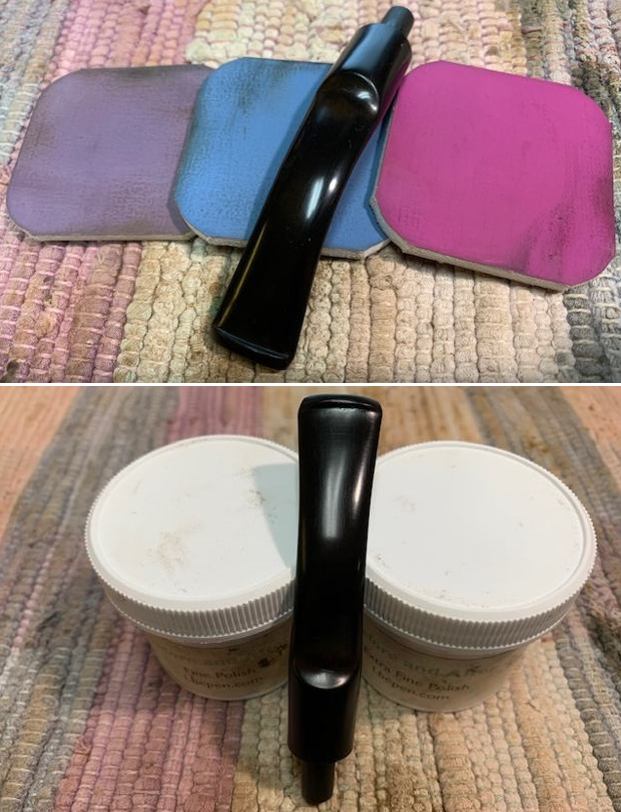
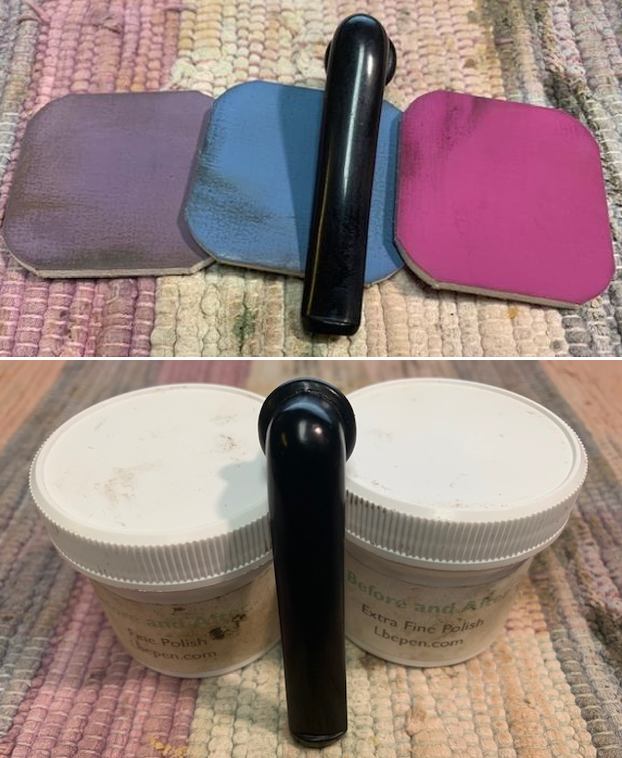
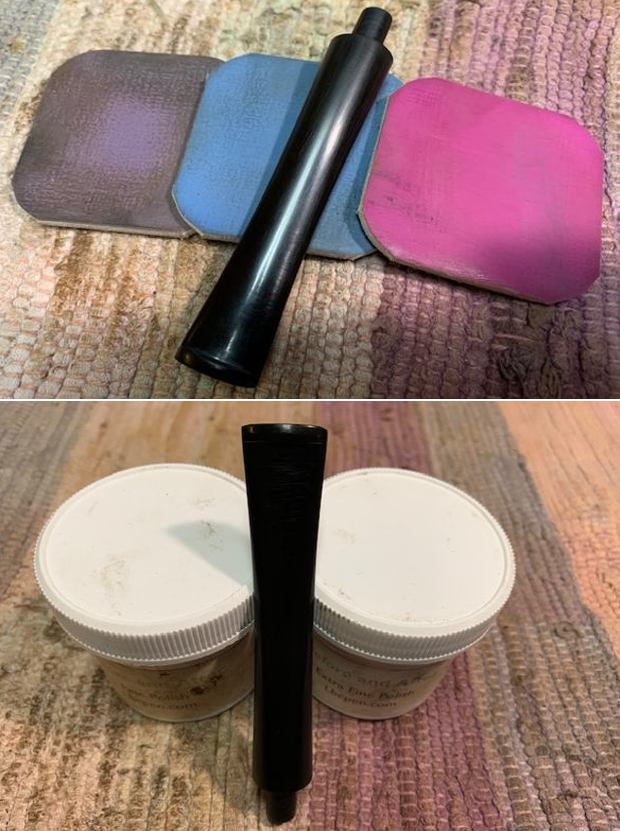
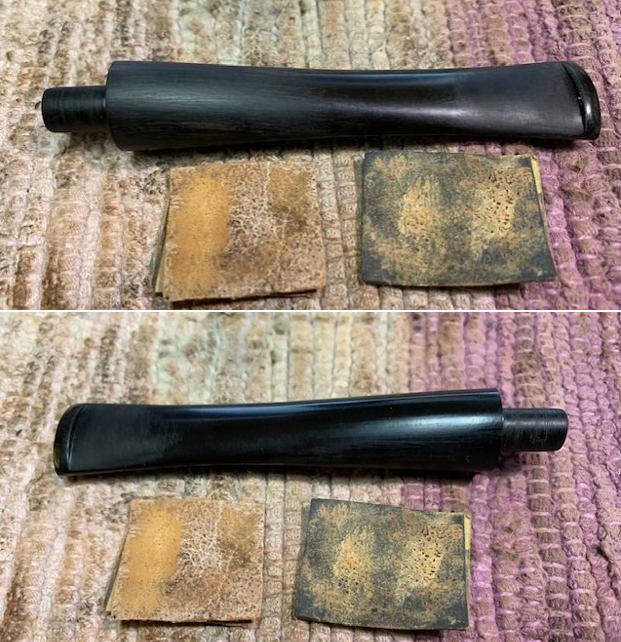
I polished the vulcanite stem with micromesh sanding pads – dry sanding with 1500-12000 grit pads. I wiped the stem down after each sanding pad with Obsidian Oil. I polished it with Before & After Pipe Stem Polish – both Fine and Extra Fine. I gave it a final coat of Obsidian Oil and set it aside. 
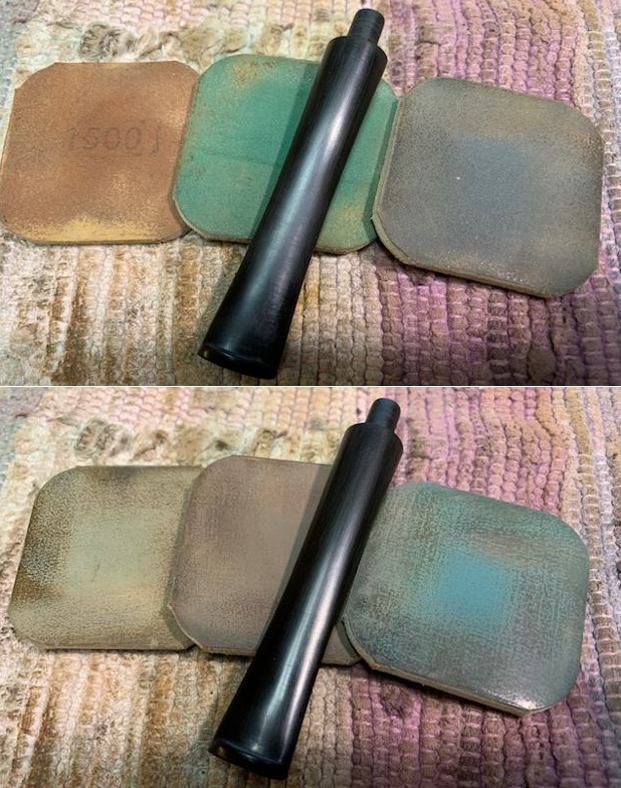
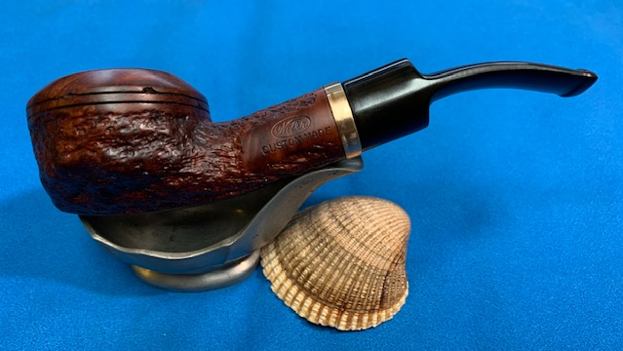
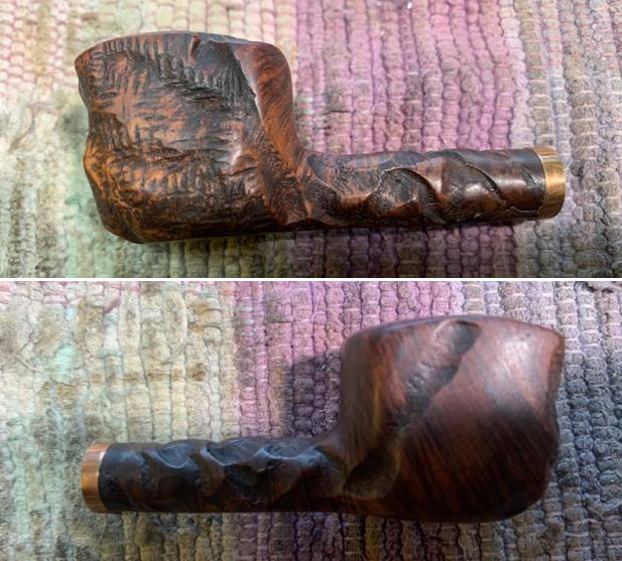
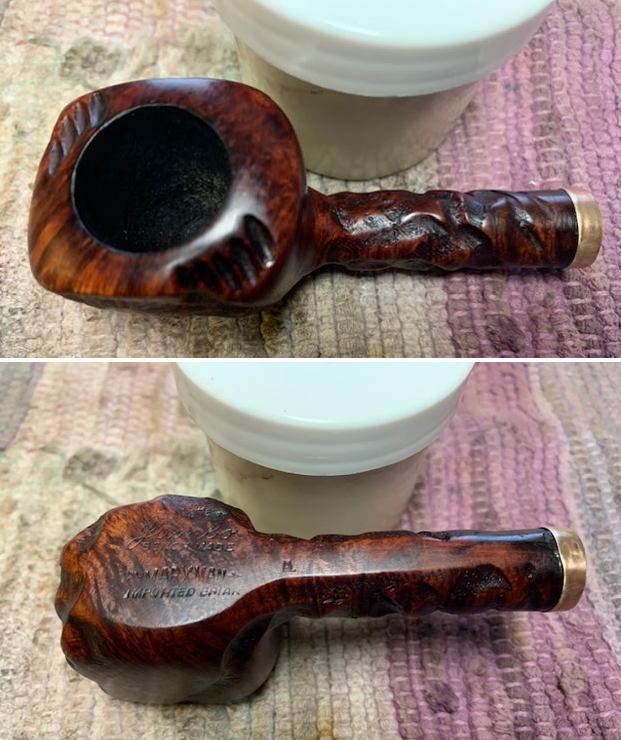
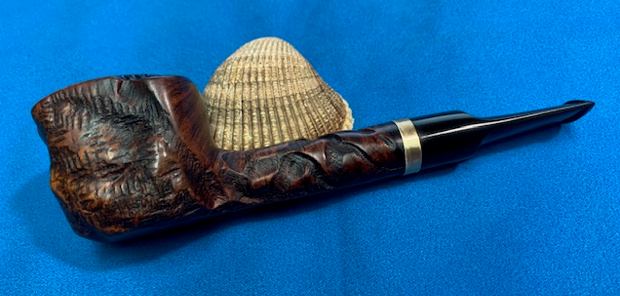
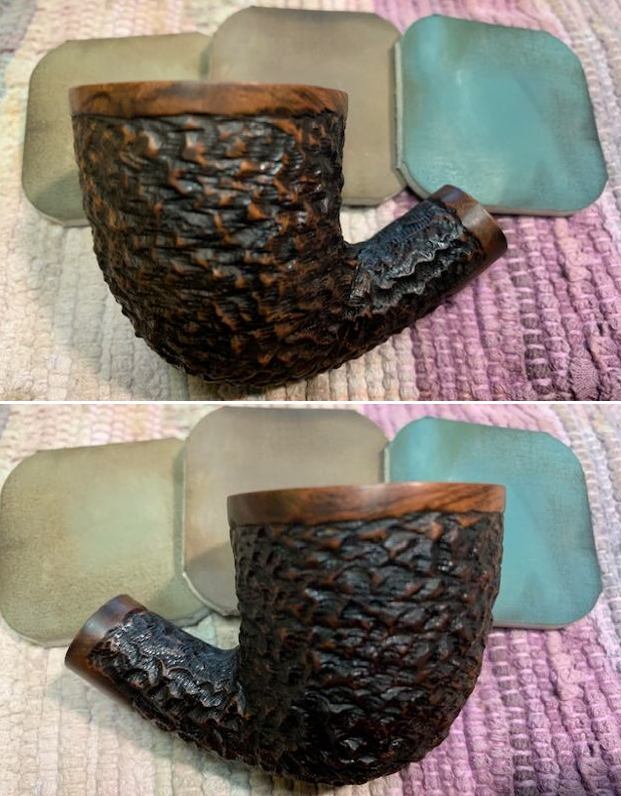
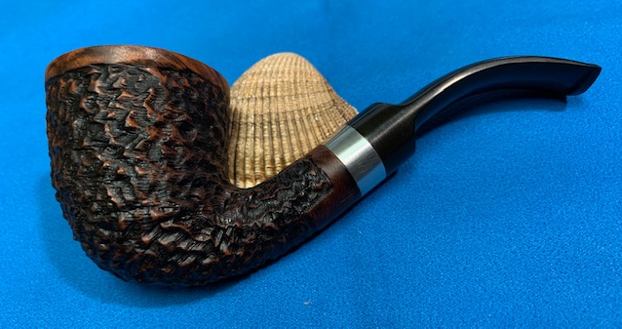
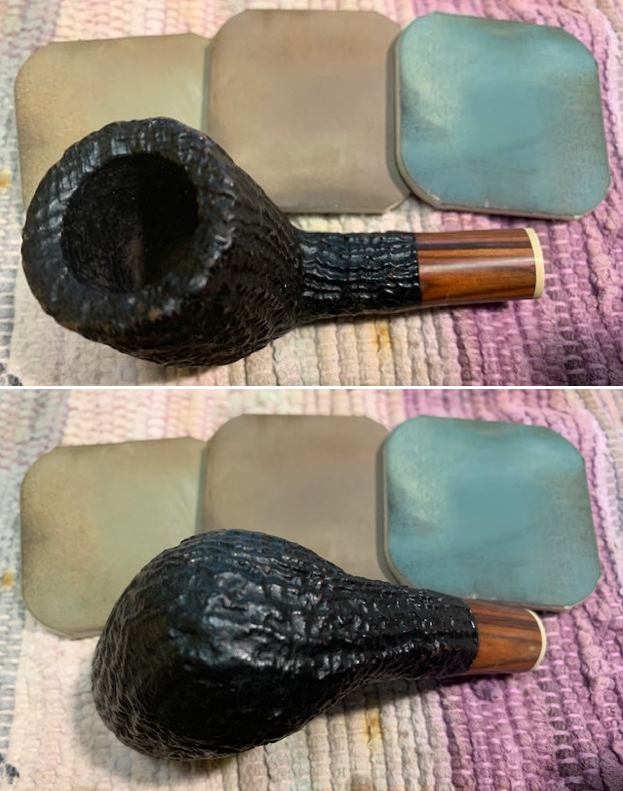
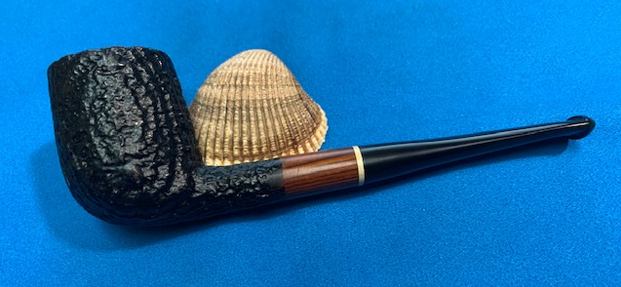
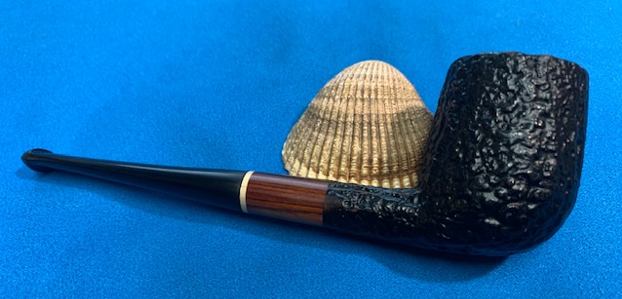
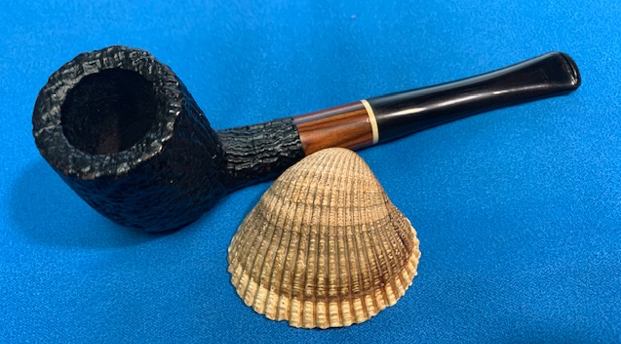
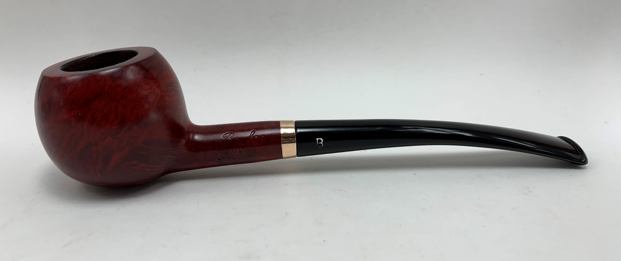
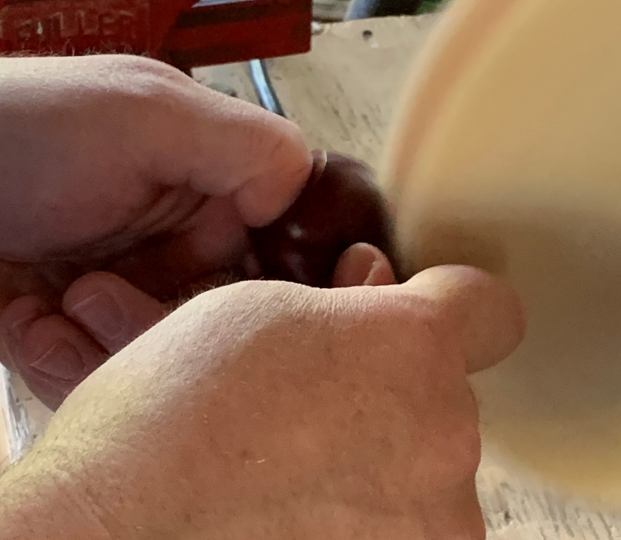
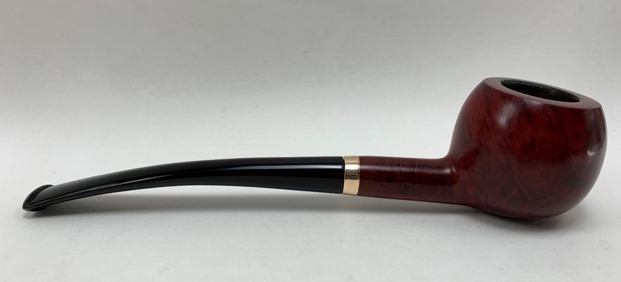
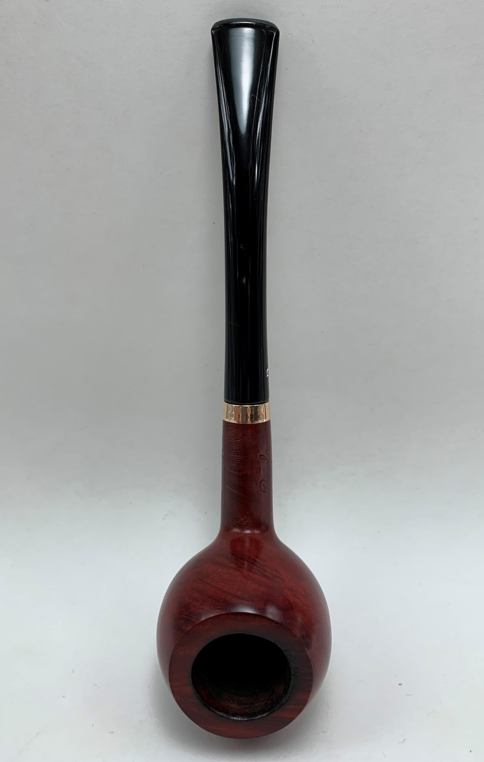
I put the parts back together and buffed this beautiful Blatter Montreal Billiard with Blue Diamond on the buffing wheel. The grain came alive with the buffing. I gave the bowl and stem multiple coats of carnauba wax and buffed it with a clean buffing pad to raise the shine further. I had buffed it with a microfiber cloth to deepen the shine. I am happy with the look of the Blatter Billiard. The only thing that would make it even better is an original stem for it. The dimensions of the pipe are Length: 6 inches, Height: 1 ¾ inches, Outer diameter of the bowl: 1 ¼ inches, Chamber diameter: ¾ of an inch. The weight of the pipe is 1.62 ounces/46 grams. The pipe is a real beauty. I am probably going to send it to Robert Blatter in Montreal to be restemmed with an original Blatter stem. If I have the stem made for it I will likely hold onto the pipe. Thanks for walking through the restoration with me. As usual there are more to come.

Restemming & Restoring a Weber Custom Made Bullmoose


Blog by Steve Laug

I think I must be on a bit of a roll with restemming some of the bowls I have collected over the years. I decided to do yet another one that has been here for a very long time. The pipe I chose to work on next is a lovely Bullmoose rusticated stummel with a smooth rim top and twin rings around the cap of the bowl. The bowl looked very good. The rustication while not deep was quite nice and an interesting texture. The rim top was a bit rough with nicks and dings in the rim top and wear on the front edge of the cap. There were also burn marks and darkening on the outer edge of the cap. The interior of the bowl was clean and there were not any chips, cracks or checking on the walls. The finish was dull and bit and tired but still quite redeemable. The stamping on the pipe was clear and readable in smooth panels on the shank. On the left side it read Weber in a circle [over] Custom Made. On the right it read Imported Briar. I took some photos of the bowl before I started to work on it. I took a photo of the stamping on the left side of the shank. It reads as noted above and is clear and readable. (I forgot to take a photo of the Imported Briar stamp on the right side). You can also see some of the chips in the twin rings around the bowl – particularly on the cap edge. I went through some of stems and found this saddle style stem that was close to the right diameter but would need to have a tenon replacement. It has a few tooth marks and chatter near the button but it would clean up well. I took a photo of the bowl and stem together to show what the look would be once I fit the stem.I worked on quite a few Weber pipes in the past but decided to have a look on Pipephil anyway (http://pipephil.eu/logos/en/logo-w2.html). I have included a screen capture of the information that was present there.I turned to Pipedia found that it gave significant amount of history and some advertising on the brand as well (https://pipedia.org/wiki/Weber_Pipe_Co.). I quote from the article below:

Carl B. Weber was a German from Bavaria. Aged 21 he emigrated to the USA in 1911. In 1938 he established Weber Briars Inc. in Jersey City, New Jersey. Later renamed in Weber Pipe Co.

The firm grew to be one of the giants of American pipe industry focusing itself in the middle price and quality zone. Trademark: “Weber” in an oval. Beside that Weber – especially in the years after 1950 – was a most important supplier for private label pipes that went to an immense number of pipe shops. Alone in New York, exactly the same pipes were found at Wilke’s, Barclay Rex, Trinity East, Joe Strano’s Northampton Tobacconist in Ridgewood, Queens, Don-Lou in Bensonhurst, Brooklyn… Nearly all pipes for Wilke were unstained and many models, for example the “Wilke Danish Bent”, could hardly deny originating of Weber.

Among other well reputated pipe makers Anthony Passante[1] worked for Weber.

Weber Pipe Co. owned and manufactured Jobey pipes – when mainly sold in the USA by the Tinder Box from 1970’s – 80’s. In addition Jobey / Weber bought Danish freehands from Karl Erik (Ottendahl). These pipes were offered as Jobey Dansk. Ottendahl discontinued exports to the United States in 1987 and in the very same year – obviously only as a ghost brand – Jobey was transferred to Saint-Claude, France to be manufactured by Butz-Choquin.

Carl B. Weber is the author of the famous book “Weber’s Guide to Pipes and Pipe Smoking”.

Armed with the confirmation about the maker of the pipe it was time to work on the pipe itself. I started my work on it by replacing the tenon on the stem. I flattened the short stubby tenon with a Dremel and sanding drum to make the surface flat. I found the proper replacement tenon in my box of tenons. I used a cordless drill and a series of bit to drill out the airway to receive the new tenon replacement. I lined up the stem and tenon with the shank and then glued the tenon in the stem with clear CA glue. I set the stem aside to let the glue cure.I decided to put a decorative band on the shank of the pipe. It was not necessary but I liked the look of it. I used a dental spatula to spread the glue on the shank end. I pressed the brass band in place on the shank, wiped off the excess glue with a damp cloth and set it aside to dry.Once the glue on the band and the tenon cured I put the stem in place on the shank and took photos of the new look of the Weber. I have always liked Weber Golden Banded pipes so this brass band approximates that look. Still a lot of work to do on the fit of the stem and the clean up of the rim and top of the bowl.I removed the stem and turned my attention to the bowl of the pipe. I started the clean up of the rim by topping it on a topping board with 220 grit sandpaper. I rebuilt the outer edge with a little bit of CA glue and briar dust and then topped it again to smooth it out. I cleaned up the inner edge of the bowl and the cap of the rim with folded 220 grit sandpaper. It took some work but it looked much better when finished.I wiped off the rim cap and smoothed it with some 400 grit wet dry sandpaper. I wiped it down with a damp cloth. I stained it with an Oak stain pen to match the rest of the bowl and shank.I polished the briar with micromesh sanding pads – dry sanding it with 1500-12000 grit pads. I wiped it down after each pad with a damp cloth. The briar began to take on a rich shine. I worked some Before & After Restoration Balm into the surface of the briar with my finger tips and a shoe brush to get into the valleys and crevices of the blast finish. The product is amazing and works to clean, enliven and protect the briar. I let it sit on the briar for 10 or more minutes and then buff it off with a soft cloth. It really makes the briar come alive and look quite rich. I set the bowl aside and turned my attention to the stem. I sanded out the tooth chatter and the deep scratches on the saddle portion of the stem with 220 grit sandpaper. I started polishing the stem with 400 grit wet dry sandpaper.I polished the stem with micromesh sanding pads – dry sanding with 1500-12000 grit pads. I wiped the stem down after each pad with a cloth and Obsidian Oil. I finished the polishing with Before & After Pipe Stem Polish – both Fine and Extra Fine. I gave it a final coat of Obsidian Oil. I put the pipe together – the bowl with its new stem. This restored and restemmed Weber Custom Made Bullmoose (or Scoop) turned out to be a real beauty. I think the brass band and the chosen stem works well with it. The finish on the bowl came alive with the buffing. I used Blue Diamond on the buffing wheel on both the bowl and stem. I gave both multiple coats of carnauba wax on the wheel then buffed it with a clean buffing pad to raise the shine. I hand buffed it with a microfibre cloth to deepen the shine. The Weber Custom Made feels great in the hand. It is lightweight and the contrast in the browns of the briar, the gold of the band and the polished vulcanite stem with the popping grain on the mixed brown stained bowl is quite amazing. The dimensions of the pipe are Length:5 ½ inches, Height: 1 ½ inches, Outer diameter of the bowl: 1 ¾ inches, Chamber diameter: ¾ of an inch. The weight of the pipe is 1.62 ounces/46 grams. It really is a beauty. I will be putting it on the rebornpipes store in the American (US) Pipe Makers section shortly if you are interested in adding it to your collection. Thanks for walking through the restemming and the restoration with me. Cheers.

Rebanding and Repairing a Jumbo Bench Made Marxman Panel Lovat


Blog by Steve Laug

The next pipe I chose to work on was a unique one in many respects. It was a rusticated Panel Lovat that came to us with a very deep silver band. Neither Jeff nor I remember where we got it. But I know it has been here for quite a while. I had no idea what was under the large Sterling silver band but truly expected the worst. The pipe is stamped on the heel of the bowl and reads Jumbo in script [over] Bench Made [over] Marxman (a logo stamp with an arrow going through it), [over] Imported Briar. There was also an upper case “A” stamped at the shank/bowl junction. It has a unique style of rustication that I have become accustomed with on Marxman Jumbo pipe. It includes Tracy Mincer style worm trails but in all different directions with a lot of cross hatching inside the trails. On this pipe the rustication is on the shank and on the left and front of the bowl with smooth portions on the back and right side of the bowl. It is flat bottomed so that it was a sitter. The silver band took away some of the charm of the pipe for me and I was looking forward to removing it and seeing what was underneath.

Jeff had done his usual thorough clean up of the pipe. He had reamed it with a PipNet reamer and finished with a Savinelli Fitsall Pipe Knife. He scrubbed the exterior with Murphy’s Oil Soap and the interior with isopropyl alcohol, cotton swabs and pipe cleaners. He worked on the vulcanite stem with Soft Scrub then let it soak in Before & After Pipe Stem Deoxidizer. It has minor tooth marks and chatter on both sides. I took photos of the pipe before I started my work. I took some close up photos of the bowl/rim top and the stem to show the condition they were in at this point. The rim top looked very good and the bowl was clean. The stem had light chatter on both sides near the button.I took a photo of the stamping on the heel of the bowl. It is clear and readable as noted above.I removed the stem from the shank to give a sense of the pipe. You can see that the band on the shank is quite large. It is a bit of a mystery in that I have no idea what is underneath it! Generally with a band this large it covers some serious shank damage.I wanted to refresh my memory of the brand so I turned to Pipephil first to get a short summary of the history (http://www.pipephil.eu/logos/en/logo-m2.html). The site had a side note that the brand was created in 1934 and merged with Mastercraft Pipes in 1953.I then turned to Pipedia to find out more information on the brand and the maker of the pipe (https://pipedia.org/wiki/Marxman). The site quote from Pipes, Artisans and Trademarks, by José Manuel Lopes. I include a portion of that information below.

Marxman (Marxman Pipe Company) was created by Robert (Bob) L. Marx in 1934, when he was 29, and after he had worked for the William Demuth Company. His pipes were not outstanding because of the quality of their wood (probably Algerian), but Bob started making unique sculpted pieces, which brought the brand fame in the World of Hollywood cinema. Actors like Zachery Scott, Dennis Morgan, Jack Carson, Alan Hale, Joel McRae, and Ronald Reagan were some of the faces that appeared on the bowls.

Bob knew how to innovate and took full advantage of marketing and press advertising in order to sell the brand–one of his slogans being “Relax with a Marxman”.

From the information on the two sites I learned that the pipe was made between 1934 when the company started and 1953 when the company was taken over by Mastercraft. I have included an advertisement for the Marxman Jumbo that was included on the article (1946 Ad, Courtesy Doug Valitchka). It includes the following information. “A rare treat for the pipe connoisseur is the Marxman Jumbo, distinguished by a carved bowl that is in perfect balance for easy, comfortable smoking. From the thousands of pieces of briar that flow into our factory we select the perfect and unusual. These are reserved only for the Marxman Jumbo – and are fashioned into truly elegant pipes of exclusive designs – unique in appearance and superior in smoking qualities. Each pipe is an individual artistic creation following the natural shape of the briar. No two pipes are alike. They are priced according to size.”

Now it was time to work on the pipe. I decided to try and remove the band from the shank so I could see what was underneath it. To my surprise and joy the glue had dried out on the band and it was quite simple to remove. I checked out the shank and there was a long (approximately 1 inch) crack from the shank end almost straight forward on the underside. At about ½ inch in it split off to the left side of the shank and was about ¼ inch long. It was not wide spread and the repair appears to have been well done under the band. I would know more once I removed the dried glue and debris on the shank surface. I went through my bands and found a nice looking thinner brass band that had an end cap on it that would work well to hold the shank together once I had clean up the repair.I wiped down the shank with acetone on a cotton pad. It worked well to remove the glue and the debris on the shank surface. I was careful around the repair to not get the acetone in the repair itself. The repair itself was lightly pitted but otherwise it looked good. I put a bead of clear CA glue on the crack and the branch crack. I used a dental spatula to fill in the hollow spots with briar dust.I smoothed out the repaired crack with 180 and 220 grit sandpaper. I was able to blend it into the surface of the shank. Once I had it smooth I put some white all purpose glue around the shank end and pressed the band in place on the shank. I wiped off the excess glue and touched up the repaired area with a Cherry Stain Pen. It matched well and the finished shank and band looked good at this point in the process. I took photos of the newly banded shank. I like the thinner depth of this band over the deeper Sterling silver one that had been on the shank previously. The finer band gave the briar a chance to really stand out. I polished the briar and band with micromesh sanding pads – dry sanding it with 1500-12000 grit pads. I wiped the bowl and band down after each pad with a damp cloth. The finish bowl and shank look very good. I worked some Before & After Restoration Balm into the surface of the briar with my finger tips and a shoe brush to get into the valleys and crevices of the rustication. The product is amazing and works to clean, enliven and protect the briar. I let it sit on the briar for 10 or more minutes and then buff it off with a soft cloth. It really makes the briar come alive and look quite rich. I set the bowl aside and turned my attention to the stem. I polished it with micromesh sanding pads – dry sanding with 1500-12000 grit pads. I wiped the stem down after each pad with a cloth and Obsidian Oil. I finished the polishing with Before & After Pipe Stem Polish – both Fine and Extra Fine. I gave it a final coat of Obsidian Oil. I put the Jumbo Bench Made Marxman Panel Lovat back together and buffed it on the buffing wheel with Blue Diamond. It raise a shine on the briar and the stem and gave some depth to the look of the carved grooves. I gave both the bowl and the stem multiple coats of carnauba wax on the wheel and buffed the pipe with a clean buffing pad to raise the shine. I hand buffed it with a microfiber cloth to deepen the shine. The pipe turned out to be a unique beauty in its own rugged way. Flat bottom and the panelled shape make it very different from most of the other Marxman Bench Made Jumbos I have worked on. I like the look of the thinner profile band as it really allows the carving on the shank of this Lovat to show. The dimensions of the pipe are Length:5 ¼ inches, Height: 1 ½ inches, Outer diameter of the bowl: 1 ¼ inches wide x 1 ½ inches long, Chamber diameter: ¾ of an inch. The weight of the pipe is 1.31 ounces/37 grams. It really is a uniquely beautiful pipe. I am not quite certain what I will do with it. I am actually sitting looking at it now as I write this. If I choose to sell it I will put it on the rebornpipes store in the American (US) Pipemakers Section. Thanks for walking through the restoration with me. Cheers.

Restemming & Restoring a Royal Danish 983 Bent Billiard


Blog by Steve Laug

I think I must be on a bit of a roll with restemming some of the bowls I have collected over the years. I decided to do yet another one that has been here for a very long time. The pipe I chose to work on first is a lovely Bent Billiard stummel with a sandblast finish and a smooth panels on the sides of the bowl. The bowl looked very good. The blast, while not deep was quite nice and a the smooth panels had some interesting grain. The rim top was in excellent condition. The interior of the bowl was clean and there were not any chips, cracks or checking on the walls. The finish was dull and bit and tired but still quite redeemable. The stamping on the pipe was clear and readable. On the underside of the bowl an shank it read 983 followed by Royal Danish [over] Made in Denmark. I took some photos of the bowl before I started to work on it. I took a photo of the stamping on the left side of the shank. It reads as noted above and is clear and readable.I went through some of stems and found this fancy saddle style stem that was close to the right diameter and had a tenon that would work as well. It has a few tooth marks and chatter near the button but it would clean up well.I knew that I was working on a Stanwell second from previous experience but decided to have a look on Pipephill anyway (http://pipephil.eu/logos/en/logo-r6.html). I have included a screen capture of the information that was present there.Pipedia also verifies that it is a Stanwell second (https://pipedia.org/wiki/Royal_Danish).

Armed with the confirmation about the maker of the pipe it was time to work on the pipe itself. I started my work on it by fitting the new stem to the shank. I trimmed down the tenon diameter slightly with a file so that the fit in the shank was snug. The stem diameter needed more work so I worked on it with 180 grit sandpaper to match it to the shank. I sanded it with 220 grit sandpaper to smooth out the shank fit. I heated the stem with a heat gun to bend it to the correct angle to match the flow of the bowl and shank.I removed the stem and turned my attention to the bowl of the pipe. I sanded the inside of the bowl with a piece of dowel wrapped 2w9th 220 grit sandpaper to smooth out the walls and further check them for issues. Fortunately the bowl was in excellent condition. I used a brass bristle wire brush to clean off the remaining debris in the sandblast finish on the rim top.I cleaned out the internals of the pipe and the stem with alcohol, cotton swabs and pipe cleaners to remove the sanding debris on both. It also removed any remnants of tars and oils in the shank and stem.I worked some Before & After Restoration Balm into the surface of the briar with my finger tips and a shoe brush to get into the valleys and crevices of the blast finish. The product is amazing and works to clean, enliven and protect the briar. I let it sit on the briar for 10 or more minutes and then buff it off with a soft cloth. It really makes the briar come alive and look quite rich. I set the bowl aside and turned my attention to the stem. I sanded out the tooth marks and smoothed out the sanding I had done on the diameter of the saddle portion of the stem with 220 grit sandpaper. I started polishing the stem with 400 grit wet dry sandpaper.I polished the stem with micromesh sanding pads – dry sanding with 1500-12000 grit pads. I wiped the stem down after each pad with a cloth and Obsidian Oil. I finished the polishing with Before & After Pipe Stem Polish – both Fine and Extra Fine. I gave it a final coat of Obsidian Oil. I put the pipe together – the bowl with its new stem. This restored and restemmed Royal Danish 983 Sandblast Bent Billiard turned out to be a real beauty. I think the chosen stem works well with it. The finish on the bowl came alive with the buffing. I used Blue Diamond on the buffing wheel on both the bowl and stem. I gave both multiple coats of carnauba wax on the wheel then buffed it with a clean buffing pad to raise the shine. I hand buffed it with a microfibre cloth to deepen the shine. The Royal Danish Bent Billiard feels great in the hand. It is lightweight and the contrast in the browns of the sandblast and smooth briar and the polished vulcanite stem with the popping grain on the mixed brown stained bowl is quite amazing. The dimensions of the pipe are Length:5 ½ inches, Height: 1 ¾ inches, Outer diameter of the bowl: 1 1/8 inches, Chamber diameter: ¾ of an inch. The weight of the pipe is 1.16 ounces/33 grams. It really is a beauty. I will be putting it on the rebornpipes store in the Danish Pipe Makers section shortly if you are interested in adding it to your collection. Thanks for walking through the restemming and the restoration with me. Cheers.

New Life for a Beautiful Rusticated Jirsa 167 Calabash


Blog by Steve Laug

I am back to a few other pipes that have been here for a long time. You can see from the photos that Jeff took that it came to us back in 2017 and maybe earlier. It is about time I got around to working on it because it really is quite nice. Jeff purchased this pipe from an antique mall in Sandy, Utah, USA. It had an interesting rusticated brown finish with a smooth band and rim top and a smooth band at the shank. The bowl was classic Calabash shape. There was a thick cake in bowl and lava on the rim top and the inner bevel. The finish was filthy with grit and grime ground into the surface of the briar. The pipe is stamped on the underside of the shank Jirsa [over] the shape number 167. The polished aluminum band is a part of the stem. The stem surface was oxidized and had a rotting Softee bit with a lot of awful looking sludge built up around it. The Jirsa logo on the topside of the saddle stem looked pretty good. Jeff took photos of the pipe before he started his clean up work. I like to have an idea of how the pipe was smoked before we got it and what the bowl and rim top looked like. Jeff always takes some photos of the bowl and rim from various angles to show what it looked like. He took photos of the stem with and without the Softee bit to show the condition. He took photos of the sides and heel of the bowl to give a sense of the rustication on the pipe. The next two photos show the stamping on the underside of the shank. It is clear and readable as noted above. Jeff also captured the Jirsa Logo stamp on the topside of the saddle stem. The band is part of the stem.I did a quick scan of rebornpipes and found a link to the Jirsa Octagonal Panel that I had restored (https://rebornpipes.com/2021/05/01/rebirthing-an-oldrich-jirsa-bent-octagonal-panel-138-billiard/). Rather than start over in my research on the brand I am quoting from that blog and the work I did there.

I turned to Pipephil’s site to see what he had on the Jirsa brand (http://pipephil.eu/logos/en/logo-j2.html). He had an entry that I did a screen capture of and also the following information on the brand. Artisan: Oldrich Jirsa (born 1962) makes pipes since 1994.I turned to Pipedia for more information on the brand (https://pipedia.org/wiki/Jirsa). I quote from the article below.

Jirsa is a Czech Republic brand owned by the family company headed by the artisan Oldrich Jirsa. They use Ebonite and Cumberland stems. Best Grading: SG (Grain), three stars. Symbol: stylized J coming out of an oval. I knew that I was working on a Czech made pipe by Oldrich Jirsa. The stem on the one I was working on was vulcanite and had a built in metal adornment on it. Now it was time to work on the pipe.

Jeff had done a great cleanup on the pipe. He reamed the bowl with a PipNet pipe reamer and followed up with a Savinelli Fitsall pipe knife to remove the cake. He scrubbed out the mortise and the airway in the shank and the stem with alcohol, cotton swabs and pipe cleaners. He scrubbed the bowl exterior with a tooth brush and Murphy’s Oil Soap to remove the grime on the finish of the bowl and the lava from the rim top. He rinsed it under running water. One of the benefits of this scrub is that it also tends to lift some of the scratches and nicks in the surface of the briar. He dried it off with a soft cloth. He cleaned the internals and externals of the stem with alcohol, pipe cleaners and cotton swabs. He soaked the stem in Before & After Pipe Stem Deoxidizer and rinsed it off with warm water and cleaned out the airway in the stem with alcohol. When I received it the pipe looked very good. I took a photo of the rim top and stem to show the condition. The rim top and the beveled inner edge and outer edge of the bowl were in good condition. The stem was vulcanite and there was some light tooth chatter on both sides ahead of the button. The stamping on the pipe is clear and readable as noted above. The Jirsa logo on the stem is deep and needs to be repainted with white.I removed the stem from the shank and took a photo of the pipe to give a sense of the whole. I polished the smooth portions of the briar with 1200-1500 micromesh sanding pads and wiping it down with damp cloth after each sanding pad. As I worked through the cycle of pads the shine developed with each change of pad. The pipe looks very good. I rubbed the bowl and shank down with Before & After Restoration Balm. I worked it into the surface of the bowl sides and shank with my fingertips and a horsehair shoe brush to clean, enliven and protect the briar. I let the balm sit for 10 minutes, then buffed with a cotton cloth to raise the shine. The Balm did its magic and the grain on the smooth portions stood and the rustication showed depth. I set the bowl aside and turned my attention to the stem. I touched up the BC stamp on the left side of the stem with white acrylic nail polish. I worked it into the stamp with a tooth pick and then sanded off the excess once it had dried with a 1500 micromesh sanding pad.I polished the stem and built in band with micromesh sanding pads – 1500-12000 grit pads. I wiped it down with Obsidian Oil after each sanding pad. I used Before & After Pipe Polish – both Fine and Extra Fine to further polish the stem. The photos below show the polished stem. This Czech Rusticated Jirsa 167 Calabash with a vulcanite stem is a great looking pipe now that it has been restored. The rich browns of the stain made the grain and rustication come alive with the polishing and waxing. I put the stem back on the bowl and carefully buffed the pipe with Blue Diamond on the buffing wheel using a light touch on the briar. I gave the bowl multiple coats of Conservator’s Wax and the stem multiple coats of carnauba wax on the buffing wheel. I buffed the entire pipe with a clean buffing pad to raise the shine. I hand buffed the pipe with a microfiber cloth to deepen the shine. The finished Jirsa 167 Calabash really is a beauty and fits nicely in the hand. Give the finished pipe a look in the photos below. The dimensions of the pipe are Length: 5 ¾ inches, Height: 2 inches, Outside diameter of the bowl: 1 ¾ inches, Chamber diameter: 7/8 of an inch. The weight of the pipe is 2.08 oz./59 grams. This beauty will be going on the rebornpipes store in the Pipes from Various Makers section. Let me know if you are interested in adding it to your collection. Thanks for reading this blog and my reflections on the pipe while I worked on it. There are many more to come!

Restemming a No Name (Anonymous) Oval Shank Sandblast Billiard


Blog by Steve Laug

The next pipe is bowl that I have had in the box for a very long time. The rugged and very tactile sandblast really caught my eye and the cocobolo shank extension (at least it looks like that to me) and the thin ivory coloured spacer looked really good. I figured some day I would restem it and bring it back to life again. Since I am in the mood to restem a few pipes today turned out to be that day! It had a broken tenon in the shank when I put it away but the stem had disappeared long before it arrived in my care. The sandblast is very visible in the photos below. The pipe was very clean with no cake in the bowl and a decent finish in good condition. The cocobolo wood shank extension was lightly scratched but otherwise in good condition. It really is a beautiful looking oval shank Billiard. (I had already started wiggling out the broken tenon when I remembered to take these photos.)    I started to work on the pipe quickly as there was no stamping or identifying features that I could dig into regarding the maker of the pipe. The first thing that had to be done was to remove the broken tenon from the shank. I used a drywall screw with coarse threads to lock into the airway in the tenon and remove it. It took a bit of wiggling to do so but it came out.I went through a can of stems that I have here and almost immediately found one that looked like it would work with the pipe. I took some photos of it. There were some tooth marks and chatter on both sides near the button. The tenon fit perfectly. The stem was a little wide on the right side and would need to have the shape reduced to fit snugly against the shank like the left side. Otherwise it was a perfect fit. I have to say that does not happen very often but it keeps me picking up used stems because one day “I will need them!”. In the second and third photo below I gave them a quick sand to see how deep the tooth marks were. I was pleasantly surprised.I wiped off the stem with some Obsidian Oil and put it in place in the shank. I took photos of the fit to the shank to give a clear picture of what the stem looked like. It would only take a bit of adjusting on the right side and clean up of the tooth marks. It would be a great looking pipe with the addition of this stem. I moved on to sand the shape of the stem fit it evenly to the shank. The stem diameter needed more work so I worked on it with 180 grit sandpaper to match it to the right side of the shank. I sanded it with 220 grit sandpaper to smooth it out. I repaired the tooth marks on each side o f the stem at the same time. I smoothed out the repairs with 220 grit sandpaper. I started the polishing of the stem with 400 grit wet dry sandpaper. I set the stem aside and polished the cocobolo shank extension with micromesh sanding pads – dry sanding with 1500-12000 grit pads and wiping it down with a damp cloth after each pad. It really began to shine.I worked some Before & After Restoration Balm into the surface of the smooth briar with my finger tips. The product is amazing and works to clean, enliven and protect the briar. I let it sit on the briar for 10 or more minutes and then buff it off with a soft cloth. It really makes the grain sing. I set the bowl aside and turned my attention back to the stem. I polished the stem with micromesh sanding pads – dry sanding with 1500-12000 grit pads. I wiped the stem down after each pad with a cloth and Obsidian Oil. I finished the polishing with Before & After Pipe Stem Polish – both Fine and Extra Fine. I gave it a final coat of Obsidian Oil. I put the pipe together – the bowl with its new stem. This restored and restemmed No Name (Anonymous) Sandblast Oval Shank Billiard is quite stunning and I think the chosen stem works well with it. The sandblast on the bowl came alive and showed the depth of the crevices with the polishing. I used Blue Diamond on the buffing wheel on both the shank extension and stem (carefully avoiding the bowl so as not to fill in the crevices). I gave the bowl multiple coats of Conservator’s Wax and the stem carnauba wax on the wheel then buffed it with a clean buffing pad to raise the shine. I hand buffed it with a microfibre cloth to deepen the shine. The attractive Anonymous Sandblast Billiard feels great in the hand. It is lightweight and the contrast in the browns of the briar, the cocobolo shank extension and the polished vulcanite stem is quite amazing. The dimensions of the pipe are Length:5 ¾ inches, Height: 1 ¾ inches, Outer diameter of the bowl: 1 ¼ inches, Chamber diameter: ¾ of an inch. The weight of the pipe is 1.34 ounces/38 grams. It really is a beauty. I will be putting it on the rebornpipes store in the American Pipe Makers section shortly if you are interested in adding it to your collection. Thanks for walking through the restemming and the restoration with me. Cheers.

Restemming & Restoring a Bertram 60 Bent Bulldog


Blog by Steve Laug

Sometimes the repetitive work on similar pipes and stems gets tiring to me and to alleviate the inevitable boredom I change things up a bit to refresh me. I have a box of stummels (bowls) here that I periodically go through and see if I have a potential stem that would fit them. Sunday afternoon I went through the box and picked out two bowls and found workable stems for them both. They were in different states of need but all had been thoroughly cleaned before I boxed them up. The pipe I chose to work on next is a nicely grained Bulldog stummel. The bowl looked very good. The grain around the sides was quite nice and a mix of flame and birdseye grain. There was one small fill on the right side of the shank but it was in good condition. The rim top was in excellent condition with a bit of darkening toward the rear of the bowl. The interior of the bowl was clean and there were not any chips, cracks or checking on the walls. The finish was dull and bit and tired but still quite redeemable. The stamping on the pipe was clear and readable. On the left side it read Bertram in script [over] Washington DC in a ribbon. The grade 60 stamp was on the same side near the bowl/shank junction. I took some photos of the bowl before I started to work on it.   I took a photo of the stamping on the left side of the shank. It reads as noted above and is clear and readable.I went through some of stems and found this diamond saddle style stem that was close to the right diameter and had a tenon that would work as well. It has some file damage on the surface near the button but it would clean up well. I also took a photo of the stem and bowl together to give a sense of the look.The pipe is a Bertram from the Bertram Pipe Shop in Washington DC. I have posted a lot of different blogs on the brand so the information available is quite accessible. I am including pic of a post card that a reader of the blog sent me. It is a great memento that I love to spend time looking at. I started my work on the pipe by fitting the new stem to the shank. I trimmed down the tenon diameter slightly with a file so that the fit in the shank was snug. The stem diameter needed more work so I worked it with a file to match it to the shank. I sanded it with 220 grit sandpaper to smooth it out. I removed the stem and polished the briar (bowl and sanded shank end) with micromesh sanding pads – dry sanding with 1500-12000 grit pads and wiping it down with a damp cloth after each pad. It really began to shine. I restained the shank end where I had sanded it to make the transition to the new stem smooth with an Oak stain pen. The colour was a perfect match. Once the bowl was buffed the newly stained section will blend in even better. I worked some Before & After Restoration Balm into the surface of the smooth briar with my finger tips. The product is amazing and works to clean, enliven and protect the briar. I let it sit on the briar for 10 or more minutes and then buff it off with a soft cloth. It really makes the grain sing. I set the bowl aside and turned my attention to the stem. I flattened out the file marks as much as possible with a flat file. I knew I would not remove them this way but I wanted make them flatter. I filled in the deeper cut marks with clear CA glue and once it was hard smoothed out the repairs with 220 grit sandpaper and started polishing the stem with 400 grit wet dry sandpaper. I polished the stem with micromesh sanding pads – dry sanding with 1500-12000 grit pads. I wiped the stem down after each pad with a cloth and Obsidian Oil. I finished the polishing with Before & After Pipe Stem Polish – both Fine and Extra Fine. I gave it a final coat of Obsidian Oil. I used my heat gun to bend the vulcanite stem to match the angles of the bowl and give it a proper Bent Bulldog look. I put the pipe together – the bowl with its new stem. This restored and restemmed Bertram Washington DC Grade 60 Bent Bulldog is a real beauty and I think the chosen stem works well with it. The grain on the bowl came alive with the buffing. I used Blue Diamond on the buffing wheel on both the bowl and stem. I gave both multiple coats of carnauba wax on the wheel then buffed it with a clean buffing pad to raise the shine. I hand buffed it with a microfibre cloth to deepen the shine. The Bertram Bent Bulldog feels great in the hand. It is lightweight and the contrast in the browns of the briar and the polished vulcanite stem with the popping grain on the mixed brown stained bowl is quite amazing. The dimensions of the pipe are Length:5 ½ inches, Height: 1 ¾ inches, Outer diameter of the bowl: 1 ¾ inches, Chamber diameter: ¾ of an inch. The weight of the pipe is 1.31 ounces/37 grams. It really is a beauty. I will be putting it on the rebornpipes store in the American Pipe Makers section shortly if you are interested in adding it to your collection. Thanks for walking through the restemming and the restoration with me. Cheers.

Restemming & Restoring a “The Londoner” Bent Dublin


Blog by Steve Laug

Sometimes the repetitive work on similar pipes and stems gets tiring to me and to alleviate the inevitable boredom I change things up a bit to refresh me. I have a box of stummels (bowls) here that I periodically go through and see if I have a potential stem that would fit them. Sunday afternoon I went through the box and picked out two bowls and found workable stems for them both. They were in different states of need but all had been thoroughly cleaned before I boxed them up. The pipe I chose to work on first is a lovely Bent Dublin stummel. The bowl looked very good. The grain around the sides was quite nice and a mix of flame and birdseye grain. There were a few fills on the right side of the bowl and shank but there were in good condition. The rim top was in excellent condition. The interior of the bowl was clean and there were not any chips, cracks or checking on the walls. The finish was dull and bit and tired but still quite redeemable. The stamping on the pipe was clear and readable. On the left side it read The Londoner in script and there are no other stamping on the pipe. I took some photos of the bowl before I started to work on it.   I took a photo of the stamping on the left side of the shank. It reads as noted above and is clear and readable.I went through some of stems and found this saddle style stem that was close to the right diameter and had a tenon that would work as well. It has a few tooth marks and chatter near the button but it would clean up well.The pipe is stamped “The Londoner” which is not listed with that style of stamp on either Pipephil or Pipedia. There was a Londoner made by Barlings but it is stamped differently than this one and does not have the article in front of the name. So the maker of the pipe remains a mystery for now. Now it is time to work on the pipe.

I started my work on the pipe by fitting the new stem to the shank. I trimmed down the tenon diameter slightly with a file so that the fit in the shank was snug. The stem diameter needed more work so I worked it with a file to match it to the shank. I sanded it with 220 grit sandpaper to smooth it out. I removed the stem and polished the briar (bowl and sanded shank end) with micromesh sanding pads – dry sanding with 1500-12000 grit pads and wiping it down with a damp cloth after each pad. It really began to shine. I restained the shank end where I had sanded it to make the transition to the new stem smooth with a Cherry stain pen. The colour was a perfect match. Once the bowl was buffed the newly stained section would blend in well. I worked some Before & After Restoration Balm into the surface of the smooth briar with my finger tips. The product is amazing and works to clean, enliven and protect the briar. I let it sit on the briar for 10 or more minutes and then buff it off with a soft cloth. It really makes the grain sing. I set the bowl aside and turned my attention to the stem. I “painted” the stem surface with a Bic lighter flame to raise the tooth marks (no pictures). I was able to lift some of them to the surface. I filled in the remaining spots with clear CA glue and once it was hard smoothed out the repairs with 220 grit sandpaper and started polishing the stem with 400 grit wet dry sandpaper. I polished the stem with micromesh sanding pads – dry sanding with 1500-12000 grit pads. I wiped the stem down after each pad with a cloth and Obsidian Oil. I finished the polishing with Before & After Pipe Stem Polish – both Fine and Extra Fine. I gave it a final coat of Obsidian Oil. I put the pipe together – the bowl with its new stem. This restored and restemmed “The Londoner” Bent Dublin is a real beauty and I think the chosen stem works well with it. The grain on the bowl came alive with the buffing. I used Blue Diamond on the buffing wheel on both the bowl and stem. I gave both multiple coats of carnauba wax on the wheel then buffed it with a clean buffing pad to raise the shine. I hand buffed it with a microfibre cloth to deepen the shine. “The Londoner Dublin” feels great in the hand. It is lightweight and the contrast in the browns of the briar and the polished vulcanite stem with the popping grain on the mixed brown stained bowl is quite amazing. The dimensions of the pipe are Length:5 ½ inches, Height: 2 inches, Outer diameter of the bowl: 1 ½ inches, Chamber diameter: 7/8 of an inch. The weight of the pipe is 1.62 ounces/46 grams. It really is a beauty. I will be putting it on the rebornpipes store in the British Pipe Makers section shortly if you are interested in adding it to your collection. Thanks for walking through the restemming and the restoration with me. Cheers.

The Prince of Pipes


Blog by Kenneth Lieblich

One of my dearest friends contacted me recently to inquire if I could repair and restore a pipe that belongs to his father. His father told me that the pipe had been given to him by his wife (my friend’s mother) as a graduation gift in 1967. I was only too happy to oblige – not just to help my friend, but to raise this beautiful pipe back to life. The pipe is from The House of Bewlay and is a Prince shape. Just as an aside, the shape was named after Prince Albert, the Prince of Wales, who later became King Edward VII (1841–1910). What a gorgeous pipe! I must admit that the prince is one of my favourite pipe shapes (and possibly my outright favourite). This one is the epitome of elegance in pipe smoking. The pipe’s markings read Bewlay [over] Deluxe [over] London Made. The other side of the pipe read Made in [over] England and the shape number, 258. This corresponds nicely with a Bewlay catalogue from the late 60s, as you can see in the photo below. One additional piece of information that was useful was the date of the gift: 1967. This certainly gives us a good idea of the time period from which this pipe dates. Let us read a bit more about Bewlay from the Pipedia article:

The English brand of Bewlay & Co. Ltd. (formerly Salmon & Gluckstein Ltd.), was in business from the early 20th century until the 1950s. The brand ended up being sold and taken over by Imperial Tobacco Co. The shop chain closed in the 1980s but there seems to be one shop still in business on Carr Lane in the city of Hull. Bewlay pipes were made by prestigious firms. Notably Barling, Charatan, Loewe & Co., Sasieni, Huybrecht, and Orlik. So understandably, the English considered a Bewlay pipe a quality pipe.Anyway, on to the pipe – and what a beauty it was. However, it was not without its issues. The stummel had the following problems: lava on the rim, a notable burn to the rim, plenty of cake in the bowl, strange stain patterns, and – most serious of all – a nasty crack to the shank. Meanwhile, the stem had its own set of problems: the ‘B’ logo was nearly obliterated, some oxidation and calcification, and minor tooth marks and dents. This pipe was not going to be too tough, but I needed to be especially careful to ensure the crack would be repaired perfectly – so it could be used for many years to come. The stem was first on my list. I took a BIC lighter and ‘painted’ the stem with its flame in order to lift the tooth marks. This was reasonably successful in raising the dents. Then, I cleaned out the insides of the stem with pipe cleaners and isopropyl alcohol. It was dirty, but not too bad and I went through a decent number of pipe cleaners in order to clean it up. I also soaked the stinger in lemon-infused isopropyl alcohol. This loosened everything up and I was able to clean it up very nicely. Once this process was done, the stem went for an overnight soak in the Before & After Hard Rubber Deoxidizer. The following day, I cleaned all of the de-oxidizing sludge off with alcohol, pipe cleaners, et cetera. The oxidation had migrated to the surface and would be fairly straightforward to remove. I scrubbed vigorously with SoftScrub to remove the leftover oxidation. Before I moved on to the Micromesh pads, I built up the small dents on the stem with cyanoacrylate adhesive and let them fully cure. I then sanded it down with 220-, 400-, and 600-grit sandpapers to meld the repair seamlessly into the stem. This ensures that it keeps its shape and looks like it should. I then used all nine Micromesh pads (1,500 through 12,000 grit) to bring out the lovely black lustre on the stem. I also used Obsidian Pipe Stem Oil in between each pad scrubbing.I then took the opportunity to repair the “B” logo on the stem. It had faded – both by loss of paint over time and also by fingers inadvertently smoothing out the “B” over time. So, I added some acrylic paint with a paint brush, let it dry, and buffed it to make it look good. The “B” is back, but, as later photos reveal, a little bit has disappeared into history.

On to the stummel, and the usual cleaning procedures were in order for this pipe. I used both the PipNet Reamer and the KleenReem to remove the built-up cake and followed that with 220-grit sandpaper to remove as much as I could. I wanted to take the bowl down to bare briar to ensure there were no hidden flaws in the walls of the bowl. Fortunately, there were none. I then proceeded to clean out the insides of the shank with Q-tips, pipe cleaners, and isopropyl alcohol. There was some nastiness inside this stummel, but fortunately not too much – it only took a handful of pipe cleaners etc. to sort that out. I followed that up by cleaning the insides with some dish soap and tube brushes. I then moved on to cleaning the outside of the stummel with Murphy’s Oil Soap and some cotton pads. That removed any latent dirt. By the way, I deliberately did not de-ghost this pipe – I wanted to leave as much of the original tobacco essence as I could for the owner.As I mentioned earlier, there was some lava and a substantial burn on the rim of the stummel that also needed to be addressed. In order to minimize the impact of both, I “topped” the pipe – that is to say, I gently and evenly sanded down the rim on a piece of 220-grit sandpaper. This effectively removed the lava and most the damage, without altering the look of the pipe. However, I had to stop short of removing it all, otherwise the look of the pipe would have been altered. For the remaining bits of burn, I took some oxalic acid on a Q-tip and rubbed and rubbed and rubbed! The burn site did improve but never fully disappeared. It would be a permanent feature of the pipe going forward. I took solace from the fact that the burn did not affect the integrity of the wood. I then took a solid wooden sphere, wrapped sandpaper around it, and gently sanded the opening of the tobacco chamber. This was to achieve on the inner part of the rim the same thing that I achieved by “topping” on sandpaper. On to the major issue with this pipe: the crack in the shank. Naturally, Steve had the answers to all of this pipe’s problems. He explained that my first step was to ensure that the crack would not continue to creep after I had repaired it. To that end, I took a micro-drill bit, inserted it in my Dremel, and very carefully drilled a hole right through the wall of the shank. This was quite nerve-wracking, but it worked perfectly. I then needed to apply cyanoacrylate adhesive to the crack in order to seal and repair it. First, however, I used a Q-tip and a folded pipe cleaner to coat the inside of the shank with petroleum jelly. This would prevent the adhesive from dripping inside the shank and creating further problems. That done, I carefully applied a bead of adhesive to the tiny hole and the length of the crack. Finally, I clamped it shut and let it sit overnight to cure. This was a great success – obviously, the crack would always be visible, but I was really pleased with how the repair looked.Before moving on to sanding, there were a couple of small nicks on the underside of the stummel that I needed to sort out. I dug out my iron and a damp cloth to try and raise the nicks. The hot and moist steam created can often cause the wood to swell slightly and return to shape. There was some movement – not a lot, but it was better than doing nothing. I filled the remaining divots with cyanoacrylate adhesive. Now, with the crack repaired and the nicks filled, it was time to sand down the stummel. Just like the stem, I used all nine Micromesh pads (1,500 through 12,000 grit) to sand everything smooth. A light application of Before & After Restoration Balm brought out the best in the stummel’s grain. All of the work I had done to this point had taken its toll on the colour of the wood. Originally, there was a lovely sort of brownish-Burgundy colour on this pipe, and I wanted to restore this as best I could – and I also wanted to ensure that we got rid of that weird mottling. In order to bring back some life to this pipe, I opted for aniline dye. I dragged out some of Fiebing’s Oxblood Leather Dye, but it looked too reddish to me. Instead, I experimented with mixing to see what I could come up with. I made my own concoction of Oxblood and Medium Brown dyes, painted the stummel, and then applied flame in order to set the colour. Furthermore, since it is an alcohol-based dye, I was able to adjust the colour to my liking by applying my own isopropyl alcohol to the colour. Let it sit overnight and it worked like a charm!Then it was off for a trip to the buffer. A dose of White Diamond and a few coats of carnauba wax were just what this pipe needed. Now that the wood was looking all spiffy, I had to circle back and complete the repair on the crack in the shank. It needed a tight-fighting band to ensure that the crack would never open up again. I went to my jar of bands and picked one that looked good. I heated it up and then messed it up! See the photos. I did not apply even pressure as I was attaching the band, so it went mush. Fortunately, I had more bands and I did a much better job of getting the next one on. I glued it in place and let that set. It looked very dapper. I polished up the band with a 12,000-grit MicroMesh pad. I also went back to the buffer with both the stem and stummel, gave them a final application of White Diamond and carnauba wax, and brought out that lovely shine.In the end, what a beauty this pipe is! It is an elegant pipe, from a very fine maker. It obviously meant a great deal to its owner, and I was delighted to bring it back to life. Once the pipe was returned to its owner, he told me that it looked better than when it was new! Although I am not sure I agree with that, I am very pleased that he is very pleased. As I mentioned before, the prince is one of my favourite shapes and it was great fun to work on this one. I hope you enjoyed reading the story of this pipe as much I as I did restoring it. If you are interested in more of my work, please follow me here on Steve’s website or email me directly at kenneth@knightsofthepipe.com. Thank you very much for reading and, as always, I welcome and encourage your comments.

Cleaning up an Interesting Italian Made Folding Pocket Pipe


Blog by Steve Laug

The next pipe on the worktable is another interesting piece of pipe history that comes from the bag of old unsmoked and lightly smoked pipes that I have been working on intermittently. It is a folding Pocket Pipe with an oval bowl. The bowl is lightly smoked. Surprisingly it is in better shape than many of these old timers. The pipe is dirty but there is some amazing grain around the sides and wedges of rustication look good as well .The stem is hard rubber which makes me think is a bit older than some similar pipes with vulcanite stems. It has a push tenon from the same material that is part of the stem. Other than some tooth chatter on the stem surface the stem is in really good shape. A short description would be that it is an Italian made lightly smoked Folding Pocket Pipe with a hard rubber stem. It is stamped on the left side of the shank and reads Imported Briar [over] Made in Italy. I would guess that the pipe was made by Savinelli as I have seen several very similar pipes shaped like this one made by them. The rim top was dirty and the inner edge had some lava. The exterior of the bowl was dirty and dusty and band was oxidized. Grain stood out in the smooth portions around the bowl sides and bottom and the interesting rustication wedges worked well. There was tooth chatter on both sides of the stem ahead of the button but nothing deep. I took some photos of this interesting Pocket Pipe extended and folded to show the condition when we received it. It was dusty, dirty and had some grime worked into the surface of the briar from being shuffled around a lot since it was made. I took close up photos of the bowl and rim top and the stem to show their condition. You can see the thin cake on the bowl sides and the thin lava on the rim top. The stem looks good with light chatter and tooth marks on both sides. I took a photo of the stamping on the left side of the shank. You can see that it is somewhat faint but still readable.I removed the stem from the shank and took a photo of the parts to give a sense of the beautiful proportions of this nice little pipe. It is going to take a little work but I think it will be quite stunning once it is restored.I reamed the bowl with a Savinelli Fitsall Pipe Knife to deal with the oval shape of the chamber. I scraped out the thin and uneven cake until the walls were clear. They looked very good. There was no heat damage or checking present. I cleaned out the mortise and the airway in the shank and stem with pipe cleaners, cotton swabs and isopropyl alcohol. The stem was an interesting challenge due to the right angle bend but it is now clean.I scrubbed off the shiny varnish coat on the bowl and shank with alcohol and a cotton pad. It came off quite easily and the grain really stood out. It is a nice piece of briar.I polished the briar with micromesh sanding pads – dry sanding with 1500-12000 grit pads. I wiped the bowl down after each pad to check and make sure there was progress. By the end the there was a rich shine to the bowl.I rubbed the bowl and shank down with Before & After Restoration Balm. I worked it into the surface of the bowl sides and shank with my fingertips to clean, enliven and protect the briar. I let the balm sit for 10 minutes, then buffed with a cotton cloth to raise the shine. The Balm did its magic and my colours worked well.I set the bowl aside and addressed the tooth chatter in the hard rubber stem. I sanded it out with 220 grit sandpaper and started the polishing with 400 grit wet dry sandpaper.I polished out the scratches in the surface of the stem with micromesh sanding pads – 1500-12000 grit pads. I was able to remove the tooth chatter on both sides. I wiped it down with Obsidian Oil after each pad. I used Before & After Pipe Polish – both Fine and Extra Fine to further polish the stem. I gave it a final coat of Obsidian Oil and set it aside to cure.This interesting Italian Made Folding Pocket Pipe was fun to work on. I love the final touches that make it sing. I put the bowl and stem back together to have a look at the whole with the newly fit band on the shank. I carefully buffed the bowl and stem with Blue Diamond on the wheel. I gave it several coats of carnauba wax and buffed the pipe with a clean buffing pad to raise the shine. I hand buffed it with a microfiber cloth to deepen the shine. It is fun to see what the polished bowl looks like with the polished shank band and the black, hard rubber stem. This richly finished Pocket Pipe is light weight and it is clean and ready load up with a favourite tobacco. Have a look at it in the photos below. When extended its measurements are Length: 4 ½ inches, Height: 1 ¾ inches, Outside diameter of the bowl: 1 inch x 1 ¼ inches, Diameter of the chamber: ½ inch x 1 inch. The folded measurements are Length: 3 inches, Height: 2 ¼ inches, Diameter of the outside and the chamber remain the same. The weight of the pipe is 33 grams/1.13 oz. I will be putting it on the rebornpipes store in the Italian Pipe Makers section if you wish to add it to your collection. Thanks to each of you who are reading this blog. Remember we are not pipe owners; we are pipemen and women who hold our pipes in trust until they pass on into the trust of the next generation.